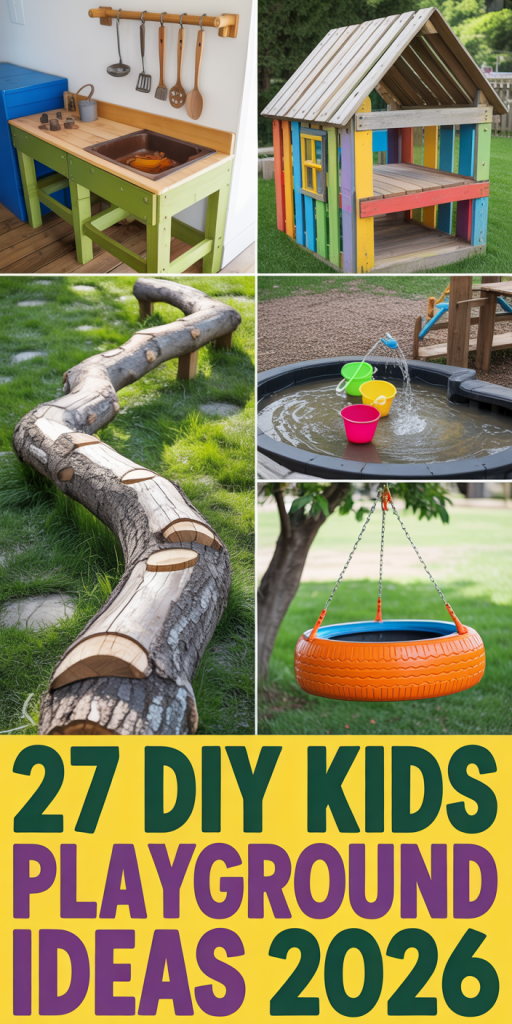
Let’s be honest, you’ve probably saved a dozen photos of dreamy kids’ playgrounds to a Pinterest board already. But turning that inspiration into a real, buildable project for your own backyard can feel overwhelming. After reviewing hundreds of DIY plans and pre-fab kits, we’ve narrowed it down to the 27 best ideas that balance fun, safety, and style. These aren’t just generic concepts; we’re diving deep into real designs that work for various budgets and backyards.
This guide focuses on the biggest trend for 2026: creating play spaces that feel like a natural extension of your home and landscape, rather than a brightly colored afterthought. We’re talking about thoughtful materials, clever layouts, and features that will actually keep them engaged for hours. We’ll cover everything from grand, multi-level structures to charmingly simple weekend projects. And stay until the end—we break down the most common mistakes that can derail your DIY playground dreams.
📌 Save this to Pinterest for later — you’ll want to revisit these ideas.
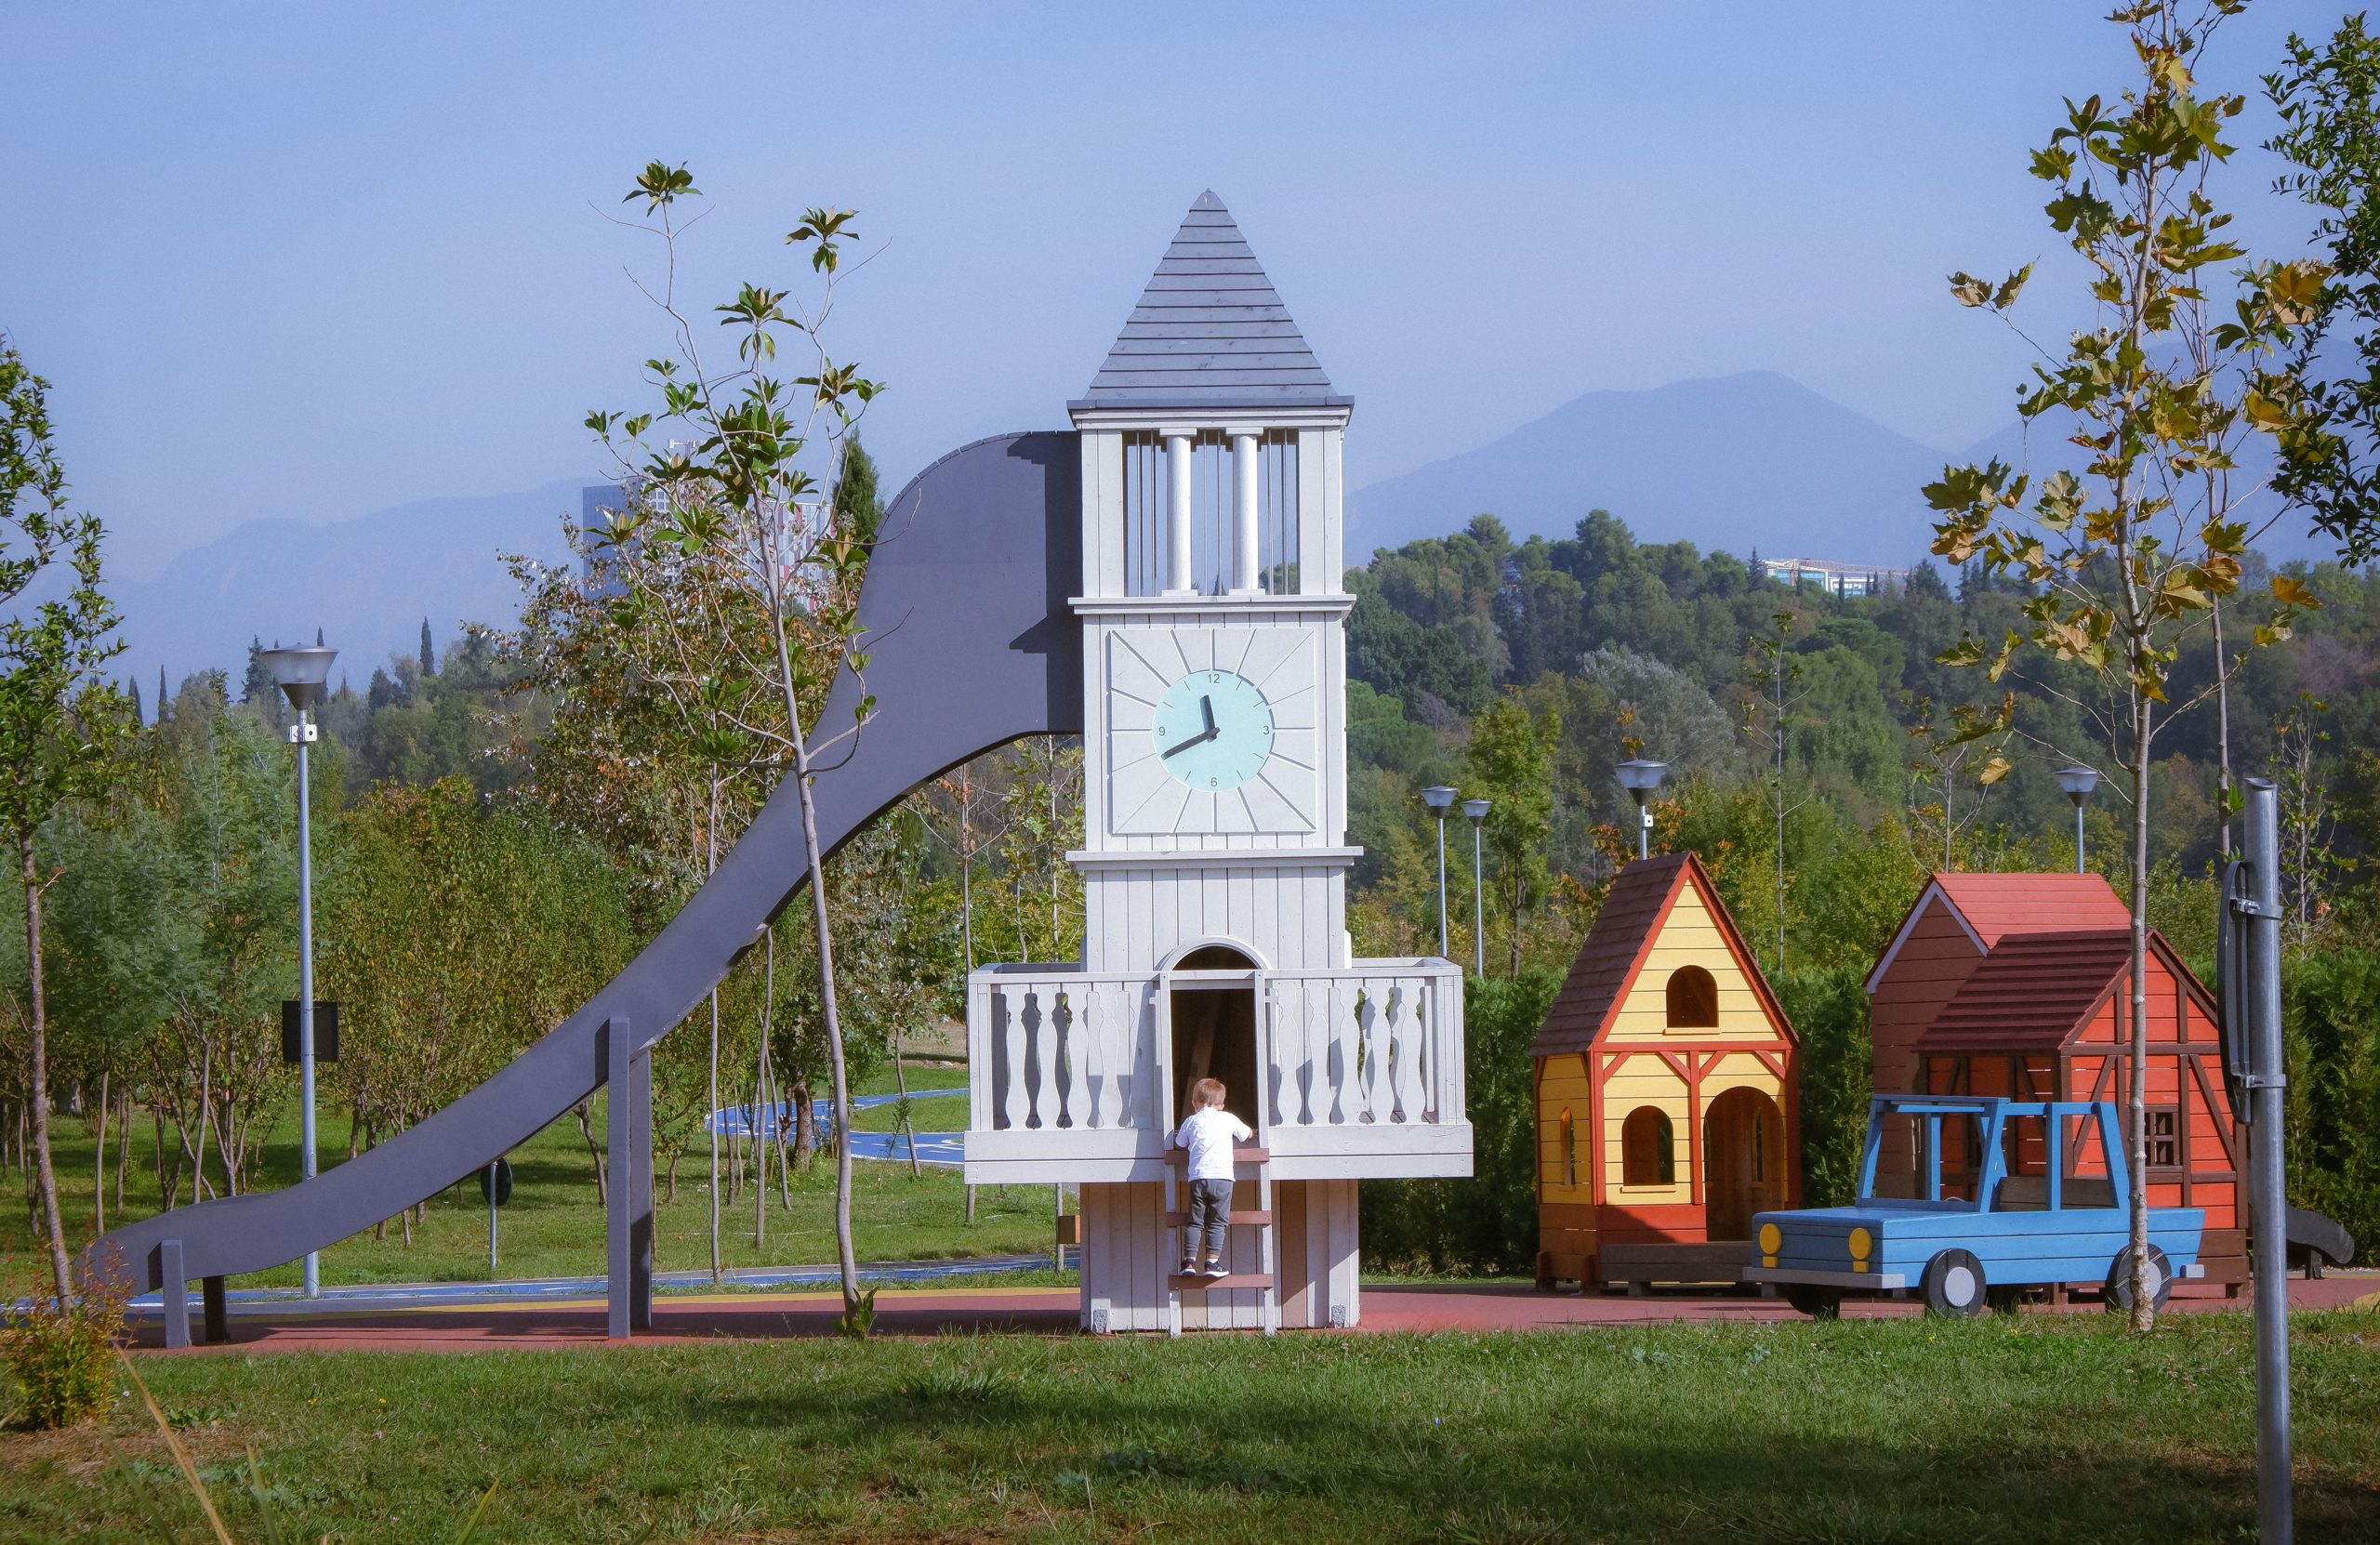
1. Build a Whimsical Clock Tower & Village Playscape
What makes this design so enchanting is its commitment to a theme. It’s not just a slide and a climbing frame; it’s a miniature village. The central clock tower provides a strong vertical anchor and a sense of place, while the smaller, colorful houses encourage narrative and imaginative play. By setting these structures on a painted sports court, the play zone is clearly defined from the rest of the yard, creating a dedicated world for kids to dive into. This masterclass uses architecture and color to tell a story.
|
📋 Copy HEX 🔗 Share |
A custom build of this scale requires a significant investment in materials and likely professional labor. The variety of structures, custom paint, and specialized court surfacing are the main cost drivers.
- Main Structures (Tower, Houses, Car): $7,000 – $12,000
- Large Slide: $800 – $1,500
- Sports Court Surfacing & Paint: $2,000 – $4,000
- Labor & Installation: $4,000 – $7,000
- TOTAL: $13,800 – $24,500
- Budget alternative: Use a standard playset for the tower and build simple, painted plywood facades for the houses to cut costs by 50-60%.
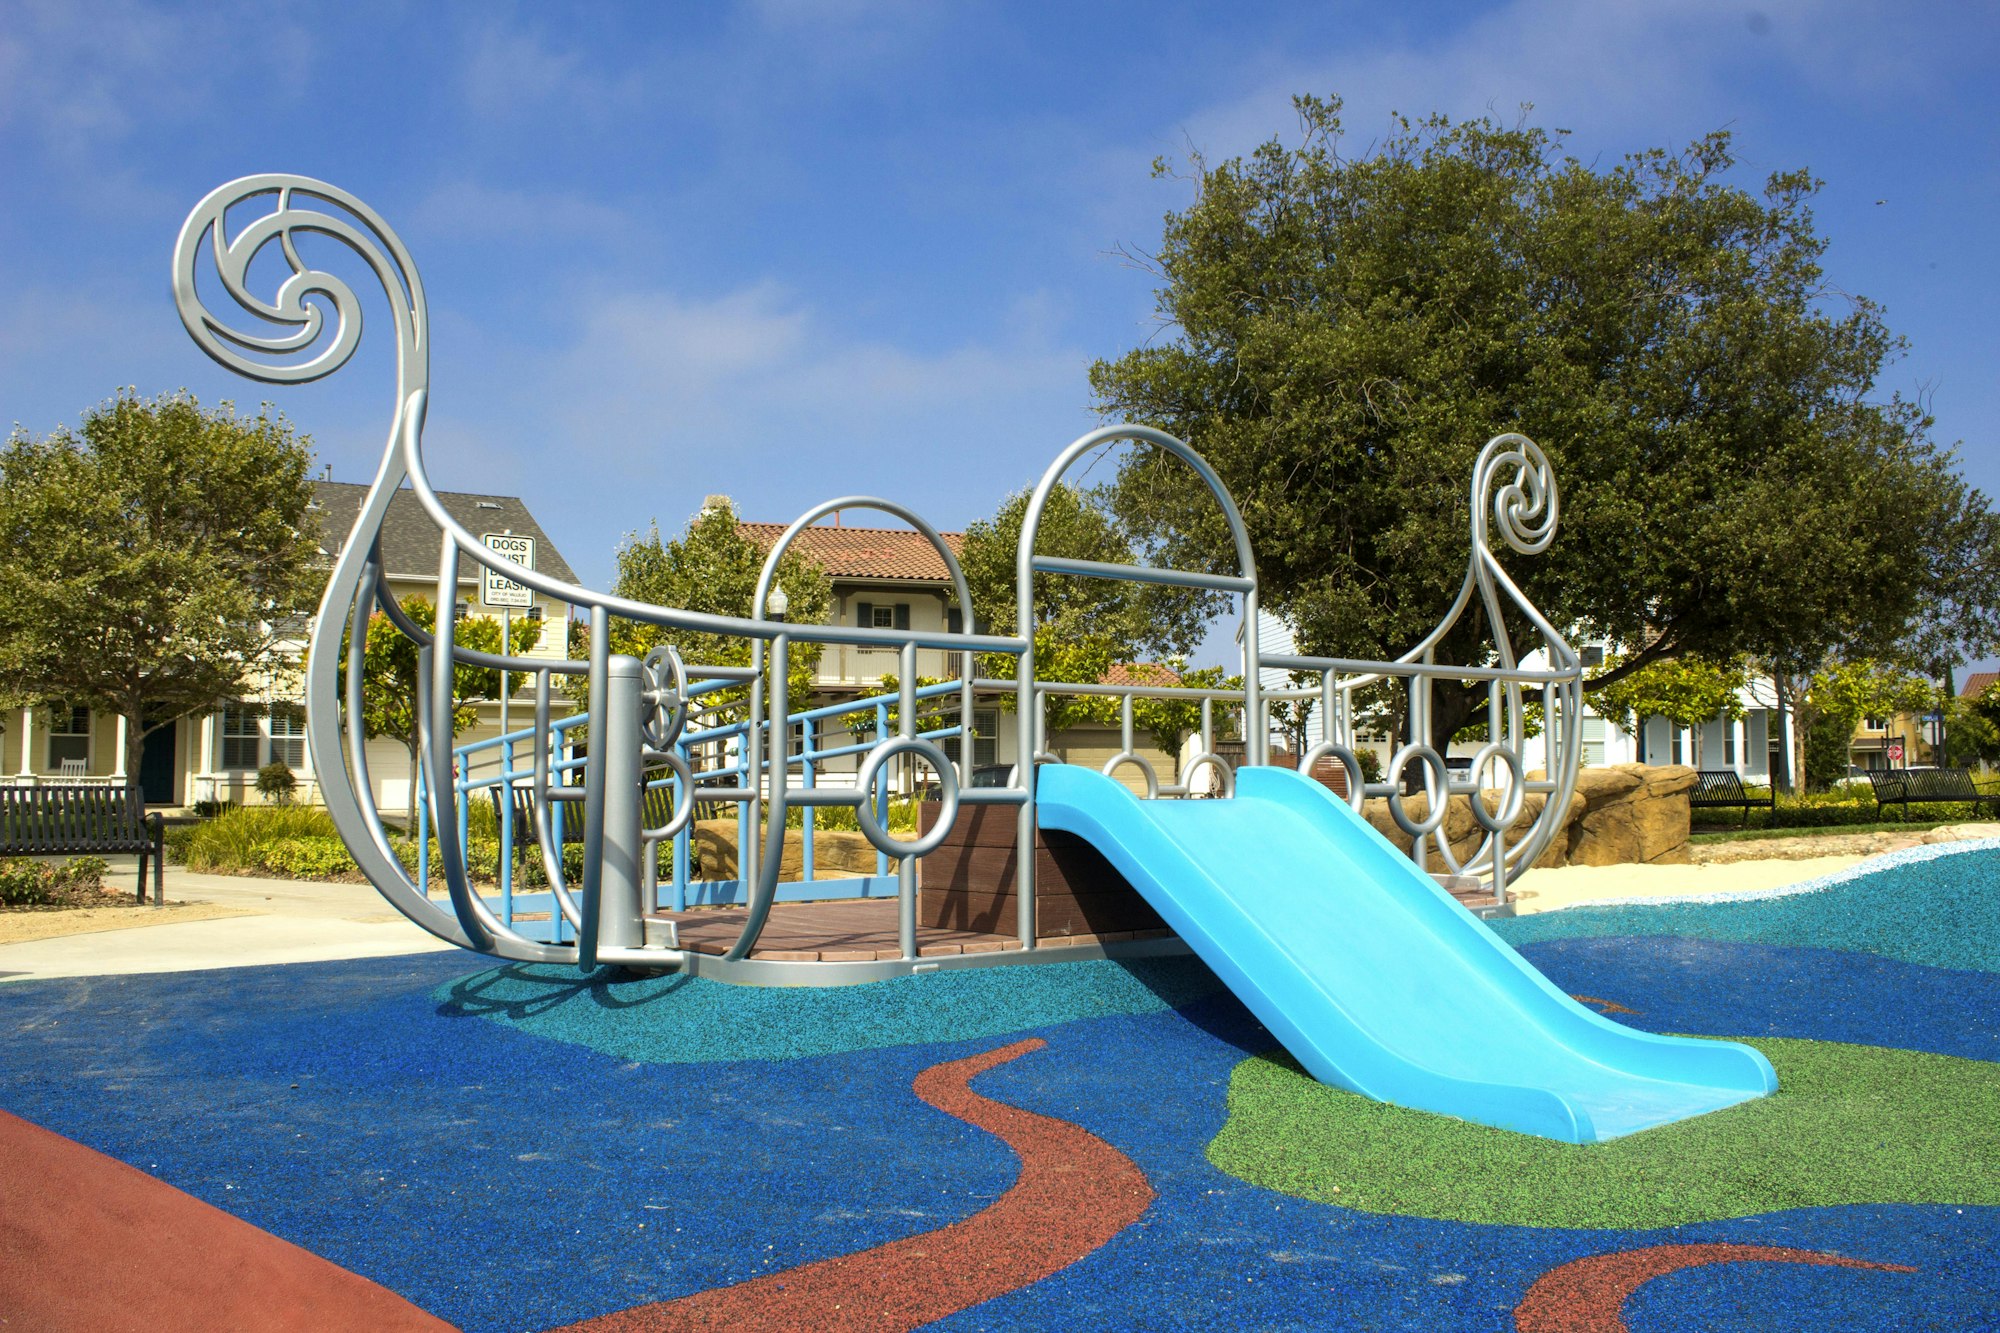
2. Install a Viking Ship Playground with a Vibrant Blue Slide
The single element that makes this playground unforgettable is the Viking ship theme. Removing it would leave you with a functional but generic set of railings and a slide. It’s the metallic silver scrollwork, the ship’s profile, and the small steering wheel that capture the imagination. This cohesive theme transforms a simple act like climbing and sliding into a high-seas adventure. It proves that a strong, unique concept is the most powerful tool for creating a play space that kids will return to again and again.
|
📋 Copy HEX 🔗 Share |
That incredible textured rubber ground is a hero for safety but requires specific care. It’s porous, so it can trap dirt, pollen, and debris. Plan for a seasonal deep clean using a power washer on a low setting with a gentle, non-abrasive cleaner. For spills or stains, address them immediately to prevent them from setting. The metallic silver finish on the structure itself may also need occasional touch-ups with a rust-resistant paint, especially in climates with harsh sun or heavy rain, to maintain its vibrant look.
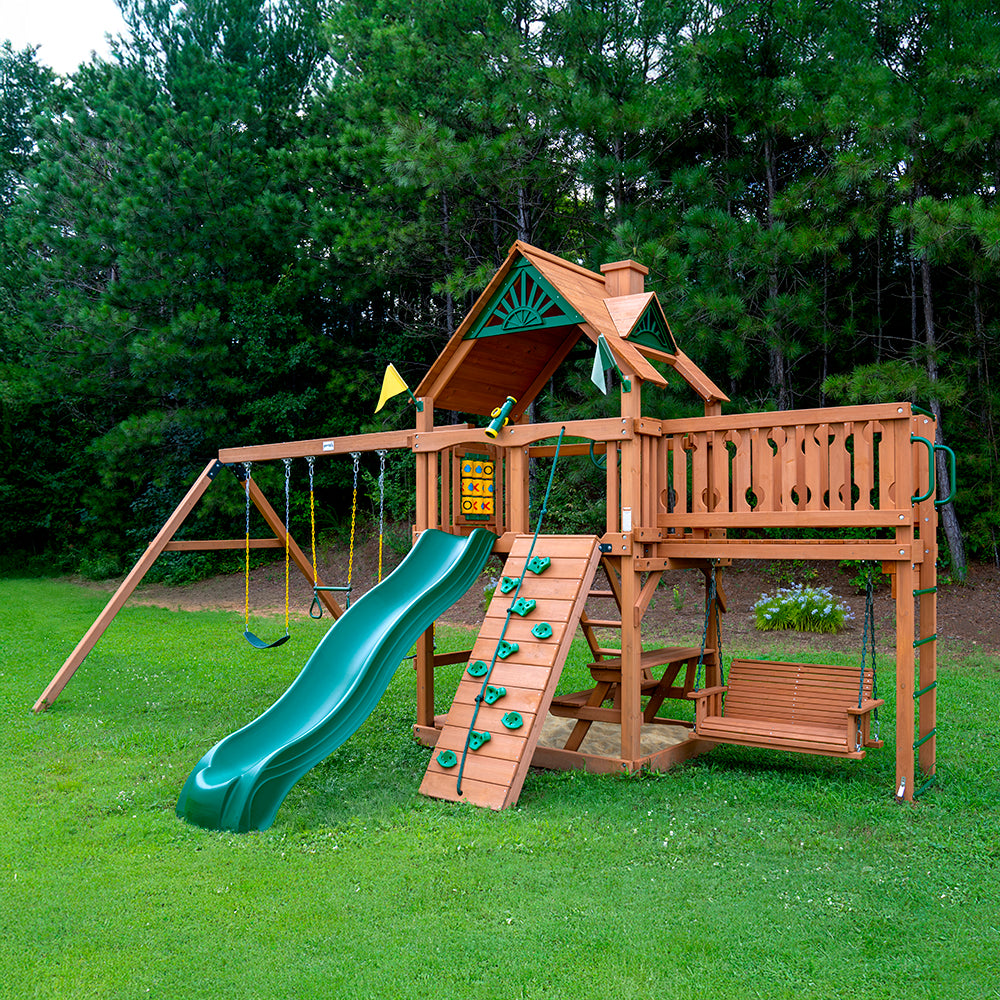
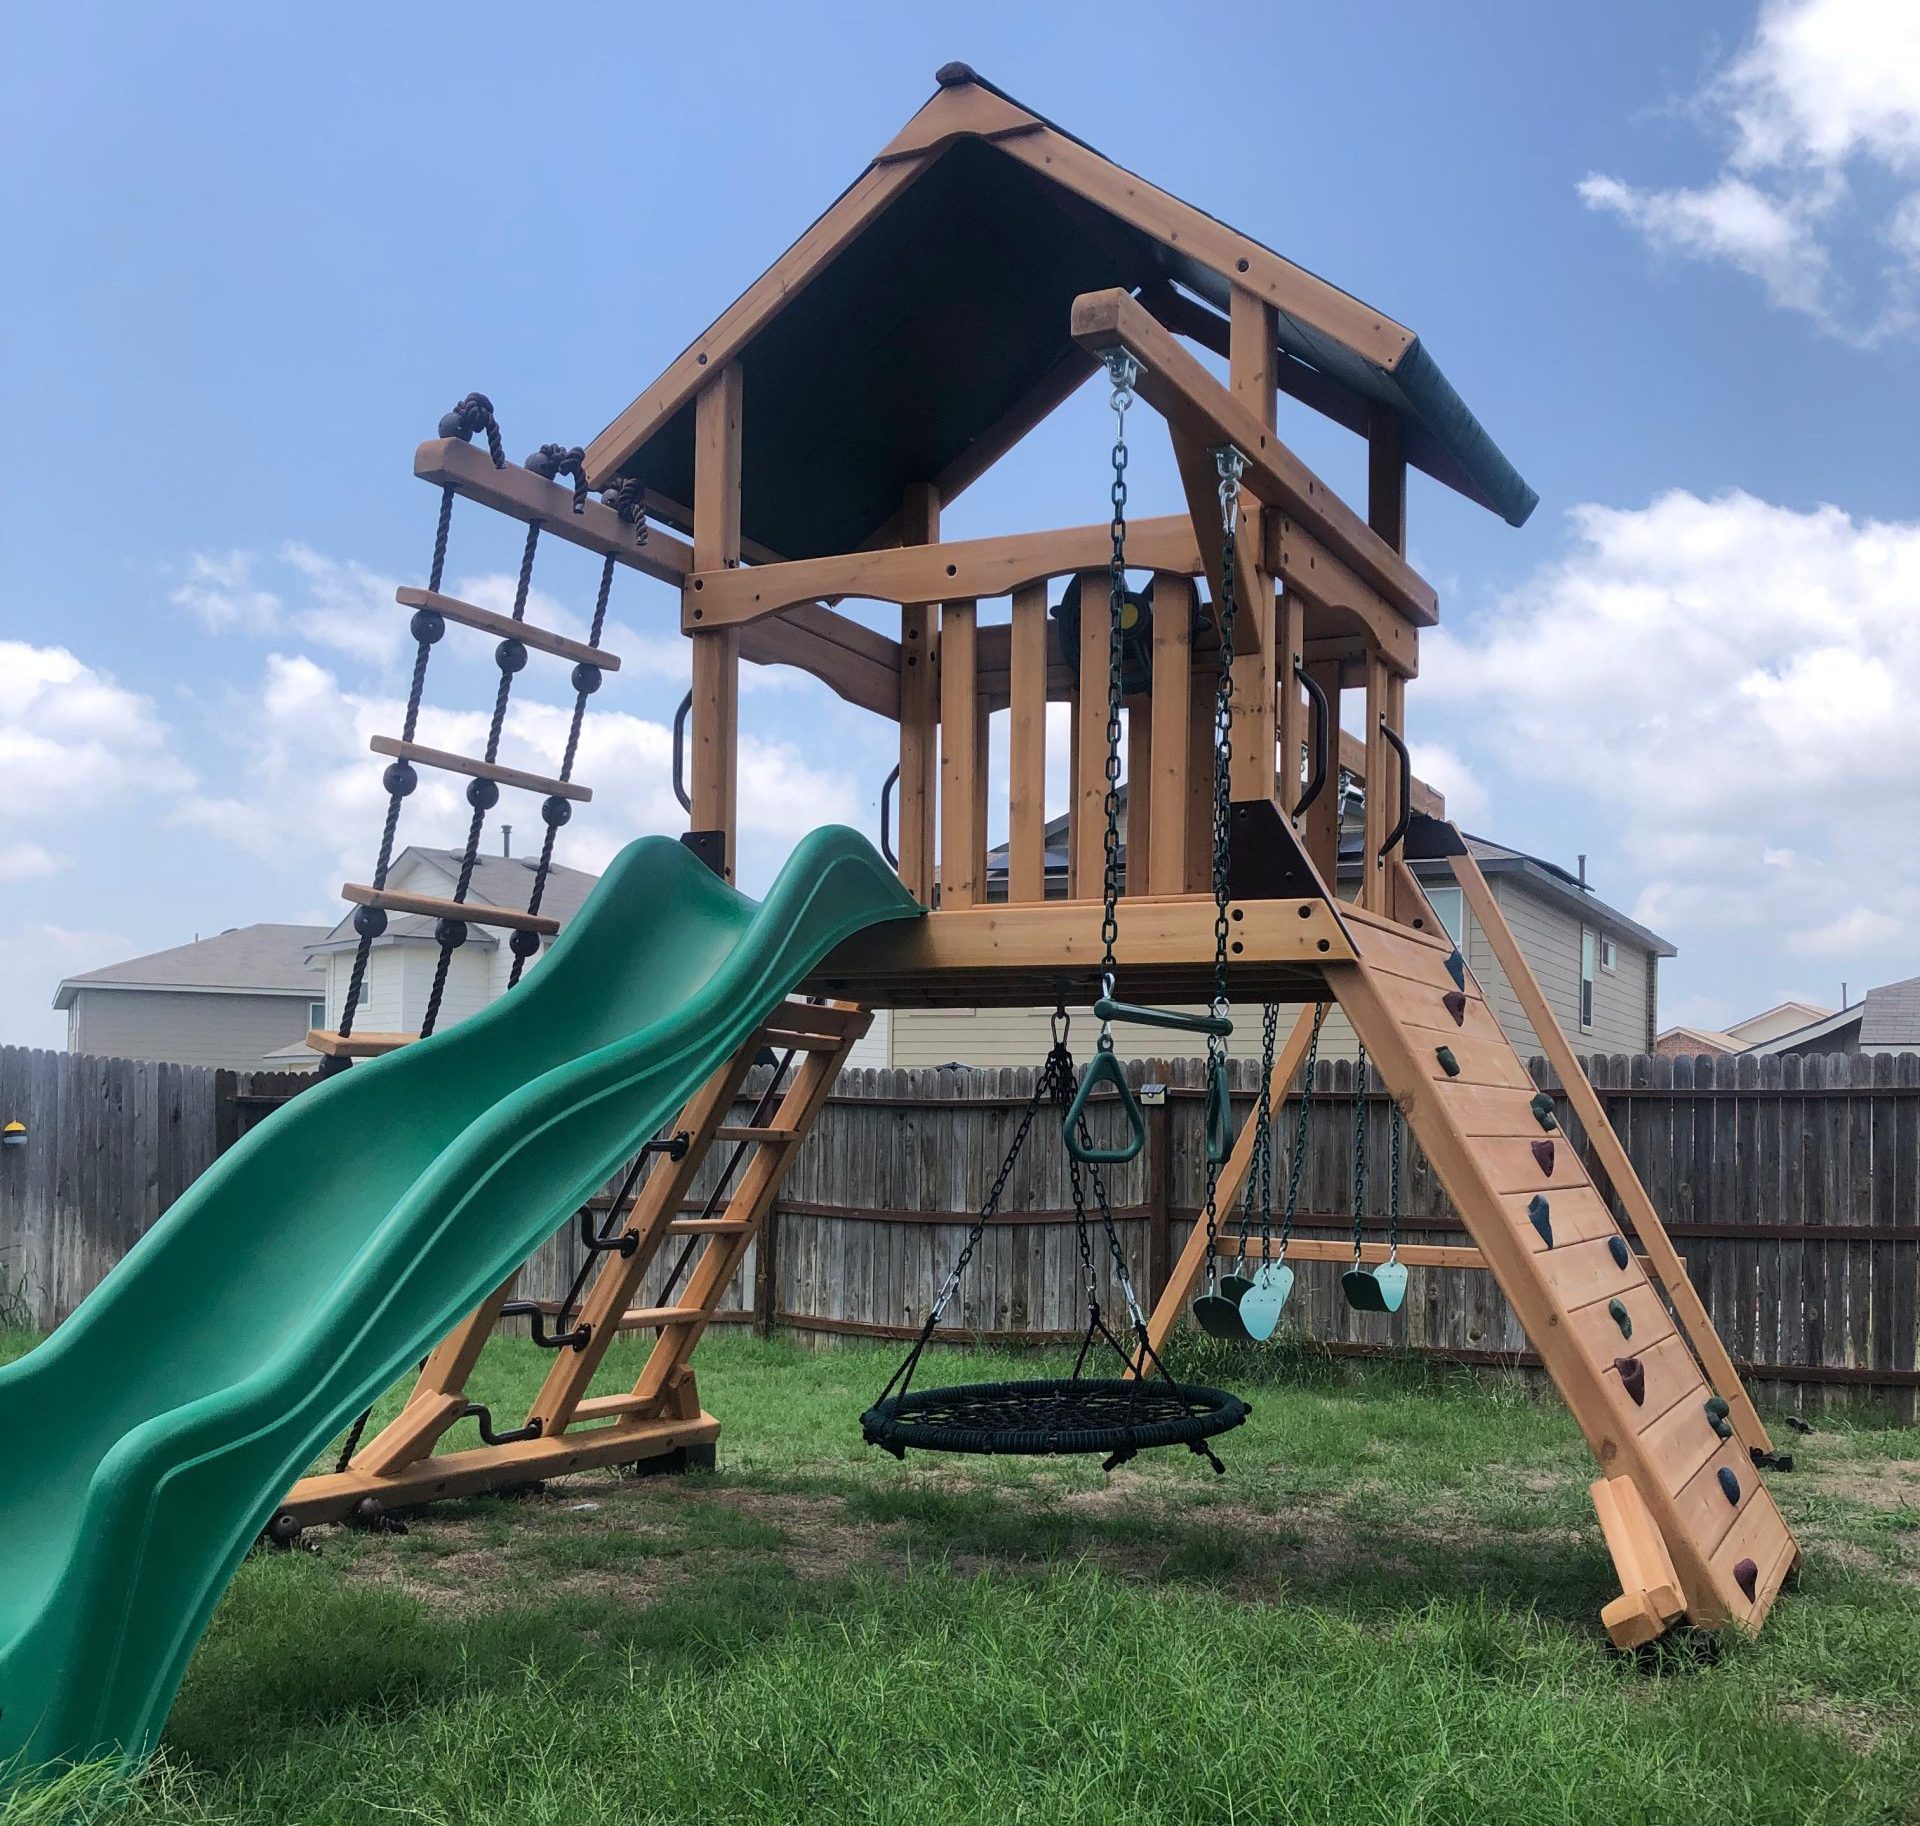
3. Go Classic with a Multi-Level Wooden Playset and Green Accents
When selecting a playset, think about play flow. The best designs have a circular pattern. Notice how a child can climb the rock wall, enter the main platform, go down the green wave slide, run to the swings, and then start over. This creates a continuous loop of activity that prevents bottlenecks and keeps multiple kids moving and engaged. Avoid linear designs where the only way down is the same way you came up, as it often leads to frustration and arguments.
|
📋 Copy HEX 🔗 Share |
A large, multi-feature playset like this needs a significant footprint. You’ll want a minimum of 25ft x 30ft of relatively level ground. This isn’t just for the structure itself but for the crucial safety “use zone” around it—at least 6 feet of clear space on all sides and even more in front of the slide exit and around the swings. This idea is best for medium to large backyards where it won’t overwhelm the entire space. For a smaller yard, consider the more compact footprint of Idea #13.
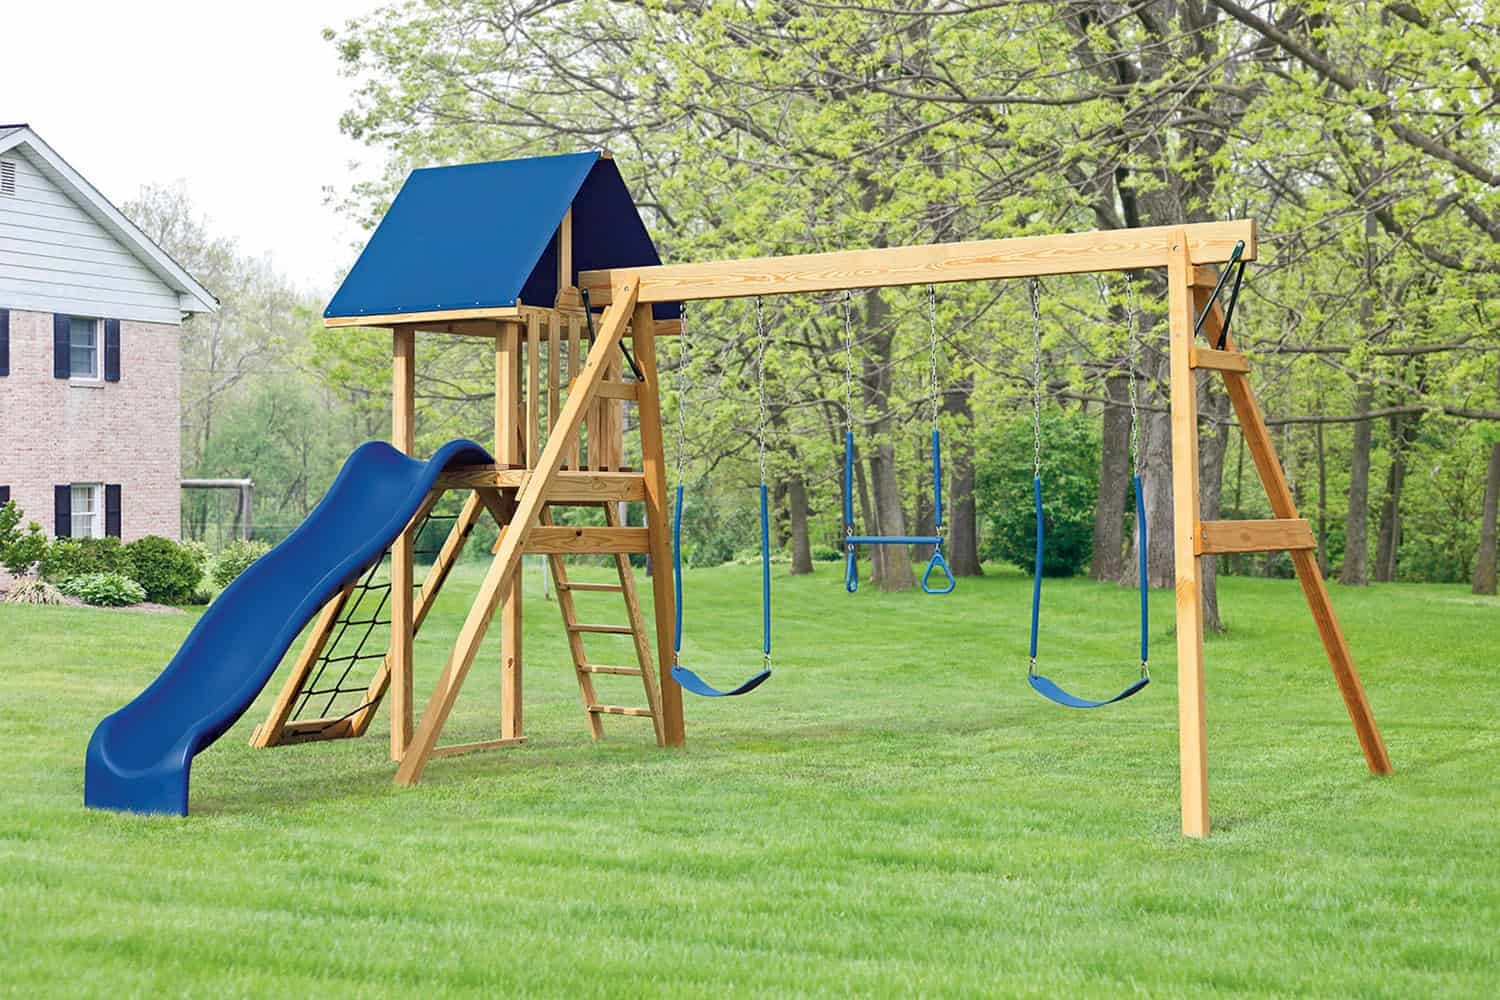
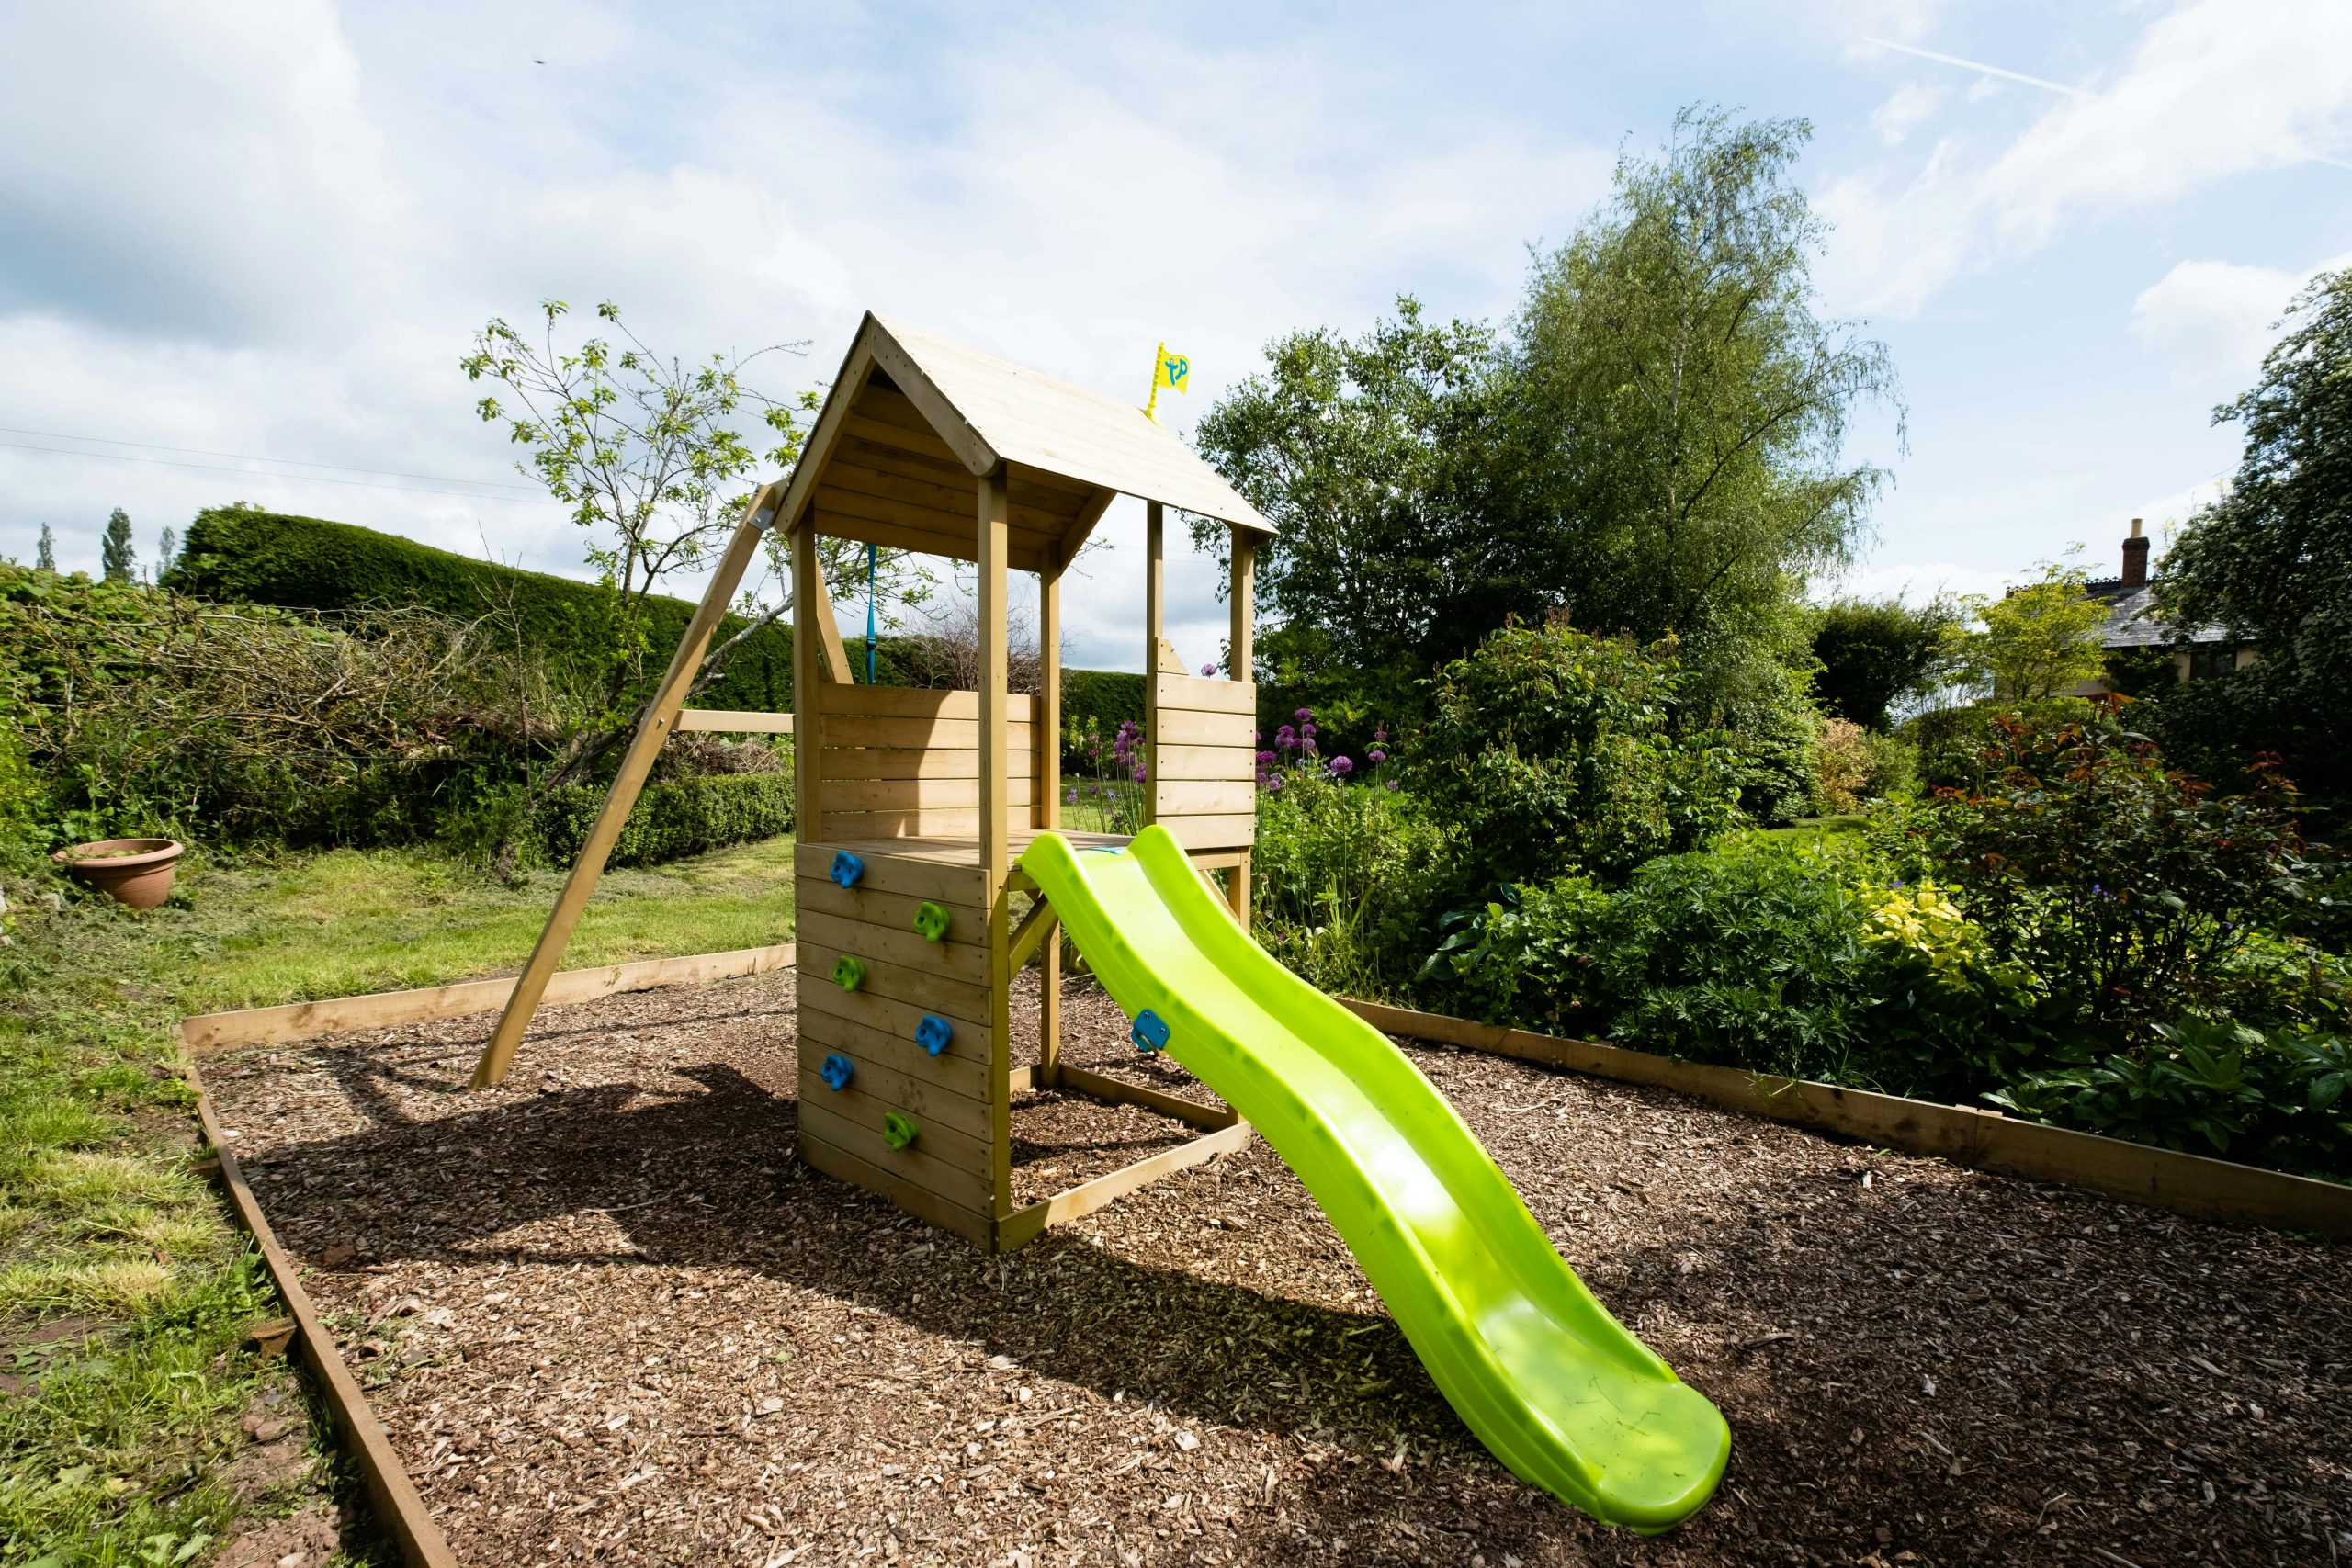
4. Assemble a Light Wood Playset with a Blue Curved Slide
This playground achieves a cheerful, classic look by following a simple formula: 70% natural material + 30% primary accent color. The light-colored wood frame provides a warm, neutral base that blends beautifully with the green grass. The royal blue, used consistently across the gabled roof, curved slide, and swings, adds a bold pop of color that feels intentional and coordinated. You could easily swap the blue for a vibrant green, sunny yellow, or cheerful red while keeping the same 70/30 ratio for a look that is equally stylish but unique to your taste.
|
📋 Copy HEX 🔗 Share |
You can get this classic backyard vibe for a fraction of the cost of a high-end pre-built set. Big-box stores like Lowe’s or Home Depot often have sales on similar wooden playset kits, bringing the price down to the $700-$1,200 range. For a super-budget approach, search Facebook Marketplace for used sets. People often give them away for free if you’re willing to disassemble and haul them yourself, leaving you with just the cost of a weekend’s worth of labor and maybe some new hardware or a replacement tarp roof.
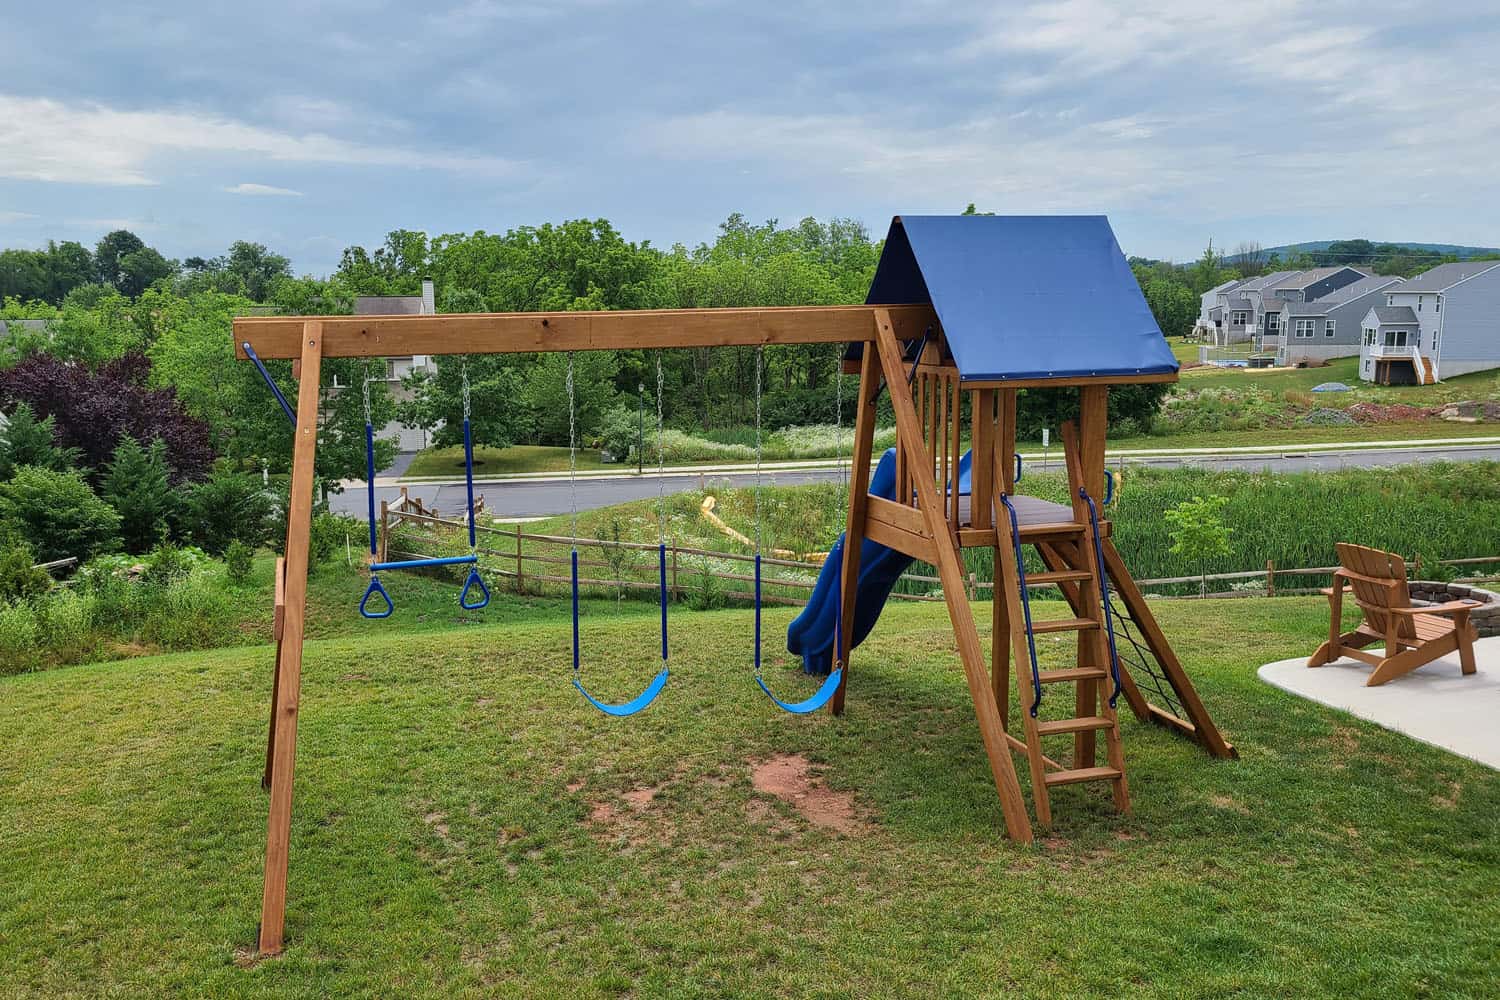
5. Add Acrobatic Fun with Trapeze Rings and a Blue Tarp Roof
Adding trapeze rings is a fantastic way to introduce a different kind of physical challenge. Here’s a quick guide to installing them on an existing wooden swing beam:
|
📋 Copy HEX 🔗 Share |
- Check beam integrity: Ensure your swing beam is at least a 4×6 and is structurally sound with no cracks or rot.
- Measure and mark: Mark two spots on the underside of the beam, about 18-20 inches apart. ensure they are at least 12 inches away from other swing hangers.
- Drill pilot holes: Use a drill bit slightly smaller than the diameter of your swing hanger bolts.
- Install hangers: Screw in heavy-duty, locking swing hangers until they are completely flush with the wood. Use a wrench to tighten fully.
- Attach rings: Clip the trapeze rings onto the hangers, ensuring any locking mechanisms are properly closed. Test with adult weight before letting kids play.
That blue tarp roof is a fantastic, affordable way to provide shade, but let’s be real about its lifespan. Unlike a wooden or metal roof, a tarp will likely need to be replaced every 2-3 years, especially in climates with strong sun, wind, or heavy snow. UV rays will cause the color to fade and the material to become brittle over time. The good news is that replacement tarps are inexpensive (typically $30-$60) and easy to install, making it a low-consequence maintenance task.
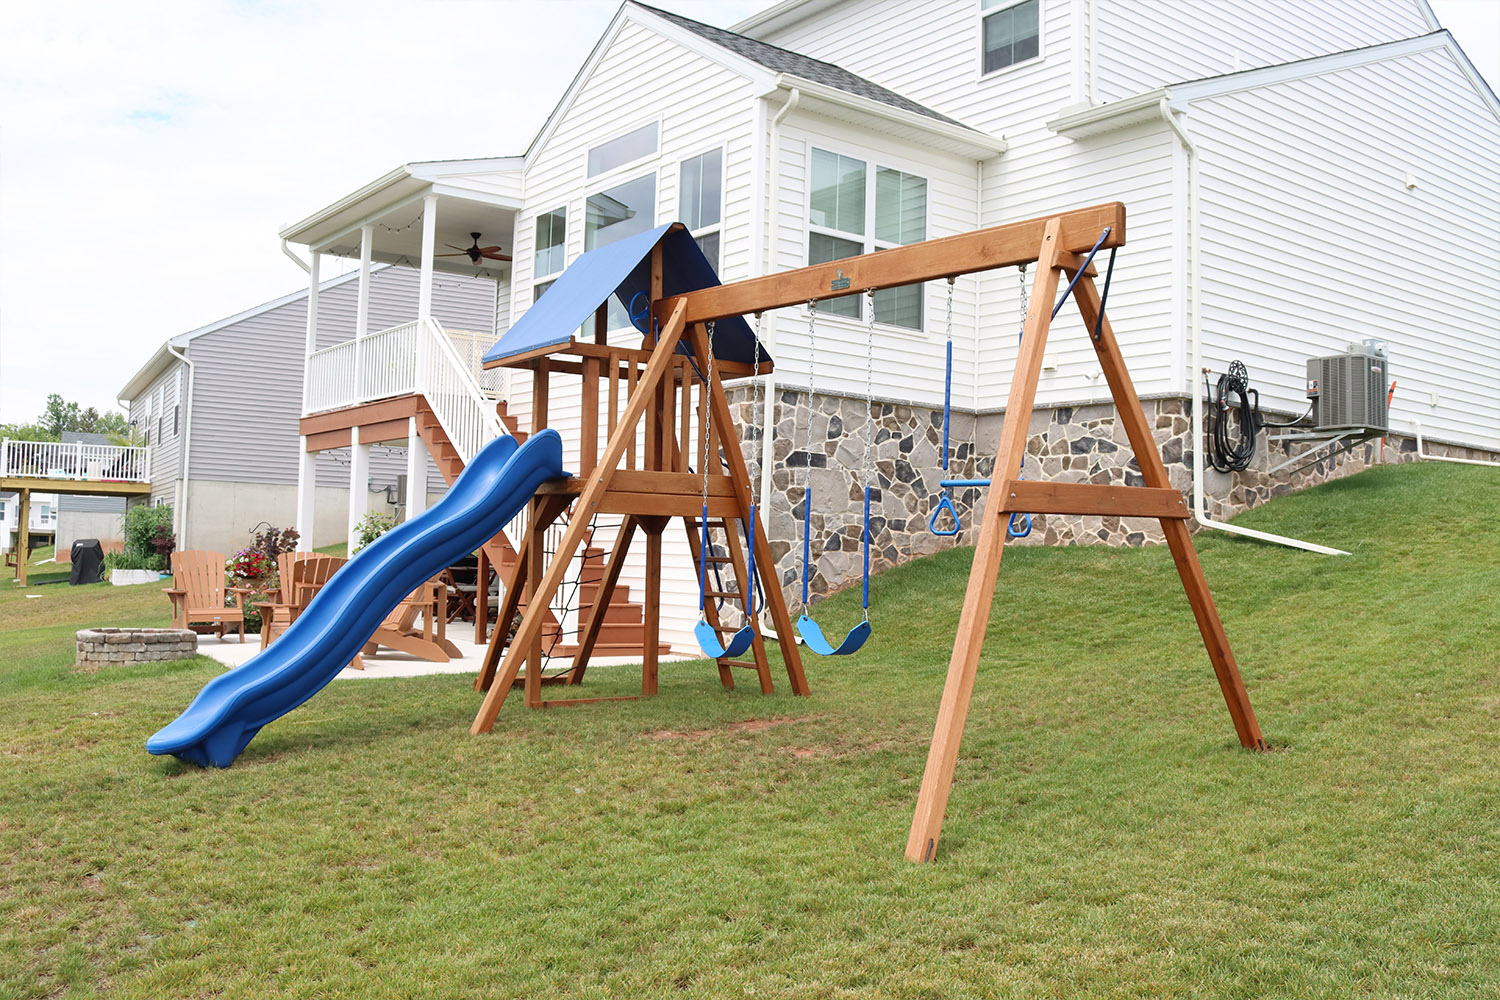
6. Create a Classic Backyard Scene with a Wooden Playset and Blue Slide
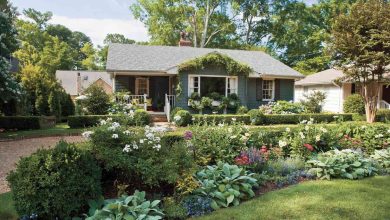
This setup works so well because it leans into a timeless, almost nostalgic, American backyard aesthetic. It’s not trying to be overly modern or rustic; it’s simply a well-proportioned wooden structure with a classic primary color accent. The pairing of the wood tones with the bright blue feels familiar and cheerful. Its placement on a lush green lawn, with the traditional white house in the background, creates a picture-perfect scene that feels both aspirational and deeply comfortable. It’s an enduring style that won’t look dated in a few years, unlike some of the more specific themes.
|
📋 Copy HEX 🔗 Share |
While ultra-modern, architect-designed play structures have their moment, there’s a strong and steady trend towards classic designs like these. In a world of fleeting digital entertainment, parents increasingly create wholesome, traditional play experiences. This kind of playset speaks to a desire for tangible, screen-free fun and physical activity. It resonates on Pinterest because it represents a familiar, happy ideal of childhood that feels both achievable and reassuring for families.
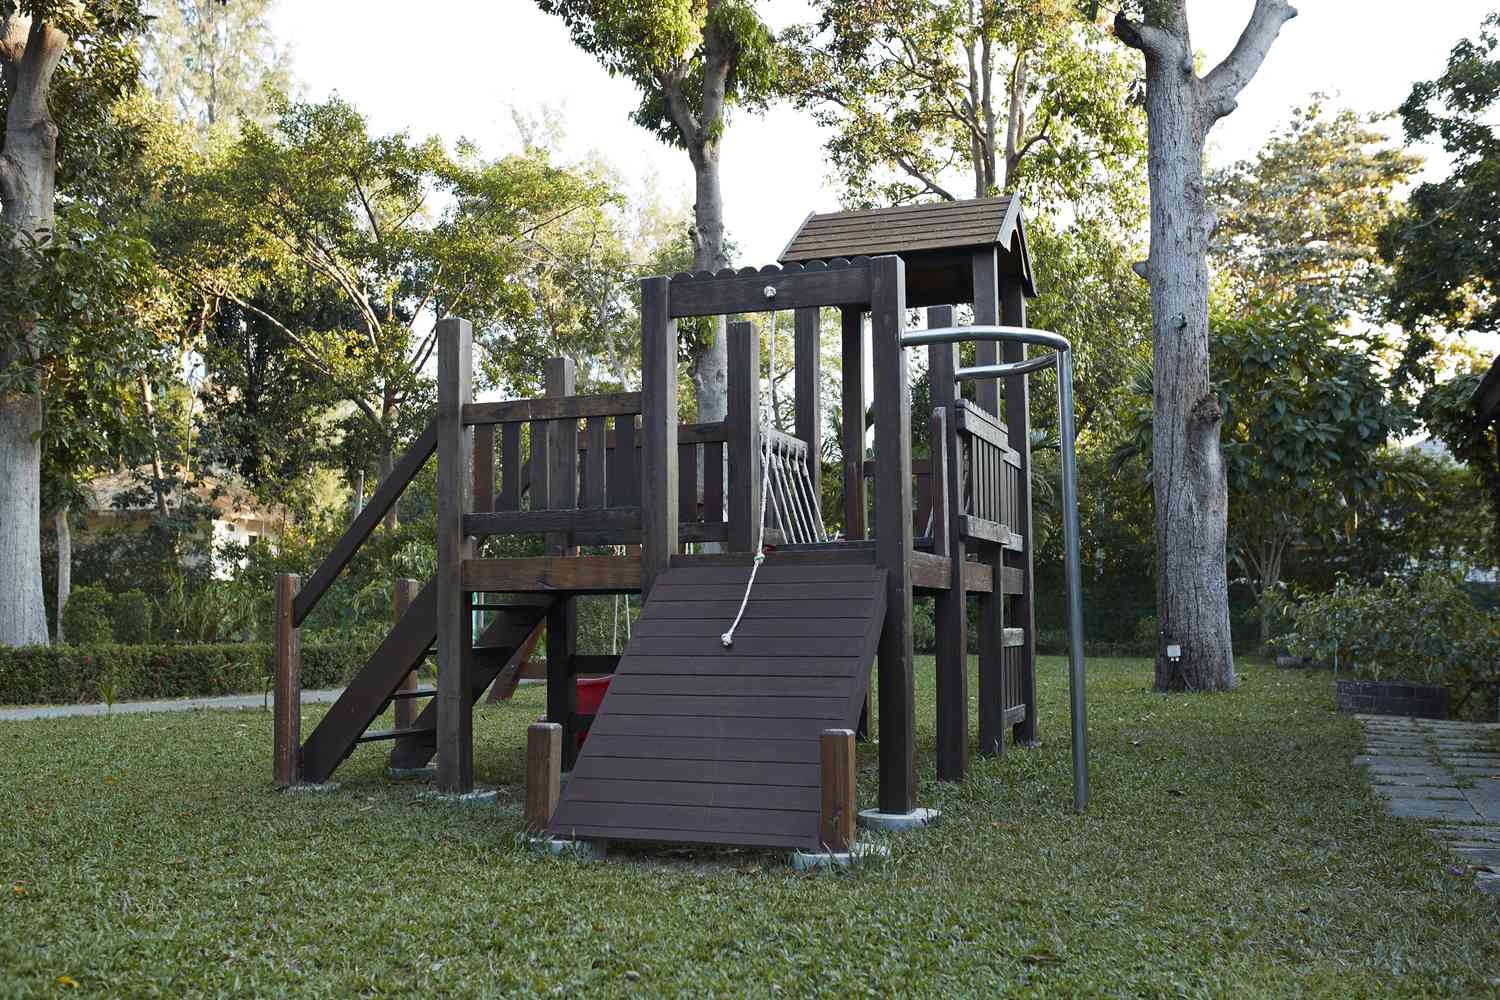
7. Opt for a Dark-Stained Wood Playground with a Curved Monkey Bar
A dark stain looks incredibly rich and helps the playground blend into a landscape with mature trees, but it requires more upkeep than natural or pressure-treated wood. To keep this handsome, dark brown finish from fading to a patchy gray, you’ll need to re-stain it every 2–3 years. This involves cleaning the surface thoroughly, possibly a light sanding, and applying a fresh coat of a high-quality outdoor wood stain and sealant. It’s a weekend project, but it’s essential for protecting the wood and maintaining the sophisticated look.
|
📋 Copy HEX 🔗 Share |
Don’t underestimate the appeal of monkey bars. While slides and swings are standard, a set of monkey bars offers a more challenging upper-body workout that older kids (ages 6-10) crave. The curved design seen here is a smart update on the traditional straight ladder, as it adds a slight dynamic challenge. When installing, ensure the height is appropriate for your kids—they should be able to reach the first bar from a standing position, but their feet shouldn’t touch the ground when hanging.
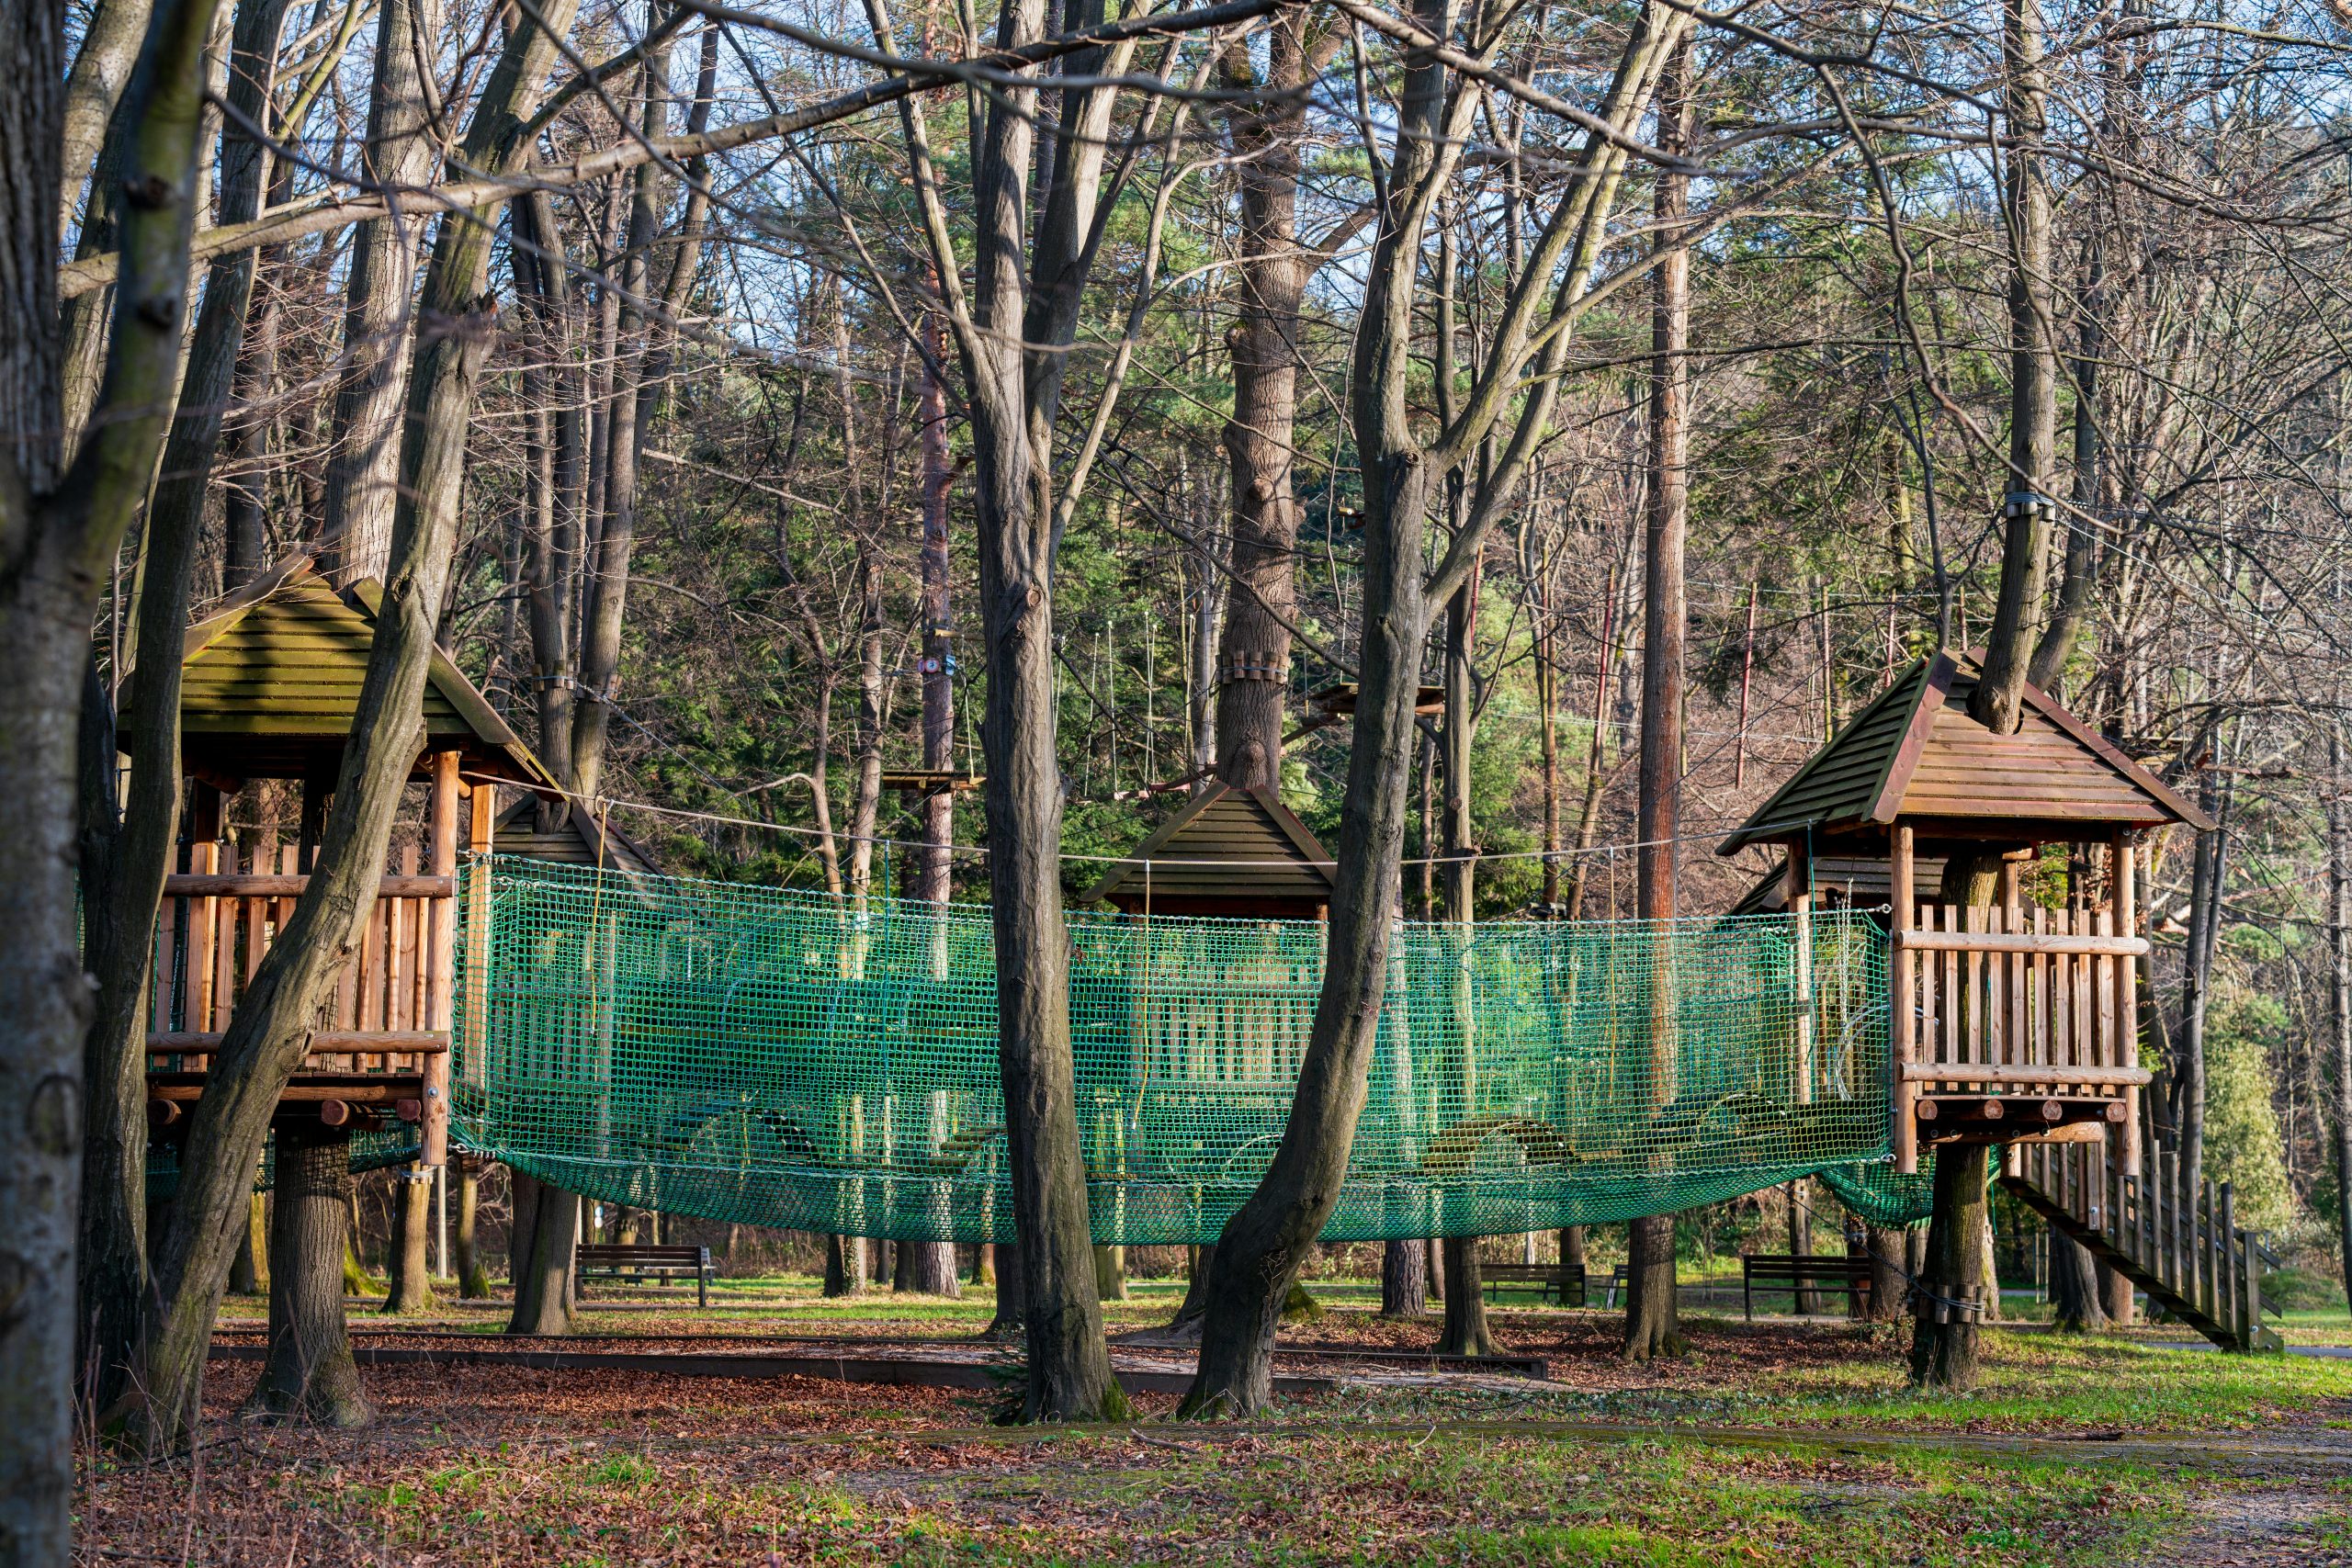
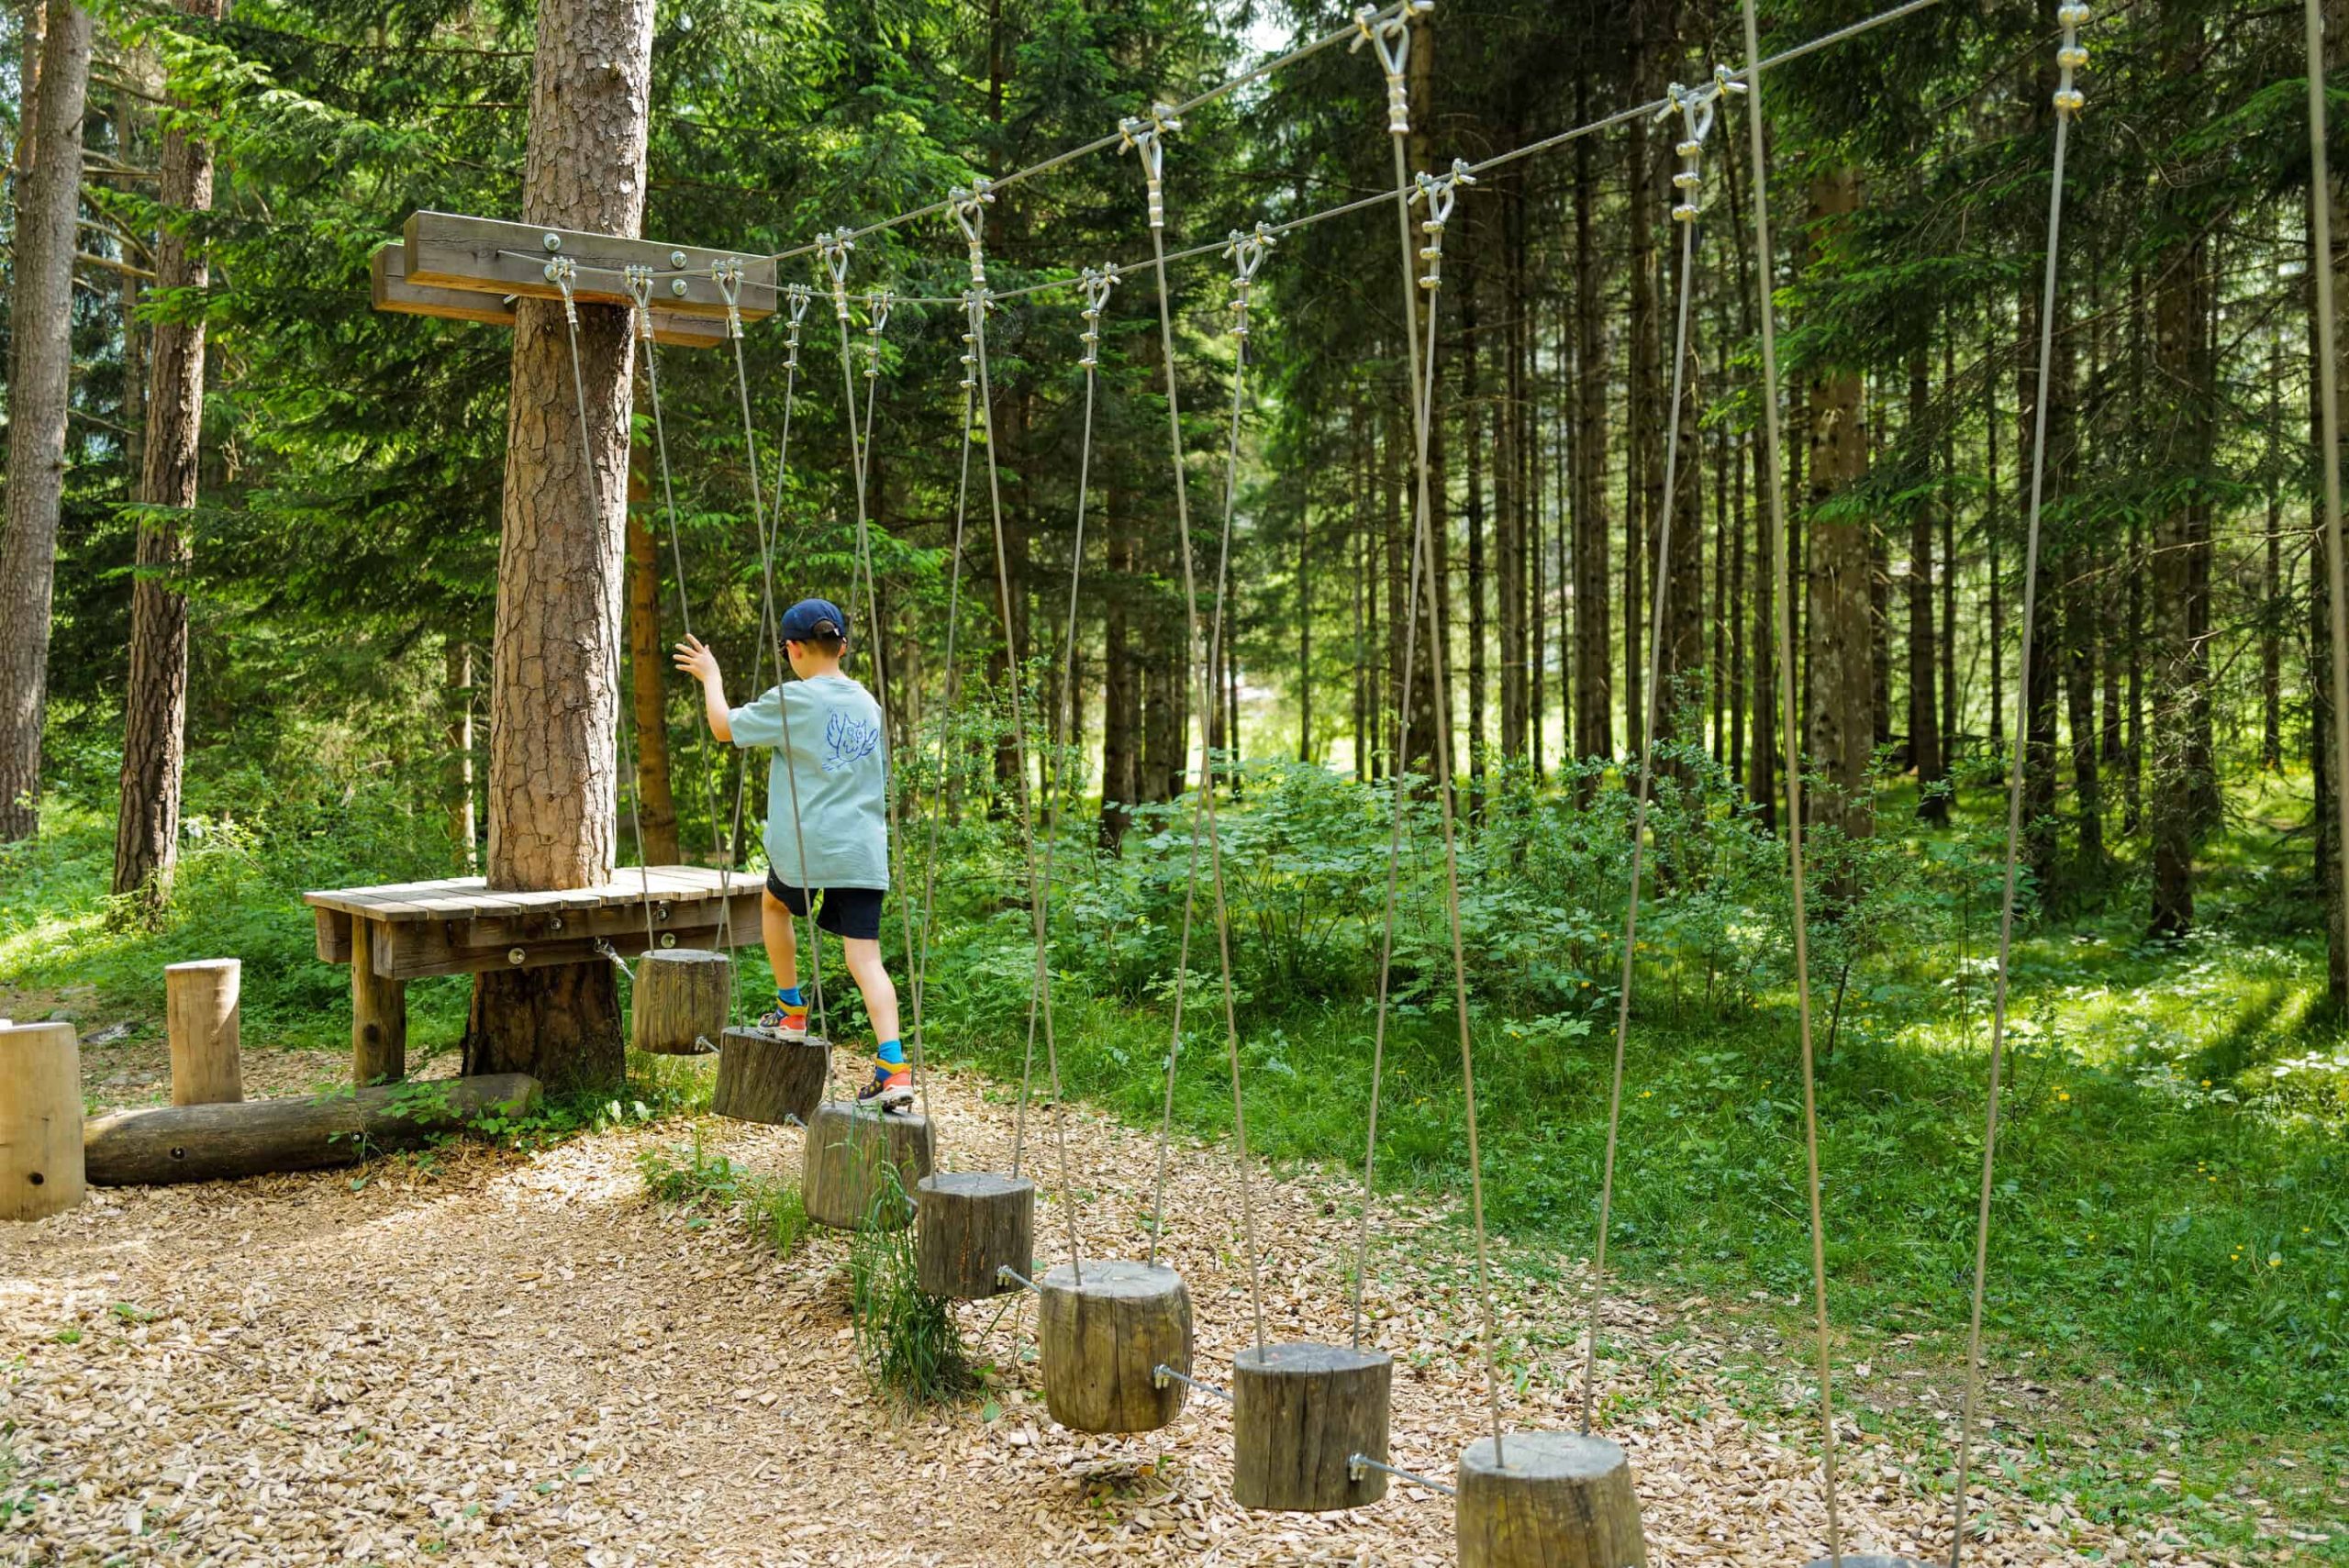
8. Build a Forest Adventure Playground with a Netted Bridge
The netted bridge is the absolute heart of this design. It’s the element that transforms two simple wooden platforms into an exciting, cohesive adventure course. The bridge introduces a challenge that requires balance and daring, creating a sense of journey and risk (in a safe way). Visually, the dark green netting adds a pop of color and texture that contrasts with the wood and blends with the natural forest setting. Without the bridge, you’d just have two separate, static playhouses; with it, you have a dynamic, engaging experience.
|
📋 Copy HEX 🔗 Share |
Before you commit to a design that spans between two points, make sure you have all your ducks in a row. A project like this, connecting two structures, requires careful planning and measurement.
- Check your levels: Are the foundation points for both towers perfectly level with each other? Use a laser level to be certain.
- Measure the span: Obtain an exact measurement for the bridge. Order or build your bridge slightly shorter to allow for tensioning.
- Confirm your anchors: Do you have solid 4×4 or 6×6 posts to anchor the bridge to? They must be properly set in concrete to handle the lateral forces.
- Assess the ground: The ground underneath the bridge must be clear of obstacles and covered with at least 9 inches of soft material like wood chips or rubber mulch.
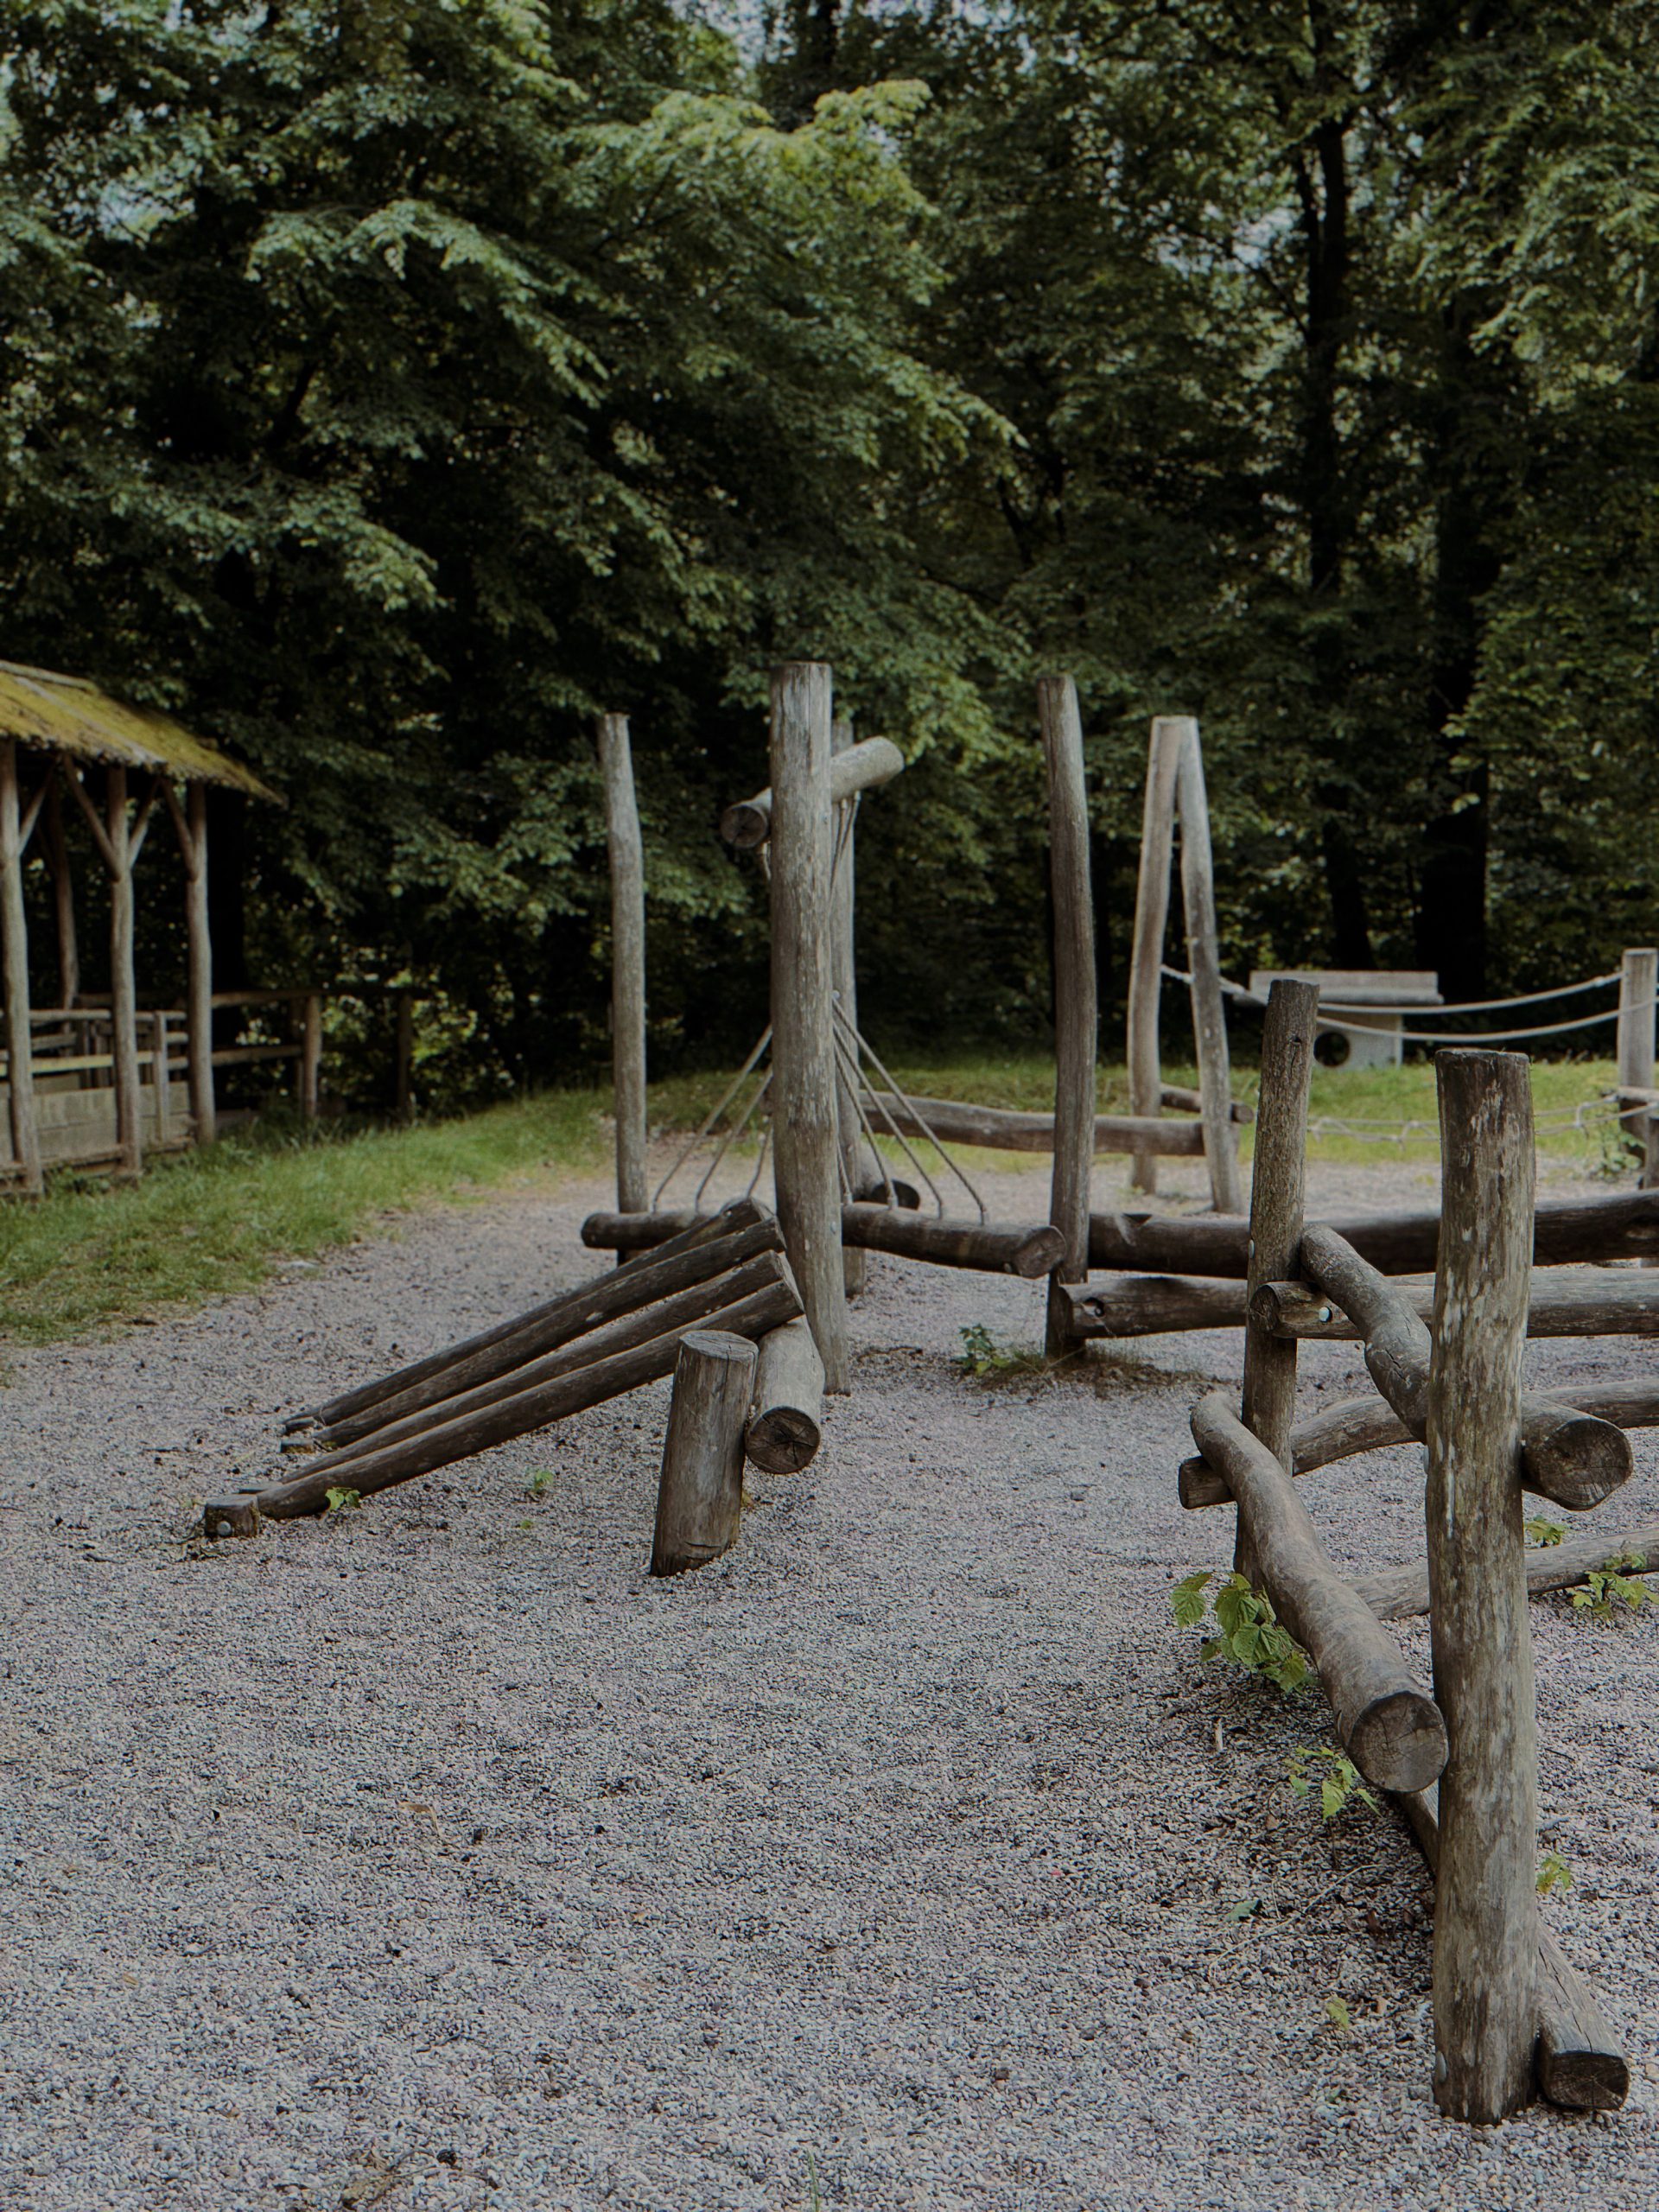
9. Embrace a Rustic Aesthetic with a Weathered Log Playground
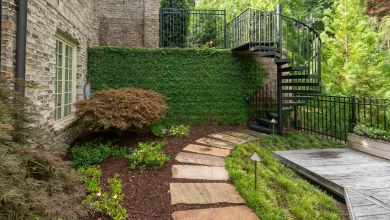
This playground’s charm comes from its complete embrace of natural, rustic materials. Using weathered logs instead of milled lumber gives every element an organic, found-in-the-forest feel. The simple construction techniques—stacking, balancing, and joining logs—feel authentic and unpretentious. By placing these raw structures on a bed of simple gray gravel and surrounding them with lush trees, the design feels like it grew right out of the landscape rather than being placed on top of it. It’s a perfect example of how limiting your material palette can lead to a stronger, more cohesive design.
|
📋 Copy HEX 🔗 Share |
Building with natural logs is not the same as using a pre-cut kit. Logs are irregular, heavy, and require specialized tools and skills to join securely. This is a project for a confident DIYer with experience in rustic construction or a job for a specialized contractor. You’ll also need to be vigilant about maintenance. Natural, unfinished logs are more susceptible to rot, insects, and splintering. Regular inspections and applications of a kid-safe wood preservative are non-negotiable for safety and longevity.
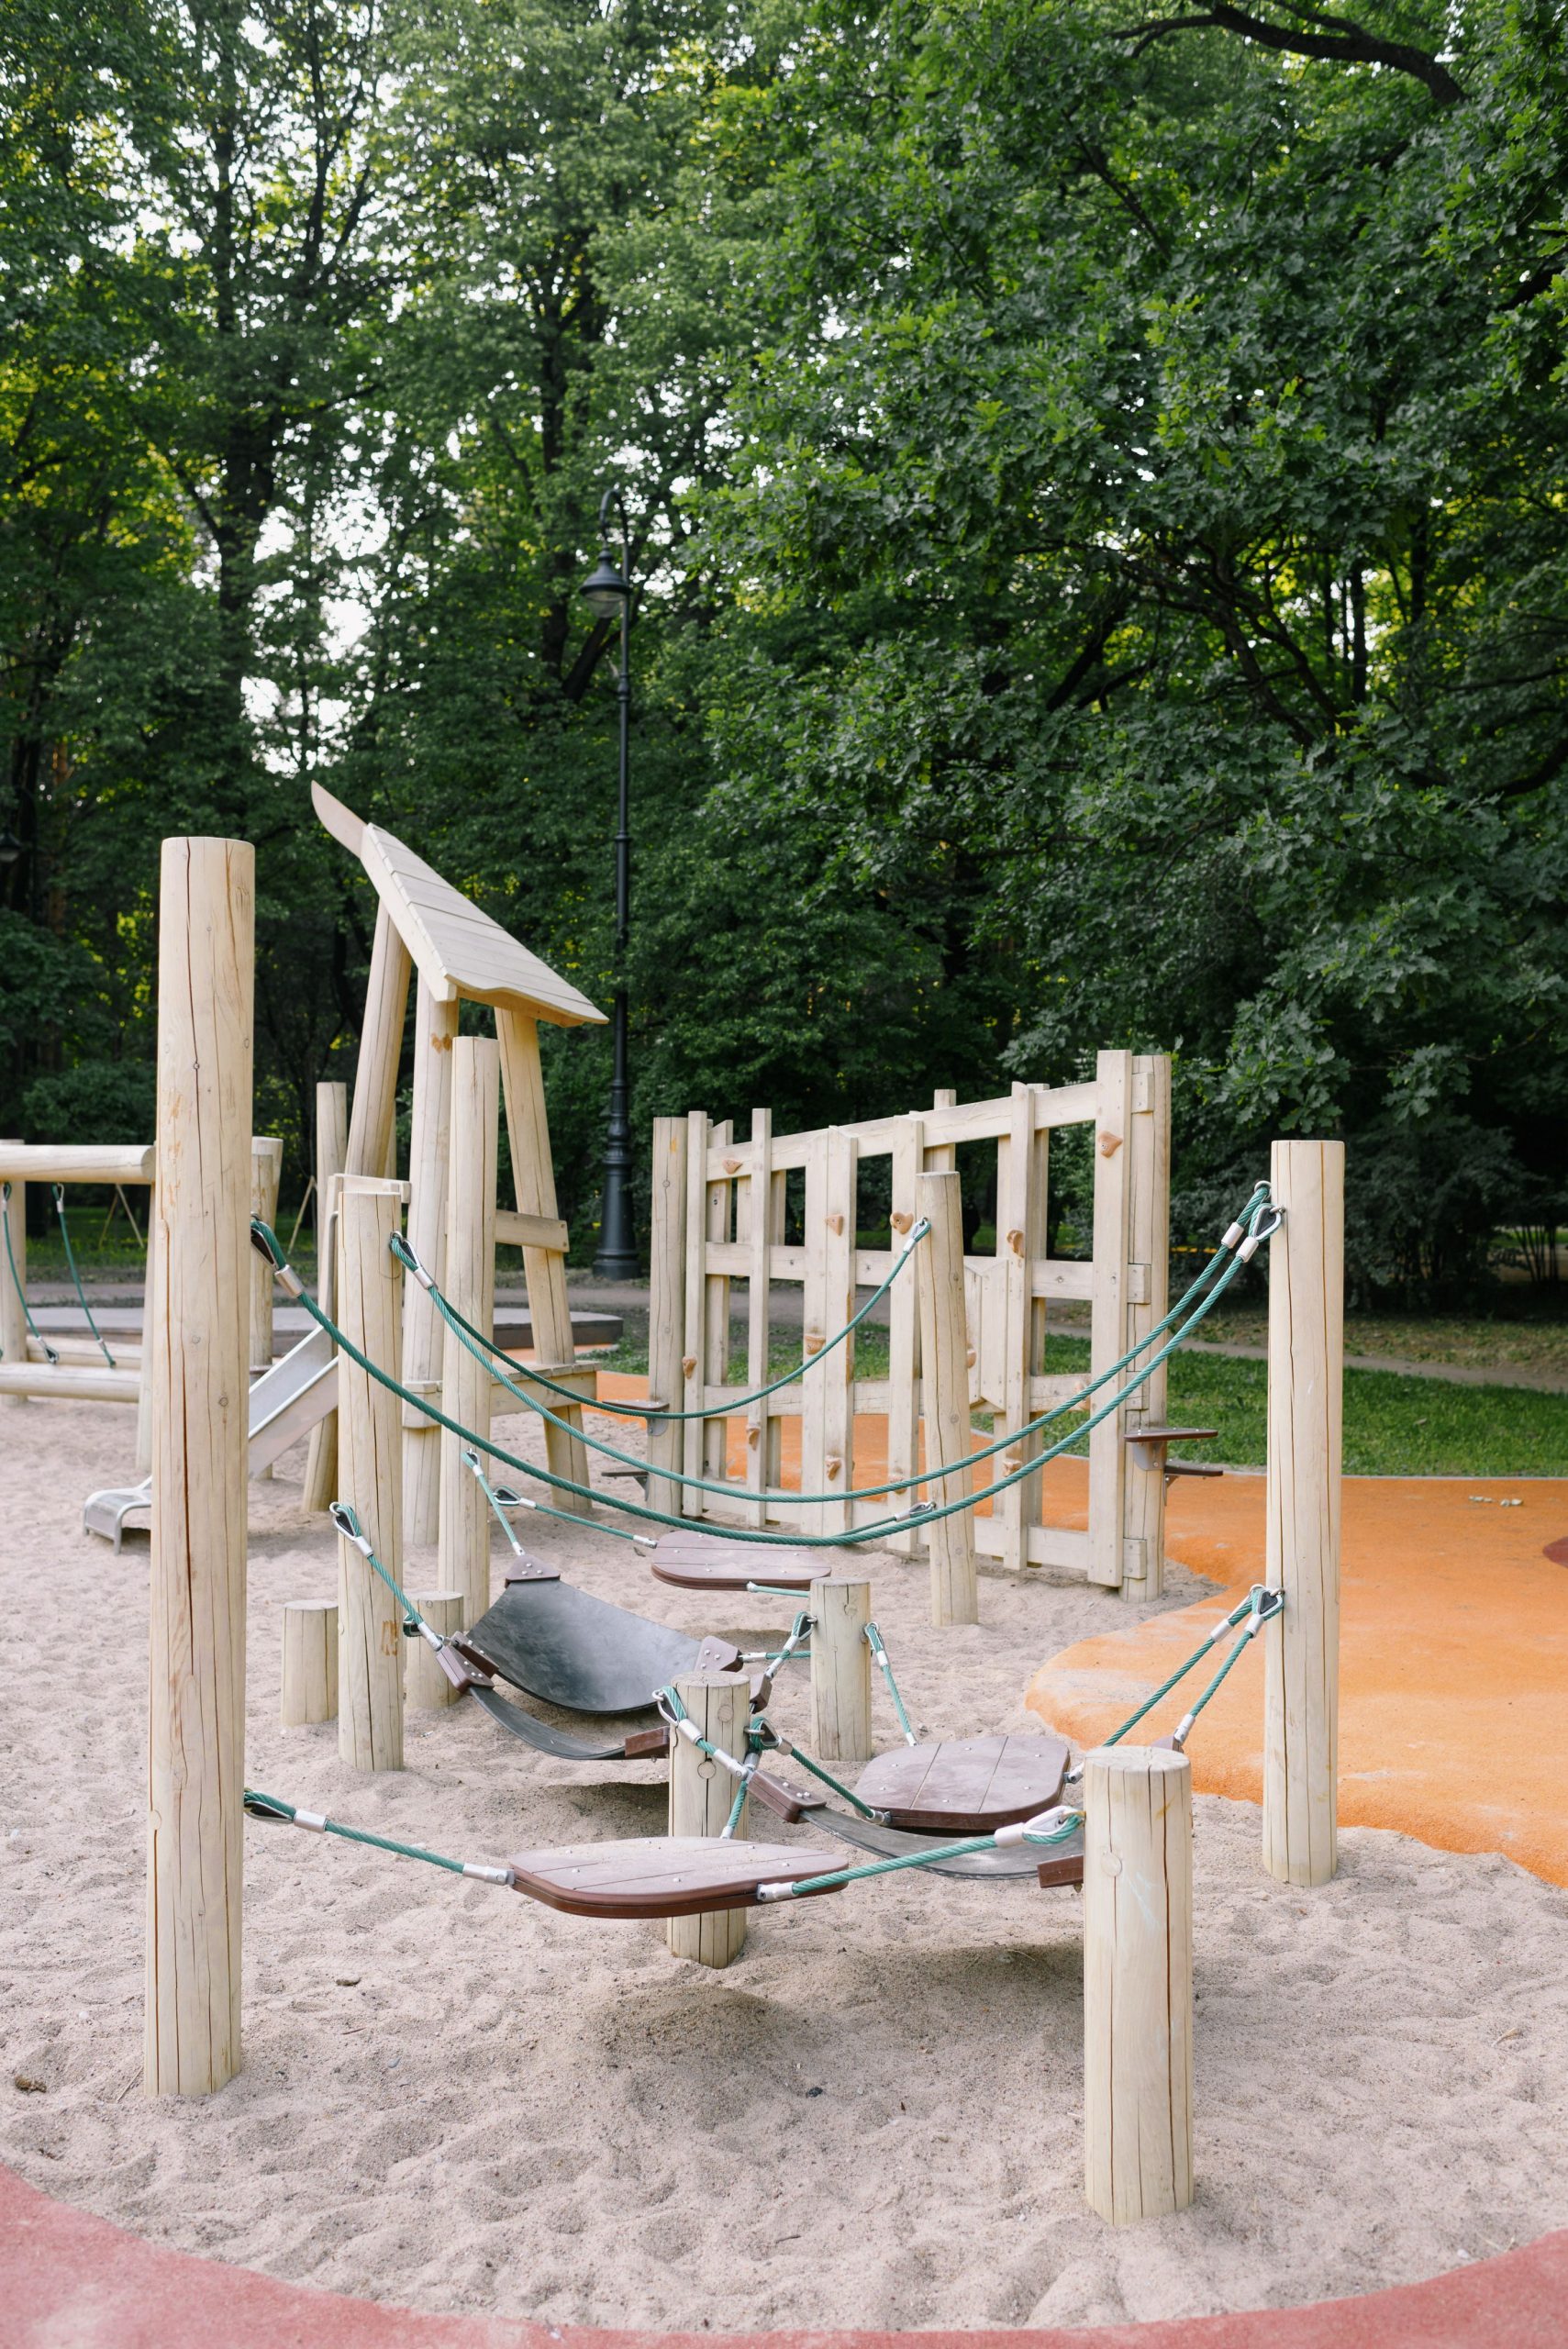
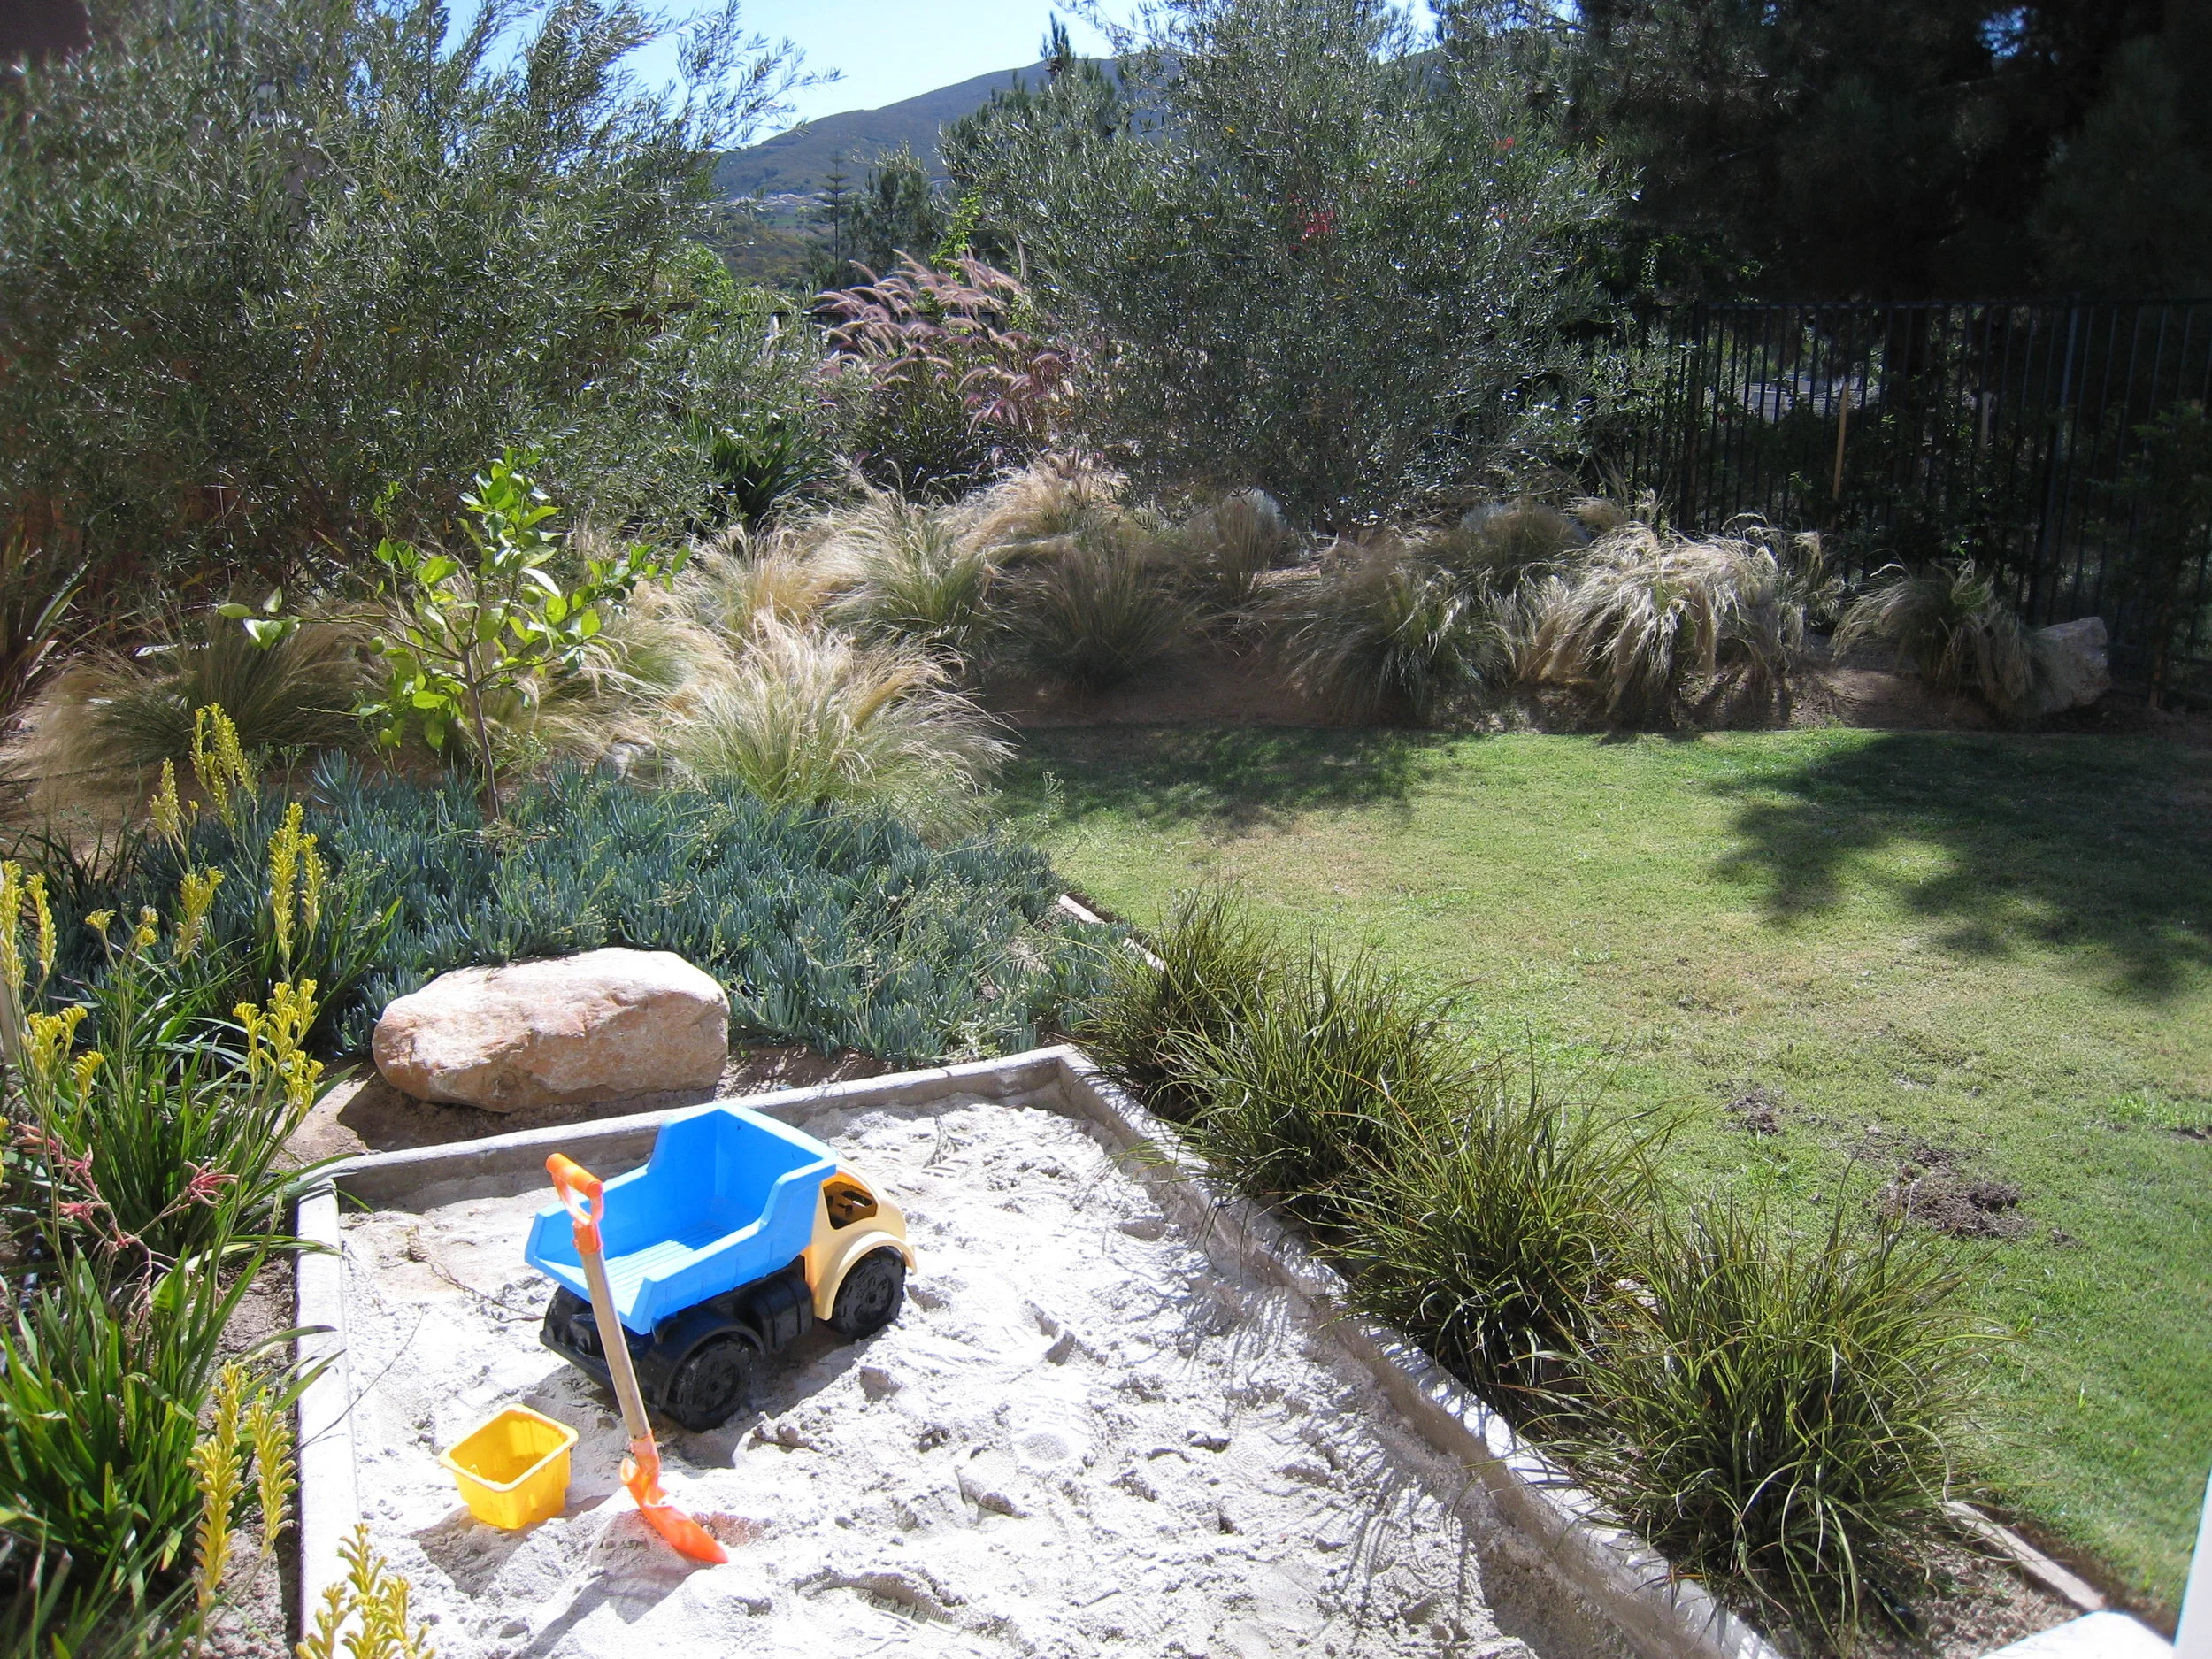
10. Create an Obstacle Course with Natural Wood and Green Ropes
The formula for this engaging, natural look is all about balance: 50% raw wood elements, 30% soft ground cover, and 20% colorful hardware. The light-colored wood logs provide the main structure and texture. The sand base defines the play area and offers a soft landing. Finally, the green ropes and orange-red border add pops of vibrant color that signal “play” without overwhelming the natural aesthetic. This balance ensures the playground is visually captivating, safe, and beautifully integrated into an outdoor space.
|
📋 Copy HEX 🔗 Share |
You can capture the spirit of this natural obstacle course without commissioning a custom build. Start with a simple DIY sandbox using landscaping timbers. Then, source a few large, smooth logs from a local arborist or landscape supplier—often very cheaply. Set them in a zig-zag pattern for balancing. Finally, add a pre-made rope-and-platform element purchased online. By breaking the project into these three smaller, more manageable parts, you can achieve a similar look for under $1,000.
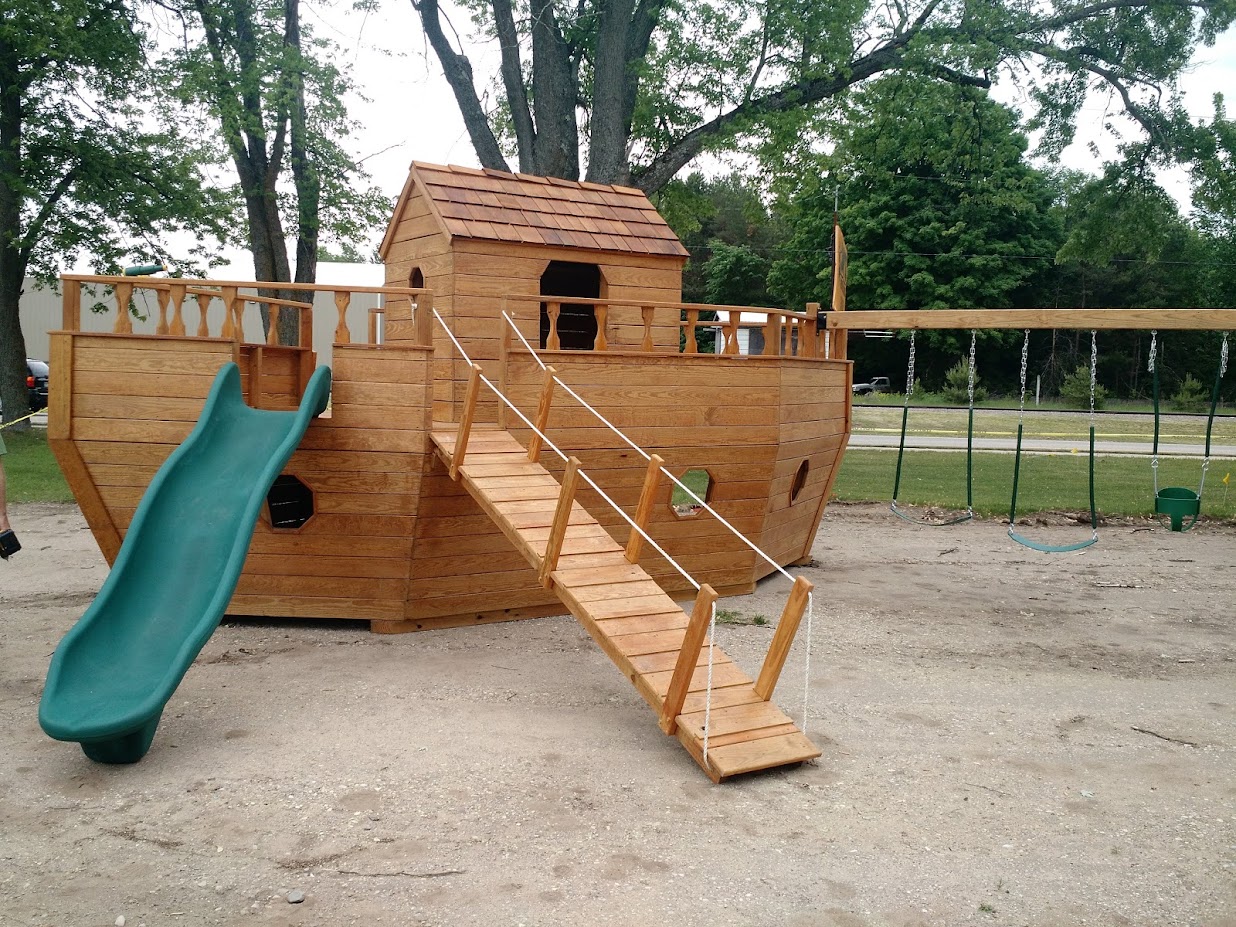
11. Launch an Adventure on a Wooden Pirate Ship Playground
The Pirate Ship theme is what makes this design a standout. It’s not just a playset; it’s a vehicle for imagination. The specific details—the ship’s bow, the cabin structure, and the ramp acting as a gangplank—all work together to create a strong narrative. A child isn’t just climbing and sliding; they’re boarding a vessel, taking the helm, and setting sail. This strong thematic identity is what elevates the play experience from simple physical activity to a full-blown adventure, ensuring it remains a favorite spot in the yard.
|
📋 Copy HEX 🔗 Share |
A large, multi-element structure like this pirate ship needs a generous amount of space. You’re looking at a minimum required area of about 35 ft x 25 ft. This accommodates the ship itself, the attached swing set’s full range of motion, and the safety zones around the slide exit and ramp. This design is ideal for larger suburban or rural backyards where it can be a true centerpiece. If your space is more limited, consider a tower-style design like Idea #14 which has a more vertical, space-saving footprint.
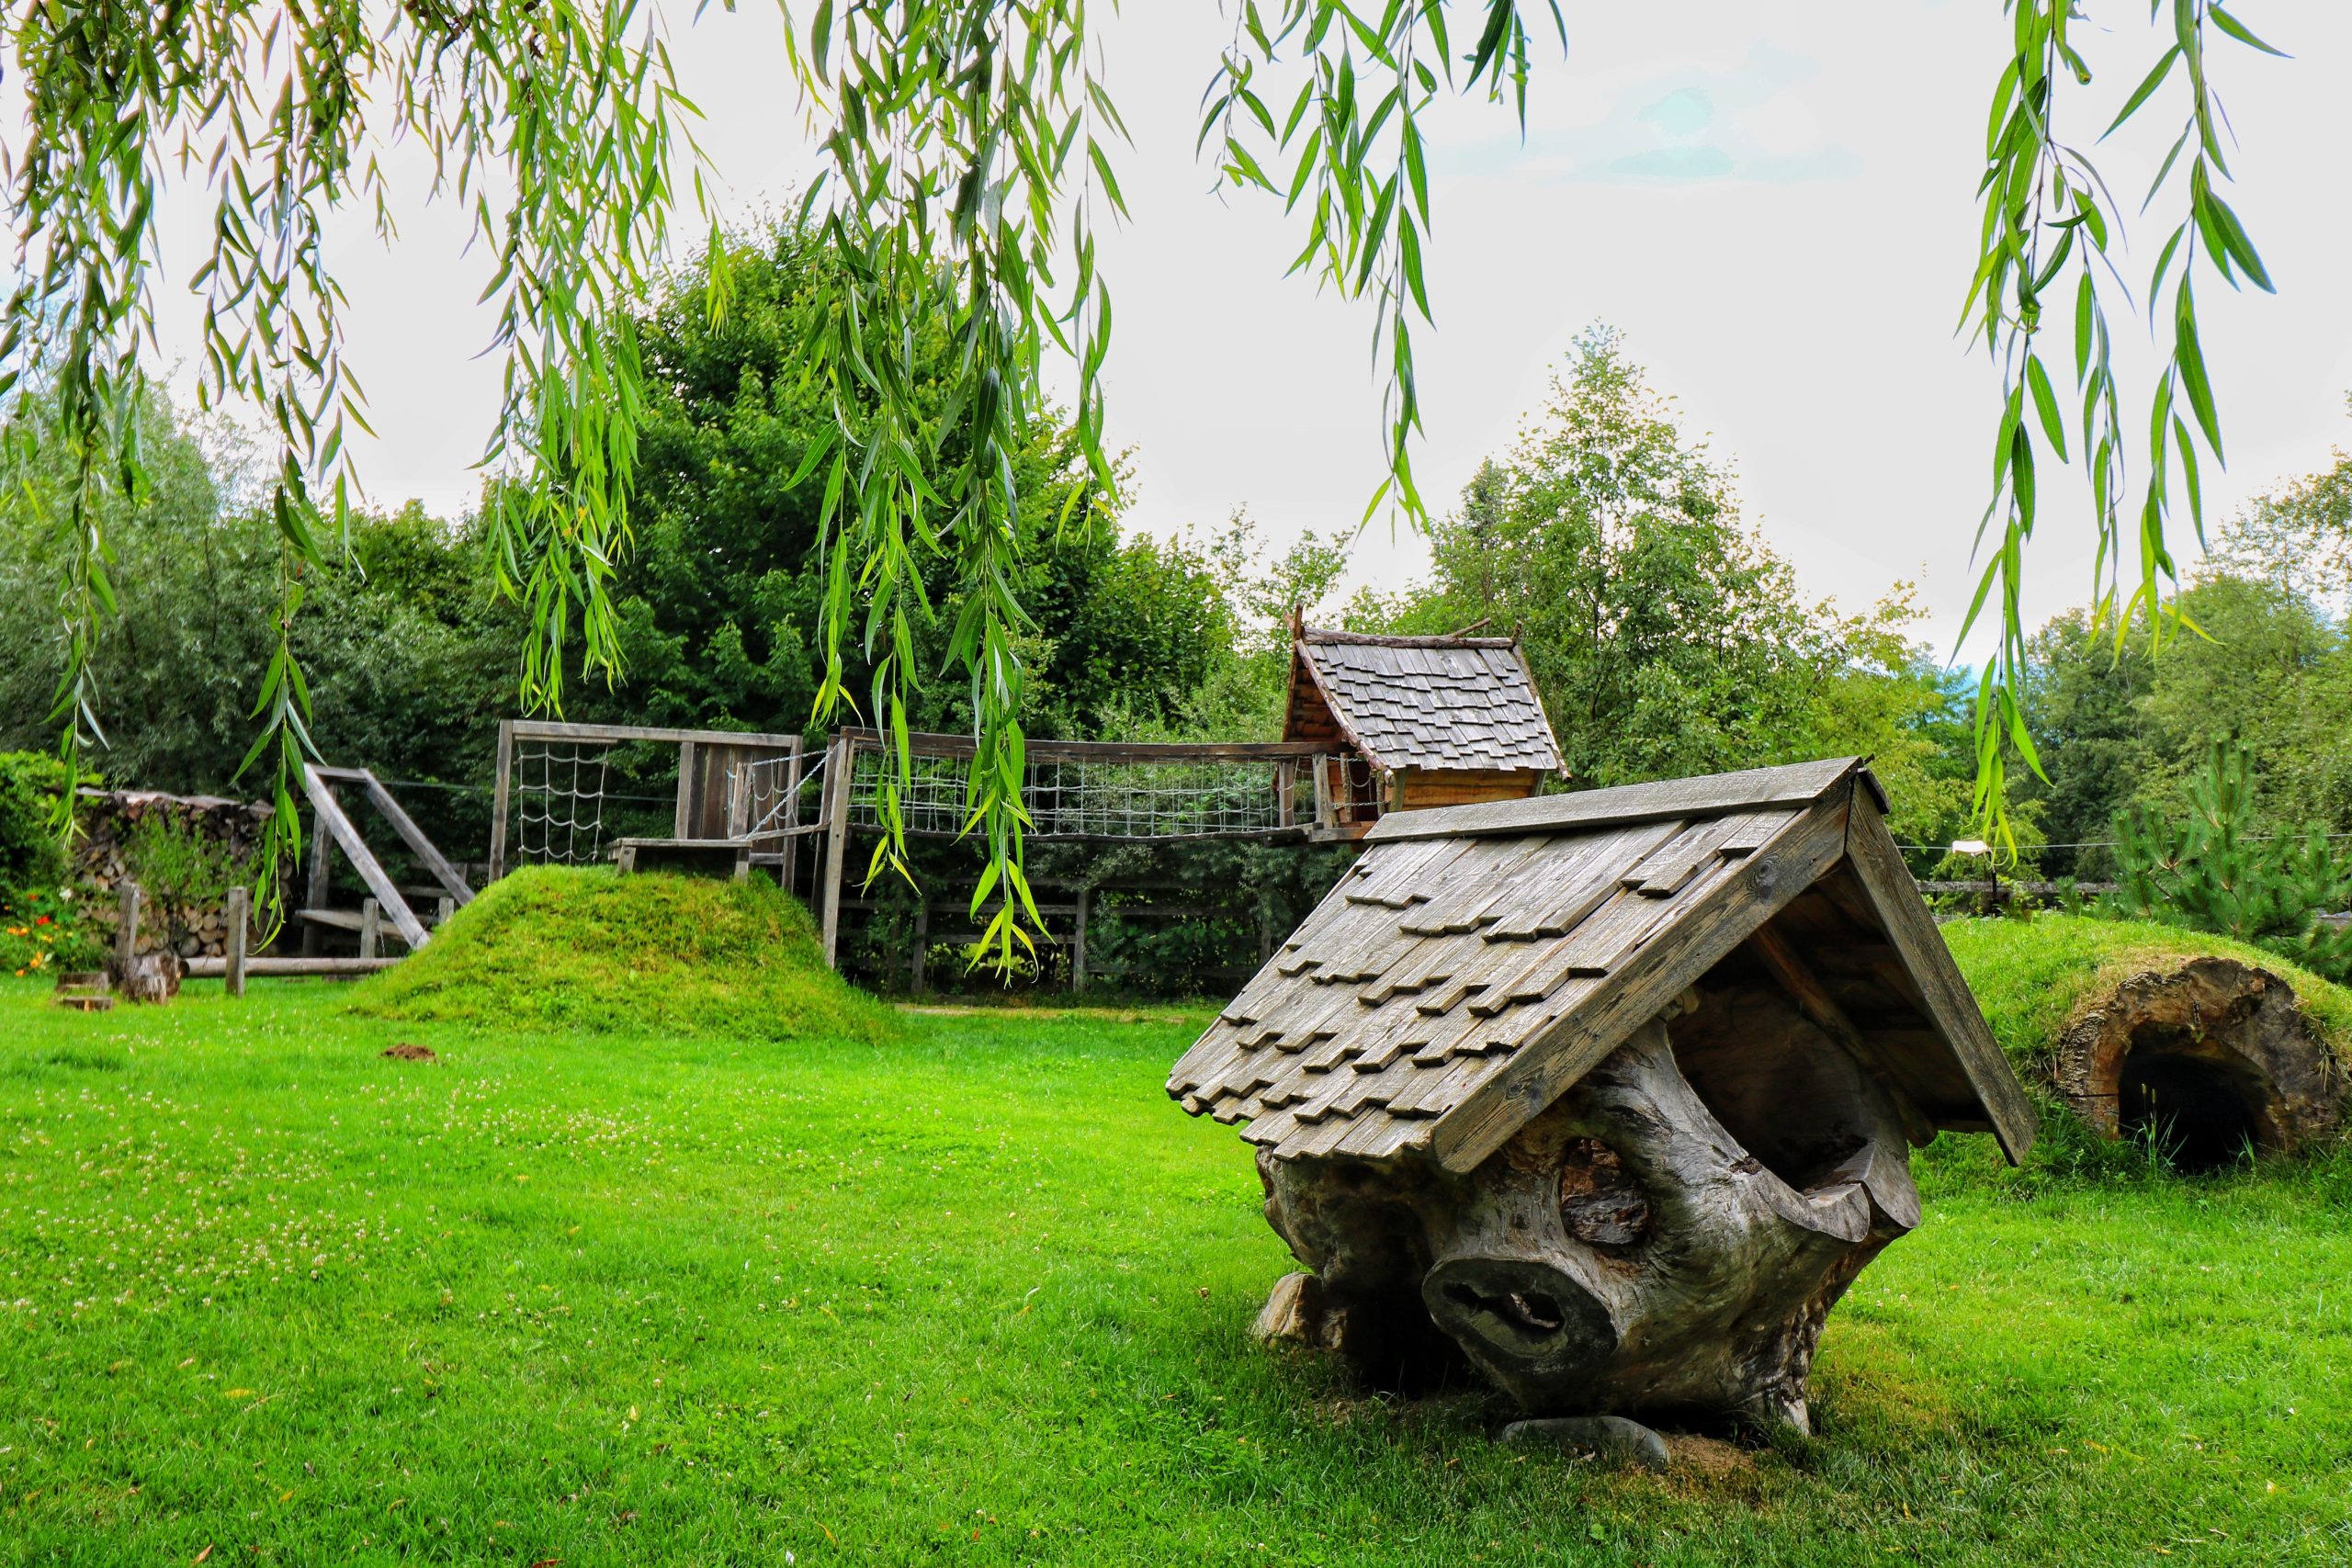
12. Design a Natural Playscape with Green Mounds and a Rope Bridge
This idea is brilliant because it integrates play directly into the landscape, a concept known as ‘playscape’ design. Instead of placing a structure on the lawn, the lawn itself becomes part of the play through the creation of grassy mounds and tunnels. The use of natural elements like a tree stump playhouse and a simple rope bridge further blurs the line between the built and natural environments. The weeping willow leaves in the foreground frame the scene perfectly, adding to the feeling of a secret, natural wonderland.
|
📋 Copy HEX 🔗 Share |
When building grass mounds, compaction is everything. Don’t just pile up topsoil. Build the core of the mound with a cheaper fill dirt, tamping it down in 6-inch layers to prevent slumping later on. Save your high-quality topsoil for the final 4- to 6-inch layer. This is also the time to install a tunnel if you want one. Once the shape is perfect, lay down sod instead of seeding. Sod will provide a tough, instantly playable surface, and its root mat will help prevent erosion on the slopes of your new hills.
13. Combine a Wooden Tower with a Bright Lime Green Slide
You don’t need a massive, complex structure to create a fully fledged zone. A simple tower like this can be a fantastic weekend DIY project. You can find basic plans online for free or for a small fee. The key is to invest in good quality, pressure-treated lumber. The real savings come from buying the components separately. A standalone slide from a playground supply company might cost $200-$400, and a set of climbing holds is under $50. By building the wooden frame yourself, you can create a custom, durable playset for under $800, which is significantly less than a comparable pre-built kit.
|
📋 Copy HEX 🔗 Share |
A wood chip ground cover is the gold standard for backyard playground safety and is simple to install yourself. Here’s a quick how-to for a 10ft x 10ft area:
- Excavate the area: Dig out the 10×10 square to a depth of about 9-10 inches.
- Install a border: Use pressure-treated 4x4s or a flexible landscape edging to frame the area and contain the chips.
- Lay down landscape fabric: Cover the entire excavated area with permeable landscape fabric to prevent weeds.
- Add the wood chips: You’ll need about 3 cubic yards of engineered wood fiber (playground mulch). Fill the area to a depth of at least 9 inches. Rake it smooth.
This project takes about 4-6 hours and costs around $200-$350 for the materials.
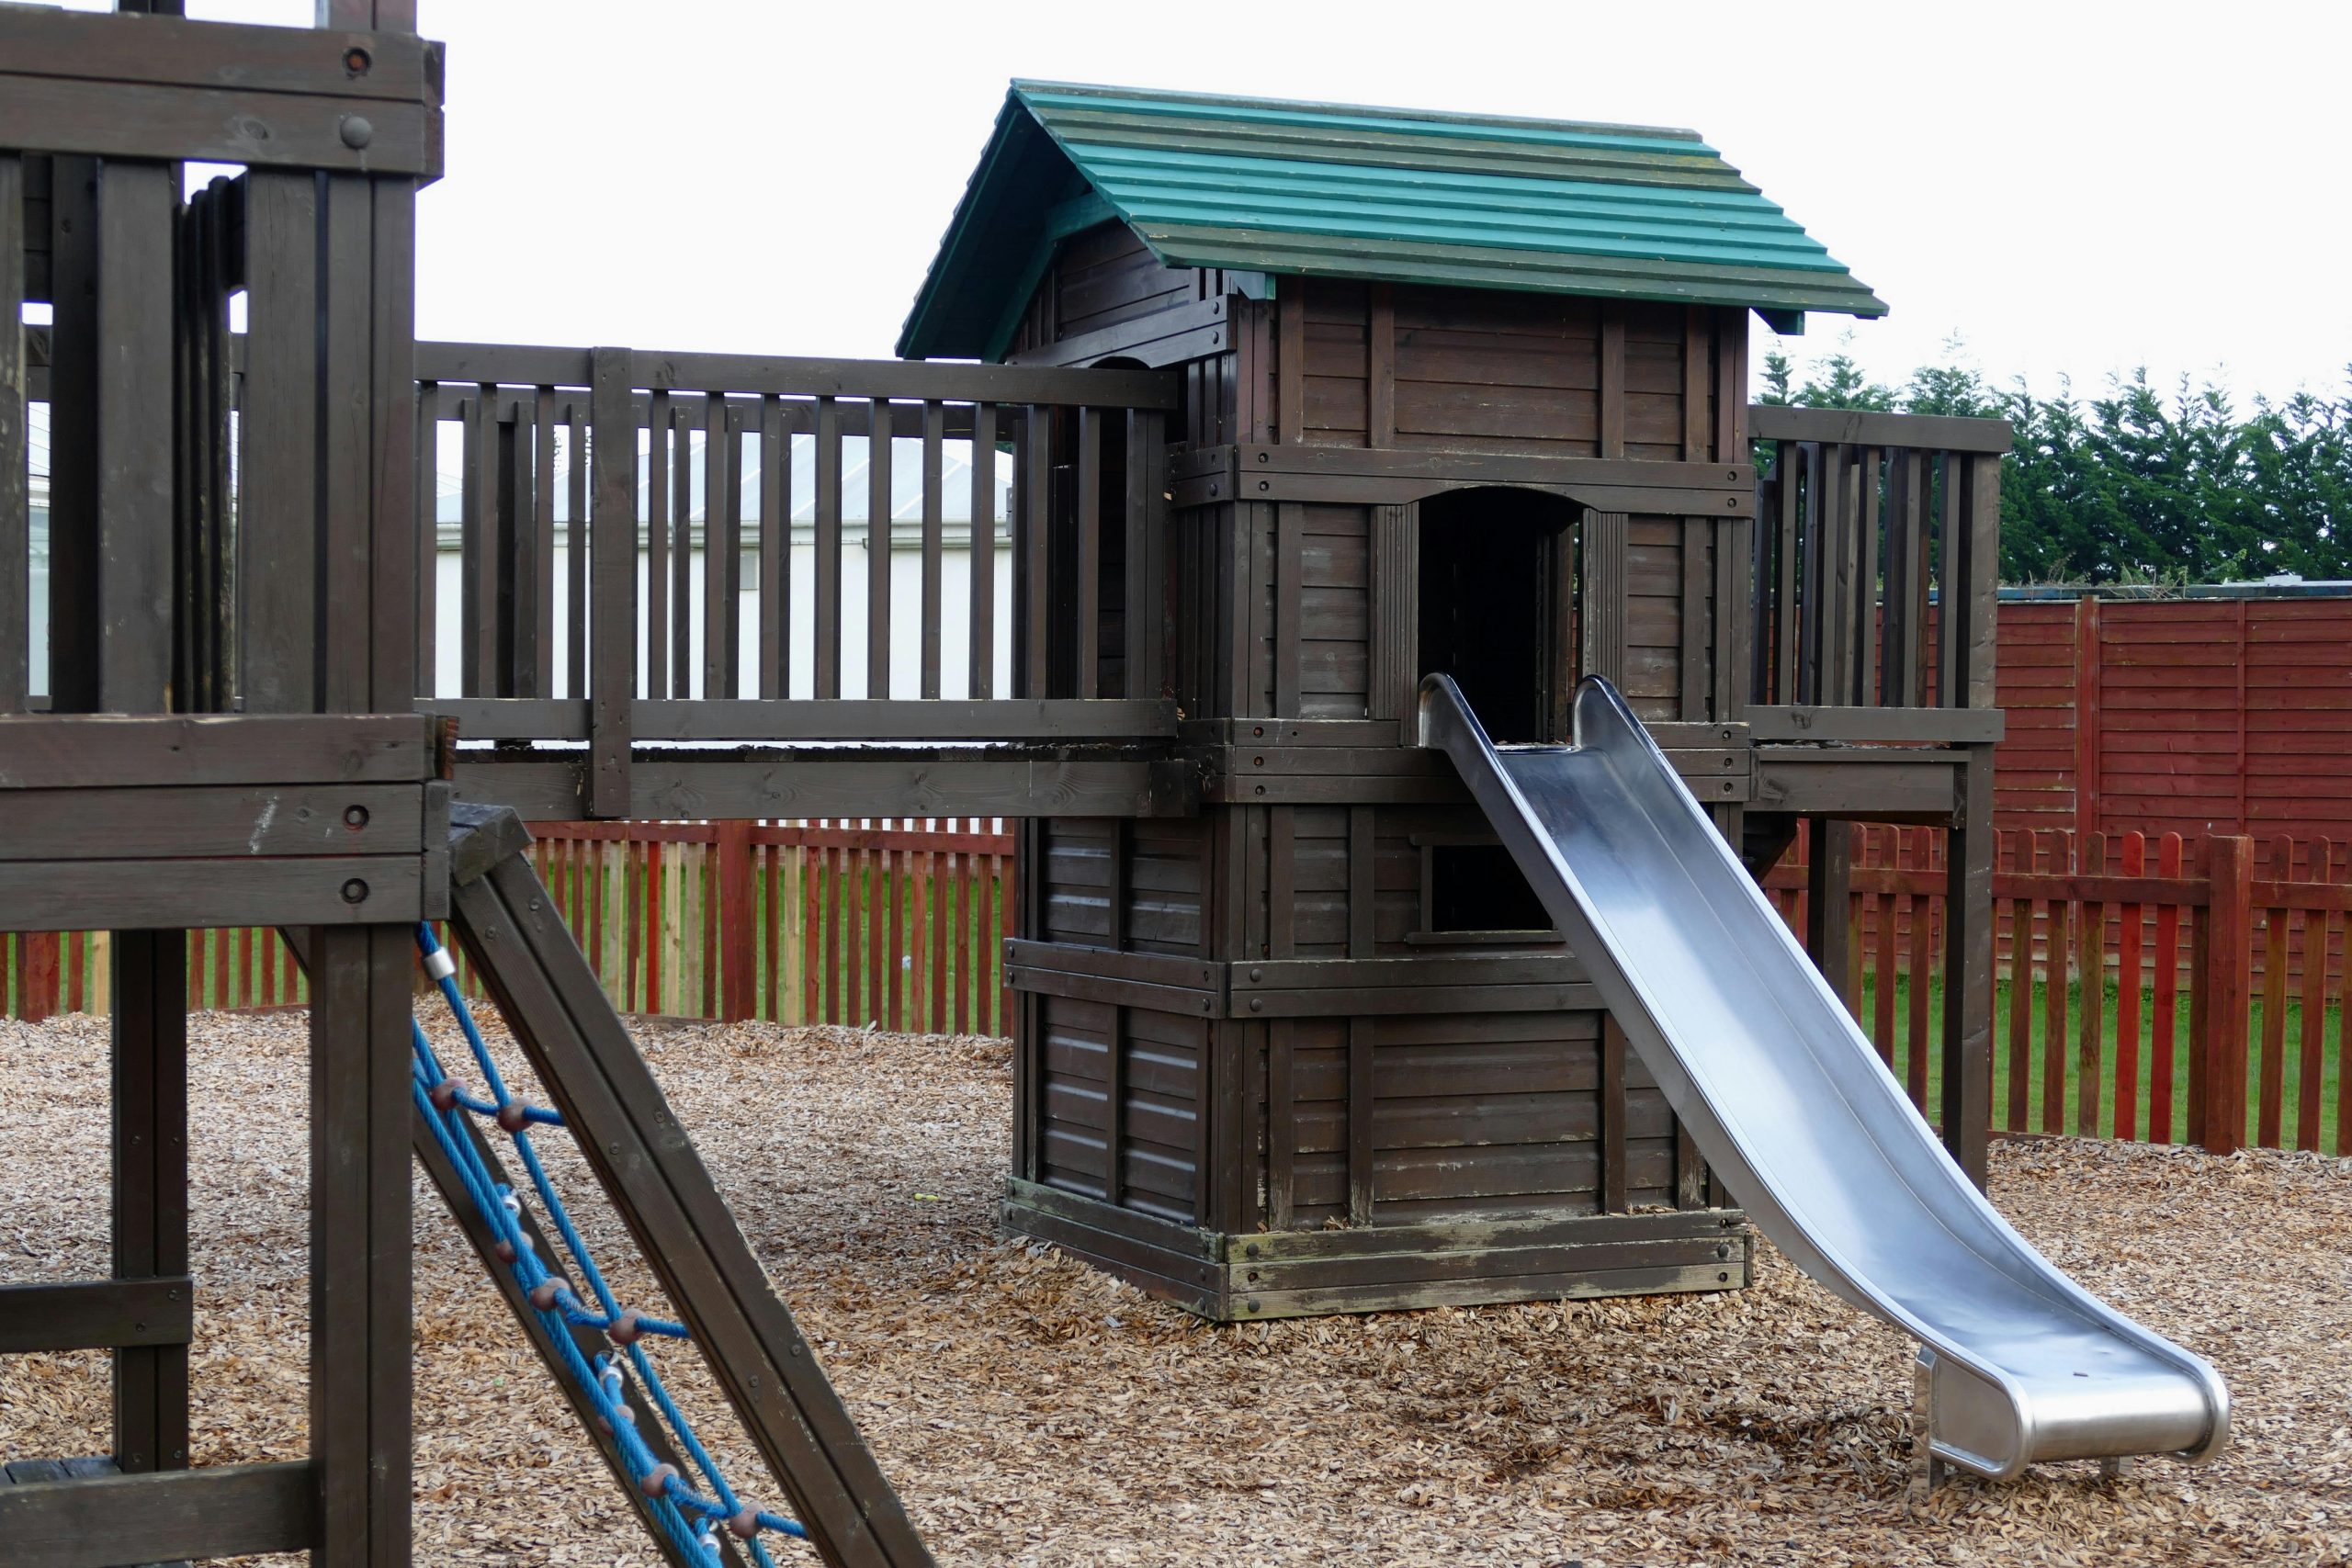
14. Build a Multi-Level Fort with a Green Roof and Silver Slide
This playground’s sturdy, handsome look comes from a balanced material and color palette. Let’s break it down: 60% dark stained wood + 20% accent color + 10% neutral metal + 10% natural ground cover. The dark wood provides a solid, grounding presence. The teal green gabled roof adds a necessary pop of color and personality. The silver slide offers a contrasting finish and a touch of modern sleekness. Finally, the light brown wood chips provide a soft, textural base that complements the whole scheme. Sticking to this ratio is key to its success.
|
📋 Copy HEX 🔗 Share |
A multi-level structure is fantastic for older kids, but be honest about the climbing challenges. The blue rope climbing net and multiple levels are better suited for children ages 5 and up who have developed the necessary strength and coordination. For toddlers and preschoolers, this design could present safety challenges and lead to frustration. If you have younger children, you might consider a design with simpler stairs or a ramp, like the one seen in Idea #11, or plan to heavily supervise play.
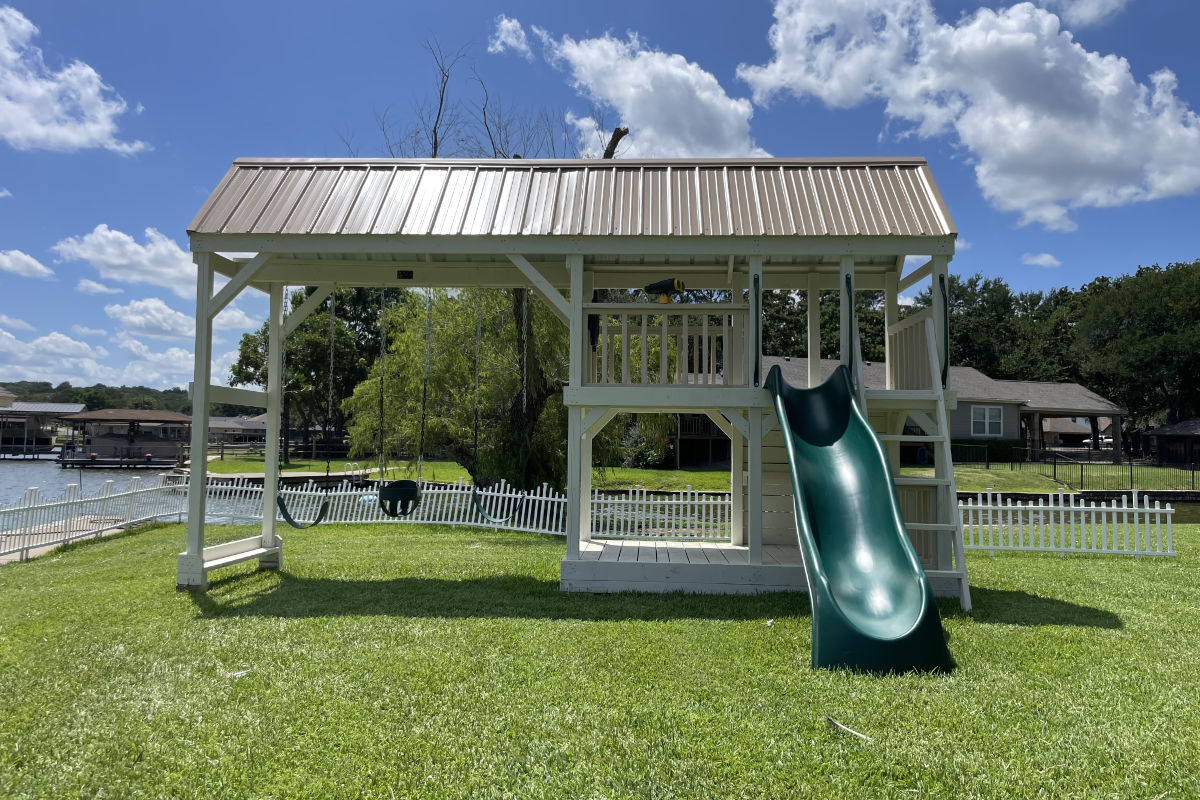
15. Install a Lakeside Playset with a Dark Green Slide
When you have a beautiful natural backdrop like a lake or woods that sets the scene for your playground, choose your accent colors carefully. The choice of a dark, forest green for the slide and swings is brilliant here. Instead of competing with the view, the color harmonizes with the surrounding trees and water, making the playset feel like it belongs in the landscape. A brighter, more jarring color like red or yellow would have created a visual distraction, pulling your eye away from the serene setting. Always consider your background when picking your palette.
|
📋 Copy HEX 🔗 Share |
This design succeeds by balancing traditional and modern elements. The light-colored wood and classic swing set form a familiar, friendly base. However, the addition of the light brown corrugated metal roof introduces a subtle, contemporary touch. It’s an unexpected material for a playset, giving it a slightly more architectural and custom feel than a standard tarp or wooden roof. This small detail, paired with the clean lines of the structure, elevates the entire design from a simple toy to a considered piece of backyard architecture.
16. Create a Modern Forest Playground
This style of modern, minimalist wooden playground is gaining huge traction on Pinterest and in designer-led projects. For 2026, there’s a major movement away from bulky, all-in-one plastic structures toward more abstract, deconstructed play. This Avenlur-inspired design focuses on open-ended physical challenges—climbing, balancing, hanging—that encourage creativity and motor skill development. The natural wood finish and clean lines appeal to parents who want to maintain a sophisticated, modern aesthetic in their backyard, blending the play area seamlessly with their home’s design.
|
📋 Copy HEX 🔗 Share |
One reality of these beautiful, minimalist wooden gyms is that they are more suited for a specific age range. They are fantastic for toddlers and preschoolers (ages 2-6) who are developing gross motor skills. However, older children may lose interest more quickly than they would with a more traditional playset that includes a fort, slide, and swings. Before investing, consider the long-term play value for your family’s age range. You might see it as a beautiful ‘starter’ playground before graduating to a larger structure.
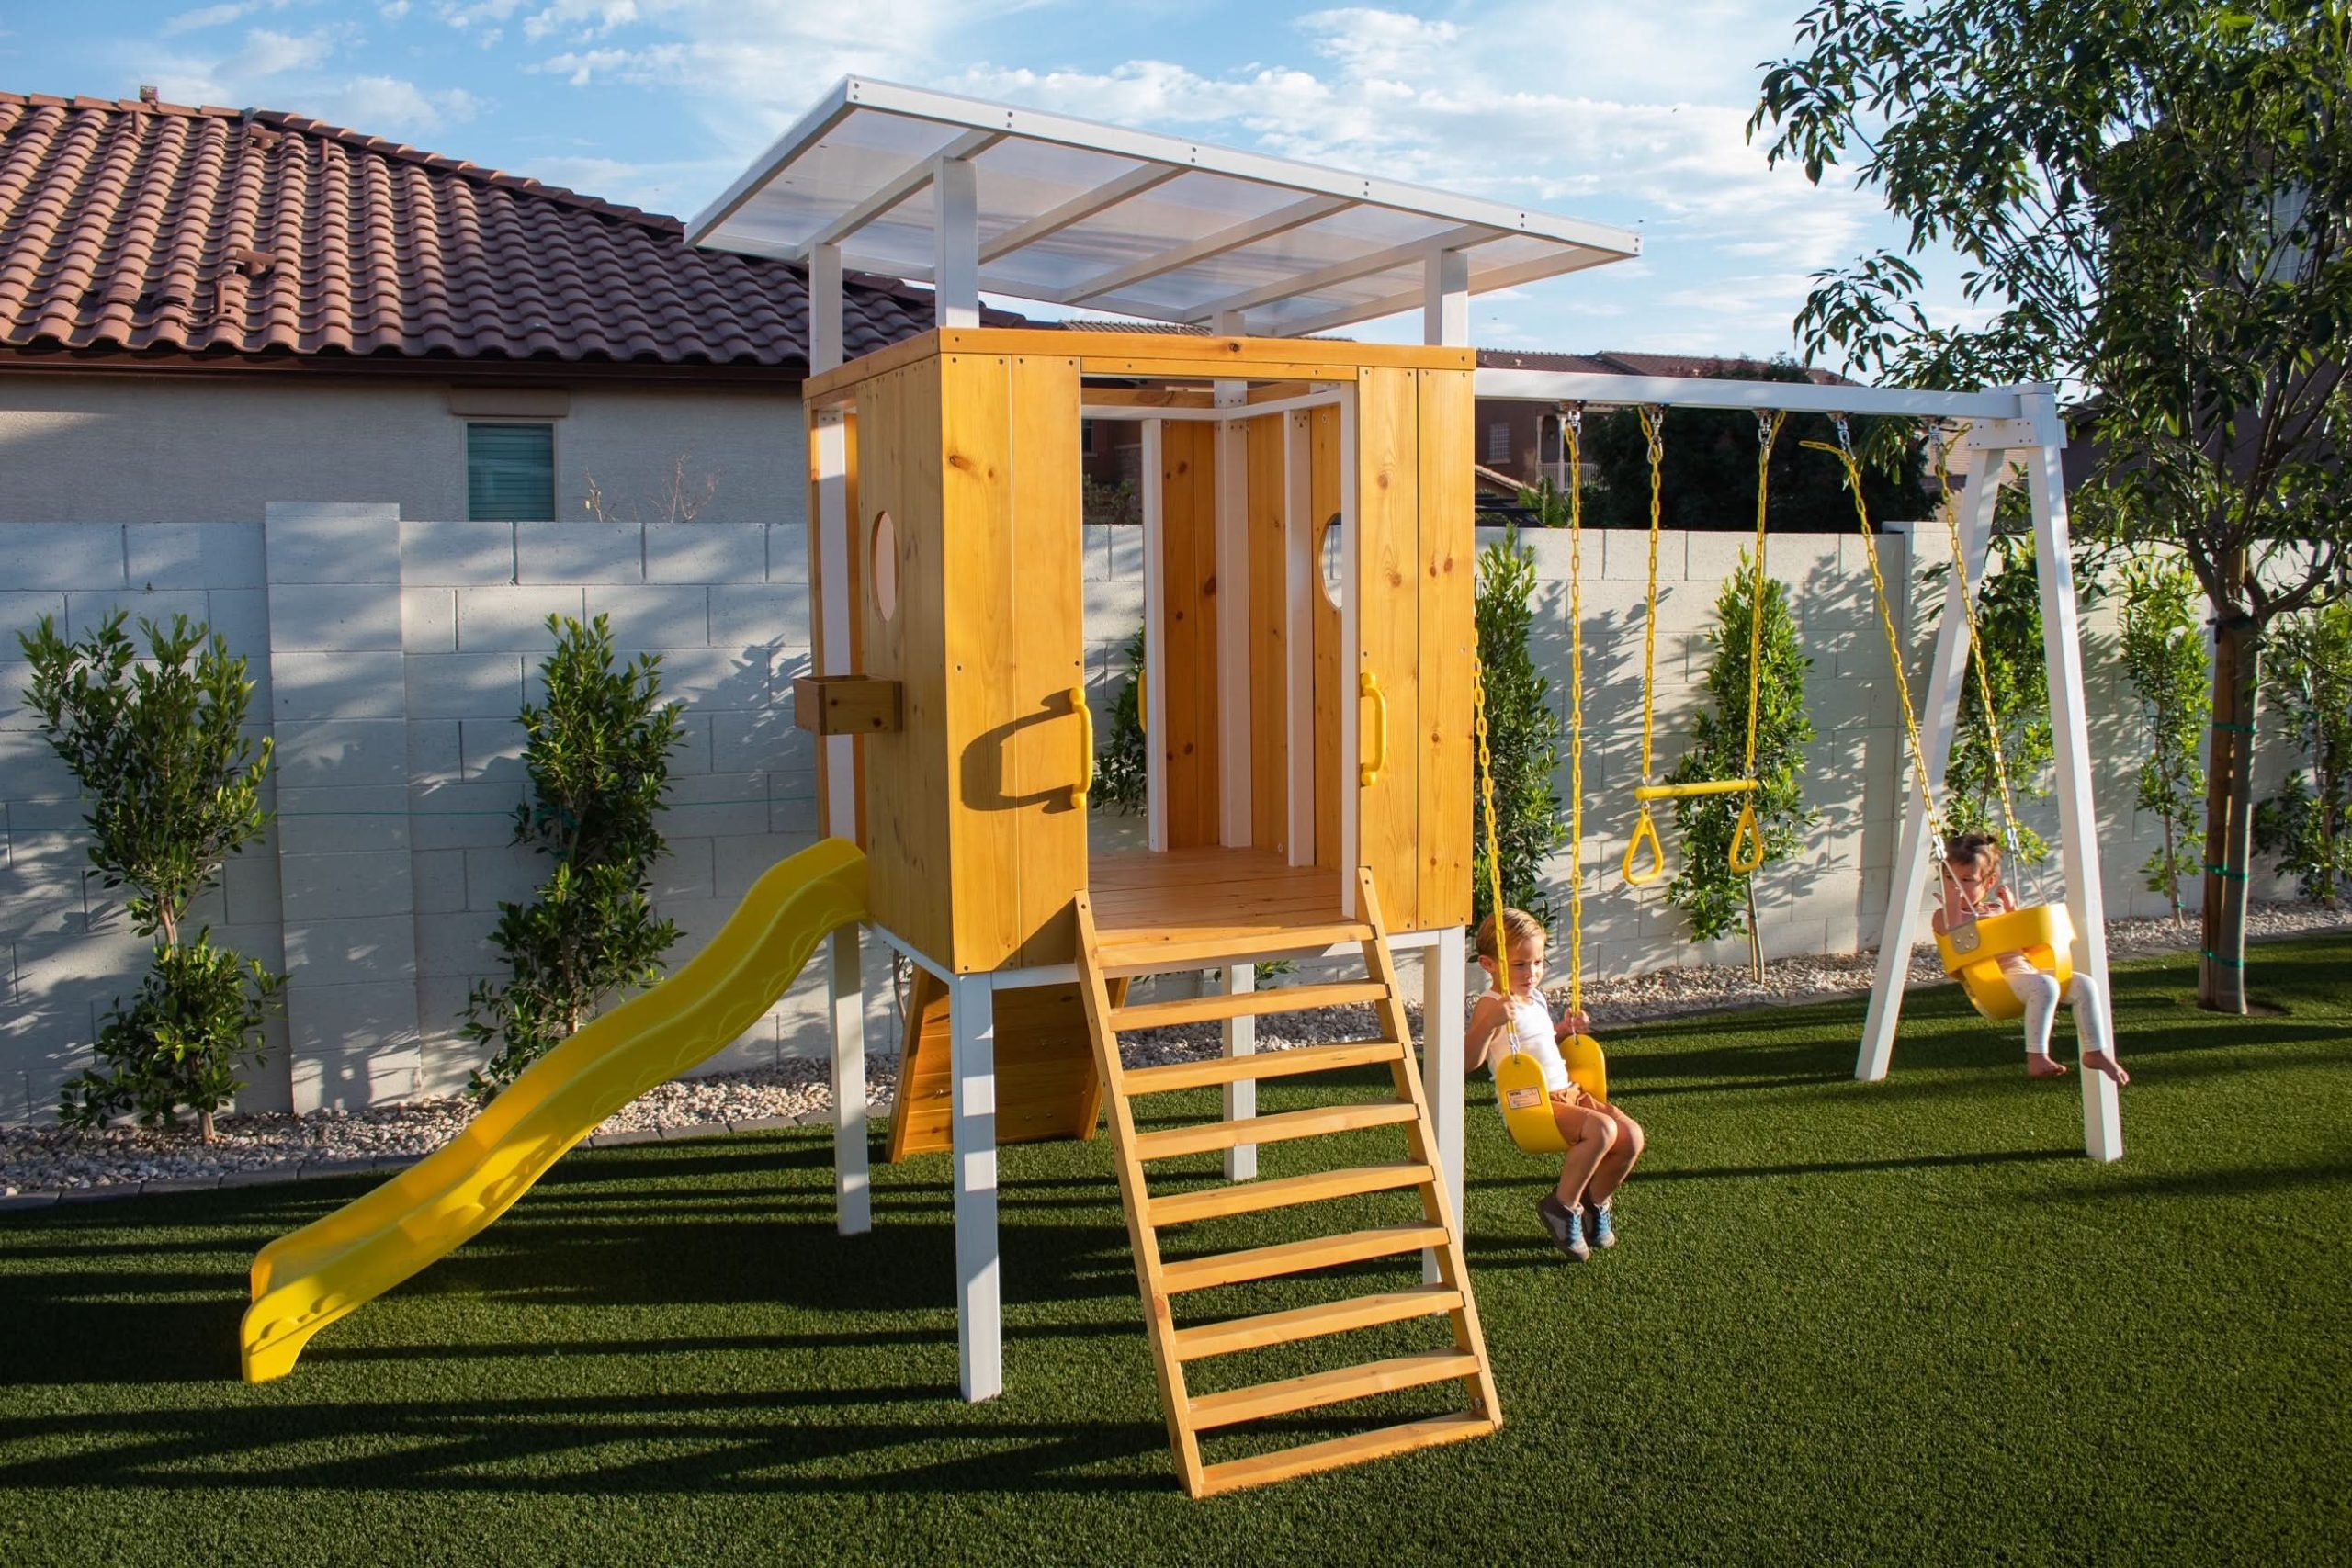
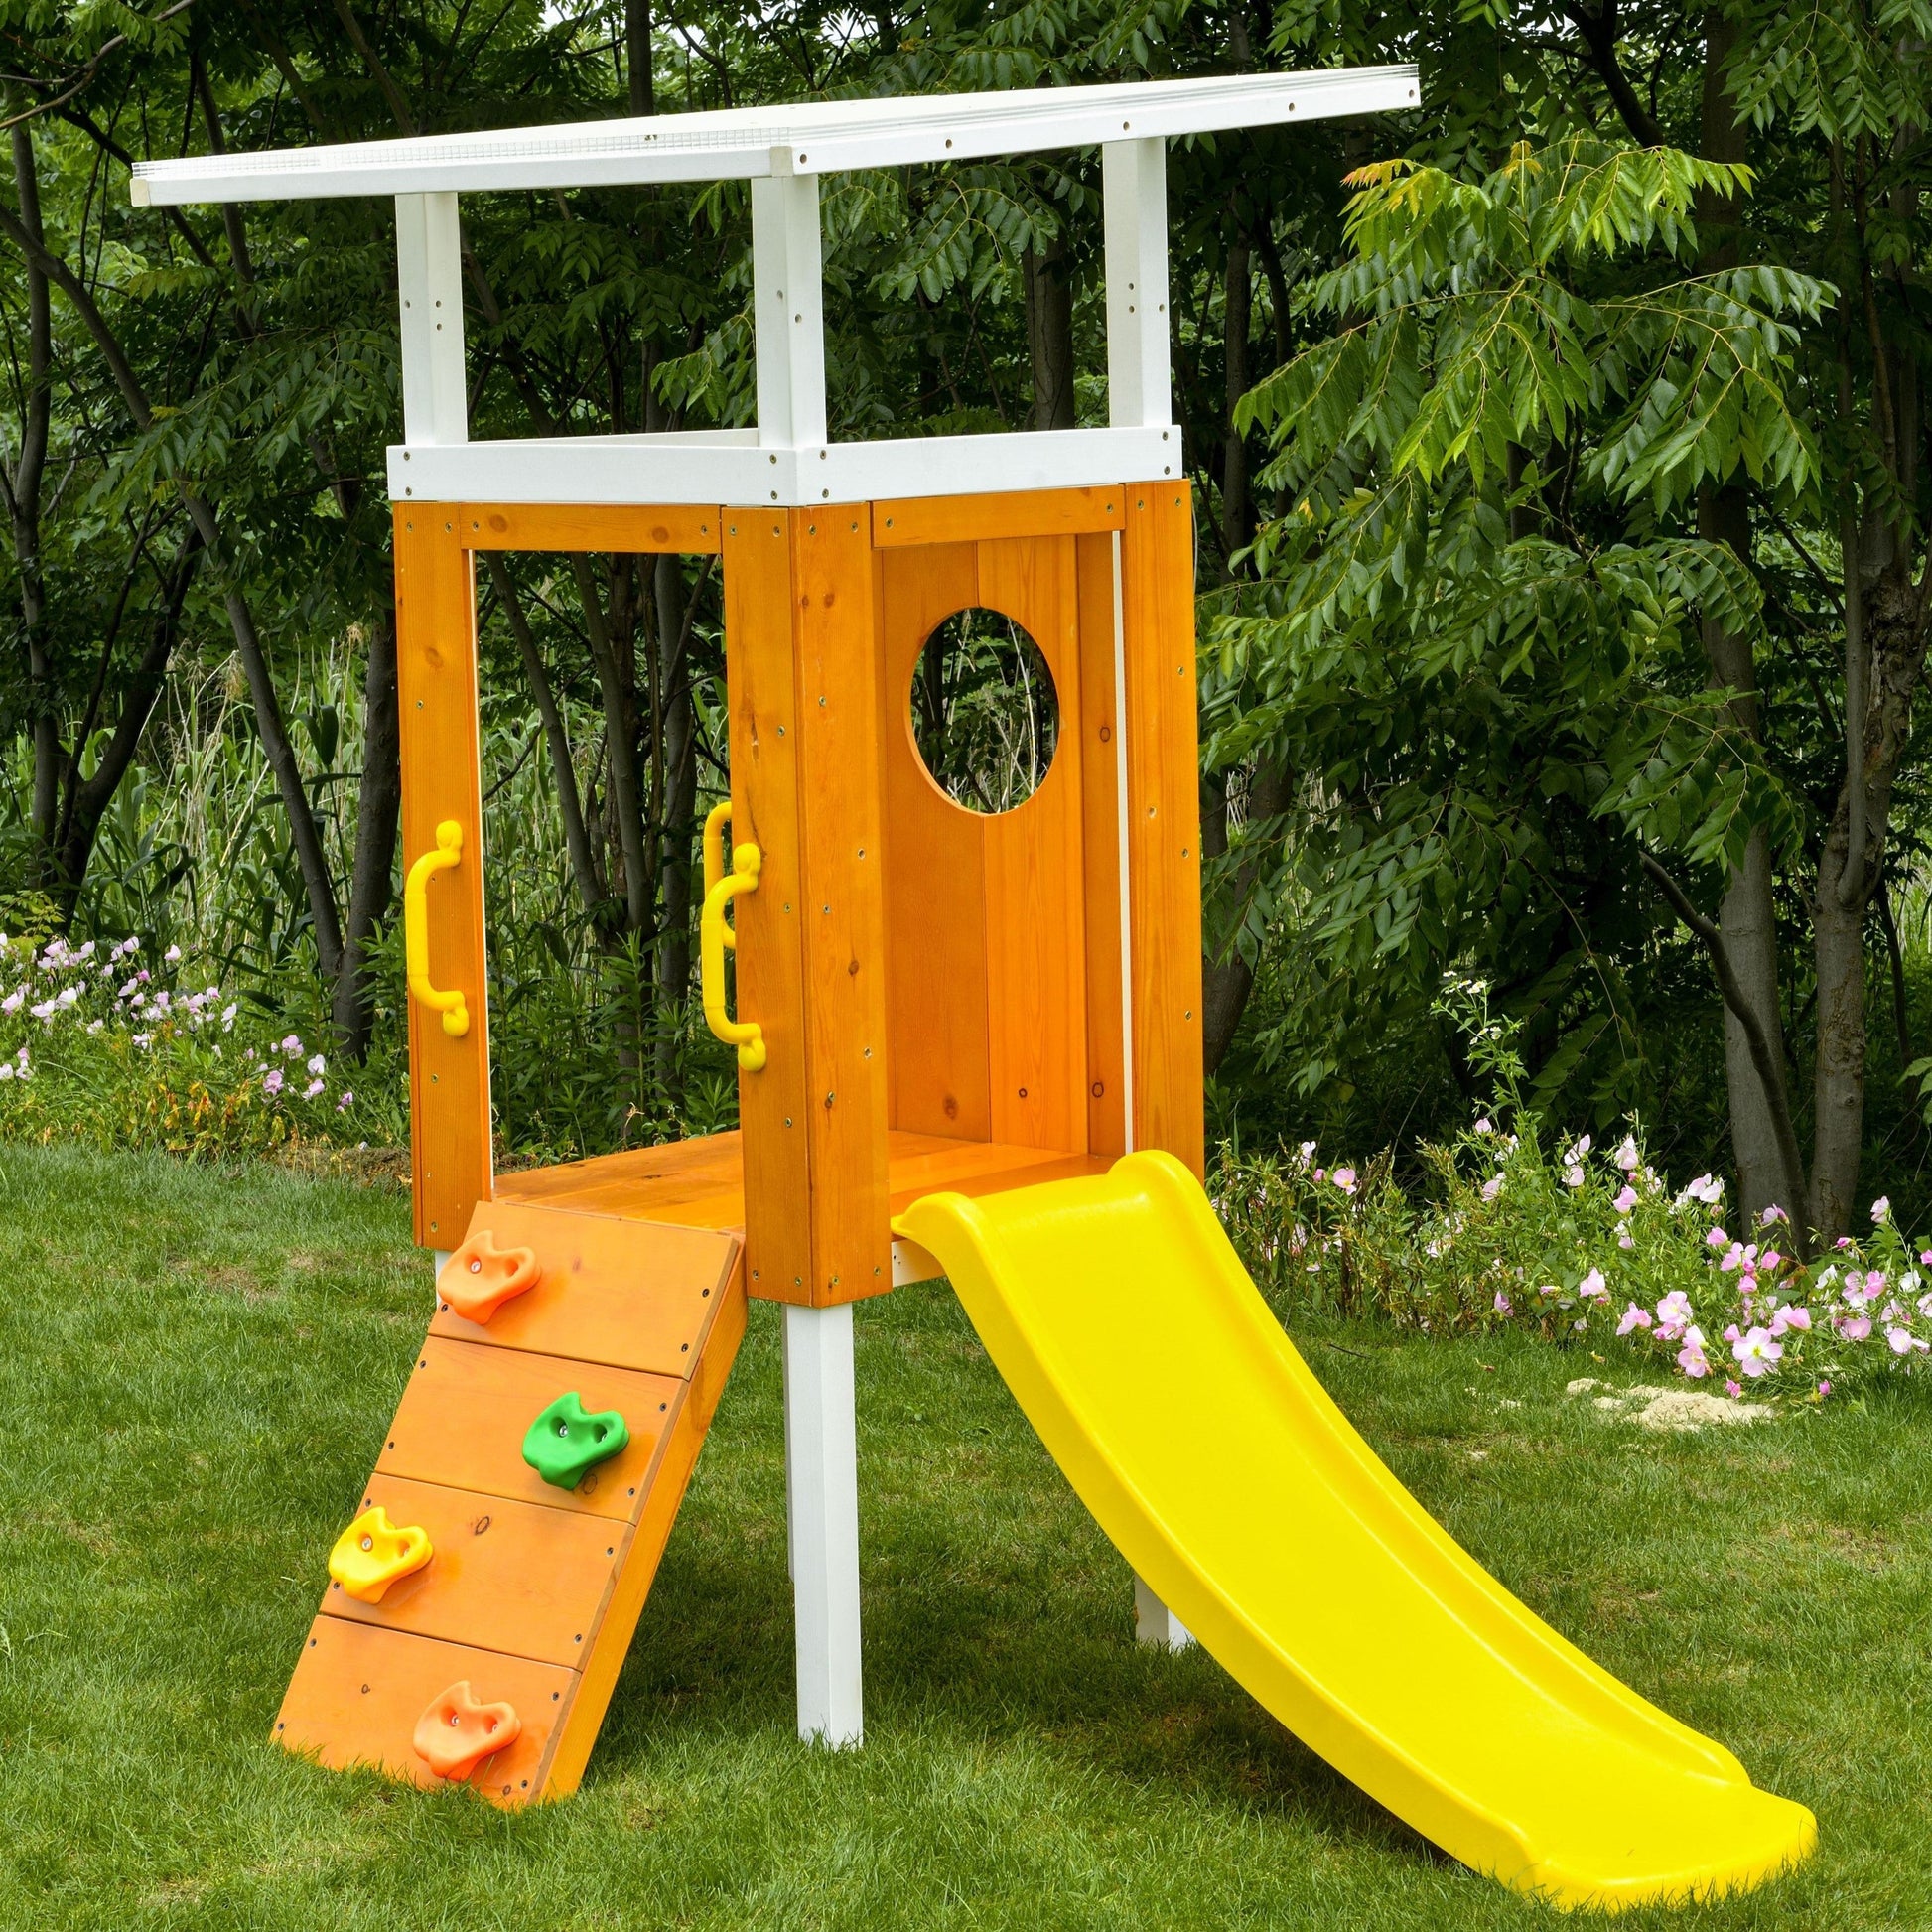
17. Assemble a Wooden Playhouse with a Yellow Slide and Climbing Wall
The single most effective element here is the vibrant yellow slide. The wooden playhouse itself is lovely, but the bold, sunny yellow transforms it from a rustic cabin into a cheerful, magnetic play zone. Yellow is an optimistic and high-energy color, making it an excellent choice for children’s items. It draws the eye, contrasts beautifully with the green grass and brown wood, and practically screams ‘fun.’ If you’re looking to update a tired wooden playset, swapping in a colorful new slide is the highest-impact change you can make.
|
📋 Copy HEX 🔗 Share |
Recreating this charming playhouse look is a very approachable DIY project or an affordable kit purchase. The costs are driven by the wood for the structure and the slide component.
- Lumber & hardware for playhouse: $400 – $700
- Yellow plastic slide: $150 – $300
- Climbing holds & grab handles: $50 – $100
- Paint/Stain (optional): $40 – $80
- TOTAL: $640 – $1,180
- Budget alternative: Source reclaimed wood or find a basic playhouse kit on sale. You can often find used slides on Facebook Marketplace for under $100, which can significantly lower the total cost.
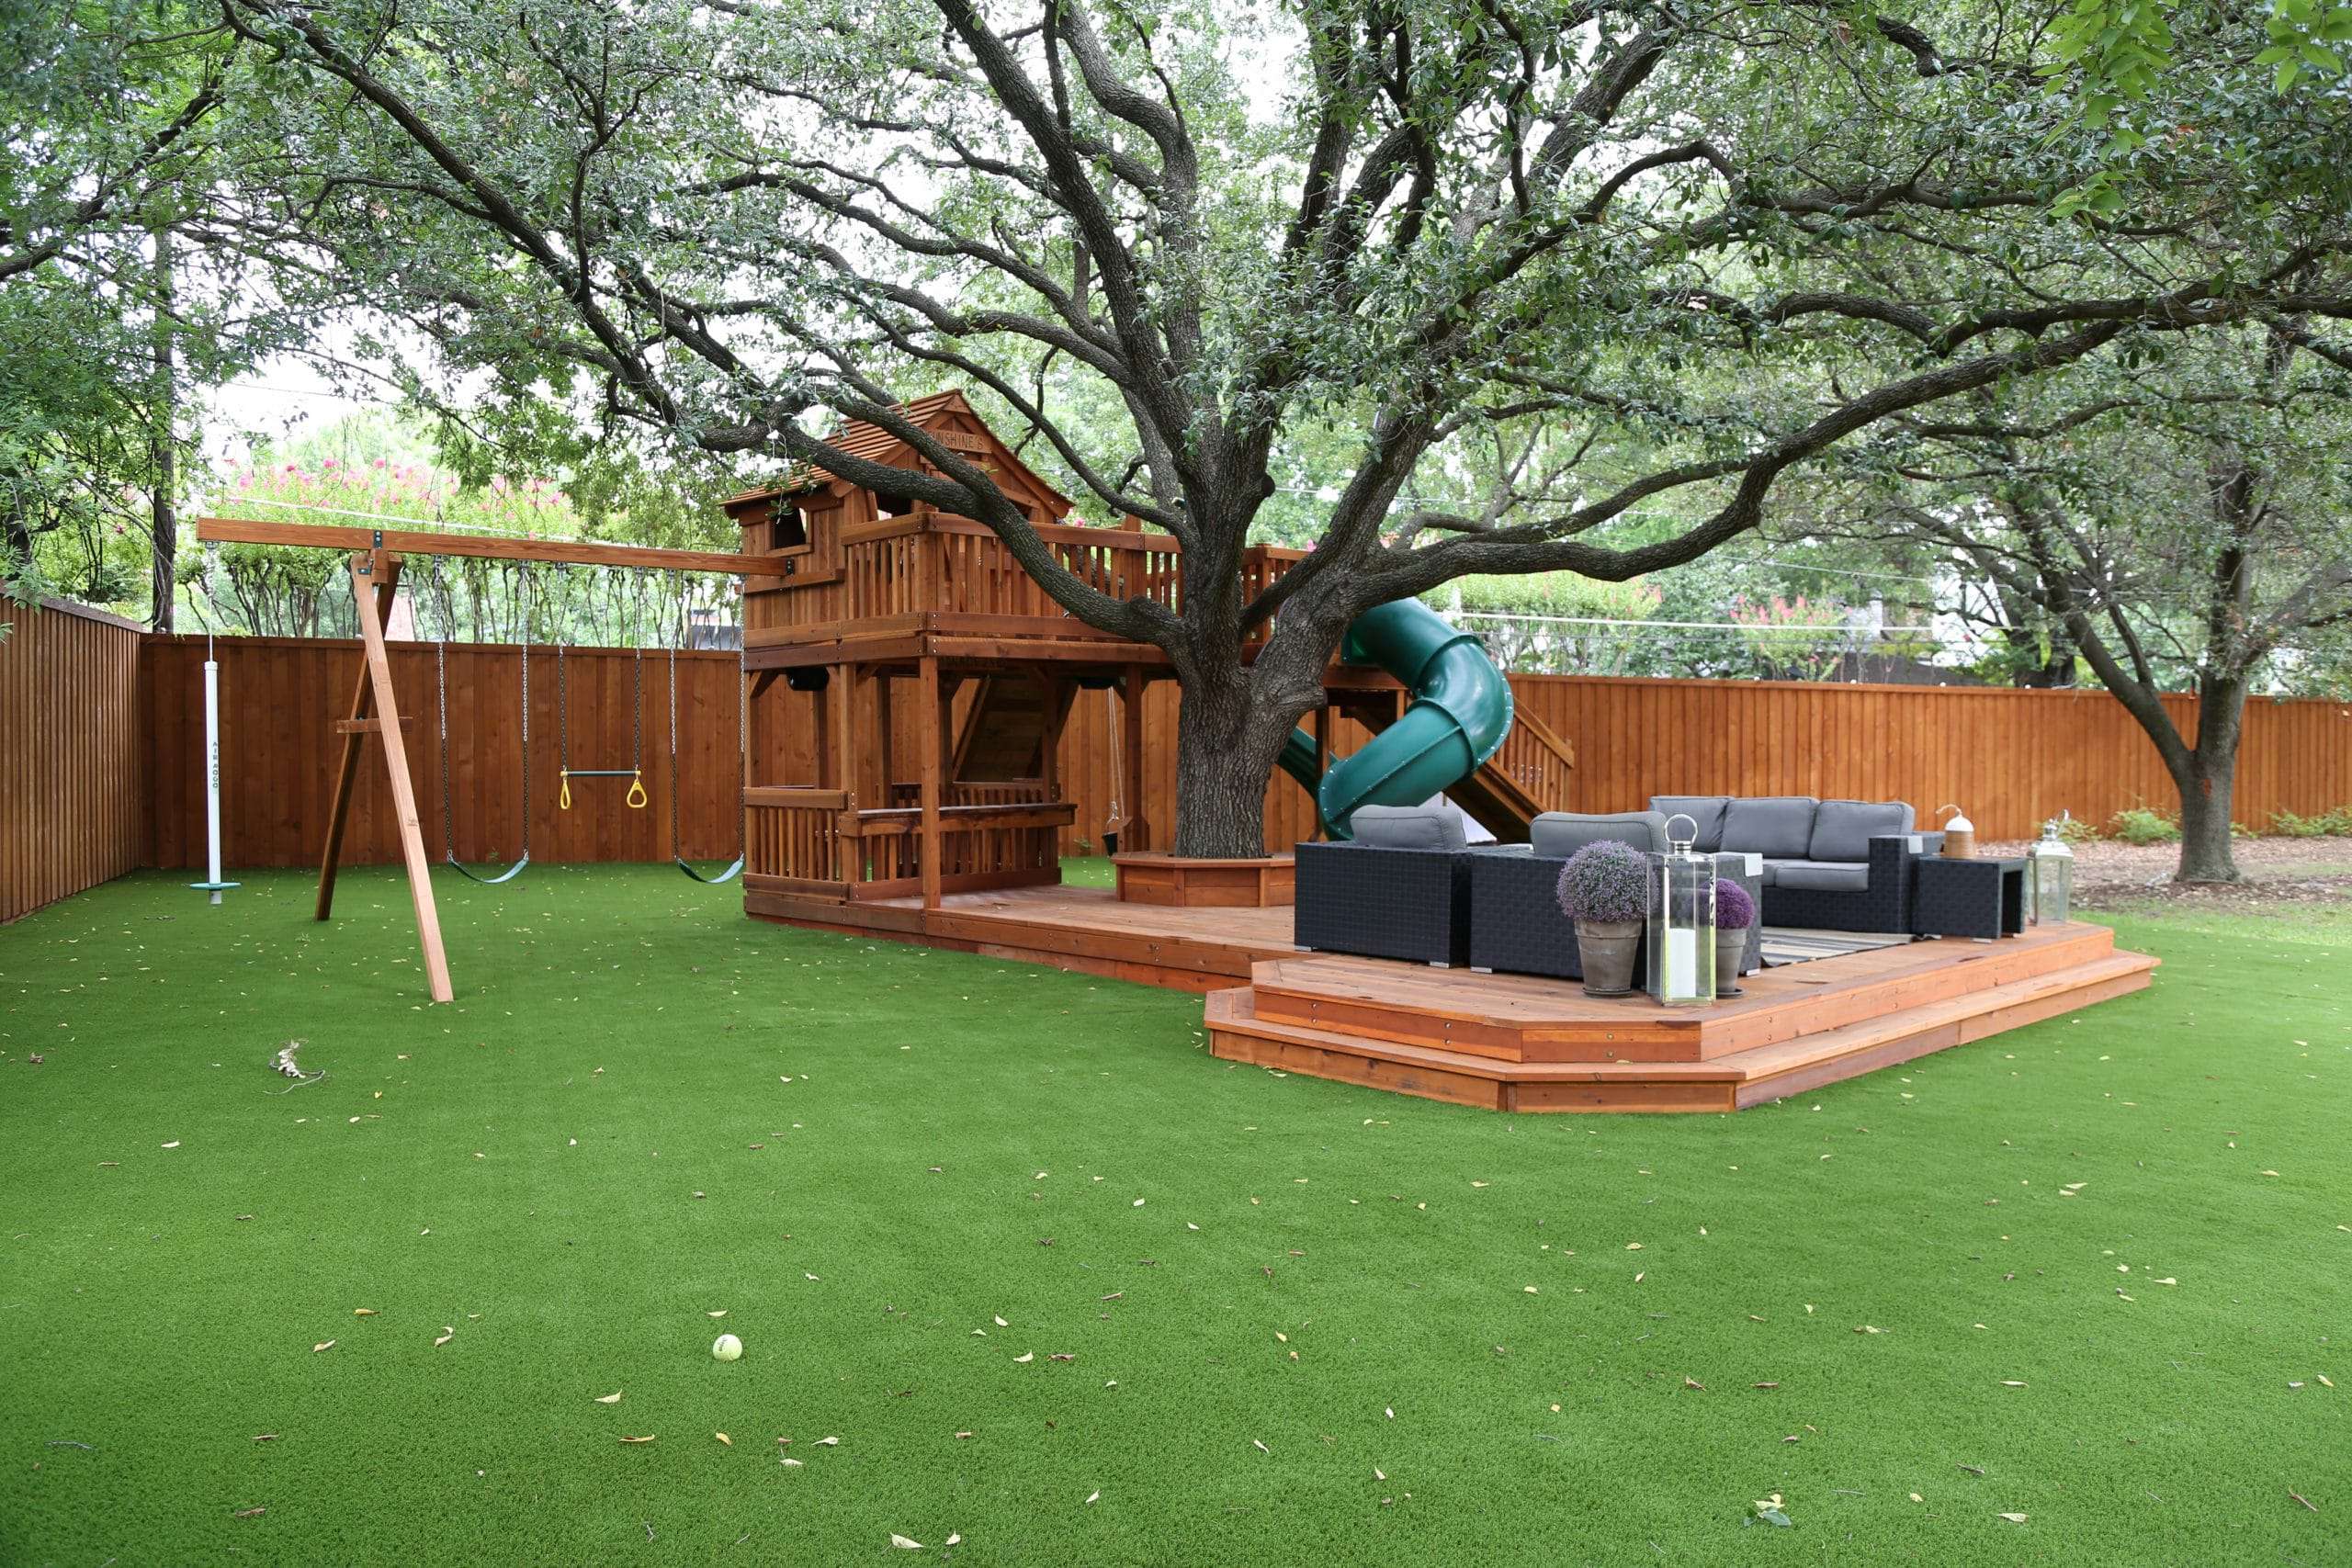
18. Build a Treehouse and Deck with a Green Spiral Slide
This is backyard ambition at its best, and it requires a substantial amount of space. A multi-level deck and treehouse combination like this project needs a large, relatively flat area, ideally at least 40ft x 50ft. You must also account for the mature tree’s root system, ensuring the foundation posts for the deck and supports don’t damage major roots. The spiral slide also has a larger landing zone requirement than a straight slide. This is a dream project for a sprawling suburban yard but would be overwhelming in a smaller city plot.
|
📋 Copy HEX 🔗 Share |
A structure of this size built from wood is a significant maintenance commitment. The entire deck and treehouse will need to be cleaned and re-stained or sealed every 2-3 years to protect them from weather and UV damage. The artificial turf is lower maintenance than grass but needs regular clearing of leaves and debris and occasional rinsing to stay fresh. Also, inspect the hardware connecting the treehouse to the tree each year, as the tree will continue to grow and may put stress on the connections.
19. Carve Out a Simple Backyard Sandbox
A built-in sandbox is a fantastic, low-cost project that provides hours of sensory play. Here’s a quick guide for a simple 6 ft x 6 ft sandbox:
|
📋 Copy HEX 🔗 Share |
- Choose your spot: Pick a location that gets a mix of sun and shade and has good drainage.
- Frame it out: Use four 6-foot landscape timbers to create a square frame. Secure the corners with long exterior screws.
- Dig and level: Dig out about 4 inches of sod and soil from inside the frame. Level the ground.
- Add a liner: Staple a layer of permeable landscape fabric to the inside of the frame. This allows water to drain but keeps the sand separate from the soil.
- Fill with sand: You’ll need about 12-15 bags of play sand (50lb bags) to fill it to a good depth.
This entire project can be completed in an afternoon for under $150.
The most budget-friendly sandbox is one made from found or inexpensive materials. Instead of buying new timbers, look for free pallets (ensure they are heat-treated, not chemically treated), break them down, and use the wood to build a frame. A heavy-duty tarp can work as a liner if you poke drainage holes in it. And a simple DIY cover made from a tarp and some bungee cords is crucial for keeping out rain and critters, which will make your sand last much longer.
20. Construct a Suspended Log Bridge in a Forest Setting
This is an advanced DIY project that borders on professional installation. The tensioning of the steel cables and the secure anchoring of the log segments are critical for safety. This isn’t a typical backyard playset; it’s an adventure course element. Unless you have specific experience with this type of construction, this project is a ‘hire a professional’ job. The risk of failure is too high for a casual build. Furthermore, you’ll need to check local building codes, as a structure like this may require a permit and inspection.
|
📋 Copy HEX 🔗 Share |
What makes the design compelling is the way it uses the natural environment as part of the structure. Anchoring the platform directly to a sturdy, mature tree makes the playground feel deeply rooted in the forest. The suspended log bridge itself mimics a challenge one might encounter in nature, like crossing a creek on a fallen log. This deep connection to the surrounding woods is what makes it feel more like a wilderness adventure than a pre-fabricated toy.
21. Craft a Wooden Playground Bridge with Green and Blue Accents
Don’t be afraid to mix materials and finishes. The success of this design lies in its thoughtful contrasts. The main structure is made of rough-hewn, natural-finish logs, giving it a rustic, sturdy feel. But the addition of the sleek, powder-coated green metal handrails and the vibrant blue rope netting adds a modern, playful touch. This high-low mix of rustic and refined is what gives the playground its unique personality. It keeps the design from feeling either too primitive or too sterile.

|
📋 Copy HEX 🔗 Share |
The single most important choice here is the use of those bright green metal handrails. They are an unexpected pop of industrial color against the natural, rough wood. This jolt of color serves two purposes: it’s a playful, kid-friendly accent, but it’s also a clever wayfinding and safety feature. The bright color clearly signals ‘hold here,’ drawing a child’s attention and hands to the safest place. It’s a perfect fusion of fun and function.
22. Assemble a Backyard Playset with a Green Slide and Multiple Activities
If a brand-new, all-in-one playset from a specialty retailer is out of your budget, this style is your best friend on the second-hand market. Because it’s a classic, popular design, you can almost always find a used one on Facebook Marketplace or Craigslist for $100-$500. It’s a weekend’s work to disassemble, move, and reassemble, but the savings are immense. You might need to replace the fabric roof ($40) or a swing ($30), but even with those small costs, you’ll come in thousands of dollars under the new price.
|
📋 Copy HEX 🔗 Share |
A multi-activity station like this looks fun, but it needs a lot of clear space. Before you buy, make sure you’ve thought through the ‘use zone.’
- Swings: Measure the height of the swing beam. You need a clear space (no trees, fences, or walls) of at least *twice* that height in front of and behind the swings.
- Slide Exit: Ensure there’s a clear, flat landing area of at least 6 feet at the bottom of the slide.
- Climbers: Allow at least 6 feet of clear space around any climbing wall or rope ladder in case of falls.
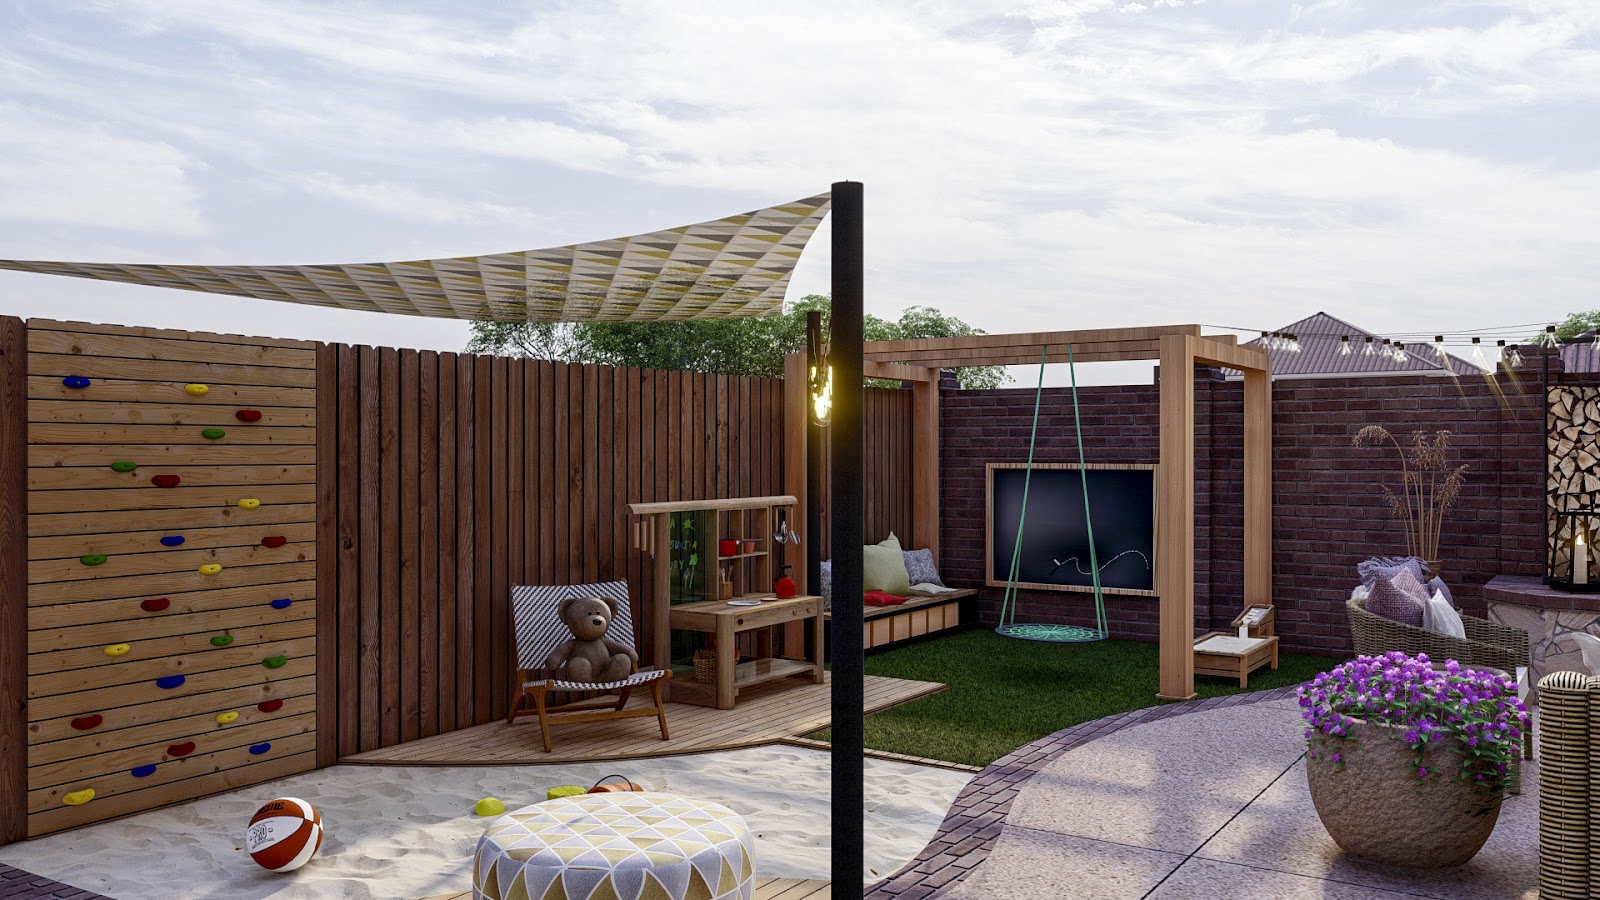
23. Design a Cozy Play Corner with a Climbing Wall and Sand Pit
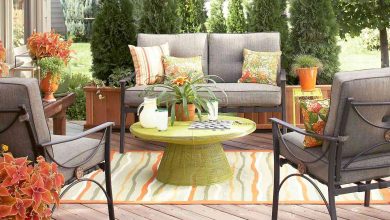
This play area feels so inviting because it applies interior design principles to an outdoor space. It uses ‘zoning’ to create distinct areas for different activities—a sand pit for sensory play, a climbing wall for active play, and a cushioned bench for quiet time. The use of layered textiles, like the patterned shade sail and bench cushions, is a move straight from a living room design playbook. It softens the space and adds personality. Finally, the inclusion of string lights ensures the area feels just as magical in the evening.
|
📋 Copy HEX 🔗 Share |
This cozy, eclectic vibe is all about texture and pattern mixing. The formula is roughly: 40% natural wood + 20% sand/brick texture + 20% textiles + 20% plant life. The wooden fence, pergola, and play kitchen provide the warm, structural base. The sand and brick add earthy, contrasting textures. The patterned shade sail and cushions bring in softness and a graphic element. Finally, the surrounding plants tie it all into the garden. Maintaining this ratio of hard, soft, and living materials is key to the cozy feel.
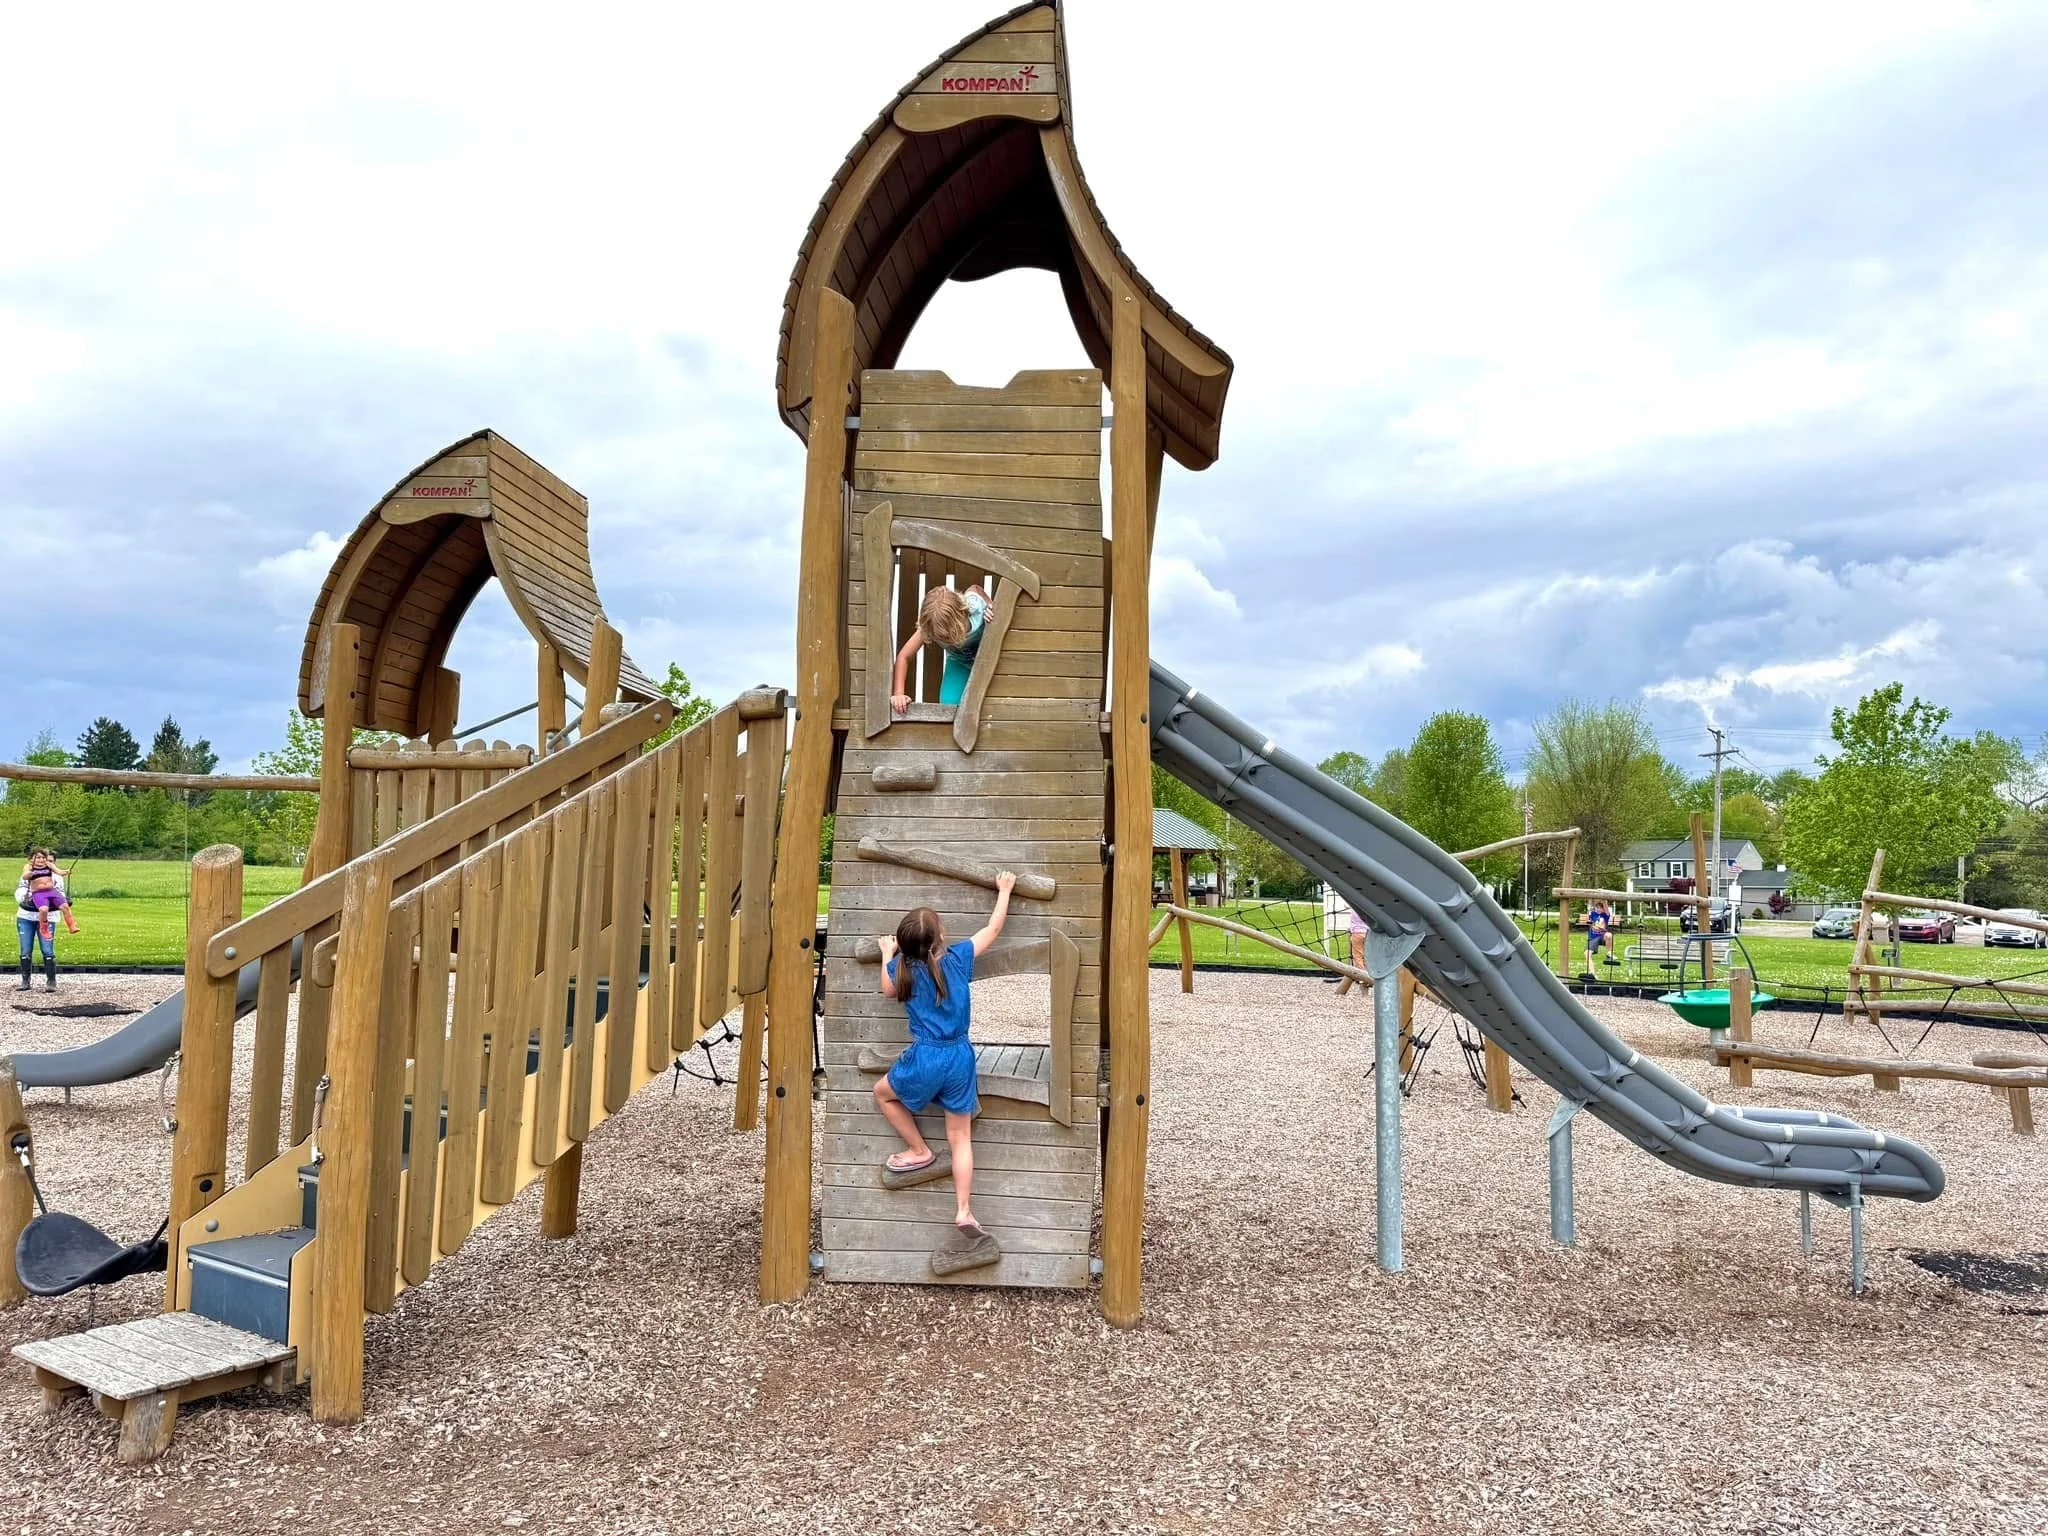
24. Go for a Kompane-Style Playground with Arched Roofs
Kompane is a leader in public and school playground design, and their influence is now trickling down into residential trends. What makes this style so current for 2026 is its focus on architectural forms and high-quality, sustainable materials. The arched, shingled roofs and thoughtfully integrated climbing features feel more like miniature buildings than simple toys. This style appeals to design-conscious parents who see the playground as a permanent feature of their landscape architecture and are willing to invest in durability and aesthetic appeal that will last for a decade or more.
|
📋 Copy HEX 🔗 Share |
Commercial-grade playgrounds like this are built to be incredibly durable, but they have one key maintenance need: the ground cover. Wood chip ground cover, also known as Engineered Wood Fiber, is the preferred safety surface. However, it decomposes and compacts over time. For safety, it needs to be maintained at a depth of at least 9 inches. This means you’ll need to ‘top it off’ with a fresh layer of chips every 2-3 years to ensure it continues to provide the necessary fall protection.
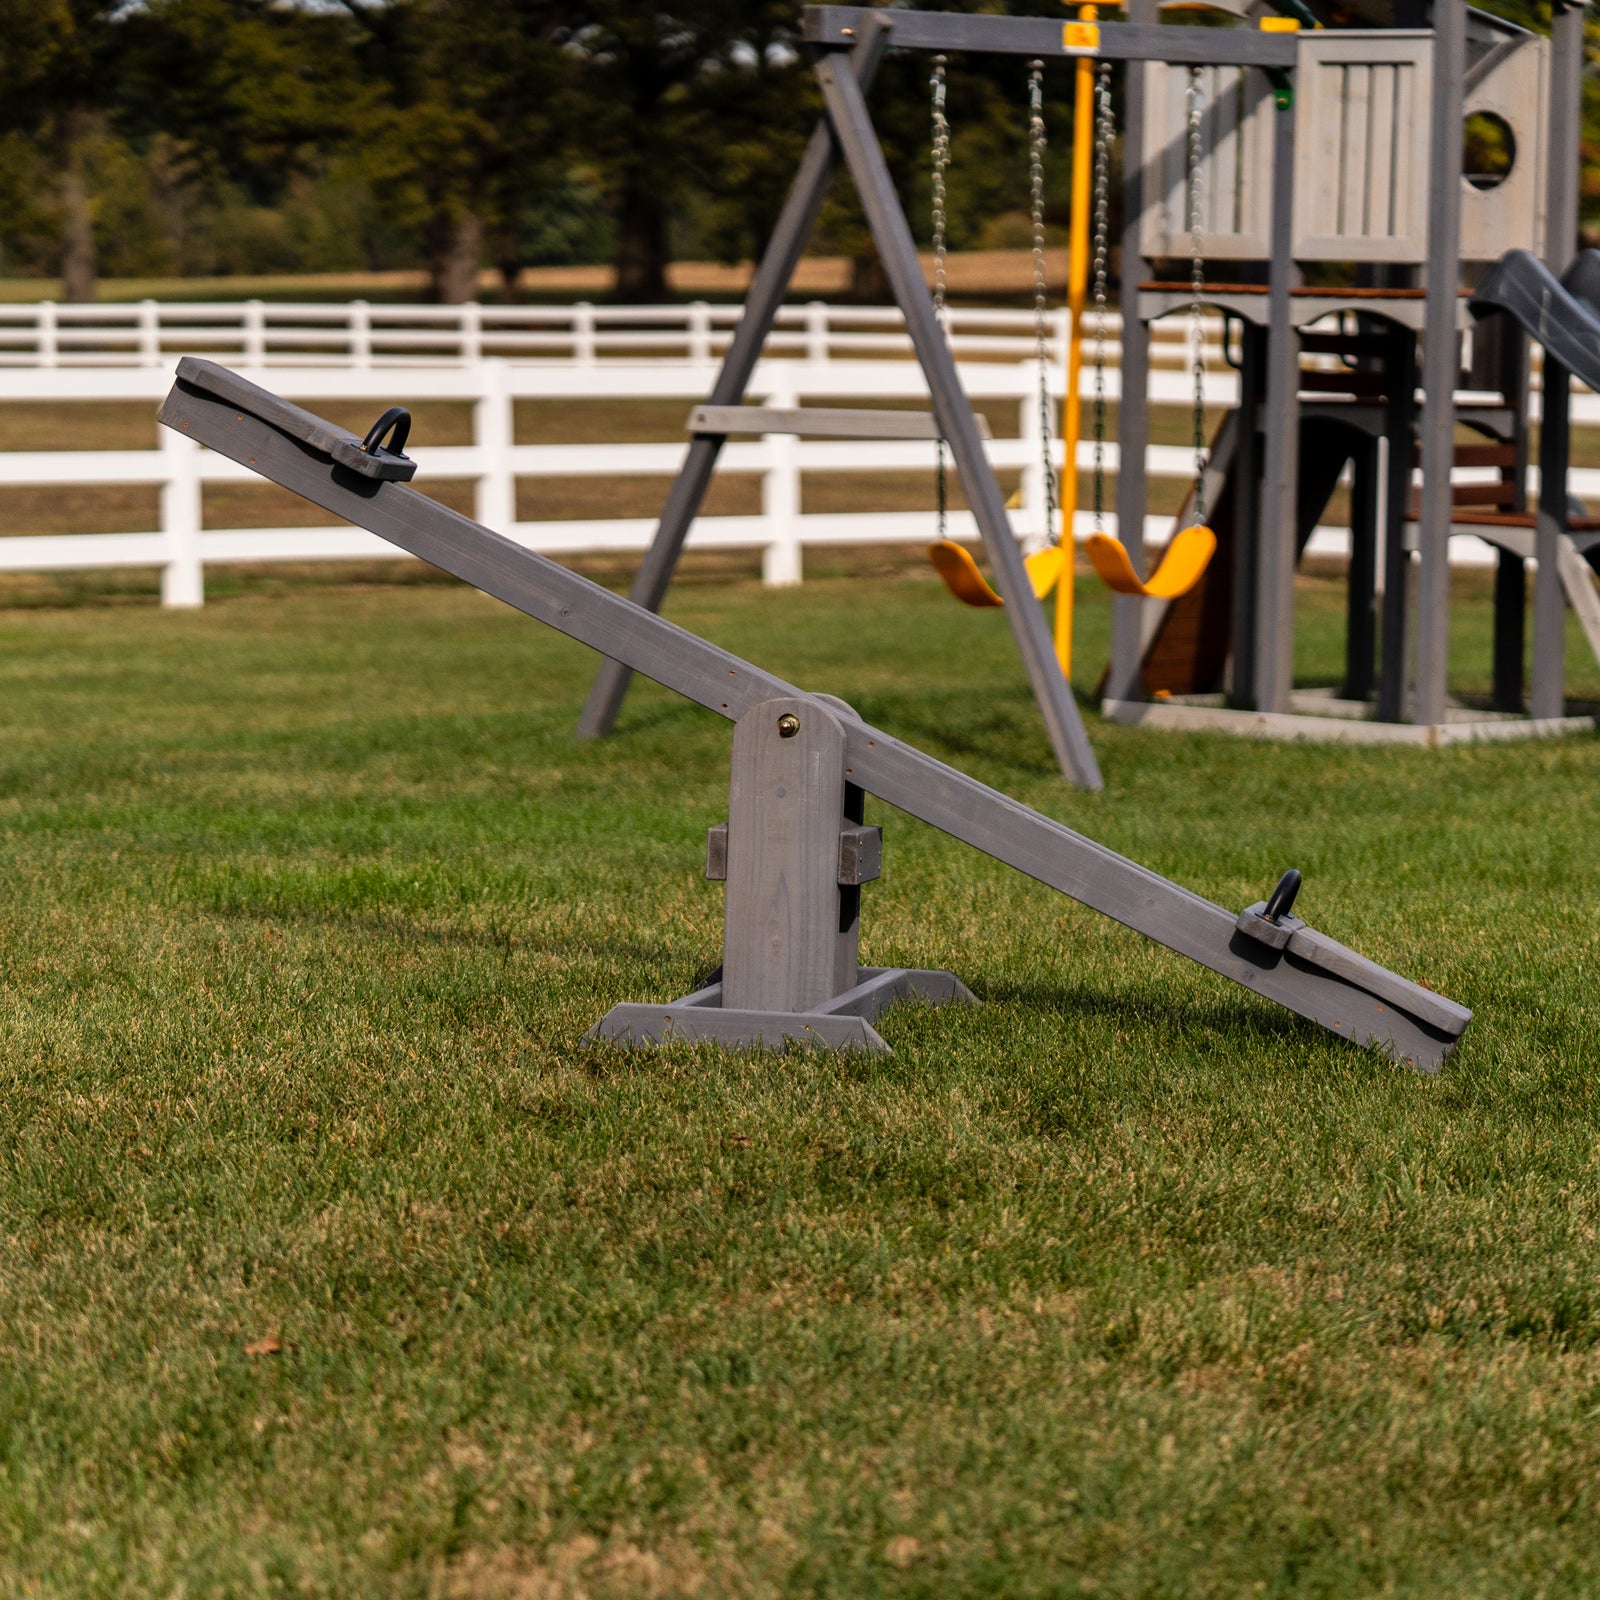
25. Add a Modern Gray Wooden Seesaw to a Grassy Yard
The key to a modern, sophisticated color palette for playground equipment is choosing a muted tone. This gray finish is a perfect example. It has enough color to feel intentional and stylish, but it’s neutral enough to blend beautifully with the green grass and other natural elements in the yard. It doesn’t scream for attention like a primary red or blue would. When in doubt, a mid-tone gray, a deep navy, or a forest green are chic, timeless choices that elevate the look of any wooden play structure. Compare this to the brighter choices in Idea #4 to see the difference in mood.
|
📋 Copy HEX 🔗 Share |
A standalone seesaw is one of the most cost-effective ways to add a major ‘fun factor’ to your yard. You can buy a pre-built wooden or metal one for $150-$300. But for a true budget DIY, you can build one for under $100. All you need is a sturdy plank of wood (like a 2×8), some handles, a central fulcrum (which can be a purpose-built bracket or even a sturdy log), and some old tires to place under the seats for a soft landing. A quick search for ‘DIY seesaw’ will yield dozens of simple, effective plans.
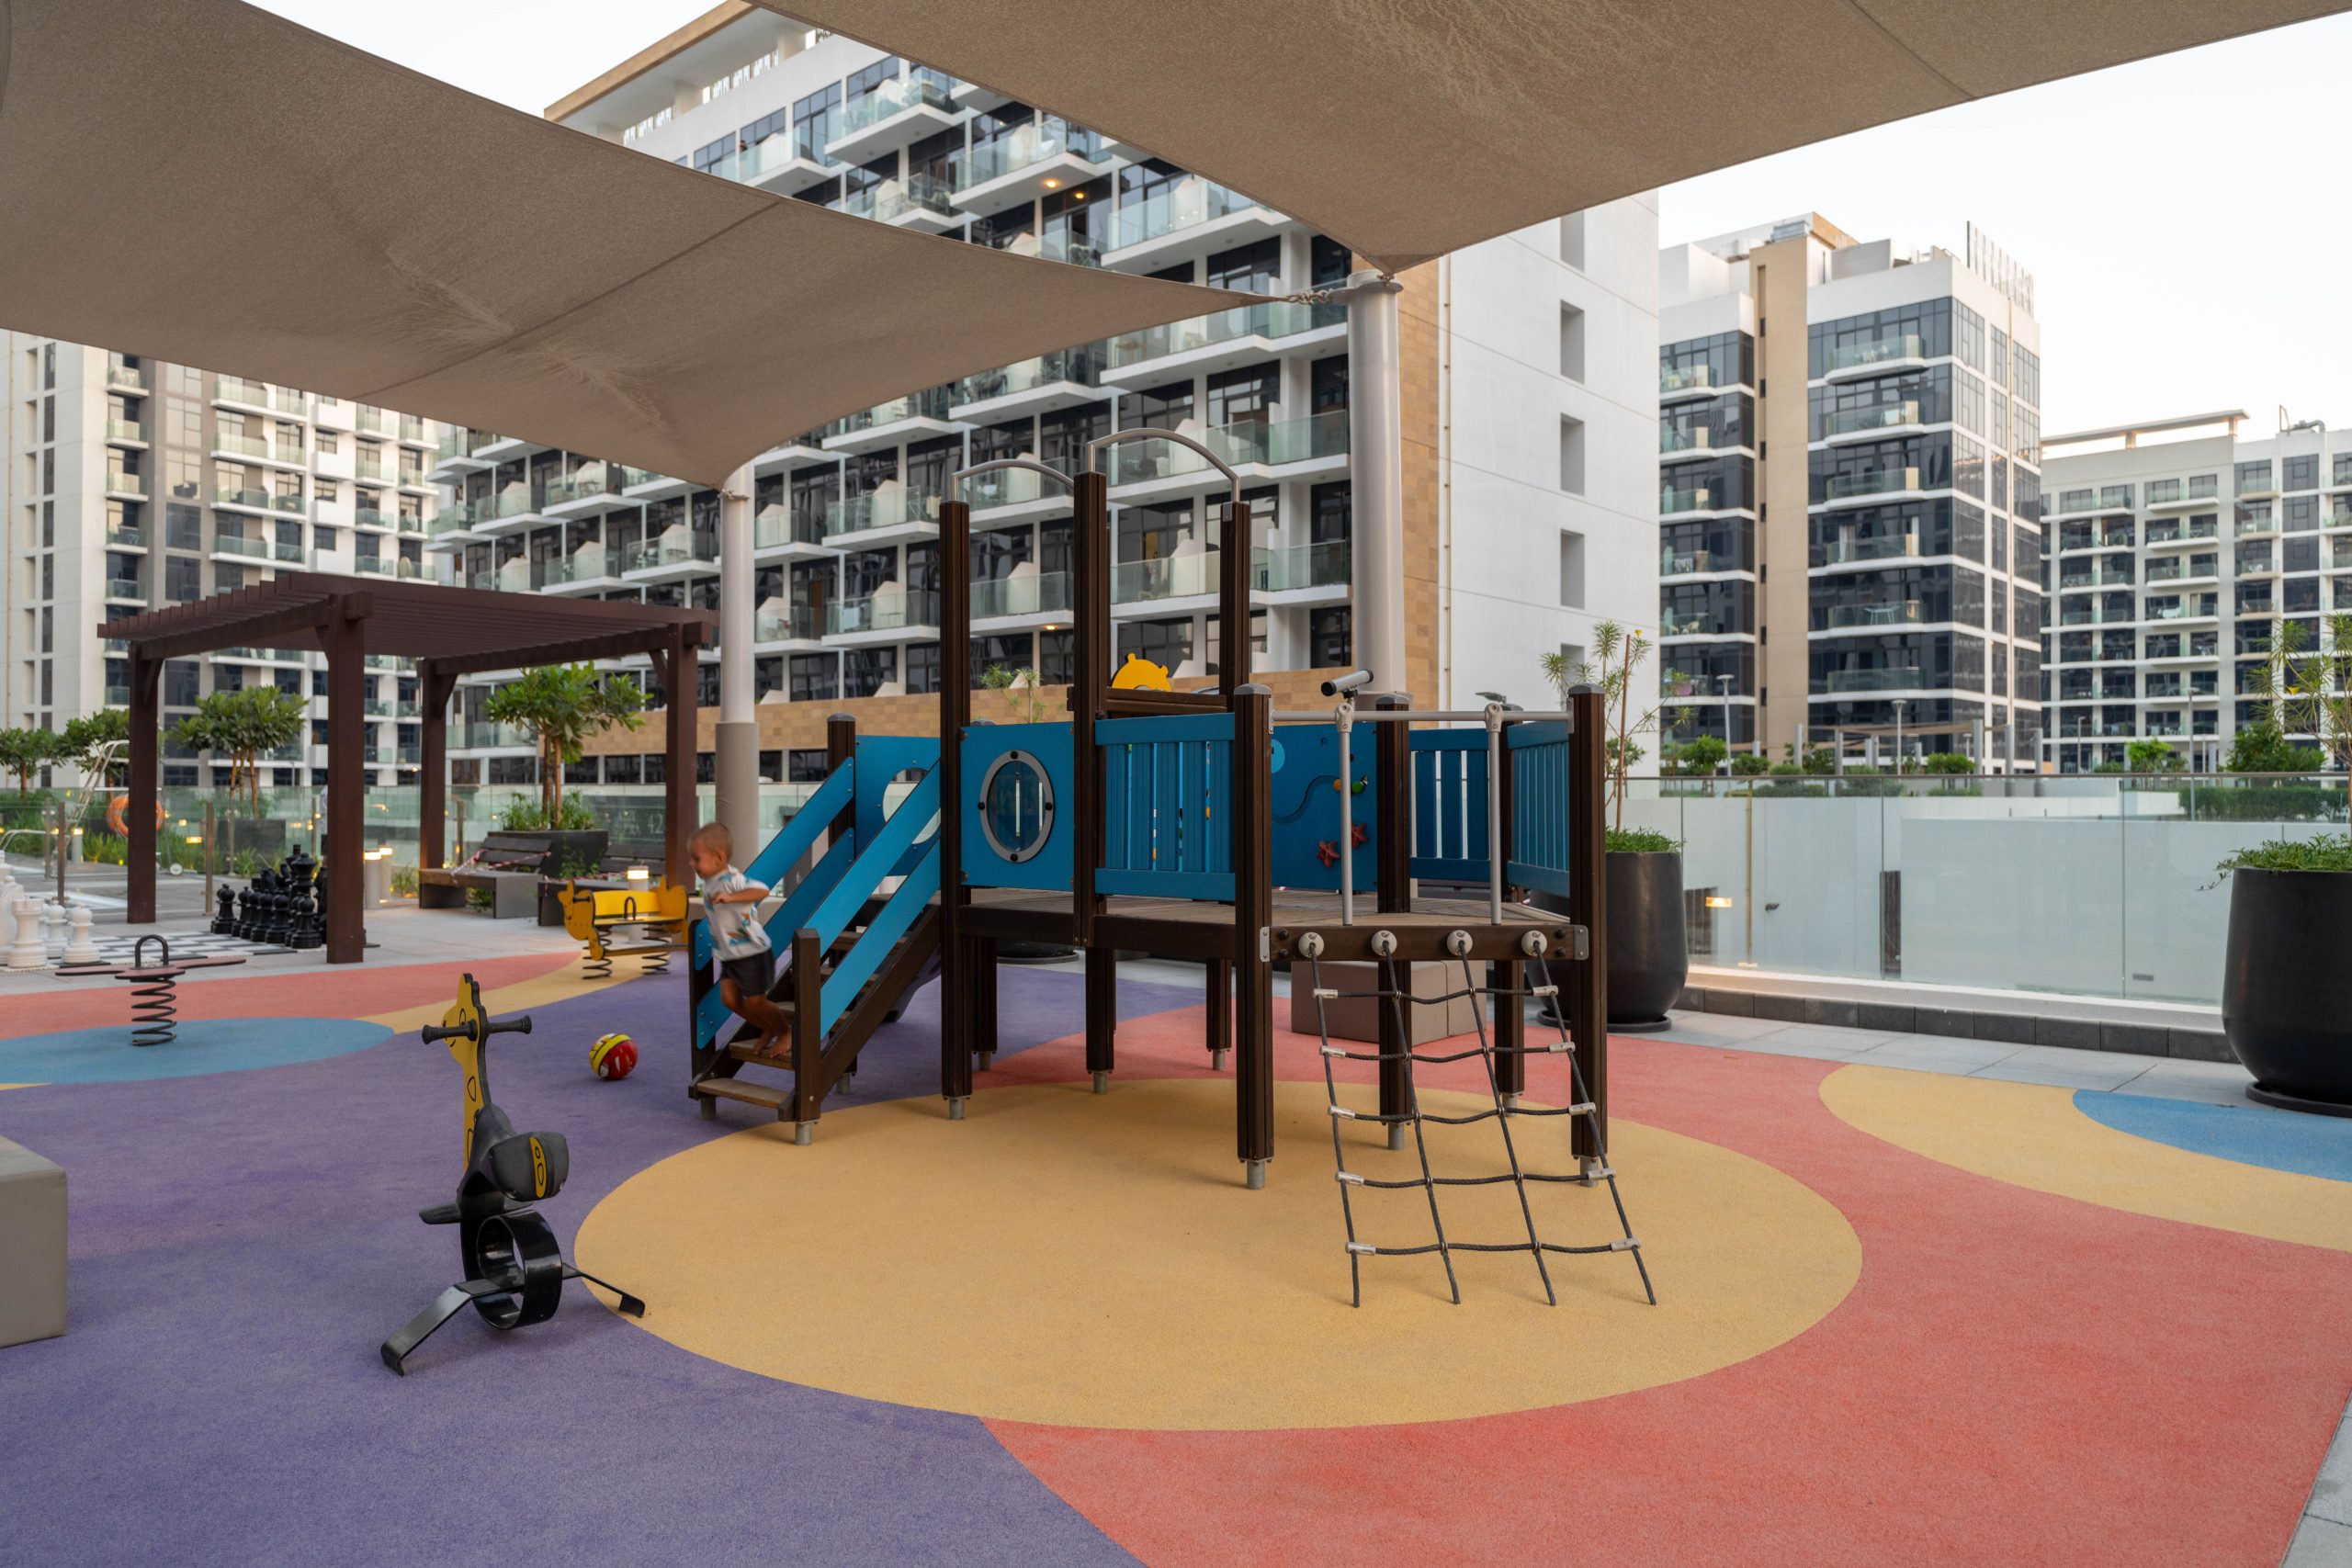
26. Incorporate a Colorful Modern Playscape in a Residential Setting
This playground design, often seen in modern residential communities, works because of its bold use of color and sculptural forms. It doesn’t try to mimic nature. Instead, it acts as a functional art installation within the landscape. The bright, contrasting colors appeal directly to children, while the clean lines and interesting shapes are appreciated by adults. The rubberized safety surfacing is a key part of the design, with its own colors and patterns defining the play zones. It’s a confident, high-energy approach to play design.
|
📋 Copy HEX 🔗 Share |
While visually stunning, this type of playground is not a simple DIY project. These are typically professionally designed and installed systems from commercial playground manufacturers. The structures are often made of powder-coated steel and composite panels, and the poured-in-place rubber surfacing requires specialized crews. Think of this less as a ‘DIY idea’ and more as inspiration for what’s possible if you’re working with a landscape architect or have a significant budget for a custom, high-end installation.
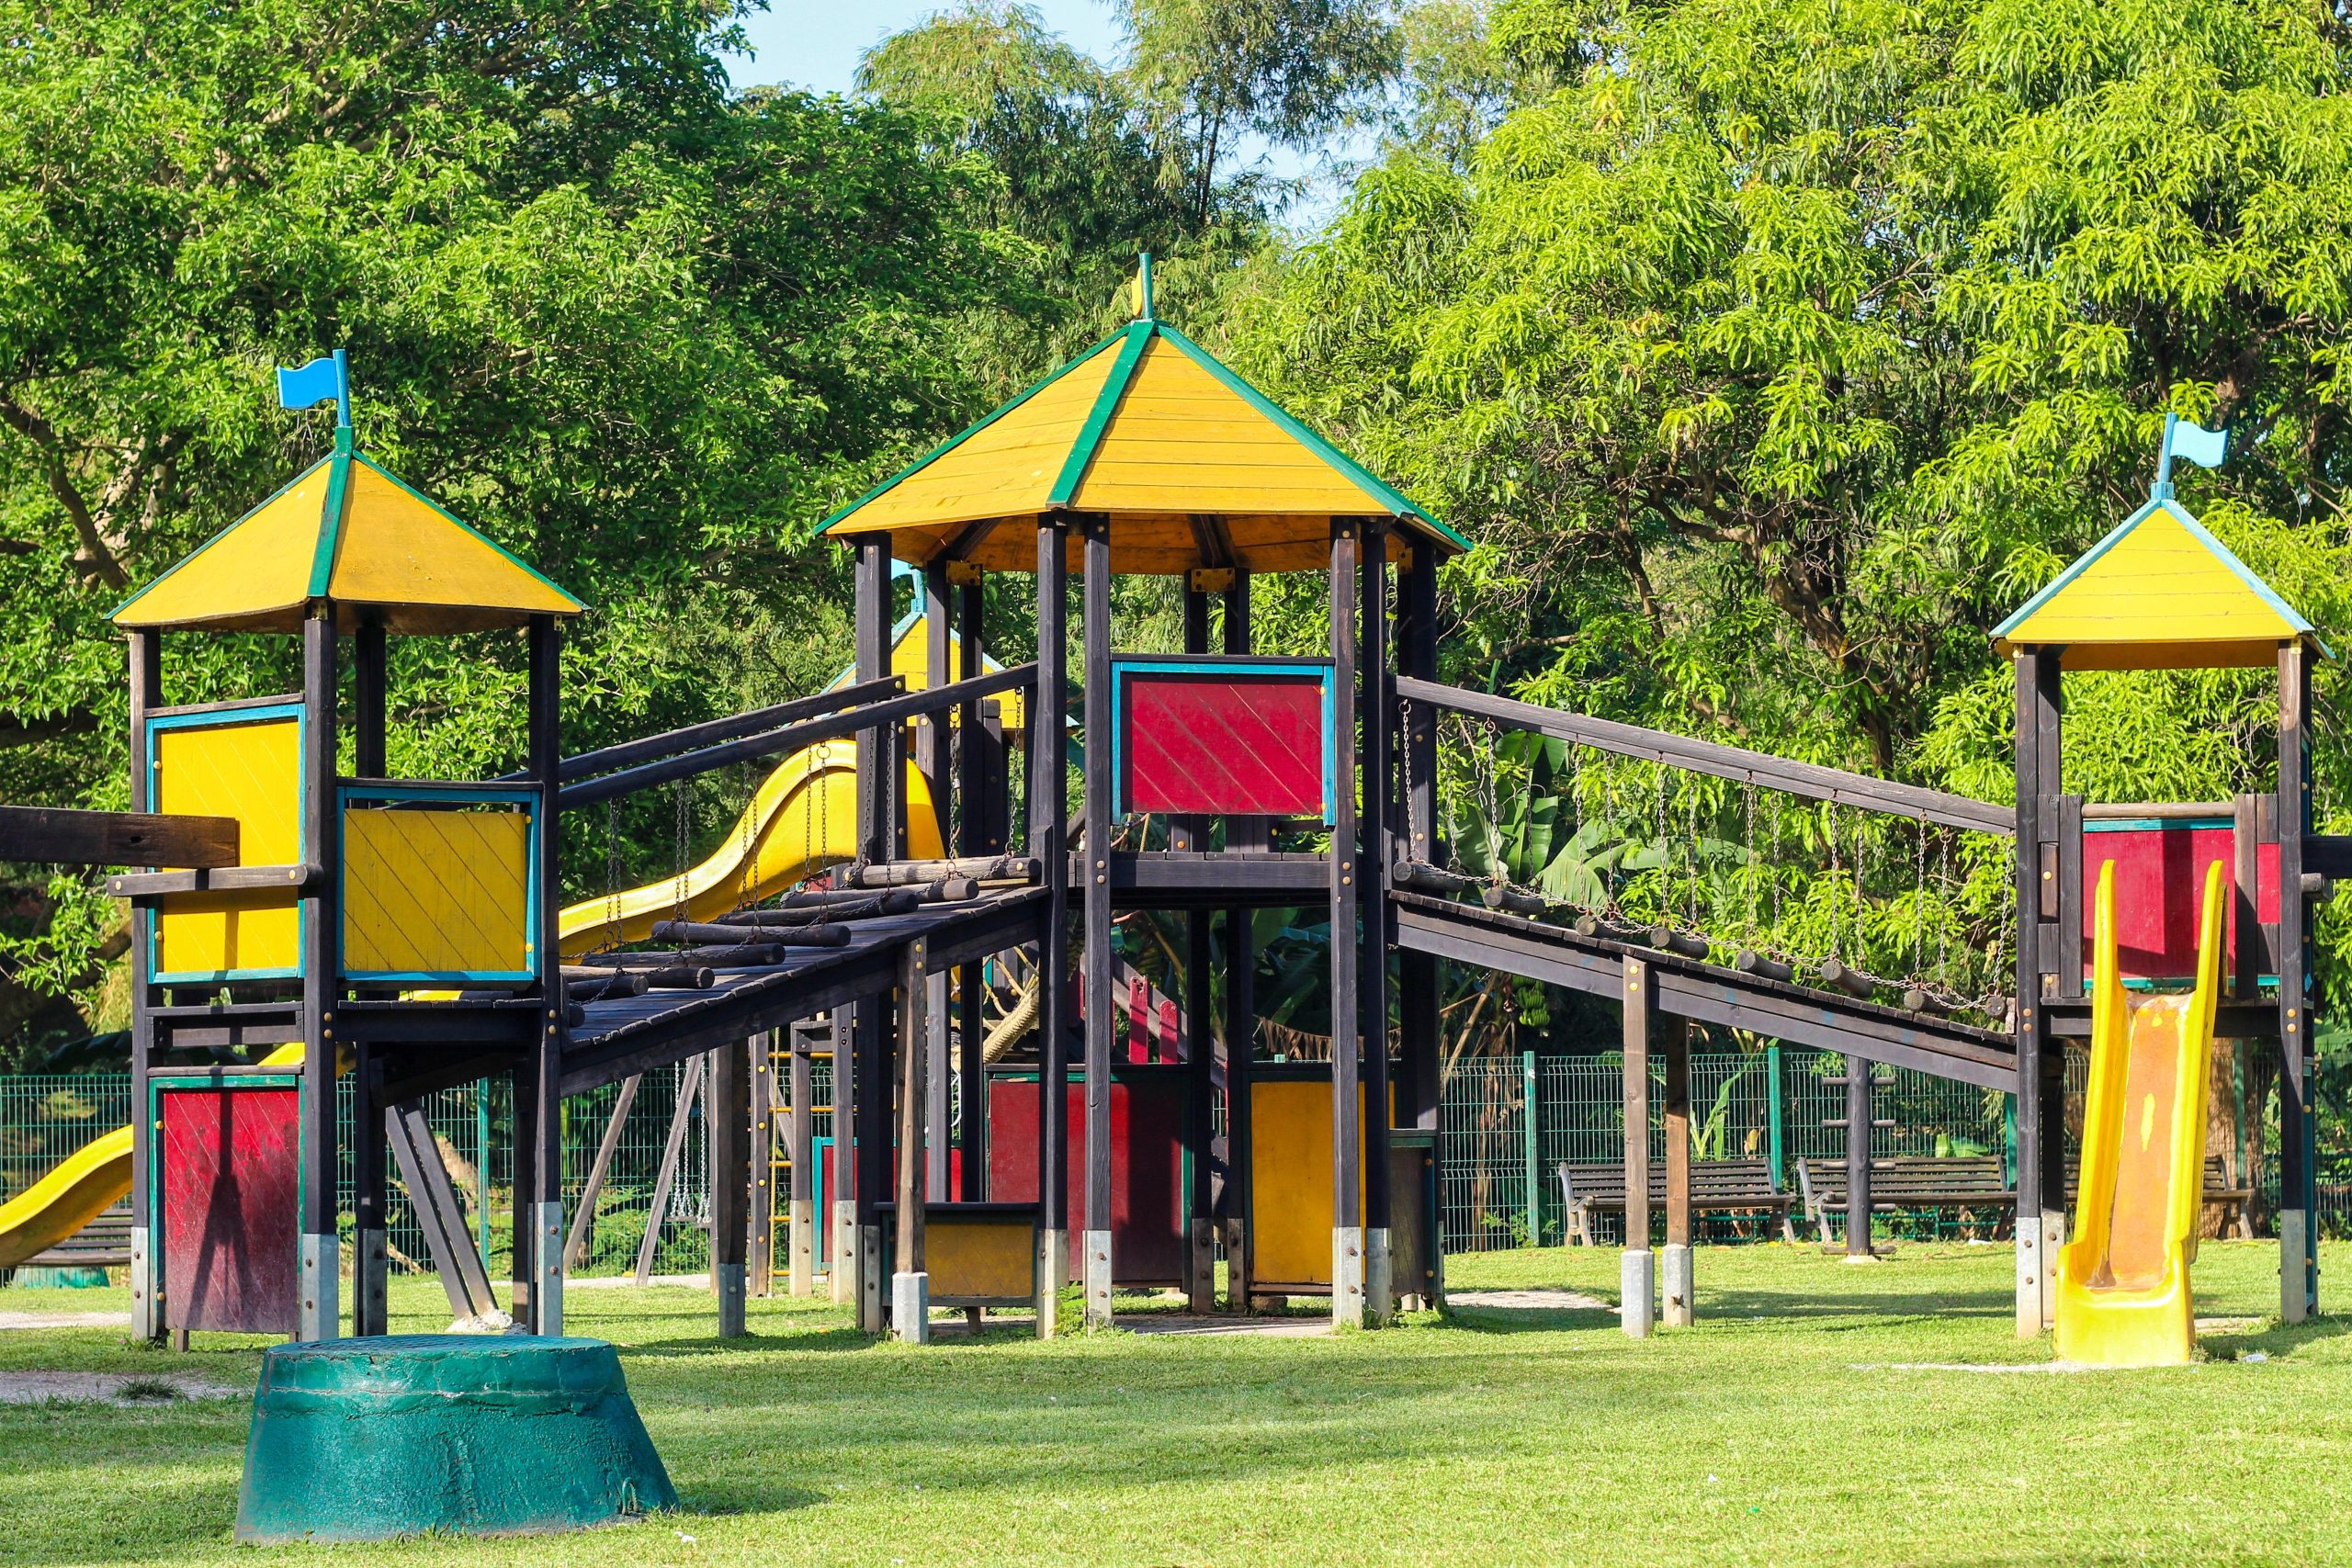
27. Choose a Multilevel Wooden Playground with Bright Primary Accents
The single thing that gives this playground its joyous energy is the fearless use of primary colors. The combination of the dark brown wood with bold panels of red, yellow, and blue is a classic for a reason: it’s incredibly cheerful and visually stimulating for kids. The yellow slides act like exclamation points, while the colorful roofs and flags create a festive, carnival-like atmosphere. Without these bright accents, the large wooden structure could feel imposing; with them, it feels like an invitation to a party. This is a great reference for how to use color to break up a large mass.
|
📋 Copy HEX 🔗 Share |
This is a maximalist playground for a large yard. A structure with this many features—multiple levels, two slides, a suspended bridge, and various climbing entry points—demands a massive safety zone. You’re likely looking at a required footprint of at least 45ft x 35ft to accommodate the structure and the necessary clear space around all exits and moving parts. This is a ‘go big or go home’ option that’s perfect if you have a lot of space to fill and want to create the ultimate neighborhood hangout spot.
Conclusion
Building a playground is more than just a weekend project; it’s about creating a backdrop for years of memories. Whether you go for a simple sandbox or a multi-level fort, the best design is the one that gets your kids outside and lets their imaginations run wild. So take these ideas, find the one that speaks to you, and start planning. Your kids (and your Pinterest board) will thank you.