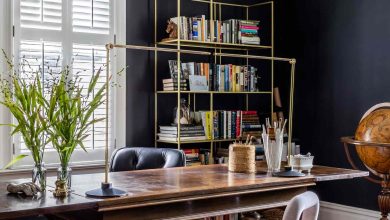
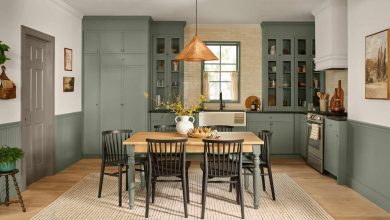
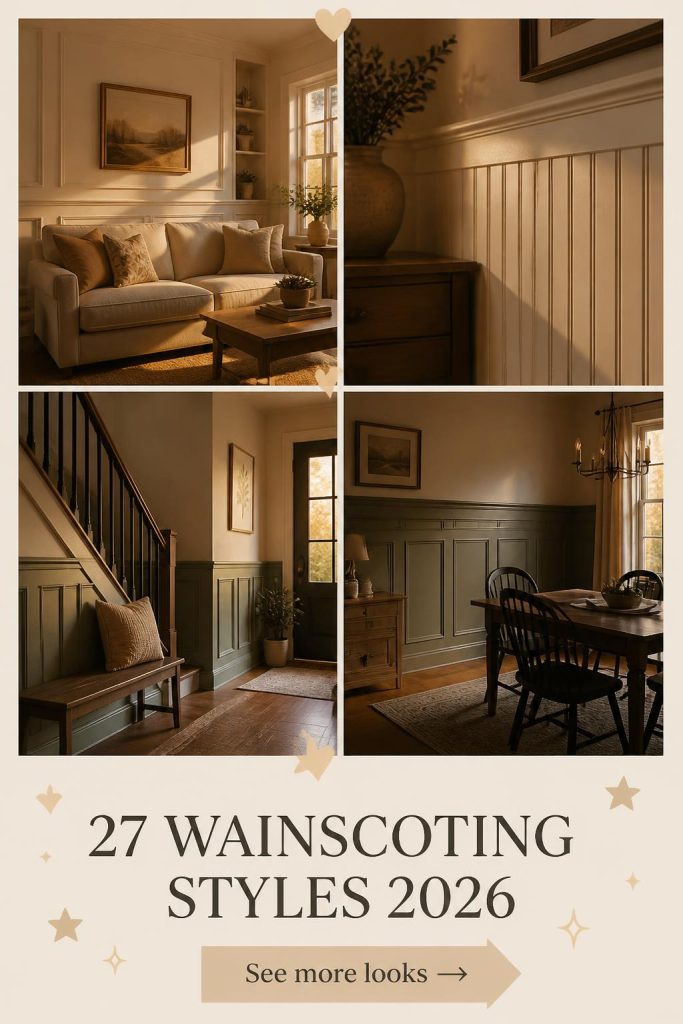
You know that feeling when you finally find the wainscoting style that looks exactly right for your space, only to realize you don’t know where to start? We spent serious time browsing the best of home decor to bring you only what’s worth your attention this year. After filtering through hundreds of options, we narrowed it down to the 27 ideas that actually deliver. Inside, you’ll find 27 curated ideas covering traditional, modern, and rustic styles. The trend of adding architectural character to formerly blank walls is exploding for 2026, as we all look to make our homes feel more custom and intentional. And stay until the end—we break down the most common mistakes that can ruin these looks. 📌 Save this to Pinterest for later—you’ll want to revisit these ideas.
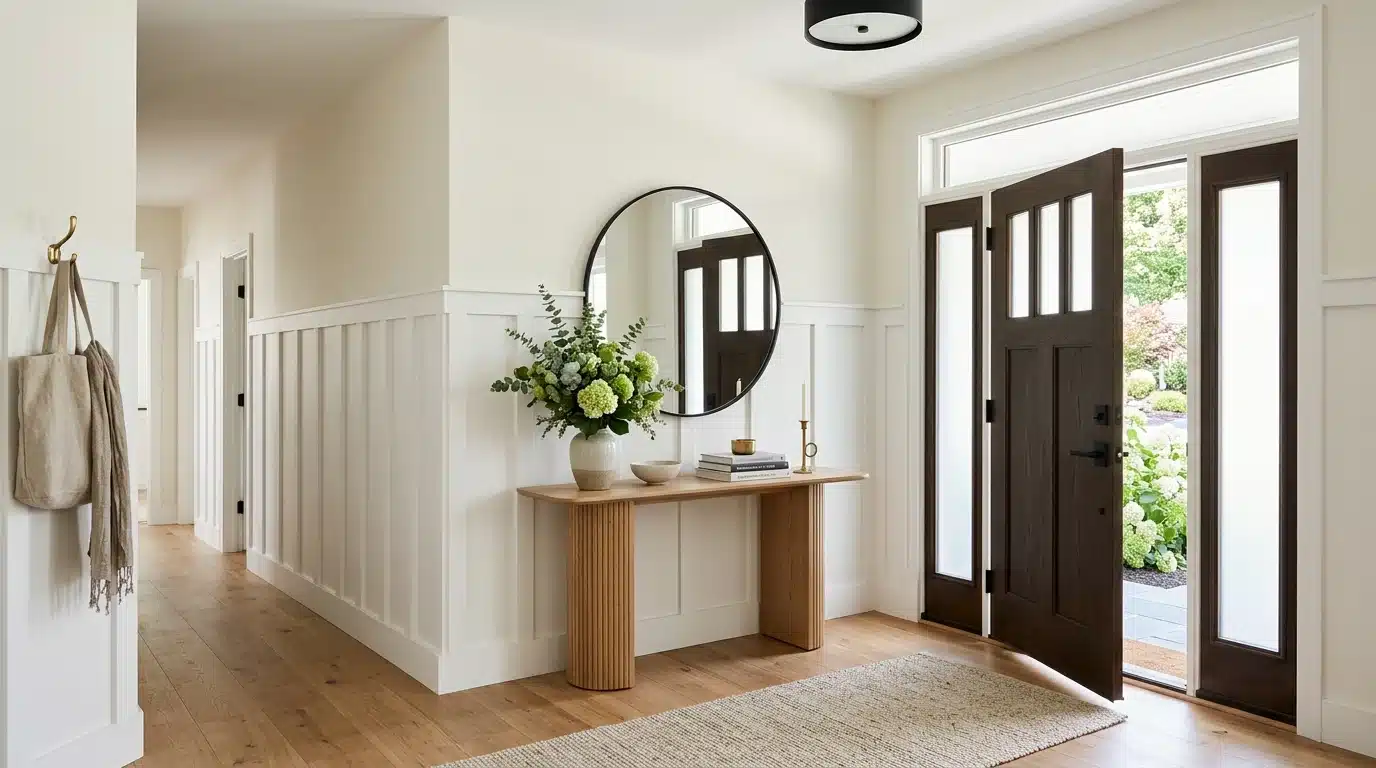
1. Modern Entryway with White Board and Batten
The magic here is in the clean, graphic contrast. The crisp vertical lines of the white board and batten wainscoting create a sense of height and order, which is exactly what you want in a first-impression space like an entryway. This bright foundation makes the warmer, organic elements—like the natural wood console table and the textured rug—feel richer and more inviting. The round, black-framed mirror acts as a perfect focal point, breaking up all the straight lines and adding a modern punch.
|
📋 Copy HEX 🔗 Share |
For an entryway, a good rule of thumb is to have the wainscoting top rail land between 32 and 40 inches from the floor. This height feels intentional and aligns nicely with the typical height of console tables and doorknobs, creating a cohesive visual line as you enter the home. If you have taller ceilings (over 9 feet), you can push this height up toward 48 inches, but for standard 8-foot ceilings, sticking to the lower end of the range prevents the space from feeling squashed.
2. Beige Walls and White Panel Wainscoting in a Traditional Setting
This look is a masterclass in traditional balance. Think of it as a formula: 50% classic white architectural elements (wainscoting, coffered ceiling, trim) + 40% warm neutral color (the beige-brown walls) + 10% dramatic dark accents (the hardwood floor and chandelier). This ratio ensures the room feels structured and elegant without being cold. You can swap the beige for a muted green or blue and still achieve the same sophisticated effect, as long as you maintain that strong foundation of white woodwork.
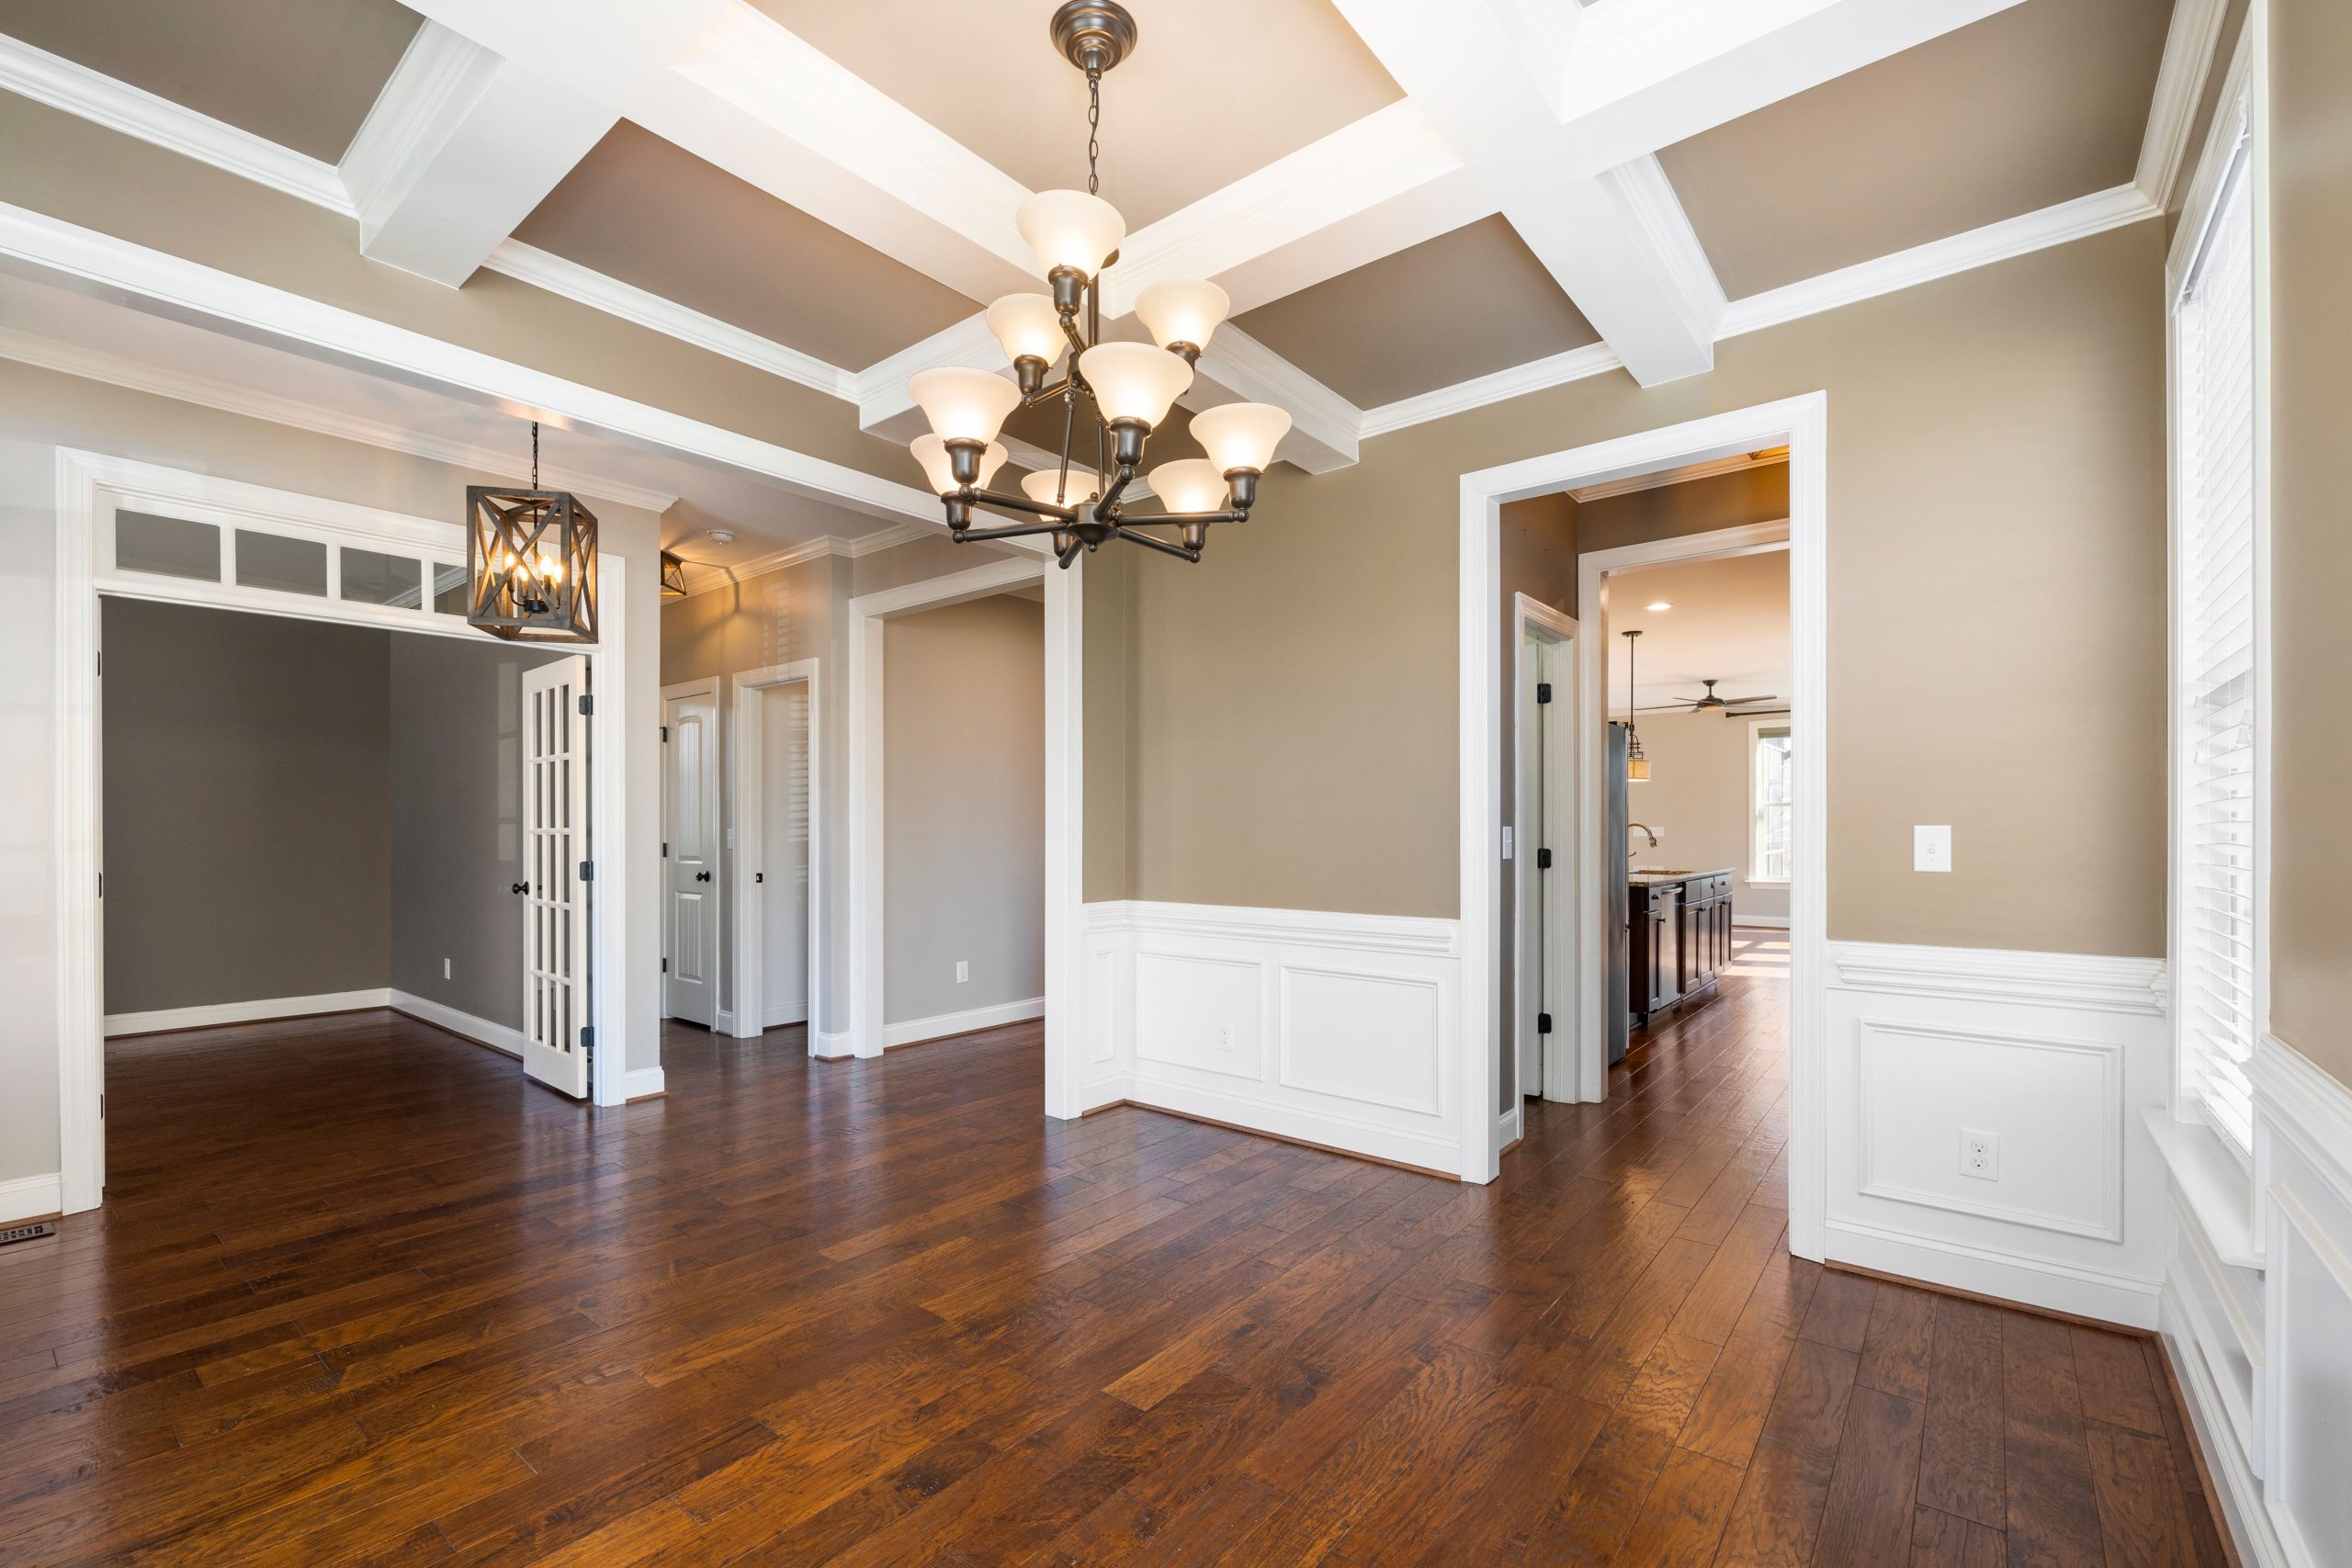
A coffered ceiling is a showstopper, but it demands vertical space. This feature works best in rooms with a ceiling height of at least 9 feet, and ideally 10 feet or more. In a room with standard 8-foot ceilings, a full coffered treatment can feel heavy and make the space seem smaller. If you love the look but lack the height, consider a simpler tray ceiling or just elegant crown molding to get a similar architectural effect without sacrificing that airy feeling.
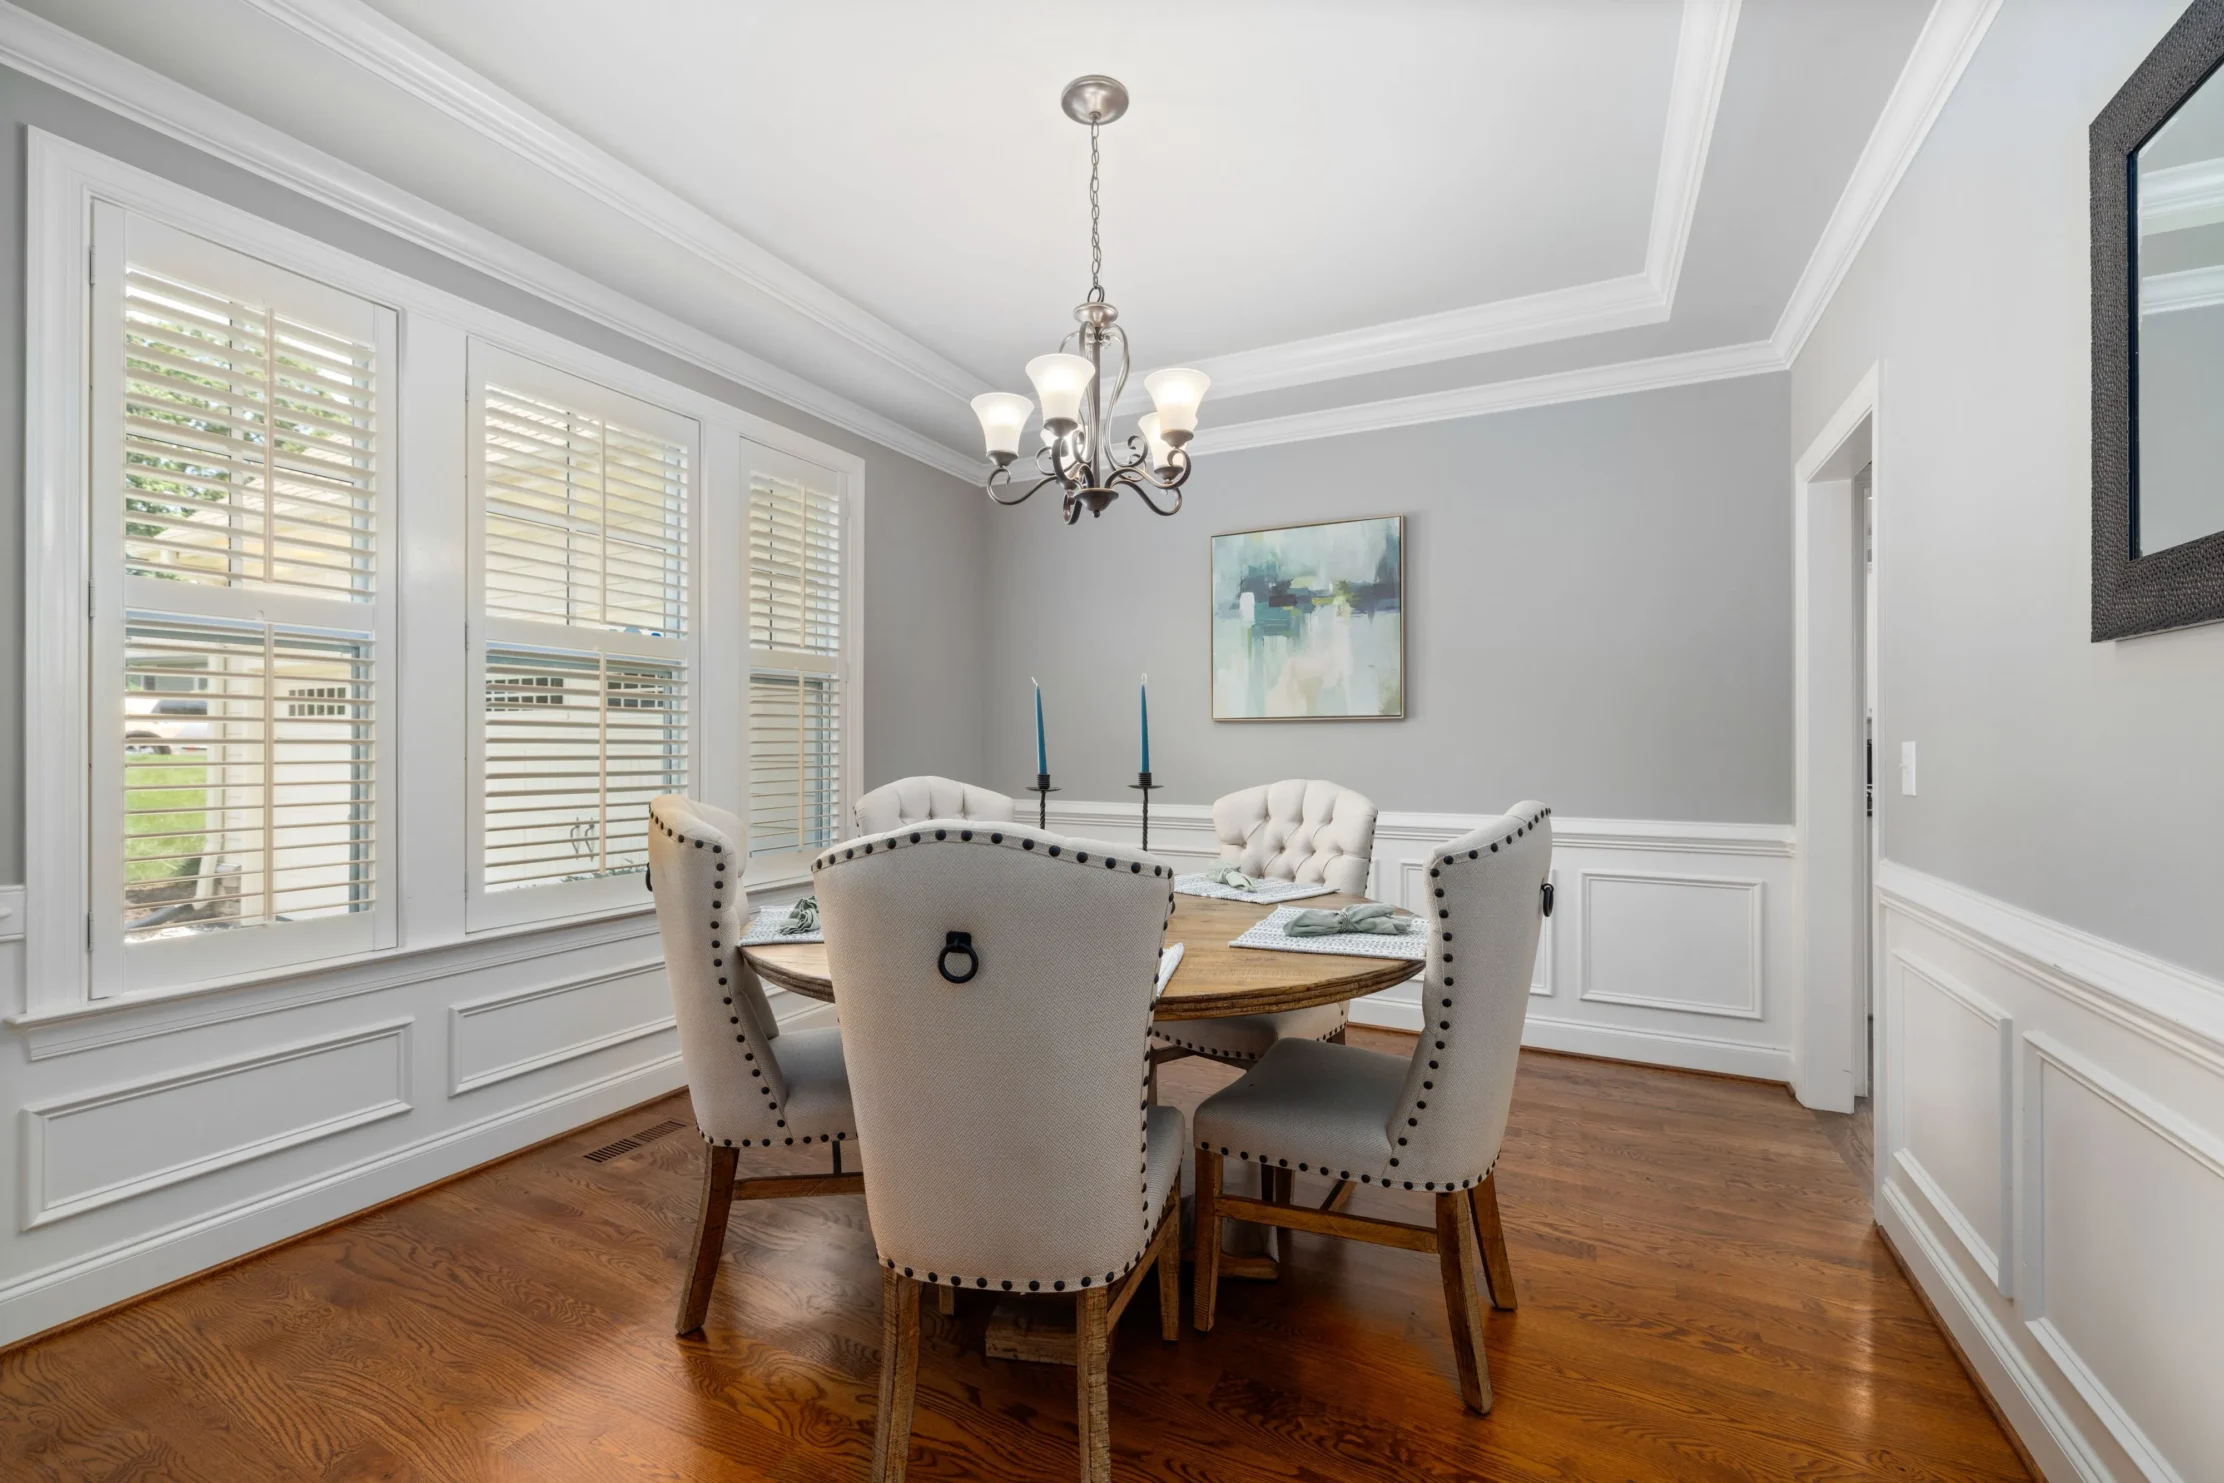
3. A Refined Dining Room with Framed Panels and a Coffered Ceiling
The single element that elevates this dining room from simply nice to truly refined is the coffered ceiling. While the framed wainscoting provides a beautiful, classic base, the ceiling treatment adds a layer of architectural depth and grandeur that nothing else can. It draws the eye upward, making the room feel taller and more expansive. Removing it would leave a perfectly lovely room, but it would lose that custom, high-end character that makes it feel so special and formally complete.
|
📋 Copy HEX 🔗 Share |
- Main Furniture (Table & Chairs): $2,500 – $6,000
- Wainscoting & Installation: $1,500 – $4,000
- Coffered Ceiling & Installation: $2,000 – $5,000
- Lighting: $500 – $1,500
- Decor & Accessories: $300 – $800
- TOTAL: $6,800 – $17,300
- Budget alternative: Get a similar vibe by combining a simpler framed wainscoting with a statement chandelier and forgetting the coffered ceiling, bringing the total closer to $3,000 – $7,000.
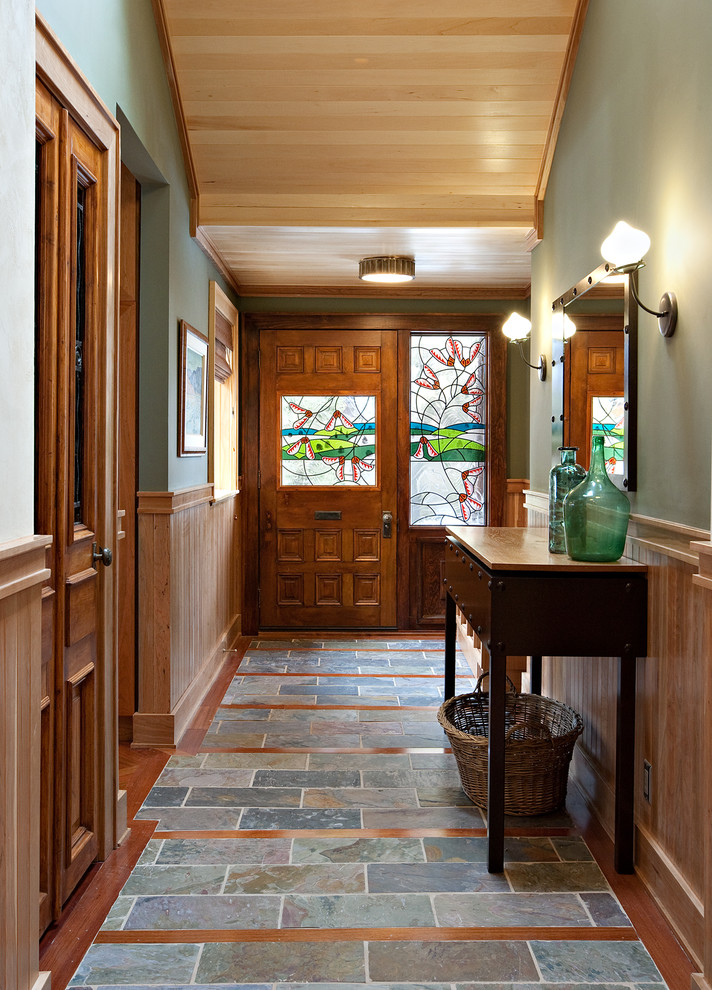
4. Craftsman-Style Hallway with Natural Wood Beadboard
Natural wood beadboard is stunning, but it requires more care than its painted counterpart. Dust and grime love to settle in the grooves, so regular cleaning with a soft brush attachment on your vacuum is a must. It’s also more susceptible to scratches and dings, especially in a high-traffic area like a hallway. To keep it looking its best, plan to apply a fresh coat of protective finish (like a satin polyurethane) every 3-5 years. The slate and wood floor, while gorgeous, also needs specific care; use a pH-neutral cleaner to avoid damaging the stone’s sealant.
|
📋 Copy HEX 🔗 Share |
This space feels so warm and established because it fully commits to the Craftsman aesthetic. The success lies in the layering of natural materials and textures. The vertical lines of the wood beadboard contrast with the horizontal pattern of the slate and wood flooring, creating subtle energy. The olive green wall color is a classic partner to the warm wood tones, while the stained glass in the door adds a touch of artistry and color that ties the entire palette together into a cohesive, inviting story.
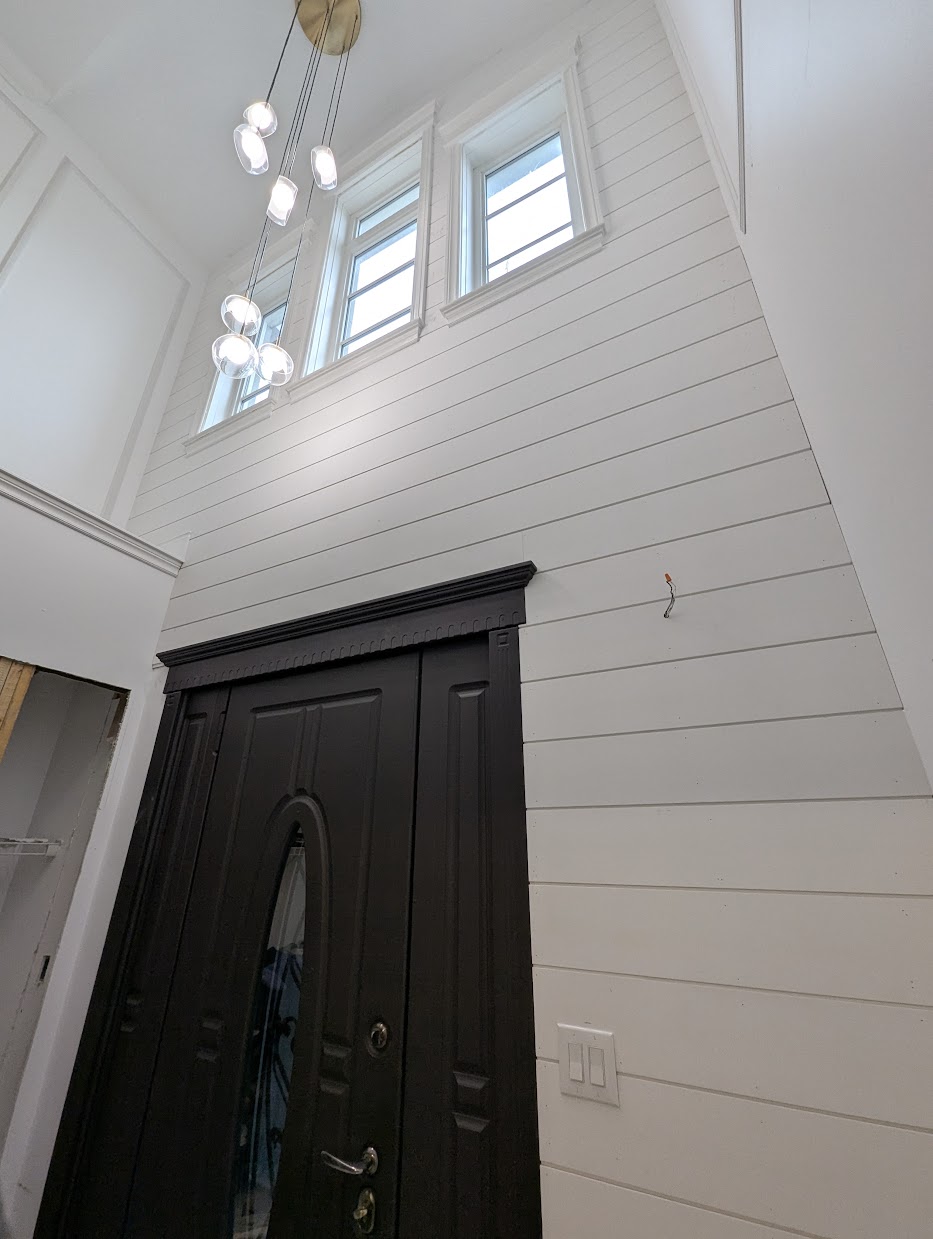
5. Modern Entry with Full-Height White Shiplap Walls
Covering an entire wall (or room) in horizontal shiplap can be a double-edged sword. In a narrow space, the strong horizontal lines can visually stretch the walls, making it feel wider. However, in a room with low ceilings, it can have the opposite effect, making the ceiling feel even lower. Be honest about your room’s proportions. This look thrives with high ceilings, where the lines draw the eye around the room without compressing it. In a standard-height room, consider vertical shiplap to create an illusion of height instead.
|
📋 Copy HEX 🔗 Share |
It’s all about the bold contrast. The single most important element here is the dark, ornate entry door set against the bright, clean canvas of the floor-to-ceiling white shiplap. Without that dramatic punctuation mark, the shiplap could feel a bit one-note or lean too heavily into a farmhouse look. The door adds a necessary dose of sophistication and modernity, creating a focal point that is both commanding and elegant. It’s the visual anchor for the entire space.
6. Subtle Olive Green Paired with Classic White Wainscoting
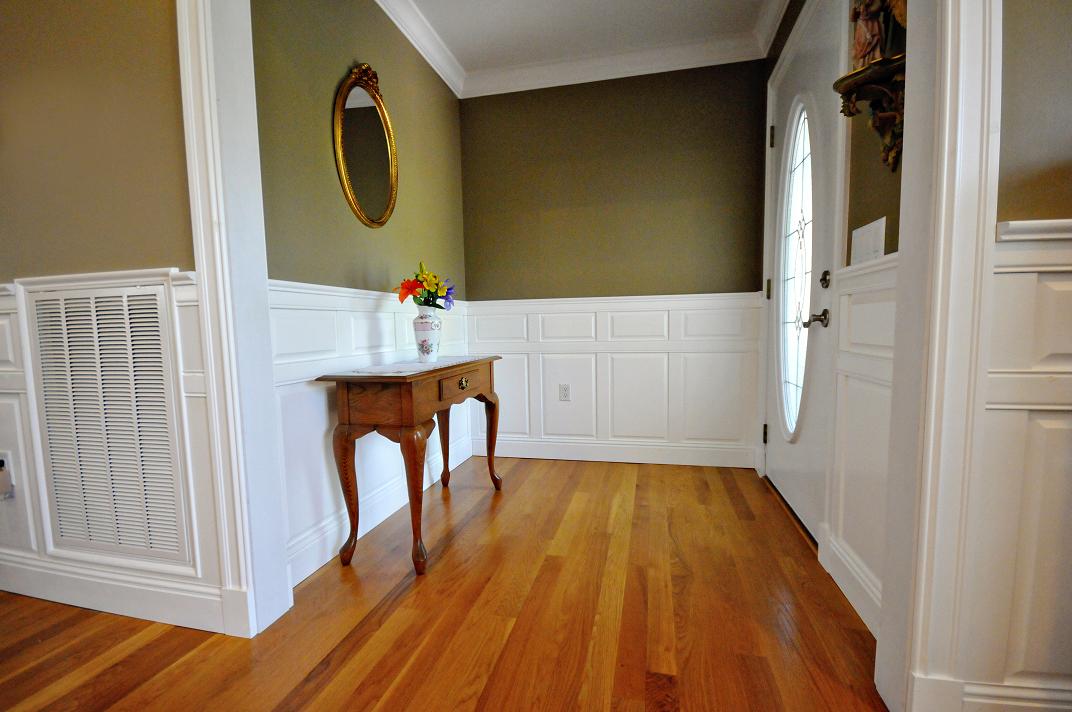
A detail that makes this installation look so custom and high-end is the integrated air vent. You can achieve this with a bit of planning. Time: 2-3 hours. Cost: $30-$50 for a paintable vent cover.
- Measure your existing air vent and purchase a paintable, flush-mount vent cover in the same dimensions.
- When installing your wainscoting panels, cut an opening for the vent, ensuring a snug fit.
- Install the wainscoting panel.
- Paint the vent cover the exact same color and finish as your wainscoting *before* you install it.
- Once dry, install the painted vent cover. The seamless look is a hallmark of professional work.
|
📋 Copy HEX 🔗 Share |
Choosing the right paint finish is just as important as the color. For a traditional look like this, use a satin or semi-gloss finish for the white wainscoting and trim. This durable finish is easy to clean and provides a subtle sheen that distinguishes the woodwork from the walls. For the upper walls (here, in olive green), a flatter finish like eggshell or matte will provide a soft, velvety contrast to the glossier trim, making the architectural details pop. Compare this subtle approach with the bolder accent wall in Idea #10.
7. Dramatic All-Black Board and Batten Living Room
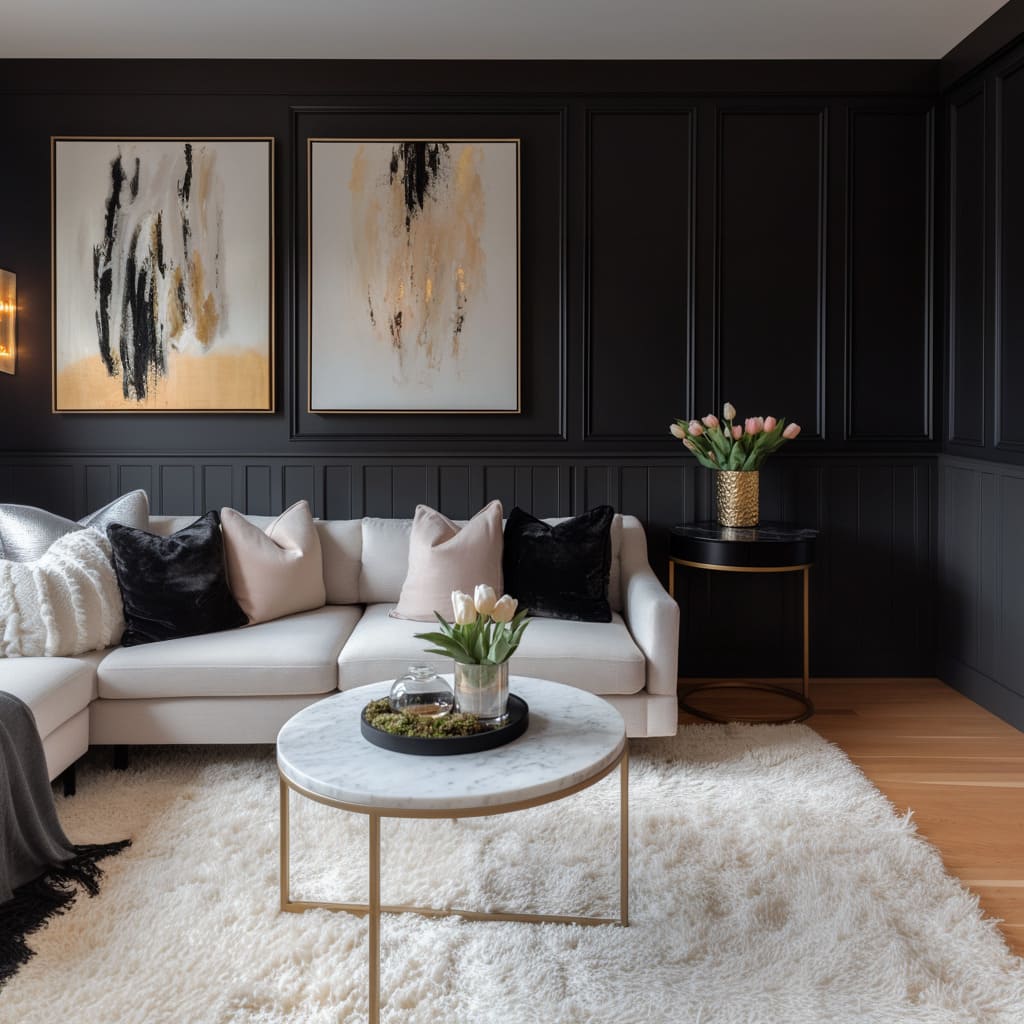
This dramatic, floor-to-ceiling dark wainscoting is a bold move that pays off, but it’s best suited for rooms with ample natural light and a footprint of at least 150 square feet. In smaller or darker spaces, this treatment could feel oppressive. A minimum ceiling height of 9 feet is also recommended to prevent the dark color from making the ceiling feel lower. The key is to balance the dark walls with large, light-colored furniture and a bright rug, as shown here, to keep the space from feeling like a cave.
|
📋 Copy HEX 🔗 Share |
Living with dark, matte walls requires a shift in mindset. They show *everything*. Dust, scuffs, fingerprints, and any little imperfection will be much more visible than on a lighter wall. Opt for a high-quality, washable paint to make cleaning easier. Be prepared for more frequent touch-ups, especially in high-traffic areas. While the look is incredibly sophisticated and cozy, it’s not a low-maintenance choice. The trade-off for that moody, luxurious vibe is a bit more upkeep.
8. The Enduring Appeal of Traditional Wainscoting
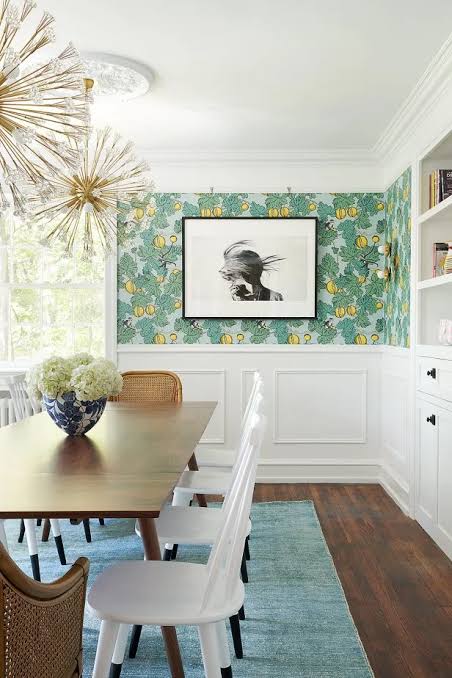
Traditional wainscoting, typically featuring raised or recessed panels, works because it’s rooted in classical architecture and proportion. It introduces a sense of order and structure to a room by creating a strong horizontal line—the chair rail—that divides the wall in a visually pleasing way, often aligning with the
|
📋 Copy HEX 🔗 Share |
9. Serene Greige Study with Floor-to-Ceiling Panels
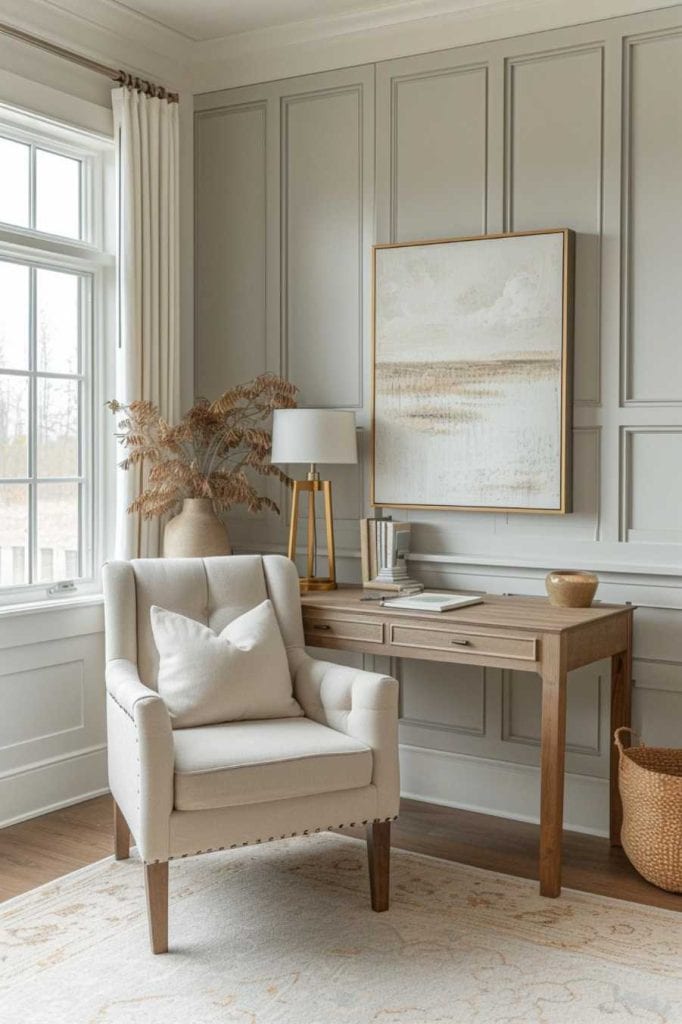
The defining feature here is the monochromatic, floor-to-ceiling paneling. By painting the walls, trim, and crown molding all in the same light greige color, the focus shifts from color to texture and shadow. The recessed panels create a subtle, rhythmic pattern that adds immense architectural interest without overwhelming the space. This technique makes the room feel taller and more cohesive, wrapping it in a calm, uniform elegance that feels both traditional and incredibly fresh.
|
📋 Copy HEX 🔗 Share |
Before committing to a full-wall paneling project, take stock of a few key items:
- Wall Condition: Paneling is great for hiding imperfections, but major bows or damage should be addressed first to ensure the molding sits flat.
- Outlet & Switch Placement: Plan how you’ll handle outlets and light switches. You may need to install box extenders to bring them flush with the new paneling depth.
- Lighting: How does natural light hit the wall throughout the day? The shadows cast by the panels are a huge part of the appeal, so observe first.
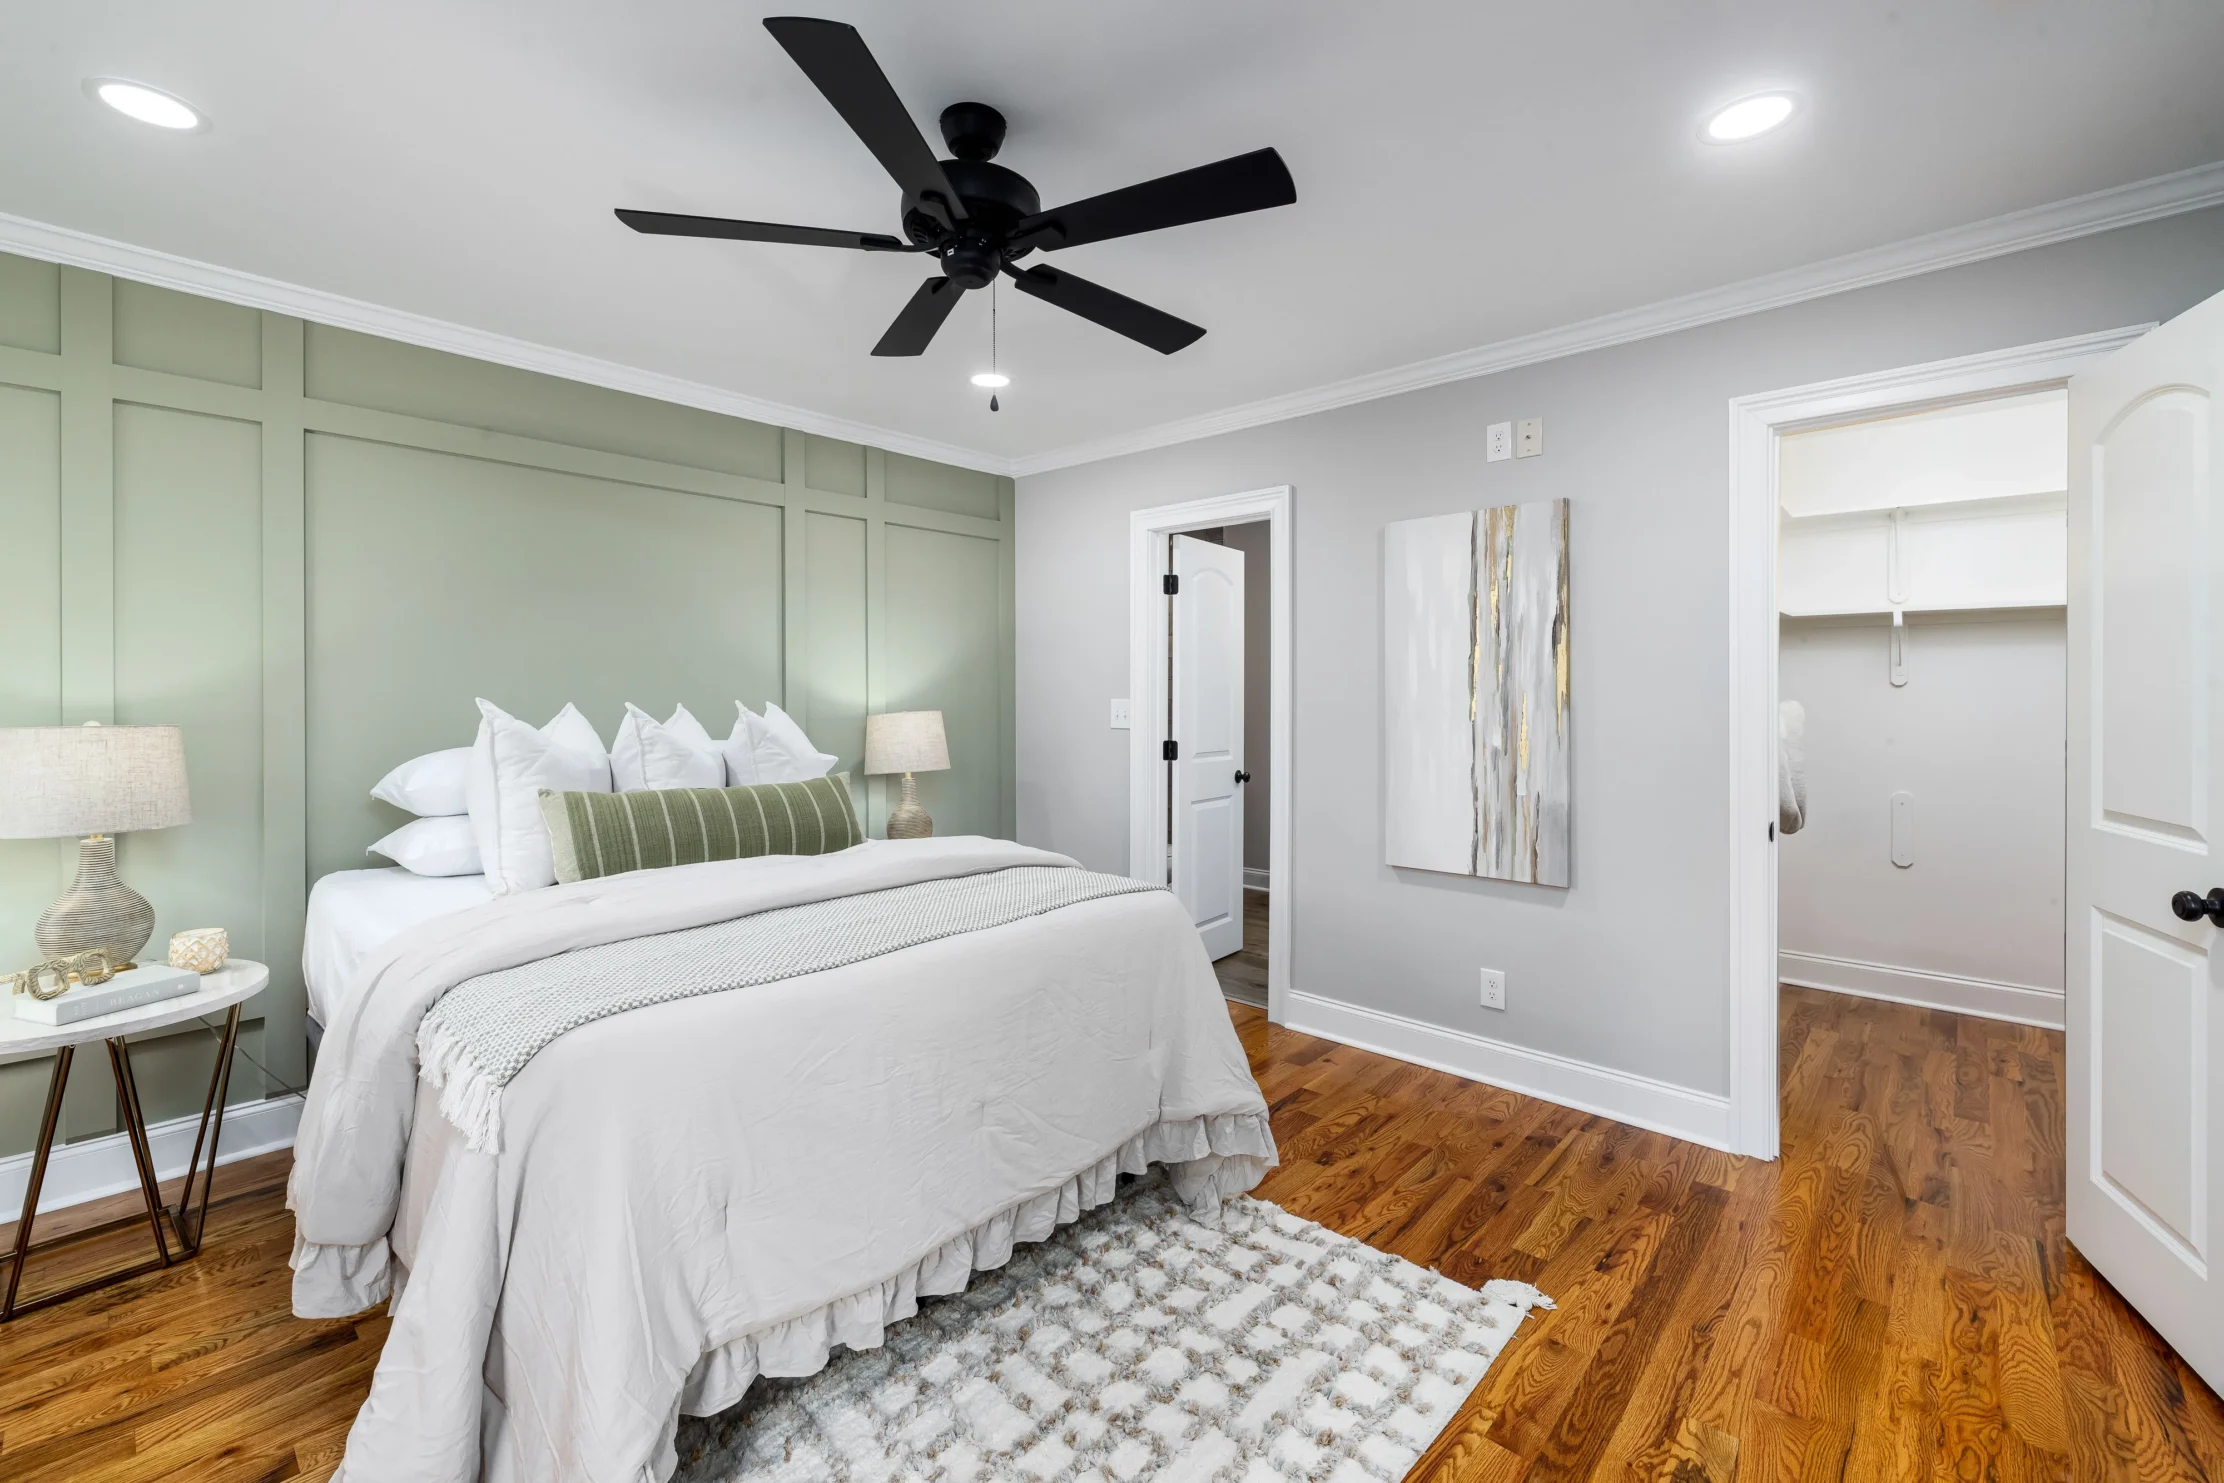
10. A Calming Bedroom with a Sage Green Grid-Panel Accent Wall
You can get this high-impact accent wall for a surprisingly low cost. The grid is typically made from 1×2 or 1×3 MDF boards, which are very affordable. For a standard 12-foot wall, you’ll need around $100-$150 worth of MDF, a gallon of quality paint for $50-$70, and basic supplies like caulk and wood filler for another $20. If you have a saw, level, and nail gun, you can do this yourself in a weekend. Even hiring a handyman would likely only be a few hundred dollars, making this a sub-$500 project with a million-dollar look.
|
📋 Copy HEX 🔗 Share |
This serene bedroom look follows a simple recipe for success: 60% calm neutrals (light gray walls, white bedding, and a shag rug) + 30% soft color accent (the sage green paneling) + 10% sharp contrast (the black ceiling fan and gold art frames). This formula ensures the room feels restful but not boring. The key is that the main accent is a color found in nature, which inherently feels calming, while the small pops of black and gold add a necessary touch of graphic sophistication.
11. Light and Structured: Floor-to-Ceiling Decorative Molding
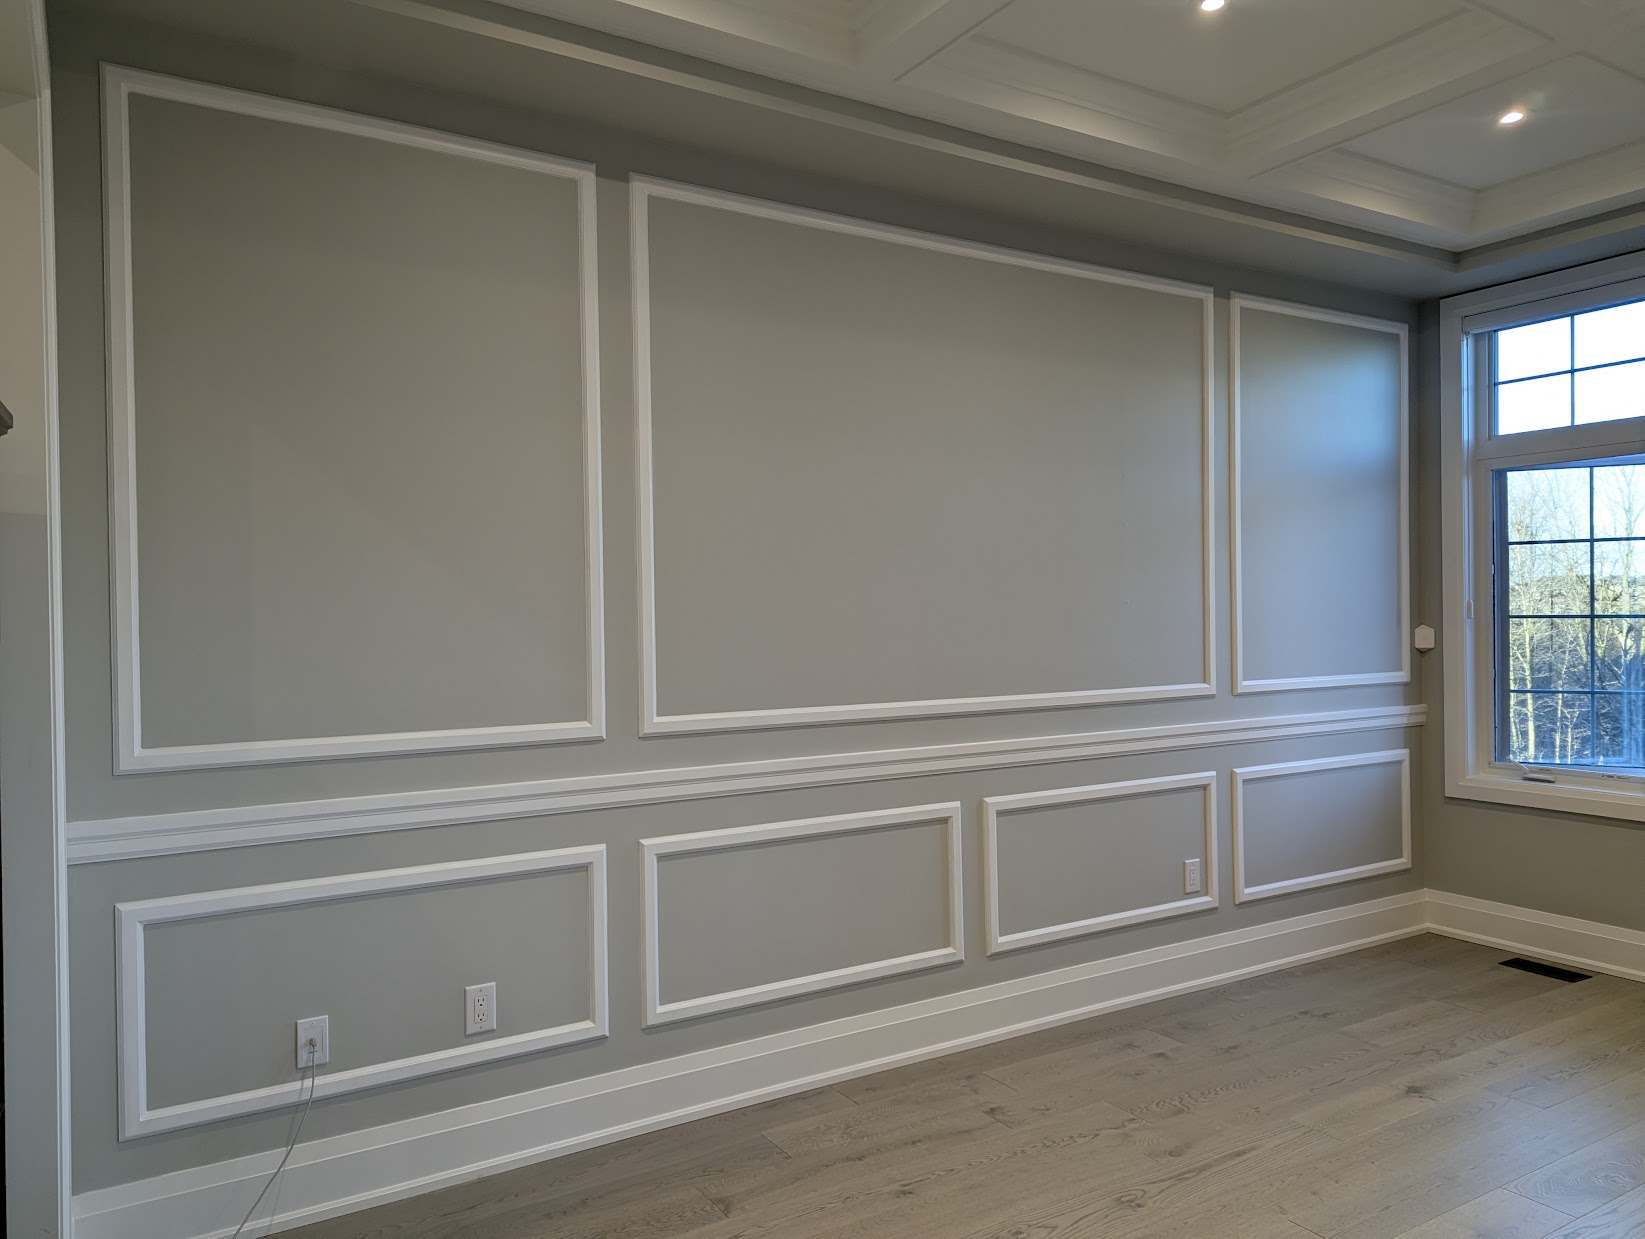
This technique, often called picture frame molding or boiserie, adds instant character and a sense of history to a room, even a new build. It works by creating rhythm and pattern through shadow lines. The repetition of the rectangular shapes provides a sense of order and sophistication. By painting the molding and wall the same color, the effect is textural rather than graphic, lending an air of quiet luxury. It’s a way to make flat walls feel substantial and architecturally significant without adding heavy, built-in elements.
|
📋 Copy HEX 🔗 Share |
While beautiful, installing this much decorative molding is a precision job. If the boxes aren’t perfectly level, square, and evenly spaced, the human eye will spot the inconsistencies immediately, and the effect will be ruined. This isn’t a forgiving DIY project for a beginner. Unless you are extremely confident with a level, miter saw, and measuring tape, this is a job best left to a professional finish carpenter. The cost of labor will be worth it to avoid a slightly off-kilter result.
12. Playful Powder Blue Geometric Wainscoting with Floral Wallpaper
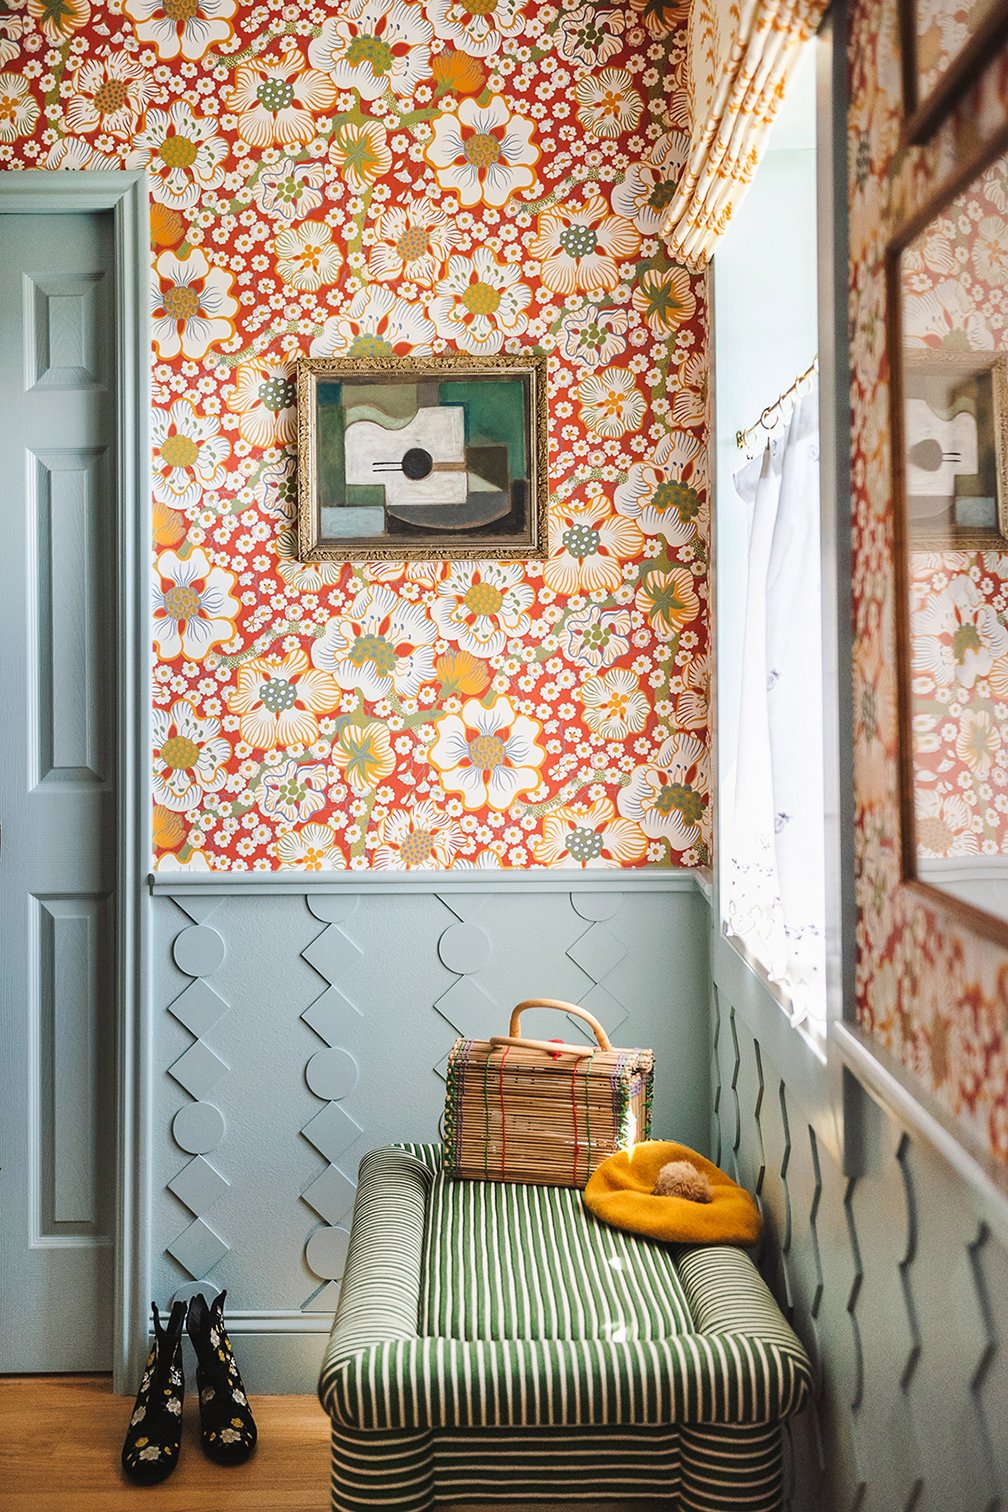
This look is a perfect example of the ‘Dopamine Decor’ trend that’s all about creating joyful, personality-packed spaces. After years of minimalist neutrals, homeowners and designers are embracing bold color, playful patterns, and unique textures that make them happy. This isn’t about following a specific style rulebook; it’s about curating a collection of things you genuinely love. The mix of geometric paneling with vintage-style floral wallpaper is confident, eclectic, and a pure expression of personal taste, which is the driving force of design in 2026.
|
📋 Copy HEX 🔗 Share |
The absolute star of this show is the custom geometric wainscoting. The floral wallpaper is fabulous, and the striped bench is a great touch, but the wainscoting is what provides the foundational uniqueness. It’s not a standard style you can buy off the shelf; its repeating pattern of circles and zigzags in that specific powder blue is a true statement piece. If you replaced it with simple beadboard, the room would still be colorful, but it would lose its quirky, high-design soul.
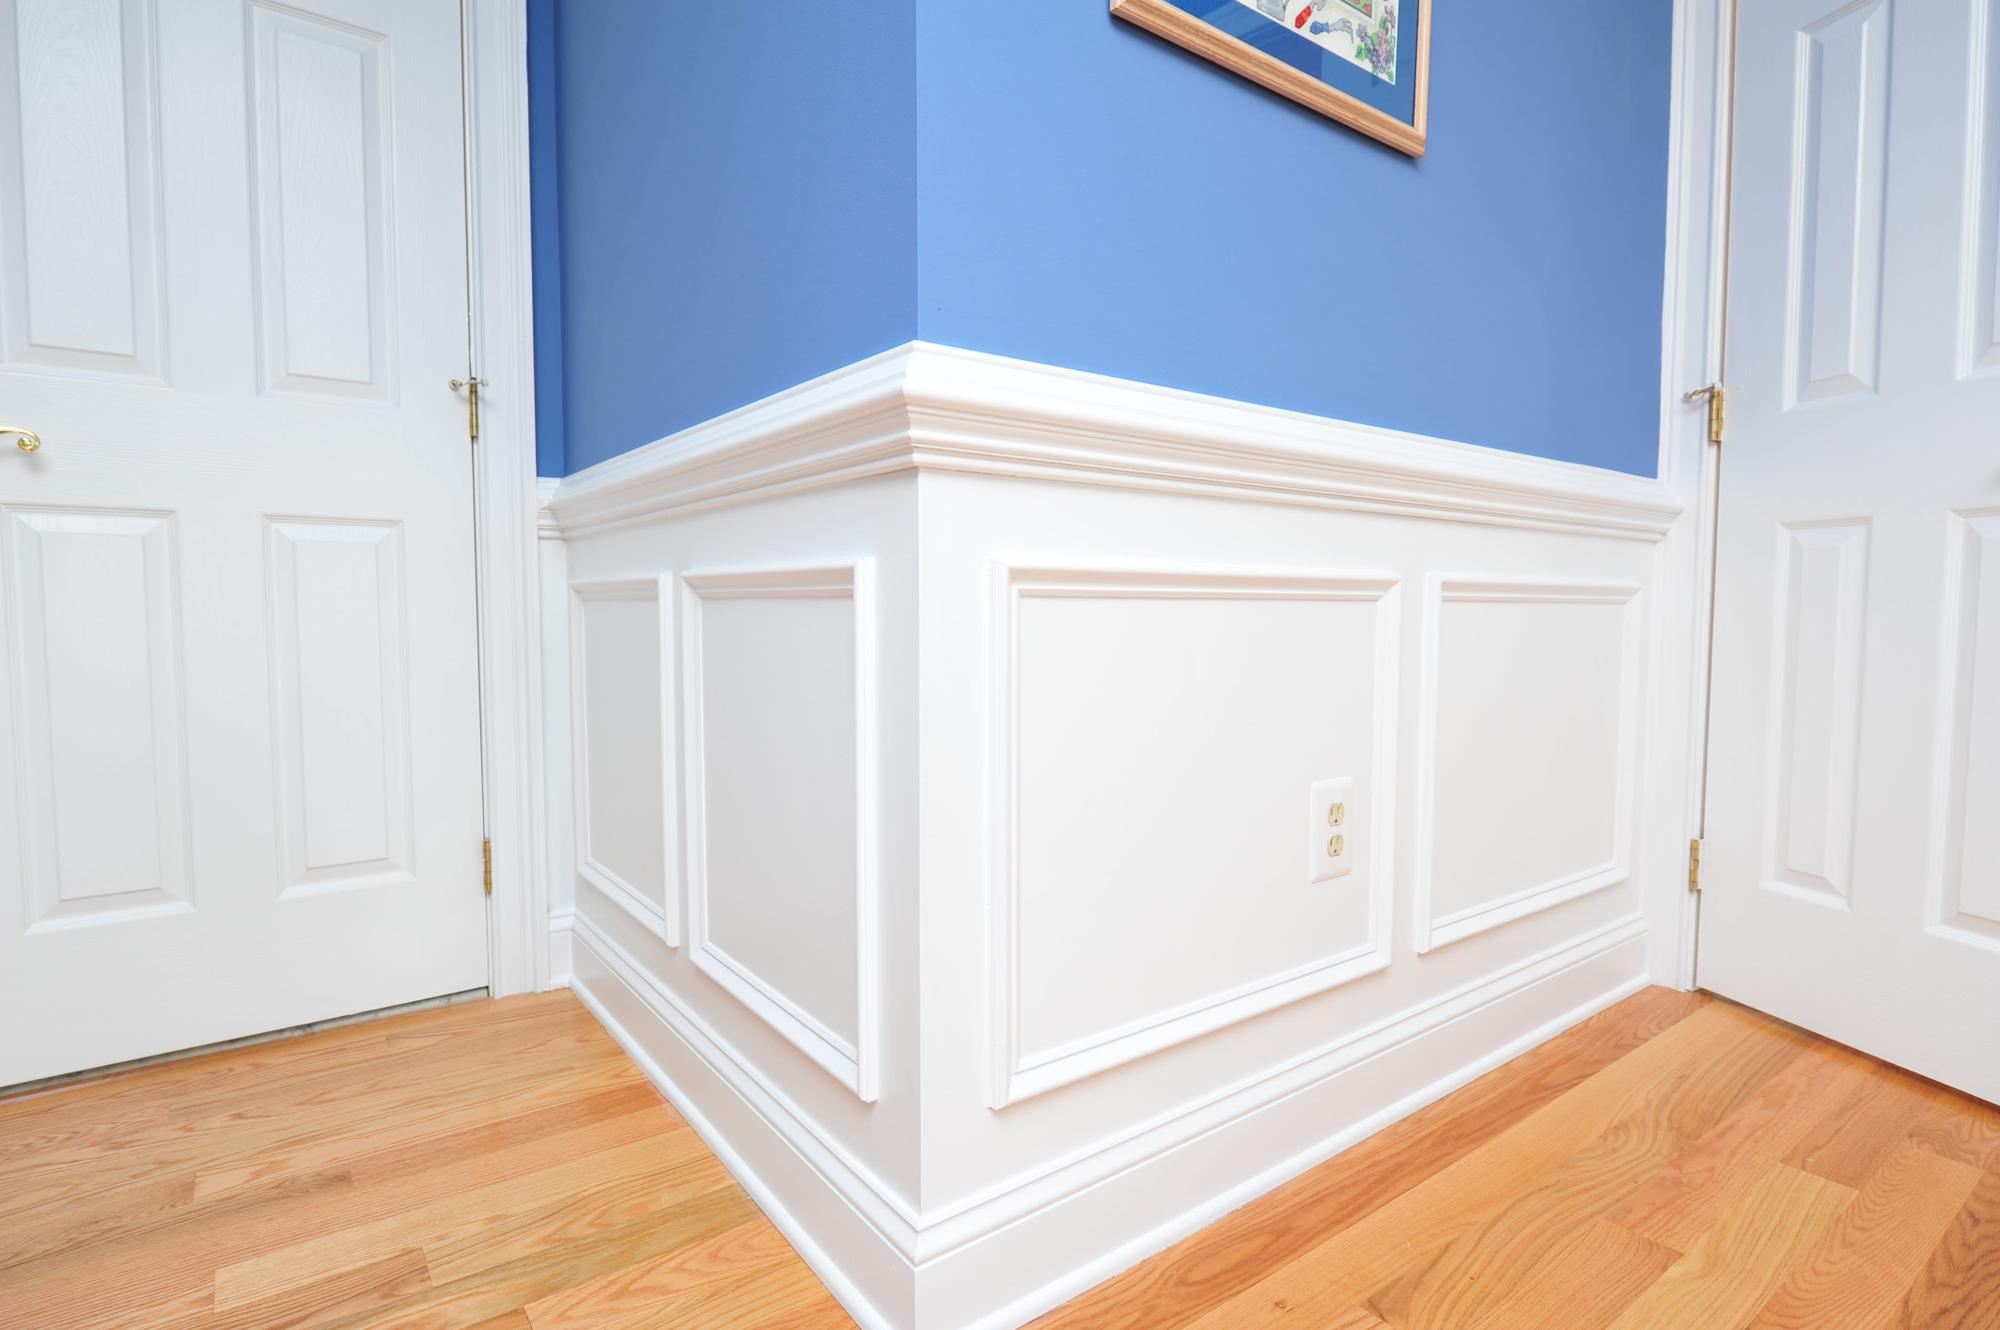
13. Classic White Framed Panels with a Vibrant Blue Upper Wall
The formula for this timeless look is all about a crisp, clean division of space: 40% classic white wainscoting + 60% bold, saturated color. The key is the pronounced trim molding that caps the wainscoting; it acts as a sharp dividing line, making both the white and the blue feel more intentional and impactful. The warm wood floor prevents the cool tones of the white and blue from feeling sterile, adding a necessary dose of organic warmth to the overall composition.
|
📋 Copy HEX 🔗 Share |
When pairing traditional white wainscoting with a bold wall color, don’t forget the ceiling. Painting the ceiling a stark, builder-grade white can create a jarring disconnect. Instead, have your paint store mix a version of your white trim color with about 10-20% of the blue wall color. This will create a very pale blue for the ceiling that reads as white but is tonally related to the walls, resulting in a much more cohesive and professionally designed look.
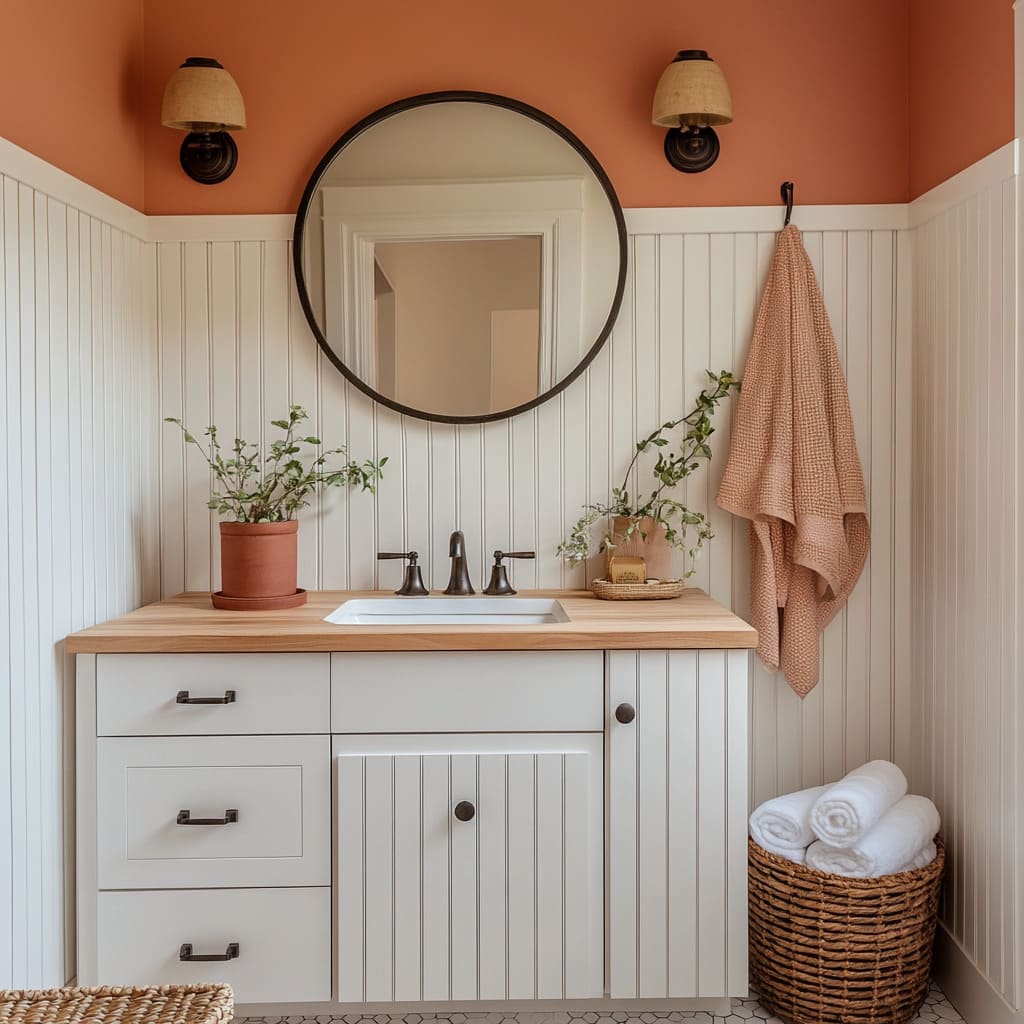
14. Warm Terracotta and Vertical Planks in a Rustic Bathroom
The success of this bathroom lies in its masterful mix of texture and color temperature. The clean, vertical lines of the off-white wainscoting provide a bright, orderly base. This cool-toned brightness makes the warm, earthy terracotta on the upper walls feel even more rich and inviting. The natural wood countertop bridges the gap between the two, while the matte black fixtures and mirror frame add a sharp, modern edge that keeps the look from feeling too rustic. It’s a beautifully balanced dance of opposites. This is a warmer take on two-tone walls than the classic blue and white seen in Idea #13.
|
📋 Copy HEX 🔗 Share |
Love this warm, rustic vibe but need to watch the budget? Swap the custom wood countertop for a butcher block slab from a big-box store like IKEA or The Home Depot—you can often get one for under $200. Look for a similar round mirror and black sconces at Target or on Amazon. For the wainscoting, instead of individual planks, use beadboard paneling sheets, which are much faster and cheaper to install. You can achieve 90% of this look for less than $500 in materials.
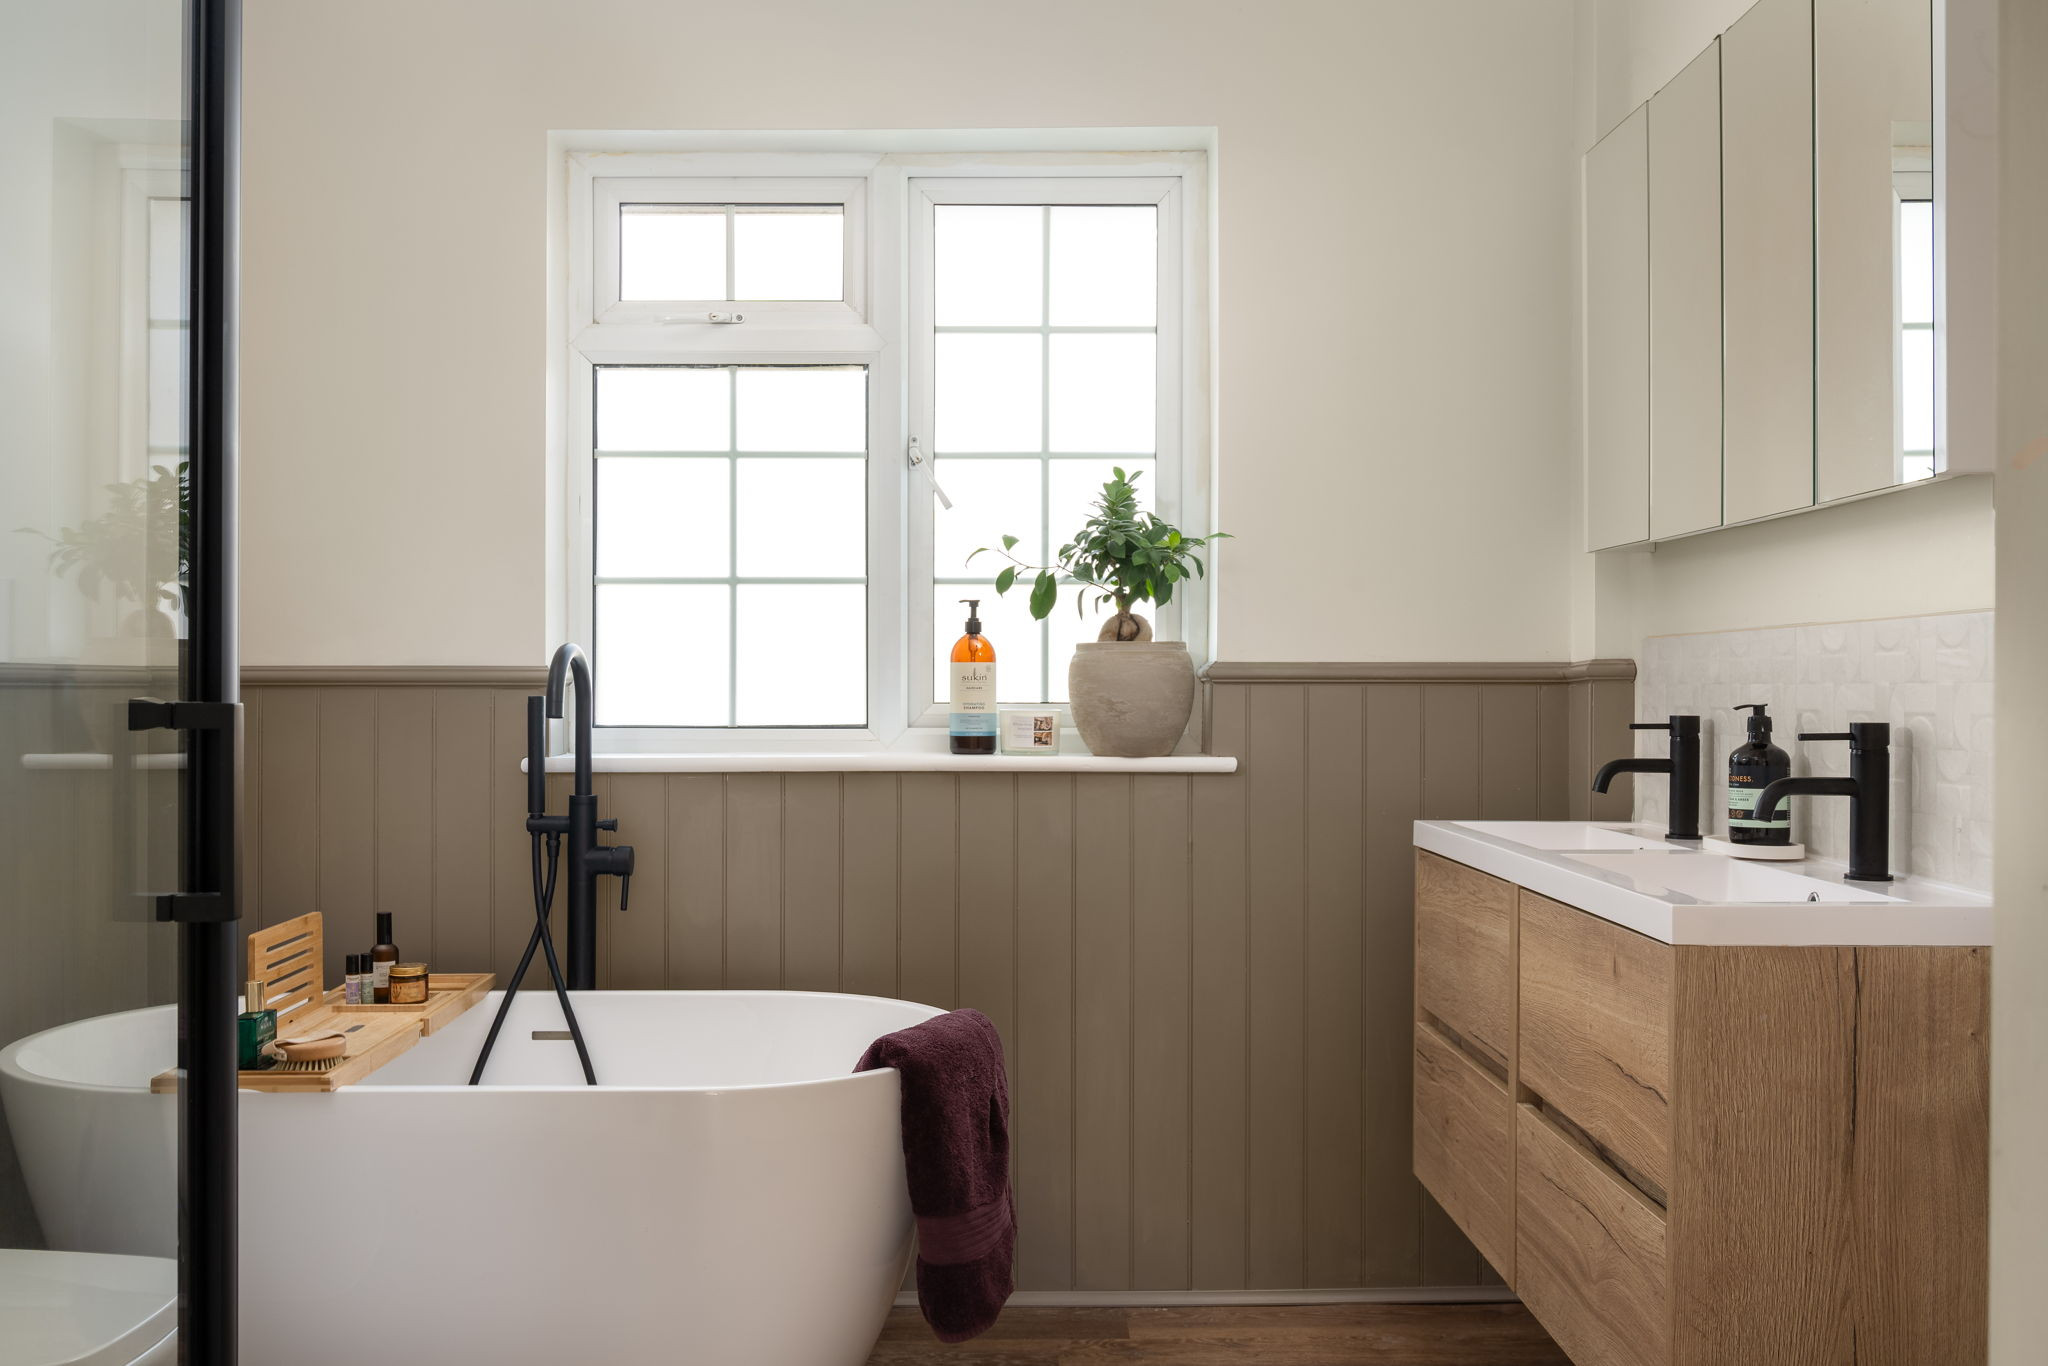
15. Contemporary Bathroom with Taupe Vertical Slat Wainscoting
This style of tall, vertical slat wainscoting is perfect for making a standard room feel taller. By drawing the eye upward, it creates an illusion of height, making it a great choice for bathrooms with 8- or 9-foot ceilings. The minimalist, clean lines work well in spaces of any size, from a small powder room to a large primary bath like this one. For smaller spaces, ensure the color palette stays light (like this taupe and cream) to maintain an airy feel. The floating vanity also enhances the sense of space by showing more floor.
|
📋 Copy HEX 🔗 Share |
A matte finish, especially in a chic color like this taupe, looks incredibly sophisticated. However, in a bathroom, it can be tricky. Matte paints have a more porous surface than their satin or semi-gloss counterparts, making them more susceptible to showing water marks and being harder to wipe down. For a bathroom application, it’s crucial to use a high-quality, scrubbable matte paint specifically designed for high-humidity environments. This will give you the modern look you want with the durability you need.
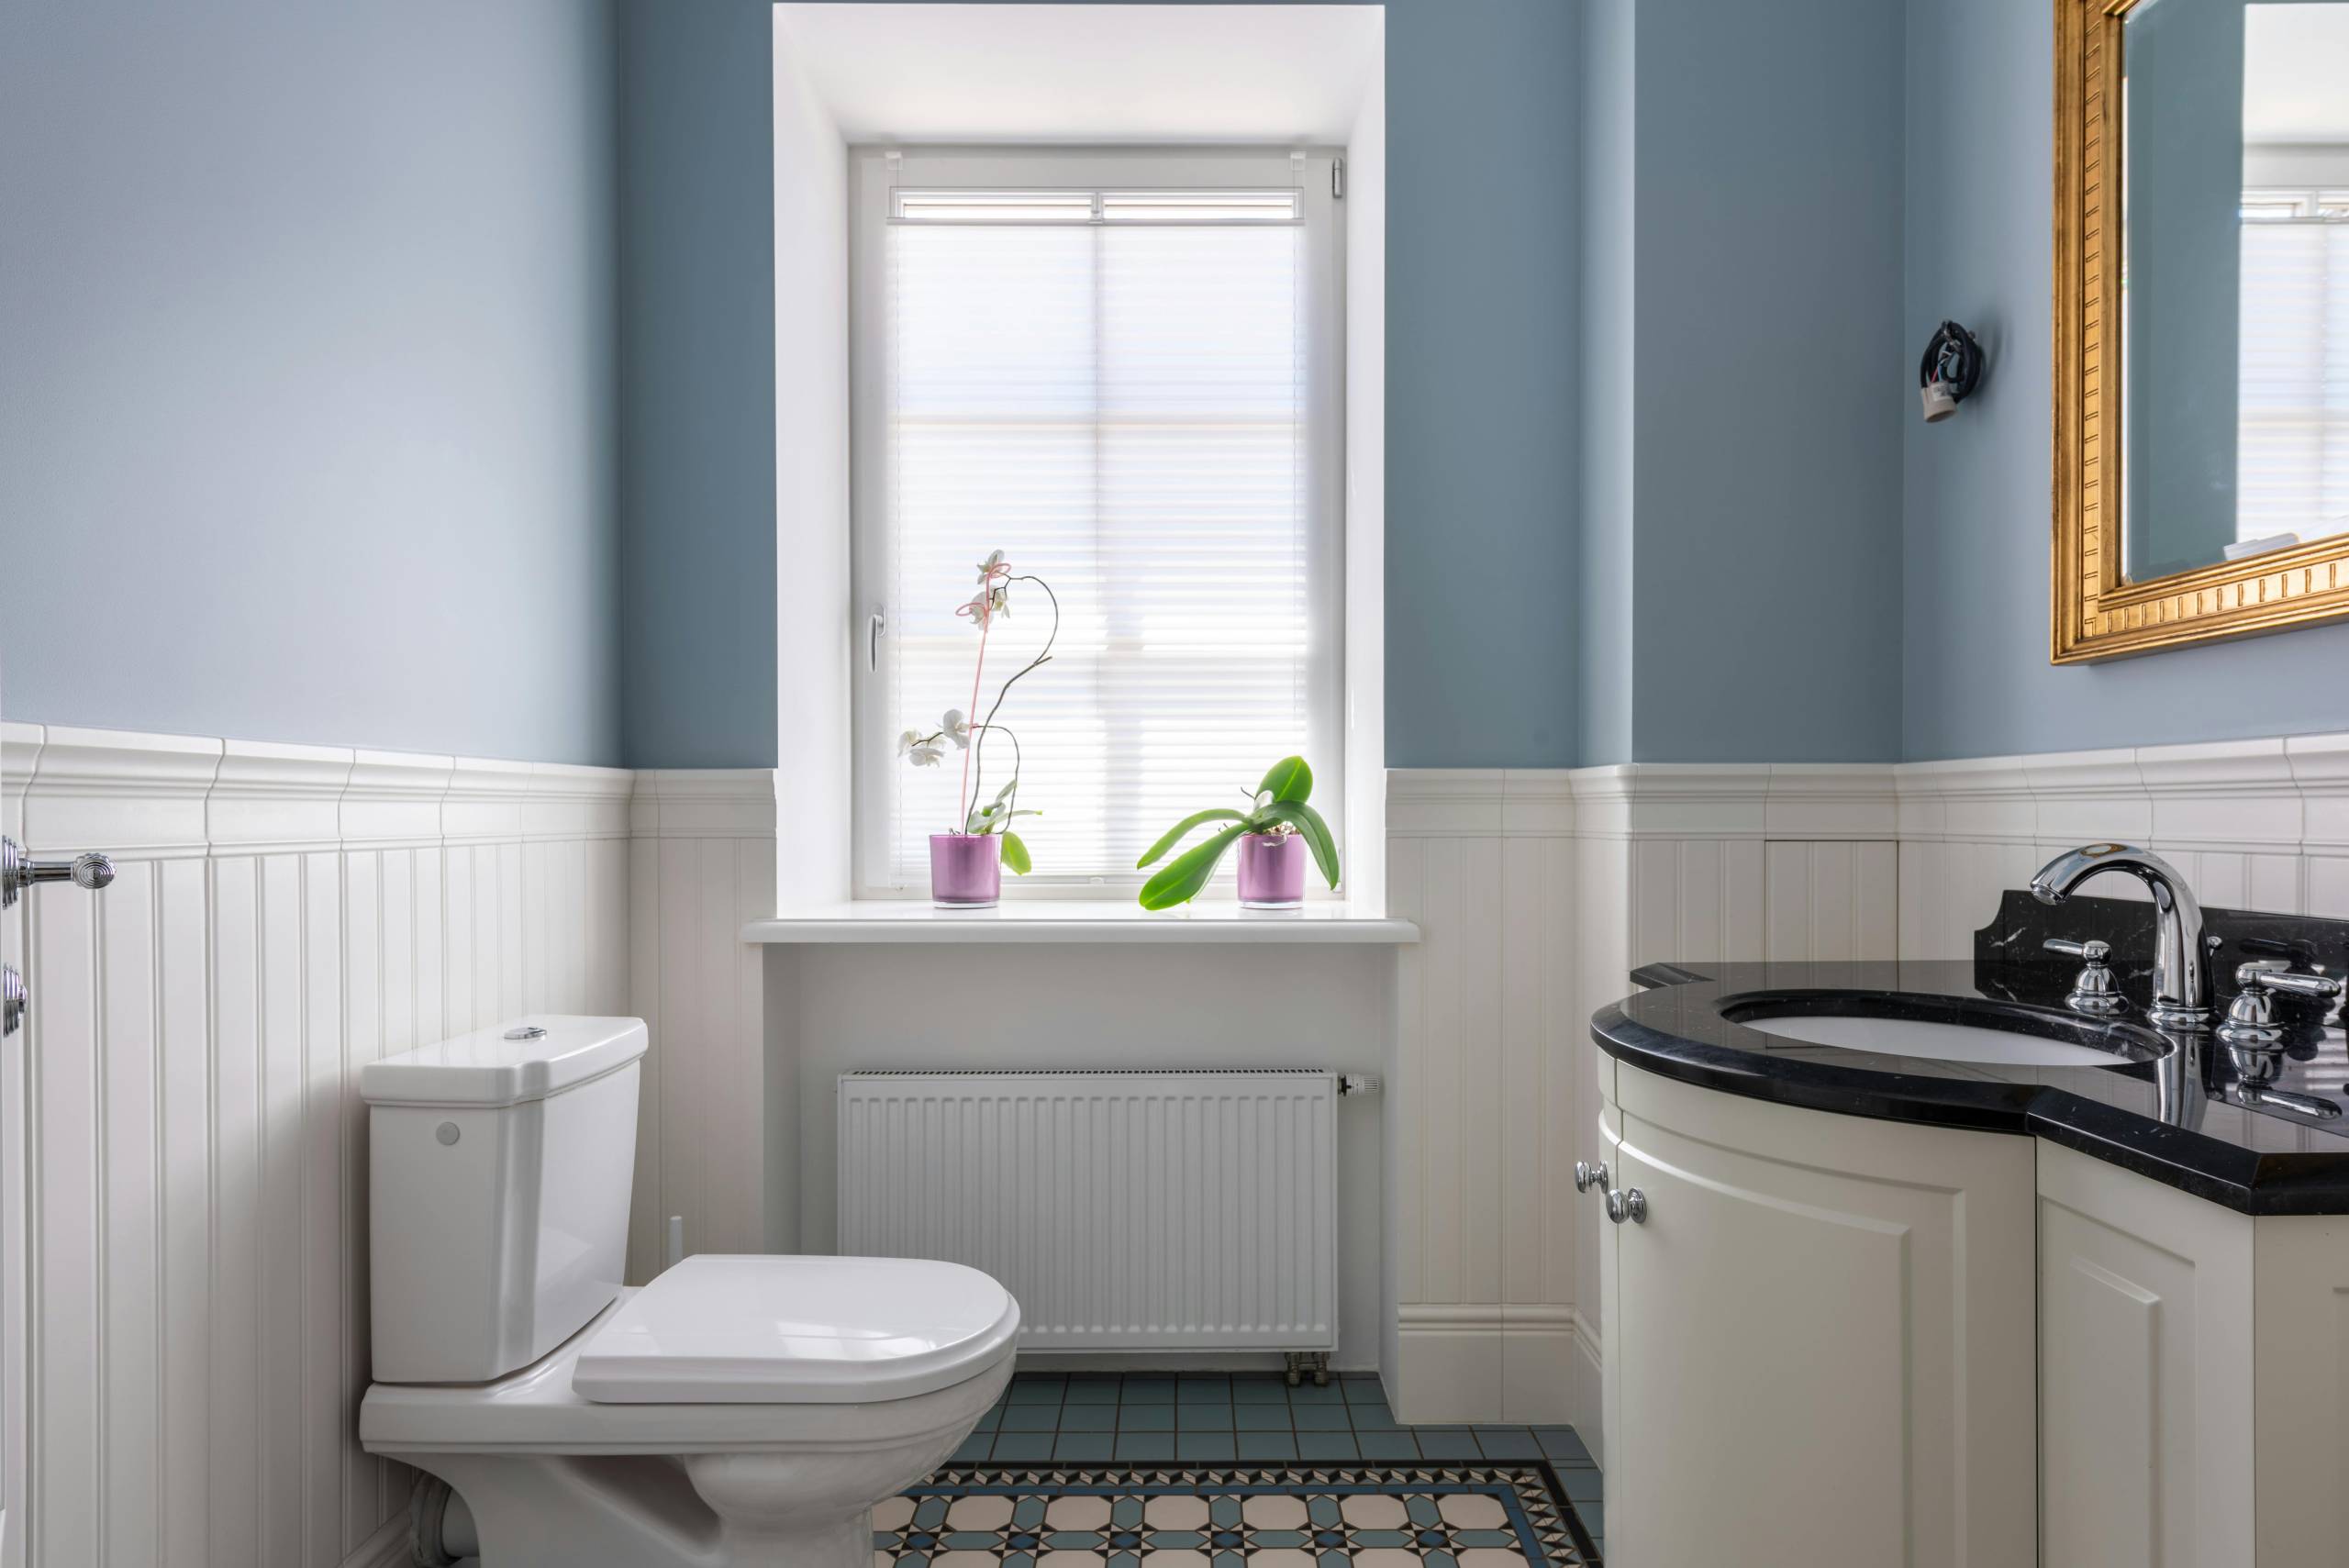
16. Wainscoting Applications for Modern Bathrooms
In a bathroom, your choice of material for wainscoting is absolutely critical. Standard MDF (medium-density fiberboard) is a popular and affordable choice for other rooms, but it will swell and warp at the first sign of significant moisture. In a powder room with no shower or bath, you might get away with it. But for a full bath, you must use either solid wood, which is more expensive, or a moisture-resistant material like PVC or vinyl beadboard, which is impervious to water and humidity. Don’t let a contractor talk you into using standard MDF to save a few dollars—you’ll be replacing it in a few years.
|
📋 Copy HEX 🔗 Share |
To make your wainscoting look truly integrated in a bathroom, caulk is your best friend. Use a high-quality, paintable, mold-resistant kitchen and bath caulk along every seam: where the panels meet the baseboard, where they meet the top cap, and in all the corners. Apply a thin, consistent bead and smooth it with a damp finger. This not only creates a seamless, professional finish but also seals all the gaps against moisture, protecting the integrity of your installation for years to come.
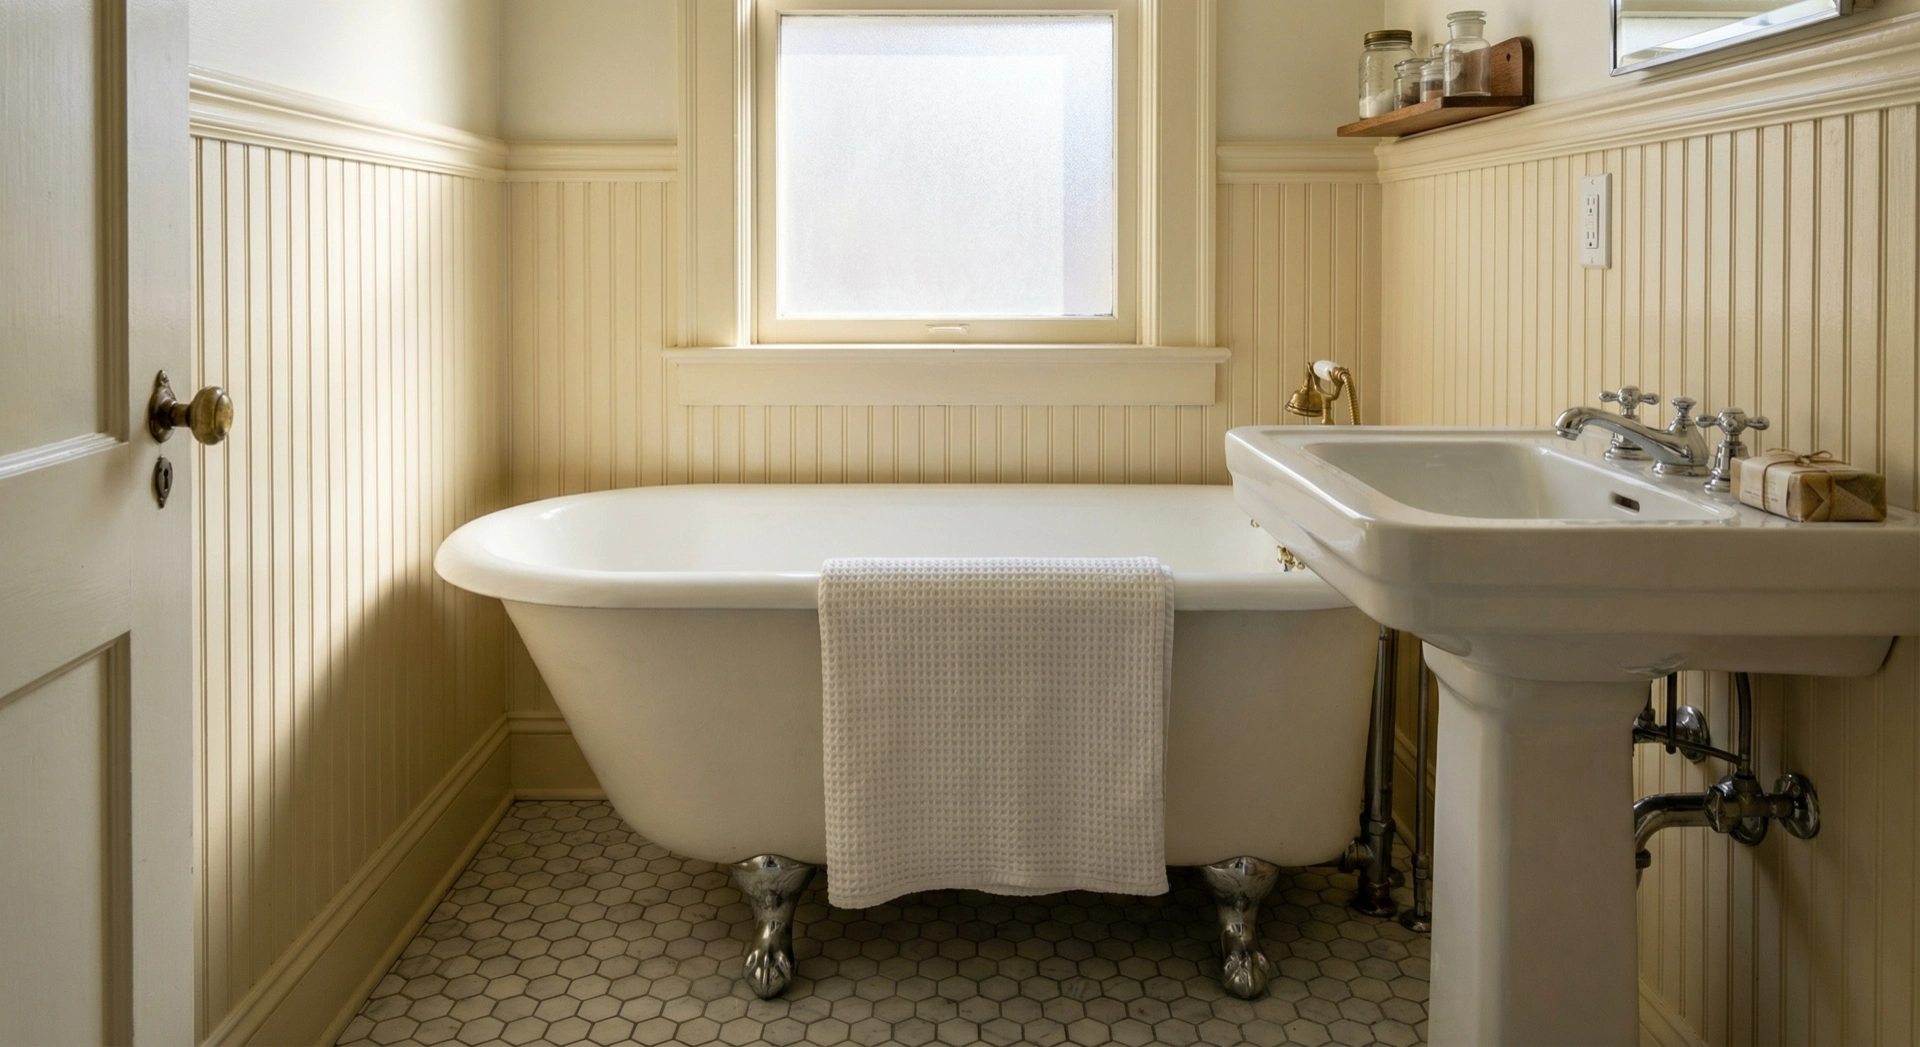
17. Vintage Charm with Cream Beadboard and a Clawfoot Tub
This bathroom nails the vintage aesthetic by pairing two iconic elements: beadboard wainscoting and a clawfoot tub. The beadboard’s simple, vertical lines evoke a sense of nostalgic, cottage-like charm that is the perfect backdrop for the sculptural curves of the tub. The choice of a warm cream paint instead of stark white softens the entire space, while the hexagonal floor tiles add another layer of period-appropriate detail. It feels authentic because every major element reinforces the same design story.
|
📋 Copy HEX 🔗 Share |
The visual recipe here is a delicate balance of warm and cool, old and new. It’s roughly 70% warm vintage elements (cream beadboard, clawfoot tub shape) + 20% cool-toned pattern (the grey and white floor tiles) + 10% mixed-metal modern shine (the chrome and brass fixtures). This mix is what keeps the room from feeling like a stuffy historical reenactment. The cool floor and shiny fixtures provide a clean, updated counterpoint to the otherwise warm and nostalgic vibe.
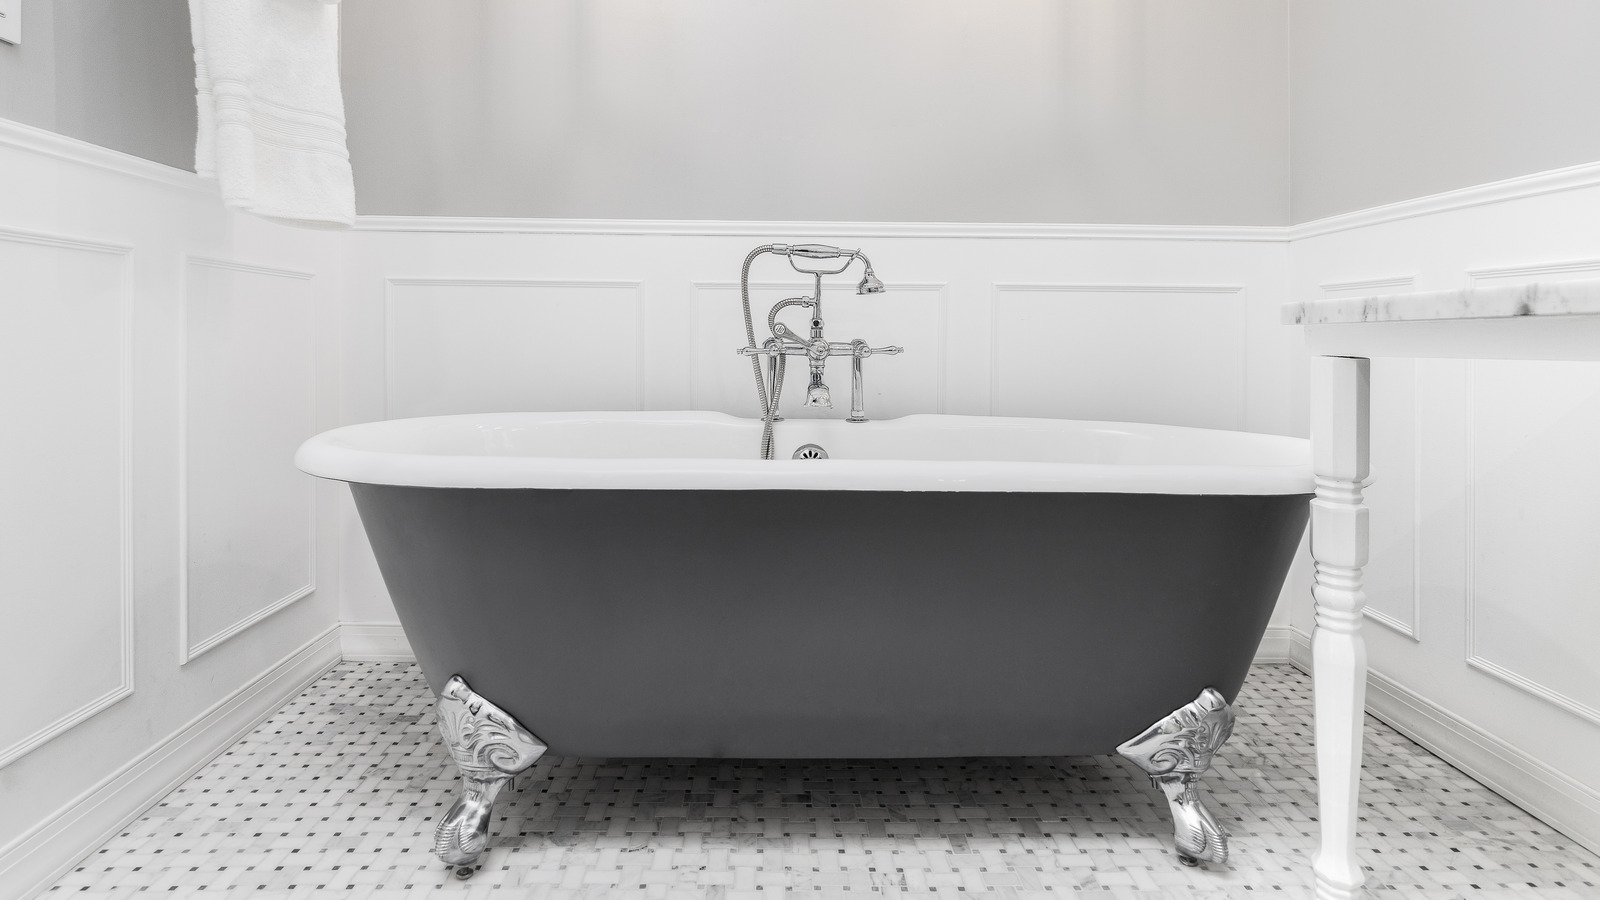
18. Serene Bathroom with White Framed Wainscoting and a Dark Gray Tub
The showstopper here is undeniably the dark gray clawfoot tub. In a room dominated by light gray and classic white, the tub serves as a dramatic and elegant anchor. Its deep color adds weight and sophistication, while its classic shape and ornate silver feet honor the traditional feel of the wainscoting. If the tub were white, the room would still be pretty, but it would lack this central point of contrast that gives the entire design its confident, high-end personality. To see a different take on a wainscoted bathroom, check out the modern approach in Idea #24.
|
📋 Copy HEX 🔗 Share |
- Clawfoot Tub (Refinished or New): $1,500 – $4,500
- Wainscoting & Installation: $800 – $2,500
- Floor Tile & Installation: $700 – $2,000
- Fixtures (tub filler, etc.): $500 – $1,800
- Console/Vanity: $400 – $1,200
- TOTAL: $3,900 – $12,000
- Budget alternative: Find a used clawfoot tub on Facebook Marketplace for $200-$500 and have it professionally reglazed. Use beadboard panels instead of custom-framed wainscoting. Total cost could be closer to $2,000 – $4,500.
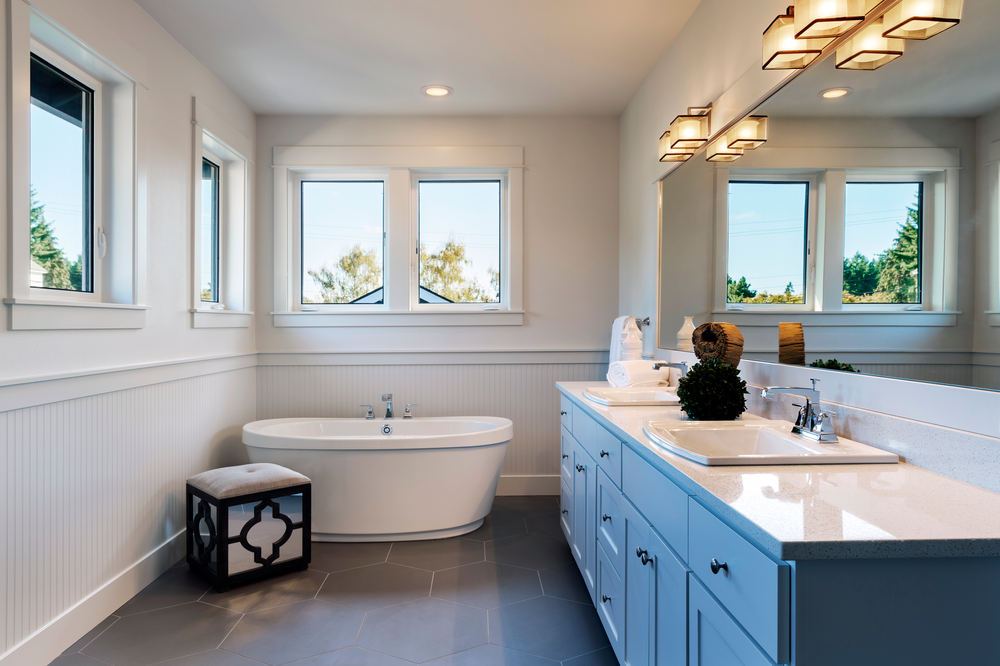
19. Bright Bathroom with Beadboard and a Light Blue Double Vanity
Beadboard wainscoting is a versatile choice that works well in bathrooms of almost any size. Here, in a spacious primary bath, it adds texture and a classic touch without overwhelming the room. In a much smaller powder room, the same treatment would work equally well, especially when painted a crisp white, to make the space feel brighter and more finished. The key is to keep the height proportional—for a standard 8-foot ceiling, a height of 36-42 inches is a safe bet. The versatility of beadboard is also shown in Idea #26, where it’s used in a child’s room.
|
📋 Copy HEX 🔗 Share |
Before you begin a bathroom renovation involving wainscoting, make a solid plan. Here’s a quick checklist:
- Confirm Material: Have you sourced moisture-proof wainscoting material (PVC, vinyl, or solid wood), not standard MDF?
- Plumbing Check: Know the exact locations of your plumbing supply lines and drains. Will the vanity and toilet need to be removed for installation? Plan for a plumber if needed.
- Fixture Placement: Mark the exact placement of your vanity, mirror, and sconces to ensure the wainscoting height and layout complement them perfectly.
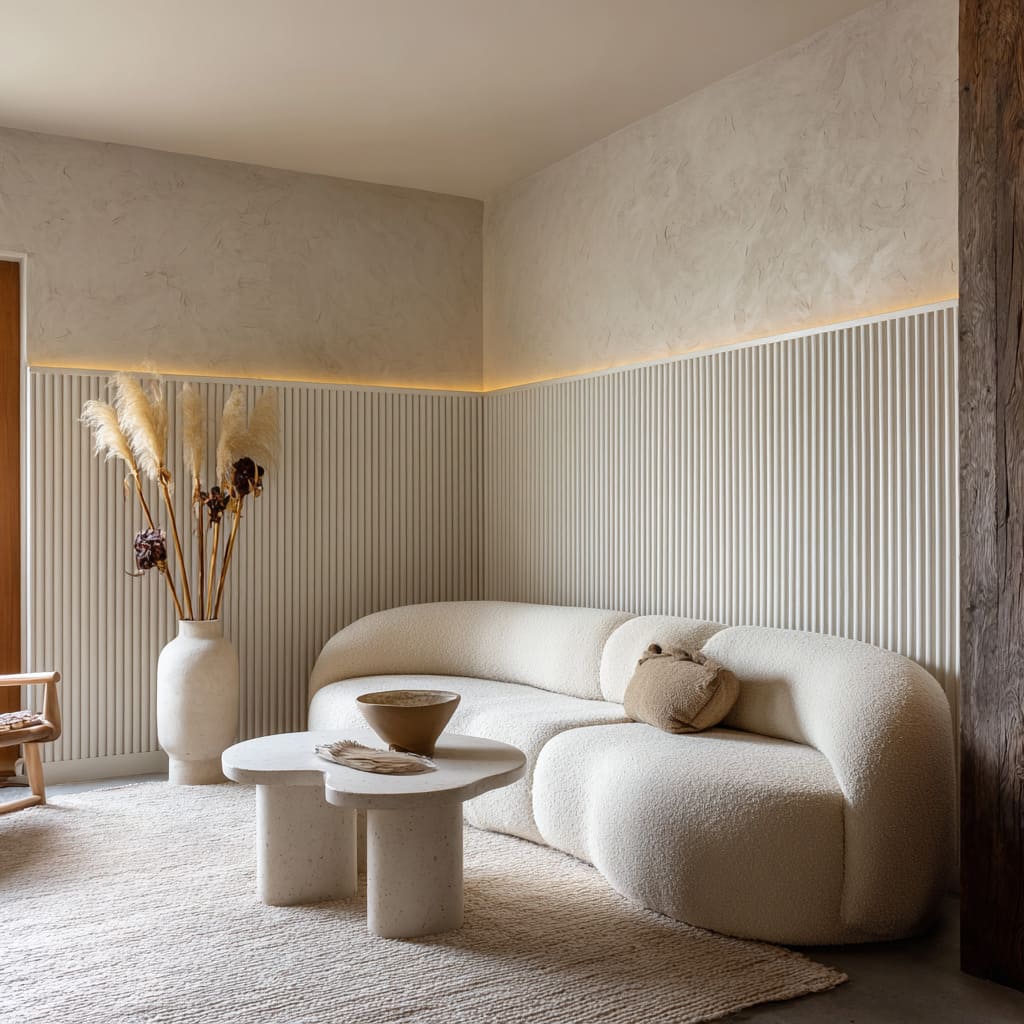
20. Minimalist Living Room with Vertical Slats and Cove Lighting
The hidden cove lighting is a high-end detail that creates an incredible ambient glow. Here’s a simplified guide to recreating it. Time: 4-6 hours. Cost: $100-$250.
- Install your vertical slat wainscoting, stopping about 4-5 inches from your desired final height.
- Install a horizontal backing board, flush with the top of the slats.
- Install an L-shaped trim piece (like a piece of 1×2 and 1×3) on top, leaving a 1-2 inch channel between the back of the trim and the wall.
- Install an LED strip light inside this channel, facing upwards or towards the wall.
- Wire the LED strip to a nearby outlet or have an electrician hardwire it to a switch.
- The light will bounce off the textured wall above, creating a soft, seamless glow.
|
📋 Copy HEX 🔗 Share |
This room feels so serene and luxurious because it prioritizes texture over color. The entire palette is a very tight range of off-whites and beiges, which forces you to notice the subtle interplay of different surfaces. You have the clean lines of the slat wainscoting, the soft curve of the boucle sofa, the rough texture of the concrete coffee table, and the grainy finish of the upper wall. The warm, hidden cove lighting accentuates all these textures, creating a space that feels incredibly rich and layered, yet remains minimalist and calm.
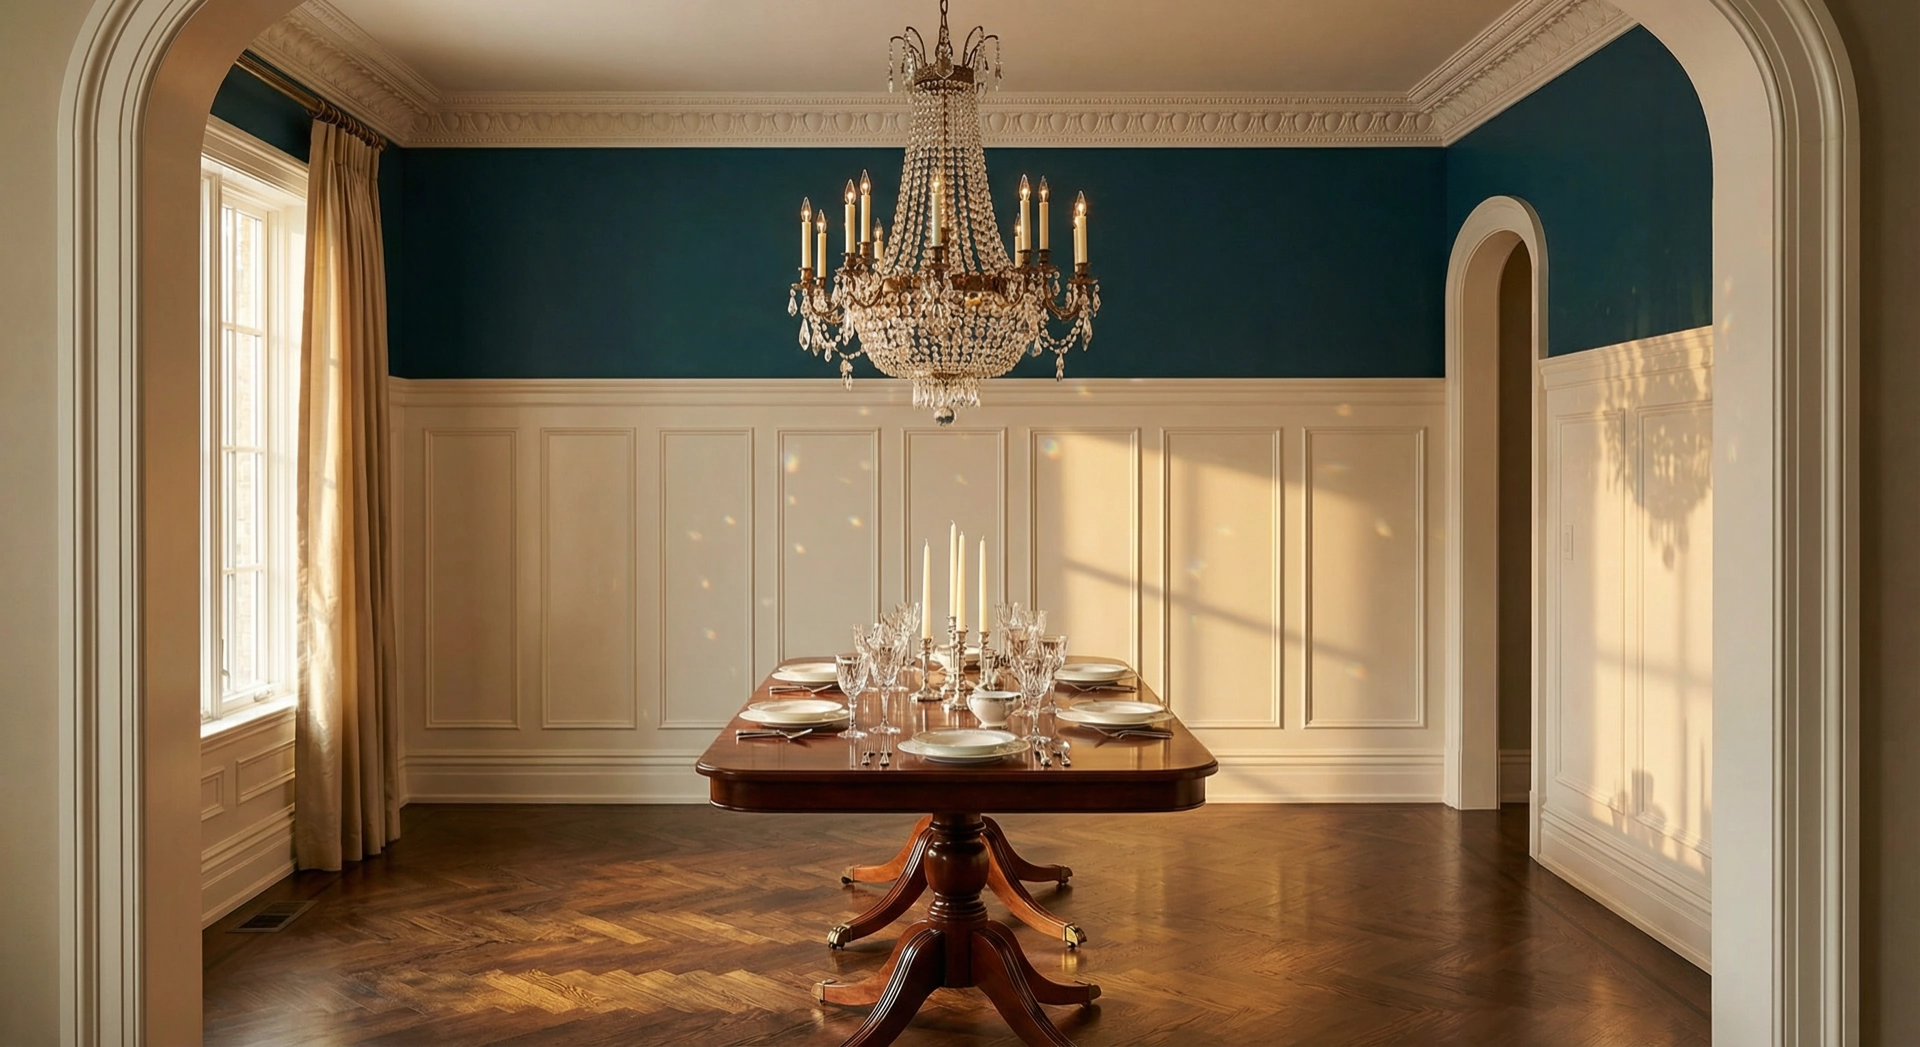
21. Formal Dining Room with Tall Panels and a Dark Teal Accent
When using a tall wainscoting style like this, the placement of the chair rail is critical. A common mistake is to divide the wall exactly in half. Instead, use the rule of thirds for a more dynamic and professional look. The wainscoting here takes up the bottom two-thirds of the wall, leaving the top third for the dramatic dark teal paint. This proportion draws the eye up and makes the ceiling feel even higher, especially when paired with ornate crown molding. It’s a classic architectural trick that always works.
|
📋 Copy HEX 🔗 Share |
A grand, formal look like this demands a room with generous proportions. To pull off wainscoting that extends two-thirds up the wall, plus ornate crown molding and a large chandelier, you need a ceiling height of at least 10 feet. In a room with 8-foot ceilings, this treatment would feel top-heavy and crowded. This style is best reserved for dedicated dining rooms or formal living areas with a minimum of 200 square feet to allow the dramatic elements, like the polished table and chandelier, to breathe.
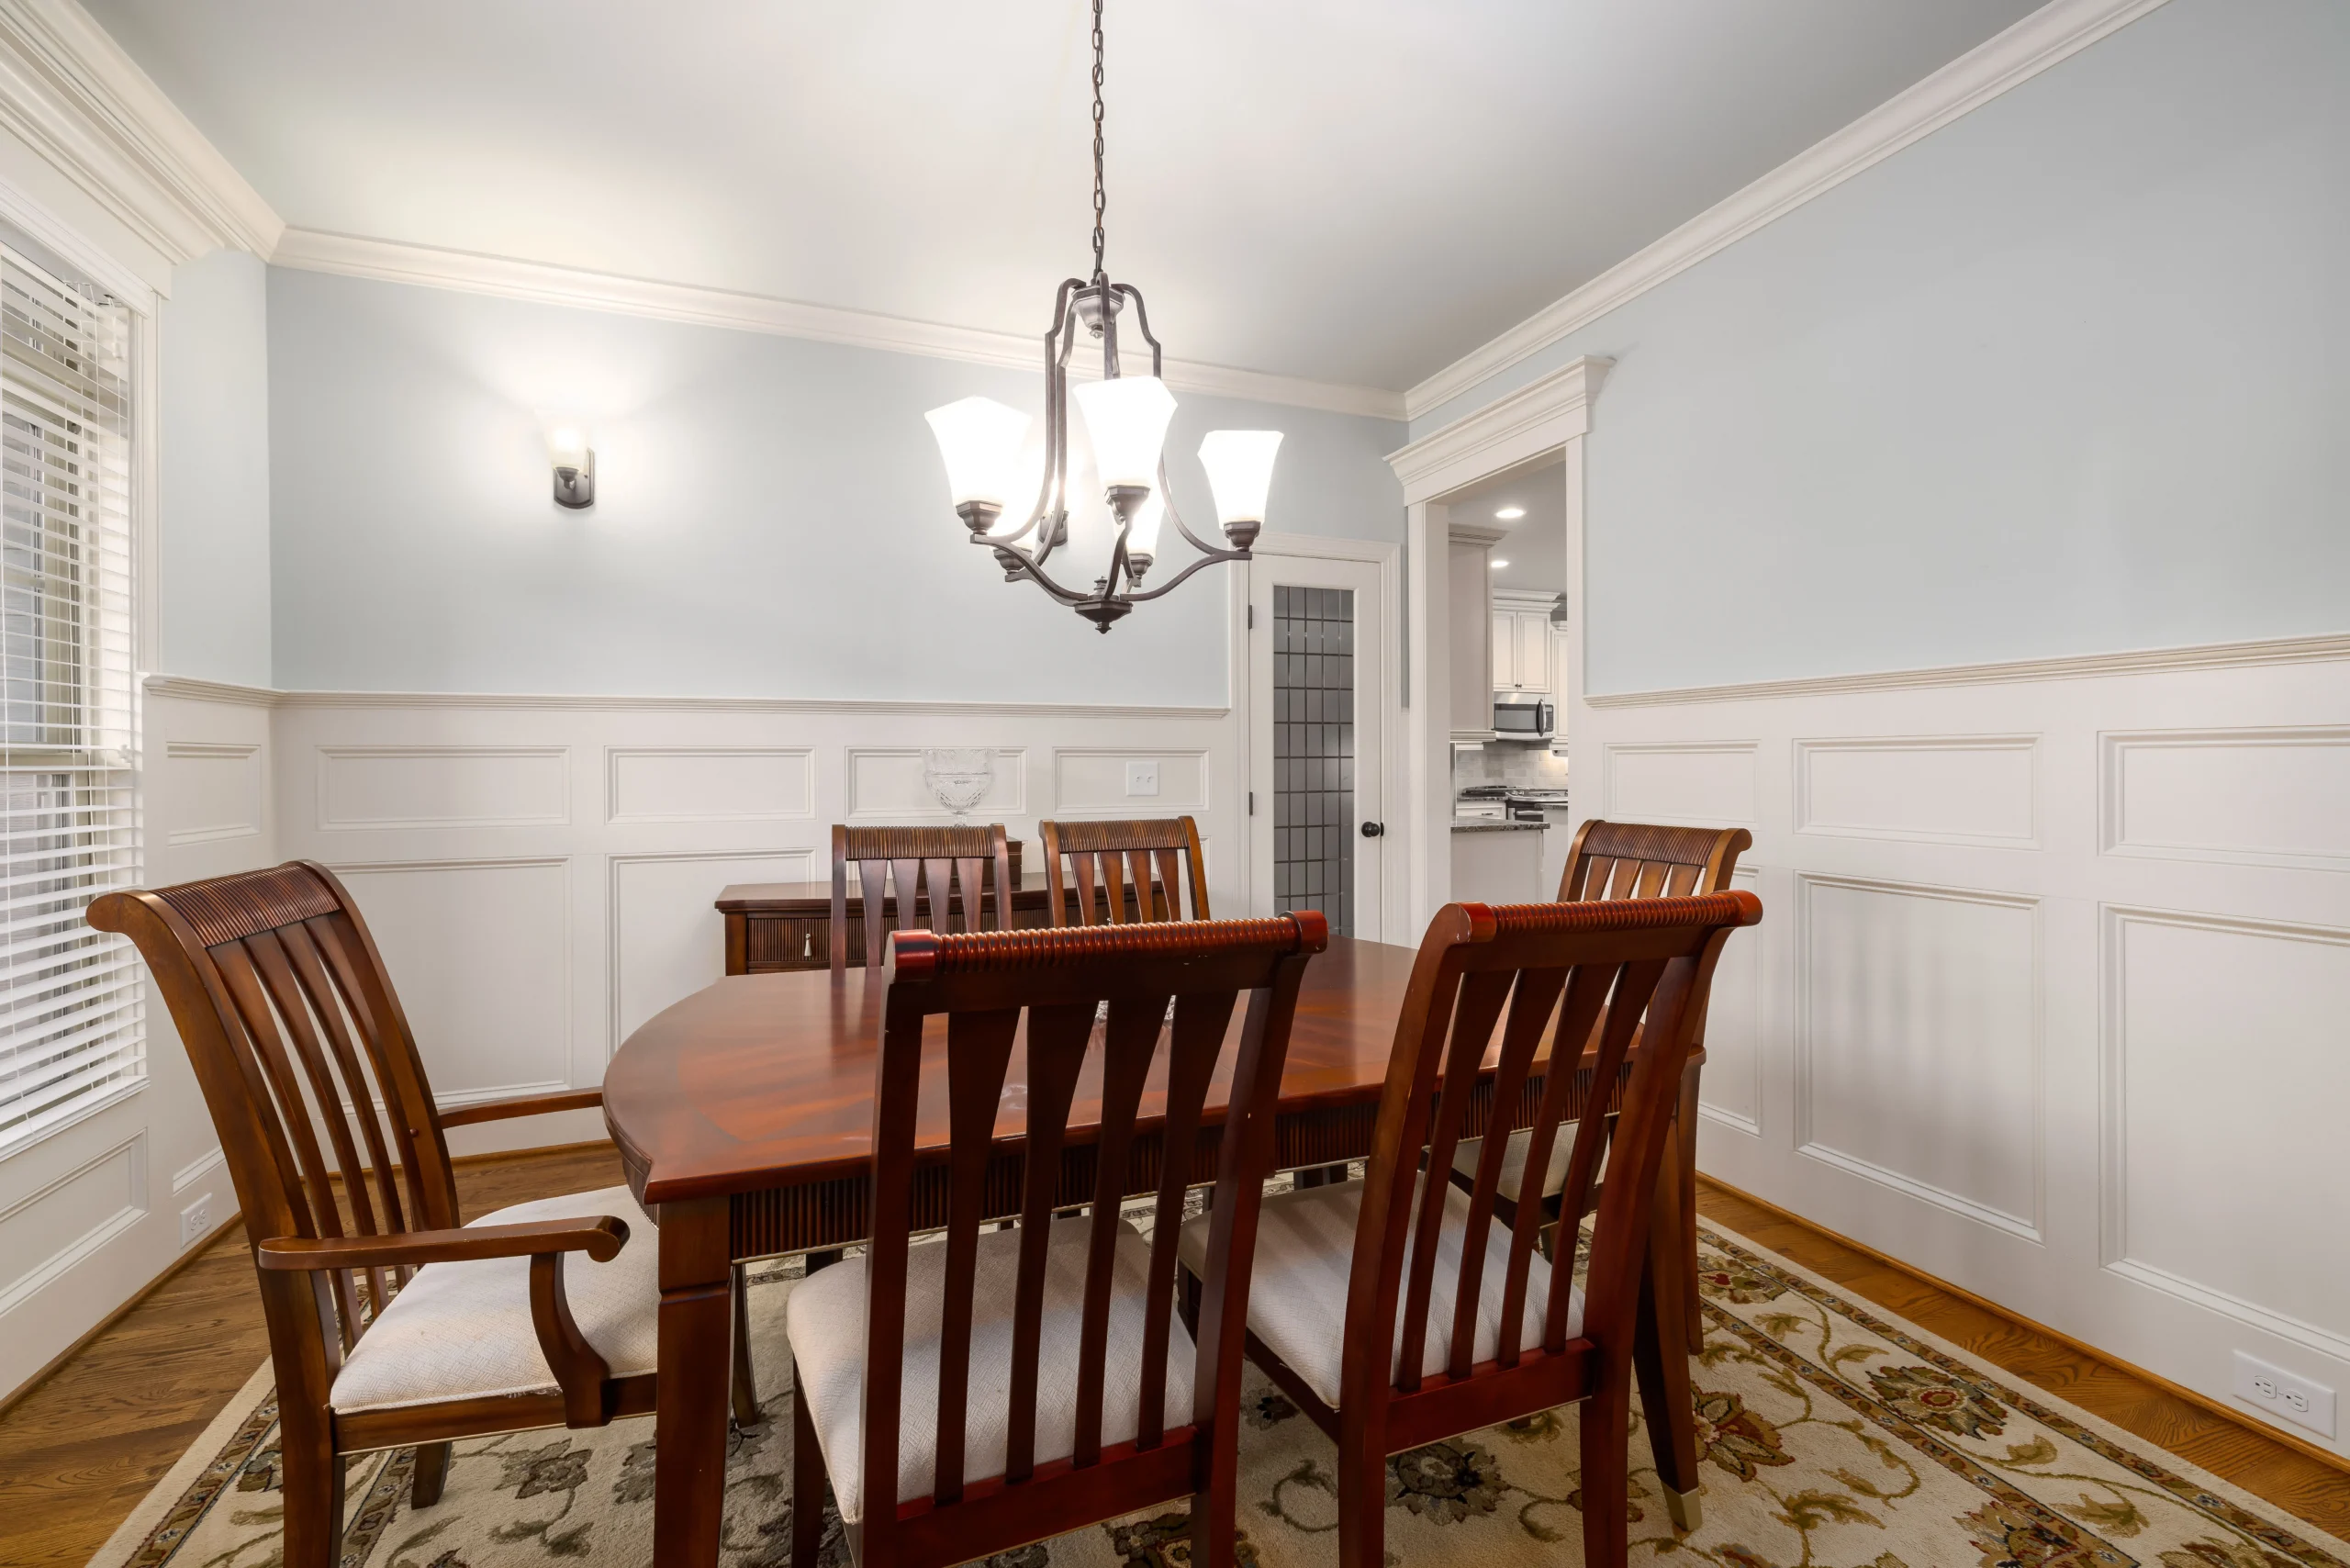
22. Classic Dining Room with Light Blue Walls and Paneled Wainscoting
This room is a perfect example of timeless design because it adheres to a proven formula of layering and contrast. The crisp white of the paneled wainscoting provides a clean, architectural base. The soft light blue on the upper walls adds a touch of color and serenity. Then, the dark wood of the dining set and the dark metal of the chandelier introduce a necessary depth and contrast that grounds the entire space. Finally, the patterned rug ties all the elements together. It’s a balanced composition that feels both formal and welcoming. For another take on formal dining, compare this to Idea #3.
|
📋 Copy HEX 🔗 Share |
That dark wood dining set is beautiful but can be pricey. To get a similar formal feel on a budget, scour Facebook Marketplace or local consignment shops for a used dining set. People often sell high-quality, solid wood furniture for a fraction of its original price. A few hundred dollars and some new upholstery for the chair seats can give you a set with more character than anything new. Pair it with a rug from an online retailer like Wayfair or Rugs USA to complete the look for less.
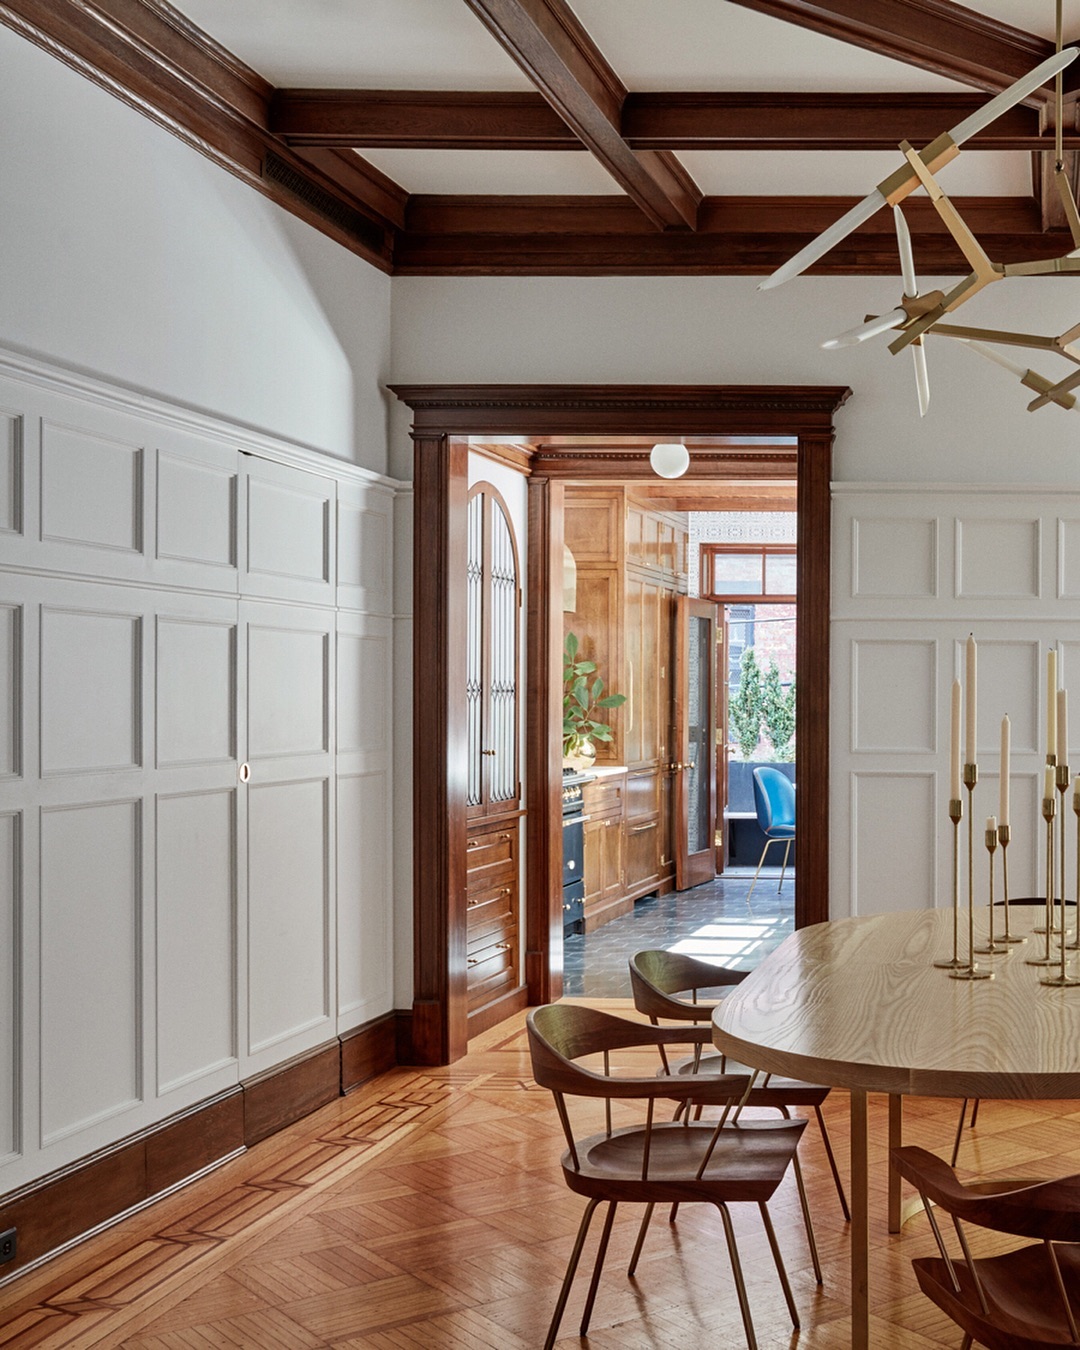
23. Sophisticated Dining with White Panels and Dark Wood Trim
This room’s sophisticated formula is all about high contrast and material play: 60% crisp white paneling + 30% deep, rich wood tones (trim, beams, chairs) + 10% warm metallic accents (chandelier, candlesticks). The white provides a bright, expansive canvas, while the dark wood adds a layer of traditional weight and architectural definition. The pops of gold and brass bring in a touch of modern glamour, preventing the traditional elements from feeling dated. The light wood of the table acts as a bridge between the two extremes.
|
📋 Copy HEX 🔗 Share |
The single element holding this entire design together is the dark stained wood trim. It’s what separates this from being just another nice room with white wainscoting. The dark wood outlines the panels, caps the wall, and frames the ceiling, creating a cohesive and bold architectural statement. It’s the unifying thread that connects the walls, the ceiling beams, and the furniture, turning them into a single, powerful design vision. Without it, the room would lose its confident, dramatic edge.
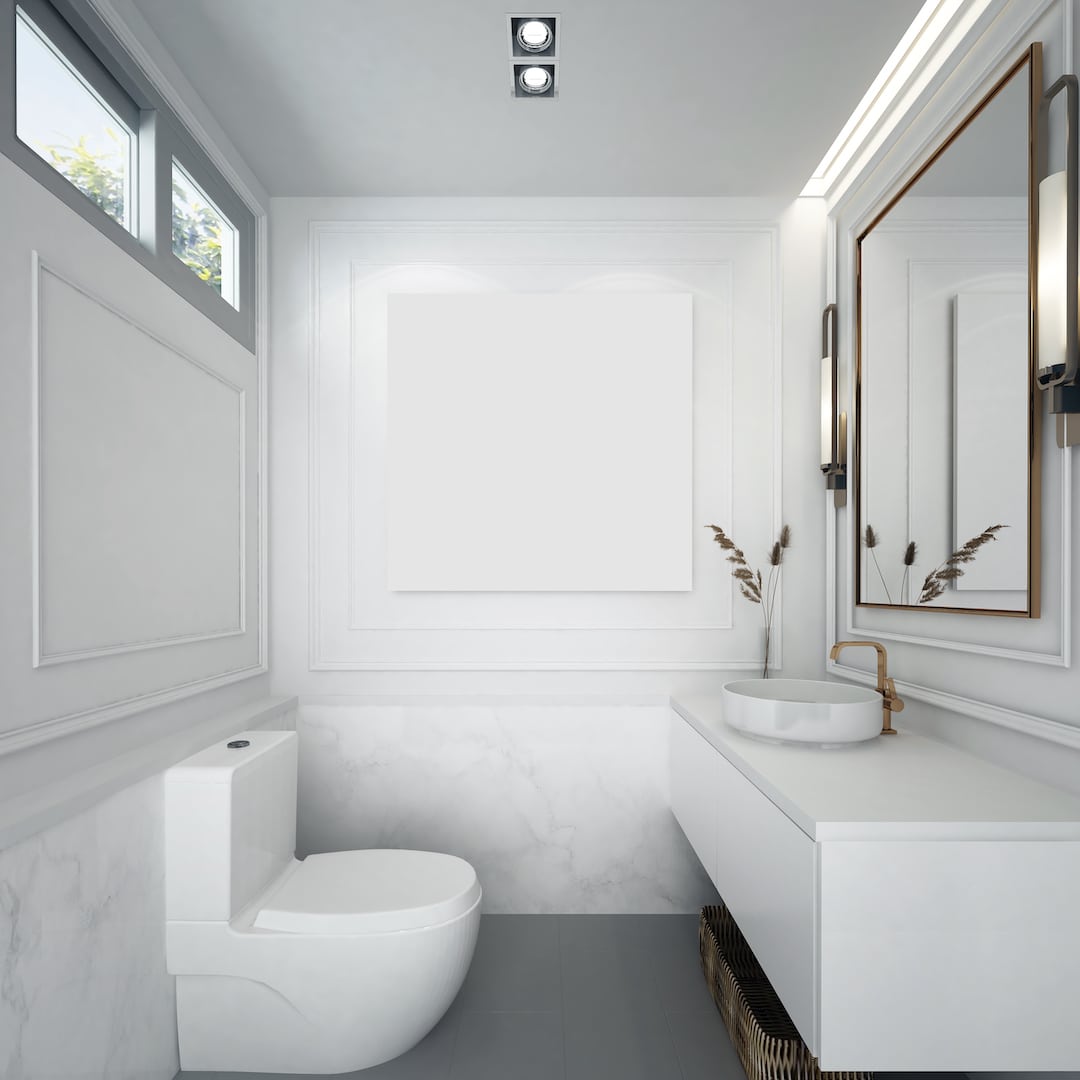
24. Modern Bathroom with Panel Molding and Marble Wainscoting
This design succeeds by blending classic and modern elements within a strictly monochromatic palette. The panel molding (boiserie) on the upper walls is a nod to classic Parisian apartments, providing texture and sophistication. But instead of traditional wood, the wainscoting below is a slab of white marble, a decidedly luxurious and modern choice. This mix works because the shared color (white) and the clean lines unify the two different textures. The brass accents and minimalist fixtures then add a final layer of contemporary polish.
|
📋 Copy HEX 🔗 Share |
Marble is the peak of luxury, but it’s a commitment. As a porous natural stone, it can be susceptible to staining from colored soaps, makeup, or hair dye and can be etched by acidic cleaners. It needs to be sealed upon installation and then resealed every 6-12 months, depending on usage. For cleaning, you must use a pH-neutral stone cleaner. If you love the look but not the upkeep, consider a high-quality porcelain or quartz slab that mimics marble. You’ll get a nearly identical look with far superior durability and zero required sealing.
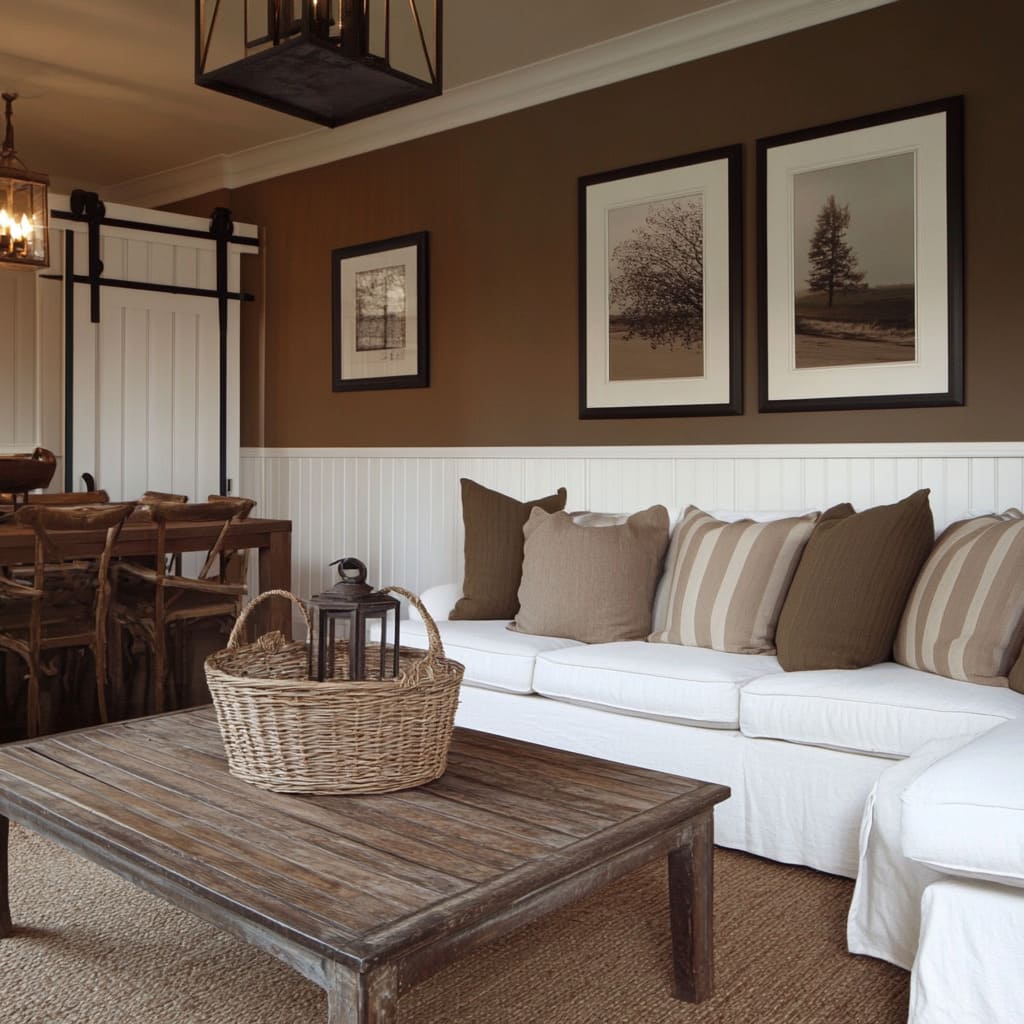
25. Cozy Living Room with Beadboard and Warm Brown Walls
This cozy, rustic look is very achievable on a tight budget. White beadboard paneling is one of the most affordable wainscoting options, costing just a few dollars per square foot. A gallon of rich brown paint is an inexpensive way to make a big impact. The real savings come from the furniture: hunt for a used slipcovered sofa on Facebook Marketplace (you can always buy a new white slipcover from IKEA or SureFit). A distressed coffee table is a perfect DIY project—find a cheap wooden table at a thrift store and go to town with sandpaper and paint. This entire vibe is about being lived-in, not perfect. For another warm combo, see the terracotta bathroom in Idea #14.
|
📋 Copy HEX 🔗 Share |
This room’s cozy formula is all about earthy comfort: 40% crisp white base (wainscoting, sofa) + 40% warm, dark neutral (the brown walls) + 20% natural textures (the distressed wood coffee table, woven basket, and natural fiber rug). The white keeps the dark brown from feeling too heavy, while the variety of textures adds depth and a relaxed, rustic feel. The balance between the clean white and the earthy brown and textures is what makes it feel both fresh and deeply comfortable.
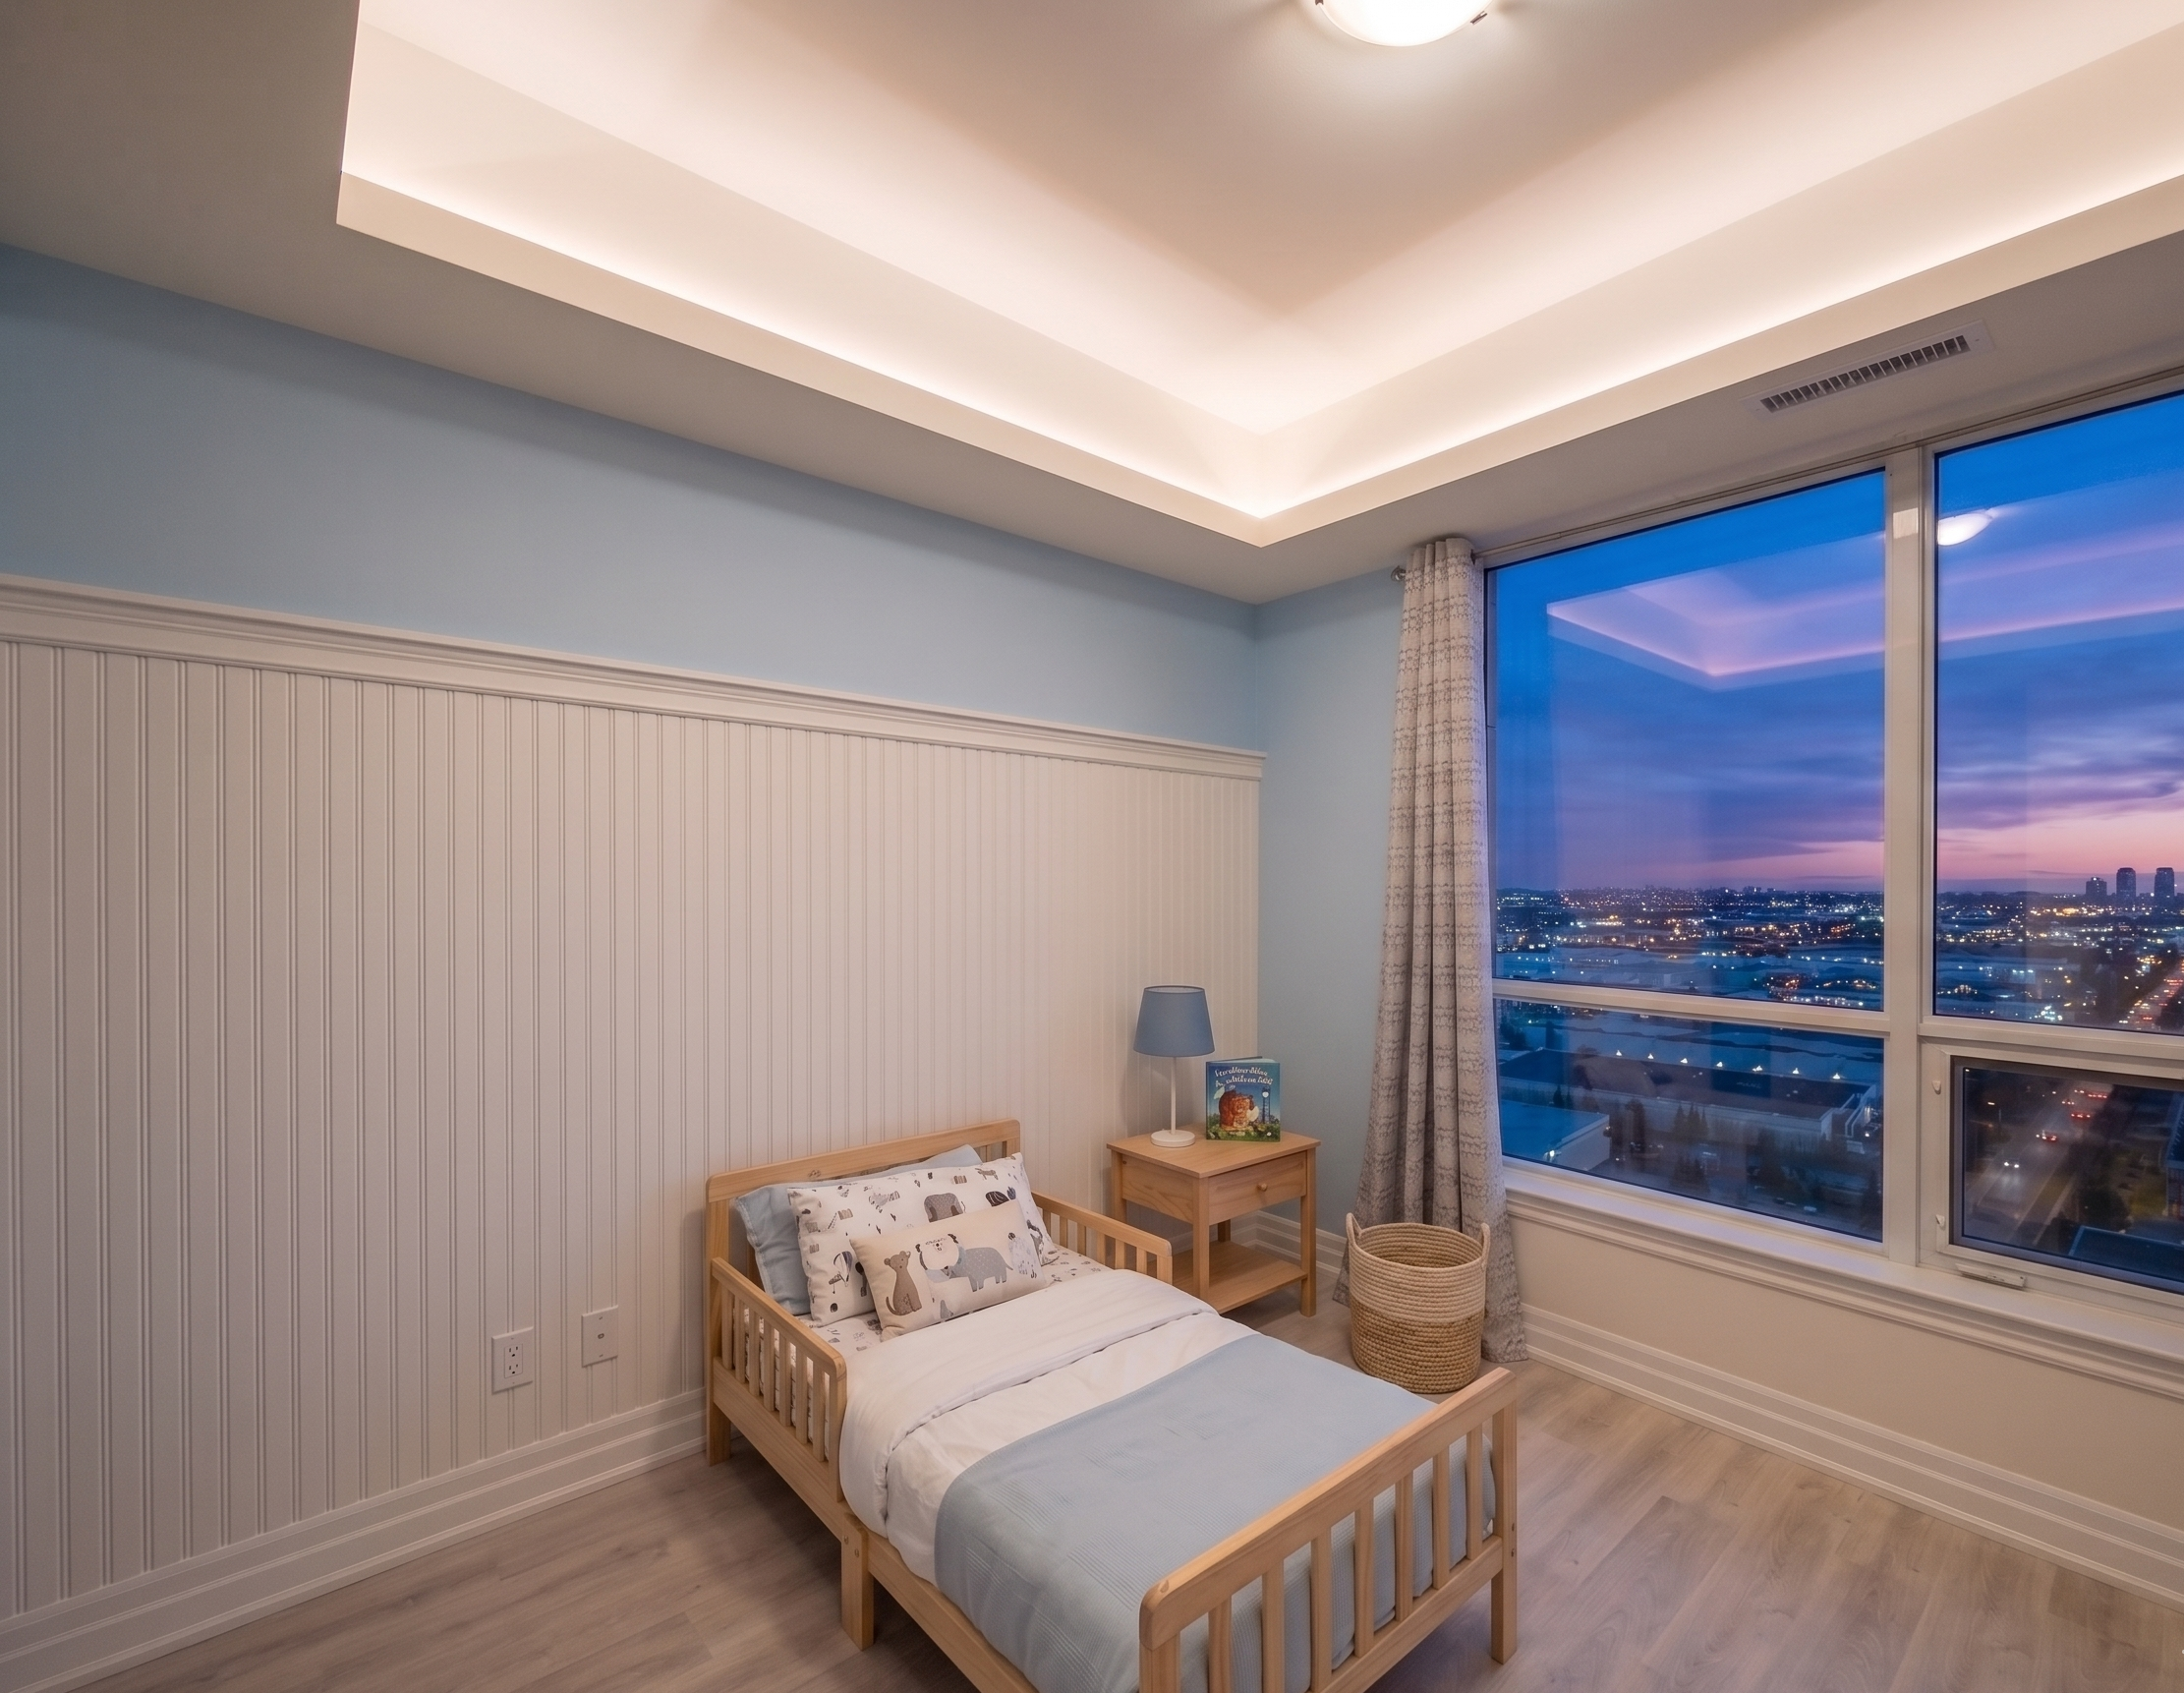
26. Serene Child’s Room with Beadboard and Light Blue Walls
Beadboard wainscoting is a fantastic choice for a child’s room because it’s incredibly durable. When painted with a quality semi-gloss paint, it can withstand an impressive amount of abuse from toys, crayons, and sticky fingers. It’s far more resilient than a plain drywall surface and much easier to scrub clean. Installing a wainscoting ‘chair rail’ also provides a natural stopping point for a two-tone paint scheme, making it easy to create a playful yet structured look that can easily evolve as the child grows.
|
📋 Copy HEX 🔗 Share |
This room feels so calm and perfect for a child because it combines classic architectural elements with a soft, simple palette. The white beadboard provides a timeless, sturdy base that feels both protective and clean. The light blue on the upper walls is psychologically known to be calming and serene. Pairing these with natural light wood furniture keeps the feeling soft and organic, avoiding the overstimulation of brightly colored plastic toys and decor. It’s a space designed for rest and gentle play.
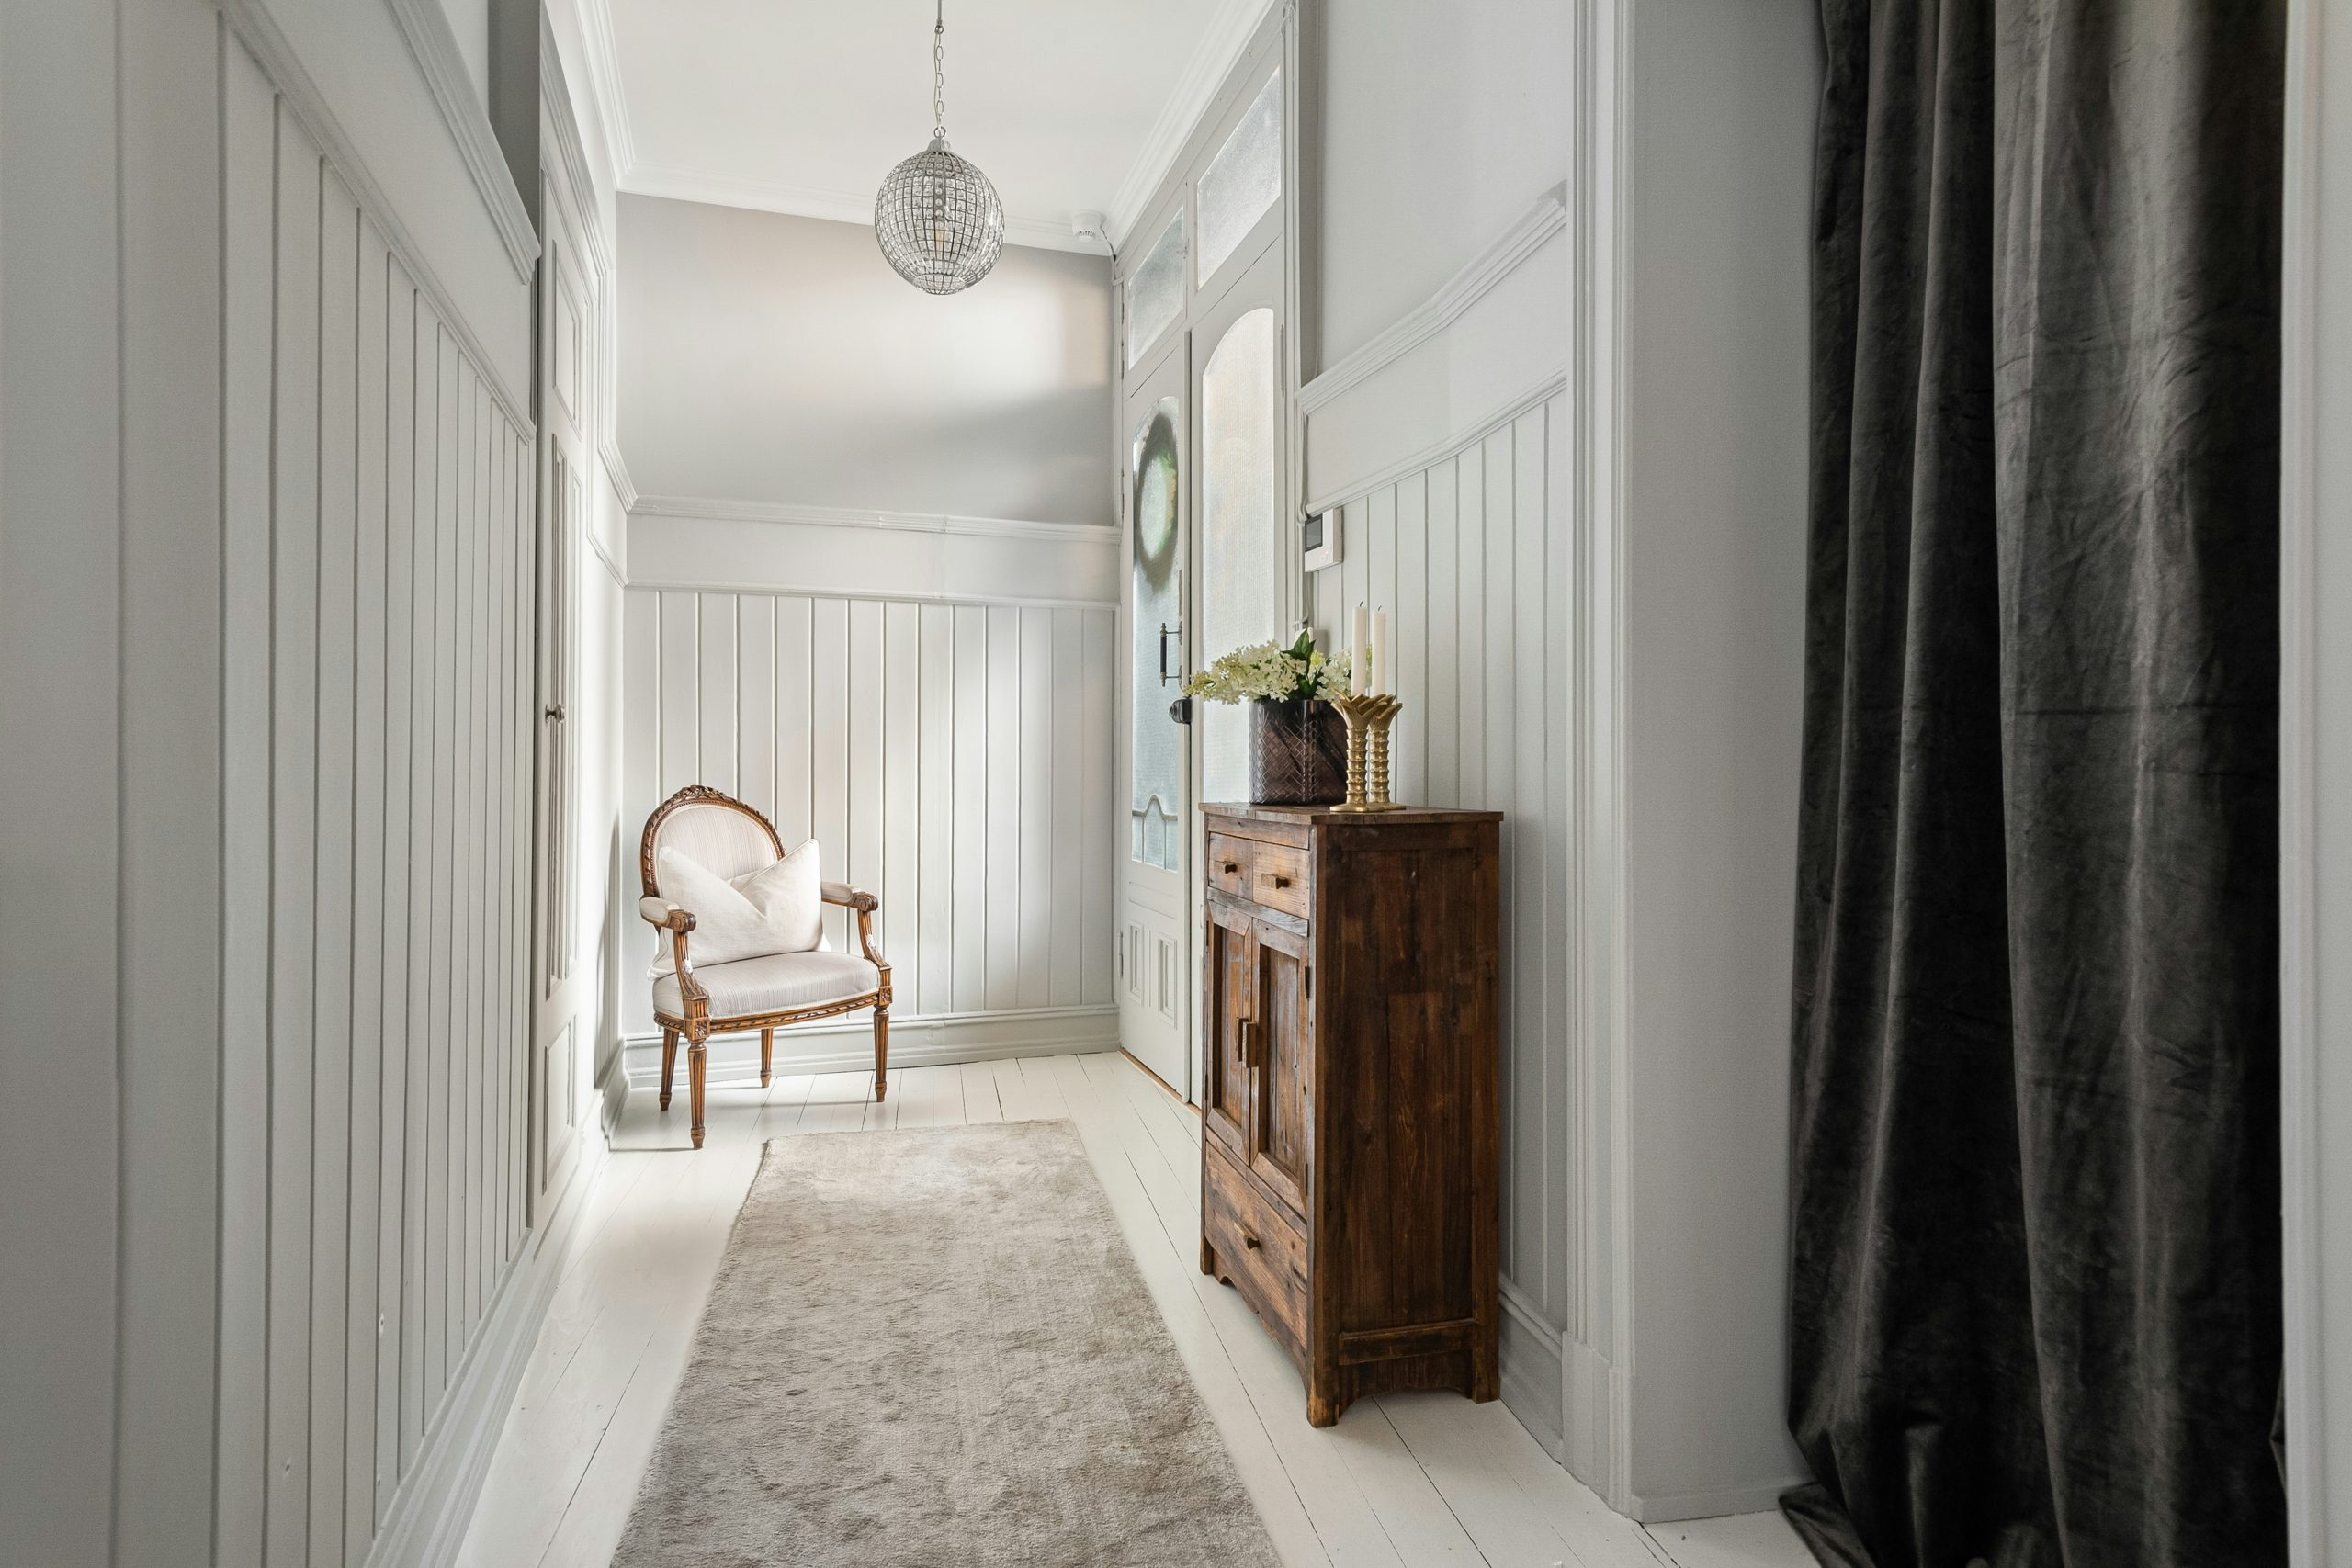
27. Classic Entryway with Light Gray Beadboard and Dark Wood
When painting wainscoting a color other than white, the key to a cohesive look is to use varying shades of that same color. Here, the beadboard is a very light gray. The wall above is a slightly darker shade, maybe two or three steps up on the same paint chip. The trim and floorboards are a crisp white. This tonal approach creates a soft, layered effect that feels much more sophisticated than just picking a random color. It ensures all elements are related, resulting in a calm and harmonious space.
|
📋 Copy HEX 🔗 Share |
The single element that gives this entryway its soul is the dark brown wooden cabinet. In a space dominated by cool, airy tones of gray and white, the cabinet provides a crucial point of warmth, history, and contrast. Its rich color and classic form anchor the design, preventing the light palette from feeling washed out or bland. It adds a sense of permanence and character that makes the entire entryway feel more grounded and thoughtfully curated. Remove it, and you lose the heart of the room.
Your Walls Are Waiting for Their Close-Up
Now that you’re armed with 27 distinct wainscoting ideas, the next step is to choose the one that speaks to your home’s personality. Don’t be afraid to mix and match concepts to create a look that’s uniquely yours. Head over to Pinterest and start a new board for your project—you’ve got this!