You know that feeling when you finally find the one cheap landscaping idea that looks exactly right for your yard? It feels like striking gold. But scrolling through endless photos can be overwhelming. That’s why we did the heavy lifting. We spent serious time digging through budget-friendly options to bring you only what’s worth your attention this year. After filtering through hundreds of possibilities, we narrowed it down to ideas that deliver high style on a low budget, with project costs ranging from under $100 to a few hundred dollars.
Here you’ll find 25 curated ideas covering everything from modern desertscapes to lush cottage gardens and clever edging tricks. For 2026, it’s all about creating personal, functional outdoor spaces without breaking the bank, a shift away from overly manicured and expensive designs. And stay until the end — we break down the most common mistakes that can ruin these looks. 📌 Save this to Pinterest for later — you’ll want to revisit these ideas.
1. Create a Modern Outdoor Living Room with Desert Plants
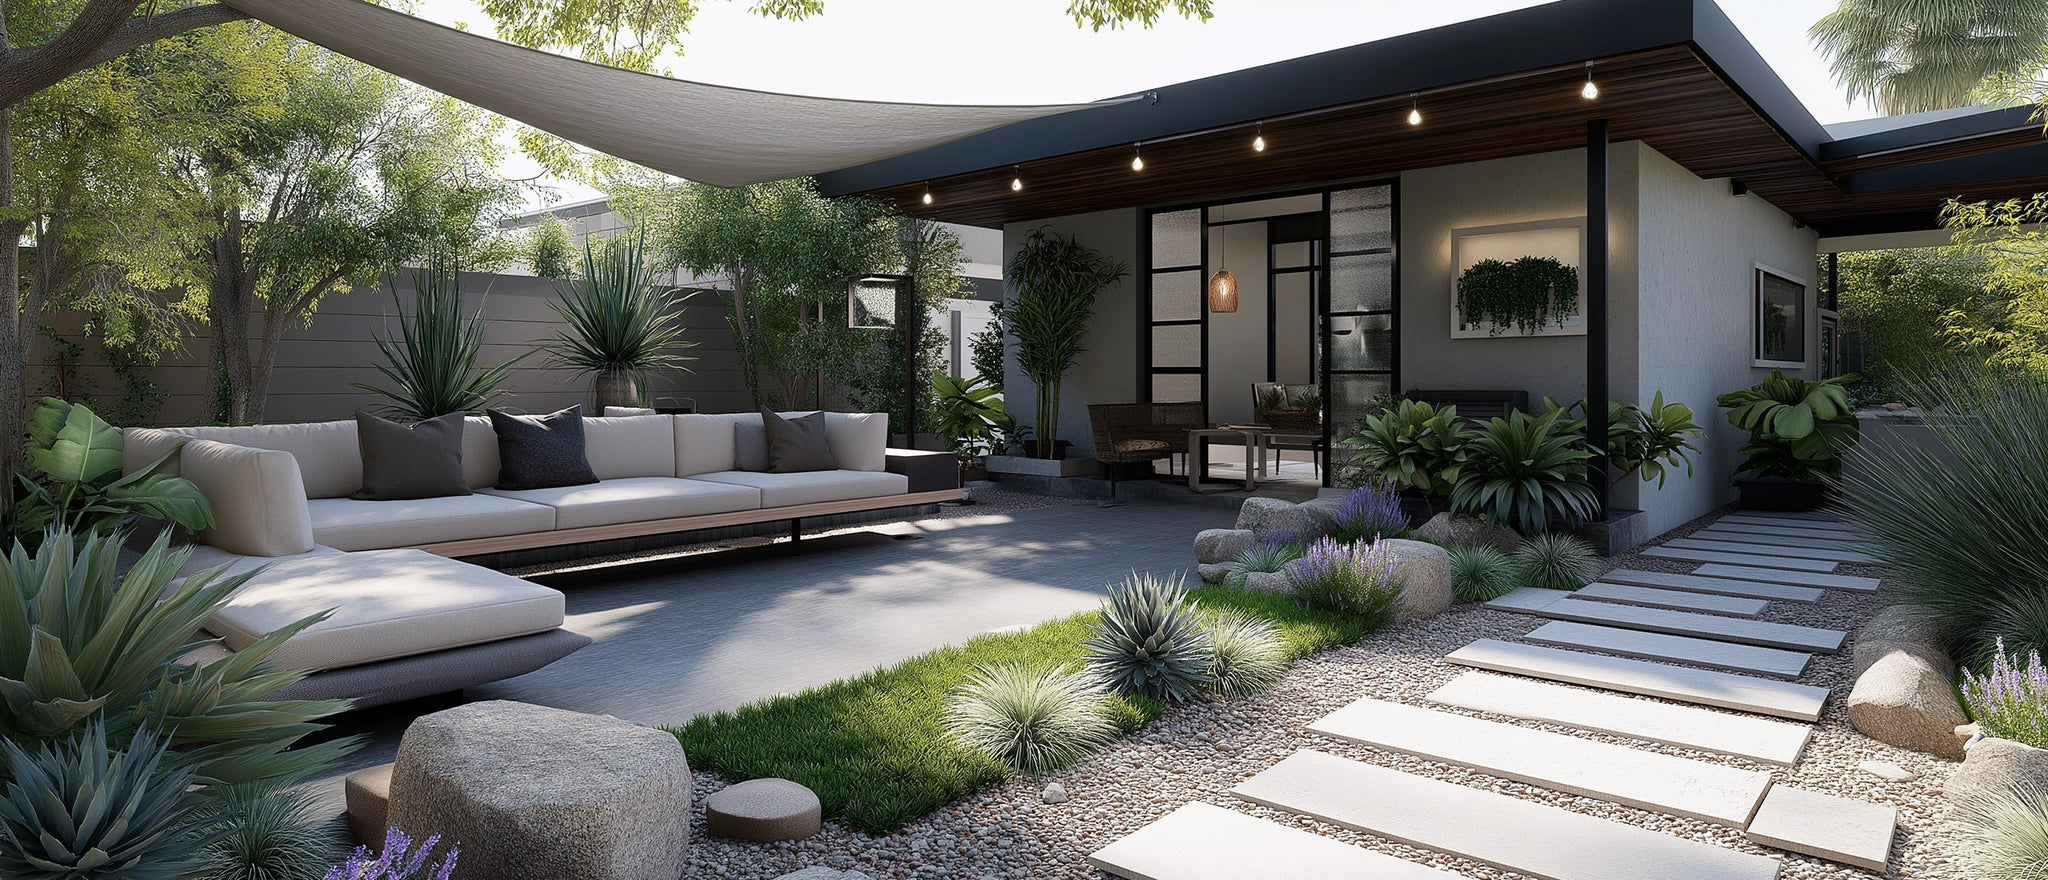
This look is a masterclass in combining comfort with low-water landscaping. The design works because of its successful marriage of hard and soft textures. The smooth, cool concrete of the patio slab provides a clean, modern base that contrasts beautifully with the organic, varied shapes of the succulent plants and the rough texture of the gravel. The large sectional sofa introduces an element of indoor comfort to the outdoor setting, making the space feel like a true extension of the home.
|
📋 Copy HEX 🔗 Share |
Let’s be honest about the sun. A setup like this, with a large, comfy sofa just begging for an afternoon nap, is only truly functional with proper shade. The gray fabric shade sail is absolutely essential, not just a decorative touch. Without it, the dark sofa fabric would become unbearably hot in direct sun, and the whole area would be unusable for most of the day. If you plan a similar open-air concept, factor in the cost and installation of a shade sail or large cantilever umbrella from the start.
2. Frame a Cottage with Lush, Layered Garden Beds
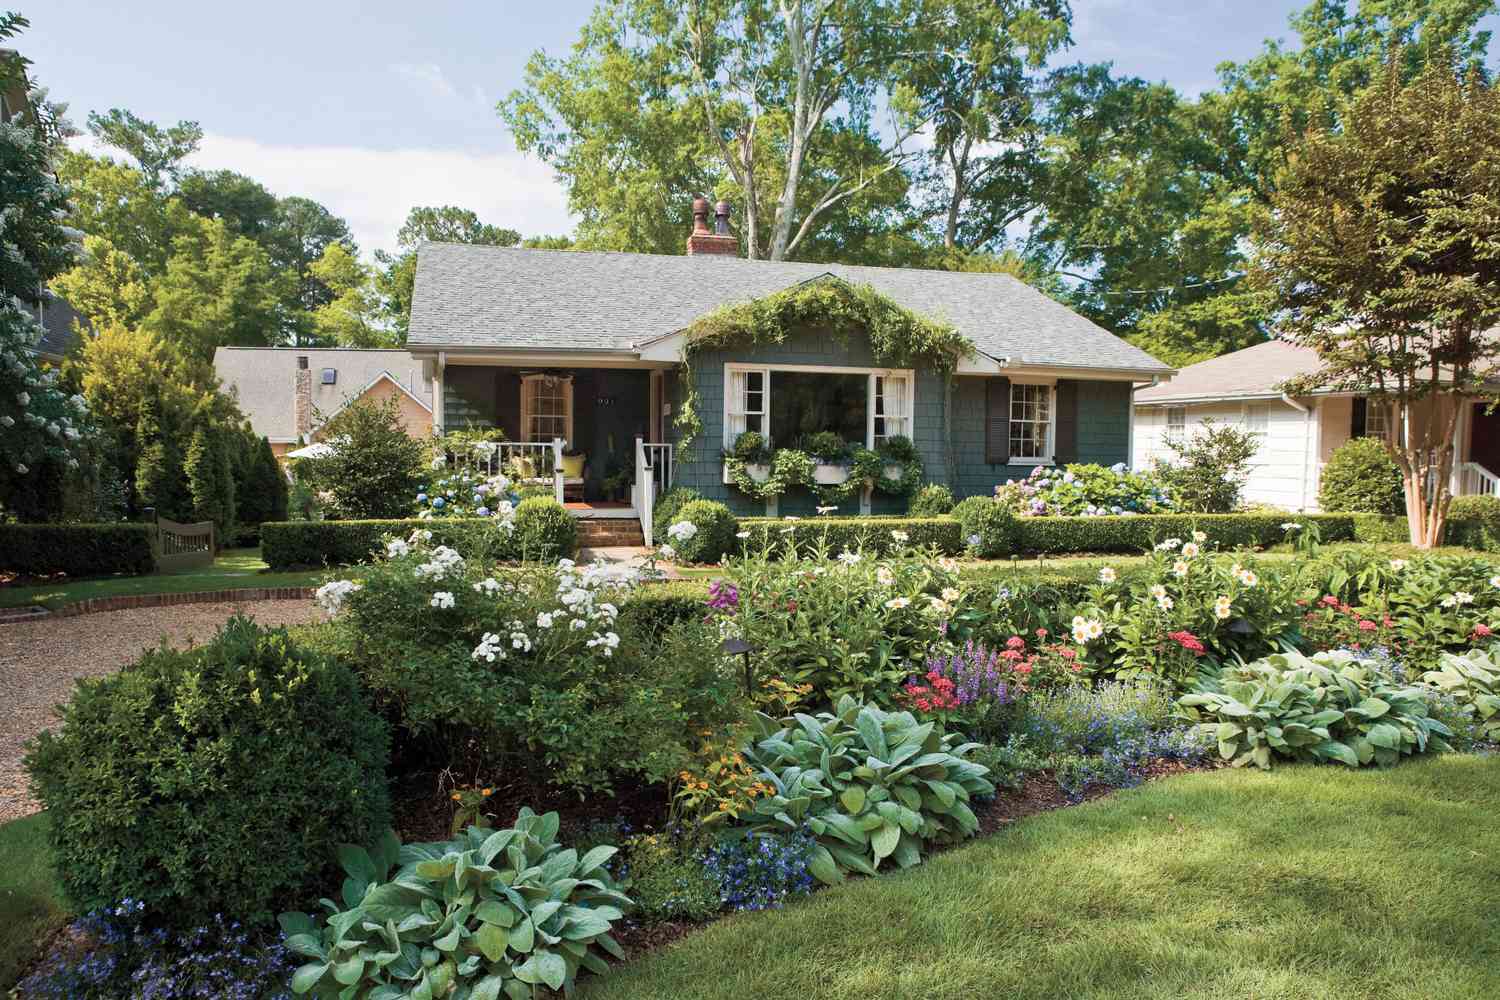
When creating layered beds like this, always plant in groups of 3, 5, or 7. Odd numbers create a more natural and visually appealing arrangement than even numbers, which can look too rigid and formal. Start with your tallest plants or structured shrubs (like the boxwood hedges here) at the back, then work your way forward with medium-sized perennials, and finish with low-growing flowers or groundcover at the very front edge. This creates depth and a full, abundant look from day one.
|
📋 Copy HEX 🔗 Share |
The visual success of this cottage garden is a simple formula: 60% structured greenery (the dark siding and boxwood hedges) + 30% soft, mixed perennials (the flowering shrubs and smaller plants) + 10% utility texture (the gray gravel driveway). You can easily adapt this. Swap the dark green siding for navy or charcoal. Change the boxwoods for yews. The core principle remains: a strong, dark backdrop makes the softer, colorful elements in the foreground pop, and a textural path adds functionality without distracting from the beauty.
3. Integrate Solar and Lighting into a Modern Pergola
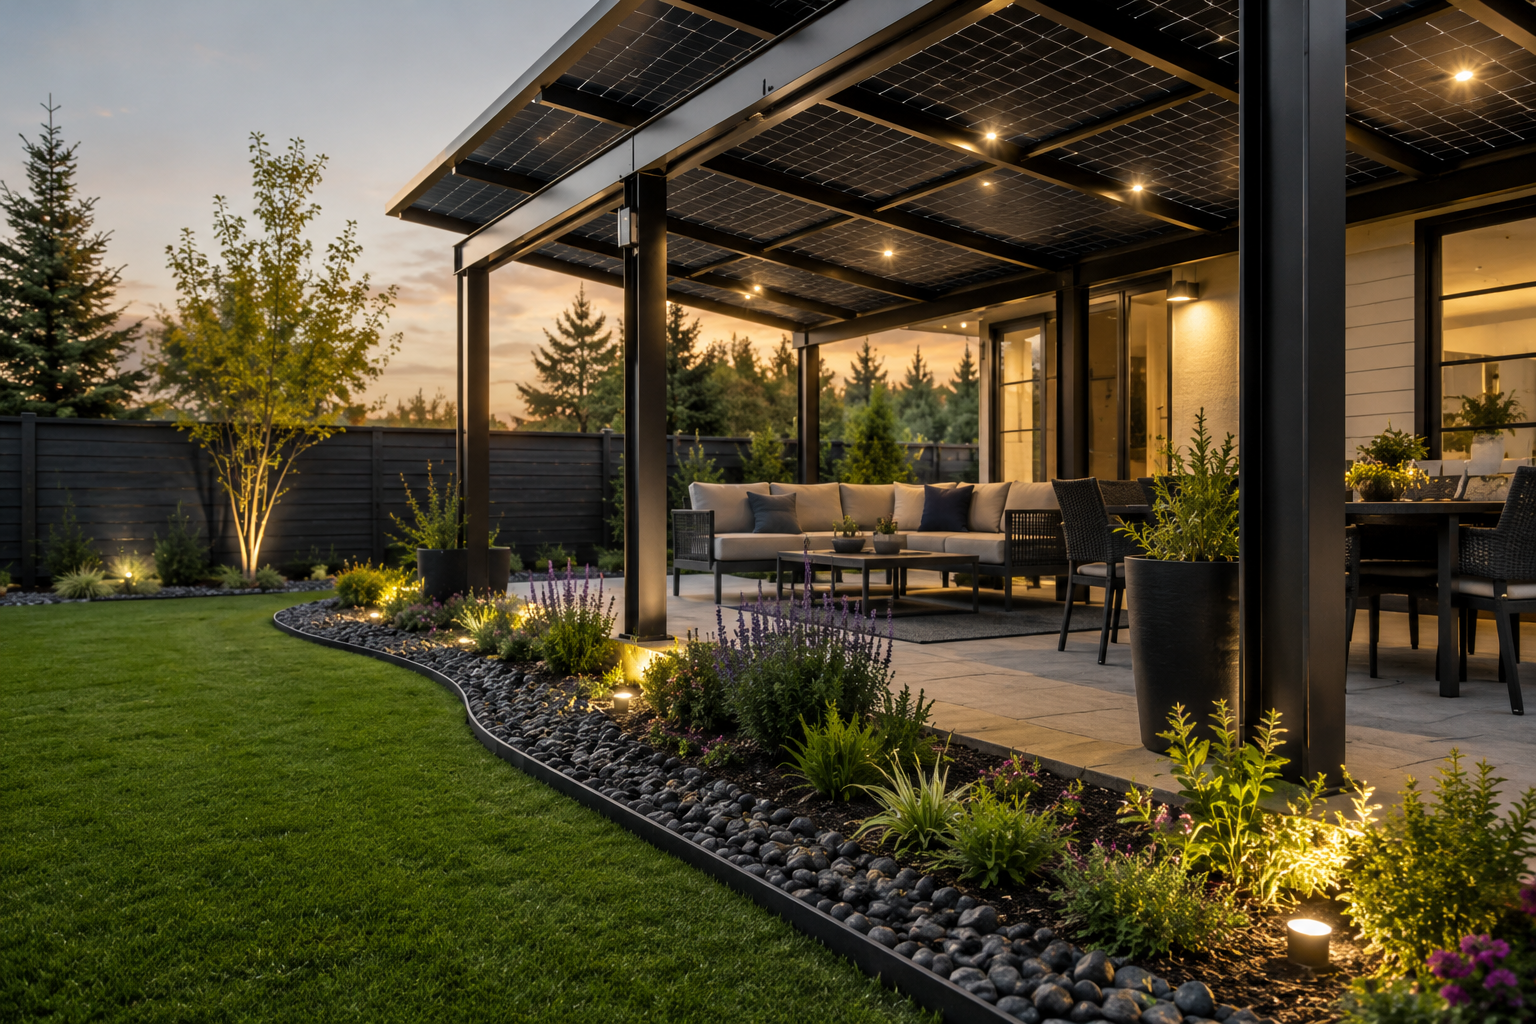
Outdoor spaces that do more than just look good are a huge focus right now. Homeowners want their yards to be functional, sustainable, and beautiful—and this pergola checks all three boxes. The integration of solar panels is a nod to rising energy costs and a desire for eco-friendly solutions. It transforms a simple shade structure into a power-generating asset for the home. Paired with the embedded lighting, it extends the use of the patio well into the evening, which is exactly what people are looking for post-2020: making every square inch of their property usable.
|
📋 Copy HEX 🔗 Share |
While solar panel pergolas are fantastic, they are not a simple weekend DIY project. This involves structural planning to support the weight of the panels, and more importantly, electrical work to connect the panels to your home’s grid or a battery storage system. You’ll need to hire a licensed electrician and likely a specialized contractor. Also, consider your climate. If you live in an area with heavy snowfall, you need to ensure the structure is engineered to handle the additional weight and that you have a plan for clearing snow off the panels.
4. Define Garden Beds with Curving, Stacked Stone Edging
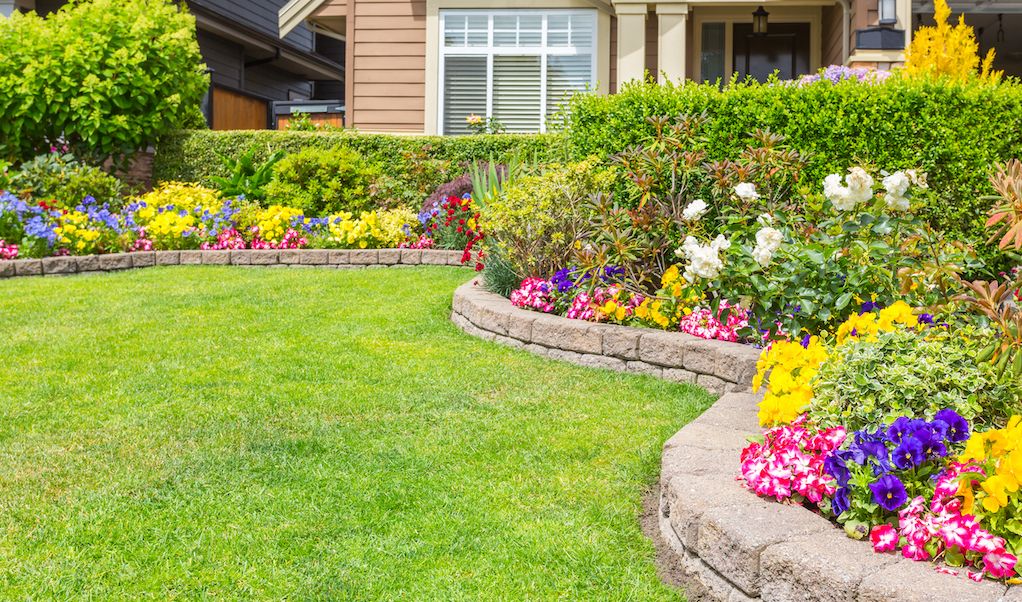
- Stacked Stone Blocks: $250 – $600 (depending on stone type and length)
- Topsoil & Compost: $100 – $250
- Perennial Plants & Shrubs: $300 – $700
- Mulch: $50 – $120
- Lawn seed/sod for patch-up: $40 – $80
- ESTIMATED TOTAL: $740 – $1,750
- Budget Alternative: Recreate this look for around $300-$500 by using smaller, more affordable concrete retaining wall blocks from a home improvement store and starting with smaller, less mature plants that will fill in over a couple of seasons.
|
📋 Copy HEX 🔗 Share |
The single most important element here is the curve. If these beds were straight, the entire yard would feel more rigid and formal. The gentle, sweeping curves of the stacked stone edging are what give this landscape its natural, organic flow. They guide the eye through the space and make the lawn area feel intentionally shaped rather than just being leftover space. Without the curves, you’d lose the entire feeling of a nurtured, evolving garden and end up with something that feels much more like a standard suburban planting strip.
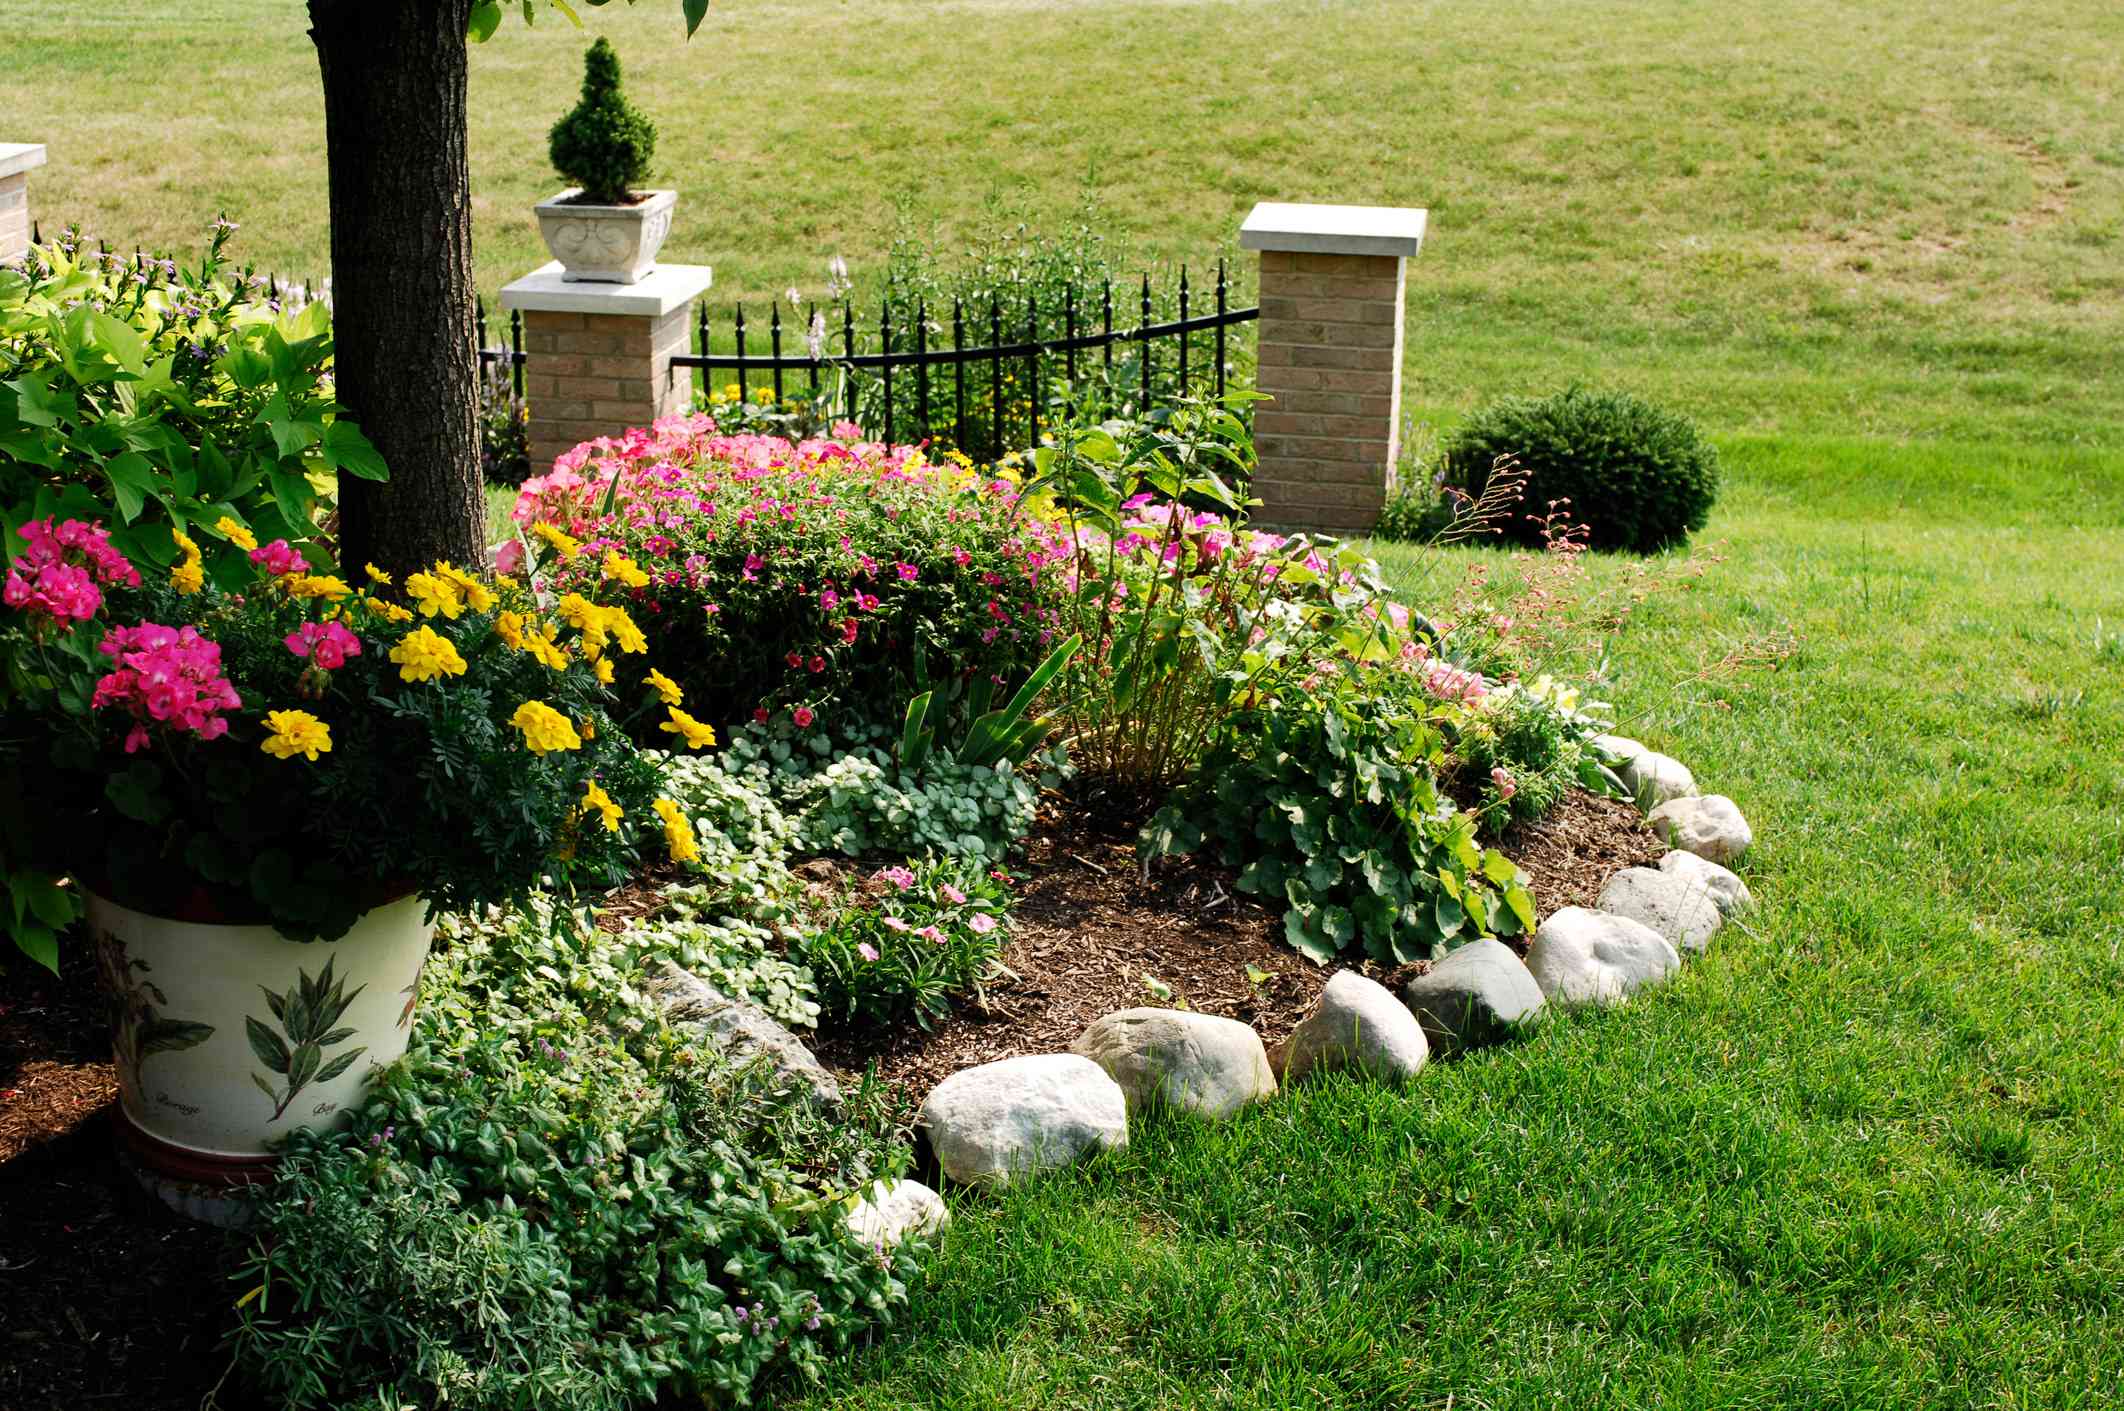
5. Mix Flowers and Foliage Along a Light Rock Border
This flowerbed feels so dynamic because it balances multiple types of contrast. First, you have color contrast between the bright pink and yellow flowers against the deep green foliage. Second, there’s texture contrast: the smooth, rounded shapes of the light-colored edging rocks play off the jagged, organic textures of the mulch and the delicate flower petals. Finally, there’s a scale contrast, with low-growing ground cover, medium-sized flowering plants, and the large, solid mass of the tree trunk all coexisting. This variation keeps the eye moving and makes the composition feel rich and full.
|
📋 Copy HEX 🔗 Share |
You don’t need expensive materials from a landscape supply store to get this look. The key is the light-colored rock edging, which you can replicate for cheap. Check Facebook Marketplace or Craigslist for people giving away free rocks from a previous project—it happens all the time! Alternatively, a few bags of large, light-colored river stones from a big box store like Home Depot or Lowe’s will only set you back $30-$50. The decorative planter can be a simple terracotta pot from Walmart, which you can easily age with some yogurt and moss for a more rustic feel. This is a much more affordable approach than buying everything new from a garden center. Compare this to the more formal stone in Idea #3; this is the charming, budget-friendly cousin.
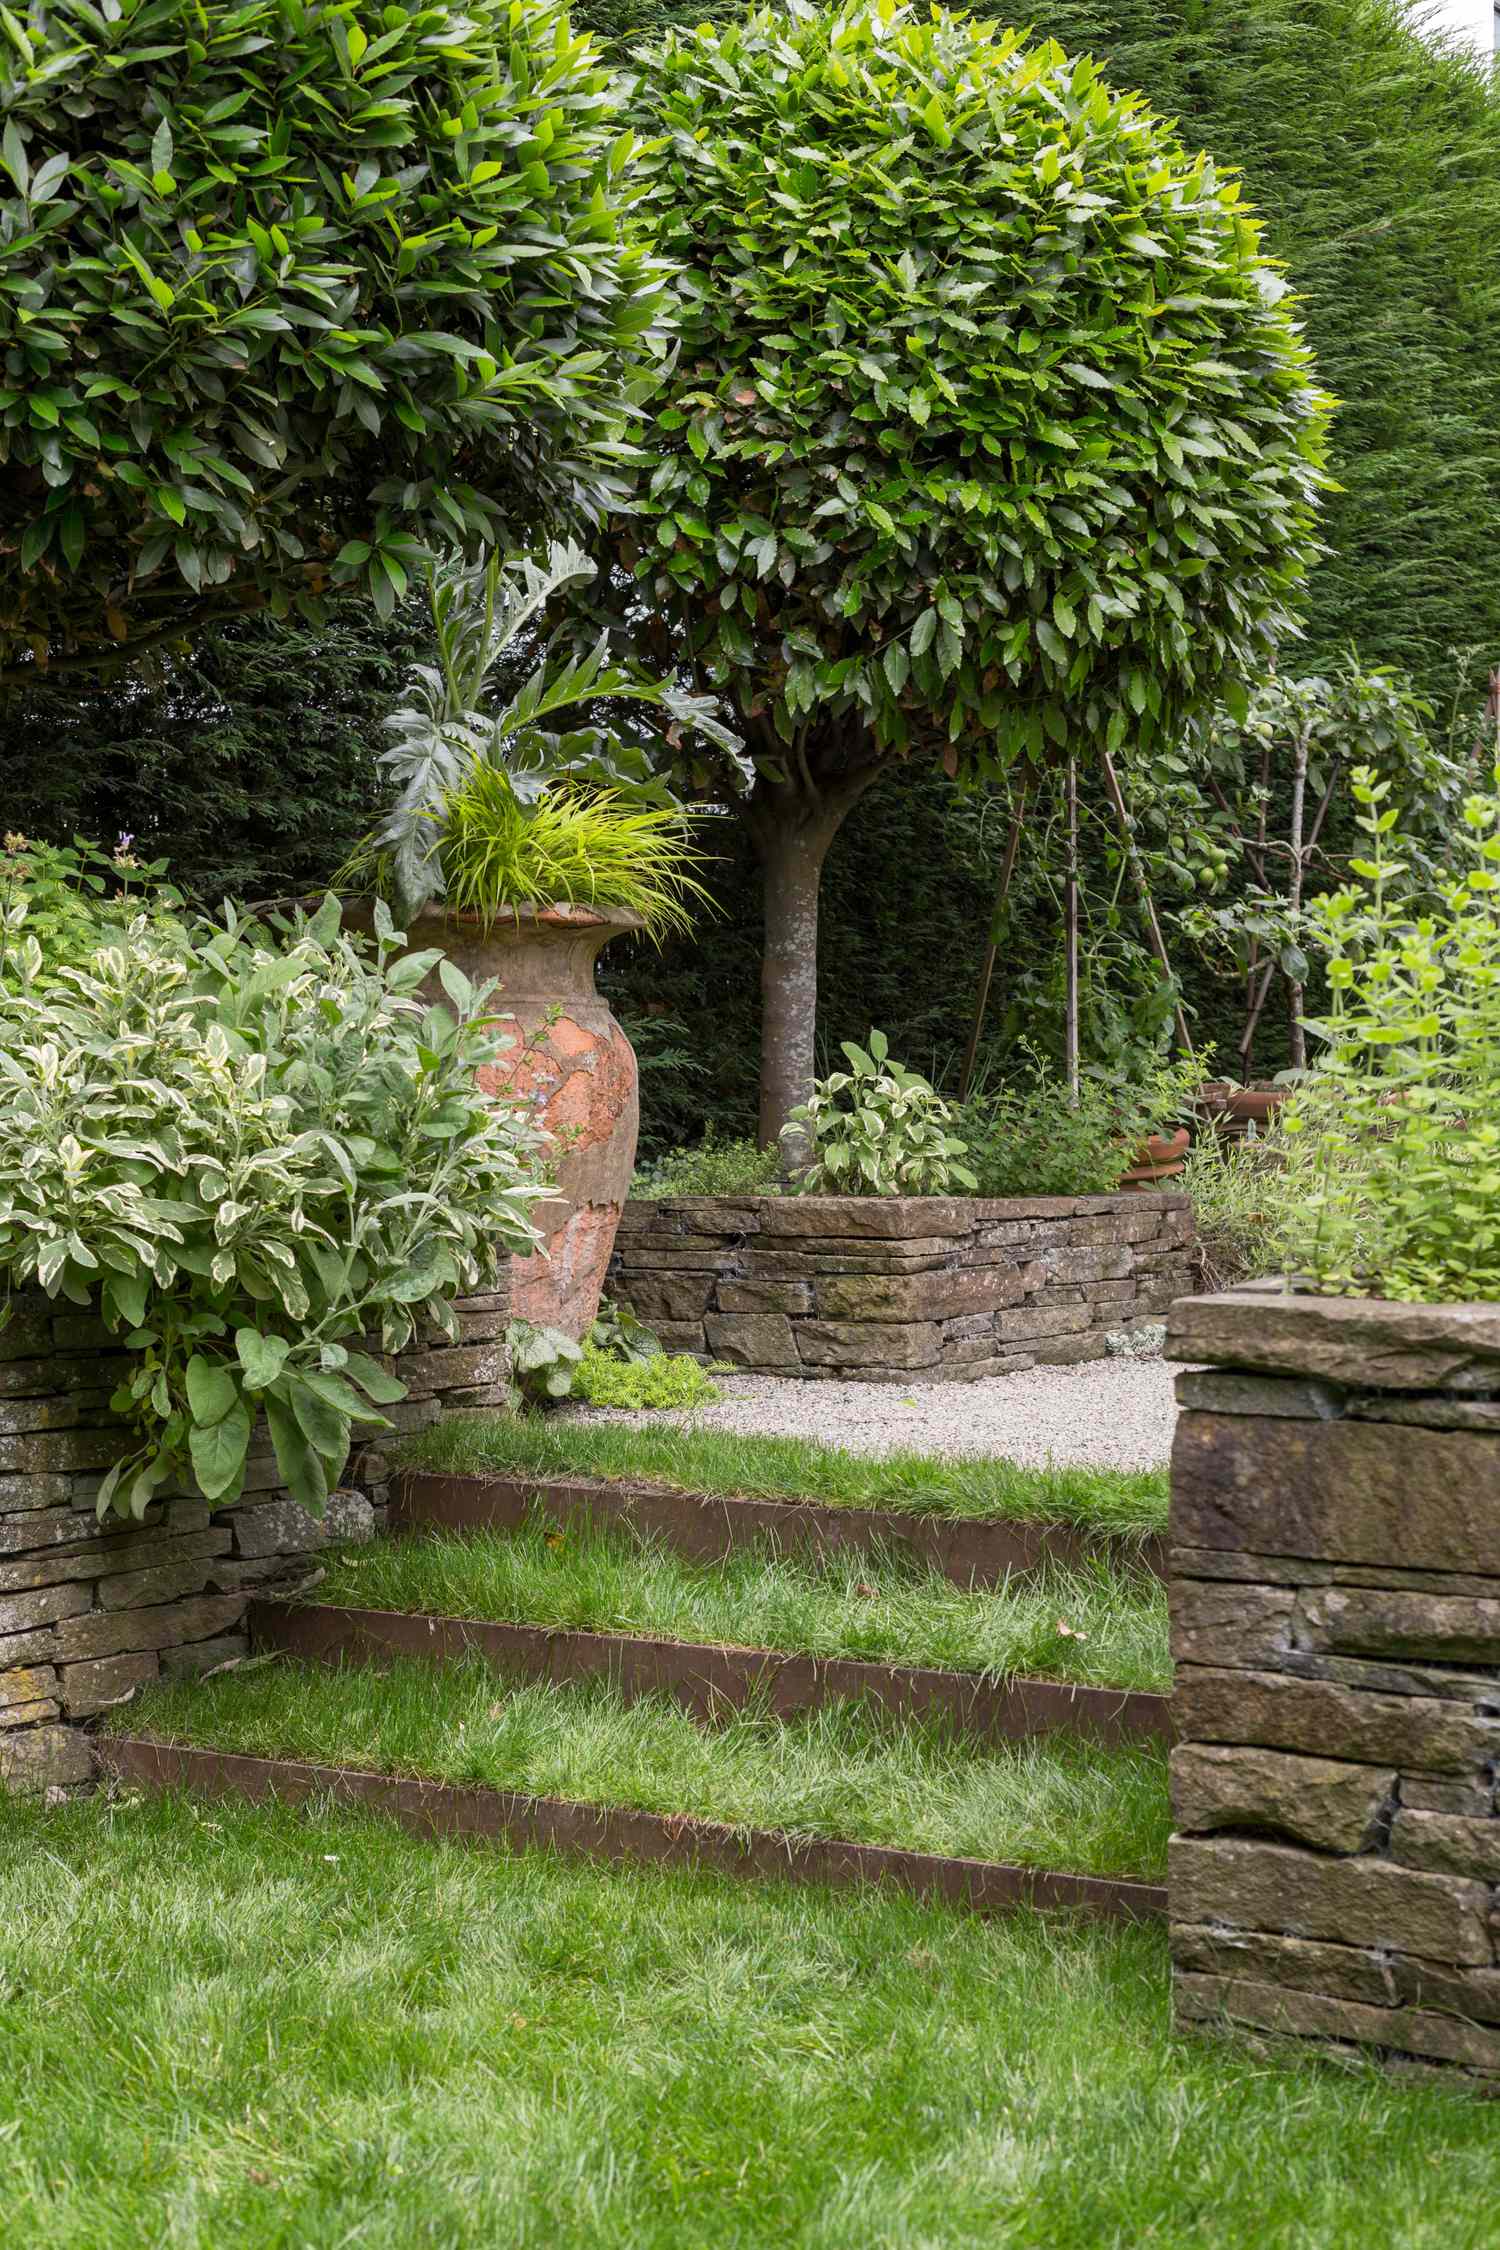
6. Build a Layered Garden with Stone Walls and a Gravel Path
This type of multi-level design is a fantastic solution for a yard with a natural slope. It turns a challenging incline into a stunning feature. To make this work, you need a grade change of at least 24-36 inches over a 10-foot run. The stone retaining walls should be no more than 18-24 inches high each to avoid needing extensive engineering and permits (check your local codes). The grass steps require a less steep section of the slope, while the gravel path works best on a gentle, meandering grade. It’s ideal for a medium-sized yard of at least 1,500 square feet to allow for the sweeping path and generously sized beds.
|
📋 Copy HEX 🔗 Share |
How to Create Grass Steps (approx. 3-4 hours, cost ~$100-300):
- Measure the rise and run of your slope to determine the number of steps and their height/depth. Aim for a comfortable 6-inch rise and 12-inch depth.
- Excavate the slope to create rough steps.
- Install the risers. Here they’ve used rust-colored metal edging, which is a great modern choice. You could also use wood beams. Secure them with stakes.
- Backfill each step with topsoil, tamping it down firmly until it’s level with the top of the riser.
- Lay down sod or plant grass seed on the soil of each step. If using seed, cover with a thin layer of straw.
- Water thoroughly and keep off the steps until the grass is well-established.
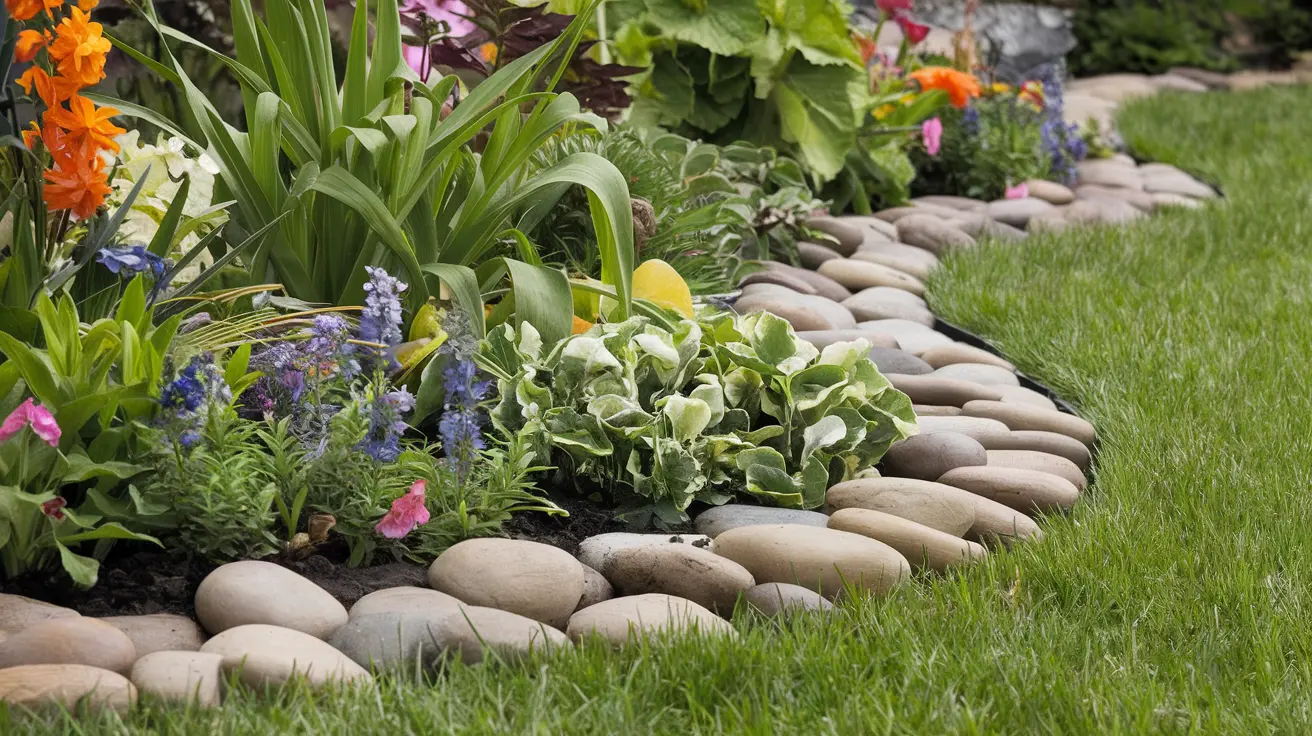
7. Use River Pebbles to Create a Clean Edge for a Flower Bed
A river pebble border is a fantastic, inexpensive edging solution, but the secret to making it look professional and not messy is to create a trench first. Before you lay the pebbles, use a flat-head spade to dig a shallow trench about 4 inches wide and 3-4 inches deep along the edge of your lawn. This channel will contain the pebbles and prevent them from migrating into your grass or your flower bed. It also keeps your lawnmower wheel from accidentally flinging rocks everywhere. A little prep work makes all the difference.
|
📋 Copy HEX 🔗 Share |
This vibrant look follows a simple ratio: 70% green base (the lush lawn and plant foliage) + 20% colorful accents (the orange, purple, and pink flowers) + 10% neutral separation (the light gray river pebbles). The green provides a restful canvas that makes the bright colors of the flowers appear even more intense. The pebbles act as a clean, visual break. You could easily swap the color palette—imagine deep blues and whites for the flowers, or dark gray pebbles for the border—and the formula would still work perfectly because the proportions are correct.
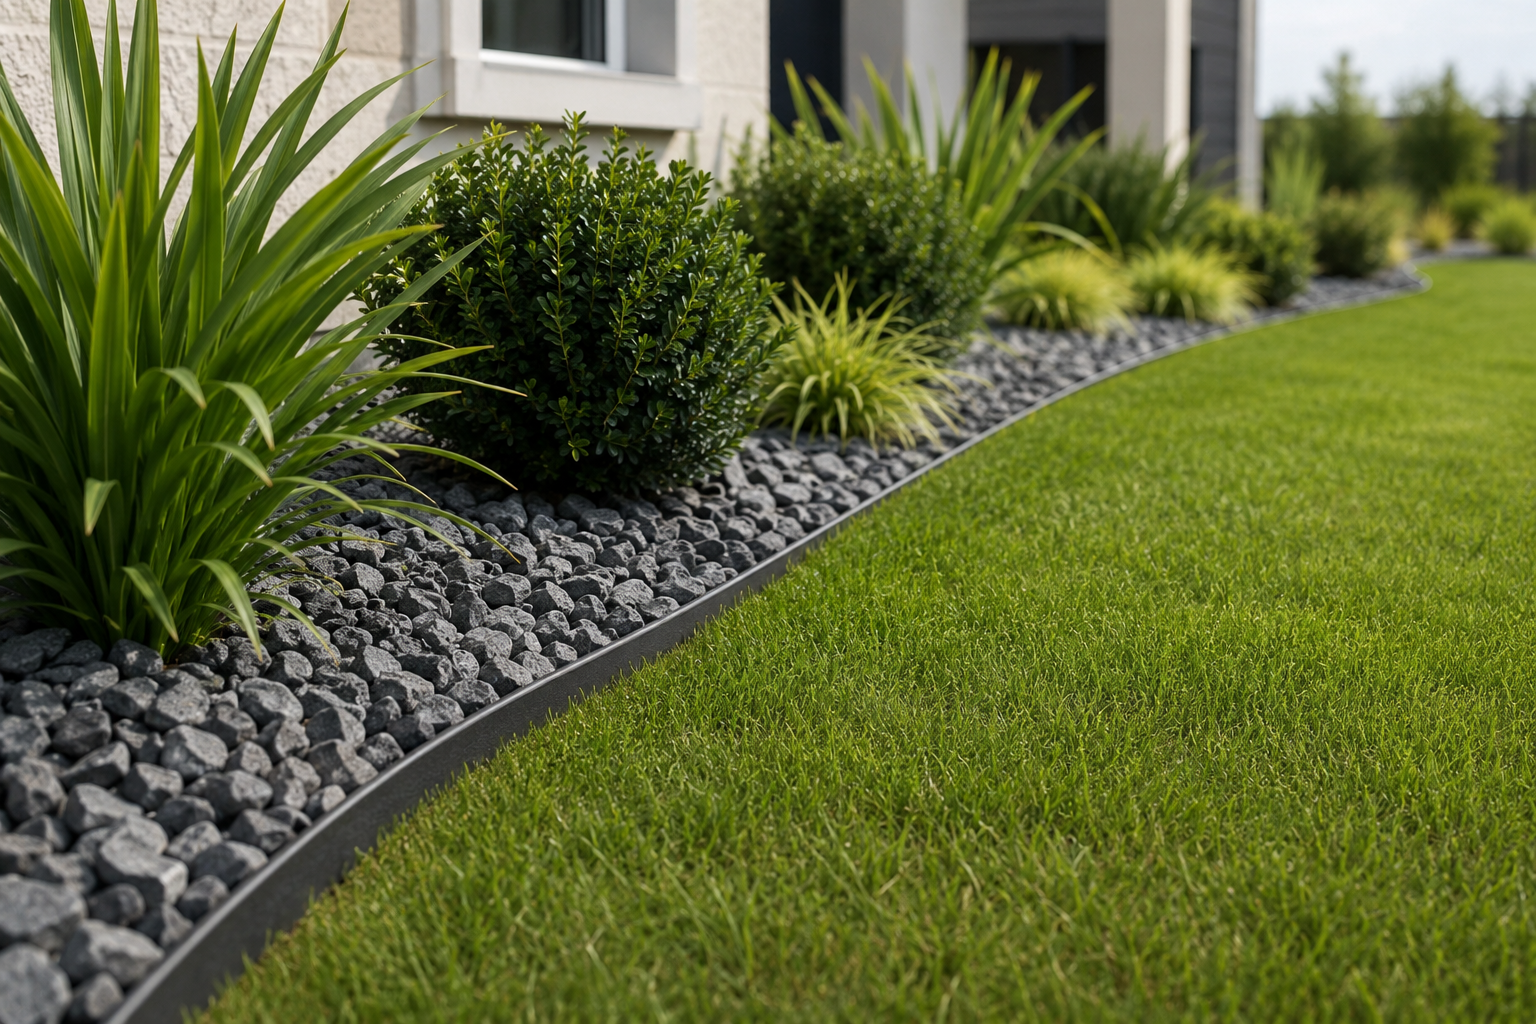
8. Design a Modern, Minimal Garden Border with Dark Gravel
The dark grey crushed gravel is the hero of this design. Take it away, and you have a very ordinary garden bed with a plastic edge. The gravel is what makes it feel modern and intentionally designed. It provides a sharp, textural contrast to the soft, green lawn and the varied foliage of the plants. The color choice is also key; dark gravel recedes visually, which makes the green of the plants look more vibrant and lush. Using wood mulch here would create a much more traditional, less impactful look.
|
📋 Copy HEX 🔗 Share |
Gravel mulch is stylish and low-maintenance, but not zero-maintenance. Weeds will eventually try to poke through, especially if you don’t lay down a high-quality landscape fabric underneath before spreading the gravel. Over time, leaves and other organic debris will break down on top of the gravel, creating a shallow layer of soil where weed seeds can germinate. Plan on spending an hour every month or two during the growing season to hand-pull any intruders. A leaf blower on a low setting is also your best friend for keeping the gravel surface clean and free of debris.
9. Plant a Manicured Bed with Evergreen Shrubs and Colored Gravel
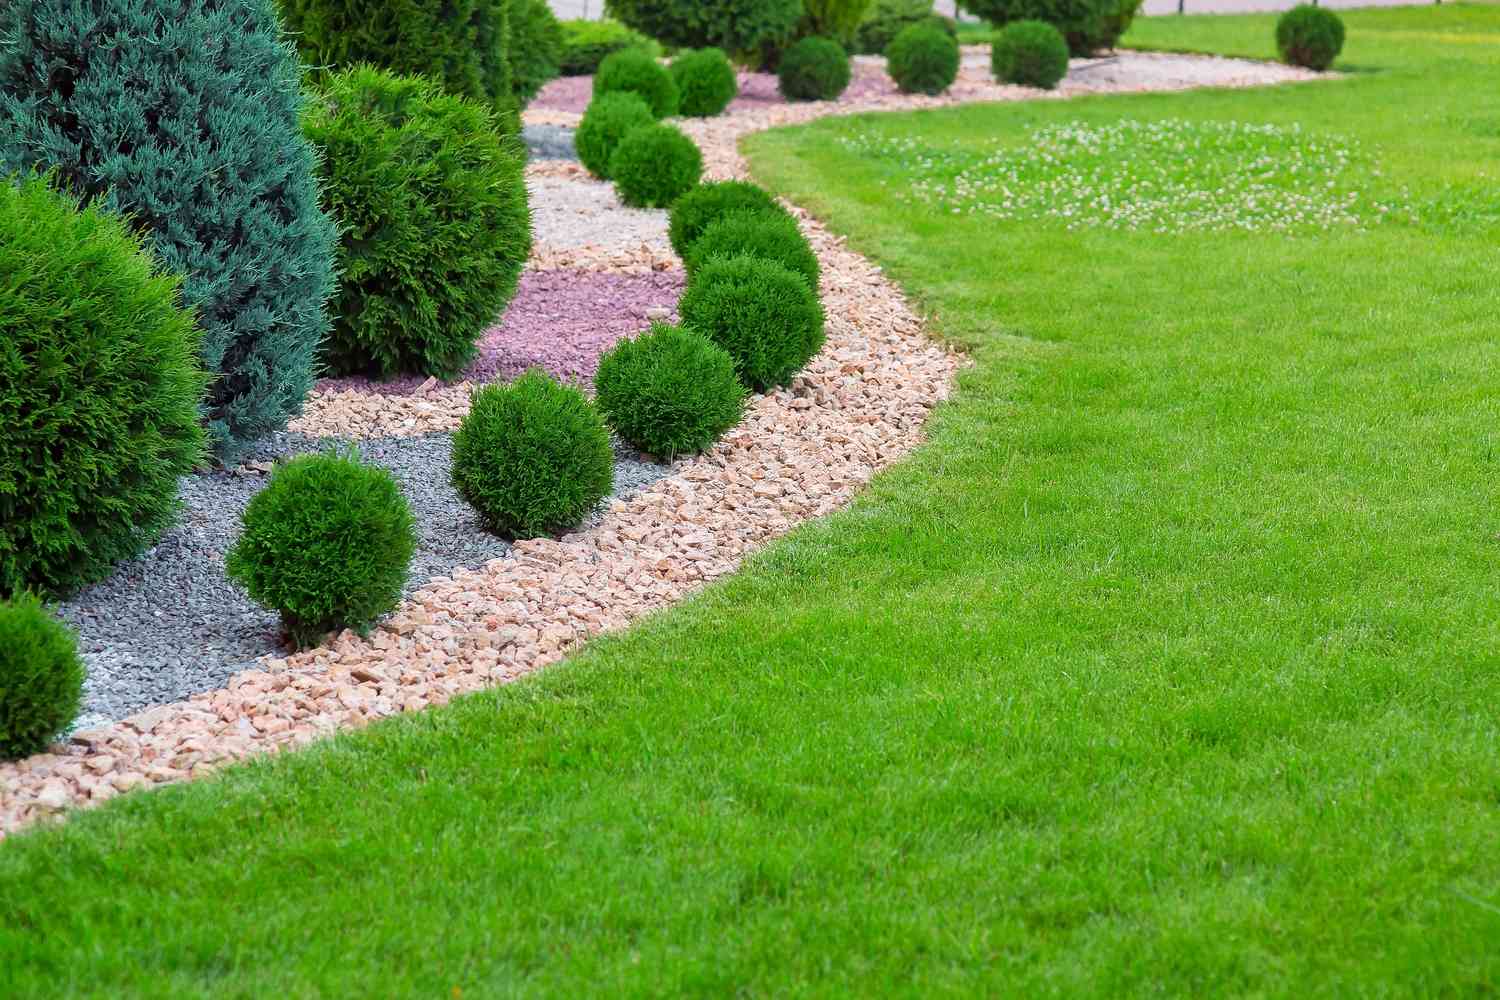
The beauty of this design lies in its sophisticated use of repetition and variation. The repetition of the trimmed, rounded shrub shapes creates a sense of rhythm and order. However, the designer avoids monotony by varying the color (vibrant green vs. bluish-green) and form (mixing in taller, conical shrubs). The same principle is applied to the gravel ground cover – it’s all gravel, but the colors are striped and varied. This creates a look that is both immaculately neat and visually interesting.
|
📋 Copy HEX 🔗 Share |
10. Line a Path with Whimsical Concrete Rabbit Planters
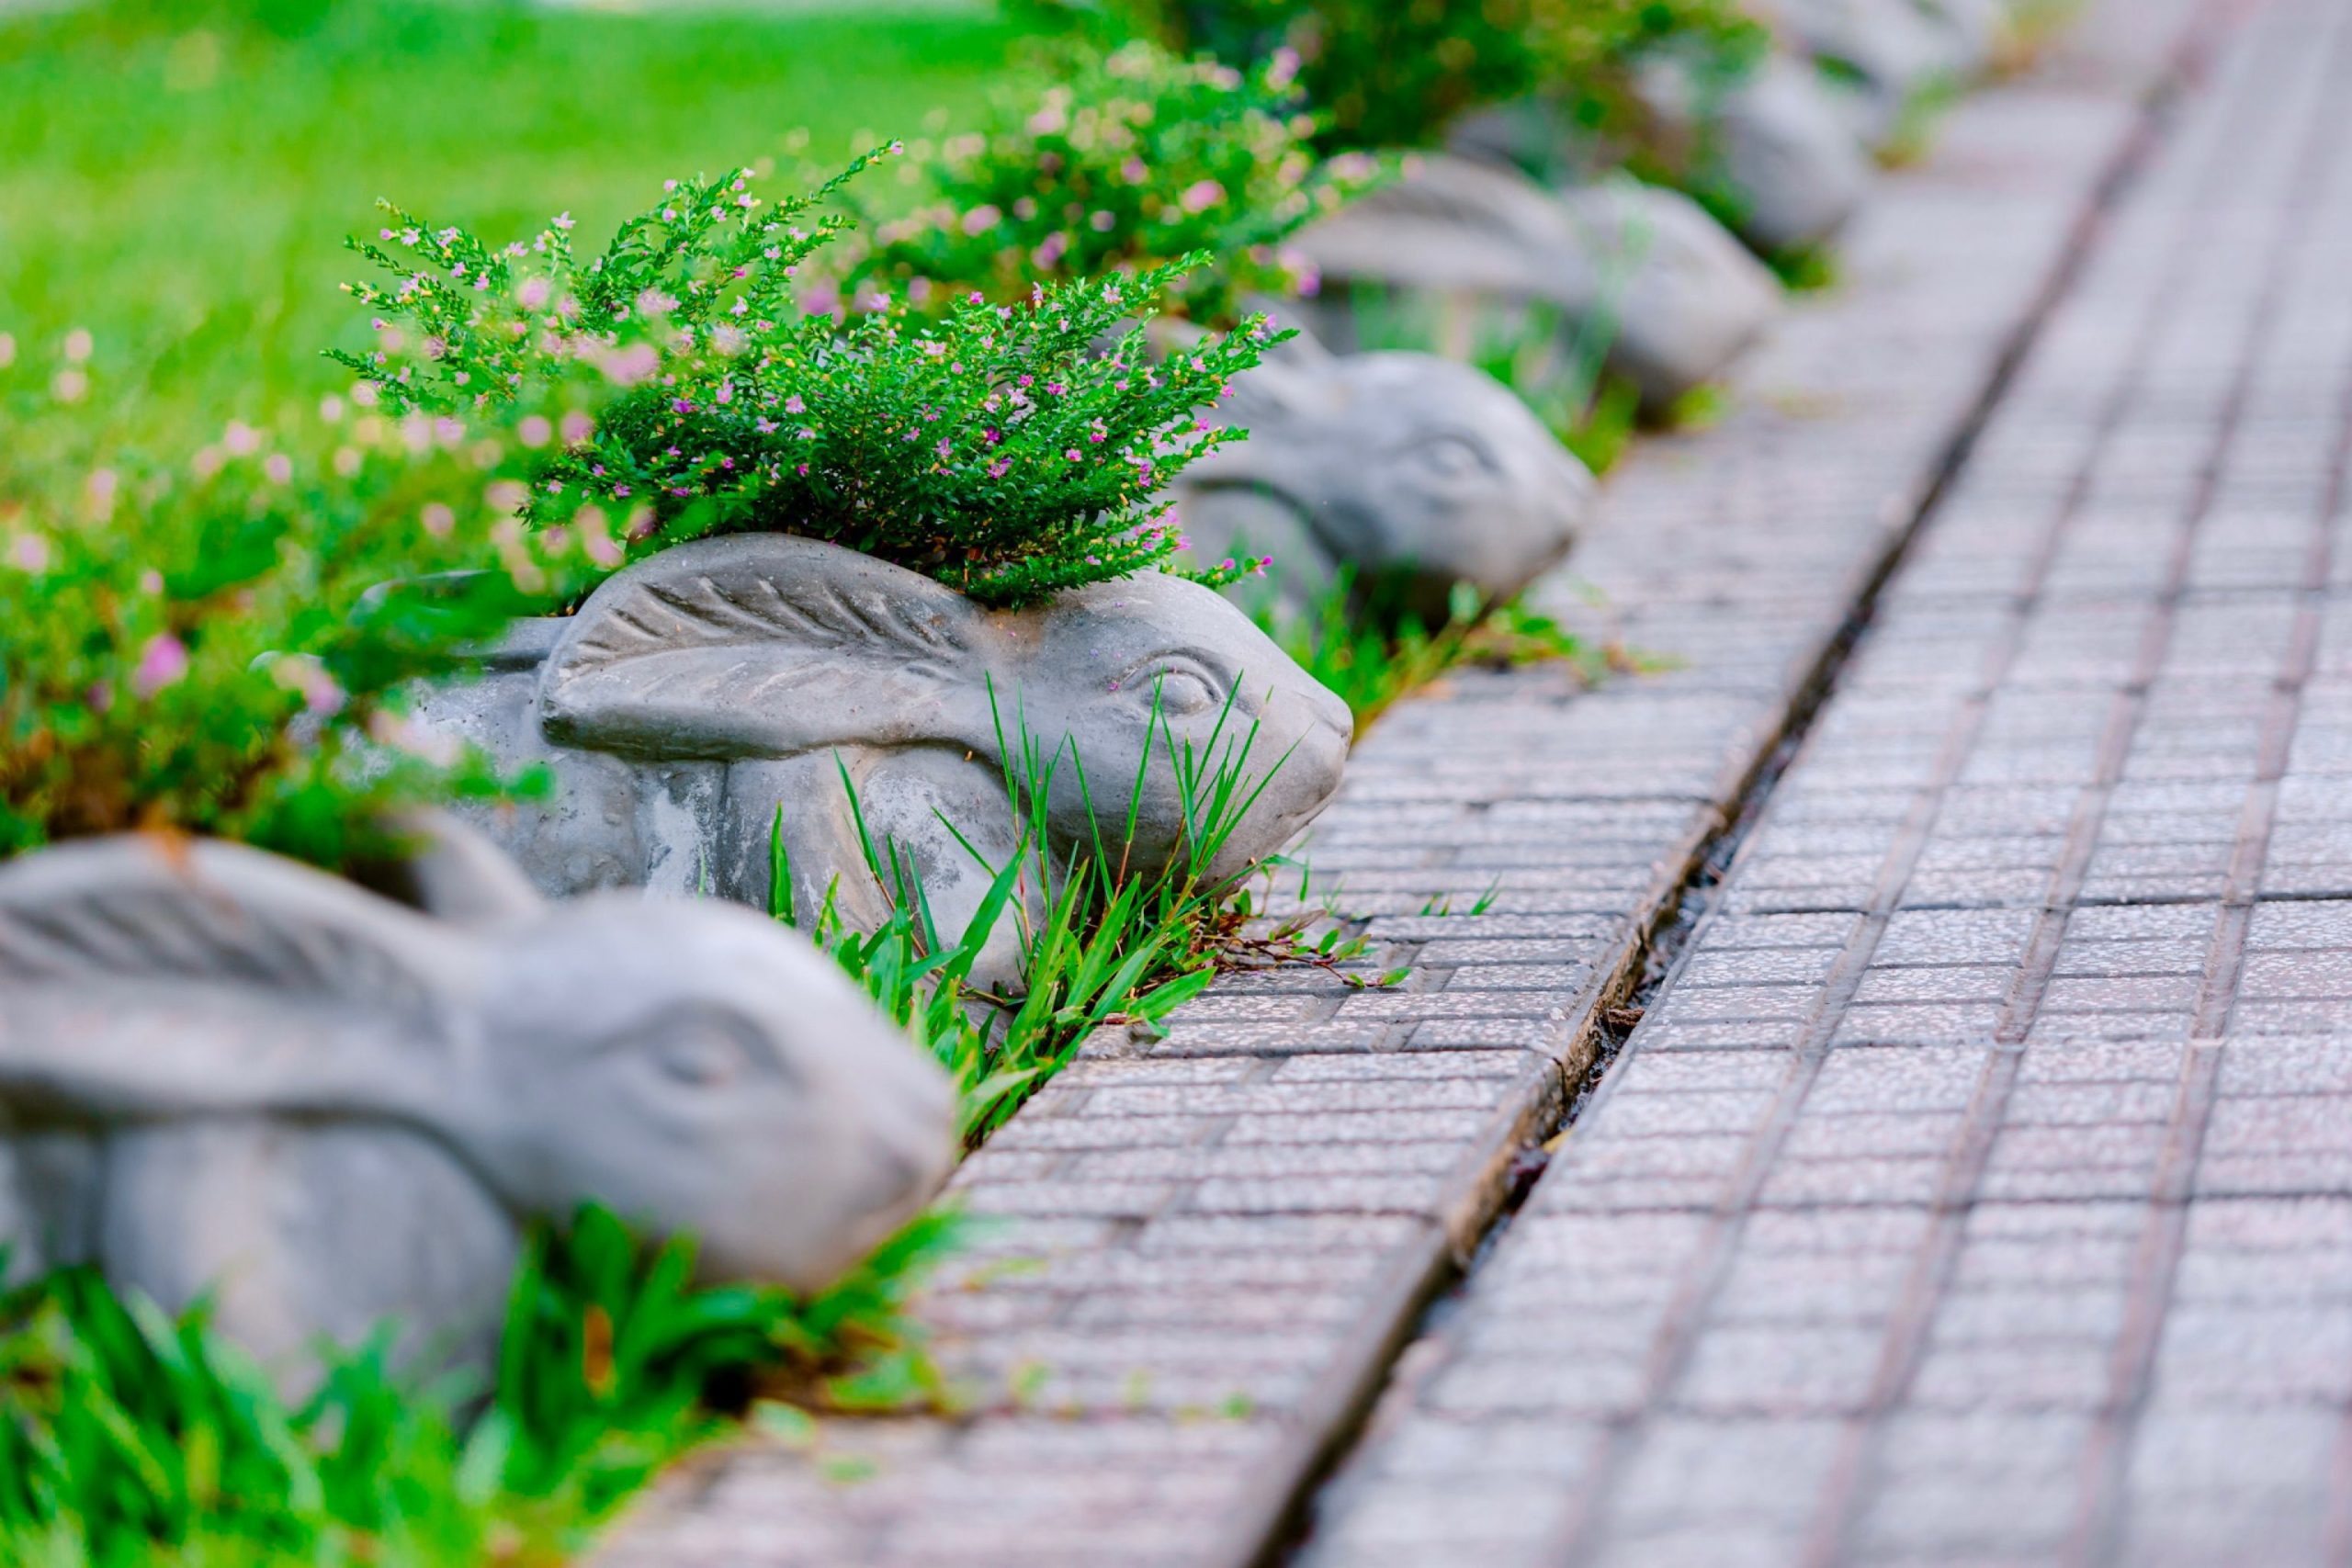
What a fun way to add personality without spending a fortune! You can find similar concrete animal planters at stores like HomeGoods, TJ Maxx, or even Walmart’s garden section for around $20-$40 each. To get this look for even less, scour thrift stores and Facebook Marketplace for old concrete or ceramic statues. With a masonry drill bit, you can easily add a drainage hole to the bottom of almost any hollow vessel, instantly turning a piece of vintage kitsch into a charming, one-of-a-kind planter. The key is the repetition—one rabbit is an object; a row of them is a design statement.
|
📋 Copy HEX 🔗 Share |
While adorable, concrete planters have a few quirks. First, they are heavy. Place them where you want them to live, because you won’t want to move them often. Second, they can get very hot in direct sunlight, which can stress the roots of the plants inside. The small soil volume also means they dry out much faster than plants in the ground. You’ll need to be diligent about watering, likely once a day in the summer heat. Also, in climates with freezing winters, you may need to bring them into a garage or shed to prevent cracking.
11. Layer a Border with Pansies, Tulips, and a Picket Fence
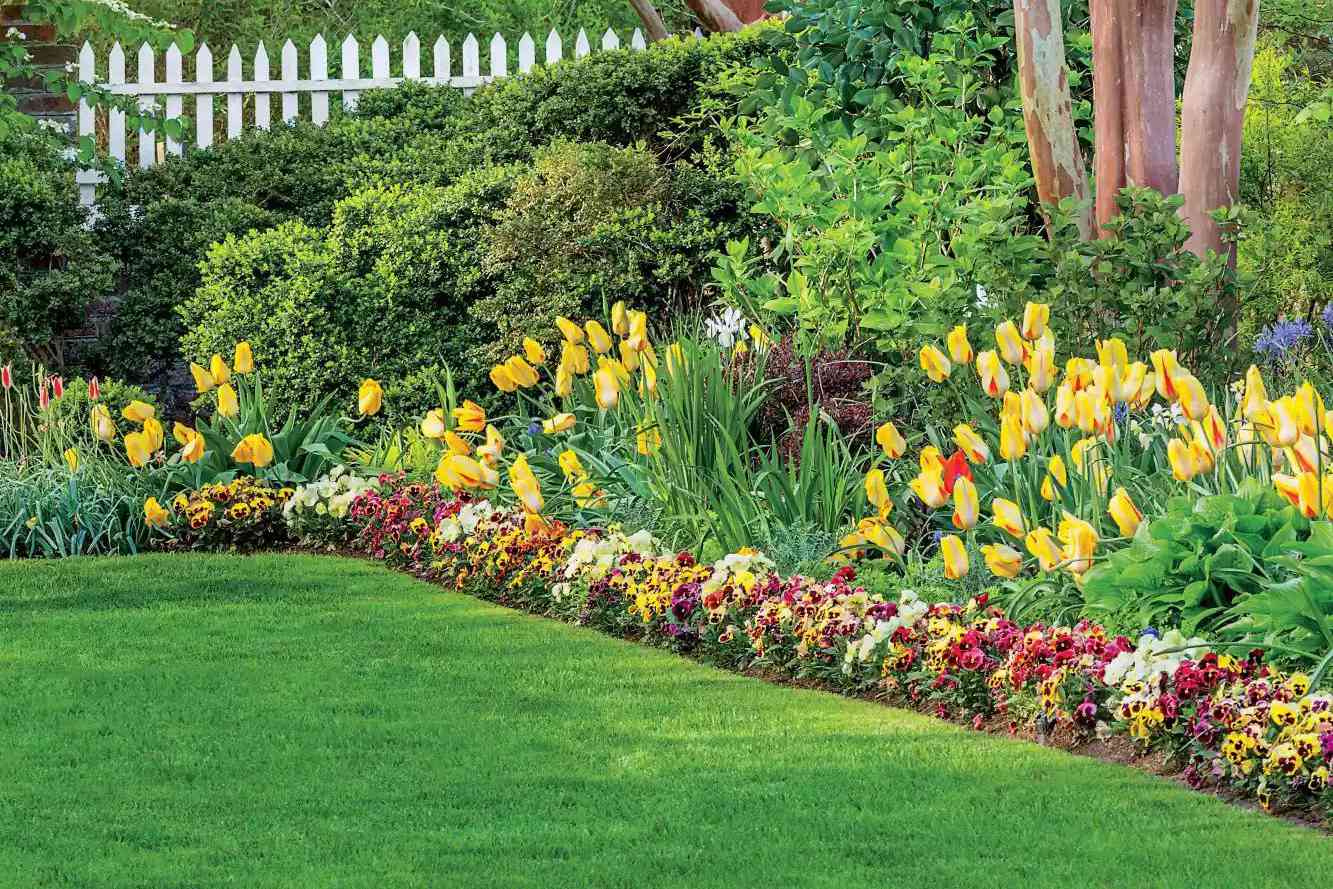
This garden is spring perfection, and it’s all about calculated layers. Think of it as 50% background structure (the dense green shrubs and white picket fence), 30% star-of-the-show color (the mass of yellow tulips), and 20% detailed foreground (the low border of colorful pansies). This formula ensures the eye has a calming backdrop, a clear focal point, and a finishing touch that makes the whole scene feel complete. Without the pansy border, the tulips would feel disconnected from the lawn. Without the tall shrubs, the fence and tulips would feel exposed.
|
📋 Copy HEX 🔗 Share |
How-To Brief: Planting a Tulip & Pansy Border (Time: 2-3 hours; Cost: $75-$150).
- In the fall, prepare your garden bed by loosening the soil and mixing in some compost.
- Plant your tulip bulbs about 6-8 inches deep and 4-6 inches apart. Plant in a dense, wide band for a mass effect like this, not a single row.
- Cover the bulbs with soil. You can add a layer of mulch for winter protection.
- In early spring, as soon as the ground is workable, buy pansy flats from your local garden center.
- Plant the pansies in a single or double row along the very front edge of the bed, right in front of where you planted the tulips.
- Water well. The pansies will provide instant color while you wait for the tulips to emerge and bloom, creating a multi-level display.
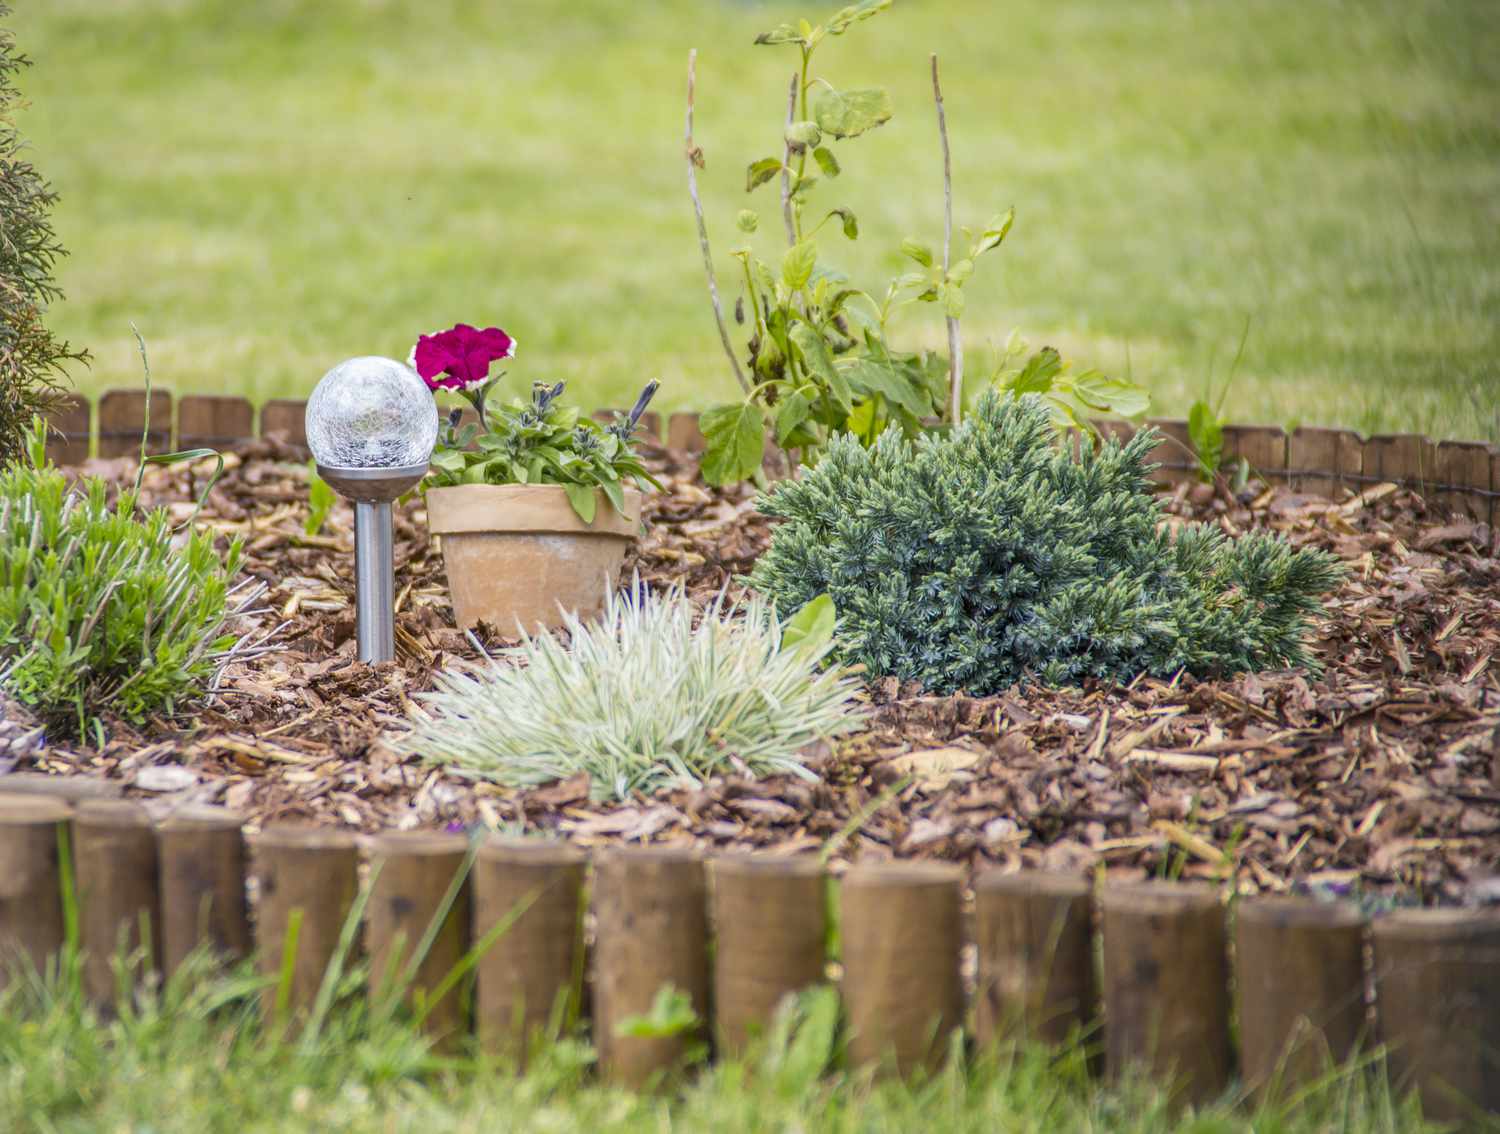
12. Use Log Edging and a Solar Light for a Simple Mulched Bed
The single element holding this charmingly simple look together is the dark brown wood chip mulch. It might not be the most glamorous part, but it’s the most important. It suppresses weeds, retains moisture in the soil, and provides a dark, uniform background that makes the green of the plants and the bright magenta flower pop. If this bed were just bare dirt, the plants would look lost and the overall effect would be messy and unfinished. The mulch provides the clean canvas that allows the other elements, like the simple log edging and solar light, to shine.
|
📋 Copy HEX 🔗 Share |
This entire look can be created for under $60. The wooden log edging is one of the most affordable border options, often sold in rolls or sections at hardware stores for about $15-$20. A few bags of dark brown mulch will run you another $15-$20. One or two interesting plants are all you need; pick them off the clearance rack at the end of the season for a steal. The solar light is the finishing touch, and you can get a multi-pack at Target or Walmart for around $20. It’s a perfect example of how a small budget can still create a tidy and attractive garden feature.
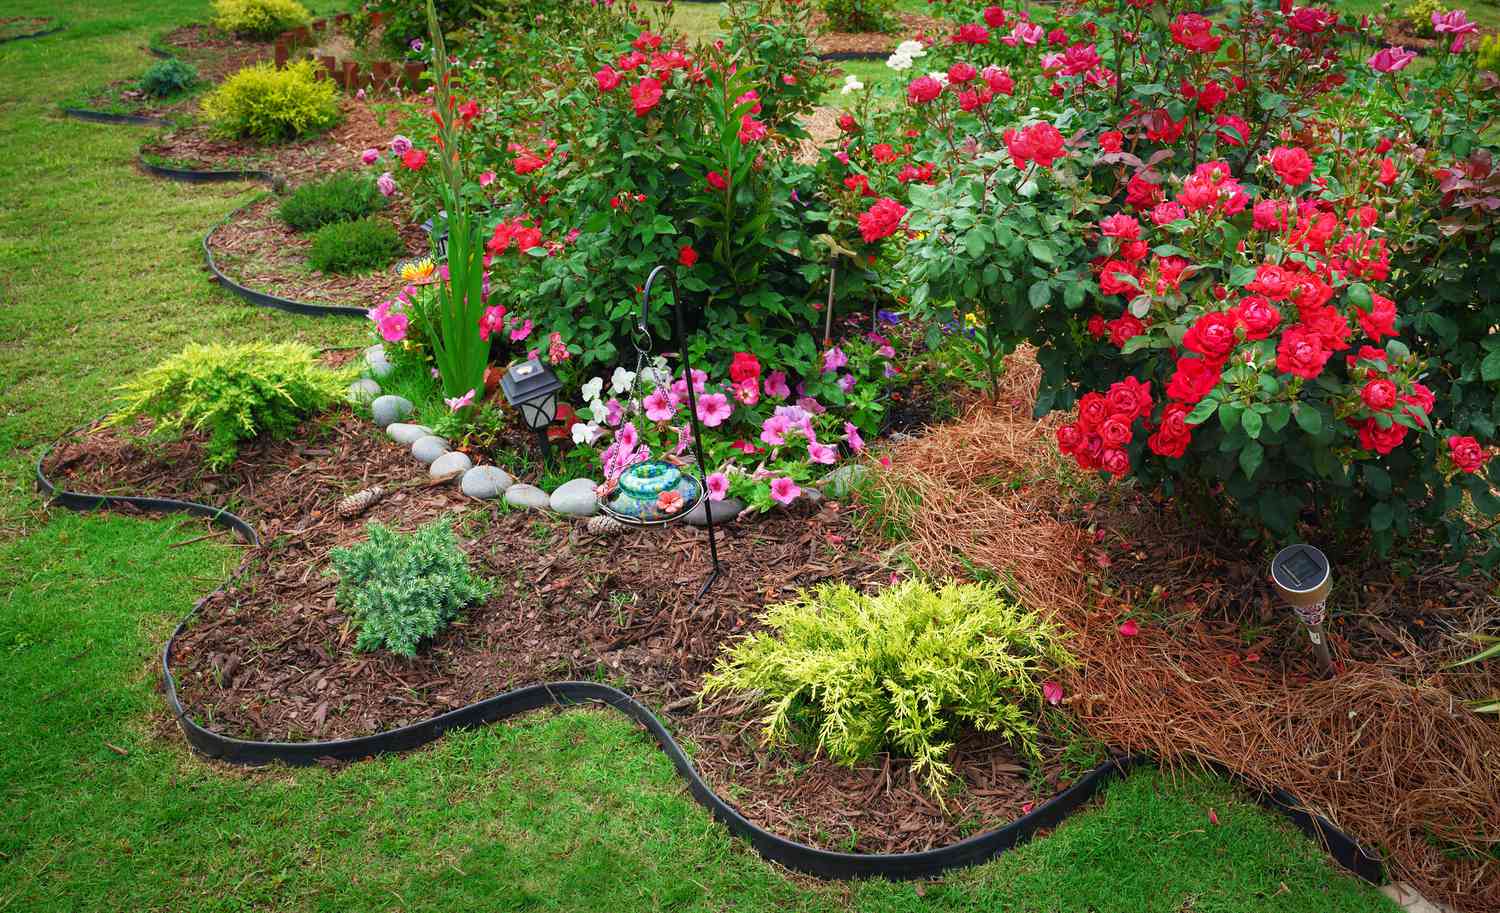
13. Define Layered Beds with Black Edging, Mulch, and Roses
Black plastic edging is one of the cheapest ways to define a garden bed, but it comes with a reality check. It can be tricky to install in a smooth, pleasing curve, and it has a tendency to get wavy or heave out of the ground after a freeze-thaw cycle. Over time, exposure to sunlight can make it brittle, and an accidental encounter with a lawnmower or string trimmer can crack or chew it up instantly. It’s a perfectly fine budget solution for a few seasons, but don’t expect it to be a permanent fixture in your landscape. For a more durable solution, consider the metal edging in Idea #8.
|
📋 Copy HEX 🔗 Share |
This landscape feels lush and full because of a design principle called ‘massing.’ Instead of planting one red rose and one pink petunia, the designer has planted large groups of the same plant. The mass of red roses creates a powerful block of color that acts as a focal point. The mass of pink petunias creates another distinct color zone. This technique is more visually effective and creates a more cohesive, intentional look than a random jumble of many different single plants would.
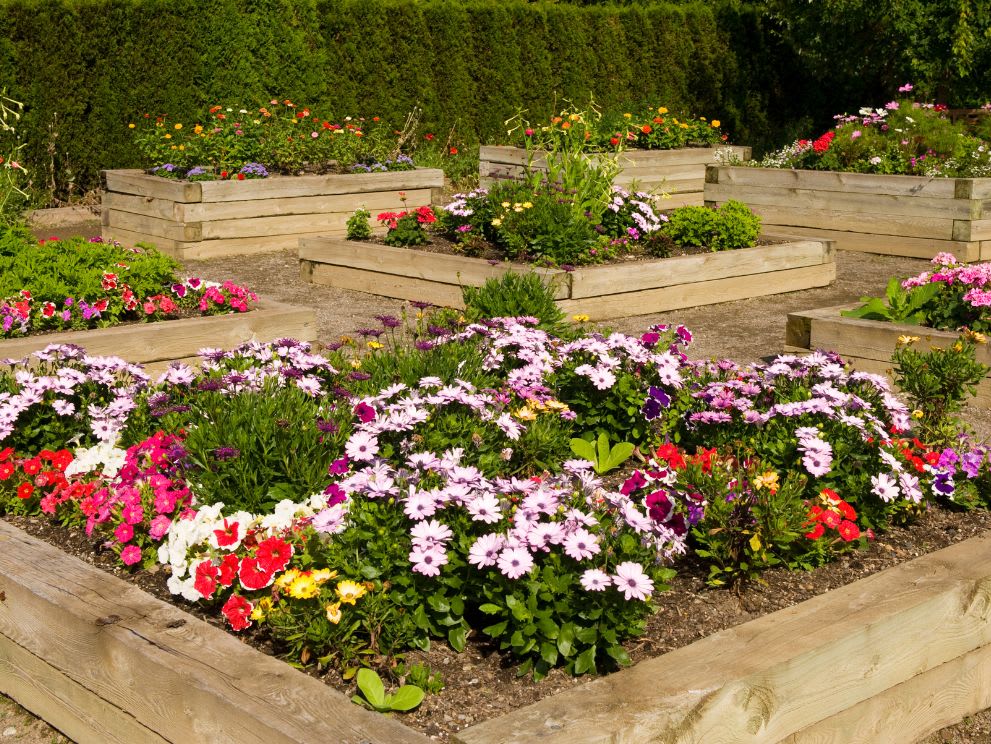
14. Build Tiered Garden Beds on a Slope with Light Wood Planks
This is a brilliant solution for a small to medium-sized yard with a gentle to moderate slope. It transforms an otherwise difficult-to-mow and unusable area into a productive and beautiful feature. These types of beds work best on a slope that drops 3-6 feet over a 15-20 foot distance. The beds themselves should be a manageable depth, typically no more than 4 feet from front to back, so you can easily reach the middle to plant and weed without stepping inside. The height of each tier can vary, but 10-12 inches (the width of two standard planks) is a good starting point.
|
📋 Copy HEX 🔗 Share |
When building raised beds from wood, choose your material wisely. The light-colored wood used here is beautiful, but if it’s untreated pine, it may only last a few seasons before it starts to rot. For longevity, use cedar or redwood planks, which are naturally rot-resistant but more expensive. A budget-friendly compromise is to use pressure-treated lumber, but make sure it is rated for ‘ground contact. ‘To be extra safe, especially if you’re planting vegetables, you can line the inside walls of the beds with heavy-duty plastic sheeting to prevent any chemicals from leaching into the soil.
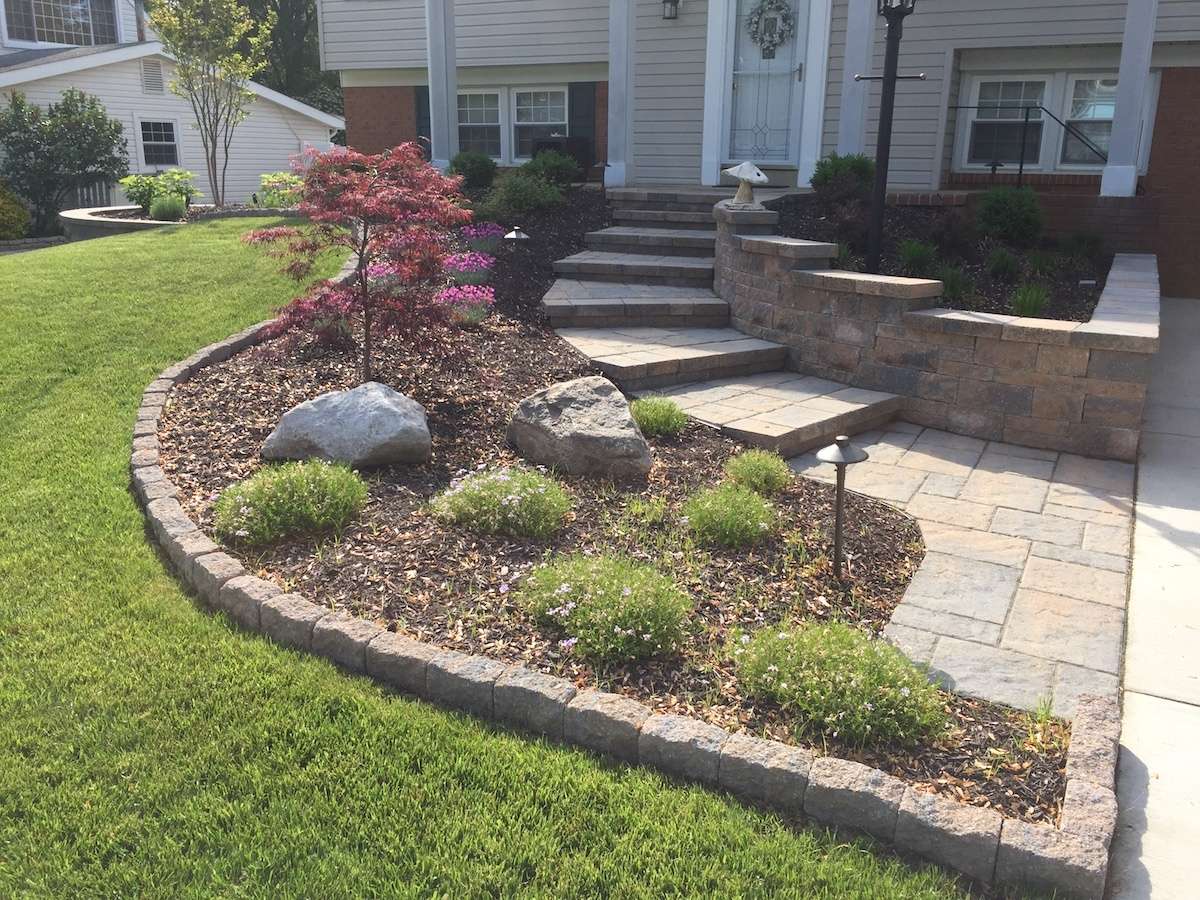
15. Create an Inviting Entry with a Tiered Retaining Wall
For a project of this scale, walk through this checklist. It will save you headaches later.
|
📋 Copy HEX 🔗 Share |
- Check Local Codes: Many municipalities have height restrictions on non-engineered retaining walls. Often, anything over 3 or 4 feet requires a permit and professional plans. This multi-tiered design is a great way to legally work around that.
- Plan for Drainage: Water needs to escape from behind the wall. Ensure your plan includes a gravel backfill and a perforated drainage pipe at the base of the lowest wall section to prevent hydraulic pressure from blowing out your wall.
- Map Your Utilities: Call 811 before you dig! You need to know the location of any buried water, gas, or electrical lines before you start excavating for the wall footings or running landscape light wires.
This integrated look is more of an investment, but it creates incredible curb appeal. Here’s a rough idea of the costs involved:
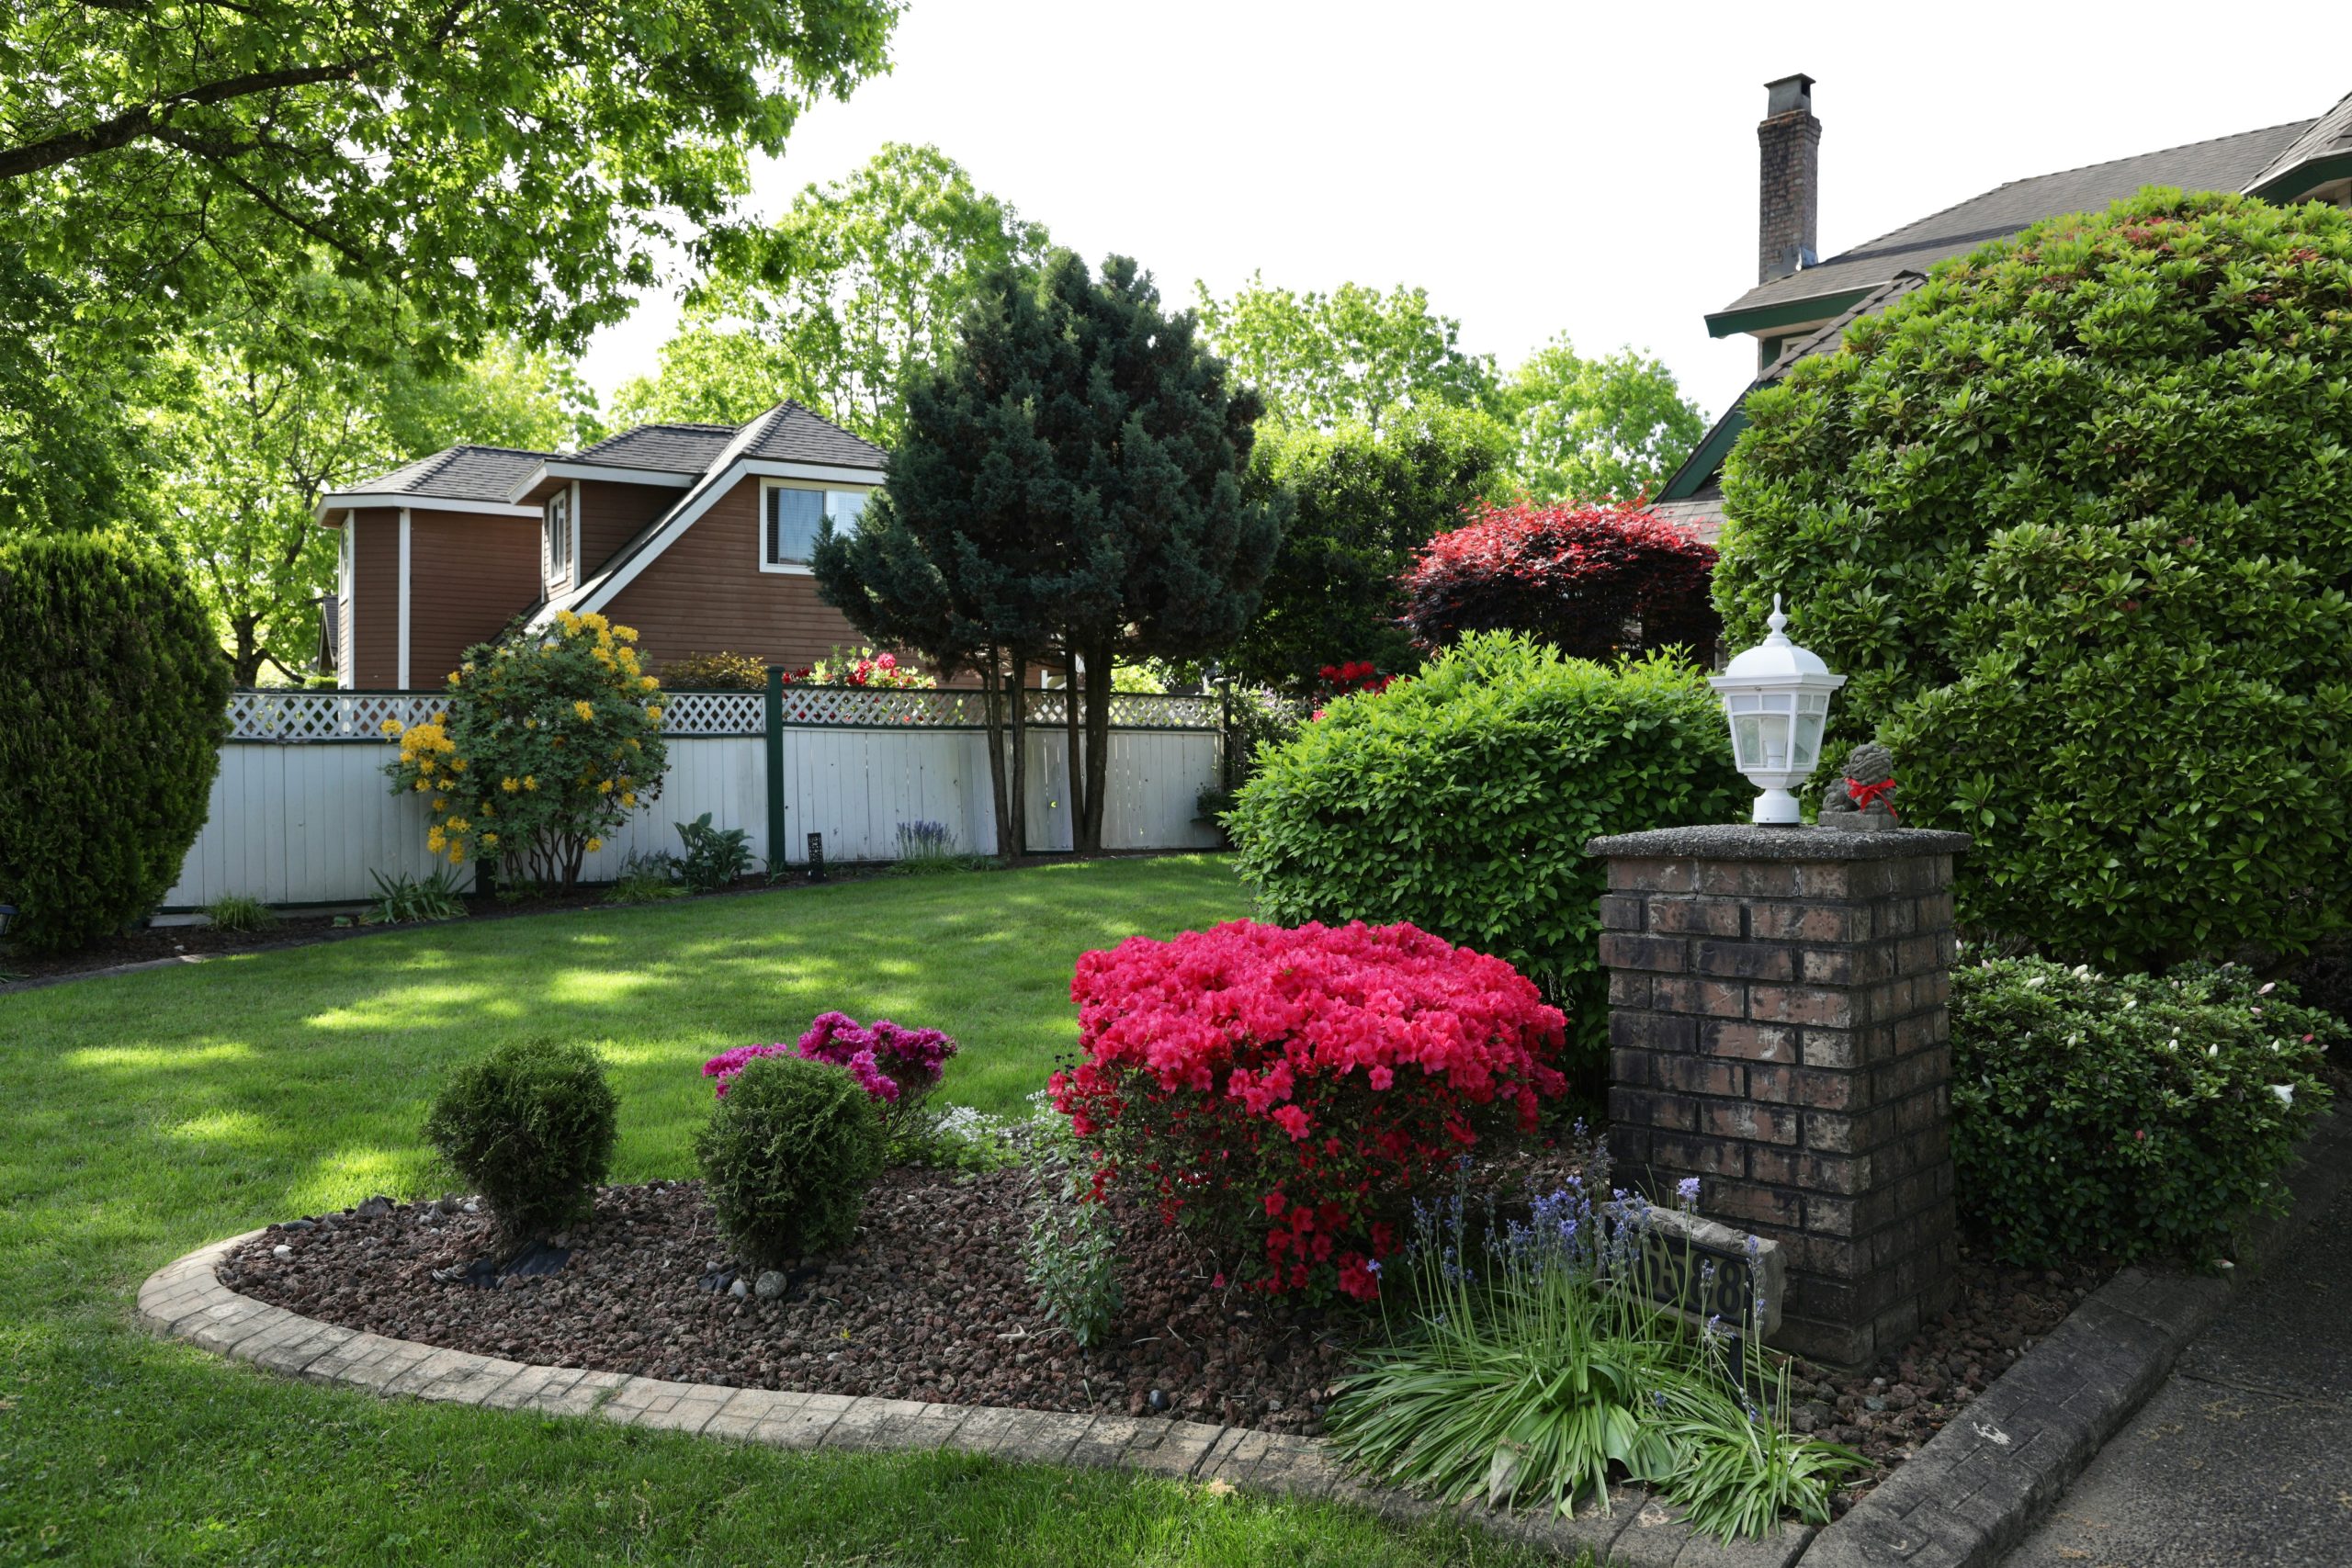
16. Combine a Picket Fence and a Brick Pillar for Classic Curb Appeal
Take away the white picket fence, and what do you have? A nice, but fairly standard, suburban garden bed. The fence is the single element that elevates this design and gives it its specific, charming character. It acts as a clean, white backdrop that makes the colors of the flowers and the green of the lawn pop. It also provides a sense of structure and enclosure, creating a visual frame for the entire garden scene and separating it from the neighboring properties in a friendly, approachable way.
|
📋 Copy HEX 🔗 Share |
This classic, inviting look is a mix of simple elements in the right proportions. It’s roughly 40% manicured nature (the green lawn and mulched beds), 30% architectural structure (the white fence, brick pillar, and distant house siding), and 30% vibrant, chaotic color (the explosion of flowering shrubs in red, pink, and yellow). This balance is key. Too much structure and it feels stiff; too much floral chaos and it looks messy. The lawn provides the necessary ‘negative space’ that allows the other elements to breathe.
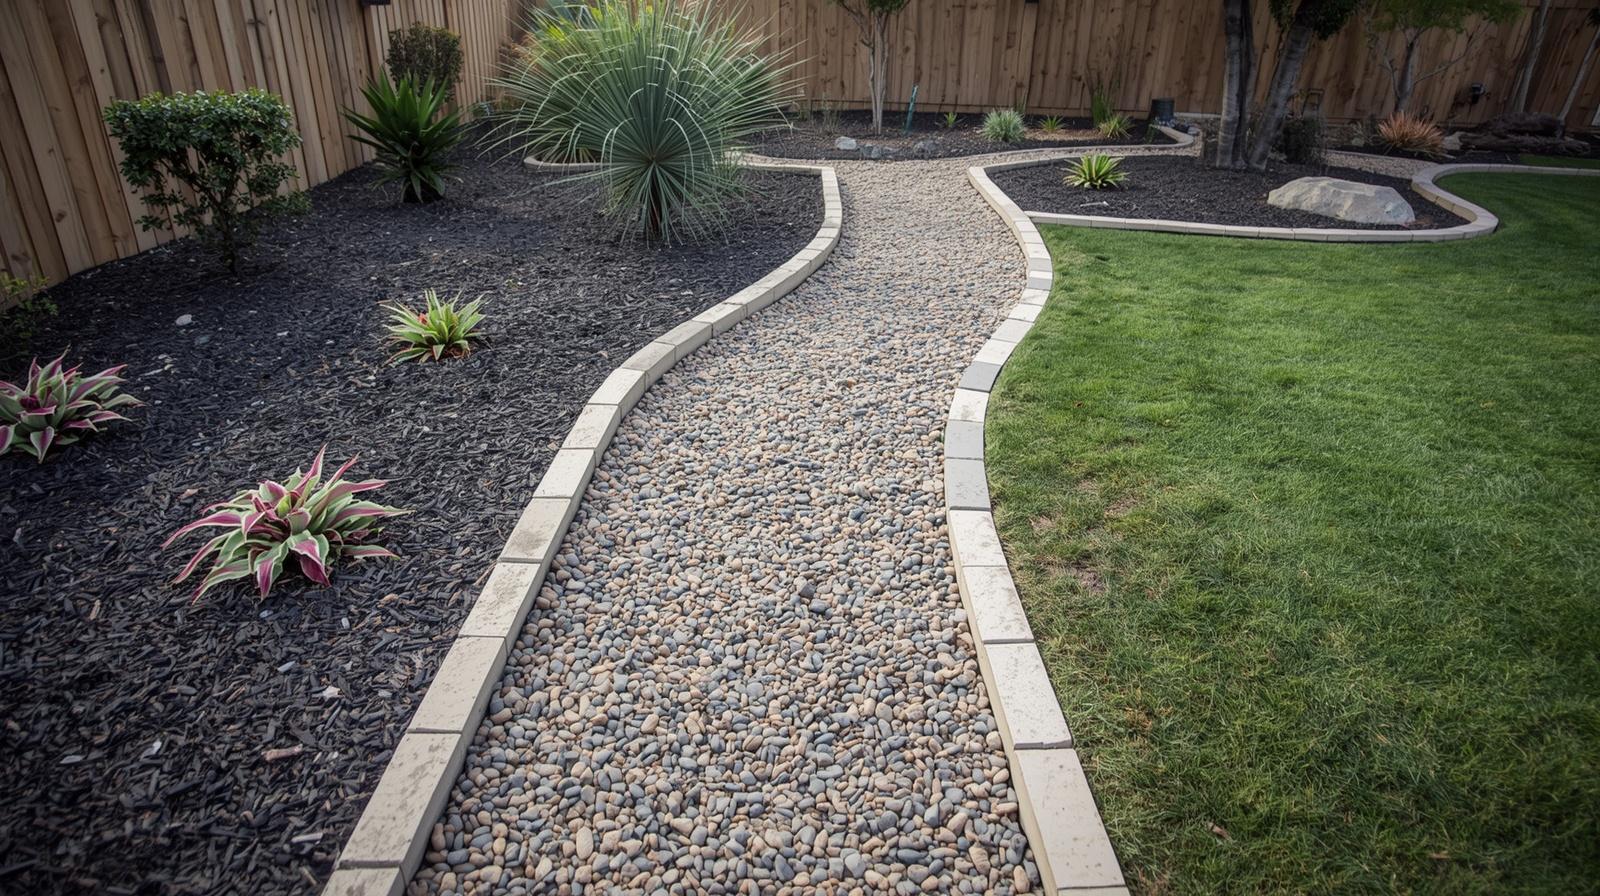
17. Lay a Winding Gravel Pathway with Paver Edging
How-To Brief: Installing a Simple Gravel Path (Time: 1 weekend; Cost: $200-$500).
|
📋 Copy HEX 🔗 Share |
- Lay out the shape of your path using garden hoses or spray paint. Gentle curves are more visually appealing than straight lines.
- Excavate the path area to a depth of 4-5 inches. Try to keep the bottom of the trench as level as possible.
- Firmly tamp down the soil in the excavated area.
- Install your paver edging along both sides of the path. Use a rubber mallet to set them in place.
- Lay down a heavy-duty landscape fabric in the trench between the pavers. This is crucial for weed prevention.
- Fill the trench with about 3 inches of gravel. ‘Pea gravel’ or ‘crushed stone’ in a 3/8-inch size is comfortable to walk on. Rake it smooth.
While gravel paths are relatively cheap and easy to install, they aren’t a ‘set it and forget it’ feature. The gravel will get kicked into the lawn or the mulch beds, requiring you to rake it back into place periodically. Over time, organic matter will accumulate, and weeds will start to grow in the gravel itself, landscape fabric or not. You’ll need to do some occasional weeding or use a weed torch. Also, dragging things with wheels, like a garbage bin or a wheelbarrow, can be a pain on a gravel surface. It’s a trade-off: you get a low upfront cost for a bit more ongoing tidying.
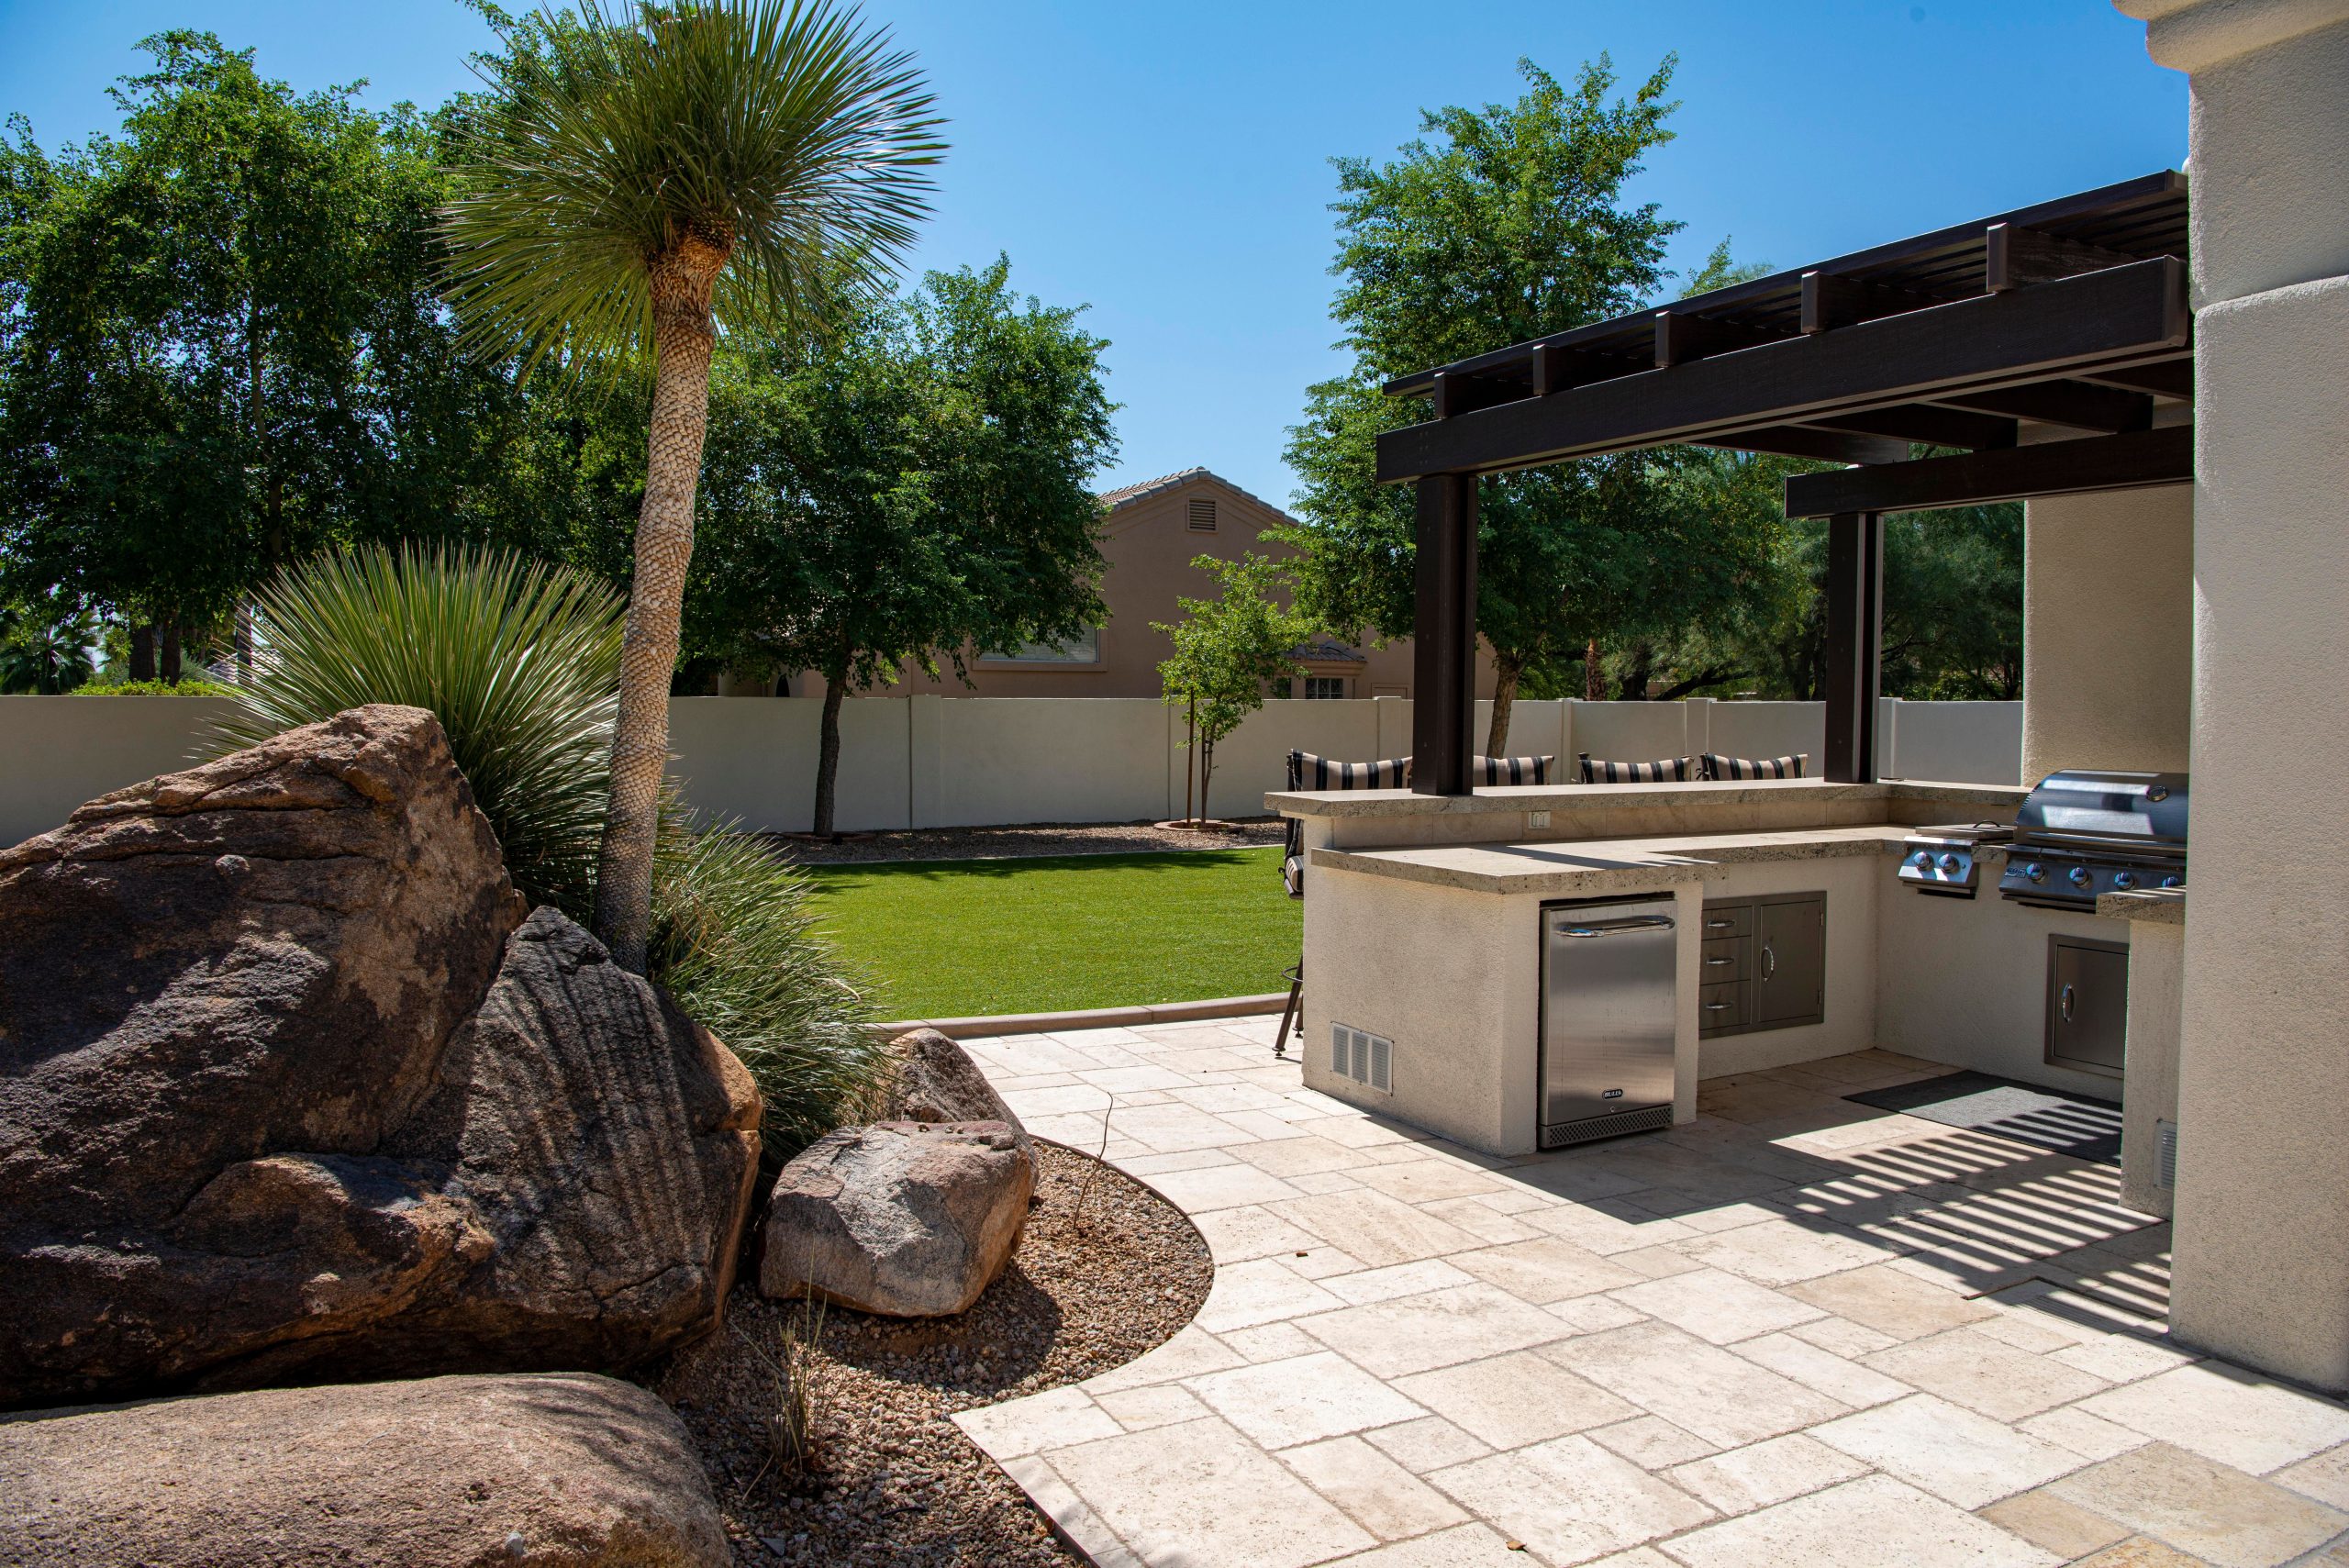
18. Design a Low-Maintenance Desert Oasis with an Outdoor Kitchen
This is a stunning, highly functional backyard, but don’t let the ‘cheap landscaping’ title fool you when it comes to this specific example. An integrated outdoor kitchen is a significant investment. The built-in grill, outdoor refrigerator, and the stucco-and-stone structure itself can easily run from $5,000 to $15,000 or more, not including the cost of the pergola and the paved patio. The ‘cheap’ part here is the landscaping concept itself—using rocks and artificial turf dramatically cuts down on water bills and weekly maintenance, which is a huge long-term saving. Compare with the simpler desert look in Idea #0 to see a more budget-conscious version.
|
📋 Copy HEX 🔗 Share |
This is a high-end execution, but the look can be broken down into more manageable chunks.
- Outdoor Kitchen Structure & Appliances: $5,000 – $15,000+
- Wood Pergola: $3,000 – $8,000
- Paved Patio: $2,500 – $6,000
- Large Boulders (delivered & placed): $1,000 – $3,500
- Artificial Turf: $2,000 – $5,000
- ESTIMATED TOTAL: $13,500 – $37,500+
- Budget Alternative: Get the vibe for under $2,500 with a standalone grill, a cantilever umbrella instead of a pergola, a smaller section of artificial turf, and sourcing smaller boulders yourself.
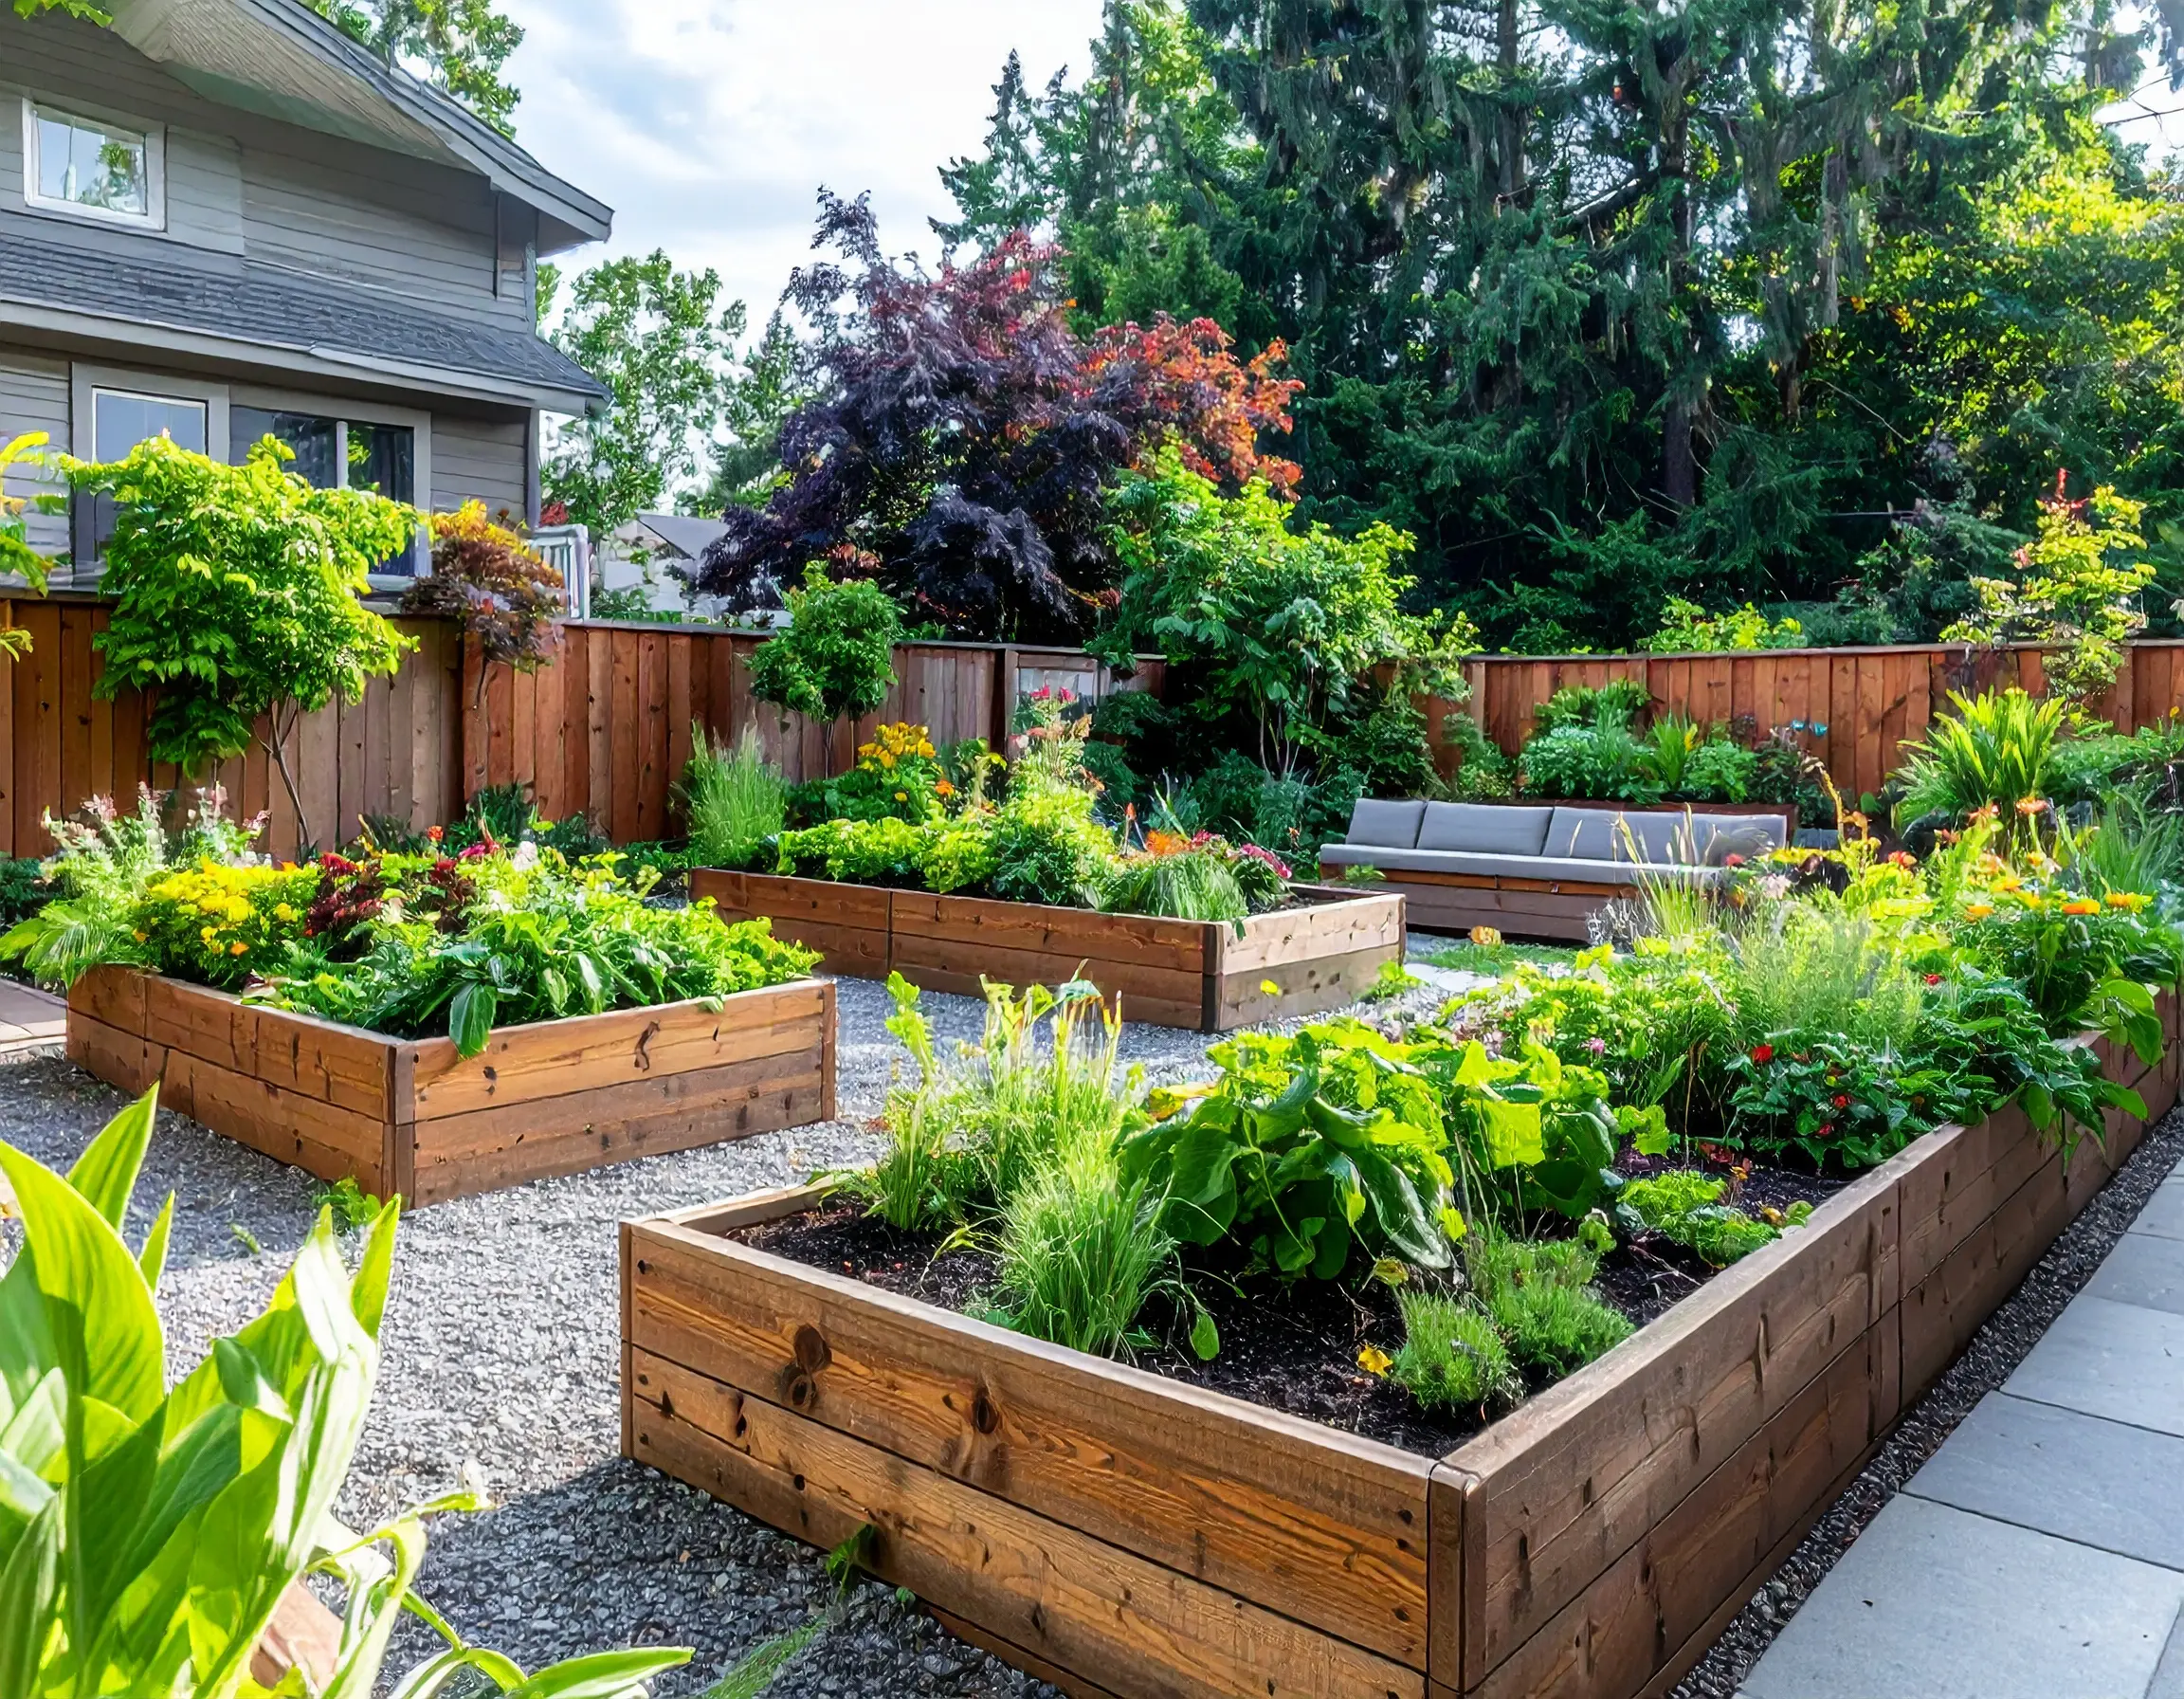
19. Use Rustic Raised Beds and Gravel for an Organized Garden
This strategy of using raised beds and gravel pathways is incredibly versatile. It works just as well in a tiny 200-square-foot urban backyard as it does in a sprawling suburban lot. The key is sizing the beds appropriately for your space. In a smaller yard, you might have just two or three 4×4-foot beds. In a larger space like this one, you can use longer 4×8 or 4×10 foot beds and create more elaborate pathways. The principle is the same: you’re creating controlled, manageable zones for planting, which is perfect for any size of garden.
|
📋 Copy HEX 🔗 Share |
This design is so satisfying because it imposes a clear, geometric order on the natural chaos of a garden. The clean lines of the rustic wooden beds create a strong grid, which is then softened by the lush, overflowing greenery within them. The grey gravel pathways serve as ‘negative space,’ providing a neutral, textural ground plane that makes the wooden boxes and the green plants the stars of the show. It’s the perfect balance of structured and unstructured, which is why it feels both organized and full of life.
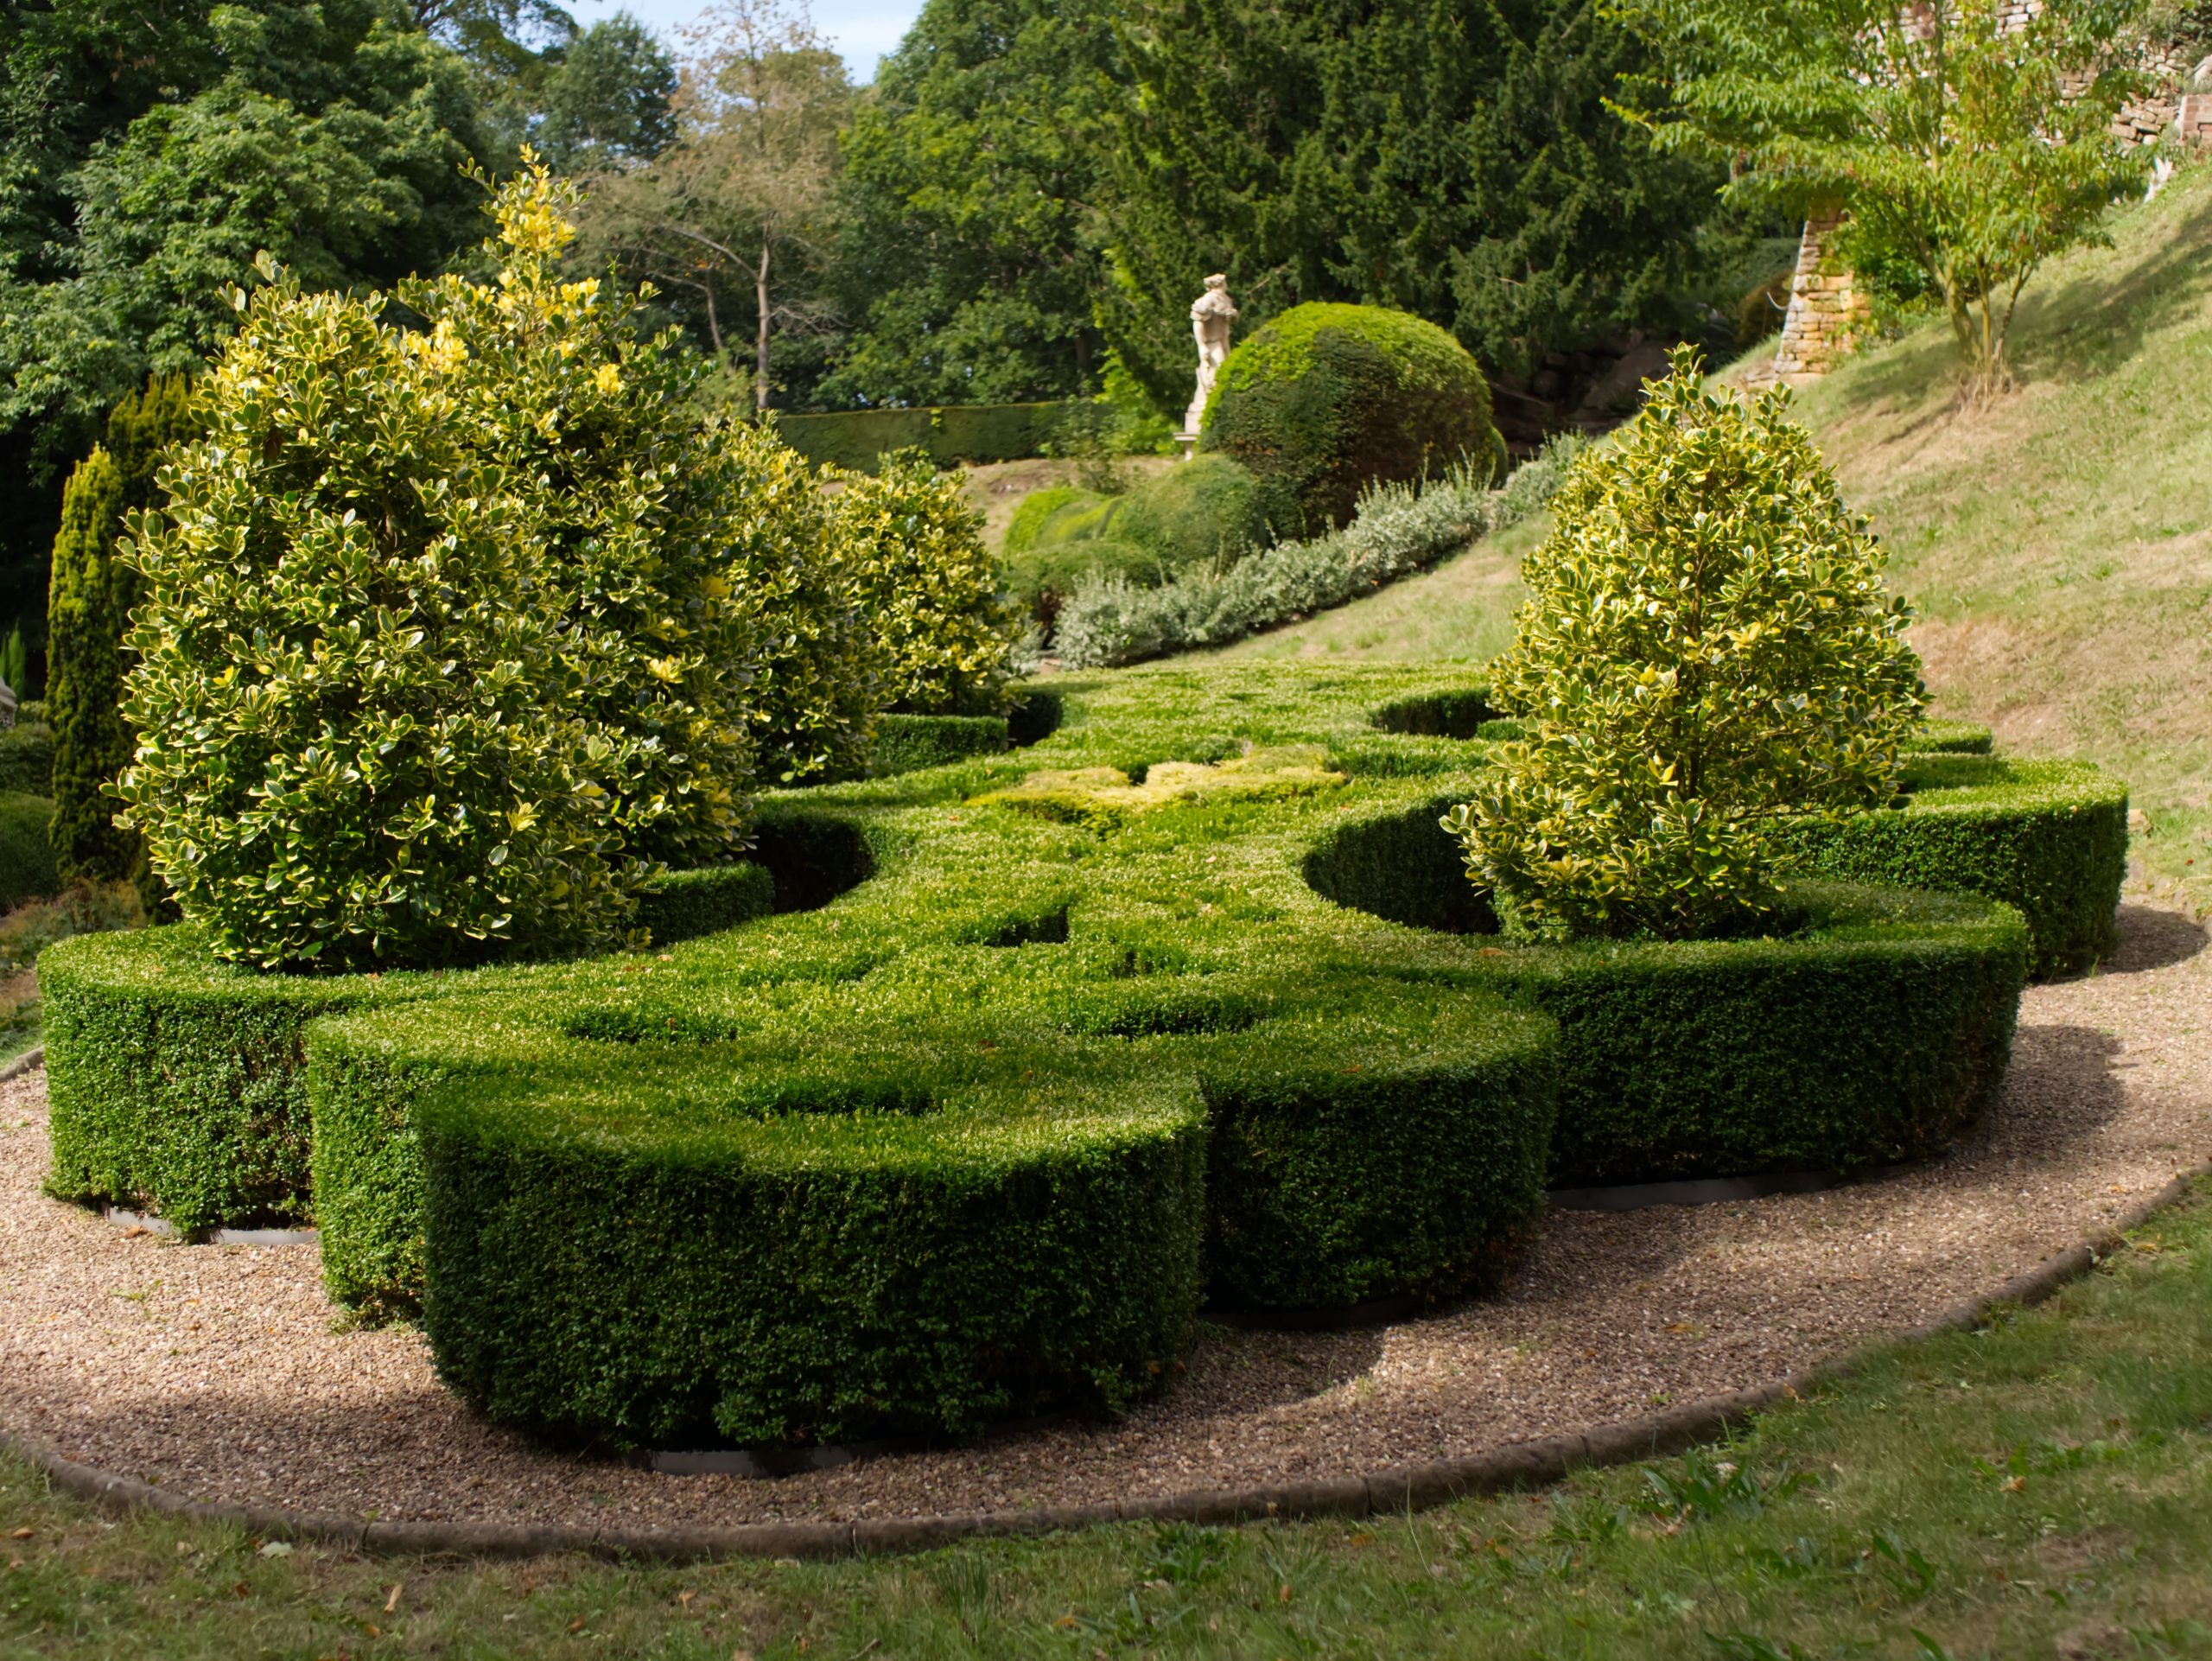
20. Carve Out a Formal Garden with Manicured Topiary Hedges
To achieve these kinds of crisp, formal lines, you need the right tools and a bit of patience. Don’t use a large electric hedge trimmer; you’ll have no control. Invest in a quality pair of hand-held hedge shears. They allow for much more precise, deliberate cuts, which is essential for creating and maintaining sculptural shapes. For the initial shaping, you can use strings and stakes to create guidelines. Once the shape is established, a light trim 2-3 times during the growing season will keep the lines sharp. Always start by trimming less than you think you need to; you can always cut more off, but you can’t put it back on.
|
📋 Copy HEX 🔗 Share |
There’s a growing interest in ‘garden rooms’ and creating distinct zones in our outdoor spaces, and this formal style is a perfect example. While minimalism and wild, natural gardens have been popular, we’re seeing a return to more structured, traditional garden designs. This look, with its clear geometry and sense of order, evokes the grand estates of Europe but on a more manageable, domestic scale. It speaks to a desire for control and beauty in our personal environments, a way of creating a peaceful, manicured sanctuary away from a chaotic world.
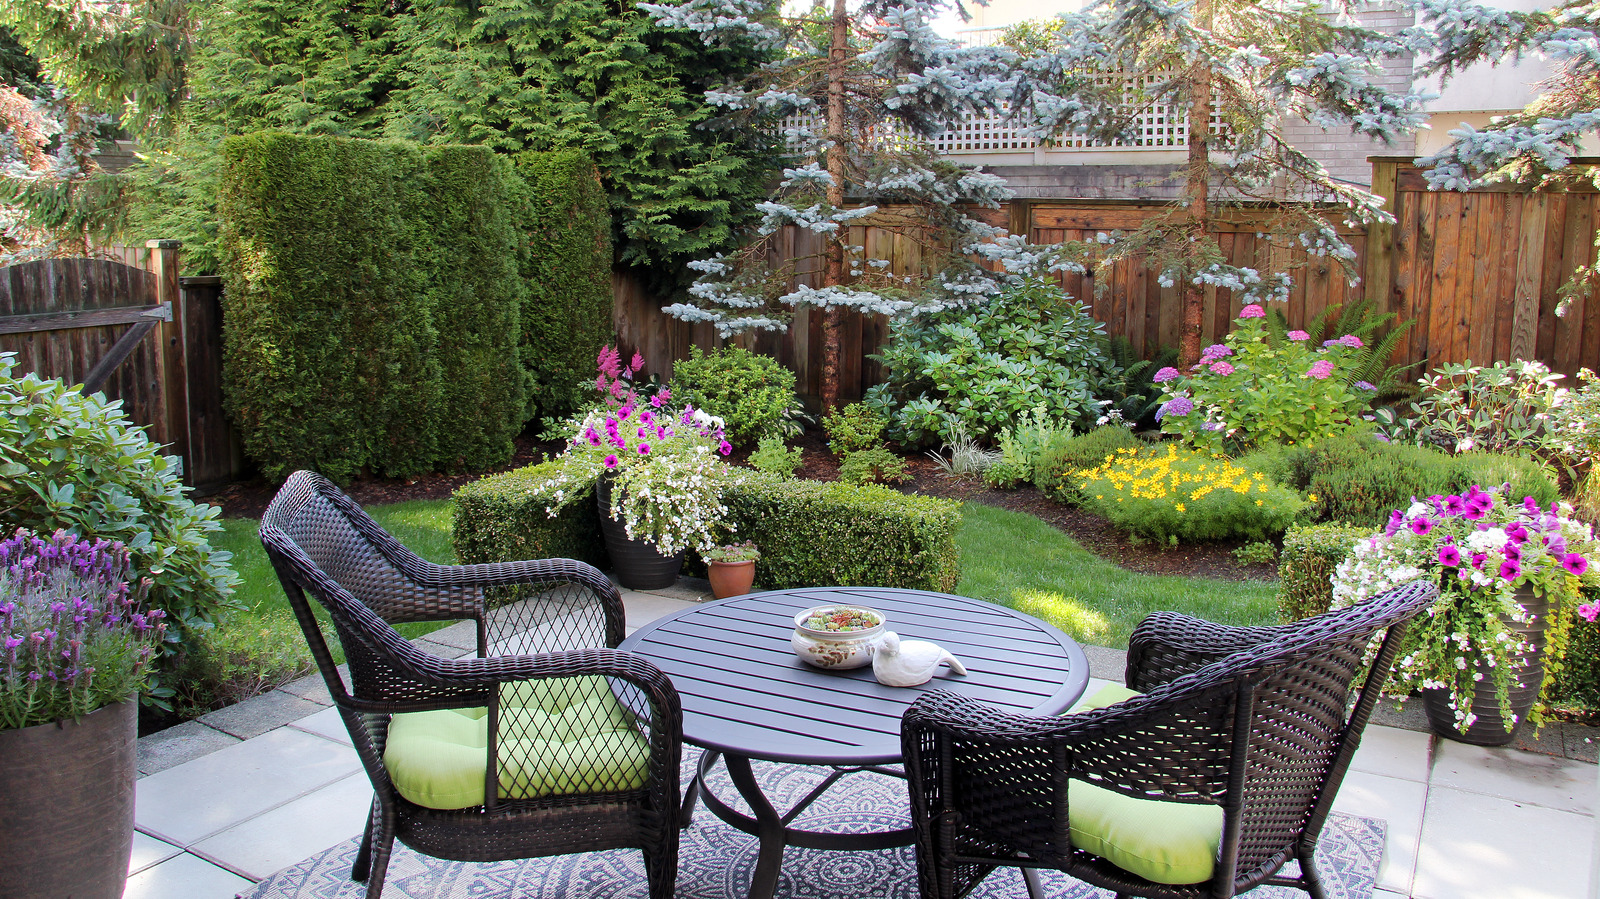
21. Tuck a Cozy Patio Set into a Lush, Multi-Textured Garden
The single most important decision the designer made here was to sacrifice a bit of lawn for the paved patio area. By carving out this small, hardscaped footprint, they created a stable, usable ‘room’ within the garden. Without the light grey square pavers, the table and chairs would be wobbly and impractical on the grass or soil. This solid anchor point is what makes the entire seating area functional. It grounds the furniture and creates the feeling of an intimate, intentional destination, rather than just a few chairs dropped randomly in the yard. This is a great small-space solution, a contrast to the larger layout in Idea #18.
|
📋 Copy HEX 🔗 Share |
You don’t need a huge budget to create a cozy garden nook. Skip the full dining set and opt for two comfortable chairs and a small side table—you can often find great options at Target or on IKEA’s summer clearance. Instead of hiring a mason to lay a patio, you can create a simple 8×8 foot ‘patio’ yourself using budget-friendly concrete pavers from a home improvement store laid over a base of sand. A few well-placed planters with colorful flowers can give the impression of a lush backdrop, even if your garden isn’t as established as this one.
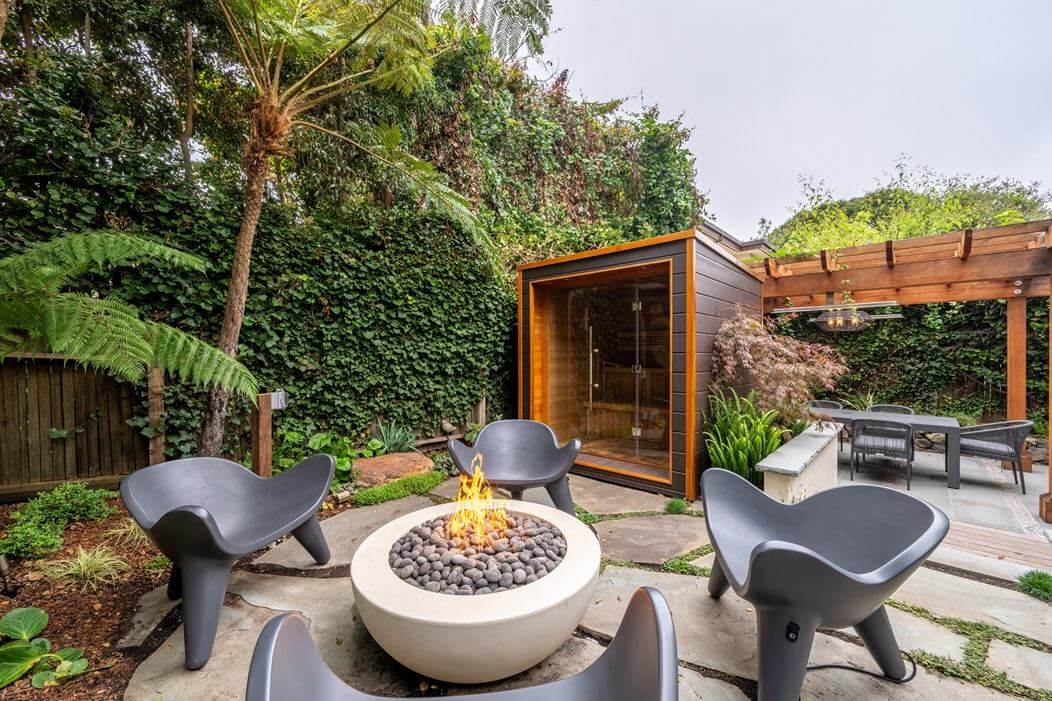
22. Build a Modern Hangout with a Concrete Fire Pit and a Sauna
- Concrete Fire Pit: The concrete itself is durable, but you’ll need to clean out ash after every few uses. The dark decorative rocks may need to be topped off every few years. If it’s a gas fire pit, you’ll need to have the lines and burner checked annually.
- Wood-Clad Sauna: The exterior wood will need to be cleaned and resealed every 2-3 years to protect it from sun and moisture, especially in a four-season climate. The glass will need regular cleaning to look its best.
- Ivy Wall: Looks amazing, but requires aggressive trimming 2-3 times a year to keep it from taking over the sauna, the pergola, and everything else in its path.
|
📋 Copy HEX 🔗 Share |
This sophisticated look is a study in cool tones and textures. The formula is approximately 50% hardscape geometry (the grey concrete of the fire pit, the dark lines of the chairs, the flagstone pavers) + 40% natural textures (the lush green ivy, the medium-brown wood of the sauna and pergola, the dark decorative rocks) + 10% open space/air. The key is the dominance of the cool gray and black tones, which are then warmed up and softened by the wood and the vibrant, living wall of ivy, creating a space that feels both modern and deeply relaxing.
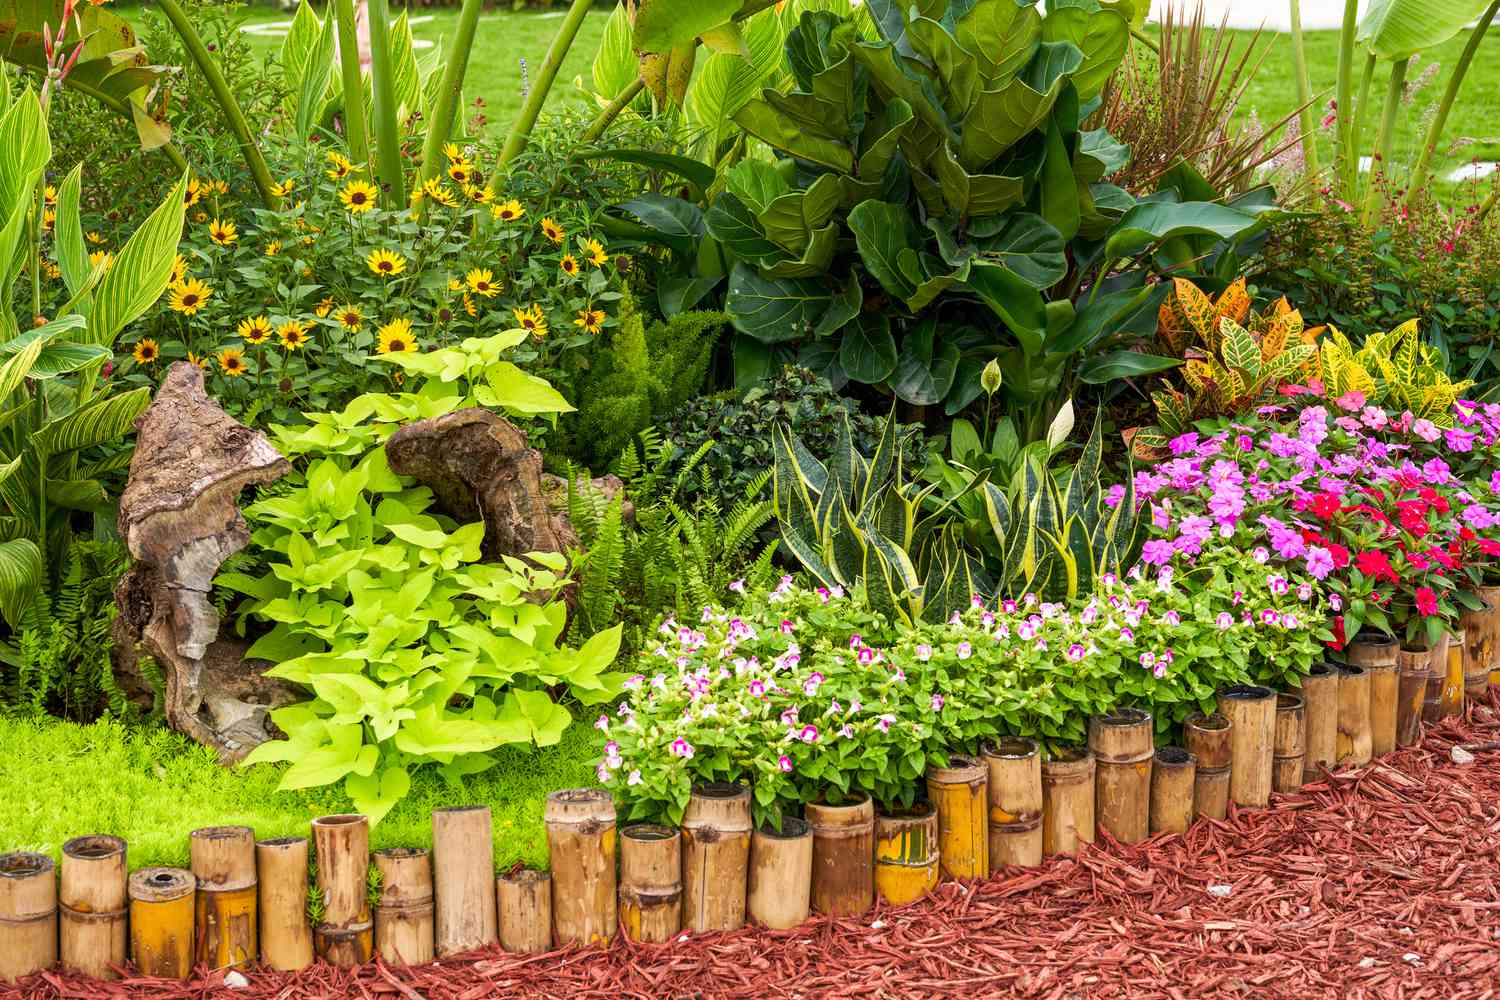
23. Edge a Vibrant Garden Bed with a Natural Bamboo Border
A bamboo border looks fantastic—it’s natural, textural, and fits perfectly with a lush, tropical vibe. However, be realistic about its lifespan. Natural bamboo, when placed in direct contact with damp soil and mulch, will start to break down and decompose. Depending on your climate and how much moisture it’s exposed to, you can expect this type of edging to last about 2-4 years before it becomes brittle and needs to be replaced. Think of it as a beautiful, but temporary, solution. For a longer-lasting but still natural look, consider stone or cedar.
|
📋 Copy HEX 🔗 Share |
How to Install a Bamboo Border (Time: 1 hour; Cost: $50-$100)
- Purchase rolls of bamboo or cane fencing from a garden supply store. It’s often sold in 6 or 8-foot lengths.
- Decide on the desired height for your border. For this look, they’ve laid it horizontally, but you could also cut the fencing down to create a short vertical border.
- Use a spade to dig a shallow trench, about 2-3 inches deep, along the edge of your garden bed.
- Lay the bamboo sections in the trench. If you’re using horizontal pieces like in the photo, you may need to secure them with small wooden stakes driven into the ground behind them to keep them from rolling.
- Backfill the trench with soil and mulch, which will help hold the bamboo firmly in place.
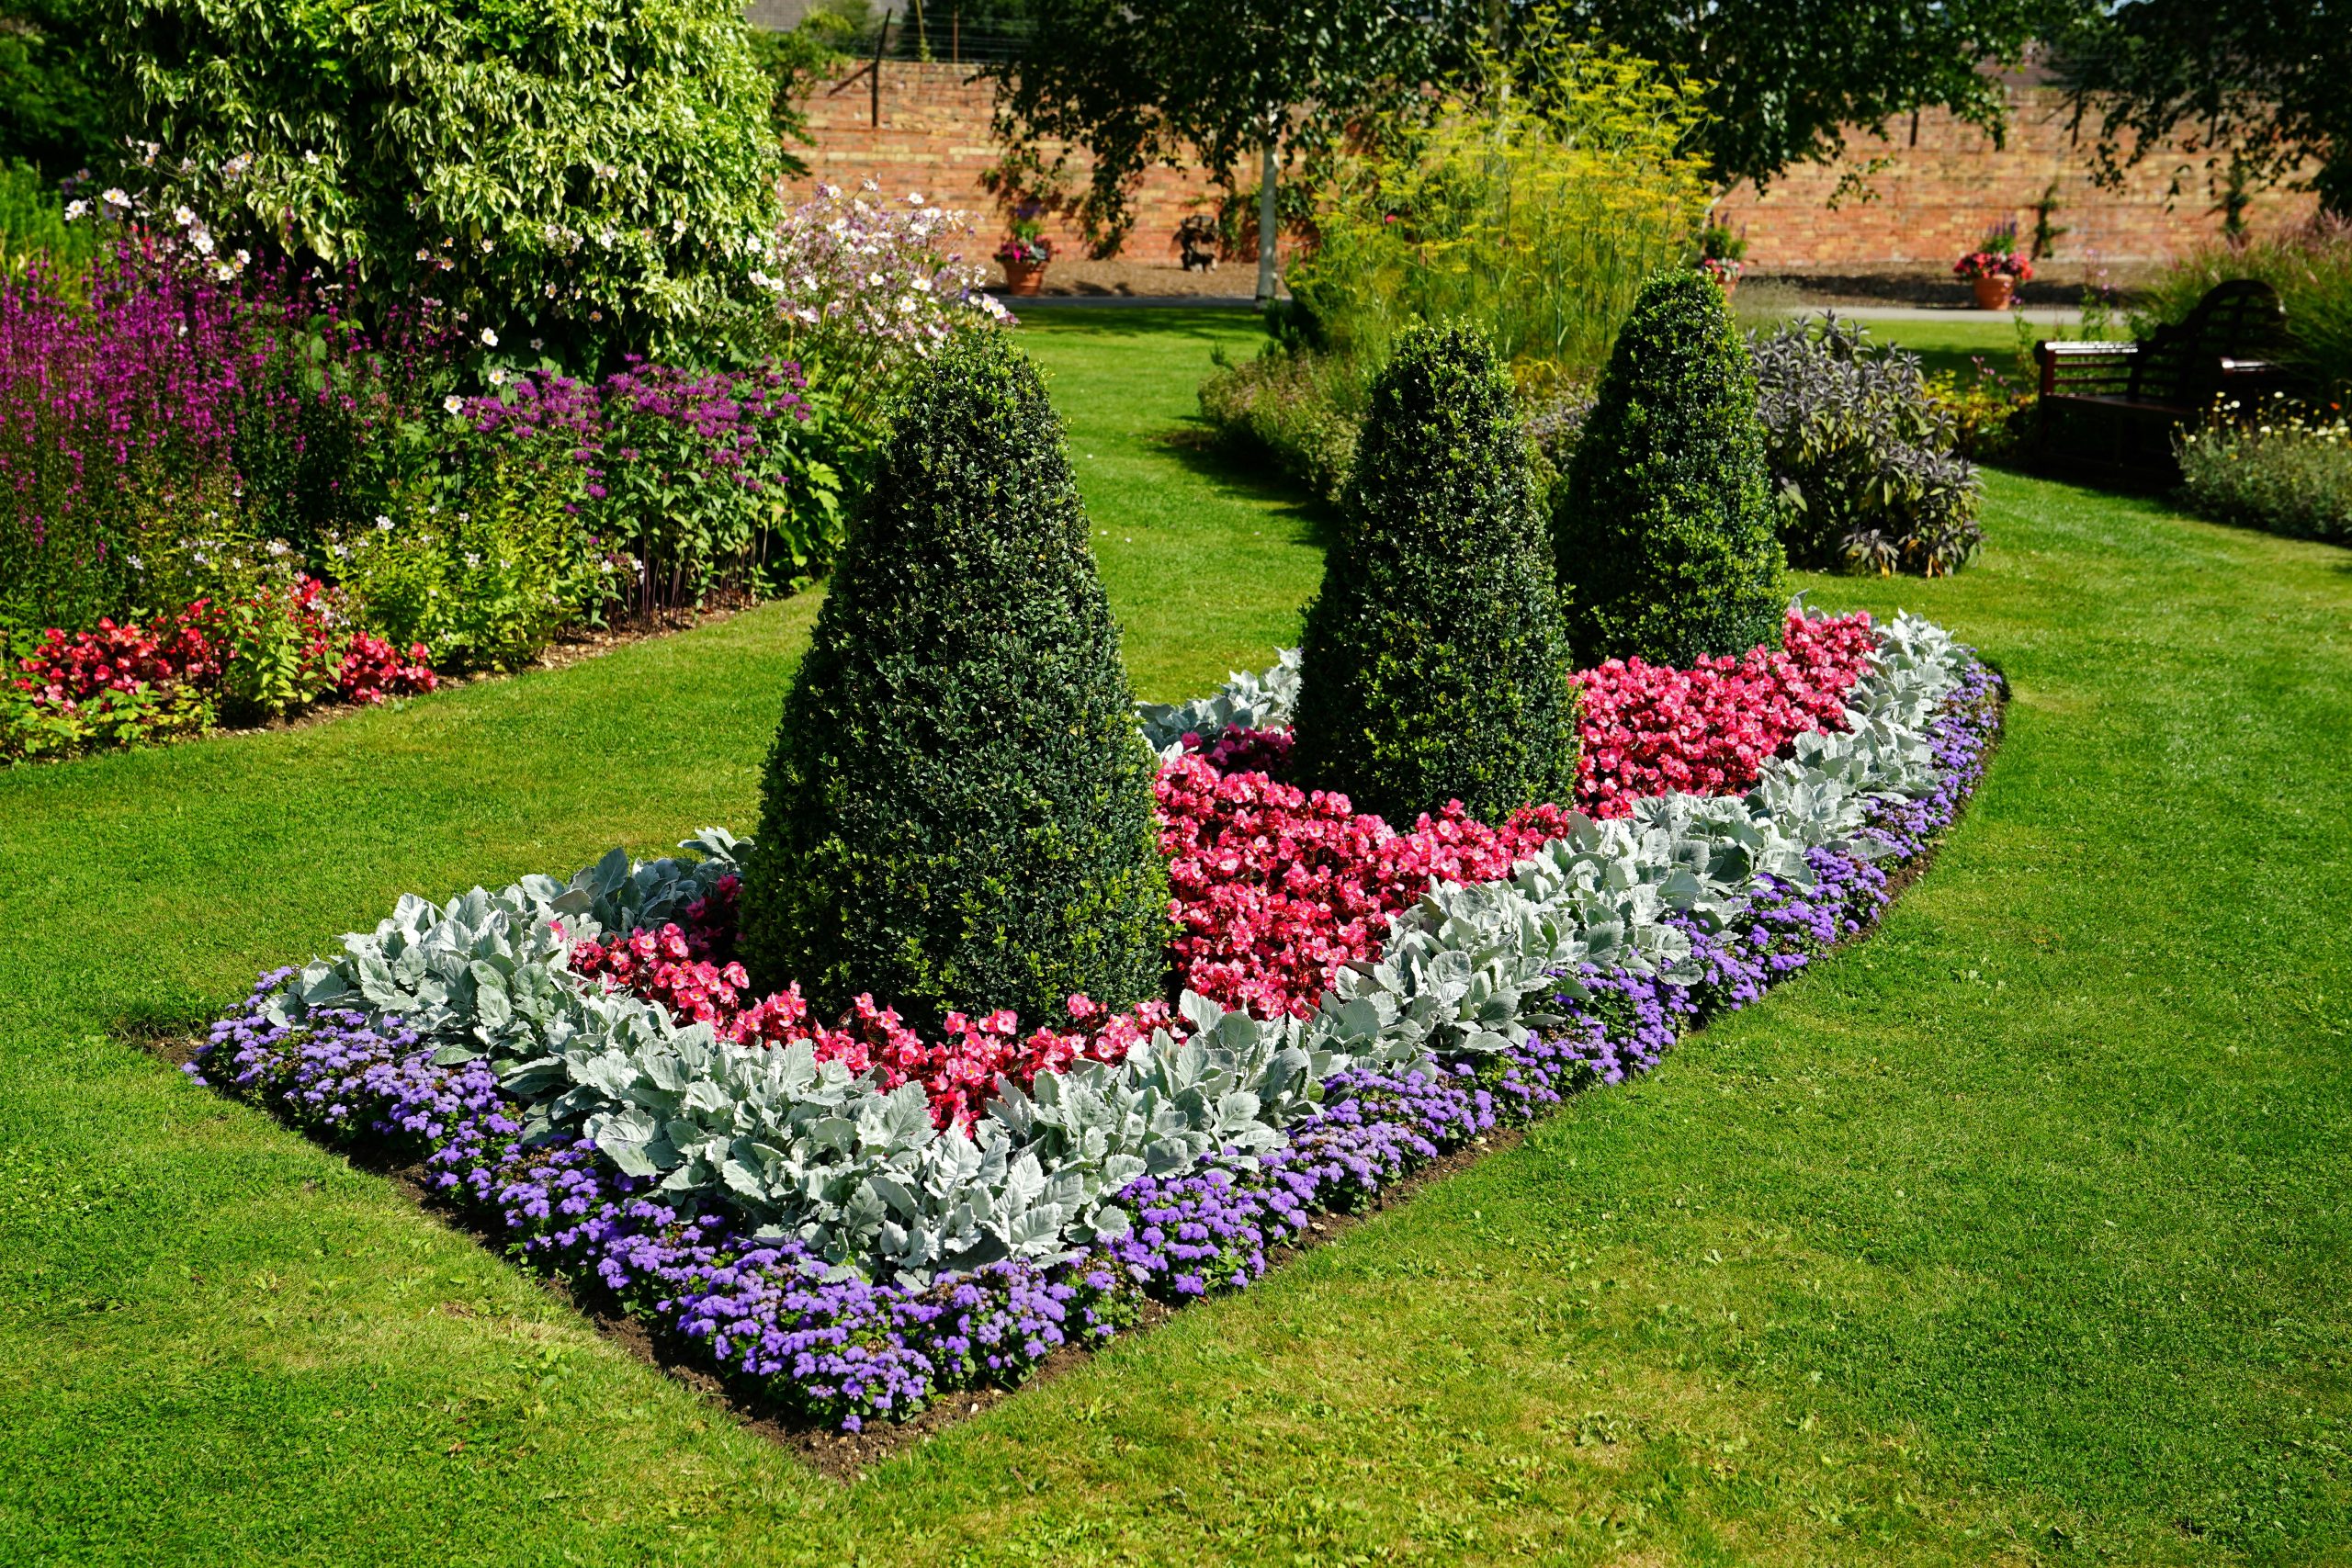
24. Plant a Formal Bed with Topiaries and Colorful Annuals
This design is a textbook example of the ‘thriller, filler, spiller’ planting concept but executed with formal flair. The cone-shaped topiaries are the ‘thrillers’—they provide the essential vertical structure and a clear focal point. The pink begonias and silvery Dusty Miller act as the ‘fillers,’ creating a mass of color and texture around the base of the thrillers. Finally, the purple carpet-forming plants at the edge act as the ‘spillers,’ softening the border and connecting the bed to the surrounding lawn. This classic combination creates a balanced, multi-level composition that is visually complete. The formality is similar to Idea #20, but with more vibrant color.
|
📋 Copy HEX 🔗 Share |
When creating a formal, symmetrical bed like this, precision is everything. Don’t just eyeball it. Use a measuring tape and landscape marking paint (or even flour) to draw the exact shape of your bed on the lawn before you start digging. To ensure your topiaries are perfectly spaced, measure the total length of the bed and use simple math to find the center point and the quarter points. Placing your ‘thriller’ plants with this level of precision is the key to achieving that polished, intentional, and high-end look.
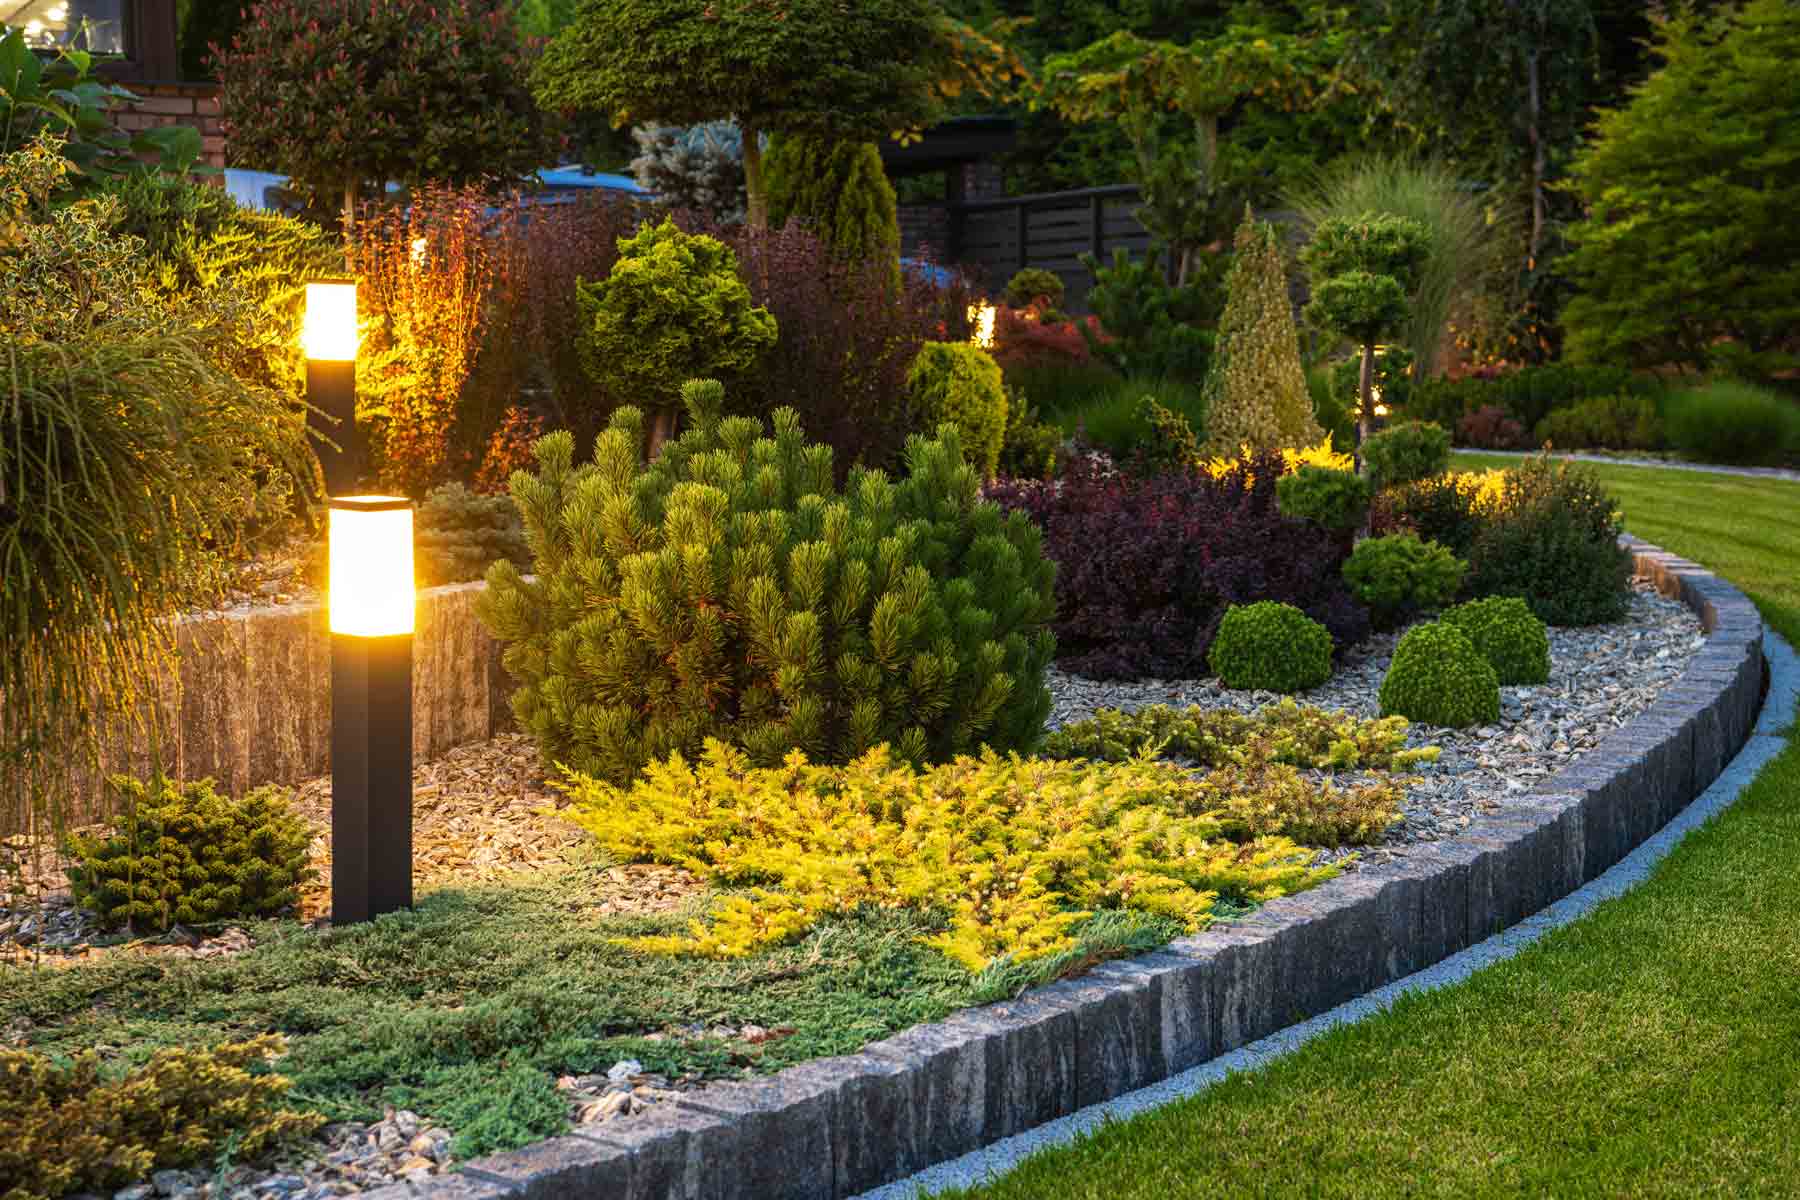
25. Illuminate a Garden Bed with Modern Bollard Lights
Landscape lighting can work in almost any size garden, but the scale of the fixtures is critical. These modern, rectangular bollard lights are about 18-24 inches tall, which is perfect for a medium-depth garden bed like this one. In a very small bed or along a narrow path, you’d want to use smaller, more discreet path lights (6-8 inches tall) to avoid overwhelming the space. In a very large, open area, you might use taller bollards or even downlighting from mature trees. The rule of thumb: the fixture should be prominent enough to make a statement but not so large that it dwarfs the plants around it.
|
📋 Copy HEX 🔗 Share |
The single element that transforms this from a pleasant daytime garden into a dramatic nighttime feature is the lighting. Without the warm glow of the bollard lights, this would just be a dark corner of the yard after sunset. The lights completely change the character of the space, creating pockets of light and deep shadows, highlighting the colors and textures of the foliage in a new way, and extending the time this beautiful garden can be enjoyed. They aren’t just functional for safety; they are a primary design element.
Your Perfect Backyard Is Just One Weekend Away
Feeling inspired? We hope so! The best backyards are the ones that reflect your personality and make you want to spend time outside. You don’t need a massive budget or a professional crew to create a beautiful space—just a good idea and a little bit of weekend effort. Pick an idea you love, start small, and enjoy the process. Now, head over to Pinterest and start creating a board for your dream yard!