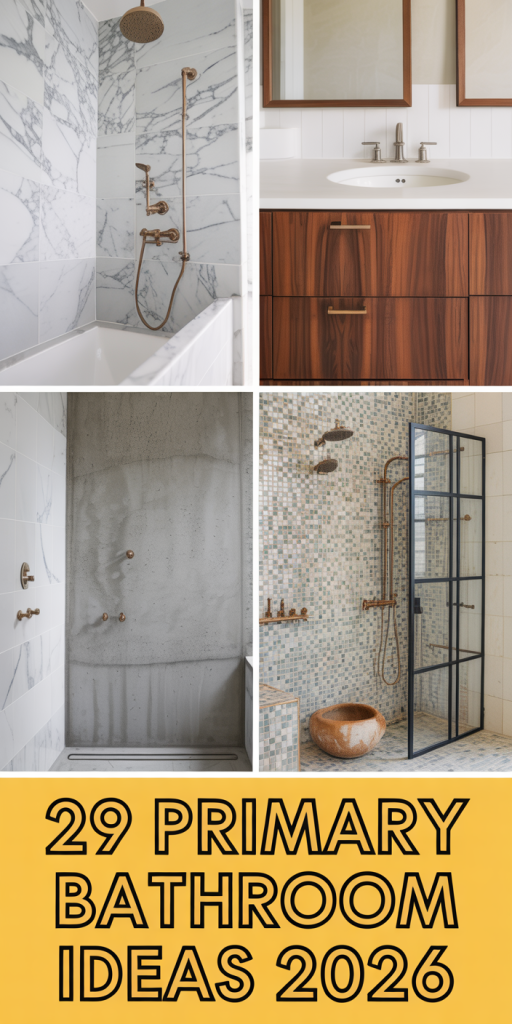
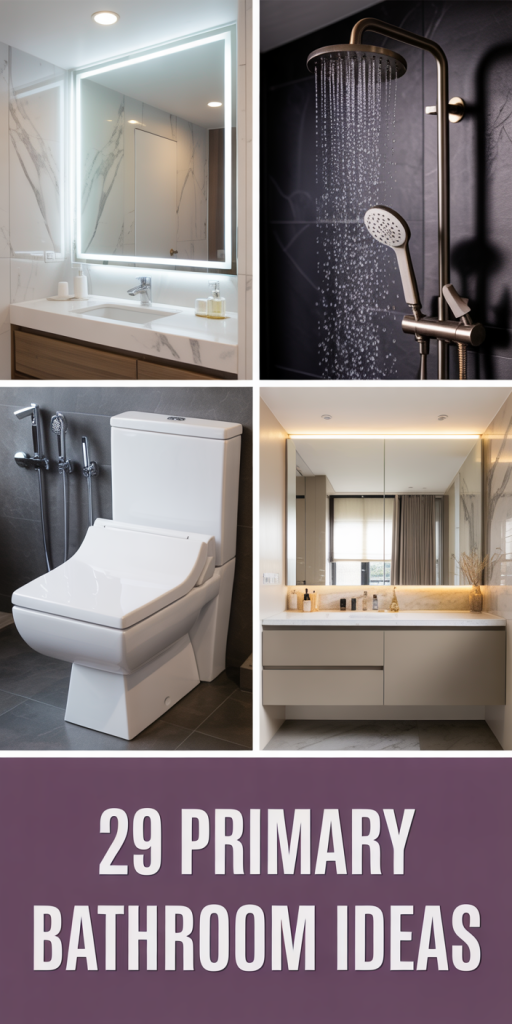
Are you familiar with that sensation when you save a pin of the ideal primary bathroom, and you are certain it is the one? That spark of “I need this” is precisely what we’ve bottled up for you here. Forget endless, generic scrolling. We’ve gone through hundreds of real homes and designer portfolios to find the 29 most inspiring, achievable primary bathroom ideas for 2026. These are the looks people are actually saving and building right now.
This isn’t just another pretty gallery. We’re breaking down what makes each space work, from the specific paint colors and tile choices to the exact vanity styles. We’ve included practical advice like budget breakdowns, designer tips, and honest talk about maintenance. Whether your taste is modern minimalist, timelessly classic, or you’re dreaming of a full-on spa sanctuary, there’s a concept here for you. We’ll even show you what not to do. And stay until the end — we break down the most common mistakes that can ruin these looks. 📌 Save this to Pinterest for later — you’ll want to revisit these ideas.
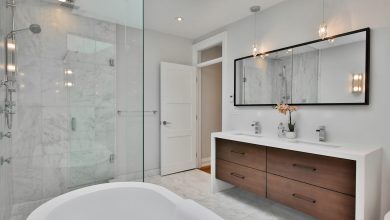
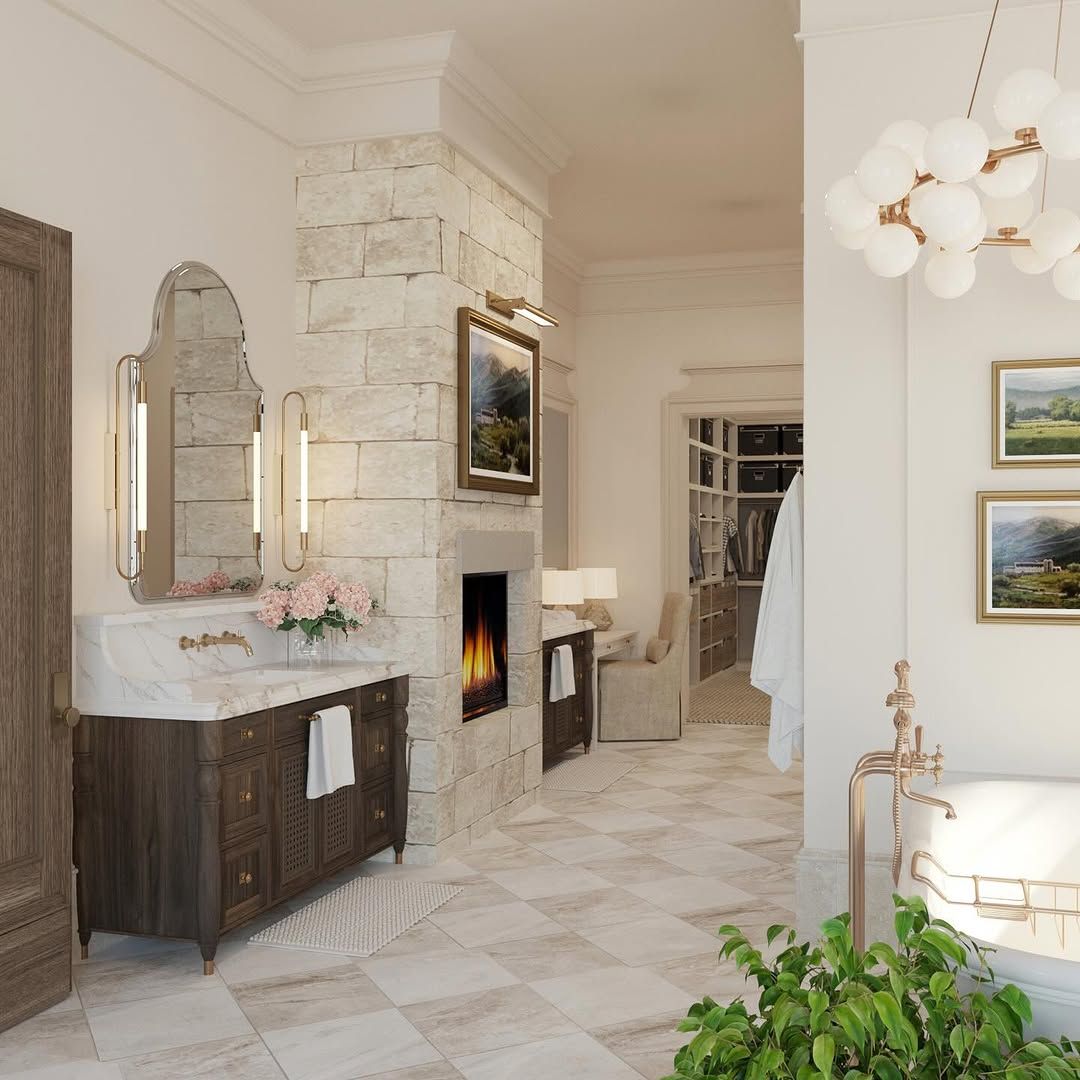
1. A Cozy Retreat with a Stone Fireplace and Dark Wood Vanity
The magic here is all about texture and temperature. The design masterfully balances the rustic, cool feel of the stone-clad fireplace and checkered floor tiles with the warmth of the dark wood vanity and the visible flames. This creates a room that feels both grounded and luxurious. The choice of rose gold for the tub fixtures, instead of a more standard chrome or nickel, adds an unexpected touch of softness and warmth, tying into the tones of the firelight and the wood.
|
📋 Copy HEX 🔗 Share |
Let’s be honest about a fireplace in the bathroom. While undeniably romantic and cozy, it requires special planning. You’ll need proper ventilation to handle humidity, which can be a complex and costly part of the installation. Maintenance is also key; the glass front will need regular cleaning to look its best, and you’ll have annual servicing to think about. Furthermore, consider local building codes, as they can be very specific about fireplace installation in a bathroom environment.
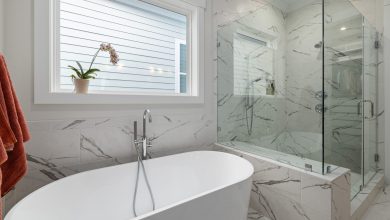
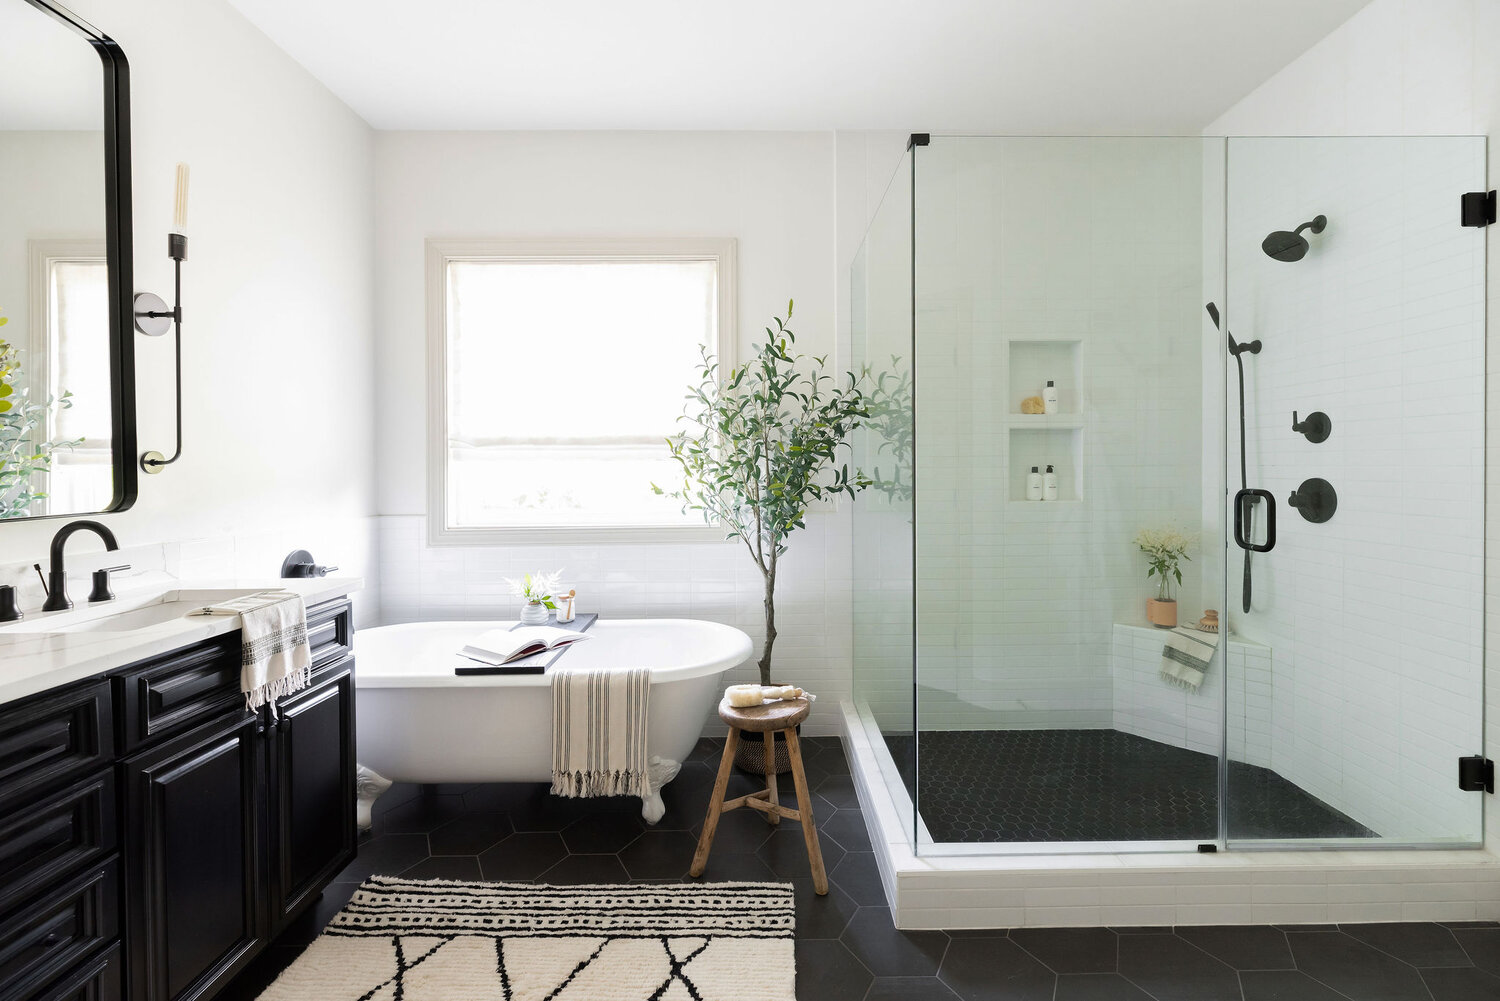
2. High-Contrast Serenity with Black Hexagon Floors and a Clawfoot Tub
This bathroom nails a clean, modern look by following a simple but effective formula: 60% bright white + 30% bold black + 10% natural warmth. The white subway tiles and walls create a light-bouncing, expansive base. The black hexagonal floor tiles and vanity provide a strong graphic anchor and a dose of drama. Finally, the touches of light wood in a small stool or accessory and a bit of greenery keep the high-contrast palette from feeling too sterile and stark.
|
📋 Copy HEX 🔗 Share |
You don’t need a hugeget to get this graphic, high-contrast vibe. Start with the floor: you can find wonderful porcelain hexagonal tiles at places like Floor & Decor or even Home Depot for a fraction of the cost of high-end brands. For the clawfoot tub, check Facebook Marketplace or a local architectural salvage yard—a vintage find can have so much more character. Pair it with an affordable vanity from IKEA and matte black fixtures from Wayfair or Amazon to complete the look for a few thousand dollars, not tens of thousands.
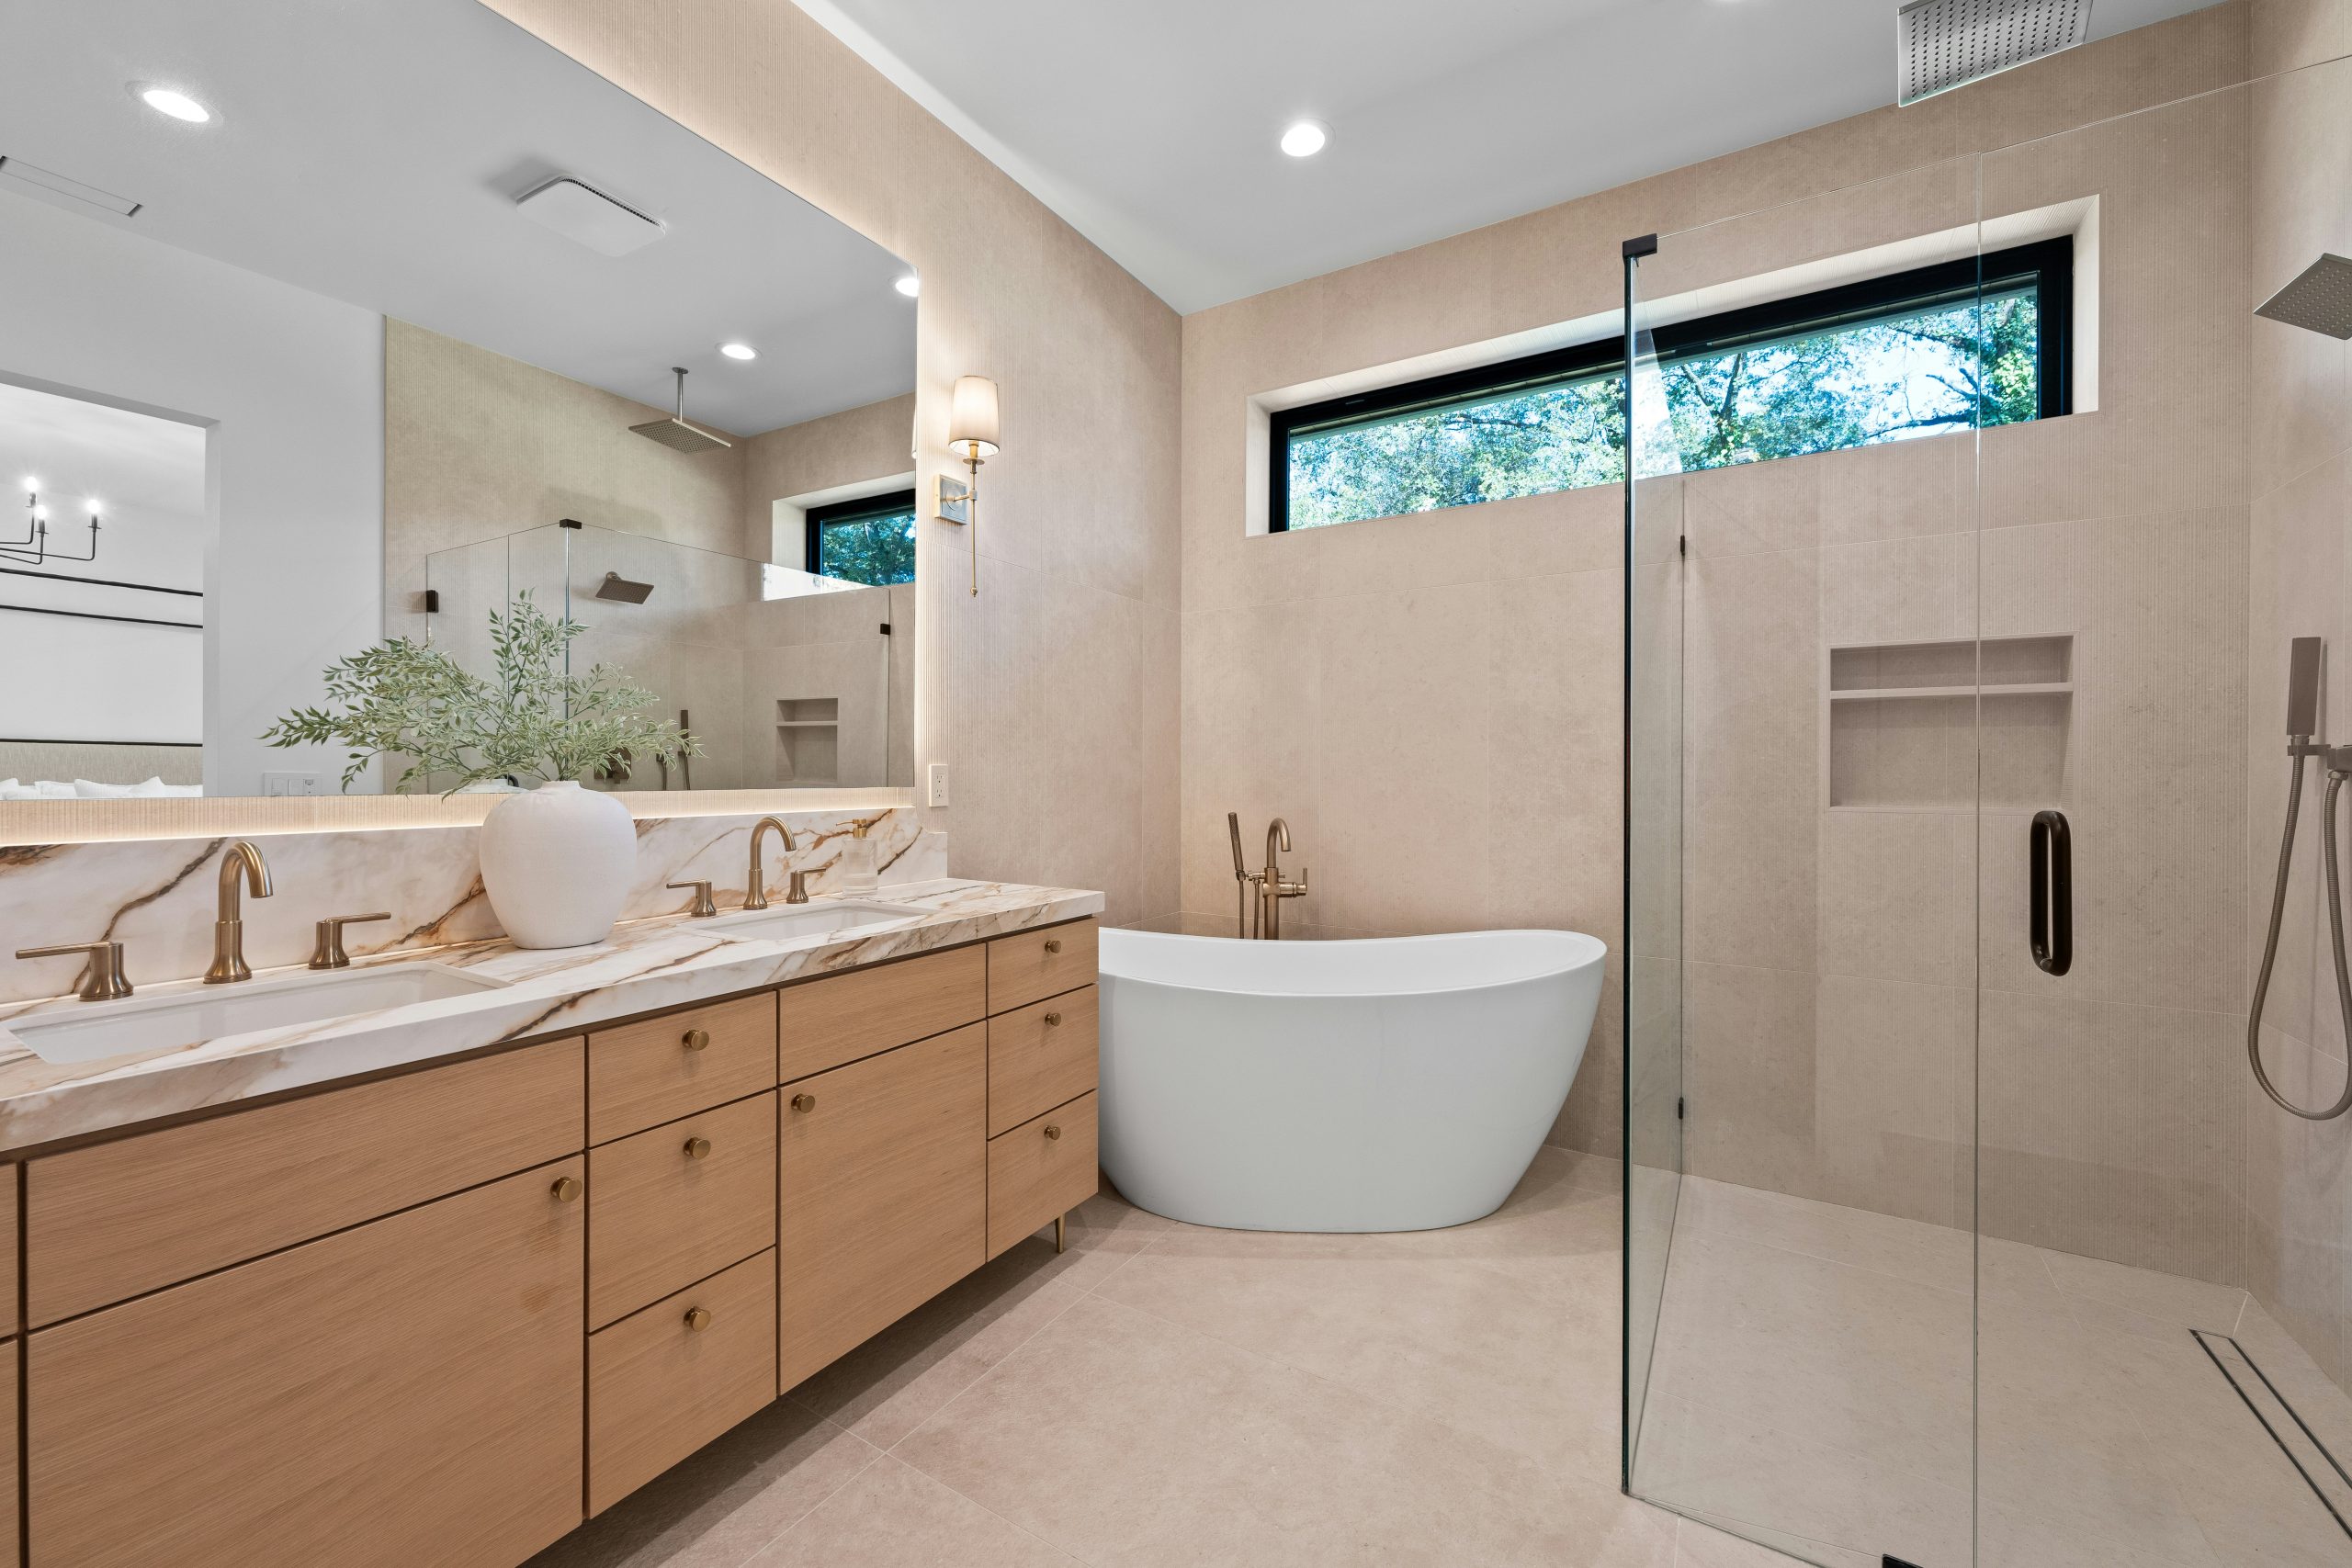
3. Achieve Spa-Like Calm with a Floating Wood Vanity and Textured Beige Tiles
When installing a floating vanity, especially a long one holding a heavy marble top, solid mounting is non-negotiable. Don’t just rely on drywall anchors. You must locate and anchor the vanity’s support bracket directly into the wall studs. For best results, add horizontal blocking between the studs before the drywall goes up. This gives you a solid wood surface to screw into, ensuring your vanity will remain perfectly level and secure for years to come, no matter how many people lean on it.
|
📋 Copy HEX 🔗 Share |
Those beautifully textured wall tiles are a key part of this room’s serene, organic feel, but they do require a bit more cleaning effort than a smooth tile. The subtle ridges can catch dust and soap scum, especially in the shower area. A weekly wipe-down with a soft brush and a high-quality tile cleaner is a must. For the marble countertop, be vigilant. Wipe up any spills from makeup or colored soaps immediately, as marble is porous and can stain easily. Using a pH-neutral stone cleaner is the best way to protect its surface.
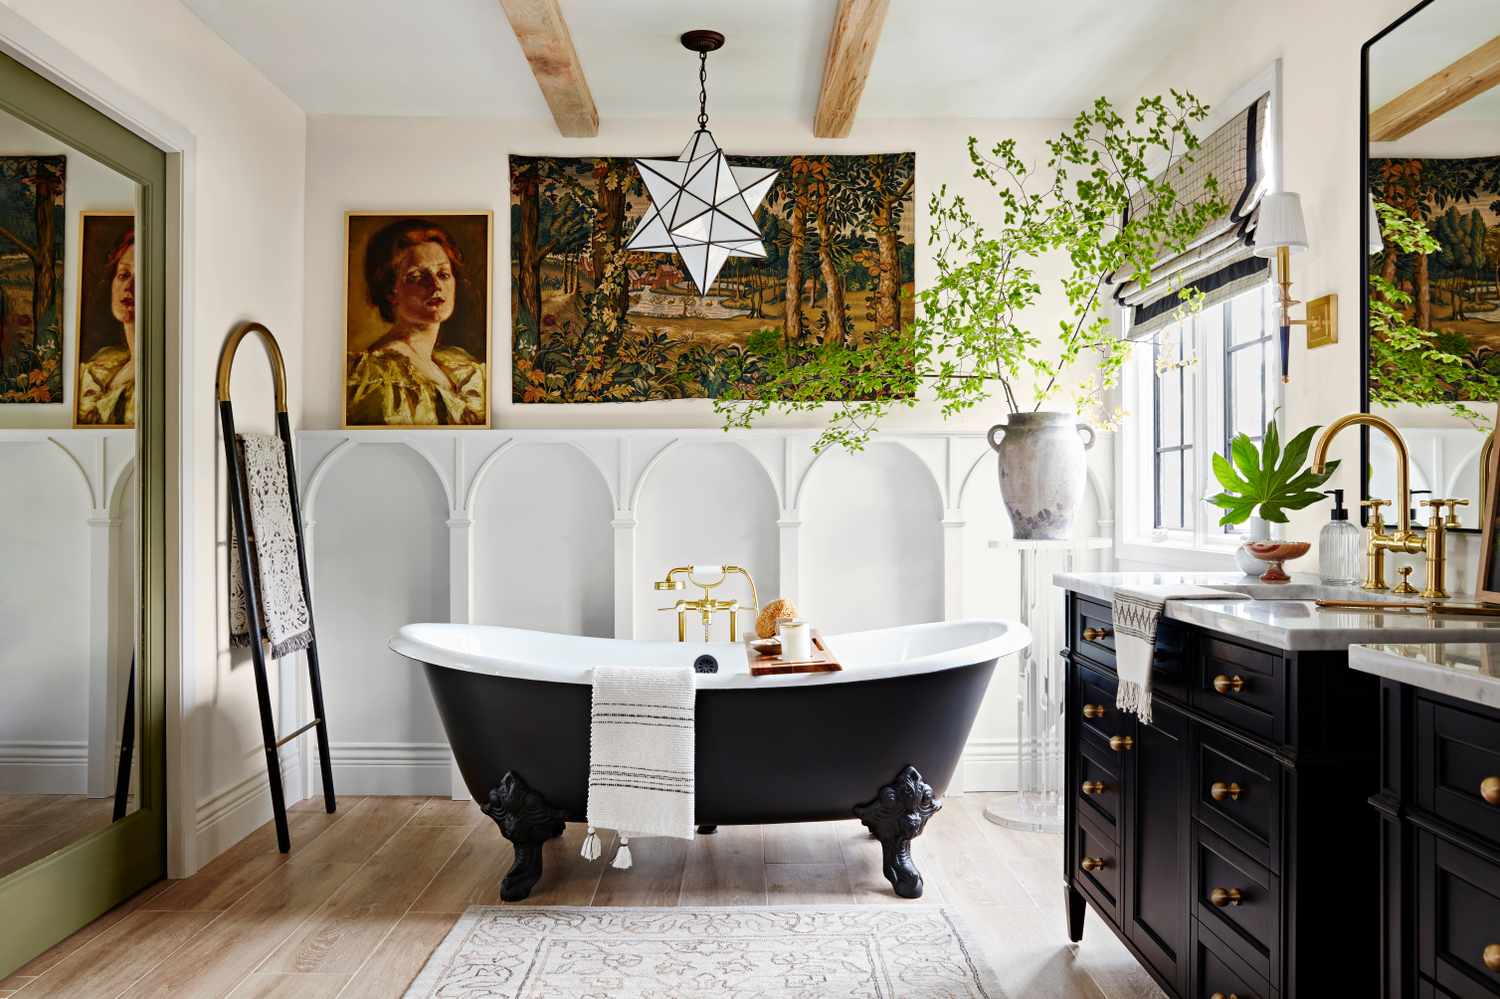
4. Timeless Charm with a Black Clawfoot Tub and an Arched Wall Panel
The single element that elevates this bathroom from simply nice to stunning and truly memorable is the oversized landscape tapestry. Without it, you have a beautiful, classic bathroom. With it, you have a story. It introduces color, character, and a sense of history that fixtures and tile alone cannot. It’s a bold, unexpected choice that serves as art and transforms the entire mood of the space, making the classic elements feel curated and personal rather than formal.
|
📋 Copy HEX 🔗 Share |
This look is a perfect example of the “Modern Ancestral” trend we’re seeing everywhere. It’s about blending classic, almost historical, elements (the clawfoot tub and the arched paneling) with personal, artful touches (the tapestry and the geometric light fixture). It rejects the idea of a sterile, cookie-cutter bathroom in favor of a space that feels collected and deeply personal. It’s about creating a home that reflects not just current trends but also your own unique story and taste.
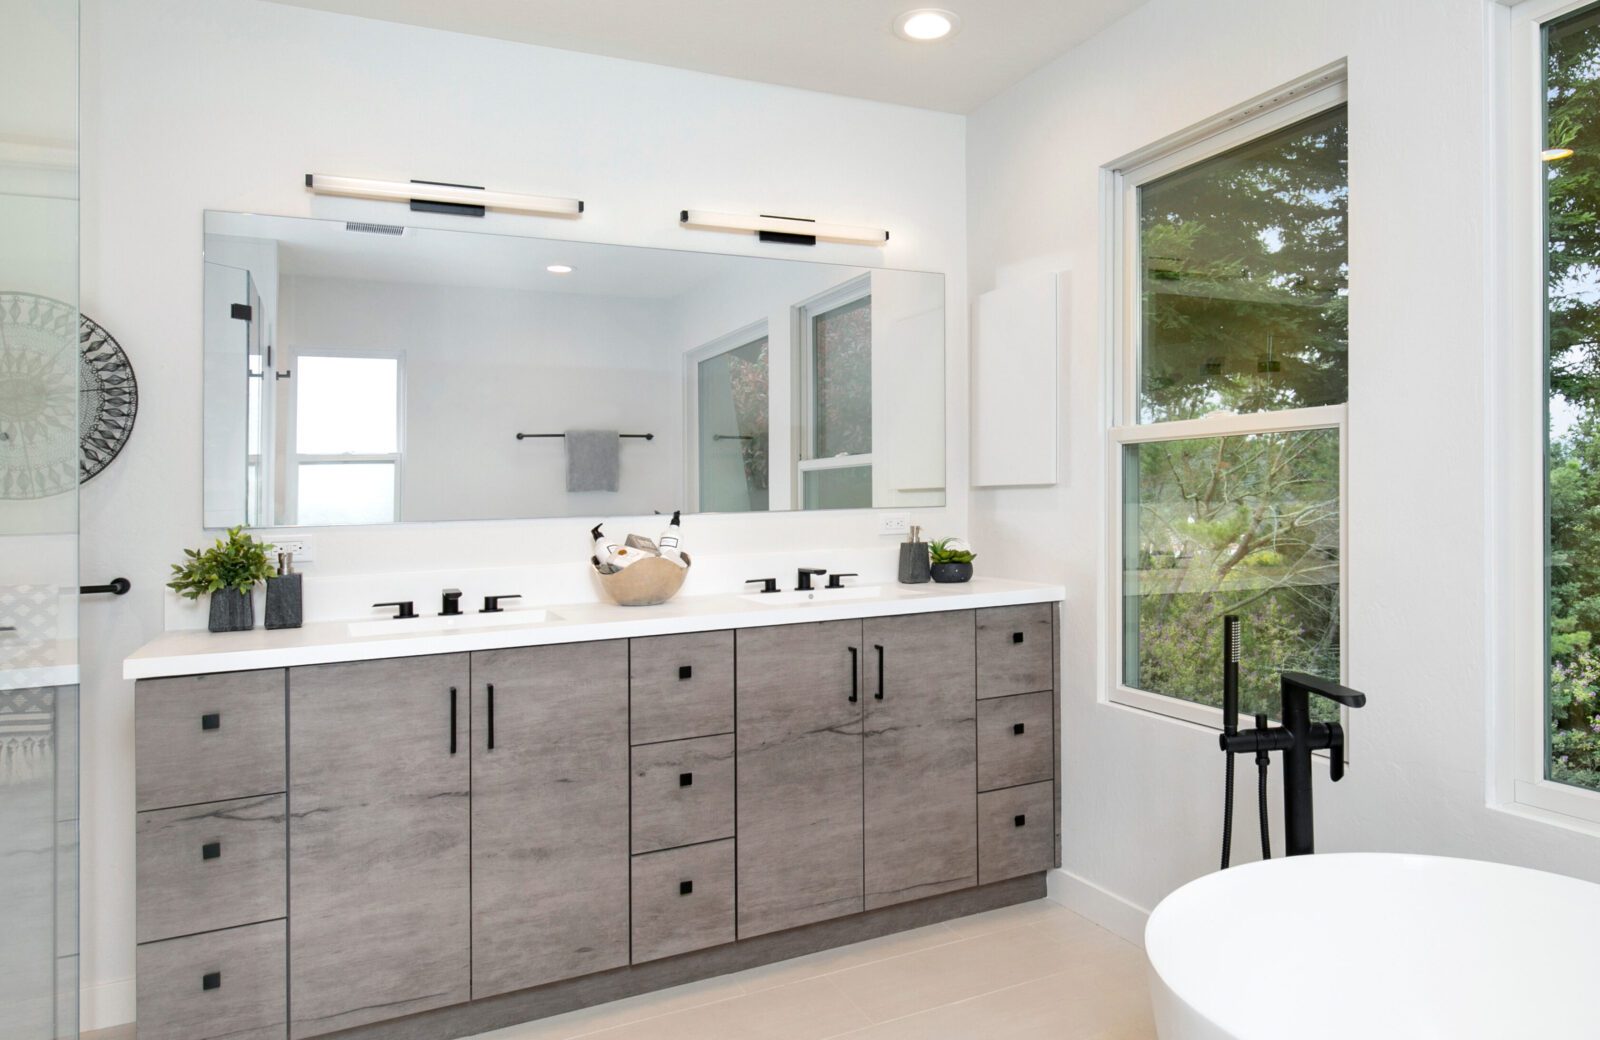
5. Modern Calm: A Light Grey Vanity with Matte Black Fixtures
Recreating this clean and modern look has a flexible price range, depending on your choices for the vanity and tub. The custom-look grey vanity and premium freestanding tub are the biggest investments.
|
📋 Copy HEX 🔗 Share |
- Main Furniture (Vanity & Countertop): $3,000 – $7,000
- Lighting (Vanity lights, recessed): $500 – $1,500
- Textiles (Towels, rug): $200 – $500
- Fixtures (Faucets, tub filler): $1,000 – $2,500
- Freestanding Tub: $1,500 – $4,000
- TOTAL: $6,200 – $15,500
Budget alternative: Source a stock vanity from a big-box store and paint it; use high-quality laminate instead of stone; and find a more affordable acrylic tub to achieve a similar vibe for around $3,500 – $6,000.
This design works best in a moderately sized to large primary bathroom, ideally with at least 100-120 square feet. The key is having enough length for the double vanity (you need a wall at least 72 inches long) and enough floor space to walk comfortably around the freestanding tub. A minimum ceiling height of 8 feet is fine, but the transom windows really shine with 9-foot or higher ceilings, drawing the eye upward and maximizing natural light. For smaller spaces, consider the layout in Idea #26.
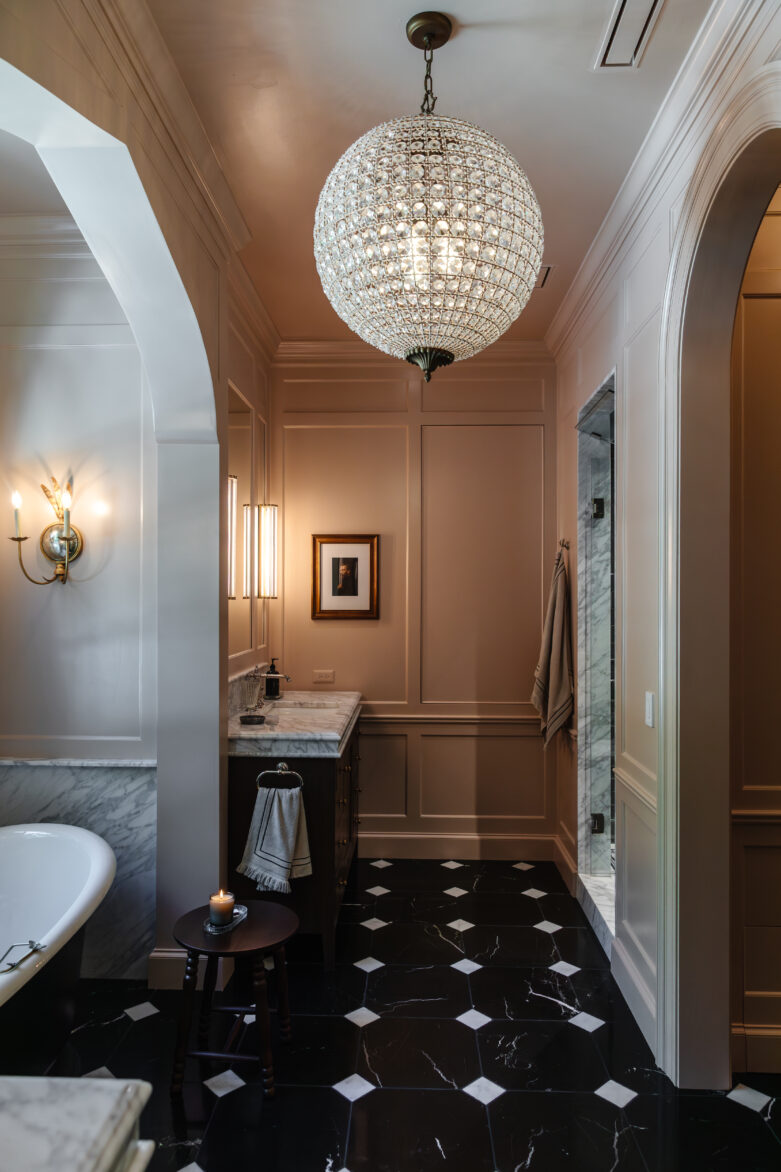
6. Sophisticated Drama: Taupe Wainscoting and a Crystal Chandelier
This bathroom’s success lies in its confident use of vertical space. The tall, taupe-colored wainscoting draws the eye upward, making the room feel grander and the ceilings higher. The white archway beautifully frames the transition into the space, adding an architectural element that feels custom and stately. The dark marble floor with its crisp white diamond accents provides a deep, rich foundation that grounds the lighter elements above, creating a beautiful and classic contrast.
|
📋 Copy HEX 🔗 Share |
A crystal chandelier in a bathroom is a statement, but it’s also a magnet for dust and moisture. To keep it sparkling, you’ll need to commit to a cleaning routine. About once a month, turn off the power and use a feather duster or a dry microfiber cloth to remove surface dust. Every 3-6 months, a deeper clean is in order, which involves carefully wiping each crystal with a specialized cleaner or a simple vinegar-water solution. It’s a labor of love, for sure.
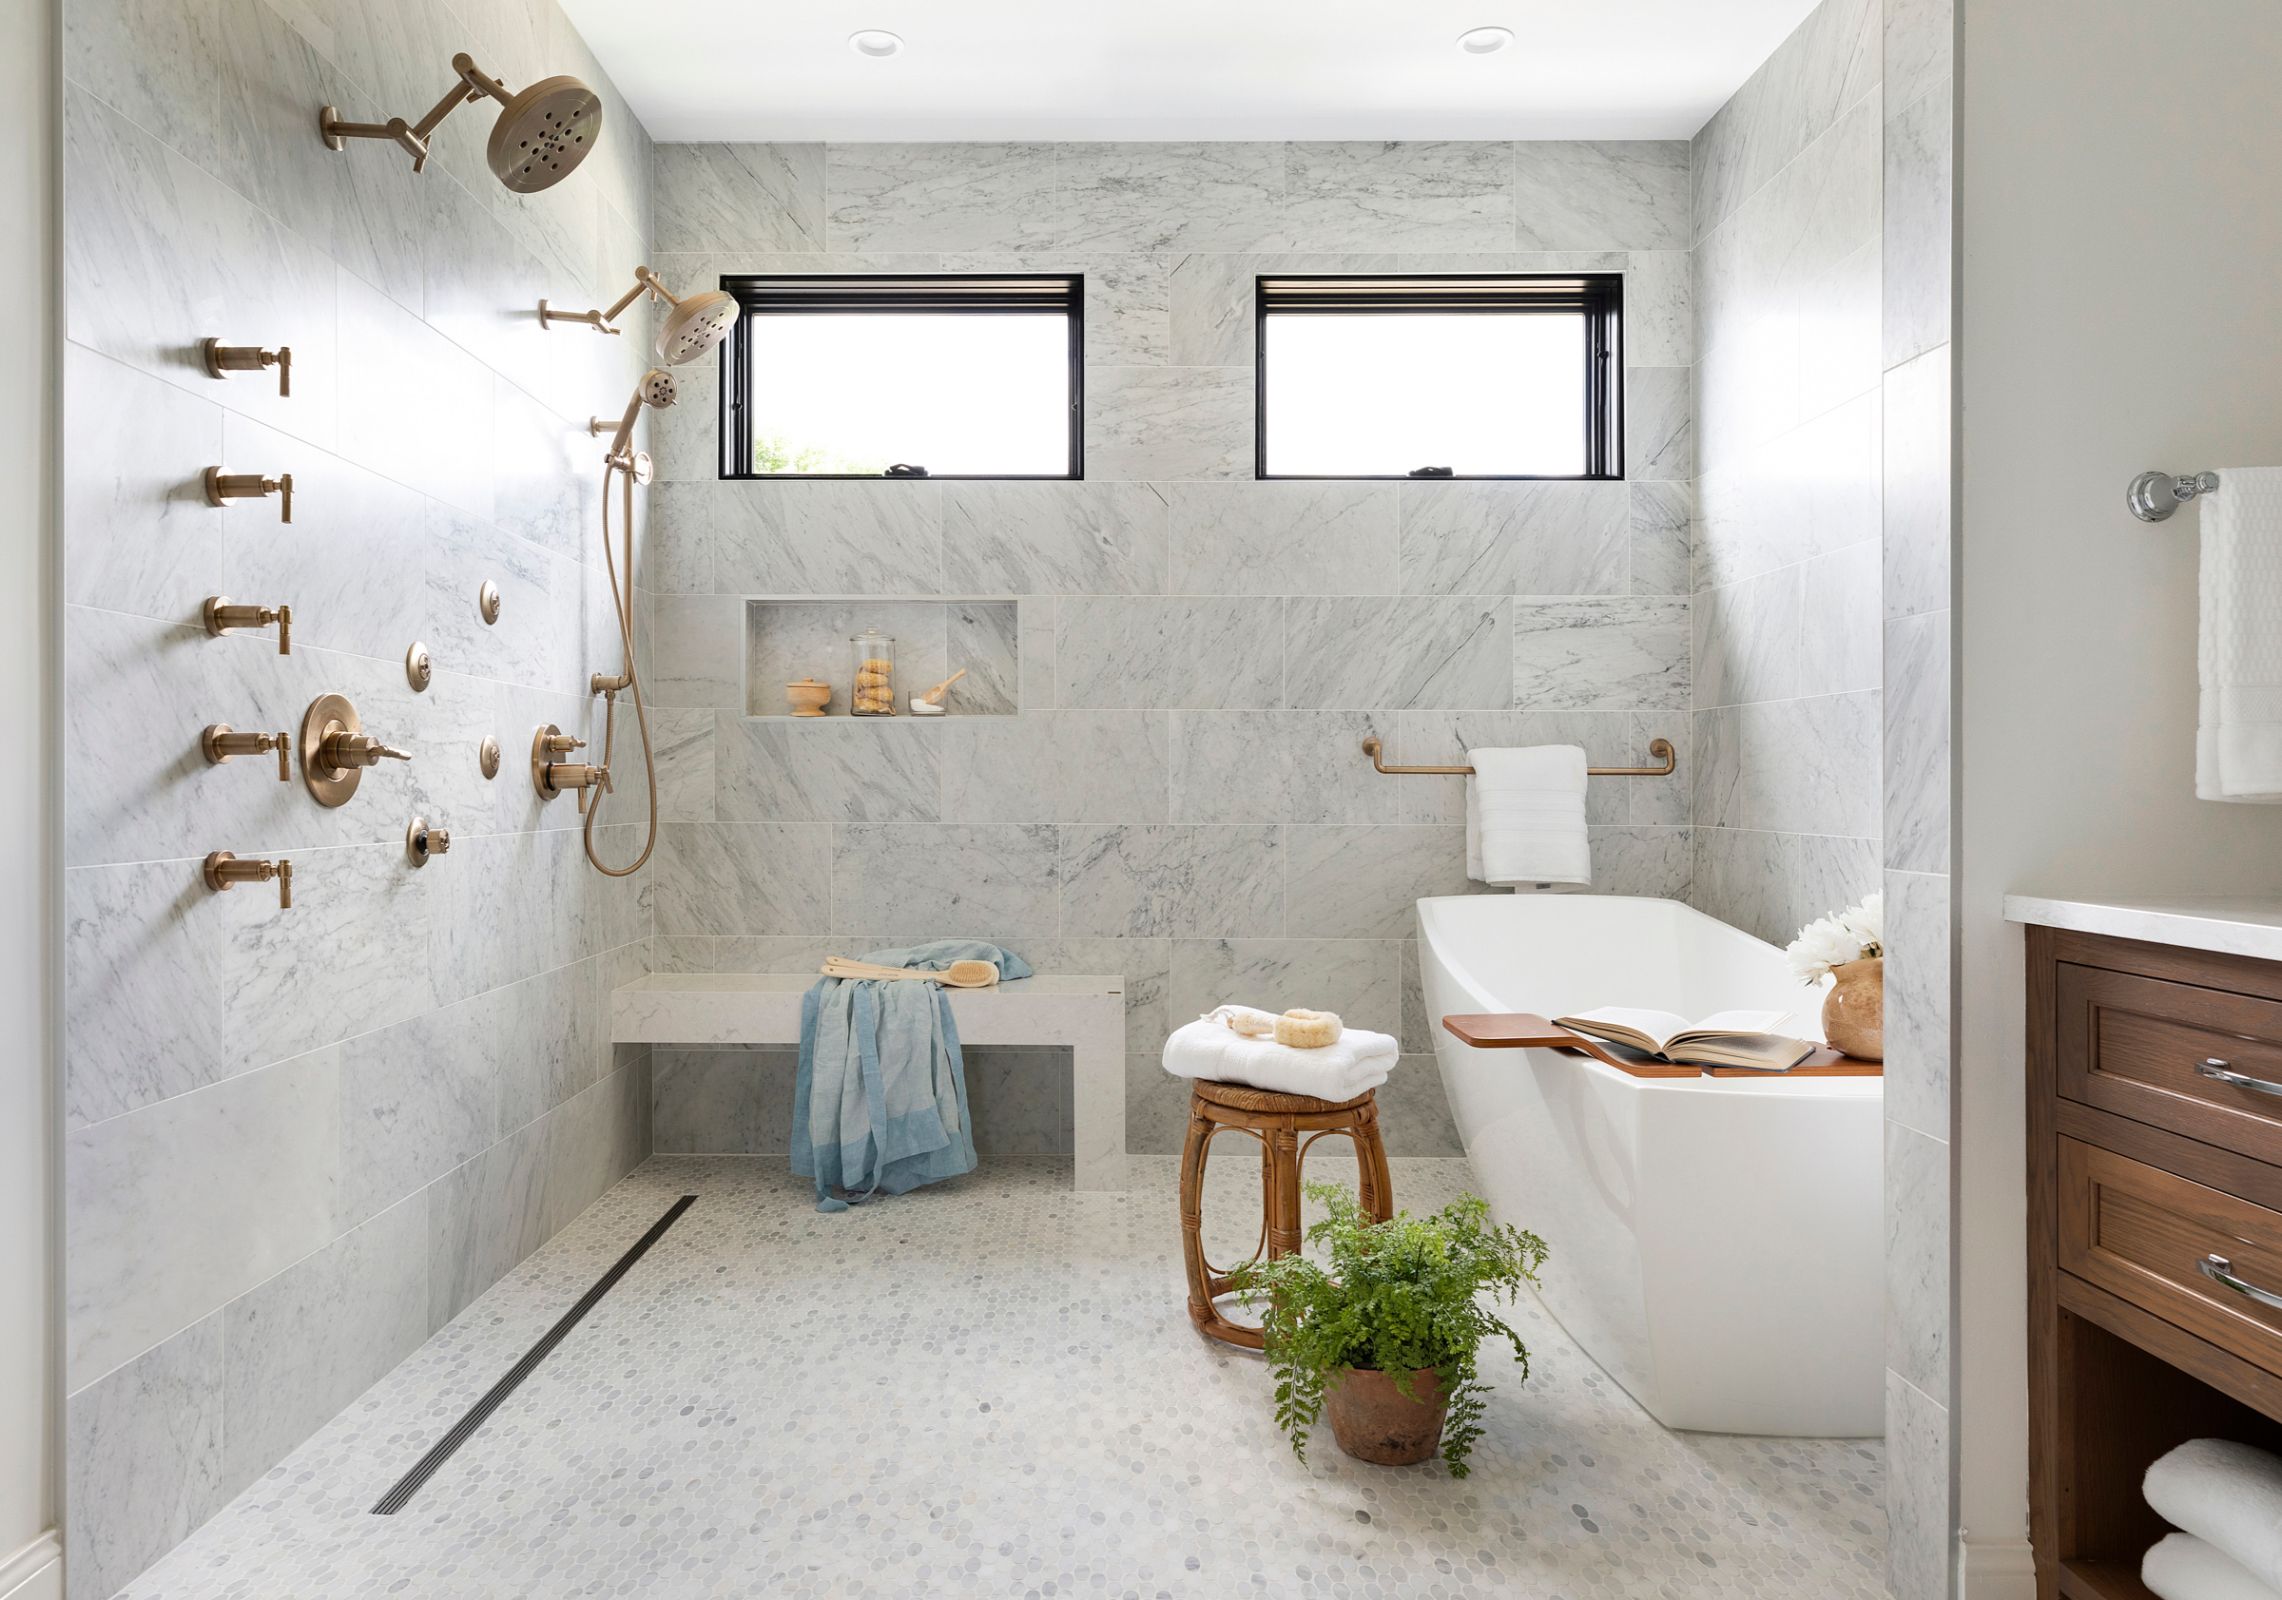
7. Build a Spa-Like Retreat with Marble-Look Tiles and Brass Fixtures
Installing a pebble tile floor in your shower gives a wonderful foot massage, but the key is getting a perfectly smooth finish. Here’s a quick guide:
|
📋 Copy HEX 🔗 Share |
- Prep is Key: Ensure your shower pan is properly sloped, clean, and dry. (Time: Varies, Cost: Part of shower build)
- Dry Layout: Lay out your interlocking pebble sheets to ensure a good, perfect mix and mix different sheets to avoid pattern repetition. (Time: 30 mins)
- Apply Mortar: Using a 1/4″ notched trowel, apply a thin, even layer of thin-set mortar. (Time: 20 mins)
- Set the Sheets: Gently press the pebble sheets into the mortar. Use a small piece of plywood and a rubber mallet to lightly tamp them down, ensuring all stones are level. (Time: 45 mins)
- Grout Generously: After the mortar cures (24-48 hrs), apply grout, making sure to push it deep into all the crevices between the stones (Time: 1 hour, Cost: $40 for grout)
- Clean & Seal: Wipe away excess grout, let it cure fully, then apply a high-quality stone sealer. (Time: 30 mins, Cost: $30 for sealer)
When selecting brushed brass fixtures, pay close attention to the “living finish.” Some brass is unlacquered, meaning it will naturally patina and darken over time when exposed to water and air, creating a unique, aged look. Other options are sealed with a PVD (Physical Vapor Deposition) finish, which protects the color and sheen, keeping it consistent for years. Decide which path you prefer before you buy—the evolving character of a living finish or the steadfast consistency of a sealed one.
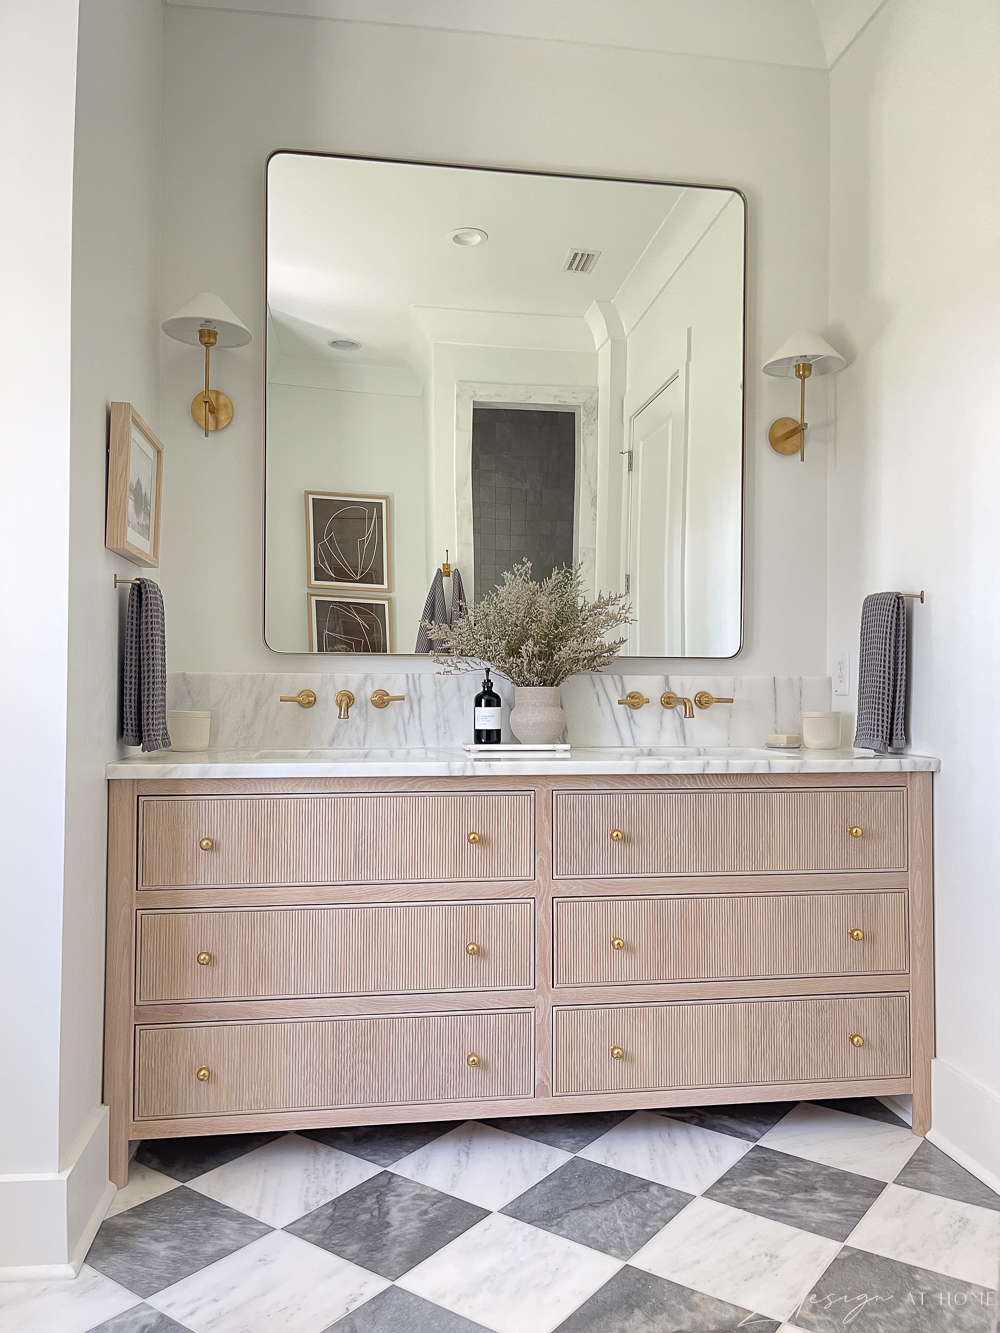
8. Classic Meets Contemporary: A Fluted Vanity and Checkerboard Floor
The formula for this serene space is a study in balanced sophistication: 50% classic patterns + 40% modern textures + 10% warm metallics. The black-and-white checkerboard marble floor is a timeless choice that provides a strong graphic base. The overall design is modernized by the clean lines and trendy fluted texture of the light wood vanity. The brass faucets and sconces add the essential 10% of warmth and gleam, preventing the black, white, and wood palette from feeling too flat. Compare this with Idea #2, which uses a different black and white floor for a more starkly modern feel.
|
📋 Copy HEX 🔗 Share |
Real marble flooring is a huge investment, but you can get this classic checkerboard look for so much less. Luxury Vinyl Tile (LVT) is your best friend here. Brands at Home Depot or Lowe’s offer incredibly realistic marble-look vinyl tiles for a few dollars per square foot. They are waterproof, durable, and much warmer underfoot than real stone. For the vanity, look for a stock model and add your own fluted paneling, which you can find online, to the drawer fronts for a high-end, custom look on a budget.
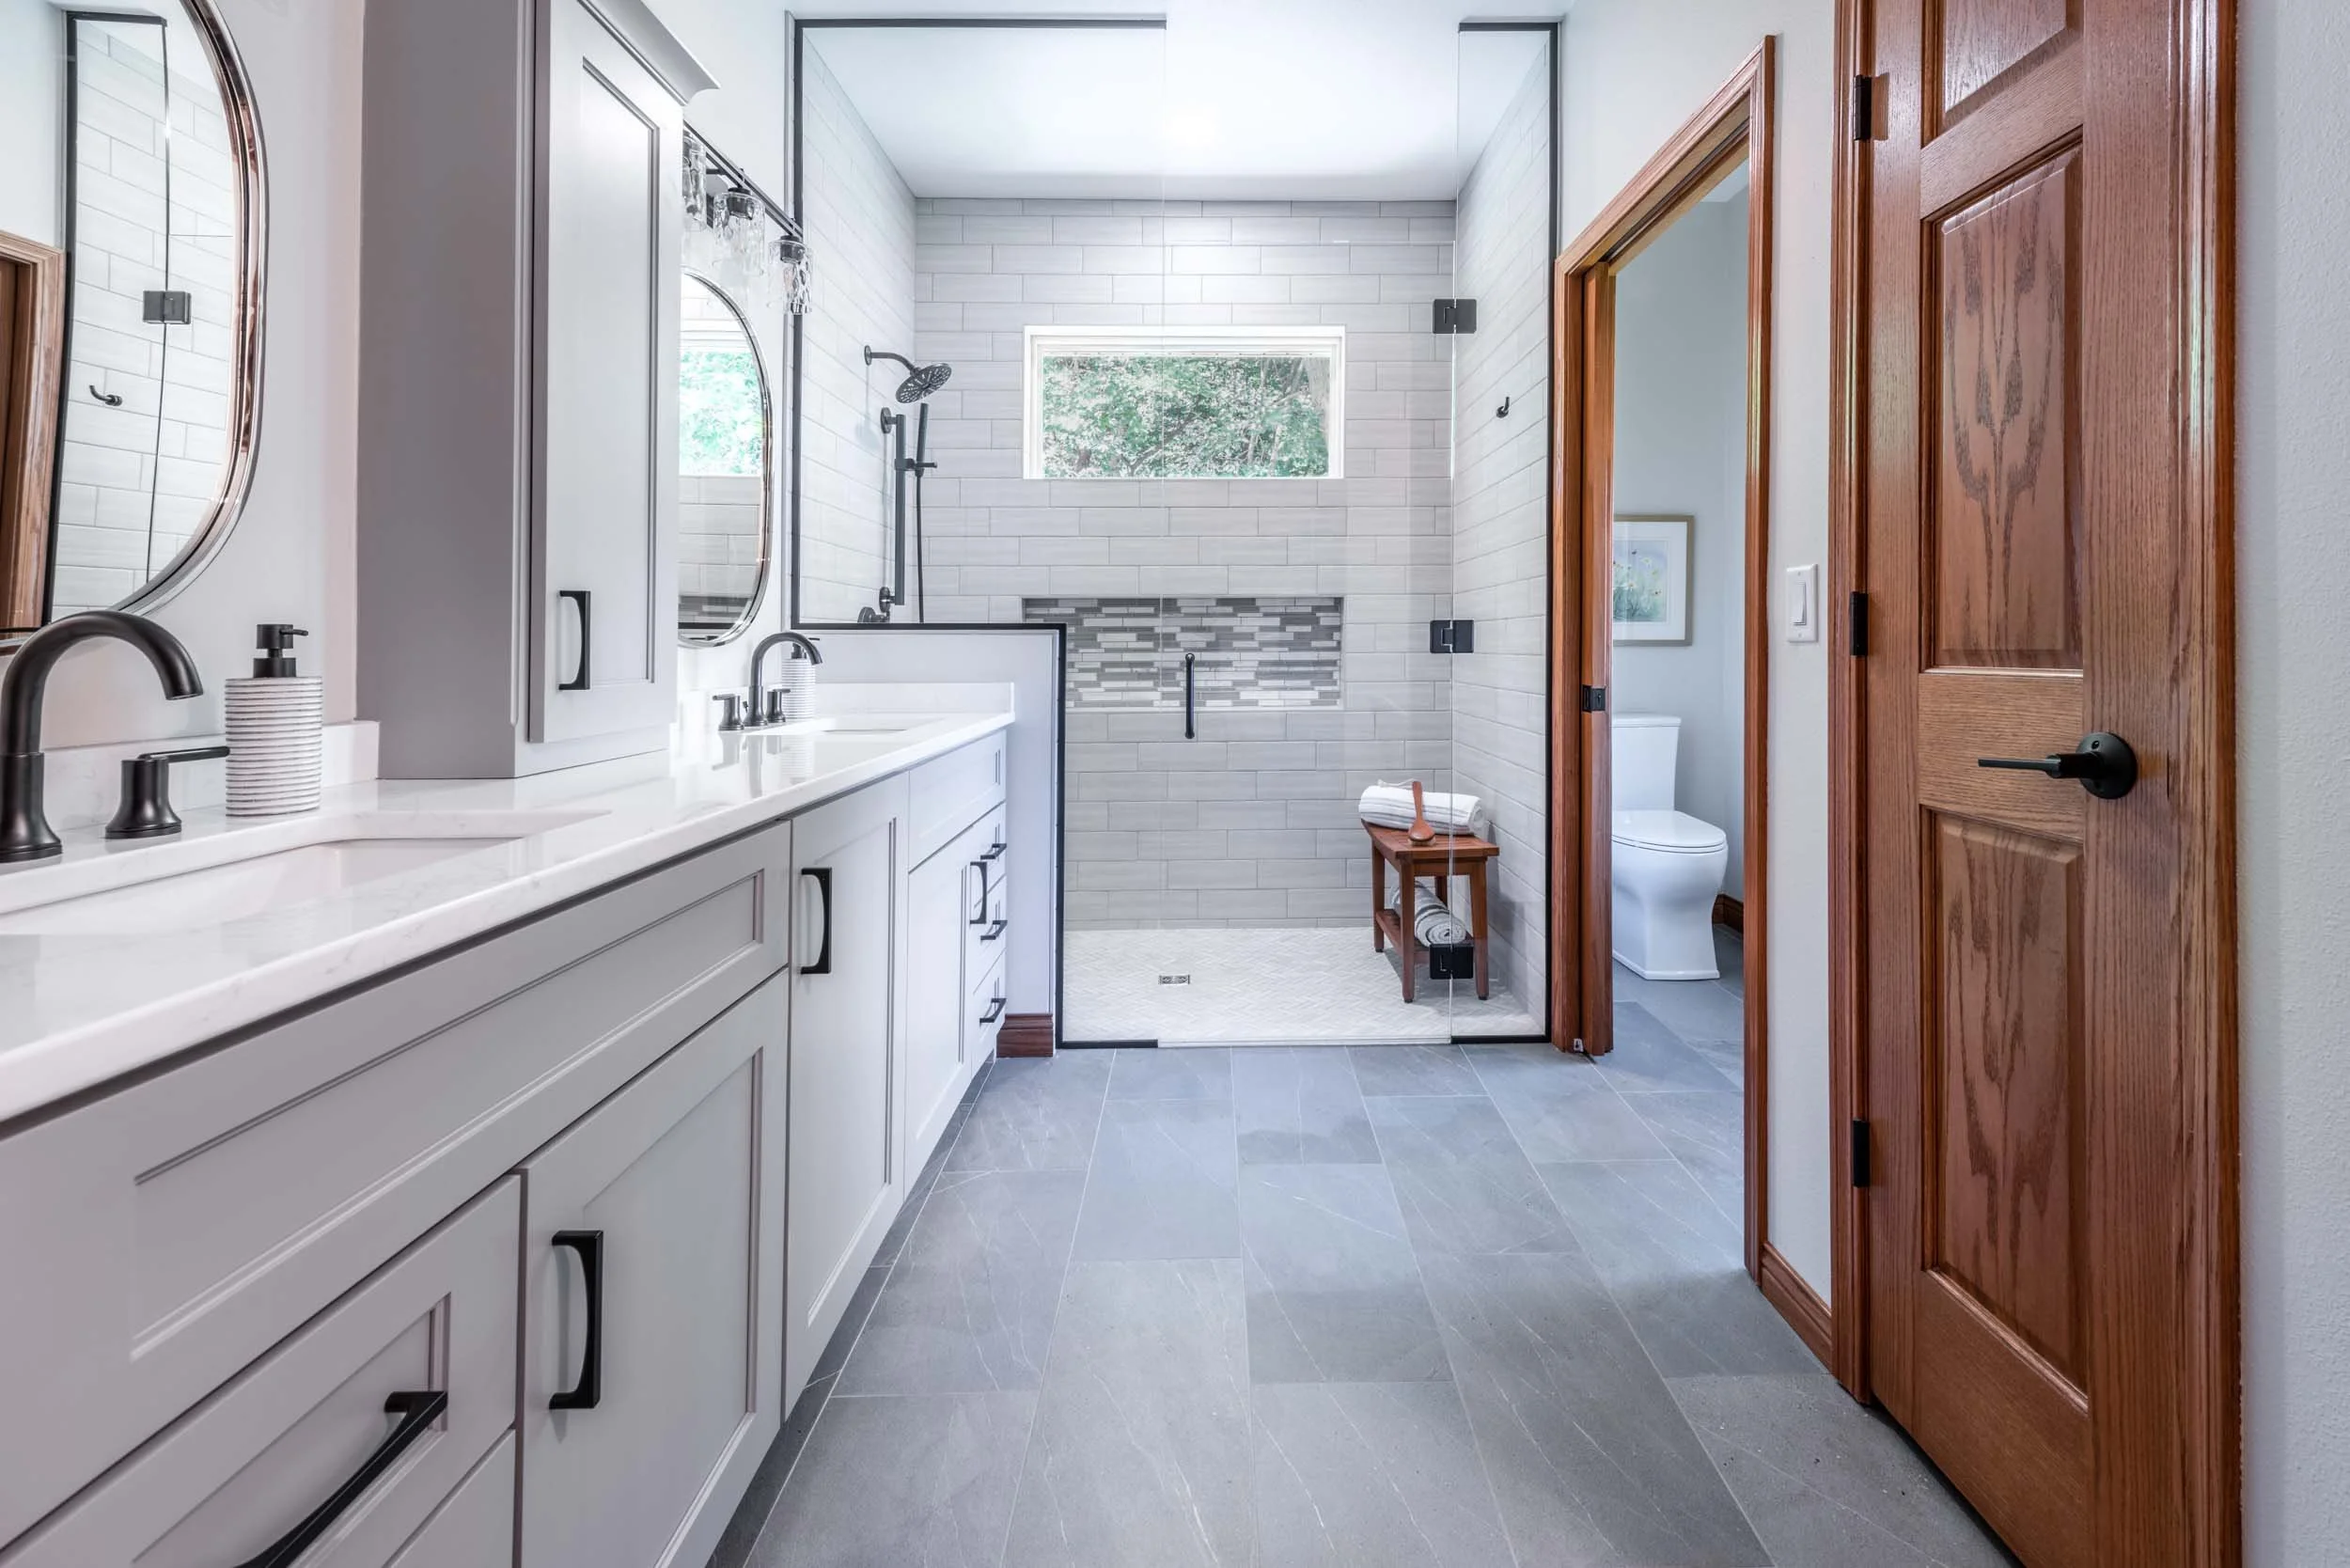
9. A Functional Family Bathroom in Gray and White with Bronze Accents
This bathroom is a masterclass in subtle layering of neutrals. Instead of one shade of gray, it uses several: light gray on the cabinets, a slightly darker gray on the floor tiles, and an even lighter gray in the shower subway tiles. This creates depth and interest without needing a bold accent color. The dark bronze hardware acts as the perfect punctuation, defining the shapes of the cabinets and faucets against the soft gray backdrop. The decorative mosaic band in the shower is just enough detail to feel special.
|
📋 Copy HEX 🔗 Share |
A double vanity and separate walk-in shower layout like this is ideal for a primary bathroom that needs to be highly functional for two people. You’ll want a room that is at least 110 square feet to avoid feeling cramped. The minimum width to comfortably fit the vanity, a toilet, and a shower side-by-side is about 9 feet. This ensures you have proper clearance for doors to swing and for two people to use the sinks at the same time without bumping elbows. This configuration is a fantastic use of a standard rectangular bathroom space.
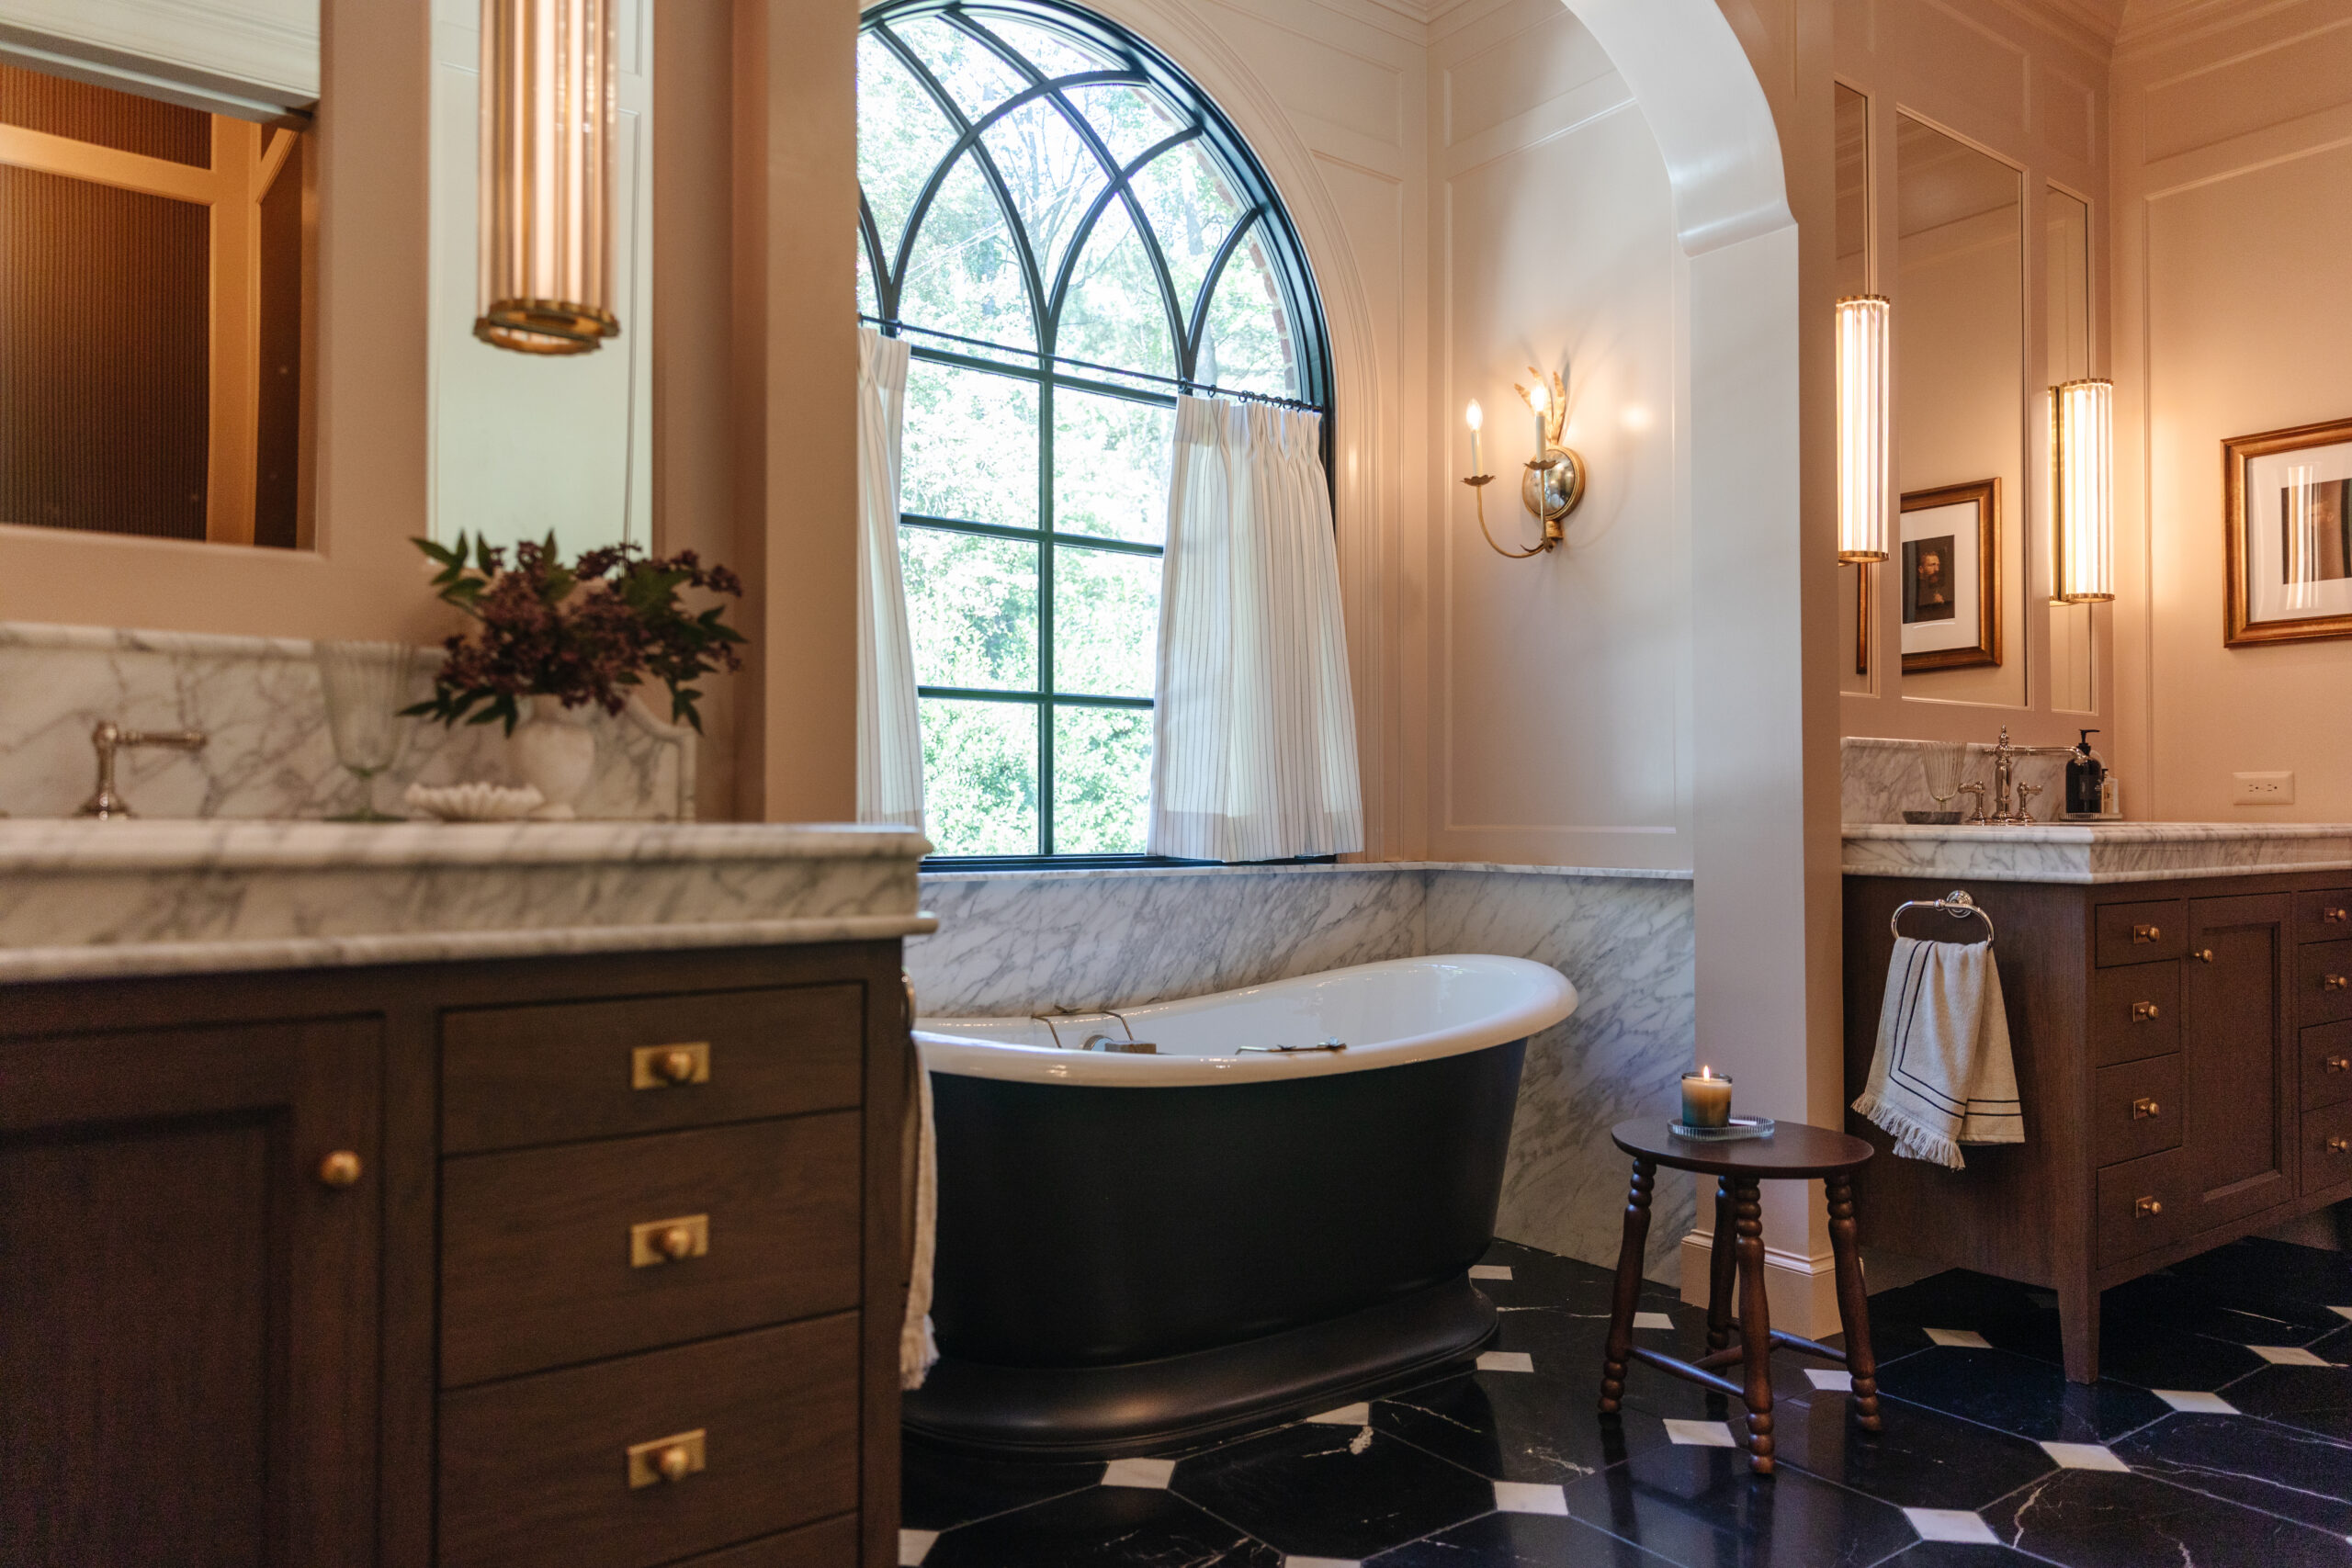
10. Grandmillennial Style with a Black Freestanding Tub and Arched Window
When you have a stunning architectural feature like a large arched window, the best thing you can do is frame it. Painting the window trim in a contrasting color, like the bold black used here, turns it from a simple window into a deliberate, powerful design statement. It’s like eyeliner for your architecture. This simple coat of paint gives the window presence and weight, establishing it as the undeniable focal point of the entire room. Don’t let your best features blend into the background!
|
📋 Copy HEX 🔗 Share |
It has to be the window. While the checkerboard floor is classic and the dual vanities are beautiful, the magnificent arched window is the soul of this room. It dictates the room’s layout, bathing the freestanding tub in light and providing a stunning focal point. Its grand scale and elegant shape lend the entire space a sense of warmth and classic luxury. If you took it away, the room would still be nice, but it would lose its heart and its architectural grandeur.
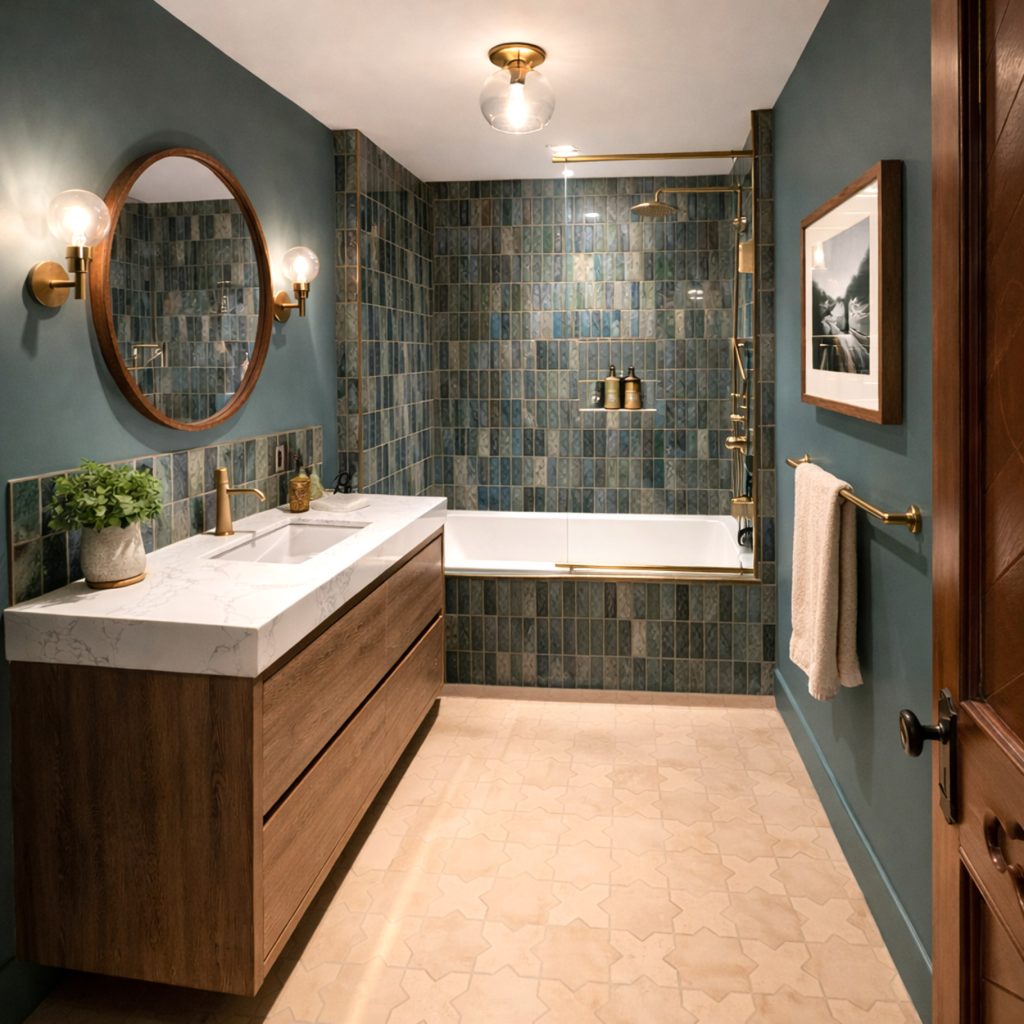
11. A Rich, Moody Bathroom with Teal Walls and Patterned Tiles
The success of this bathroom lies in its fearless embrace of a deep, saturated color palette. The deep teal walls create a cozy, enveloping feel, which is a bold and effective choice for a smaller space. The patterned shower tiles, while different, work because they stay within the same blue-green color family, creating harmony through a shared color story rather than direct matching. The warmth of the brass fixtures and wood vanity is essential, as it cuts through the cool tones and prevents the room from feeling chilly or somber.
|
📋 Copy HEX 🔗 Share |
A dark, moody bathroom can be incredibly chic, but it’s not for every space. This look relies heavily on good/excellent lighting. Without it, “moody” can quickly become “gloomy.” Notice the globe sconces and the light from the shower area—multiple light sources are key. Furthermore, a dark color on the walls will make a small, windowless bathroom feel even smaller. This idea works best in a room that either has a decent source of natural light or where you can invest in a layered lighting scheme (sconces, overhead, and maybe even mirror lighting).
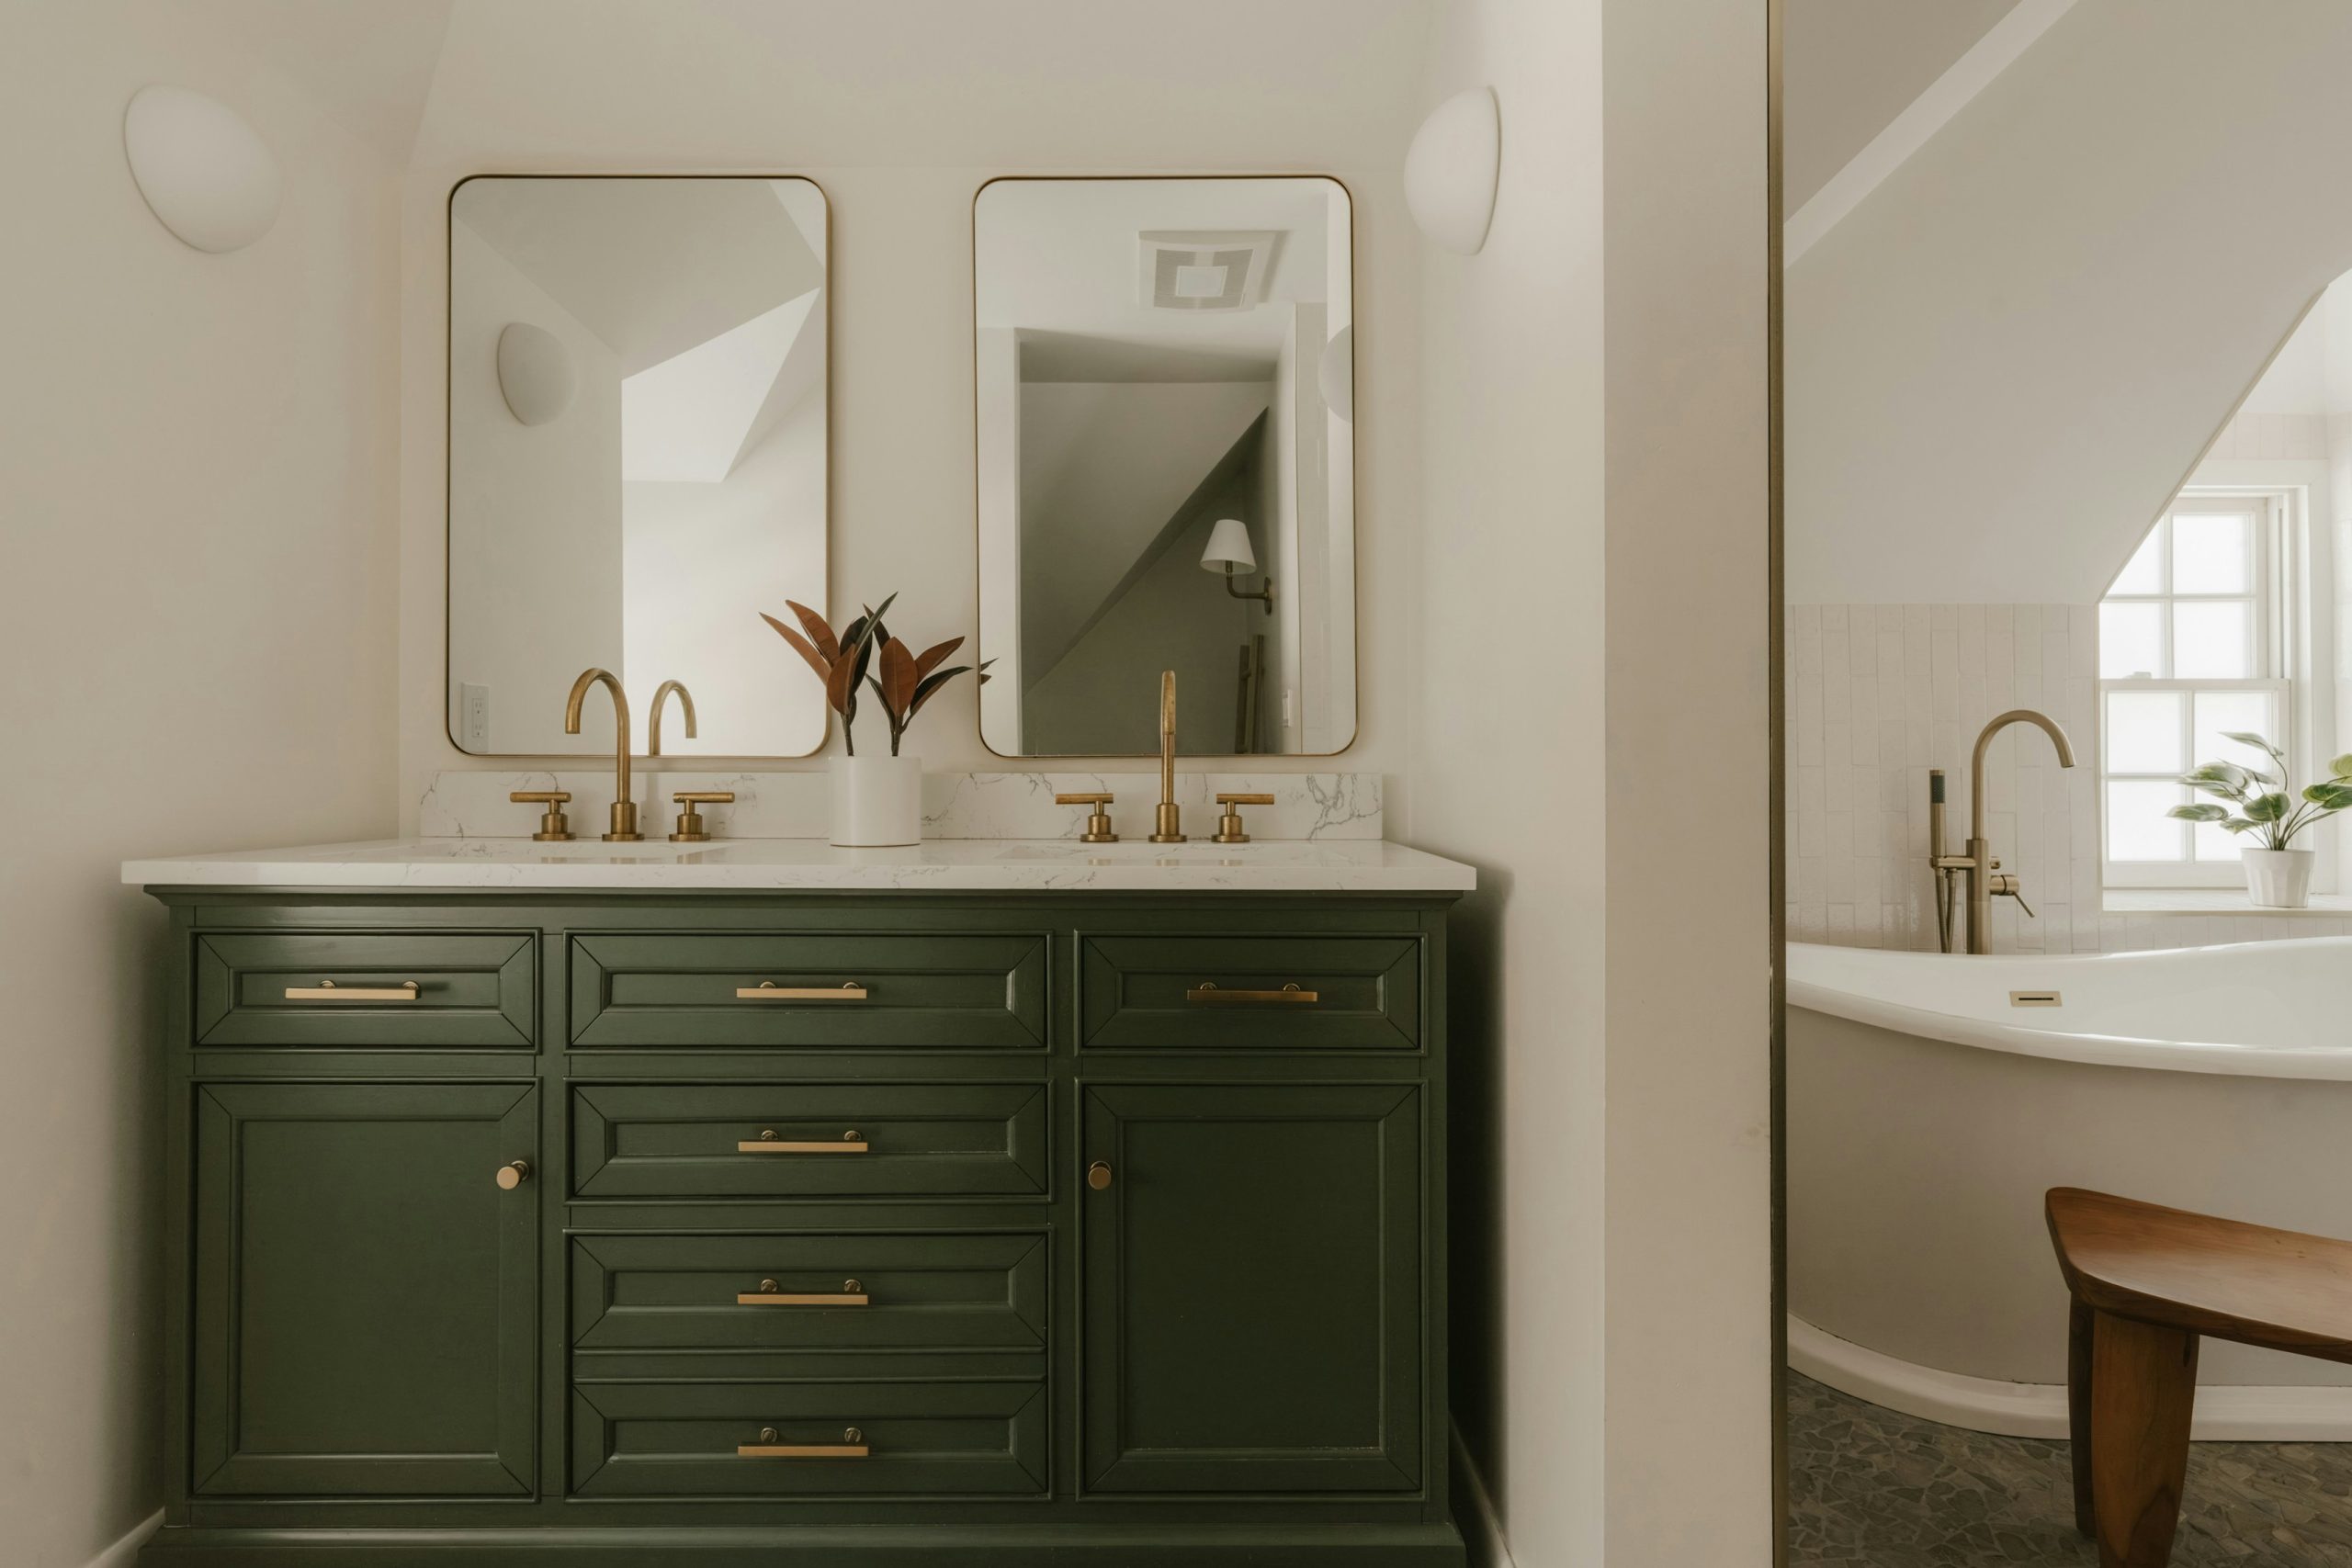
12. A Classic Look with a Deep Green Double Vanity and Brass Hardware
This bathroom achieves its calming, elegant aesthetic with a well-defined visual recipe: 50% rich, saturated color + 40% crisp white + 10% warm metallic. The deep forest-green vanity provides a strong, grounding element that is full of personality. The white marble countertop, vertical subway tiles, and freestanding tub create a clean, bright canvas that keeps the green from overwhelming the space. The brass faucets, mirrors, and hardware are the perfect finishing touch, adding a layer of warmth and luxury. This design is a formula you can adapt with other deep colors like navy or burgundy.
|
📋 Copy HEX 🔗 Share |
Before you commit to a bold vanity color like this gorgeous deep green, make sure you have the right supporting elements in place. Ask yourself these questions:
- Is my flooring neutral enough? A simple greige or light wood-look floor works perfectly, but a busy or strongly colored floor might clash.
- Do I have enough light? Deep colors absorb light, so ensure you have ample natural light or a solid plan for sconces and overhead lighting to keep the room bright.
- Am I ready to commit to a metal finish? This look hinges on the warmth of brass. Mixing in chrome or nickel would dilute the effect.
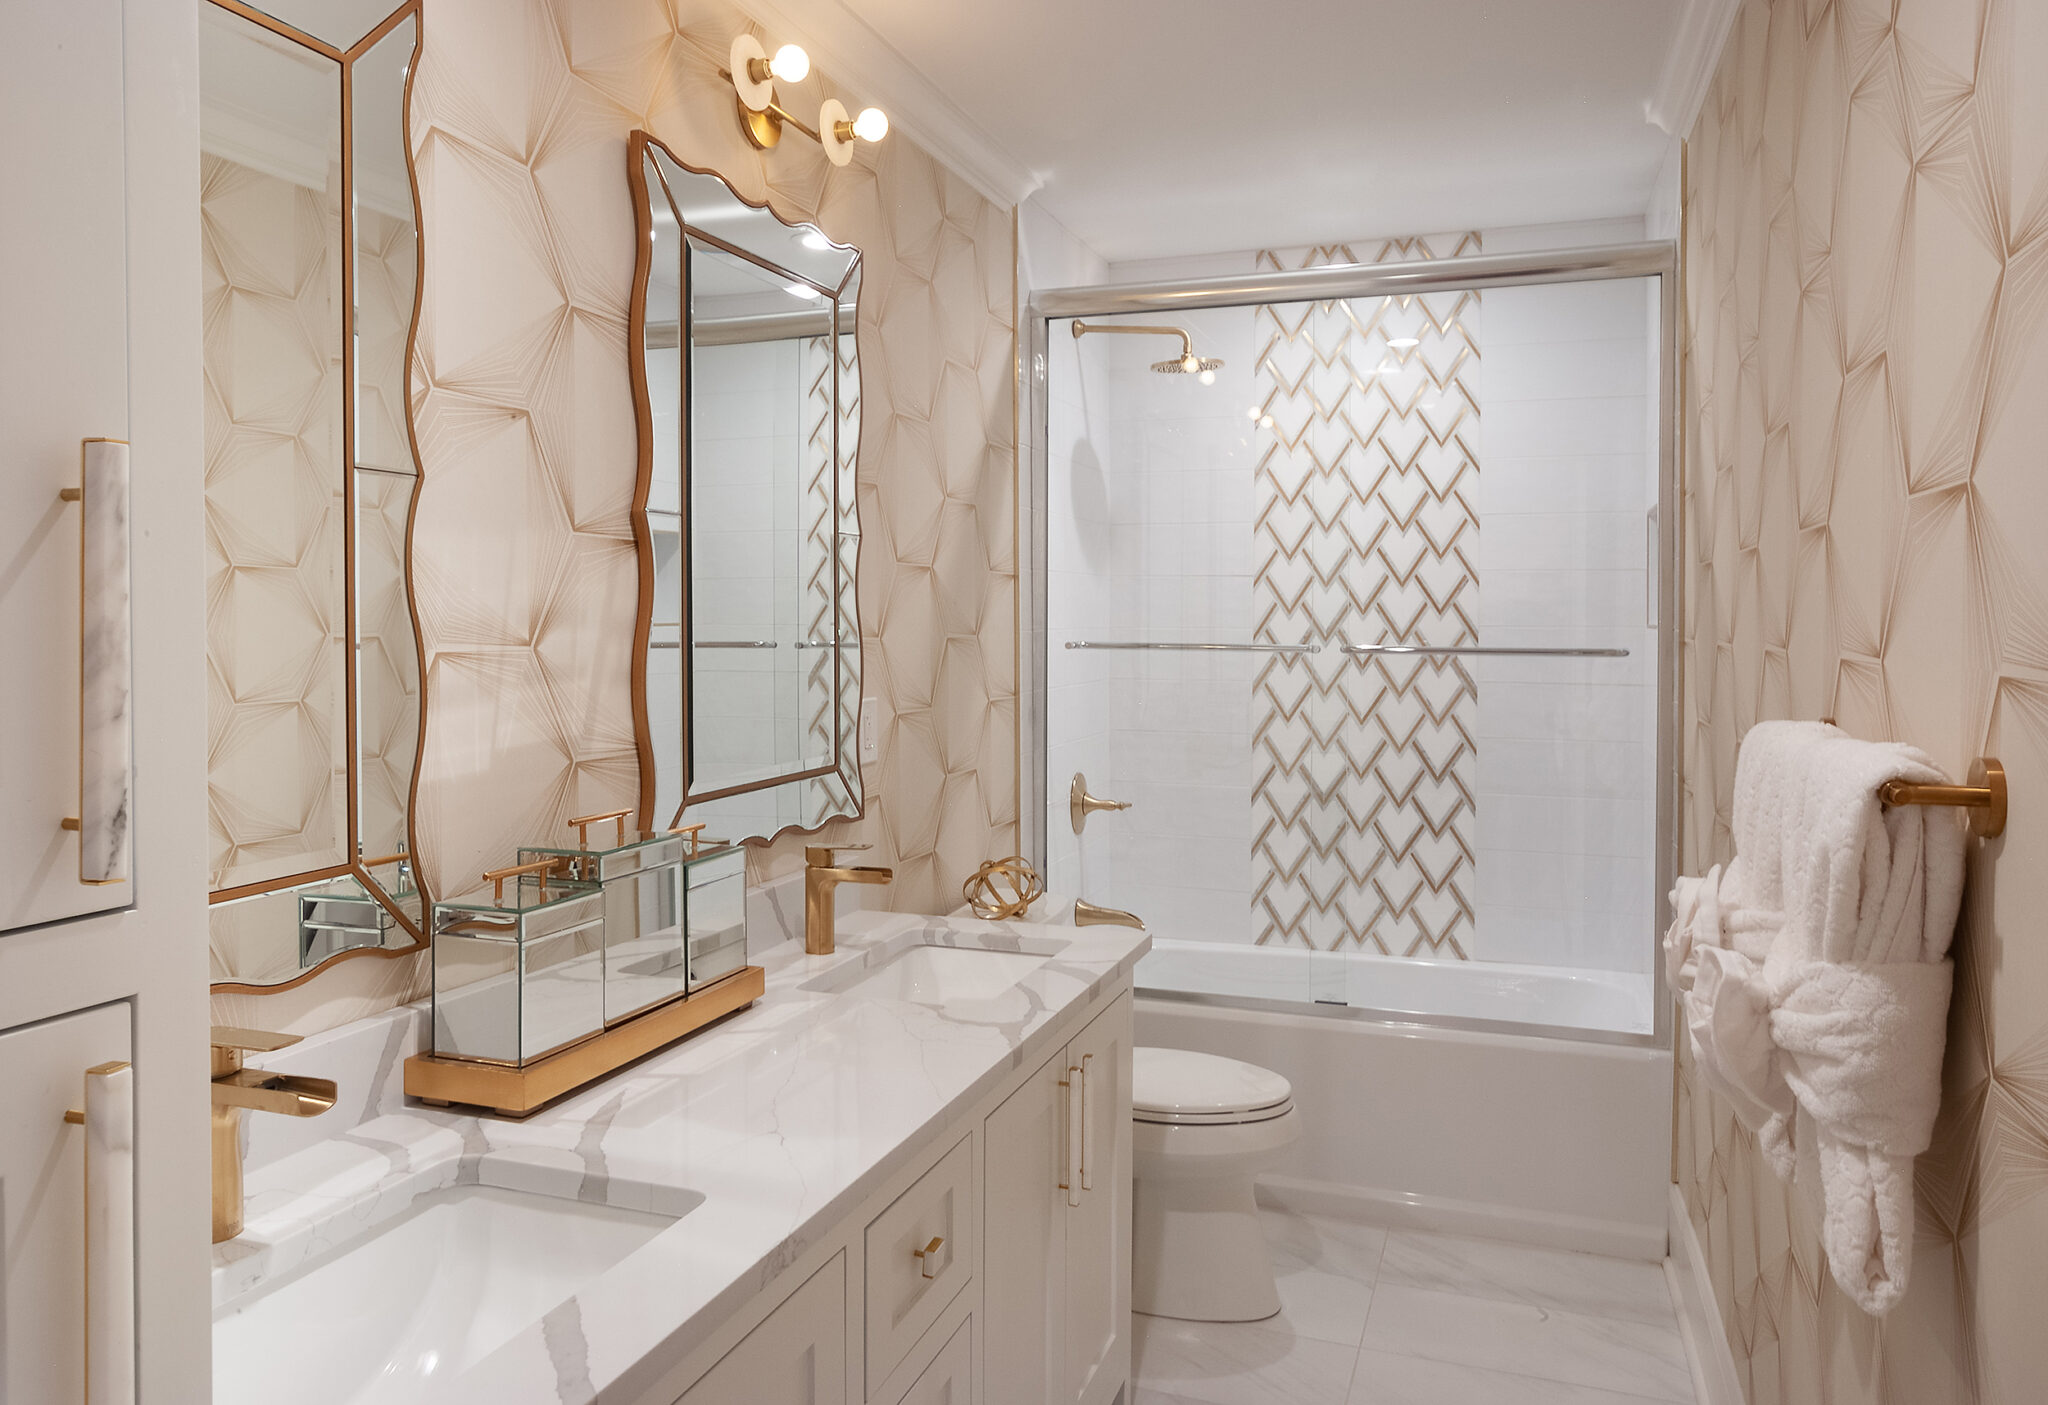
13. Go for Glam with Gold Geometric Wallpaper and Scalloped Mirrors
The single most impactful choice in this bathroom is, without a doubt, the wallpaper. It’s the engine driving the entire design. The gold hexagon pattern sets the glamorous tone, dictates the metallic finish for the rest of the room, and provides a stunning backdrop that makes everything else pop. The scalloped mirrors and geometric tile inlay are beautiful, but they are supporting characters. Without the wallpaper, the room would be a pretty, but standard, white-and-gold bathroom. With it, it’s a full-blown statement of personal style.
|
📋 Copy HEX 🔗 Share |
Wallpaper in a bathroom, especially near a shower, requires some practical considerations. You truly must use a wallpaper specifically rated for high-humidity environments, often called “bathroom” or “vinyl” wallpaper. Proper ventilation is also crucial—always run your exhaust fan during and after a shower to manage moisture. Be mindful of seams near the shower enclosure; a professional installer will know how to properly seal these edges to prevent peeling over time. It’s a high-impact look, but it needs the right materials and prep work to last.
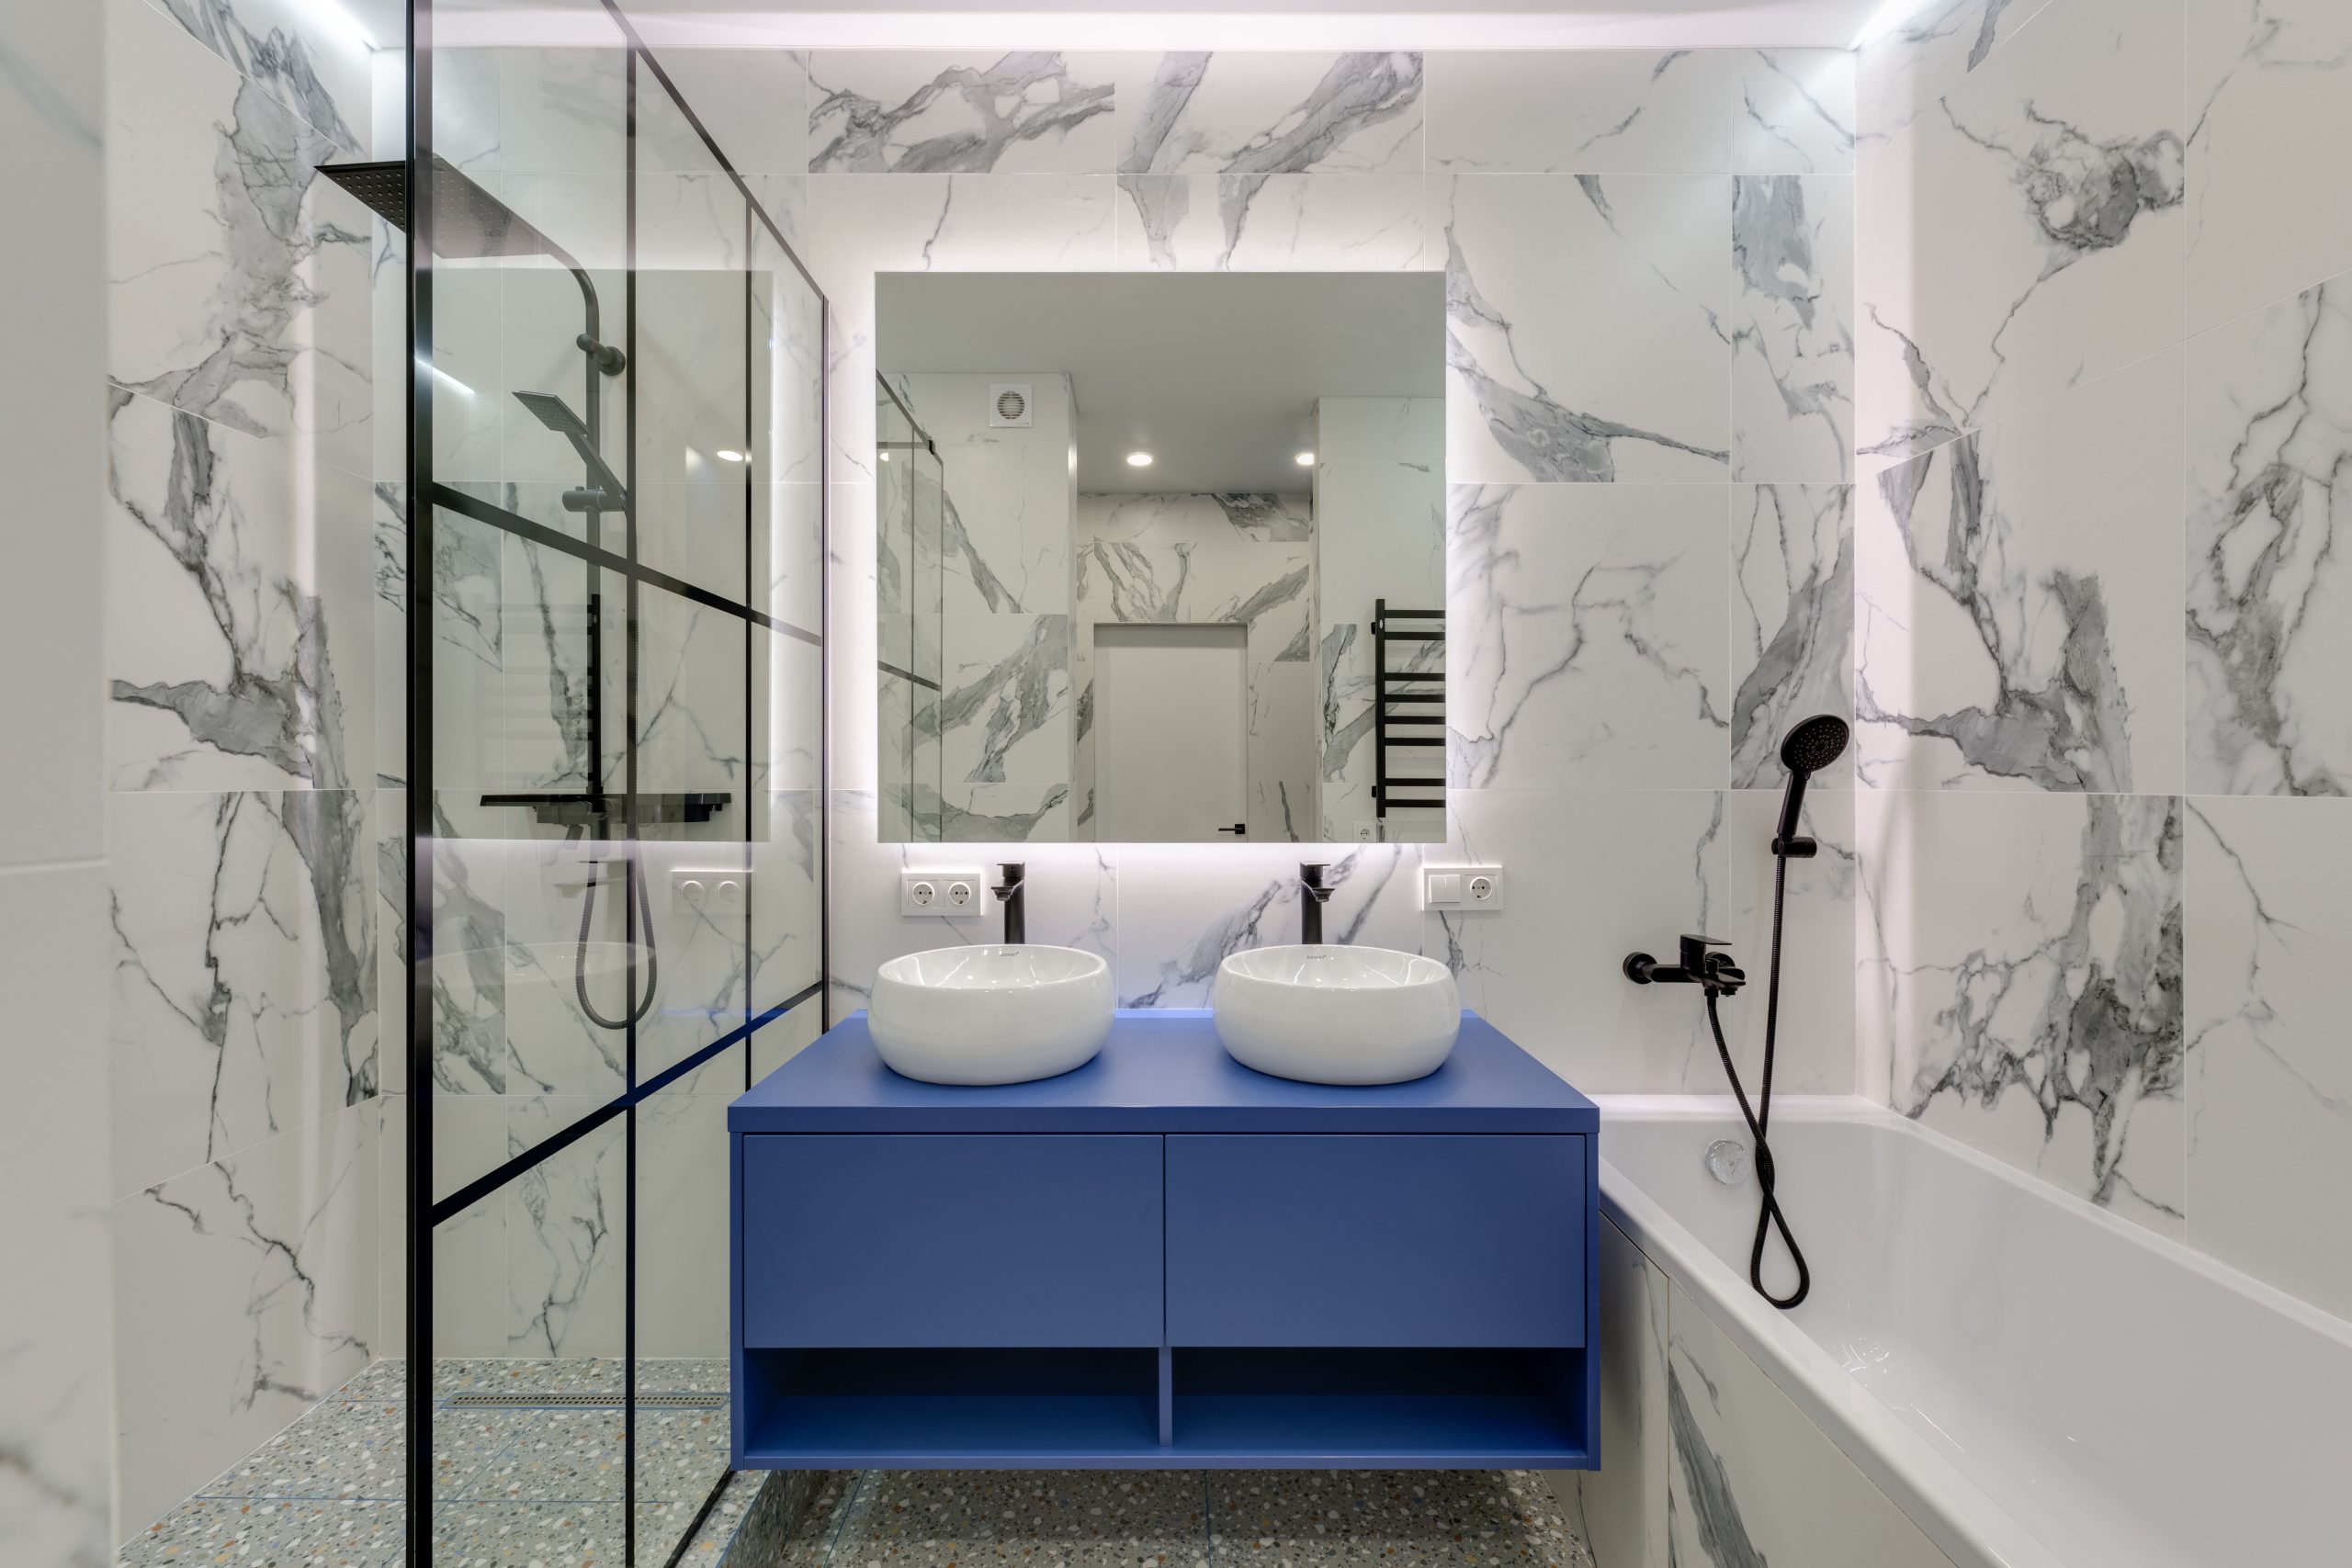
14. A Pop of Cobalt Blue in a Modern Marble-Look Bathroom
This bathroom design works because of its brave use of a single, high-impact accent color. The bold, royal blue of the floating vanity immediately captures the eye, creating a dynamic focal point against the neutral backdrop of the marble-look wall tiles. The choice of matte black for all the fixtures is a crucial supporting decision. The black provides a sharp, graphic contrast to both the white tiles and the blue vanity, outlining each element and giving the whole space a crisp, contemporary edge. It feels cohesive because the boldness is consistent.
|
📋 Copy HEX 🔗 Share |
When using large-format marble-look tiles like these, the goal is to make them look as much like a real slab of stone as possible. The secret is in the grout line. Use the thinnest grout line your tile setter is comfortable with (1/16 inch is ideal) and, most importantly, choose a grout color that matches the primary background color of the tile, not the veining. In this case, a bright white grout allows the gray veins to flow visually from one tile to the next, creating a more seamless and convincing marble effect.
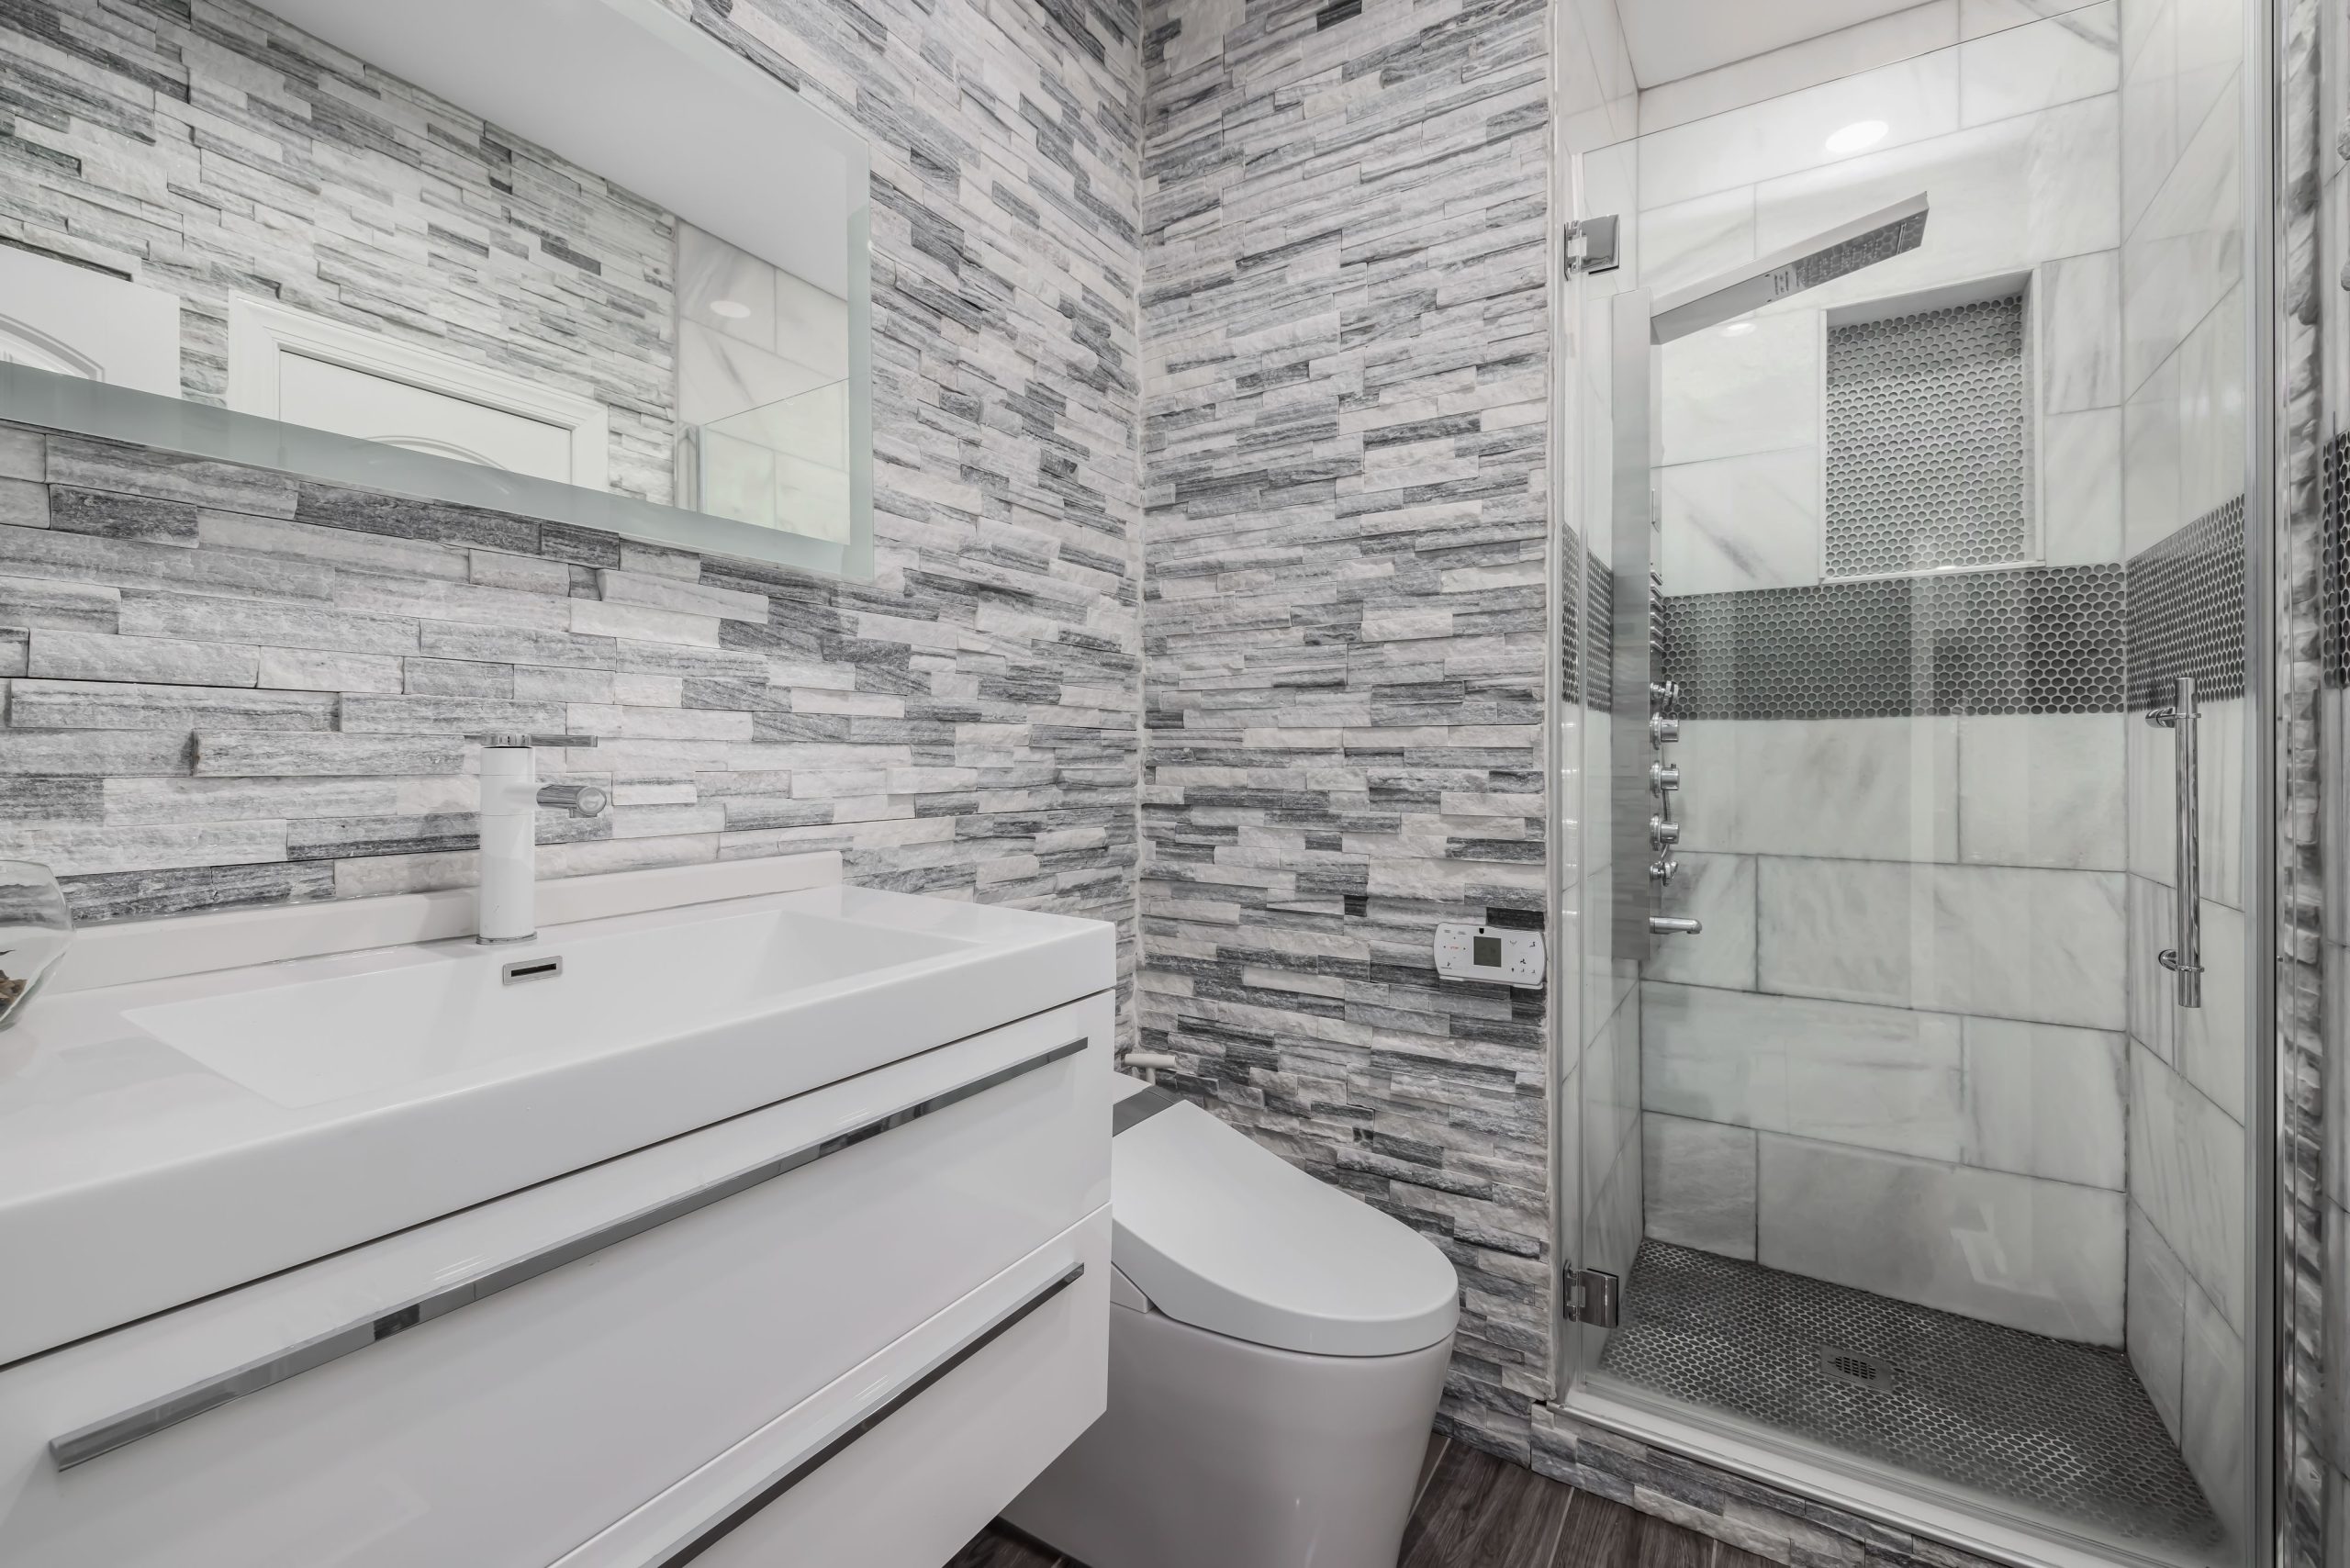
15. Textural Sleekness: A Stacked Stone Wall and Modern White Fixtures
Creating this highly textural, modern bathroom involves balancing the cost of the stone with relatively standard fixture prices.
|
📋 Copy HEX 🔗 Share |
- Wall Treatment (Stacked stone veneer panels): $2,000 – $6,000 (depending on stone type and wall size)
- Vanity & Toilet (Modern wall-mount units): $1,500 – $3,500
- Fixtures (Chrome sink and shower): $600 – $1,500
- Shower (Glass enclosure, pebble floor): $2,500 – $5,000
- Floor Tile (Wood-look porcelain): $500 – $1,200
- TOTAL: $7,100 – $17,200
Budget alternative: Use stacked stone on a single accent wall behind the vanity instead of the entire room. This gives you the textural impact for about one-third of the cost. Look for porcelain tile that mimics stacked stone for an even more affordable option.
That gorgeous stacked stone wall is a showstopper, but it’s not a “wipe-and-go” surface. The nooks and crannies are world-class dust collectors. You’ll want to go over it with the brush attachment on your vacuum every few weeks to keep it looking fresh. In the shower area, soap scum and mineral deposits can build up on the textured surface. Use a pH-neutral stone cleaner and a medium-stiff brush for regular cleaning. Sealing the stone (and grout for the pebble floor) annually is critical to prevent water penetration and staining.
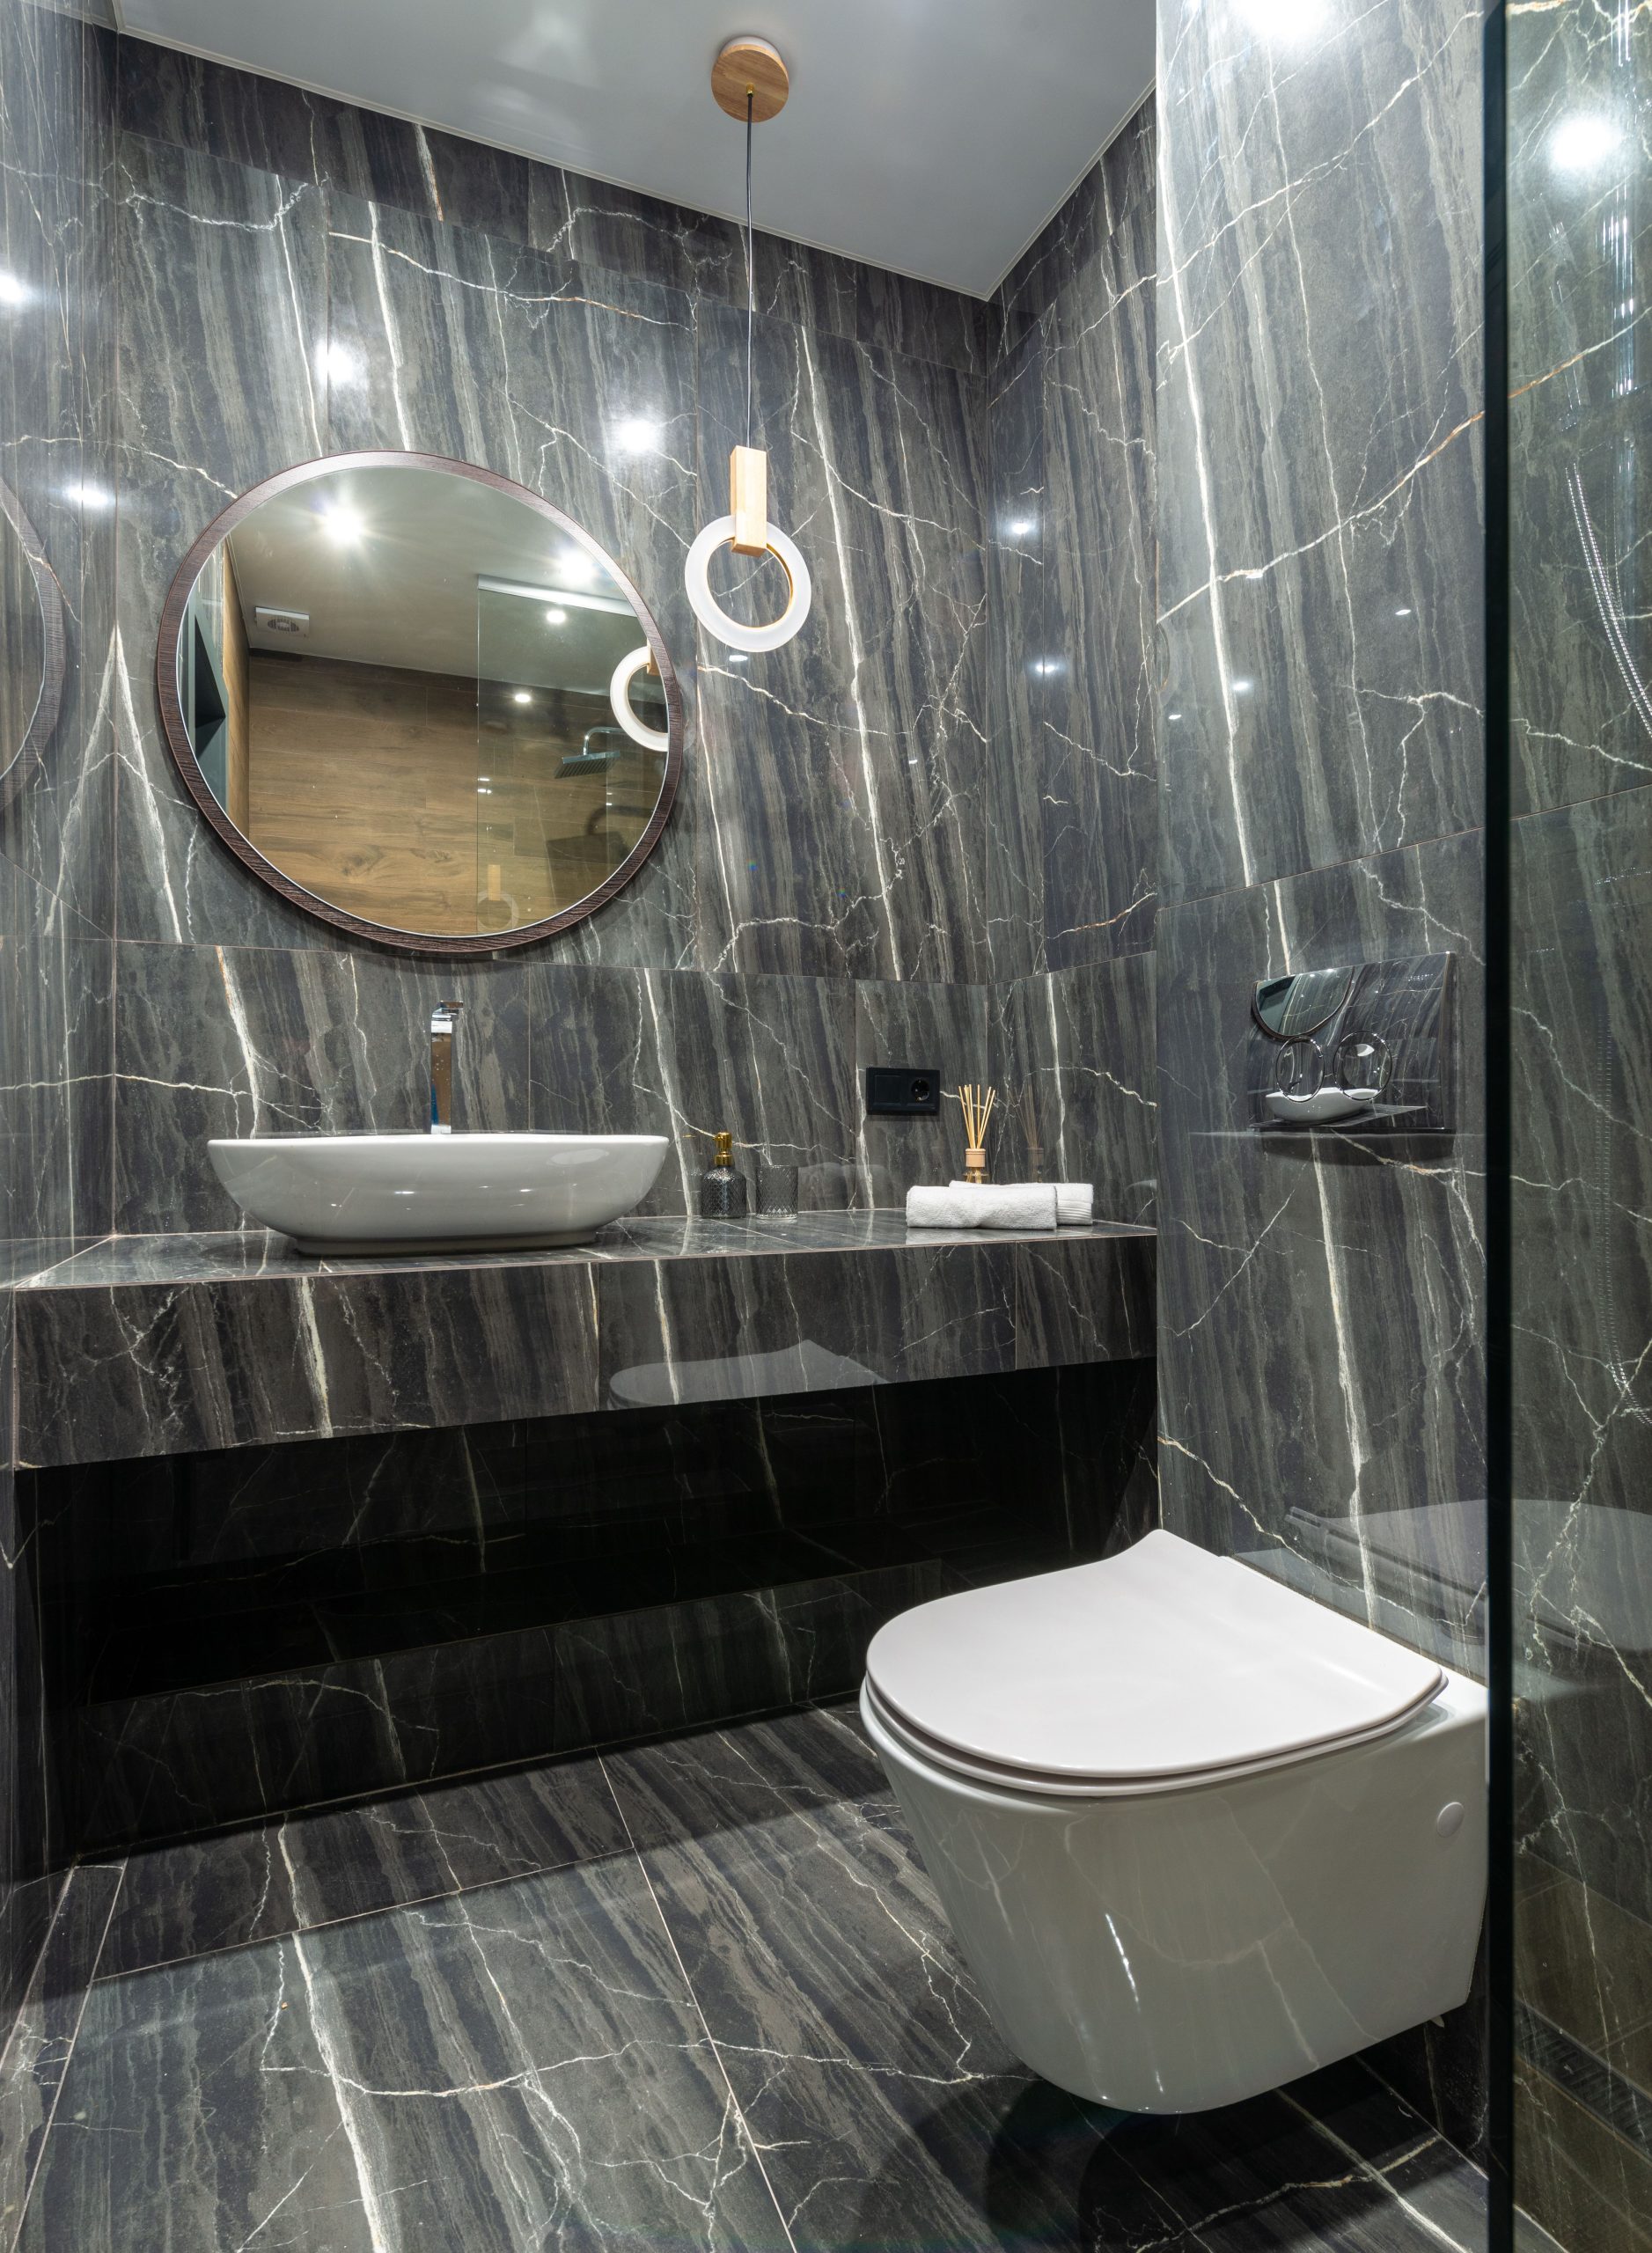
16. Monochromatic Moodiness with Dark Marble and a Round Mirror
This bathroom commits fully to its moody, monochromatic vision, and that’s why it succeeds. By wrapping the same dark grey marble-look tile from the floor all the way up the walls, it creates a seamless, immersive environment that feels incredibly luxurious and enveloping, like being inside a block of carved stone. The repetition of circular shapes—the large mirror, the vessel sink, and the pendant light—is a brilliant touch. It softens the acute angles of the tile and creates a sense of visual harmony and flow throughout the space.
|
📋 Copy HEX 🔗 Share |
A dark, floor-to-ceiling tile design like this one is stunning, but it can be a significant financial and stylistic commitment. Tiling every wall is labor-intensive and expensive. More importantly, it’s a very specific look. If you decide to sell your home in a few years, a dark, dramatic bathroom might not appeal to all potential buyers. If you love the mood but are concerned about resale, consider a similar tile on just the floor and one main accent wall, as seen in Idea #17, which gives a similar vibe with less commitment.
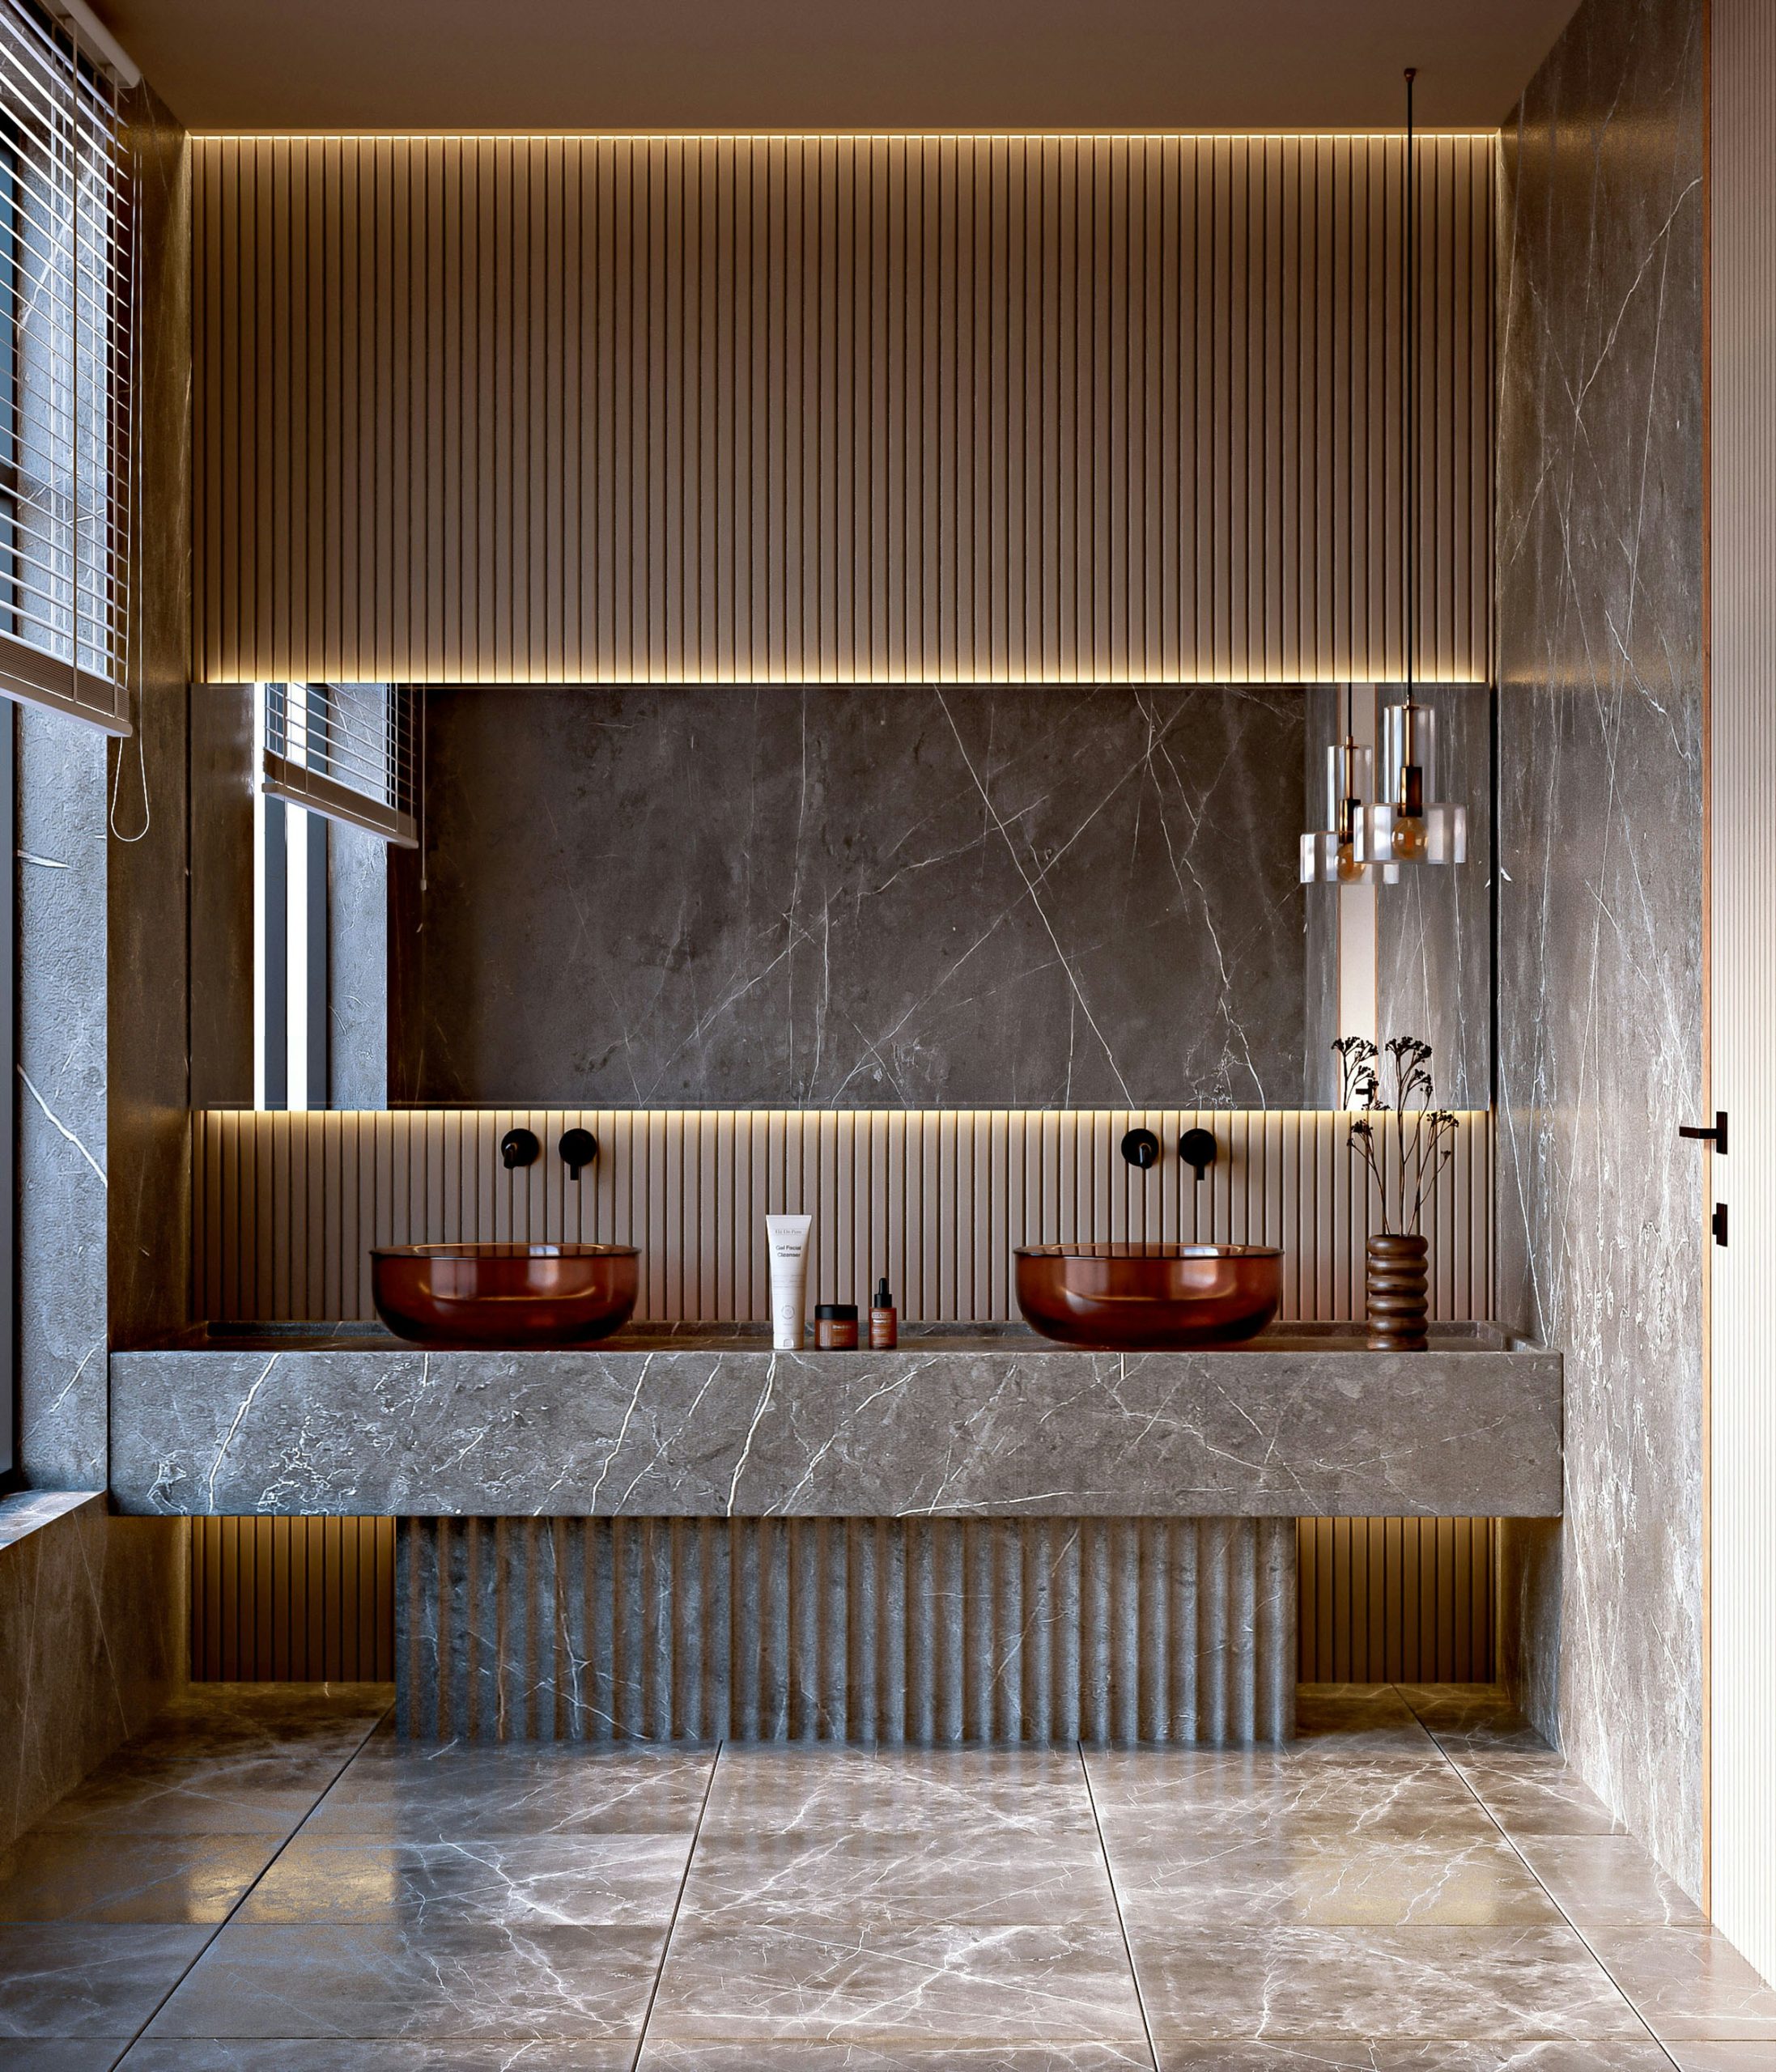
17. Warm Modernism: A Fluted Wood Wall with Dark Marble and Amber Sinks
The amber vessel sinks are the undeniable stars of this show. In a bathroom dominated by cool, dark gray marble and rich brown wood, these sinks provide a necessary and stunning pop of warmth and color. They glow like jewels under the accent lighting, instantly drawing the eye and adding a layer of unique, artful personality. If you replaced them with standard white or black sinks, the bathroom would still be handsome and modern, but it would lose its most special, captivating element. They transform the vanity from a functional fixture into a piece of art.
|
📋 Copy HEX 🔗 Share |
When designing with dramatic textures like fluted wood walls and heavily veined marble, lighting is not an afterthought—it’s a crucial design tool. Notice the use of hidden LED strip lighting here. Placing a light strip above or below a textured surface (a technique called “wall grazing”) is the best way to highlight the shadows and depth of the material. It turns a flat wall into a dynamic feature. Always opt for warm white LEDs (2700K-3000K) to bring out the richness in wood and stone.
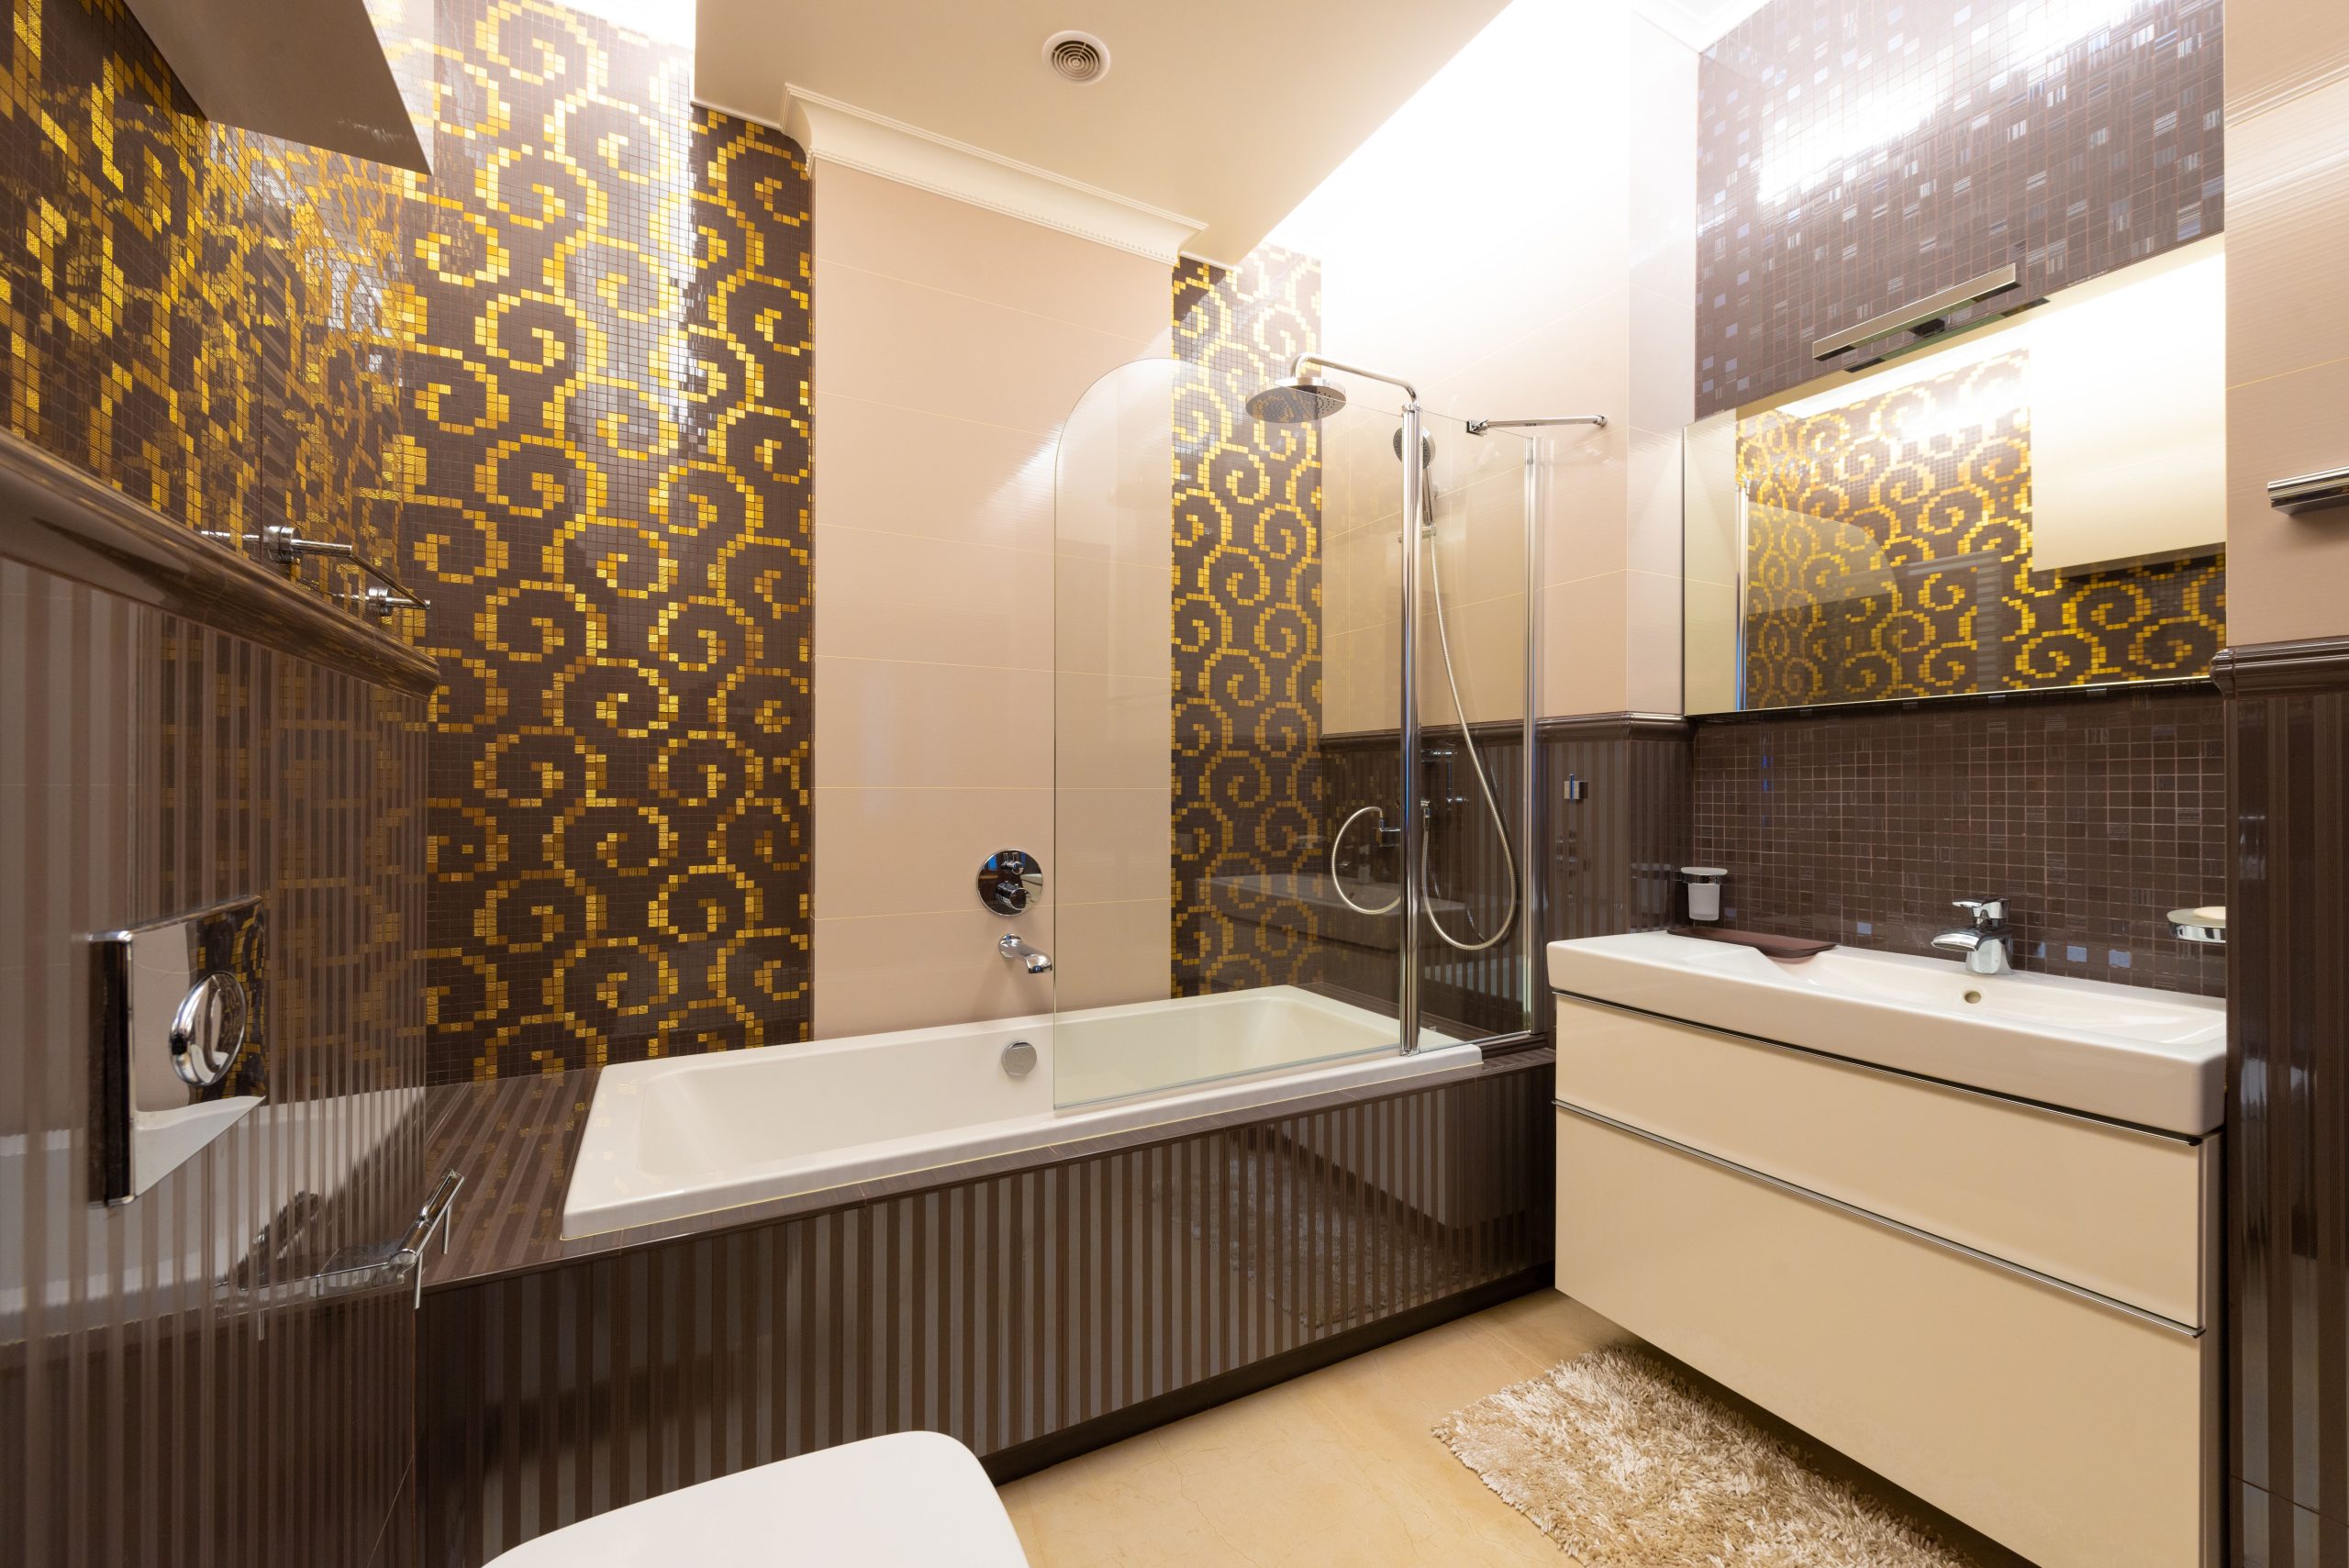
18. Opulent Warmth with Brown and Gold Mosaic Tiles
This bathroom feels so luxurious because it expertly balances large areas of intricate pattern with solid blocks of calming color. The brown and gold mosaic tiles are visually rich and complex, so pairing them with large, solid cream tiles in the shower and tub area is essential. This gives me a place to rest and prevents the opulent pattern from becoming overwhelming. The simple, clean lines of the cream vanity cabinet perform the same function, providing a quiet, functional anchor in a sea of detailed tilework.
|
📋 Copy HEX 🔗 Share |
A full wall of mosaic tile can be incredibly expensive, both in materials and installation cost. To get this opulent feel without the massive price tag, use the mosaic tile strategically. Instead of covering a whole wall, use it to create a wide vertical accent strip in the shower or a “rug” inlay on the floor. You can then surround it with much more affordable large-format neutral tile. This gives you the drama and luxury of the detailed mosaic in a focused, budget-friendly way. Look for peel-and-stick mosaic options for an even easier DIY backsplash effect.
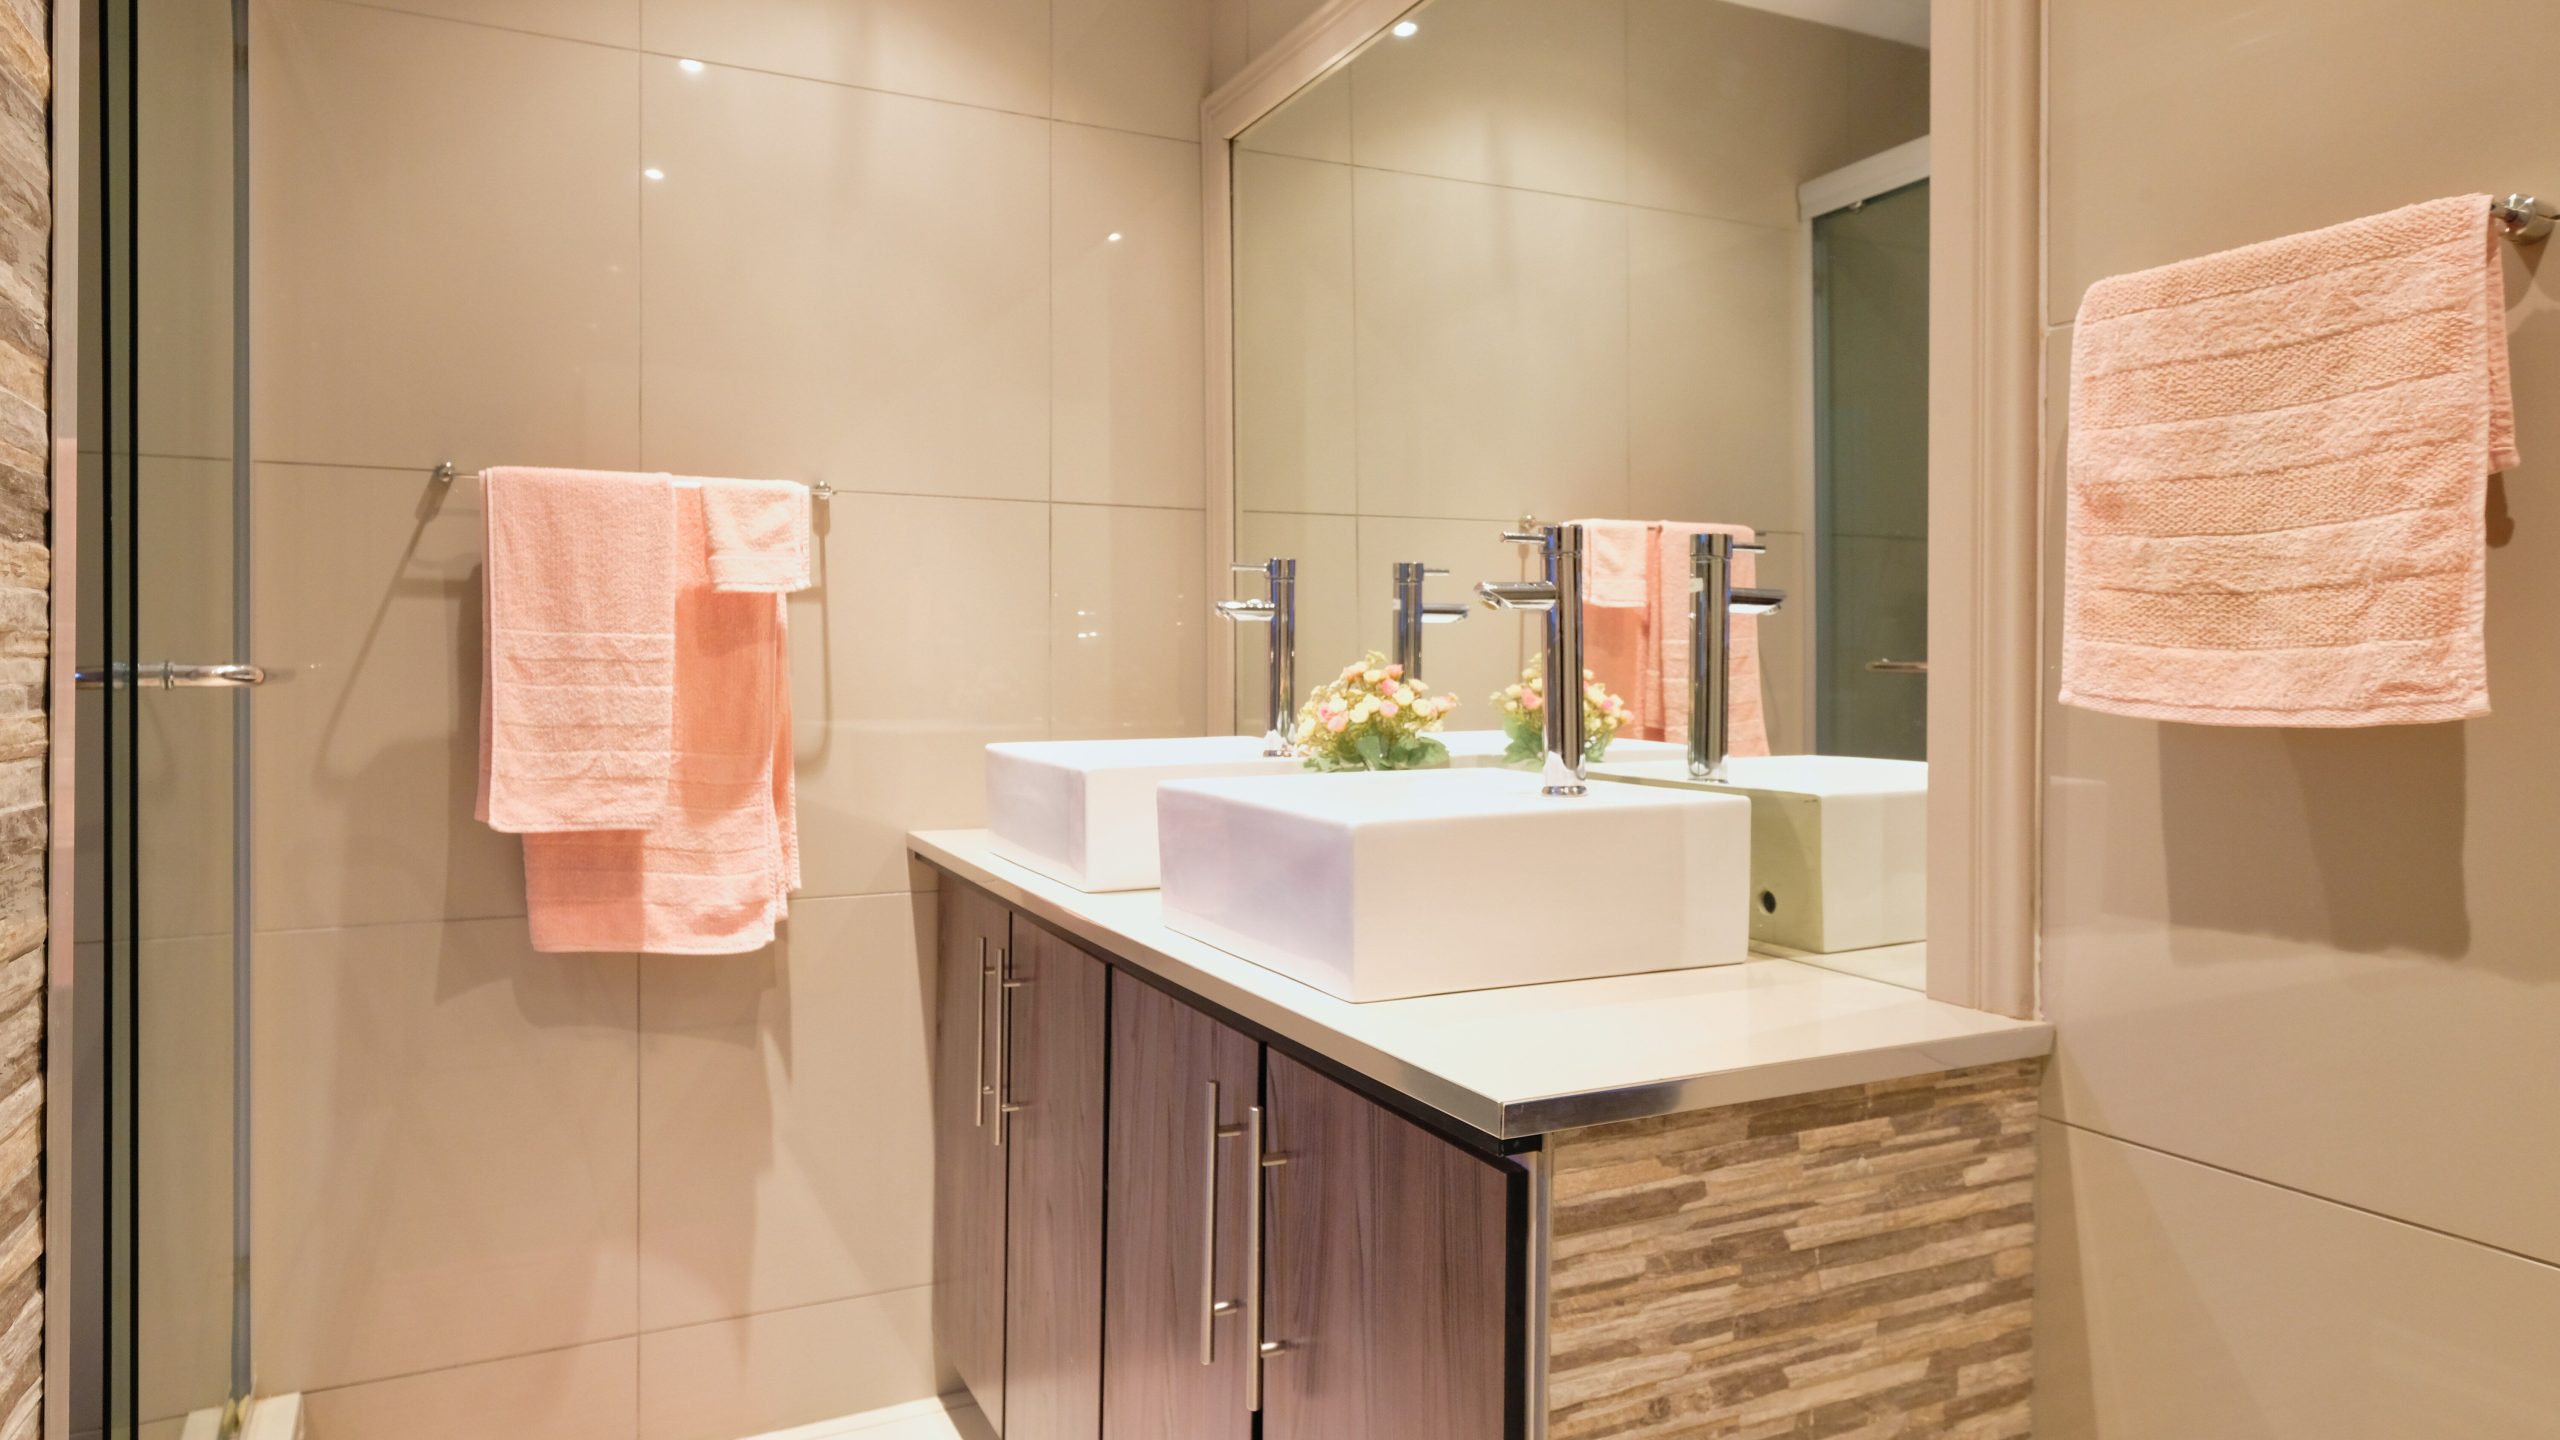
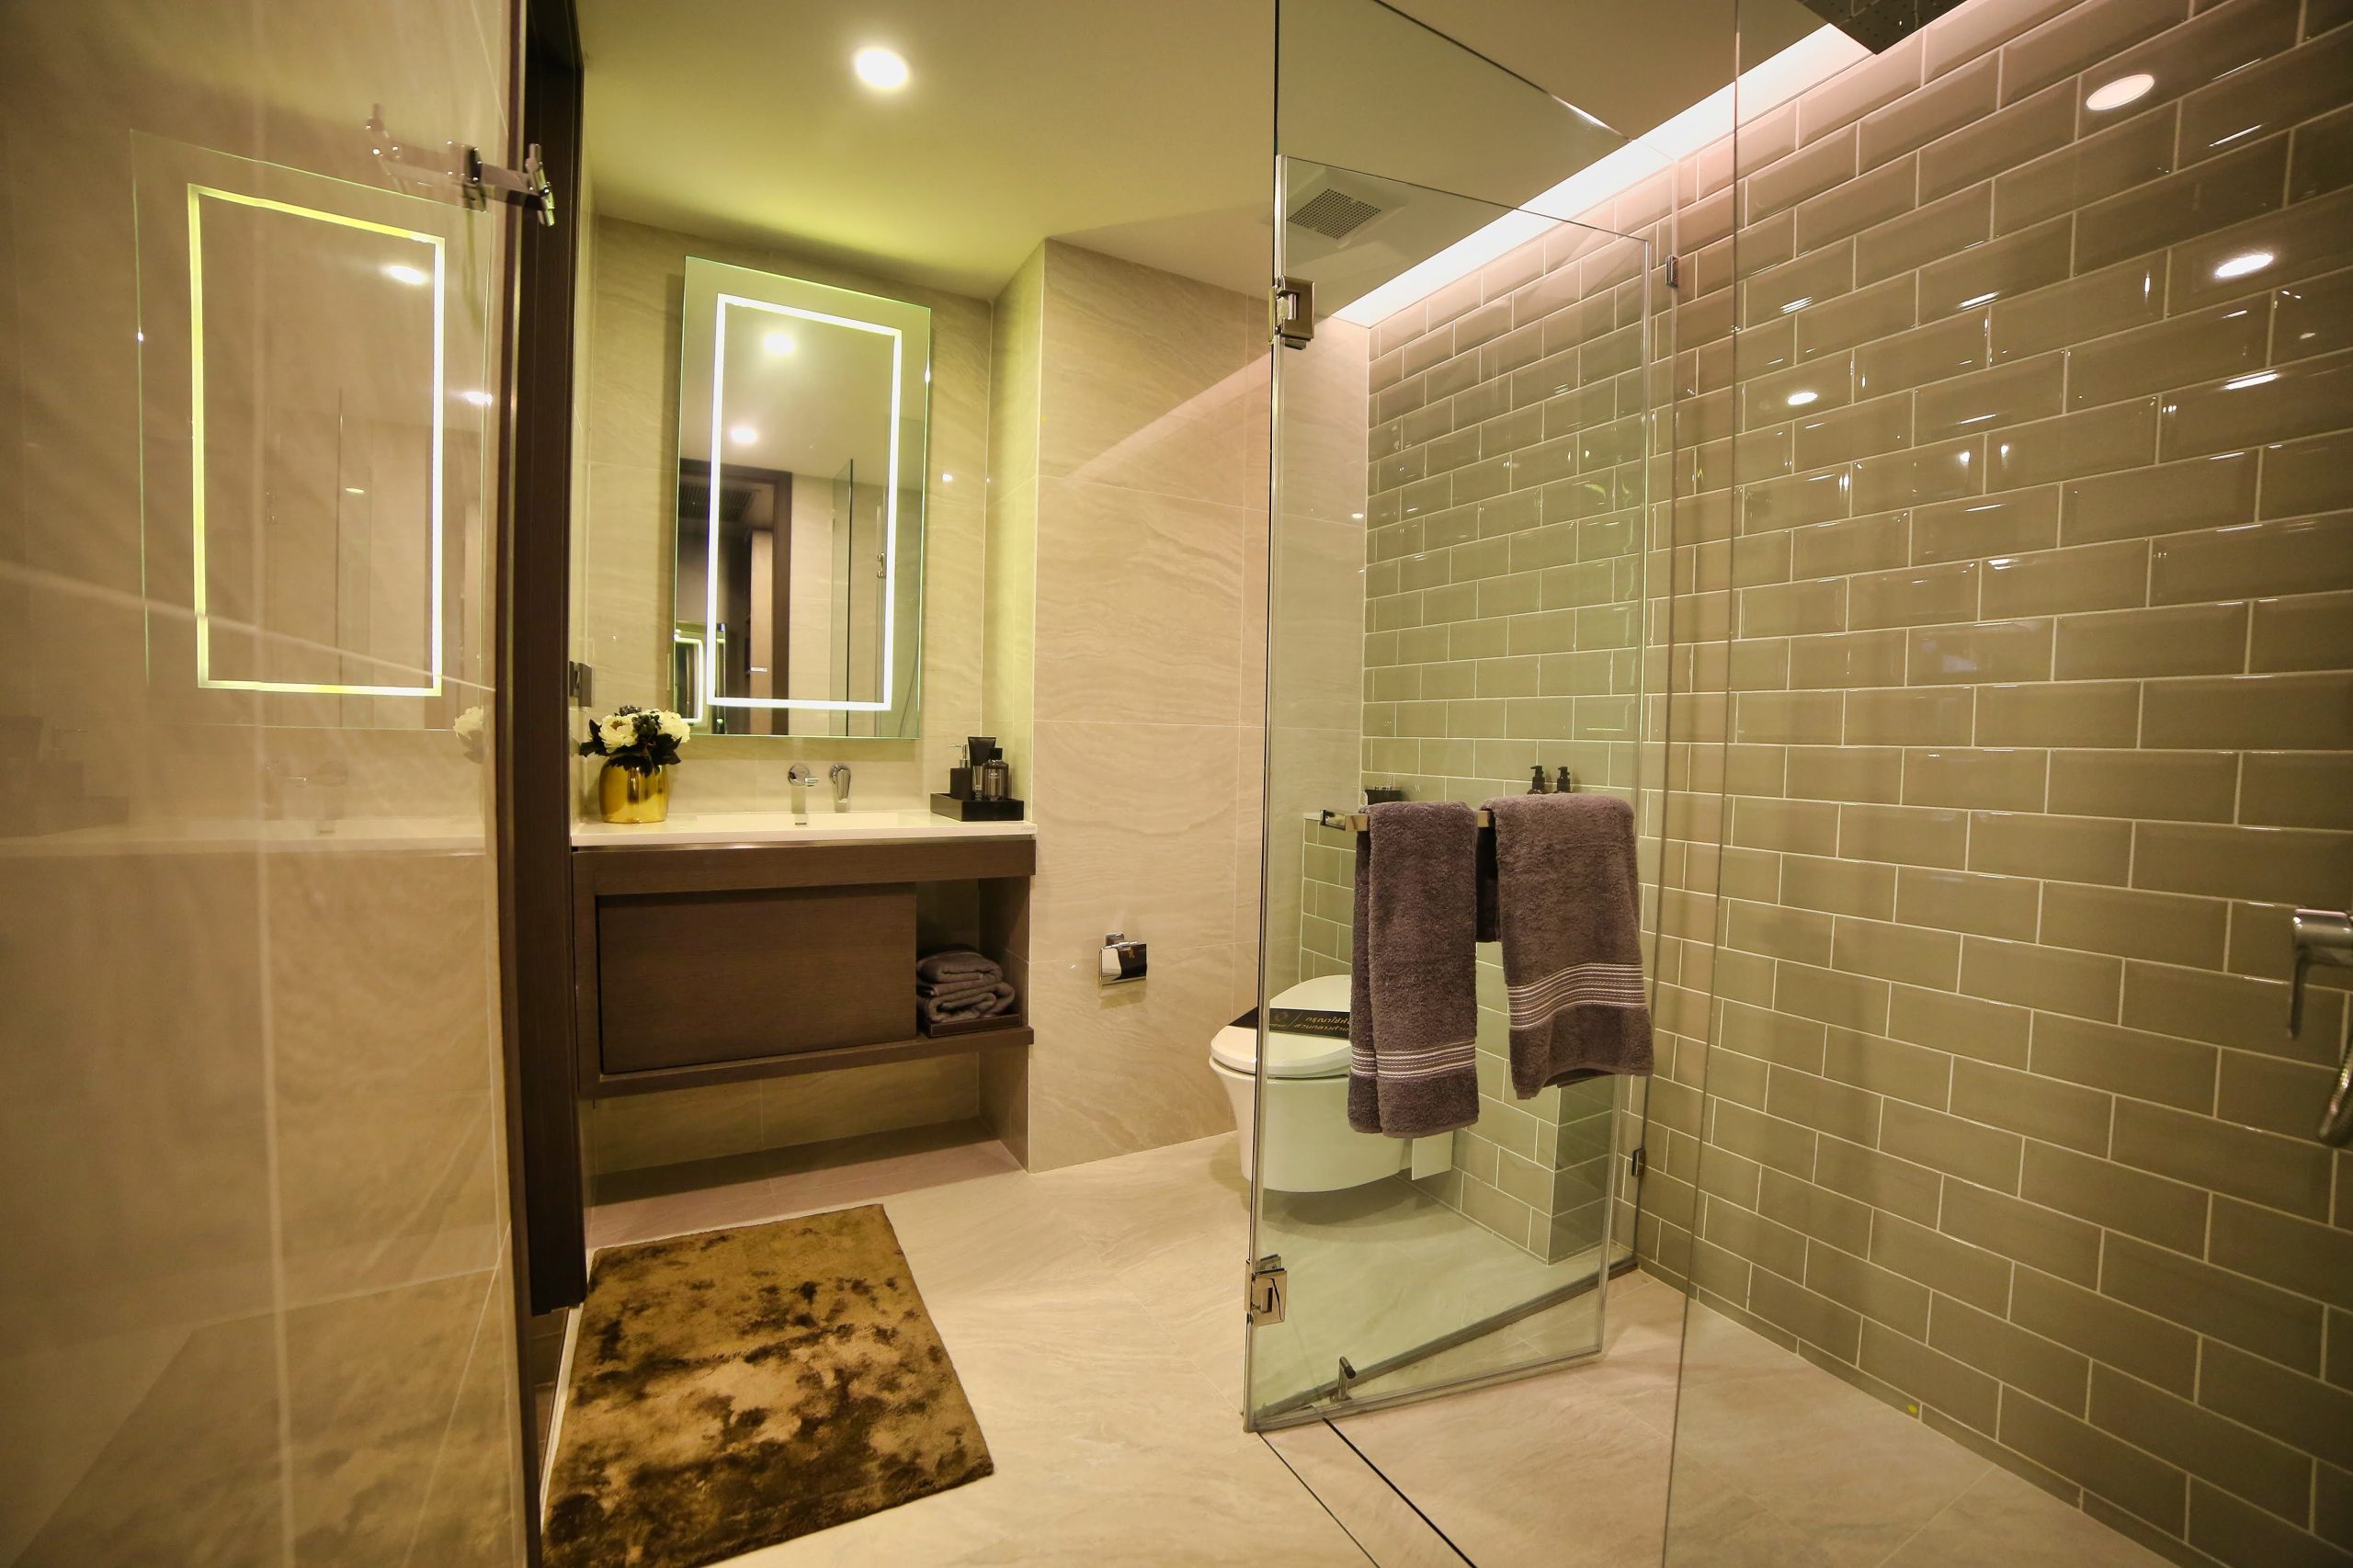
19. A Clean, Contemporary Look with Vessel Sinks and Stacked Stone
A double vanity with vessel sinks works well in various bathroom sizes, but you need to pay attention to counter depth. Because vessel sinks sit on top of the counter, you need a vanity that is at least 21 inches deep to ensure you have enough space behind the sink for the faucet and for cleaning, plus enough space in front. For a double vanity setup like this, you will want a wall that is at least 60 inches wide, but 72 inches is more comfortable to avoid feeling cramped. For a smaller bathroom, consider a similar look with a single vessel sink.
|
📋 Copy HEX 🔗 Share |
This bathroom’s warm and modern appeal comes from a simple recipe: 70% warm neutrals + 20% clean white + 10% natural texture. The light beige wall tiles and flooring create a soft, inviting base. The crisp white of the rectangular vessel sinks provides a clean, modern contrast without feeling cold. The final, crucial 10% comes from the stacked natural stone accent wall, which introduces organic texture and visual interest, preventing the neutral palette from becoming monotonous. This is a versatile formula that will stand the test of time.
20. Serene and Modern with Teal Mosaic Tile Accents
When using a small, powerful accent tile like this teal mosaic, a little goes a long way. The key to making it look intentional and high-end is to use it in at least two, but no more than three, places. Here, using it both behind the mirror and around the tub creates a sense of connection and pulls the whole room together. If it were only used in one spot, it might look like an afterthought. Using it in too many spots would make the room feel busy and diminish the tile’s special impact.
|
📋 Copy HEX 🔗 Share |
Creating that sleek, recessed bathtub look is a project that requires precision. Here’s a simplified path:
- Frame It Out: Build a sturdy wooden frame (typically 2x4s or 2x6s) around the area where the tub will sit. The top of the frame should be level with the top edge of the tub. (Time: 2-3 hours)
- Install the Tub: Set the bathtub into the frame, ensuring it is perfectly level. Secure it to the studs according to the manufacturer’s instructions. (Time: 1 hour)
- Add Substrate: Attach cement backerboard to the front and top surfaces of the frame. This is the waterproof surface your tile will adhere to. (Time: 1 hour, Cost: $15/sheet)
- Waterproof: Apply a liquid waterproofing membrane over all the seams and surfaces of the backerboard. (Time: 30 mins)
- Tile & Grout: Once the membrane is dry, you can tile the tub surround just as you would a wall. (Time: 3-4 hours, Cost: Varies by tile)
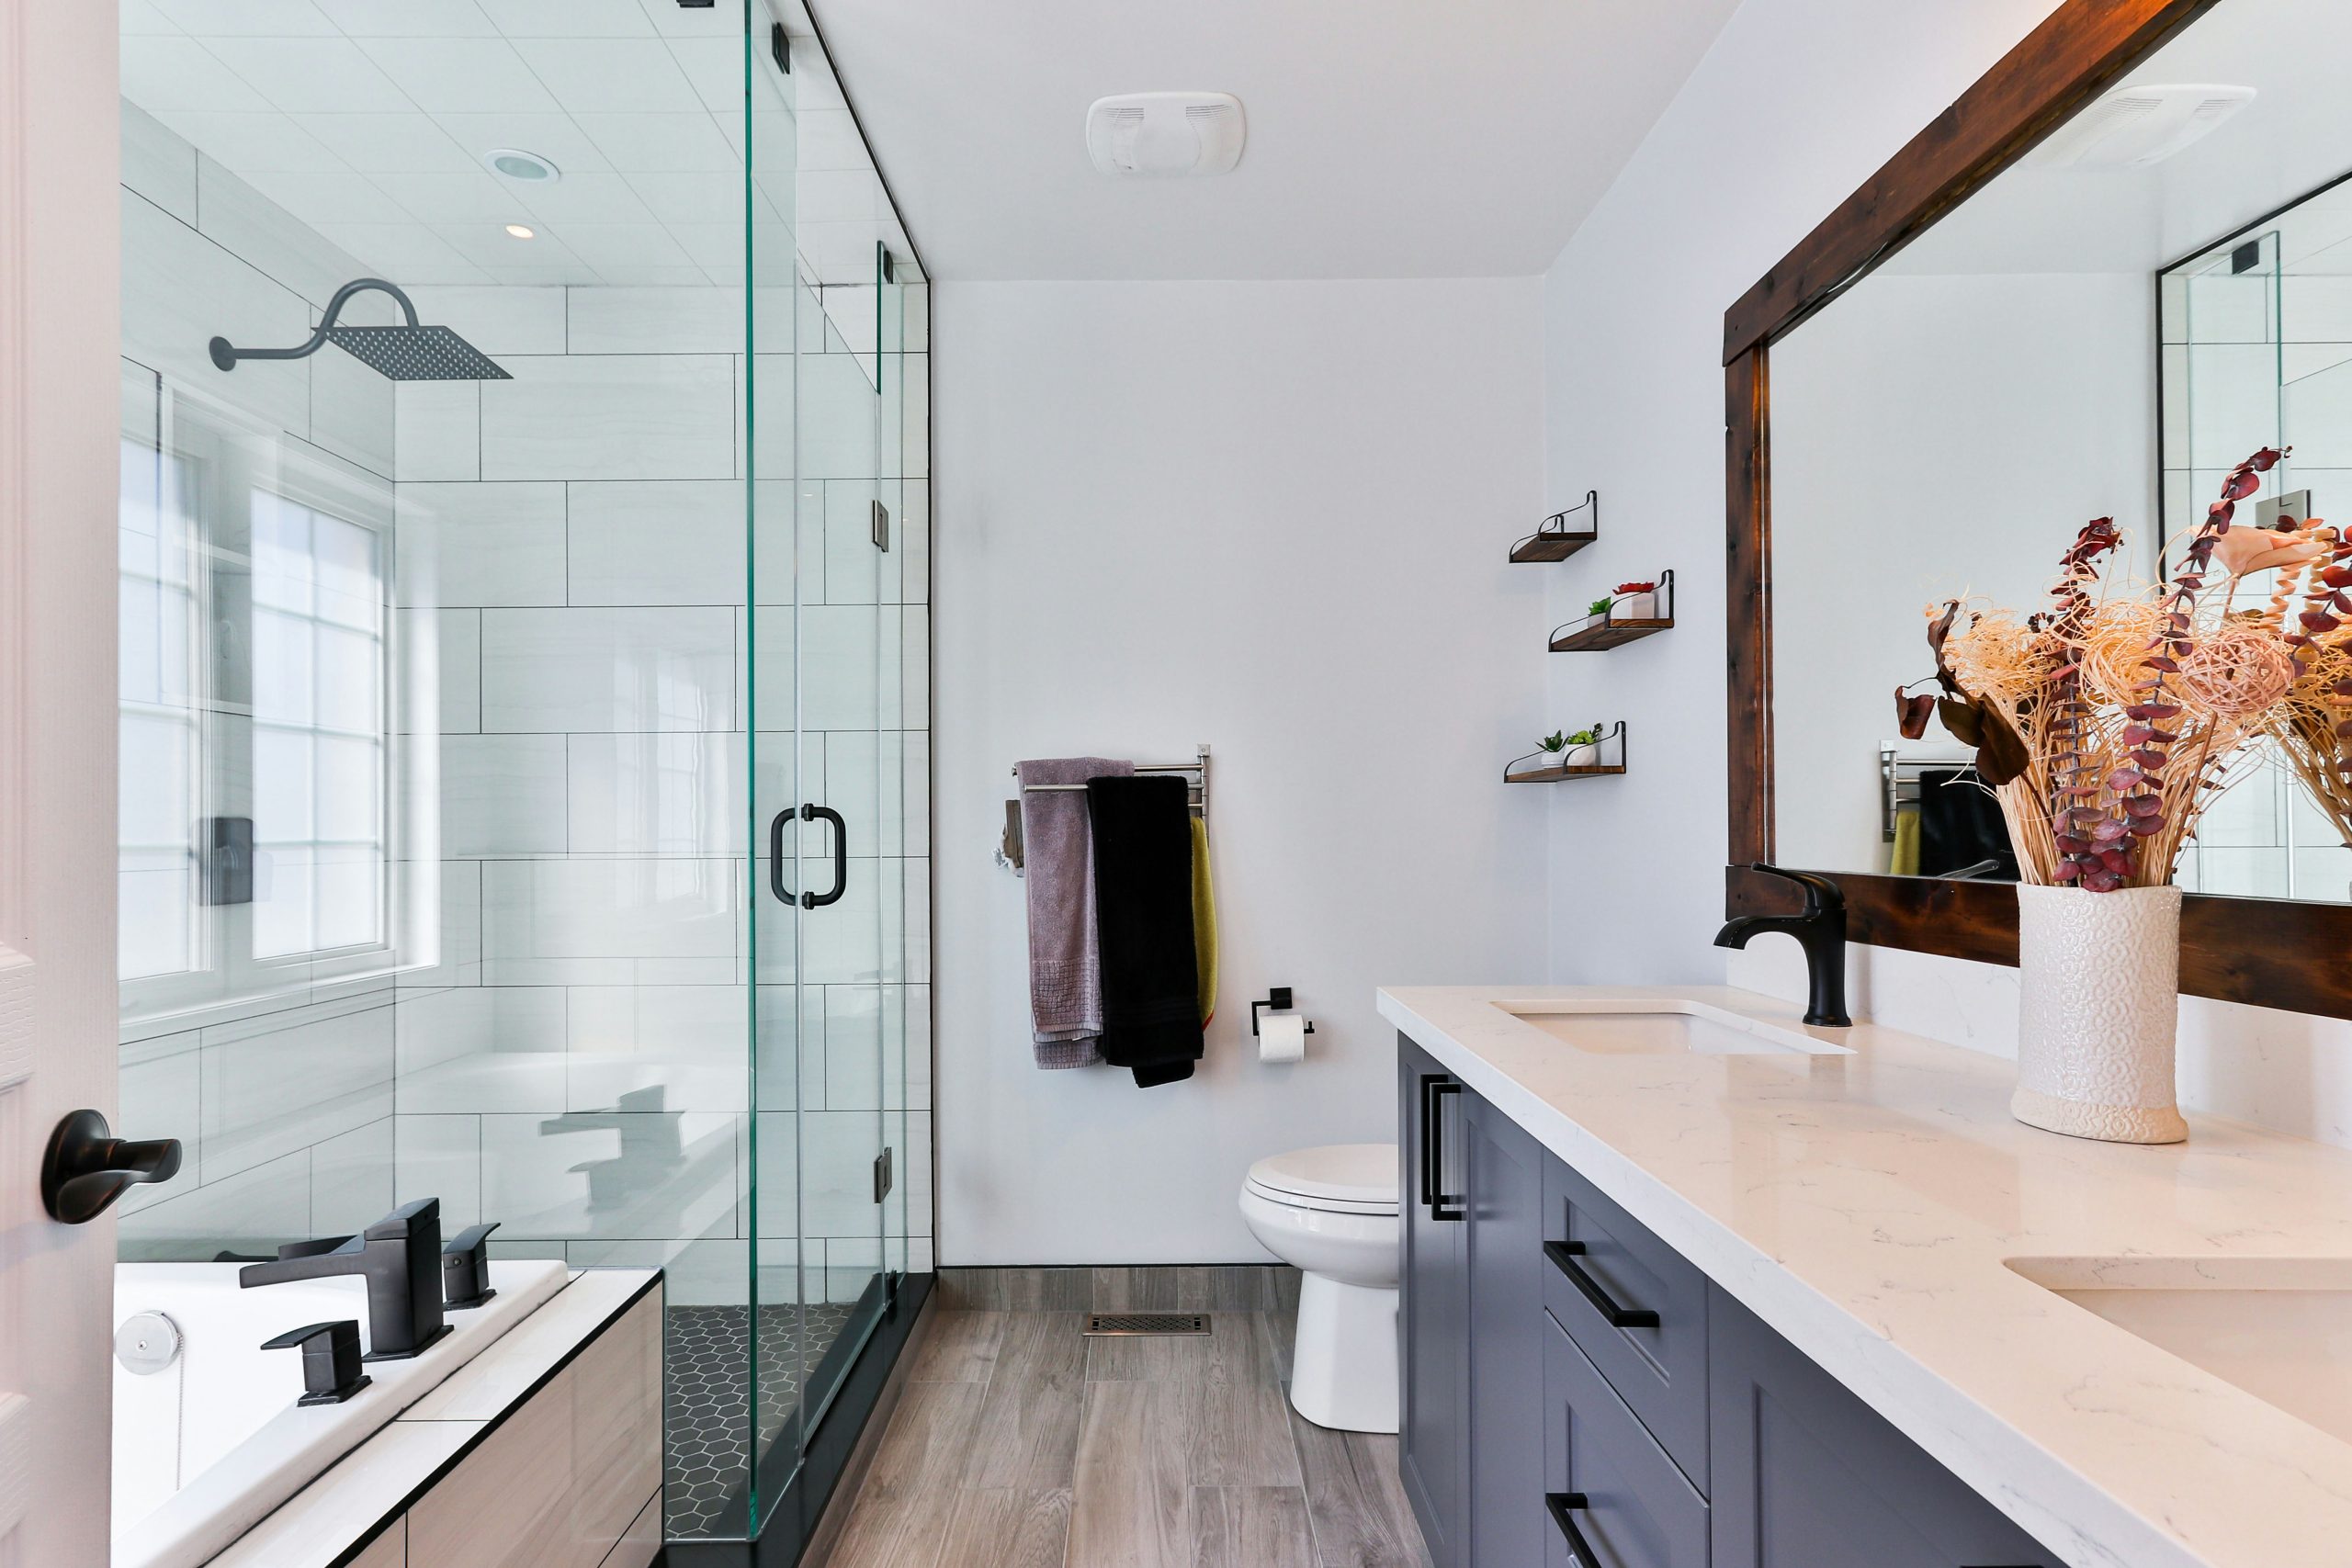
21. A Sophisticated Mix of Grey, Black, and Dark Wood
This bathroom feels effortlessly cool and organized because it sticks to a very well-disciplined color and material palette. The foundation is a simple gradient of grays and whites in the tiles and vanity. The masterstroke is the consistent use of matte black for every single metal element—from the shower frame and faucets to the tub filler and cabinet hardware. This repetition creates a strong, graphic rhythm. The final touch of warmth from the dark wood-framed mirror and floating shelves is just enough to keep the space from feeling too industrial.
|
📋 Copy HEX 🔗 Share |
Love this organized, sophisticated look? Run through this checklist before you start buying fixtures:
- Confirm Your Greys: Take samples of your chosen vanity color, floor tile, and wall tile and look at them together in your actual bathroom light to ensure their undertones are compatible.
- Source Your Blacks: Matte black finishes can vary slightly between brands. If possible, try to buy all your fixtures (faucets, showerheads, hardware) from the same manufacturer for a perfect match.
- Measure for Shelving: Floating shelves need to be anchored into studs. Locate your studs first to ensure you can place the shelves where you envision them.
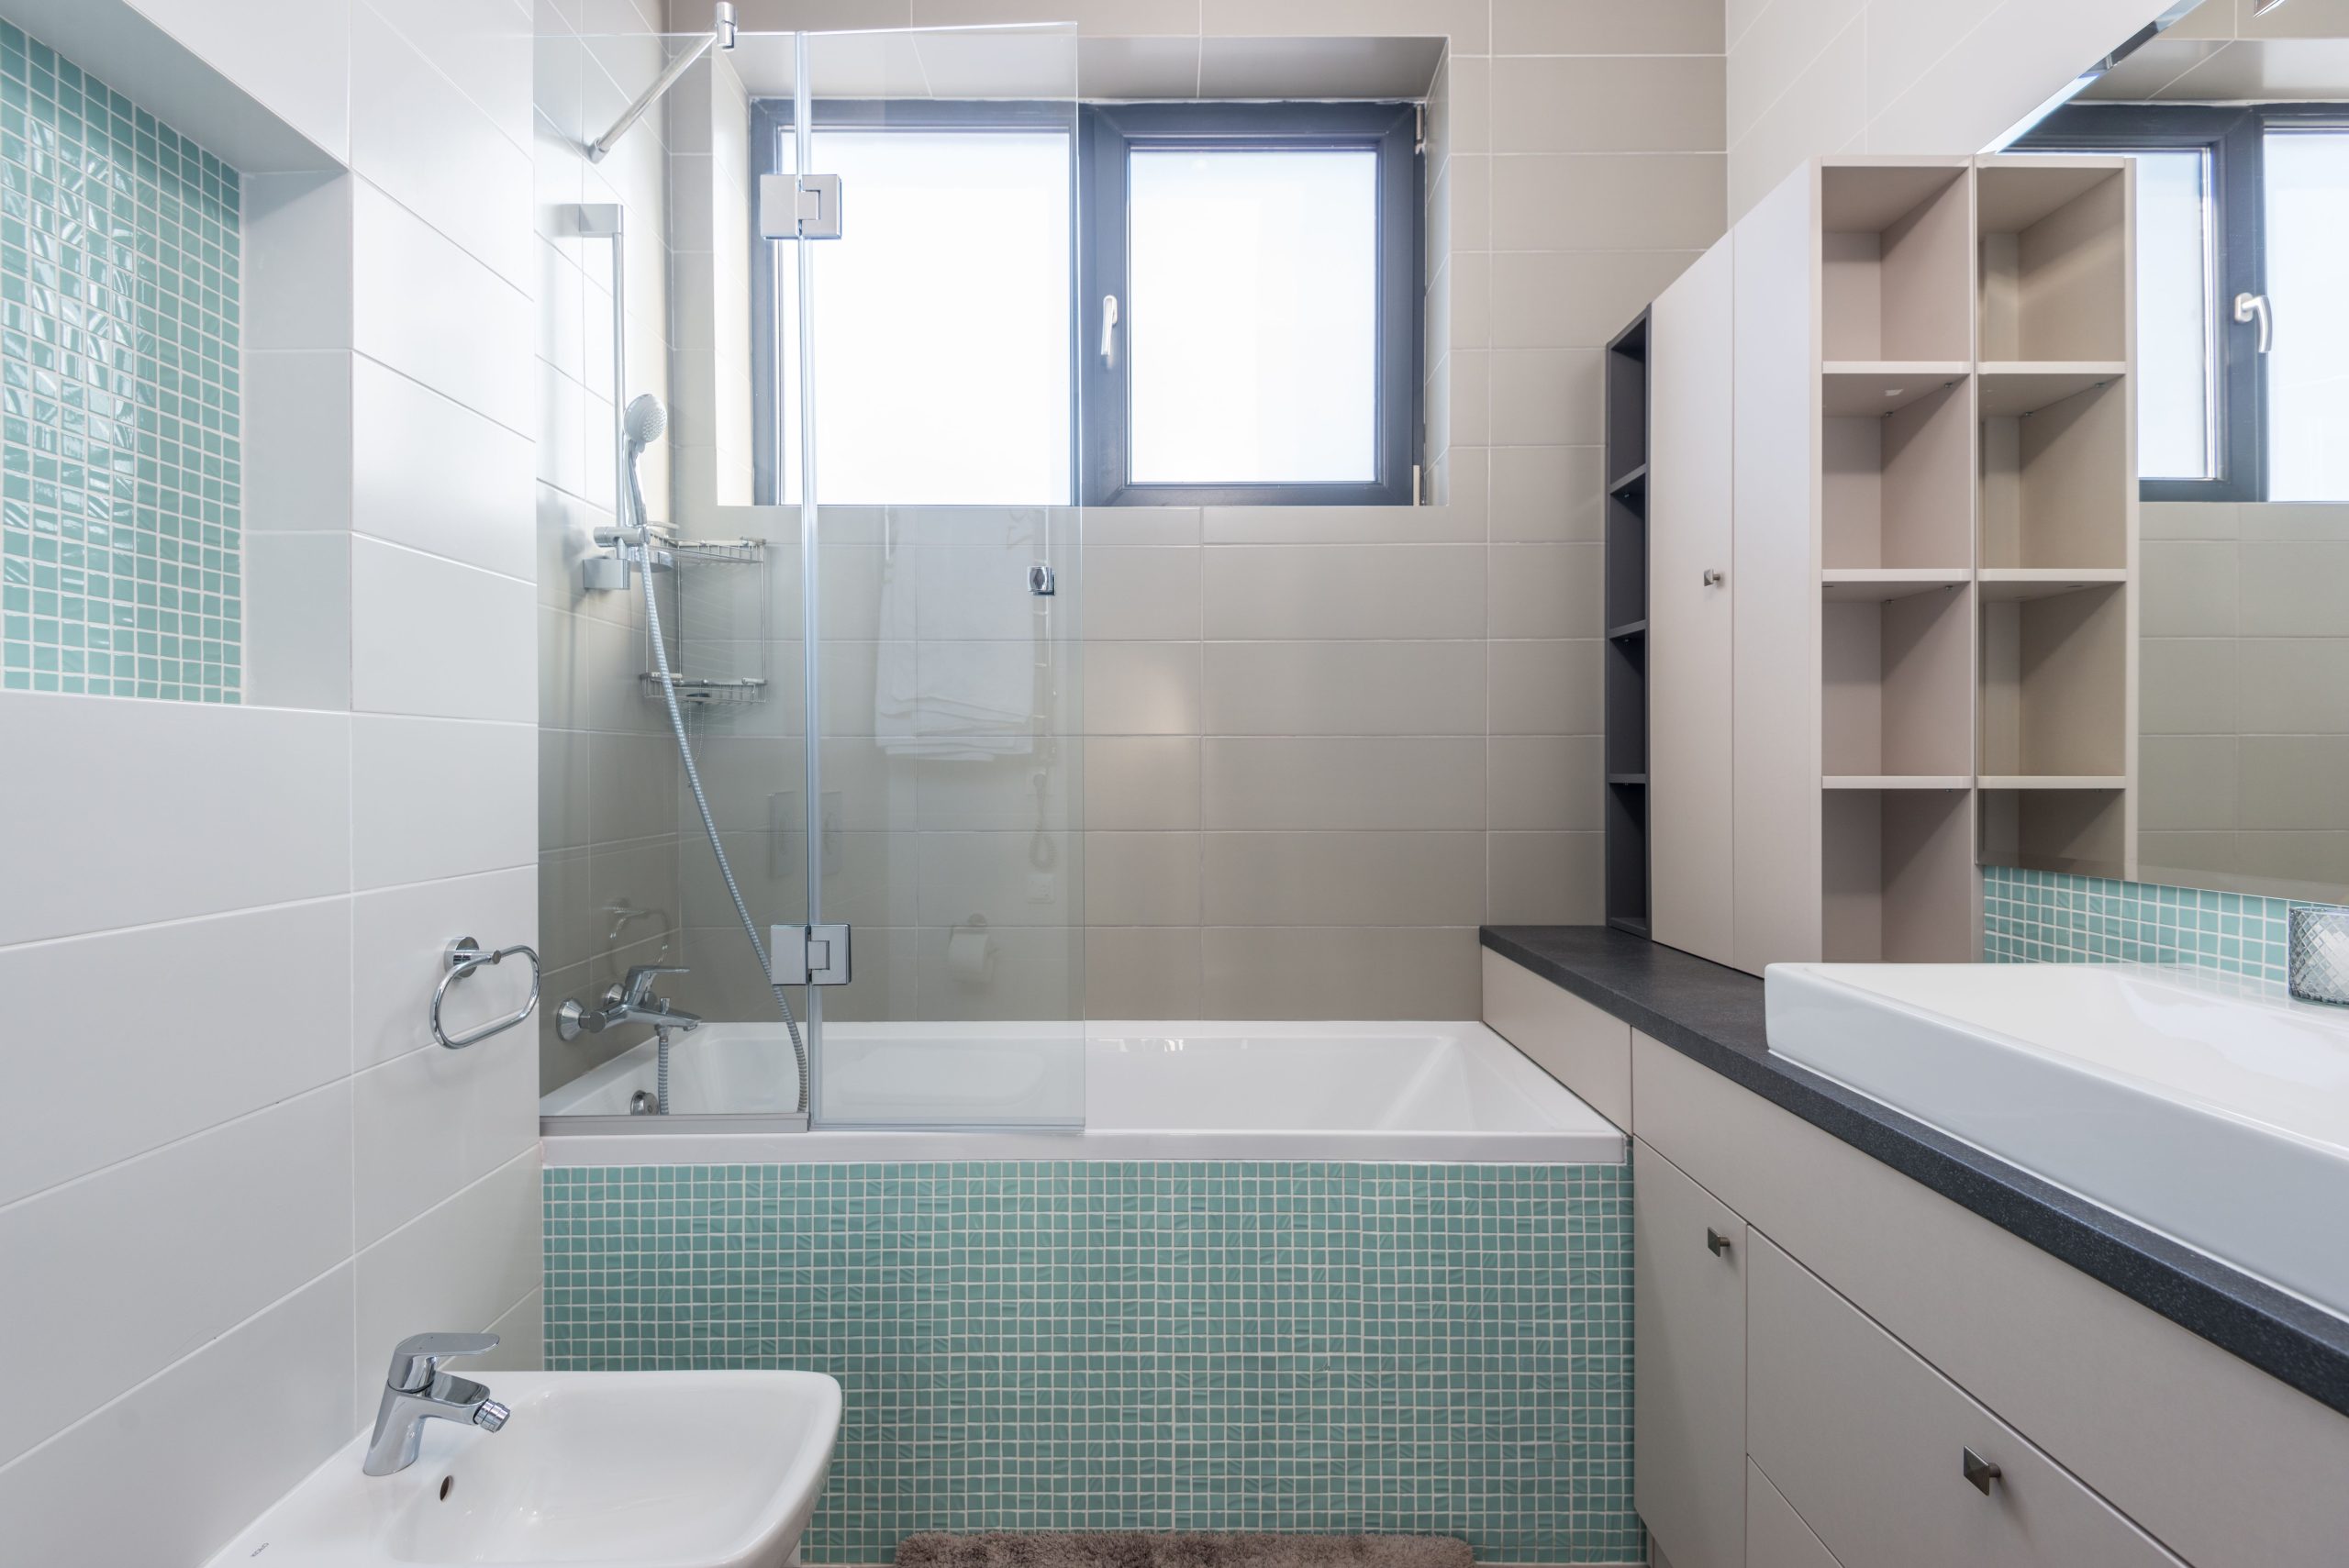
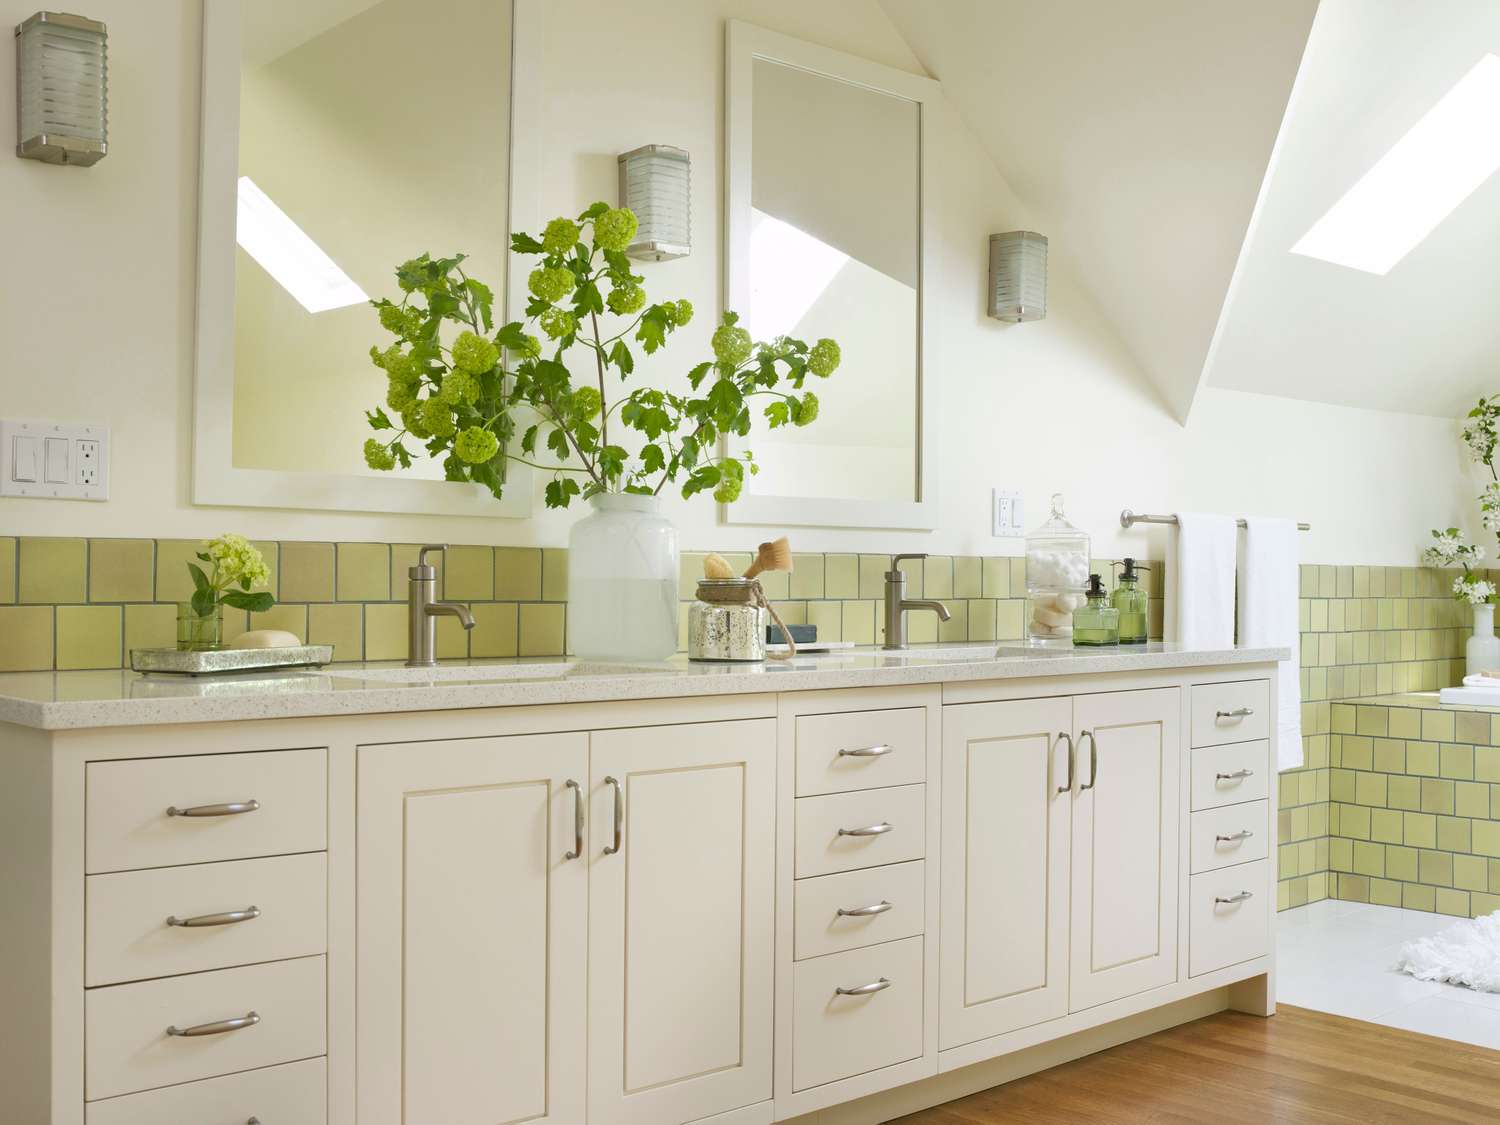
22. A Fresh and Airy Bathroom with a Bright Green Subway Tile Backsplash
The element that gives this bathroom its joyful and energetic personality is undeniably the bright green subway tile. While the warm white vanity and plentiful light from the skylights create a lovely, airy base, the green tile is the heart of the design. It injects a huge significance of color and life, turning a simple, functional space into one that feels vibrant, fresh, and unique. This serves as a reminder that it is not necessary to paint every wall in order to create a powerful color statement. For a different take on a green vanity, see Idea #29.
|
📋 Copy HEX 🔗 Share |
We’re seeing a huge giant leap away from all-white bathrooms toward spaces that embrace joyful, saturated color. After years of minimalist neutrals, homeowners are ready for more personality and fun in their homes, and the bathroom is a perfect place to experiment. This trend, sometimes called “Dopamine Decor,” is all about using color to boost your mood. A vibrant tile backsplash is a fantastic, relatively low-commitment way to bring this trend home, and we expect to see much more of it in 2026.
23. Warm Minimalism: A Floating Vanity and Backlit Mirror
This bathroom achieves its warm, minimalist aesthetic with a carefully balanced equation: 50% natural stone texture + 30% warm wood tones + 20% sleek modern elements. The large-format beige tiles create a soft, textured envelope for the whole room. The dark wood floating vanity provides a grounding element of organic warmth. The final 20%—the glossy subway tile, the crisp glass shower enclosure, and the backlit mirror—adds the necessary touch of modern sleekness that keeps the design feeling current and clean.
|
📋 Copy HEX 🔗 Share |
A mirror with integrated backlighting provides a beautiful, soft glow and is fantastic for ambiance, but it is not enough to be your only source of light at the vanity. This type of lighting is not direct enough for tasks like applying makeup or shaving. To get both the beautiful ambient glow and the functional task lighting you need, you must supplement a backlit mirror with other light sources, like a pair of sconces flanking the mirror or a set of recessed ceiling lights positioned directly over the sink area.
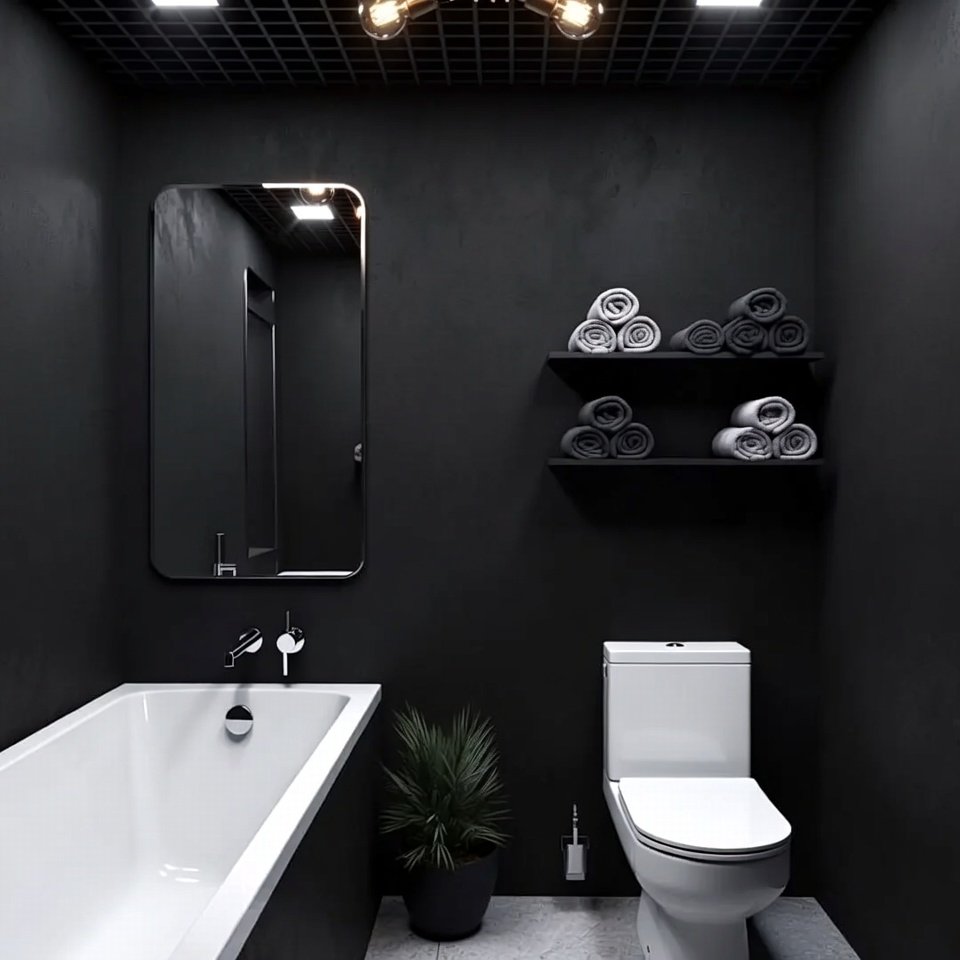
24. A Minimalist Bathroom with Matte Black Walls and Industrial Lighting
This design’s power comes from its extreme commitment to contrast. The matte black textured walls and ceiling create a dark, cocoon-like space that is dramatically punctured by the stark, sculptural forms of the white toilet and bathtub. This isn’t just a color choice; it’s a study in light and shadow. The industrial-style exposed bulb lighting is crucial, as its warm glow prevents the black from feeling flat and adds a raw, edgy character that completes the minimalist, industrial aesthetic.
|
📋 Copy HEX 🔗 Share |
Achieving this dark, industrial vibe doesn’t have to be expensive. Instead of specialty textured wall panels, consider a paintable textured wallpaper (found available at stores like Home Depot) and coat it with high-quality matte or flat black paint for a similar effect at a low cost. For the fixtures, you don’t need high-end designer pieces; simple, clean-lined white fixtures from a big-box store will provide the necessary contrast. Source industrial-style lighting and floating shelves from Amazon or IKEA to finish the look on a tight budget.
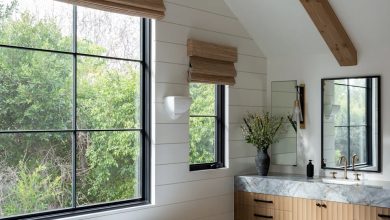
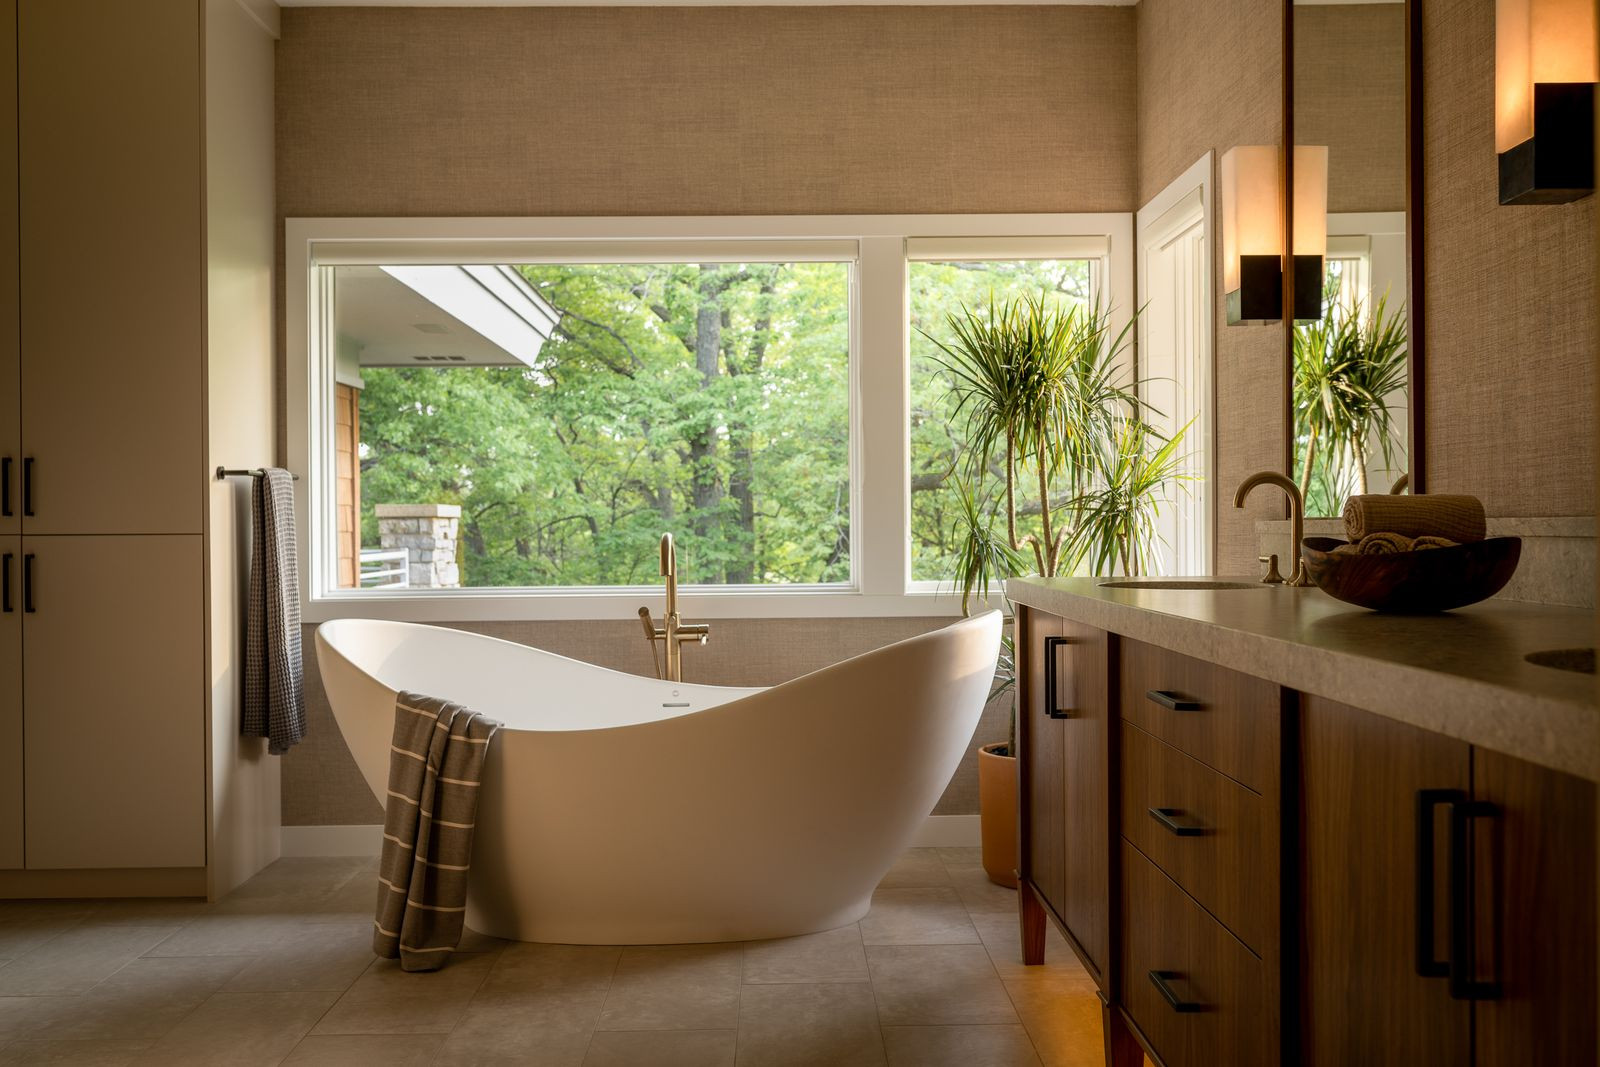
25. Natural Serenity with a Freestanding Tub and Textured Tan Wallpaper
The most important element in this bathroom is the connection to the outdoors. The large, unobstructed window overlooking the lush greenery serves as a focal point that everything else is designed to support. It floods the room with natural light and brings the calming influence of nature inside. The freestanding tub is placed to take full advantage of this view, transforming the act of bathing into a serene experience. Without that expansive view, the room would be pleasant, but it would lose its core identity as a nature-inspired retreat.
|
📋 Copy HEX 🔗 Share |
Textured wallpaper, like the lovely tan grasscloth-style paper used here, adds incredible warmth and dimension to a room, but it requires careful maintenance in a humid bathroom. It can be more delicate than standard vinyl wallpaper, and its seams can be lifted more easily if the room isn’t well-ventilated. Dust can also settle into the texture, so a gentle vacuum with a brush attachment every so often is a wise idea. Avoid using harsh chemical cleaners, as they can damage or discolor the natural fibers.
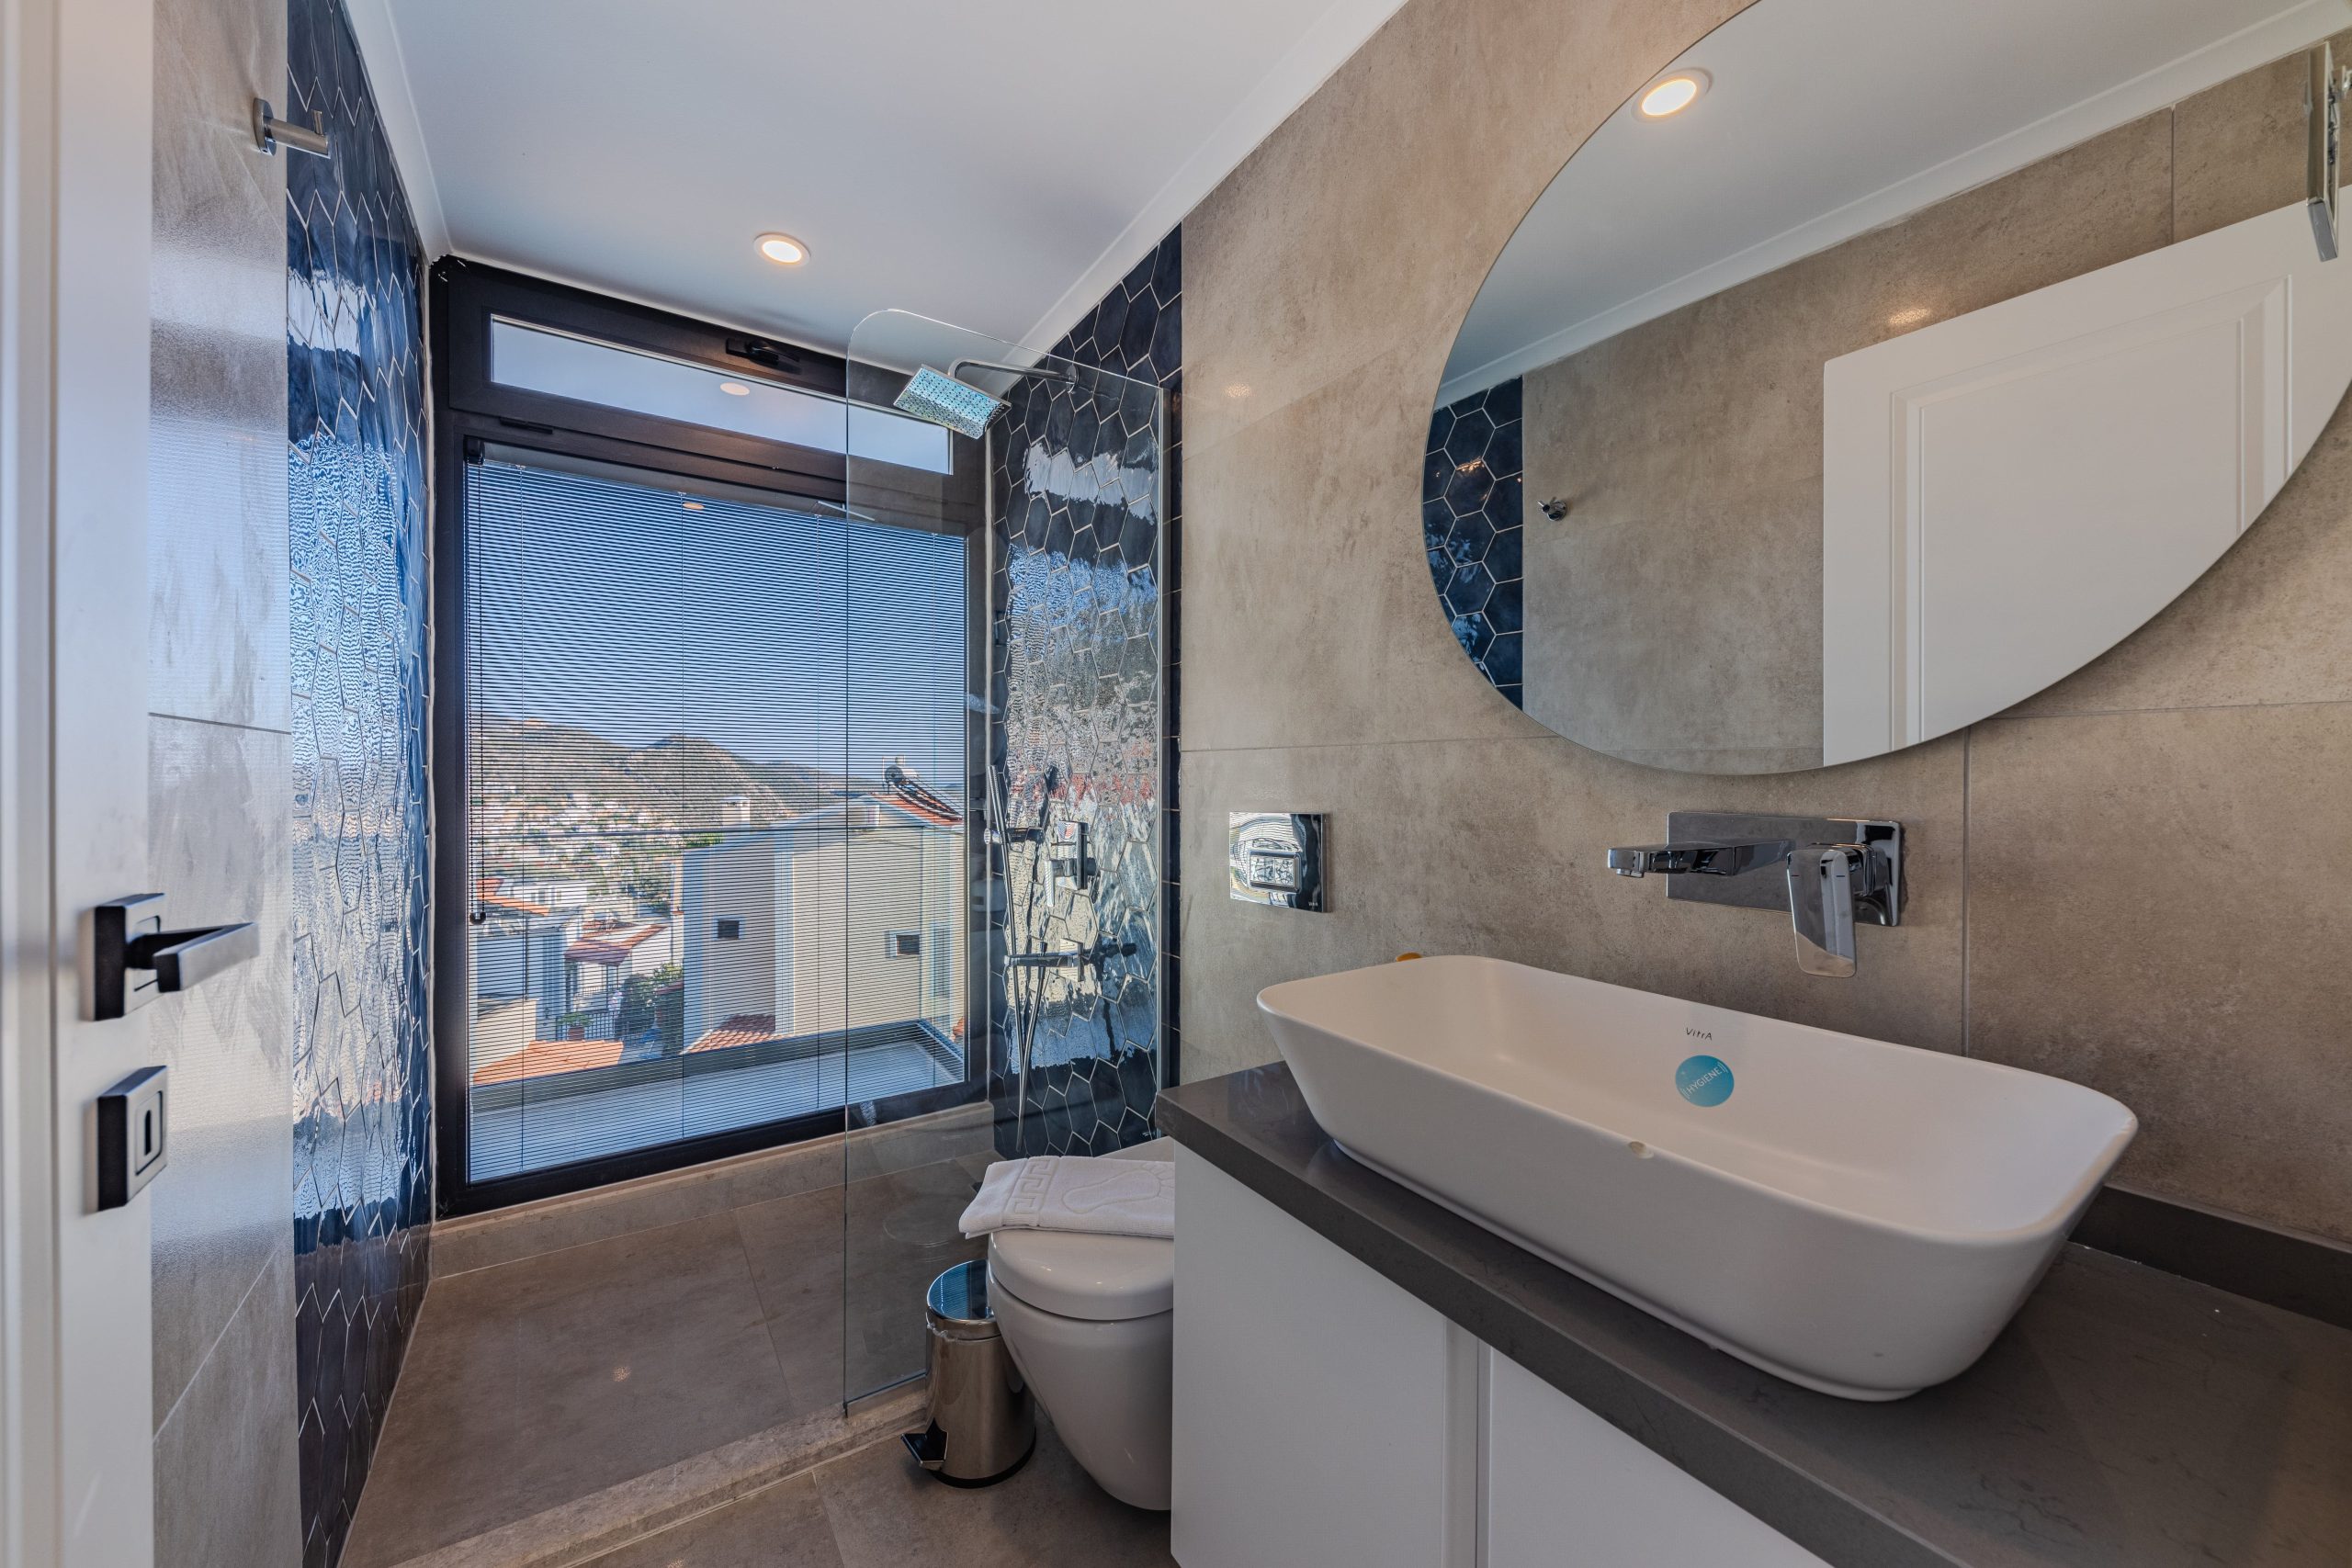
26. A Pop of Personality with a Blue Hexagon Accent Wall
This bathroom design is successful because it uses an accent wall for maximum impact. By confining the bold, iridescent blue hexagon tiles to one continuous wall that wraps into the shower, it creates a powerful, singular statement. This choice feels deliberate and confident. The rest of the bathroom uses large-format beige tiles and simple white fixtures, which act as a quiet, neutral canvas, allowing the blue accent wall to be the undisputed hero of the space without any competition.
|
📋 Copy HEX 🔗 Share |
A wall-mounted faucet creates a clean, streamlined look and makes the countertop easier to clean. Here’s a quick overview of the installation process, which typically happens before drywall.
- Choose Your Faucet First: You need the faucet in hand to know the exact placement required for the valve and spout.
- Install Blocking: Secure a piece of 2×8 lumber horizontally between the wall studs where the faucet will be.
- Mount the Valve: The faucet valve body is mounted to the block inside the wall. Its depth is critical and must be set according to your specific wall thickness and tile depth.
- Run Supply Lines: Connect the hot and cold water lines to the valve.
- Pressure Test: This procedure is a crucial step for a plumber to ensure there are no leaks inside the wall before it’s closed up.
This is a job best left to a professional plumber unless you are a well-experienced DIYer.
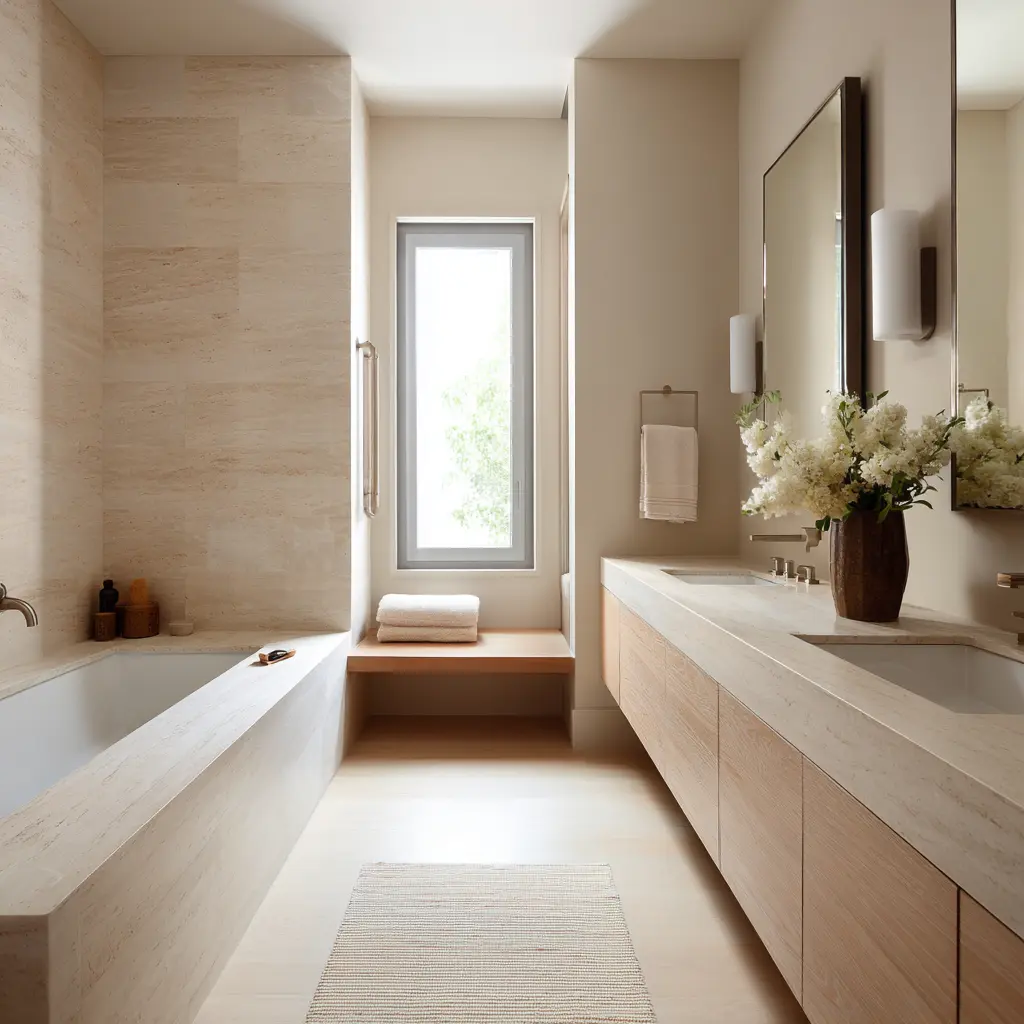
27. Warm and Minimal with a Floating Light Wood Vanity
In a minimalist bathroom where every detail counts, the lighting needs to be both functional and beautiful. Placing vertical sconces on either side of the mirrors, as seen here, is the absolute best way to light a vanity. This positioning provides even, shadow-free illumination on your face, which is far more flattering and effective for grooming than overhead lighting alone. For a double vanity, aim to have the center of each sconce roughly at eye level, about 66-70 inches from the floor.
|
📋 Copy HEX 🔗 Share |
This layout is brilliant for a long, narrow bathroom. It works well in a space that is at least 10 feet long but may be as narrow as 6 or 7 feet. By integrating the tub into a tiled surround at one end and using a floating vanity, the design maximizes usable floor space, making the room feel more open. The narrow vertical window is another smart choice for this footprint, providing natural light and a sense of height without requiring a large amount of horizontal wall space. Compare the space-saving integrated tub here with the freestanding tub in Idea #5.
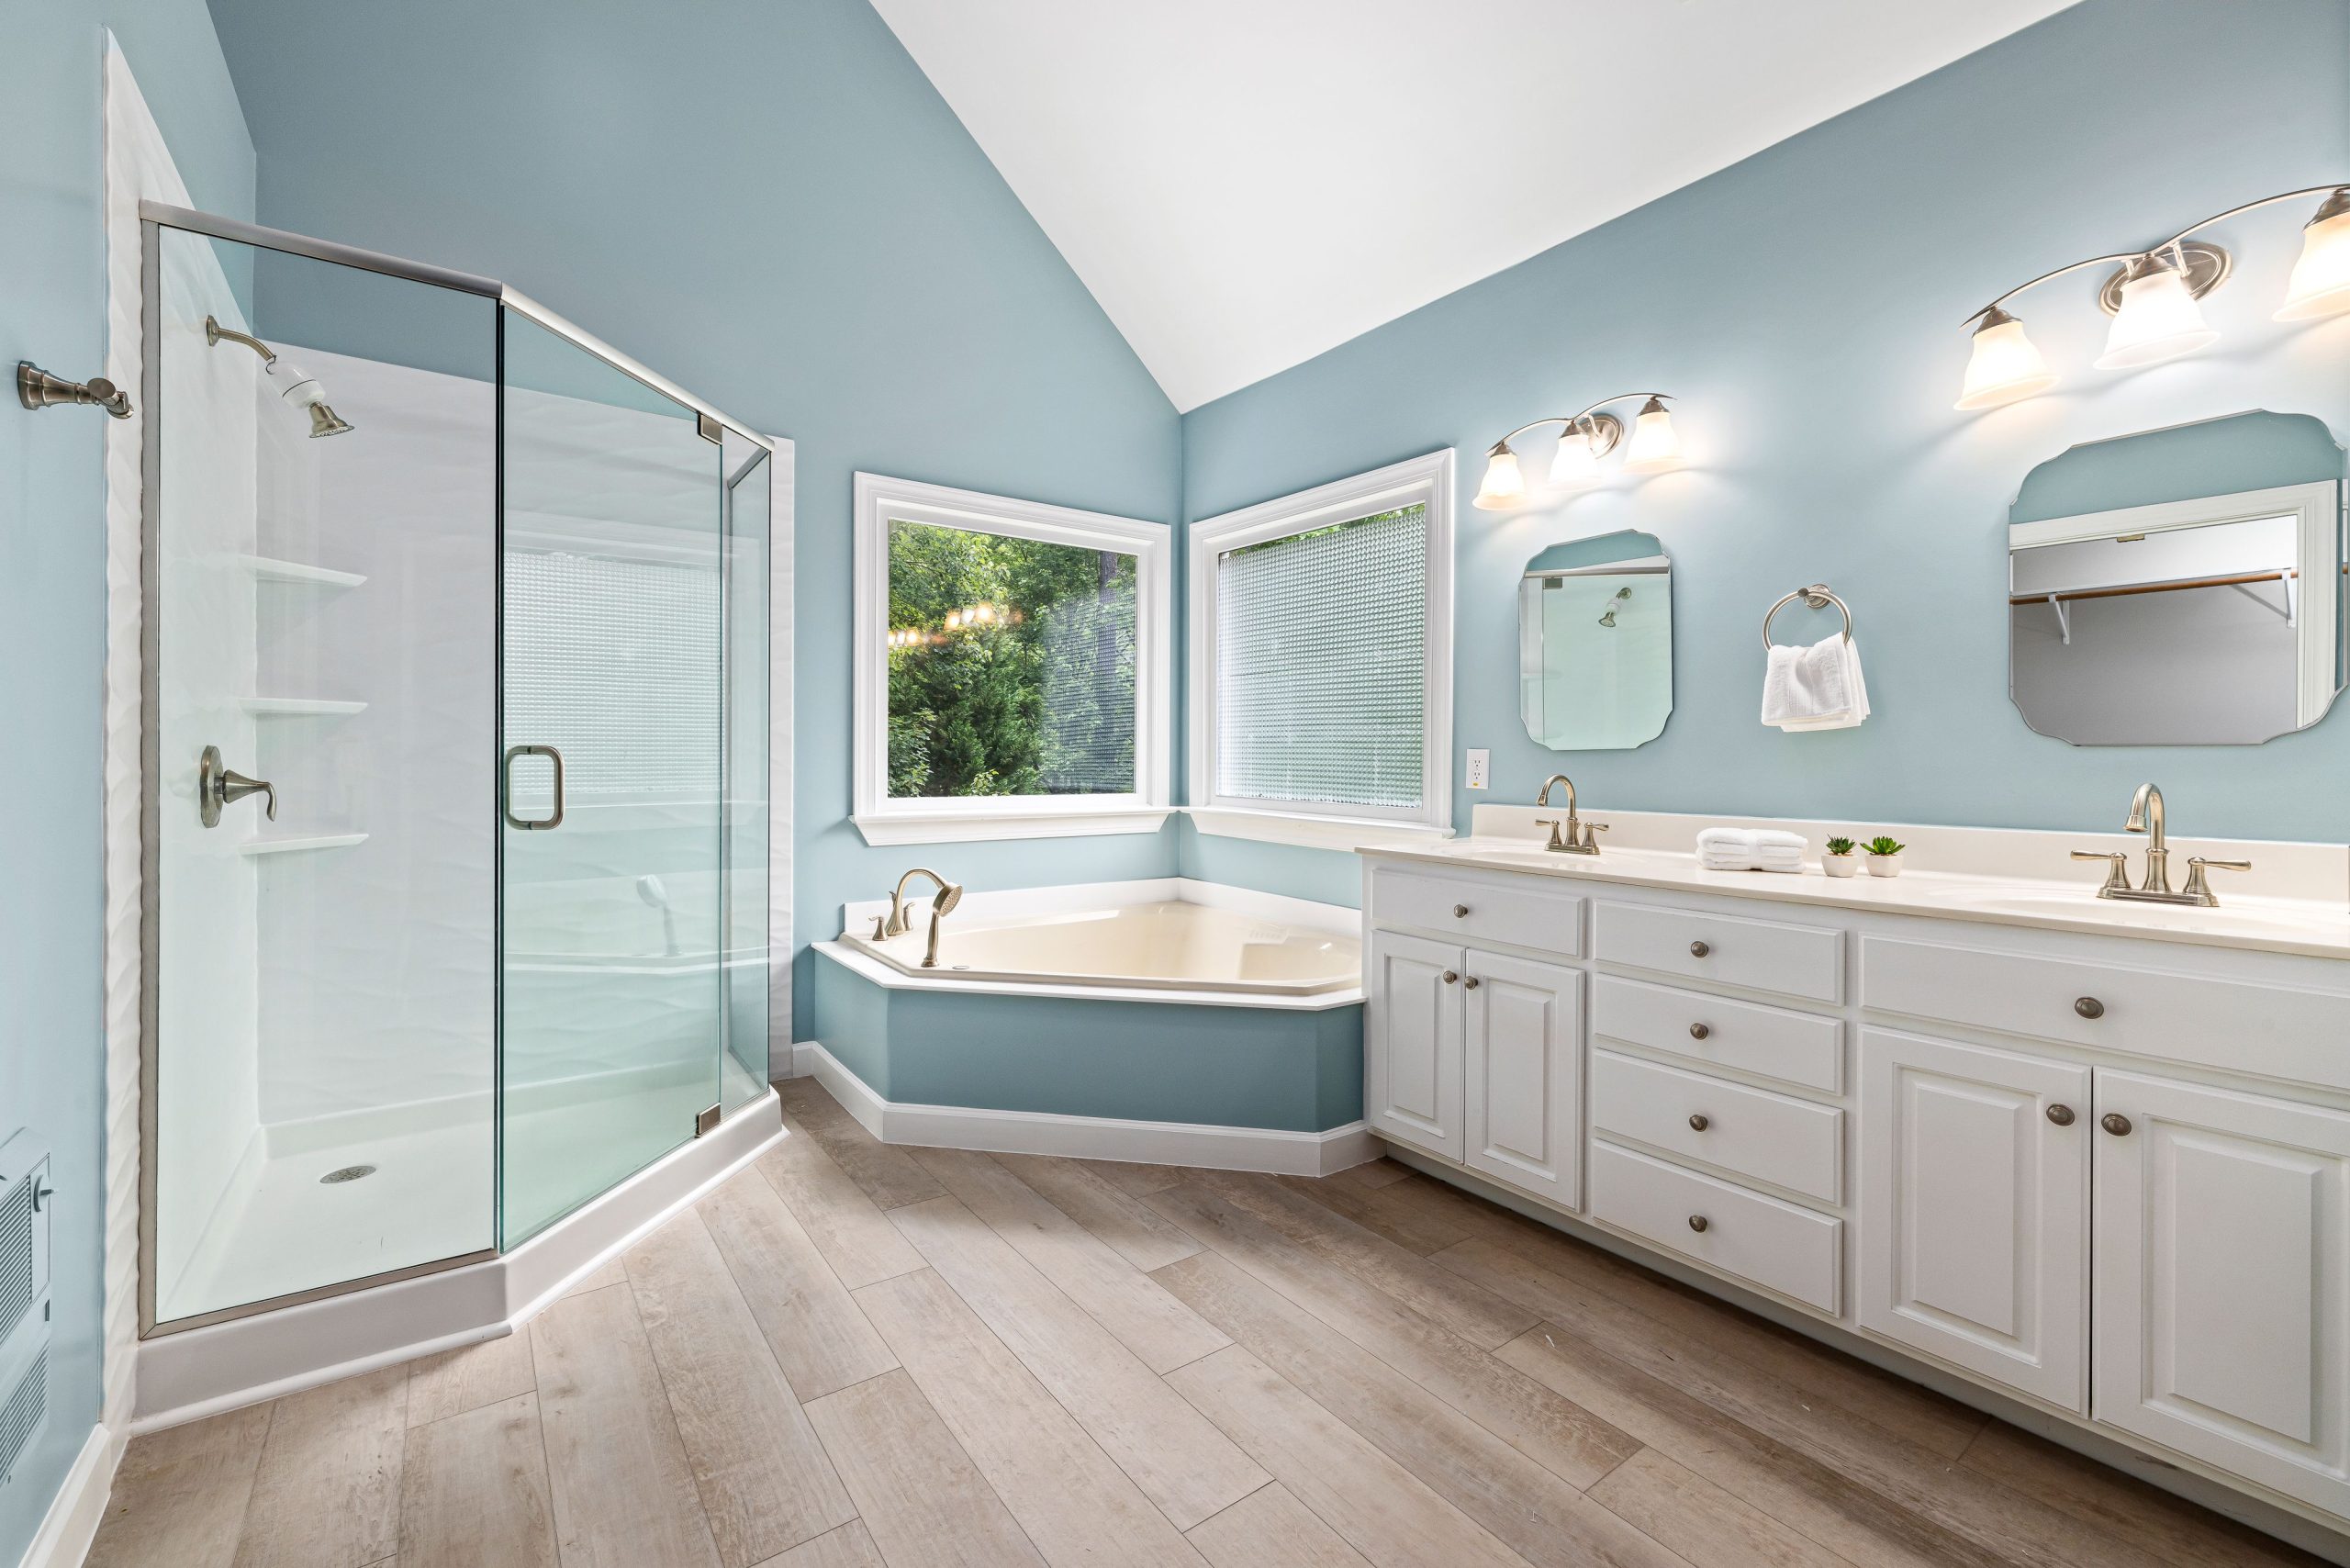
28. A Bright and Serene Bathroom in Light Blue and White
Creating this bright, clean, and classic bathroom look is quite achievable on a reasonable budget, as it relies on paint and standard-sized fixtures rather than expensive custom work or high-end tile.
|
📋 Copy HEX 🔗 Share |
- Vanity & Countertop (Stock double vanity): $1,000 – $2,500
- Fixtures (Brushed nickel faucets, shower trim): $500 – $1,200
- Built-in Tub & Shower: $2,000 – $4,500 (including glass door)
- Paint & Trim: $200 – $500
- Flooring (Wood-look tile): $600 – $1,500
- TOTAL: $4,300 – $10,200
Budget alternative: Keep your existing tub if it’s in good/excellent shape and have it professionally reglazed for around $500. Use a high-quality shower curtain instead of a glass door to save over $1,000.
A corner soaking tub can seem like a great, particularly effective way to fit a larger tub into a smaller space, but be aware of the trade-offs. The large deck surrounding the tub can be awkward to clean, requiring you to climb into the tub to reach the back corner. They also take up a significant amount of floor space—often more than a standard rectangular tub. Before committing, mock up the tub’s footprint on your floor with painter’s tape to get a real sense of its scale and how it will impact traffic flow in your bathroom.
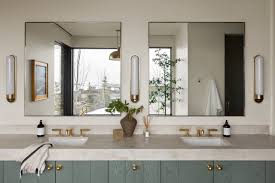
29. A Contemporary Double Vanity with Green-Stained Cabinetry
The beauty of this vanity design is in its sophisticated layering of neutral tones and textures. The green-stained cabinetry isn’t a flat, opaque paint; it allows the natural wood grain to show through, adding a layer of organic texture. This is complemented by the subtle, soft veining of the light marble countertop. The brass fixtures provide a warm metallic counterpoint, while the thin black mirror frames and dark stoneware vase add a final touch of sharp, graphic definition. It’s a perfectly orchestrated balance of soft, natural, and sharp elements.
|
📋 Copy HEX 🔗 Share |
When using a vanity with integrated sinks (where the sink and countertop are one seamless piece), choosing the right faucet is key. A vessel faucet, like the tall, elegant brass ones used here, is a perfect pairing. The height of the faucet provides a beautiful sculptural contrast to the low profile of the integrated sinks and ensures you have plenty of room to wash your hands. Standard-height faucets would look squat and be functionally awkward. Always check the faucet’s spout height and reach to ensure it pairs correctly with your sink basin.
Conclusion
Your primary bathroom has the potential to be so much more than just a functional space—it can be a personal retreat that sets the tone for your day. Whether you’re planning a full remodel or just looking for a weekend update, we hope these ideas have sparked your imagination. The perfect bathroom for you is one that blends beautiful design with your daily life.
Ready to start planning? Head over to Pinterest and start a board for your project. Don’t forget to save your favorite ideas from this article to get you started!