You know that feeling when you finally find the deck privacy idea that looks exactly right for your space, only to realize you have no idea how to make it happen? We’ve been there. After filtering through hundreds of options across Wayfair, Home Depot, and even custom build plans, we narrowed it down to the ideas that actually deliver. Inside this guide, you’ll find 27 distinct, real-home solutions for creating your own backyard escape, from modern slatted screens to lush natural hedges.
Privacy has become the ultimate luxury, and homeowners are getting creative with materials and structures to carve out personal sanctuaries. It’s less about just building walls and more about creating an atmosphere. We’ll show you how. And stay until the end—we break down the most common mistakes that can ruin these looks. As an affiliate, we may earn from qualifying purchases.
📌 Save this to Pinterest for later—you’ll want to revisit these ideas.
1. Modern Deck with a Dark, Horizontally Slatted Wood Screen
This design is all about confident contrast. The deep, moody tone of the horizontal wood screen makes the lush green plants and the cream cushions of the sectional pop. It’s a classic color theory trick: dark backgrounds create depth and make lighter objects in the foreground appear more vibrant. The strong horizontal lines of the screen are repeated in the deck planks and the base of the sofa, creating a cohesive rhythm that’s incredibly pleasing to the eye. It feels structured without being rigid and private without feeling boxed in.
To get perfectly even spacing on a slatted screen like this, use a scrap piece of wood as a spacer. Cut a block to your desired gap width—say, 1/2 inch. As you install each horizontal slat, place the spacer block against its top edge before positioning the next slat above it. This ensures a uniform gap from top to bottom, giving you that crisp, professional finish. It’s a simple trick that eliminates the need for constant measuring and marking, saving you a ton of time and frustration during the build.
2. Deck Privacy with a Patterned Metal Screen and Integrated Lighting
The single element that makes this space unforgettable is the integrated lighting. Without it, you’d have a handsome, modern deck. With it, you have a 24/7 destination. The strip lighting in the overhead canopy and the subtle lights on the screen itself transform the area from a simple seating spot into an ambient lounge after dark. It highlights the screen’s X-pattern, turning a functional privacy element into a piece of illuminated art. It proves that a great lighting plan isn’t an afterthought; it’s a core part of the design.
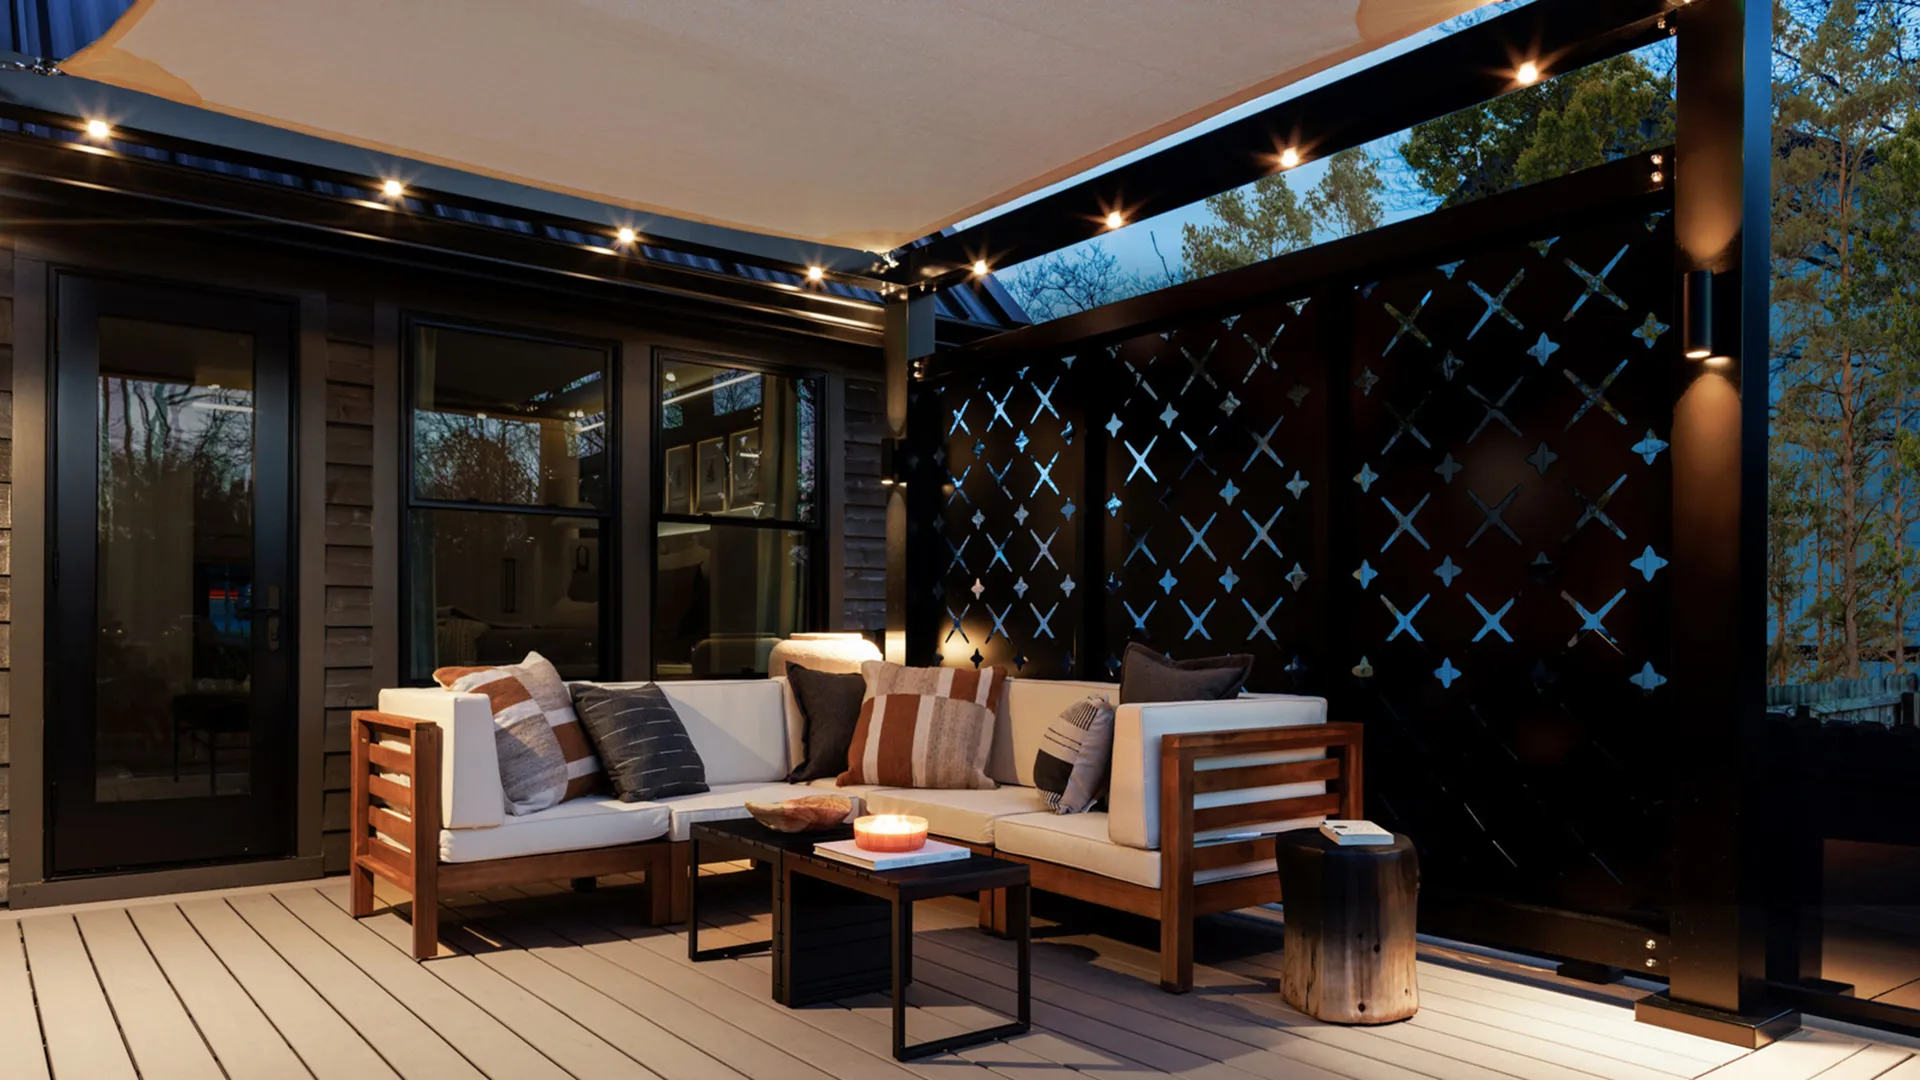
We’re seeing a huge move away from purely functional outdoor structures and toward what designers are calling ‘exterior rooms.’ This is a perfect example. The screen acts as a ‘wall,’ the canopy as a ‘ceiling,’ and the integrated lighting provides the same warmth you’d expect indoors. It’s a response to our collective desire to extend our living space, creating comfortable, stylish areas outdoors that feel just as considered as our living rooms. These decorated, functional privacy screens are at the forefront of that trend.
3. Create a Living Wall with a Dense Evergreen Privacy Hedge
A lush evergreen hedge is the dream, but let’s be honest about the commitment. This is not an instant solution. Depending on the species (like Arborvitae or Leyland Cypress), it can take 3-5 years of consistent watering, fertilizing, and pruning to achieve this level of dense, uniform privacy. You’ll also need to manage pests and potential diseases. If you’re an impatient gardener or looking for a low-maintenance fix, a natural hedge might test your patience. The stunning, natural result is worth it, but it’s a long-term relationship, not a weekend project.
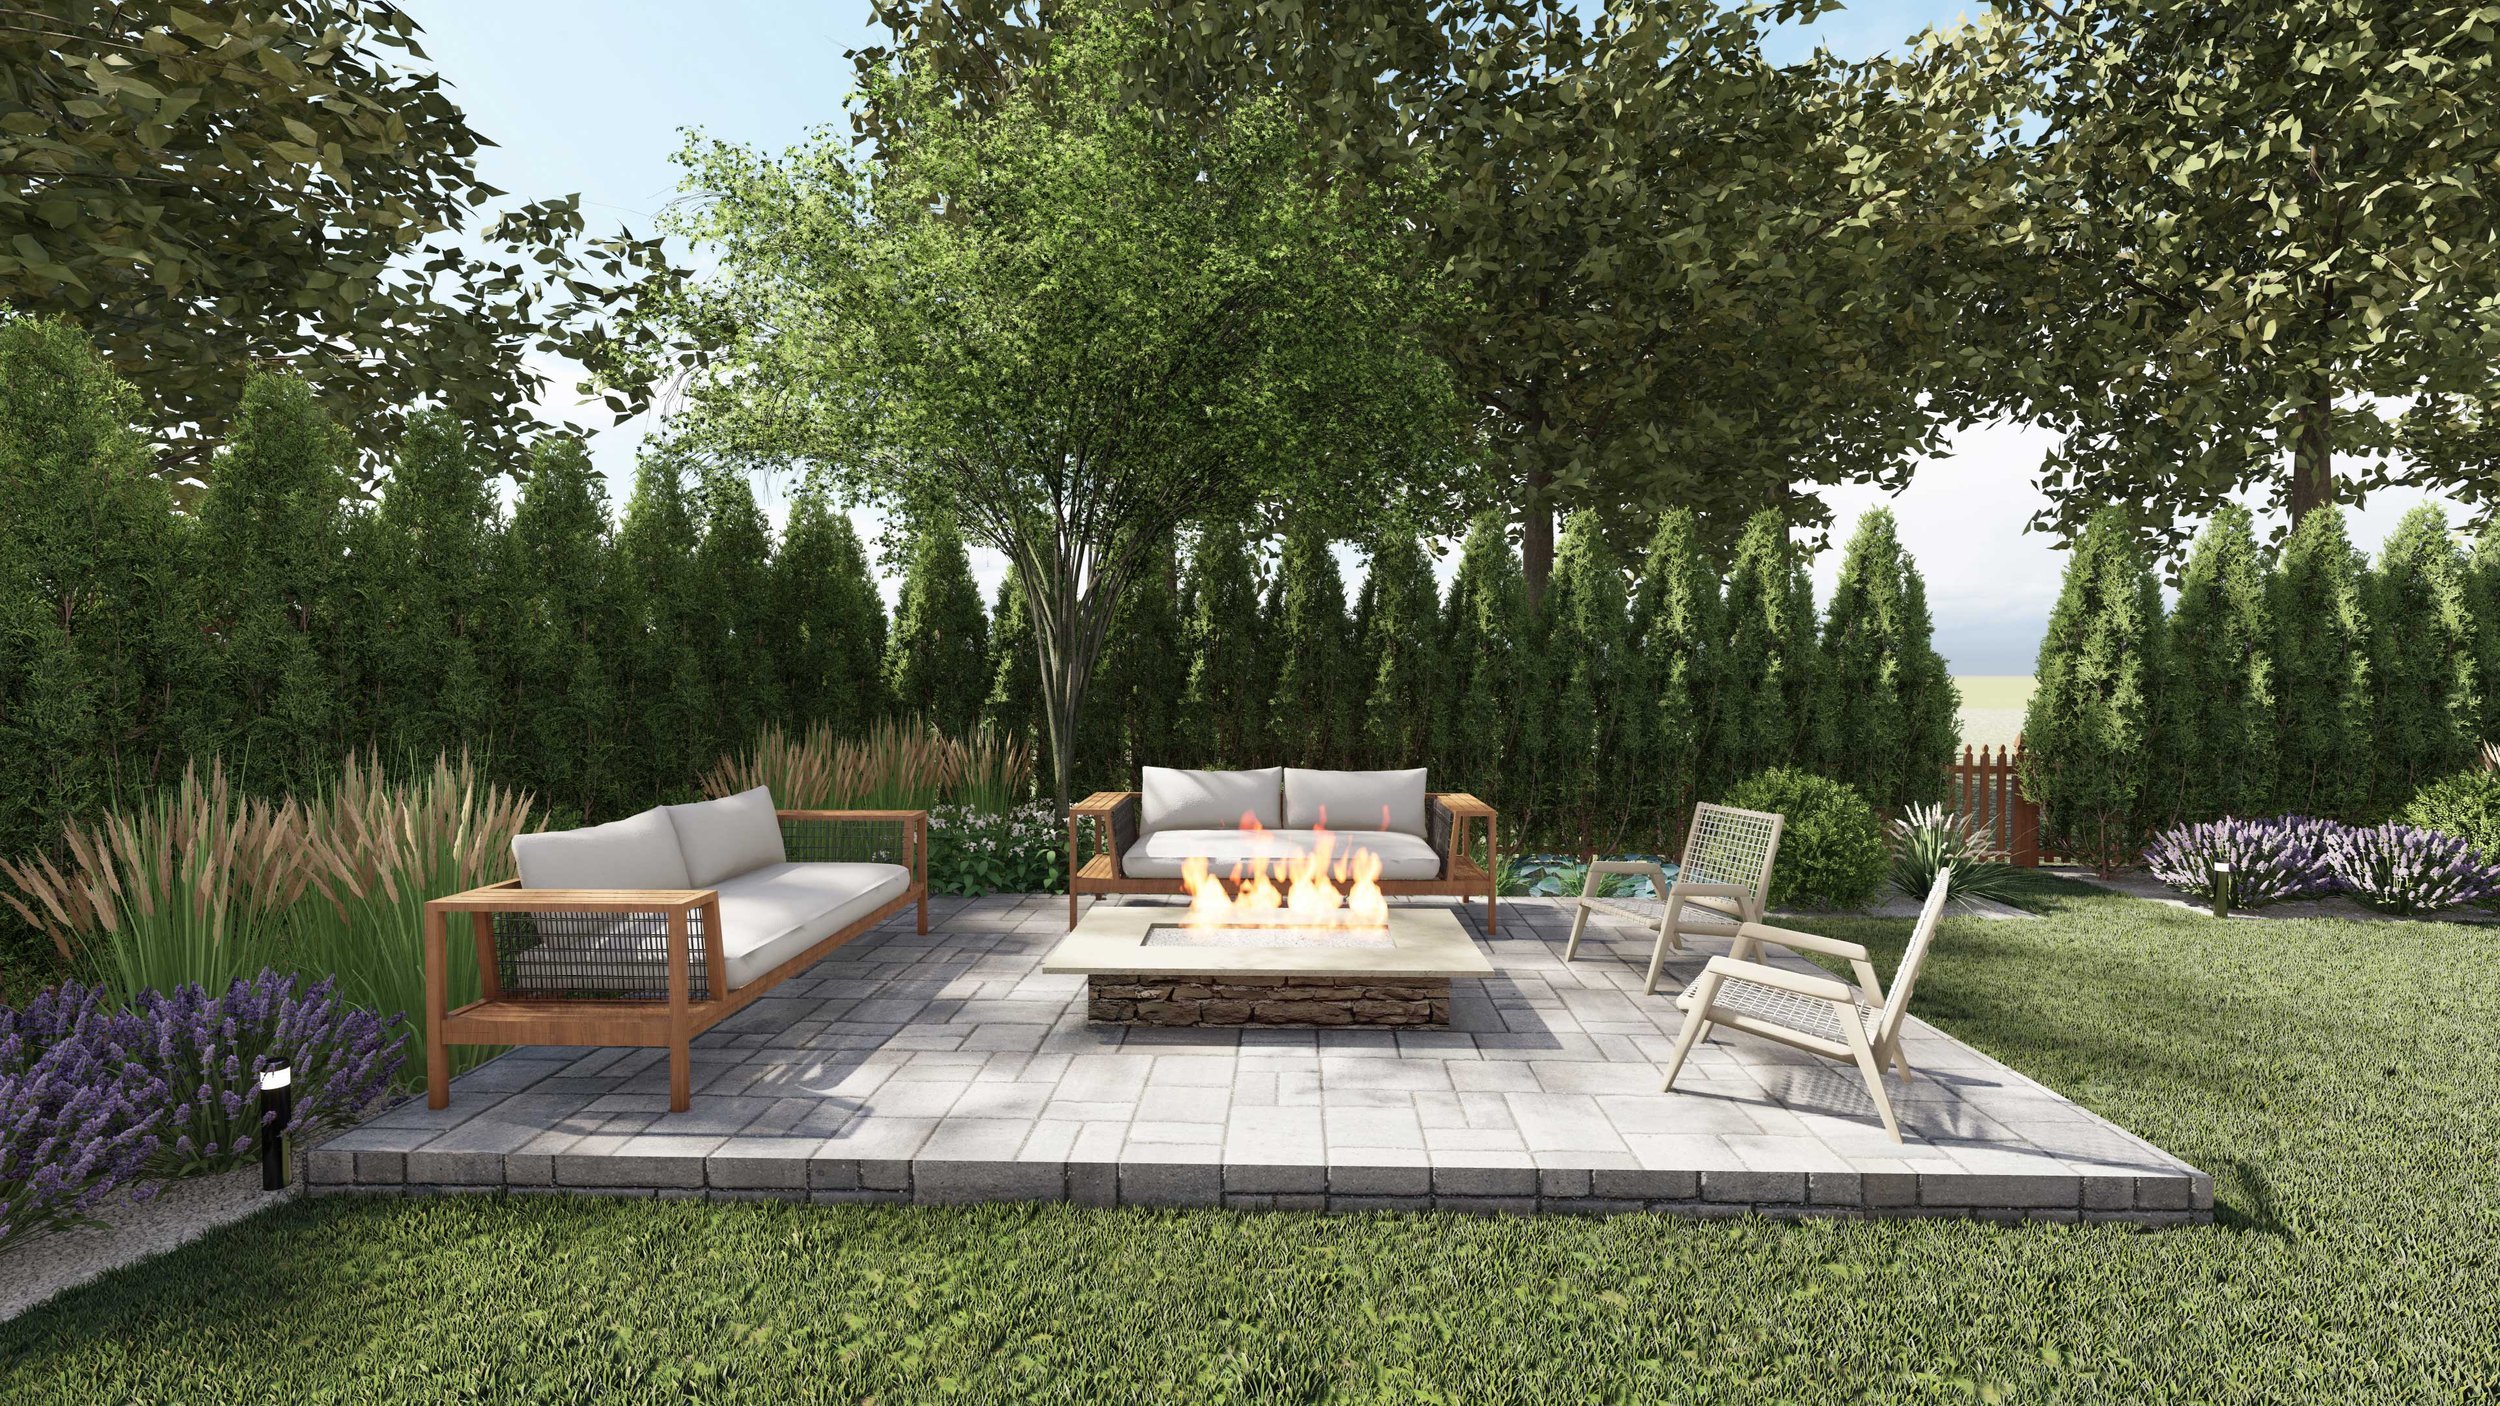
This idea is perfect for properties with at least 15-20 feet of backyard depth. The hedge itself will require a footprint of about 3-5 feet deep once mature, and you need ample space in front of it for the patio, lawn, and comfortable circulation. It’s ideal for suburban lots where you want to completely block the view of a neighboring house. For smaller spaces, consider the more vertical profile of the artificial hedge in Idea #24, which offers a similar green screen without the deep footprint.
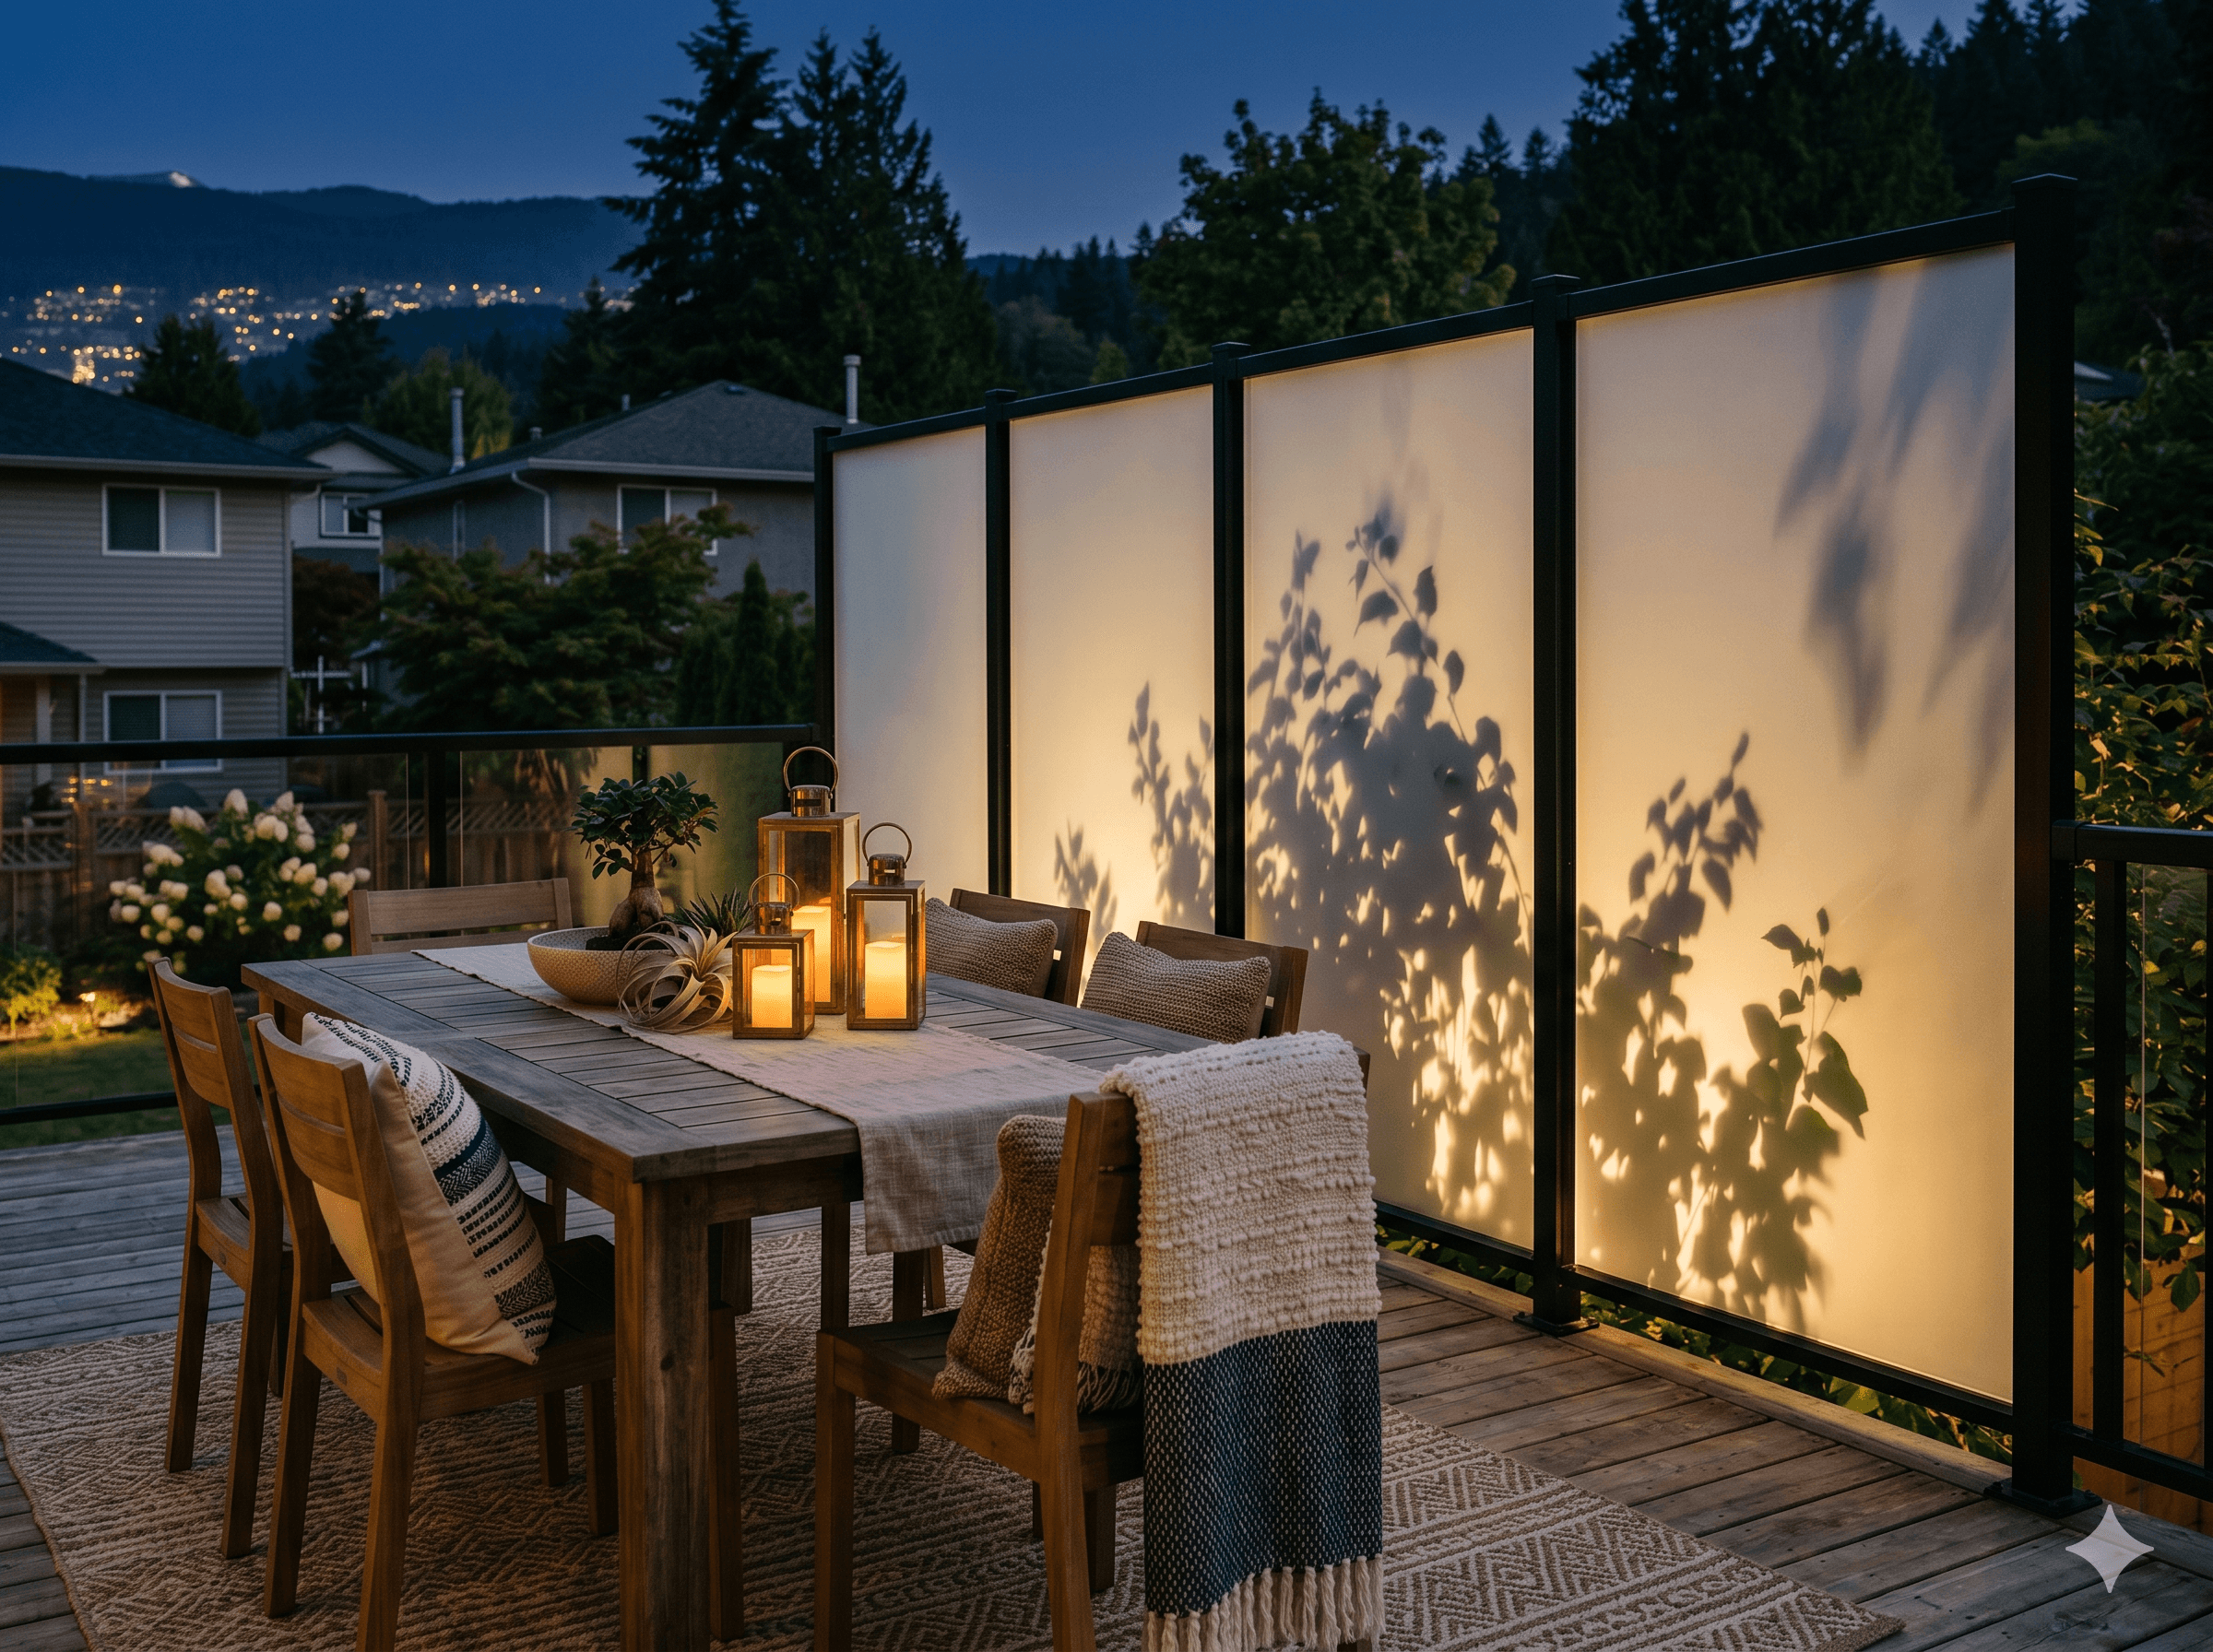
4. Set the Mood with Backlit Frosted Privacy Panels
This look is pure magic because it plays with light and shadow. The frosted panels diffuse the light, creating a soft, ethereal glow instead of a harsh glare. This turns the privacy screen into a massive lantern for the entire deck. By placing plants behind the panels, their silhouettes become a dynamic, natural art installation, especially as the sun sets. It’s a masterful use of layering—not with textiles, but with light, structure, and nature. The warmth of the wood and lanterns prevents the modern panels from feeling cold.
|
📋 Copy HEX 🔗 Share |
You don’t need custom frosted glass to get this effect. You can achieve a very similar look for a fraction of the cost using polycarbonate or acrylic sheets (like Plexiglas) from a home improvement store. Apply a frosted window film to one side of the panels. For the backlighting, instead of hardwired fixtures, use solar-powered LED strip lights (around $30-$50 on Amazon). Frame the panels with standard pressure-treated lumber painted black. You’ll get the same glowing, private ambiance for a much more accessible price.
5. A Modern Deck Featuring a Black Slat Screen and Concrete Fire Pit
That beautiful, raw concrete fire pit base and low wall are stunning, but concrete is porous. It will absolutely show water marks, dirt, and any spilled drinks (hello, red wine). To keep it looking crisp, you’ll need to seal it annually with a penetrating concrete or masonry sealer. This will help repel moisture and prevent stains from setting in. As for the reddish-brown metal fire bowl, it’s likely Corten steel, which is designed to have a stable, rust-like appearance. It’s very low-maintenance, but be aware it can initially stain the light grey concrete below it as it weathers.
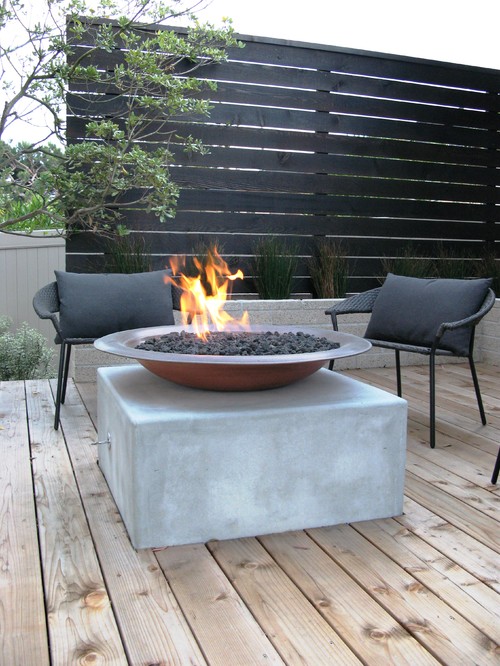
Here’s a look at what it takes to build this chic fire pit zone. Remember, prices for custom work can vary wildly based on your location and labor costs.
- Main Furniture: Two dark grey woven chairs ($800 – $1,500)
- Wall Treatment: Black horizontal slat screen, materials only ($700 – $2,000)
- Key Feature: Concrete fire pit base with metal bowl ($2,500 – $6,000)
- Decking: Light natural wood deck planks, per sq ft ($15 – $35)
- Decor/Accessories: Tall grasses and planters ($300 – $600)
- TOTAL: $4,315 – $10,135+
Budget alternative: Swap the custom concrete fire pit for a pre-fabricated one from Wayfair or Home Depot ($500-$1,200) to save thousands.
6. Frame Your Seating with a Horizontal Light Wood Privacy Screen
Want to build a simple version of this slatted screen? Here’s a quick guide for one 8’x6′ panel. Time: 4-6 hours. Cost: $200-$400.
- Set Your Posts: Secure two 4×4 posts (cut to 6.5′ height) into concrete footers, 8′ apart. Ensure they are perfectly plumb.
- Attach Top and Bottom Rails: Cut two 2x4s to span the 8′ between the posts. Attach one at the very top and one about 6″ from the ground.
- Install the Slats: Starting from the top, attach your 1×4 horizontal slats. Use a 1/2″ spacer block for even gaps.
- Add a Center Support: To prevent bowing, attach a vertical 2×4 to the backside of the slats, right in the center of the panel.
- Seal Everything: Apply a good quality outdoor wood sealer to protect your screen from the elements.
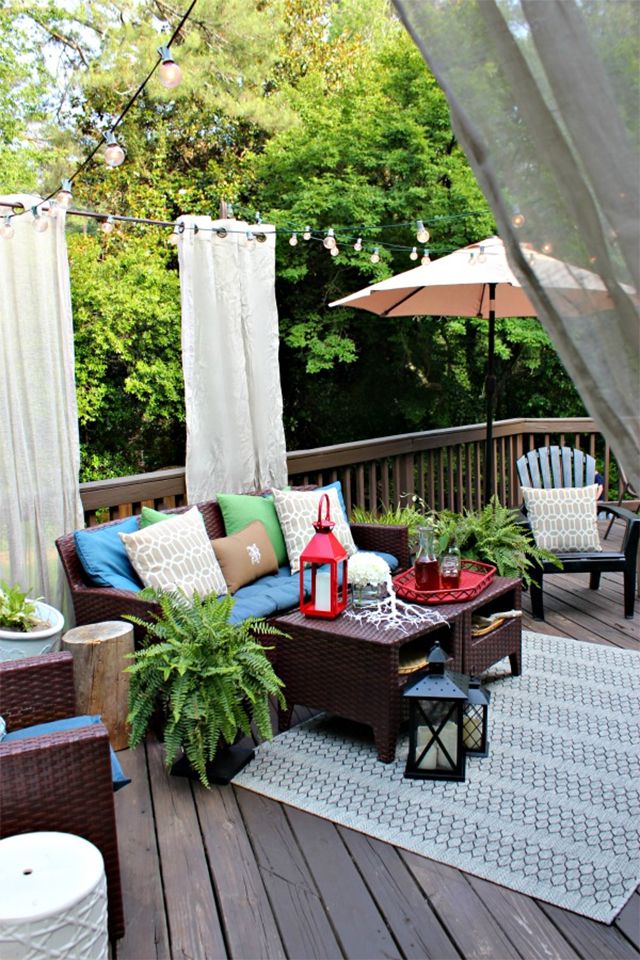
This space feels so calm and balanced because of its simple formula. Think of it as 60% natural wood + 30% neutral grey + 10% greenery. The large surfaces—the deck and the privacy screen—are warm, natural wood, creating a welcoming base. The furniture provides the cool, neutral grey that anchors the space and feels modern. Finally, the tall green plants in the dark planters are the 10% accent, adding life and a pop of organic color. You could easily swap the grey for navy blue or the light wood for a darker stain, and the formula would still work perfectly.
7. Drape String Lights Over a Tall, Dark Slatted Privacy Screen
Before you commit to this cozy, illuminated look, run through this quick checklist.
- Power Source: Do you have a GFCI-rated outdoor outlet nearby? Running extension cords across the deck is both unsafe and unsightly. Plan for power first.
- Structure Strength: Is your privacy screen (or pergola) strong enough to support the tension of string lights, especially in wind or snow? Ensure posts are well-anchored.
- Light Color: Have you decided on warm white vs. cool white? Warm white (2700K-3000K) creates this inviting, amber glow. Cool white can feel sterile and harsh in a lounge setting.
- Measure Twice: Measure the total length you need for the lights, including swags and dips. Buy a strand that’s slightly longer than your measurement.
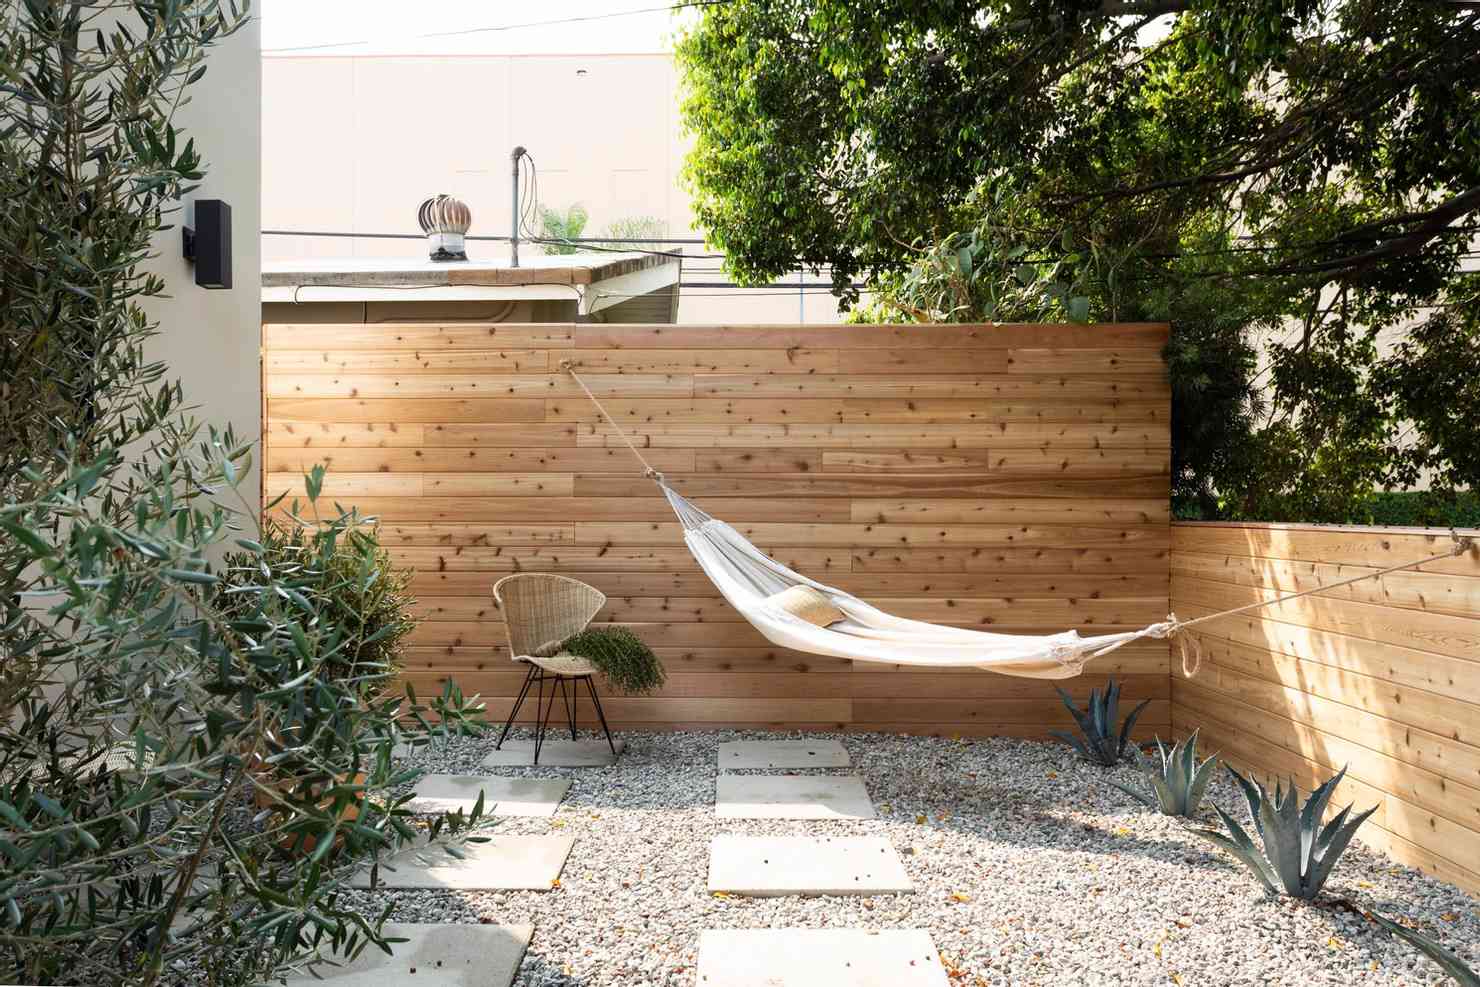
When hanging string lights for ambiance, always aim for a gentle ‘swoop’ or ‘scallop’ rather than pulling them taut. A perfectly straight line looks rigid and commercial. The relaxed drape is what creates that effortless, cozy vibe. A good rule of thumb is to allow for about 5-10% extra length for sag. So for a 20-foot span, use a 21 or 22-foot strand. This also reduces tension on the anchor points, making the installation safer and longer-lasting. If you like this, you’ll love the integrated lighting in Idea #1 as well.
8. Carve Out a Nook with a White Lattice Pergola
A lattice pergola nook like this is a brilliant solution for smaller yards or corner spaces where a full-size deck feels too exposed. It works best in an area that is at least 8×8 feet, which gives you enough room for two comfortable chairs and a small table without feeling cramped. The key is the verticality; the structure draws the eye upward, making a small footprint feel more substantial and intentional. This wouldn’t work as well floating in the middle of a large lawn; it needs to be anchored to a corner or against a house or fence line to feel like a true ‘nook.’
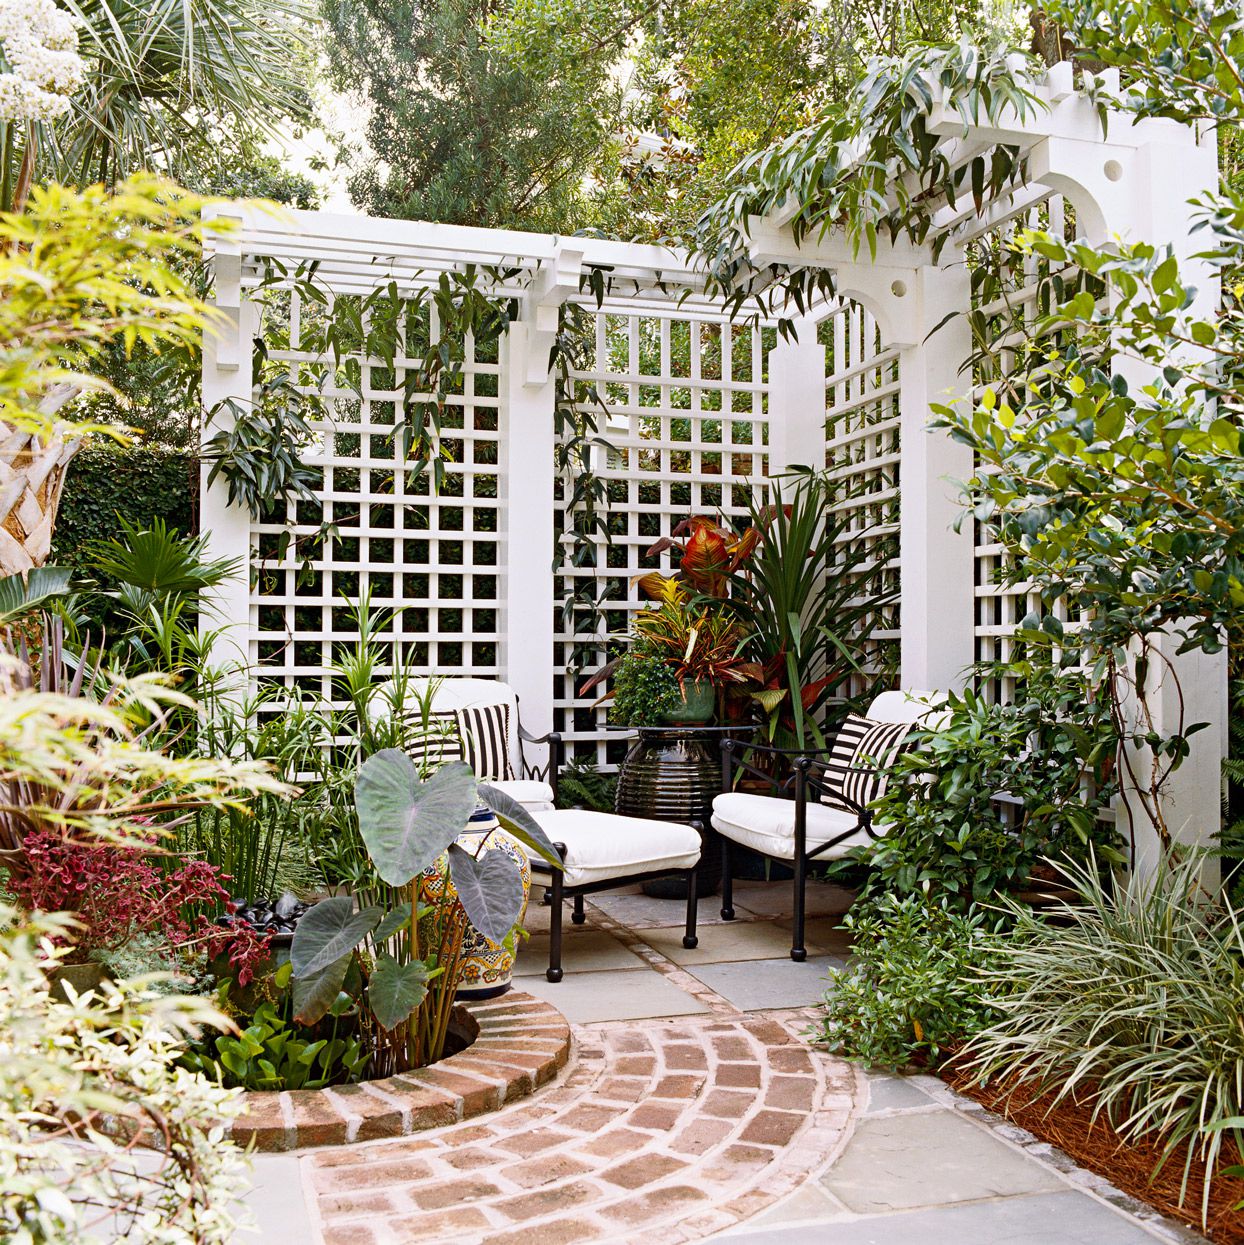
White lattice shows dirt, mildew, and grime faster than any other color. Especially in a lush, damp setting with climbing vines, you will need to commit to cleaning this structure at least once or twice a year with a pressure washer (on a gentle setting) or a good scrub brush and a deck-cleaning solution. The beautiful, airy look is high-contrast and high-impact, but it is not ‘set it and forget it. ‘If low maintenance is your top priority, consider a darker wood or composite material instead of painted white wood.
9. Modern Privacy with Decorative Black Metal Cutout Screens
The white support posts are the unexpected genius of this design. The default would be to use matching black posts, but the choice of white creates a striking visual frame. It breaks up the monotony of the dark screen and gray deck, adding a crisp, architectural element that feels incredibly custom. The posts also provide a perfect mounting point for the small oval lights, integrating them seamlessly. Without the white posts, the screen could feel heavy; with them, the whole installation feels lighter and more thoughtfully designed.
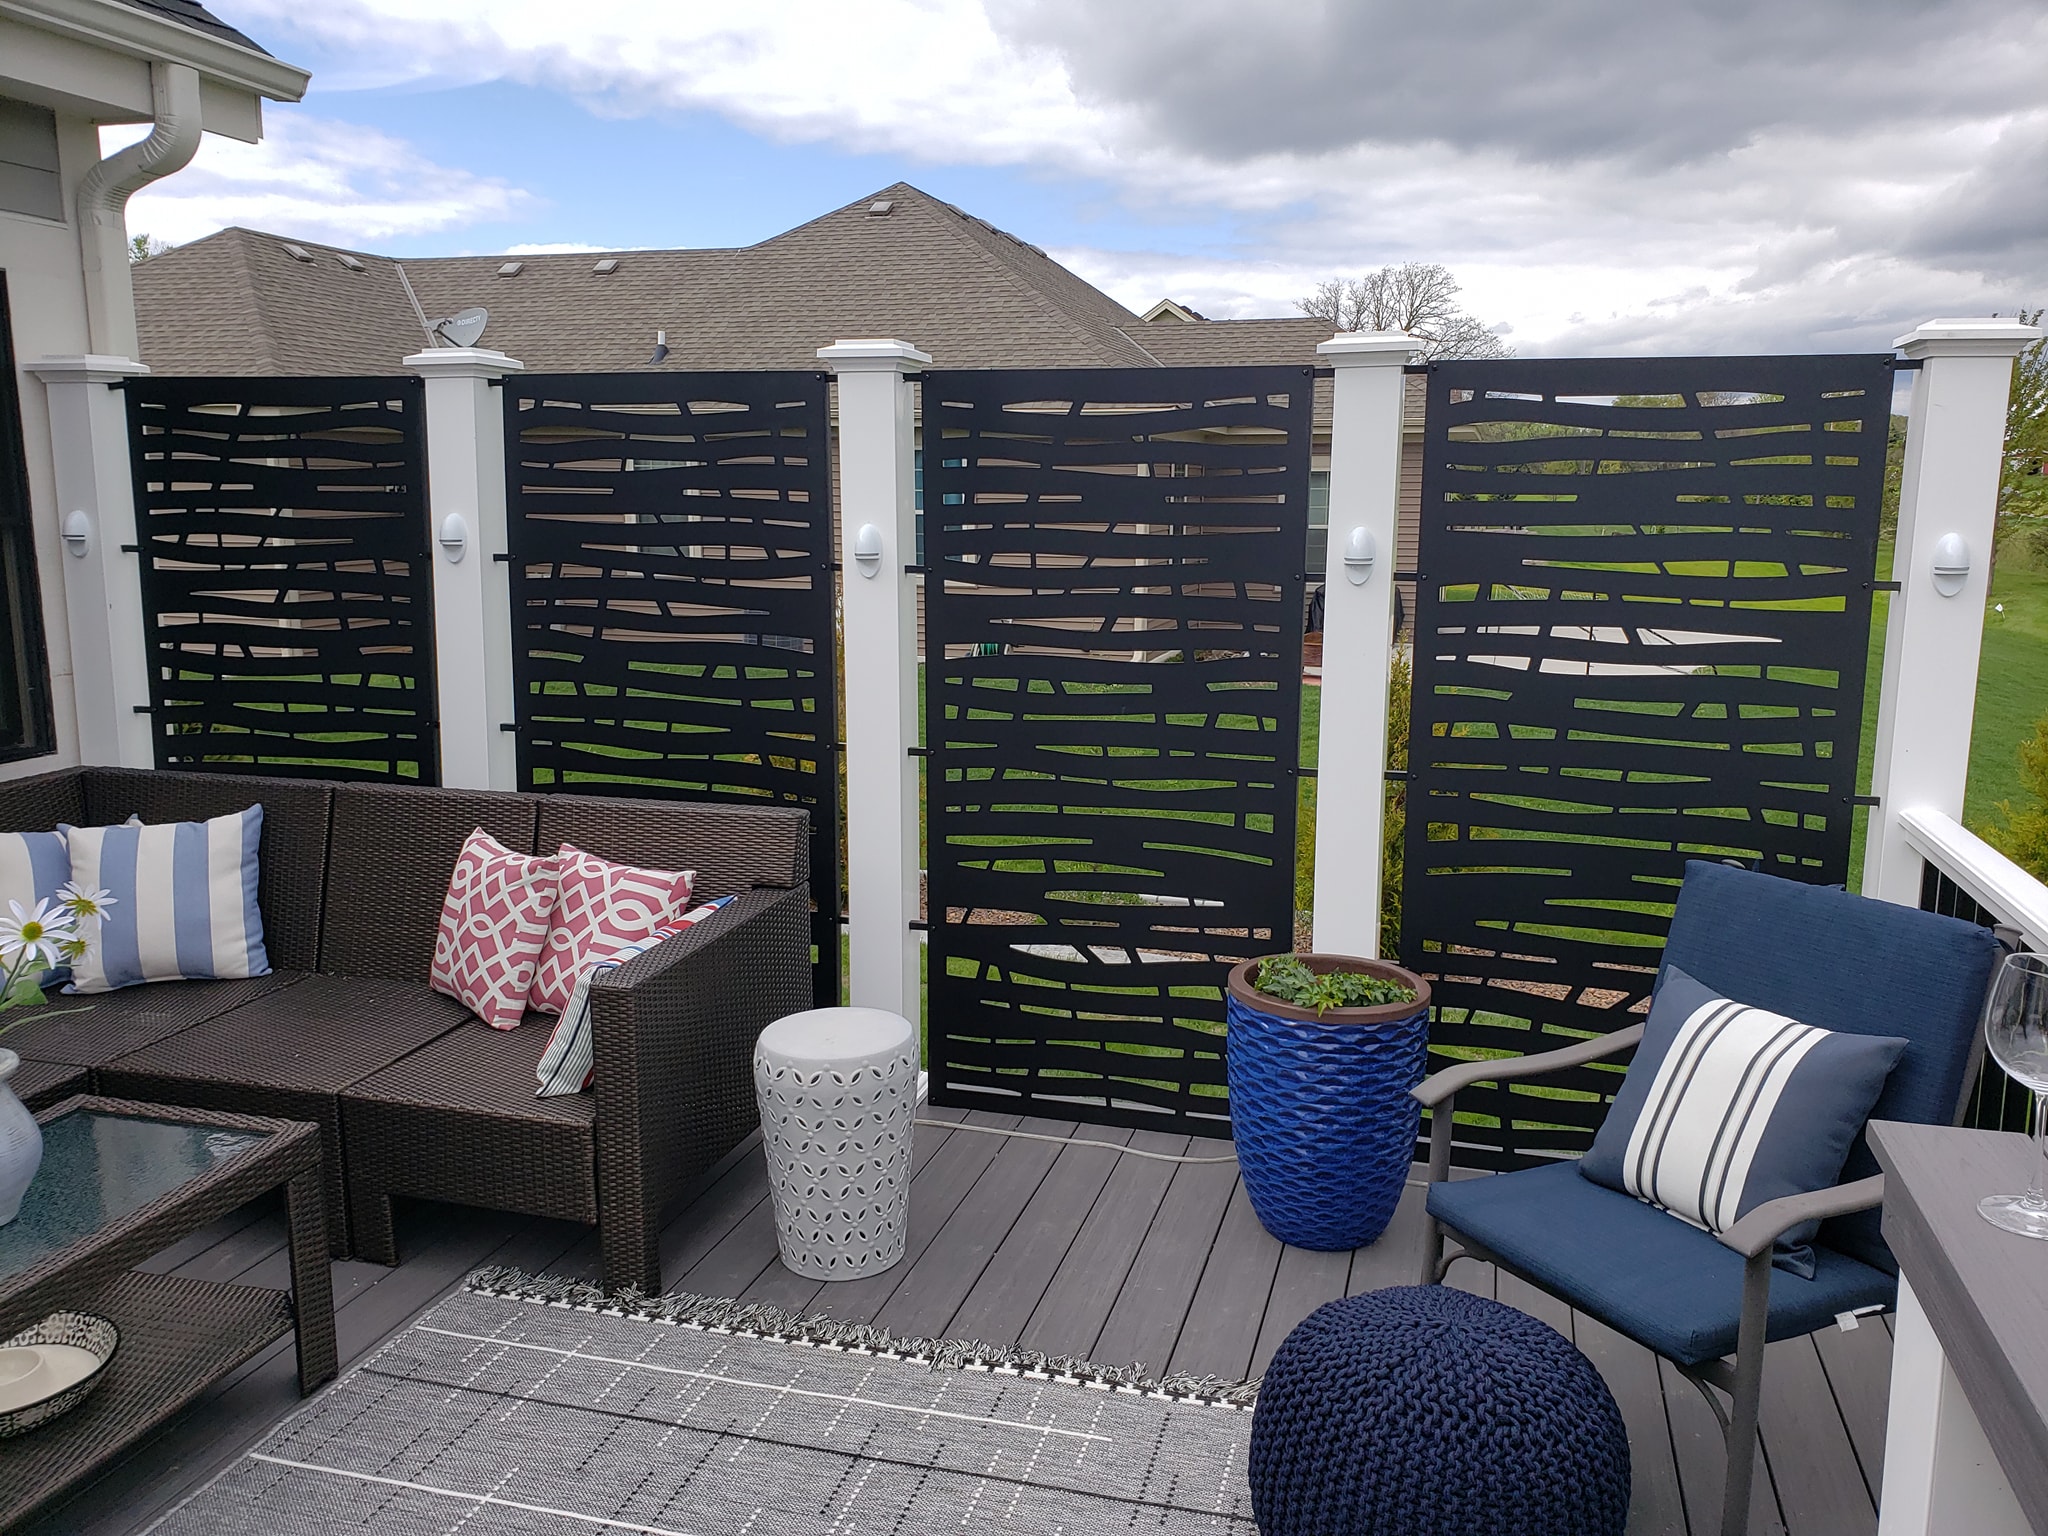
This deck design succeeds by balancing ‘hard’ and ‘soft’ elements. The black metal screens, white posts, and dark gray composite decking are all hard, geometric, and modern. To counteract this, the design introduces soft textures: the plush cushions of the brown wicker sectional, the cozy navy chair, and the patterned outdoor rug underfoot. This blend is crucial. It prevents the space from feeling like a cold, commercial patio and instead makes it a comfortable, inviting outdoor living room. It’s a masterclass in texture mixing.
10. A Contemporary Patio with a Slatted Taupe Privacy Screen
That sleek, dark gray metal frame on the pergola and privacy screen looks amazing, but powder-coated metal isn’t invincible. In areas with high humidity or salty air, you’ll want to inspect it yearly for any scratches or chips in the finish. If you find any, touch them up immediately with a matching exterior-grade metal paint. If you let exposed metal sit, rust can form and begin to creep under the surrounding powder coating, causing it to bubble and peel. A quick annual touch-up is the secret to keeping it looking sharp for years.
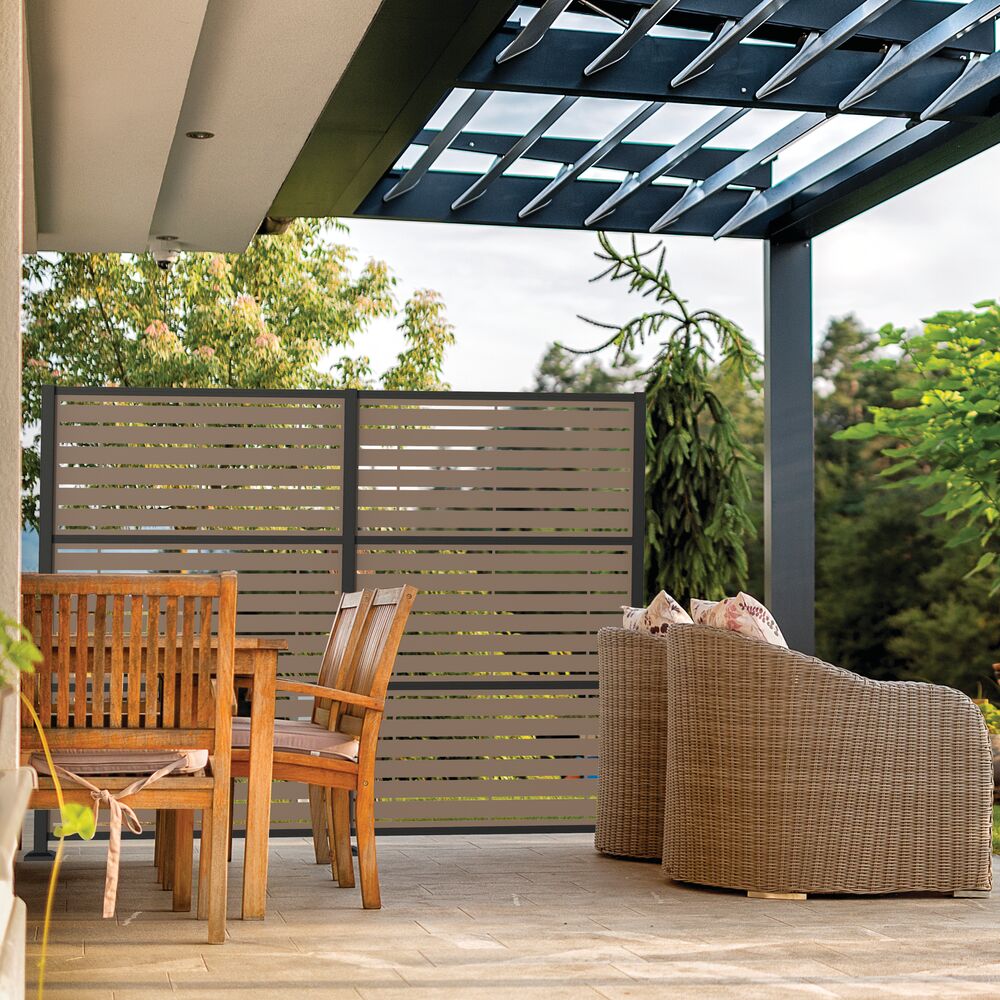
This space feels so sophisticated due to its ‘Tone-on-Tone’ formula: 50% Mid-Tone Neutrals + 40% Dark Neutrals + 10% Natural Textures. The slatted screen (taupe) and pavers (light gray) create the mid-tone base. The pergola and screen frame provide the dark, grounding element. Finally, the wooden chairs and woven wicker sofa add that essential 10% of natural warmth and texture, keeping the palette from feeling flat. You could swap the taupe and gray for shades of olive or navy, and as long as you keep the tonal balance, it will feel just as chic.
11. Layer Natural Privacy with Tall Hedges and a Pergola
This look taps directly into the ‘Lush Sanctuary’ trend. After years of minimalist, hardscaped backyards, people are craving softness, greenery, and a connection to nature. This design delivers that by layering multiple elements: the hard structure of the white pergola, the soft glow of the string lights, and the ultimate natural privacy of the tall evergreen hedges. It’s not just about blocking a view; it’s about creating a multi-sensory experience that feels cozy, safe, and completely transportive. It feels like a boutique hotel patio, right at home.
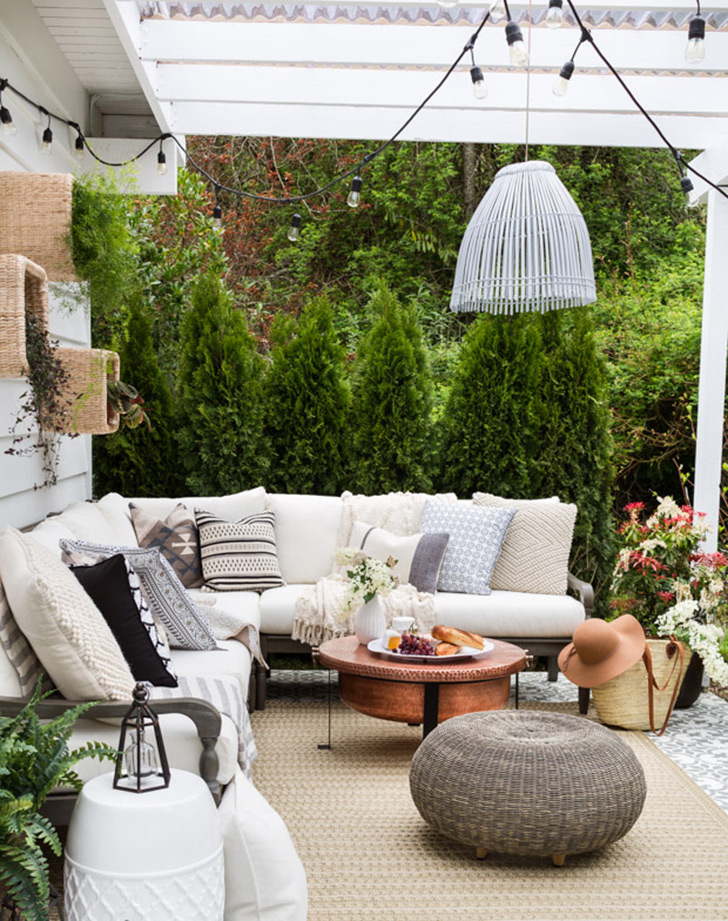
A custom pergola and high-end sectional can run into the tens of thousands. To get this vibe for less, start with a more affordable metal or vinyl pergola kit from a big box store ($800 – $2,000). For seating, scour Facebook Marketplace for a used outdoor sectional—people move and sell them for a steal. A good cleaning and new cushion covers can make it look brand new. Instead of a copper coffee table, find a simple wood or metal one and use a can of copper-colored spray paint. You’ll get the same private, cozy lounge for a much smaller investment. Compare this to the similar hedge in Idea #2.
12. Create High-Contrast Privacy with a Dark Wood Screen and Greenery
Replicating this lush planter look against a dark screen is easy. Here’s how to assemble one planter. Time: 1 hour. Cost: $150-$300.
- Choose Your Planter: Select a large rectangular planter (at least 30″ long and 18″ tall) in a dark color like black or charcoal to blend with the screen.
- Ensure Drainage: Drill several 1/2″ holes in the bottom if there aren’t any. Good drainage is non-negotiable for healthy plants.
- Add Filler: Fill the bottom third of the planter with empty plastic bottles or packing peanuts. This reduces the amount of soil needed and makes the planter lighter.
- Layer Landscape Fabric: Place a layer of landscape fabric on top of the filler to prevent soil from washing out.
- Add Soil and Plants: Fill the rest with high-quality potting mix. Choose tall, leafy plants like fiddle leaf figs (for shade) or canna lilies (for sun) to create that dramatic vertical effect.
To make a privacy screen feel truly integrated, the ‘rule of three’ is your best friend. Instead of one lonely planter, use a grouping of three. They can be three identical planters for a formal look or three planters of varying heights and similar materials for a more organic feel. In this look, the repetition of the dark rectangular planters at the base of the dark screen makes the design feel intentional and complete. It visually anchors the tall screen to the deck floor, creating a beautiful and cohesive composition.
13. A Shaded Deck with a Dark Louvered Privacy Wall
A louvered wall and pergola combination is a fantastic solution for decks that get blasted with sun from a specific direction. This setup is ideal for a deck or patio that is at least 12×14 feet, allowing enough space for a full seating arrangement without feeling crowded by the solid wall. The louvered wall is most effective on the west or south-facing side of your deck to block the harshest afternoon sun. If your deck is smaller, a full wall might feel too imposing; consider a more open design like the slatted pergola in Idea #18 instead.
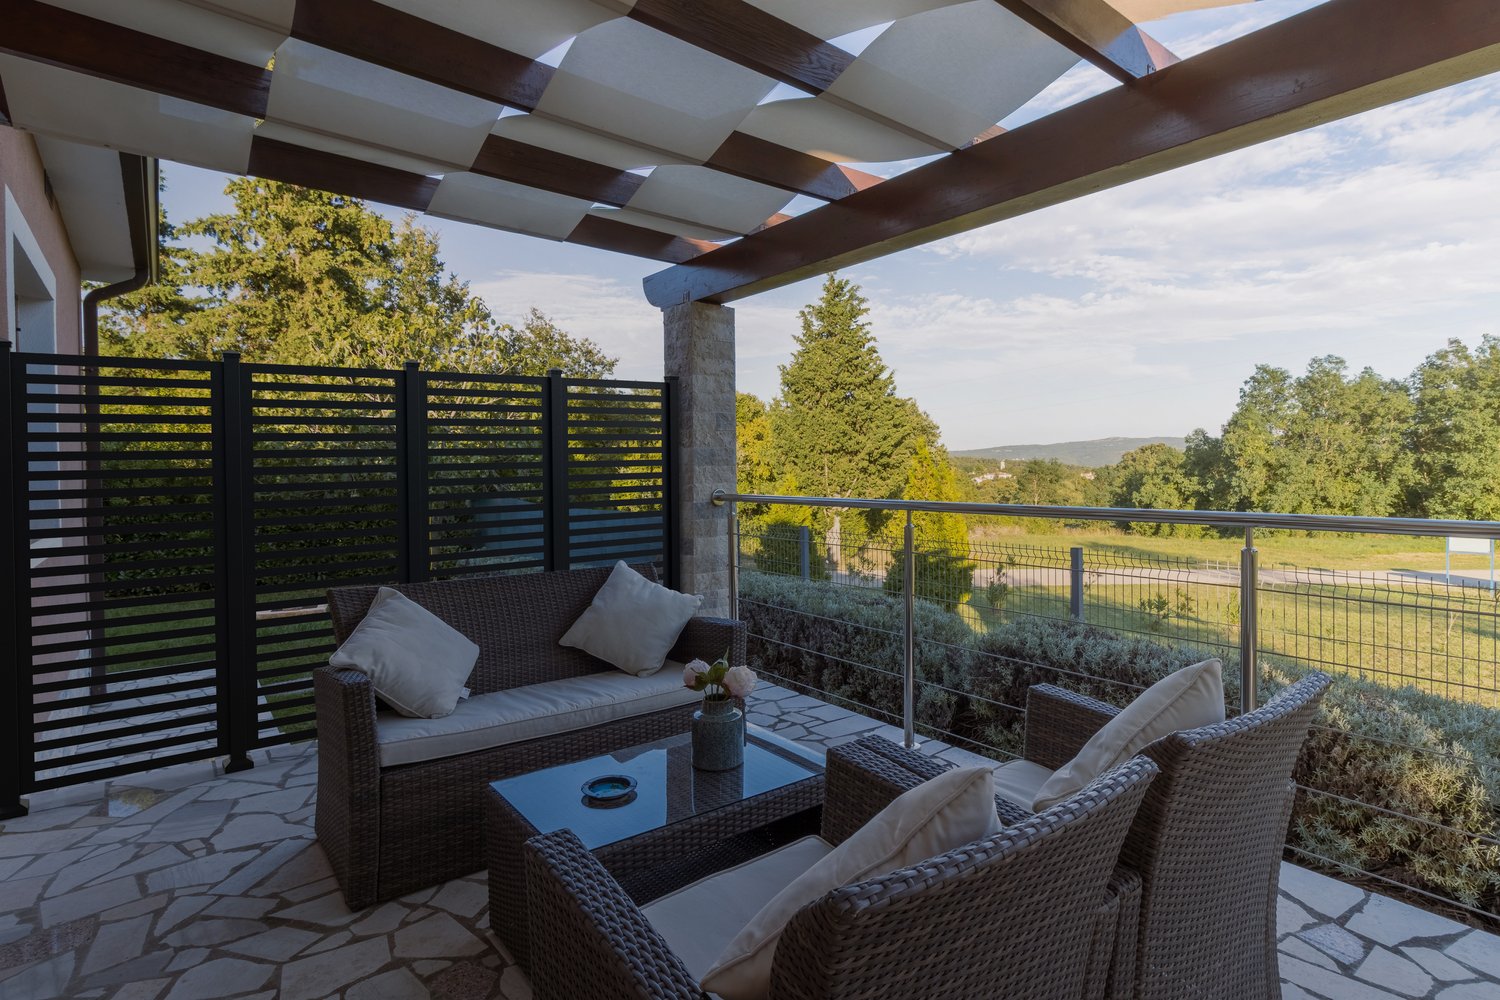
Let’s talk about those adjustable fabric panels on the pergola. They are brilliant for providing flexible shade, but they are also magnets for pollen, leaves, and bird droppings. To keep them looking clean, you’ll need to retract them during storms and take them down completely at the end of the season. Most are machine washable, but it’s a significant chore to unhook, wash, dry, and re-hang them every year. If you’re not up for the maintenance, consider a pergola with fixed metal or wood slats instead.
14. Install Decorative Laser-Cut Panels for Artistic Privacy
These artistic panels make a statement, and the price reflects their custom nature. Here’s a rough estimate for a similar 12-foot section.
- Main Feature: Three 3’x6′ laser-cut metal or composite panels ($900 – $2,500)
- Structure: Natural wood posts and top rail materials ($400 – $800)
- Furniture: Black woven sofa and armchair set ($1,200 – $2,800)
- Textiles & Decor: Dark blue cushions, pots, and plants ($300 – $700)
- Labor for installation can add another $1,000-$2,500.
- TOTAL: $2,800 – $8,500+
Budget alternative: Find stencils with a similar pattern and paint them onto a simple, solid wood fence. It won’t have the cutout effect, but you’ll get the artistic flair for a tiny fraction of the cost.
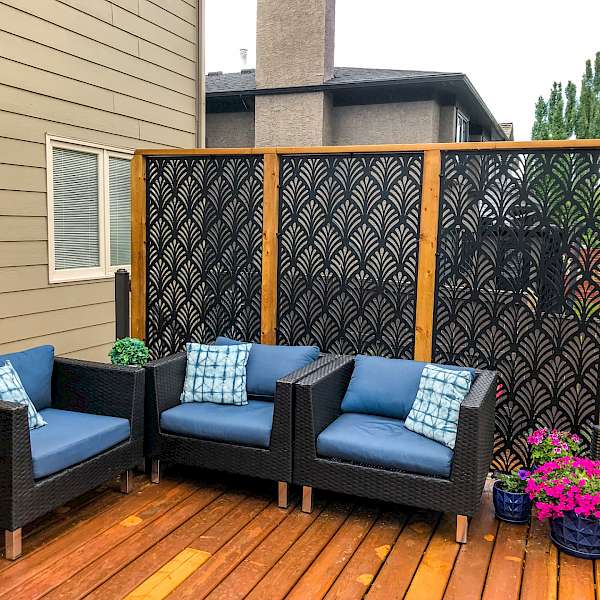
This works because it successfully balances intricacy and simplicity. The laser-cut screen panels are highly detailed and visually complex. To prevent the scene from becoming too busy, everything else is kept simple. The furniture is a classic shape in a solid color. The screen frame is made of clean, straight lines of natural wood. The color palette is tight: black, wood brown, and a single accent of dark blue. This restraint allows the decorative panels to be the undisputed star of the show without competing for attention.
15. A Cozy Patio with Woven Furniture and a Horizontal Plank Screen
The formula here is all about warm, inviting textures: 40% woven texture + 30% smooth lines + 20% rustic brick + 10% color pop. The dark brown woven chairs provide the main textural story. The smooth, light-colored horizontal planks of the privacy screen and the clean black railing offer a modern, linear contrast. The herringbone brick pavers ground the entire space in rustic charm. And finally, those vibrant turquoise pillows are the 10% splash of energy that brings the whole composition to life and keeps it from feeling too brown.
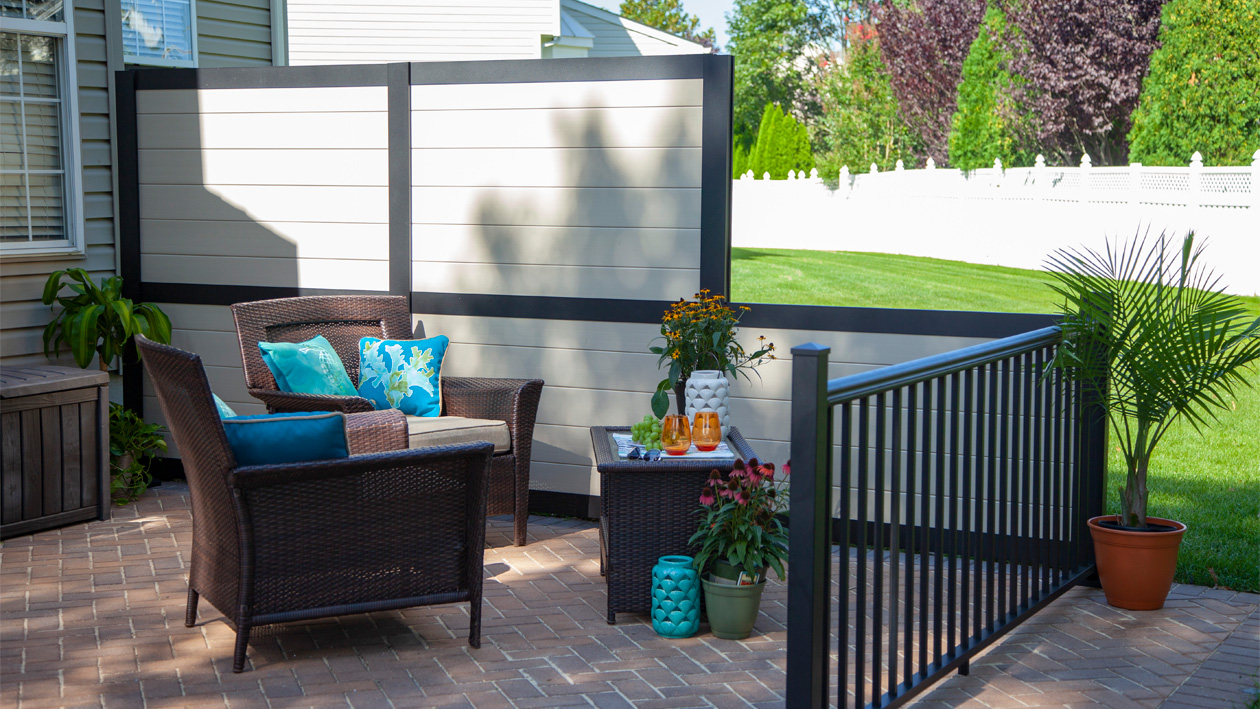
The turquoise pillows are the absolute key to this entire look. Seriously. Take them away, and you have a perfectly nice, neutral patio. It’s pleasant but forgettable. Add them back, and the space suddenly has personality, confidence, and a focal point. It’s a powerful lesson in how a small, inexpensive dose of bold color can completely transform a space. It proves you don’t need to paint a wall or buy a wild sofa; sometimes, two $25 pillows are all the ‘wow’ you need. This is the easiest and most impactful takeaway from this entire design.
16. Go Modern with a Geometric Black Metal Privacy Screen
When installing pre-fabricated screen panels like these, pay close attention to the posts. The secret to making them look high-end and custom is to use posts that are beefier than the standard 4×4. This design uses thick black posts that feel substantial and architectural, matching the visual weight of the screen itself. Also, consider adding post caps and base trim. These small finishing details cost very little but make the entire installation look incredibly polished and professionally done, elevating it from a DIY project to a design feature.
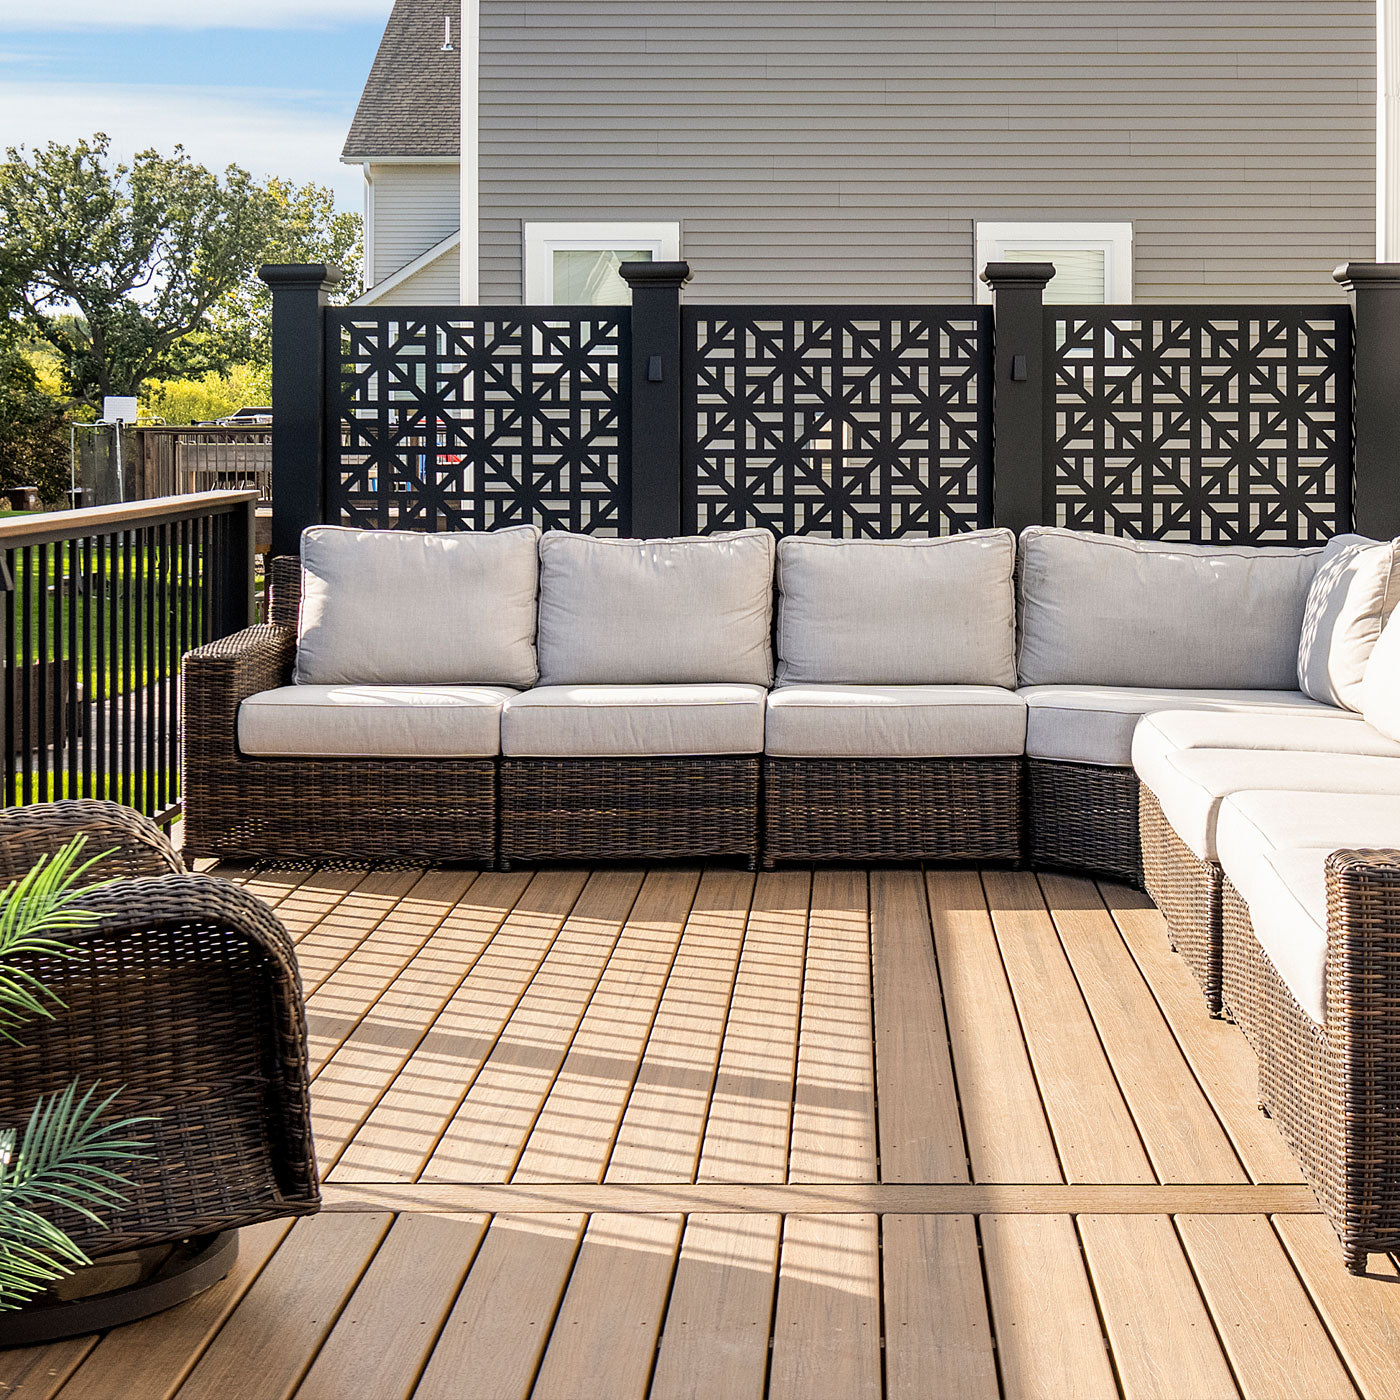
Be mindful of the ‘moiré effect’ with intricate geometric screens. When viewed from certain angles or distances, the repeating patterns can appear to vibrate or shimmer, which can be distracting or even dizzying for some people. Before you purchase and install a large number of these panels, order a single one (or a sample) first. Hold it up in your space and look at it from various spots where you’ll be sitting or walking. It’s better to know if the pattern plays tricks on your eyes before you’ve invested in a full wall of it.
17. Layer Privacy with Slatted and Solid Wood Fences
Adding climbing vines to a slatted fence creates a beautiful living wall. Here’s a quick guide. Time: 2 hours. Cost: $50-$150.
- Choose Your Vine: Select a non-invasive climber suitable for your climate. Clematis, or star jasmine, are great options. Avoid aggressive growers like English ivy that can damage wood.
- Install a Trellis System: Attach a wire trellis grid or stainless steel cables to your fence, leaving a 2-3 inch gap. This allows air to circulate and prevents the vine from attaching directly to the wood.
- Plant Your Vine: Dig a hole about 12 inches away from the fence base. Gently tease the roots and plant it, angling the vine towards the trellis.
- Train the Vine: Loosely tie the main stems to the trellis with garden twine to guide its growth upwards.
- Water and Mulch: Water thoroughly and add a layer of mulch to retain moisture and suppress weeds.
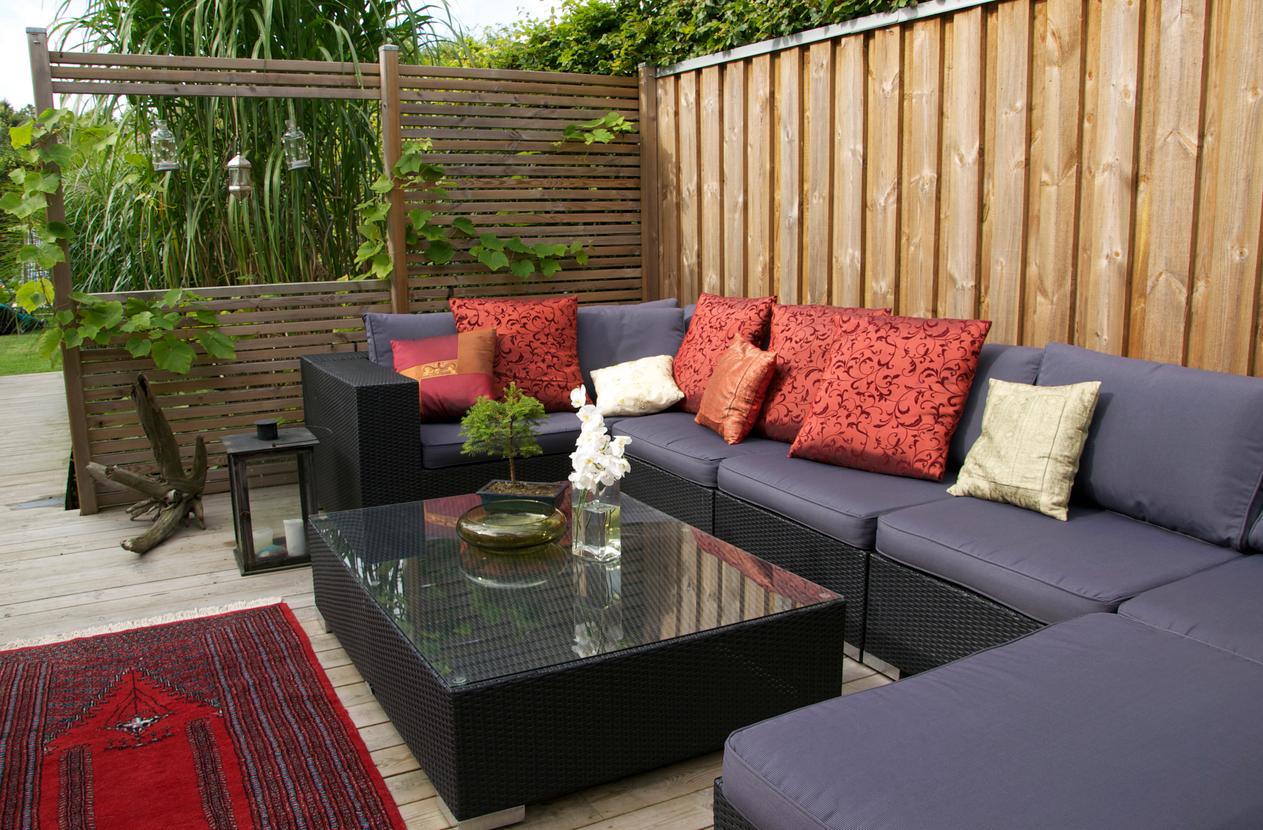
This mixed-fence approach is clever, but it requires some planning. Here’s what to check before you start combining fence styles.
- Check Local Ordinances: Does your city or HOA have rules about fence height, style, or materials? Get approval before you build, especially for a fence facing the street.
- Wood Species: Are you using the same type of wood for both the slatted and solid sections? If not, will their colors weather differently over time? Plan your stain or sealer accordingly.
- Property Lines: Get a survey to be 100% certain of your property lines. Building even six inches onto your neighbor’s property can lead to expensive disputes.
- Sun and Shade: How will the solid fence cast shadows on your deck or garden? Observe the sun’s path for a full day before finalizing the placement.
18. Define an Outdoor Lounge with a Slatted Wood Pergola
This design is a masterclass in creating a ‘room’ outdoors. The pergola structure acts as the ‘walls’ and ‘ceiling,’ clearly defining the lounge area from the rest of the yard. This sense of enclosure is what makes it feel so intimate and private. The choice of square pavers separated by gravel also helps delineate the space, acting like an area rug would indoors. The repetition of rectangular shapes—in the pergola slats, the daybeds, and the pavers—creates a calming, geometric rhythm that feels incredibly modern and intentional.
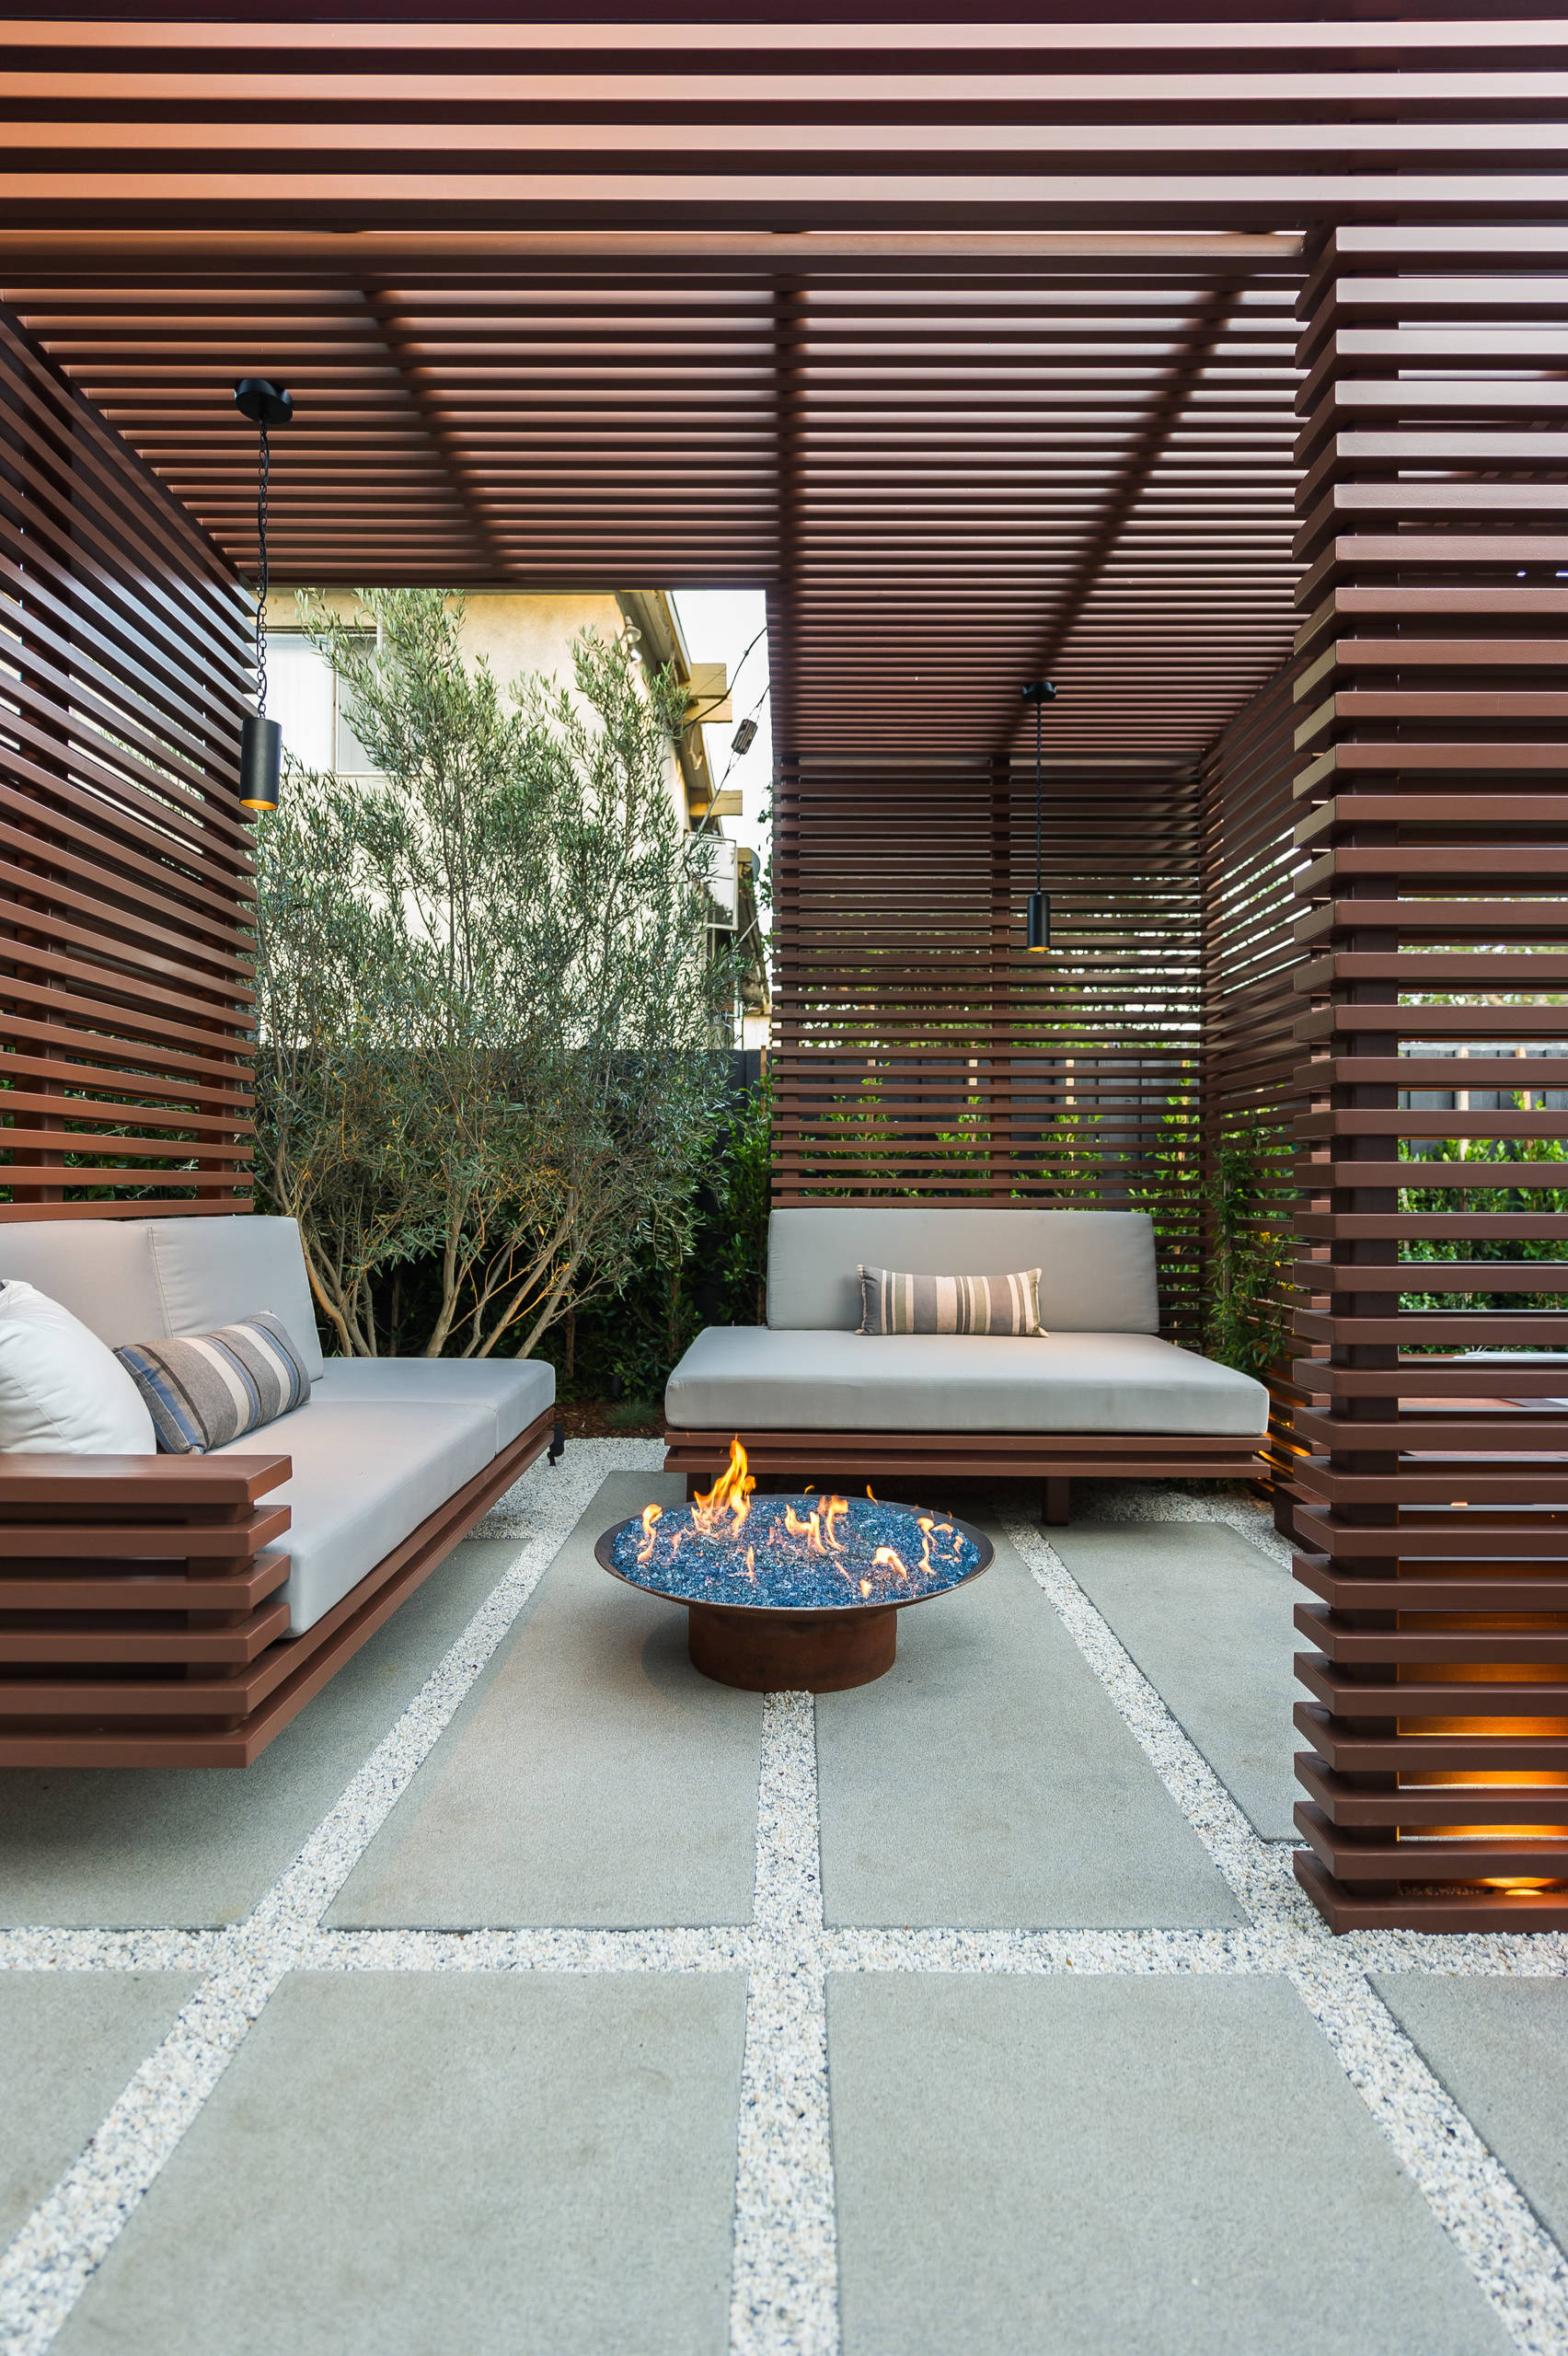
The secret formula here is a high-contrast, minimalist palette: 40% dark structure, 40% light softness, 10% rustic metal, and 10% lush green. The dark brown slatted pergola provides the dominant architectural frame. The light grey cushions on the daybeds offer visual relief and comfort. The rusted metal fire pit introduces a warm, textural, and slightly industrial element. Finally, the dense green foliage behind the structure adds life and a necessary organic touch, keeping the look from becoming too stark.
19. Combine a Horizontal Wood Fence with a Manicured Hedge
This layered approach is beautiful but doubles your maintenance tasks. The horizontal wood fence will need to be cleaned and resealed every 2-3 years to prevent it from turning gray and weathered. The evergreen hedge behind it will require regular pruning (at least 2-3 times per year) to keep its shape clean and prevent it from overgrowing and pressing against the wooden fence, which can trap moisture and accelerate rot. It’s a stunning, high-end look, but be prepared for the ongoing commitment to both yard work and woodwork.
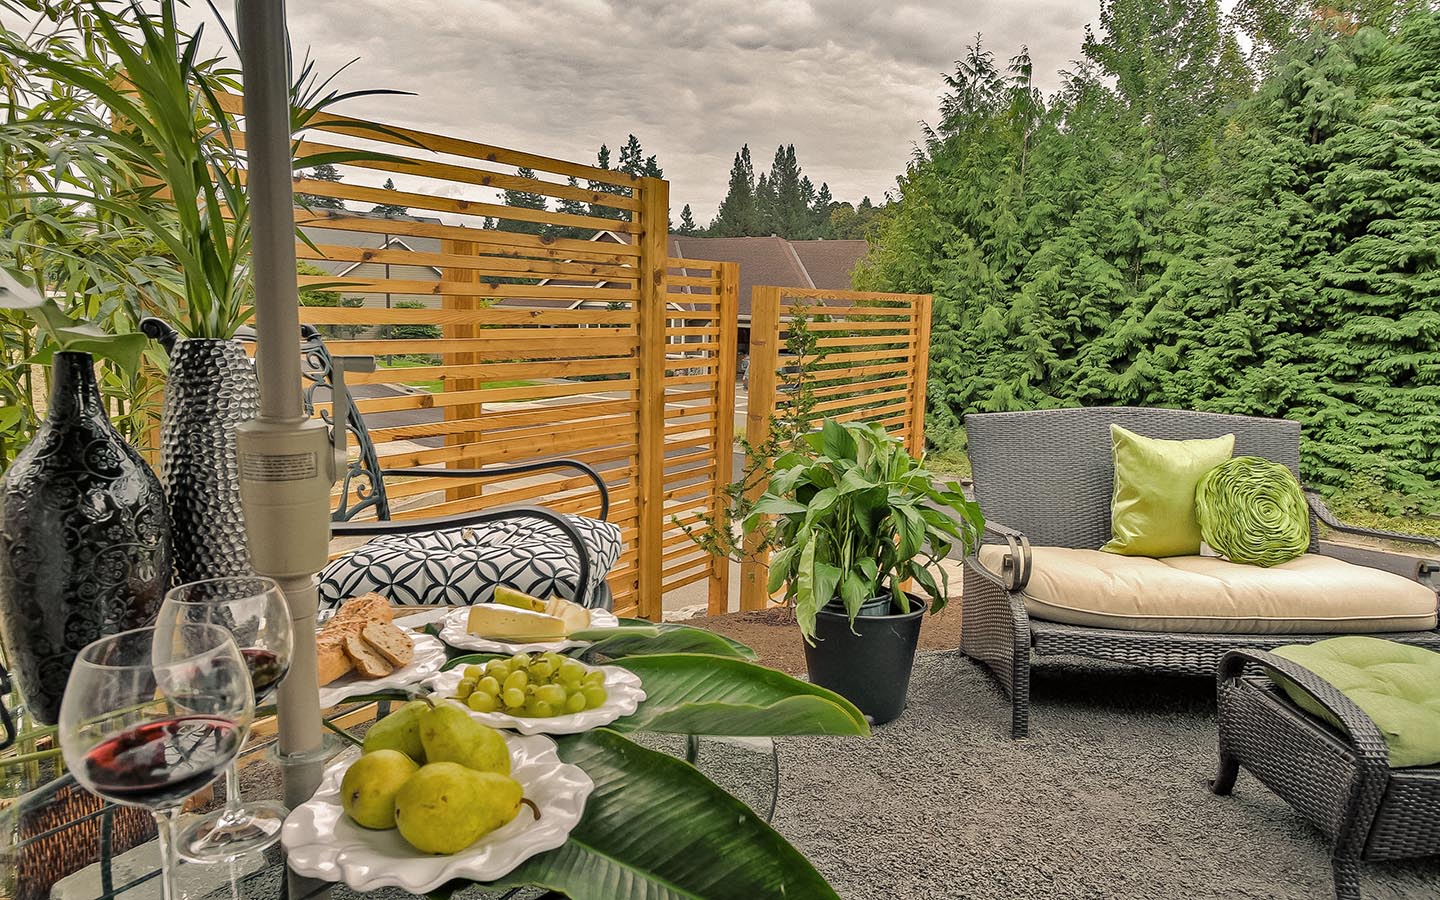
Can’t spring for a custom horizontal fence and a mature hedge? Create a similar layered effect on a budget. Start with standard pre-made fence panels from a home improvement store. For the ‘hedge,’ use a row of tall, narrow planters filled with a fast-growing, upright grass like feathered reed grass. This gives you the height and green texture of a hedge without the years of waiting or the intense pruning. You get that same sense of layered privacy for a much lower upfront cost and commitment. See a similar hedge concept in Idea #11.
20. A Classic Covered Porch with White Rocking Chairs
This timeless rocking chair setup is perfect for a classic front porch or a long, narrow back porch. It requires a depth of at least 6 feet to allow for the rocking motion without hitting the wall or the railing. The width should be at least 10 feet to comfortably fit two rockers and a side table and allow for circulation. This idea is less about creating total privacy and more about carving out a comfortable, semi-private space for relaxing and observing. For true seclusion, a design like the lattice nook in Idea #8 would be more effective.
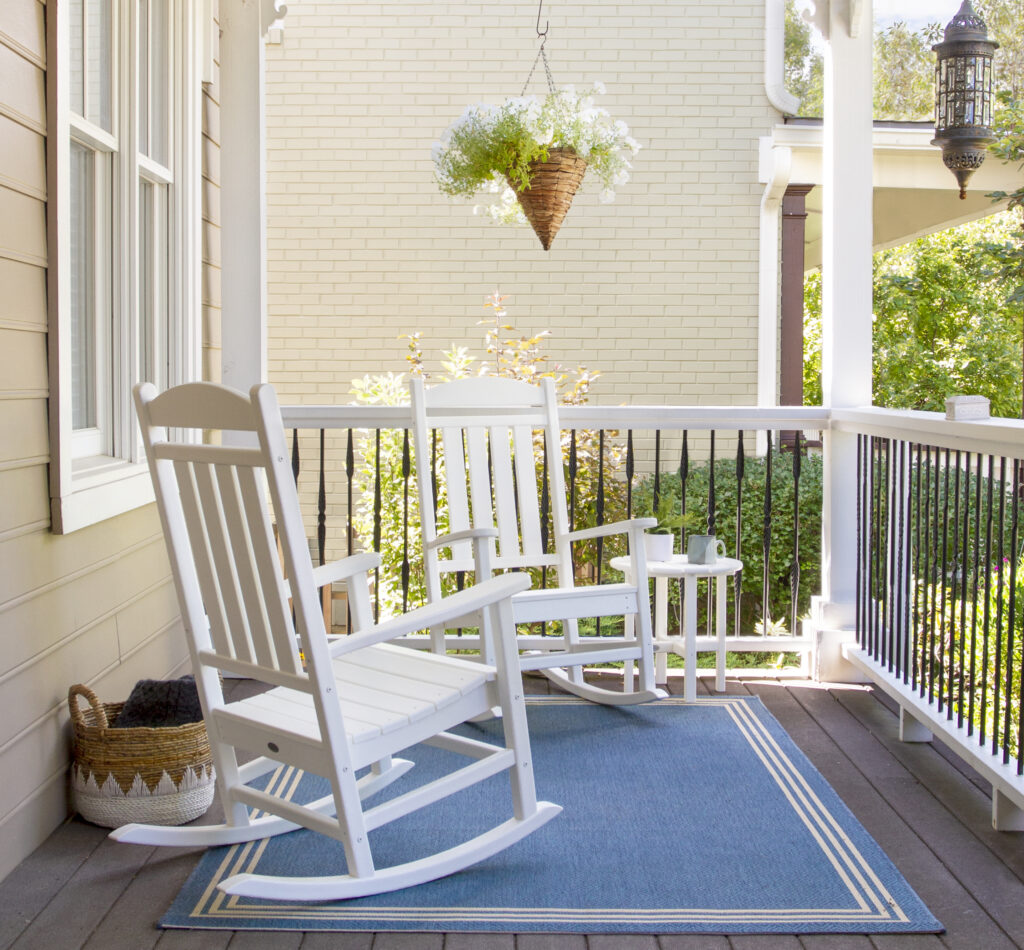
The deep blue outdoor rug is the single element that pulls this entire scene together. Without it, you’d have two white chairs floating on a dark porch—nice, but disconnected. The rug acts as an anchor, defining the seating area and adding a bold stroke of color and pattern. It connects the white chairs to the dark floor and makes the entire composition feel deliberate and complete. It’s the design equivalent of drawing a line around the conversation area and saying, ‘This is a space for relaxing.’ It transforms the porch from a walkway into a destination.
21. Modern Privacy with a Vertical Slatted Screen and Integrated Planters
Building a planter box integrated into your privacy screen is a brilliant way to add greenery. Here’s a simplified version. Time: 3-4 hours. Cost: $150-$250.
- Frame the Box: Build a three-sided rectangular frame from 2×6 lumber. The ‘back’ of the box will be the screen itself.
- Attach to Screen: Securely screw the frame to the base of your vertical privacy screen posts.
- Add a Bottom: Cut a piece of pressure-treated plywood to size and drill several 1/2″ drainage holes in it. Attach it to the bottom of your 2×6 frame.
- Line the Interior: Staple a heavy-duty plastic liner or pond liner inside the box to protect the wood from constant moisture. Be sure to poke holes in the liner that align with your drainage holes.
- Fill and Plant: Fill with a layer of gravel for drainage, then top with potting soil and your favorite plants.
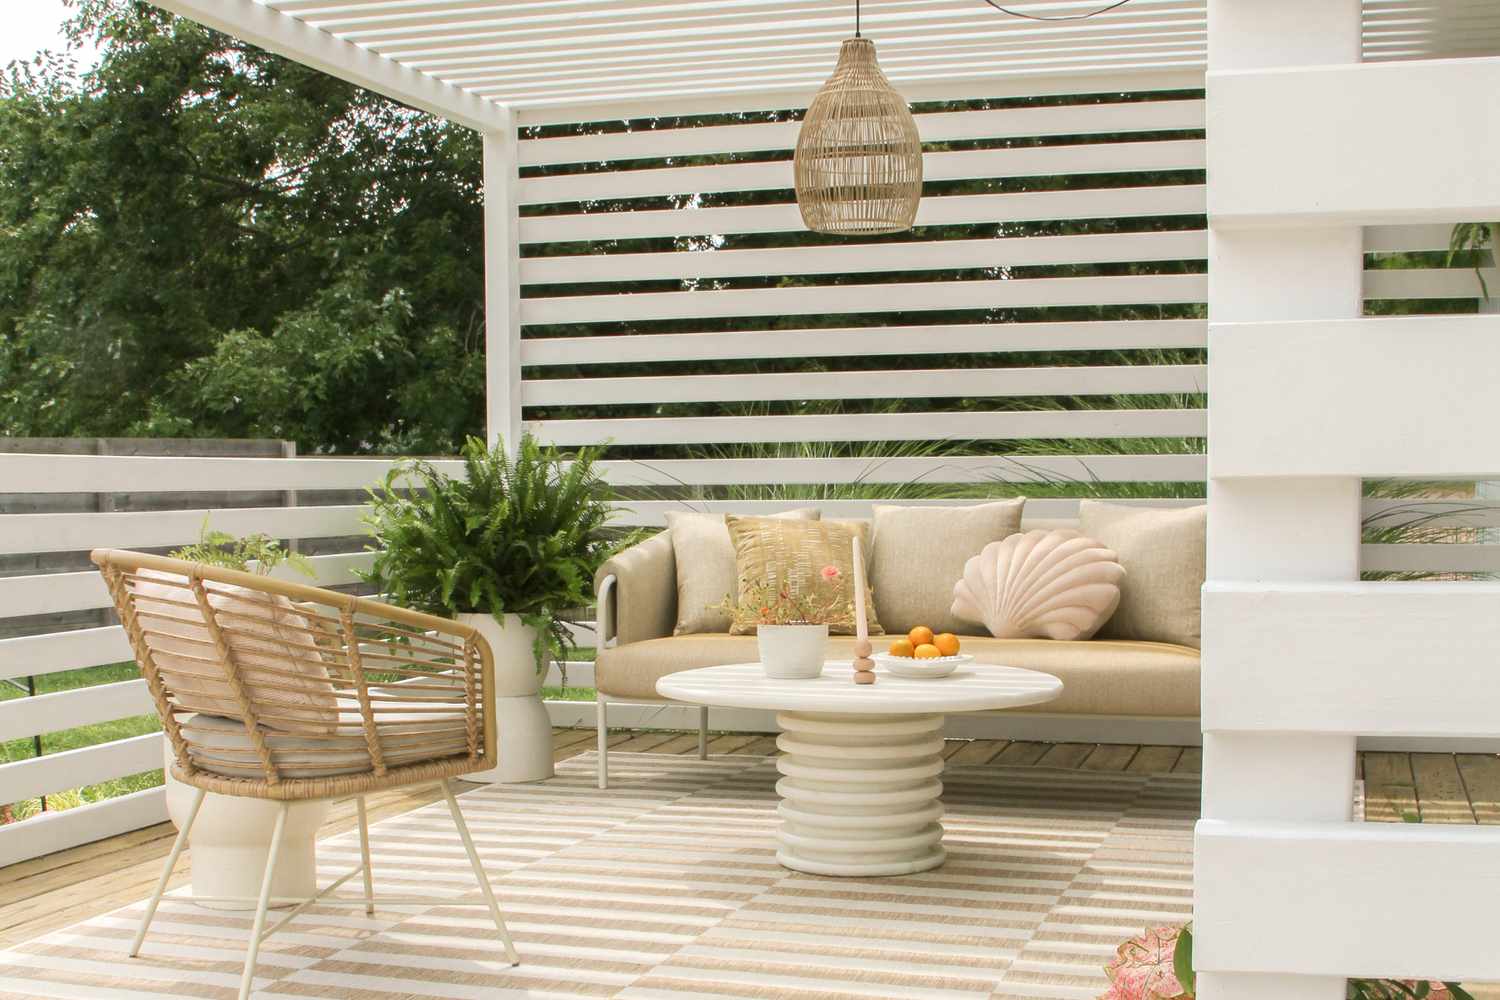
This design is so successful because it seamlessly merges function, form, and nature. The screen provides privacy (function). The clean, vertical lines of the wood slats are a strong architectural statement (form). The integrated planters literally build greenery into the structure (nature). This integration is key. The planters aren’t just placed in front of the screen; they are part of it. This makes the entire piece feel like a single, cohesive unit—a living wall, not just a fence with some pots. It’s a holistic approach that feels incredibly modern and serene.
22. Cozy Balcony Nook with a Fabric Privacy Screen
This look is gaining huge traction with apartment dwellers and homeowners with small balconies. It’s part of the ‘micro-retreat’ trend, where people are maximizing tiny outdoor spaces to create functional, private escapes. A simple fabric screen is the perfect tool for this—it’s inexpensive, easy to install without permanent modifications, and instantly blocks the view from neighbors. It allows renters, in particular, to claim their small slice of the outdoors and infuse it with personal style, turning a generic balcony into a cozy bistro spot.
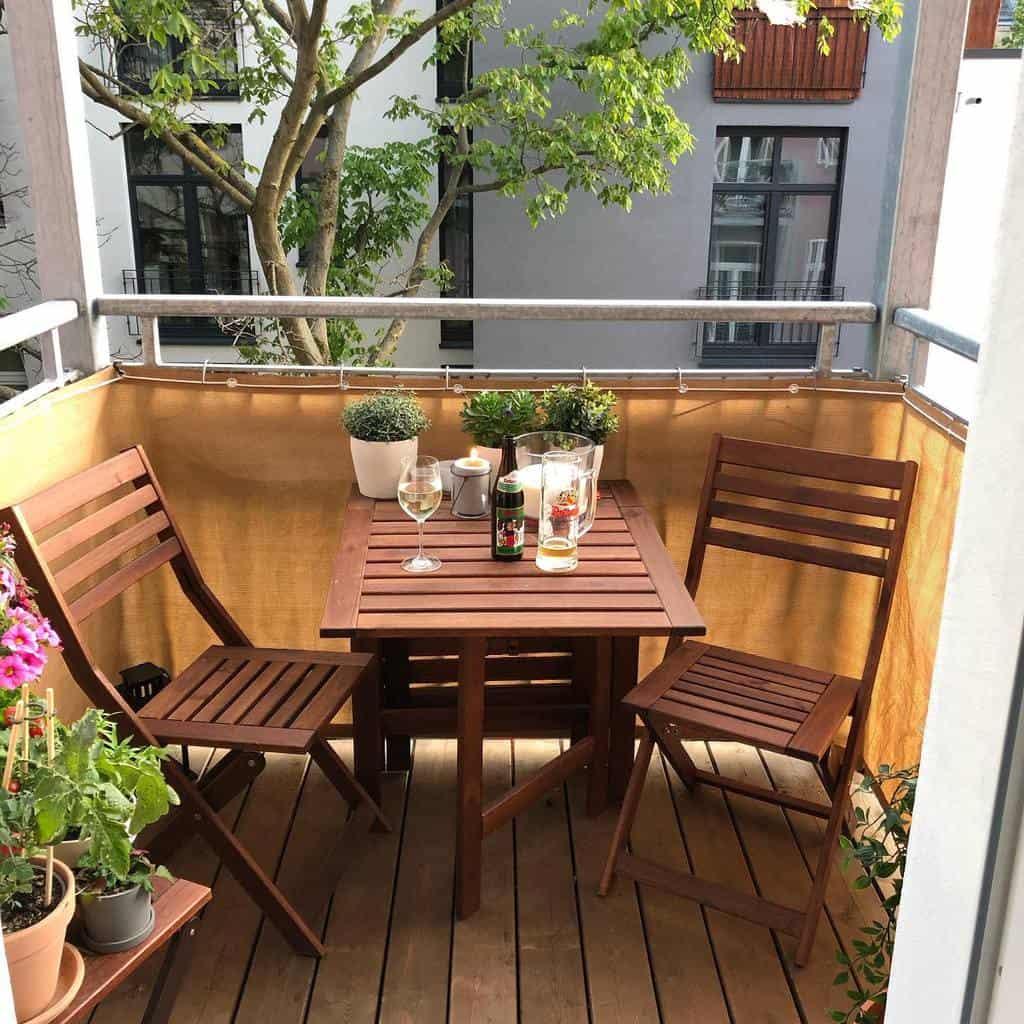
You don’t need a fancy, custom-sewn screen. The most affordable way to get this look is to buy a heavy-duty canvas drop cloth from a hardware store (around $25 for a large one). They are durable, neutral in color, and provide excellent coverage. Simply fold it to the correct height for your railing and use zip ties or sturdy outdoor-rated Velcro straps to attach it to the railings. This DIY approach costs a fraction of a pre-made screen and gives you that same sense of enclosure for your small space. Perfect for a quick, impactful weekend upgrade.
23. An Evening Oasis with a Vertical Slatted Screen and String Lights
This scene nails the cozy vibe by mastering the art of layering. It’s not just one thing, but the combination of several elements. The vertical wood screen provides the structural backdrop and privacy. The patterned rug defines the ‘floor’ of the outdoor room. The dark grey sectional adds soft, comfortable mass. Finally, the string lights drape a ‘ceiling’ of warm light over the entire space. It’s this multi-layered approach—structure, texture, and light—that creates such a powerful sense of an inviting, enclosed room, even under the open sky. Compare it to the horizontal version in Idea #1.
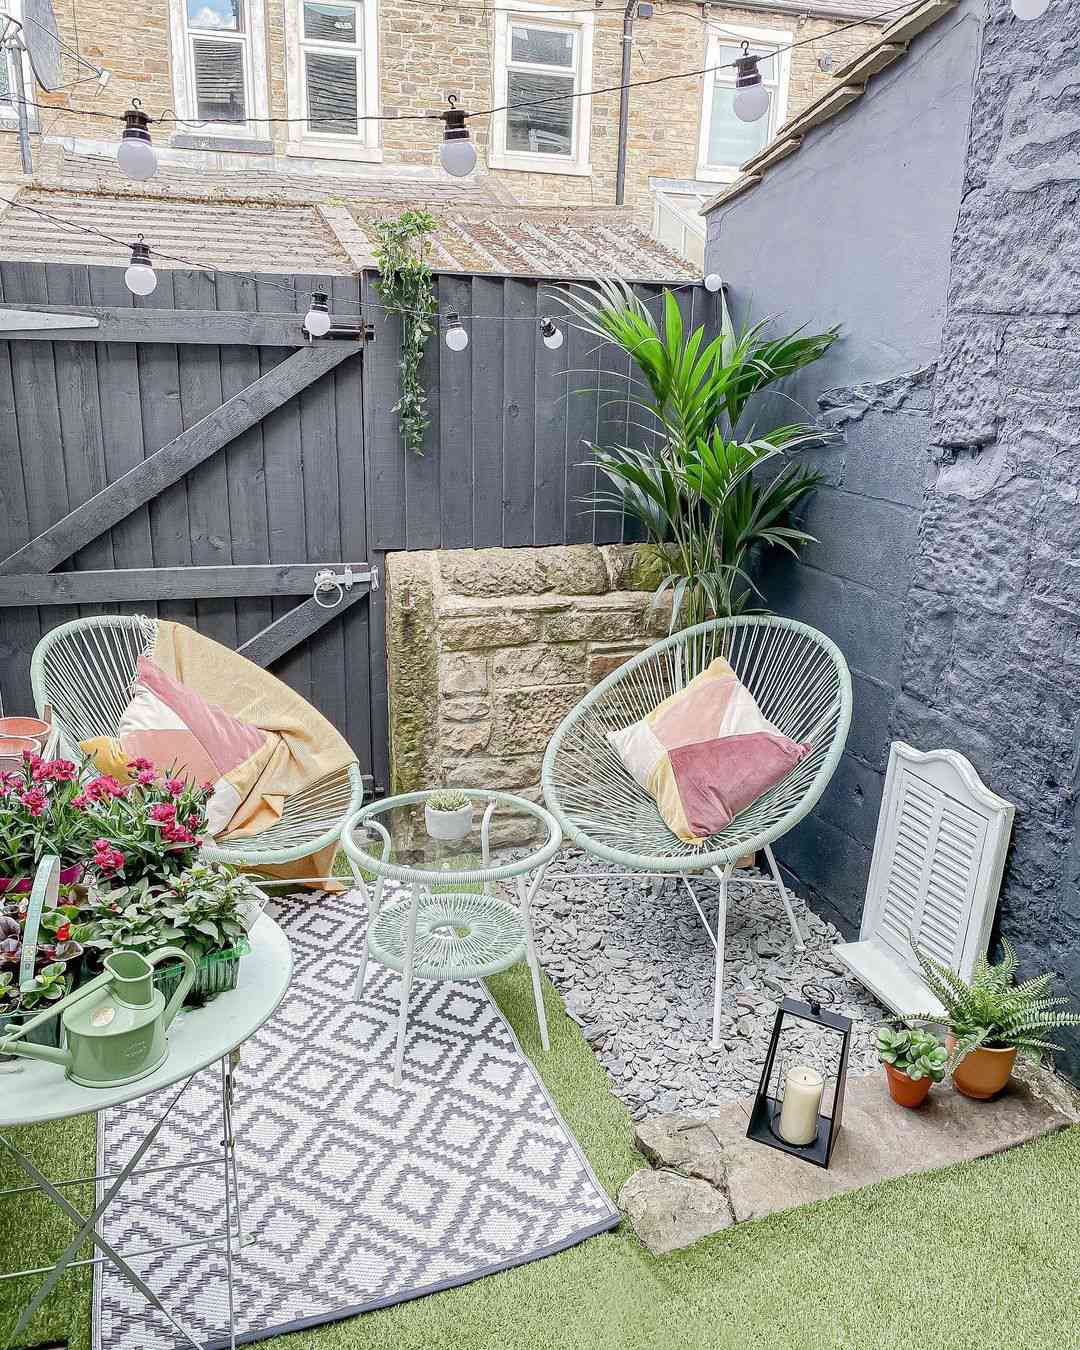
Ready to create your own string light haven? Hold on and check these things first. It’s more than just hanging lights.
- Confirm Power Access: Is there a properly installed outdoor GFCI outlet within reach? Avoid long, hazardous extension cords. If not, budget for an electrician to install one.
- Verify Structural Integrity: Ensure the posts of your privacy screen are securely anchored in concrete or to the deck frame. String lights can create significant tension, especially in windy conditions.
- Choose the Right Bulbs: Opt for shatterproof LED bulbs. They use less energy, last longer, and won’t rain glass on your deck if one gets knocked by a stray ball or heavy winds.
- Measure Your Path: Carefully measure the path the lights will take, including any desired swags, to ensure you buy a long enough strand.
24. Add Instant Greenery with an Artificial Hedge Privacy Panel
Let’s have an honest chat about artificial hedges. While they provide instant, zero-maintenance greenery, not all are created equal. Cheaper versions can look plasticky and may fade to an unappealing blue-green color after a few seasons in direct sun. To avoid this, invest in a quality product made with UV-stabilized materials. Look for panels with varied leaf shapes, sizes, and colors to mimic the look of a real hedge. It will cost more upfront, but it will save you from the disappointment of a fake-looking, faded wall in two years.
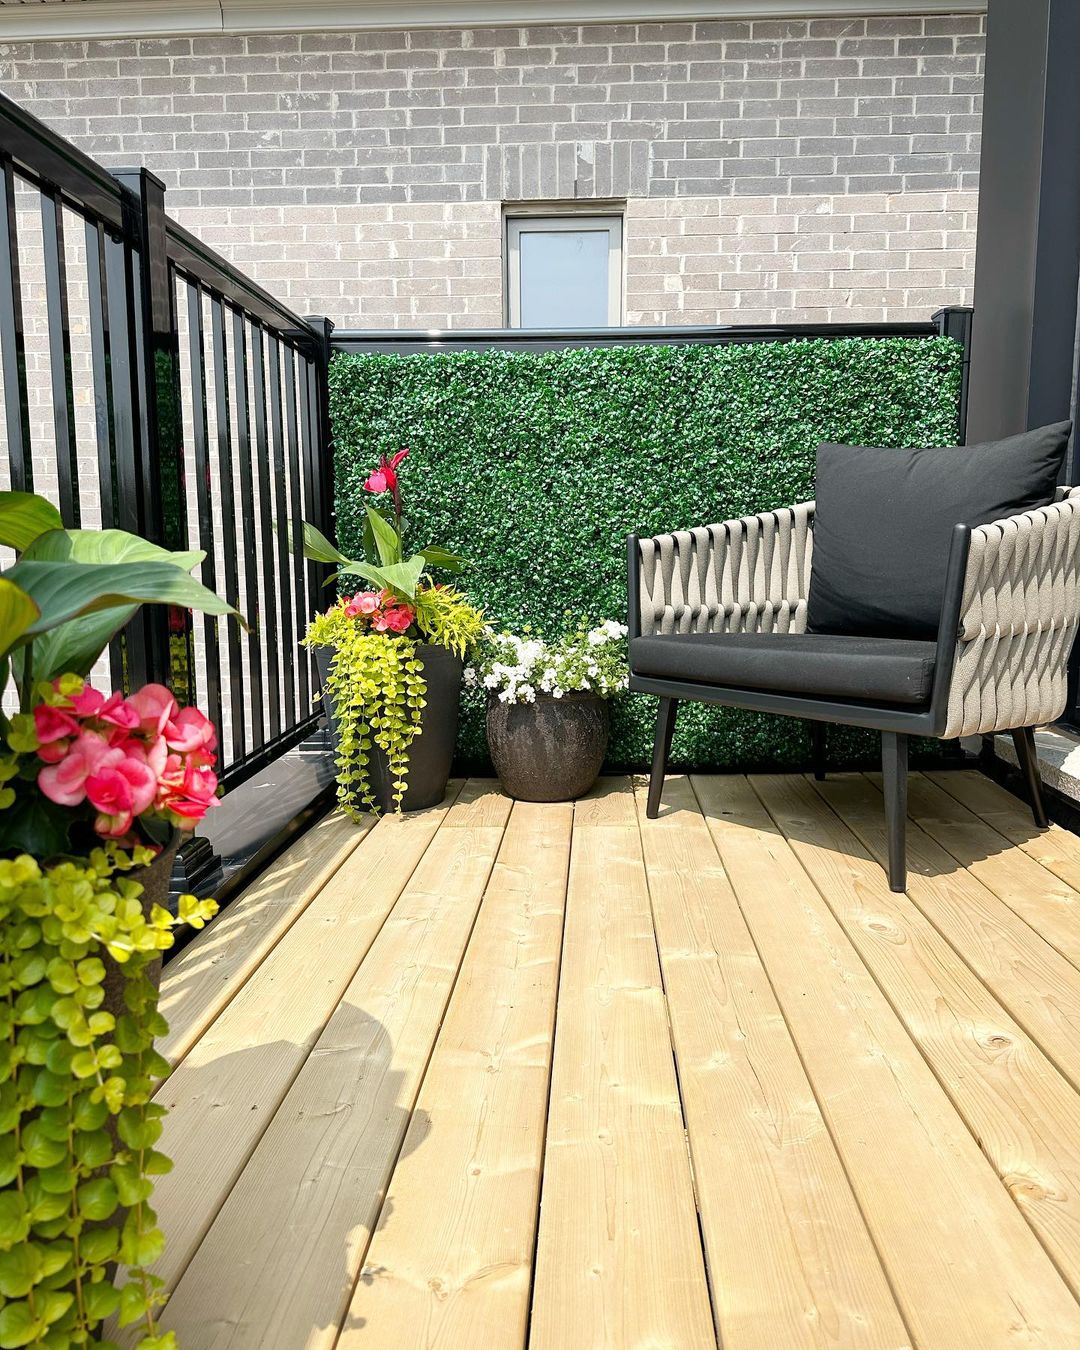
The most important element here is the immediacy of it all. With a natural hedge, you’re looking at years of waiting for it to grow in. With this artificial panel, you get a dense, green, private screen in a single afternoon. That’s its superpower. It provides an instant solution for an immediate problem—the need for privacy *now*. For someone who wants a green backdrop without the long-term commitment of gardening, watering, and pruning, this is the perfect answer. It delivers the aesthetic without the wait time, which is a massive win for many homeowners.
25. A DIY Gazebo Lounge with Slatted Privacy Walls
This charming pallet lounge and gazebo is a testament to DIY creativity. Here’s how the costs might break down for a similar project, assuming you do the labor yourself.
- Structure: Basic wooden gazebo kit or raw lumber ($800 – $2,000)
- Wall Treatment: Lumber for slatted walls and light green paint ($200 – $400)
- Furniture: Free wooden pallets, plus paint and custom-cut foam for cushions ($300 – $600)
- Textiles & Decor: Outdoor rug, throw pillows ($150 – $350)
- TOTAL (DIY): $1,450 – $3,350
Hiring a pro to build a custom gazebo would start around $5,000, so the savings here are huge if you’re handy.
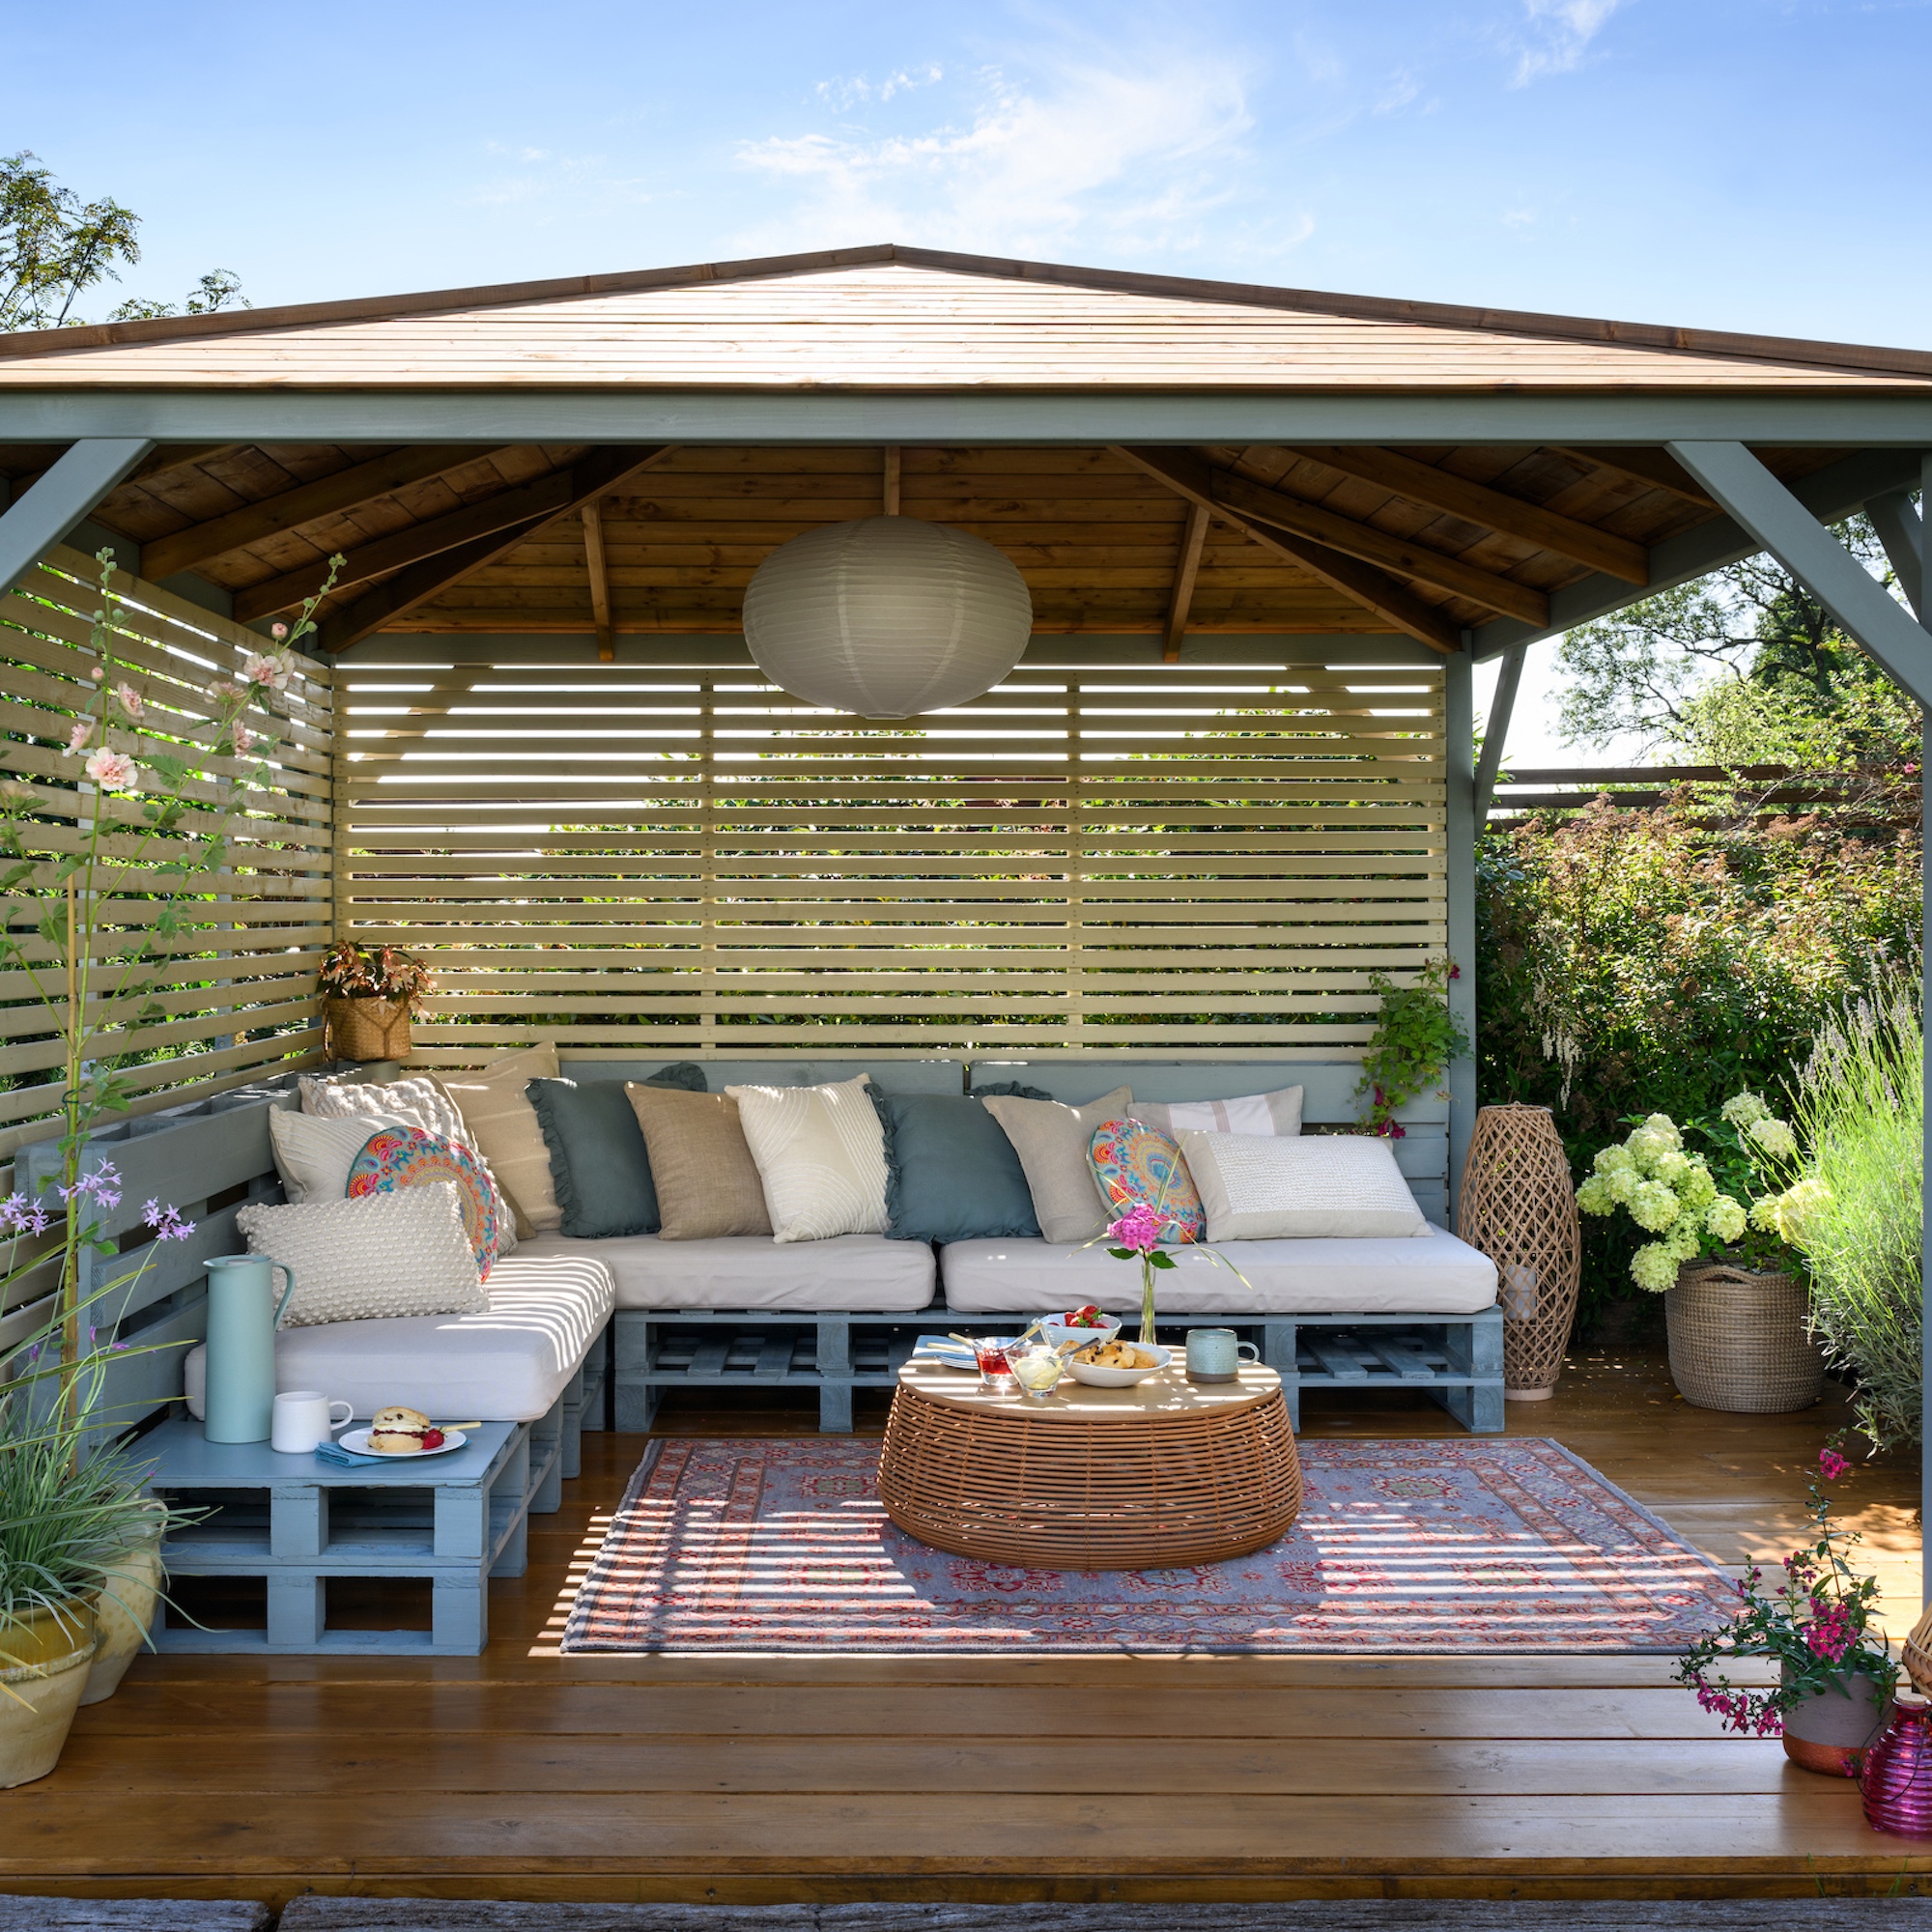
A gazebo structure like this works beautifully to anchor a corner of a larger yard or define a space on an expansive deck. The ideal footprint for this kind of intimate lounge is about 10×10 or 12×12 feet. This provides enough room for the L-shaped pallet sofa and coffee table without feeling cramped, but it’s still small enough to feel cozy and enclosed. The slatted walls are key; they offer privacy and shade while still allowing for airflow, which is essential to keep the space from feeling stuffy on hot days. It’s a great solution for creating a destination spot in an otherwise open area.
26. Modern Deck with a Horizontal Screen and Dark Gray Sectional
When pairing a large piece of furniture like this dark gray sectional with a wood privacy screen, pay attention to the wood’s undertones. This design works so well because the light wood of the deck and screen has cool, slightly grayish undertones that harmonize perfectly with the gray sofa. If the wood had strong orange or red undertones, the combination could clash. Before you buy your furniture, grab a sample of your wood stain or an extra deck board and hold it up to a cushion fabric swatch to ensure the tones are compatible.
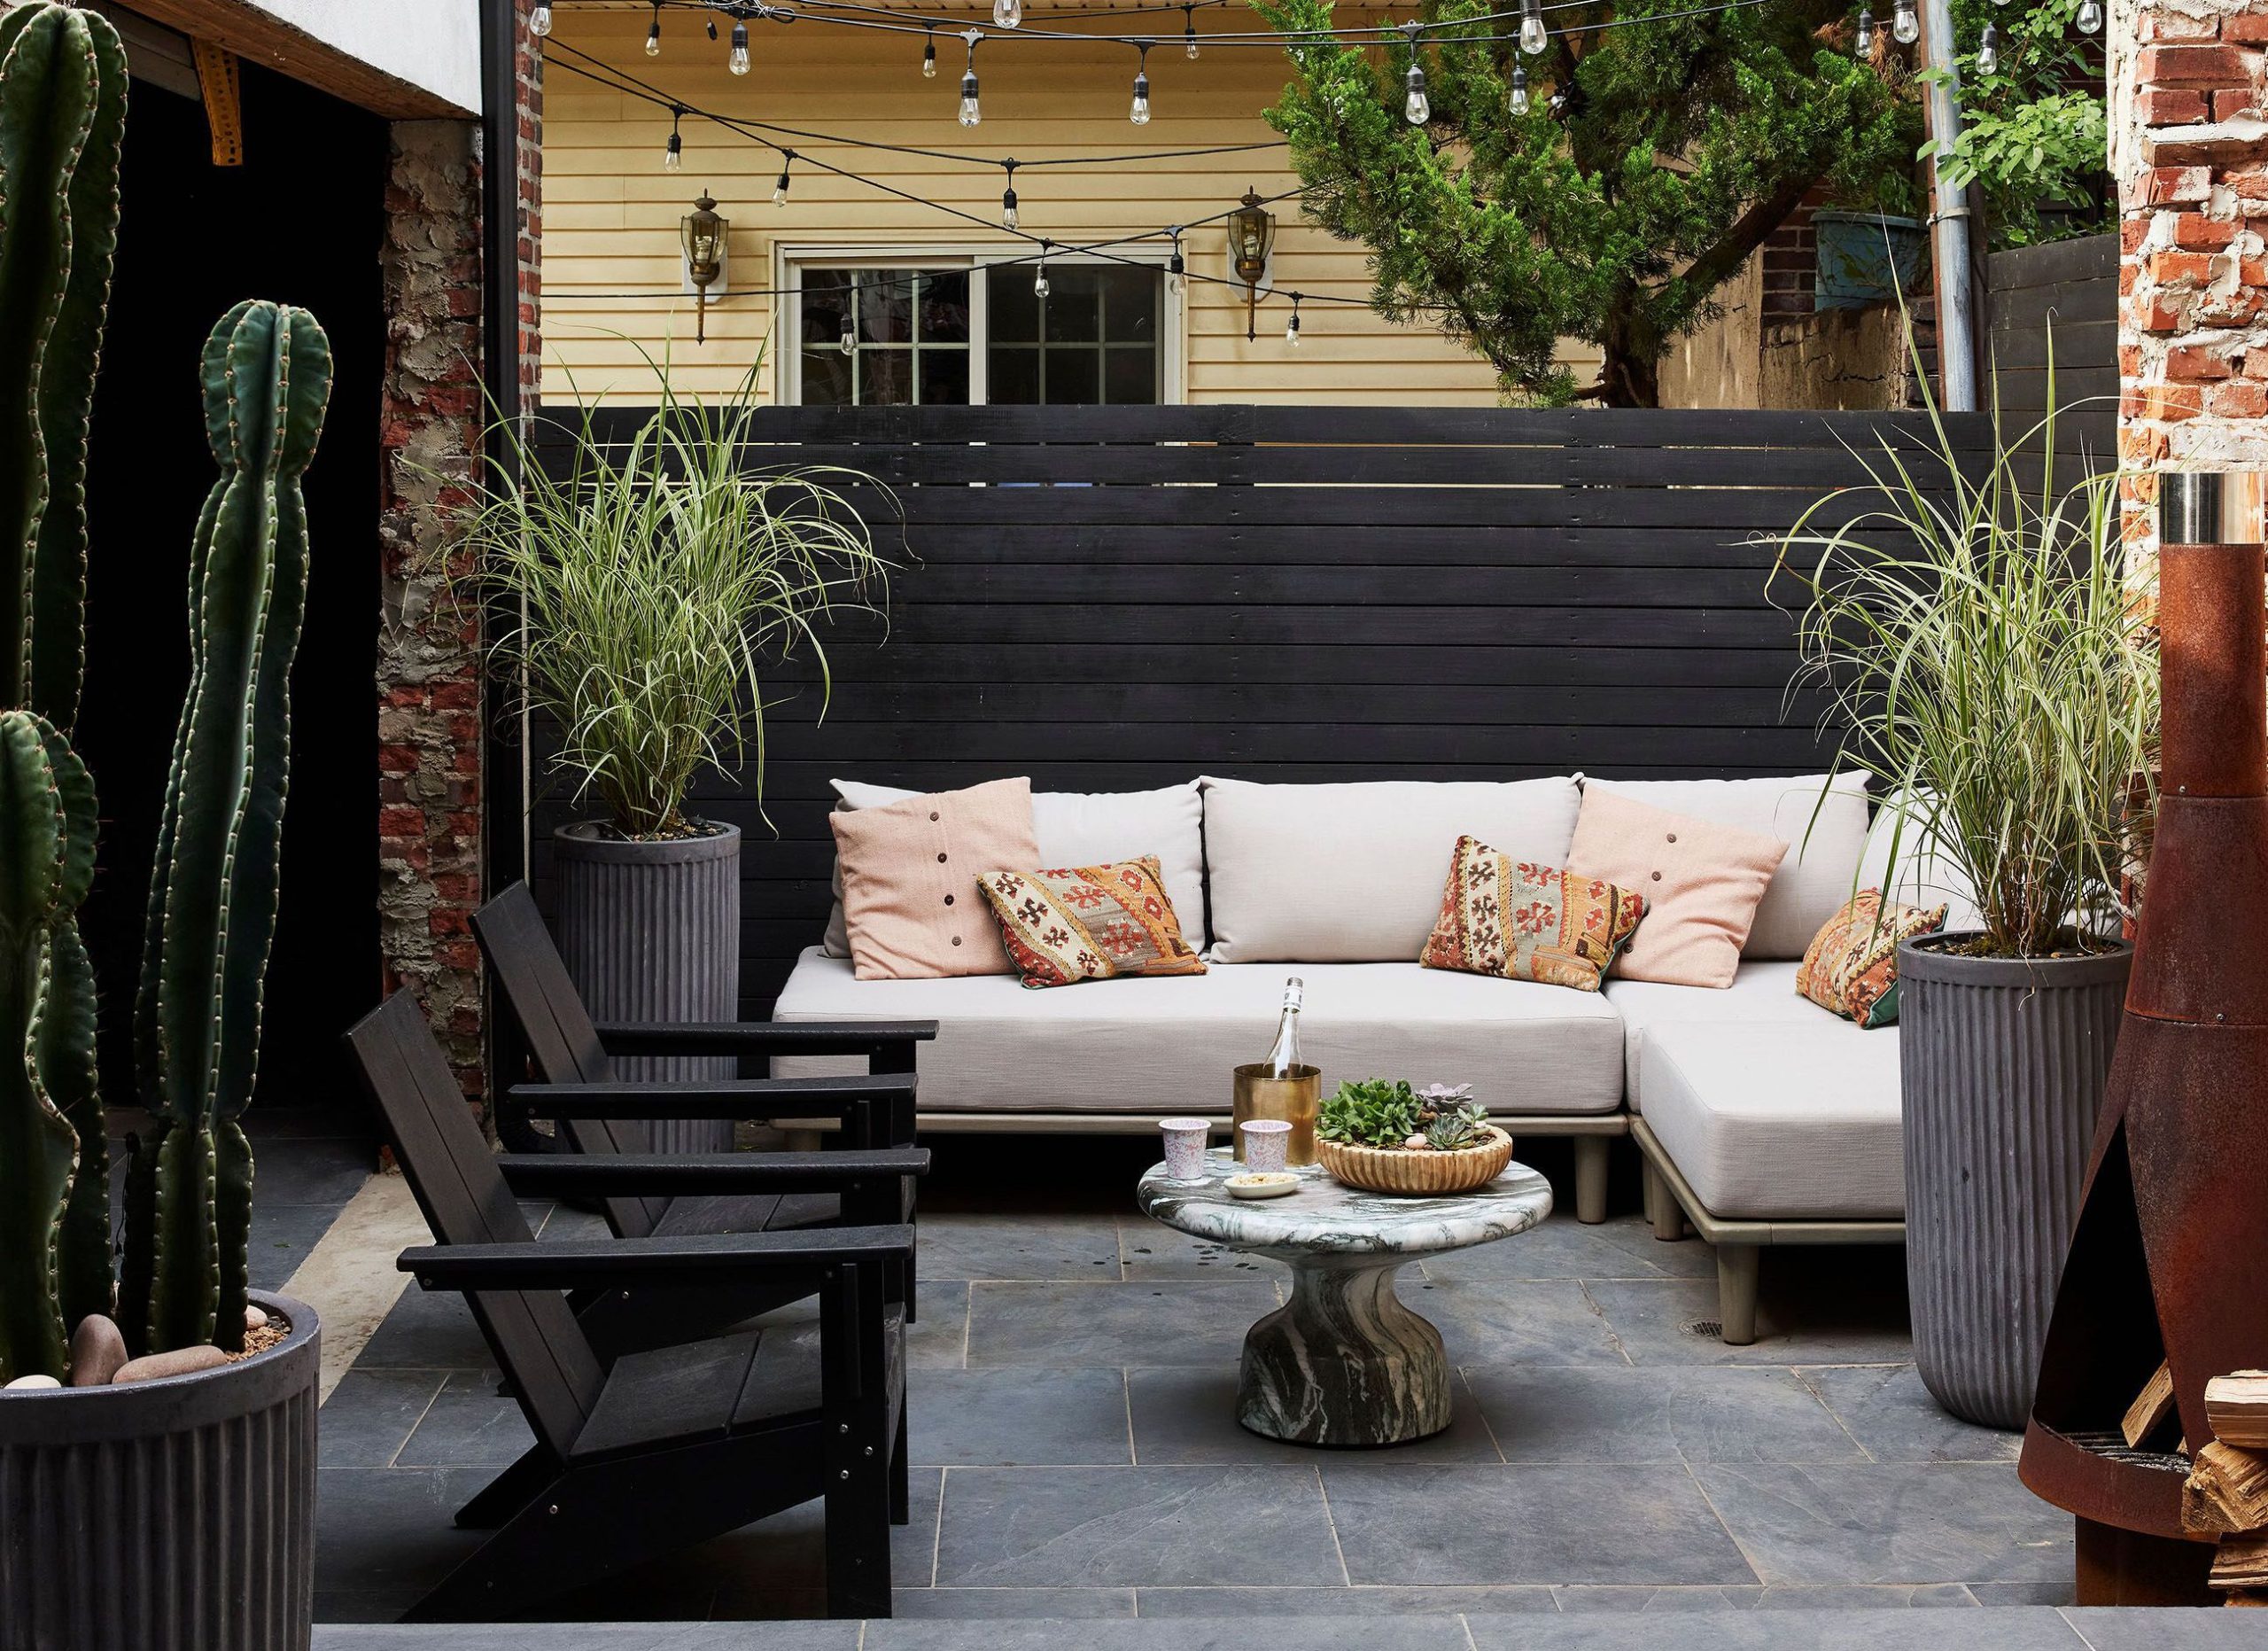
This serene space follows a simple, effective recipe: 50% warm wood, 40% cool gray, and 10% black & green accents. The horizontal screen and deck provide a large swath of warm, natural texture. The sectional sofa is the main cool, solid element, grounding the space. The cylindrical black side table and the deep green of the potted plants act as small, high-contrast accents that add a final layer of visual interest. This balance of warm and cool is the secret to its sophisticated yet inviting feel.
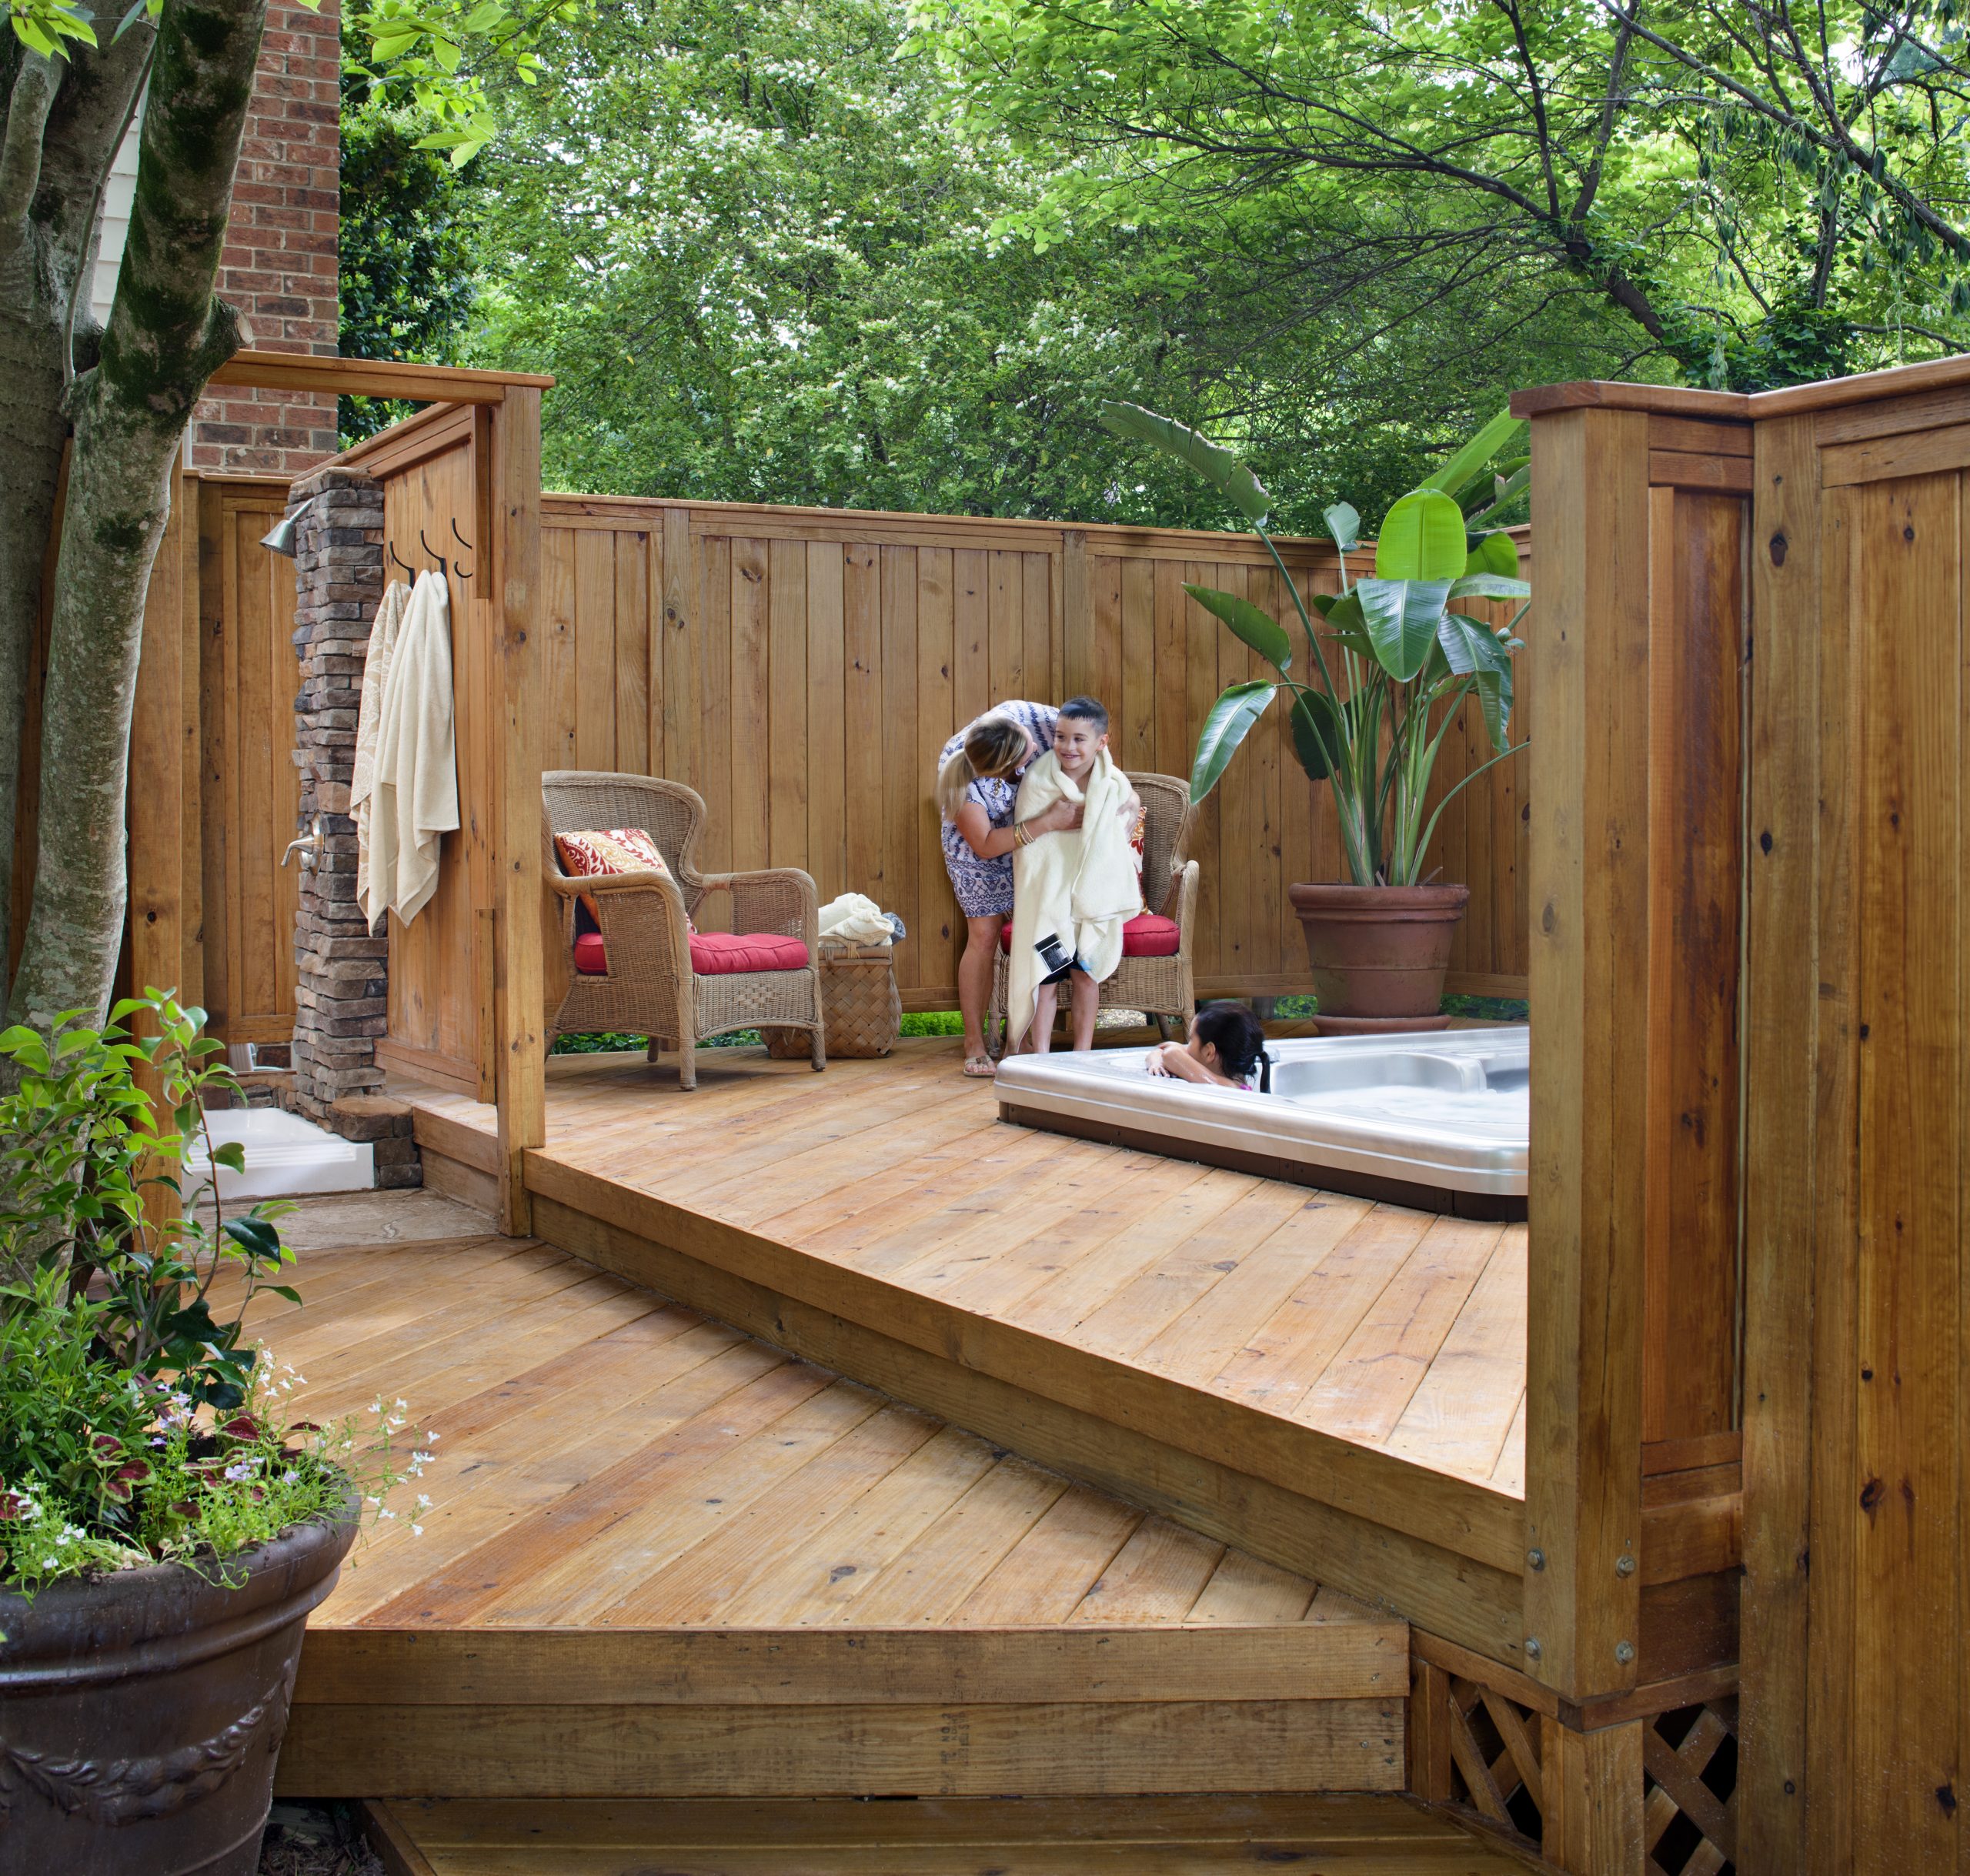
27. A Tranquil Poolside Deck with Stone and Bamboo Privacy Screens
This mixed-material approach is stunning, but each element has its own needs. That beautiful textured stone wall can trap dirt and grow moss in shady, damp areas; a gentle pressure wash or scrub every year will keep it looking fresh. The bamboo screen is the most demanding element. Bamboo is prone to splitting and fading in the sun. To preserve its color and integrity, you’ll need to clean it and apply a specific bamboo sealer annually. The wooden deck, of course, will require its own regular cleaning and sealing every 1-2 years to protect it from water and UV damage.
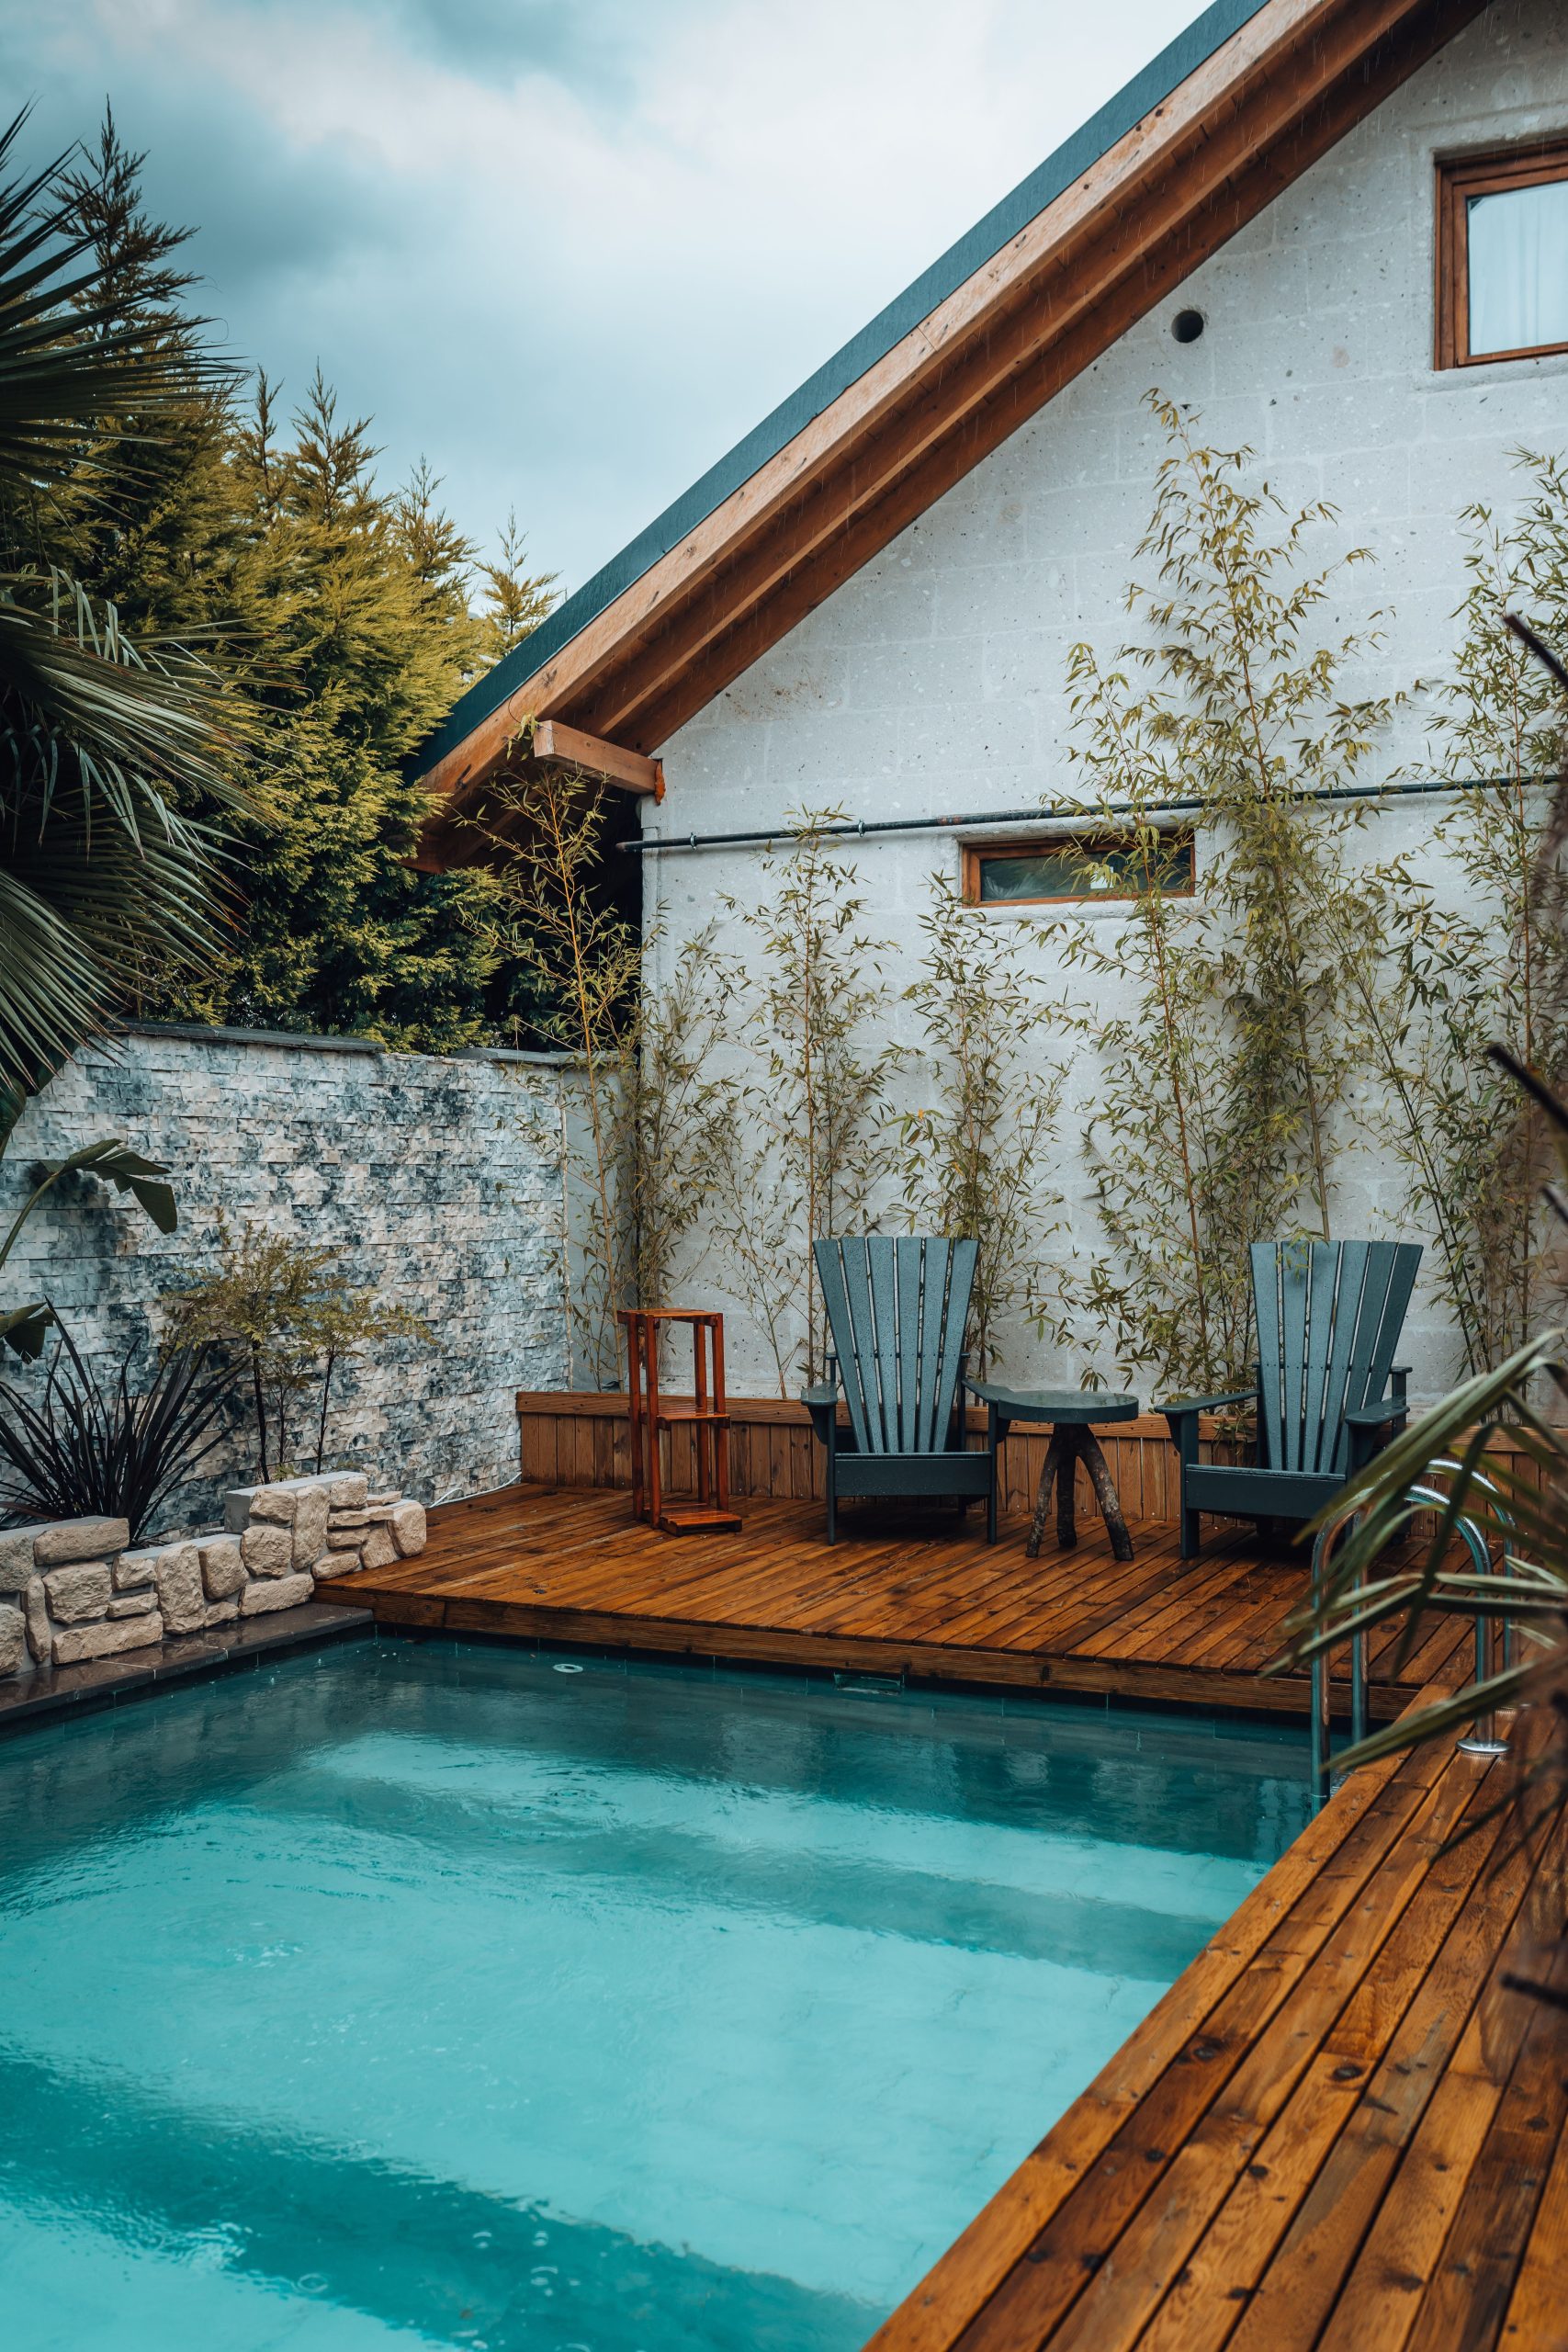
The success of this design lies in its rich textural variety. Instead of just one material, it layers several natural elements to create a complete sensory experience. You have the smooth, cool water of the pool, the rough, earthy texture of the stone wall, the linear, organic pattern of the bamboo, and the warm, familiar grain of the wooden deck. This combination of different textures makes the small space feel incredibly rich, complex, and high-end. It’s a design that engages more than just the eye; it speaks to the sense of touch as well.
Your Private Outdoor Oasis Awaits
Creating privacy on your deck or patio is about so much more than just blocking your neighbors’ view. It’s about crafting a space that feels like a true extension of your home—a personal sanctuary where you can relax and recharge. Whether you opt for a modern slatted screen, a living wall of green, or a cozy pergola, the right solution is waiting for you.
Feeling inspired? Pick your favorite idea, start planning, and get ready to enjoy your own little slice of paradise. Don’t forget to save your top picks to your Pinterest board to keep the inspiration flowing!