You know that feeling when you finally find the DIY landscaping idea that looks exactly right for your space, but turning that pin into reality feels impossible? We get it. That’s why we’ve done the hard work, digging through the endless options to find what actually works. After filtering through hundreds of possibilities at places like Home Depot, Lowe’s, and local garden centers, we narrowed it down to 23 incredible, achievable ideas that deliver on style, covering everything from modern minimalist to lush and natural. We’re talking real-world projects with costs ranging from a simple $50 refresh to a $5,000 transformation. And stay until the end—we break down the most common mistakes that can ruin these looks. 📌 Save this to Pinterest for later—you’ll want to revisit these ideas.
1. Modern Front Yard with Red Trees and Geometric Pavers
What Makes It Work: This design is all about the power of clean lines and intentional contrast. The geometric grid of the light-colored paver pathway creates a strong, modern foundation that guides the eye. This structure is softened by the organic shapes of the plants, but the order is maintained by the low stucco walls that act as crisp borders. The real magic is the color play: the vibrant red-leaf trees pop against the neutral grays and greens, creating focal points that prevent the modern design from feeling cold.
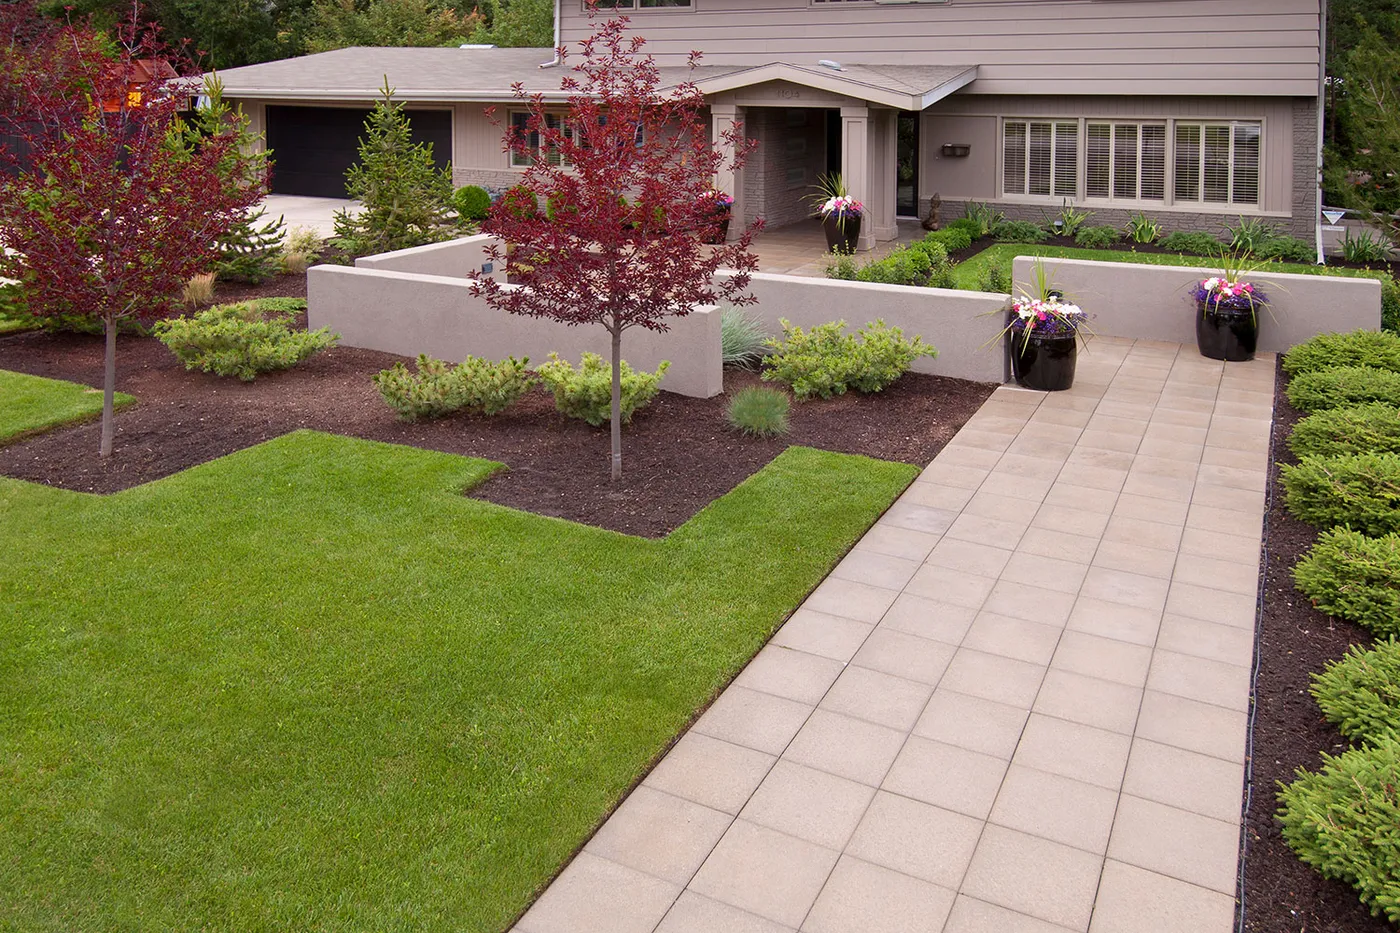
Style Math: Think of this look as a simple formula: 60% neutral hardscaping + 30% green foundation + 10% bold color. The hardscaping (the light pavers and gray walls) provides the clean, modern canvas. The green lawn and shrubs are your essential, textural base layer. The final 10% is where the personality comes in—the fiery red leaves of the trees. You could swap the red for a deep purple or even a bright yellow foliage, and the formula would still hold because the core structure is so strong.
2. Natural Boulder Retaining Wall with Ornamental Grasses
Designer Tip: To make large boulders look like they’ve been there forever, you need to bury them. A good rule of thumb is to bury at least one-third of the boulder’s mass below the soil line. This grounds the stone visually and makes it appear as though it’s an authentic part of the landscape, not just a rock dropped on top of the dirt. Always place them with the widest, flattest side down for stability, and slightly tilt them back into the slope they are retaining.
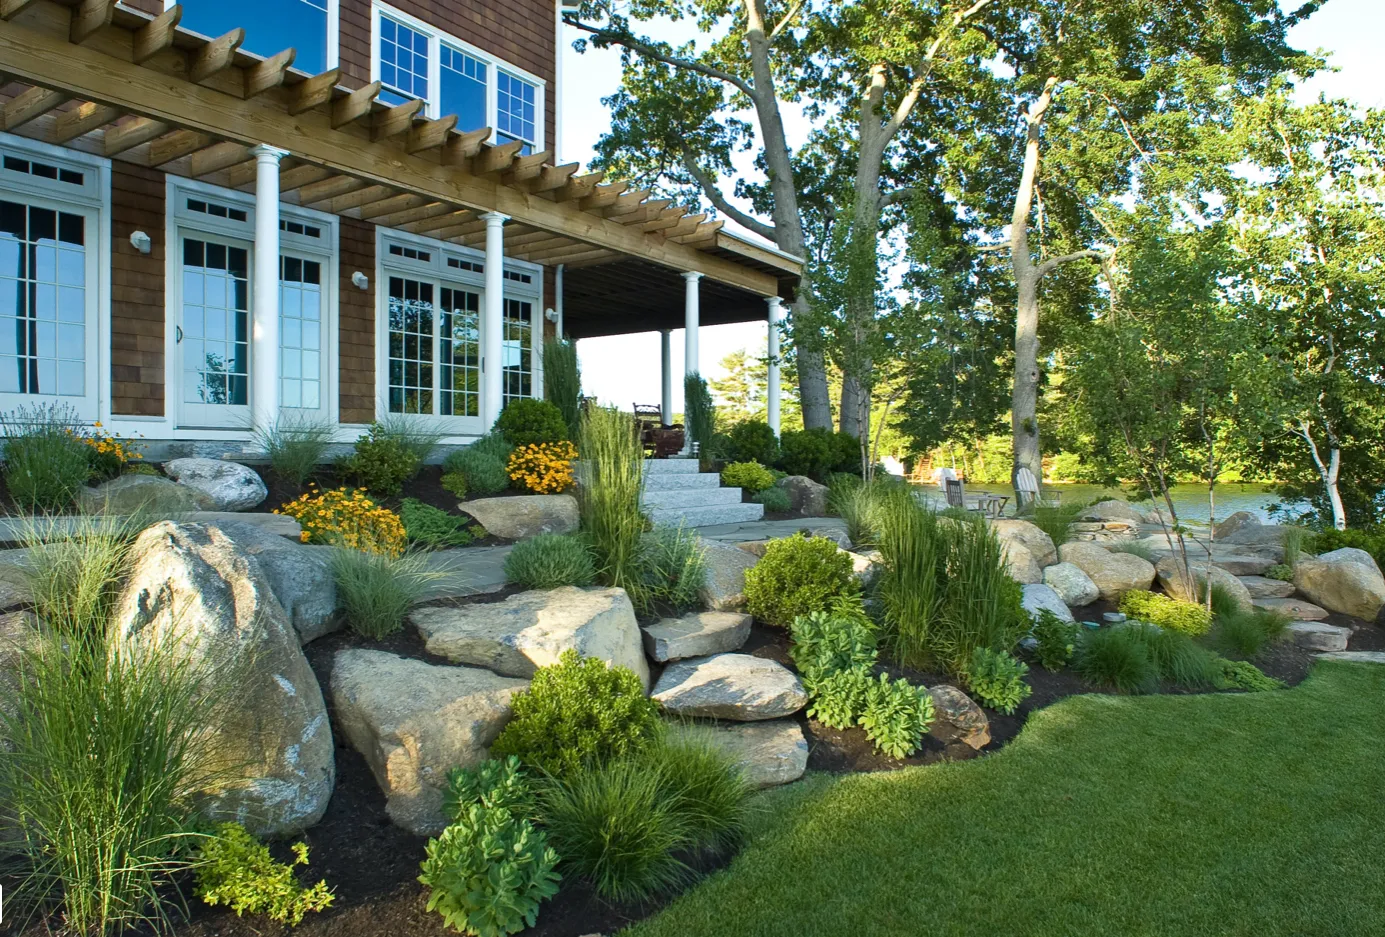
Real Talk: Those gorgeous, hefty granite boulders don’t just magically appear in your yard. Unless you’re lucky enough to have them on your property, sourcing and placing them is a serious undertaking. These can weigh hundreds, if not thousands, of pounds. You will need a plan for delivery and professional equipment like a small excavator or a crane to move them into place safely. This is not a wheelbarrow and shovel kind of weekend project. Factor the cost of delivery and machinery rental into your budget from the start.
3. Raised Brick Garden Bed with a Flagstone Path and Fire Pit
How-To Brief: You can build a similar raised brick bed over a weekend. Time: 4-6 hours. Cost: $150-$300.
- Mark and level the area for your bed. A perfectly flat base is key.
- Lay your first course of bricks directly on the leveled soil, tapping them into place with a rubber mallet. Check for level in both directions.
- Stagger the joints for the second course, just like a classic brick wall. Apply a bead of landscape block adhesive between courses for stability.
- Continue stacking courses to your desired height (2-3 courses is great for a low bed).
- Once the adhesive cures, line the inside with landscape fabric and fill with a mixture of garden soil and compost.
Budget Breakdown: Recreating this relaxed backyard zone is surprisingly accessible.
- Raised Bed Bricks: $100 – $250
- Irregular Flagstone & Gravel: $200 – $400
- Fire Pit (pre-made): $150 – $500
- Bench: $100 – $300
- Plants & Mulch: $100 – $250
- TOTAL: $650 – $1,700
Budget alternative: Build a fire pit ring with leftover bricks, find a bench on Facebook Marketplace, and start with smaller, less mature plants. This can bring the total cost down to the $350-$700 range.
4. Modern Entry with Rectangular Stepping Stones in River Rock
Style Math: The formula for this chic, modern look is about balancing hard and soft textures. It’s roughly 50% hard geometry + 50% lush, varied planting. The large, gray rectangular pavers and dark metal edging provide the strong geometric backbone. This is contrasted and softened by the surrounding sea of white river rocks and the incredibly diverse foliage—from feathery grasses to bold, red-leafed plants. Neither side overpowers the other; they’re in perfect harmony, which is the secret to successful modern-natural design.
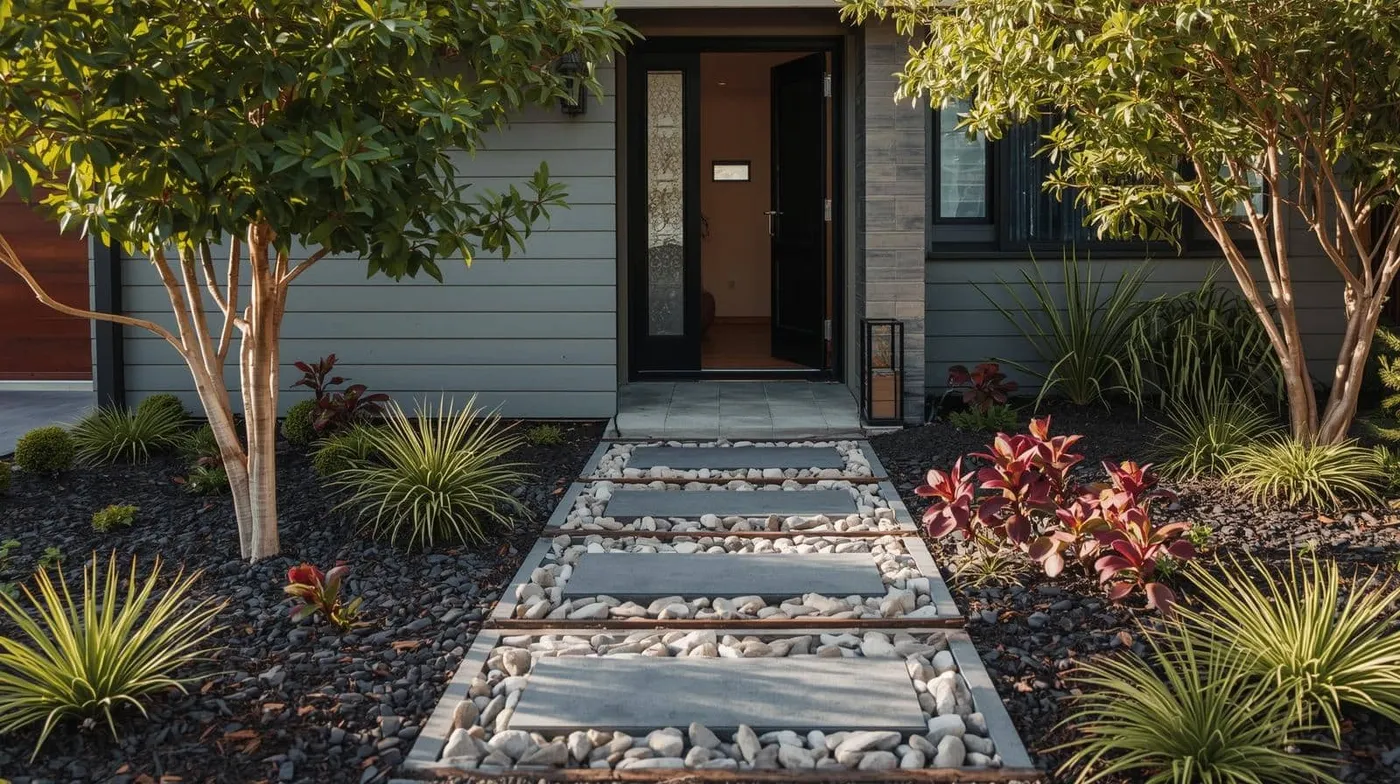
Real Talk: Keeping that crisp separation between the white river rocks and the dark mulch is the real challenge here. Over time, rain, wind, and even just walking can cause the materials to mix, which ruins the clean, graphic effect. A deep, high-quality metal or plastic edging is absolutely non-negotiable. Even with good edging, you’ll still spend a bit of time each season picking out stray pieces of mulch from the rocks and vice versa. Also, white rocks show dirt and algae, so a yearly pressure wash might be on your to-do list.
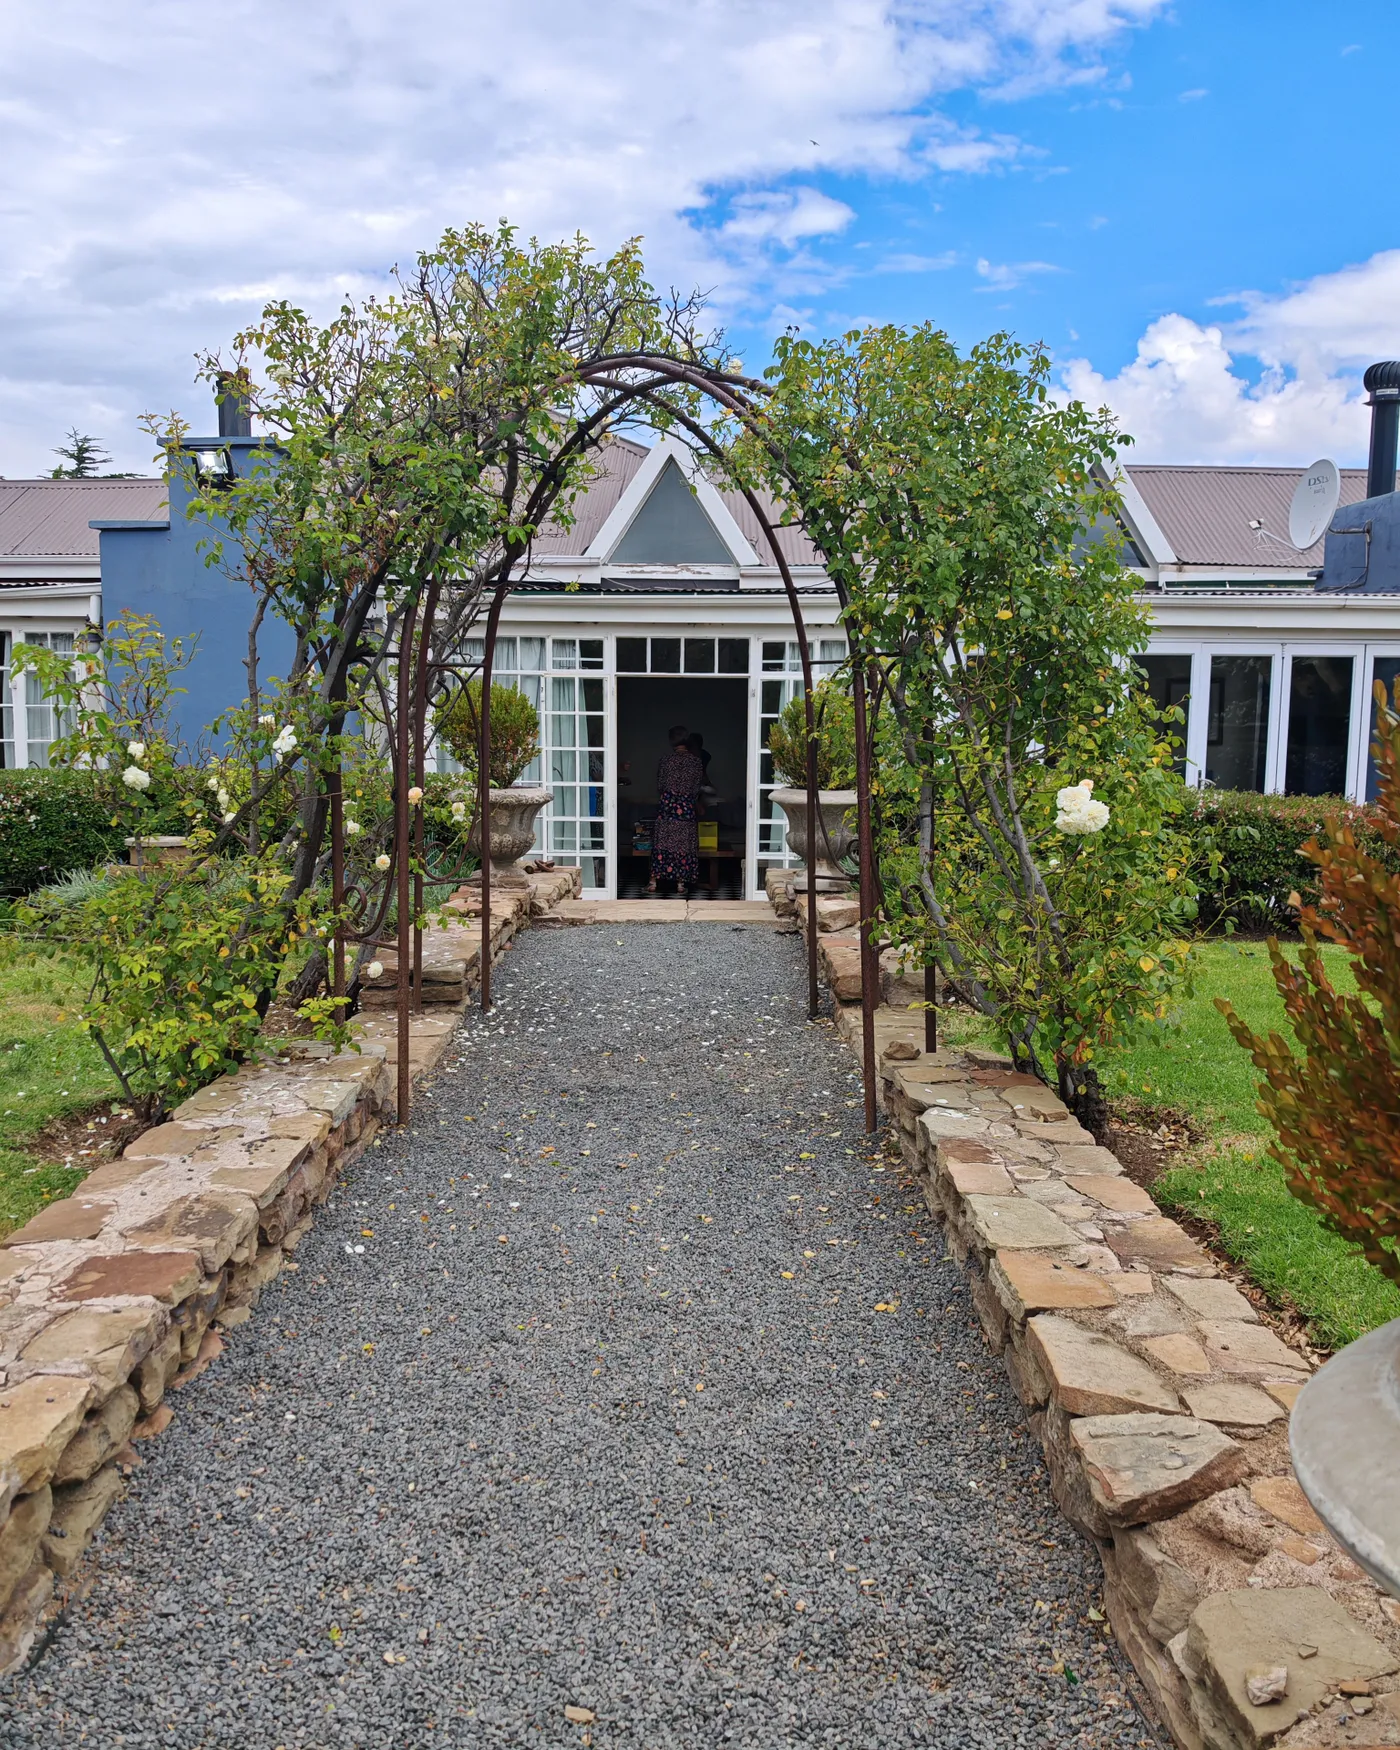
5. Gravel Garden Path with Stone Edging and Rose Arbor
The One Thing: It has to be the rose arbor. Without it, you have a perfectly nice, rustic gravel path. But with the arbor, you have an experience. It creates a gateway, a sense of transition and arrival. It draws the eye upward, adding vertical interest to a landscape that is otherwise low to the ground. The climbing roses add romance, fragrance, and a touch of wildness to the structured path and stone borders. It’s the single element that elevates the entire scene from simple to magical.
6. Curved Flower Bed with River Rock Border and Fountain
Designer Tip: When creating a border with river rocks, variety is your friend. Instead of using stones that are all the same small size, mix in a variety of shapes and sizes, from palm-sized up to cantaloupe-sized. Place the largest, most interesting stones intermittently along the curve to act as anchors. This creates a much more natural, less toy-like appearance. Also, dig a small trench (2-3 inches deep) for the first layer of stones to sit in. This locks them in place and prevents them from being easily knocked into the lawn by a mower or trimmer.
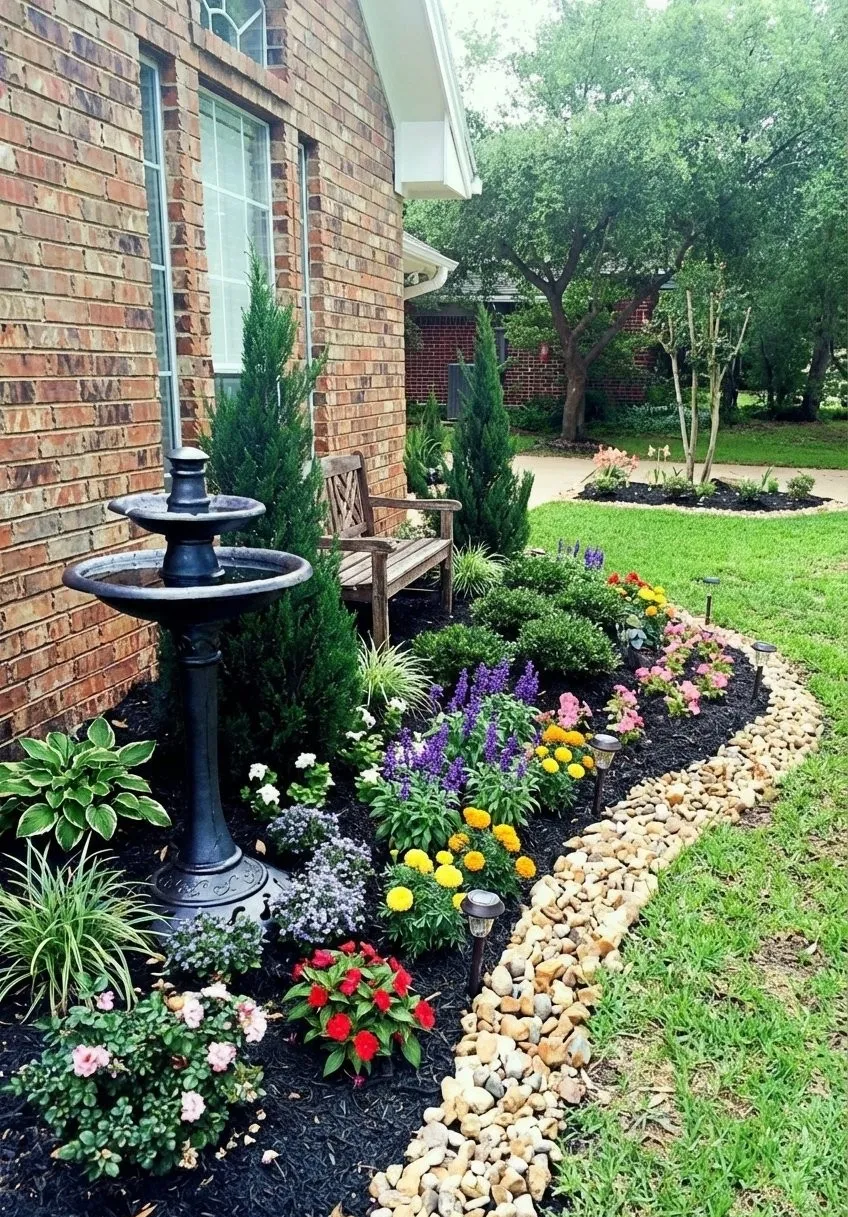
Maintenance Reality: A water fountain is a beautiful sensory addition, but it’s not a zero-maintenance feature. You’ll need to regularly check the water levels, especially on hot, windy days when evaporation is high. The pump will need to be cleaned every month or two to remove clogs from algae or debris. And depending on your climate, you’ll need to winterize it—draining it completely and either removing the pump or covering the entire fountain to prevent freezing and cracking. It’s a commitment, but the soothing sound can be worth it.
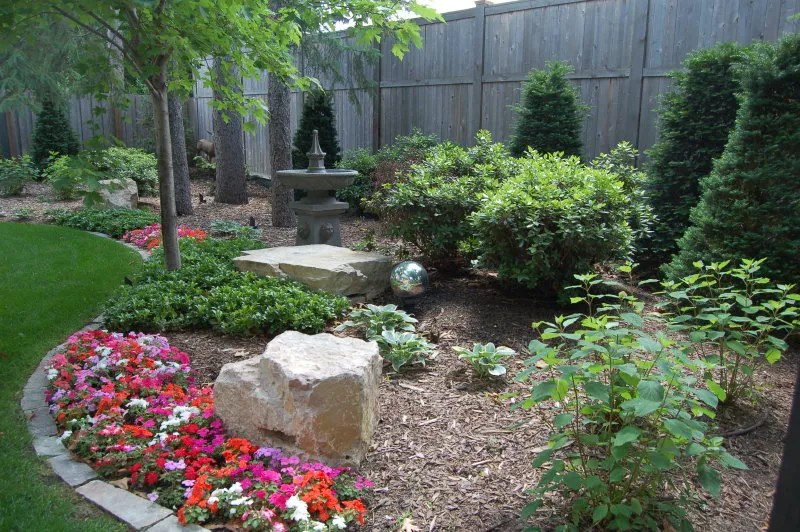
7. Sweeping Garden Bed with Mixed Shrubs and a Stone Fountain
What Makes It Work: This garden bed succeeds because of its masterful use of layering. It’s not just a flat row of plants. Taller evergreen shrubs are in the back, creating a solid green backdrop. Medium-sized deciduous shrubs and the stone fountain create a middle layer of interest. Finally, the front is filled with low, colorful bedding flowers and ground cover. This front-to-back layering creates a sense of depth and fullness that makes the garden feel lush and established. The sweeping, curved edge also feels more natural and dynamic than a straight line.
Before You Start Checklist: Creating a large, mixed bed like this requires planning.
- Measure the sun: Track the sun’s path for a full day. How many hours of direct sun does the area get? This will determine your plant choices.
- Test your soil: Is it sandy, loamy, or clay? A simple soil test kit will tell you what amendments you need to add for healthy plants.
- Plan your access: How will you water, weed, and mulch the plants in the back? Plan for a few hidden stepping stones or a small access path within the bed.
- Verify your budget: A bed of this size can easily cost $500-$1,000 in plants, mulch, and soil amendments. Price out your plant list before you dig.
8. Japanese-Inspired Stepping Stone Path in a Narrow Side Yard
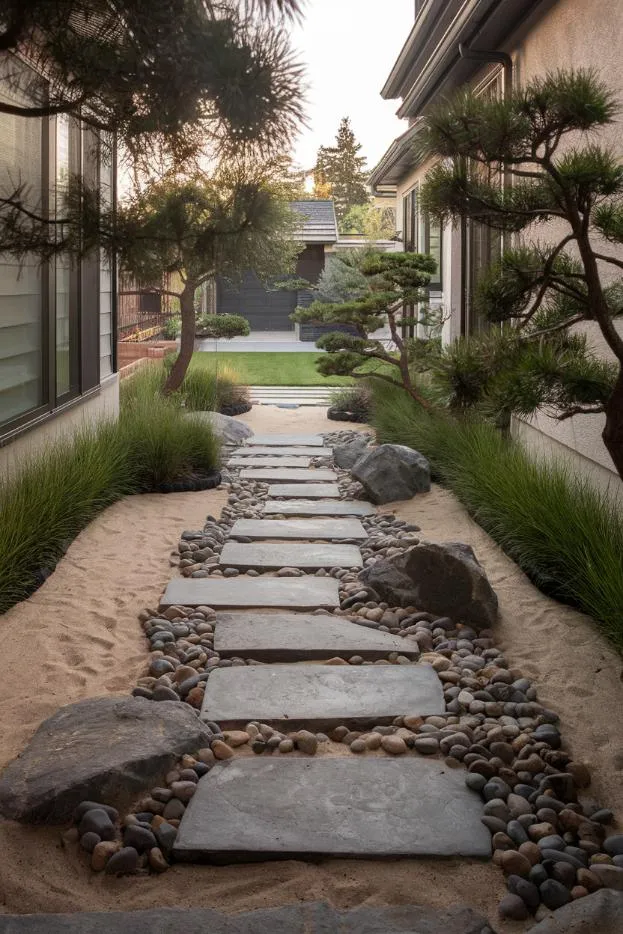
Scale Guide: This is a brilliant solution for a notoriously tricky spot: the narrow side yard. This idea works best in a space that’s 4 to 8 feet wide. Any narrower, and it feels cramped; any wider, and the minimalist aesthetic is lost. The rectangular pavers should be substantial, around 18×24 inches, to feel stable. The key is keeping the plantings low and linear. The pruned pines and grasses provide green texture without encroaching on the walkway, maintaining a feeling of openness in the tight space.
Style Math: This look is a study in textural minimalism. The formula is approximately 70% grounding texture + 20% hardscape geometry + 10% sculptural green. The tan sand is the dominant element, creating a serene, uniform base. The gray stone pavers interrupt this field with clean, geometric lines. Finally, the carefully placed ornamental pines and linear grasses act as living sculptures, providing the only complex forms and deep color in the entire composition. The high-contrast border of dark river rocks acts as the frame for the whole picture.
9. Artful Side Yard with Sculptural Planters and Stone Steppers
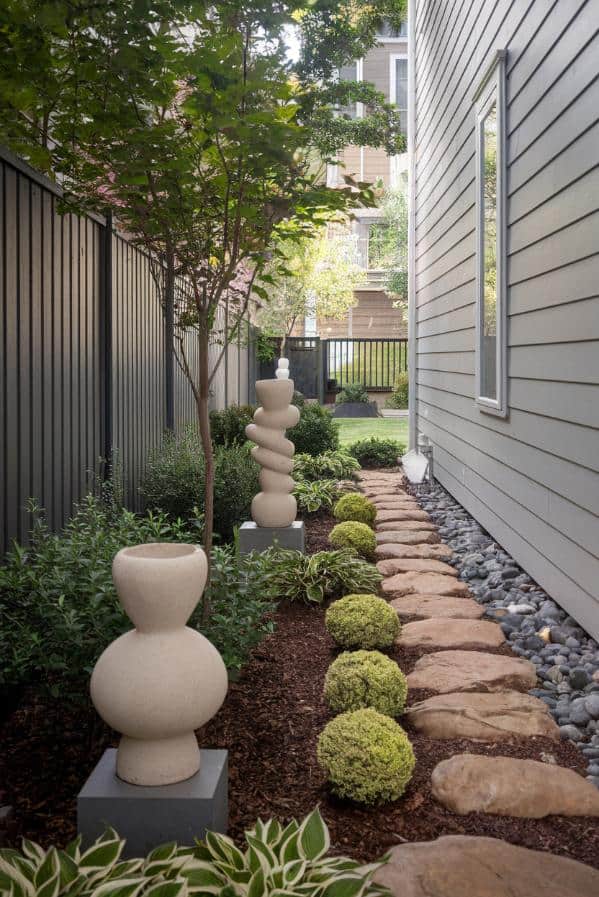
The One Thing: The stacked sculptural urns are the undeniable stars of this show. They transform a simple, narrow pathway into a curated art walk. Without them, it’s a perfectly pleasant side yard. With them, it’s a statement. Placing them on dedicated gray bases elevates them further, both literally and figuratively, treating them like gallery pieces. Their classical shape provides a beautiful, sophisticated contrast to the modern lines of the vertical slat fence and the home’s siding.
Real Talk: Those sculptural planters are gorgeous, but they can be a bit of a diva. Being raised and exposed, the soil inside will dry out much faster than soil in the ground, especially on hot days. You’ll need to be diligent with watering. Also, a top-heavy urn on a narrow base can be a tipping hazard in high winds or if bumped. Ensure the base is perfectly level and consider using landscape adhesive or even a hidden pin to secure the urn to its base, particularly if you have kids or pets running around.
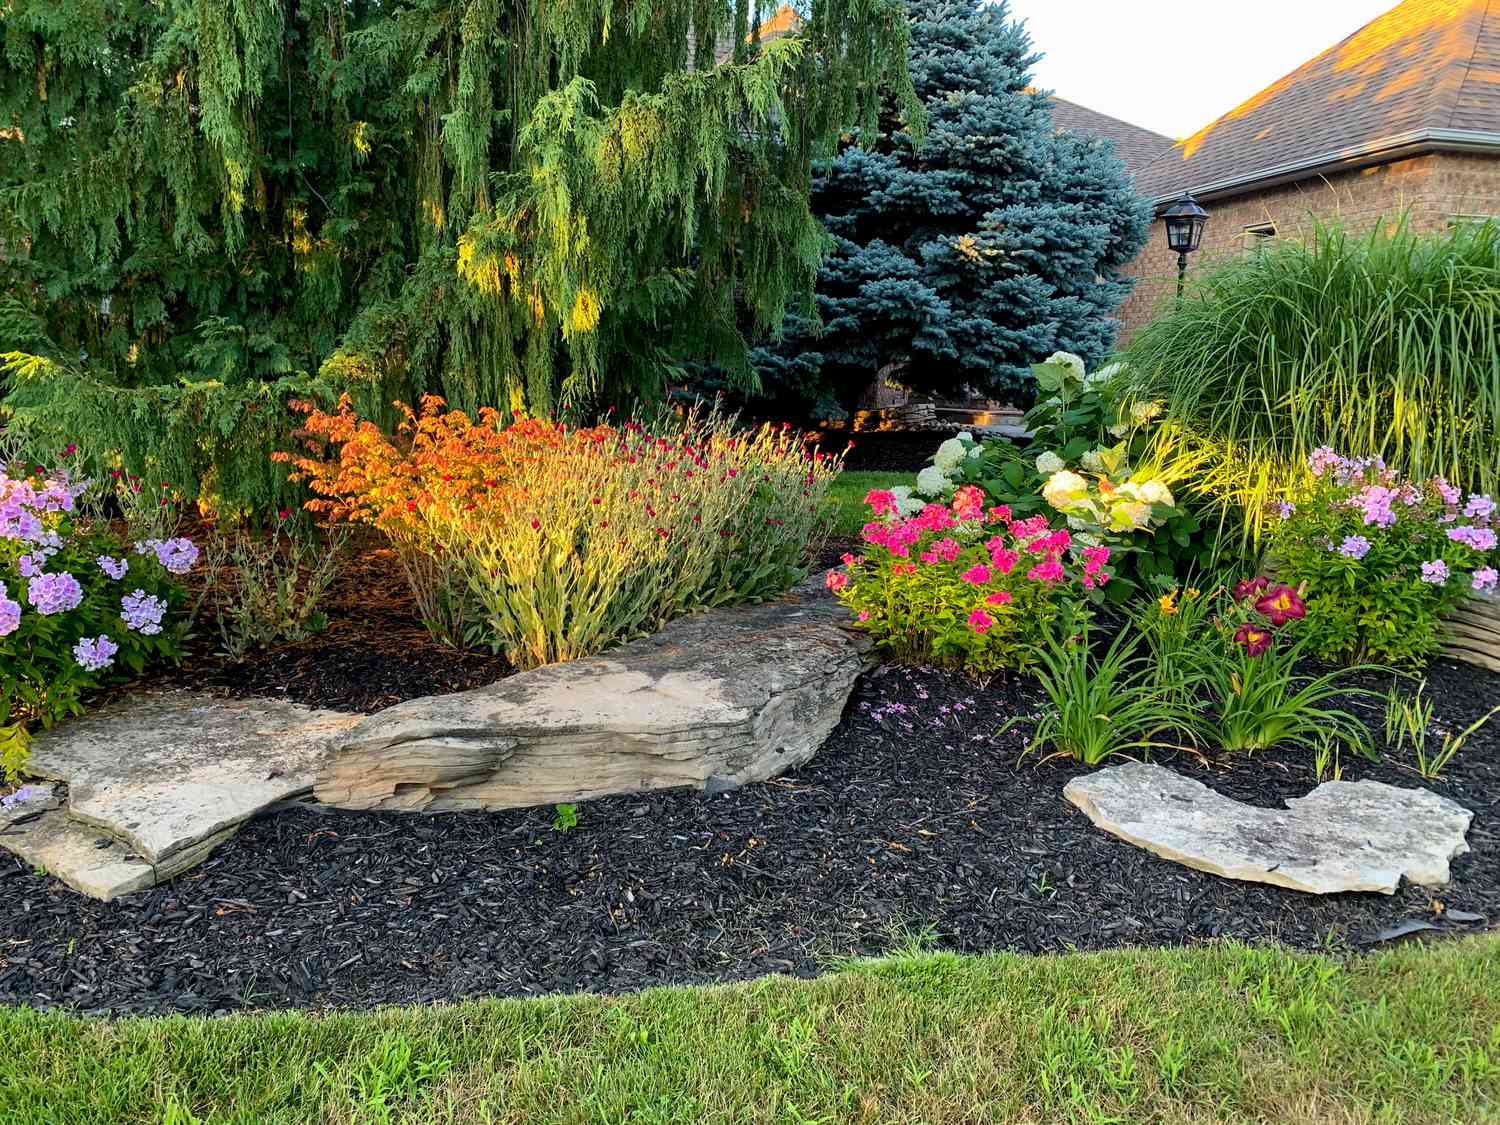
10. Curved Front Yard Mulch Bed with Large Mossy Boulders
What Makes It Work: This landscape feels so natural and established thanks to the combination of curves and texture. The deep, curved edge of the mulch bed is much more visually engaging than a straight line. The large mossy boulders anchor the entire design, providing weight and a sense of permanence. The variety in plant textures—from the fine blades of ornamental grasses to the broad leaves of shrubs and delicate purple blooms—creates layers of visual interest that keep the eye moving and exploring.
Designer Tip: When grouping plants in a garden bed, think in odd numbers. Planting in groups of three, five, or seven looks more natural and less staged than planting in even-numbered pairs. Notice how the rounded green shrubs are clustered? It feels more organic. Apply this rule of three to different types of plants throughout the bed to create harmonious, pleasing compositions. Also, repeat a few key plants or colors (like the purple blooms) throughout the design to create a sense of rhythm and cohesion.
11. Illuminated Multi-Tiered Garden Bed at Twilight
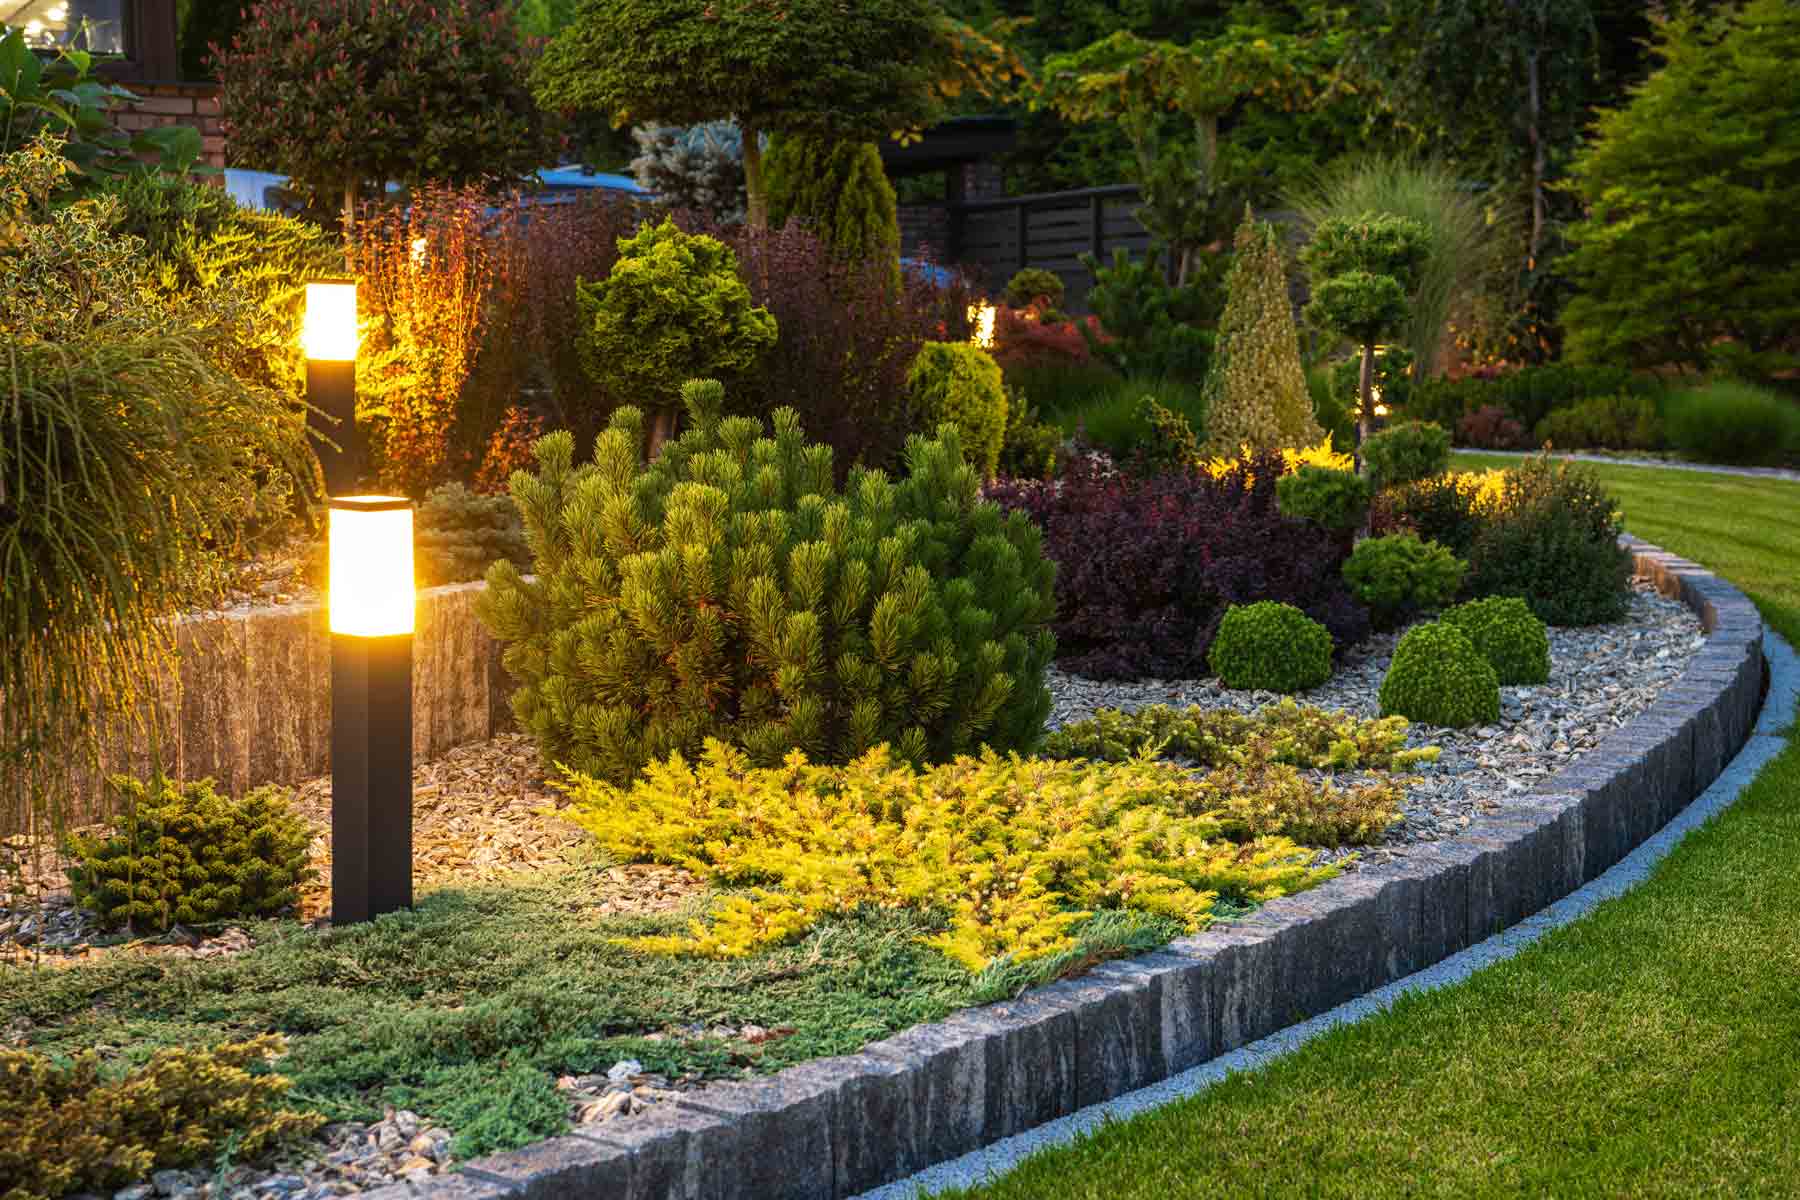
The One Thing: The landscape lighting is what makes this entire scene come alive. During the day, it’s a lovely, well-planted garden. But at night, the modern black bollard lights transform it into a piece of art. The warm, glowing tops cast a soft, downward pool of light, highlighting the textures and colors of the different conifers and shrubs. This technique, known as path lighting or area lighting, creates ambiance, provides safe navigation, and extends the enjoyment of the garden long after the sun has set.
How-To Brief: Installing a low-voltage lighting system like this is a very manageable DIY project. Time: 3-4 hours. Cost: $200-$500 for a starter kit.
- Plan your layout. Place the lights where you want them and lay the low-voltage cable along the path it will follow.
- Mount the transformer on an exterior wall near an outdoor GFCI outlet. Don’t plug it in yet!
- Run the cable from the transformer to the lights. Bury it a few inches deep in the mulch or soil.
- Attach each light fixture to the cable using the simple clip-on connectors that come with the kit. This is the fun part!
- Set the timer on the transformer, plug it in, and enjoy your new illuminated garden.
12. Sloped Backyard with Stone Retaining Walls and a Tiered Patio
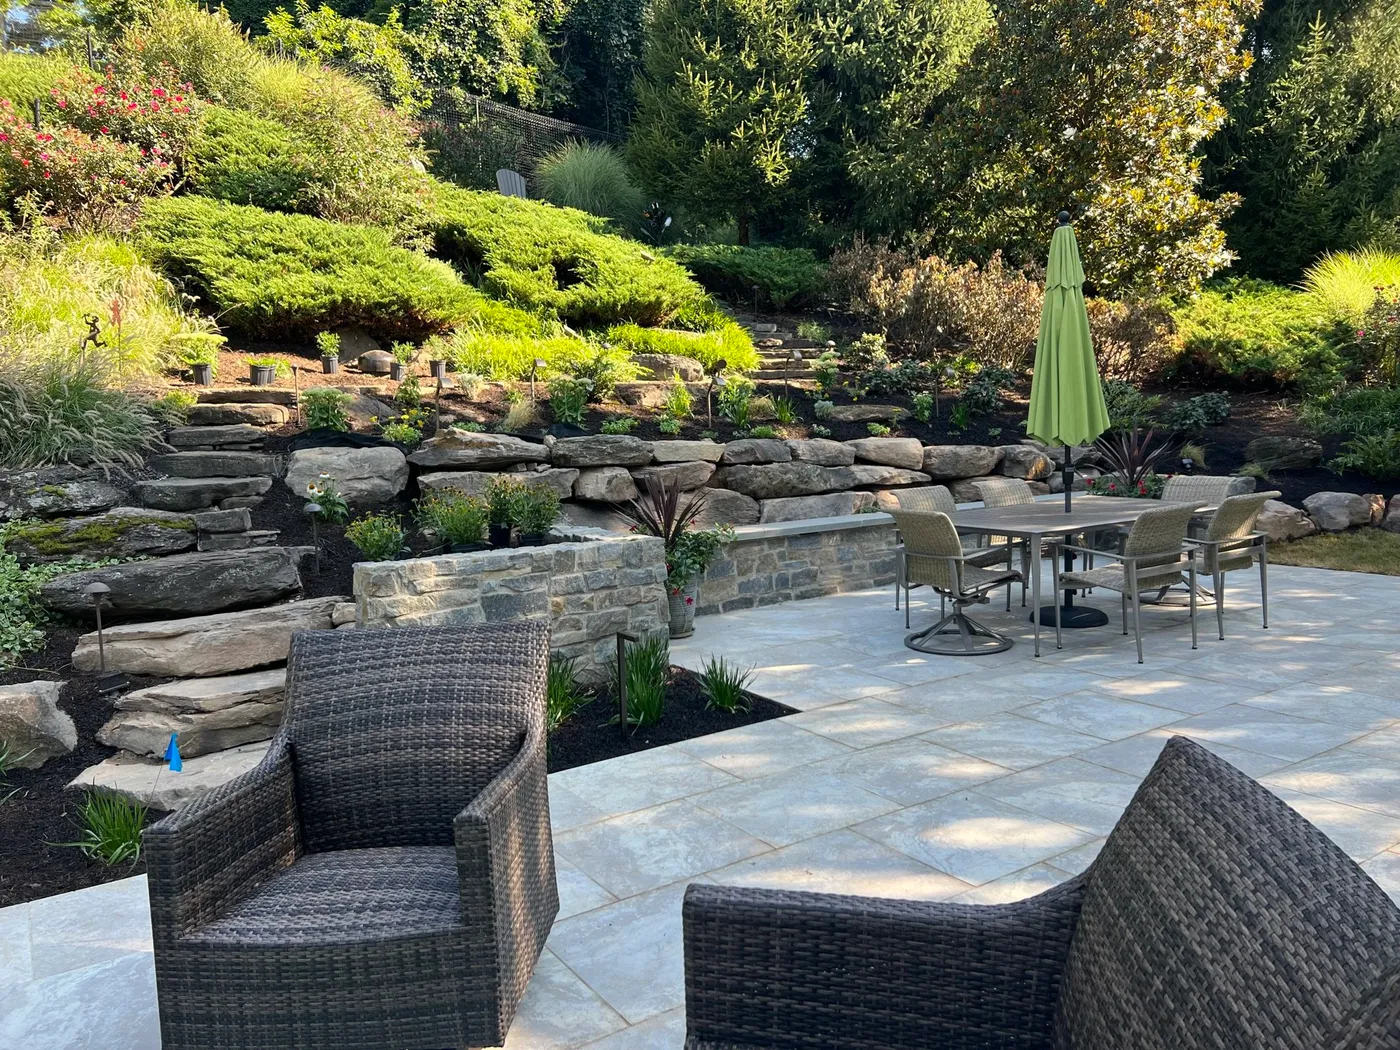
Scale Guide: A terraced design like this is the ultimate solution for a large, sloped backyard, but it requires significant space. You need a slope with at least 8-10 feet of vertical drop to create two or three distinct, usable levels. Each retaining wall will consume about a foot of depth, and the planting beds should be at least 3-4 feet deep to support healthy shrubs. The lower patio area needs a minimum of 15×15 feet to comfortably fit both a dining and a seating zone as shown here. This is a large-scale project for a substantial property.
Budget Breakdown: This is a major landscape construction project, and the costs reflect that.
- Excavation & Grading: $3,000 – $8,000
- Stacked Stone Retaining Walls (materials & labor): $15,000 – $30,000+
- Stone Paver Patio (250 sq ft): $5,000 – $10,000
- Plants, Soil & Mulch: $2,000 – $5,000
- Outdoor Furniture: $1,500 – $4,000
- TOTAL: $26,500 – $57,000+
Budget alternative: For a more manageable approach, use interlocking concrete retaining wall blocks instead of natural stone, and build only one wall to create a single level patio. This could bring the project into the $10,000 – $20,000 range.
13. Modern Front Garden with Concrete Pavers and a Rusted Metal Planter
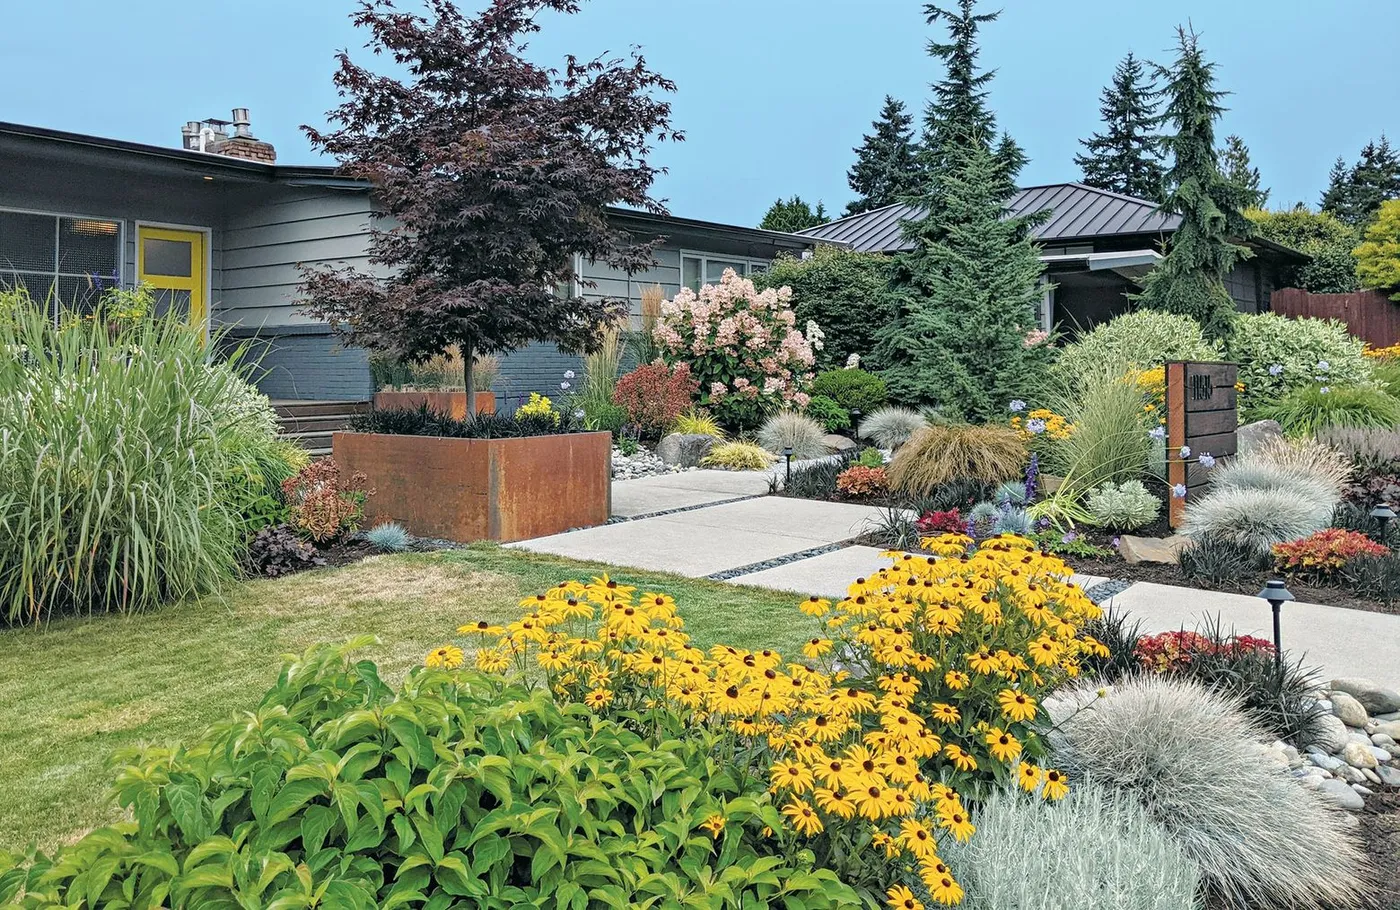
Trending Context: This garden is a perfect example of the New Perennial movement, which has been gaining huge traction on Pinterest. It’s all about creating gardens that look beautiful but also feel loose, natural, and ecologically friendly. The mix of ornamental grasses, coneflowers, and other perennials provides year-round interest and supports pollinators. The rusted metal (Corten steel) planter adds a warm, industrial edge that keeps the look firmly in the modern camp. It’s a move away from stuffy, formal gardens toward something more vibrant and alive.
What Makes It Work: This design is a masterclass in texture and repetition. The hard, smooth surface of the concrete paver walkway is the perfect counterpoint to the soft, wild textures of the surrounding plants. Look at the feathery ornamental grasses next to the bold, daisy-like coneflowers and the dark leaves of the Japanese maple. The designer also uses repetition brilliantly: the warm, rusty color of the planter is echoed in the centers of the yellow coneflowers, and the upright form of the grasses is repeated throughout the space, creating a cohesive, unified feel.
14. Cozy Backyard Seating Nook with Stone Pavers and String Lights
Style Math: The magic formula for this cozy nook is a simple one: 50% natural materials + 30% lush greenery + 20% warm ambiance. The stone pavers and the wood of the fence and raised bed provide a solid, earthy base. This is then heavily layered with greenery – from the small trees to the mixed shrubs, creating a feeling of being enveloped by nature. The final, crucial 20% comes from the overhead string lights, which cast a warm, inviting glow that makes the space feel like an outdoor room and encourages you to stay long after sunset.
Real Talk: String lights create amazing ambiance, but they don’t last forever. The bulbs burn out, and exposure to sun and rain will cause the wires and sockets to degrade over time, especially with cheaper sets. Invest in commercial-grade, outdoor-rated string lights; they cost more upfront but are built to withstand the elements. Also, be mindful of what’s underneath. If a bulb breaks over your stone patio, it’s an easy cleanup. If it breaks over your lawn, you could be finding tiny shards of glass for weeks.
15. Minimalist Outdoor Seating with Concrete Pavers and Strip Lighting
What Makes It Work: This is architectural minimalism at its best. The design succeeds by ruthlessly editing down to the essentials. The materials are simple and honest: concrete, gravel, and metal. The color palette is strictly monochromatic. The drama comes from the composition itself—the grid of large square pavers floating in the fine gravel, and the long, low line of the concrete retaining wall. The integrated LED strip lighting is the final brilliant touch, turning a functional bench into a glowing, sculptural element at night.
Designer Tip: When working with a minimalist design, precision is everything. The gaps between these large concrete pavers must be perfectly uniform for the effect to work. A 2-inch gap is a good standard to aim for. Use tile spacers when you’re setting them to ensure your grid is flawless. The same goes for the gravel—choose a fine, angular gravel (like 1/4″ crushed rock) rather than rounded pea gravel. It locks together and provides a more stable, uniform surface, which is critical for this clean aesthetic.
16. Lush Backyard Patio with a Green Sectional Sofa
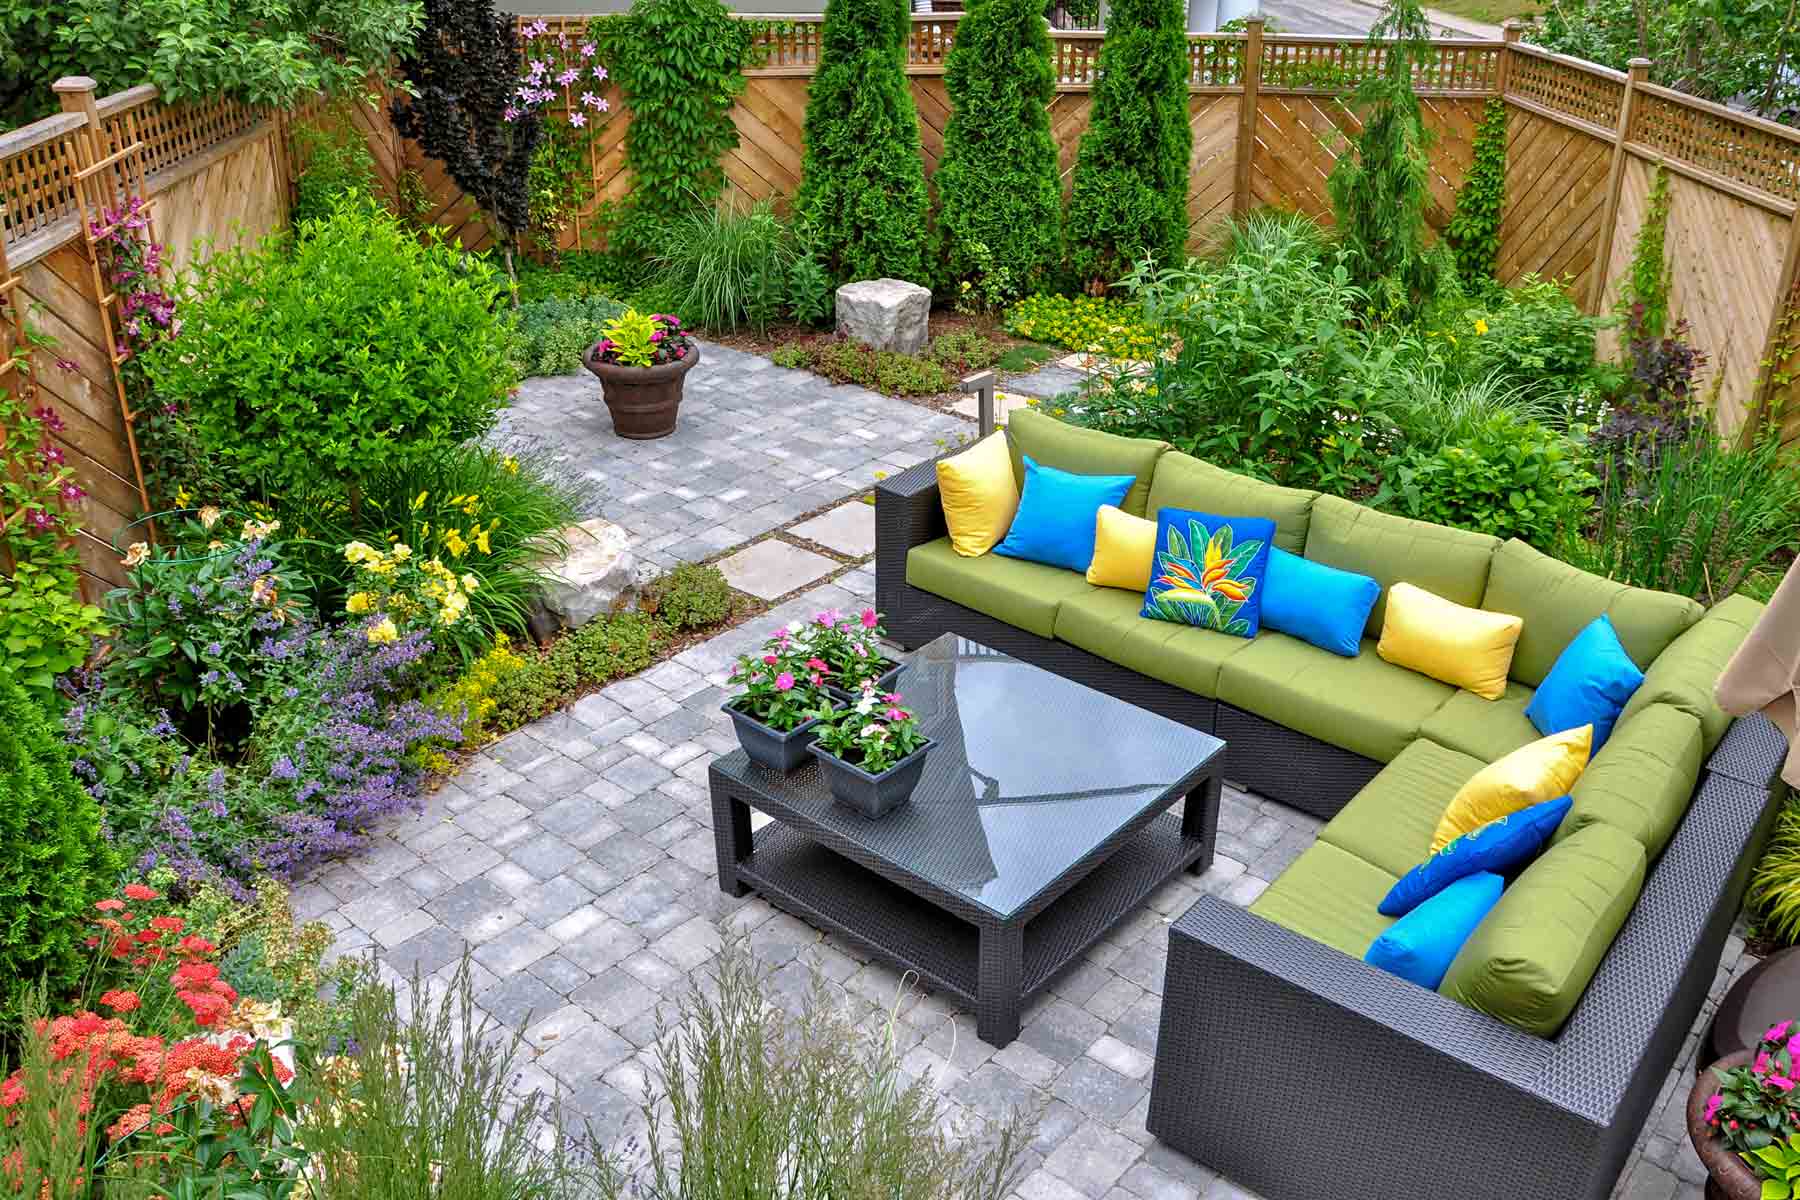
The One Thing: The massive, green-cushioned sectional sofa is the heart and soul of this space. It’s an unapologetic statement that this patio is for serious lounging. By choosing an outdoor sofa with the scale and comfort of an indoor piece, the design blurs the line between inside and out. The bold green cushions connect the furniture directly to the surrounding lush garden, while the pops of blue and yellow in the pillows add a playful, vibrant energy. It’s not just a patio; it’s an outdoor living room. Compare this to the minimalist seating in Idea #18 for a completely different vibe.
Before You Start Checklist: Before investing in a large outdoor sectional, run through this list.
- Measure your patio space twice. Don’t just measure the total area; use painter’s tape to mark the actual footprint of the sofa on the ground to ensure you have enough walkway space around it.
- Check your sun exposure. Will the sofa bake in the hot afternoon sun? Fading is a real issue. Consider a light, UV-resistant fabric or plan for a large umbrella.
- Plan for storage. Where will those big, bulky cushions go during the off-season or before a big storm? Make sure you have a plan for a deck box or garage space.
- Confirm material maintenance. Wicker needs cleaning, metal can rust, and cushions need regular washing. Be honest about the upkeep you’re willing to do.
17. Modern Courtyard with Interlocking Pavers and a Wood Slat Fence
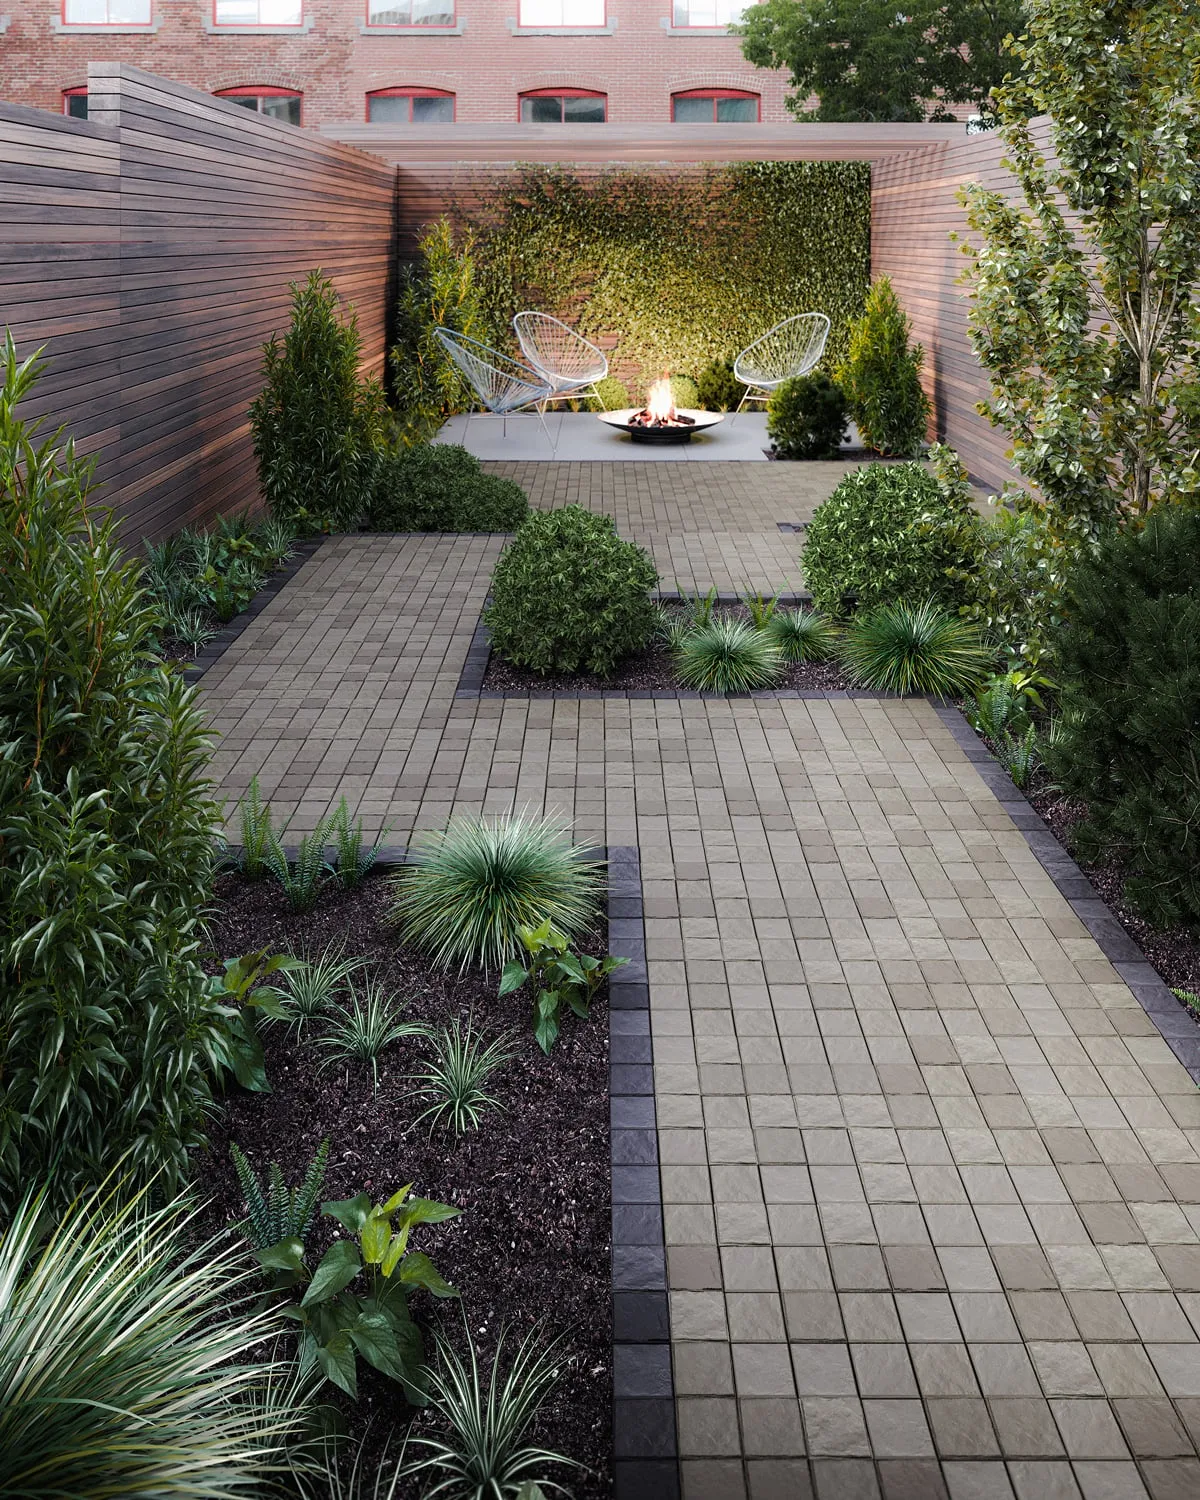
Style Math: This serene, modern courtyard follows a clean formula: 40% warm wood + 40% cool gray stone + 20% vibrant green. The horizontal wood slat fencing provides a warm, organic backdrop that defines the space. This is balanced by the cool gray of the interlocking paver patio, creating a perfect harmony of temperatures. The remaining 20% is the crucial injection of life from the plants in the raised beds and the ivy on the back wall. Swapping the wood for a dark composite or the gray pavers for a darker charcoal would still work because the ratio of warm-to-cool-to-living is what makes it successful.
Maintenance Reality: A horizontal wood slat fence is stunning, but it’s not a no-maintenance choice. To keep that warm, rich wood tone, it will need to be cleaned and resealed every 2-3 years, depending on your climate’s sun and rain exposure. If you don’t, it will eventually weather to a silvery-gray color, which can also be beautiful, but you have to be intentional about it. Also, the gaps between the slats can become a haven for spiderwebs, so a quick brush-down will be a regular part of your routine.
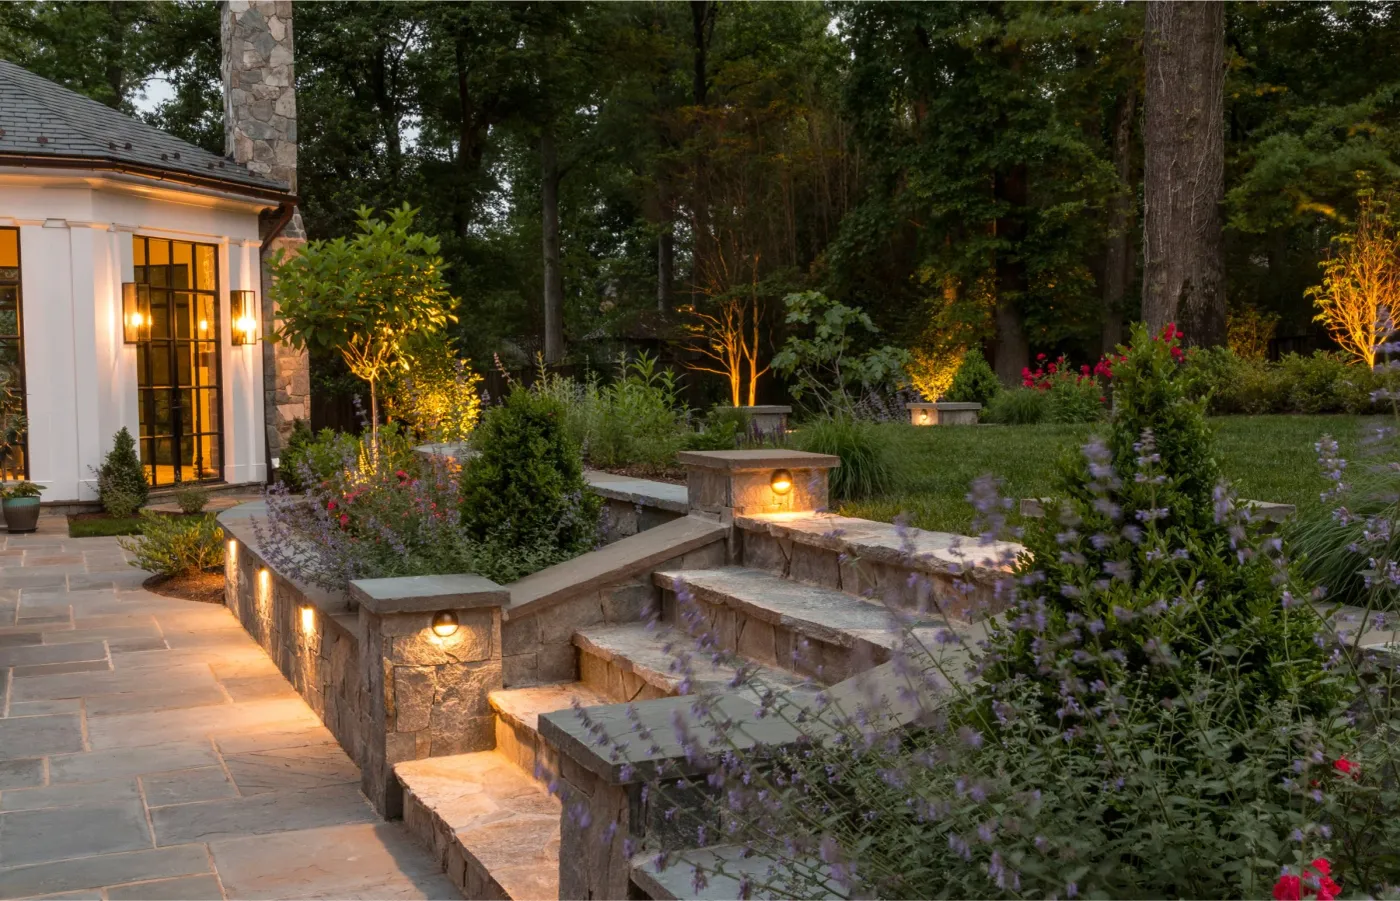
18. Illuminated Stone Retaining Wall and Stairway at Dusk
What Makes It Work: This landscape design is all about ‘wayfinding’ and mood. The built-in lighting is not just for show; it’s a critical safety feature that also happens to be beautiful. By placing lights under the capstones of the retaining walls and embedding them into the stair risers, the design clearly defines the different levels and pathways in the dark. The warm temperature of the light (around 2700K) creates a welcoming, gentle glow that feels cozy and high-end, unlike the harsh, blueish light of older outdoor fixtures.
Designer Tip: For subtle, integrated lighting like this, planning is key. The wiring for these fixtures needs to be run during the construction of the stone walls and stairs, not after. Use direct-burial rated low-voltage wire. For stair riser lights, cut the hole in the stone before you mortar it in place. For wall lights, plan to leave a channel for the wire as you stack the stones. While low-voltage systems are DIY-friendly, a complex, multi-level installation like this might be worth consulting an electrician or landscape lighting specialist for the initial layout.
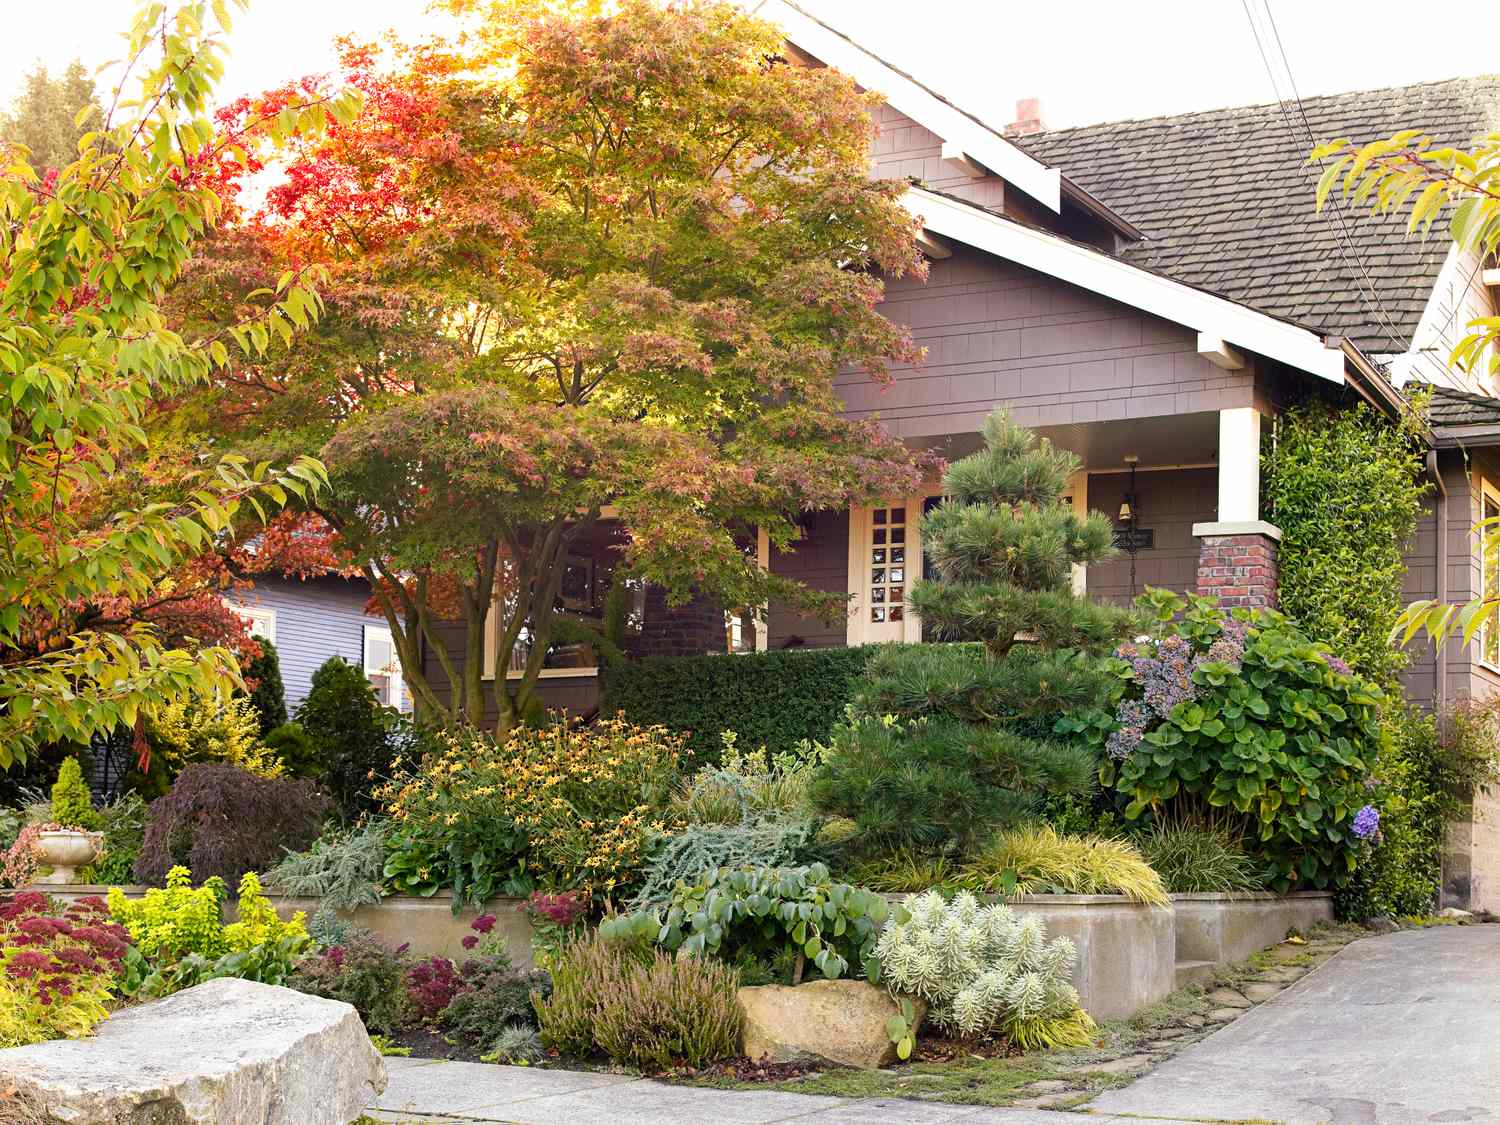
19. Curved Concrete Walkway with Vibrant, Layered Garden Beds
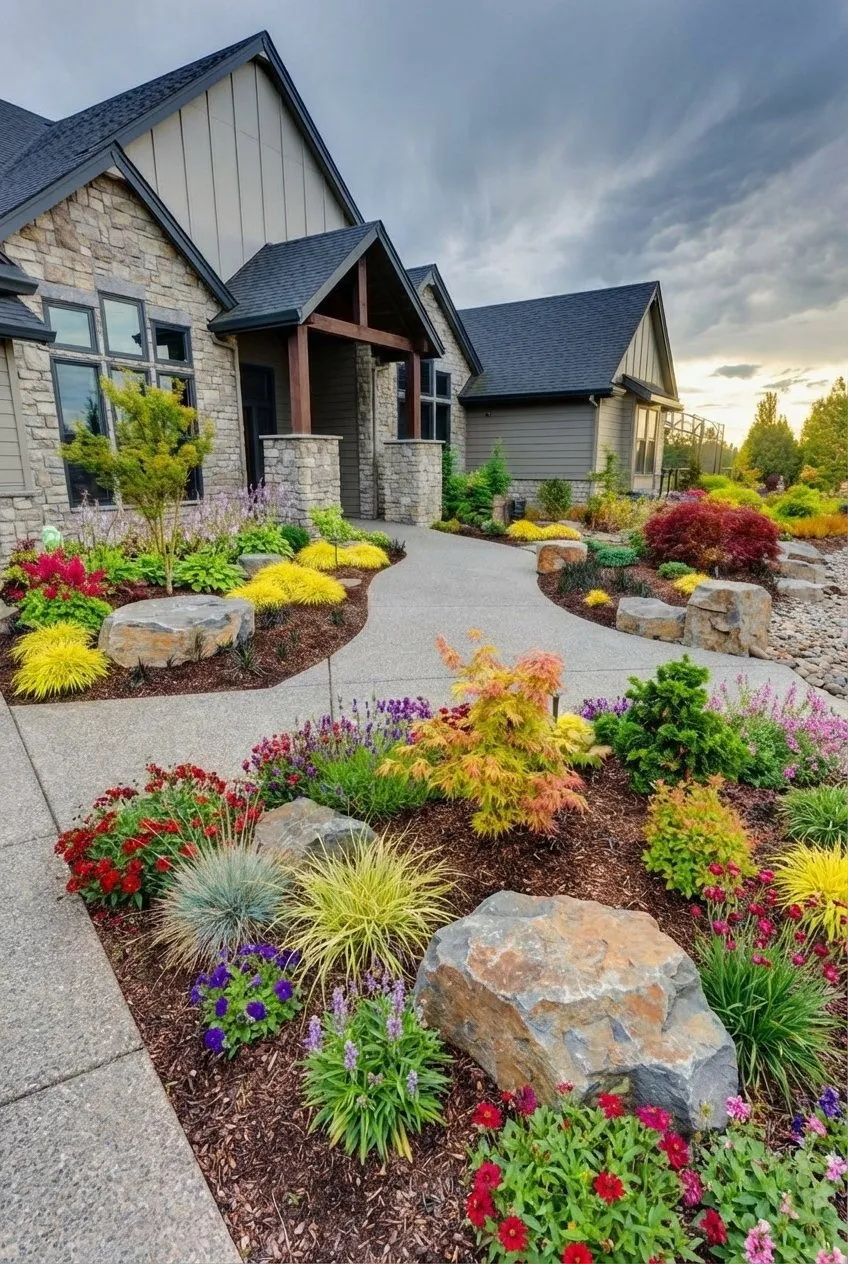
The One Thing: The sheer, unadulterated use of color is what sets this landscape apart. While the curved walkway and boulders provide excellent structure, it’s the bold, painterly mix of plants that truly sings. The designer wasn’t afraid to use vibrant chartreuse grasses next to deep burgundy foliage, punctuated by pops of purple and red flowers. This isn’t a timid, one-color-at-a-time garden. It’s a confident, joyful explosion of color that creates incredible energy and curb appeal. This is maximalism in the garden, and it’s glorious.
Get This Look For Less: That much plant material can get expensive fast, especially when buying gallon-sized perennials. The secret to getting this look on a budget is patience. Buy smaller, more affordable quart size plants or even plugs. They will look sparse at first, but within two seasons, they will fill in beautifully. Focus your budget on the structural bones like a few key shrubs or the boulders, and fill in the rest with fast-growing, self-seeding perennials and annuals. Also, check local garden club sales for great deals on plants from other gardeners’ yards.
20. Lush Cottage Garden with an Arched Stone Entryway
What Makes It Work: This design excels by balancing structure and chaos, a hallmark of the best cottage gardens. The manicured green lawn provides a neat, calm ‘negative space’ that allows the densely packed flower beds to shine without feeling overwhelming. The arched stone entryway and the clean lines of the white stucco house provide strong architectural framing. Within that frame, the plants are allowed to spill over, creating a soft, romantic, and slightly wild feeling. It’s the perfect marriage of formal and informal.
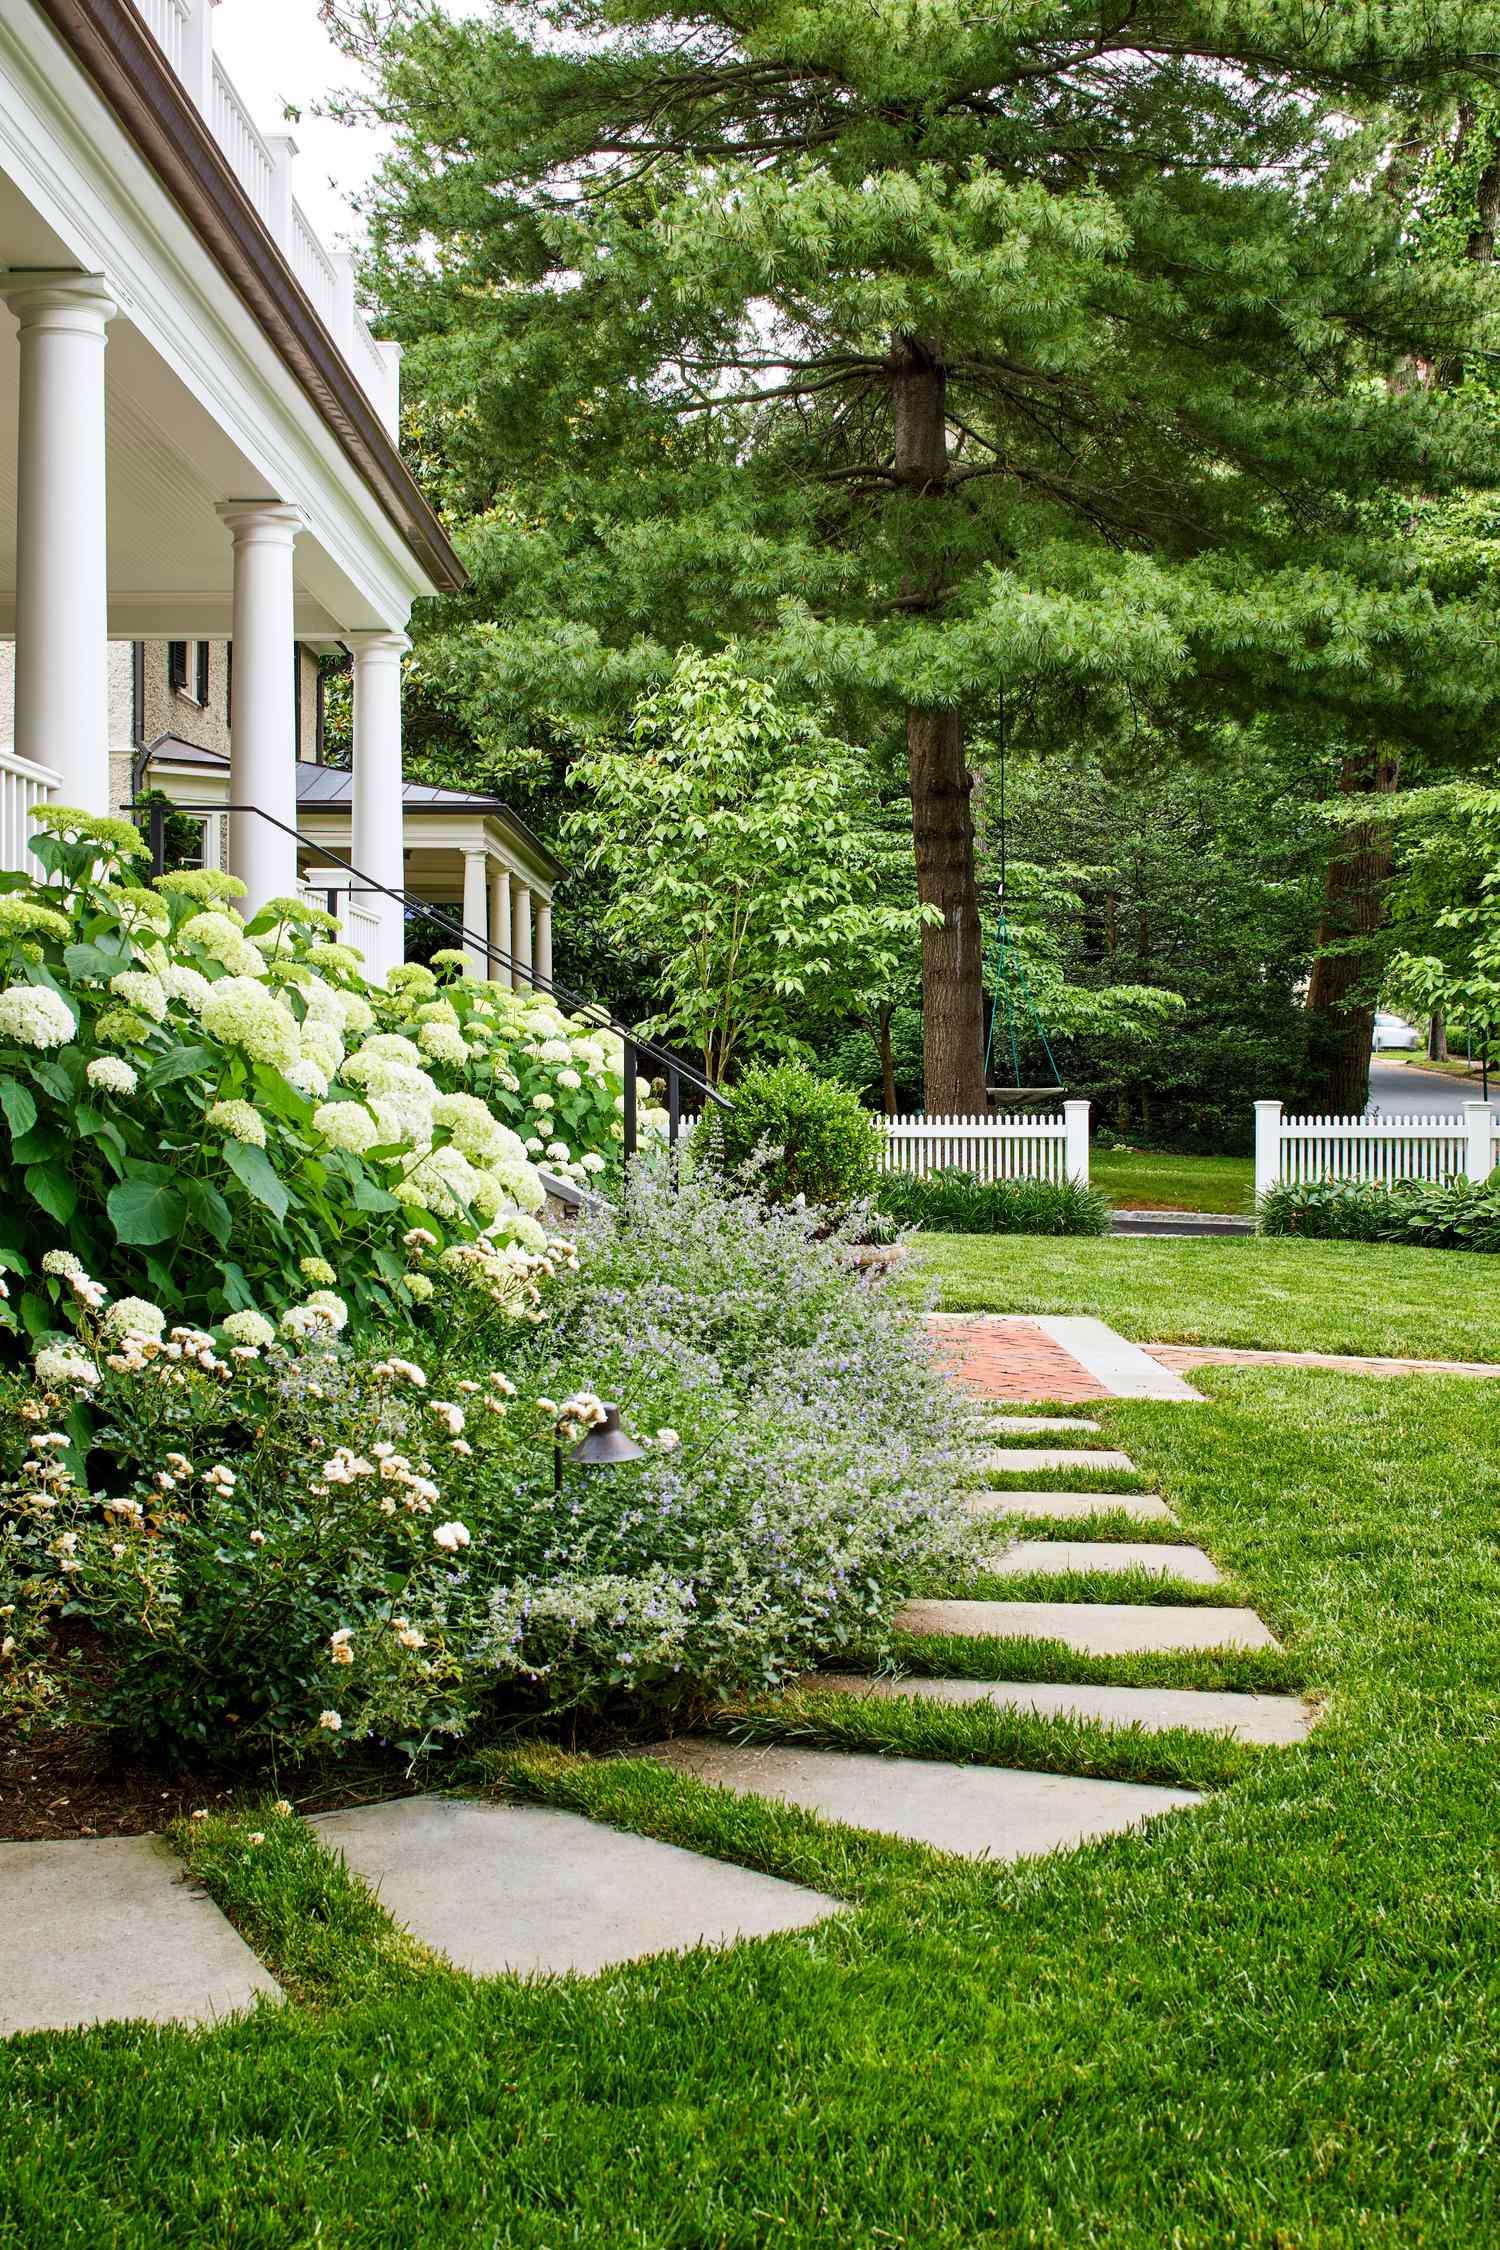
Real Talk: A lush, overflowing cottage garden is the opposite of low maintenance. This look requires constant attention. You’ll be deadheading flowers to encourage more blooms, pulling weeds that thrive in the rich soil, dividing overgrown perennials every few years, and pruning shrubs to keep them from swallowing the path. It’s a labor of love. If you want a garden that you can ignore for weeks at a time, this is not the style for you. A simpler, more structured design like the one in Idea #1 would be a better fit.
21. Modern Wooden Pergola with a Slat Wall and Paved Walkway
Style Math: The success of this clean, modern look comes down to a simple, powerful ratio: 80% repeating lines + 20% soft texture. The overwhelming visual information comes from the repeating slats of the pergola and the privacy wall, and the grid of the large stone pavers. It’s all about rhythm and pattern. This strong geometry is then softened by the 20% of organic texture from the perfectly manicured lawn, the fluffy ornamental grasses, and the rounded shapes of the shrubs. It’s a textbook example of how to make minimalism feel warm and inviting.
Scale Guide: A structure like this pergola works beautifully to define an outdoor ‘room’ in a medium-sized backyard. To feel substantial but not overwhelming, a good size for a pergola like this is 10×12 feet or 12×14 feet, with a height of about 8-9 feet. The large stone pavers should match this scale; anything smaller than 24×24 inches would look too busy. This design is perfect for creating a focal point and a destination in a yard that is at least 30 feet deep.
22. Rustic Log-Edged Garden Bed with Colorful Hydrangeas
The One Thing: It’s the weathered log edging. This single choice defines the entire character of the garden. Using natural, rustic logs instead of perfect bricks or quarried stone immediately signals a casual, charming, and slightly untamed aesthetic. It feels resourceful and connected to the woods. The logs provide the necessary structure for the raised bed, but their imperfect, weathered forms are the perfect rustic frame for the riot of colorful hydrangea blooms, making the whole scene feel like a found treasure.
Designer Tip: When working with hydrangeas to get that stunning mix of colors, you need to understand your soil’s pH. For bigleaf hydrangeas (Hydrangea macrophylla), acidic soil (pH below 6.0) produces blue flowers, while alkaline soil (pH above 7.0) produces pink or red flowers. White hydrangeas are not affected by pH. To get this mix, you can amend the soil in different sections of the bed. Add garden lime to raise the pH for pinks, and use aluminum sulfate or a soil acidifier for blues.
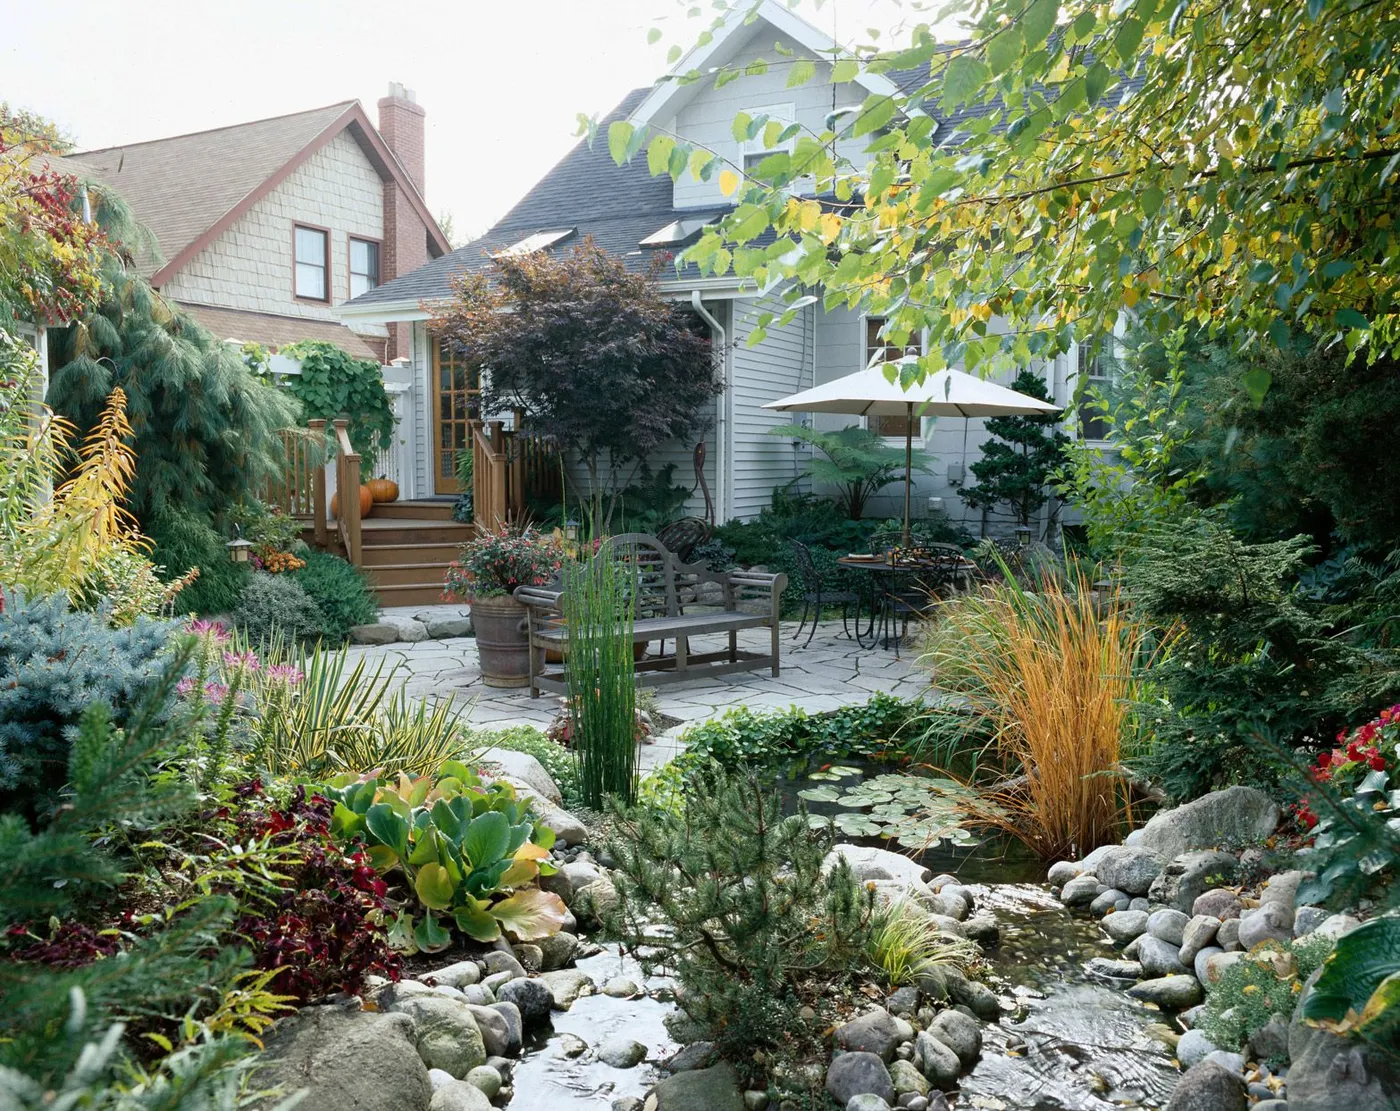
23. Enclosed Wooden Garden Patio with Lush Climbing Vines
What Makes It Work: This little patio is a masterclass in creating a private, cozy oasis in a small space. The magic comes from the verticality. The tall wooden fence and the stone retaining walls create a sense of enclosure and privacy. The design then uses that vertical space by encouraging dense climbing vines to cover the walls, making the space feel incredibly lush and secluded. It feels less like a backyard and more like a secret garden room. The pops of orange from the cushions add a perfect touch of warmth to the cool stone and wood tones. This is a much cozier approach than the open patio in Idea #19.
Get This Look For Less: The custom stone retaining walls and steps are likely the most expensive part of this project. To get a similar multi-level, enclosed feel on a budget, you can use pressure-treated lumber or even stacked landscape timbers to create raised beds and retain soil. For the patio surface, consider decomposed granite or pea gravel over a fabric weed barrier instead of stone pavers. A simple, fast-growing vine like sweet autumn clematis can cover a fence in just a couple of seasons for very little cost.
Your Dream Yard is a DIY Away
See? A stunning landscape doesn’t have to be a professional-only job. With a little planning and a lot of inspiration, you can create an outdoor space you’ll love for years to come. Go back to your favorite ideas, check your Pinterest boards, and start sketching out what your own personal oasis could look like.