27 Jaw-Dropping DIY Outdoor TV Ideas That Will Transform Your Patio Into an Entertainment Oasis

Still scrolling through DIY outdoor TV idea photos without knowing where to start? It’s easy to get lost in a sea of perfect patios, but turning that inspiration into a reality for your own backyard is a whole different ballgame. We filtered through hundreds of options across Amazon, Home Depot, and Wayfair to bring you only what’s worth your attention this year. In this guide, we’ve curated 27 distinct ideas, from rustic stone fireplace setups to sleek modern enclosures. You’ll find setups ranging from a few hundred dollars to more elaborate projects over $15,000. And stay until the end—we break down the most common mistakes that can ruin these looks. 📌 Save this to Pinterest for later—you’ll want to revisit these ideas.
1. Create a Cozy Outdoor Living Room with a TV Over a Stone Fireplace
This setup works because it perfectly anchors the entire patio. The stone fireplace acts as a massive, textured focal point, and mounting the TV above it consolidates the two main attractions—warmth and entertainment—into a single visual destination. The dark wicker furniture with light cushions provides a comfortable, grounding contrast to the light stone and beige siding, creating a defined ‘room’ within the open space. The vaulted white ceiling makes the area feel grand and airy, not cramped.
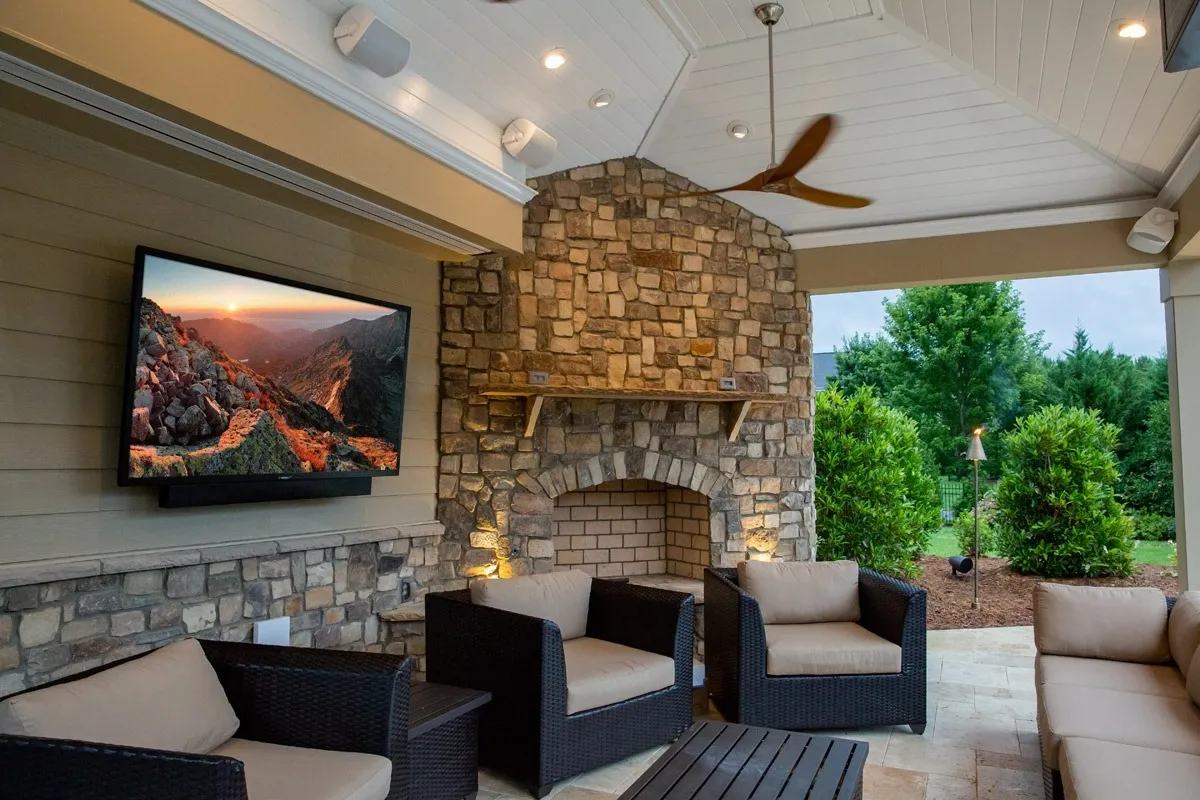
An outdoor TV and stone fireplace combo looks incredible, but it’s not a set-it-and-forget-it feature. The stone veneer will need to be inspected annually for any loose pieces or cracks in the mortar, especially after freeze-thaw cycles. A gentle power washing on a low setting every 1-2 years will keep it free of mildew and grime. For the TV, even with an outdoor rating, you’ll want to wipe down the screen and casing monthly to prevent dust and pollen buildup in vents, and consider a weatherproof cover for the off-season to prolong its life.
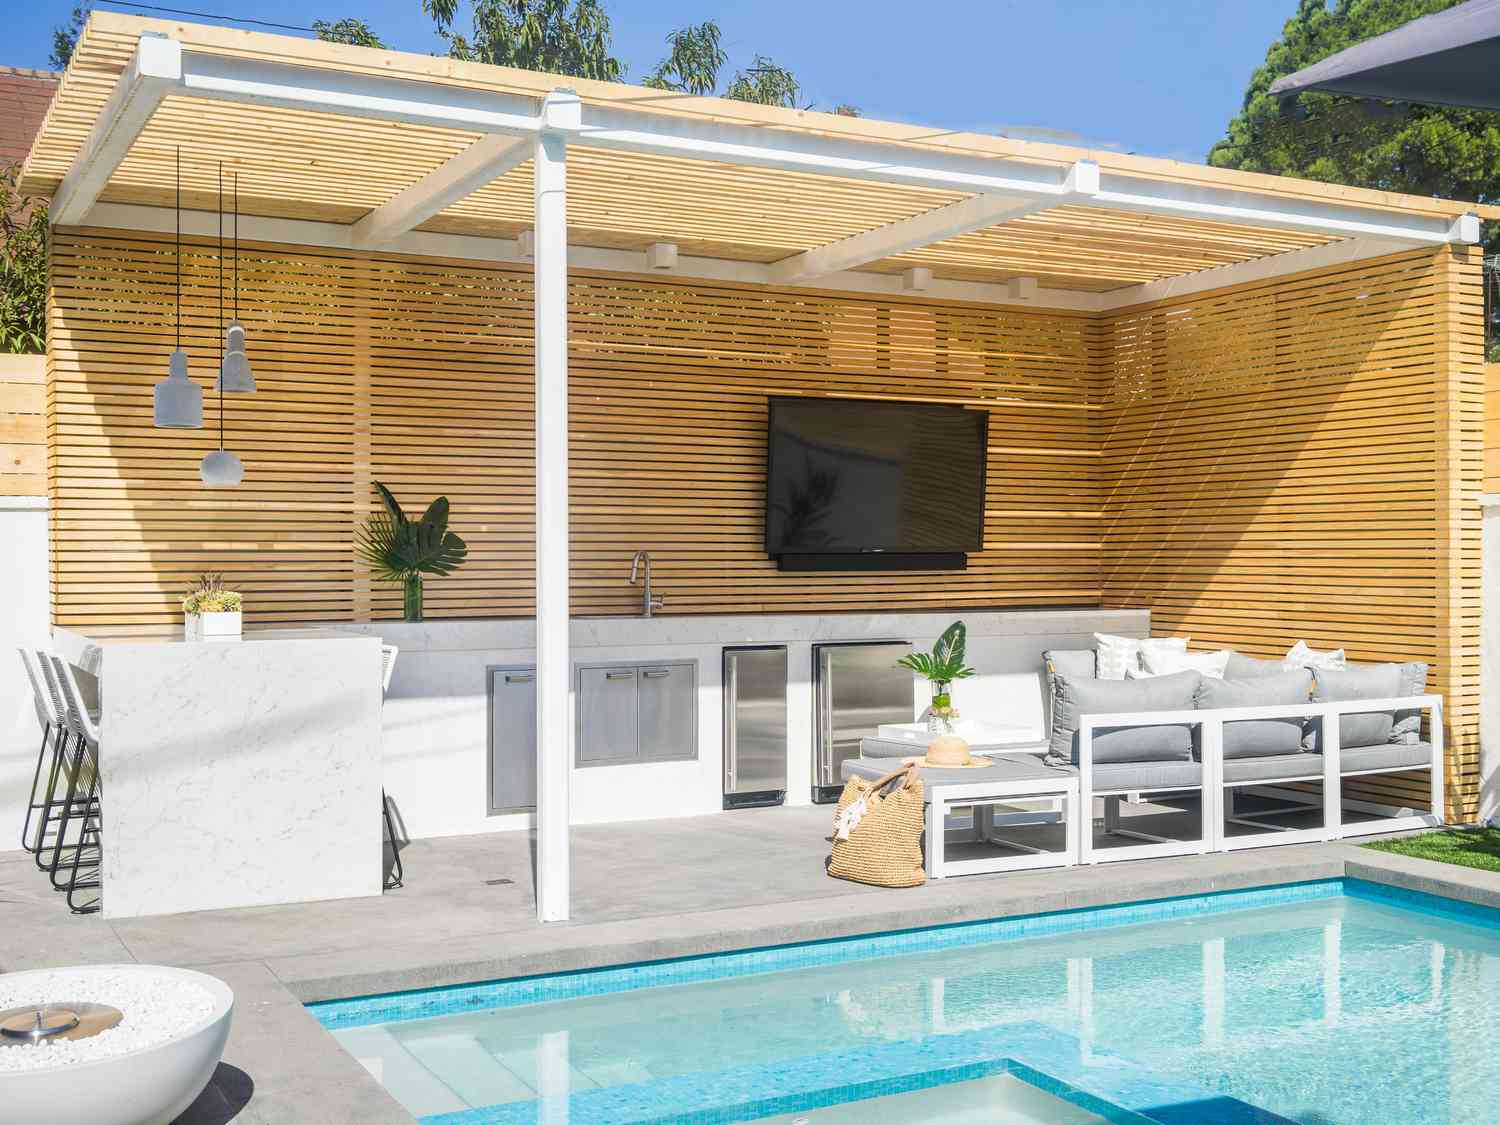
2. Go Modern with a TV on a Dark Wood Wall Above a Concrete Bar
This look is a masterclass in modern, functional-style math. It’s about 60% dark, dramatic texture (the horizontal wood plank wall), 30% sleek industrial material (the light gray concrete countertop), and 10% soft contrast (the light upholstered stool seats). The formula creates a high-contrast, sophisticated vibe. You could swap the dark wood for charcoal composite decking boards or change the concrete to a quartz countertop for a different feel, but keeping that 60/30/10 ratio of texture, slab, and softness is key.
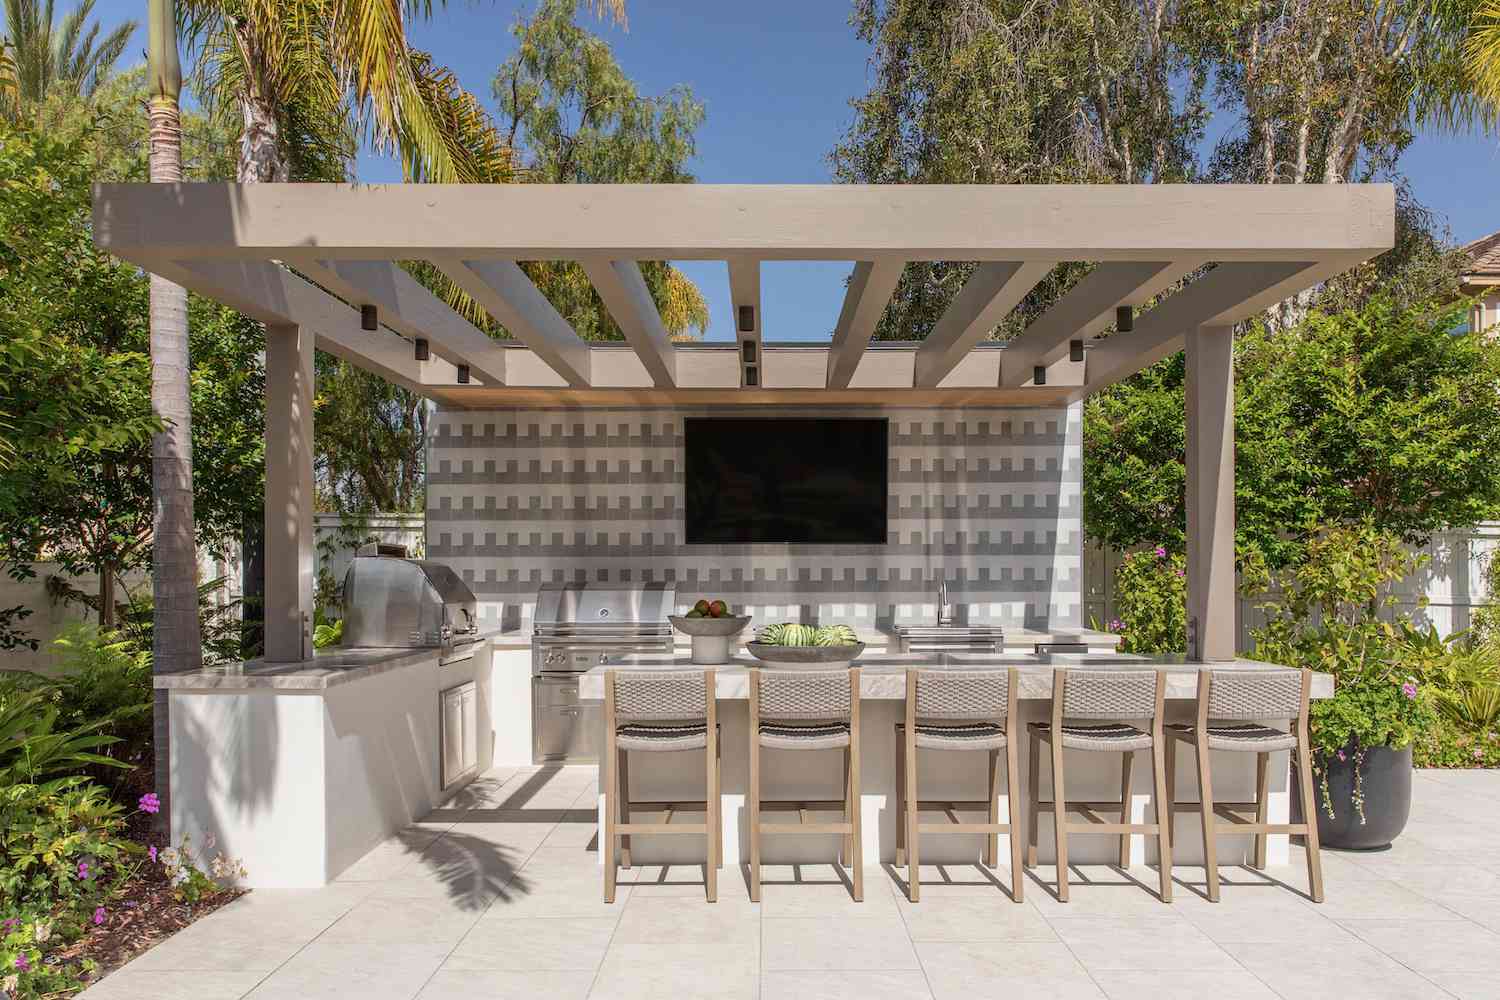
When mounting a heavy TV on a feature wall like this, don’t just screw into the wood planks. You need to locate the structural studs behind the planks and use long lag bolts that go through the wood and anchor securely into the studs. Mark your stud locations before you install the final plank if you’re building the wall from scratch. For a 65-inch TV, you’ll want to hit at least two studs. This ensures the weight is supported by the house’s frame, not just your decorative finish.
3. Frame a Landscape View with a Fireplace TV and Woven Seating
What makes this space truly breathtaking is the sense of openness. While the fireplace and TV are the focal points, they are intentionally designed not to obstruct the vast landscape beyond. The low-profile coffee table and armless sections of the woven sofa keep sightlines clear. Removing the massive open arch of the patio cover would make this feel like any other backyard, but with it, the structure acts like a picture frame for the sky and distant scenery, making the entire setup feel integrated with nature.
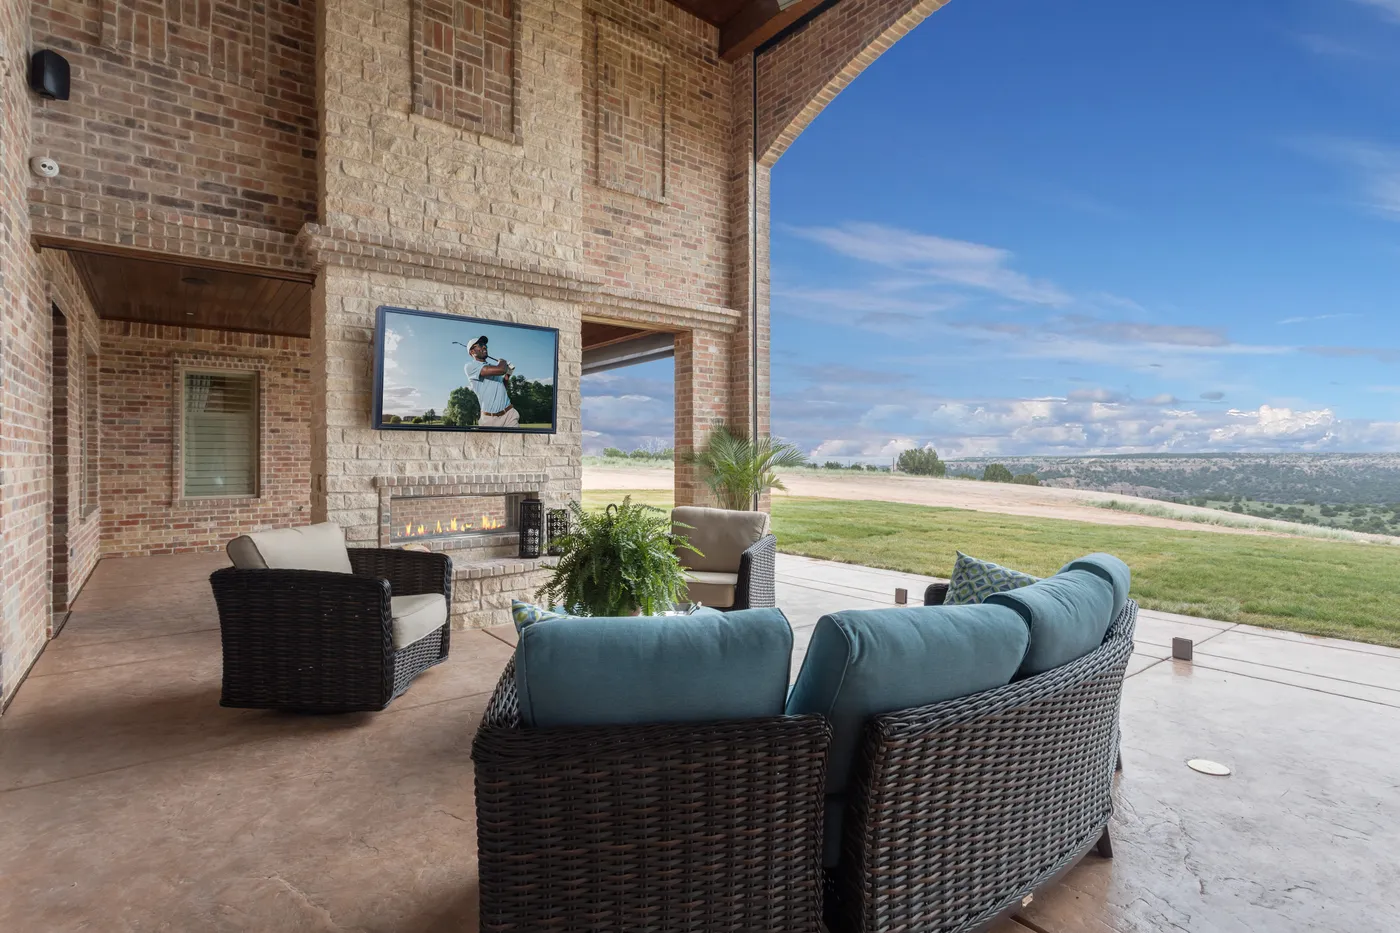
A grand, open-air living room like this requires significant square footage. To accommodate a large fireplace structure, a U-shaped sectional, and comfortable walkways, you’re looking at a minimum patio footprint of 20′ x 25′ (500 sq. ft.). Anything smaller will make the massive fireplace feel overwhelming and the seating cramped. The high, vaulted ceiling is also crucial; a minimum ceiling height of 10 feet at the lowest point prevents the large furniture and stone from feeling oppressive.
4. Conceal Your Outdoor TV in a Stained Wood Cabinet
Building a simple TV cabinet is a great weekend project. Here’s a basic guide for a cabinet like this one:
- Time Estimate: 6-8 hours. Material Cost: $150-$300.
- Measure your TV’s width, height, and depth, adding 3 inches on all sides for ventilation and clearance.
- Build a simple box frame using 1×4 cedar or treated pine boards.
- Construct two door frames and attach slatted panels (1×2 boards with 1/4-inch spacing work well).
- Mount the box to your wall, ensuring you hit studs. Use heavy-duty exterior screws.
- Attach the doors using exterior-grade hinges. Add magnetic catches to keep them closed.
- Finish with an exterior-grade stain and sealant to protect the wood from UV rays and moisture.
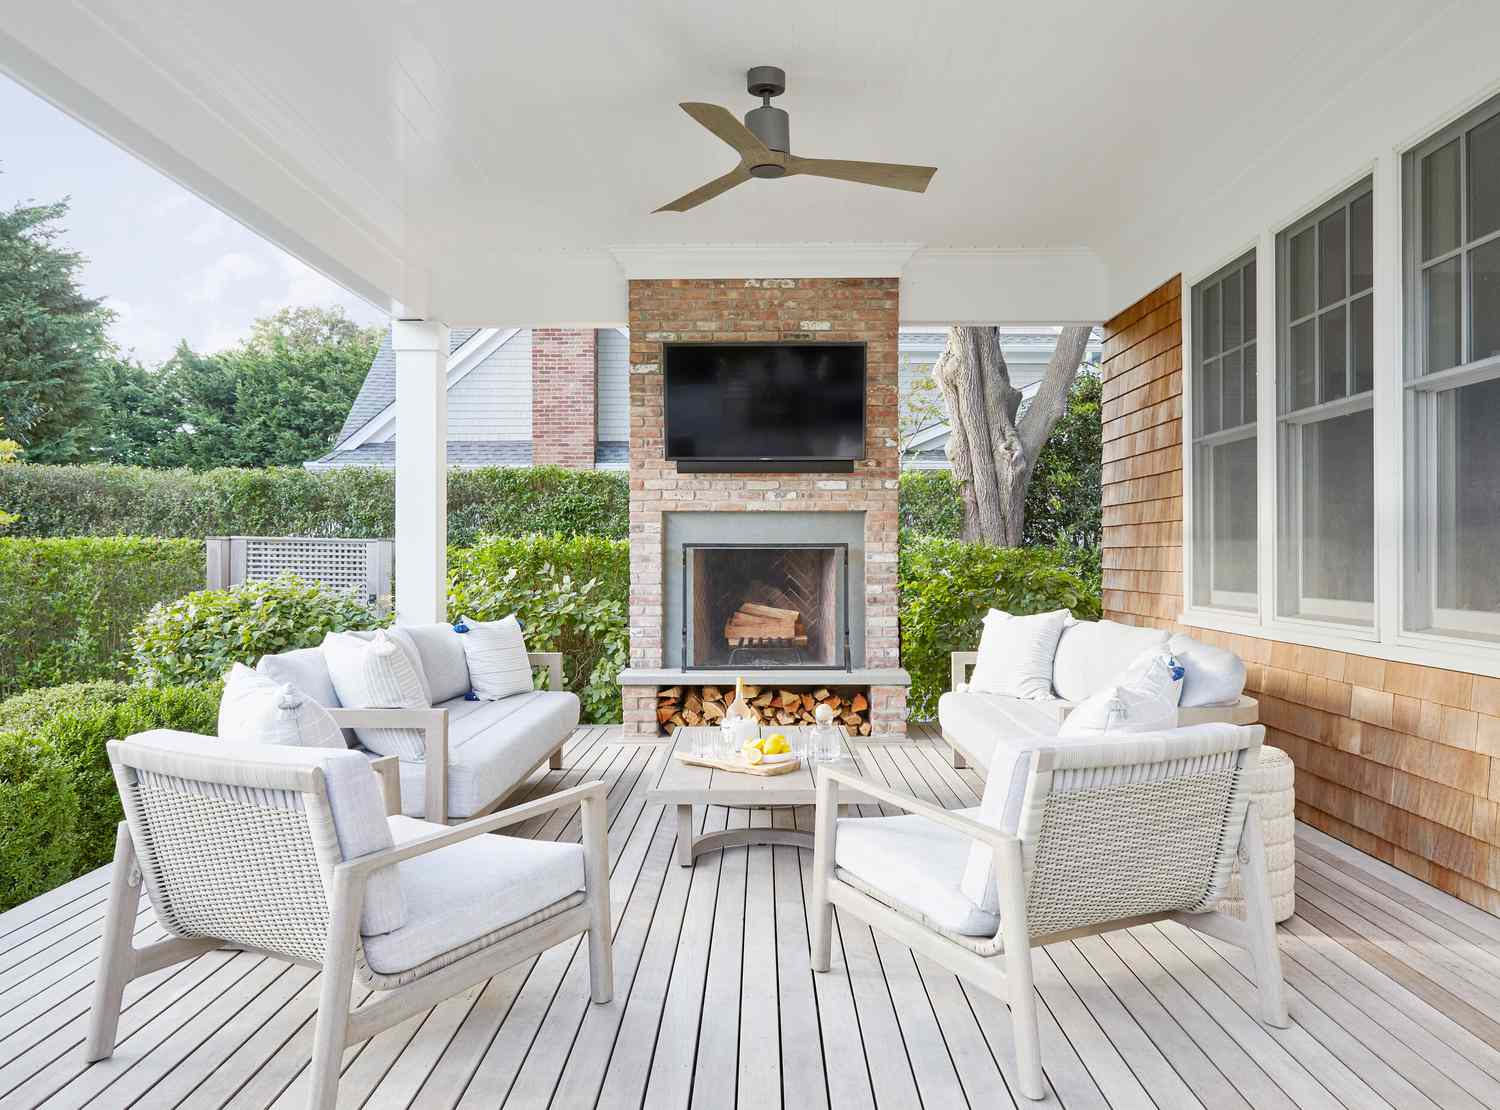
Let’s be honest: a wood cabinet looks fantastic, but it’s another thing to maintain. Even with the best exterior stain, you’ll need to re-coat it every 2-3 years to prevent the wood from graying, warping, or rotting. You also need to be vigilant about ventilation. A tightly sealed cabinet can trap heat from the TV, shortening its lifespan. The slatted design here is smart, but you should still check that air can circulate freely around the back and sides of the unit, especially during hot summer days.
5. Achieve Rustic Elegance with a Rough-Cut Stone Fireplace TV
This design succeeds by balancing rugged materials with elegant details. The rough-cut, light-colored stone of the fireplace provides a powerful, natural texture that feels both rustic and substantial. This is contrasted by the delicate, ornate scrollwork of the cast iron side tables. The sturdy wicker furniture bridges the gap between the two, offering texture that’s more refined than the stone but more casual than the ironwork. The crackling fire adds a dynamic, living element that makes the whole scene come alive.
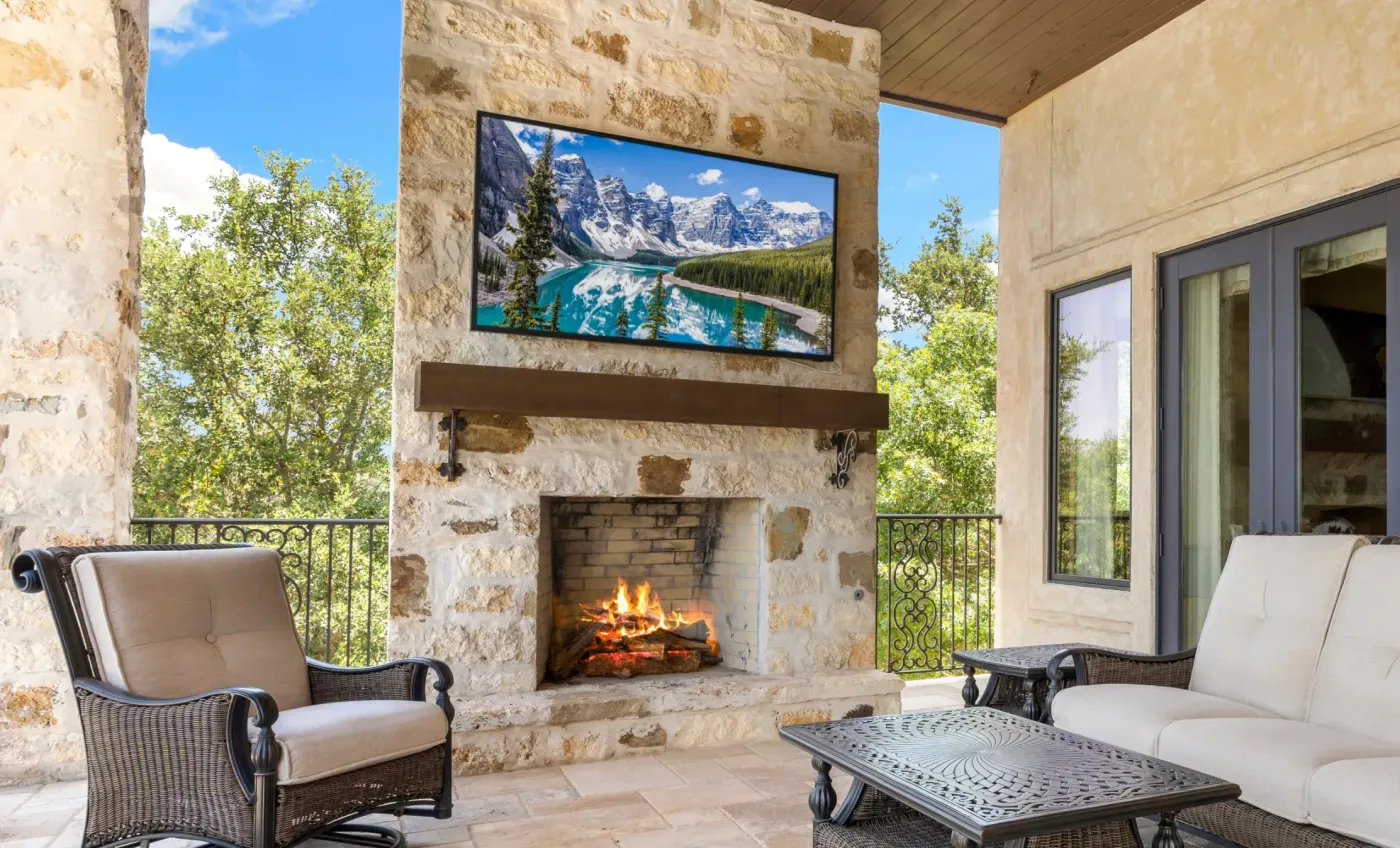
A full masonry stone fireplace can cost upwards of $20,000. To get this look for less, focus on the core elements. Start with a pre-fabricated outdoor fireplace kit from a big-box store ($2,000-$4,000) and apply a stone veneer yourself ($800-$1,500 in materials). For seating, skip the high-end wicker and hunt for a second-hand set on Facebook Marketplace ($300-$600), then refresh it with new cushions. You can find similar ornate cast iron tables at antique shops or online for under $100 each. You’ll get the same cozy, elegant vibe for a fraction of the cost.
6. Integrate a TV Above a Light Stone Fireplace Under an Overhang
When mounting a TV above a fireplace, heat is your enemy. The rule of thumb is to ensure the mantel deflects heat away from the electronics. Your mantel should project at least 3 inches from the fireplace face for every 12 inches of distance between the top of the firebox and the bottom of the TV. Here, with the TV mounted high, a deep mantel isn’t as critical, but it’s still a vital consideration. Also, always choose a TV specifically rated for outdoor use, as they are built to handle greater temperature fluctuations and humidity.
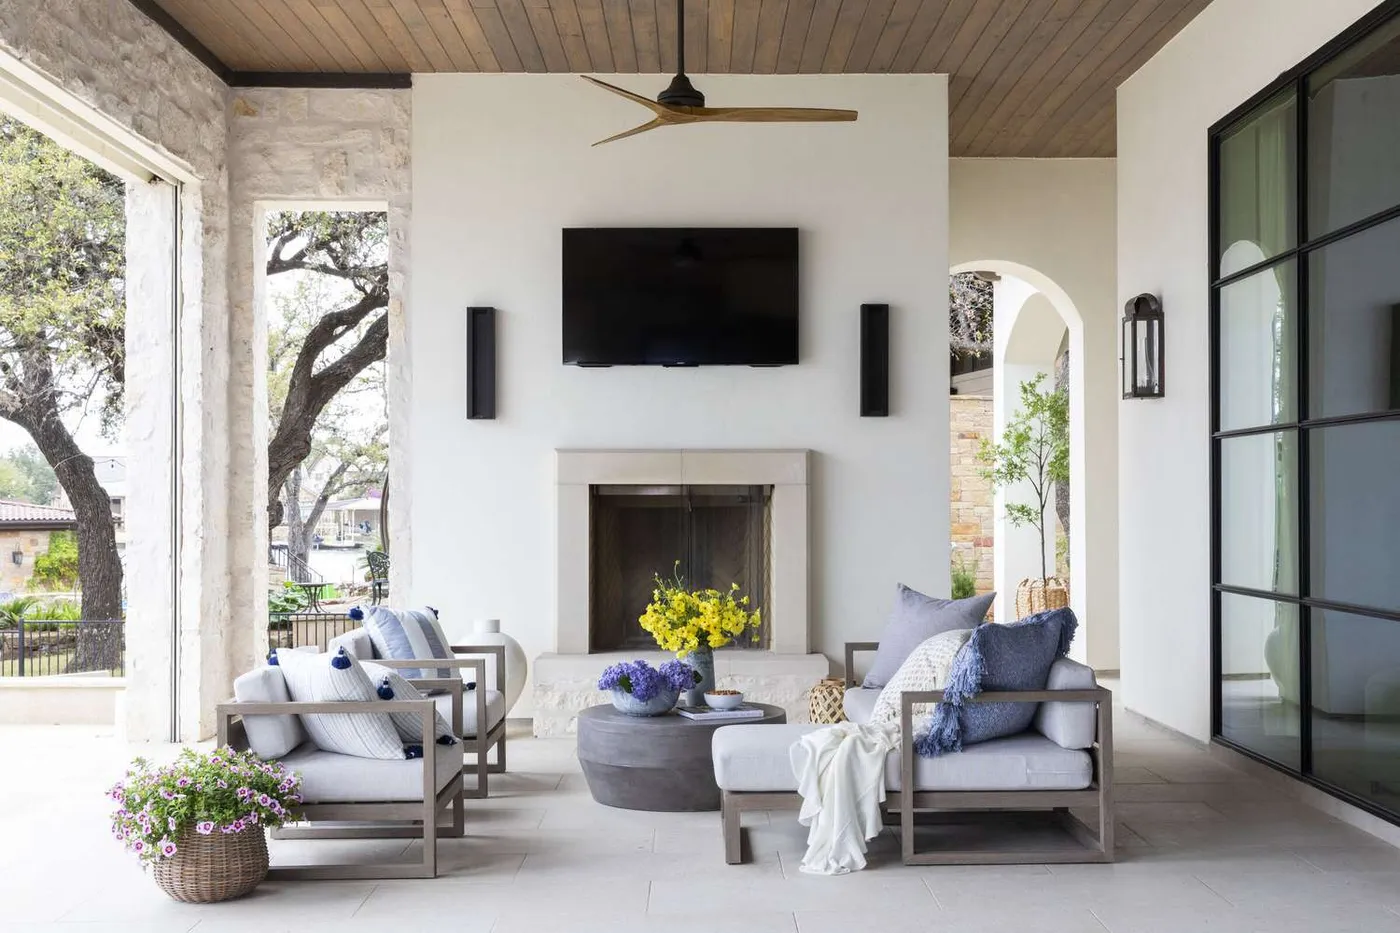
Before you commit to mounting a TV on a stone facade, run through this quick checklist:
- Can you confirm the stone is just a veneer over a standard framed wall with studs? If it’s solid masonry, mounting becomes a much more complex job.
- Is there a protected path to run power and signal cables to the TV location without them being exposed to the elements?
- Have you measured the viewing distance? For a large TV, you’ll want to be at least 8-10 feet away for comfortable viewing.
- Does the overhang provide enough protection from rain and direct sun at all times of the day?
7. Get a Sleek, Integrated Look with a Recessed Outdoor TV
The single element that elevates this design is the custom recess. Mounting a TV on a wall is standard, but sinking it *into* the wall so it sits perfectly flush is a high-end, architectural detail. It transforms the television from an appliance hanging on the house into a deliberate, integrated part of the structure itself. The dark frame around the opening further defines the space, making it feel intentional and clean. Without the recess, this would just be a TV on a wall; with it, it’s a design statement.
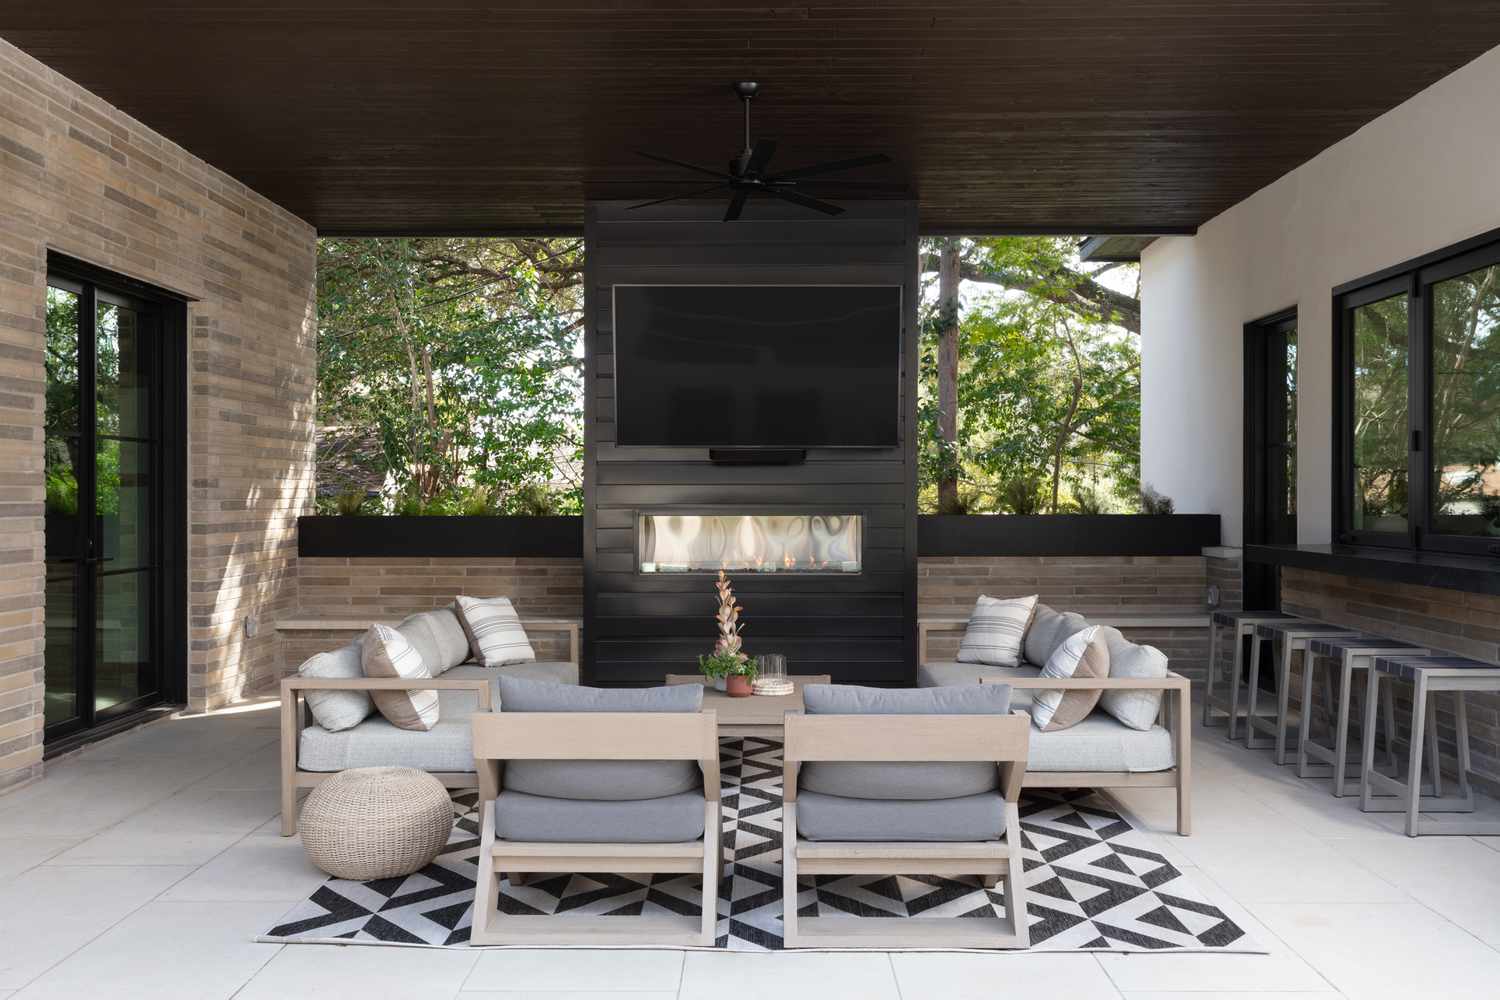
A recessed installation looks incredibly clean, but it can be a trap for moisture and pests if not executed perfectly. The enclosure must have a slight downward slope on its bottom surface and small drainage holes (weep holes) to allow any water that gets in to escape. It also needs to be sealed with high-quality exterior caulk at all seams. You’ll want to inspect this caulk annually and reapply as needed. Also, check for spiderwebs or wasp nests inside the recess monthly, as they love these sheltered spots.
8. Combine a Stone Fireplace TV with Cozy String Lights
The formula here is all about layering sources of warmth. It’s 50% structural warmth from the natural stone fireplace and wood-paneled ceiling, 30% soft furnishing warmth from the light-colored sofas and outdoor rug, and 20% ambient warmth from the lighting—the fireplace glow, recessed lights, and especially the string lights. The string lights are the magic ingredient; they add a casual, celebratory layer that keeps the grand stone and beams from feeling too formal and makes the space feel instantly inviting.
Recreating this cozy, high-end look involves some significant investment but also some budget-friendly touches.
- Main Feature: Stone fireplace construction & TV installation: $12,000 – $25,000
- Furniture: High-quality outdoor sectional & coffee table: $4,000 – $8,000
- Lighting: Commercial-grade string lights & professional installation: $500 – $1,500
- Textiles: Large outdoor rug & throw pillows: $400 – $1,000
- Budget alternative: A stone veneer fireplace kit, a Wayfair sectional, and DIY string lights can achieve a similar vibe for around $7,000 – $12,000.
- TOTAL: $16,900 – $35,500
9. Nestle a TV in a Slatted Wood Cabinet on a Stone Wall
This design works so well because of the harmonious contrast in textures. The rugged, irregular surface of the stacked stone wall provides a deeply natural, earthy backdrop. Setting the smooth, linear pattern of the slatted light wood cabinet against it creates a beautiful point of tension. The sleek, black surfaces of the TV and soundbar add a third, modern layer. It’s a sophisticated mix: rough stone, refined wood, and modern tech. The little green plant is the perfect finishing touch, adding a pop of life.
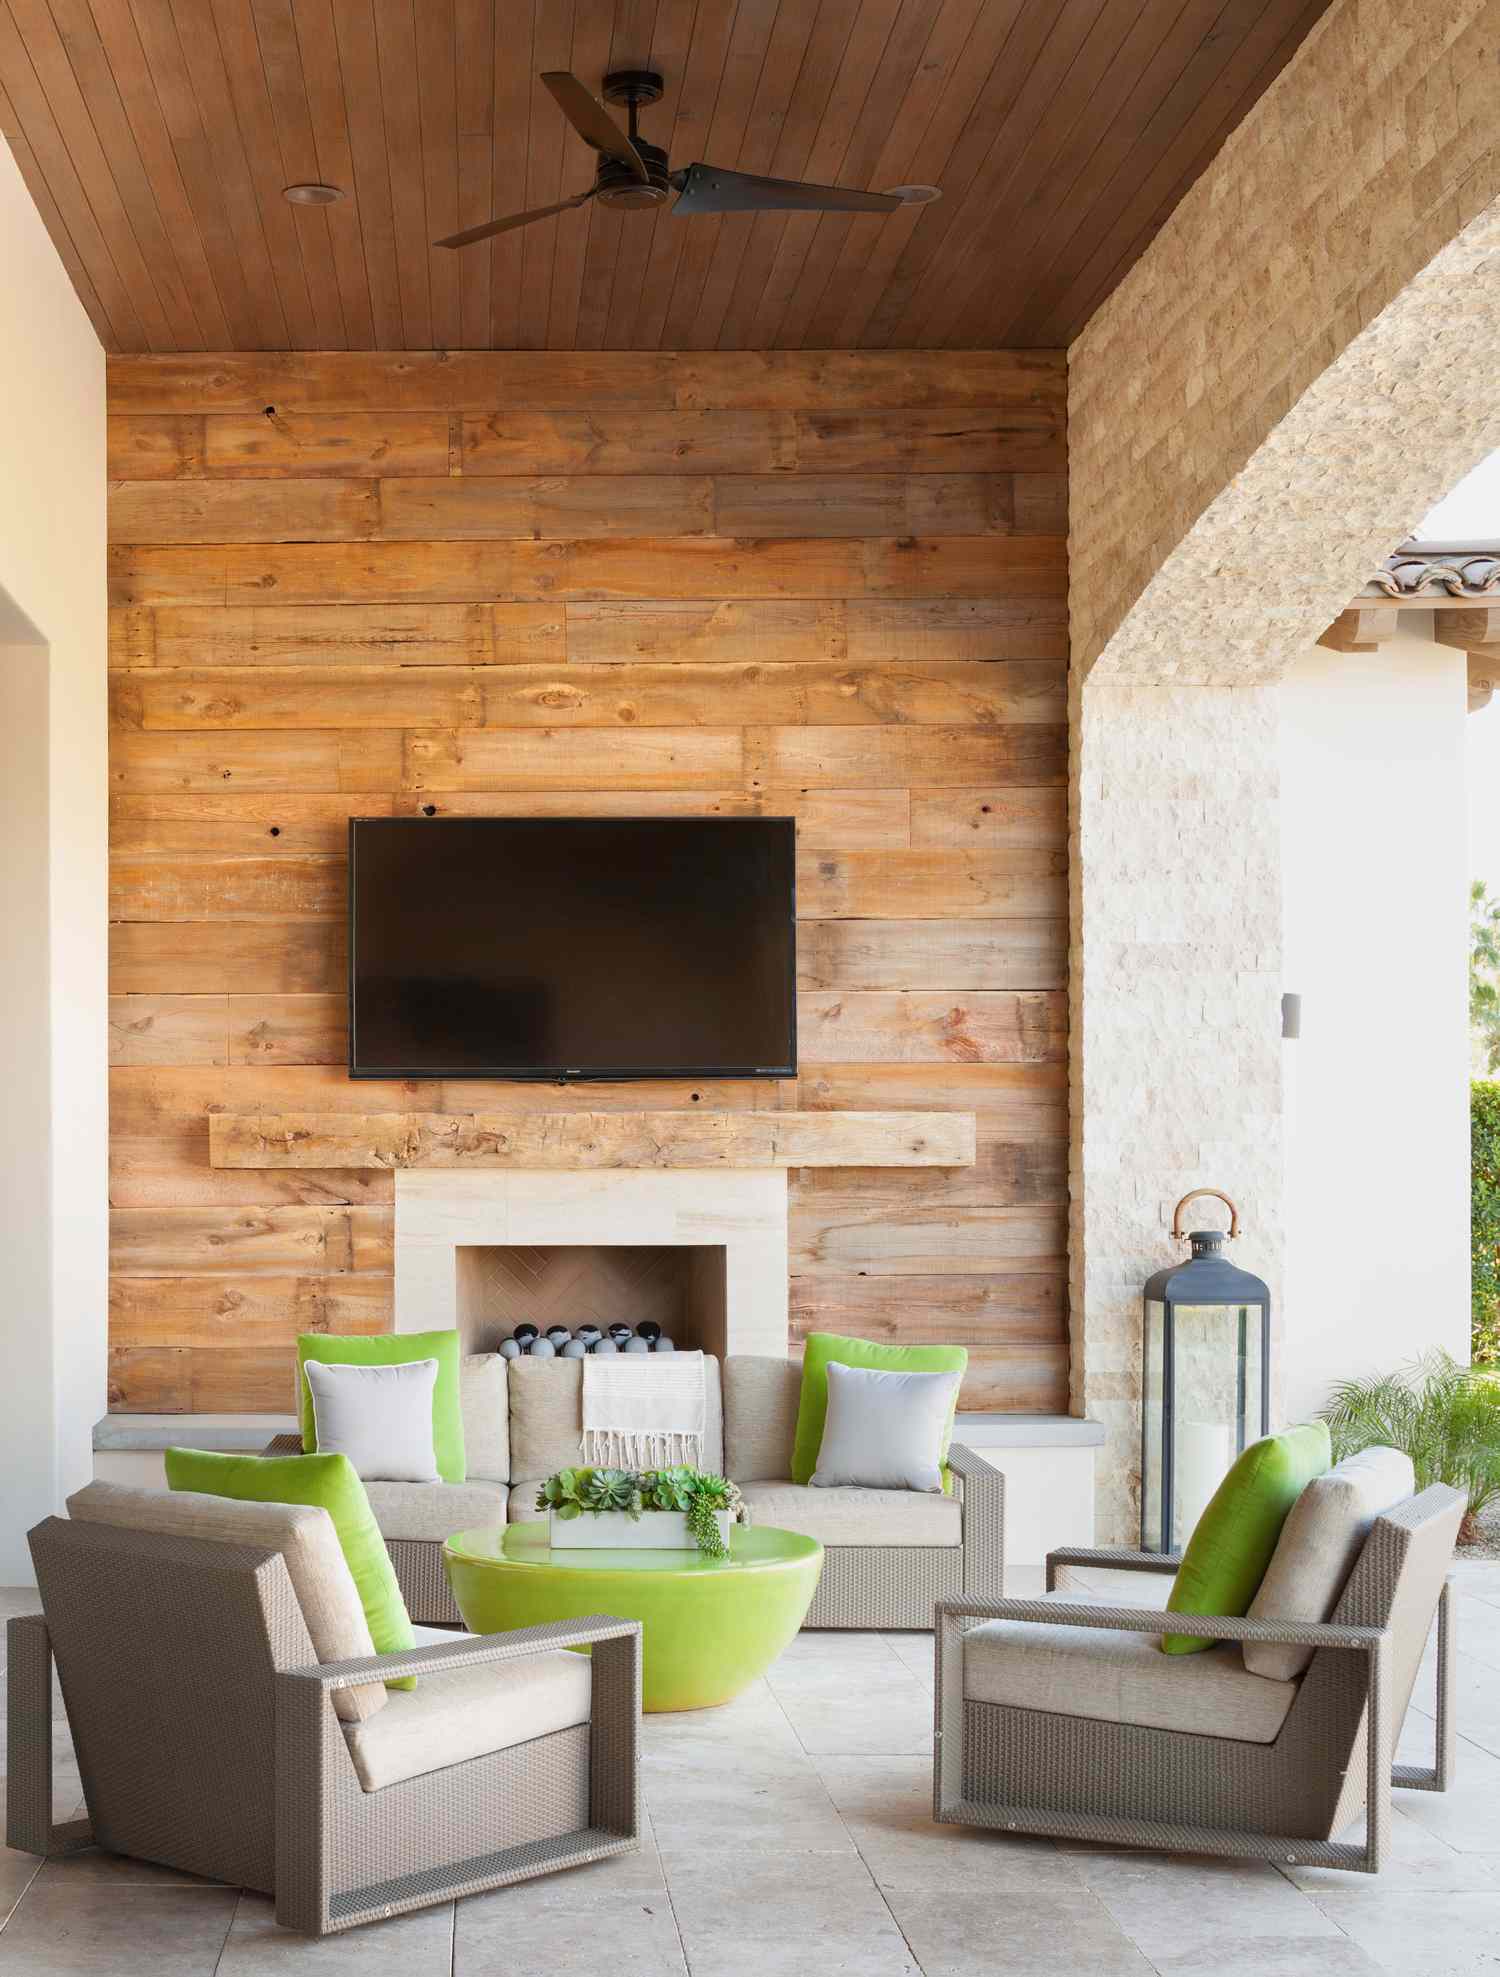
While building a TV cabinet into a stone wall is a stunning look, it presents a challenge for future upgrades. TVs are constantly changing in size and thickness. A custom-built niche that perfectly fits your current 55-inch TV will be useless when you want to upgrade to a 65-inch model in five years. If you’re going this route, consider building the cabinet with a larger opening than you currently need and using a secondary frame or trim to make it fit your current TV. This gives you some built-in flexibility down the road. Compare this built-in look to the more flexible cabinet in Idea #4.
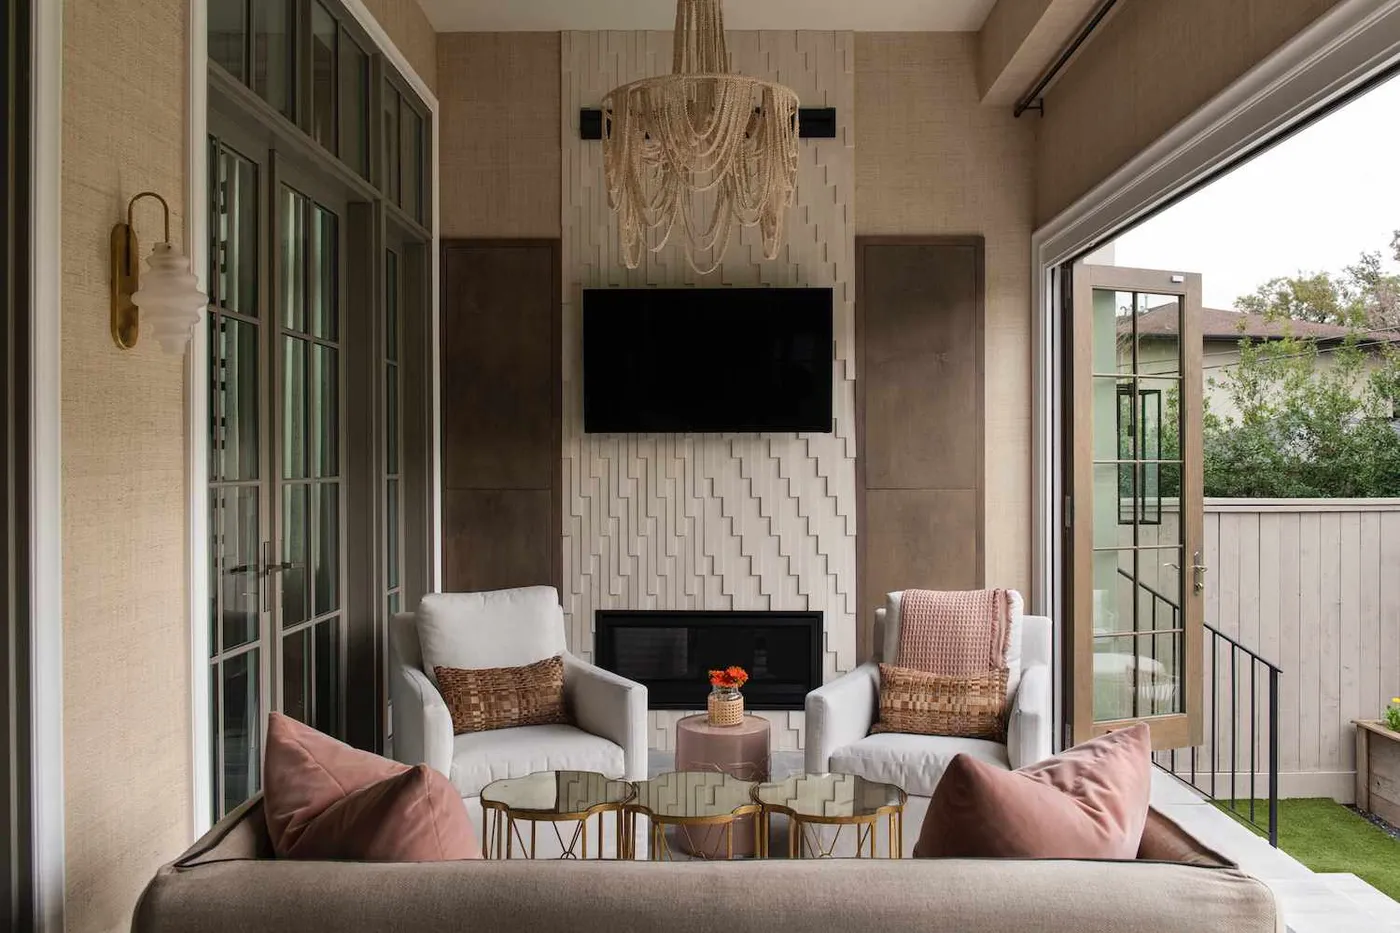
10. Embrace Modern Luxury with a TV Above a Tiled Linear Fireplace
Linear gas fireplaces are having a major moment, and this is why. They offer a clean, contemporary alternative to the traditional square firebox, creating a sleek, horizontal line that feels very modern and minimalist. Paired with the small-format white tile, this setup leans into the quiet luxury trend—it’s opulent without being loud. The dark wood ceiling beams and plush seating add the necessary warmth and texture to keep the space from feeling sterile, making it a perfect example of 2026’s take on outdoor living.
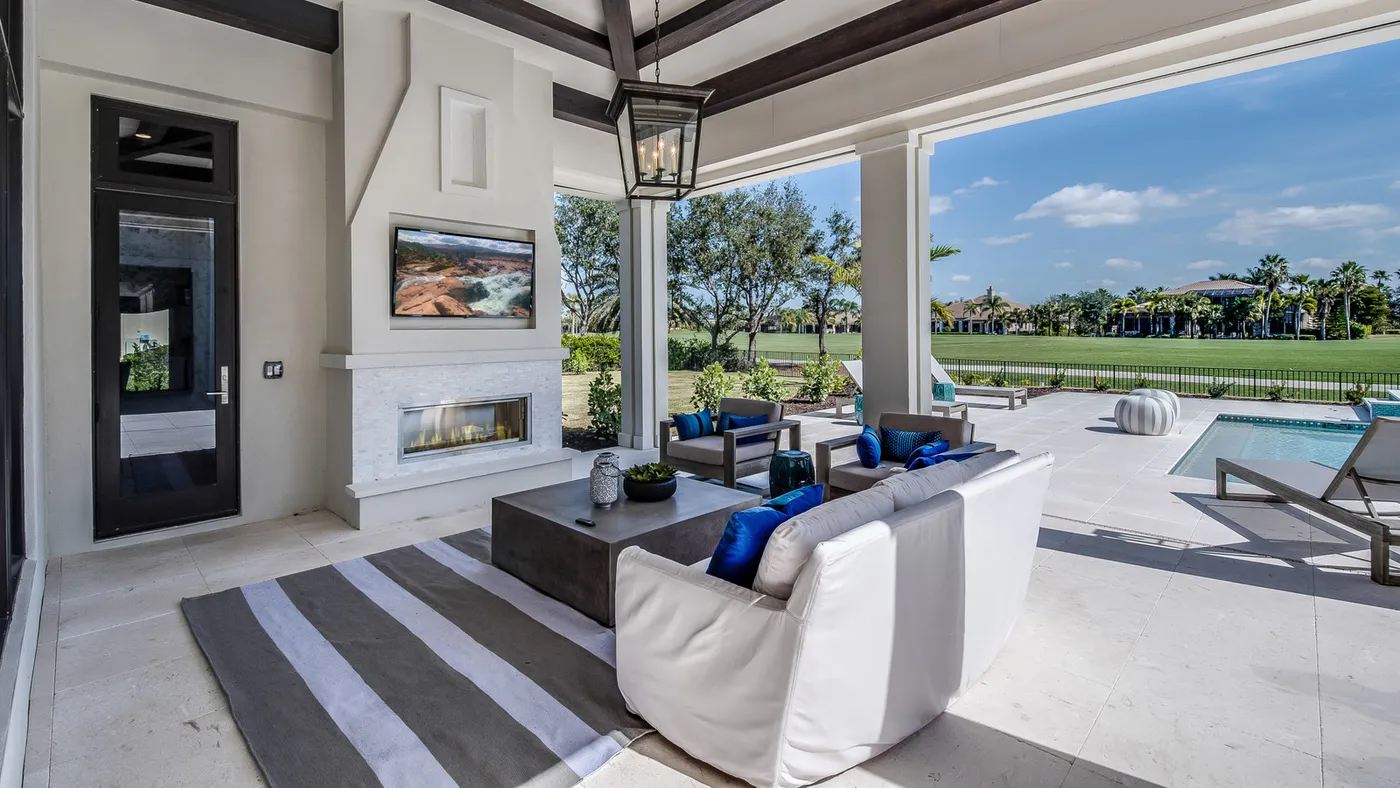
This look is ideal for a covered patio with a ceiling height of at least 9 feet to accommodate the dramatic dark beams and large hanging lantern without feeling crowded. The patio itself should be at least 15 feet wide to allow for the central fireplace feature wall, comfortable seating, and adequate traffic flow on either side. A depth of 12-15 feet would be sufficient to create an intimate lounge area without feeling disconnected from the fireplace wall. It’s a great mid-to-large scale option, more contained than the sprawling patio in Idea #3.
11. Design a Modern-Cozy Nook with a Stacked Stone Fireplace TV
When arranging furniture in a compact outdoor space like this, think in pairs. Using two identical armchairs instead of a clunky sofa creates a sense of symmetry and intention. It defines the area as a conversation or viewing spot for two. Place the chairs so they are angled slightly toward each other, not just pointing straight at the TV. This encourages connection and makes the space feel more welcoming, even when the TV is off. The small table between them should be no taller than the arms of the chairs.
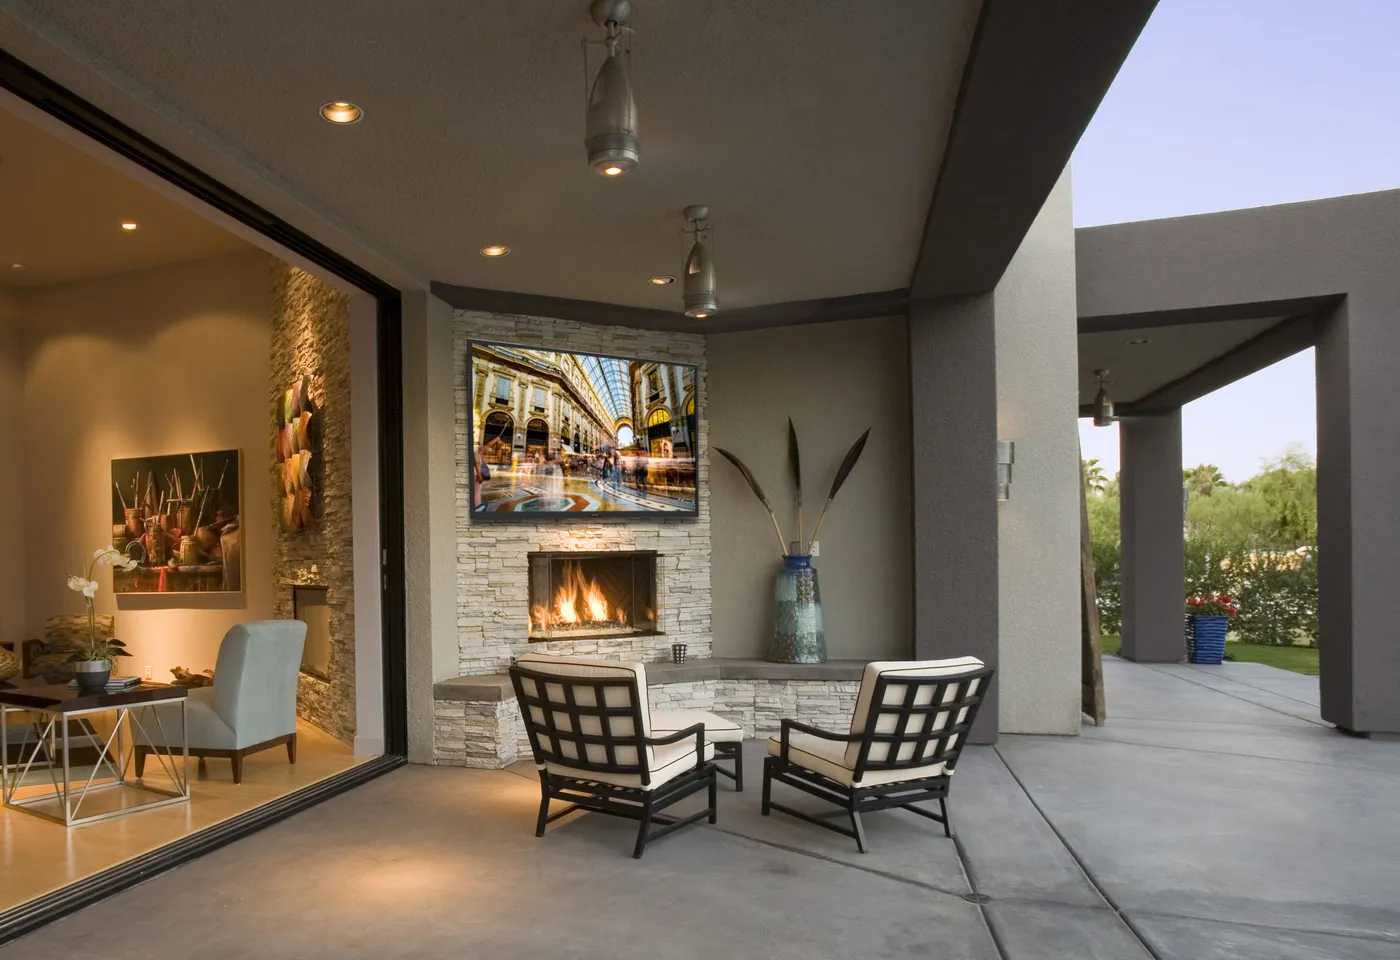
The single element that makes this space feel both modern and cozy is the choice of chair frames. The thin, black metal frames are distinctly contemporary and prevent the seating from looking heavy or dated. They create a crisp, graphic outline that contrasts beautifully with the rugged texture of the stacked stone. If these chairs were bulky, traditional wicker, the whole vibe would shift to be purely rustic. The slim frames are the key to the modern-cozy balance.
12. Mount Your TV on a Simple Post Under a Pergola
This is the ultimate budget-friendly, flexible outdoor TV setup. Forget building a massive fireplace or feature wall. A simple 6×6 treated wood post can be had for under $50. A standard tilting TV mount is about $40. Combined with an outdoor-rated extension cord, you can create a viewing station almost anywhere in your yard for less than $100 in structural materials. Pair it with a couple of budget-friendly Adirondack chairs from Target or Walmart ($150 for two), and you have a functional, charming outdoor theater for a tiny fraction of the cost of the more built-in options.
Securing a post for your TV is critical for safety and stability. Here’s the right way to do it:
- Time Estimate: 2-3 hours (plus concrete curing time). Material Cost: $60-$100.
- Dig a hole that is three times the width of your post and at least 2.5-3 feet deep.
- Pour 6 inches of gravel at the bottom of the hole for drainage.
- Set your 6×6 treated wood post in the center of the hole. Use a level to ensure it is perfectly plumb on all sides, and temporarily brace it in place.
- Mix fast-setting concrete according to the package directions and pour it into the hole, filling it to the top.
- Let the concrete cure for at least 24-48 hours before mounting your TV.
13. Add a DIY Slat-Front TV Cabinet to a Painted Brick Wall
The visual success here comes from a simple formula: 70% existing texture + 30% new, contrasting texture. The dark grey painted brick wall provides a moody, industrial backdrop that covers most of the visual space. The introduction of the light, natural wood cabinet with its clean, vertical slats creates a single, powerful point of contrast. It’s warm against cool, natural against industrial, and linear against mottled. The brown woven chair adds just enough complementary texture to tie it all together without competing.
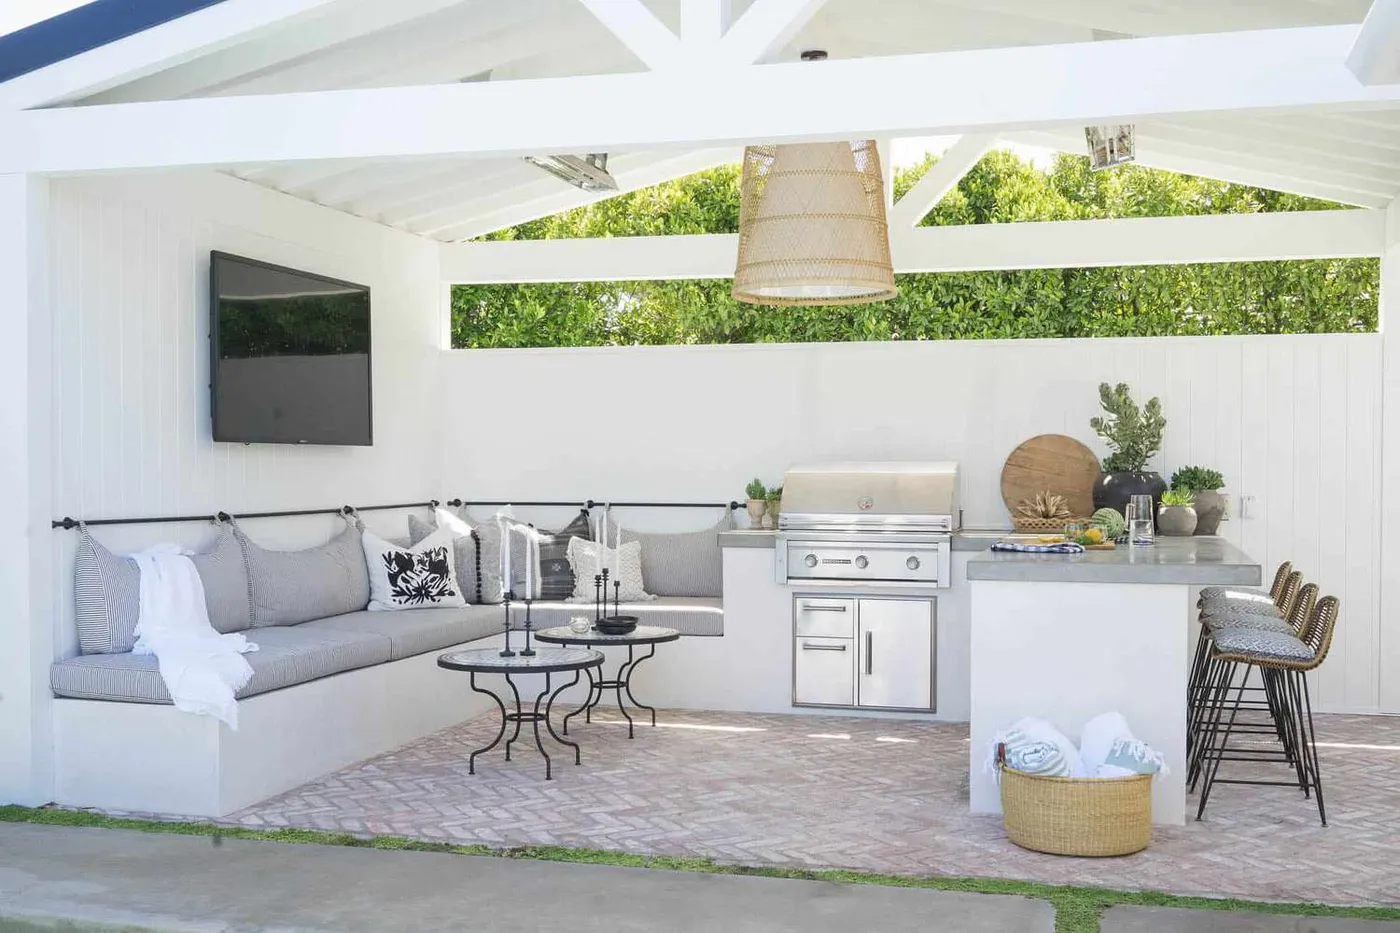
Painting exterior brick can be a great way to update a look, but it’s a permanent decision. Once painted, it’s incredibly difficult and expensive to strip back to the original brick. More importantly, you must use the right kind of paint. Standard exterior latex paint can trap moisture inside the brick, causing it to spall and degrade over time, especially in freezing climates. You need to use a breathable, silicate-based or mineral-based paint specifically designed for masonry to allow the brick to breathe.
14. Create a Casual Viewing Spot on a Siding Wall with Patio Chairs
This little vignette proves you don’t need a huge, dramatic feature to create an inviting outdoor TV area. It works because it’s simple, balanced, and surrounded by life. The TV is the clear focal point, but the two wrought iron chairs create a symmetrical, welcoming frame. The striped pillows and potted flowers add just enough color and personality to make it feel styled, not sterile. Most importantly, the lush green foliage envelops the space, making it feel like a private garden retreat. It’s a perfect example of working with what you have.
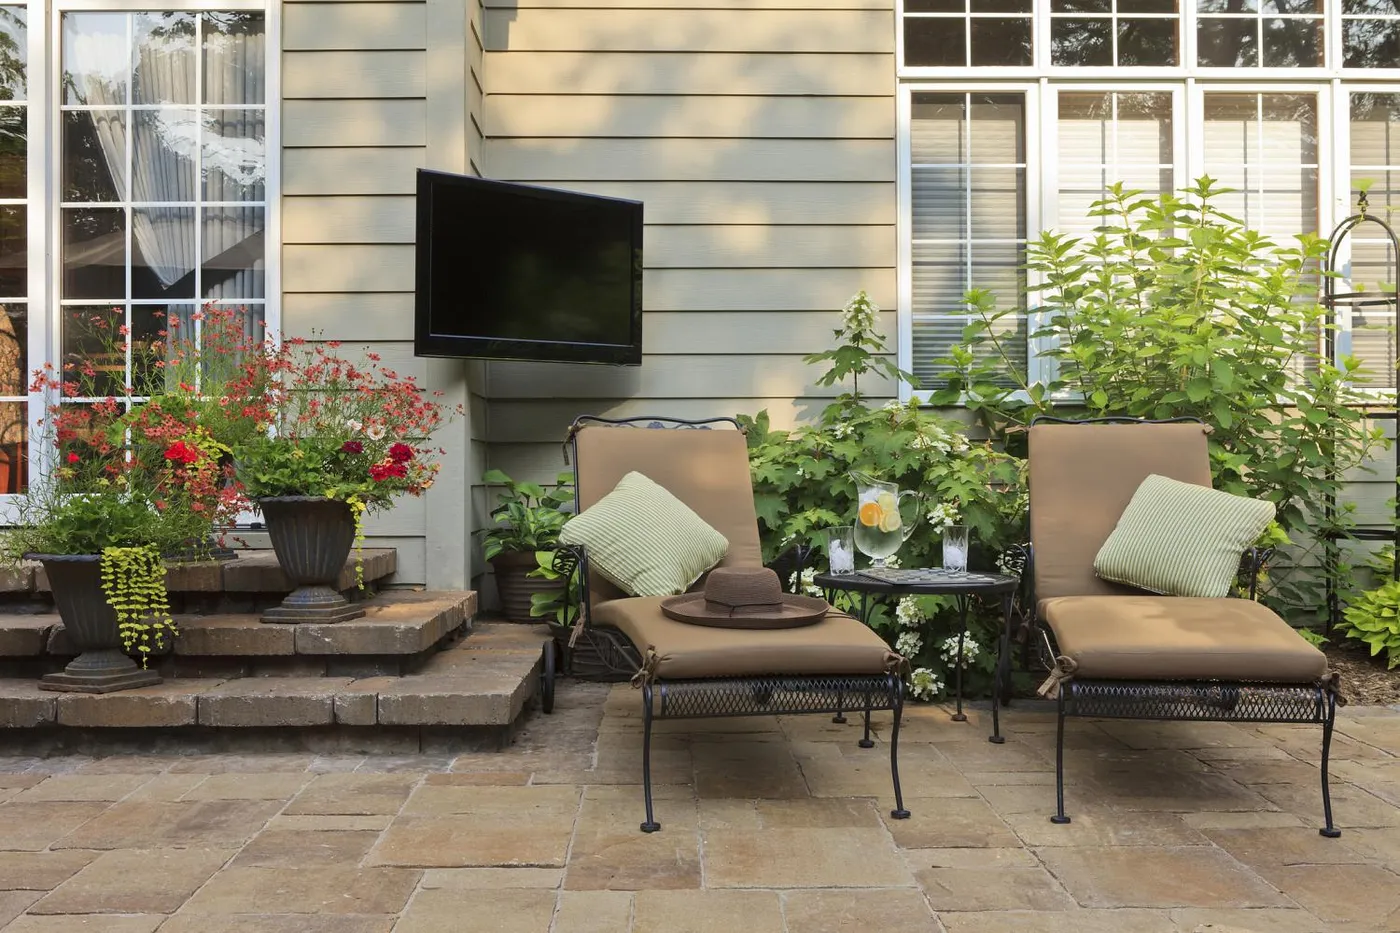
This is a look anyone can achieve on a shoestring budget. A wall-mount for a mid-sized TV can be found for $30. Instead of new patio furniture, search Facebook Marketplace or garage sales for a pair of used wrought iron chairs—they last forever and can be spray-painted black for about $10 to look brand new. New cushions might be $50-$80, but the rest is just simple gardening. This entire comfortable setup can easily be put together for under $200, a welcome alternative to the five-figure projects like Idea #20.
15. Set Up an Outdoor Game Zone with a TV and Dartboard
The dartboard is the key piece that defines this space. Without it, this is just a TV on a wall. With it, the area is instantly transformed into a dedicated ‘game zone’—a place for active entertainment, not just passive viewing. It sends a clear signal that this corner of the patio is all about fun and friendly competition. The inclusion of the dartboard broadens the function of the space, making it a social hub even when there isn’t a game on TV. It’s a brilliant, low-cost way to add a ton of personality and purpose.
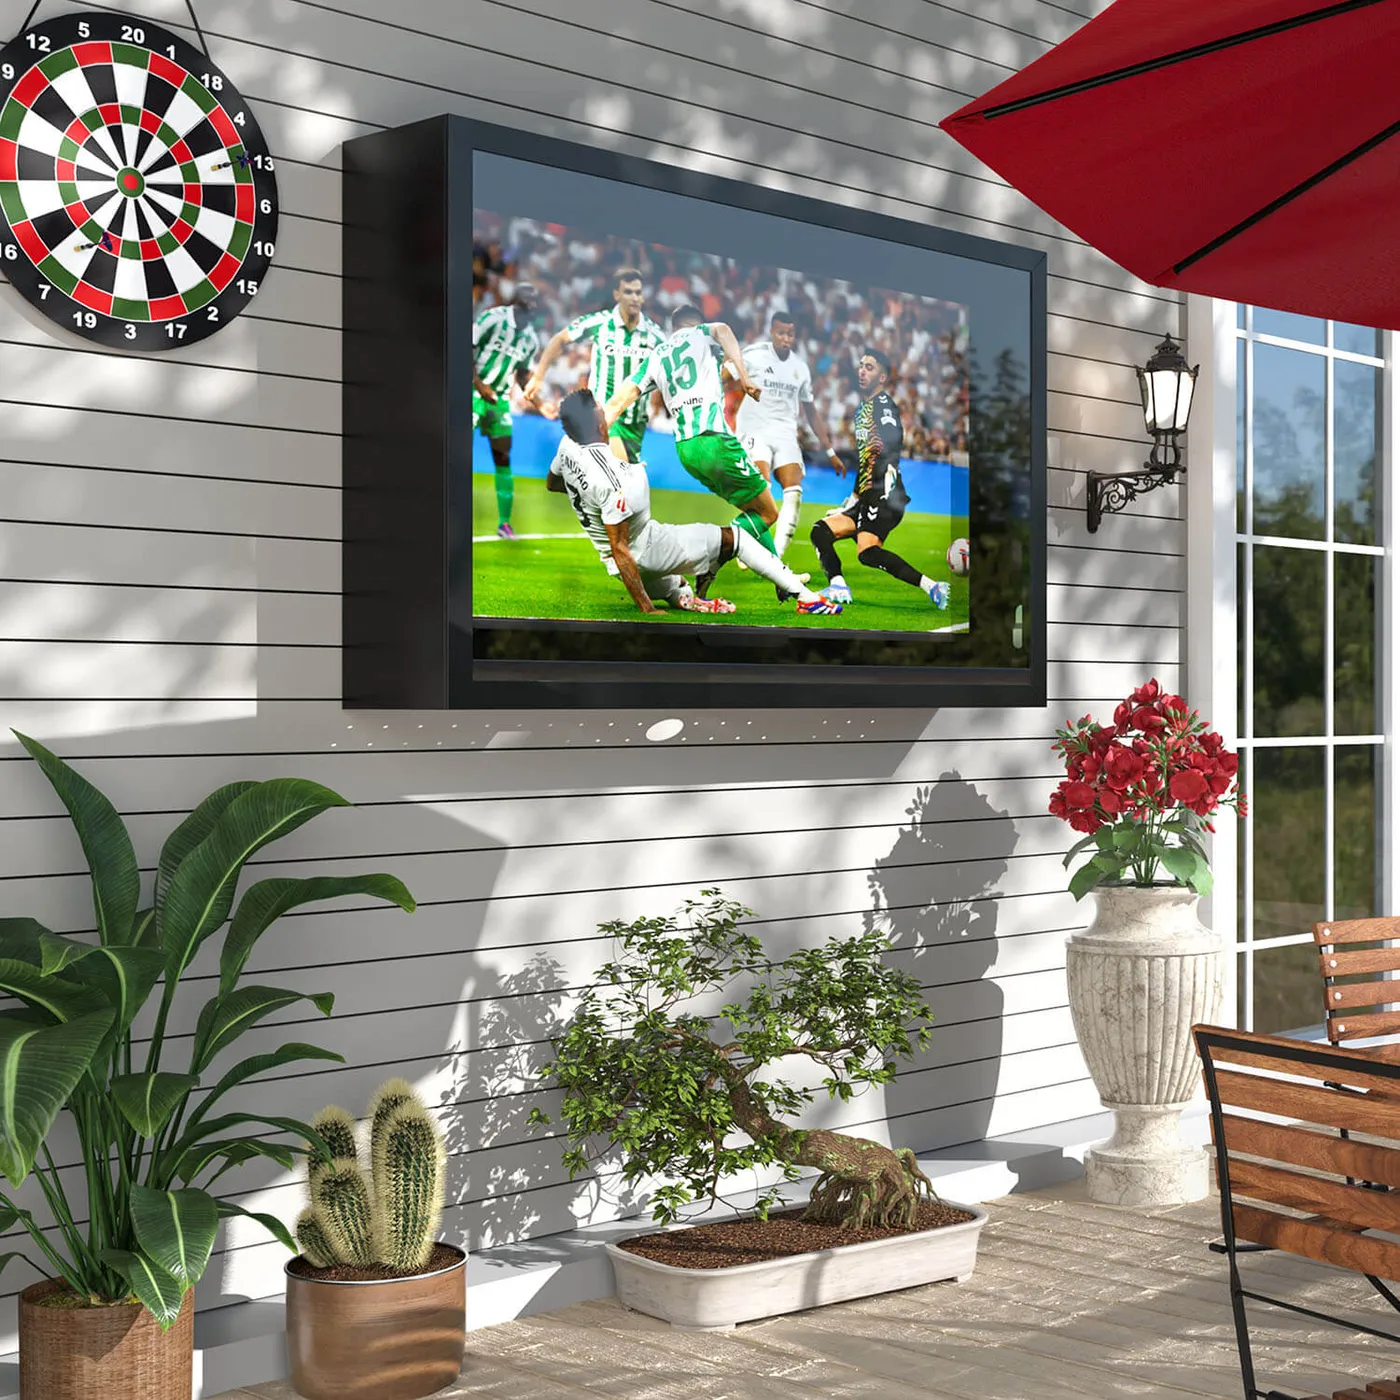
This idea is perfect for smaller patios or even a narrow side yard where a full seating arrangement won’t fit. All you need is a solid wall with about 8-10 feet of width to accommodate the TV and dartboard side-by-side. The critical dimension is the depth: for darts, you need an official throwing line 7 feet, 9 ¼ inches from the face of the board. So, ensure you have at least 8.5 feet of clear, unobstructed space in front of the wall for safe play. This is a fantastic use of a compact area that might otherwise go unused.
16. Save Wall Space with a Ceiling-Mounted TV on a Covered Balcony
When using a ceiling or pole mount, precise height is everything. The ideal vertical position for a TV is to have the center of the screen at eye level from your primary seating position. For an outdoor space where people might be standing or sitting, a good compromise is to place the center of the screen about 55-60 inches off the floor. Use a mount that allows for tilting, so you can angle the screen down slightly to reduce glare and provide a better viewing angle for those seated below.
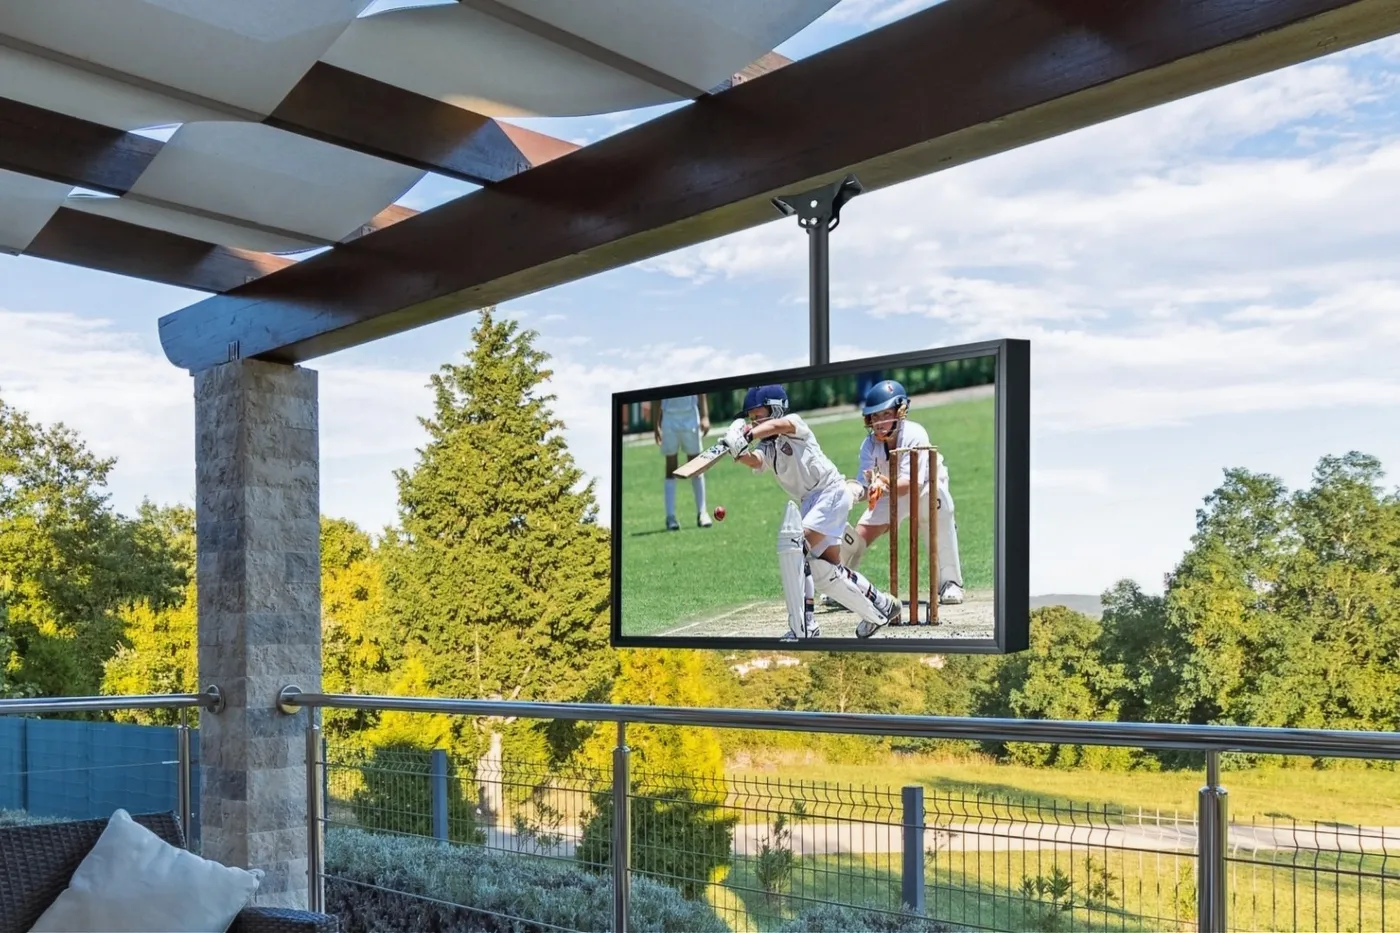
A ceiling-mounted TV is a clever space-saver, but it’s more susceptible to movement than a wall mount. Wind can cause the TV to sway or rotate, which is not only distracting but also puts stress on the mounting hardware over time. It’s crucial to choose a heavy-duty, commercial-grade mount specifically designed for outdoor use. Also, consider models that have a feature to lock the rotation or use secondary guide wires to stabilize the unit if you live in a particularly windy area. Never use a standard indoor ceiling mount for an outdoor application.
17. Use a TV on a Stand for a Flexible Tropical Patio Setup
This vibrant space is a lesson in confident color and classic forms. The formula is approximately 50% bold color (the red-striped cushions and pillows), 30% classic architecture (the white columns and balustrade), and 20% natural warmth (the reddish-brown wood ceiling and lush green view). The TV on its ornate stand acts as a modern counterpoint to the classical elements. The key is the unapologetic use of the thick red stripes—they are the energetic heart of the design, keeping the white and wood from feeling too staid.
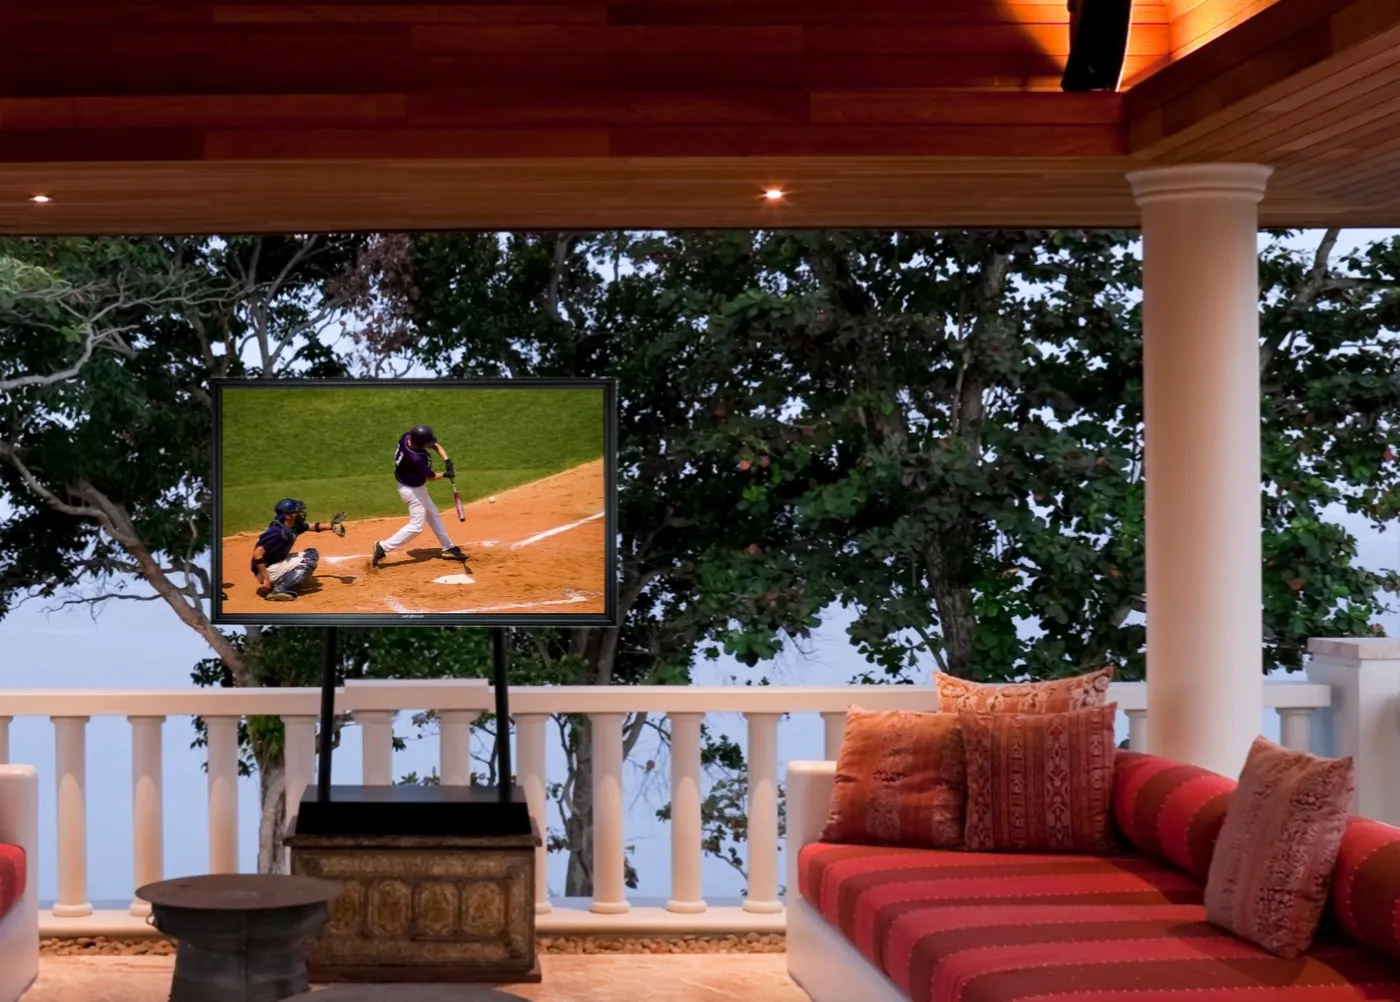
Using a standard TV on a stand outdoors, even on a covered patio, is a risky move. Most indoor TVs are not designed to handle the humidity, temperature swings, or pollen found outside. Moisture can corrode internal components, and insects can find their way inside through ventilation slots. If you’re going this route, you absolutely must bring the TV indoors when you’re not using it. It’s a hassle, but it’s the only way to prevent your electronics from frying. A true outdoor-rated TV costs more for a reason.
18. Design a Clean, Modern Patio with a Wall-Mounted TV and Fire Pit
This design’s success lies in its strict geometric language and limited color palette. The entire space is built on rectangles: the TV, the fire pit, the sofa sections, the pavers, and even the building’s form. This repetition of shape creates a sense of order and clean, modern rhythm. The palette is tightly controlled to white, light gray, and dark gray, which allows the green of the artificial grass and the blue of the sky to pop. It’s a highly disciplined design where every element reinforces the minimalist aesthetic.
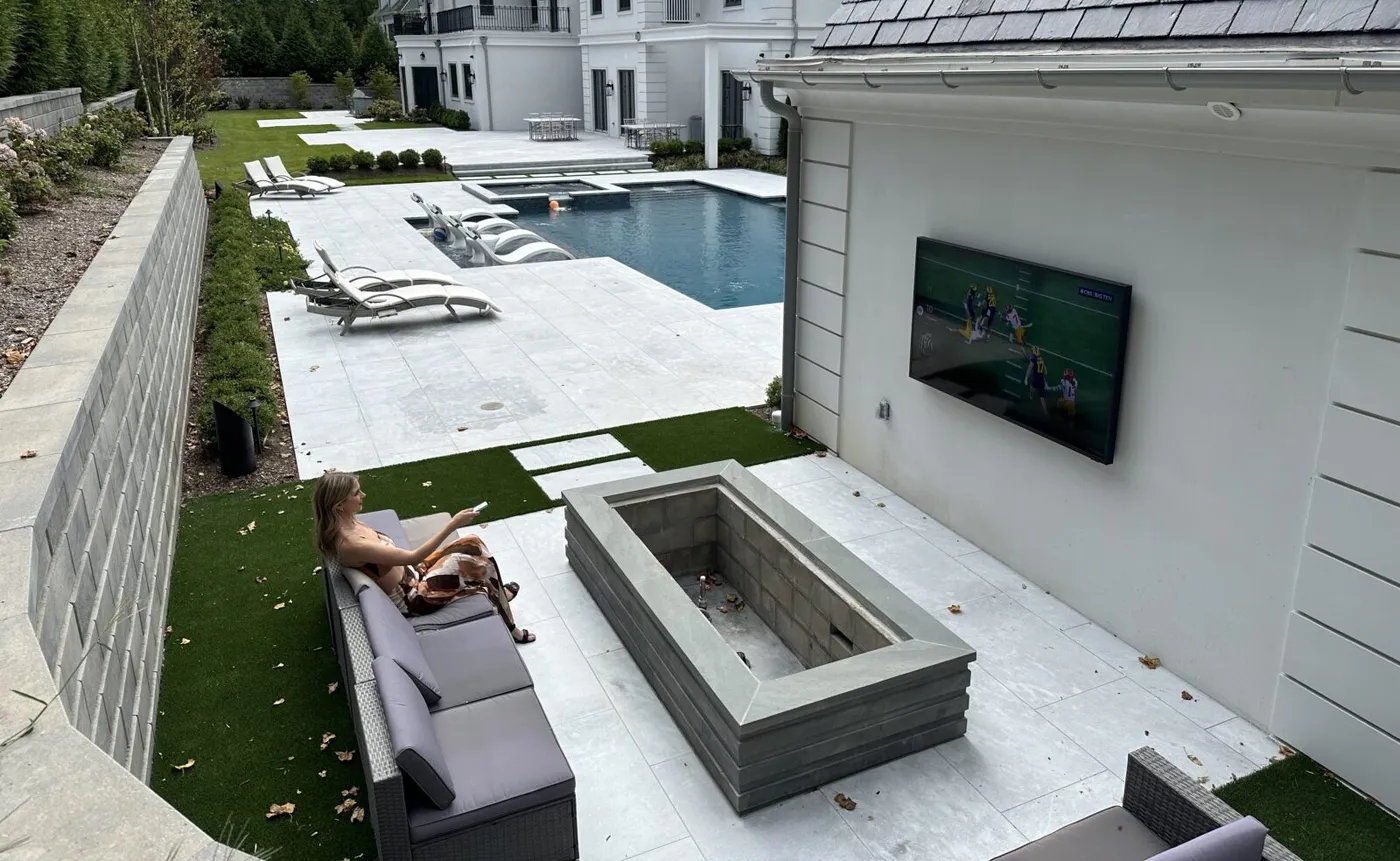
A sleek, minimalist design like this leaves no room for error. Before you start, map everything out with precision.
- Confirm the location of underground utilities before installing the gas line for the fire pit.
- Plan your electrical. Where will the outlet for the TV go? Will it be hidden? Do you need power for landscape lighting?
- Check your local building codes for required clearances between a fire feature and a structure or seating.
- Does your patio have a slight grade for water runoff? A perfectly flat surface will lead to pooling water.
19. Enjoy Bug-Free Viewing in a Screened Porch with a Fireplace TV
The screened porch is making a huge comeback, and this is the perfect example of why. It offers the best of both worlds: you feel connected to the nature and fresh air just outside, but you’re protected from bugs, harsh sun, and light rain. It effectively adds a whole other living room to your home. As we continue to invest more in our properties, creating these kinds of flexible, multi-season spaces that extend our living area is a top priority for homeowners, and a fireplace TV setup makes it usable for much more of the year.
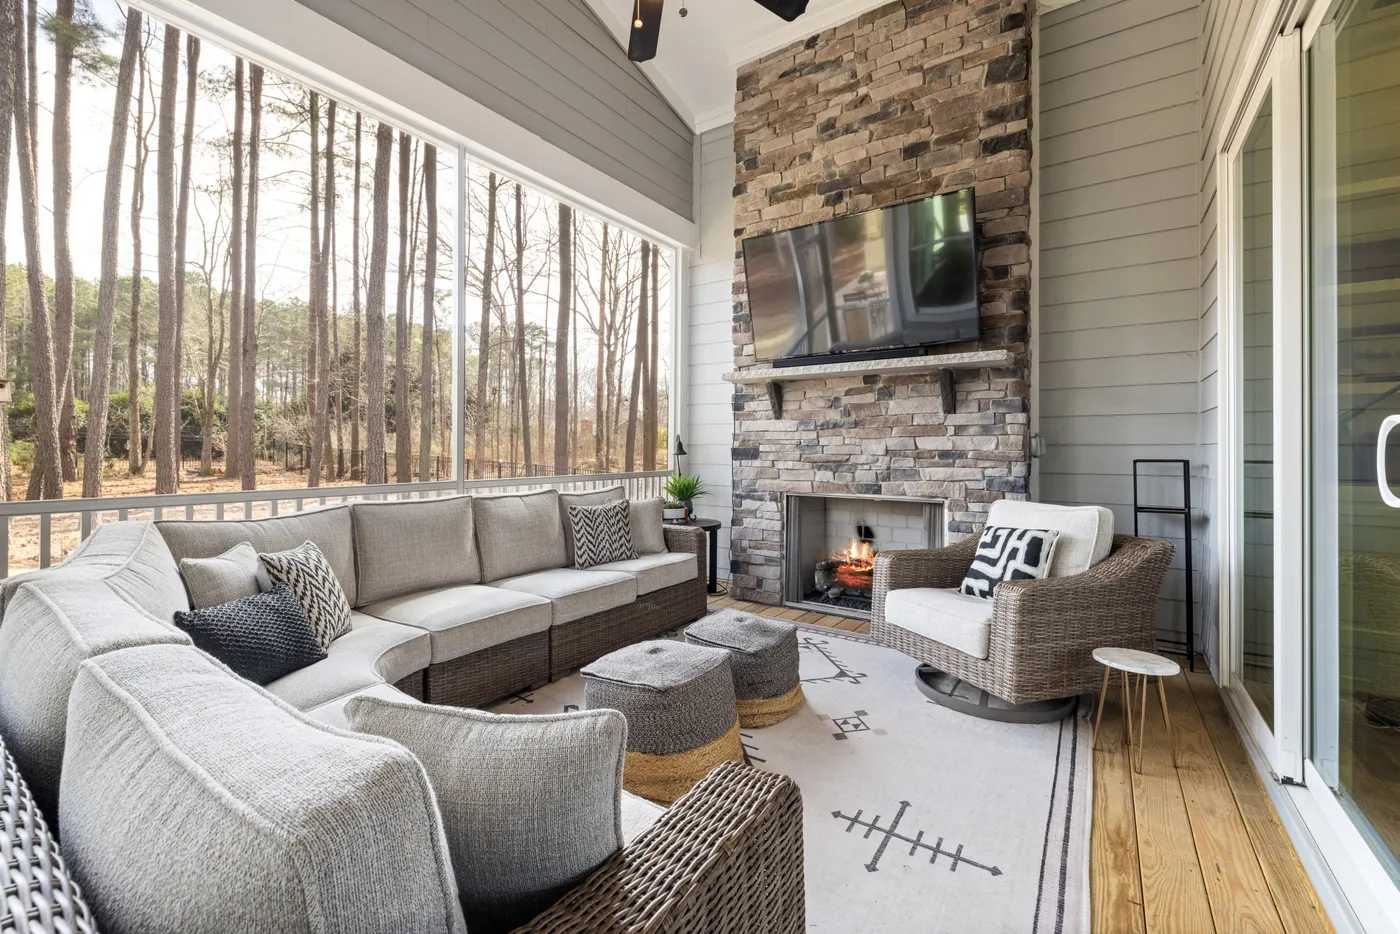
This idea is perfect for creating a true ‘outdoor room’. For a spacious layout with a U-shaped sectional, two armchairs, and a central fireplace, you’ll need a porch that is at least 16 feet wide and 20 feet deep. This allows for the furniture, a 3-foot walkway behind the sofa, and ample clearance around the fireplace hearth. The ceiling height should be at least 9 feet to keep the large volume of furniture and stone from feeling cramped. The effect is less of a ‘patio’ and more of an airy, protected living space.
20. Build the Ultimate Entertainment Hub with a TV, Kitchen, and Pergola
This is a full-scale outdoor renovation, and the budget reflects that. The costs here are for a professionally installed, high-quality setup.
- Structure: Large pergola with retractable canopy: $8,000 – $20,000
- Kitchen: Built-in grill, counters, and cabinetry: $7,000 – $18,000
- Features: Stone veneer wall and TV installation: $4,000 – $9,000
- Furnishings: Dining table, 8+ chairs, lighting: $3,000 – $7,000
- Budget alternative: A DIY pergola kit, a standalone grill, and a manufactured stone wall can deliver a similar zone for $10,000 – $18,000.
- TOTAL: $22,000 – $54,000
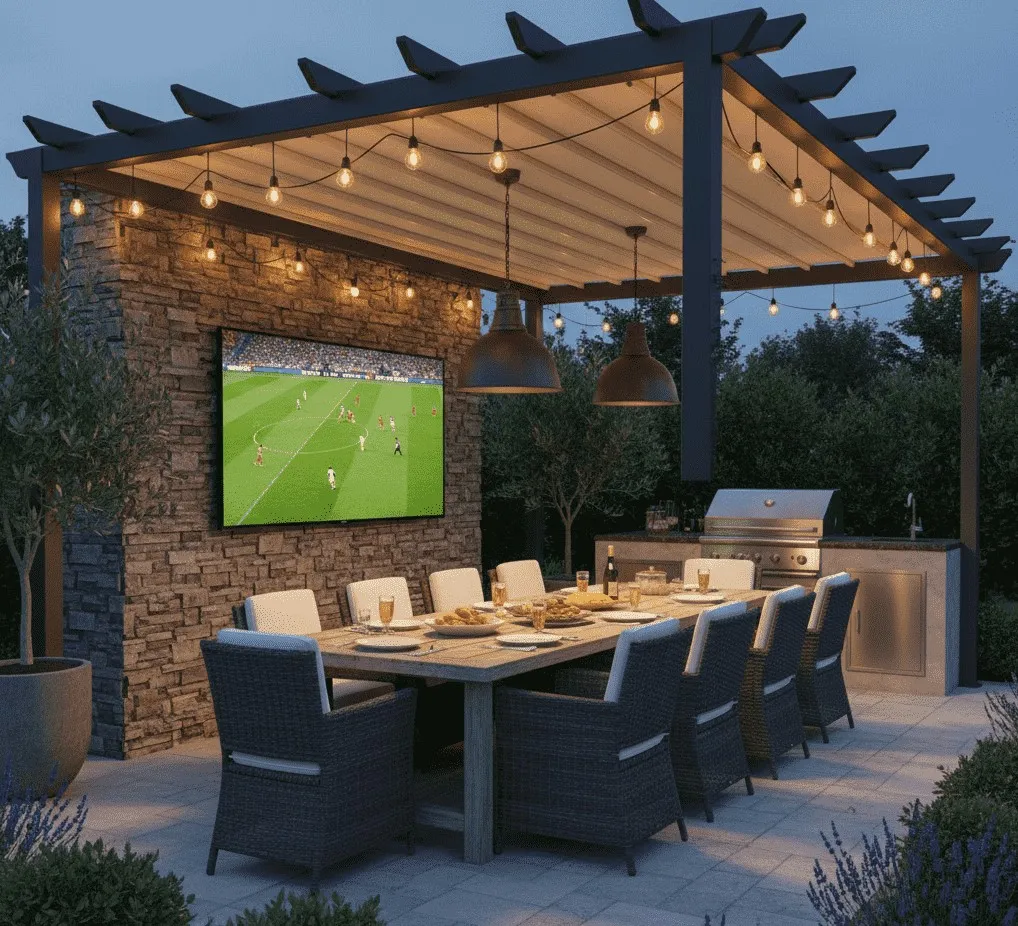
that makes this space the ultimate hub is the combination of functions. It’s not just a place to watch TV, or just a place to eat, or just a place to cook. It’s all three, seamlessly integrated into one cohesive zone. The TV is visible from the dining table and the grill, meaning the cook and the guests are all part of the same social experience. By removing the walls between the kitchen, dining room, and living room, you create a social powerhouse where everyone can be together. That multifunctional design is the real genius here.
21. Mount a TV on a Brick Wall Above Your Outdoor Kitchen
When mounting a TV on a brick wall, you must anchor into the brick itself, not the mortar joints. Mortar is much softer and can crumble over time under the weight and torque of a TV mount. Use a hammer drill with a masonry bit to create your pilot holes. Then, use concrete sleeve anchors or lag shields with lag bolts to secure the mount. It’s a much more robust installation that will hold strong for years. And always, always wear safety glasses when drilling into brick.
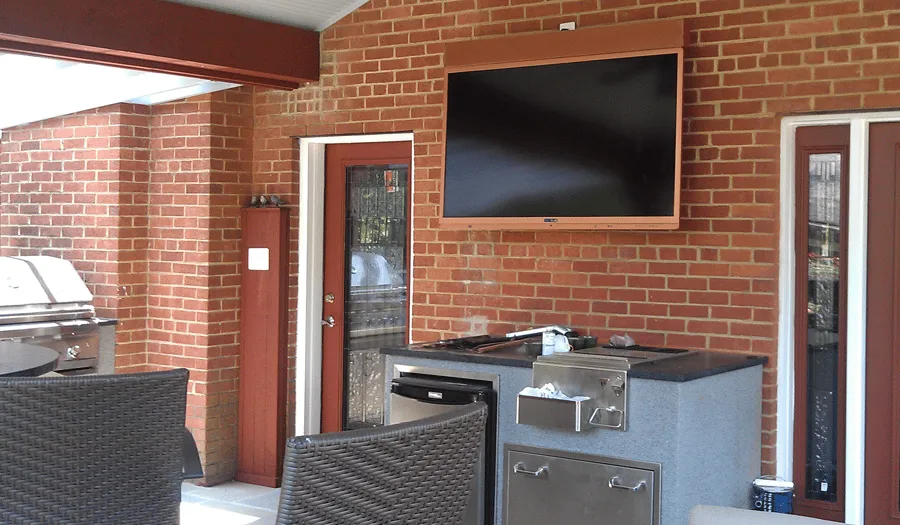
Heat, grease, and smoke are the enemies of electronics. Placing a TV directly above a grill is a recipe for disaster, even if it’s an outdoor-rated model. The intense heat can damage the screen and internal components, while smoke and airborne grease will coat the screen and clog ventilation ports. In this setup, the TV is wisely positioned over a countertop prep area, away from the main heat source. If your layout requires the TV to be near the grill, ensure there’s at least 4-5 feet of horizontal separation and a powerful vent hood over the grill.
22. Frame a Cozy Nook with a TV Cabinet and Wicker Armchairs
This comfortable corner follows a simple, effective design recipe: 40% crisp white structure (the paneled wall), 40% warm natural texture (the wicker chairs and table), and 20% dark, grounding accent (the wood TV cabinet). The equal balance of the bright white and the warm wicker creates a look that is both airy and cozy. The dark cabinet serves as a focal point, drawing the eye and anchoring the television within the scene. It’s a classic, can’t-go-wrong combination for an inviting patio space.
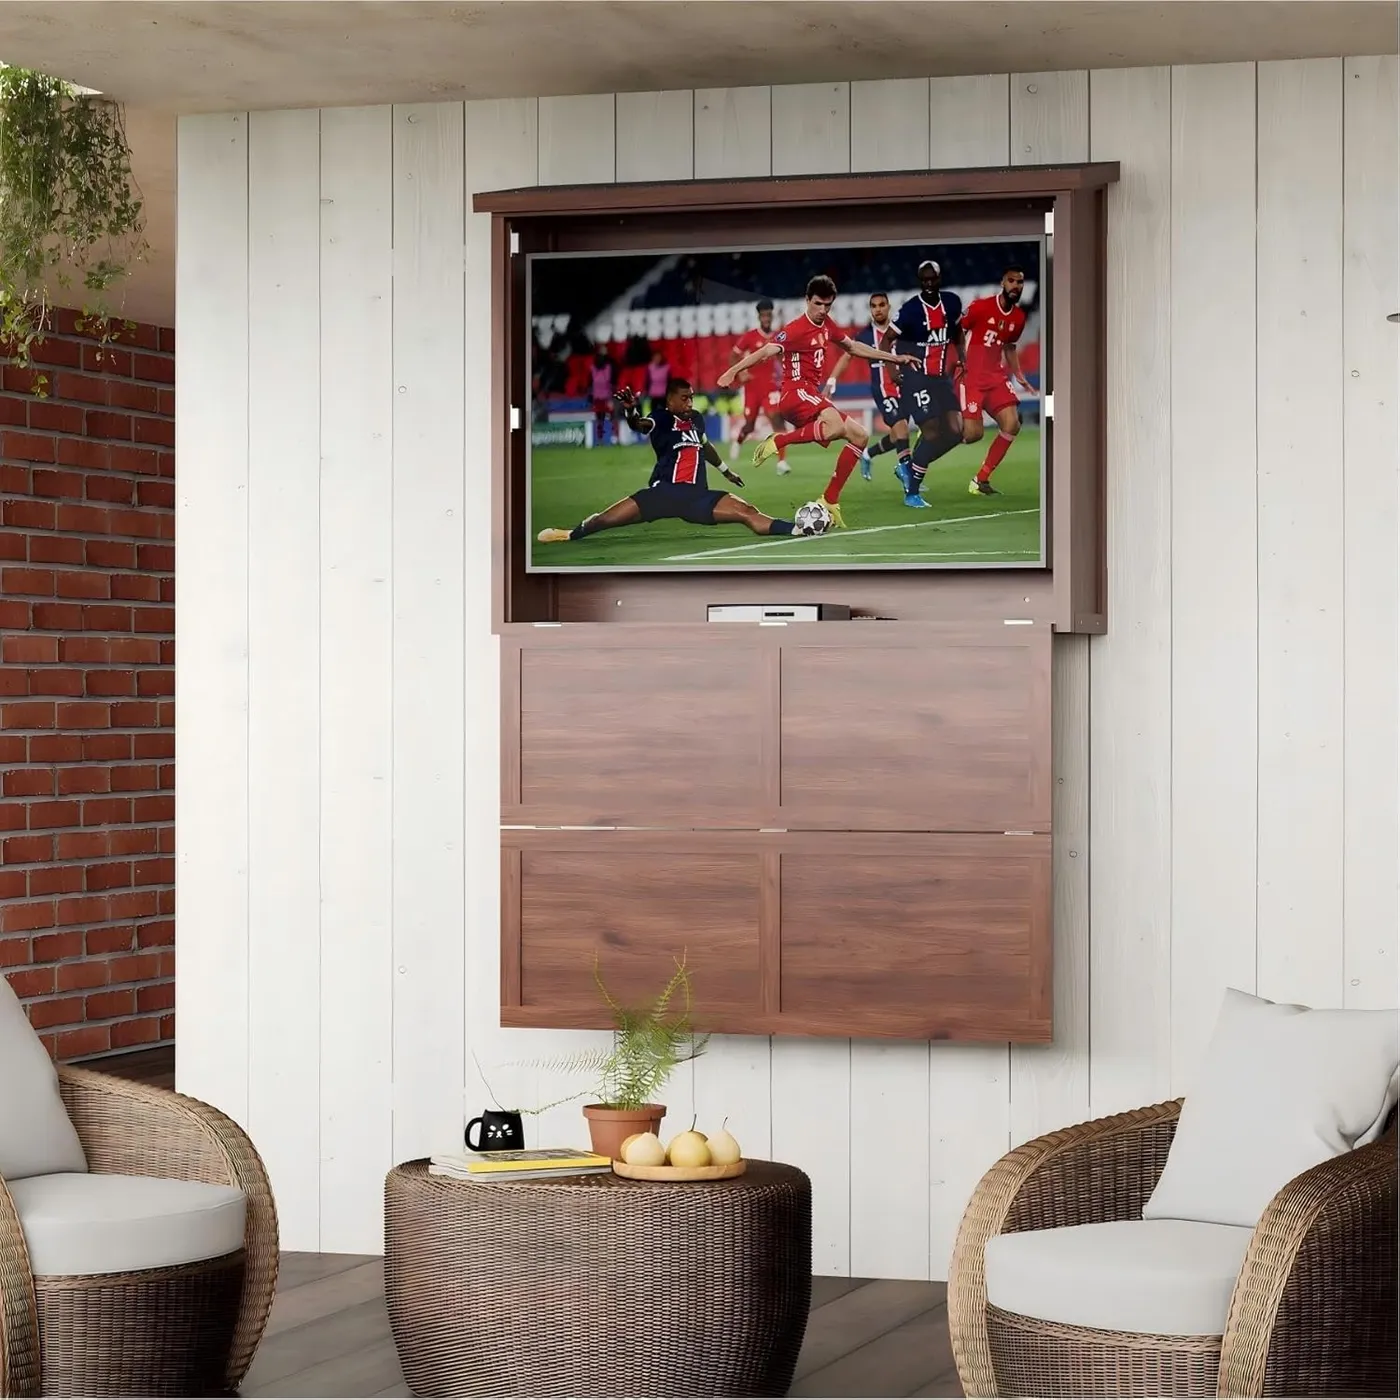
This arrangement works so well because it creates an intimate ‘room’ within a larger outdoor area. The two armchairs and matching table form a self-contained conversational grouping. The white paneled wall and the edge of the brick act as ‘walls,’ defining the corner. This is a much more inviting approach than just placing a TV on a long, empty wall. It feels intentional and cozy, a space designed for a specific purpose. It’s a great strategy for breaking up a large, undefined patio into smaller, more functional zones, similar to the cabinet idea in Idea #4 but with a brighter feel.
23. Add a Pop of Color with a TV Corner and Bright Blue Cushions
You don’t need a massive budget to create a stylish outdoor TV spot. The core of this look is a simple wall-mounted TV and a pair of wicker chairs. You can find affordable versions of these dark wicker armchairs at Target, Walmart, or on Amazon for around $200-$350 a pair. The real star, the vibrant blue cushions, can be found for $30-$50 each. The patterned rug pulls it all together and can be had for under $100. This is proof that a few smart, colorful choices can have more impact than a huge construction project.
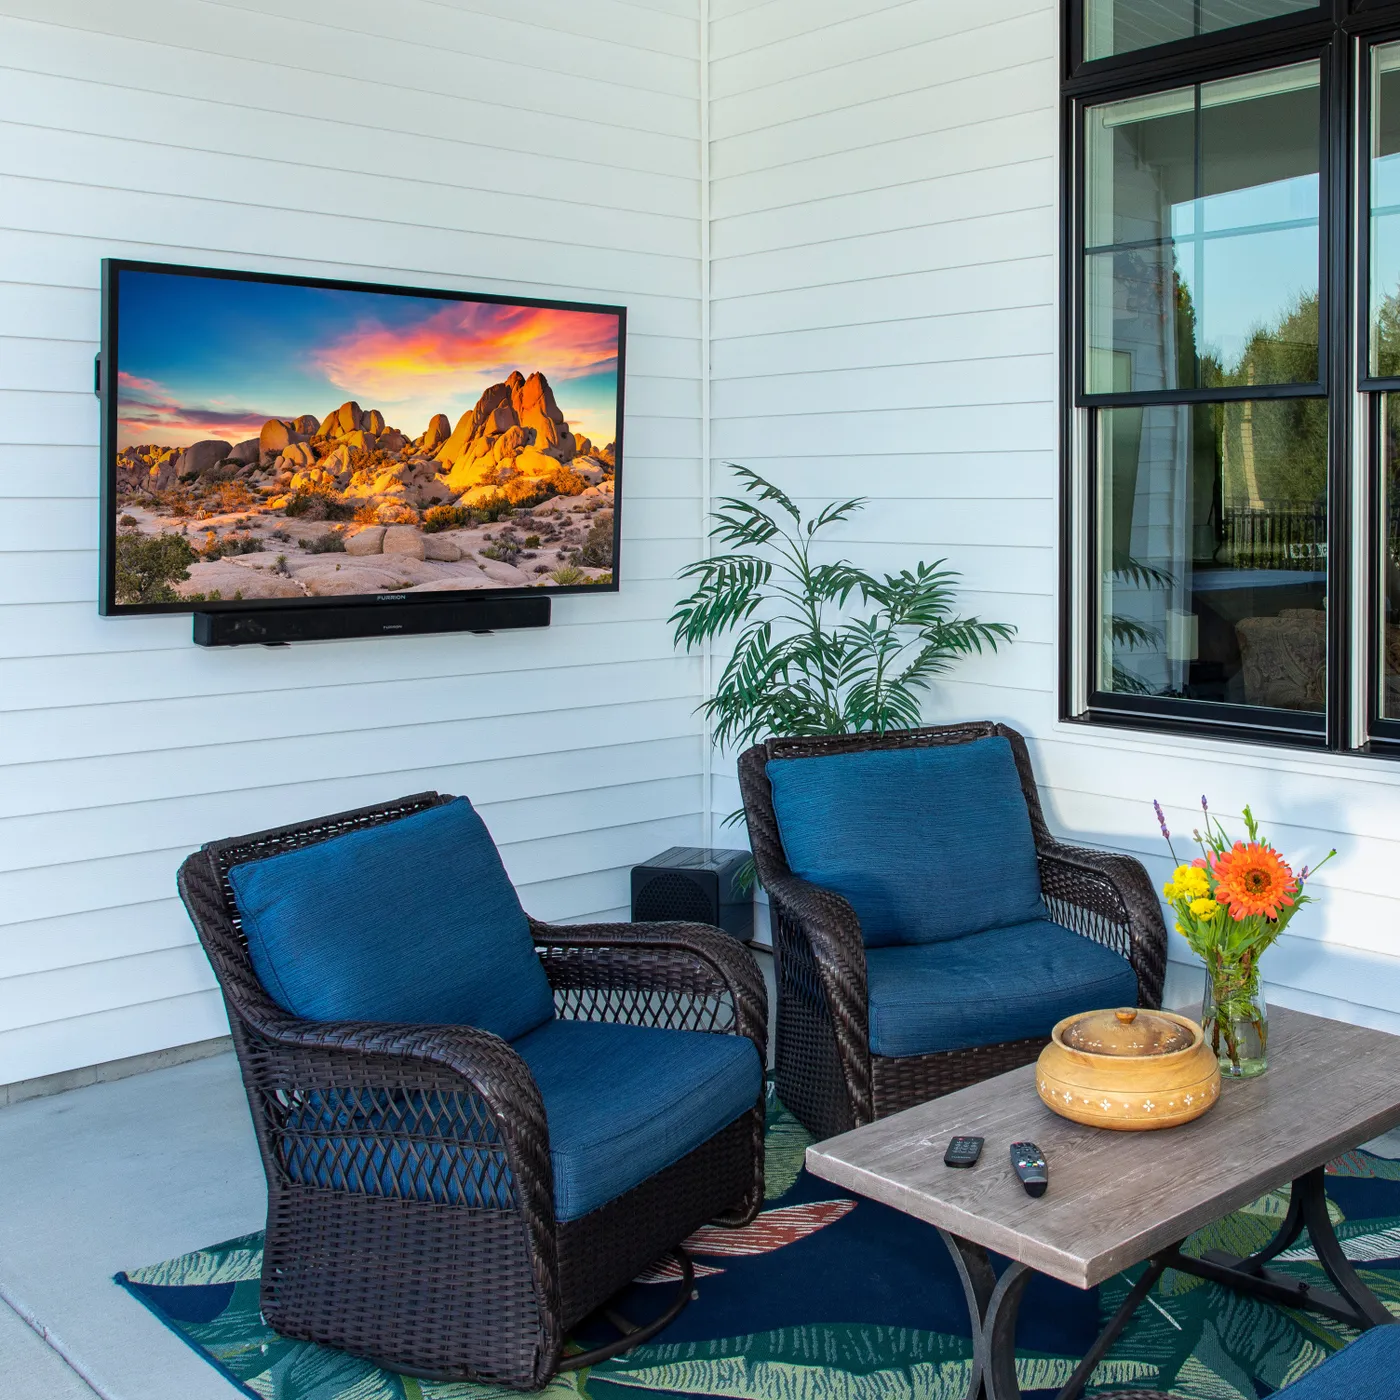
The secret to making bold colors work in a small space is repetition and grounding. The vibrant blue is used on both chairs, which creates a sense of balance. The blue is then repeated in the patterned outdoor rug, which connects the chairs to the floor and makes the color choice feel intentional. The dark brown of the wicker and the neutral white of the wall act as grounding elements, giving the eye a place to rest and preventing the blue from feeling overwhelming. When using a bold color, use it in at least two places.
24. Double the Warmth: Pair a Fireplace TV with a Fire Pit Table
The singular feature that defines this space is the double fire. By combining a traditional fireplace with a modern fire pit table, the design creates two distinct zones of warmth and social gathering. The fireplace is the focal point for viewing, while the fire pit table creates a more intimate, conversational circle. This layering of fire features extends the usability of the patio into cooler weather and provides flexible options for entertaining: a big group can spread out, or a smaller group can gather closely around the table.
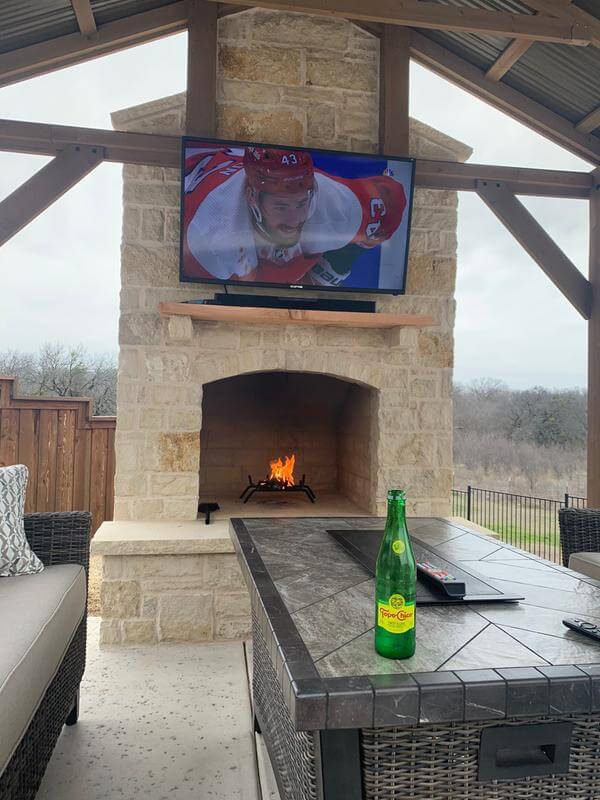
This double fire layout is best suited for a large, deep patio. You need a minimum depth of 20-22 feet. This allows for the fireplace structure (approx. 2 ft deep), a comfortable viewing distance for the sofa (8-10 ft), the fire pit table and surrounding clearance (6-7 ft), and a walkway. The width should be at least 15 feet to accommodate the width of the fireplace and a sofa. Trying to squeeze both features into a smaller space will result in a cramped, awkward layout where you’re too close to one fire and too far from the other.
25. Ditch the TV for a Projector Screen on a Wooden Deck
Setting up an outdoor projector is easier than you think. Here’s how to get a simple, cozy movie night going:
- Time Estimate: 1 hour. Material Cost: $200-$500 (for screen, projector, speaker).
- Install a retractable projector screen on a sturdy wall or pergola beam. A 100-inch manual pull-down screen is a great, affordable option.
- Position your projector on a stable surface (like the wooden ledge shown here) at the correct distance for your screen size (check the projector’s manual for its ‘throw ratio’).
- Connect your video source (e.g., a streaming stick, laptop) to the projector.
- Connect a portable Bluetooth speaker for much better audio than the projector’s built-in sound.
- Wait for dusk, grab some blankets, and enjoy the show!
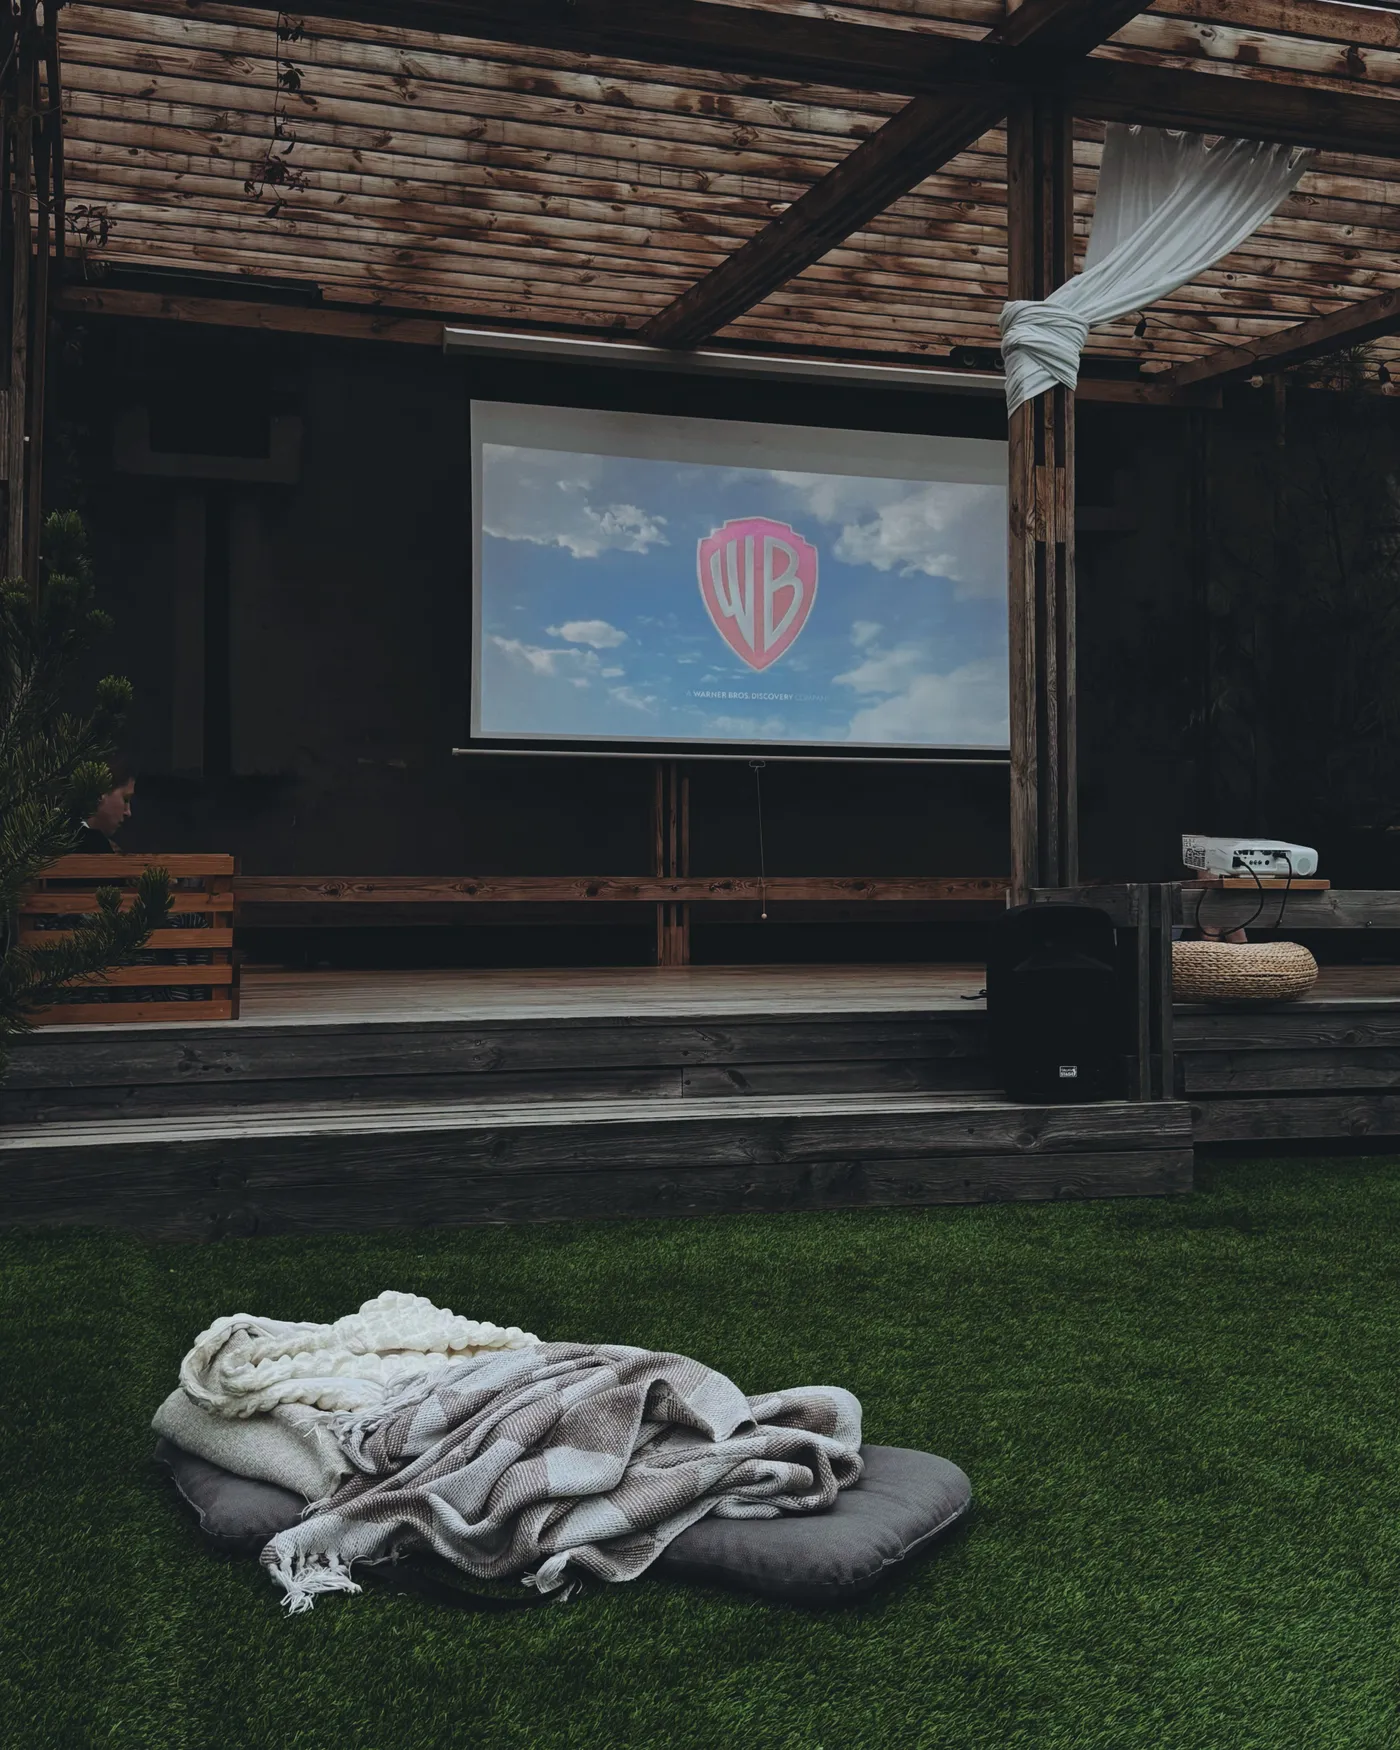
The DIY backyard movie night is more popular than ever, and it’s a direct reaction to the desire for more authentic, communal experiences at home. It feels nostalgic and special in a way that just turning on a TV doesn’t. Projector technology has also become incredibly affordable and user-friendly, making it accessible to almost everyone. This trend isn’t about having the highest-definition picture; it’s about the experience—gathering under the stars, the giant scale of the image, and creating a memorable event for family and friends.
26. Mix Modern and Rustic with a Brick Fireplace TV and Metal Seating
This space nails the modern-rustic look by pairing materials from opposite ends of the design spectrum. The traditional red brick fireplace and chunky wood mantel provide a warm, rustic foundation. In contrast, the outdoor furniture features clean lines and a sleek, dark grey metal finish that feels distinctly modern. The lime green pillows are the brilliant ‘bridge’ between the two styles—a bold, contemporary color that pops against both the red brick and the grey metal, tying the whole composition together. It’s a confident, unexpected mix.
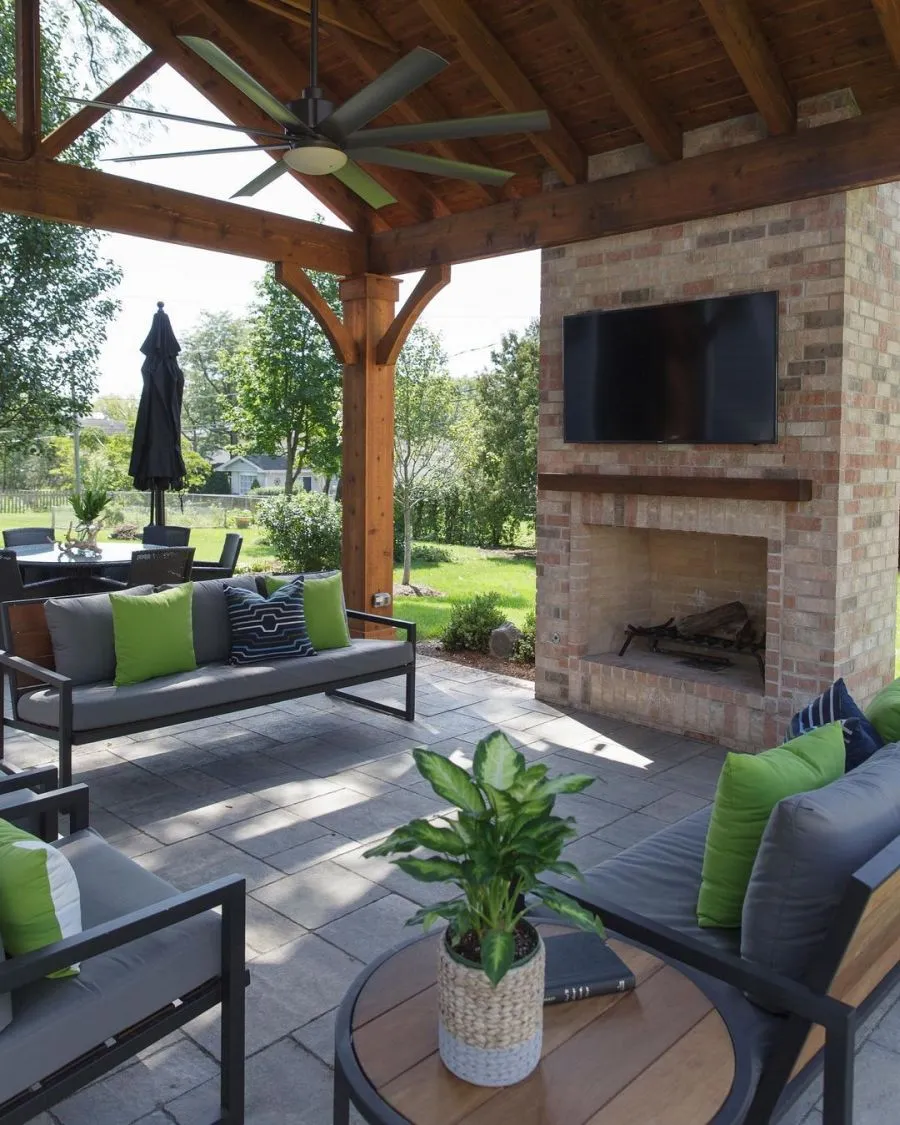
Lime green is a fantastic accent color, but it can be a real heartbreaker when it comes to fading. Fabrics with bright, saturated colors are notoriously prone to fading in direct sunlight. When choosing pillows or cushions in a vibrant shade like this, it’s absolutely crucial to invest in high-quality outdoor fabric like Sunbrella or another solution-dyed acrylic. These fabrics have the color locked into the core of the fibers, rather than just printed on the surface, making them far more resistant to UV degradation. Even so, storing them indoors when not in use will dramatically extend their life.
27. Create an Elegant Brick Patio with an Inset TV and Fireplace
When you have a large, dominant wall of a single material like this brick, layering your lighting is key to creating mood and dimension at night. Don’t rely on a single overhead fan light. Here, the wall-mounted lanterns add a warm, traditional glow that highlights the texture of the brick. The recessed lights in the TV niche provide focused task lighting. And the smaller lanterns on the mantel add a final, intimate layer of flickering light. This multi-layered approach prevents the space from feeling flat and creates a truly magical ambiance.
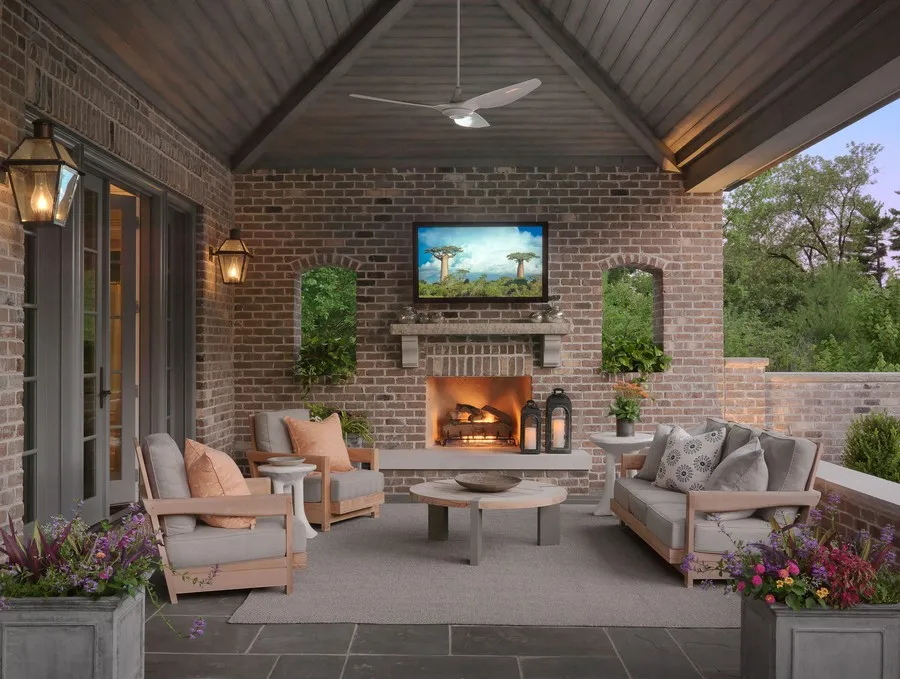
This polished, highly-integrated look represents a significant investment in custom masonry and carpentry. It’s a true extension of the home.
- Main Feature: Custom brick and stone fireplace/media wall construction: $18,000 – $35,000
- Furniture: High-end light wood sofa set with performance cushions: $5,000 – $10,000
- Ceiling & Floor: Covered structure, ceiling fan, and premium rug: $3,000 – $8,000
- Lighting & Electrical: Wall lanterns, recessed lights, and professional installation: $1,500 – $4,000
- Budget alternative: You could mimic this look with brick veneer, a pre-fab fireplace insert, and more affordable furniture for $12,000 – $20,000.
- TOTAL: $27,500 – $57,000
Your Outdoor Movie Night Is Ready for Its Debut
Now that you’re armed with ideas ranging from simple weekend projects to full-scale backyard transformations, it’s time to stop scrolling and start planning. Pick the look that speaks to you, consider your budget and your space, and get ready to create an outdoor area your family and friends will love. Pin your favorites, make a list, and get ready to press play on your new favorite spot.