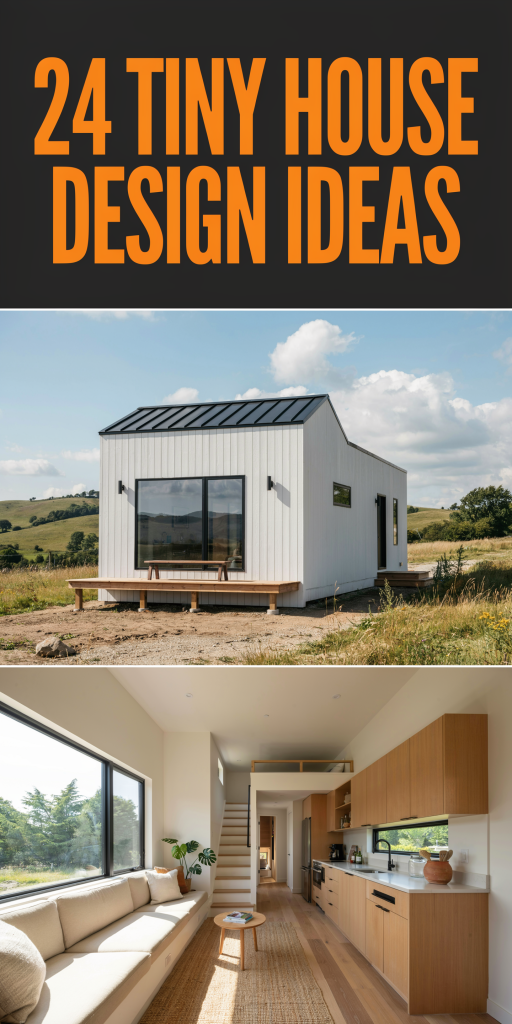
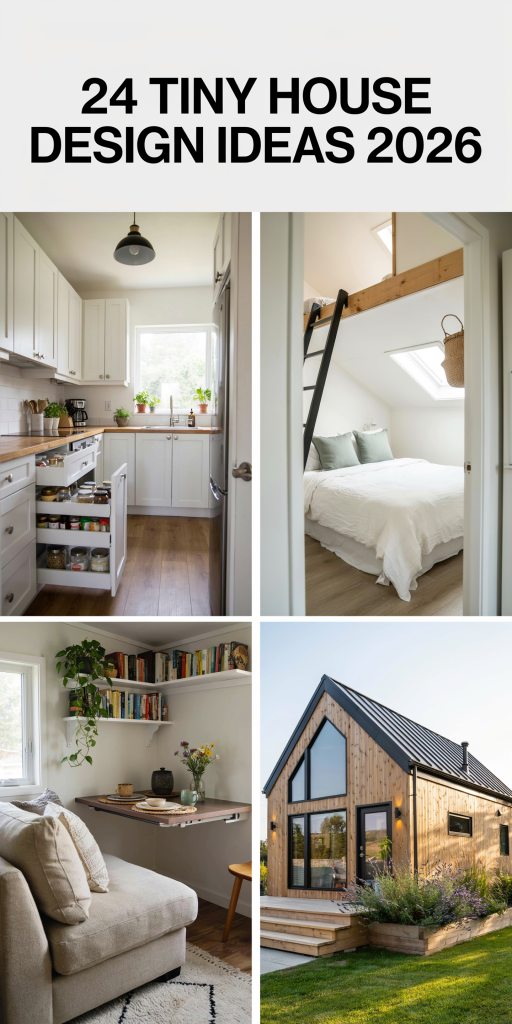
You’ve pinned a hundred “perfect” tiny house interiors, yet your space still feels…off. It’s a common story. You have the inspiration, but turning those dreamy photos into a functional, beautiful reality is the hard part. After filtering through hundreds of designs, we narrowed it down to the 24 ideas that genuinely work for compact living. We’re talking real homes, real solutions—no fluff.
Inside, you’ll find a mix of modern, rustic, and seriously smart minimalist designs. We’re diving deep into why these layouts work, from clever storage to the perfect color palettes. In 2026, the tiny living movement is less about sacrifice and more about intentional, streamlined design that enhances daily life—and that’s precisely what this guide is about. And stay until the end — we break down the most common mistakes that can ruin these looks.
📌 Save this to Pinterest for later — you’ll want to revisit these ideas.
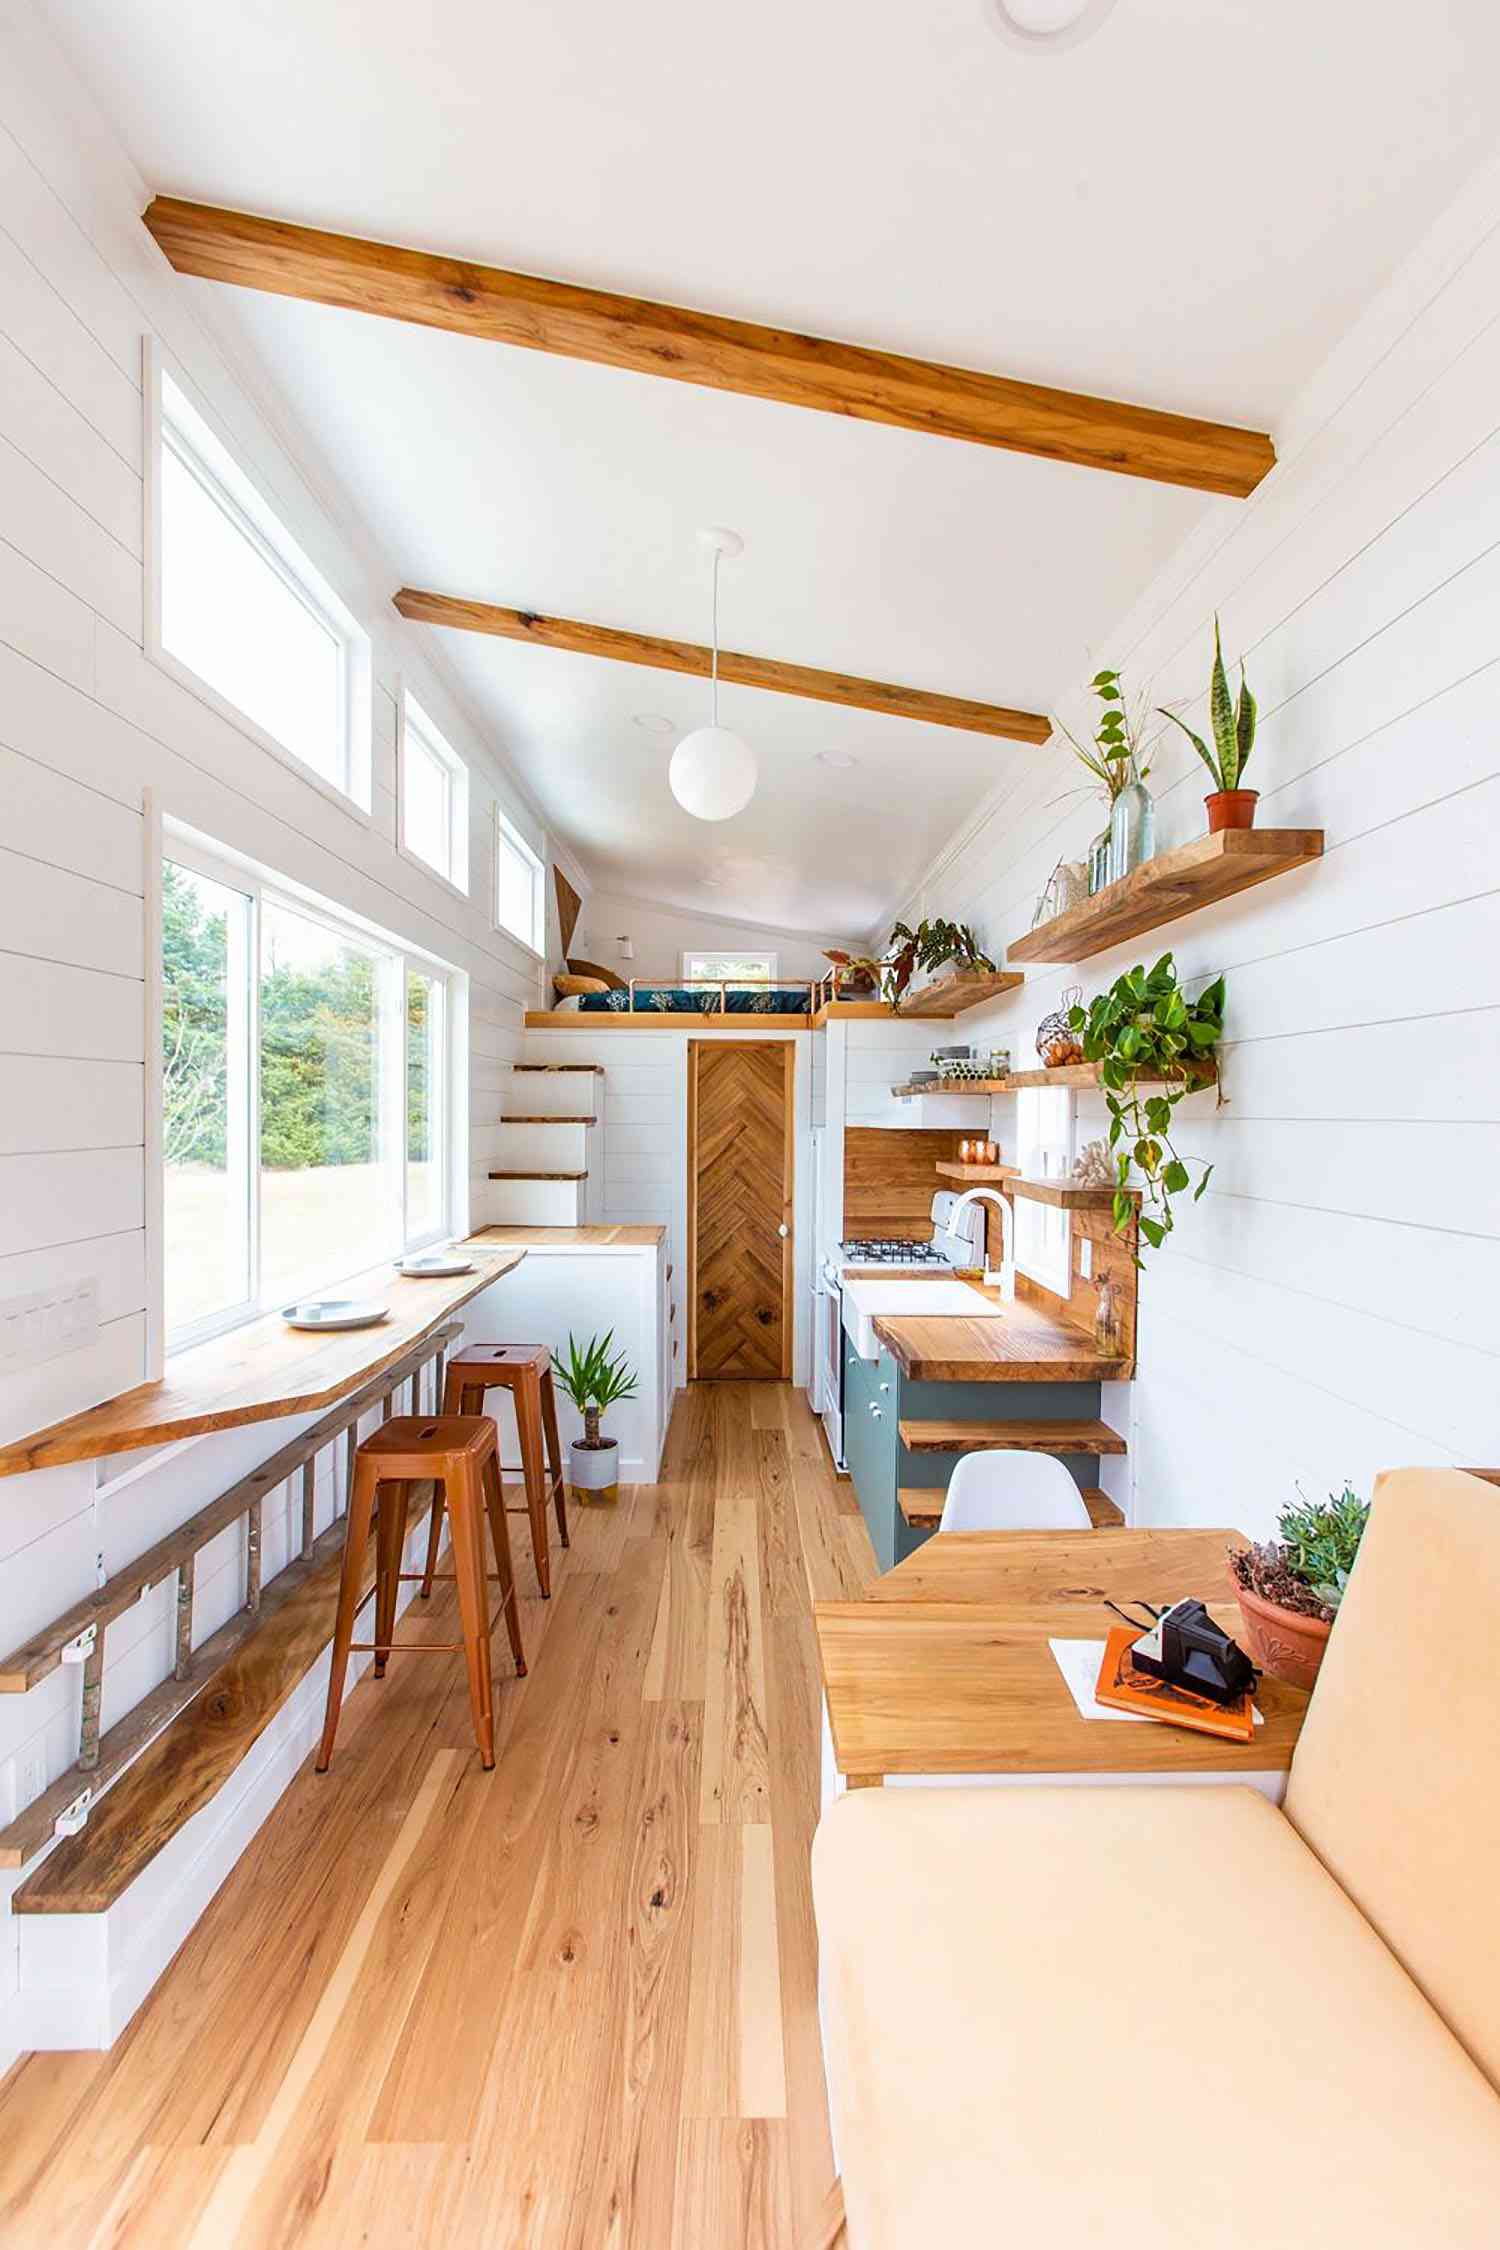
1. Bright, Rustic Interior with a Live-Edge Counter
There are two things making this space feel so open and inviting: repetition and light. The consistent use of white shiplap on the walls and ceiling creates a seamless visual plane, which makes the room feel wider and taller than it actually is. The bright, uniform backdrop then features warm, natural wood tones in the beams, flooring, and that gorgeous live-edge counter. This simple, consistent palette is a classic trick for making small spaces feel cohesive and intentionally designed, not just cramped.
|
📋 Copy HEX 🔗 Share |
When installing a long, narrow counter like this one, don’t make it a standard 24-inch kitchen depth. A 15 to 18-inch depth is plenty for a laptop, a cup of coffee, or a simple meal. This saves you 6 to 9 inches of precious floor space, which can make the difference between a comfortable walkway and an awkward squeeze. Make sure to account for at least 36 inches of clearance behind the stools for comfortable passage when someone is seated.
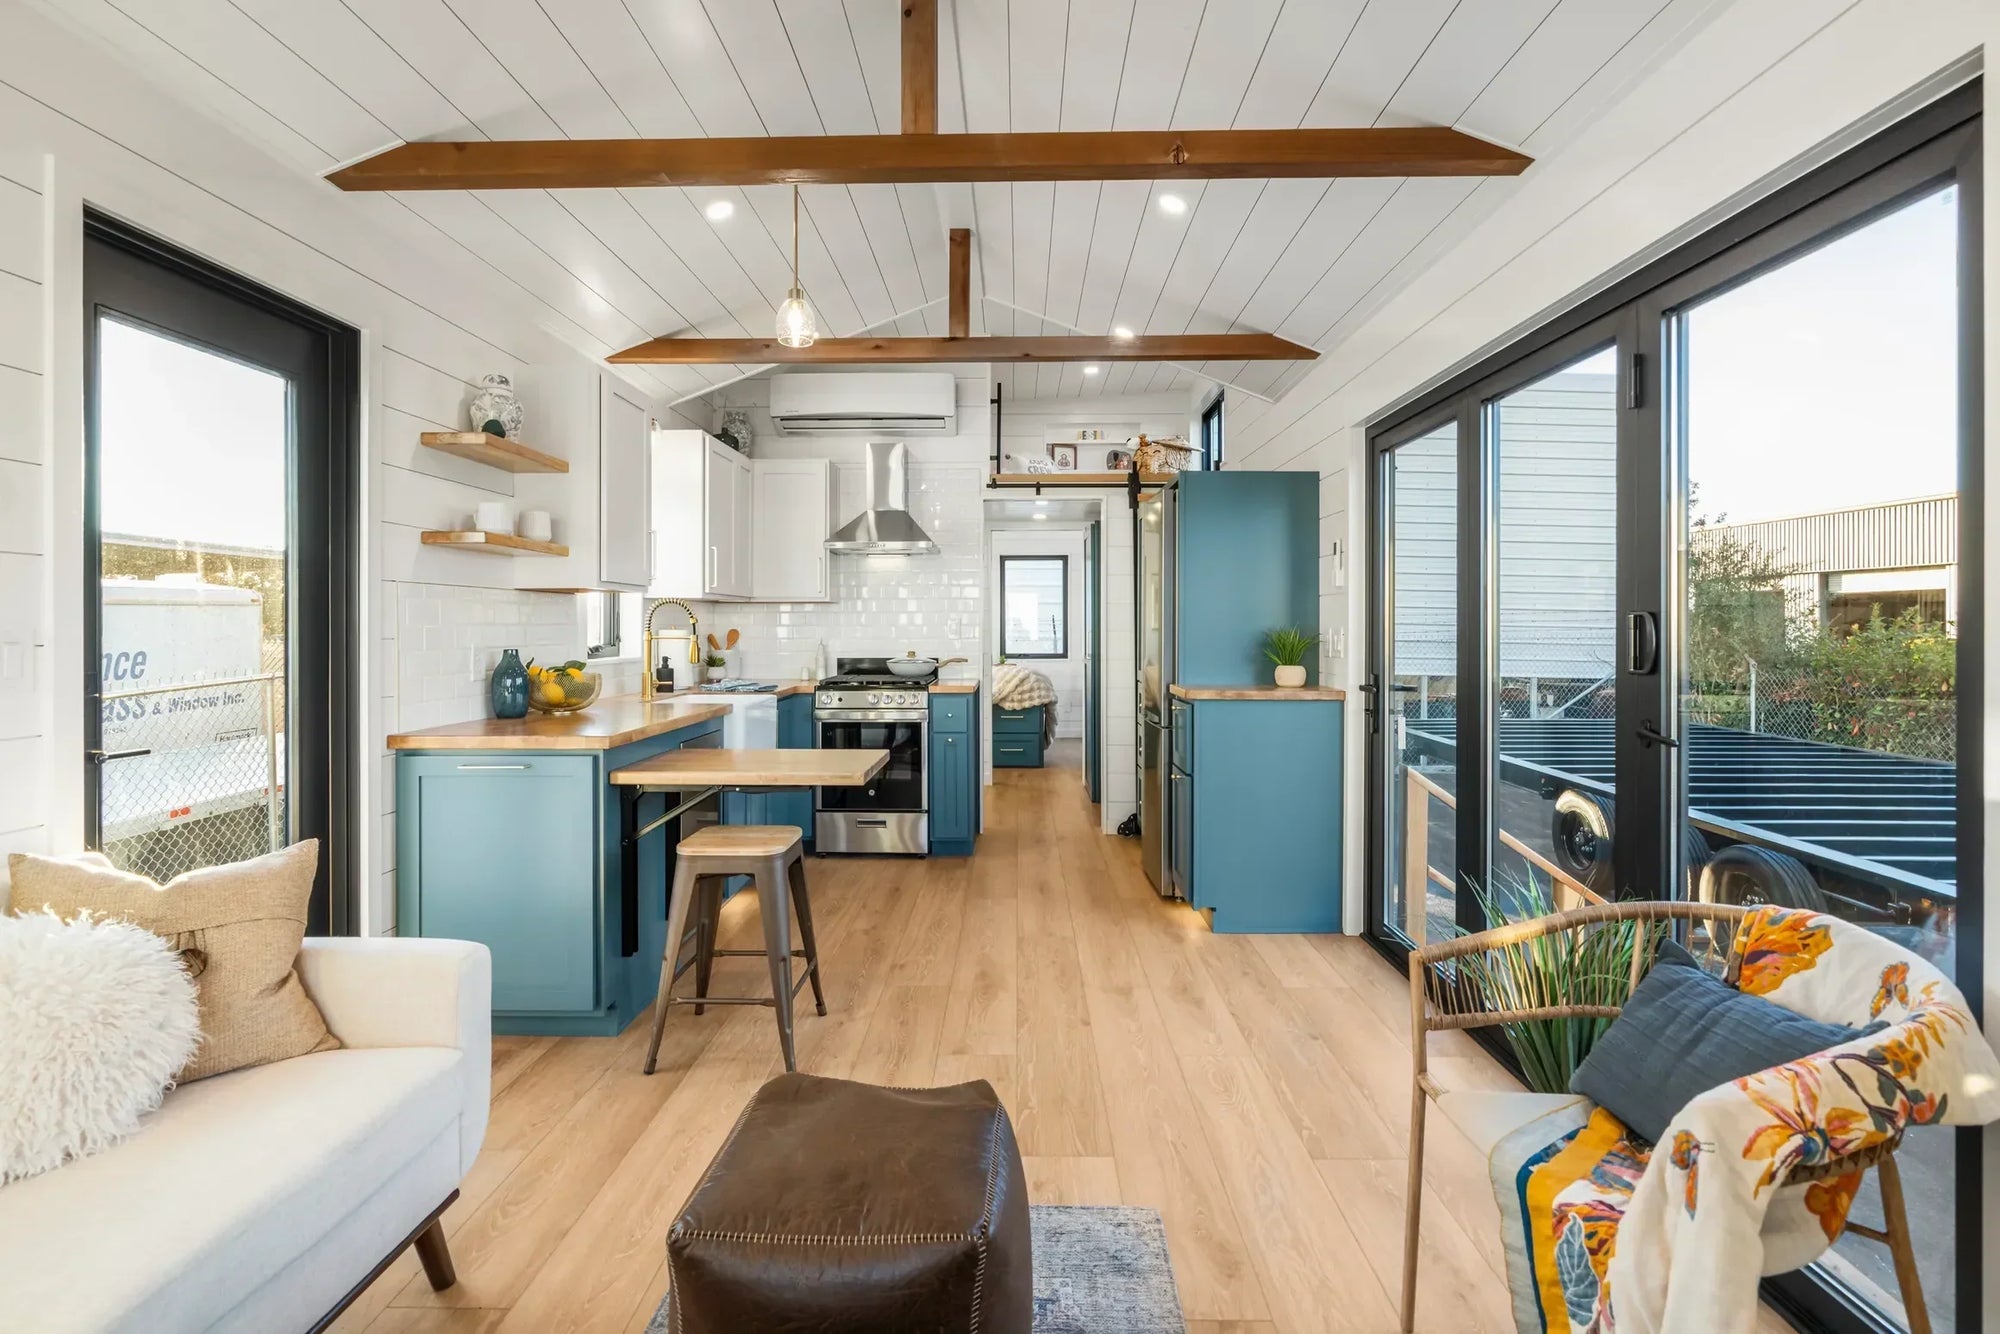
2. Modern Farmhouse Kitchen with Teal Cabinets
This kitchen’s inviting look follows a simple formula: 60% neutral foundation + 30% bold color + 10% natural texture. The white shiplap walls, ceiling, and subway tile create the bright, neutral base. The vibrant teal on the lower cabinets provides the personality and visual punch. Finally, the light wood flooring, exposed beams, and wooden countertops add that essential 10% of organic warmth. You could easily swap the teal for a deep navy, forest green, or even a daring terracotta while keeping the rest of the formula for a totally different but equally balanced vibe. Compare this to the all-wood look in Idea #1, which uses texture instead of color for its main statement.
|
📋 Copy HEX 🔗 Share |
A bold cabinet color is a fantastic way to add personality, but be prepared for the commitment. While you can always repaint, it’s a detailed job—especially in a compact kitchen. Also, consider the light. That teal looks brilliant and cheerful thanks to the huge glass doors and white upper walls. In a darker tiny house with fewer windows, the same color could feel heavy and shrink the space. Always get a sample door or paint a large swatch and see how it looks in the morning, noon, and evening light before you commit.
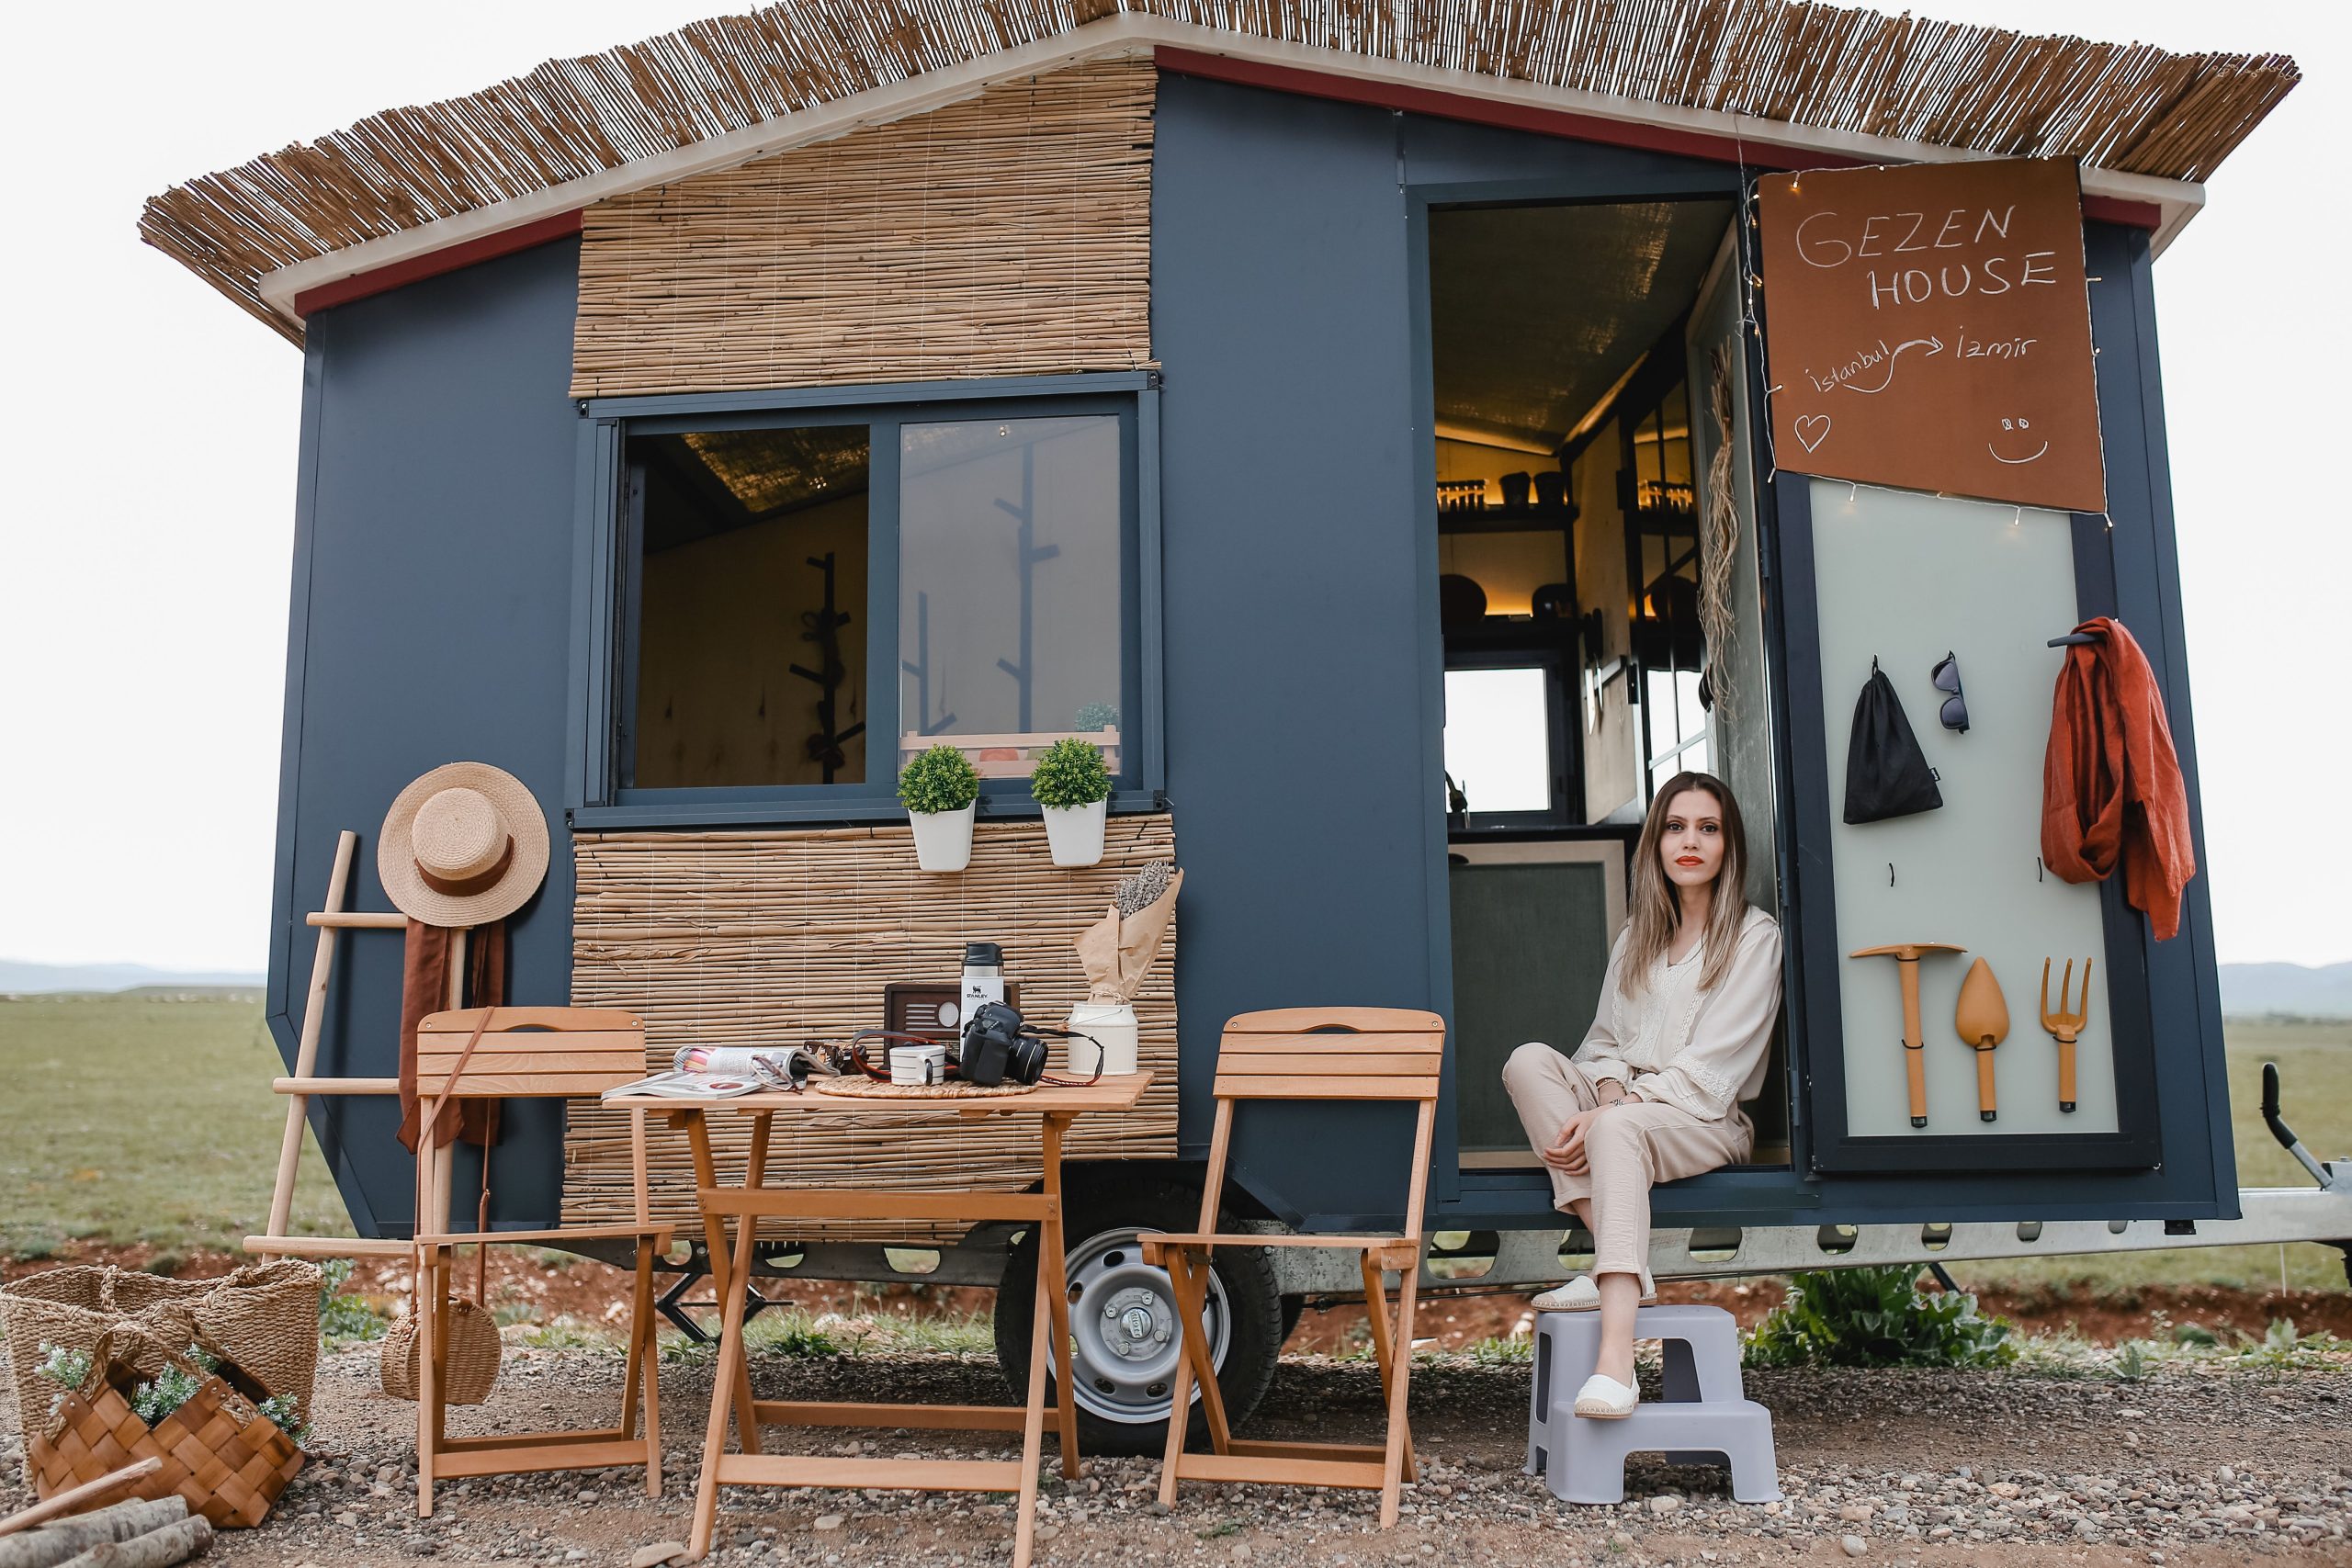
3. Mobile Traveler’s Home with Bamboo Accents
The single element that defines this tiny home’s character is the natural bamboo matting. Without it, you’d have a standard, modern gray box on wheels. But the addition of that organic, textured bamboo on the roofline and as an under-window accent completely changes the story. It speaks to travel, nature, and a certain bohemian spirit. It’s a brilliant, low-cost way to add immense personality and warmth to an otherwise simple exterior, proving that your material choices tell a story beyond just function.
|
📋 Copy HEX 🔗 Share |
This idea is tailor-made for micro-homes, specifically those under 150 square feet on a mobile chassis. The focus isn’t on expansive interior living but on creating a seamless connection between inside and out. The fold-down table and exterior seating are key, effectively doubling your usable living space when weather permits. This concept wouldn’t work as well for a stationary tiny home in a cold climate, where interior square footage is everything. It’s a design for adventurers and sun-seekers.
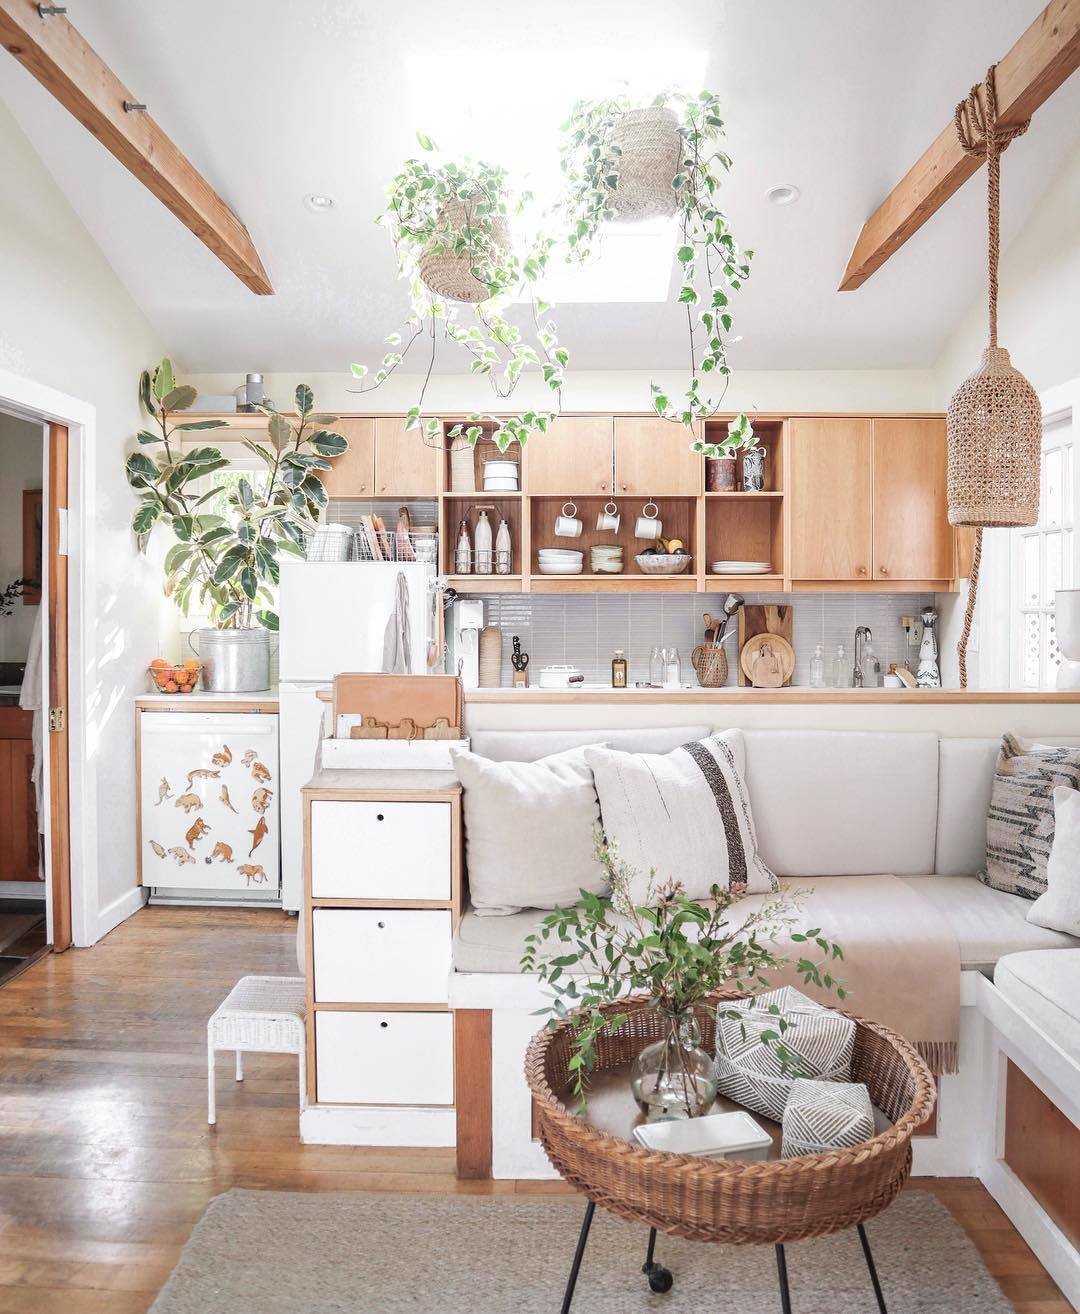
4. Skylight-Lit Kitchen with Integrated Bench Seating
You can create similar hanging plant baskets to bring life to your ceiling space. Here’s a quick guide:
- Time: 1 hour. Cost: $30-50.
- Gather materials: A woven basket, a small plastic liner to fit inside, lightweight potting mix, a trailing plant (like a pothos or philodendron), 3-4 strands of sturdy rope or macrame cord, and a ceiling hook.
- Drill three evenly spaced holes around the rim of the basket.
- Thread your ropes through the holes and tie securely. Gather the ropes at the top and tie a strong loop for hanging.
- Place the plastic liner in the basket and add your soil and plant.
- Install the hook into a ceiling joist (not just drywall!) and hang your plant.
|
📋 Copy HEX 🔗 Share |
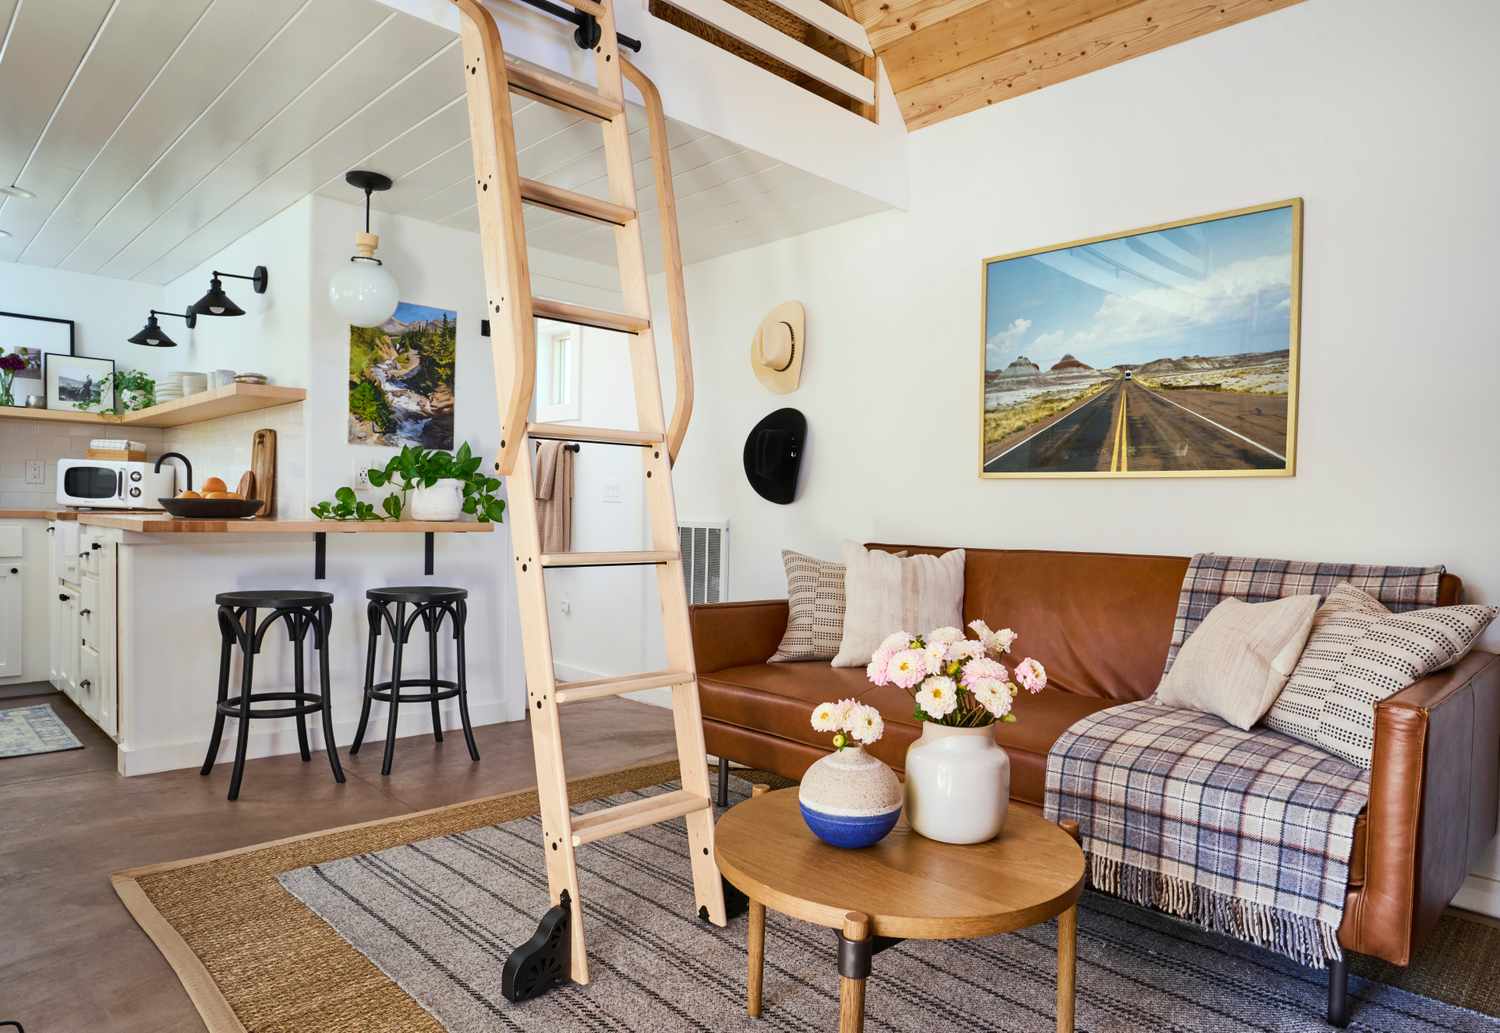
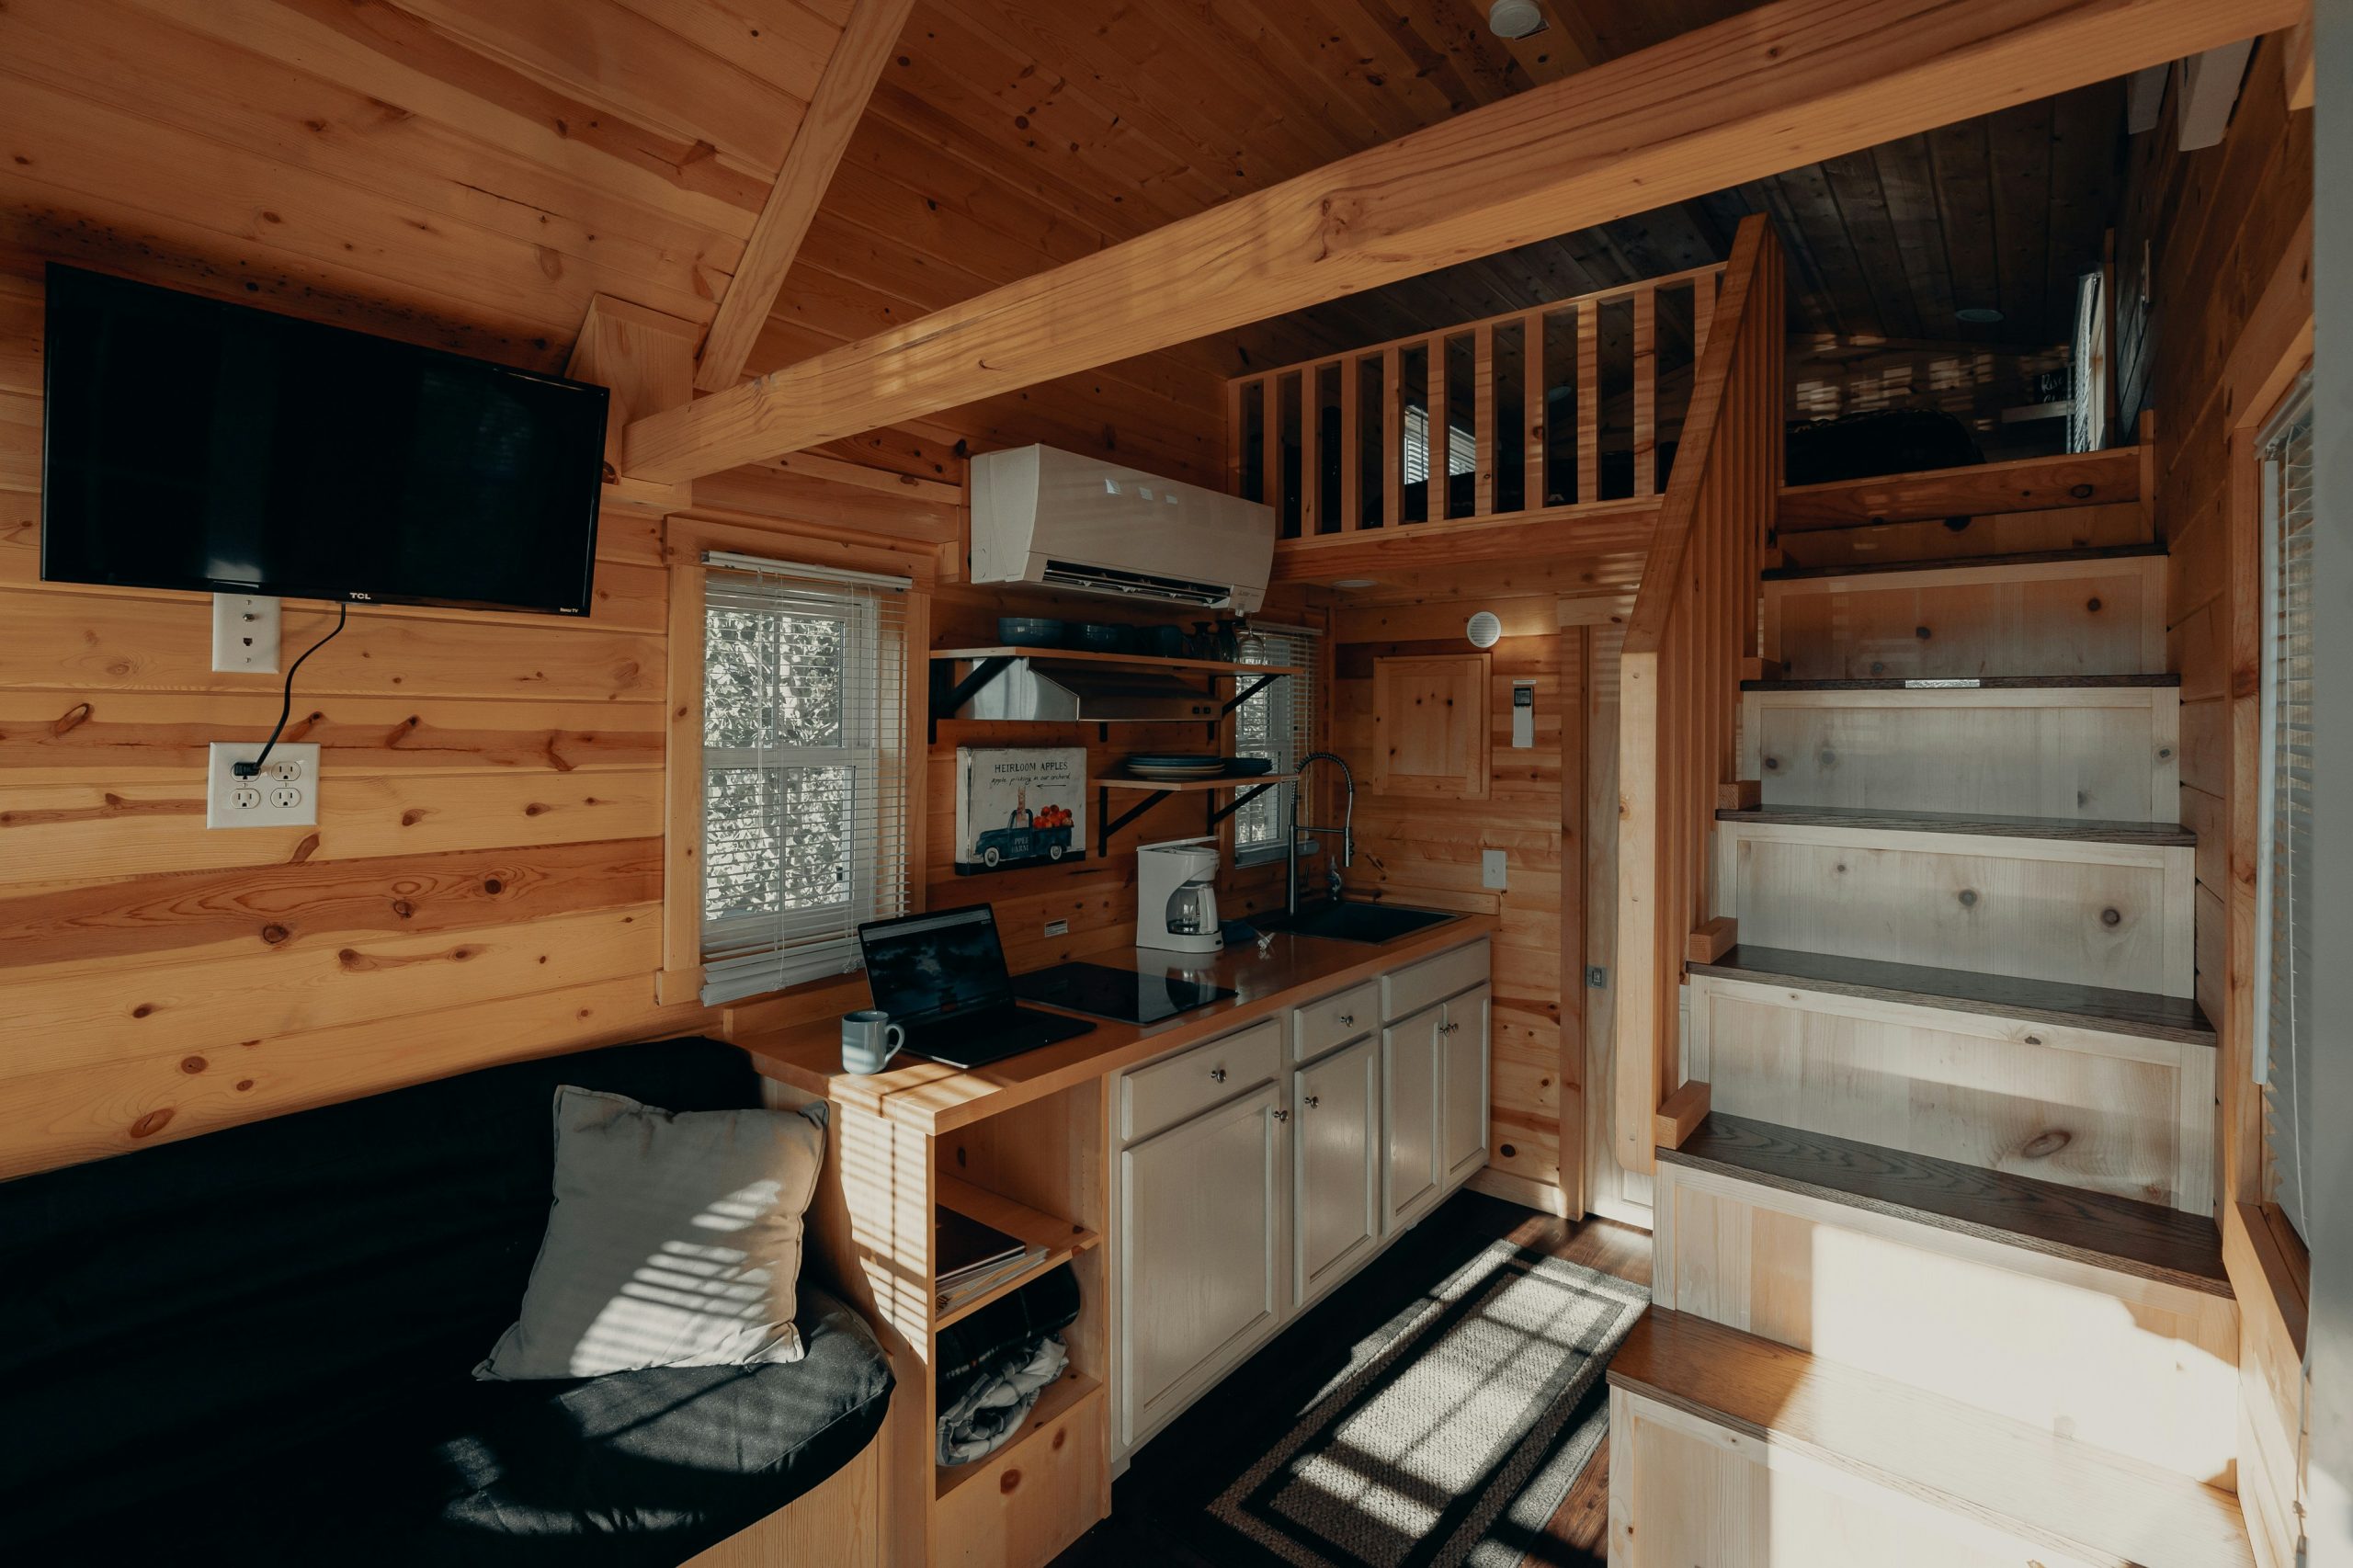
5. Cozy Living Space with a Rolling Loft Ladder
Here’s a look at what it might cost to get this cozy, functional living area. Prices are estimates and can vary widely based on location and brand choices.
- Main Furniture (leather sofa, coffee table): $2,200 – $4,500
- Lighting (fixtures, sconces): $300 – $700
- Textiles (area rug, pillows, throw): $400 – $900
- Decor/Accessories (artwork, bar stools): $500 – $1,200
- Custom Loft Ladder: $800 – $2,000
- TOTAL: $4,200 – $9,300
- Budget alternative: A fabric sofa, DIY ladder, and thrifted decor could achieve a similar feel for around $2,000 – $3,500.
|
📋 Copy HEX 🔗 Share |
This room feels balanced because it masters the art of layering. It’s not just one style; it’s a careful blend. You have the rustic elements of the wooden coffee table and ceiling, the modern touch of the sleek black bar stools and light fixtures, and the classic comfort of that brown leather couch. The striped rug acts as a neutral anchor that ties all these different elements together. By not committing 100% to a single style, the space feels more personal and curated, just like you see in Idea #21.
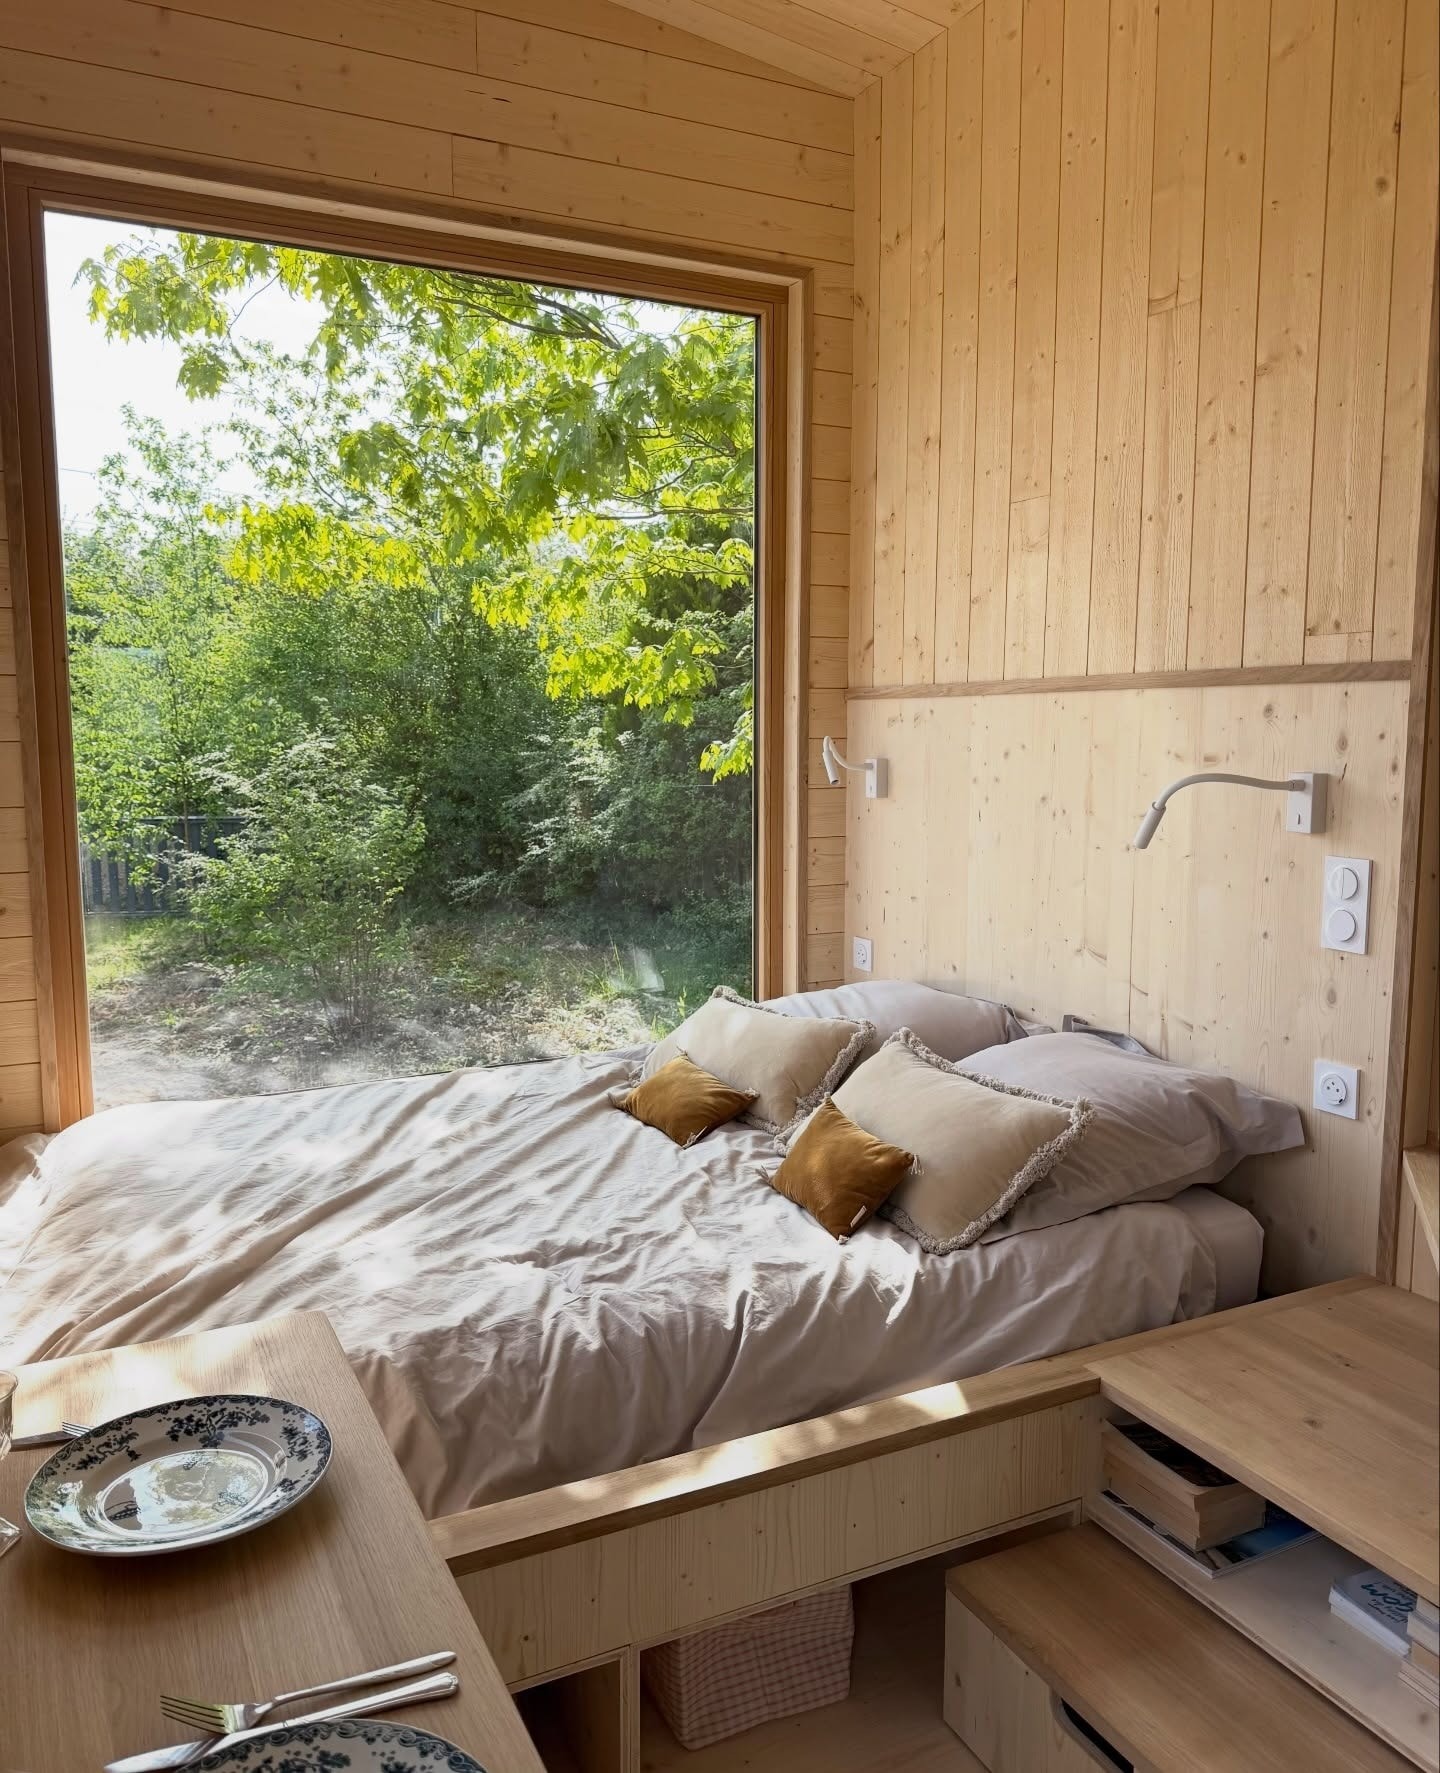
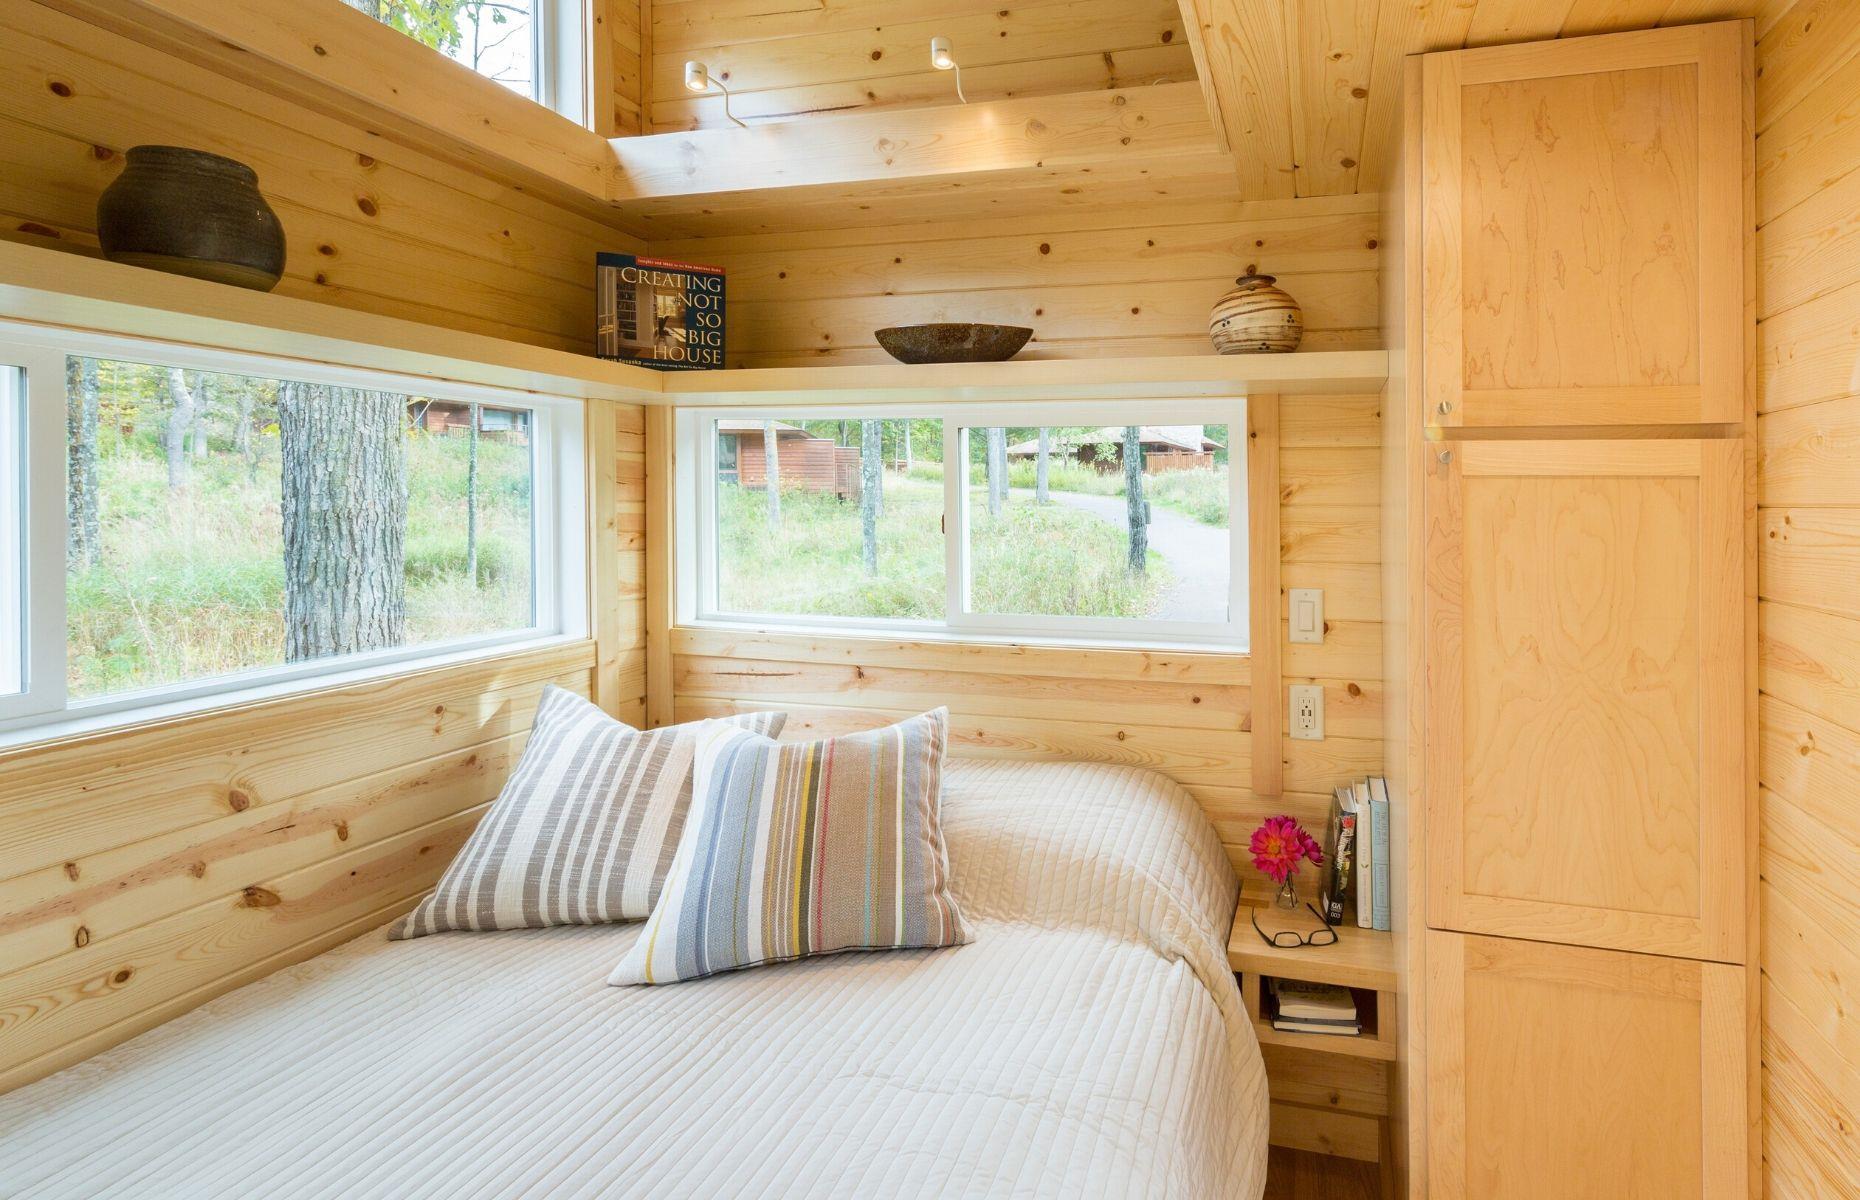
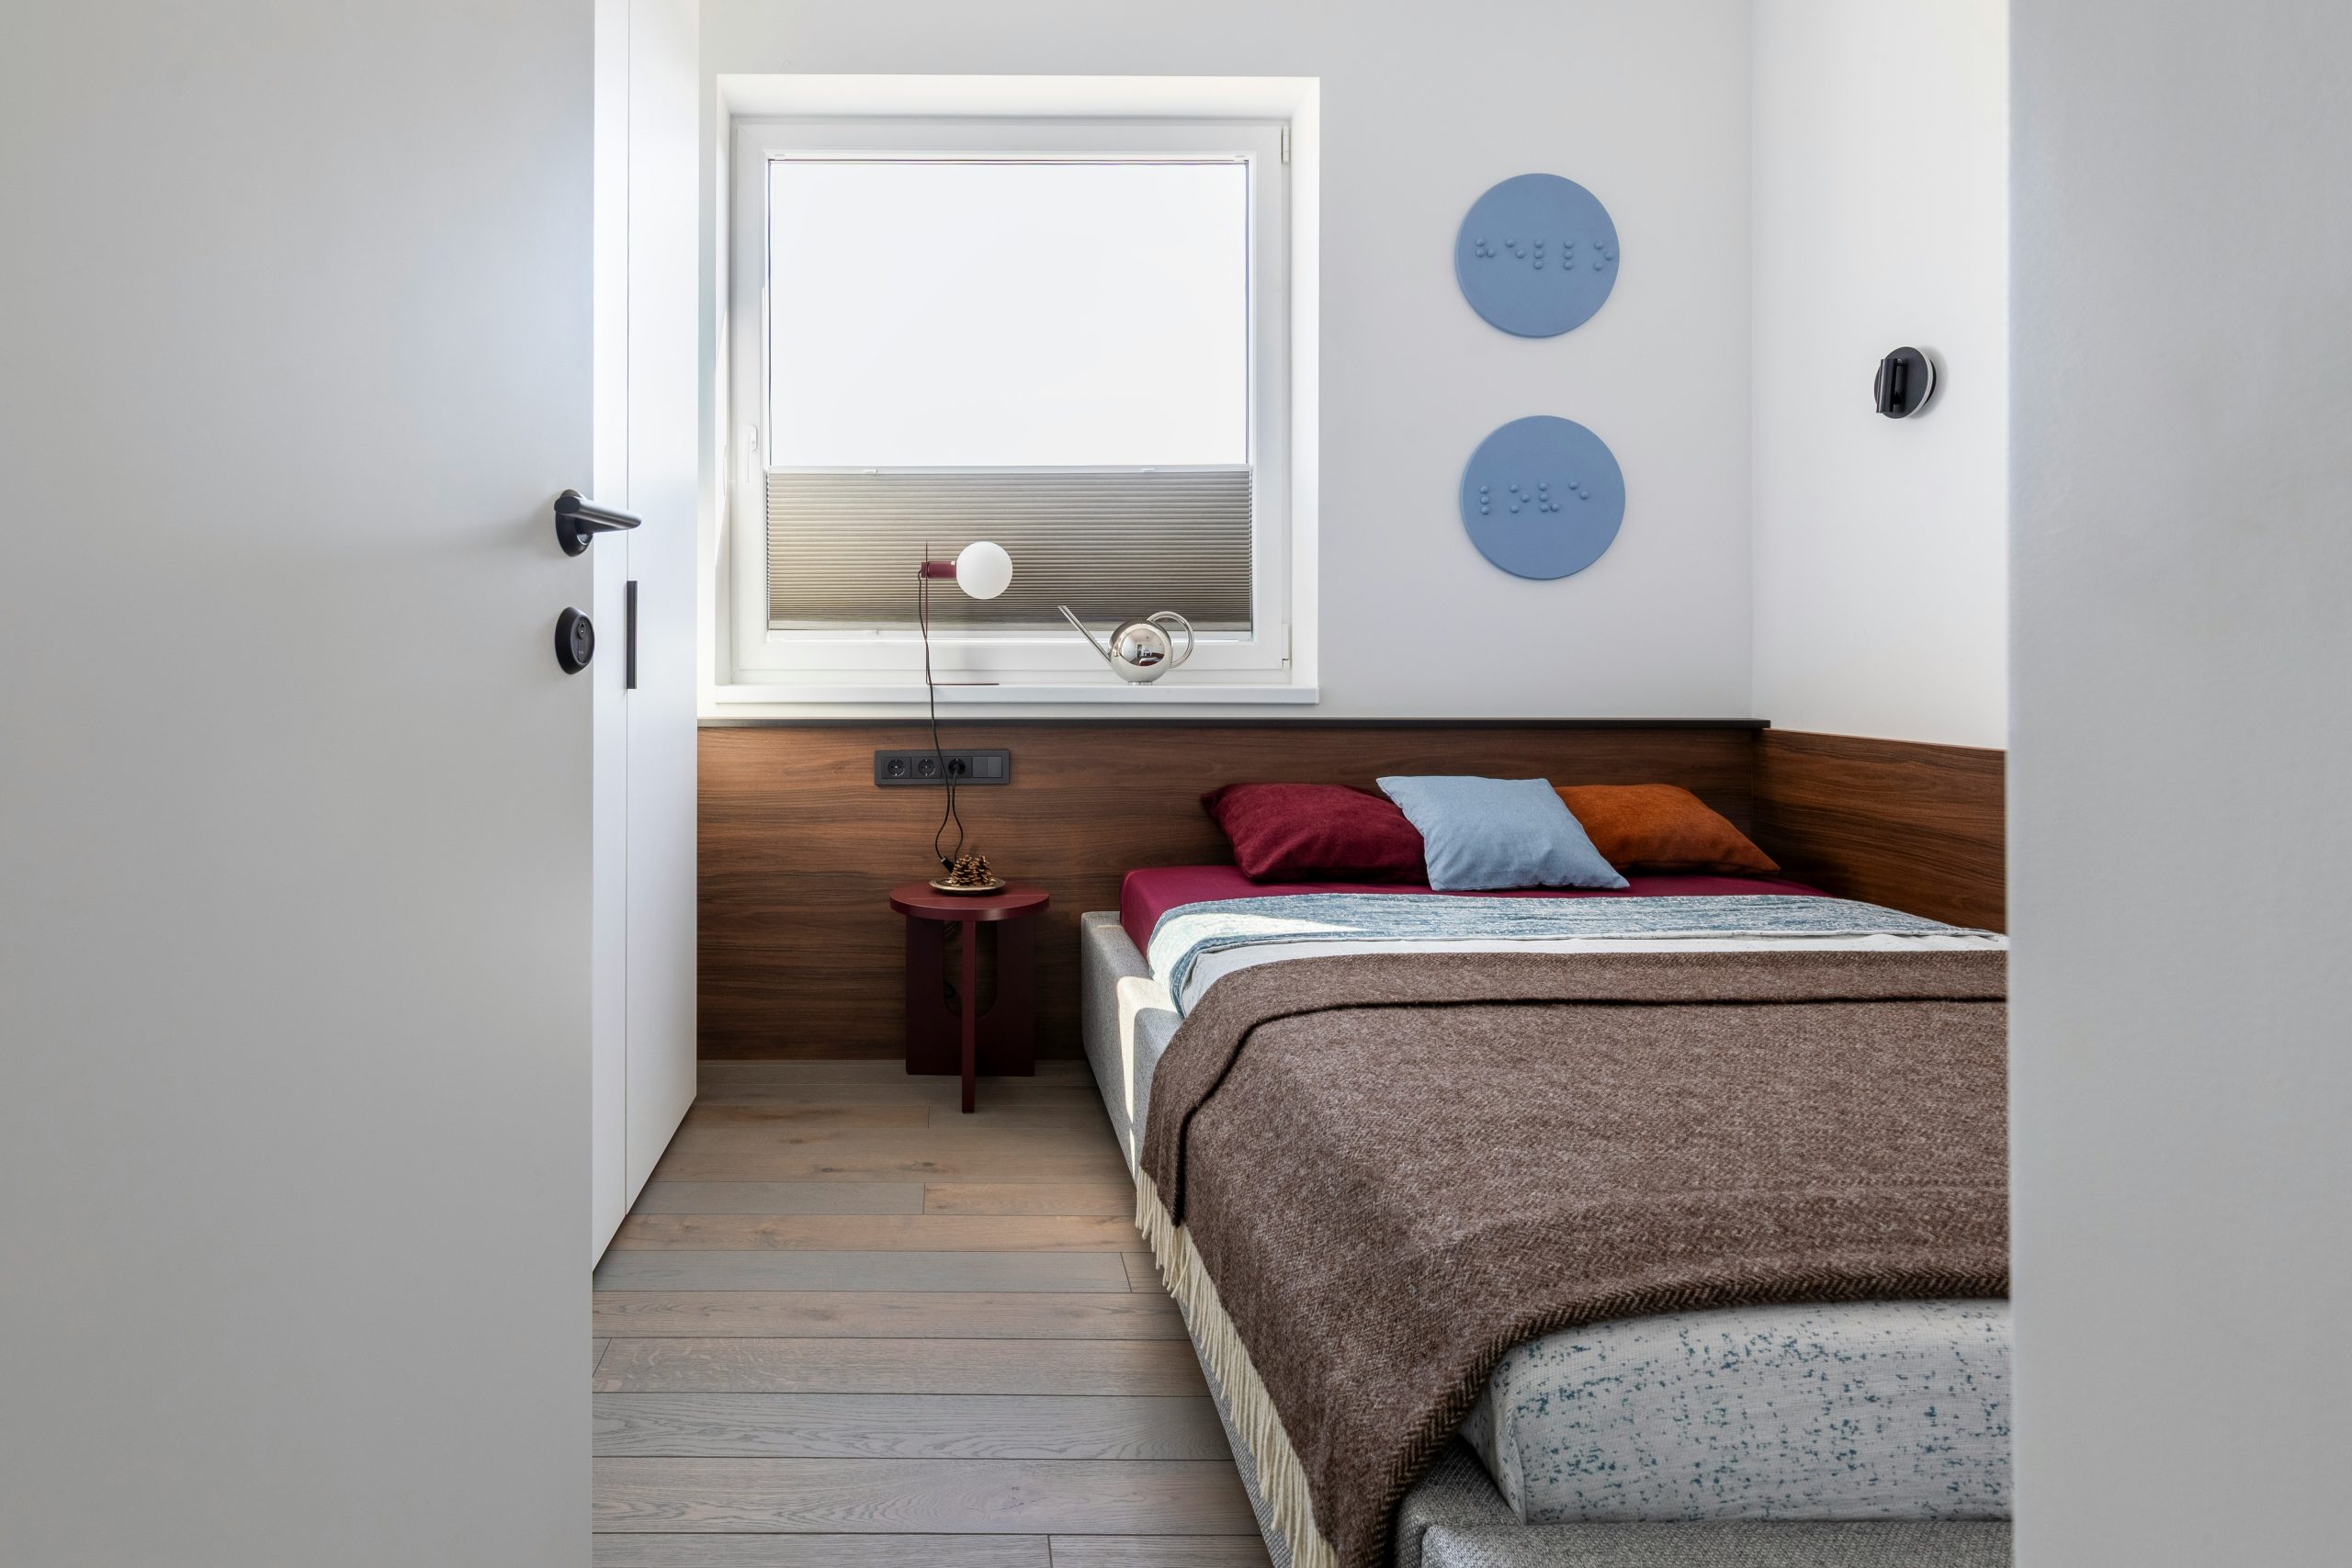
6. Serene Bedroom with a Large Picture Window
When using wood paneling in a small bedroom, run the planks horizontally, not vertically. Horizontal lines trick the eye into seeing the room as wider than it actually is, which is exactly what you want in a narrow space. Also, choose a light-toned wood like the pine or maple shown here. A dark wood like walnut or mahogany would absorb the light and make this serene nook feel like a dark, confining box, no matter how big that window is.
|
📋 Copy HEX 🔗 Share |
A design like this is perfect for bedrooms in the 70-100 square foot range. The key is the integration of furniture with the walls. The built-in platform bed and headboard unit save precious floor space that would otherwise be taken up by a freestanding bed frame and nightstands. The large, dominant window requires at least one wall that can be almost entirely dedicated to glass, so this works best for tiny homes situated in private, scenic locations where privacy isn’t the primary concern for that wall.
7. Minimalist Loft Bedroom with a Large Skylight
The skylight is, without a doubt, the hero of this design. Remove it, and you have a potentially dark, cramped attic space. With it, you get a bright, airy, and surprisingly spacious-feeling sleeping loft. It’s more than just a window; it’s a design feature that connects the indoors with the outdoors, floods the minimalist space with natural light, and creates a unique experience of sleeping under the stars. In a tiny house where every square inch counts, thinking vertically about light is a game-changer.

|
📋 Copy HEX 🔗 Share |
A huge skylight is a stunning feature, but it comes with practical considerations. Cleaning the exterior can be a real hassle, especially on a pitched roof. You’ll also want to invest in a high-quality skylight with excellent UV protection to prevent your bedding and the wood floors from fading over time. A model with an integrated, remote-controlled shade is a must-have for lazy sunny mornings or hot summer afternoons when the direct sunlight can turn your loft into a greenhouse.
8. Embrace Simplicity with a Plywood and Murphy Bed Interior
The beauty of this minimalist design lies in its material honesty. Using simple, unpainted plywood for walls, ceilings, and cabinetry creates a clean, unified, and warm aesthetic. It’s a backdrop that is visually quiet, allowing the shape of the room and the few pieces of furniture to stand out. This approach avoids the visual clutter that can make a small space feel chaotic, proving that simplicity is often the most sophisticated choice. The single-material focus makes the tiny home feel intentional and serene.
|
📋 Copy HEX 🔗 Share |
You don’t need custom cabinetry to get this look. The core material here is high-quality plywood, which is relatively affordable. Instead of a custom Murphy bed, look for ready-to-assemble versions from companies like IKEA or Wayfair, which can save you thousands. For storage, simple floating shelves or basic flat-pack cabinets from a big-box store can be clad in the same plywood to create that seamless, built-in appearance without the custom price tag. This entire vibe is achievable on a tight budget with some smart DIY.
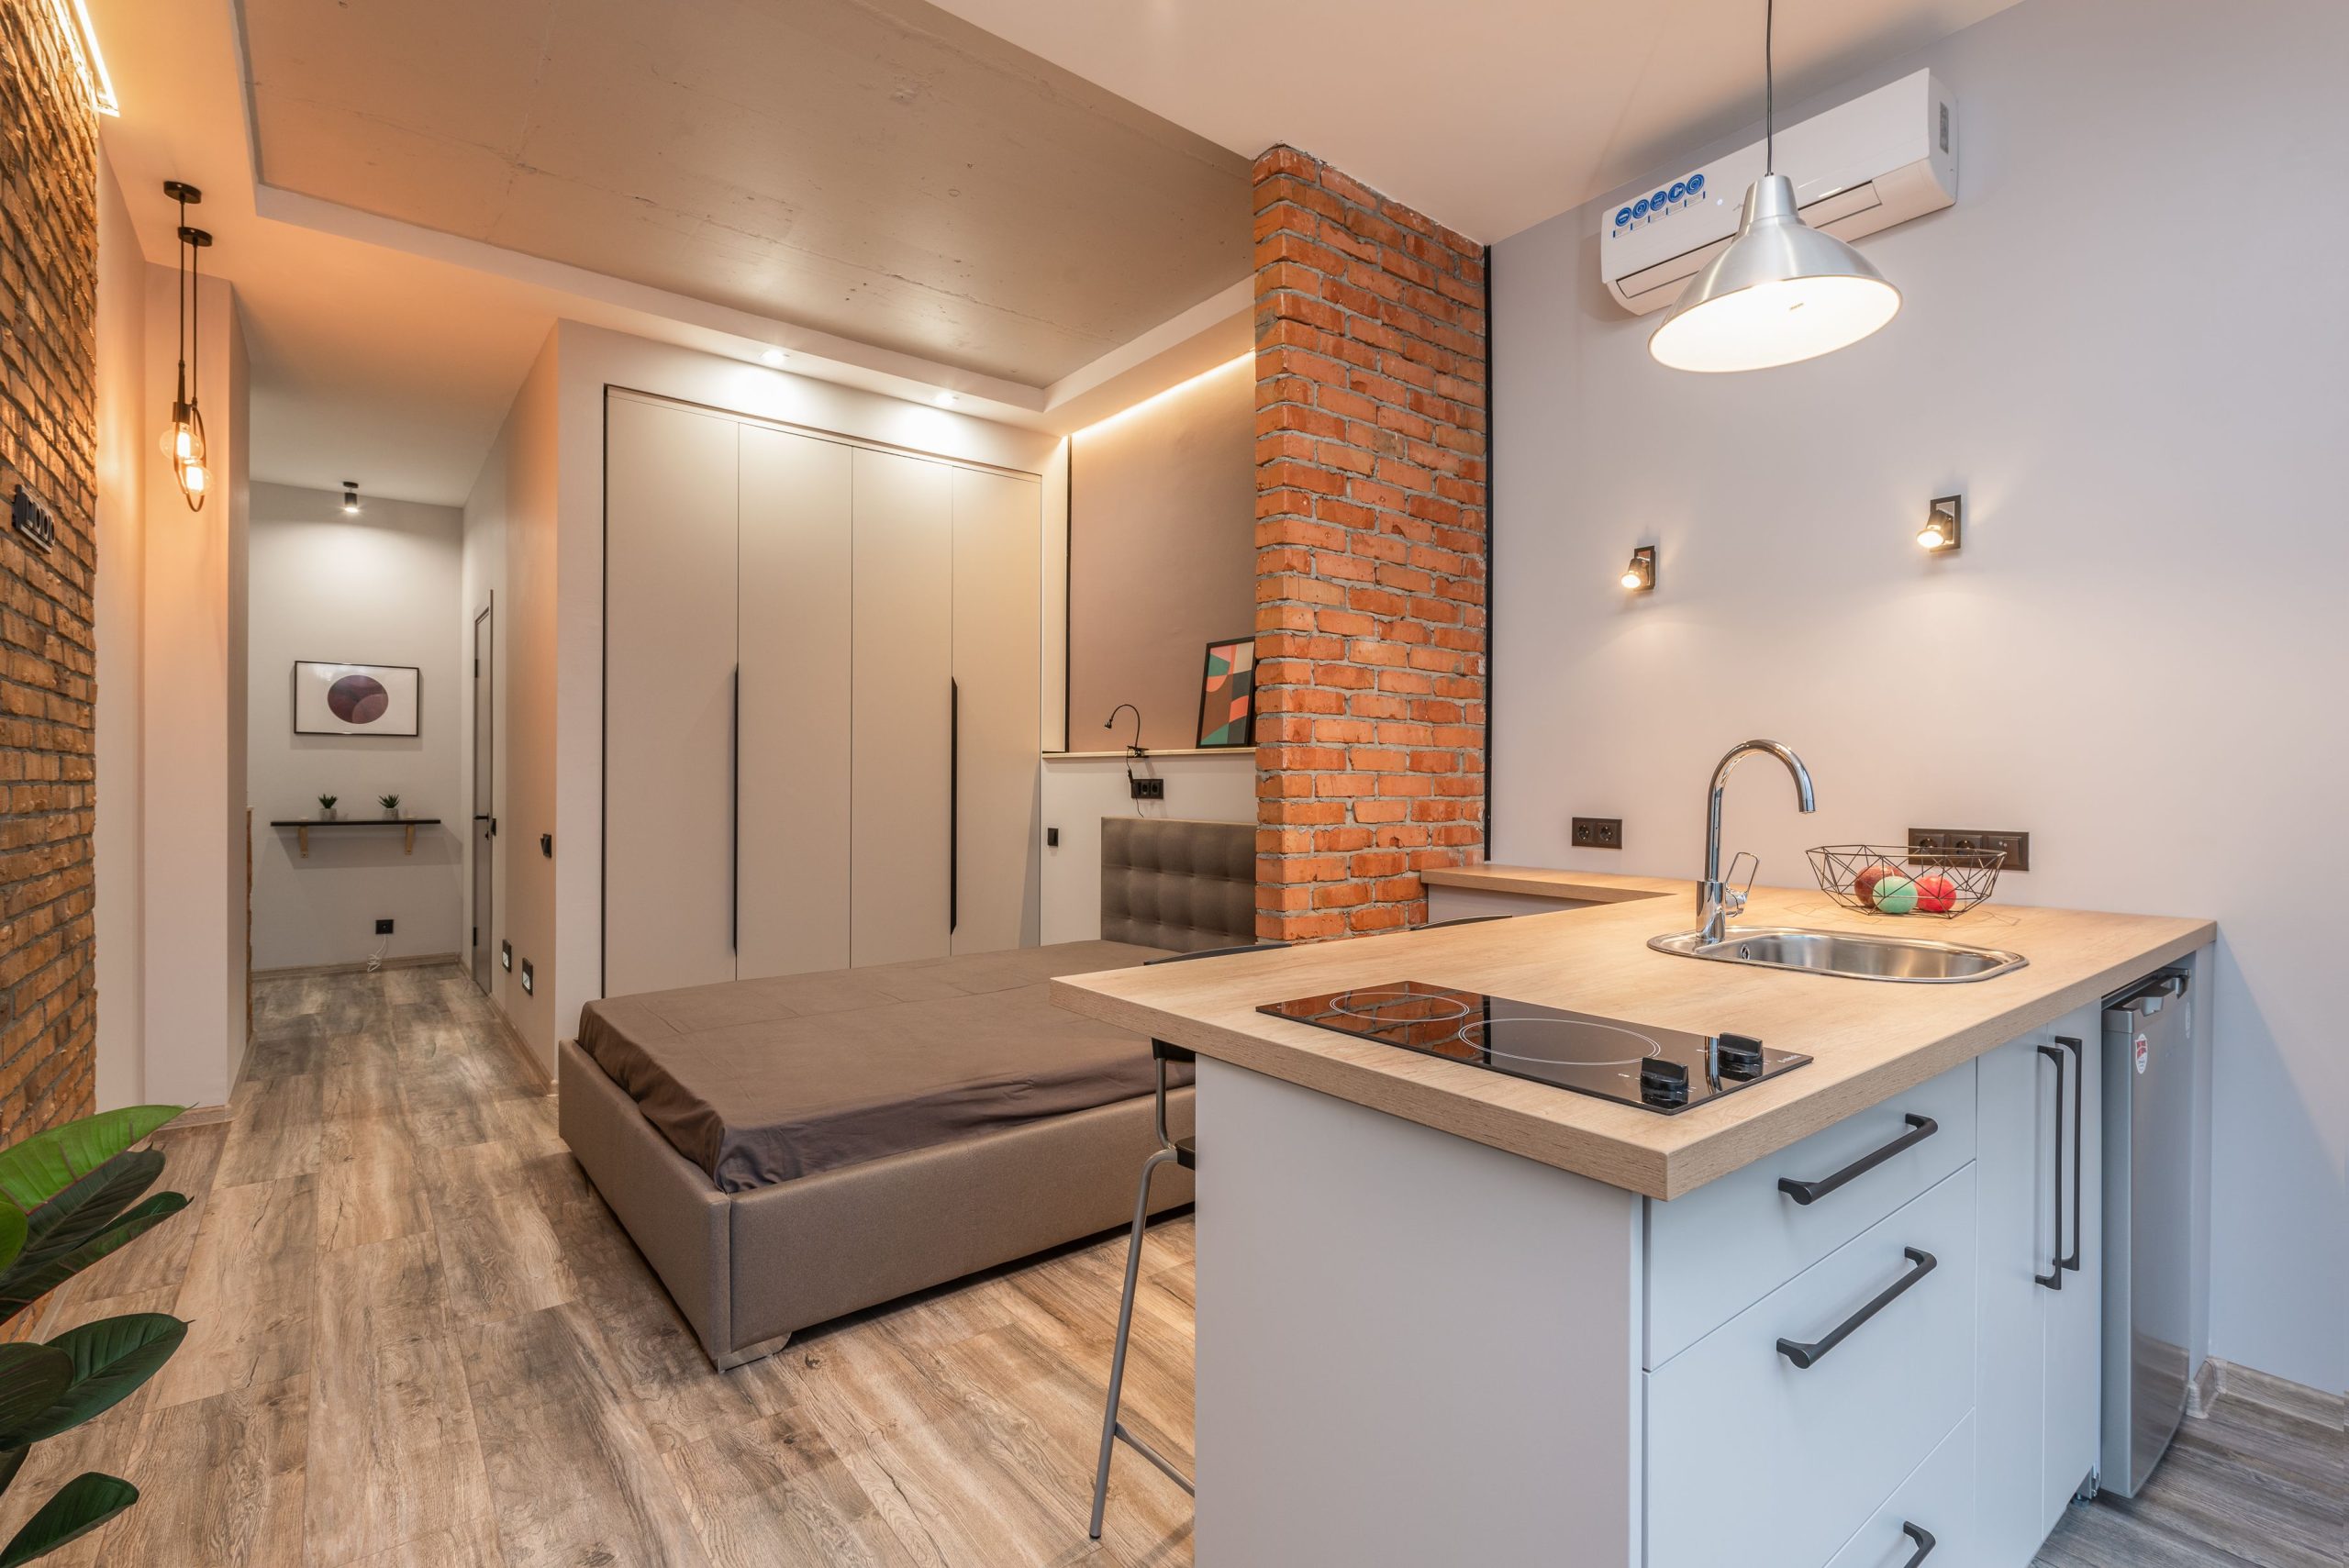
9. Modern Studio with a Red Brick Accent Wall
This studio’s design math is all about balancing grit and polish: 40% industrial texture + 50% sleek modernism + 10% warm lighting. The exposed red brick wall provides that raw, industrial character. The clean lines of the grey wardrobe, integrated kitchenette, and simple bed frame bring the sleek, contemporary feel. Finally, the strategic use of recessed and pendant lighting adds a layer of warmth that keeps the space from feeling cold or sterile. The light wood-look floor acts as the neutral bridge between the brick and the modern elements.
|
📋 Copy HEX 🔗 Share |
An exposed brick wall is a fantastic feature, but it’s not always practical. Real brick can be dusty and porous, requiring sealing to be cleanable, especially near a kitchen. It’s also a poor insulator. If you have an exterior brick wall, it can make the room colder in the winter. A more practical alternative for many tiny homes is using thin brick veneer. It gives you the exact same look without the structural weight, dust, or insulation problems of a real, solid brick wall.

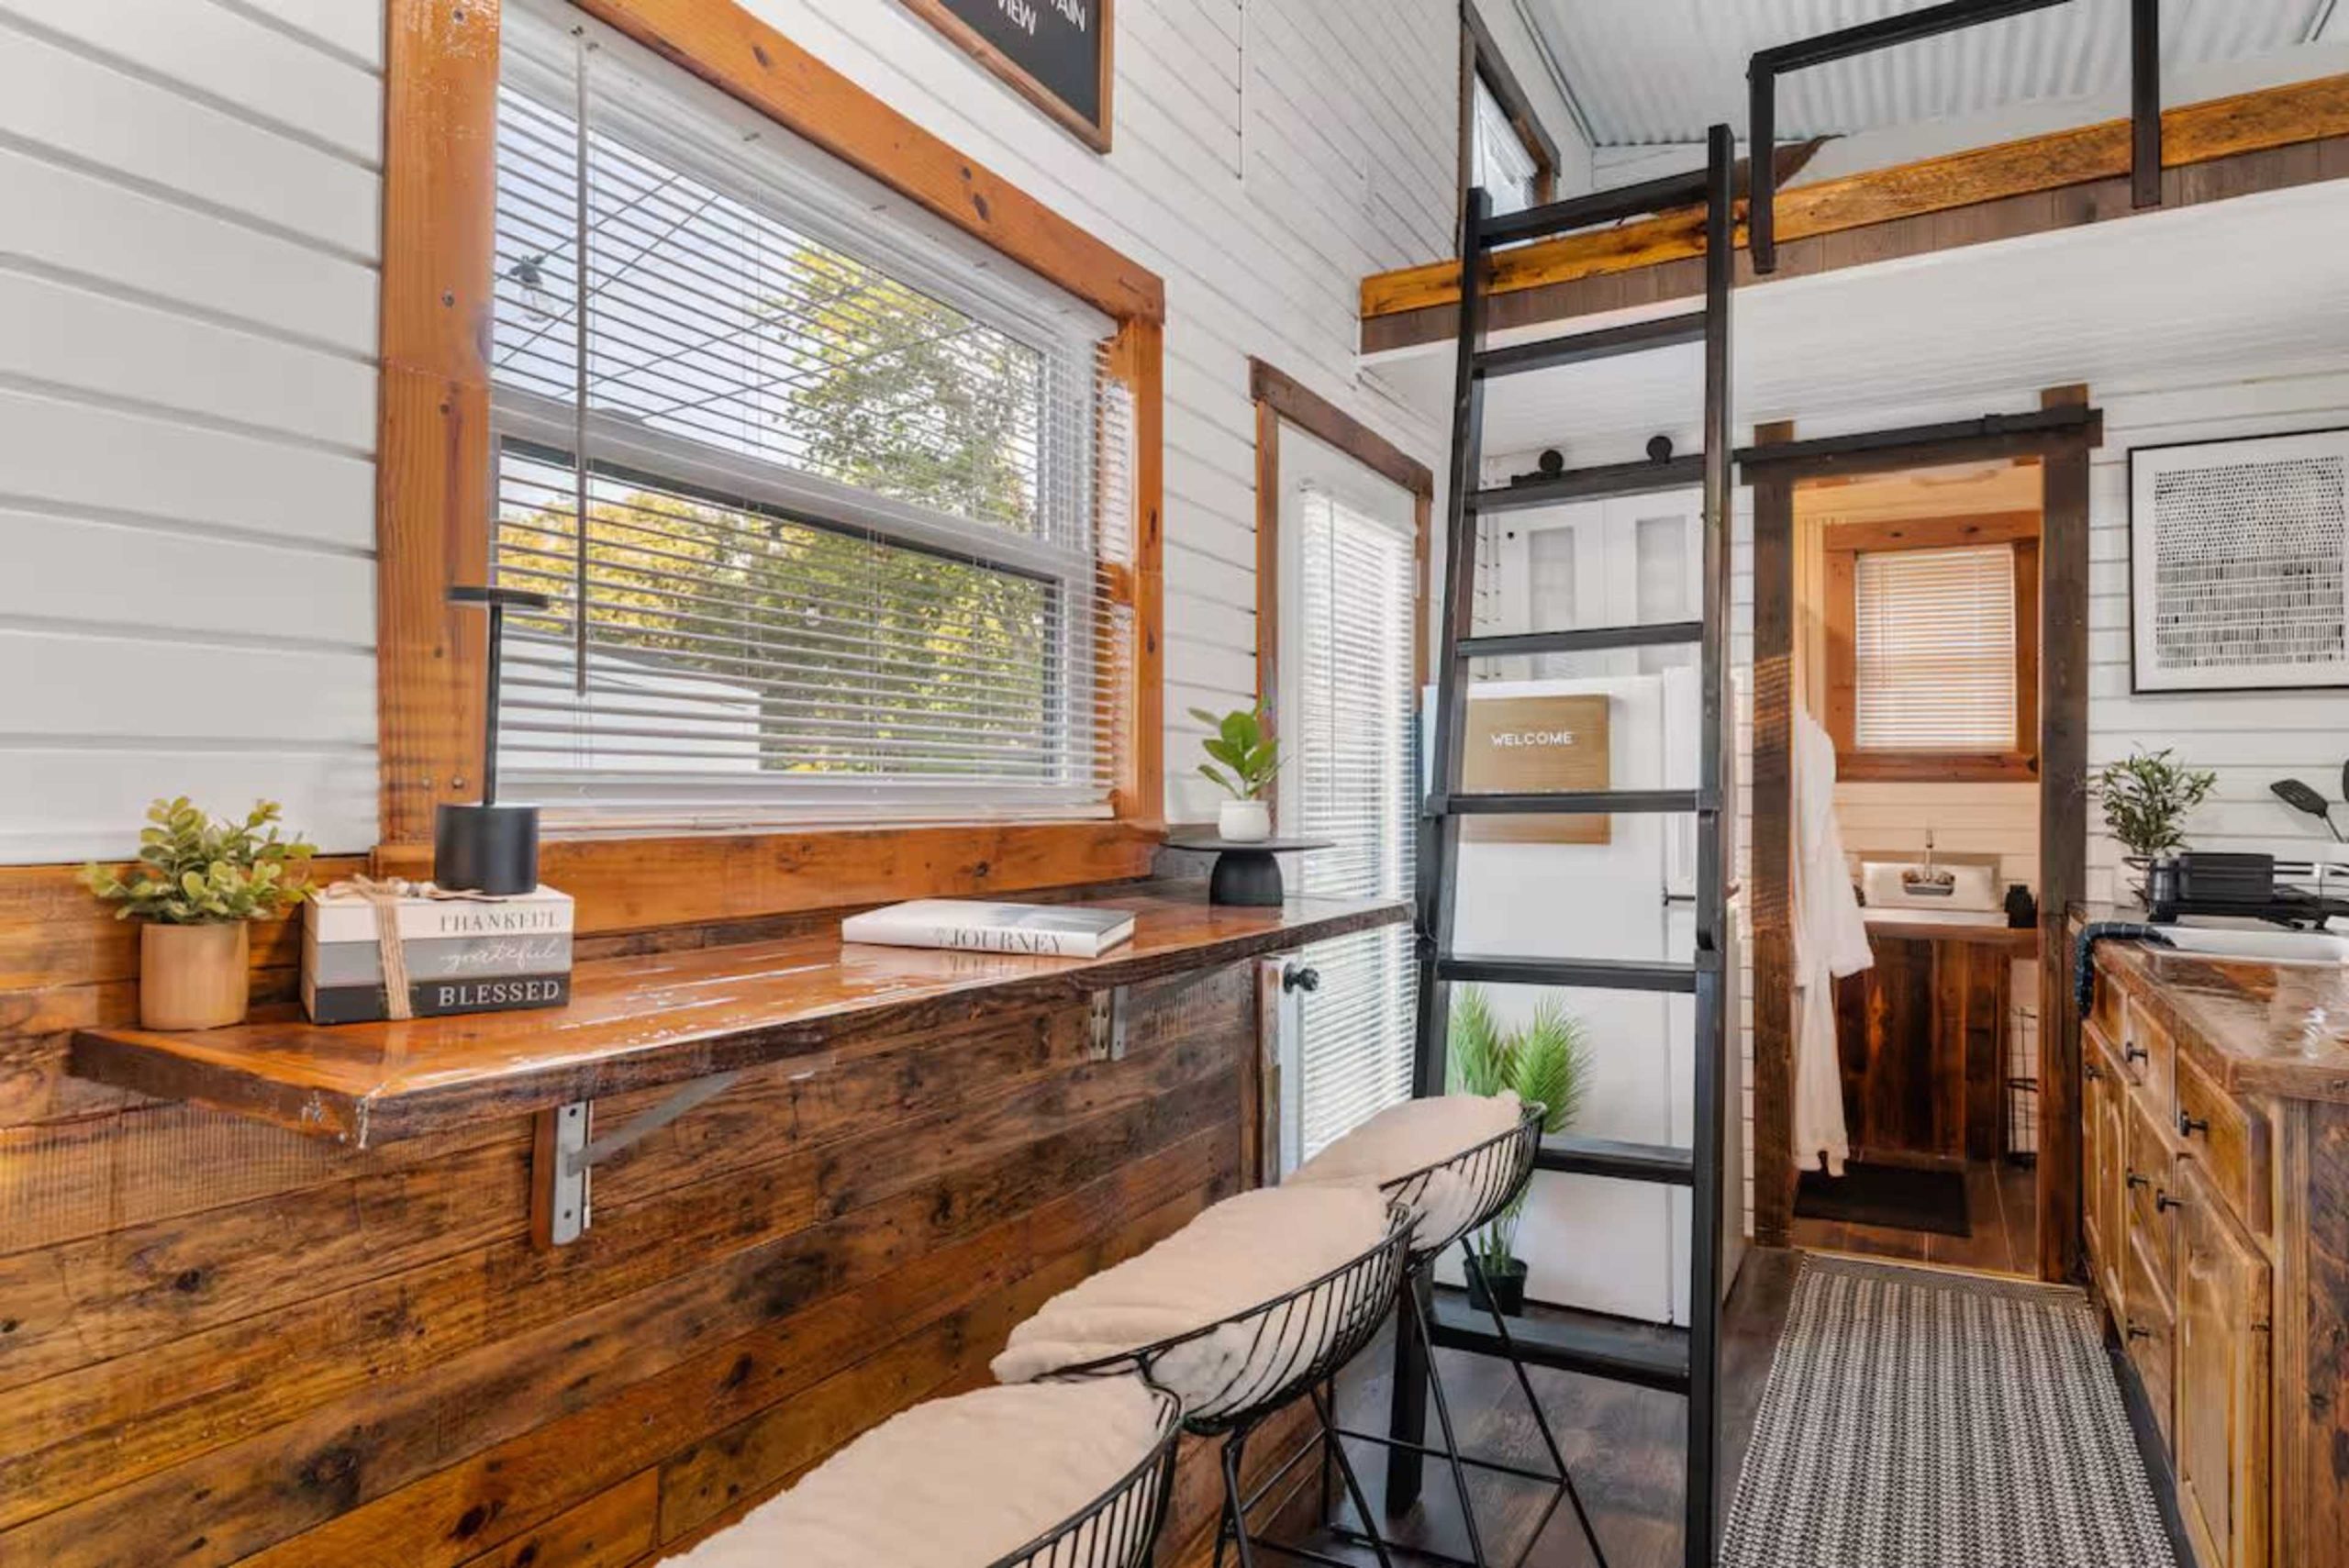
10. Rustic Tiny Home with a Black Metal Loft Ladder
When pairing white shiplap with reclaimed wood, pay attention to the wood’s undertones. The wood here has warm, orange-brown tones, which creates a cozy, high-contrast look against the stark white. If you used a cooler, grayer reclaimed wood, the entire space would feel more coastal or modern. For a cohesive look, pull a color from the wood for your metal accents—the black in the ladder, window frames, and stool legs echoes the darker knots and grain in the reclaimed wood, tying everything together. This is a more rustic take on the shiplap look in Idea #1.
|
📋 Copy HEX 🔗 Share |
11. Cozy Pine-Paneled Room with Natural Light
This room feels like a warm, cozy hug, and it’s all thanks to the floor-to-ceiling pine paneling. By using the same material on every surface, the design eliminates visual breaks and fussy details. This creates a simple, monolithic shell that feels incredibly restful and serene. The large, unadorned windows then act as living artworks, punching through the wood cocoon to bring in light and the vibrant green from outside. It’s a masterful exercise in material simplicity, very different from the painted shiplap in Idea #1 but achieving a similar rustic brightness.
|
📋 Copy HEX 🔗 Share |
This wall-to-wall wood paneling works best in a simple, rectangular room between 80 and 150 square feet. The simplicity of the shape allows the wood’s texture to be the star. In a room with lots of odd angles, dormers, or complicated rooflines, the all-over paneling could start to feel busy and claustrophobic. It requires high ceilings (at least 8 feet) to prevent the wood from feeling too heavy and oppressive. The success of this look is entirely dependent on having large windows to flood the space with natural light.
12. Compact Living Area with a Suspended Loft Bed
The suspended loft bed is the undeniable centerpiece of this room’s clever design. By hoisting the bed up high, the layout frees an entire room’s worth of floor space underneath, allowing for a comfortable sectional sofa that would otherwise never fit. It’s a brilliant solution in a tiny house, where the floor plan is the ultimate puzzle. This single move doubles the functionality of the main living area, transforming it from just a sitting room into a sitting room and a bedroom without sacrificing comfort in either zone. Compare this to the layout in Idea #13, which uses a similar trick.

|
📋 Copy HEX 🔗 Share |
To recreate the striking yellow and white floral comforter pattern as a painted accent wall, follow these steps:
- Time: 3-4 hours. Cost: $70.
- Find your pattern: Find a simple floral or geometric stencil you like, or freehand a design on paper first.
- Prep the wall: Make sure your wall (likely a crisp white) is clean and dry. Use painter’s tape to mark off the edges.
- Base color: Using a small roller or brush, paint your main floral color (that vibrant yellow). Don’t worry about being perfect yet.
- Add details: Once the yellow is dry, use a small artist’s brush to add the white centers or other accents to your flowers.
- Clean up: Peel off the painter’s tape while the paint is still slightly tacky for the cleanest lines.
13. Functional Loft Bed Over a Sofa with Integrated Shelving
This space is a masterclass in functional Scandi design, and it follows a clear recipe: 70% crisp white + 20% light natural wood + 10% dark accents. The walls, ladder, and much of the furniture are white, creating a bright canvas. The wooden loft bed frame, shelf, and floor provide warmth and texture. Finally, the navy blue sofa and dark grey rug ground the space and add a touch of sophisticated contrast. This formula is endlessly adaptable—swap the navy for a forest green or a deep burgundy for a different mood without losing the clean, balanced feel. It’s a similar vertically stacked concept to Idea #12 but with a cooler palette.

|
📋 Copy HEX 🔗 Share |
Before you commit to a loft bed setup, check these three things:
- Ceiling Height: You need a minimum of 9 feet from floor to ceiling. This allows for about 40-42 inches of clearance in the loft (enough to sit up) and a standard ceiling height underneath.
- Triple-Check Measurement: Measure the length, width, and height of your space. Then measure the dimensions of the exact loft bed and sofa you plan to buy. Don’t eyeball it.
- Stud Location: A loft bed, especially one with an integrated shelf, needs to be securely anchored to the wall studs for safety. Use a stud finder and mark the locations before you even think about assembly.
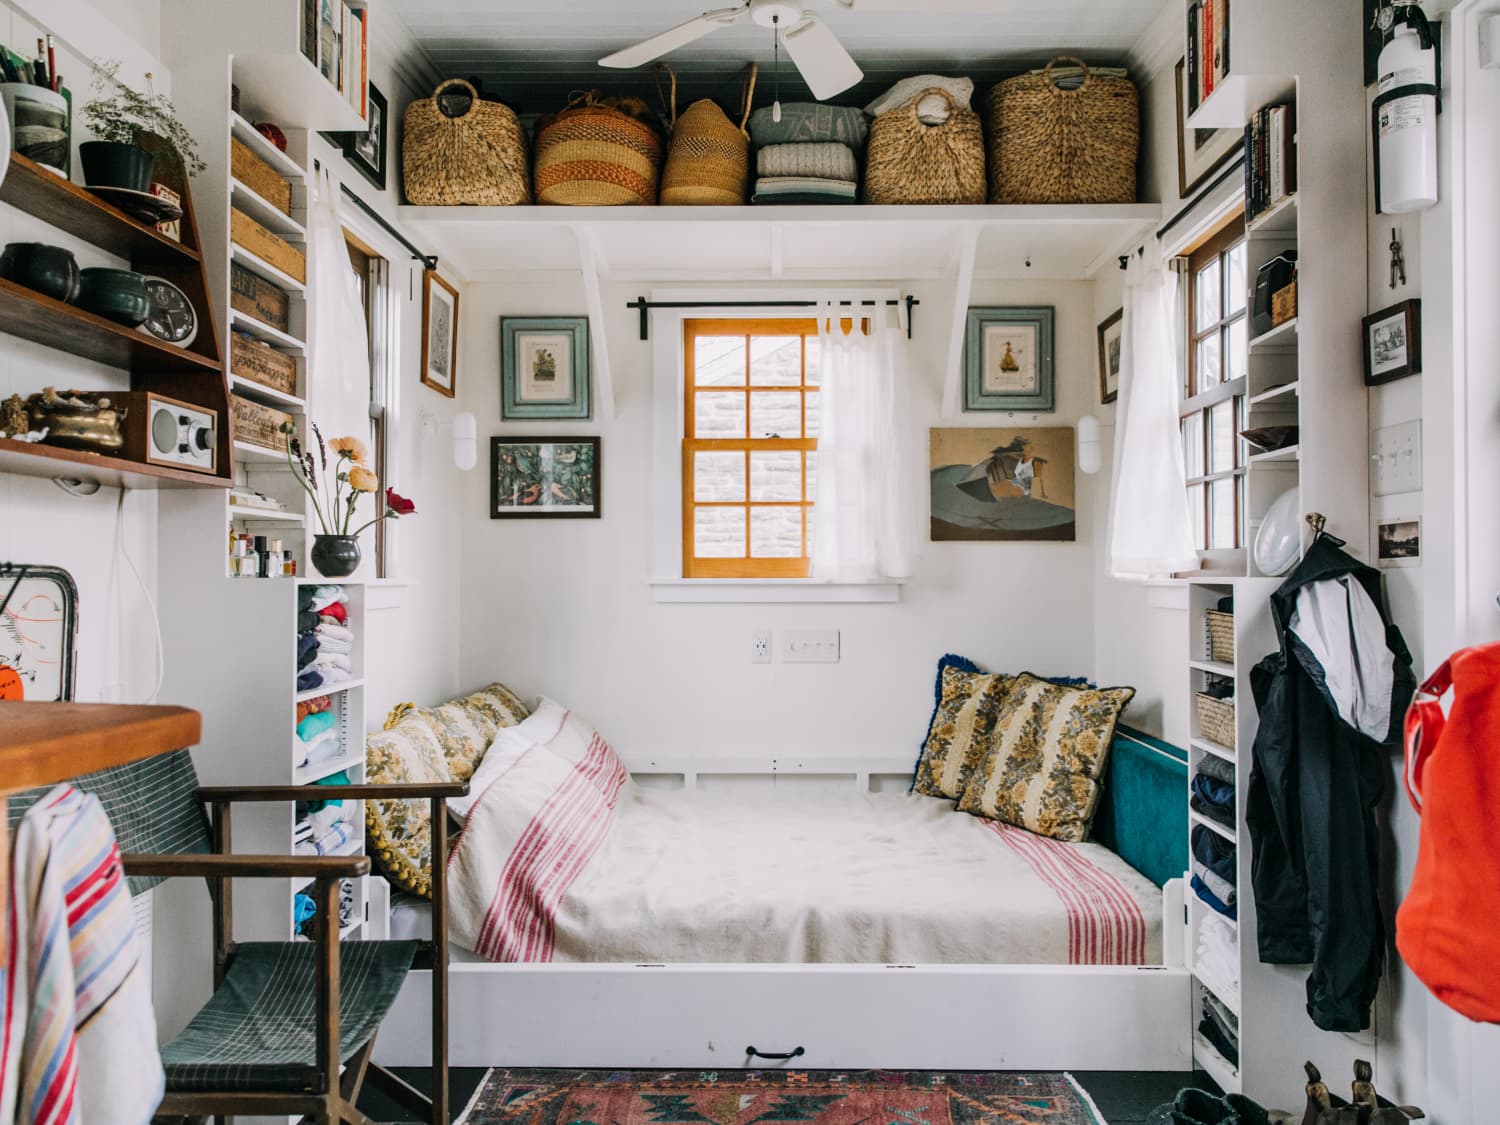
14. Cozy Sleeping Nook with Wall-to-Wall Built-in Shelving
You don’t need a custom carpenter to create this cozy, library-like nook. You can achieve this exact look using standard, off-the-shelf bookcases from IKEA or Target. The key is to buy enough units to span the entire wall. Assemble them, arrange them around your daybed, and then use simple wood trim from a hardware store to cover the seams between the units. Anchor everything securely to the wall. It will give the impression of a single, expensive custom built-in for a fraction of the cost. Fill the lower shelves with affordable wicker baskets from Walmart for chic, hidden storage.
|
📋 Copy HEX 🔗 Share |
The secret to making a small space like this feel personal and not cluttered is a controlled color palette for your accessories. Notice how the decor sticks to a theme of whites, natural wicker, and pops of blue and red, echoed in the rug and artwork. By limiting the number of colors you introduce, the items on the shelves read as a cohesive collection rather than random stuff. Too many colors would make this cozy nook feel chaotic and visually noisy.
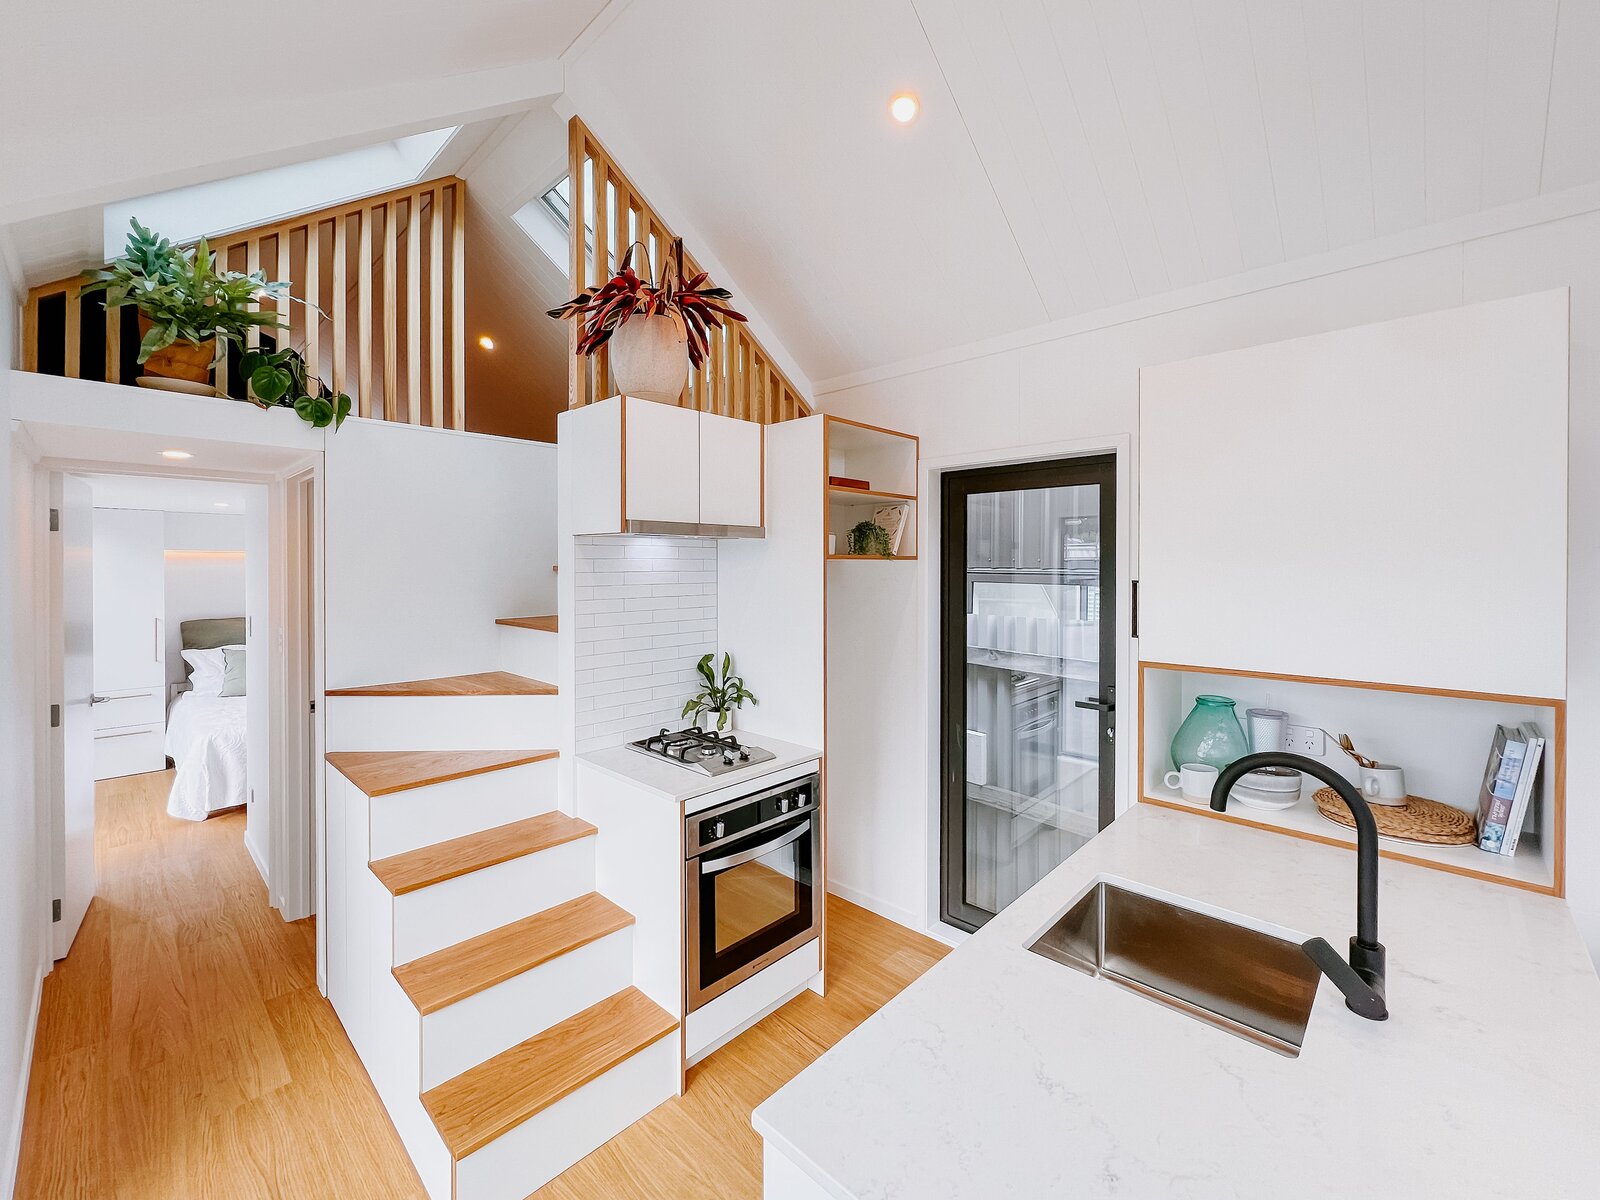
15. Bright Loft Kitchen with Light Wood and White Finishes
This design feels so airy and modern because it prioritizes vertical lines and a simple palette. The slatted wood railing on the stairs and loft draws the eye upward, emphasizing the ceiling height. This vertical movement is repeated in the clean lines of the white subway tile backsplash. By sticking to a strict color scheme of white, light wood, and black accents, the space avoids visual clutter. This is a great example of how you can make multiple functional zones—kitchen, stairs, and hallway—feel like one harmonious space. It’s a more modern interpretation of the kitchen in Idea #2.
|
📋 Copy HEX 🔗 Share |
An all-white kitchen with open-tread stairs looks stunningly clean… when it’s clean. White marble-look countertops, while beautiful, can be prone to staining from things like coffee, wine, or tomato sauce if not sealed properly and wiped up immediately. Those open-tread stairs are a magnet for dust and debris falling from the loft above, meaning you’ll be cleaning the kitchen countertops and floor more often than in a standard layout. The look is a 10/10, but the required cleaning is a solid 8/10 on the effort scale.
16. Cozy Twin Loft Bedroom with Pink and Gray Bedding
While this dual-bed loft looks incredibly cozy, be realistic about headroom. In a pitched-roof tiny house, the ceiling height can vary dramatically. The bed positioned closer to the eaves will have significantly less sit-up space than the one near the peak. This setup might be perfect for young children, but adults might find the lower side frustrating. Also, consider the skylight placement—a large, central skylight is great for light but can be intense for the person sleeping directly under it without a good blackout shade.

|
📋 Copy HEX 🔗 Share |
This twin bed layout is specifically for a narrow loft, likely measuring between 7 and 9 feet wide. The beds are placed lengthwise to maximize the floor space. You’ll need a ceiling peak height of at least 5 feet to make the center of the room feel usable, with the sides tapering down. This design is highly space-specific and is an efficient way to create sleeping quarters for two in a loft that’s too narrow for a single queen bed placed horizontally.
17. Knotty Wood-Paneled Living Area with a Taupe Sofa
The visual recipe here is a masterclass in warm minimalism: 80% textured natural wood + 15% soft neutral textiles + 5% sharp black/white contrast. The knotty wood planks on the walls and ceiling create an almost monolithic shell of texture. The light taupe sofa and white throw soften the wood and add a layer of comfort. Finally, the black lines of the rug’s geometric pattern and the white-paned door provide just enough crisp definition to keep the space from becoming a blurry sea of brown. It’s a simple but incredibly effective formula.
|
📋 Copy HEX 🔗 Share |
18. Smart Storage Solutions in a Compact Living Area
A built-in bench with hidden storage is a tiny house superhero. Here’s a simplified breakdown of how to build one:
- Time: 1 day. Cost: $150-300.
- Build the Frame: Construct a simple rectangular frame from 2x4s to your desired length and height (a standard seat height is 18 inches). Add vertical supports every 16-24 inches.
- Clad the Frame: Cover the front and sides of the frame with plywood or MDF.
- Create the Lid: Cut a piece of 3/4-inch plywood to sit on top of the frame. Attach it to the back of the frame using piano hinges so it can lift up easily.
- Finish and Style: Sand everything smooth, then paint or stain to match your decor. Add a custom cushion on top for comfort.
|
📋 Copy HEX 🔗 Share |
In a tiny space, every piece of furniture should do at least two jobs. A bench is for seating and storage. An ottoman is for your feet and storage and an extra seat. A dining table can also be a desk. Before buying anything for your tiny home, ask yourself: “What else can this do?” If the answer is “nothing,” you probably haven’t found the right piece of furniture. Multifunctionality is the single most important principle in tiny house design.
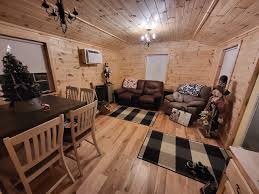
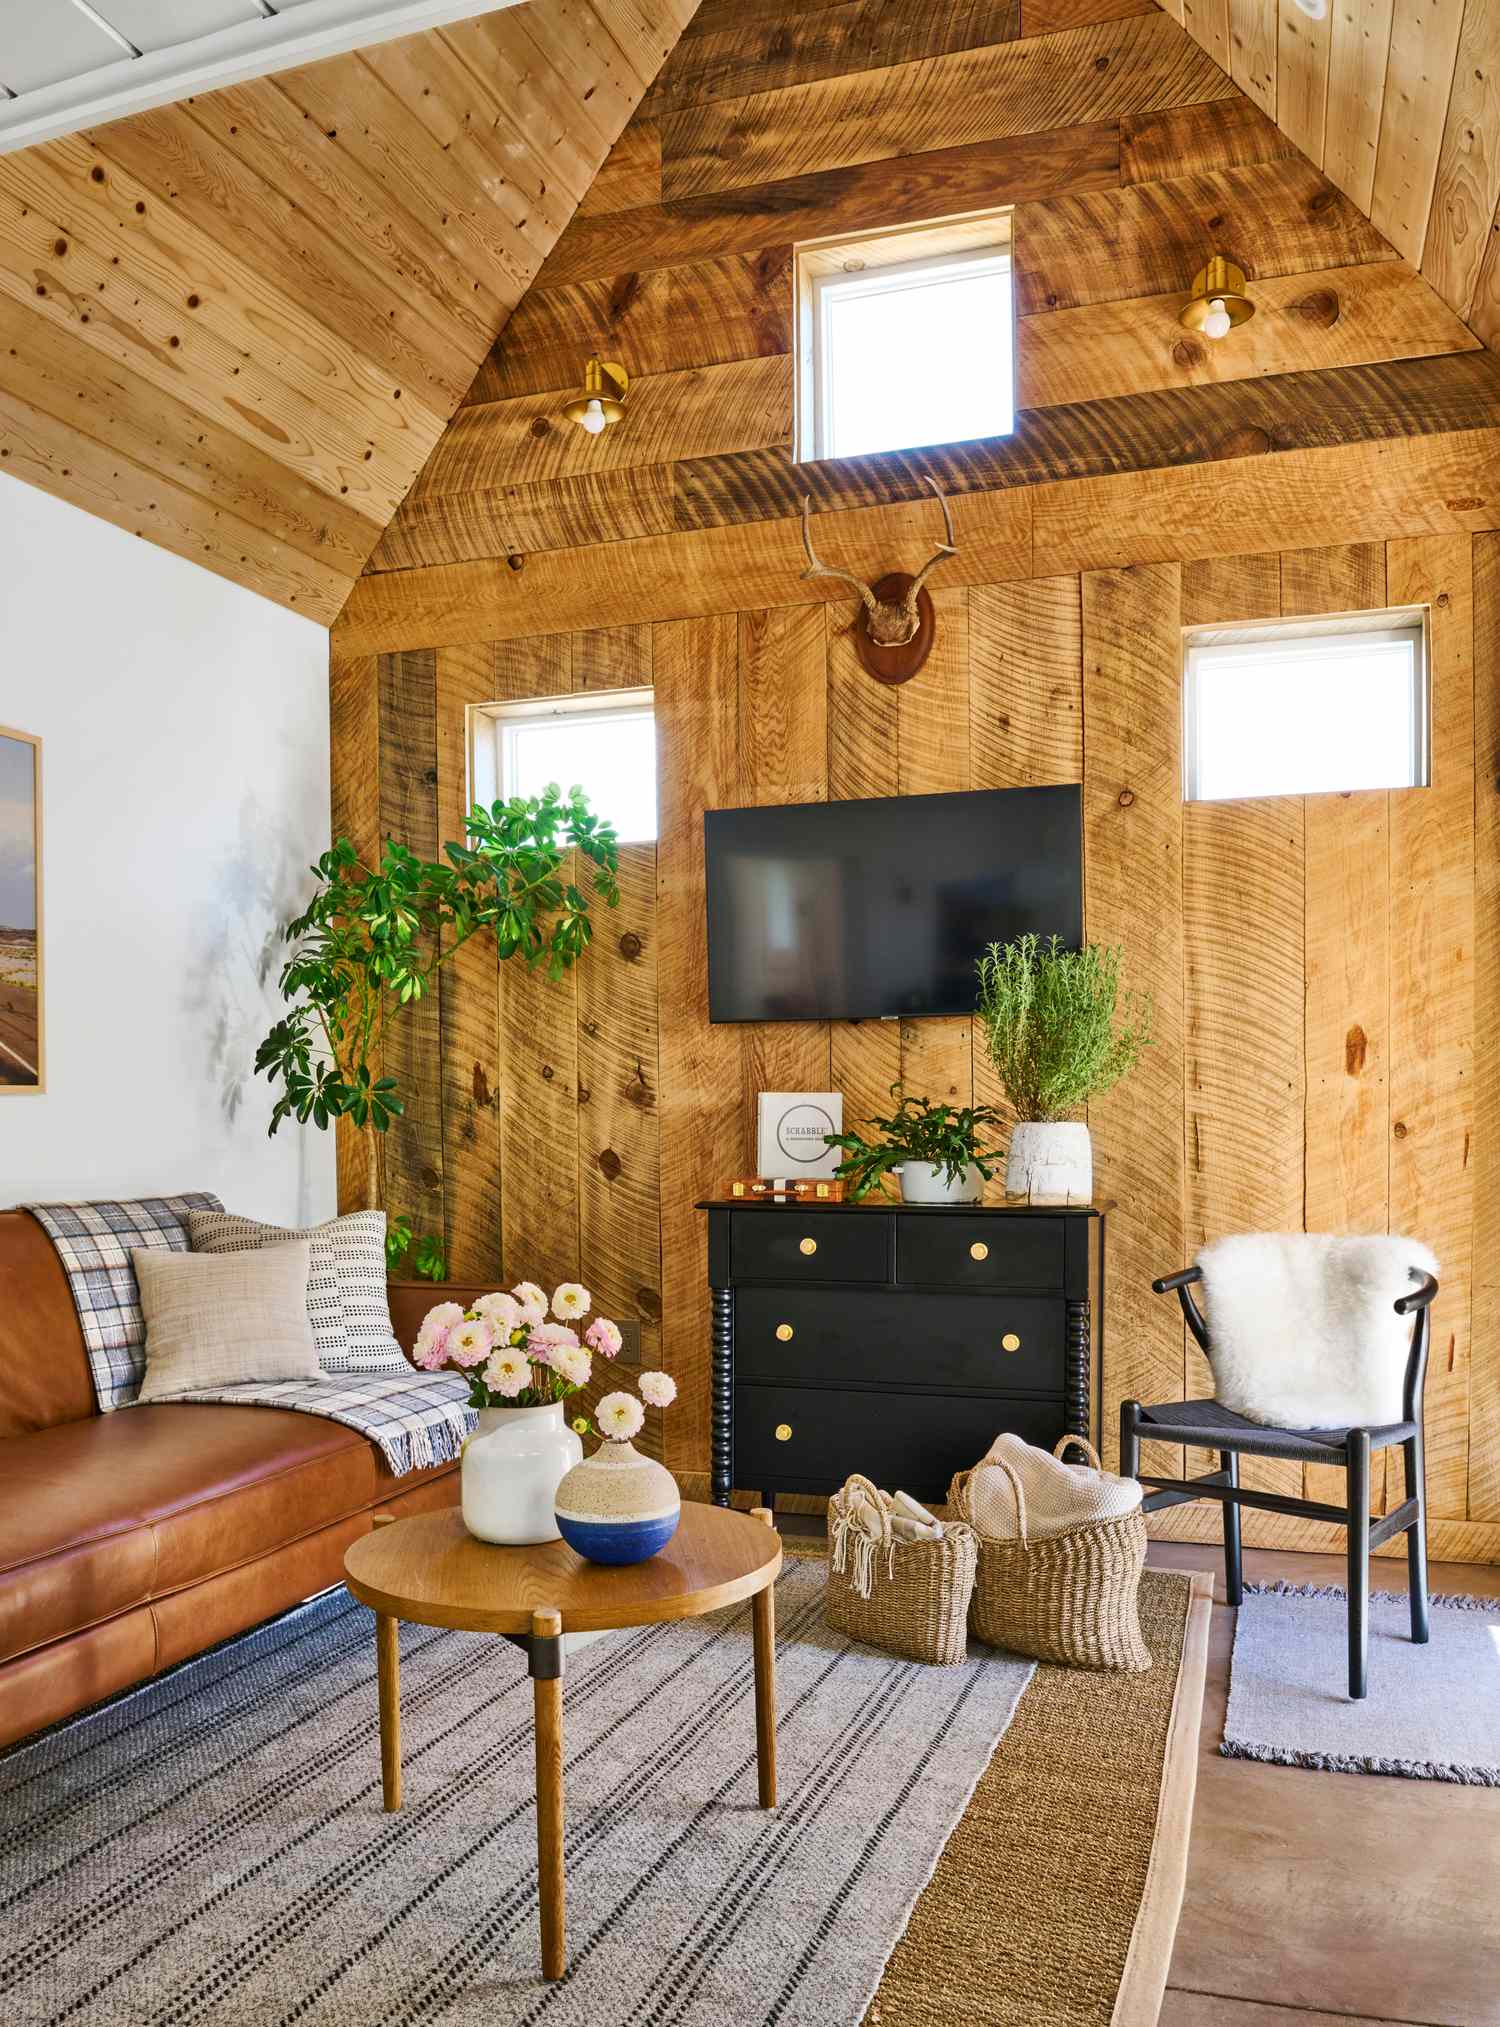
19. Rustic Living Room with a Tan Leather Sofa
This rugged, cozy look can be put together across a range of price points. Here are some estimates for recreating this specific vibe:
- Main Furniture (tan leather sofa, black dresser): $2,800 – $6,000
- Textiles (area rug, throw pillows): $500 – $1,100
- Decor/Accessories (coffee table, lighting, antler mount): $600 – $1,500
- Wall Treatment (textured wood planks): $1,000 – $3,000 (installed)
- TOTAL: $4,900 – $11,600
- Budget alternative: A faux leather sofa, staining standard pine boards, and thrifting the dresser and decor could bring this look home for $2,500 – $4,000.
|
📋 Copy HEX 🔗 Share |
This room feels so authentically rustic because it perfectly balances textures. You have the smooth, warm texture of the tan leather sofa, the rough, organic texture of the natural wood walls, the soft, nubby texture of the knitted pillows, and the flat, woven texture of the area rug. This layering of different tactile surfaces creates a rich, complex visual experience that feels curated and deeply comfortable. The sleek black of the dresser adds a single, smooth counterpoint that keeps the textures from overwhelming the space.
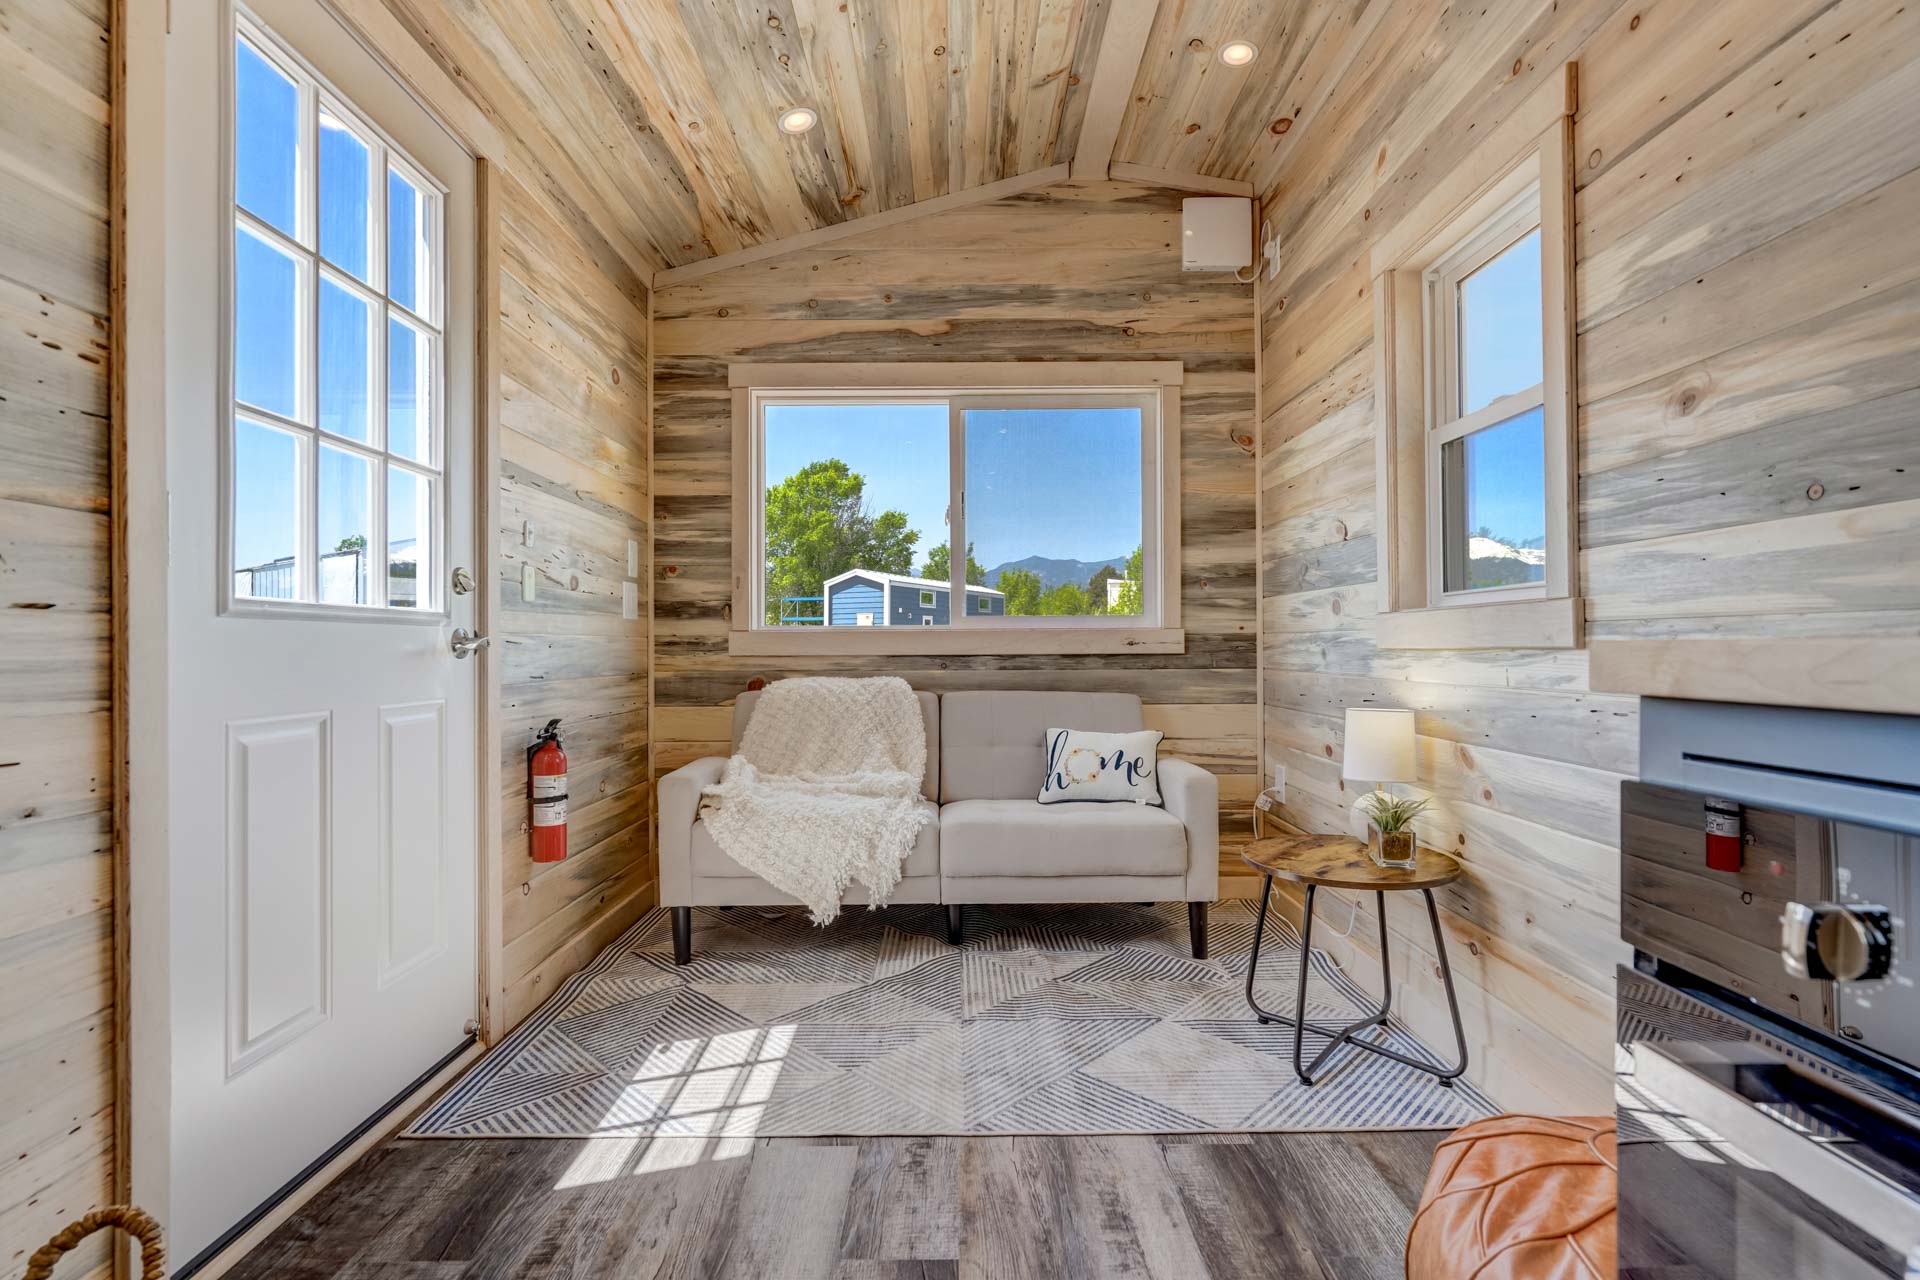
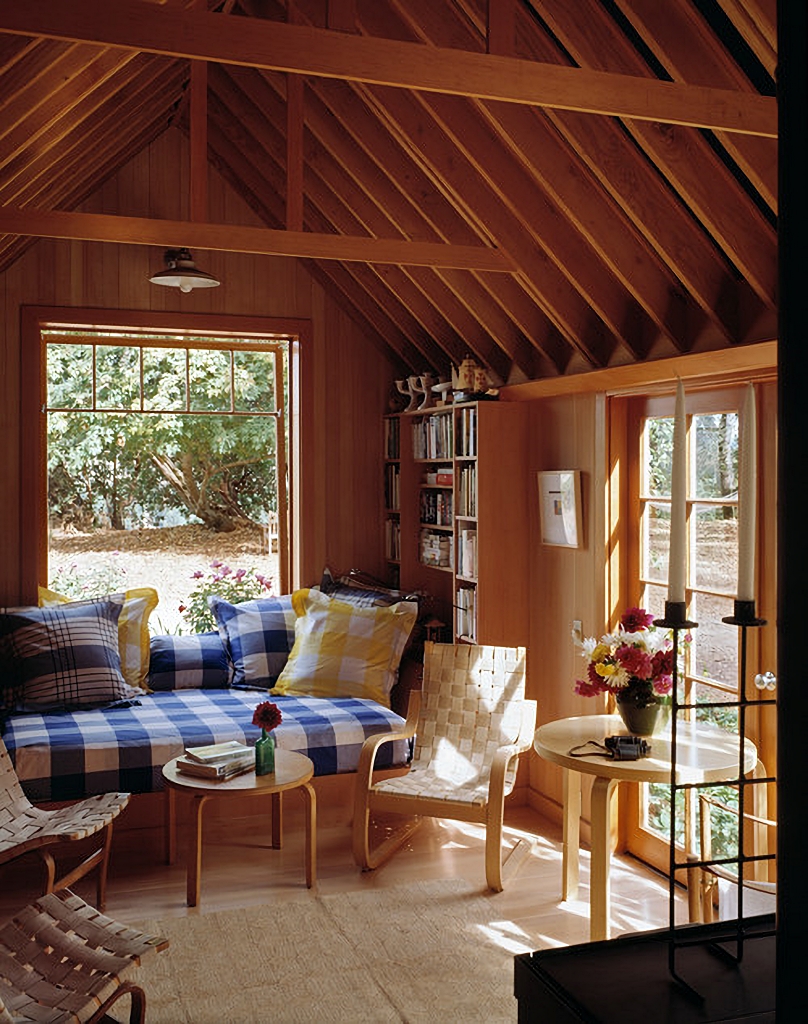
20. Cozy Cabin Nook with Blue and Yellow Plaid
When using a bold pattern like plaid, the key is to apply it in a contained, structured way. Here, the blue and white plaid on the daybed upholstery is treated almost like a wall treatment—it’s a large, flat plane of pattern. The accent pillows use a different, smaller plaid in a contrasting color. This works because the primary plaid is large-scale and simple, while the accent plaid is small-scale and busy. Never use two plaids of the same scale and complexity together; it creates visual chaos.
|
📋 Copy HEX 🔗 Share |
Light-toned, unfinished-looking wood walls are beautiful, but they are also soft and prone to absorbing moisture and stains. In a high-traffic area, they will show scuffs, dings, and fingerprints more readily than painted drywall. You’ll want to finish them with a high-quality matte or satin clear polyurethane. This protects the wood from dirt and oils without adding a glossy, unnatural shine, preserving that raw, rustic look while making it durable enough for real life.
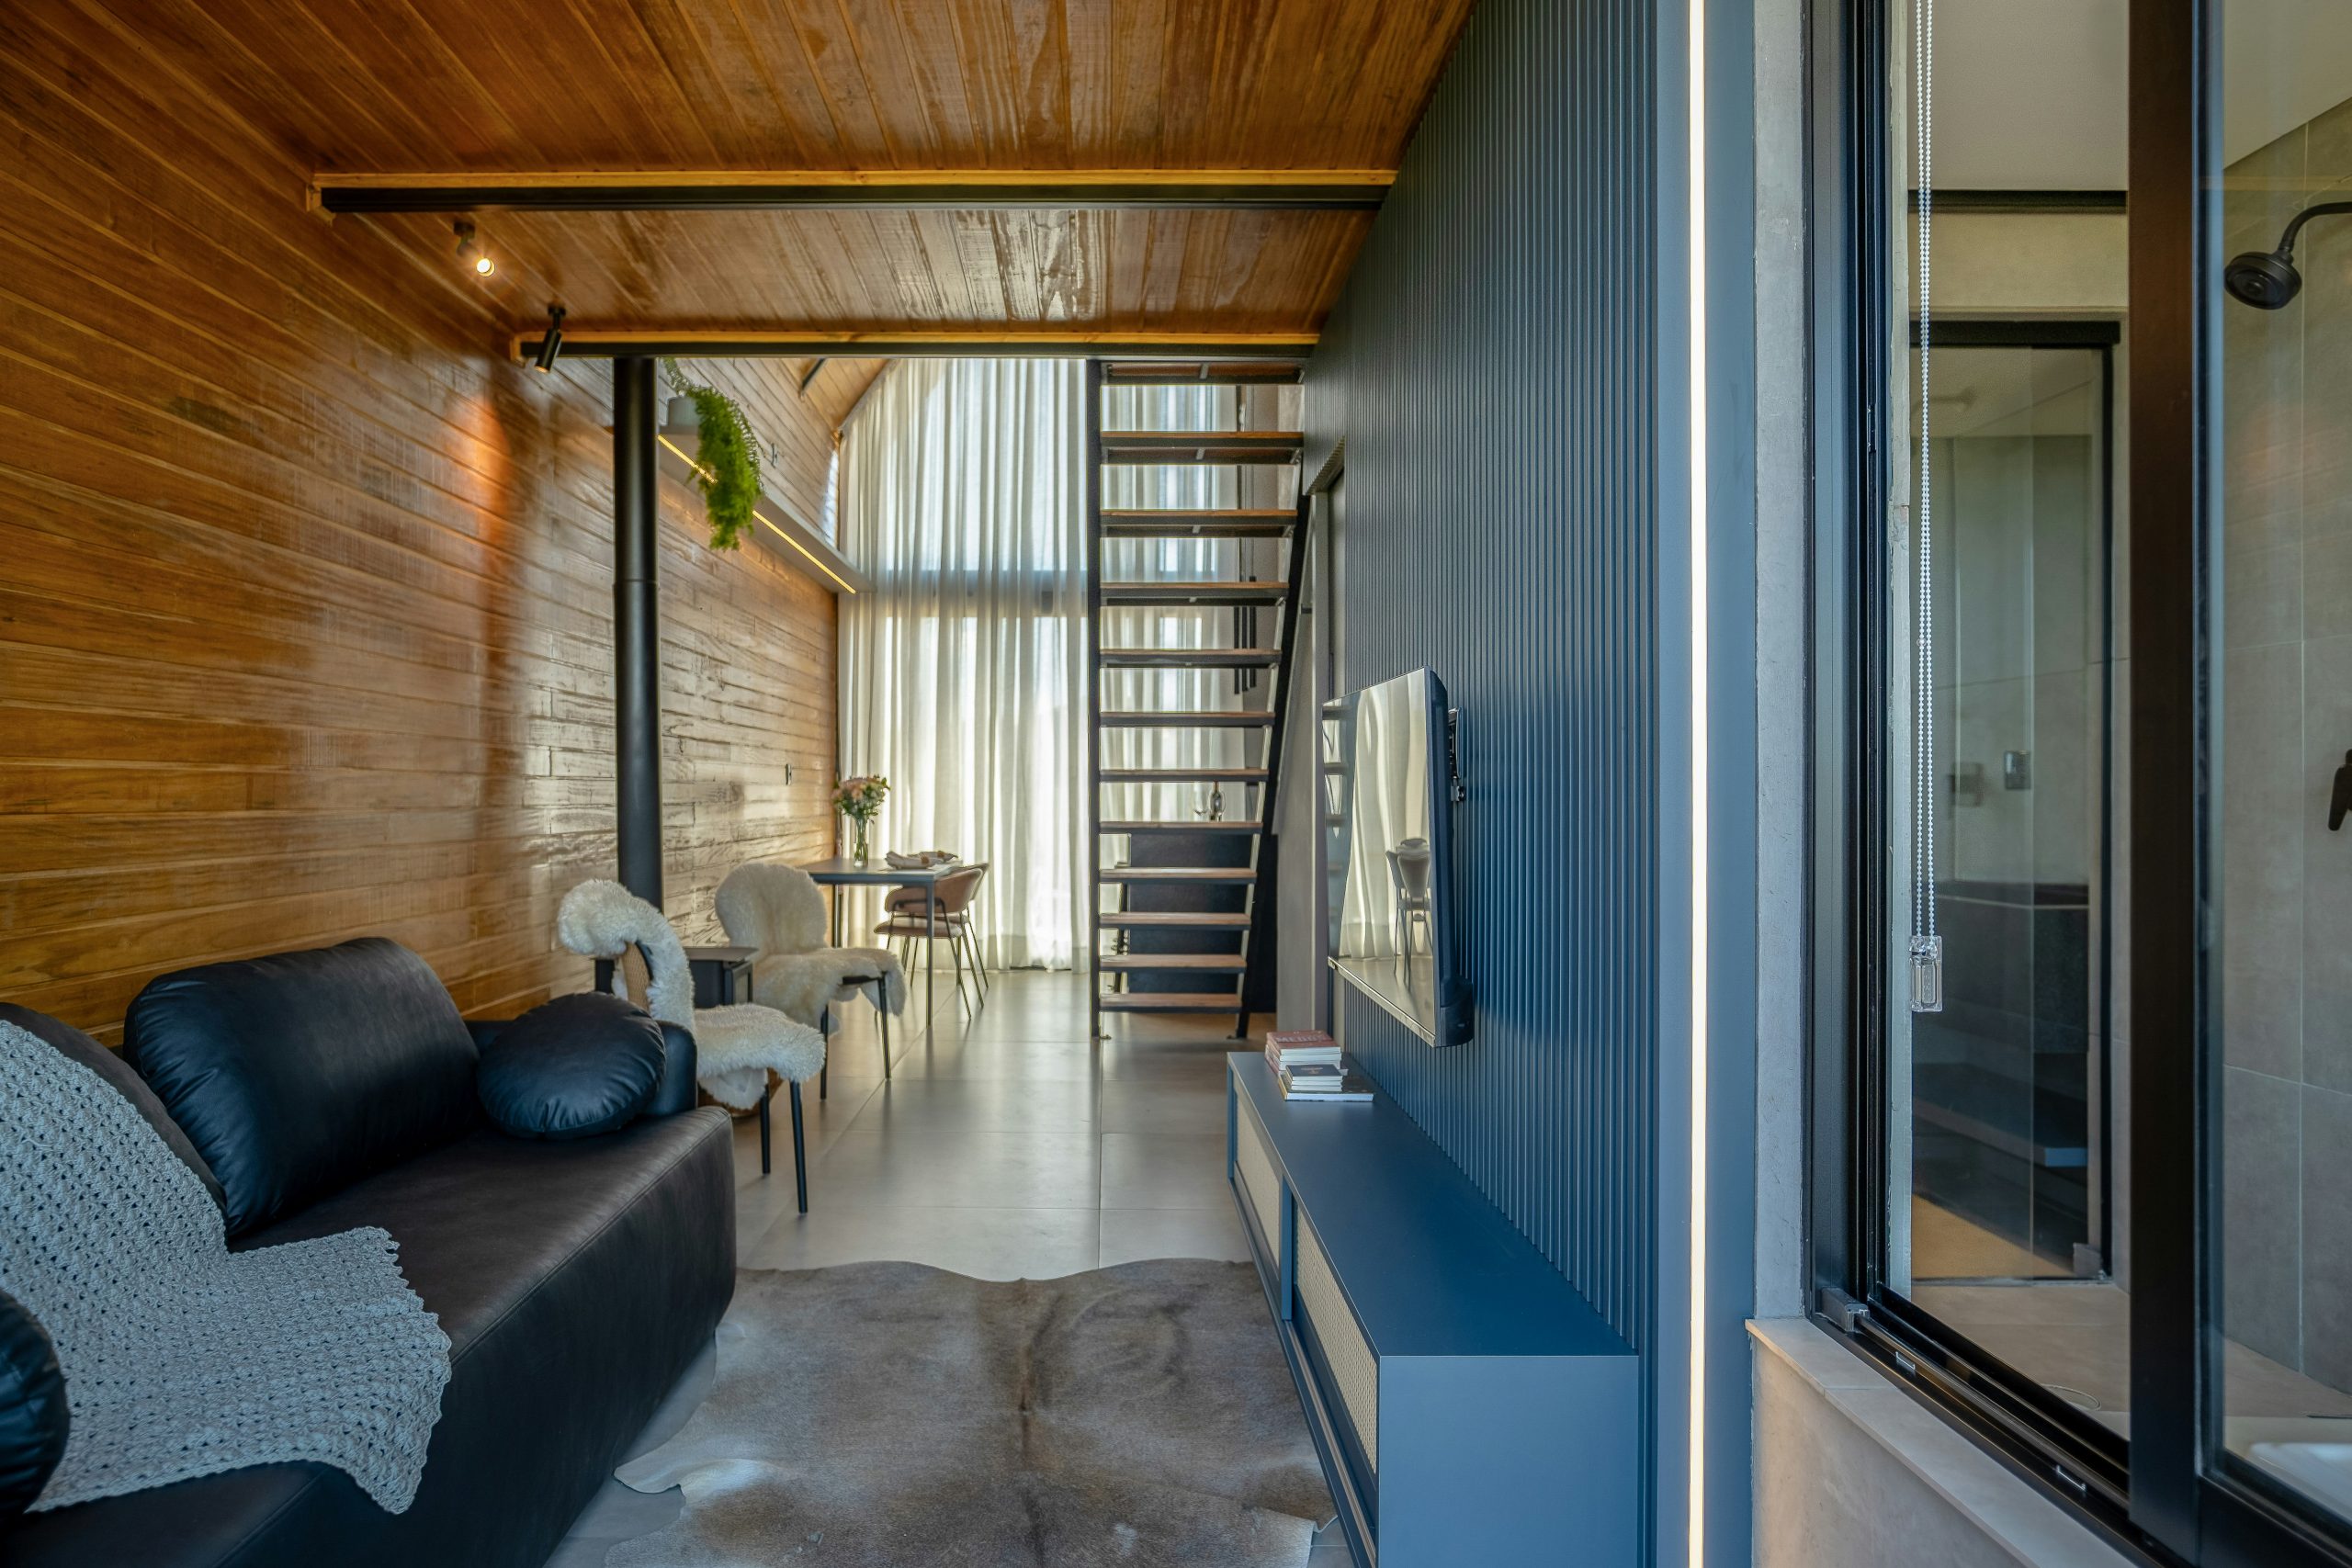
21. Modern Tiny House with a Blue Slatted Accent Wall
This is a seriously high-impact, high-style look. But be honest with yourself about your tolerance for visual drama. The strong contrast between the warm wood, the deep blue wall, and the black leather sofa is exciting but also very busy. It’s a design that demands attention. If you are sensitive to visual stimulation or prefer a more serene, restful environment, this much contrast in a small space could feel overwhelming over time. It’s a fantastic design, but it’s for a specific personality who thrives on bold energy.
|
📋 Copy HEX 🔗 Share |
This high-end, modern look comes with a price tag to match. The custom millwork and integrated lighting are major cost drivers.
- Furniture (leather sofa, dining set): $4,000 – $8,500
- Custom Staircase & Railing: $5,000 – $12,000
- Custom Wall Paneling (Wood & Blue Slat): $3,000 – $7,000
- Lighting (Track, Integrated LED): $1,500 – $4,000
- Flooring (Large Format Tile): $1,000 – $2,500
- TOTAL: $14,500 – $34,000
- Budget alternative: Achieve a similar contrast with paint, a standard staircase, and more affordable furniture for $5,000 – $9,000.
22. Minimalist Bedroom with a Wood Panel Headboard
This bedroom proves that you don’t need a lot of stuff to make a big statement. The design works because of its extreme simplicity and focus on form. The dark wood headboard creates a strong, warm geometric shape against the clean white wall. The spherical bulb of the lamp and the two light blue circular art pieces repeat this focus on simple shapes. By keeping decor to a minimum and focusing on the interplay of color and form, the room feels intentional, modern, and restful, not empty.
|
📋 Copy HEX 🔗 Share |
A dramatic wood headboard doesn’t have to be a custom piece. You can create this look for under $100. Get a piece of high-quality plywood or even reclaimed pallet wood from a hardware store. Cut it to the desired height and width (going wider than the bed adds drama). Sand it down and apply a dark walnut or ebony stain to get that rich, warm color. Mount it directly to the wall behind your bed using a French cleat for a secure, floating look. It’s a weekend project that delivers a huge design impact.
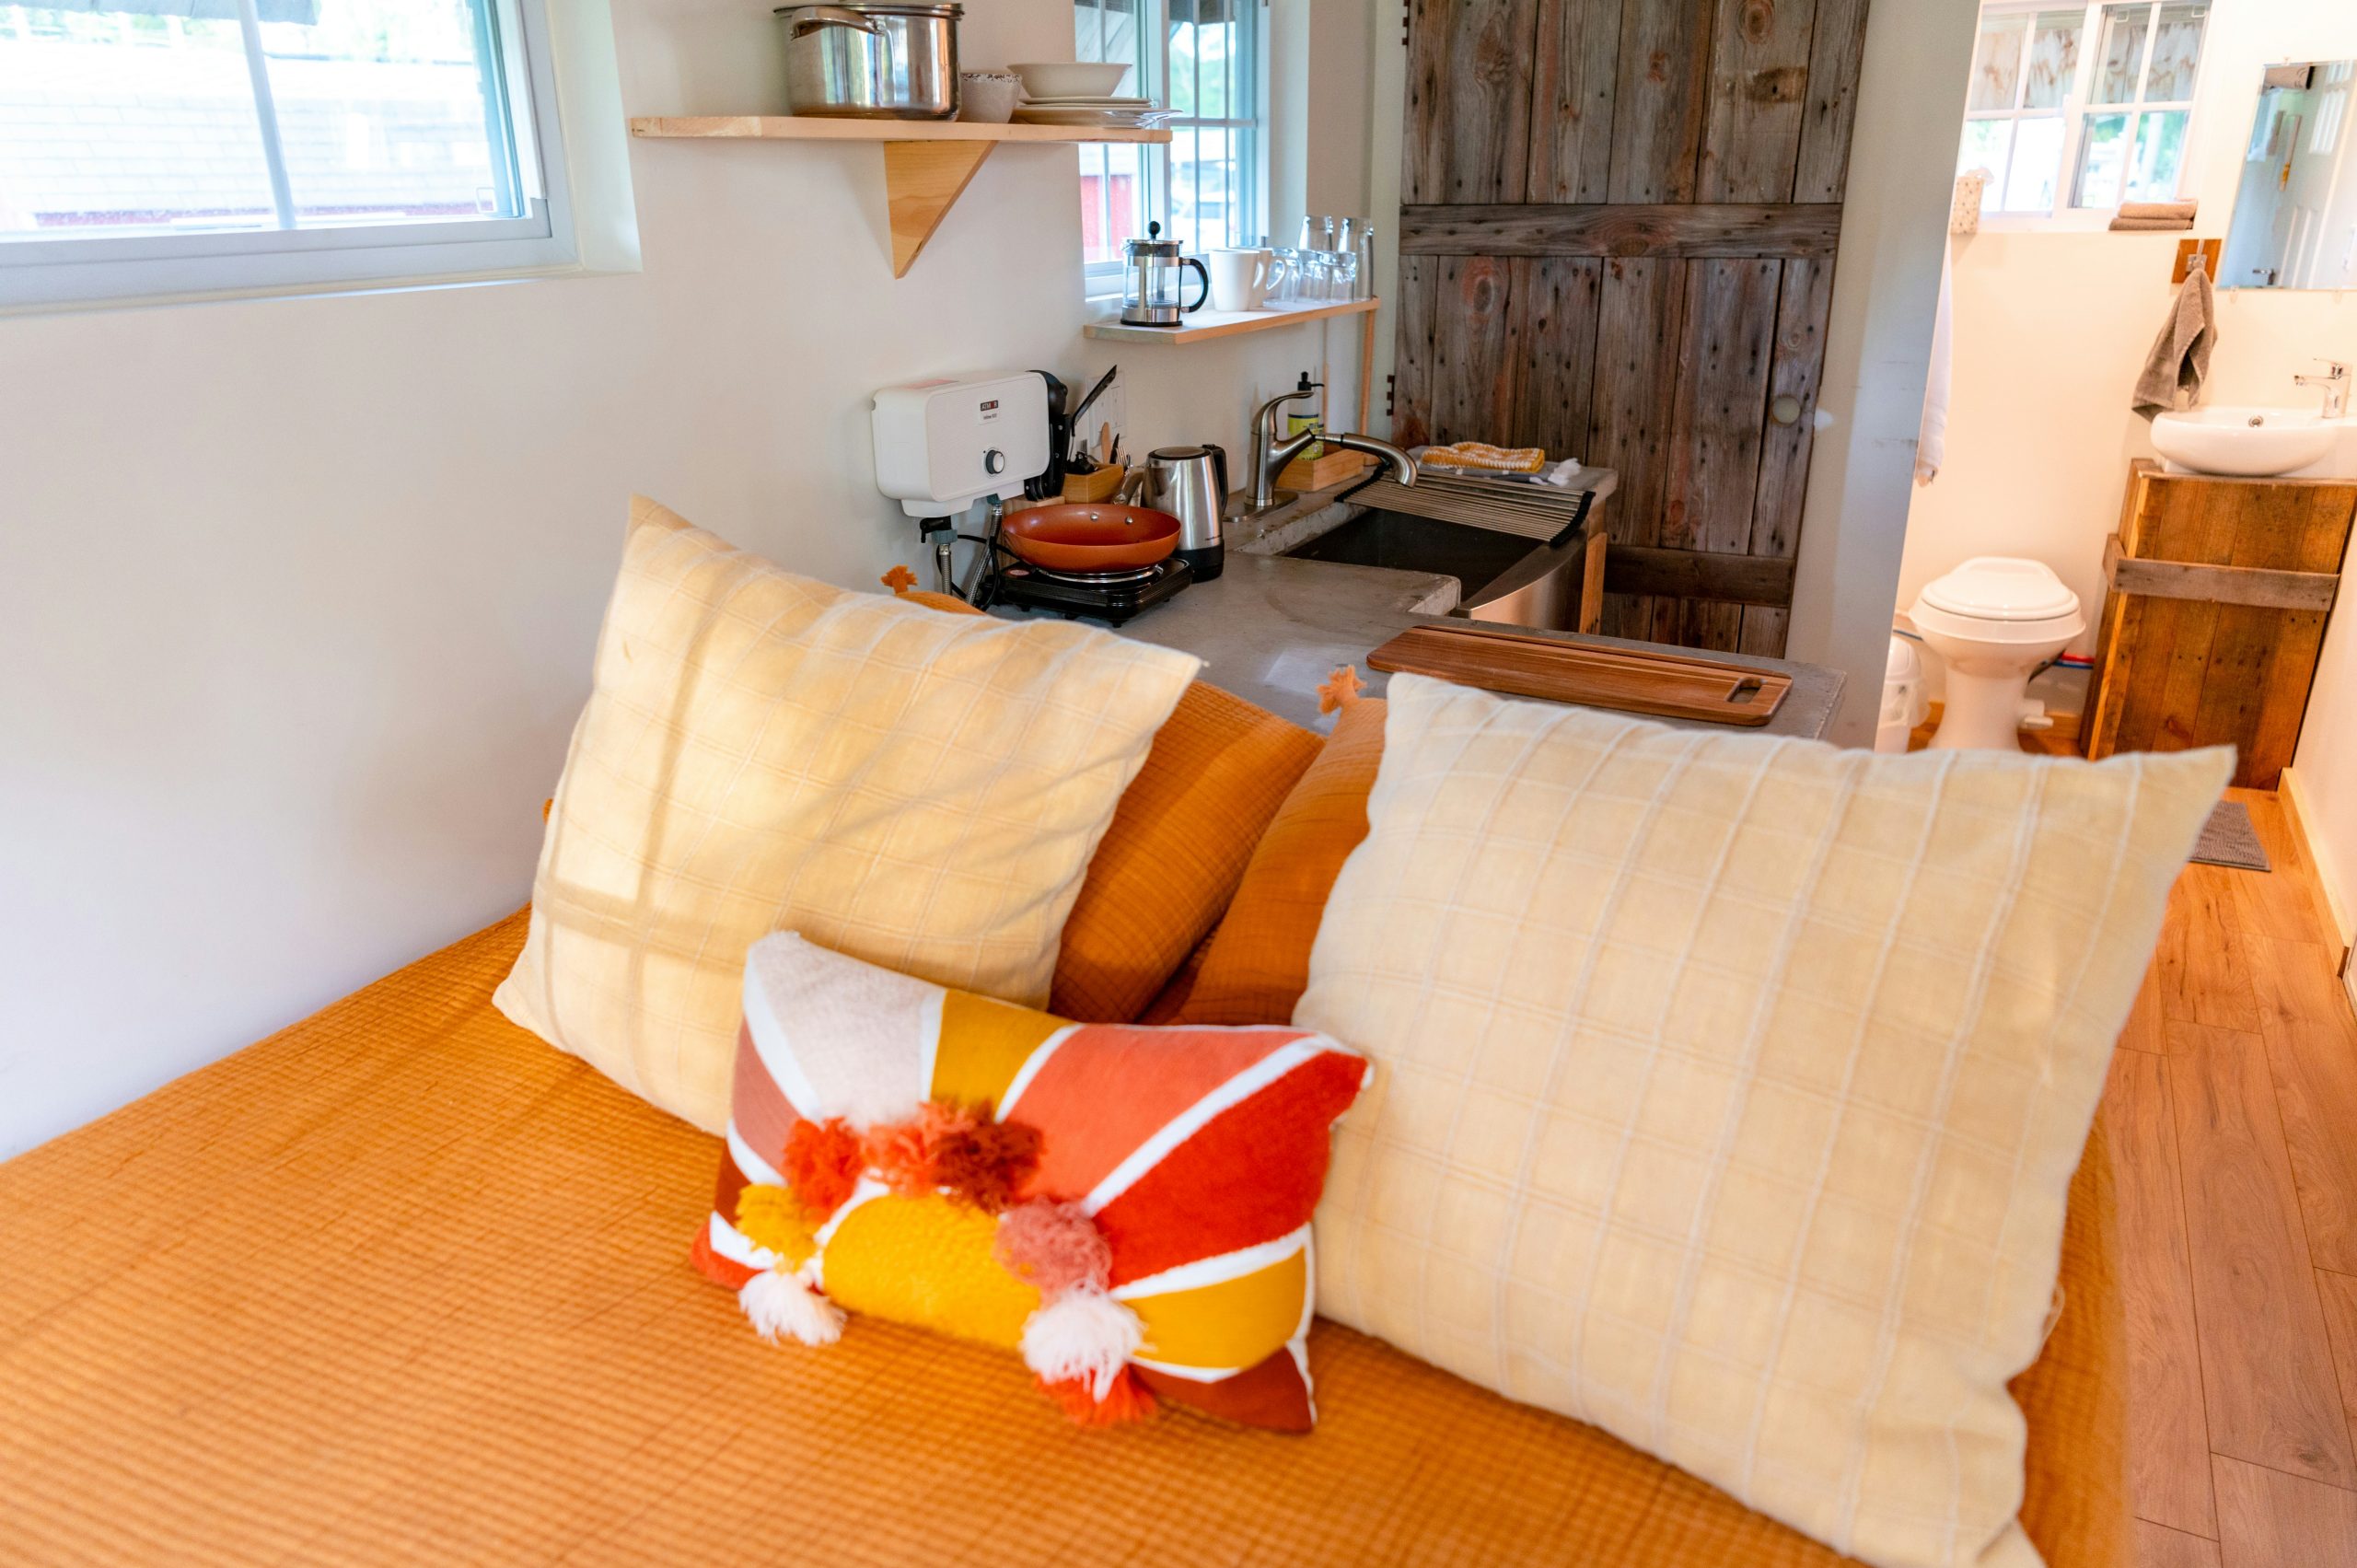
23. Rustic Nook with a Concrete Kitchen Countertop
Creating floating shelves like these is a classic tiny house project. Here’s the rundown:
- Time: 3 hours + drying time. Cost: $60-120.
- Get your materials: You’ll need blind shelf hardware (floating shelf brackets), a 2-inch thick piece of wood cut to your desired length, a drill, and a level.
- Install brackets: Locate the studs in your wall. This is non-negotiable for shelves that will hold any weight. Securely attach the shelf brackets to the studs, ensuring they are perfectly level.
- Drill the shelf: Carefully drill holes into the back of your wooden shelf that correspond exactly to the bracket posts.
- Mount the shelf: Slide the shelf onto the posts. It should be a snug fit.
- Style and enjoy: Place your favorite lightweight mugs, plants, and decor on the shelves.
|
📋 Copy HEX 🔗 Share |
Before you commit to a cozy, open-plan nook like this, do a quick inventory of your lifestyle.
- Are you a minimalist? This layout has very limited hidden storage. You need to be comfortable with having your kitchen items and personal belongings on display.
- How much cooking do you do? That concrete counter and small sink are great for basics, but there’s no cooktop or oven visible. This setup is for reheating and simple prep, not gourmet meals.
- What’s your mess tolerance? The bed is right next to the kitchen prep area. If a few crumbs on your duvet will drive you crazy, this layout may not be for you. Compare with the more separated spaces in Idea #1.
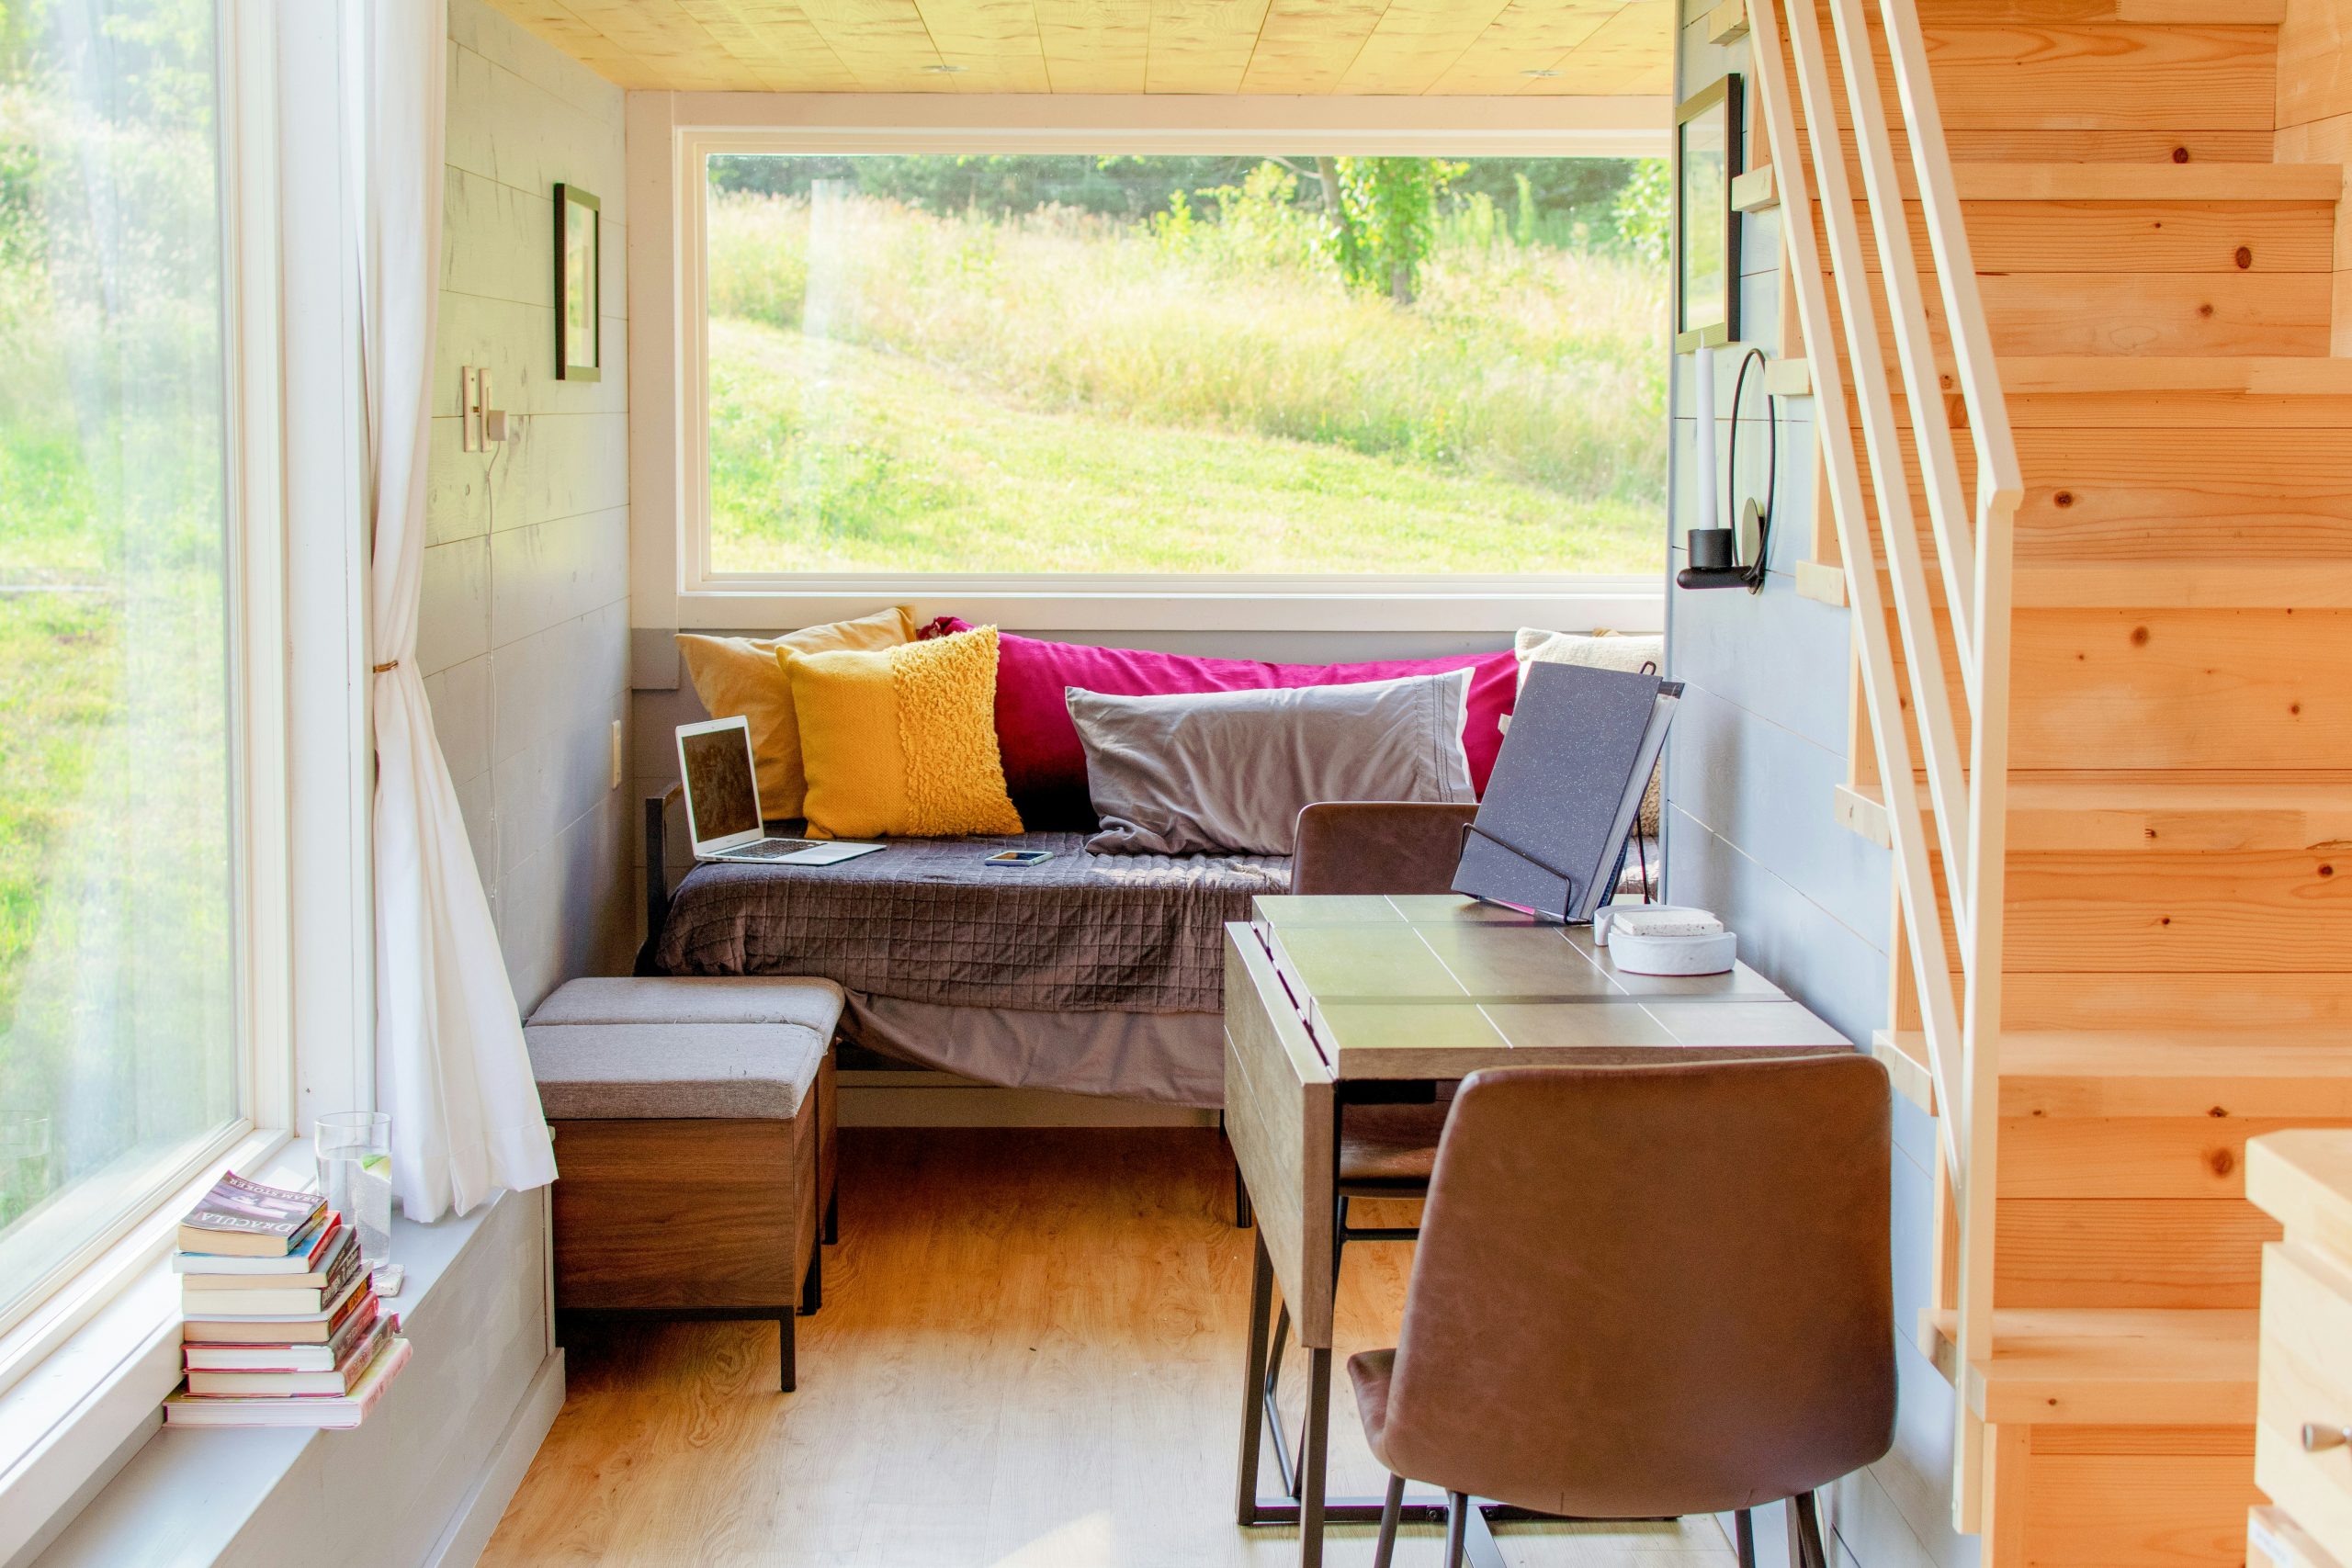
24. Cozy Daybed Area with a Large Picture Window
This bright and cheerful space uses a simple but effective color strategy: 70% light neutrals + 30% vibrant accents. The light gray walls and light wood on the floor, ceiling, and stairs create a calm, neutral envelope. Then, the pillows on the daybed inject that crucial 30% of life and energy with pops of magenta, yellow, and brown. This approach ensures the space feels fun and personalized without being overwhelming. The large window and all the natural light it provides are what make these bold colors sing.
|
📋 Copy HEX 🔗 Share |
This multi-functional layout is ideal for a long, relatively narrow tiny house, specifically in a main living area of about 120-180 square feet. It requires one long wall that can be dedicated to a large picture window and the daybed. Placing the dining/work table opposite keeps the central corridor clear for traffic flow to the staircase. The ceiling should be at least 8 feet high to accommodate the stairs and prevent the space from feeling compressed.
Conclusion
See? A small space doesn’t mean small style. The best tiny homes are a masterclass in personal, intentional design. They prove that when you’re smart about layout, materials, and scale, you can create a home that’s not just functional but deeply beautiful and restorative.
Ready for more daily inspiration? Follow us on Pinterest to keep discovering new ideas for your perfect tiny home.