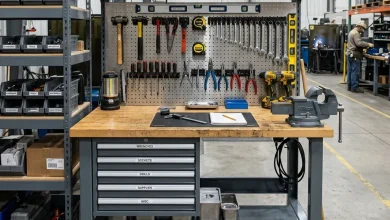
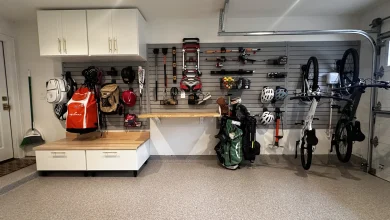
You know that feeling when you finally find the one garage workbench that looks exactly right for your space? It’s that perfect blend of sturdy, organized, and ready for action. But sifting through endless photos can feel like a project in itself. That’s why we did the heavy lifting for you. After filtering through hundreds of real-home workshops and the latest offerings from places like Home Depot, Lowe’s, and IKEA, we’ve nailed down what truly works.
Inside, you’ll find 24 distinct workbench ideas that cover every style—from rugged industrial and rustic DIY setups to sleek, modular systems. We’re talking real-world solutions that range from a simple weekend DIY for under $200 to a fully decked-out pro build that can go over $2,500. As garages increasingly become our home’s “fifth room” in 2026, creating a functional and inspiring workspace has never been more relevant. This isn’t just about storage; it’s about creating a dedicated zone for creativity and projects. Stay until the end, because we also break down the most common mistakes that can ruin these looks.
📌 Save this to Pinterest for later — you’ll want to revisit these ideas.
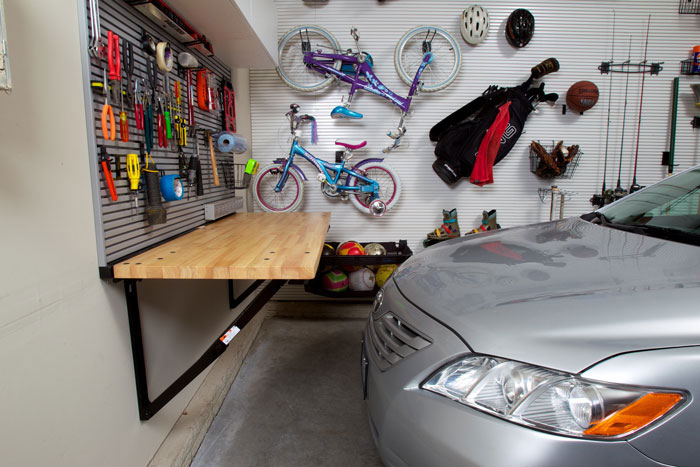
1. Floating Butcher Block Bench with Slatwall Organization
This setup works because it visually frees up floor space, making the garage feel larger and less cluttered. Mounting the workbench directly to the wall creates an airy, “floating” effect that is both modern and practical—no legs to get in the way of your feet, your shop vac, or rolling storage. The use of a black and gray slatwall system directly above the bench provides high-density, configurable storage, keeping every tool visible and within arm’s reach, which is the key to maintaining a functional workflow.
|
📋 Copy HEX 🔗 Share |
Here’s a pro tip for installing a floating workbench: for maximum stability, you absolutely must anchor the support brackets directly into wall studs. Don’t rely on drywall anchors alone, especially for a heavy-duty surface like butcher block. Use a stud finder to locate them and plan your bench height and length accordingly. For a standard 36-inch high workbench, your horizontal ledger board (which the back of the bench rests on) should be centered at about 34.5 inches from the floor, assuming a 1.5-inch thick countertop.
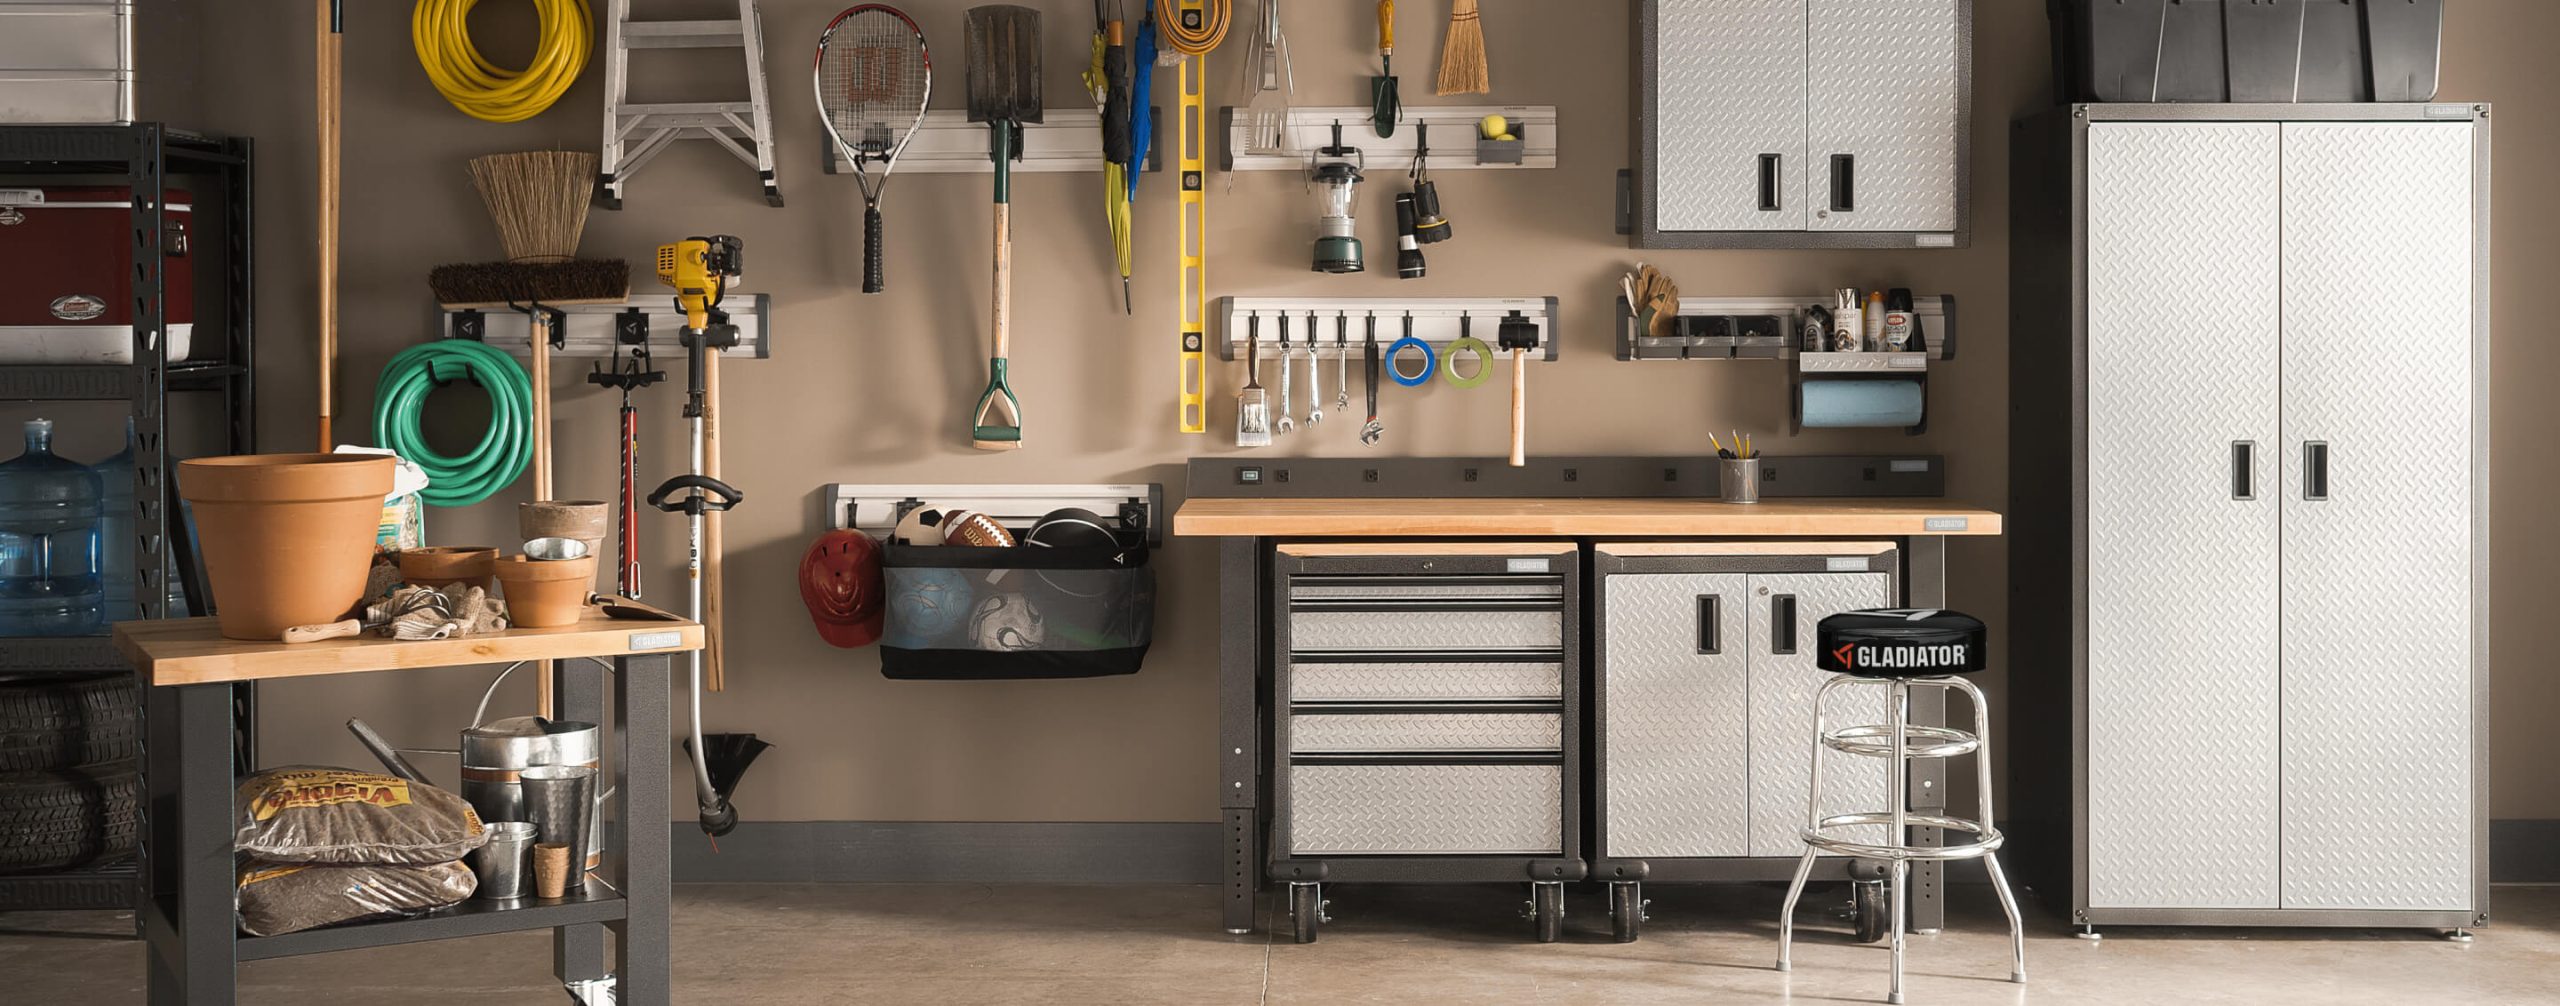
2. Diamond Plate Cabinetry with a Long Wooden Workbench
Getting this pro-level, organized look involves a few key investment areas. The diamond plate cabinets are the star, offering durability and a clean, industrial aesthetic.
|
📋 Copy HEX 🔗 Share |
- Main Furniture (Cabinets & Benchtop): $1,200 – $3,500
- Lighting (Overhead Fixtures): $150 – $400
- Wall Treatment (Slatwall Panels): $500 – $1,500 for a full wall
- Decor/Accessories (Stool, Bins): $100 – $300
- TOTAL: $1,950 – $5,700
- Budget Alternative: Get a similar vibe with stock metal cabinets from a big box store and a laminate countertop for 40-50% less.
Let’s be honest: diamond plate shows everything. Fingerprints, smudges, and dust are highly visible on that reflective surface, so it requires regular wipe-downs to keep it looking sharp. While it’s incredibly durable against dings and scratches, it’s not maintenance-free from a cleaning perspective. Also, a full wall of slatwall is a commitment. Once it’s up, moving it is a major job, so be absolutely certain about the placement before you start drilling into your studs. It is, however, incredibly versatile for reconfiguring hooks and shelves.
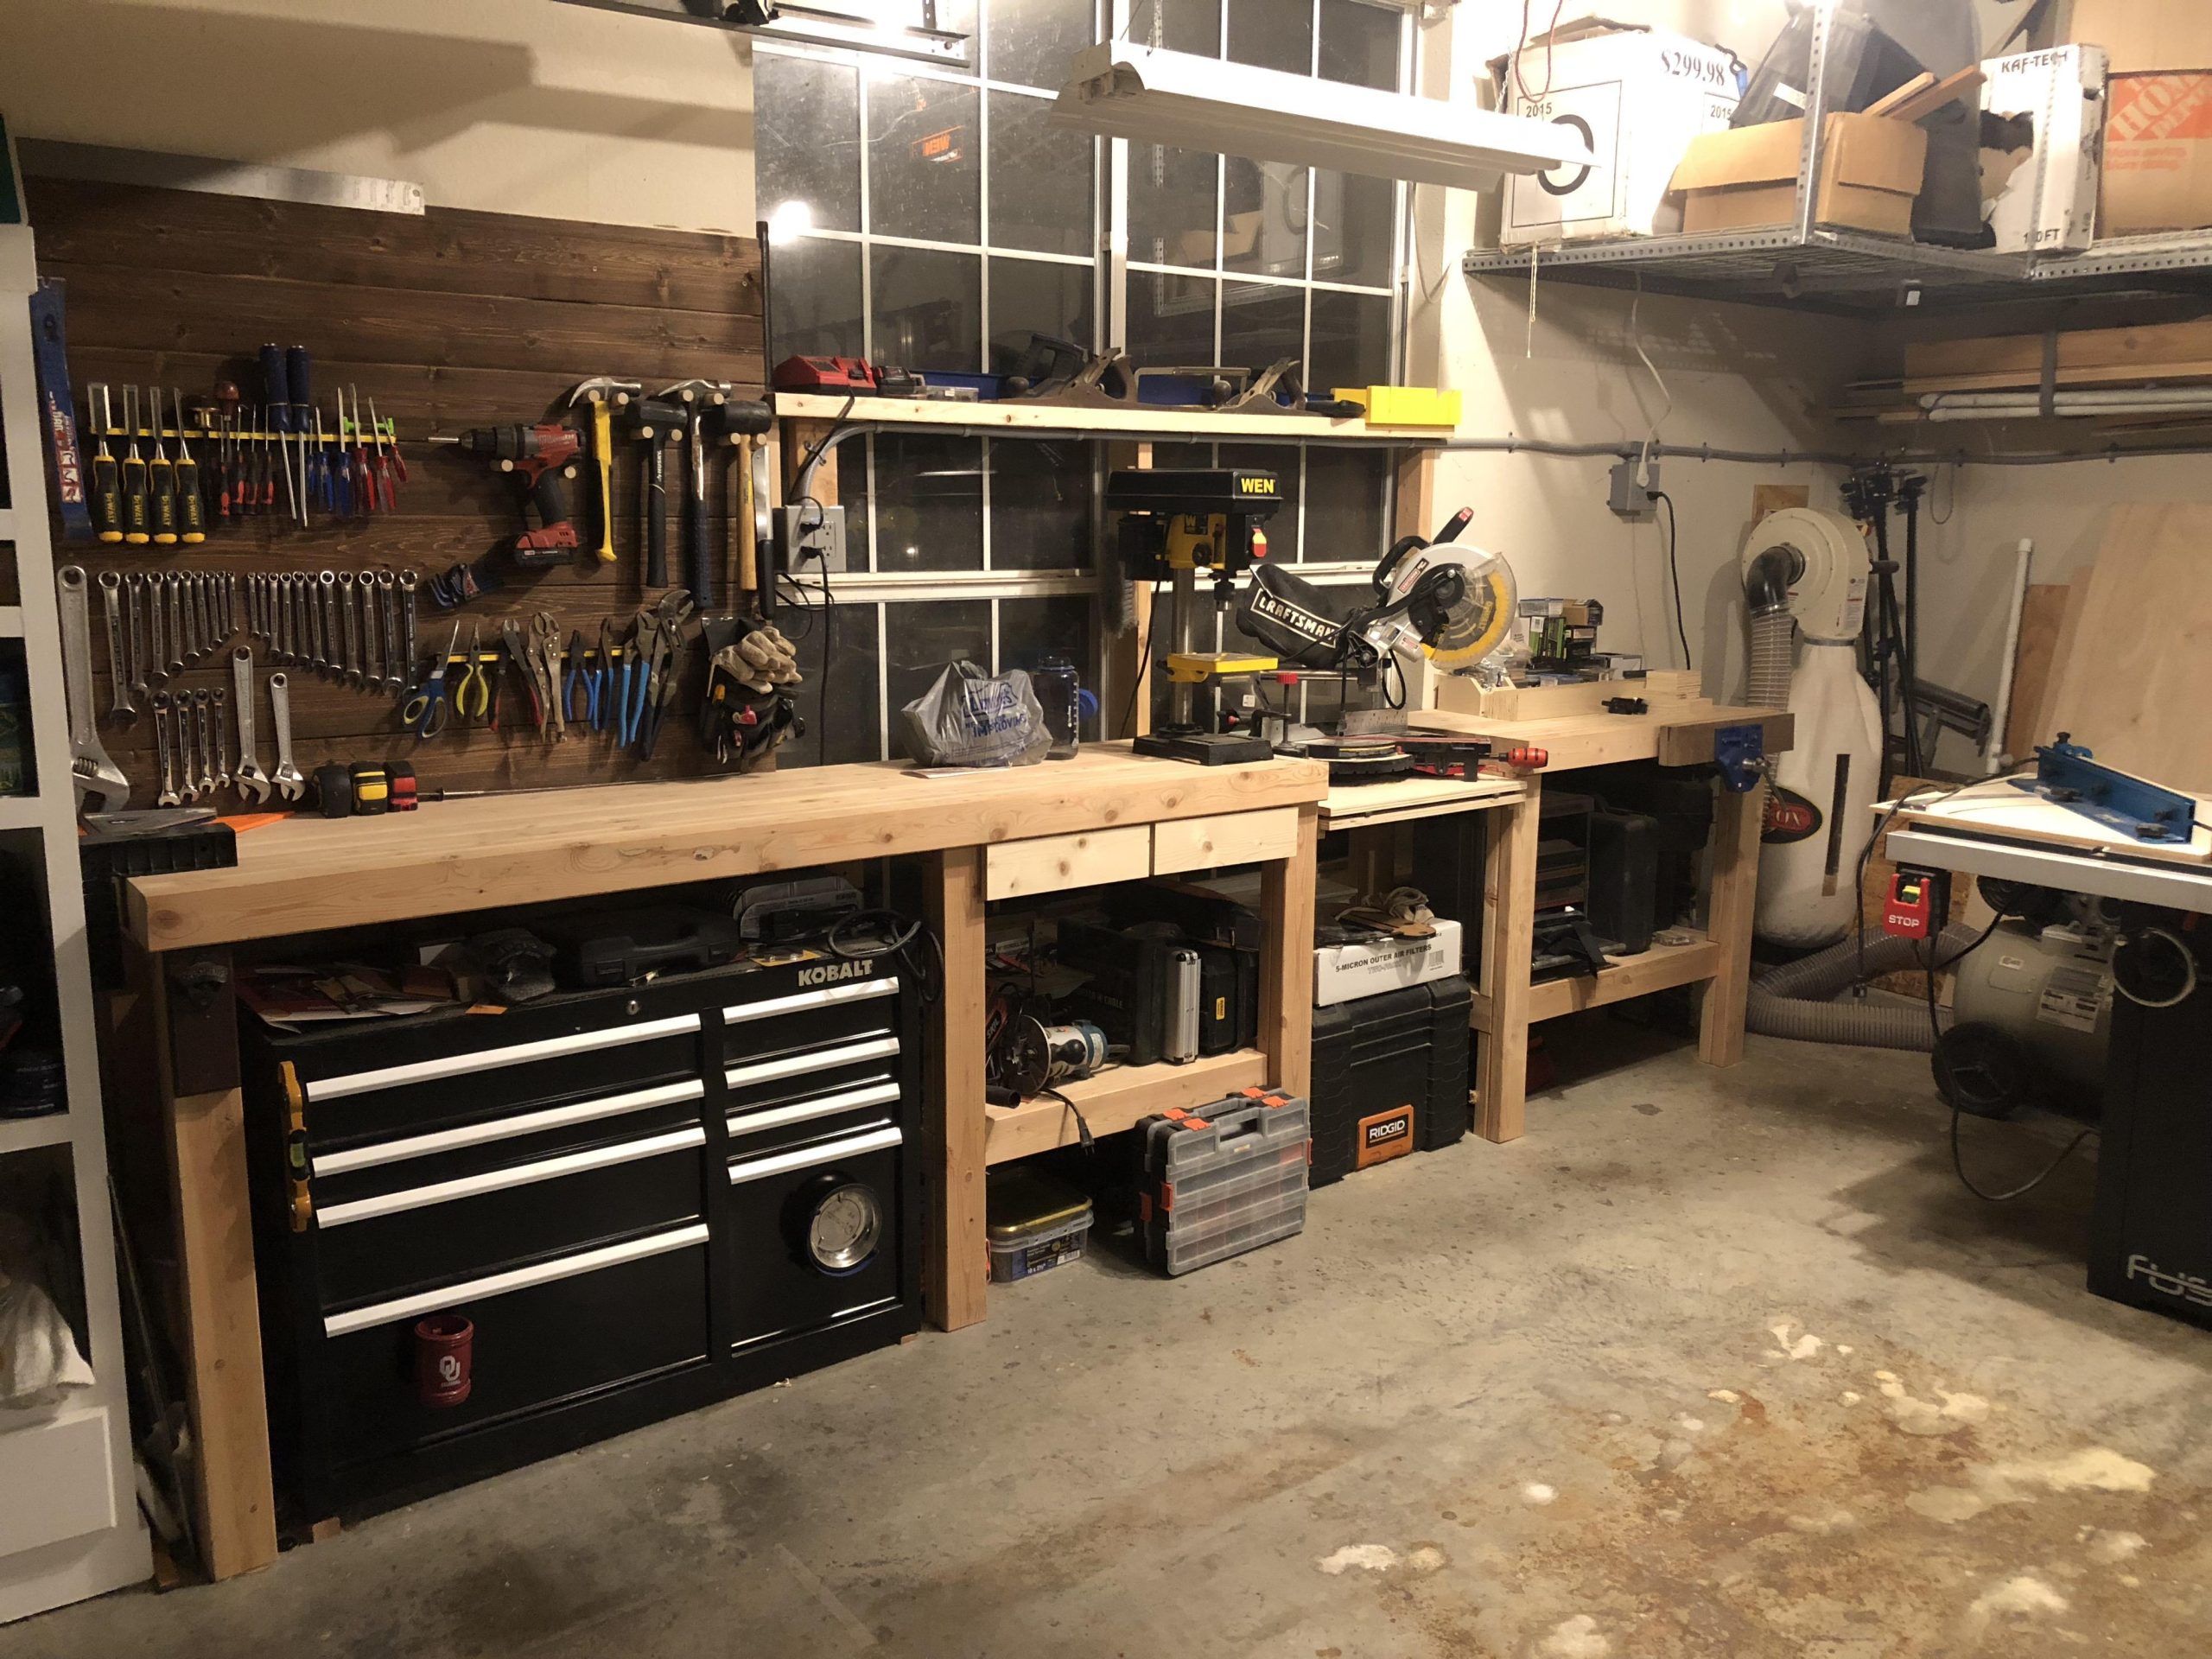
3. Rustic Workbench with a Dark Stained Slat Wall Feature
The single element that makes this design stand out is the dark stained wooden tool wall. It elevates the entire space from a simple garage workbench to a curated workshop with a distinct point of view. Without it, you’d just have tools on a wall. With it, you have a deliberate, rustic-modern feature that provides visual weight and contrast against the light wood bench and off-white walls. It proves that functional storage can—and should—be a core part of the design aesthetic, not just an afterthought.
|
📋 Copy HEX 🔗 Share |
This look follows a simple but effective formula: 60% Light Naturals + 30% Dark Contrast + 10% Industrial Black. The light natural wood of the workbench and pale walls create a bright, airy base. The dark-stained tool wall provides a powerful, earthy contrast that grounds the space. Finally, the black accents from the tool chest and equipment add a sharp, industrial edge. You could easily swap the dark stain for a deep navy blue or charcoal gray paint to keep the formula but shift the mood from rustic to contemporary.
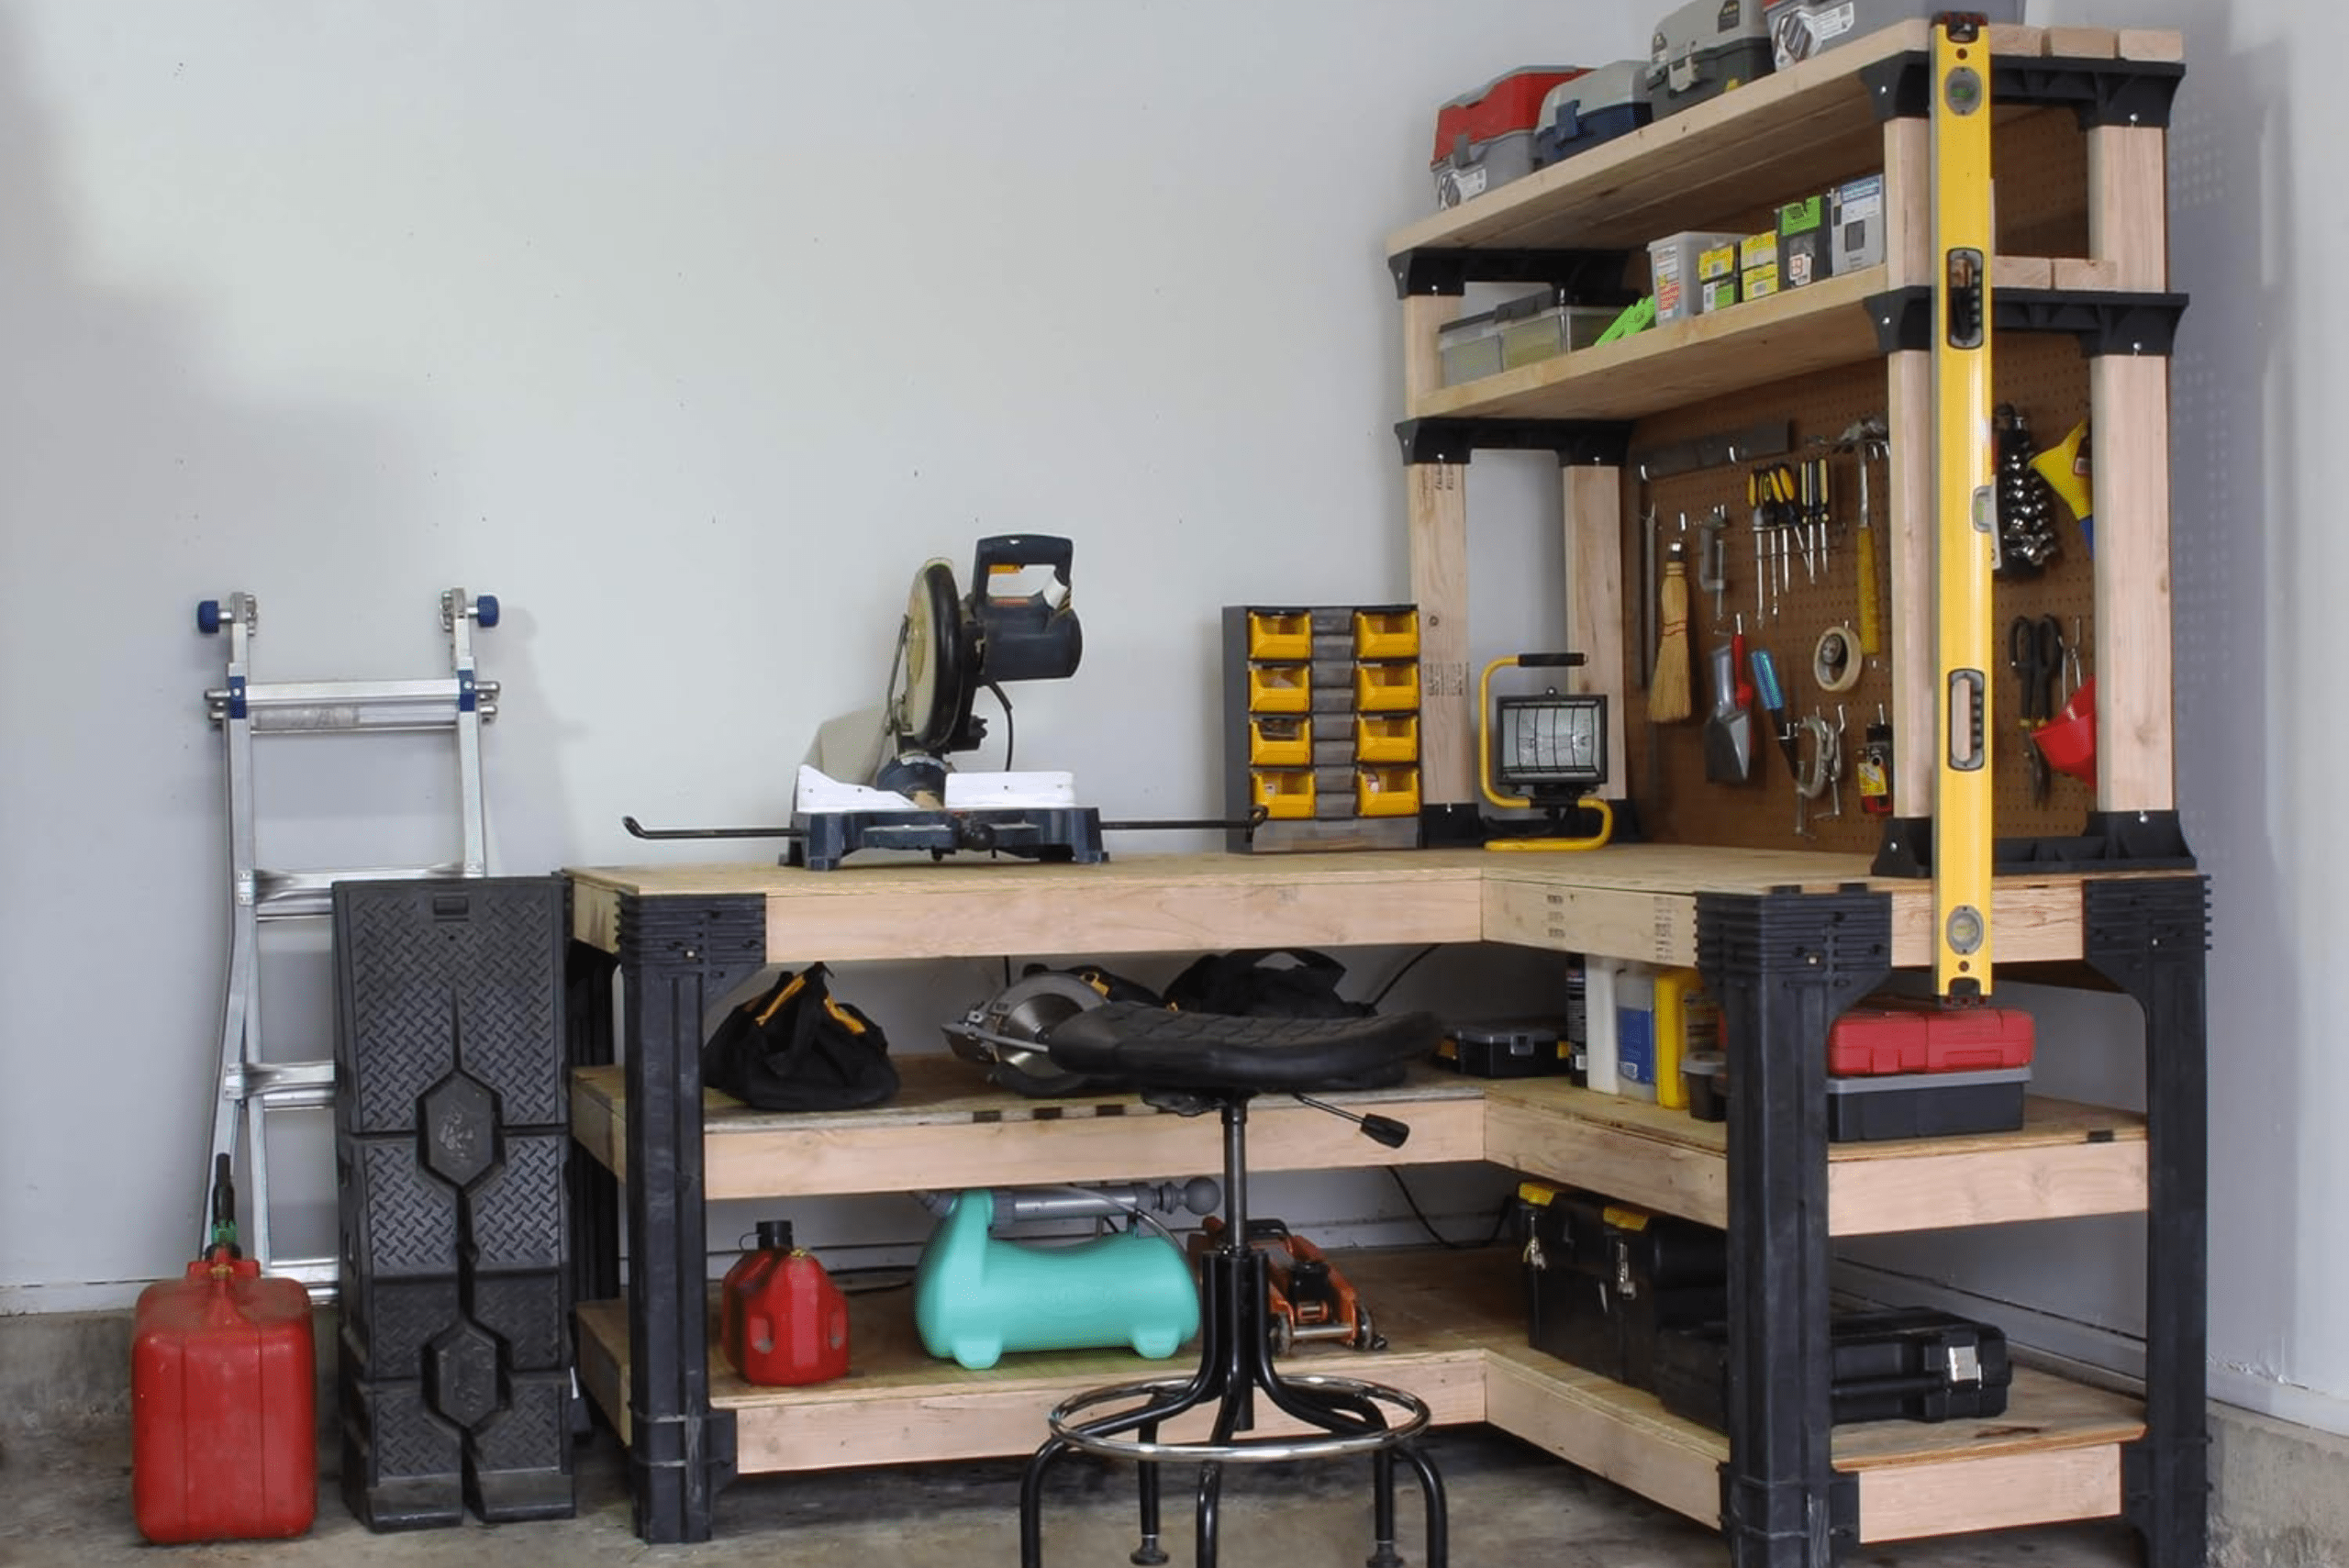
4. L-Shaped DIY Workbench with an Integrated Pegboard
Building this style of L-shaped workbench frame is surprisingly straightforward with plastic corner connectors. Here’s a quick guide to assembling the core structure.
|
📋 Copy HEX 🔗 Share |
- Cut your 2×4 lumber to the desired lengths for the legs, rails, and shelf supports. Precision is key.
- Begin by assembling one rectangular side of the “L.” Firmly insert the lumber into the plastic connectors to form the top and bottom frames, then attach the legs. A rubber mallet helps seat the wood securely.
- Build the second rectangular section in the same way.
- Join the two sections together at the corner to form the L-shape, ensuring everything is level.
- Install the center legs and any cross-bracing for added stability.
- Finally, lay down your plywood or MDF surfaces for the top and shelves.
An L-shaped configuration is a brilliant use of a corner, but it requires a decent amount of dedicated space. For this idea to work without feeling cramped, you’ll want a corner with at least 6-8 feet of clear wall space in each direction from the corner. The bench itself is about 24-30 inches deep, so you need a minimum of an 8×8 foot clear area to not only house the bench but also have room to work comfortably in front of it. This is a fantastic solution for a standard two-car garage but would likely overwhelm a smaller one-car space.
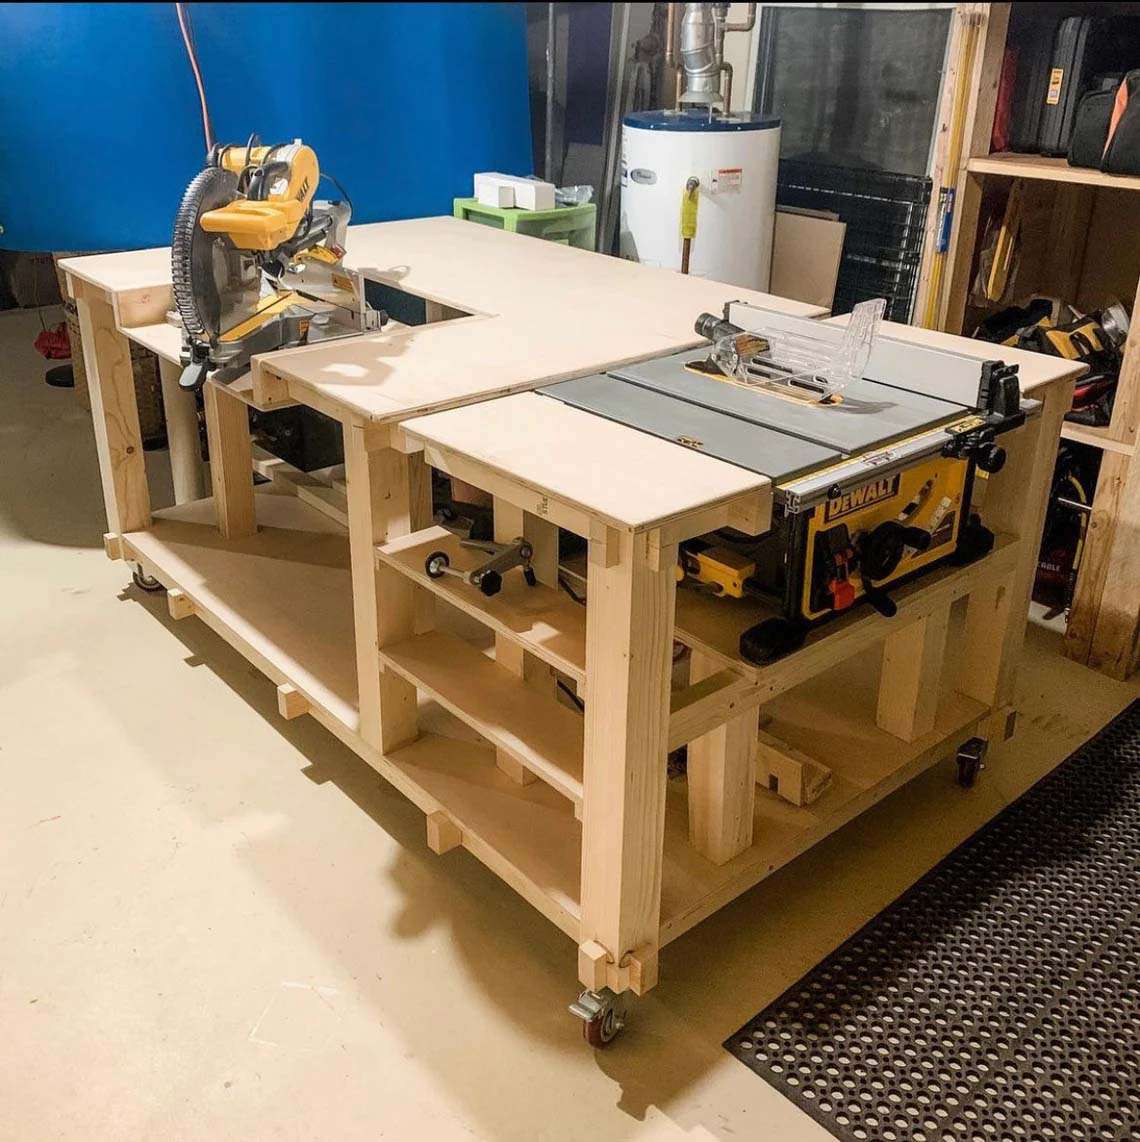
5. Mobile Woodworker’s Bench with Integrated Saws
A custom-built mobile workbench with integrated tools is a dream, but you can get 80% of the function for a fraction of the price. Start with a pre-made rolling workbench from Husky or Craftsman, which often costs between $300 and $600. Instead of permanently integrating your tools, use them as-is on the benchtop. For the “mobile” part, you can buy high-quality locking casters for around $50-$80 and install them on a sturdy, basic workbench. You still get a movable, solid work surface without the complexity of custom-building recessed bays for your saws.
|
📋 Copy HEX 🔗 Share |
A workbench with integrated power tools requires precision alignment and regular checks. The recessed bays for the miter saw and table saw must be perfectly flush with the main workbench surface to ensure accurate cuts on long pieces of wood. Over time, wood movement and vibrations can cause slight shifts. You’ll need to periodically check and adjust the tool heights. Also, dust collection becomes more complex. You’re not just cleaning the benchtop; you need to vacuum out the recessed cavities where sawdust inevitably collects, which can be a fire hazard if ignored.
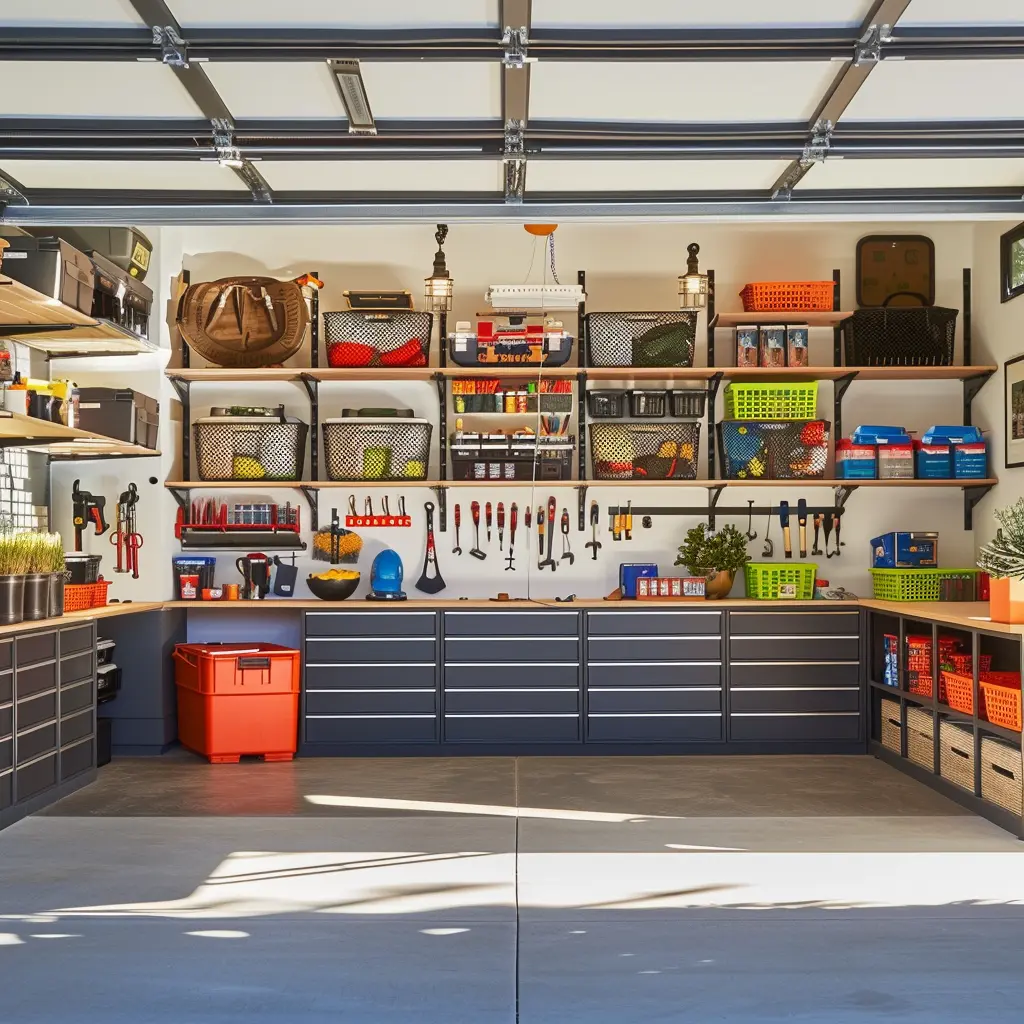
6. U-Shaped Workspace with Dark Gray Cabinets and Open Shelving
When using a mix of closed cabinets and open shelving, create visual rhythm by repeating materials and colors. Notice how the light wood of the countertop is echoed in the open shelves above, and the black metal brackets of the shelves tie into the cabinet hardware. This repetition makes the different types of storage feel like a single, cohesive system rather than a random collection of parts. Use bright, bold colors for your removable storage bins, as seen here with the red-orange and lime green, to add personality that can be easily changed out later.
|
📋 Copy HEX 🔗 Share |
The success of this design lies in its mastery of contrast and balance. The dark, heavy base of the gray cabinets grounds the entire room, making it feel solid and substantial. This is balanced by the light and airy feel of the white walls and the open wooden shelving above. The U-shape itself is a classic ergonomic choice, creating a “cockpit” where the user is surrounded by their tools and workspace, minimizing steps and maximizing efficiency. It’s a perfect marriage of form and function.
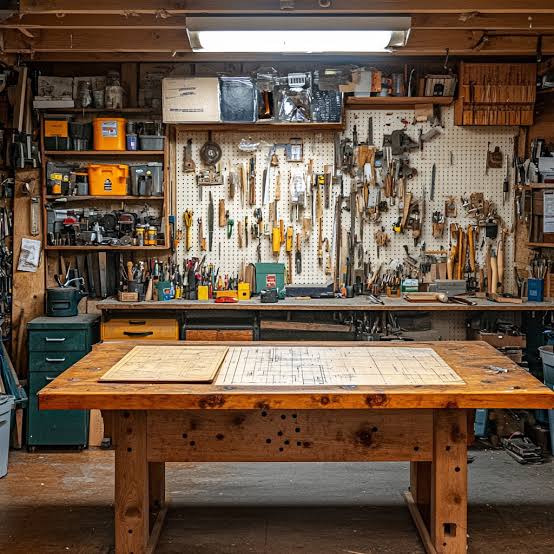
7. Productive Maker’s Bench with a Full Pegboard Tool Wall
What defines this space is the sheer density of the tool wall. It’s a testament to the idea of “a place for everything, and everything in its place.” The pegboard isn’t just a backdrop; it’s the heart of the workshop, an entire ecosystem of tools that tells a story of projects past, present, and future. Removing it would leave a functional bench, but it would strip the space of its soul and its incredible, at-a-glance efficiency. Here, the organization system is the design.
|
📋 Copy HEX 🔗 Share |
Let’s be real: a tool wall this dense can be a nightmare to keep organized. It looks amazing when every hammer and wrench is perfectly aligned, but after a busy project, it can quickly descend into chaos. This system requires discipline. You have to commit to putting tools back immediately after use. Also, a pegboard wall can collect a surprising amount of sawdust and grime on all those little hooks and surfaces, so it needs a good vacuuming or blow-off with an air compressor periodically to stay clean.
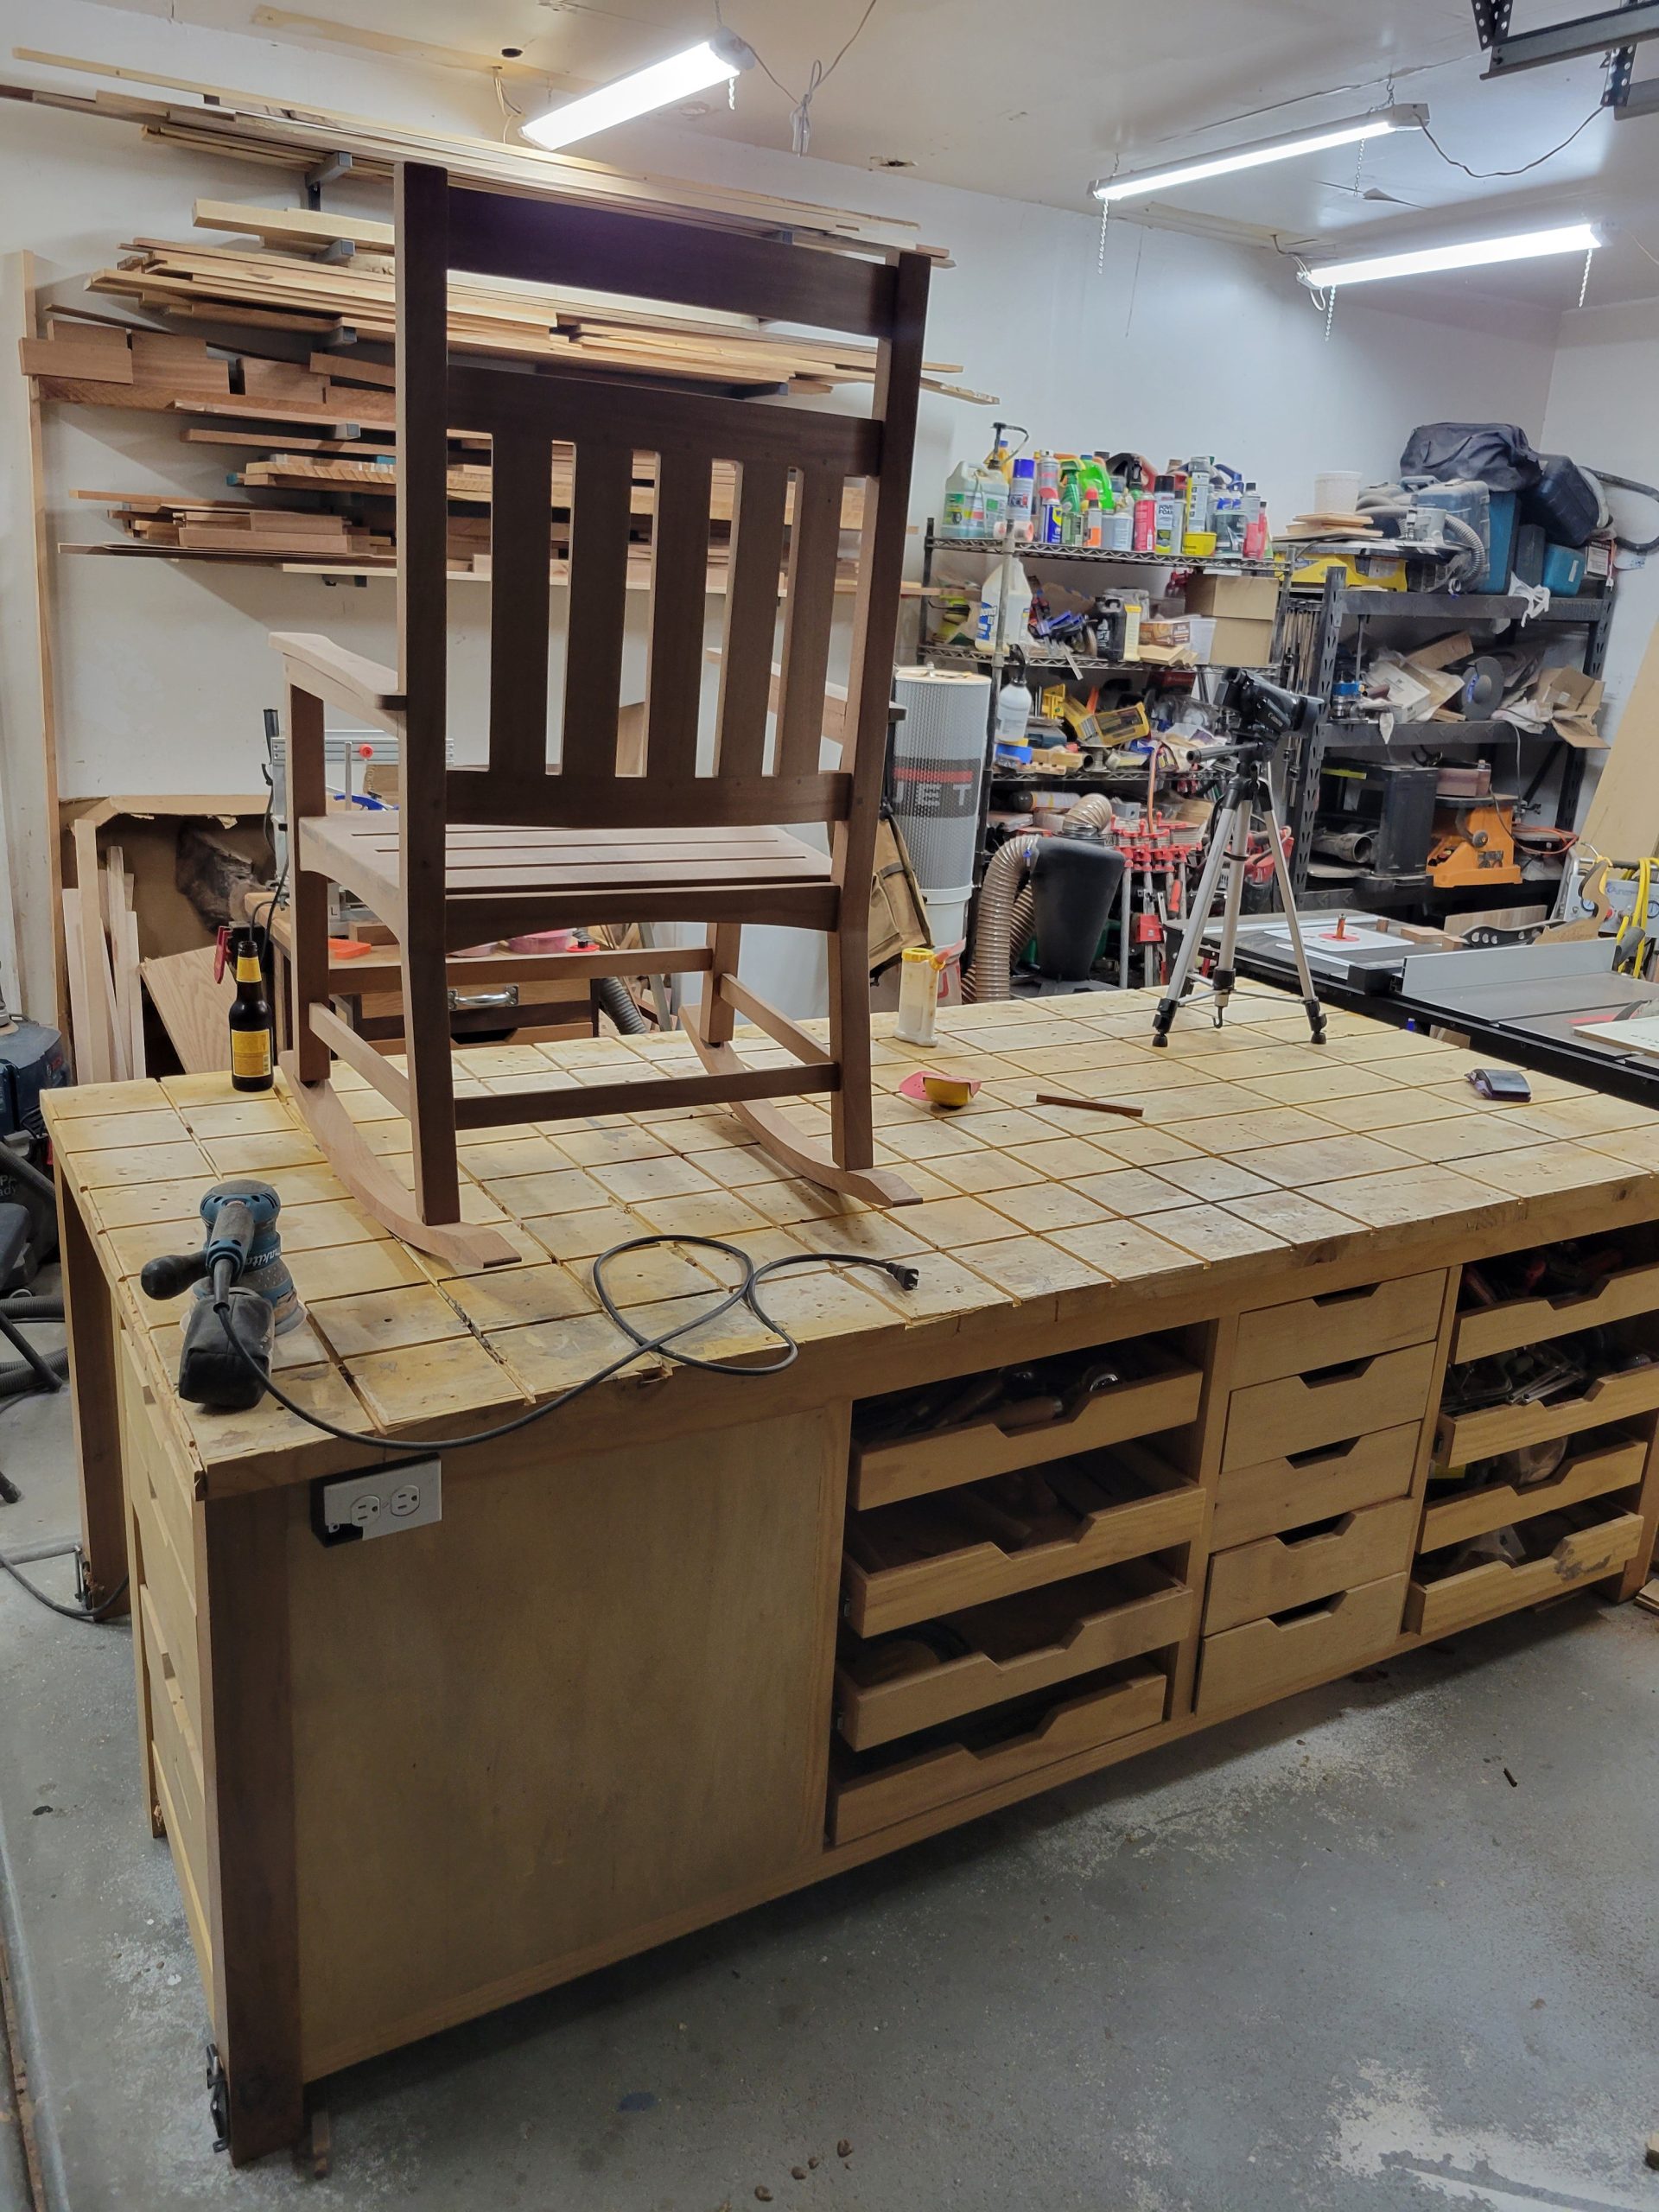
8. Large Wood-Paneled Workbench with Integrated Drawers
This design is all about celebrating a single material. The formula is approximately 80% monochromatic wood + 15% neutral backdrop + 5% dark accent. The workbench, with its grid top, drawers, and cabinet faces, is all built from the same light-toned wood, creating a massive, unified block of texture. The white walls and grey floor act as a quiet, neutral canvas that lets the workbench dominate. The dark wood of the in-progress rocking chair provides just enough of a contrasting accent to add depth and interest. It’s a masterclass in texture over color.
|
📋 Copy HEX 🔗 Share |
A large, central workbench like this one is best suited for a spacious, dedicated workshop, likely in a two or three-car garage. You need a minimum of 3-4 feet of clear space on all sides to walk around it, open drawers, and maneuver large pieces of material. We’d estimate the bench itself is about 4 feet wide by 8 feet long, so the room should ideally be at least 12 by 16 feet to accommodate it comfortably without feeling obstructed. For a more compact solution, consider the wall-mounted approach in Idea #10.
9. Long Plywood Workbench with a Recessed, Lighted Shelf
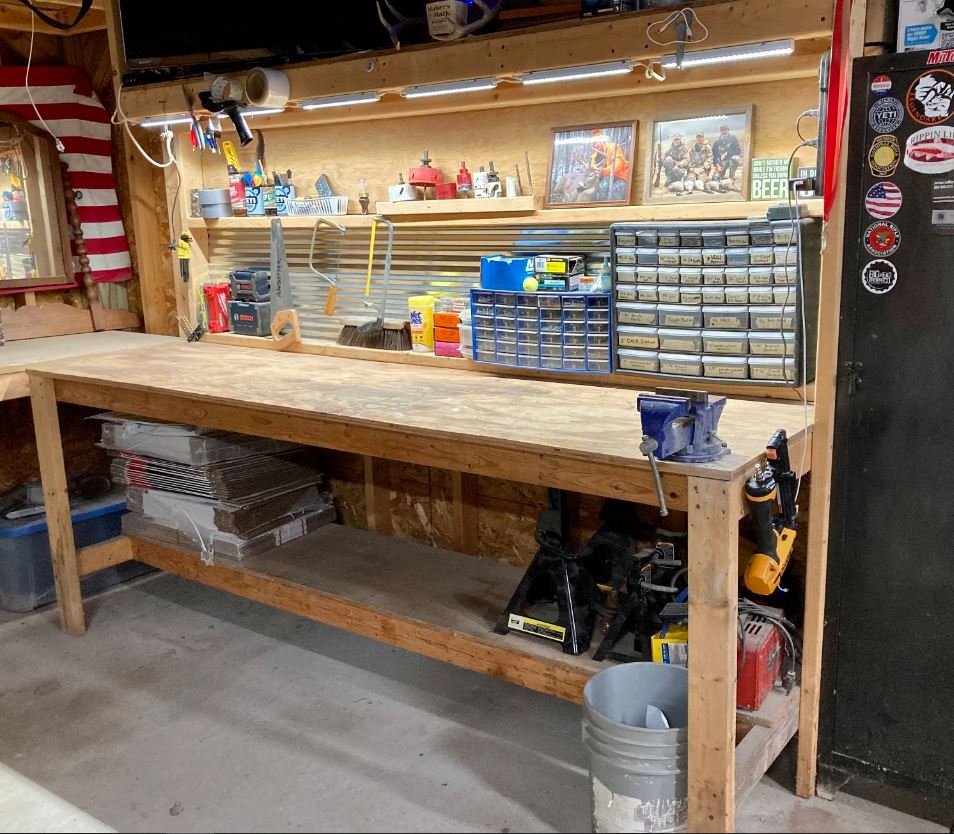
Installing integrated LED strip lighting under a shelf is a game-changer for task visibility. Here’s a quick-and-dirty how-to:
|
📋 Copy HEX 🔗 Share |
- Choose your LED strip. For a workshop, a “daylight” color temperature (5000K-6500K) is best for color accuracy.
- Measure the length of your shelf and purchase a strip kit that is slightly longer. You can usually cut them at designated points.
- Install the shelf, but leave a 1-2 inch gap between the back of the shelf and the wall to run the wiring.
- Clean the underside of the shelf where the strip will go. Most LED strips have a self-adhesive backing. Peel and stick it in place, ideally inset an inch from the front edge.
- Run the power cord behind the shelf and down to your power source. Use small cable clips to keep it tidy.
- Plug it in and enjoy a perfectly illuminated workspace!
There’s a huge trend right now towards “honest” materials in design, and this plywood-heavy workspace nails it. In 2026, people are tired of fake finishes and are embracing the inherent beauty of construction materials like plywood, OSB, and concrete. This look celebrates its own construction. It’s not trying to be a fine piece of furniture; it’s a proud, hard-working bench. The addition of clean, modern touches like the LED strip lighting keeps it from feeling purely utilitarian and pushes it into a stylish, industrial-chic category that’s all over Pinterest.
10. Compact Fold-Down Workbench with Black Pegboard
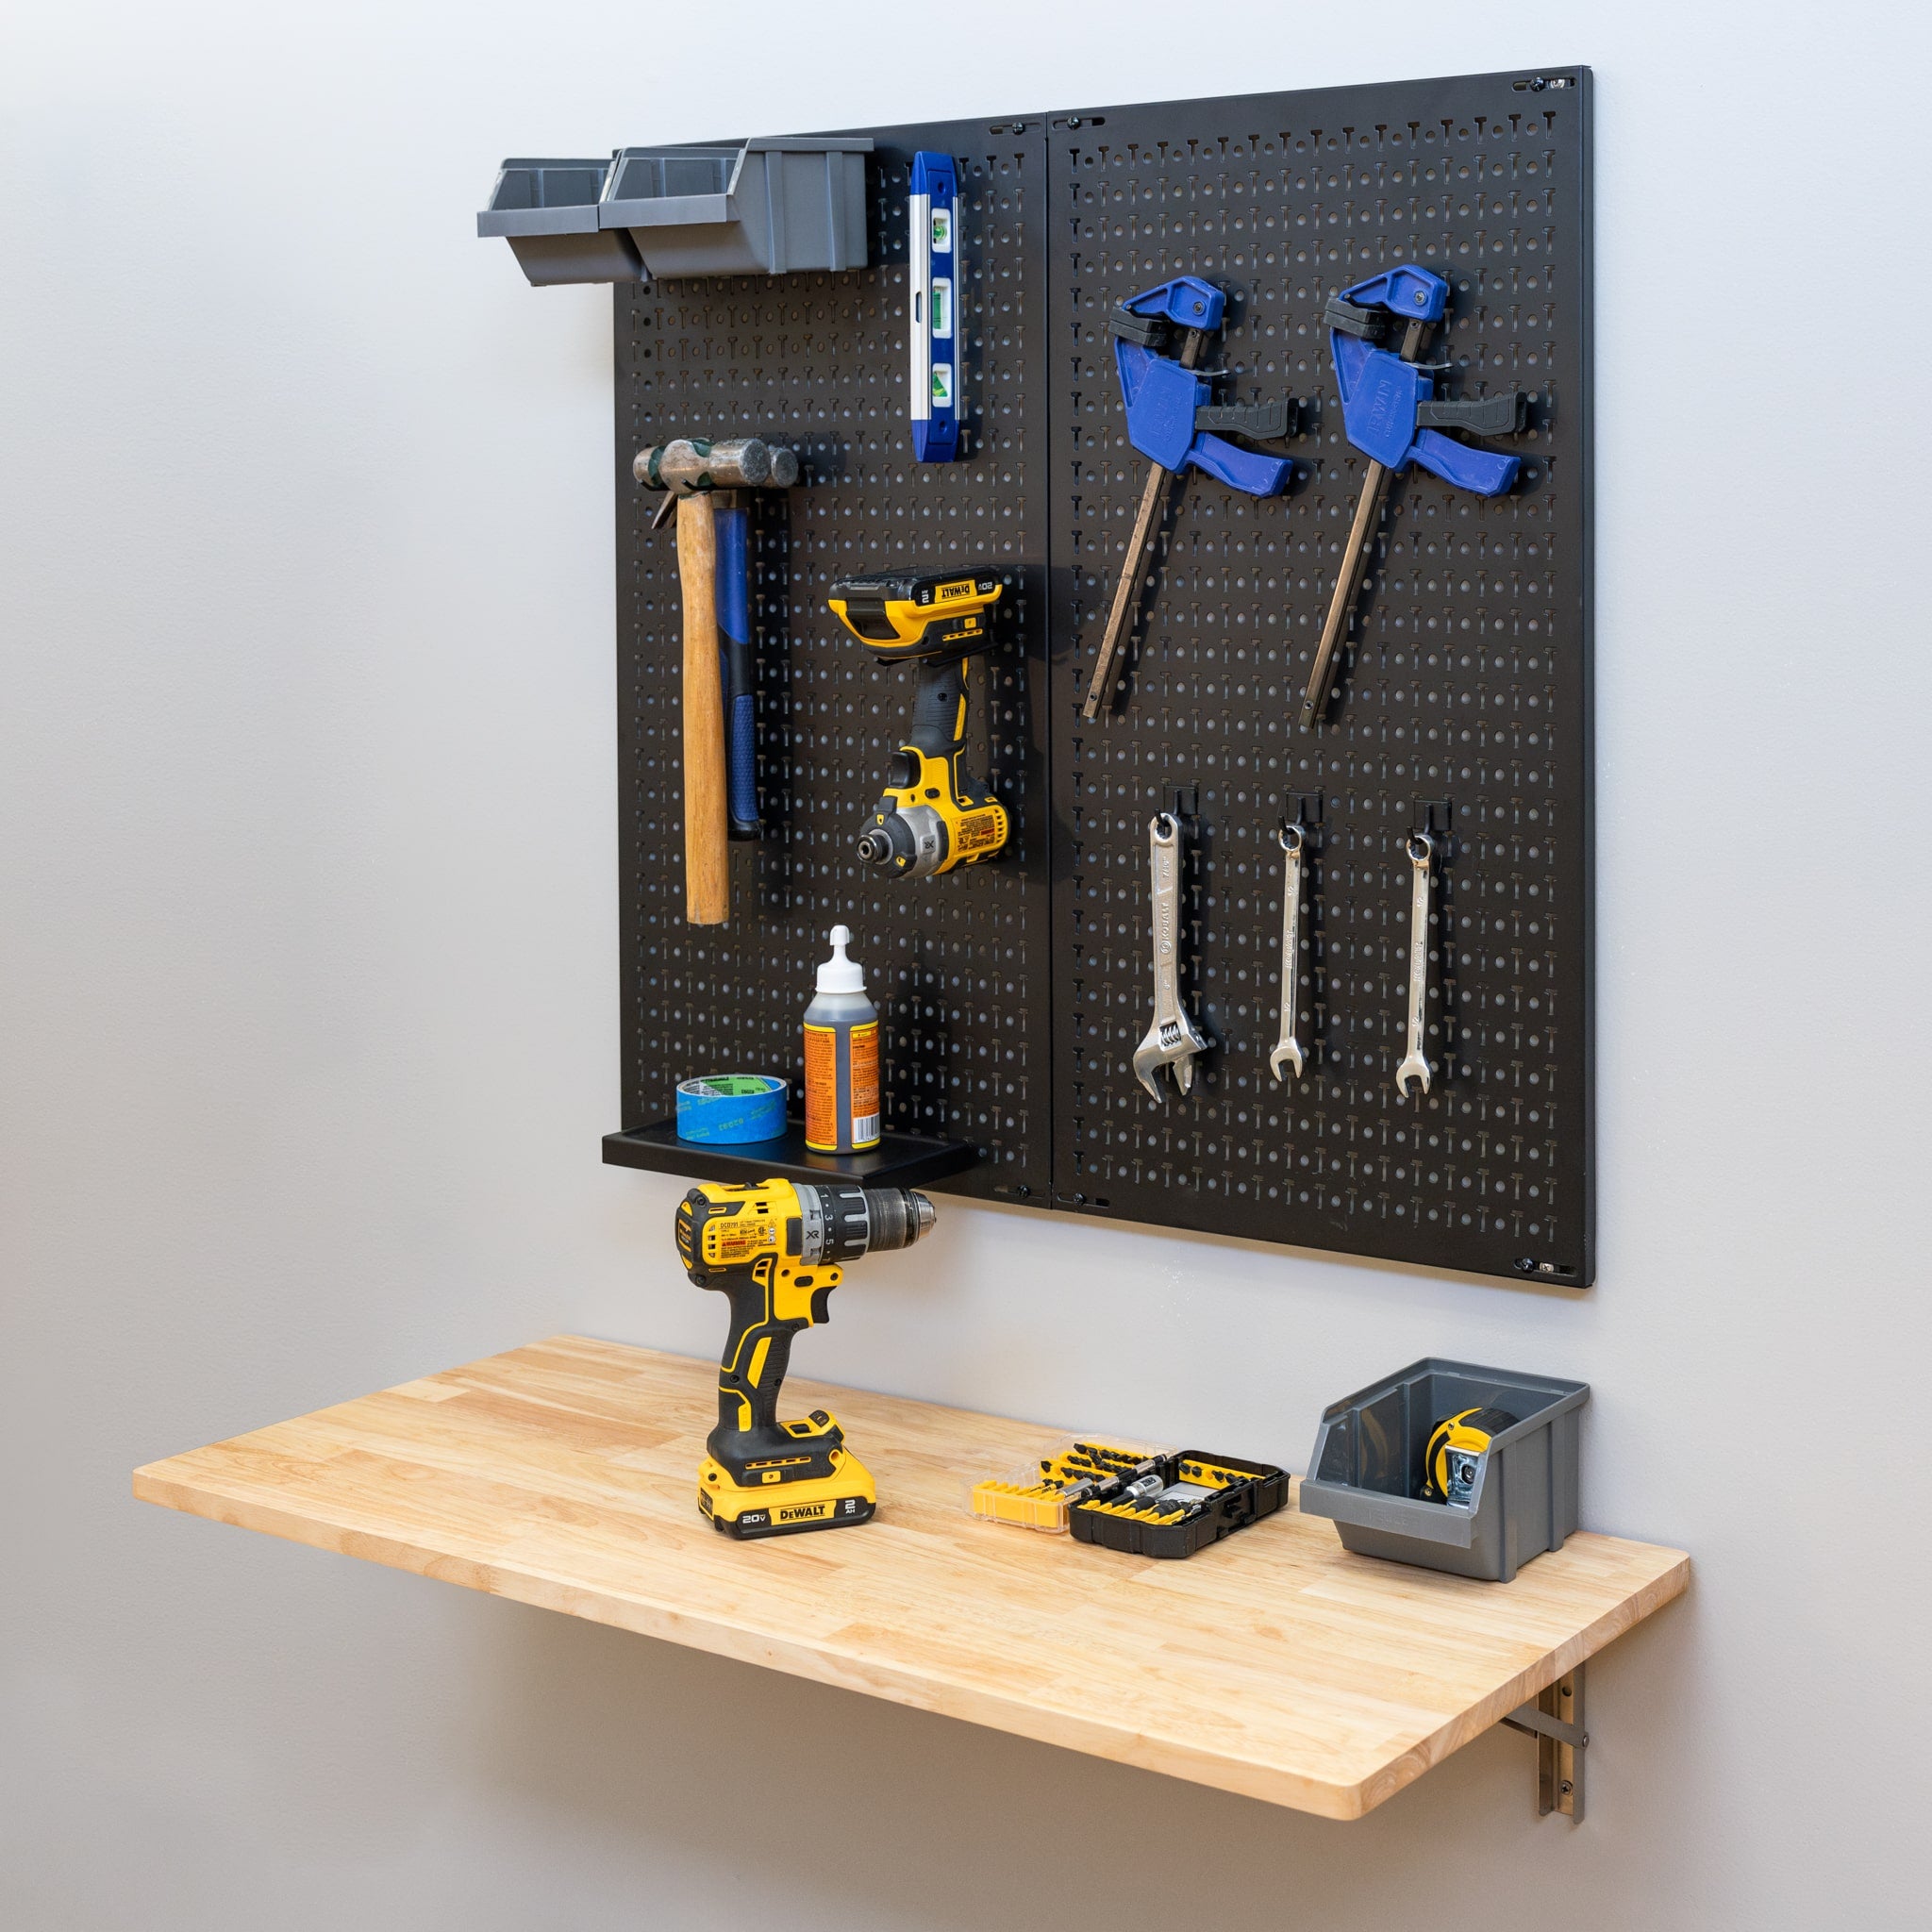
This space-saving setup is brilliant, but you need to check a few things before you commit.
|
📋 Copy HEX 🔗 Share |
- Wall Structure: Can your wall support this? You MUST mount the folding brackets and the pegboard into studs. Drywall alone will not hold.
- Clearance: When folded down, will the workbench block a doorway, an outlet, or access to something important? Measure the footprint on the floor.
- Fold-Up Space: Is there anything on the wall that will prevent the bench from folding up flush? Think conduit, pipes, or other fixtures.
- Your Project Needs: Is a smaller surface like this genuinely enough for the kind of work you do? Be realistic about your needs.
This is already a budget-friendly idea, but you can get this look for even less. Look for folding shelf brackets on Amazon or at Walmart—a heavy-duty pair can be as low as $20-$40. For the work surface, instead of a nice piece of finished wood, use a scrap piece of plywood or an old solid-core door cut to size from an architectural salvage yard. Facebook Marketplace is also a great place to find free or cheap pegboard from someone else’s garage clean-out. For another great space-saving design, check out the floating bench in Idea #1.
11. Slatwall System with a Wood Bench and Rolling Tool Cabinet
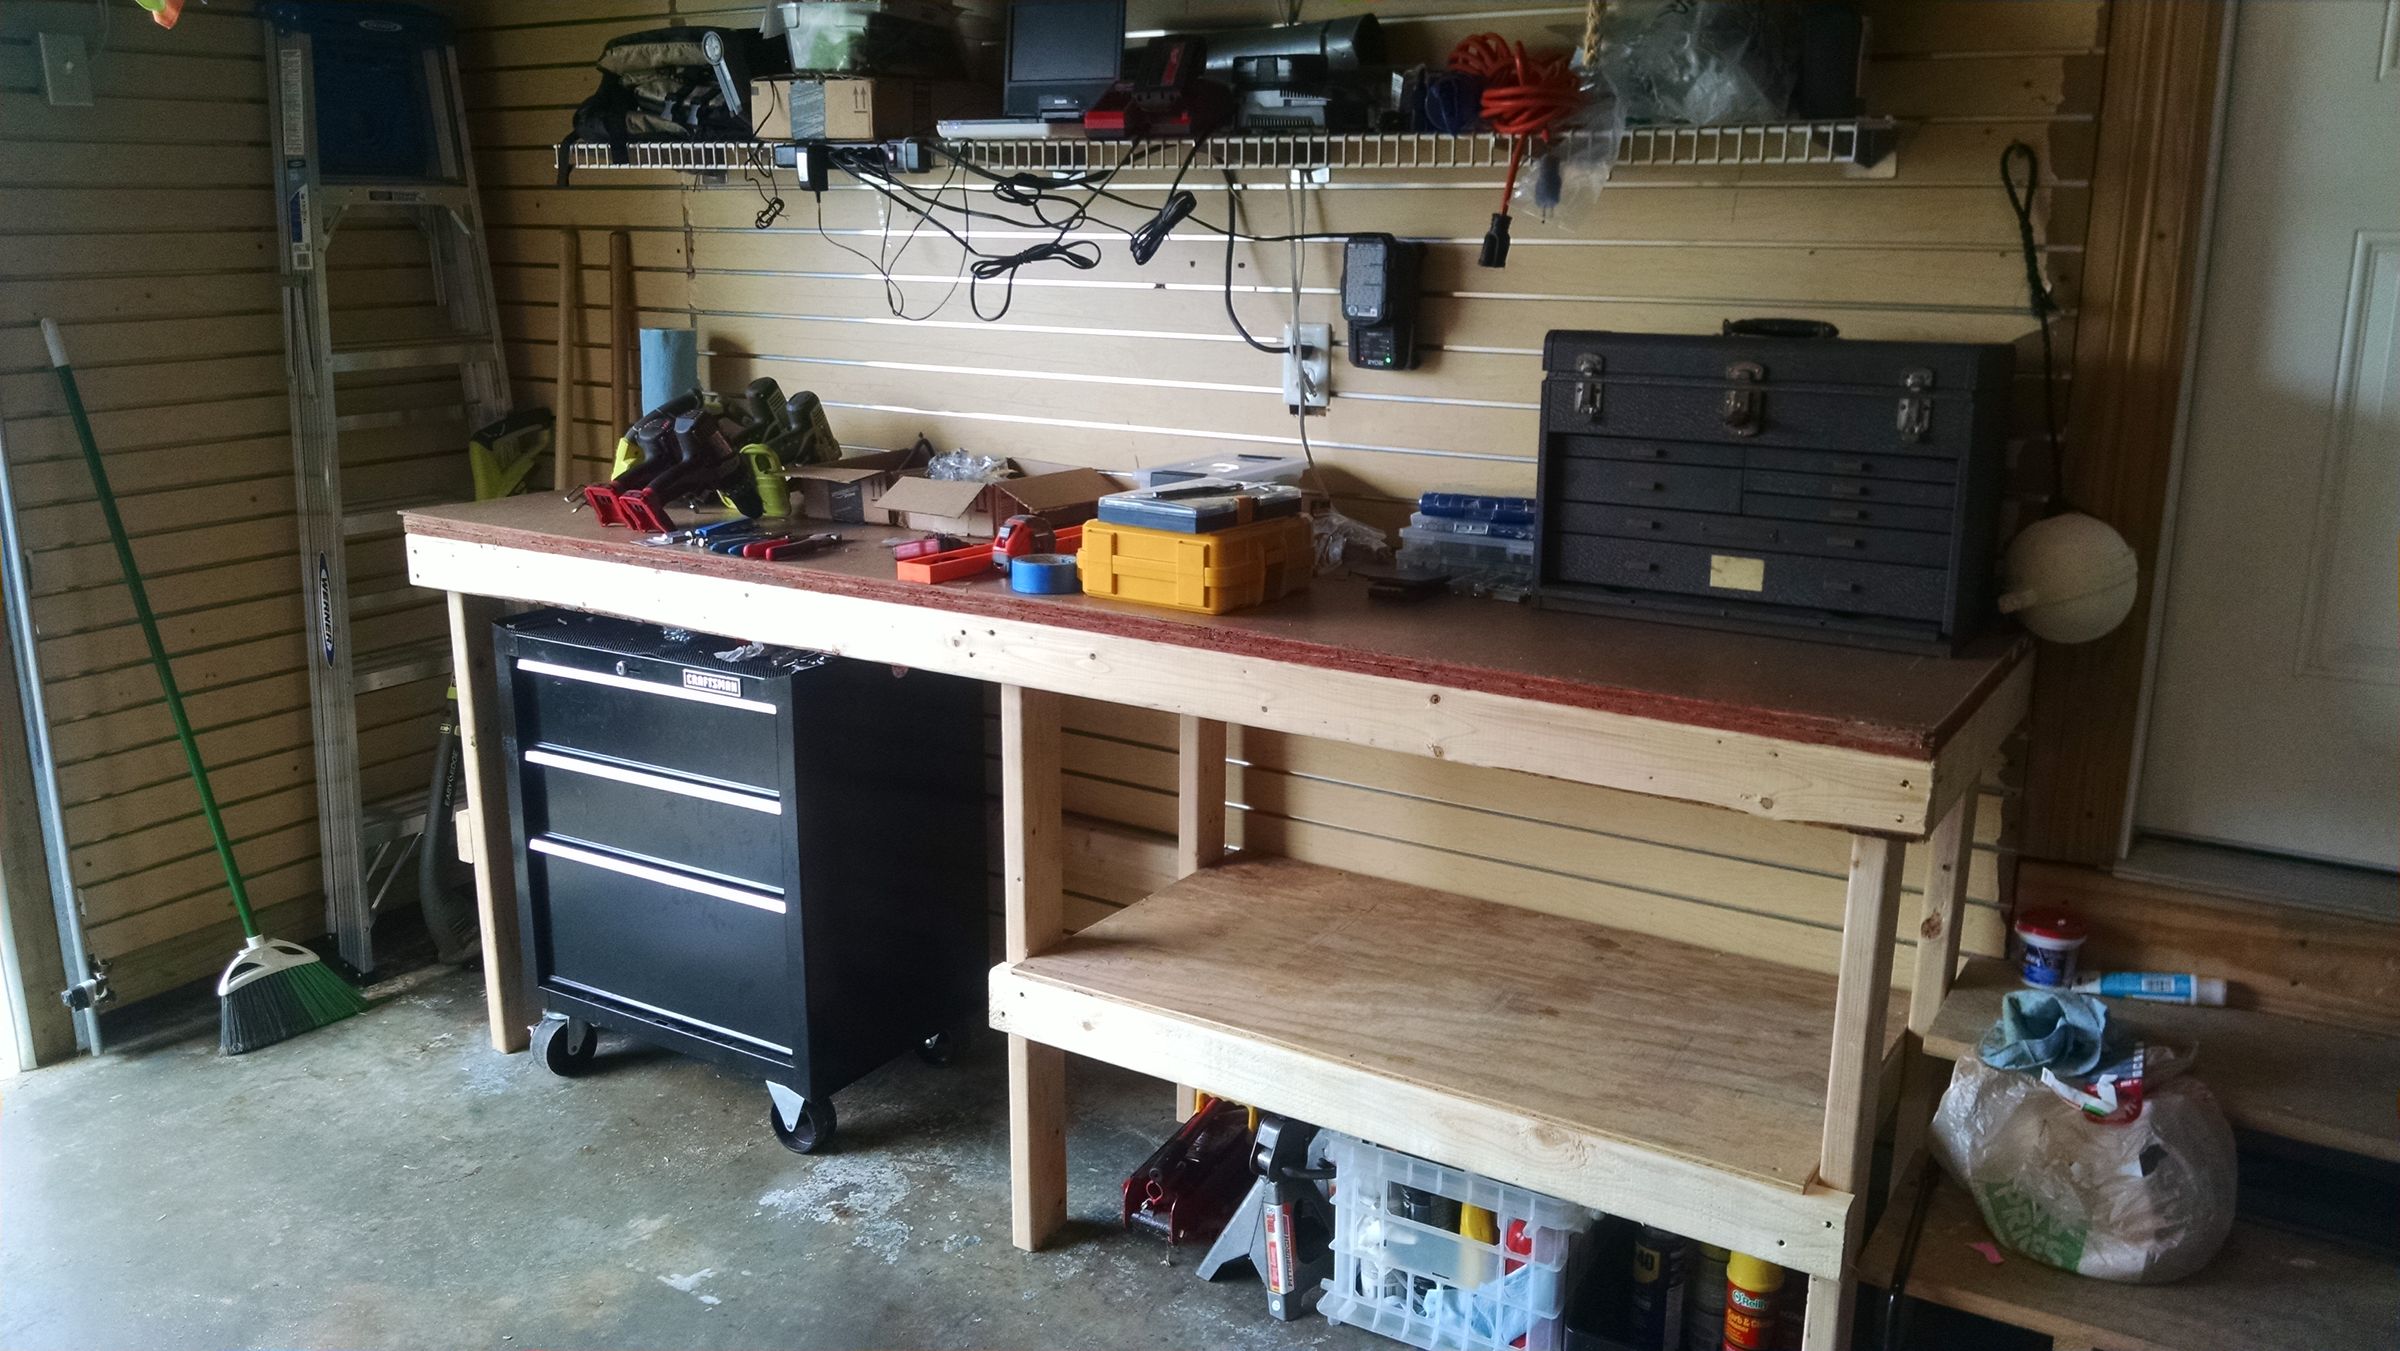
The key to making a slatwall system feel less like a retail store and more like a custom workshop is to mix in other materials. Here, the warm, rough-hewn wood of the workbench and the solid black of the rolling cabinet break up the monotony of the cream-colored plastic panels. Don’t be afraid to leave some of the slatwall exposed. White space is a design element, too; it gives your storage room to breathe and makes the overall composition feel less cluttered, even when it’s full of tools.
|
📋 Copy HEX 🔗 Share |
Slatwall is fantastic for versatility, but those grooves are magnets for dust and sawdust. Cleaning them can be tedious. The most effective way is to use a shop vac with a brush attachment or an air compressor with a nozzle to blow the debris out. The tools themselves will also gather dust, so a regular wipe-down or blow-off of everything on the wall is necessary to keep the space from looking grimy. Also, be mindful of the weight capacity of your slatwall hooks and shelves—overloading them can cause the plastic to warp or fail.
12. Simple Wall-Mounted Bench with Pegboard Backsplash
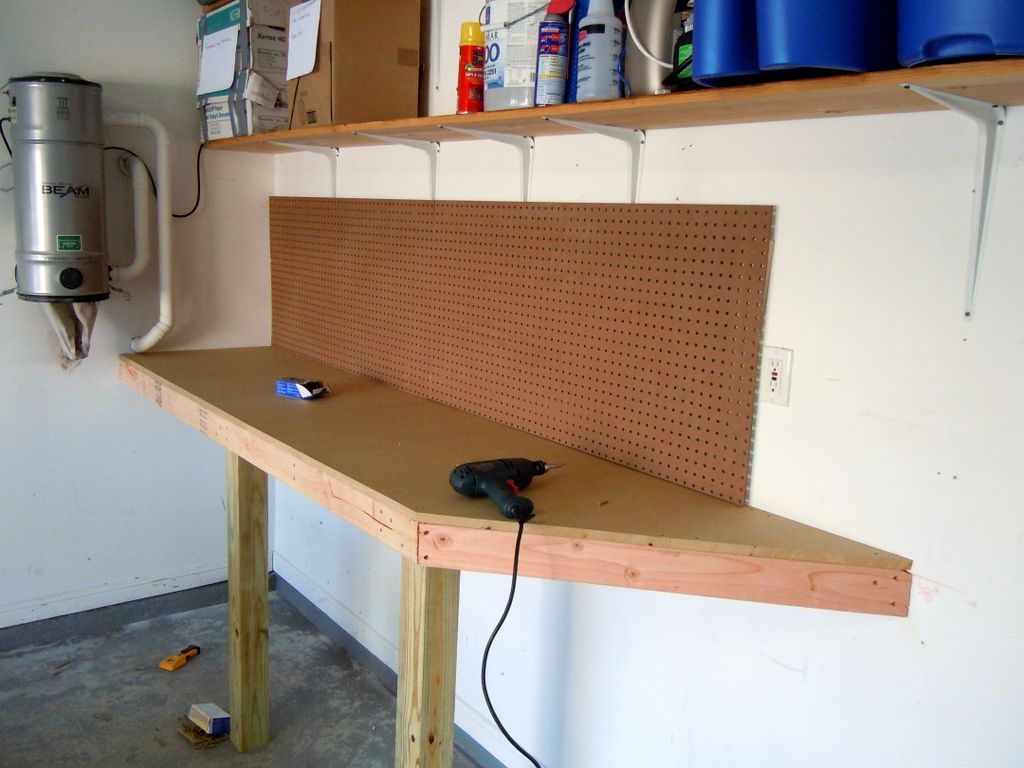
This design demonstrates the power of simplicity and using what you have. It works because it doesn’t try to be more than it is: a practical, functional workspace. The combination of wall-mounting and two simple legs provides stability without the bulk of a full four-legged table. The brown pegboard provides a warm, textured contrast to the white wall, while the high shelf maximizes vertical storage for less-used items. It’s a straightforward, honest-to-goodness garage workbench.
|
📋 Copy HEX 🔗 Share |
What makes this setup so approachable is the brown pegboard backsplash. It’s an inexpensive, incredibly effective material that provides instant organization and a classic workshop aesthetic. It’s more visually interesting than a bare wall and more flexible than permanent shelves. It serves as the perfect “bridge” element, visually connecting the workbench below with the storage shelf above, making the entire wall feel like a single, cohesive unit. Take it away, and you just have a shelf and a table.
13. Rustic Corner Workbench Framed by a Bright Green Wall
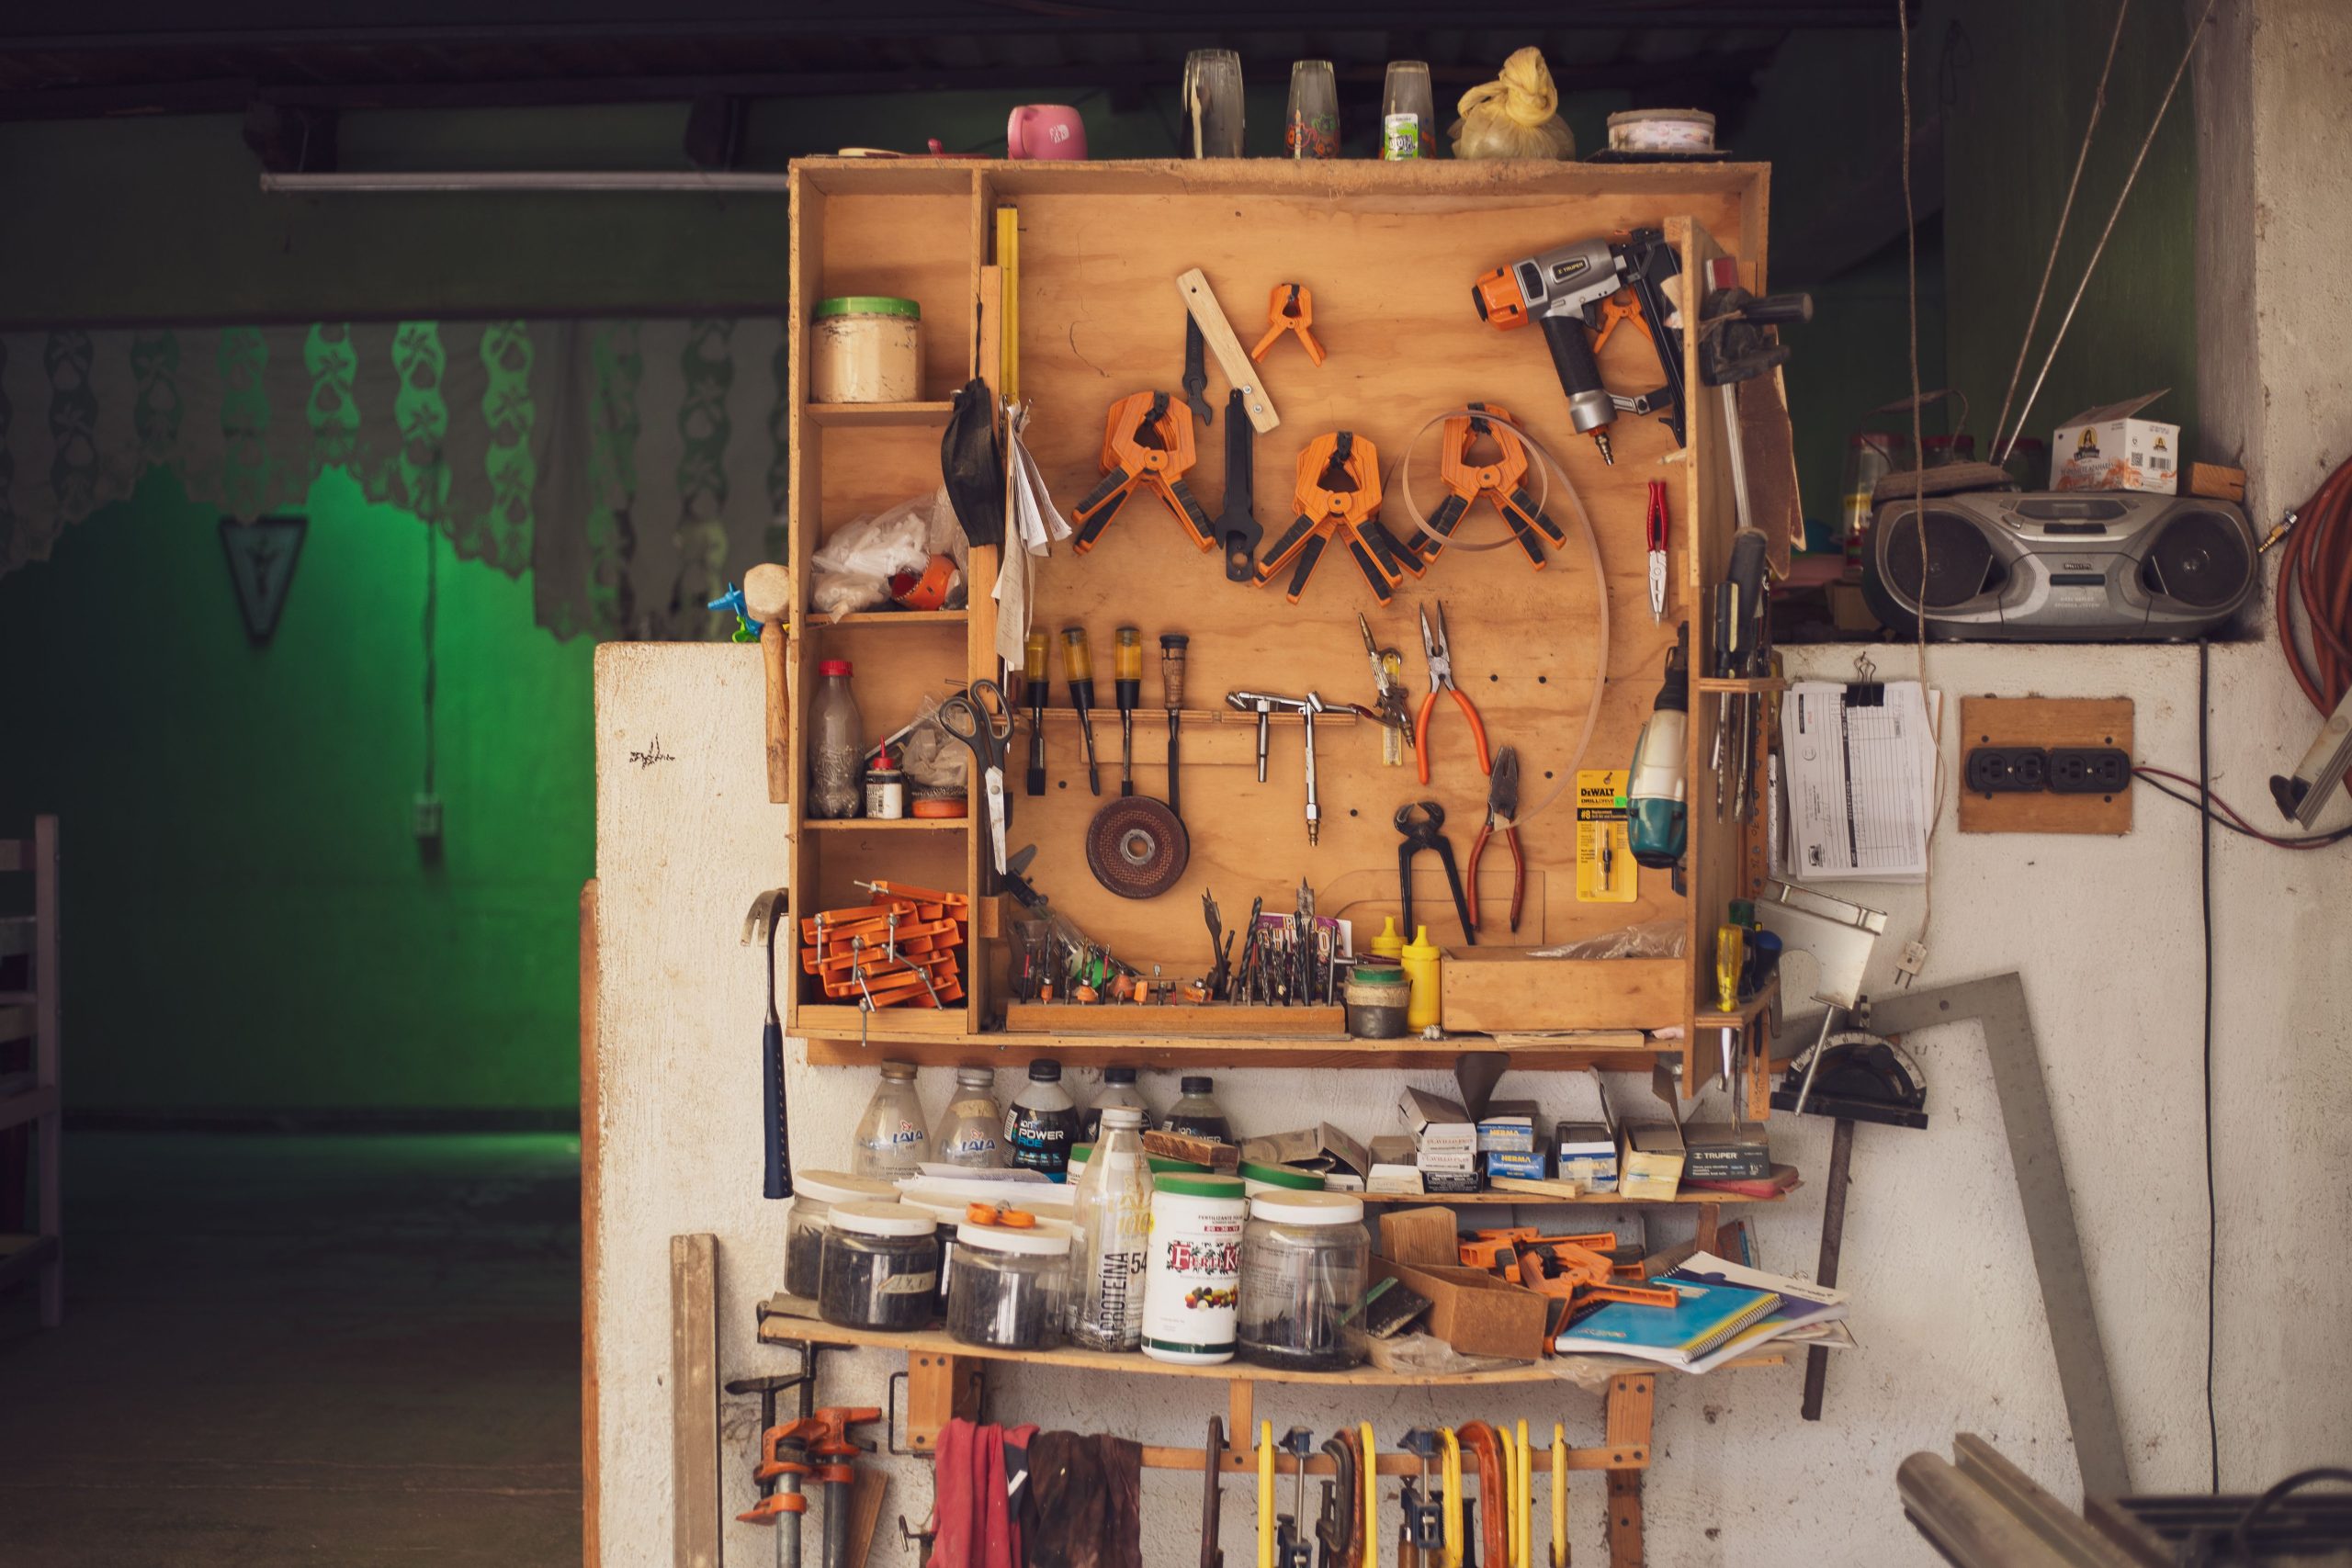
This vibrant space uses a daring but effective style recipe: 50% Rustic Wood + 40% Bold Color Pop + 10% Organized Clutter. The extensive use of light, unfinished wood for the workbench, shelves, and pegboard provides a warm, rustic base. The bright green accent wall is a huge dose of personality, preventing the wood from feeling monotonous. Finally, the “organized clutter” of the neatly arranged tools, jars, and clamps adds the texture and reality that makes it feel like a genuine, loved workspace rather than a sterile showroom.
|
📋 Copy HEX 🔗 Share |
A setup with this much open storage and this many small items is a double-edged sword. It looks fantastic when it’s tidy, but it can quickly become a visual mess. This is not a low-maintenance design. It requires a personality that enjoys—or at least tolerates—the constant act of putting things back in their proper place. The bright green wall is also a bold commitment. Make sure you absolutely love the color before you paint, and test a large sample on the wall first. A color that vibrant can look very different under garage lighting compared to in the paint store.
14. Industrial-Style Tool Wall with Corrugated Metal and Pegboard
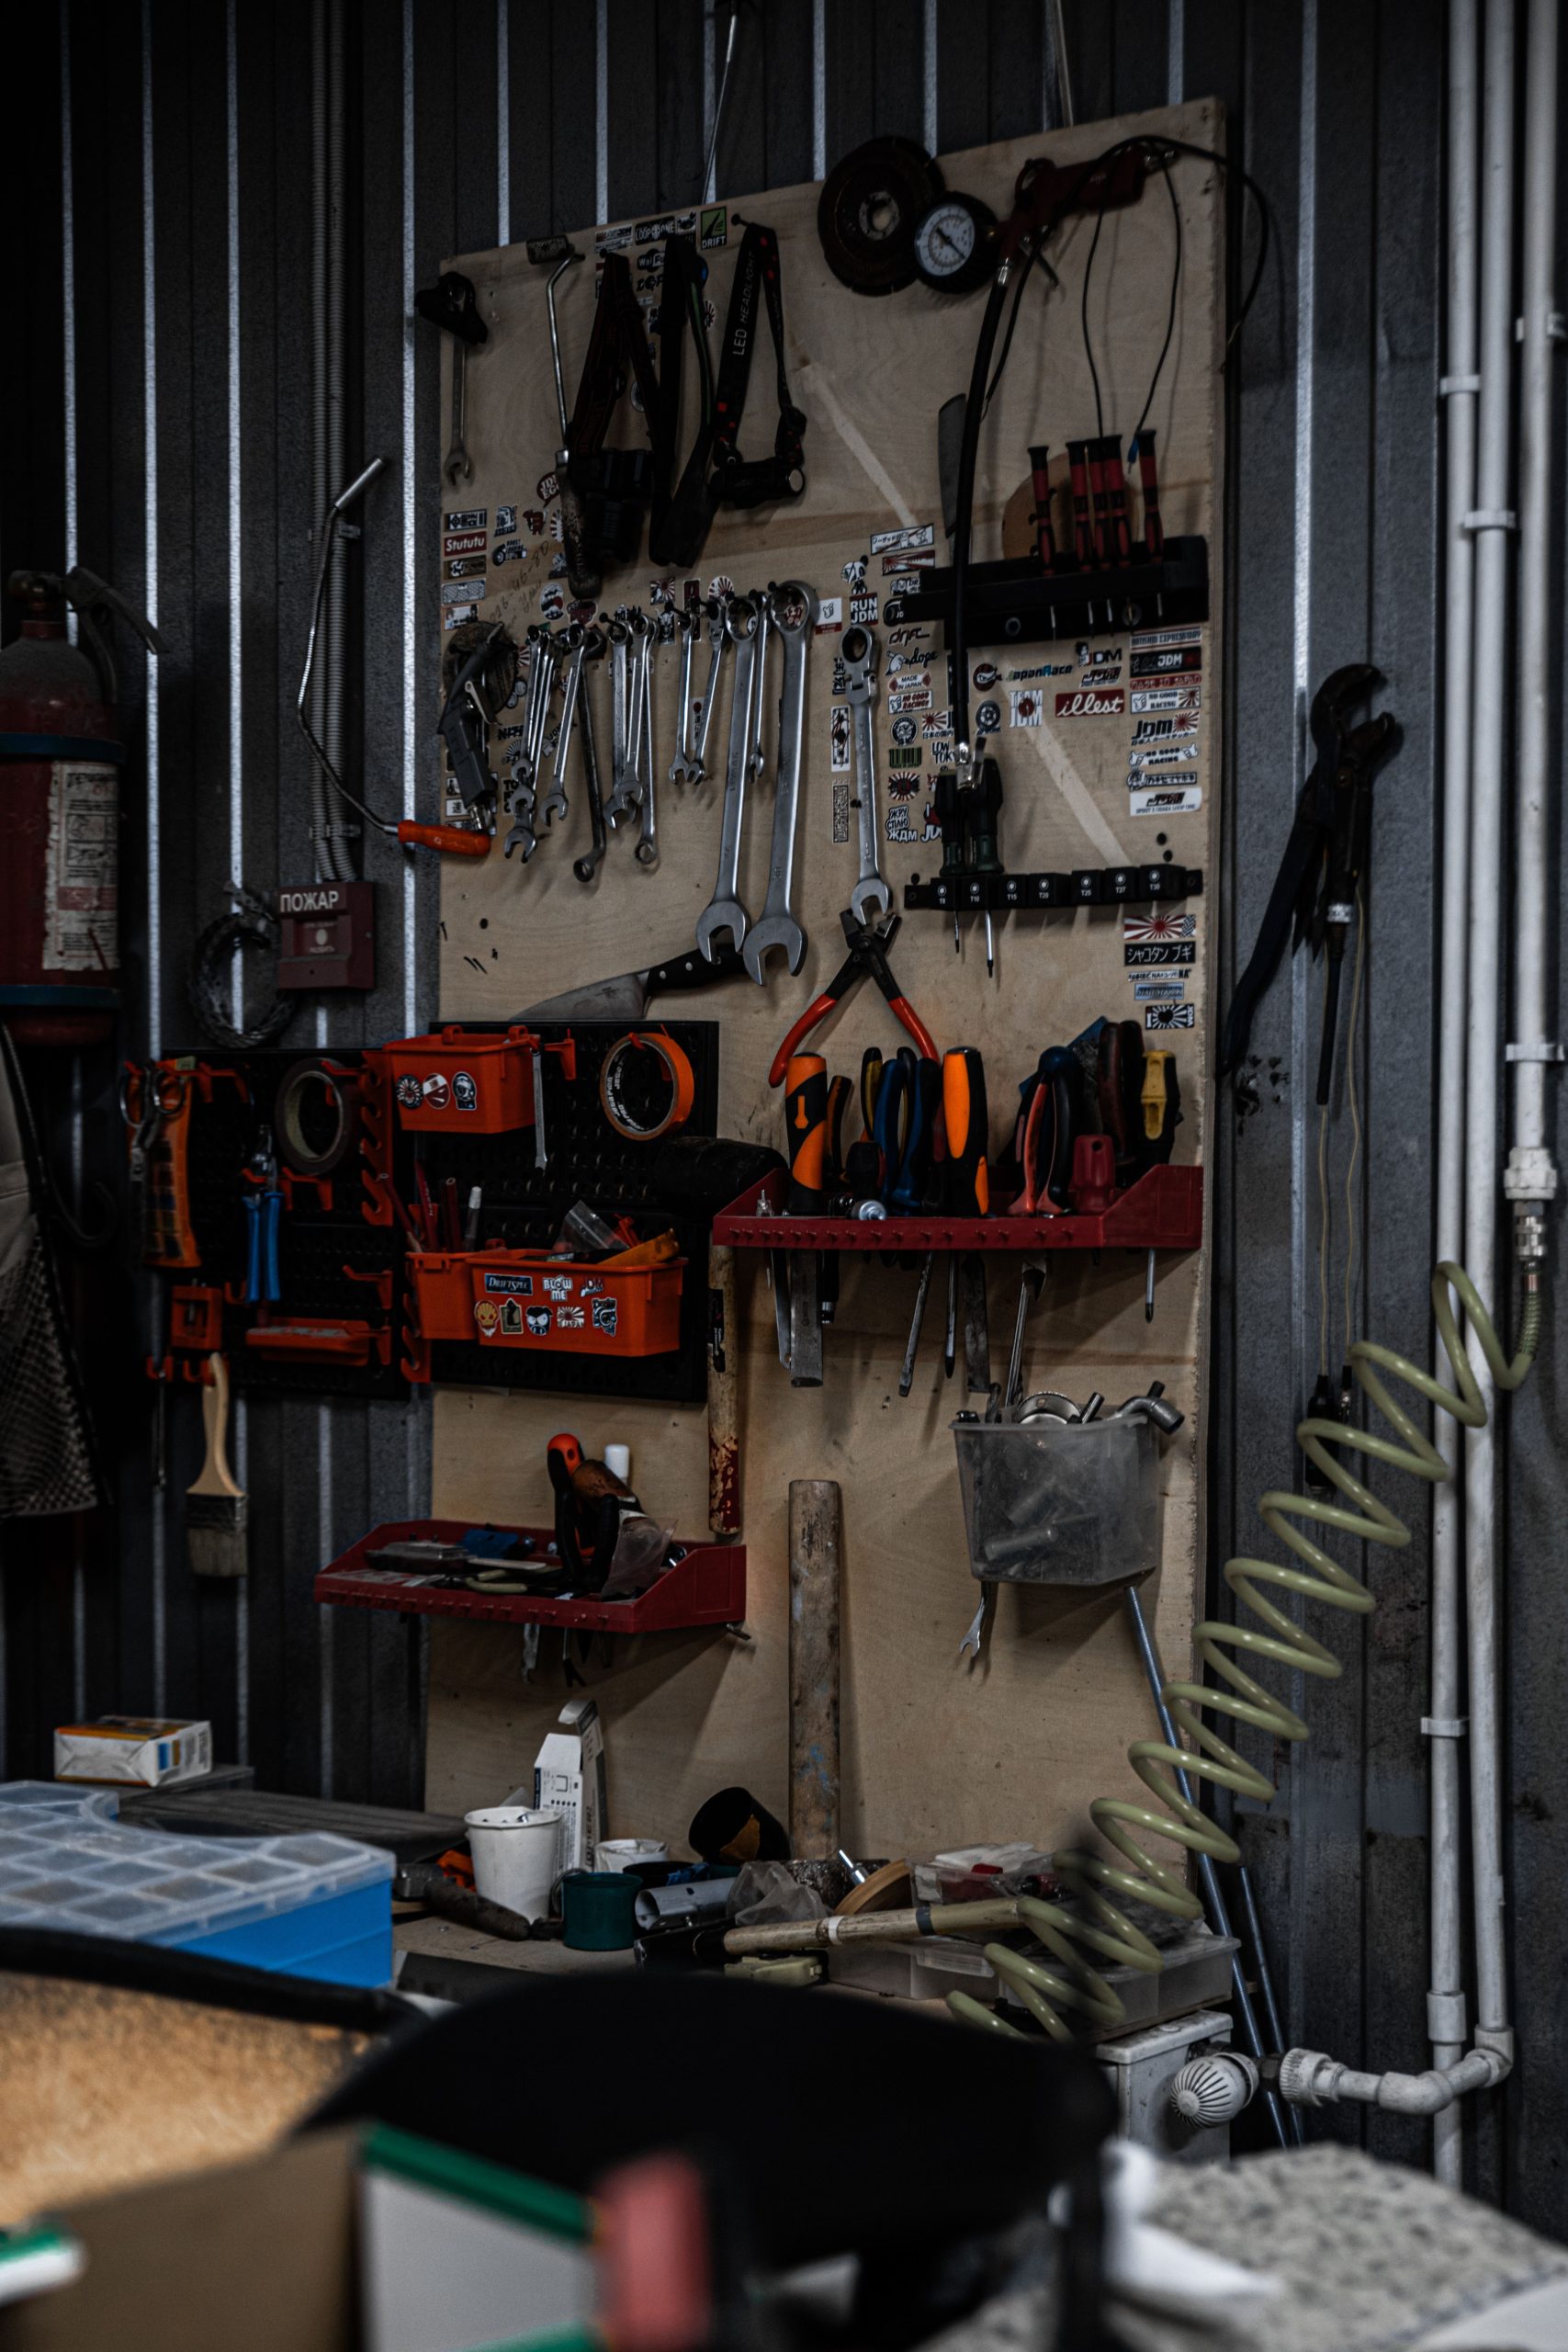
This is a look you can achieve with a focus on materials. The cost comes from layering different storage systems over a unique wall treatment.
|
📋 Copy HEX 🔗 Share |
- Wall Treatment (Corrugated Metal Panels): $150 – $400
- Main Organizer (Large Wooden Pegboard): $80 – $200
- Storage Accessories (Shelves, Bins, Hooks): $100 – $300
- Lighting & Electrical: $75 – $250
- TOTAL: $405 – $1,150
- Budget Alternative: Skip the metal panels and mount the pegboard directly to the wall. Use thrifted or DIY shelving instead of new plastic bins to capture the eclectic vibe for 50% less.
This heavily layered, almost curated “cluttercore” aesthetic is a direct reaction against years of stark minimalism. People are embracing the reality of their hobbies and workspaces, showing off their tools and supplies as part of the decor. The mix of industrial materials like corrugated metal with the warmth of wood and the pop of colorful, utilitarian tools feels authentic and personal. It’s a trend that celebrates the beauty in function and the story that our belongings tell, which is why it has so much staying power on Pinterest and Instagram.
15. The Essential Garage Workbench Starter Setup
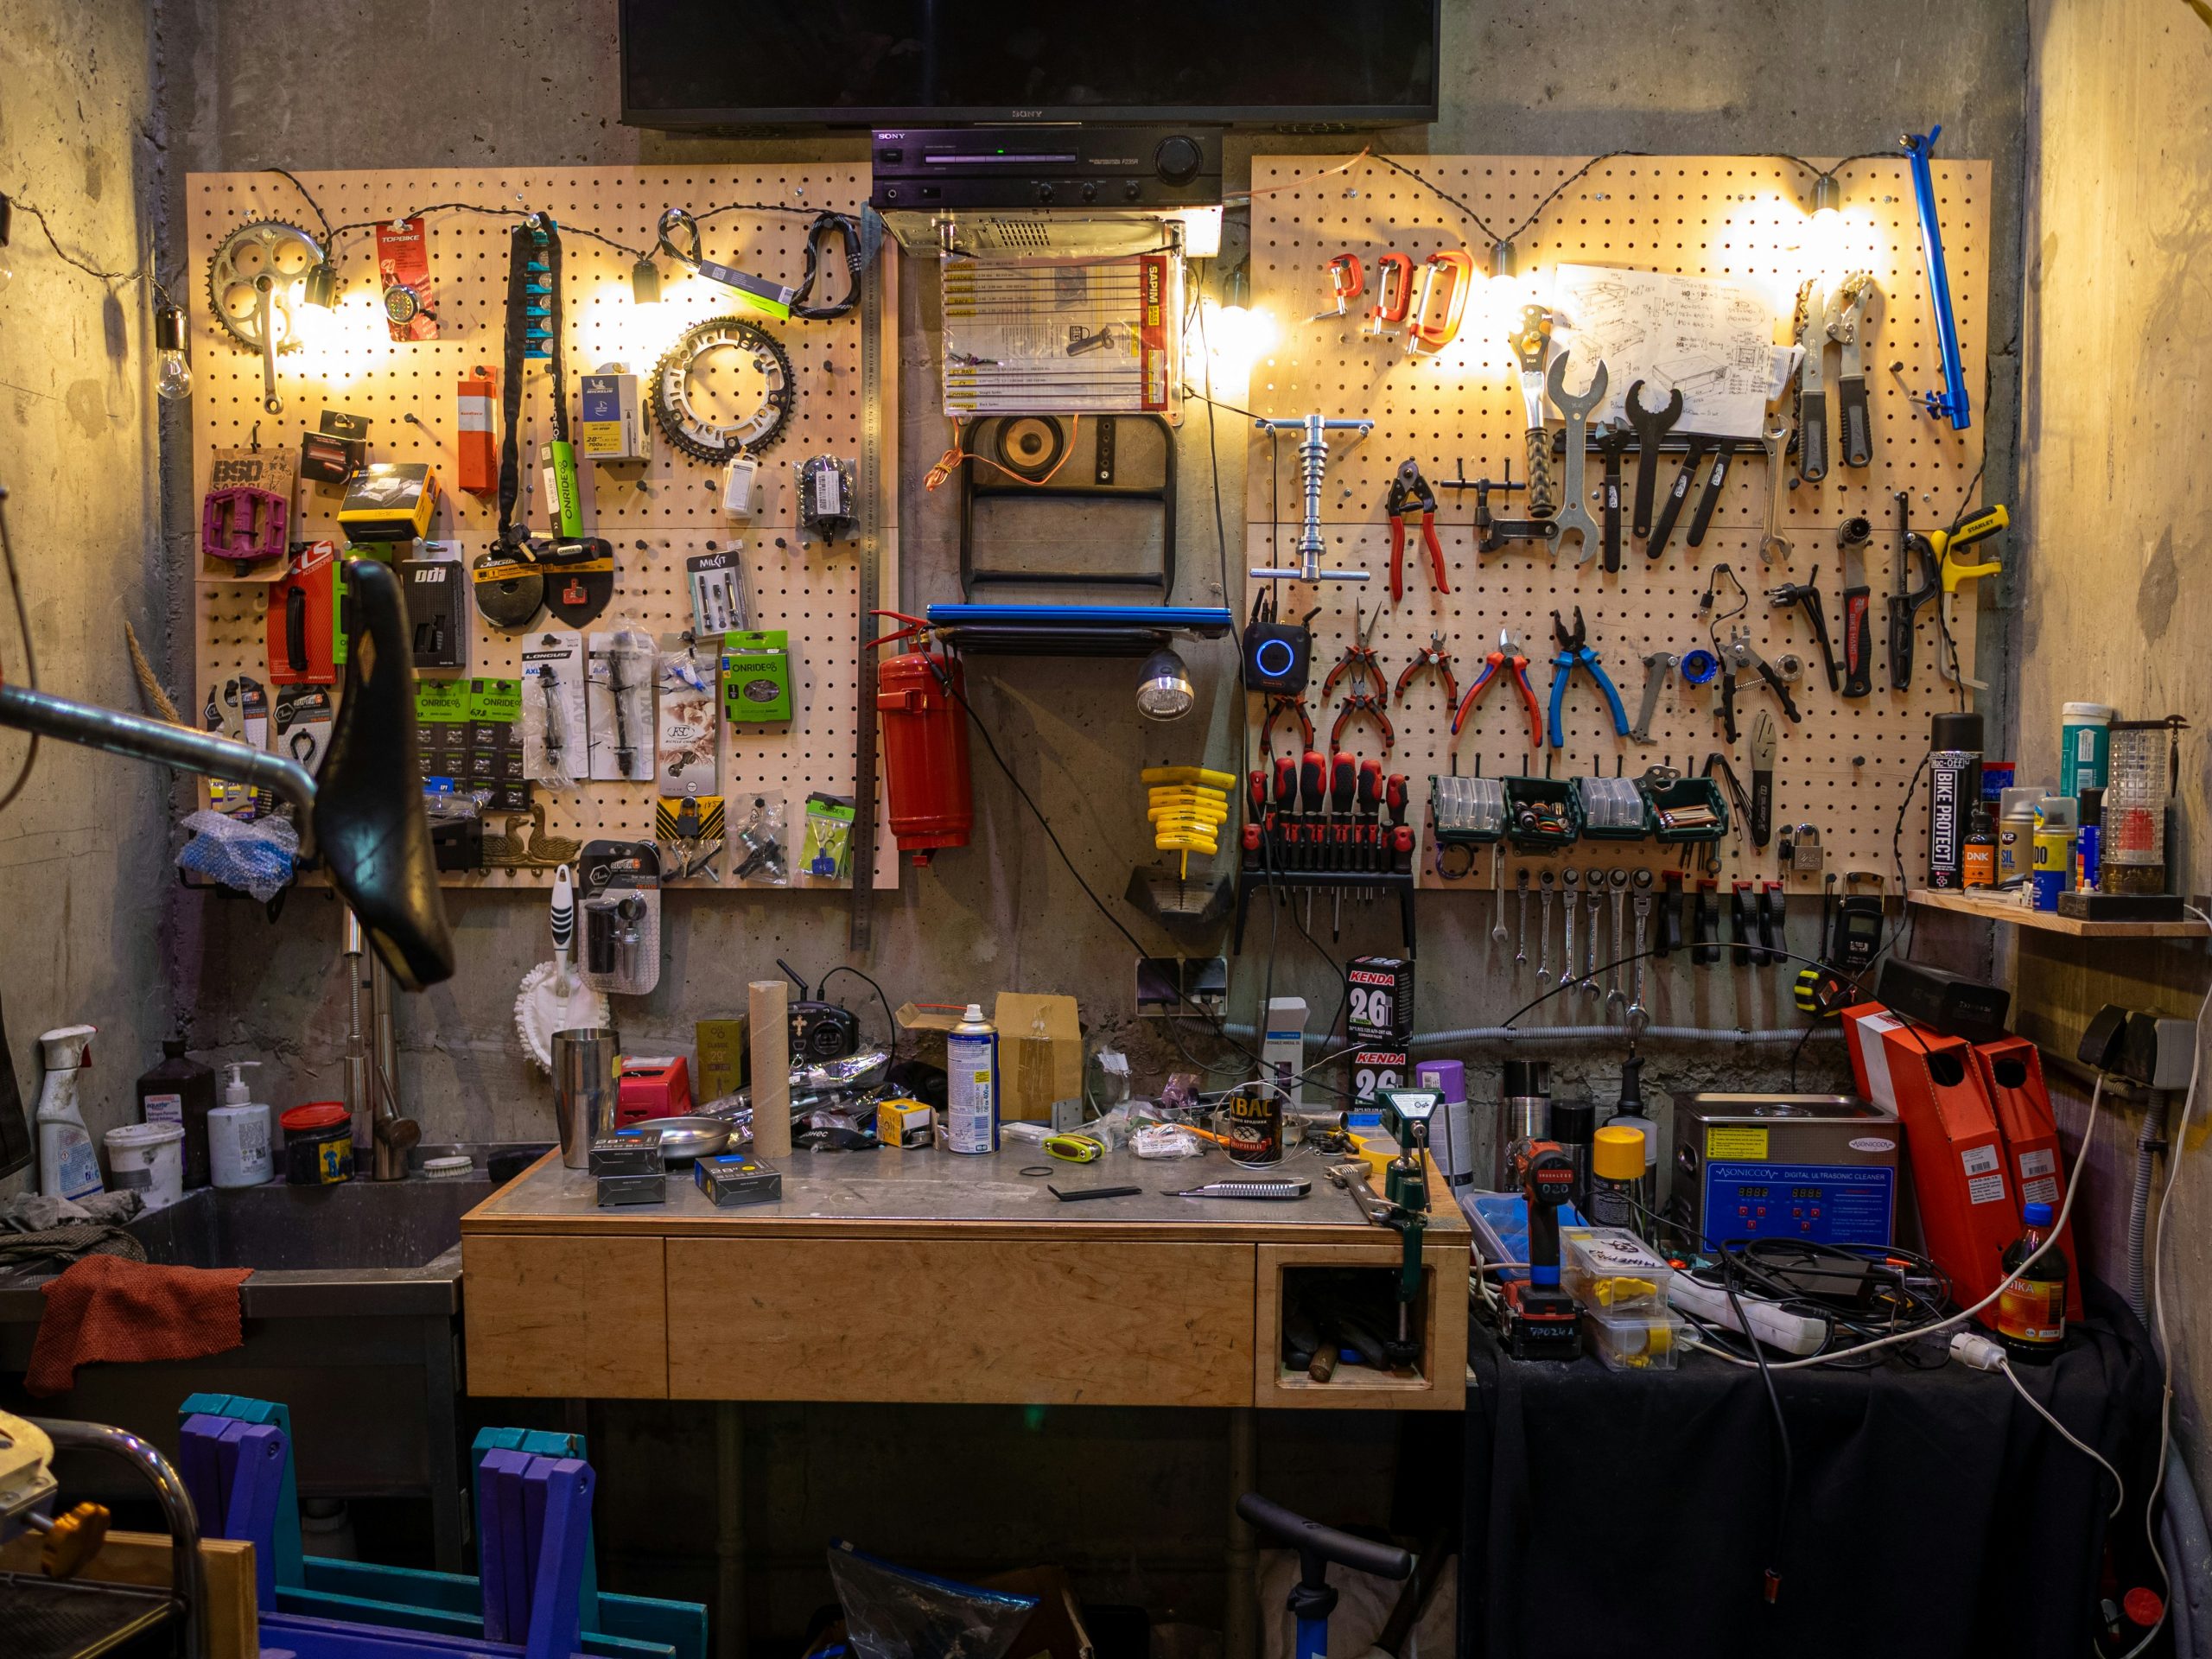
When you’re just starting out, focus on the “big three”: a solid surface, good lighting, and accessible tool storage. Don’t get bogged down in complex cabinet systems. A simple, sturdy wooden table is more versatile than you think. For tool storage, a sheet of pegboard or a French cleat system is a flexible starting point you can add to over time. Most importantly, don’t neglect task lighting. An inexpensive LED shop light hung directly over the bench will make your work safer and more enjoyable than any fancy storage system in a dim room.
|
📋 Copy HEX 🔗 Share |
A basic workbench setup like this is perfect for a single-car garage or a designated corner in a larger one. You only need about 6 to 8 feet of wall length. The key is to keep the bench depth to a manageable 24 inches. Any deeper, and it starts to eat up valuable floor space; any shallower, and it becomes less useful. This scale works because it provides a dedicated work zone without commandeering the entire garage, leaving room for a car, bikes, or general storage.
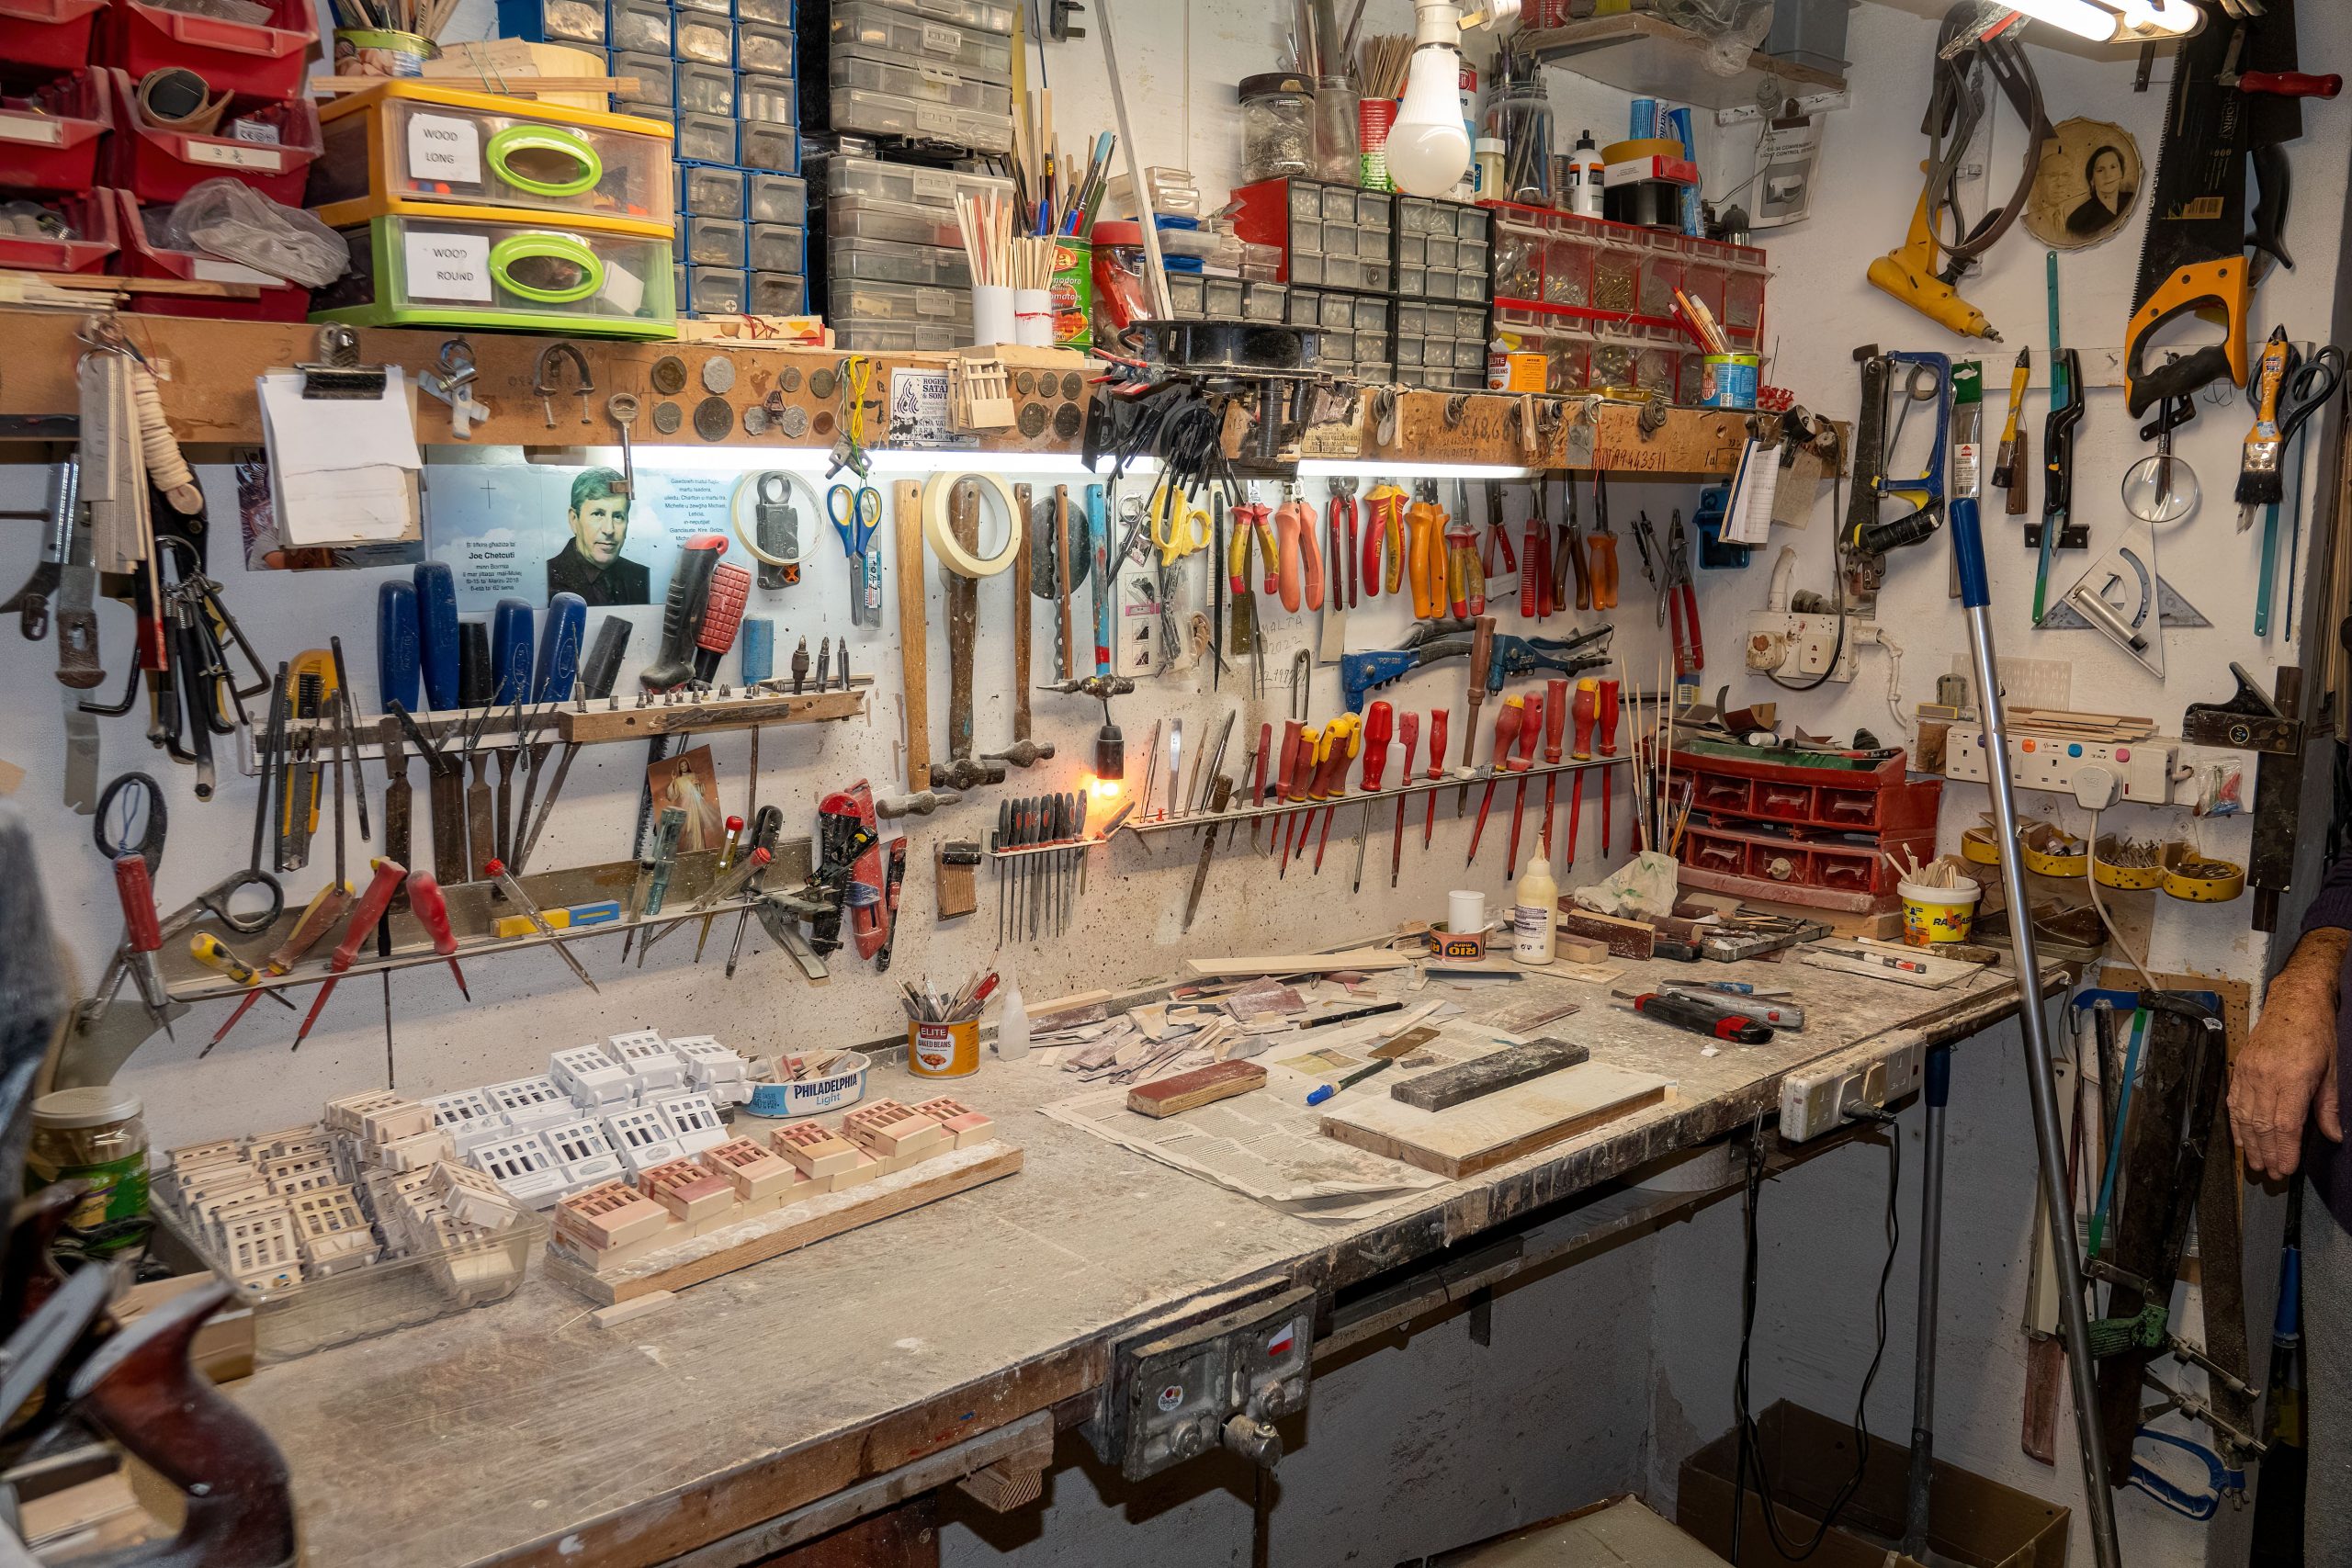
16. The Lived-In Creative’s Workshop
What gives this workshop its character is the visible evidence of work. The newspaper covering the bench, the dust on the surfaces, the miniature models in progress—it’s a space that is clearly in the middle of being used. It’s not sanitized for a photo shoot. This authenticity is what makes it so appealing. It gives you permission to be a little messy and to prioritize the creative process over perfect tidiness. It feels real, approachable, and inspiring in its productivity.
|
📋 Copy HEX 🔗 Share |
This space works because it embraces high-density, vertical storage. Almost every square inch of wall is utilized, from the pegboards packed with tools to the shelves loaded with small parts organizers. This strategy allows the workbench itself to remain relatively clear for active projects. By moving the bulk of the storage off the primary work surface and onto the walls, the design maximizes both storage capacity and usable workspace, which is the ultimate goal of any effective workshop.
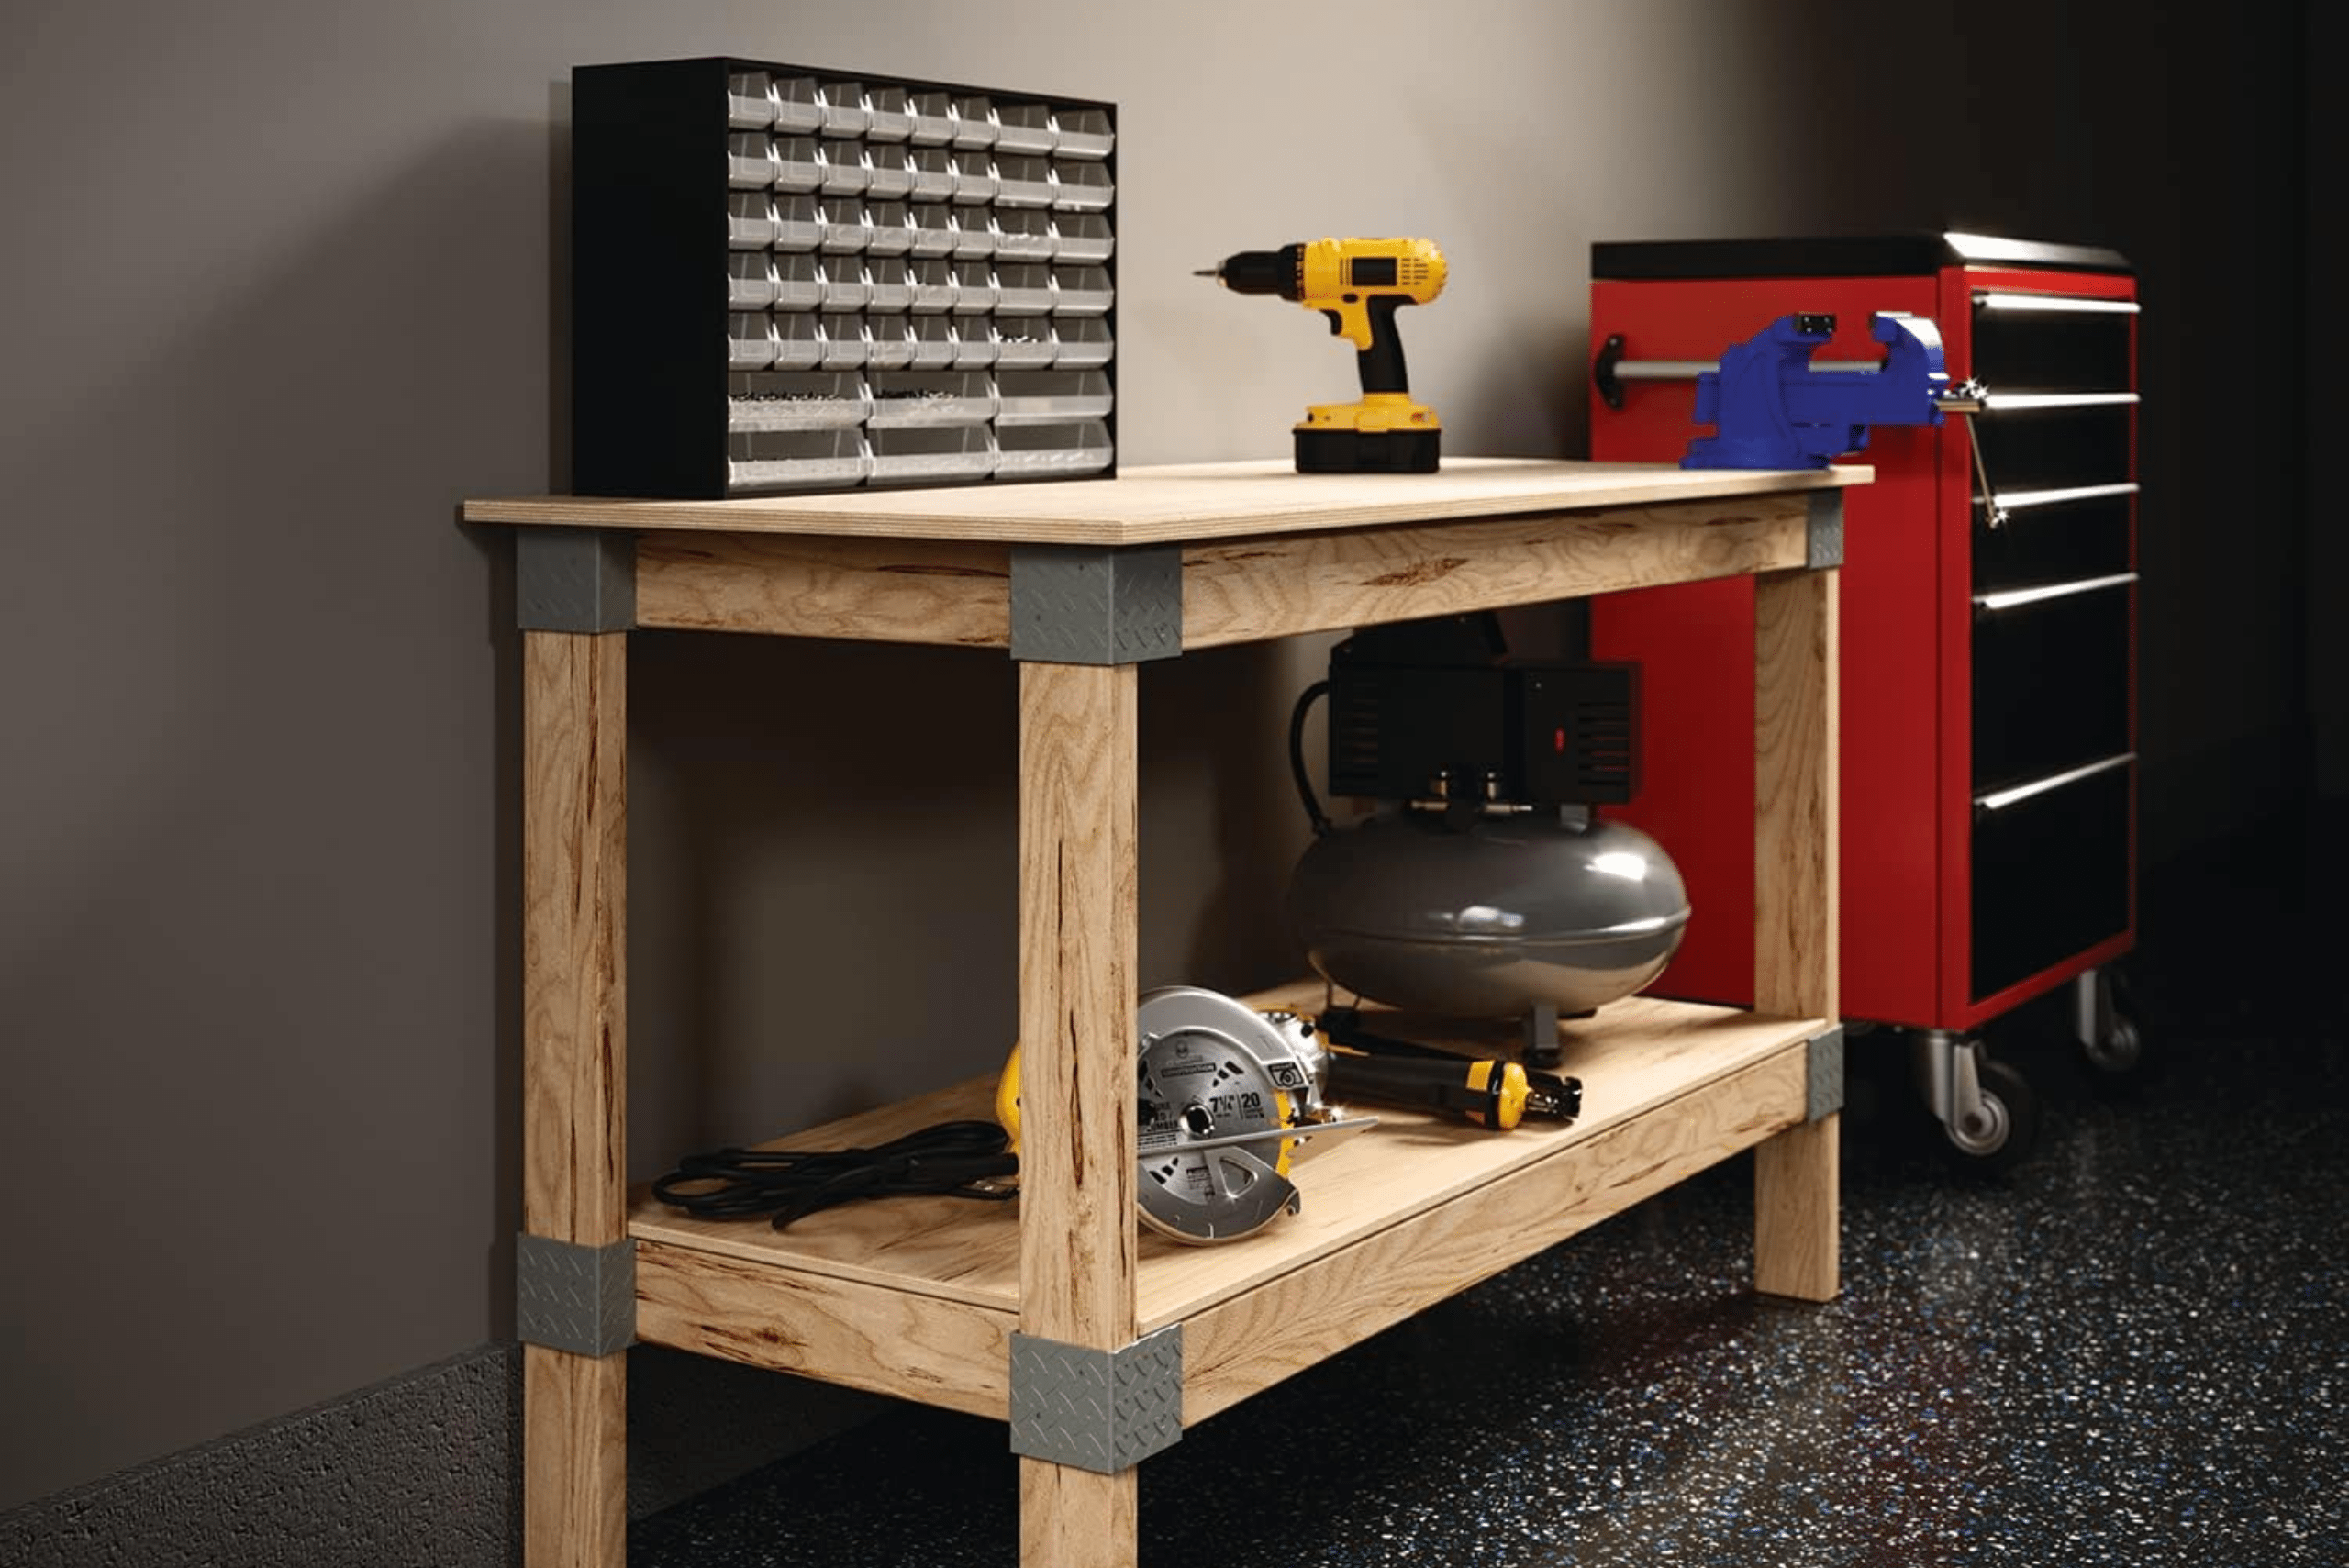
17. Simple Plywood Workbench with Metal Corner Brackets
Building this utilitarian workbench is a perfect beginner’s project. The metal corner brackets provide strength and make assembly incredibly simple, as they guide the alignment for you.
|
📋 Copy HEX 🔗 Share |
- Start by purchasing a set of workbench brackets and the 2×4 lumber required. The bracket kit instructions will specify the lengths to cut.
- Cut your lumber for the legs and horizontal supports. For a sturdier bench, consider adding a lower shelf frame.
- Assemble the two end frames first by screwing the 2x4s into the metal brackets.
- Connect the two end frames using the longer 2x4s for the front and back. Ensure all your corners are square.
- Once the frame is built and standing, cut a sheet of 3/4-inch plywood or MDF to size for your top surface.
- Secure the top to the frame with screws from underneath for a clean surface. Now you have a rock-solid bench!
This is already a smart, budget-conscious design, but you can get it for even less. Check the “culled lumber” section at Home Depot or Lowe’s for discounted 2x4s that might be slightly warped or cosmetically imperfect—they’re often perfect for a garage bench. For the top, instead of a full sheet of new plywood, look on Facebook Marketplace or Craigslist for a used solid-core door. They are incredibly flat, strong, and can often be found for under $20. Compare this build to the more complex L-shaped version in Idea #4 to see how the same principles can be expanded.
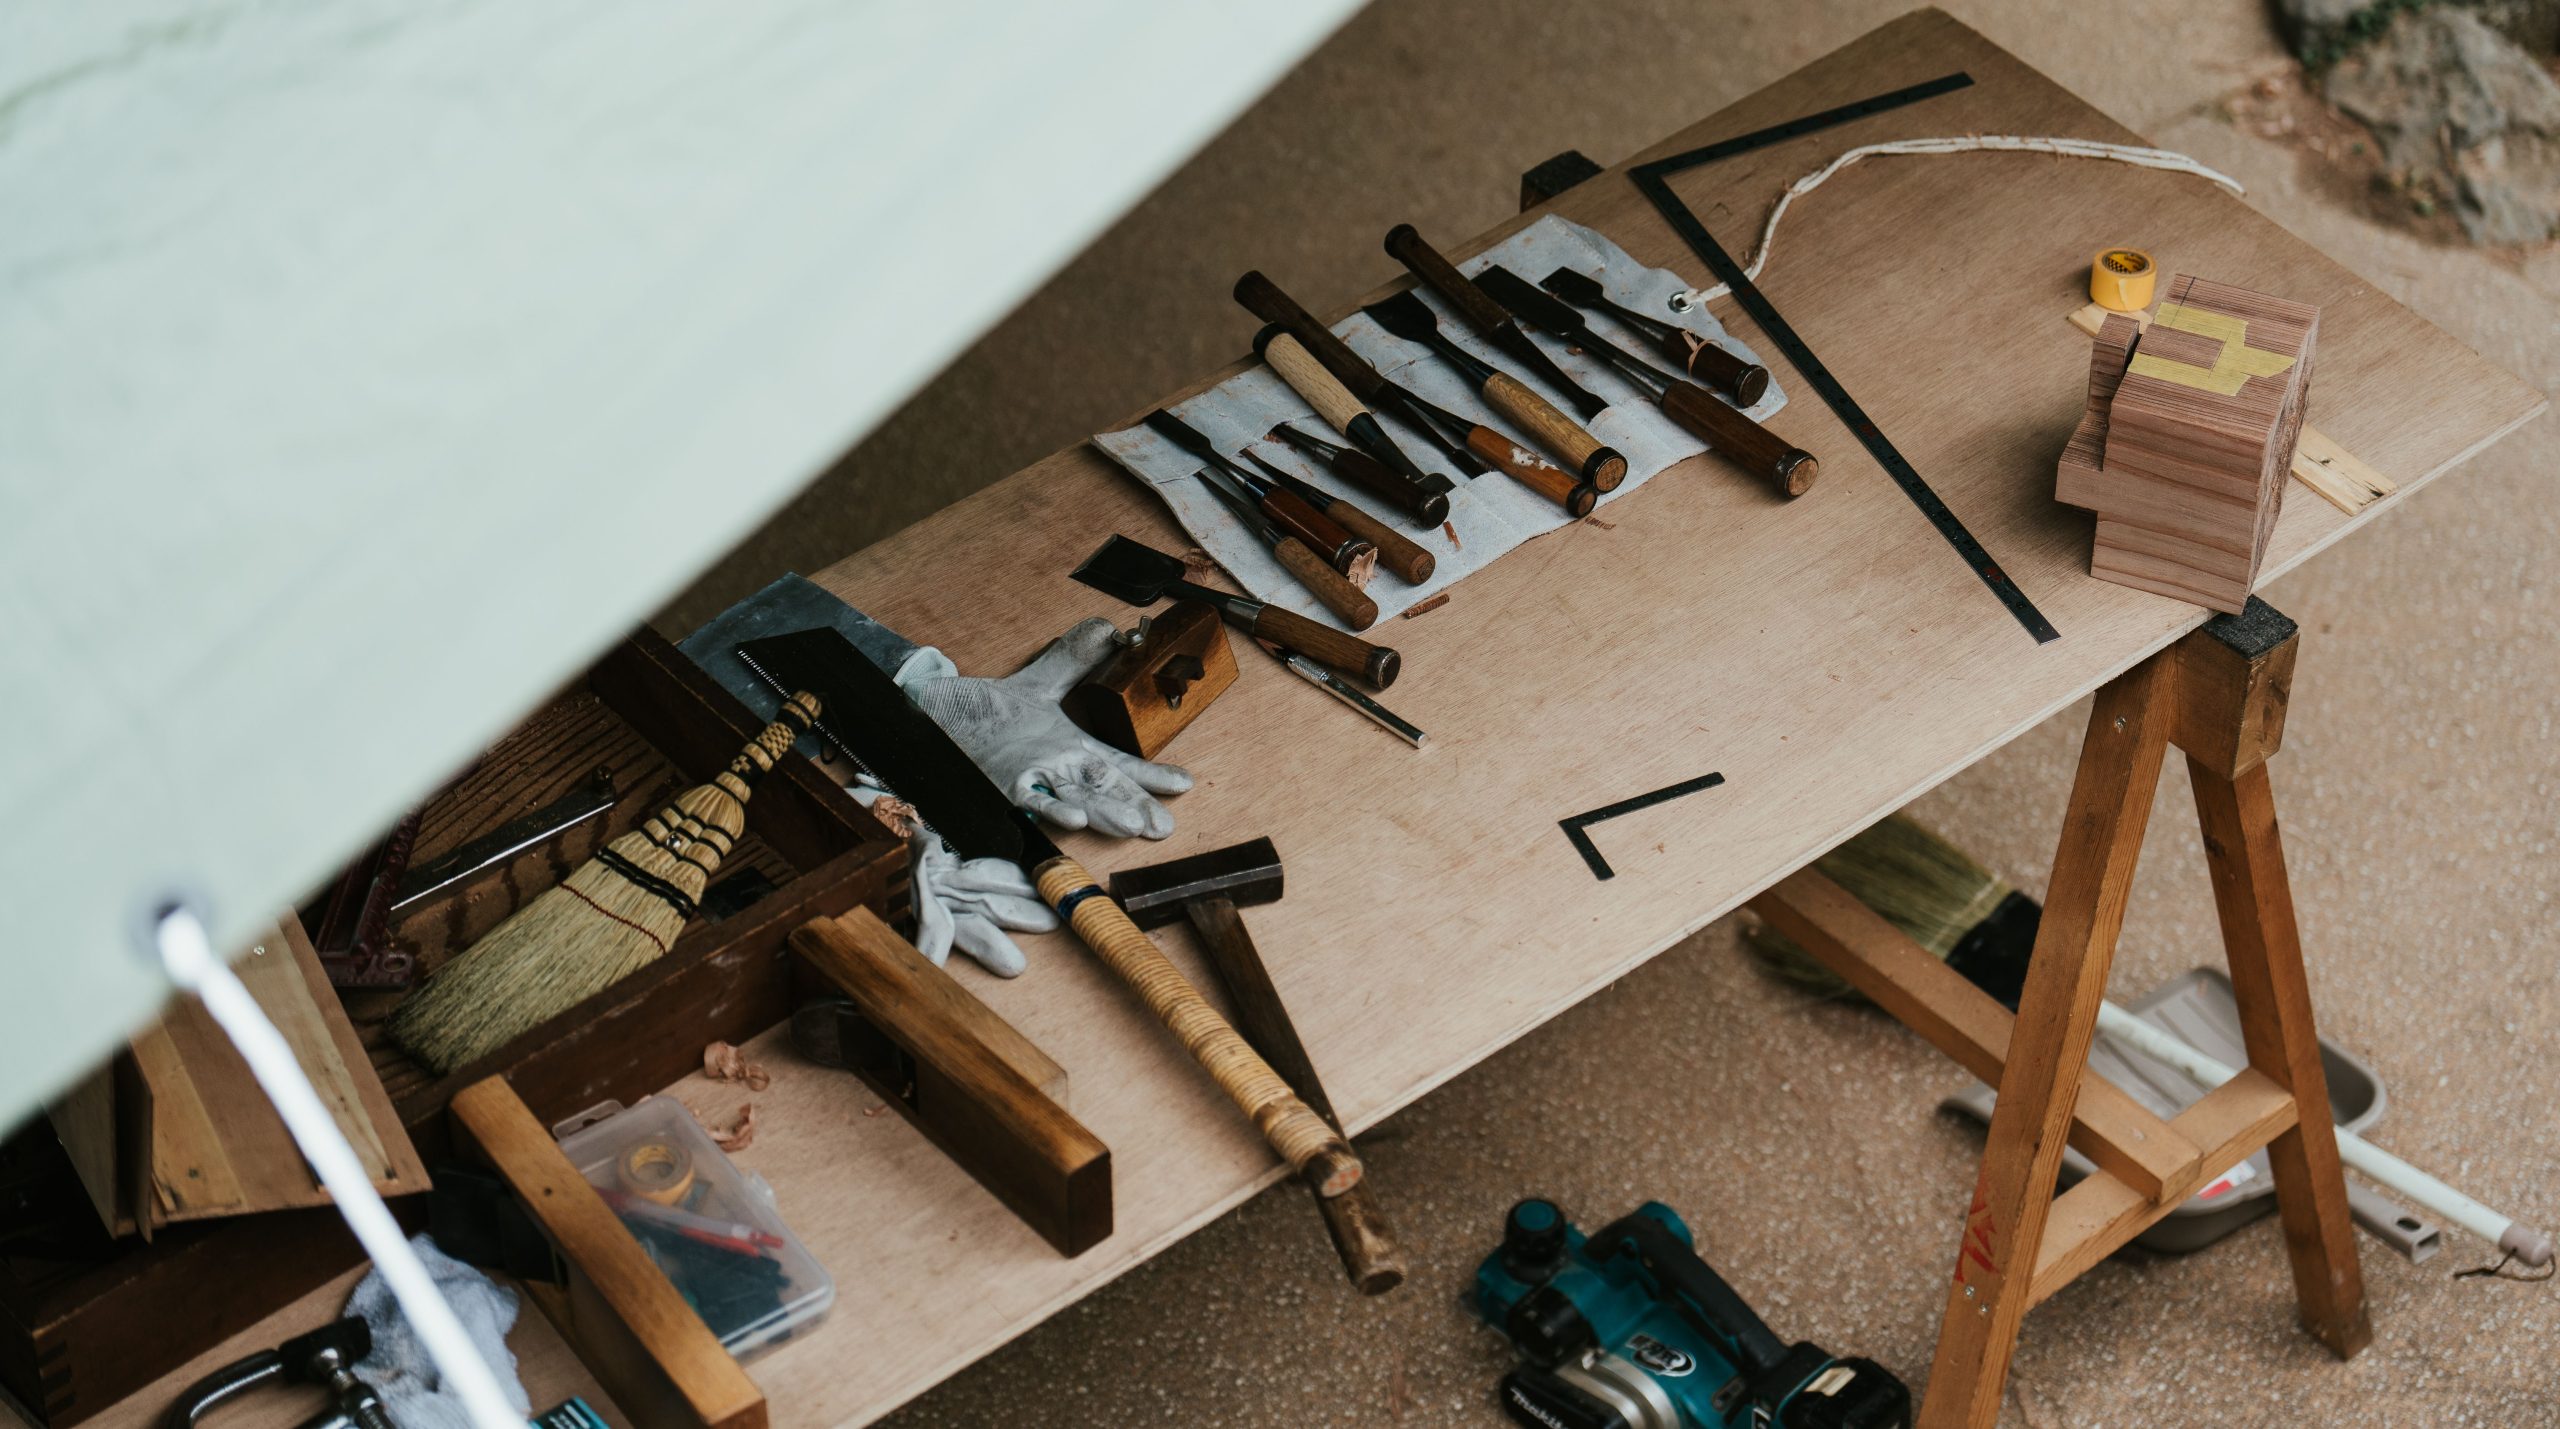
18. Raw Plywood & Sawhorse Woodworking Station
Let’s be honest: this setup is for woodworking, not for general-purpose garage tasks. A simple plywood top on sawhorses is not ideal for tasks that involve heavy hammering, liquids, or chemicals, as it’s not as stable or easy to clean as a permanent bench. It’s a temporary, project-specific surface. Its biggest advantage is that you can break it down and store it away, but it lacks the permanence and integrated storage of a real workbench. It’s a great secondary surface but might be frustrating as your only one. For a more permanent solution, look at the integrated bench in Idea #5.
|
📋 Copy HEX 🔗 Share |
The aesthetic here is pure function, a formula of 90% Raw Material + 10% Function. The overwhelming majority of the visual is the light, unfinished wood of the plywood top and the sawhorses. The only “design” comes from the functional items themselves: the dark-handled chisels, the metal planes, the pop of yellow tape. There is zero decoration. To change the feel, you could paint the sawhorses a bold color, which would shift the formula to something like 70% raw material + 20% color pop + 10% function, instantly giving them a more designed look.
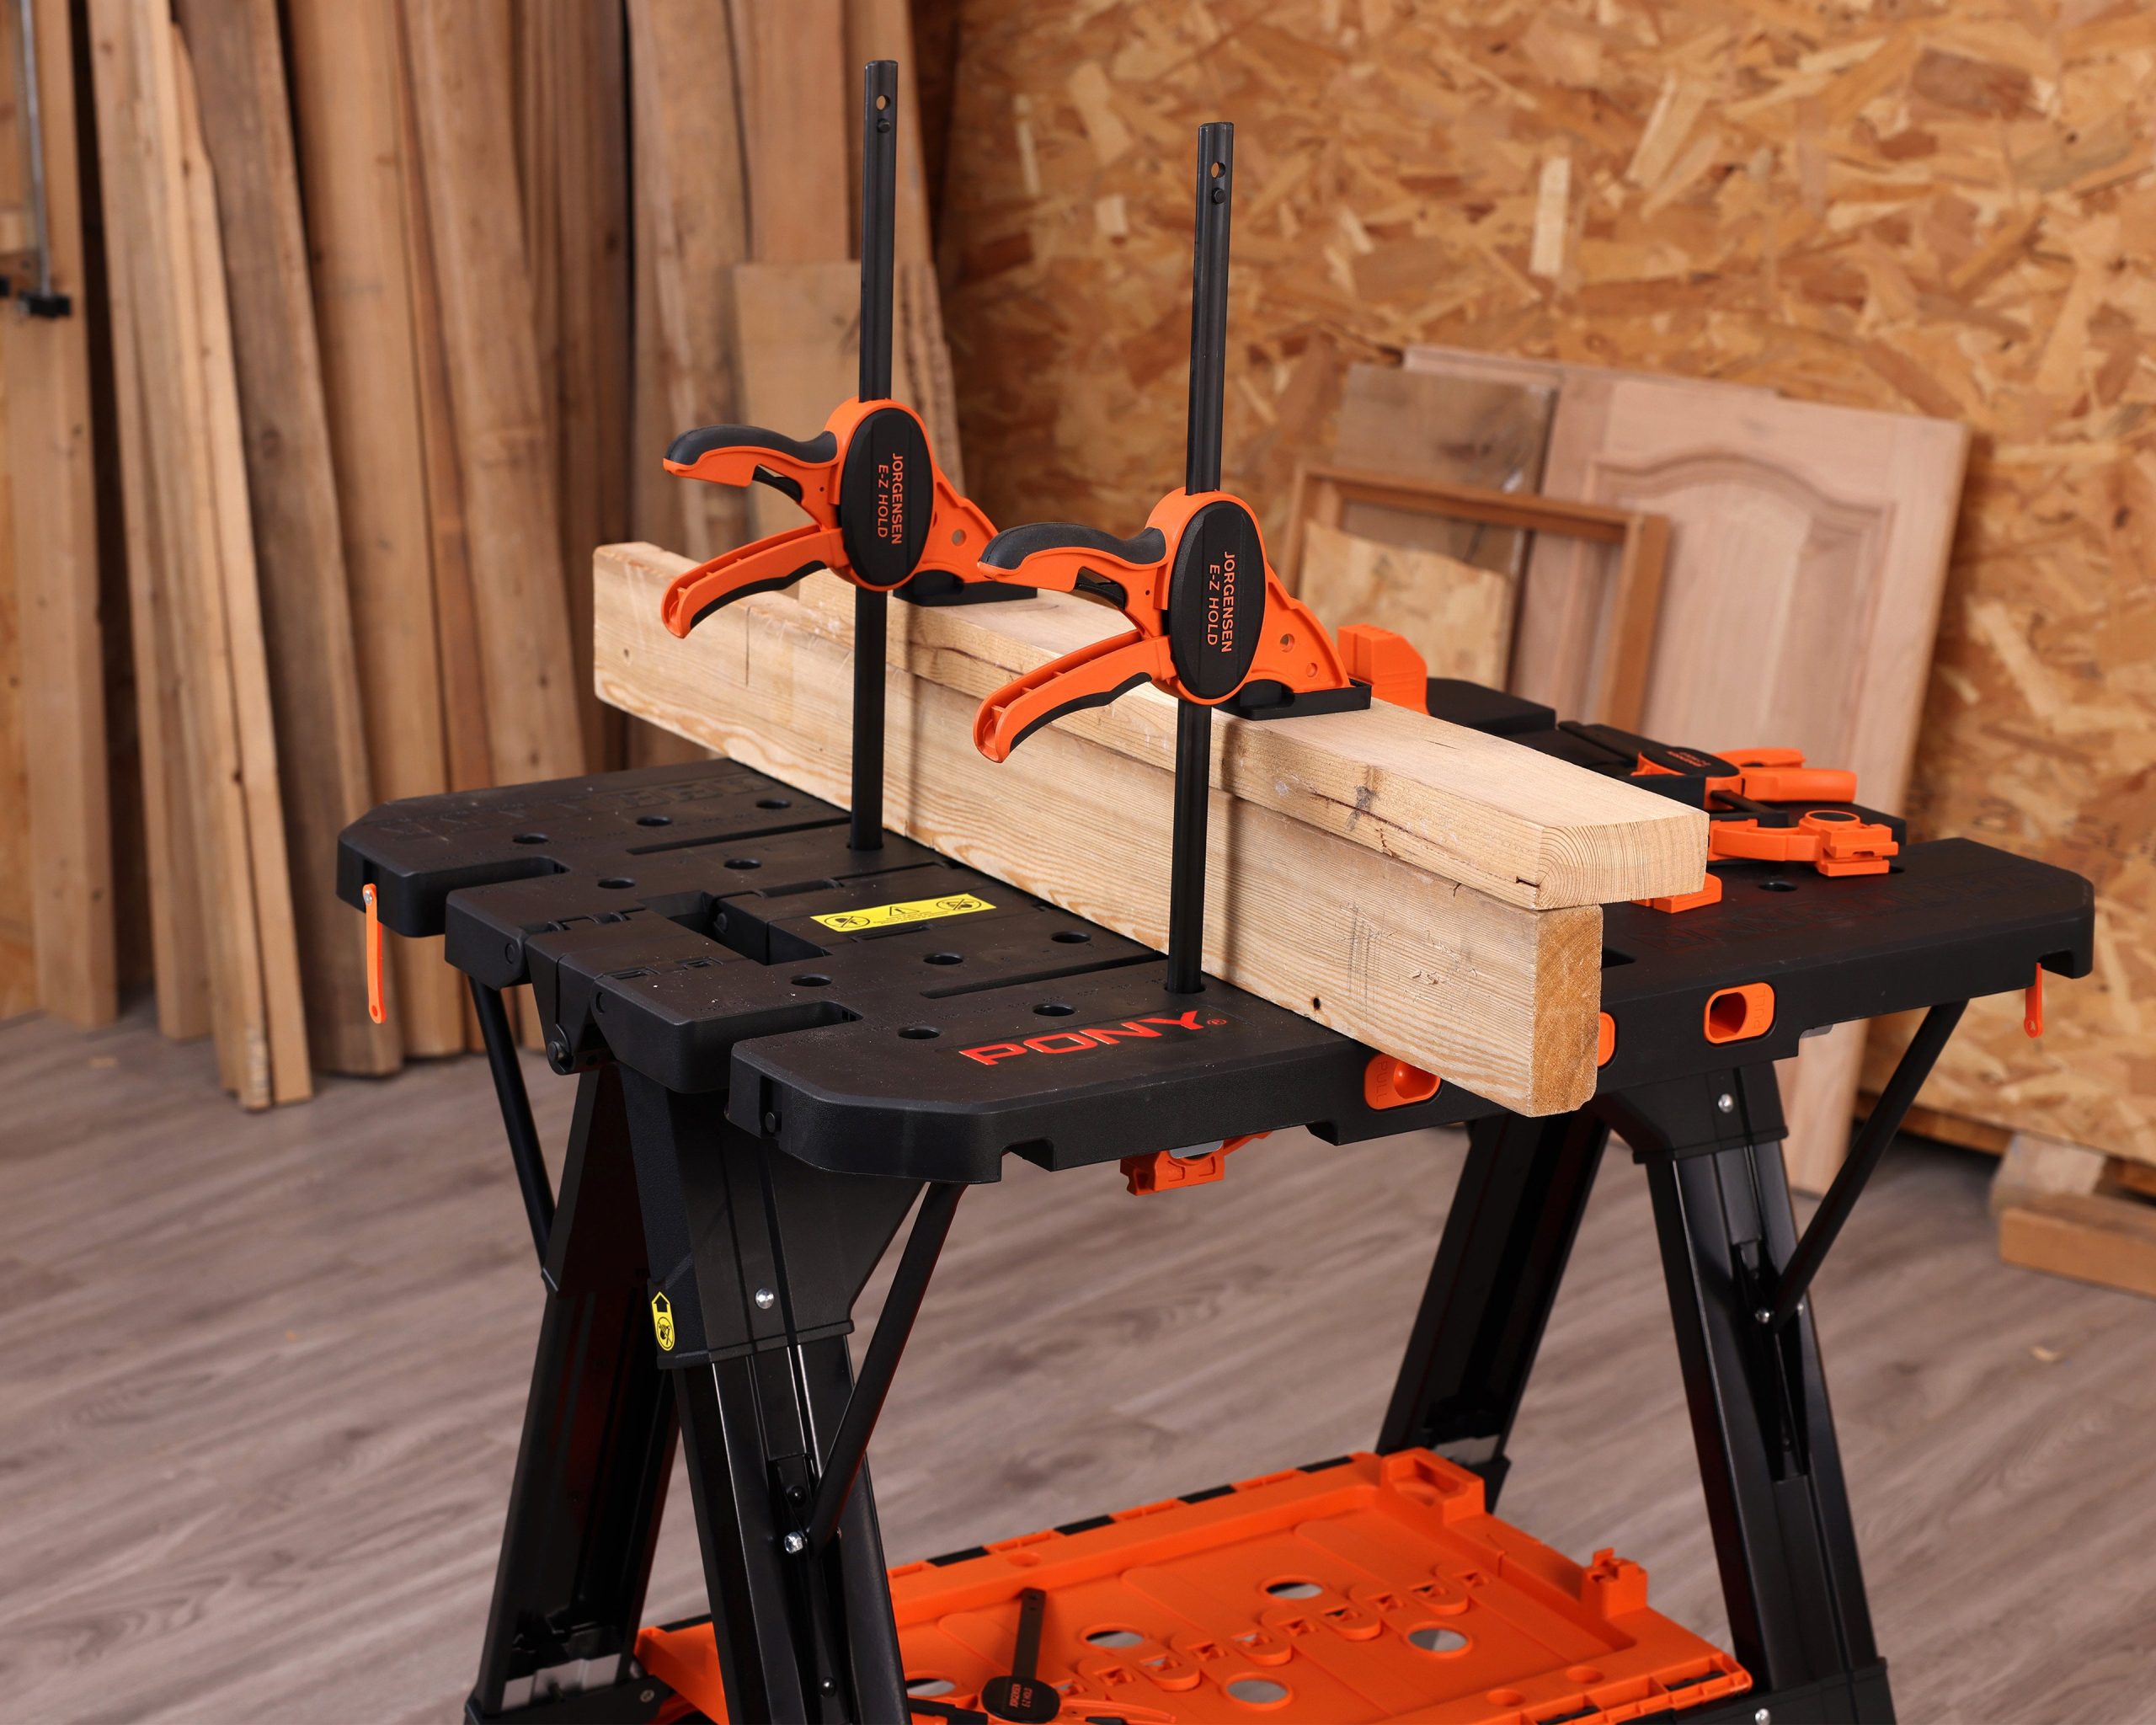
19. Portable Clamping Workbench for On-the-Go Projects
When using a portable workbench like this, your biggest challenge is stability. To get the most out of it, always place it on the most level ground you can find. If you’re doing any vigorous work like sawing or sanding, place a sandbag or a heavy bucket on the lower shelf. This added weight at the base dramatically lowers the center of gravity and reduces the chances of the bench tipping or walking away from you. This simple trick can make a lightweight, portable bench feel almost as solid as a stationary one.
|
📋 Copy HEX 🔗 Share |
This design is so successful because it delivers maximum functionality in a minimal footprint. The bright orange accents aren’t just for looks; they are visual cues that draw your eye to the interactive parts of the bench—the clamps, the handles, and the lower shelf. This is smart, user-centric design. The perforated top and included clamps provide incredible versatility, allowing you to securely hold materials of various shapes and sizes. It’s a complete problem-solving system in a compact, portable package.
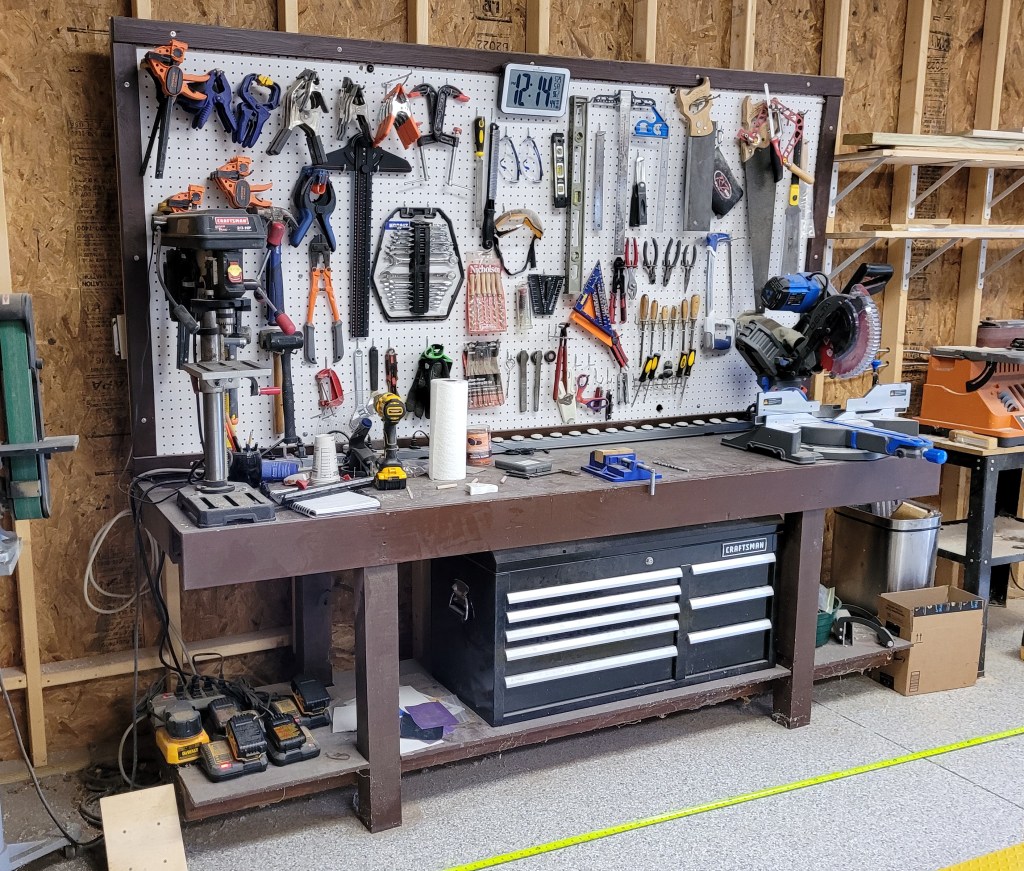
20. Dark-Stained DIY Bench with a White Pegboard Wall
A large, single bench like this is a great anchor for a one-and-a-half or two-car garage. You’ll want a wall that is at least 10-12 feet long to truly replicate this look and give you enough space for the bench itself, plus room on the side for a tool chest and other equipment like a miter saw. A depth of 28-32 inches is ideal for the workbench—deep enough for projects but not so deep that you can’t reach the tools on the pegboard. A minimum ceiling height of 8 feet is needed to accommodate the pegboard and any potential overhead lighting.
|
📋 Copy HEX 🔗 Share |
Building this look yourself is a very affordable way to get a ton of function. The costs are primarily in lumber and the organizational systems.
- Lumber & Stain (for workbench): $150 – $300
- Pegboard & Hooks (4×8 sheet): $50 – $100
- Tool Storage (Black Toolbox): $150 – $500+
- Power Tools (Miter Saw, Drill Press): These are the biggest variable, from $300 to $1500+
- TOTAL (without major tools): $350 – $900
- Budget Alternative: Use unstained construction lumber and find a toolbox on sale or used to bring the core cost down significantly.
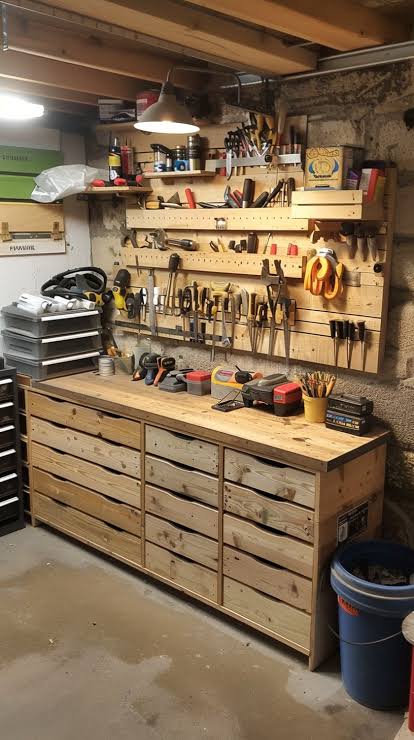
21. Rustic Workshop with Concrete Block Walls and a Drawer-Filled Workbench
What truly defines this space is the texture of the exposed concrete block walls. It sets an immediate rustic, industrial, and unpretentious tone. Most people would rush to cover up block walls with drywall, but embracing them gives the workshop an incredible sense of solidity and history. The natural wood of the workbench and ceiling beams perfectly complements the cool gray of the concrete, creating a balanced palette. Without the block walls, this would be a nice workshop; with them, it has unforgettable character.
|
📋 Copy HEX 🔗 Share |
A wooden pegboard is a fantastic DIY alternative to manufactured ones. Here’s how to make one:
- Select your wood. A 3/4-inch sheet of plywood or MDF is a great choice for strength.
- Plan your grid. A standard 1-inch grid is most compatible with common pegboard hooks. Use a tape measure and a long straightedge to mark out your grid points with a pencil.
- Drill the holes. Use a drill press if you have one for perfectly straight holes. If using a hand drill, a drilling guide can help. A 1/4-inch bit is standard.
- Mount it to the wall. You MUST mount it on “furring strips” (1×2 boards) to create a gap between the pegboard and the wall. This space is necessary for the hooks to be inserted.
- Sand any rough edges and apply a finish if desired, then hang your tools!
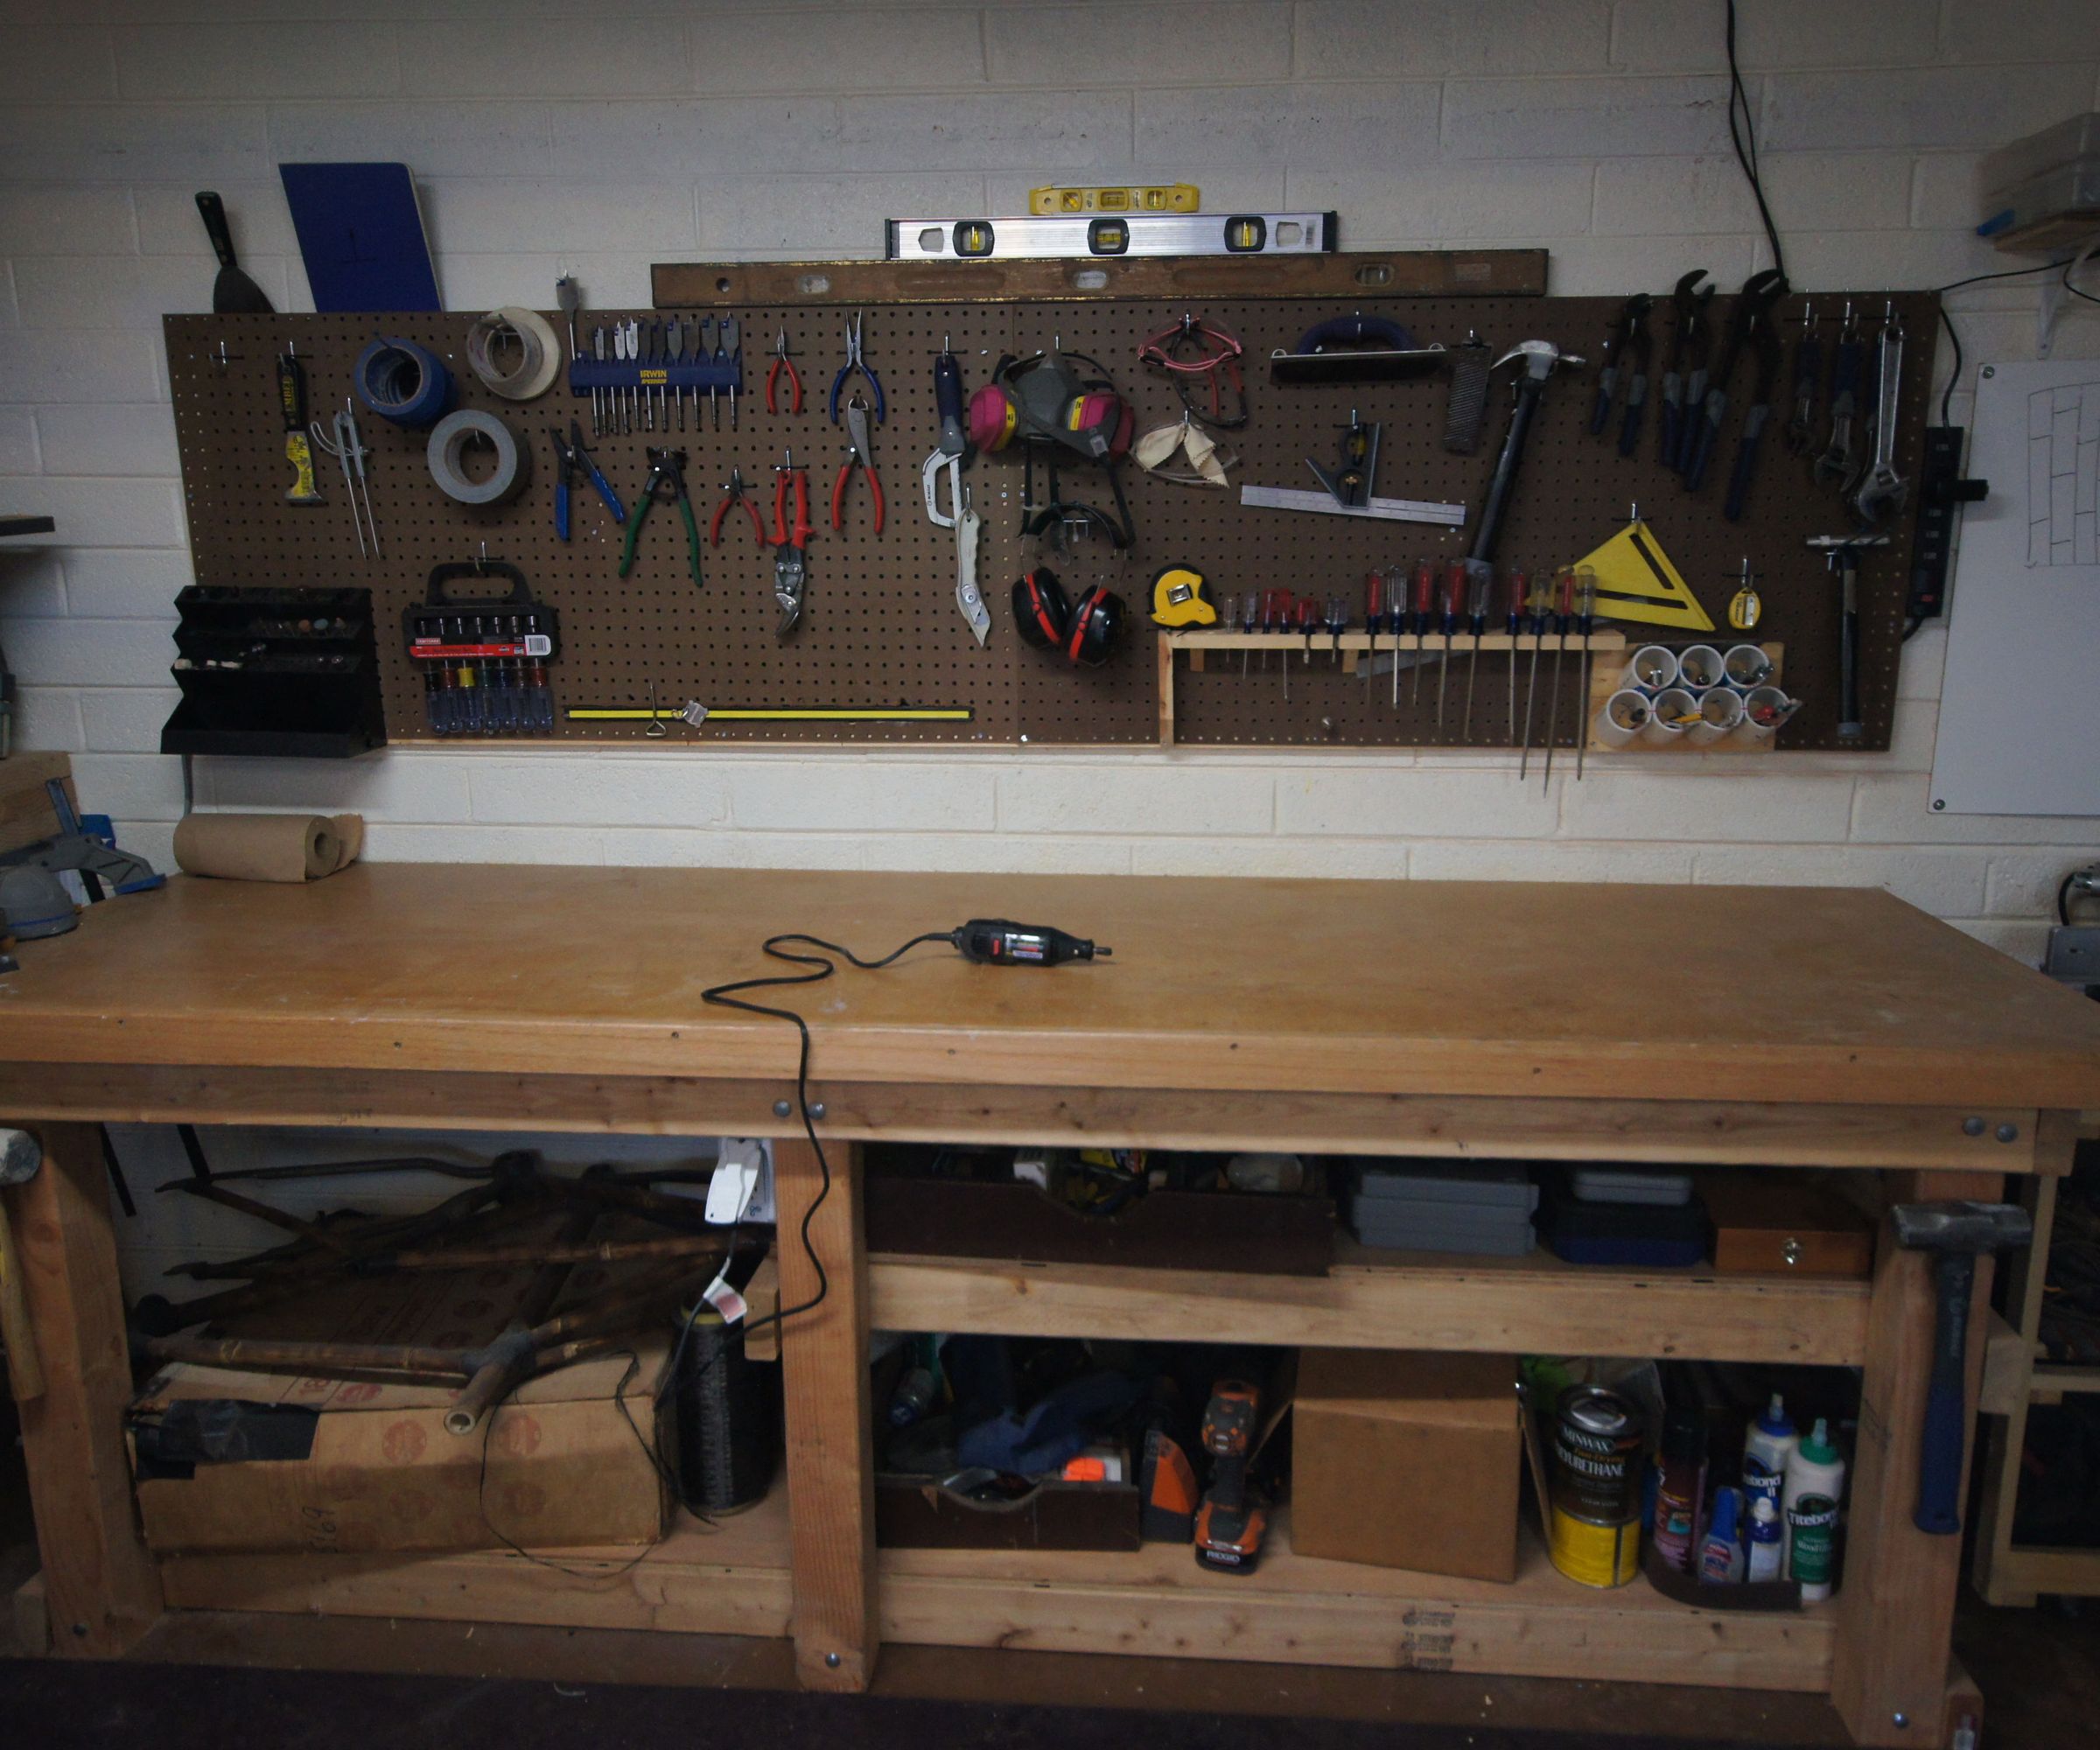
22. A Simple, Rock-Solid DIY Workbench for Pure Function
Before you commit to building a “simple” workbench, think about your future needs. This is a great starting point, but will you wish you had drawers in six months? Or integrated power? It might be worth building the base now, but planning to add features later. Also, consider mobility. Adding casters now is much easier than flipping a heavy, fully loaded workbench over to add them in a year. A little bit of future-proofing can save you a lot of hassle. For inspiration on what you could add later, check out the impressive integrated storage of Idea #8.
|
📋 Copy HEX 🔗 Share |
The appeal of a “low waste” design is great, but let’s be real: unless you are a very precise woodworker, your first build will likely have some mistakes and wasted material. Don’t beat yourself up if your cuts aren’t perfect or if you have to redo a step. A garage workbench is meant to be functional, not a museum piece. A few dings, a little wood filler, and some extra sawdust are all part of the process. The goal is a sturdy bench, not a perfect one. Embrace the imperfections as a sign that it was built, not bought.
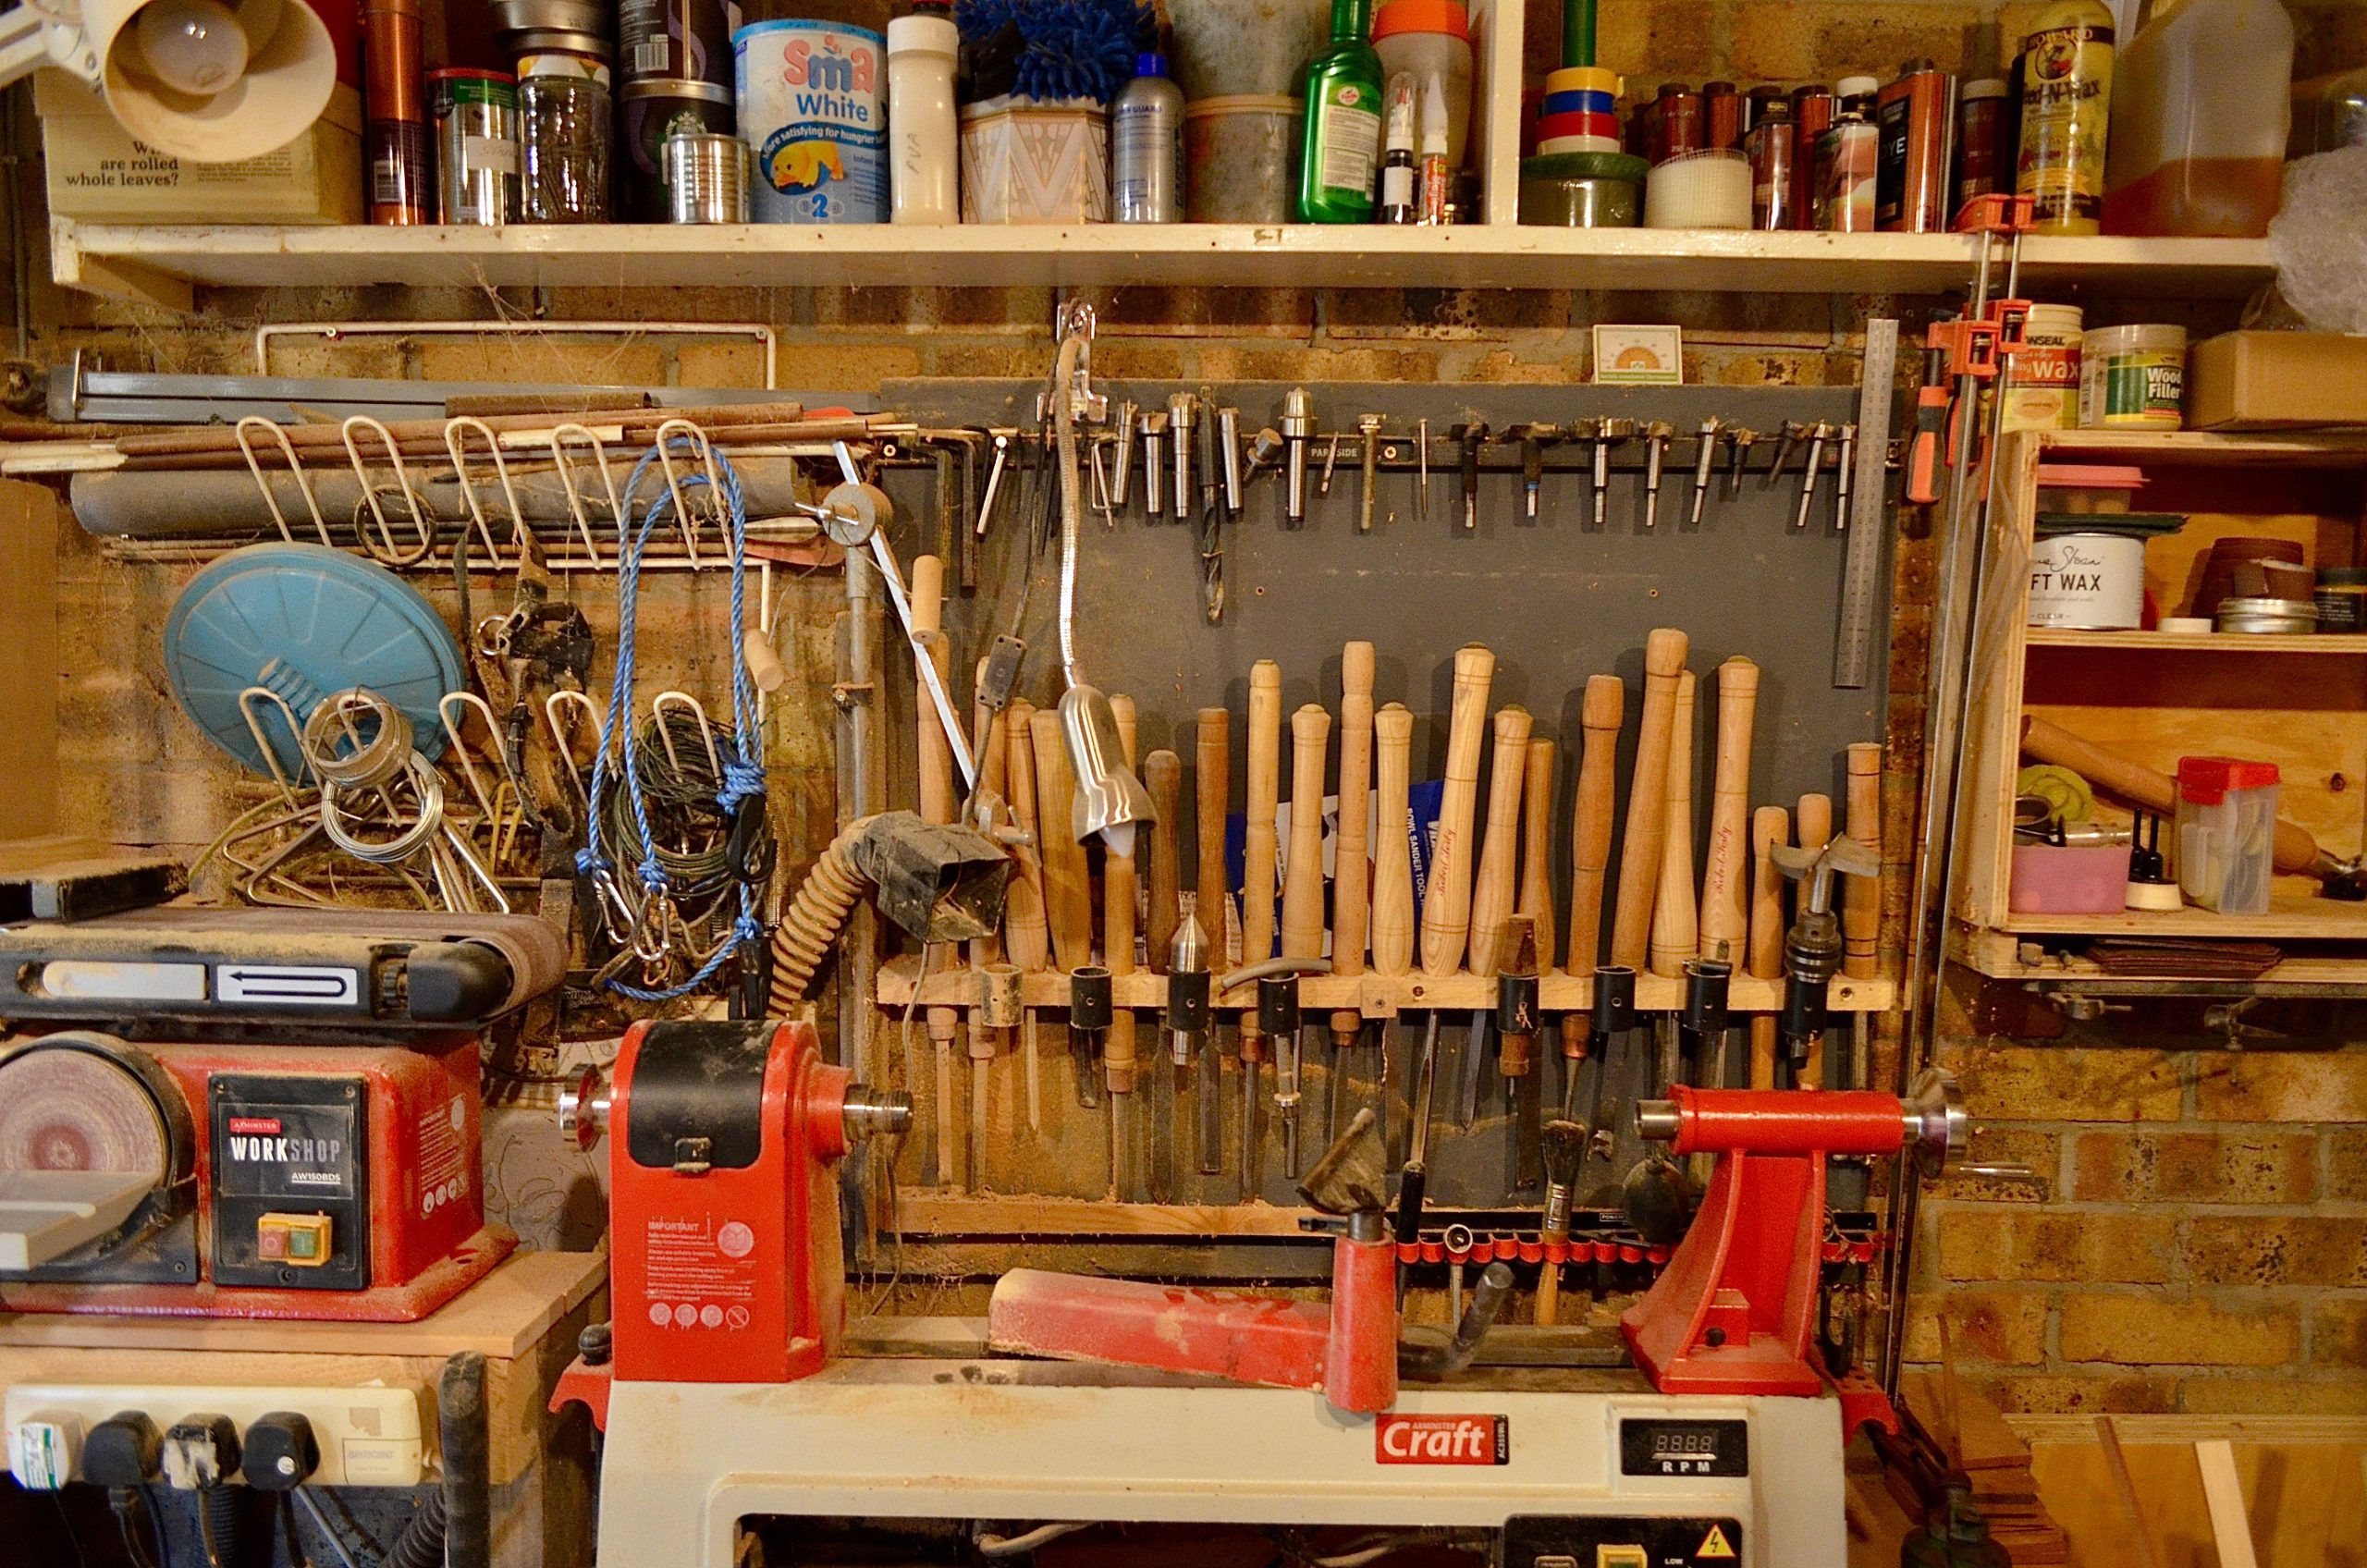
23. The Woodturner’s Nook with a Brick Wall Backdrop
Love the warm, industrial vibe of that brick wall but don’t have one in your garage? You can get this look for less than $200. Faux brick paneling from places like Home Depot or Lowe’s gives you a surprisingly realistic texture and is easy to install with construction adhesive and a few nails. For an even cheaper option, look for brick-patterned, paintable 3D wallpaper. It won’t have the same rigid texture, but it will deliver the same visual warmth and pattern for a fraction of the cost and effort. For a different industrial texture, see the corrugated metal wall in Idea #14.
|
📋 Copy HEX 🔗 Share |
This setup works so well because of its visual density and clear purpose. It’s not a generic workbench; it’s unmistakably a station for woodworking and turning. The lathe and sander are the stars, and all the storage is built around them. The chisels hang right above the lathe, ready for use. This task-oriented design is incredibly efficient. The rich texture of the brick wall adds warmth and character, preventing the density of tools and machines from feeling sterile or overwhelming. It feels like a true craftsman’s corner.
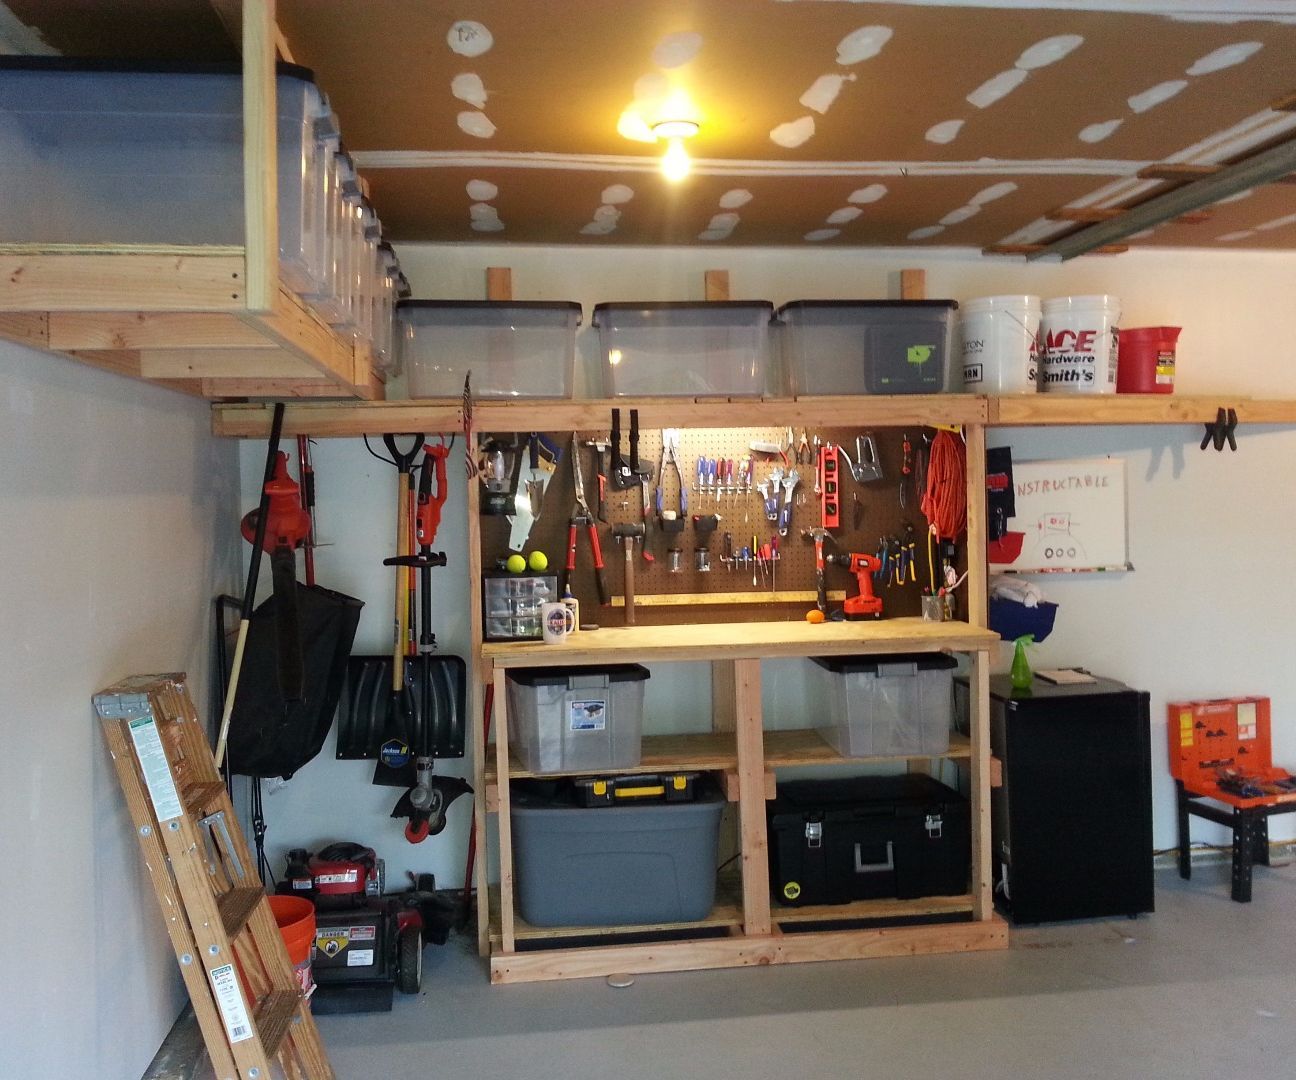
24. DIY Garage Workbench with Extensive Overhead Storage
This highly practical setup follows a clear visual formula: 70% Utilitarian Structure + 20% Organized Systems + 10% Color Accents. The vast majority of the visual is the unfinished wood of the workbench and shelving—pure, raw function. The clear plastic bins and the brown pegboard are the next layer, bringing a sense of order and systemization. Finally, the small pops of color from the tools themselves (a red handle, a blue case) provide just enough visual interest to keep it from being monotonous. It’s a design that prioritizes function above all.
|
📋 Copy HEX 🔗 Share |
When you have this much open storage, consistency is your best friend. Notice how nearly all the smaller items are stored in identical clear plastic bins. This simple choice makes the entire system feel calmer and more organized, even though it holds a huge variety of things. If you had a random mix of cardboard boxes, coffee cans, and mismatched containers, it would look chaotic. Investing in a single, unified storage system for small parts is one of the fastest ways to make your workshop look 100% more professional and put-together.
Build the Workspace You Deserve
Your garage has the potential to be so much more than a place to park your car. It can be a hub for creativity, repairs, and projects that you’re passionate about. We hope these 24 ideas have sparked some inspiration for your own space, proving that a great workbench is within reach, no matter your budget or skill level. Now go build something amazing.
Ready to start planning? Pin your favorite ideas from this article to your “Garage Workshop” board on Pinterest to keep them handy!