That feeling when you find the perfect closet idea on Pinterest but have no idea how to make it happen in your own home? We’ve all been there. A good closet dresser system isn’t just about storage; it’s about making your daily routine smoother and, dare we say, a little more joyful. We’ve filtered through hundreds of options to bring you the 29 most practical and stylish closet and dresser ideas that actually work for real homes.
This guide has something for every style and budget, from minimalist built-ins to stunning luxury setups, with ideas you can pull from stores like IKEA and The Container Store. We cover everything from clever small-space solutions to full-scale walk-in transformations. And stay until the end — we break down the most common mistakes that can ruin these looks. 📌 Save this to Pinterest for later — you’ll want to revisit these ideas.
1. Exploring a Custom Closet Dresser Project
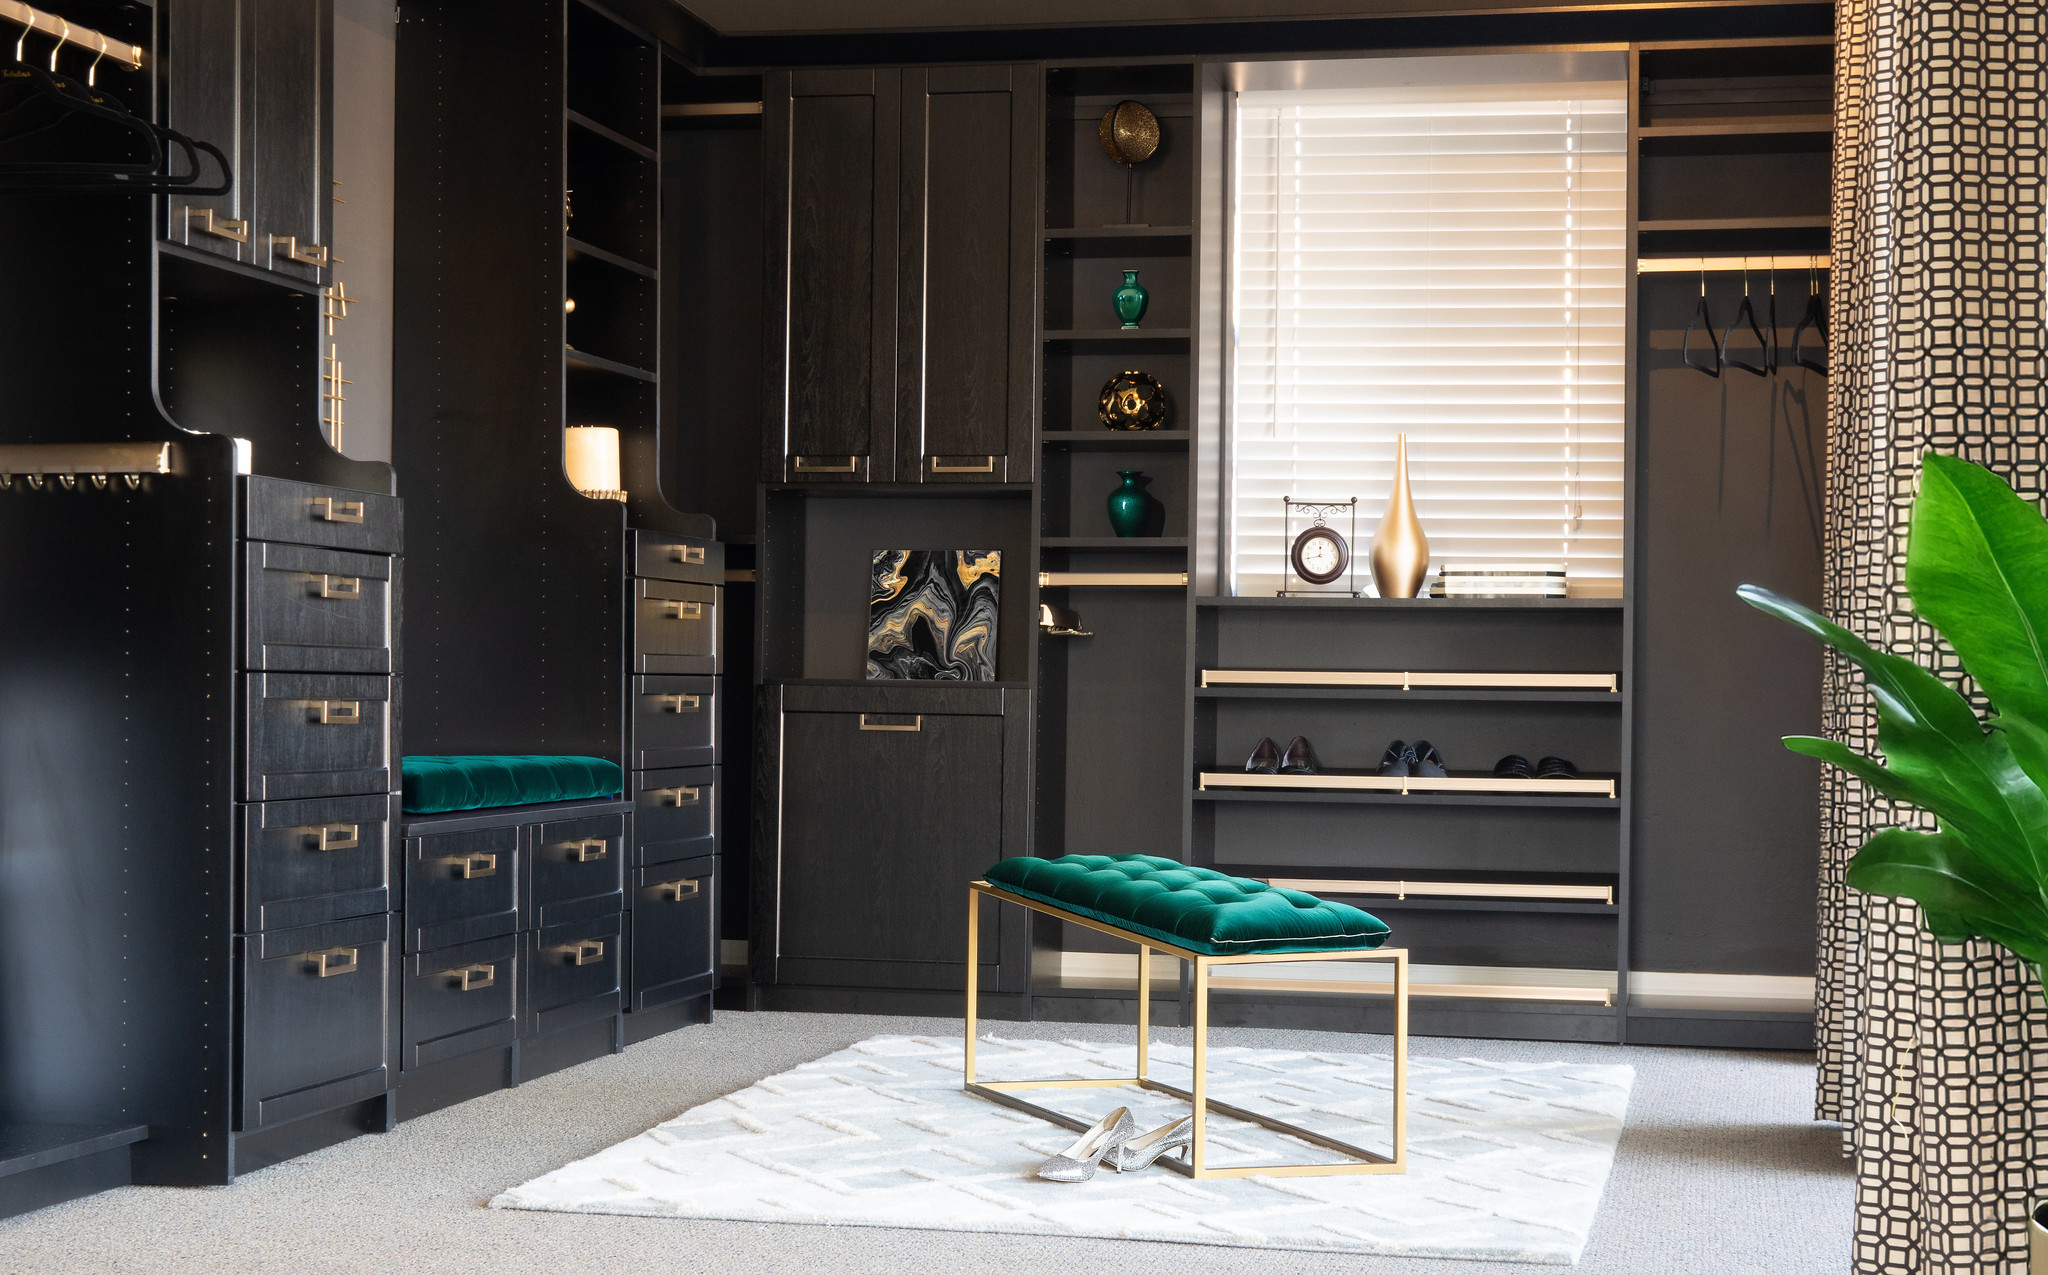
The allure of a “custom project” is strong, but it’s a journey. Be prepared for a process that involves consultations, design mockups, and a significant amount of time from start to finish. It’s not an off-the-shelf solution. Communication with your builder is everything. If you’re not comfortable articulating exactly what you want—and what you don’t—you might end up with a beautiful but dysfunctional space. This route is for those who have a very specific vision that modular systems can’t meet.
|
📋 Copy HEX 🔗 Share |
Before you even call a designer, get crystal clear on your needs. Take a full inventory of your wardrobe. How many long-hang items vs. short-hang? How many pairs of shoes? Do you prefer folding sweaters or hanging them? Answering these questions upfront will make the design process infinitely smoother and ensure the final product is tailored to you, not just a generic idea of a “dream closet.” Consider your budget ceiling and be honest about it from the first conversation.
2. Go Sleek with a Grey Woodgrain Closet and Cove Lighting
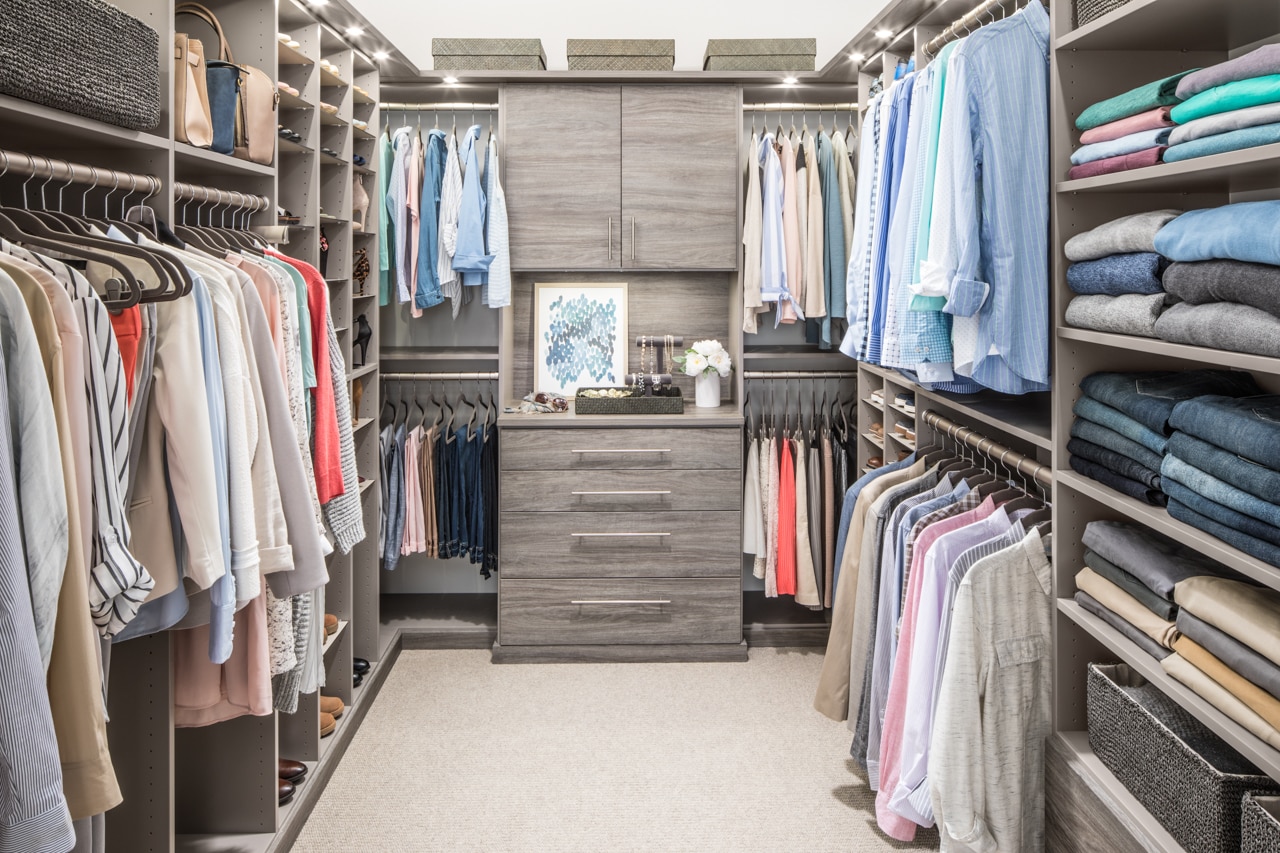
This design feels so cohesive because it pairs a single, consistent material—the grey woodgrain—with thoughtful, integrated lighting. The cove lighting isn’t just for show; it serves the very practical purpose of illuminating your clothing choices, eliminating dark corners common in closets. The central dresser acts as a strong focal point, grounding the space and preventing the walls of storage from feeling overwhelming. By keeping the palette tight and the hardware minimal, the focus remains on the clean lines and functionality.
|
📋 Copy HEX 🔗 Share |
- Main Furniture (custom cabinetry & dresser): $8,000 – $15,000
- Lighting (LED strips & installation): $700 – $2,000
- Textiles (carpet): $500 – $1,500
- Decor/Accessories (baskets, art): $200 – $600
- TOTAL: $9,400 – $19,100
- Budget alternative: Recreate this look using IKEA’s PAX system with grey-stained ash effect doors and add third-party LED strip lighting for about 40% less.
3. Maximize an Attic with Modular White Storage
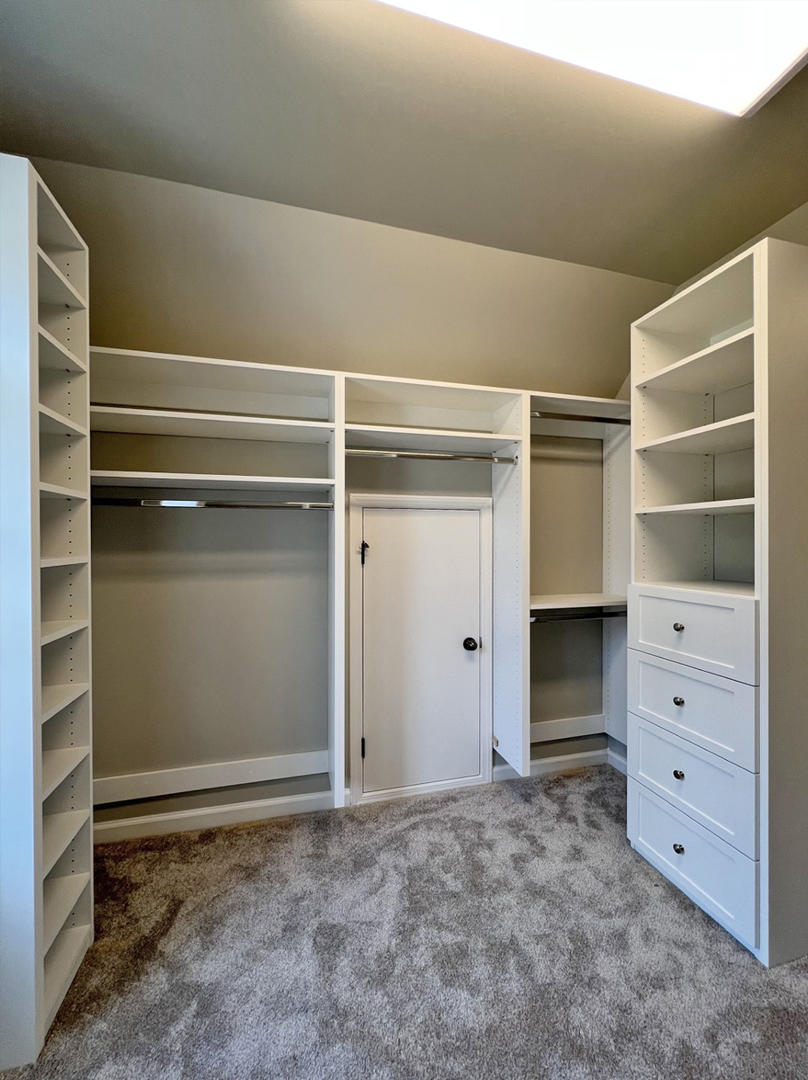
This idea is a lifesaver for rooms with challenging architecture, like a converted attic or a bedroom with a low, sloped ceiling. The modular approach is key here. It works best in a space that has at least 8 feet of linear wall space, even if the ceiling height varies. The pictured setup likely fits into a room around 100-150 sq ft. The low profile of the drawers under the slope is a brilliant use of otherwise dead space. For a less cramped feel, ensure you have at least 30 inches of clearance in front of the units to comfortably open drawers and doors.
|
📋 Copy HEX 🔗 Share |
When dealing with a sloped ceiling, always place your tallest storage units against the highest wall. Then, step down your storage heights as the ceiling slopes down. Use the lowest areas under the eaves for drawers or shoe racks, as seen here. This maximizes every inch and creates a custom, built-in feel without the custom price tag. Measure the angle of your ceiling beforehand to ensure any freestanding units will fit flush.
4. Considering a Custom Built-in Closet Dresser
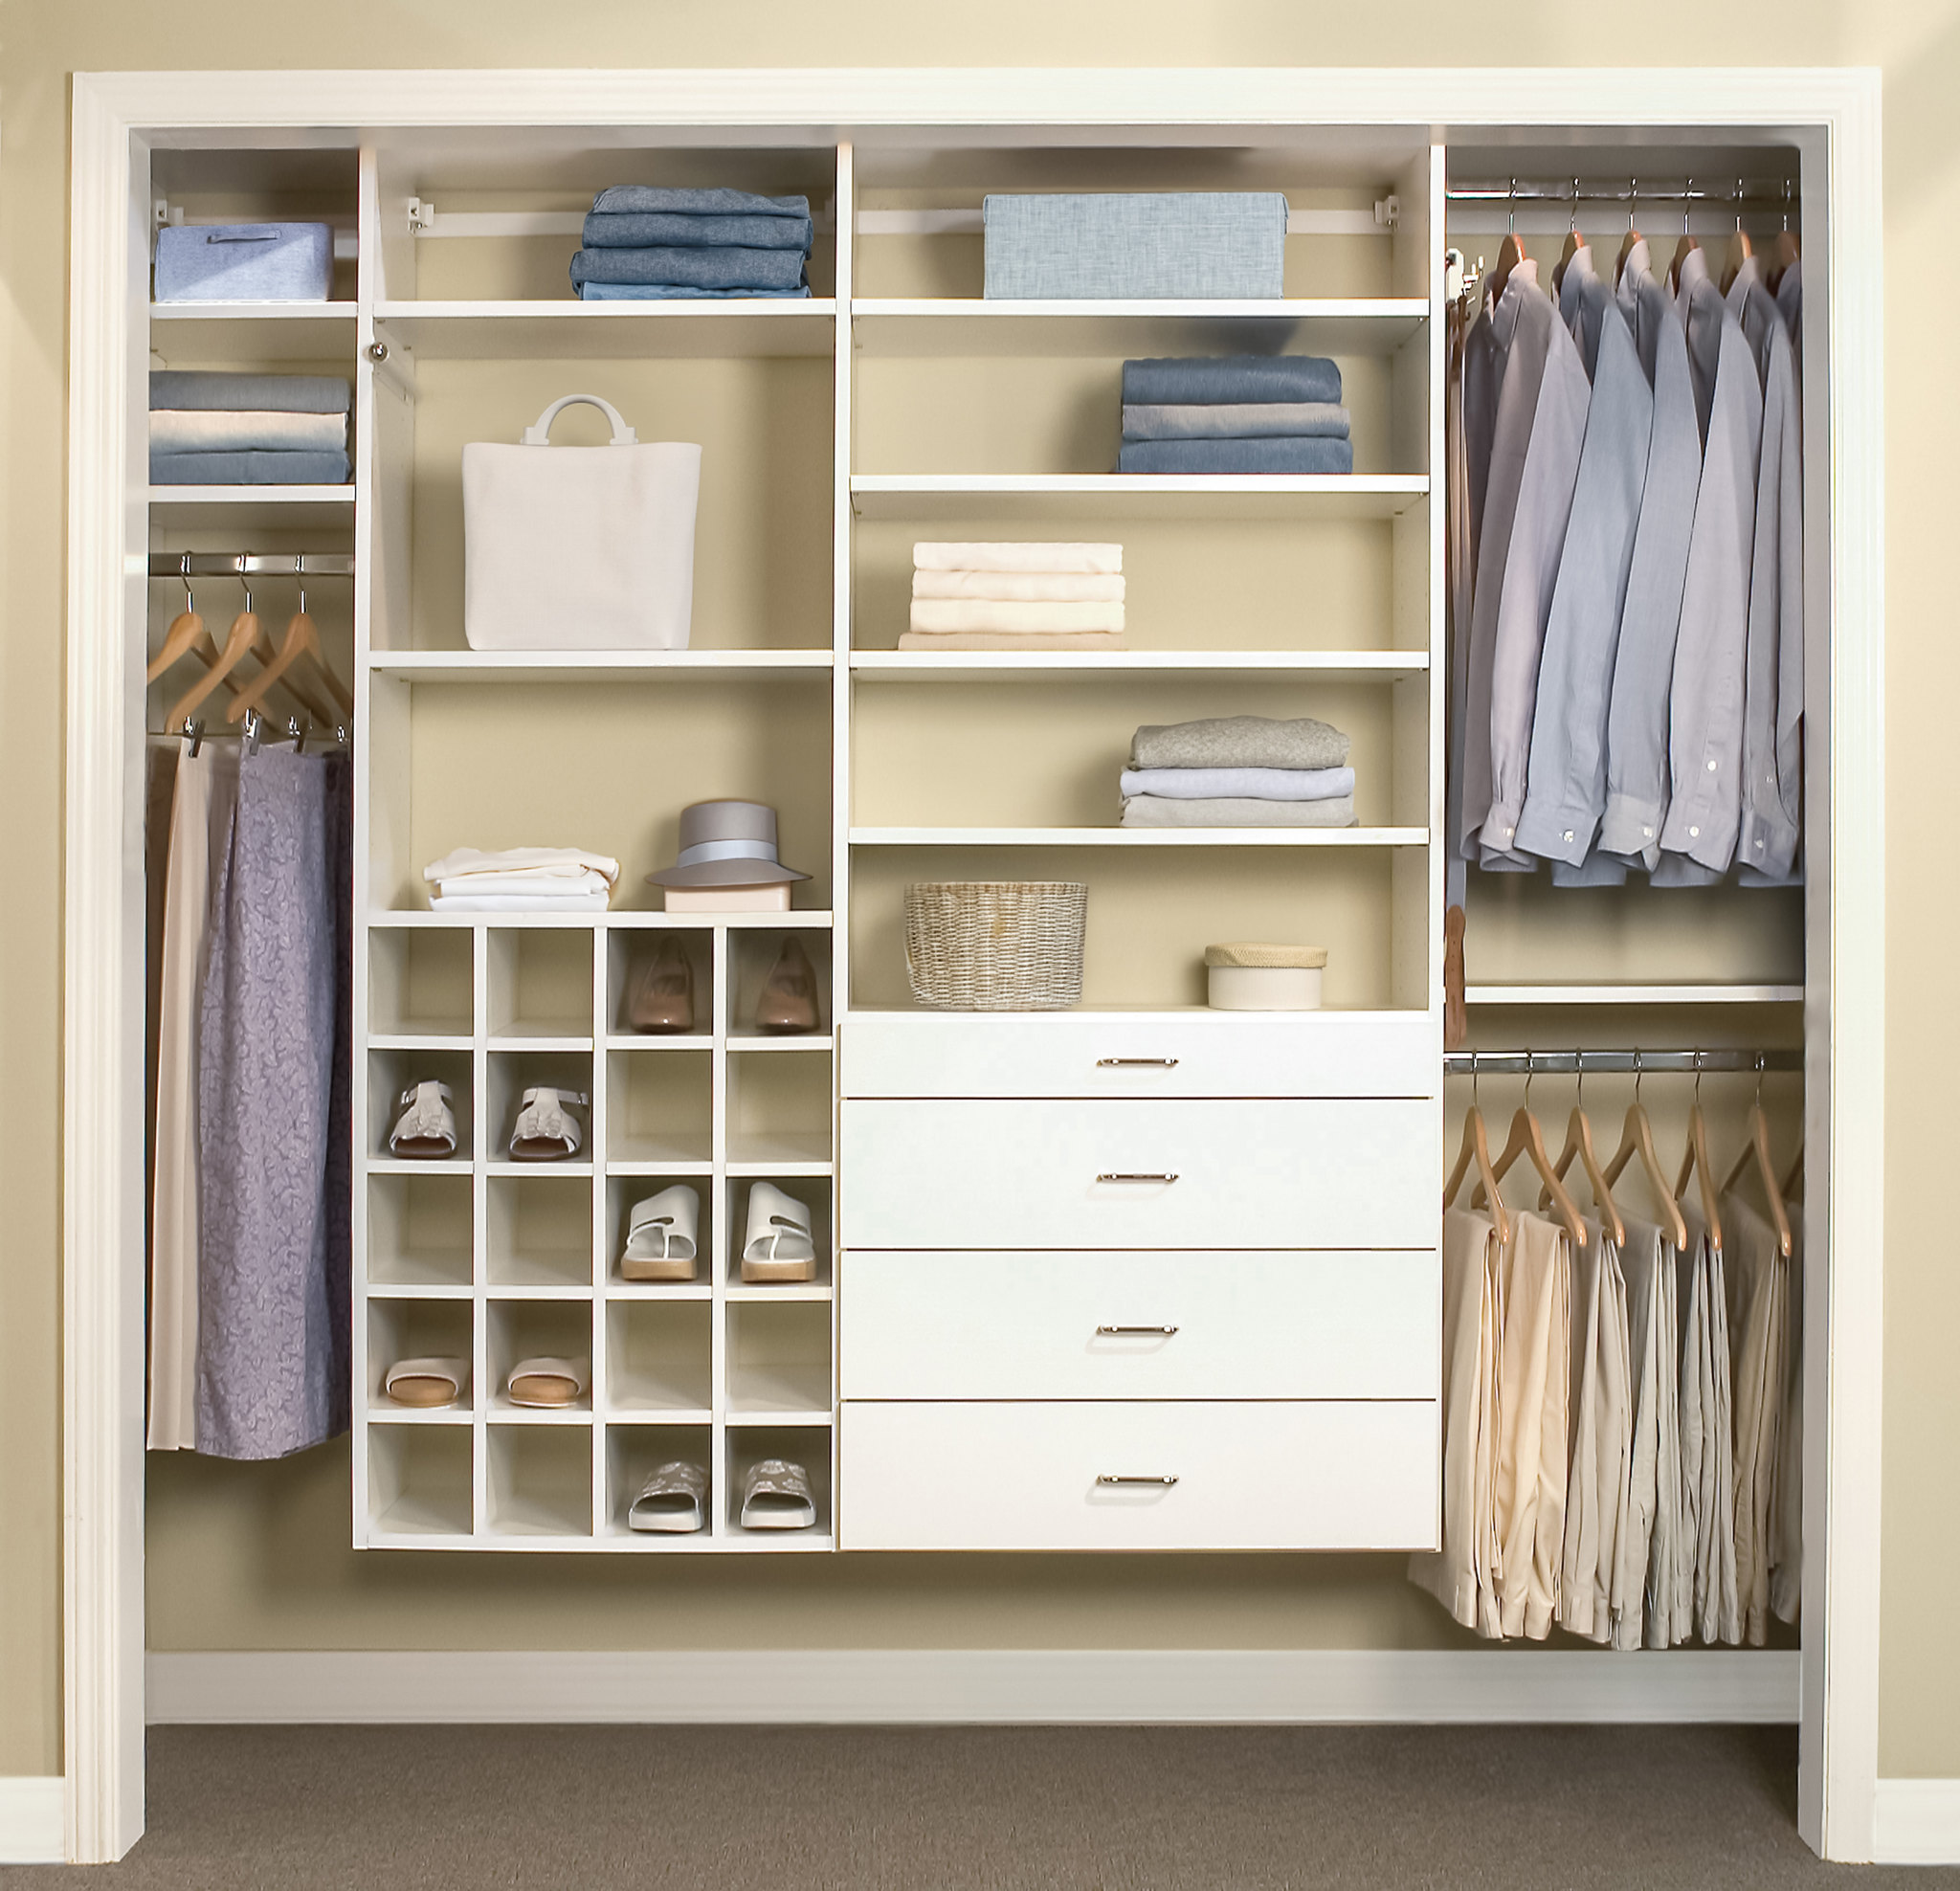
While a fully custom project like the one hinted at here (similar to Idea #1) can cost thousands, you can get a surprisingly similar aesthetic on a budget. Head to IKEA and explore their BOAXEL or ALGOT systems. A combination of vertical uprights, shelves, and a few pre-made dresser units from their MALM or KOPPANG line can create a ‘built-in’ look. With some careful planning and a weekend of DIY, you could achieve a comparable level of organization for under $1,000.
|
📋 Copy HEX 🔗 Share |
The formula for a successful custom-look closet is about balance. Think: 60% hanging space (a mix of long and double-hang) + 30% enclosed drawers + 10% open shelving. This ratio provides ample room for different types of clothing while keeping things visually tidy. The open shelving is your spot to inject personality with bags, hats, or a few decorative objects. The drawers are essential for hiding away the visual clutter of socks, undergarments, and t-shirts.
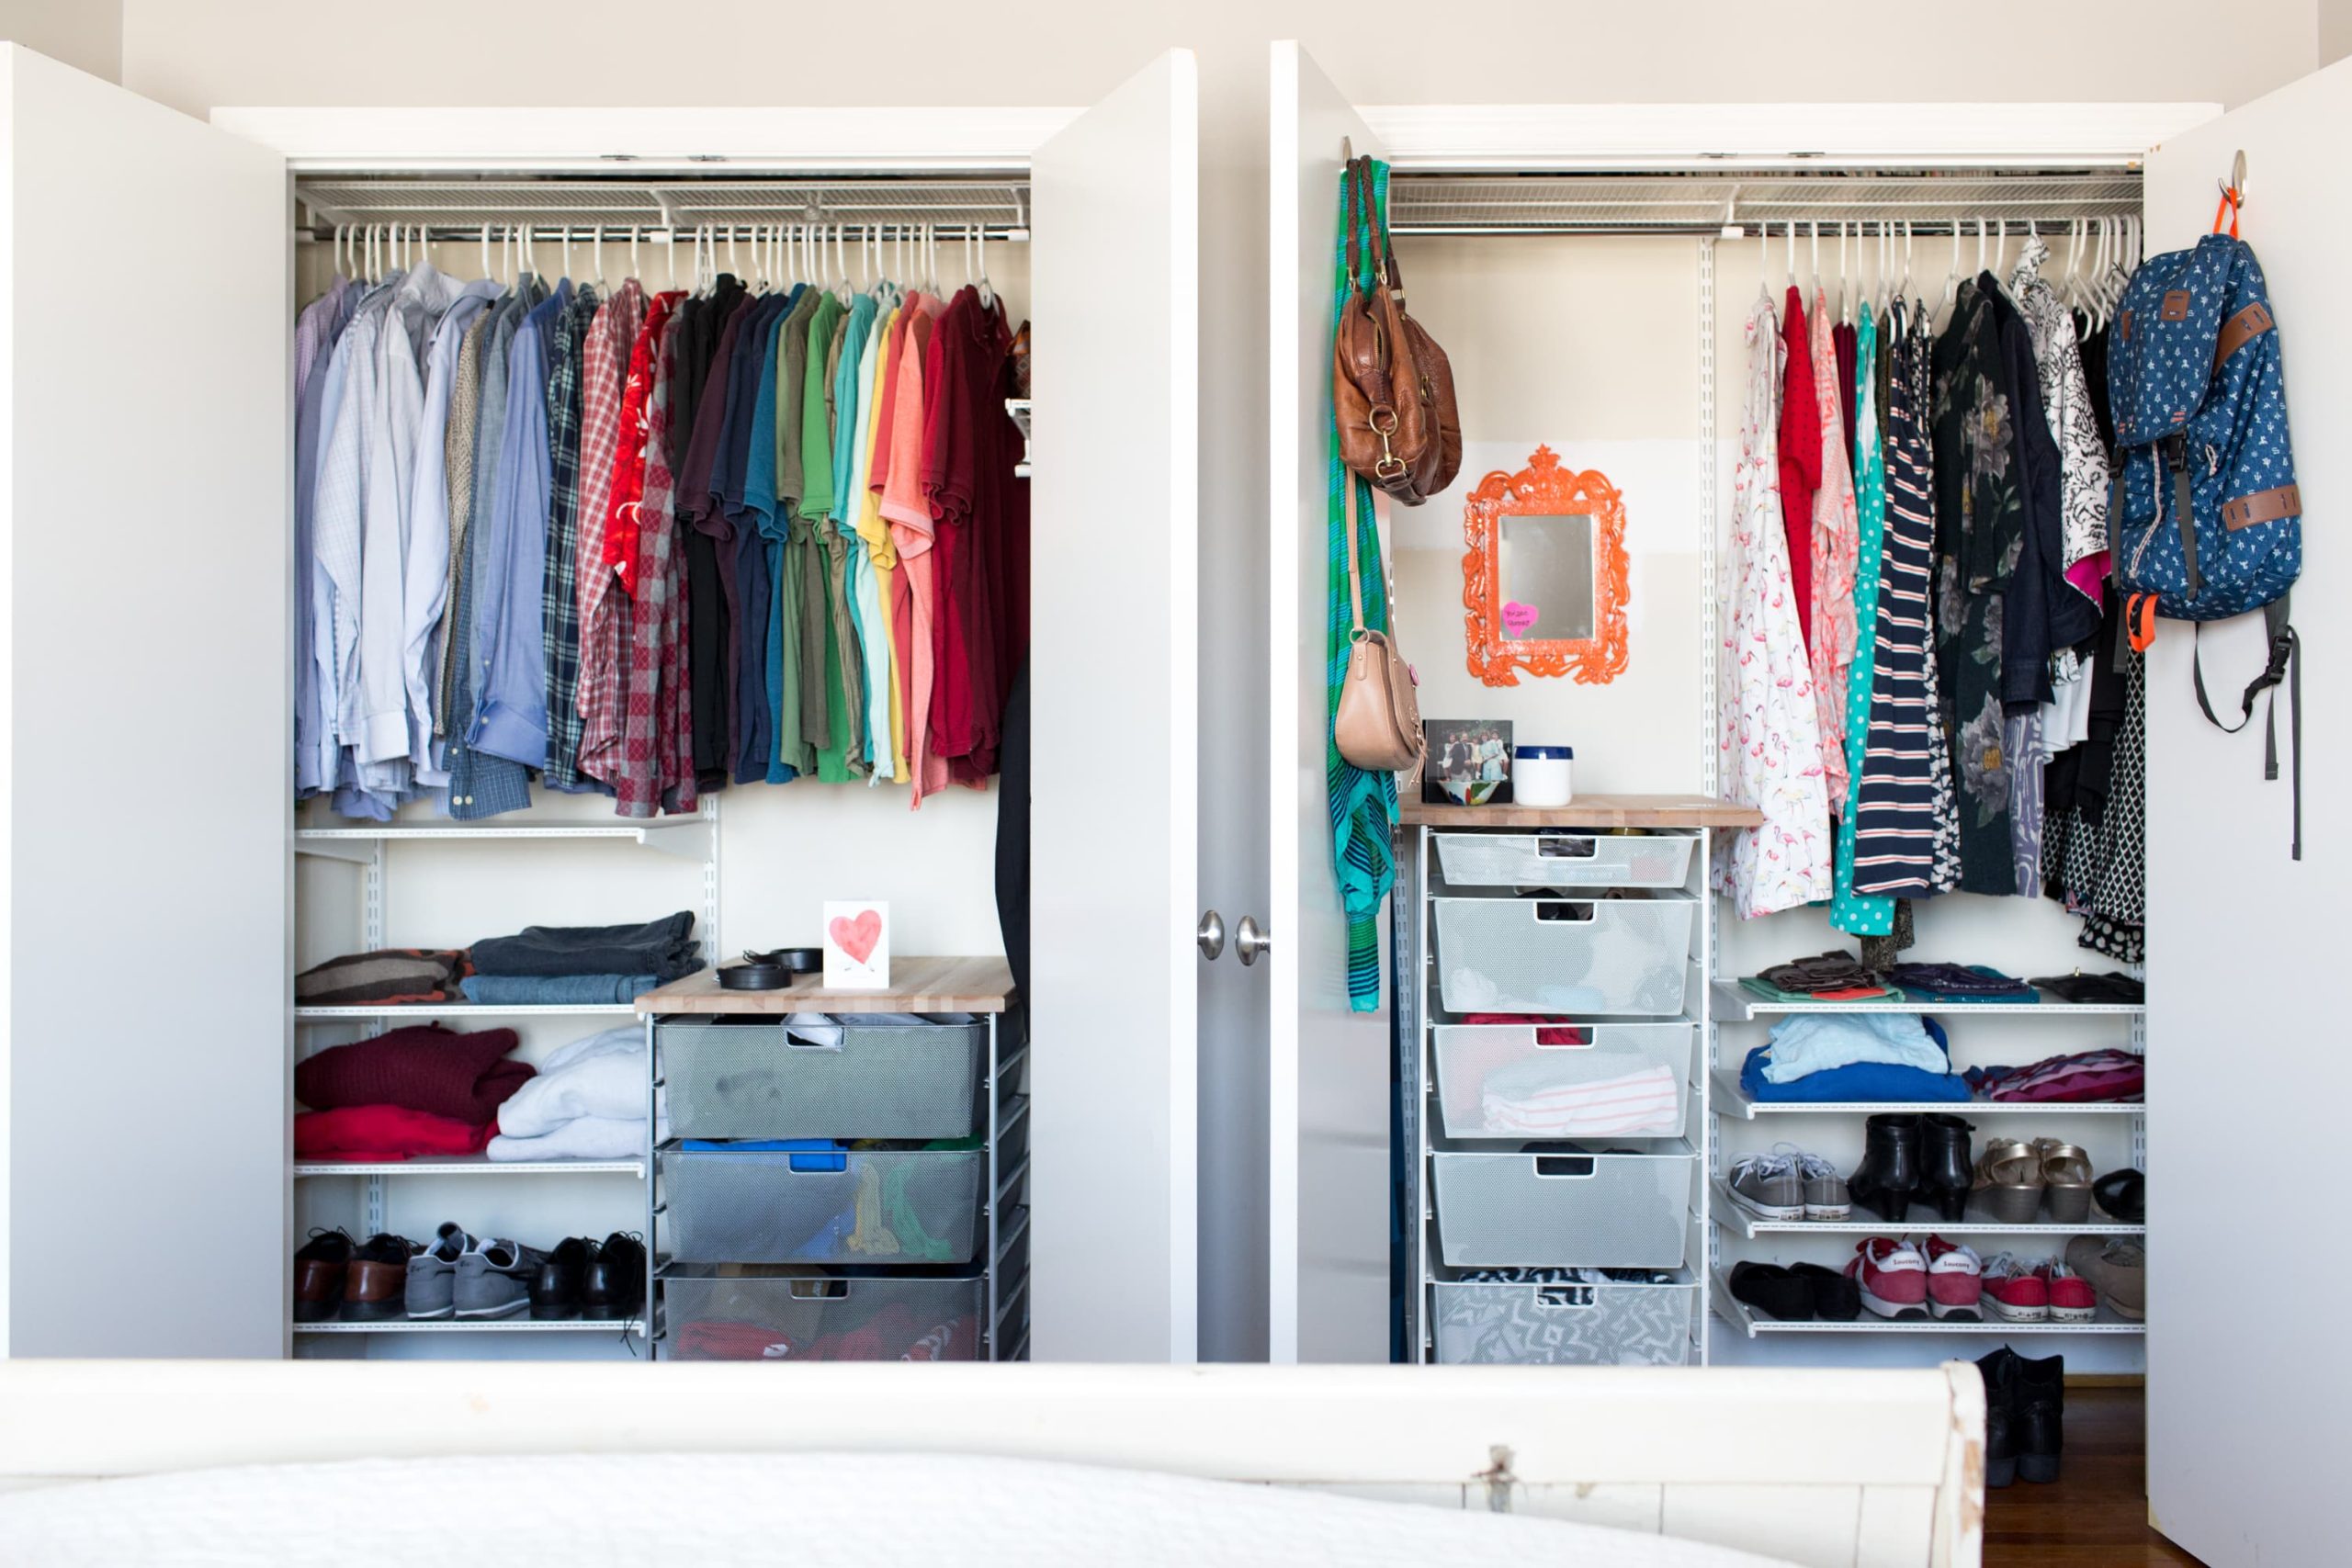
5. A Smart System with Wire Shelving and Mesh Drawers
This is the epitome of getting a high-functioning closet without a high price tag. Systems like this from The Container Store (elfa) or ClosetMaid are your best friend. The key is the combination of adjustable wire shelves and sliding mesh drawers. You can outfit a standard 6-foot-wide closet for $400-$700. The mesh drawers are a game-changer, allowing you to see what’s inside without pulling every single one open. The wooden top on the drawer unit adds a touch of warmth, making it feel more like furniture.
|
📋 Copy HEX 🔗 Share |
You can install a basic wire shelving system like this in an afternoon. Time: 2-3 hours. Cost: $150-$300.
- Start by installing the horizontal top track, making sure it’s perfectly level. This is the most crucial step.
- Hang the vertical standards from the track. Space them according to your shelf and drawer widths.
- Attach brackets to the standards at your desired heights.
- Click the wire shelves into the brackets.
- Assemble the drawer frames and slide them into place.
- Add a wood top for a finished look.
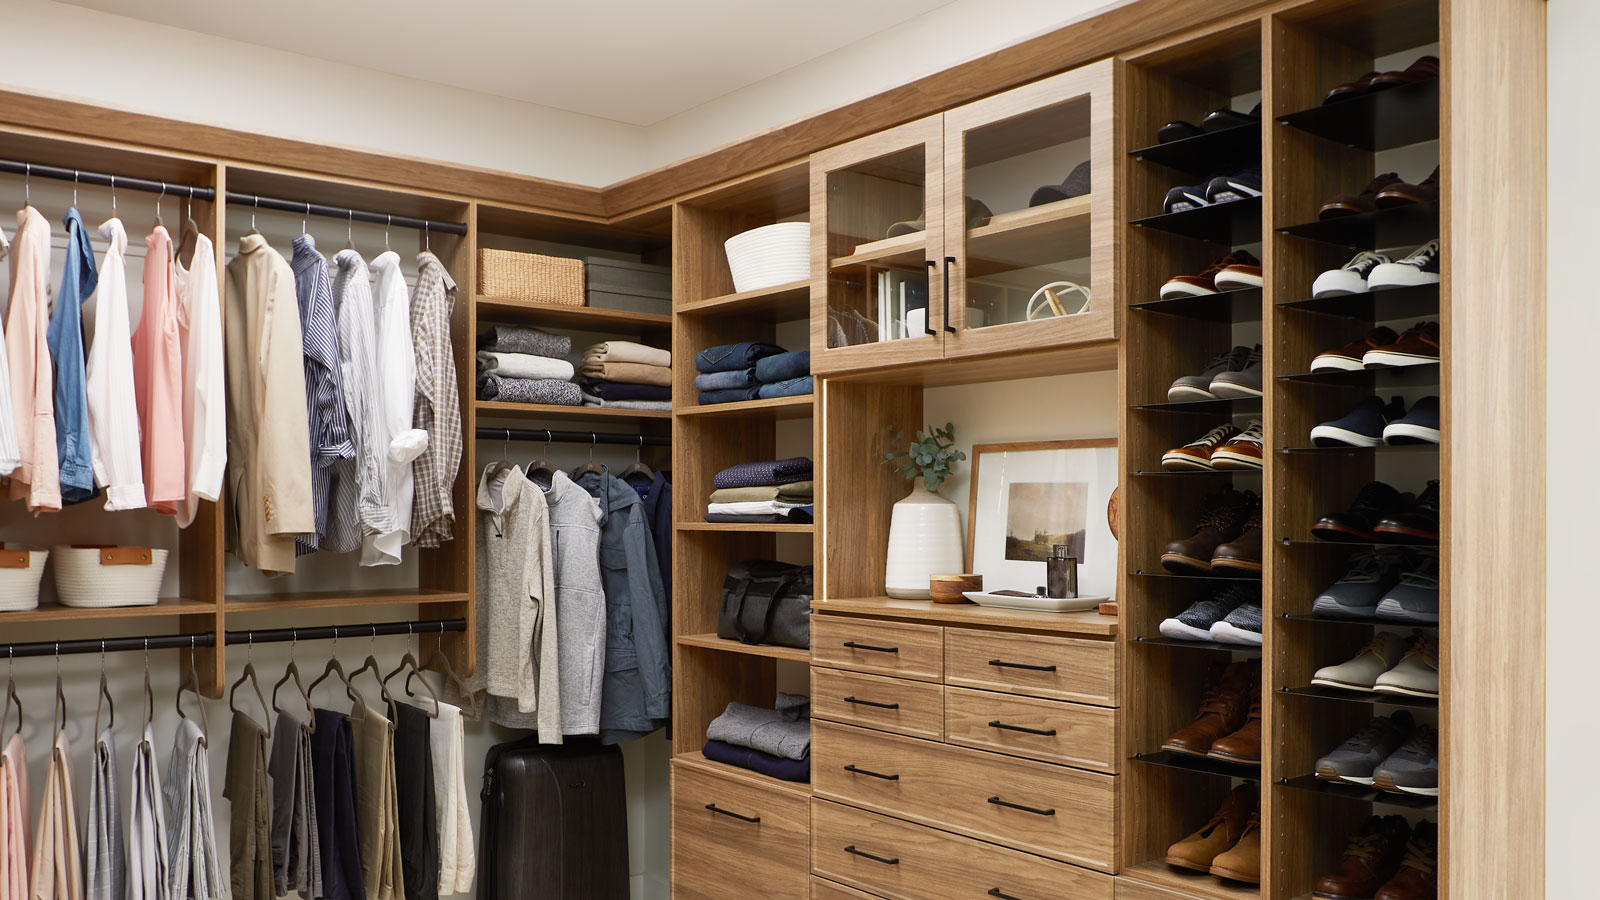
6. Organize Everything with Warm Wood and Glass Cabinets
The single element that elevates this closet from merely functional to truly luxurious is the dedicated, well-lit shoe storage. By giving the shoes their own specific, multi-level home on clear shelves, the design treats them like a collection to be admired, not just another item to be stored. Removing this feature would turn the closet back into a standard (though very nice) wood storage system. It’s this specific attention to a personal passion—be it shoes, bags, or watches—that defines a high-end custom feel.
|
📋 Copy HEX 🔗 Share |
Let’s be honest: a closet with this much wood and glass requires a commitment to cleaning. The glass-front cabinets will show every fingerprint and attract dust, so they’ll need weekly wiping with a microfiber cloth and glass cleaner. The wood surfaces should be dusted just as often. The biggest challenge? The clear shoe shelves. To keep them looking pristine, you’ll need to wipe them down frequently, especially after wearing shoes on a wet or dusty day. It’s a high-style look with a high-maintenance reality.
7. The Basics of a Custom Closet Organization System
A custom system works because it’s designed around a person’s actual inventory of belongings. Rather than forcing your things into a pre-made box, the box is built around your things. It combines different types of storage—hanging, shelving, and drawers—in the precise ratio you need. This eliminates wasted space, like having a long-hang section when you only own two dresses. The result is a space where everything has a logical home, which is the foundation of true organization.
|
📋 Copy HEX 🔗 Share |
Custom closet companies sell convenience and a perfect fit, but the process can be overwhelming. You’ll be presented with dozens of choices for finishes, hardware, and accessories, each with a different price tag. It’s easy to get upsold on features you may not actually need, like velvet-lined jewelry trays or pull-out tie racks. Go in with a clear list of your absolute must-haves and a firm budget to avoid getting carried away during the design consultation.
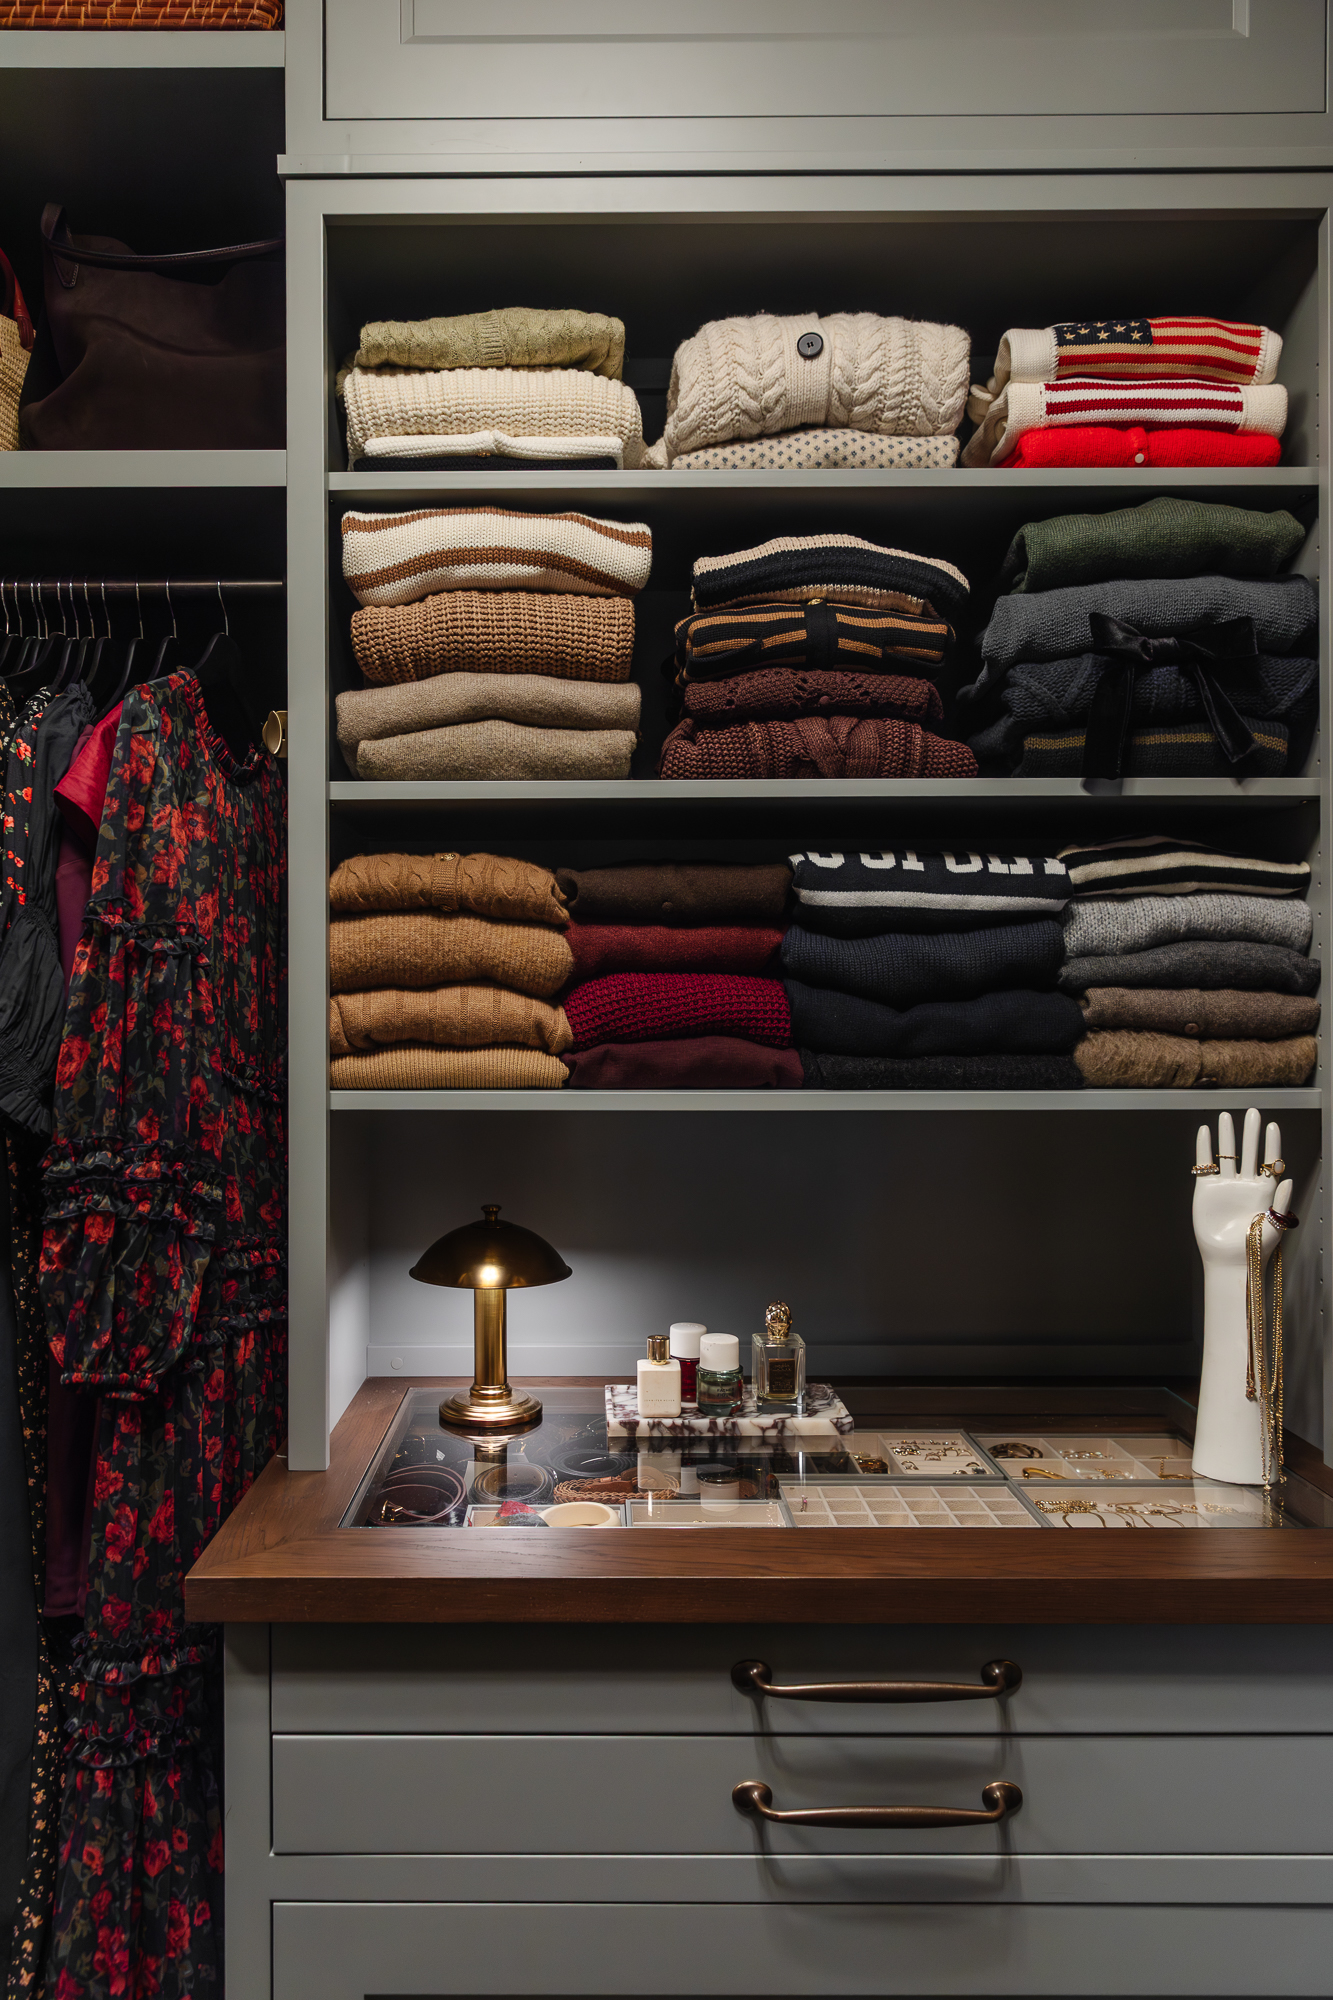
8. Add Personality with Sage Green Cabinetry and a Jewelry Display
The beautiful balance in this closet comes from a simple but effective formula: 50% bold color (the sage green cabinetry) + 30% warm neutrals (the folded knitwear in creams and grays) + 20% rich accents (the dark wood countertop and brass lamp). This strategy proves you don’t need to keep an all-white closet to feel organized. You could swap the sage green for a deep navy or a moody terracotta and, by keeping the other percentages the same, achieve a similarly sophisticated and personal look.
|
📋 Copy HEX 🔗 Share |
That glass-topped jewelry display is the detail that makes this closet feel truly special and custom. It turns the top of the dresser from a potential clutter magnet into a curated, boutique-like experience. By creating a designated, visible home for your most-loved accessories, it forces you to be intentional about what you keep there. It’s a functional feature that feels incredibly luxurious and personal, and it prevents the dresser top from becoming a dumping ground for receipts and pocket lint.
9. Embrace Minimalism with a Light Wood Dresser and Black Pulls
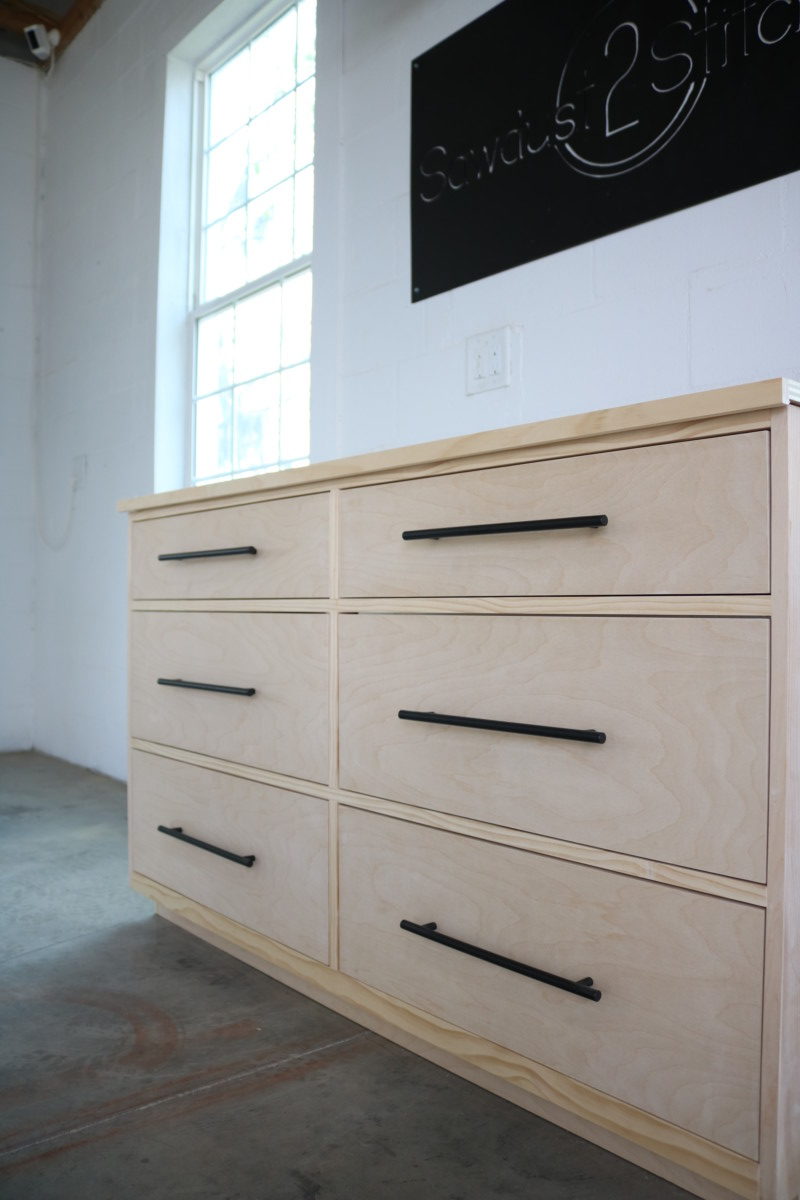
The clean lines, natural wood tone, and high-contrast hardware of this dresser are right in step with the Japandi trend that continues to dominate Pinterest boards. It’s a blend of Scandinavian simplicity and Japanese minimalism. The look is popular because it feels both warm and uncluttered, which is a difficult balance to strike. This isn’t a fleeting trend; its focus on natural materials and functionality gives it serious staying power. It’s a calm, quiet aesthetic that works beautifully in a bedroom or closet space.
|
📋 Copy HEX 🔗 Share |
When selecting a dresser, pay close attention to the hardware. Long, linear bar pulls like the black ones shown here instantly create a modern, graphic look and can make a simple piece feel more intentional and designed. For a softer, more traditional feel, choose knobs. For a glam touch, opt for brass or gold. Hardware is the jewelry of your furniture, and it’s one of the easiest things to swap out to change the entire vibe of a piece.
10. A Simple Wardrobe with Internal Mesh Drawers
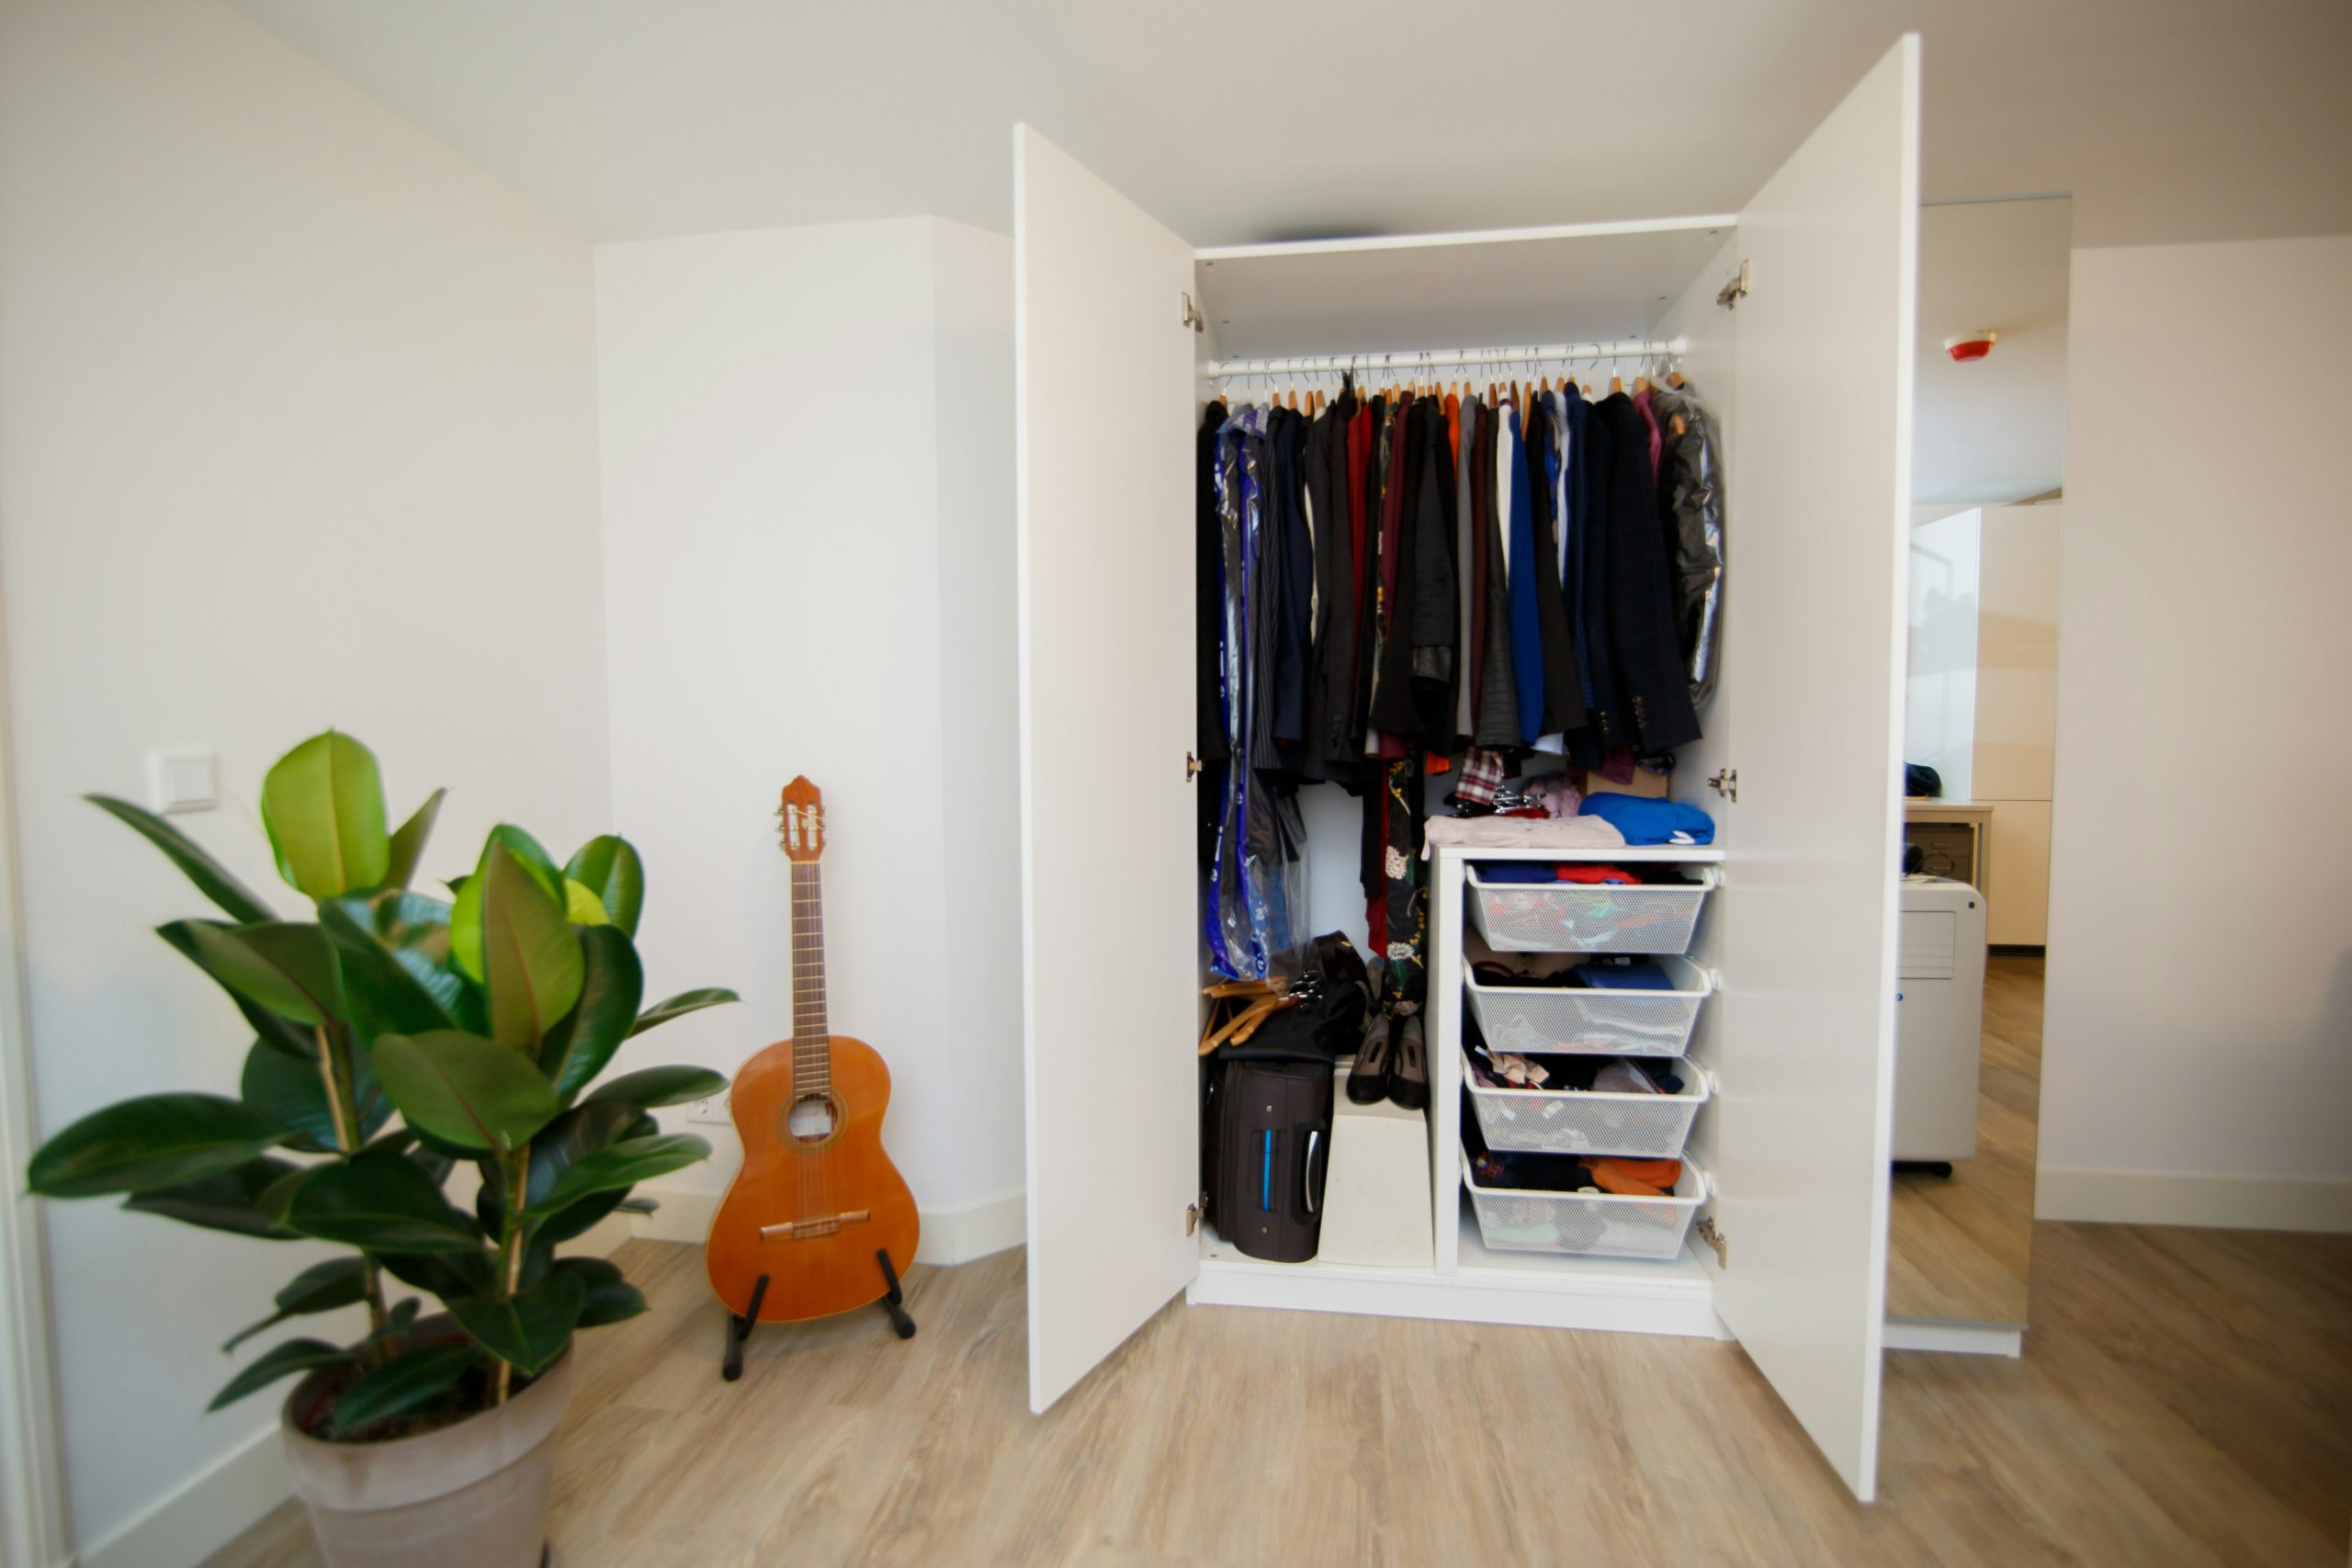
This is a classic IKEA PAX wardrobe setup, and it’s a brilliant solution for anyone needing closet space where none exists. A similar unit costs between $400 and $800, depending on the interior organizers you choose. The pull-out mesh drawers are significantly cheaper than the solid wood drawers and offer better visibility and air circulation for your clothes. This is a fantastic way to get the function of a built-in closet for a fraction of the cost and with the flexibility to take it with you when you move. It’s the perfect starter ‘real’ closet. Check out Idea #5 for another budget-friendly take.
|
📋 Copy HEX 🔗 Share |
A wardrobe of this style is ideal for smaller bedrooms or guest rooms that lack a built-in closet. Look for a wall that’s at least 40 inches wide to accommodate a standard double-door unit. The key measurement is depth. Most of these wardrobes are around 22-24 inches deep, so make sure you have enough floor space for the doors to swing open without hitting your bed or other furniture. A minimum of 3 feet of clearance in front of the wardrobe is a good rule of thumb.
11. Create a Luxe Look with an Illuminated Beige Dresser and Glass Cabinets
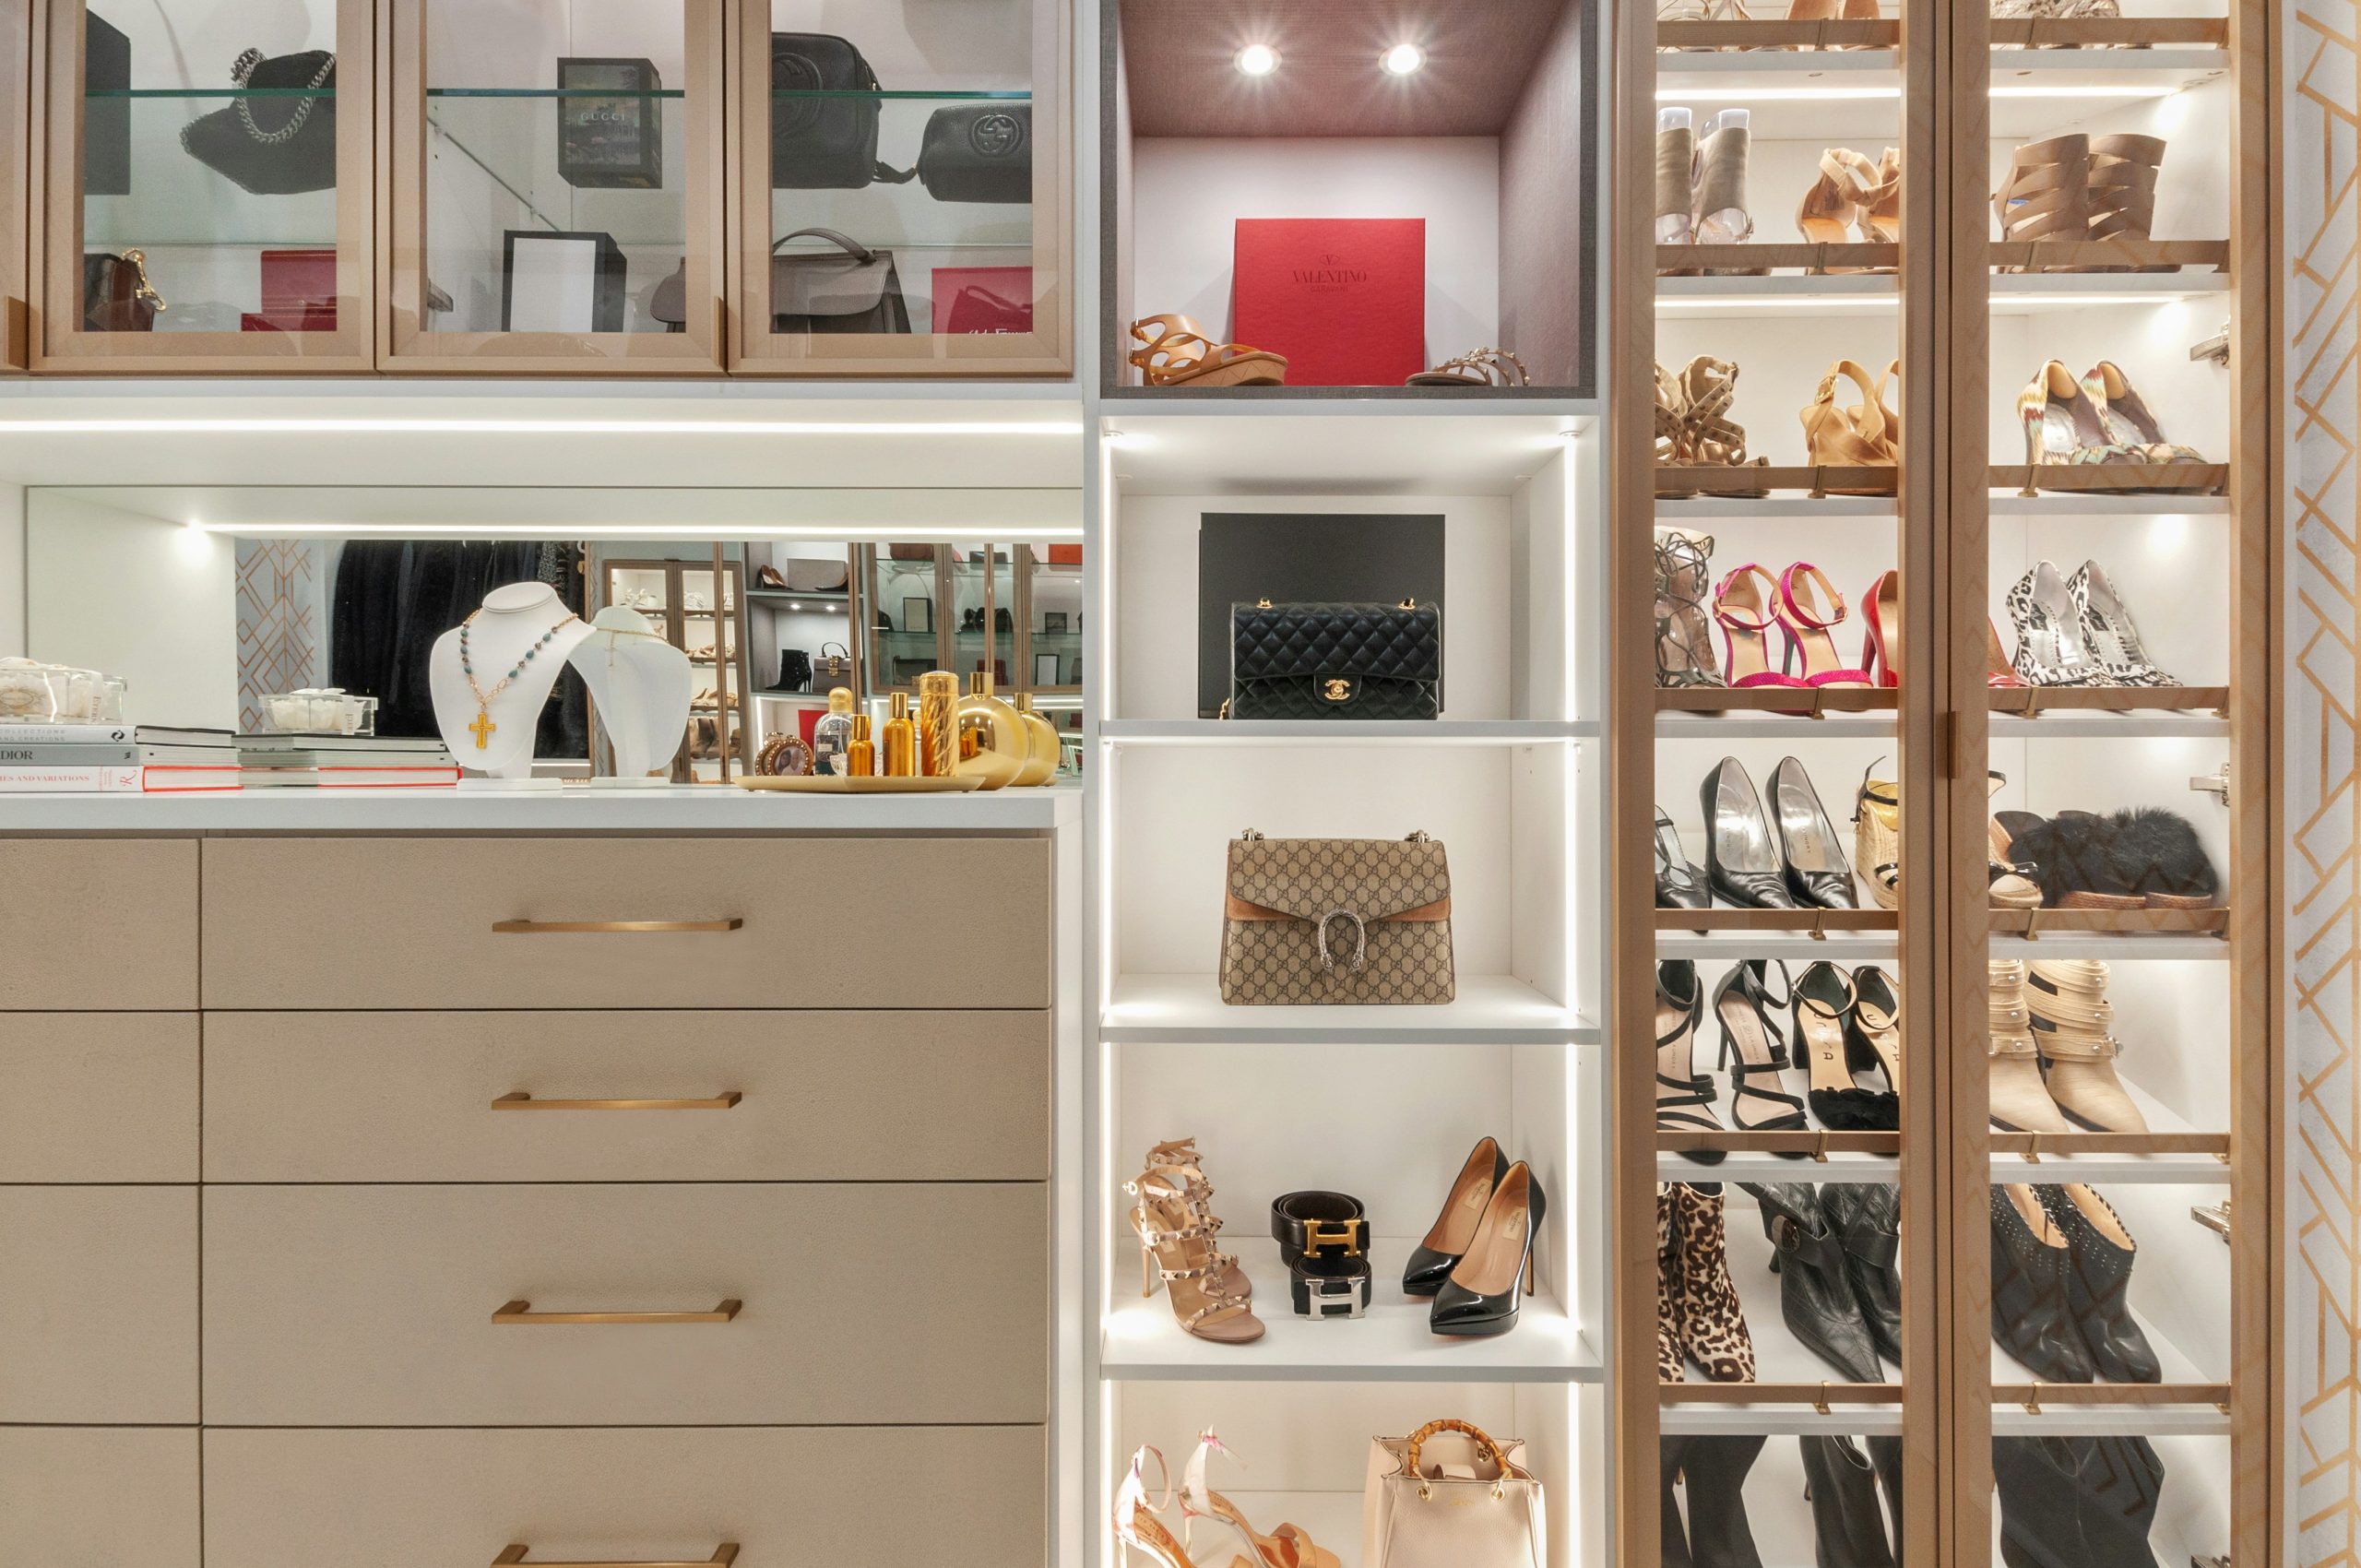
This is a high-end, custom look with a price tag to match. The cost is in the details: the integrated lighting, the mirrored backsplashes, and the glass cabinetry.
- Main Furniture (custom dresser & cabinets): $9,000 – $18,000
- Lighting (LEDs, spotlights & electrician): $1,500 – $3,500
- Mirrored Surfaces: $800 – $2,000
- Hardware (gold pulls): $300 – $700
- TOTAL: $11,600 – $24,200
- Budget alternative: Use IKEA PAX frames and beige high-gloss doors and add gold handles from a third party. Use stick-on, battery-powered LED strips for a similar illuminated effect at about 60% less cost.
|
📋 Copy HEX 🔗 Share |
The magic here is all about layering light and reflection. The combination of recessed ceiling spotlights, back-lit open shelving, and light bouncing off the mirrored backsplash creates incredible depth and a sense of glamour. The glass-front cabinets add another layer of transparency, preventing the wall of storage from appearing as a heavy, solid block. The warm, consistent color palette of beige and gold ties it all together, making it feel serene and luxurious rather than chaotic. This is less about storage and more about display.
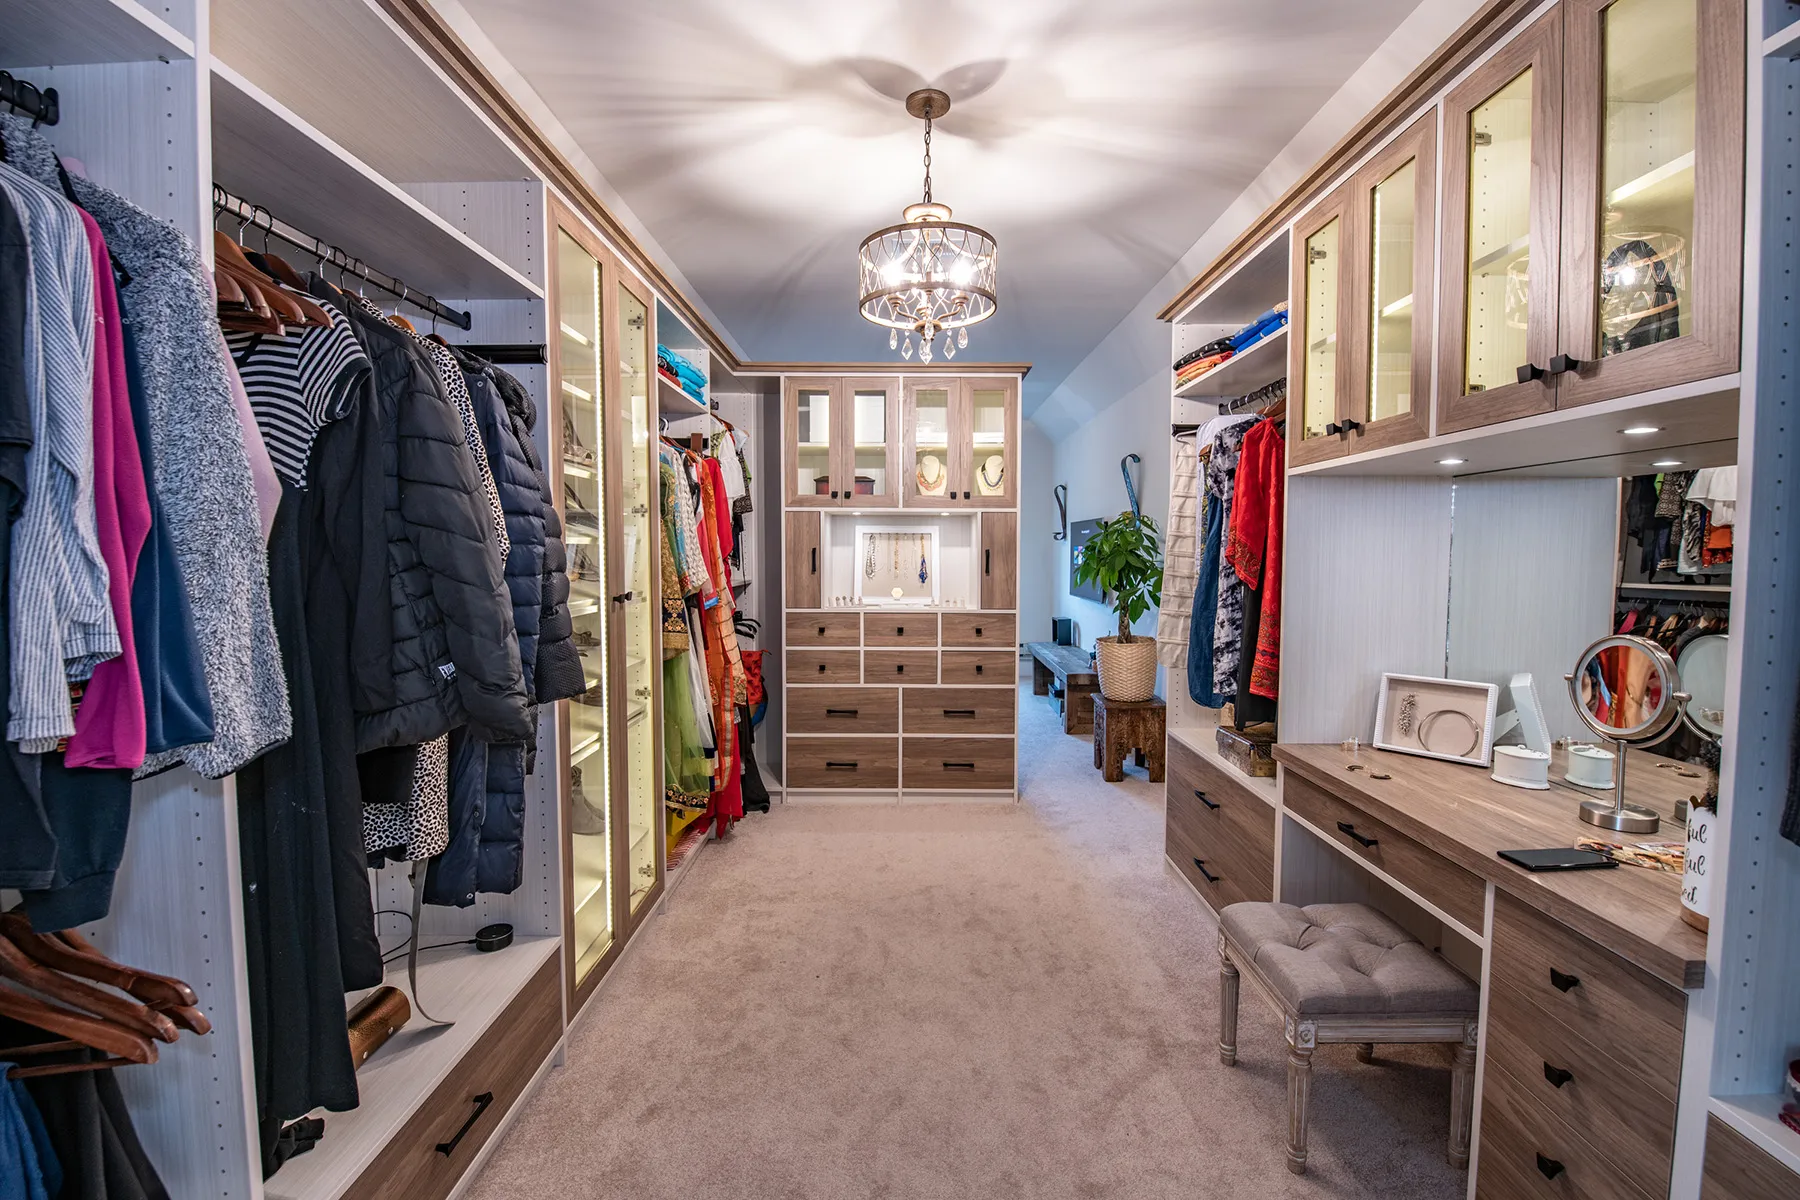
12. Combine Your Closet and Vanity in a Light Wood Space
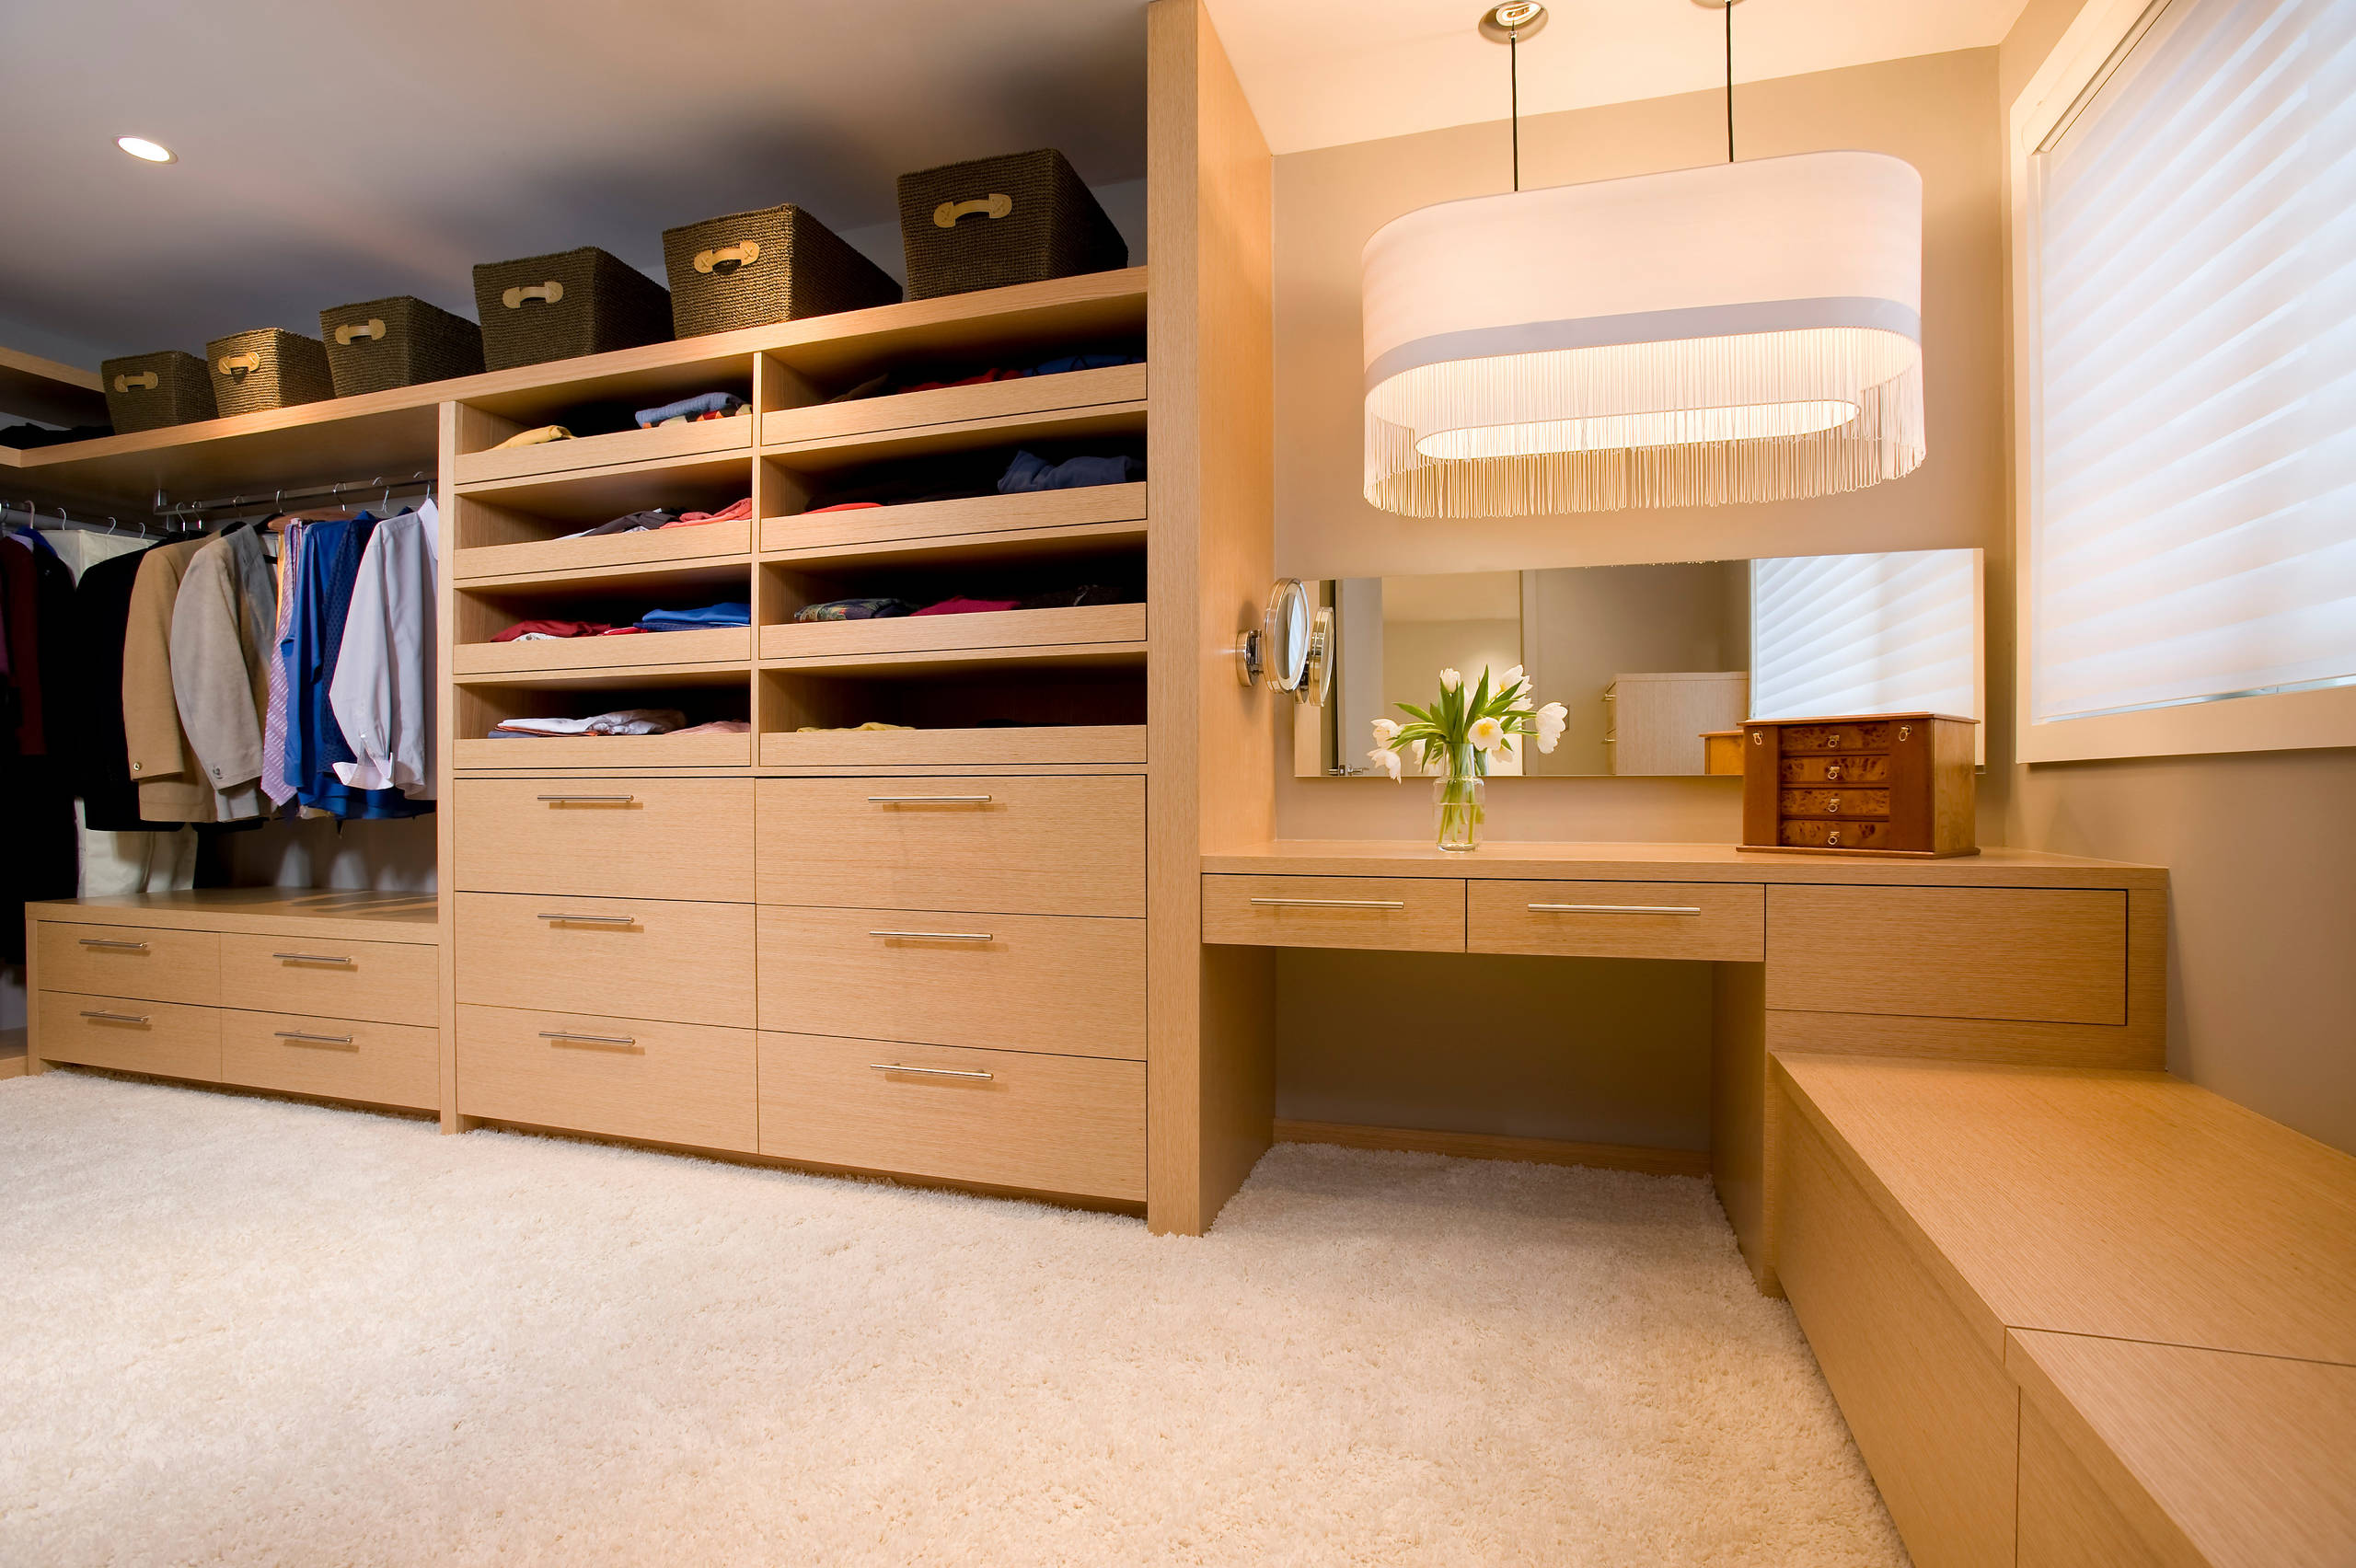
An integrated vanity is a fantastic feature, but it requires significant space. This concept is best suited for a dedicated walk-in closet or a very large primary bedroom. You’ll need a room that is at least 10 feet wide to accommodate storage on one side and a vanity on the other without feeling cramped. For the setup pictured, with storage on both sides and a central dresser, you’re looking at a minimum room size of 12′ x 10′ (120 sq ft). Anything smaller will feel tight and defeat the purpose of a spacious, multi-functional area.
|
📋 Copy HEX 🔗 Share |
The integrated vanity station is what transforms this from a simple (though large) closet into a true dressing room. It creates a dedicated zone for getting ready, separate from a potentially steamy bathroom. This single feature elevates the room’s function, providing a place for makeup application, hairstyling, and accessorizing. It acknowledges that getting dressed is a process that involves more than just clothes. Without it, this would just be a nice, big closet.
13. Get a Boutique Feel with Glass-Doored Wood Cabinets
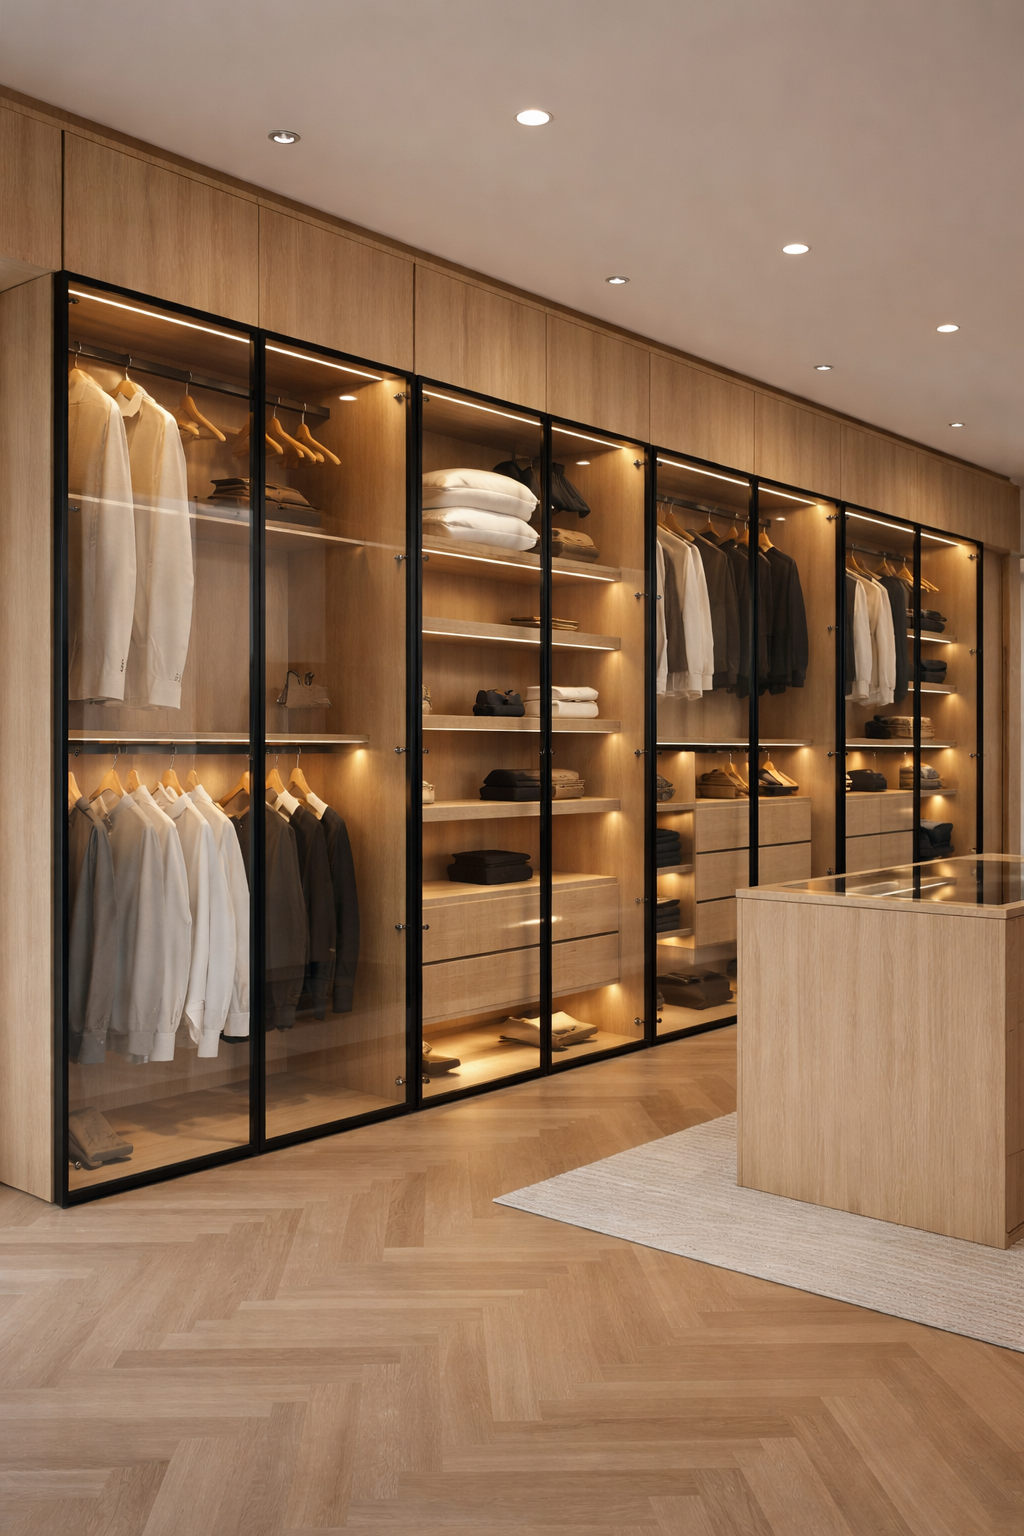
The combination of transparency and illumination is what gives this closet its high-end, retail-inspired feel. The glass doors allow you to see your entire wardrobe at a glance, but in a much more orderly way than open shelving. The internal LED lighting then turns your clothing and accessories into a curated display. The black metal frames add a graphic, modern edge that contrasts beautifully with the warm wood, keeping the overall look from feeling too traditional or heavy.
|
📋 Copy HEX 🔗 Share |
Glass doors look stunning, but they demand tidiness. If you’re the type to shove things into your closet, this is not the look for you. Every item behind the glass is on display, so folded items need to be neat, and the general organization has to be on point. The glass itself will also need regular cleaning to remove fingerprints and dust, as will the illuminated interior shelves. It’s a commitment to maintaining not just a clean closet, but a visually perfect one.
14. Integrate Your Wardrobe with a Media Center and Fireplace
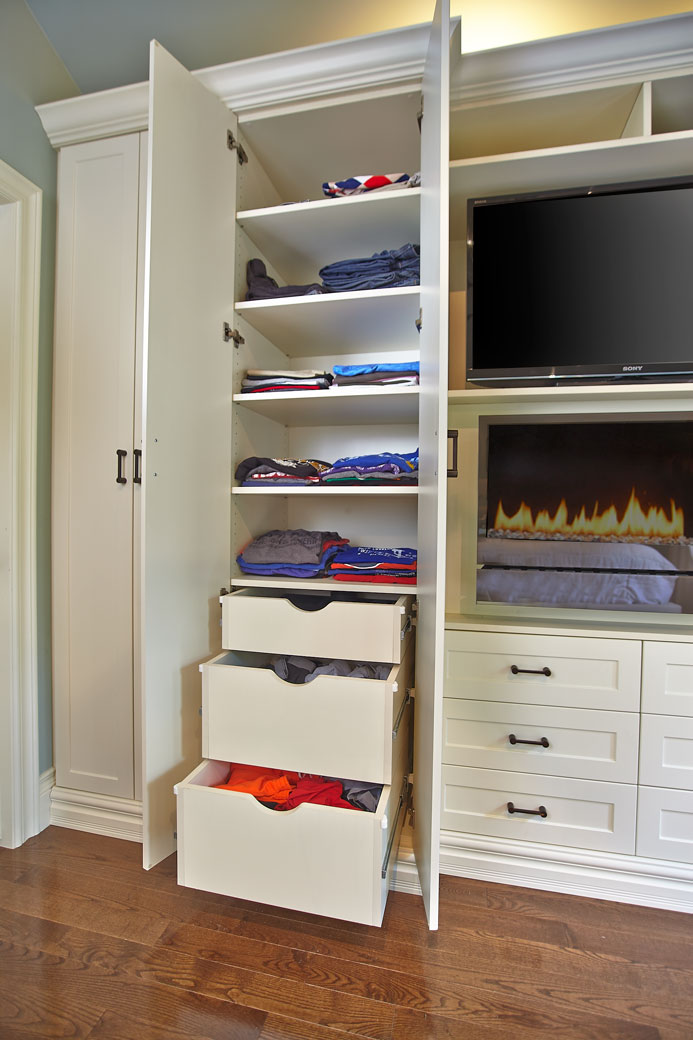
This is a clever use of space in a studio apartment or a primary bedroom that doubles as a retreat, but be realistic about heat. Even electric fireplaces produce some warmth. Ensure there’s adequate ventilation and that the unit isn’t directly touching any delicate clothing. Also, consider the dual function. If this is in your main living space, are you comfortable with your clothing storage being so visible to guests? It requires a certain level of consistent tidiness that a closed-off closet does not.
|
📋 Copy HEX 🔗 Share |
This look is a masterclass in functional blending. The formula is roughly: 50% dedicated clothing storage (the drawers and shelves) + 40% entertainment focus (the TV and fireplace nook) + 10% display space (the upper shelves). The key to making it work is the single, unifying color—white. By using the same cabinetry style and color throughout, the different zones merge into one cohesive architectural feature rather than looking like a random collection of furniture pushed together.
15. The Classic White Built-in with Central Shelving
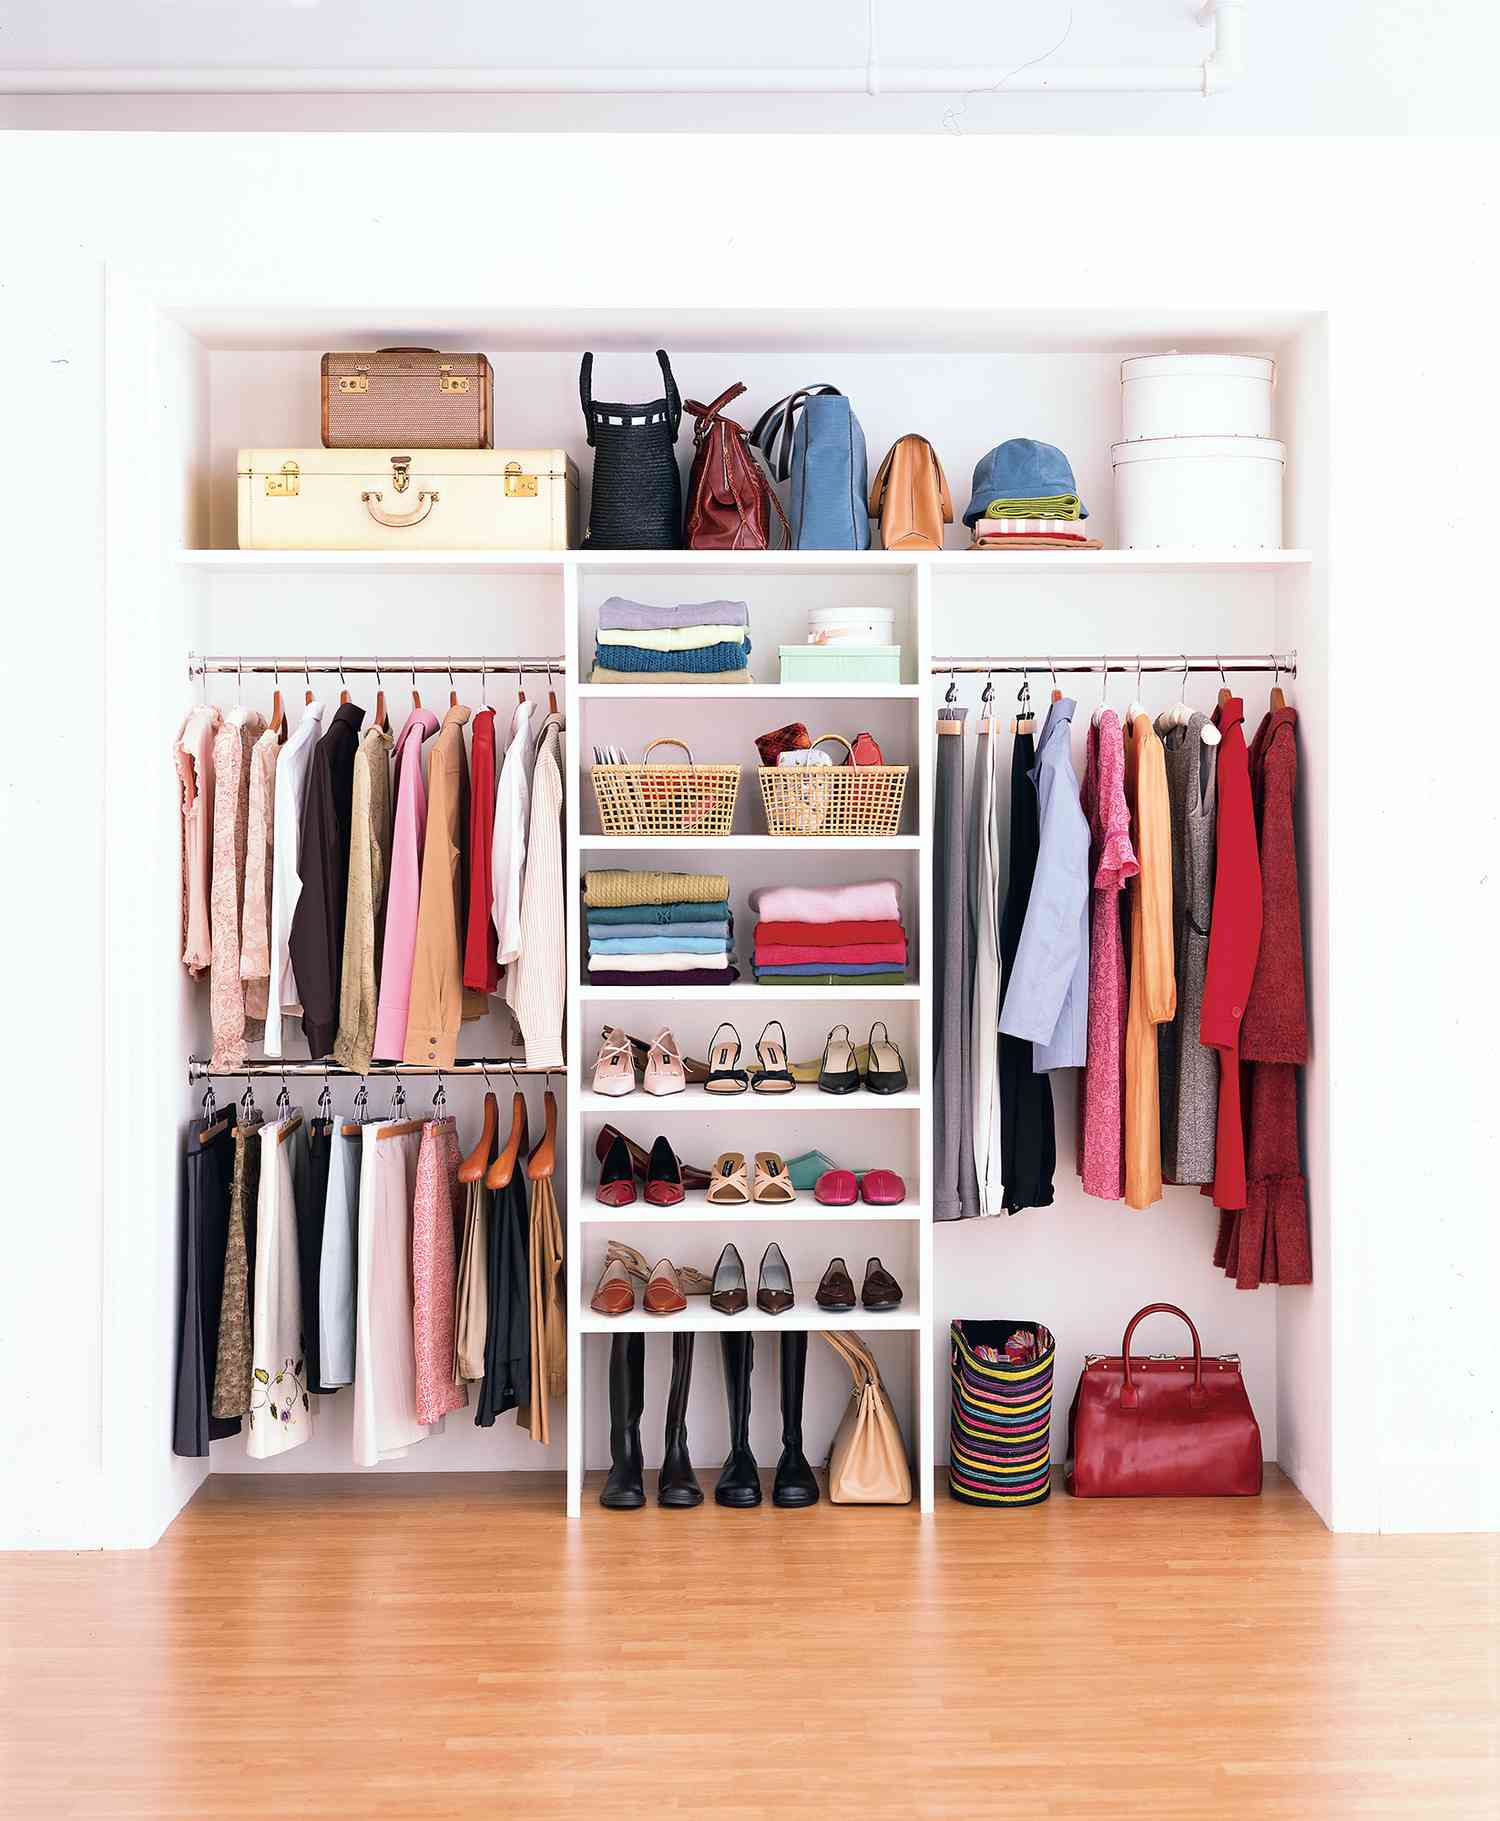
This is a perennially popular design for a reason, but it requires planning. Before you commit, do this:
- Measure your wall’s total width and height. This will determine if you can fit the classic ‘tower-rod-rod’ configuration.
- Take a complete inventory of your clothes. Do you need more double-hang space for shirts and pants or long-hang space for dresses and coats? Adjust the plan to your wardrobe, not the other way around.
- Decide on your ‘clutter tolerance. ‘If you hate seeing visual mess, plan for more drawers or doors. If you like seeing your options, lean into open shelving.
|
📋 Copy HEX 🔗 Share |
The most common mistake people make with this setup is not using the vertical space effectively. The professional move is to always install two rods in sections for shirts, skirts, and pants (double-hanging). A typical setup places one rod at 40-42 inches from the floor and the second one at 80-84 inches. This single change can literally double your hanging capacity. Reserve a smaller section for single, long-hanging items like dresses and coats, which only require one rod placed at about 68-72 inches high.
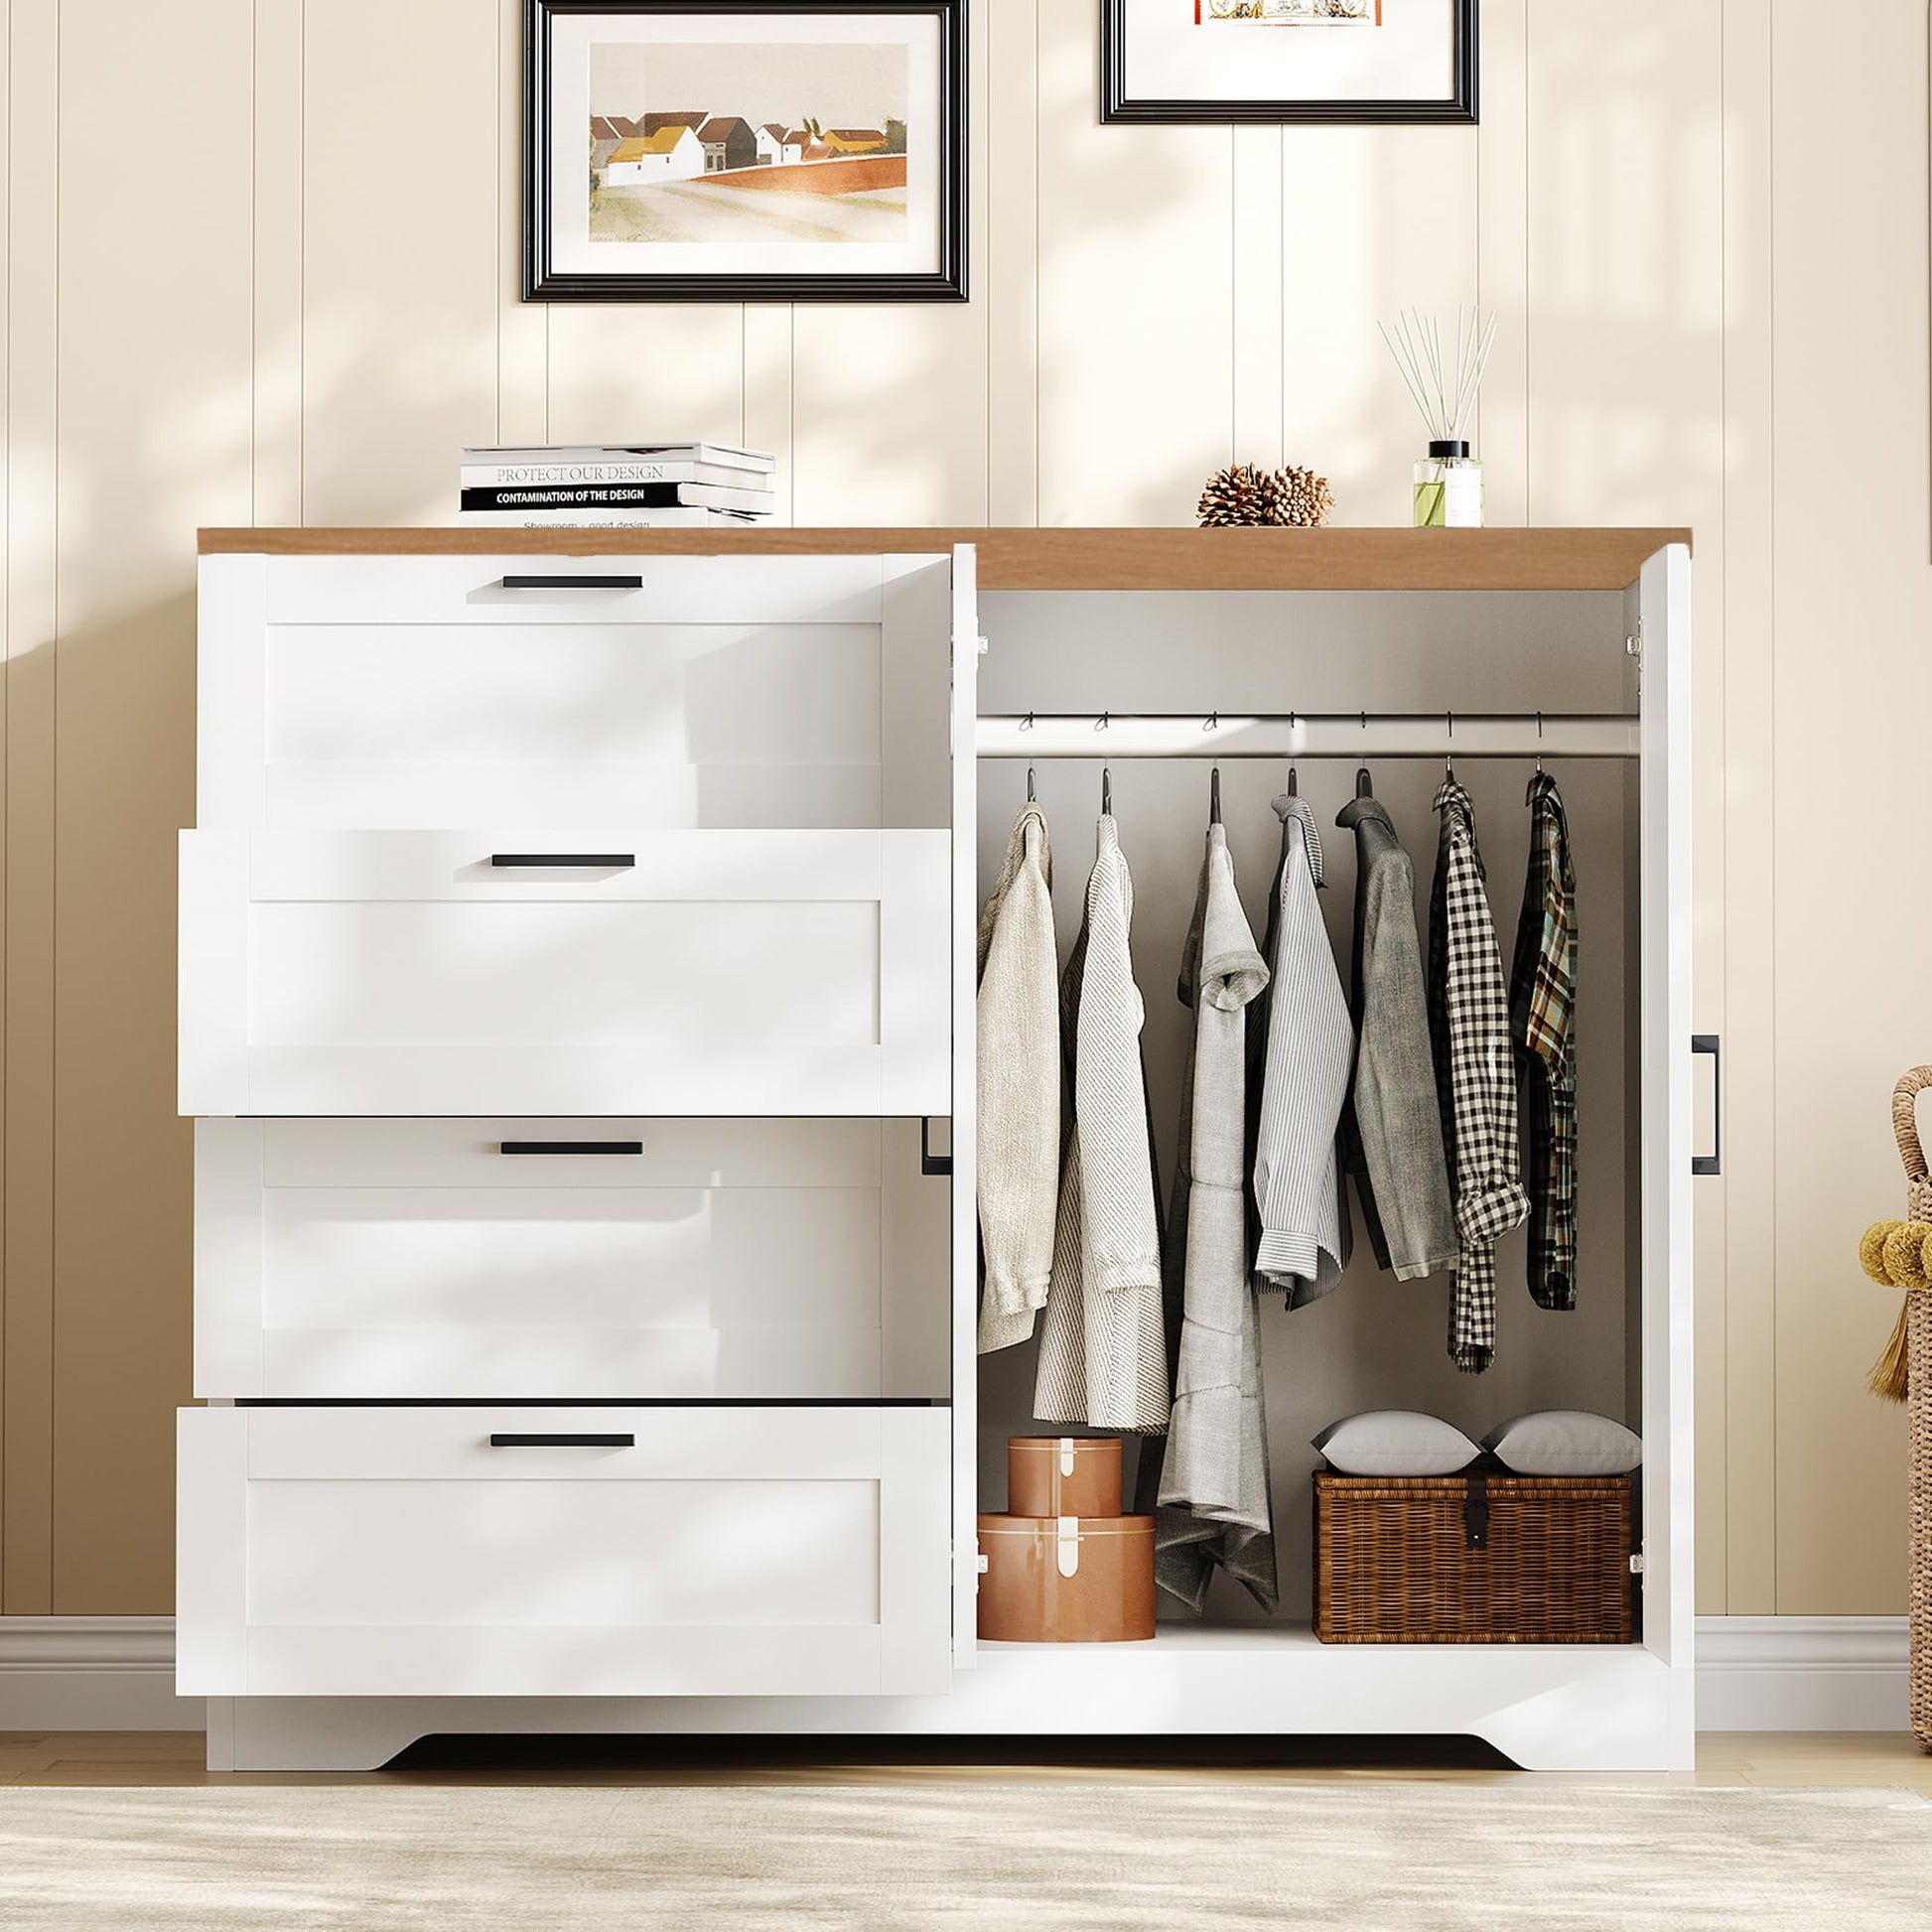
16. Try a Two-Tone Wardrobe with a Wood Top
You don’t need a custom built-in to get a functional and stylish closet dresser. A standalone piece like this offers great flexibility and is significantly more affordable. You can find similar wardrobes at stores like Wayfair or Target for between $300 and $700. The combination of drawers and hanging space makes it a perfect all-in-one solution for a room without a closet, a guest room, or supplementing a too-small existing closet. And the best part? You can take it with you when you move.
|
📋 Copy HEX 🔗 Share |
The two-tone look—typically white or a color paired with a wood accent—is a major trend that bridges the gap between cold minimalism and overly rustic aesthetics. It’s popular because it adds warmth and texture without sacrificing a clean, modern feel. The wood top on this piece makes it feel more substantial and furniture-like than an all-white box. This trend has staying power because it’s so versatile and easy to integrate into various decor styles.
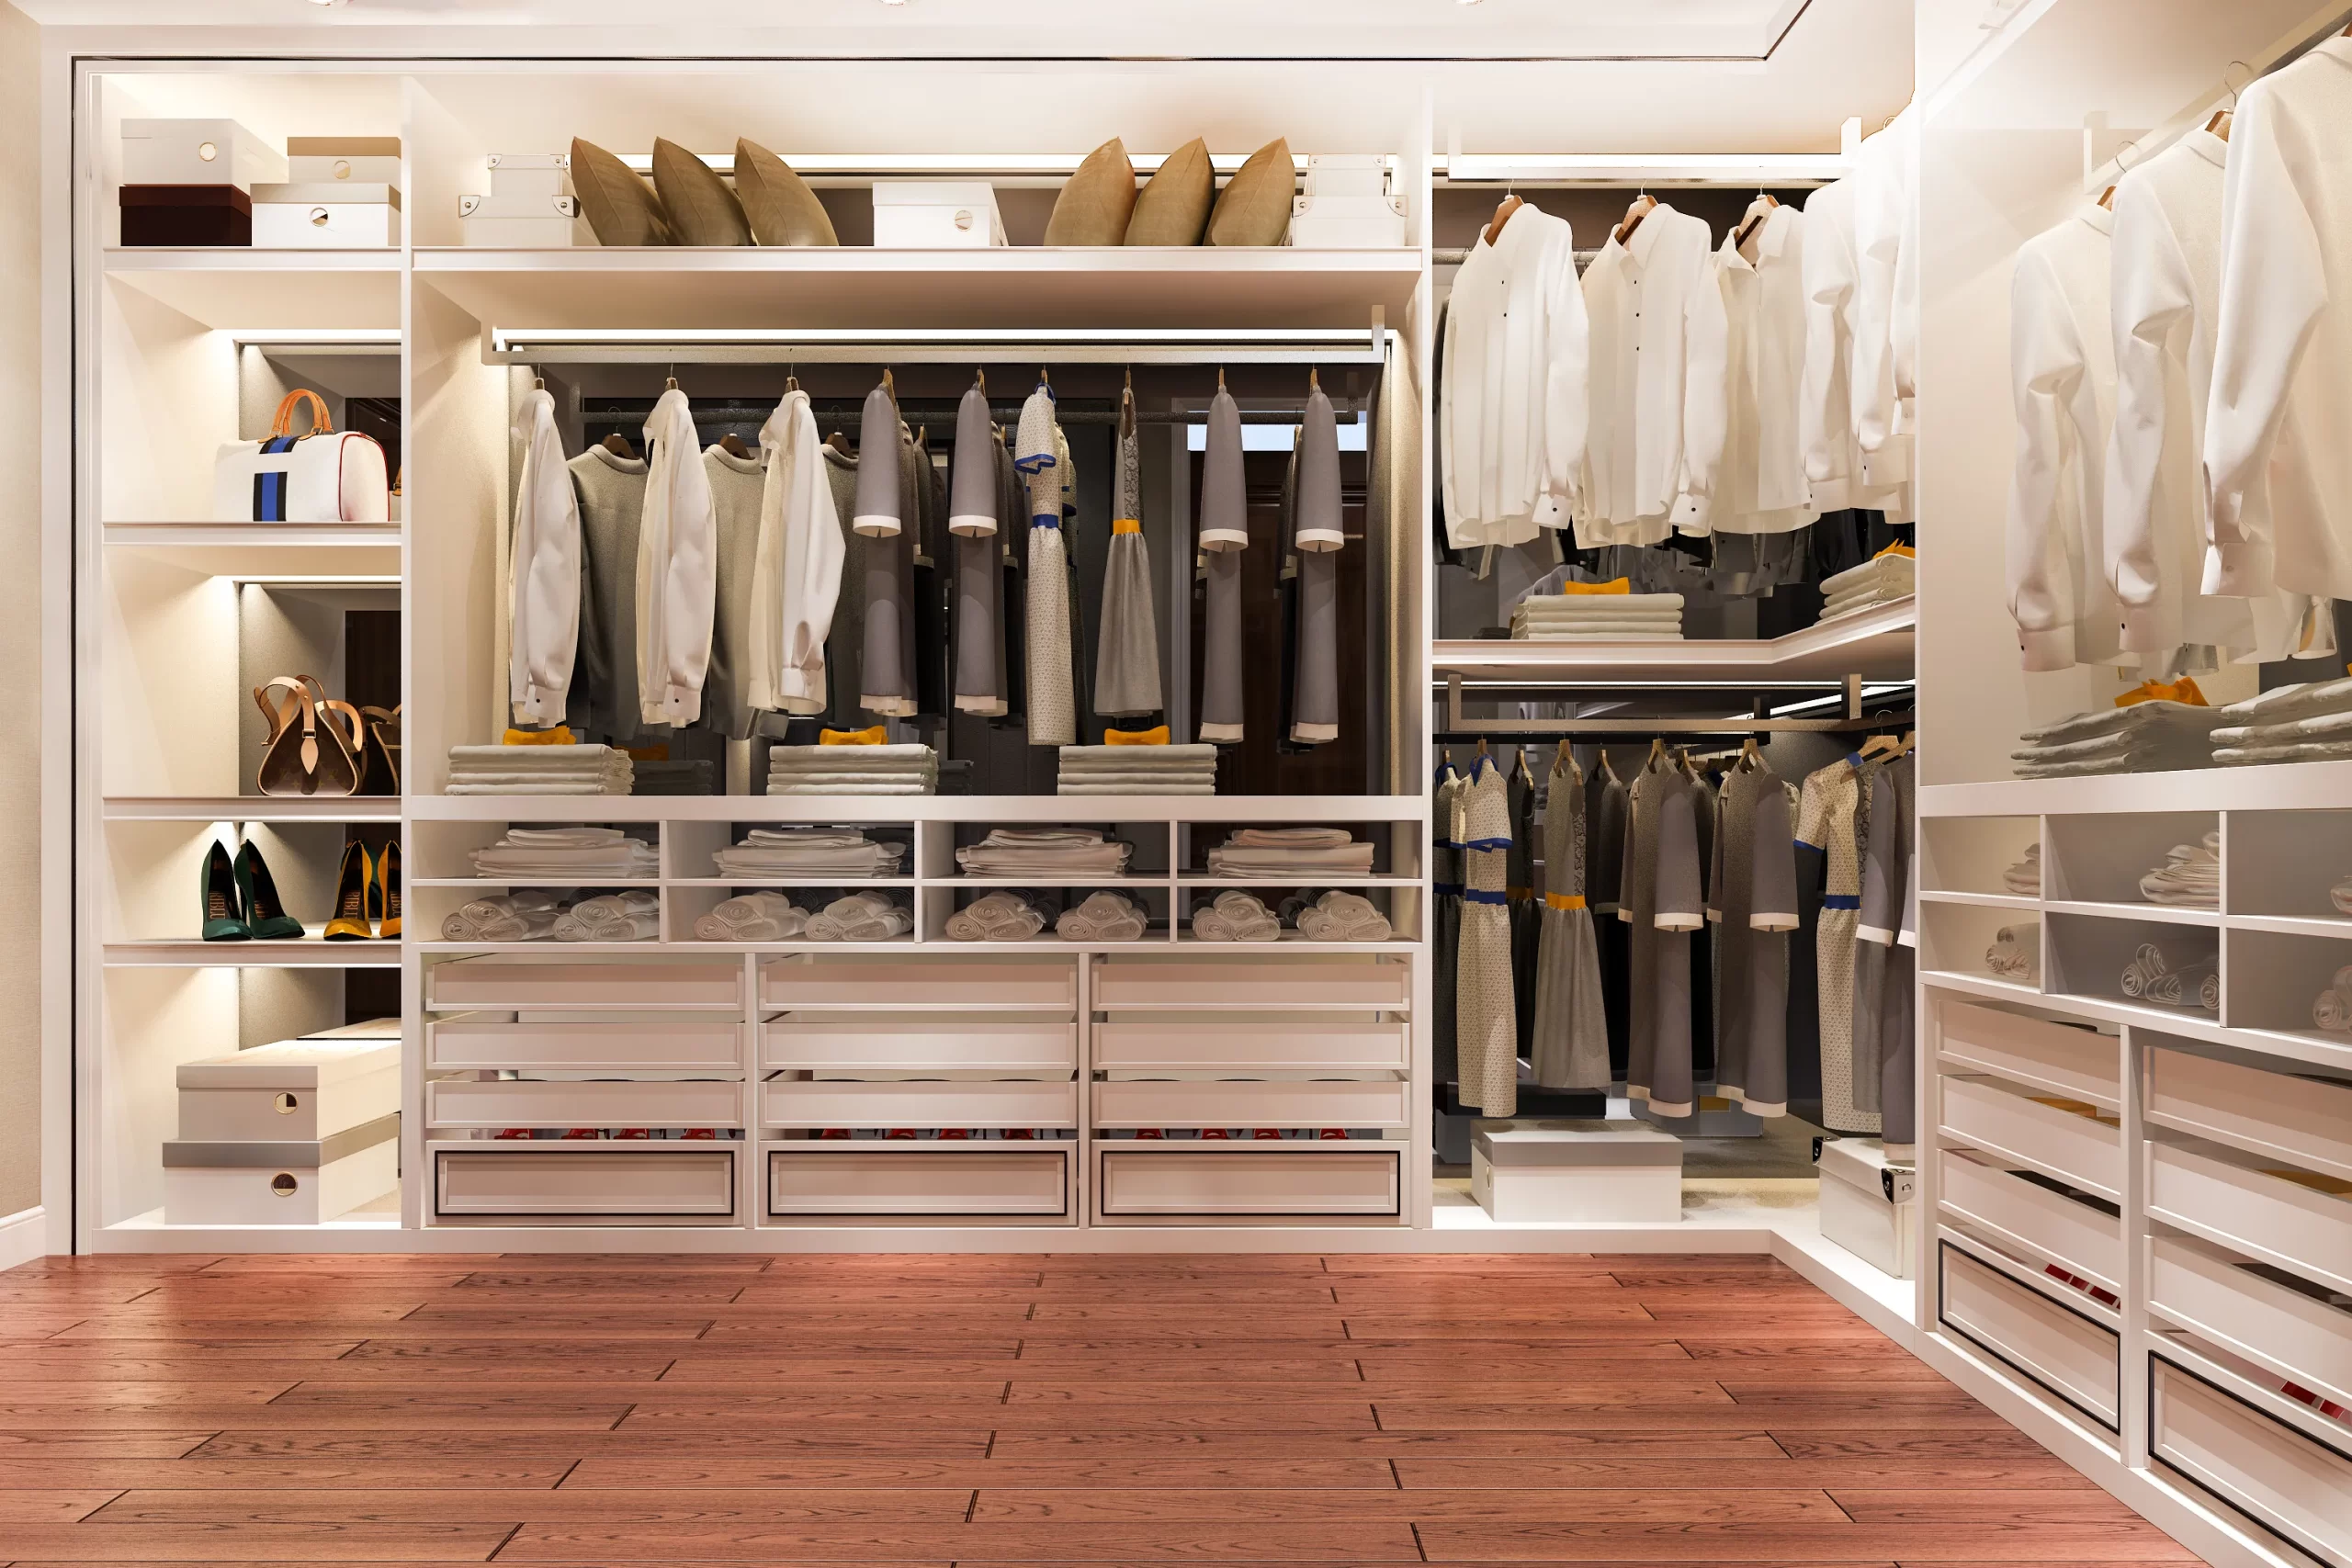
17. Achieve Ultimate Organization with a Wall-to-Wall White System
To create a system of this scale and finish, you’re looking at a significant investment in custom or semi-custom cabinetry. It offers a truly seamless, high-end look. Compare with the similar but moodier aesthetic in Idea #2.
- Main Furniture (custom full-wall cabinetry): $12,000 – $22,000
- Lighting (integrated strips & installation): $1,000 – $2,500
- Flooring (hardwood): $1,500 – $4,000
- Labor/Installation: $2,000 – $5,000
- TOTAL: $16,500 – $33,500
- Budget alternative: An ambitious DIYer could use multiple IKEA PAX frames secured together and to the wall, with custom trim added to create the built-in feel for under $5,000.
|
📋 Copy HEX 🔗 Share |
This design’s success lies in its sheer, uninterrupted scale. By taking the storage from floor to ceiling and wall to wall, it becomes an architectural element of the room, not just furniture within it. The bright white finish prevents the massive unit from feeling heavy or oppressive. The under-shelf lighting is crucial; it breaks up the monotony of the white, adds warmth and dimension, and practically highlights your clothing and accessory zones. It’s a statement of ultimate order.
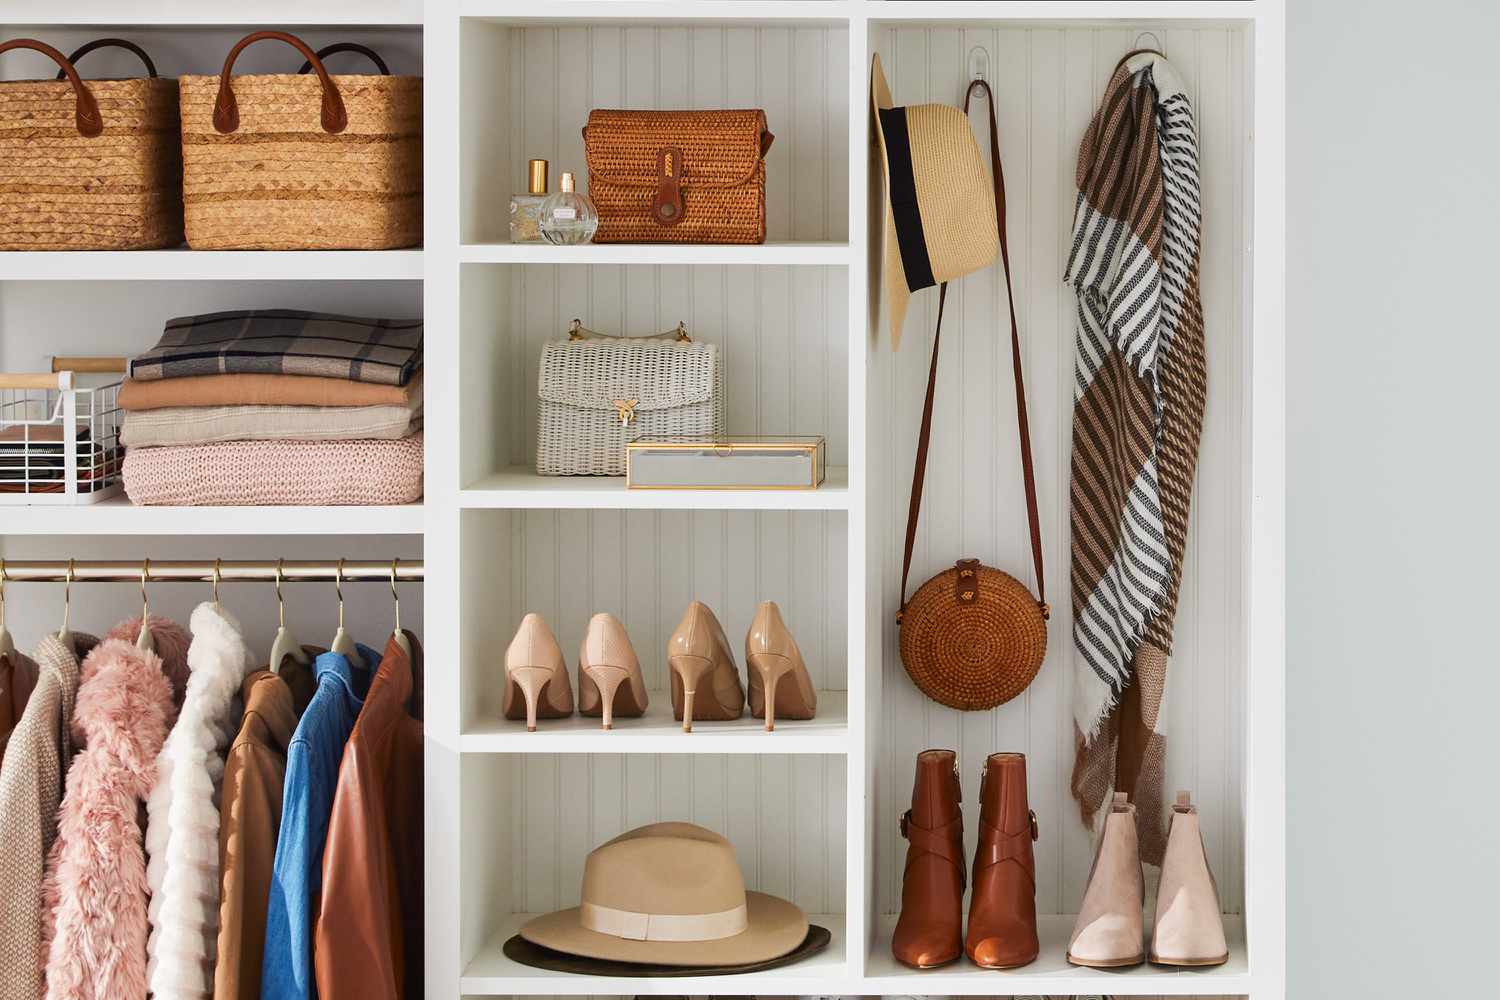
18. Add Charm with Beadboard Paneling and Brass Hardware
Adding beadboard paneling to the back of a plain closet system is a fantastic DIY to add custom character. Time: 3-4 hours. Cost: $50-$100.
- Measure the back of each shelving section carefully.
- Cut sheets of beadboard paneling to size. Most home improvement stores will do this for you.
- Paint the panels your desired color (in this case, white) and let them dry completely.
- Apply construction adhesive to the back of the panels.
- Press the panels firmly onto the back wall of the closet system. Use a few finishing nails to secure them while the adhesive cures.
- Caulk the edges for a seamless, professional finish.
|
📋 Copy HEX 🔗 Share |
This warm, classic look is all about texture and material mix. It follows a simple recipe: 60% classic structure (the white shelving and beadboard) + 30% natural texture (the woven bags, hats, and even the clothes themselves) + 10% warm metallic accent (the brass-toned hanging rod and any other hardware). This formula feels timeless and inviting. You could swap the brass for polished nickel for a slightly more modern, cooler take on the same classic style.
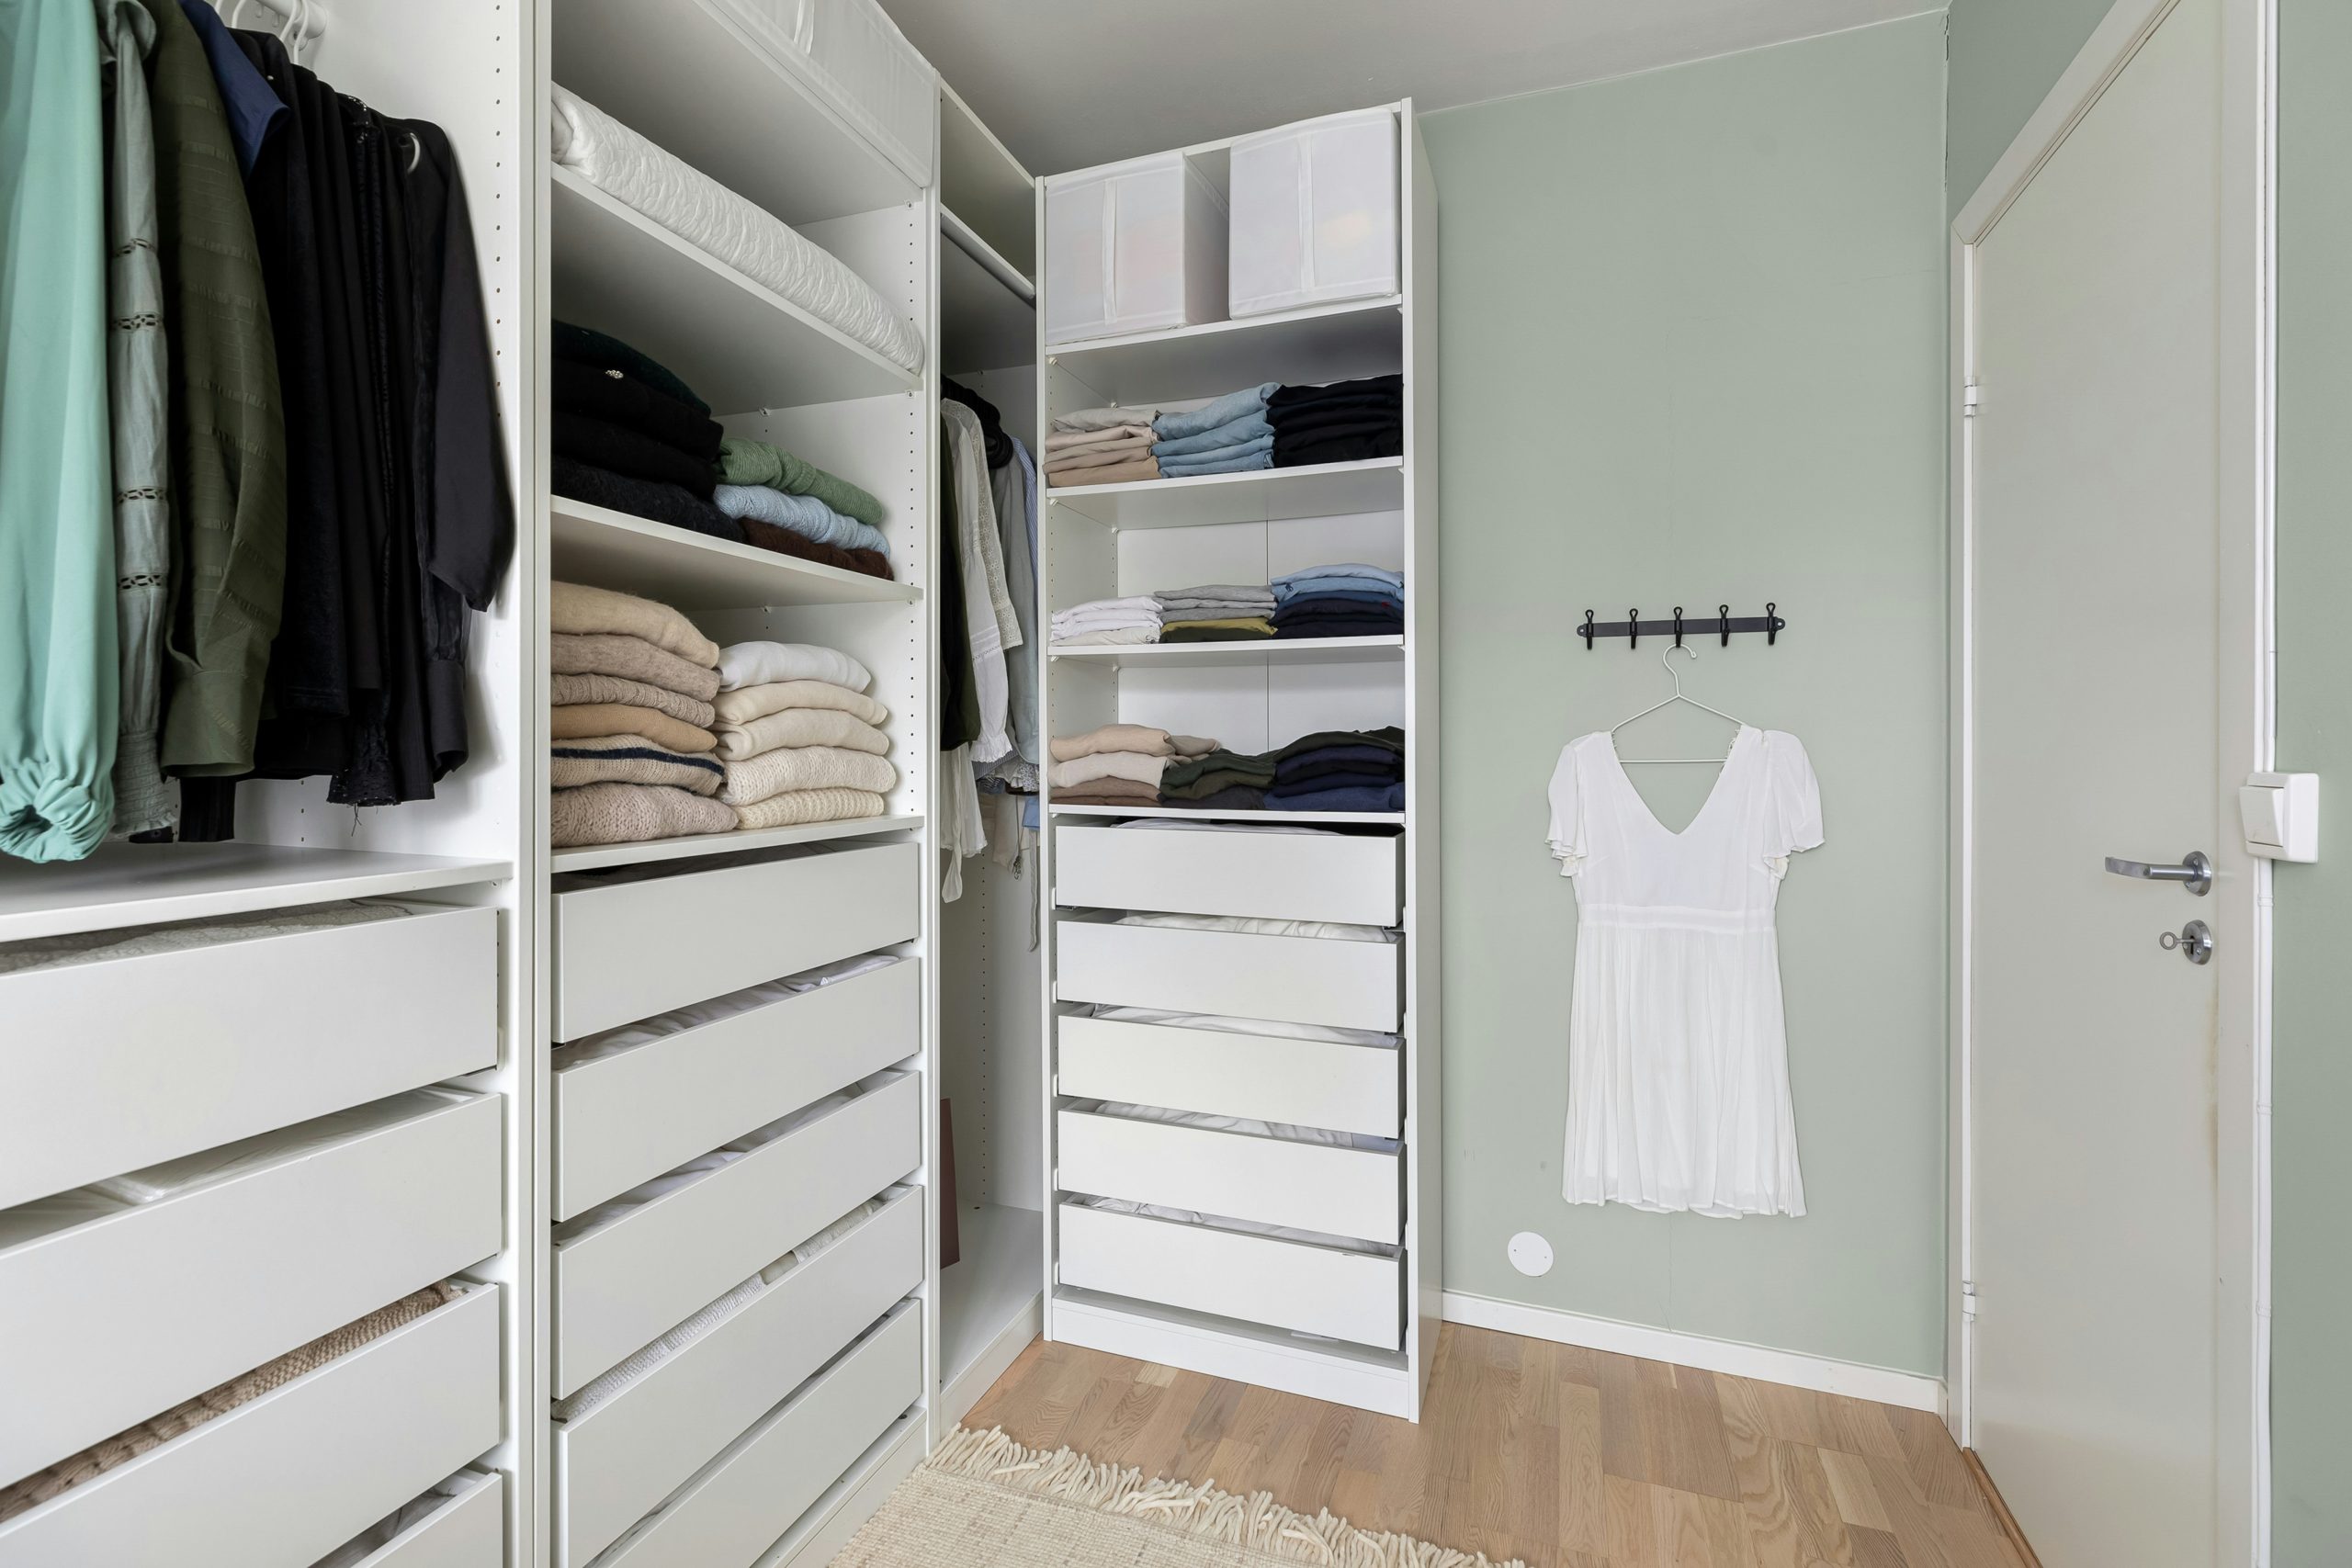
19. Use a Pop of Mint Green to Brighten a White Closet
Without a doubt, the single element that makes this closet memorable is the mint green wall color. If you were to paint the walls white, it would become a perfectly nice, but standard, white modular closet. The splash of soft color adds personality, creates a custom feel, and provides a cheerful backdrop that makes the white storage units pop. It’s a testament to the transformative power of a simple can of paint. This is a design choice that is low-cost, high-impact, and easy to change if you ever tire of it.
|
📋 Copy HEX 🔗 Share |
Painting the inside of a closet is one of the fastest and most affordable ways to make a generic system feel custom and luxurious. Don’t be afraid to go with a bold or unexpected color. Since it’s a small, enclosed space, it’s the perfect spot to experiment with a color you might be hesitant to use in a larger room. For best results, use a paint with a satin or semi-gloss finish. It will be more durable and easier to wipe clean of scuffs from hangers and shoes than a flat finish. Contrast this bright look with the dramatic dark closet in Idea #24.
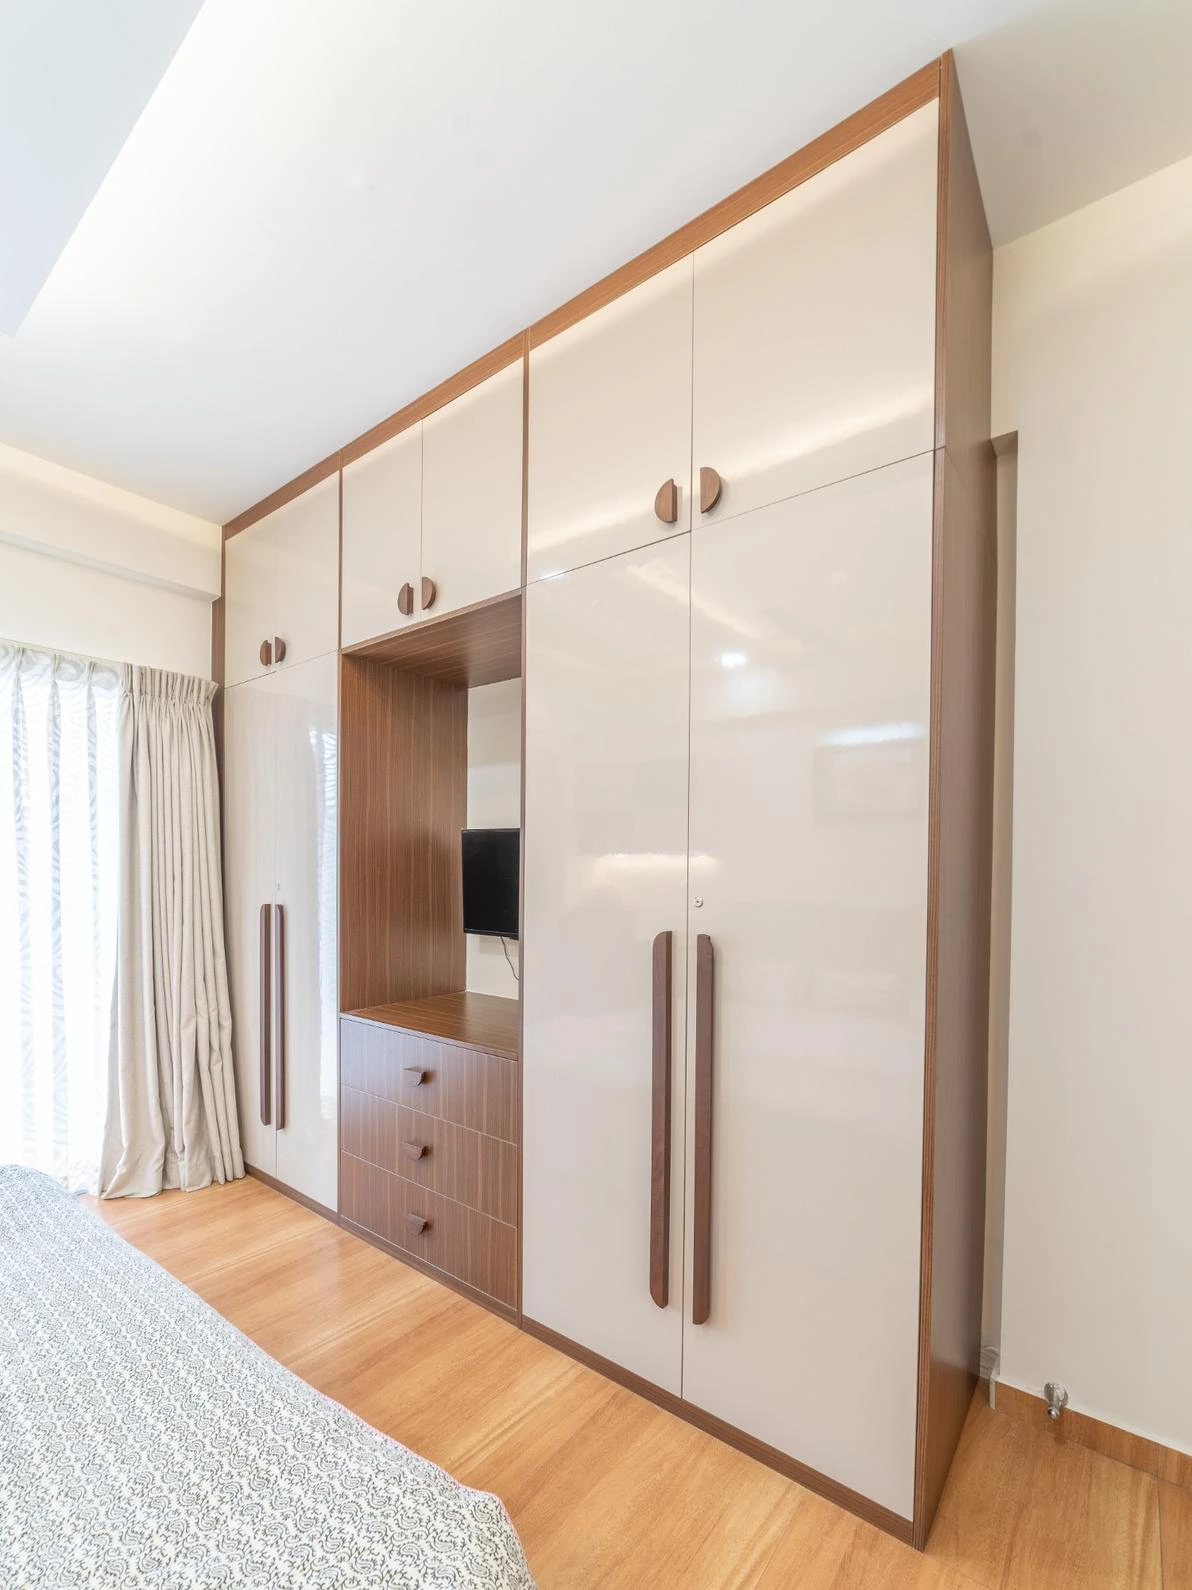
20. Go Modern with High-Gloss Cream and Rich Wood
High-gloss finishes deliver a sleek, modern look, but they are unforgiving. They will show every single fingerprint, smudge, and speck of dust. If you have kids or are simply not a fan of constant wiping, this might not be the finish for you. To maintain the pristine look, you’ll need to wipe down the doors and handles weekly with a soft, damp microfiber cloth. Avoid harsh chemical cleaners, which can dull the glossy finish over time. The rich wood elements will be more forgiving but will still require regular dusting.
|
📋 Copy HEX 🔗 Share |
This design is a study in successful contrast. The sleek, cool, reflective quality of the high-gloss cream doors is perfectly balanced by the warmth and natural grain of the rich brown wood frame and handles. This material pairing prevents the modern design from feeling sterile. The strong verticality of the wardrobe doors and long handles draws the eye upward, enhancing the sense of height and making the unit feel like an integral part of the room’s architecture.
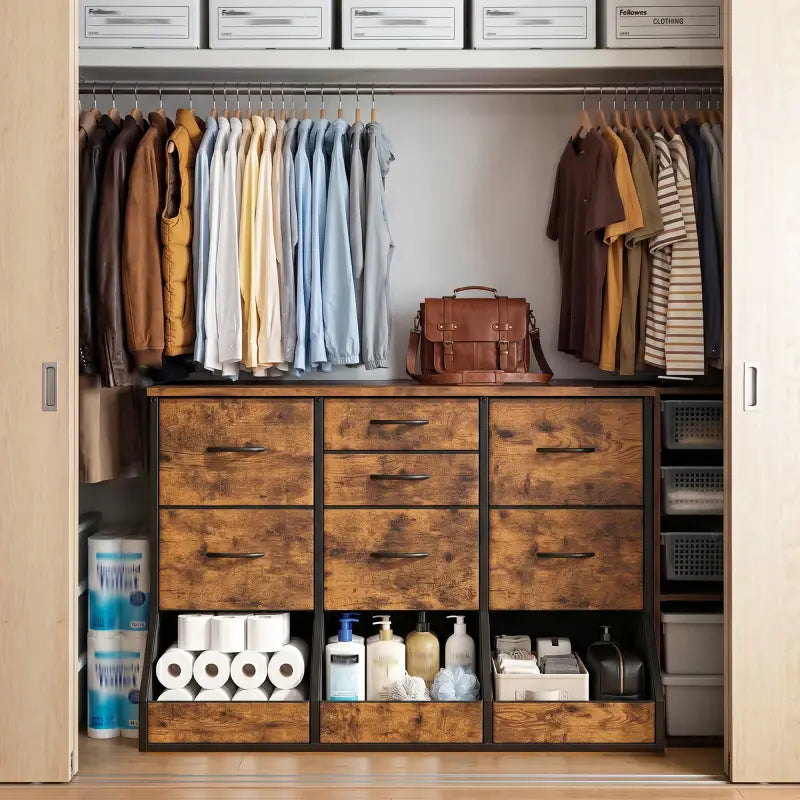
21. Embrace Rustic Industrial Style with a Wood and Metal Dresser System
The rustic-industrial aesthetic is all about a specific recipe of materials. This look breaks down to: 50% raw/rustic wood tones + 40% dark, matte metal frames + 10% simple, functional hardware. The key is the ‘unfinished’ feel of the components. The wood shouldn’t be too polished, and the metal should feel structural, not decorative. This style celebrates the functionality of the materials themselves. The open compartments at the bottom are perfect for shoes or baskets, reinforcing the practical, workshop-inspired vibe.
|
📋 Copy HEX 🔗 Share |
You can find pre-made dressers and shelving units in this style at stores like Wayfair, Overstock, or Amazon for a few hundred dollars. For an even more budget-friendly approach, take a basic wooden dresser (like an IKEA RAST or a thrift store find) and a set of metal pipe shelving kits. Sand and stain the dresser to a rustic finish, add some industrial-style pulls, and assemble the pipe shelving above it. You’ll get the same custom-look, mixed-material vibe for under $400.
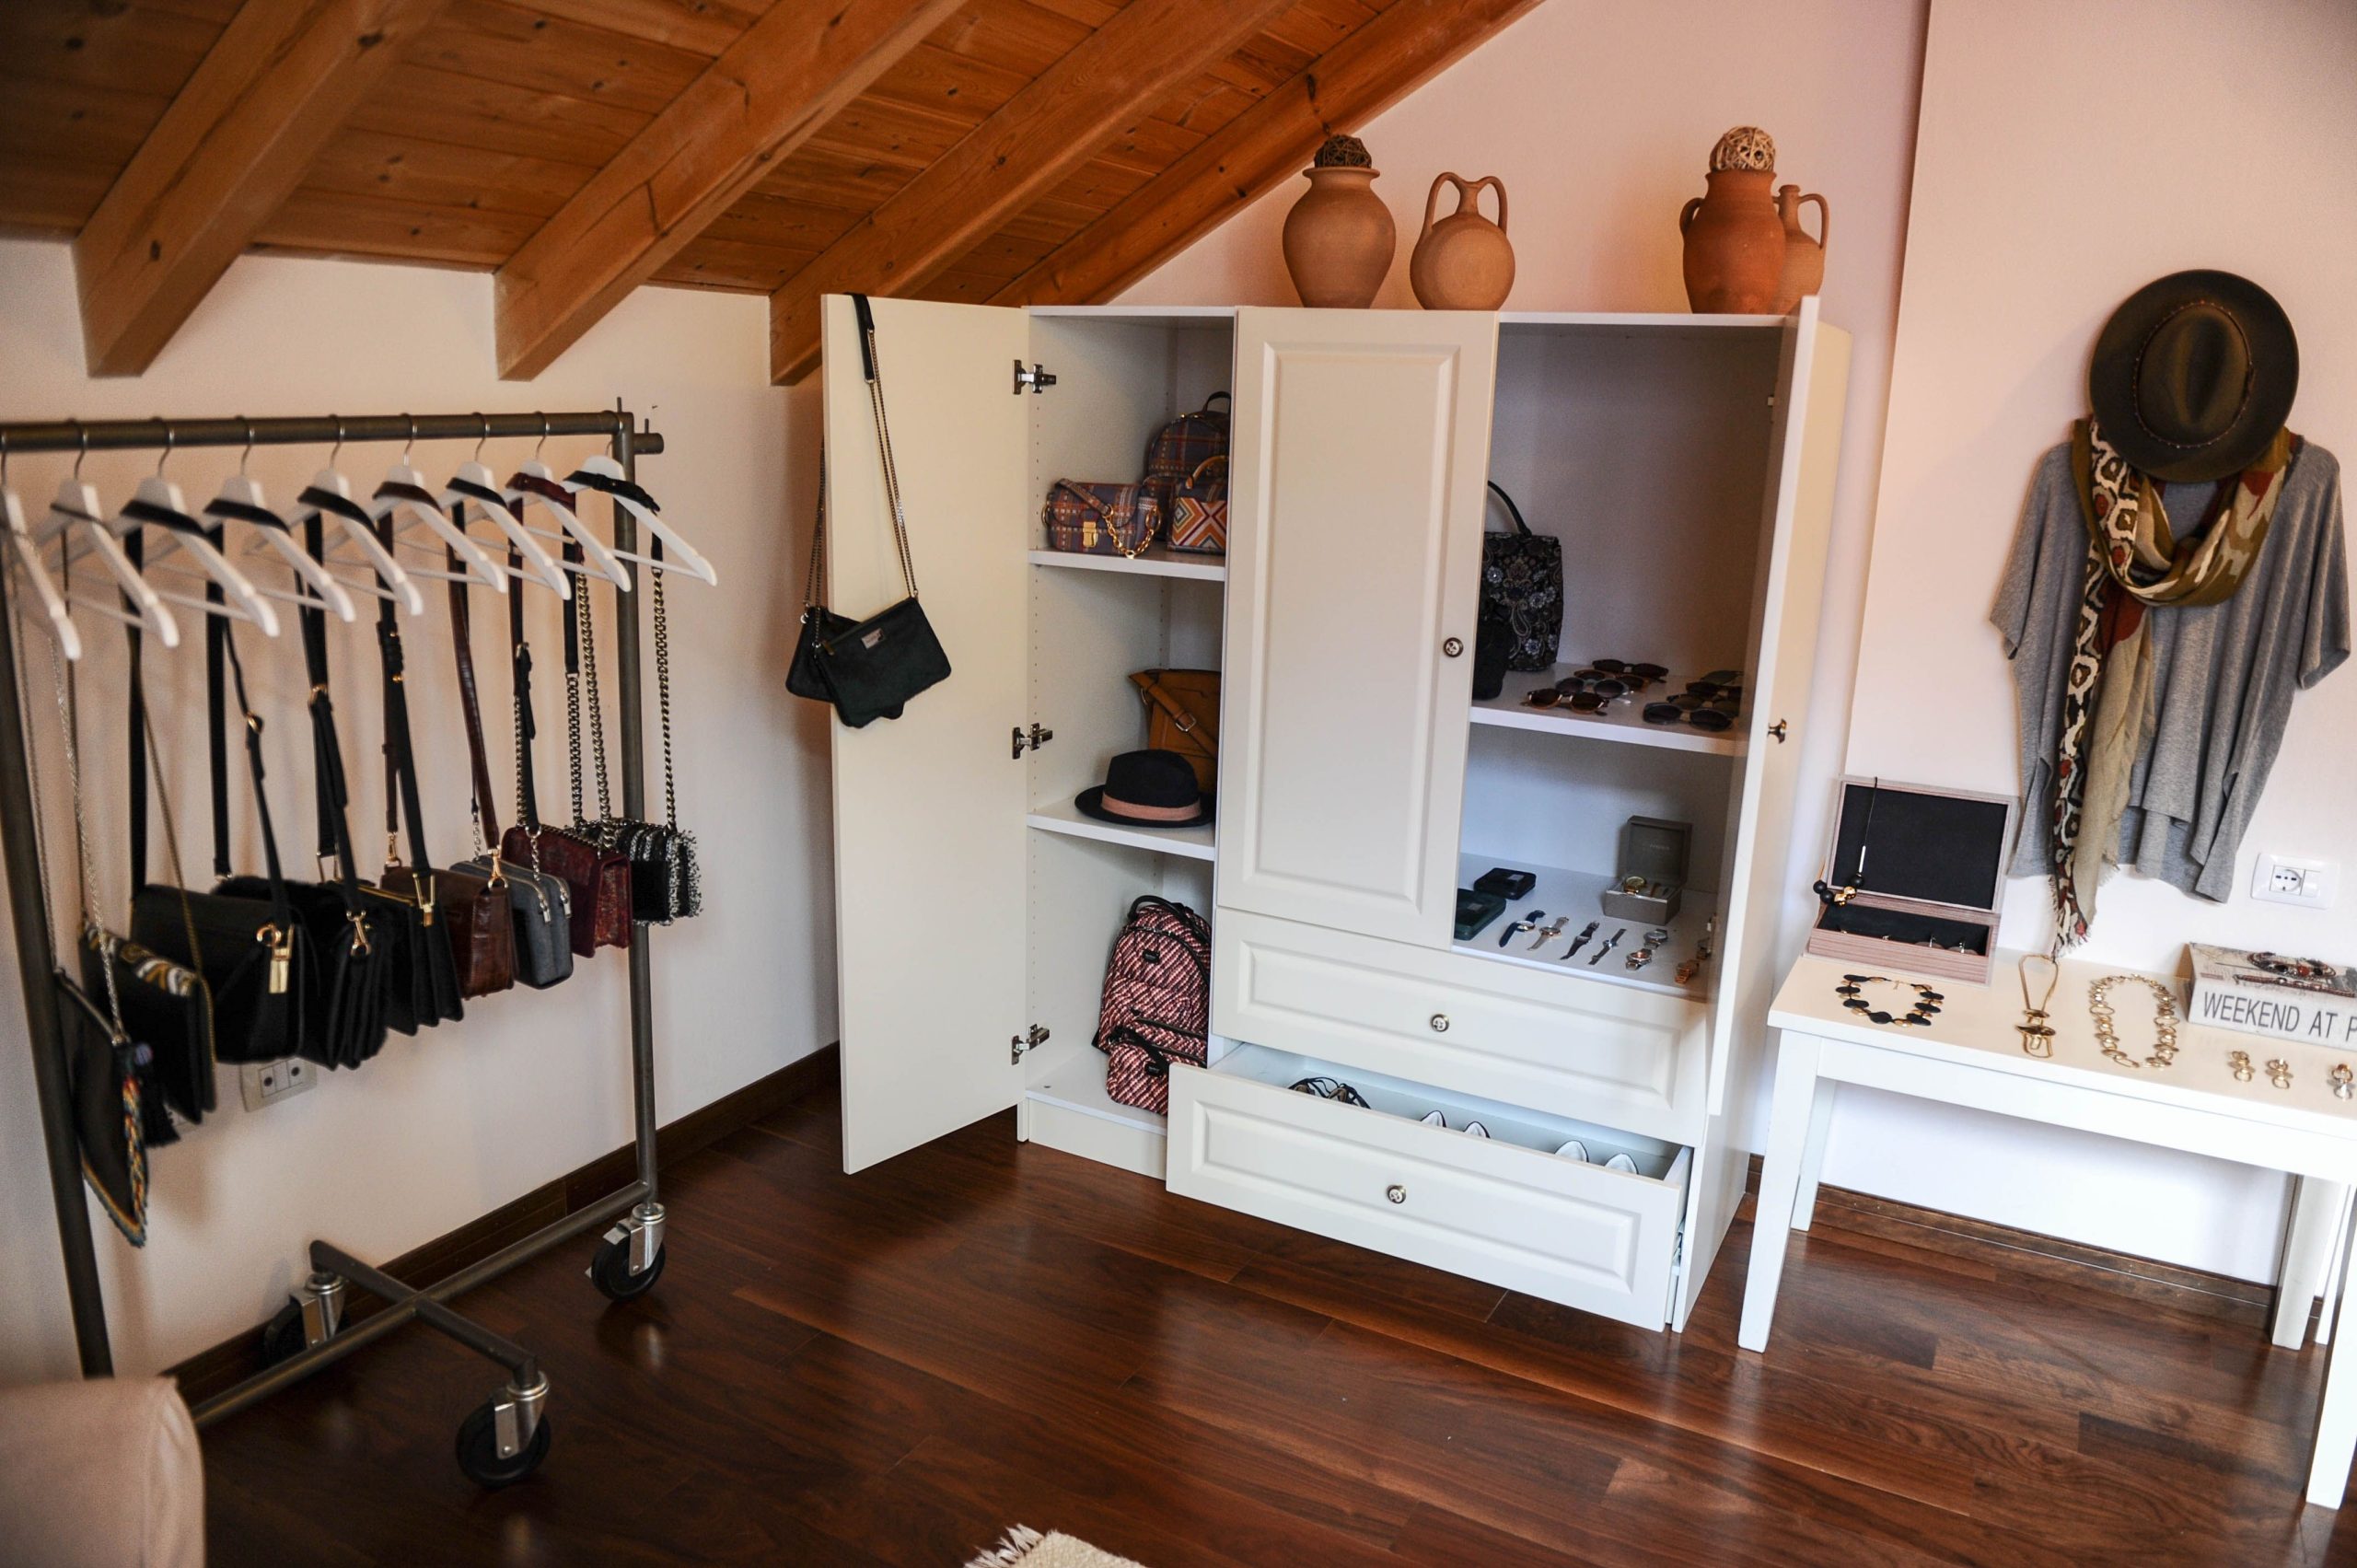
22. Style an Attic Closet with Terracotta Accents and a Bag Rack
This idea works beautifully in an attic room with character, specifically one with existing features like exposed beams or wood-planked ceilings. It’s less about a specific square footage and more about embracing architectural quirks. This setup is perfect for a long, narrow space under the eaves. The key is to use lower-profile furniture, like the console table and wardrobe, to avoid visually crowding the room. This approach is a great alternative to the built-in strategy seen in Idea #3.
|
📋 Copy HEX 🔗 Share |
A sloped ceiling looks romantic, but it’s a pain to work with. Standard-height furniture often won’t fit, and you’ll inevitably hit your head at least once. The key is to measure the height at various points along the wall before you buy anything. Use the lowest points for low benches, dressers, or mobile racks. Reserve the highest point of the room for your tallest piece, like a wardrobe. And remember that the usable floor space is less than the actual footprint due to the lack of headroom near the walls.
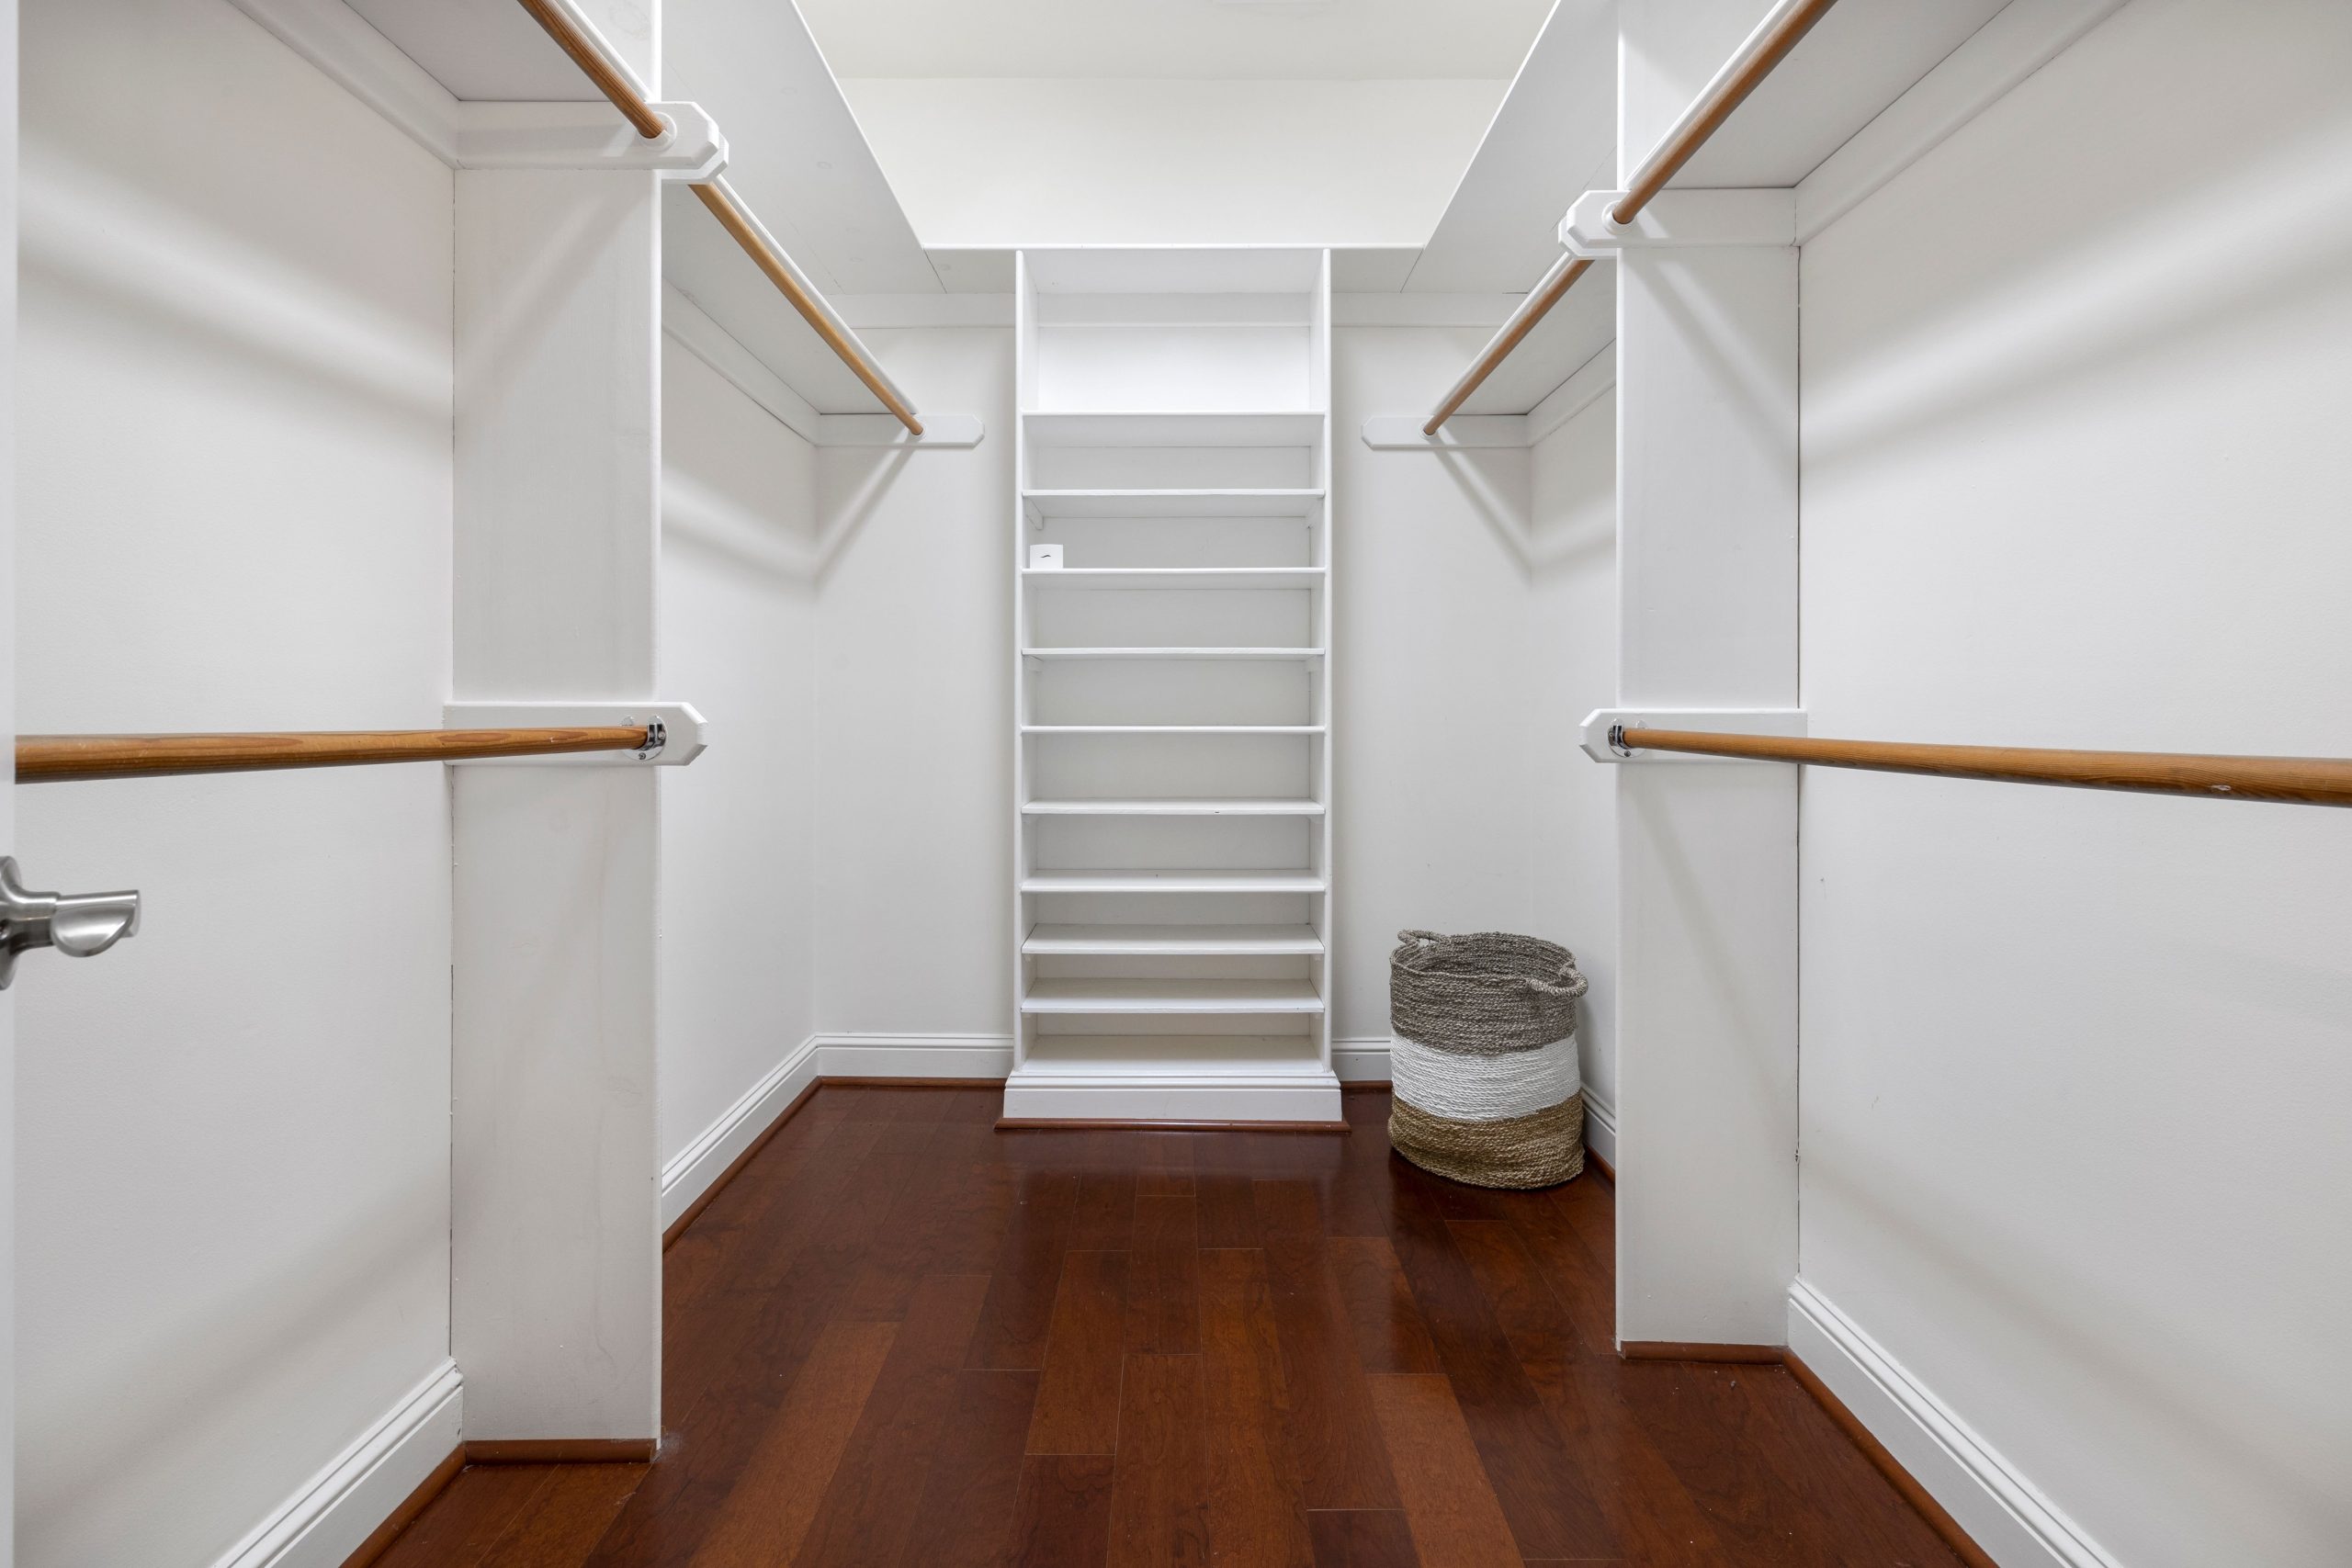
23. Build a Minimalist Shoe Tower in a White Walk-in
A vertical shoe tower is an incredibly efficient use of space. You can build a simple one yourself. Time: 2-3 hours. Cost: $60-$120.
- Purchase two 1×12 boards (for the sides) and enough 1×12 boards for your shelves, cut to your desired width (e.g., 24 inches).
- Designate one side board and mark where each shelf will go. Use a square for straight lines. We recommend 7-8 inches of vertical space for most shoes.
- Drill pilot holes through the side board at your marks.
- Use a level and wood glue to attach each shelf, then secure them with screws from the outside.
- Attach the second side board.
- Paint or seal the tower, and anchor it to the wall for safety.
|
📋 Copy HEX 🔗 Share |
The shoe tower is what makes this simple closet work so well. By dedicating a specific vertical zone just for shoes, it keeps them off the floor and prevents them from becoming a chaotic pile. This single organizational choice has a massive impact, making the entire closet feel more orderly and intentional. It frees up floor space for other things, like the woven basket, and makes finding the pair you want to wear effortless. It’s a prime example of how one smart solution can define the success of a space.
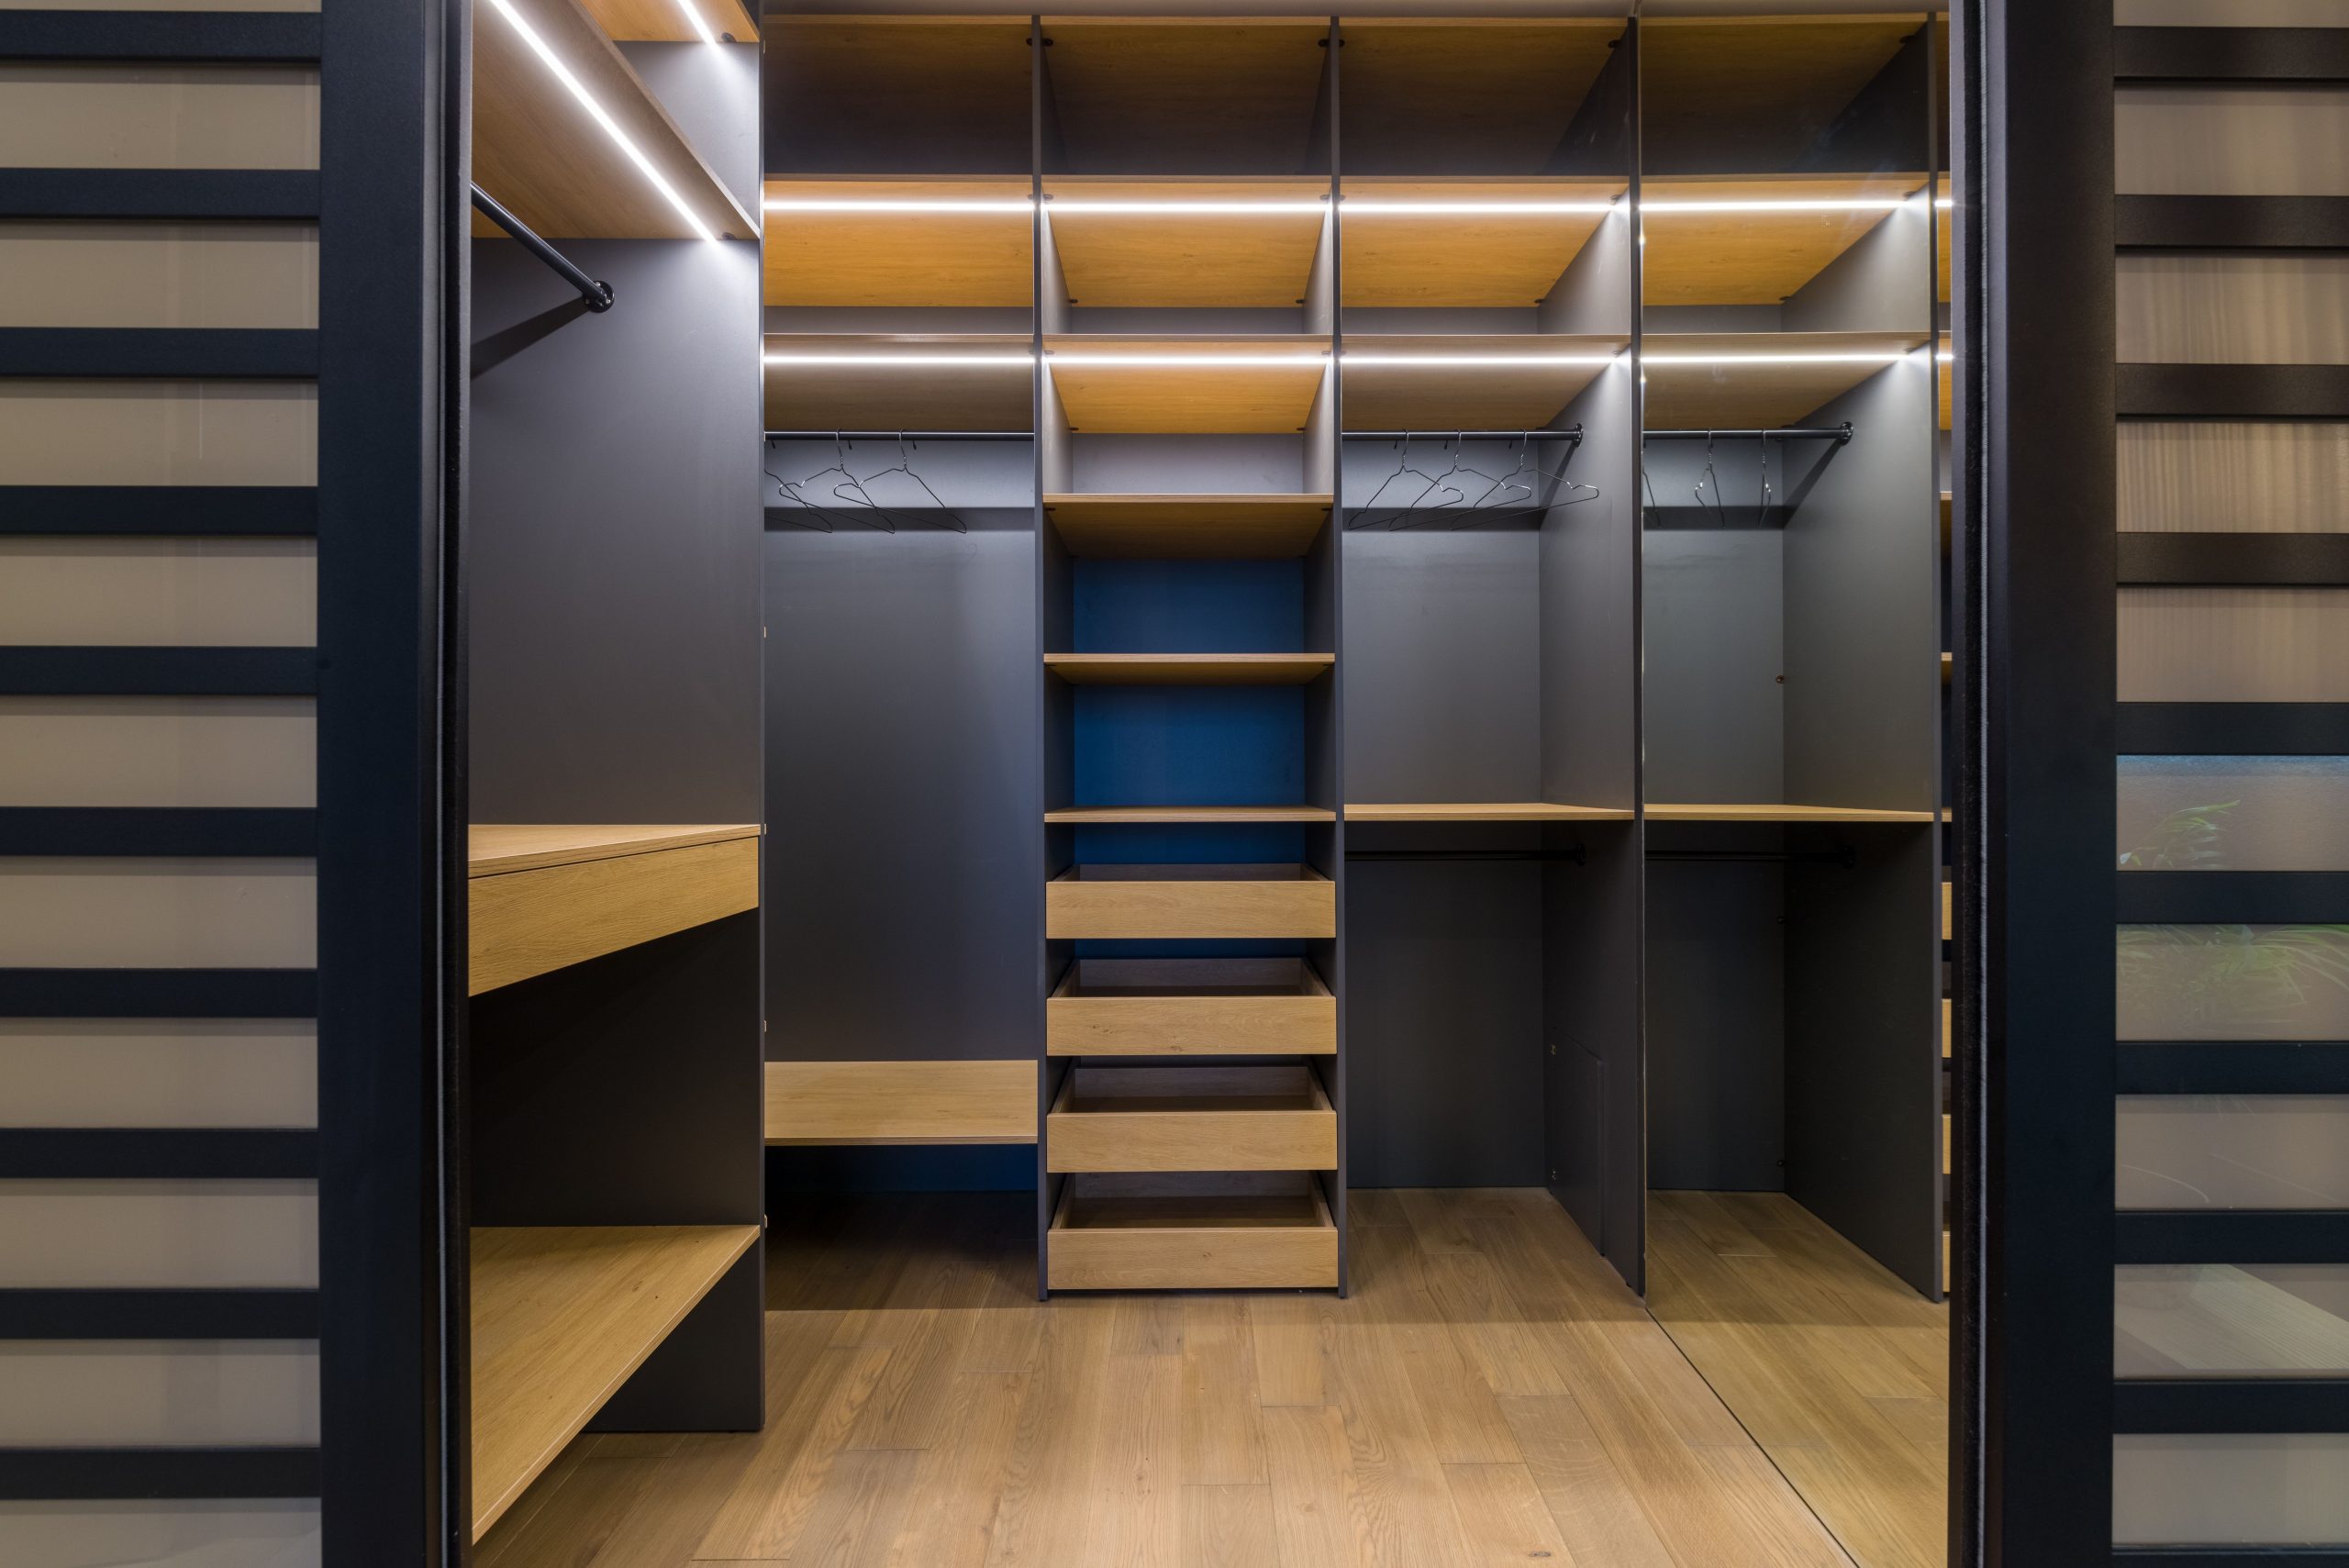
24. Create Drama with a Dark Walk-in Closet and LED Accents
A dark, moody closet feels luxurious and dramatic for one key reason: contrast. The dark gray walls and cabinetry make any lighter-colored clothing pop, and more importantly, they make the integrated lighting work overtime. The cool glow of the LEDs against the dark backdrop feels intentional and high-tech. The light wood shelves and flooring provide a necessary touch of warmth and organic texture, preventing the space from feeling like a sterile black box. It’s a sophisticated, boutique-like atmosphere.
|
📋 Copy HEX 🔗 Share |
A dark closet can be stunning, but it can also be a black hole where items get lost forever if not lit properly. One overhead light will absolutely not be enough. You must incorporate integrated lighting within the system—under shelves, along vertical stiles, or inside drawers. Without it, you won’t be able to tell your black socks from your navy ones. Also, be prepared for dust to be much more visible on dark surfaces than on white or wood-toned ones. Regular dusting is non-negotiable.
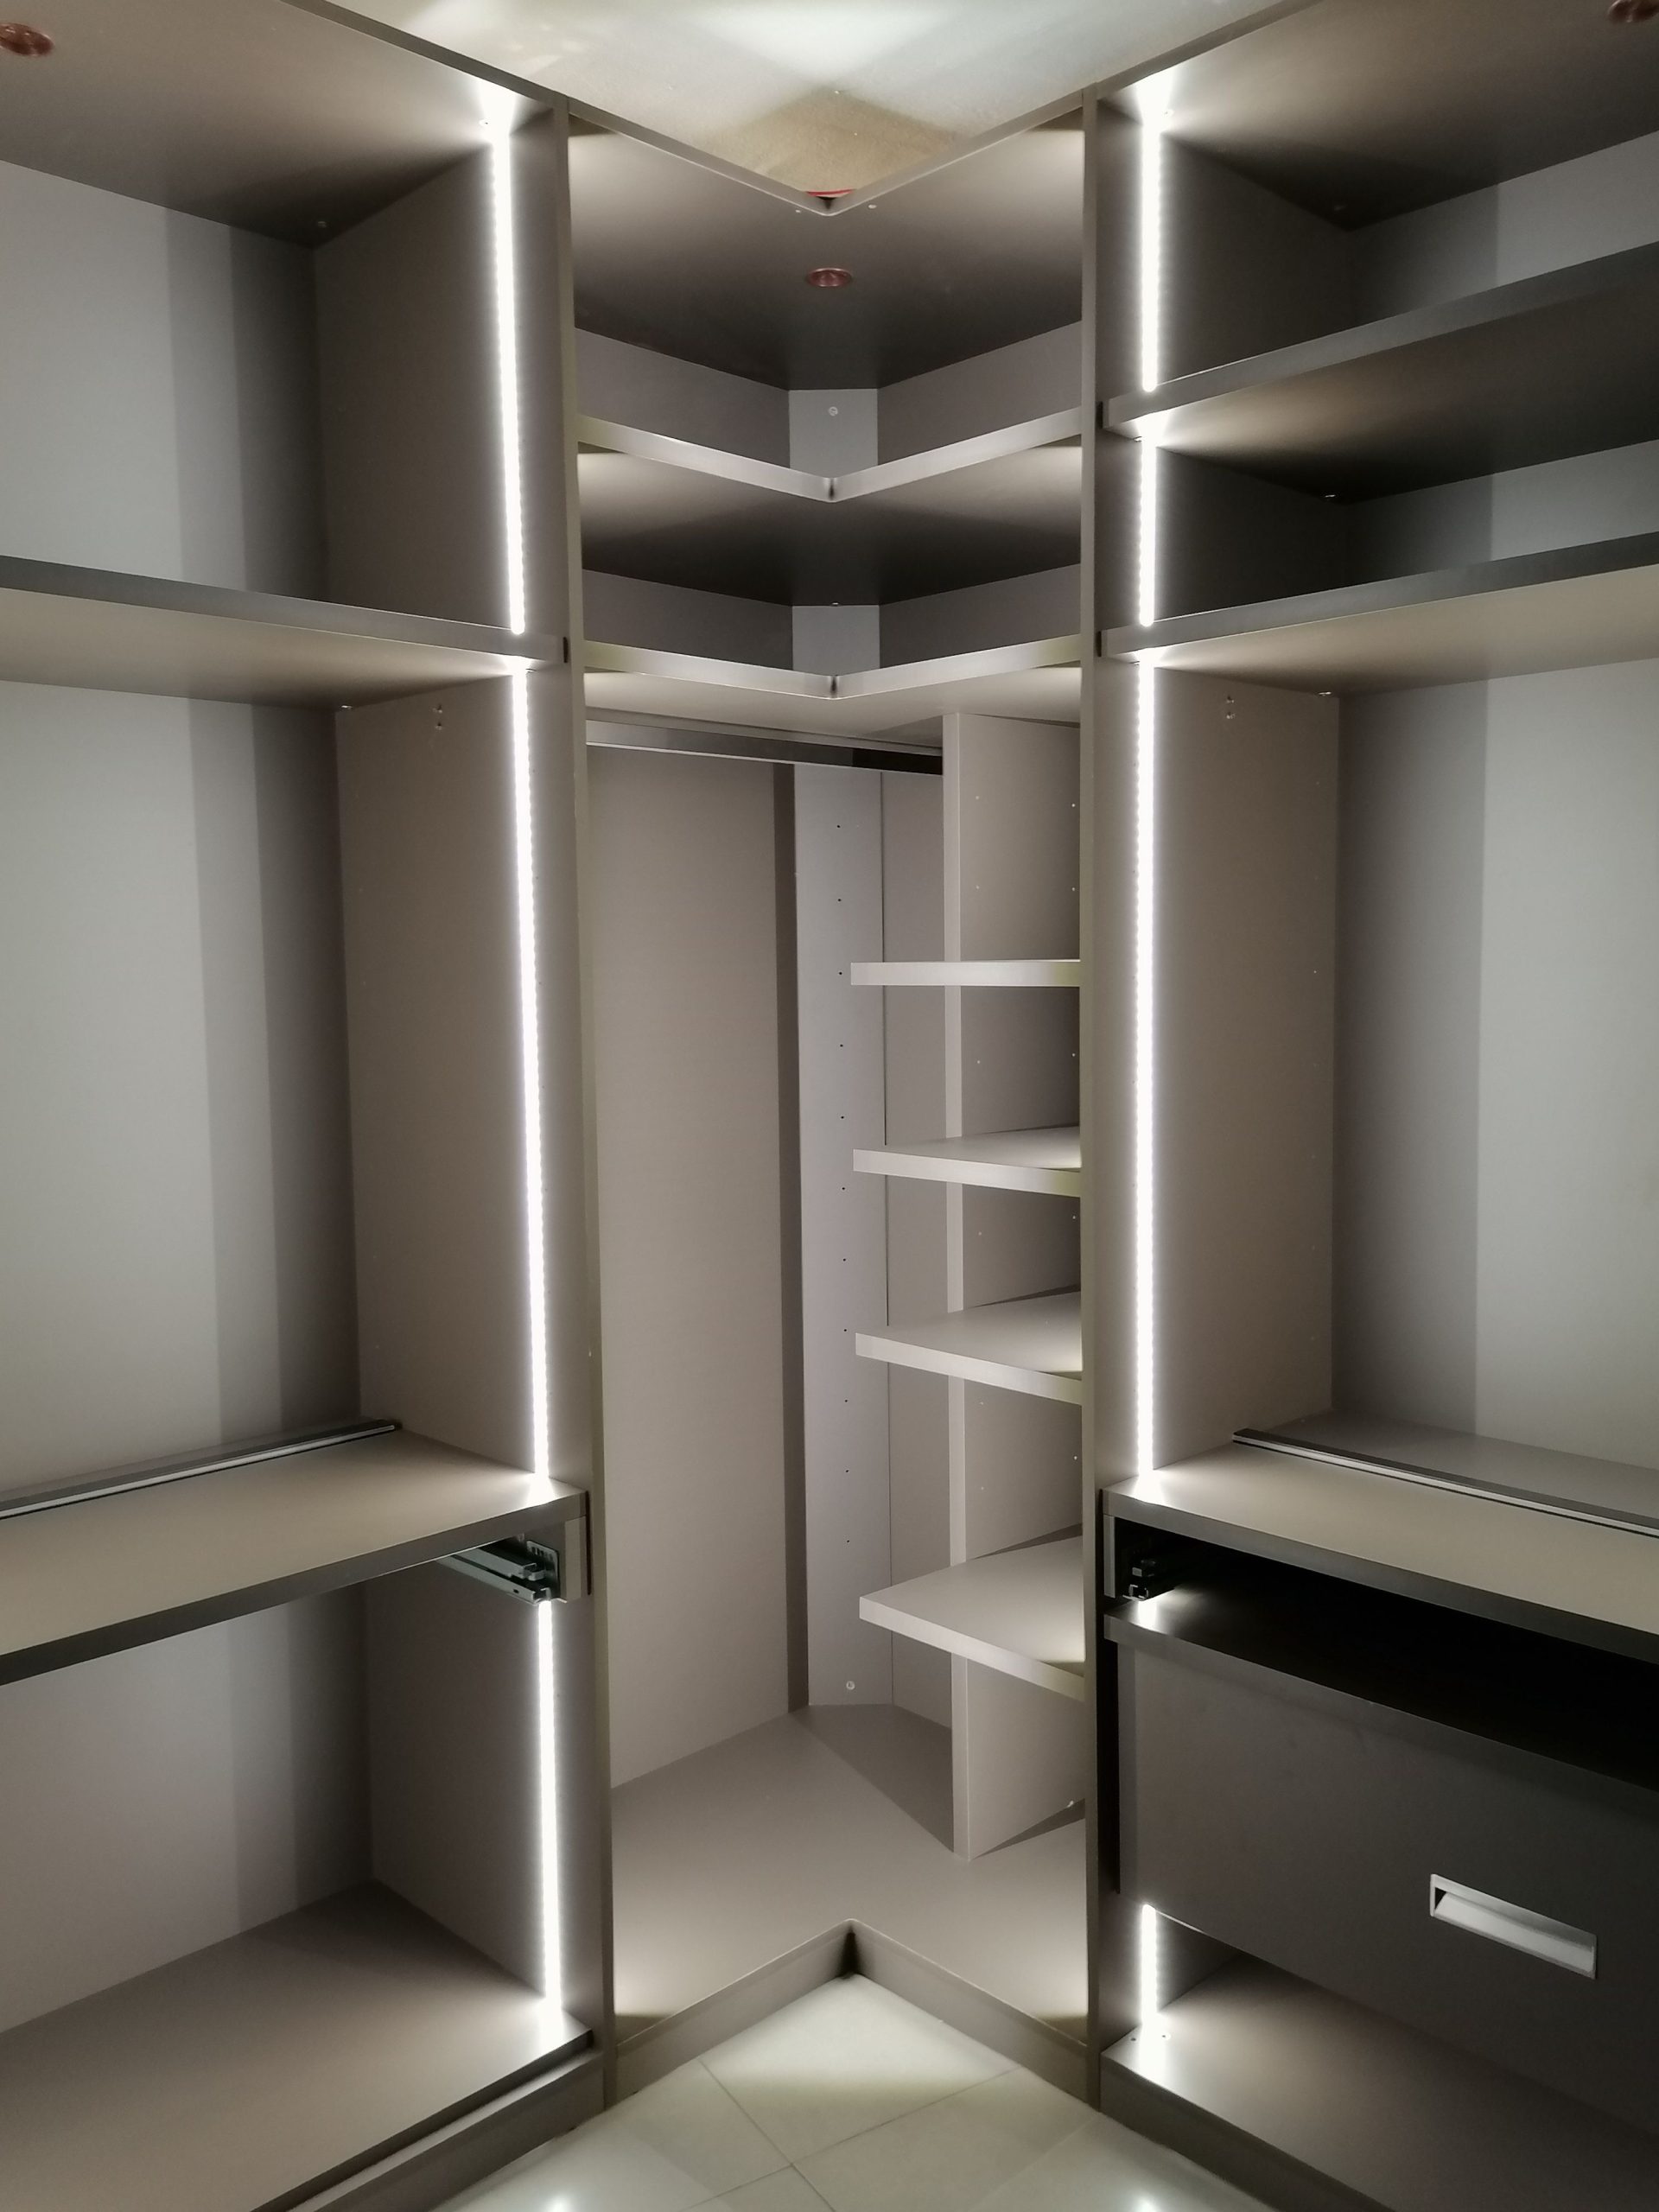
25. Illuminate Every Corner with Vertical LED Light Strips
When installing integrated lighting, most people think of placing LED strips horizontally under shelves. For a truly modern and effective look, install them vertically along the front stiles of your closet system, as shown here. This technique illuminates the entire height of the closet section, evenly lighting your clothes from top to bottom. It eliminates the shadows that horizontal lighting can create and makes it much easier to see everything at a glance. It’s a pro move that gives a huge visual and practical payoff.
|
📋 Copy HEX 🔗 Share |
Planning for closet lighting happens before you build. Don’t treat it as an afterthought.
- Where is your nearest power source? You’ll need to plan for either a licensed electrician to hardwire the system or a place to discreetly run a power cord.
- Choose your light temperature. A neutral white (around 4000K) is best for closets, as it renders colors most accurately. Warm white can make clothes look yellow.
- Decide on your switching method. Do you want a main wall switch, motion sensors that turn on when you enter, or individual switches for each section?
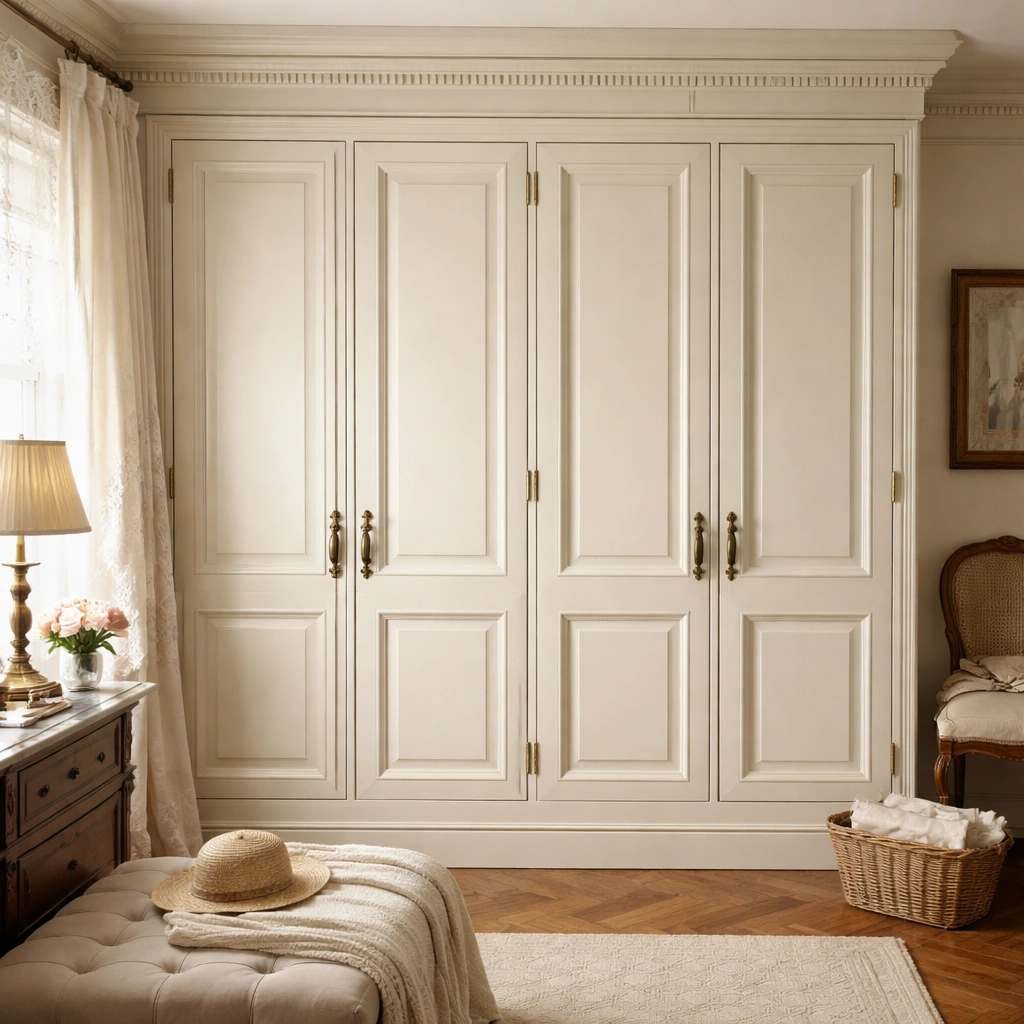
26. Achieve Timeless Elegance with Detailed Molding
The formula for this elegant, almost Parisian look is 70% classic architectural detail (the paneled doors, fluted trim, and crown molding) + 20% soft, light-filtering textiles (the sheer curtains) + 10% delicate metallic hardware (the antique brass pulls). The power of this design is in its commitment to traditional millwork. By treating the wardrobe as an integrated architectural feature with substantial molding, it elevates the entire room and makes it feel custom, expensive, and timeless.
|
📋 Copy HEX 🔗 Share |
This look is a perfect example of the ‘grandmillennial’ or ‘new traditional’ style that’s been gaining momentum. It’s a reaction against years of stark minimalism, reintroducing classic details like intricate molding, warm metals, and traditional furniture forms. This style has staying power because it’s rooted in classic design principles but feels fresh when paired with modern textiles and a less-cluttered approach. It’s about creating a sense of history and permanence in a space.
27. Streamline Chores with an Integrated Laundry Hamper
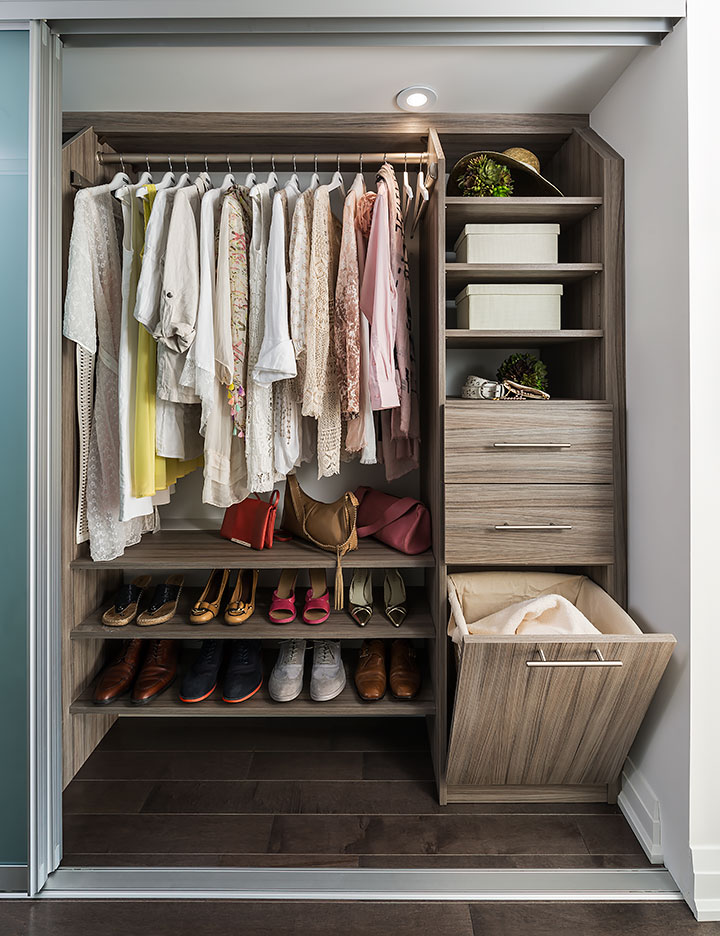
The single most practical and life-improving feature in this closet system is the built-in, tilt-out laundry hamper. It’s not the most glamorous detail, but it’s the one you’ll appreciate every single day. It keeps dirty laundry completely out of sight, eliminating the dreaded ‘clothes pile’ on the floor or a clunky plastic basket taking up space. This feature signals a closet that is designed not just for storage but for the entire lifecycle of a wardrobe, from clean and folded to ready for the wash.
|
📋 Copy HEX 🔗 Share |
You can add a tilt-out hamper to an existing closet system or cabinet. Time: 1 hour. Cost: $70-$150.
- Purchase a tilt-out hamper hardware kit online (Rev-A-Shelf is a popular brand).
- Choose a lower cabinet or a deep drawer section in your closet.
- Remove the existing door or drawer front.
- Attach the pivot hardware to the bottom of the cabinet opening and to the back of your door/drawer front, following the kit’s instructions.
- Mount the included hamper basket (usually wire or fabric) to the inside of the door.
- Re-attach the door to the cabinet using the new pivot hardware.
28. A Balanced Scandi-Style Closet in Light Wood
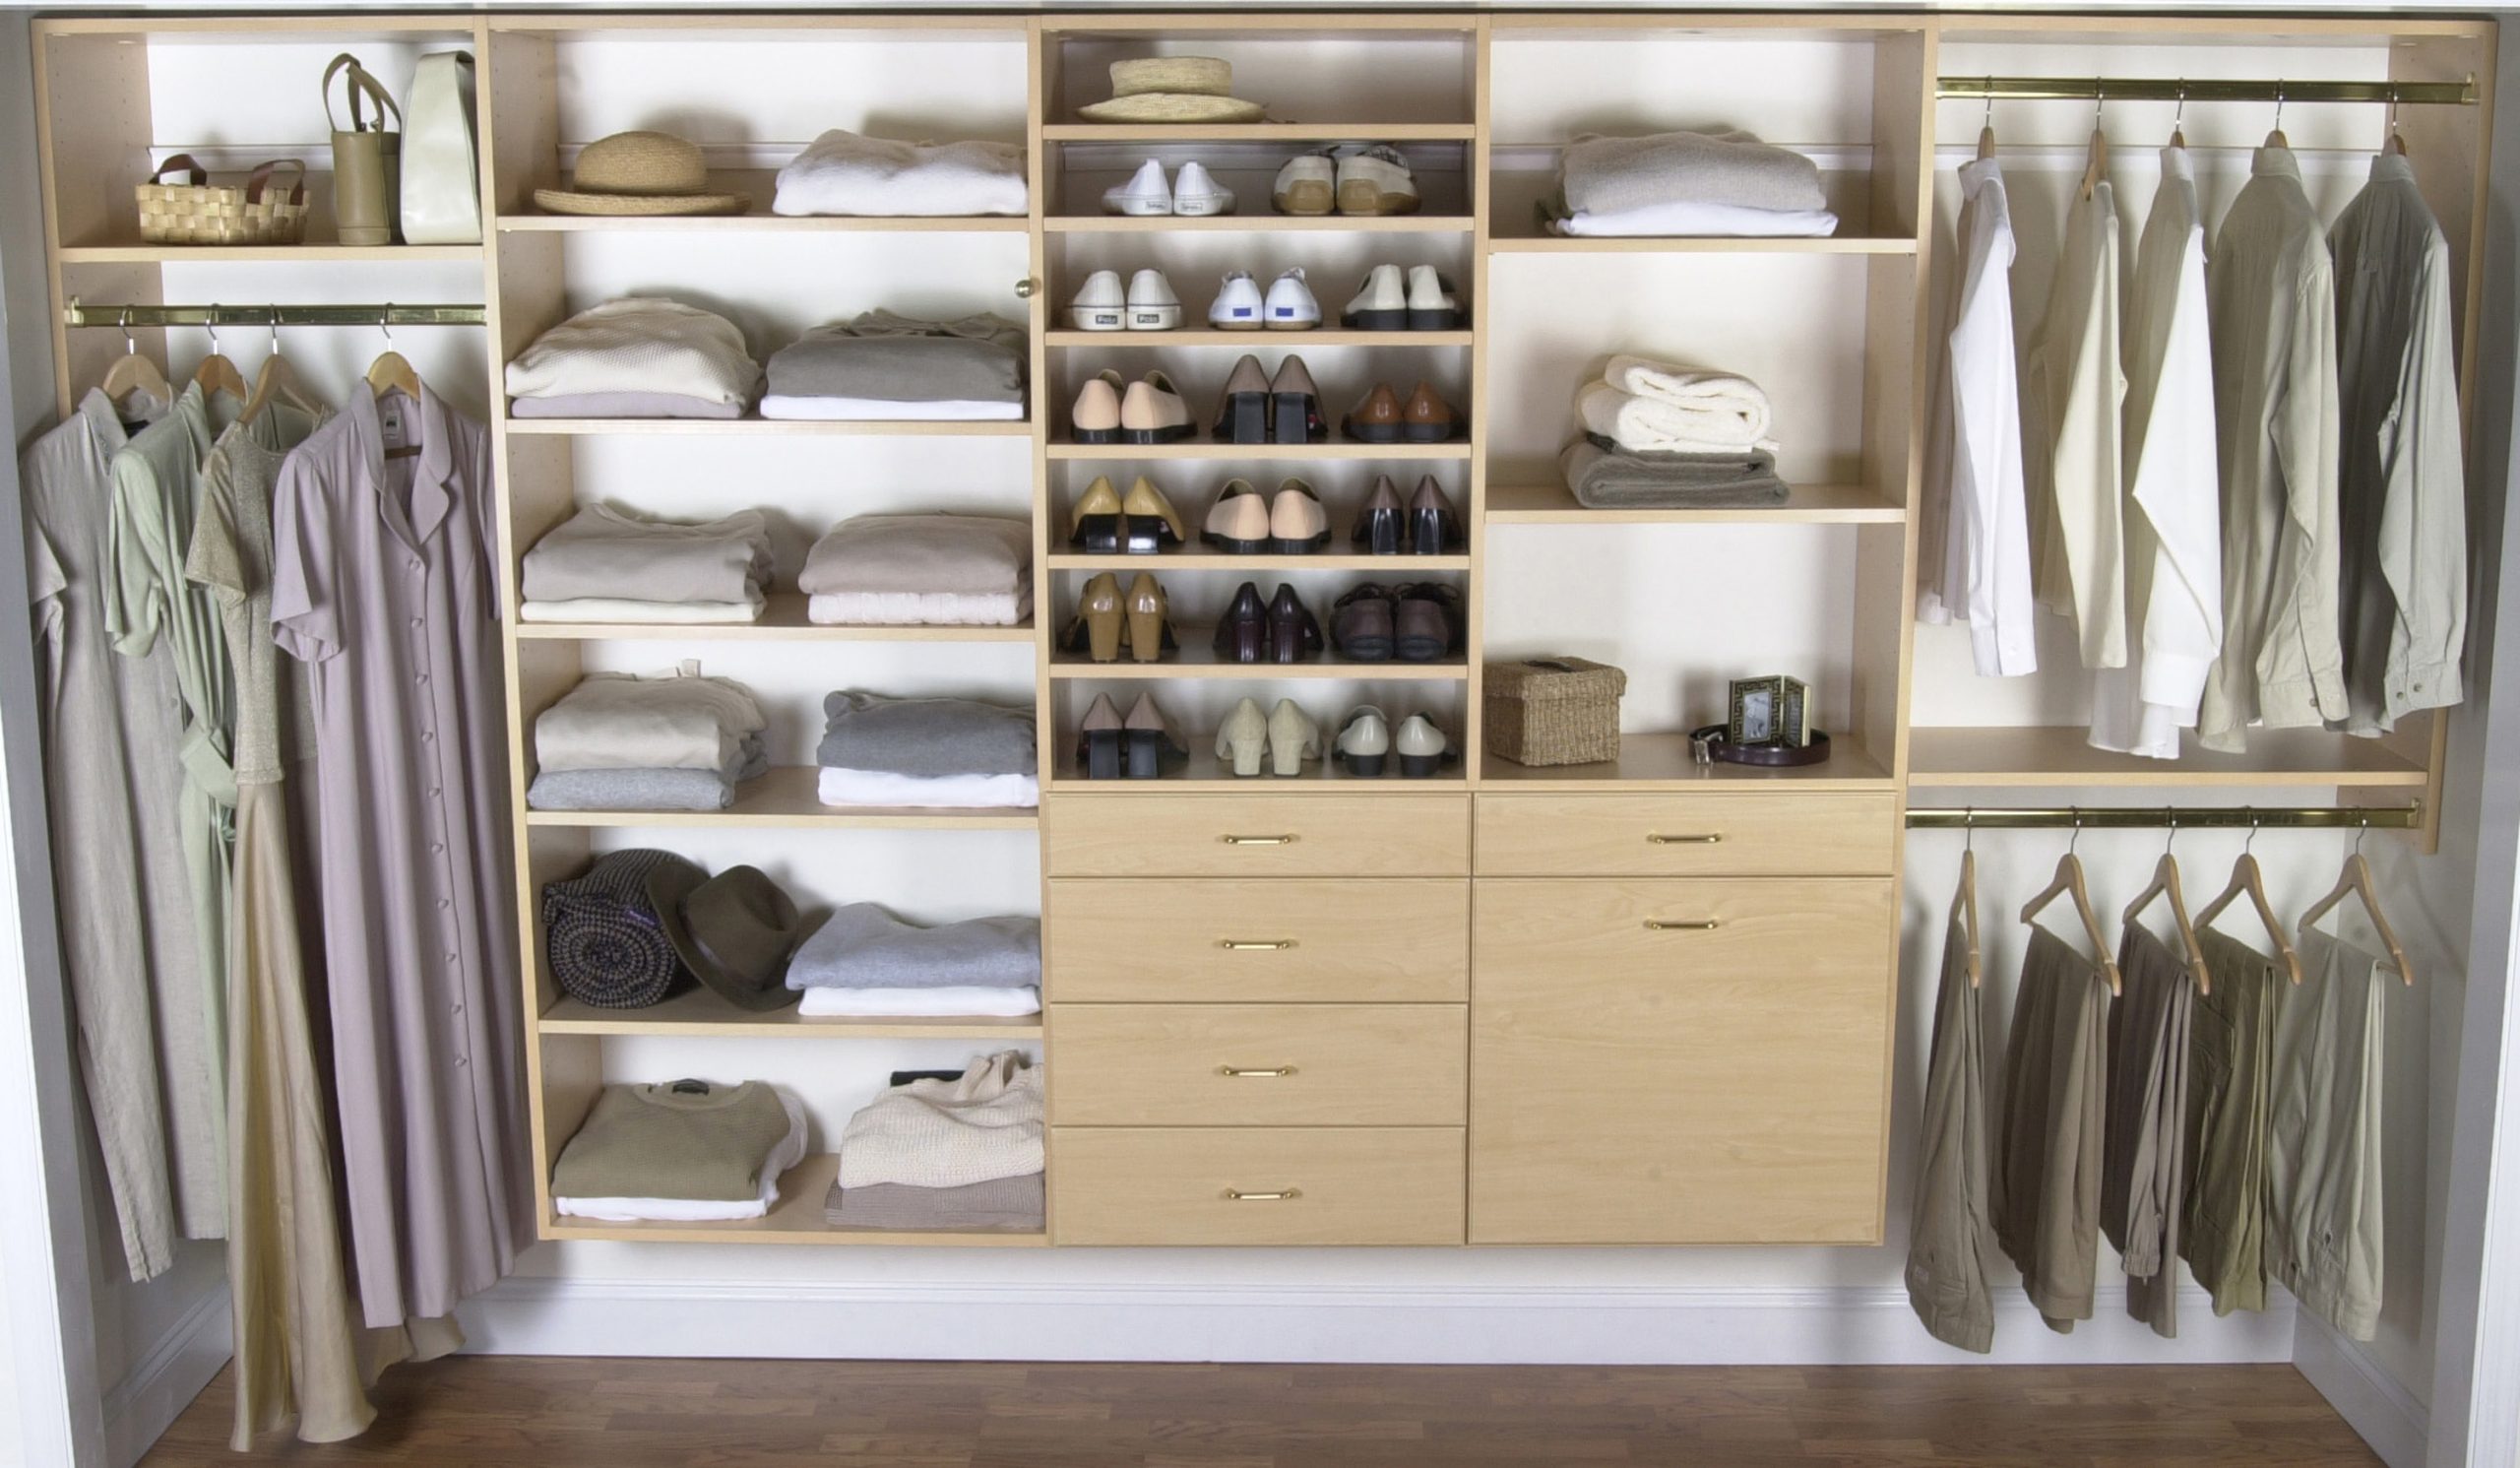
A successful closet always balances open and closed storage. The rule of thumb is to aim for about 60% closed storage (drawers, cabinets) and 40% open storage (shelves, hanging rods). In this light wood system, the drawers hide away small, messy items like socks and t-shirts, while the open shelves and hanging rods make your go-to items like sweaters, pants, and shirts easy to see and grab. This mix keeps the space from looking either too cluttered or too sterile and blocky.
|
📋 Copy HEX 🔗 Share |
This type of modular wood system, whether from a custom company or a retailer like The Container Store (their Avera line is similar), is incredibly versatile. It’s shown here in what is likely a walk-in, but the same components can be used to outfit a reach-in closet. For a reach-in, aim for a minimum depth of 24 inches. For a walk-in where you have storage on one side, you’ll want a minimum width of 5 feet. If you plan for storage on two opposing sides, your closet should be at least 7 feet wide to allow for a 3-foot walkway.
29. A Warm and Inviting Custom Wood Closet
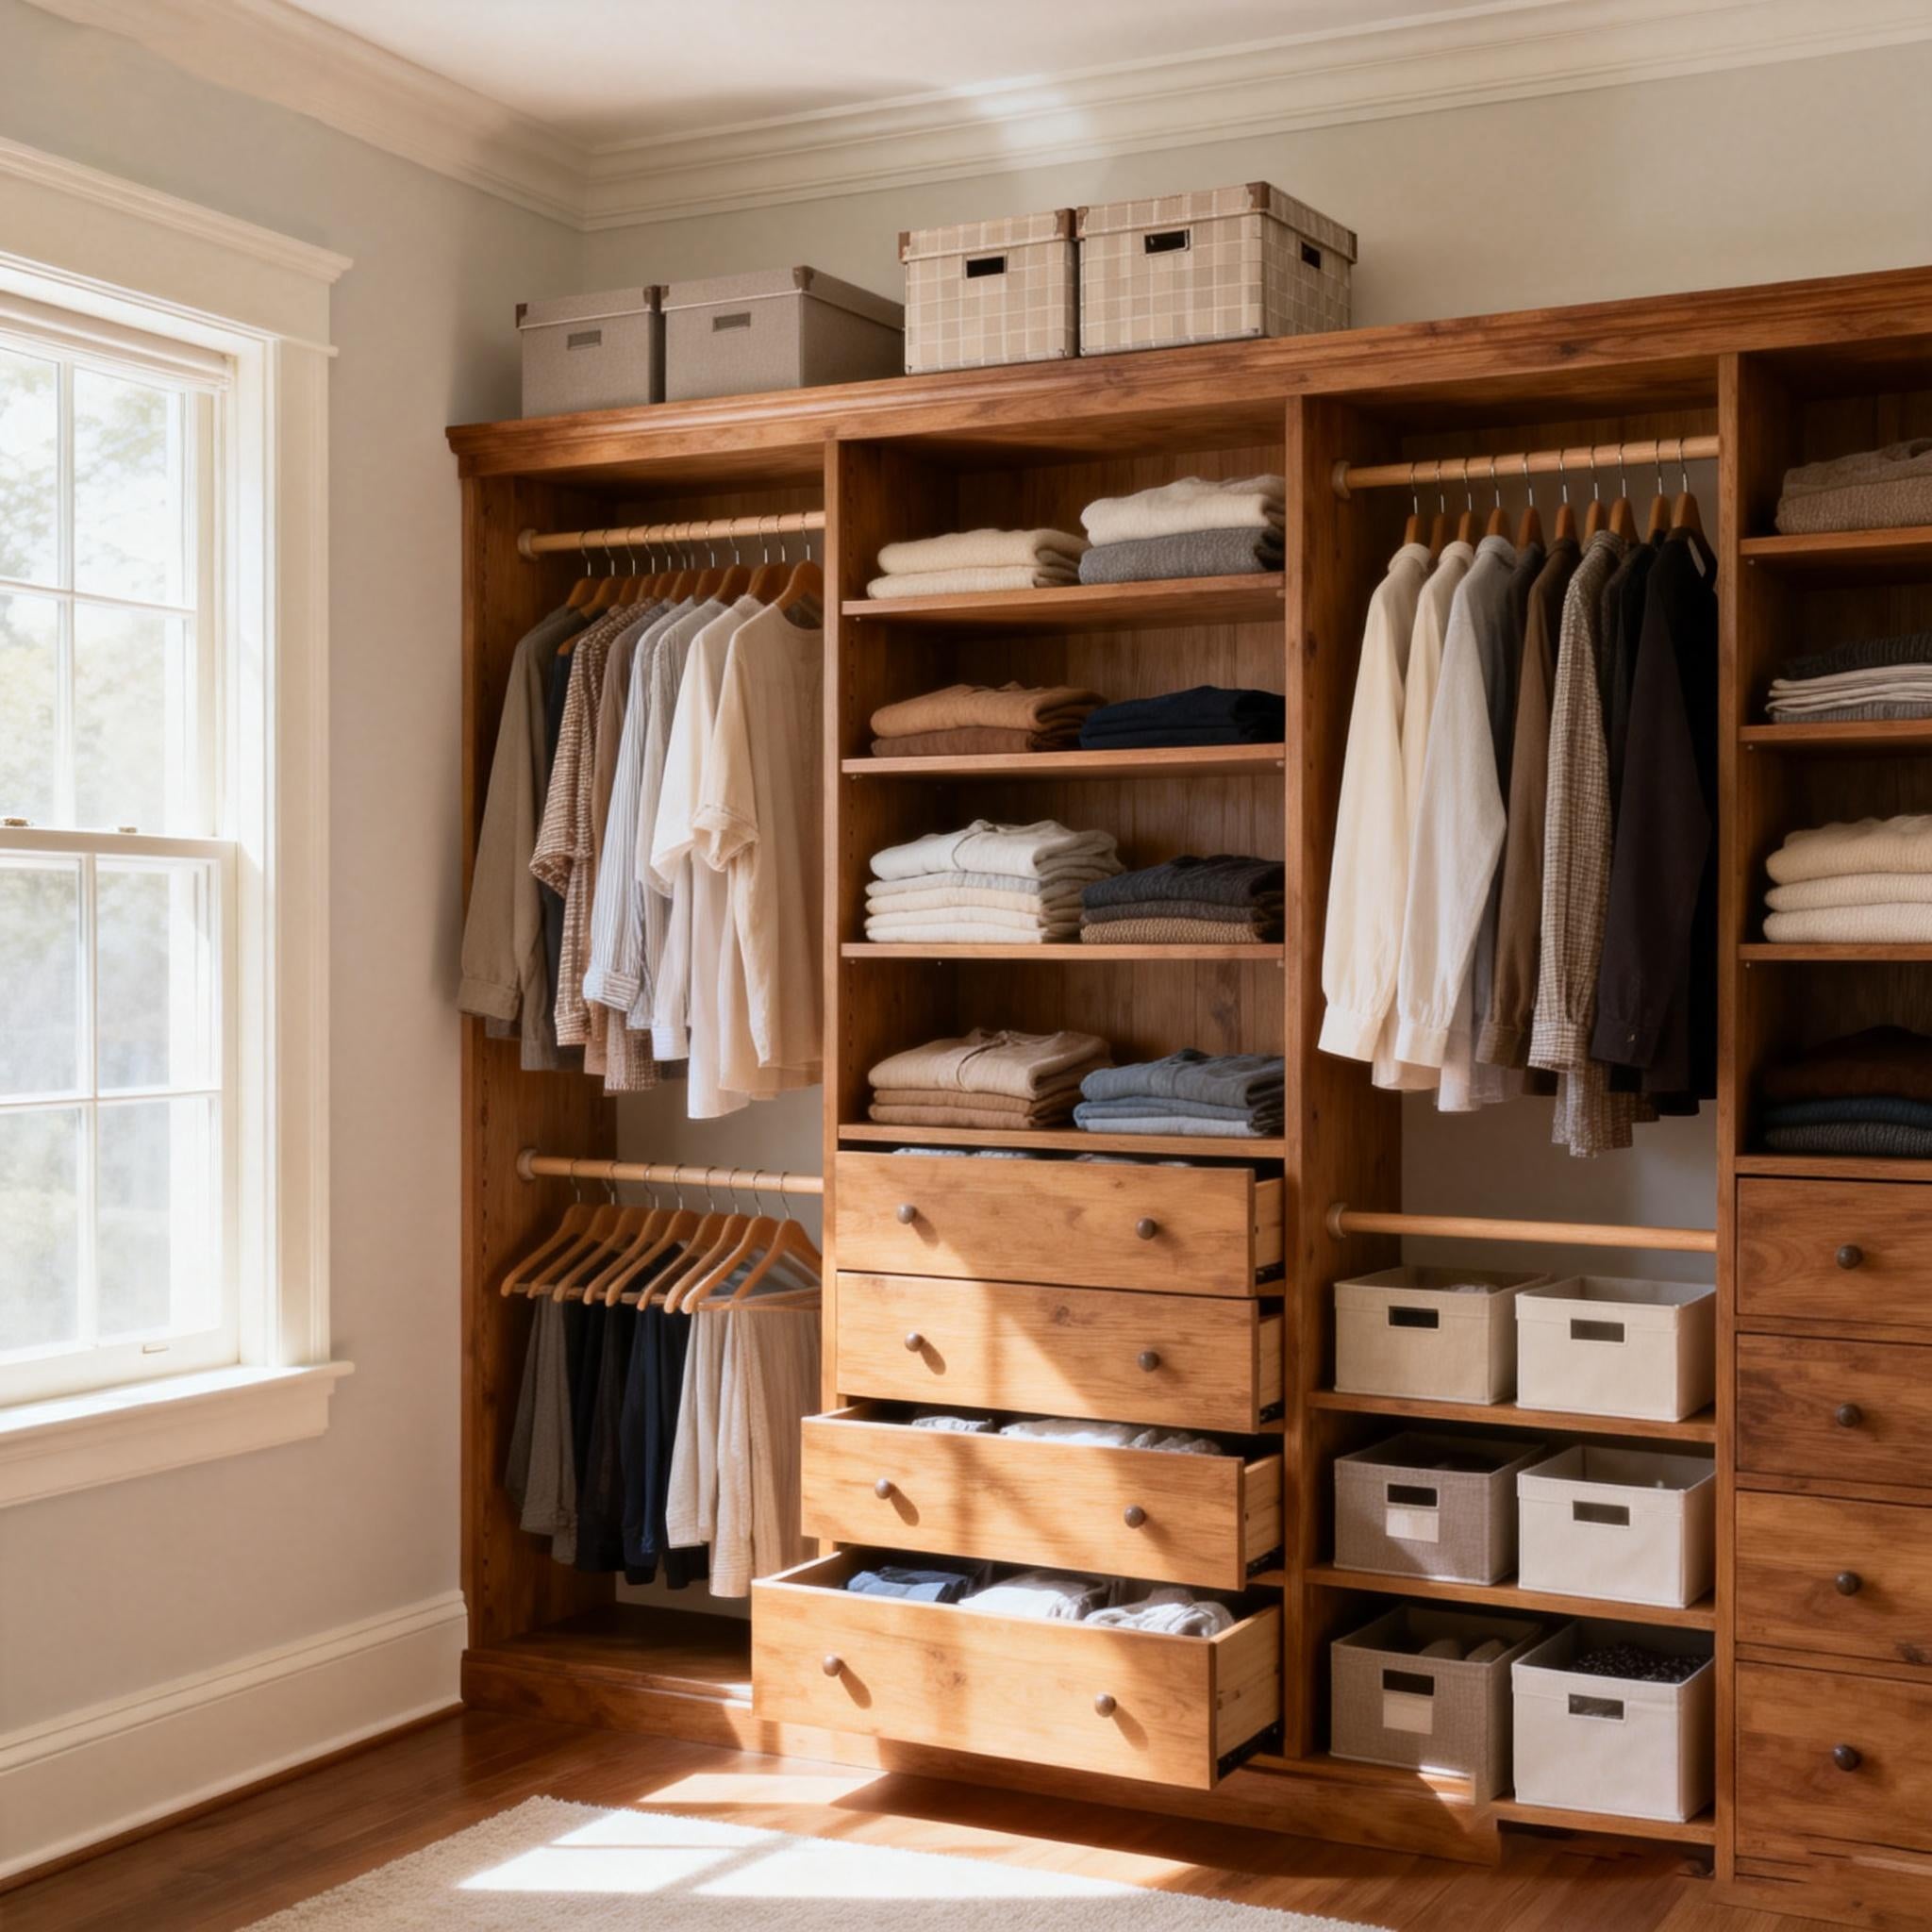
The warmth and inviting feel of this closet come from the thoughtful balance of materials and light. The medium-toned wood provides a rich, natural base that feels cozier than stark white. The inclusion of a large window is a game-changer, bathing the space in natural light and preventing the wood from feeling too dark or heavy. The use of soft-textured fabric bins adds another layer of warmth and breaks up the solid wood surfaces. A great cross-reference for another successful wood system is Idea #6.
|
📋 Copy HEX 🔗 Share |
You can achieve this warm, custom look using more affordable components. Use IKEA’s wood-effect PAX wardrobe frames or IVAR pine shelving as your base. The key is to mix in different textures. Instead of custom drawers, use a standalone IKEA MALM dresser inside the closet. Add woven baskets like the IKEA LUSTIGKURRE or DRÖNA for soft storage. The goal is to combine the wood with softer materials to get that layered, inviting feeling without the custom closet price tag.
Your dream closet is closer than you think.
Now that you’re armed with tons of inspiration, the next step is to start planning. Don’t be afraid to mix and match these concepts to fit your own space, budget, and style—that’s how you create a closet that truly works for you. Remember that great organization is a process, not a one-time fix.
Go ahead and save your favorite ideas from this article to your Pinterest board. When you’re ready, you’ll have a personal lookbook to help make that dream closet a reality.