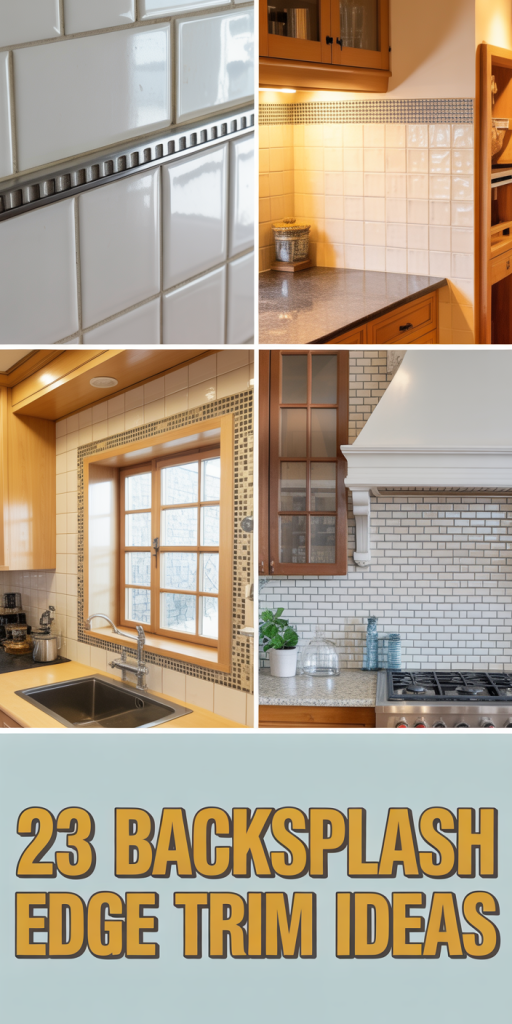
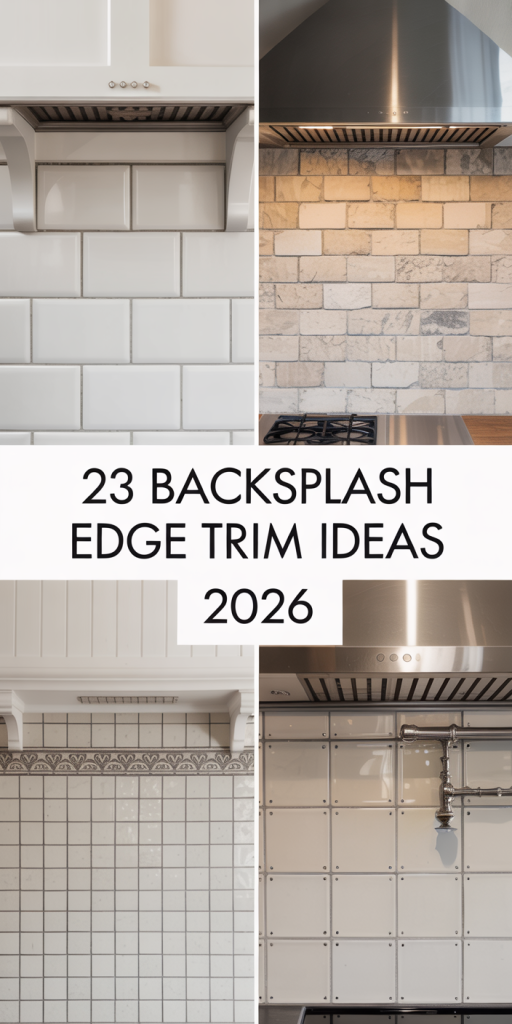
You know that feeling when you find the perfect tile, but then freeze when you think about how to… end it? The edge of a backsplash can make or break the entire look, turning a high-end tile job into a DIY-looking mess. We get it. We’ve scrolled through endless Pinterest boards and filtered through hundreds of options at Lowe’s, The Home Depot, and Wayfair to find what really works. We’ve narrowed it down to these 23 standout ideas for finishing your backsplash edges, with options for every style from modern minimalist to ornate traditional.
For 2026, the trend is all about intentional, integrated edges that feel like a core part of the design, not a plastic afterthought. And stay until the end — we break down the most common mistakes that can ruin these looks. As an Amazon Associate, we may earn from qualifying purchases. 📌 Save this to Pinterest for later — you’ll want to revisit these ideas.
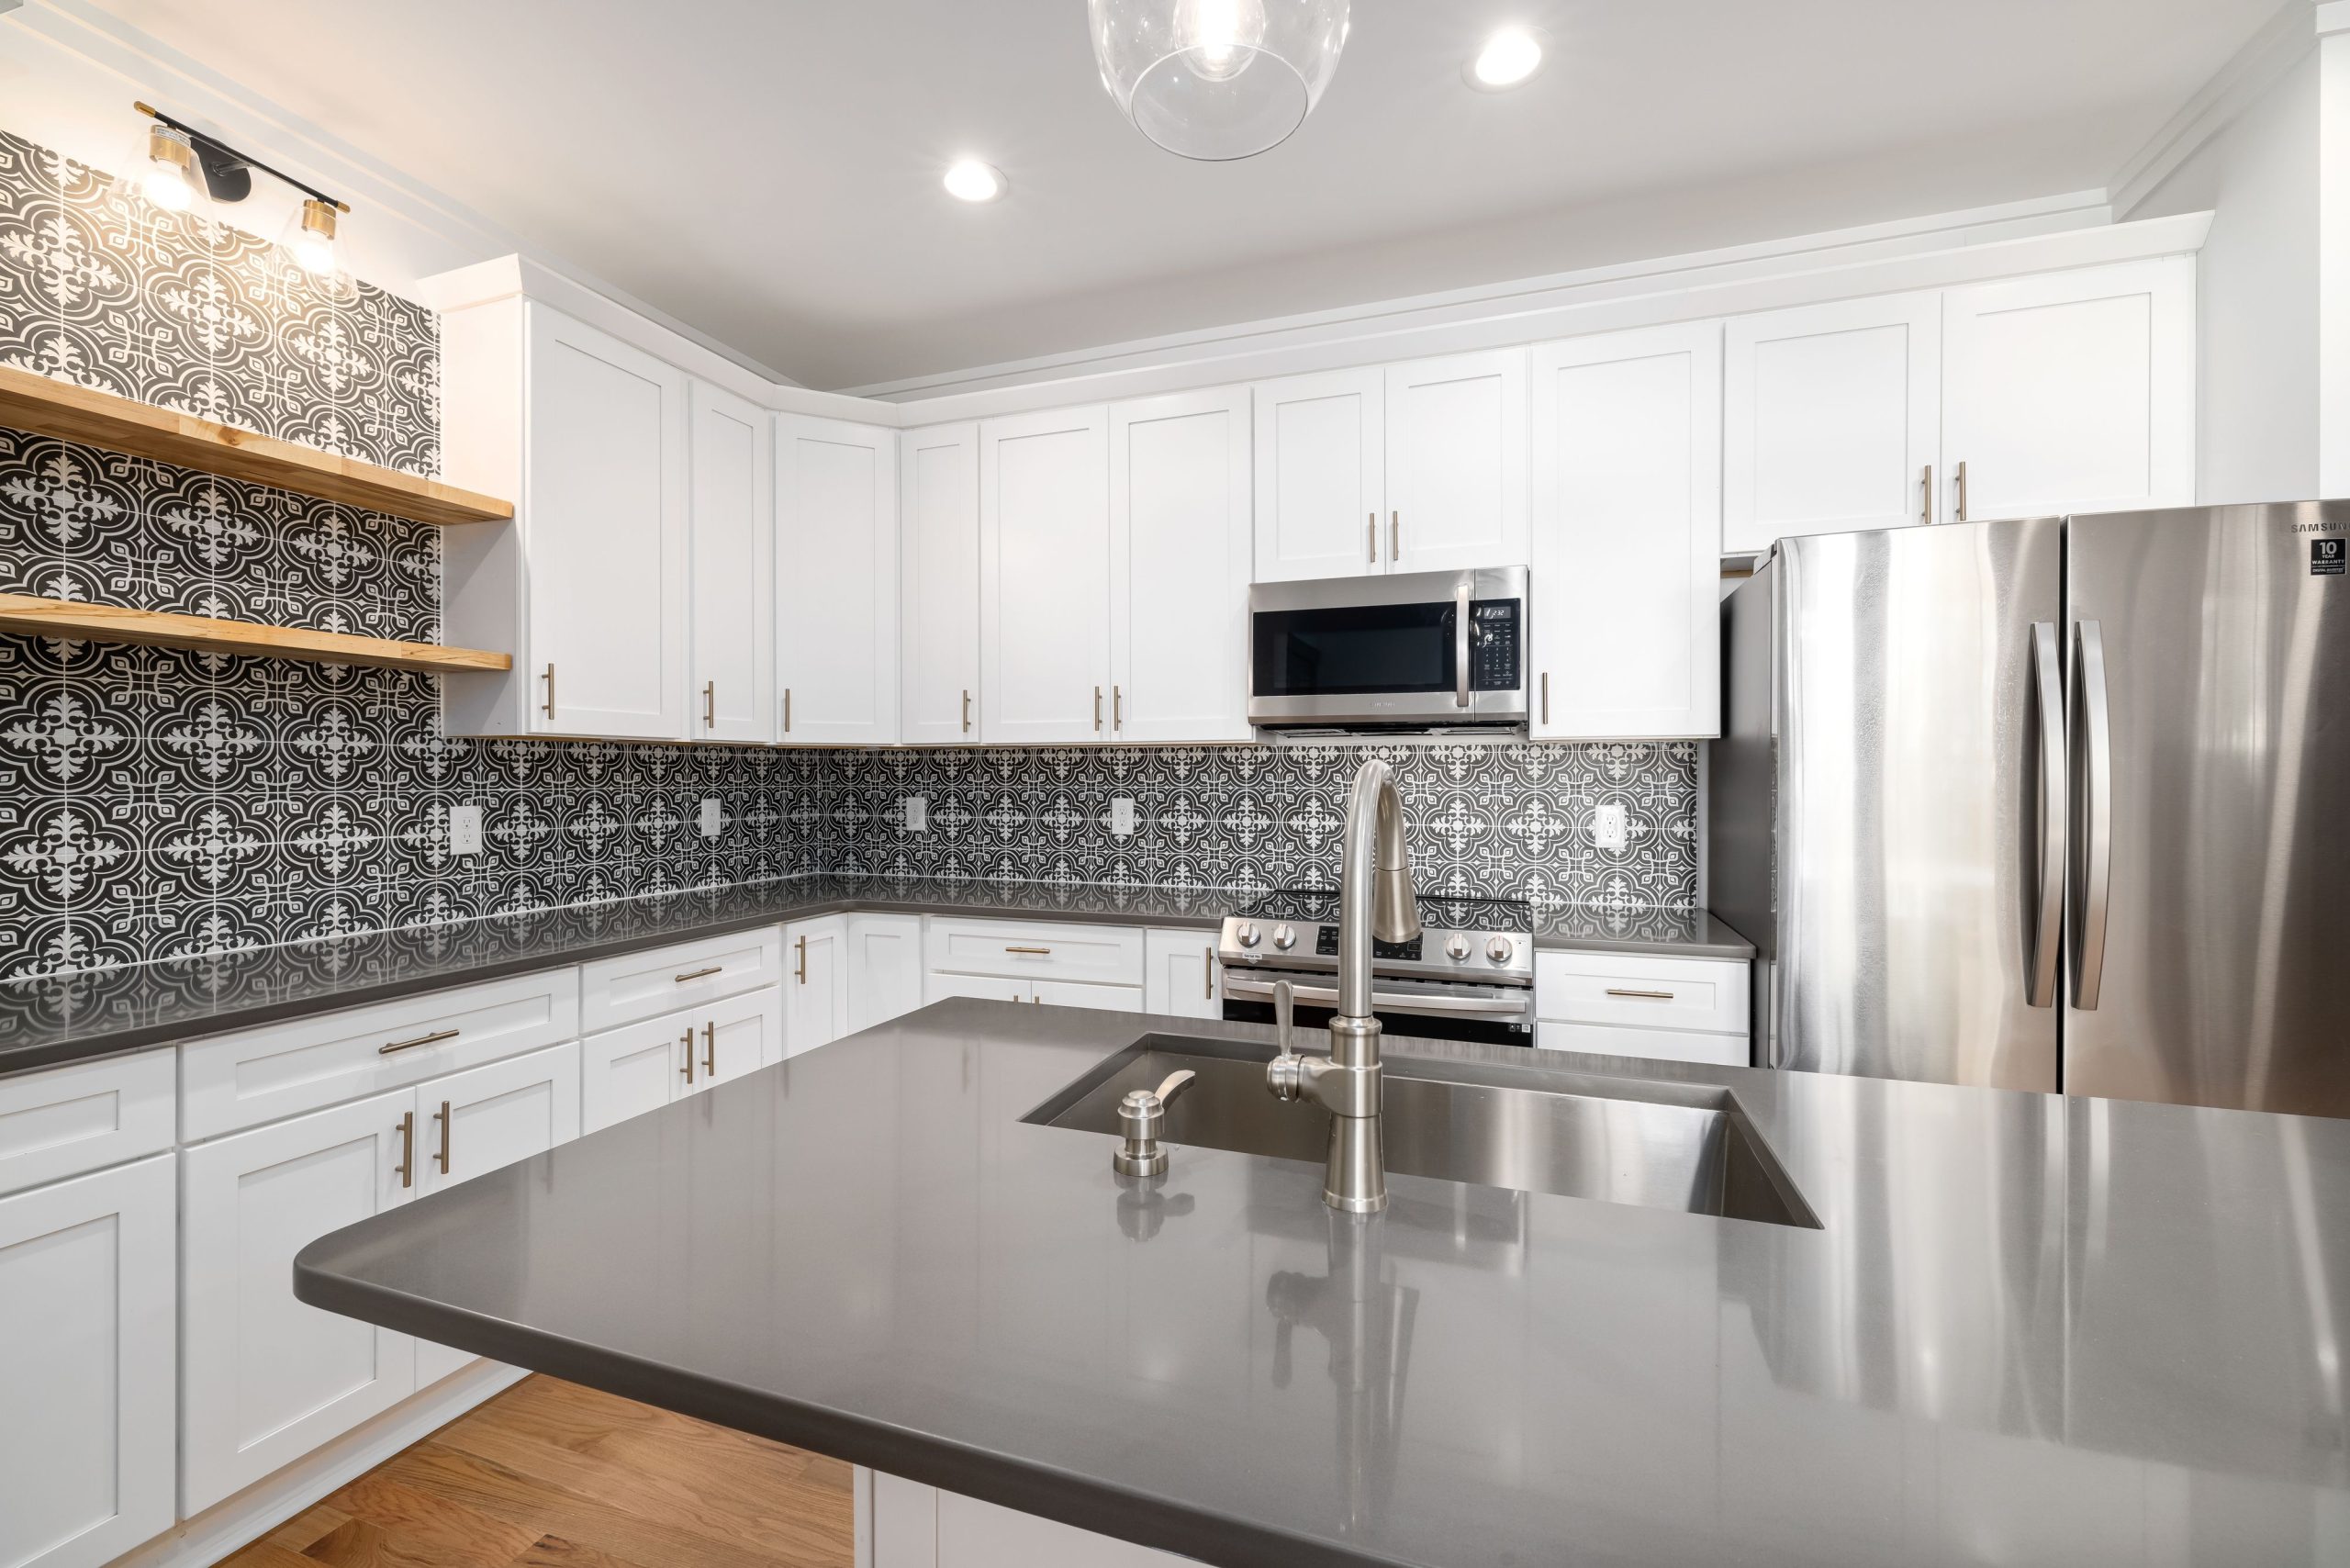
1. Frame a Patterned Backsplash with Floating Wood Shelves
What makes this work is the clever use of functional elements as trim. The light wood floating shelves create a strong horizontal line that neatly caps the vertical run of the patterned tile, turning a potential awkward endpoint into a design feature. This integration makes the shelving feel custom and built-in. The contrast between the busy black-and-white geometric tile and the warm, simple wood creates a visual resting point, preventing the pattern from overpowering the space.
|
📋 Copy HEX 🔗 Share |
To get this look right, ensure the thickness of your shelf is substantial enough to feel intentional. Aim for a shelf that is at least 1.75 inches thick. When installing, the bottom of the shelf should sit perfectly flush with the top edge of your last row of tiles. There should be no gap and no grout line above the final tile row. This precision is what makes the shelf appear as a deliberate frame rather than a separate element placed on top.
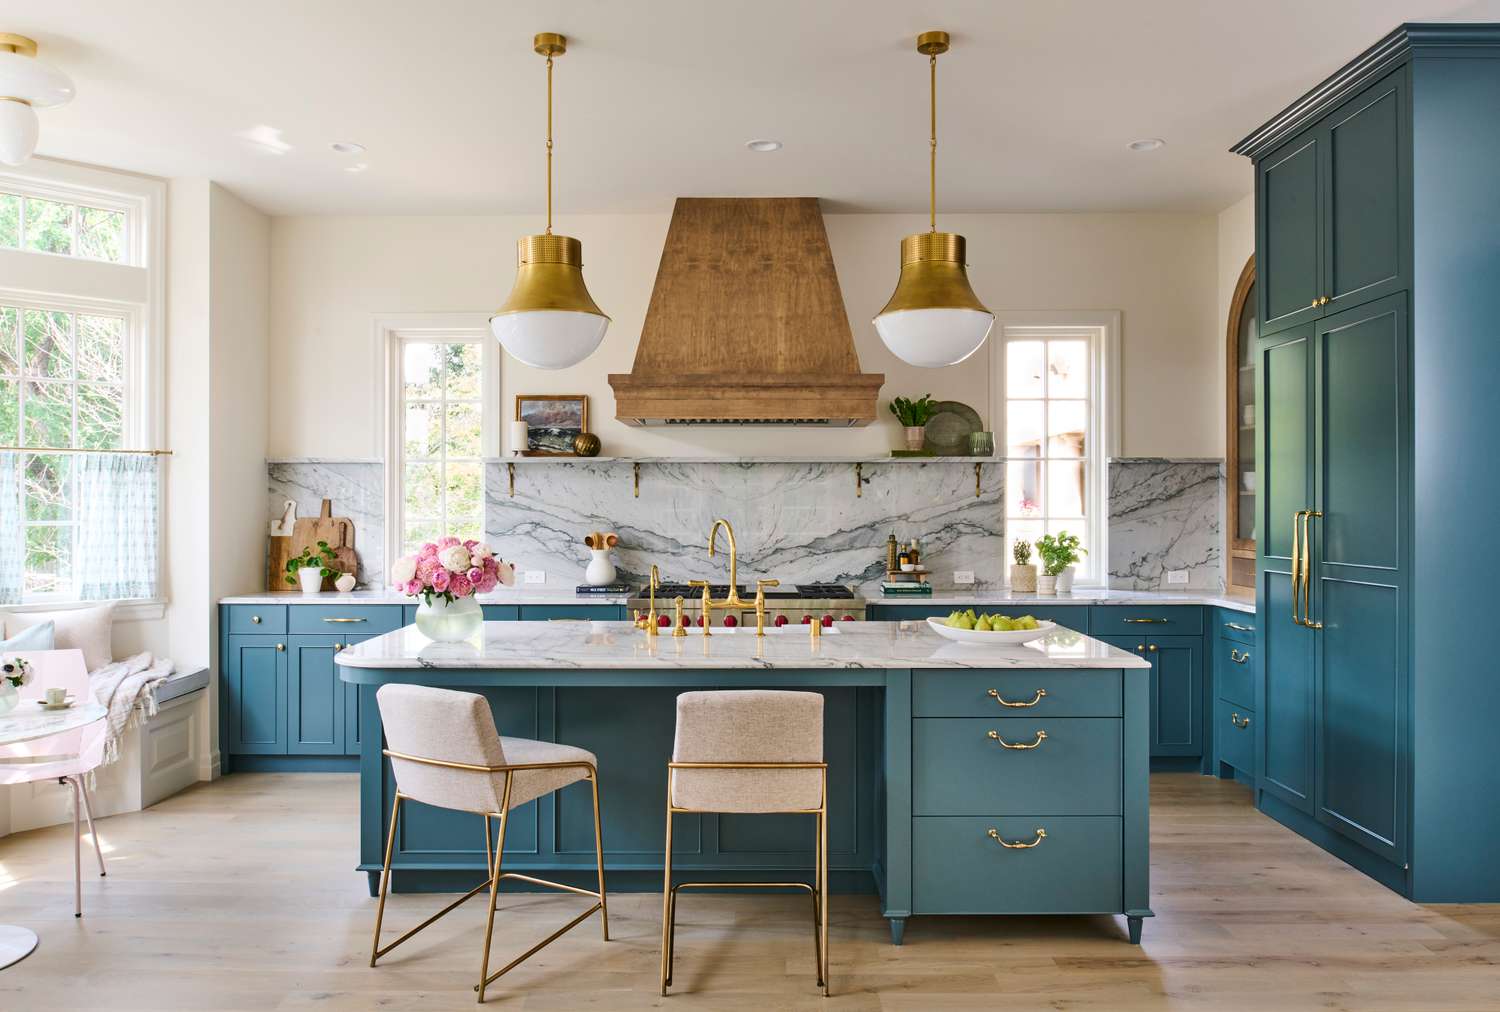
2. Integrate Windows Into a Continuous Marble Slab Backsplash
The single element that defines this kitchen is the decision to treat the window as an interruption within the backsplash, not a border for it. By wrapping the white marble slab seamlessly around the window openings, the stone becomes an architectural feature of the room itself. Removing this would relegate the marble to just a surface treatment. Here, it feels structural, creating a custom, high-end look that feels both grand and completely integrated. The light and view from the windows feel like they are part of the marble’s domain.
|
📋 Copy HEX 🔗 Share |
This approach works best in kitchens with at least 9-foot ceilings to allow the marble to feel expansive rather than crowded. The wall length should be a minimum of 8 feet to justify the cost and visual weight of a full slab. For smaller kitchens or those with lower ceilings, this much stone can feel overwhelming. Consider the vertical tile look in Idea #7 for a more approachable way to add height in a compact space.
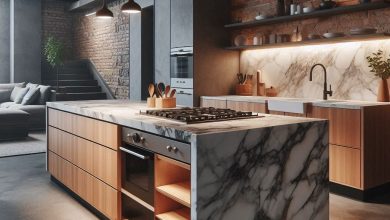
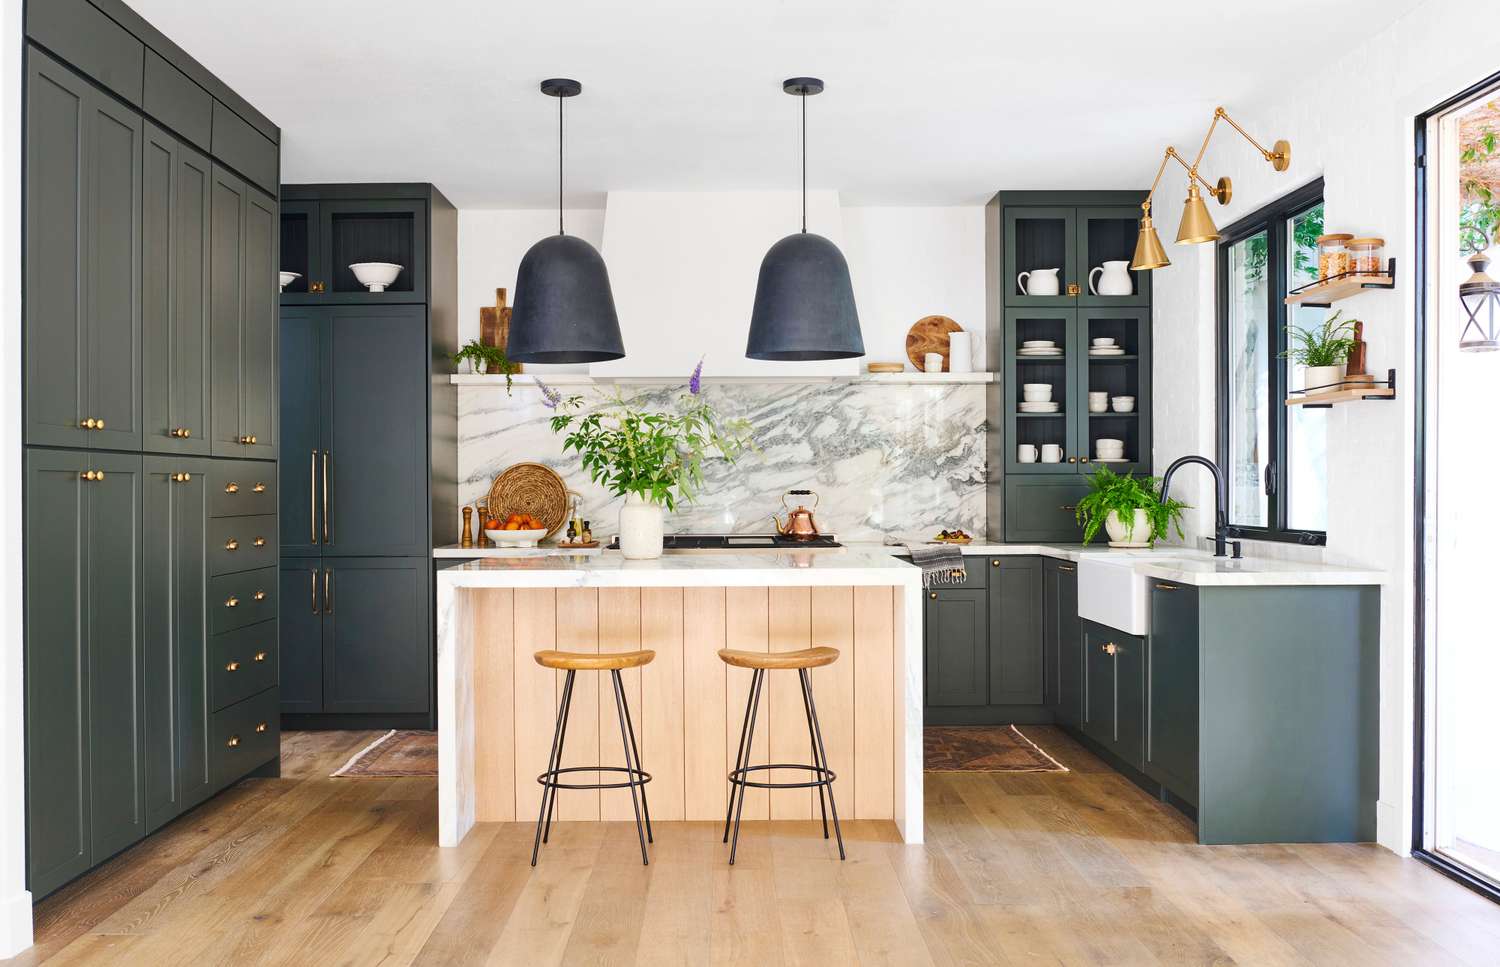
3. Carve a Ledge from a Full-Height Marble Backsplash
The visual formula here is about elegant unity: 70% monolithic material + 20% deep color + 10% warm accents. The key is using the same white marble for the countertop, the full-height backsplash, and the integrated shelf. This creates a seamless, sculptural block of texture. The dark forest green cabinetry provides a dramatic, grounding contrast, while brass and light wood accents add warmth and prevent the marble from feeling too cold. You could swap the green for a deep navy or charcoal and the brass for polished nickel, and the sophisticated formula would still hold.
|
📋 Copy HEX 🔗 Share |
Let’s be honest: an integrated marble shelf like this is a commitment. It’s not something you can easily change or remove. This is a forever design choice, and its installation requires a highly skilled stonemason. The shelf itself is more for display than heavy-duty storage; loading it with heavy appliances is a no-go. It will also be prone to the same etching and staining risks as your marble countertops, so you’ll need to be diligent with coasters and cleaning. It’s stunning, but it’s not low-maintenance. Compare this to the wood shelf in Idea #1 for a more flexible shelf-as-trim solution.
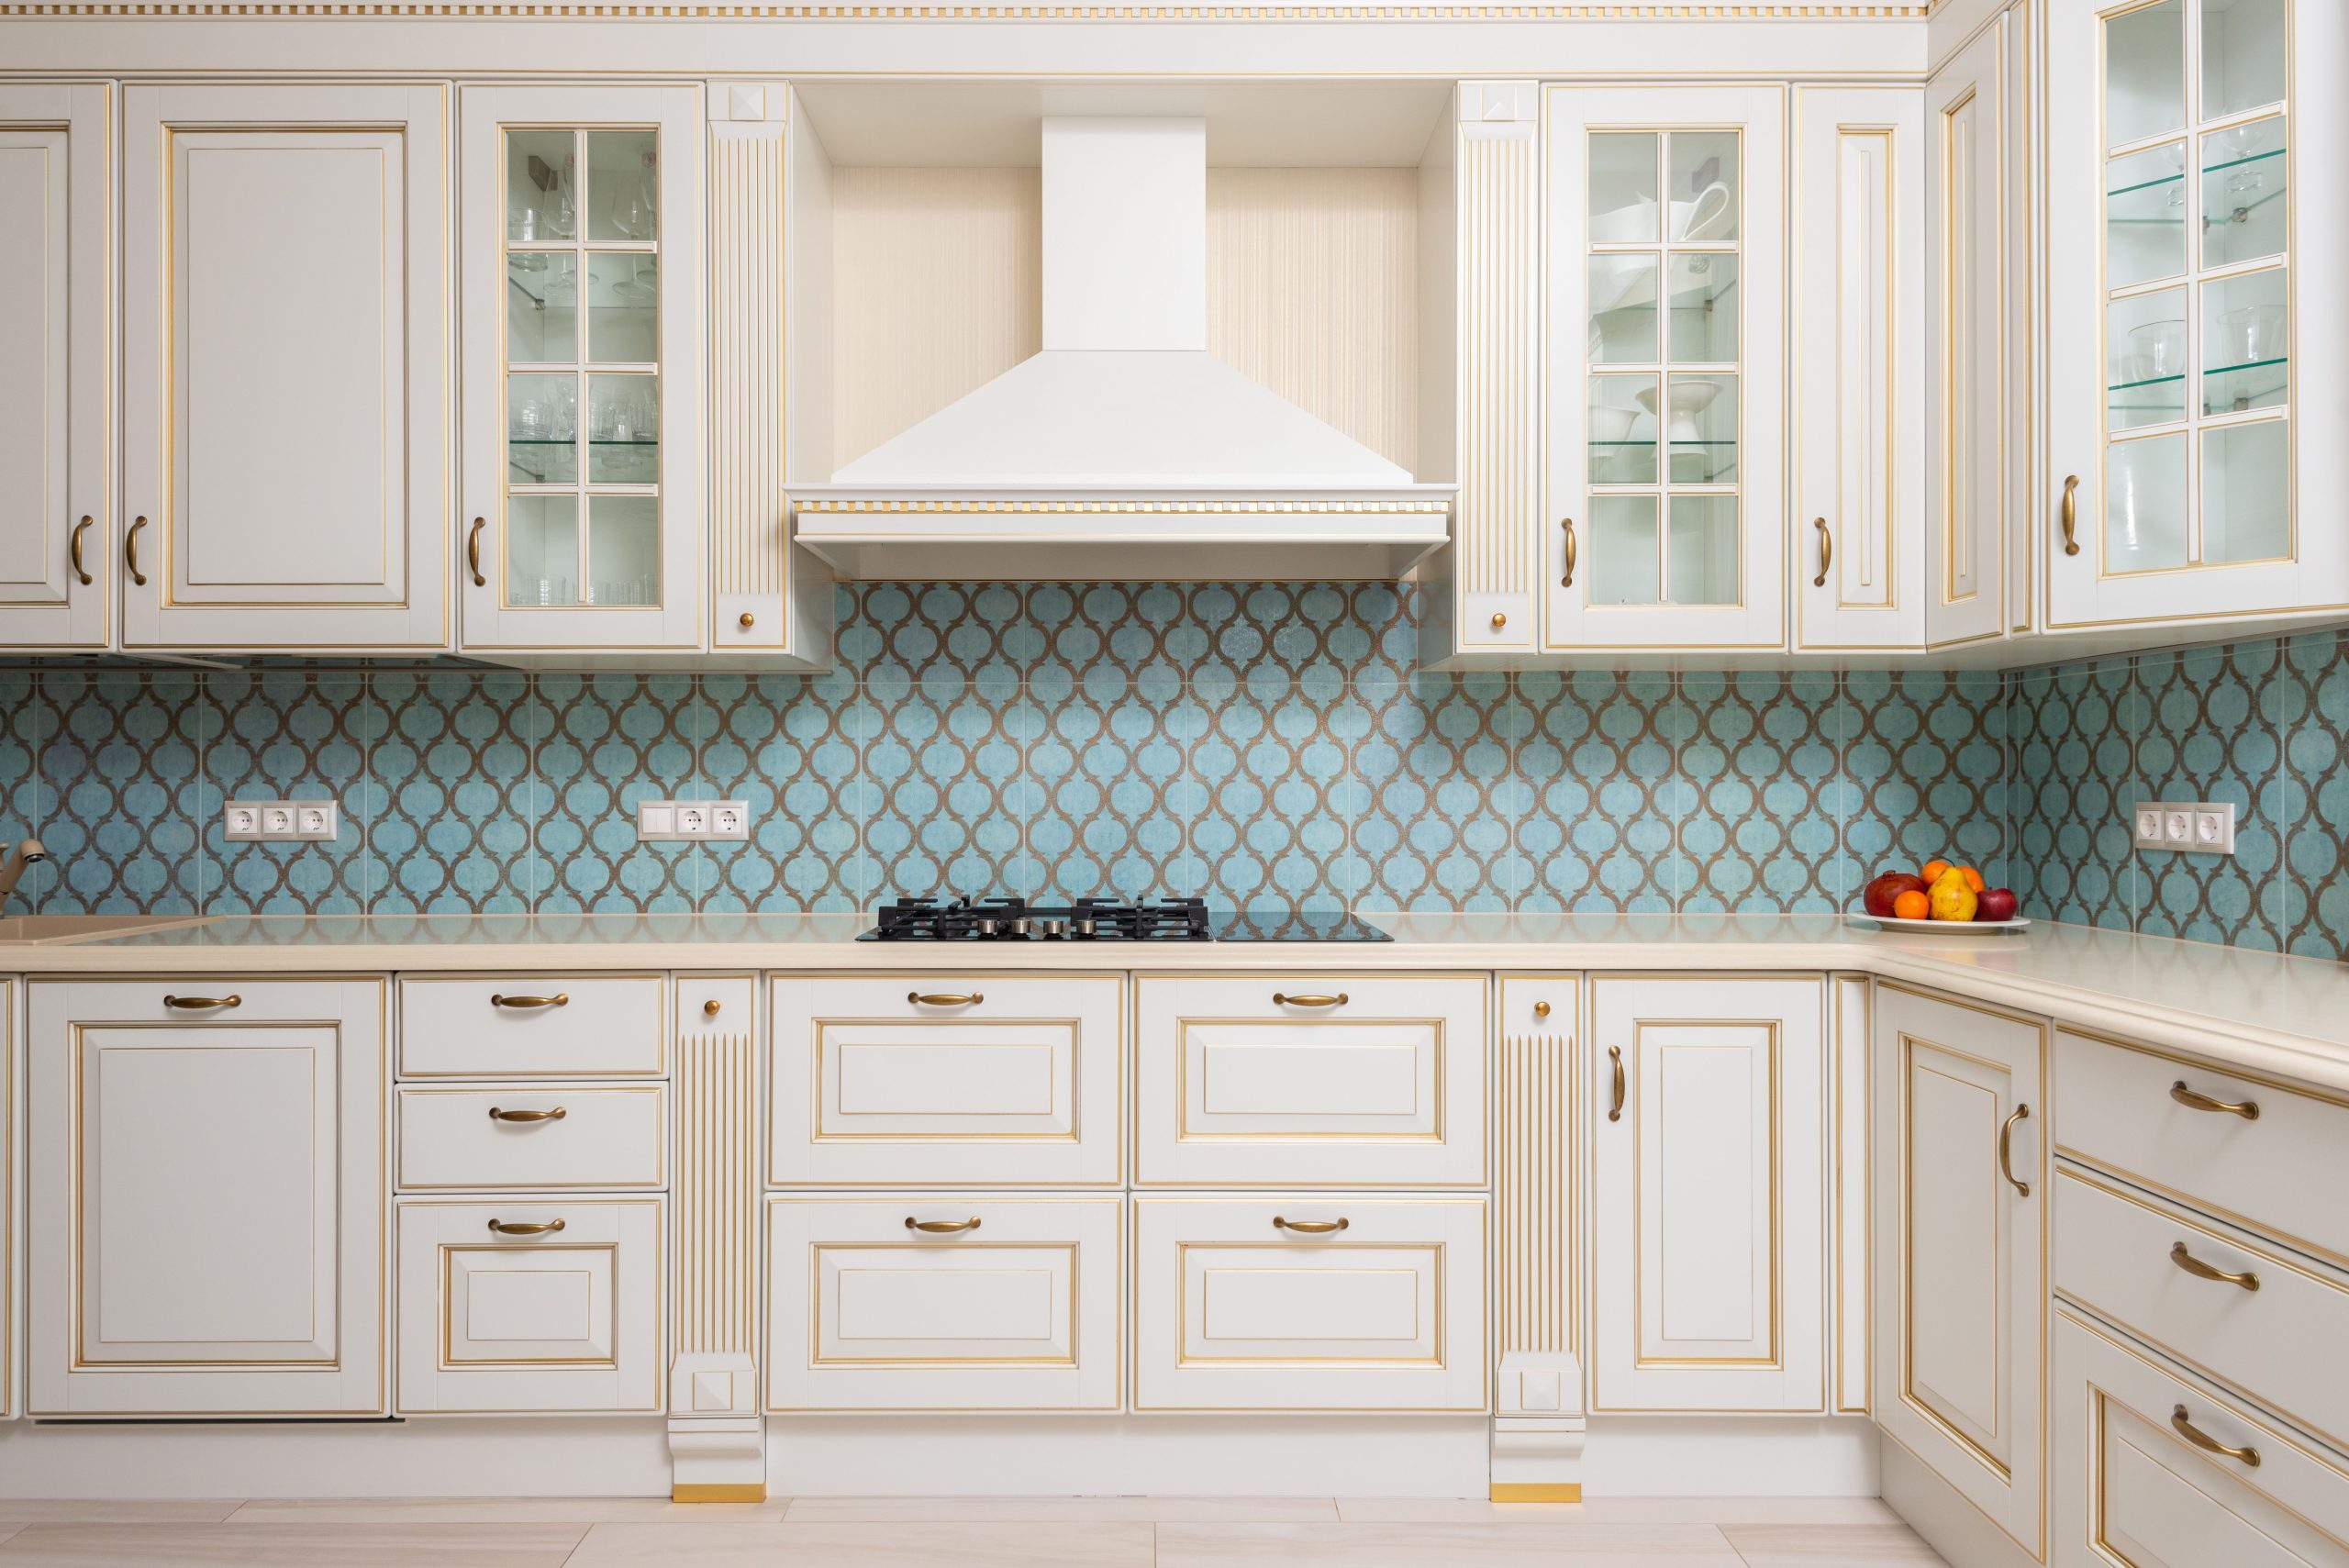
4. Frame Ornate Trellis Tile with Classic Beige Cabinetry
You don’t need custom cabinetry to get this classic, elegant vibe. The core components are the vibrant tile and the framed cabinets. Find a similar blue trellis or geometric tile from Wayfair or a specialty tile shop for $15-$25 per square foot. For the cabinets, look for unfinished shaker-style cabinets from Lowe’s or The Home Depot and paint them a creamy beige like Sherwin-Williams’ ‘Accessible Beige.’ Add your own gold trim using metallic paint pens and a steady hand, and source gold hardware from Amazon for a few dollars a piece. You can achieve this entire look for under $2,000.
|
📋 Copy HEX 🔗 Share |
This look is a direct nod to the ‘Grandmillennial’ style that continues to have a strong grip on platforms like Pinterest. It’s the art of mixing traditional, almost ‘granny-chic’ patterns and details (like trellis tile and ornate trim) with a fresh, modern sensibility. It offers a sense of history and permanence that feels like a comforting counterpoint to years of stark, minimalist kitchens. This trend has staying power because it’s rooted in classic design principles, just interpreted with a bit more fun and personality.
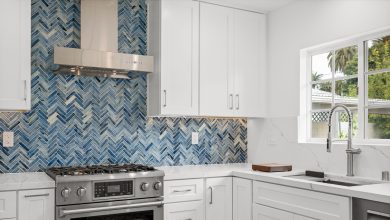
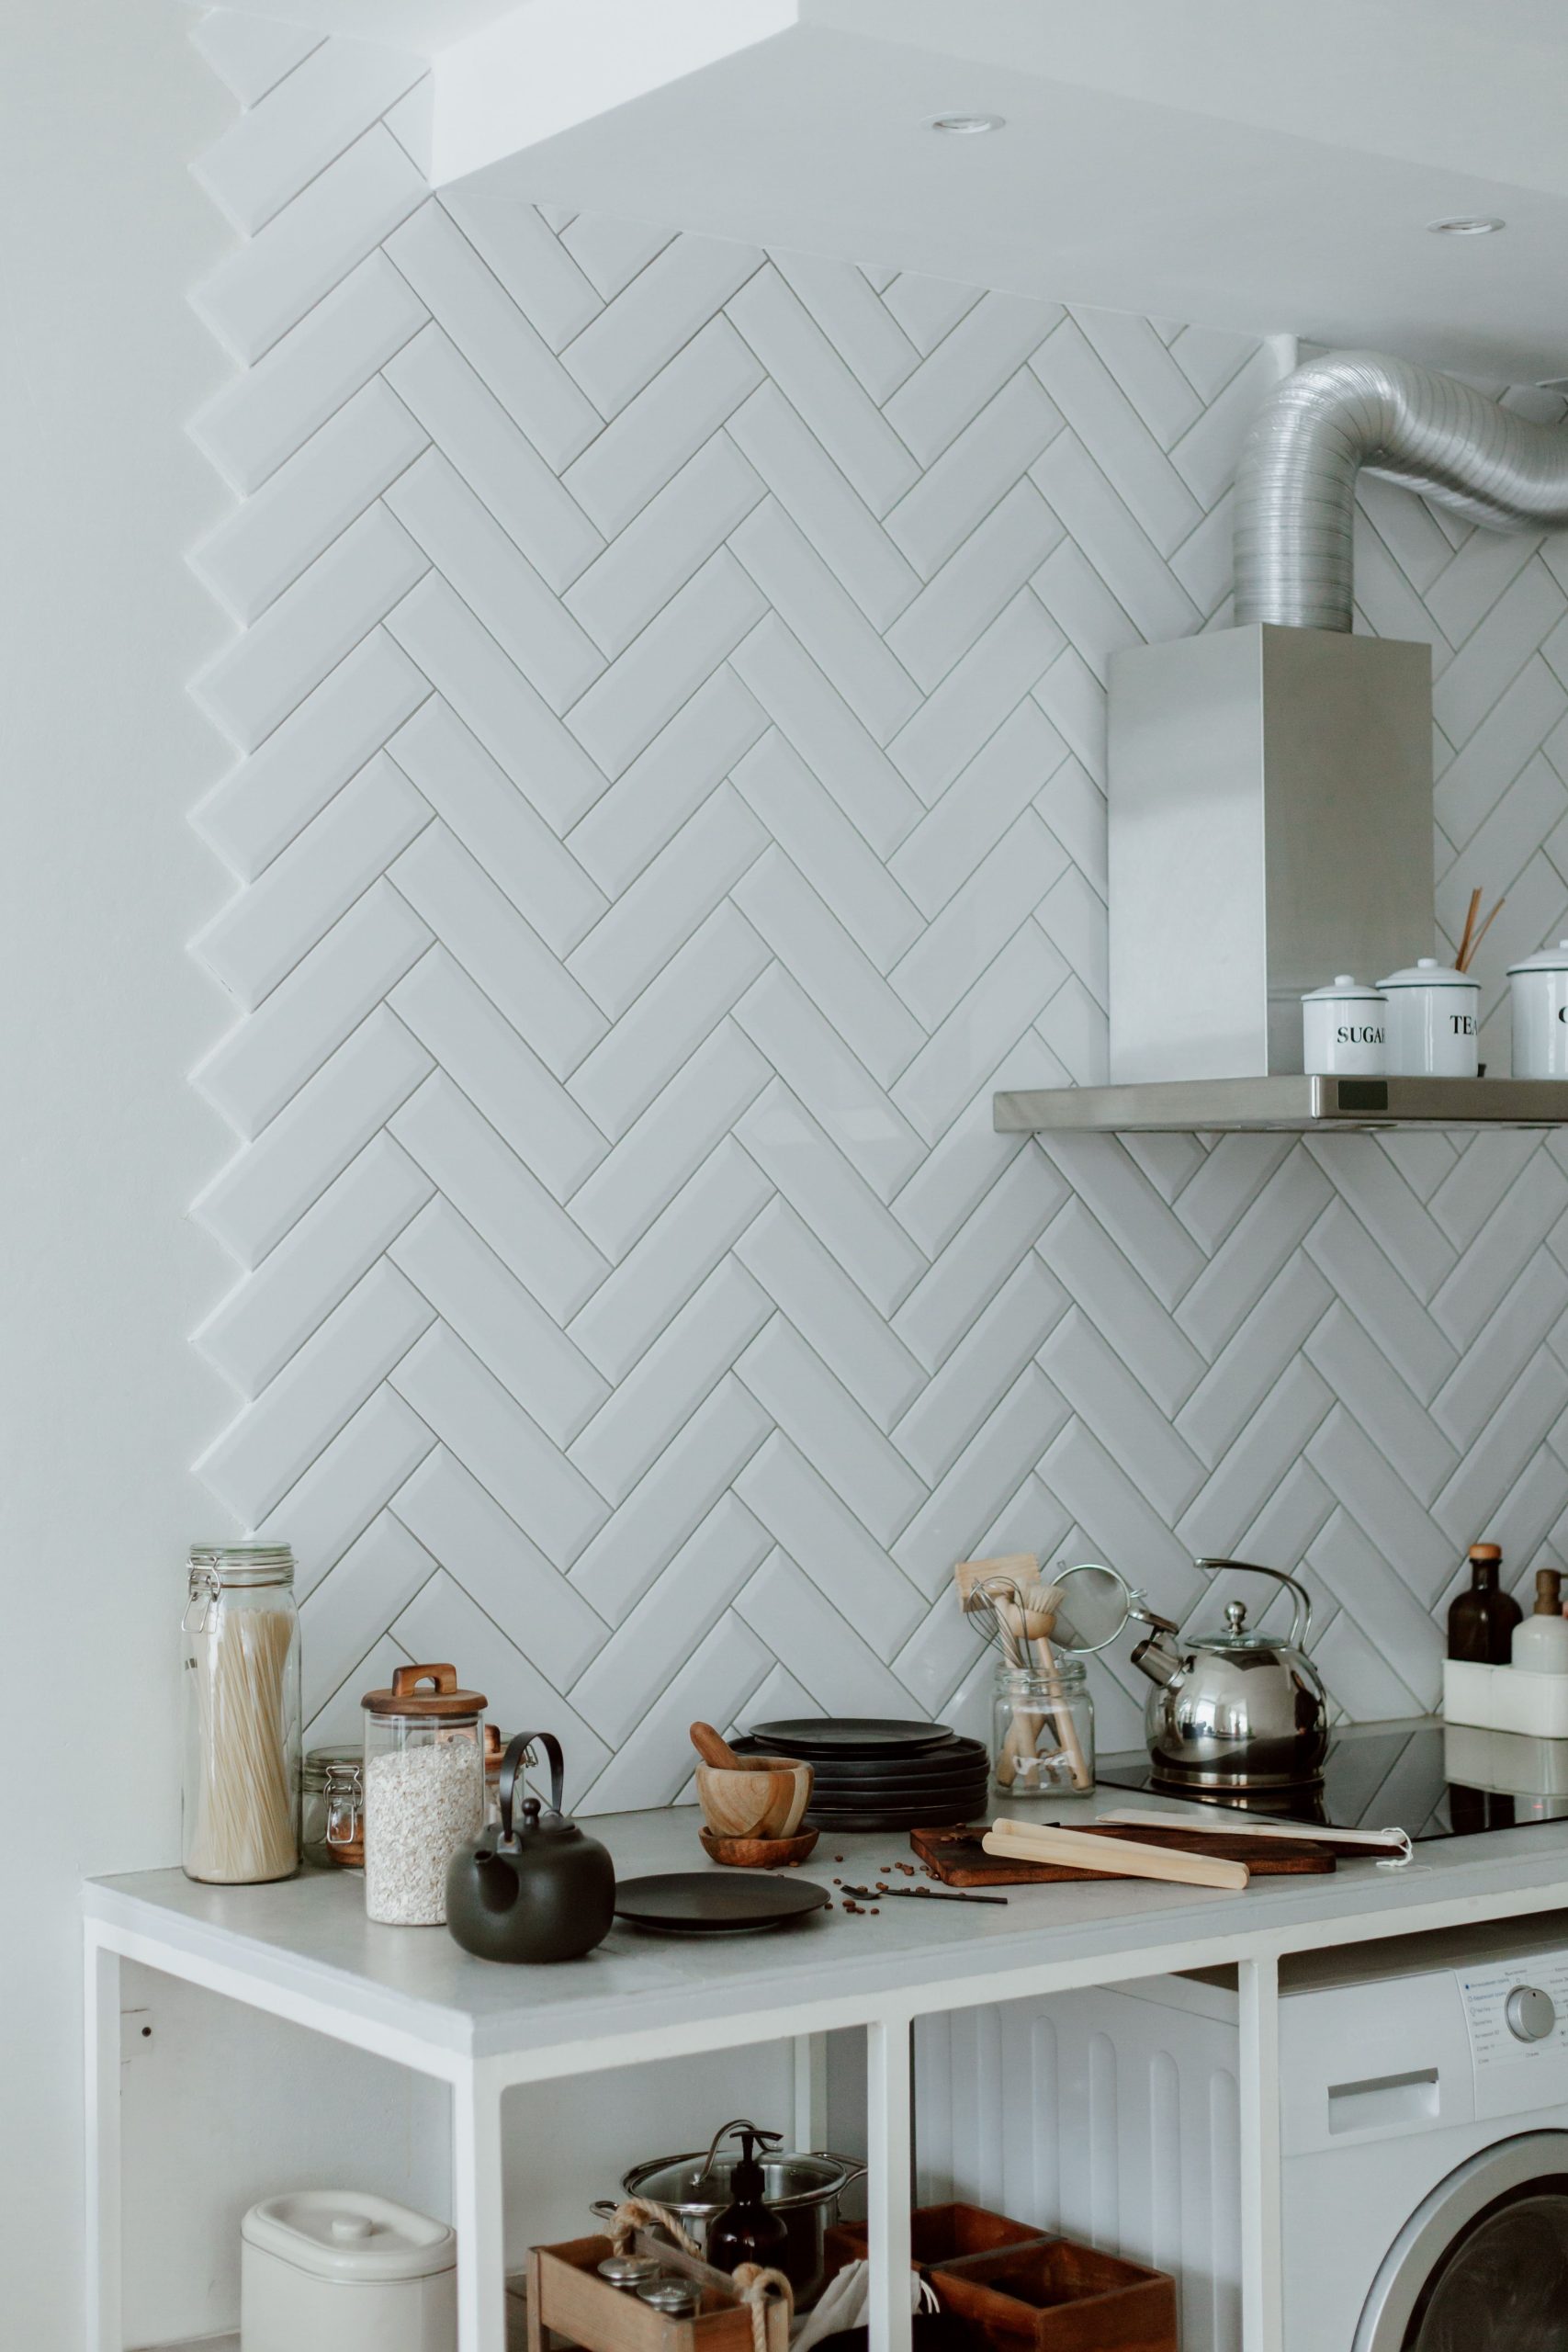
5. Let a Zellige Tile Edge End Naturally Against the Wall
The beauty of Zellige tile is its handmade imperfection, but that comes with some upkeep notes. The irregular surface and porous nature mean you must seal it upon installation and reseal it every 1-2 years, especially behind a sink or stove. The wide grout lines can also be a magnet for stains. Opting for a medium-gray or beige grout can be more forgiving than pure white. Wiping up splashes immediately, especially acidic things like lemon juice or tomato sauce, is non-negotiable to prevent etching and staining.
|
📋 Copy HEX 🔗 Share |
This unfinished edge works specifically because of the nature of Zellige tiles. The slightly irregular, rustic quality of each tile means a raw edge doesn’t look sloppy—it looks authentic. This approach celebrates the material itself. It creates a soft, organic transition from tile to wall that feels effortless and textural. Trying this with a precise, machine-made tile would look jarring and incomplete, as we see in the jagged edge of Idea #12, which has a much more industrial feel.
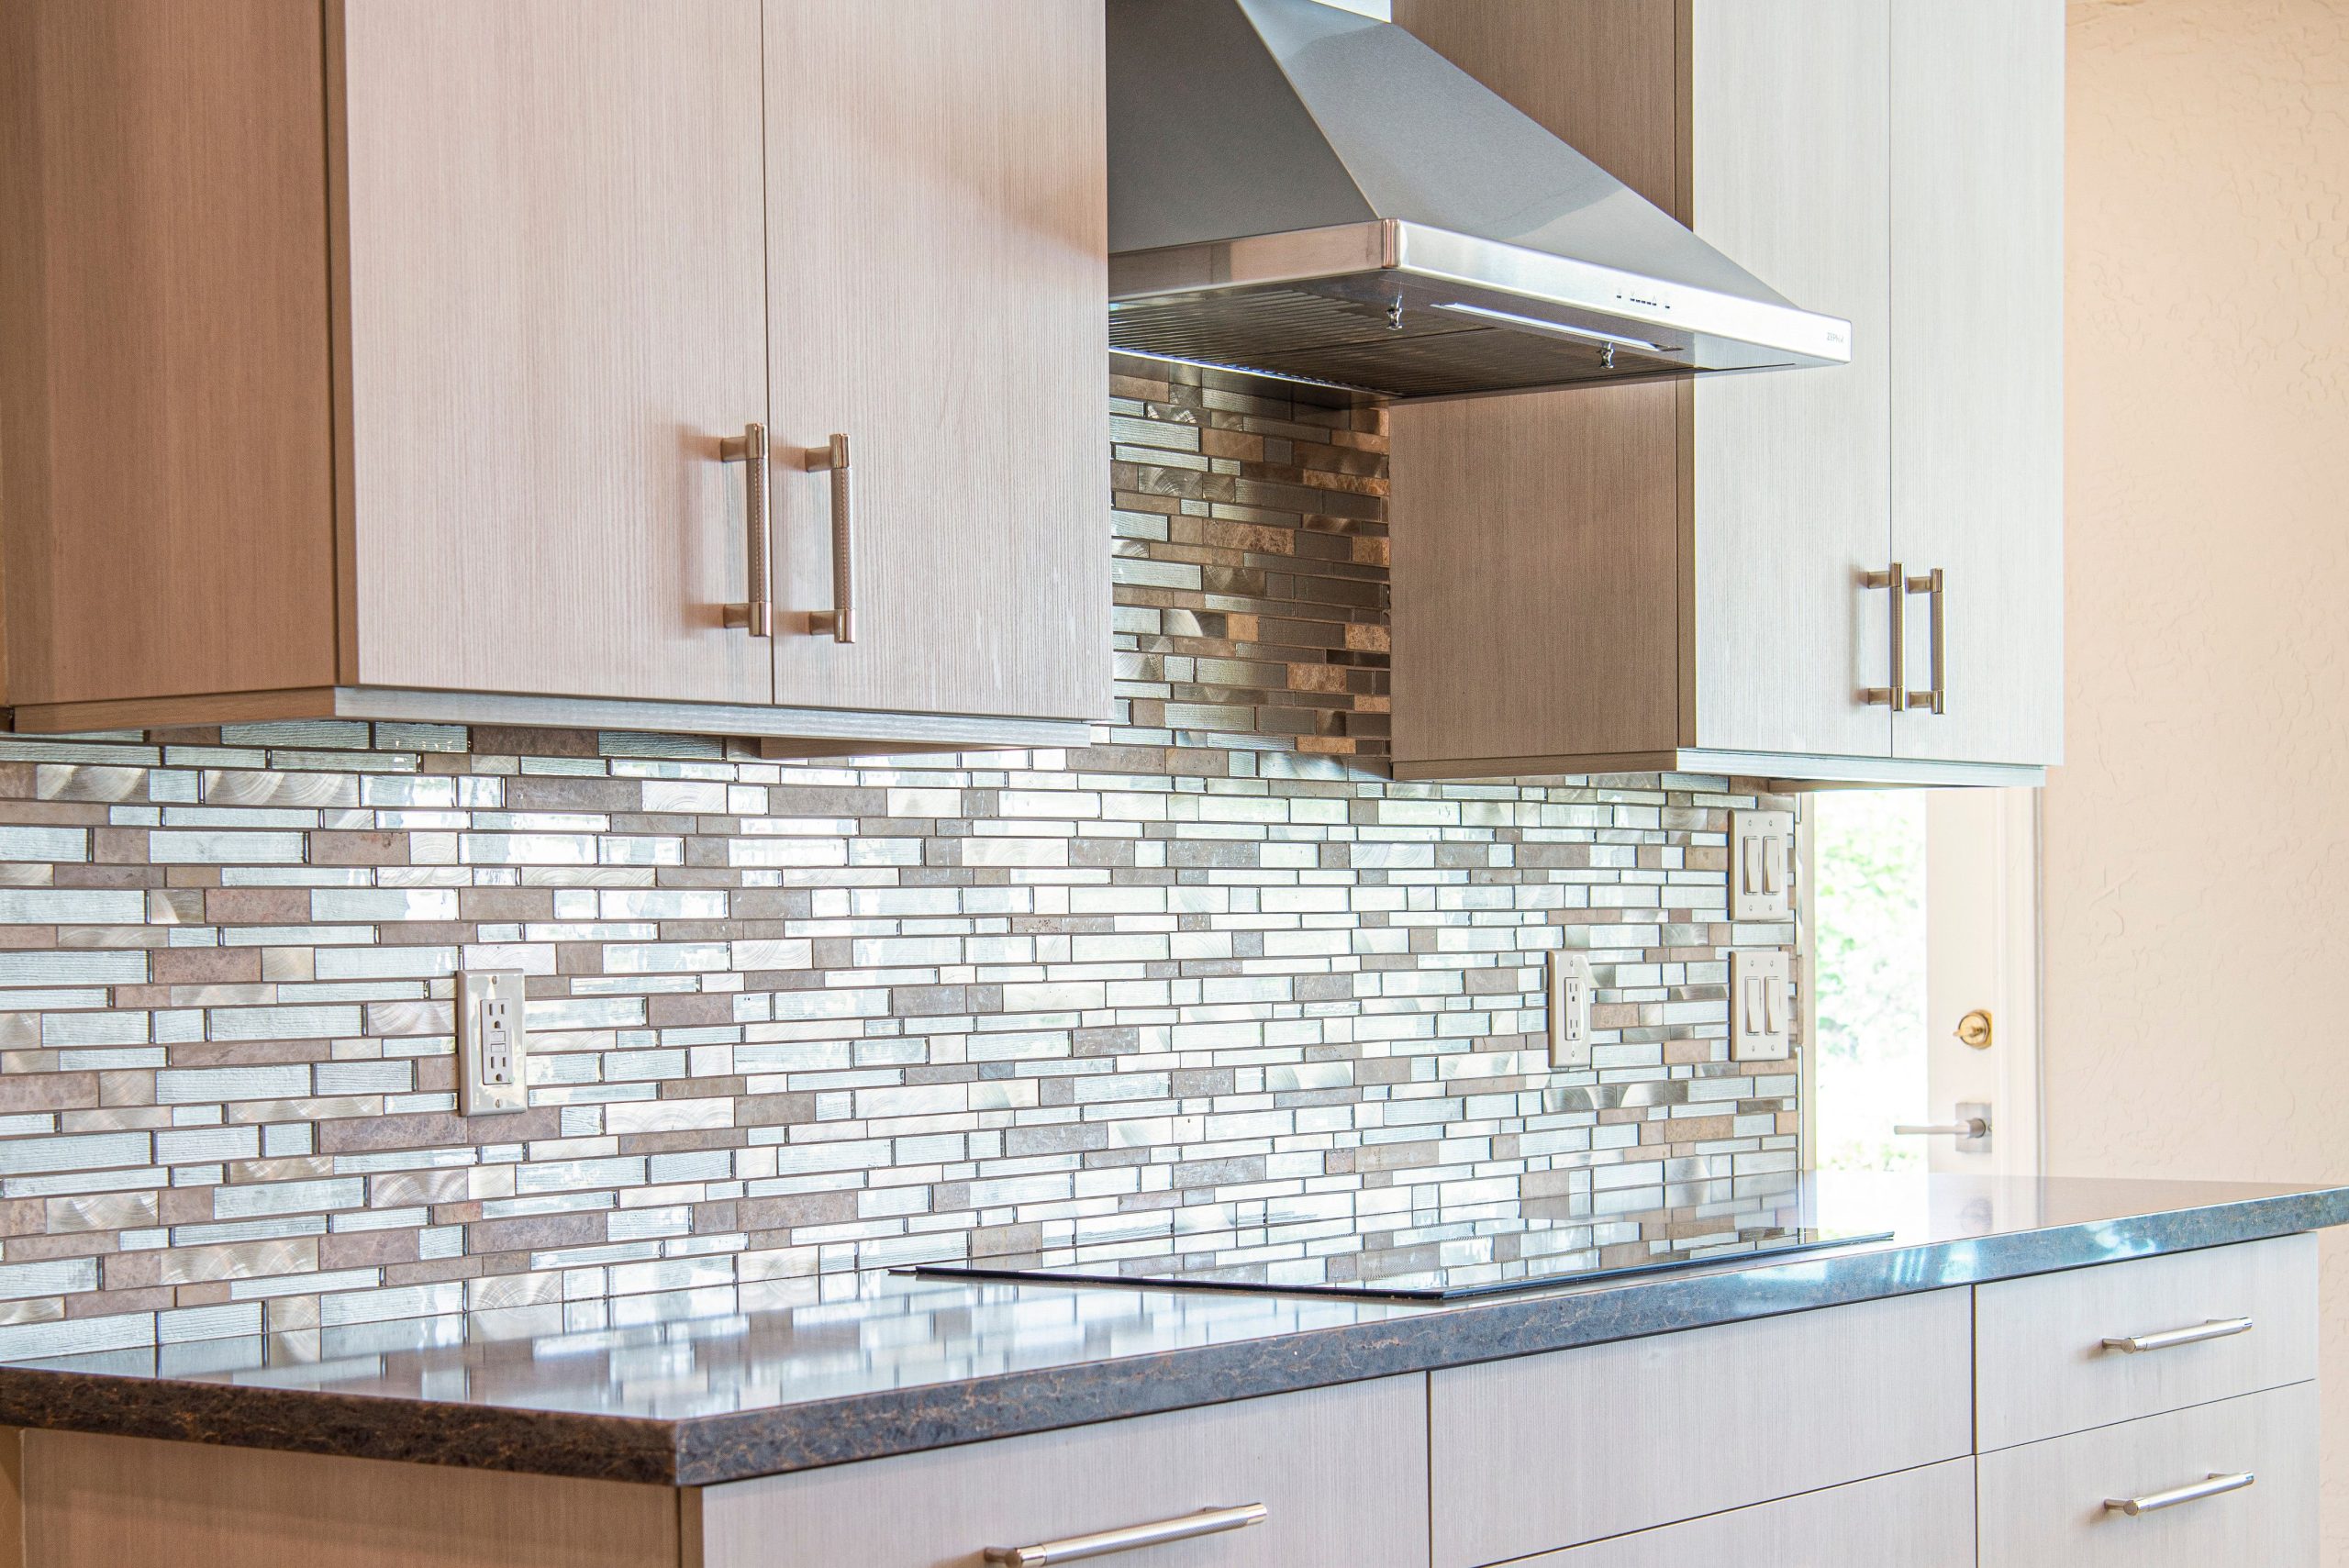
6. Terminate a Metallic Mosaic Tile Flush with Cabinetry
For a clean, modern look with mosaic tile sheets, the key is a perfectly straight and plumb cabinet installation. The backsplash should die directly into the underside of the upper cabinets and the inside edge of any side panels. To achieve this, your tile installer should use the cabinet as their guide, scribe the tile sheet carefully, and leave a tiny 1/16-inch gap to be filled with a thin bead of color-matched caulking, not grout. This creates a seamless, almost invisible transition.
|
📋 Copy HEX 🔗 Share |
This kitchen follows a sleek, contemporary formula: 50% warm wood grain + 40% cool metallics + 10% dark contrast. The light wood cabinets provide a natural, organic base. The backsplash, stainless hood, and cabinet hardware all contribute to the metallic layer, creating a cohesive, light-reflective surface. The dark speckled countertop and cooktop anchor the space, adding depth and preventing the wood and metal from washing each other out. The beauty of this formula is its neutrality; it’s modern without being cold.
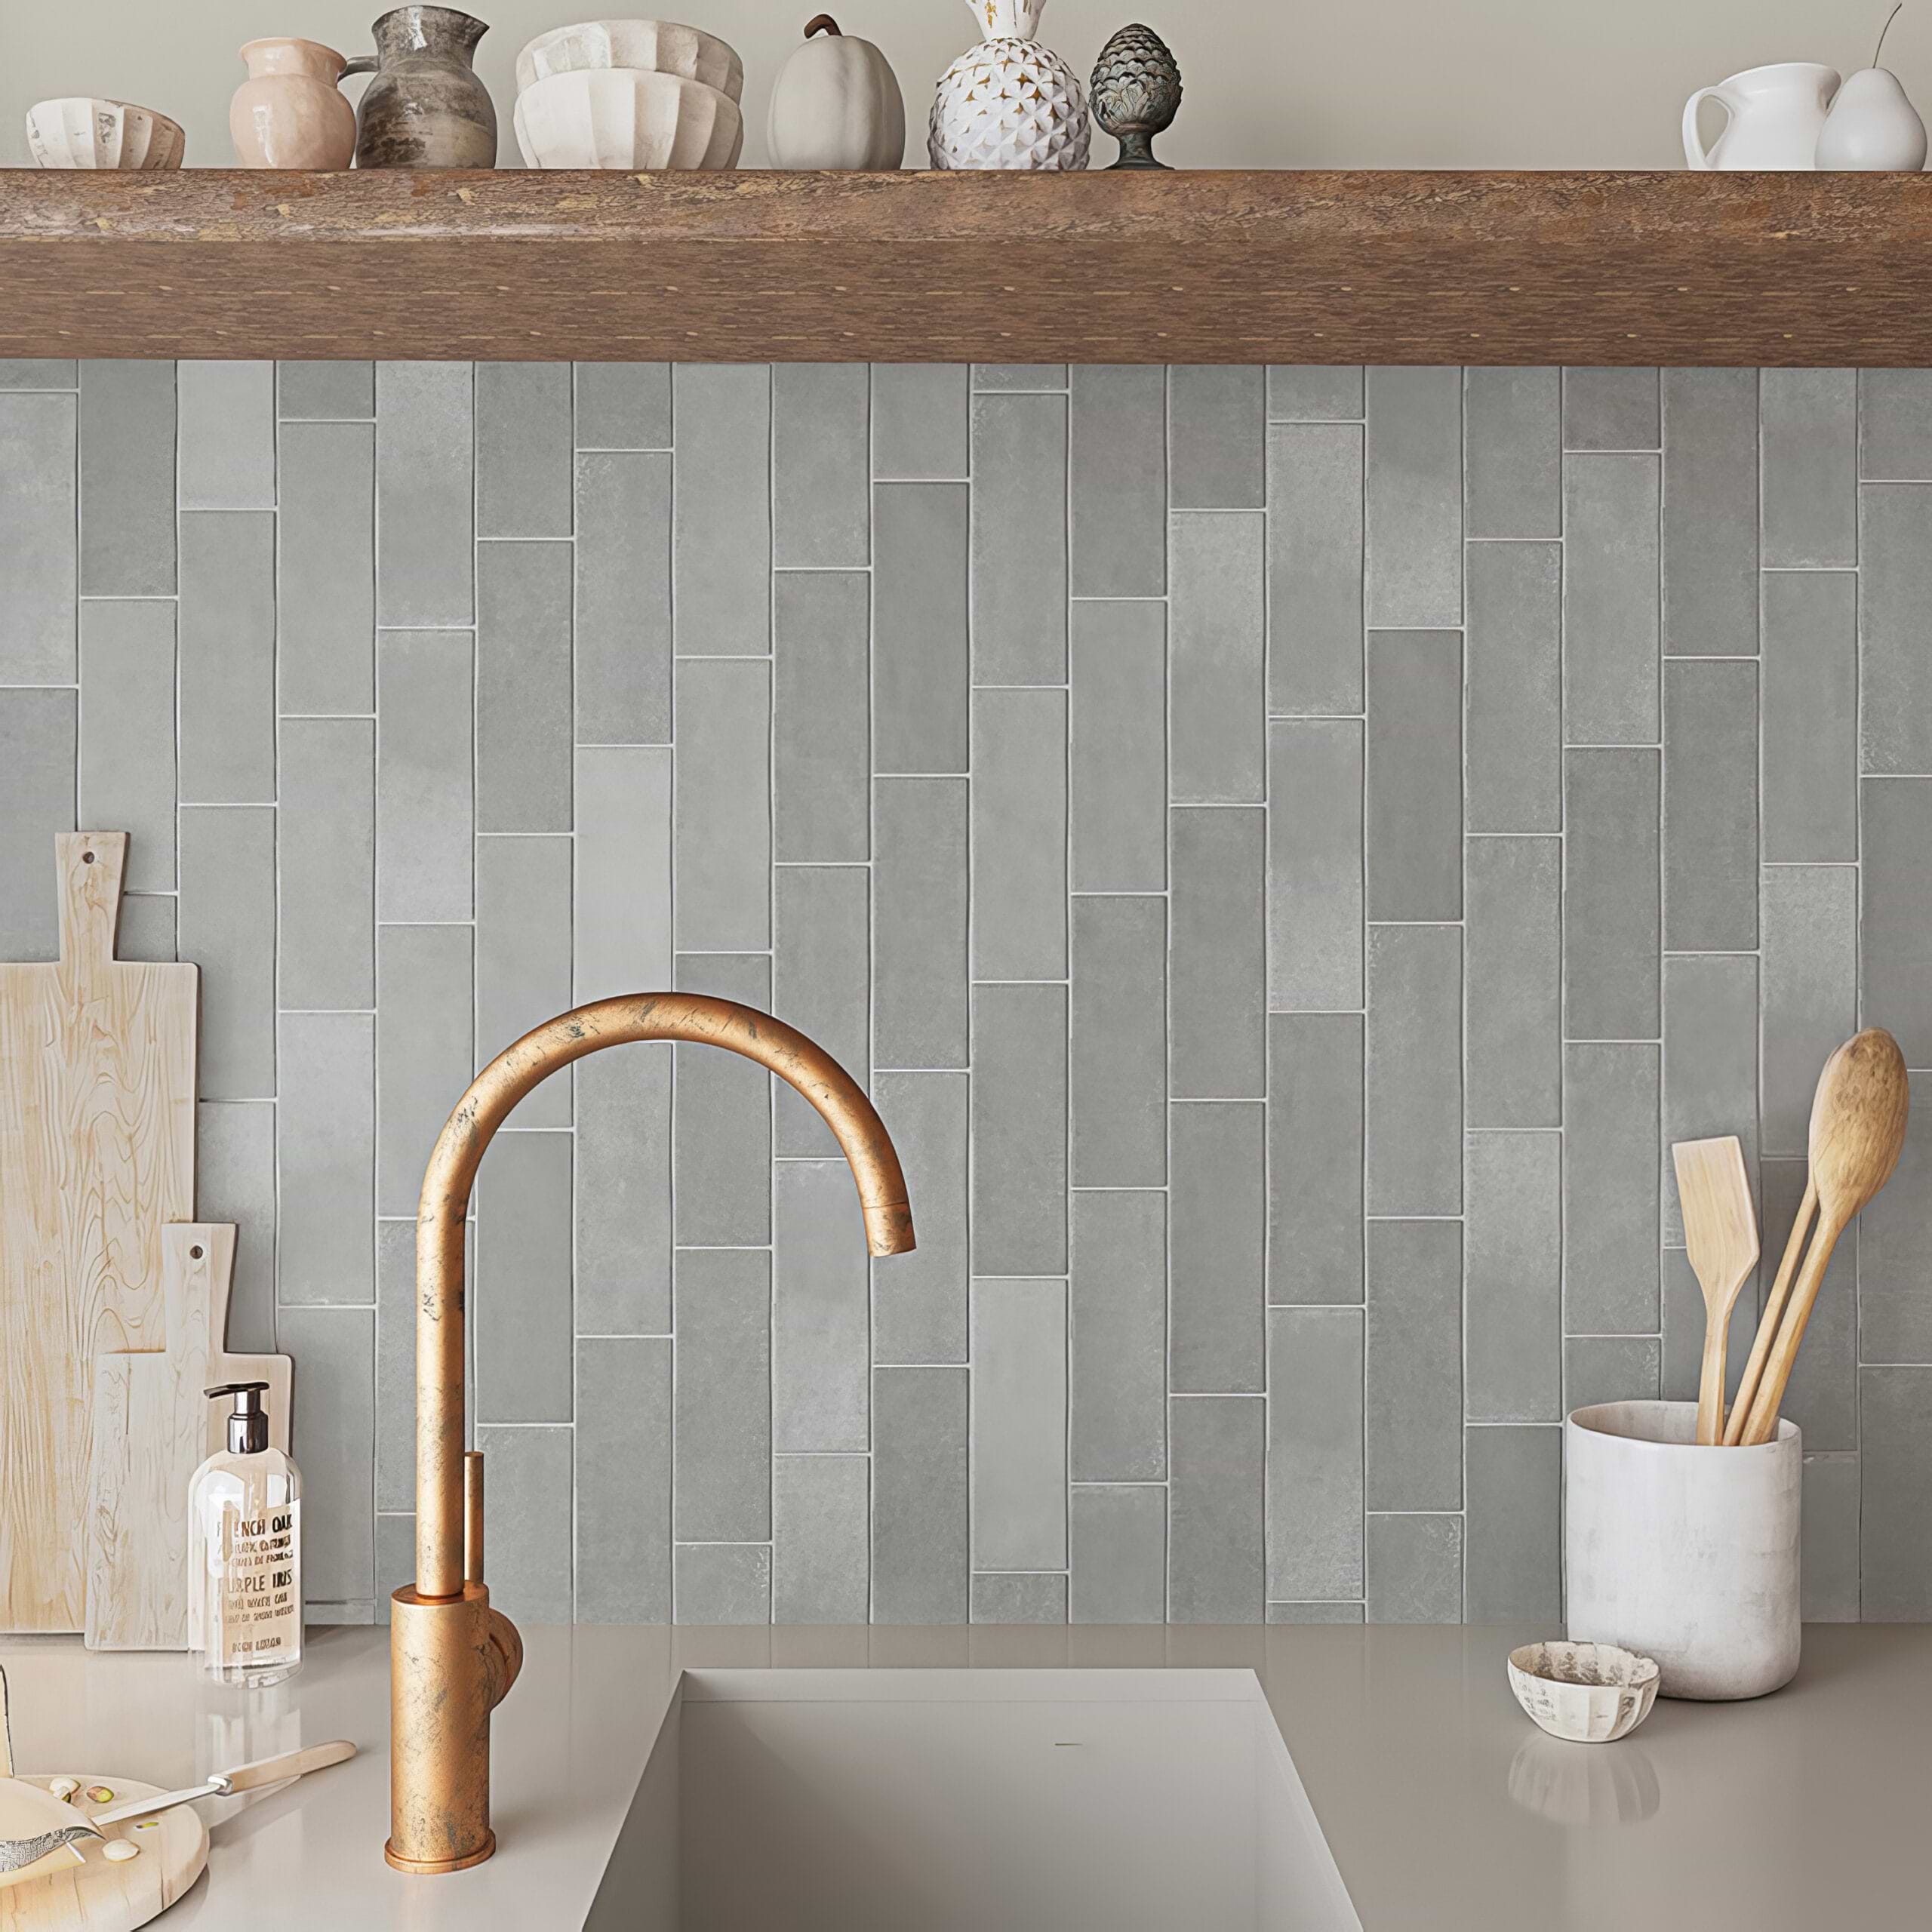
7. Cap Vertical Subway Tiles with a Rustic Wood Shelf
To install a floating shelf as a tile cap, follow these steps. This project should take 2-3 hours, with a material cost of $50-$150, depending on the wood.
- First, determine the final height of your backsplash and mark a level line. Install tile up to this line.
- Install the floating shelf’s hidden bracket directly above the tile line, screwing it firmly into wall studs.
- Apply a bead of clear silicone adhesive to the top edge of the tile.
- Slide the hollow wood shelf onto the bracket, pressing it down firmly onto the tiled edge.
- Secure the shelf to the bracket from underneath with the provided set screws.
- Caulk the seam where the wall meets the top of the shelf for a finished look.
|
📋 Copy HEX 🔗 Share |
The defining element here is the vertical orientation of the gray subway tiles. Flipping the classic subway pattern on its end instantly modernizes the look and creates a sense of height, drawing the eye upward. If these tiles were laid horizontally, the effect would be far more traditional and standard. The vertical lines add subtle texture and a graphic quality that pairs beautifully with the strong horizontal line of the rustic wood shelf, making the whole composition feel thoughtful and unique.
8. Create a Raw Edge with Staggered Marble Tiles Against Plaster
A staggered, unfinished edge is a bold and artistic choice, but it can be a cleaning nightmare. The exposed top edges of the tiles create tiny ledges for dust, grease, and cooking splatters to collect. This isn’t a practical choice for a backsplash directly behind a messy cooking zone. The textured plaster wall above is also more difficult to wipe down than a standard painted surface. This look is best for a low-use area, like a coffee bar or entryway, where its sculptural quality can be appreciated without the demands of heavy use.
|
📋 Copy HEX 🔗 Share |
This dramatic, minimalist statement is best suited for spaces with significant visual breathing room. It requires a wall run of at least 6 feet to allow the staggered pattern to feel rhythmic and not just random. It also works best on a section of wall without upper cabinets, where the plaster texture and staggered edge can be the main feature. The ideal ceiling height is 9 feet or more, which emphasizes the negative space above the tile and adds to the gallery-like, artistic feel of the installation.
9. Frame a Window Nook within a Hexagon Tile Wall
To recreate this clean, custom-looking niche, here’s a potential cost breakdown:
- White Hexagon Mosaic Tile: $10 – $20/sq. ft. (approx. $300 – $600 for 30 sq. ft.)
- Marble Shelf: $75 – $200 (for a custom-cut remnant)
- Tile Edge Trim (Schluter-style): $20 – $40
- Gold Wall Sconces: $150 – $400 (for a pair)
- Labor for Tile/Niche Creation: $800 – $1500
- TOTAL: $1,345 – $2,740
- Budget Alternative: Use a pre-made recessed niche from a big-box store ($100) and tile within it.
|
📋 Copy HEX 🔗 Share |
When tiling a recessed niche or window reveal, the trim is everything. For a sharp, professional finish, use a metal edge trim like the Schluter Jolly. The key is to have the trim on the outside corners only. The inside corners where the niche walls meet the back should be a clean, caulked seam, not another piece of trim. This makes the niche look like it was carved out of a solid tiled wall, rather than constructed from multiple pieces. Contrast this with the trim on the bold backsplash in Idea #17.
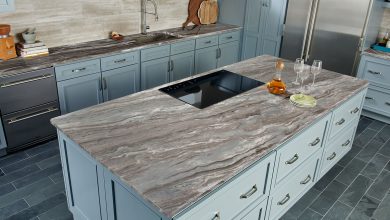
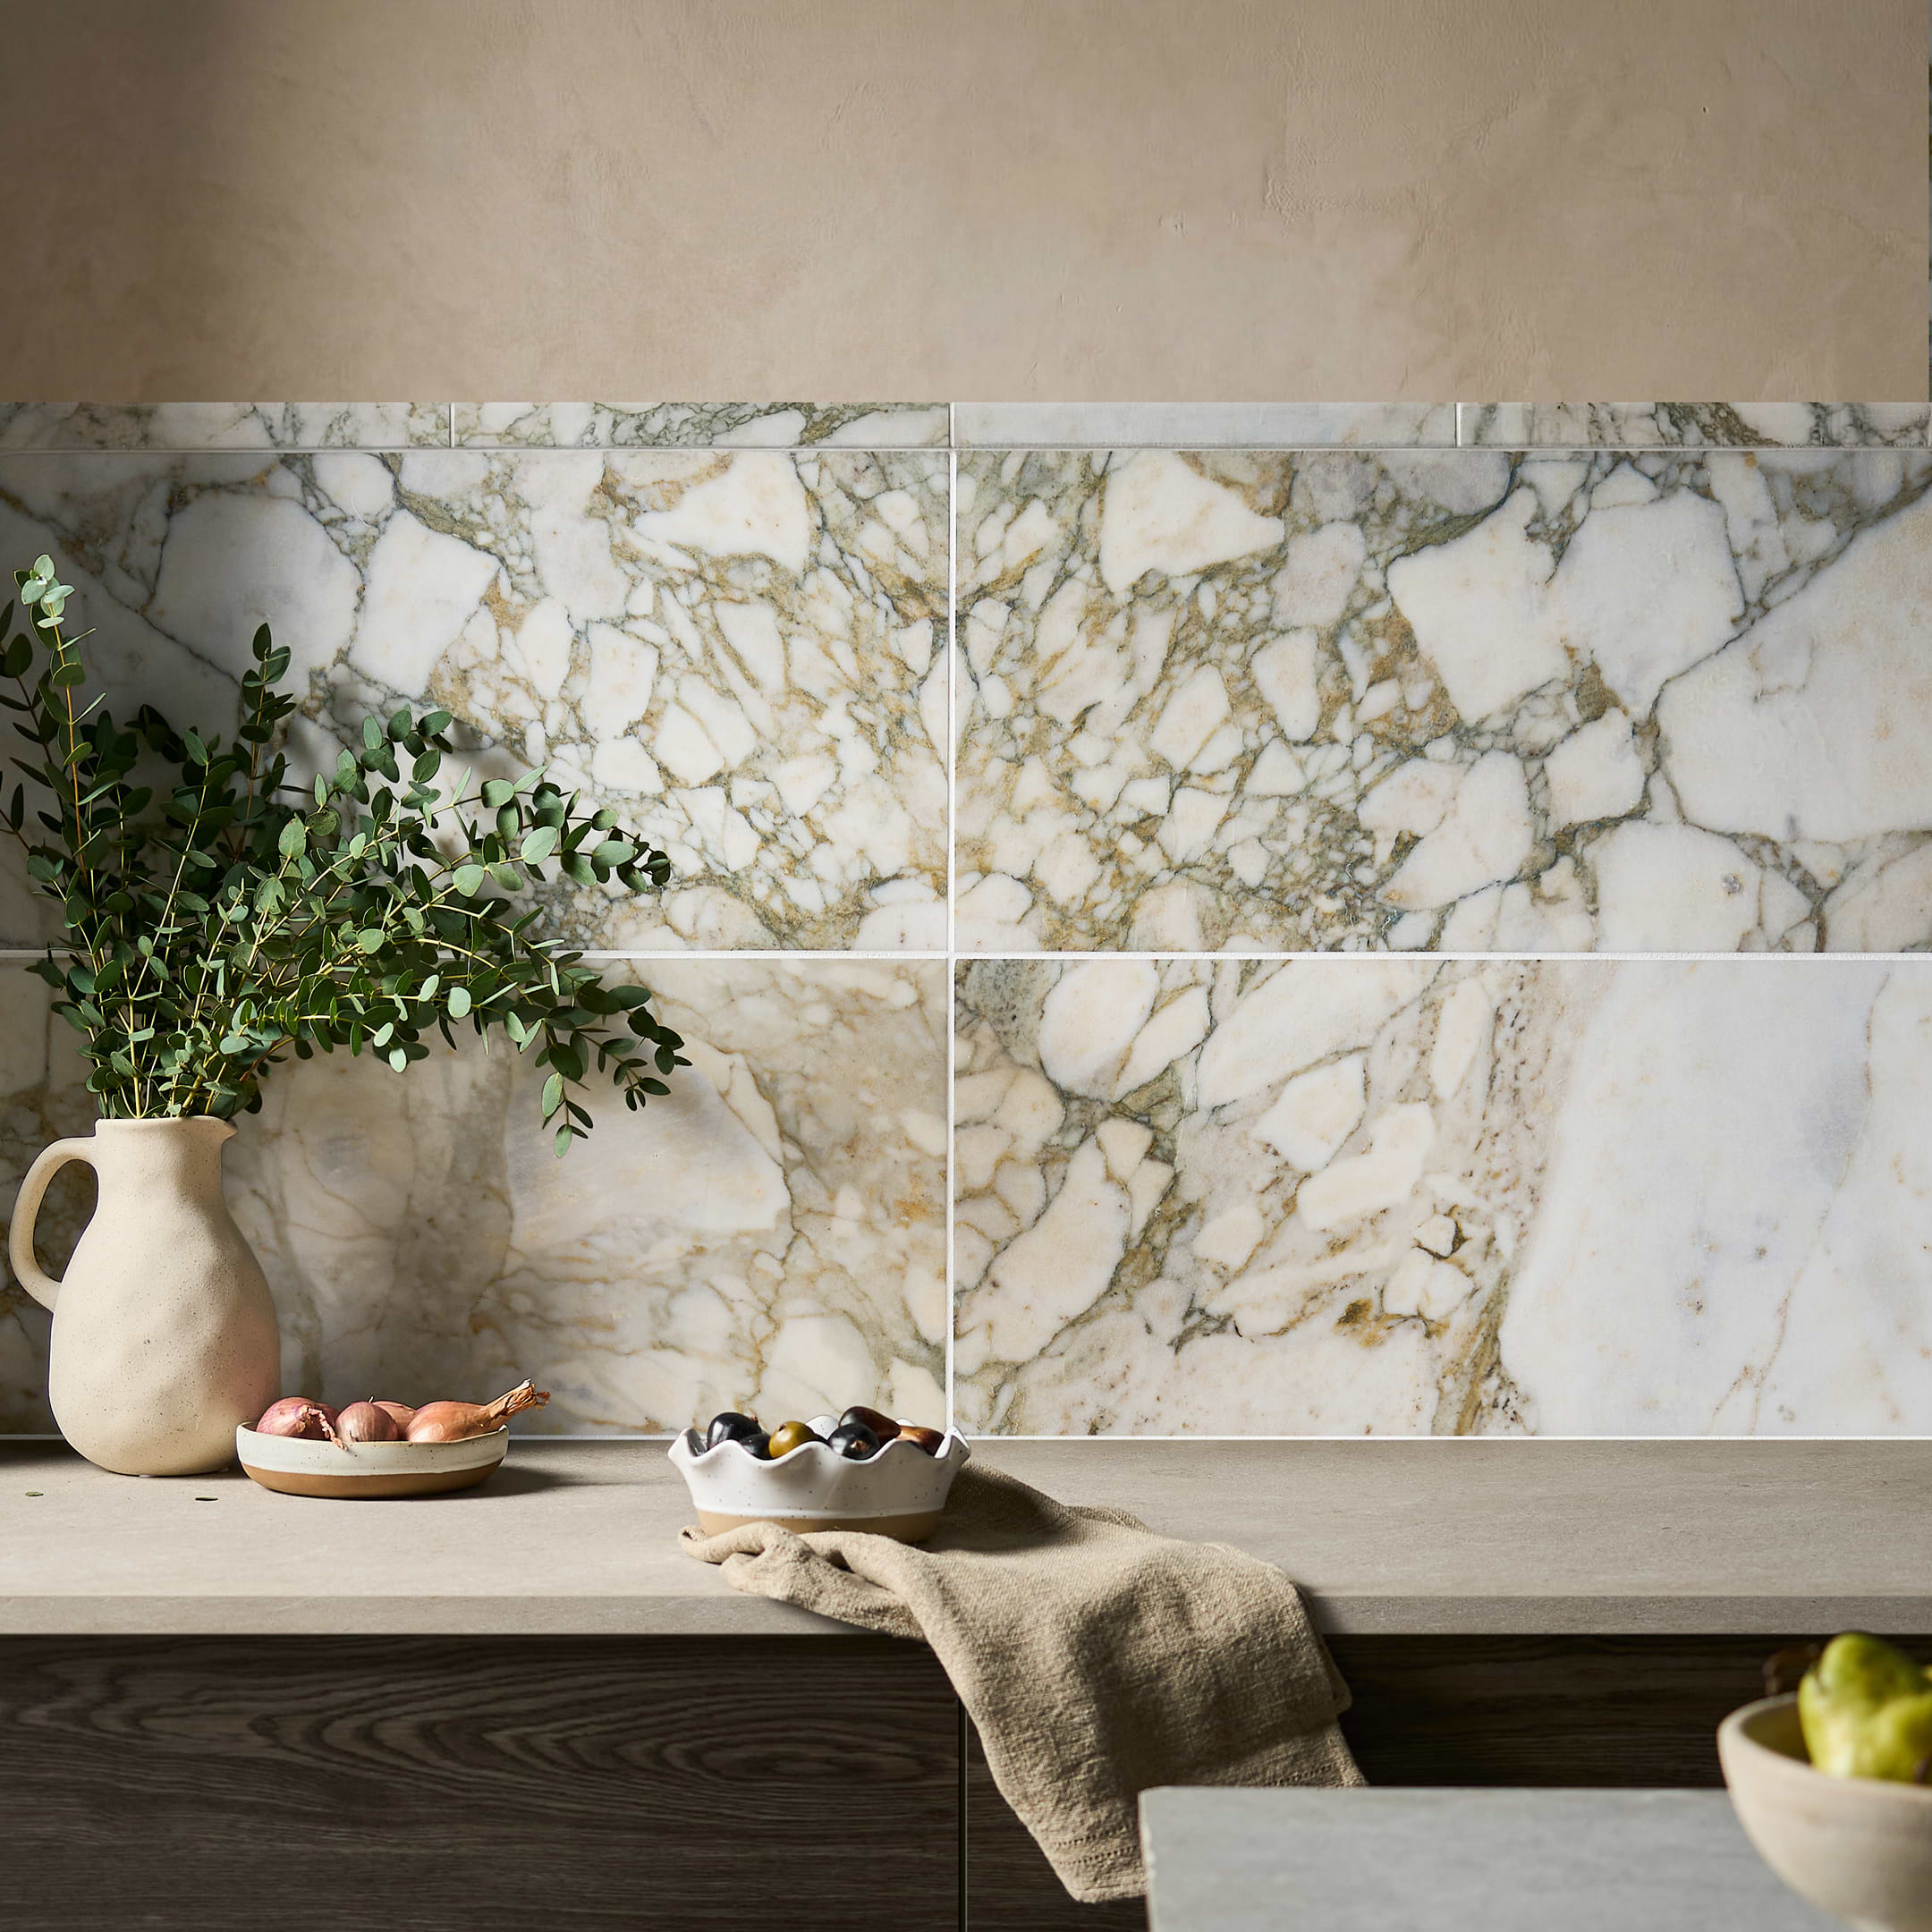
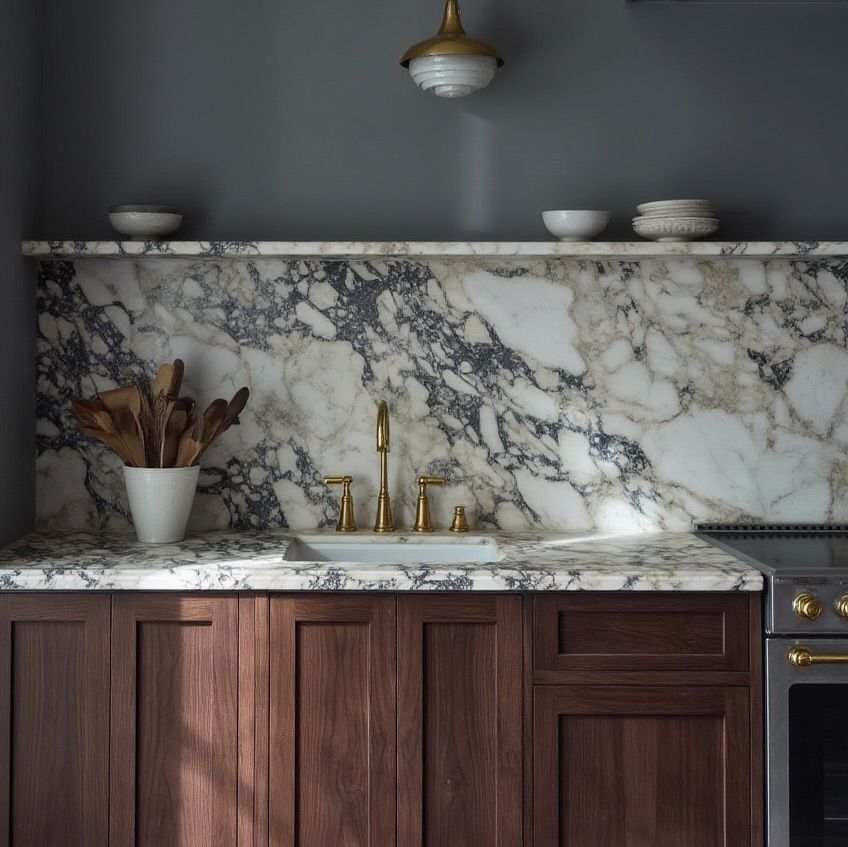
10. Extend a Marble Countertop Up for a Seamless Shelf
The absolute star of this kitchen is the continuity of the marble. Using the exact same slab for the countertop, the full-height backsplash, and the integrated upper shelf creates an unbroken flow of dramatic veining that is pure luxury. This isn’t just a backsplash; it’s a monolithic sculpture that serves a kitchen’s function. The dark wood cabinets below simply act as a pedestal for the marble artistry above. Without this continuity, it would just be a collection of nice materials; with it, it’s a singular, breathtaking statement.
|
📋 Copy HEX 🔗 Share |
Living with a marble backsplash and shelf requires care. Marble is a soft, porous stone prone to etching from acids (like lemon juice, vinegar, or wine) and staining from oils and colorful liquids. The integrated shelf is particularly vulnerable to drips from anything placed on it. You must use a high-quality penetrating sealer upon installation and reseal it every 6-12 months. Clean up spills immediately using only a pH-neutral stone cleaner. Avoid all abrasive sponges or harsh chemical cleaners, which will dull the finish.
11. Use an Ornate Stone Corbel to Transition Between Tile Styles
This traditional design works by using a strong, architectural element to create a deliberate and decorative transition. The carved stone corbel acts as a visual full stop, allowing the busy mosaic tile behind the range to have its moment without clashing with the simpler subway tile on the adjacent wall. It provides a logical reason for the two patterns to coexist. The substantial size and matching material of the corbel give it the authority to be this dividing line, making the whole arrangement feel grand and intentional.
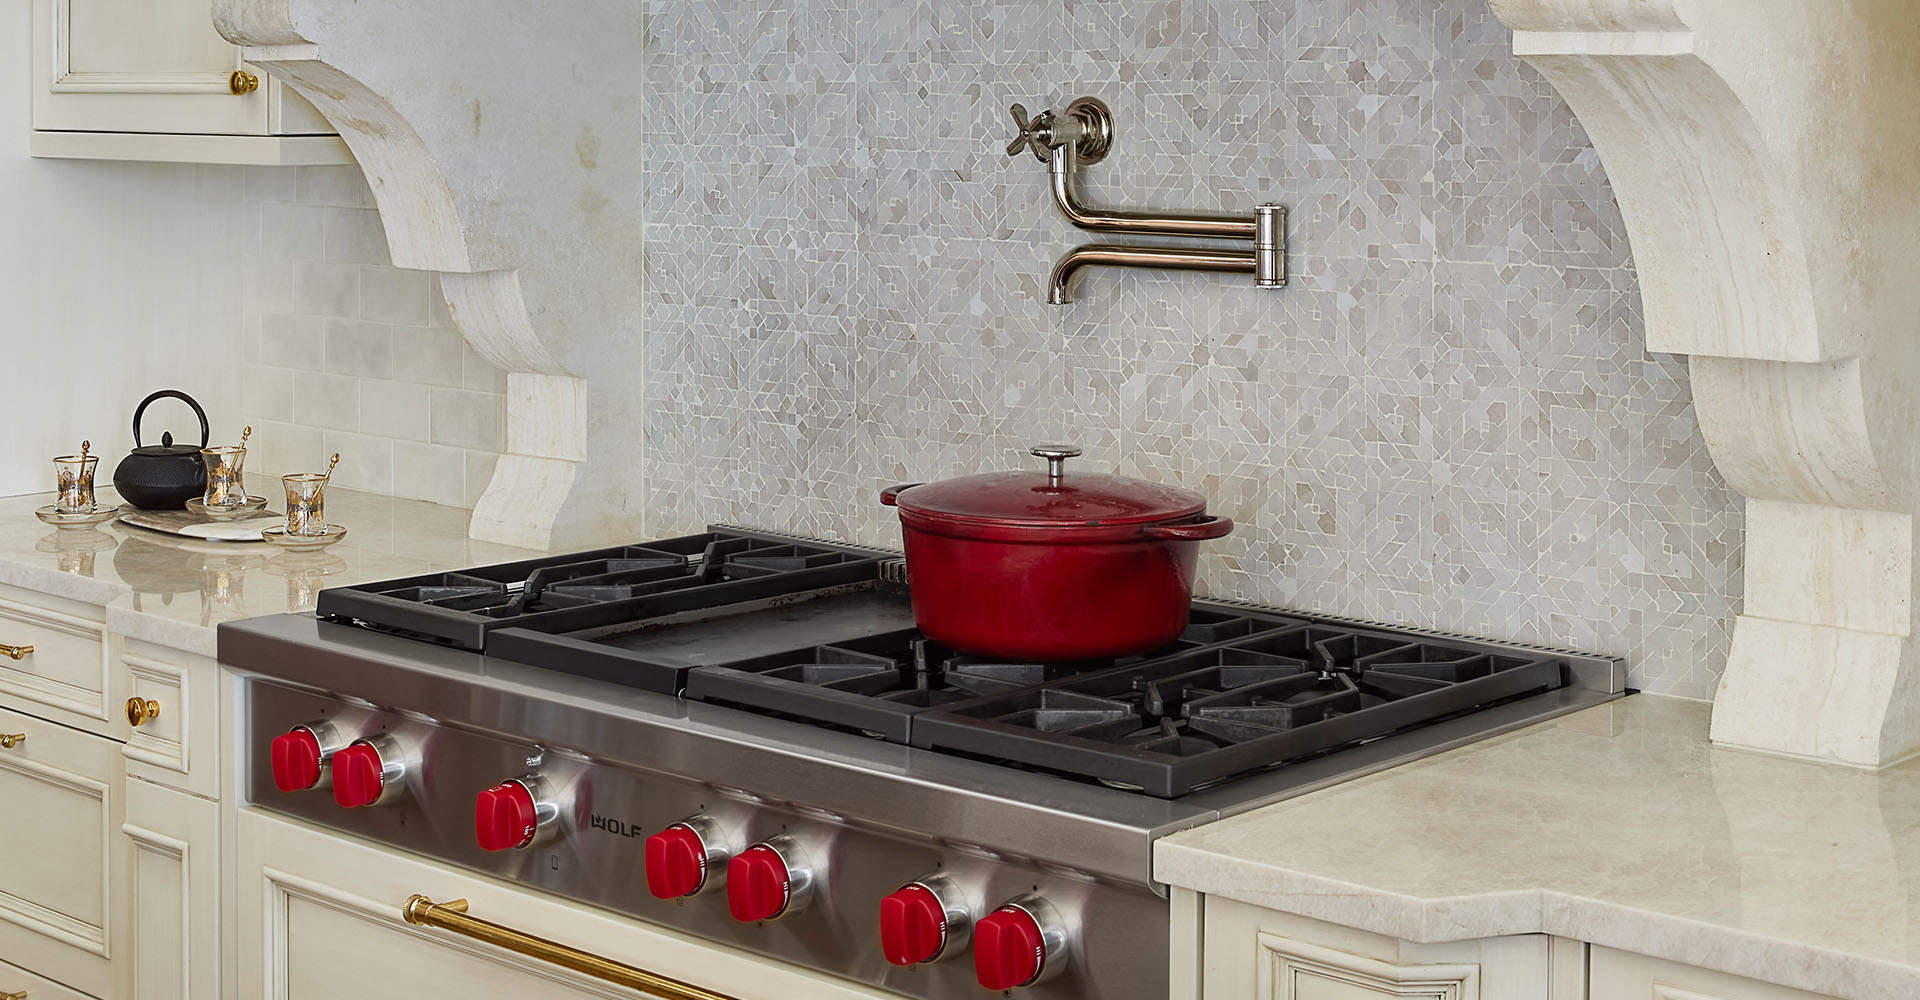
A large, carved stone corbel is a very specific, traditional design choice. It can look stunning and stately in the right kitchen, but it can easily look out of place or dated in a more modern or transitional home. It also adds another surface to clean, with curves and crevices that can collect grease and dust, especially when located right next to the range. This is a look you have to be fully committed to, as it will heavily define the style of your entire kitchen.
12. Leave a Jagged, Unfinished Edge on Herringbone Tile
This unfinished, “deconstructed” look is gaining traction, particularly in Europe, as a reaction against overly perfect, sterile kitchens. It’s a wabi-sabi approach that finds beauty in imperfection and the construction process itself. By leaving the stepped edge of the herringbone pattern exposed, the homeowner is making a confident style statement that values texture and authenticity over a flawless finish. It’s a bit industrial, a bit rustic, and feels very personal and unfussy, which is a direction many designers are exploring right now.
|
📋 Copy HEX 🔗 Share |
This is an incredibly budget-friendly way to finish a backsplash edge because… you don’t! The main cost is the tile itself. You can find beveled subway tiles at any big-box hardware store for $0.30 – $0.50 per tile. The savings come from not needing to buy any specialty trim pieces (like schluter, pencil liners, or bullnose tiles) and potentially saving on labor, as the tiler doesn’t have to make precise cuts for a straight edge. Just be sure the exposed wall is painted perfectly, as it becomes part of the final look.
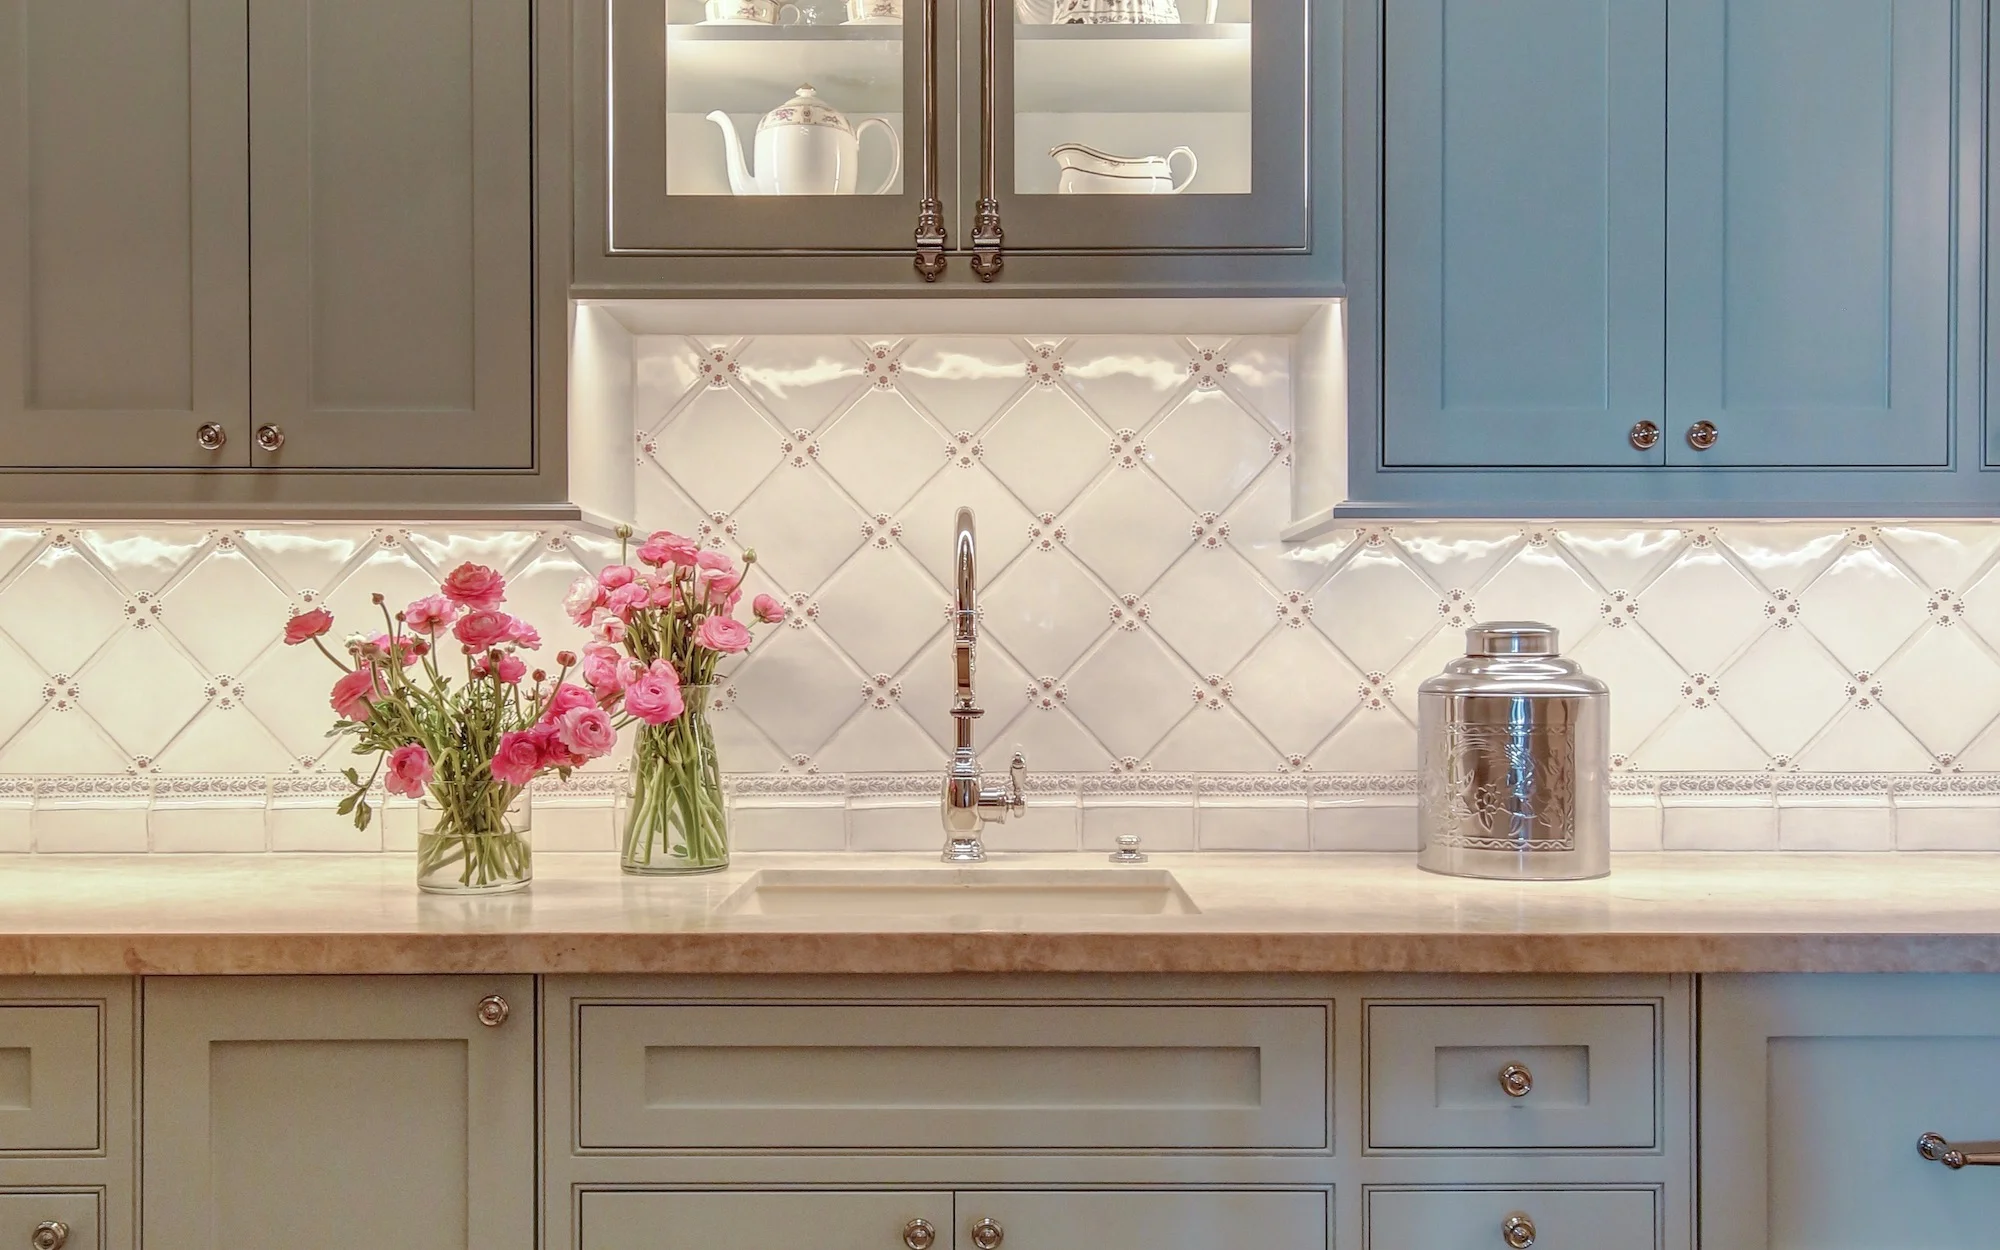
13. Add a Delicate, Carved Border at the Countertop Seam
When using a decorative liner tile like this, proportion is key. The border tile should be no taller than one-third the height of the main field tile. Here, the delicate carved piece is a perfect accent to the larger diamond-shaped tiles, defining the edge without overwhelming it. For installation, always start with the border tile. Lay it perfectly level along the countertop first, then build your main pattern up from there. This ensures your ‘foundation’ is straight and the rest of the pattern will be flawless. This is a much more classic approach than the ornate tile in Idea #4.
|
📋 Copy HEX 🔗 Share |
The formula here is one of subtle elegance: 80% neutral texture + 15% decorative detail + 5% polished shine. The creamy white diamond tiles provide a gentle, textured field that covers most of the surface. The carved border tile is the single piece of ornate detail, concentrated at the bottom for a grounding effect. Finally, the polished chrome faucet adds a small but essential touch of sparkle, keeping the monochromatic scheme from feeling flat. It’s a quiet, confident style that feels timeless.
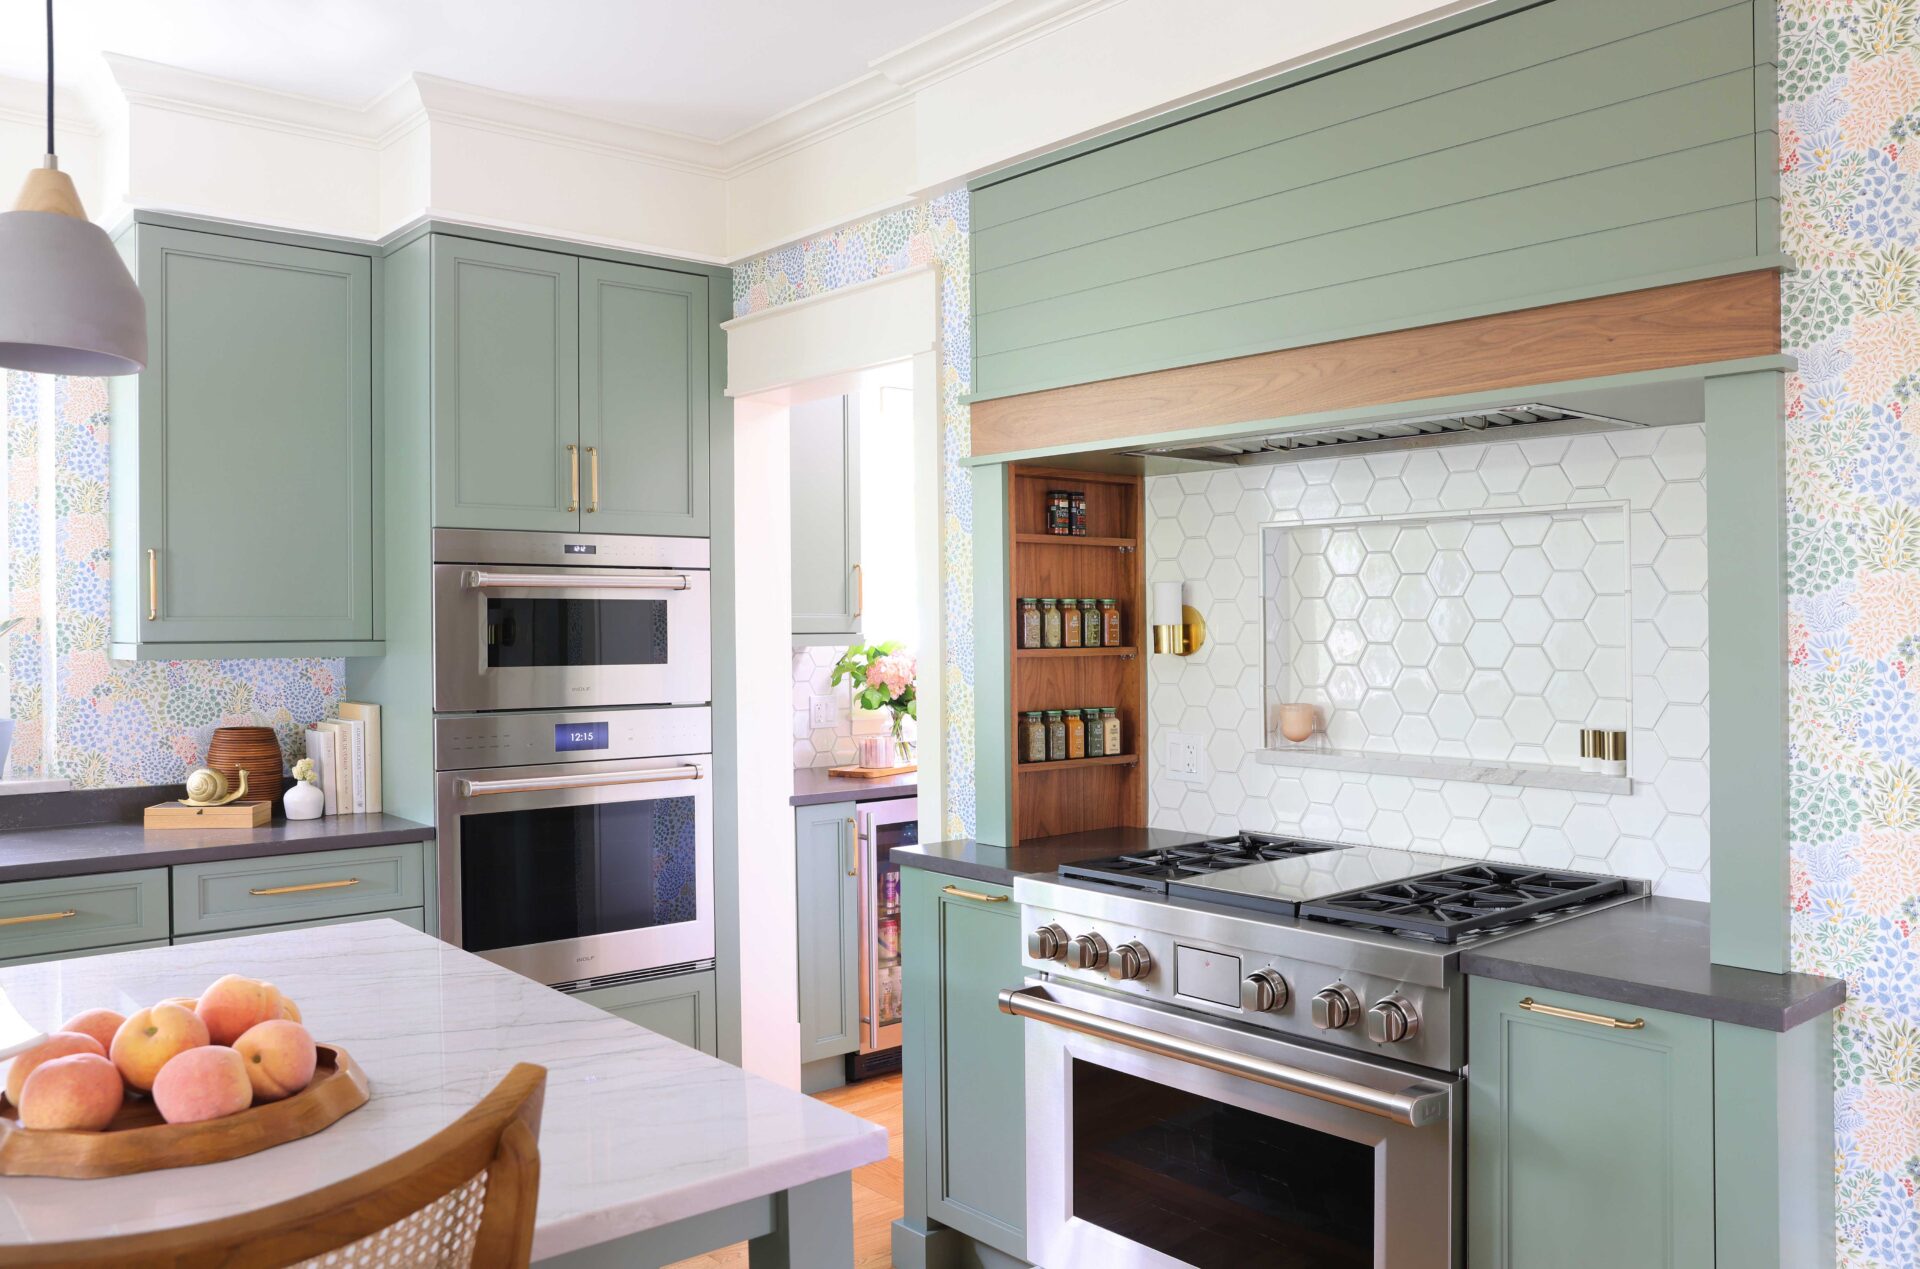
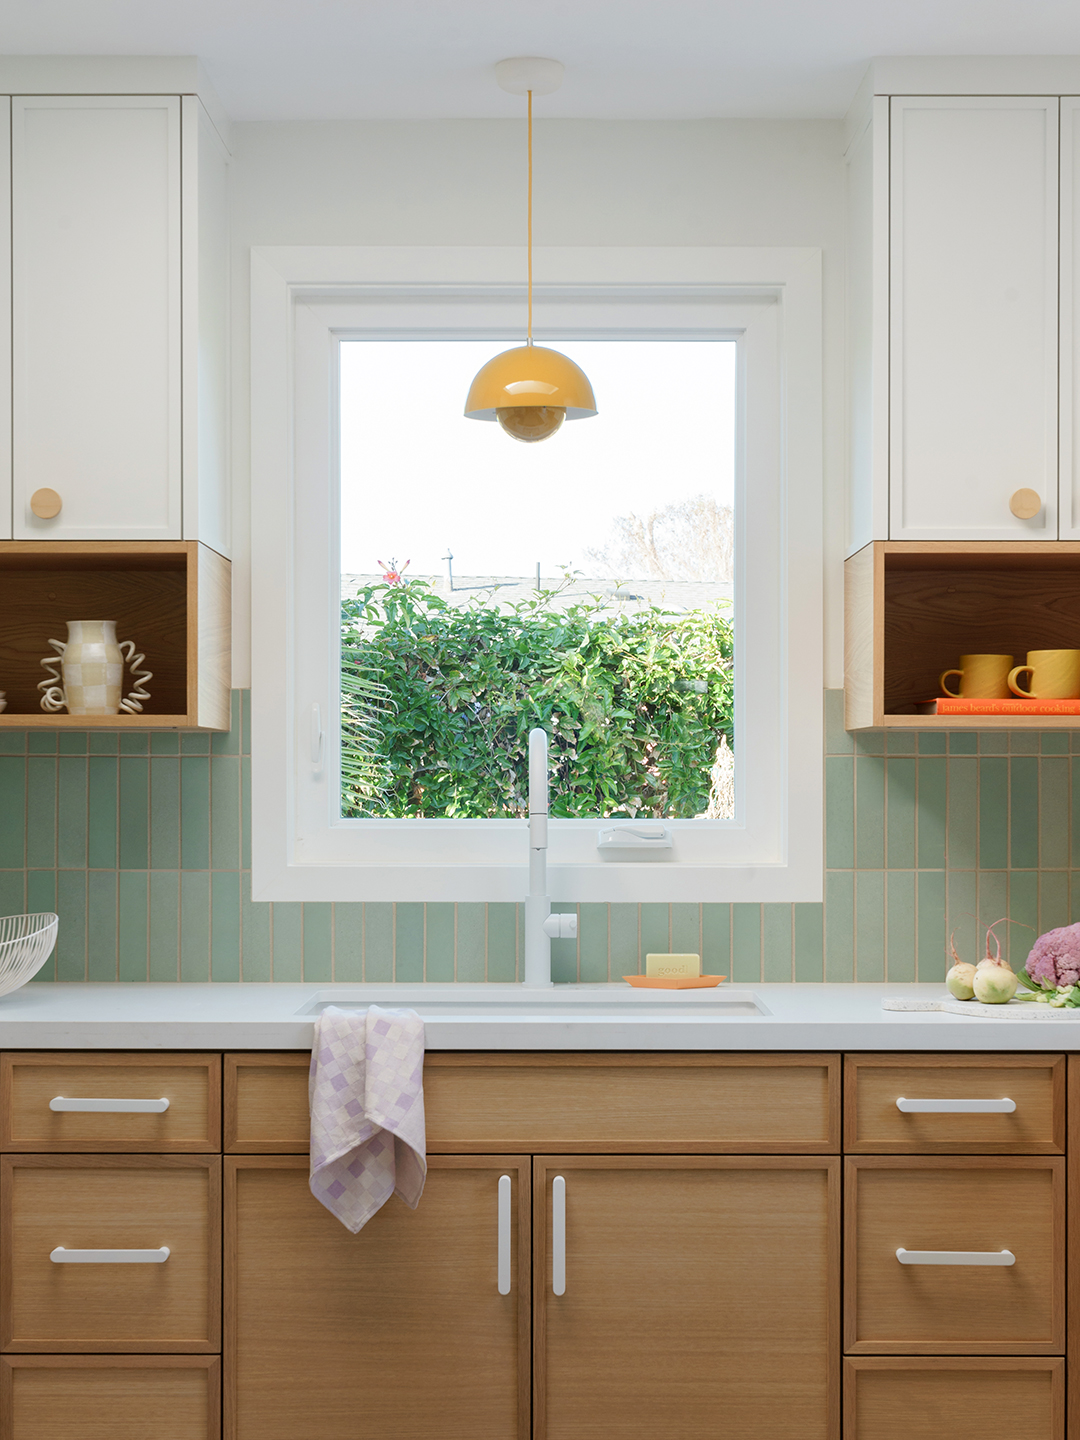
14. Use a Window Frame as a Natural Backsplash Terminus
The smartest decision in this kitchen was to choose a tile color that purposefully and beautifully complements the cabinetry, but let’s talk about what makes it work. The mint green of the vertical tiles is the absolute star of the show. It’s a fresh, playful, and unexpected color choice that injects so much personality into the space. If this were a white or gray tile, the kitchen would be perfectly nice, but it wouldn’t be memorable. The mint green is a confident choice that defines the entire mood, making it feel cheerful and custom.
|
📋 Copy HEX 🔗 Share |
This design is a masterclass in using existing architecture as a frame. By running the vertical mint green tiles right up to the underside of the white window frame, the frame itself becomes the backsplash trim. This works because of the clean color contrast and the perfect ninety-degree angles. It creates a crisp, no-fuss boundary that feels completely natural and integrated. The tile doesn’t need a separate trim piece because the window is doing that job perfectly, making the whole installation look seamless.
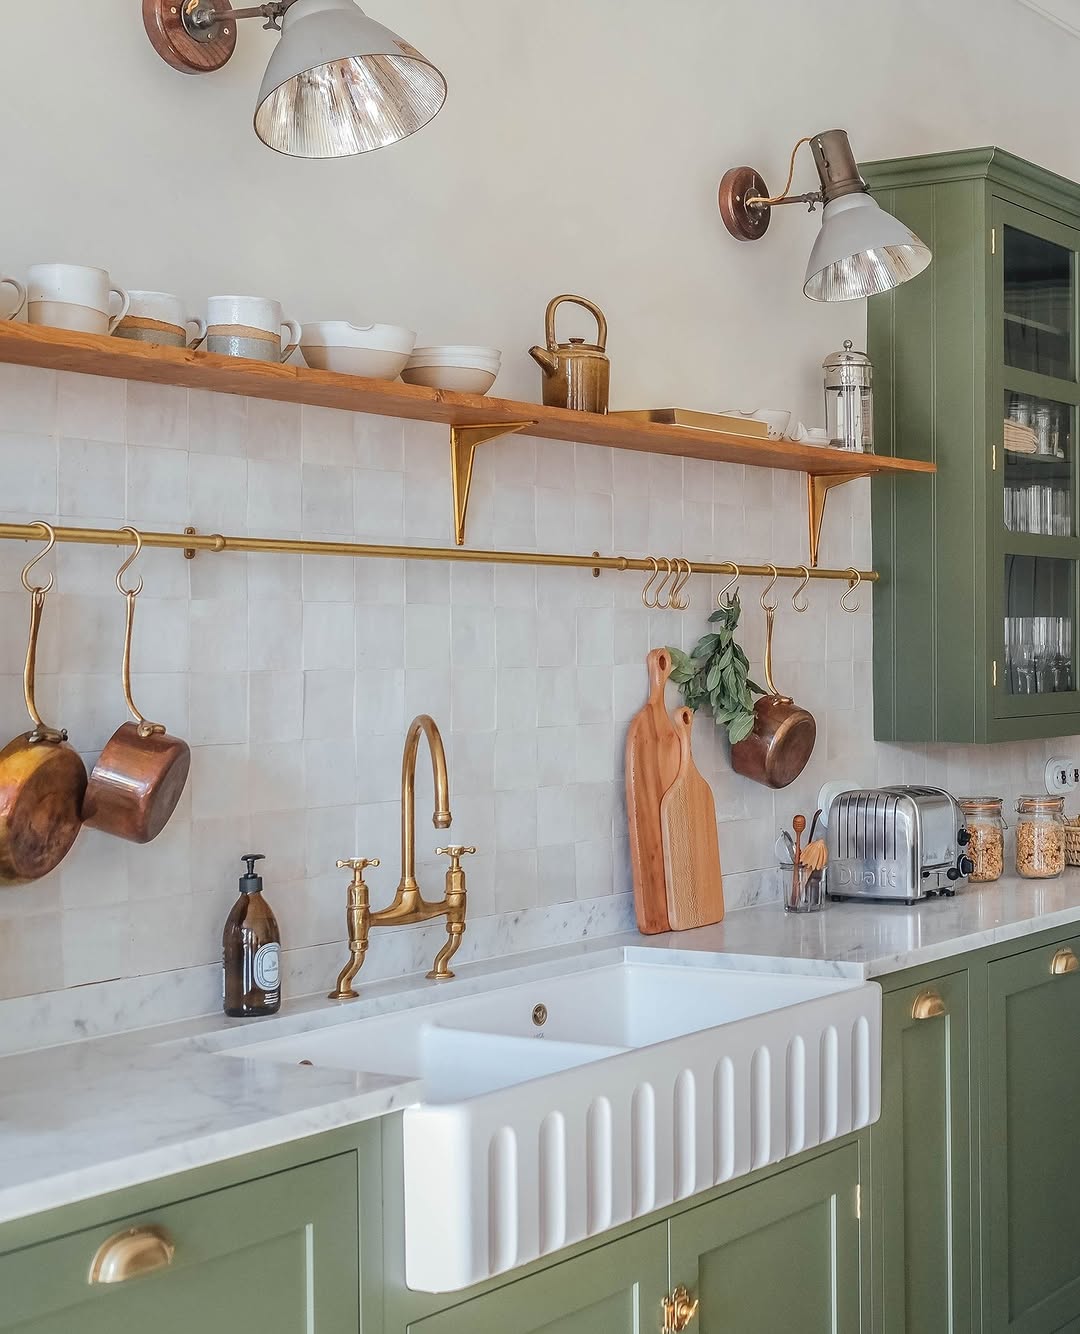
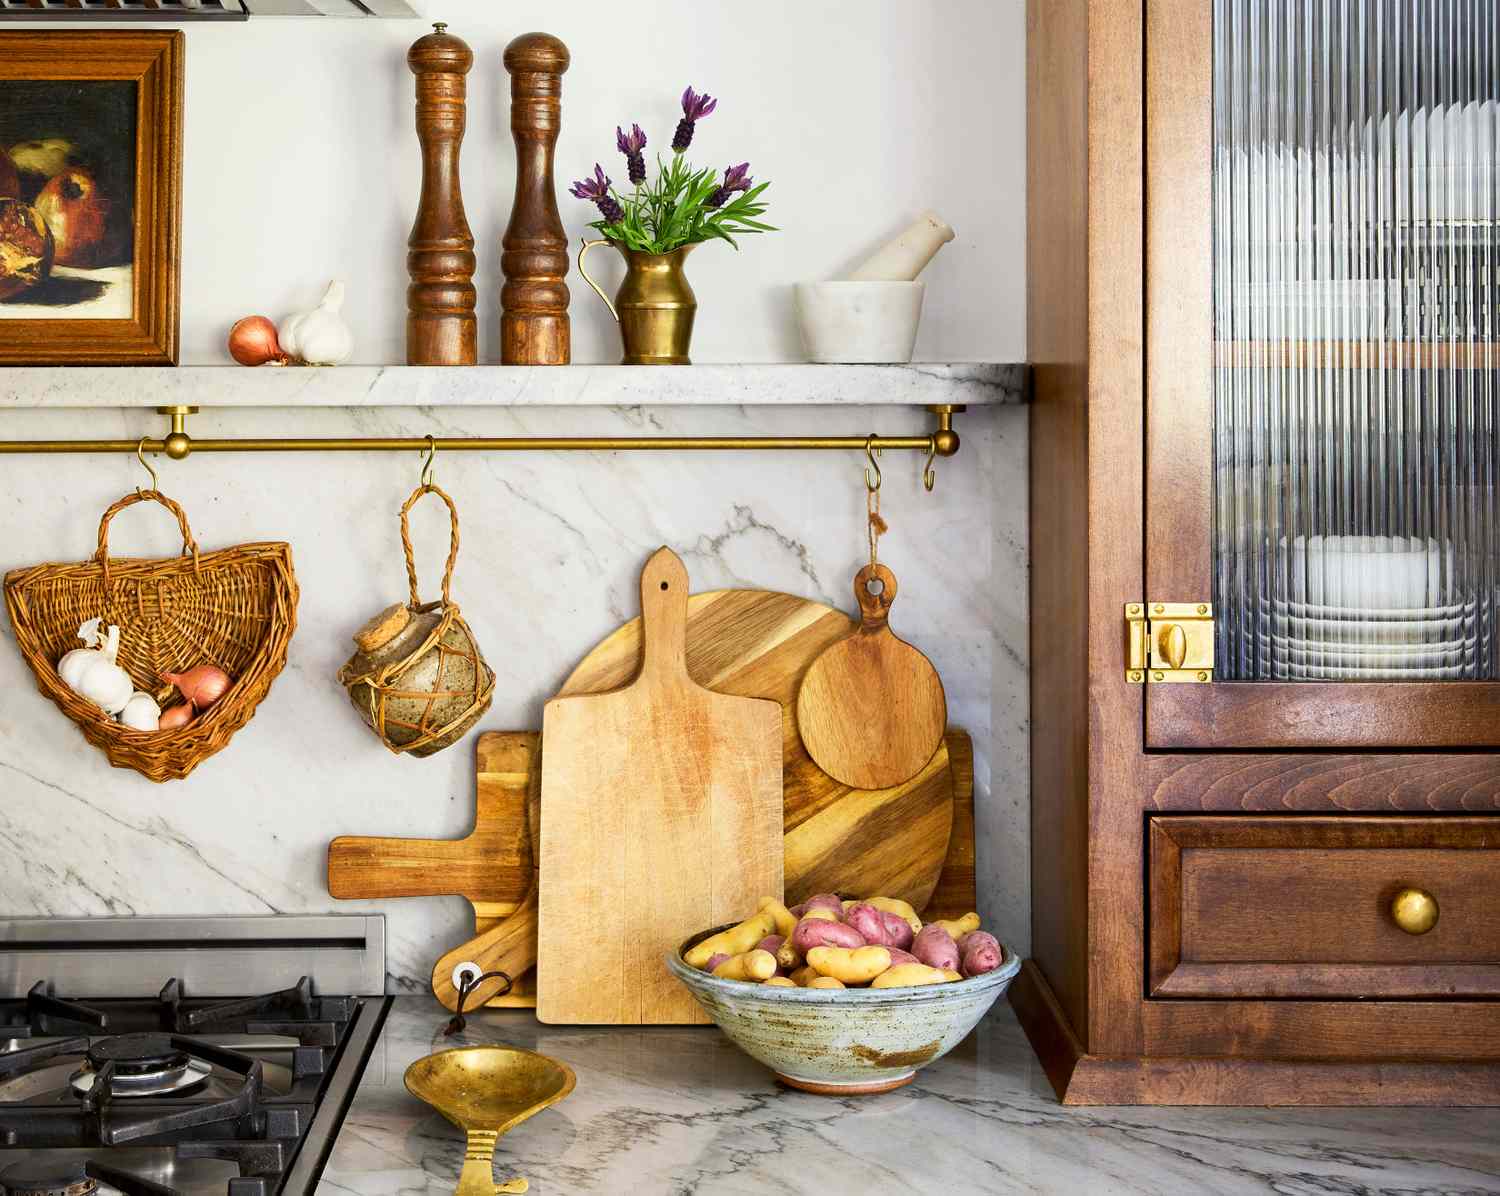
15. Add Function with a Brass Rod Below an Integrated Marble Shelf
Before committing to an integrated shelf-and-rod system, run through this checklist:
- Have you confirmed the wall has sufficient blocking to support the weight of a stone shelf plus anything you hang from the rod? Standard drywall is not enough.
- Did you source your shelf, brackets, and rod from the same supplier or finish family to ensure the brass matches perfectly?
- What will you hang from the rod? Ensure your S-hooks and utensils won’t constantly clank against and potentially chip or scratch your expensive marble backsplash.
- Is the shelf purely for decor, or do you need it for storage? This will determine the depth you need, which impacts cost and installation. The shelf in Idea #3 is a simpler, more decorative version.
|
📋 Copy HEX 🔗 Share |
While a brass utensil rod looks incredibly chic and is a favorite on Pinterest, be prepared for the reality. If you hang metal utensils, they will swing and clatter against your marble backsplash every time you grab one, which can lead to chips and scratches over time. We notice this one uses wooden cutting boards, a much safer bet. The brass rod and hooks will also develop a patina over time, which can be beautiful if you like a lived-in look but will require regular polishing if you prefer a bright, uniform shine.
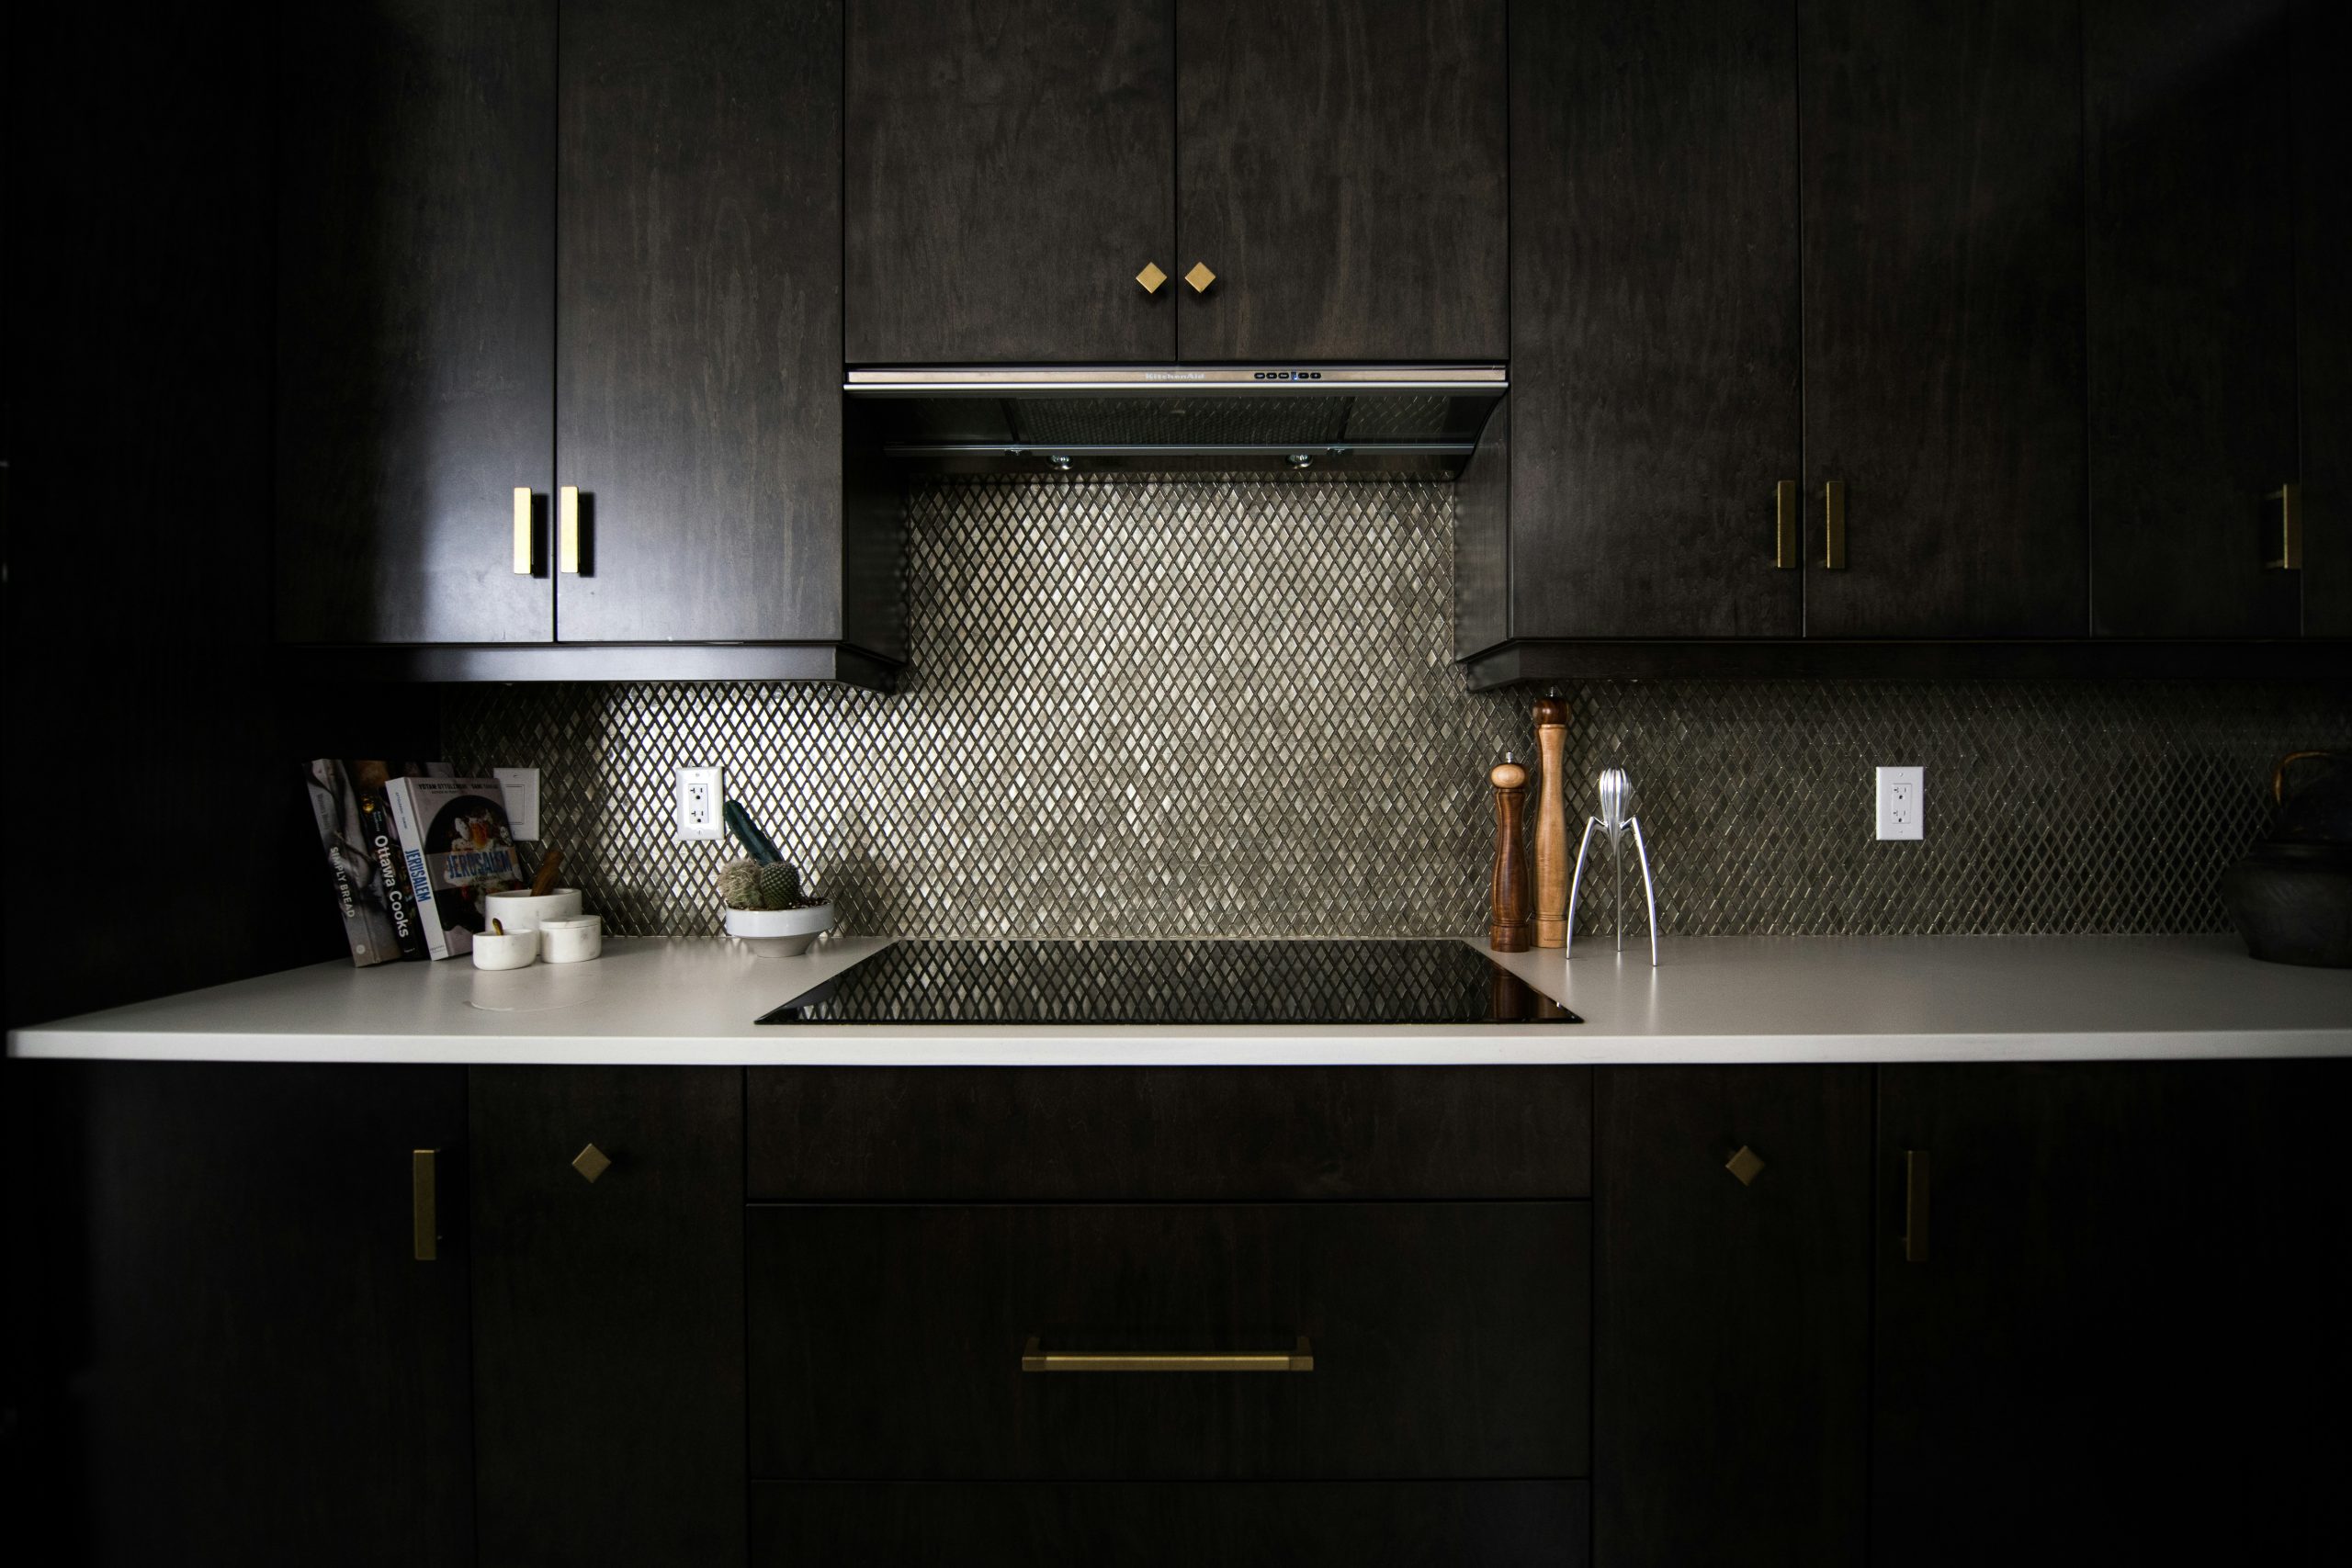
16. Contrast Dark Wood and a Diamond Mosaic with a Simple White Counter
A dark and dramatic look like this works best in a kitchen that receives a good amount of natural light. In a small, dark kitchen, the dark wood cabinets and busy backsplash could feel heavy and enclosing. This style is ideal for an open-concept space or a kitchen with large windows. The minimum recommended ceiling height is 8 feet, but 9 feet is better to prevent the dark tones from feeling oppressive. The reflective quality of the metallic tile and the stark white countertop are key to bouncing light around and maintaining balance.
|
📋 Copy HEX 🔗 Share |
When using a busy, small-scale mosaic tile, it’s critical that the surrounding elements are simple and clean. Notice how the backsplash is paired with a pure white, solid-surface countertop with no pattern or veining. This provides a visual break and prevents the two surfaces from competing. If the countertop were also heavily patterned, the entire look would become chaotic. Let the backsplash be the star and ensure the countertop is a quiet, supporting actor.
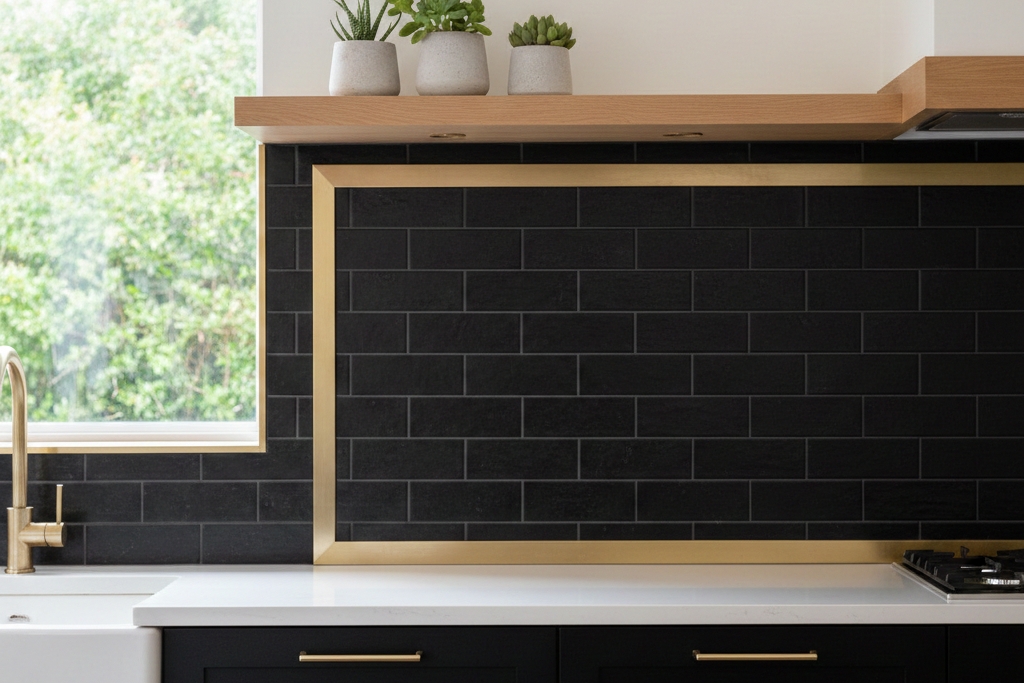
17. Frame Black Subway Tile with a Sharp Brass Trim
This high-contrast, elegant look is surprisingly achievable on a budget. Black subway tile is very affordable, often costing just $5-$8 per square foot. The key is the brass trim. Instead of a solid brass bar, look for Schluter-style edge trim in a brushed brass finish. A standard 8-foot piece costs around $30-$50 at a tile or hardware store. Pair it with a simple white farmhouse sink from IKEA ($250) and a budget-friendly brass faucet from Amazon or Wayfair ($100-$150). The light wood shelf can be a simple stained pine board from Lowe’s. The entire vibe can be yours for under $700.
|
📋 Copy HEX 🔗 Share |
This design works because of the powerful principle of contrast. First, you have the stark black tile against the bright white sink and grout lines, a classic and bold pairing. Second, you have the material contrast between the matte ceramic tile and the shiny, metallic brass trim. The trim acts like a picture frame, elevating the simple subway tile and making it feel much more luxurious and intentional. The warm wood shelf adds a third layer of contrast, this time with a natural, organic texture that softens the graphic black and gold.
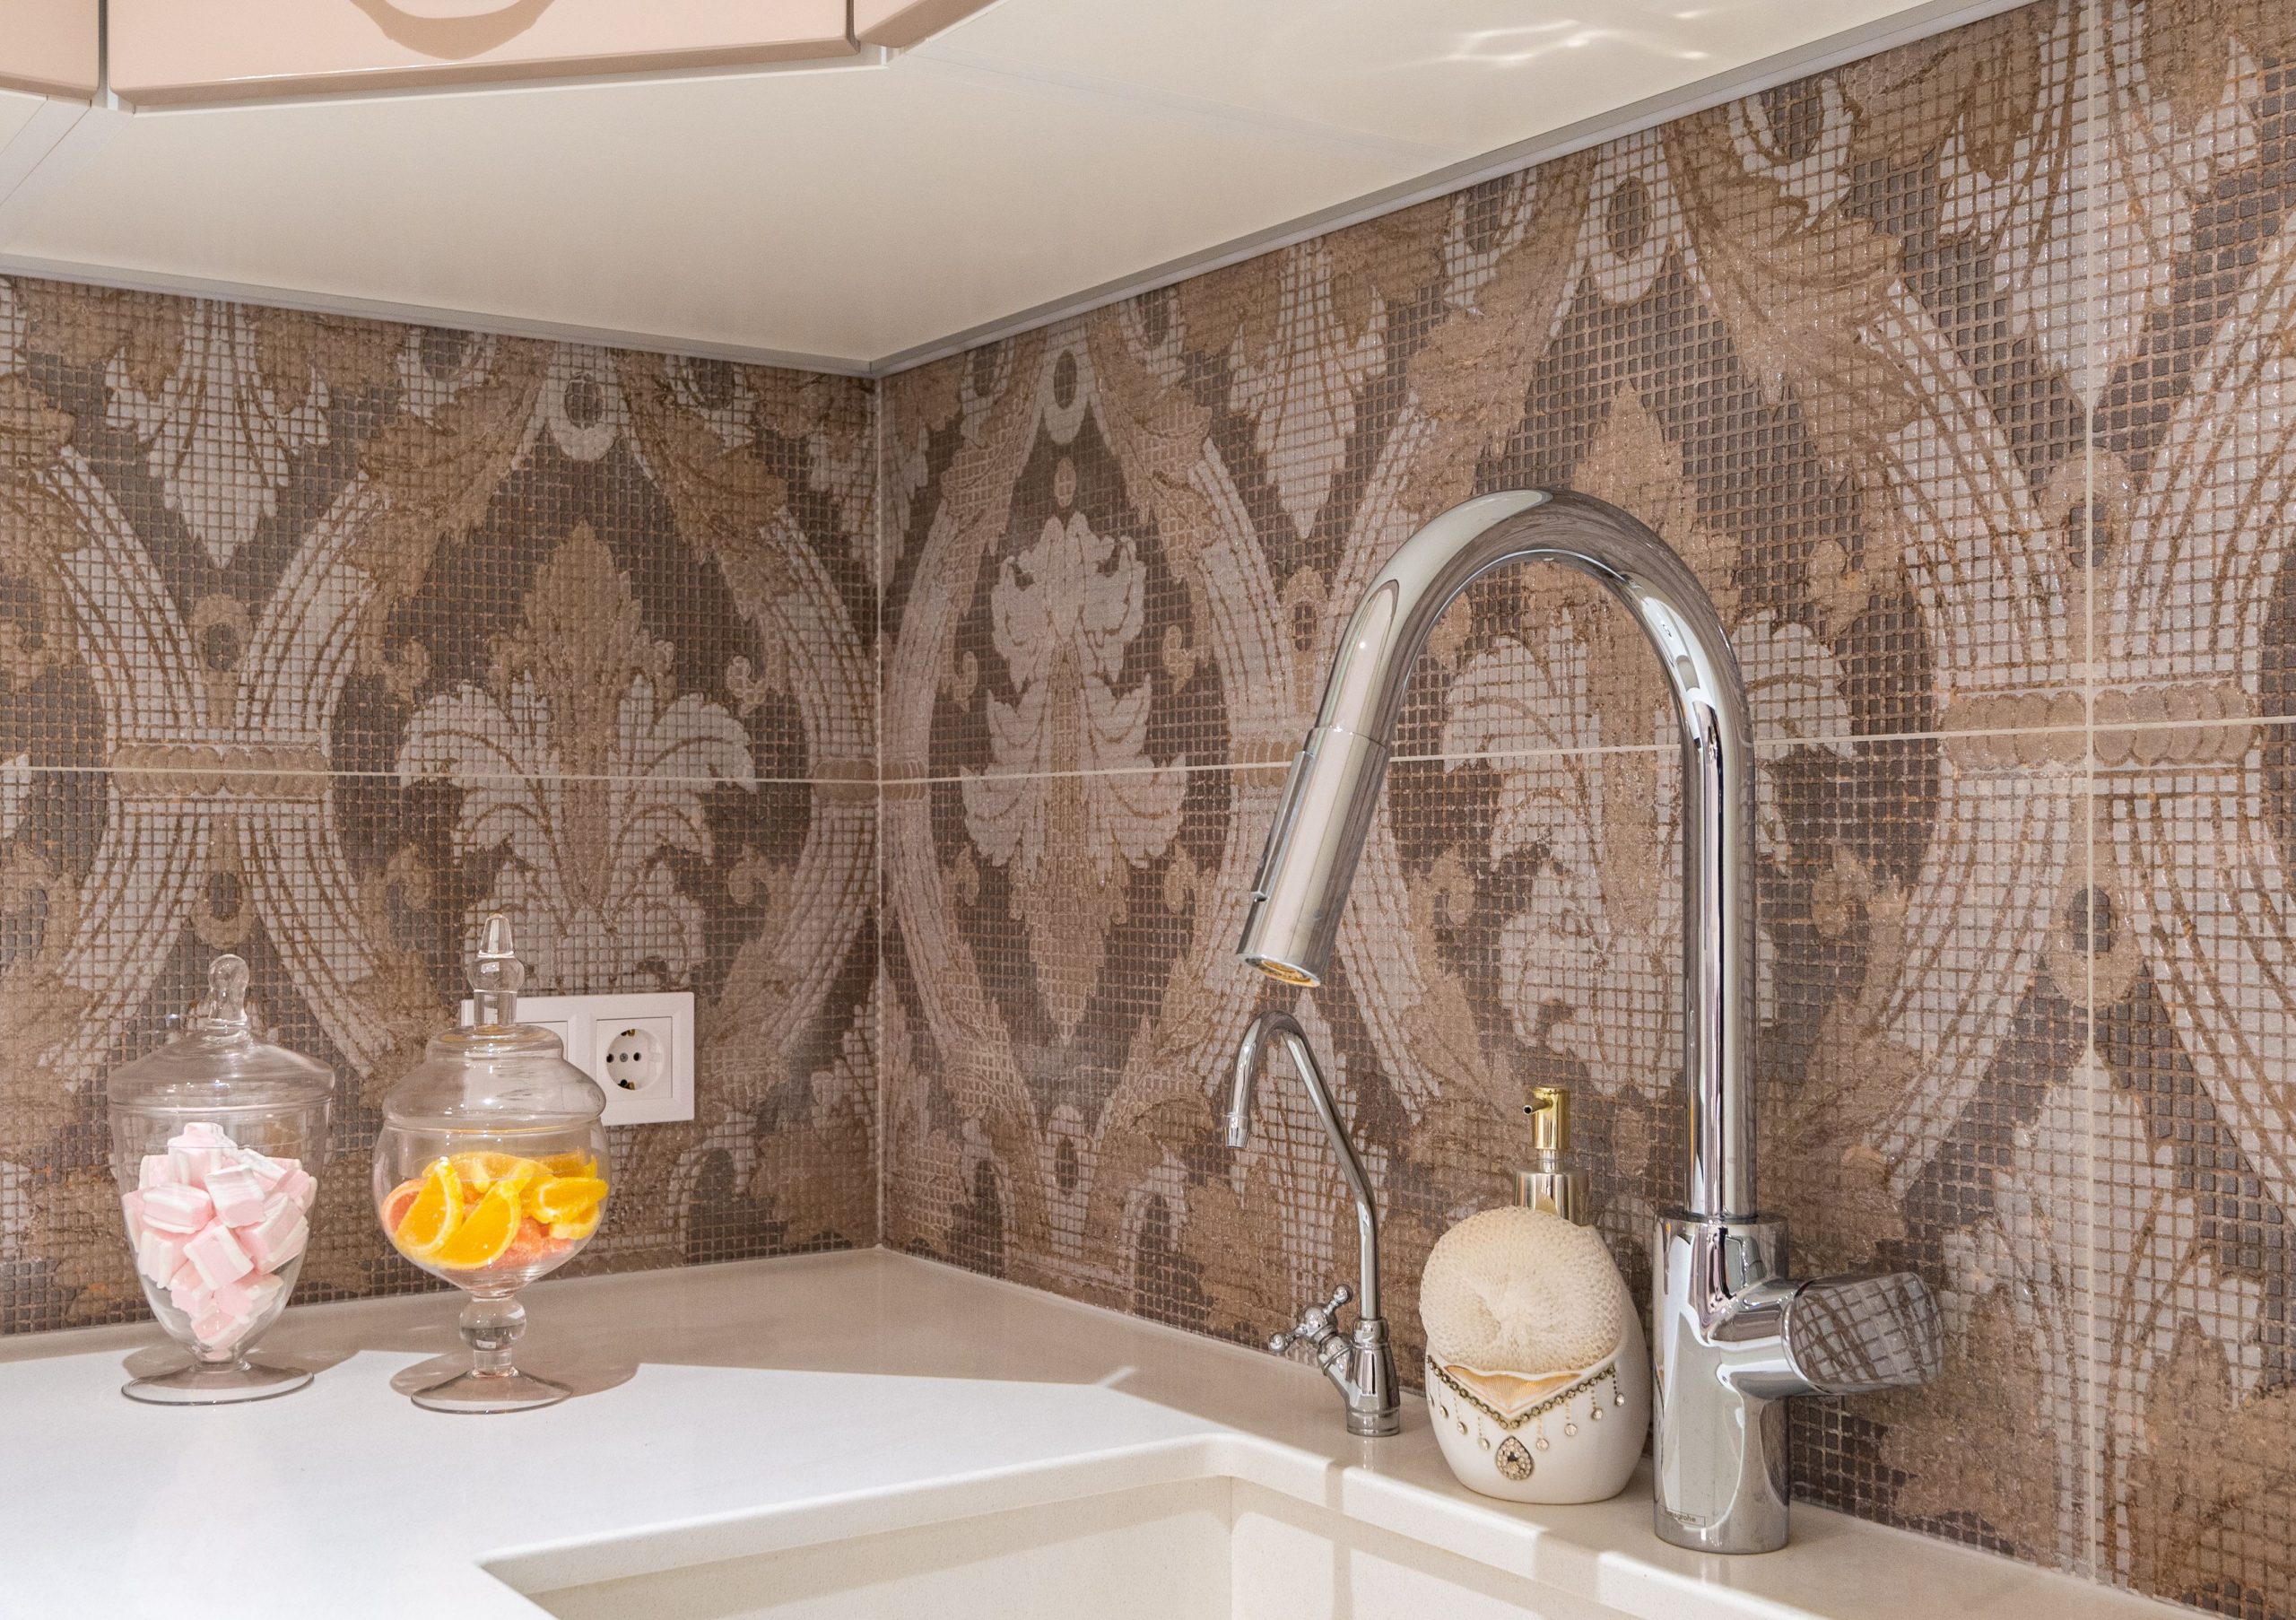
18. Finish a Damask-Patterned Mosaic with Thin, Blending Trim
What makes this backsplash look so polished and professional is the incredibly subtle trim. Instead of a contrasting metal edge or a thick pencil liner, the designer chose a thin plastic or resin trim in a color that perfectly matches the lightest tone in the mosaic pattern. It almost disappears, allowing the intricate brown and beige pattern to be the hero. By not calling attention to itself, the trim does its job perfectly: providing a clean, crisp edge without distracting from the main event.
|
📋 Copy HEX 🔗 Share |
The visual recipe for this look is about quiet coordination: 70% intricate pattern + 25% solid neutral + 5% high gloss. The damask-style mosaic is the dominant feature, providing texture and traditional elegance. The solid white countertop and the light beige soffit above serve as neutral bookends, calming the pattern down. The final 5% comes from the polished chrome of the gooseneck faucet, which adds a single point of light-catching shine to keep the composition from feeling too flat or old-fashioned.
19. Use Simple PVC Trim on a Whimsical Floral Tile Backsplash
A backsplash made of individual, decorative tiles can be a stunning focal point, but be aware of the visual commitment. This isn’t a quiet, subtle background; it’s a piece of art on your wall. This choice will dictate many other design decisions in your kitchen, from paint color to countertop accessories. If you love the pattern, that’s wonderful! But if your taste changes frequently, you might feel locked in by such a bold and specific choice. And if you’re concerned with resale, something this unique can be a turn-off for some buyers. This mistake is a common pitfall we discuss in our mistakes section.

|
📋 Copy HEX 🔗 Share |
The white PVC trim at the bottom is a practical choice, but it requires some specific upkeep. PVC is non-porous and easy to wipe clean, which is great. However, it can be prone to yellowing over time, especially if it receives a lot of direct sunlight. Also, be careful with abrasive cleaners or scrubbing pads, as they can scratch the soft plastic surface, creating dull spots. The caulked seam between the PVC trim and the countertop is the area to watch; keep it clean and dry to prevent mildew from forming in that crevice.
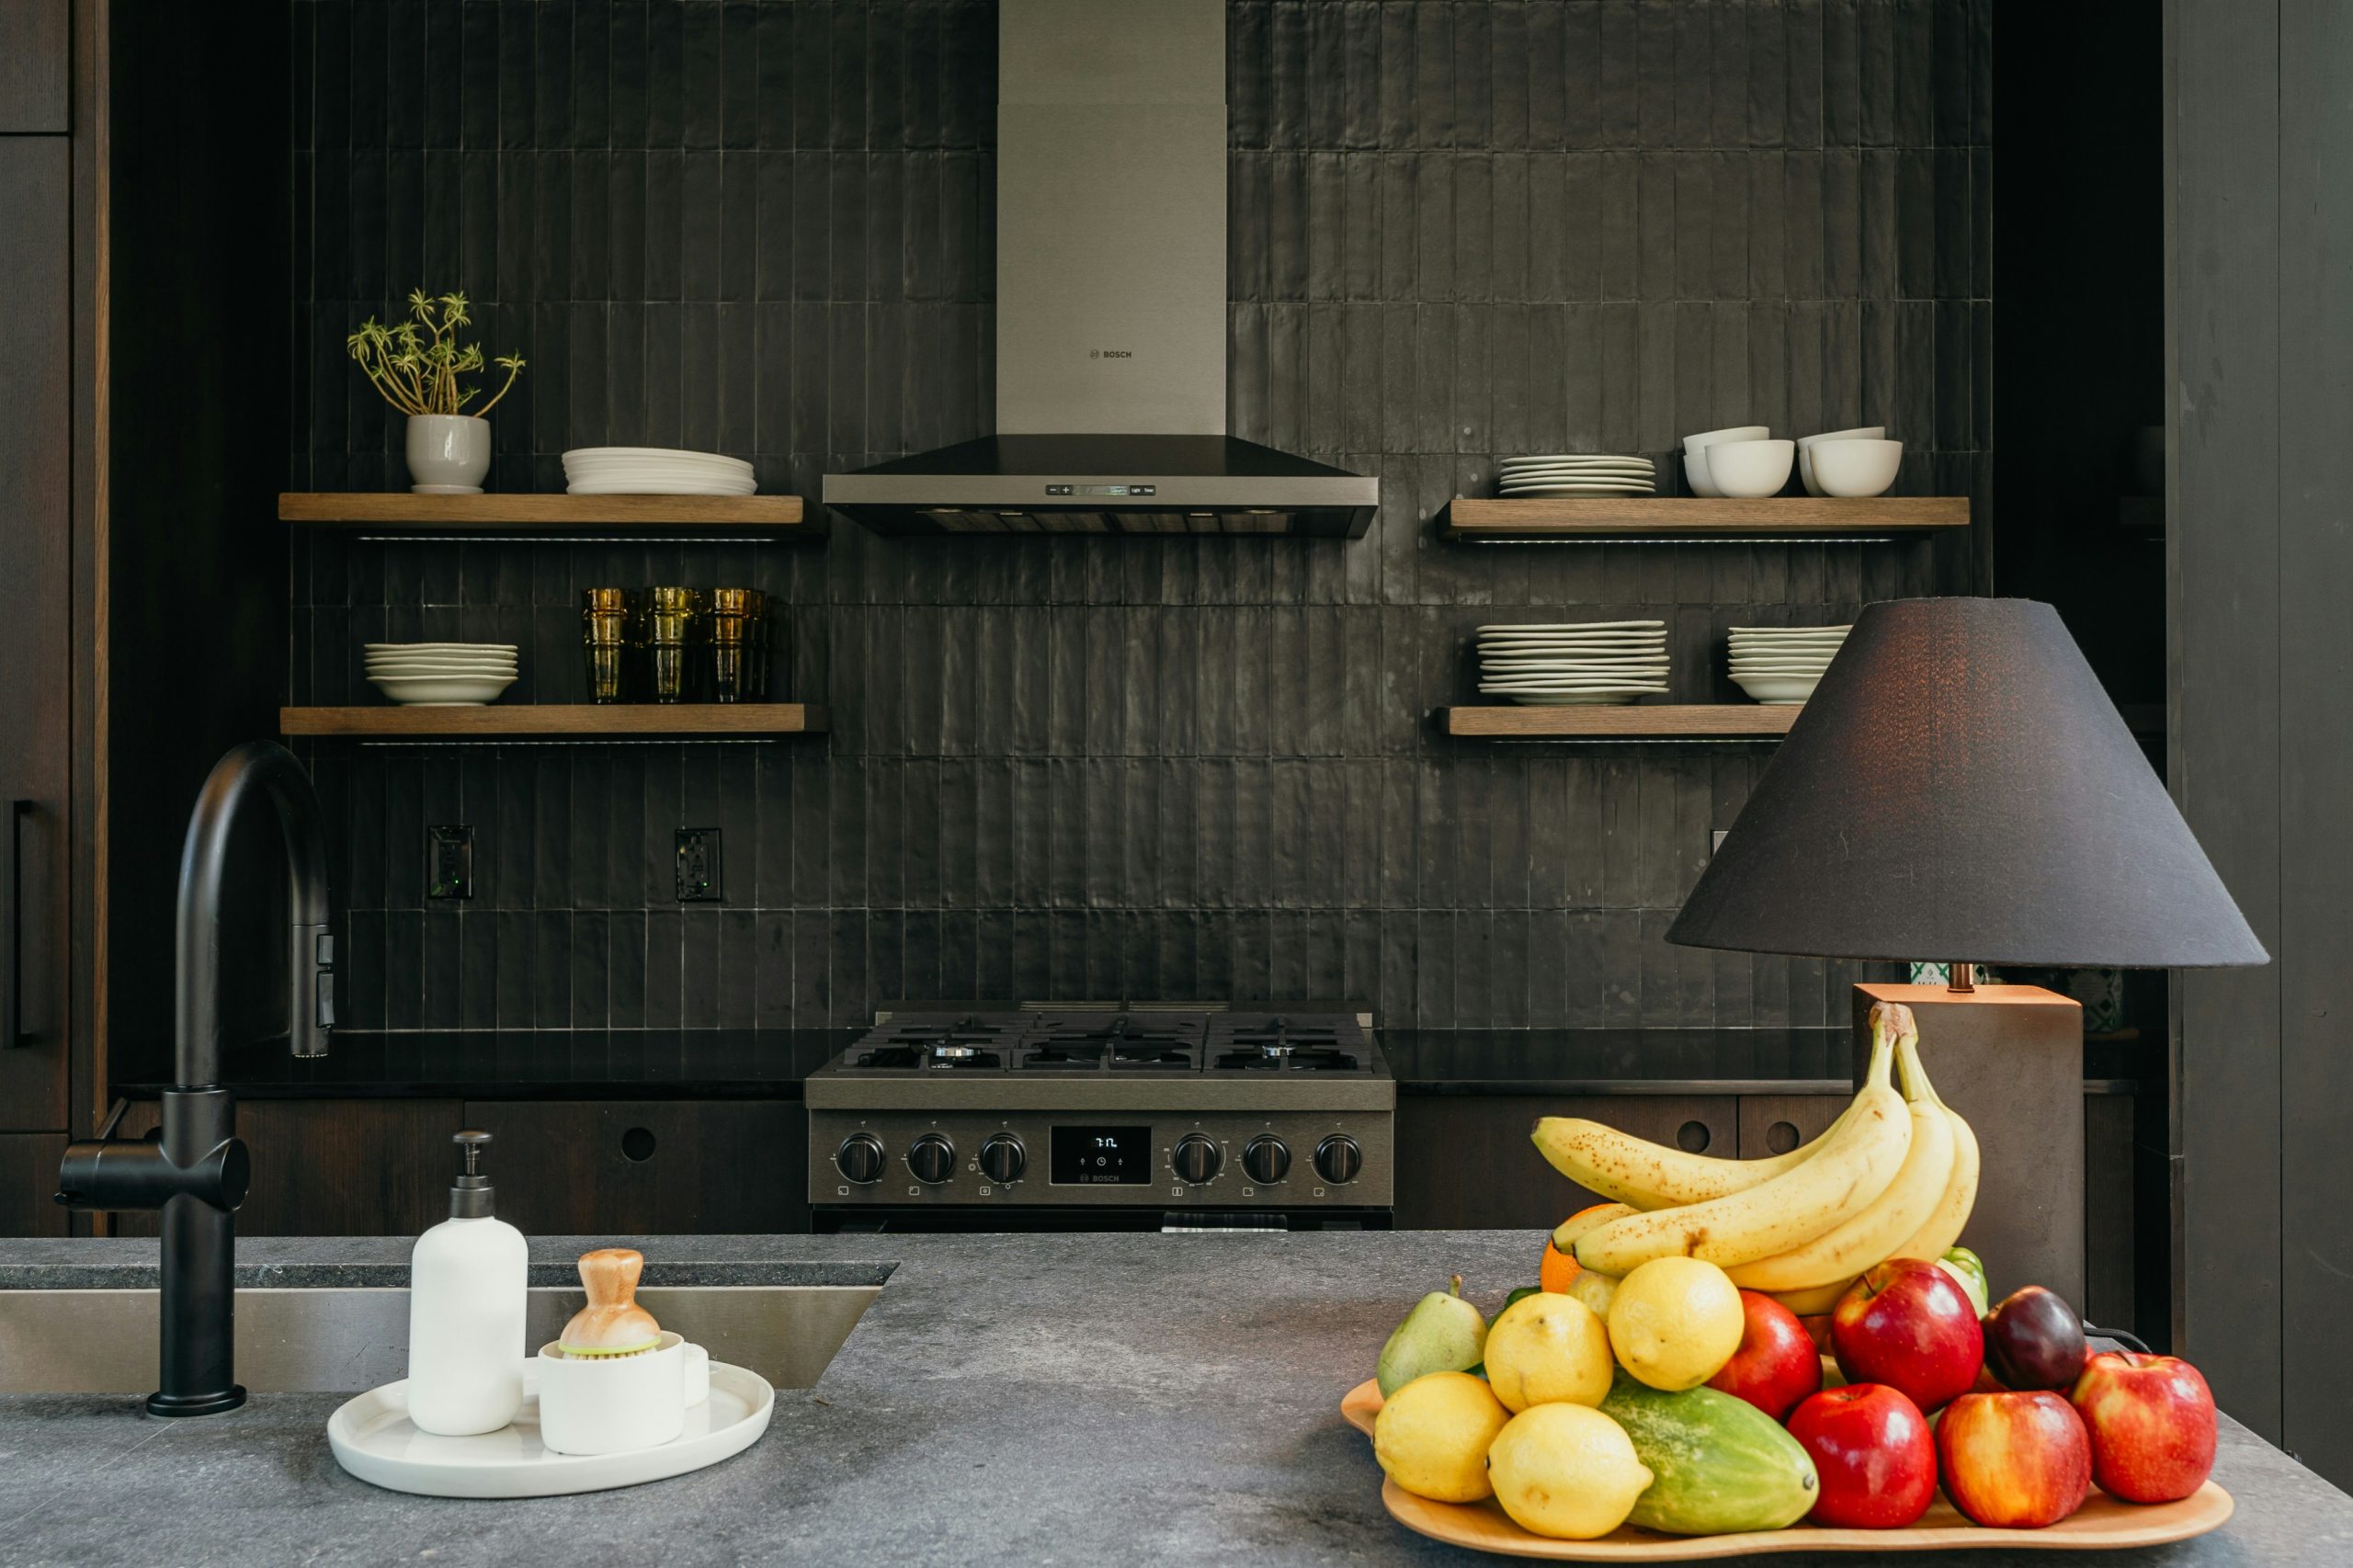
20. Mount Floating Shelves Directly onto a Floor-to-Ceiling Tile Wall
When mounting shelves onto a tiled wall, especially a textured one like this, precision is paramount. The installer must use a diamond-tipped drill bit specifically designed for porcelain or ceramic to avoid cracking the tiles. It’s critical to locate the wall studs before tiling and mark their locations. The shelf brackets must be anchored into these studs through the tile. Simply using tile anchors in the hollow space behind the tile will not be strong enough to support the weight of shelves and their contents. The integrated lighting here also requires pre-planning to run the wiring before tile goes up.
|
📋 Copy HEX 🔗 Share |
A full floor-to-ceiling tile application like this is a bold, modern statement that works best in kitchens with at least 9-foot ceilings. The vertical orientation of the dark tiles already draws the eye up, and the height is needed to give the effect breathing room. This look is particularly effective on a single feature wall, perhaps 8 to 12 feet long, that serves as the kitchen’s main focal point. In a smaller, galley-style kitchen, floor-to-ceiling dark tile could feel a bit cavernous unless balanced with excellent lighting and light-colored flooring.
21. Let a Brushed Brass Countertop Form Its Own Low Backsplash
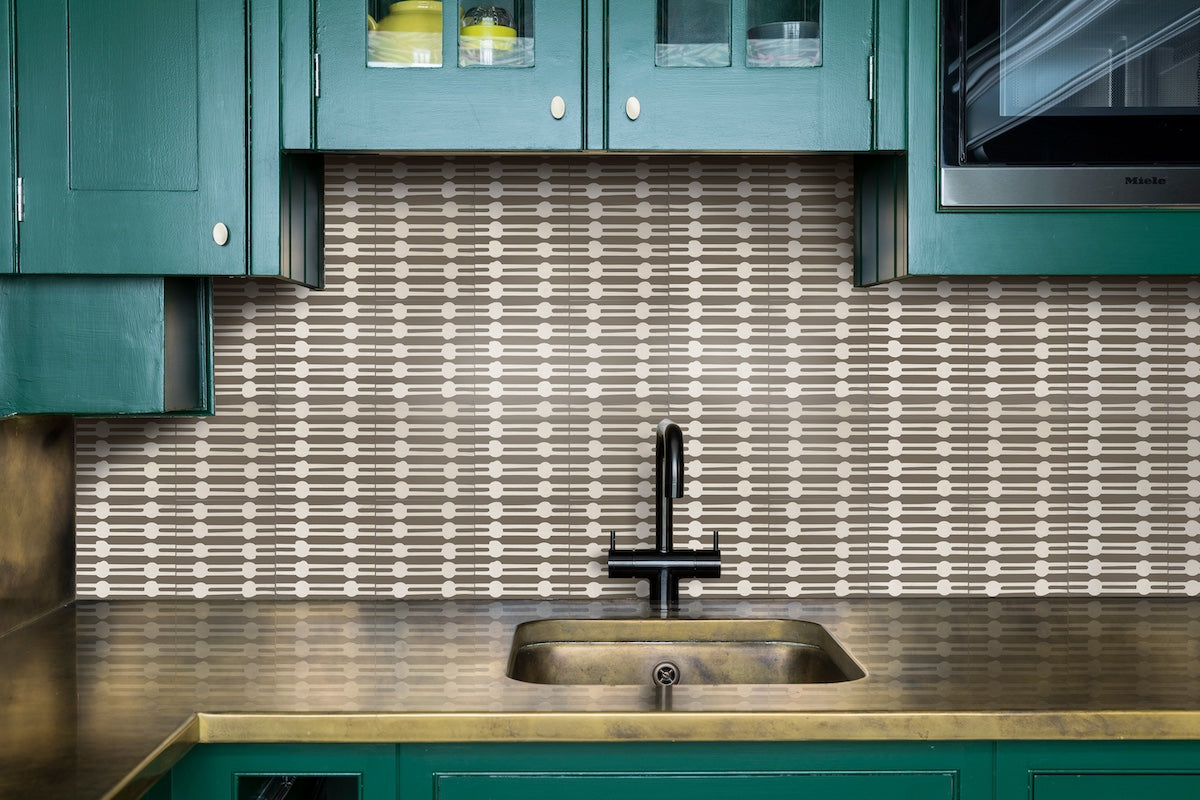
The single most impactful element here is, without a doubt, the distressed brass countertop. It’s an incredibly bold and unconventional choice that sets a sophisticated, industrial, and slightly moody tone for the entire kitchen. The fact that it forms its own small, integrated backsplash before the patterned tile begins makes it feel even more custom and substantial. Everything else—the dark teal cabinets, the patterned tile—is in service to the statement made by this stunning, evolving metal surface.
|
📋 Copy HEX 🔗 Share |
This design succeeds by breaking the rules in a calculated way. It masterfully mixes cool and warm tones: the cool, deep teal of the cabinetry is balanced by the warmth of the brushed brass countertop. It also layers multiple patterns and textures—the geometric tile, the distressed metal, the flat-panel cabinets—but keeps the color palette tight and controlled. The beige and taupe in the tile pick up on the warm tones of the brass, tying the two disparate elements together and making the whole combination feel intentional and curated.
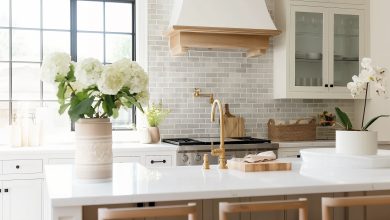
22. Keep It Classic with White Subway Tile and Under-Cabinet Lighting
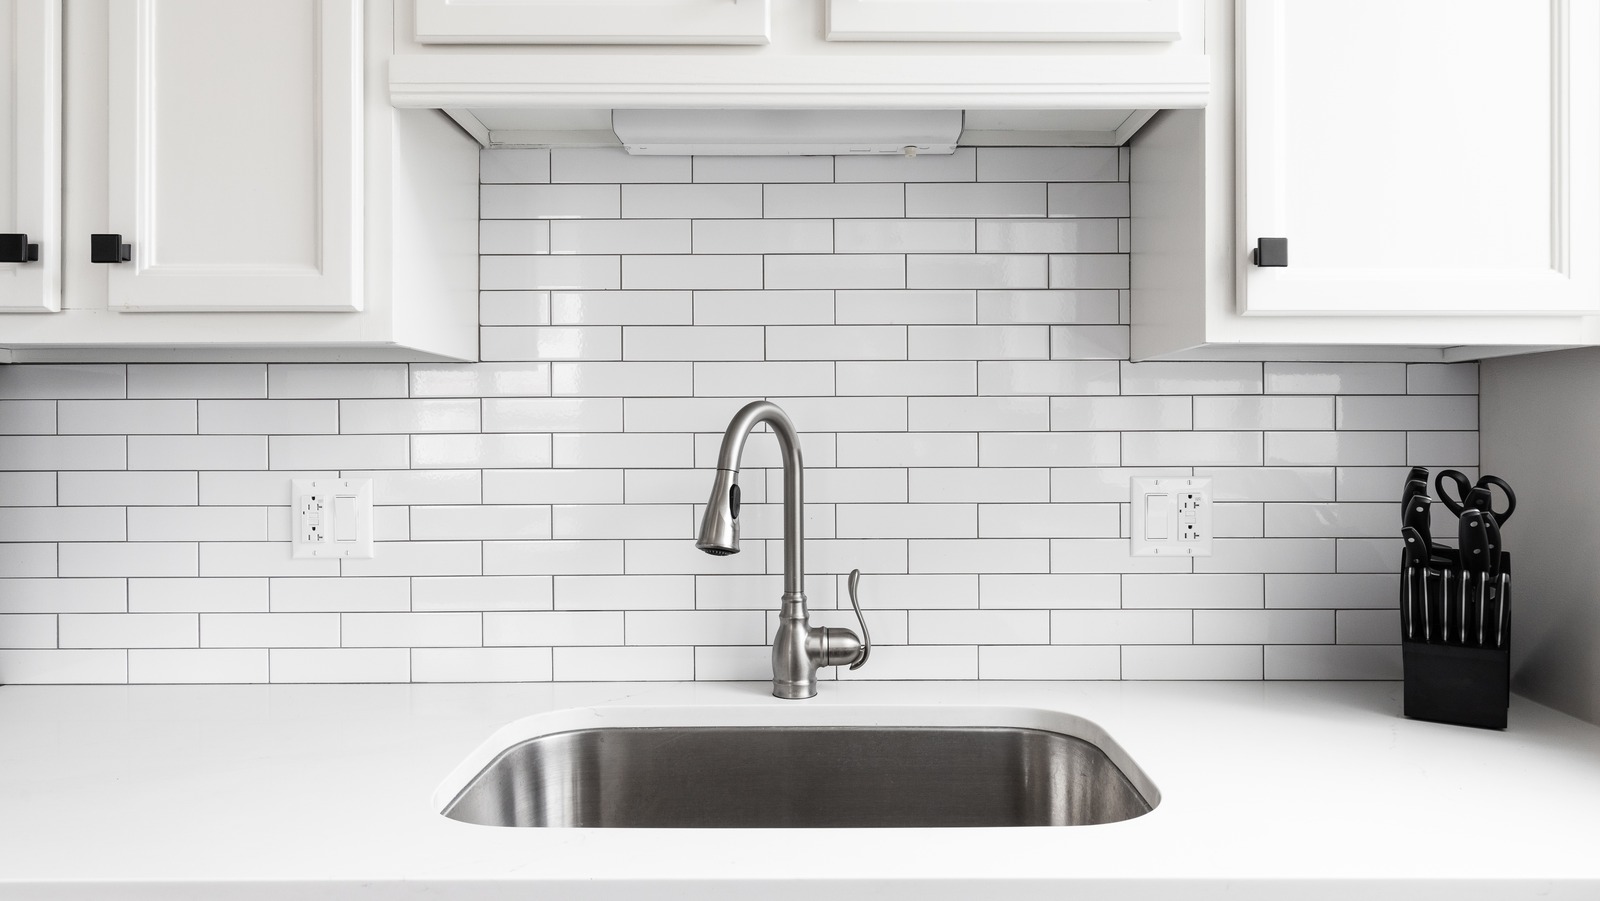
This is one of the most budget-friendly and timeless kitchen backsplash looks you can create. Classic 3×6 white subway tile is available at any home improvement store for as little as $2-$4 per square foot. A bag of grey grout is about $20. The edge of the tile is cleanly hidden by the overhang of the upper cabinets, so you don’t need to spend money on any special trim pieces. The most significant “splurge” to make this look feel more high-end is the under-cabinet lighting, which can be found in affordable LED strip kits for $30-$60 online.
|
📋 Copy HEX 🔗 Share |
While white subway tile has been popular for decades, it continues to trend for a simple reason: it works. In 2026, as home costs continue to rise, homeowners and designers are leaning on classic materials that offer longevity and versatility. White subway tile is a safe investment. It provides a clean, bright, and neutral backdrop that won’t go out of style next year. It allows for personality to be added through hardware, decor, and paint, which are much easier and cheaper to change out than the tile itself.
23. Hide the Backsplash Edge with a Cabinet Overhang
For this seamless, trim-free look, the secret lies in the cabinet installation. The upper cabinets must be installed with a 1/4 to 1/2 inch gap between the bottom of the cabinet and the wall. This is typically done by fastening a temporary wooden ledger a half inch below the desired cabinet height. The cabinets are then hung using that ledger for support. When the backsplash tile is installed, it slides up behind the bottom lip of the cabinet, completely hiding the top edge. The result is a clean, uninterrupted finish.

|
📋 Copy HEX 🔗 Share |
This “hidden edge” technique looks incredibly clean, but it requires careful planning. You cannot decide to do this after your cabinets are already installed flush against the wall. This detail must be part of the plan from the very beginning. It also makes future changes more difficult. If you ever decide you want to replace the backsplash, you’ll either have to remove the upper cabinets completely or be left with a very tricky tile demolition job right up to the finished edge of your cabinetry.
Your Backsplash Story Starts at the Edge
As you can see, the edge of your backsplash is so much more than just a stopping point—it’s a design opportunity. Whether you opt for a bold metal frame, a rustic wood shelf, or a seamless, invisible transition, the right choice will make your kitchen feel cohesive and custom. The perfect finish is all in the details.
Ready to start your project? Save your favorite ideas from this article to your Pinterest board to keep the inspiration flowing!