You know that feeling when you finally find the DIY backsplash idea that looks exactly right for your space, but the thought of actually doing it feels… a little overwhelming? Don’t worry, we’ve got you. After filtering through hundreds of real-home projects and scouring the aisles of Home Depot, Floor & Decor, and even IKEA, we narrowed it down to what truly works. Inside, you’ll find 27 genuinely achievable DIY backsplash ideas, from timeless subway tile and rustic brick to bold modern patterns. In 2026, it’s all about personalizing your kitchen with texture and personality, moving beyond generic builder-grade finishes. And stay until the end—we break down the most common mistakes that can ruin these looks. 📌 Save this to Pinterest for later—you’ll want to revisit these ideas.
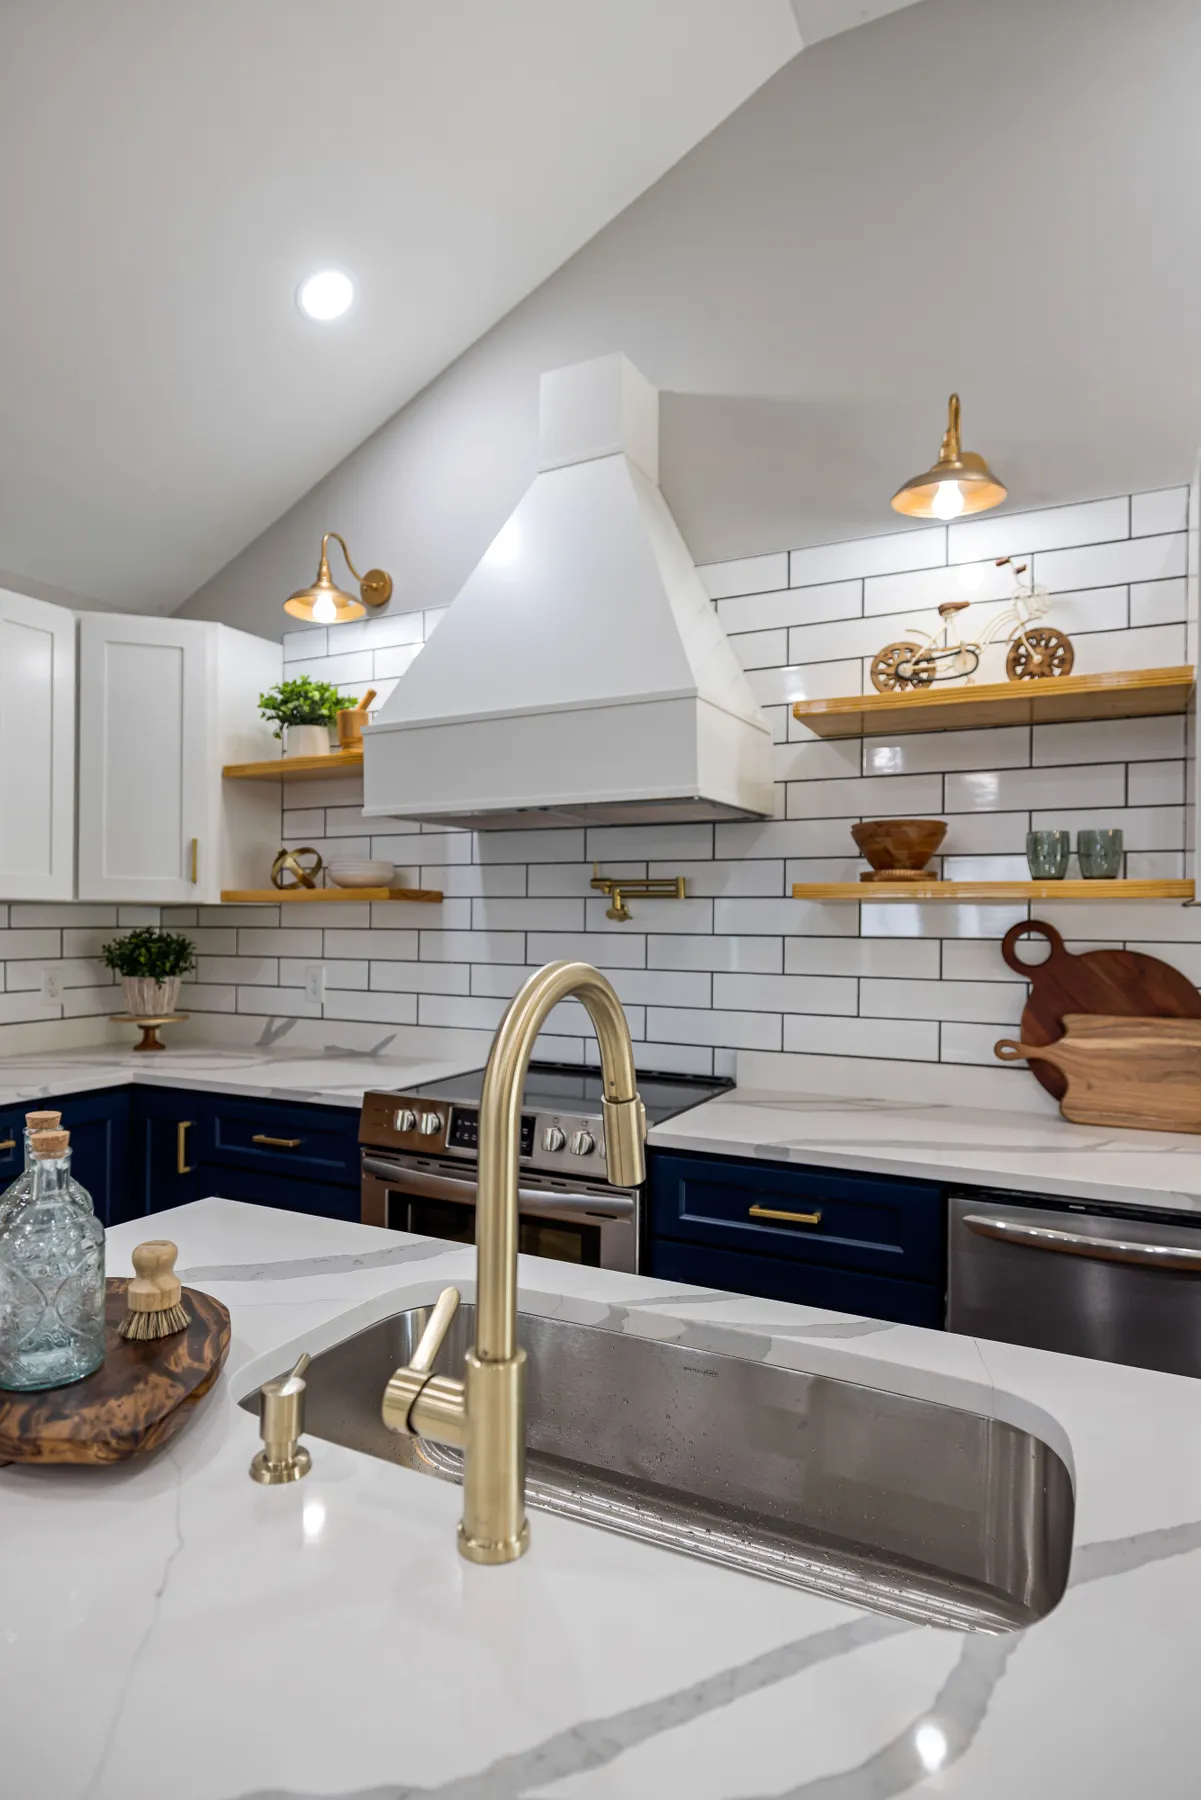
1. Classic White Subway Tile with Dark Grout and Brass Accents
The enduring appeal of white subway tile with dark grout is all about balance. The bright, clean surface of the tile reflects light, making the kitchen feel larger and more open, while the dark grout lines create a graphic grid that adds definition and a touch of industrial edge. It’s a visual trick that provides structure without overwhelming the space. The floating wooden shelves and brass fixtures introduce warmth and a layer of organic texture, preventing the graphic black-and-white scheme from feeling cold or sterile. It’s a study in contrasts that feels both classic and completely current.
|
📋 Copy HEX 🔗 Share |
Here’s a pro tip for getting those grout lines just right: use a grout release agent on your tiles *before* you start grouting. This is especially important for matte or unglazed tiles, but it’s a lifesaver even on glossy ones. It’s an invisible liquid that you wipe on, and it prevents the grout color from staining the face of the tile. This simple step saves you an immense amount of scrubbing later and ensures your white tiles stay perfectly white and your grout lines look crisp and clean. It’s the secret to a professional-looking finish every time.
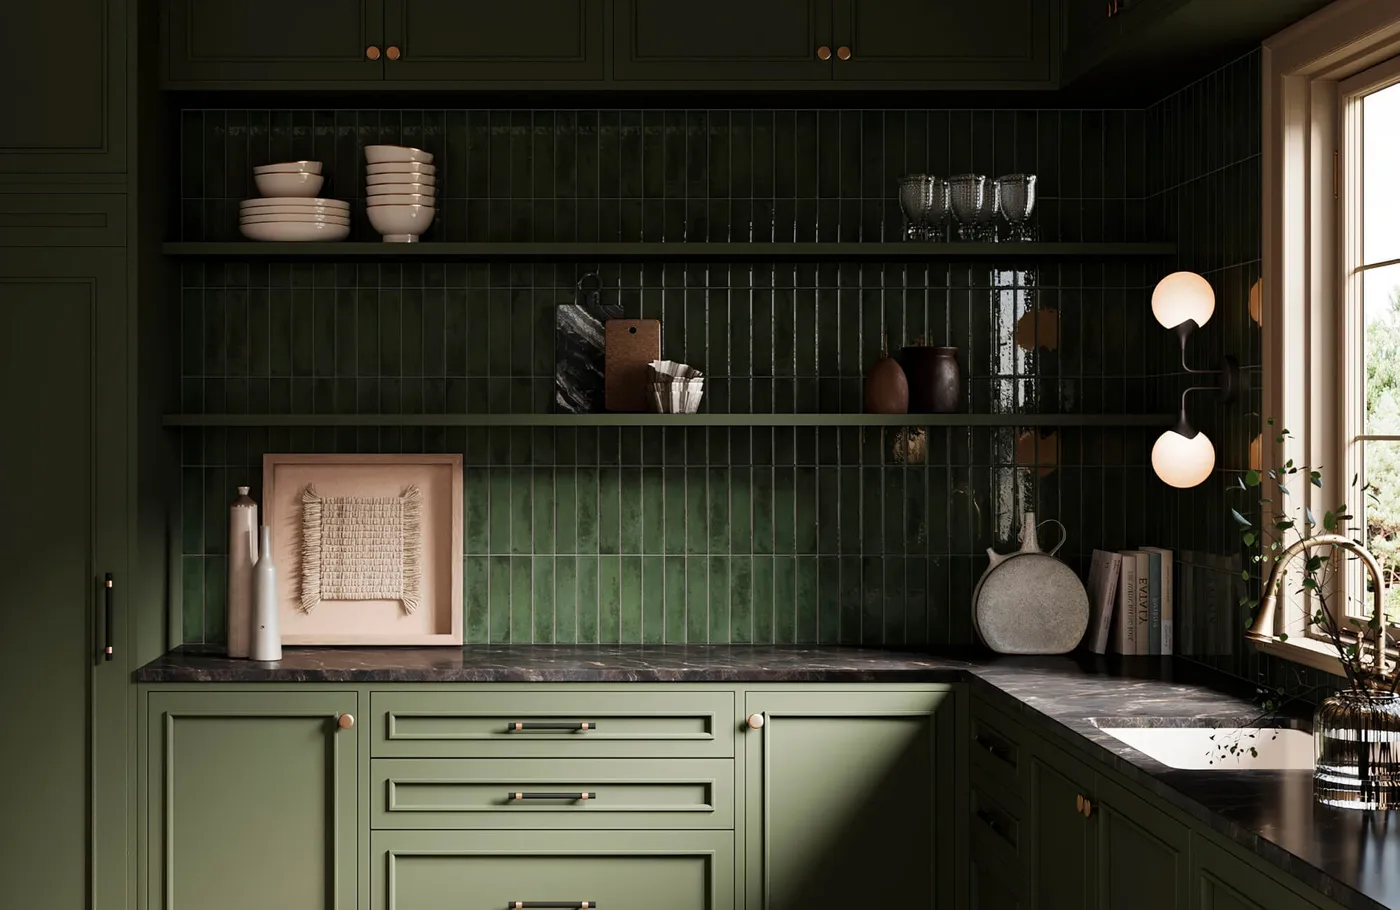
2. Moody Monochrome with Vertical Dark Green Tiles
The single most important element here is the commitment to a monochromatic palette. By matching the glossy vertical tiles, the shaker cabinets, and the floating shelves in the same deep green, the design achieves a powerful, immersive effect. Removing this would shatter the entire mood. It’s not just a green backsplash; it’s a green room. This decision makes the space feel intentionally dramatic and sophisticated. The subtle variations in sheen—glossy tiles versus matte cabinets—create texture and depth, proving that a single-color scheme can be incredibly rich and complex.
|
📋 Copy HEX 🔗 Share |
Let’s talk upkeep. While stunning, glossy dark tiles are the detectives of the kitchen—they will show you every single splash of water, oil, and fingerprint. To keep these looking sharp, you’ll need to wipe them down daily with a microfiber cloth. A simple solution of water and a drop of dish soap or vinegar works best to cut through grease without leaving streaks. The dark grout is forgiving, but you’ll want to seal it upon installation and then annually to prevent it from lightening or staining over time, especially behind the cooktop.
3. Artisanal Kitchen with Hand-Painted Green Patterned Tile
This look follows a simple but effective formula: 70% Neutral Foundation + 30% Statement Pattern. The white shaker cabinets and simple wooden shelves act as the quiet, neutral base, allowing the eye to rest. The backsplash is the 30%, injecting all the personality and life into the room. You could easily swap the green botanical pattern for a blue geometric one or a terracotta floral design, and the formula would still hold. The key is to keep the surrounding elements simple so the tile can be the undisputed star of the show. The dark countertop acts as a grounding element that ties it all together.
|
📋 Copy HEX 🔗 Share |
Want to recreate that floating shelf look? It’s easier than you think.
- First, locate the studs in your wall using a stud finder and mark them. This is non-negotiable for strength.
- Purchase a floating shelf kit that includes a hidden metal bracket and the shelf itself. Aim for a shelf depth of 8-10 inches for dishware.
- Secure the metal bracket to the wall, driving heavy-duty screws directly into the studs you marked. Use a level to ensure it’s perfectly straight.
- Slide the wooden shelf onto the bracket. Most have small set screws on the underside to lock the shelf in place.
- Style with your favorite items, but don’t overcrowd it. Time: 1 hour. Cost: $40-$120 per shelf.
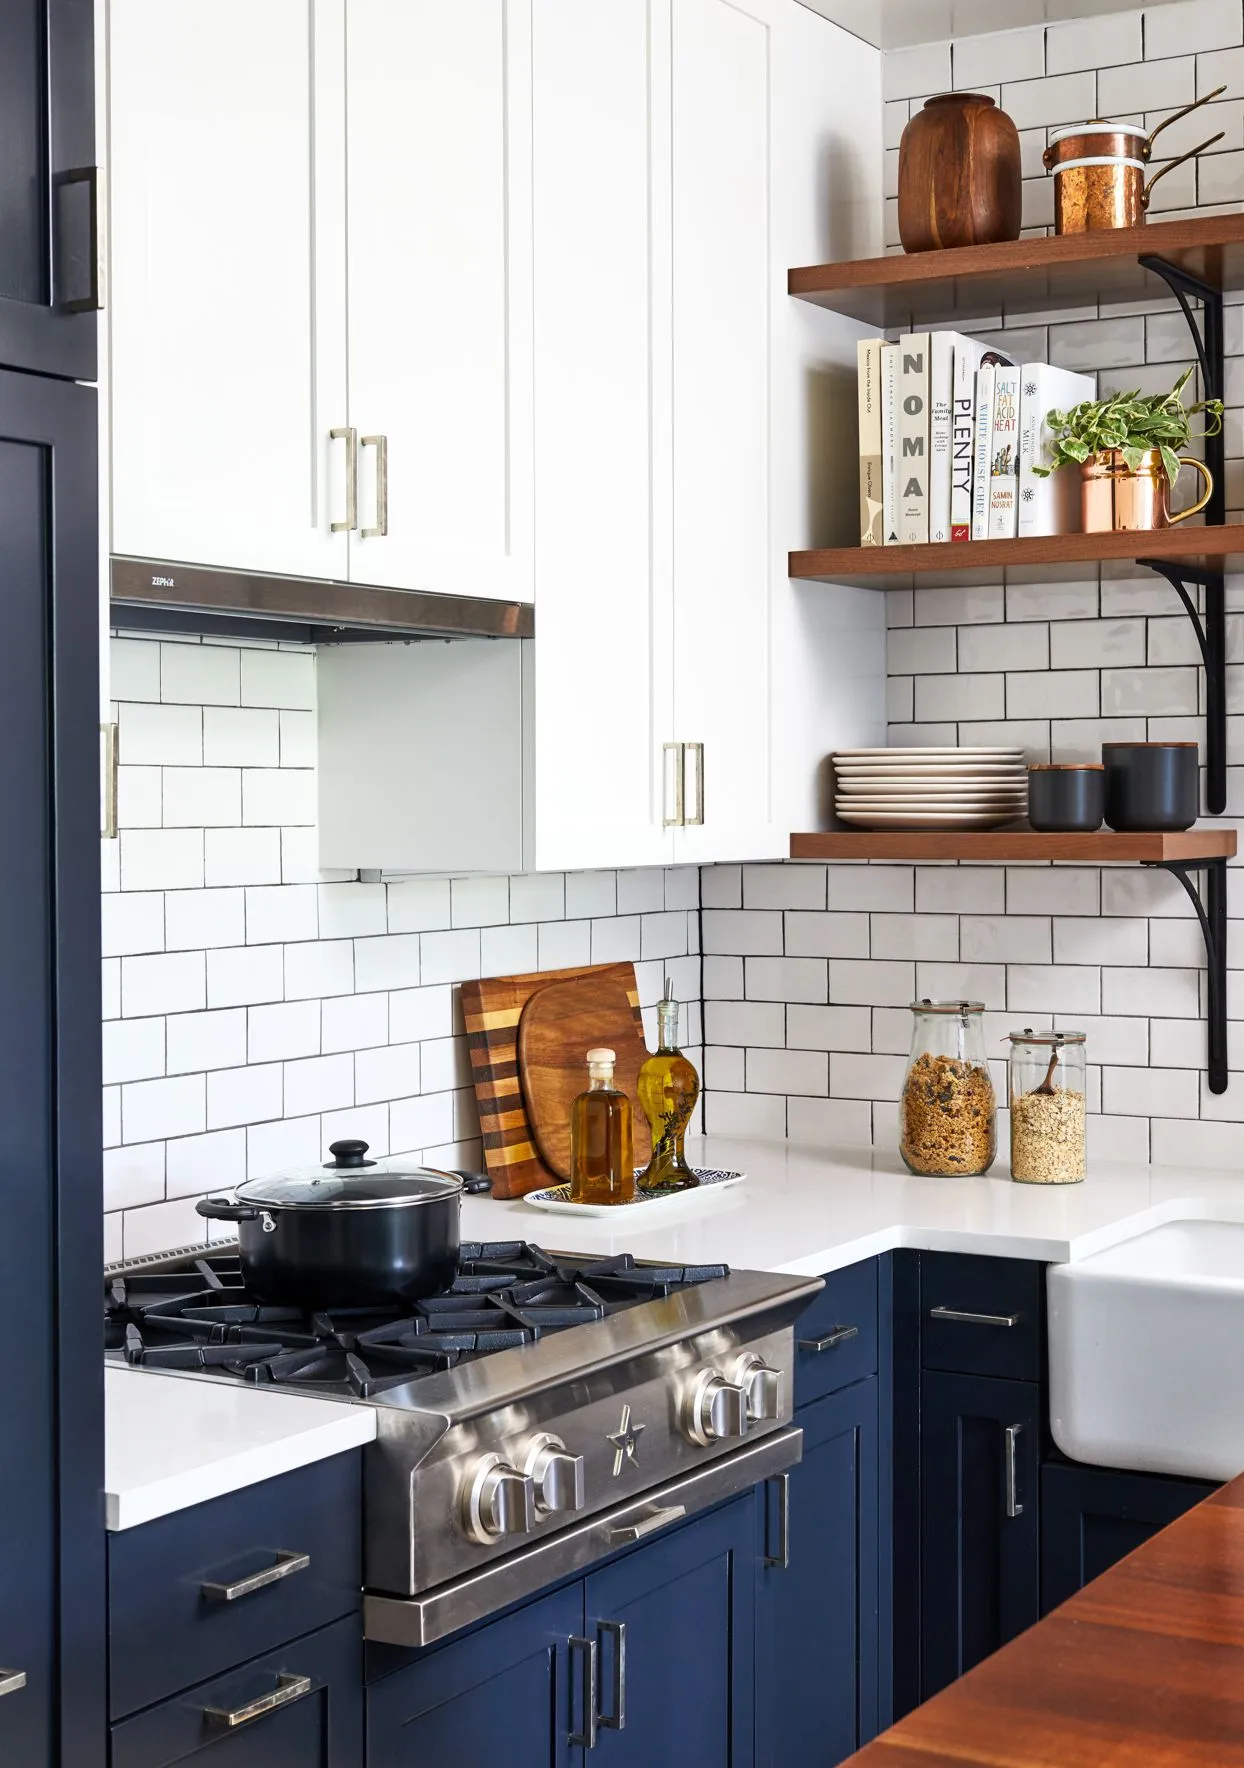
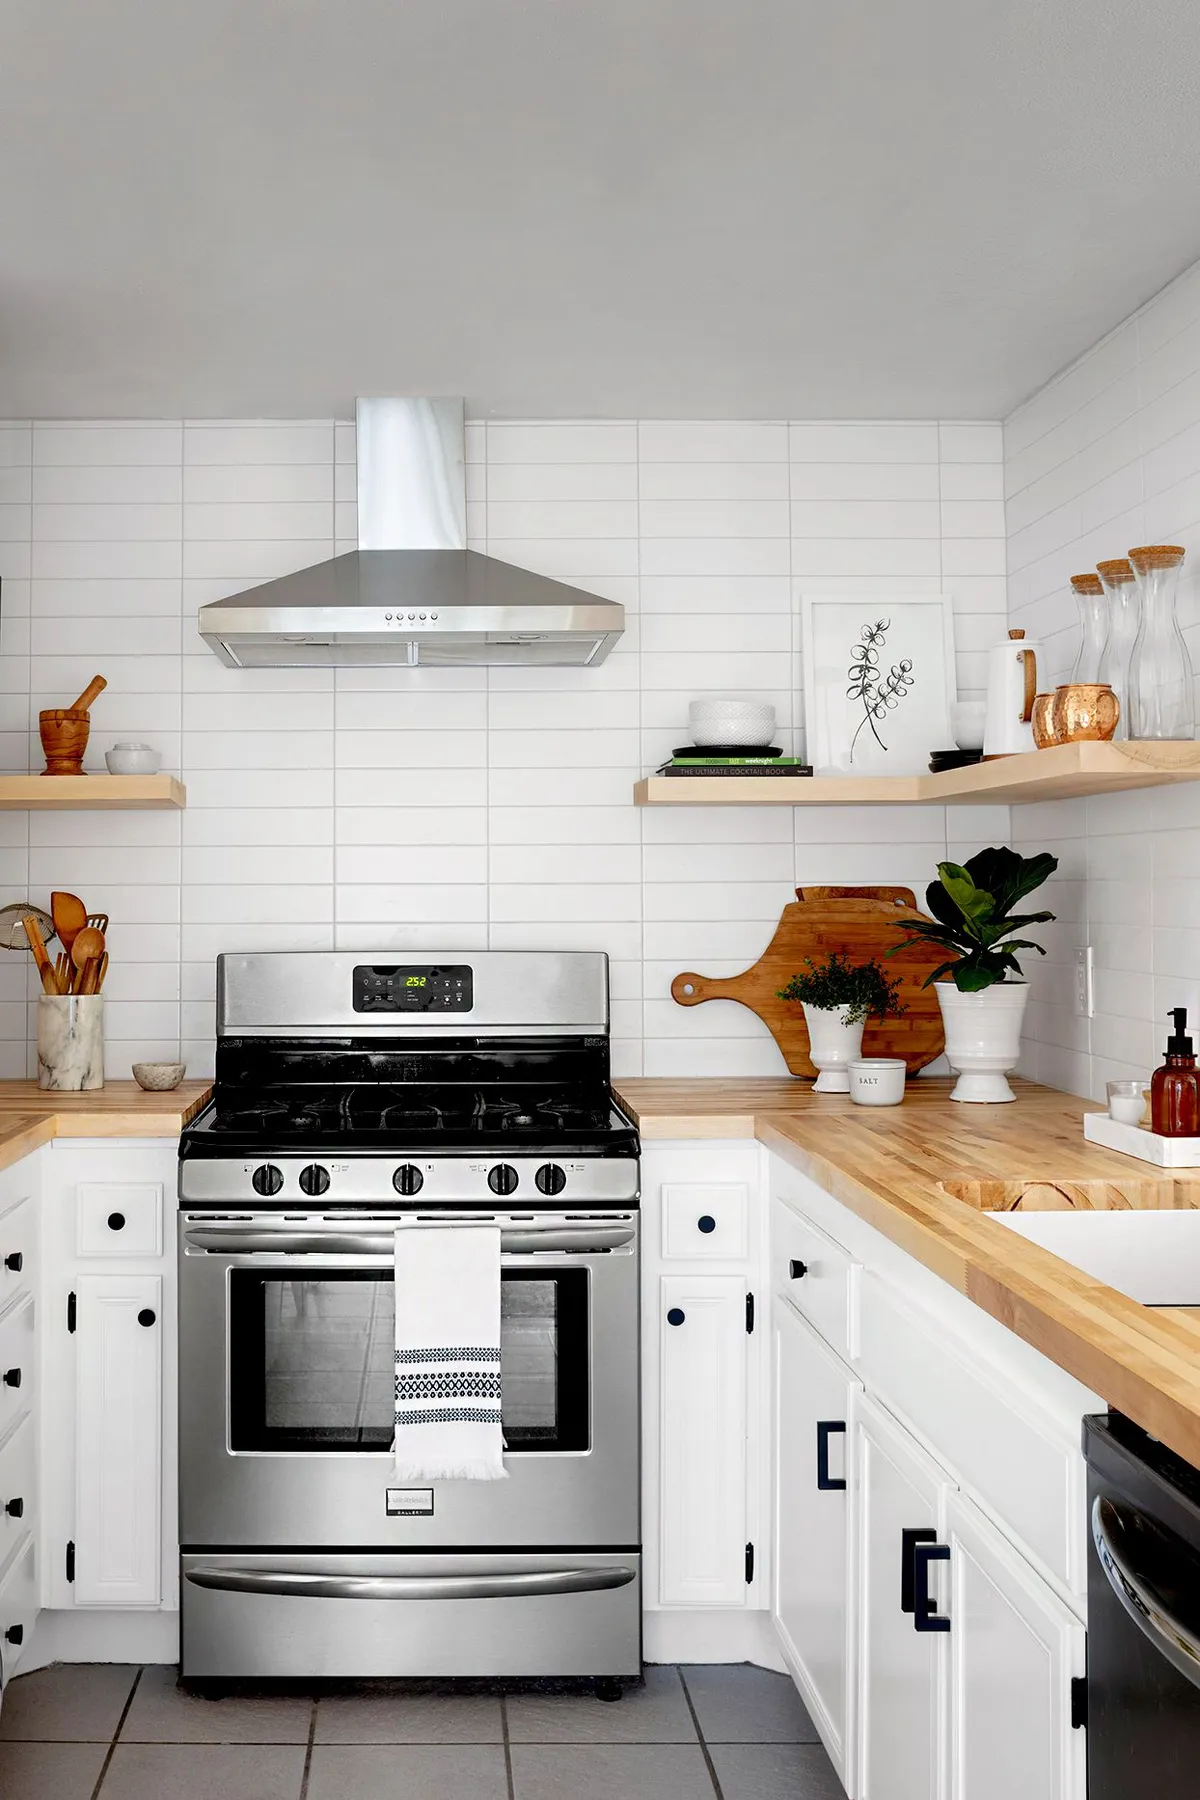
4. Glossy Subway Tile and Open Shelving for a Budget-Friendly Look
This entire look screams ‘attainable style.’ White subway tile is one of the most affordable options out there, often coming in under $3 per square foot at big box stores. You can get a high-impact look for a 20-square-foot backsplash for less than $100 in tile. The open wooden shelving can be a weekend DIY project using pine boards and simple brackets from IKEA or Home Depot for under $50. The brass wall sconce might seem pricey, but places like Target’s Threshold line or Amazon offer similar styles for $30-$60. You don’t need a massive budget to create this clean, warm, and modern kitchen vibe. For a more luxe take, see how Idea #1 incorporates a full range hood and faucet to match.
|
📋 Copy HEX 🔗 Share |
Here’s the honest truth about open shelving in a kitchen: it requires discipline. If you are not a naturally tidy person, these shelves will quickly become a cluttered mess of mismatched mugs and half-empty bags of pasta. They look beautiful in photos because they are meticulously styled. Before you commit, honestly assess your daily habits. Are you willing to curate and dust these shelves regularly? If the answer is no, you might be happier with closed upper cabinets to hide the beautiful, chaotic reality of everyday life.
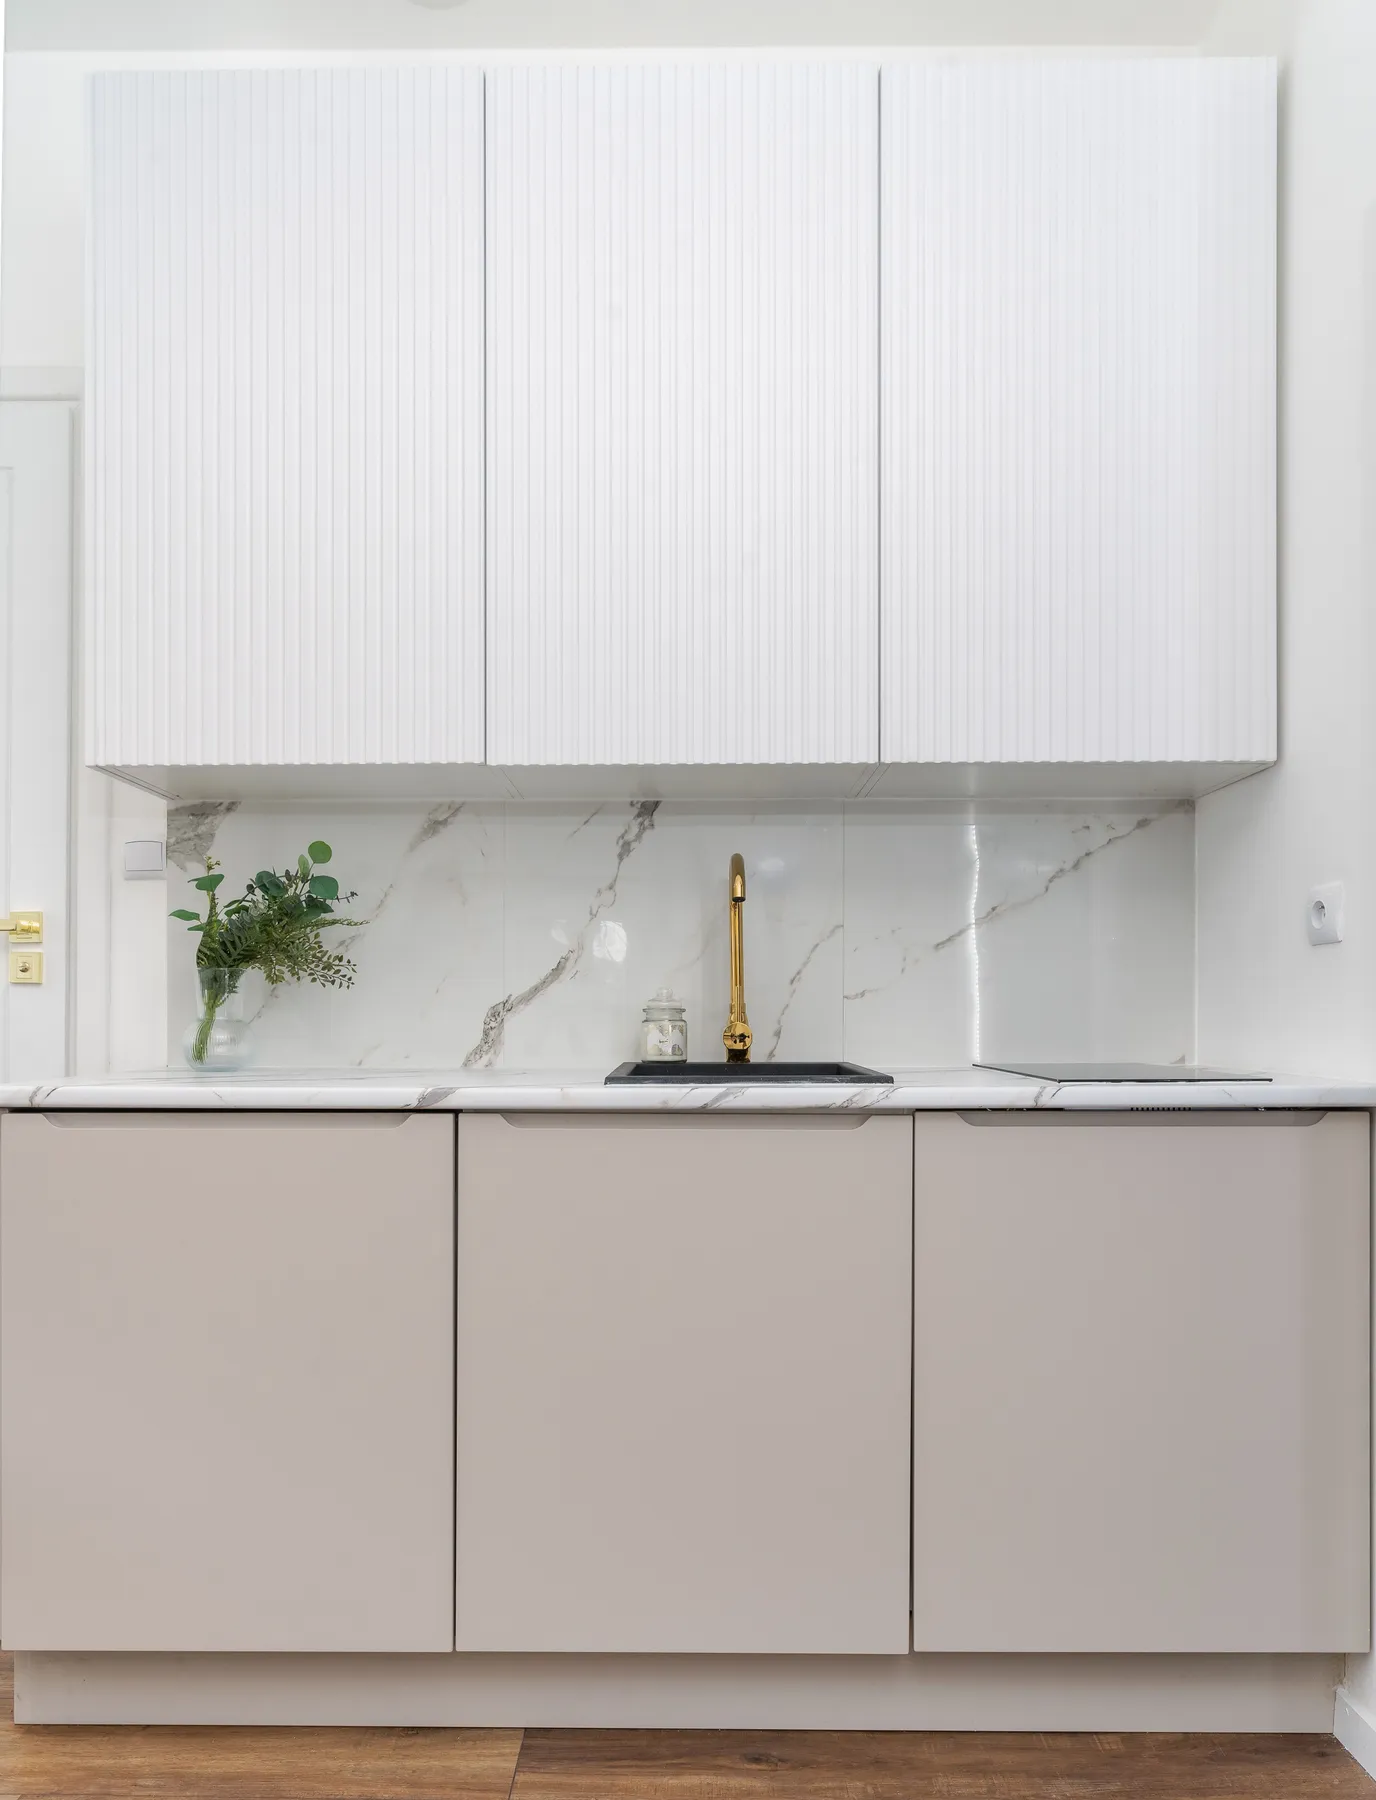
5. Modern Elegance with a Marble-Look Slab Backsplash
The slab backsplash trend is a direct reaction to years of busy patterns and grout lines. In 2026, homeowners are craving clean lines and low-maintenance surfaces, and a seamless slab delivers both. It feels luxurious and intentional, instantly elevating the kitchen from standard to statement. This look is all over high-end design feeds because it reads as a single, uninterrupted piece of art. The use of porcelain or quartz slabs that mimic marble makes this trend more accessible and durable than its natural stone counterpart, which is why we’re seeing it move from designer showrooms into real-world homes.
|
📋 Copy HEX 🔗 Share |
This idea works best in kitchens with at least 8 feet of continuous counter space to allow the slab’s veining to make a statement. In a smaller, chopped-up space, you lose the dramatic, seamless effect. A minimum ceiling height of 8 feet is recommended, but 9 feet is ideal to really let the slab feel grand. For very small kitchens or galley-style spaces, a full slab can feel overwhelming. Consider the beautiful patterned tiles in Idea #6 or the simple beadboard in Idea #7 as alternatives that add texture without dominating a compact room.
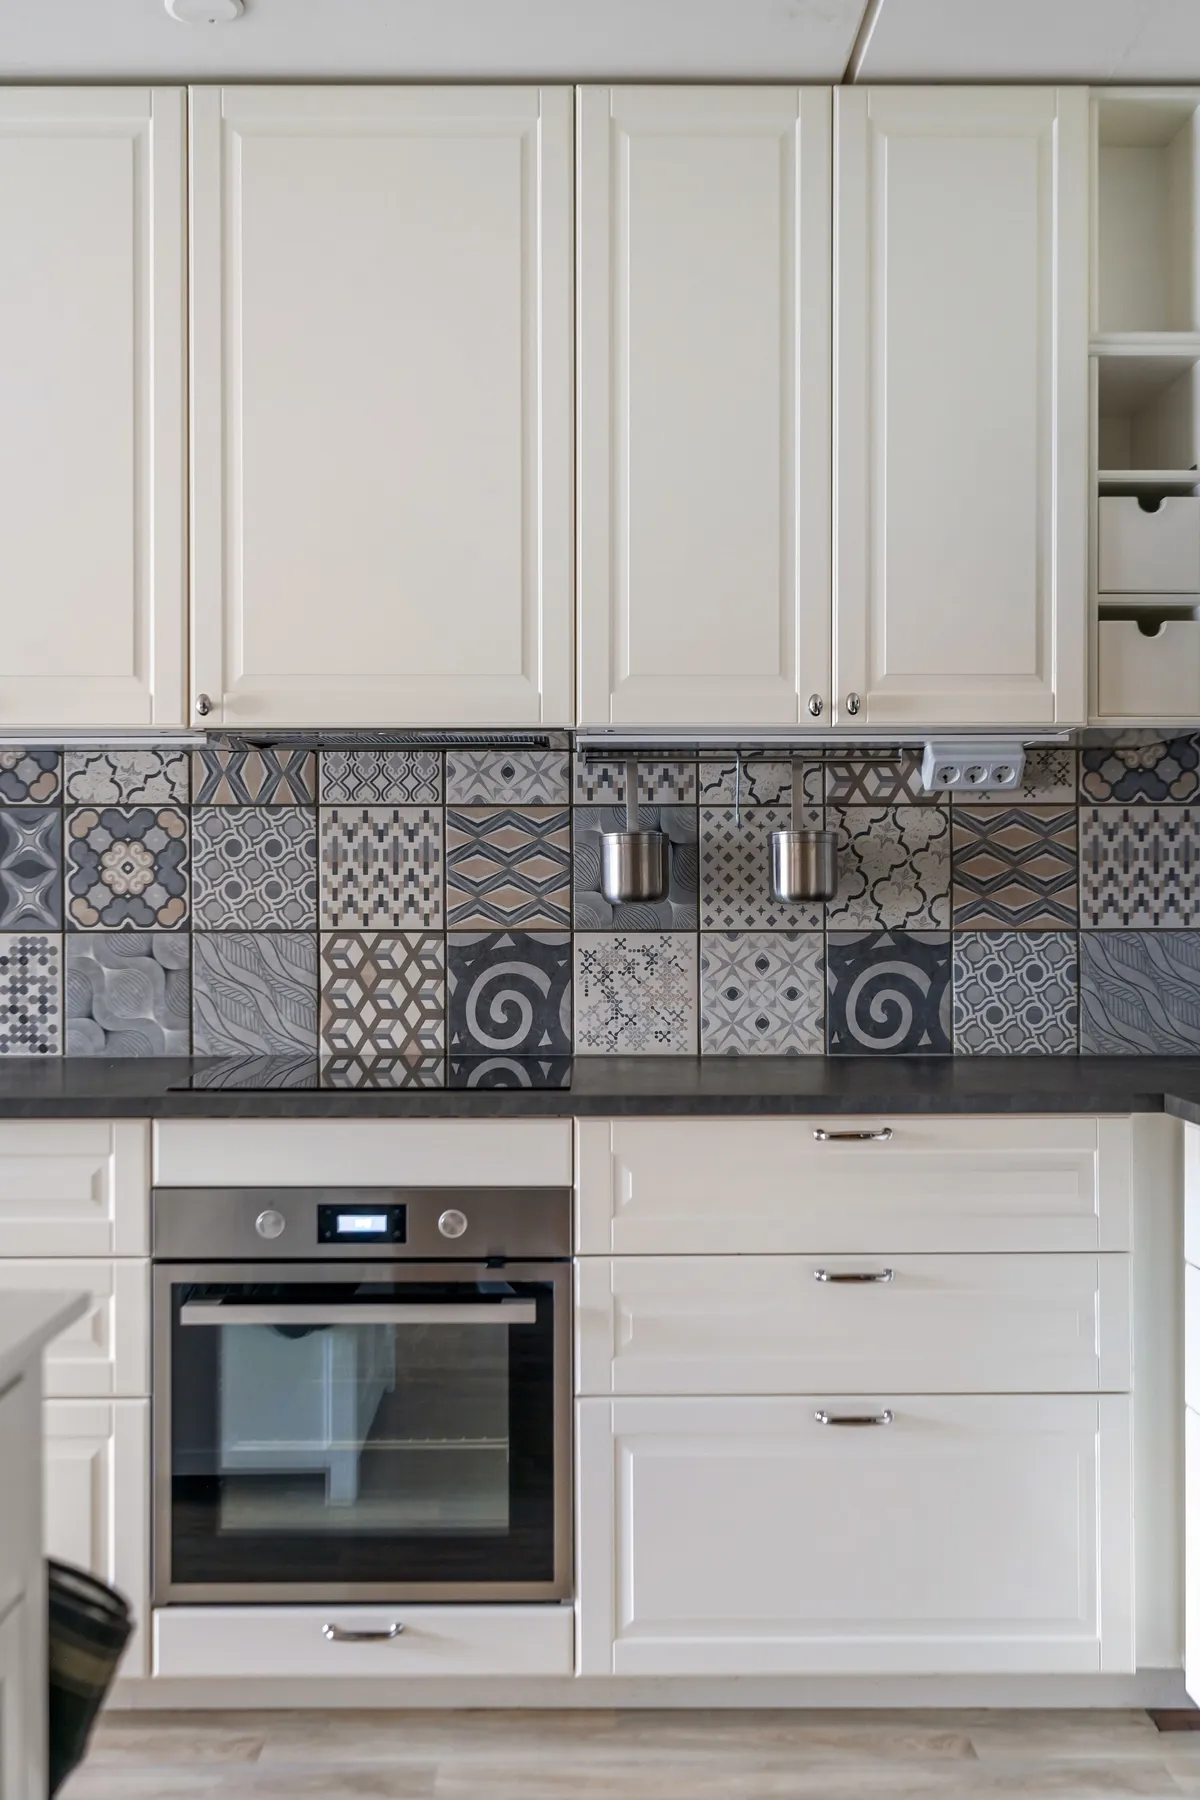
6. Cozy Kitchen with Mixed-Pattern Blue and Grey Tiles
Getting this cozy, collected look is more affordable than you might think. The magic is in the mix-and-match tiles, which often come in packs.
- Main Furniture: The cream cabinets are a significant cost, but you could reface existing ones. ($2,000 – $6,000)
- Backsplash Tile: Patterned tiles vary widely. ($15 – $40 per sq. ft.) For a 30 sq. ft. area: $450 – $1,200
- Countertop: A dark laminate can mimic this look. ($500 – $1,500)
- Accessories: The hanging rails and containers are key. ($50 – $150)
- TOTAL: $3,000 – $8,850
- Budget alternative: Use peel-and-stick patterned tiles over your existing backsplash ($200), paint your current cabinets cream ($150), and find storage rails at IKEA ($30). Total: ~$380.
|
📋 Copy HEX 🔗 Share |
This kitchen feels so inviting because it expertly balances pattern and plain. The backsplash is visually busy, filled with an assortment of floral and geometric designs. However, the surrounding elements—the solid cream cabinets and the simple dark countertop—are completely uniform and neutral. This creates a visual ‘frame’ that contains the energy of the pattern. If the cabinets were also patterned or a loud color, the whole space would feel chaotic. The repetition of the cream color provides rhythm and rest for the eye, making the patterned tiles a delightful focal point instead of a dizzying mess.
7. Cottage Charm with a White Beadboard Backsplash
If you’re looking for maximum charm on a minimal budget, beadboard is your best friend. A 4×8 foot sheet of beadboard paneling costs around $30-$40 at any home improvement store. For the cost of one sheet, a tube of construction adhesive, and a can of semi-gloss paint, you can have a brand new backsplash for under $100. This is a fraction of the cost of even the cheapest tile. The natural wood floating shelf adds a touch of rustic warmth and can be made from a simple pine board for about $20. This entire look is a masterclass in achieving a high-end cottage aesthetic for less than a fancy dinner out.
|
📋 Copy HEX 🔗 Share |
Beadboard looks fantastic, but it’s not as bulletproof as tile. The biggest issue is water. You absolutely must use a high-quality, kitchen-and-bath-rated semi-gloss or gloss paint to seal it. Pay special attention to the area behind the sink, caulking thoroughly where the beadboard meets the counter. If water gets behind the paneling, it can warp or develop mildew. Also, the grooves are little dust and grease collectors. You’ll need to give them a good wipe-down more often than you would a flat tile surface, especially behind the stove.
8. Functional Simplicity with Subway Tile and a Wooden Shelf
The floating wood shelf is the single element that elevates this from a basic kitchen counter to a thoughtfully designed space. Without it, you’d just have a wall of tile. The shelf breaks up the grid of the backsplash, adding a warm, organic line that draws the eye. It introduces a natural material that balances the coolness of the tile and stainless steel faucet. Functionally, it provides valuable, easy-access storage for everyday items, but its most important job is aesthetic: it adds a layer of personality and warmth that makes the kitchen feel like a home. For another take on this classic, see Idea #18.
|
📋 Copy HEX 🔗 Share |
When installing a floating shelf over a tile backsplash, precision is key. You’ll need a special diamond-tipped drill bit designed for drilling into porcelain or ceramic tile. Before you drill, apply a piece of masking tape to the tile where you want the hole. This will prevent the drill bit from ‘walking’ or slipping across the glossy surface as you start. Use firm, steady pressure but let the drill bit do the work; forcing it can crack the tile. Always wear safety glasses, as tile can splinter during drilling. This is the most crucial step to get right.
9. Charming and Practical White Beadboard with a Peg Rail
The visual formula for this charming look is about layering texture and function: 60% Beadboard Texture + 30% Functional Peg Rail + 10% Curated Decor. The vertical lines of the beadboard provide the primary visual interest. The peg rail, painted to match, adds a second layer of horizontal structure and—most importantly—utility. The final 10% comes from the carefully chosen items hanging from the pegs. You could change the hanging items from copper pots to ceramic mugs to bundles of herbs, and the look would adapt, but the underlying structure remains strong. A similar beadboard idea without the peg rail can be seen in Idea #7.
|
📋 Copy HEX 🔗 Share |
You can add a peg rail to an existing beadboard backsplash in an afternoon. Here’s how:
- Purchase a pre-made peg rail or create your own from a 1×4 board and wooden pegs.
- Paint the rail the same semi-gloss white as your beadboard for a seamless, built-in look. Apply at least two coats.
- Decide on the height. A good rule of thumb is 6-8 inches above the countertop.
- Use a stud finder to locate the studs behind your beadboard. Mark their locations on the wall just above where the rail will go.
- Drill pilot holes through the peg rail, aligning them with your stud locations.
- Secure the rail to the wall using long screws that go through the rail, the beadboard, and deep into the wall studs.
Time: 2-3 hours (plus paint drying time). Cost: $25-$60.
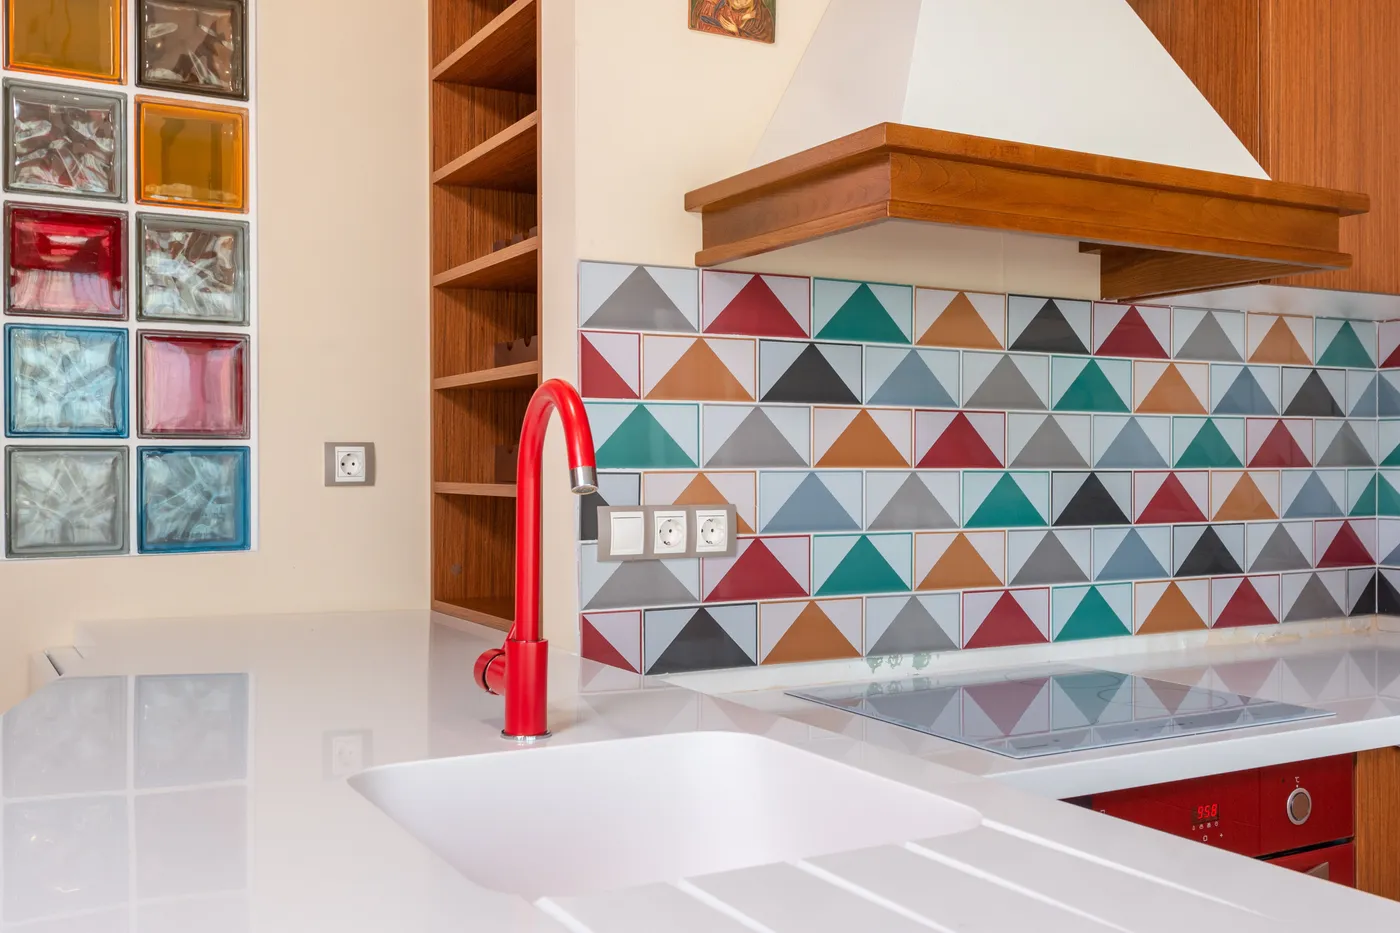
10. Playful Kitchen with a Colorful Geometric Triangle Backsplash
This kitchen is pure joy, and it works because it follows the ‘one big statement’ rule. The tile backsplash is the undeniable hero, and everything else is designed to support it. The countertops and integrated sink are a seamless, solid white, creating a blank canvas that makes the colors pop. The faucet is a bold, solid red pulled directly from the tile pattern, which makes it feel connected and intentional rather than random. Even the wooden cabinets have a simple, flat-front design that doesn’t compete for attention. The design is confident and fearless, letting the tile do all the talking.
|
📋 Copy HEX 🔗 Share |
A bold, colorful pattern like this is a huge commitment. While it looks incredible now, ask yourself if you’ll still love it in five or ten years. Trends change, and your personal taste might, too. Tearing out a tile backsplash is a significant job. If you’re hesitant, consider using high-quality peel-and-stick tiles to test-drive the look. It will give you the same vibrant effect with a much lower level of commitment. Also, this much color and pattern works best in a space that gets a lot of natural light to keep it from feeling chaotic or claustrophobic.
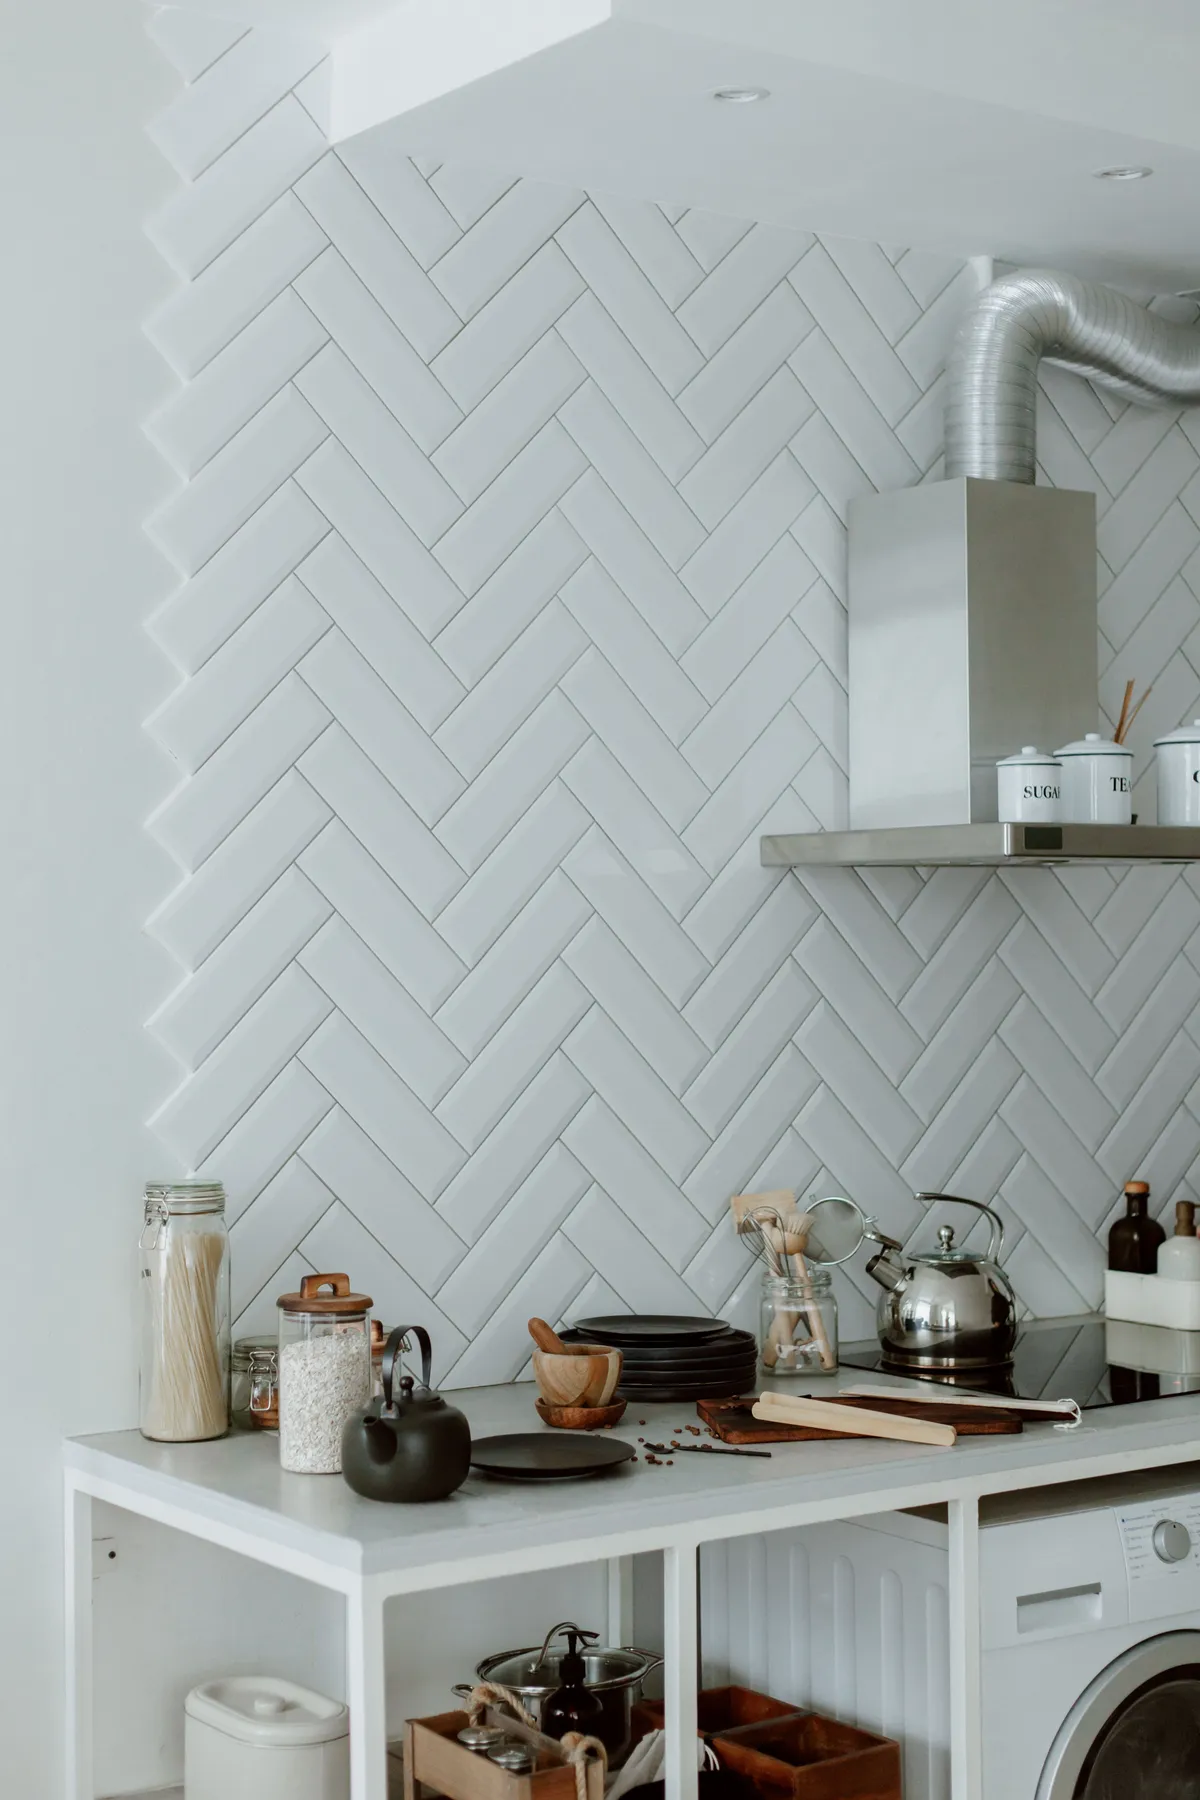
11. Sleek White Herringbone Tile with a Stainless Steel Hood
When tiling a herringbone pattern up to the ceiling, the termination point is everything. The most professional way to finish the top edge, where the tile meets the ceiling, is with a clean, straight line. Don’t end with the points of the herringbone pattern. Instead, plan your layout so you can cut the top row of tiles at a 45-degree angle to create a perfect horizontal edge against the ceiling line. Fill this joint with a flexible, paintable caulk, not grout, to prevent cracking as the house settles. This small detail makes the entire installation look sharp and intentional. You can compare this full-wall look to the more focused use of herringbone in Idea #21.
|
📋 Copy HEX 🔗 Share |
A full-height tile wall like this is a brilliant choice for kitchens with standard 8-foot ceilings, as it draws the eye upward and creates an illusion of height. It’s particularly effective behind a range and hood, creating a focal point that feels grand and custom. This idea works best on a single, uninterrupted wall at least 6 feet wide. In smaller or more broken-up spaces, the herringbone pattern can start to feel busy. For kitchens under 100 square feet, consider a simpler running bond pattern like in Idea #18 to maintain a sense of openness.
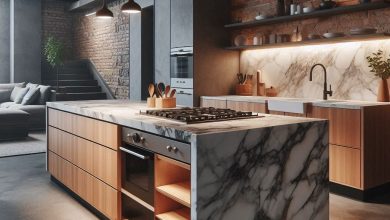
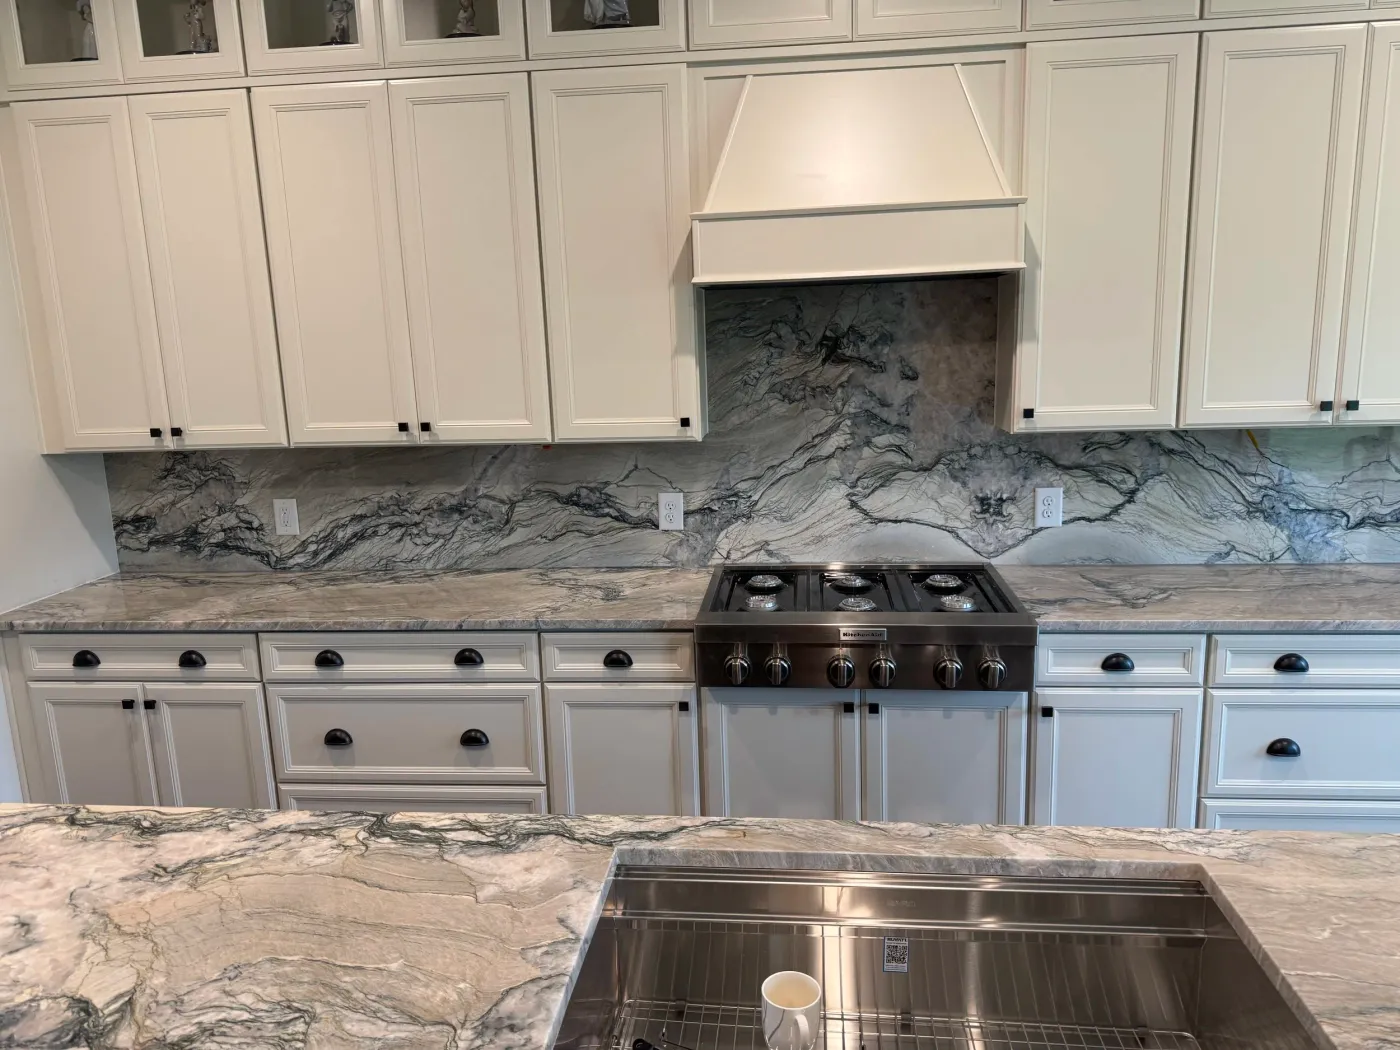
12. Dramatic Kitchen with Continuous Marble Slab Backsplash and Countertops
The single most powerful element here is the continuity of the material. By using the same heavily veined marble slab for both the countertop and the full-height backsplash, the kitchen achieves a seamless, monolithic look that is pure drama. This technique, known as bookmatching if the veining is mirrored, turns the stone into a massive piece of art. If you were to use a different material for the backsplash, even a simple tile, you would lose this incredible sense of luxury and cohesion. It’s a bold, expensive choice, but the visual payoff is undeniable. Just be careful with lighting; a potential pitfall we outline in the mistakes section.
|
📋 Copy HEX 🔗 Share |
Natural marble is stunning, but it’s a diva. It’s a porous stone, meaning it will stain. A splash of red wine, a lemon left on the counter, a drop of tomato sauce—all can leave a permanent mark if not wiped up immediately. It also etches easily, which is a chemical reaction that dulls the surface. You must be vigilant about sealing it at least once a year, and some high-use kitchens may require it twice a year. If you love this look but not the anxiety, consider a high-quality quartz or porcelain slab that mimics marble. You get 95% of the look with 10% of the worry.
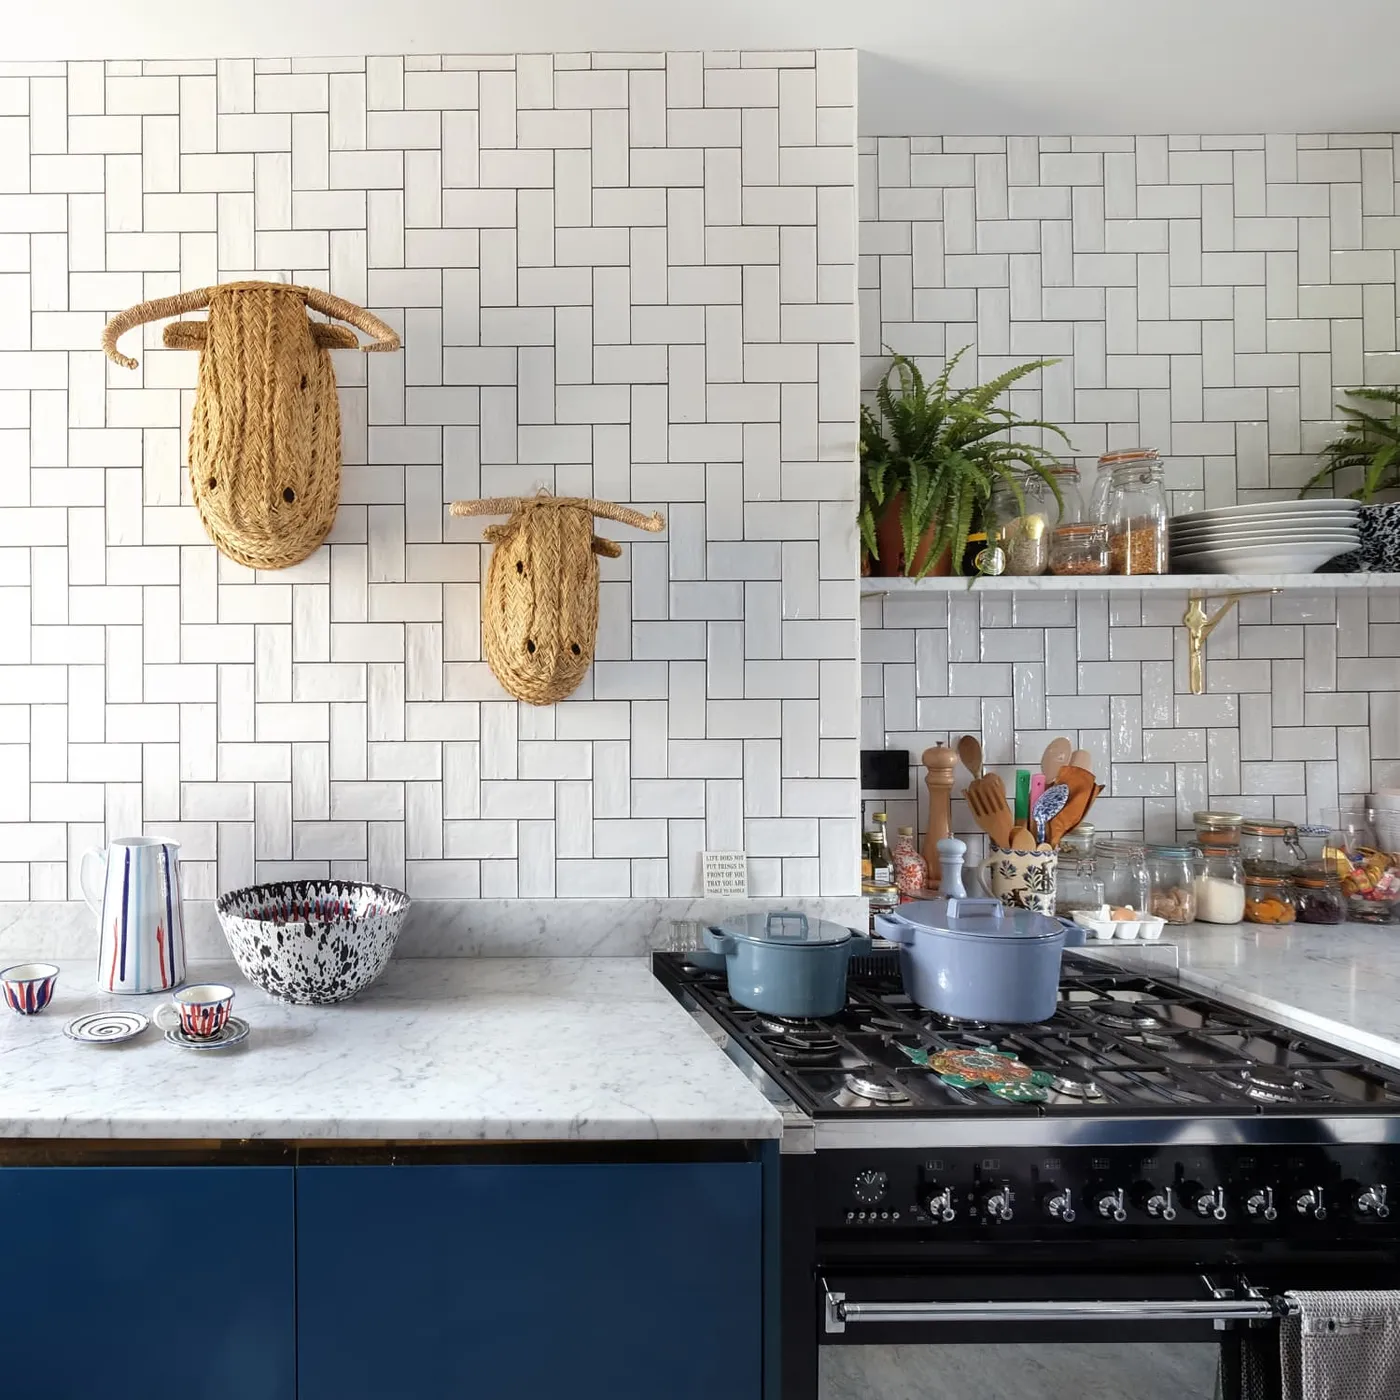
13. Eclectic Kitchen with a White Basket Weave Tile Backsplash
This space feels so dynamic because of its masterful use of texture. The basket weave tile provides a complex, geometric pattern that is subtle from a distance but rewarding up close. This is then layered with the organic, rough texture of the woven animal head, the smooth coolness of the marble countertop, and the matte finish of the deep blue cabinets. The variety of surfaces keeps the eye moving and engaged. The repetition of the white color in the tiles and the gray veining in the marble connects the elements, while the deep blue cabinets provide a strong, grounding anchor for the entire composition.
|
📋 Copy HEX 🔗 Share |
We’re seeing a huge move away from perfectly matched, showroom-style kitchens and toward spaces that feel collected and personal. This kitchen is a perfect example of the Eclectic Grandpa trend that’s taking over Pinterest. It’s about mixing modern elements (the clean tile pattern, the sleek range) with quirky, personal, and slightly old-fashioned touches (the woven wall decor, the traditional cabinet color). It feels authentic and lived-in, not staged. People are tired of sterile, all-white kitchens and are craving warmth, personality, and a bit of whimsy.
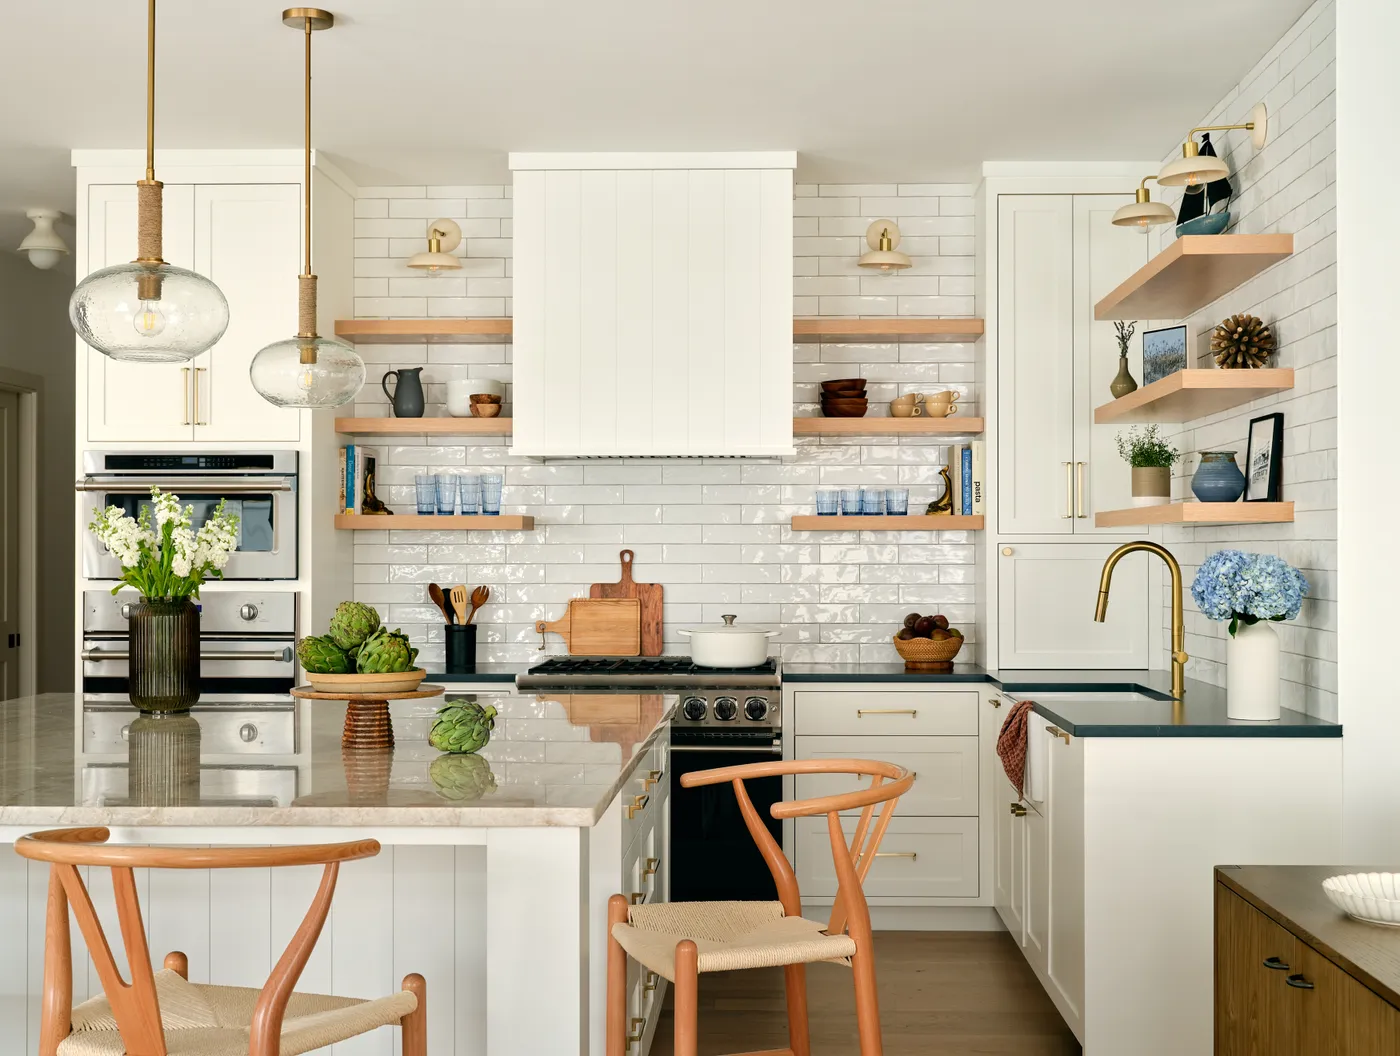
14. Bright and Airy Kitchen with Glossy White Zellige Tiles
The magic of this kitchen comes from the Zellige tiles. Unlike standard subway tiles, authentic Zellige tiles have slight imperfections, variations in color, and an undulating, glossy surface. These imperfections are the whole point. They catch the light in a thousand different ways, creating a surface that shimmers and feels alive. If you swapped these for perfectly uniform, machine-made tiles, the kitchen would instantly lose its soulful, handcrafted character. The Zellige tile provides a layer of subtle texture and luxury that makes the whole space feel special and custom-made.
|
📋 Copy HEX 🔗 Share |
This look is a beautiful exercise in material balance. The formula is roughly: 50% Handcrafted Texture (the Zellige tile) + 40% Natural Warmth (the wood shelves and range hood trim) + 10% Metallic Gleam (the brass hardware and lighting). The Zellige is the star, covering a large surface area. The wood provides a necessary counterpoint, preventing the white and brass from feeling too stark or glamorous. The brass is used sparingly as jewelry for the room, adding a final touch of polish. You could swap the brass for matte black for a more modern-industrial feel, and the balance would still work.
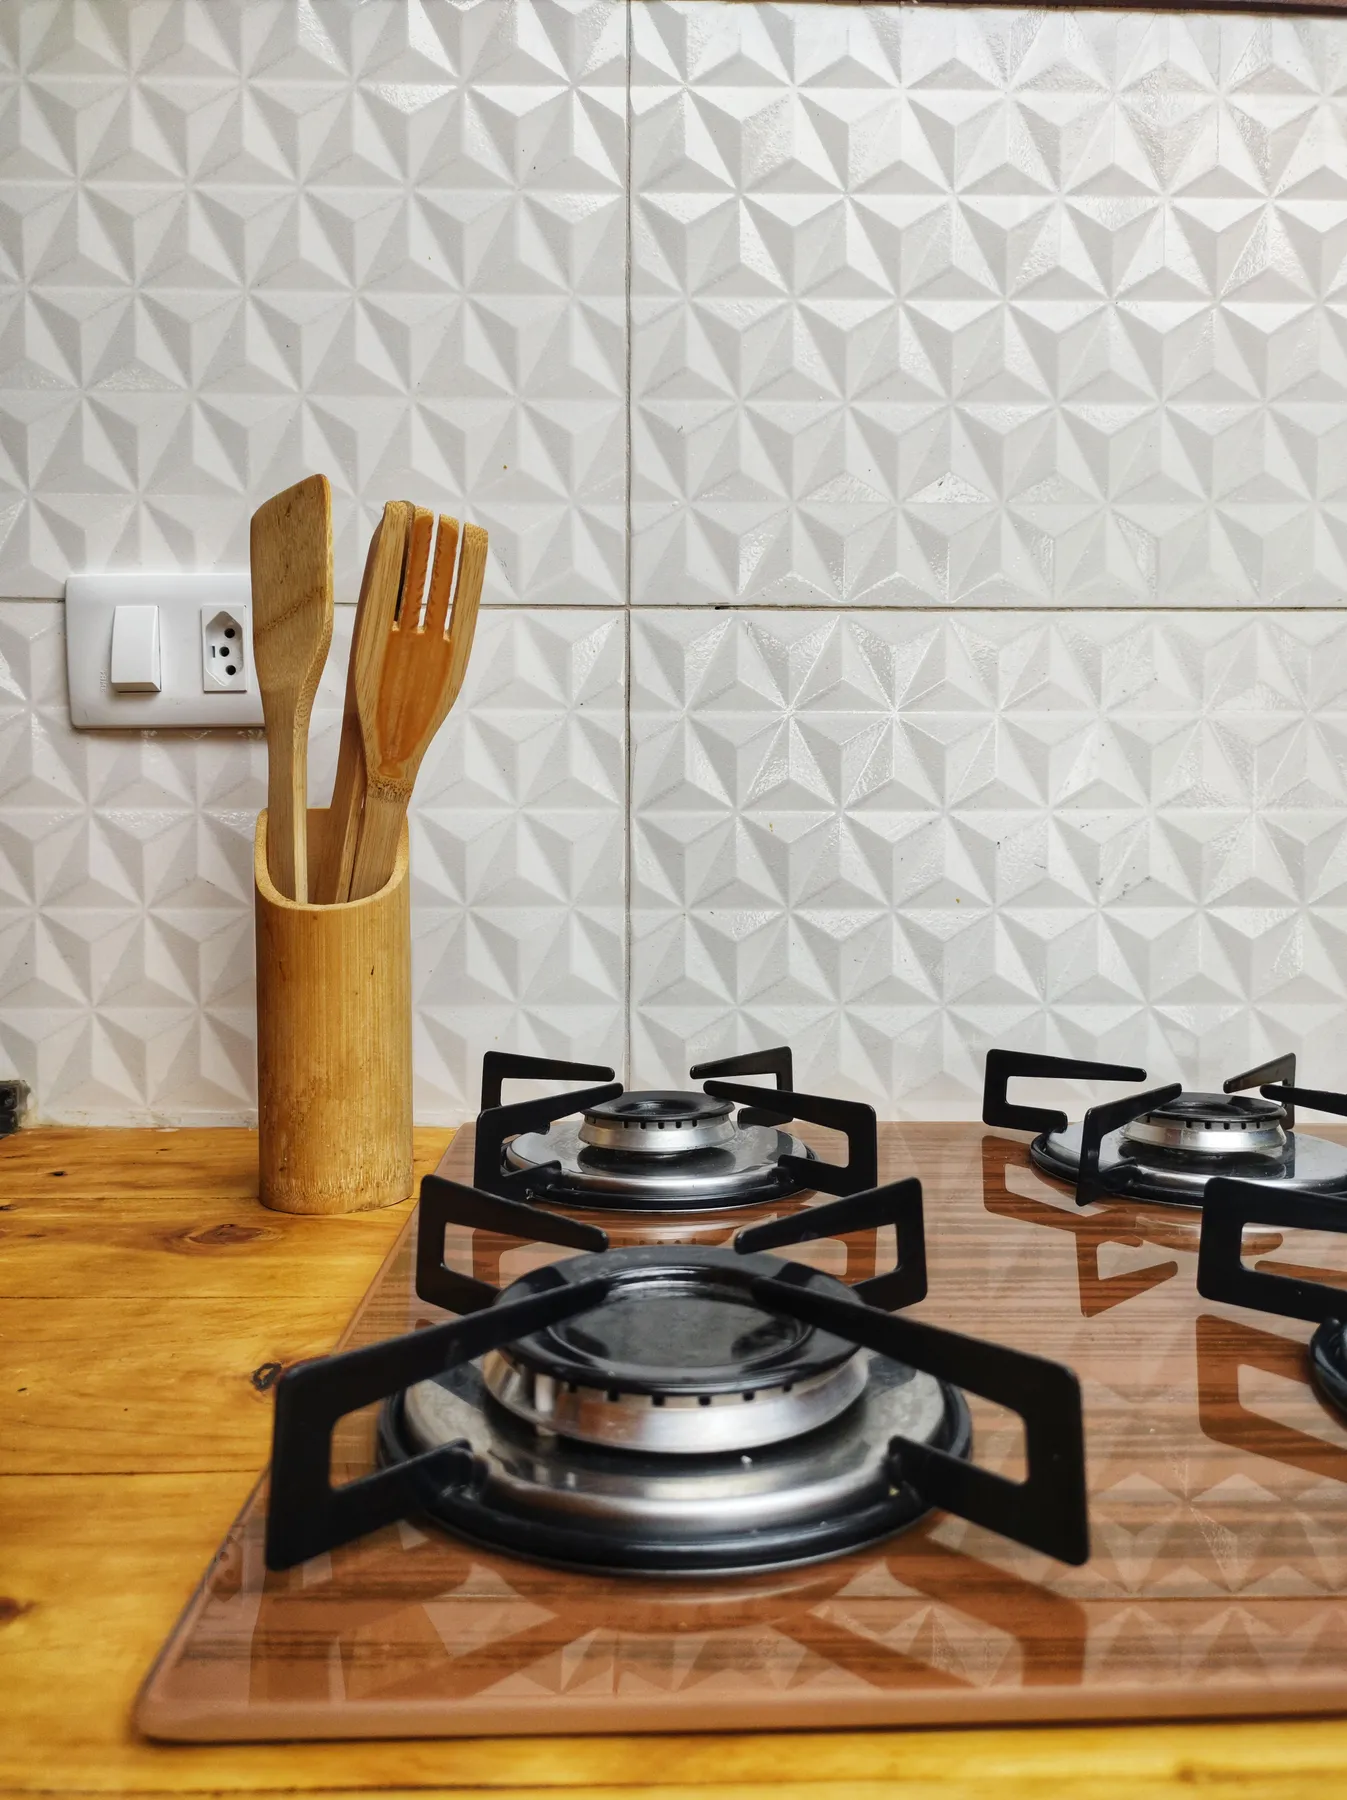
15. Warm Modern Kitchen with a White Geometric Textured Backsplash
This design works because it’s a study in quiet texture. Instead of using color or a loud pattern, the interest comes from the subtle, three-dimensional geometric design of the white tiles. The light catches the raised edges, creating a gentle play of shadow and highlight that’s more felt than seen. This textural approach is balanced by the smooth, flat surfaces of the wooden countertop and the glass cooktop. The warmth of the wood keeps the all-white tile from feeling clinical, creating a space that is both minimalist and inviting. It’s a sophisticated way to add detail without adding clutter.
|
📋 Copy HEX 🔗 Share |
Textured geometric tiles can be pricey. To get a similar effect on a budget, look for paintable textured wallpaper. There are many geometric designs available that mimic the look of 3D tiles for around $2-$4 per square foot. You can install it yourself in a weekend. The key is to use a high-quality, scrubbable semi-gloss or gloss paint over it to make it durable and wipeable enough for a kitchen backsplash. While not as permanent as tile, it’s a fantastic way to get this high-end look for about $150 and see if you love it before committing to the real thing.
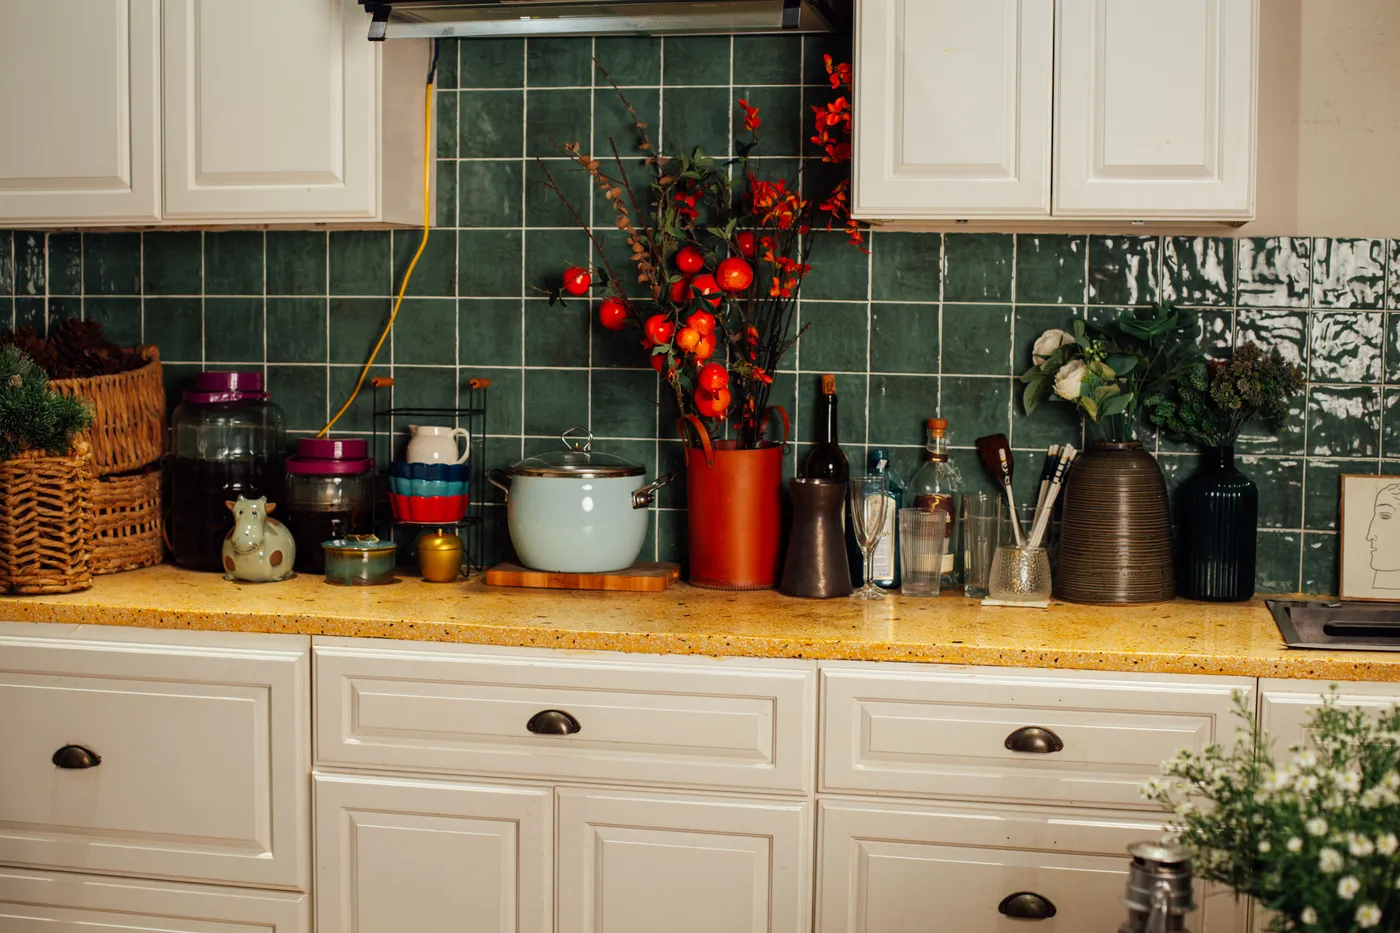
16. Eclectic Kitchen with Dark Green Square Tiles and a Yellow Countertop
The fearless color combination is everything here. Pairing dark, earthy green tile with a bold, speckled yellow-orange countertop is a choice. A very specific, personality-driven choice. It breaks all the ‘safe’ design rules and that’s precisely why it’s so wonderful. It declares that this is a kitchen for someone who loves color and isn’t afraid to show it. If you were to replace the yellow countertop with a neutral white or grey, the room would still be nice, but it would lose its quirky, vibrant soul. The confidence of this pairing is what makes the entire space sing.
|
📋 Copy HEX 🔗 Share |
This look is not for the faint of heart or for those thinking about resale value in the next few years. A bold and specific color palette like this is deeply personal. While you may adore the green and yellow combination, it might be a major turn-off for a potential buyer who prefers neutrals. If this is your forever home, go for it! But if you plan to sell soon, you might consider a more classic combination. Also, a speckled countertop can be great at hiding crumbs, but it can also camouflage spills, so you’ll need to be diligent about wiping it down thoroughly.
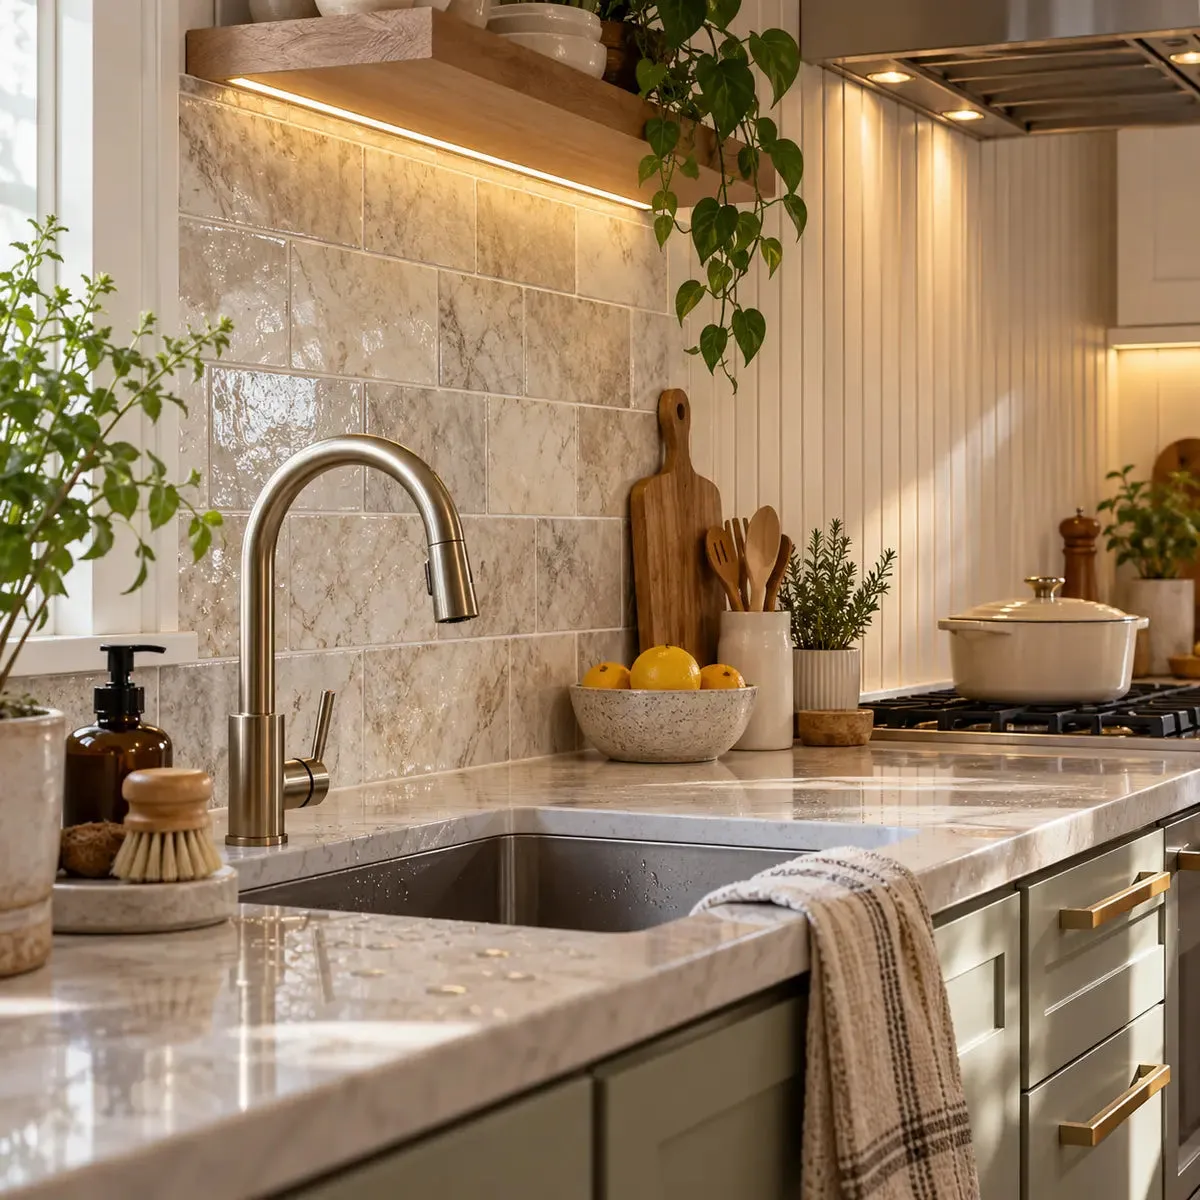
17. Earthy Kitchen with Mixed Marble and Beadboard Backsplash
This kitchen successfully mixes two different backsplash materials by assigning them clear zones and connecting them with a third element. The marble subway tile is used in the wet zone around the sink, where its durability and water resistance are most needed. The less-durable but charming beadboard is used in the dry zone behind the stove. The wooden floating shelf is the brilliant bridge that visually connects the two distinct areas, making the transition feel intentional and cohesive rather than disjointed. The consistent sage green color on the lower cabinets further unifies the space, tying everything together.
|
📋 Copy HEX 🔗 Share |
When mixing tile and another material like beadboard, the transition is critical. Don’t just butt them up against each other. The cleanest method is to use a simple, squared-off wood trim piece, like a 1×2 board, running vertically between the two materials. Paint this trim piece the same color as the beadboard (or the wall color) to make it blend in. This creates a crisp, deliberate border and neatly hides any small gaps or uneven edges between the tile and the paneling. It’s a small detail that makes the mixed-material look feel professional and planned.
18. A Minimalist’s Take on Classic White Subway Tile
This perfectly executed minimalist look adheres to a strict visual diet: 80% Clean Lines + 20% Natural Texture. The vast majority of the visual information comes from the clean, graphic lines of the subway tile grid and the simple, horizontal lines of the shelving and countertop. There are no complex shapes or unnecessary adornments. The remaining 20% is all about the warmth and subtle imperfection of the natural wood shelving. This touch of organic texture is just enough to keep the space from feeling sterile, adding a necessary dose of warmth to the otherwise stark, geometric composition.
|
📋 Copy HEX 🔗 Share |
White tile with dark grout looks sharp, but the grout is the weak link. Even when sealed, dark grout behind a sink or stove can show hard water stains (which look like a white film) or get splattered with grease. To maintain that crisp contrast, you’ll need a good maintenance routine. A weekly scrub with a pH-neutral cleaner and a stiff brush will keep it looking fresh. For stubborn stains, a paste of oxygen bleach and water, left to sit for 15 minutes, can work wonders. Reseal the grout every 1-2 years to protect it from discoloration.
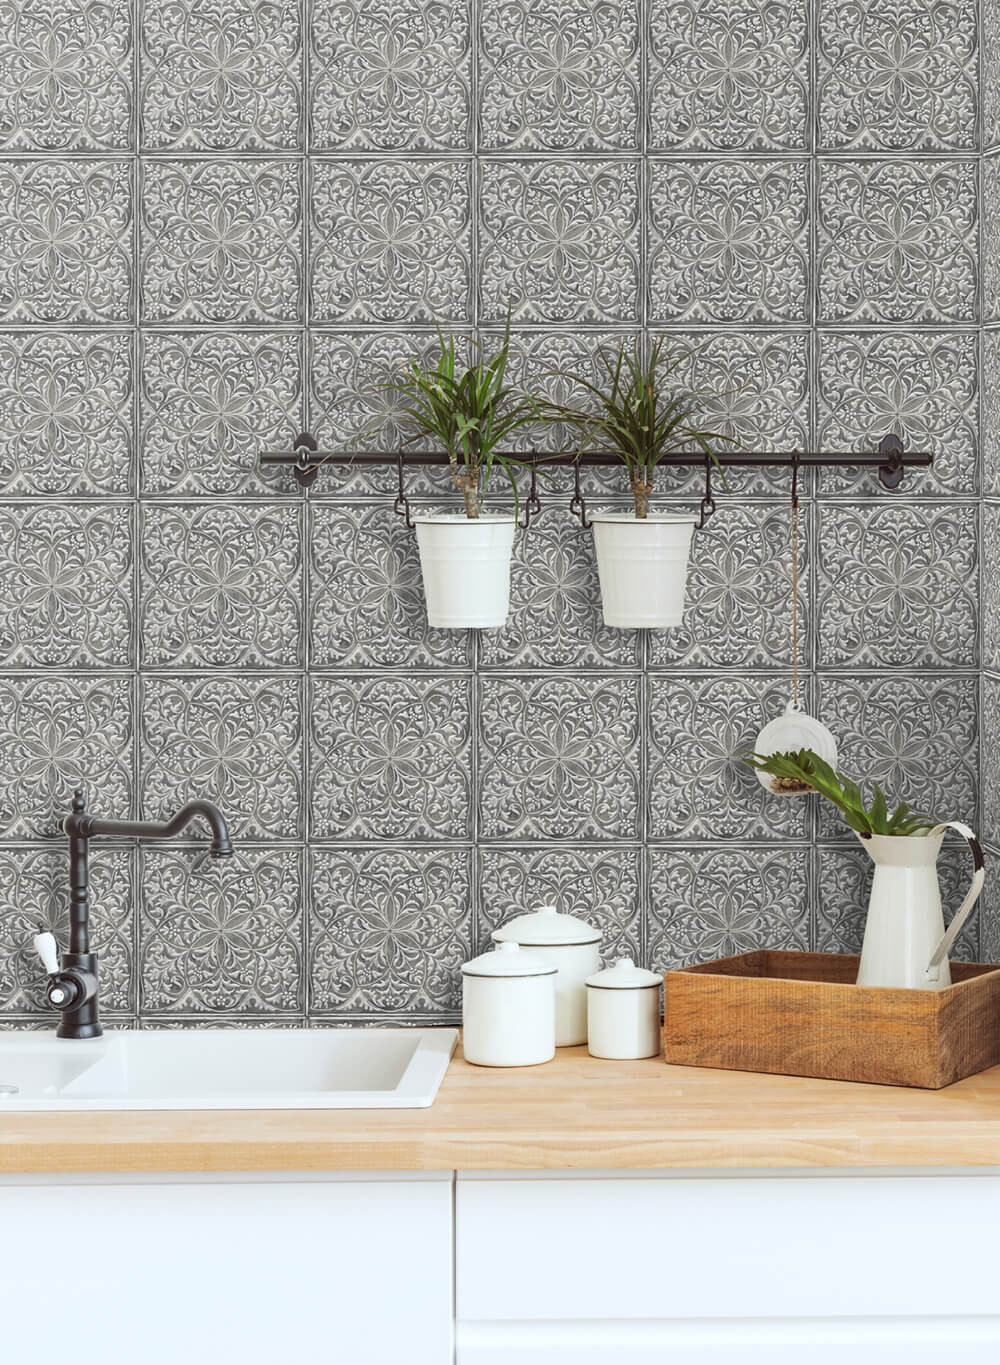
19. Rustic Charm with an Ornate Grey Tin Tile Backsplash
Thinking about tin tiles? They’re a fantastic way to add vintage character. Here’s a quick checklist before you buy:
- Measure your backsplash area twice. Tin tiles come in specific sizes (often 24″ x 24″), so planning your layout to minimize awkward cuts is crucial.
- Check your countertop. A busy, heavily patterned countertop might clash with the ornate design of the tiles. This look works best with simple, solid countertops like the wood one shown.
- Confirm the material. True tin can be pricey. Many affordable and beautiful options are made from PVC or other plastics that mimic the look but are easier to cut and install.
- Plan your outlets. Cutting holes in metal tiles requires a different tool (tin snips or a jigsaw with a metal blade) than cutting plastic ones. Know what you’re working with.
|
📋 Copy HEX 🔗 Share |
Installing a hanging rail like this is a 30-minute upgrade that adds major function.
- Decide on the placement. Position it high enough that items on the counter won’t interfere with what’s hanging, but low enough to be easily reached.
- Use a stud finder to locate studs in the wall. If the rail’s mounting holes don’t align with studs, you’ll need to use heavy-duty drywall anchors.
- Hold the rail up to the wall, use a level to make sure it’s straight, and mark your drill holes with a pencil.
- Drill pilot holes for your screws or install your drywall anchors.
- Screw the rail firmly to the wall. That’s it! Now you can hang plants, utensils, or mugs to free up counter space.
Cost: $20 – $50. Time: Under 30 minutes.
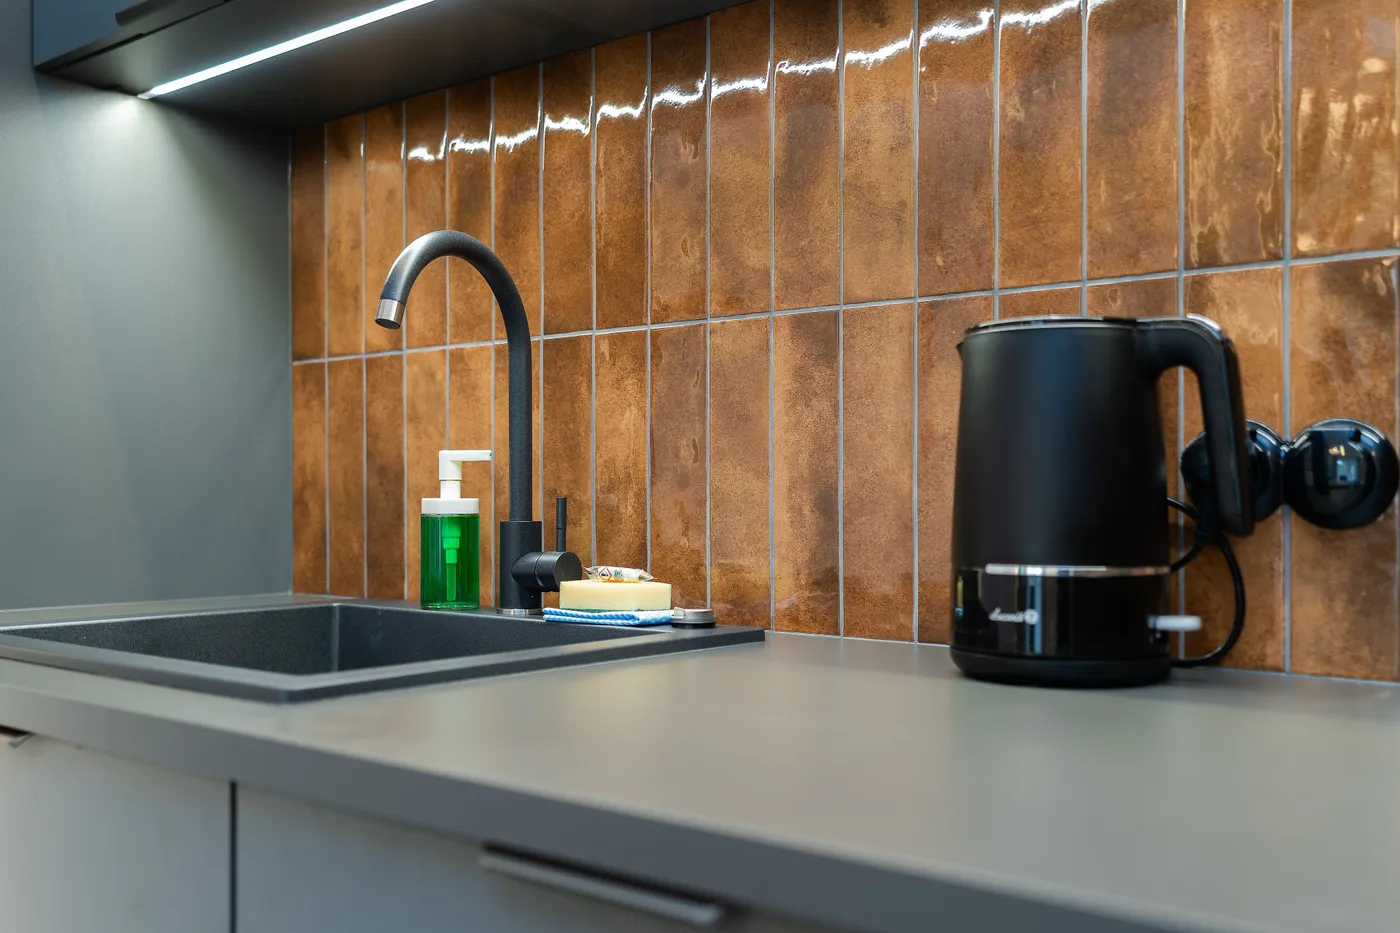
20. Sophisticated Kitchen with Glossy Copper Vertical Tiles
The star of this show is undeniably the color and texture of the tiles. The rich, warm tones of copper and rust bring an incredible depth and sophistication that a standard ceramic tile just can’t match. The glossy, slightly uneven surface reflects the under-cabinet lighting beautifully, creating a sense of movement and warmth. The vertical orientation of the tiles also adds a modern touch, drawing the eye upward. If you were to change these tiles to a simple white or grey, the kitchen’s entire identity would shift from warm and sophisticated to standard modern.
|
📋 Copy HEX 🔗 Share |
Achieving this sleek, high-end look is a game of material choices. Metallic-look or glass tiles are often more expensive than standard ceramics.
- Backsplash Tile: Specialty tiles like these can range from $25 to $60 per sq. ft. For a 25 sq. ft. area: $625 – $1,500.
- Countertop: A dark solid surface or quartz is a mid-to-high-end choice. ($2,000 – $4,500).
- Faucet: A quality matte black faucet is a key detail. ($200 – $500).
- Lighting: Under-cabinet LED strip lighting is a relatively affordable but crucial element. ($100 – $300).
- TOTAL: $2,925 – $6,800
- Budget alternative: Find a copper-toned peel-and-stick tile ($250), use a dark grey laminate countertop ($600), and find a budget-friendly matte black faucet on Amazon ($80). Total: ~$930.
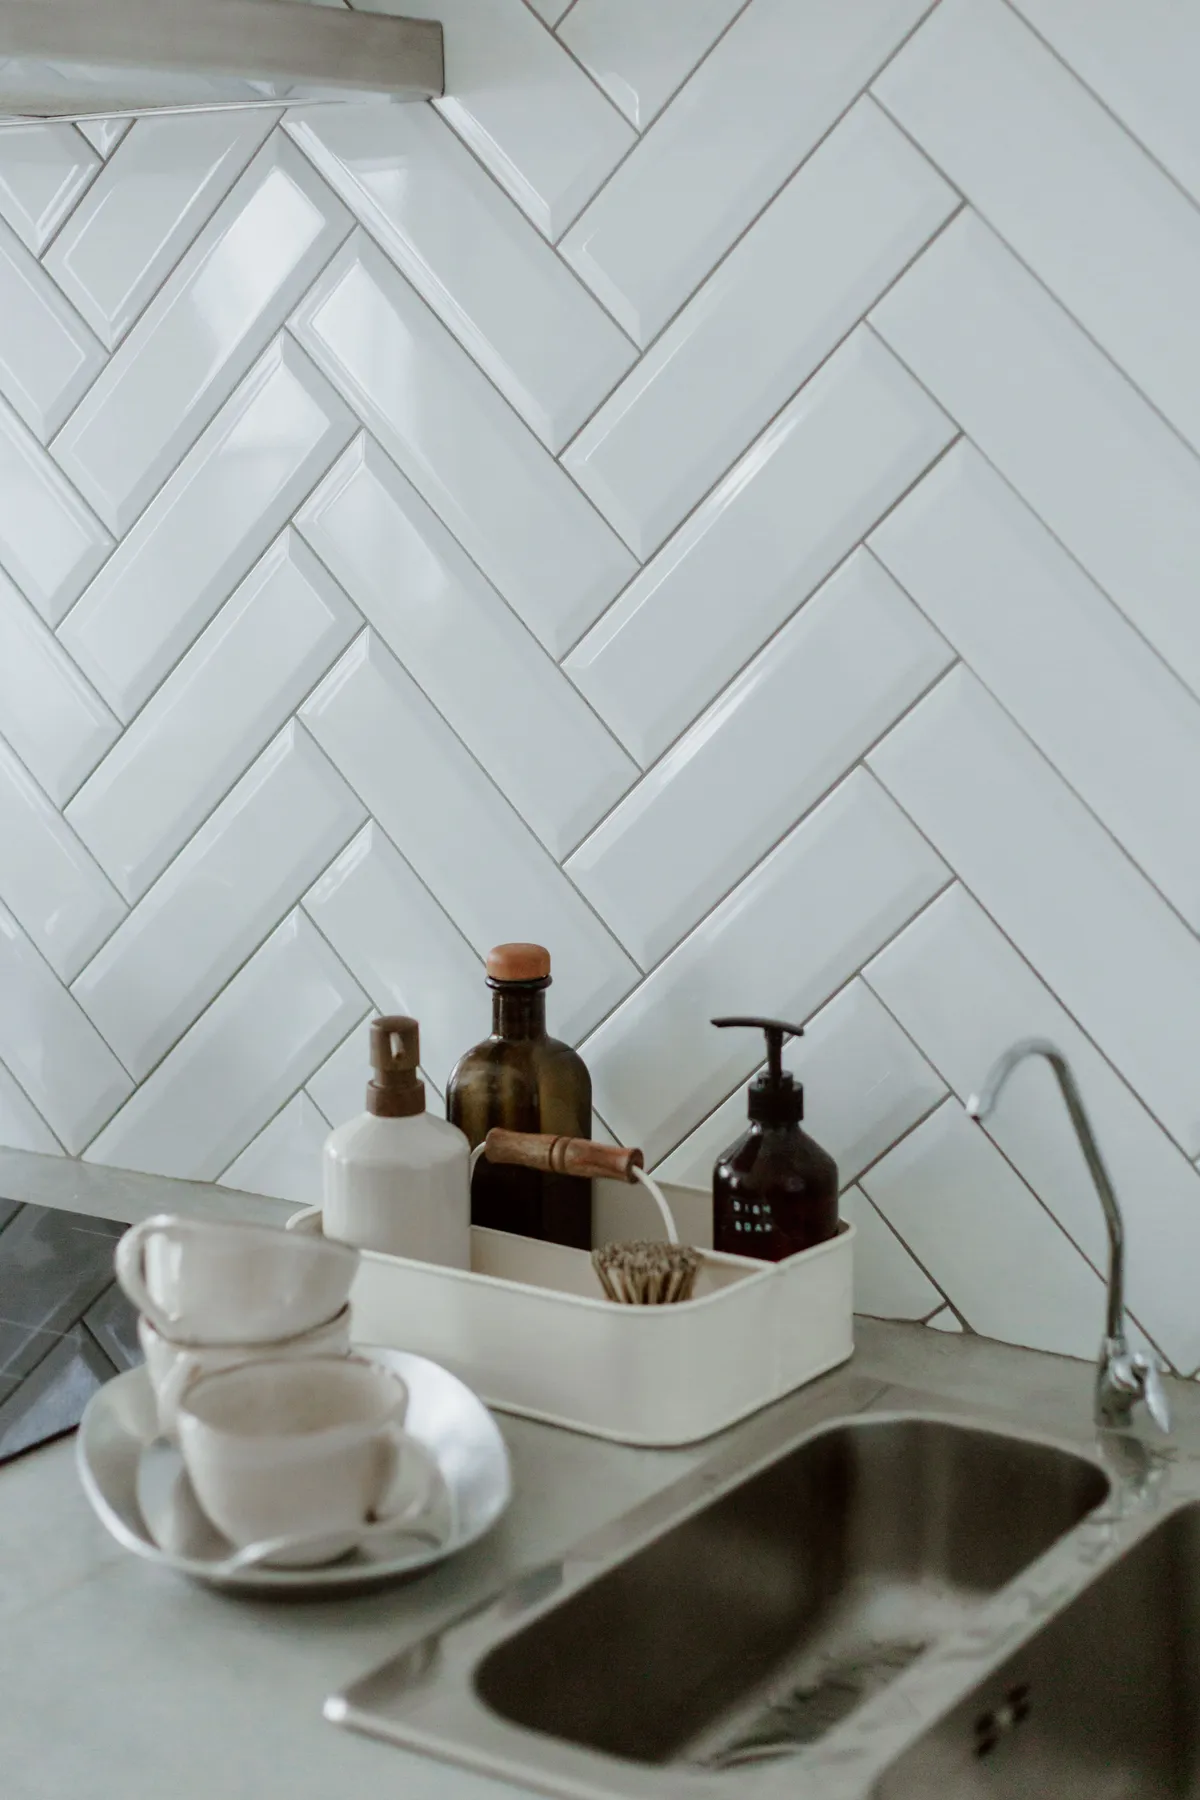
21. Clean and Simple: A White Herringbone Tile Close-Up
The beauty of this design lies in its subtle complexity. At first glance, it’s just a white backsplash. But the herringbone pattern provides a sense of movement and sophistication that a standard subway tile layout lacks. It’s a classic pattern that feels elevated and custom without shouting for attention. The use of white grout enhances this effect, making the pattern itself the source of texture rather than the contrast of the grout lines. It proves that you can create a dynamic and interesting surface using only one color and one shape, just by changing the arrangement. Compare this to the full-wall version in Idea #11.
|
📋 Copy HEX 🔗 Share |
Love the herringbone look but intimidated by the price of professional installation or the complexity of the cuts? There’s a solution: herringbone mosaic sheets. Many manufacturers now sell subway tiles pre-arranged in a herringbone pattern on a mesh backing. These typically come in 12×12 inch sheets. You install them sheet by sheet, which is far faster and requires much less planning than laying individual tiles. While the sheets themselves might be slightly more expensive per square foot, you’ll save a huge amount of time and frustration, making it a fantastic DIY-friendly option.
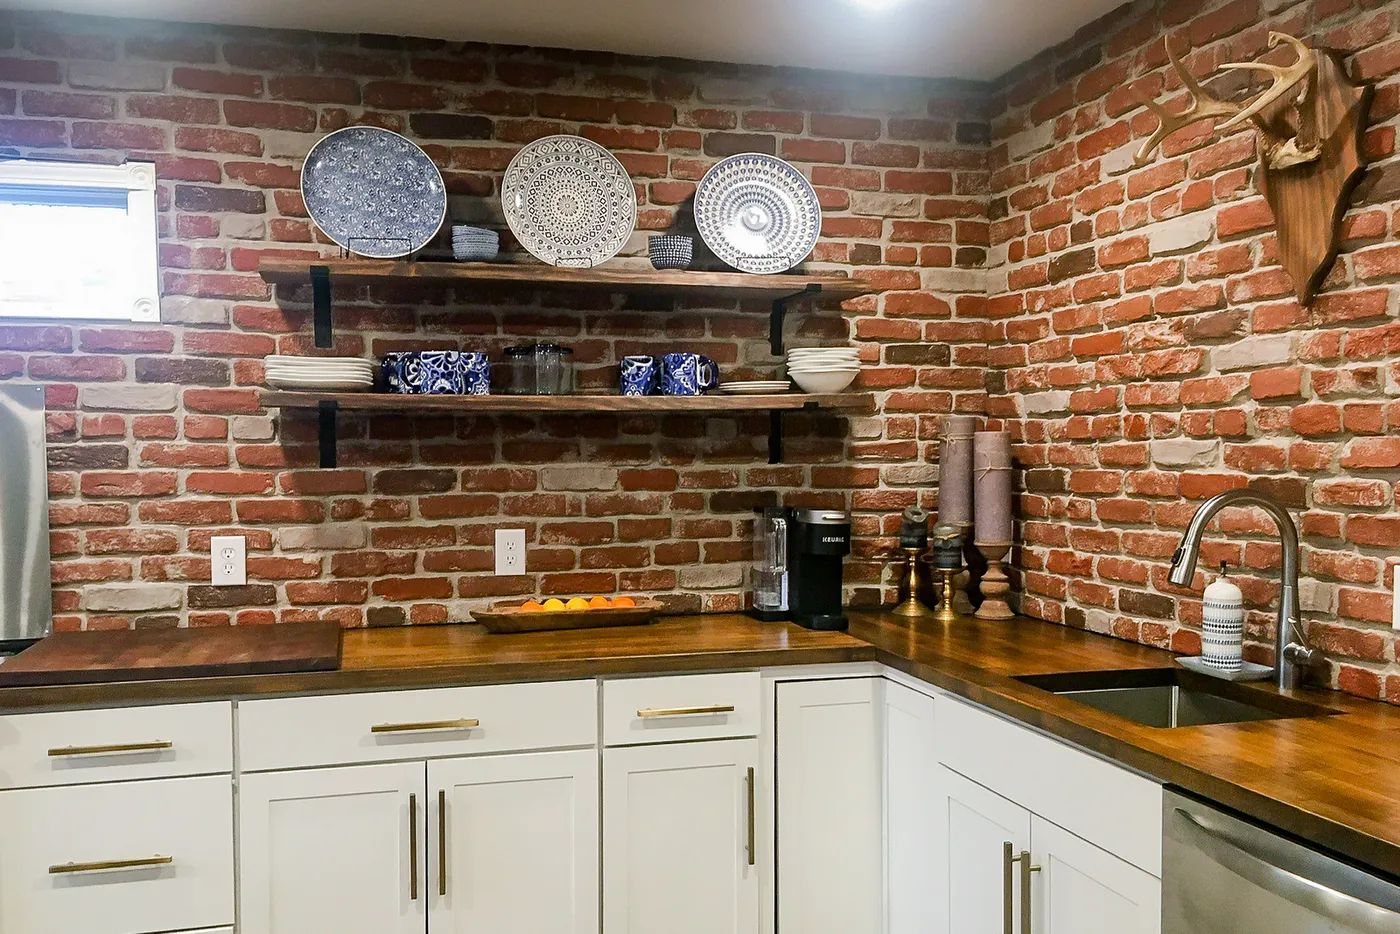
22. Rustic Industrial Kitchen with an Exposed Red Brick Wall
An exposed brick wall is the dream for many, but it comes with practical considerations. Real brick is porous and uneven, making it a nightmare to clean kitchen grease and food splatters from. It absolutely must be sealed with a matte-finish sealant designed for masonry. This will create a wipeable surface without adding an artificial-looking shine. Even when sealed, the rough texture can shred sponges and paper towels, so a stiff-bristled brush will be your go-to cleaning tool. Also, running new wiring or plumbing on a solid brick wall is a major, dusty, and expensive job. Plan your outlet and lighting placement carefully from the start.
|
📋 Copy HEX 🔗 Share |
If you’re using thin brick veneer to get this look, the type of mortar you use for the gaps is just as important as the bricks themselves. Don’t use standard tile grout. Use actual mortar, and apply it with a grout bag (it looks like a pastry bag for construction). Overfill the joints slightly, let it set up until it’s firm but not hard (the thumbprint test), and then use a brick jointer tool to strike the joints. This compacts the mortar and gives you that clean, concave shape you see in professional brickwork. It’s the detail that makes a veneer wall look like the real thing.
23. Modern Kitchen with White Linear Glass Tile and Dark Cabinets
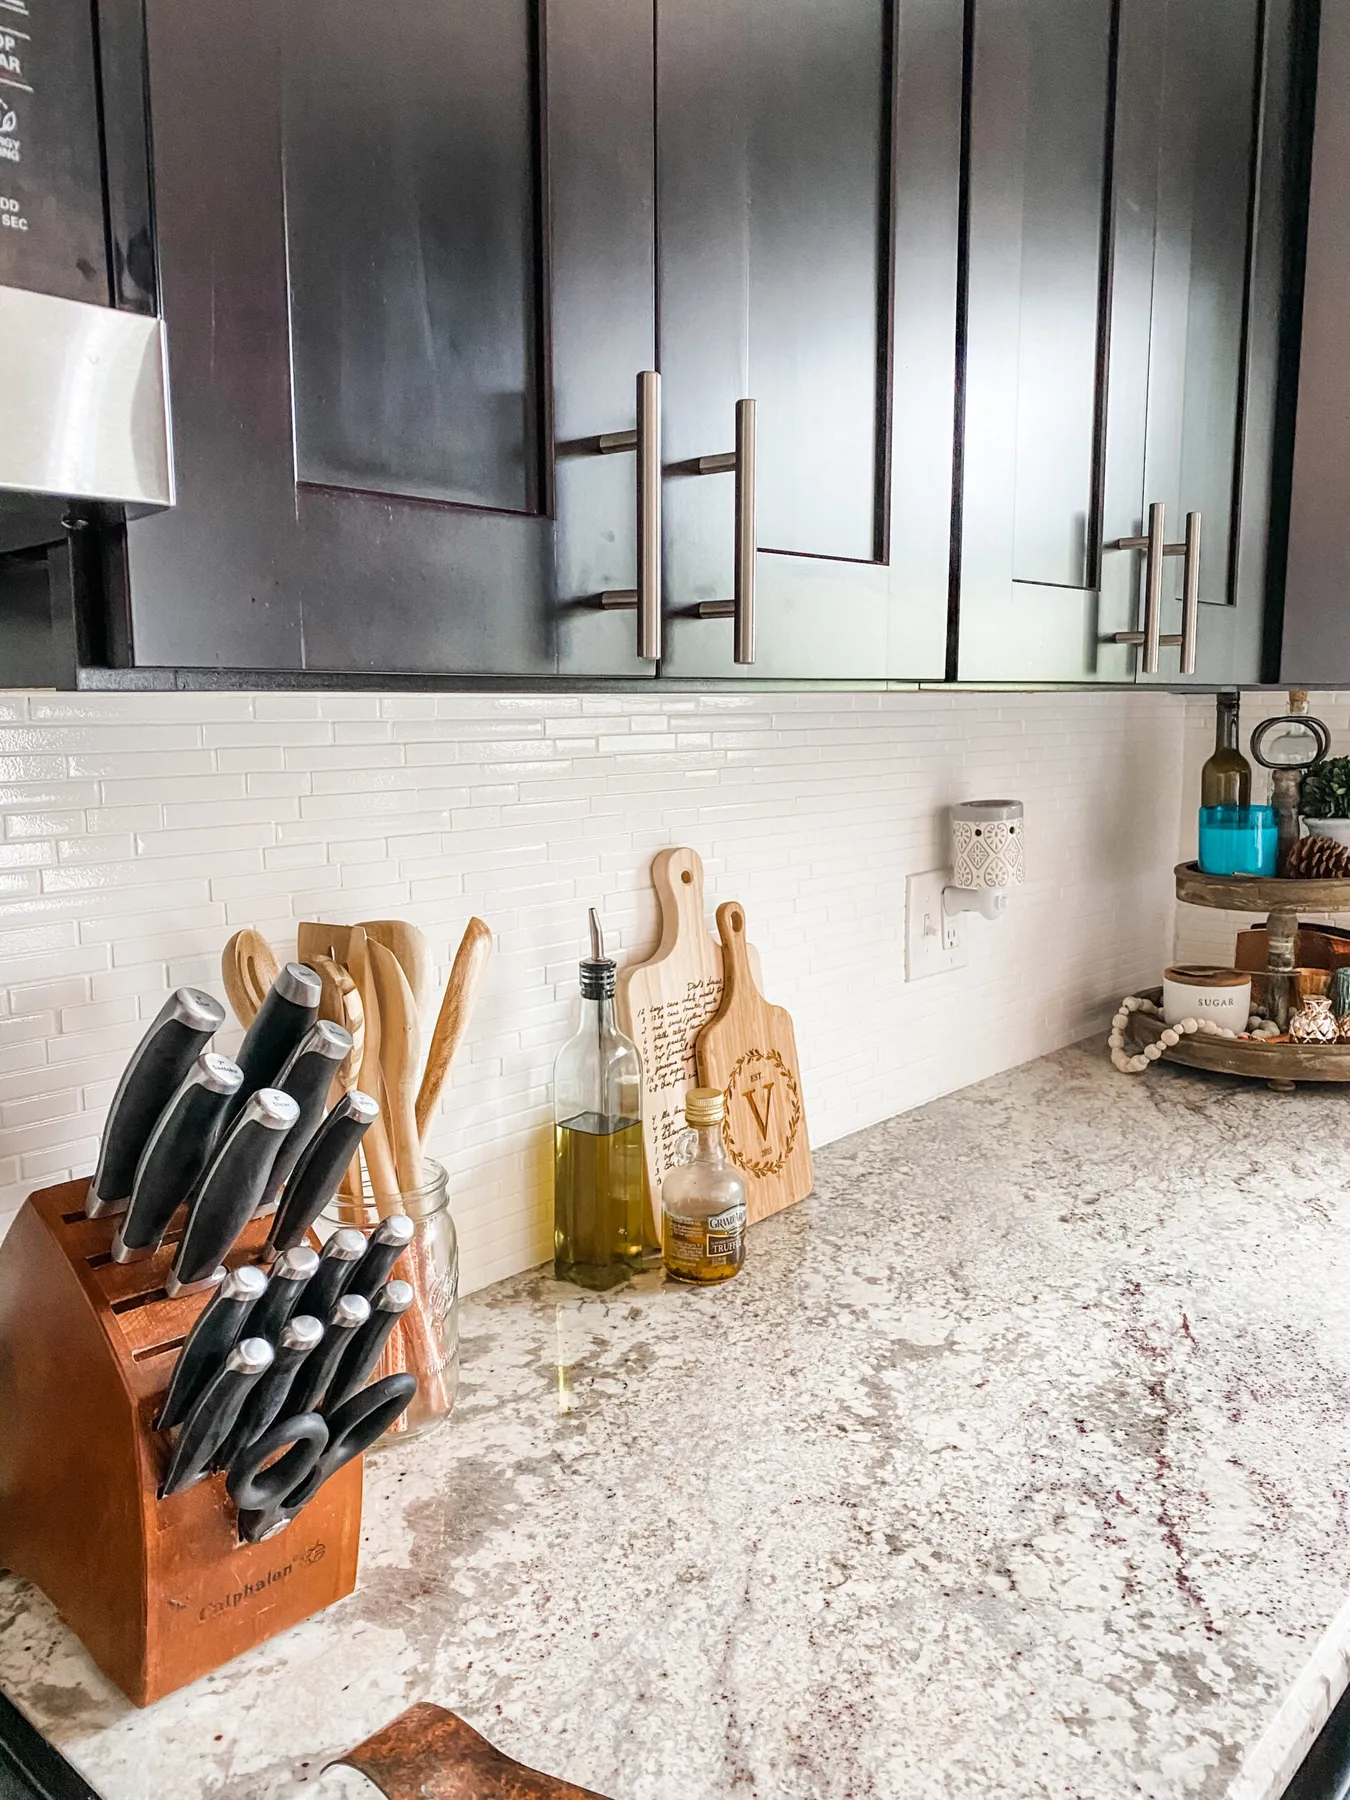
This kitchen’s success is a formula of balanced contrast: 50% Dark & Heavy + 50% Light & Sleek. The dark brown upper cabinets provide a sense of weight and anchor the top of the space. This is perfectly counterbalanced by the backsplash, composed of thin, glossy white glass tiles that feel light, reflective, and modern. The horizontal orientation of the tiles accentuates the width of the kitchen. The speckled granite countertop acts as a bridge, containing both the dark and light tones from the cabinets and backsplash, tying the whole look together seamlessly.
|
📋 Copy HEX 🔗 Share |
The thin, linear tile (often called kit kat or finger tile) is a fantastic choice for adding texture and the illusion of space to a standard-sized kitchen. It works particularly well in spaces with 8-foot ceilings and counter runs between 8 and 12 feet long. The strong horizontal lines can make the kitchen feel wider. However, in a very small or narrow galley kitchen, the numerous grout lines might start to feel a bit busy. In a very large, open-concept space, it might not have enough visual weight to make an impact. It’s the Goldilocks of backsplash tiles—just right for the average kitchen.
24. Bold Kitchen Featuring Black and White Patterned Tile
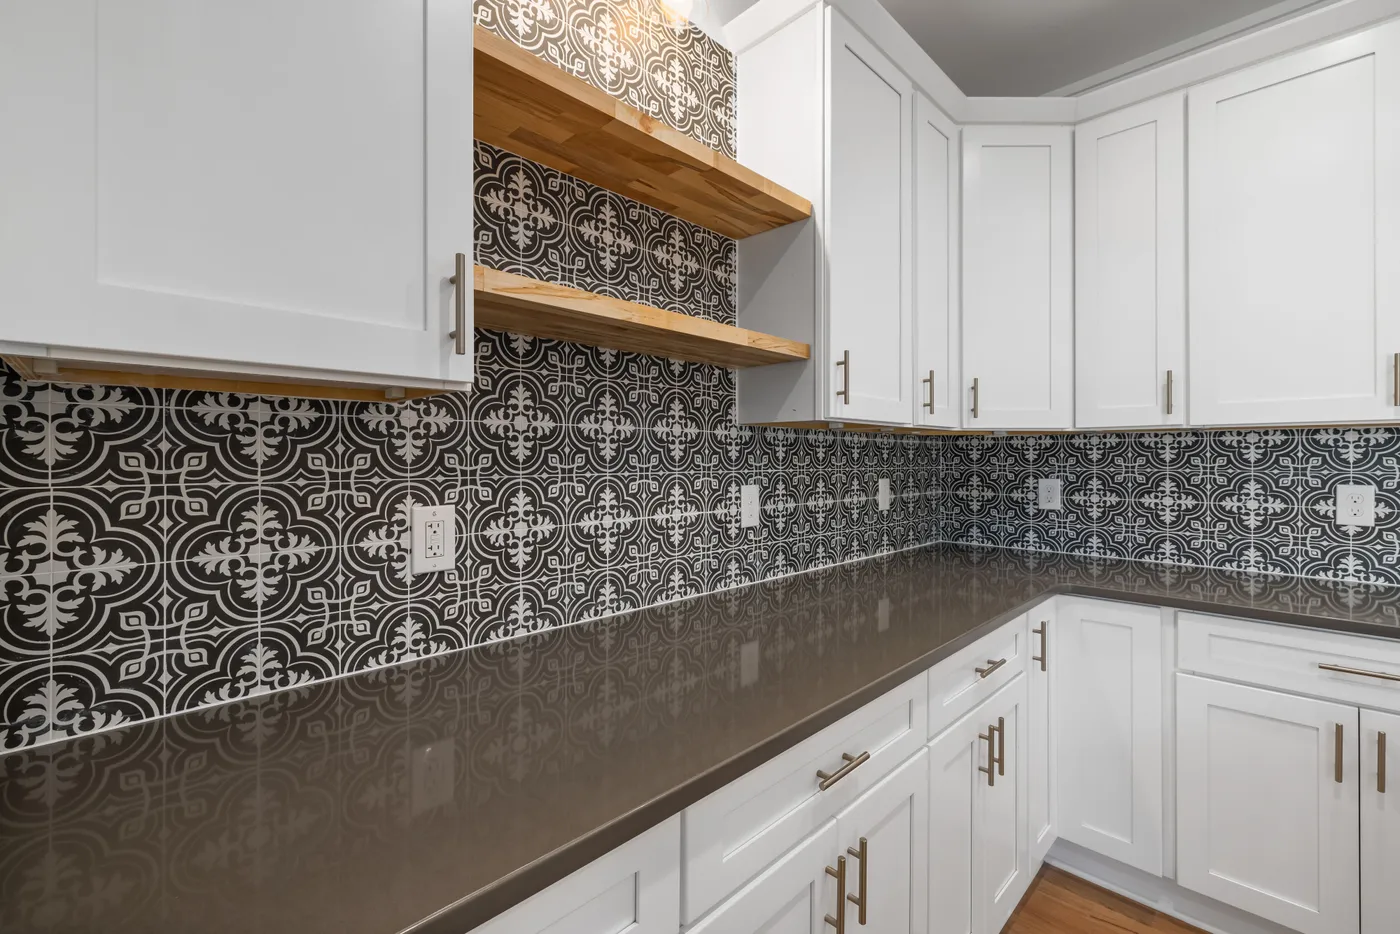
The absolute centerpiece of this design is the bold, graphic pattern of the tile. It’s the first thing you see, and it sets the entire tone for the room. This isn’t just a backsplash; it’s a feature wall that happens to be in a kitchen. The decision to run the tile behind the open shelving is crucial—it reinforces the tile’s importance and creates a continuous, impactful statement. If you were to swap this for a simple, solid-colored tile, the kitchen would lose all of its vibrant, modern personality. Everything else—the white cabinets, the dark counters—is chosen specifically to support and showcase this stunning tile.
|
📋 Copy HEX 🔗 Share |
This design is a masterclass in repetition and contrast. The pattern works because it’s bold but simple, using only black and white. This high contrast gives it energy. The repetition of this pattern across a large area creates a powerful rhythm. The design smartly repeats the black and white elsewhere: white in the shaker cabinets and black (or dark grey) in the solid countertops. This makes the tile feel integrated, not just stuck on. The warm wood of the floating shelves is the perfect finishing touch, adding an organic element that prevents the graphic scheme from feeling too cold or stark.
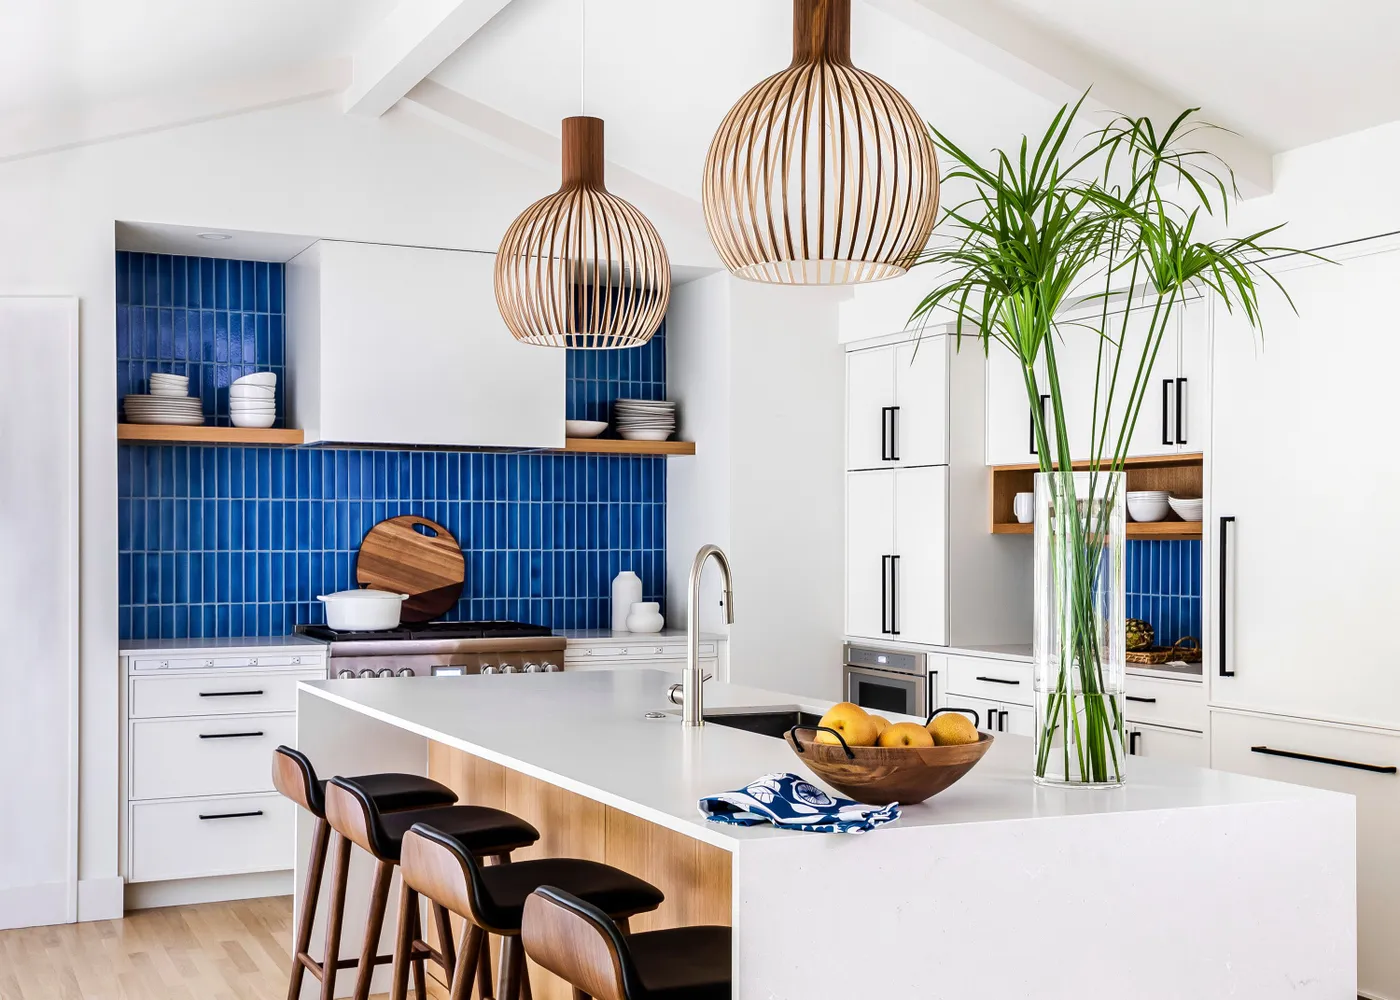
25. Moody and Modern with a Black Horizontal Tile Backsplash
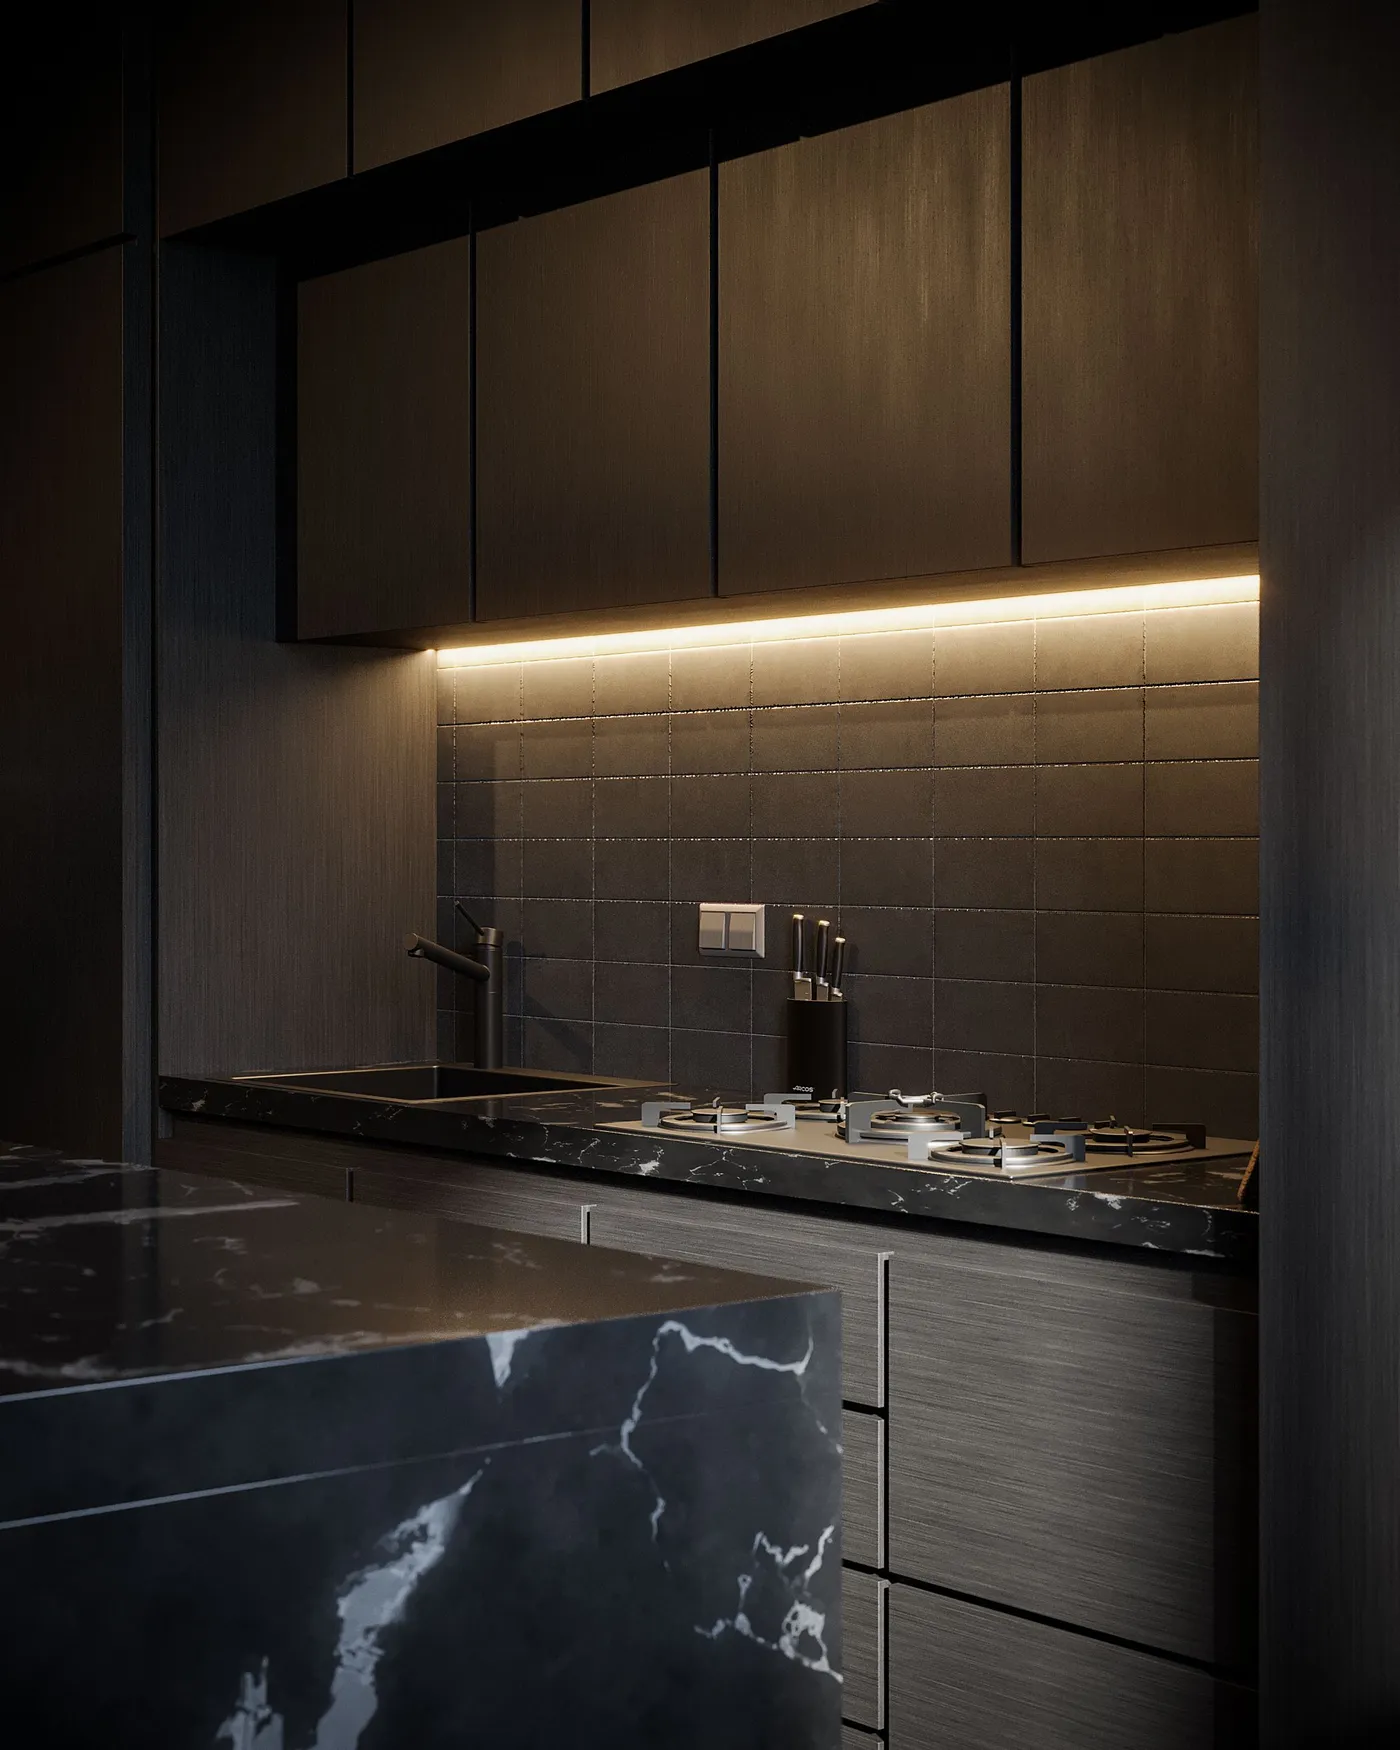
The secret to making a dark, monochromatic kitchen like this work is lighting. Under-cabinet lighting is not an optional accessory here; it is an essential design element. Without it, the black backsplash would absorb all the light and create a dark, cavernous void between the countertop and the cabinets. The warm LED strip shown here not only provides critical task lighting for cooking but also highlights the glossy finish of the tiles and the rich texture of the dark wood grain. When planning a dark kitchen, budget for and plan your lighting first, not last. If you love moody kitchens, don’t miss the deep green version in Idea #2.
|
📋 Copy HEX 🔗 Share |
Living with a dark kitchen requires a certain mindset. It will inherently feel smaller and less bright than an all-white kitchen, even with great lighting. It’s a vibe, and you have to be committed to it. On a practical level, dark, glossy surfaces are notorious for showing dust, fingerprints, and water spots. A matte finish can be more forgiving for fingerprints but might show oil splatters more readily. You’ll be wiping down surfaces frequently to keep it looking sharp. It’s a high-fashion look, and like a great black dress, it sometimes requires a bit more maintenance to look its best.
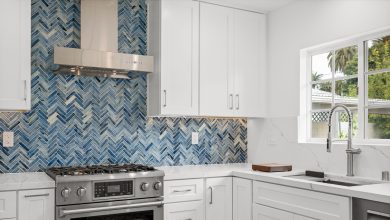
26. Cheerful Kitchen with a Vibrant Blue Mosaic Tile Wall
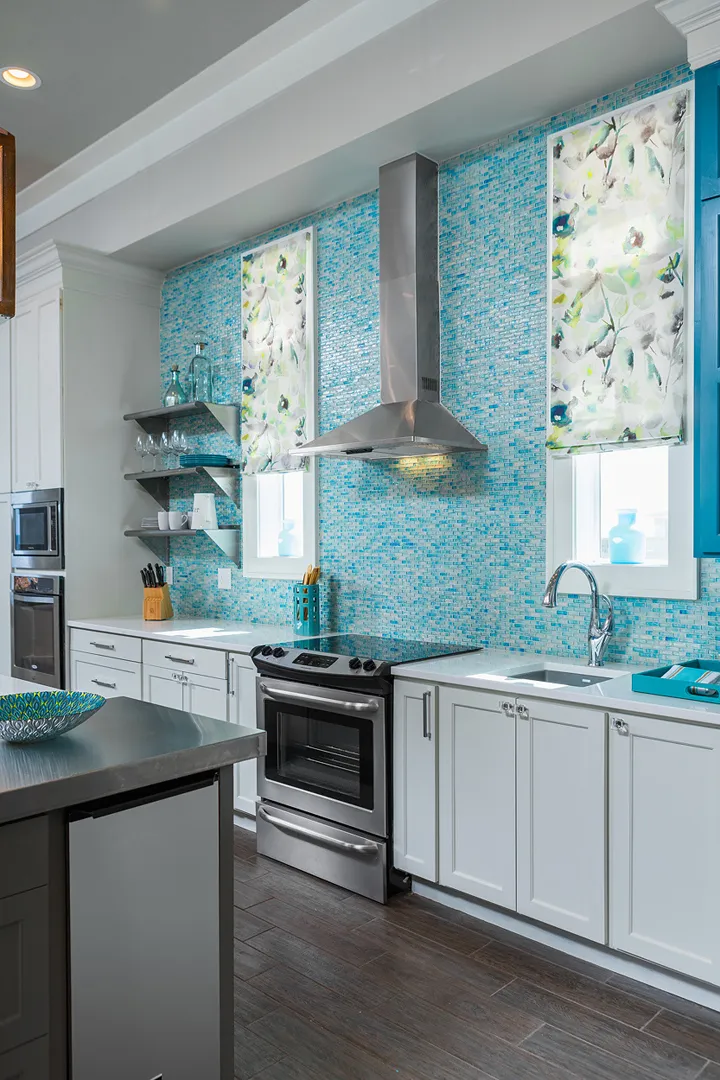
This kitchen feels so bright and energetic because it commits fully to its main feature. The floor-to-ceiling blue mosaic tile creates an immersive wash of color that feels like a day at the beach. The design works by balancing this incredible texture and color with simple, solid elements. The white shaker cabinets, plain stainless steel range hood, and simple metal shelves provide clean, structural lines that prevent the tiny mosaic tiles from feeling overwhelming. The two windows punctuate the wall, breaking up the pattern and flooding the space with natural light, which is essential for pulling off such a saturated look.
|
📋 Copy HEX 🔗 Share |
A floor-to-ceiling mosaic tile installation is a bold move that works best on a single, dominant feature wall, typically the range wall. This creates a strong focal point without overwhelming the entire room. It’s ideal for a wall that is 8 to 15 feet long in a kitchen that is at least 150 square feet. In a very small kitchen, this much small-scale pattern can feel chaotic and make the space feel smaller. For more compact spaces, consider using the mosaic tile in a more contained area, like the space between the countertop and the upper cabinets only.
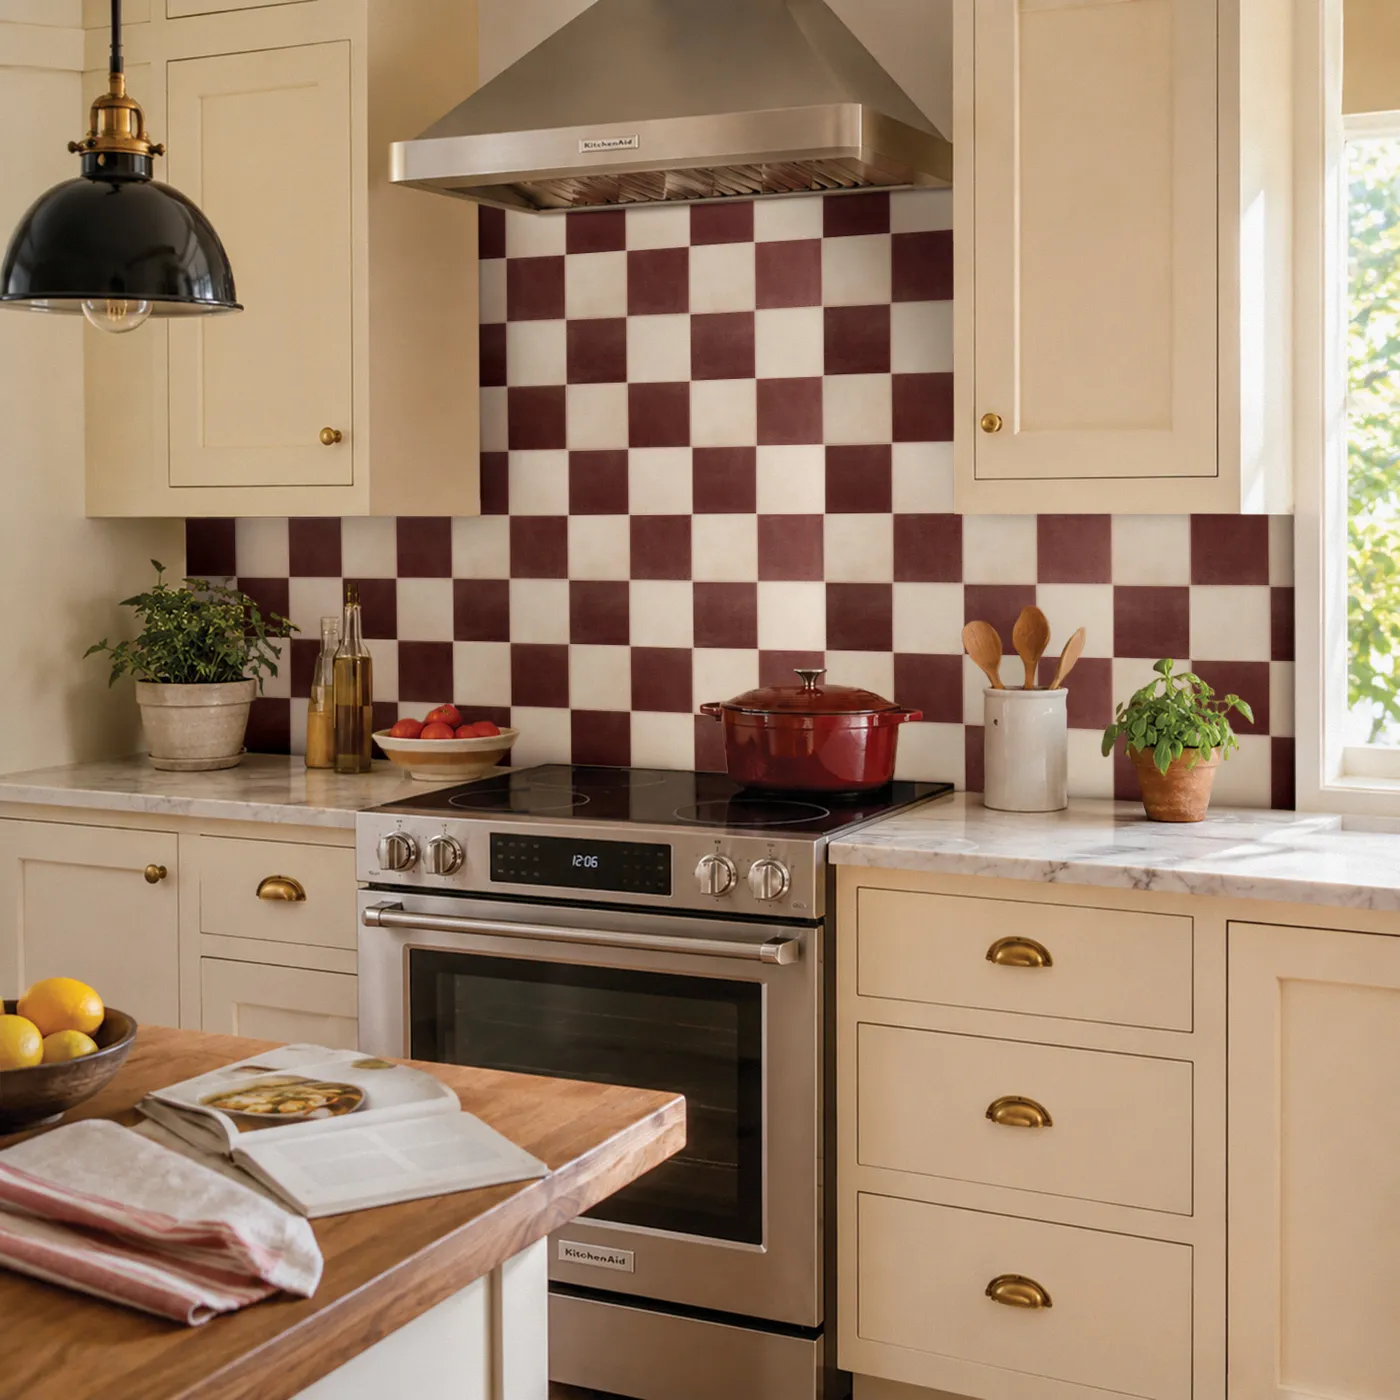
27. Cozy Kitchen with a Burgundy and Cream Checkered Backsplash
This warm, traditional look feels custom, but is surprisingly achievable. The star is the checkered tile, which is often very affordable.
- Backsplash Tile: Standard 4×4 or 6×6 ceramic tiles are budget-friendly. ($4 – $10 per sq. ft.). For a 30 sq. ft. area: $120 – $300.
- Cabinets: Off-white shaker cabinets are a mid-range staple. If painting existing ones: $200. If new: $3,000 – $8,000.
- Countertop: A laminate or butcher block could sub for marble. ($800 – $2,000).
- Appliances: Stainless steel is standard. ($2,000 – $5,000).
- Lighting: A statement pendant can be found for a good price. ($80 – $300).
- TOTAL: $6,200 – $15,600 (with new cabinets & appliances)
- Budget alternative: Use your existing appliances, paint your cabinets ($200), and install the tile yourself ($200). A huge impact for under $500.
|
📋 Copy HEX 🔗 Share |
The checkerboard pattern is having a massive resurgence, and this kitchen shows why. It taps into a collective nostalgia for cozy, traditional spaces while still feeling fresh. After years of cool greys and all-white minimalism, people are craving warmth and character. The deep burgundy and soft cream combination is a sophisticated update on the classic black and white checkerboard, feeling more like a cozy English pub than a 1950s diner. It’s part of the larger ‘grandmillennial’ trend, which celebrates classic patterns, warm colors, and a lived-in, layered aesthetic.
Your Perfect Backsplash is Waiting
A backsplash is more than just a wall covering; it’s the design move that pulls your whole kitchen together. We hope these 27 ideas have shown you that a beautiful, personality-packed kitchen is completely within your reach. Now, which one are you saving to your ‘Dream Kitchen’ board on Pinterest?