You know that feeling when you finally find the one concrete patio idea that looks exactly right for your space? That little spark of “Aha!” is what this guide is all about. Forget endless, generic scrolling. After filtering through hundreds of options across Wayfair, Home Depot, and Target, we narrowed it down to 27 ideas that actually deliver in 2026. Inside, you’ll find 27 distinct, curated patio extension looks, covering everything from modern and minimal to cozy and rustic designs. We’re seeing a huge shift in 2026 toward blurring the lines between indoor comfort and outdoor living, and a well-designed concrete patio is the foundation for that. 📌 Pin this guide for later — your future self will thank you when it’s time to actually get started.
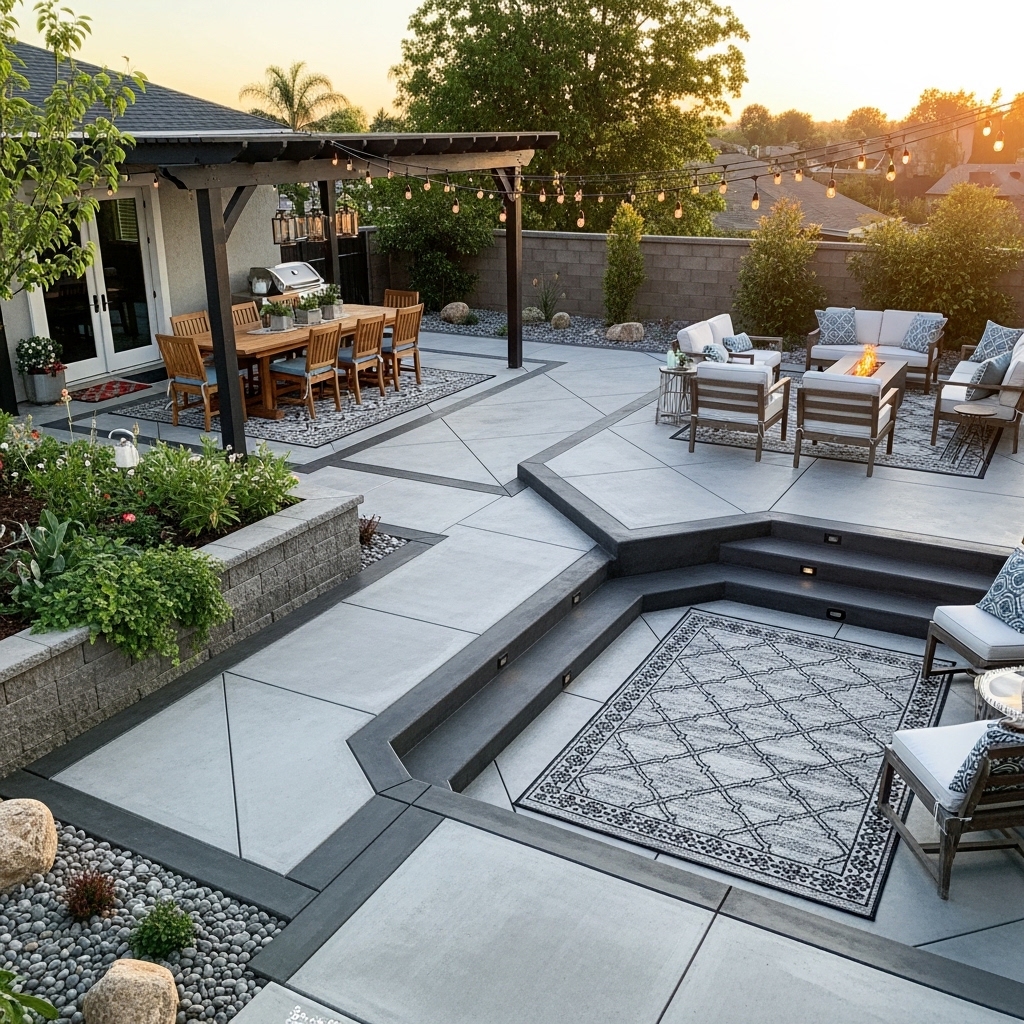
1. Multi-Level Concrete Patio with a Pergola Dining Zone
The success of this design lies in its brilliant use of zoning. By creating distinct levels and using geometric expansion joints, the large expanse of concrete is broken down into manageable, functional areas. The dark wood of the pergola provides a strong vertical element that contrasts beautifully with the light gray horizontal planes of the patio, drawing the eye upward and creating a sense of an outdoor room. It’s a masterclass in making a large space feel both grand and intimate at the same time.
|
📋 Copy HEX 🔗 Share |
When installing integrated lighting in patio steps, always opt for downward-facing fixtures. This prevents harsh glare for people sitting on the lower level and creates a soft, ambient glow that washes over the step tread. For a 4-foot-wide step, use two fixtures spaced about 18 inches from either edge. This provides even illumination without looking like an airport runway and ensures safety without sacrificing mood. Choose a warm white temperature (around 2700K) to complement the tones of the concrete.
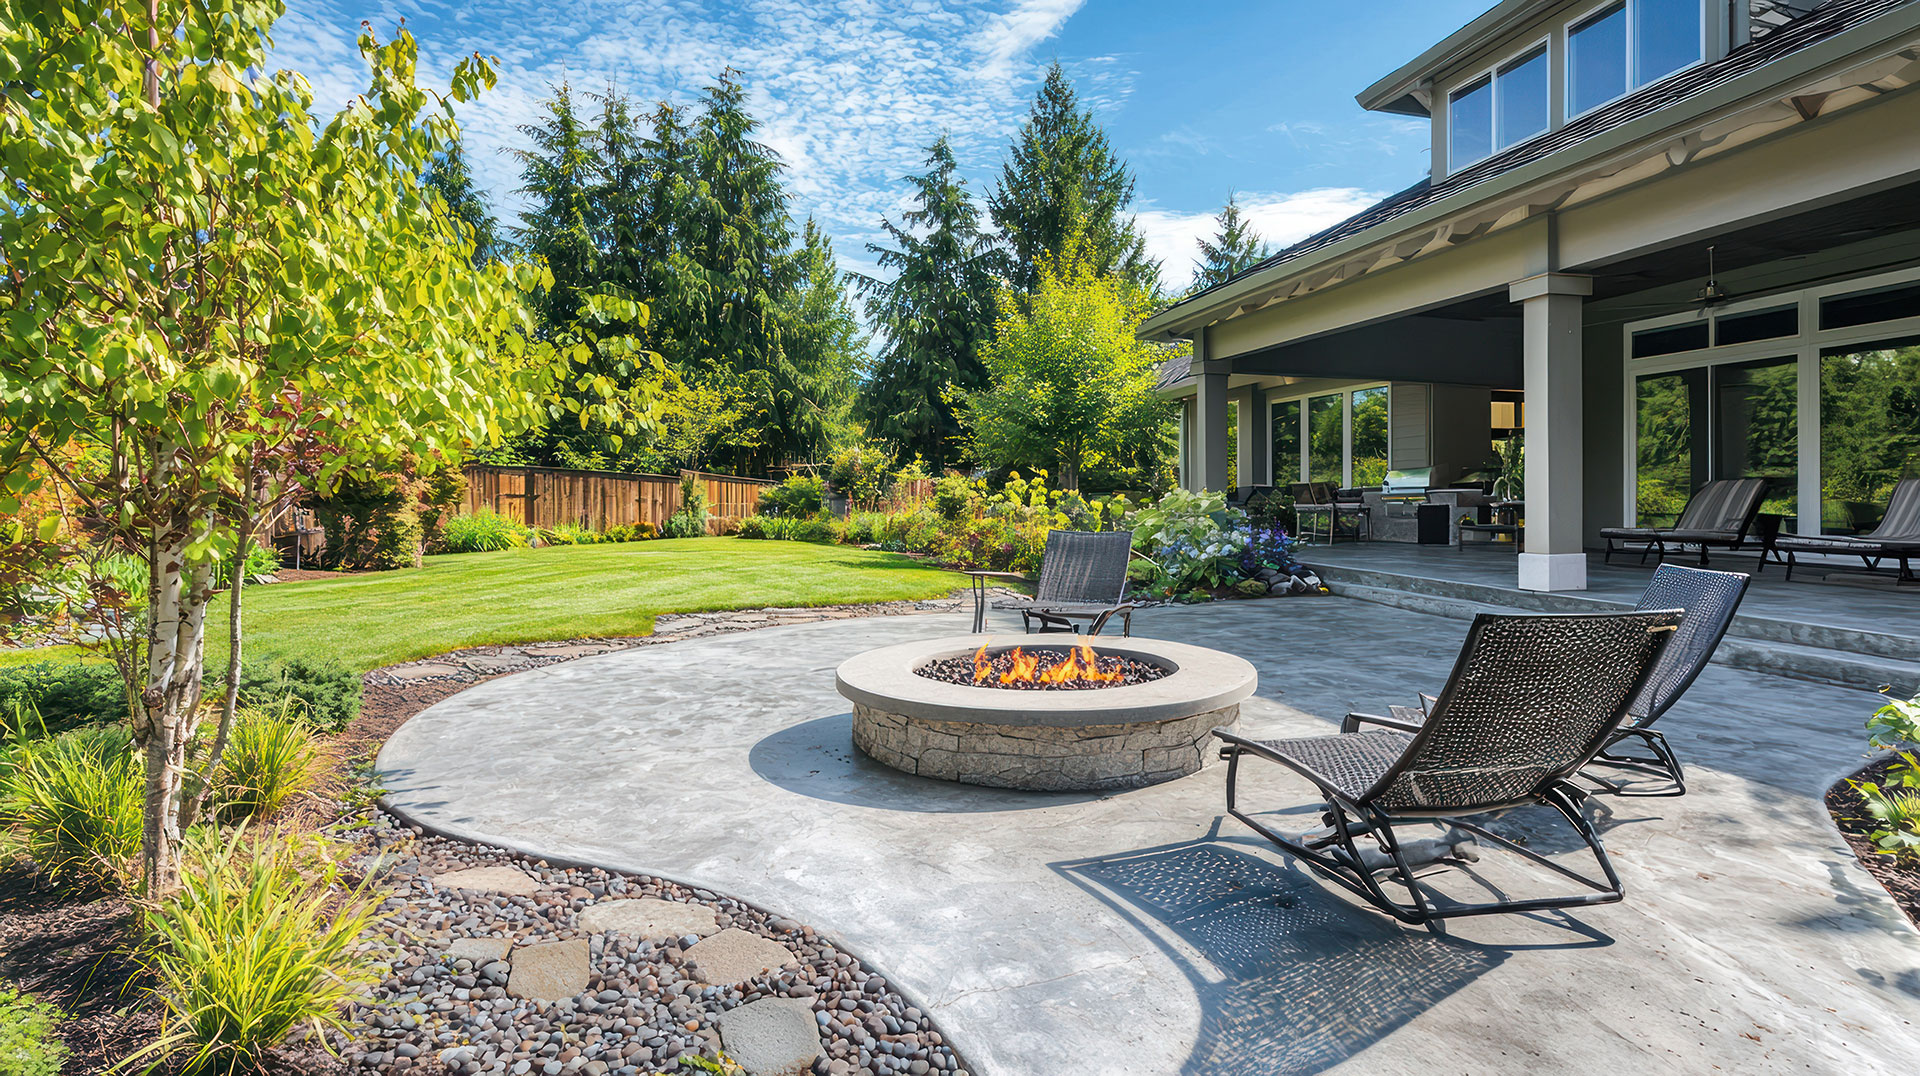
2. Curved Concrete Patio with a Central Stone Fire Pit
An expansive, curved design like this works best when you have at least 25-30 feet of width extending from the house. The gentle curve needs room to breathe and look intentional, rather than cramped. This style is ideal for backyards that are wider than they are deep. To accommodate the central fire pit and a comfortable 4-foot walkway around it, the main circular section should have a diameter of at least 15 feet. This ensures there’s plenty of space for seating without feeling crowded by the landscaping.
|
📋 Copy HEX 🔗 Share |
The single element holding this entire design together is the curved edge. Without it, this would just be another large, rectangular slab of concrete. The curve introduces a soft, organic line that contrasts with the straight lines of the house, guiding the eye smoothly into the lush green yard. It transforms a functional surface into a deliberate, sculptural feature that feels integrated with the natural landscape. It’s the detail that makes the patio feel custom and high-end.
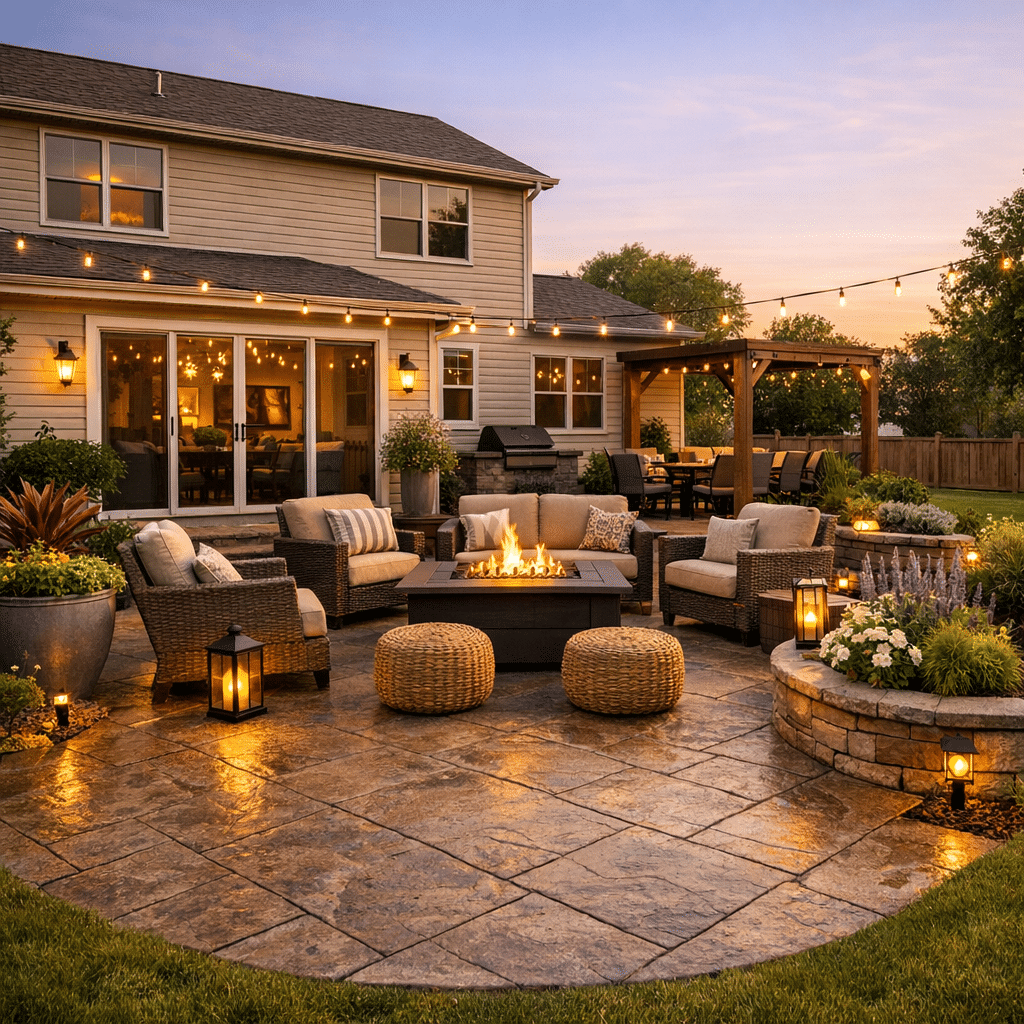
3. Stamped Concrete Patio Mimicking Natural Stonework
Recreating this cozy, layered look requires a thoughtful budget allocation. The stamped concrete is the star, but the supporting elements make it shine.
|
📋 Copy HEX 🔗 Share |
- Stamped Concrete (approx. 400 sq. ft.): $4,800 – $8,000
- Wicker Seating Set (sofa, 2 chairs, coffee table): $1,500 – $3,500
- Wooden Pergola Kit (10×12 ft): $1,000 – $2,500
- Fire Pit & String Lights: $400 – $900
- Stone Retaining Walls & Landscaping: $2,000 – $5,000
- TOTAL: $9,700 – $19,900
Budget alternative: Get a similar vibe for about 40% less using a smaller, unstamped concrete slab, DIY-ing a simple pergola, and sourcing furniture from Target or Facebook Marketplace.
Let’s be honest: those beautiful string lights can be a bit of a hassle. If you don’t have a dedicated outdoor outlet nearby, you’ll be running extension cords, which can be a tripping hazard and look messy. Also, cheaper solar-powered options often don’t provide enough light to be truly functional for a dinner party. Before you commit, plan your power source. It might be worth the extra cost to have an electrician install a permanent outdoor outlet on a switch right inside the door.
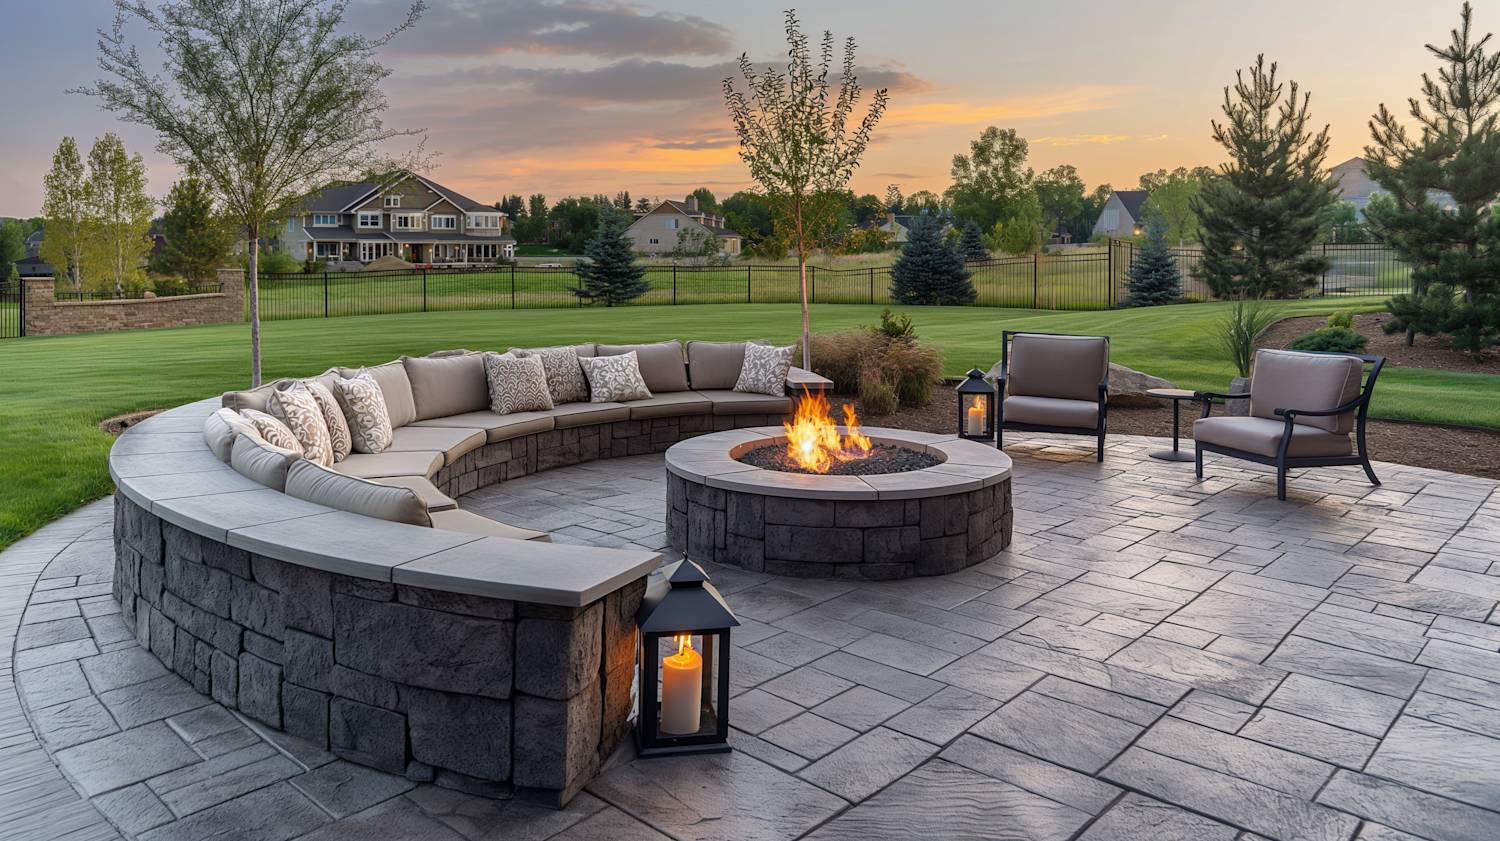
4. Round Concrete Patio with an Integrated Fire Pit and Curved Seating
This inviting setup follows a simple but effective formula: 50% hardscape + 40% comfort + 10% accent. The stamped concrete and stone-faced bench form the durable base (50%). The plush cushions and generous armchairs provide the comfort and reason to linger (40%). Finally, the decorative lanterns and the warm glow of the fire itself act as the crucial accents (10%). You could easily change the flavor of this space by swapping materials while keeping the ratio: trade the stone for a smooth, modern concrete finish and change the cushions to a bold navy for a completely different, more contemporary vibe.
|
📋 Copy HEX 🔗 Share |
While a built-in stone bench is a fantastic, durable feature, it’s not zero-maintenance. The stone or veneer will need to be pressure washed gently every year or two to prevent moss and mildew growth, especially in damp climates. The cushions are the real issue; they must be made of high-performance outdoor fabric (like Sunbrella) to resist fading and mold. You will need a plan for where to store those cushions during the off-season or bad weather—they are bulky and represent a significant investment to replace.
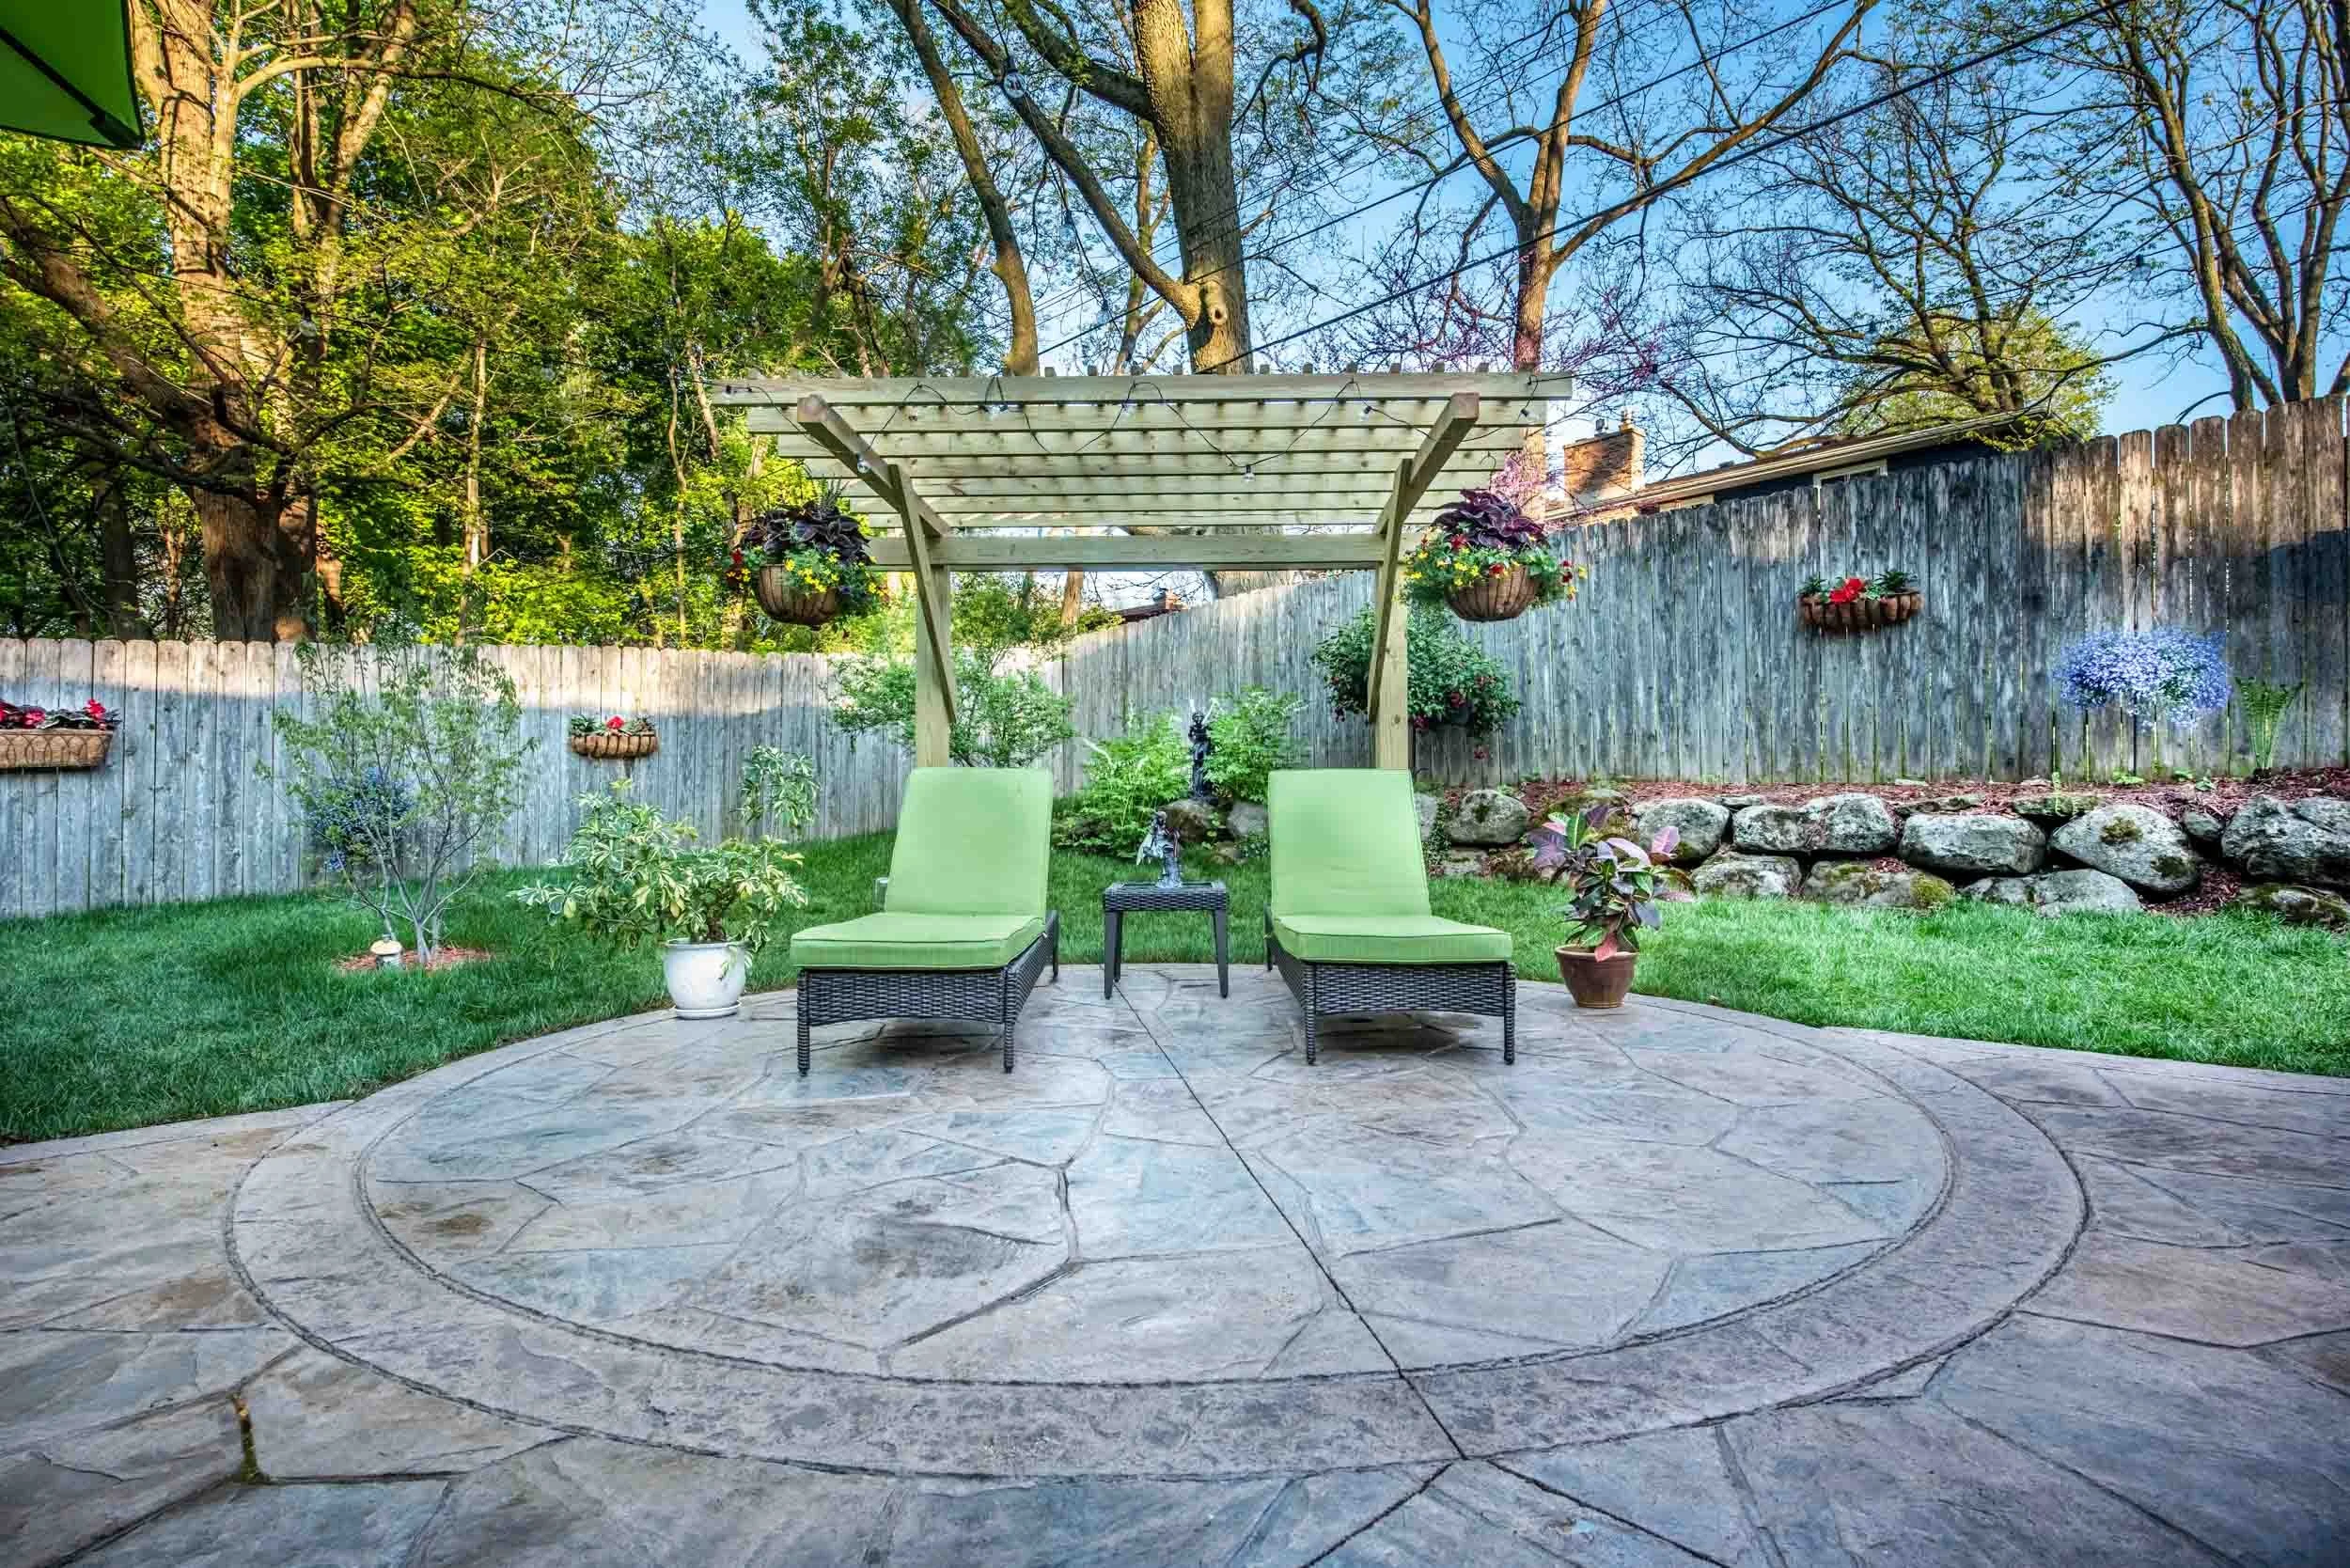
5. Faux Stone Patio with a Light Wood Pergola
This design is a study in texture and contrast. The rough, organic pattern of the faux stone concrete plays against the smooth, clean lines of the light wood pergola. This creates immediate visual interest. Furthermore, the dark, heavy weave of the lounge chairs provides a grounding element, while the vibrant lime green cushions inject a dose of playful energy. It’s a balanced composition where each material highlights the qualities of the others, a key principle of good design. The circular border within the patio also cleverly defines the seating zone.
|
📋 Copy HEX 🔗 Share |
You can capture this serene mood without the cost of a custom stamped patio. Start with a basic 12×12 foot concrete slab from a local contractor (around $1,200-$1,800). Then, grab a pergola kit from a big box store like Home Depot for $700-$1,200. The real savings come from furniture: find similar dark woven chairs at Target or Walmart for around $150-$250 each. A set of bright green cushions from Amazon can be had for under $80. You’re getting 80% of the look for a fraction of the price. The style of this is similar to Idea #1, but on a more compact and budget-friendly scale.
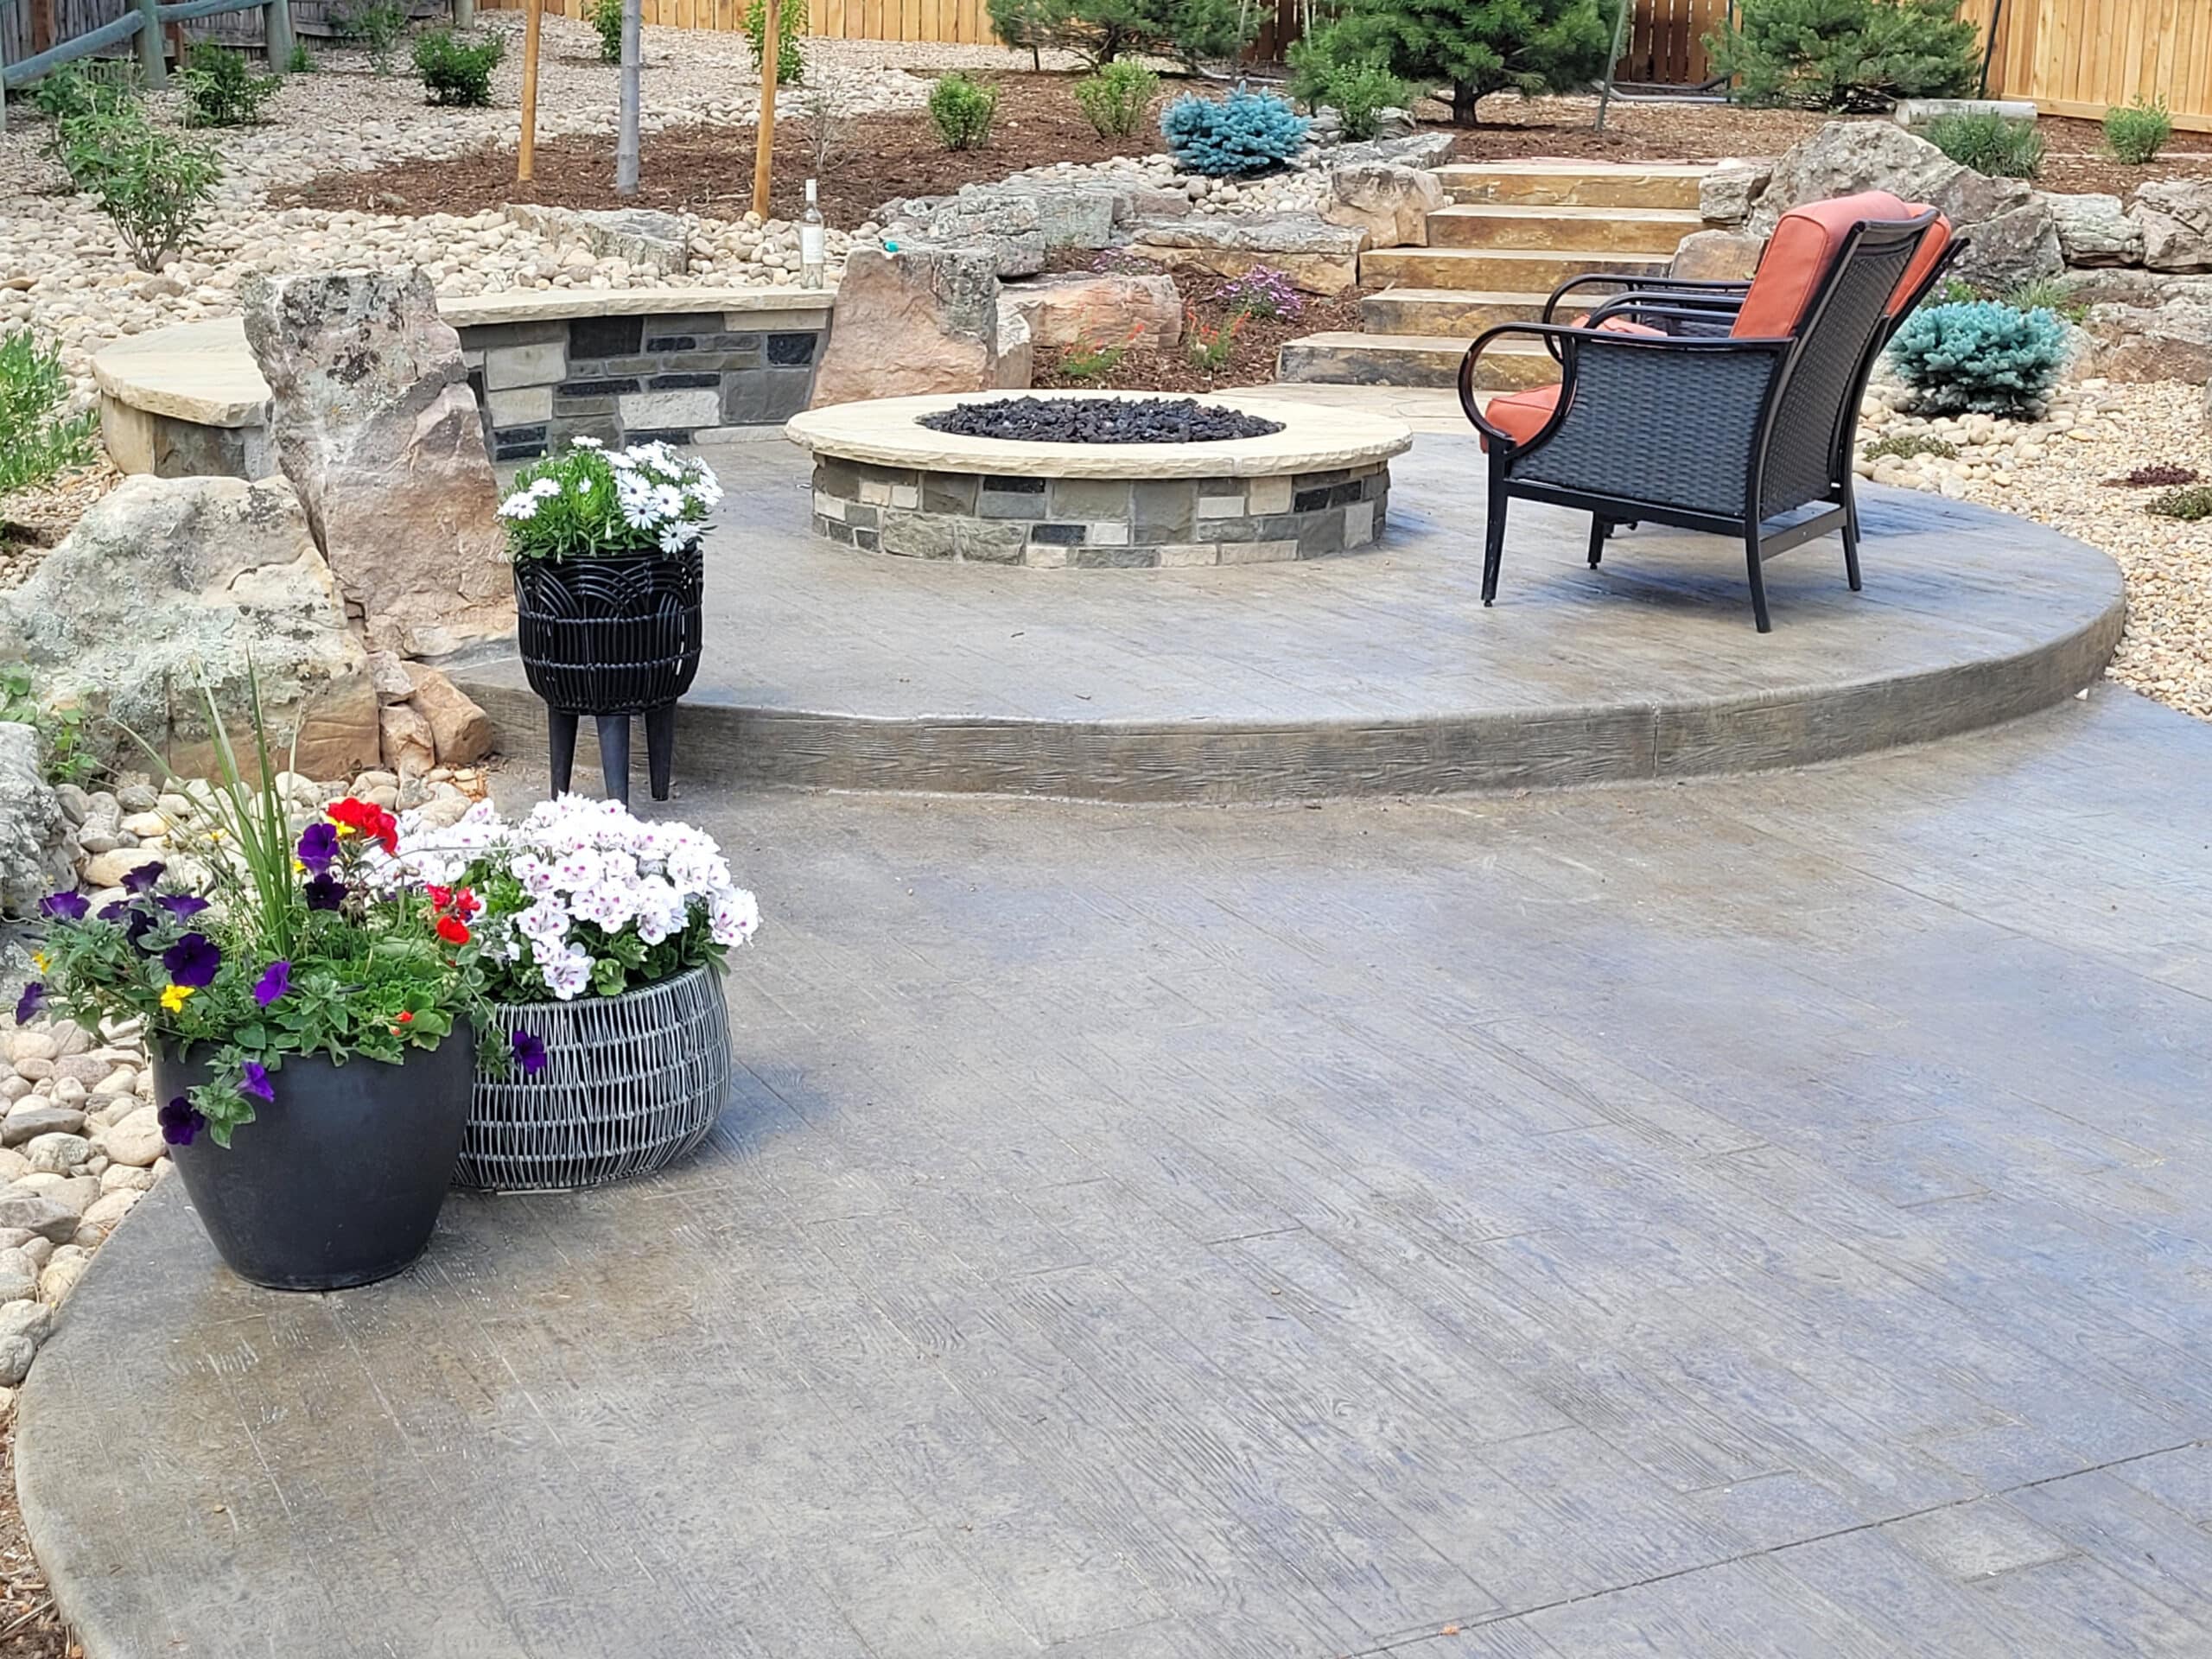
6. Tiered Concrete Patio with a Wood-Grain Stamp
The standout feature here is the wood-grain texture stamped into the concrete. It’s an unexpected and brilliant choice. Concrete can sometimes feel cold or industrial, but applying a wood-grain pattern instantly imbues it with warmth and a natural feel. It provides the durability and longevity of concrete while borrowing the aesthetic charm of a wooden deck. Removing this element would make the space feel far more generic and less thoughtfully designed.
|
📋 Copy HEX 🔗 Share |
When you have a multi-level patio, repeating a key material is crucial for creating a cohesive look. Here, the stone veneer on the fire pit is cleverly repeated on the curved bench. This repetition makes the two distinct elements feel like they belong together. When planning your own space, identify one material—be it a type of stone, wood, or even a specific color—and use it in at least two, preferably three, places to tie the whole design together. It’s a simple trick that designers use to create visual harmony.
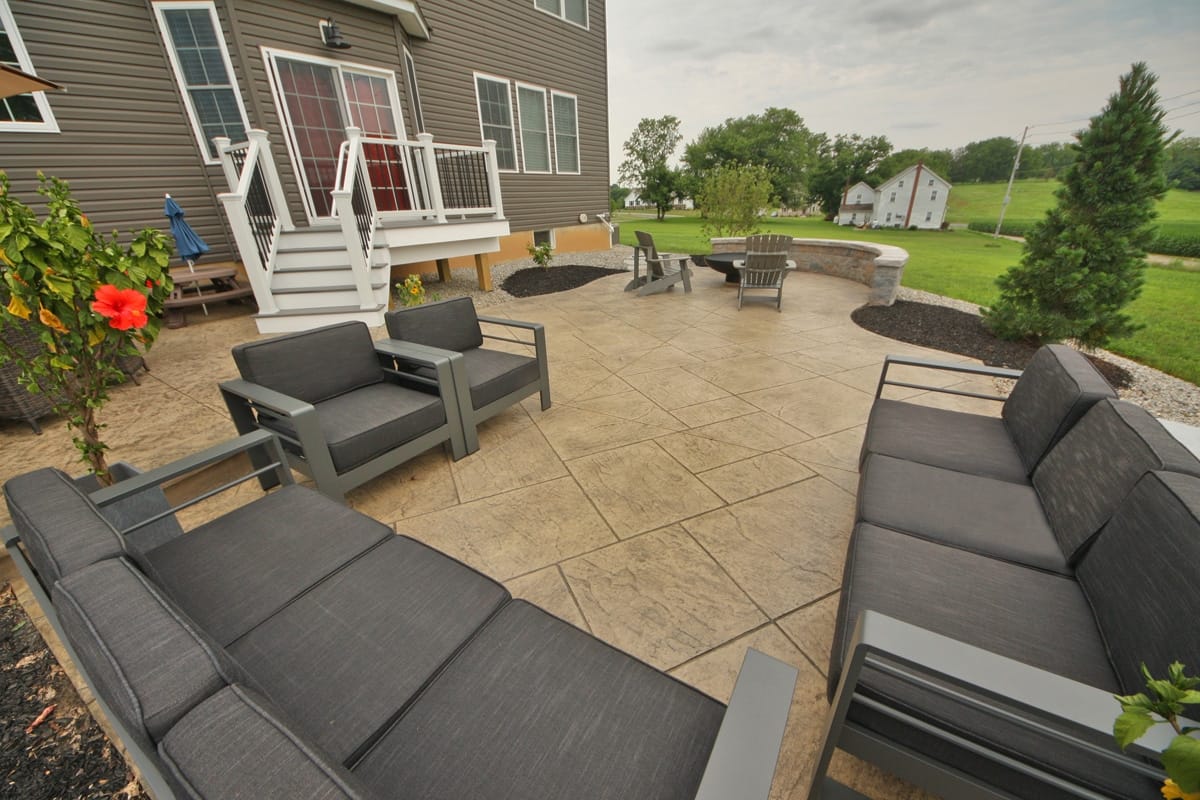
7. Light Stamped Concrete with Dark Gray Metal Furniture
Think of this patio’s design as a recipe: 70% Neutral Base + 20% Grounding Accents + 10% Natural Elements. The light brown stamped concrete is your expansive neutral canvas (70%). The dark gray furniture with its clean metal frames provides the strong, modern contrast that grounds the space (20%). Finally, the landscaping—the black mulch, the potted hibiscus, the surrounding greenery—brings life and softness (10%). You could swap the dark gray for navy blue or the light brown concrete for a soft gray, and the formula would still work perfectly.
|
📋 Copy HEX 🔗 Share |
A large, open patio like this looks fantastic, but it can feel a bit like a stage if you don’t anchor your furniture. Without an outdoor rug or a central feature like a fire pit, furniture sets can look like they’re just floating in a sea of concrete. Notice how the seating here is intentionally grouped. If your budget doesn’t stretch to a fire pit, a large-scale outdoor rug (at least 8×10) can serve the same purpose, defining the conversation area and making it feel much more intentional and cozy.
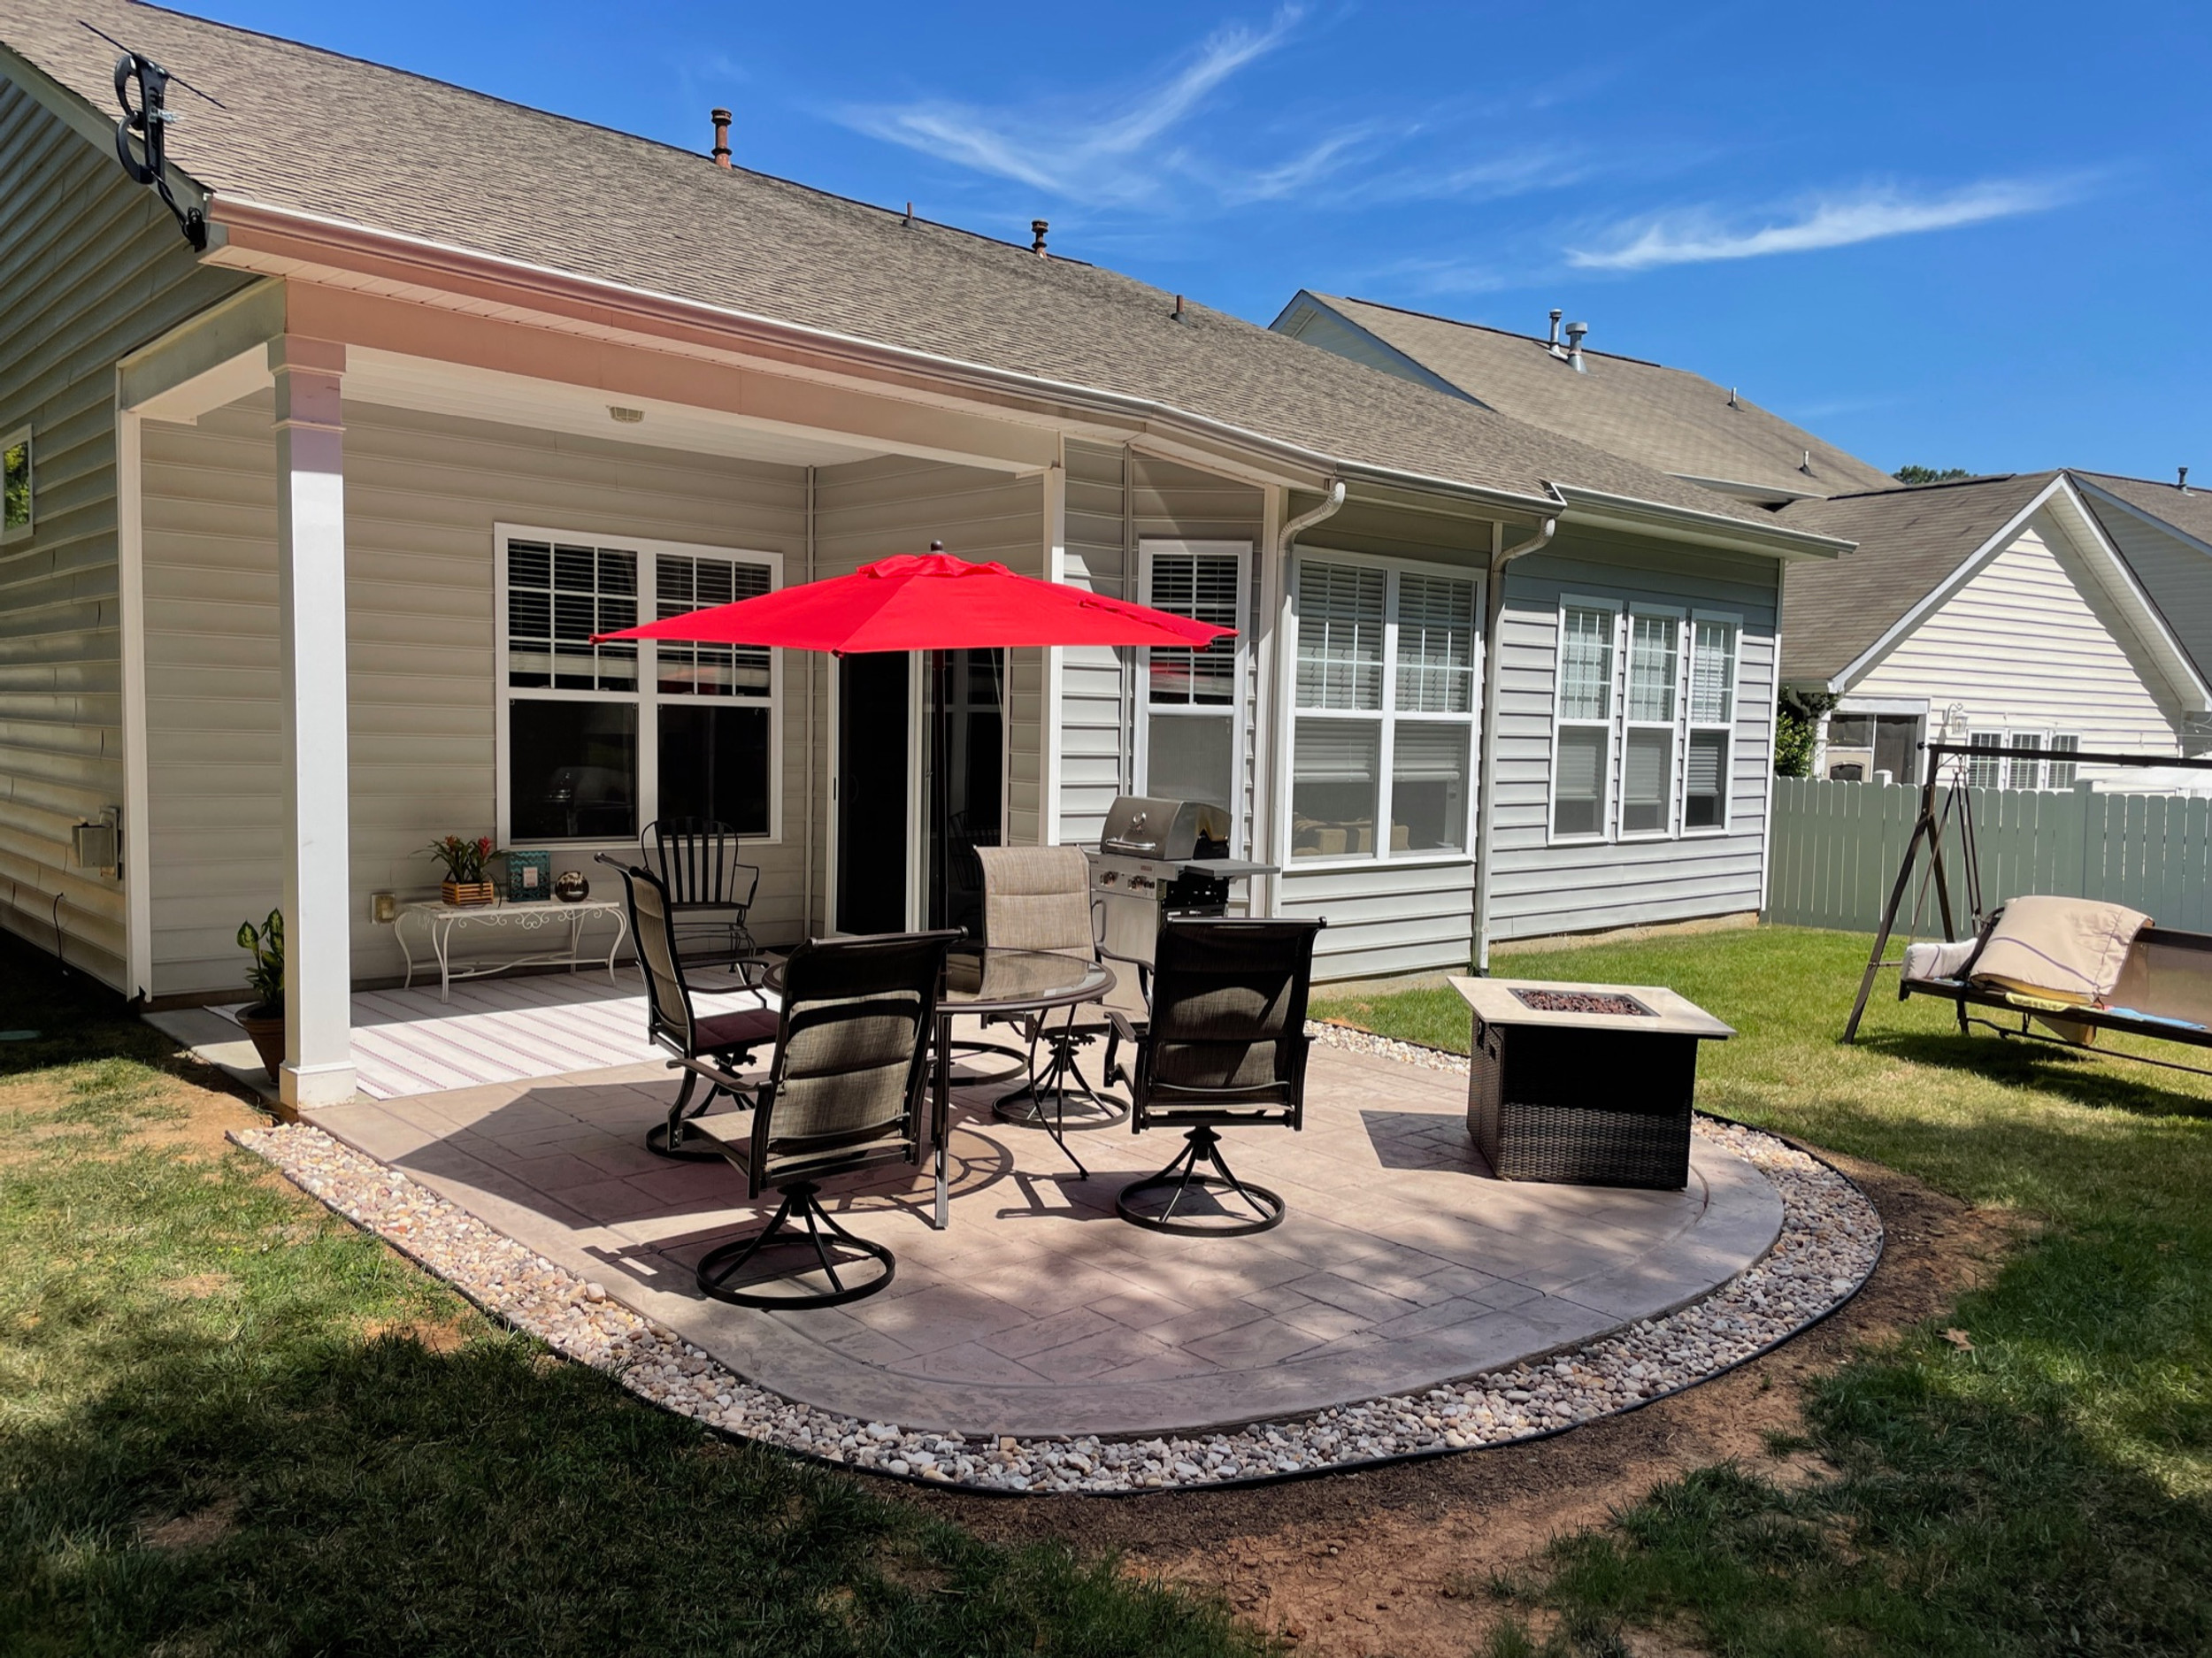
8. Stamped Concrete with a Light Gravel Border
This design succeeds because it deftly manages the transition from hardscape to landscape. Instead of the concrete ending abruptly at the lawn, the wide border of light-colored gravel creates a visual buffer. This ‘soft edge’ makes the patio feel more integrated into the yard. It also serves a practical purpose, improving drainage around the slab’s perimeter and making mowing easier. The red umbrella then acts as a perfect focal point, drawing the eye and adding a pop of color that balances the earthy neutrals.
|
📋 Copy HEX 🔗 Share |
Before you commit to a gravel border, check a few things to avoid future headaches. A simple addition like this can elevate your patio, but preparation is key.
- Will the gravel get kicked into your lawn constantly? Plan for a metal or paver-brick retaining edge between the gravel and grass.
- Is the area underneath the gravel properly prepared? You need to lay down landscape fabric first to prevent weeds from growing through.
- Have you considered the color? The light gravel here contrasts with the darker mulch, which is a deliberate choice. Ensure your gravel color complements your concrete and house trim.
9. Matching a New Concrete Extension to an Existing Patio
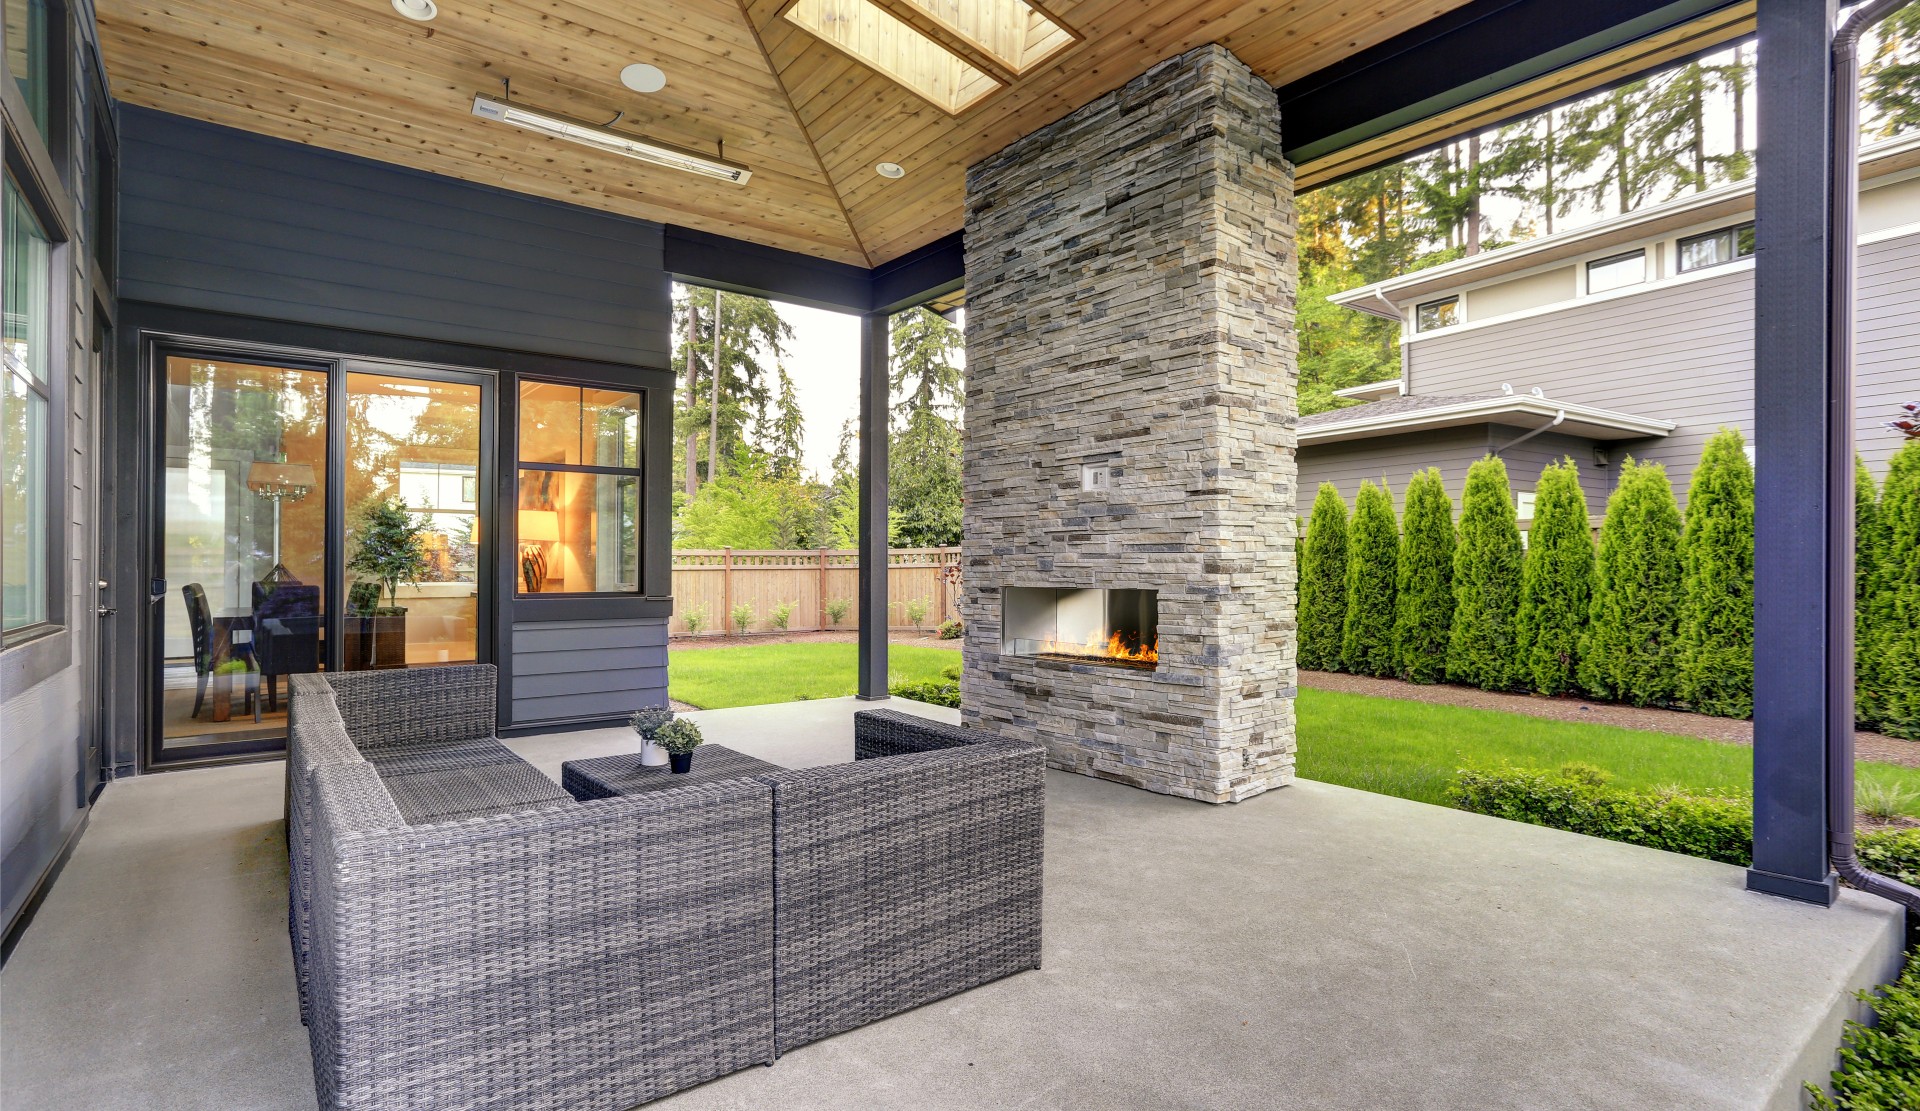
Adding a new slab next to an old one requires care to get a good match. Here’s a quick guide to minimize the difference.
|
📋 Copy HEX 🔗 Share |
- Clean the Old Surface: Pressure wash the existing patio thoroughly to reveal its true color, free from dirt and stains. This is your target color.
- Analyze the Aggregate: Look closely at the existing concrete. Can you see the color and size of the sand and gravel? Tell your concrete supplier about it.
- Test a Mix: Before the main pour, have the contractor create a small sample batch and let it cure for a few days. Concrete lightens as it dries.
- Consider a Topping: If a perfect match is impossible, you can pour the extension and then apply a thin concrete resurfacer or stain over both the old and new slabs to create one uniform finish.
Time: 1-2 weeks (including curing). Cost: $10-25 per square foot for the new slab.
Here’s the hard truth: getting a perfect color and texture match between old and new concrete is nearly impossible. Factors like the original mix, the weather on the day of the pour, and years of weathering create a unique finish. You should expect a visible difference. Instead of fighting it, you can embrace it. Use a decorative gravel trench (like in Idea #8) or a line of contrasting pavers to create a deliberate border between the old and new sections, making the transition look intentional.
10. Modern Concrete Patio with Lime Green Dining Chairs
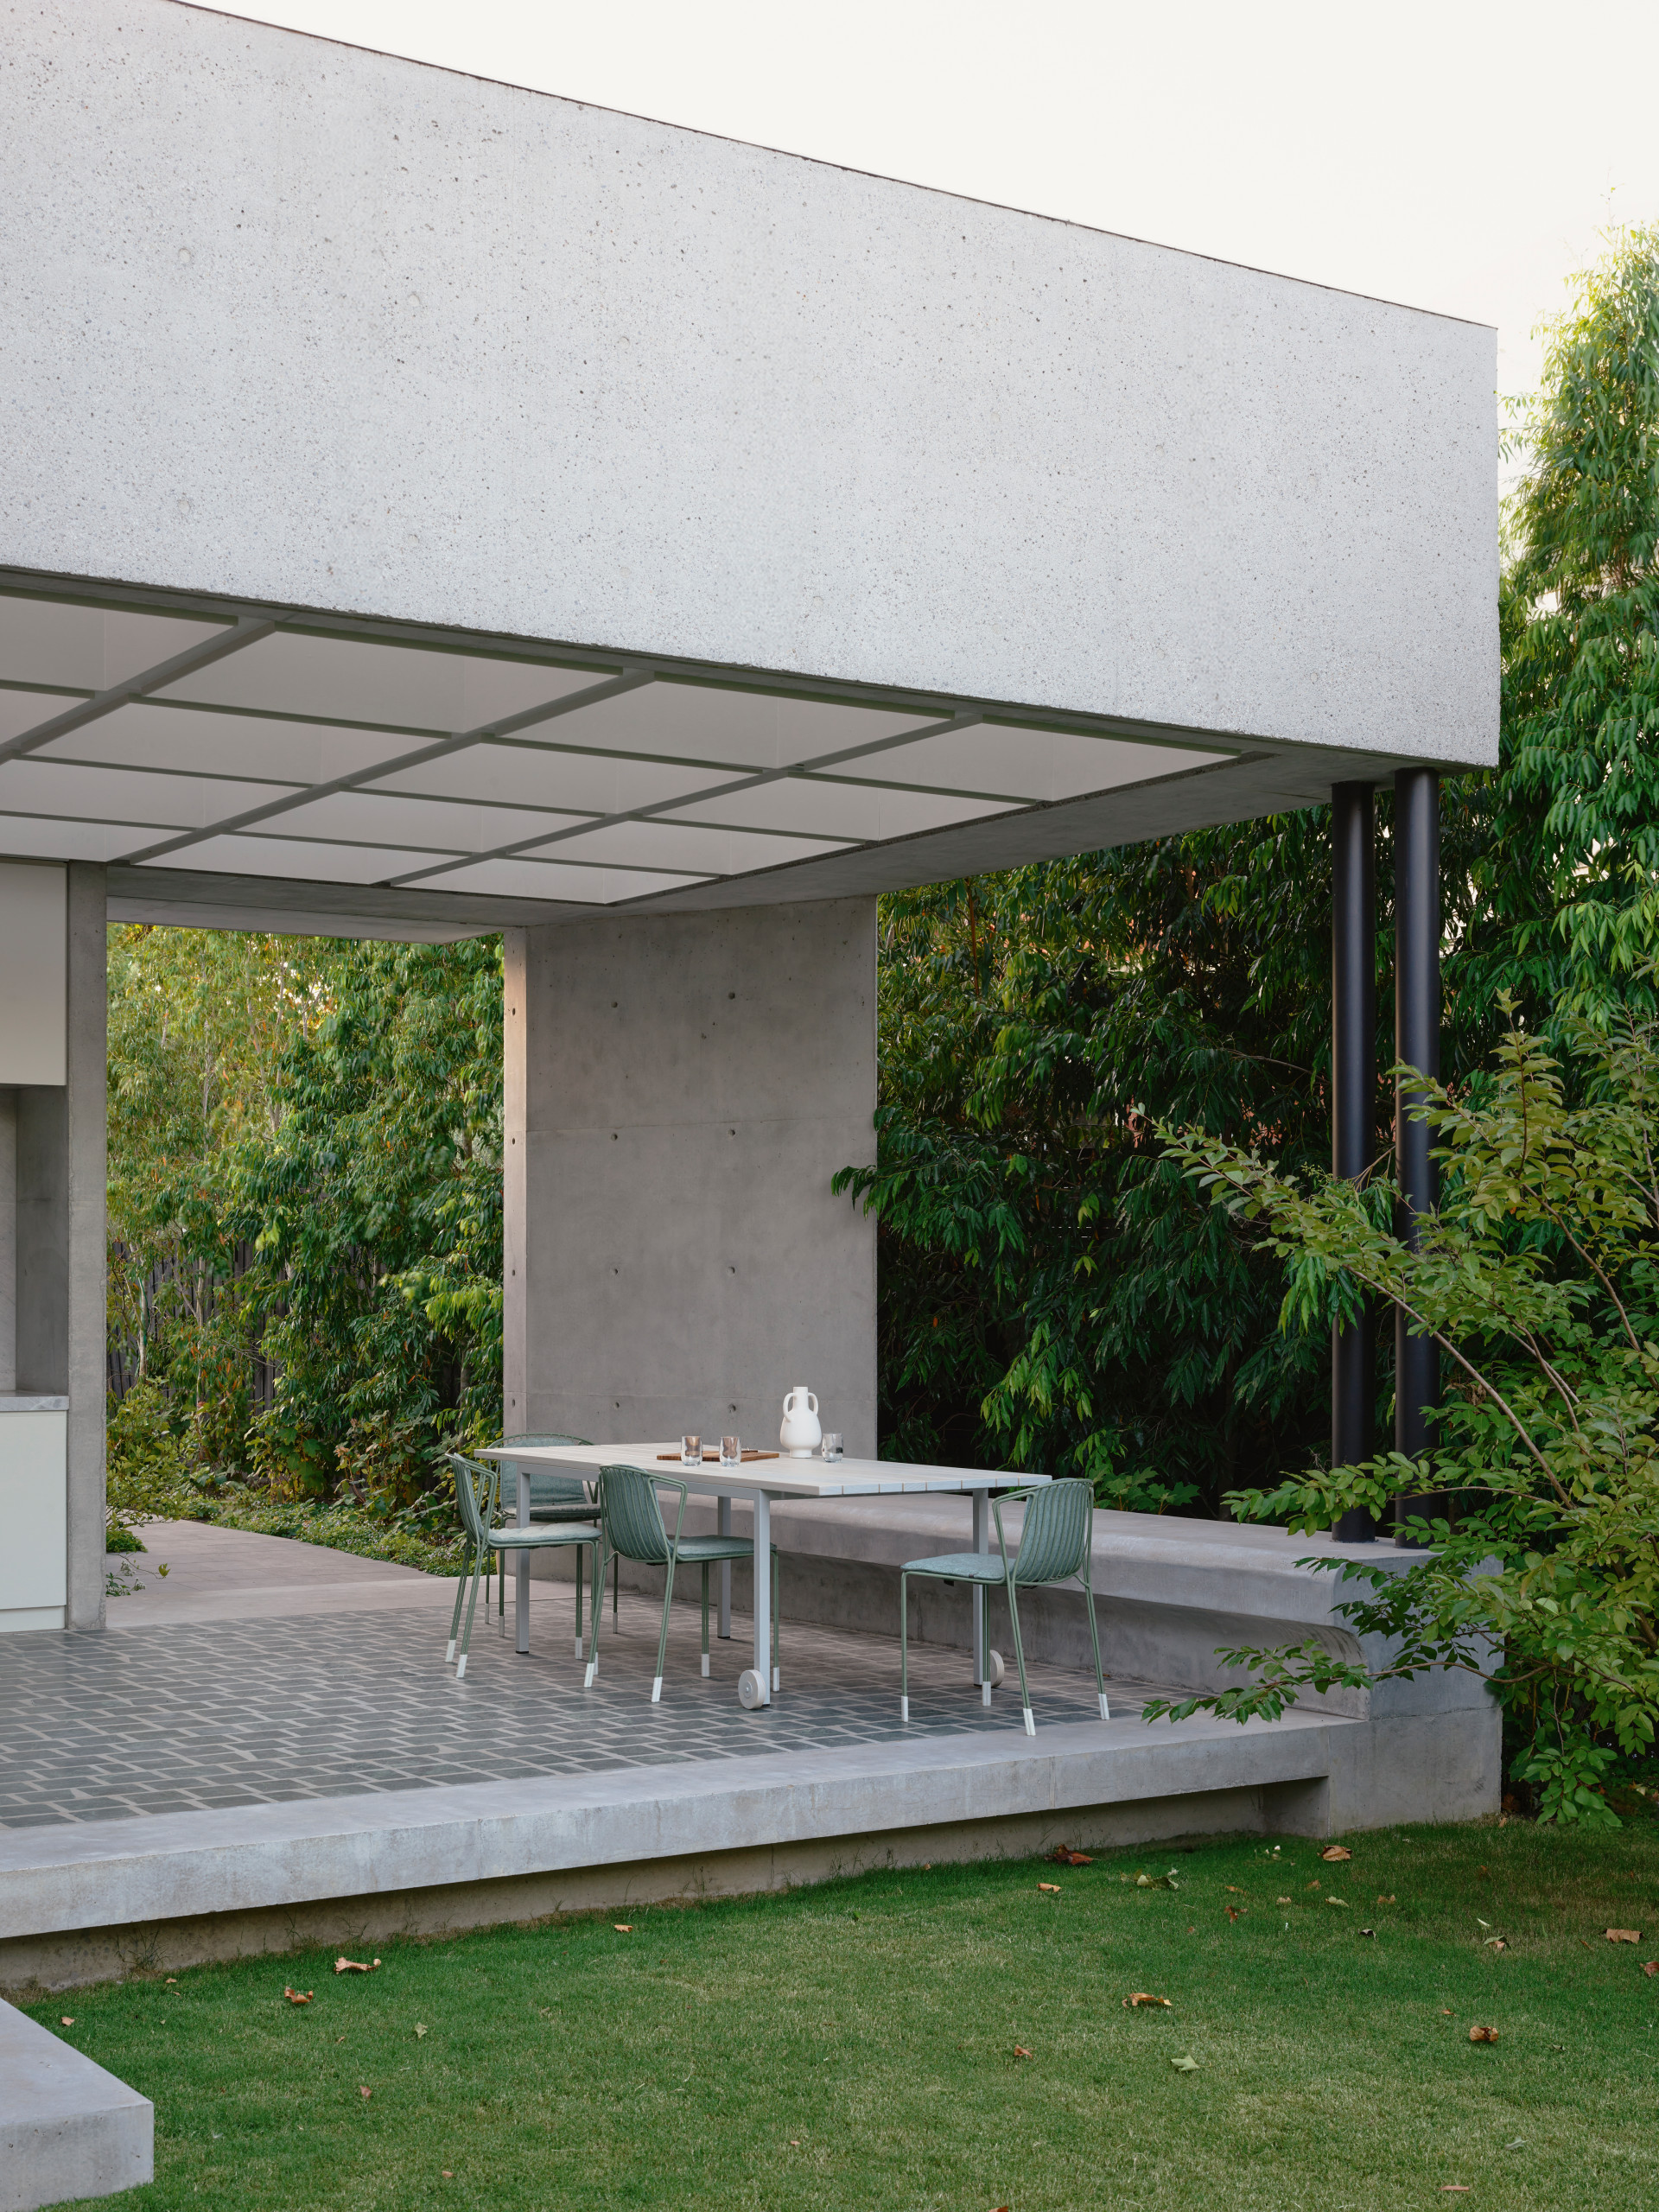
The light green chairs are, without a doubt, the element that makes this entire space work. Against the stark, monochrome background of grey concrete, a white table, and black framing, the chairs are a jolt of pure energy and personality. If you were to swap them for white or grey chairs, the entire design would instantly become cold, leaning towards sterile and architectural. The green introduces a necessary touch of playful, organic color that connects the modern structure to the lush landscaping surrounding it.
|
📋 Copy HEX 🔗 Share |
This look is gaining traction because it perfectly captures the 2026 desire for ‘joyful minimalism. ‘Homeowners are moving away from the all-gray-everything aesthetic of the late 2010s but still appreciate clean lines and uncluttered spaces. The solution is a neutral, durable base (like this concrete patio and structure) punctuated by one or two moments of bold, unapologetic color. It provides personality and visual excitement without sacrificing the calm, modern feel. It’s a trend with staying power because it’s so easy to personalize.
11. Upgrading Your Patio with Surface Treatments
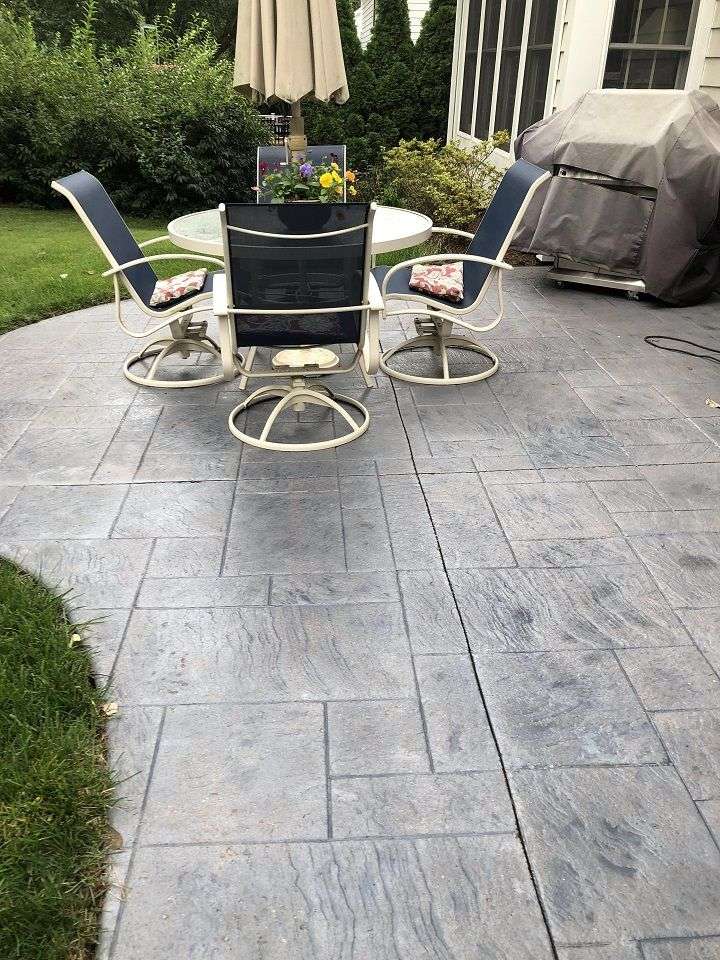
If your existing concrete patio is in good shape but just looks dated or boring, don’t rip it out—resurface it. A concrete overlay or a high-quality stain can completely transform the look for a fraction of the cost and hassle of a full replacement. For a high-traffic area, ask your contractor about a stamped overlay. They can apply a thin layer of new concrete on top of your old slab and then stamp it with a pattern, like the stone look in Idea #3, giving you a brand-new look for about half the price of a tear-out and repour.
|
📋 Copy HEX 🔗 Share |
Want to upgrade your patio on a serious budget? Paint it. A weekend, a few gallons of concrete porch and patio paint, and some painter’s tape can work wonders. You can paint it a solid color or even create a bold pattern like stripes or a checkerboard. A gallon of good quality patio paint costs around $40-$60 and can cover up to 400 square feet. It’s not as permanent as staining or overlays, and you might need to touch it up every couple of years, but for a total project cost of under $200, you can’t beat the impact.
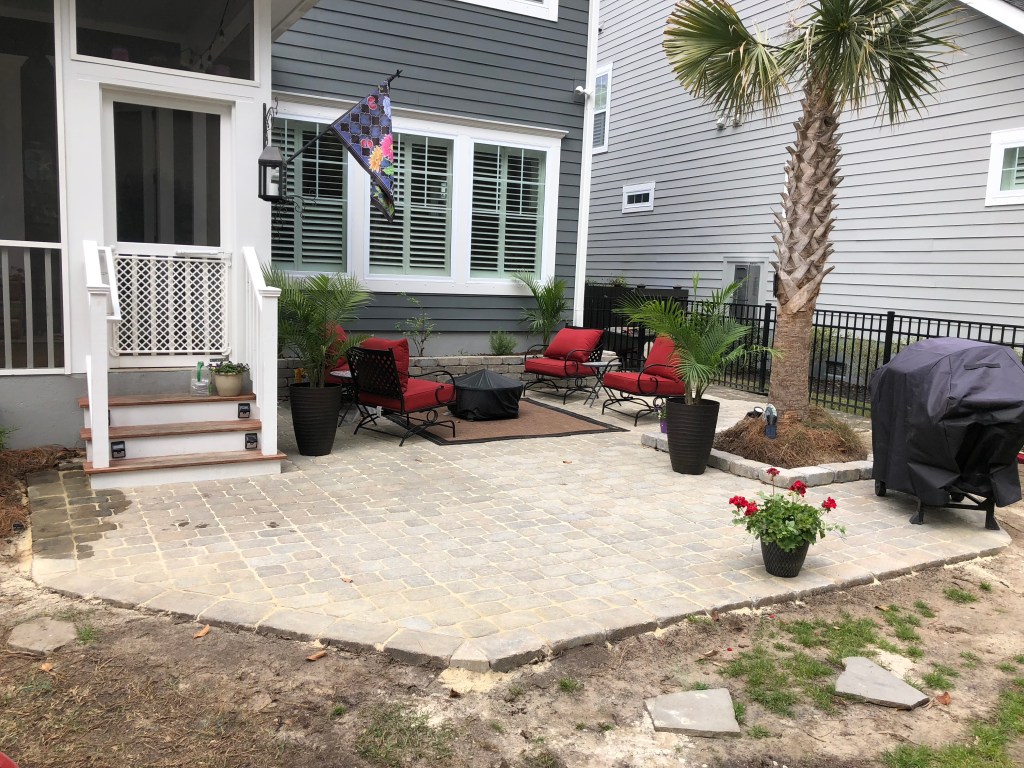
12. Gray Paver Patio with Red Accents and Tropical Plants
The color theory here is simple and effective. The light grey pavers and black wrought iron furniture create a classic, neutral foundation. This allows the vibrant red of the cushions and flowers to truly pop without overwhelming the space. Repetition is also key; the red isn’t just in one spot. It appears on the chair cushions, in the planters, and on the small side table, which guides the eye around the patio and makes the color choice feel intentional and cohesive. The lush green from the palm trees adds a final, complementary layer.
|
📋 Copy HEX 🔗 Share |
If you don’t live in a warm climate (USDA Zone 9 or higher), maintaining those beautiful palm trees will be a high-effort task. You’ll need to plant them in large, heavy pots that can be moved indoors or into a sheltered garage during the winter. This can be a serious logistical challenge. Be honest with yourself about your commitment to winterizing your plants. If it sounds like too much work, you can achieve a similar tropical vibe with hardier options like ornamental grasses or a Japanese maple in a large planter.
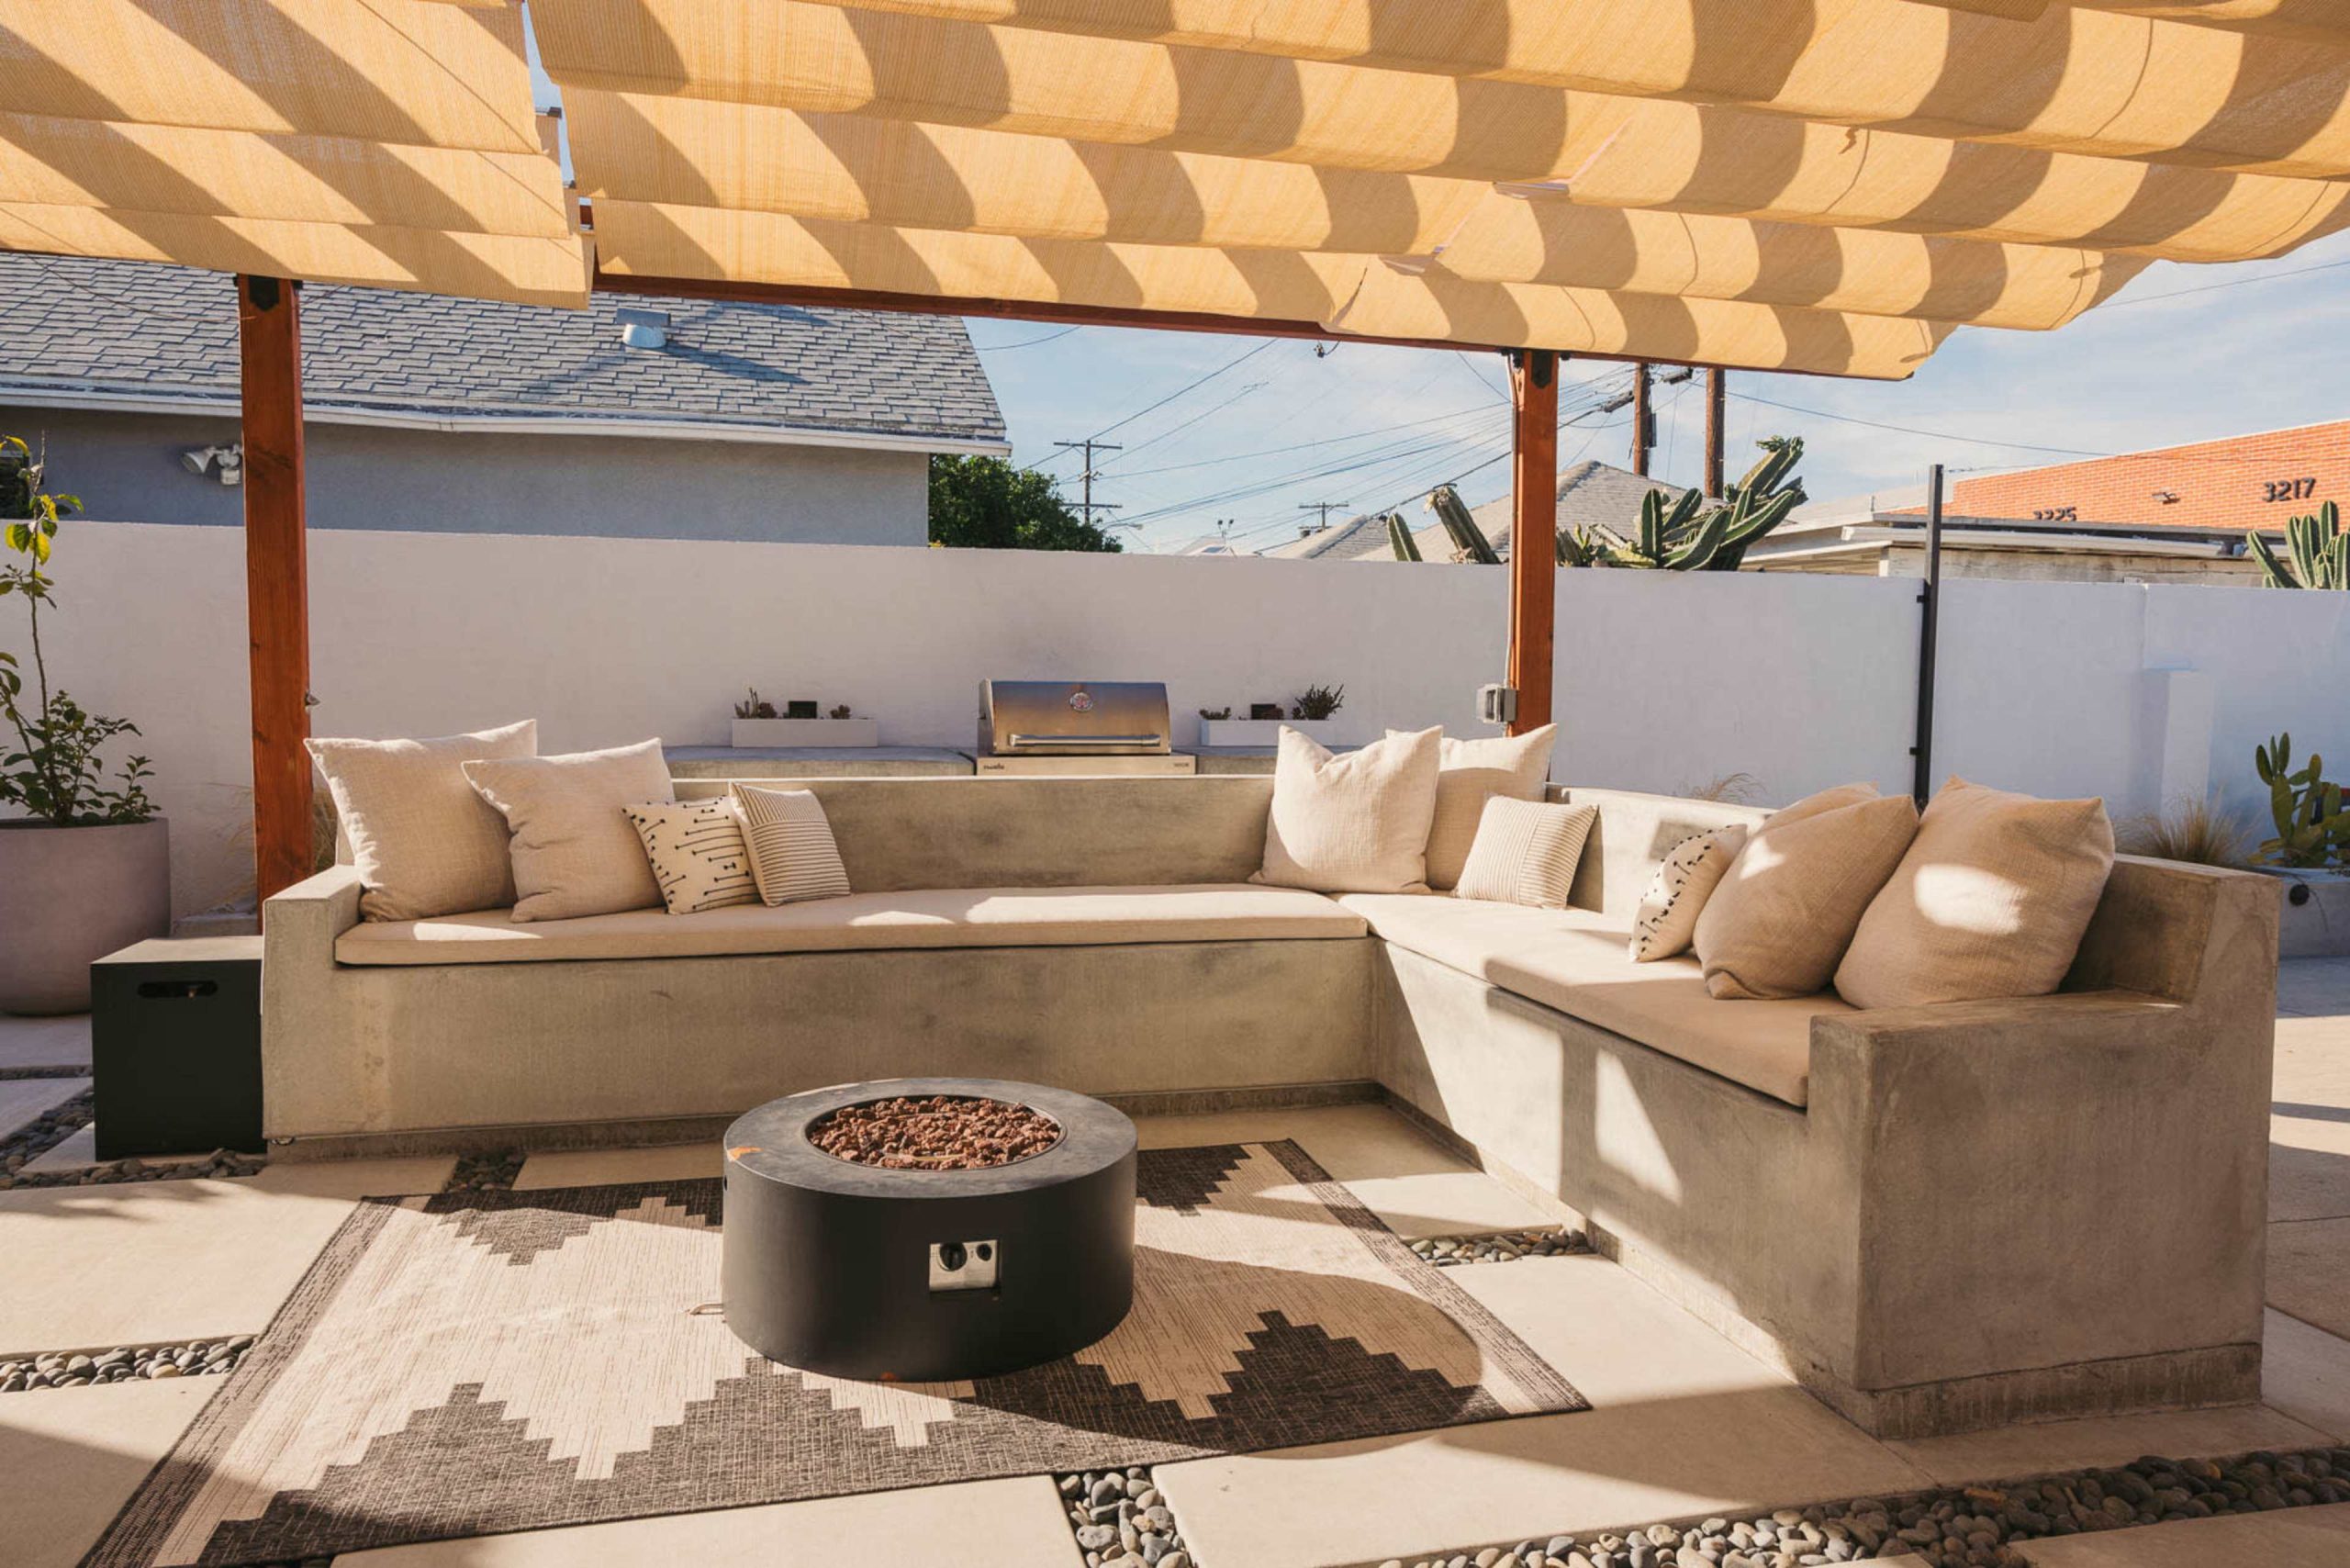
13. L-Shaped Concrete Bench with a Retractable Pergola Shade
That built-in concrete bench is a dream—solid, permanent, and sleek. However, the light-colored cushions are the reality. They will get dirty. Even with performance outdoor fabric, they’ll need regular cleaning to fend off pollen, bird droppings, and mildew. Plan on a thorough scrub with a specialized fabric cleaner at the beginning and end of each season. The retractable fabric shade also requires care. It should be retracted during high winds or heavy rain to prevent damage, and it needs to be cleaned annually to remove dirt and prevent staining.
|
📋 Copy HEX 🔗 Share |
This idea is perfect for a small-to-medium-sized patio, especially a corner space that might otherwise feel awkward. For the L-shaped bench to feel generous, aim for each leg of the ‘L’ to be at least 6-8 feet long. This allows enough room for 2-3 people to sit comfortably on each side. The depth of the bench should be around 20-24 inches to accommodate cushions and provide comfortable back support. The overall footprint for this cozy corner nook, including the fire pit and walking space, is roughly 12×12 feet.
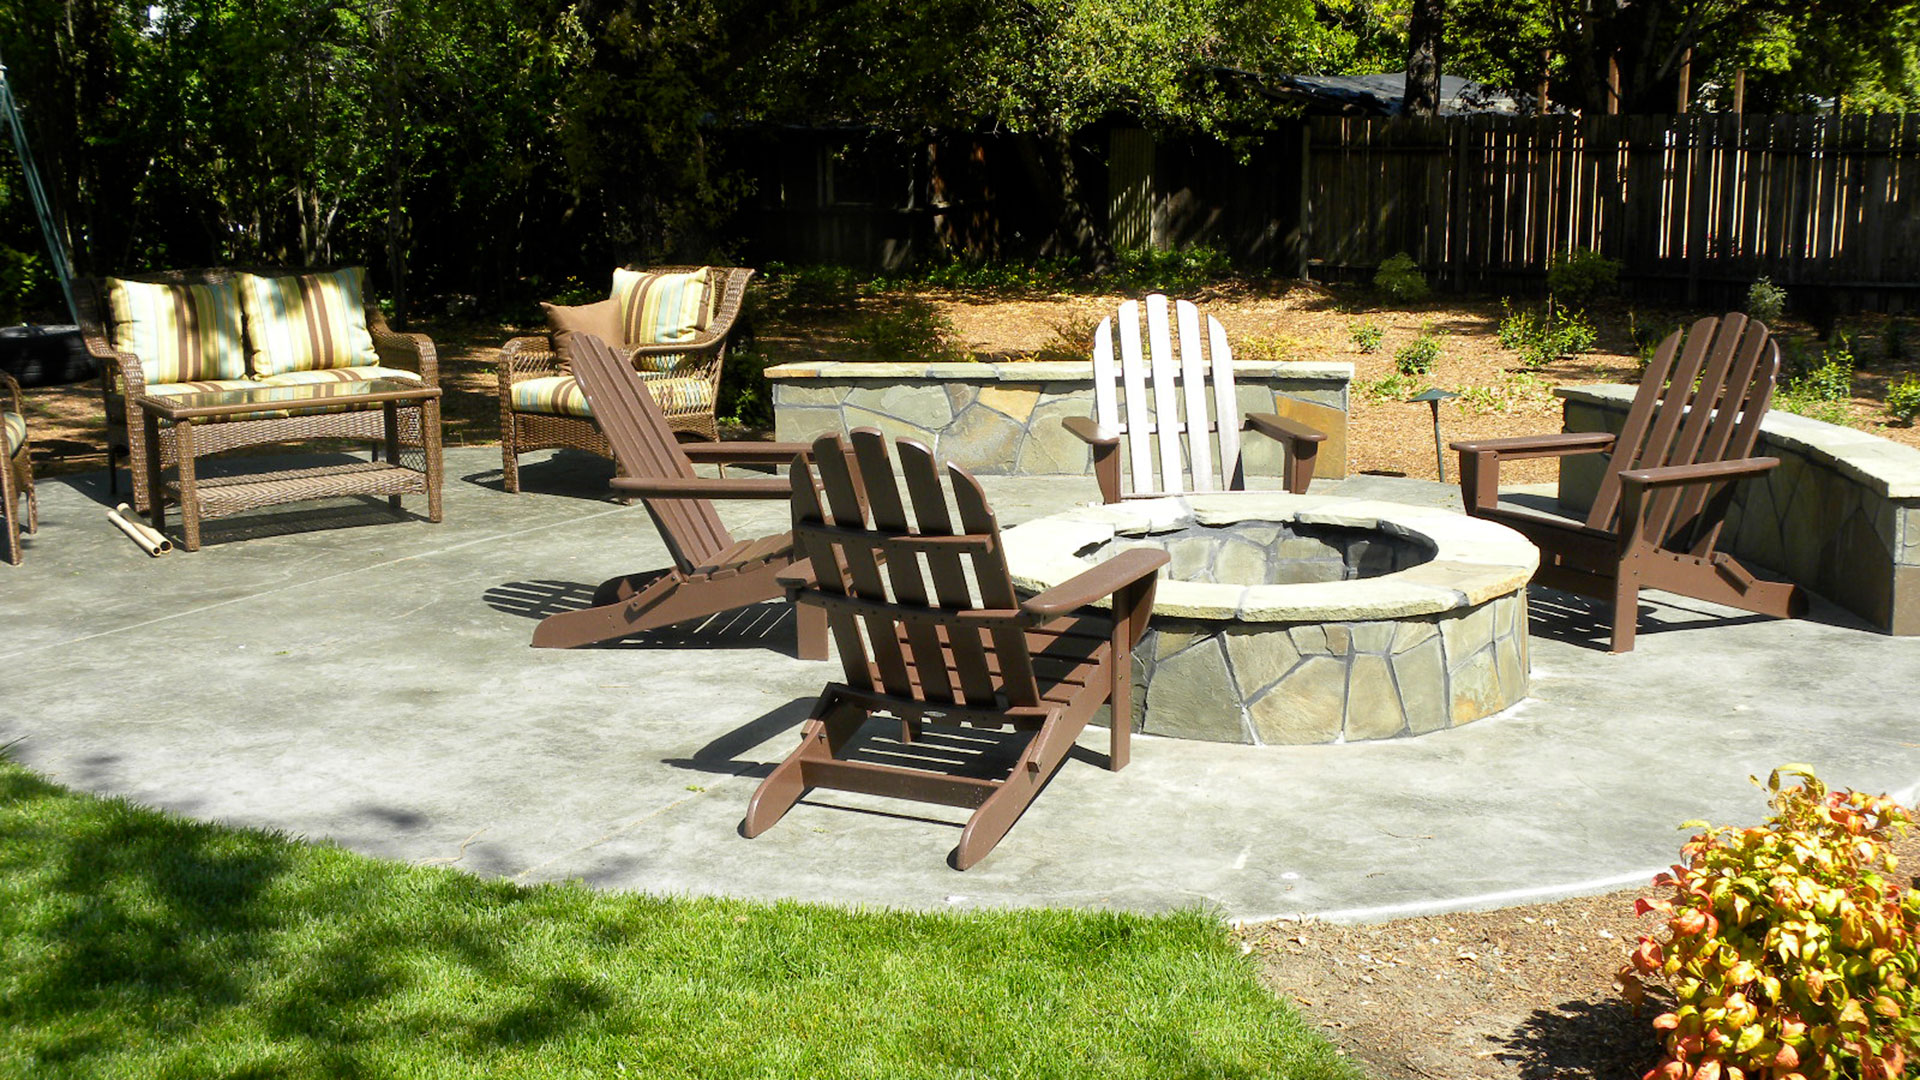
14. Concrete Patio Extension with Stone Fire Pit and Adirondack Chairs
The single most important choice here is the mix of seating types. By pairing the classic, low-slung brown Adirondack chairs with a more upright wicker sofa, the space immediately becomes more dynamic and accommodating. It acknowledges that people relax in different ways—some want to lean back and lounge, others prefer to sit up and chat. This simple mix makes the patio more useful for a wider range of social situations, from a quiet morning coffee to a lively evening gathering. It’s a thoughtful detail that elevates the entire area.
|
📋 Copy HEX 🔗 Share |
You can get this relaxed, fire-pit-centric vibe on a tighter budget. Skip the stone-built fire pit and opt for a metal fire bowl from a big box store for $100-$300. Instead of a full wicker set, focus on the Adirondack chairs. You can find durable plastic versions at stores like Lowe’s or Home Depot for $30-$60 each, especially during end-of-season sales. A set of four chairs around a simple fire bowl on a basic concrete slab still creates that essential gathering spot. For a similar look with built-in seating, check out Idea #4.
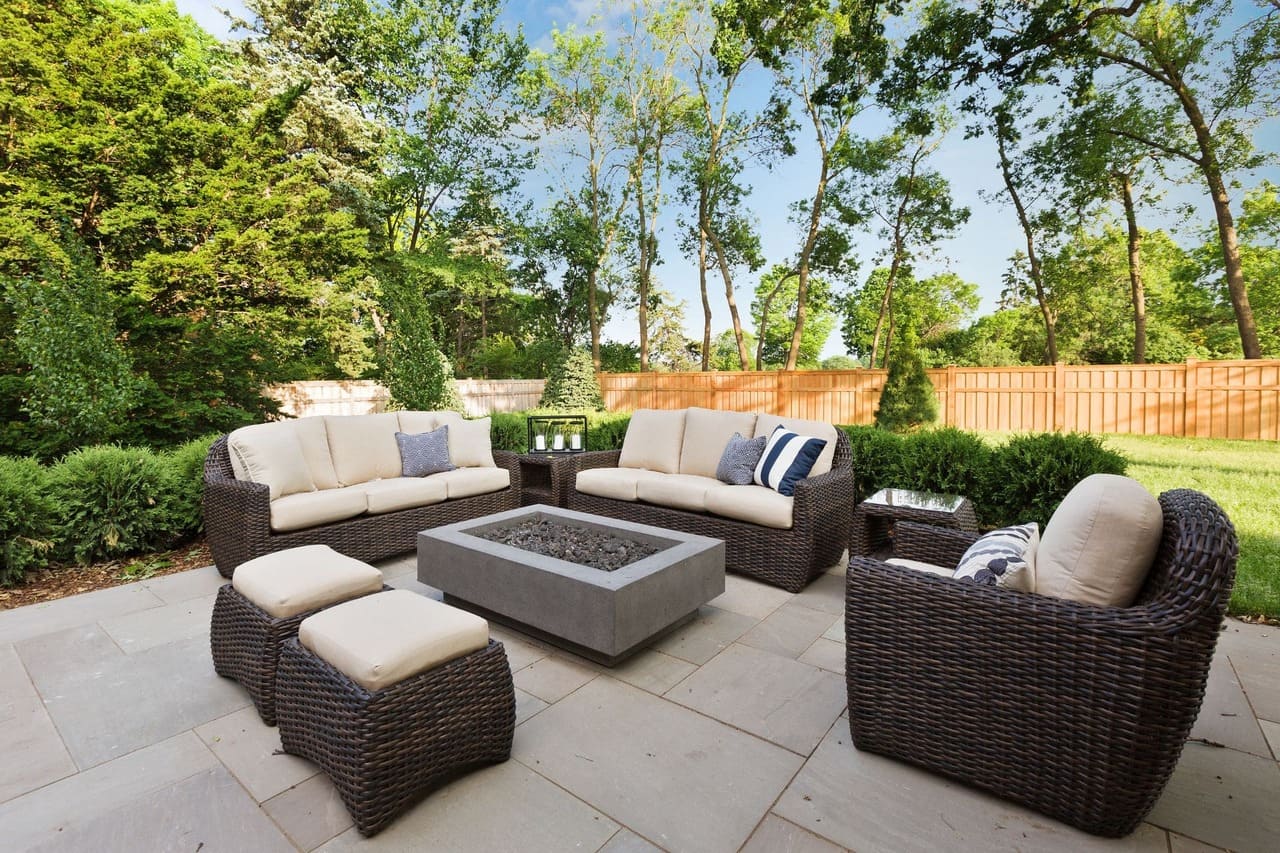
15. Spacious Flagstone Patio with Concrete Fire Pit and Wicker Seating
When arranging a large outdoor seating set, create a clear focal point. Here, the substantial rectangular concrete fire pit acts as an anchor for the entire arrangement. A good rule of thumb is to place your main sofa or loveseat about 3-4 feet away from the edge of the fire pit. This is close enough for warmth and conversation but far enough for safety and to allow people to walk by comfortably. Arrange the accompanying chairs to face the sofa, creating a closed loop that encourages conversation.
|
📋 Copy HEX 🔗 Share |
This inviting patio follows a classic formula: 60% Cozy Neutrals + 30% Natural Textures + 10% Color Pop. The light cream cushions and light grey flagstone create a soft, neutral base (60%). The dark brown wicker furniture and surrounding wood fence and foliage provide the essential, grounding natural textures (30%). Finally, the subtle blue and white striped pillows add just the right amount of a classic, coastal color pop (10%) to keep the scene from feeling monotonous.
16. Modern Outdoor Dining with a Geometric Wooden Screen
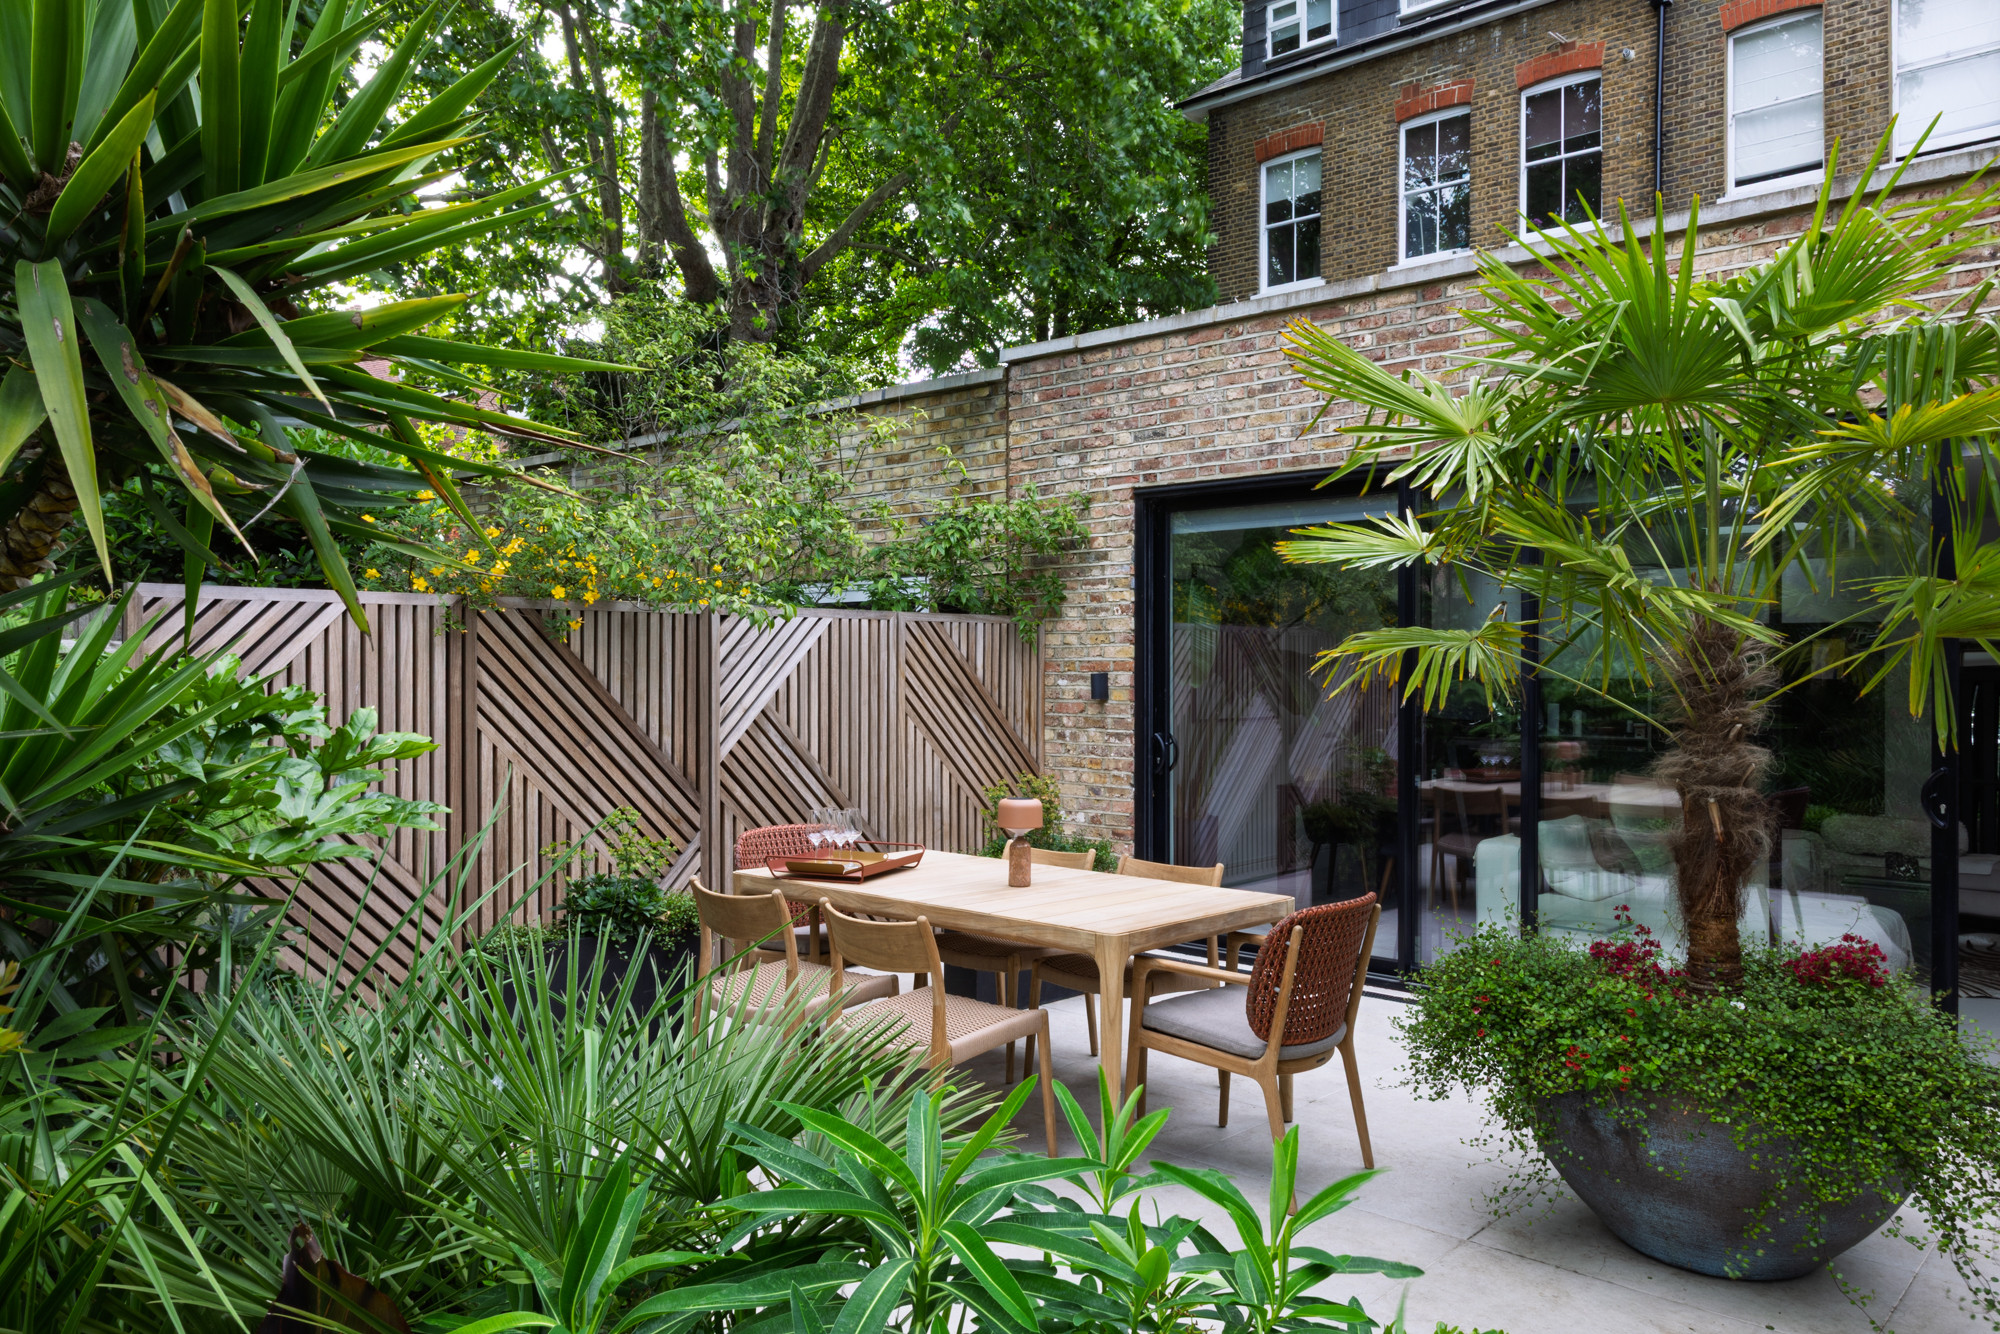
This space works because of the brilliant interplay between the man-made and the natural. The sharp, clean lines of the geometric wooden screen and the black-framed glass door are softened by the explosion of lush, oversized green foliage. This contrast is what creates the drama and serenity. Neither element would be as impactful without the other. The warm brick of the building adds another layer of texture, connecting the sleek modern elements to a more traditional material, making the whole composition feel rich and layered.
|
📋 Copy HEX 🔗 Share |
We are seeing a huge move towards ‘Japandi’ design principles in outdoor spaces for 2026, and this is a perfect example. It blends the smooth, modern minimalism of Scandinavian design with the Japanese aesthetic’s reverence for natural materials, craftsmanship, and tranquility. The clean lines of the furniture, the focus on natural wood, and the integration of lush greenery all point to this calming, sophisticated trend. It’s popular because it feels both modern and timeless, creating a peaceful escape right in your backyard.
17. Circular Stamped Concrete Patio with a Dark Gray Border
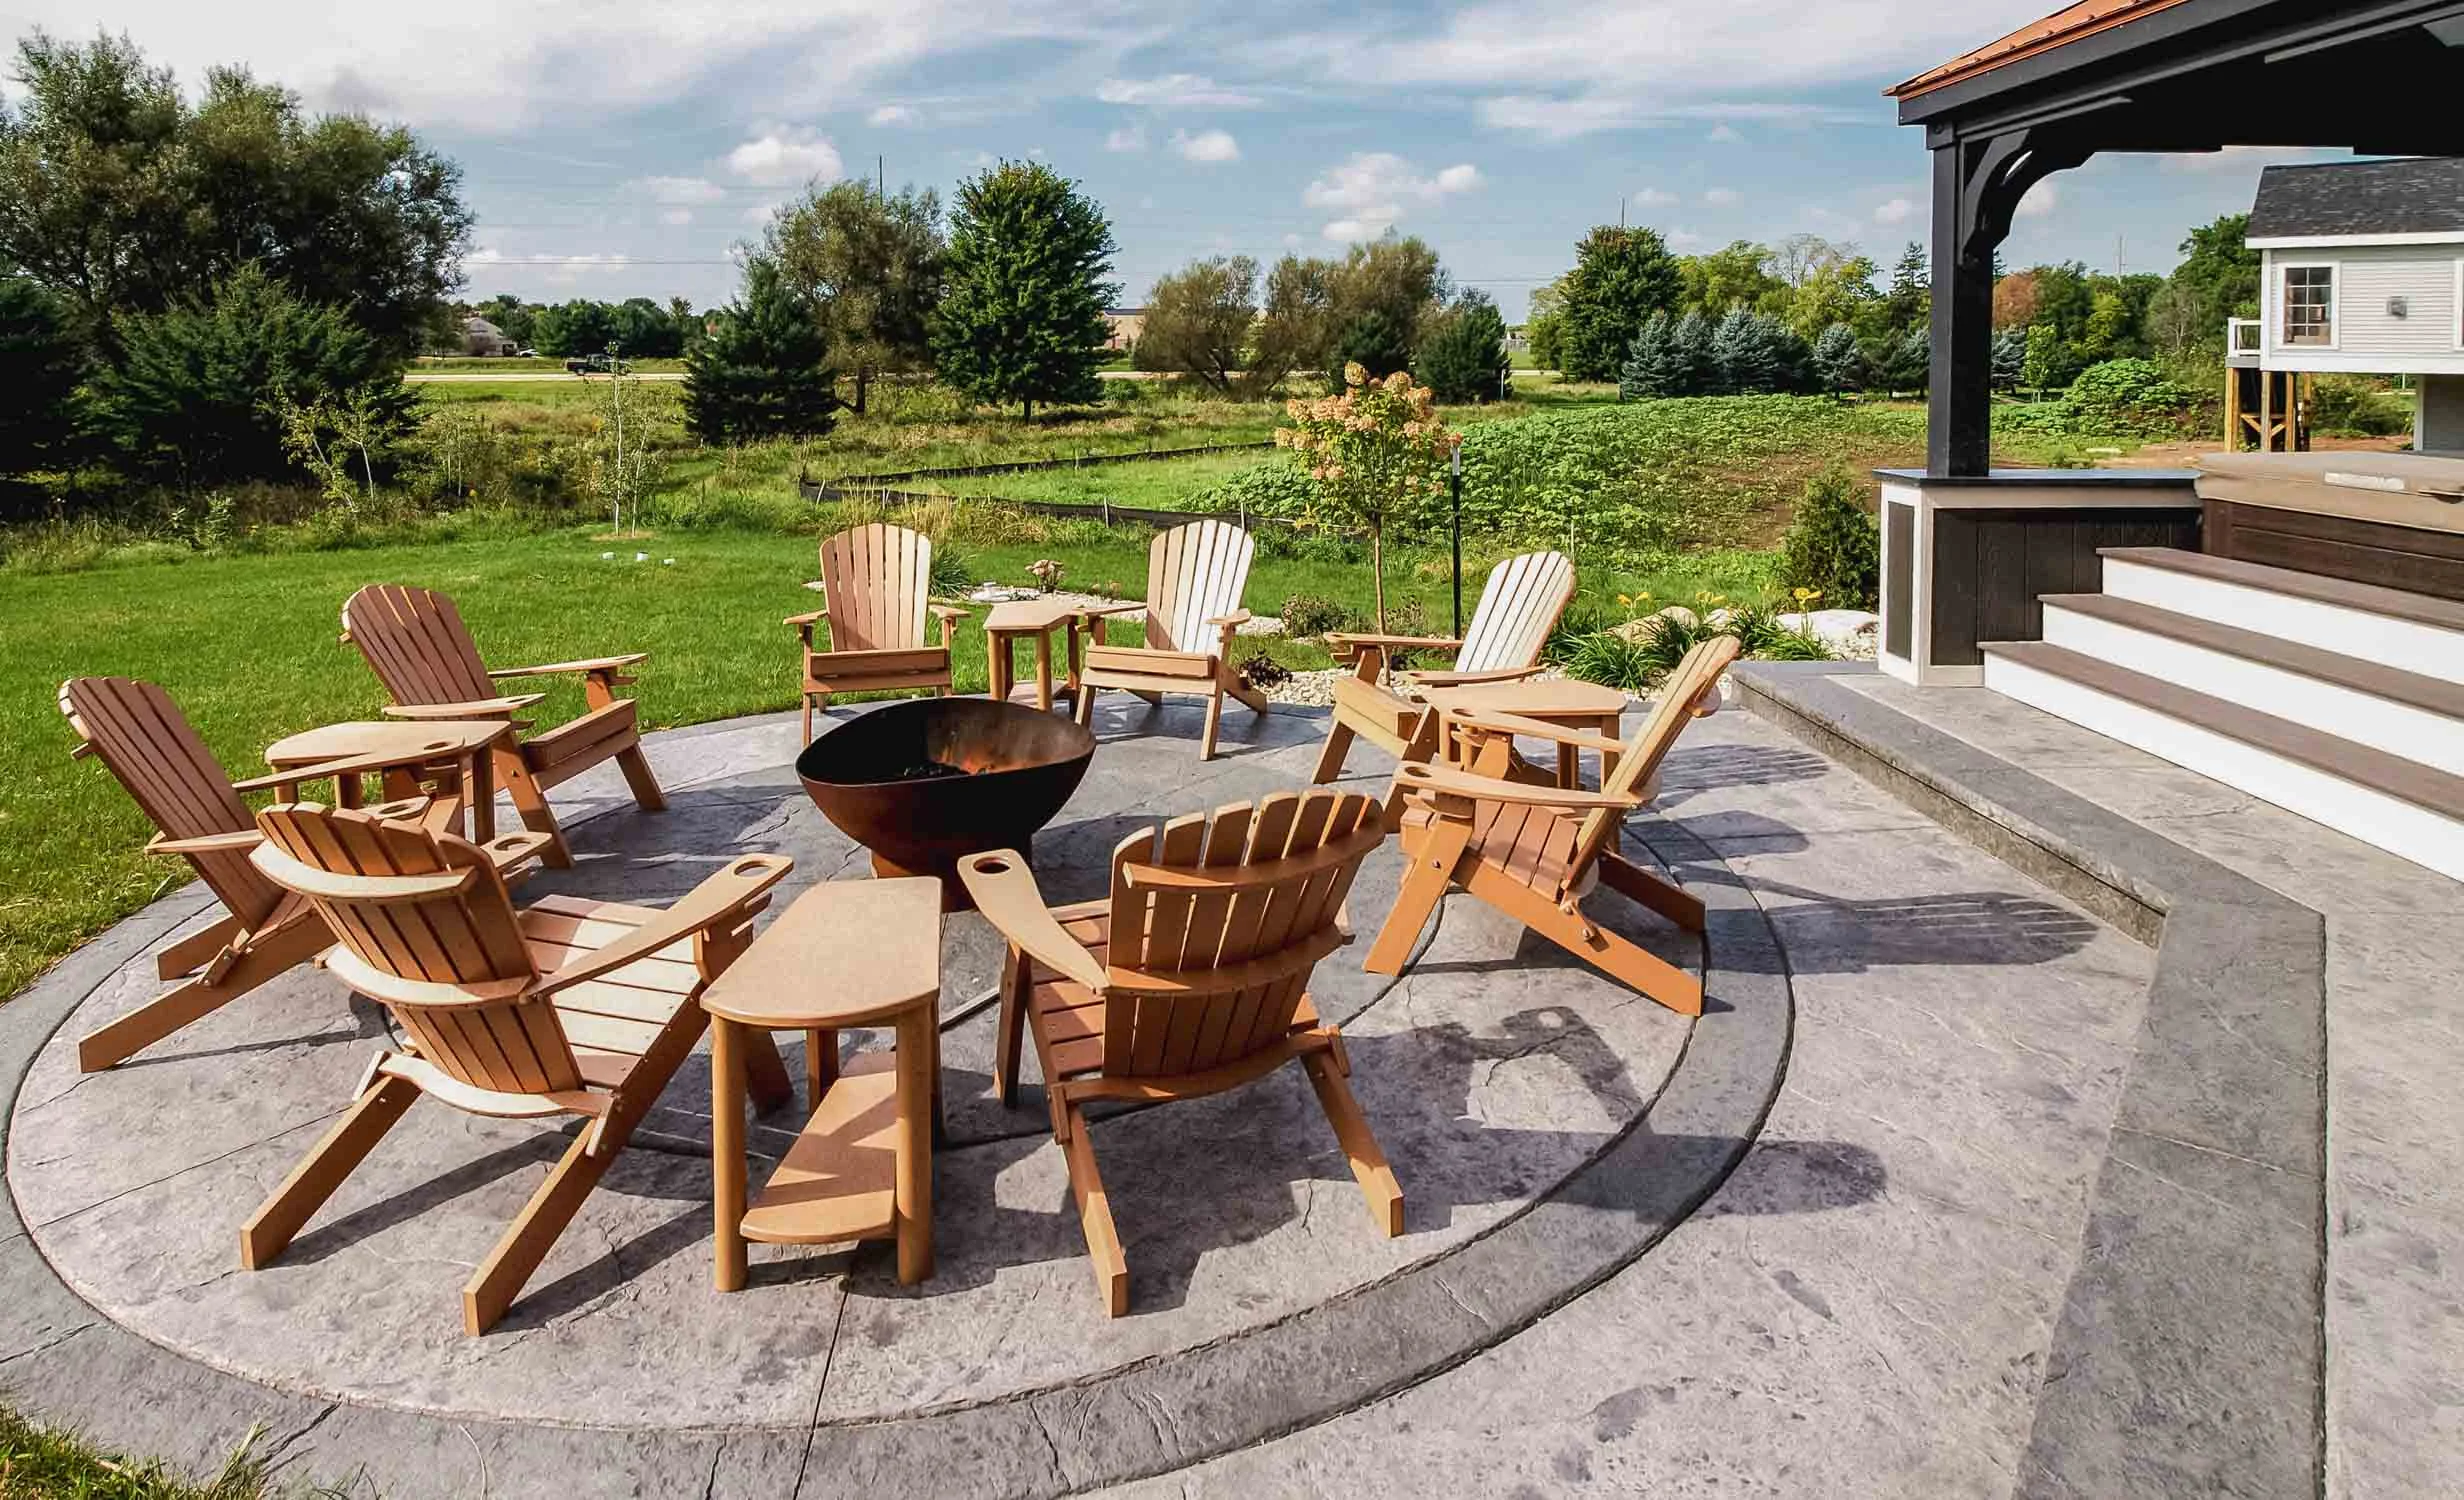
Creating a contrasting border on a stamped concrete patio happens during the pour, not after. It’s a key part of the setup and finishing process.
|
📋 Copy HEX 🔗 Share |
- Forming the Shape: The circular shape and the border area are defined with flexible form boards before any concrete is poured.
- The Main Pour: The lighter gray concrete for the main area is poured first, staying within the inner border.
- Coloring the Border: While the main slab is still wet, a dark gray color hardener (a powder) is broadcast evenly over the border section.
- Finishing: The color hardener is worked into the surface with a trowel. Later, the entire surface, including the border, is stamped with the chosen pattern to ensure a continuous texture.
Time: 2-3 days (including stamping). Cost: Adds $1-2 per square foot to the total project cost.
A grand circular statement patio like this needs ample space. To achieve this sense of openness, you’re looking at a minimum diameter of 20 feet. This allows for a central fire pit, a comfortable ring of Adirondack chairs with space to recline, and clear pathways. It’s an excellent choice for a larger, open backyard where it can act as a natural destination point. For smaller yards, a half-circle variation tucked against the house can provide a similar feel without consuming the entire lawn. Compare this open layout to the more enclosed feeling of Idea #23.
18. Covered Patio with Wooden Beams and Wicker Seating
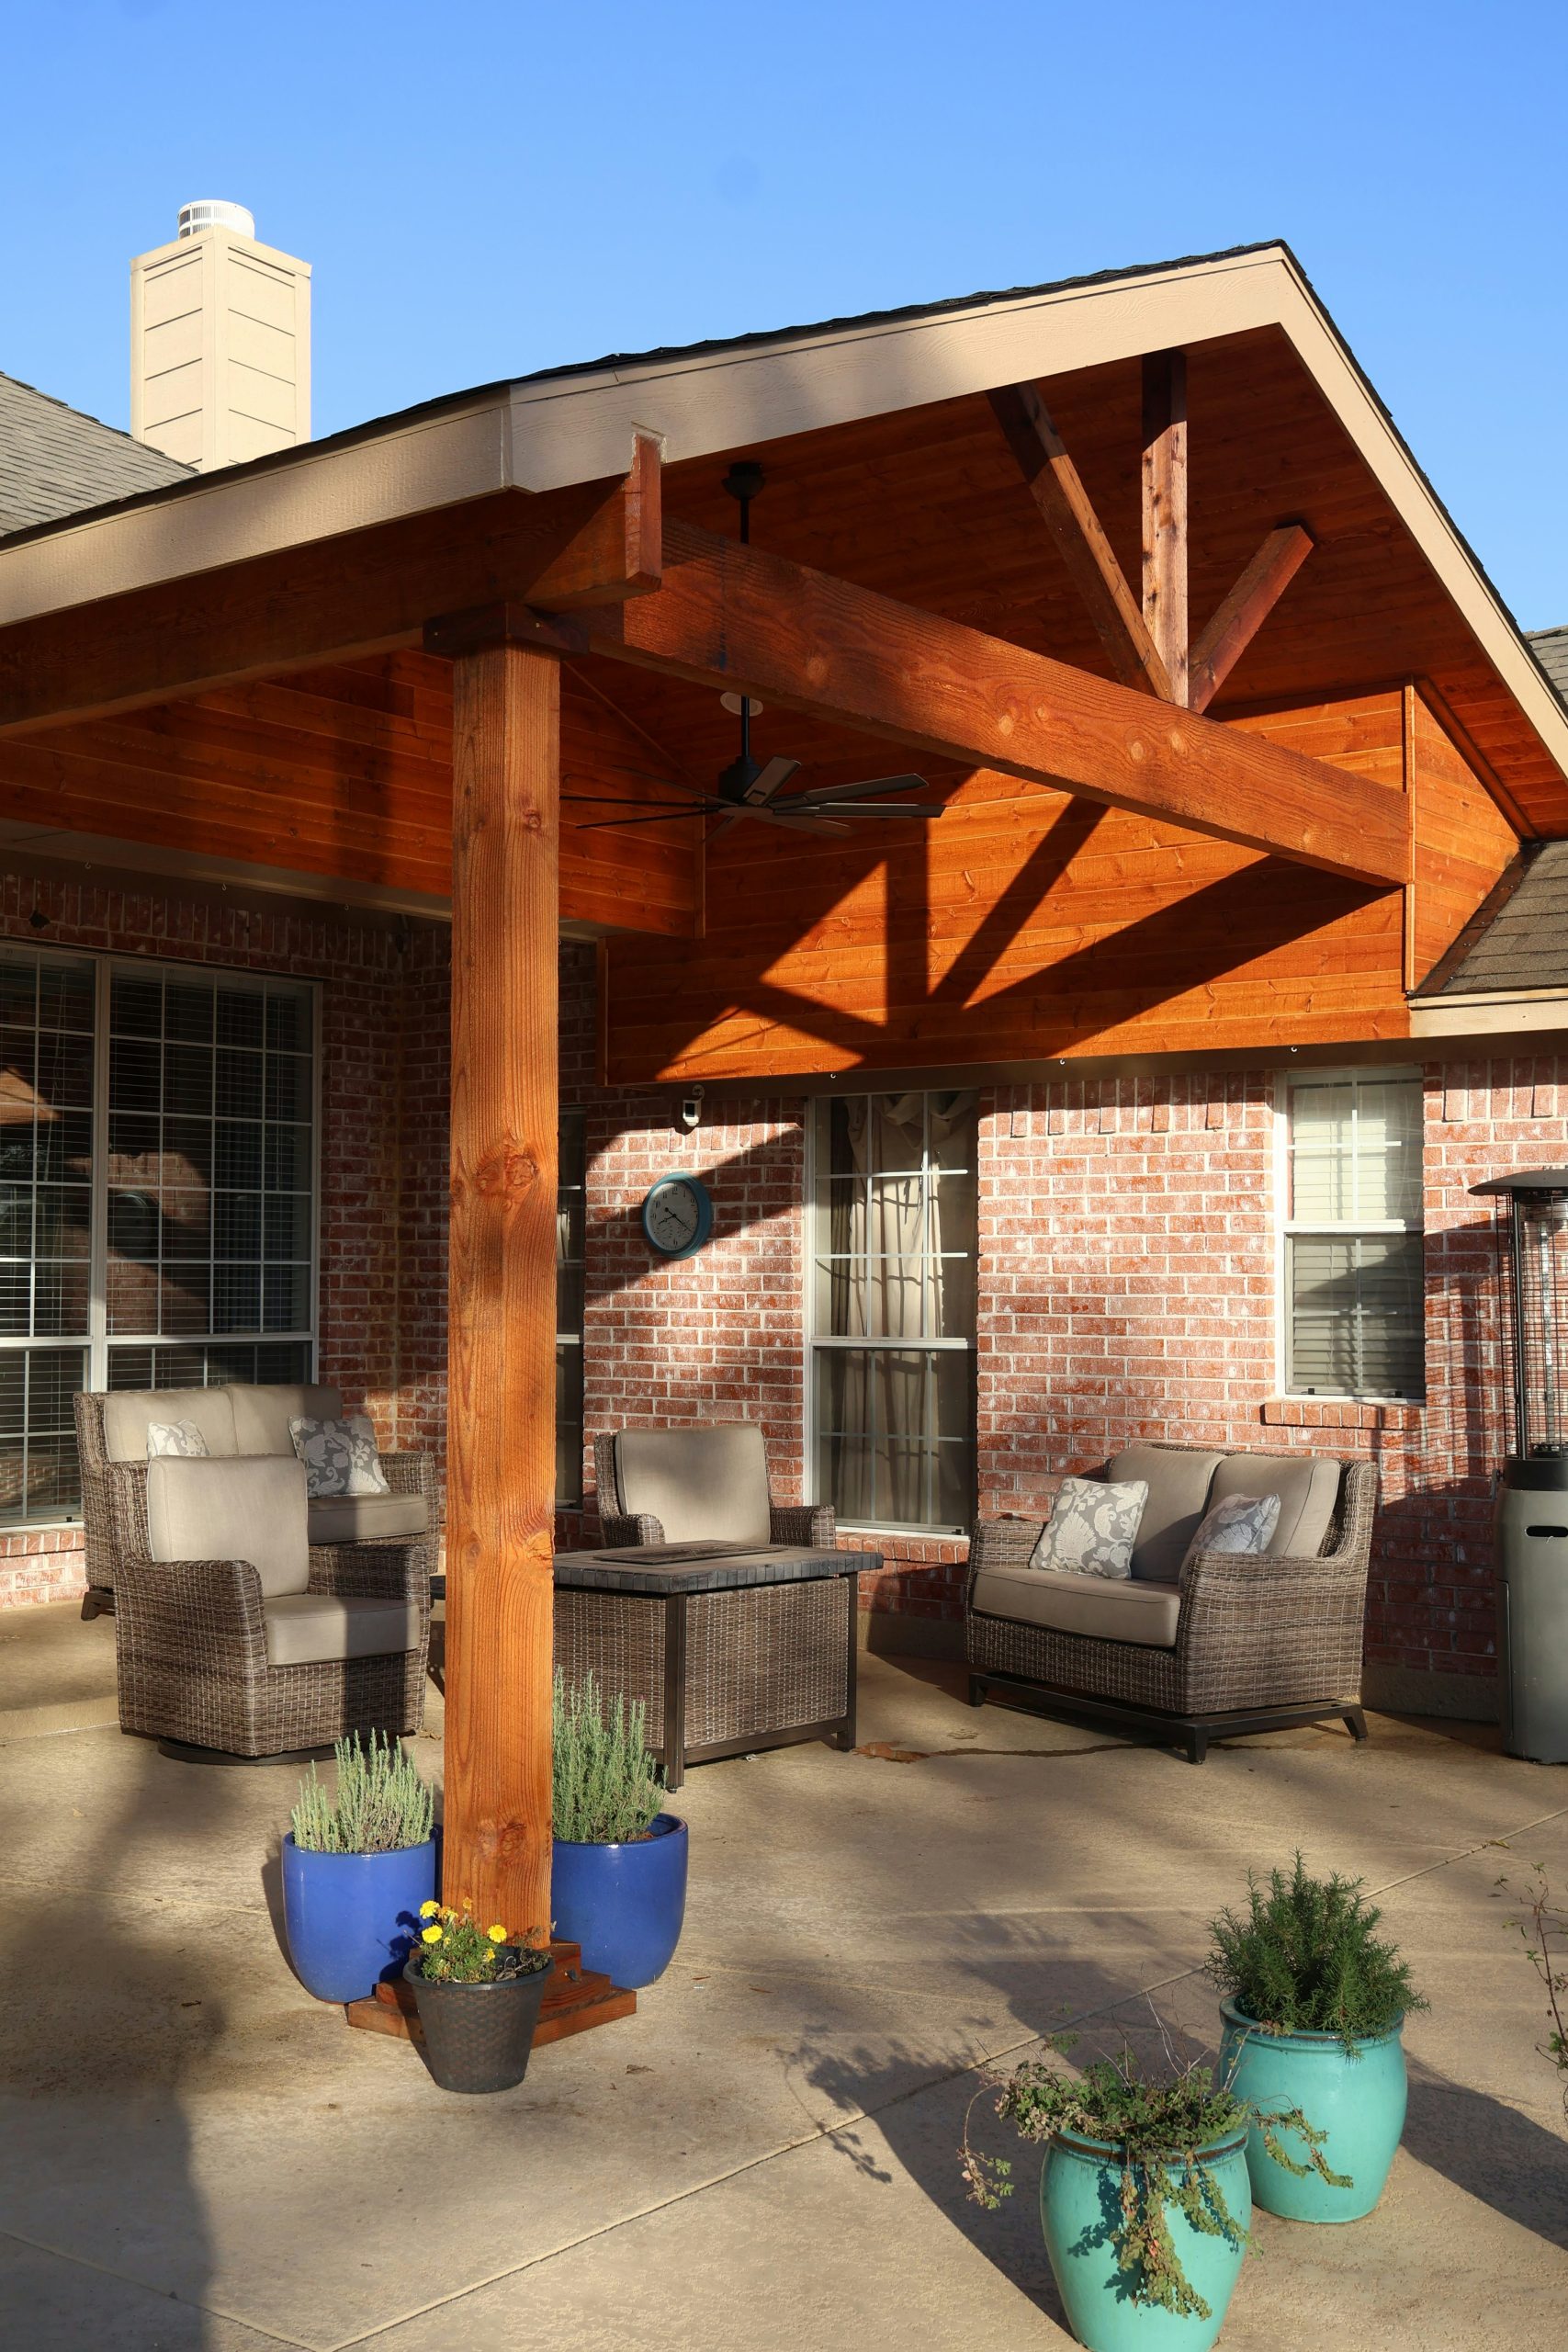
The single element that defines this space is the massive wooden-beamed patio cover. It does more than just provide shade; it creates a true outdoor room. The substantial scale of the beams adds architectural weight and a rustic, cozy feeling that you couldn’t achieve with a simple umbrella or a metal awning. It visually separates this zone from the rest of the yard, signaling that this is a place for relaxation and gathering. Without the cover, it would just be furniture on a concrete slab.
|
📋 Copy HEX 🔗 Share |
A large wooden structure like this is a significant investment and comes with maintenance. Depending on your climate and the type of wood used (cedar and redwood are best), you’ll need to re-stain or re-seal the structure every 2-4 years to protect it from sun and water damage. Failing to maintain the wood will lead to it graying and, eventually, warping or rotting, which can become a safety issue. Be sure to factor the ongoing cost and effort of maintenance into your decision; it’s not a one-and-done project.
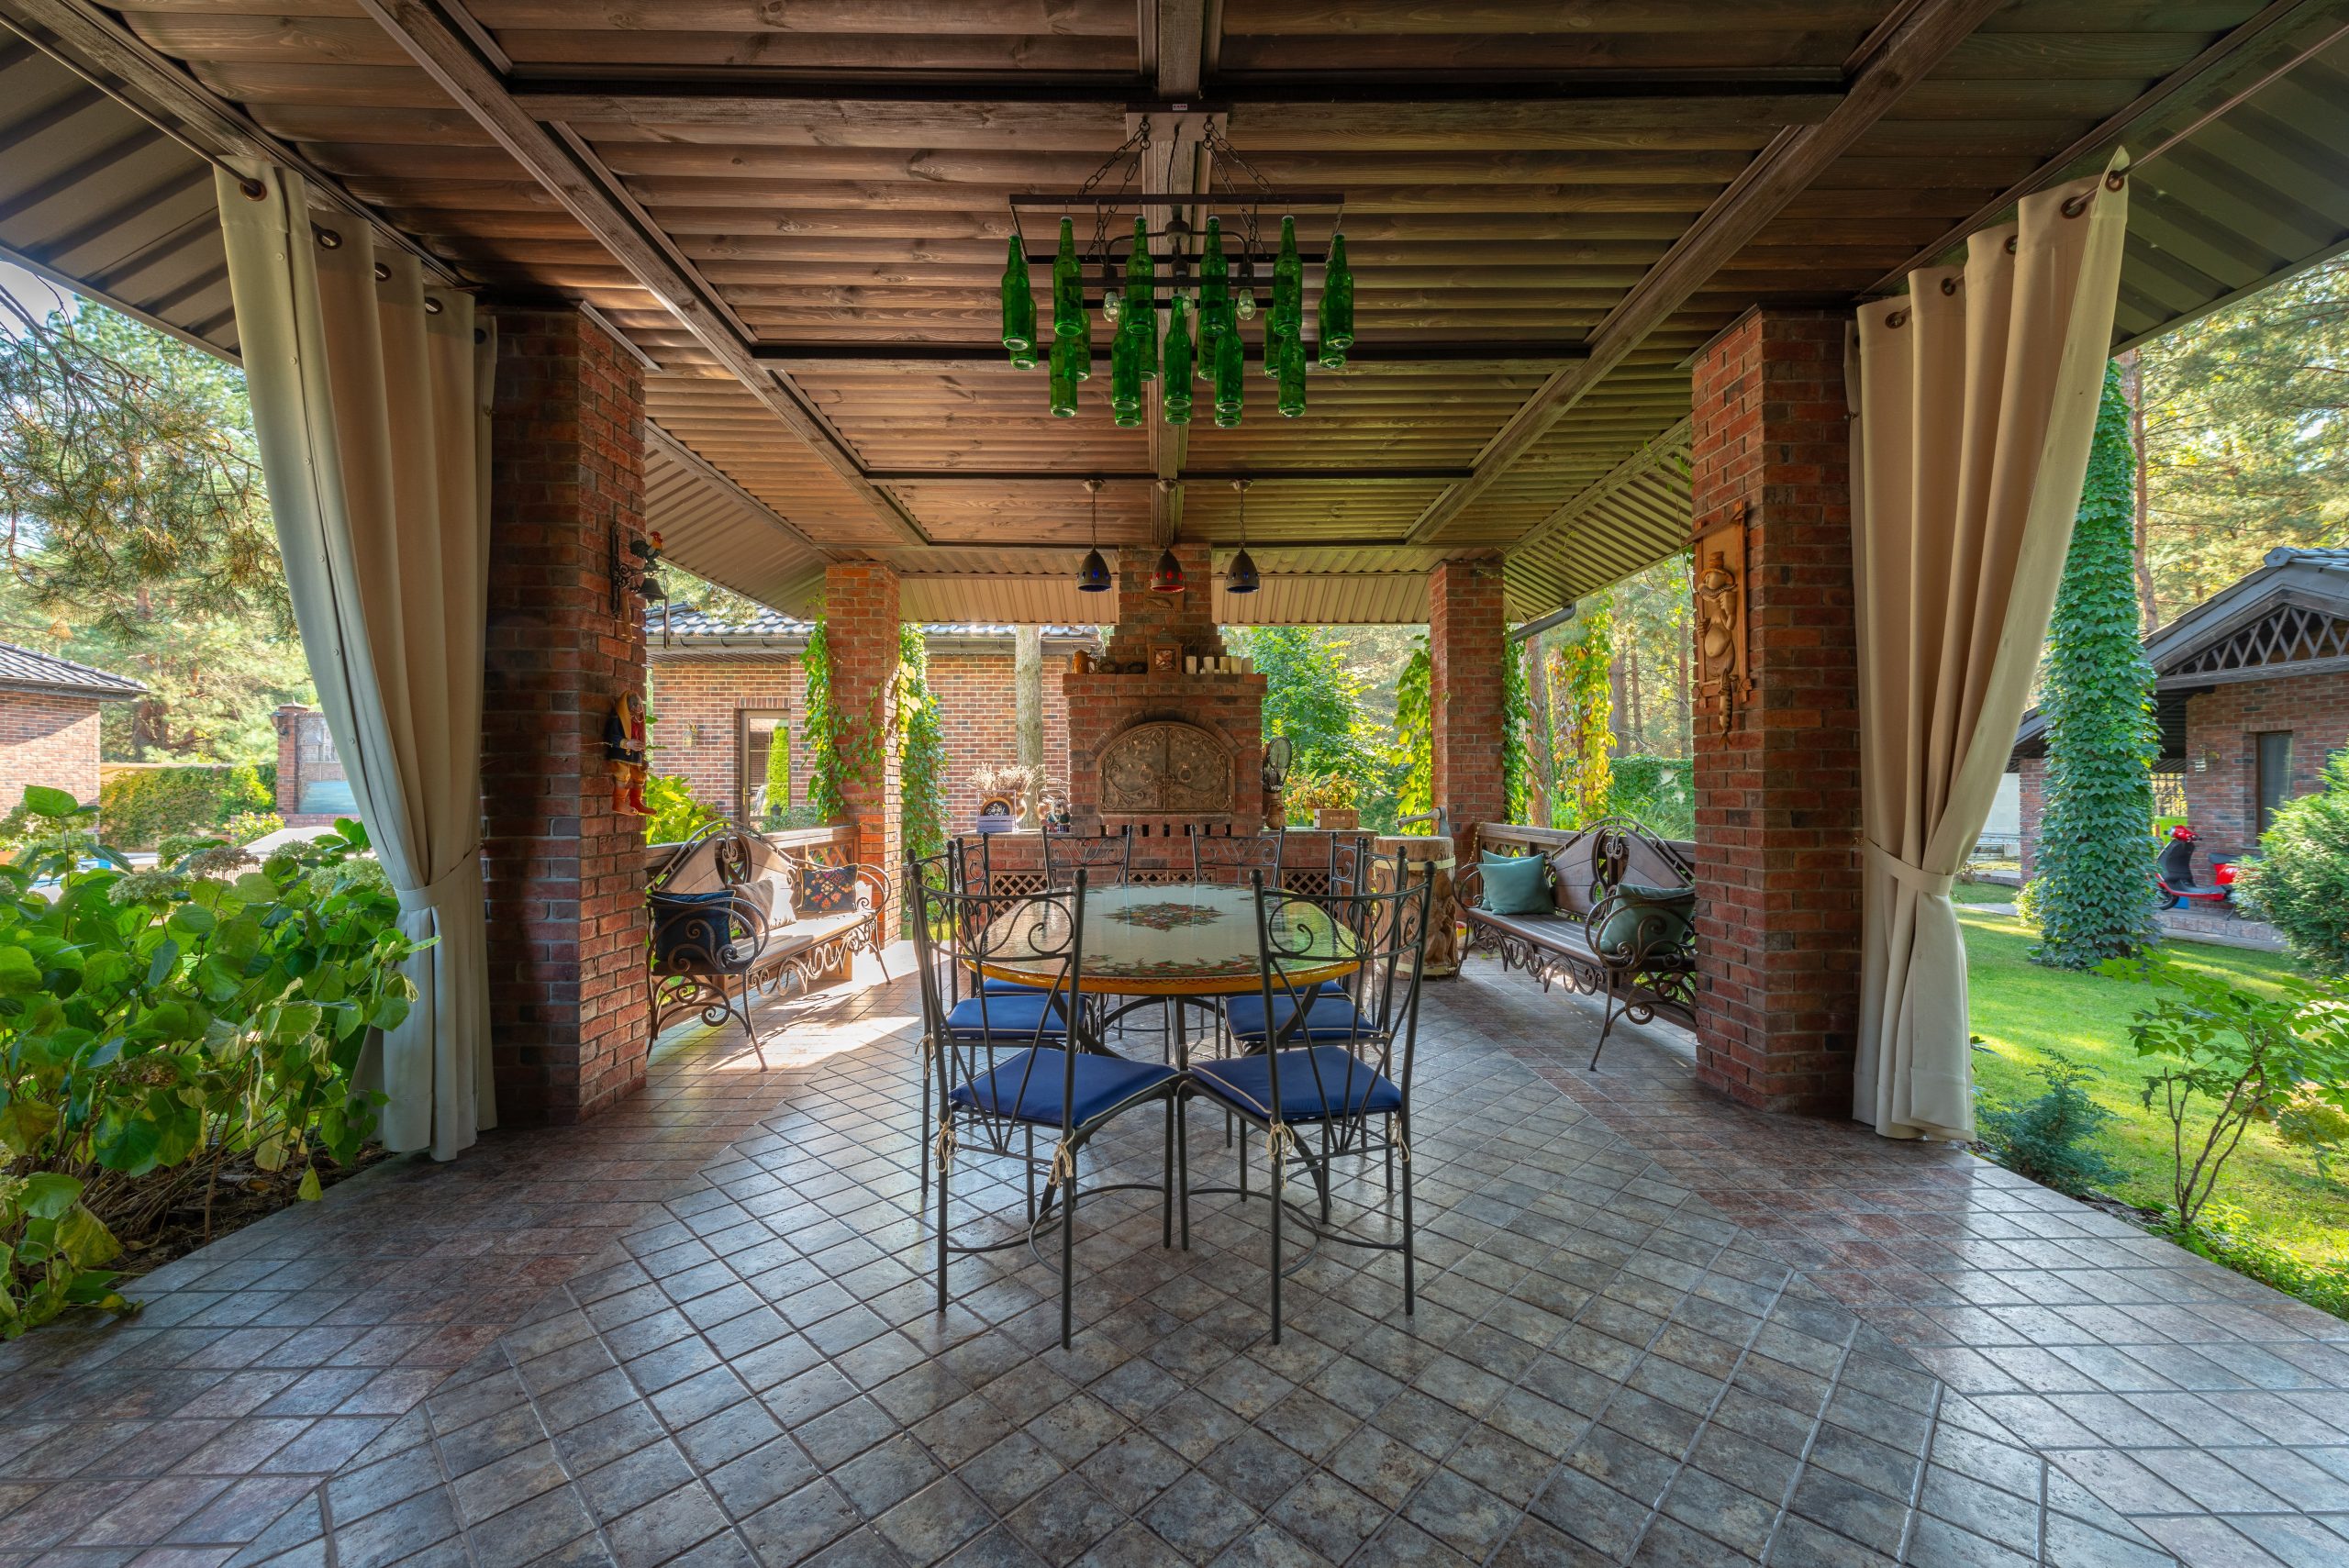
19. Rustic Covered Patio with Brick Columns and a Wood-Plank Ceiling
This design feels so complete because it fully commits to its rustic, functional aesthetic. The material palette is tightly controlled: warm red brick, dark wood, and dark metal. These three materials are repeated throughout the space—the brick in the columns and fireplace, the wood on the ceiling and furniture, and the metal in the dining set and benches. This repetition creates a powerful sense of cohesion. The geometric floor tiles add a touch of pattern without breaking from the earthy color scheme, completing the ‘indoor room, outdoors’ feeling.
|
📋 Copy HEX 🔗 Share |
Achieving this substantial, built-in look is a major project, and the budget reflects that. The cost here is in the structure and masonry.
- Poured Concrete Foundation & Tiled Floor (approx. 300 sq. ft.): $4,500 – $9,000
- Brick Columns & Fireplace/Oven: $10,000 – $20,000+
- Wood Beam & Plank Roof Structure: $8,000 – $15,000
- Dining Set, Benches, Lighting: $2,000 – $4,500
- TOTAL: $24,500 – $48,500+
Budget alternative: Mimic the vibe with a freestanding wooden pergola, a brick-veneer fire pit kit, and rustic metal furniture for about 60% less.
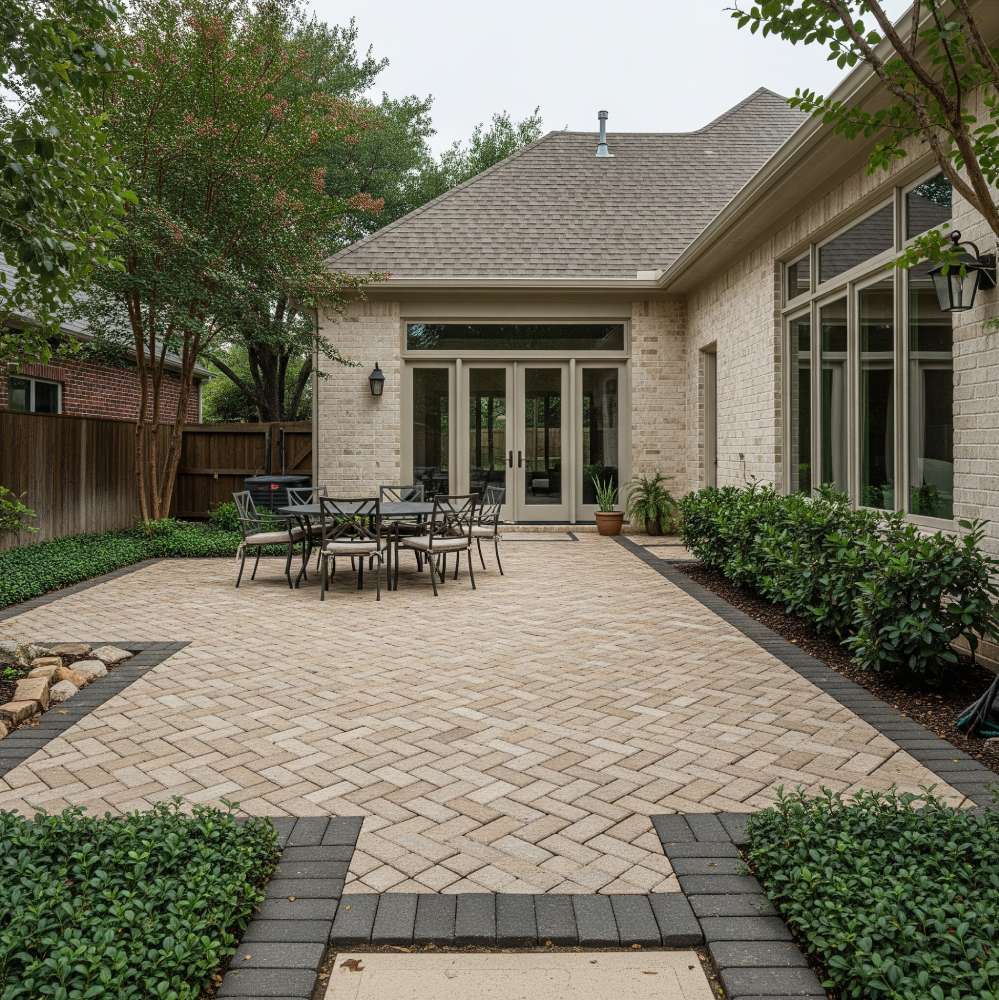
20. Herringbone Paver Patio with a Dark Gray Border
The herringbone pattern is a timeless choice that adds a touch of elegance and movement to a patio. The key to making it look sharp and defined is the contrasting border. By framing the intricate herringbone pattern with a simple, dark gray paver, the design is given a clean, finished edge. For maximum impact, the border should be at least two pavers wide. This creates a substantial visual frame that contains the energy of the herringbone and stops it from looking messy where it meets the lawn or garden beds.
|
📋 Copy HEX 🔗 Share |
A paver patio is a fantastic long-term investment, but proper prep is non-negotiable. Don’t even think about starting until you’ve confirmed these items:
- Solid Base: Have you planned for a proper base of at least 4-6 inches of compacted gravel and a 1-inch layer of sand? Skipping this will cause the pavers to shift and become uneven within a year.
- Proper Drainage: Does the entire patio slope away from your house’s foundation? A slope of 1/4 inch per foot is the standard.
- Edge Restraints: Have you planned for permanent edge restraints (plastic, metal, or concrete) around the entire perimeter? This is what holds the whole system together and prevents pavers from spreading apart.
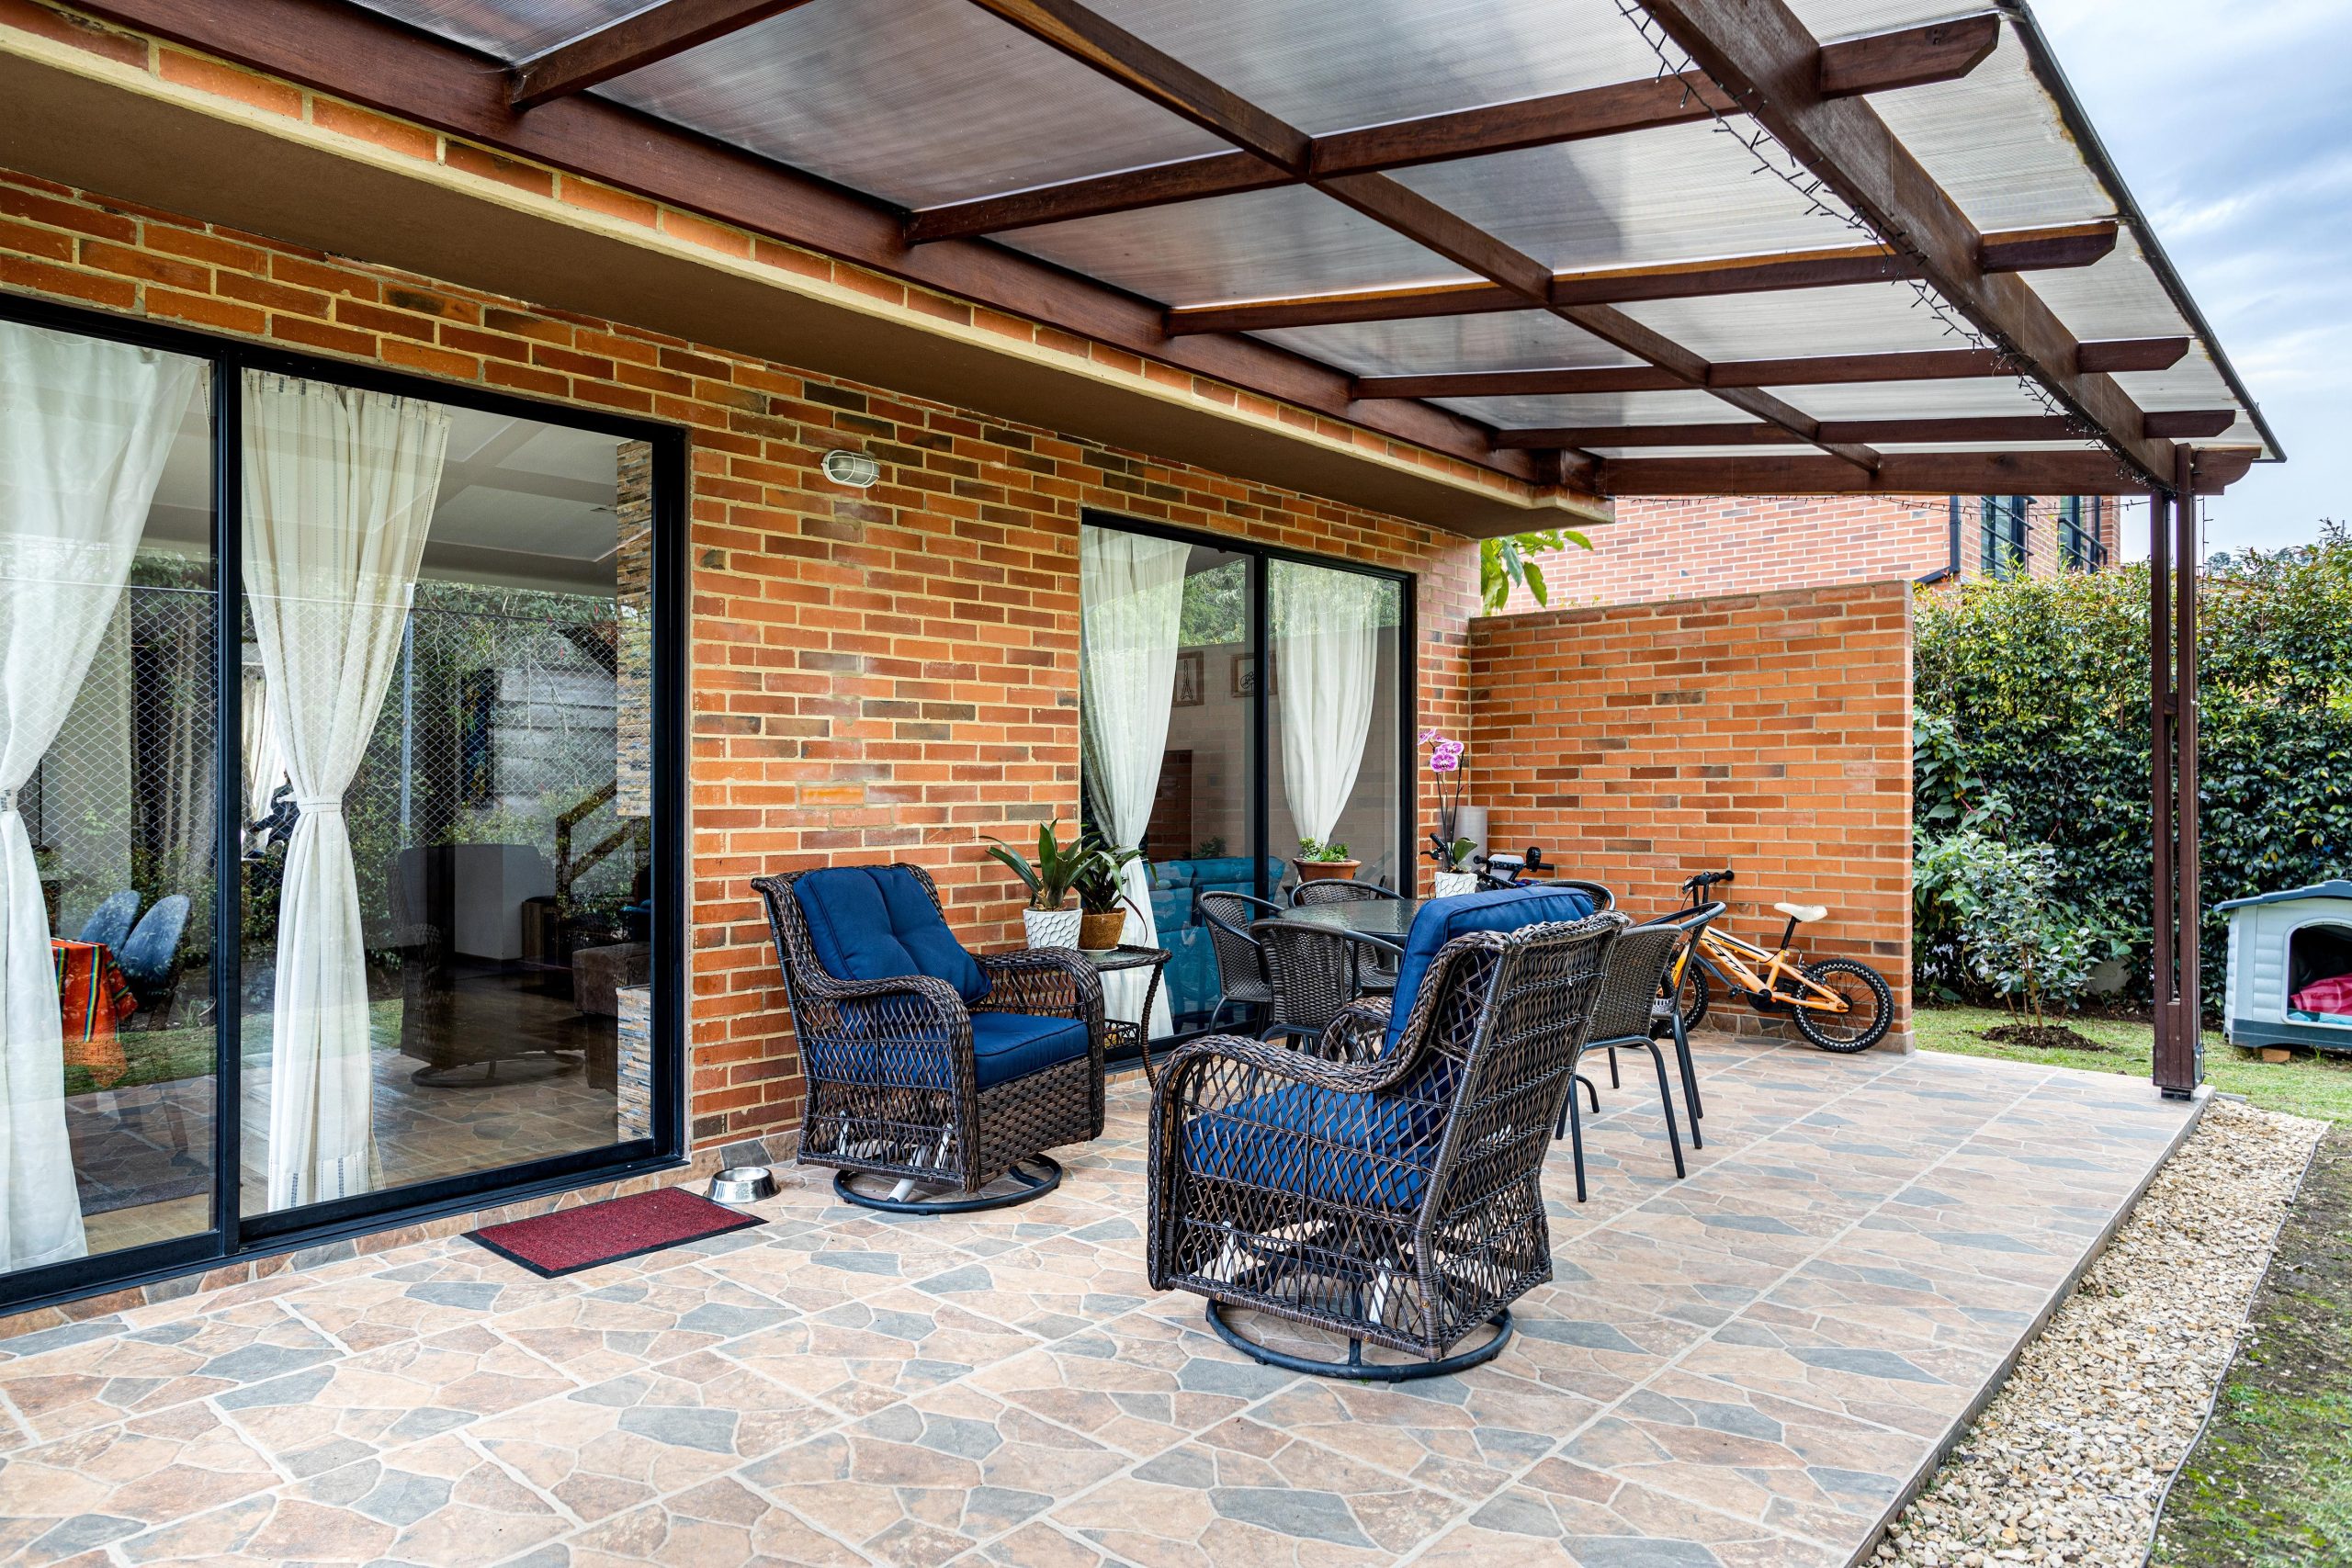
21. Eclectic Patio with Red Brick, Patterned Tile, and a Pergola
This eclectic look is a careful balancing act: 40% Rustic Base + 30% Modern Structure + 30% Boho Accents. The red brick facade provides a warm, rustic foundation (40%). The clean lines of the black-framed sliding doors and the wooden pergola introduce a modern, structural element (30%). The irregular patterned floor tiles, wicker furniture, and string lights bring in the relaxed, bohemian vibe (30%). The blue cushions provide a cool counterpoint to the warm red brick, keeping the palette interesting and balanced.
|
📋 Copy HEX 🔗 Share |
That clear pergola roof is great for letting in light while keeping the rain out, but it can be a magnet for dirt, leaves, and bird droppings. To keep it from looking grimy, it will need to be cleaned at least twice a year, maybe more if you have a lot of trees overhead. This usually involves a ladder, a long-handled soft brush, and a hose. Also, on hot, sunny days, a clear roof can create a greenhouse effect, making the patio uncomfortably warm. Consider adding a retractable shade underneath for temperature control.
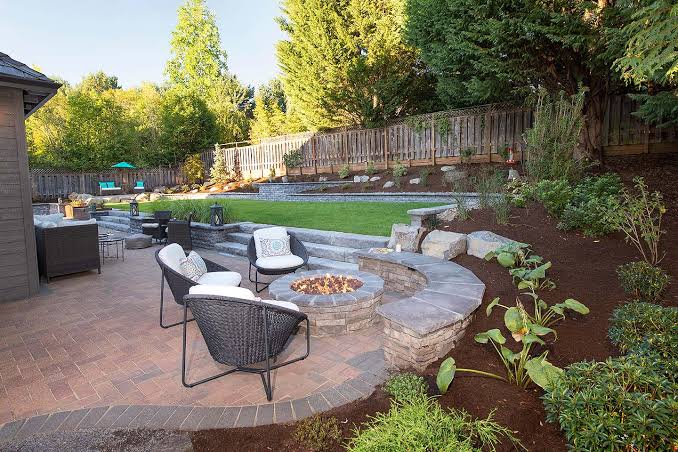
22. Building a Concrete Patio Seating Wall
When designing a built-in seating wall, the dimensions are critical for comfort. The standard height for a seat wall is 18 inches. This includes the capstone. Any higher and guests’ feet will dangle uncomfortably; any lower and it feels awkward to stand up from. The depth should be at least 15 inches, but 18-20 inches is better if you plan to use thick back cushions. For a finishing touch, make the capstone slightly wider than the wall itself, creating a small overhang of 1-2 inches for a more polished look.
|
📋 Copy HEX 🔗 Share |
A built-in seating wall is an incredibly space-efficient feature, making it ideal for patios from small to large. On a smaller patio (say, 12×15 feet), a single straight wall along one edge can provide all the seating you need without the clutter of extra chairs. On a larger, multi-level patio like the one in Idea #6, a curved seating wall can be used to define a specific zone, like a fire pit area. The key is that it provides maximum seating for the minimum footprint, freeing up valuable floor space.
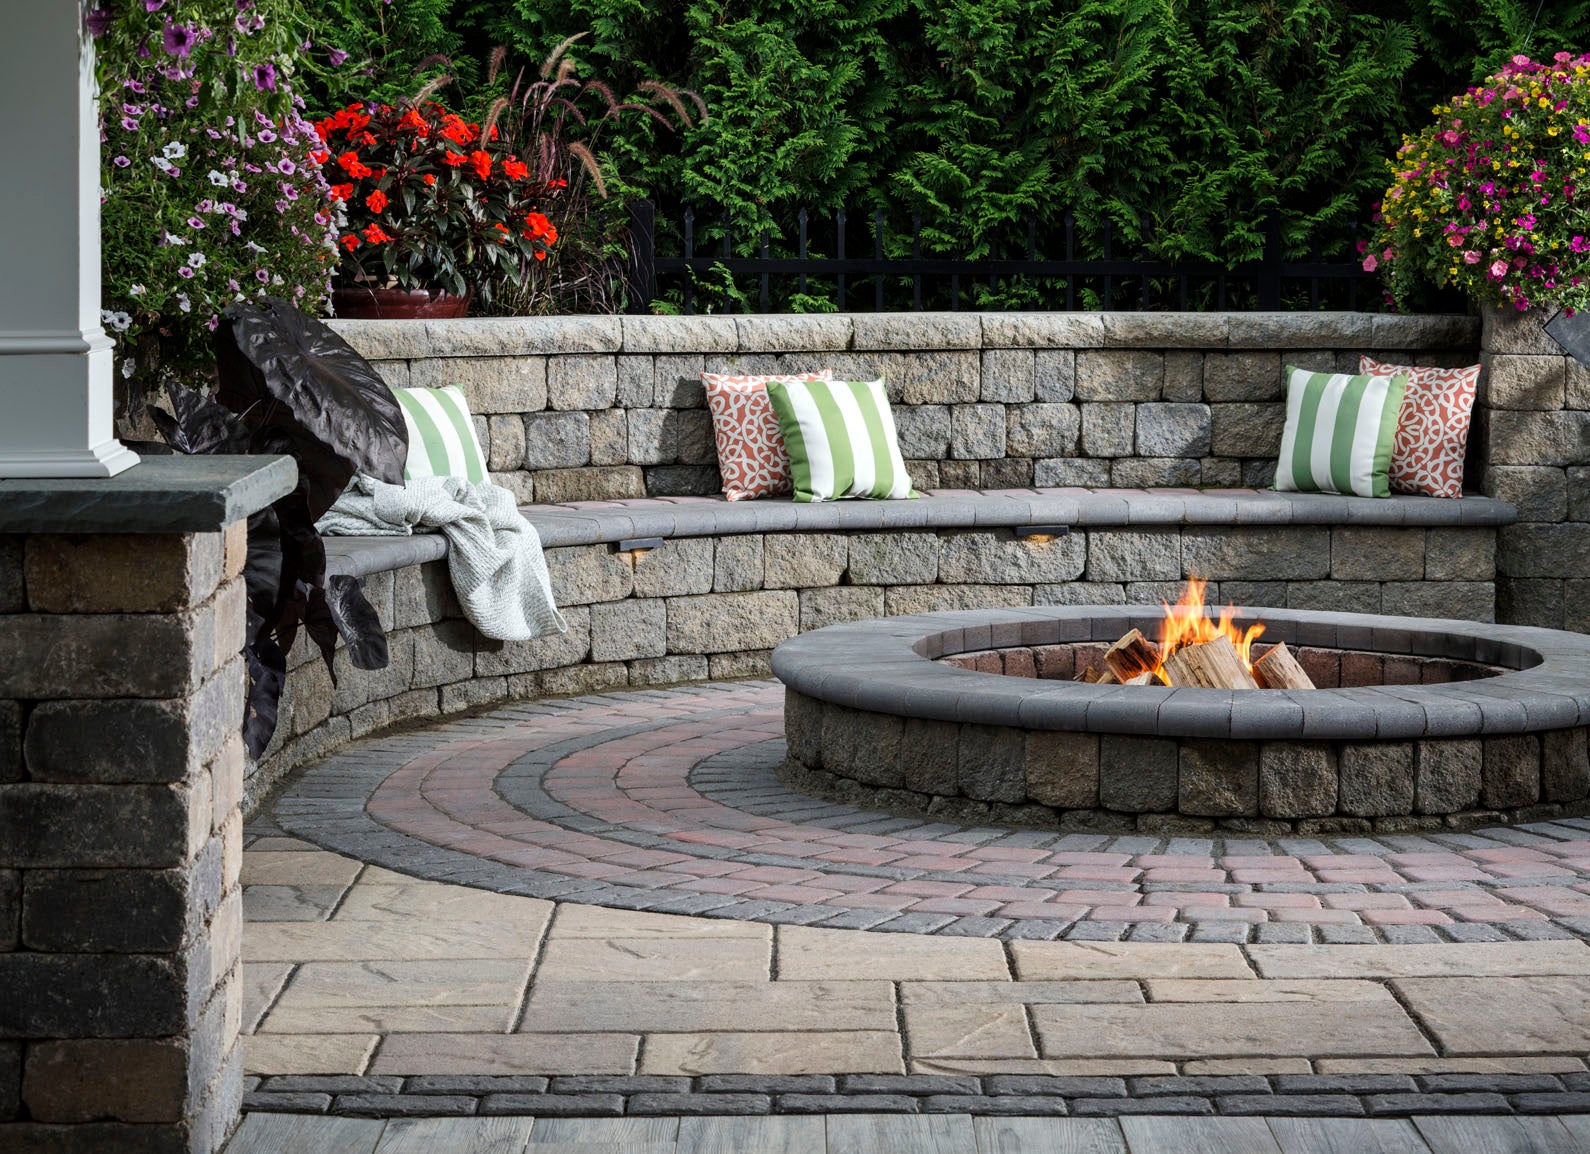
23. Curved Stone Paver Patio with Integrated Lighting
Integrating low-voltage lighting into a stone bench is a job you tackle during construction. It’s all about planning for the wiring.
|
📋 Copy HEX 🔗 Share |
- Choose Your Fixtures: Select your low-voltage hardscape lights before you start. You’ll need their exact dimensions.
- Run the Conduit: Before you build the wall, lay PVC conduit from your transformer’s location to the base of the wall.
- Place the Wires: As you build the wall, leave gaps for the fixtures at your desired locations. Run the low-voltage wire from the conduit up through the wall to each fixture opening.
- Mortar the Fixtures: Secure the fixtures in place with mortar, ensuring they are level. The mounting plates are hidden behind the stone veneer.
- Connect and Test: Connect all fixtures to the main wire and test the system before you install the final capstones.
Time: Adds 4-6 hours to the wall construction. Cost: $50-150 per fixture, plus transformer.
The integrated lighting is what transforms this patio from great to magical. During the day, it’s a handsome stone seating area. But at night, the soft glow from within the bench completely changes the atmosphere. It highlights the texture of the stone, provides gentle, indirect illumination for the whole patio, and adds a major dose of custom, high-end ambiance. It’s both a practical safety feature and the single most impactful design choice for creating evening mood.
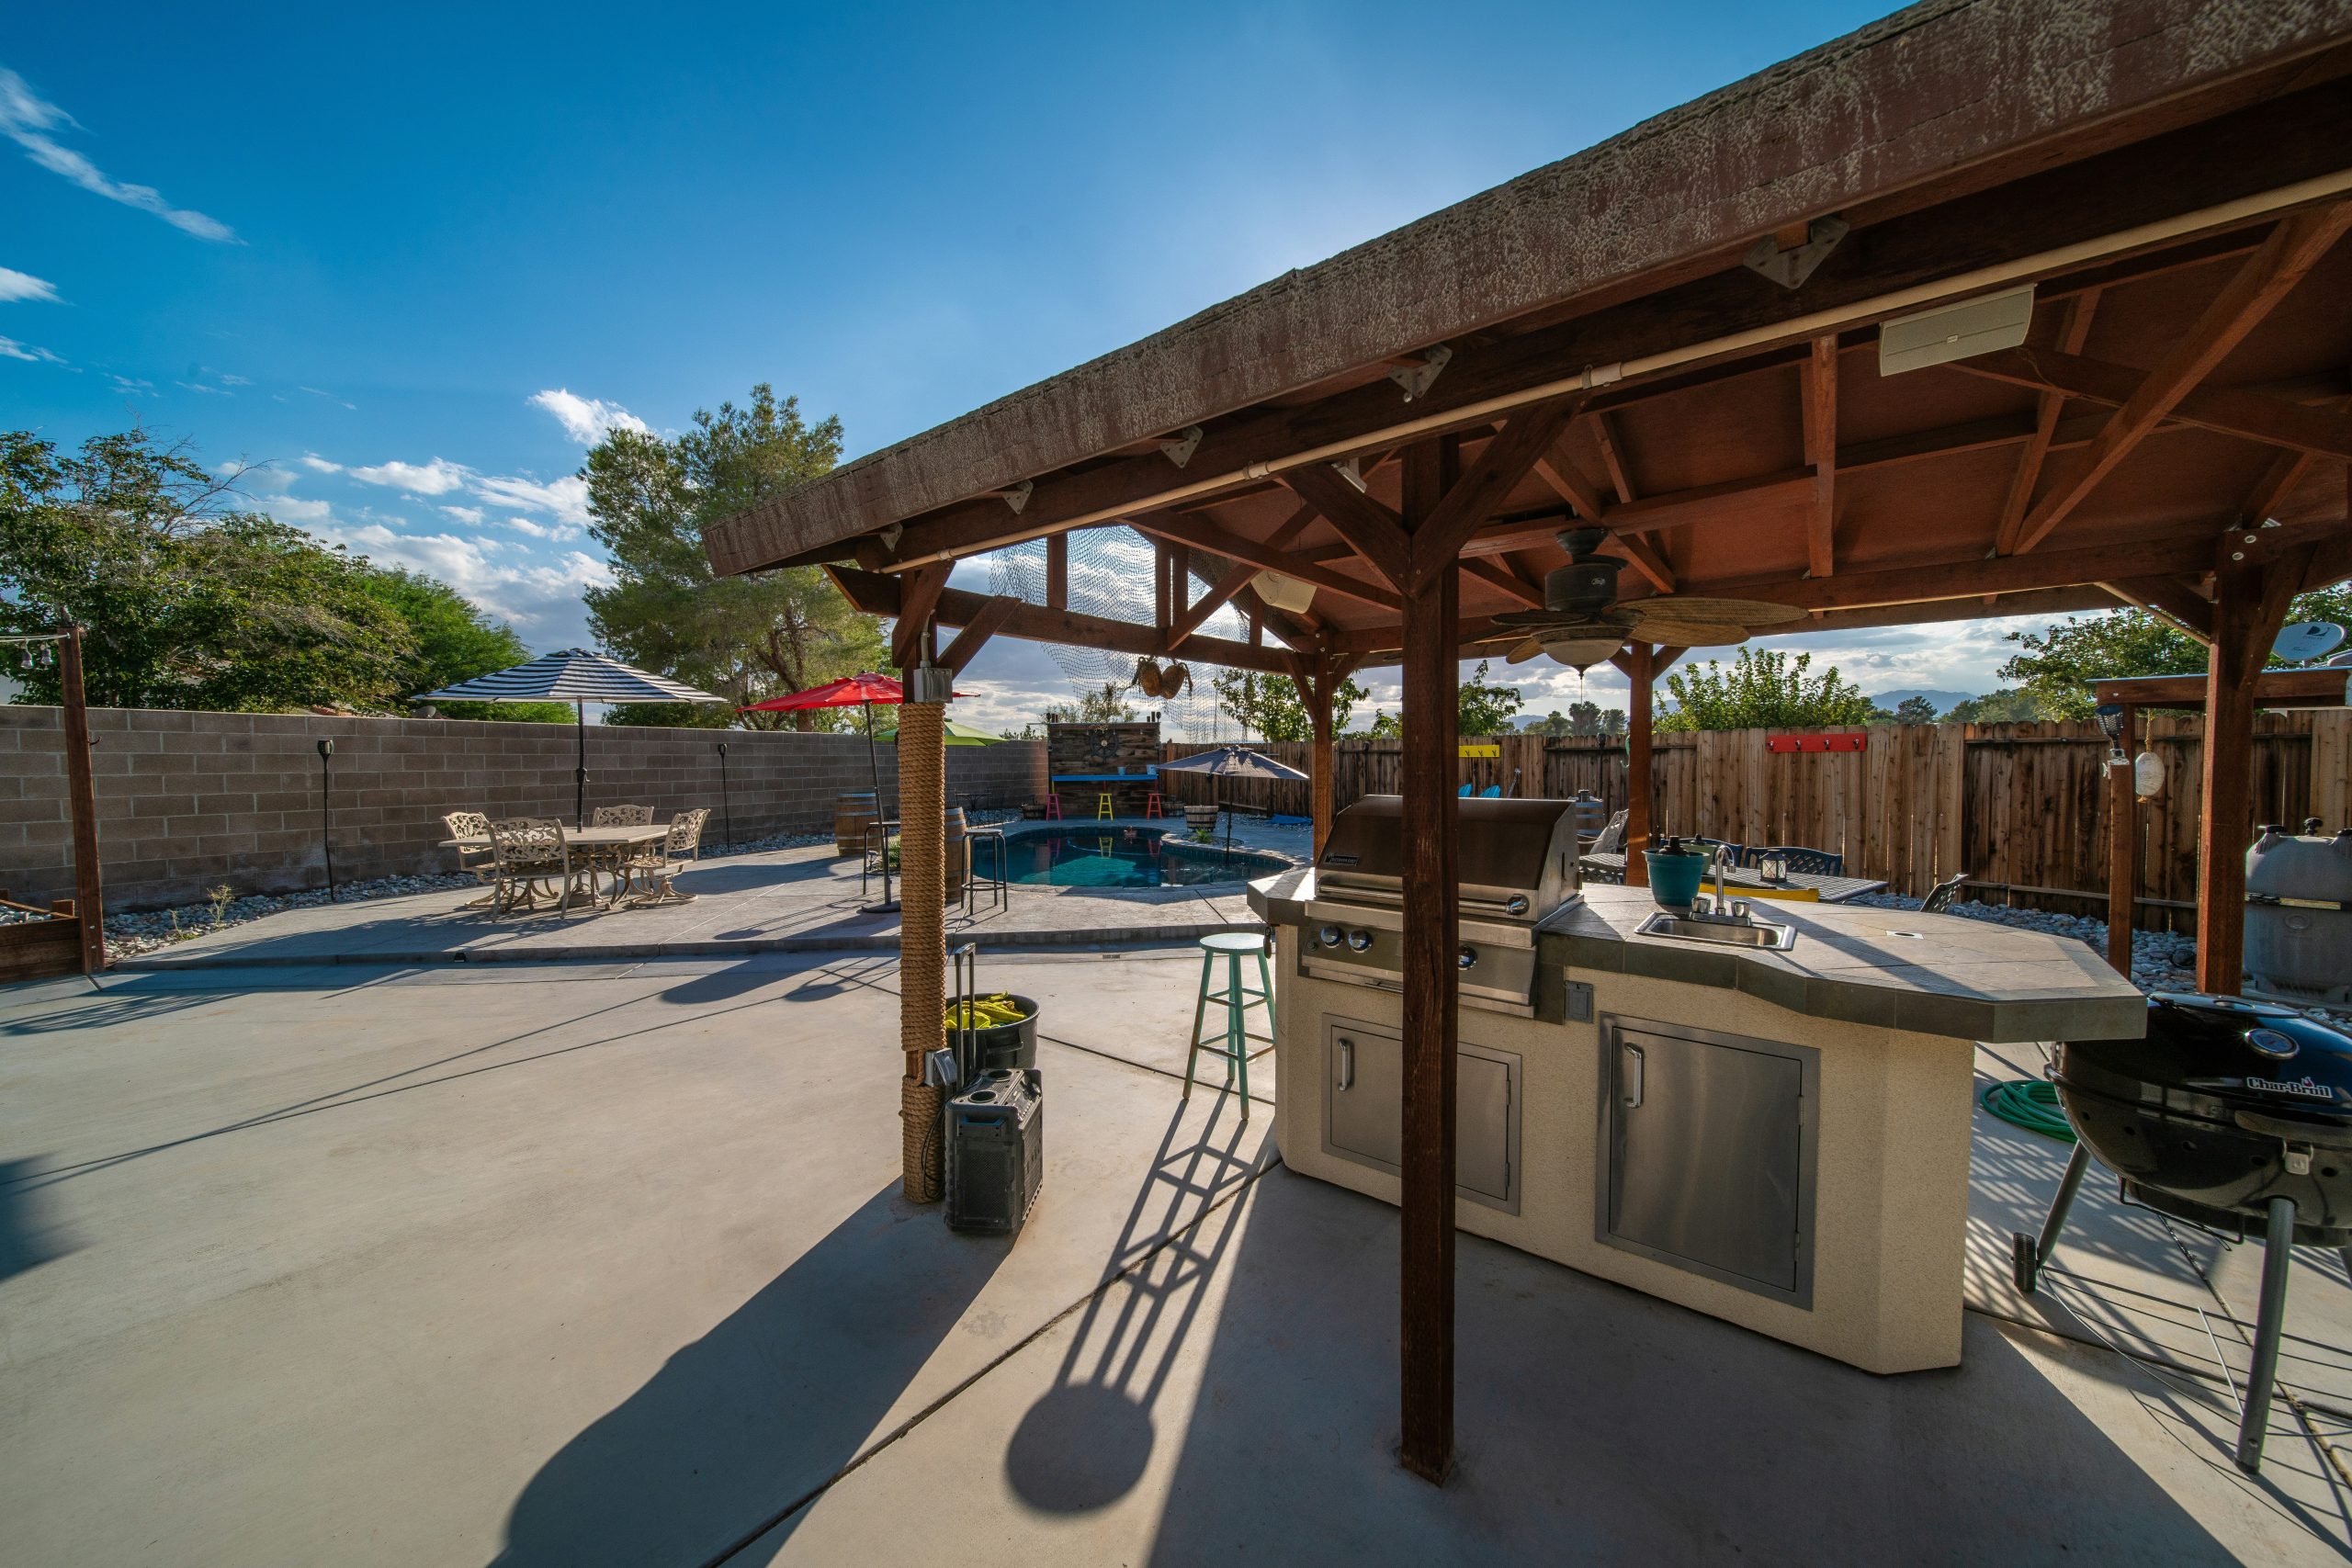
24. Concrete Patio with an Outdoor Kitchen Under a Large Wooden Pergola
An outdoor kitchen is an amazing feature, but you need to be realistic about utilities. Running gas lines, plumbing for a sink, and electrical for a refrigerator to an outdoor location is not a simple DIY job. These tasks require licensed professionals and can add thousands of dollars and significant time to your project. Before you fall in love with the idea of a fully integrated kitchen, get quotes for running the necessary utilities to your desired spot. Sometimes the cost can be a real surprise.
|
📋 Copy HEX 🔗 Share |
You don’t need a fully plumbed-in kitchen to get the same functionality. Create a designated ‘kitchen’ zone on your patio with a high-quality standalone grill ($500-$1,500). Flank it with two stainless steel outdoor worktables (you can find these at restaurant supply stores for $150-$300 each). Use one for prep and one for serving. A stylish, well-insulated cooler can stand in for a fridge during parties. This modular approach gives you 90% of the function for 20% of the cost of a built-in outdoor kitchen. Compare this massive setup to the more intimate pergola in Idea #5.
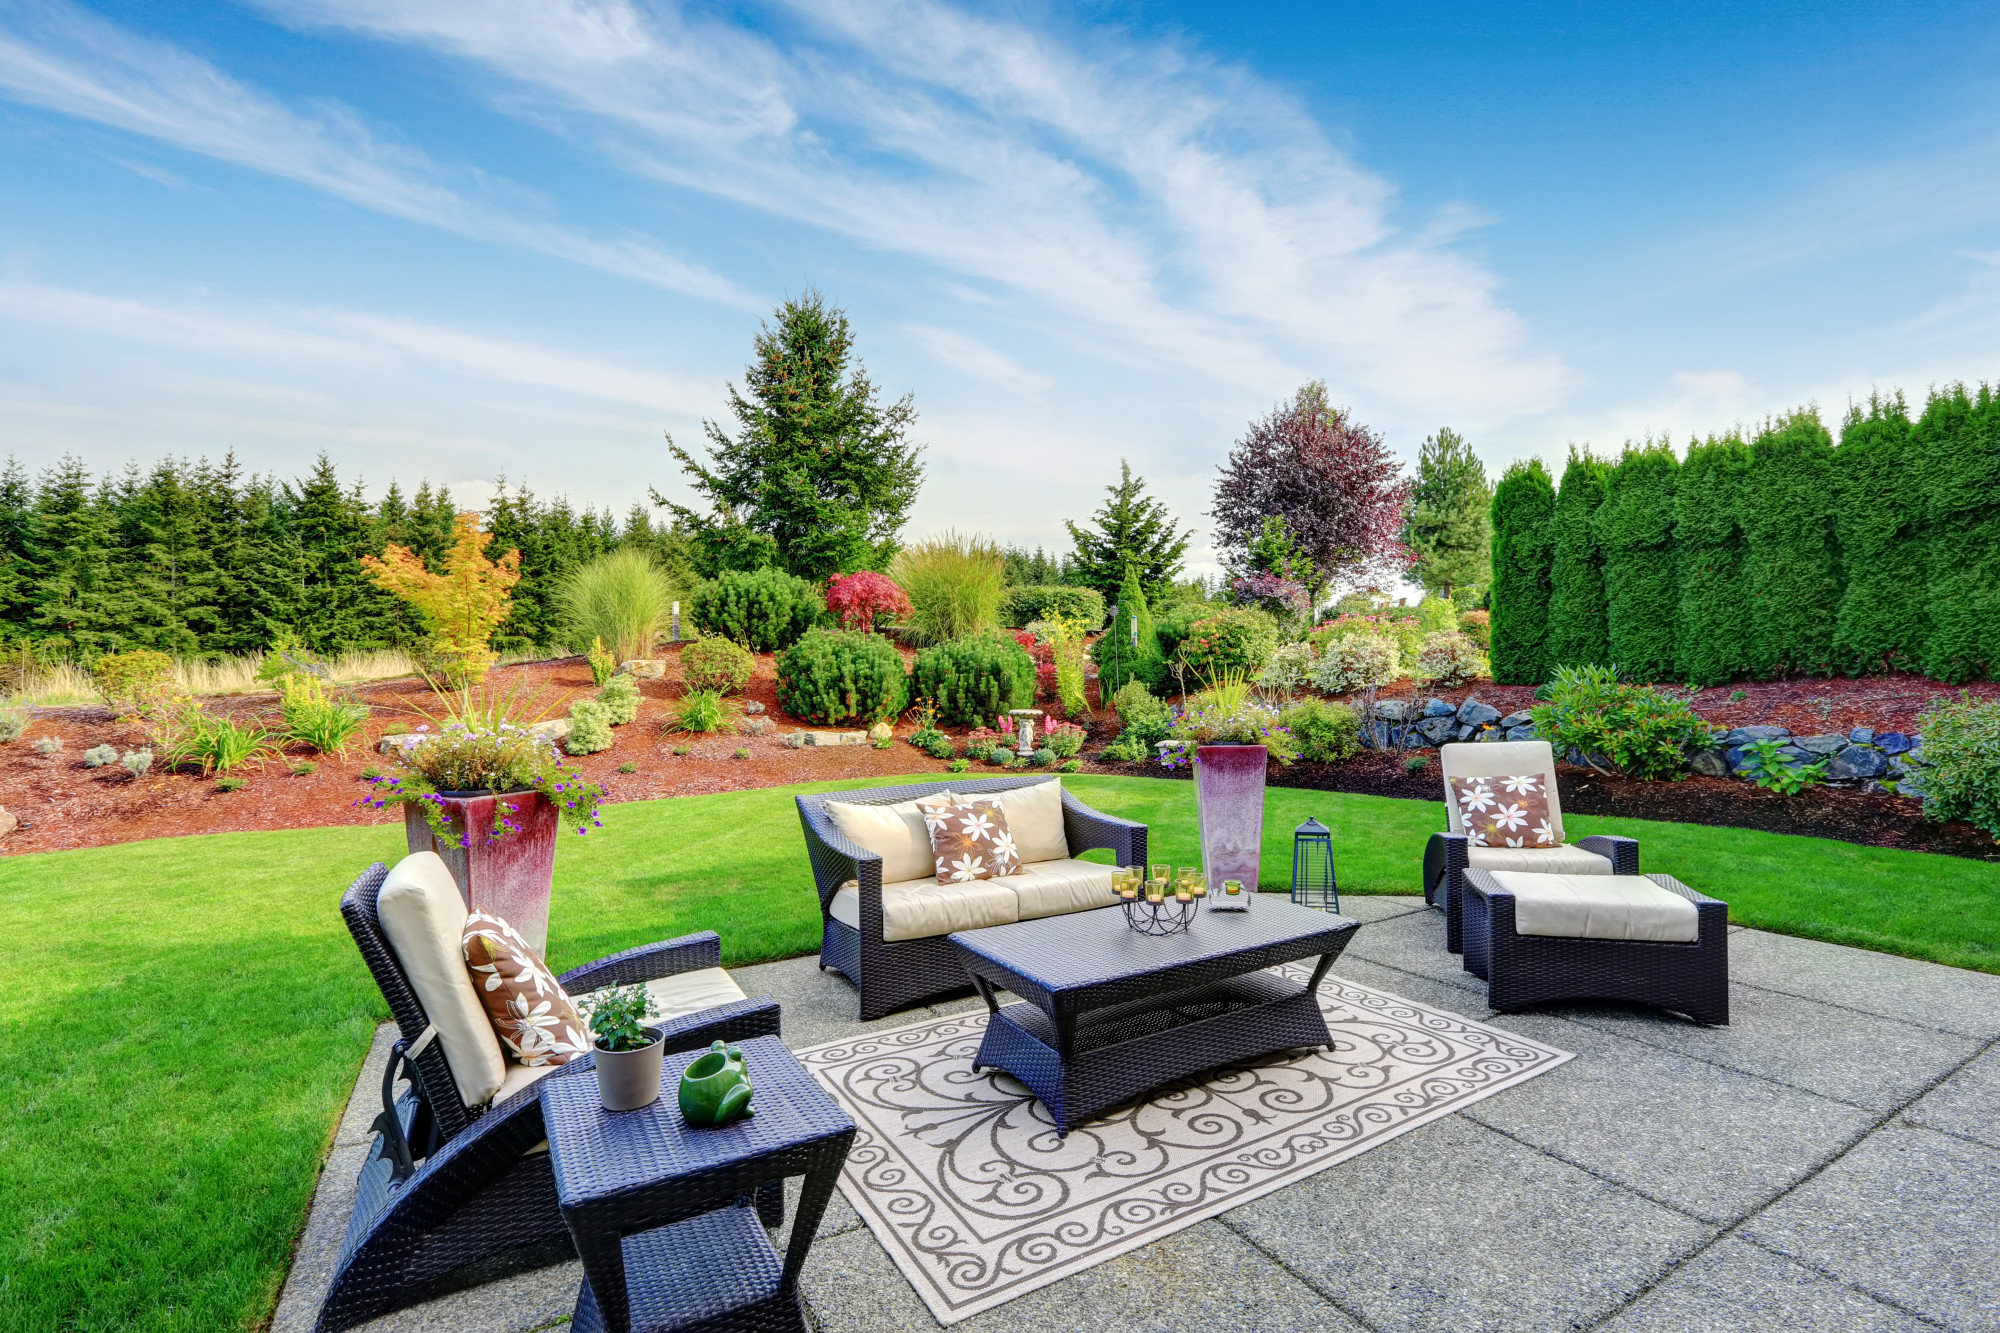
25. Simple Concrete Slab Patio with a Wicker Furniture Set
The secret to making a simple concrete slab feel like a deliberate, designed space is to use an outdoor rug. Look how the ornate rug here defines the seating area. It acts as an anchor for the furniture, preventing it from feeling like it’s just floating in space. When choosing a rug, make sure it’s large enough that at least the front legs of all your seating pieces can rest on it. This creates a unified and inviting conversation zone. For a standard sofa and two chairs, an 8×10-foot rug is usually the perfect size.
|
📋 Copy HEX 🔗 Share |
This setup is proof that you don’t need complex hardscaping to create a beautiful outdoor room. The design works because of its simplicity and the clear distinction between the three main zones: the ‘living room’ on the concrete slab, the ‘dining room’ on the grass (implied), and the ‘garden’ in the background. The low-maintenance concrete provides a clean, practical base, while the lush, layered greenery of the surrounding garden beds provides all the texture, color, and natural beauty the space needs. It’s a balanced partnership between the built and the natural.
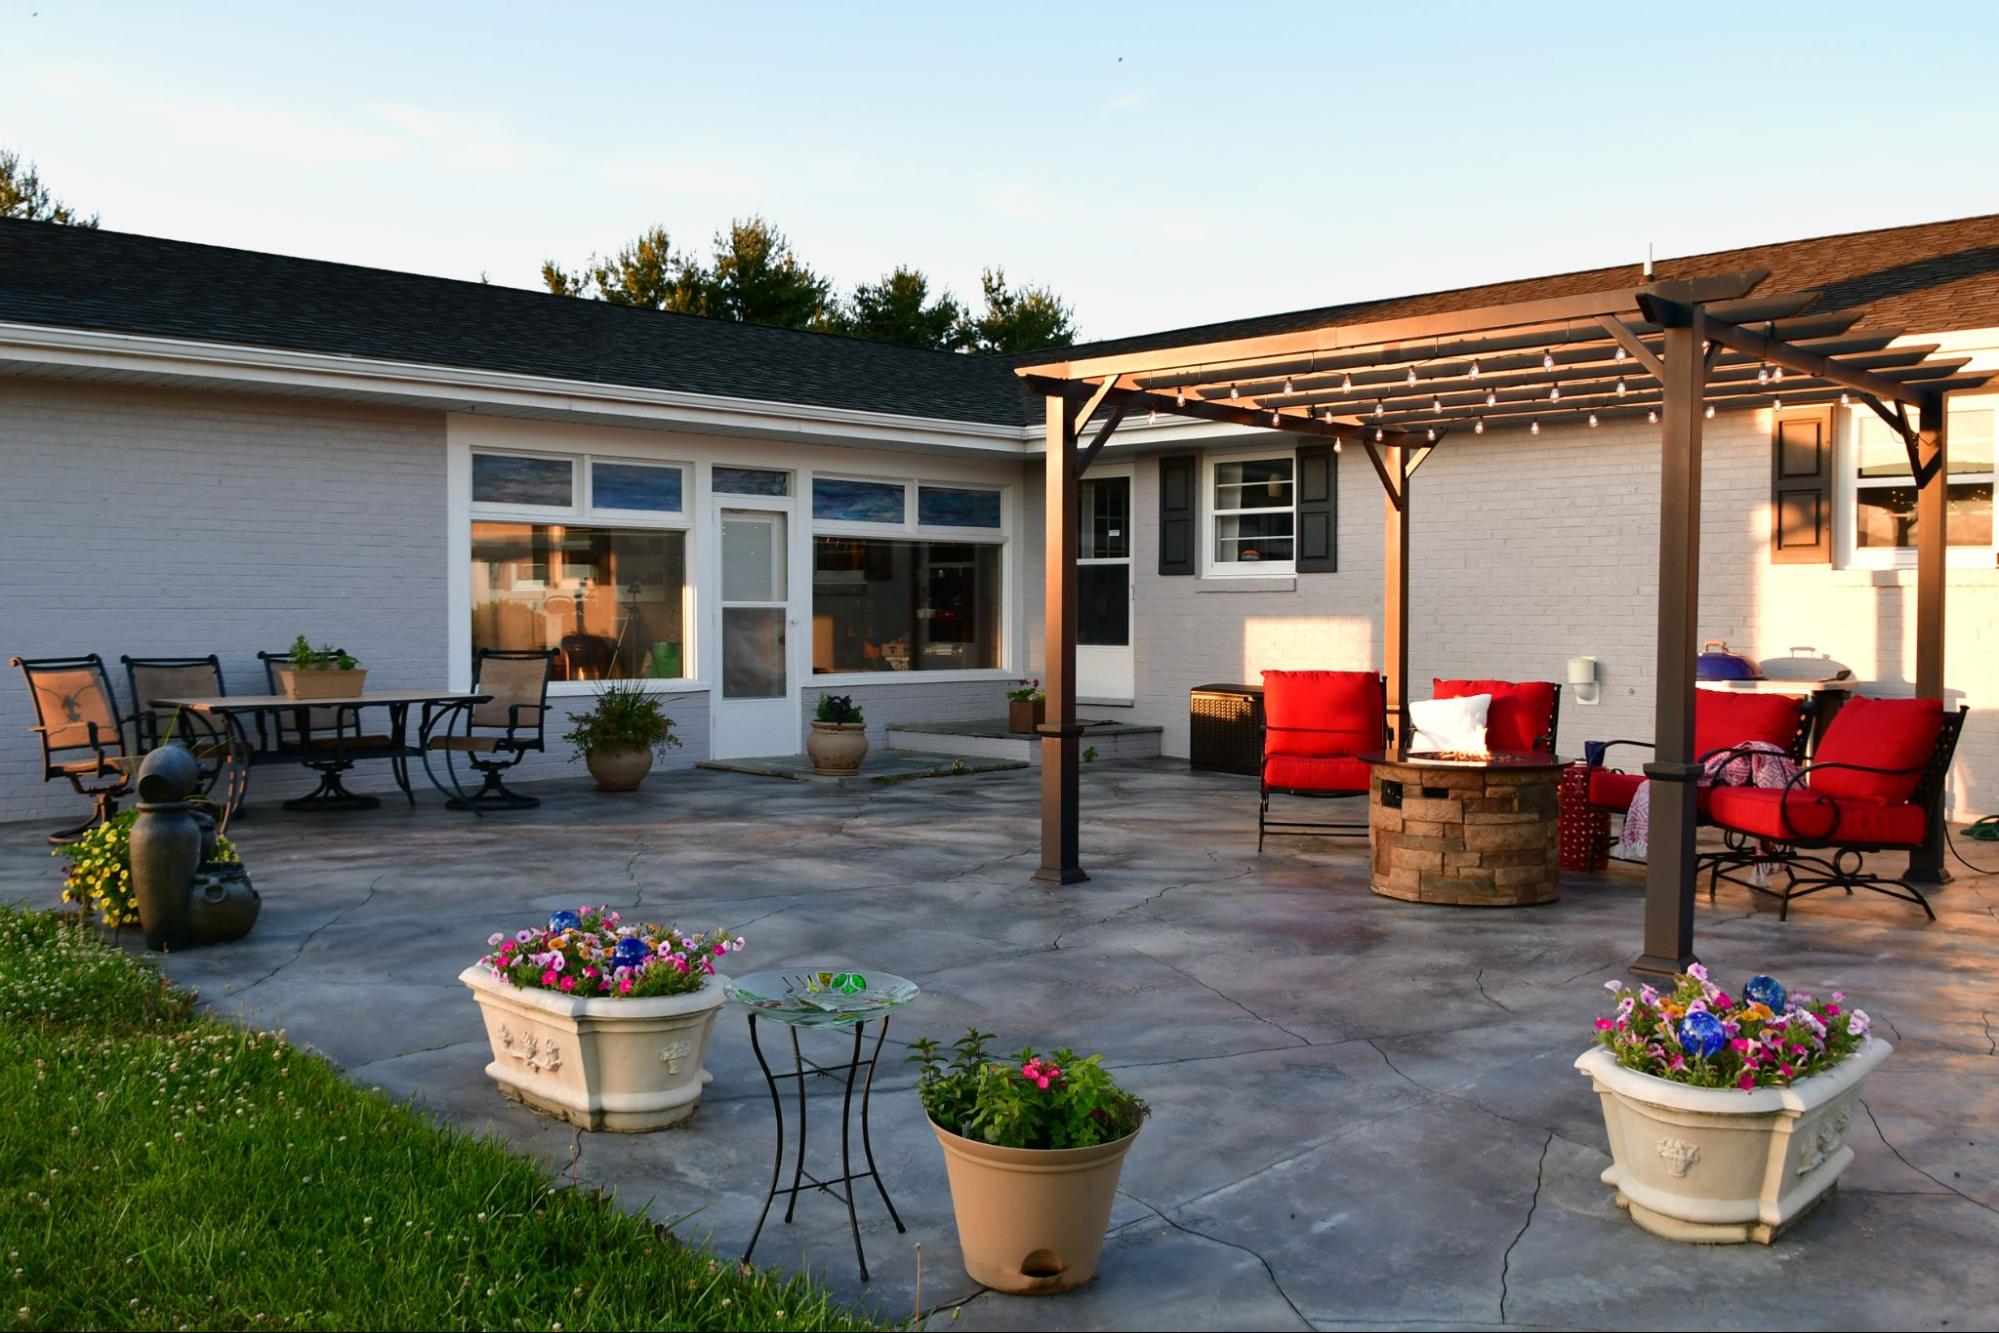
26. Stained Concrete Patio with Red Accent Cushions
This layout is all about balance and color theory. The formula is approximately 60% Dark Neutrals + 30% Light Neutrals + 10% Bold Accent. Here, the dark stained concrete and the black metal furniture form the moody, grounding base (60%). The light gray house siding and the pale stones of the fire pit provide the necessary lightness and contrast (30%). Finally, that punchy red on the cushions is the 10% accent that brings the whole scene to life. Remove the red, and the space becomes dramatically more subdued.
|
📋 Copy HEX 🔗 Share |
The single element that makes this patio feel special is the use of two distinct zones. It’s not just one big seating area. There’s a dedicated dining space and a separate, cozier lounge area under the pergola. This division of space makes the patio far more functional for entertaining. You can have a group of people enjoying dinner while another group gathers by the fire. This multi-functionality is what elevates it from a simple patio to a true outdoor living room, a theme also seen in Idea #1‘s layout.
27. Stamped Flagstone-Pattern Concrete with Multi-Zone Seating
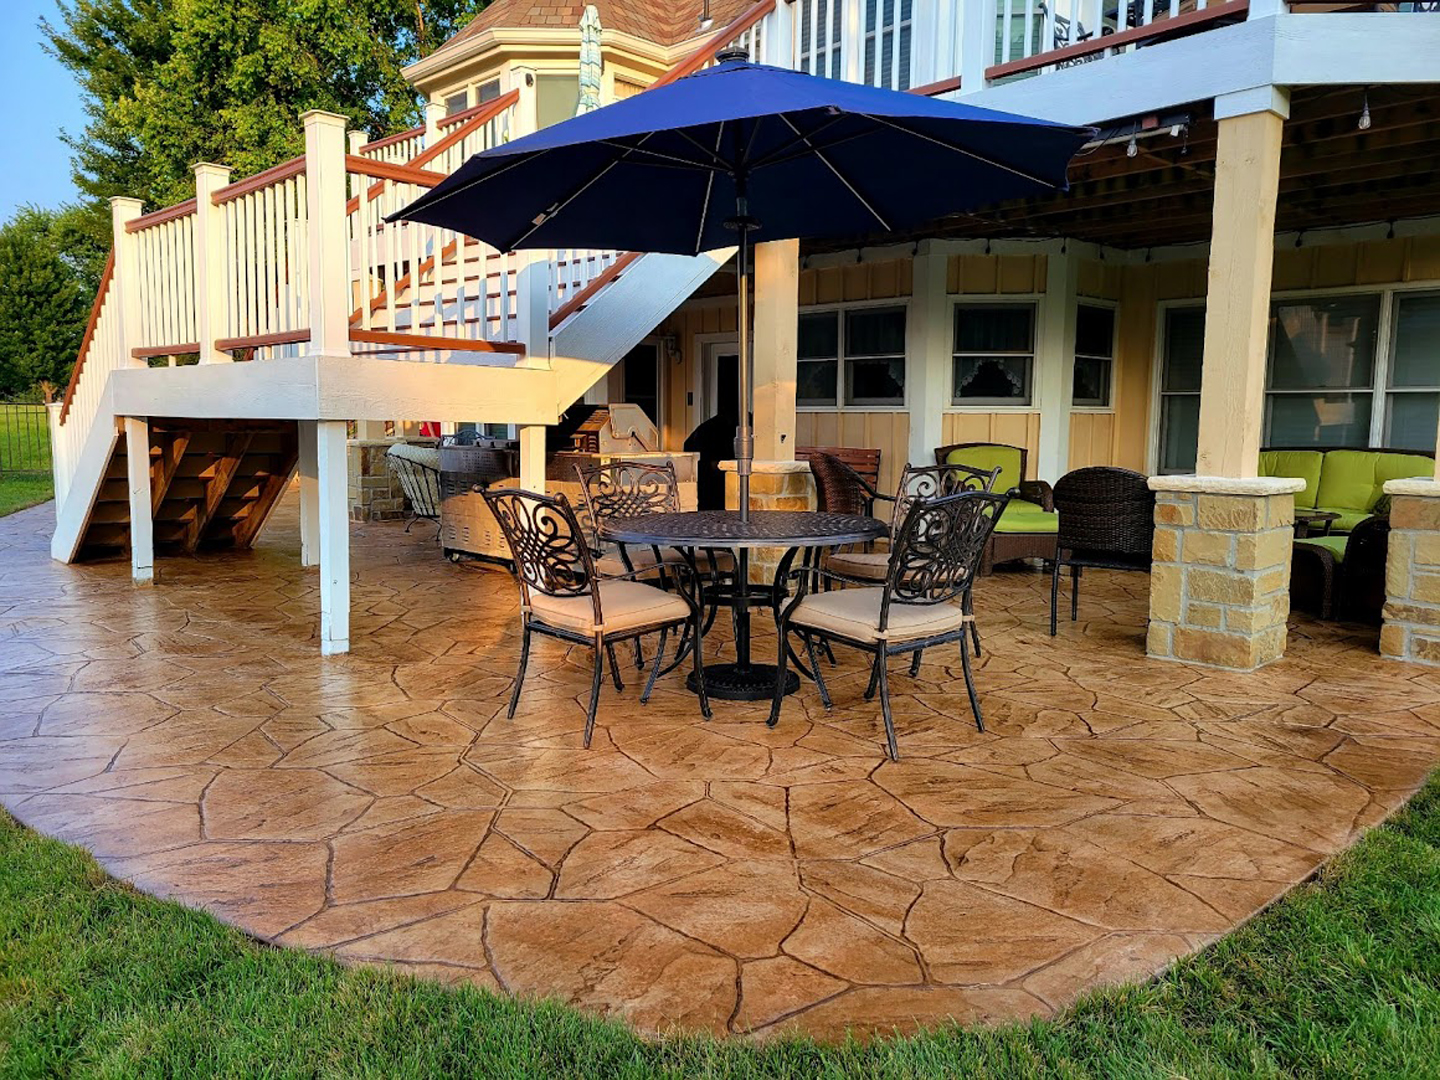
The irregular, free-form shape of this patio extension is a key to its success. By avoiding a simple square or rectangle, the patio’s edge feels more organic and blends more naturally with the curves of the lawn and garden beds. The pattern within the stamped concrete also mimics natural flagstone, furthering this connection to the landscape. It’s a smart way to make a very large hardscaped area feel less imposing and better integrated with its surroundings. The use of different sitting areas, one under the deck and one in the sun, adds to the functionality.
|
📋 Copy HEX 🔗 Share |
This multi-zone patio look involves a mix of professional work and smart furniture choices. Here’s a potential cost breakdown:
- Stamped & Stained Concrete Extension (approx. 500 sq. ft.): $6,000 – $11,000
- Wrought Iron Dining Set (6-person): $800 – $2,000
- Large Market Umbrella: $200 – $500
- Outdoor Lounge Set (Sofa & Chairs): $1,200 – $3,000
- Stone Veneer on Existing Pillars: $1,000 – $2,500
- TOTAL: $9,200 – $19,000
Budget alternative: Use regular brushed concrete, source furniture from a big-box store, and skip the stone veneer to achieve a similar layout for 40-50% less.
Your Outdoor Story Starts Here
Think of your concrete patio as the foundation for your home’s outdoor life—the stage where memories will be made. Whether you’re drawn to a sprawling multi-level design or a simple, cozy corner, the right plan can completely change how you experience your backyard. Now get to it, and don’t forget to save your favorite looks to Pinterest to start building your dream board!