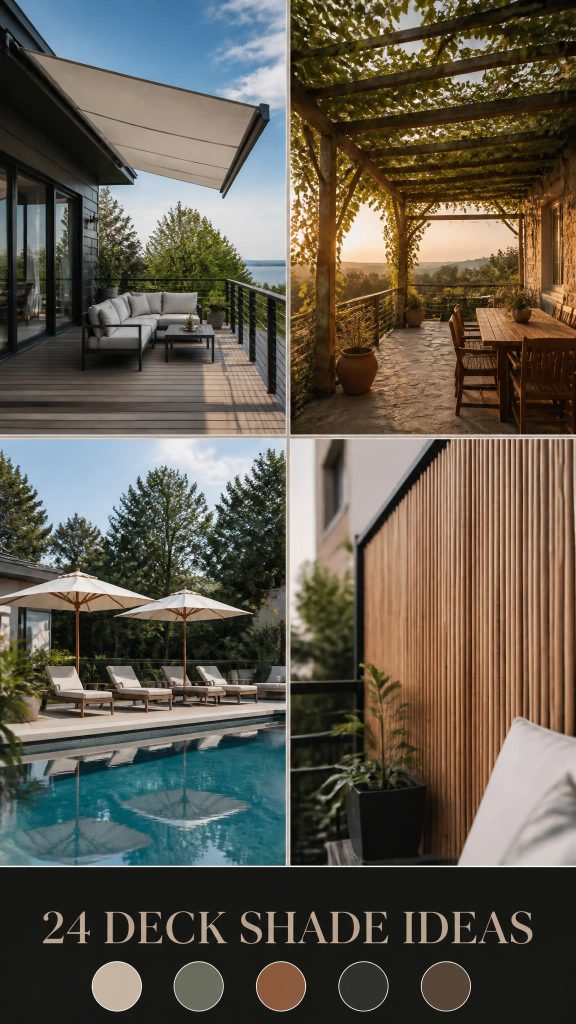
You know that feeling when you finally find the deck shade idea that looks exactly right for your space, but turning that pin into a reality feels… impossible? We get it. That’s why we did the hard work for you. After filtering through hundreds of options across Wayfair, Home Depot, and Amazon, we narrowed it down to the looks that actually deliver on style and function. In this guide, you’ll find 24 curated ideas, from sleek modern louvered pergolas to breezy, colorful sail shades and classic timber pavilions. These outdoor rooms are a huge trend for 2026, as we continue to invest in making our backyards a true extension of our homes. And stay until the end—we break down the most common mistakes that can ruin these looks. 📌 Pin this guide for later—your future self will thank you when it’s time to actually do this.
Just so you know, this post may contain affiliate links. This means if you buy something, we may earn a small commission at no cost to you.
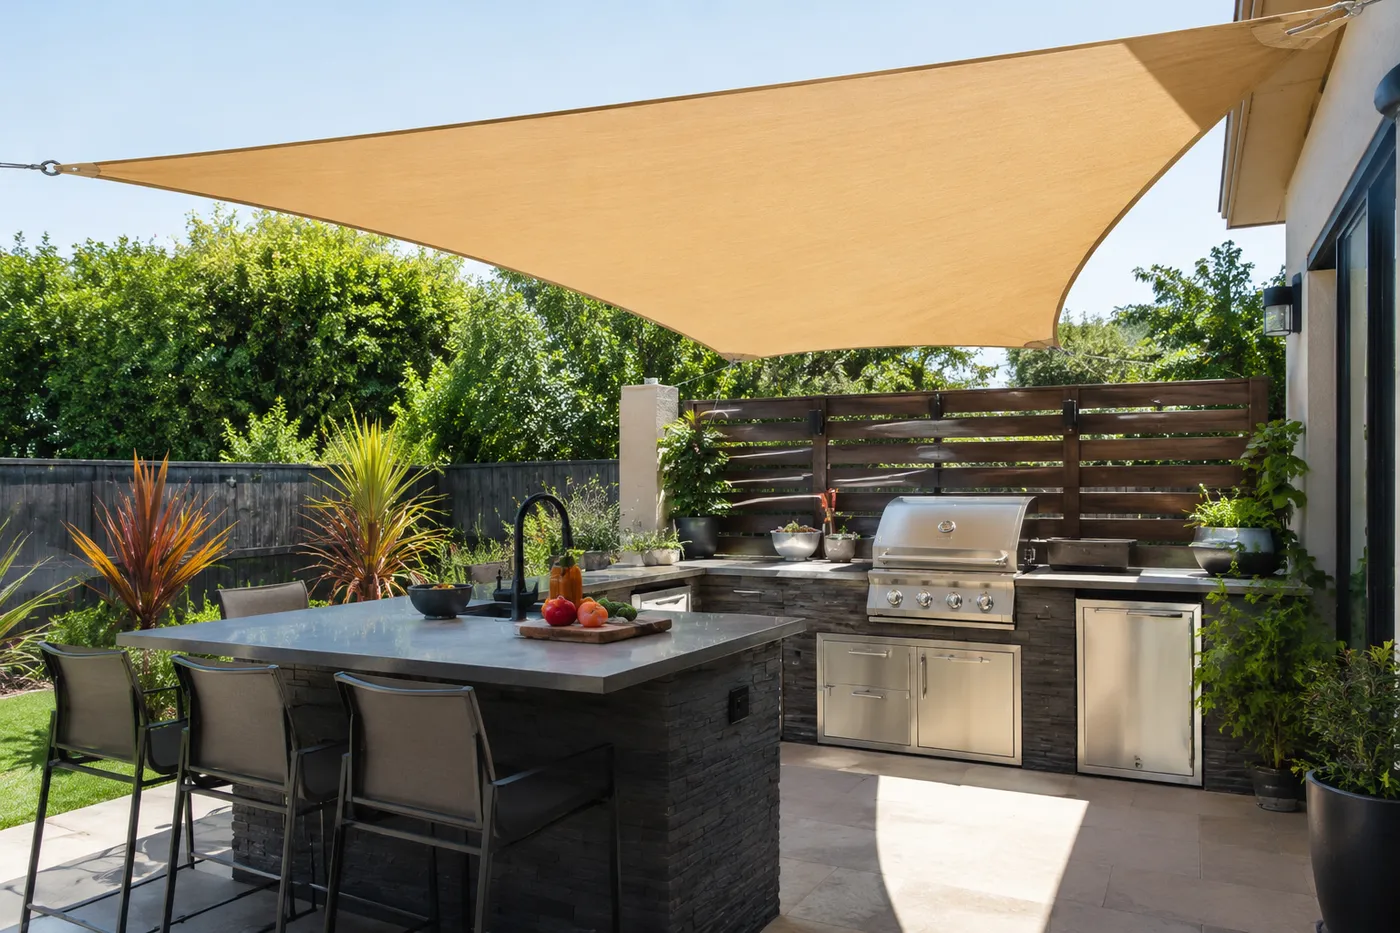
1. A Tan Shade Sail Over a Modern Stacked Stone Outdoor Kitchen
The magic here is in the textural contrast. The rough, organic feel of the dark stacked stone on the kitchen island creates a beautiful tension with the smooth, clean lines of the light grey countertop and stainless steel appliances. The tan shade sail is the perfect choice to tie it all together; its warm, earthy tone complements the stone without competing with it, while also harmonizing with the surrounding green foliage. The dark horizontal fence in the background cleverly echoes the linear form of the kitchen, creating a cohesive and visually satisfying frame for the whole scene.
|
📋 Copy HEX 🔗 Share |
When installing a shade sail, tension is everything. To get that perfectly taut, architectural look and avoid a saggy mess, use high-quality, marine-grade stainless steel turnbuckles at each corner. This allows you to crank the tension way up after the initial installation and easily re-tighten it over time as the fabric naturally settles and stretches. Don’t just tie it off with rope—invest in proper hardware. It’s the difference between a DIY look and a professional one. Compare this sail’s simple elegance with the one in Idea #17 for another take.
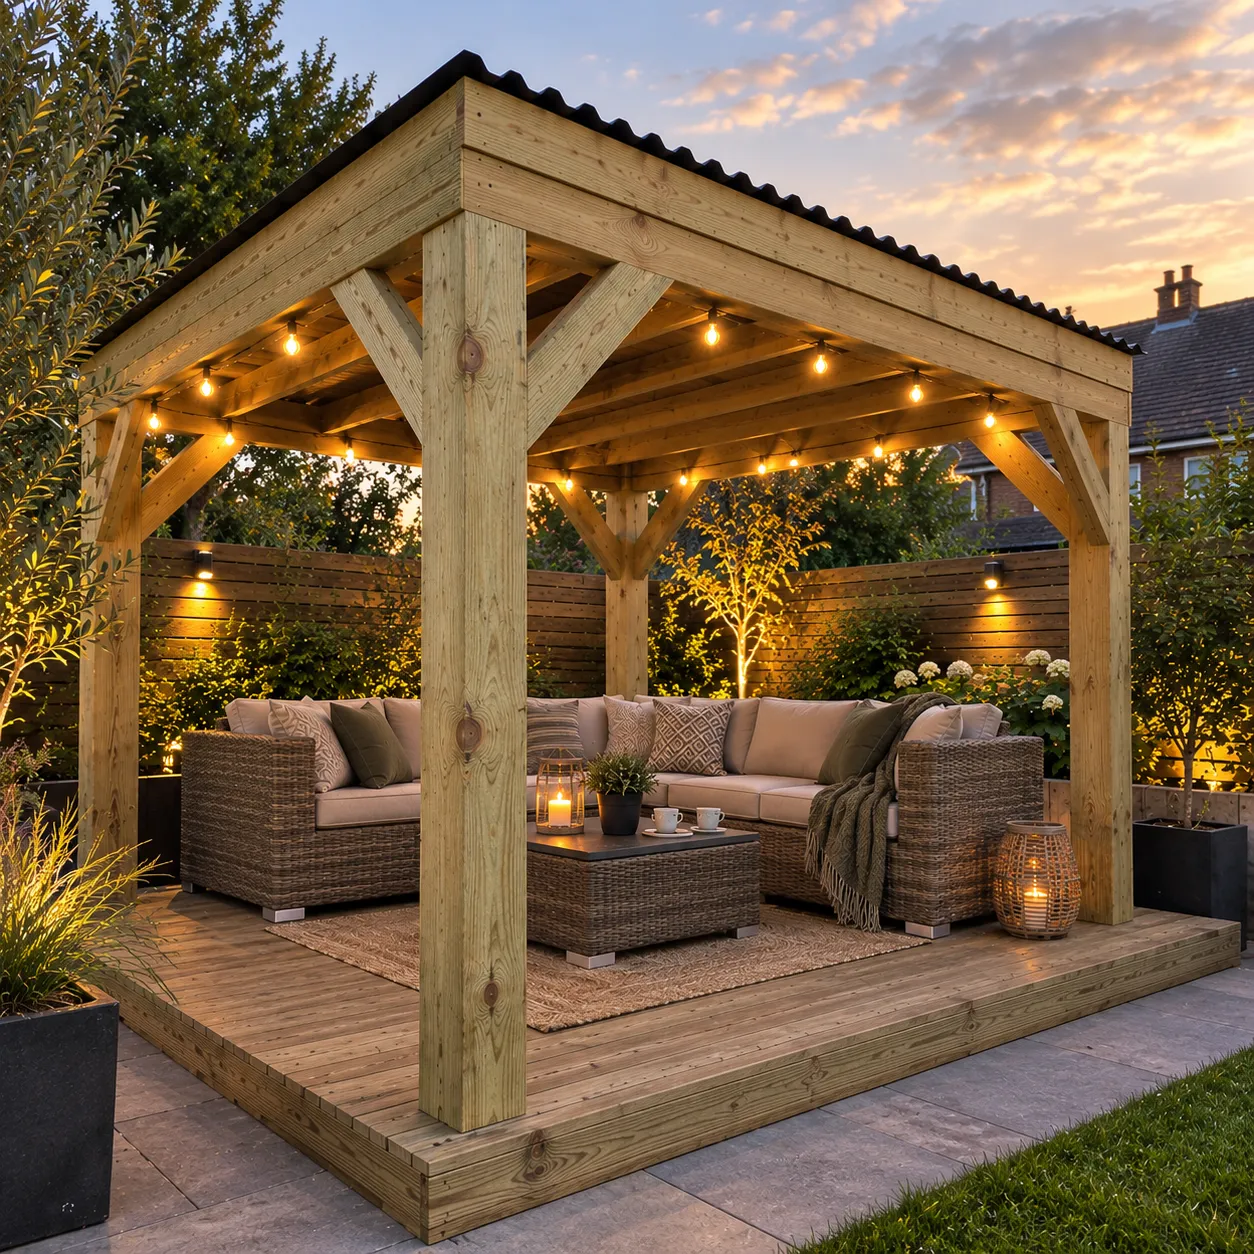
2. Cozy Pergola with a Corrugated Roof and String Lights
It’s the black corrugated roof. Remove it, and you just have a standard (though lovely) wooden pergola. With it, the entire structure gains substance and a modern-industrial edge that contrasts beautifully with the natural wood and soft textiles. This solid roof provides all-weather protection, not just partial sun filtering, instantly turning the deck into a true three-season outdoor room. The dark color also makes the warm glow from the string lights and lanterns underneath feel even more intimate and inviting, creating a true haven.
|
📋 Copy HEX 🔗 Share |
A solid roof like this is amazing for rain protection, but it can create a ‘dark zone’ underneath, especially if the deck is adjacent to windows leading into your house. Notice how this design compensates with tons of layered lighting: overhead string lights, lanterns on the ground, and even accent lighting on the fence. If you opt for a solid roof, you must have a solid lighting plan, too. Otherwise, your cozy retreat can feel more like a gloomy cave, both on the deck and inside your home.
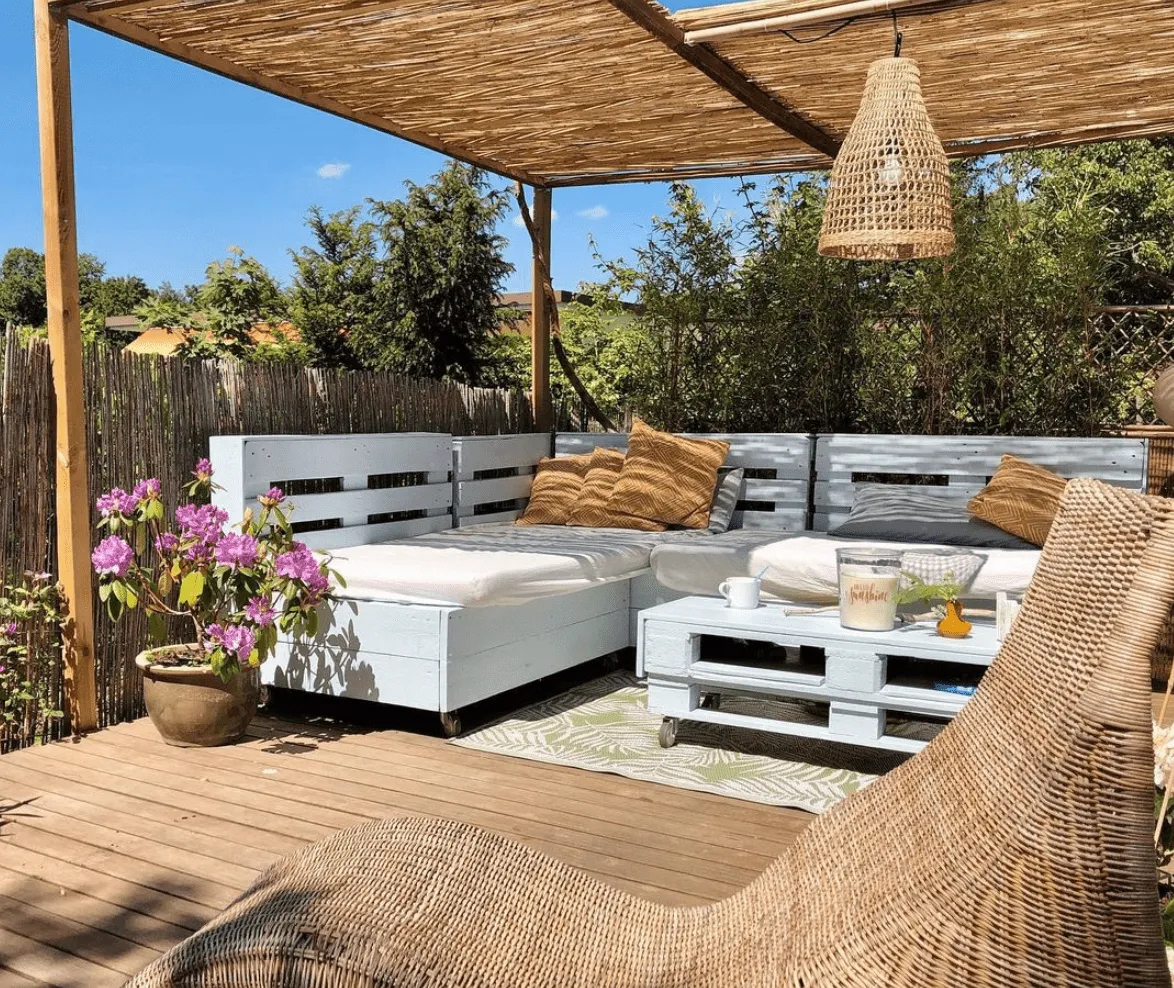
3. Slatted Wood Pergola Casting Striped Shadows on a Lounge Deck
This look follows a simple, calming formula: 60% natural wood, 30% neutral textiles, and 10% greenery. The dominant feature is the light-toned wood of the pergola, deck, and coffee table, creating a warm and unified base. The dark grey cushions and light pillows provide a soft, contemporary contrast without introducing jarring color. The final 10% is the surrounding foliage, which breathes life into the neutral palette. You could easily swap the grey for navy or olive green, or change the wood to a darker stain, and the balanced feel would remain intact.
|
📋 Copy HEX 🔗 Share |
You don’t need custom carpentry to get this vibe. A prefabricated pergola kit from a big-box store can run you $800-$1,500. For the seating, skip the high-end outdoor sectional and look for a simple L-shaped pallet sofa project online—you can build the frame for under $200. Then, invest in quality cushions from Target or IKEA. A DIY slatted coffee table and some cushions from Facebook Marketplace could round out the look for a total project cost well under $2,000. See how a similar slatted wood concept is used differently in Idea #13 over the water.
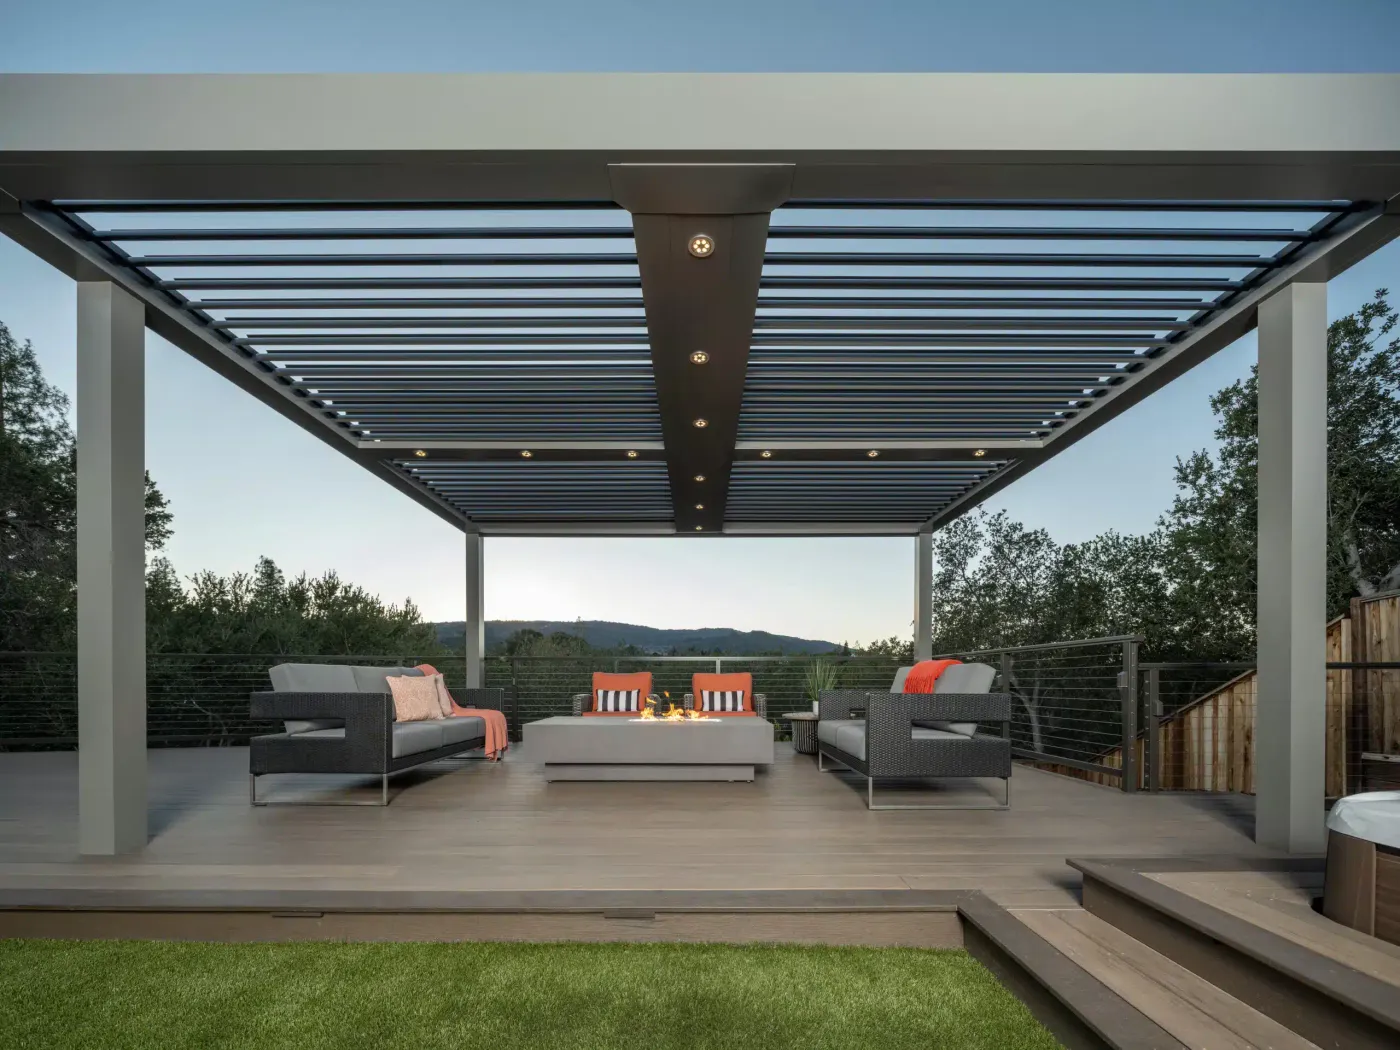
4. Modern Louvered Pergola with Integrated Lighting and a Fire Pit
A large, feature-rich structure like this needs room to breathe. This design is best suited for patios or decks that are at least 16×20 feet. This size allows you to have a full-sized lounge set, a central fire pit table with proper clearance (at least 3 feet on all sides), and comfortable circulation paths. The flat roof profile works well with ceiling heights from 9 to 12 feet. Anything lower might feel a bit claustrophobic with the dark frame and integrated lighting. For smaller spaces, a cantilevered umbrella or a simple shade sail might be a better fit.
|
📋 Copy HEX 🔗 Share |
Adjustable louvered pergolas are fantastic, but they aren’t set it and forget it. The moving parts—the louvers and the motor that controls them—need to be kept clean of debris like leaves, twigs, and dirt to function smoothly. Plan on a twice-yearly cleaning where you clear the gutters and wipe down the tracks. The integrated spotlights are generally long-lasting LEDs, but replacing one can be a hassle, so it’s wise to check the manufacturer’s warranty and replacement process before you buy. The concrete fire pit will also need to be sealed annually to prevent staining and weather damage.
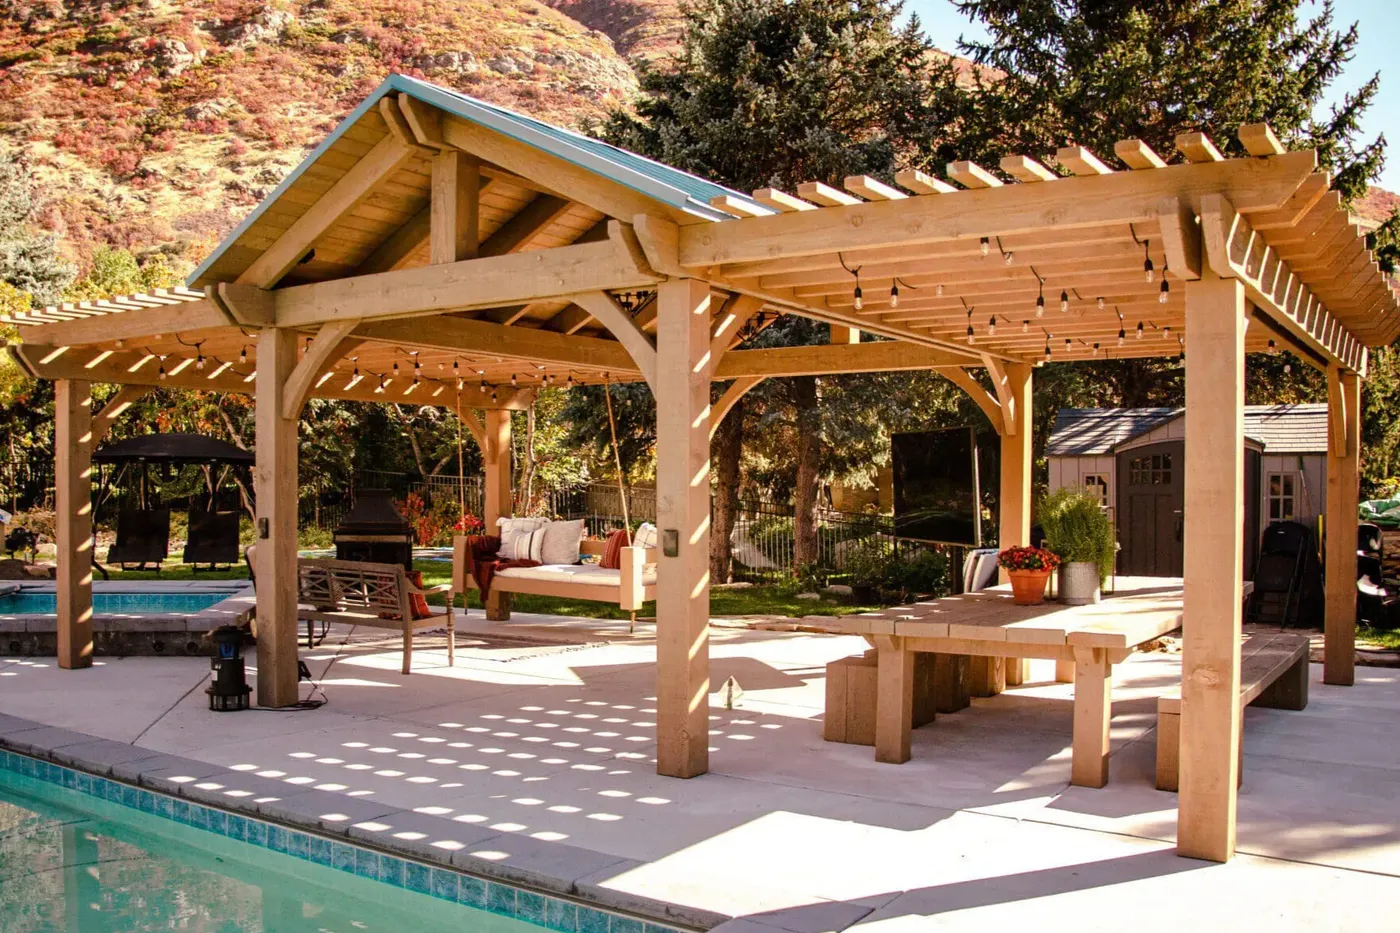
5. Sprawling Wooden Pavilion with a Pitched Roof and Open Sides
Building a structure this substantial is a major project, so get your ducks in a row first. Check these items off your list before you even think about buying lumber:
- Confirm local building codes and permit requirements for structures over a certain size or height. Don’t skip this!
- Get multiple quotes from qualified builders. This is not a beginner DIY project.
- Map out the sun’s path throughout the day to ensure the pitched roof section provides shade when and where you need it most.
- Have a clear electrical plan for the string lights and any other desired outlets or fans.
|
📋 Copy HEX 🔗 Share |
We’re seeing a huge move towards creating distinct ‘zones’ in backyards, and this design is a perfect example of why it’s trending. Instead of just a patio, this structure creates multiple rooms without walls. You have a dining zone under one slatted side, a lounging zone with the swing bed under the other, and the central covered area for flexible use. It reflects a desire to maximize every square foot of property, turning a simple backyard into a multi-purpose destination for relaxing, dining, and entertaining. This is less about temporary shade and more about permanent architecture.
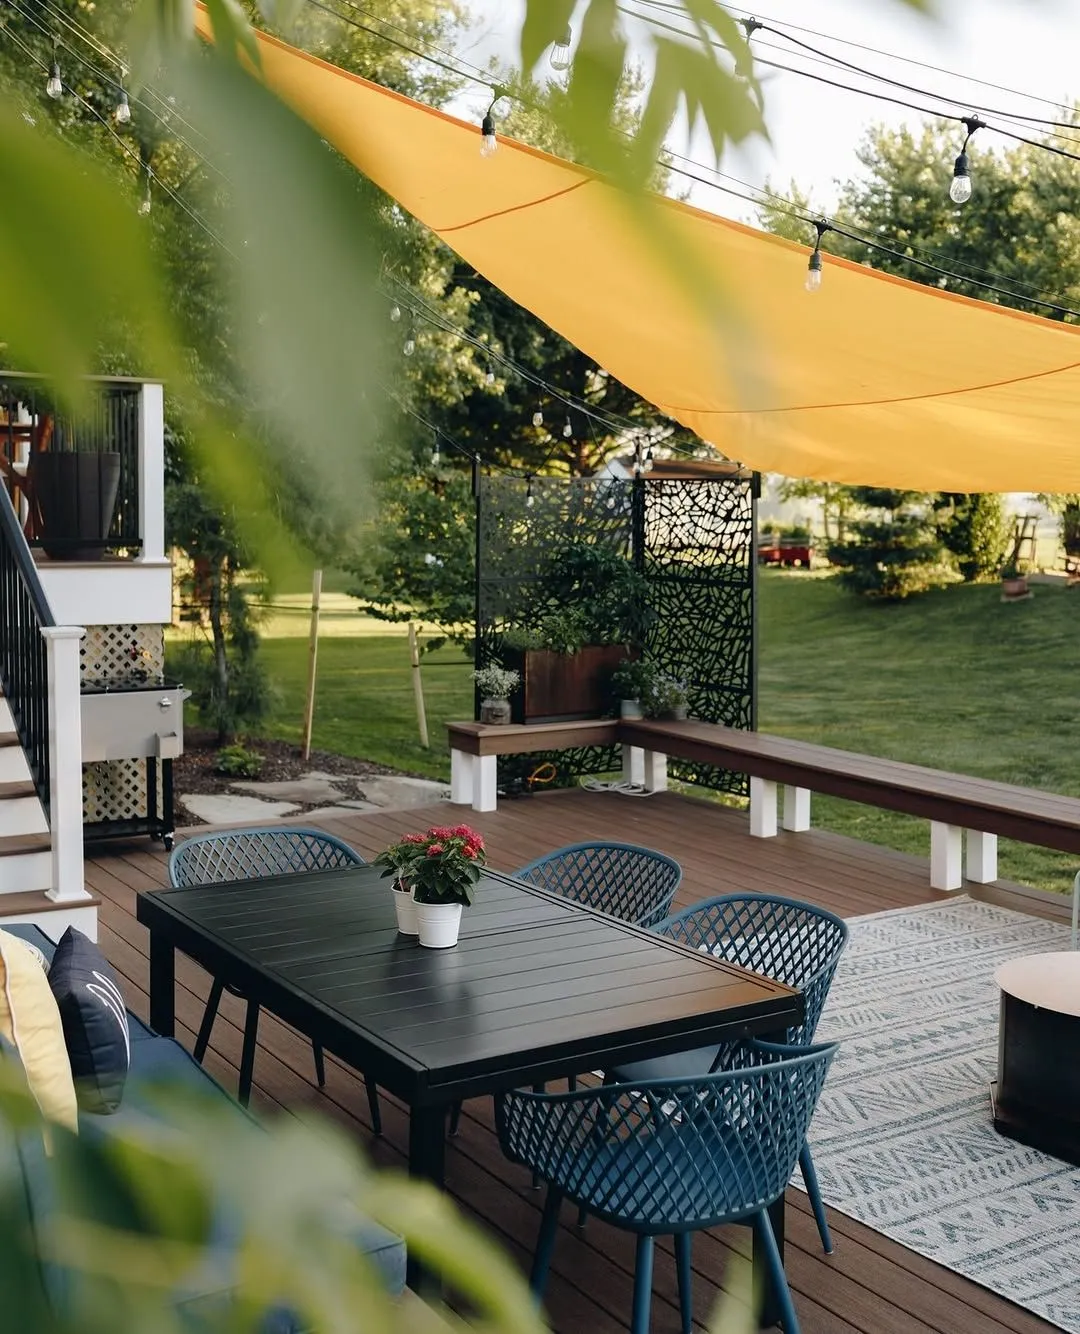
6. Vibrant Orange Shade Sail Over a Modern Dining Deck
Recreating this cheerful dining spot is more accessible than you think. The key is to balance splurges with saves.
- Shade & Lighting: Large triangular shade sail ($150-$300), commercial-grade string lights ($80-$150).
- Dining Furniture: Black slatted table ($400-$800), set of 4 teal mesh chairs ($400-$700).
- Privacy & Decor: Patterned metal privacy screen ($250-$500 per panel), large planters ($100-$300).
- TOTAL: $1,380 – $2,750
- Budget alternative: Swap the designer chairs for a colorful set from IKEA, use a simple wooden privacy lattice instead of metal, and find a secondhand table on Facebook Marketplace to bring this look home for under $800.
|
📋 Copy HEX 🔗 Share |
Want to hang those string lights for the perfect evening glow? Here’s a quick guide for installing them under your shade sail. (Time: 1 hour, Cost: $20 for hardware).
- Lay out your string lights on the ground to plan your pattern and ensure they reach your power source.
- Install galvanized or stainless steel cup hooks into the anchor points (house, posts, fence) where your sail is attached.
- Use a guide wire kit. Run a thin steel cable between your anchor points and pull it taut. This prevents sagging and protects the light cord from strain.
- Attach the string light cord to the guide wire every 18-24 inches using zip ties or S-hooks.
- Screw in the bulbs after the string is fully hung to avoid breakage.
- Plug in and enjoy the ambiance!
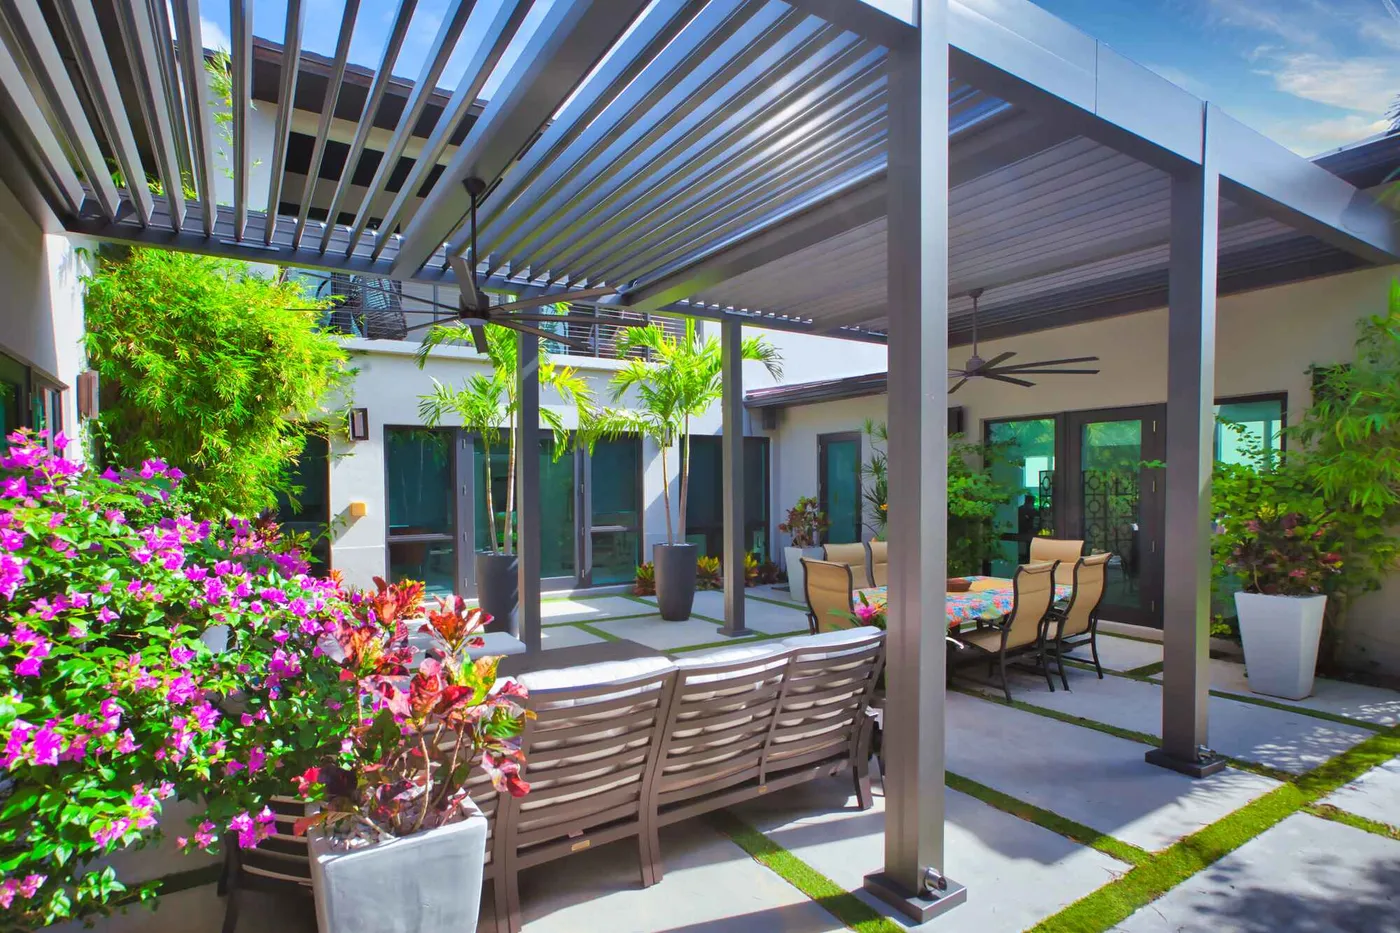
7. Lush Backyard with a Dark Grey Louvered Pergola
This space feels so luxurious because of the interplay between the rigid, man-made structure and the wild, lush nature surrounding it. The dark grey pergola provides a strong, modern frame, like a piece of architecture dropped into a jungle. The geometric concrete pavers with grass strips continue this theme, integrating green into the hardscaping itself. The vibrant magenta flowers and towering palms aren’t just background decoration; they actively push against the clean lines of the pergola, creating a dynamic and exciting visual energy that feels both controlled and untamed.
|
📋 Copy HEX 🔗 Share |
To achieve that paver with grass look, you need a specific installation method. Use pavers that are at least 2 inches thick. Lay them on a compacted gravel and sand base, leaving consistent 3-4 inch gaps between them. Fill the gaps with a 50/50 mix of topsoil and compost, then seed with a durable, traffic-resistant grass variety like a tall fescue blend or a synthetic turf for a zero-maintenance option. The key is the solid base underneath—without it, the pavers will shift and become uneven in no time. This is a very different vibe from the other louvered pergolas, like in Idea #3.
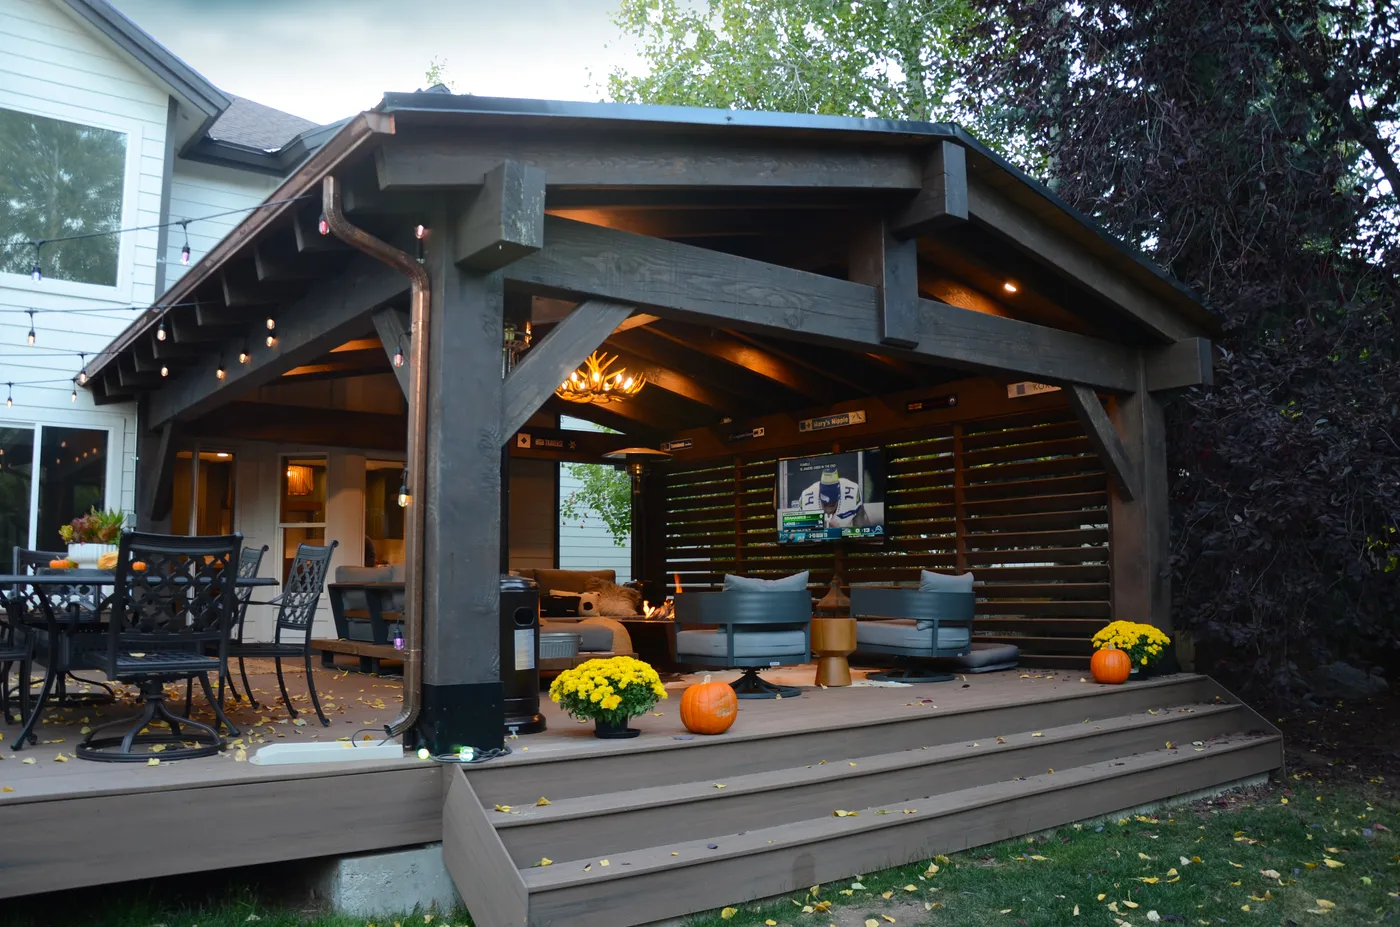
8. Dark Stained Wood Pavilion with Louvered Privacy Wall
The dark wood stain is the single element that defines this entire space. If this pavilion were natural or light-toned wood like the one in Idea #4, it would feel summery and airy. But with this deep, almost-black stain, it becomes a cozy, moody, and sophisticated retreat. The dark color envelops you, making the large, open structure feel more intimate and protected. It also provides a dramatic backdrop that makes the warm gray cushions, copper accents, and autumn foliage pop. It’s a bold choice that pays off in pure atmosphere.
|
📋 Copy HEX 🔗 Share |
A structure this dark can be a real heat magnet. On a blazing hot, sunny day, the solid roof and dark-stained wood will absorb and radiate a significant amount of heat, potentially making the space uncomfortably warm. Notice the design includes louvered walls for cross-breeze and is open on two sides. If you live in a very hot climate like the Southwest, a lighter color roof and wood stain would be a more practical choice, or you would absolutely need to install one or two large ceiling fans to keep the air moving.
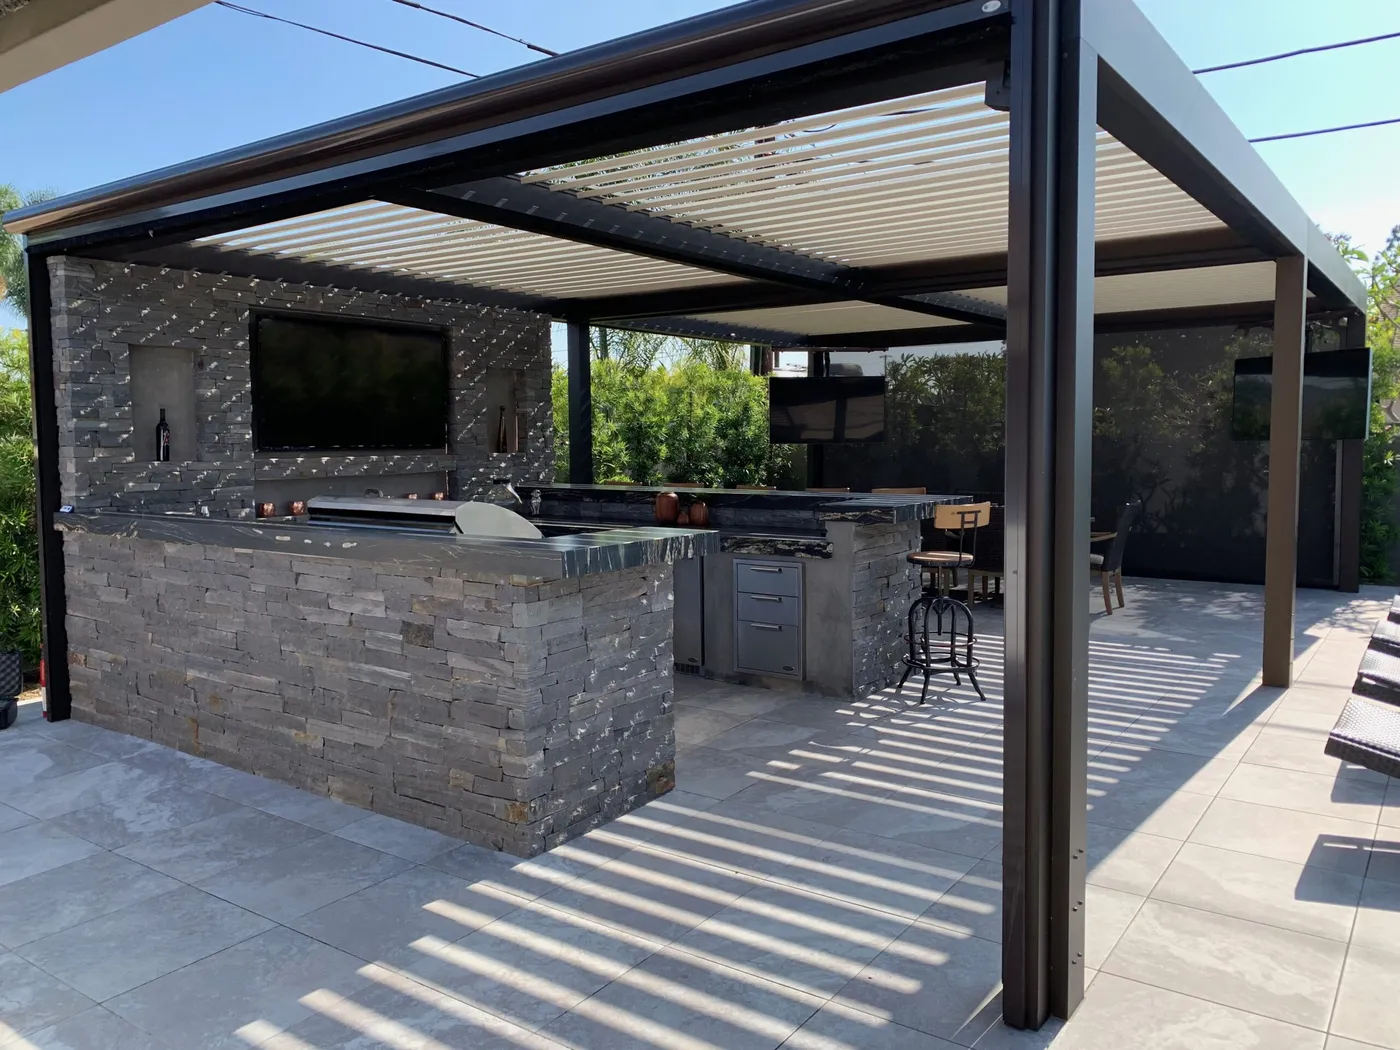
9. Modern Louvered Pergola with an Outdoor Stone Kitchen and TVs
This is the ultimate outdoor entertaining hub, and it requires a grand scale. You’re looking at a minimum footprint of 25×25 feet to comfortably house the louvered pergola, a full L-shaped kitchen, and seating without feeling cramped. Ceiling height for the pergola should be at least 10 feet to accommodate the TVs and prevent the dark frame from feeling oppressive. Also, consider the infrastructure: this setup requires running electrical for the pergola motor, outlets, and televisions, as well as plumbing and gas lines for the kitchen. It’s a small house, but outside.
|
📋 Copy HEX 🔗 Share |
An outdoor TV is not the same as a regular TV. You need a model specifically rated for outdoor use, which can withstand temperature fluctuations, humidity, and insects. These are significantly more expensive. The louvered pergola mechanism will require periodic cleaning to keep it free of debris. And those beautiful dark stacked stone walls? They can be a haven for spiders and other insects. A regular sweep-down with a firm brush or a power washer on a low setting will be necessary to keep it looking sharp.
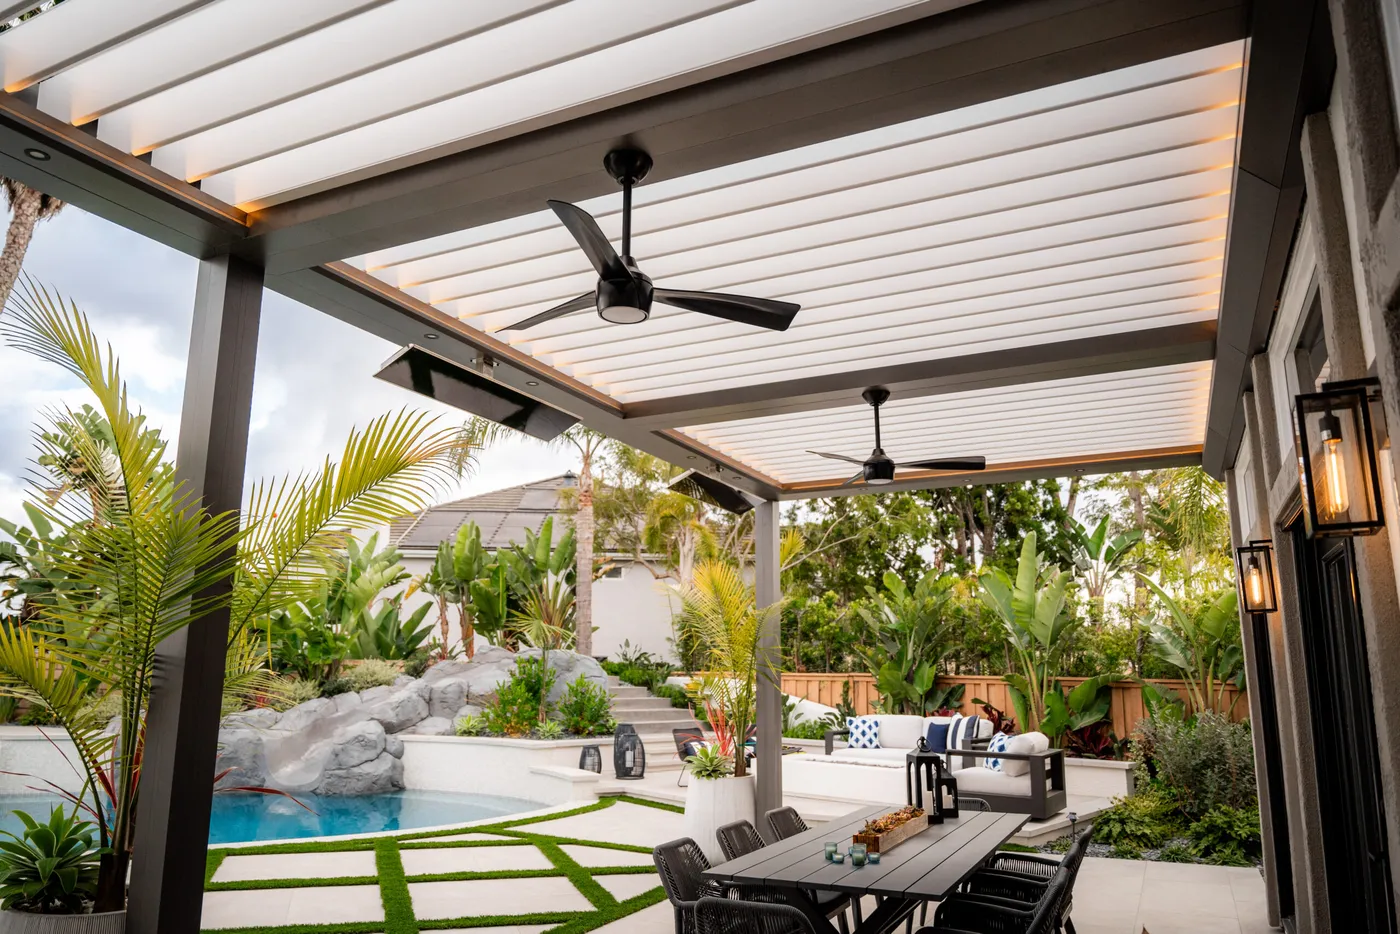
10. Pergola with White Louvers, Strip Lighting, and Panel Heaters
Integrated features are the key to a high-end look. When planning for a pergola like this, ask for the heaters and lighting to be included in the initial design. The perimeter LED strip lighting seen here is routed into the frame itself for a seamless glow, not tacked on afterward. Similarly, the black panel heaters are positioned for optimal heat distribution over the main seating area. Pre-planning allows all the wiring to be hidden within the pergola’s hollow frame, resulting in a clean, uncluttered, and professional finish. Retrofitting these elements later is much harder and rarely looks as good.
|
📋 Copy HEX 🔗 Share |
The formula for this luxurious space is about balancing hard and soft elements: 50% Sleek Structure + 30% Lush Greenery + 20% Comfort Features. The dark gray and white pergola provides the strong, modern bones. The massive wall of tropical plants acts as a living wallpaper, softening the hard lines and injecting vibrant color. The final 20% is all about function and feel—the warm lighting, the ceiling fans for air movement, and the heaters for chilly evenings. This combination transforms it from a simple shade structure into a year-round outdoor living room.
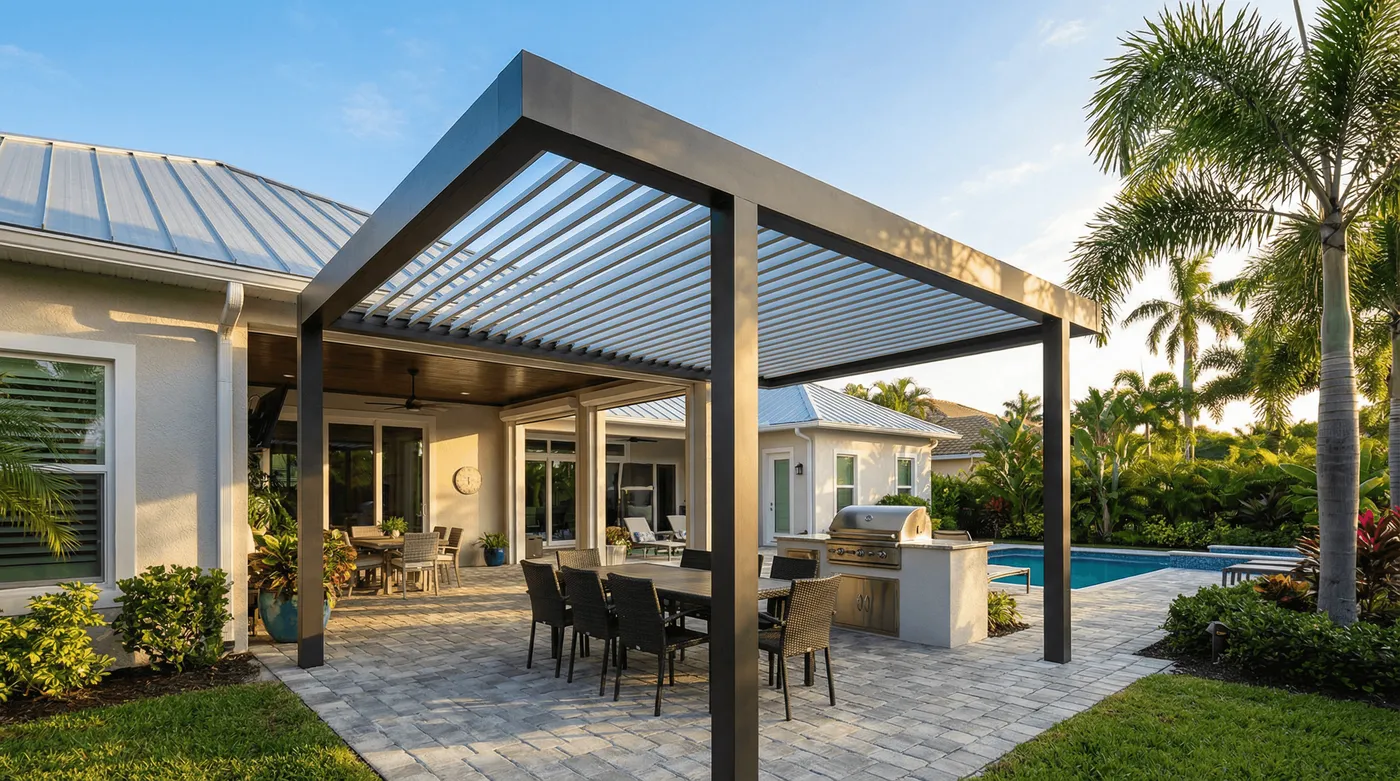
11. Expansive Patio with a Dark-Framed Louvered Pergola and Pool
A fully automated louvered pergola of this size can easily cost $20,000-$50,000. To get a similar zoned effect for less, use a combination of shade solutions. Install a more affordable standard wood pergola kit (around $2,000-$4,000) over your main dining area. Then, use a large, high-quality cantilever umbrella (like those from Costco or Target for $500-$900) to create a flexible shaded lounge zone by the pool. This breaks up the expense and allows you to create functional, shaded areas across a large patio without the massive single investment of a high-end automated system.
|
📋 Copy HEX 🔗 Share |
This design works because it uses the pergola to create a human-scaled room within a very large, open space. The massive paver patio could feel empty and exposed, but the dark frame of the pergola acts like an anchor, defining the primary social hub for dining and cooking. It draws your eye and gives the entire backyard a focal point. The structure’s dark color also pops against the light pavers and the blue of the pool, creating a crisp, high-contrast look that feels intentional and well-designed, not just like a collection of random outdoor elements.
12. Retractable Fabric Awning over a Contemporary Wood Deck
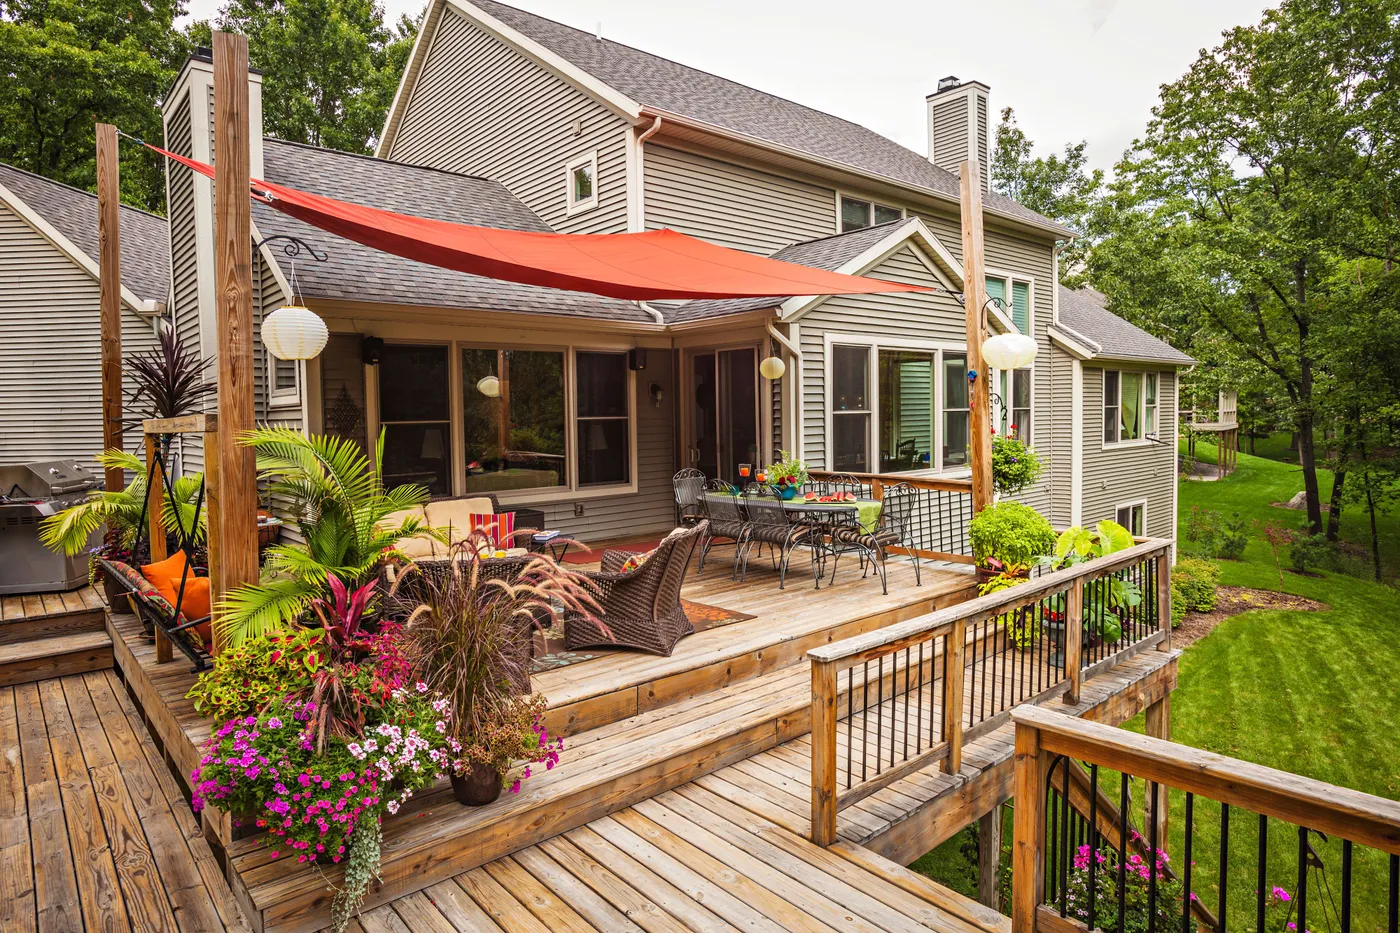
The key here is flexibility. Unlike a permanent pergola, the retractable awning offers the best of both worlds. On a scorching afternoon, it provides a massive patch of cool shade, turning the deck into a usable living space. But on a beautiful, mild morning or for stargazing at night, you can retract it completely to enjoy an open sky. This adaptability is its superpower, allowing you to control the sun and shade on demand. The string lights attached to the frame ensure the space remains just as usable and atmospheric after dark, even with the awning extended.
|
📋 Copy HEX 🔗 Share |
Want to clean your fabric awning to keep it looking fresh? It’s easier than you think. (Time: 30 minutes, Cost: $15 for soap).
- Extend the awning fully on a calm, overcast day.
- Gently brush off any loose dirt, leaves, and cobwebs with a soft-bristled broom.
- Hose down the entire fabric with cool water.
- Mix a solution of mild soap (like Dawn or a specialized awning cleaner) in a bucket of lukewarm water.
- Use a soft brush or sponge to gently scrub the fabric with the soapy solution. Avoid harsh chemicals or bleach!
- Rinse thoroughly with the hose until no suds remain.
- Let it air dry completely before retracting to prevent mildew.
13. A Patio Layered with a Shade Sail, Roller Blind, and Slatted Screen
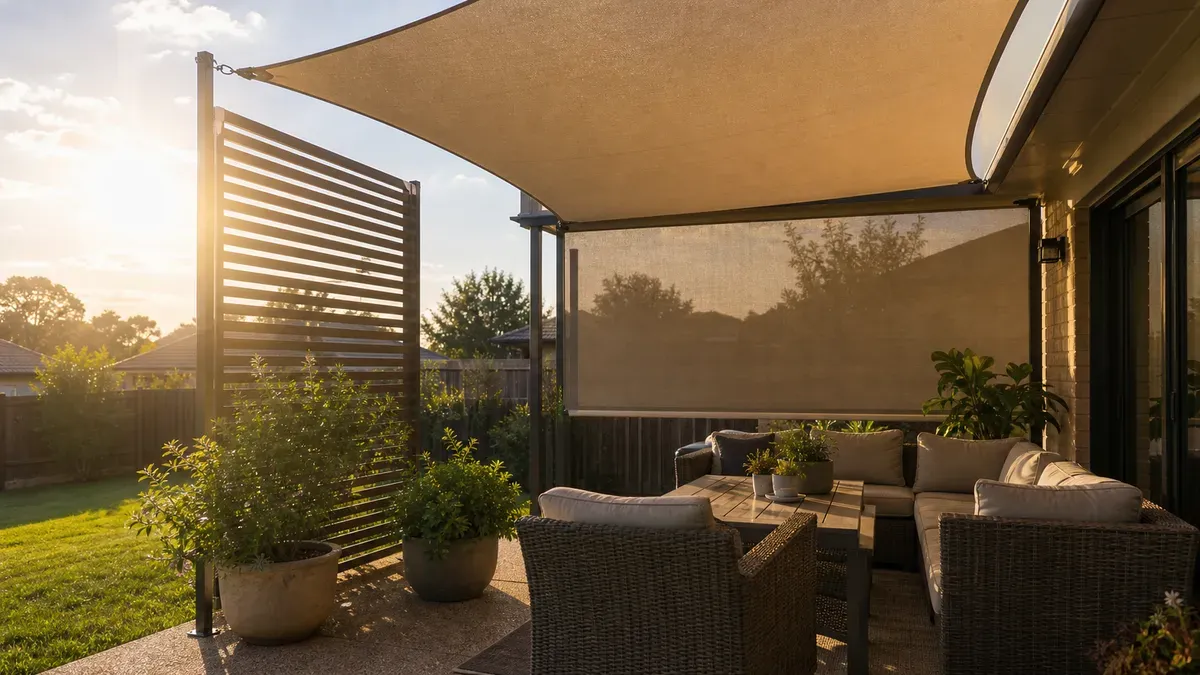
Before you commit to a multi-layered shade system, assess your sun exposure from all angles.
- Track the sun for a full day. Where does the light come from in the morning versus the late afternoon? An overhead sail won’t block low-angle evening sun.
- Consider your privacy needs. Do you need to block a neighbor’s view from the side or just shade from above? This will determine if you need screens and blinds.
- Measure all your attachment points carefully. Ensure your house, posts, or fences are structurally sound enough to handle the tension from a sail and the weight of a roller blind.
- Check for clearance. Make sure a retractable blind won’t interfere with doors, windows, or light fixtures when it’s rolled down.
|
📋 Copy HEX 🔗 Share |
While layering shade solutions offers ultimate control, it can also look busy and cluttered if not done carefully. The key to making this work is a cohesive color palette. Notice how the beige sail, dark blind, and dark screen all pull from the same neutral family, complemented by the wicker furniture. If you introduce a striped blind, a blue sail, and a natural wood screen, the space could quickly become a visual mess. Stick to two main neutral colors for all your shade structures to maintain a calm, intentional look.
14. Intricate Slatted Pergola Overlooking a Serene Body of Water
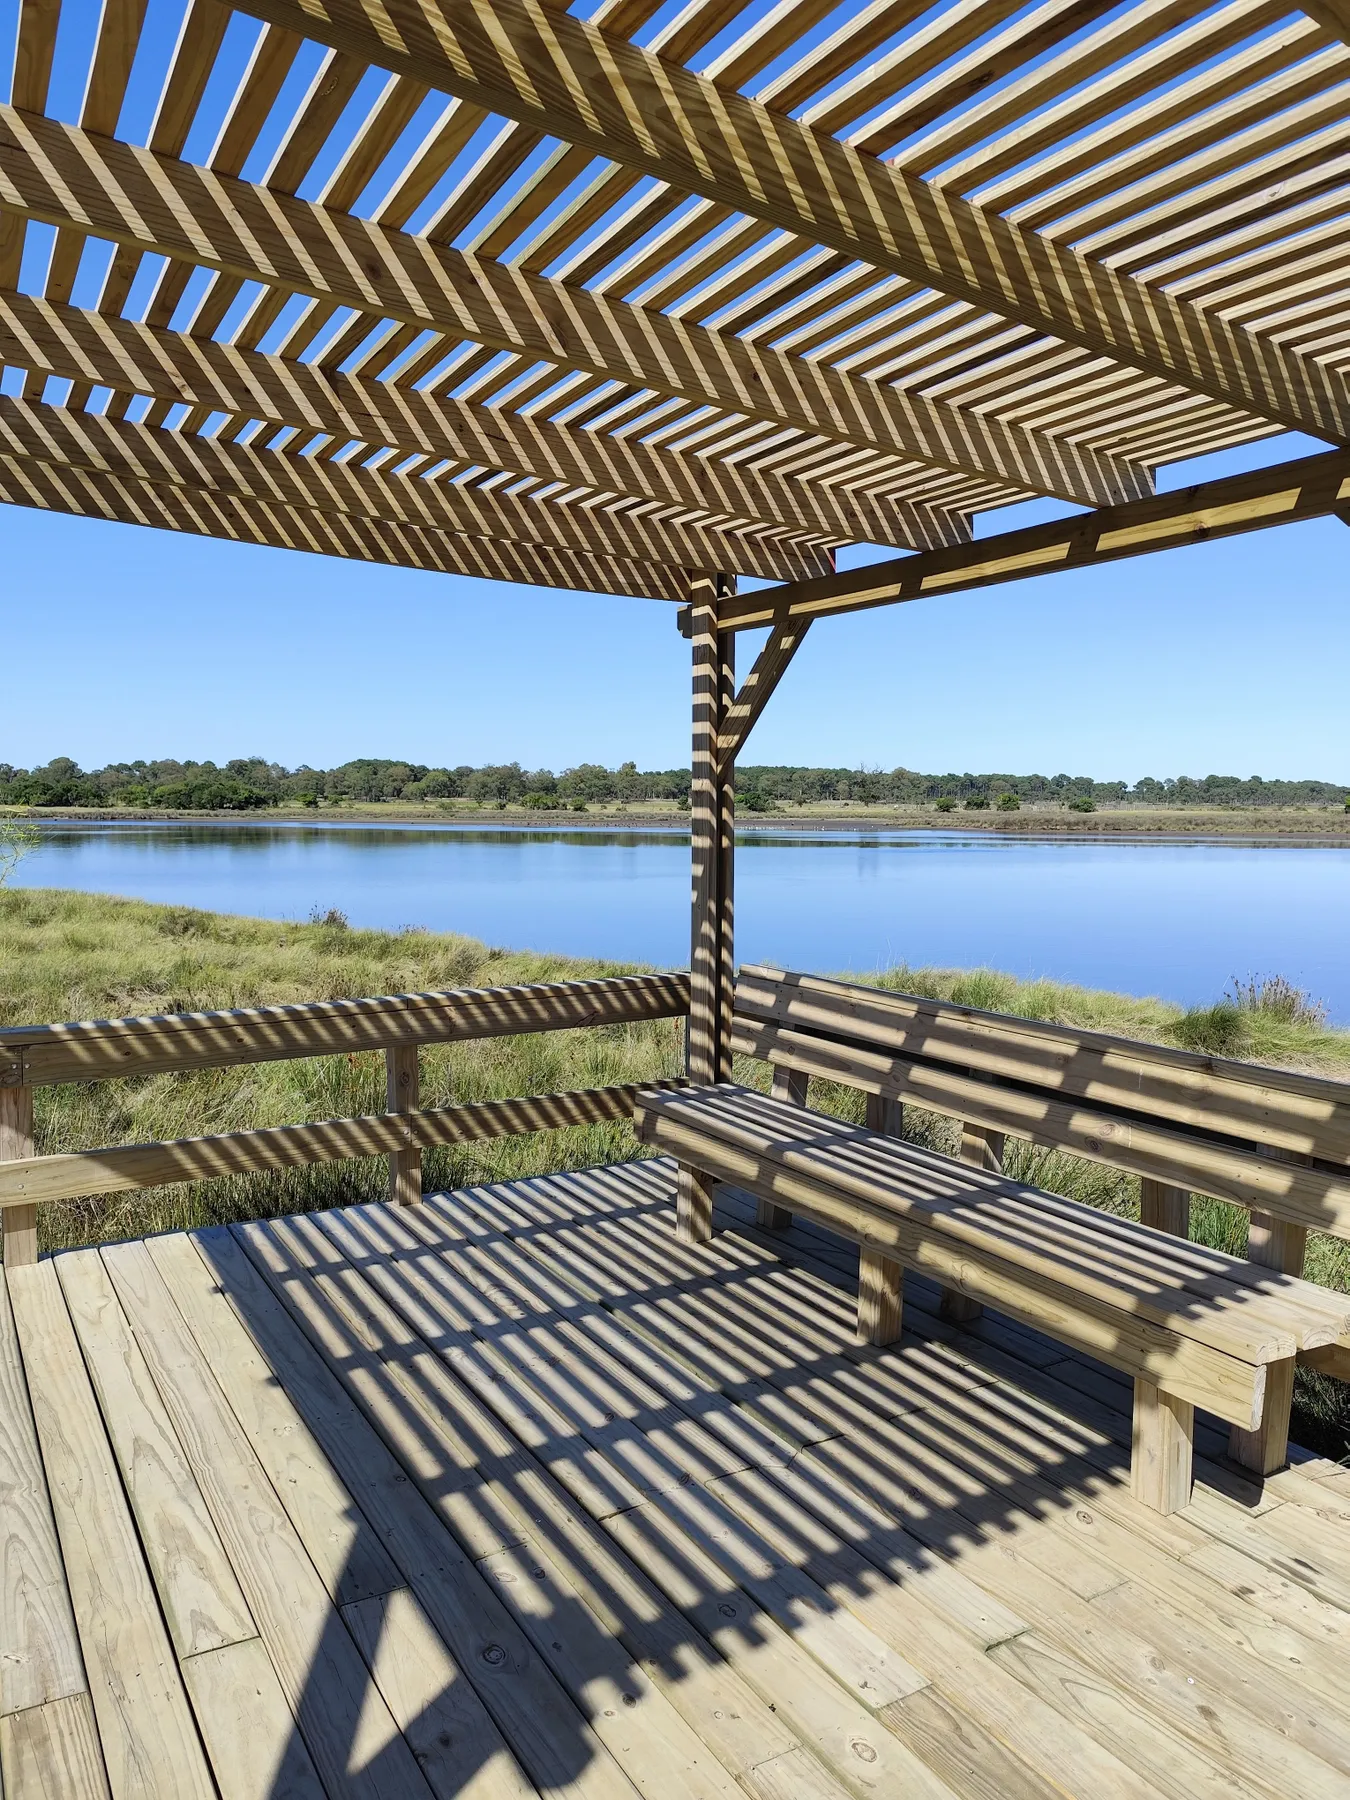
This design is a masterclass in using light as a design material. The pergola isn’t just for shade; its primary purpose is to create art. The intricate slatted roof acts like a stencil, casting complex geometric patterns that dance across the deck and bench as the sun moves. This dynamic play of light and shadow turns a simple wooden structure into an ever-changing art installation. The simple, clean lines of the deck and integrated bench provide a perfect, uncluttered canvas for this light show, ensuring the focus remains on the beautiful patterns and the water view beyond.
|
📋 Copy HEX 🔗 Share |
There’s a growing movement in design called biophilic design, which is all about connecting with nature. This structure taps right into that trend. It doesn’t block the environment; it frames it and interacts with it. The open design allows for unobstructed views of the water and sky, while the wooden construction feels natural and warm. The way it filters sunlight mimics the experience of sitting under a tree canopy. It’s a design that acknowledges its beautiful surroundings and seeks to enhance the experience of being in them, rather than competing with them.
15. Retractable Striped Awning with Integrated LED Lighting
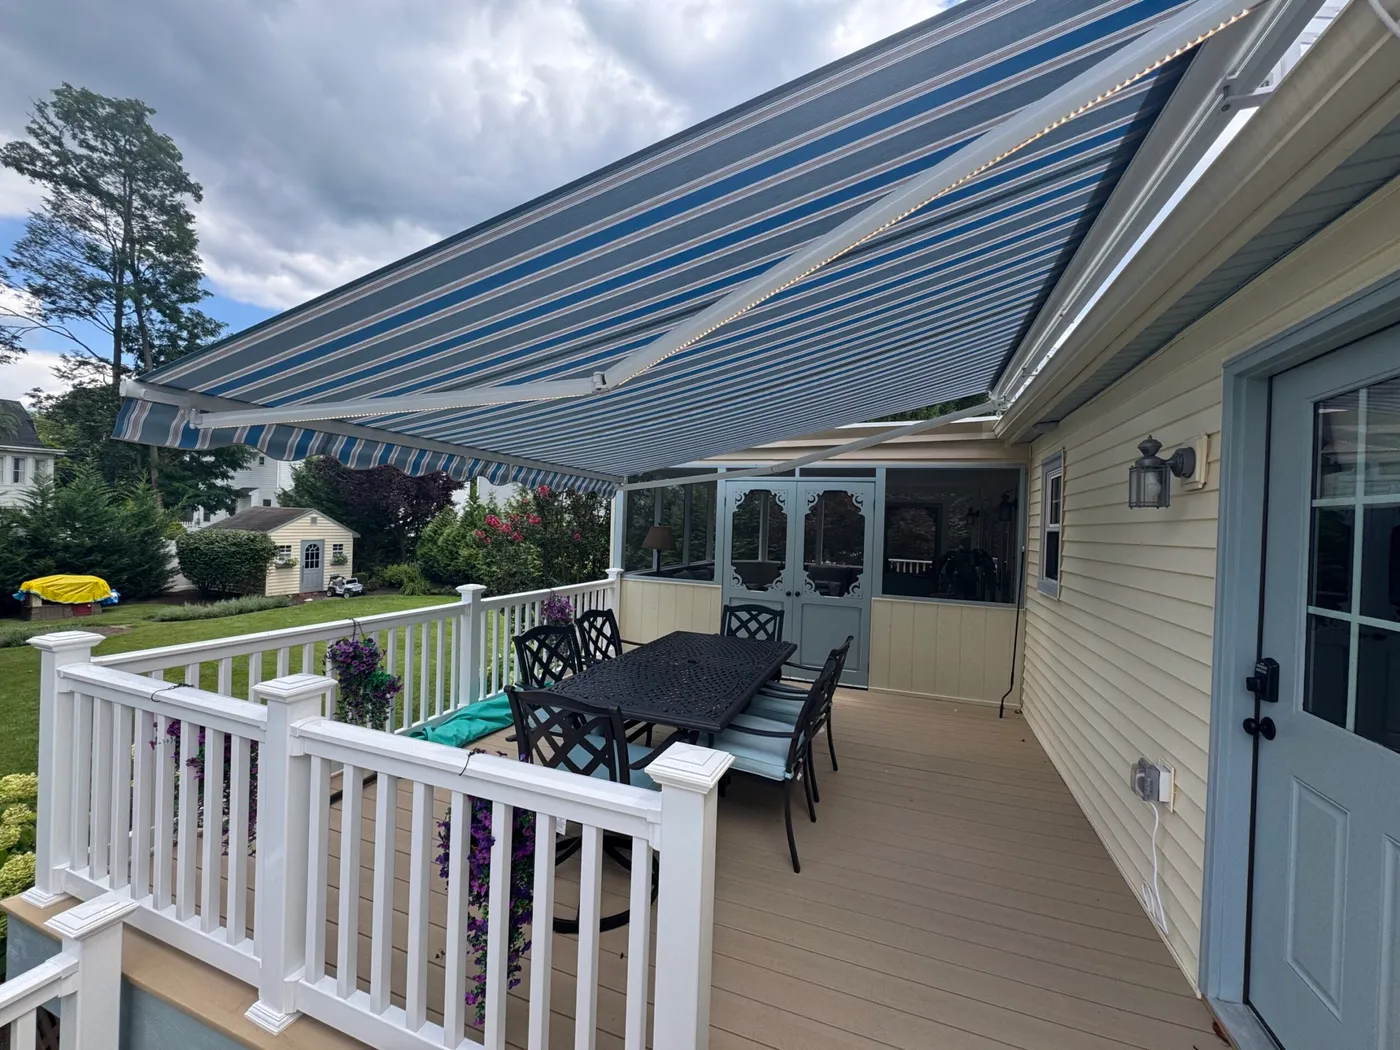
A quality retractable awning is an investment, but it adds significant functionality to a deck. Here’s a realistic breakdown for a motorized version with lights.
- Awning Unit: Motorized retractable awning (approx. 12’x10′) with striped, weather-resistant fabric and integrated LEDs ($2,500 – $5,000).
- Installation: Professional installation, including mounting and electrical hookup ($500 – $1,200).
- Furniture: Black metal dining set for four ($400 – $900).
- TOTAL: $3,400 – $7,100
- Budget alternative: A manual (hand-crank) version of the same size awning can save you $800-$1,500. For lighting, you can attach your own outdoor-rated LED strip lights for under $100.
|
📋 Copy HEX 🔗 Share |
When choosing an awning fabric, don’t just think about color. The type of fabric makes a huge difference in longevity. Solution-dyed acrylic (like Sunbrella) is the gold standard. The color is locked into the core of the fibers, so it resists fading from UV exposure far better than cheaper printed or coated polyester fabrics. The blue, gray, and white stripes on an acrylic awning will look vibrant for a decade or more, while a cheaper version might look washed out in just a few seasons. It’s worth the upfront cost.
16. A Wooden Pergola with Lush Vines Shading a Corner Nook
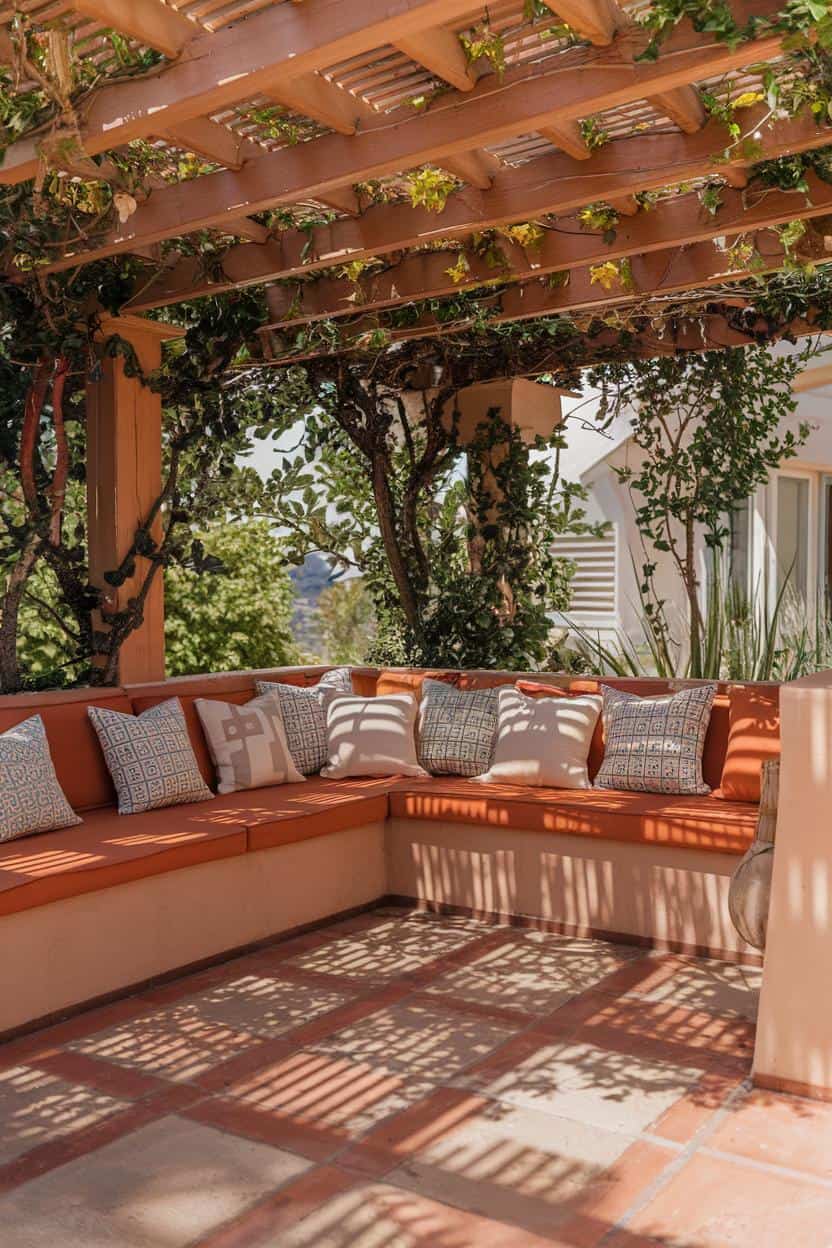
This cozy corner follows a lush, Mediterranean-inspired formula: 40% Living Greenery + 30% Warm Earth Tones + 30% Natural Materials. The climbing vines are the star, providing most of the shade and atmosphere. They’re balanced by the warm burnt orange cushions and terracotta floor tiles. The final third comes from the wood of the pergola and the fabric of the pillows, keeping the entire palette grounded and organic. This is a look that feels grown and collected over time, not installed in a weekend.
|
📋 Copy HEX 🔗 Share |
Living shade is beautiful, but it’s alive. Vines drop leaves, flowers, and sometimes attract insects and birds. You will be sweeping this patio daily during certain seasons. You’ll also need to be patient—it can take 2-3 years for a climbing vine like a wisteria or trumpet vine to provide significant coverage. And be warned: choose your vine carefully. Some aggressive growers can damage siding, pry apart pergola joints, or become a massive maintenance headache. Do your research on species that are right for your climate and desired level of upkeep.
17. Overlapping Sail Shades Creating a Canopy in a Stone Courtyard
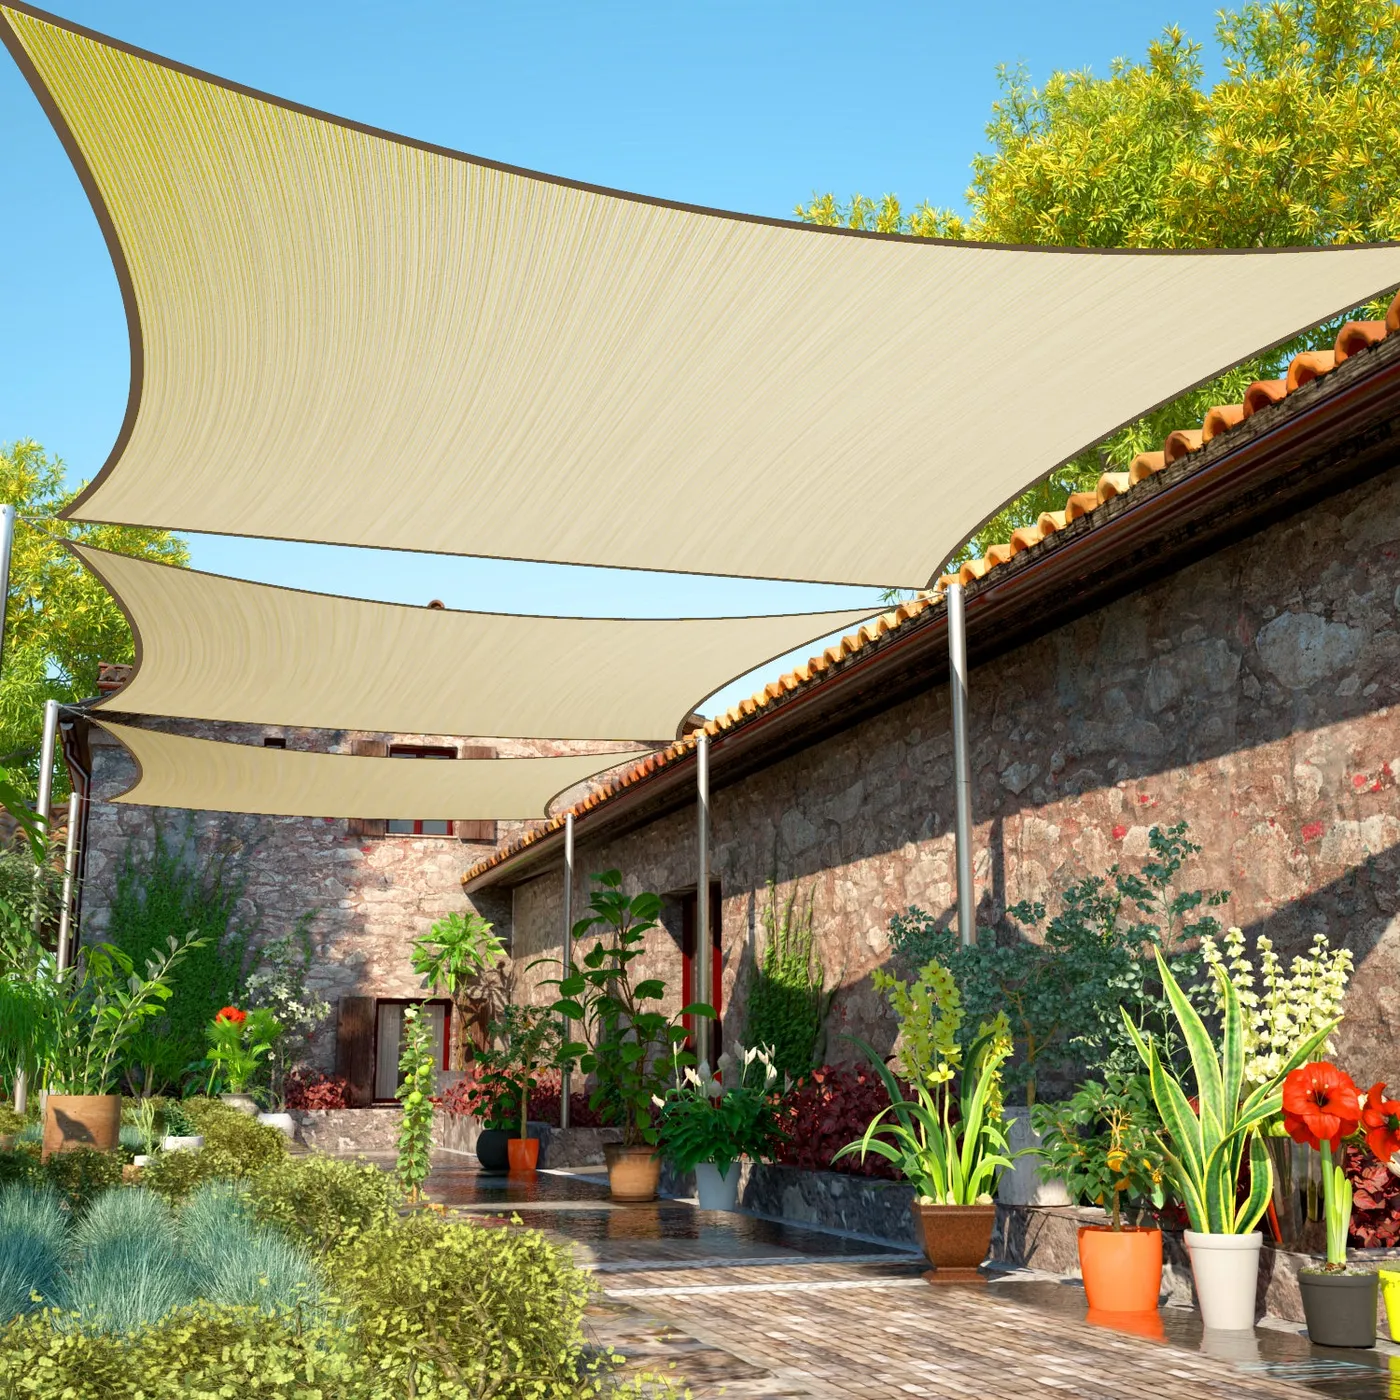
The key to this entire look is the layering. A single shade sail would look small and temporary against the heavy stone building. But by overlapping two large sails at different heights and angles, the design creates a dynamic, architectural roof that feels intentional and substantial. This layering provides more complete and consistent shade throughout the day as the sun moves. It also adds a ton of visual interest, transforming the overhead view from a simple utility into a sculptural element that defines the entire courtyard.
|
📋 Copy HEX 🔗 Share |
This layered sail approach is perfect for large or irregularly shaped spaces where a single shade solution wouldn’t work. It’s ideal for courtyards or patios that are 20×20 feet or larger. The key is having strong, well-placed anchor points. You’ll need structurally sound walls or properly installed steel poles (sunk in concrete footings) that are at least 10-12 feet tall to achieve the height variation needed for this look. Attaching multiple large sails to a standard wooden fence or a flimsy fascia board is a recipe for disaster in a strong wind.
18. Light Gray Sail Shade Over a Deck with Woven Wicker Furniture
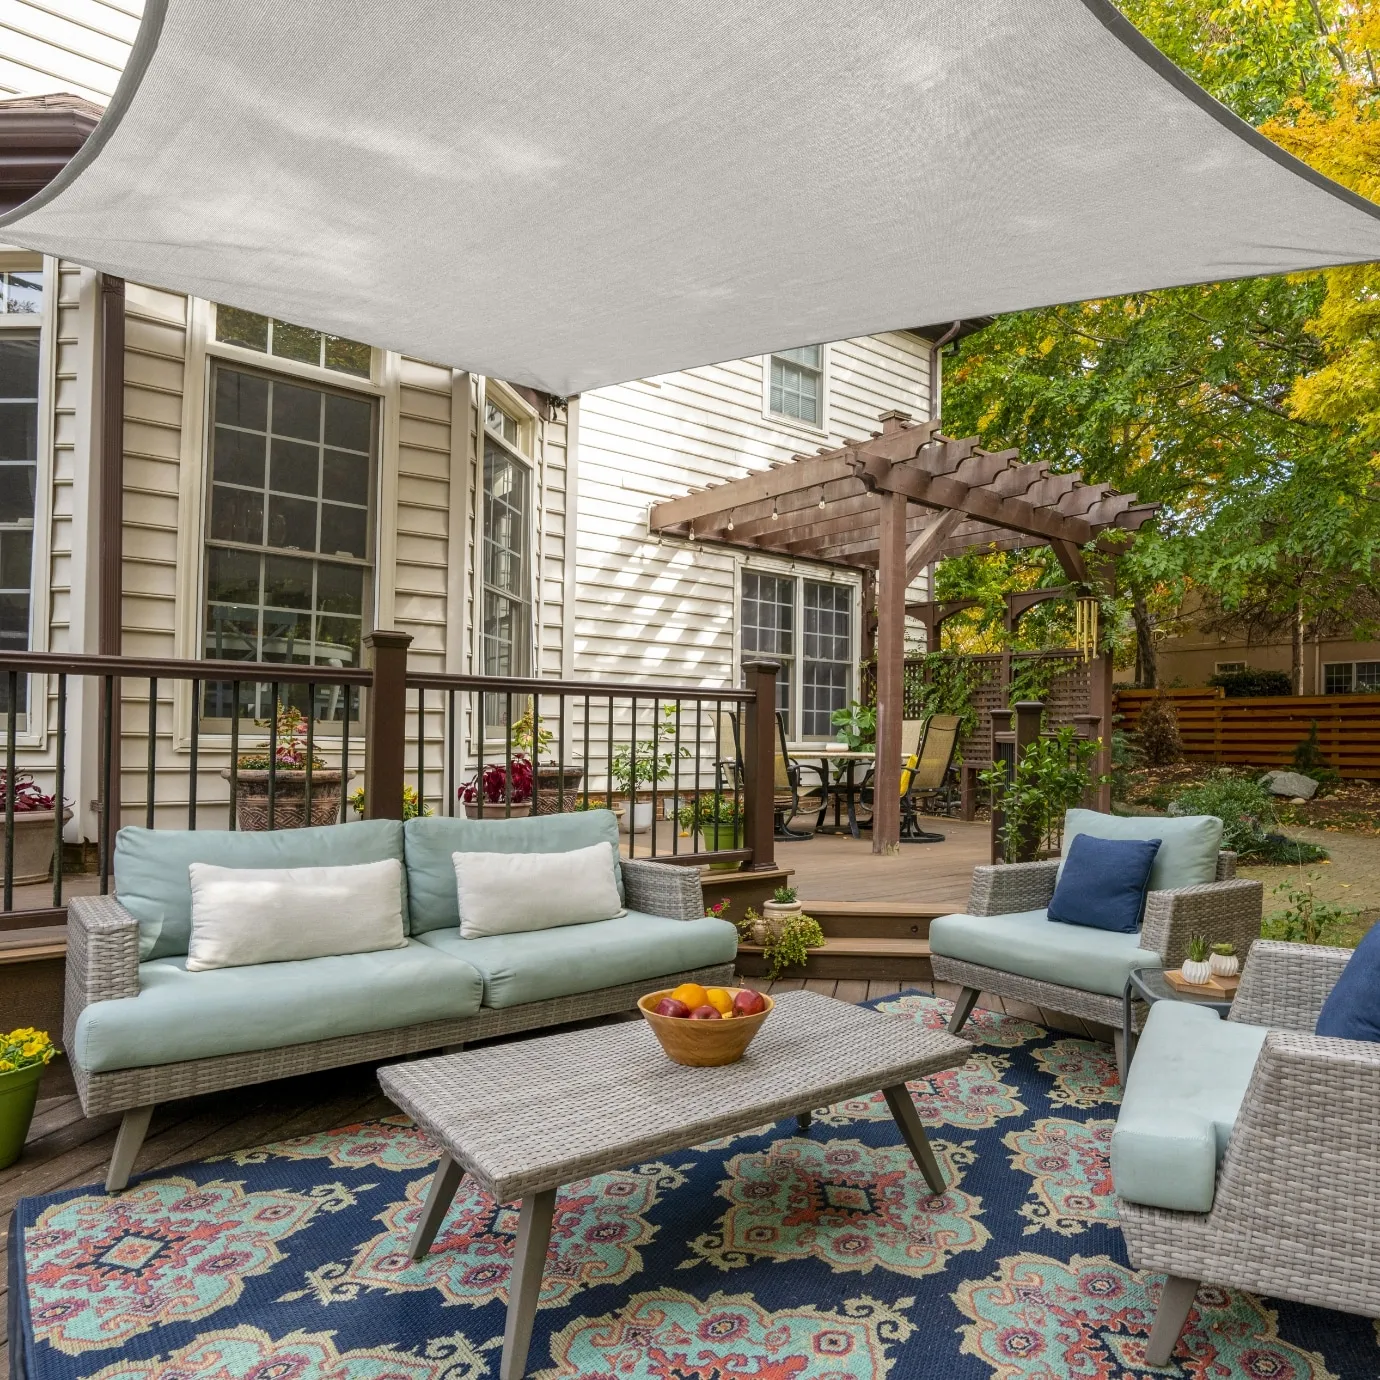
This is a fantastic example of a stylish, achievable deck. A high-quality shade sail (12 to 16-foot triangle) runs about $150-$250, plus another $50 for mounting hardware. You can find gray woven wicker conversation sets at Target, Walmart, or Wayfair for $400-$800. The key to pulling it all together on a budget is the rug. A good outdoor rug like the navy patterned one here can be found for $100-$200 and instantly defines the space, making the whole arrangement feel more expensive and cohesive. This entire look is easily achievable for under $1,200.
|
📋 Copy HEX 🔗 Share |
While shade sails are relatively low-maintenance, they aren’t no-maintenance. To prevent mold and mildew, especially with a light gray fabric, it’s a good idea to take the sail down and store it during the wettest, coldest months of the year. Before storing, give it a good cleaning with mild soap and water and ensure it’s completely dry. Also, check the tension on your mounting hardware at the beginning of each season. Wind can cause things to loosen over time, and a quick tightening will keep your sail looking crisp and prevent damage.
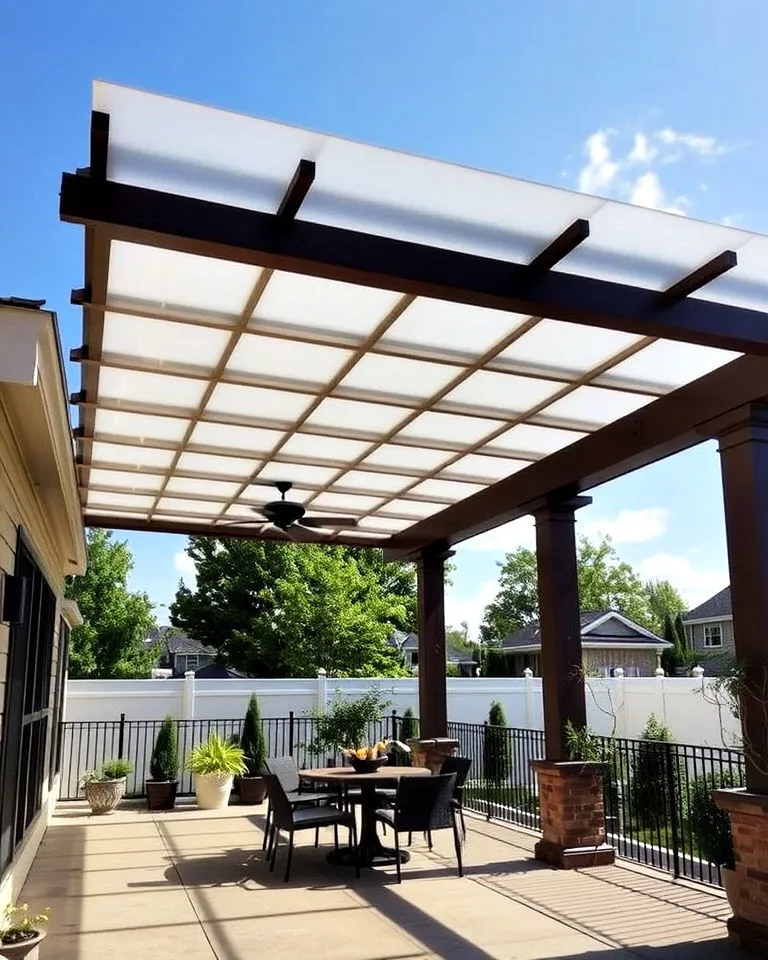
19. Wood Pergola with a Translucent Grid Panel Roof
Installing a ceiling fan in an outdoor pergola requires a few specific steps for safety and longevity. (Time: 2 hours, Cost: $200-$500 for fan & supplies).
- Choose a ‘wet-rated’ or ‘damp-rated’ outdoor ceiling fan. An indoor fan will quickly rust and fail.
- Ensure your pergola has a central beam that is structurally sound enough to support the fan’s weight and rotational force. Add blocking between rafters if needed.
- Run electrical wiring through a weatherproof conduit to the fan location. This must be done by a qualified electrician to meet code.
- Mount an outdoor-rated electrical box securely to the beam.
- Assemble and hang the fan according to the manufacturer’s instructions, using the provided outdoor-rated hardware.
- Caulk around the base of the canopy where it meets the electrical box to create a watertight seal.
|
📋 Copy HEX 🔗 Share |
The translucent roof panels are a brilliant choice for providing rain protection without creating a dark, cavernous space. The grid pattern adds a subtle graphic detail. These are typically twin-wall polycarbonate panels. When installing them, pay close attention to the UV-protected side—it must face up towards the sun. Installing them upside down will cause the panels to yellow, become brittle, and degrade in just a few years. Most panels have a film or sticker indicating the correct orientation. Don’t remove it until the panel is secured in place!
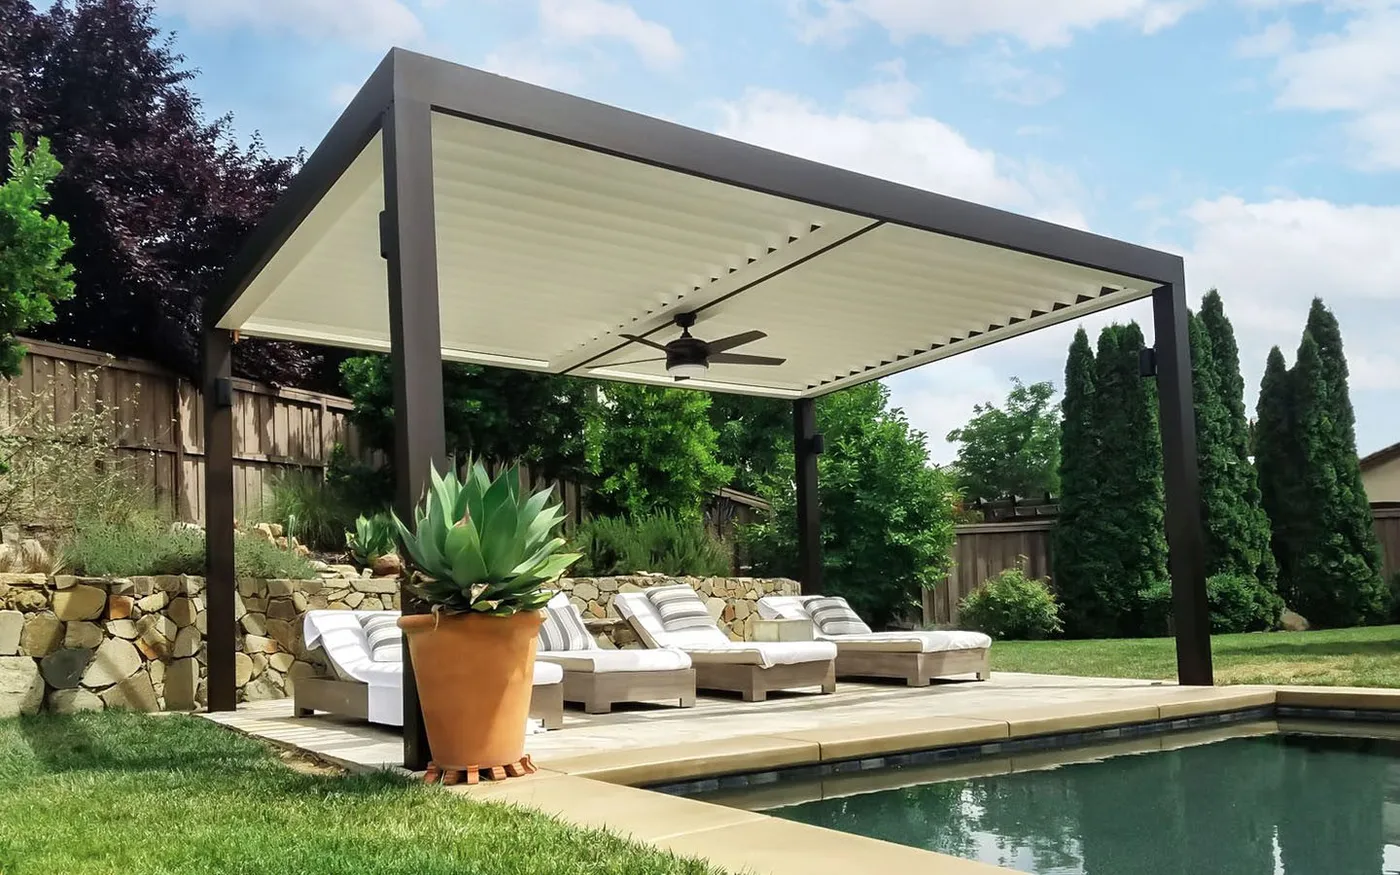
20. Dark-Framed Pergola with Adjustable Louvers Over a Poolside Lounge
A poolside pergola has some unique considerations. Make sure you cover these points before installation:
- Check local codes regarding how close a structure can be built to the edge of your pool. There are often minimum setback requirements for safety.
- Ensure the pergola’s footing locations won’t interfere with any underground pool plumbing or electrical lines. ‘Call before you dig’ is essential here.
- Opt for a powder-coated aluminum frame over steel. It will hold up much better to the constant humidity and potential splashes of chlorinated or salt water.
- Plan for drainage. If the louvered roof is meant to be waterproof when closed, make sure the integrated gutters will direct rainwater away from the pool deck, not onto it.
|
📋 Copy HEX 🔗 Share |
The contrast between the dark pergola frame and the white louvers is the design secret here. It’s a crisp, graphic statement that feels incredibly modern and clean. The white louvers reflect sunlight and heat, keeping the space underneath cooler, while the dark frame anchors the structure and makes it a strong visual focal point against the light-toned paving and blue water. It’s a practical choice that also happens to be a powerful aesthetic one, giving the whole area a high-end, resort-like feel. It’s much more dynamic than a solid-colored structure would be.
21. Perforated Beige Canopy Casting Dappled Light on a Bohemian Deck
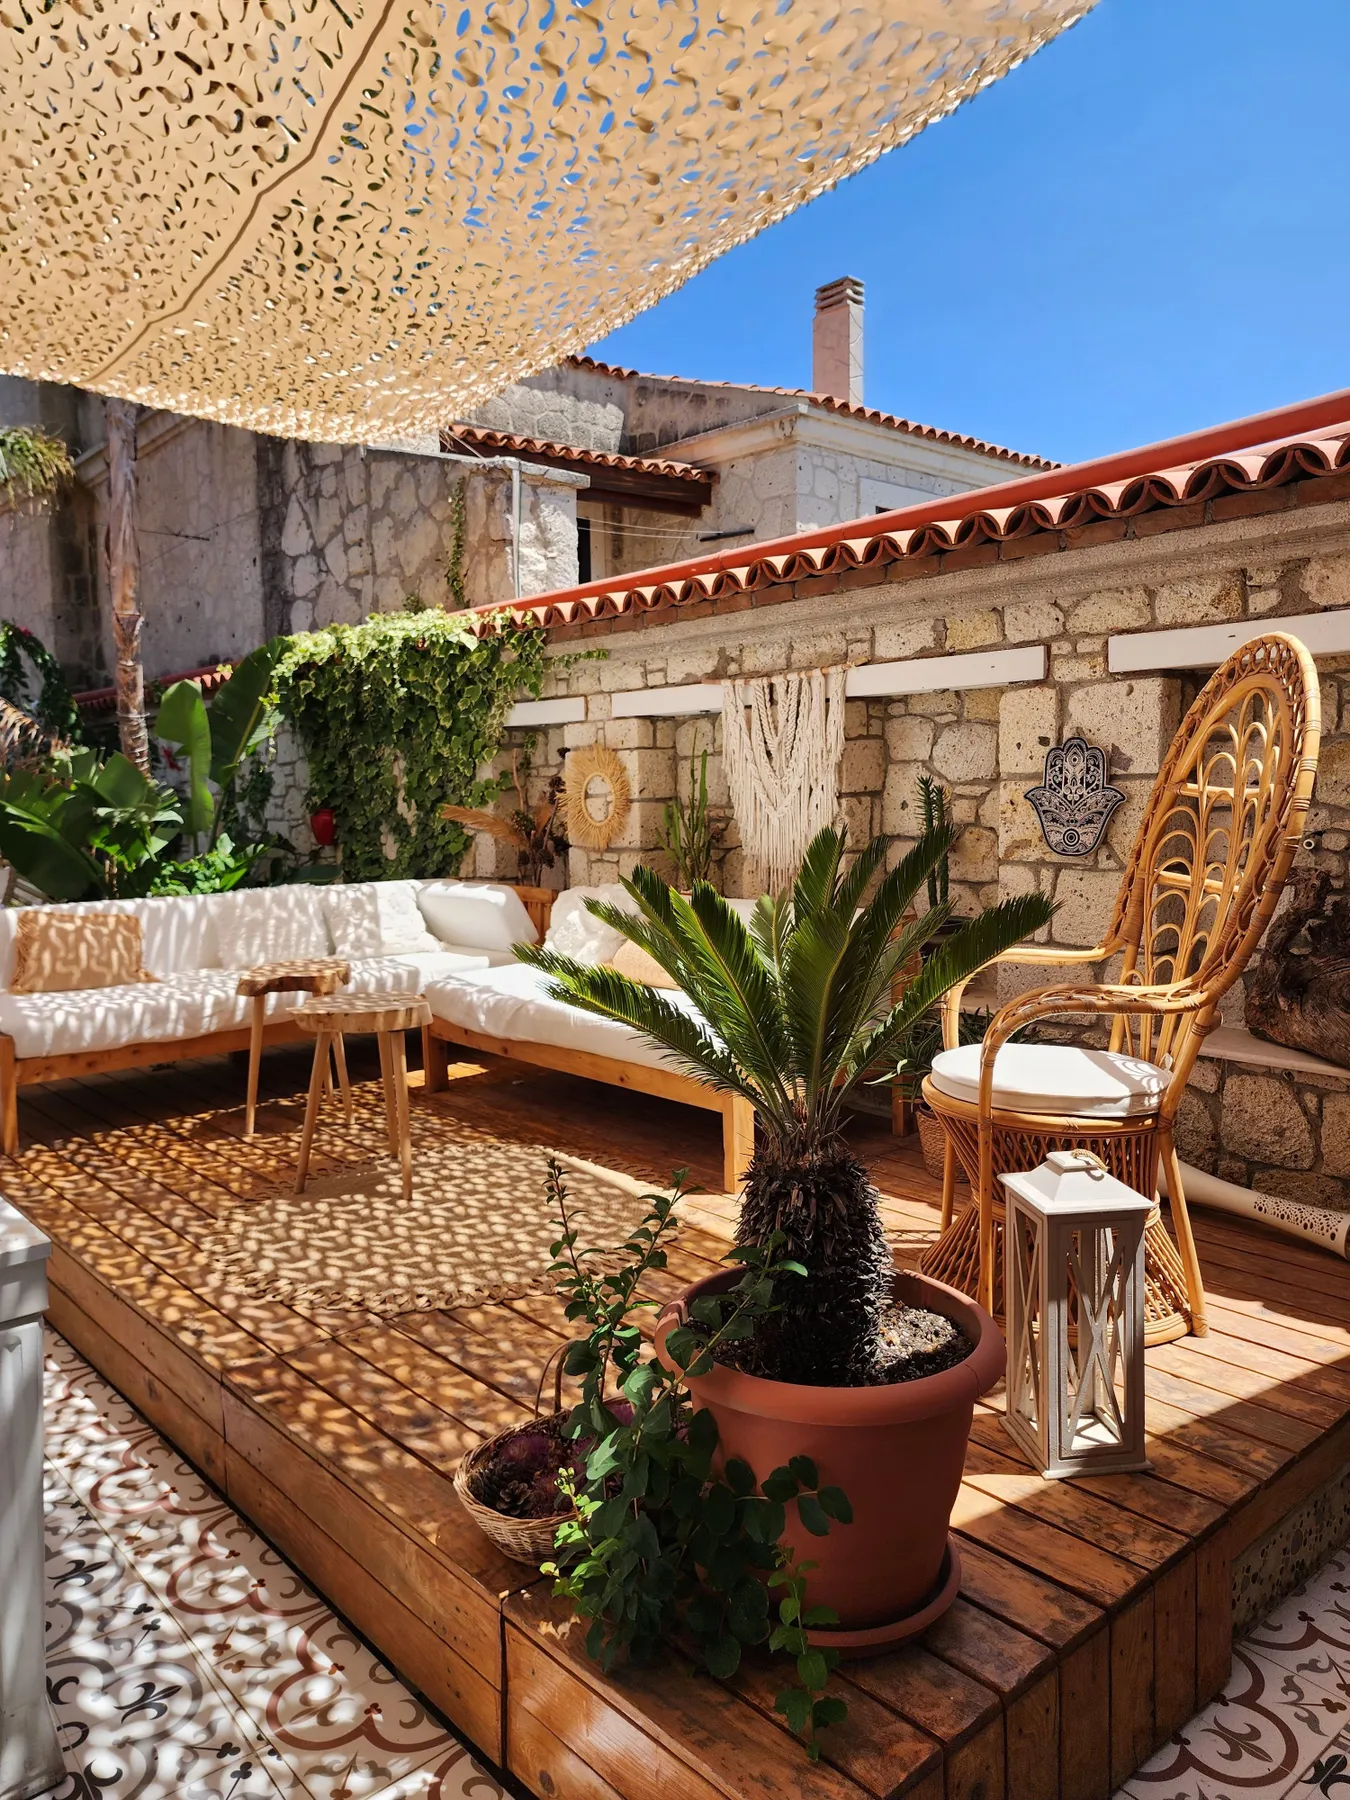
It’s the perforated canopy. A solid fabric would have provided shade, but it would have felt heavy and static. The perforated material transforms sunlight into a design element, creating a beautiful, dappled light effect that mimics the feeling of sitting under a leafy tree. This moving, shifting pattern of light and shadow adds a layer of texture and life to the entire space, perfectly complementing the bohemian, natural vibe of the wicker peacock chair, wood furniture, and climbing ivy. It’s not just shade; it’s atmosphere.
|
📋 Copy HEX 🔗 Share |
This effortlessly chic look is a mix of global-inspired textures: 40% Warm Wood + 30% Woven Naturals + 20% Soft White Textiles + 10% Raw Stone. The deck and sofas form the wooden base. The woven element comes from the iconic peacock chair and other rattan details. The crisp white cushions provide a clean, modern counterpoint, preventing the look from feeling too rustic. Finally, the rough stone walls and climbing ivy add an aged, Mediterranean patina that makes the space feel authentic and grounded.
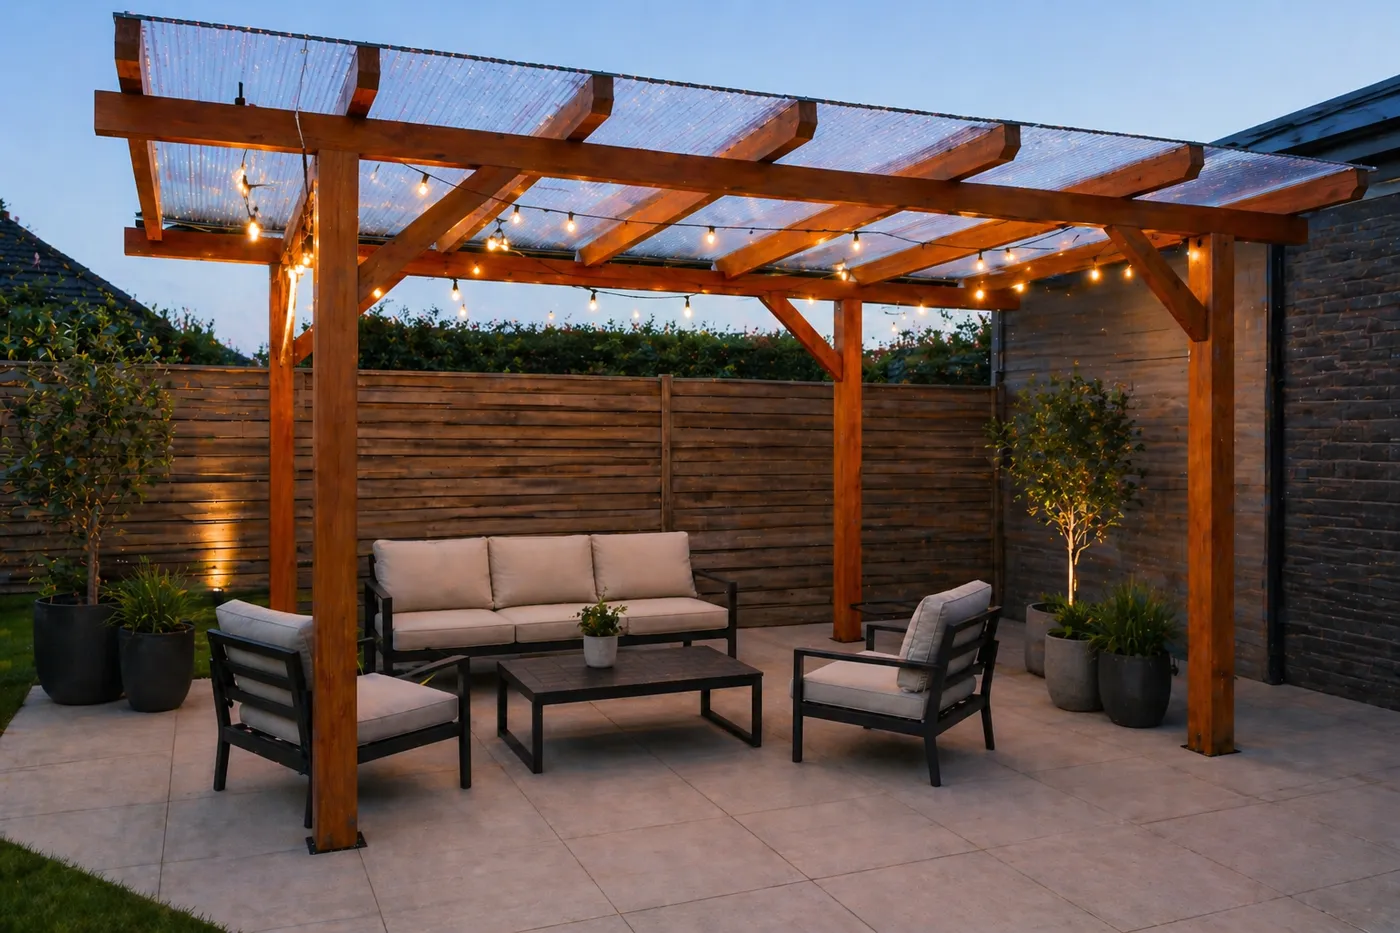
22. A Wood Pergola with a Clear Roof and Twinkling String Lights
Love this look but not the price of a custom-built pergola? You can get 90% of the way there with off-the-shelf components. Start with a basic 10×12 foot wood pergola kit from Home Depot or Lowe’s ($1,000-$2,500). Instead of custom glass, use clear corrugated polycarbonate roof panels, which you can cut to size and install yourself for about $300-$500. Add a few sets of commercial-grade string lights ($150) and a budget-friendly outdoor conversation set from a store like At Home or Big Lots ($500-$900), and you’ve created a nearly identical cozy, all-weather patio for a fraction of the cost.
|
📋 Copy HEX 🔗 Share |
This type of covered patio structure works beautifully in a range of sizes, but it’s particularly effective for smaller to medium-sized spaces, from 10×10 to 12×16 feet. The clear roof is key; it provides rain protection without making the area feel dark or visually smaller, which is a common issue with solid roofs in compact yards. It’s an ideal solution for a townhome patio or a designated zone on a larger deck, creating an intimate ‘room’ feel that’s protected from the elements but still connected to the outdoors.
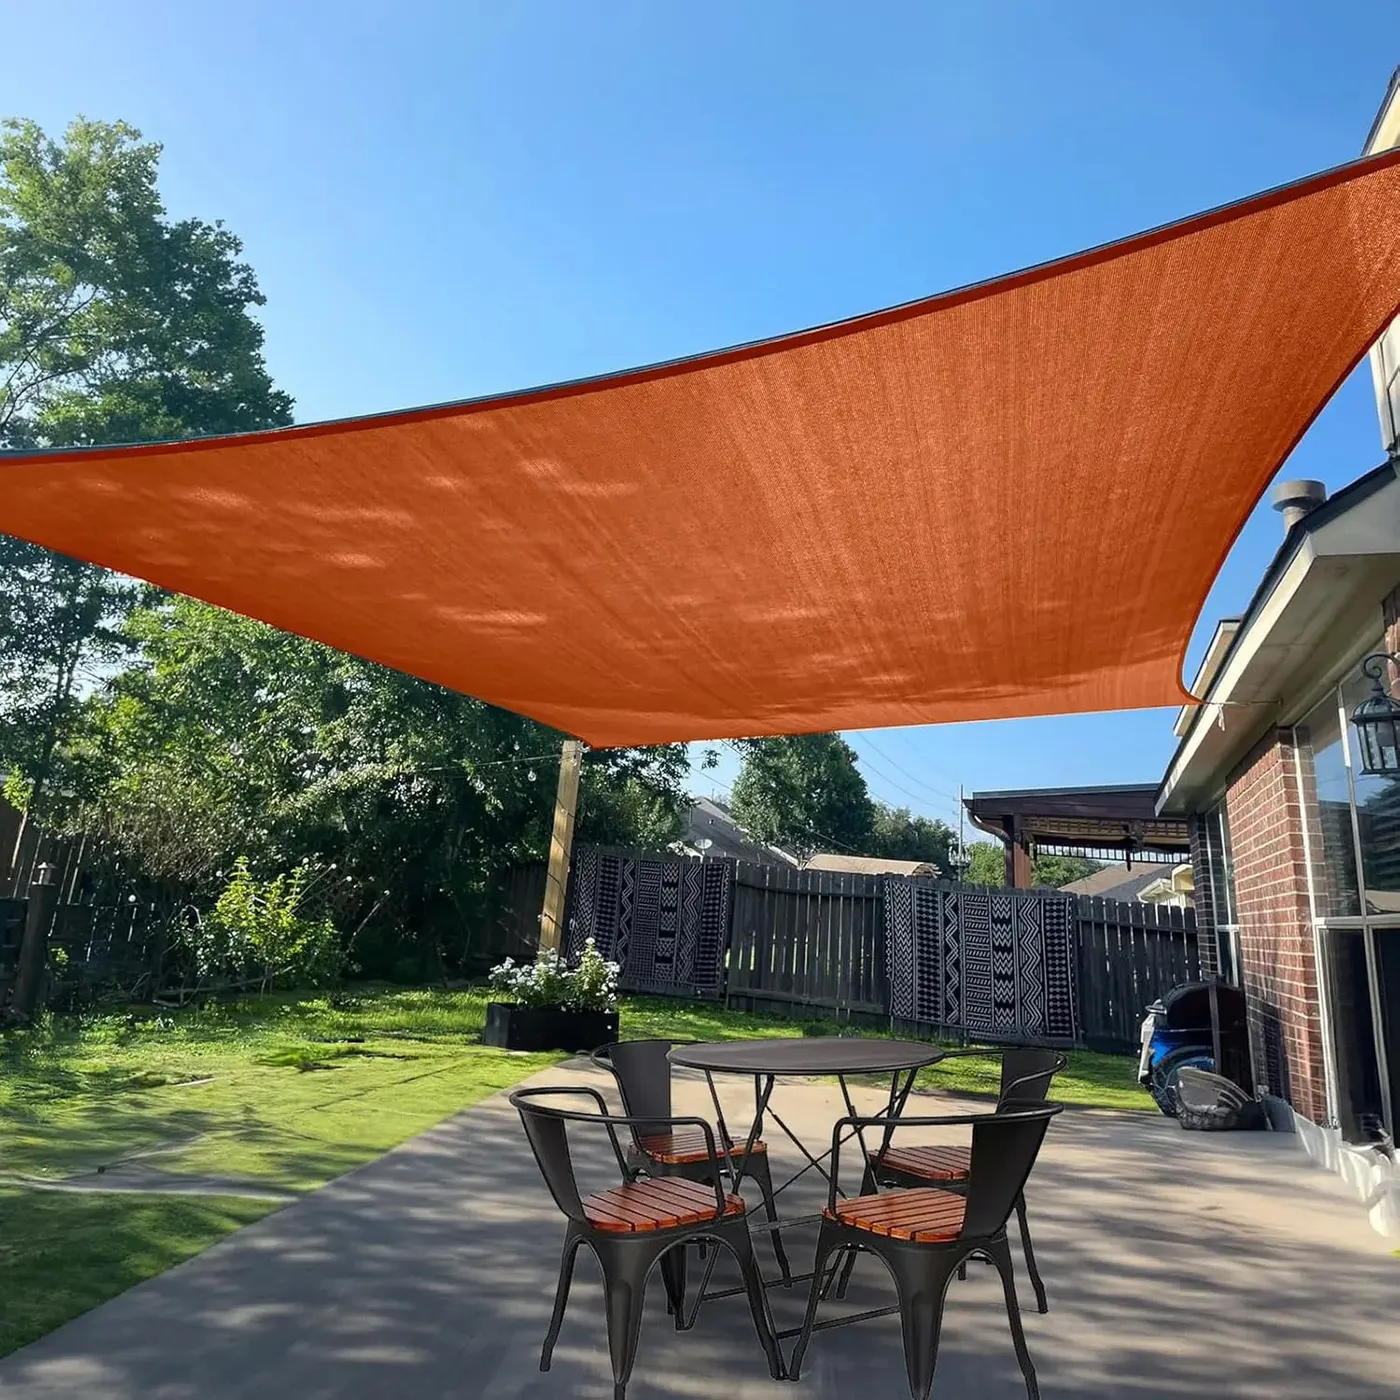
23. Bright Orange Triangular Shade Sail Over a Simple Patio Dining Set
To get a shade sail tight and secure, focus on the anchor points. (Time: 2-3 hours, Cost: $100-$300 for posts/hardware).
- Identify your anchor points. You need at least three for a triangle. You can use the side of your house (if you can securely bolt into a stud or header), a mature tree, or a dedicated post.
- For posts, use a 6×6 pressure-treated wood or a heavy-gauge steel pole. Dig a hole at least 3 feet deep.
- Set the post in the hole with concrete, ensuring it’s plumb (perfectly vertical). Angle the post slightly away from the sail’s center to counteract the tension. Let the concrete cure for 48-72 hours.
- Attach heavy-duty eye bolts or D-rings to your anchor points.
- Connect the sail using turnbuckles on at least two corners to allow for proper tensioning.
|
📋 Copy HEX 🔗 Share |
A bold color like this brilliant orange is fantastic, but be prepared for it to fade over time. No matter how UV-resistant the fabric claims to be, a vibrant color will lose some of its punch after several seasons in direct, harsh sunlight. To prolong its life, take it down during the off-season. Also, a bright color will cast a colored glow on everything underneath it. Your white plates might look a bit peachy, and your skin tones will take on a warm hue. It’s part of the charm, but something to be aware of! Compare with the similar sail in Idea #5.
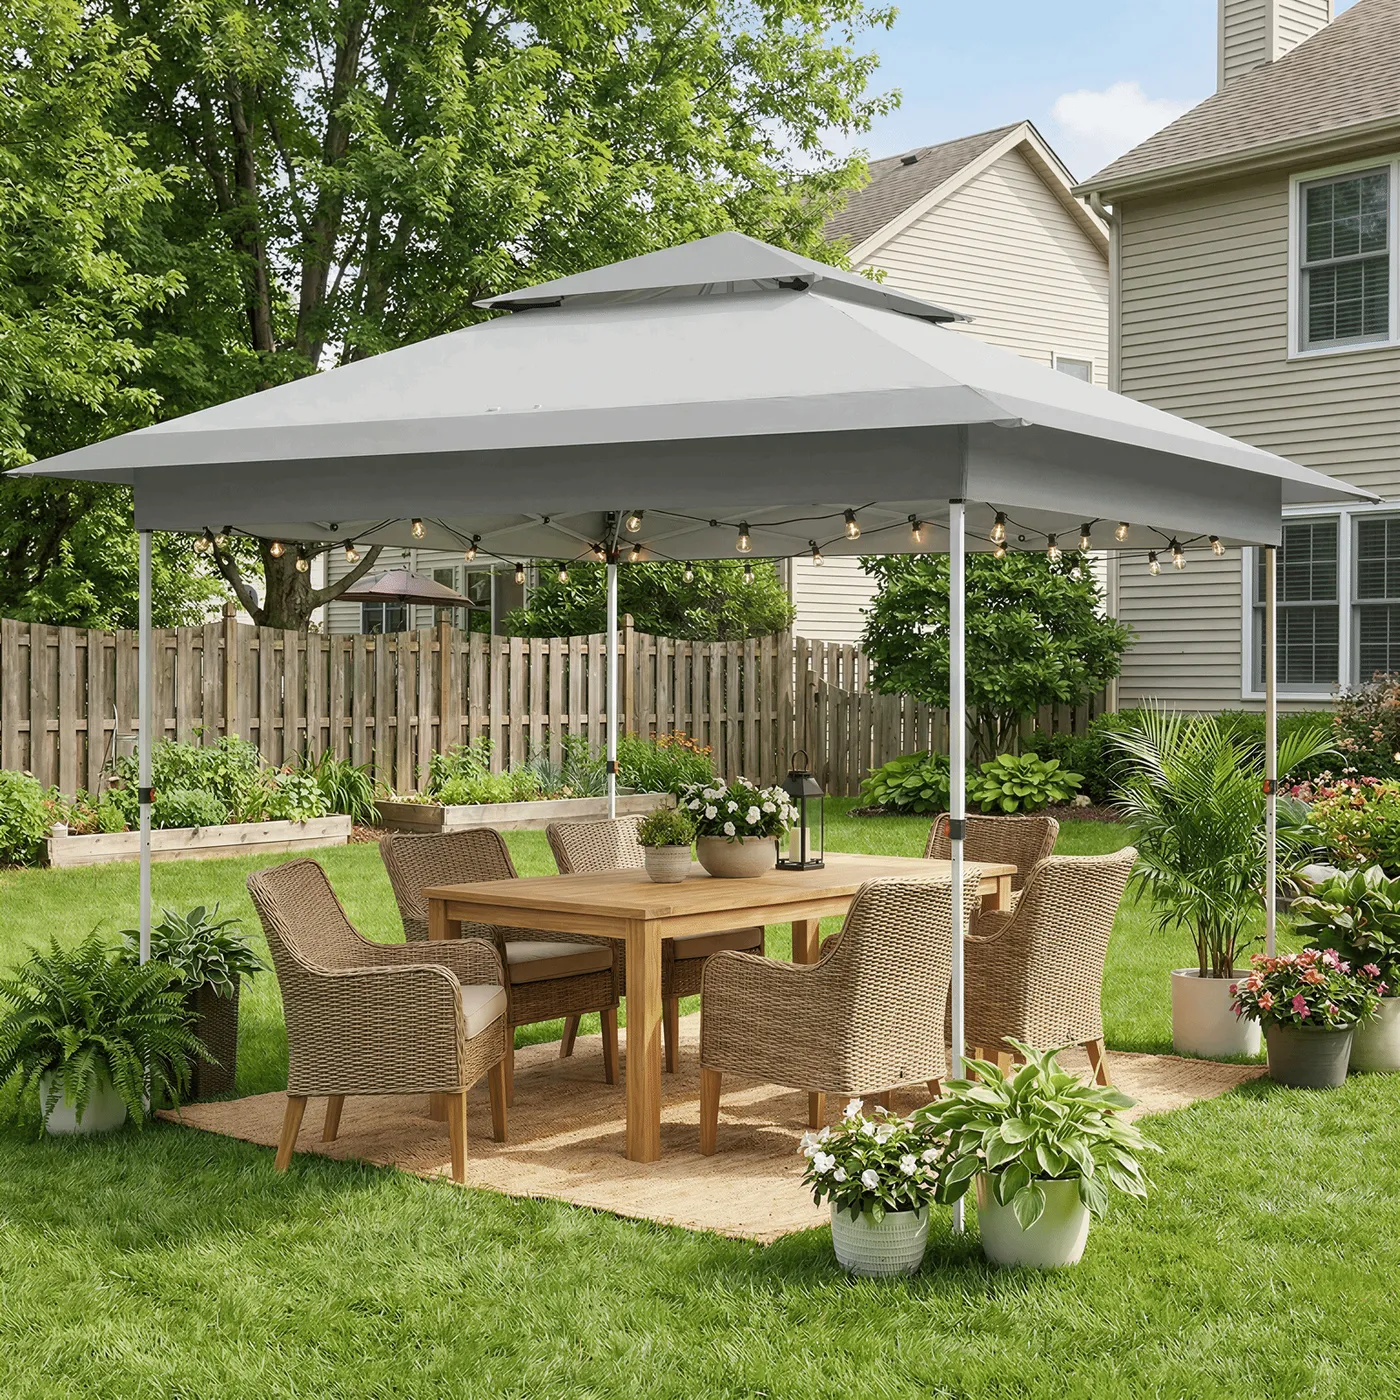
24. Tiered Grey Gazebo with Wicker Chairs and String Lights
A semi-permanent gazebo like this is a great way to anchor an outdoor dining space without the cost of a full custom build.
- Structure: 10×12 ft. steel or aluminum tiered gazebo kit ($700 – $1,800).
- Dining Furniture: Wooden table ($300 – $600), set of 6 wicker chairs with cushions ($600 – $1,200).
- Flooring & Lighting: Large natural fiber outdoor rug ($150 – $300), 2-3 strands of string lights ($60 – $120).
- TOTAL: $1,810 – $4,020
- Budget alternative: Look for end-of-season sales on gazebo kits at stores like Target or Walmart. A metal dining set is often cheaper than wood, and you can find great secondhand wicker chairs on Facebook Marketplace that just need new cushion covers. This could bring the total below $1,000.
|
📋 Copy HEX 🔗 Share |
This setup feels so inviting because it uses the ‘room within a room’ concept effectively. The gazebo frame clearly defines the dining area, separating it from the wider expanse of the lawn. The outdoor rug reinforces this boundary from the ground up, making the space feel intentional and grounded. The two-tiered roof isn’t just for show; the vent allows heat to escape, making it more comfortable on hot days. Finally, the warm glow of the string lights strung inside the frame creates a low, intimate ceiling of light, making the space feel cozy and perfect for evening dinners.
Your Perfect Spot in the Shade Awaits
Whew, that was a lot of inspiration! Whether you’re dreaming of a high-tech louvered system or a simple, colorful sail, the right shade solution can completely change how you use your outdoor space. Don’t be afraid to mix and match ideas to create the deck or patio that works for your home and your budget. Now that you’re armed with all these ideas, go create your own little slice of shady paradise. We’re cheering for you!
Ready to start planning? Pin your favorite ideas from this article to your Backyard Dreams board on Pinterest!