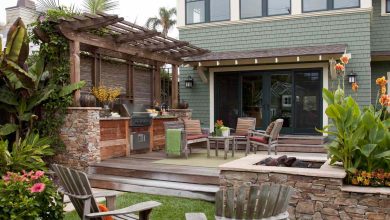
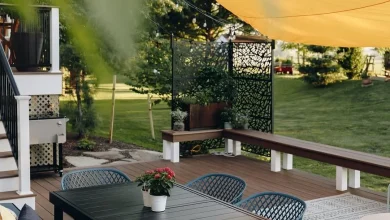
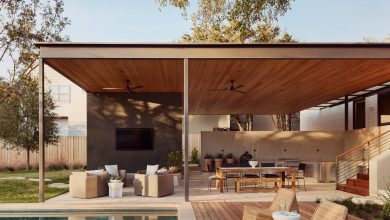
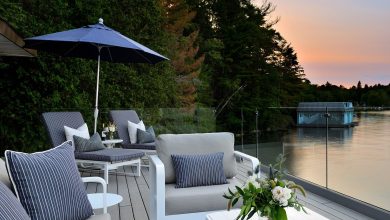
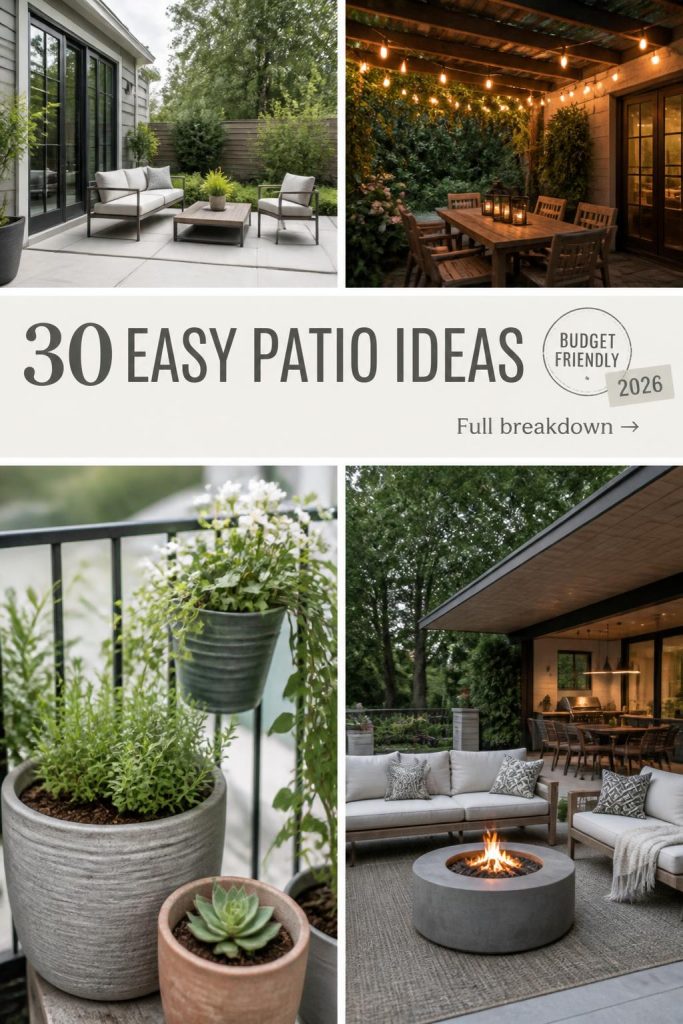
That feeling when you pin a dozen Easy Patio Ideas but end up more confused than when you started? We get it. Your outdoor space should be a retreat, not another source of decision fatigue. We went deep, sorting through hundreds of real-life patios to find what truly works. After filtering through options across Home Depot, Target, and IKEA, we narrowed it down to 30 ideas that deliver on style without demanding a huge budget or a construction crew. We’re covering everything from modern and minimalist looks to cozy, rustic escapes. The best part? We found ideas that work for every price point, from a simple $150 refresh to a more involved $5000 project. In 2026, the biggest trend is creating a true outdoor room—an extension of your home’s personality, not just a place for a grill. 📌 Save this to Pinterest for later—you’ll want to revisit these ideas.
1. Modern Balcony Seating with Ambient String Lights
The success of this small balcony boils down to two key design principles: high contrast and vertical space. The bold black of the round coffee table and railing creates a strong graphic outline against the light grey pavers and cream armchair cushions. This keeps the look crisp and modern, not cluttered. Secondly, the design utilizes vertical space brilliantly. Potted plants provide life at floor level, the seating occupies the mid-level, and the string globe lights draw the eye upward, making the compact area feel more voluminous and intentional.
When hanging string lights, aim for a gentle swag rather than pulling them completely taut. For a standard 8-10 foot span, allow for about 6-12 inches of dip in the center. This creates a more relaxed, celebratory feel and also puts less tension on the anchor points. Use a vinyl-coated aircraft cable as a guide wire for longer spans or heavier lights to prevent sagging over time and ensure they last through all seasons. It’s an extra step that makes a huge difference in durability.
2. Cozy Patio Nook with Woven Seating and Lush Greenery
The single most important element here is the sheer volume of plants. Remove the lush potted plants and garden beds, and you’re left with a nice but standard patio set. The greenery is what transforms the space from just outdoors into a secluded, private garden room. The layers of different heights, textures, and leaf shapes create a living wall that provides privacy, muffles sound, and makes the nook feel like a secret escape. It’s a masterclass in biophilic design—using nature to create a sense of well-being.
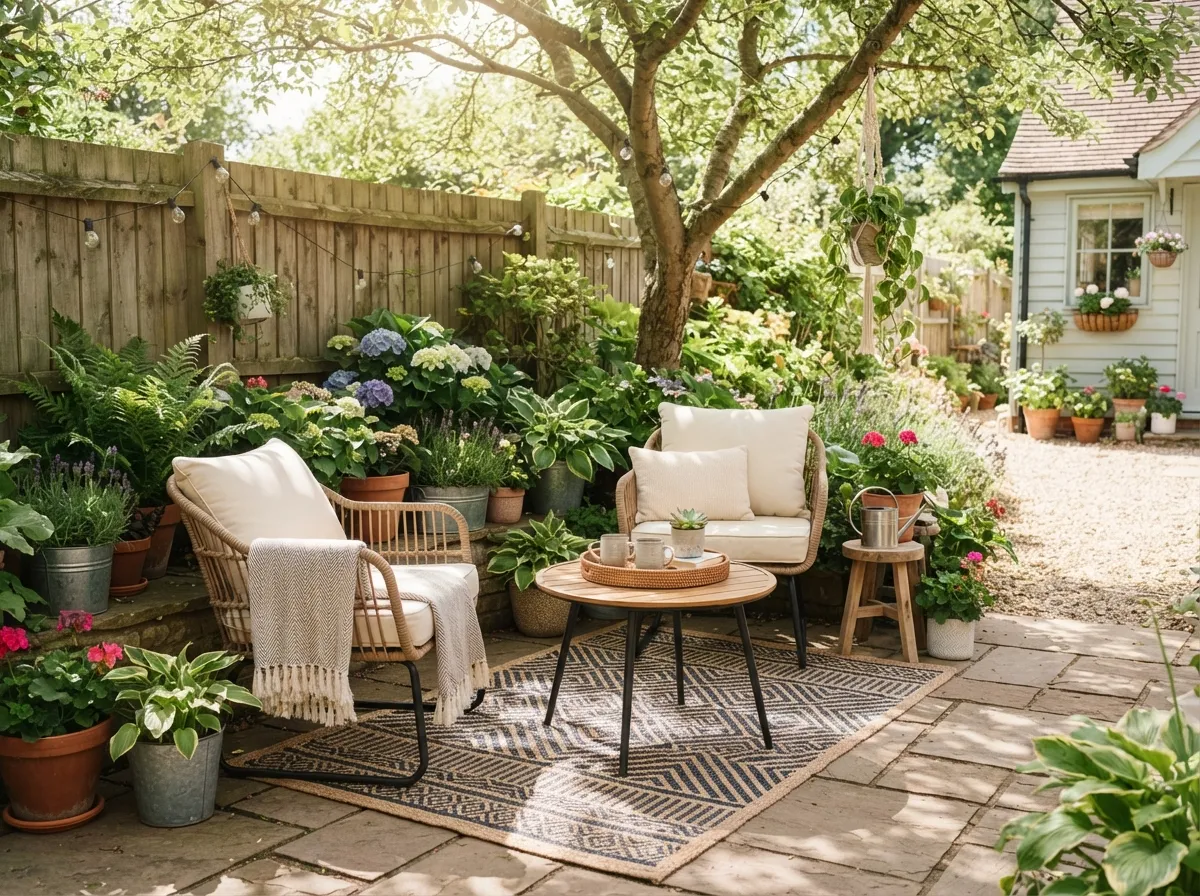
A look this lush requires commitment. All those pots need regular, consistent watering, especially during hot spells. If you travel often or are a bit forgetful, this much container gardening can quickly turn into a sad, crispy mess. Before you buy a jungle’s worth of plants, be honest about your routine. Consider investing in a simple drip irrigation system with a timer (kits start around $50) or choose drought-tolerant plants like succulents, lavender, and rosemary to reduce the daily watering burden.
3. Charming Bistro Set on a Bright Tiled Patio
This classic European cafe look follows a simple, refreshing formula: 50% Crisp White (walls, table) + 30% Neutral Grey (large patio tiles) + 10% Grounding Black (chairs) + 10% Organic Texture (terracotta pots and greenery). The high percentage of white and light grey makes the small space feel open and airy. The black chairs add just enough graphic punch to keep it from feeling washed out. You could easily swap the black for a bright color like yellow or teal to change the personality while keeping the same balanced equation.
You don’t need a custom tile job to get this vibe. Create a similar base using large, light grey outdoor-safe composite deck tiles from IKEA (RUNNEN series), which click together over any flat surface—no grout needed. For the seating, hit up Facebook Marketplace or a thrift store for a vintage bistro set; a can of white and black spray paint for outdoor metal can work wonders. Total cost for a DIY version could be under $250, a fraction of the cost of new high-end furniture and tile installation.
4. Modern L-Shaped Patio with Fire Pit and Mountain Views
This design works because it doesn’t try to compete with the view; it frames it. The low profile of the L-shaped sectional and the simple, circular fire pit keep the eyeline open to the lawn and mountains beyond. The color palette is pulled directly from the environment—greys from the stone and mountains and browns from the house and trees—which makes the man-made patio feel integrated and harmonious with the natural landscape. The clean lines of the furniture echo the modern architecture of the home, creating a cohesive indoor-outdoor experience.
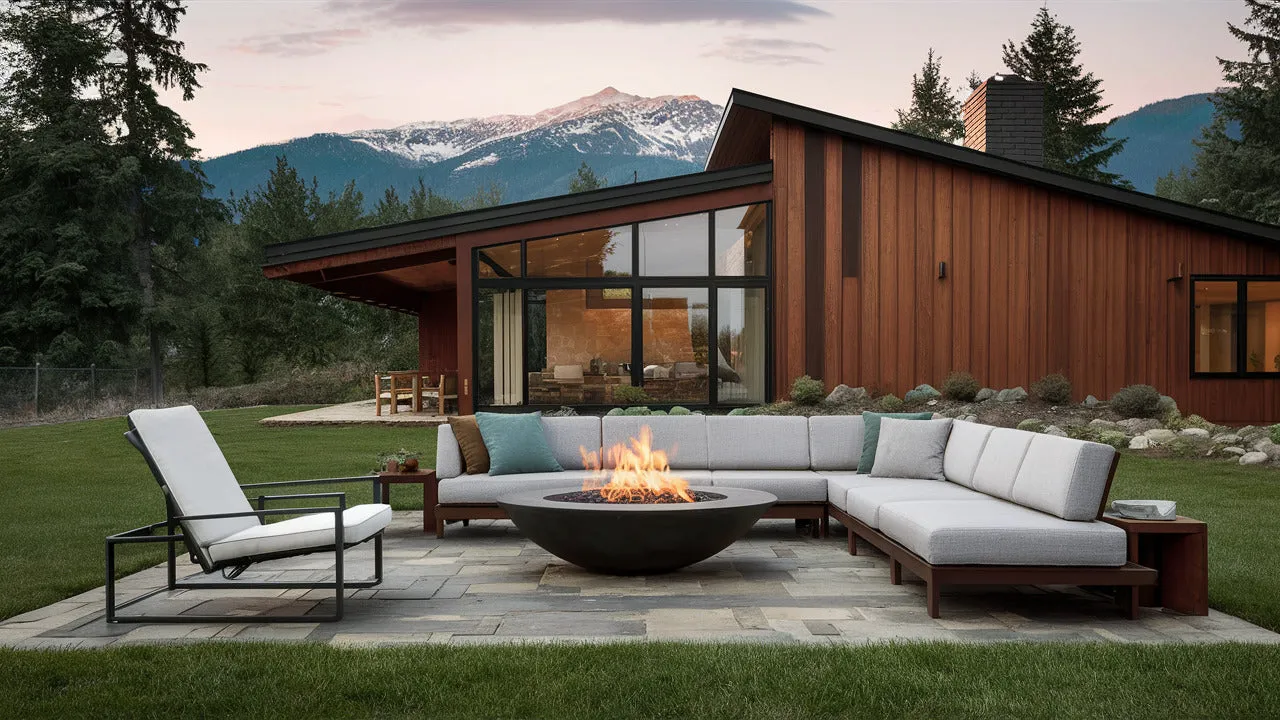
An expansive, open concept like this is best suited for patios with at least 200-250 square feet of usable space and a direct connection to a large yard or open area. The L-shaped sectional alone often measures 8×8 feet or more. This idea would feel cramped in a small, enclosed yard. If you have less space but love this modern feel, consider the more compact setup in Idea #1, which uses a similar color palette but is tailored for a balcony.
5. Geometric Paved Patio with Integrated Planting Beds
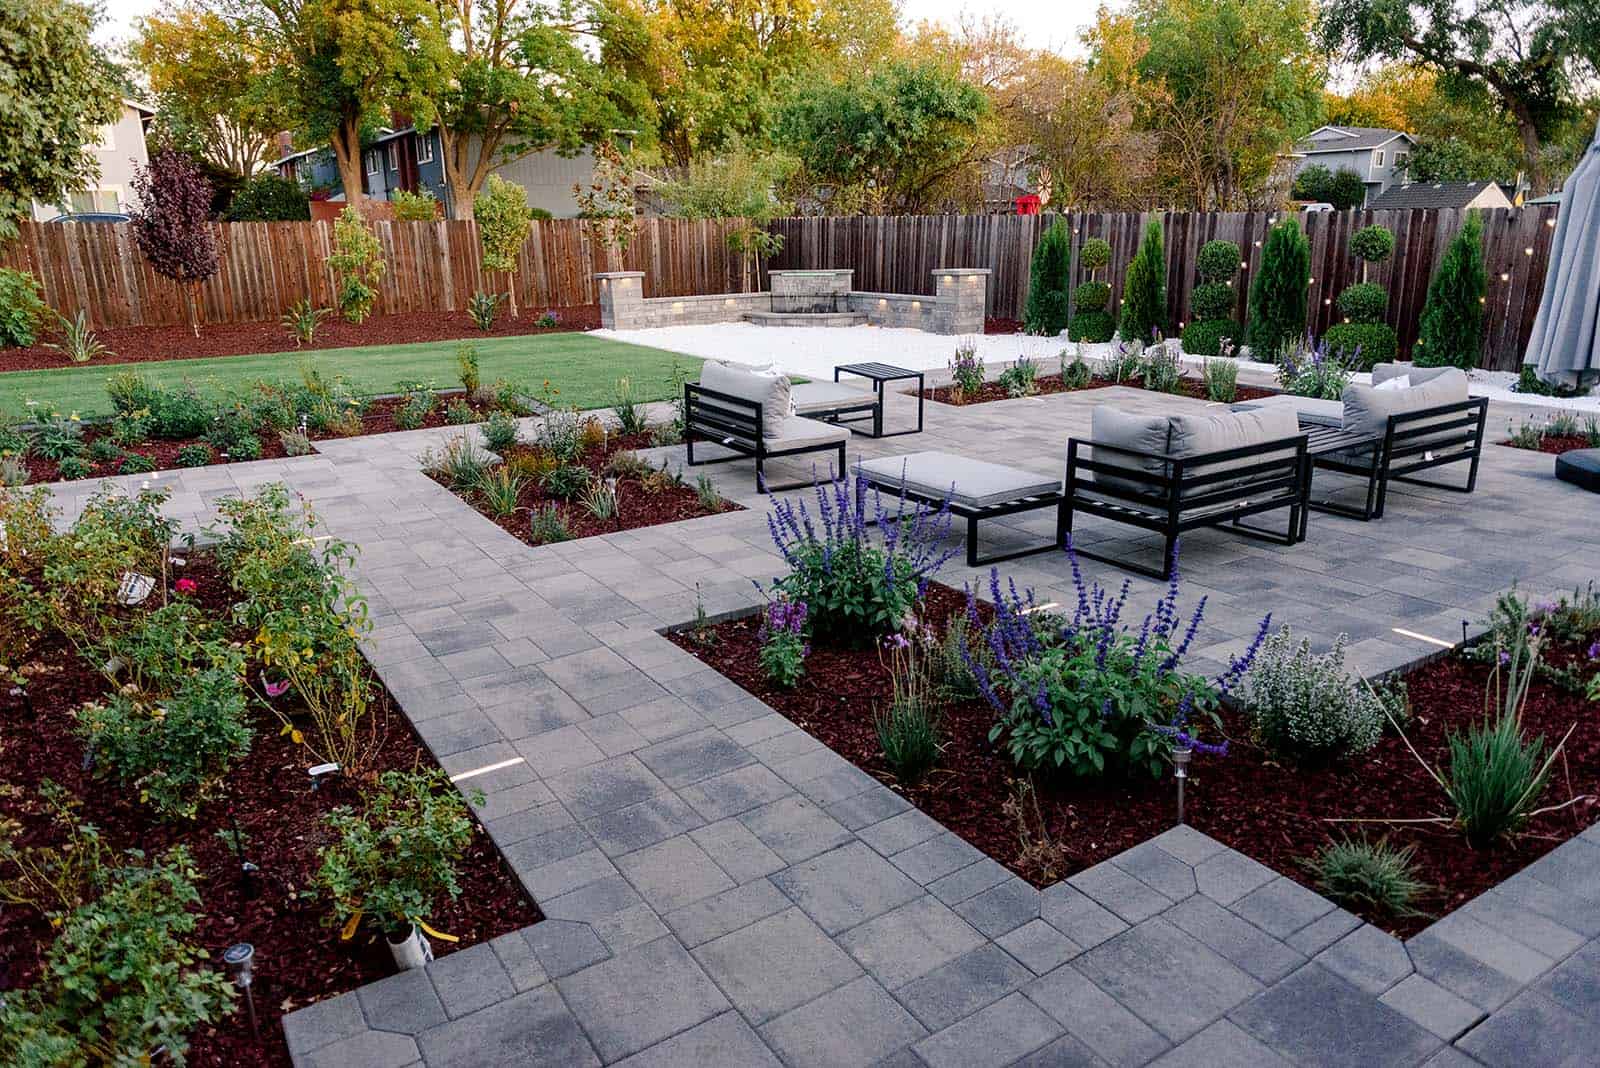
The integrated planting beds are the star of this design. By replacing some of the pavers with planting areas, the designer breaks up what could have been a monotonous sea of grey stone. This technique softens the hardscape, introduces color and texture directly into the patio floor, and creates a more dynamic, custom look. The contrast between the clean-edged grey pavers and the organic, dark red mulch and greenery is what gives this space its sophisticated, architectural quality. It’s a brilliant way to merge landscape and hardscape.
|
📋 Copy HEX 🔗 Share |
While stunning, this design requires diligent maintenance. The crisp edges between pavers and mulch beds are magnets for weeds and grass. You’ll need to commit to weekly or biweekly weeding and redefining those edges to keep it looking sharp. The dark red mulch will also fade over time from sun exposure and will need a top-up layer every 1-2 years to maintain its rich color. For a lower-maintenance alternative, use a dark-colored pea gravel or river rock instead of mulch in the beds.
6. Cozy Balcony Dining Nook with String Lights
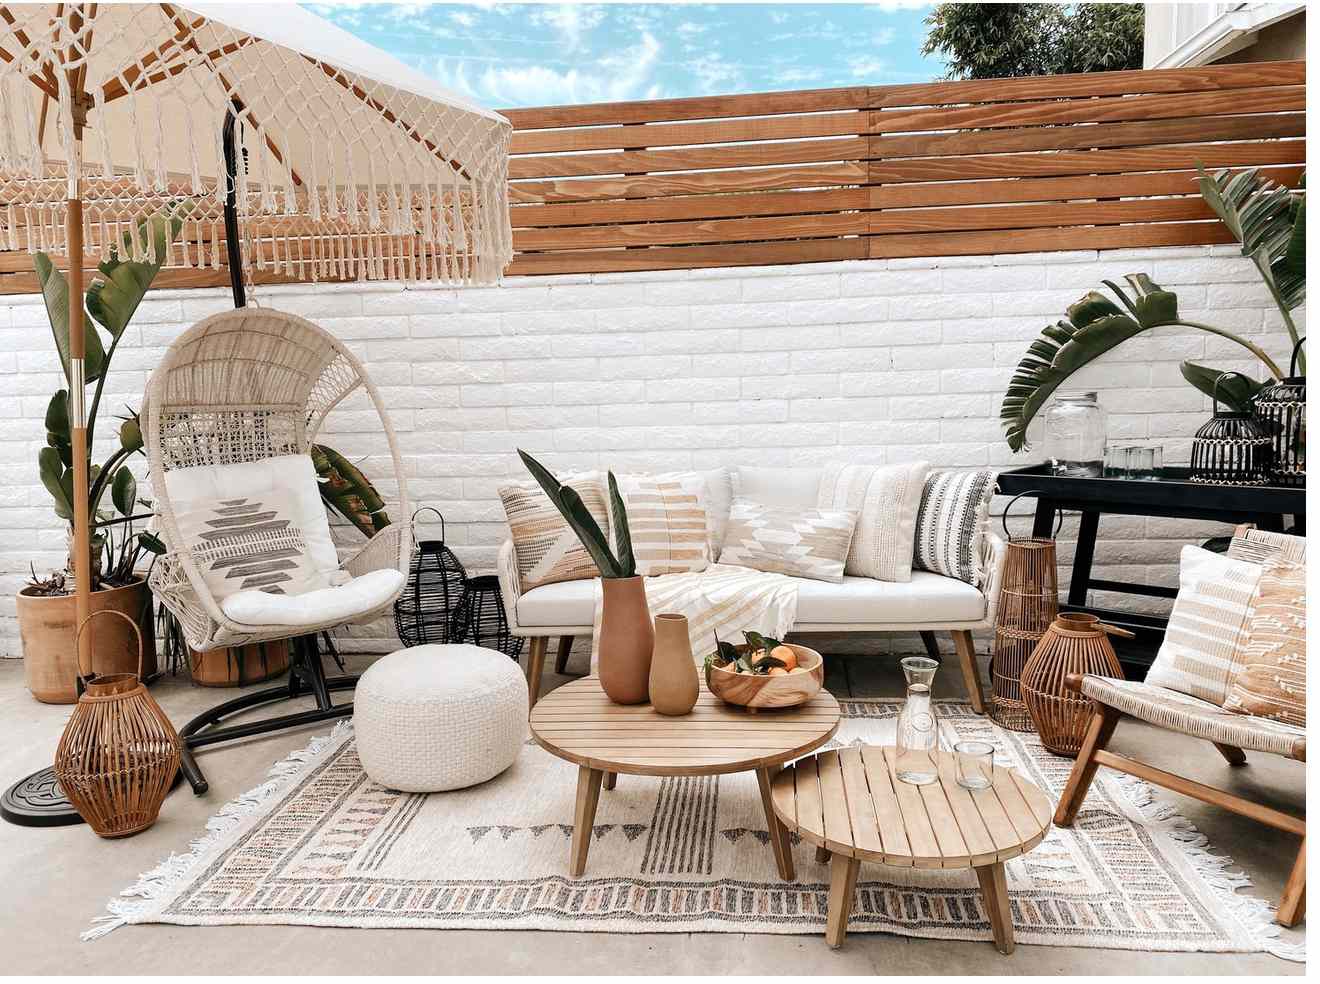
Here’s a realistic cost estimate to bring this intimate dining nook to life:
- Main Furniture (table & 2 chairs): $250 – $600
- Lighting (1-2 strands of outdoor string lights): $40 – $100
- Decor/Accessories (Assorted pots & plants): $75 – $200
- TOTAL: $365 – $900
Budget alternative: Score a used bistro set on Facebook Marketplace for under $100. Grab string lights from Target or Walmart for $20 a strand. For plants, check out local plant swap groups or propagate cuttings from friends for free. This brings the total look down to around $150-$200.
Let’s be honest: a setup this cozy is perfect for coffee or a two-person dinner, but it’s not ideal for hosting. The rectangular table pushed against the wall limits seating to two, and there’s not much surface area for serving dishes. Before you commit, think about how you actually use your outdoor space. If you dream of hosting brunches for four or more, you might be better served by a small round table, like the one in Idea #2, which allows for more flexible seating.
7. Covered Patio with a Grand Stone Fireplace and Wood Beams
This space feels so inviting because it masters the art of mixing textures. You have the rough, cool surface of the stone fireplace, the smooth, dark-stained wooden beams, the soft, light-colored fabric of the sofa, and the woven pattern of the rug. This textural variety creates a rich, layered look that feels collected and comfortable. The L-shaped sofa also carves out a distinct ‘room’ within the larger patio, making the conversation area feel protected and intimate, even in an open setting.
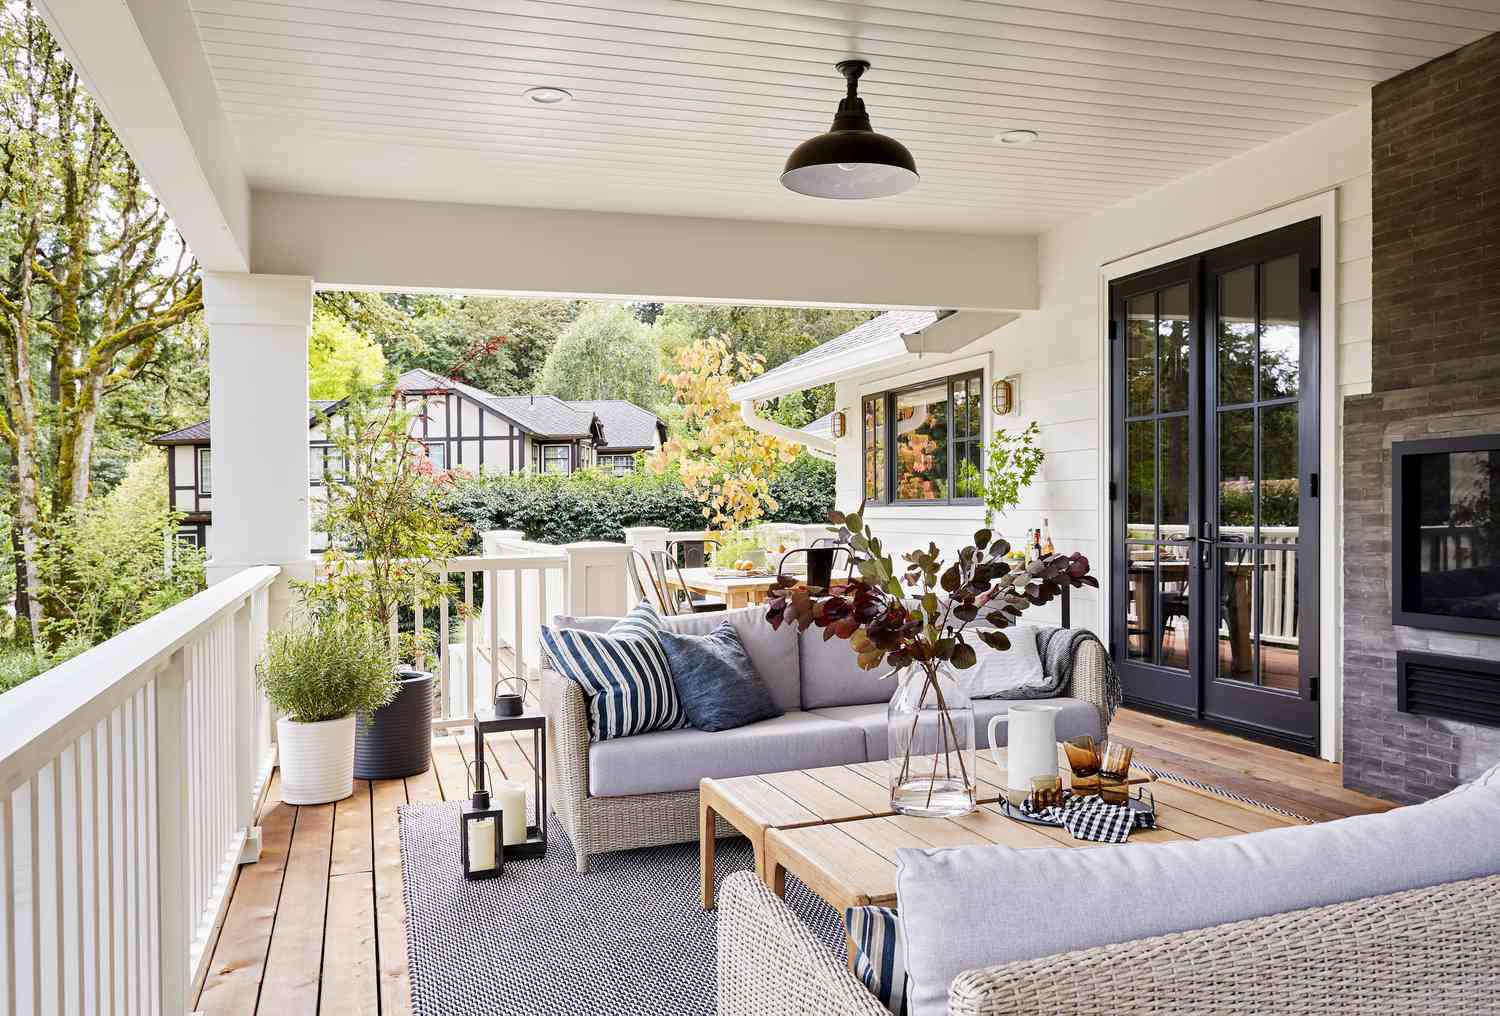
To make an outdoor living room feel truly complete, anchor the seating area with an outdoor rug that is large enough for at least the front legs of all furniture pieces to rest on it. A common mistake is using a rug that’s too small, making it look like a postage stamp floating in the middle. As a rule of thumb, your rug should extend at least 12 inches on either side of your sofa. This visually connects all the elements and defines the zone.
8. A Smart, Inexpensive Paving Solution for Small Backyards
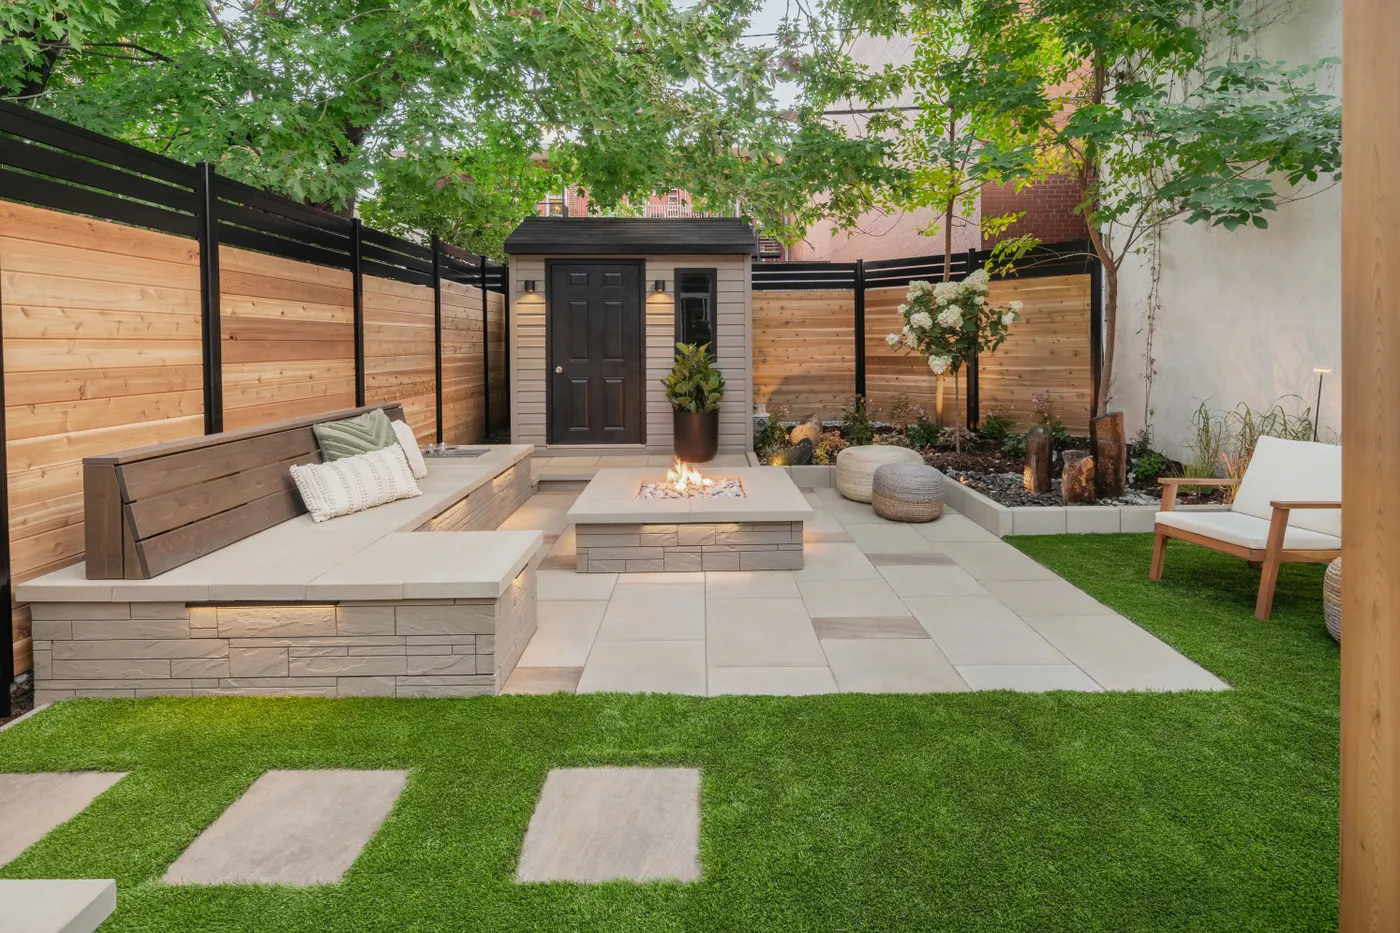
Creating a simple, budget-friendly paver area is one of the most impactful DIY projects for a backyard. Here’s a quick guide to laying a basic paver patio:
|
📋 Copy HEX 🔗 Share |
- Excavation (2-3 hours): Mark your patio area. Dig out 6-7 inches of soil. Ensure the area has a slight slope away from your house for drainage (about 1/4 inch per foot).
- Gravel Base (1-2 hours): Add a 4-inch layer of paver base gravel. Rake it level, then compact it thoroughly with a hand tamper or rented plate compactor.
- Sand Layer (1 hour): Add a 1-inch layer of leveling sand over the compacted gravel. Use a straight 2×4 to screed the sand perfectly smooth.
- Lay Pavers (2-4 hours): Gently place your pavers on the sand, working from one corner outwards. Use a rubber mallet to tap them into place.
- Jointing Sand (30 mins): Sweep polymeric sand over the entire surface, working it into all the joints between pavers.
- Activate (15 mins): Gently mist the patio with a hose to activate the polymeric sand, which will harden and lock the pavers in place.
Material cost can be around $5-$15 per square foot.
While pavers offer a classic look, the cheapest and easiest DIY patio surface is pea gravel or decomposed granite. For a 10×10 foot area, you can often source the materials for under $200. You’ll still need to excavate and put down a layer of landscape fabric to suppress weeds, but you skip the tedious leveling and placement of individual pavers. It gives a more rustic, informal feel that’s perfect for a casual seating area or fire pit zone. Look for suppliers on Facebook Marketplace for the best deals on bulk material delivery.
9. Circular Stone Patio with Navy Adirondack Chairs
It’s the navy blue Adirondack chairs. Without that specific, bold color choice, this is a pleasant but generic stone patio. The deep navy provides a strong, sophisticated anchor that contrasts beautifully with the vibrant pink flowers and lush green surroundings. It elevates the entire scene from backyard to designed landscape. The classic, comfortable shape of the chairs invites you to sit, but it’s the confident color that makes the whole composition memorable and pin-worthy.
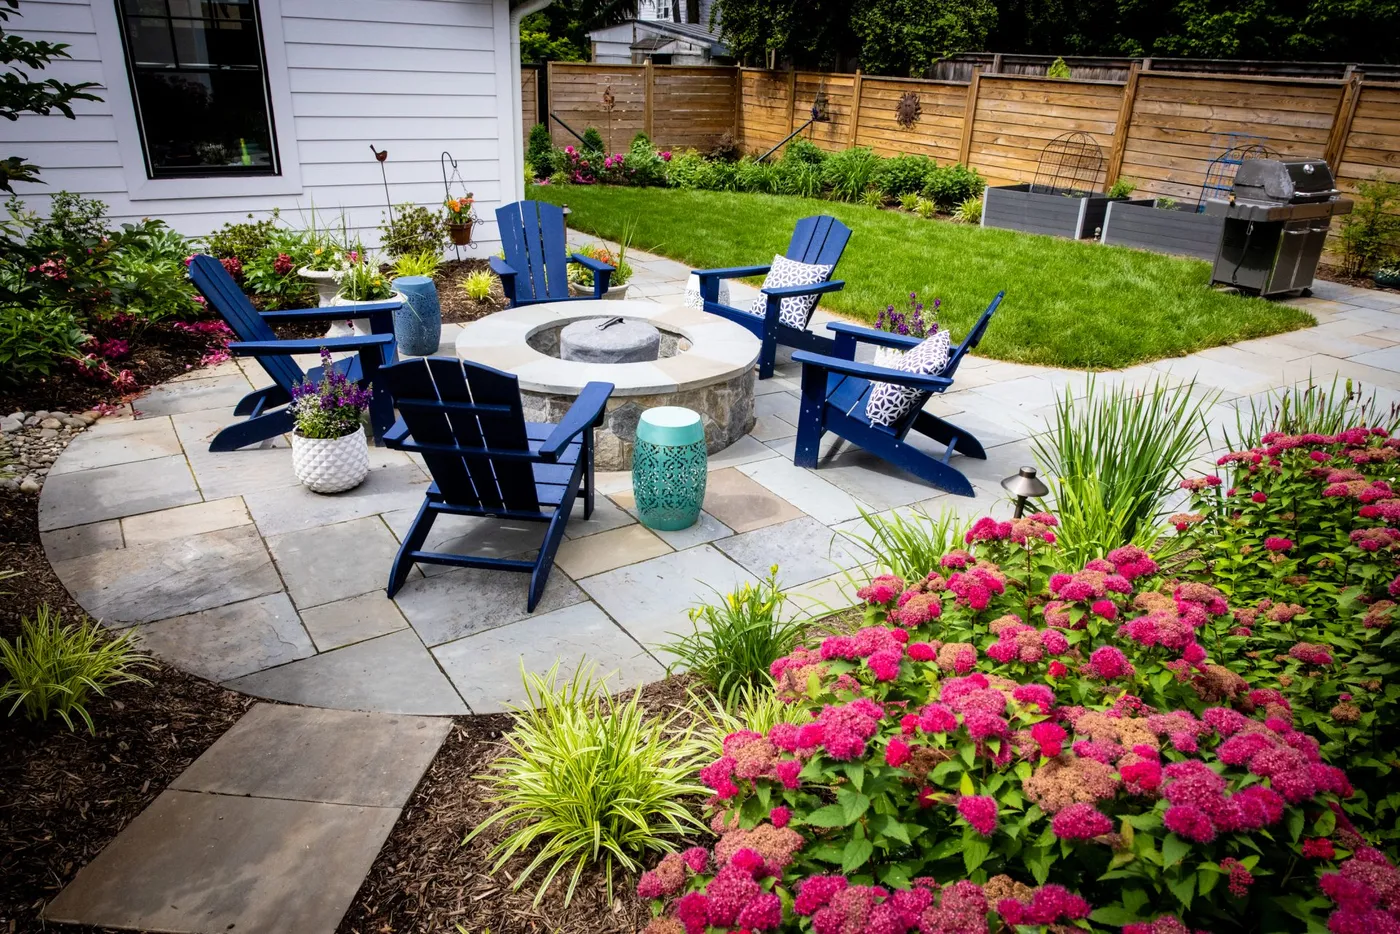
This vibrant, welcoming look is all about color balance. Think of it as: 50% Natural Base (grey stone, green lawn, wood fence) + 30% Bold Accent Color (the navy chairs) + 20% Bright Pop Color (the pink flowers). The natural base grounds the space, the bold accent provides the main personality, and the bright pop adds energy and seasonal interest. You could swap the navy for a deep forest green and the pink for yellow and still have a successful, balanced palette.
10. Luxury Covered Patio with an Outdoor Kitchen and Spa
A high-end outdoor living space like this is a significant investment. Here’s a general breakdown for a professionally installed setup:
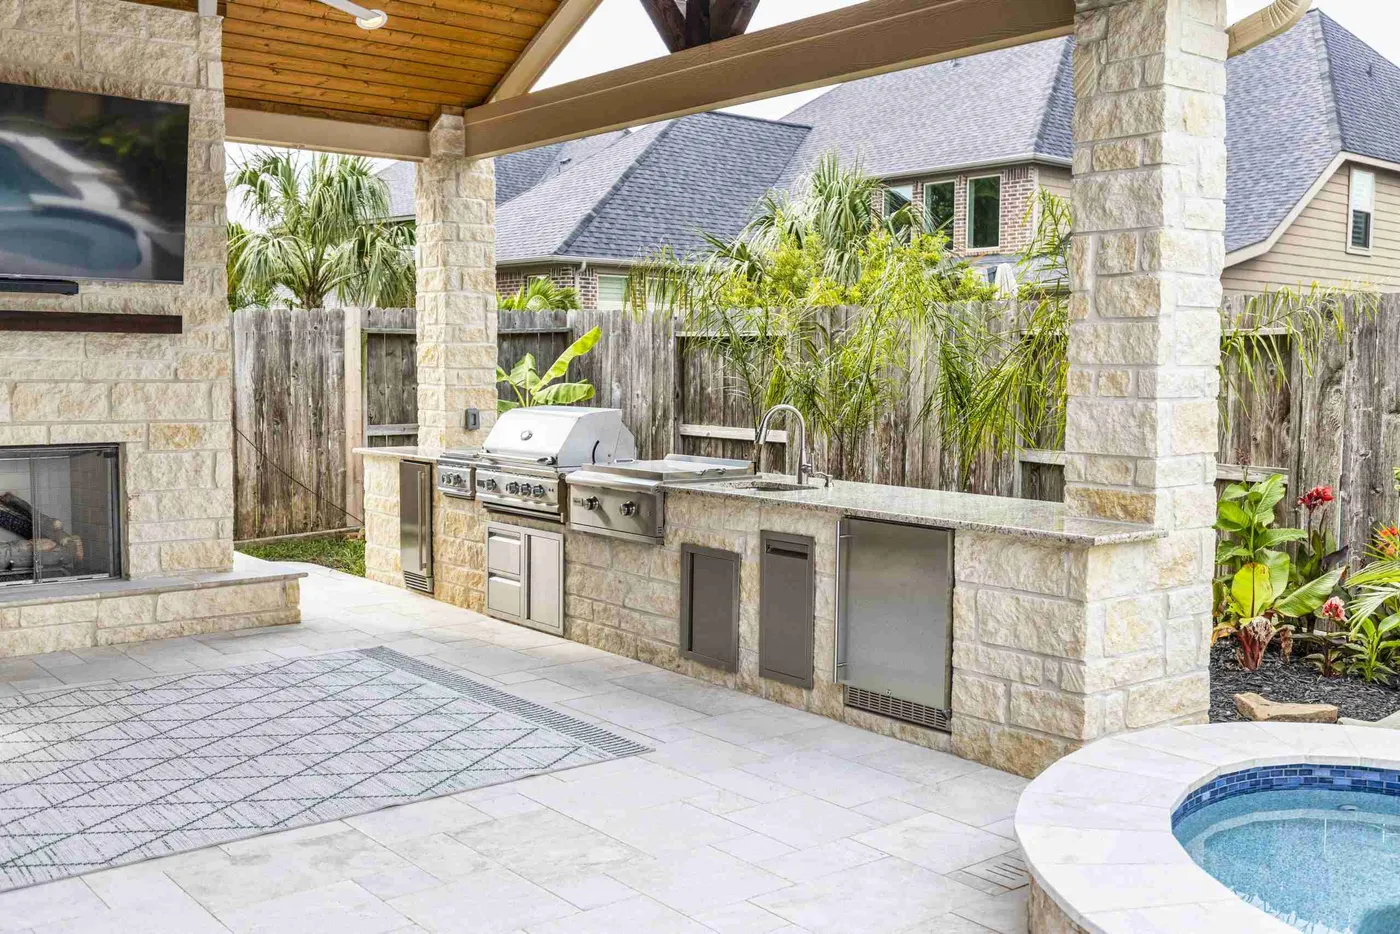
- Structure (Covered roof, columns, ceiling): $15,000 – $40,000+
- Stacked Stone Work (Kitchen island, fireplace): $10,000 – $30,000+
- Appliances (Grill, fridge, sink): $5,000 – $15,000
- Flooring (Pavers or stone): $5,000 – $15,000
- Electrical & Plumbing: $3,000 – $8,000
- Hot Tub/Spa (Including installation): $8,000 – $20,000
- TOTAL: $46,000 – $128,000+
Budget alternative: This is a major construction project. A budget version isn’t really possible, but you could phase it. Start with a simple paver patio and a standalone grill, then add a pergola, and build up from there over several years.
An integrated outdoor kitchen and spa requires more than just a big budget; it requires careful planning with your municipality. You will absolutely need permits for the structure, electrical wiring, and plumbing/gas lines. The process can be slow and involves inspections at multiple stages. Don’t assume you can just hire a contractor and start building. Begin by talking to your local planning department to understand the specific requirements, setbacks, and permit fees in your area. Ignoring this step can lead to massive fines and orders to tear everything down.
11. Pergola Patio with a Cozy Fire Pit and Grill Station
This design excels at creating zones within a single space. The dark wood pergola clearly defines the main living and dining area, separating it from the open yard. Underneath, the seating is clustered around the fire pit, forming a cozy conversation zone, while the built-in grill creates a distinct cooking zone. The string lights and lanterns further reinforce the boundary of the room, making it feel like an intentional outdoor living space, especially as the sun sets. This thoughtful layout allows for multiple activities to happen at once without feeling chaotic.
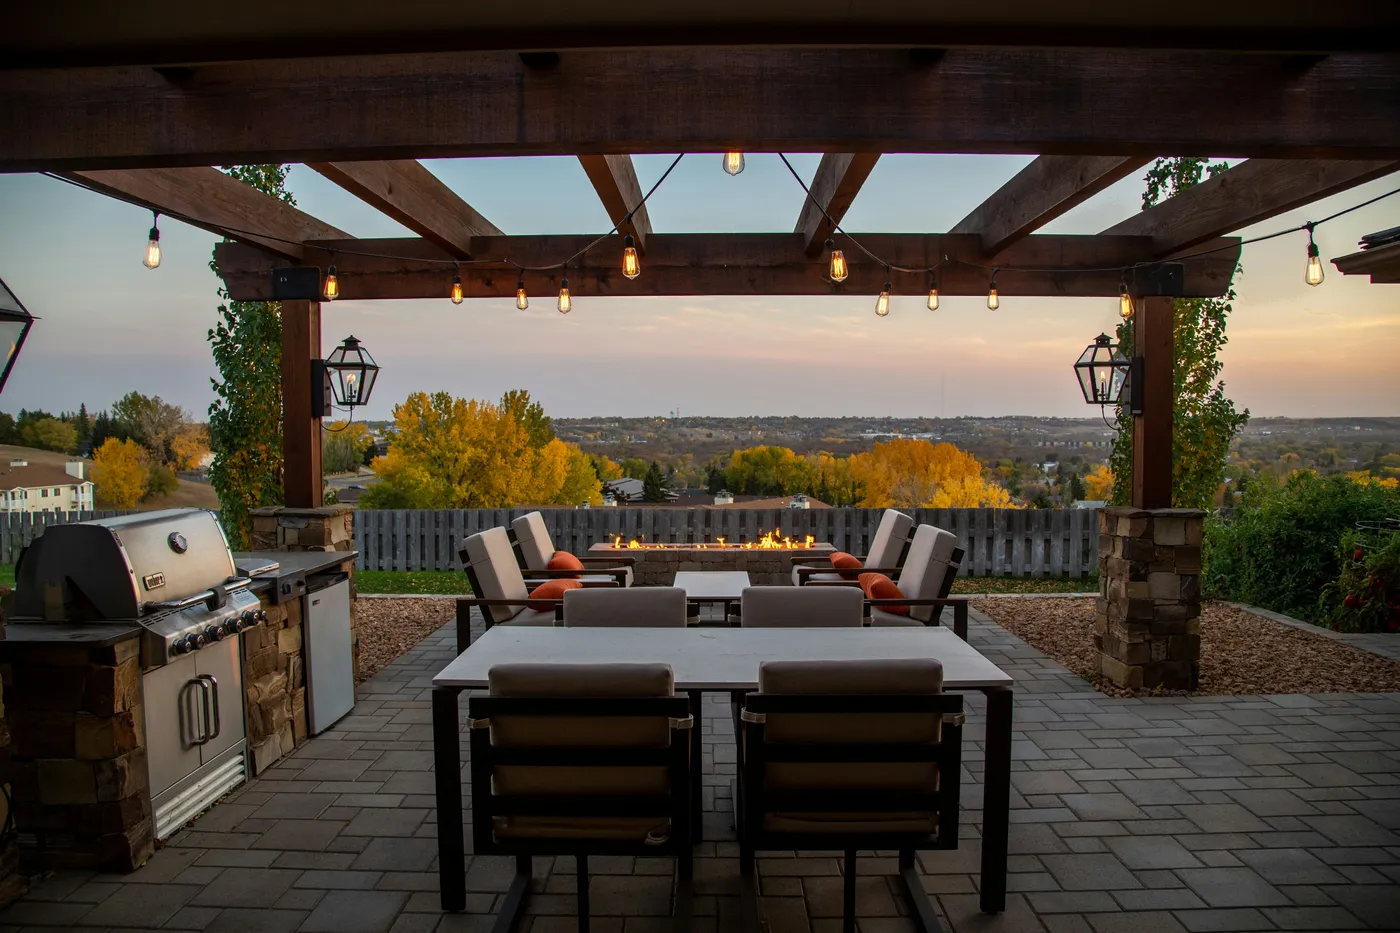
Before you commit to building a pergola and outdoor kitchen, run through this quick checklist:
- Measure your space: Do you have a minimum of 12×12 feet for a comfortable seating area and safe clearance around the grill and fire pit?
- Check sun direction: Will the pergola actually provide shade during the hottest parts of the day? Observe the sun’s path for a full day before deciding on placement.
- Confirm utilities: Do you need to run electrical for lights and a fridge, or a gas line for the grill/fire pit? Know where your existing lines are and what it will take to extend them.
- Budget for the base: The paver patio is the foundation. Is it in your budget? A professionally installed paver patio can cost $15-$30 per square foot.
12. Relaxed Covered Patio with Natural Stone Flooring
Natural stone flooring, like the irregular flagstone shown here, is incredibly durable but not maintenance-free. The textured, uneven surface can trap dirt, and the grout lines are prone to mildew and moss growth, especially in damp, shaded areas. Plan on a deep cleaning at least twice a year with a pressure washer on a low setting and a stiff brush. You should also inspect the grout/mortar annually for cracks and reseal the stone every 2-3 years to protect it from stains and water damage. The tradeoff for its timeless beauty is a bit of annual upkeep.
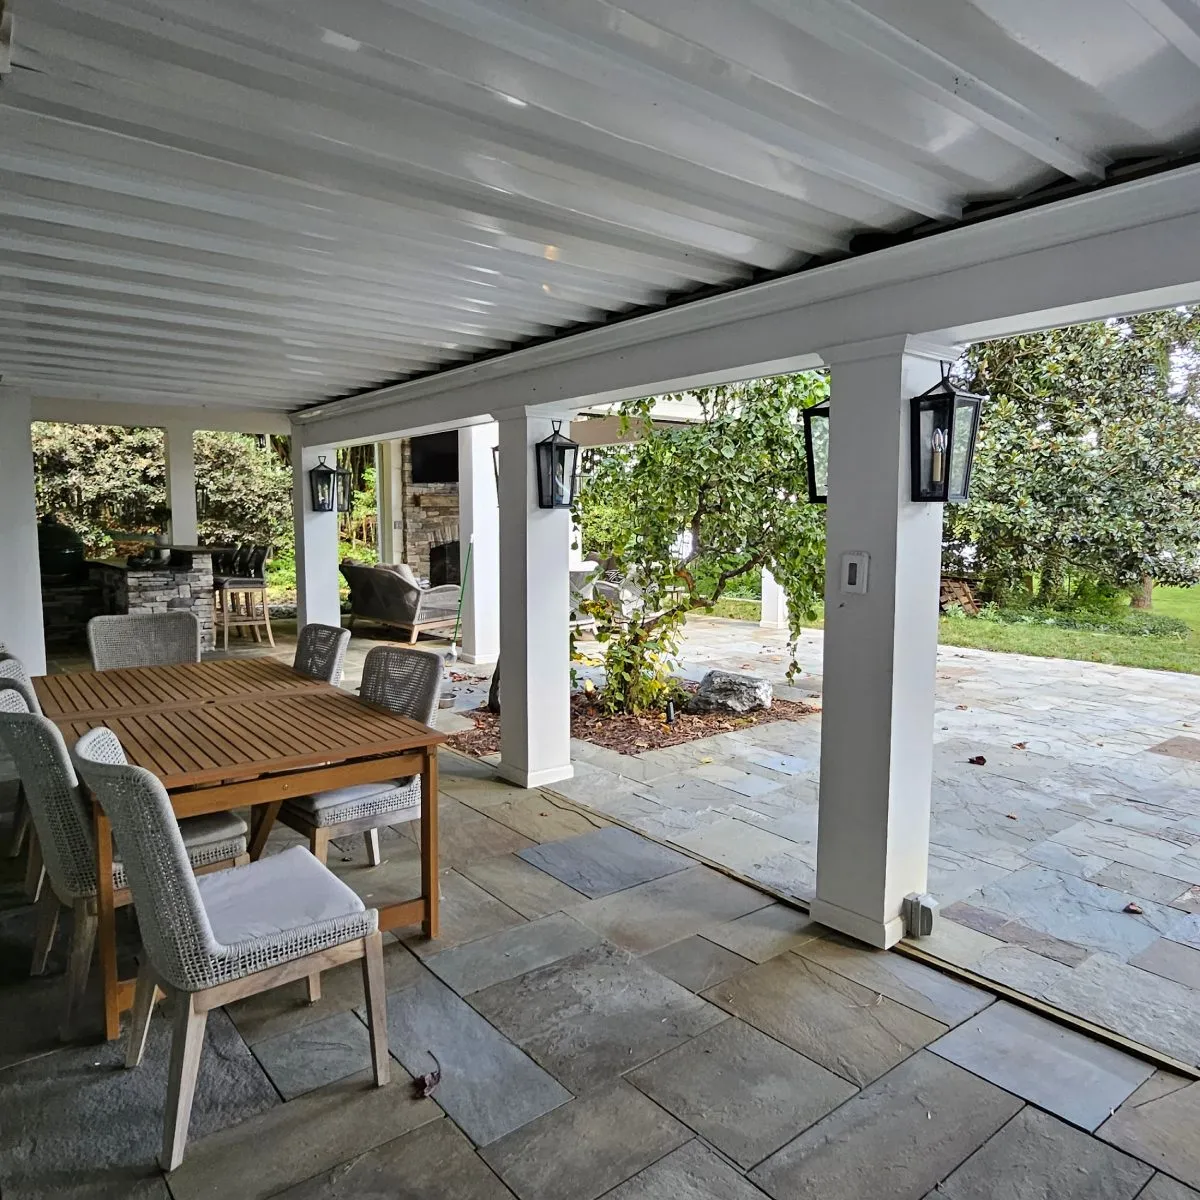
When choosing chairs for an outdoor dining set, think beyond looks and prioritize comfort. The woven backs on these chairs offer more give and breathability than solid wood or metal, which is a huge plus during hot summer dinners. Always try to test-sit chairs before you buy. Can you lean back comfortably? Is the seat height right for the table? A beautiful chair no one wants to sit in for more than 20 minutes is a design fail. Cushions can help, but the chair’s underlying ergonomics are what really matters for long, lingering meals.
13. Cozy Wicker Sectional Under a Shaded Pergola
The retractable fabric shade is the game-changer here. A standard slatted pergola offers partial, shifting shade, but the ability to extend a full canopy transforms the patio into a usable room even in the middle of a hot, sunny day. It provides consistent, reliable shade and a greater sense of enclosure and privacy. This single feature dramatically increases the number of hours the space can be comfortably used. The white curtains and string lights are lovely, but the functional shade is what makes this setup truly practical and luxurious.
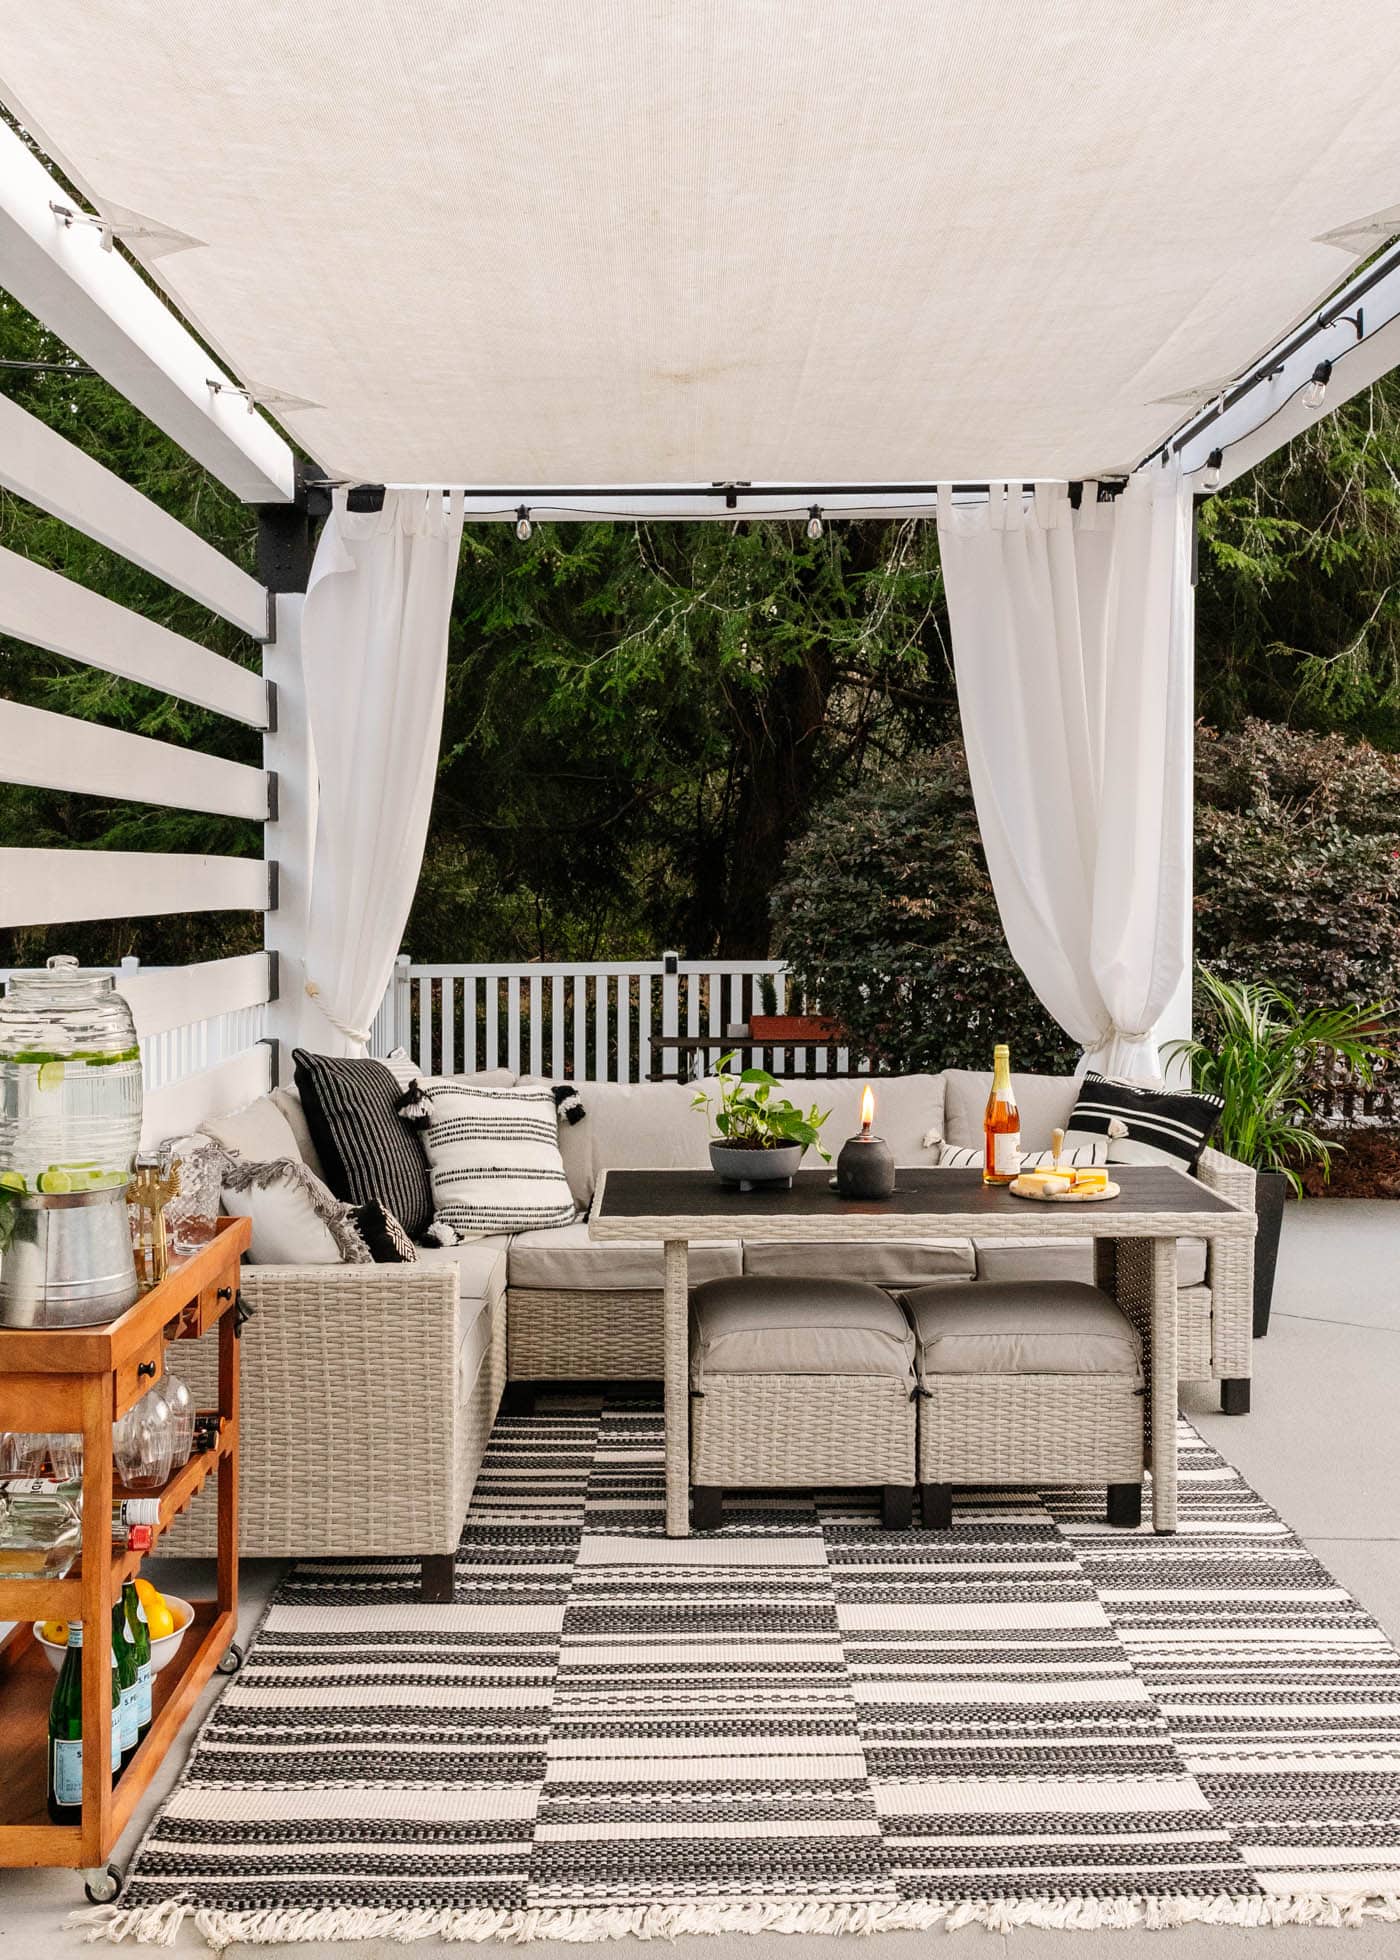
You can get this look for much, much less. Instead of a permanent pergola, use a large cantilever umbrella (around $150-$400 from places like Wayfair or Overstock) to create a flexible shaded zone. For the seating, scout Target’s end-of-season sales or Facebook Marketplace for a wicker sectional—you can often find them for 50-70% off the original price. A black and white striped outdoor rug from IKEA or Amazon costs less than $100. Add some simple outdoor curtains on a tension rod and you’ve got a very similar vibe for under $800.
14. Versatile Patio Furniture Layouts for Easy Entertaining
A flexible and inviting patio layout often follows this formula: 60% Anchor Seating + 20% Flexible Seating + 20% Surface Area. The Anchor Seating is your main sofa or sectional. The Flexible Seating includes items like ottomans, poufs, or lightweight armchairs that can be easily moved around for conversation or to accommodate more guests. Surface Area refers to coffee tables and side tables. This ratio ensures you have a comfortable, grounded main zone but also the adaptability needed for real-life use, from a quiet morning coffee to a small party.
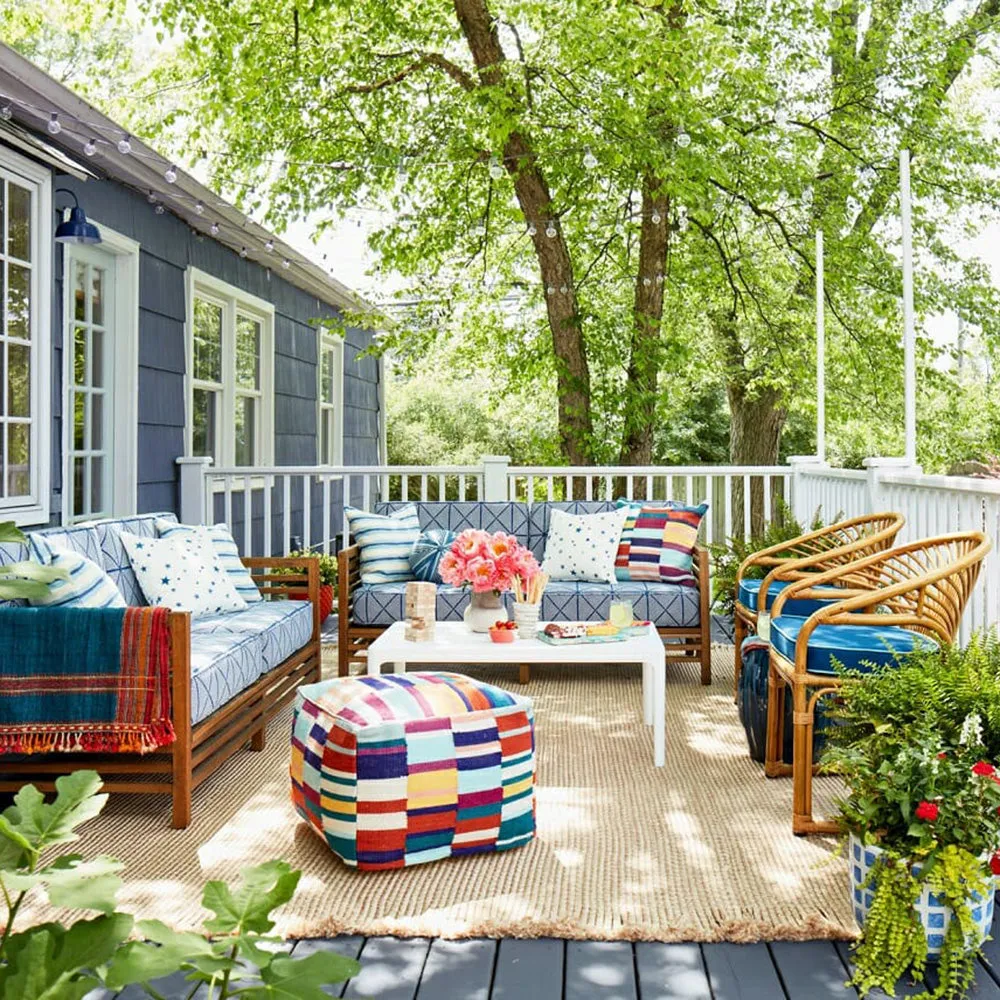
To comfortably fit a sofa, a coffee table, and at least one armchair with proper walkways, you need a patio space that is at least 10 feet deep and 12 feet wide (120 sq ft). For a larger L-shaped sectional arrangement like the one seen in Idea #3, you should have a minimum of 15×15 feet (225 sq ft). Anything smaller, and you should focus on a bistro set (see Idea #2) or a pair of armchairs to avoid a cramped, unusable space. Always leave a 3-foot ‘hallway’ for major traffic paths.
15. Evening Ambiance: Layering Patio Decor
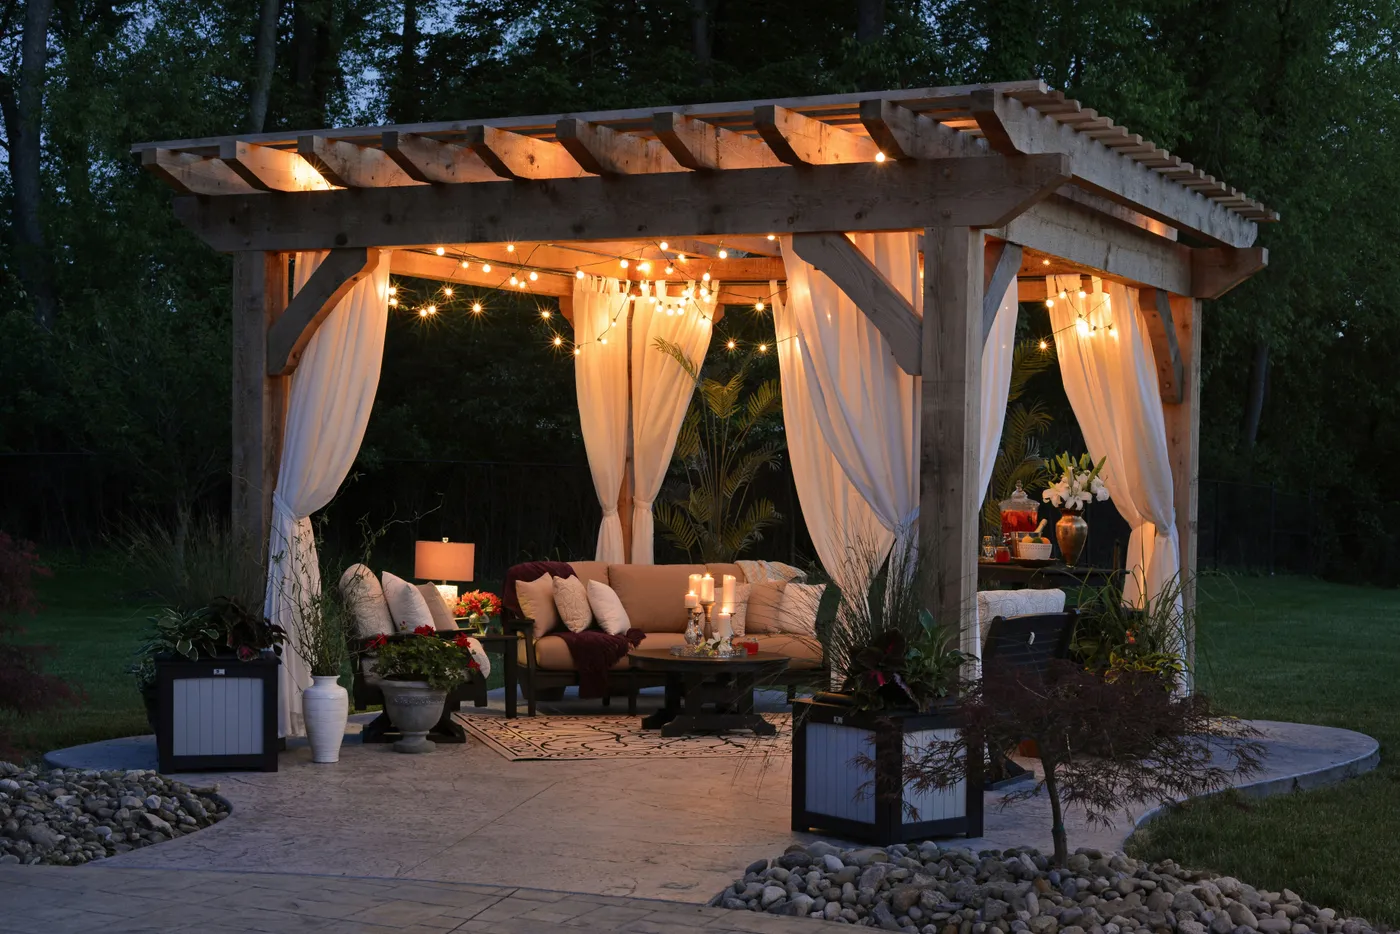
For truly magical evening ambiance, you need at least three sources of light. Don’t just rely on one string of overhead lights. Layer them! Start with your main ambient light (string lights or lanterns). Then add task lighting where needed, like a small lamp on a side table for reading. Finally, add accent lighting—this could be candles on the coffee table, solar-powered uplights in your planters, or even the glow from a fire pit. This layered approach creates depth, warmth, and a much more sophisticated and inviting atmosphere than a single, flat light source.
|
📋 Copy HEX 🔗 Share |
There’s a reason cozy outdoor living is blowing up on Pinterest. After years of focus on sleek, minimalist interiors, people are craving warmth, texture, and comfort—and they’re extending that desire outdoors. This trend is about creating a true extension of the home, a space that feels just as personal and layered as a living room. It’s less about perfect, sterile design and more about creating a feeling of welcome and relaxation. This trend has staying power because it’s rooted in a fundamental human desire for comfort and connection.
16. Cozy Night Patio with Wicker Furniture and String Lights
This patio feels incredibly cozy due to the brilliant use of enclosure and warm light. The furniture is arranged in a tight conversational grouping, grounded by the rug, which creates a room within a room. The brick wall on one side and the surrounding trees on the others provide a sense of privacy and enclosure. But the real magic comes from the sheer quantity of string lights. By stringing them both overhead and along the back wall, the space is wrapped in a warm, low-level glow that feels intimate and magical, drawing you in.
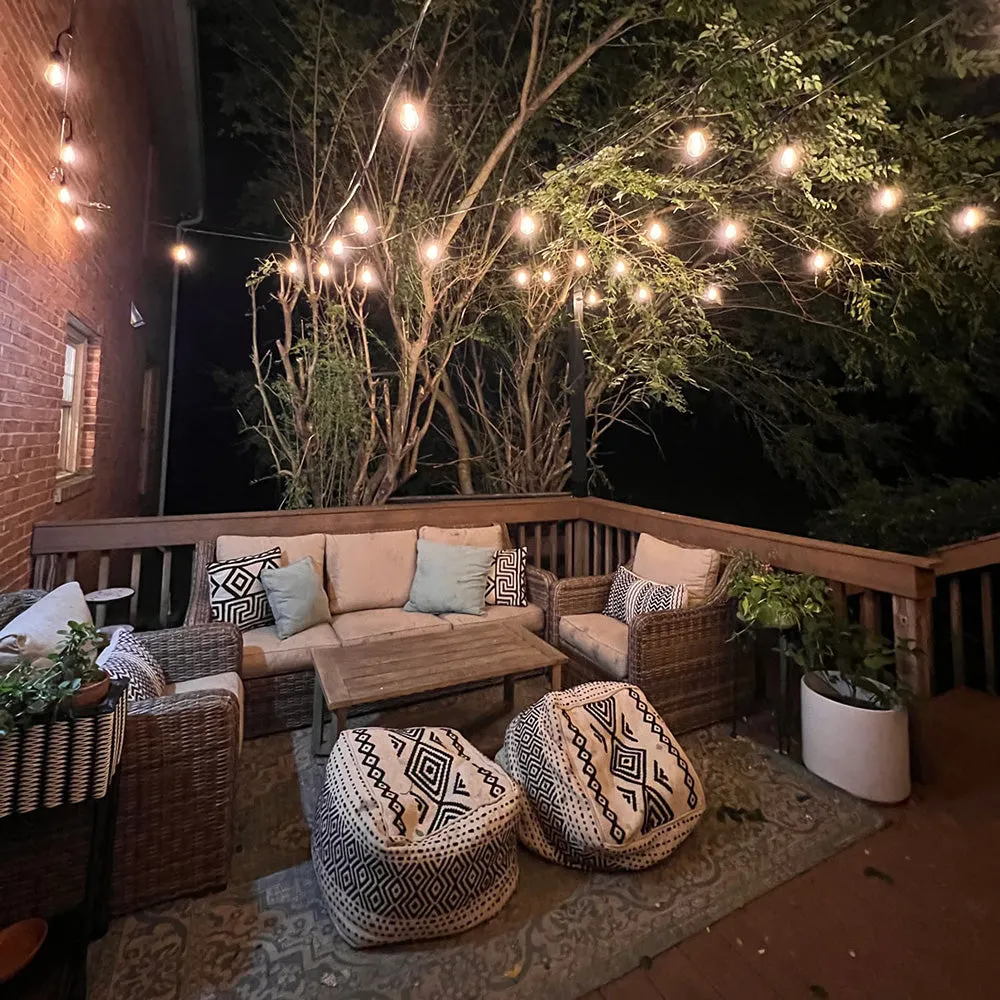
Want to recreate this relaxed, layered look? Here’s a potential cost breakdown:
- Main Furniture (Wicker sectional & armchair): $1,200 – $3,500
- Textiles (Outdoor rug, poufs, pillows): $300 – $800
- Lighting (Multiple strands of quality string lights): $100 – $250
- Coffee Table: $150 – $400
- TOTAL: $1,750 – $4,950
Budget alternative: Source a used sectional from an online marketplace for $400-$800. Find affordable outdoor rugs and poufs at stores like Target or At Home. You can achieve a very similar atmosphere for about 40% of the high-end cost if you’re willing to hunt for deals.
17. Creating a Relaxing Backyard Space with Wooden Loungers
The key to a truly relaxing backyard space isn’t complicated furniture or elaborate hardscaping—it’s editing. The most crucial element is creating a dedicated zone for quiet contemplation, away from the hustle of a dining area or grill. By placing two simple wooden lounge chairs in a spot surrounded by greenery, you are making a clear statement: this spot is for relaxing. It’s an intentional choice to prioritize peace over activity, and that clarity is what makes a space feel genuinely serene and restorative.
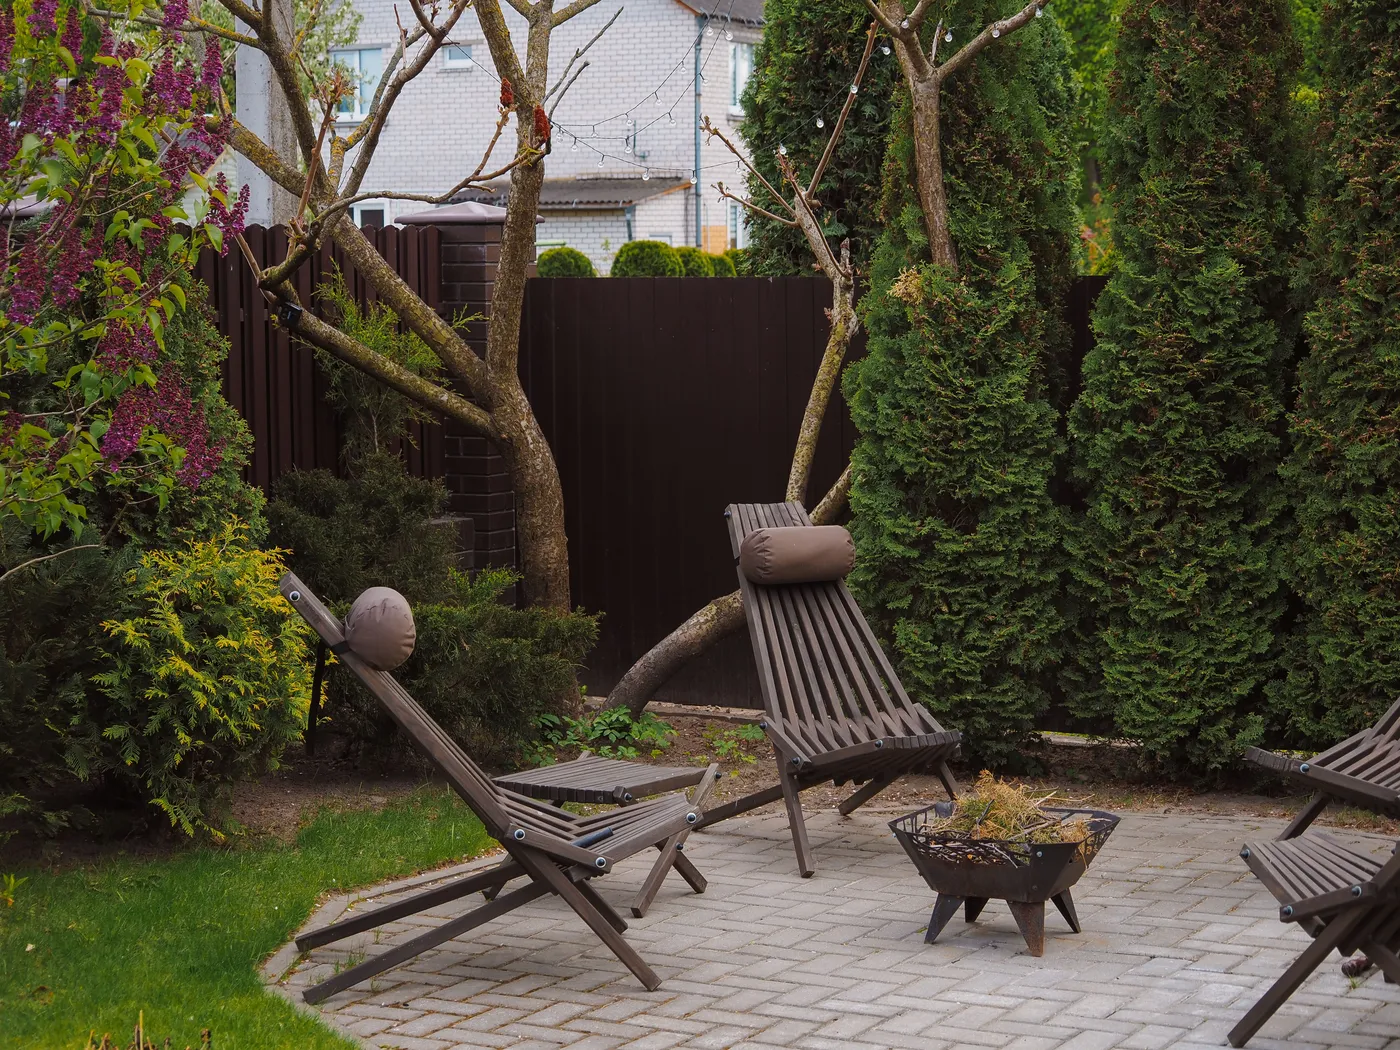
Wooden outdoor furniture is beautiful, but it’s not set it and forget it. To keep it from turning a sad, splintery grey, you need to treat it. Most wood furniture will require a light sanding and a new coat of protective sealant or oil (like teak oil or tung oil) at least once a year, typically in the spring. If you live in a particularly harsh climate with lots of sun or moisture, you may need to do it twice a year. If that sounds like too much work, consider furniture made from poly-wood, which mimics the look of wood with zero maintenance.
18. Modern Covered Patio with Grey Lounge and Wood Ceiling
This serene, modern look is a masterclass in texture and tone. The formula is approximately: 60% Soft Neutrals (light grey sofa, rug, and floors) + 30% Natural Wood (slatted ceiling, stool tops) + 10% Black Accents (furniture frames, door frames). The dominance of soft greys creates a calm, cloud-like base. The wood adds warmth and organic texture, preventing the grey and black from feeling too cold or corporate. The sharp black details provide definition and a graphic punch that keeps the design feeling crisp and contemporary.
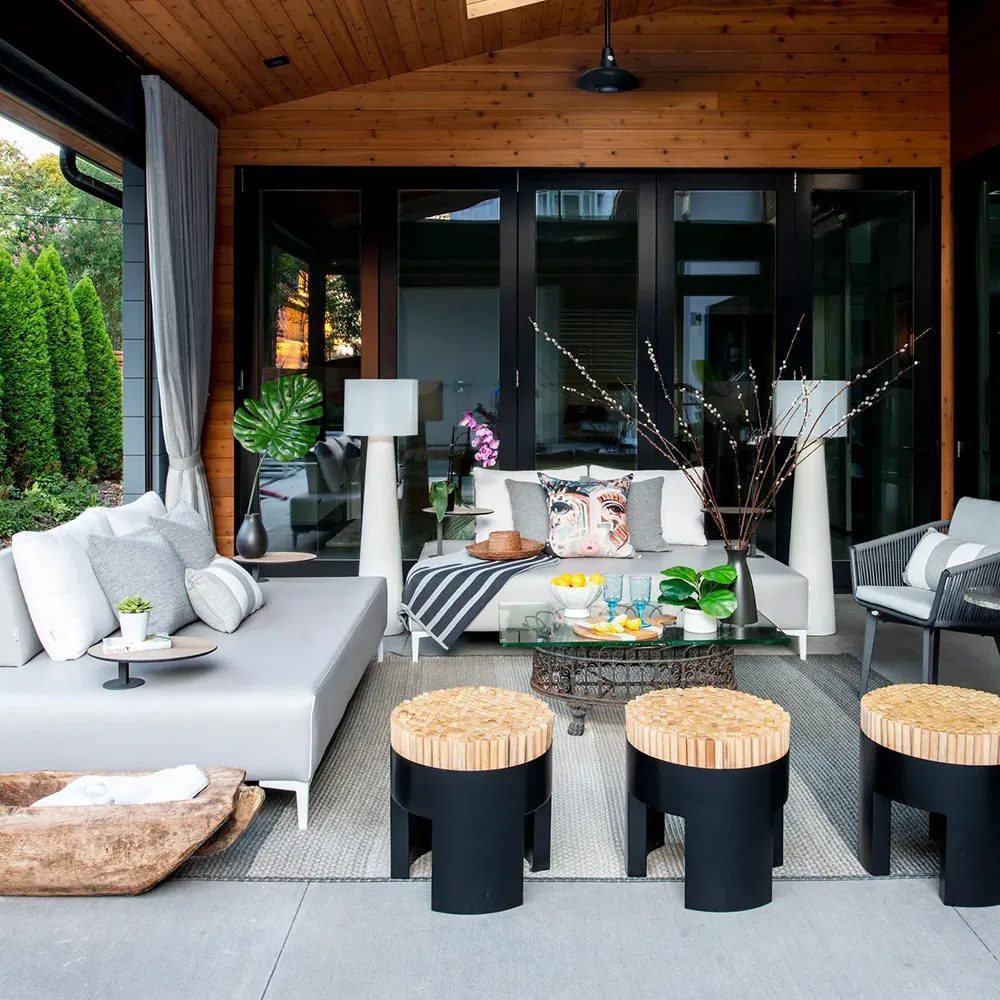
That gorgeous wooden slatted ceiling requires protection. If it’s real wood and exposed to any humidity or moisture, it needs to be properly sealed to prevent warping, mildew, and rot. Depending on the type of wood and the climate, it will likely need to be re-sealed every 3-5 years. The light grey outdoor cushions will also show dirt and stains easily. To keep them looking fresh, you’ll need to treat them with a fabric protector like Scotchgard and plan to spot clean spills immediately. Most quality outdoor cushion covers are machine washable, but it’s still a chore.
19. Designing a Simple Outdoor Living Space in a Sunny Climate
planning your patio in a hot, sunny climate like Reno, go through this checklist:
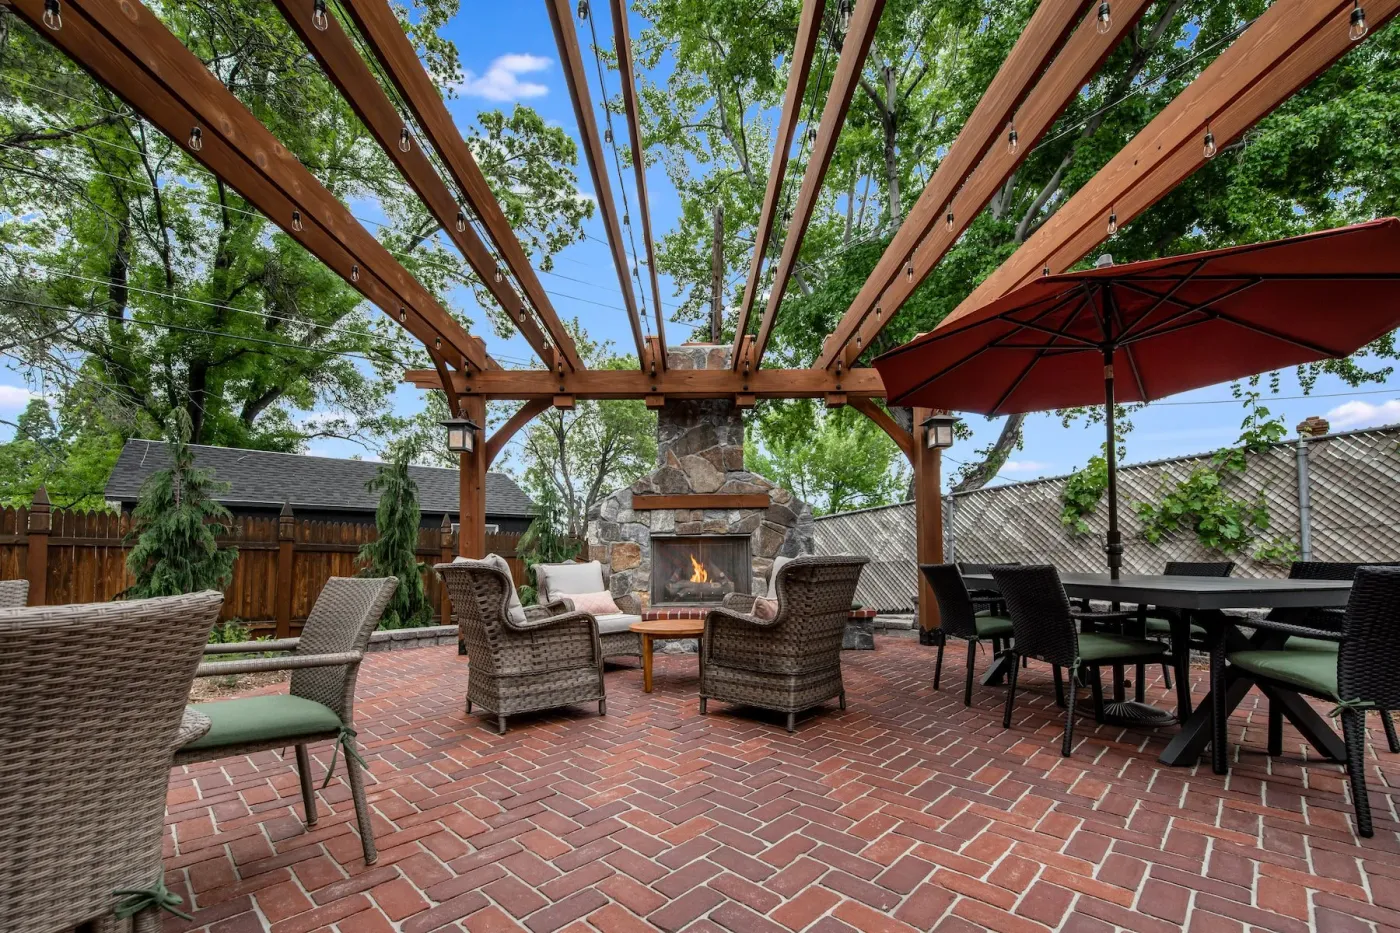
- Prioritize Shade: Is there a plan for shade during peak sun hours (11 am – 4 pm)? This could be a pergola, a shade sail, a large umbrella, or a covered roof. Without it, the space will be unusable for much of the day.
- Choose Heat-Resistant Materials: Dark-colored pavers or composite decking can become dangerously hot to the touch. Opt for lighter colors or natural stone that stays cooler. Test samples by leaving them in the sun.
- Select UV-Resistant Furniture: The intense sun will fade fabrics and degrade plastic or untreated wood quickly. Invest in furniture and cushions made with solution-dyed acrylic fabrics (like Sunbrella) that are warrantied against fading.
- Plan for Wind: Many sunny areas are also windy. Ensure umbrellas have heavy bases (75lbs+) and that furniture is substantial enough not to blow around.
The scale of your outdoor living room should be dictated by your shade source. A standard 9-foot umbrella can comfortably shade a small bistro set or two lounge chairs. For a full sofa and conversation set, you’ll need a larger 11-13 foot umbrella or a structure that’s at least 10×12 feet. Don’t buy the furniture until you’ve solved the shade problem. An expensive sofa nobody can sit on is just a very large, sad garden ornament.
20. A Simple and Unfinished-Proof Backyard Furniture Arrangement
What prevents a backyard from looking ‘unfinished’ isn’t the amount of furniture, but its arrangement. The key is to create a clear focal point and a sense of destination. Instead of scattering chairs randomly, group them together to form a conversational circle or square. Anchor the grouping with an outdoor rug, a fire pit, or a large coffee table. This simple act of clustering furniture with intention creates a defined zone that feels purposeful and complete, even if the rest of the yard is just grass.
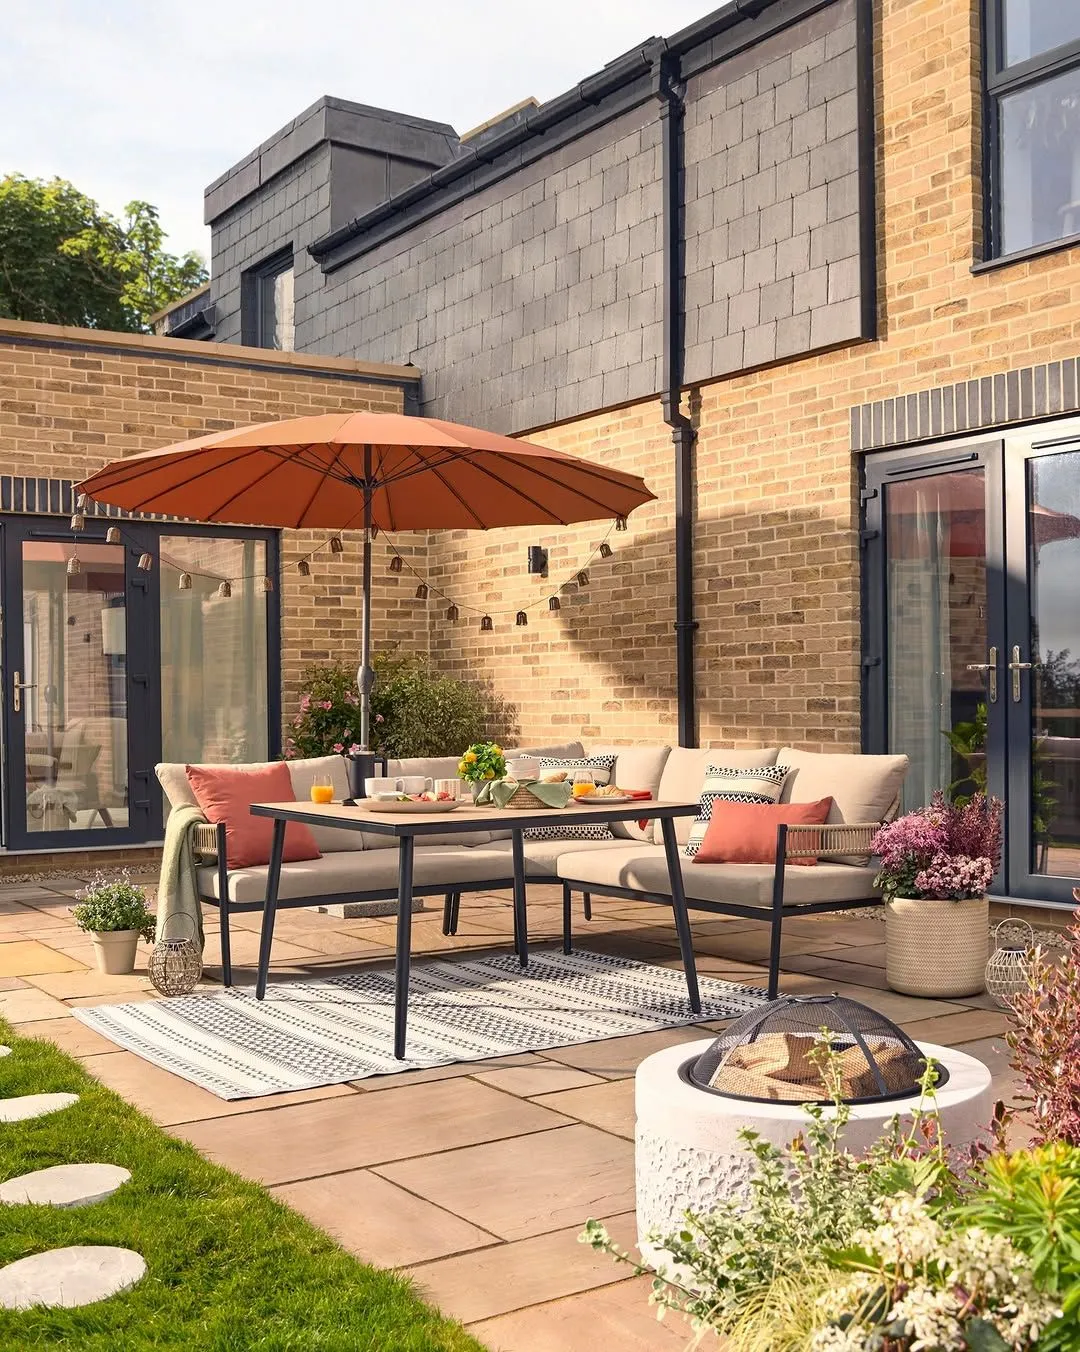
The fastest way to make any patio furniture arrangement look more polished and intentional is to add outdoor pillows. But don’t just grab a few random ones. Follow the 3-2-1 rule for a sofa: start with three larger, solid or simple-patterned pillows, add two medium-sized ones with a more complex pattern, and finish with one unique pillow in a fun shape or texture (like a lumbar). This creates a layered, designer look with minimal effort and cost. And make sure they’re rated for outdoor use!
21. An Inexpensive Design for a Small Summer Sanctuary Patio
Creating a sanctuary on a small patio is all about smart, budget-friendly choices. Your best friends are thrift stores and DIY. Look for a small, weathered wooden bench or a pair of mismatched chairs ($20-$50). A can of colorful outdoor paint can unify them. Instead of buying expensive planters, use found objects like old galvanized tubs, wooden crates, or even painted coffee cans (with drainage holes drilled in the bottom). Hang a cheap, plain white shower curtain on a tension rod to create a billowy privacy screen. It’s about creativity, not cost.
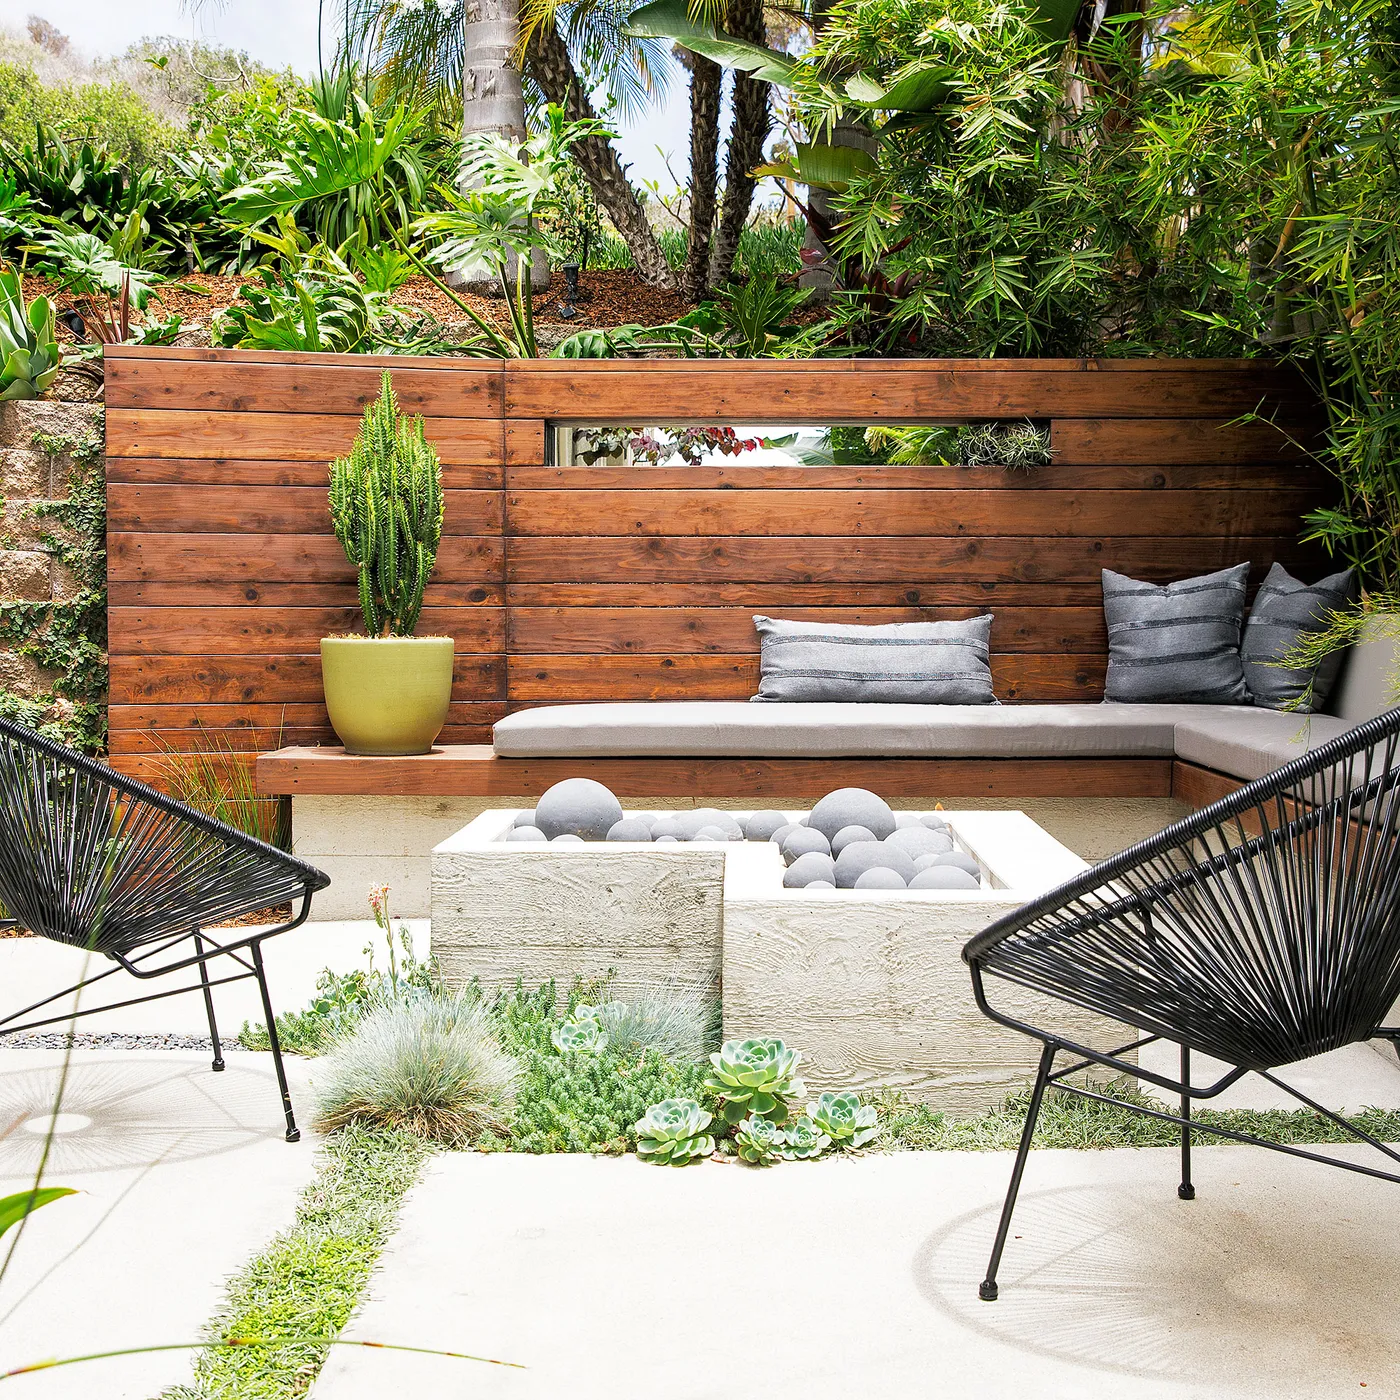
A DIY privacy screen using lattice is a cheap and easy way to create a sense of enclosure. Here’s how:
- Materials (approx. $75): One 4×8 ft sheet of vinyl lattice, two 8 ft pressure-treated 2x4s, two large planter boxes, a bag of concrete mix, and exterior screws.
- Set Posts: Place the 2x4s inside the planter boxes as posts. Mix the concrete and fill the planters to secure the posts, making sure they are perfectly vertical. Let cure for 24 hours.
- Attach Lattice: Once the concrete is set, cut the lattice panel to your desired height and screw it directly onto the posts.
- Finish: Fill the top of the planters with soil and plant tall grasses or climbing vines to soften the look and add greenery.
This project takes about 3-4 hours of active time and creates instant privacy and structure.
22. Intimate Patio Nook with Rattan Chairs and String Lights
This simple, two-chair setup is perfect for small or awkward spaces where a full dining set or sectional won’t fit. It works beautifully on narrow balconies, in a neglected side yard, or on a small landing at the top of a set of deck stairs. You only need a footprint of about 6×8 feet to create this look comfortably, leaving enough room to walk around the chairs. It proves that you don’t need a large, square patio to create a functional and inviting outdoor moment. Compare this to the larger space required for Idea #13.
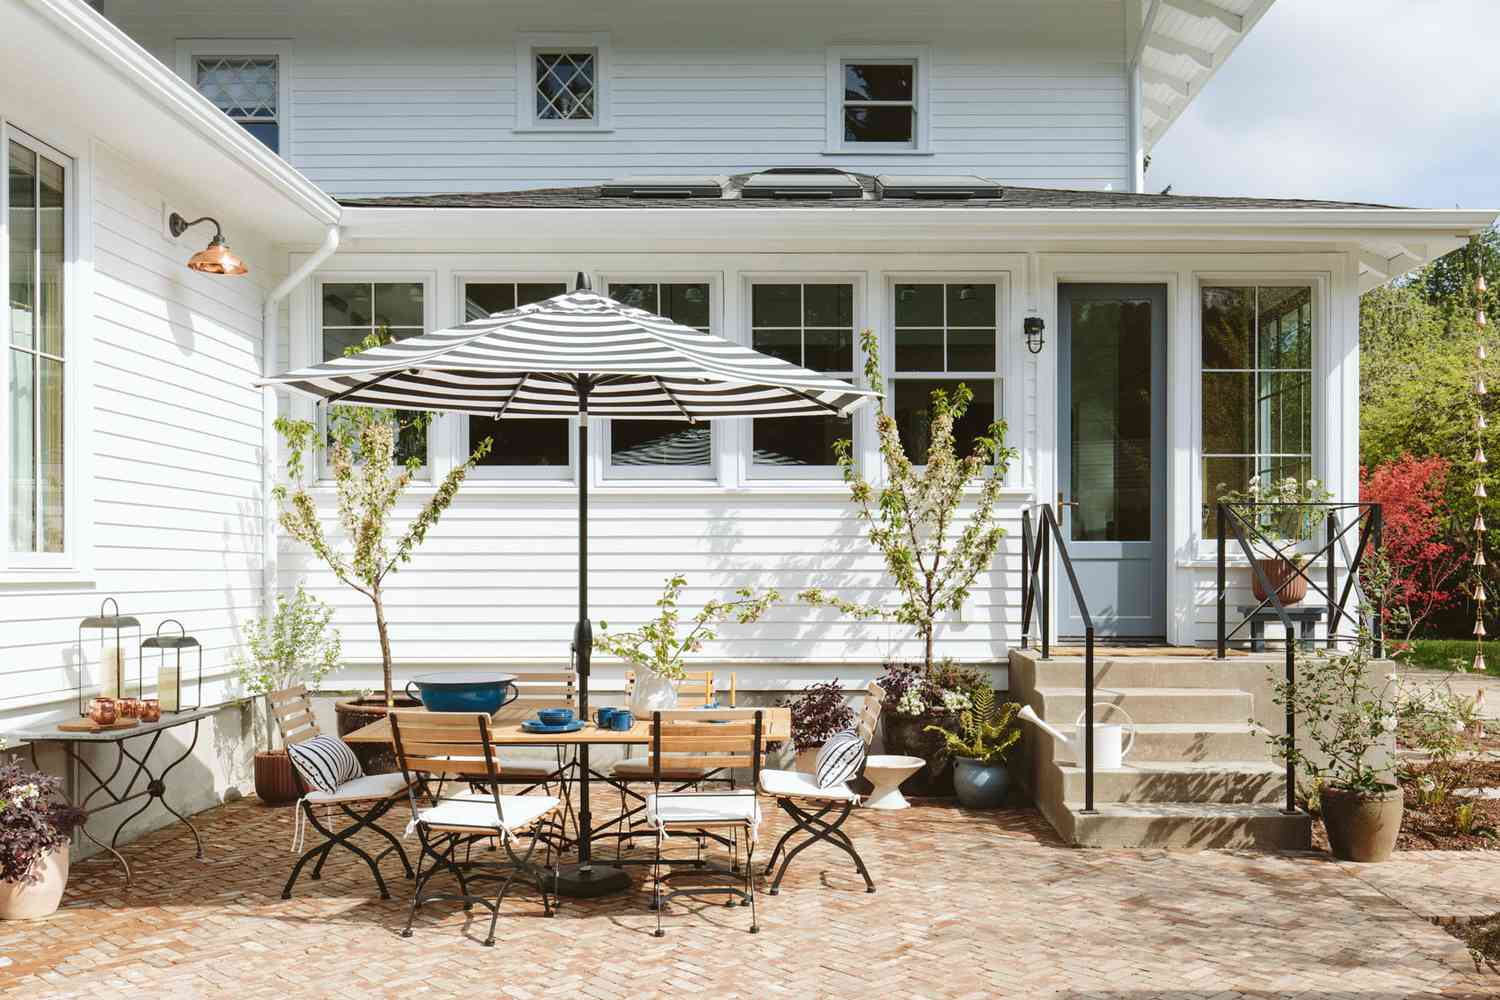
The single most important element is the lighting. In daylight, this is just two chairs and a table on some pavers. But the warm, low-hung string lights completely transform the mood at dusk. They create a soft, golden canopy that makes the small space feel intentionally intimate and protected. The light turns a simple furniture arrangement into an experience—a specific destination for an evening glass of wine or conversation. Without the lights, the magic is gone.
23. Protecting Your Paver Patio for All-Season Use
Pavers are tough, but they aren’t invincible. To keep them looking great, protection is a year-round job. In the spring, do a deep clean and re-apply polymeric sand in the joints to prevent weeds and shifting. In the summer, spot-clean spills from grilling or drinks immediately to prevent stains. In the fall, sweep leaves and debris regularly to avoid organic stains and slippery spots. In the winter, use a plastic shovel or a snowblower with a raised blade to avoid scratching the surface, and use calcium chloride instead of rock salt for ice, as salt can damage the pavers over time.
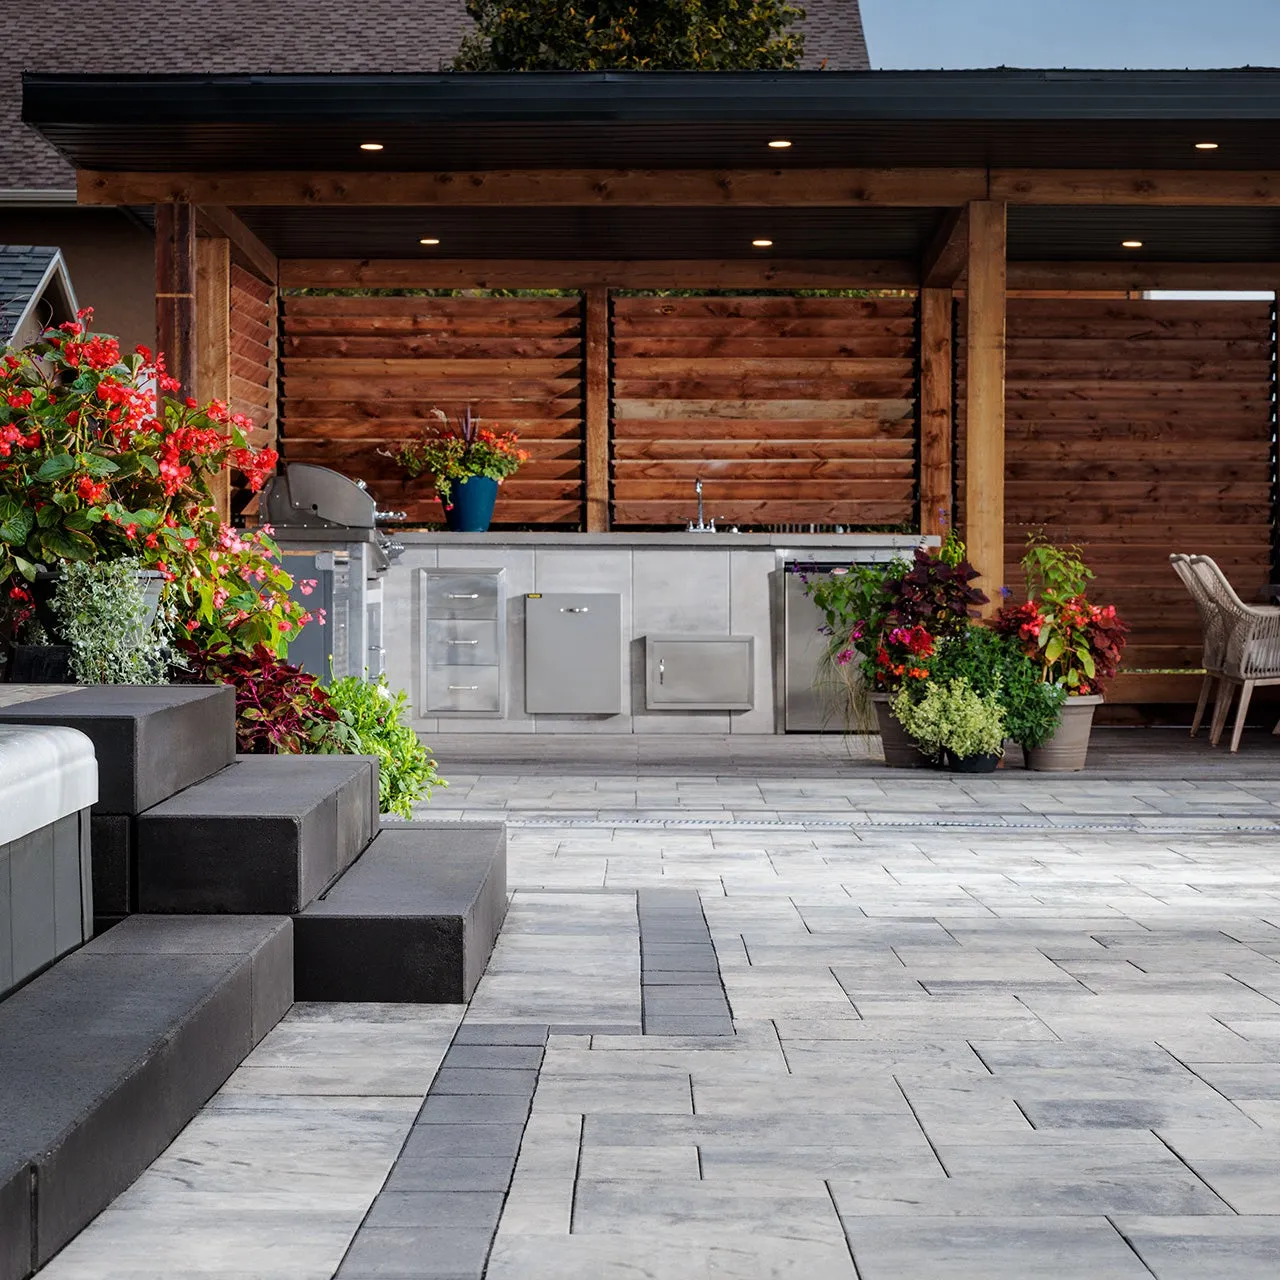
Many homeowners think sealing pavers is a one-and-done job. It’s not. A good quality sealer will last 3-5 years, not forever. Furthermore, applying a new coat of sealer over a dirty or improperly prepped surface is a disaster. It will trap dirt and haze, and can even fail and peel, leaving a flaky mess that’s expensive to strip. If you’re going to seal your pavers, either hire a pro who guarantees their work or commit to doing the prep work 100% correctly. A bad sealing job is worse than no sealing at all.
24. Modern Deck with a Fireplace and Dome-Shaded String Lights
This deck design succeeds by using a strong focal point and repetition. The light-colored outdoor fireplace immediately draws the eye, acting as the anchor for the entire space. The seating is arranged to face it, reinforcing its importance. The design then uses repetition to create a sense of rhythm and cohesion: the clean horizontal lines of the wood-slat sofas are echoed in the tiered planters and the distant picket fence. Even the dark dome shades on the string lights repeat the dark accents found in the rug and furniture frames, tying the whole look together.
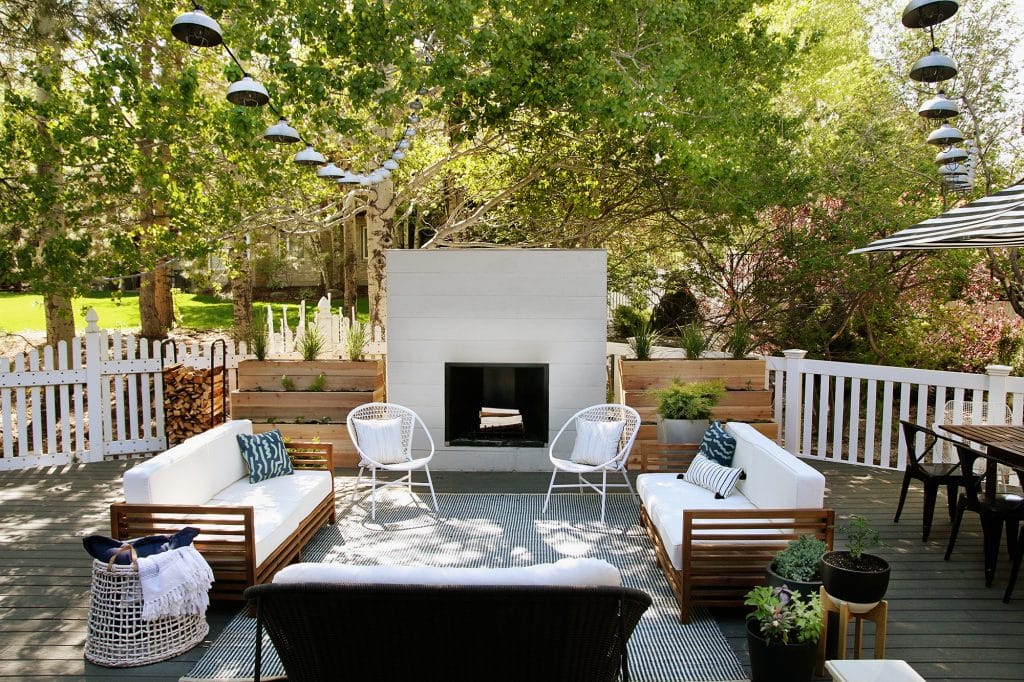
When using string lights, consider the shade. While bare bulbs are popular, adding shades—like the metal domes seen here—can dramatically change the effect. They direct the light downward, creating more focused pools of illumination on the seating and dining areas. This reduces overhead glare, making the space feel more intimate and less like a stadium. It’s a great choice for creating a cozy, room-like atmosphere rather than just general ambient light.
25. Affordable Patio Flooring for Every Style and Budget
You don’t need expensive stone or pavers for a great patio floor. One of the most affordable and stylish options is a simple pea gravel patio. For a 10×10 foot area (100 sq ft), you’ll need about 2 tons of gravel, which can cost as little as $100-$200 if you buy in bulk from a landscape supplier. Add another $50 for steel edging to contain it and landscape fabric to go underneath. It’s a weekend DIY project that gives you a chic, European-garden feel for a fraction of the cost of hardscaping. It’s a much cheaper entry point than the built-in look of Idea #4.
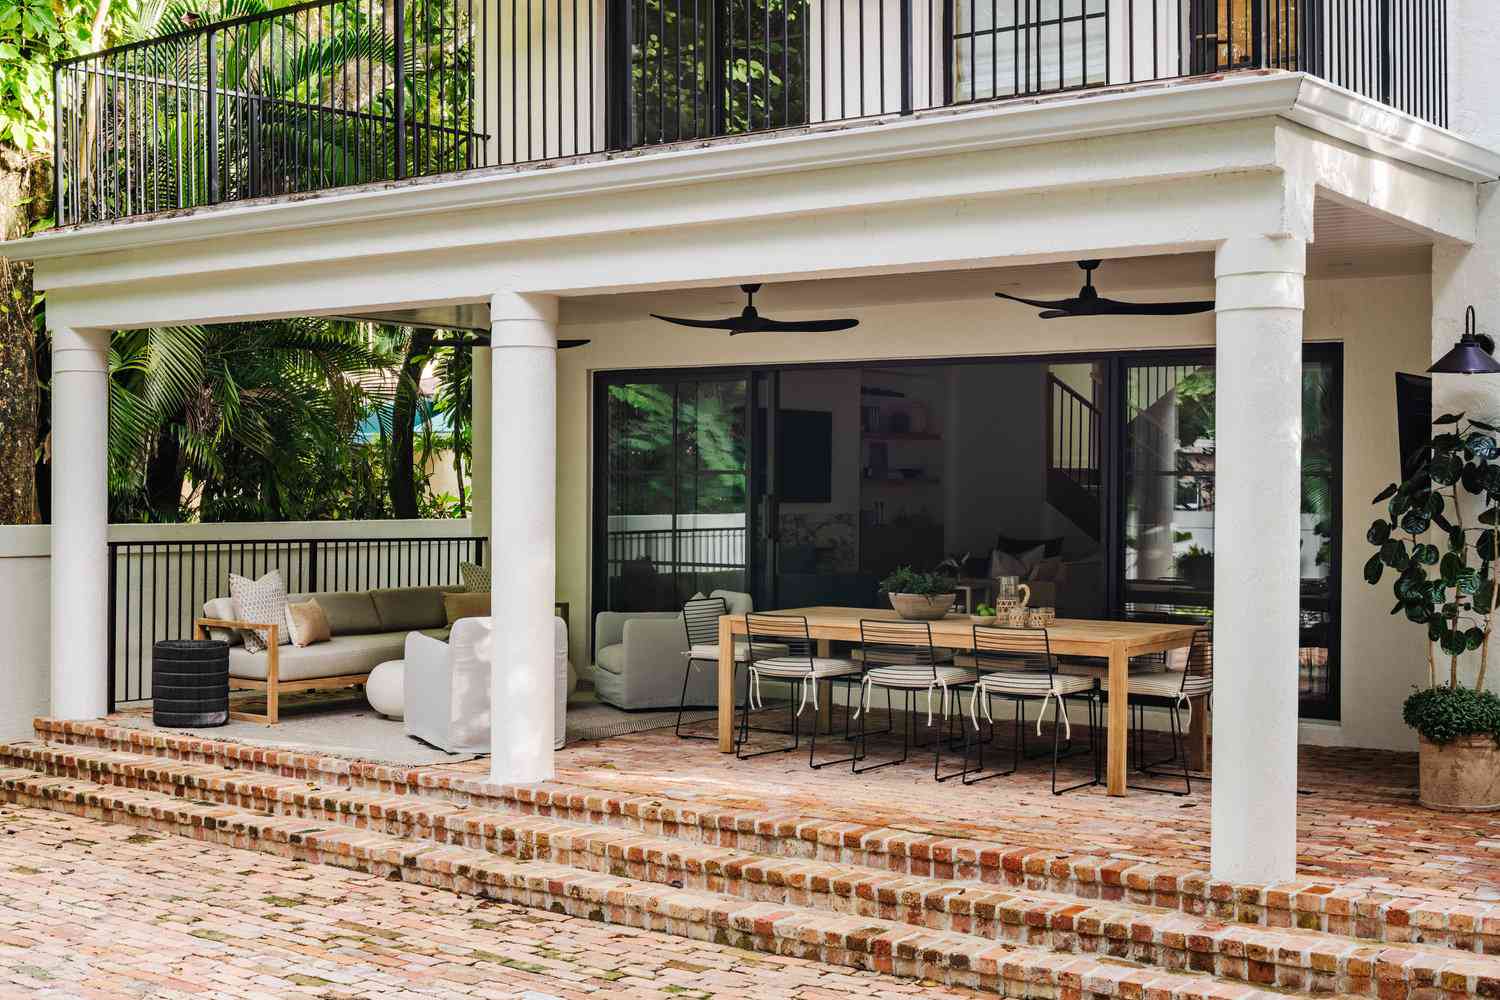
Want an instant, tool-free patio floor? Interlocking deck tiles are your answer. They can be laid directly over a solid, level surface like old concrete or even a patchy lawn.
- Source Materials: Buy plastic or wood composite interlocking deck tiles. Popular options include IKEA’s RUNNEN or offerings from Wayfair. You’ll need about one tile per square foot. Cost: ~$3-$7 per sq ft.
- Prep Surface: Sweep the area clean. If laying over grass, you may want to put down landscape fabric first. Ensure the ground is relatively level.
- Click Together: Start in one corner and simply click the tiles together. They have built-in connectors on all sides. Use your hands or a rubber mallet to snap them firmly in place.
- Cut to Fit: For edges or corners, you can easily cut the tiles to size using a handsaw or jigsaw.
You can cover a 100 sq ft area in about an hour.
26. Achieving High-End Style with Budget-Friendly Outdoor Decor
The secret to making affordable decor look expensive is a cohesive color palette. You can buy the most random assortment of budget items from Target, Walmart, and thrift stores, but if you stick to a strict color story—say, black, white, and terracotta—they will automatically look curated and intentional when placed together. A cheap black planter next to a white pillow on a chair with a terracotta pot nearby creates a purposeful visual connection. This discipline costs nothing but makes everything look more pulled-together and high-end.
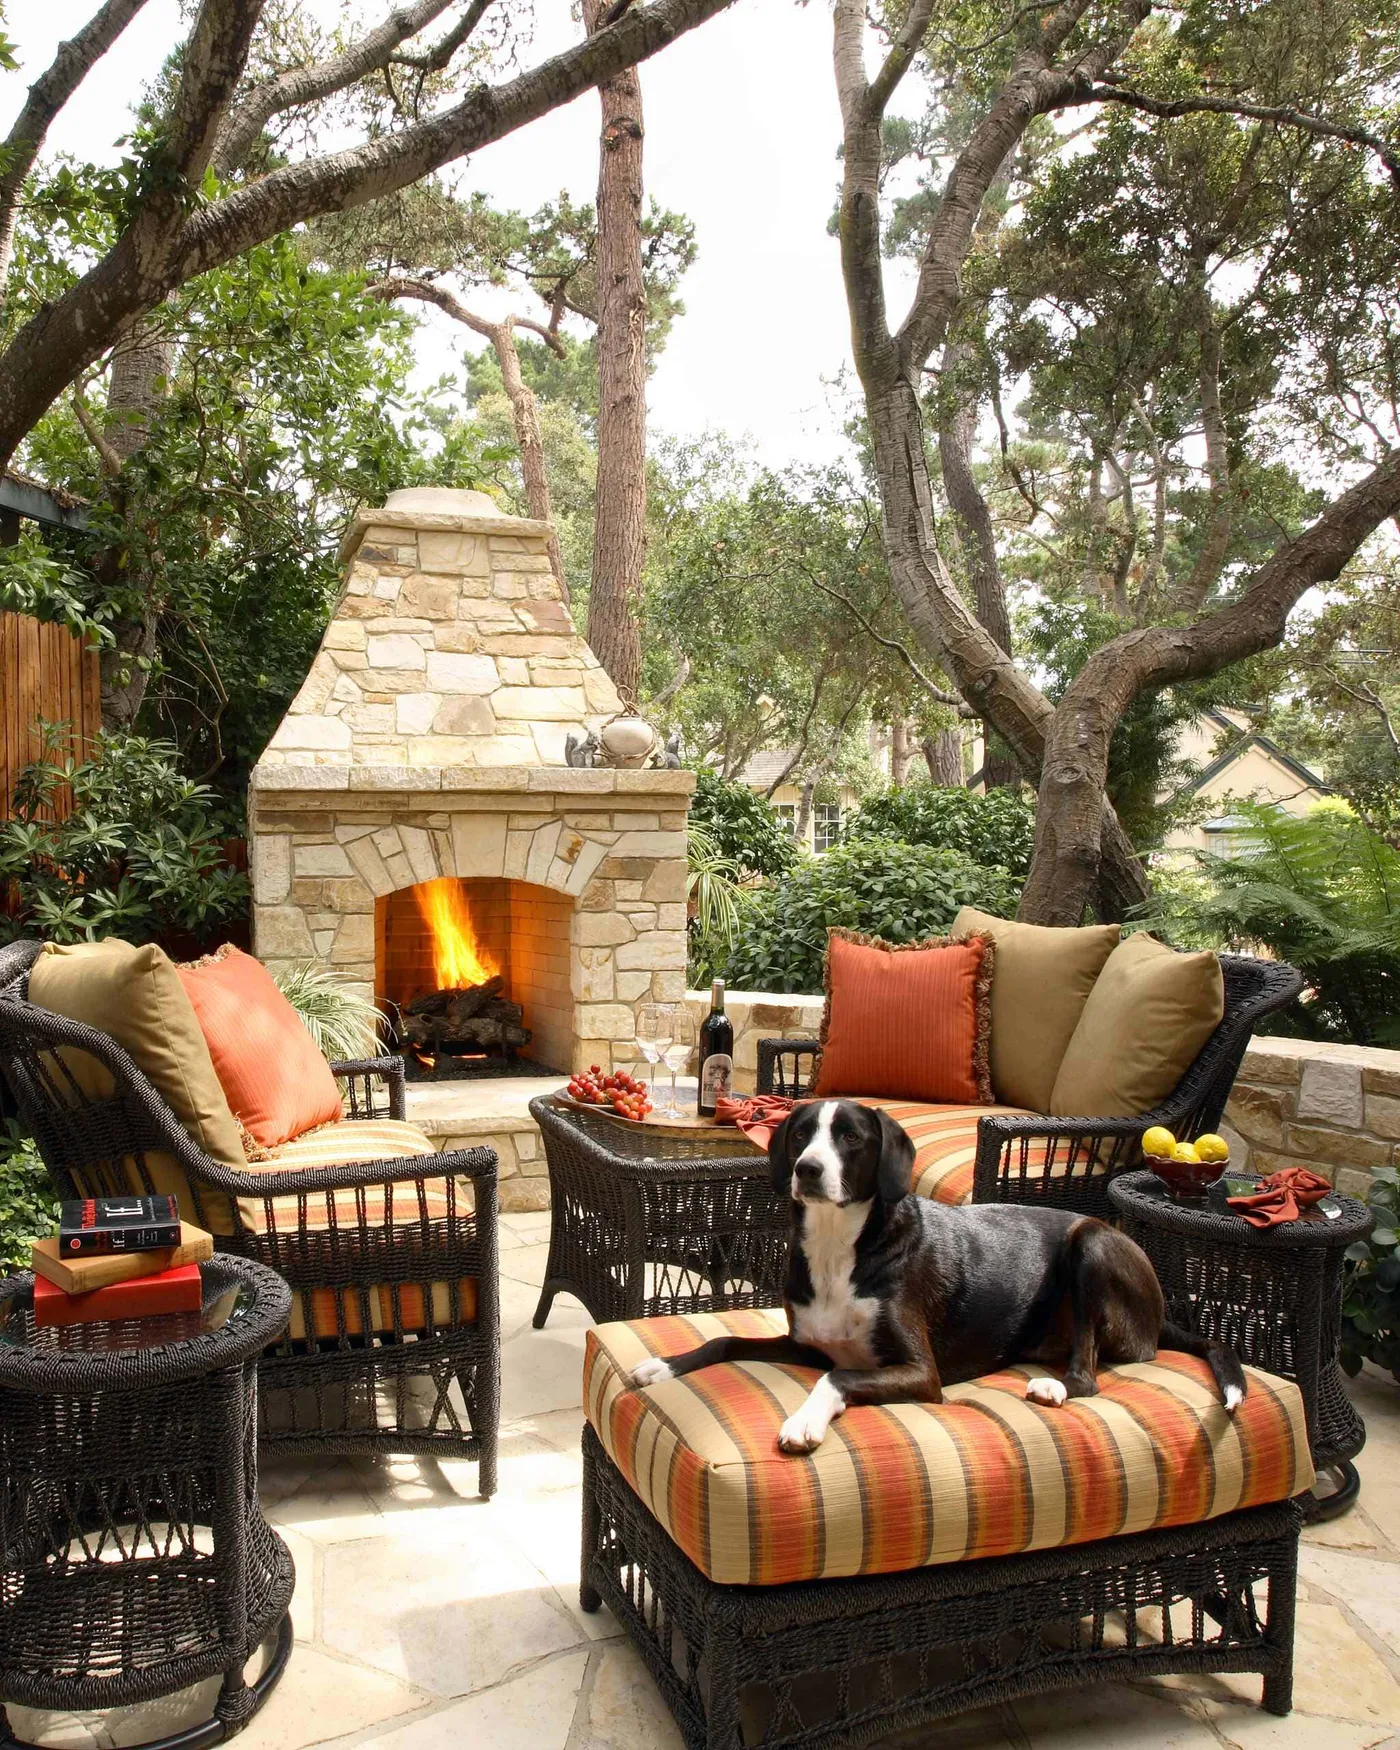
When decorating on a budget, focus your spending on one hero piece and go cheap on the rest. Splurge on a single, high-quality item that has a big impact—maybe it’s a pair of really great outdoor pillows in a designer fabric, or one large, architectural planter. Then, fill in around it with budget-friendly basics. The quality of the hero piece will elevate everything else around it, making the whole vignette feel more luxurious than it actually is. It’s a classic high-low styling trick.
27. A Budget-Friendly Paver Deck for Your Backyard
Pavers are often a more budget-friendly and DIY-able option than a traditional wooden deck. Here’s a sample cost for a 12×12 foot (144 sq ft) DIY paver patio:
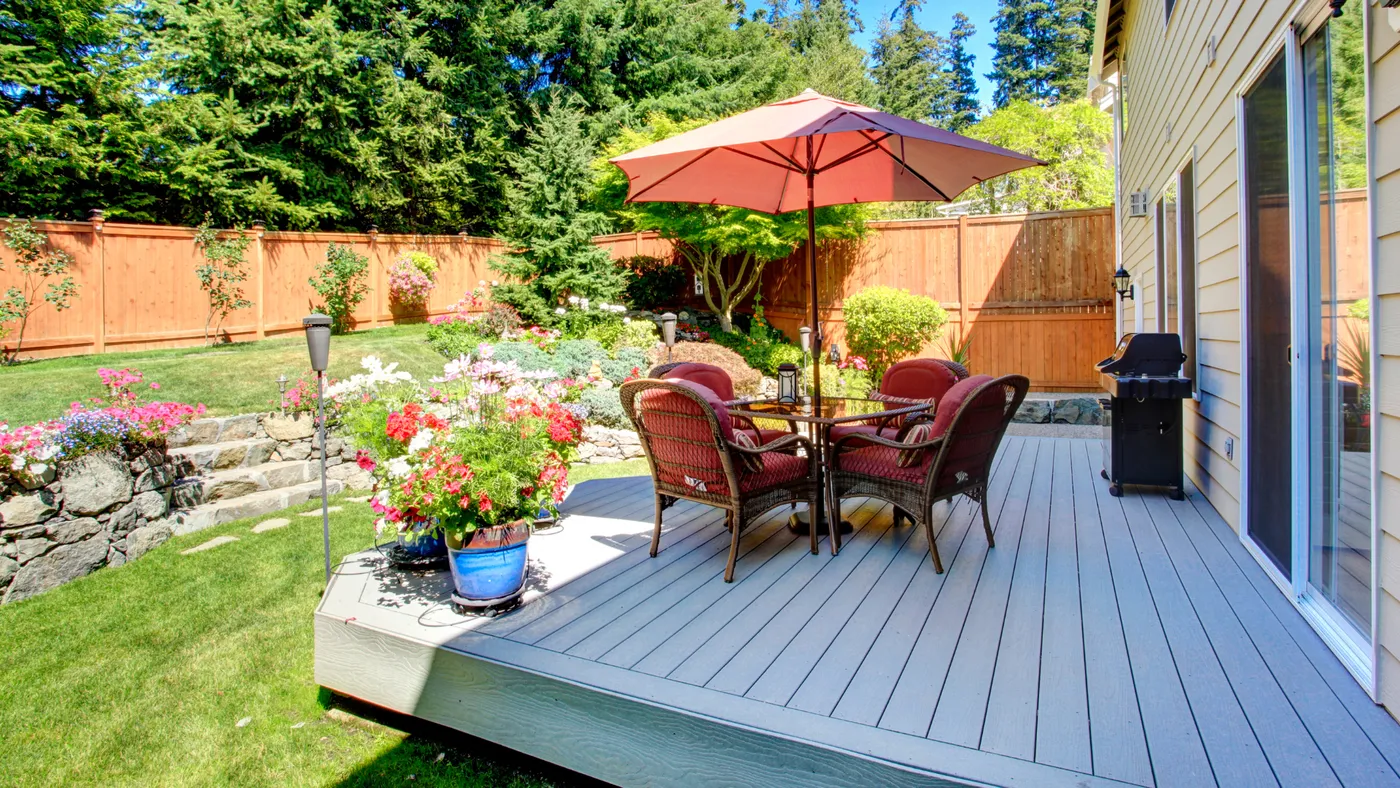
- Pavers (basic concrete style from a big box store): $300 – $600
- Paver Base Gravel (approx. 2.5 tons): $100 – $200
- Leveling Sand (approx. 0.75 tons): $50 – $100
- Polymeric Sand & Edging: $75 – $150
- Tool Rental (plate compactor): $50 – $100
- TOTAL DIY COST: $575 – $1,150
Budget alternative: For a project this size, using decomposed granite instead of pavers could lower the material cost to $300-$500. This is a massive saving compared to a professionally built wood deck which can start at $5,000-$10,000.
A budget-friendly paver project is only budget-friendly if you DIY the labor, and the labor is hard. We’re talking about excavating and moving several tons of soil, gravel, and sand by shovel and wheelbarrow. It is physically demanding, back-breaking work. Be brutally honest with yourself about your physical fitness and willingness to spend a full weekend (or two) doing heavy manual labor. If you’re not prepared for that, the budget project suddenly requires a few thousand dollars in labor costs, making it not so budget-friendly after all.
28. Modern Garden Patio with Large Format Pavers
This modern look works because of the choice of large format pavers. Using oversized square or rectangular pavers (e.g., 24×24 inches or 12×24 inches) results in fewer grout lines. This creates a cleaner, more seamless, and less busy surface that feels calm and sophisticated. The simple, clean grid visually expands the space and provides a perfect neutral canvas for modern furniture and minimalist planting. The look is intentional and architectural, a clear step up from standard small brick pavers.
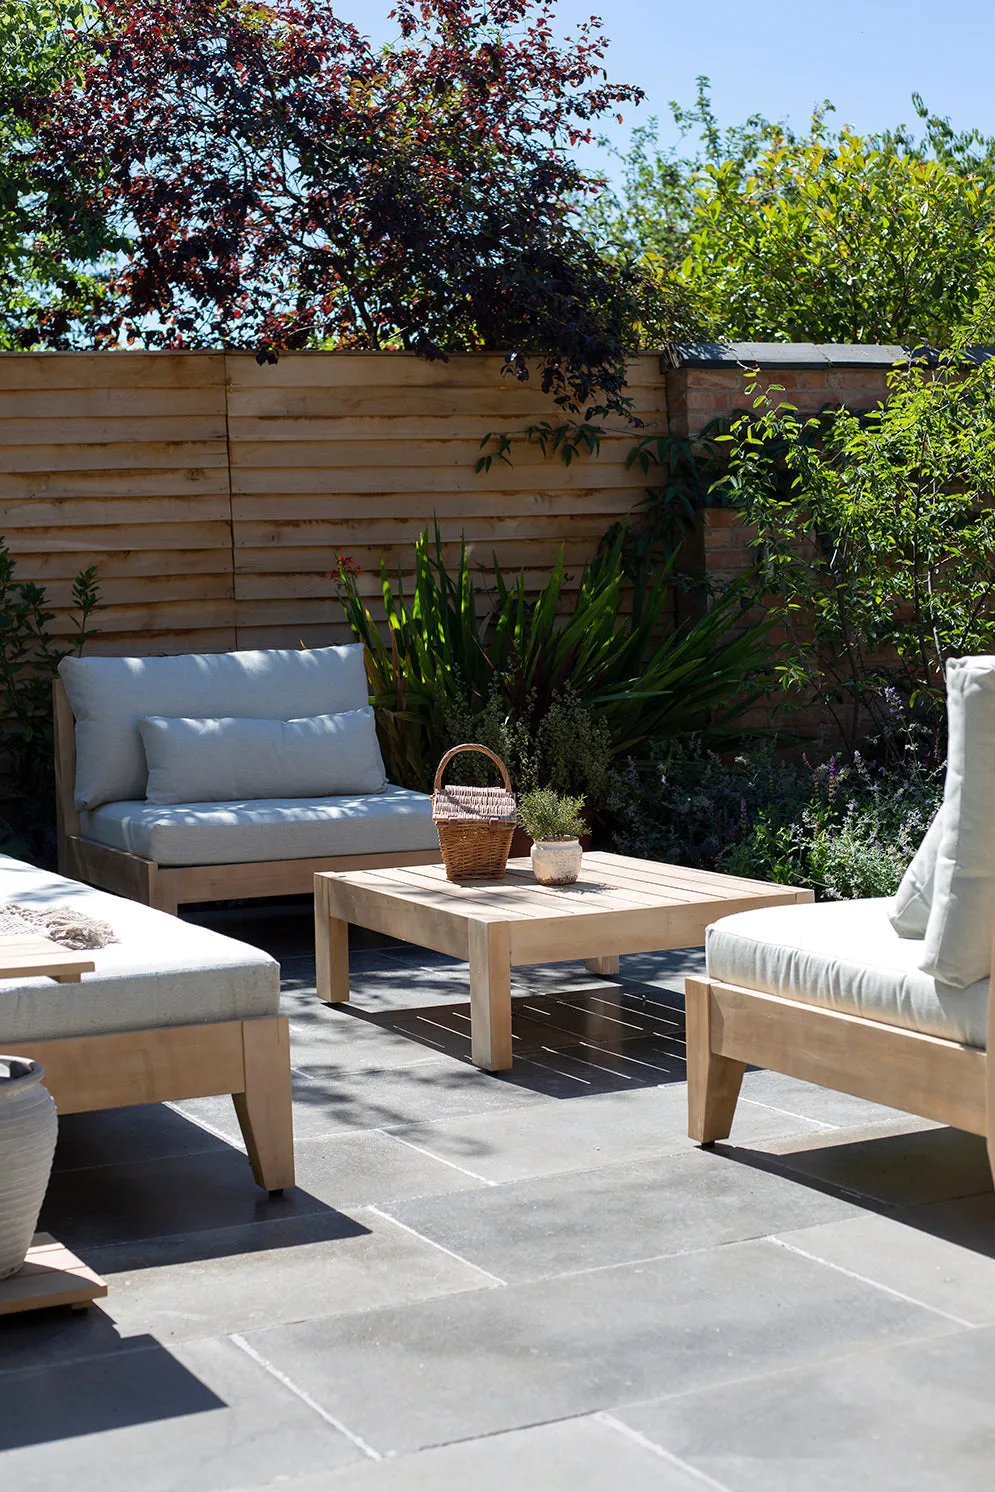
Large format pavers are stunning, but they are unforgiving of an imperfect base. Whereas small pavers can mask minor dips and inconsistencies in the foundation, a large paver will rock and eventually crack if the gravel and sand base isn’t perfectly level and compacted. Installation is also more physically demanding, as each paver can weigh 50-100 pounds. This is a project where meticulous prep is not just recommended; it’s absolutely essential for a lasting, stable result. If you’re a novice, you may want to hire a pro for this specific style.
29. An Easy Patio Furniture Setup for Effortless Style
The formula for an ‘easy’ but stylish setup is balance. Think symmetry. Start with your largest piece, a sofa or loveseat. Then, place two matching armchairs directly opposite it. Ground the space between them with a coffee table. This creates a simple, mirrored layout that is naturally pleasing to the eye and promotes conversation. It’s a classic living room layout for a reason—it just works. The style math: 50% Anchor Sofa + 40% Mirrored Armchairs + 10% Central Table. It’s foolproof.
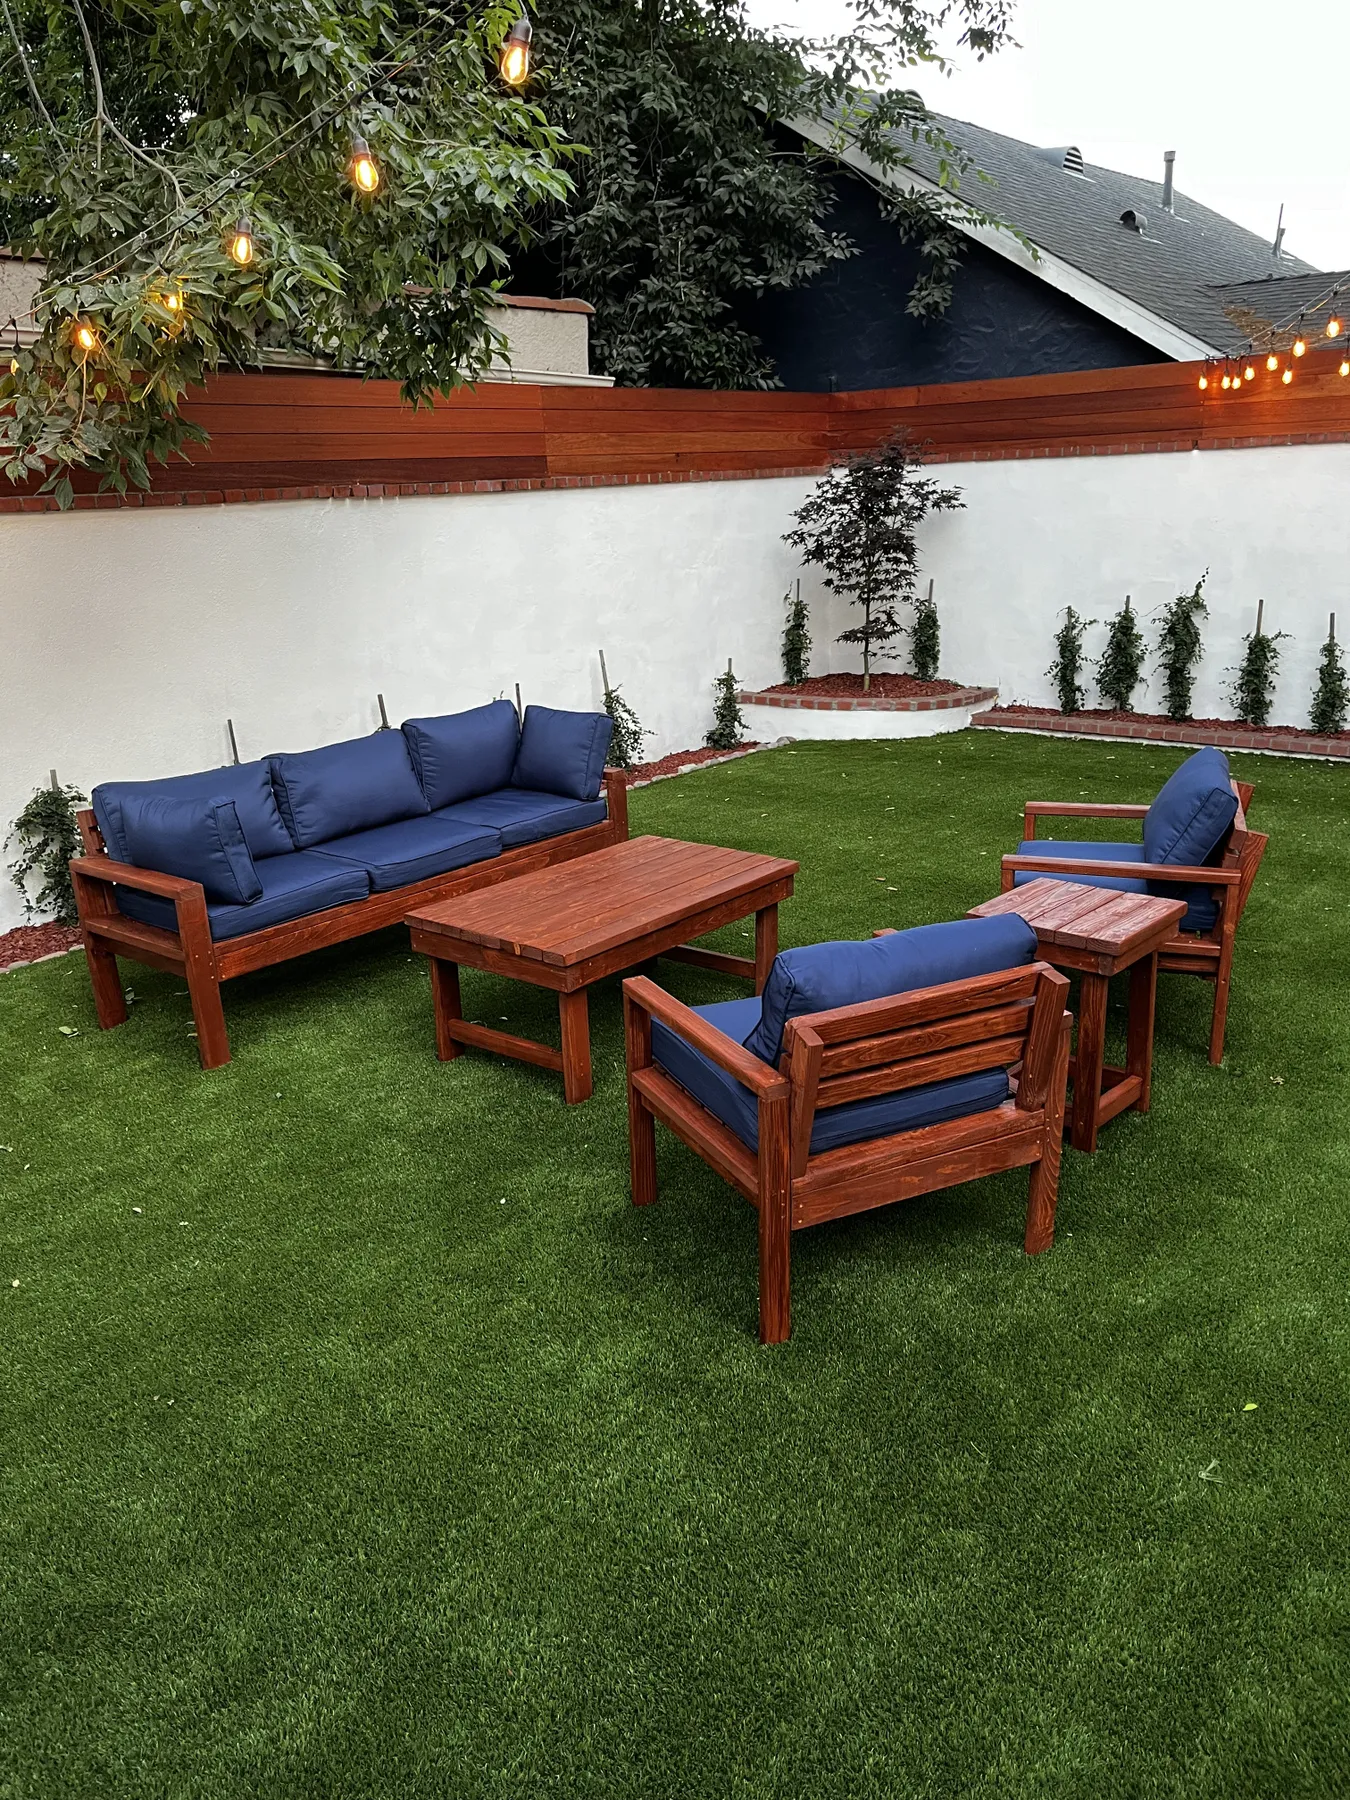
Before you buy a matching patio set, check these two things:
- Measure, then measure again: Use painter’s tape to mark out the dimensions of the sofa, chairs, and table on your actual patio. Can you walk around them comfortably? You need at least 30-36 inches for a main walkway.
- Check the cushion situation: Are the covers removable and machine washable? Are they made of a quick-drying material? Cushions that are a pain to clean will quickly ruin the easy vibe of your setup.
This simple check prevents the number one patio mistake: buying furniture that’s too big for the space.
30. Finishing Touches: Decor for a Beautifully Decorated Garden
In 2026, the trend in garden decor is all about personal, curated touches that blur the line between indoors and out. People are moving beyond just planters and bringing elements traditionally found inside out onto the patio: think waterproof floor lamps, decorative sculptures, outdoor-safe mirrors to reflect light and greenery, and even art. It’s part of a larger movement towards outdoor maximalism—creating rich, layered, personal spaces that are anything but generic. It reflects a desire to make every square inch of a property feel like home.
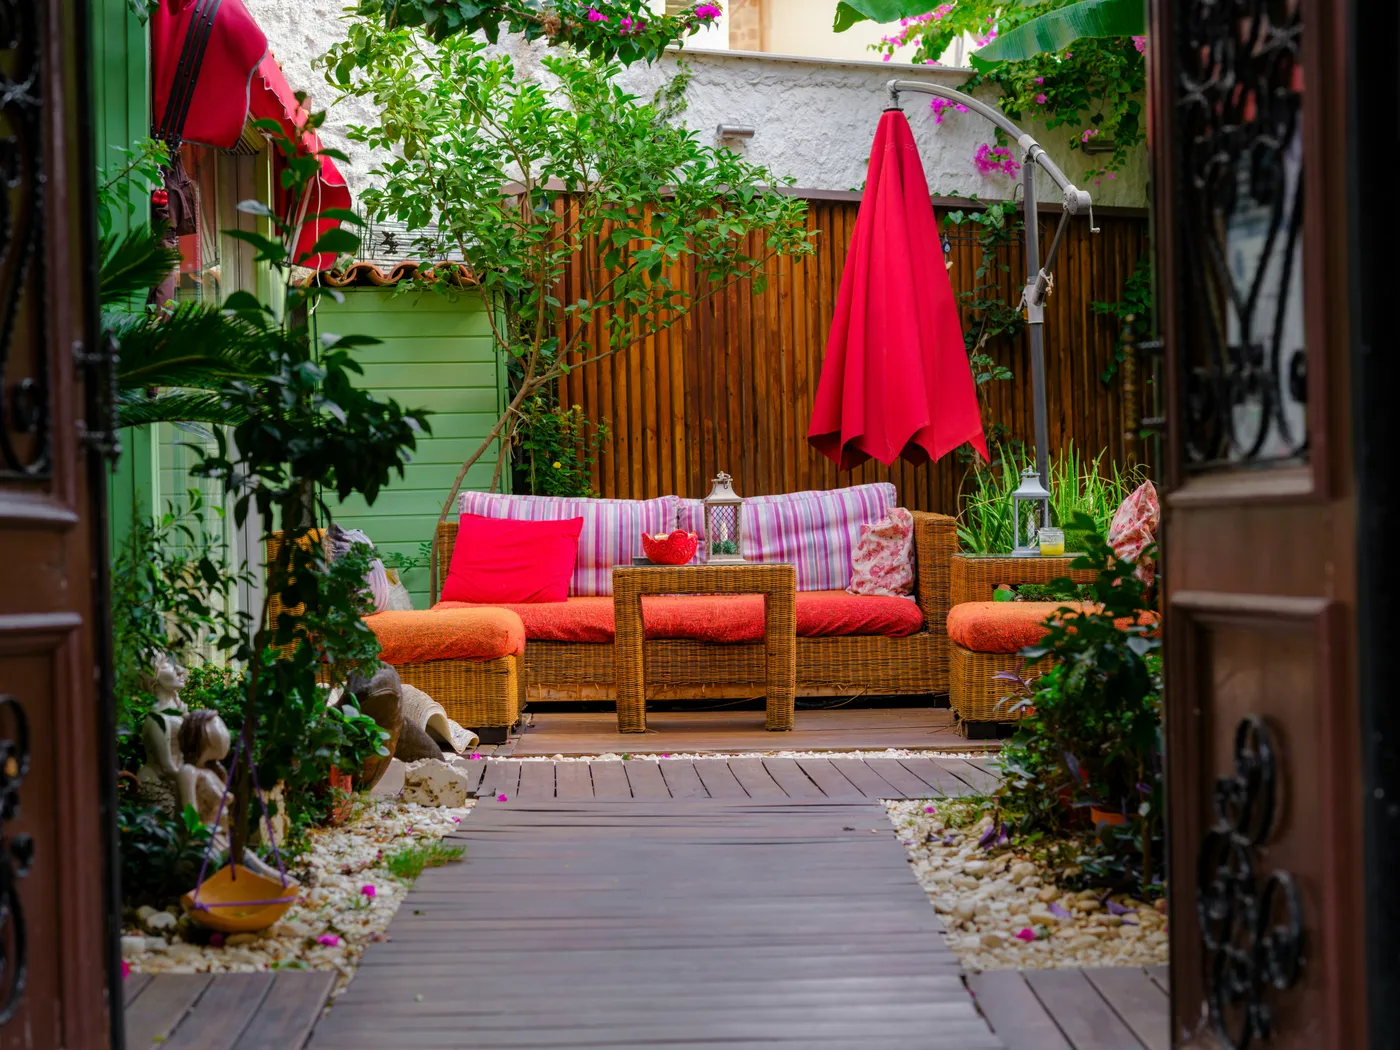
Decorating your patio doesn’t have to be expensive. Some of the most impactful decor is free or nearly free. Go for a walk and collect interesting rocks or pieces of driftwood to display on a table. Paint a collection of mismatched terracotta pots a single, unifying color. Hang mason jars with tea lights from tree branches. Use outdoor-safe craft paint to create a custom pattern on a cheap doormat to use as a small accent rug. A beautifully decorated garden is about soul and creativity, not a big credit card bill.
Your Outdoor Oasis Awaits
See? Creating a patio you love doesn’t have to be overwhelming. Whether you’re working with a tiny balcony or a sprawling backyard, the right combination of seating, lighting, and personal touches can make all the difference. Pick one idea that sparked something for you and start there. The perfect outdoor escape is closer than you think. Now go on, Pin your favorites and start planning!