You know that feeling when you finally find the DIY patio idea that looks exactly right for your space? That’s aha! moment is what this guide is all about. After filtering through hundreds of options across Home Depot, Lowe’s, and even Facebook Marketplace, we narrowed it down to the 31 ideas that actually deliver. This isn’t just a list of pretty pictures; we’re diving into curated ideas, from lush, multi-level retreats to cozy, modern nooks, with specific DIY tips for each. In 2026, the outdoor room is more than a trend; it’s an essential extension of our homes, and we’re seeing a huge move towards creating multi-functional spaces that feel just as considered as our living rooms. 📌 Save this to Pinterest for later—you’ll want to revisit these ideas.
1. Embrace Bold Color with a Vibrant Mosaic Tile Patio
This patio is a masterclass in controlled chaos. The success lies in the balance between the wildly colorful mosaic floor and the grounded, simple furniture. The dark, wrought-iron style frames and solid orange cushions act as a visual anchor, preventing the busy floor from feeling overwhelming. It’s a classic design principle at play: pair one bold, complex pattern with several simple, solid elements to create a look that feels vibrant but not dizzying.
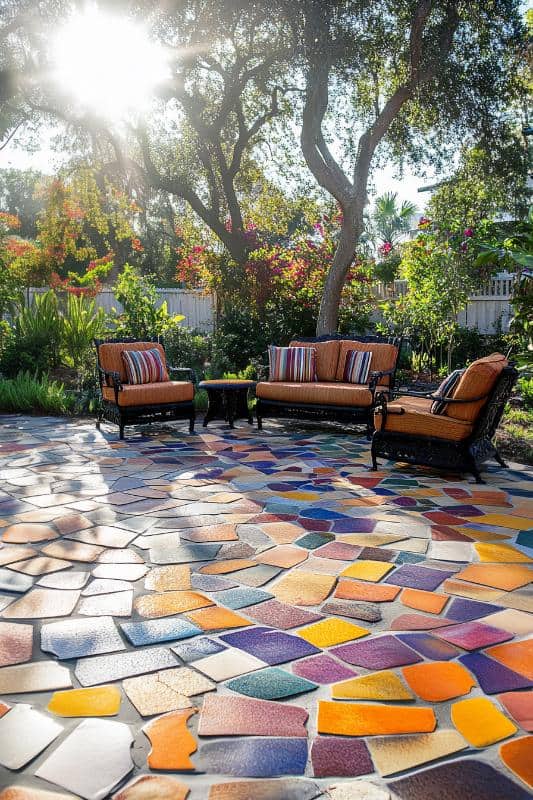
Let’s be honest: a mosaic floor like this is stunning, but it’s not a weekend project. Sourcing, breaking, and setting irregular tile pieces is incredibly labor-intensive. You also need to be meticulous with your grout and sealant to prevent water from getting underneath and popping tiles during freeze-thaw cycles. Consider this a ‘passion project’ and be realistic about the time and patience required. A simpler approach would be to use patterned stencil kits on existing concrete.
2. Define Zones with a Multi-Level Flagstone Patio
When designing a multi-level patio, the transitions are everything. Ensure your steps have a rise of no more than 7.5 inches and a run of at least 10 inches for comfort and safety. Here, the stacked stone retaining walls do double duty: they manage the slope and create a cohesive look that ties the upper dining area to the lower lounge. Using the same flagstone pavers on both levels is key to making the whole space feel like one intentional design.
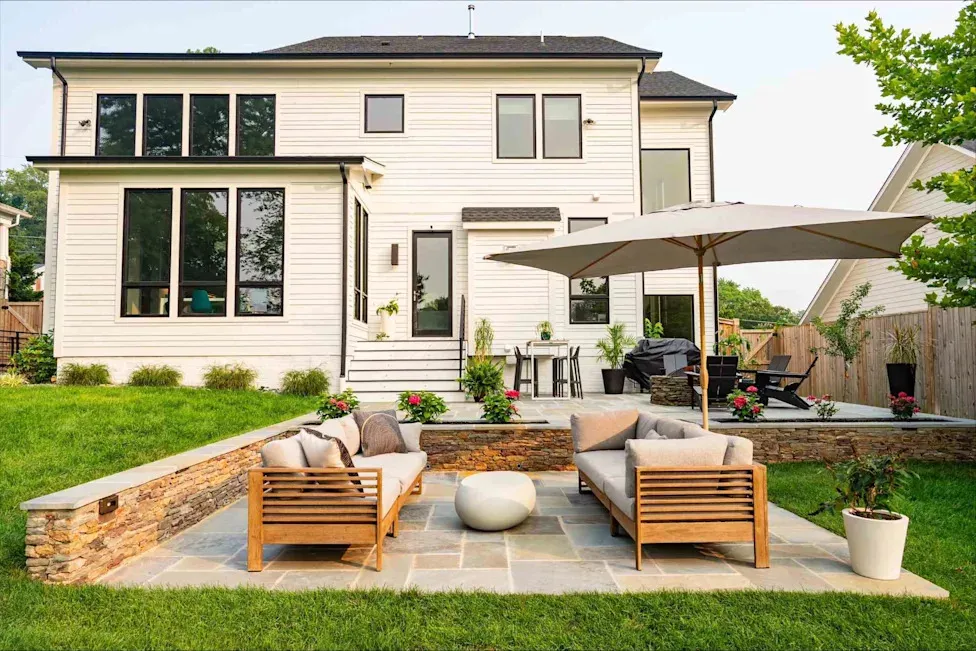
The visual formula here is a study in texture: 50% earthy flagstone pavers, 30% rustic stacked stone, and 20% natural wood and soft textiles. This recipe creates a rich, layered look that feels connected to the surrounding landscape. You could swap the flagstone for more affordable concrete pavers and the slatted wood sofas for dark wicker, and the fundamental balance would still hold. The key is maintaining that ratio of hardscape texture to softer furniture elements.
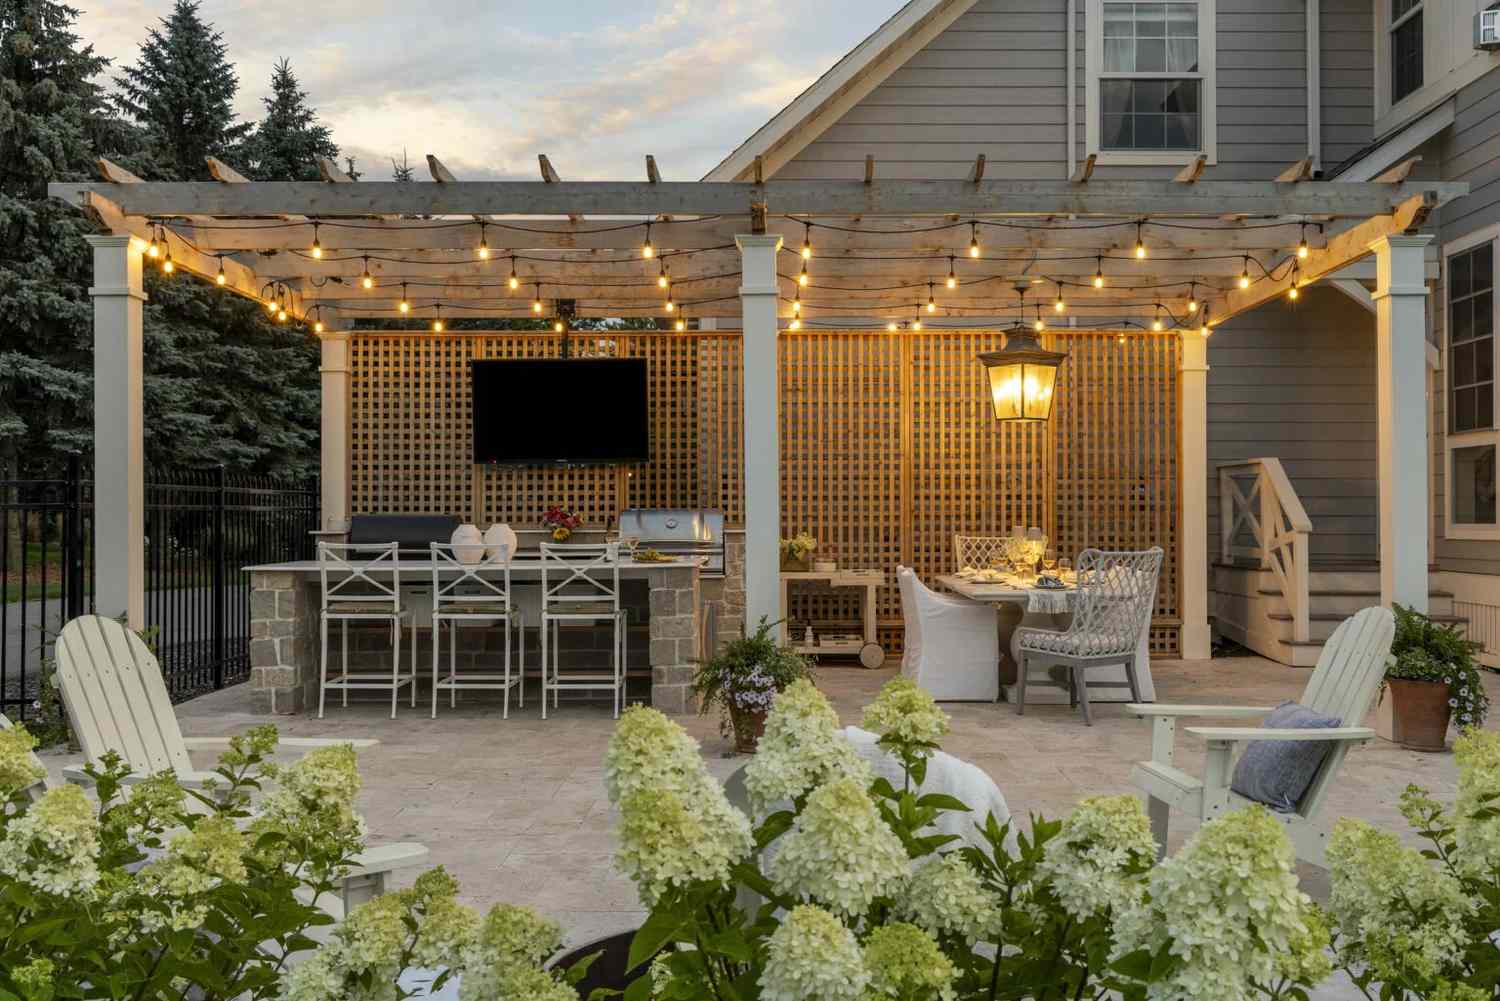
3. Integrate a Wooden Pergola with an Outdoor Kitchen
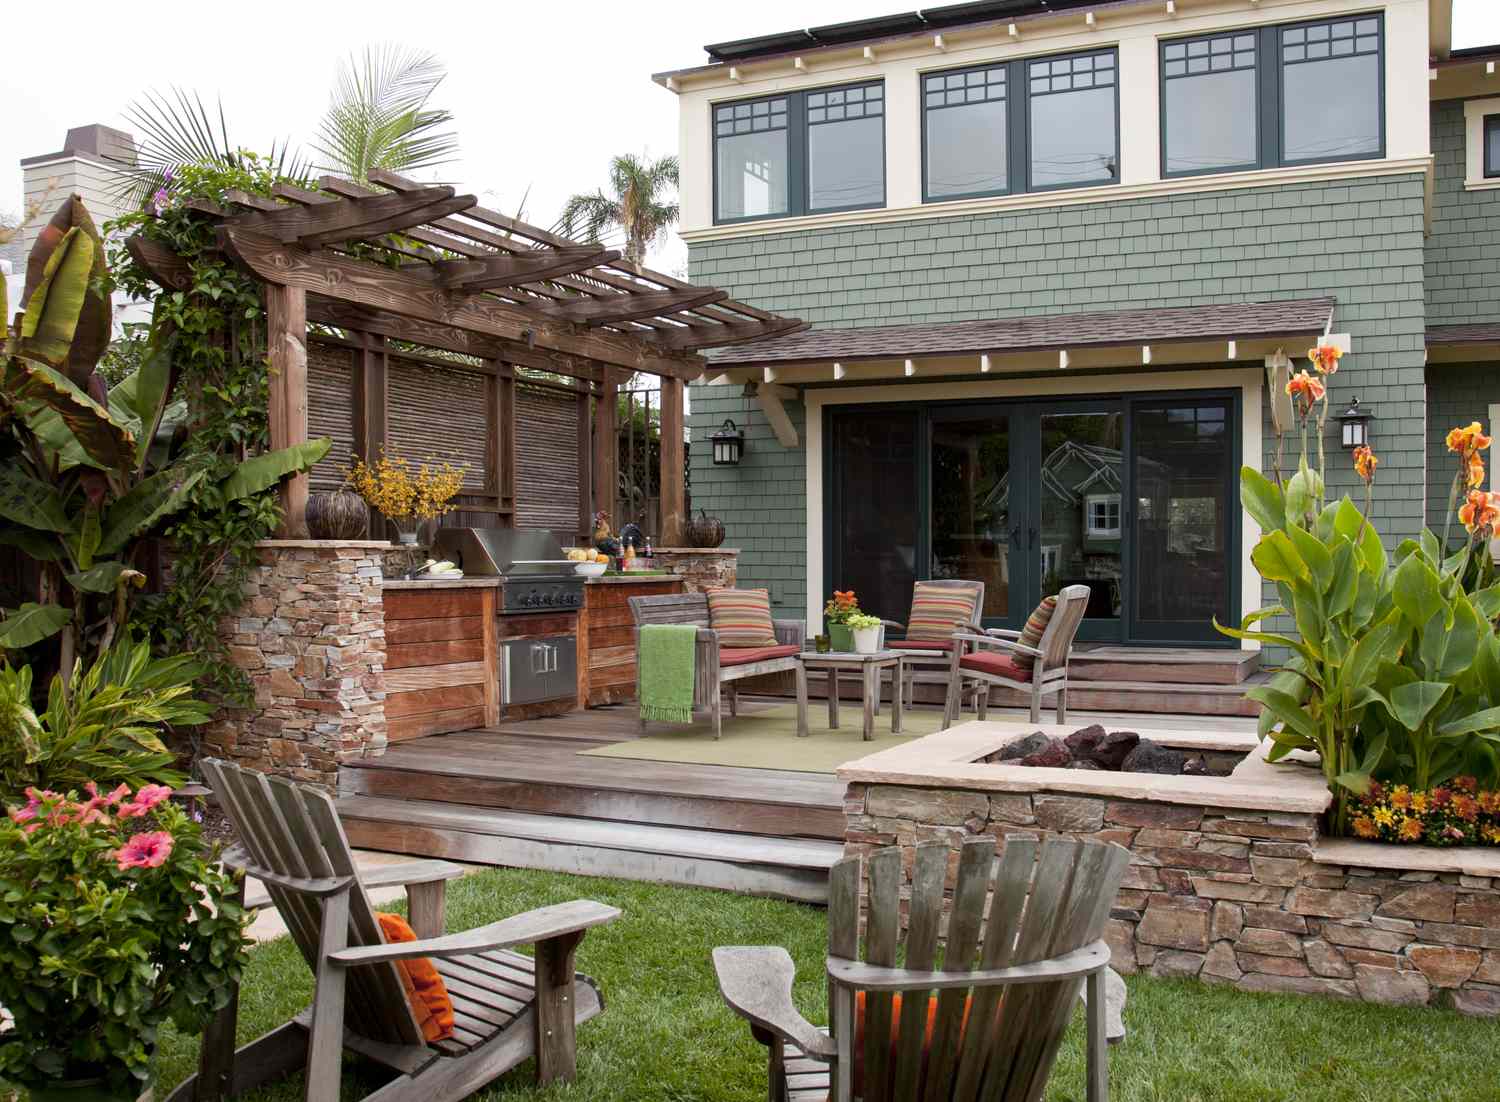
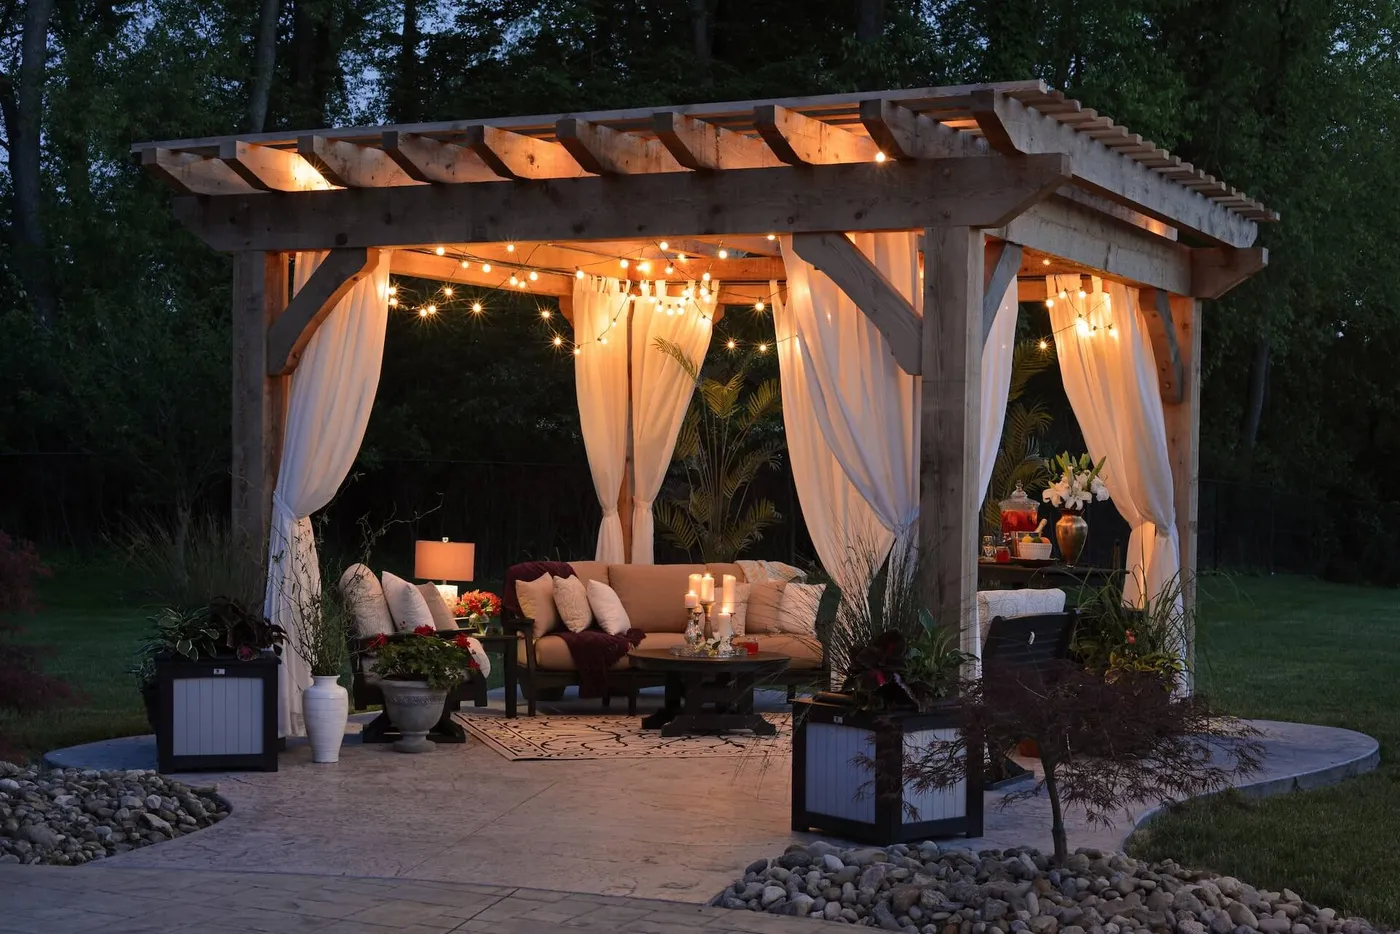
The single element that makes this space magical is the wooden pergola. Without it, you’d have a perfectly functional outdoor kitchen and seating area. But with it, you have an outdoor room. It defines the space, provides a structure for romantic string lights and climbing vines, and offers just enough dappled shade to make the area usable on a sunny afternoon. It transforms the patio from a collection of features into a true destination.
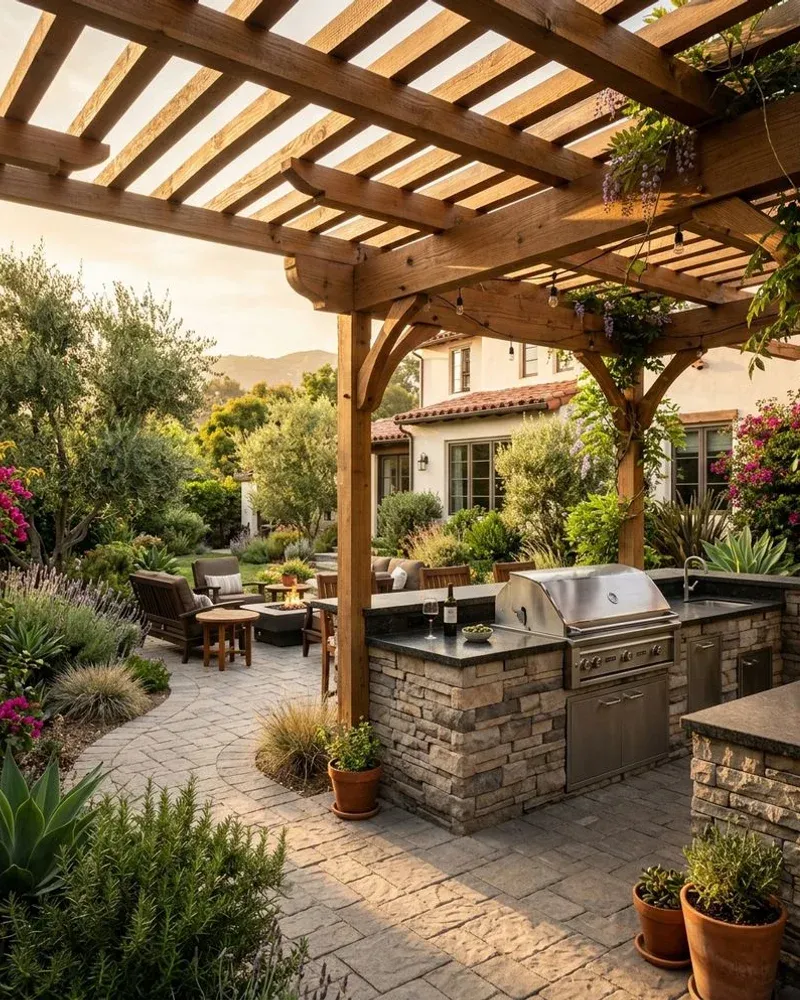
A wooden pergola is gorgeous, but it’s not a set-it-and-forget-it feature. To prevent rot and insect damage, you’ll need to clean and re-seal it every 2-3 years, especially if you live in a wet or humid climate. The integrated climbing vines are beautiful but require regular pruning to keep them from becoming overgrown and potentially damaging the wood. Budget around $100-$200 for supplies and a weekend of work for this biennial maintenance task.
4. Design a Spacious Paver Patio with Dual Seating Zones
This layout is ideal for a larger backyard, requiring a footprint of at least 25×30 feet to comfortably accommodate both the lounge area and the fire pit circle without feeling cramped. The key to making a large space feel inviting is creating distinct rooms without walls. This design excels by using furniture arrangement to define zones. The sofa area is for conversation, while the rocker chairs around the fire pit offer a more relaxed, communal vibe. It’s perfect for hosting larger groups where different conversations can happen simultaneously.
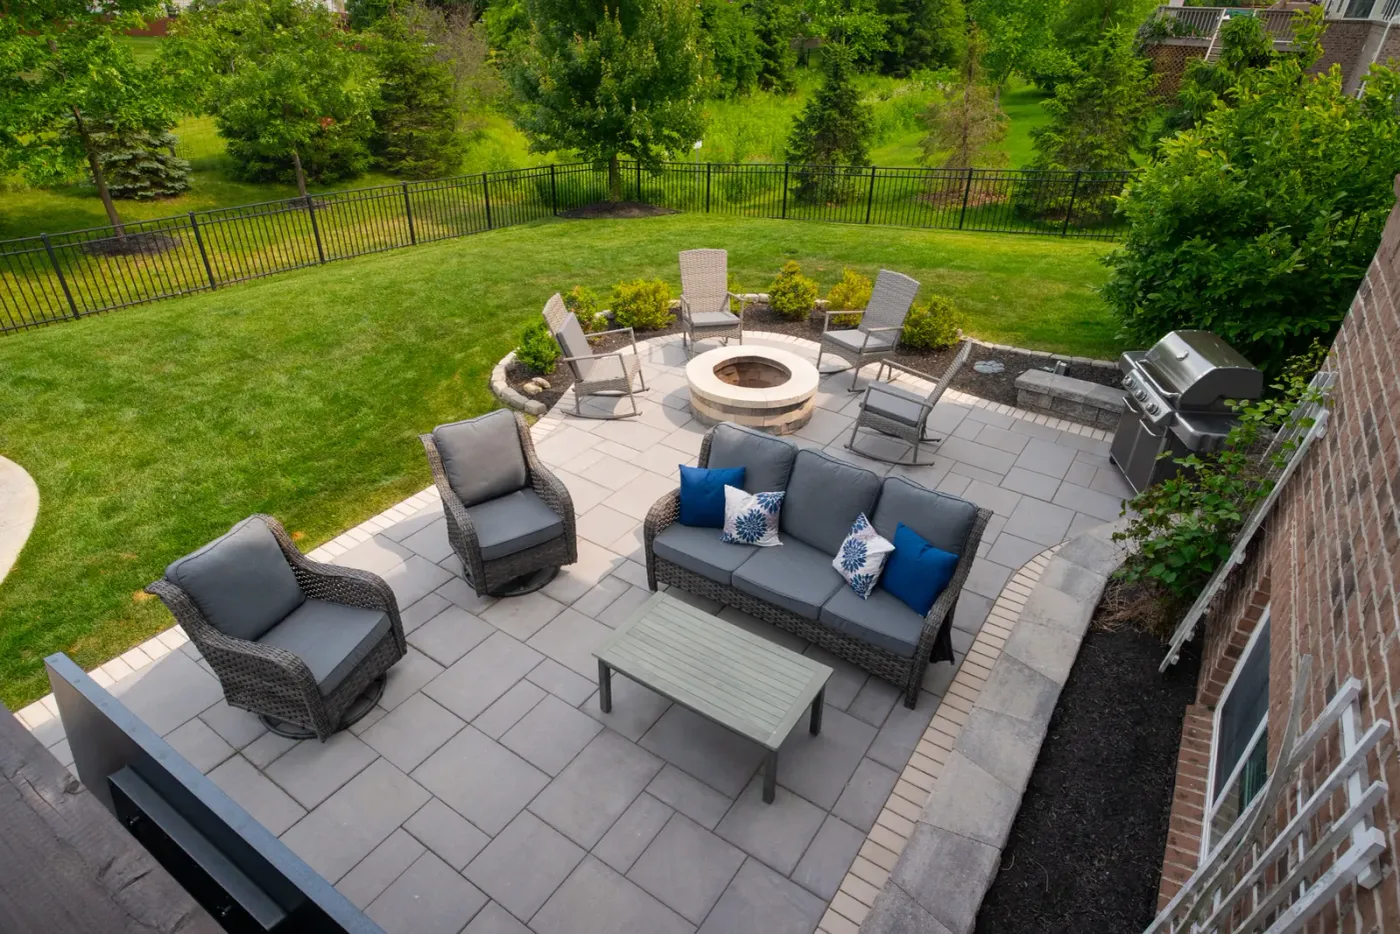
What makes this multi-zone layout successful is the use of repetition and subtle variation. The light gray pavers create a unified foundation across the entire space. The color palette—gray, white, and blue—is repeated in both the woven sectional area and the metal fire pit chairs, tying them together. However, the different furniture materials (woven vs. metal) and shapes (square lounge vs. circular fire pit) provide just enough visual interest to clearly define each zone.
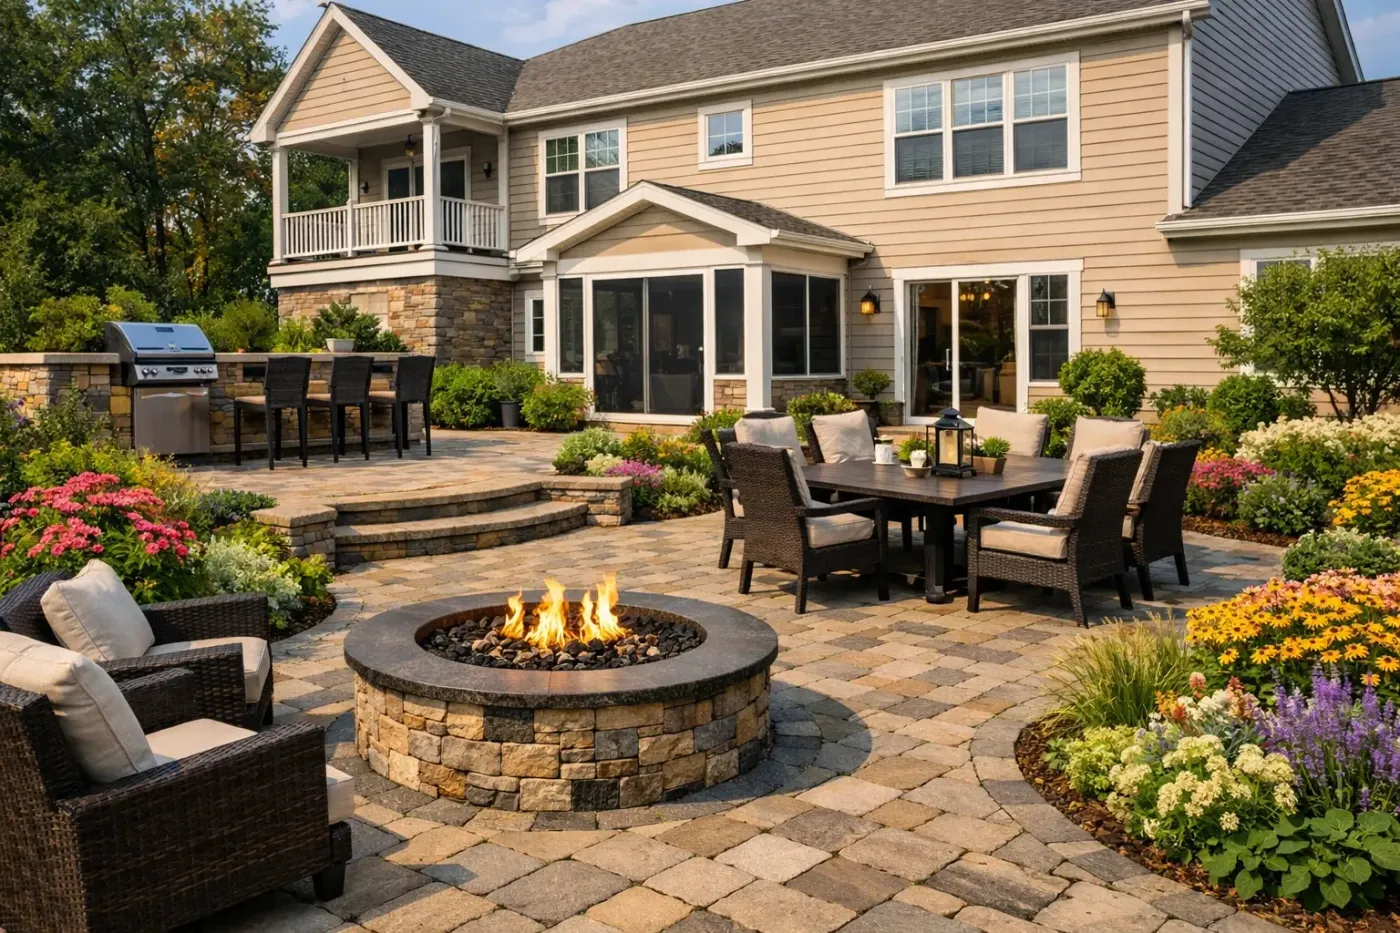
5. Build a Luxurious Multi-Zone Patio with a Stone Fire Pit
Recreating this luxurious, multi-zone patio is a significant investment, primarily due to the extensive hardscaping and built-in features. Here’s a rough estimate:
- Pavers & Installation (approx. 600 sq ft): $9,000 – $15,000
- Stacked Stone Fire Pit & Kitchen Island: $8,000 – $14,000
- Furniture (Dining & Lounge Sets): $3,500 – $7,000
- Built-in Grill & Appliances: $2,500 – $6,000
- Landscaping & Plants: $2,000 – $5,000
- TOTAL: $25,000 – $47,000
Budget alternative: Use pre-fabricated concrete blocks for the fire pit, opt for a standalone grill, and find furniture on end-of-season sales to achieve a similar vibe for around $10,000 – $18,000.
An expansive patio with this many features requires professional-level planning. Drainage is a major concern; you must ensure water slopes away from the house and doesn’t pool on the large paved surface. Also, running gas and electrical lines for the kitchen and fire pit requires licensed contractors and permits. This is not a project to rush. Trying to cut corners on the foundation or utilities will lead to very expensive problems down the road. For a more streamlined project, check out the simpler layout in Idea #3.
6. Create an Expansive Paver Patio with an Integrated Outdoor Kitchen
The curved stone retaining wall is the unsung hero of this design. It does so much more than just hold back the earth. Its gentle curve softens the hard edges of the patio and house, guiding the eye through the space and making the large area feel more organic and less like a giant slab of pavers. It also provides extra casual seating for large parties. Removing it would make the entire design feel much more rigid and less integrated with the natural surroundings.
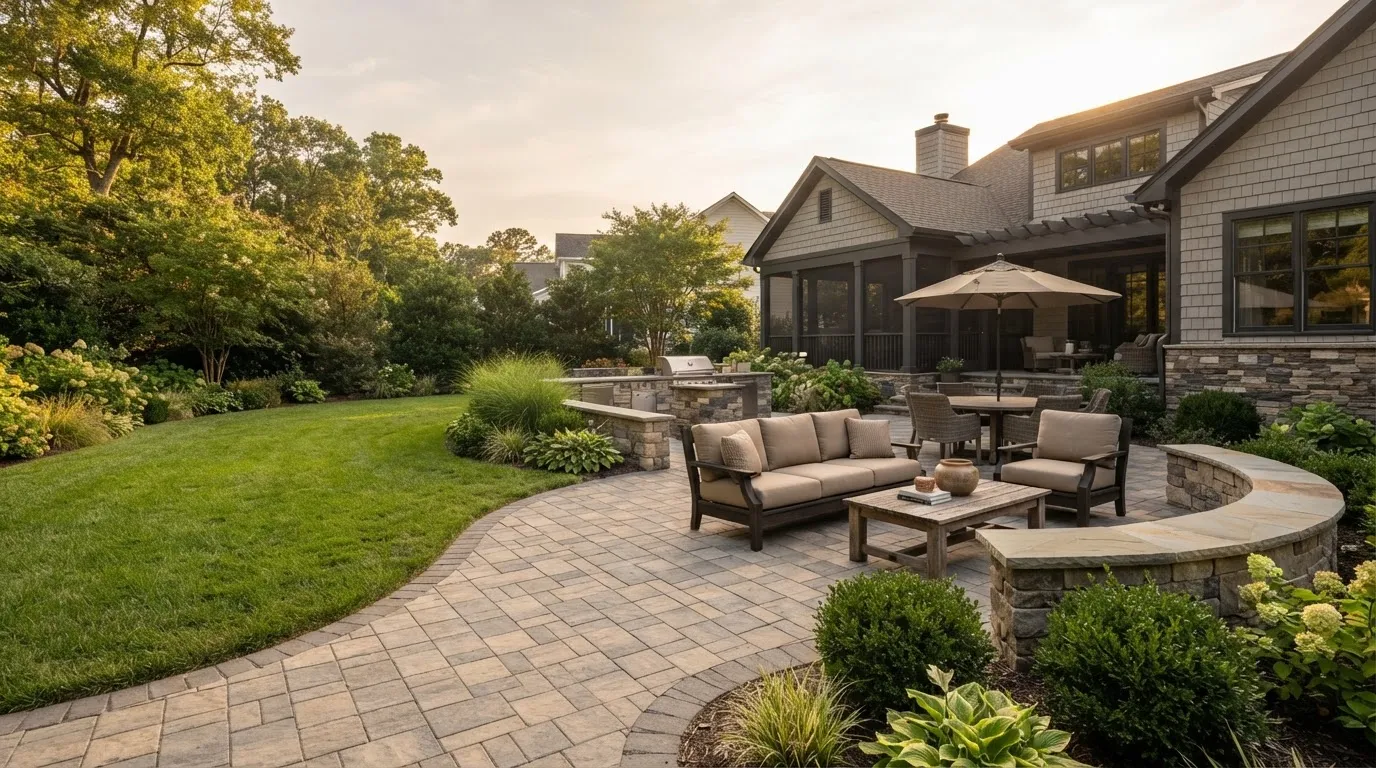
When choosing pavers, don’t just grab one color. Notice how this patio uses a mix of beige and gray pavers. This multi-tone approach is far more forgiving than a solid color—it hides dirt and stains better and gives the surface a more natural, stone-like appearance. For a DIY project, buy your pavers from at least 3-4 different pallets and mix them as you lay them to ensure a random, natural-looking distribution of colors and avoid unintentional blotches.
7. Craft a Cozy Patio Nook with a Sectional and Globe Lights
This setup is the perfect solution for a small backyard or a neglected corner, proving you don’t need a huge space to create a big impact. A minimum area of about 10×12 feet is ideal to fit the L-shaped sectional and a coffee table and allow for comfortable movement. The key here is the verticality provided by the light wood fence and overhead globe lights. They draw the eye upward, creating an intimate, room-like feeling and making the compact footprint feel purposeful and cozy, not cramped.
You can absolutely get this look for under $1,000. Start by searching for used outdoor sectionals on Facebook Marketplace or Craigslist—they often go for $300-$500. A few strings of commercial-grade globe lights from Target or Amazon will run you about $50-$70. The dark grey pavers can be a DIY project using basic squares from a home improvement store. The real savings come from your own labor in building the wooden fence and laying the pavers yourself.
8. Design a Modern Patio with a Dark Grey Sectional and Wood Screen
This patio works because of its masterful use of contrast. The dark grey sectional and coffee table create a bold, modern statement against the large, light grey pavers. The dark wood slatted screen then adds warmth and texture, preventing the grey-on-grey scheme from feeling cold or sterile. Finally, the vibrant green of the potted plants injects life and a pop of natural color. It’s a carefully balanced composition of light, dark, warm, and cool elements.
Think of this look as a simple equation: 60% cool neutrals (light and dark grey), 30% warm wood tones, and 10% organic green. This formula is incredibly versatile. You could swap the dark wood screen for a warmer teak or even a painted black one, and it would still work. You could change the light grey pavers to a warmer beige tone, as long as you maintain the contrast with the dark furniture. The key is the ratio of cool base, warm accent, and a touch of nature.
9. Build a Rustic Brick Outdoor Kitchen with a Pizza Oven
This warm, Mediterranean-inspired look is trending because it leans into the idea of slow living and authentic experiences. As people seek to create more meaningful moments at home, dedicated features like a wood-fired pizza oven become the heart of the backyard. It’s less about a sterile, stainless-steel kitchen and more about a rustic, communal hub for cooking and gathering. The use of weathered, reclaimed-looking materials like the red brick and distressed wood feels timeless and personal, a reaction against mass-produced perfection.
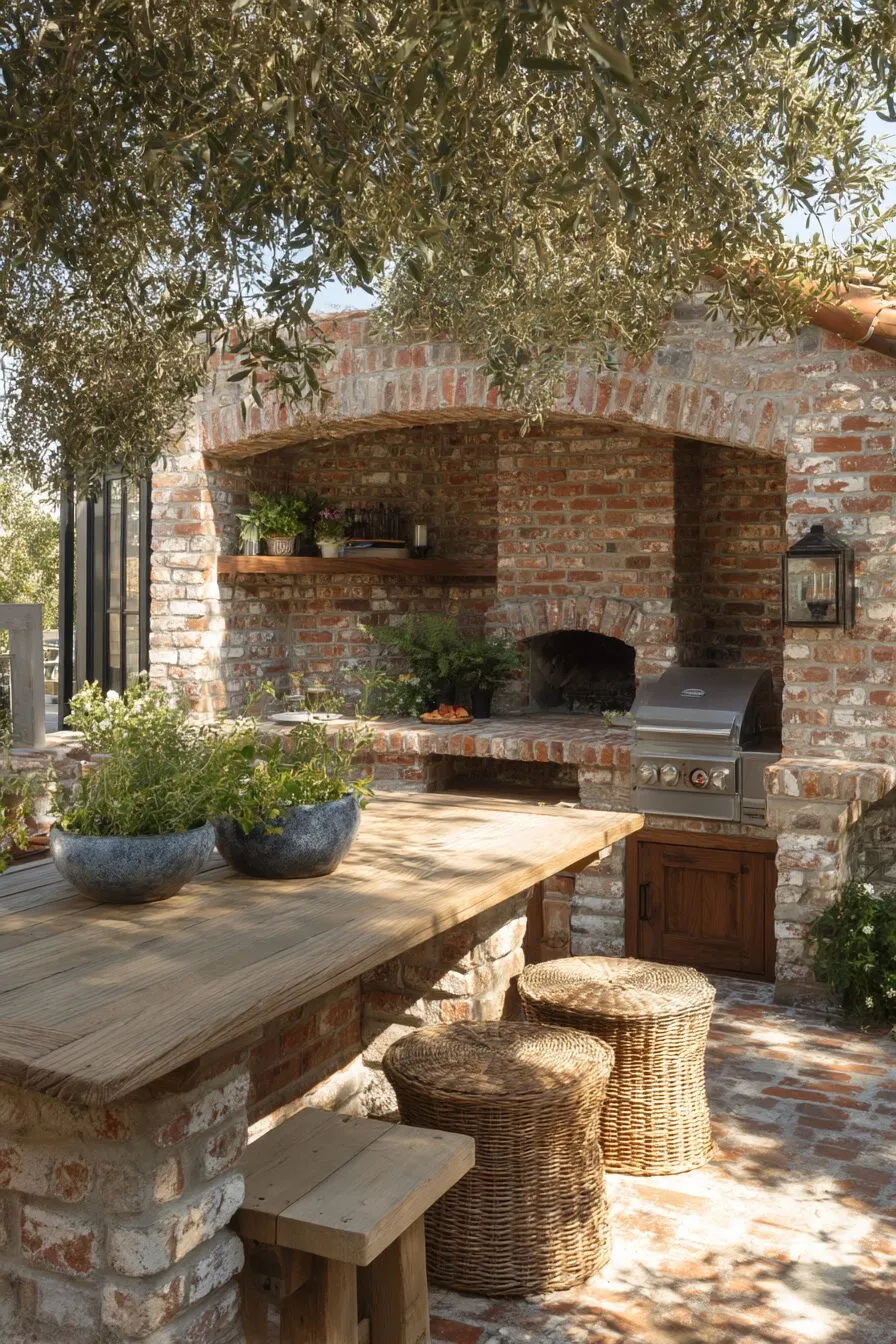
A brick pizza oven requires specific care. The brick and mortar can crack with extreme temperature changes if not built correctly with refractory materials. You’ll need to regularly sweep out ash and inspect the masonry for cracks, which should be repaired with high-heat mortar. The distressed wood table is beautiful but will need to be sanded and sealed annually with a food-safe outdoor finish to prevent it from splintering or warping, especially if it’s left uncovered in the elements.
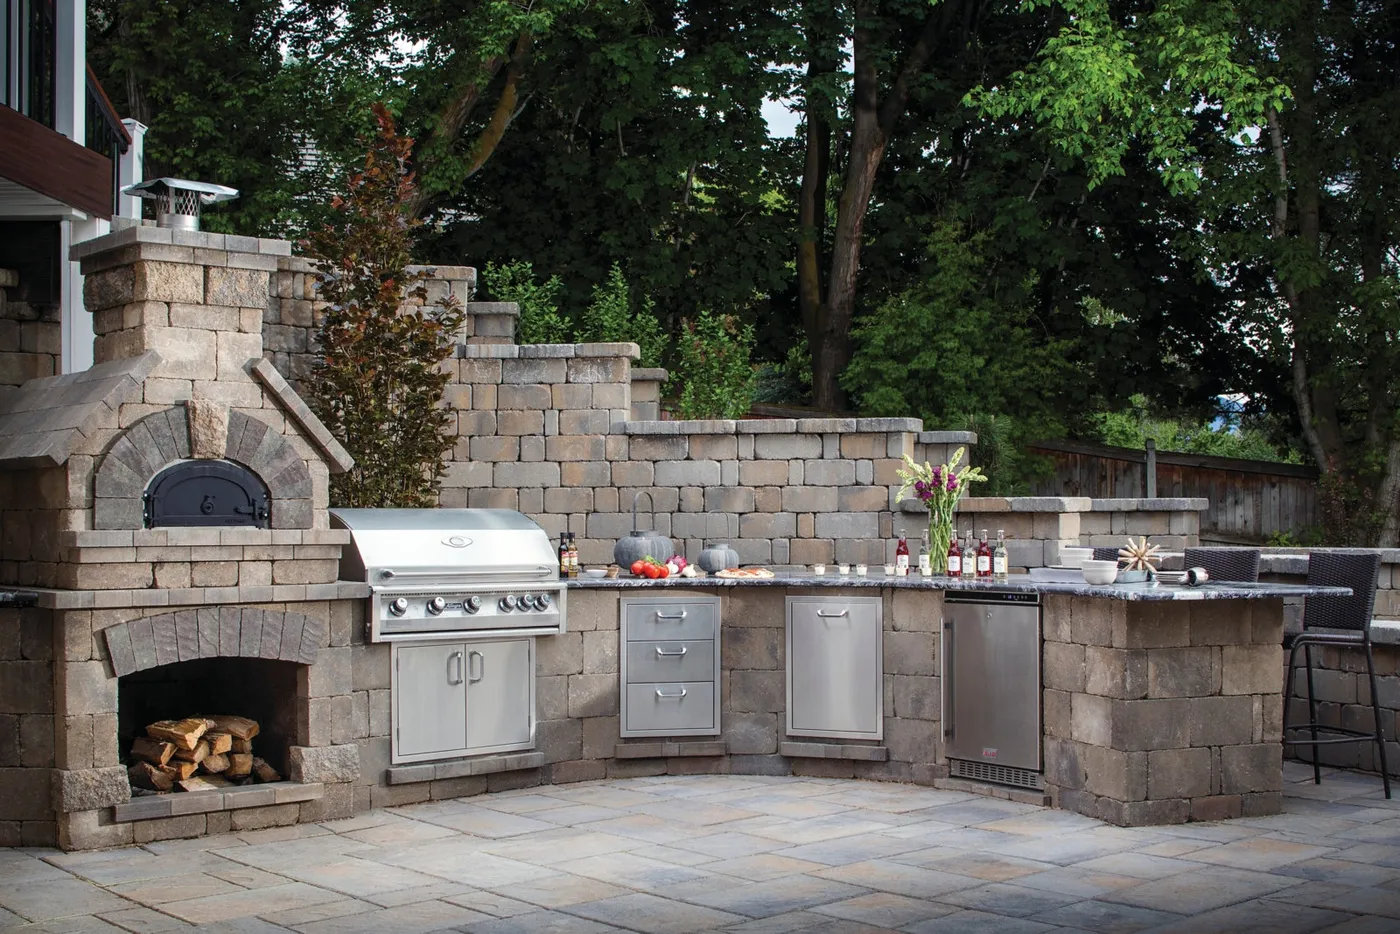
10. Construct an L-Shaped Outdoor Kitchen with Modular Stone Blocks
Building a kitchen island with modular stone blocks is a popular and accessible DIY project. Here’s the basic process:
- Pour a level concrete slab foundation for your island. This is non-negotiable for stability.
- Lay the first course of blocks, ensuring it’s perfectly level and square.
- Apply landscape block adhesive and stack subsequent courses in a running bond pattern (like bricks).
- Cut blocks as needed for appliance openings using a masonry blade on a circular saw.
- Once the blocks are set, have a professional measure and install the countertop.
- Slide in your grill, drawers, and other appliances.
Time: 2-3 weekends for the blockwork. Cost: $1,500-$3,000 for blocks and adhesive.
stacking blocks, have a solid plan. Here’s your checklist:
- Finalize your appliance selections. You need the exact dimensions for your grill, fridge, and drawers before you build.
- Plan your utility runs. Where will the gas/propane line and electrical outlets go? This needs to be figured out before you pour the slab.
- Check local building codes. Some municipalities have specific requirements for clearance from combustible materials (like your house siding).
- Confirm your countertop choice. The weight and size of your countertop will determine if your block structure needs additional support.
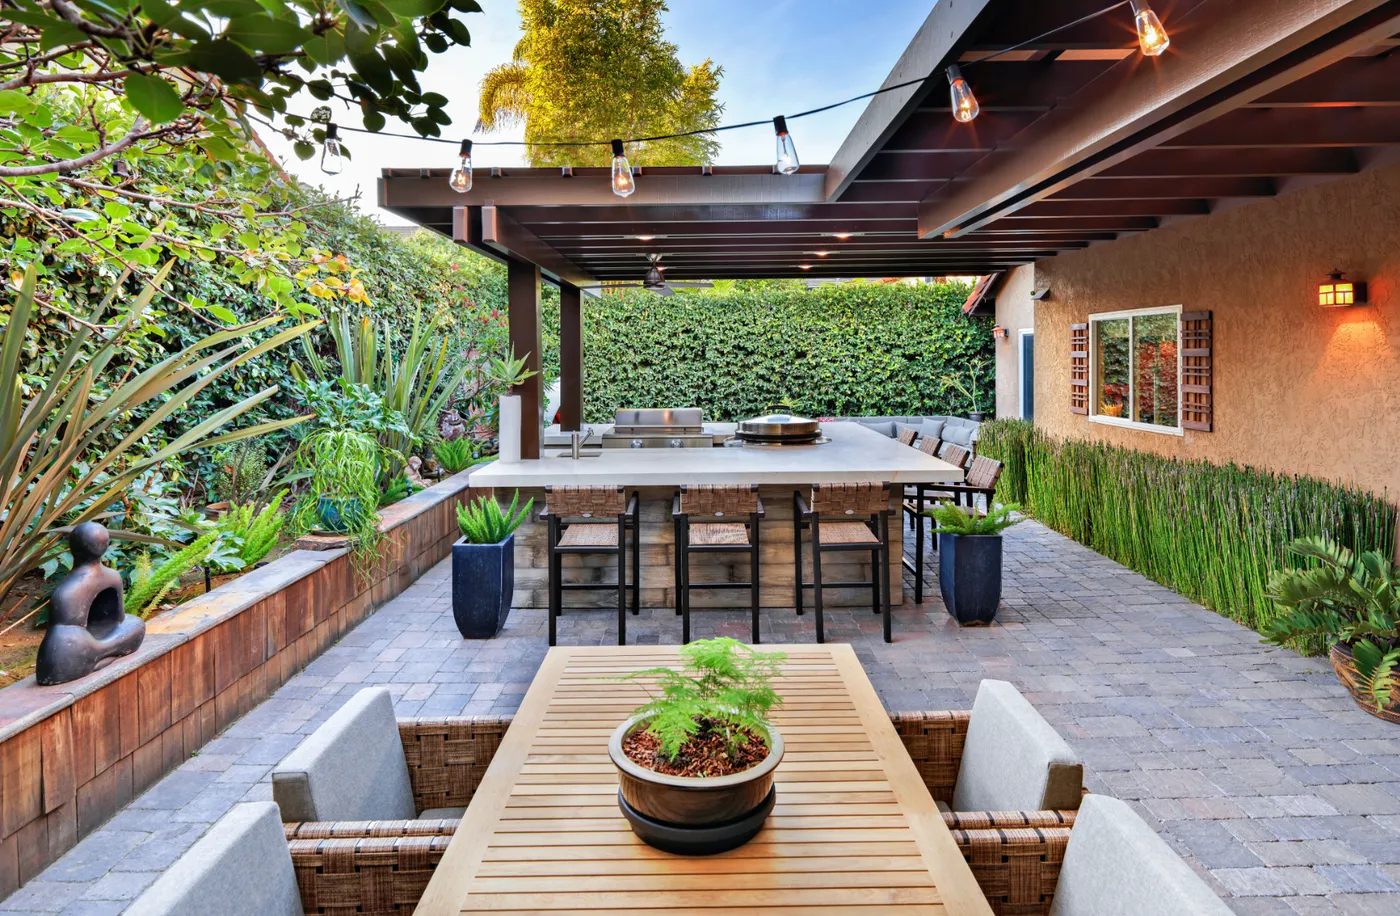
11. Create an Intimate Patio with a Vertical Garden and String Lights
This small patio feels so successful because it perfectly balances hard and soft elements. The large, square pavers and dark grey furniture provide a strong, modern, hard foundation. But the design is softened and brought to life by the slatted wood screen, the lush greenery in the vertical garden, and the warm glow of the string lights. This interplay prevents the modern elements from feeling sterile and makes the small space feel like a secret garden oasis. It’s a great example of using a simple material palette effectively. Compare the cozy feel here to the more open plan in Idea #7.
A vertical garden on a privacy screen looks amazing, but it requires commitment. Those small pots will dry out very quickly in the summer sun, likely needing water every single day. You’ll also need to consider drainage—where does the excess water go? If it just runs down the back of your wooden screen, it can cause staining and premature rot. Look for vertical planter systems with built-in irrigation or be prepared for a daily watering routine.
12. Layer Textures with a Multi-Level Patio and Brick Walls
The single element that gives this patio its established, timeless character is the use of real red brick for the retaining walls and steps. It injects a sense of history and warmth that modern concrete blocks can’t replicate. The brick, combined with the overflowing terracotta pots, creates a charming, slightly rustic feel that perfectly complements the lush, mature garden. Without the brick, the grey pavers and dark wood furniture might feel a bit too plain; the brick is the essential ingredient that ties it all together.
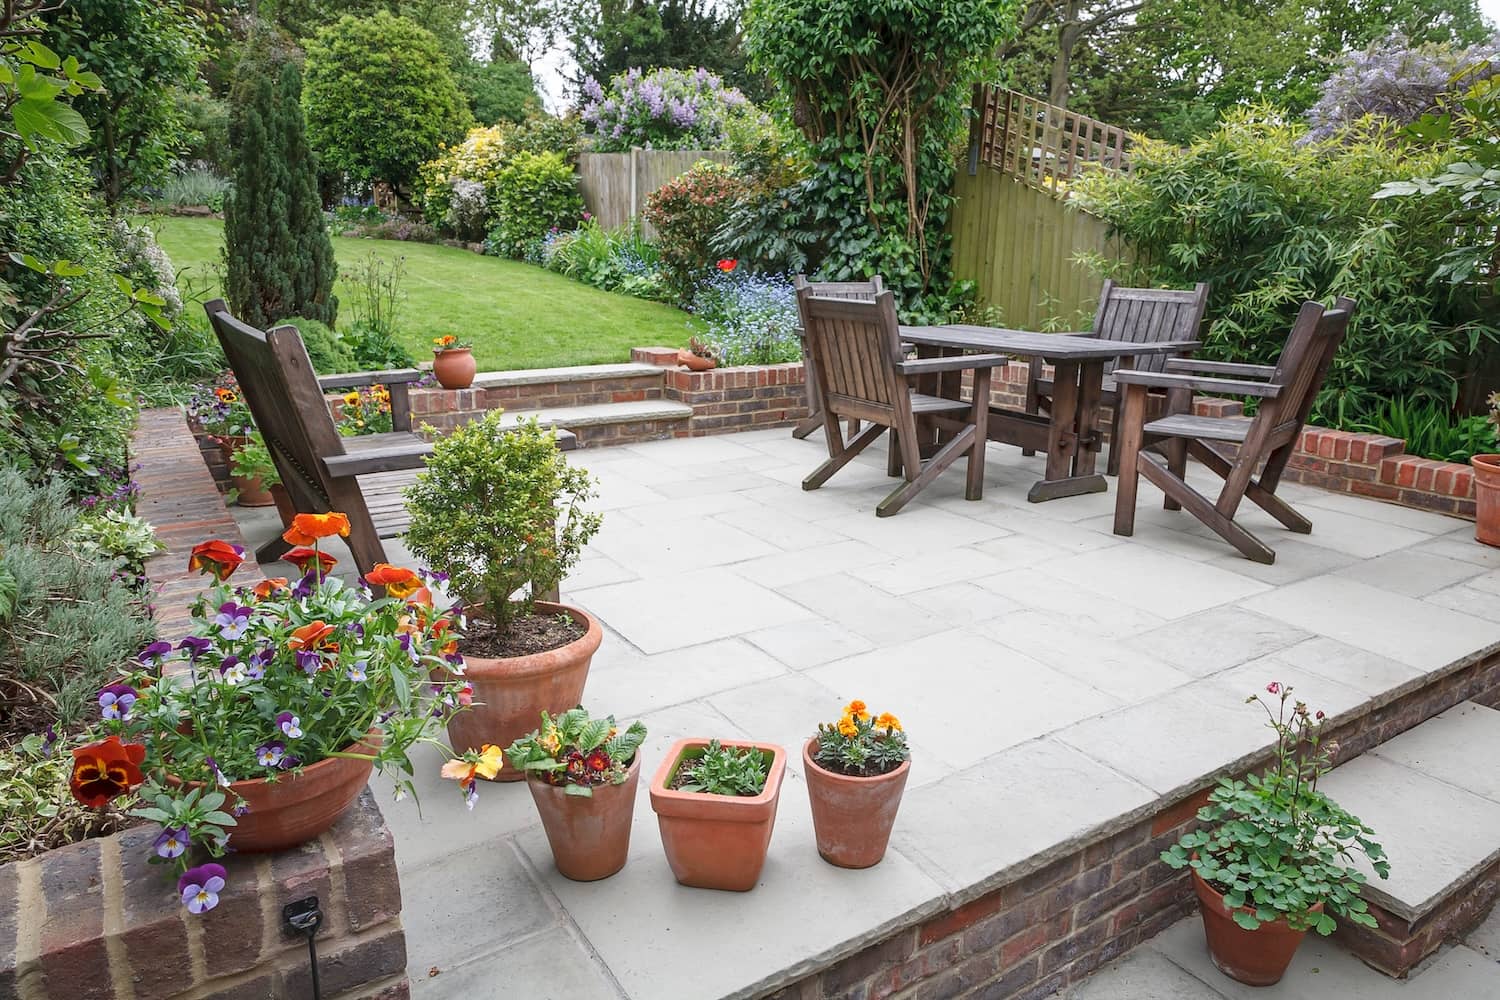
Love the look but not the price of a full brick-and-mortar wall? You can get a similar layered effect on a tighter budget. For the retaining walls, use affordable concrete retaining wall blocks from a big-box store and then cover them with a thin brick veneer. For the patio surface, instead of all pavers, consider a combination of a small paved area for the table and a larger area of compacted pea gravel to save significantly on material and labor costs.
13. Center Your Patio Around a Tiled DIY Fire Pit
Creating a unique tiled fire pit is an achievable DIY that makes a huge statement. Here’s a simplified guide to building it on an existing patio:
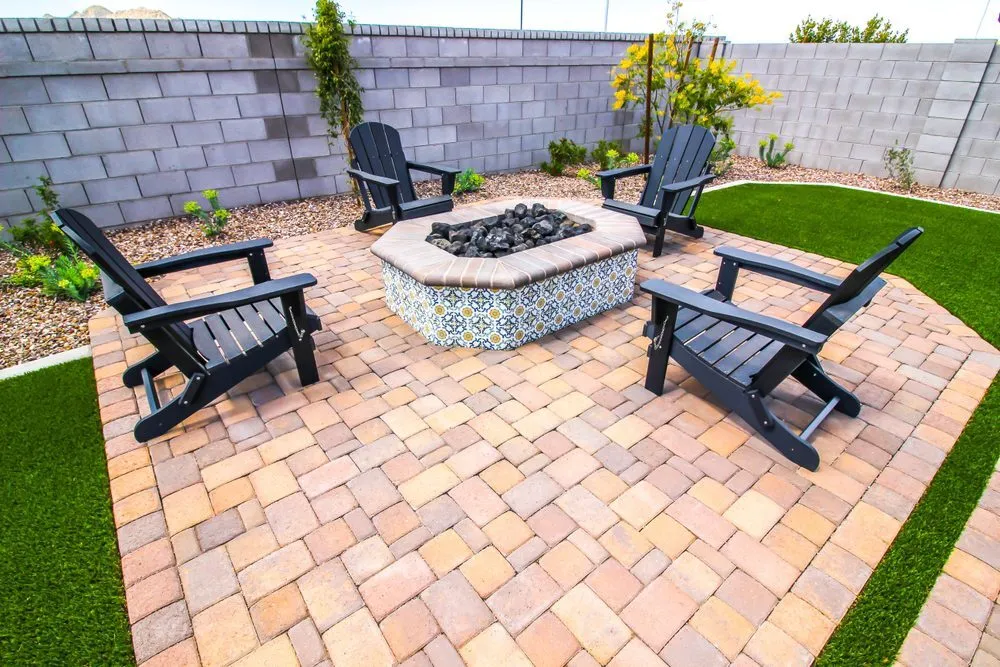
- Construct a frame for your desired shape (like this octagon) using concrete blocks, mortaring them together.
- Apply a layer of thin-set mortar to the exterior surfaces of the block structure.
- Press your chosen outdoor-rated tiles into the mortar, using tile spacers for even gaps. Let it cure for 24-48 hours.
- Grout the tile joints, wiping away excess with a sponge.
- Install a brick or stone coping on top with mortar for a finished edge.
- Fill the interior with lava rock and connect your gas fire pit kit.
Time: 2 weekends. Cost: $400 – $900, depending on tiles and fire pit kit.
The secret to a comfortable fire pit area is scale. A common mistake is making the fire pit too large or placing the chairs too far away. For good conversation and warmth, the interior diameter of your seating circle should be no more than 10-12 feet. Your chairs should be about 3 feet from the edge of the fire pit itself. This keeps everyone close enough to feel the heat and chat without having to shout across a void.
14. Start Your Patio with a Budget-Friendly Paver Foundation
A paver patio feels like a luxury project, but it can be surprisingly affordable if you handle the labor yourself. The key is to choose inexpensive, readily available pavers from big-box stores like Lowe’s or The Home Depot, which can cost as little as $2-$4 per square foot. Renting a plate compactor for a day is about $100 and is the secret to a professional-looking, long-lasting result. By avoiding complex patterns and expensive materials, you focus your budget on creating a solid, usable foundation for your future outdoor living space.
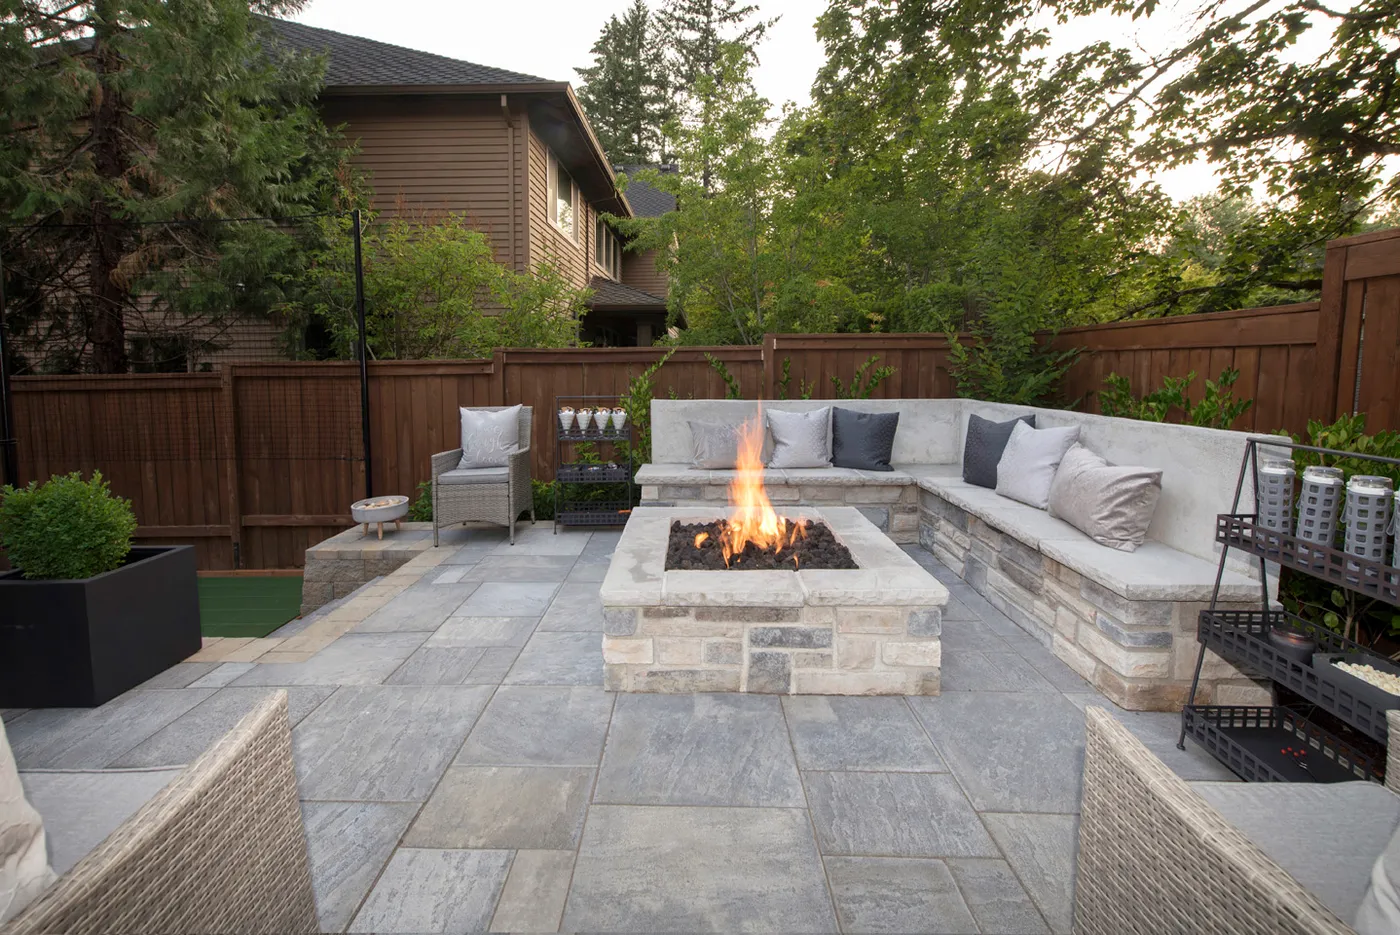
Even the most basic paver patio looks good because it brings order and intention to a patch of your yard. It carves out a dedicated zone for living, separating it from the wildness of the lawn or garden beds. The simple grid of the pavers creates a sense of stability and cleanliness. It’s the first and most important step in turning an empty backyard into a functional outdoor room. A similar principle is seen in Idea #10, but on a grander scale.
15. Creating an Affordable Patio Nook for a Small Backyard
Small spaces demand smart design. To create a functional patio in a compact backyard, you need a minimum of an 8×10 foot area. This provides just enough room for a small conversation set or a bistro table without feeling completely cramped. The key is to think vertically. Use wall planters, string lights, or a tall privacy screen to draw the eye up and create the illusion of more space. Avoid bulky furniture; opt for pieces with clean lines and visible legs to create a sense of openness.
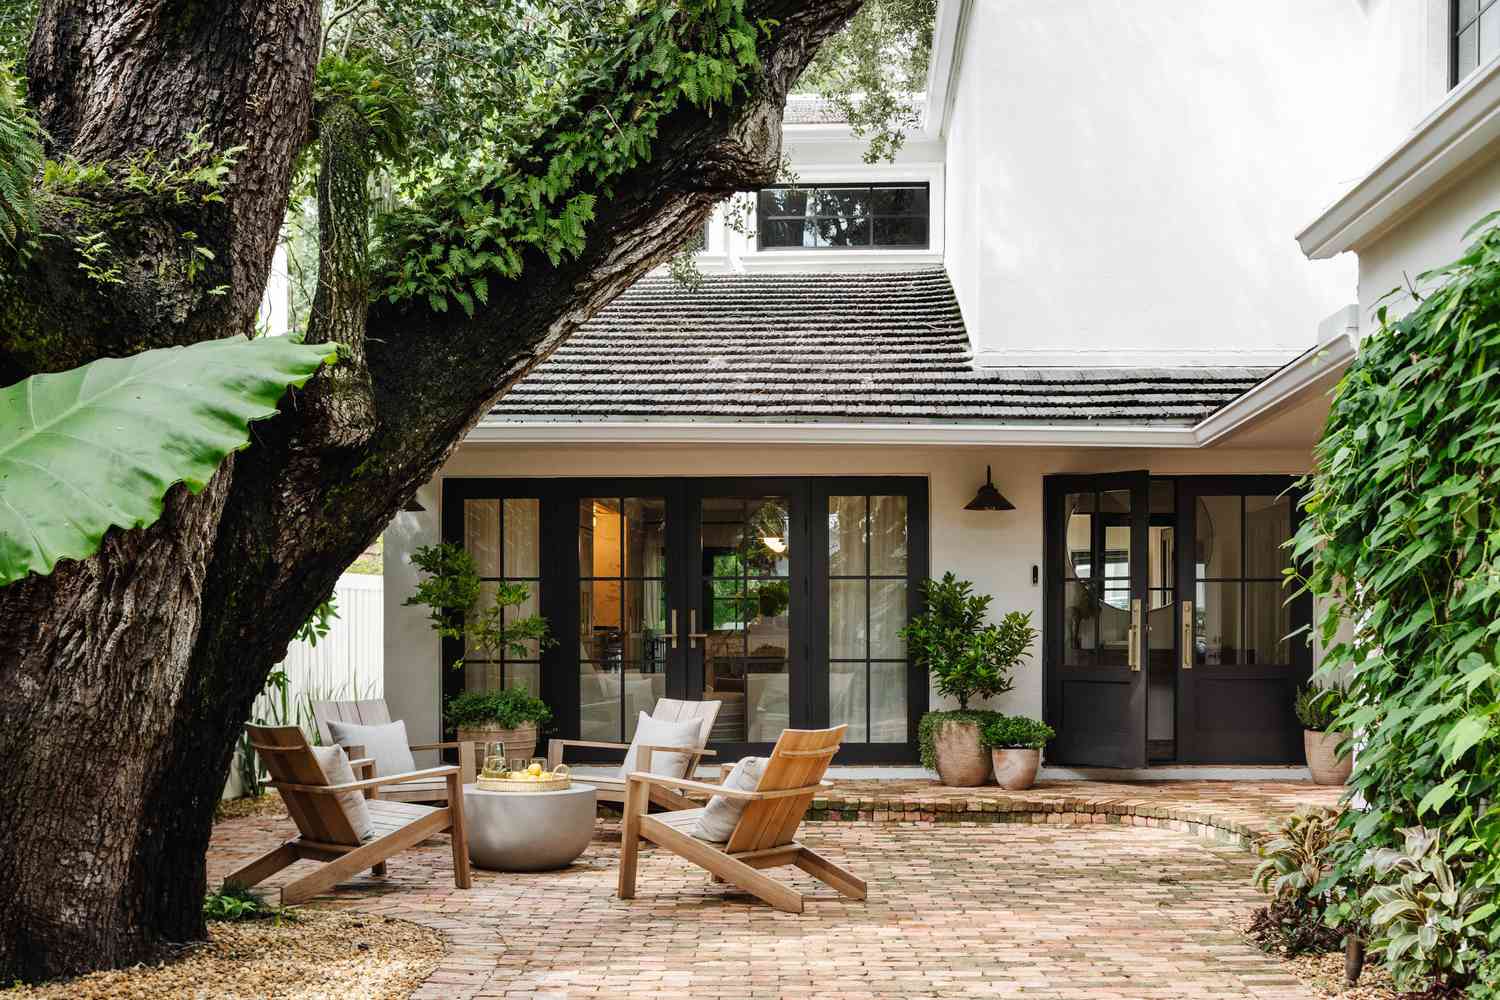
The formula for a successful small patio is simple: 50% flexible seating, 30% durable flooring, and 20% personality. Flexible seating means lightweight chairs you can easily move around. Durable flooring could be simple concrete pavers, a deck, or even a well-maintained gravel pad. The personality comes from potted plants, outdoor textiles, and lighting. This balance ensures your small space is both functional and a joy to be in, much like the cozy corner in Idea #6.
16. Achieve a High-End Look with Inexpensive Pavers
The secret to making budget pavers look expensive is the installation pattern. Don’t just lay them in a boring grid. A running bond or, even better, a herringbone pattern will instantly elevate the look. Another pro trick is to add a soldier course border—a row of pavers laid perpendicular to the main field. This creates a clean, finished frame for your patio and makes the whole project look custom and intentional, even if you used the cheapest pavers available.
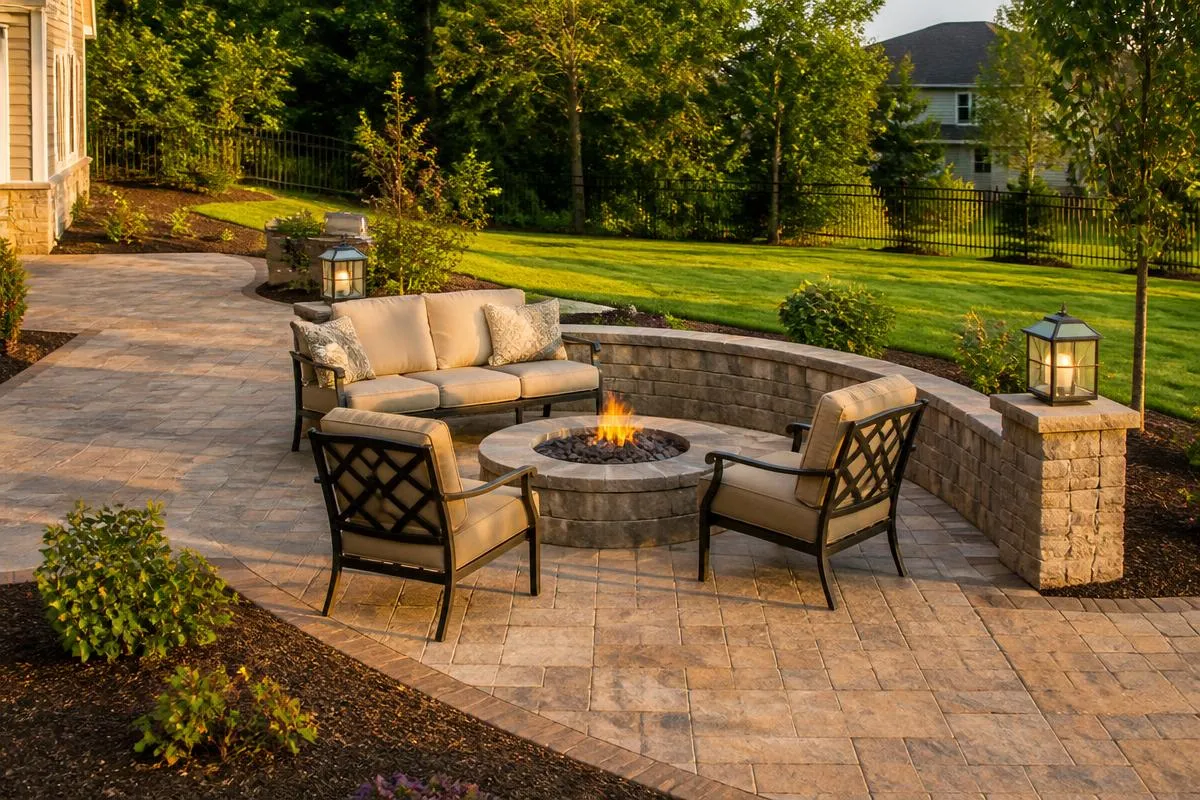
The part of a DIY paver project that nobody likes to talk about is the base preparation. It’s 80% of the work and 100% of the reason a patio succeeds or fails. You absolutely cannot skip excavating the soil, putting down several inches of compacted gravel base, and then a layer of leveling sand. If you lay pavers directly on dirt, they will become a wobbly, uneven mess within a year. There are no shortcuts here; do the prep work right, or you’ll be doing it all over again.
17. Design a Simple DIY Patio That Won’t Break the Bank
This is a realistic look at a truly affordable, small DIY patio project. The focus is on creating a functional space without splurging on high-end materials. Here’s a possible breakdown for a 10×10 foot area:
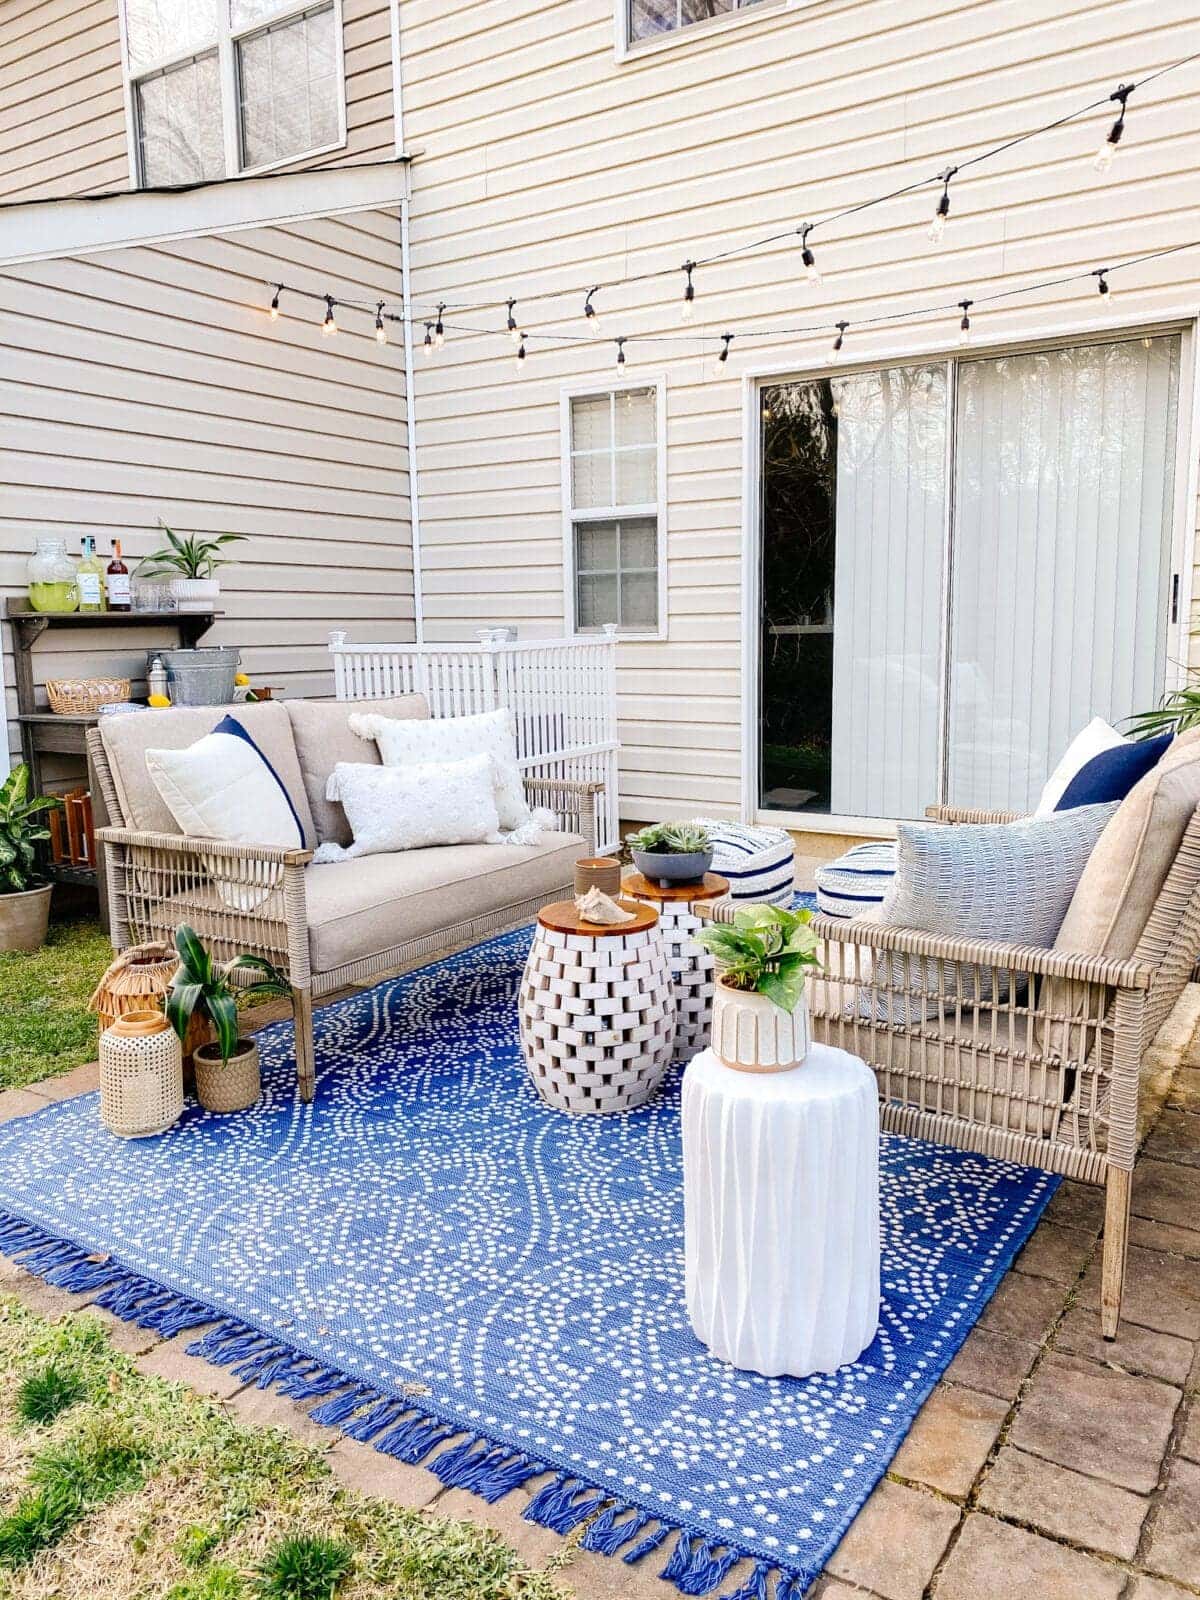
- Basic Concrete Pavers (100 sq ft): $200 – $400
- Paver Base & Sand: $150 – $250
- Tool Rentals (Compactor, Screeds): $100 – $150
- Used Furniture (Facebook Marketplace): $150 – $300
- String Lights & a Few Potted Plants: $100 – $200
- TOTAL: $700 – $1,300
Budget alternative: Skip the pavers entirely and create a gravel patio for about 40-50% less. You still need to prep the base, but the material cost is much lower.
Before you even buy a single paver for your budget patio, run through this quick checklist to save yourself a headache:
- Is the area relatively level? A steep slope will dramatically increase the prep work required.
- Where will rainwater run off? Ensure it flows away from your home’s foundation.
- Do you have a way to transport materials? A pickup truck or delivery service is essential for bags of gravel and sand.
- Have you called 811? Always get underground utility lines marked before you dig, even for a shallow excavation.
18. Your First DIY Paver Project: What to Expect
Laying your first paver patio can feel intimidating, but it’s a series of simple steps. Here’s the game plan:
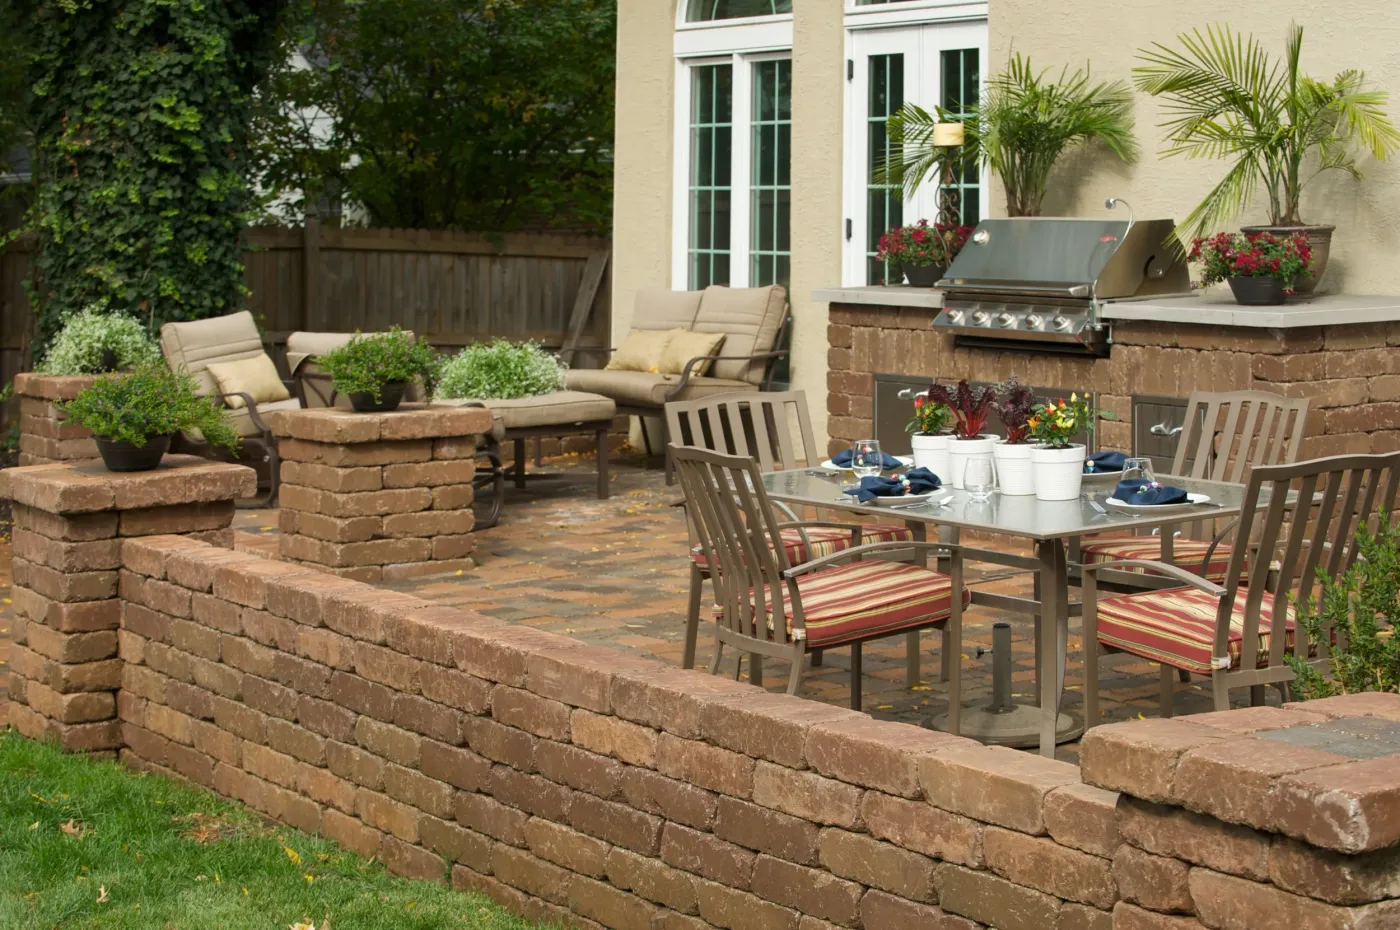
- Define your patio area with stakes and string.
- Excavate 6-7 inches of soil from the entire area. This is the hardest part!
- Fill with 4 inches of paver base (crushed stone), wetting and compacting it in 2-inch layers.
- Add a 1-inch layer of paver sand and drag a straight board across it (screeding) to create a perfectly flat surface.
- Lay your pavers on the sand, working from a corner outwards. Don’t slide them; place them straight down.
- Once all pavers are laid, sweep polymeric sand into the joints and mist with water to lock them in place.
Time: A full weekend for a small (10×10) patio. Cost: $5-$10 per sq. ft. in materials.
you absolutely cannot skimp on is the compacted base. It’s the invisible foundation that prevents your beautiful patio from turning into a lumpy, sinking mess. It’s not the glamorous part of the job—it’s just heavy, dusty work. But a solid, level, and compacted base is the difference between a patio that lasts two years and one that lasts twenty. Rent the plate compactor. Your future self will thank you.
19. Weighing the Costs: A Paver Patio vs. a Wooden Deck
When deciding between a paver patio and a deck, the initial cost is a huge factor. Here’s a general comparison for a 200 sq. ft. space, assuming professional installation:
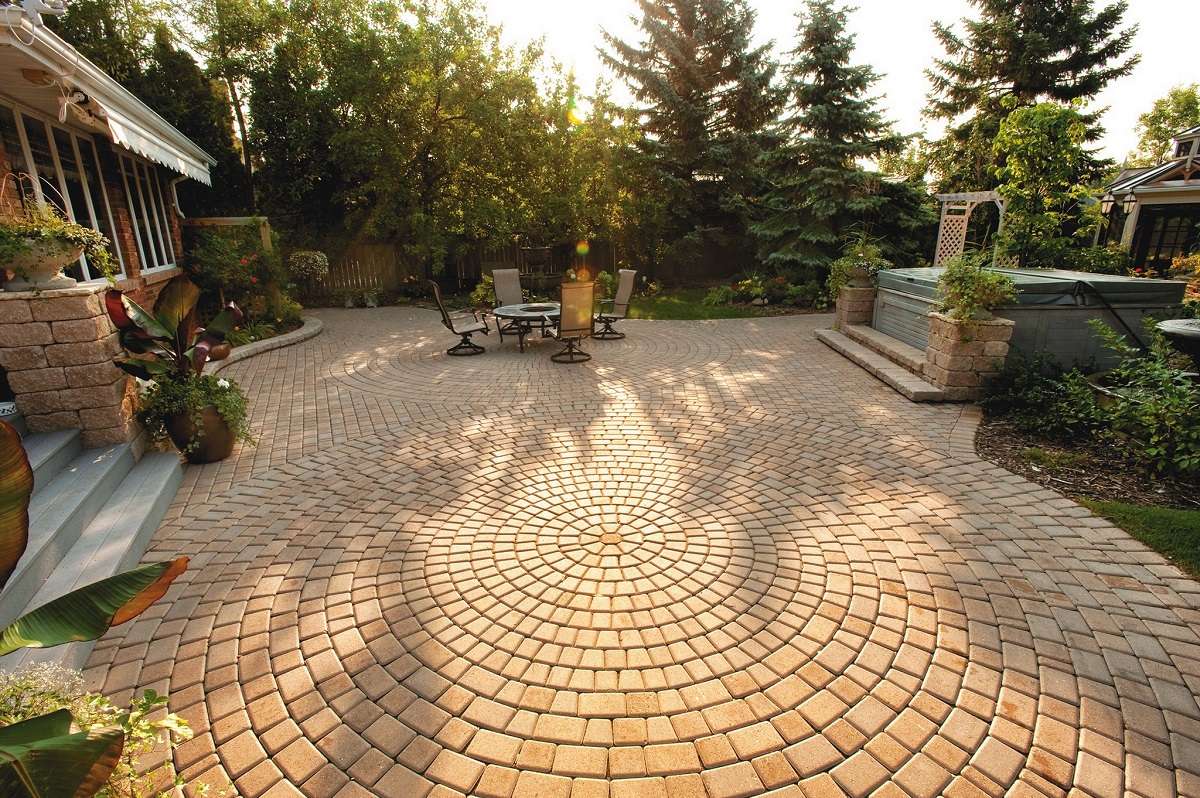
- Paver Patio:
- Materials (Pavers, base, sand): $1,200 – $4,000
- Labor: $1,600 – $4,000
- Total: $2,800 – $8,000 ($14-$40/sq. ft.)
- Wooden Deck (Pressure-Treated Pine):
- Materials (Lumber, concrete, hardware): $2,000 – $4,000
- Labor: $3,000 – $6,000
- Total: $5,000 – $10,000 ($25-$50/sq. ft.)
Generally, a paver patio has a lower upfront cost, especially if you DIY the labor.
The long-term commitment is where these two options really diverge. A paver patio is incredibly low-maintenance. You might need to top up the joint sand every few years or pressure wash it, but that’s about it. A wooden deck, on the other hand, demands regular care. You’ll need to clean it annually and re-stain or re-seal it every 2-4 years to protect it from sun and moisture damage. This ongoing cost in both time and money is a crucial factor to consider beyond the initial price tag.
20. Carve Out a Simple, Budget-Friendly Grill Station
You don’t need a massive built-in kitchen to have a great grilling area. A dedicated, budget-friendly grill station can be created for under $300. Start with a small, level pad of either concrete pavers or even just compacted gravel (about 4×6 feet). Then, find a simple outdoor prep cart or a stainless steel work table from a restaurant supply store for around $150. This gives you valuable counter space for platters and tools right where you need it, instantly making your standalone grill feel more like a purposeful station.
When placing your grill, safety and convenience are paramount. Your grill should be at least 10 feet away from your house siding, deck railings, and any overhanging branches or eaves. Also, consider the prevailing wind direction in your backyard. Try to position the grill so that smoke will blow away from your seating areas and open windows. No one enjoys getting a face full of smoke while they’re trying to relax.
21. Create an Easy Backyard Grill and Dining Patio
The quickest way to a usable patio on a budget is with concrete paver slabs and pea gravel. Here’s how:
- Level a section of your yard and cover it with landscape fabric to suppress weeds.
- Spread a 2-3 inch layer of pea gravel over the fabric and rake it smooth.
- Strategically place large (18×18 or 24×24 inch) concrete paver slabs to create solid footing for your grill and table legs.
- Fill in the surrounding area with more pea gravel, raking it up to be level with the pavers.
This checkerboard method gives you the stability of pavers where you need it and the low cost and easy installation of gravel everywhere else. Time: One weekend. Cost: $2-$5 per square foot.
This mixed-material approach is smart because it solves the two biggest problems of a simple gravel patio: wobbly furniture and rolling grills. By placing solid paver slabs at key points, you create stable ‘islands’ for your main pieces. It’s a practical design choice that acknowledges the limitations of a loose material like gravel while still benefiting from its low cost and excellent drainage. It feels intentional and solves a real-world problem.
22. Plan the Perfect Outdoor Kitchen Island for Grilling
Designing an outdoor kitchen island requires careful thought about workflow. For a basic setup with a grill and some counter space, you’ll need an island that’s at least 6-8 feet long. This provides about 24-36 inches of landing zone on either side of the grill—essential for holding platters of raw and cooked food. The standard countertop height is 36 inches, but consider a 42-inch high bar section if you want to incorporate seating. The depth should be at least 24-30 inches to accommodate most built-in grills.
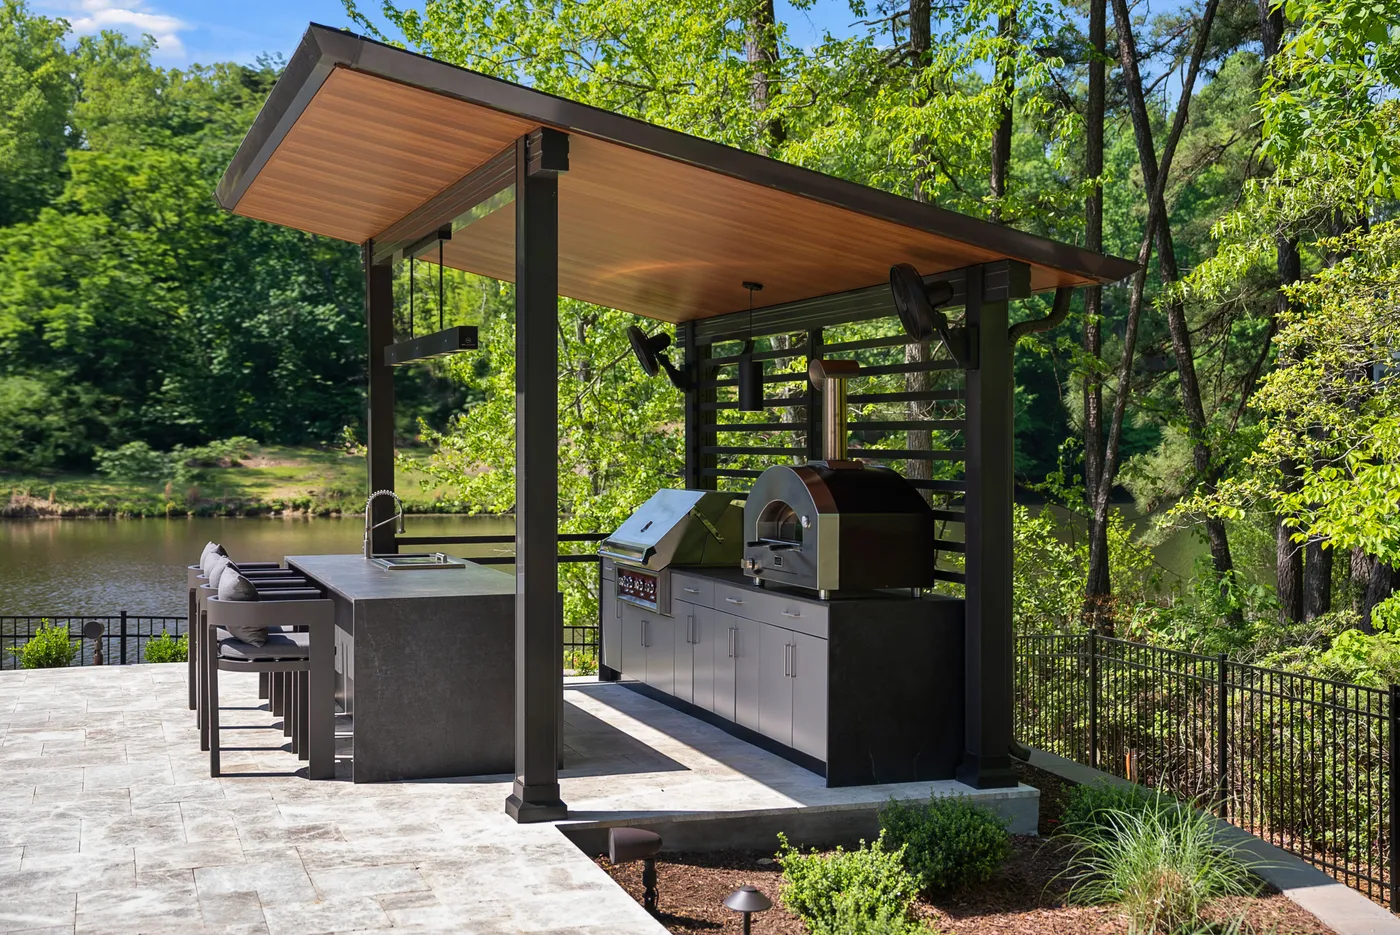
An outdoor kitchen is a major upgrade, so don’t start without a solid plan. Tick these boxes first:
- Have you chosen your grill and all other appliances? You must have the manufacturer’s spec sheets before building the structure.
- Where are your utilities? Plan the route for gas, electrical, and water lines before you pour any concrete.
- What is your countertop material? The weight of granite or concrete may require a stronger base than a simple tile top.
- Consider the work triangle. Just like an indoor kitchen, you want easy flow between your grill (cook), sink (prep), and fridge (storage).
23. Anchor Your Patio with a Stone Fireplace and Deep Red Seating
The massive stone fireplace is, without a doubt, the element that defines this entire space. It’s more than just a heat source; it’s an architectural anchor that gives the patio a sense of permanence and grandeur. It creates a focal point, drawing you in and providing a cozy, room-like backdrop for the seating area. If you removed the fireplace, you’d just have furniture on a patio. With it, you have an outdoor living room that feels cozy and protected.
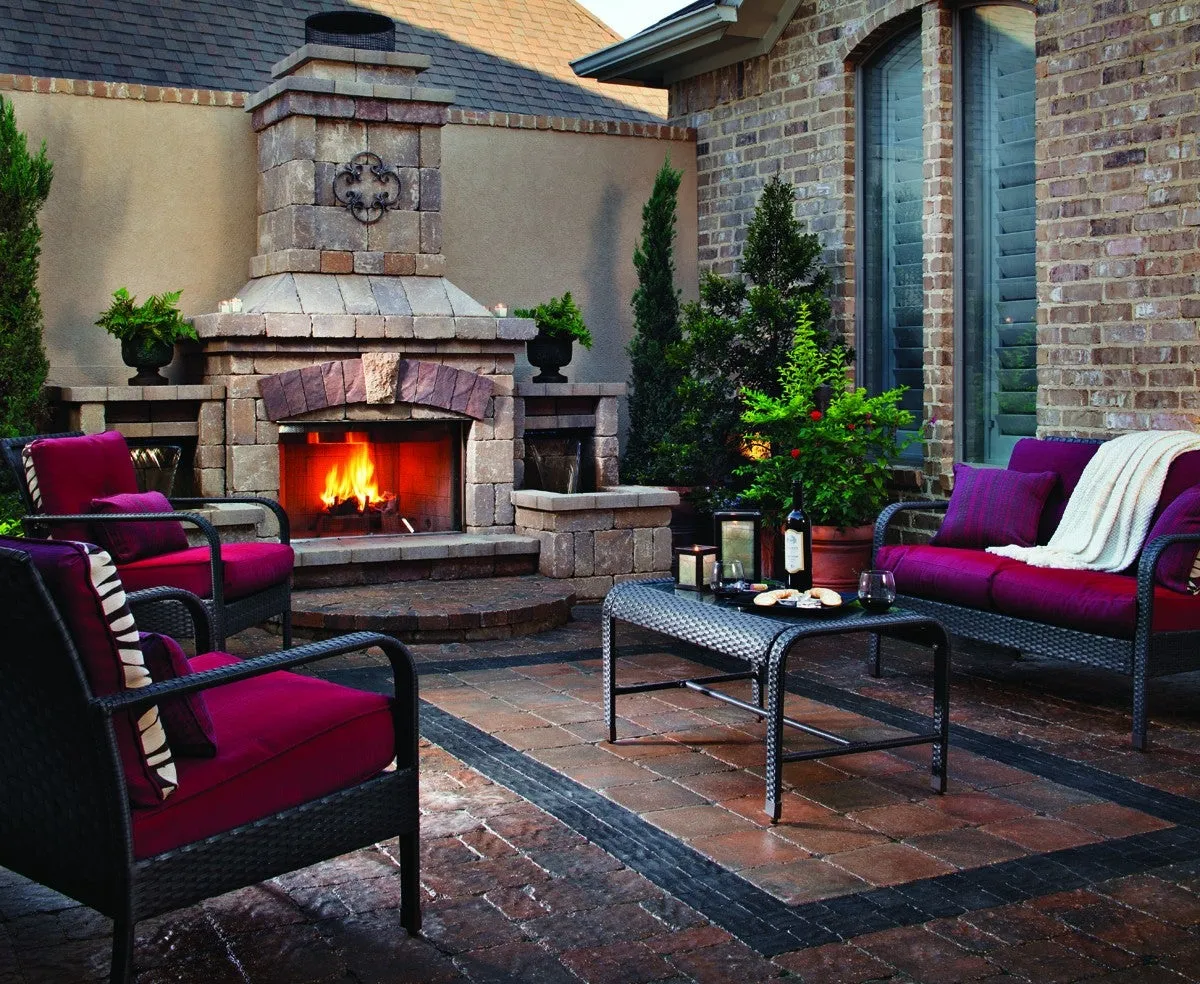
This inviting look is all about warmth and weight. The formula is approximately 50% heavy, textured stone, 30% deep, saturated color (the red cushions), and 20% dark, grounding neutrals (the woven furniture and paver border). The stone provides the rustic, earthy base, while the deep red adds passion and visual punch. The dark brown/black of the furniture frames this intense color, keeping it from overwhelming the scene. It’s a bold, confident palette that works beautifully.
24. Assembling an Outdoor Oasis on a Strict Budget
Building a patio on a tight budget is all about smart choices and DIY hustle. Your best friends are Facebook Marketplace, thrift stores, and end-of-season clearance sales. Instead of expensive pavers, consider a simple gravel and mulch area defined by a clean edge. For furniture, look for pieces with good bones that you can clean up and repaint. A can of spray paint can work wonders on a dated metal bistro set. Focus your spending on one or two impact items, like great string lights or a colorful outdoor rug, to tie it all together.
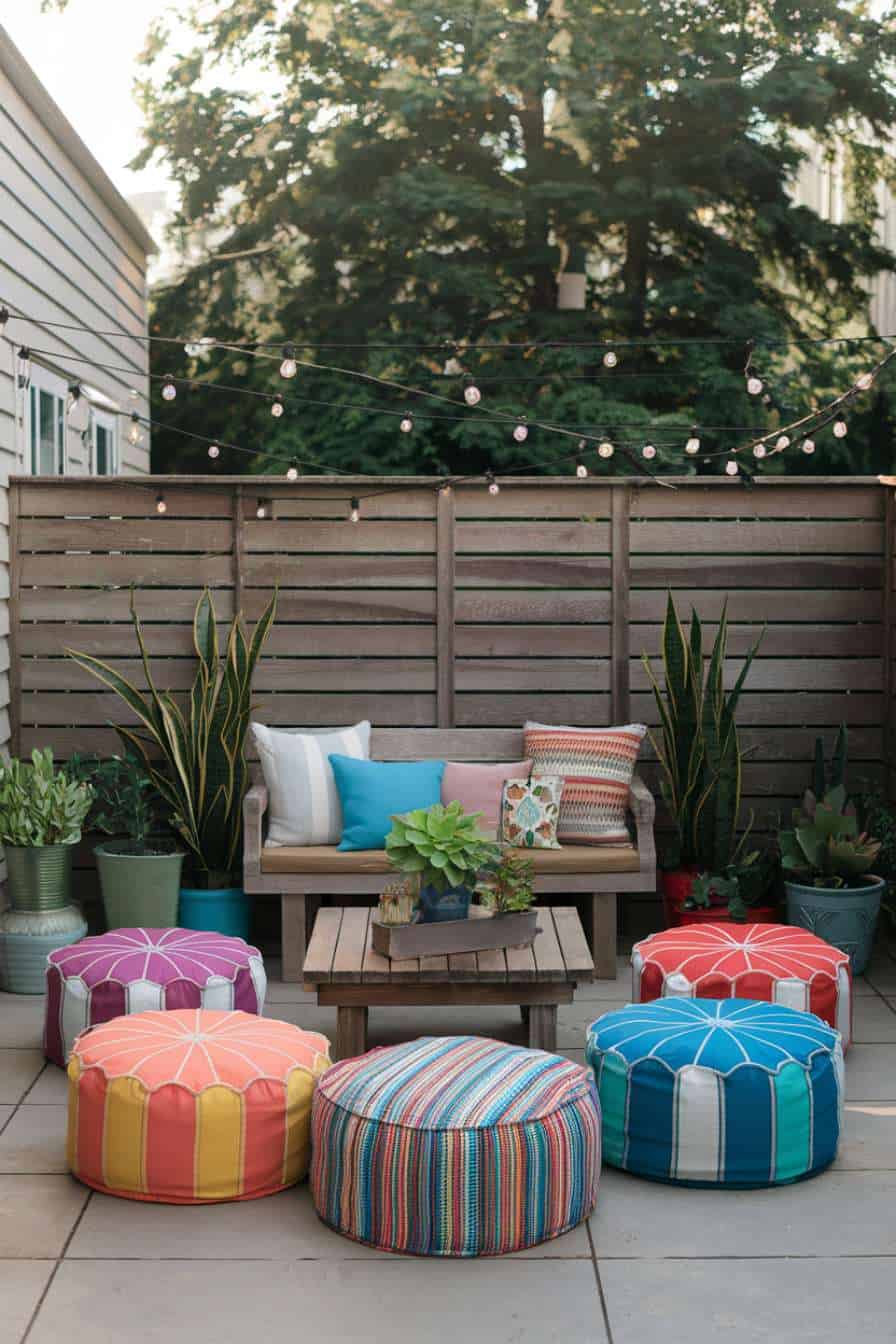
The rise of the scrappy DIY patio is a direct response to the high cost of materials and a desire for unique, personalized spaces. People are realizing they don’t need a $20,000 hardscaped paradise to enjoy their backyard. This trend celebrates creativity over cost, using clever hacks, upcycled materials, and elbow grease to create charming and functional outdoor rooms. It’s less about perfection and more about creating a comfortable, lived-in space that reflects your personality. For a great example of this, see Idea #25.
25. Get Cozy with a DIY Pallet Sofa and Festoon Lighting
A pallet sofa is a classic, budget-friendly DIY that adds instant rustic charm. Here’s the quick and dirty guide:
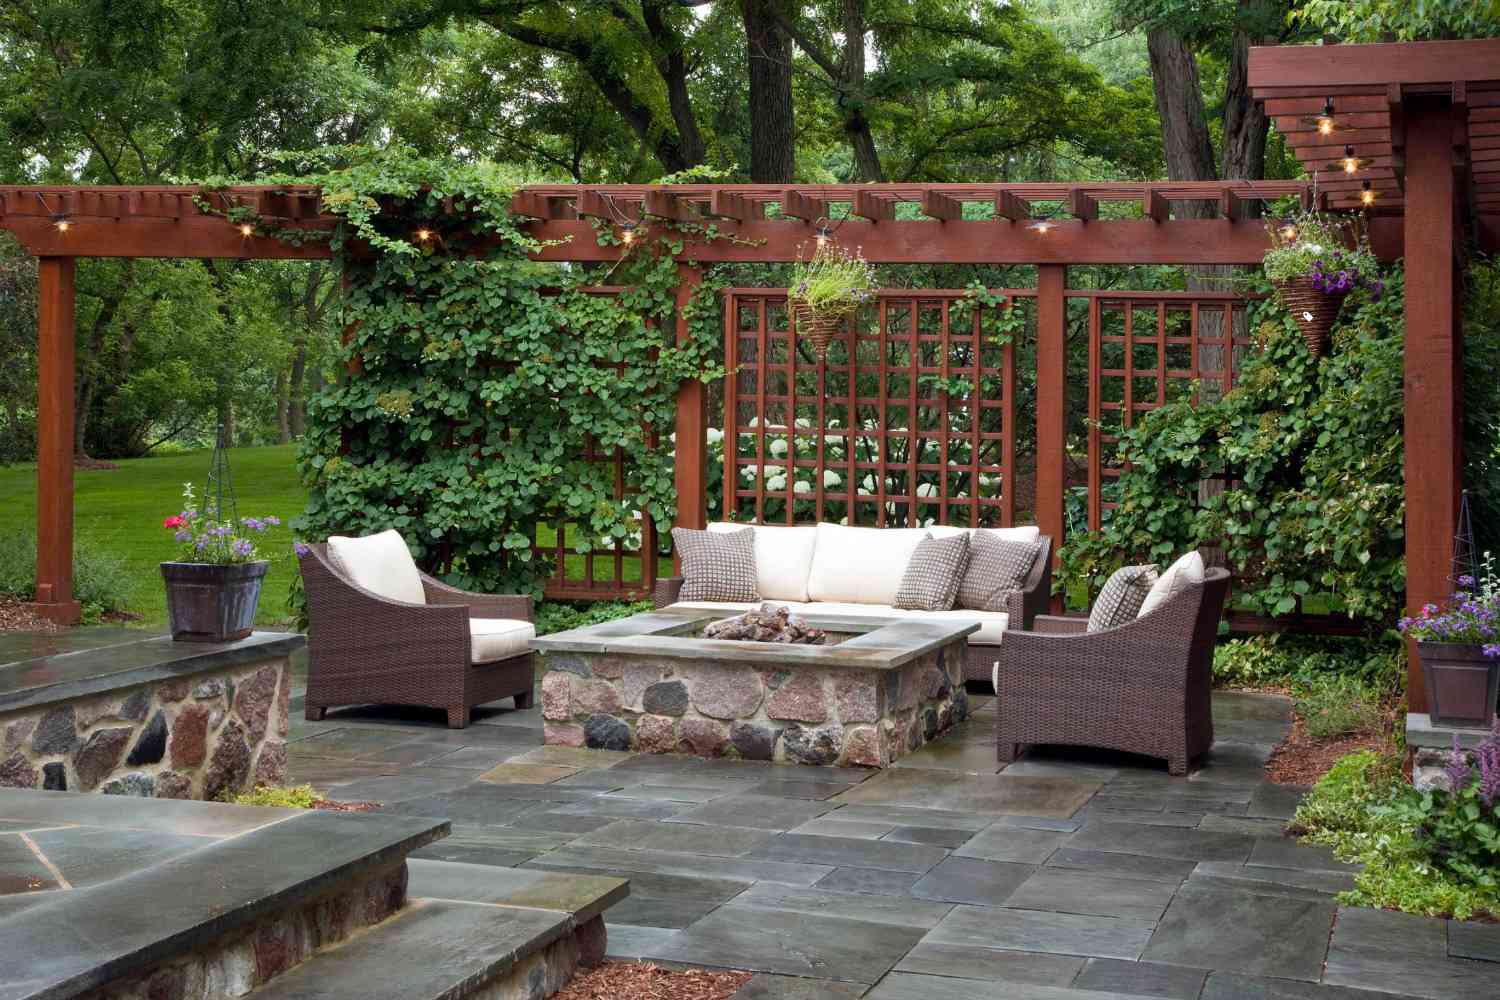
- Source 4-6 clean, heat-treated (marked HT) pallets. Avoid chemically treated ones.
- Clean the pallets thoroughly with a stiff brush and soapy water. Let them dry completely.
- Sand all surfaces aggressively to remove splinters. Start with a coarse grit and finish with a finer one.
- Stack two pallets for the base and stand one or two upright for the backrest, securing them together with long screws or L-brackets.
- Seal the wood with an outdoor-rated polyurethane or paint to protect it from the elements.
- Top with comfy outdoor cushions.
Time: One weekend. Cost: $50-$150 (plus cushions).
Before you run off to grab free pallets from behind a grocery store, a reality check. Not all pallets are safe for furniture. Look for the HT stamp, which means it was heat-treated, not chemically treated with pesticides. Pallets can also be incredibly rough, so you will spend far more time sanding than you think to make them safe and splinter-free. Finally, they are heavy and awkward. This is a project that requires some muscle and a healthy respect for splinters.
26. Designing a Paver Patio as a True Outdoor Living Room
The most successful outdoor living spaces borrow principles from interior design. A great paver patio isn’t just a slab of stone; it’s a foundation for a room. This means defining the space with purpose-driven furniture arrangements, using outdoor rugs to anchor conversation areas, and adding layers of texture through pillows, throws, and potted plants. Just like indoors, these details are what transform a functional area into a comfortable, inviting place where people want to linger.
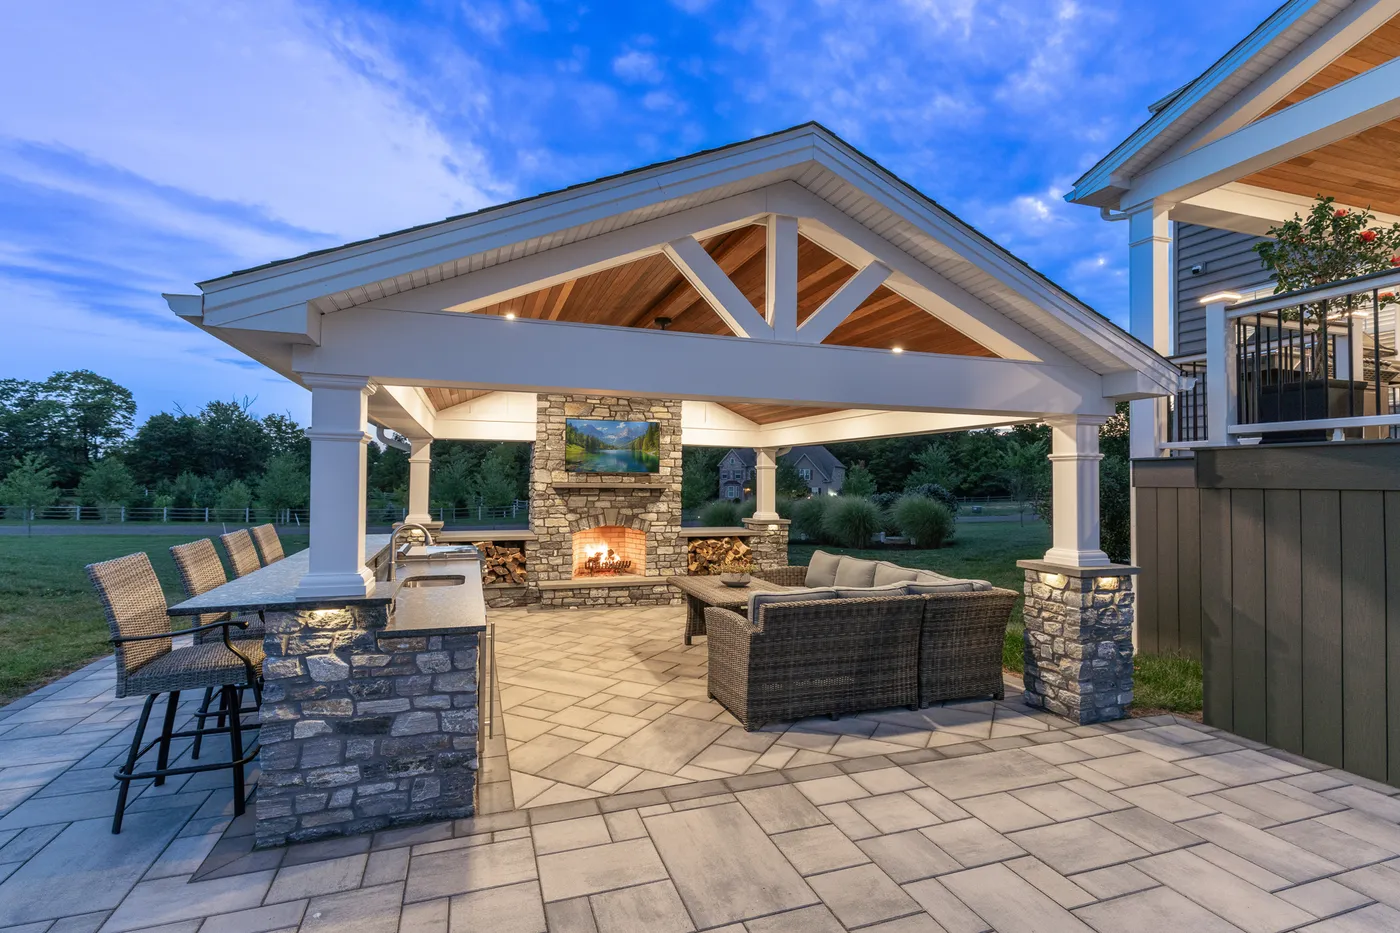
The concept of an outdoor living room works best when you have adequate space. To comfortably fit a sofa, two armchairs, and a coffee table with proper walkways, you’ll need a patio that is at least 12×16 feet (around 200 sq. ft.). Anything smaller will start to feel cramped. For a layout that also includes a dining area, like in Idea #4, you should be thinking in the range of 400-600 sq. ft. to keep the zones distinct and uncluttered.
27. Combine Grilling and Dining with Blue and Orange Accents
The secret ingredient that makes this patio pop is the strategic use of complementary colors: blue and orange. This classic color-wheel pairing creates an energy and vibrancy that neutrals alone could never achieve. The deep blue cushions provide a cool, calming base, while the pops of bright orange in the table runner and accessories add a jolt of warmth and excitement. It’s a confident, joyful choice that instantly signals this is a space for lively gatherings.
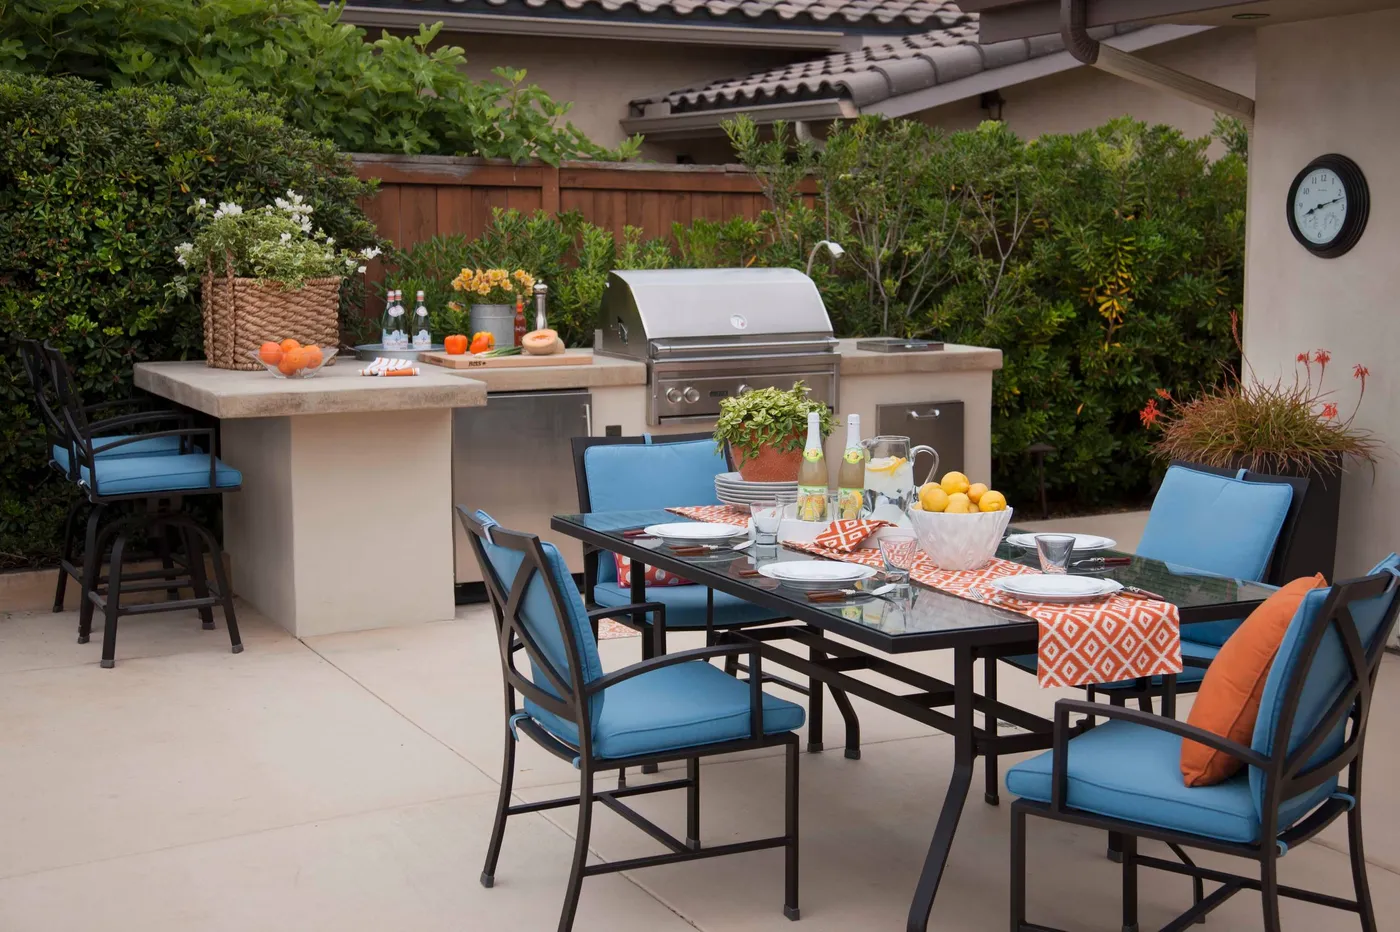
Achieving this functional and vibrant look involves a mix of built-in and freestanding elements. Here is a sample budget for the key items:
- Outdoor Kitchen Structure (DIY concrete & block): $1,000 – $2,500
- Built-in Grill & Fridge: $2,000 – $5,000
- Dining Set (Table & 6 Chairs): $800 – $2,000
- High-Quality Cushions & Textiles (Runner, pillows): $400 – $800
- Pavers (approx. 250 sq ft, DIY install): $1,250 – $2,500
- TOTAL: $5,450 – $12,800
Budget alternative: Swap the built-in kitchen for a high-quality standalone grill and a prep cart to get a similar function for 30-40% less.
28. Modern Relaxation: A Wooden Pergola and Light Grey Sectional
This design feels so serene and modern because of its clean lines and simple, tonal color palette. The horizontal slats of the pergola, the rectangular shape of the coffee table, and the blocky form of the sectional all contribute to a strong, geometric foundation. The palette is kept intentionally simple—light wood, light grey, and black metal. This restraint allows the textures of the materials and the green of the plants to become the main focus, creating a calm, uncluttered atmosphere.
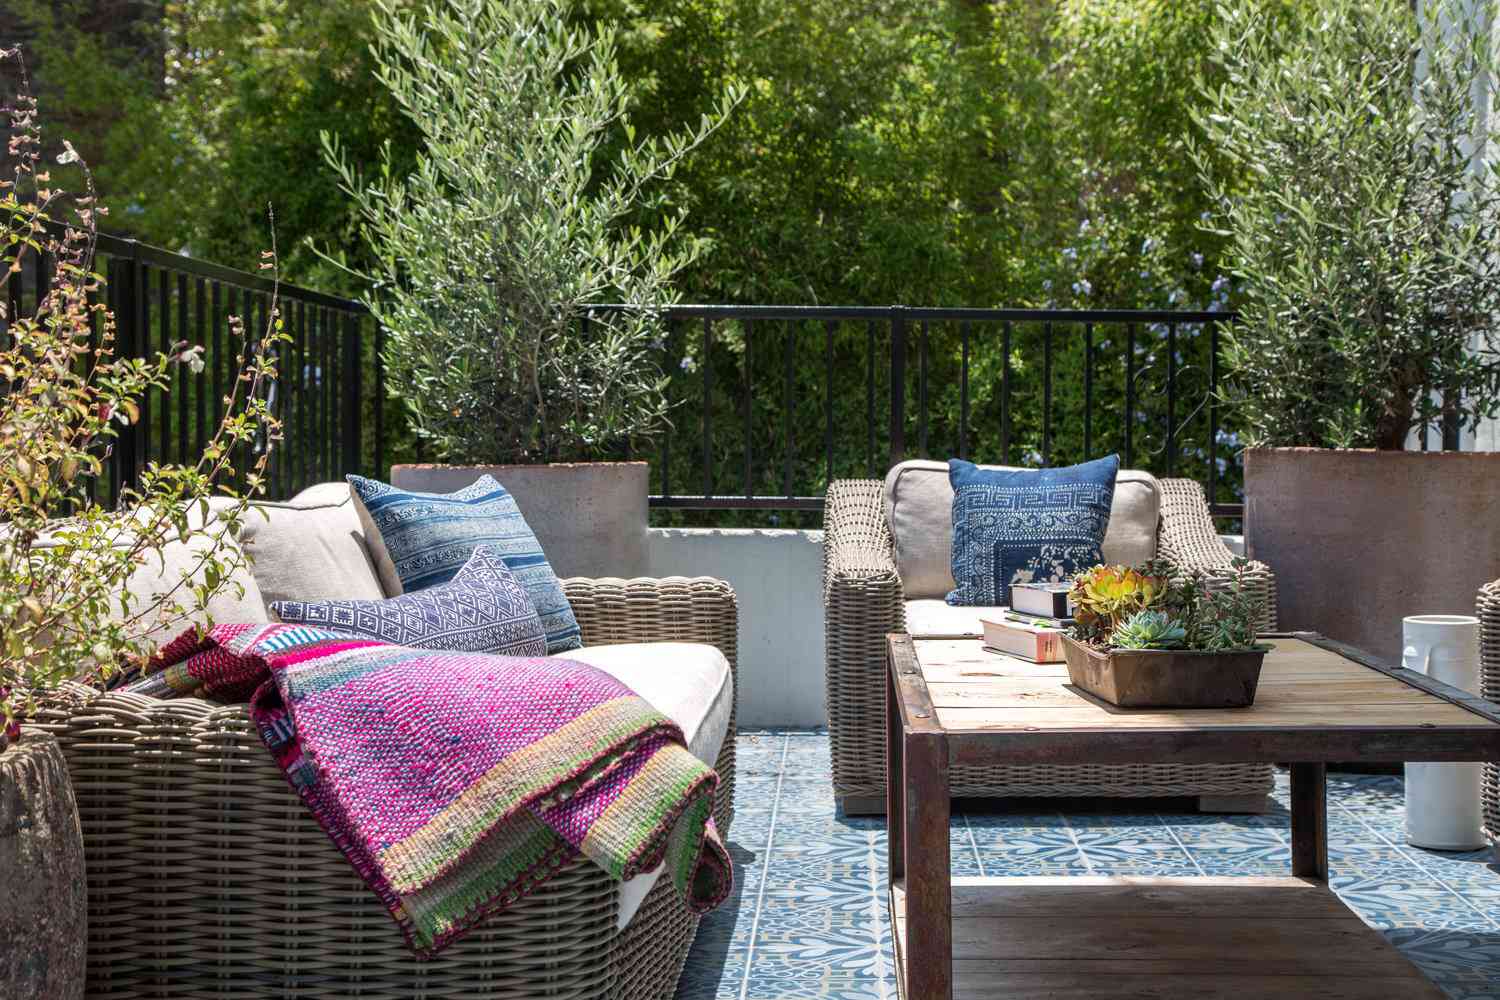
Light-colored fabric cushions look incredible when they’re new, but they are unforgiving. Pollen, bird droppings, mildew, and sunscreen stains will be very noticeable. To keep them looking fresh, you’ll need to buy cushions with removable, machine-washable covers made from performance fabrics like Sunbrella. Even then, plan to wash them a few times a season and bring them inside or use furniture covers before it rains. It’s a trade-off: you get a bright, modern look in exchange for more diligent upkeep.
29. Crafting Your Own Patio Furniture: A DIY Guide
Building your own outdoor furniture is the ultimate budget hack. Plans for simple, modern sofas and chairs made from standard lumber (like 2x4s and 2x6s) are widely available online. For the cost of lumber, screws, and a good outdoor sealant—typically $200-$400 for a sofa—you can build a piece that would cost over $1,500 to buy. The big expense will be the cushions. Look for replacement cushion sets online or learn to sew your own using outdoor fabric to maximize your savings.
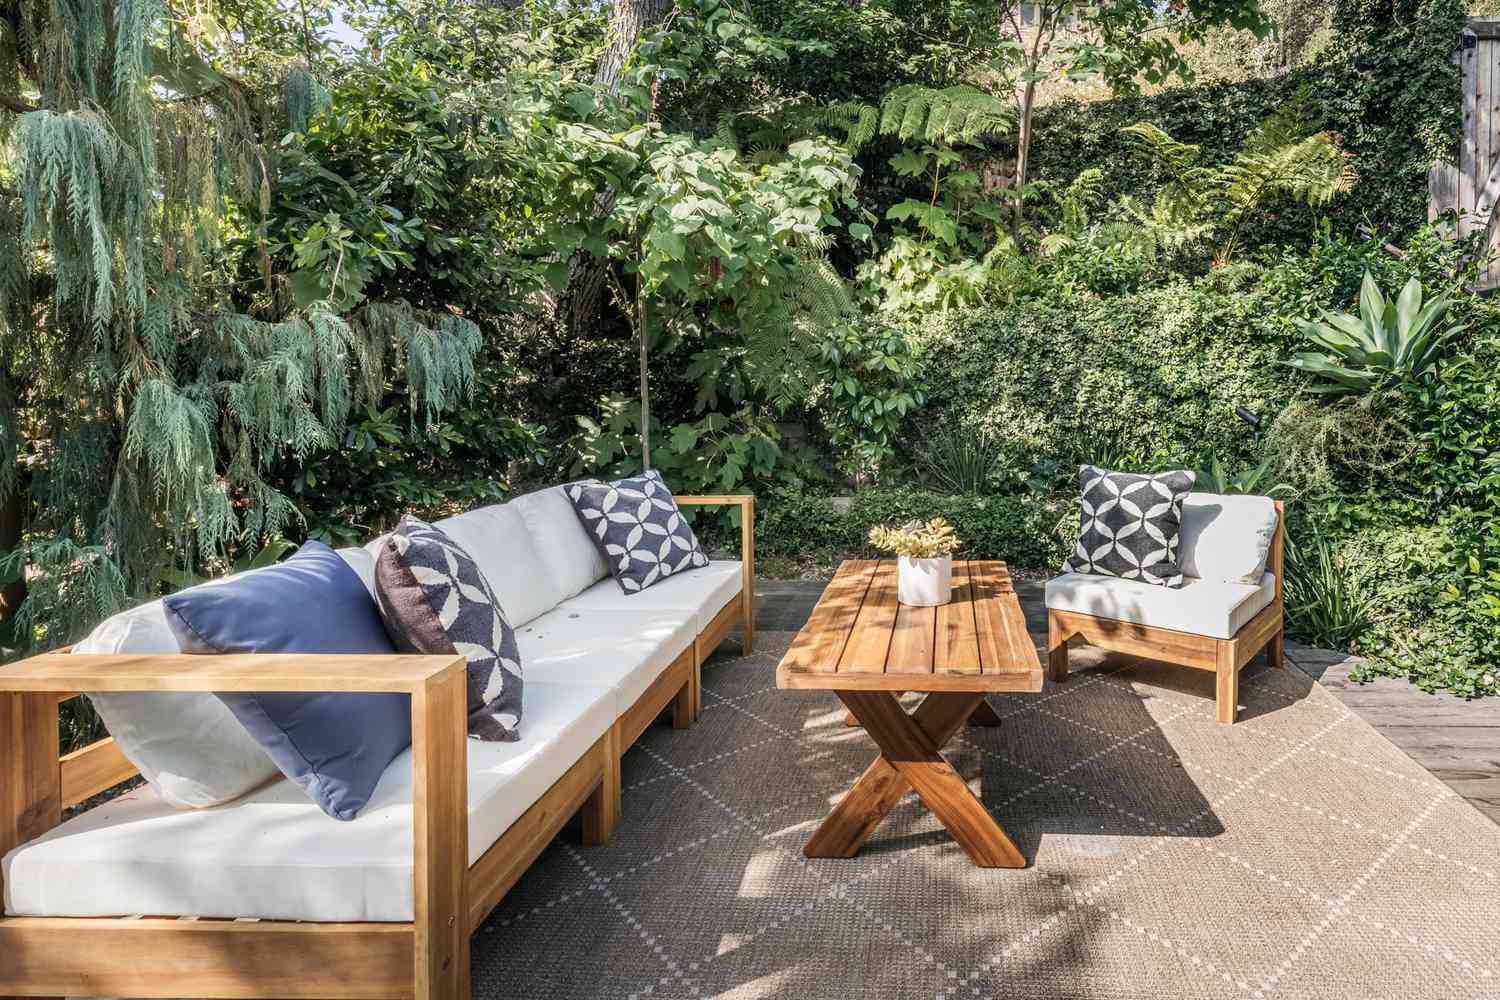
Building furniture is more than just cutting wood and driving screws. It requires a decent level of skill and the right tools—at a minimum, you’ll need a good circular saw or miter saw, a drill, and a sander. Your cuts need to be precise and your joints need to be strong, especially for a piece of furniture that people will be sitting on. Be honest about your skill level. A wobbly, poorly built sofa isn’t just ugly; it’s a safety hazard. If you’re new to woodworking, start with a simpler project like a side table or planter box first.
30. The Enduring Appeal of a Classic Paver Patio
Paver patios remain a cornerstone of backyard design for a simple reason: they are the perfect canvas. As homeowners increasingly see their yards as extensions of their interior living space, the paver patio provides a durable, all-weather floor for this ‘outdoor room’. Unlike a wood deck that dictates a certain style, a paver patio is a neutral backdrop that can support any aesthetic—from rustic farmhouse to sleek modern—depending on the furniture and decor you place upon it. Its versatility is its greatest strength.
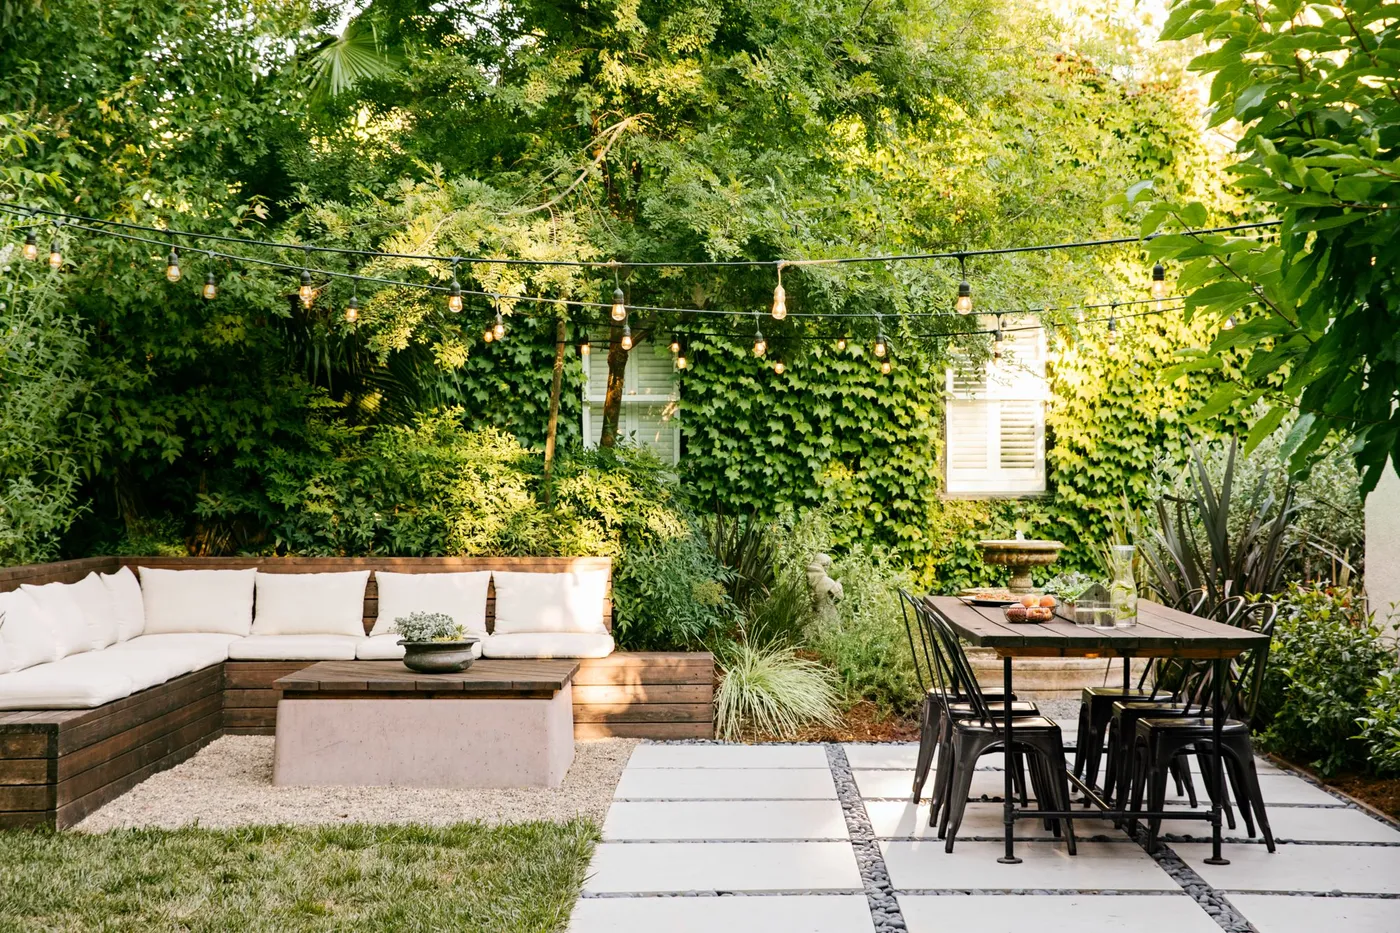
When selecting pavers, think beyond the initial color. Pay attention to the texture and the edge detail. A paver with a slightly tumbled or irregular edge will give a more rustic, old-world feel. A paver with a sharp, crisp edge will look more modern and precise. Similarly, a smooth surface reads as contemporary, while a textured or riven surface feels more natural and organic. These subtle details have a huge impact on the overall style of your patio.
31. Maximizing Your Outdoor Living with a High-Value Paver Patio
A well-designed paver patio adds significant value—both to your lifestyle and your home’s resale price. Why? Because it transforms an often-unused patch of lawn into a highly functional living area. It clearly signals this is a space for dining, relaxing, and entertaining. This clear definition of space is a powerful psychological cue that makes a backyard feel larger, more useful, and ultimately more valuable. It’s an investment that pays dividends in curb appeal and everyday enjoyment.
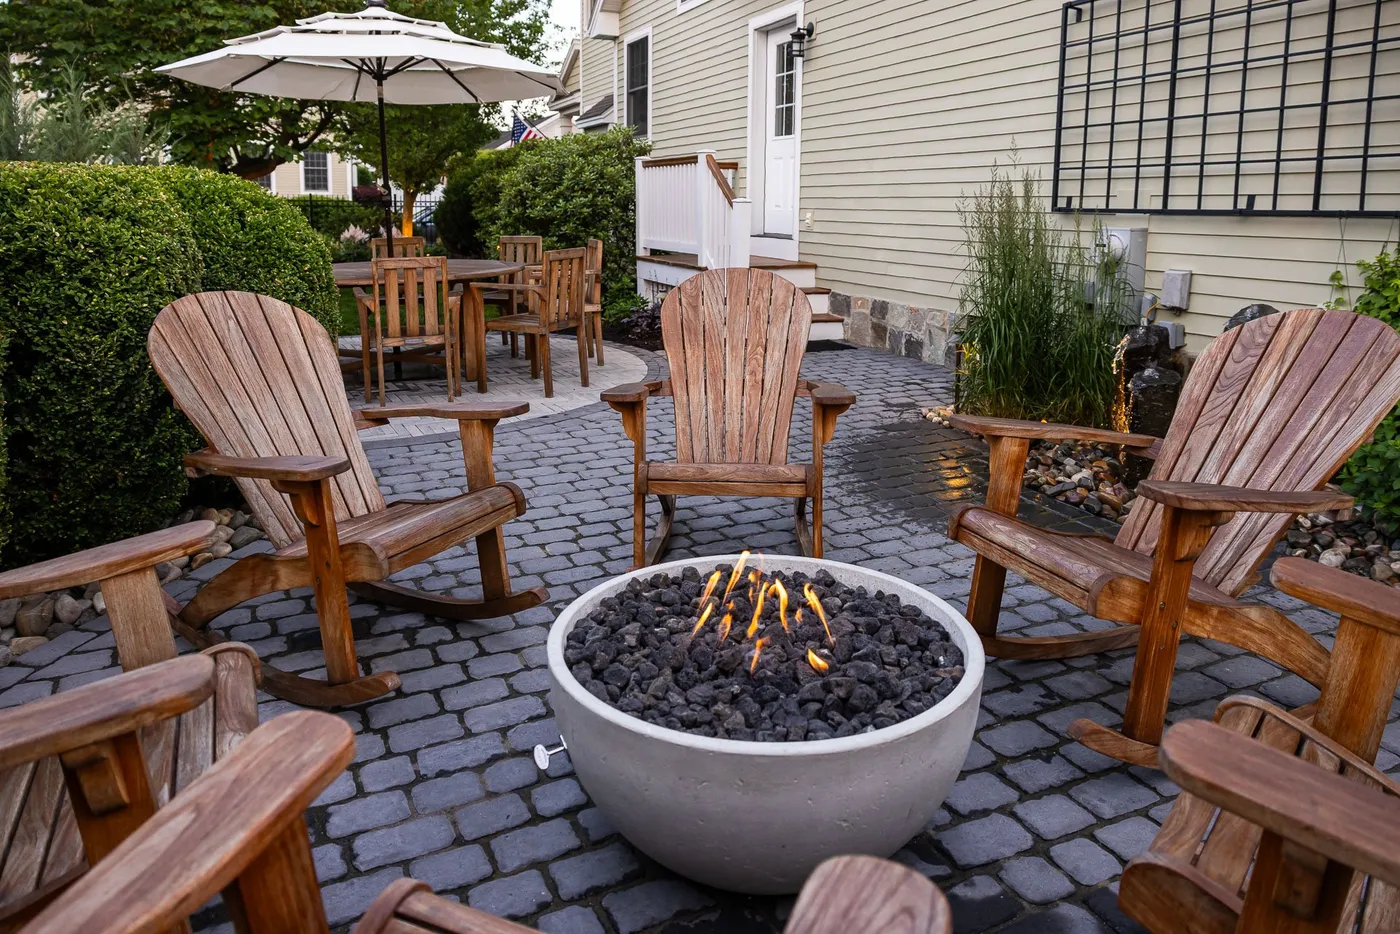
A professionally installed paver patio is a significant project. Here’s a general cost estimate for a high-quality, mid-range installation for a 300 sq. ft. area:
- Mid-Grade Pavers (e.g., Belgard, Techo-Bloc): $1,500 – $3,000
- Base Materials, Edging, and Sand: $800 – $1,200
- Professional Labor (Excavation, Installation): $3,000 – $6,000
- Cleanup and Haul-Away: $300 – $600
- TOTAL: $5,600 – $10,800
Budget alternative: A DIY installation using more basic pavers can bring the cost down to the $2,500 – $4,500 range, but requires significant labor.
Your Backyard’s Next Chapter Starts Here
Whew, that was a lot of inspiration! But remember, the best patio is the one you’ll actually use. Whether you’re drawn to a sprawling outdoor kitchen or a simple, cozy nook, the goal is to create a space that feels like an extension of your home. Pick an idea, make a plan, and start building the backyard you’ve been dreaming of. Don’t forget to save your favorites to Pinterest to keep the inspiration flowing!