You know that feeling when you finally find the garage workshop idea that looks exactly right for your space? That aha moment after scrolling through hundreds of pins. Getting from that inspiration to a finished, functional workshop is the real challenge. Most guides just show you pretty pictures, but we’re here to break down what actually works for a real DIY setup in 2026. After filtering through countless options from The Home Depot, Lowe’s, and specialty suppliers, we narrowed it down to the 25 ideas that deliver on both style and substance. We’re covering everything from industrial and modern layouts to rustic and hyper-practical setups, with options ranging from a simple $250 bench to a full $20,000 custom fit-out. And stay until the end—we break down the most common mistakes that can ruin these looks. 📌 Go ahead and save this—you’re going to want to reference it.
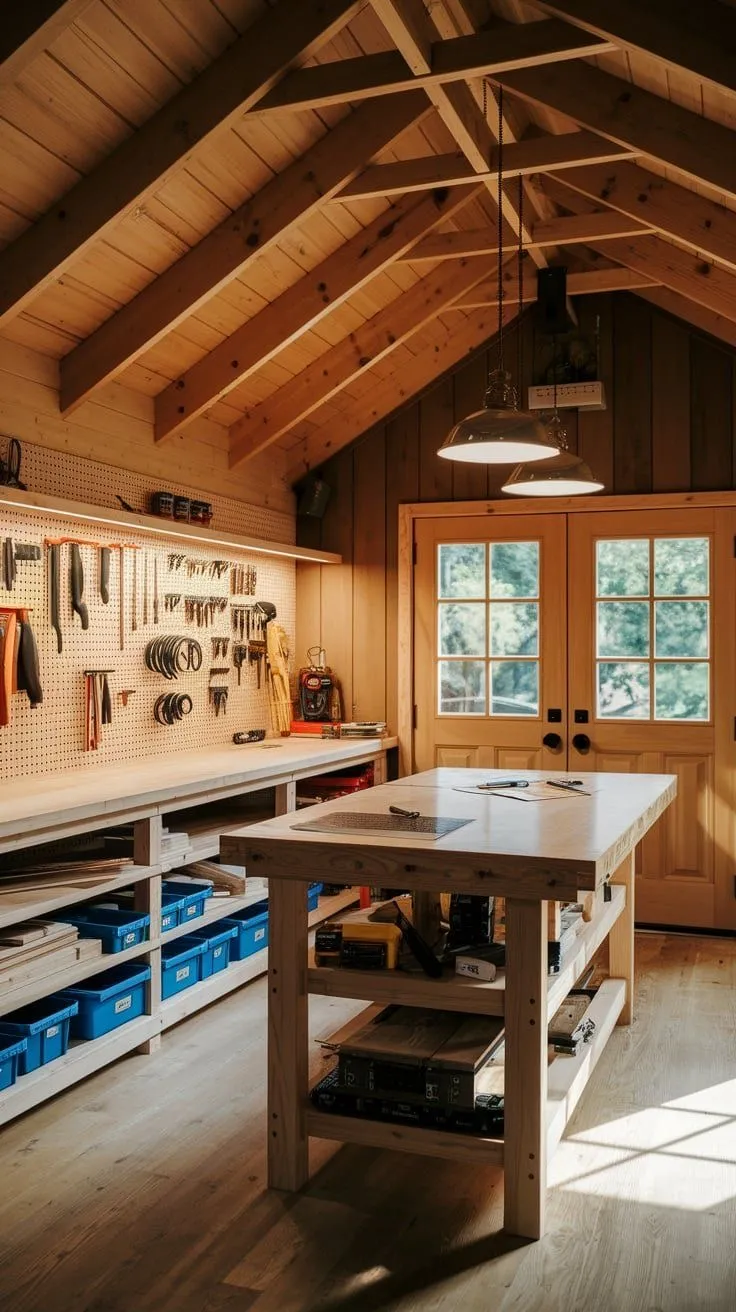
1. Rustic Workshop with Exposed Wood Beams and Central Workbench
What makes this space so inviting is the commitment to natural materials. The vaulted wooden ceilings and matching walls create a warm, cabin-like envelope that feels more like a creative retreat than a garage. The design works because of its clear hierarchy: the massive central workbench is the undisputed hero, encouraging big projects, while the secondary pegboard wall handles the everyday tool organization. It’s a classic example of form meeting function beautifully.
Here’s a realistic look at what a setup like this could cost. The custom woodwork is the biggest variable, but you can get close to the feeling with clever material choices.
- Custom Workbench & Shelving: $1,500 – $4,000
- Lumber for Walls & Ceiling (T&G Pine): $2,000 – $5,000
- Pegboard & Hooks: $150 – $300
- Storage (Blue Bins): $100 – $250
- Lighting & Electrical: $500 – $1,200
- TOTAL: $4,250 – $11,050
Budget alternative: Use plywood sheets for walls and build a simple workbench from 2x4s and a solid core door to capture the vibe for 40% less.
2. Expansive Industrial Garage with Classic Cars and Brick Ceilings
This is not an idea for a standard two-car garage. To achieve this sprawling, museum-like feel, you need serious volume. We’re talking a minimum of 1,000-1,500 square feet with ceilings at least 14-16 feet high to accommodate the hydraulic lifts and create that airy, industrial atmosphere. Anything smaller and the brick ceilings and large signage would feel overwhelming and cramped rather than impressive. The multiple large arched windows are also key for bringing in enough light to fill the space.

That truly defines this space, not the cars—it’s the architecture. The vaulted red brick ceiling is the soul of this workshop. It provides texture, color, and an immediate sense of history and industrial authenticity. You could swap out every car, tool, and sign, but without that incredible brickwork overhead, the entire vintage, utilitarian mood would be lost. It’s the element that elevates the room from a simple garage to a stunning automotive gallery.
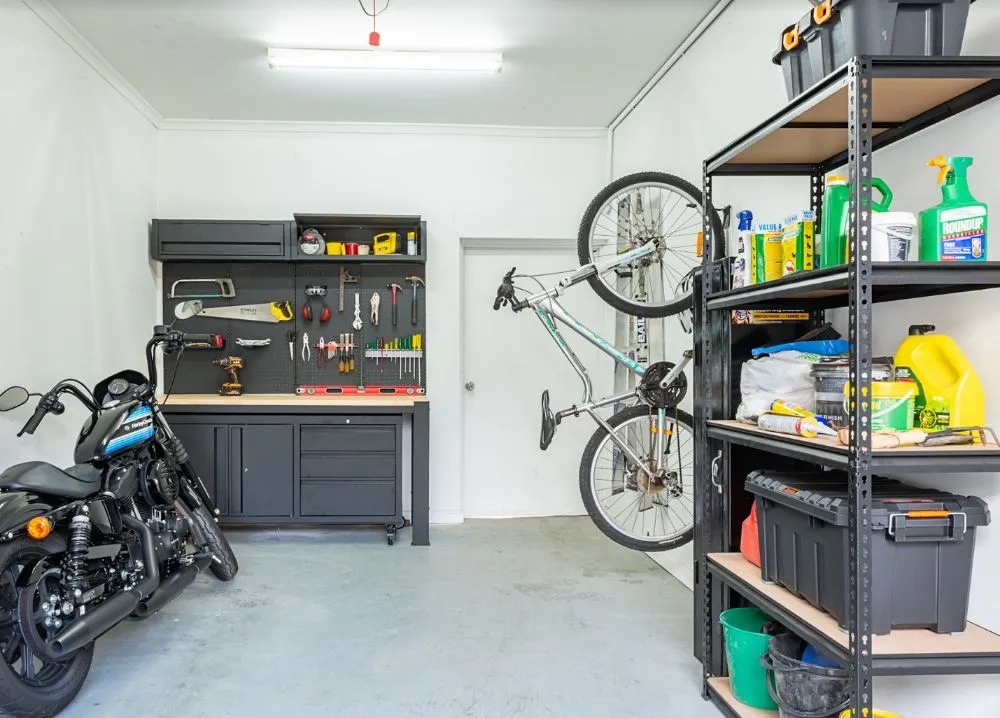
3. Clean Garage with Black Metal Workbench and Wall-Mounted Bike
This look is all about a clean, high-contrast formula that’s easy to replicate. Think of it as 60% neutral base, 30% black metal, and 10% utility. The neutral base is the white walls and light grey concrete floor, which bounce light around. The black metal elements—the workbench, shelving unit, and even the motorcycle—provide strong graphic lines and a sense of order. The final 10% is pure utility, like the wall-mounted bike, which serves as both storage and a cool visual piece.
|
📋 Copy HEX 🔗 Share |
Let’s be honest: keeping a workshop this clean is a job in itself. That bright white wall and light grey floor will show every drop of oil, every bit of sawdust, and every muddy footprint. If you’re doing genuinely messy work (painting, grinding, major engine work), you’ll either be cleaning constantly or you’ll lose this pristine look fast. An epoxy floor coating helps, but this aesthetic is best suited for assembly, light mechanical work, or someone who genuinely enjoys tidying up.
4. Heavy-Duty Steel Workbench and Matching Tiered Shelving
When setting up a heavy-duty workbench, always secure it to the wall, even if it feels sturdy. Use L-brackets to connect the back of the workbench frame or top to the wall studs. This prevents any tipping or shifting when you’re using a vise, hammering, or applying significant force to a project. It’s a simple five-minute step that turns a good workbench into a rock-solid, professional-grade workstation and dramatically improves safety.
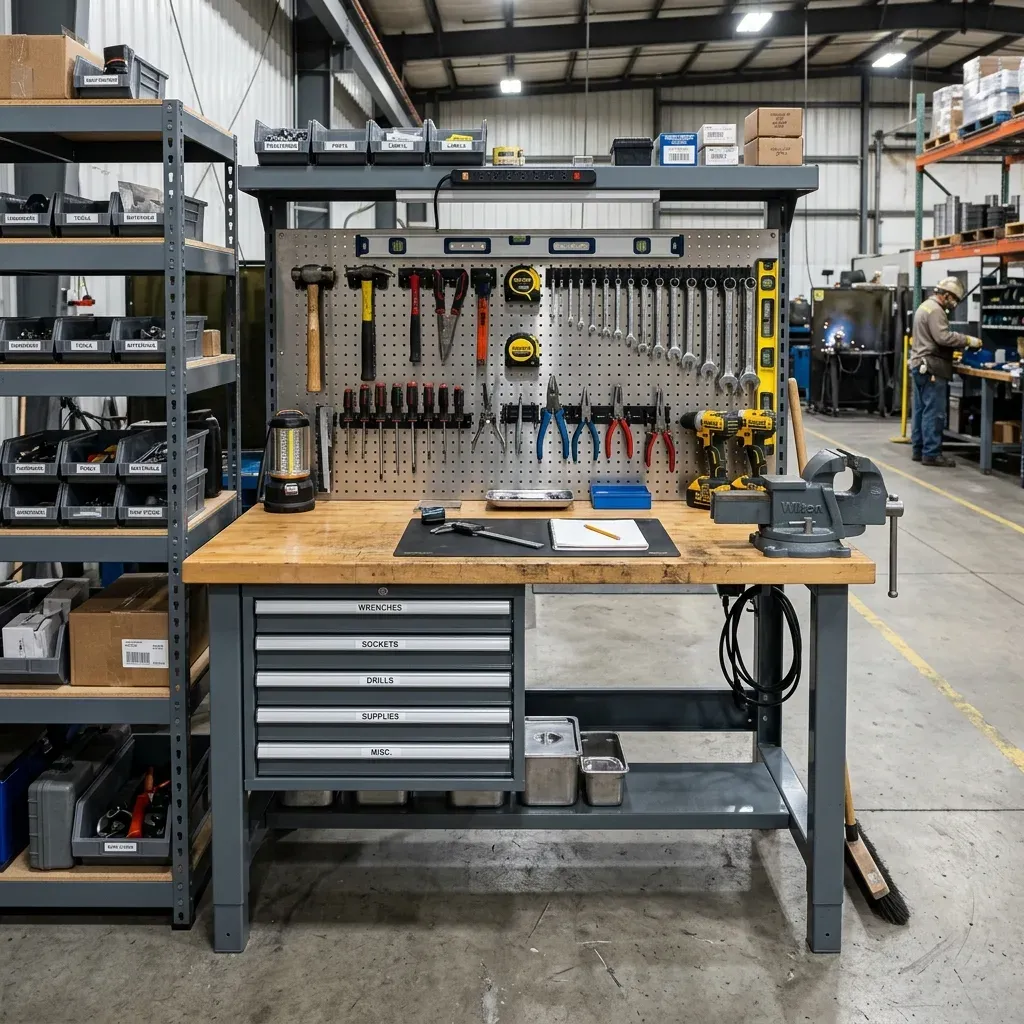
You don’t need to drop $1,000+ on a name-brand steel workbench system to get this level of organization. Check Facebook Marketplace and Craigslist for used industrial or commercial workbenches; businesses closing down often sell them for pennies on the dollar. For shelving, a standard steel unit from a big-box store ($80-$150) paired with a set of uniform, labeled bins from Target or IKEA ($50-$100) will give you 90% of the function for a fraction of the cost. The key is consistency in your bin choice.
5. Dark Grey Workshop with Red Accents and Modular Pegboard
The success of this design lies in its disciplined color palette and smart use of modularity. The dark grey walls create a moody, focused atmosphere that makes the silver metal and bright red accents pop. By concentrating the organization on the central shelving unit with its integrated pegboards, the design leaves the surrounding walls feeling less cluttered. It’s a great example of negative space being used effectively in a typically crowded environment. Compare this with the lighter take in Idea #11.
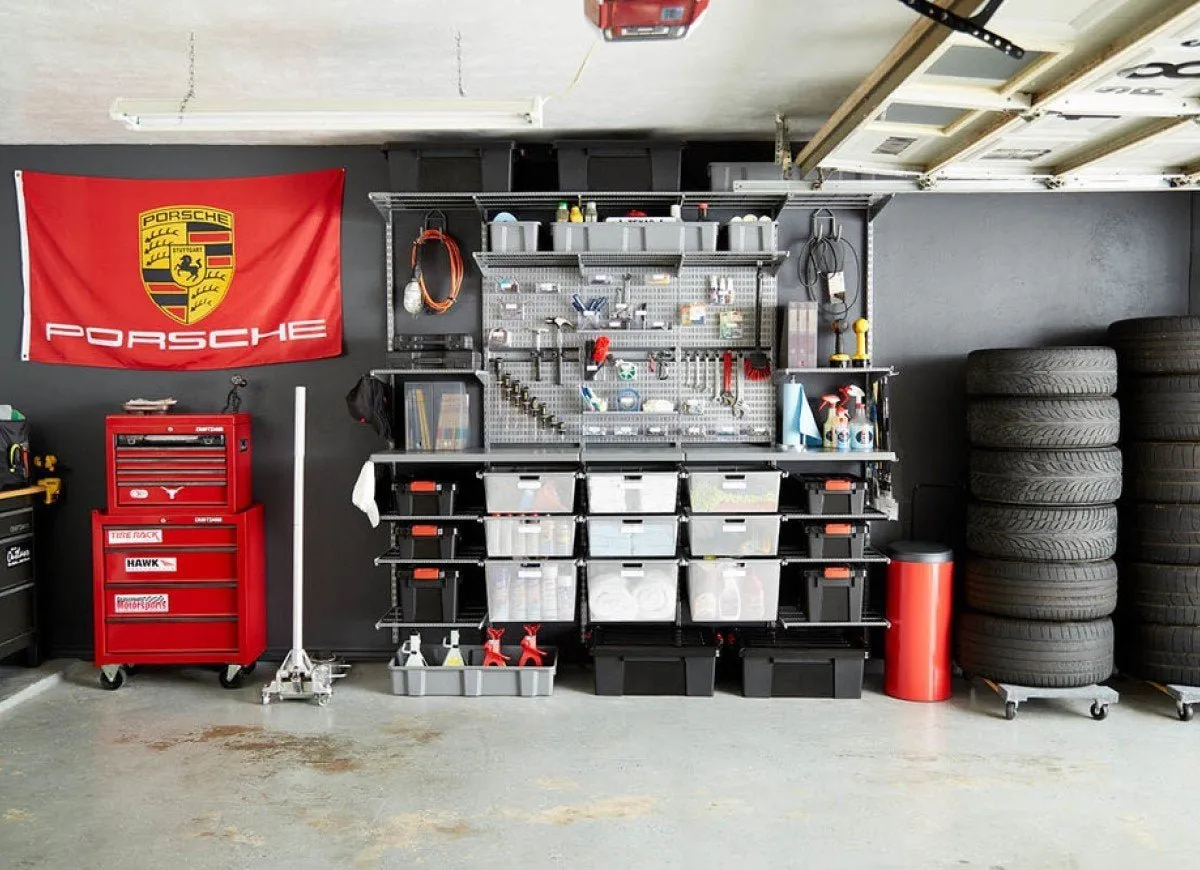
A modular metal system like this is fantastic for flexibility, but the open-wire design of the shelves and the pegboard holes are dust magnets. Expect to spend time with a vacuum brush attachment or compressed air to keep this looking sharp, especially if you’re doing any woodworking. The clear plastic bins are great for visibility but can look grimy quickly if not wiped down. Also, be mindful that those rolling tire dollies can leave black marks on certain types of flooring if they are dragged sideways.
6. White Pegboard Wall Densely Organized with Colorful Tools
The single element that makes this work is the sheer density of the tool arrangement. It’s not just a few tools hung up; it’s an entire collection turned into a functional mural. The white pegboard acts as a blank canvas, allowing the colorful handles of the tools to become the art. If you removed half the tools, it would just look sparse and unfinished. The intentional, tight packing is what gives it that satisfying, ‘everything-in-its-place’ visual appeal.
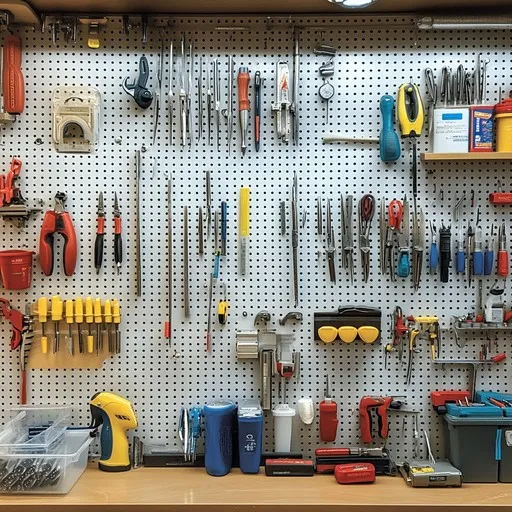
You can create a custom tool shadow board on any pegboard to make organizing (and finding) tools a breeze.
- Arrange your tools on the pegboard exactly where you want them.
- Use a pencil to lightly trace the outline of each tool.
- Remove the tools.
- Using a small brush and a contrasting paint color (like black), carefully paint inside the outlines you traced.
- Let it dry completely.
- Hang your tools back up. Now every tool has a designated home that’s impossible to miss.
This simple project takes about 2-3 hours and costs less than $10 for a small can of paint.
7. Modern Garage with Grey Wood Grain Cabinets & Stainless Steel Bench
This look is a direct result of the ‘garage as an extension of the home’ trend that’s been huge on Pinterest for the last few years. Homeowners want their garage to feel as designed and finished as their kitchen. The use of sophisticated materials like grey wood-grain cabinet fronts and stainless steel countertops—materials you’d typically see indoors—is a deliberate move to elevate the space from a purely utilitarian zone to a clean, stylish, multi-purpose room.
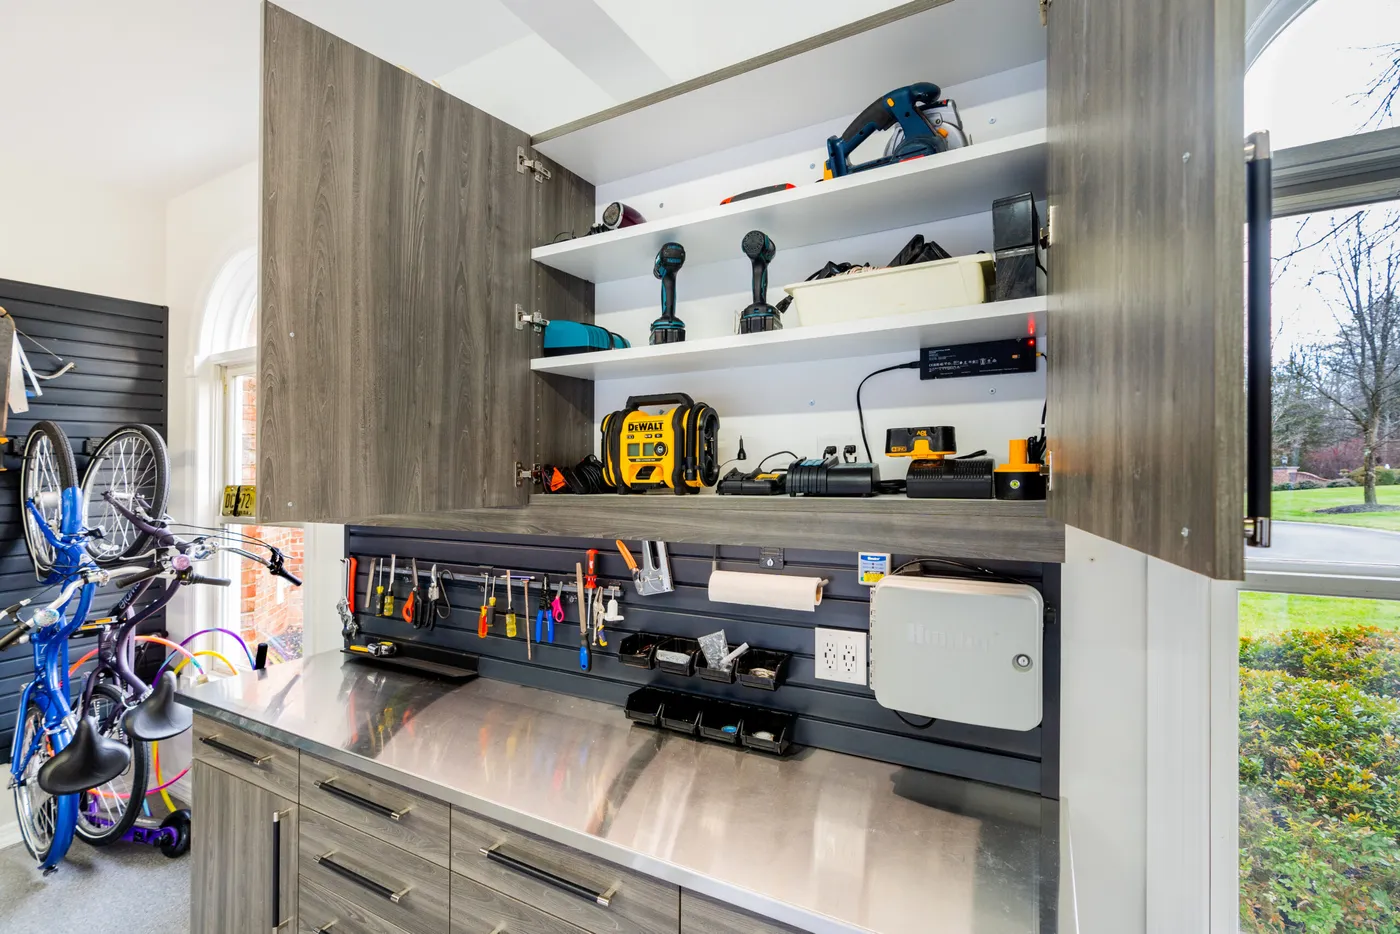
Let’s talk about that stainless steel workbench top. It’s incredibly durable, heat-resistant, and looks amazing when clean. However, it scratches. And not in a cool patina way at first, but in an “oops, I dragged a screw across it” way. It also shows every single fingerprint and oily smudge. You’ll be wiping it down constantly with a microfiber cloth and stainless steel cleaner if you want to maintain this pristine, modern look. The grey laminate cabinets are much lower maintenance, just needing a wipe-down.
8. Light Blue Garage Wall with Wooden Shelves and Fold-Down Bench
This is a brilliant, budget-friendly setup for a small garage or shed. The fold-down workbench is the star. You can buy pre-made folding brackets for around $30-$50 and attach any piece of laminated board or plywood to create a sturdy work surface that disappears when you don’t need it. The open wooden shelves are just basic pine boards and standard brackets from any hardware store, costing less than $100 for the whole wall. It’s a huge amount of function for a very small investment and footprint. Contrast this with the sprawling space in Idea #2.
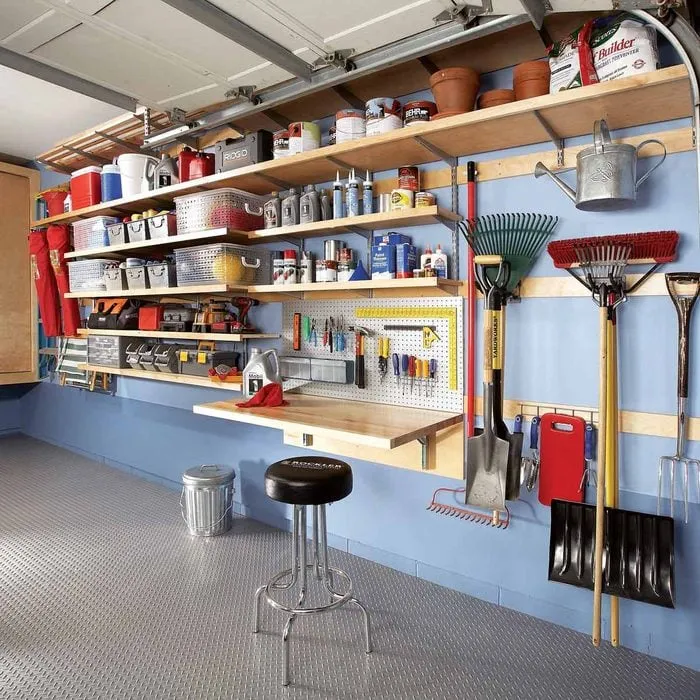
This compact design is ideal for a single-car garage or a dedicated corner, requiring a wall space of about 6-8 feet wide and a standard 8-foot ceiling height. The key is the fold-down workbench, which needs a clear floor area of about 3 feet deep when in use but frees up that entire space when folded away. This allows you to still park a car or move large items through the garage without a permanent workbench getting in the way. It’s the perfect solution for spaces under 250 square feet.
9. Workshop Corner with Wraparound White Bench and Wood Pegboard
This design succeeds by creating two distinct but connected zones. The hot zone on the left features the wooden pegboard, a warm and tactile area for frequently used tools. This transitions seamlessly into the cold zone—the long, clean white wraparound benchtop that provides ample, uncluttered surface area for projects. The continuity of the benchtop visually expands the space and makes the corner feel larger and more integrated. The corrugated metal ceiling adds a nice industrial texture that keeps it from feeling too sterile.
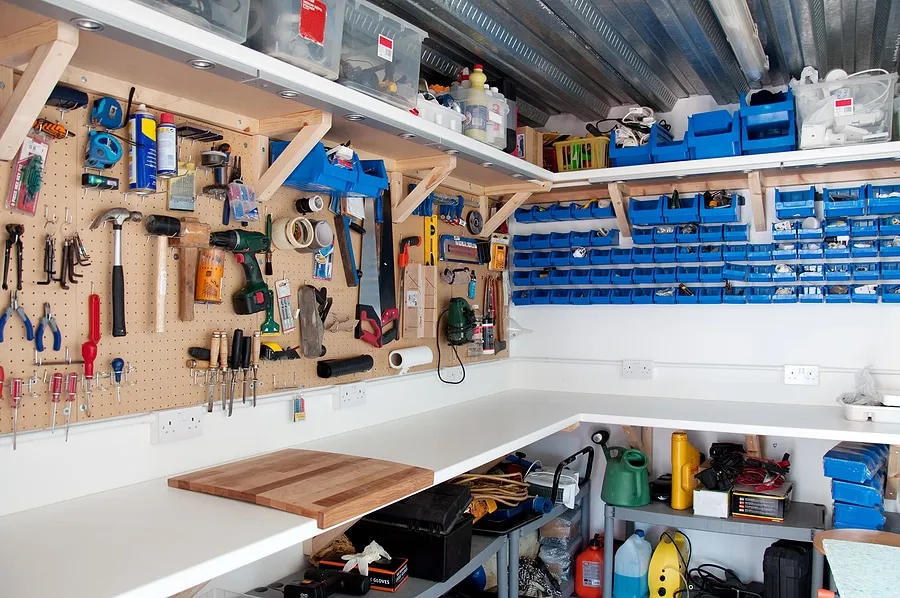
When building a wraparound or L-shaped workbench, pay close attention to the corner joint. For a professional finish and a truly flat surface, use a 45-degree miter cut where the two tops meet. Reinforce the joint from underneath with wood glue and either pocket screws or metal mending plates. This prevents the corner from sagging or separating over time and gives you a continuous, smooth work surface all the way around.
10. Modern Garage with Dark Gray Cabinets and Overhead Storage
The formula here is about sleek uniformity and verticality. It’s approximately 70% monolithic color, 20% functional texture, and 10% empty space. The dark gray cabinets create a single, unbroken visual plane, making the room feel organized and intentional. The slatwall panels add the 20% functional texture, breaking up the solid gray without introducing a new color. The final 10% is the polished concrete floor, which acts as negative space, reflecting light and adding to the clean, uncluttered feeling.
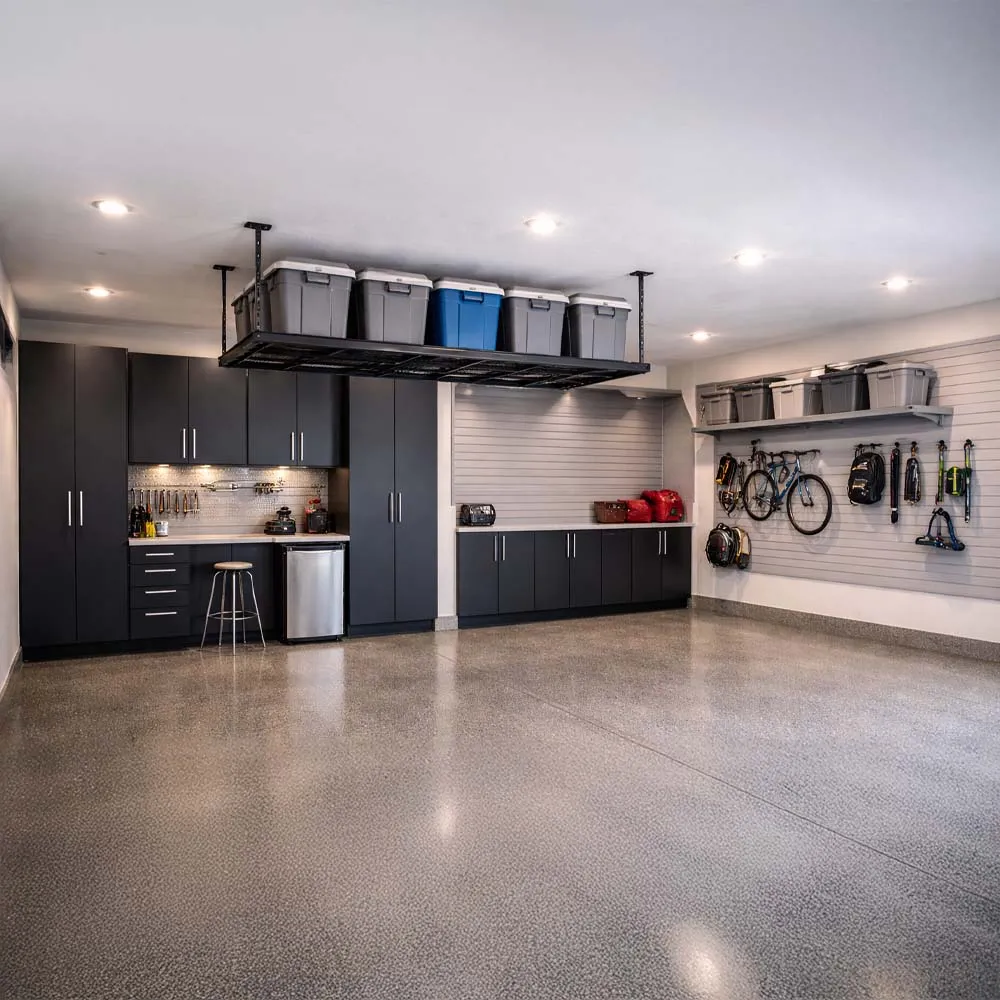
Thinking about a similar high-end cabinet system? Run through this checklist first:
- Measure everything three times. Not just the wall width, but check the floor for level and the walls for squareness. Custom cabinets are unforgiving.
- Confirm the location of all electrical outlets and light switches. You’ll need to plan cutouts or relocate them.
- Check your ceiling height and ensure it’s sufficient for both the floor-to-ceiling cabinets and any overhead storage racks you plan to install.
- Get a lighting plan. A dark cabinet system like this can make a garage feel like a cave without proper task and ambient lighting.
11. Bright Garage Workshop with Light Wood and Grid Shelving
The tall wooden grid shelving unit is the undeniable centerpiece of this entire garage. It’s more than just storage; it’s a piece of functional furniture that defines the room’s aesthetic. The light wood and open grid structure keep it from feeling heavy or bulky, while the neatly labeled clear bins turn everyday supplies into a design element. Without this unit, the space would just be a nice, clean garage. With it, it’s a fully realized, beautifully organized workshop. This is the brighter, lighter version of the setup in Idea #10.
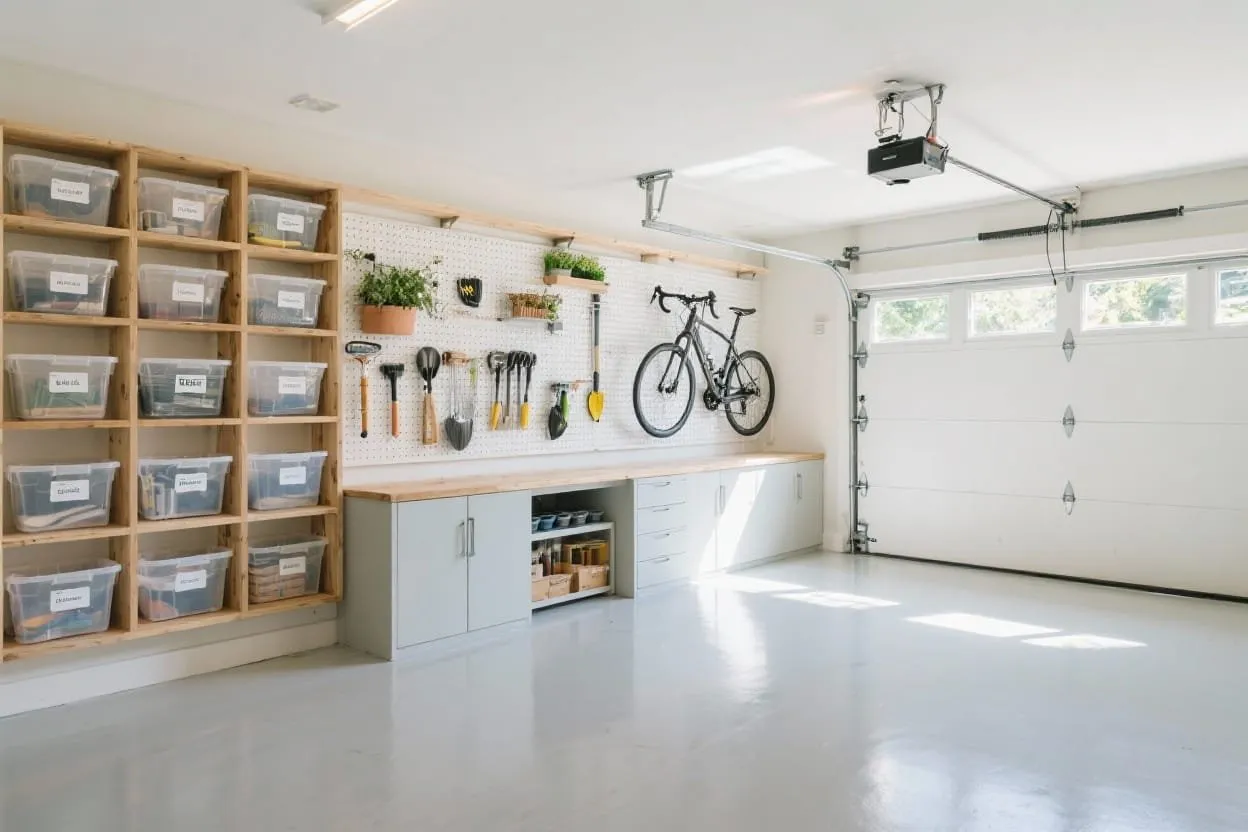
This level of organization looks incredible, but it requires serious discipline to maintain. The clear bins mean there’s nowhere to hide your mess—every mismatched item is on full display. If you’re the type of person who just shoves things onto a shelf, this system will look chaotic fast. You have to commit to the decanting, the labeling, and the ‘one thing in, one thing out’ philosophy. It’s a lifestyle, not just a storage solution. Also, that light gray epoxy floor will show every bit of dirt.
12. Modern Workshop with Epoxy Floors and Dark Grey Cabinets
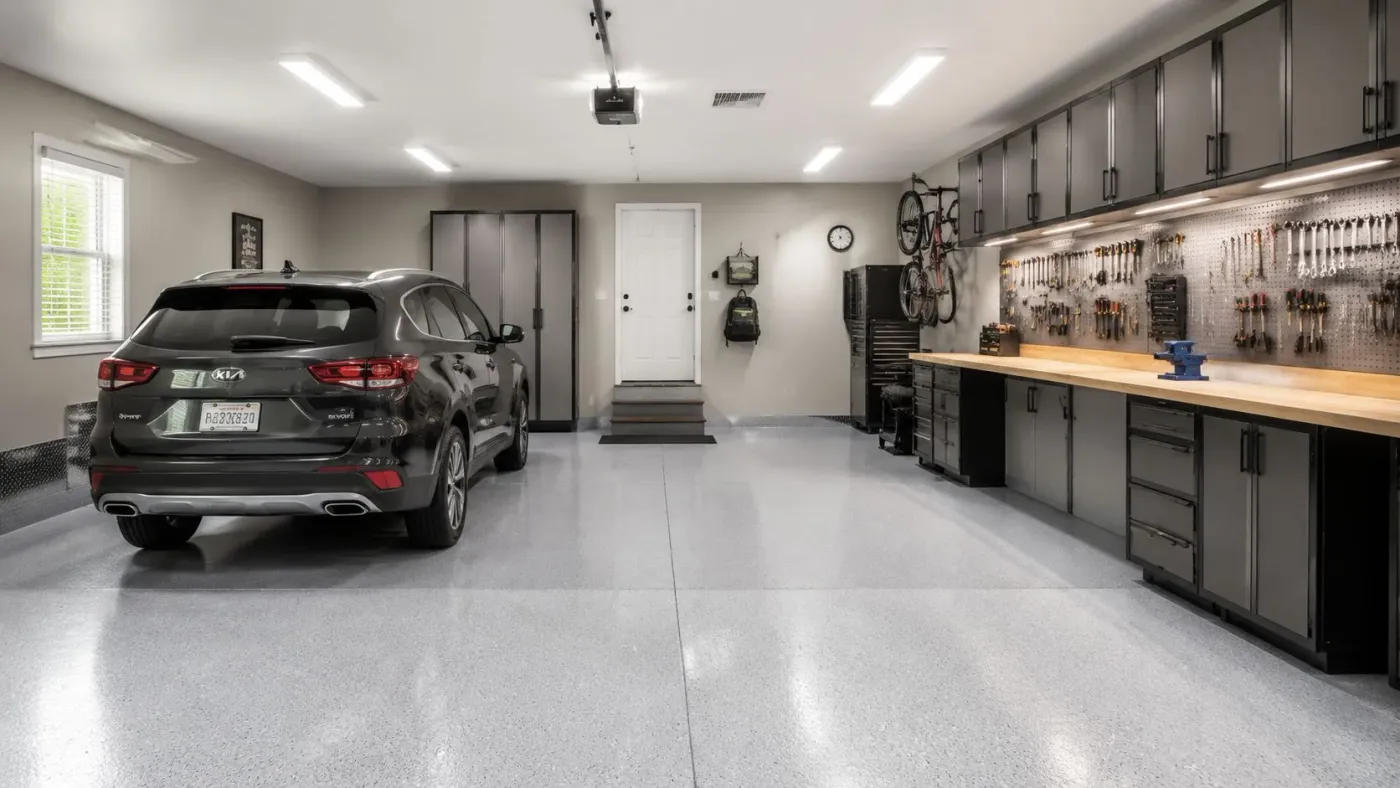
This space feels so professional because of the expert mixing of color temperatures and textures. The dark grey cabinets and light grey walls provide a cool, neutral foundation. Then, the light wood-topped workbench introduces a layer of warmth that keeps the room from feeling cold or clinical. The speckled epoxy floor adds subtle visual texture without being distracting, and the smooth metal of the tools on the pegboard offers a final, polished touch. It’s a balanced, layered approach that feels very deliberate.
|
📋 Copy HEX 🔗 Share |
For a truly professional-looking pegboard, plan your layout before you drill a single hole. Lay the pegboard on the floor and arrange your most-used tools on it. Group them by function (e.g., screwdrivers together, wrenches together) and leave a little breathing room. Once you have a layout you like, take a photo with your phone. Then, when you mount the board and start putting in hooks, you’ll have a clear guide to follow instead of just guessing.
13. White Metal Pegboard on an Exposed Brick Accent Wall
This look is a masterclass in texture and contrast. The style math is simple: 50% rustic texture + 40% clean modern lines + 10% color pop. The exposed brick wall provides that huge dose of rustic, historical texture. The crisp white metal pegboard and light wood workbench bring in the clean, sharp lines of modern design. Finally, the colorful orange, red, and silver tools provide small, distributed pops of color that bring the whole composition to life. It’s a perfect blend of old and new.
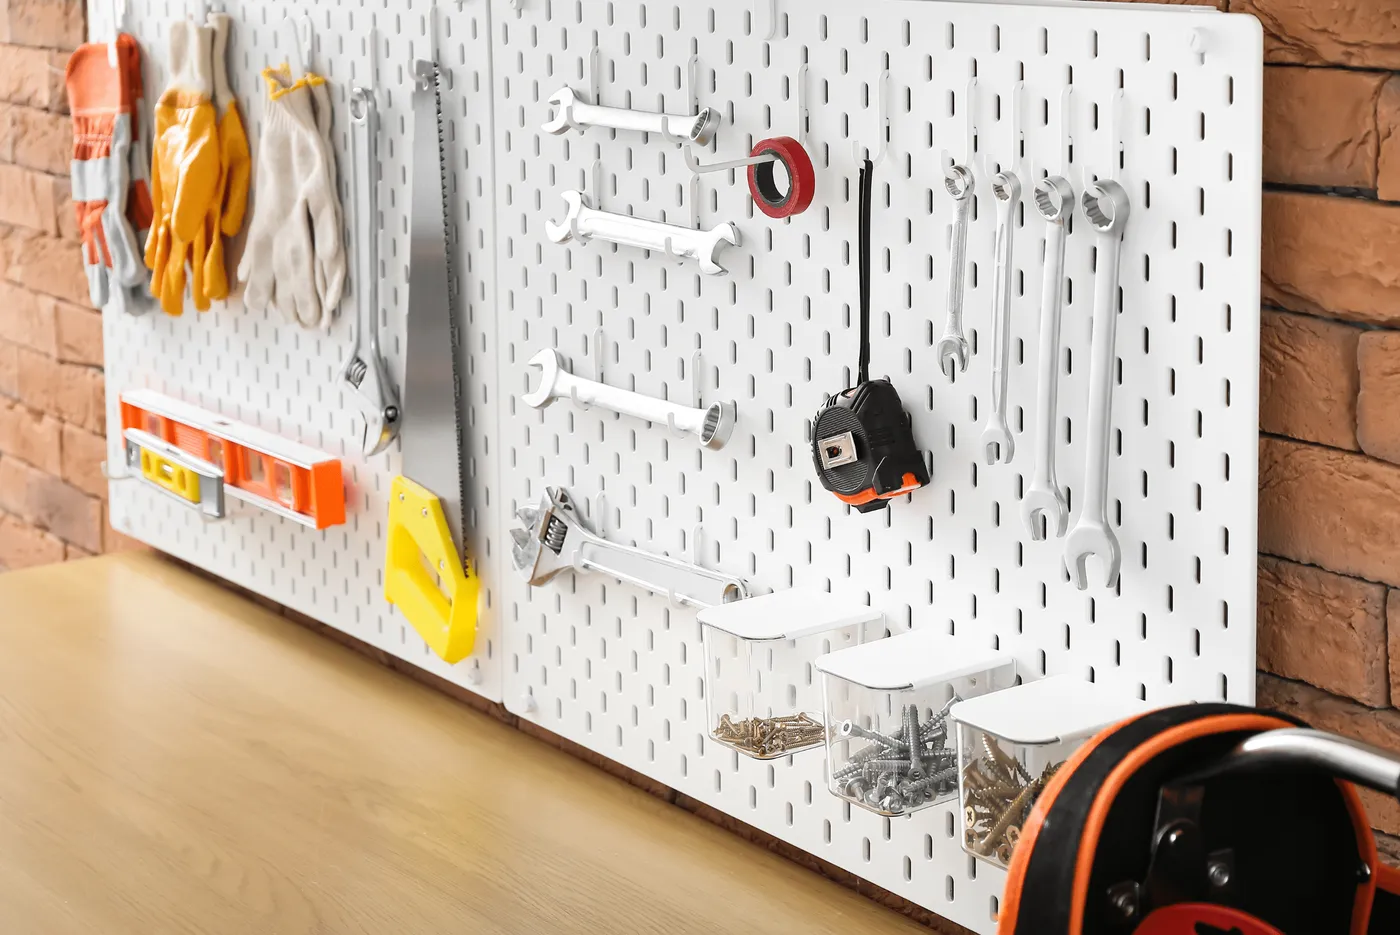
Don’t have a 100-year-old brick wall in your garage? You can get this exact look for under $200. Faux brick panels made of composite material are available at all major home improvement stores. They are lightweight, easy to cut, and install with construction adhesive and a few screws. A single 4’x8′ panel costs about $60-$80. Paired with a standard white pegboard ($30) and a simple wooden shelf for a benchtop ($50), you can recreate this high-end loft vibe on a serious budget.
14. Organized Wooden Workbench Against a White Brick Wall
Symmetry and repetition are the quiet heroes of this design. The workbench is centered perfectly on the wall, creating a pleasing sense of balance. The two black pendant lights are placed symmetrically above, reinforcing this balance and drawing the eye. Above the bench, the repetition of the wooden pegboard modules and the neatly arranged tools creates a rhythm and order that is incredibly satisfying to look at. Even the supplies on the lower shelf are arranged with a sense of visual balance.
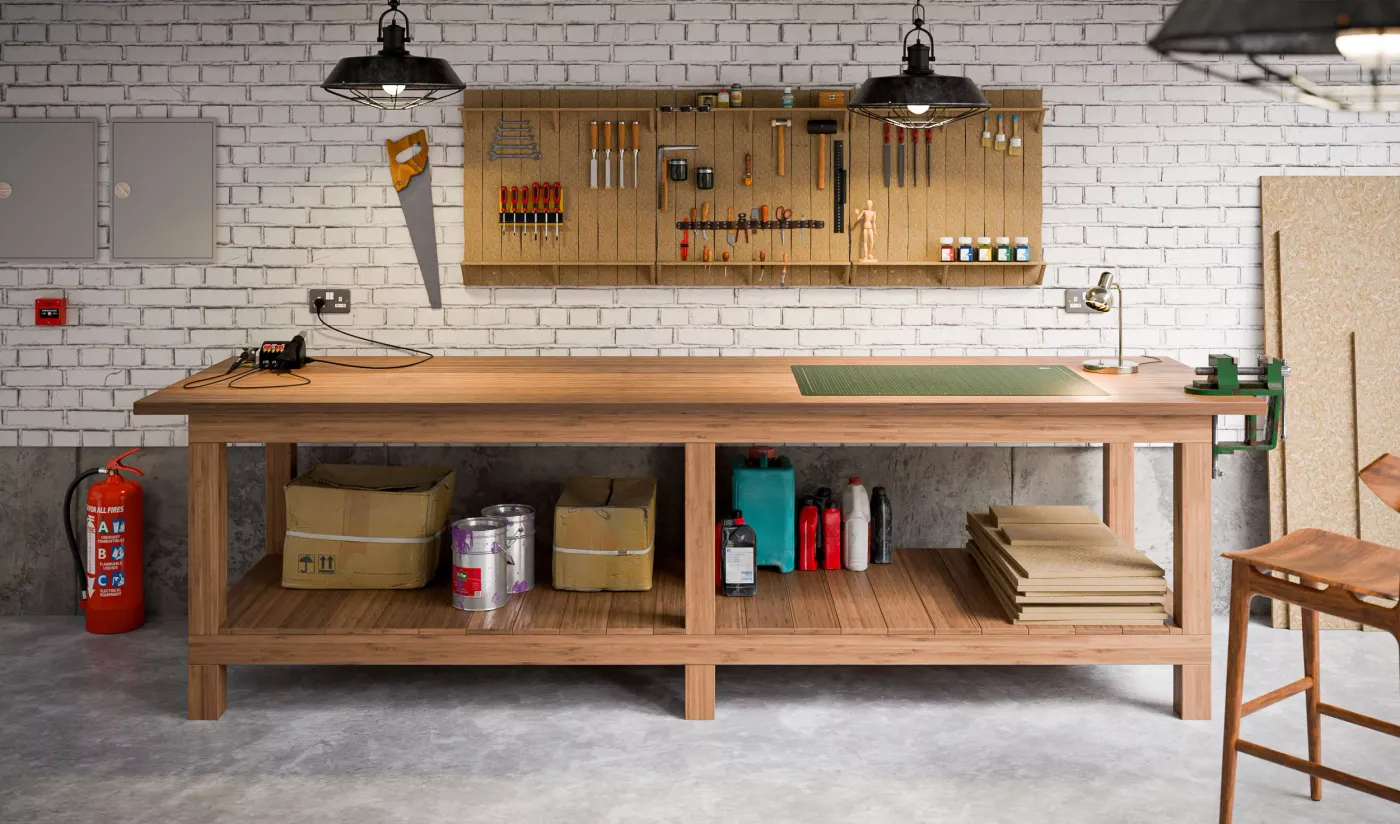
This type of centered, symmetrical layout works best on a dedicated, uninterrupted wall that is at least 10-12 feet wide. This allows for the large workbench (typically 6-8 feet wide) to have at least 2 feet of visual breathing room on either side. A standard 8-foot ceiling is fine, but the pendant lights are most effective with ceilings 9 feet or higher, allowing them to hang down and define the workspace without becoming a head-bumping hazard.
15. Mobile Wooden Tool Cart with Pegboard Sides
The absolute key to this design is its mobility. It’s not just a storage unit; it’s a mobile workstation. The caster wheels mean you can bring your most-used tools and supplies directly to your project, whether it’s in the middle of the garage, out on the driveway, or tucked in a corner. This transforms your workflow, saving countless steps back and forth to a stationary workbench. Removing the wheels would turn this from a clever solution into just another small, inconveniently placed box. Compare this mobile concept to a large static bench like in Idea #14.
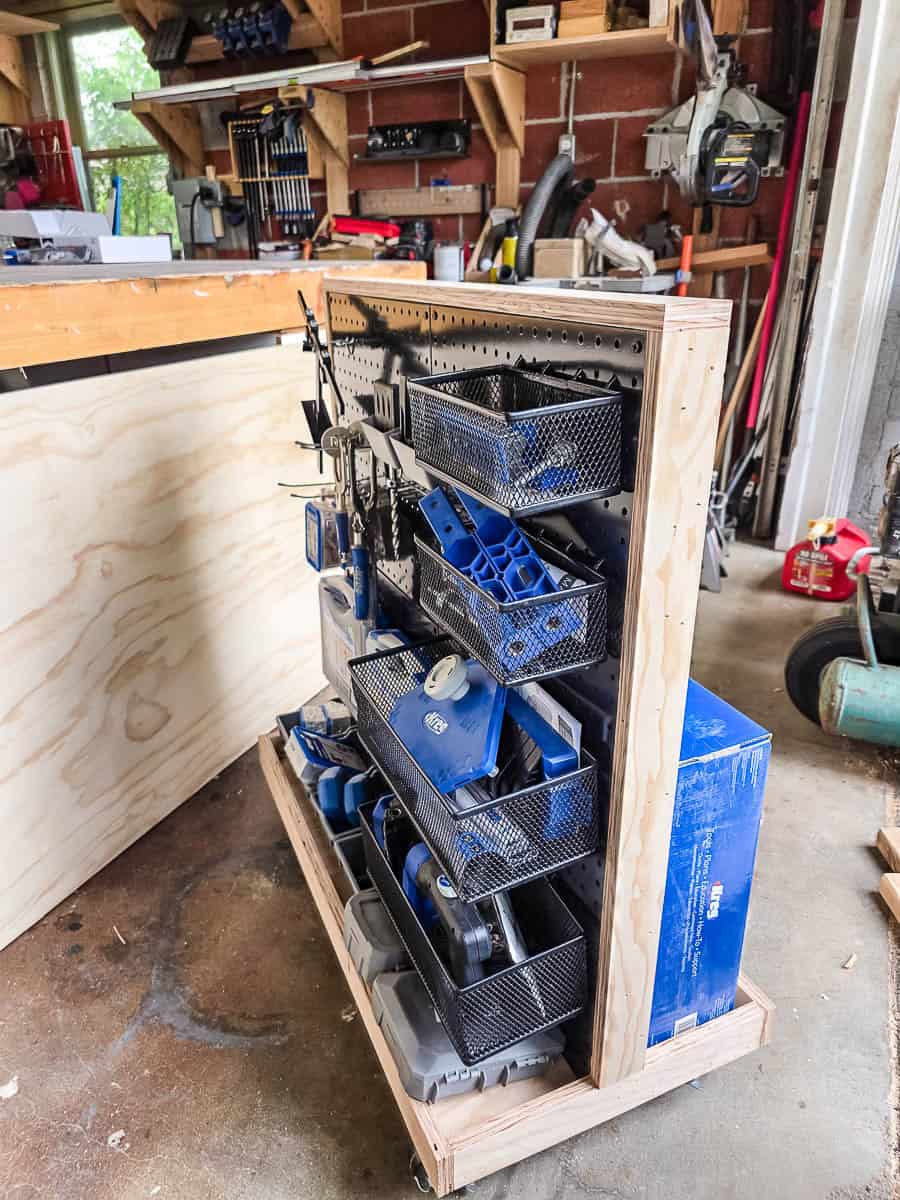
When building or buying a mobile tool cart, invest in high-quality locking casters. Don’t skimp here. Look for casters that are rated for at least 50-75 lbs more than you think you’ll need, and make sure at least two of them have a reliable foot-operated locking mechanism. This ensures the cart stays put when you’re working and doesn’t roll away on a slightly sloped garage floor. A cart that moves while you’re trying to saw or drill is both annoying and dangerous.
16. Meticulously Organized Silver Metal Pegboard Tool Wall
This close-up shot reveals why metal pegboard systems are so popular with serious hobbyists. It’s about precision. The clean grid of holes, the uniform silver finish, and the specialized hooks create a system that looks incredibly professional and orderly. The tools themselves become the only source of color and shape, turning the wall into a highly functional, graphic display. The tight spacing and perfect alignment aren’t accidental; they are a testament to the user’s meticulous nature.
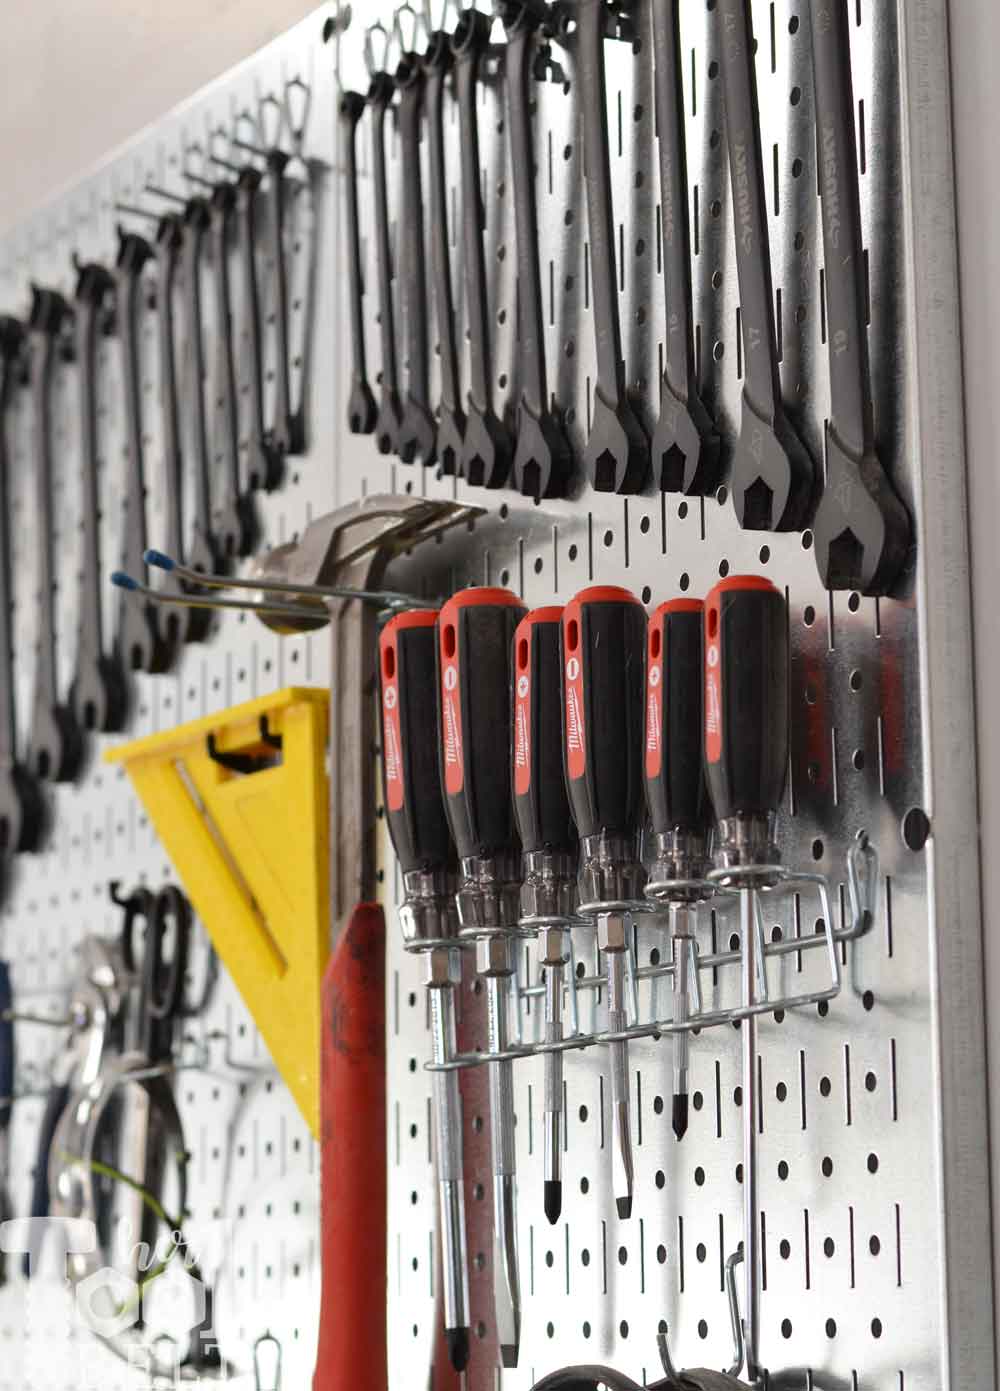
A metal pegboard looks incredible, but it’s an investment and has its own quirks. It’s significantly more expensive than traditional pressboard pegboard. While it won’t warp from humidity, it can be dented or scratched. The biggest reality check is the hooks: you often need to use proprietary (and more expensive) hooks designed for that specific metal system to get a secure fit. Standard 1/4 inch pegboard hooks can be loose and wobbly, which defeats the purpose of such a precise system.
17. Workshop with Diamond Plate Steel Cabinets and Slatwall
This industrial-chic look follows a clear recipe: 50% rugged texture, 40% clean lines, and 10% warm contrast. The diamond plate steel on the black cabinets provides the rugged, masculine texture. The beige slatted wall panels and the clean cabinet frames provide the strong horizontal lines that give the space structure. The final, crucial 10% is the wooden top of the rolling workbench, which injects just enough warmth to keep the space from feeling like a sterile commercial garage.
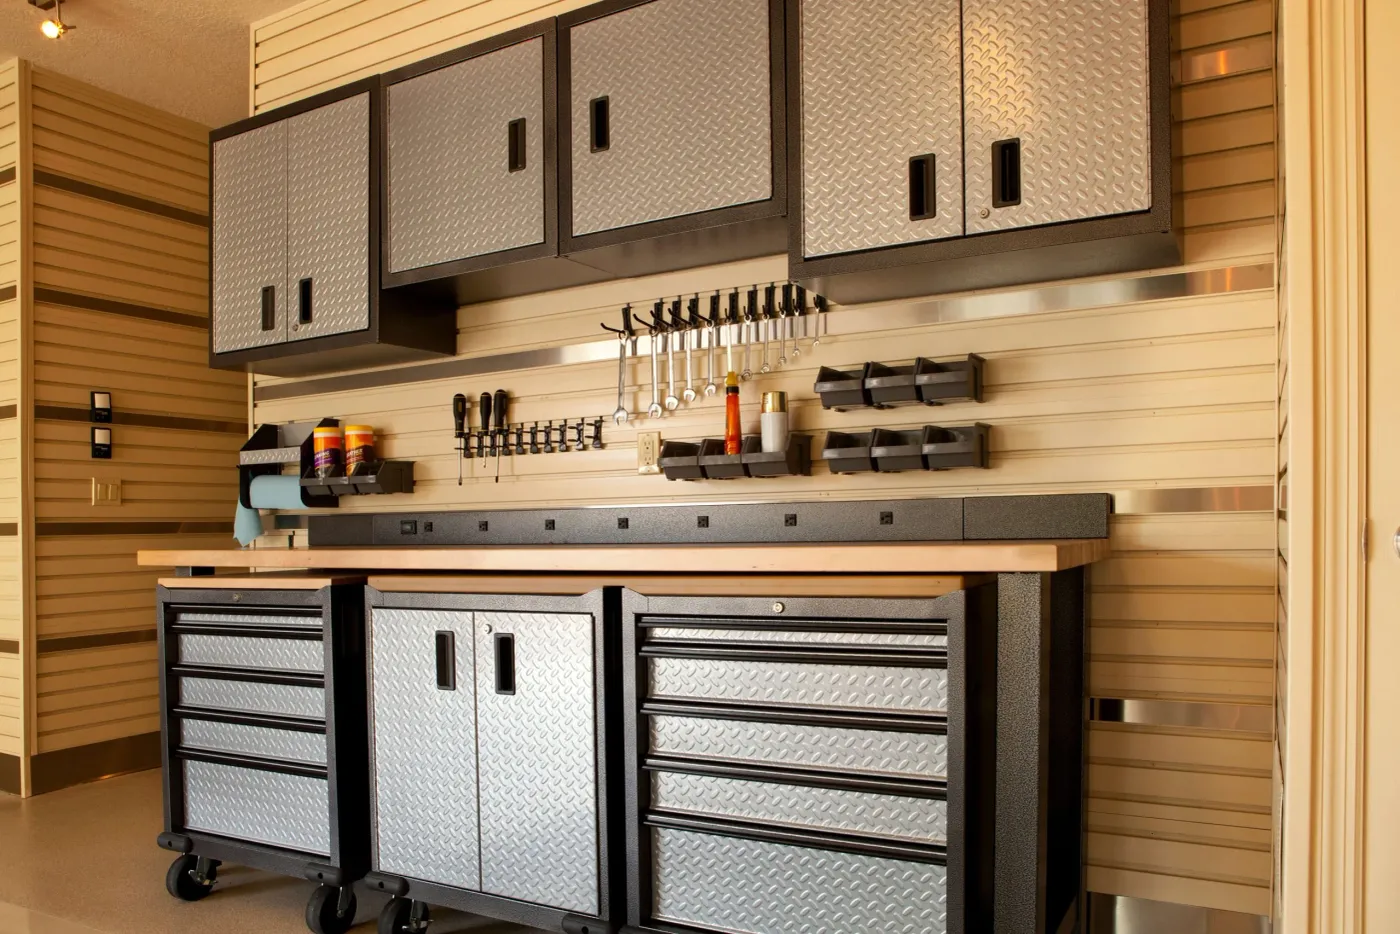
This premium, modular look comes with a premium price tag, but it’s built to last. Here’s a general cost estimate for a similar 10-12 foot wall section:
- Overhead Wall Cabinets (3): $600 – $1,500
- Rolling Base Cabinets/Tool Chests (2): $1,000 – $3,000
- Slatted Wall Panels (approx. 50 sq ft): $250 – $500
- Slatwall Hooks & Accessories: $100 – $300
- Workbench with Power Strip: $400 – $900
- TOTAL: $2,350 – $6,200
Budget alternative: Get the diamond plate look with adhesive vinyl film on cheaper plain cabinets and use a standard pegboard instead of slatwall.
18. Cluttered but Creative DIY Workshop for Miniature Models
that makes this space feel so authentic and inspiring is the organized chaos. It’s not messy; it’s densely packed with creativity. Every surface, shelf, and wall hook is being used to its absolute maximum potential. This isn’t a showroom garage; it’s a room where things are actively being made. The presence of the miniature models and countless tiny parts on the workbench tells the story of a passionate hobbyist, and that sense of purpose is what gives the room its charm.
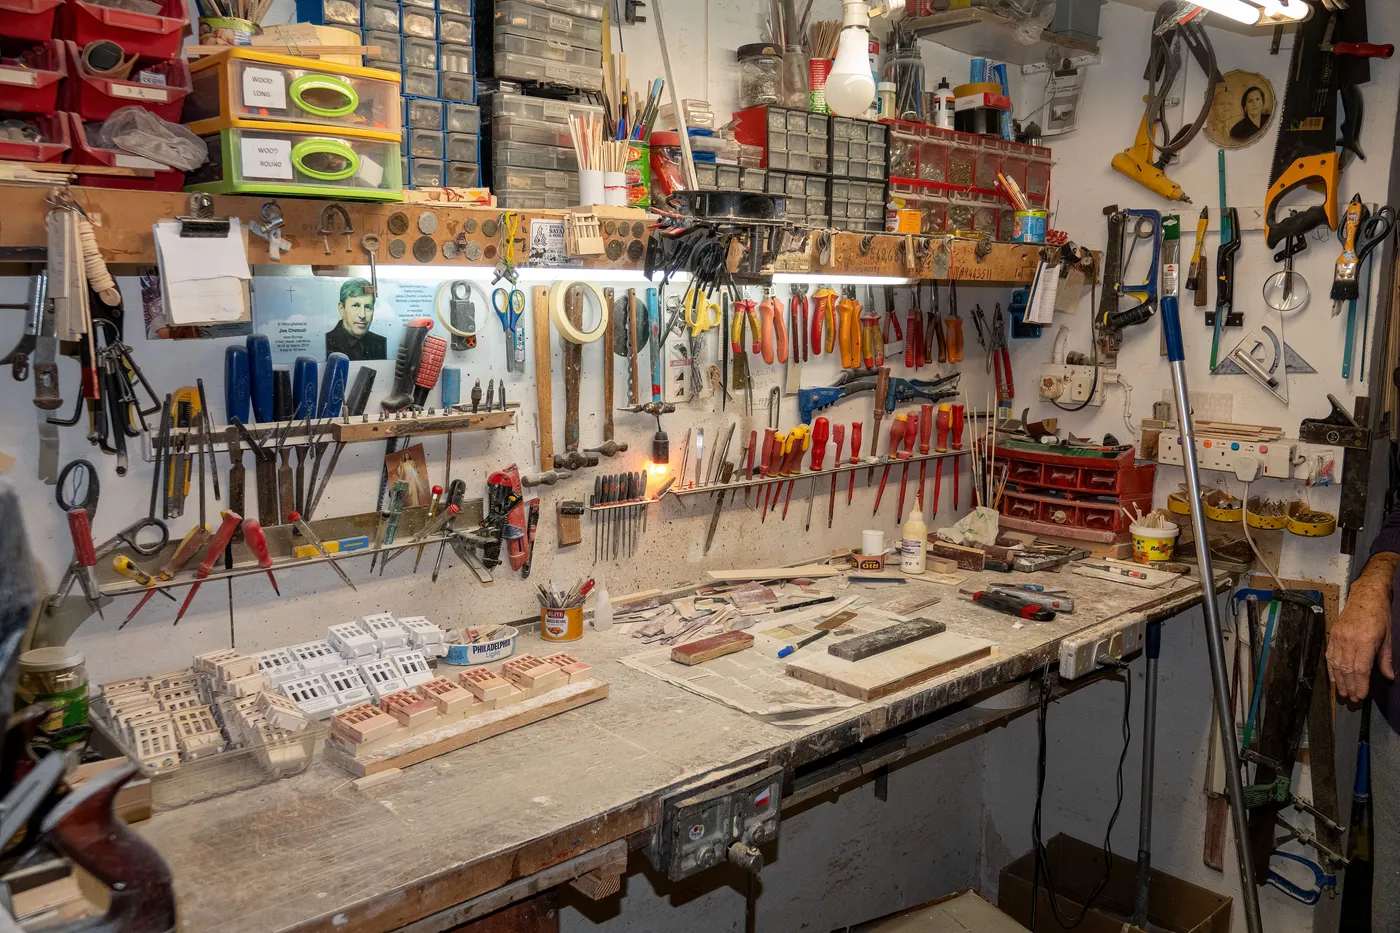
A simple under-shelf light strip can completely change your workbench. Here’s how to install one in under 30 minutes:
- Measure the length of the shelf you want to illuminate.
- Buy a peel-and-stick LED light strip kit of the appropriate length (around $20-$40 online or at hardware stores).
- Clean the underside of the shelf with rubbing alcohol to ensure the adhesive sticks properly.
- Peel the backing off the LED strip and carefully press it into place on the underside of the shelf, usually towards the front edge.
- Securely run the power cord down the back of your shelving unit using small cable clips.
- Plug it in and enjoy your perfectly lit workspace.
It’s one of the highest-impact, lowest-effort upgrades you can make.
19. Workshop Wall with Horizontal Wood Planks for Tool Storage
This system works because of its absolute simplicity and flexibility. Unlike a pegboard with a fixed grid of holes, the gaps between the horizontal wooden planks allow you to place a hook or bracket literally anywhere along the wall. This gives you total freedom to arrange tools of any shape or size. The natural wood provides a warm, rustic backdrop that makes the blue and black colors of the power tools stand out, turning them into a functional wall display. See another take on this plank wall concept in Idea #23.
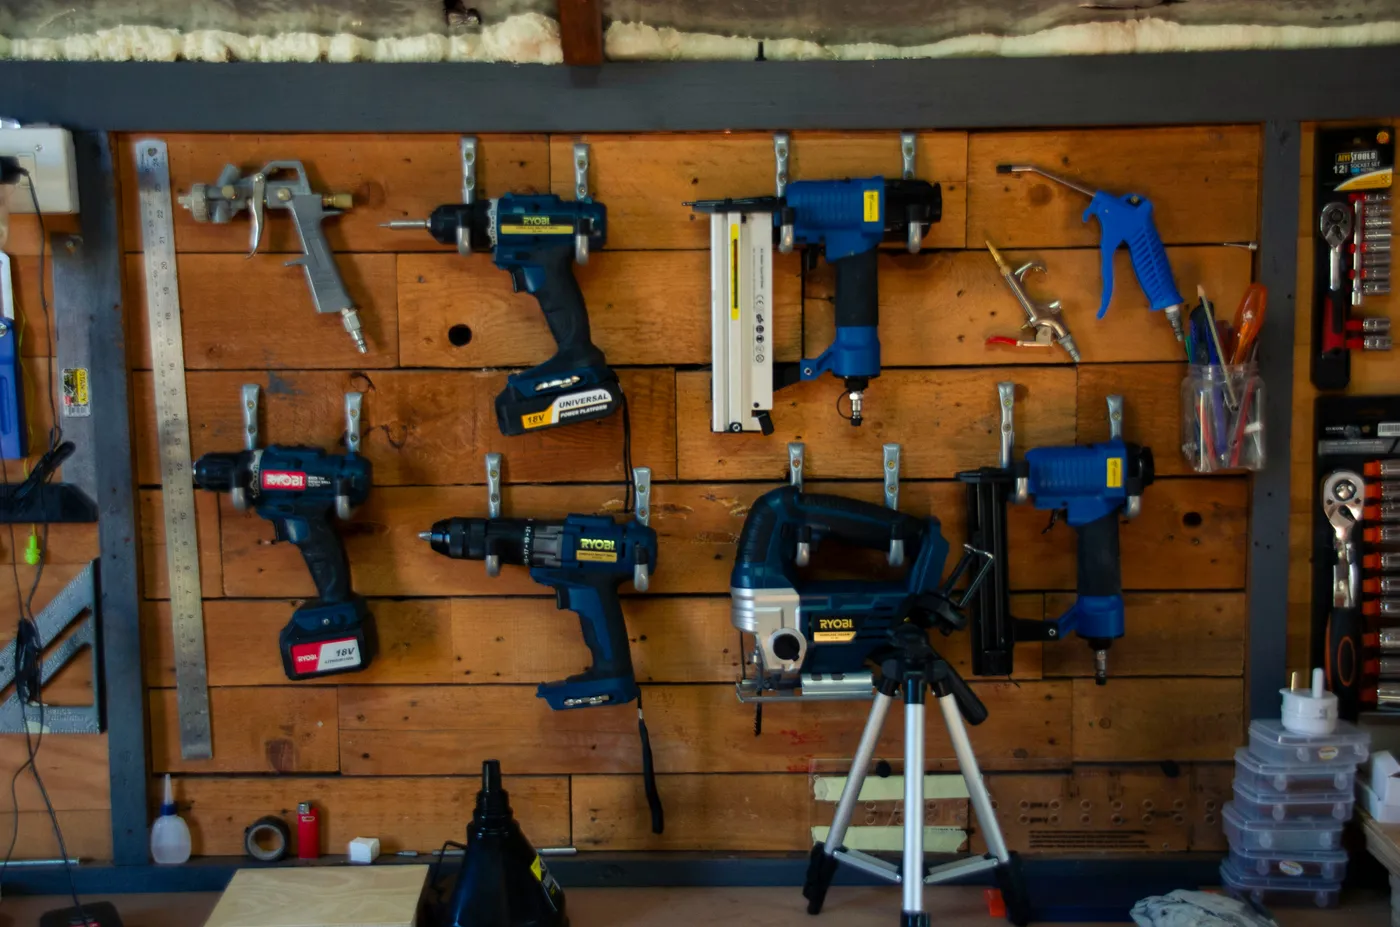
When building a tool wall like this with horizontal planks, use a spacer to ensure the gap between each board is perfectly consistent. A small piece of 1/4-inch or 1/2-inch plywood works perfectly. As you install each plank from the bottom up, place the spacer on top of the previously installed board before setting the next one in place. This guarantees a uniform gap for your tool hooks and a professional, clean look across the entire wall.
20. Rustic Tool Wall Made from Vertical Wood Planks
Okay, let’s be real. While hanging tools directly on a wood wall looks incredibly rustic and cool, it’s not the most practical system for tools you use every day. Unlike a pegboard or slatwall, you can’t easily rearrange things without leaving visible nail or screw holes. This type of display is best for showcasing a collection of vintage tools or for storing items you don’t need to access frequently. For your daily-use drivers and wrenches, a more flexible system is probably a better bet.

You can get this rugged, rustic look for practically free. If you see anyone replacing a wooden fence or deck, ask if you can have the old planks. A quick pressure wash and a light sanding can reveal beautiful, weathered wood. You can also check for shipping pallets, which are often made of oak or pine and can be disassembled. It takes a little more effort, but using reclaimed wood adds an authentic character and history to your workshop wall that you just can’t buy new.
21. Modern Dark Gray Workbench with Illuminated Slatwall
This design feels high-end because it masterfully layers light. There are three key light sources working together: general ambient light for the room, bright under-cabinet LED strips for task lighting on the butcher block, and the softer, diffuse light that bounces off the slatwall. This layering eliminates shadows on the work surface and creates a sense of depth and sophistication. The warm wood countertop is the perfect counterpoint, preventing the sleek gray and white palette from feeling too sterile.
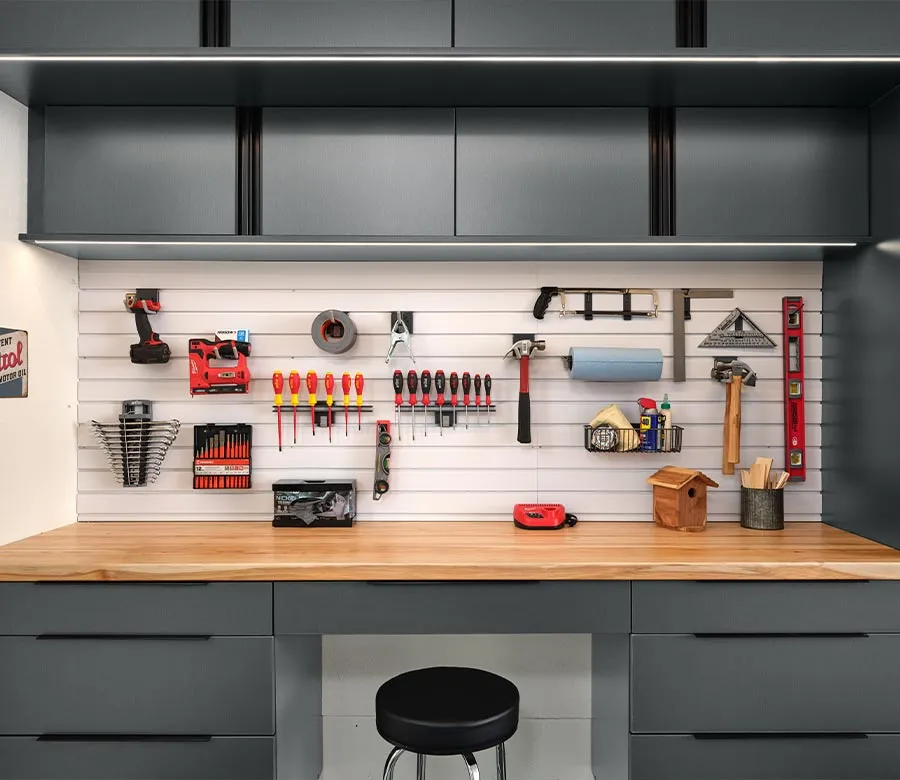
Butcher block countertops look stunning and are great for work surfaces, but they are not maintenance-free. To keep it looking this good, you’ll need to treat it with mineral oil or a specialized wood conditioner every 2-3 months. This prevents the wood from drying out, cracking, and staining. Spills, especially oil or grease, should be wiped up immediately. While it can be sanded and refinished to remove deep scratches or stains, it requires more care than a laminate or metal top.
22. Organized Garage Workspace with Desk and Pegboard Wall
This setup perfectly captures the 2026 work-from-home-meets-DIY trend. The garage is no longer just for the car or messy projects; it’s become a flex space for a home office, a hobby zone, and a workshop. The inclusion of a dedicated computer desk with a proper chair right next to the heavy-duty workbench shows a blend of digital and analog work. This ‘mullet’ approach—business in the front (desk), party in the back (workbench)—is becoming increasingly popular as people look to maximize every square foot of their homes.
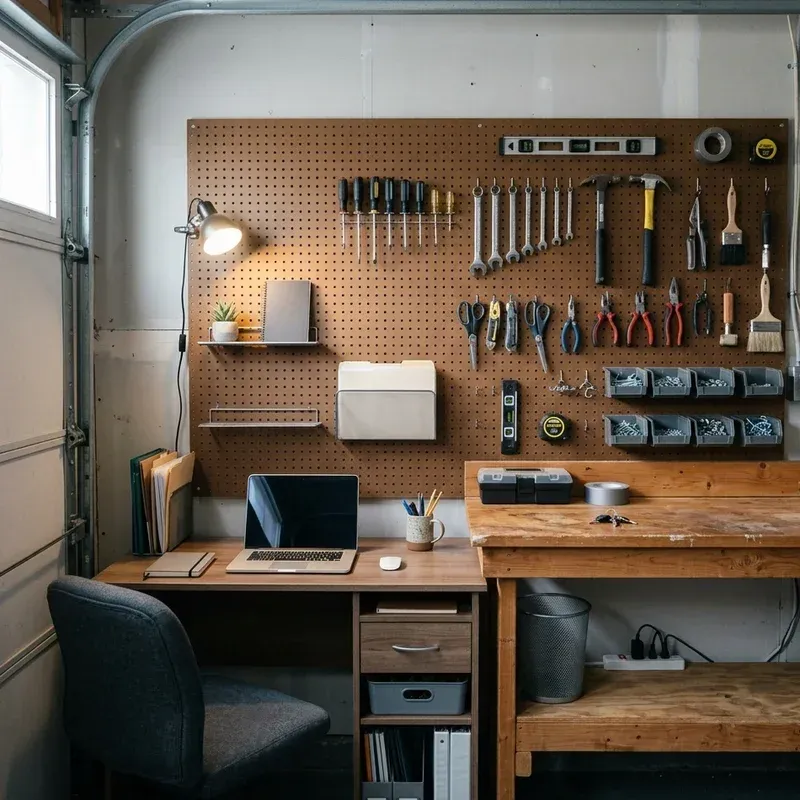
This integrated desk-and-bench concept is perfect for a standard two-car garage where you’ve claimed one of the bays for your workspace. It requires a wall length of at least 12-14 feet to comfortably fit both a standard desk (around 4 feet) and a decent-sized workbench (6-8 feet) side-by-side. The key is to maintain a clear path of at least 36 inches in front of the setup to allow for chair movement and access to tools without feeling cramped.
23. Rustic Power Tool Wall with Charcoal Frame Detail
The visual formula here is a study in rustic refinement. It’s about 70% raw natural wood, 20% bold graphic lines, and 10% industrial hardware. The horizontal wood planks provide a warm, textured base. The dark charcoal framing acts like a picture frame, containing the composition and adding a touch of modern, graphic contrast. The final 10% comes from the silver metal hooks and the blue and black tools, which serve as the functional ‘art’ within the frame. It’s a more refined version of the plank wall in Idea #19.
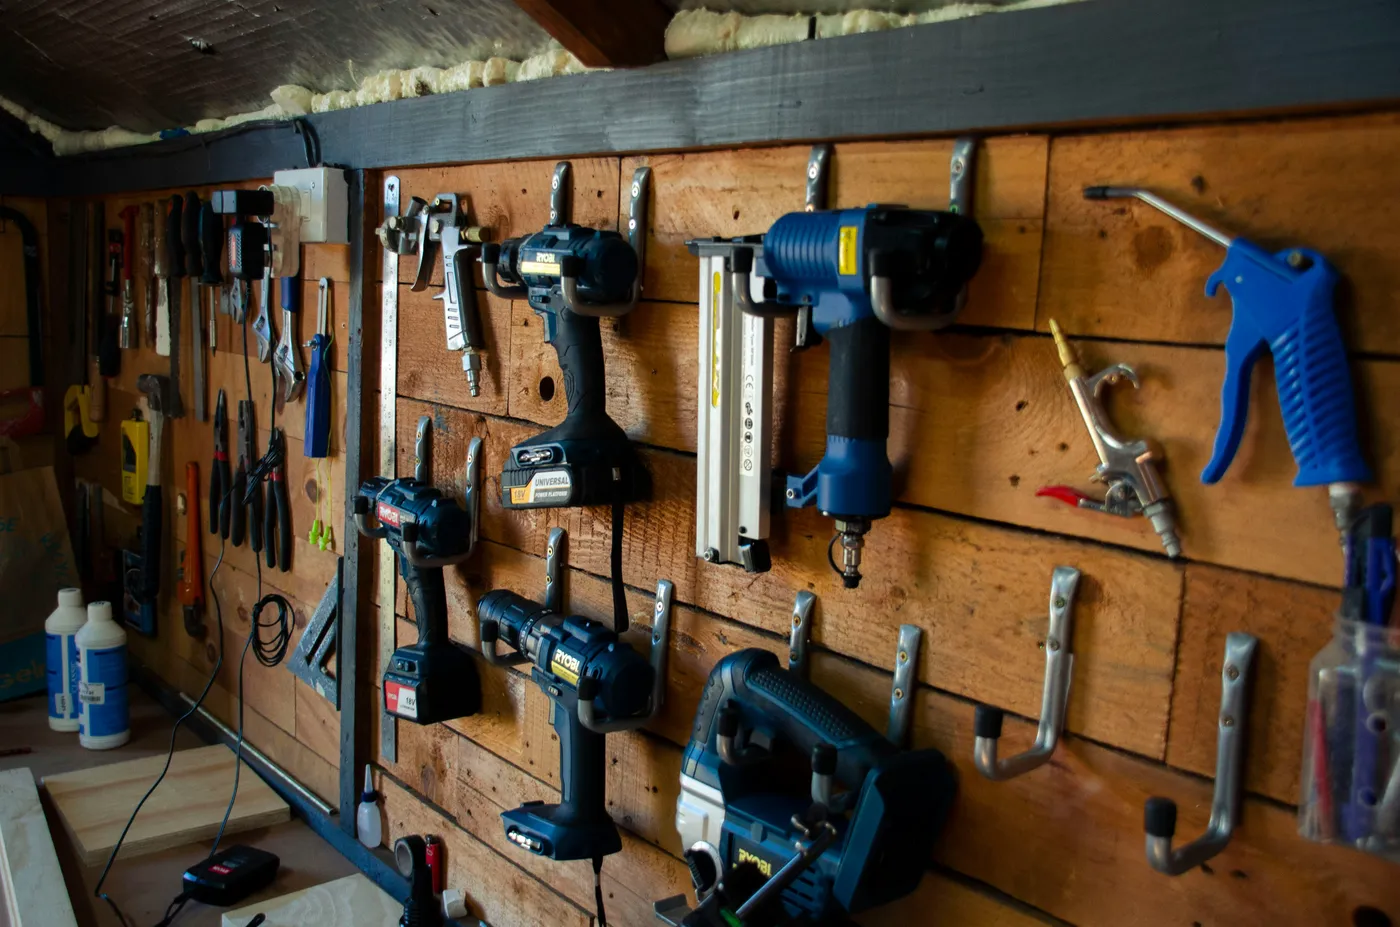
Creating custom power tool holders for a plank wall is easier than it looks. Here’s a quick guide for cordless drills:
- Take a scrap piece of 1×4 or 2×4 lumber, about 6 inches wide.
- Use a T-square to draw a centerline down the length.
- Mark a spot in the center and use a hole saw or large Forstner bit (typically 1.5″ to 2″) to drill a hole through the board.
- Use a jigsaw or handsaw to cut from the front edge of the board into the sides of the hole, creating a U-shaped slot.
- Sand the edges smooth.
- Mount this holder to your wall, and you can now slide your drill into the slot, where it will hang securely by the battery pack.
24. Dark Green Pegboard with Lime Green and Yellow Power Tools
This is a fantastic example of using color theory to create a dynamic yet organized look. The dark green pegboard provides a rich, moody background that’s less harsh than black. The lime green and yellow tools are analogous colors (next to each other on the color wheel), so they create a vibrant but harmonious pairing. The brain reads them as a cohesive set, which makes the wall feel intentional and put-together, even with many different items on display.
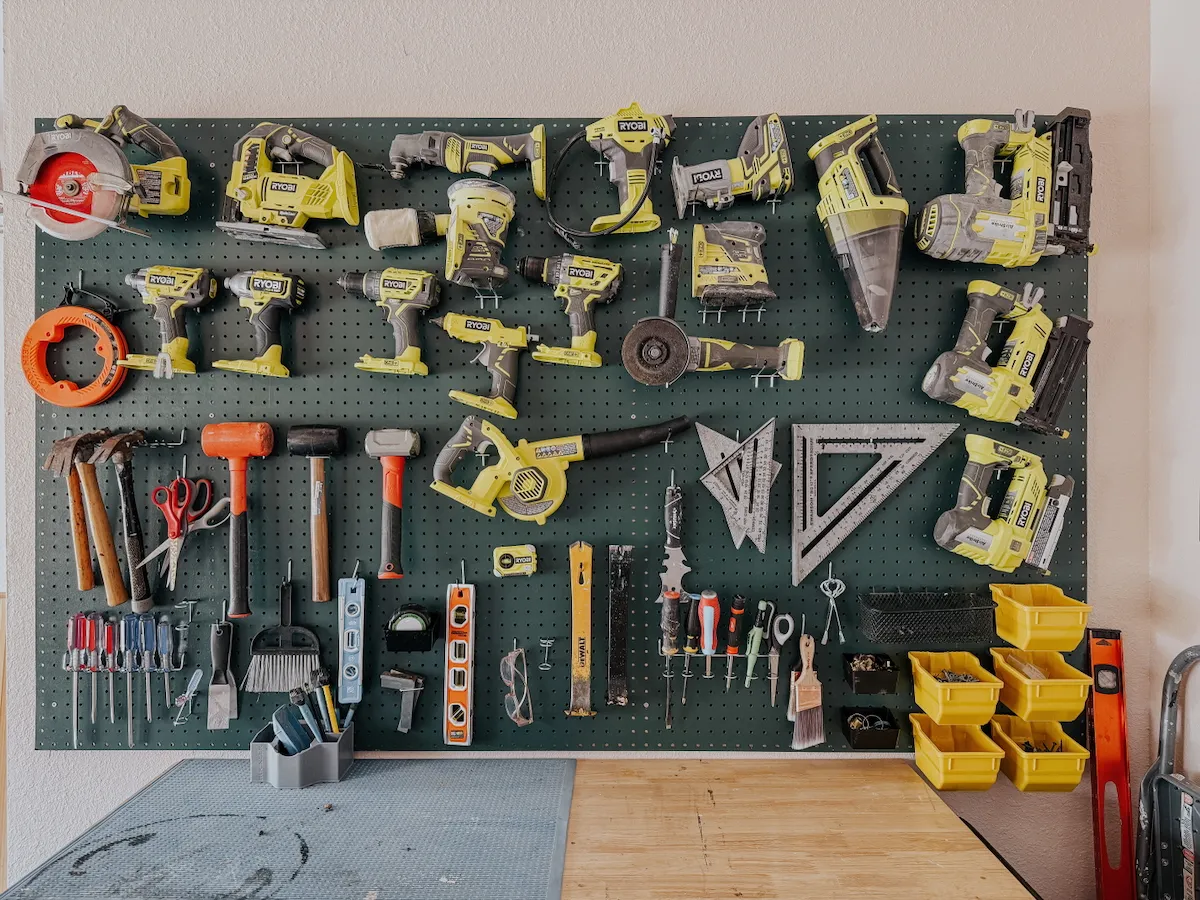
Before you commit to a bold pegboard color like this, do a quick inventory and gut check:
- Take stock of your tools. Do they have a consistent color scheme (like the lime green here) or are they a random mix? A bold background works best with some color consistency.
- Check your garage’s lighting. A dark color like this forest green will absorb a lot of light. Make sure you have good overhead or task lighting to compensate.
- Grab a paint swatch and tape it to the wall for a few days. See how the color looks in the morning, afternoon, and under artificial light before you commit to painting the whole board.
25. Compact Workshop with Slatwall and 3D Printer Station
When you’re working in a compact space, think in zones, even on a small countertop. The L-shaped layout here is used perfectly to create a digital fabrication zone for the 3D printer and a separate manual assembly zone. Notice the colorful filament spools are stored directly below the printer, and the hand tools are clustered on the slatwall in the other area. This logical grouping prevents cross-contamination of space and makes your workflow much more efficient, even in tight quarters.
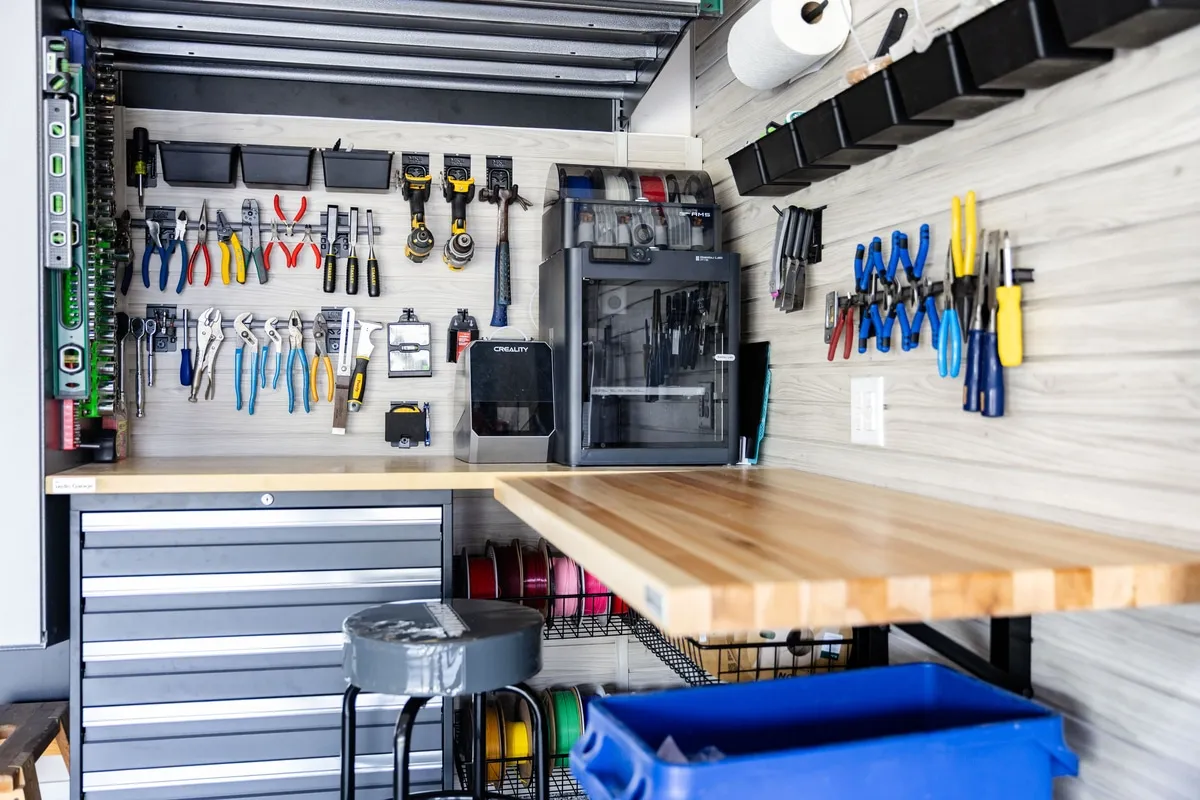
A slatwall and butcher block setup offers maximum function for a reasonable price. Here’s a cost breakdown for a compact corner like this:
- Butcher Block Countertop (8 ft section, cut to L-shape): $200 – $400
- Grey Rolling Tool Cabinet: $250 – $600
- Horizontal Slatwall Panels (4’x8′ section): $150 – $250
- Slatwall Accessory Kit (hooks, bins, holders): $100 – $200
- Magnetic Tool Holders (2): $30 – $60
- TOTAL: $730 – $1,510
Budget alternative: Use a standard pegboard instead of slatwall and build a simple workbench from 2x4s and plywood to achieve a similar layout for under $500.
From Dream Board to Dream Bench
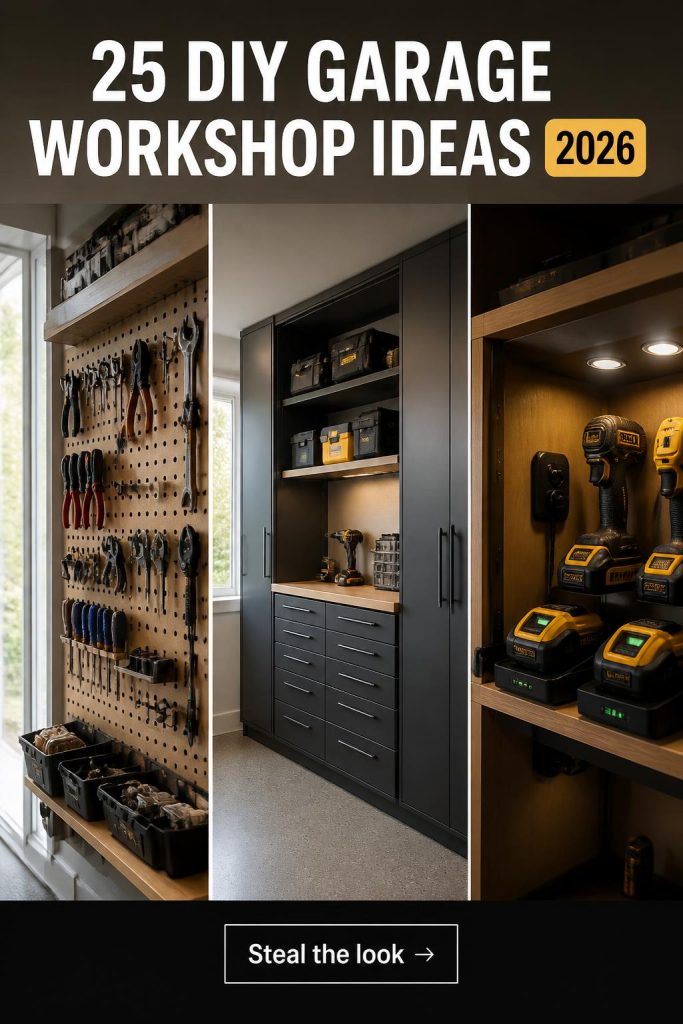
Your perfect garage workshop is more than just storage—it’s a space that fuels your creativity and makes projects more enjoyable. Whether you’re inspired by a sleek modern setup or a rustic wooden retreat, the right plan makes all the difference. Pick your favorite, start small, and build the space you’ve been dreaming of. Don’t forget to save your top ideas to Pinterest so you can find them when you’re ready to start building!