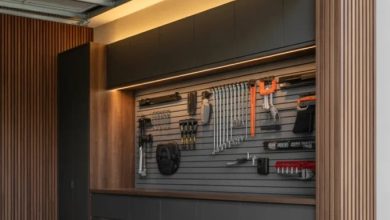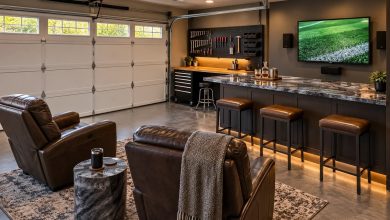

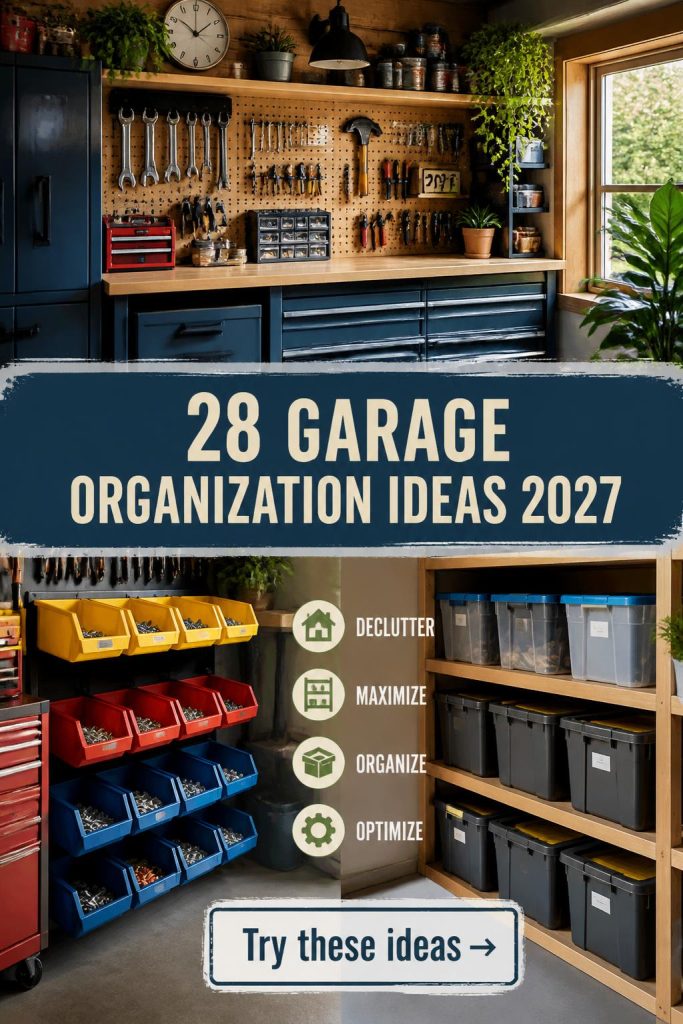
You know that feeling when you finally find the garage organization idea that looks exactly right for your space, only to realize you have no idea how to actually make it happen? We’ve been there. After filtering through hundreds of options across The Container Store, Home Depot, and IKEA, we narrowed it down to 28 ideas that actually deliver. In this guide, you’ll find curated inspiration for modern, utilitarian, and modular setups that work for real homes. We’re seeing a huge trend in 2027 where the garage is treated as a true extension of the home—not just a dumping ground—and these ideas reflect that shift. And stay until the end—we break down the most common mistakes that can ruin these looks. 📌 Save this to Pinterest for later—you’ll want to revisit these ideas.
1. Modern Garage with Light Wood and Gray Cabinetry
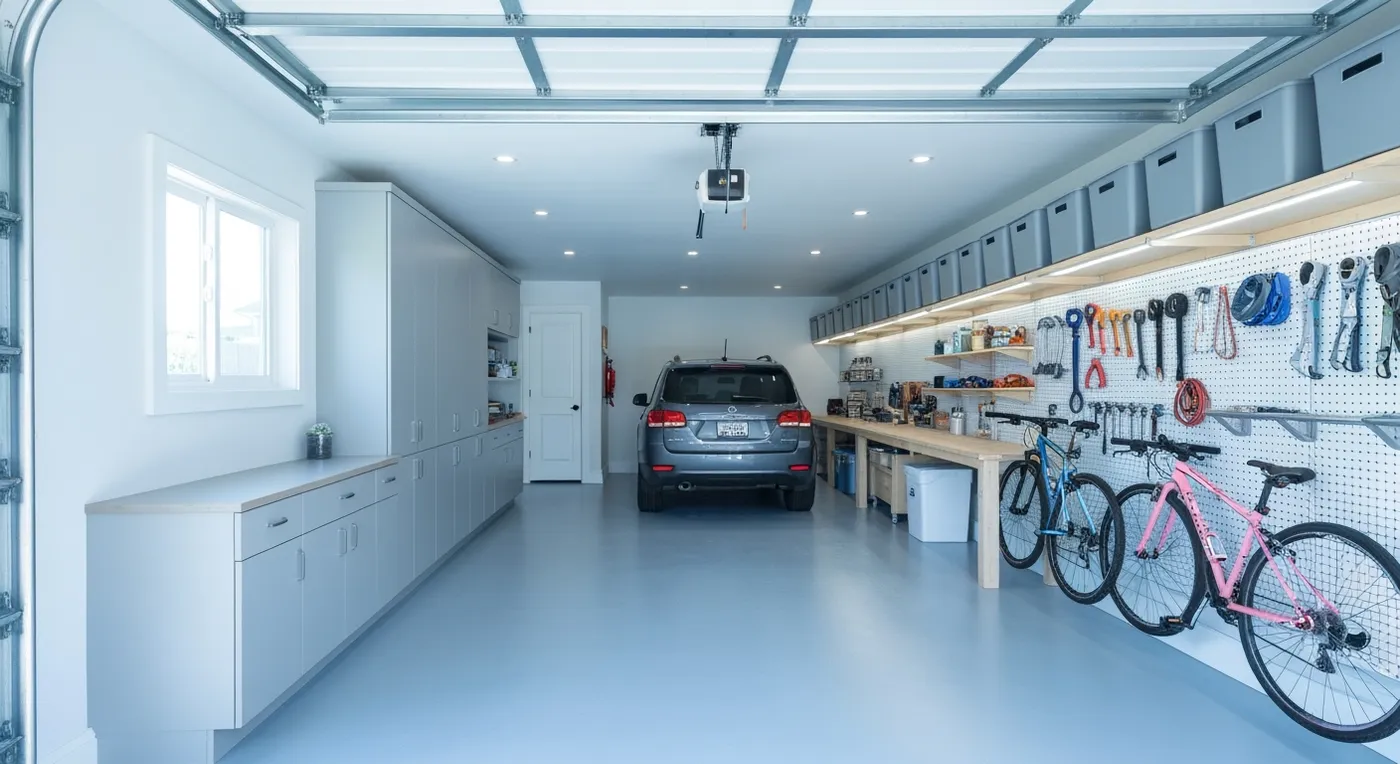
This setup feels so calm and clean because of its tightly controlled color palette. The light gray cabinetry, light wood countertops, and blue-gray epoxy floor all share a cool, muted undertone. This creates a cohesive backdrop that makes the tools on the pegboard feel like intentional decor rather than clutter. The integrated lighting under the wood shelves is another key detail, adding warmth and preventing the space from feeling like a sterile workshop. It’s a masterclass in using texture—smooth epoxy, matte cabinets, natural wood—to add interest without adding noise.
|
📋 Copy HEX 🔗 Share |
Getting this polished look requires a multi-step investment. The custom cabinetry and epoxy flooring are the biggest ticket items, but they provide the high-end foundation. Here’s a general estimate:
- Main Furniture (Cabinetry & Workbench): $4,000 – $9,000
- Flooring (Professional Epoxy Coat): $2,500 – $6,000
- Wall Treatment (Pegboard & Shelving): $800 – $2,000
- Lighting (Recessed & Undercabinet): $700 – $1,500
- Decor/Accessories (Bins, Hooks): $300 – $600
- TOTAL: $8,300 – $19,100
- Budget alternative: Get a similar vibe for around $4,000 by using stock cabinetry, DIY epoxy floor kits, and standard pegboard sheets.
2. Full-Wall Gray Slatwall with Tiled Flooring
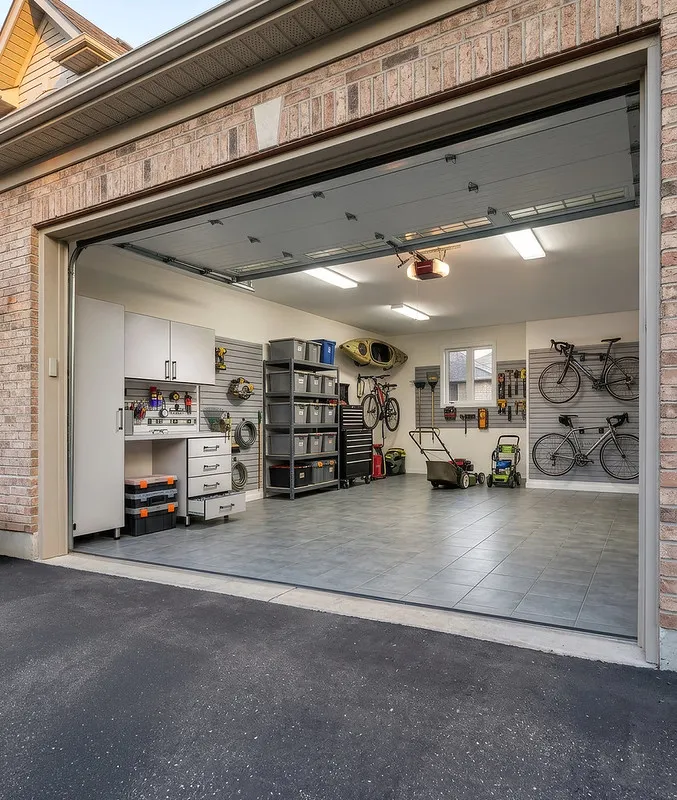
The absolute hero of this garage is the gray slatwall system. Without it, this would just be a nice garage with some cabinets. With it, every square foot of wall becomes infinitely flexible storage. It allows heavy items like bicycles and lawn equipment to get off the floor, instantly making the space feel larger and more organized. What’s brilliant is how it unifies the wall, turning a collection of random tools into a cohesive, organized display. It’s the ultimate commitment to an adaptable system over fixed shelves or hooks.
|
📋 Copy HEX 🔗 Share |
While this system looks incredibly sleek, it comes with its own maintenance needs. The tiled floor, while durable, will show dirt in the grout lines, requiring periodic deep cleaning with a grout brush. The slatwall panels themselves are low-maintenance, but dust can settle in the grooves. A quick pass with a vacuum brush attachment every month or so is a good idea. The biggest reality check is the slatwall hooks and accessories—they can be surprisingly expensive, so budget for more than you think you’ll need to truly outfit the space.
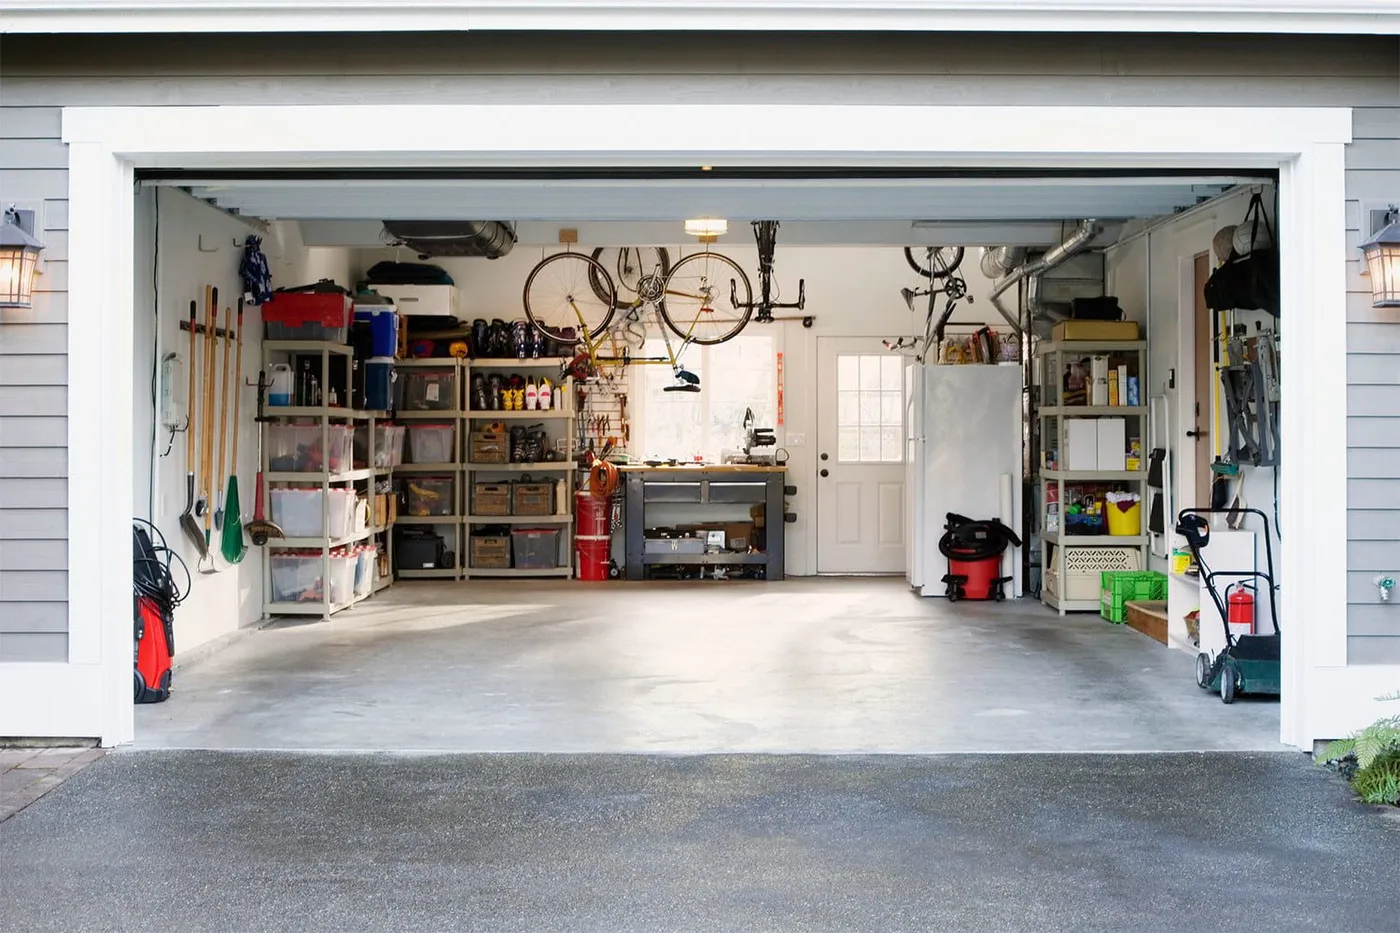
3. Utilitarian Storage with Modular Shelving and Clear Bins
When using clear storage bins, the key to avoiding a chaotic look is to categorize relentlessly and turn labels outward. But here’s a pro tip: for items you use frequently, create kits within larger bins. For example, have a small open-top caddy for basic plumbing repair inside a larger bin labeled “Plumbing.” This way, you can grab the small kit for a quick fix without lugging the entire 20-pound bin. It adds a second layer of organization that makes tasks much faster and keeps your shelves from getting constantly disheveled.
|
📋 Copy HEX 🔗 Share |
You don’t need custom build-ins to get this level of organization. The core of this look is accessible and affordable. Gray modular shelving units can be found at big-box stores like Home Depot or Lowe’s for $80-$150 each. The real savings come from the clear plastic bins—buy them in bulk packs from Costco, Sam’s Club, or Target during back-to-school sales for the best prices, often around $5-$10 per bin. For ceiling bike storage, a simple pulley system costs under $30. This entire look can be achieved for well under $1,000 if you shop smart.
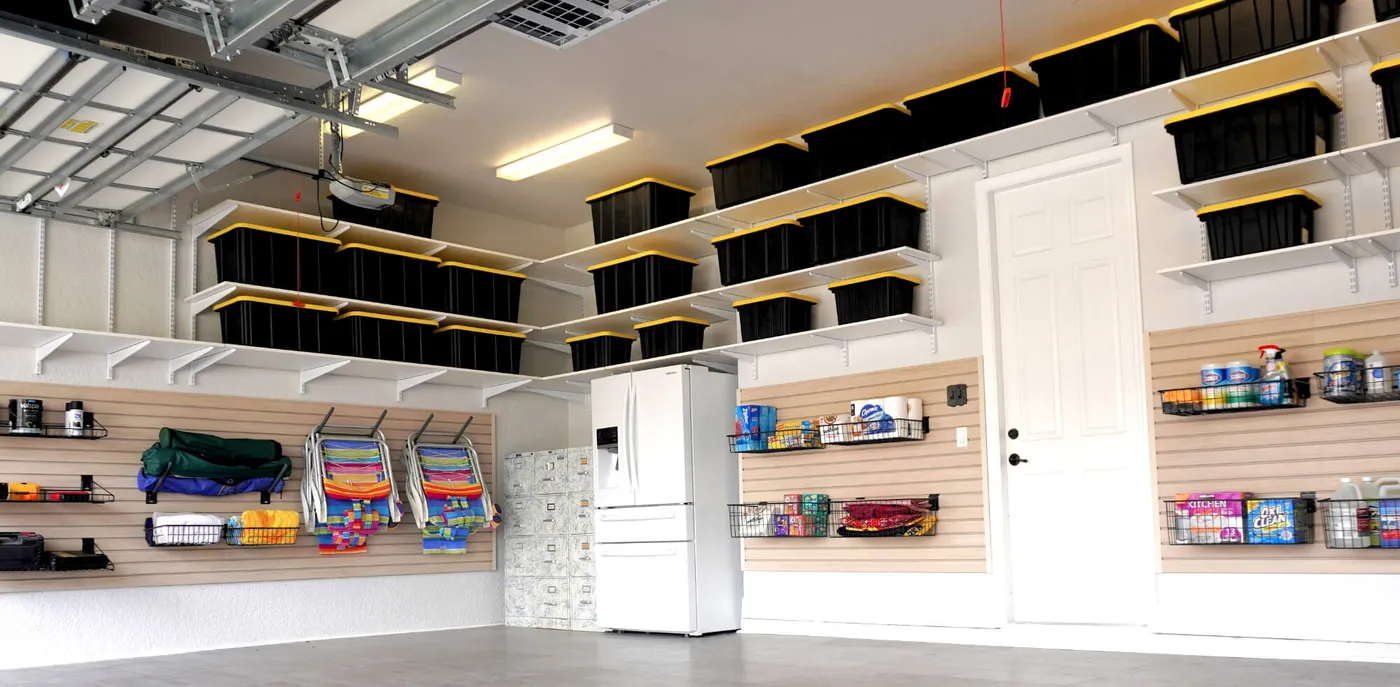
4. High and Low Storage with Slatwall and Overhead Shelves
This garage perfectly executes a layered storage formula. Think of it as: 50% High-Density Overhead Storage + 40% Mid-Wall Accessible Slatwall + 10% Floor-Level Appliances. The overhead white shelves are packed with black and yellow bins for long-term, less-used items. The wood-toned slatwall is for everyday grab-and-go things. By keeping the floor clear except for the refrigerator, the space feels open despite being packed with storage. You can swap the colors—imagine navy bins and a dark gray slatwall—but the ratio is what keeps it functional.
|
📋 Copy HEX 🔗 Share |
This high-low storage approach is brilliant for single or two-car garages with at least a 9-foot ceiling. The overhead shelving needs enough clearance to go above the garage door track and any parked vehicles, so measure that carefully. This system is less about total square footage and more about vertical height. If your ceilings are under 9 feet, you might struggle to fit both the high shelves and the slatwall without it feeling cramped. For lower ceilings, consider the full-wall slatwall approach in Idea #2 instead.
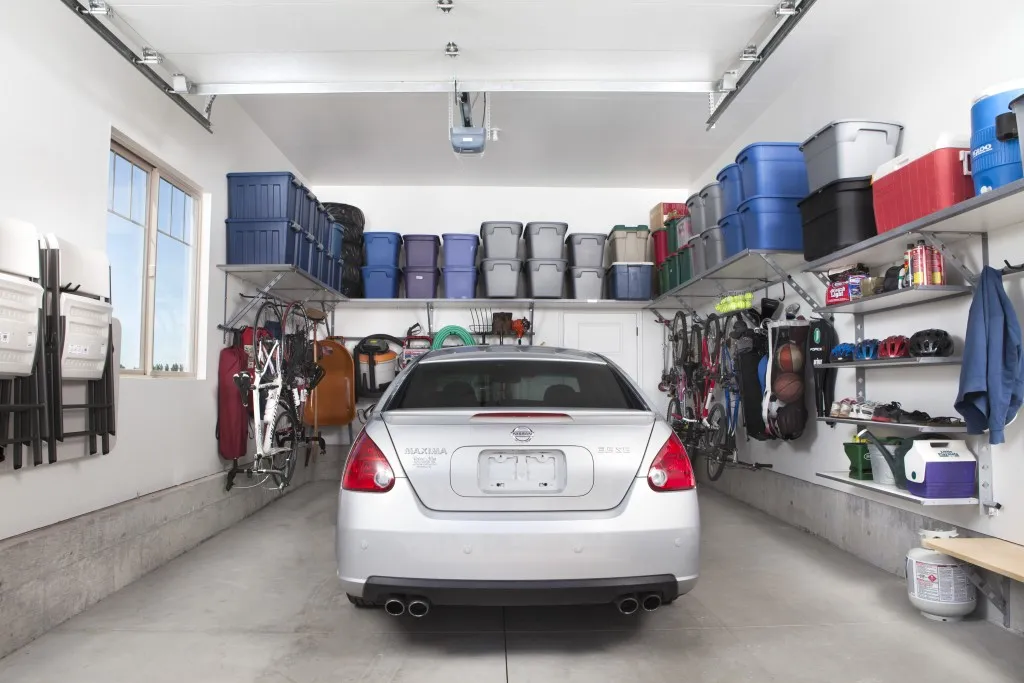
5. Clean White Garage with Vertical Bike Racks
This space feels so bright and airy for one simple reason: the storage is pushed to the perimeter and painted white to match the walls. By using tall, narrow metal shelving units, the storage goes vertical, leaving a generous amount of open floor space in the middle. The uniform use of white on the walls and gray on the floor/ceiling creates a simple, clean canvas. Even the colorful storage bins feel organized because they are contained within the neutral grid of the shelving. It’s a great example of how visual consistency can make a packed space feel calm.
|
📋 Copy HEX 🔗 Share |
Let’s be honest: a garage this white requires commitment. If you do any woodworking, car maintenance, or messy projects, white walls will show every smudge and scuff. You’ll want to use a high-quality, scrubbable semi-gloss paint. Also, while the open metal shelving is cost-effective, it can look cluttered fast if you aren’t disciplined. If your stuff isn’t naturally photogenic, you might need to rely more heavily on opaque bins to keep the look clean, which can make finding things a bit harder. Compare this to the closed cabinetry in Idea #1 for a lower-maintenance option.
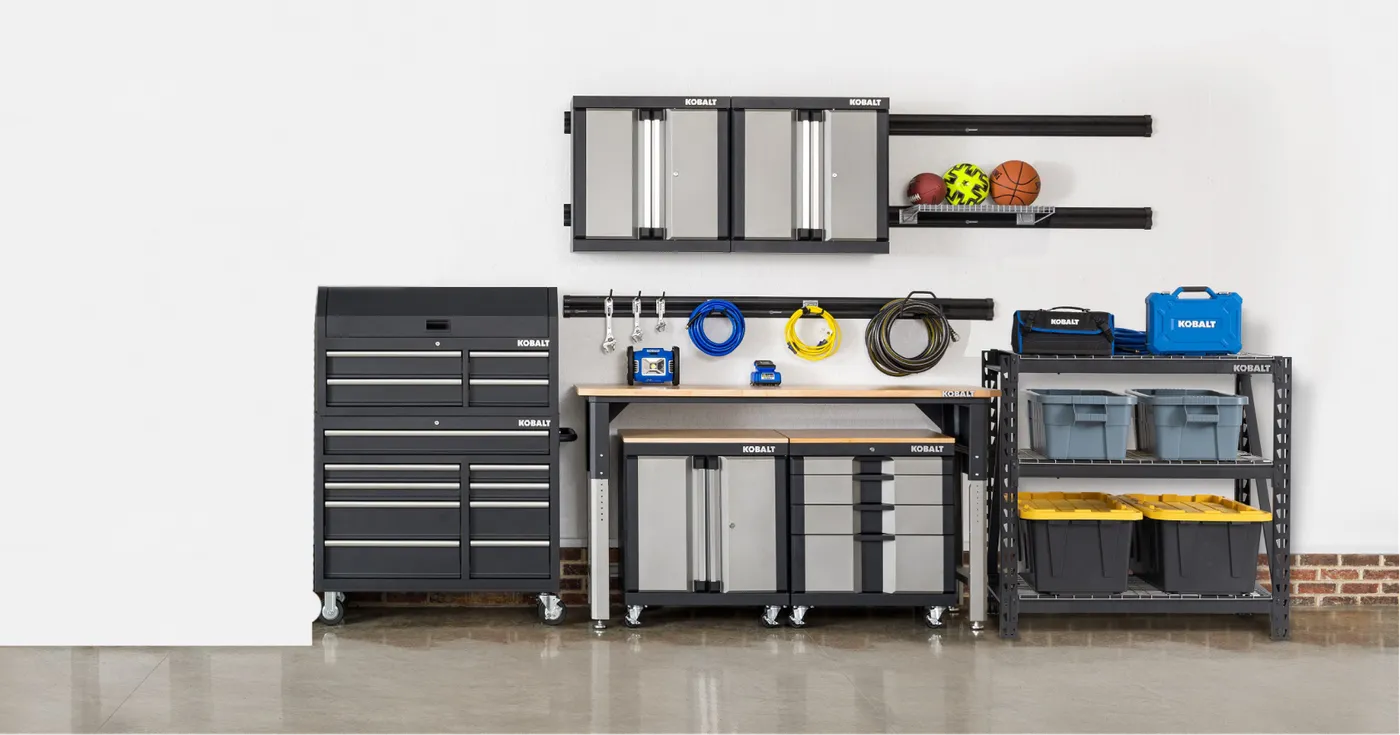
6. Sleek Dark Gray and Silver Modular Cabinet System
The single element that defines this space is its modularity. This isn’t just a collection of cabinets; it’s a cohesive system. The rolling toolbox, the workbench with lower cabinets, and the wall-mounted units all share the same design language—the same dark gray finish, the same silver accents. This system approach means you can start with a few key pieces and add on over time as your needs or budget change, without it ever looking mismatched. It’s the difference between a curated storage solution and a random assortment of furniture.
|
📋 Copy HEX 🔗 Share |
There’s a reason garage cabinet systems like this are blowing up on Pinterest. Homeowners are increasingly viewing the garage as a finished, functional room, not just a place to park the car. This trend is driven by the desire to maximize every square foot of property. Systems that look as good as kitchen cabinets but are built to withstand garage conditions (think durable powder coats and heavy-duty casters) are in high demand. This look has staying power because it combines residential aesthetics with industrial-grade functionality.
7. Creating a Clean and Organized Garage Interior
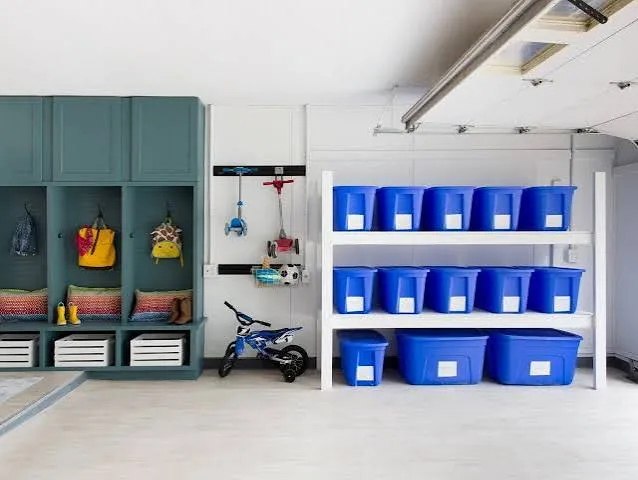
One of the fastest ways to make a garage feel intentional is to define zones. Even in a small space, create a clear area for car maintenance, gardening, and bulk storage. Use floor mats, different styles of lighting, or a change in storage type (e.g., cabinets for tools, open shelves for bins) to visually separate the areas. This mental map makes it easier to find things and, more importantly, put them away. Don’t just line the walls with shelves; think about the workflow for your most common garage tasks and organize around that.
|
📋 Copy HEX 🔗 Share |
Before you buy a single bin or shelf, you need a plan. A weekend of prep will save you hundreds of dollars and hours of frustration. Here’s your checklist:
- Measure your space: Get the length, width, and ceiling height. Note the location of outlets, switches, and windows.
- Take inventory: Pull everything out and group it into categories: keep, donate, and trash. Be ruthless.
- Plan your zones: Where will tools, sports gear, and seasonal items live? Sketch a rough layout.
- Set a realistic budget: Account for storage containers, shelving, and any potential professional help for things like epoxy flooring.
8. Bright Garage with Chrome Wire Shelving and Pegboard
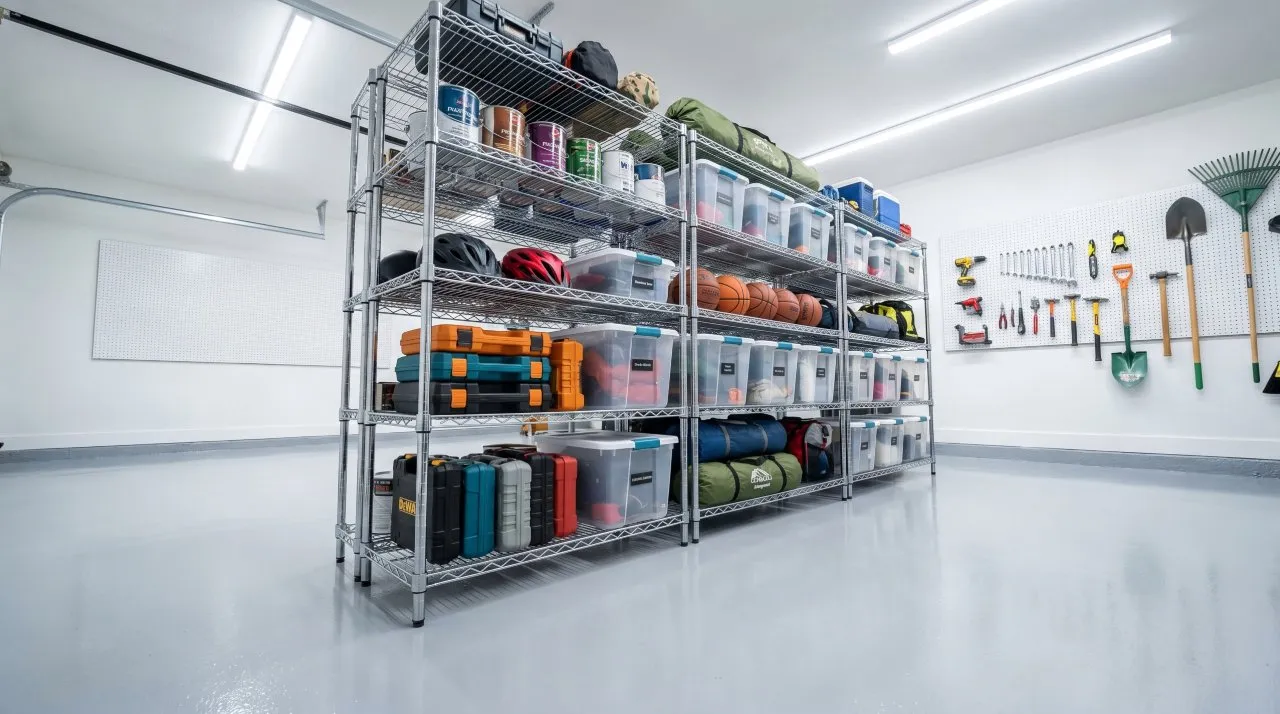
The combination of chrome wire shelving and a massive white pegboard makes this garage feel incredibly bright and efficient. The open nature of the wire shelves prevents them from feeling heavy or bulky, allowing light from the overhead fluorescent fixtures to filter through the space. This transparency, paired with the use of clear bins, means you can see almost everything at a glance. The polished gray concrete floor reflects the light, further enhancing the brightness and giving it a clean, industrial feel. This look is all about function and visibility.
|
📋 Copy HEX 🔗 Share |
Chrome wire shelving is a workhorse, but it’s a magnet for dust and cobwebs. Unlike solid shelves, you can’t just wipe them down; dust settles on every wire. The best way to clean them is with a vacuum cleaner brush attachment. The same goes for the pegboard—a wall full of tools will collect a surprising amount of sawdust and grime. Plan for a quarterly deep clean where you take things down and wipe the surfaces. The polished concrete floor is durable but can be slippery when wet, so good drainage is key.
9. Practical Garage with Black Shelving and Epoxy Floors
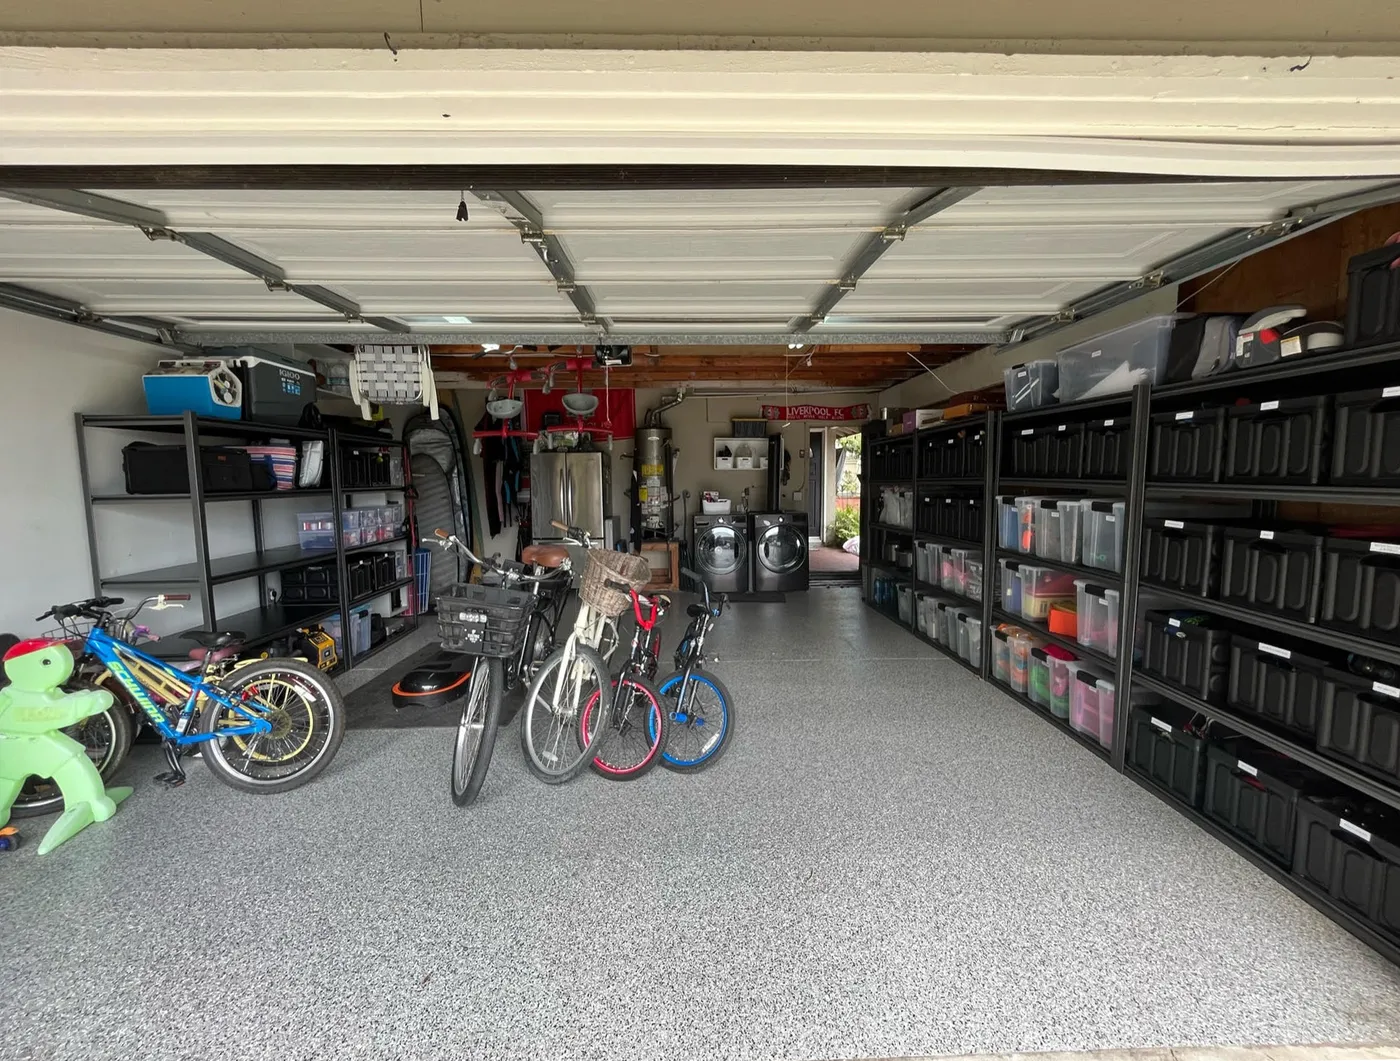
This setup, with its durable black metal shelving and epoxy flake floor, is perfect for a standard two-car garage (around 20×20 feet or larger). The key is having enough depth to accommodate the shelving units (typically 18-24 inches deep) along the walls while still leaving ample room to open car doors and create a clear walkway. This design also assumes you have a dedicated utility wall where appliances like the water heater and laundry can be grouped, freeing up the other walls for pure storage.
|
📋 Copy HEX 🔗 Share |
Having your washer, dryer, and a second refrigerator in the garage is incredibly convenient, but be aware of the practicalities. These appliances generate heat and humidity, which can be an issue in non-climate-controlled garages, potentially leading to rust on tools or mildew on stored items. Ensure you have adequate ventilation. Also, running plumbing and 220v electrical for a dryer can be a significant hidden cost if it’s not already in place. Factor those potential expenses into your budget from the start.
10. Modern Workshop with a Car Lift and Gray Cabinetry
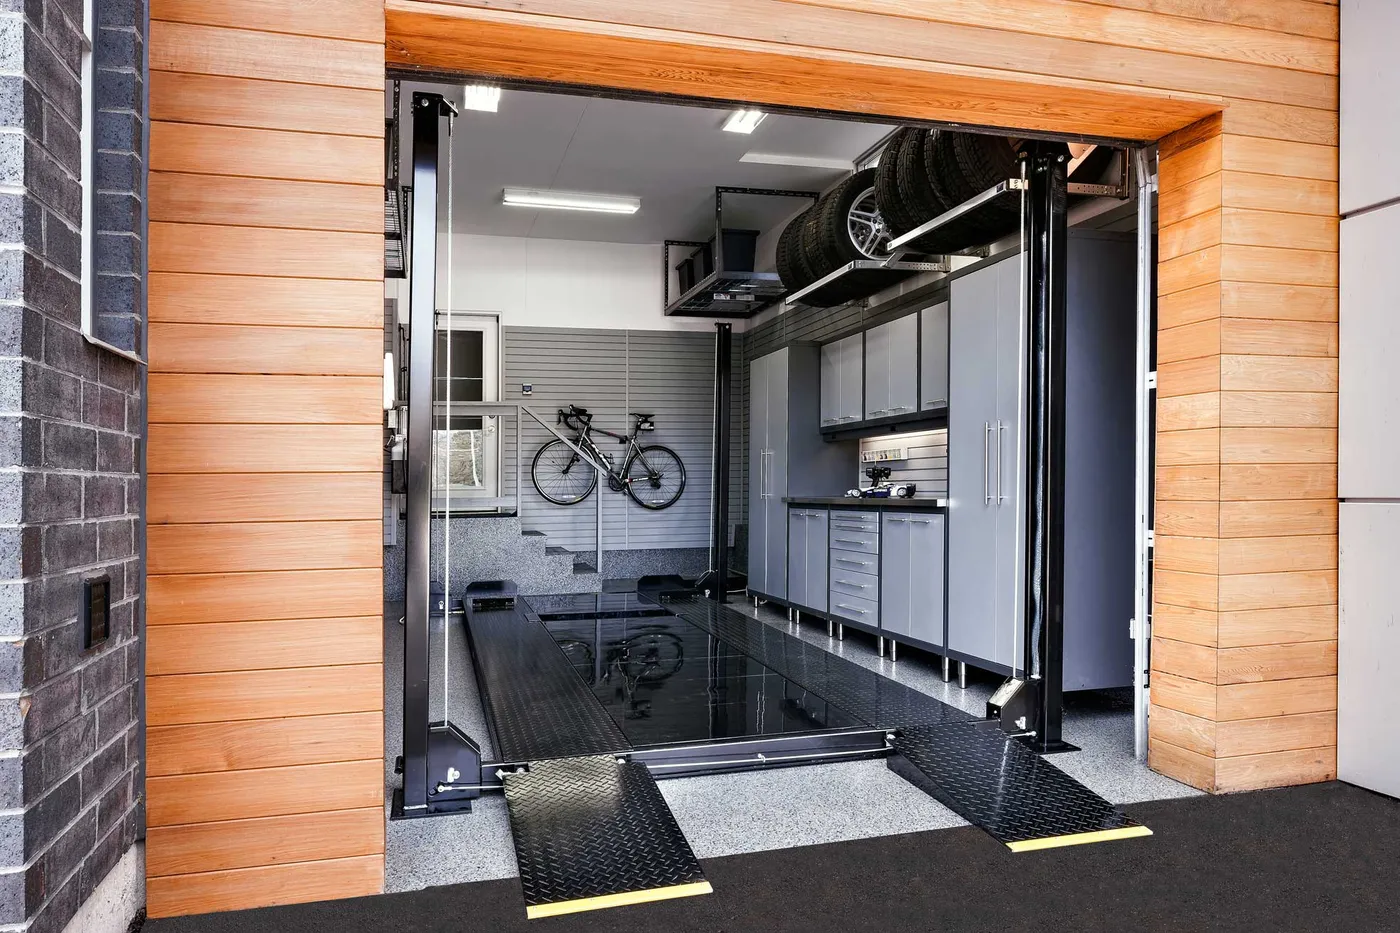
Obviously, the car lift is the showstopper here. It’s more than just a tool; it’s a piece of functional architecture that fundamentally changes how the garage can be used. It doubles the parking capacity or, as shown here, provides unparalleled access for vehicle maintenance. Its presence dictates the entire room’s purpose, elevating it from a simple storage space to a serious workshop. Everything else—the sleek gray cabinets, the slatwall, the overhead racks—is designed to support this central feature, creating a hyper-functional, professional-grade environment.
|
📋 Copy HEX 🔗 Share |
A car lift isn’t a casual purchase. Before you even start shopping, you have to do some serious homework on your space. Check these items off first:
- Ceiling Height: Most four-post lifts require a minimum of 10-12 feet of clearance. Measure from the floor to the lowest obstruction (like the garage door opener).
- Concrete Slab: Your concrete floor needs to be at least 4 inches thick and properly cured, with a compressive strength of at least 3,000 PSI. You may need to consult an engineer.
- Electrical: Check the power requirements for the lift’s motor (usually a dedicated 110v or 220v circuit).
11. Functional Workspace with Metal Shelving and a Pegboard
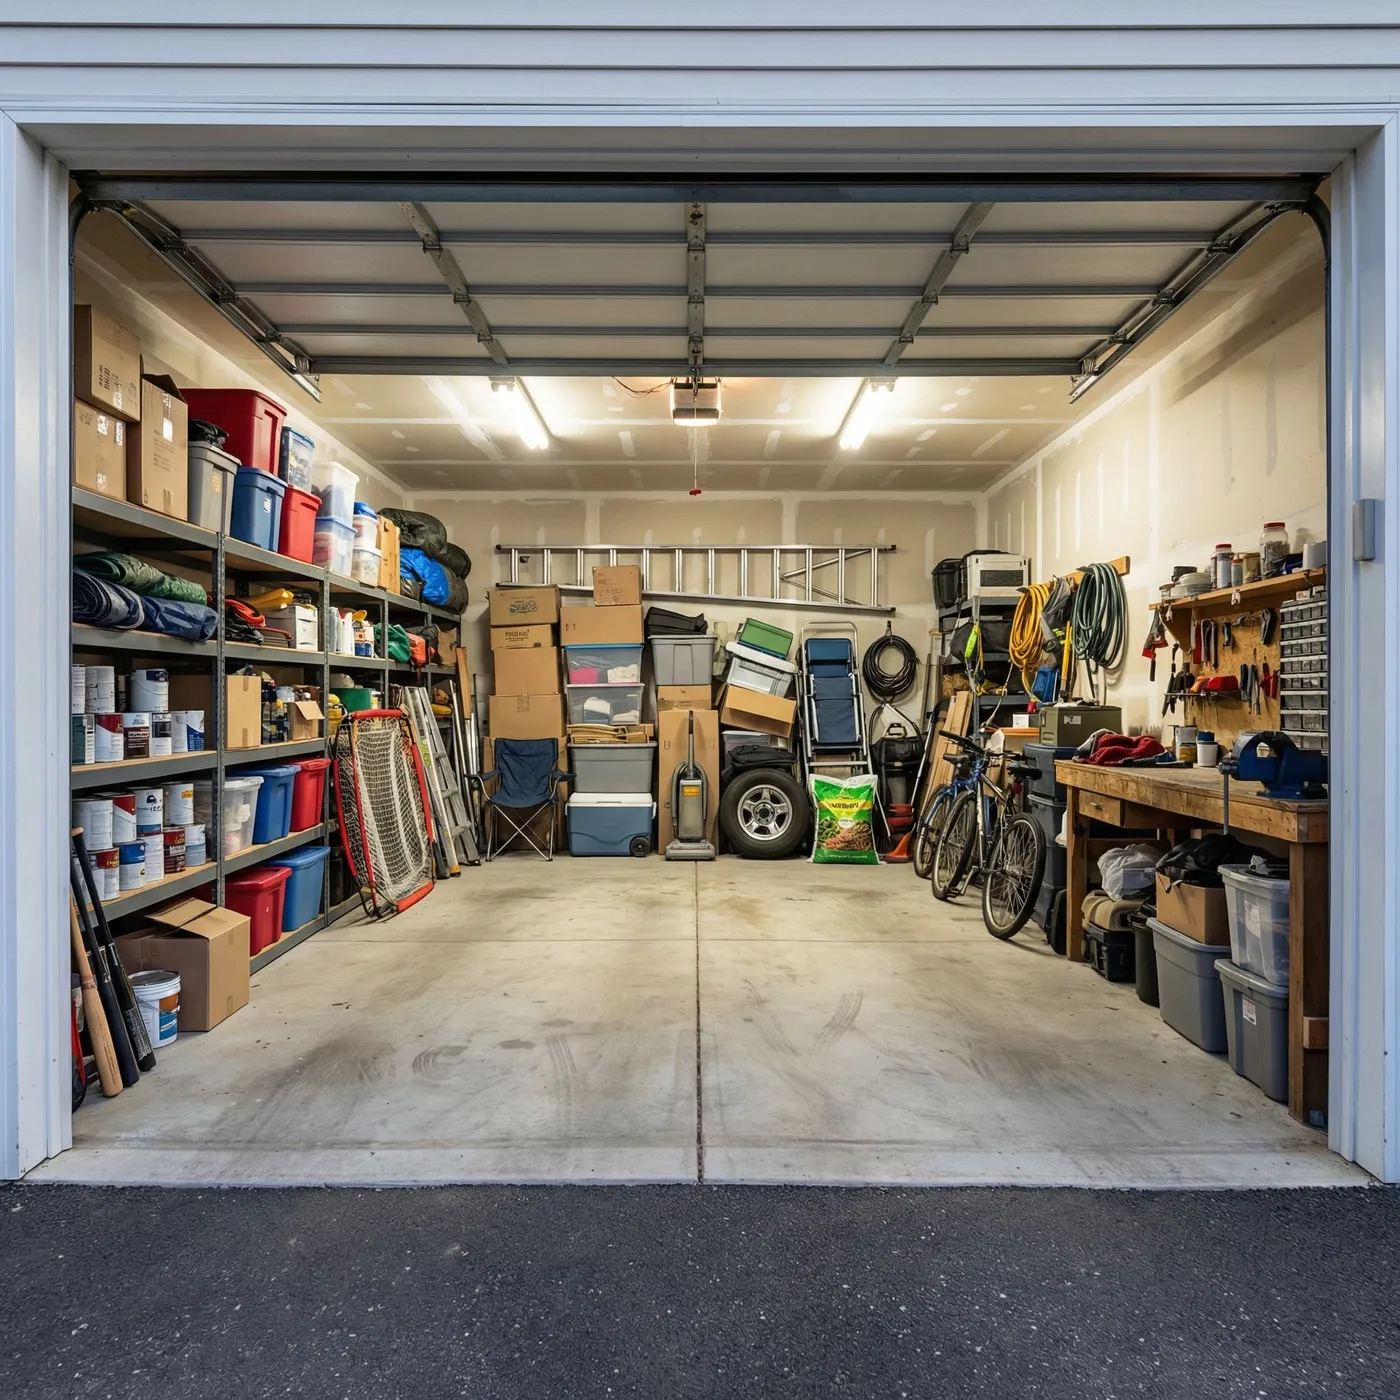
This is the quintessential get it done on a budget garage, and it’s fantastic. The unfinished drywall and concrete floor save a fortune on finishing costs. The star players are standard-issue metal shelving units ($100-$200 each) and a simple wooden workbench, which you can build yourself for under $150 in materials. The pegboard is just a 4×8 sheet from a hardware store. The beauty of this approach is its pure function-over-form ethos. You can build it out piece by piece from places like Harbor Freight or by watching Facebook Marketplace for used shelving.
|
📋 Copy HEX 🔗 Share |
Mounting a ladder on the wall is a simple project that frees up a ton of floor space. Here’s how to do it in under an hour:
- Locate the studs in your wall using a stud finder. You’ll need to hit at least two studs. Mark their centers with a pencil.
- Choose your hooks. For a heavy ladder, use large, heavy-duty screw-in storage hooks or a dedicated ladder hanging system.
- Pre-drill pilot holes into the center of the studs where you plan to place your hooks. This prevents the wood from splitting.
- Screw the hooks securely into the pilot holes. Make sure they are level with each other.
- Hang your ladder! Ensure it sits securely on the hooks and is flush against the wall.
12. Organized Tool Wall with Two-Toned Panels
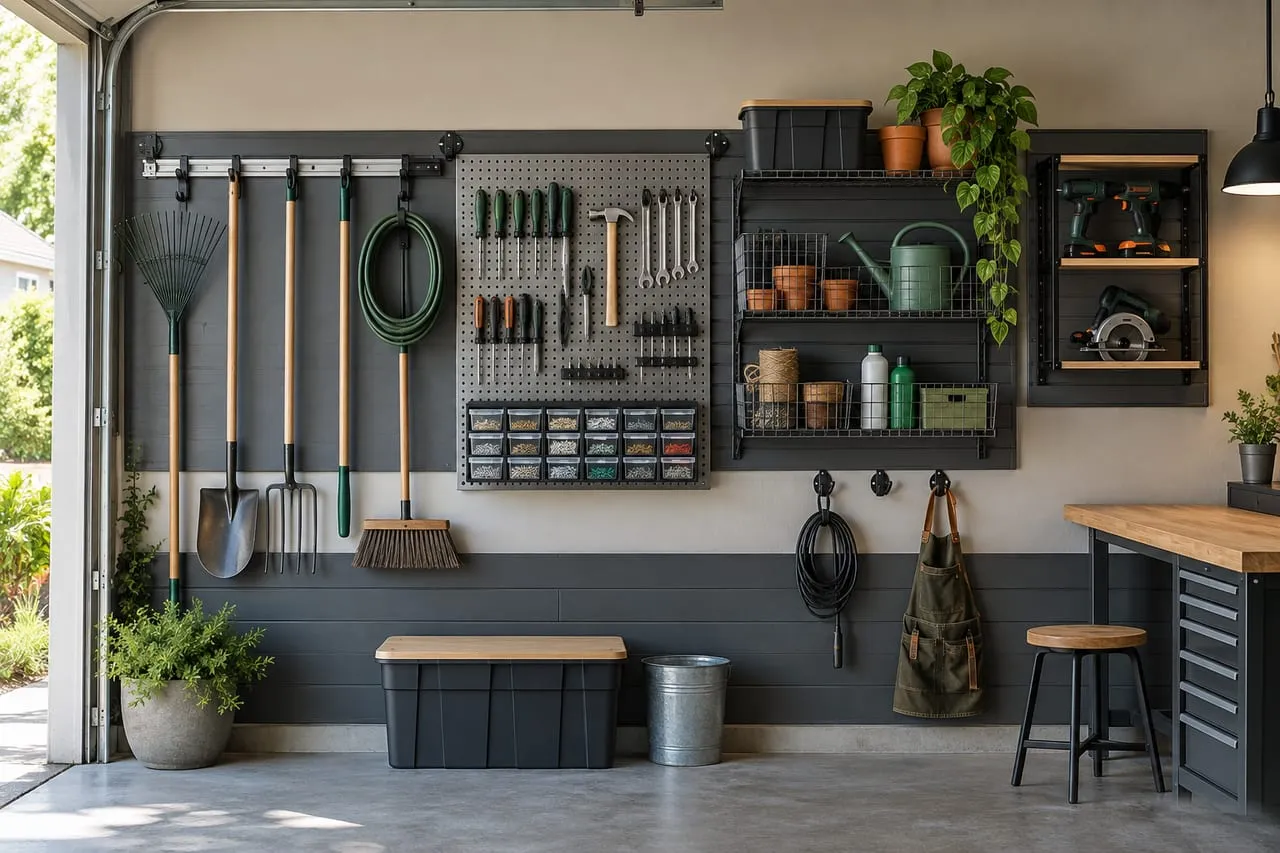
This wall achieves a sophisticated, custom look by following a simple formula: 60% Neutral Wall Panel + 20% Metallic Pegboard + 20% Dark Accents. The dark gray and beige horizontal panels create a strong, linear background. The metallic pegboard adds an industrial texture and a place for smaller tools. The dark gray workbench, black wire shelves, and black tool handles provide the grounding accent color. This balance prevents any one element from overwhelming the design, resulting in a look that feels curated and intentional, not just utilitarian.
|
📋 Copy HEX 🔗 Share |
When planning a tool wall, group your tools by task, not by type. Instead of having a section for screwdrivers and another for hammers, create a Picture Hanging Kit area with a hammer, nails, a level, and a screwdriver. Create another zone for Yard Work with gloves, trowels, and shears. This task-based organization makes you much more efficient because you can grab a collection of tools for a specific project in one motion instead of hunting and gathering from all over the wall.
13. Custom Garage Tool Wall and Storage Systems
Custom systems like this work so well because they are designed with a specific inventory in mind. Notice how there are dedicated holders for everything, from screwdrivers to power tools. This eliminates the visual chaos of mismatched hooks and hangers. The use of a consistent system across the entire wall, often from a single manufacturer, creates a powerful sense of order and rhythm. The combination of hooks, shelves, and bins within the same system ensures that every single item has a logical, purpose-built home.
|
📋 Copy HEX 🔗 Share |
A fully custom wall organization system can be pricey, but you can get 90% of the look for a fraction of the cost. Start with large sheets of standard pegboard or install your own French cleat system using plywood. Both options offer incredible flexibility. For the accessories, look for multi-piece hook assortment kits online or at hardware stores—they offer much better value than buying hooks one by one. You can also build your own custom holders for specific tools out of scrap wood to mount on your cleat or pegboard system.
14. Maximizing Vertical Space with Overhead Garage Storage
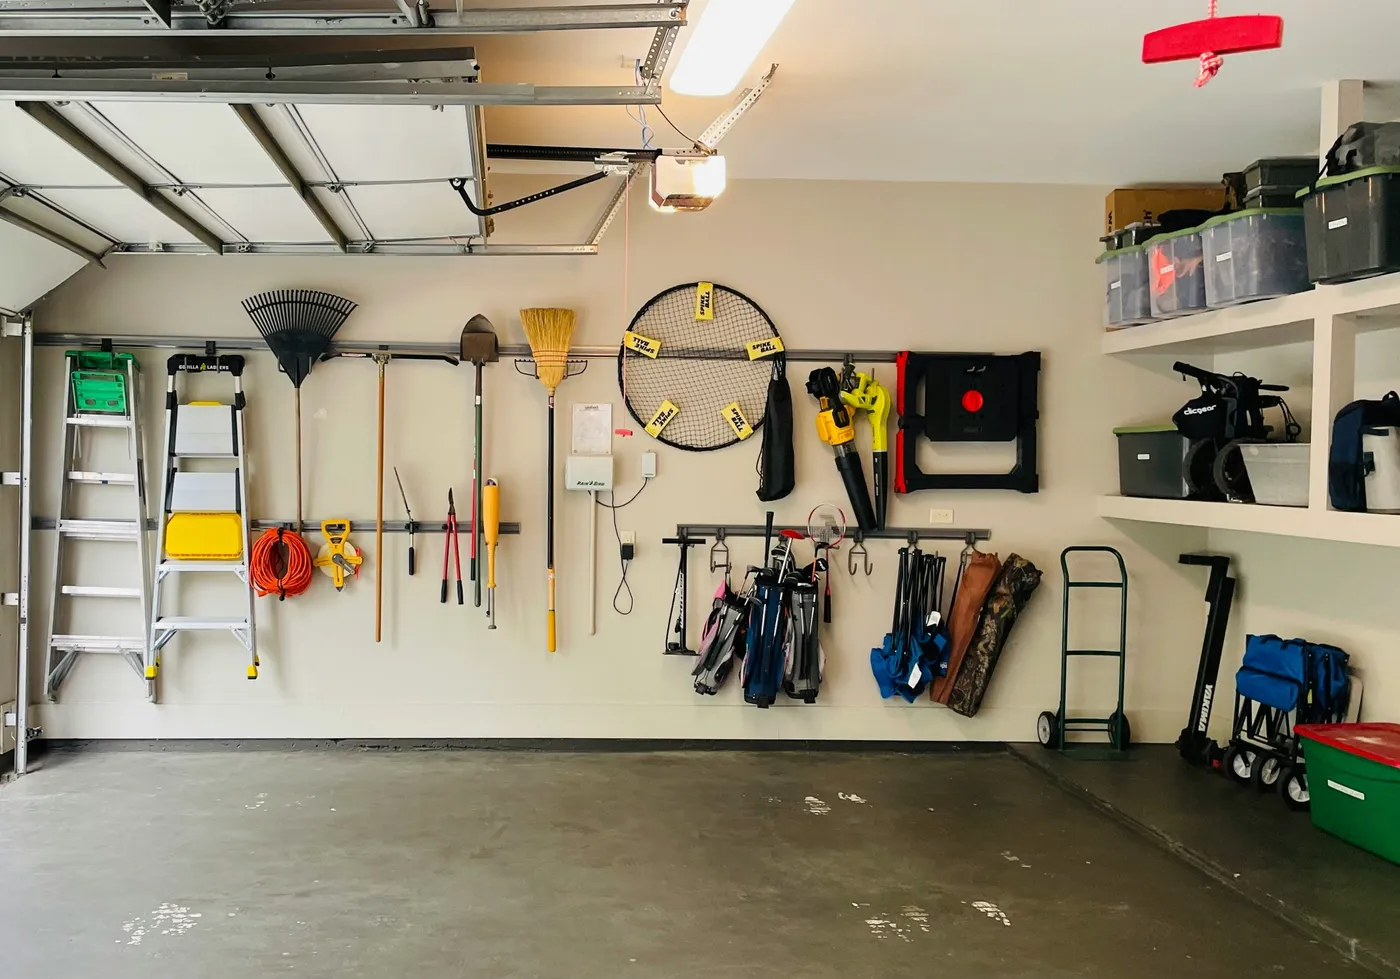
The most important element here is the commitment to using the upper 3-4 feet of the garage. By installing deep, sturdy shelving high on the walls, this space effectively doubles its storage capacity without sacrificing any floor space. This attic space is perfect for seasonal items, camping gear, and anything you don’t need to access daily. It keeps the lower, more accessible areas free for tools and equipment that are in constant rotation. Without these high shelves, all those bins would be stacked on the floor, making the garage feel cluttered and cramped.
|
📋 Copy HEX 🔗 Share |
Overhead storage is a game-changer, but safety is non-negotiable. These shelves must be installed directly into studs or ceiling joists with heavy-duty lag bolts—never just into drywall with anchors. Overloading them is a serious risk. Pay close attention to the manufacturer’s weight limits and distribute the weight evenly. Use high-quality, sturdy bins with securely latching lids. The last thing you want is a cheap bin failing and dropping its contents onto your car (or a person) below.
15. Full-Wall Slatwall System for Garden Tools and Bikes
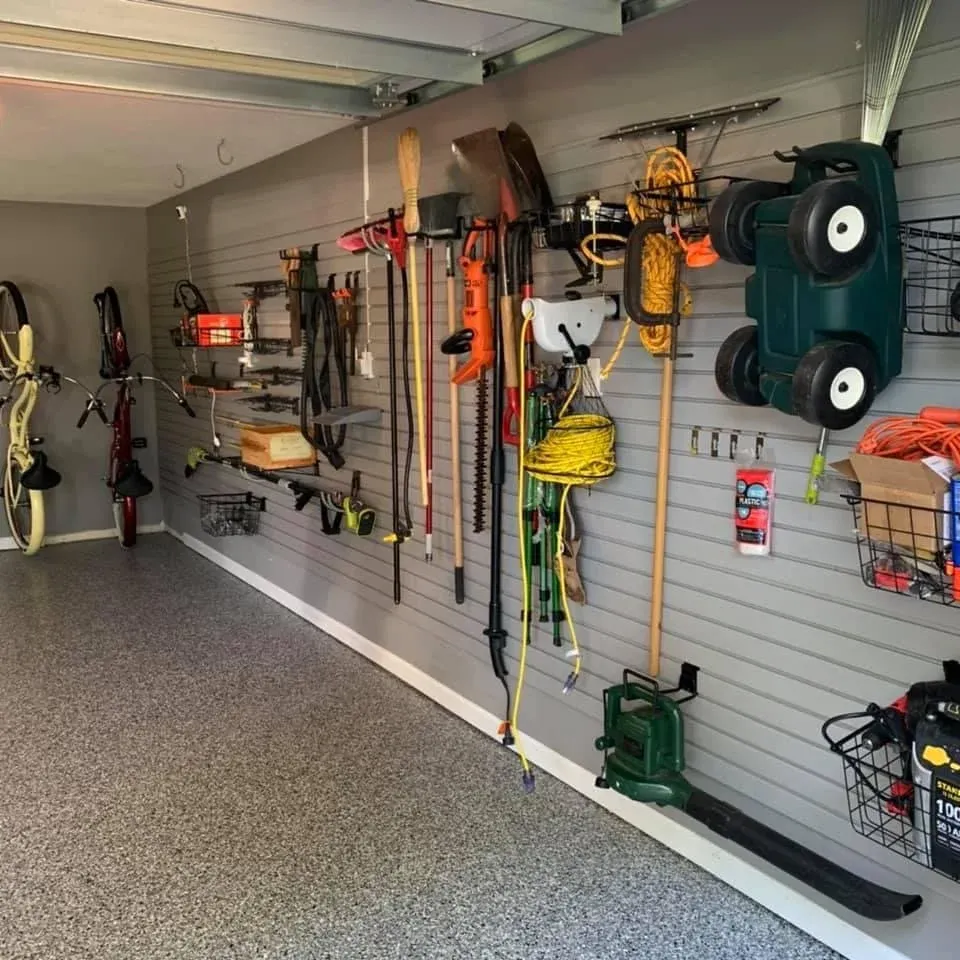
Installing a slatwall system seems intimidating, but it’s a manageable DIY project. Here’s a quick guide for a single 4×8-foot panel section:
|
📋 Copy HEX 🔗 Share |
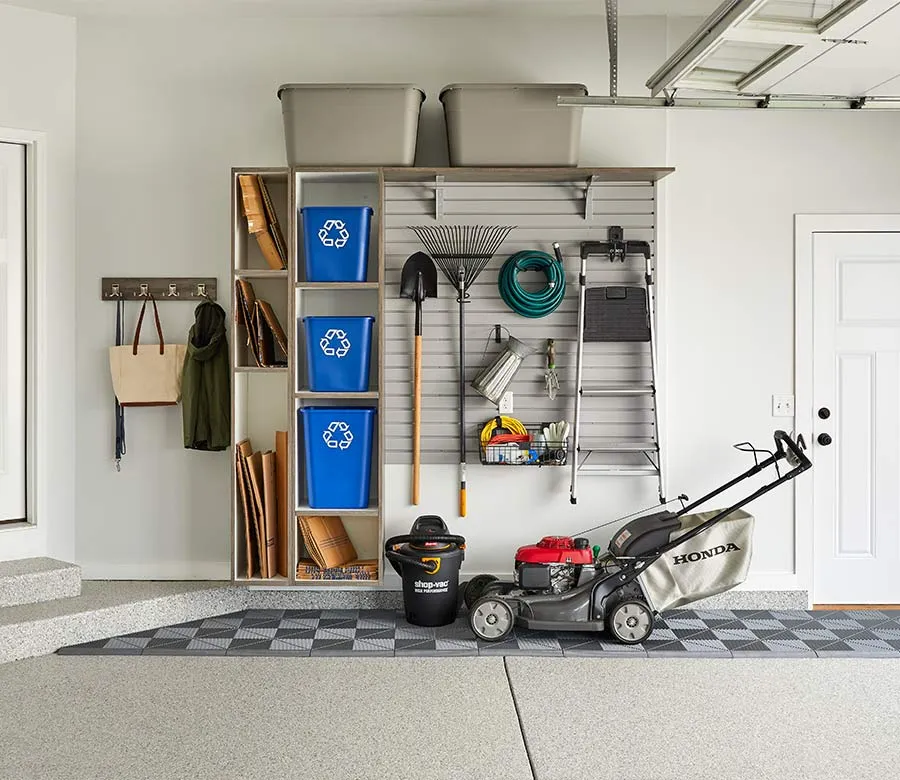
This system’s genius lies in its visual and functional unity. By covering a large portion of the wall with a single material—the gray slatwall panels—it creates a clean, uniform backdrop. This makes the items hanging on the wall feel like a curated collection rather than random clutter. The speckled epoxy floor complements the gray of the panels, and the consistent use of black for hooks and baskets provides a sharp, organizing accent color. It turns a wall of stuff into a purposeful design feature. Check out the similar system in Idea #4 with wood-toned panels.
16. Utilitarian Gray Garage with Grid and Wire Shelving
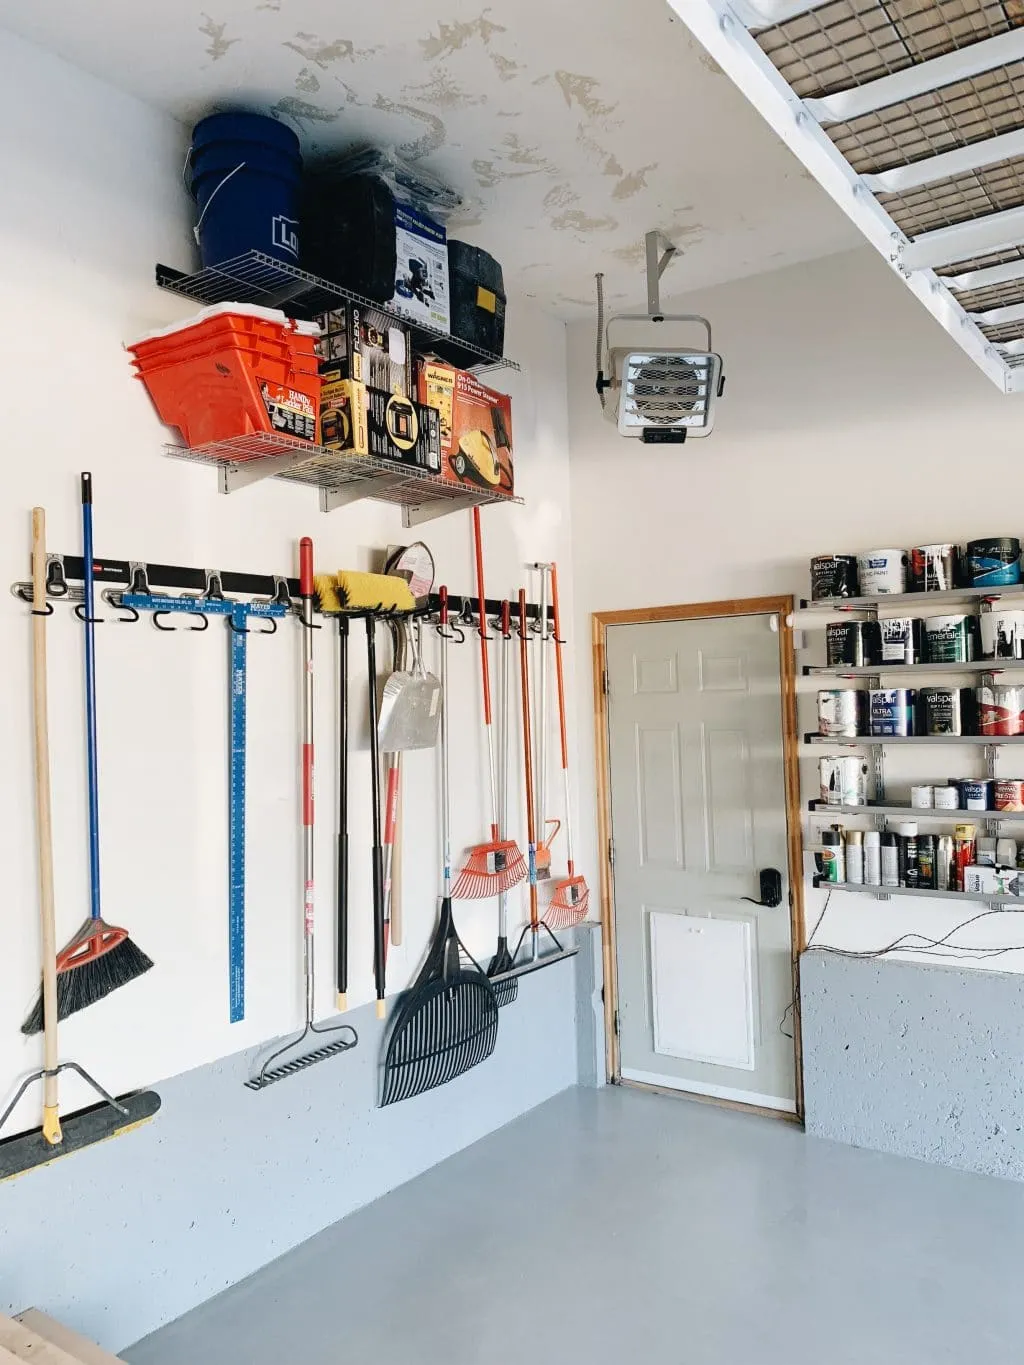
When organizing a space with a monochrome gray palette like this one, use lighting to create depth and interest. The recessed heater is a functional element, but the main overhead lighting should be bright and evenly distributed to prevent the gray from feeling flat or gloomy. Consider adding task lighting, like an LED strip above a workbench or a focused spotlight on the tool grid. This not only improves functionality but also creates highlights and shadows that make the simple, utilitarian space feel more dynamic and intentionally designed.
|
📋 Copy HEX 🔗 Share |
This type of organization, which relies on wall-mounted grids and overhead shelving, is ideal for a narrow, single-car garage. Because the storage is kept relatively shallow (the tool grid is only a few inches deep, and the overhead shelves don’t come down too far), it preserves the maximum amount of width for your car. In a tight space (10-12 feet wide), this is far more effective than trying to line the walls with deep, 24-inch shelving units, which would make opening car doors nearly impossible.
17. Workshop Corner with Pegboard and Blue Bin System
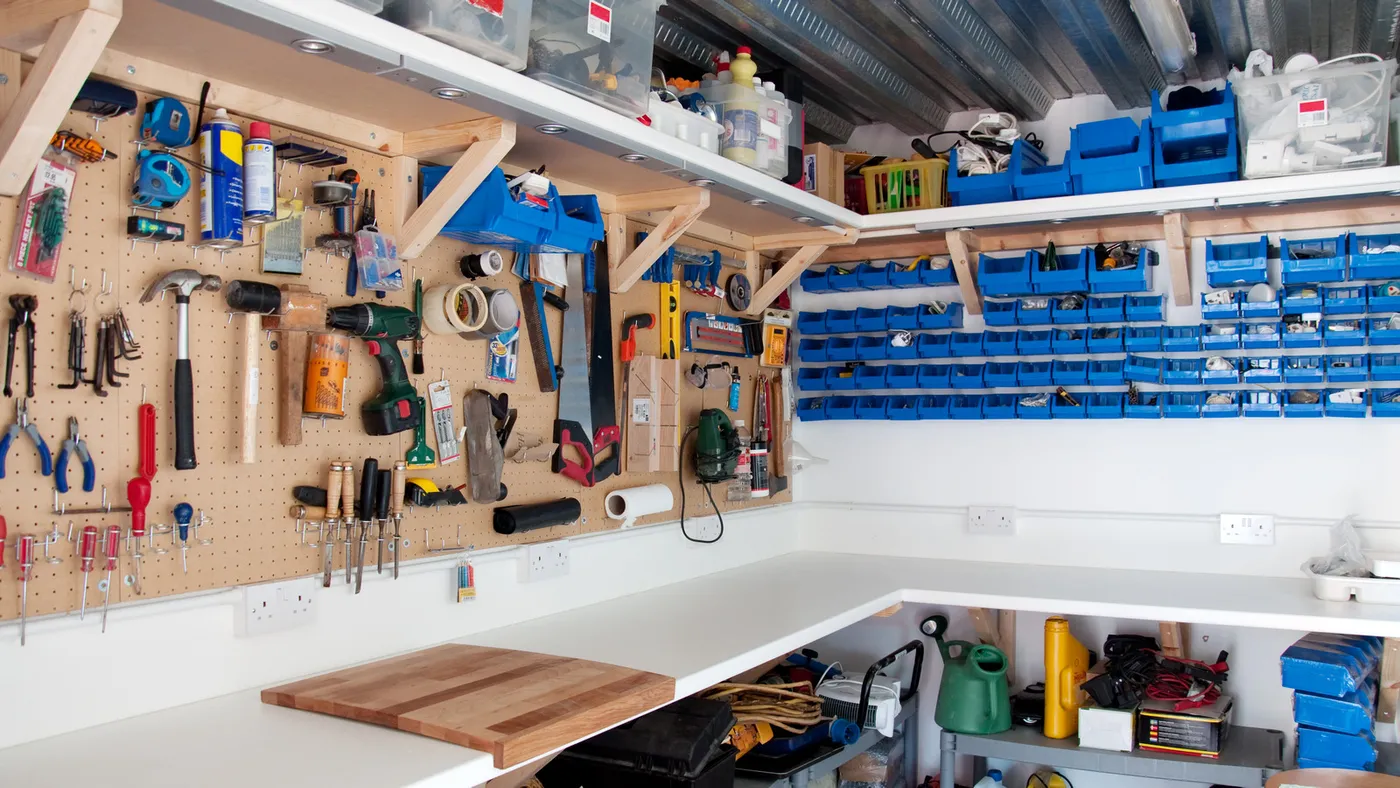
The wall of blue plastic bins is the undeniable heart of this workshop’s organization. While the pegboard is great for tools, this extensive system of small, open-front bins is what makes finding tiny items—screws, nails, washers, electrical components—fast and efficient. It’s a visual indexing system that is far superior to rummaging through drawers or coffee cans. The sheer quantity and uniform color of the bins turn a potentially chaotic collection of small parts into a clean, graphic, and incredibly functional wall feature.
|
📋 Copy HEX 🔗 Share |
You can replicate this hyper-organized bin system for less than you think. While specialty wall-mounted bin systems can be expensive, you can get the same functionality with a DIY approach. Look for stackable, open-front bins from places like Uline, Harbor Freight, or even Amazon. Then, build simple, narrow shelves out of plywood to hold them. This allows you to customize the shelf height to fit the exact bins you choose and costs significantly less than a pre-made system. For a similar pegboard setup, see Idea #20.
18. Rustic Tool Wall with Horizontal Wood Planks
This tool wall feels so satisfying because of its tactile, rustic simplicity. The warm wood planks provide a rich, textured background that makes the metal and plastic of the tools pop. Unlike a uniform pegboard, the lines of the planks create a strong horizontal rhythm that guides the eye across the display. The organization feels less rigid and more organic; tools are placed where they fit best, creating a composition that is both functional and aesthetically pleasing. It’s a perfect blend of workshop utility and modern farmhouse style.
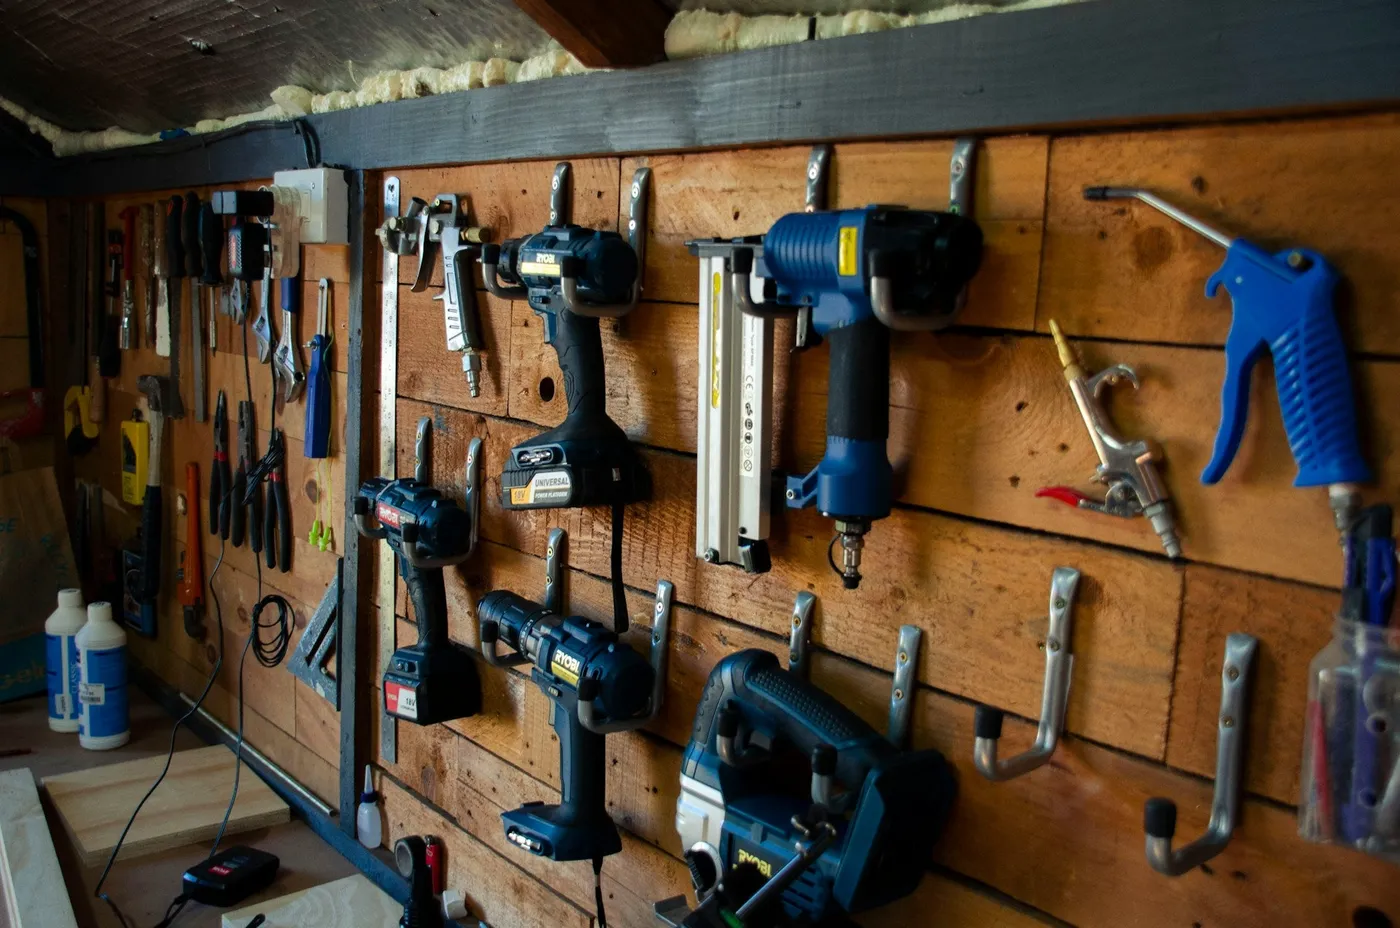
|
📋 Copy HEX 🔗 Share |
Creating a wood plank wall like this is a great weekend project. Estimated cost: $50-$150. Time: 3-4 hours.
- Choose your wood: Use inexpensive 1×4 or 1×6 pine or cedar boards.
- Prepare the boards: Lightly sand them to remove splinters, but keep the rustic texture. You can leave them raw, stain them, or apply a clear sealant.
- Mark your studs: Use a stud finder and pencil to mark the vertical stud locations on your wall.
- Install the planks: Starting from the bottom, use a level to position your first board. Nail it into the studs with a brad nailer. Leave a small gap (the width of a nickel works well) between boards as you work your way up the wall.
- Add hooks: Screw your tool hooks directly through the planks and into the wall behind them for maximum strength.
19. Detailed Workshop Organization with Pegboard and Bins
For this level of micro-organization, think like a retailer. The goal is visibility and accessibility. Use clear stacking bins and multi-drawer organizers for all your small hardware (screws, nuts, bolts). Label everything, even if you think you’ll remember. For pegboard hooks, use small zip ties or specialty peg locks to keep them from pulling out every time you grab a tool. This small step saves a massive amount of daily frustration and keeps your wall looking pristine. The mesh bags are a brilliant touch for holding irregularly shaped items.
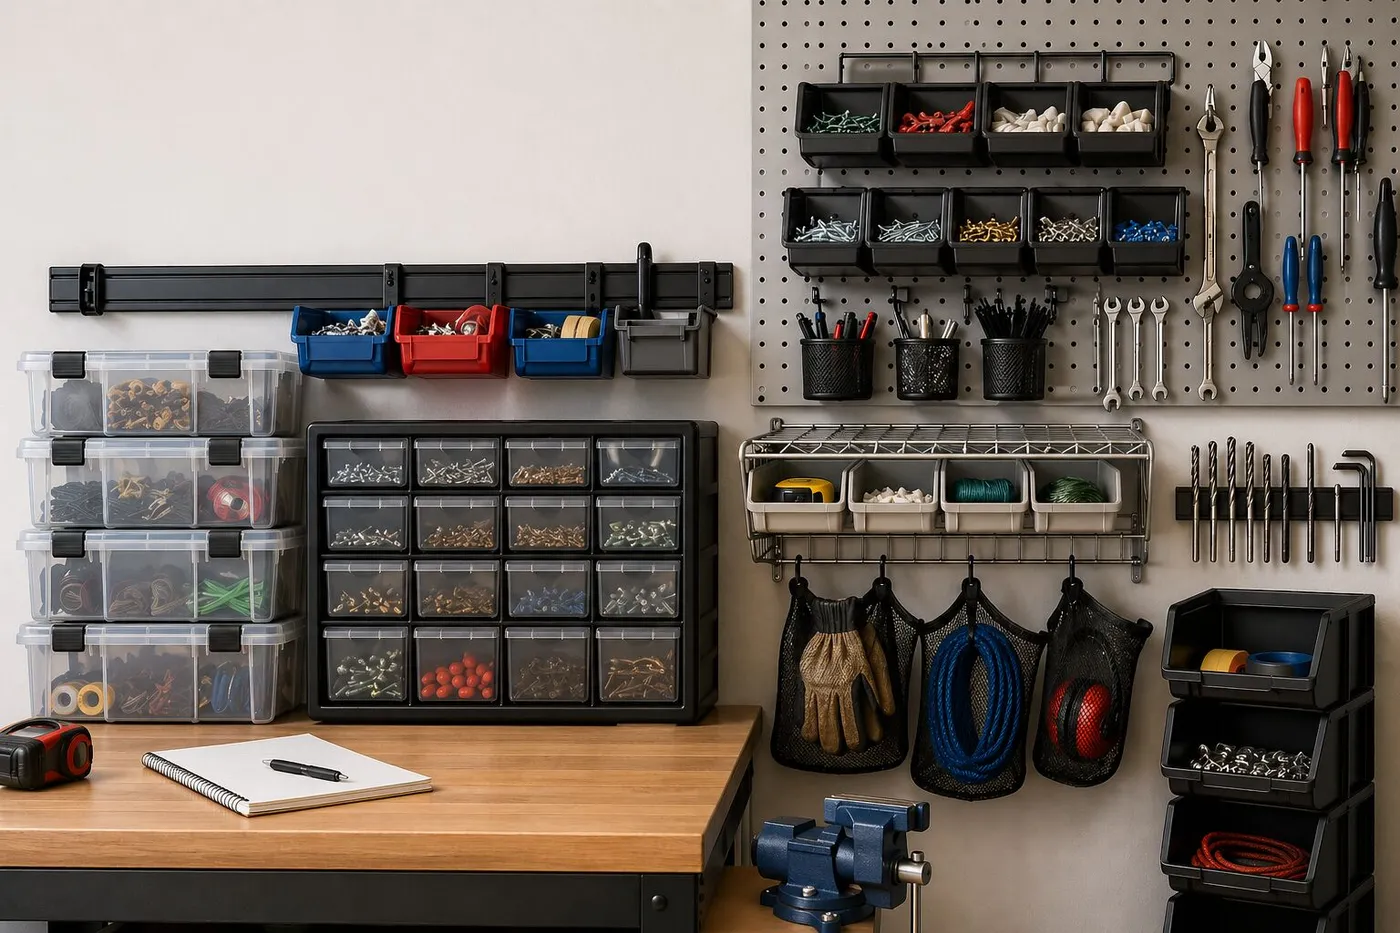
|
📋 Copy HEX 🔗 Share |
This look is all about investing in the small stuff. While the workbench is a core piece, the real cost is in the dozens of containers that make the system work. This is a very scalable, budget-friendly approach.
- Main Furniture (Workbench): $150 – $400
- Wall Treatment (4×8 Pegboard Sheet & Hooks): $75 – $200
- Storage Containers (Clear Bins, Drawer Organizers, Hanging Bins): $200 – $500
- Lighting (Task light for bench): $40 – $100
- TOTAL: $465 – $1,200
- Budget alternative: Build your own simple workbench from 2x4s and plywood for under $100. Collect glass jars for screw storage instead of buying new plastic bins.
20. Vibrant Red Pegboard Tool Storage Wall
The bold, bright red pegboard is everything here. Color is one of the most underutilized tools in garage design, and this is a perfect example of how to use it effectively. The red is energetic and motivating, turning a simple tool wall into a powerful focal point. It makes the metallic silver of the wrenches and the dark handles of the pliers stand out, making them easier to spot. If this wall were white or gray, it would be functional. Because it’s red, it has personality and style.
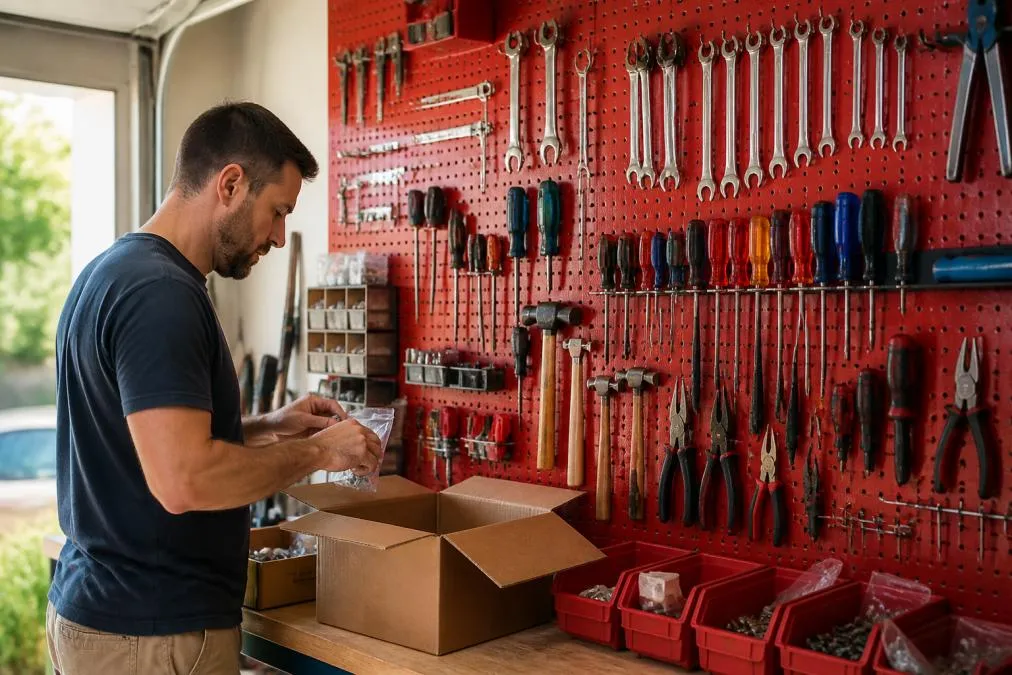
|
📋 Copy HEX 🔗 Share |
The visual formula for this energetic space is surprisingly simple: 70% Bold Color + 20% Neutral Surface + 10% Metallic Accents. The red pegboard is the dominant feature. The light wood workbench provides a neutral, warm surface that keeps the red from being overwhelming. The tools themselves provide the metallic accents that catch the light and add a bit of sparkle. You could easily swap the red for a deep navy blue or a vibrant yellow and achieve the same dynamic effect, as long as you keep the ratios intact.
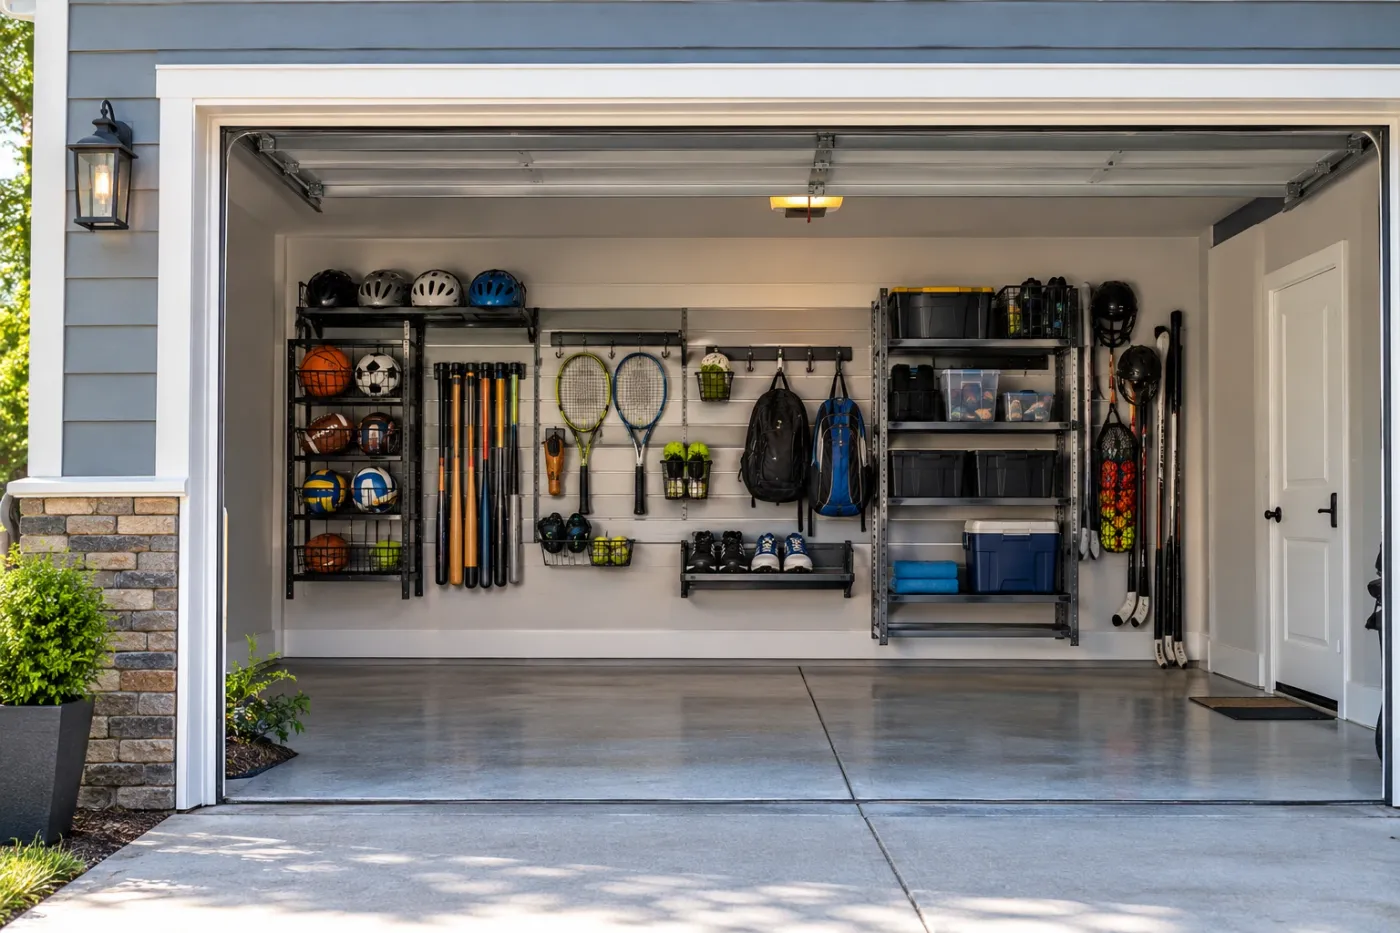
21. Organized Sports Equipment on a Slatwall System
This system works because it uses specialized accessories for each type of equipment. Instead of generic shelves, you see deep wire baskets perfect for holding a collection of basketballs and footballs, curved hooks designed for helmets, and racks that can hold multiple bats or rackets. This specificity is key. It treats each piece of sports gear as a unique item with its own storage needs, which ultimately leads to a much more organized and easy-to-use system. It’s the opposite of a one-size-fits-all approach. For more general storage, compare with the shelving in Idea #5.
|
📋 Copy HEX 🔗 Share |
A system like this is incredible for keeping kids’ sports gear from taking over the house, but it only works if you teach them how to use it. The biggest point of failure for any organization system is the users. Have a family meeting, show everyone where their helmet, bat, and ball goes, and make it a rule that things get put back immediately after use. If the hooks are too high for younger kids to reach, this system will fail. Adjustability is key; position hooks for balls and gloves at a kid-friendly height to set them up for success.
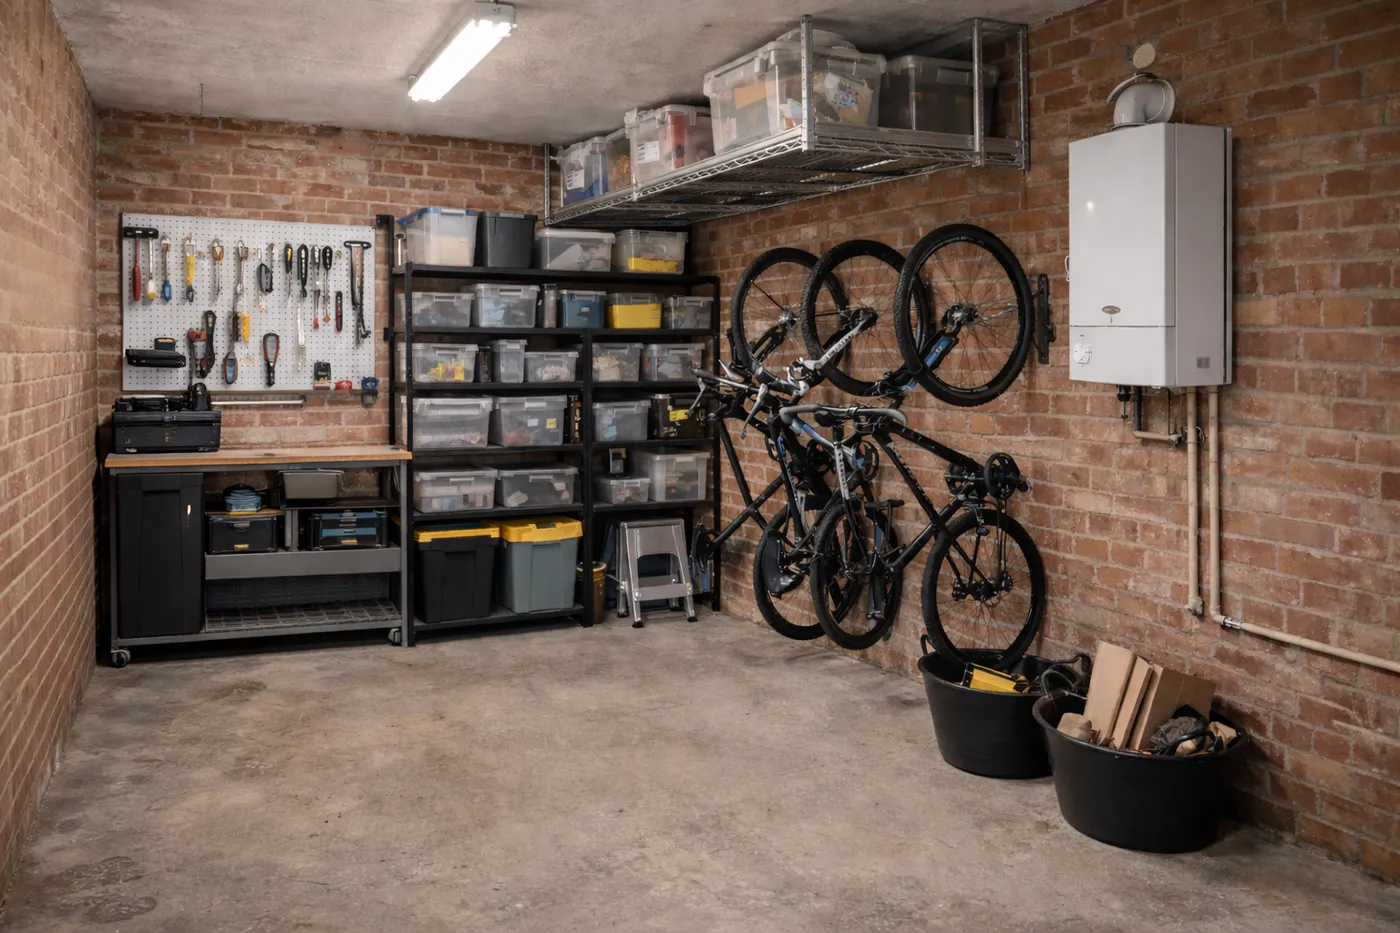
22. Industrial Exposed Brick Garage with Tiered Storage
Exposed brick adds incredible character to a garage, but it’s not without its quirks. Brick is porous and can produce a fine red dust, so it’s not the ideal environment for storing sensitive items without proper containers. Sealing the brick with a matte-finish masonry sealer can help mitigate the dust. Mounting anything to it requires a hammer drill and masonry anchors, which is more involved than drilling into drywall studs. However, its durability is unmatched—you’ll have a hard time damaging a brick wall with a stray bicycle pedal.
|
📋 Copy HEX 🔗 Share |
This eclectic mix of storage solutions is well-suited for a long, narrow garage, often found in older homes or townhouses. The exposed brick already provides a strong vertical element. By using a combination of tall, floor-standing shelves for bulk items, wall-mounted pegboards for frequently used tools, and bike racks to get large items off the floor, you can pack a lot of storage into a small footprint without making the space feel claustrophobic. The key is to leave a clear path down the center for walking and working.
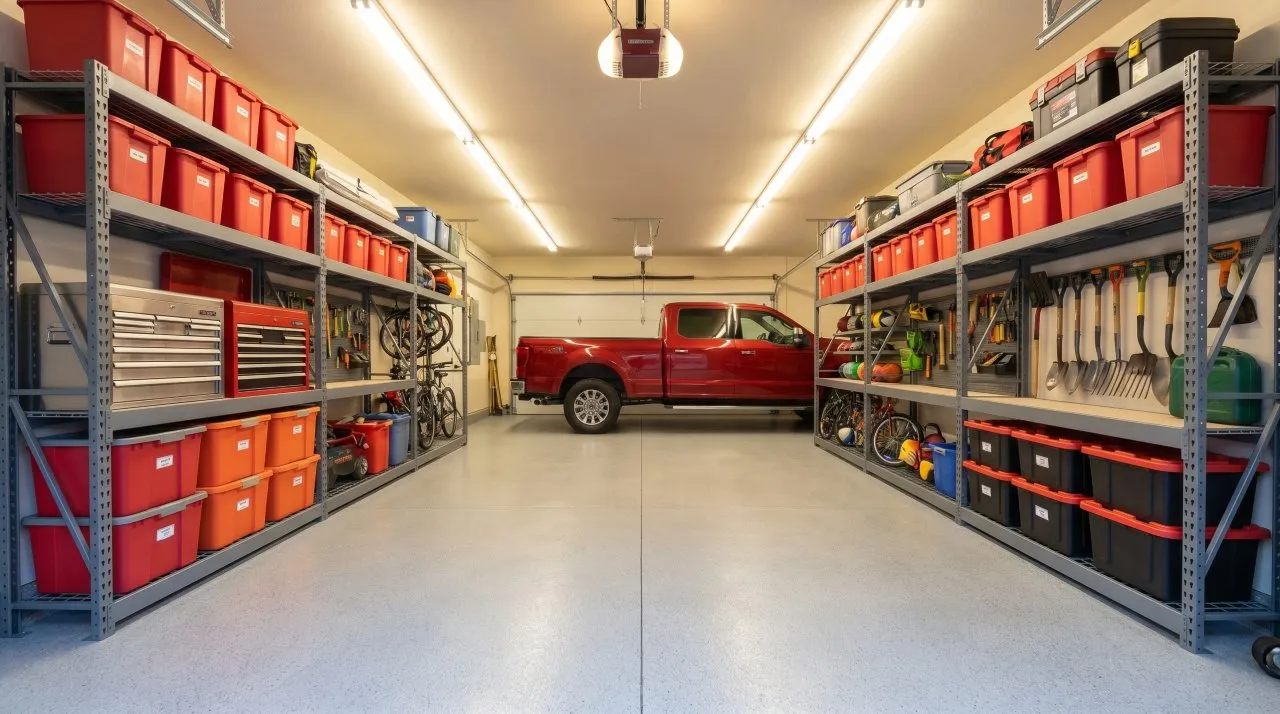
23. Efficient Two-Car Garage with Color-Coded Bins
When you have this much open shelving, color-coding your bins is a simple hack that makes finding things dramatically faster. Assign a color to a category: red for automotive, orange for camping, black for tools, etc. It creates a visual shorthand that allows your brain to immediately scan for the right section without having to read a single label. For even better results, use a label maker to add specific contents to each bin. The combination of color and text is the ultimate organizational one-two punch.
|
📋 Copy HEX 🔗 Share |
This garage feels so orderly, despite being packed with stuff, due to the principle of repetition. The identical gray metal shelving units are repeated down both sides of the garage, creating a strong, rhythmic grid. Within that grid, the storage bins are also repeated in shape and size. This powerful sense of order and predictability makes the space feel calm and under control. The wide, clear aisle down the middle, created by parking the truck perfectly in the center, acts as a crucial negative space that allows the organized chaos on the shelves to breathe.
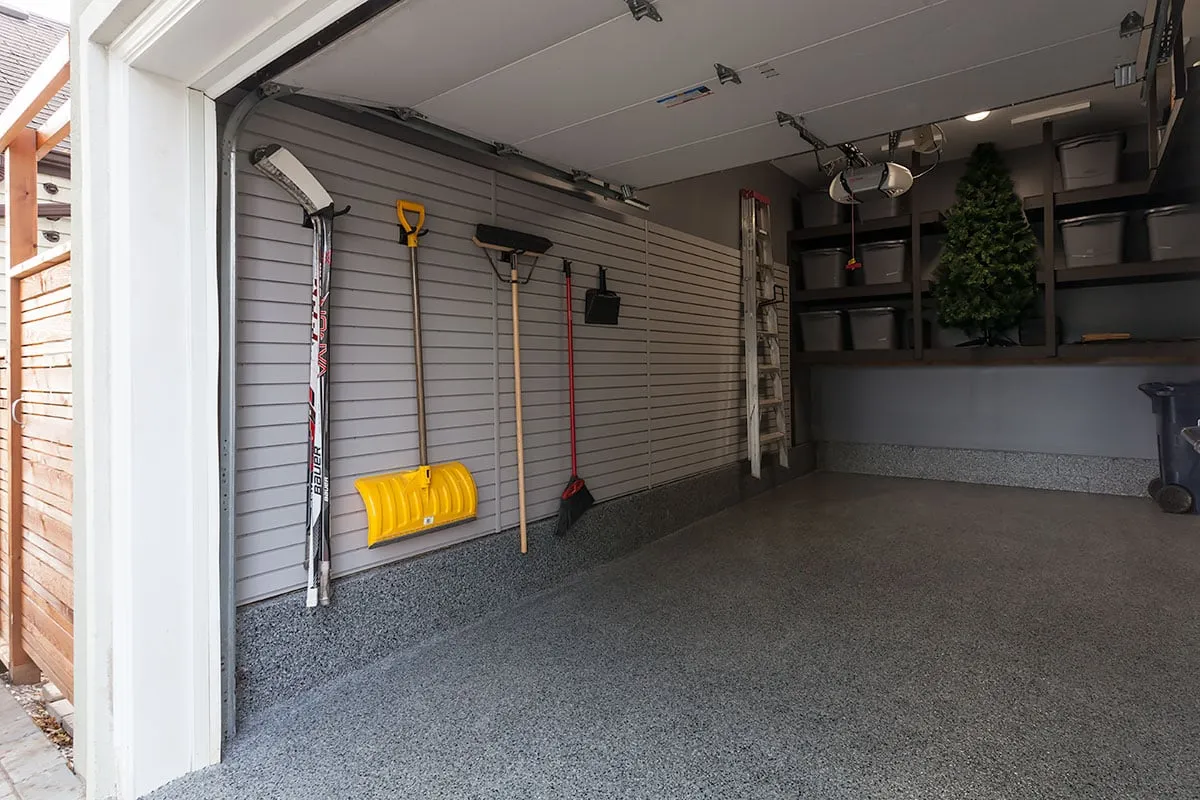
24. Clean Slatwall with Open Wood Shelving Above
This is a beautiful example of mixing materials to create a warm, modern look. The formula is simple: 50% Utilitarian Slatwall + 30% Warm Wood + 20% Neutral Floor/Wall. The gray slatwall provides the functional backbone for hanging tools. The open wood shelving above introduces a natural, organic element that feels more like interior design than garage storage. The speckled gray epoxy floor and white walls provide a quiet, neutral canvas that allows the slatwall and wood to be the stars. The little pop of green from the plant is the perfect finishing touch.
|
📋 Copy HEX 🔗 Share |
Before you commit to a slatwall and shelving combo, think about what you actually need to store. Here’s a quick checklist:
- Inventory your long-handled items: Do you have enough rakes, shovels, and brooms to justify a large slatwall section?
- Assess your bin-worthy items: Do you have lots of smaller items that need to be contained in bins on shelves, or do you mostly have larger, individual items?
- Consider accessibility: Are you comfortable using a step stool to access items on the higher wooden shelves? If not, they should be reserved for deep storage or decor.
25. Light Blue Garage with Wooden Shelves and Diamond Plate Floor
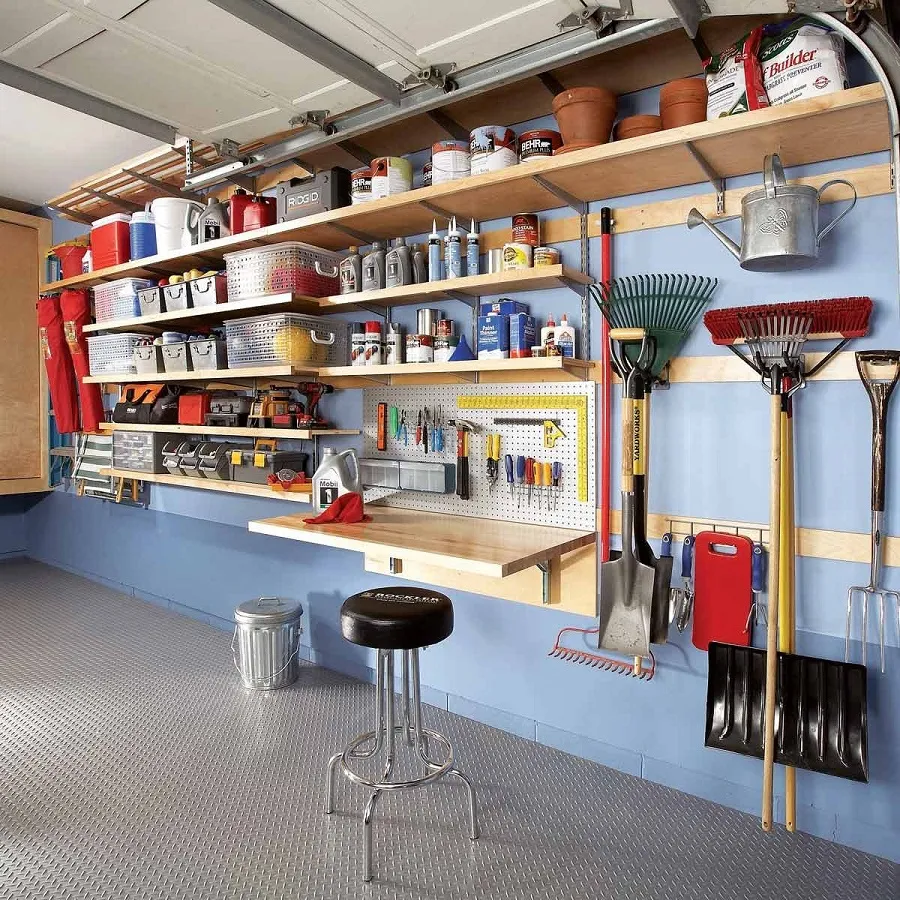
The diamond plate floor is the element that sets this garage apart. While the light blue walls and wood shelves are charming, the metallic, industrial flooring adds an unexpected edge. It’s incredibly durable, resistant to spills, and easy to clean, but its main contribution here is textural and stylistic. It provides a cool, reflective contrast to the soft blue walls and warm wood, creating a unique personality that is part workshop, part retro diner. It’s a bold choice that signals this is a space meant for serious projects.
|
📋 Copy HEX 🔗 Share |
We’re seeing a move away from boring gray concrete floors in garages. As people spend more time in their workshops and garages for hobbies, they want the space to feel inspiring. Flooring options like diamond plate tiles, colorful epoxy coatings, and even durable vinyl planks are becoming more common. It’s part of the larger trend of finished garages where every surface is considered. A statement floor has staying power because it’s a foundational element that adds both high function and high style.
26. Flexible Slatwall with a Mobile Workbench
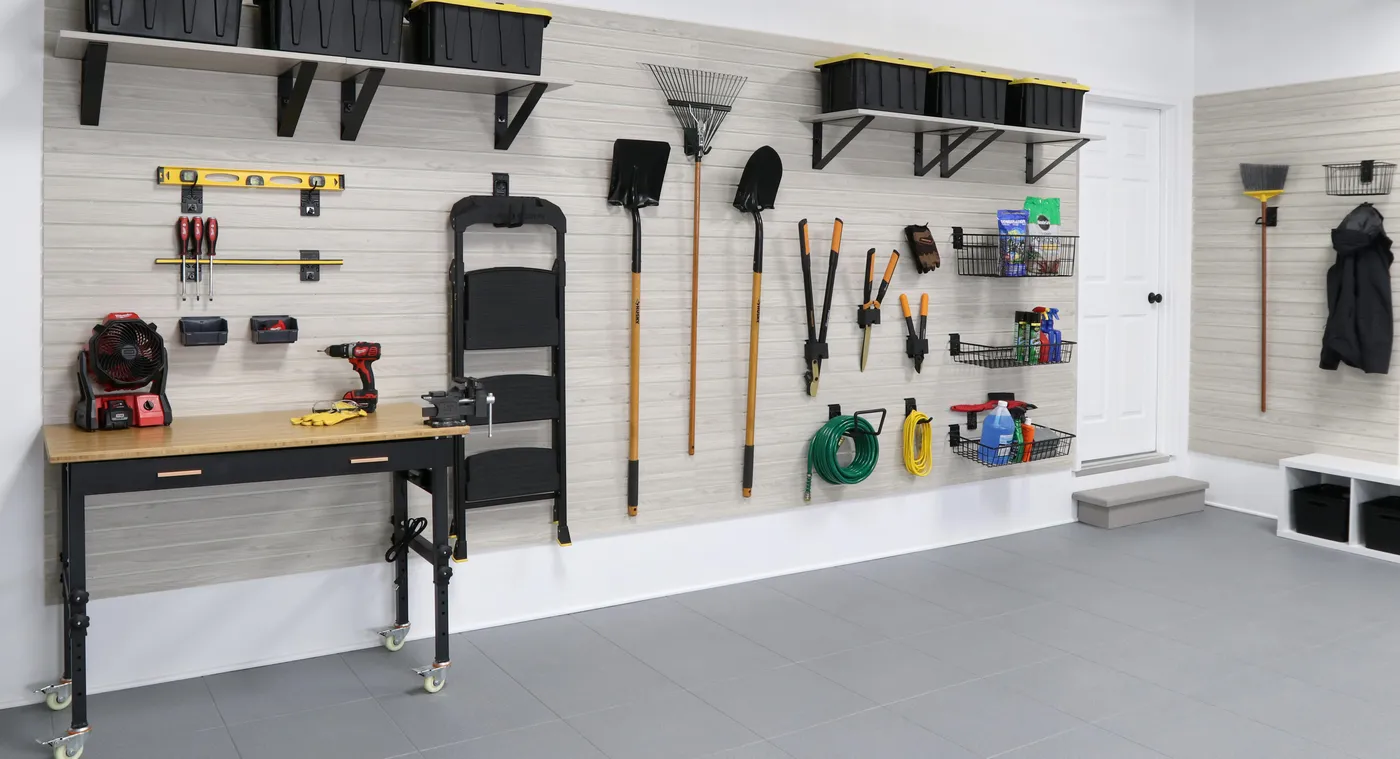
The combination of a full slatwall system and a mobile workbench is the ultimate power couple for a flexible garage space. The slatwall allows for infinite re-configuration of hooks, baskets, and shelves, so the storage can adapt as your needs change. The mobile workbench on casters means your primary work surface isn’t locked to one wall. You can roll it to the middle of the garage for a big project, move it closer to your tools, or push it completely out of the way to make room for a car. This pairing provides maximum adaptability. Compare this to the fixed workbench in Idea #27.
|
📋 Copy HEX 🔗 Share |
A mobile workbench is amazing for flexibility, but make sure you get one with high-quality, locking casters. Cheaper casters can wobble, stick, or fail to lock securely, which is incredibly frustrating and potentially dangerous when you’re working. Also, be realistic about your floor. If your garage floor is heavily cracked, un-level, or has a steep slope, a mobile bench will be a constant source of annoyance as it rolls away or sits at an angle. A perfectly level floor is the best friend of any mobile furniture.
27. Clean Garage with Dark Gray Cabinets and Slatwall
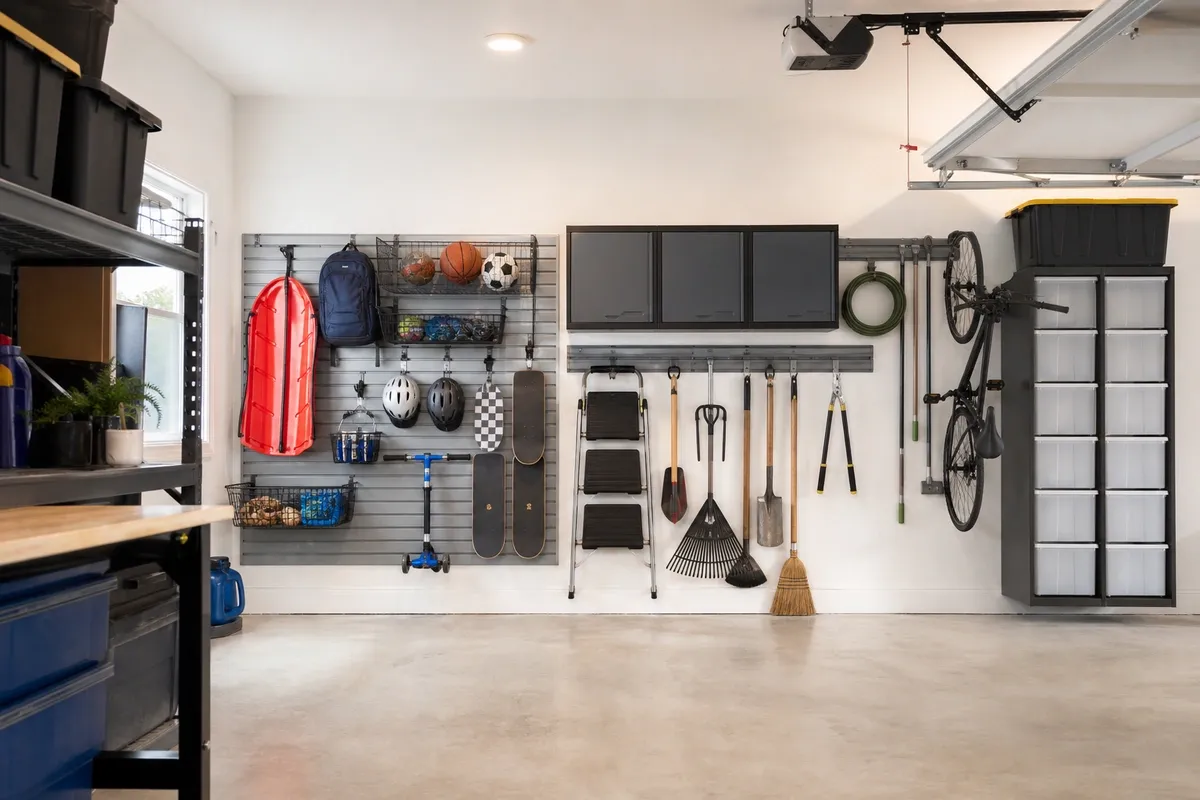
This space feels polished and high-end thanks to a balanced design recipe: 40% Closed Storage + 40% Open Slatwall + 20% Open Wall Space. The dark gray overhead and tall cabinets hide the visual clutter, creating clean, solid blocks of color. The light gray slatwall offers functional, accessible storage for items you want to grab quickly. Leaving a good amount of the white wall exposed prevents the storage systems from overwhelming the room, making it feel spacious and breathable. It’s a perfect mix of hidden and display storage.
|
📋 Copy HEX 🔗 Share |
When combining closed cabinets and an open slatwall system, use the cabinets for things you want to protect from dust and grime. This includes nicer power tools, car cleaning supplies, and anything in a cardboard box. The open slatwall is perfect for items that are frequently dirty or wet, like garden tools and sports equipment, as it allows them to air dry and keeps the mess contained to an easy-to-clean surface. This strategic placement keeps your whole system cleaner and more functional in the long run.
28. Woodworker’s Wall with Custom Tool Storage
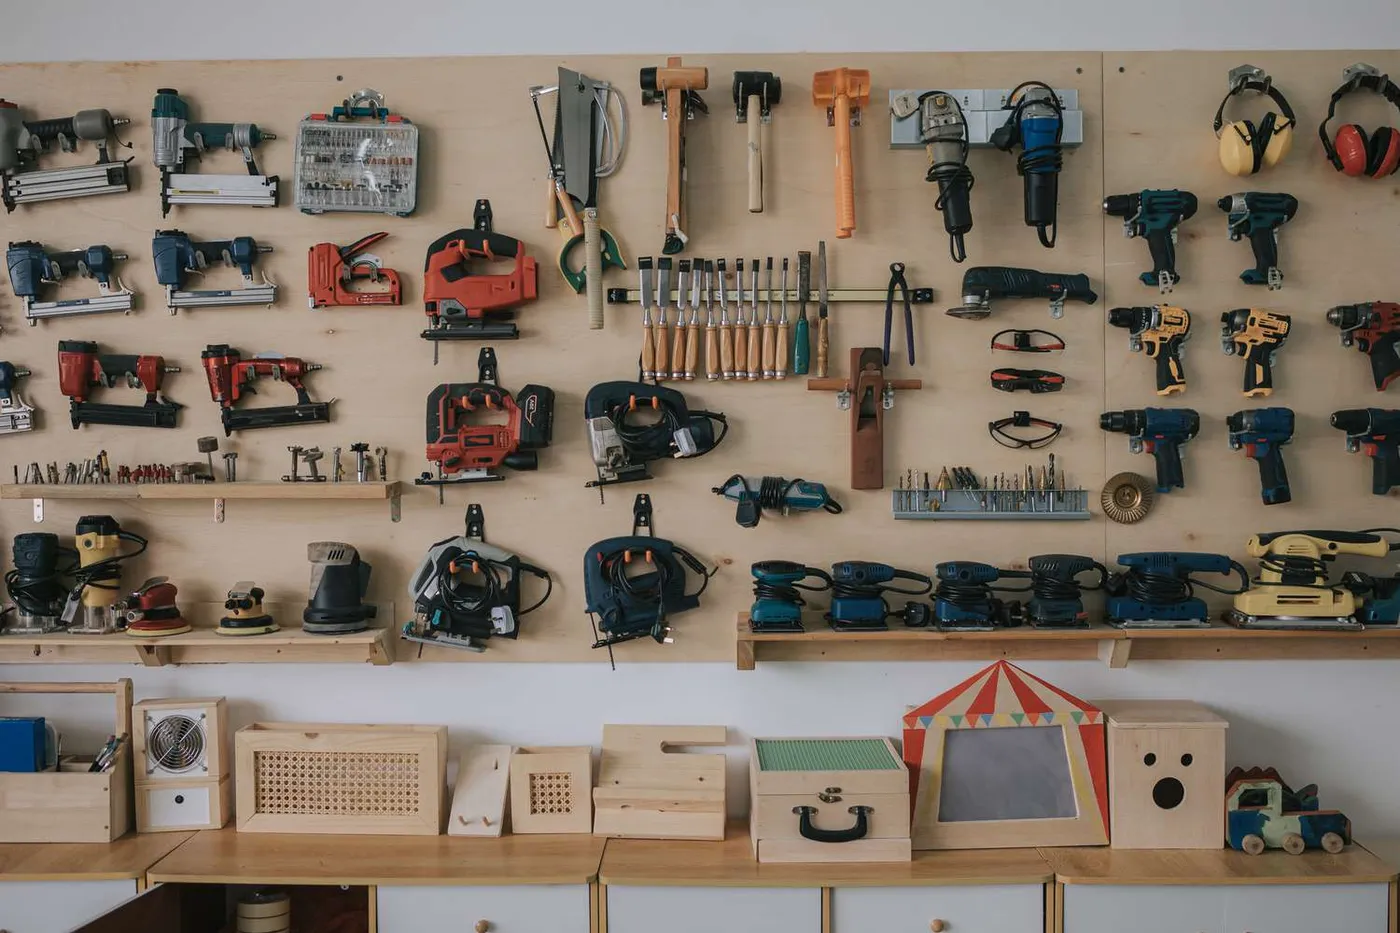
This is more than just storage; it’s a celebration of the craft. The entire wall is paneled in light wood, matching the workbench and custom storage boxes. This creates a completely immersive, workshop-focused environment. The tools aren’t just stored; they are displayed with care, each in its own specific place. The organization is so meticulous that the wall itself becomes a piece of art. This harmony of material and purpose is what makes the space feel so calming and inspiring—it’s a room built by a creator, for a creator.
|
📋 Copy HEX 🔗 Share |
The most special thing about this space is the collection of custom-made wooden boxes and containers on the workbench. Some hold tools, others seem to be completed projects, but they all tell a story. They add a layer of personality and history that you could never get from store-bought plastic bins. They show that this is a living, breathing workspace where things are made. Removing these would turn it into a generic tool display; with them, it’s a personal portfolio of craftsmanship.
Ready to Reclaim Your Garage?
Your garage holds so much potential, and with the right plan, it can be one of the most functional and satisfying rooms in your home. Don’t feel like you have to do it all at once; pick one wall or one system to start with and build from there. Feeling inspired? Save your favorite ideas from this article to your Pinterest board and start planning your perfect garage today.