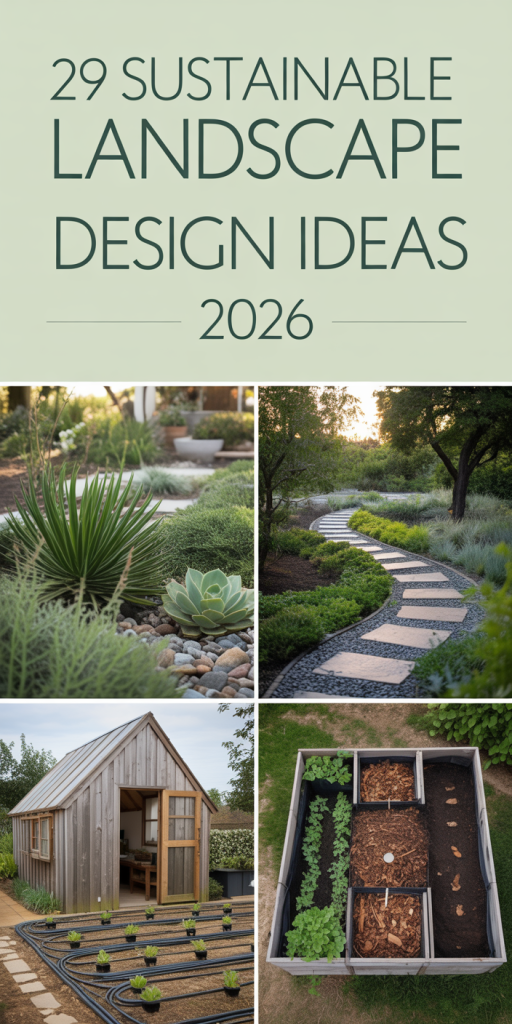
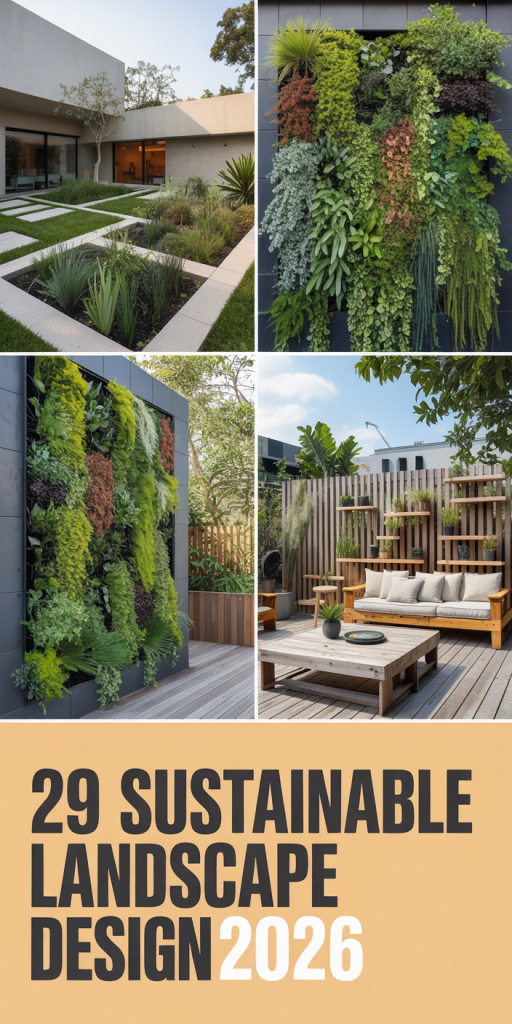
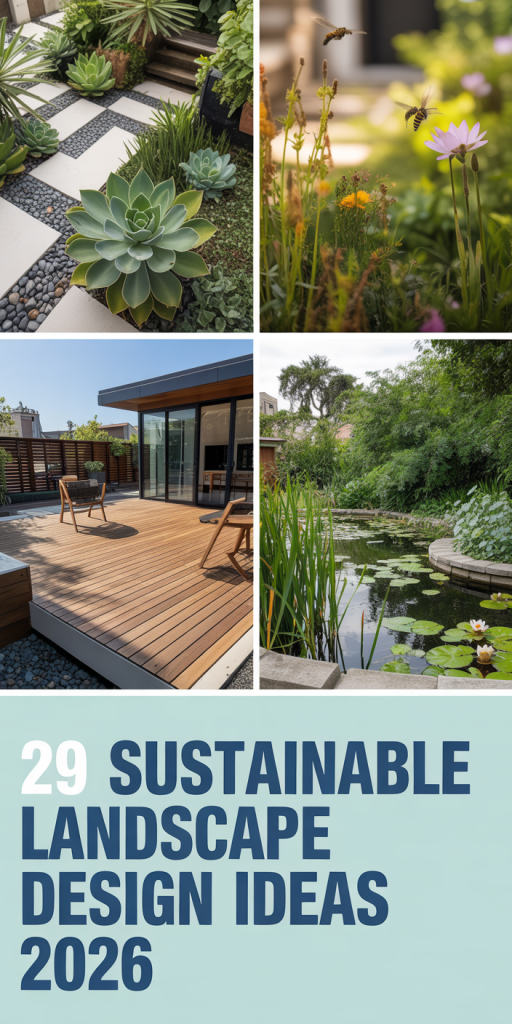
Still scrolling through sustainable landscape design photos and feeling stuck? It can feel like every beautiful yard is a massive, expensive project. But creating a gorgeous, eco-friendly outdoor space is more achievable than you think. After filtering through hundreds of options, we narrowed it down to 29 ideas that deliver on both style and sustainability. Inside, you’ll find everything from minimalist xeriscapes to lush, naturalistic gardens and even functional edible plots. We’re seeing a giant shift in 2026 toward landscapes that work with nature, not against it, saving water, time, and money. Pin this guide for later — your future self will thank you when you get started.
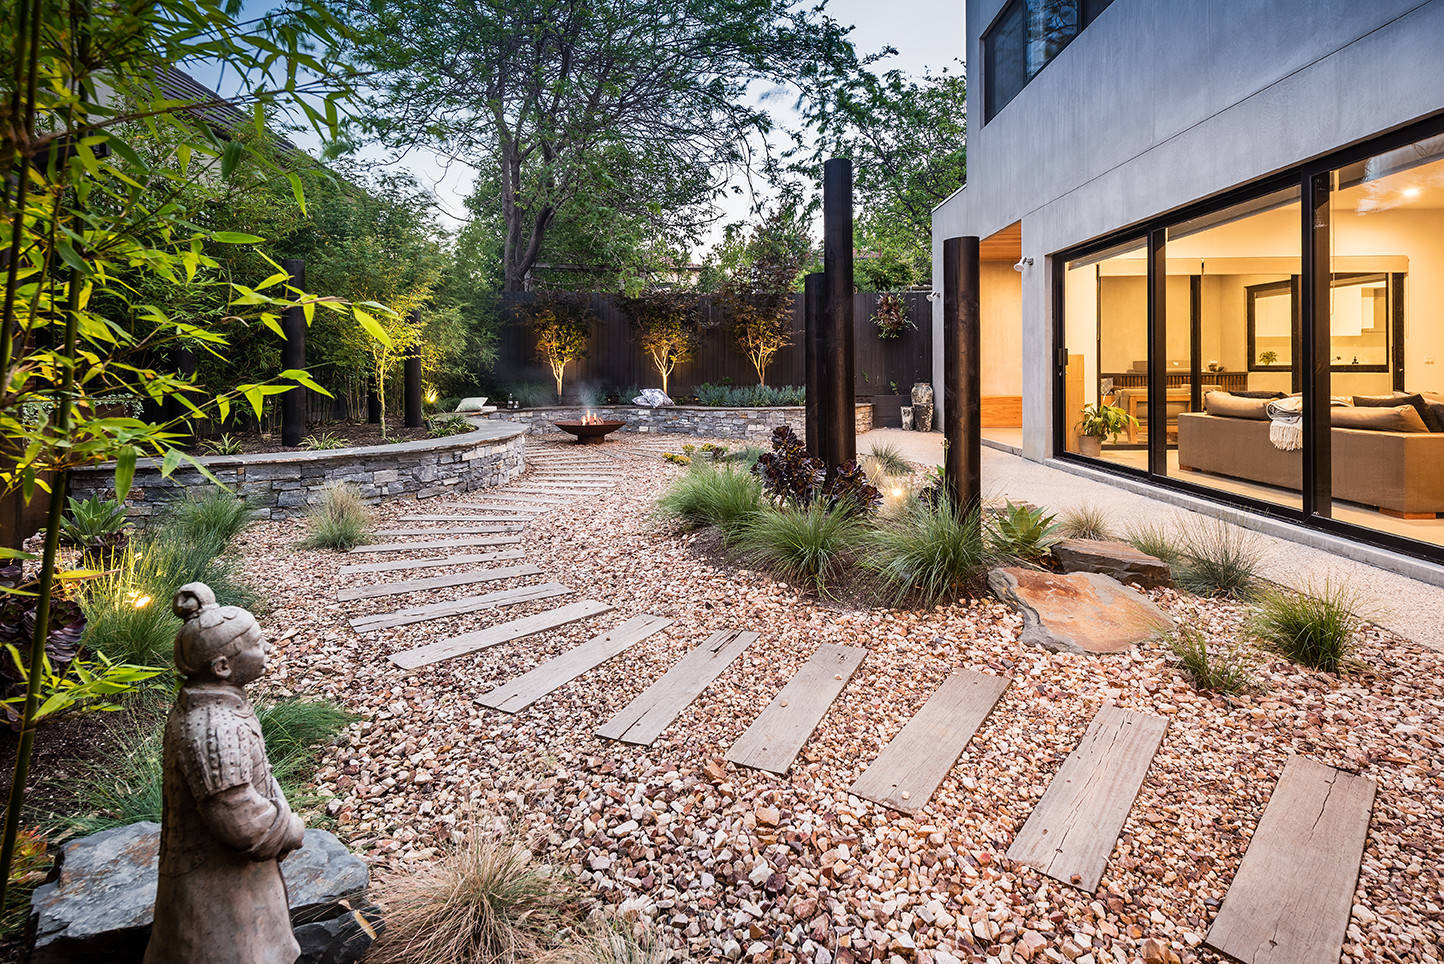
1. Weave a Stepping Stone Path Through a Modern Gravel Courtyard
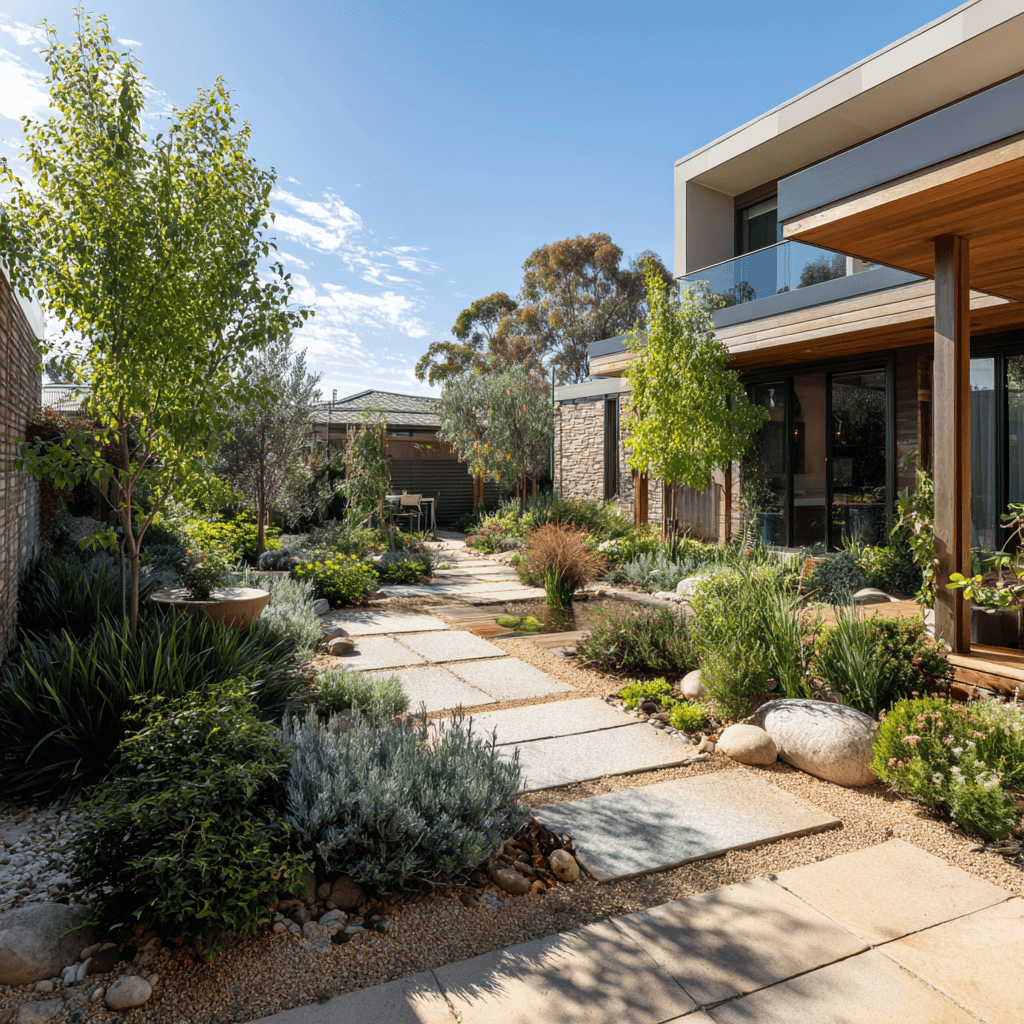
This design is a masterclass in balancing contrasts. The clean, geometric lines of the rectangular stepping stones provide a clear, organized walkway, preventing the design from feeling messy or overgrown. The surrounding naturalistic plantings soften this structure with their varied heights, textures, and shades of green and grey-blue. The use of fine, light brown gravel as a base unifies the entire space, acting as a neutral canvas that makes both the stones and the plants pop. It feels both modern and deeply connected to nature.
|
📋 Copy HEX 🔗 Share |
When laying a stepping stone path like this, the spacing is everything. For a comfortable, natural walking rhythm, aim for a center-to-center distance of 22 to 25 inches between each stone. Before you set them permanently, lay them all out and walk the path several times. Adjust the spacing until your stride feels effortless. If it feels awkward, it is. A slightly shorter or longer gap can make all the difference between a pleasant stroll and a clumsy hopscotch game.
2. Embrace Natural Tiers with Stacked Stone and Mountain Views
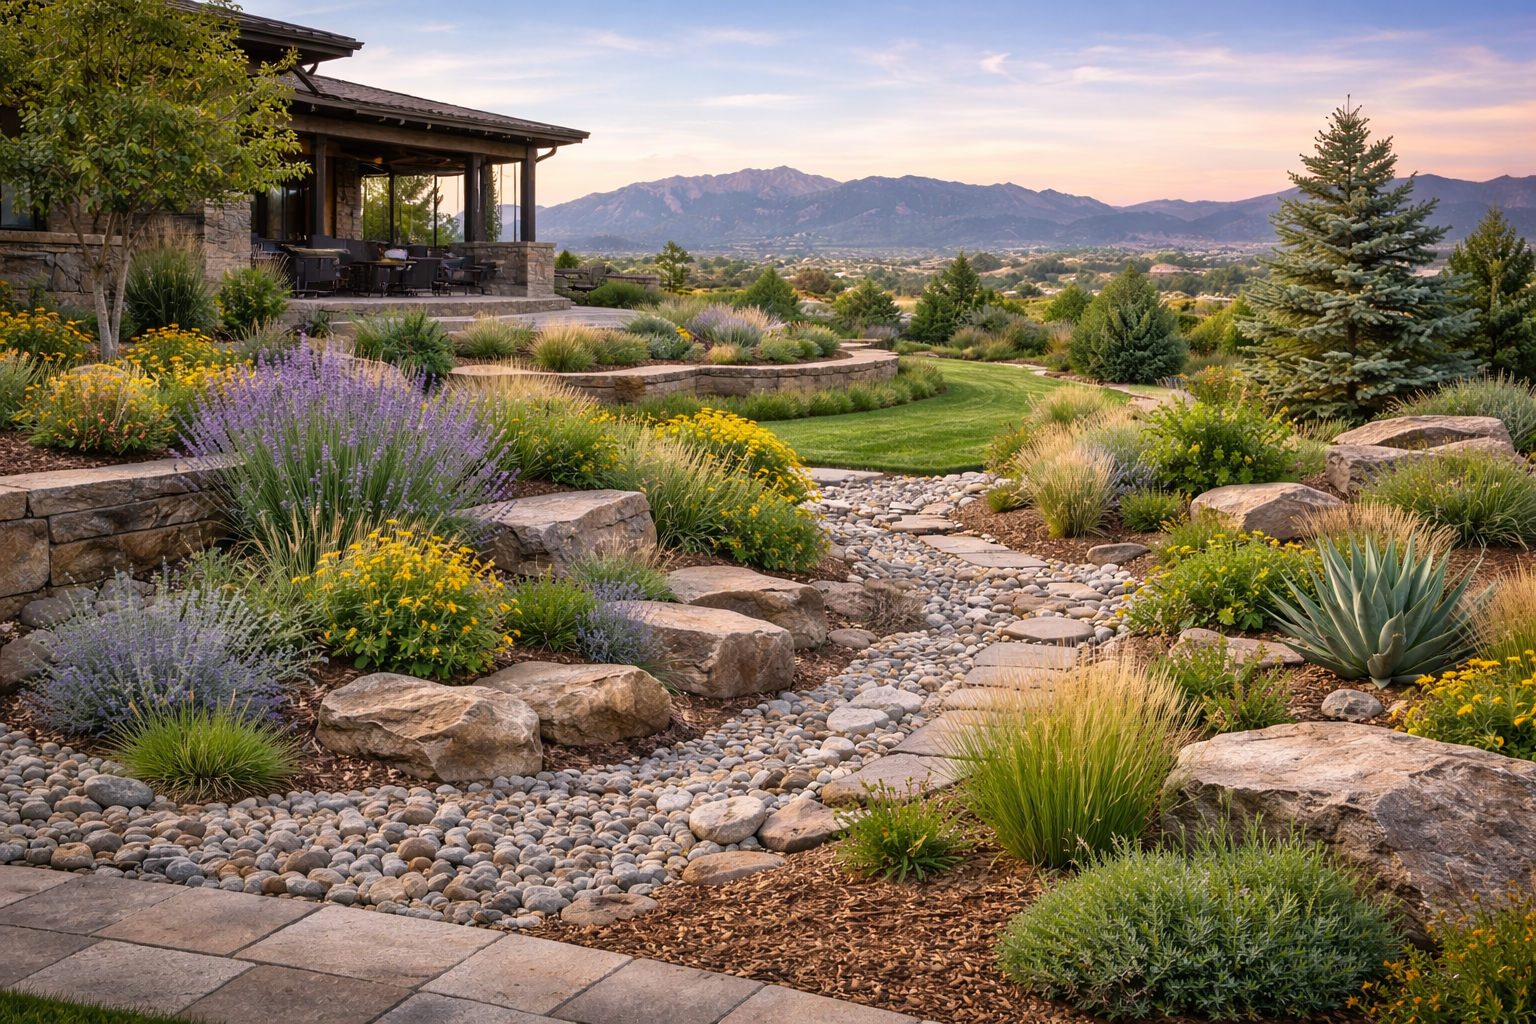
The single element holding this entire landscape together is the use of tiered, stacked stone retaining walls. Without them, the natural slope would just be a chaotic jumble of plants. The walls create defined levels, turning a potential challenge into the garden’s main feature. They introduce a sense of order and permanence, allowing the more wild, naturalistic plantings of grasses and flowers to feel intentional rather than accidental. They are the bones of the design, providing structure that makes the softness of the plants shine.
|
📋 Copy HEX 🔗 Share |
This tiered approach is perfect for properties with a gentle to moderate slope and covers an area of at least 800 square feet to have a real impact. The height of each retaining wall should ideally be kept under 3 feet to avoid the need for complex engineering and permits; taller walls can make a space feel fortress-like. For smaller yards, a similar effect can be achieved on a smaller scale, as seen in Idea #13, by using just one or two low retaining walls to create a focal-point planting bed.
3. Juxtapose Lush Rooftop Greenery with Modern Glass Architecture
|
📋 Copy HEX 🔗 Share |
- Structural Engineering & Waterproofing: $5,000 – $15,000+ (highly variable)
- Paving Stones & Hardscaping: $3,000 – $8,000
- Soil & Irrigation System: $2,500 – $6,000
- Plants & Trees: $2,000 – $7,000
- Railings & Lighting: $1,500 – $5,000
- Budget Alternative: Focus on container gardening. Use large planters ($100-$400 each) with excellent drainage on an existing patio or balcony. You can get a similar lush feel for under $2,000.
- TOTAL: $14,000 – $41,000+
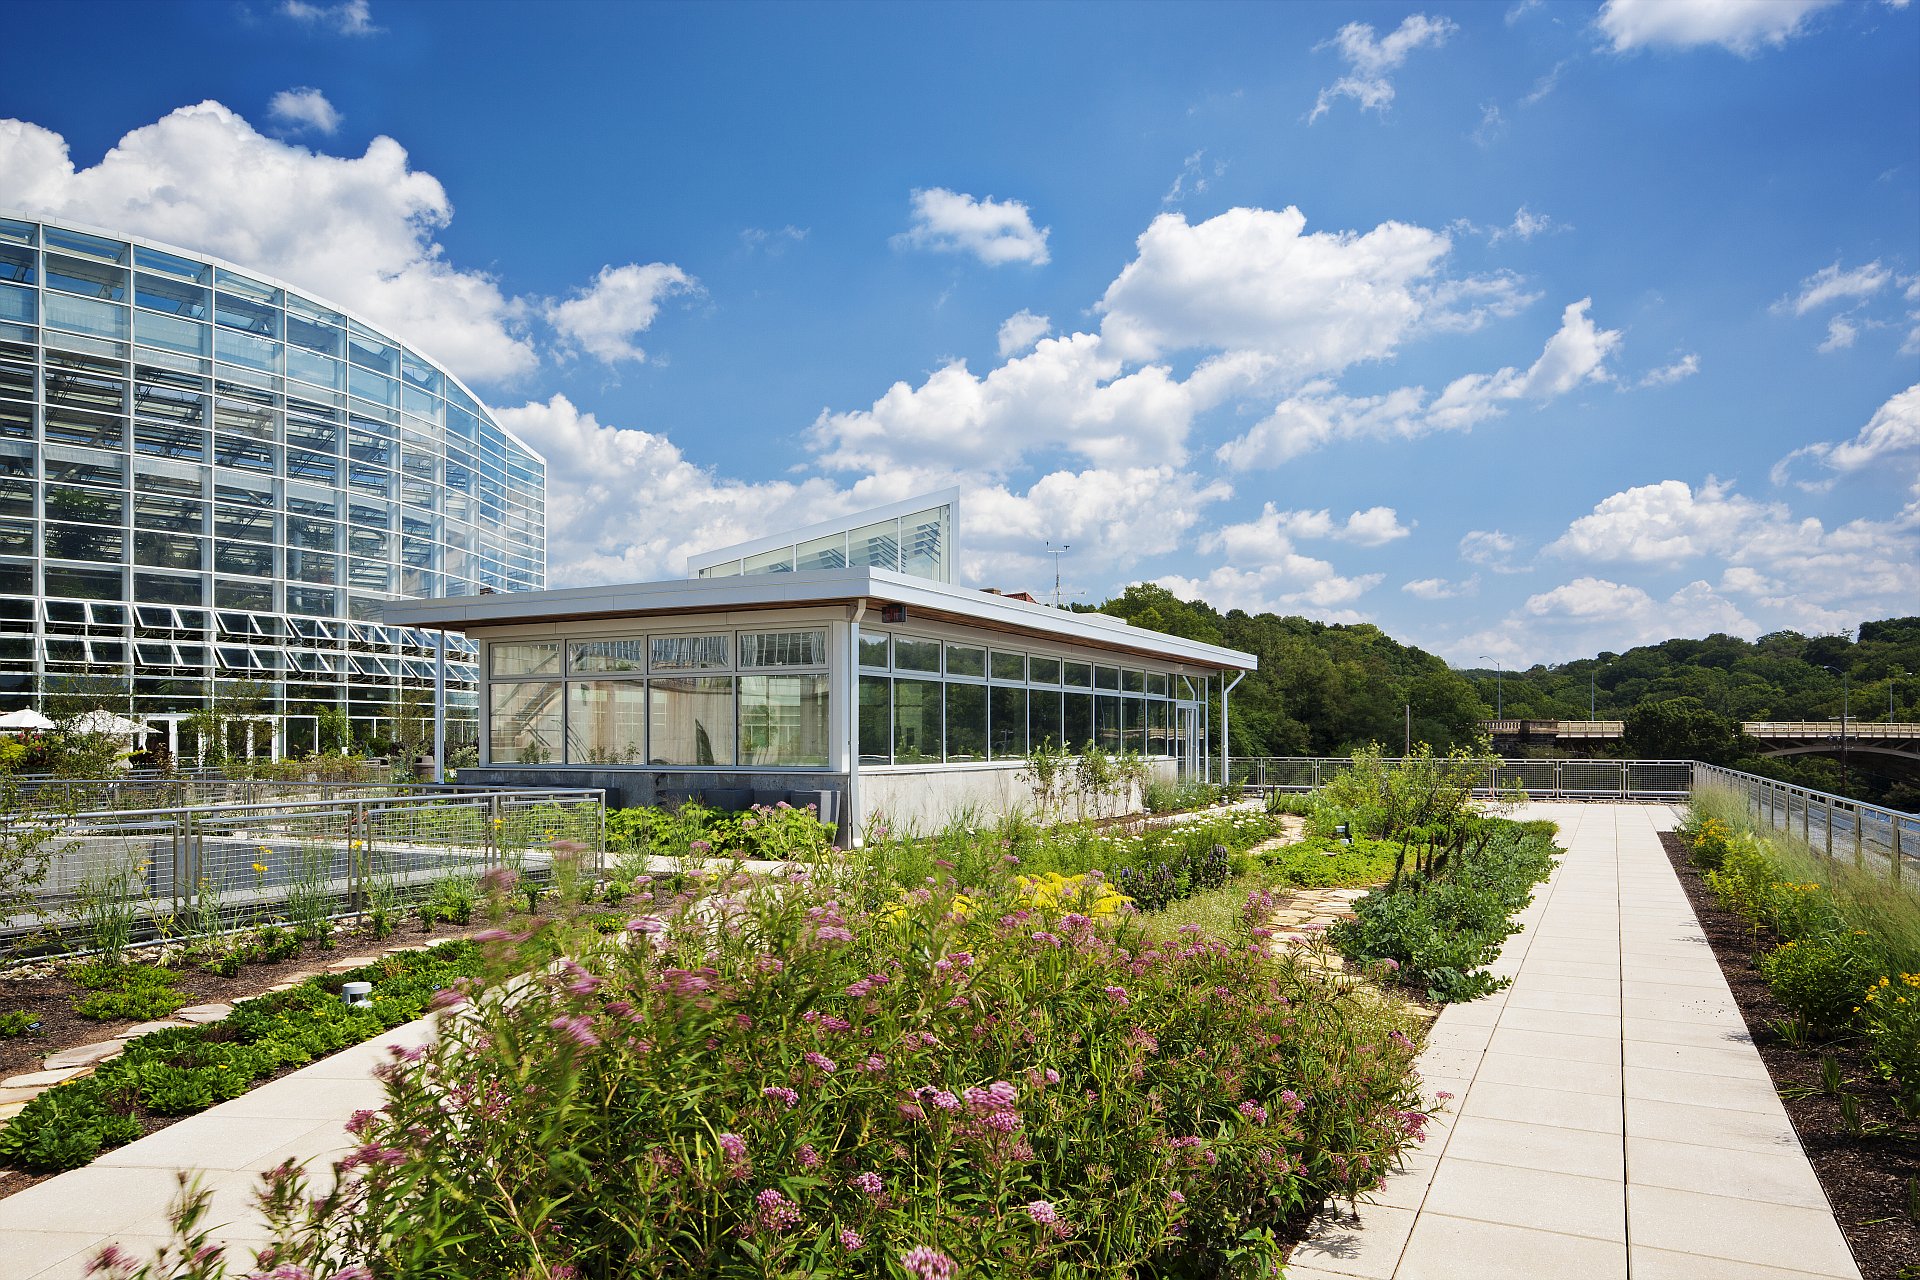
Before you get carried away by visions of a rooftop oasis, you must first conduct a structural assessment. Not all roofs are designed to handle the immense weight of soil, water, plants, and pavers. You truly must hire a structural engineer to determine your roof’s load-bearing capacity. Adding a garden without this step can lead to catastrophic structural failure, leaks, and damage that will cost infinitely more to fix than the garden itself. This step is the one corner you can’t afford to cut.
4. Embrace Eco-Conscious Principles in Your Garden
The push for “eco” landscaping is a direct response to a growing awareness of climate change and water shortages. Homeowners are tired of pouring resources into manicured lawns that offer little ecological benefit. The trend in 2026 is all about creating resilient, regenerative spaces. This isn’t about sacrificing beauty; it’s about finding beauty in biodiversity, native plants, and systems that support local wildlife. Pinterest boards are overflowing with inspiration for rain gardens, pollinator habitats, and low-water designs because they are both beautiful and responsible.
|
📋 Copy HEX 🔗 Share |
Before you tear up your lawn, do a little homework. A truly sustainable garden starts with observation, not just action.
- Test Your Soil: Get a simple soil test kit. Understanding your soil’s pH and composition is the first step to choosing plants that will thrive without constant intervention.
- Track the Sun: Spend a day noting which parts of your yard get full sun, partial shade, and deep shade. This is non-negotiable for plant survival.
- Observe Water Flow: Where does water pool after it rains? These observations will tell you where you might need to improve drainage or where you could site a rain garden.
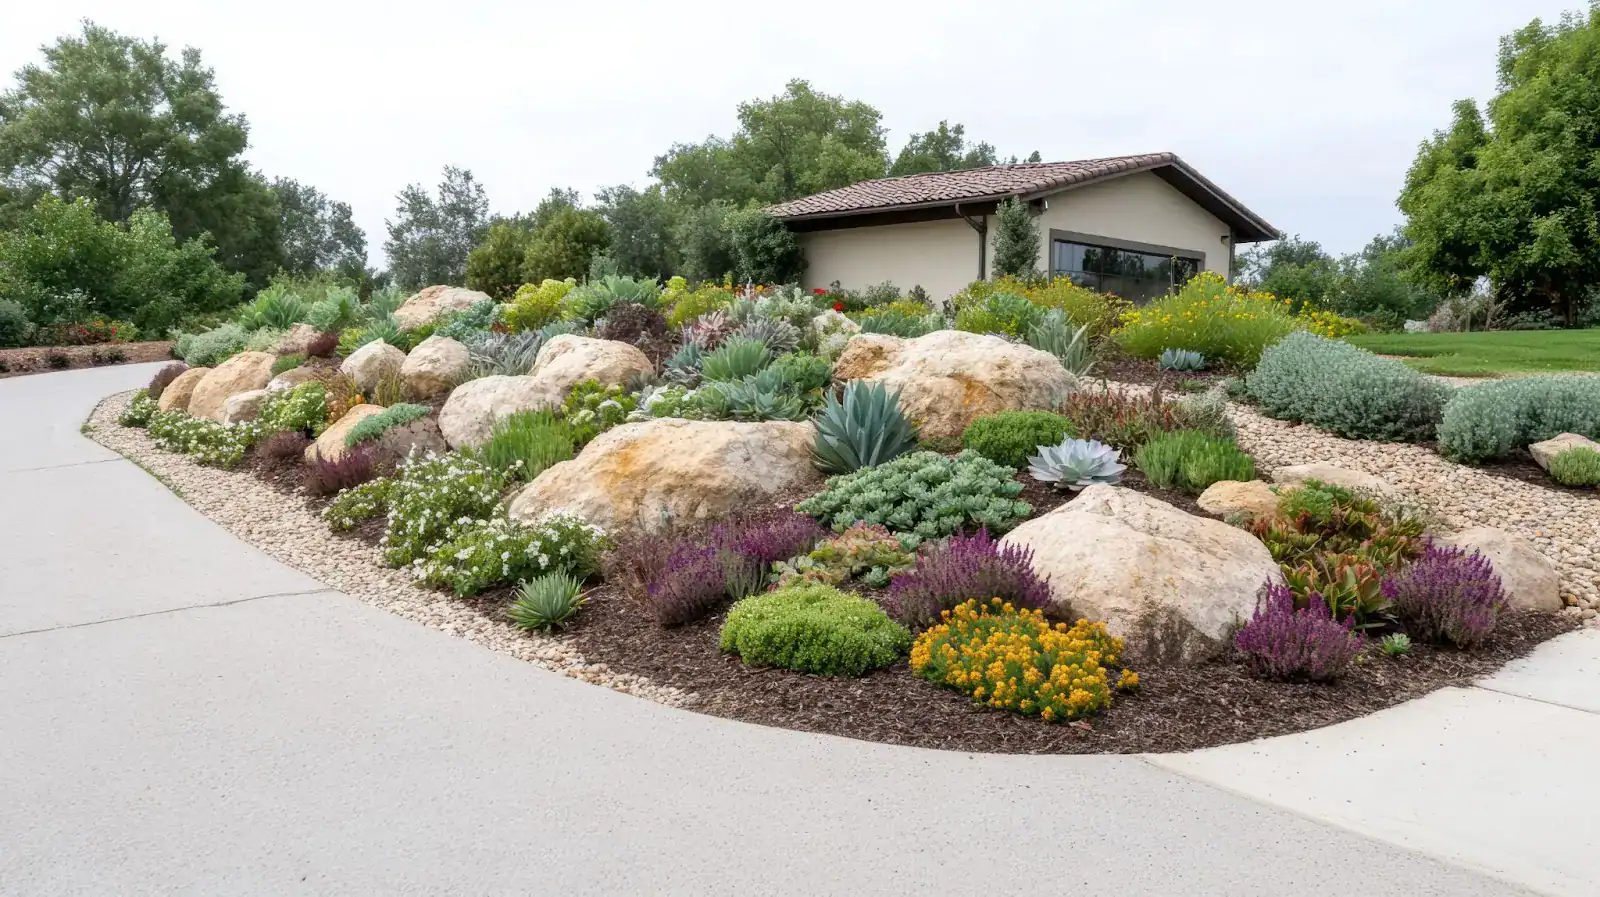
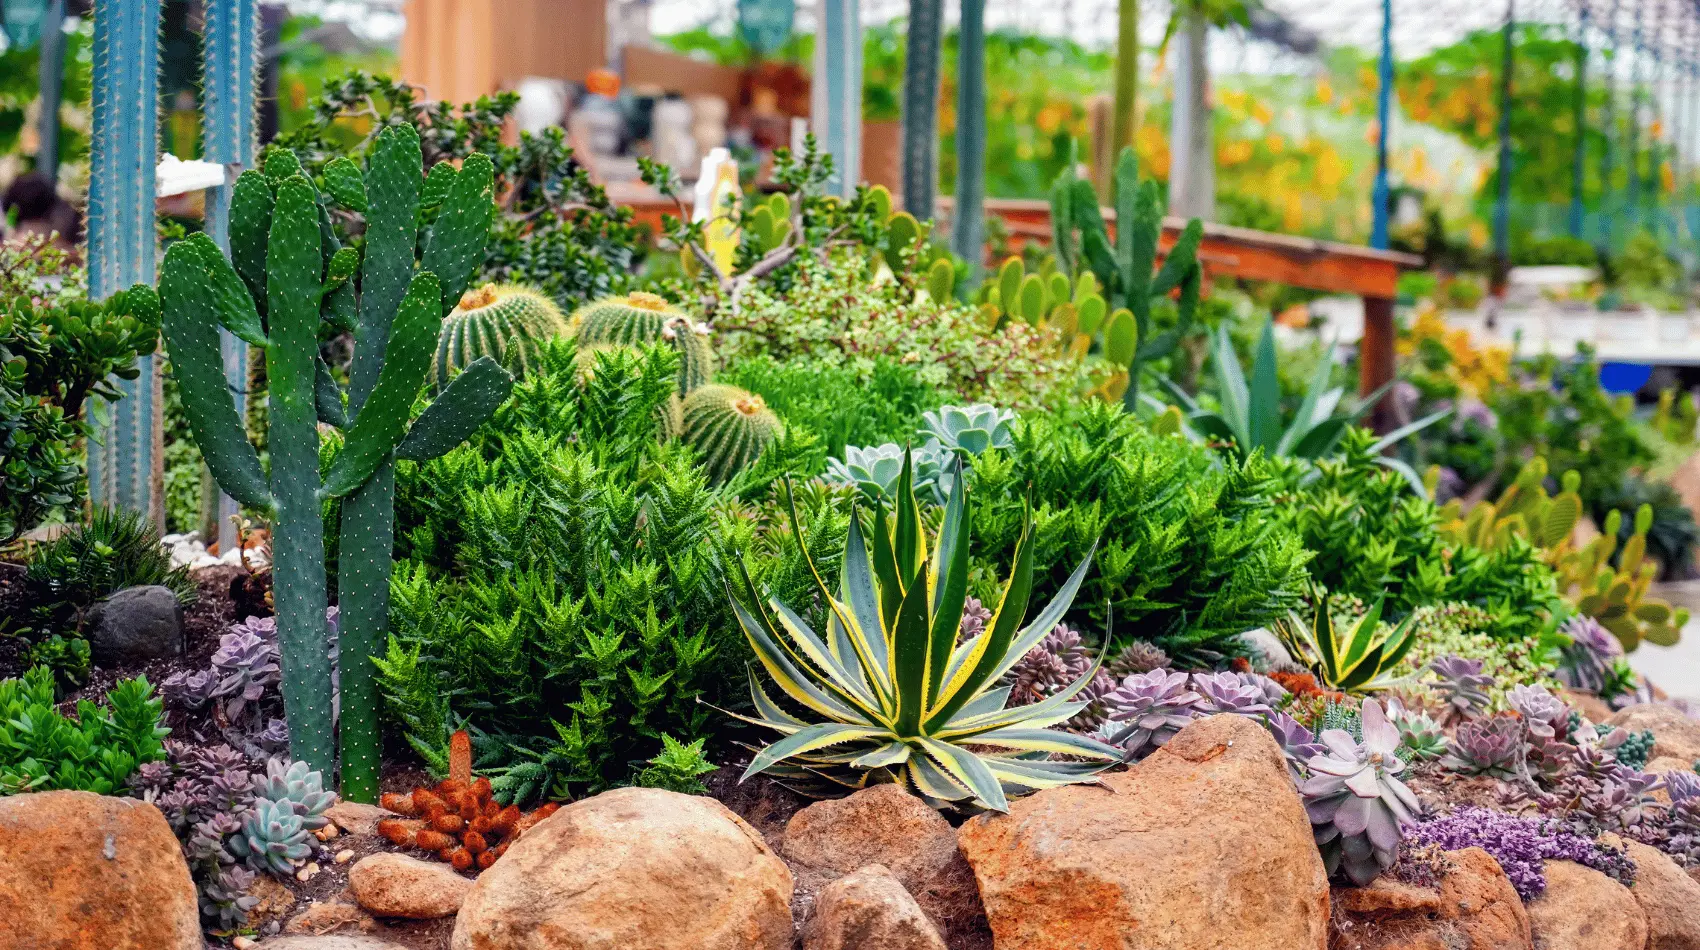
5. Use Boulders and Succulents to Master a Sloped Xeriscape
This colorful, arid look is all about a simple formula: 50% large feature rocks + 40% mixed-height plants + 10% ground cover. The large, tan boulders are the stars, providing scale and a natural, earthy structure. The plants—a diverse mix of succulents and flowering shrubs—fill in the gaps with texture and color. A thin layer of brown mulch and a clean pebble border complete the look, suppressing weeds and defining the edge. You could swap the tan boulders for gray ones and the purple flowers for orange, and the formula would still work perfectly.
|
📋 Copy HEX 🔗 Share |
While xeriscaping is low-maintenance, it’s not no-maintenance. The biggest task will be weeding the mulched and pebbled areas, especially in the first two years before your plants fully mature and crowd out newcomers. Expect to spend an hour or two every other week on these tasks during the growing season. Succulents are hardy, but they are not immune to pests like mealybugs or rot from poor drainage. The good news? Once established, the watering commitment is minimal, often only requiring a deep soak once every few weeks during the hottest, driest months.
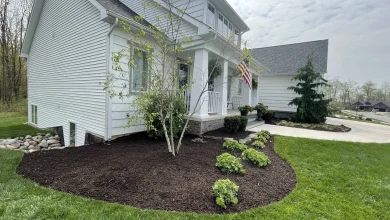
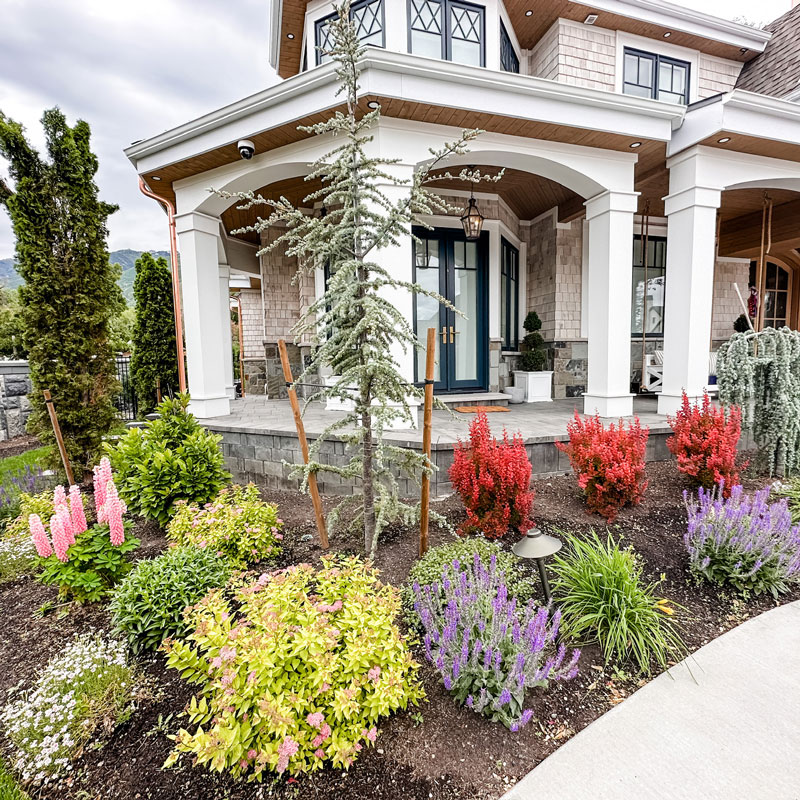
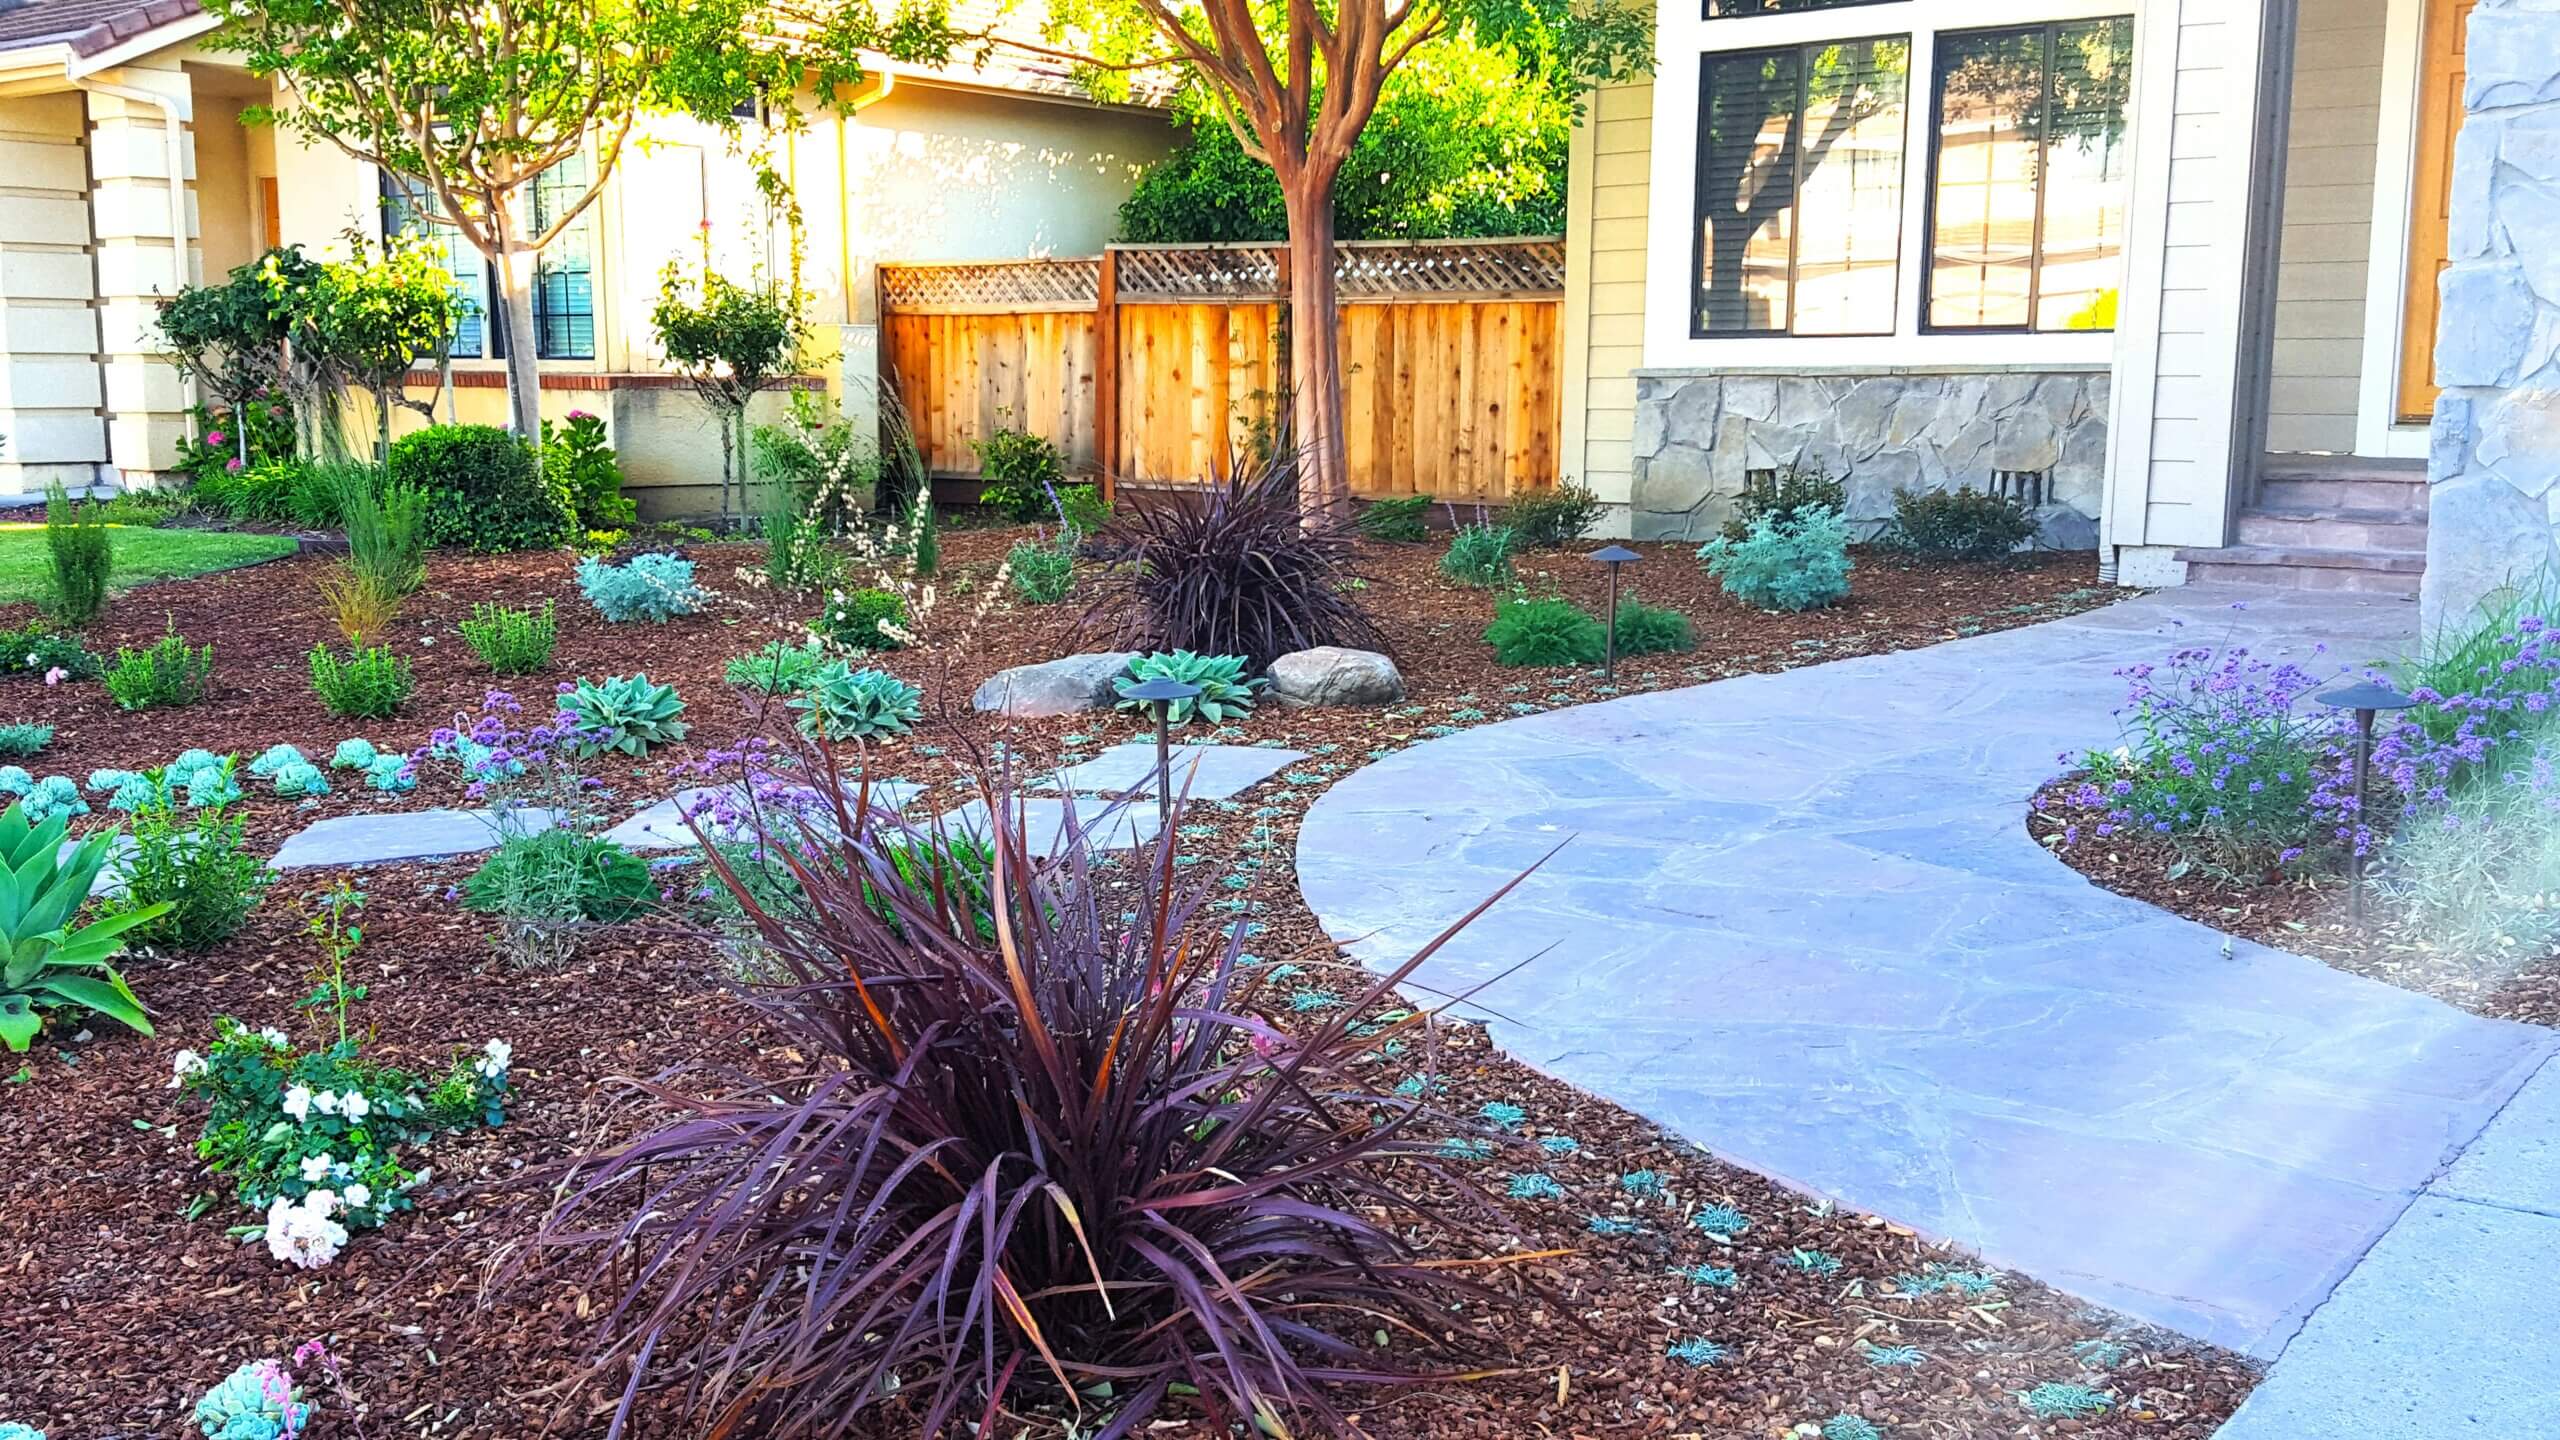
6. Frame a Modern Craftsman Entry with a Lush, Mixed Garden
To get this full, layered look, think in triangles. When you’re placing plants in the bed, don’t line them up. Instead, arrange them in groups of three or five, forming a triangle or a loose diamond shape. Place a taller plant or shrub at the back point and two shorter, contrasting plants in front of it. This creates immediate depth and a more natural-looking cluster. Repeating these triangular groupings with different plant combinations throughout the garden bed gives it a professionally designed, cohesive feel.
|
📋 Copy HEX 🔗 Share |
What makes this entrance so inviting is the brilliant use of repetition and contrast. The flower selection repeats the crisp white of the Craftsman columns and trim, creating a sense of unity. The rich, varied textures of the green foliage and the bold, dark teal of the double doors contrast with this clean, bright frame. The garden isn’t just a static border; it’s an active participant in the home’s color story, guiding your eye directly to the welcoming entry point. The gray paver porch acts as a quiet, neutral stage for all these elements.
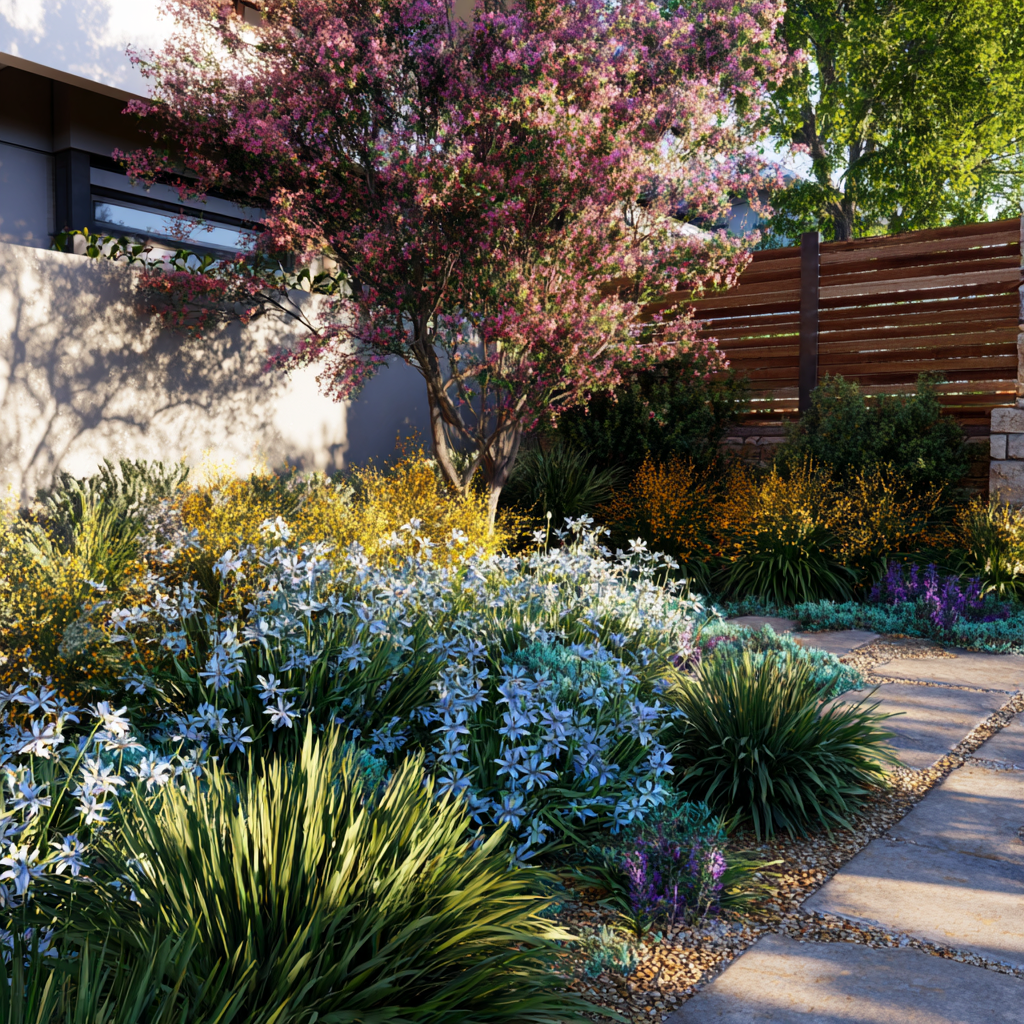
7. Design a Vibrant Garden Path with a Pink-Blossomed Tree
The pink blossoming tree is the undeniable heart of this garden scene. While the blue flowers, pebble path, and wooden fence are all beautiful, the tree provides the verticality and single, powerful burst of color that elevates the entire design. It’s the focal point that draws your eye upward and creates a sense of seasonal drama. Without it, the garden would still be lovely, but it would lose its ‘wow’ factor and feel much flatter. It’s a reminder that every stunning garden needs at least one showstopper.
|
📋 Copy HEX 🔗 Share |
A path made of pavers and loose pebbles is beautiful, but it requires upkeep. The pebbles will inevitably get kicked around, ending up in your garden beds or creating bare spots on the path. You’ll need to rake them back into place periodically. More importantly, weeds will find a way to grow between the pebbles. Using a high-quality landscape fabric underneath can help significantly, but some hand-weeding will always be necessary to keep the path looking crisp and clean. It’s a trade-off for that satisfying crunch underfoot.
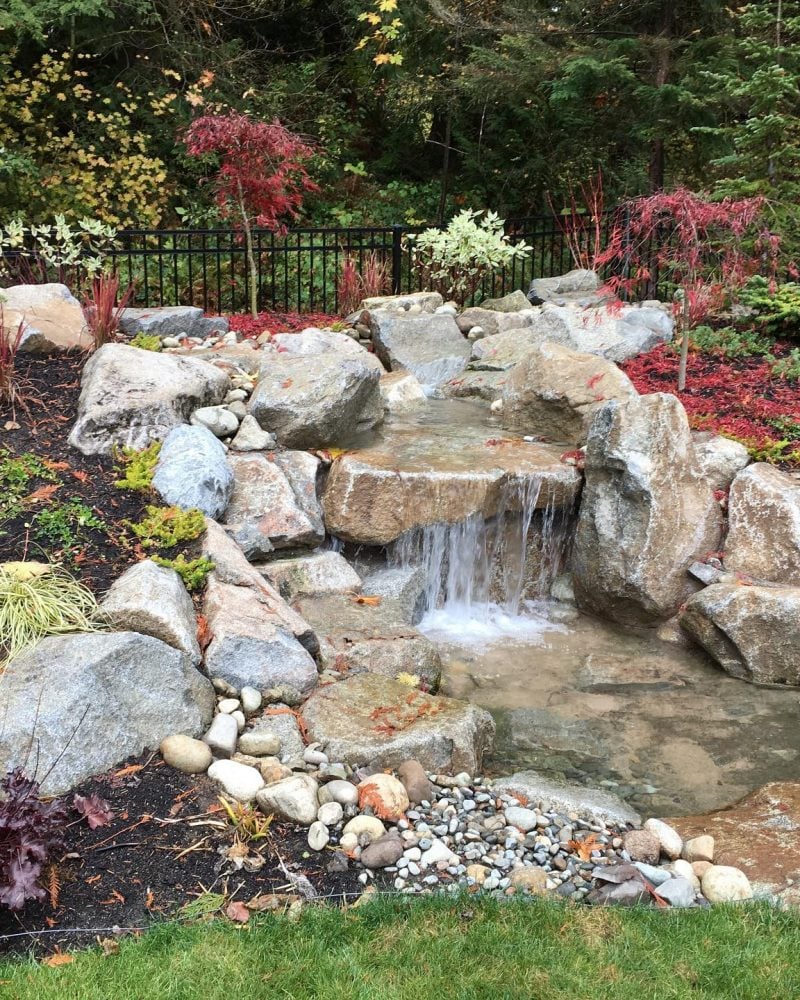
8. Install a Natural Rock Waterfall with Red Foliage Accents
You don’t need a massive, professionally installed water feature to get this tranquil vibe. You can create a small, self-contained waterfall for a fraction of the cost. Start with a pre-formed pond liner or even a large, sturdy basin from a garden center ($100-$300). Purchase a small submersible pump ($50-$100) and some flexible tubing. Then, hit up a local landscape supply yard for a few characterful boulders and bags of river stones (or even find them on Facebook Marketplace). With a budget of around $500 and a weekend of work, you can build a feature that delivers that same soothing sound and lush look.
|
📋 Copy HEX 🔗 Share |
Here’s a quick guide to placing the rocks for your waterfall. Estimated time: 3-4 hours. Material cost: $200-$1000 (depending on rock size/source).
- Choose the Foundation: Select your largest, flattest boulder as the base. This piece is critical for stability.
- Build the Sides: Place two medium-sized rocks on either side of the base to create the main channel for the water to fall between.
- Create the Spillway: Find a relatively flat, wide rock to act as the spillway. Set it on top of the side rocks, tucking your water tube underneath and behind it. This is the stone the water will cascade over.
- Add Height and Volume: Stack more rocks behind and around your main structure to hide the tubing and give the feature a more substantial, natural look.
- Test and Adjust: Run the pump and see how the water flows. You may need to insert smaller stones (shims) to direct the water and get the sound just right.
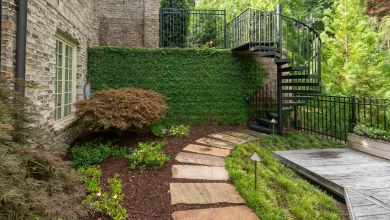
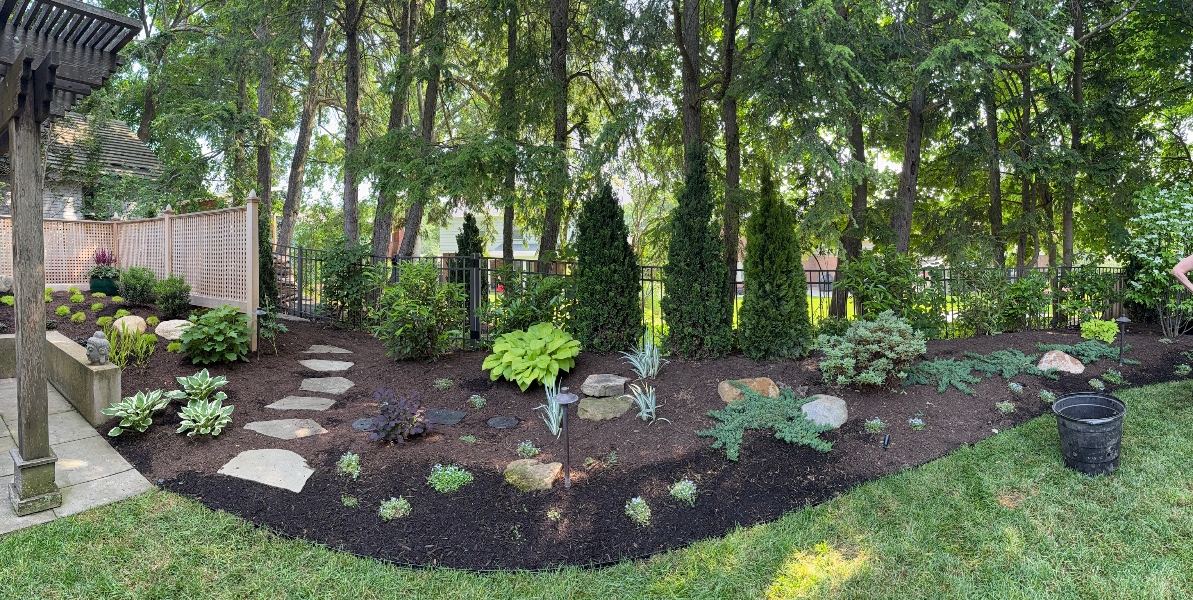
9. Layer a Lush Garden Bed with Stepping Stones and Dark Mulch
This design succeeds by creating clear visual layers. The dark brown mulch provides a rich, uniform base that makes the greens of the foliage appear more vibrant. It also serves a practical purpose, retaining moisture and suppressing weeds. The stepping stone path cuts a clean line through the bed, adding a functional and graphic element. Finally, the varied heights of the shrubs and plants create a third, textural layer that adds depth and interest, preventing the garden from feeling like a flat, green mat. The black metal fence in the background acts as a simple, dark frame.
|
📋 Copy HEX 🔗 Share |
When selecting plants for a layered garden bed, pay close attention to their mature sizes—both height and width. It’s a common mistake to plant everything too close together, only to have faster-growing shrubs completely swallow their smaller neighbors within a few years. A good rule of thumb is to space plants so that their foliage will just touch when they are fully grown. This gives each plant room to shine and saves you from having to constantly prune or relocate them later.
10. Lay a Curved Flagstone Walkway Through Mulched Beds
The gentle curve of the flagstone walkway is the single most important element in this design. A straight path would have felt rigid and formal, cutting the space in half. The curve, however, forces a slower pace and creates a sense of discovery. You can’t see the entire garden at once, which makes the space feel larger and more intriguing. It transforms a simple walk through the yard into a journey, inviting you to see what’s around the next bend. This graceful arc is what gives the landscape its relaxed, serene character.
|
📋 Copy HEX 🔗 Share |
A thick layer of bark mulch is fantastic for suppressing weeds and retaining soil moisture, but it doesn’t last forever. Organic mulches decompose over time, enriching the soil but also shrinking in volume. To keep this look fresh and effective, you’ll need to top it up with a fresh 1- to 2-inch layer of mulch every one to two years. The annual cost is relatively low, typically $50-$200 for a space this size, but it’s a recurring task to keep on your garden maintenance calendar to keep weeds under control.
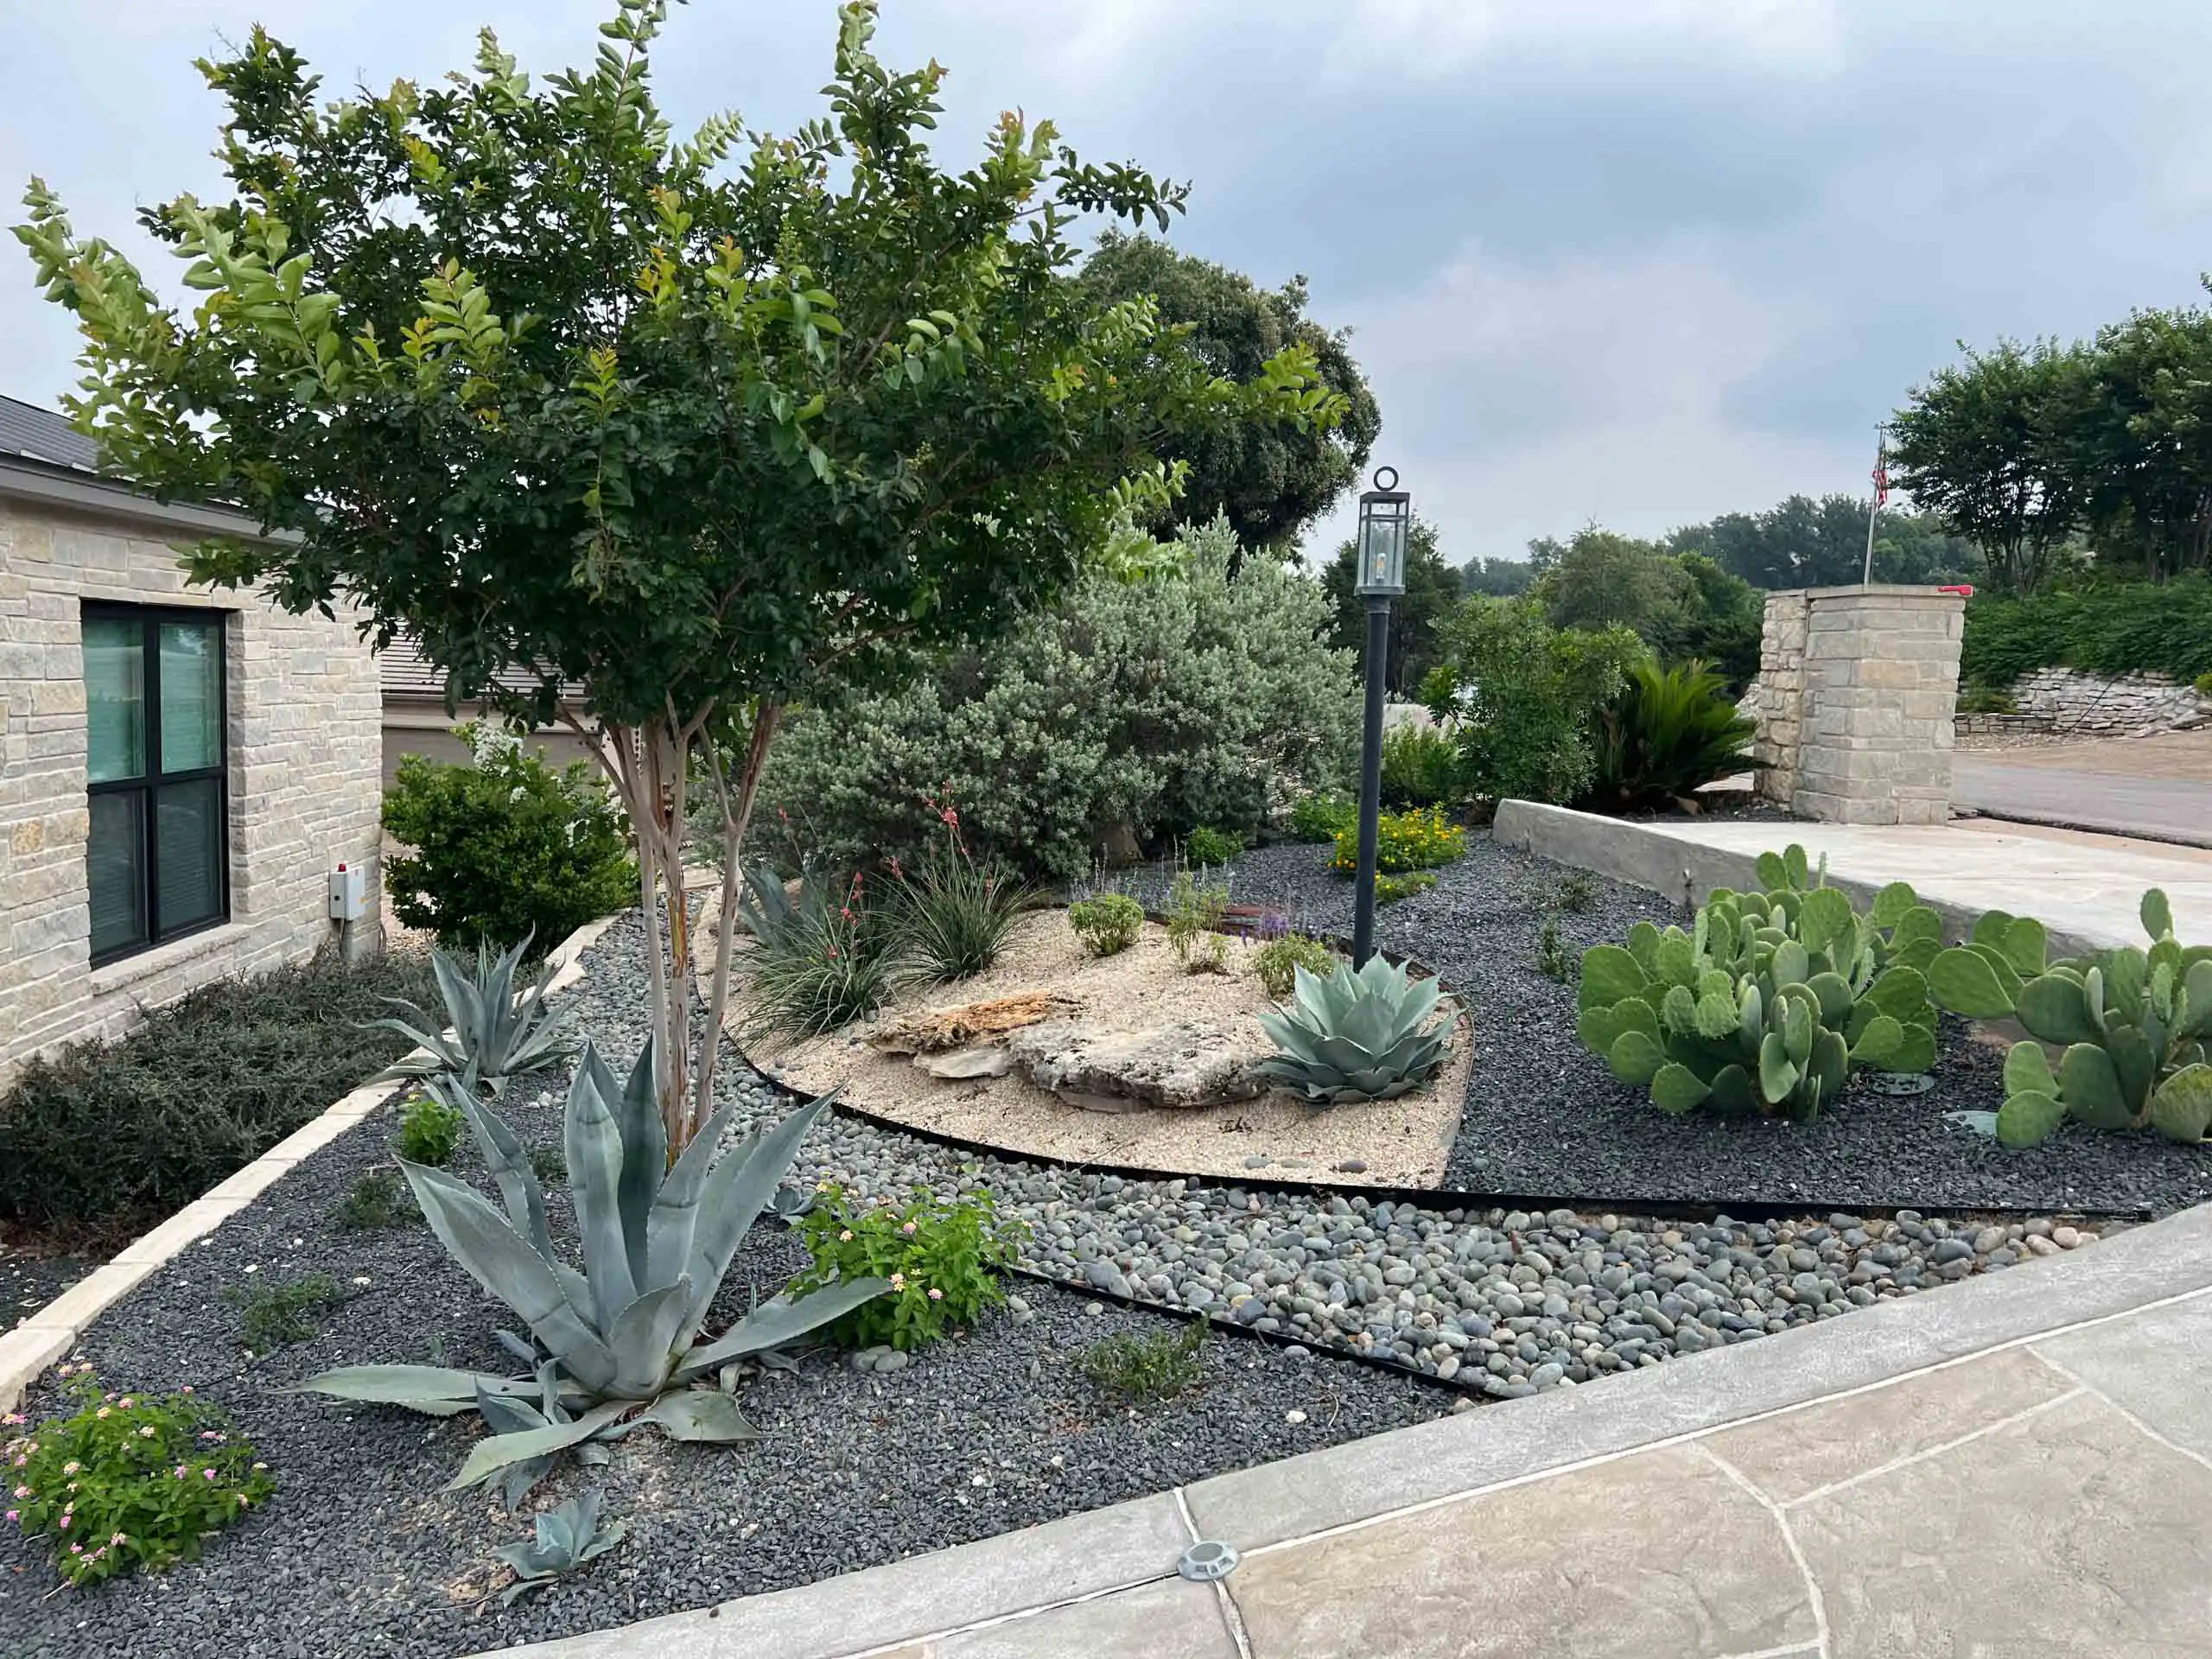
11. Design a Structured Xeriscape with Gravel Zones and a Lantern Post
This desert-inspired look relies on a strict but effective formula: 60% gravel coverage + 30% feature plants + 10% rock accents. The gravel is doing the heavy lifting, with two-thirds light tan pea gravel and one-third dark grey crushed stone creating distinct zones of color and texture. The plants, mostly succulents and cacti, are placed like living sculptures. Finally, the smooth river stones and larger rock formations are used sparingly to add naturalistic detail and define edges. The vertical lantern post is the exception, adding a single point of height.
|
📋 Copy HEX 🔗 Share |
Be honest with yourself about your climate. While this xeriscaped style is incredibly popular and water-wise, it can look stark and out of place in regions with high rainfall and lush, green surroundings. This aesthetic works best in arid or semi-arid climates where it harmonizes with the natural environment. In a wetter area, you may find yourself constantly battling moss, algae, and weeds in the gravel, undermining the low-maintenance appeal. Idea #8 has a similar look but uses plants that are better for the climate.
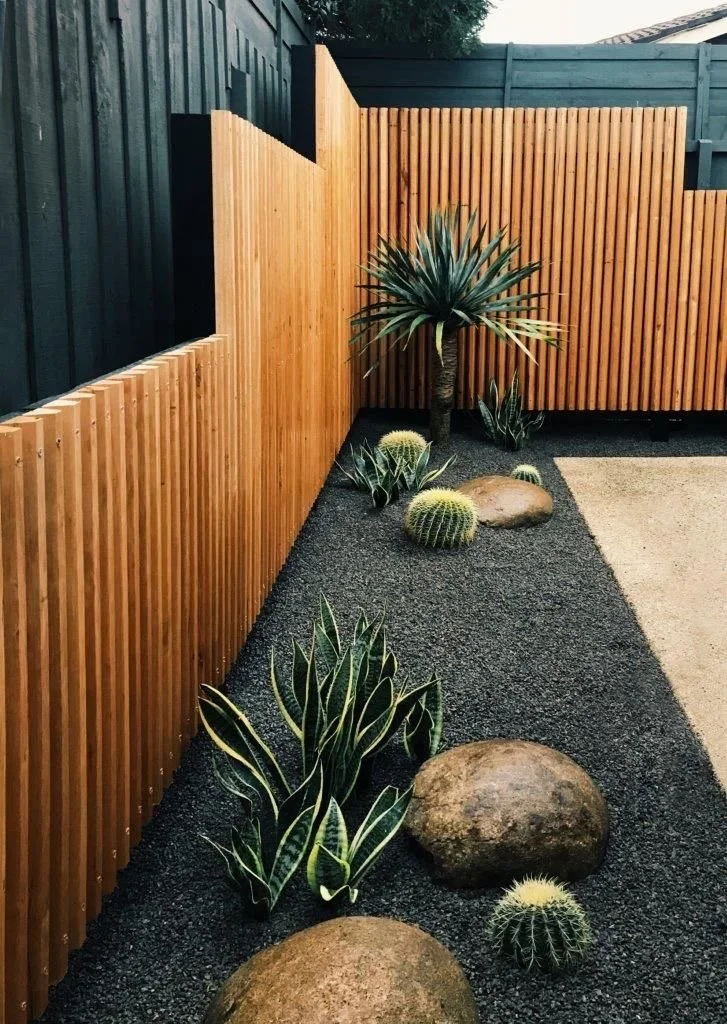
12. Combine a Slatted Wood Fence with Dark Gravel and Cacti
This design is a study in texture and modern lines. The warmth and natural grain of the light wood slatted fence contrasts beautifully with the industrial feel of the dark vertical plank fence next to it. This material play is carried down to the ground, where the dark gray gravel creates a uniform, minimalist base that makes the sculptural forms of the green succulents and barrel cacti stand out. The occasional large, smooth brown rock adds an organic, weighty element, breaking up the sea of fine gravel. It’s a highly curated, almost gallery-like approach to a garden.
|
📋 Copy HEX 🔗 Share |
When using dark gravel, especially in a sunny spot, be mindful of the heat it absorbs. Dark colors can create a ‘heat island’ effect, significantly raising soil temperatures and stressing or even scorching the roots of some plants. While many cacti and succulents adapt to heat, it’s a good idea to choose species that are known for their extreme heat tolerance. Furthermore, consider placing your most sensitive plants where they might get a little afternoon shade from the fence or larger plants to give them a break from the most intense heat.
13. Know the Truth About Xeriscape Myths
Xeriscaping is one of the most misunderstood concepts in sustainable design. Driven by drought and a desire for lower-maintenance yards, it has exploded in popularity. However, many people still incorrectly believe it means a yard full of nothing but rocks and cacti. The 2026 approach is about creating lush, beautiful, and regionally appropriate gardens that are simply water-wise. The focus is on smart plant selection, efficient irrigation, and reducing turf grass, not eliminating color and life. It’s about sustainability, not austerity.
|
📋 Copy HEX 🔗 Share |
Let’s clear up a common myth: xeriscaping is not zero-maintenance. In fact, the first year or two can be quite hands-on. You will need to water regularly to get your drought-tolerant plants established. Their deep root systems, which make them water-wise later, take time to develop. You will also need to be vigilant about weeding, as the open spaces in a new xeriscape are prime real estate for opportunistic weeds. The low-maintenance payoff is real, but it’s not immediate.
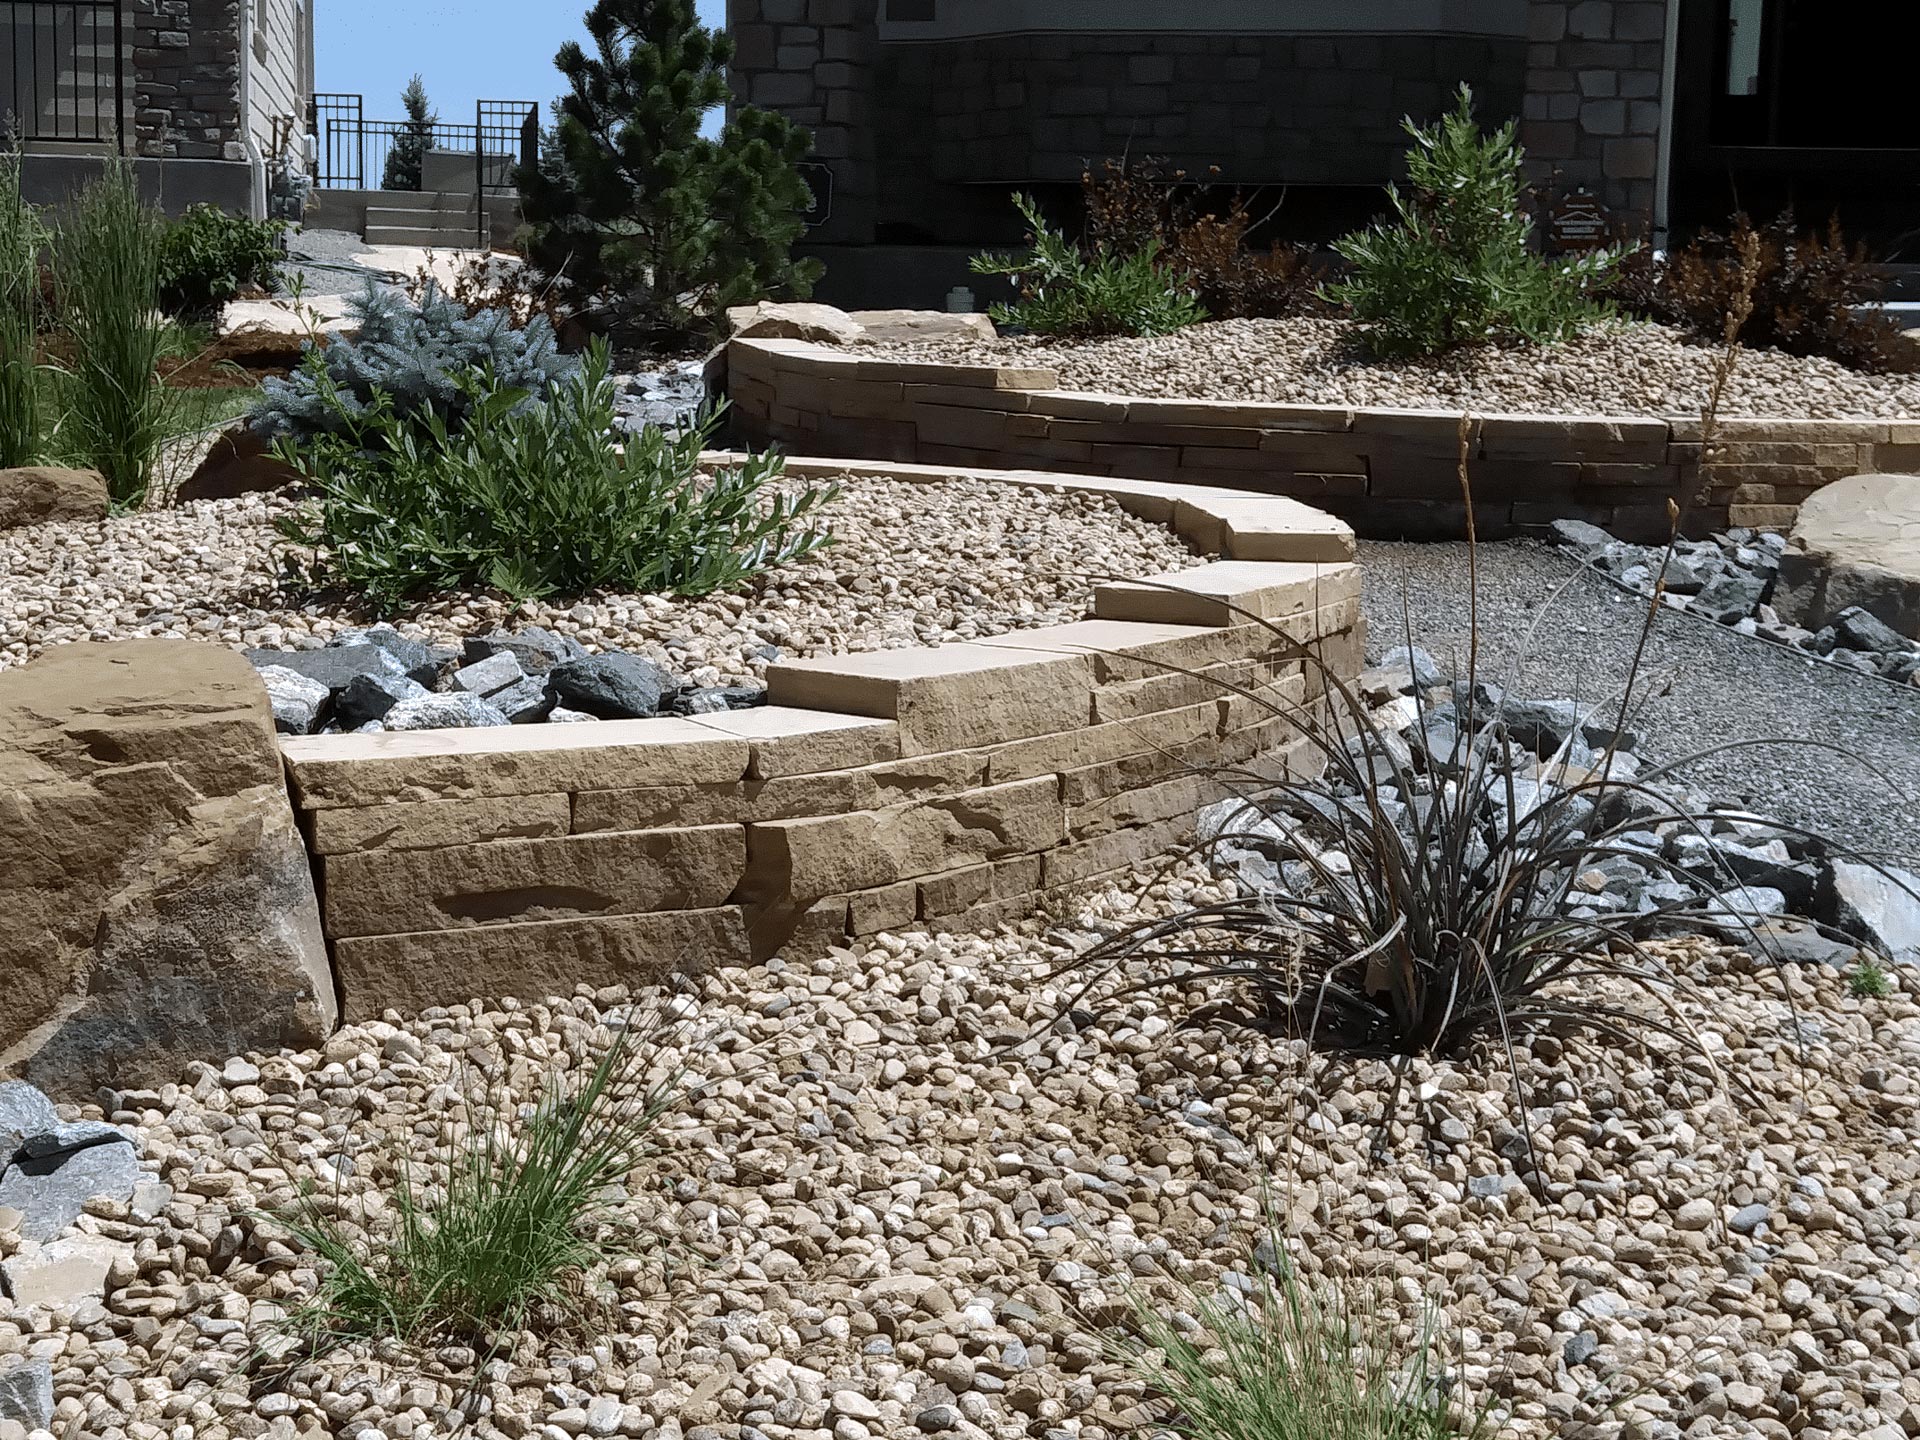
14. Create Terrace Beds with Stacked Stone and Pea Gravel
The defining feature here is the use of light-colored pea gravel as the primary filler for the beds instead of traditional mulch. This choice instantly signals an arid, low-water design aesthetic. It creates a clean, bright surface that reflects sunlight and provides a stark, textured contrast to the green foliage of the shrubs. While mulch makes you think of a damp forest floor, this gravel evokes a dry riverbed or a Mediterranean hillside. It’s a bold choice that sets the entire tone for the landscape, prioritizing texture and form over dense planting.
|
📋 Copy HEX 🔗 Share |
Stacked stone walls can be expensive due to the labor involved. For a much more budget-friendly approach, you can get a similar terraced look using interlocking concrete retaining wall blocks from stores like Lowe’s or Home Depot. These are designed for DIY installation and cost significantly less than natural stone. To get the look for even less, search for reclaimed concrete or broken sidewalk pieces on Facebook Marketplace. With a bit of creativity, these can be stacked into rustic, charming retaining walls for next to nothing.
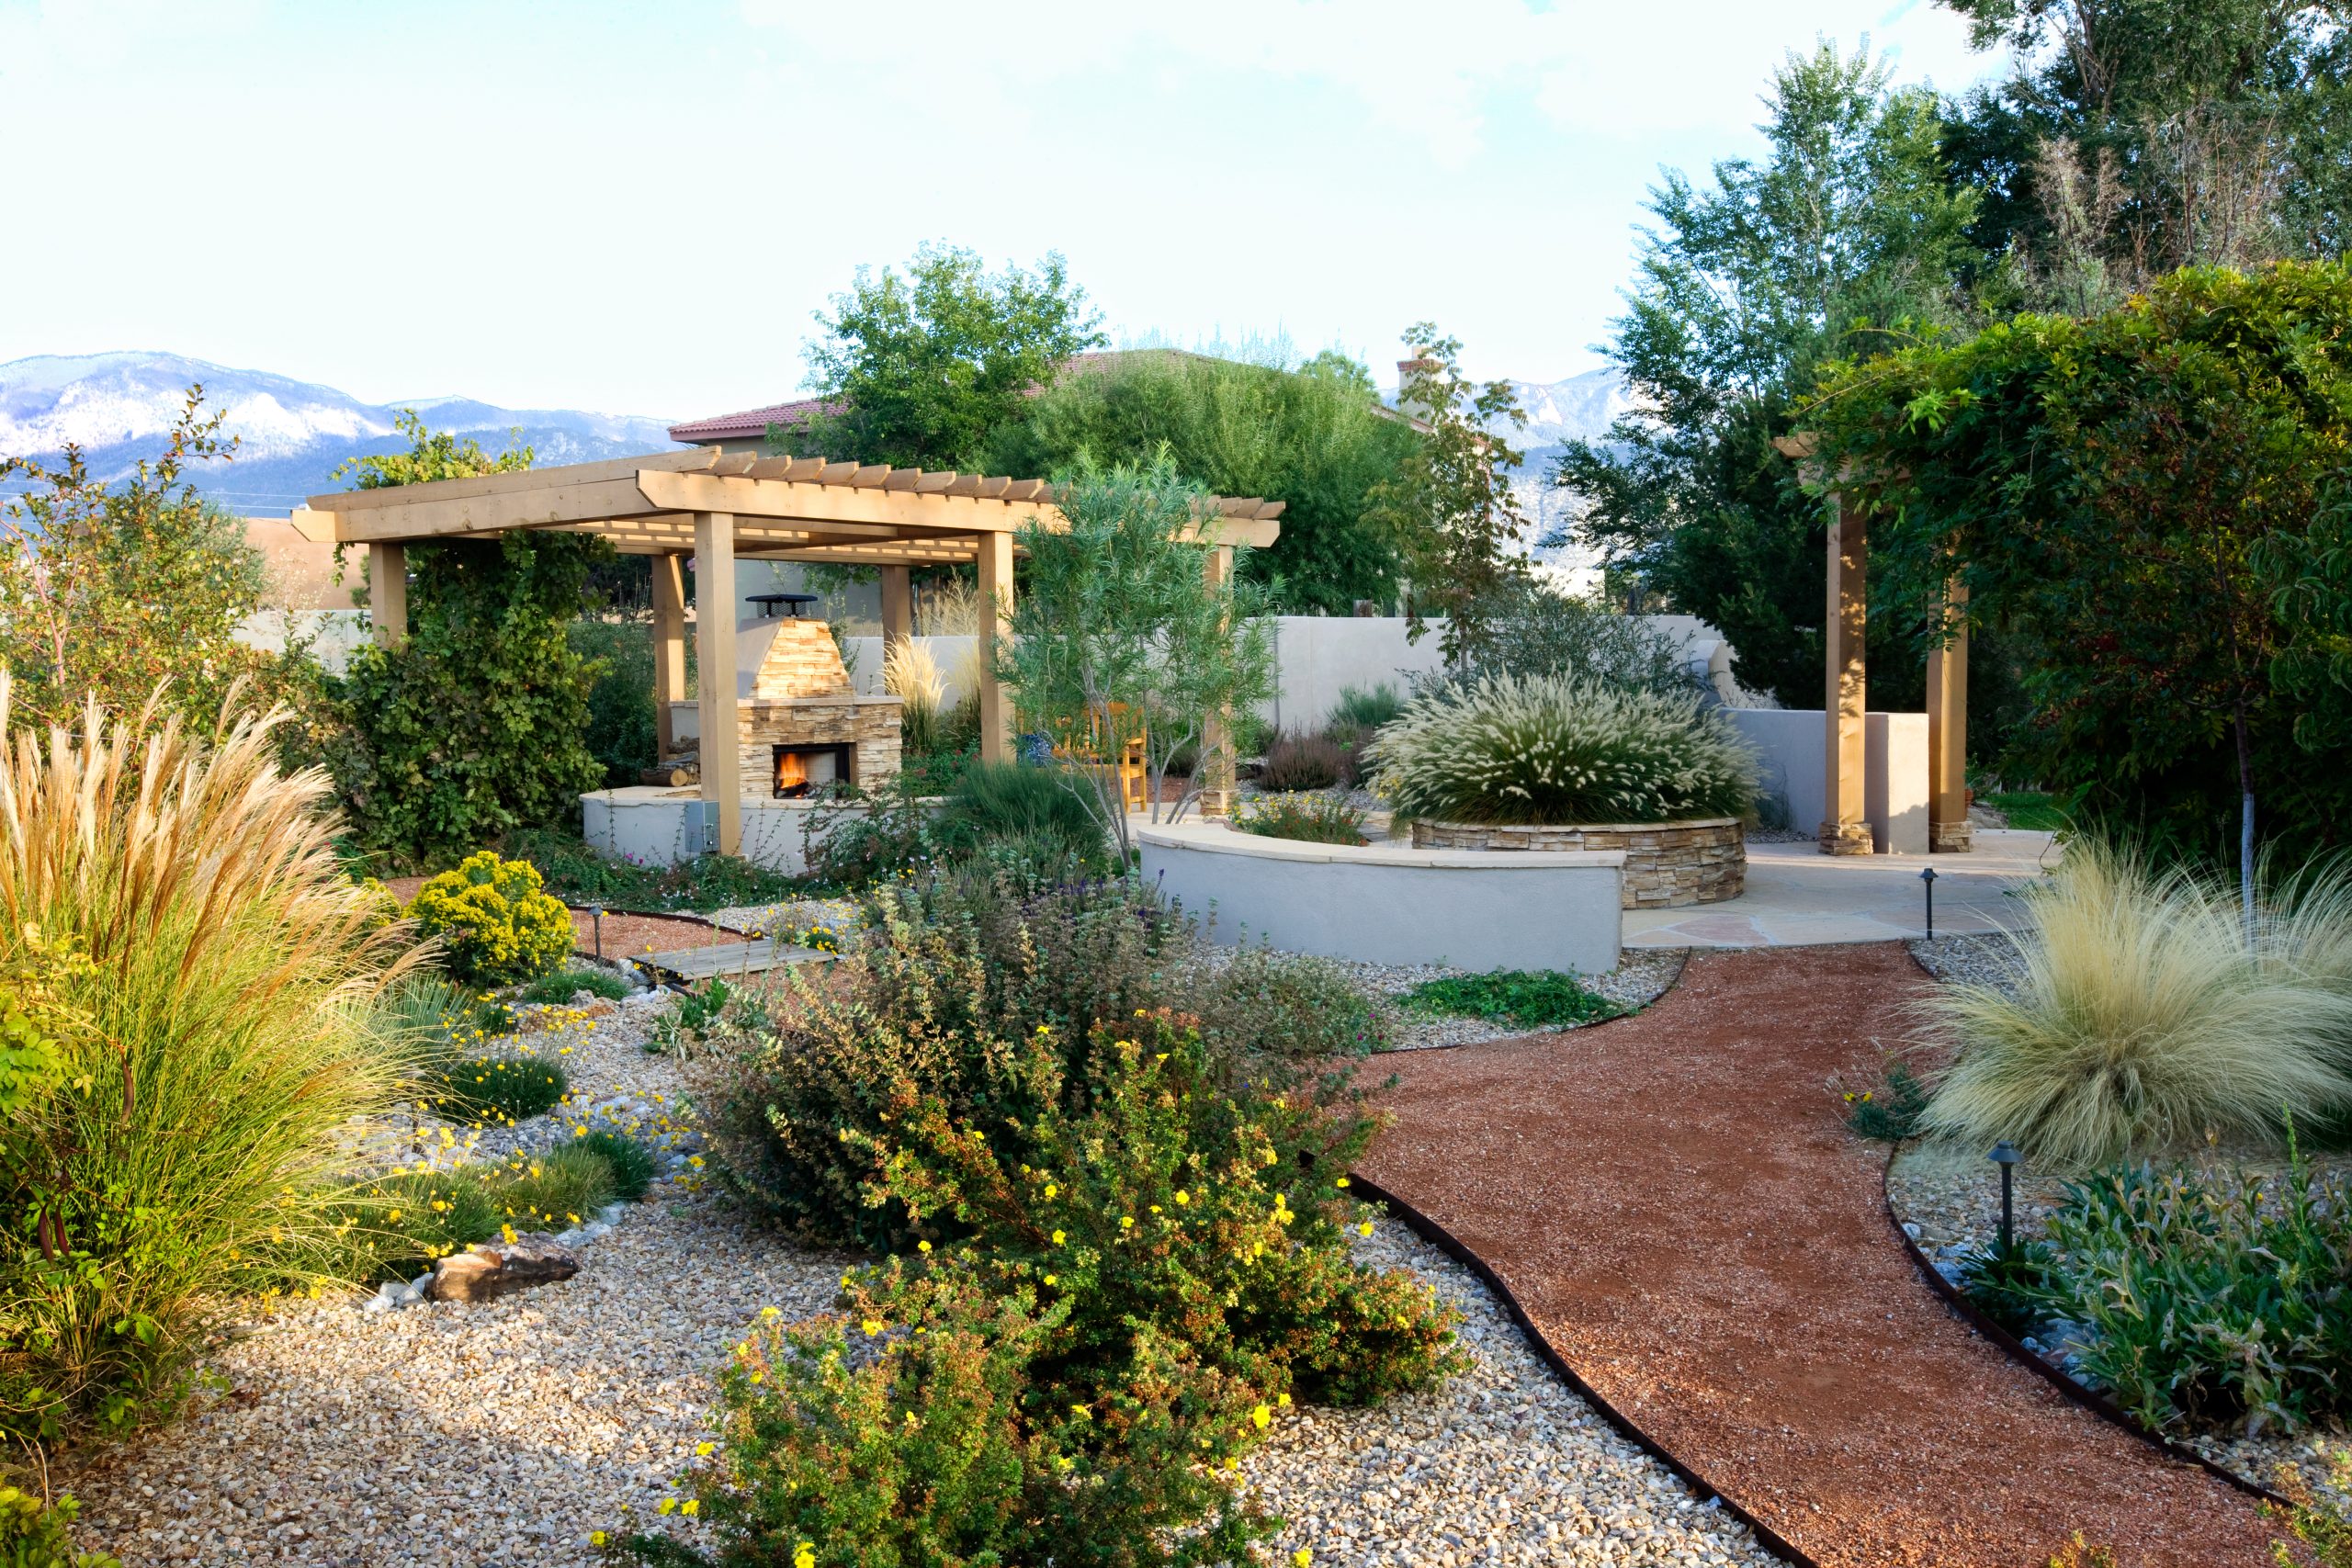
15. Create Outdoor ‘Rooms’ with a Pergola, Pizza Oven, and Varied Ground Covers
This multi-zone concept is ambitious and works best in a larger, relatively flat yard of at least 1,500 square feet. This allows enough space for each ‘room’—the pergola-covered cooking area, a dining patio, and the surrounding garden beds—to feel distinct and not cramped. The pergola itself should be at least 10×12 feet to comfortably house the oven and a prep area. The key is to maintain open, visible pathways between zones so the entire space still feels connected. For a smaller yard, focus on perfecting one or two zones instead of trying to fit everything in.
|
📋 Copy HEX 🔗 Share |
This landscape is successful because it uses different ground cover materials to define distinct functional areas. The main entertaining space under the pergola might use flagstone, while a crushed red stone path clearly signals a walkway, and gravel beds define the planting areas. This material shift acts as a visual cue, like changing the flooring from one room to another inside a house. It breaks up a large, potentially monotonous space into smaller, more intimate zones without needing walls, making the entire yard more functional and visually engaging.
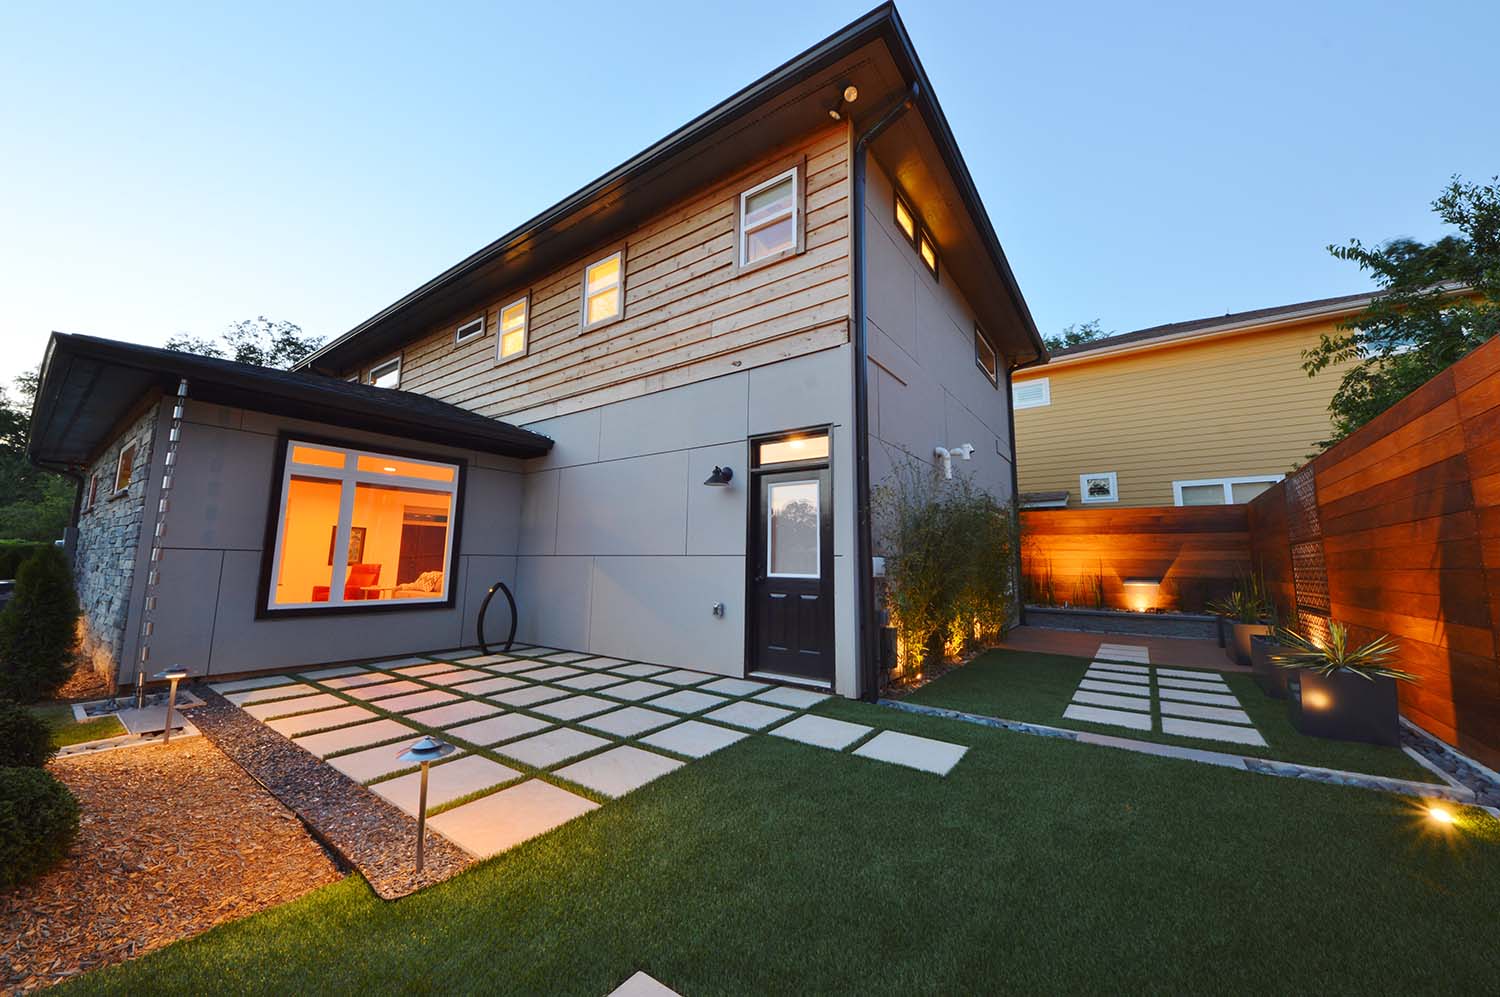
16. Illuminate a Modern Patio with Integrated Turf and Uplighting
While the combination of concrete pavers and artificial turf looks incredibly sleek and modern, be aware of the maintenance reality. The turf strips, while small, act as channels that collect leaves, dust, and debris. You’ll need to use a leaf blower or outdoor vacuum regularly to keep them looking clean and green. Furthermore, depending on your climate, you may have to deal with moss or algae growth in the turf, which will require occasional treatment with a specialized cleaner. It’s a lower-maintenance option than real grass, but it’s not a set-it-and-forget-it solution.
|
📋 Copy HEX 🔗 Share |
The key to successful landscape lighting is to focus on grazing and uplighting. Instead of pointing lights down from above, which creates flat, uninteresting light, place fixtures on the ground near the base of features you want to highlight. Angle an uplight to shoot up the trunk of a tree, or ‘graze’ a textured wall (like the tall wood fence here) with light placed just inches away to bring out its texture. This creates dramatic shadows and highlights, making your landscape feel luxurious and custom-designed after dark.
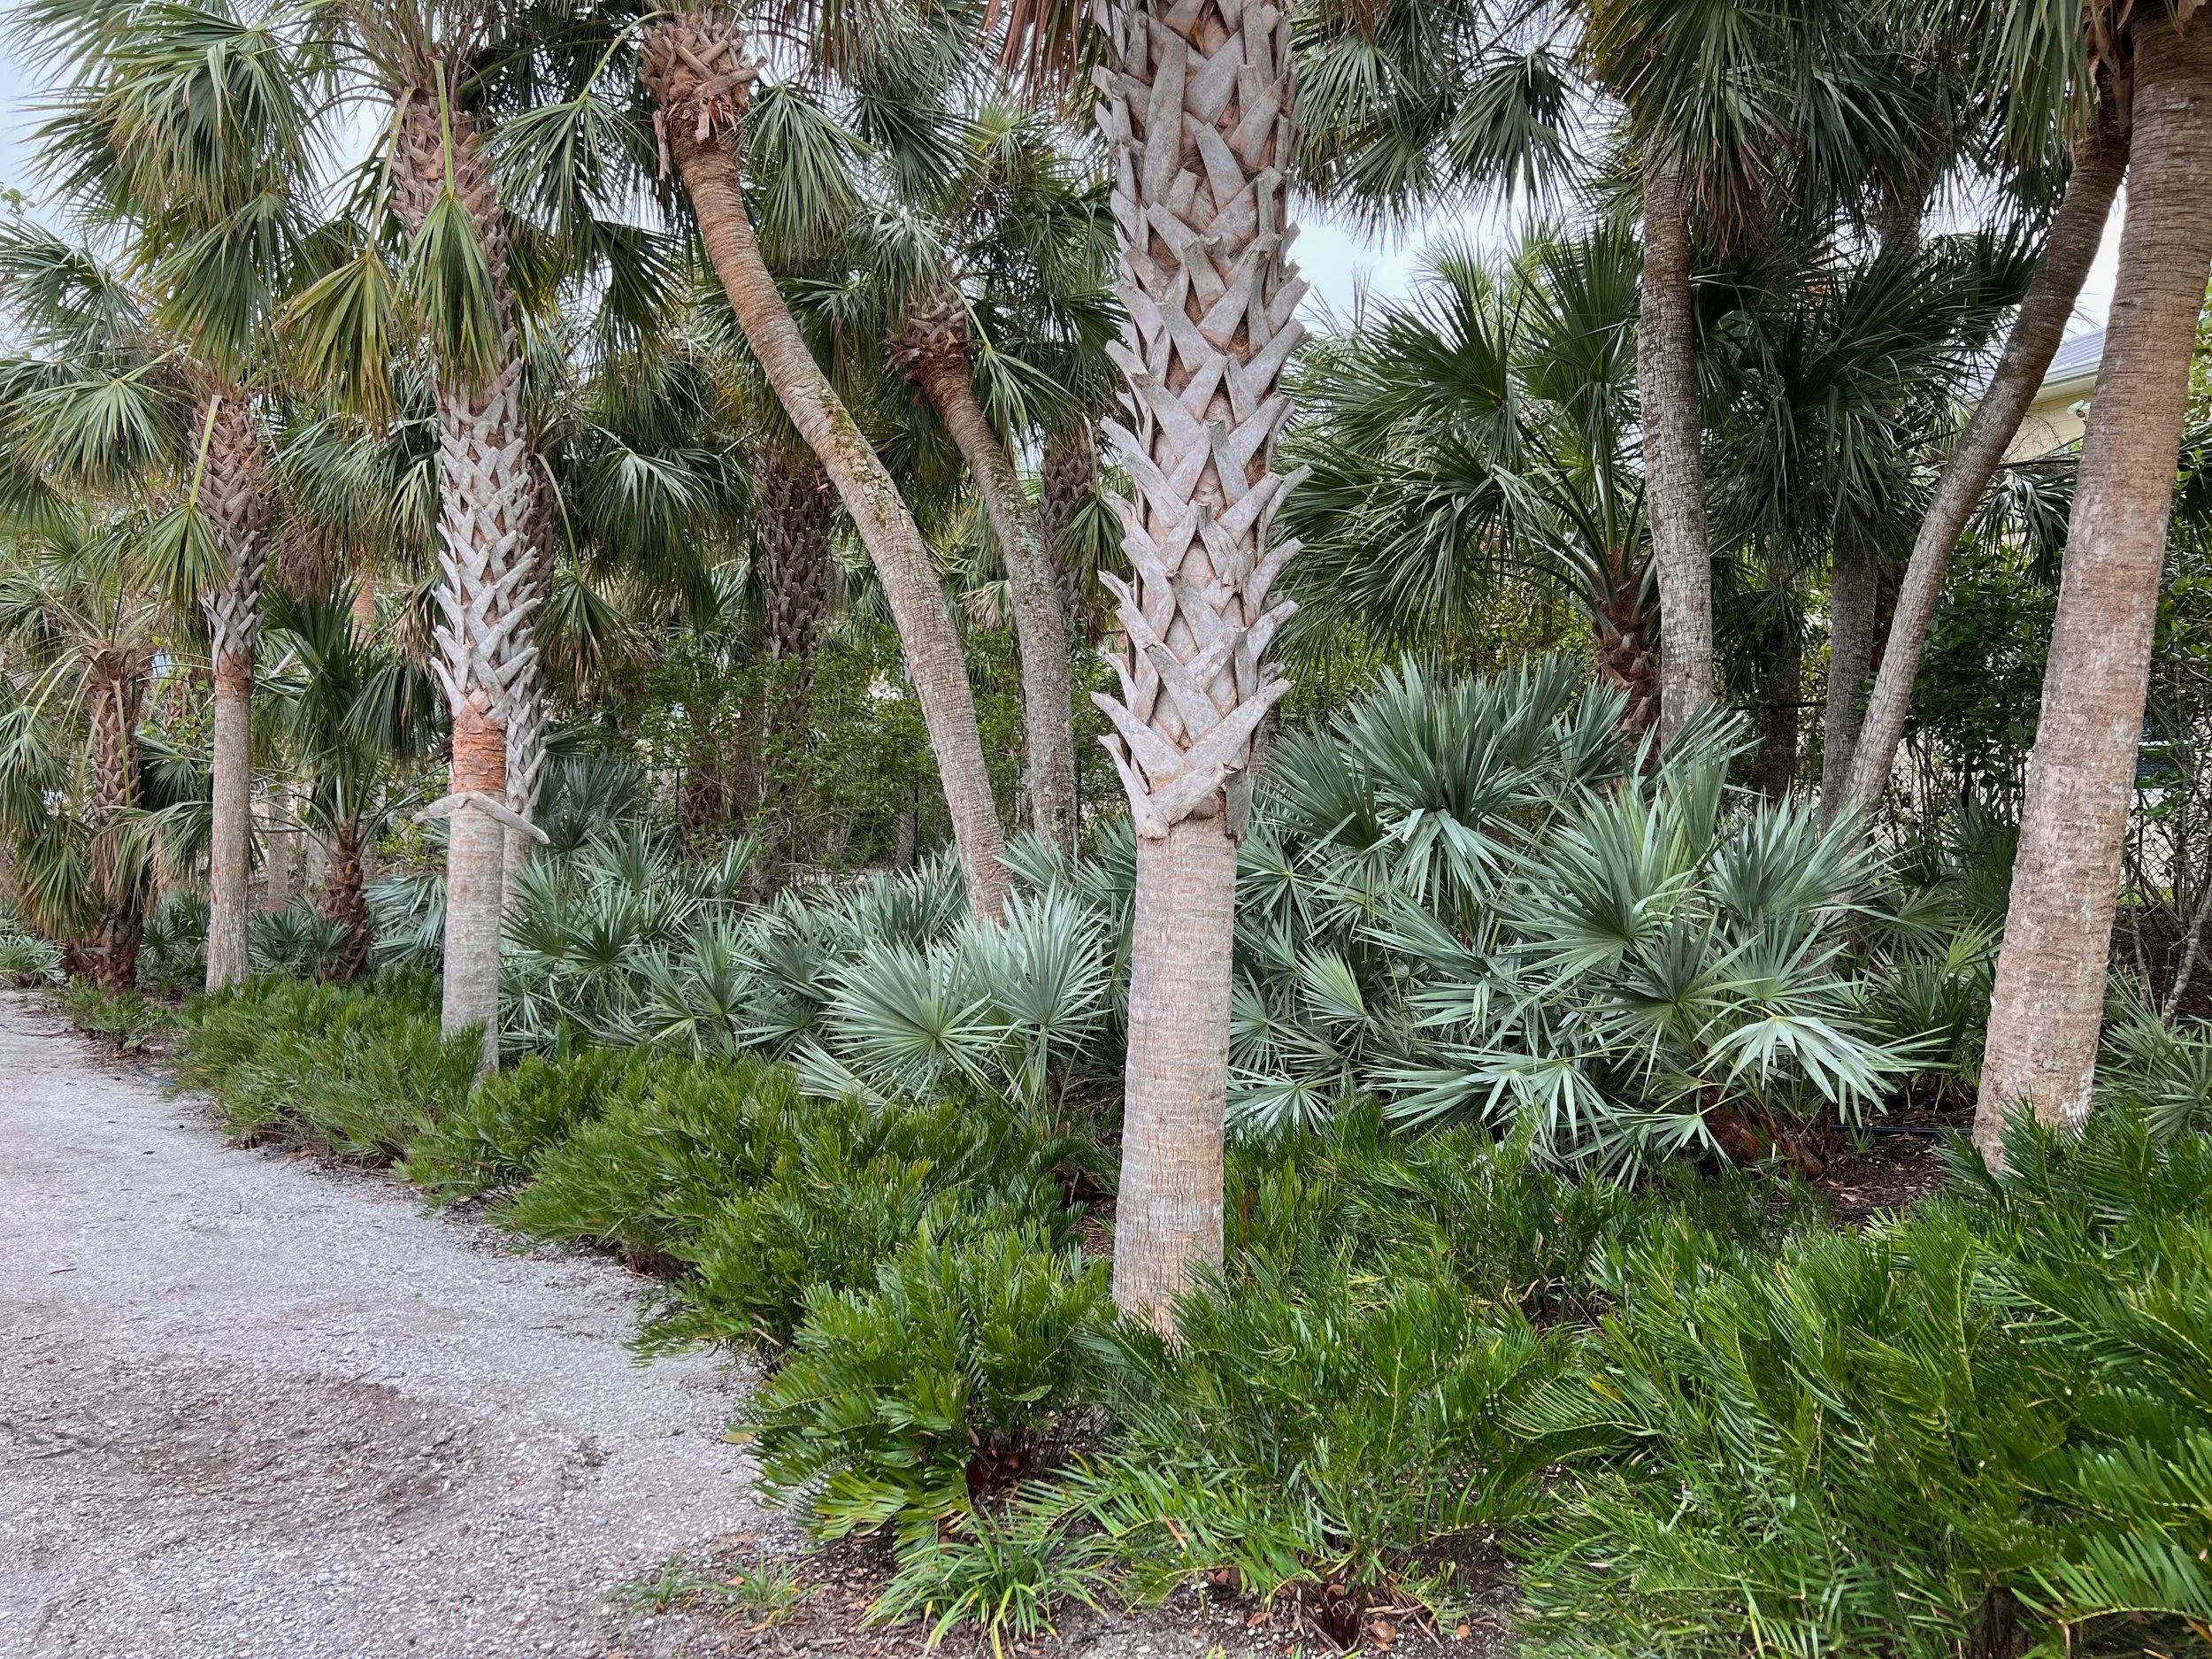
17. Layer Tropical Textures Along a Winding Gravel Path
The secret ingredient in this lush landscape is the silver-blue fan palm. In a sea of greens, its distinct color and bold, fanned-out shape provide a crucial point of contrast. It breaks up the monotony of the surrounding dark green foliage and draws the eye. Its unique silhouette adds an exotic, almost prehistoric texture that elevates the garden from a simple collection of plants to a deliberately designed tropical paradise. If you removed it, the entire composition would feel less dynamic and far more ordinary.
|
📋 Copy HEX 🔗 Share |
Achieving this dense, jungle-like feel follows a simple formula: 30% tall canopy + 60% mid-level texture + 10% ground cover. The tall palm trees provide the overhead canopy and vertical structure. The bulk of the design is the mid-level layer, where you mix a wide variety of textures—from the spiky cycads to broad-leafed plants and silver fan palms. The gravel path acts as the simple 10% base, a neutral river that winds through the riot of foliage. This formula ensures depth, variety, and that immersive, layered look.
18. Design a Cozy Backyard with Mulch, Brick, and Stone
This cozy, multi-textured look is incredibly achievable on a tight budget. The key is to source materials cleverly. Check Facebook Marketplace or Craigslist for free or cheap leftover bricks from someone else’s patio project. Instead of buying expensive nursery plants, ask for cuttings from friends or neighbors—many common shrubs and perennials propagate easily. A bag of stepping stones from Home Depot is inexpensive, and you can often get free bark mulch from local arborists or your city’s green waste program. This entire look could be recreated for under $300 with some sweat equity.
|
📋 Copy HEX 🔗 Share |
This backyard feels so inviting because it successfully mixes multiple materials and textures. You have the rough, dark brown bark mulch, the smooth, light gray stepping stones, and the classic red-brown grid of the brick patio. Each surface defines a different zone, yet they all work together because they share a natural, earthy quality. The lush, varied greenery spills over the edges, further softening the design and blurring the lines between the hardscaping and the garden. This design perfectly shows how combining textures creates a rich, lived-in feel.
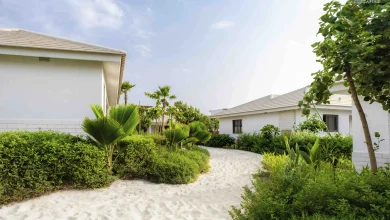
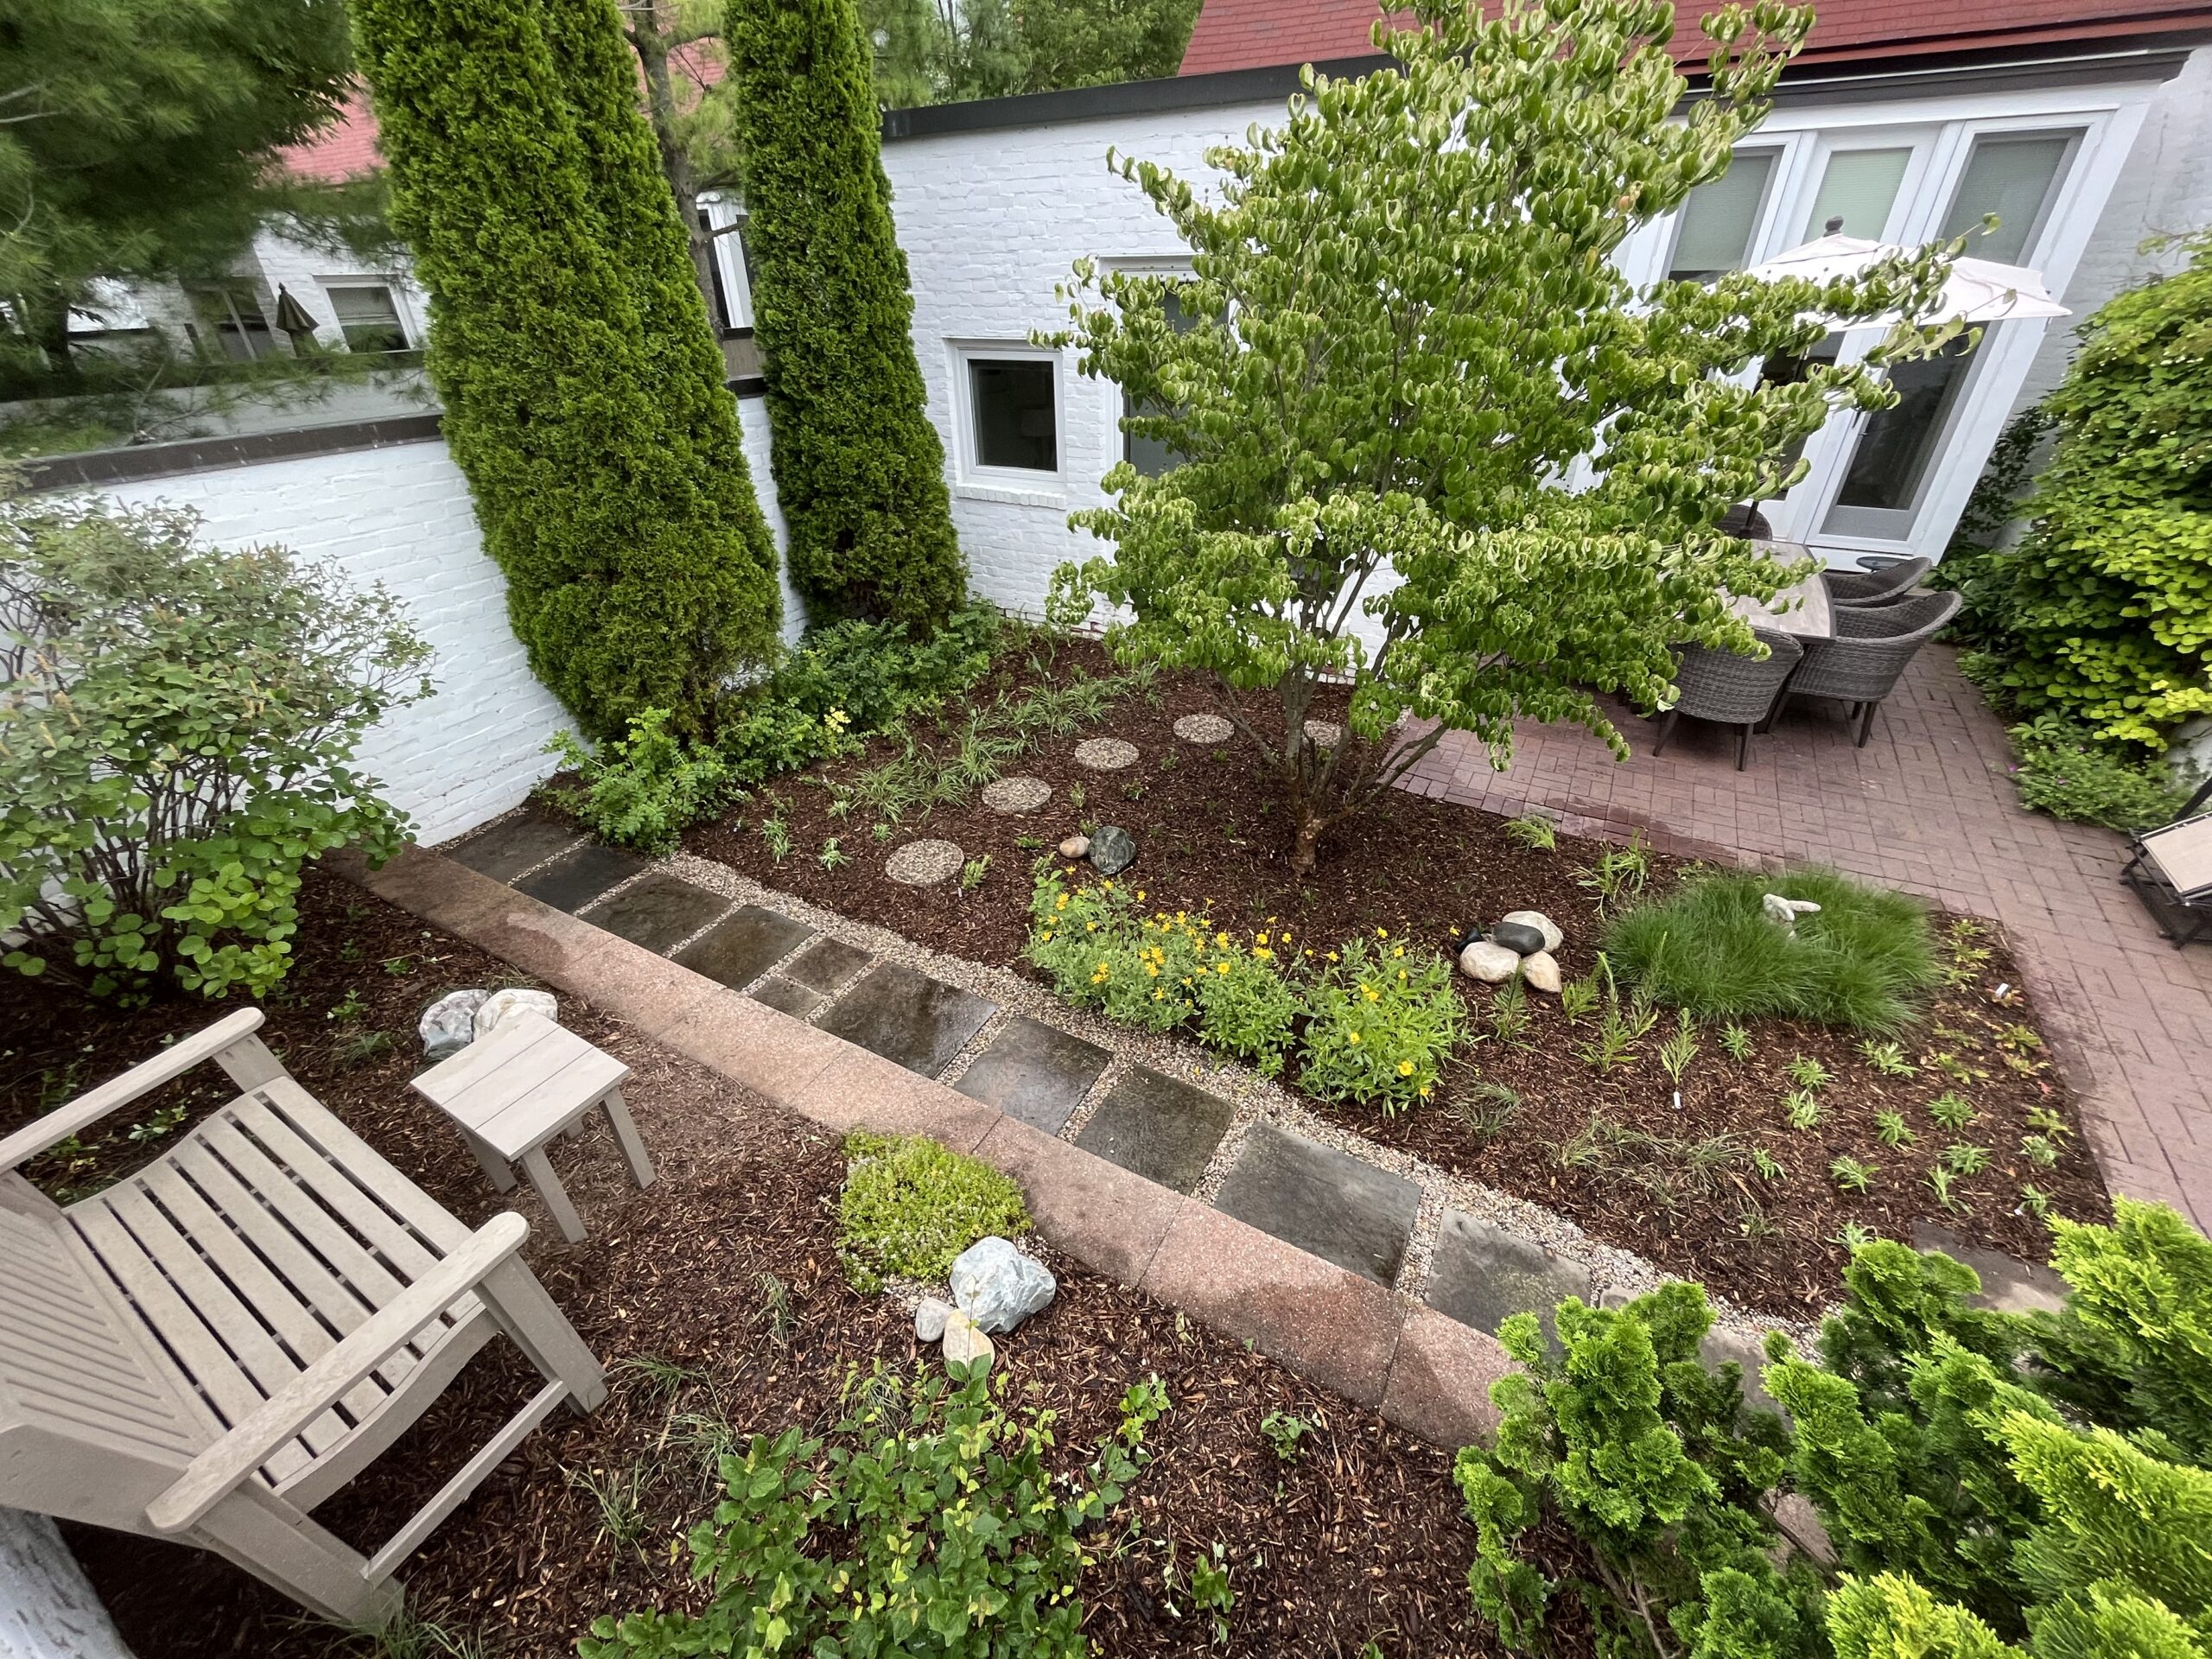
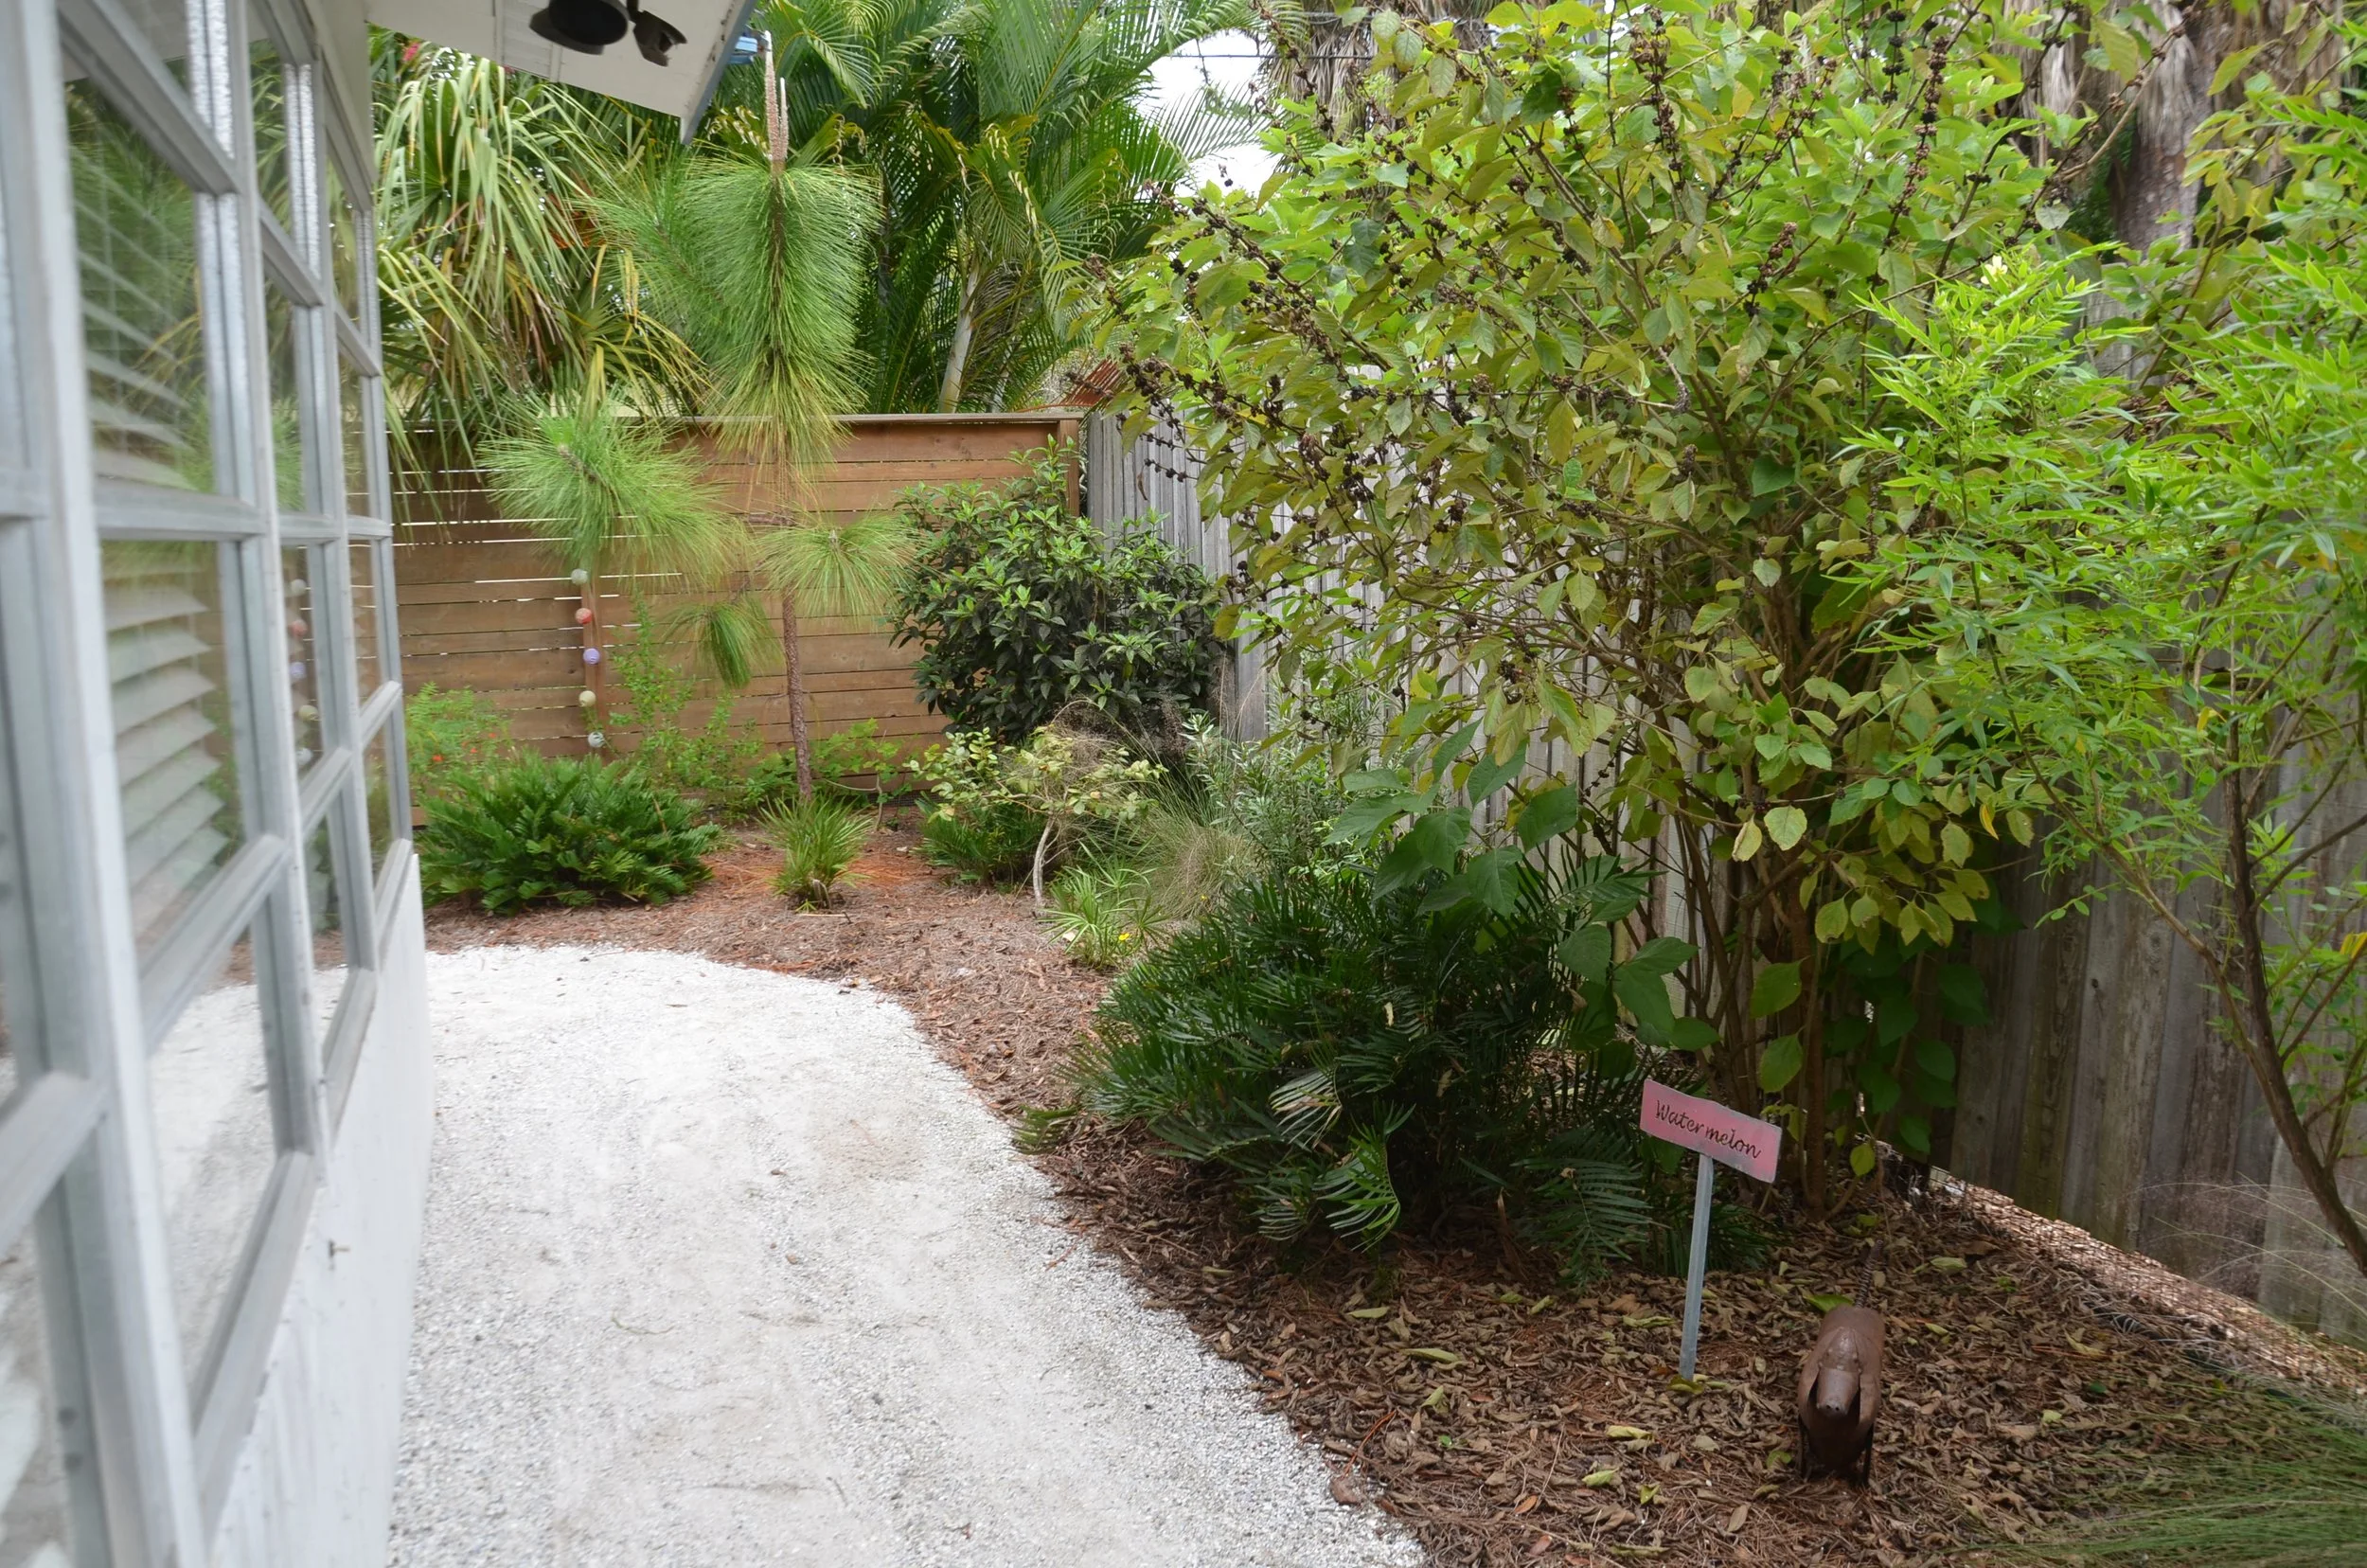
19. Carve a Serene Path Through a Tropical Garden
In a narrow space like this garden, creating curves is essential. A straight path would feel like a bowling alley, emphasizing the corridor-like shape of the yard. By introducing a gentle ‘S’ curve to the white gravel path, the designer makes the space feel wider and more dynamic. The curves partially obscure the view, creating a sense of mystery and encouraging you to explore what’s further on. This simple trick is one of the most effective ways to add interest and a sense of spaciousness to a small or narrow garden.
|
📋 Copy HEX 🔗 Share |
White gravel looks stunningly crisp when it’s first installed, but it is the highest-maintenance gravel choice. It shows every fallen leaf, twig, and speck of dirt. To keep it looking pristine, you’ll need to rake or blow it clean at least weekly. Over time, it can also become stained or discolored by tannins from decomposing leaves or dirt runoff. If you love the look but not the work, consider using it in a smaller, more contained area or opt for a light gray or tan gravel, which is much more forgiving. This material is not a good choice for areas with lots of overhanging deciduous trees.
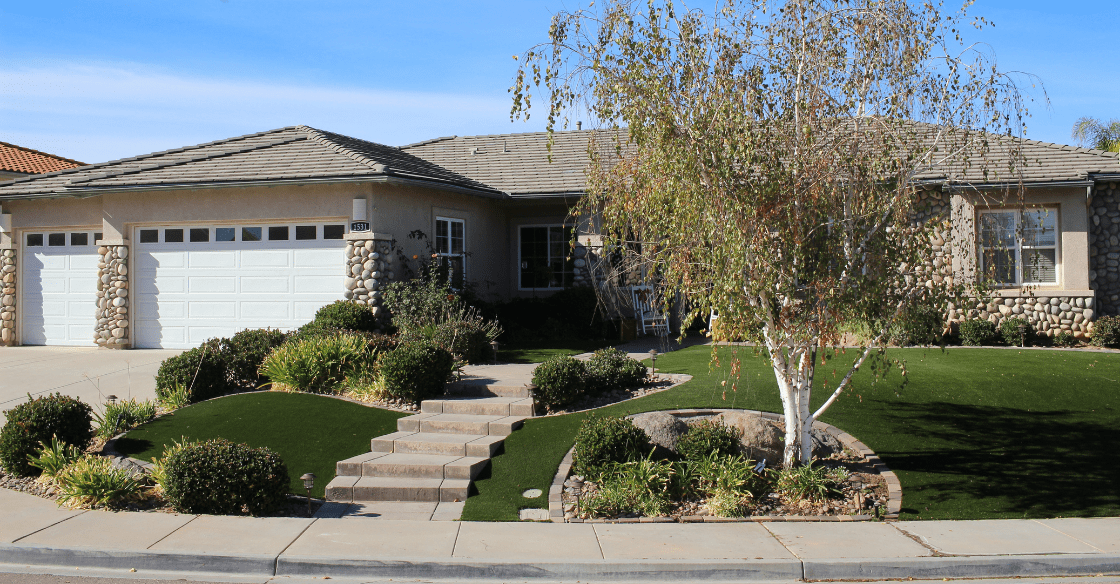
20. Combine Artificial Turf and Stone Veneer for a Low-Maintenance Facade
Artificial turf has seen a major glow-up recently, which is why it’s trending in 2026 for both eco-conscious and design-forward homeowners. Early versions looked plastic and fake, but modern turf has realistic color variations and textures. For regions battling drought and water restrictions, it offers a green lawn without the guilt and endless upkeep. It’s a pragmatic choice that’s increasingly being embraced for its clean, modern aesthetic, especially when paired with natural materials like the stone veneer and shrubs seen here.
|
📋 Copy HEX 🔗 Share |
While you can say goodbye to mowing, watering, and fertilizing, artificial turf is not zero-maintenance. It needs to be regularly cleared of leaves and debris with a leaf blower. In high-traffic areas, the blades can become matted down and will need to be ‘brushed up’ with a stiff broom to maintain them looking good, so they need to be rinsed down periodically to wash away dust and pet urine. While it requires much less work than a real lawn, it still needs some maintenance. Compare the upkeep with the natural lawn in Idea #23.
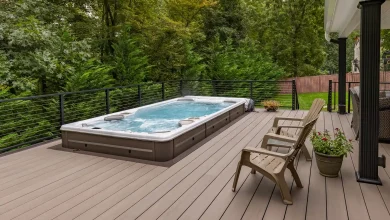
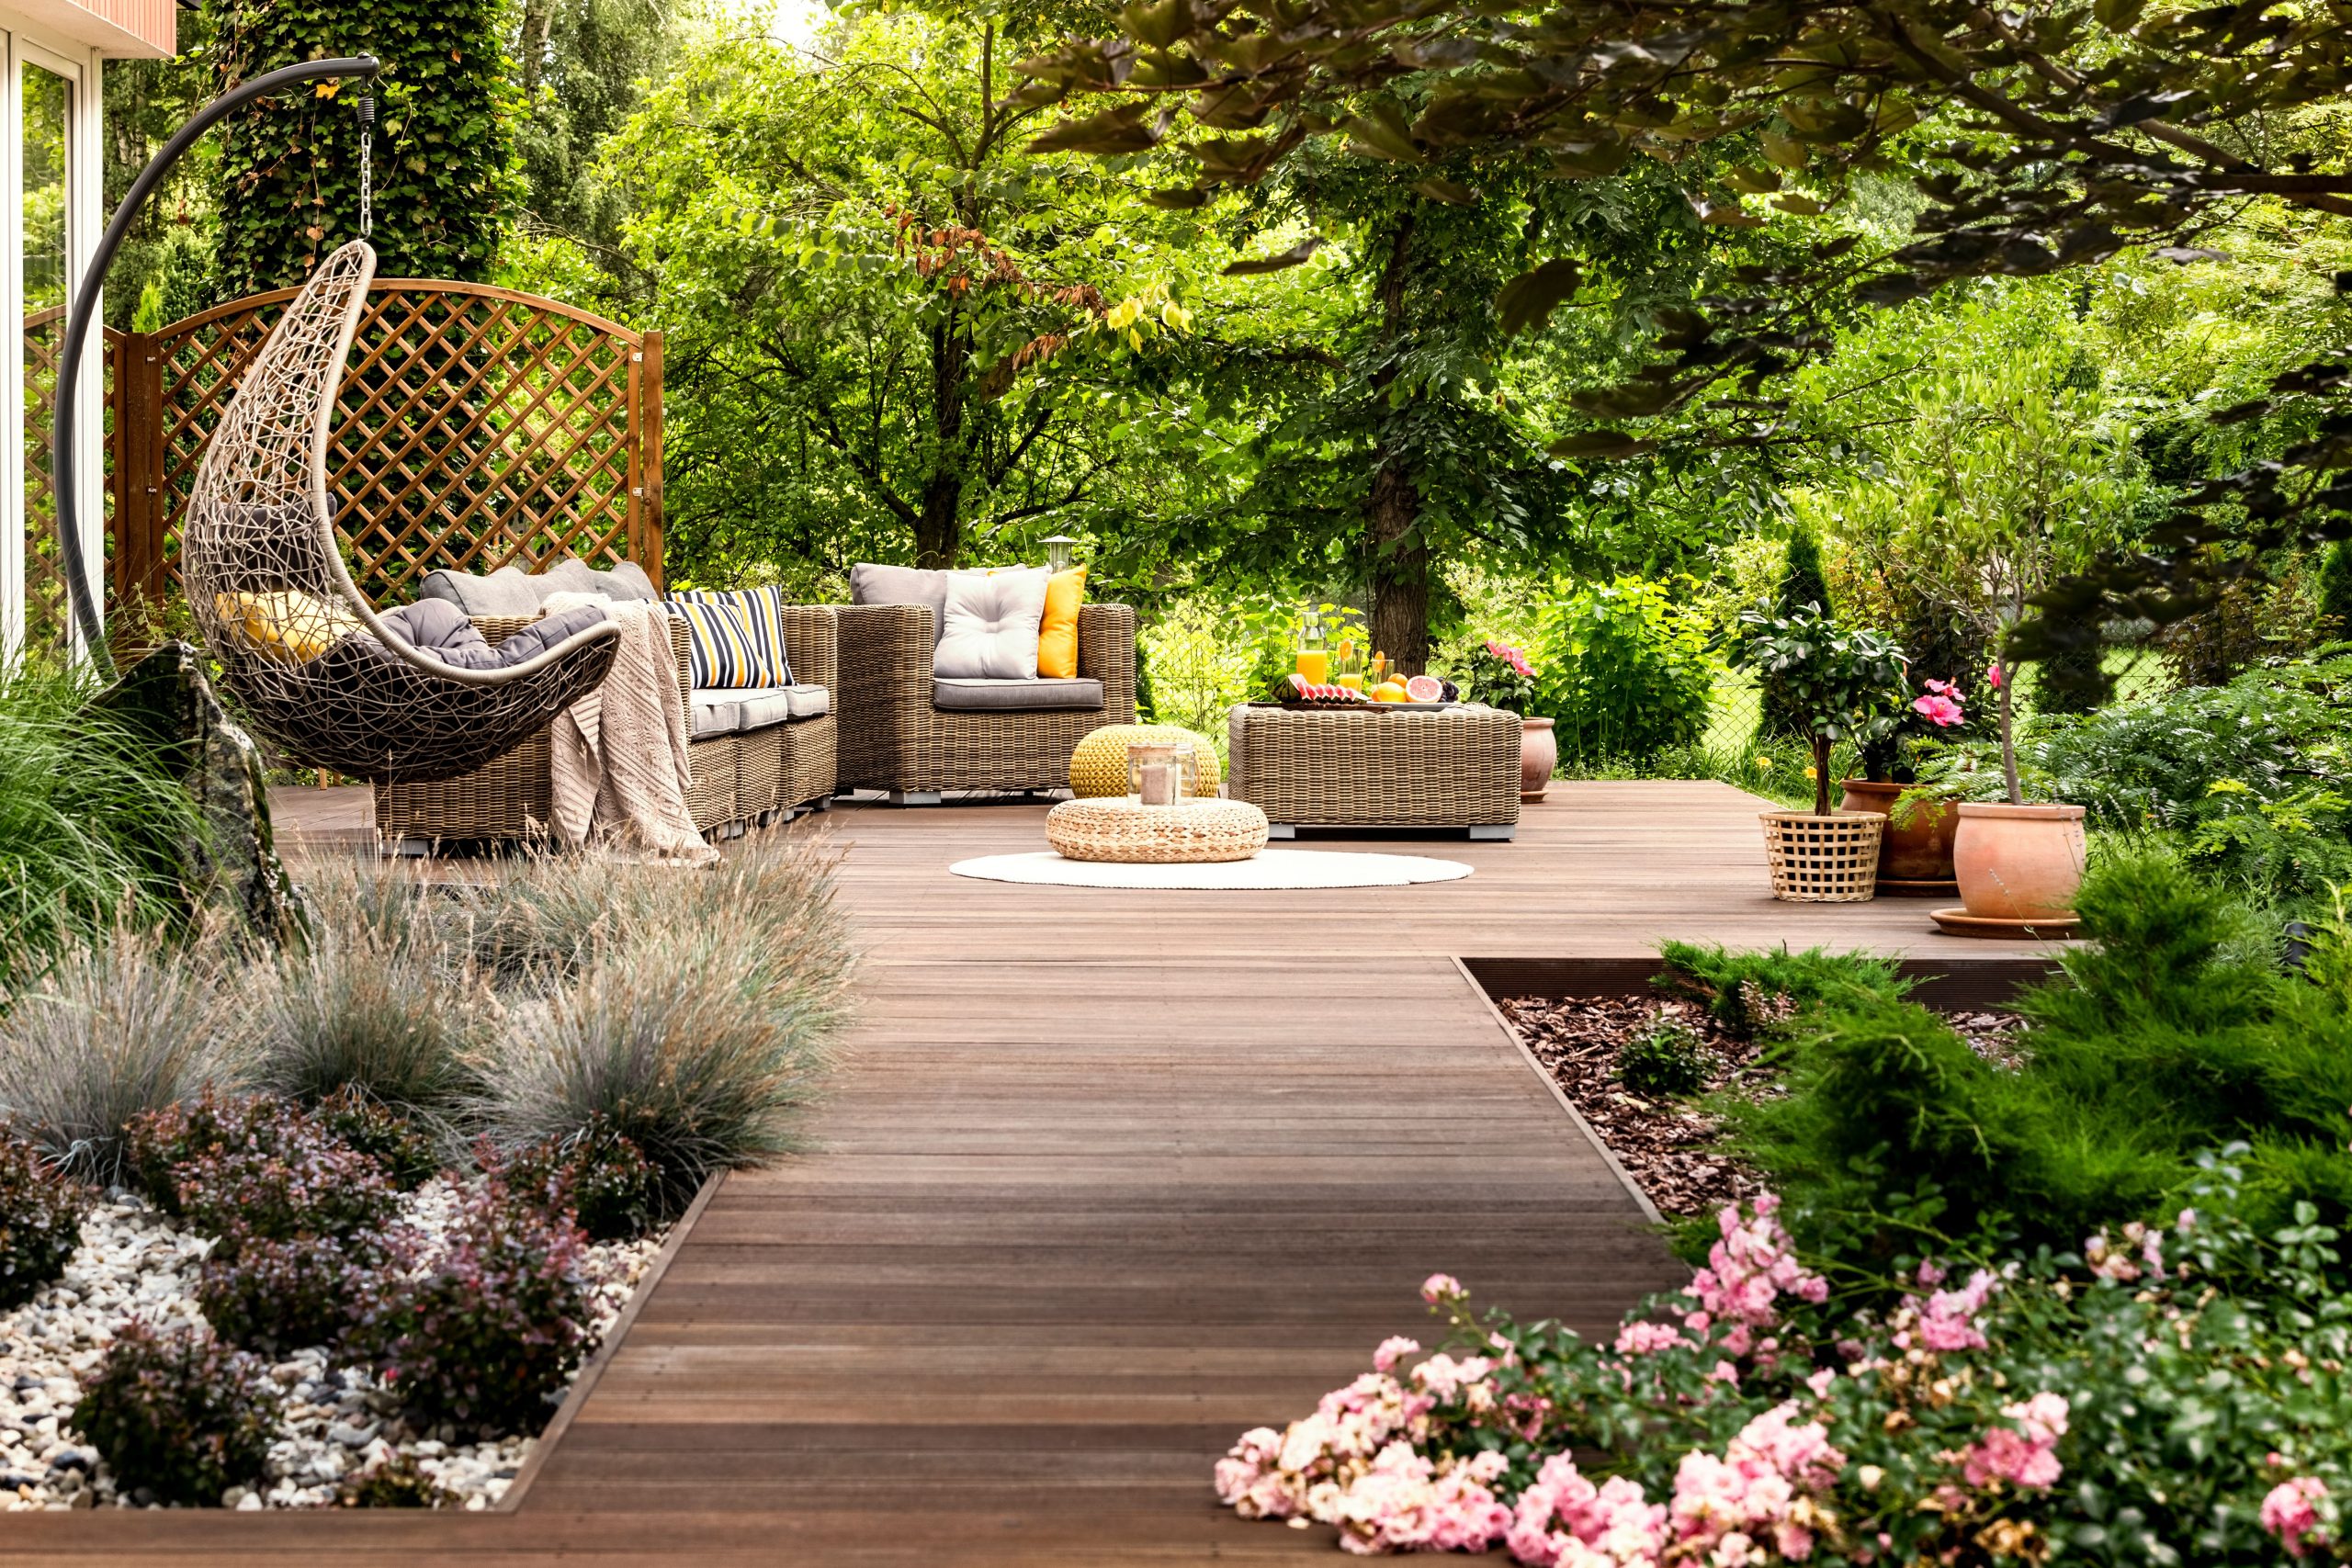
21. Create a Relaxing Deck Oasis with a Hanging Chair and Wicker Furniture
The single element that transforms this space from a standard patio into a true retreat is the egg-shaped hanging chair. It instantly signals relaxation and comfort. While the wicker sofa is practical for hosting, the hanging chair is a personal indulgence—a cozy nook for one. Its gentle, suspended motion offers a sense of escape that a static chair can’t match. It breaks up the horizontal lines of the deck and furniture, adding a playful, sculptural element that says, ‘This is a place to unwind.’ It’s the emotional centerpiece of the space.
|
📋 Copy HEX 🔗 Share |
- Wood Decking (DIY): $2,000 – $5,000
- Wicker Seating Set: $800 – $2,500
- Hanging Egg Chair & Stand: $300 – $800
- Plants & Terracotta Pots: $400 – $1,200
- Wooden Lattice Screen: $200 – $600
- Budget Alternative: Search Facebook Marketplace for a used patio set ($200-$500). Build planters from cedar fence pickets. Focus on smaller, less expensive plants you can grow over time. Total cost could be under $1,000.
- TOTAL: $3,700 – $10,100
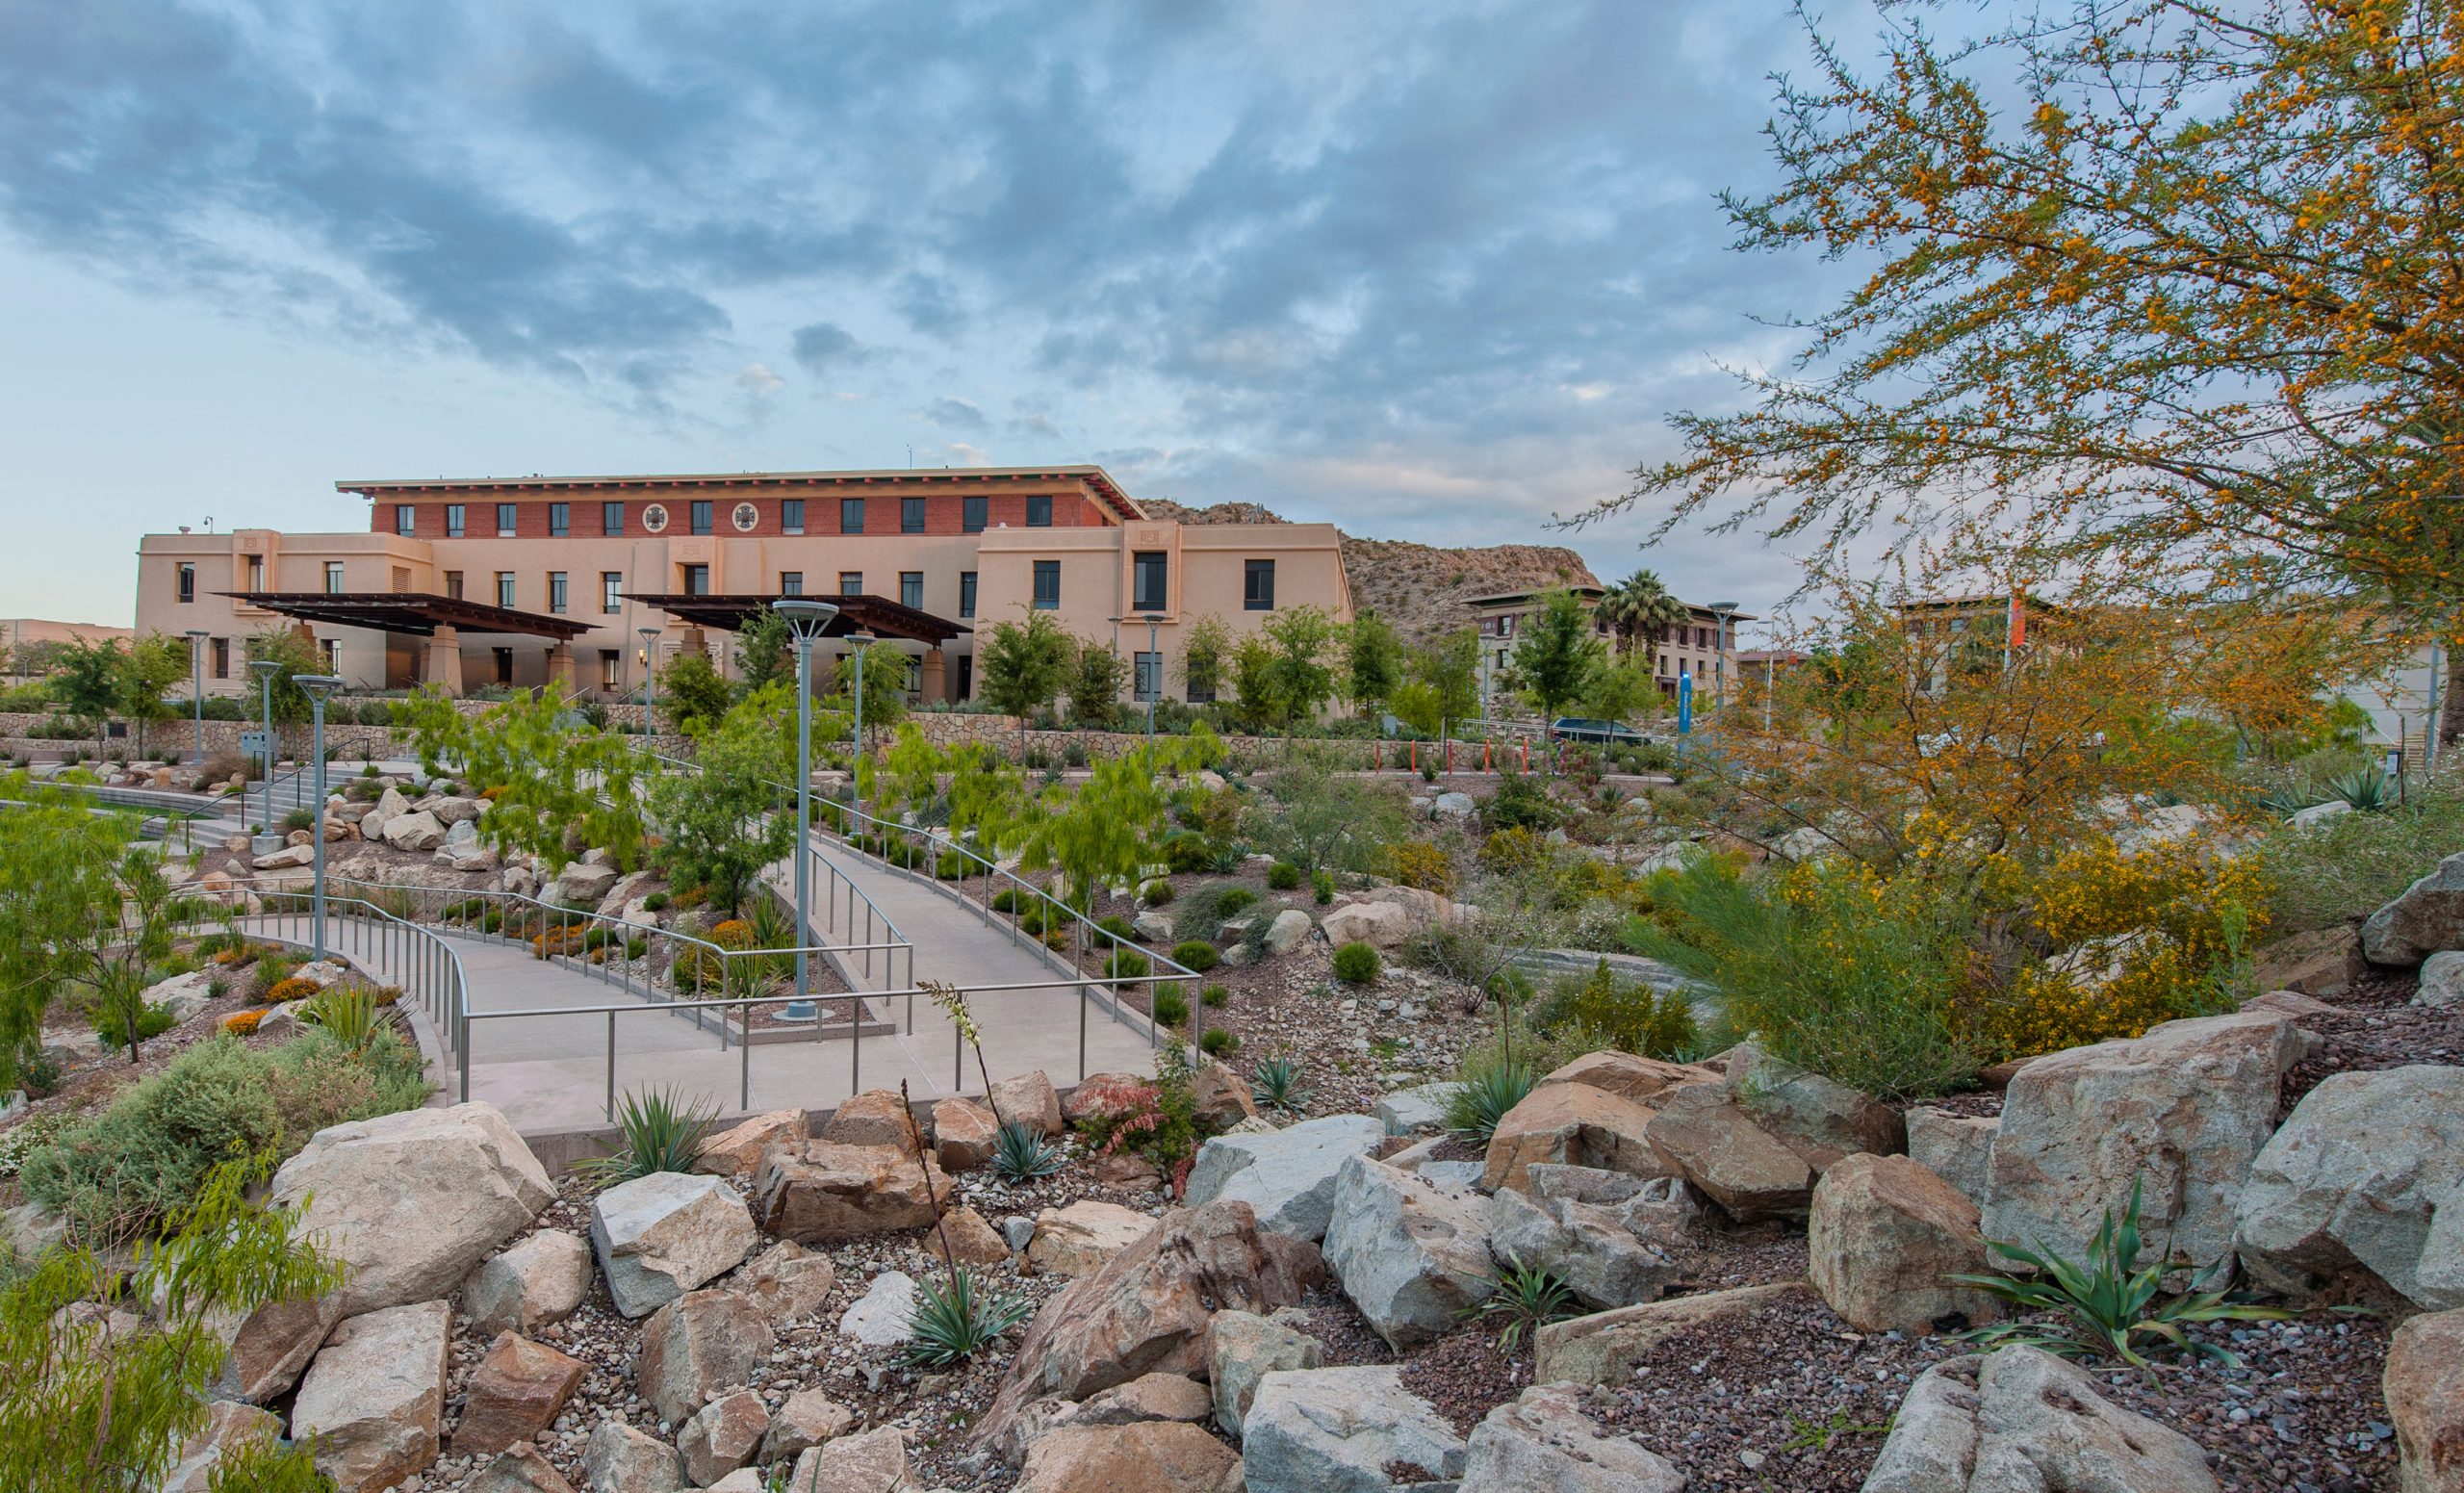
22. Design a Water-Wise Landscape with Curved Concrete Paths
This large-scale design works because it prioritizes circulation and accessibility. The wide, curved concrete pathways are not just decorative; they are functional arteries that guide people through the space efficiently and safely, as indicated by the presence of sturdy metal railings. The pathways clearly separate the pedestrian zones from the planted areas. This strong ‘hardscape’ backbone allows the ‘softscape’—the drought-tolerant plants and gravel beds—to feel more natural and less chaotic, providing a structured frame for the wilder desert flora.
|
📋 Copy HEX 🔗 Share |
This approach, with its wide paths and large-scale plantings, is best suited for commercial properties, public spaces, or huge residential lots (half an acre or more). A typical suburban backyard would feel overwhelmed by the width of the paths (likely 4-5 feet) and the scale of the boulders. For a smaller residential space, you can capture the same feeling by using a narrower, winding path of flagstones or gravel and scaling down the size of the boulders and plants, similar to the design shown in Idea #9.
23. Achieve Zen with a Minimalist Asian-Inspired Gravel Garden
The key to this entire design is the choice of light-colored, fine gravel as the ground plane. It functions like a canvas, creating a serene, unified field that highlights the form of every other element. The timber stepping stones, the dark posts, the circular fire pit, and the bamboo plants are all placed like deliberate sculptural objects within this sea of gravel. This minimalist base evokes the feeling of a traditional Japanese karesansui (dry landscape) garden and encourages contemplation and a sense of tranquility. Without this minimalist base, the design would lose its entire Zen quality.
|
📋 Copy HEX 🔗 Share |
Installing timber stepping stones in gravel is a straightforward DIY project. Estimated time: 2 hours. Material cost: $150-$400.
- Position the Timbers: Lay your timber-look pavers or treated wood blocks on top of the existing gravel, arranging them in the desired path.
- Trace the Outline: Use a small trowel or even just your finger to trace the outline of each stepping stone in the gravel.
- Excavate the Gravel: Set the stone aside and scoop out the gravel from within the traced outline, creating a depression that is the same depth as your stone.
- Add a Sand Base: Pour about an inch of paver sand into the depression and level it. This allows for fine-tuning the height.
- Set the Stone: Place the stepping stone into the depression and press down firmly. Use a rubber mallet to gently tap it until it sits perfectly level with the surrounding gravel.
- Backfill: Brush the excavated gravel back around the edges of the stone to lock it in place.
24. Contrast a Lush Lawn with a Sharp Gravel Path and Ornamental Grasses
The power of this design comes from its bold use of contrast. You have the vibrant, uniform green of the meticulously maintained lawn set against the dark, moody gray of the gravel path. It’s a clash of textures—soft versus firm Then, you have the contrast in form: the low, flat plane of the grass is punctuated by the tall, fluffy plumes of the ornamental grasses. The path itself is further defined by the river stone edging, adding another layer of texture. This is a landscape that feels confident and intentional because every element has a clear counterpoint.

|
📋 Copy HEX 🔗 Share |
Achieving a lawn this lush and a path this crisp requires discipline. That razor-sharp edge between the turf and the gravel path doesn’t happen by accident. It will require weekly maintenance with a string trimmer or edger to prevent the grass from creeping into the gravel. The gravel itself will need to be periodically raked to keep it smooth, and any stray grass that manages to sprout in the path will need to be pulled by hand immediately. This design is a high-impact look, but it is also high-maintenance in its own way.
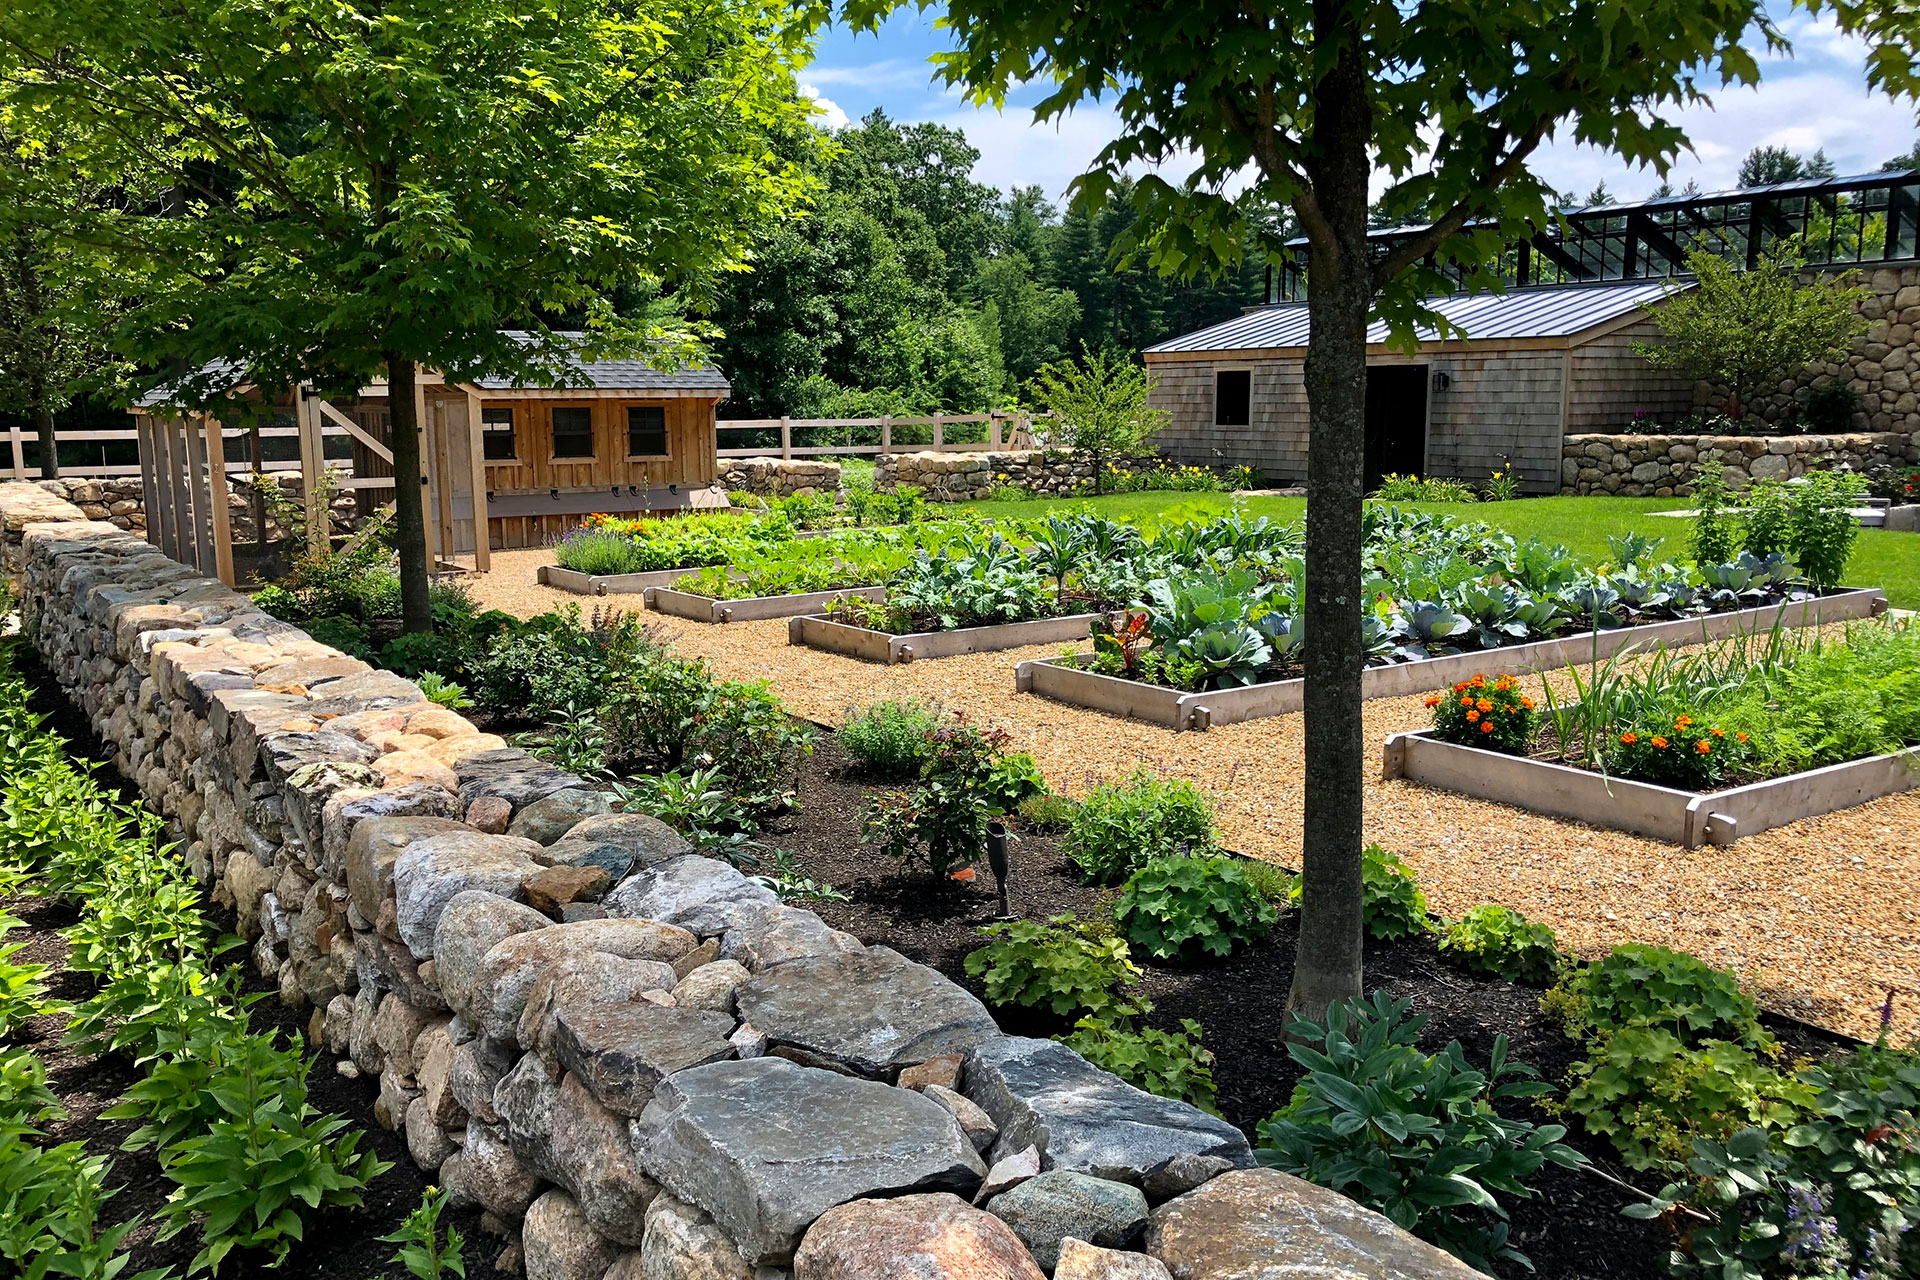
25. Frame Your Edible Garden with Raised Beds and Stone Walls
|
📋 Copy HEX 🔗 Share |
- Raised Wooden Beds (DIY): $100 – $300 per bed (materials only)
- Gravel for Paths: $200 – $500 for the entire area
- Quality Garden Soil & Compost: $150 – $400 per bed
- Plants, Seeds & Starts: $100 – $500 depending on variety
- Stacked Stone Wall (Pro-installed): $40 – $75 per square foot of face
- Budget Alternative: Use reclaimed wood or cinder blocks for beds. Source stone for free from construction sites (with permission!) or Craigslist. Start plants from seed. You could create a similar garden for under $800.
- TOTAL (Pro wall): $5,000 – $15,000+
An edible garden is a commitment, so make sure you’re ready before you build. Here’s a quick checklist.
- Sunlight is Not Optional: Most vegetables need at least 6 to 8 hours of direct sunlight each day. Track the sun in your chosen spot for a full day before you build a single bed.
- Water Access: Is there a hose bib nearby? Hauling water in buckets gets old very, very quickly. Plan for convenient irrigation from the start.
- Know Your Time Budget: Be realistic about how much time you can dedicate to weeding, watering, and harvesting. Start smaller than you think you want to; you can always add more beds next year.
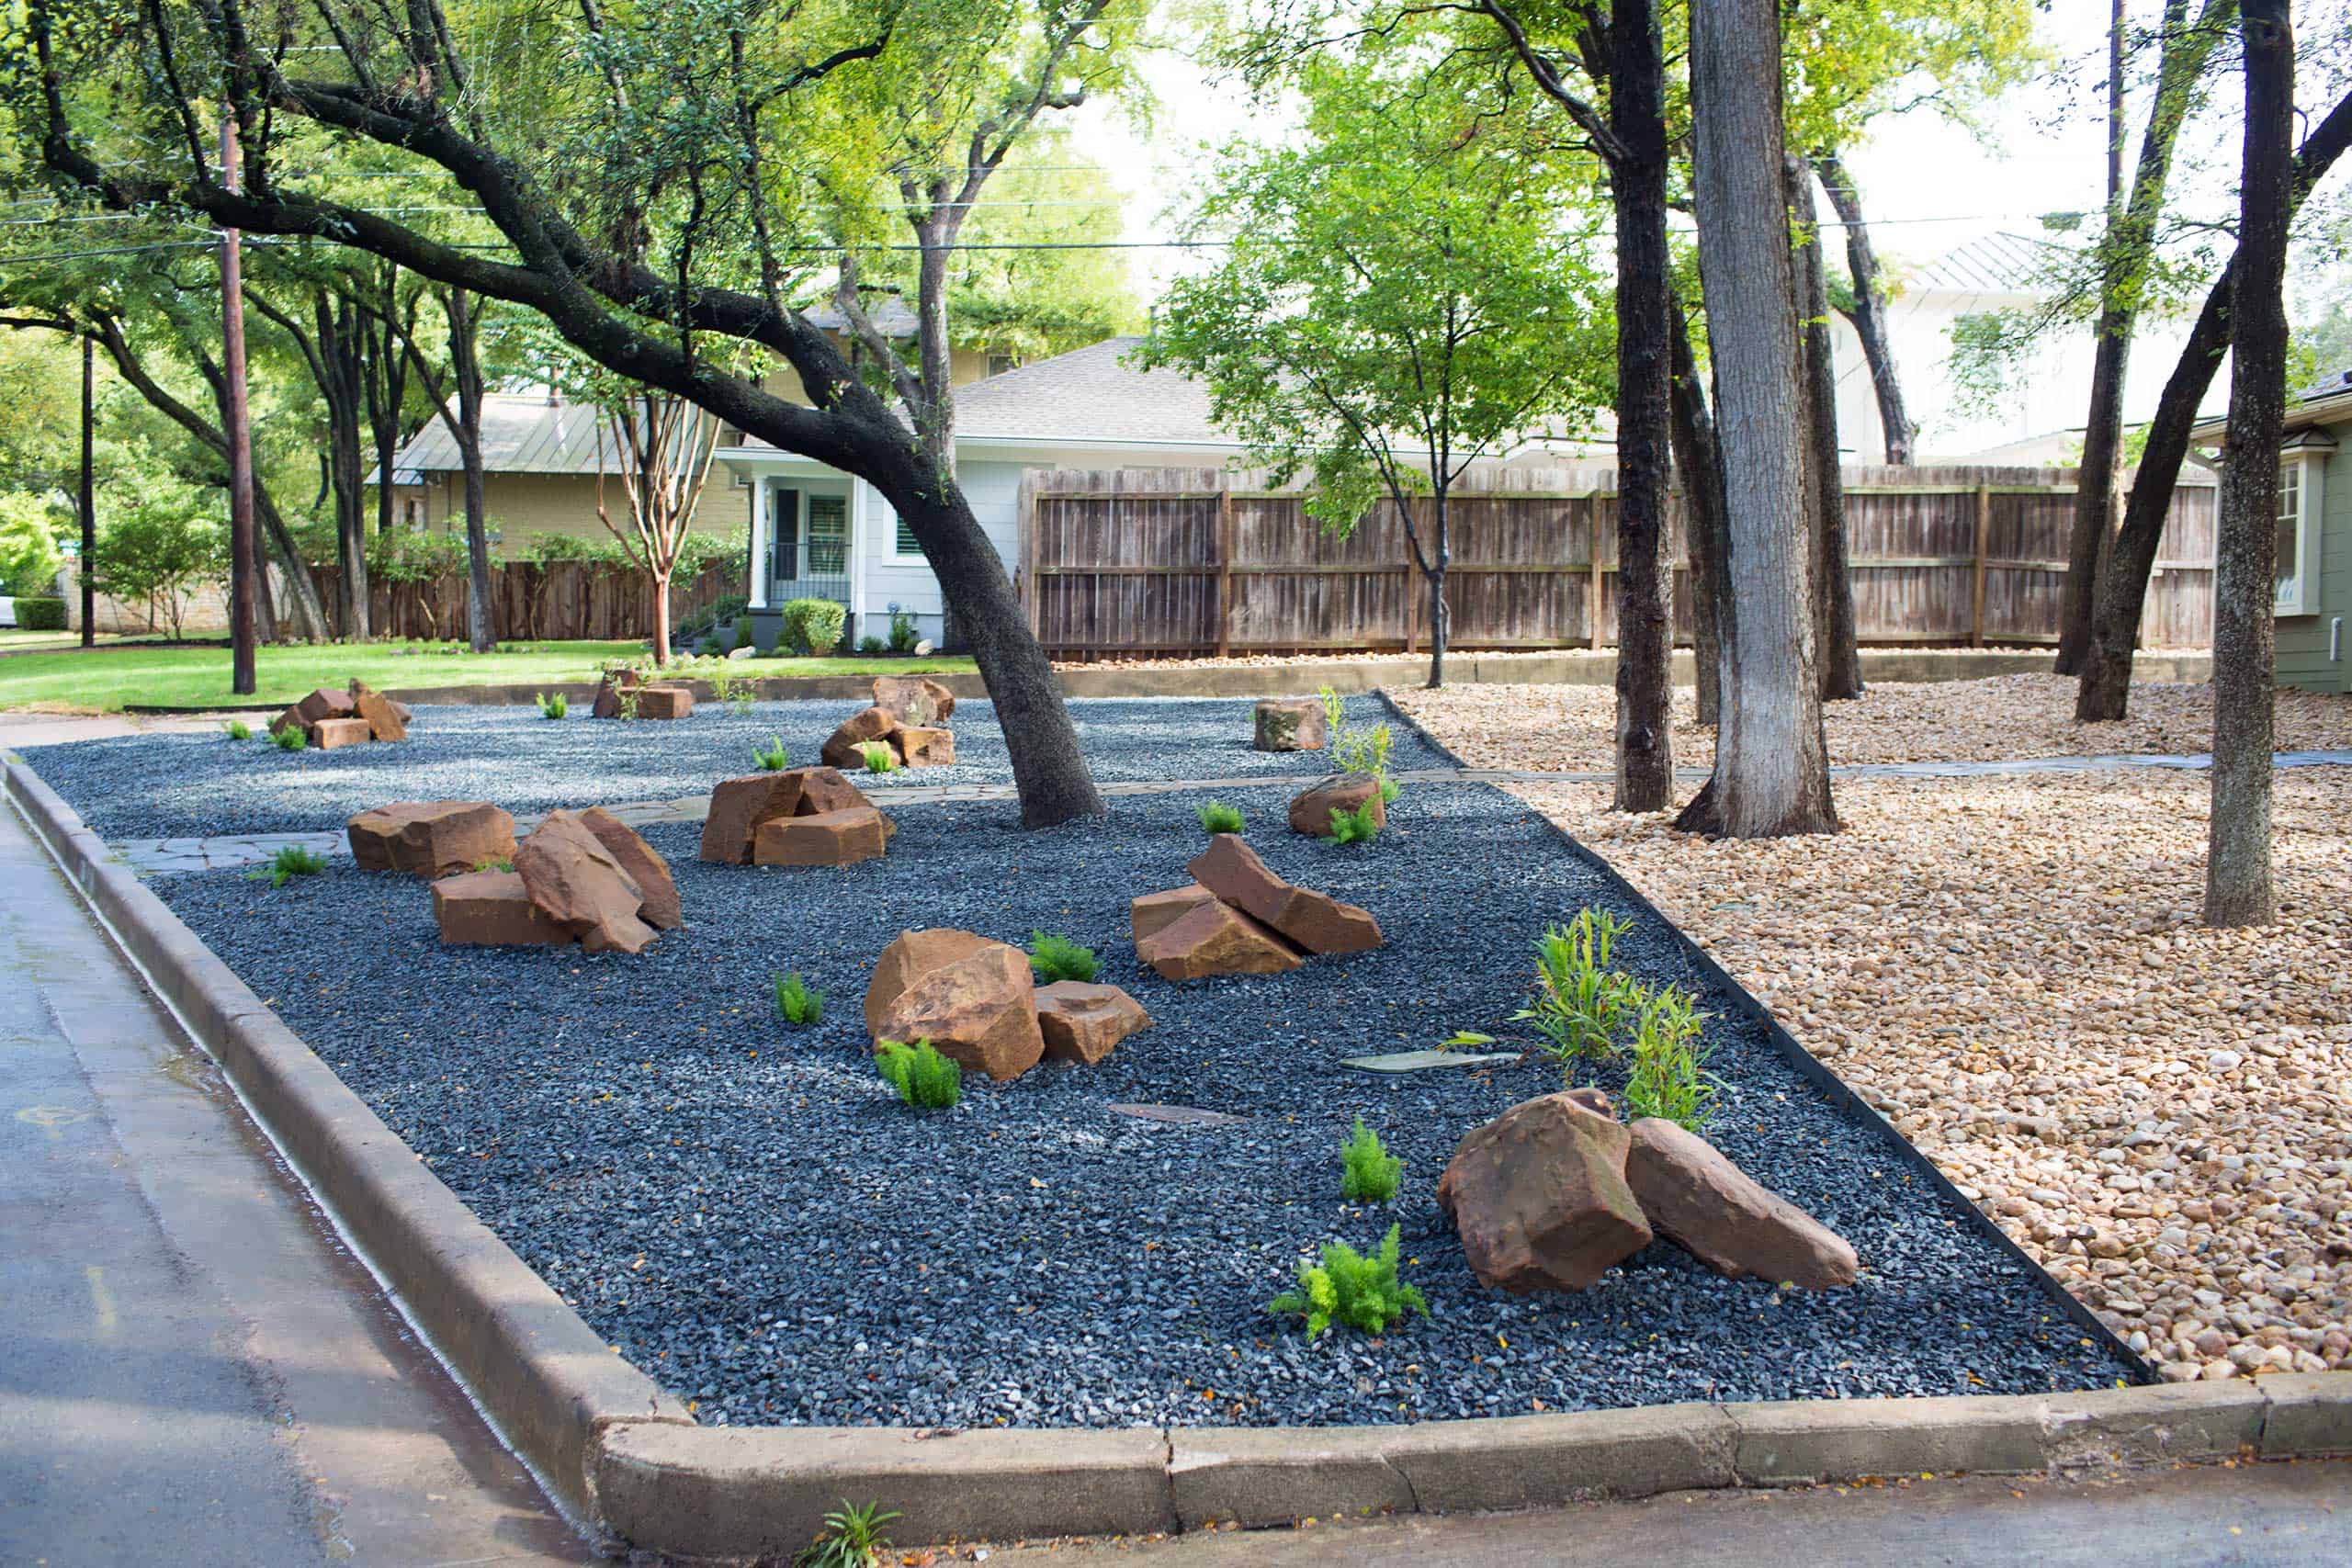
26. Create a Modern Landscape with Contrasting Dark and Light Gravel Zones
This minimalist design achieves its impact through a simple ratio: 70% gravel ground cover + 20% feature boulders + 10% sparse planting. The key is in the division of that gravel base—about half is dark gray and the other half is light-tan river rocks, creating large, graphic blocks of color. The reddish-brown boulders are then placed thoughtfully within the dark gravel to provide a warm, earthy contrast. The small green shrubs are used like punctuation, adding just enough life without cluttering the minimalist aesthetic. This project is a game of color-blocking with natural materials.
|
📋 Copy HEX 🔗 Share |
When creating distinct zones with different types of gravel or rock, a high-quality metal or plastic landscape edging is your best friend. Install it securely between the two areas before you pour the rock. This edging, which should be mostly buried for a clean look, creates a physical barrier that prevents the dark and light gravel from mixing over time due to rain, wind, or foot traffic. It’s the secret to maintaining those crisp, clean lines that make this design so striking.
27. Mix Ornamental Grasses and a Decorative Fence for a Natural Look
The single element that makes this garden sing is the tall, golden ornamental grass. It provides movement and a soft, feathery texture that you can’t get from shrubs or flowers alone. As the wind blows, the grasses sway, bringing the entire landscape to life. Their warm, golden hue in the sunlight contrasts beautifully with the deep greens of the other foliage and the dark gray of the hardscaping. Without the grasses, the design would feel static and far less dynamic. They are the heart of the garden’s natural, untamed spirit.

|
📋 Copy HEX 🔗 Share |
This design is a beautiful lesson in balancing hard and soft elements. The decorative metal fence, the concrete edging, the paved path, and the dark bollard light are all strong, rigid elements. This structure could easily feel harsh, but it is perfectly softened by the riot of plant life. The tall, wispy grasses, the colorful flowers, and the rounded boulder break up the straight lines and add organic forms and textures. This interplay between the man-made structure and the naturalistic plantings is what creates a balanced, harmonious composition.
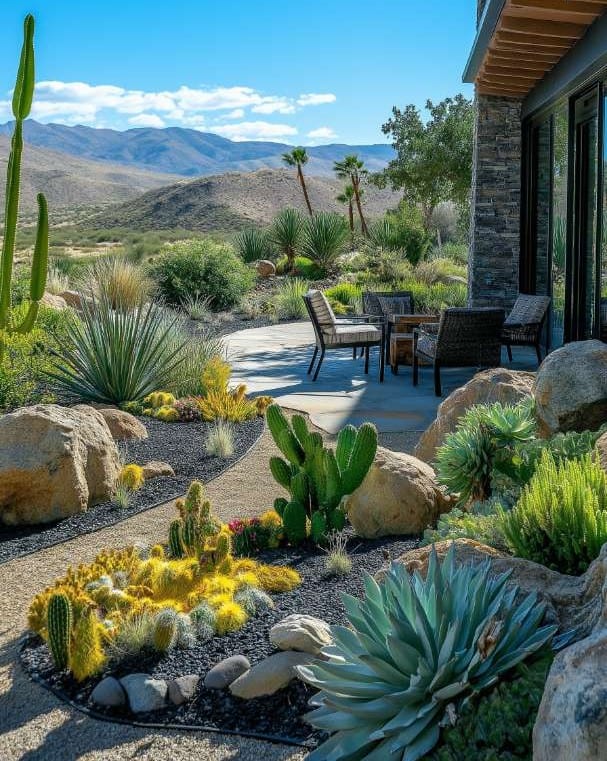
28. Stage a Modern Desert Patio Against a Mountain Backdrop
This expansive desert look is all about embracing the scale of the surrounding environment. It works best on properties of a quarter-acre or more, where the landscaping can act as a foreground for a larger, borrowed view, such as a mountain range. The patio itself should be generously sized, at least 12×12 feet, to not feel dwarfed by the open space. The key is to use large boulders and groupings of cacti to create pockets of interest, rather than dotting single plants around, which would look sparse and lost in a large yard. For a smaller space, refer to the more contained xeriscape in Idea #10.
|
📋 Copy HEX 🔗 Share |
Living with cacti requires a certain level of respect—and caution. Those spines are not for show. If you have curious pets or small children, this type of landscaping can be a genuine hazard. Planting the most prickly specimens further away from main paths and seating areas is a must. Maintenance, like weeding around a barrel cactus, requires thick, specialized gloves and long-handled tools. It’s a stunningly beautiful aesthetic, but you have to be practical about the day-to-day reality of living with plants that can (and will) bite back.
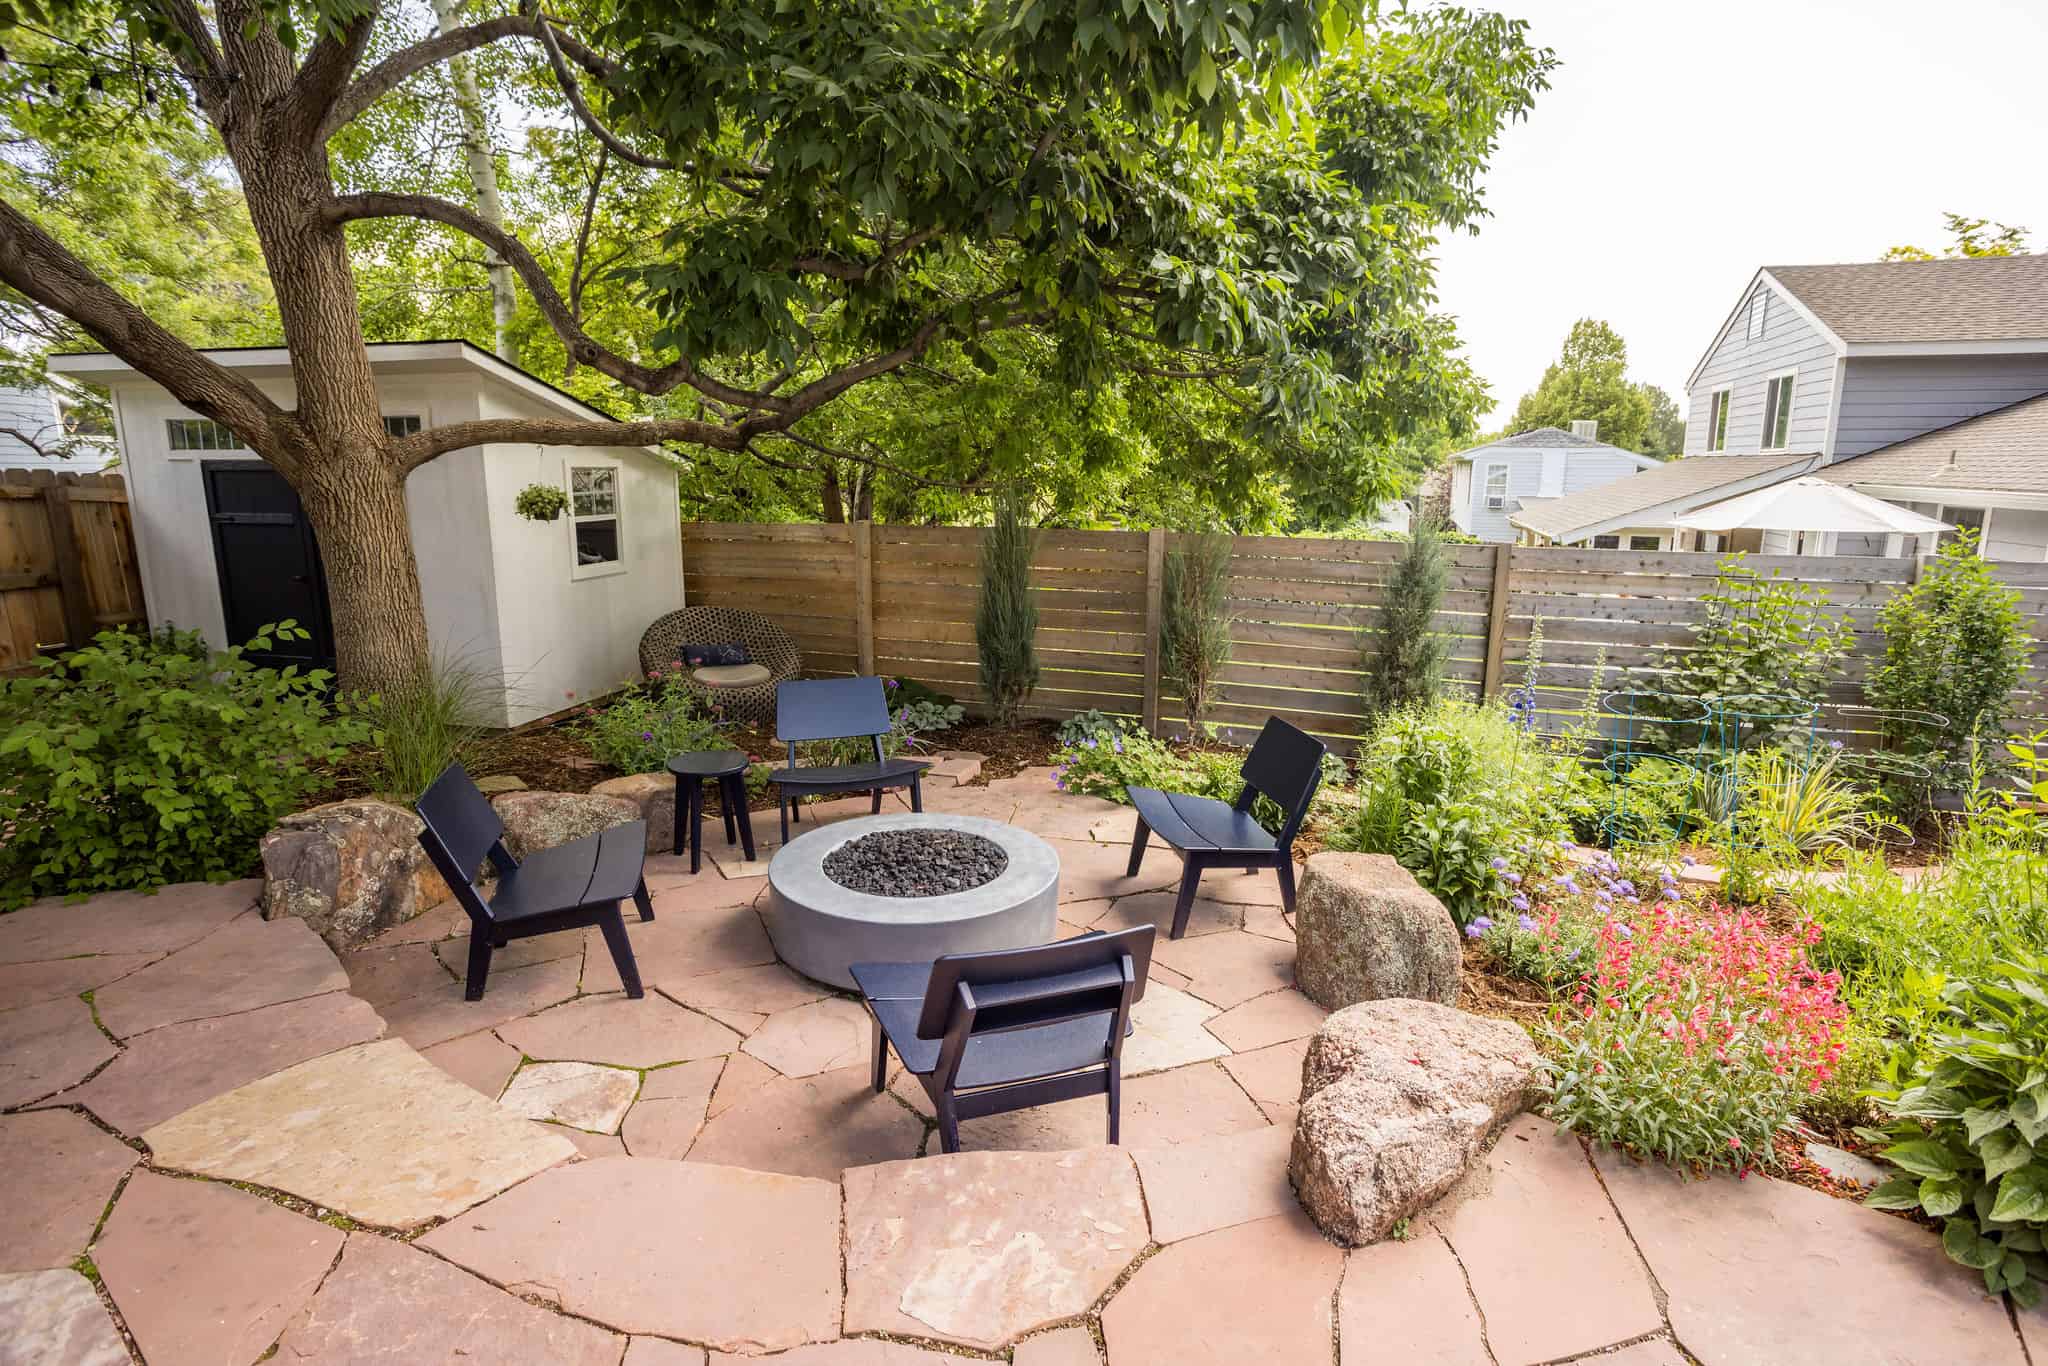
29. Gather Around a Flagstone Patio with a Concrete Fire Pit
A professionally installed flagstone patio and concrete fire pit can run into the thousands. To get this look for less, focus on DIY-friendly materials. Instead of irregular flagstone set in mortar, create a circular patio area using inexpensive gravel or decomposed granite contained by simple landscape edging. You can buy a high-quality metal fire pit bowl at a big-box store for $150 to $400. For seating, look for resin or plastic Adirondack chairs, which give a similar slatted look for a fraction of the cost of these dark gray ones. You can achieve the same cozy, circular gathering spot for under $1,000.
|
📋 Copy HEX 🔗 Share |
Creating this circular flagstone ‘rug’ is a fantastic weekend project. Estimated time: 6-8 hours. Material cost: $300-$900.
- Define Your Circle: Stake the center of your patio, tie a string to it, and use it like a compass with a can of spray paint to mark a perfect circle.
- Excavate: Dig out about 5 inches of soil and sod from within your circle.
- Add a Gravel Base: Fill the area with 3 inches of paver base gravel and compact it thoroughly with a hand tamper.
- Lay a Sand Bed: Add a 1-inch layer of paver sand and screed it smooth.
- Create the Puzzle: Start laying your flagstones, arranging them like a puzzle with consistent half-inch gaps. Start from the outside edge and work your way in.
- Lock it In: Sweep polymeric sand into the joints, spray with a fine mist of water per the manufacturer’s instructions, and let it cure.
Conclusion
Creating a sustainable landscape is a journey, not a destination. It’s about making thoughtful choices that benefit both you and the environment. Don’t feel pressured to do everything at once. Start with one idea—a small patch of native plants, a single raised bed, or a smarter watering system. We hope this collection of real-world designs has sparked your imagination and shown you what’s possible.
Ready to start planning? Save your favorite ideas to your Pinterest board and let your sustainable landscape begin to take root.