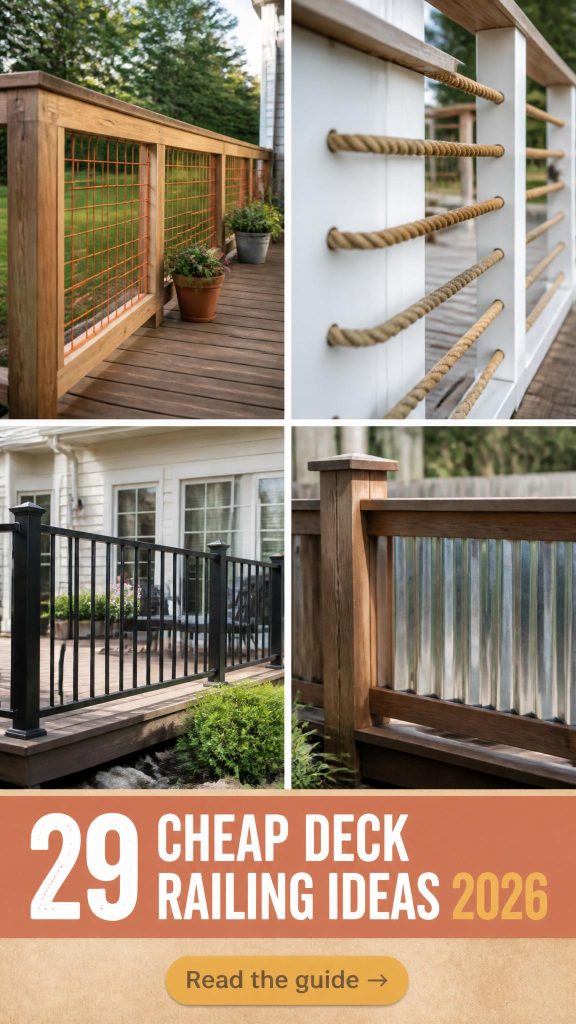
Still scrolling through “Cheap Deck Railing Ideas” on Pinterest without a clear direction? It’s easy to get lost in a sea of options that look great but feel totally out of reach for a real-world budget. We spent serious time browsing DIY forums, Home Depot, and specialty suppliers to bring you only what’s worth your attention this year. After filtering through hundreds of designs, we narrowed it down to 29 ideas that actually deliver on style without destroying your wallet, with options from $15 to $150 per linear foot.
Inside, you’ll find 29 curated ideas covering styles from modern cable and sleek composite to timeless wood and breezy nautical rope. For 2026, it’s all about maximizing our outdoor living spaces with smart, affordable choices that look anything but cheap. And stay until the end—we break down the most common mistakes that can ruin these looks. 📌 Save this to Pinterest for later—you’ll want to revisit these ideas.
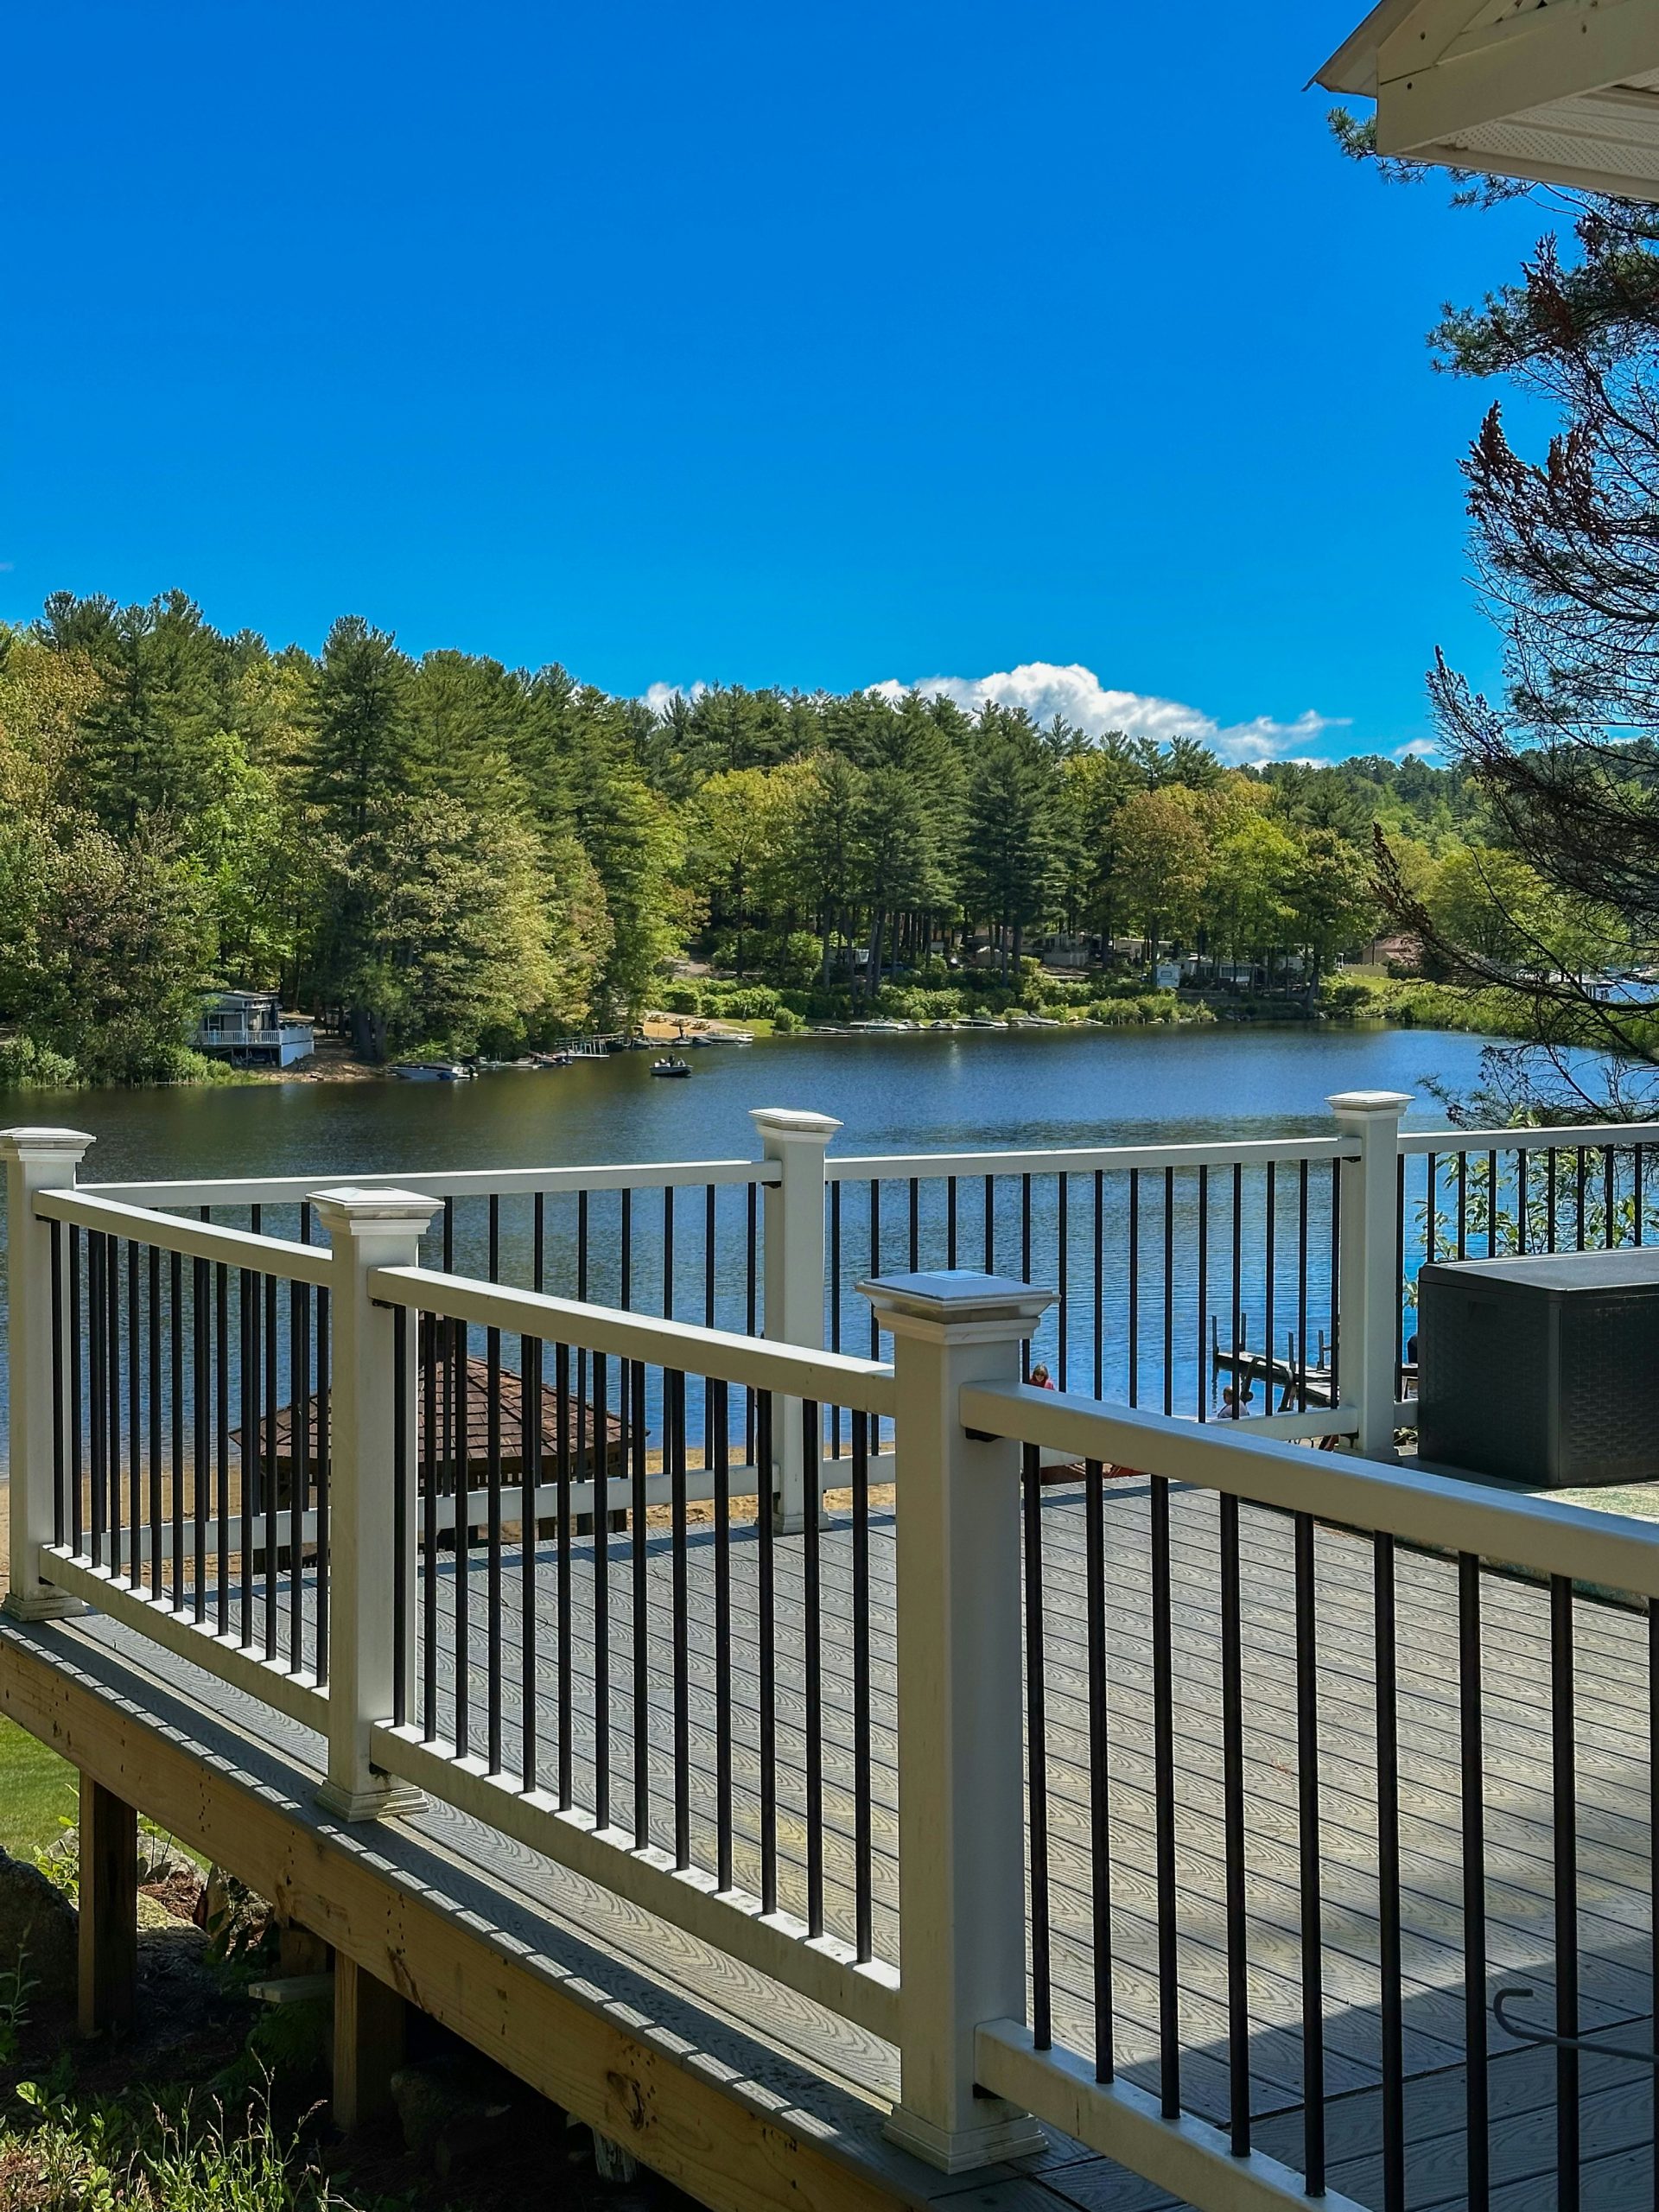
1. Lakefront View with White Composite and Black Metal Balusters
This look is all about framing a view, not blocking it. The choice of slender black metal balusters is key; they visually recede, making the lake and landscape the main event. By keeping the structural parts—the posts and top/bottom rails—a crisp white, the railing feels clean and defined without being heavy. The contrast between the dark, thin balusters and the thick white rails creates a rhythm that is both modern and timeless. It’s a classic combination that works because it balances strength and openness perfectly.
|
📋 Copy HEX 🔗 Share |
Composite and metal are your best friends for low-maintenance living. Unlike wood, the white composite won’t need annual staining or painting and can be cleaned with simple soap and water. The powder-coated black metal balusters resist rust and fading. However, be mindful of the solar post caps; their batteries will need replacing every 2-3 years, and the plastic lenses can get cloudy over time. Also, in very humid or salty air environments, even powder-coated metal can show pitting near fasteners over many years, so an occasional rinse is a good idea.
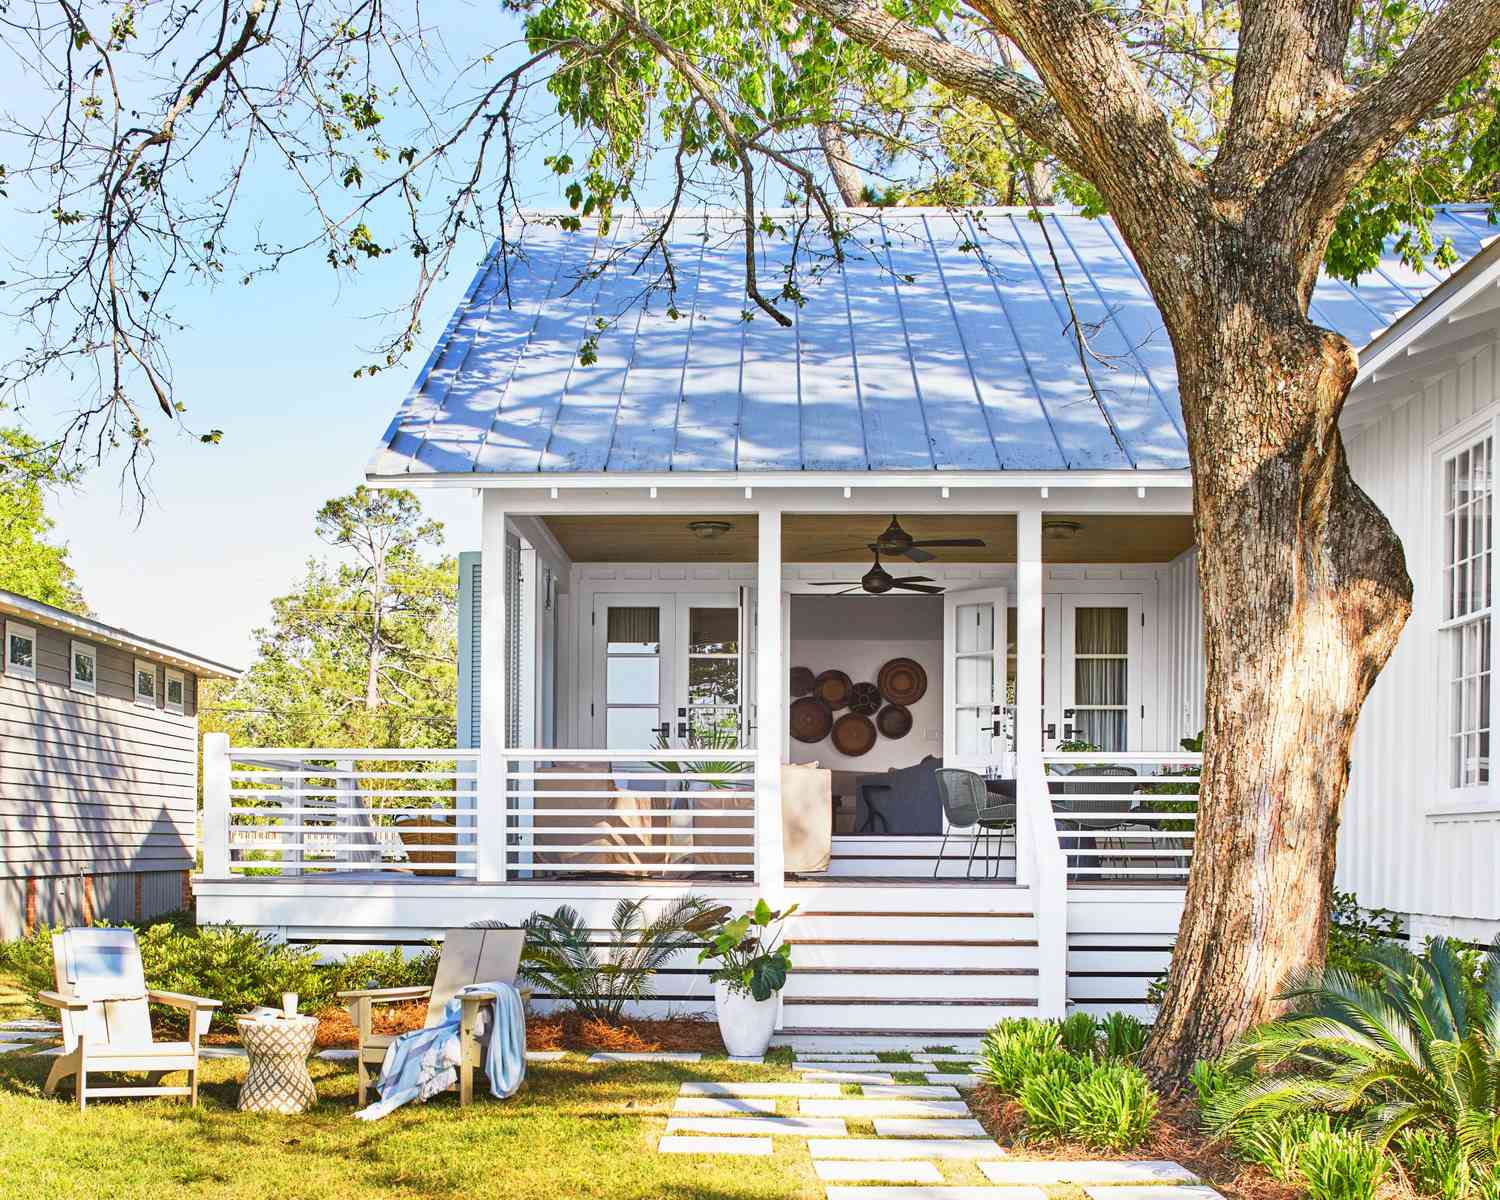
2. Crisp White Horizontal Slats for a Fresh Porch Vibe
The formula here is simple and effective: 80% clean white + 20% natural texture. The dominant white on the railing slats, posts, and even the house siding creates a bright, cohesive look that feels breezy and coastal. The 20% comes from the warm tones of the wooden deck floor and the surrounding greenery. This high-contrast palette makes the space feel bigger and more inviting. You could swap the natural wood deck for a soft grey composite to lean more modern or even a painted blue for a classic beach house feel, and the formula would still hold up.
|
📋 Copy HEX 🔗 Share |
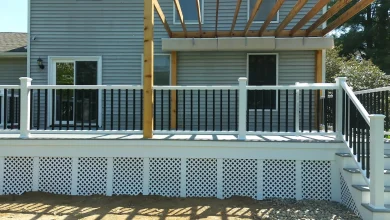
While this horizontal style is undeniably chic, it has a nickname in the design world: “the ladder.” If you have small children, be aware that horizontal railings can be easier for them to climb. Check your local building codes, as some areas have specific regulations or even prohibit horizontal railings on elevated surfaces for this very reason. It’s a fantastic look for style-conscious adults, but it might not be the most practical choice for a home with adventurous toddlers. Always prioritize safety, and consider professionally installed, code-compliant options.
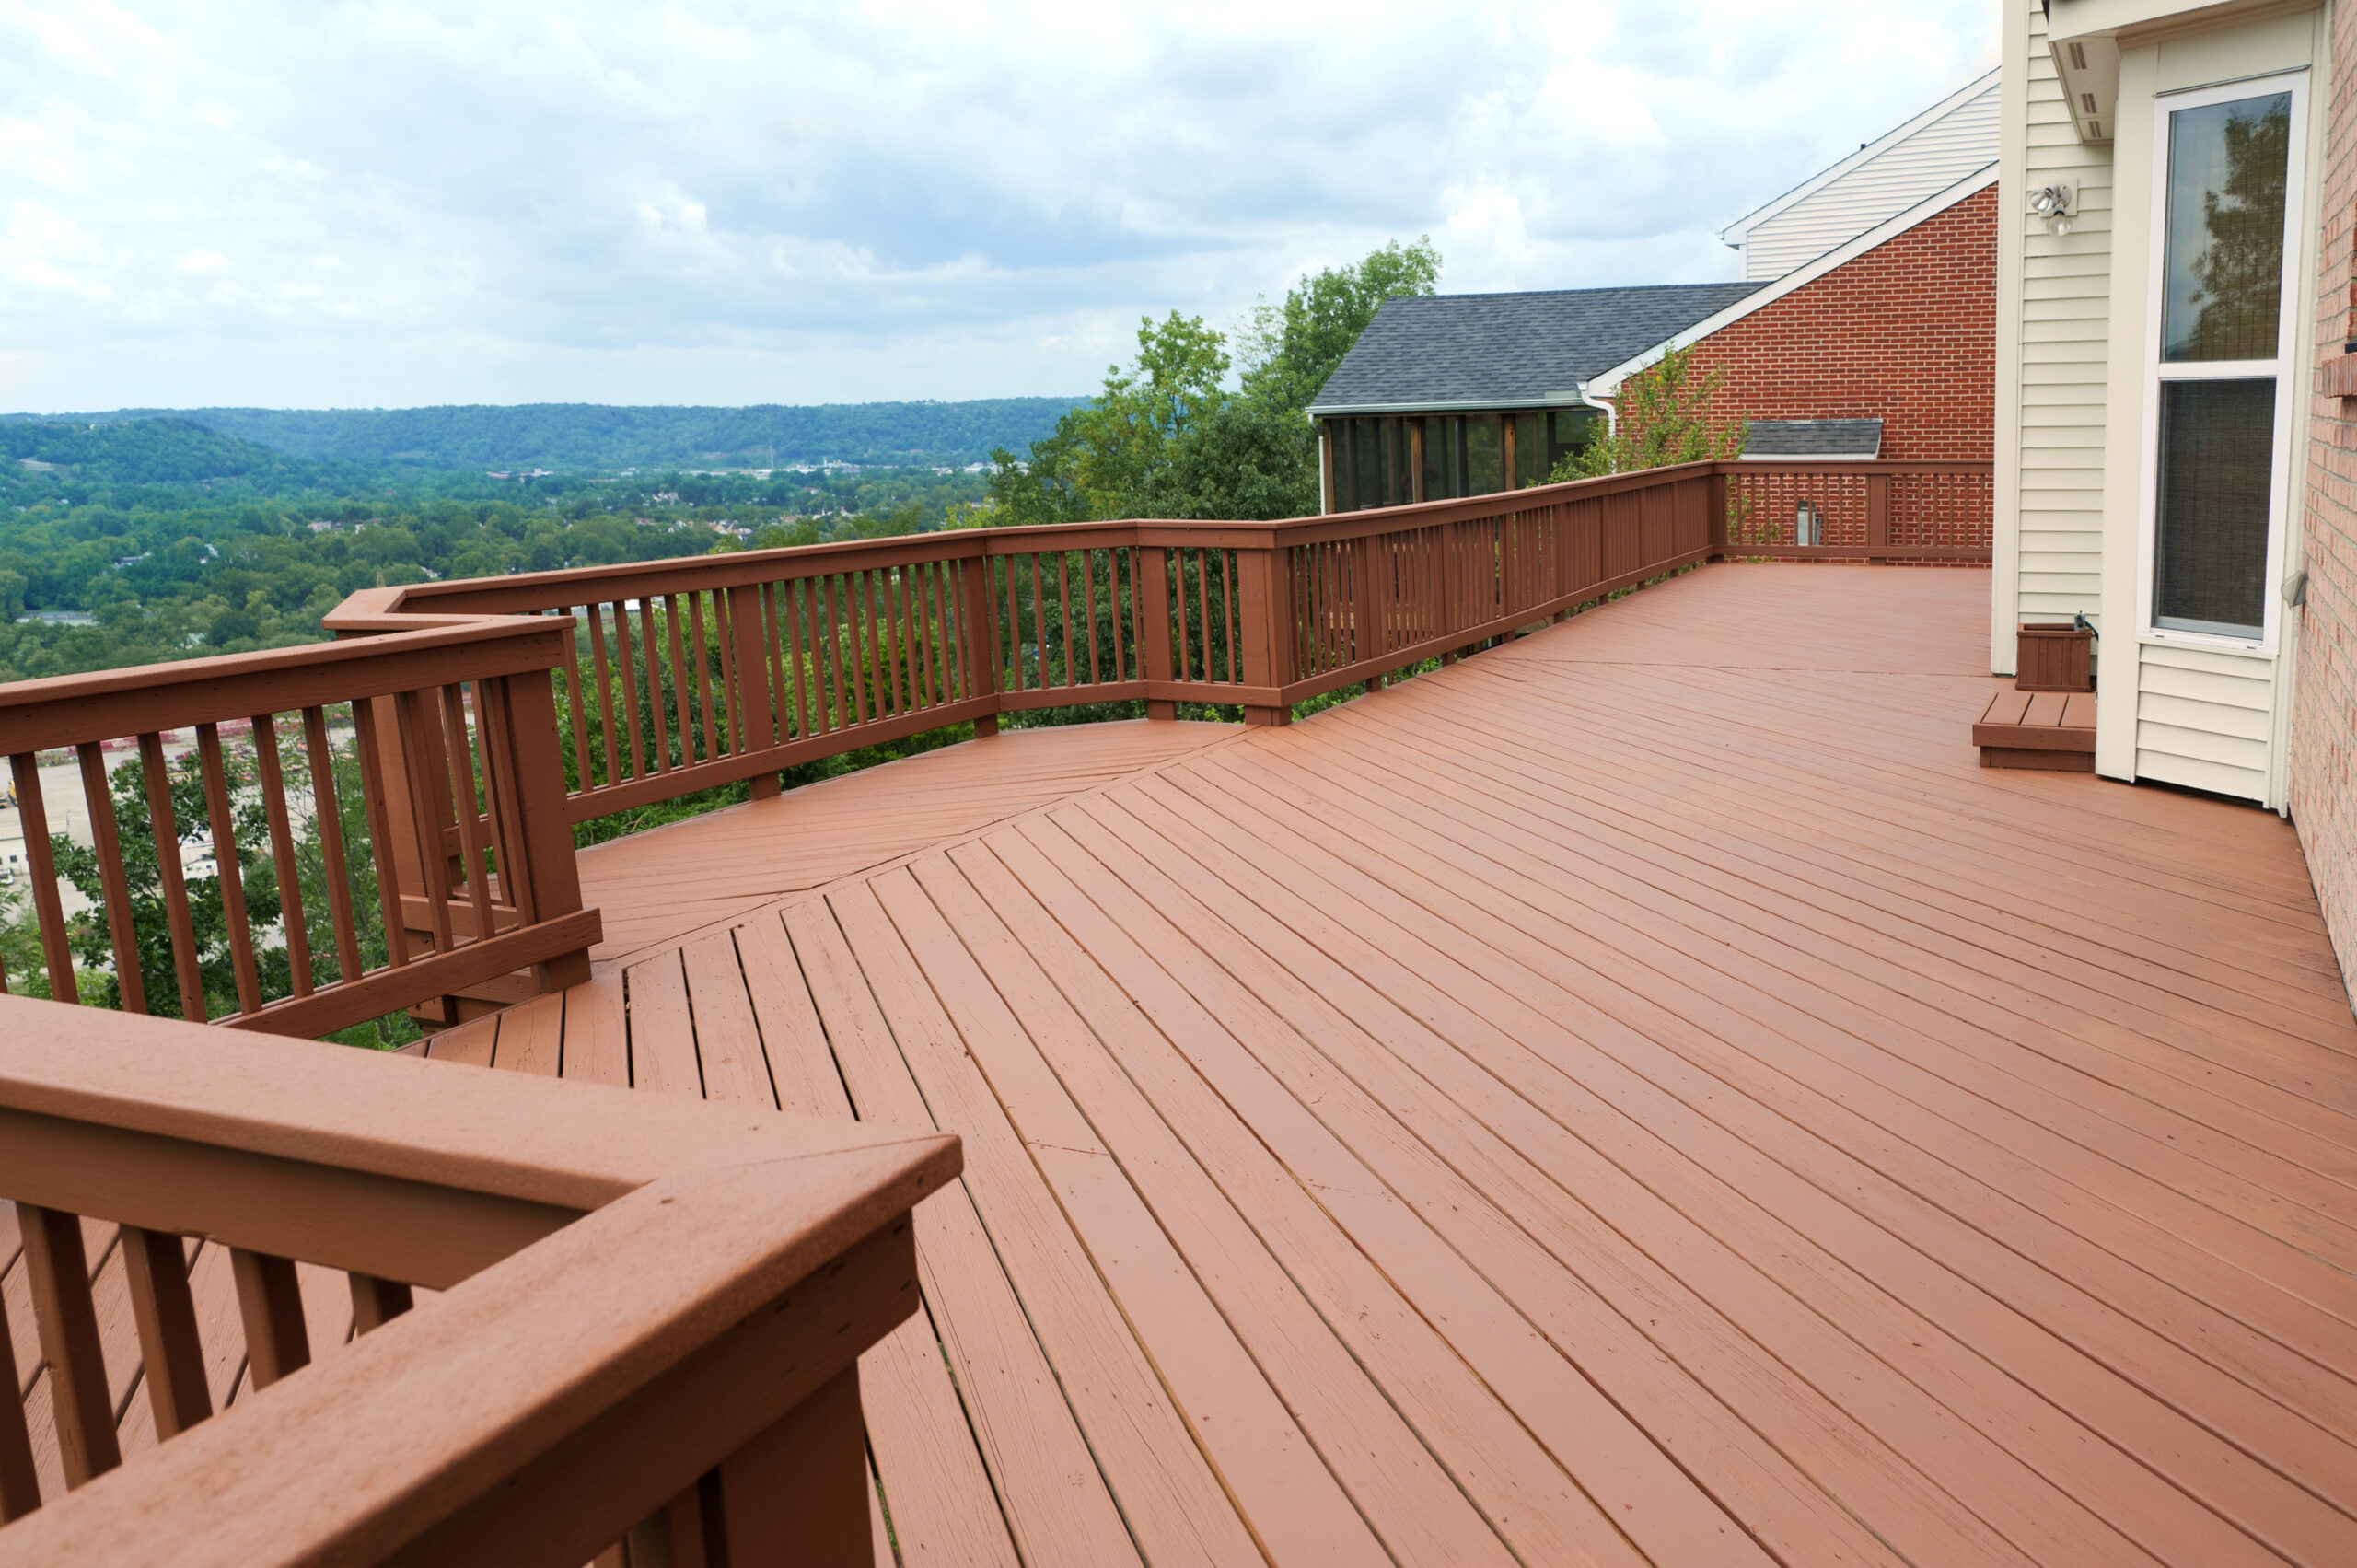
3. Expansive Curving Deck with Traditional Brown Wood Spindles
The single most important element here is the use of gentle curves in the railing. On such a massive, sprawling deck, purely straight, angular lines could feel rigid and static. The curved sections soften the entire structure, making it feel more organic and better integrated into the rolling hills of the landscape. They guide the eye smoothly around the perimeter and create more dynamic, interesting spaces for furniture placement. Without the curves, this would just be a very large deck; with them, it becomes a thoughtful piece of architecture.
|
📋 Copy HEX 🔗 Share |
An expansive, multi-angled design like this is best suited for a large, open backyard where the deck itself is a primary feature. You need a minimum of 400-500 square feet of available ground space to justify this scale without overwhelming your yard. The gentle curves work beautifully here because they have room to breathe. In a smaller, more rectangular space (under 250 sq. ft.), a simpler, straight-railing design like the one in Idea #13 would be a more practical and visually balanced choice, preventing the area from feeling cluttered.
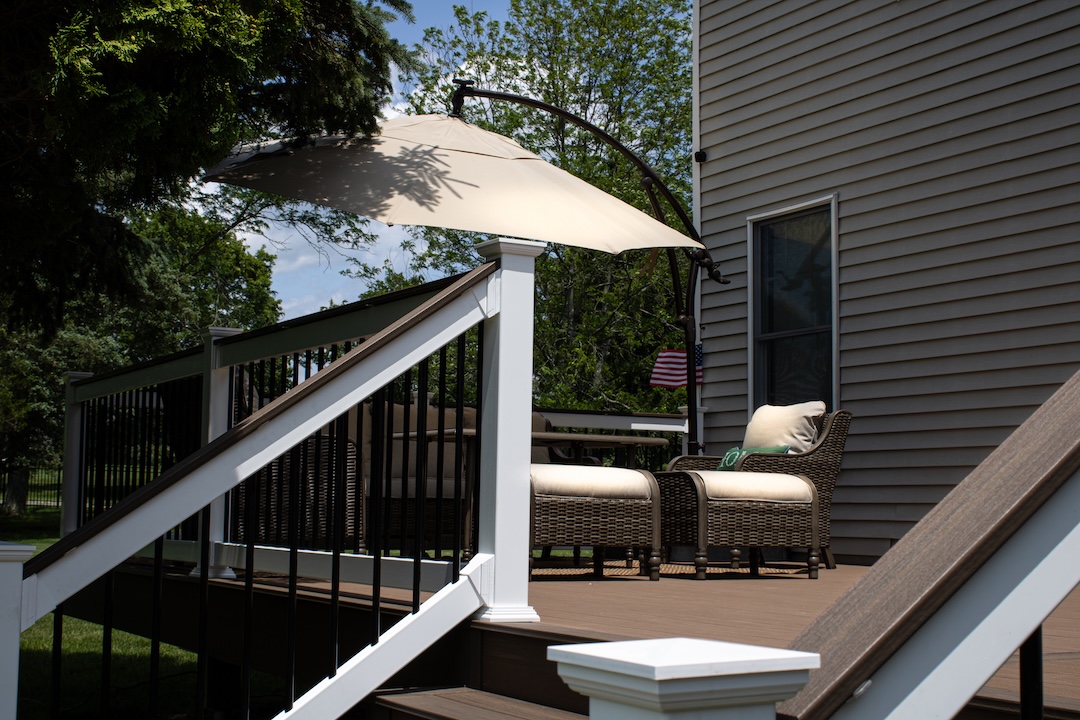
4. Classic Composite Deck with Two-Tone Railing
When you have a two-tone railing, always place the darker color on the top rail. This technique, called ‘capping,’ grounds the design and draws a strong, confident line around the space. A white or light-colored top rail can often look unfinished and get dirty much faster. Here, the dark brown top rail not only hides dirt and handprints but also neatly ties in with the black balusters and the darker threads in the wicker furniture, creating a cohesive, professionally designed palette without any extra effort.
|
📋 Copy HEX 🔗 Share |
Recreating this classic composite look has a moderate price tag, but it pays off in longevity.
- Composite Railing Kit (posts, rails): $800 – $1,500
- Black Metal Balusters: $300 – $600
- Composite Decking (for a 12×12 area): $1,500 – $2,500
- Outdoor Seating & Umbrella: $500 – $1,200
- TOTAL: $3,100 – $5,800
Budget alternative: Use pressure-treated wood for the railing structure and paint it white, with a dark brown painted top rail. This can bring the total cost down by 40-50%, especially if you tackle the painting yourself.
5. Modern Industrial Mix: Black Metal, Steel Cable, and Wood Steps
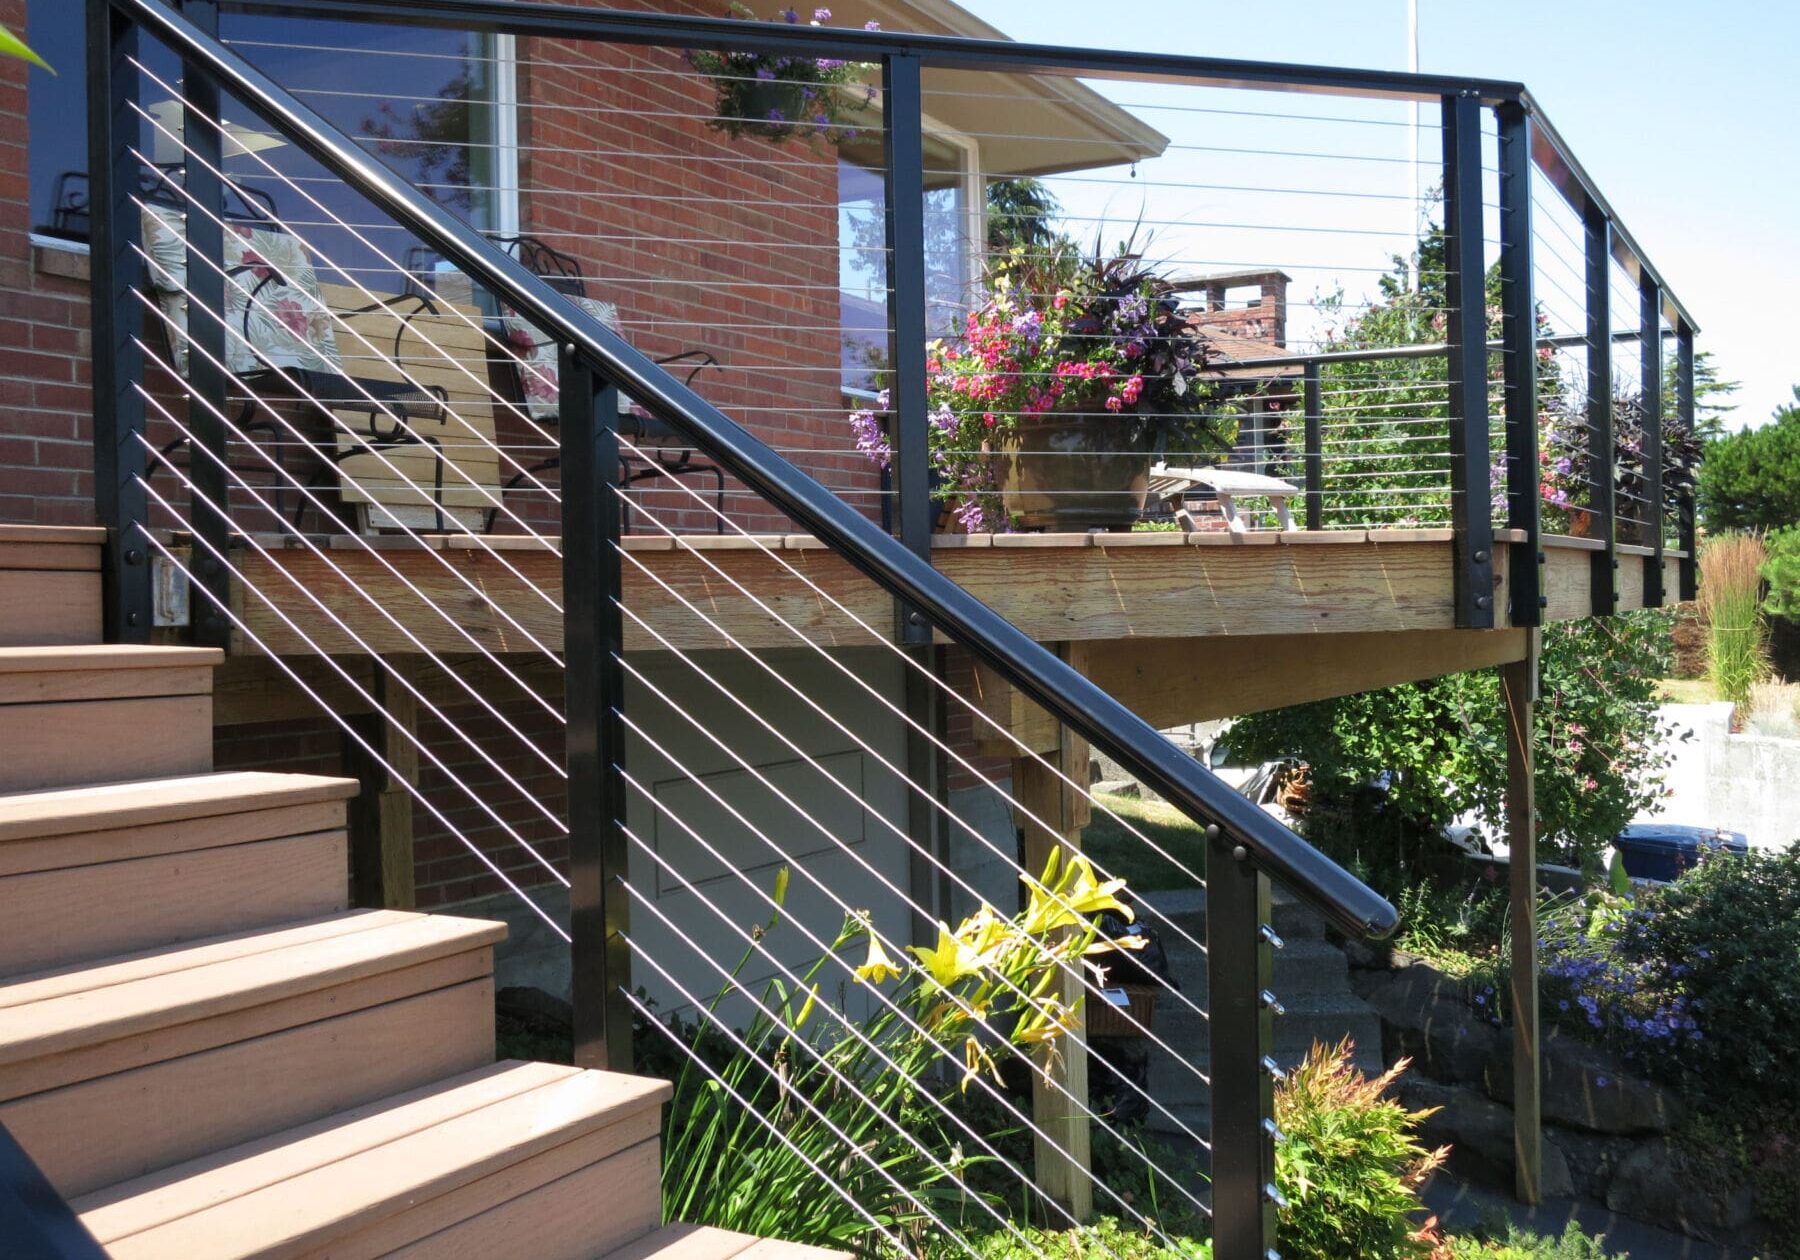
This design succeeds by masterfully blending textures and temperatures. You have the cool, sleek feel of the black metal posts and horizontal stainless steel cables, which creates an industrial, minimalist vibe. This is immediately balanced and warmed up by the natural light brown wood of the deck and stairs. The rough, earthy texture of the red brick house in the background adds a third layer of material complexity. It’s this trio of smooth metal, natural wood, and rustic brick that gives the design its sophisticated, high-end feel.
|
📋 Copy HEX 🔗 Share |
Cable railings look fantastic, but they aren’t ‘set it and forget it.’ The cables can lose tension over time due to temperature changes, potentially sagging and creating a safety issue. Plan on checking and tightening the cables once or twice a year using a special wrench, which is usually included in the kit. Also, be aware that stainless steel, while resistant to rust, can still develop small spots of corrosion, especially in damp or polluted climates. A quick wipe-down with a specialized stainless steel cleaner once a season will keep them looking perfect.
6. Coastal Modern Deck with White Posts and Wire Cable Railing
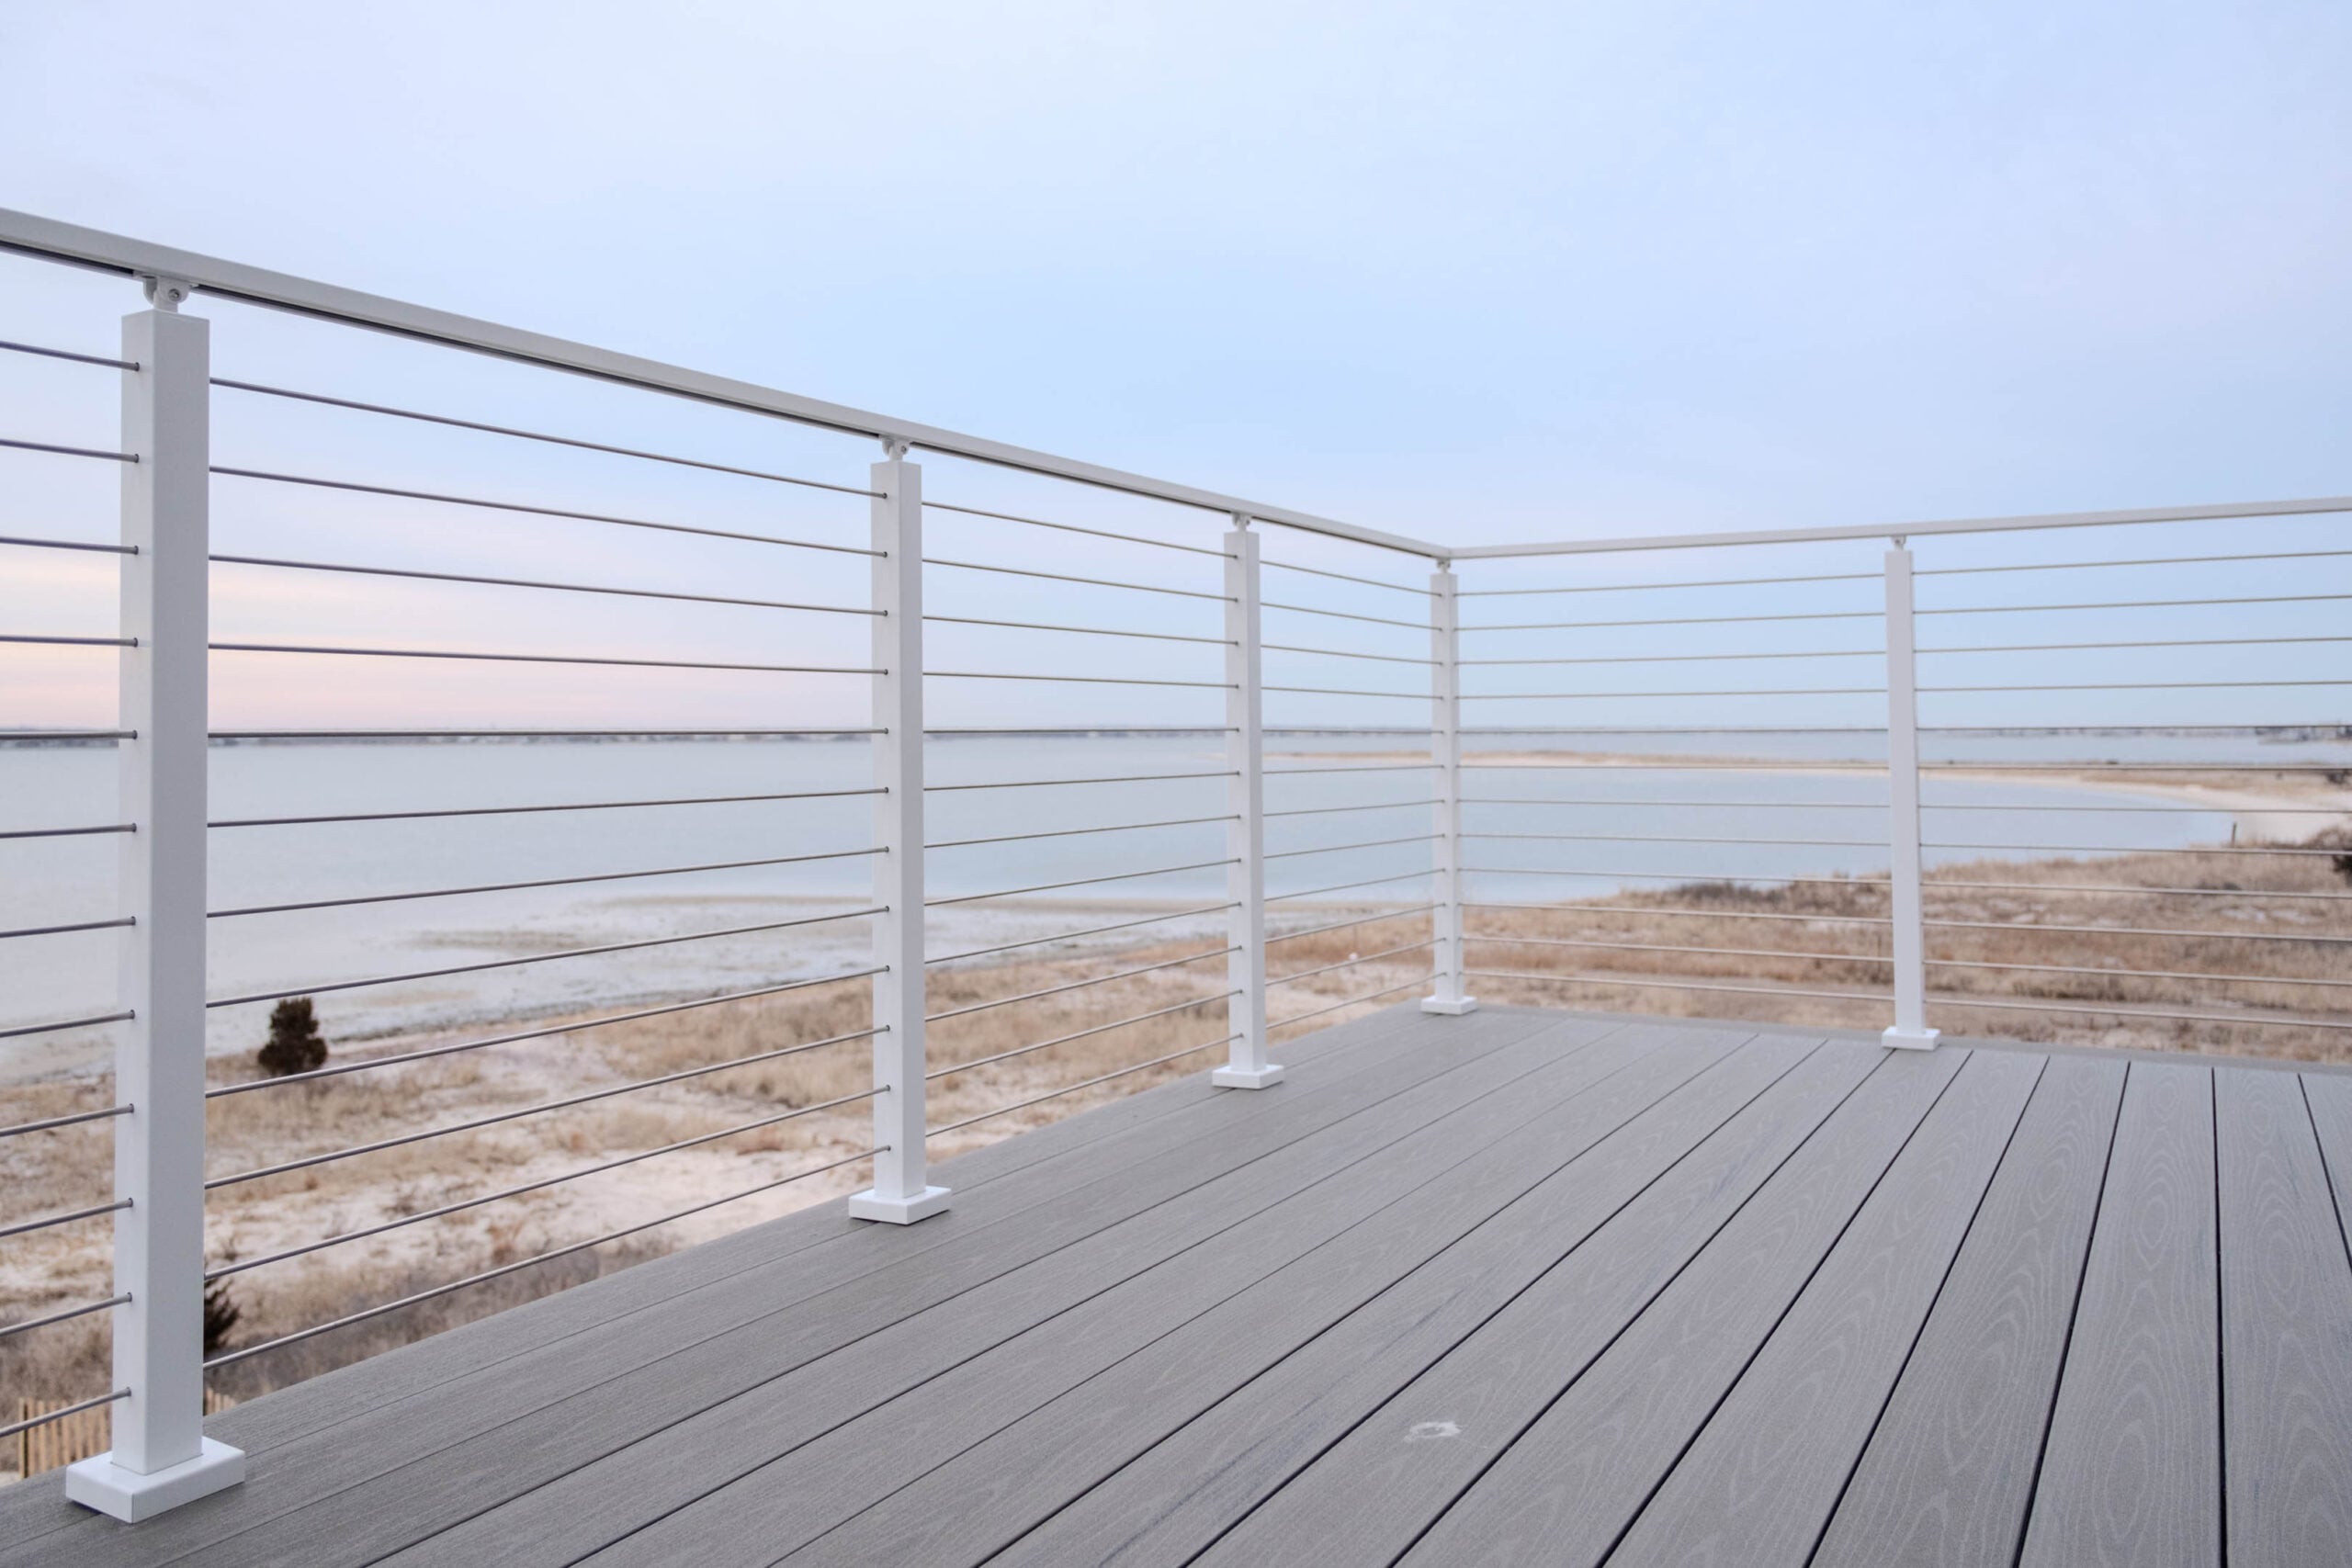
The defining feature of this railing is its near-invisibility. The combination of slender white posts and paper-thin horizontal cables basically disappears, pulling the stunning coastal view directly into the living space. If you were to replace the cables with traditional balusters, even thin black ones as seen in Idea #1, you would introduce dozens of vertical lines that chop up the panorama. This design prioritizes the landscape above all else, making the railing a frame for the art outside, rather than a feature in itself.
|
📋 Copy HEX 🔗 Share |
7. Minimalist Black Horizontal Bar Railing for Panoramic Views
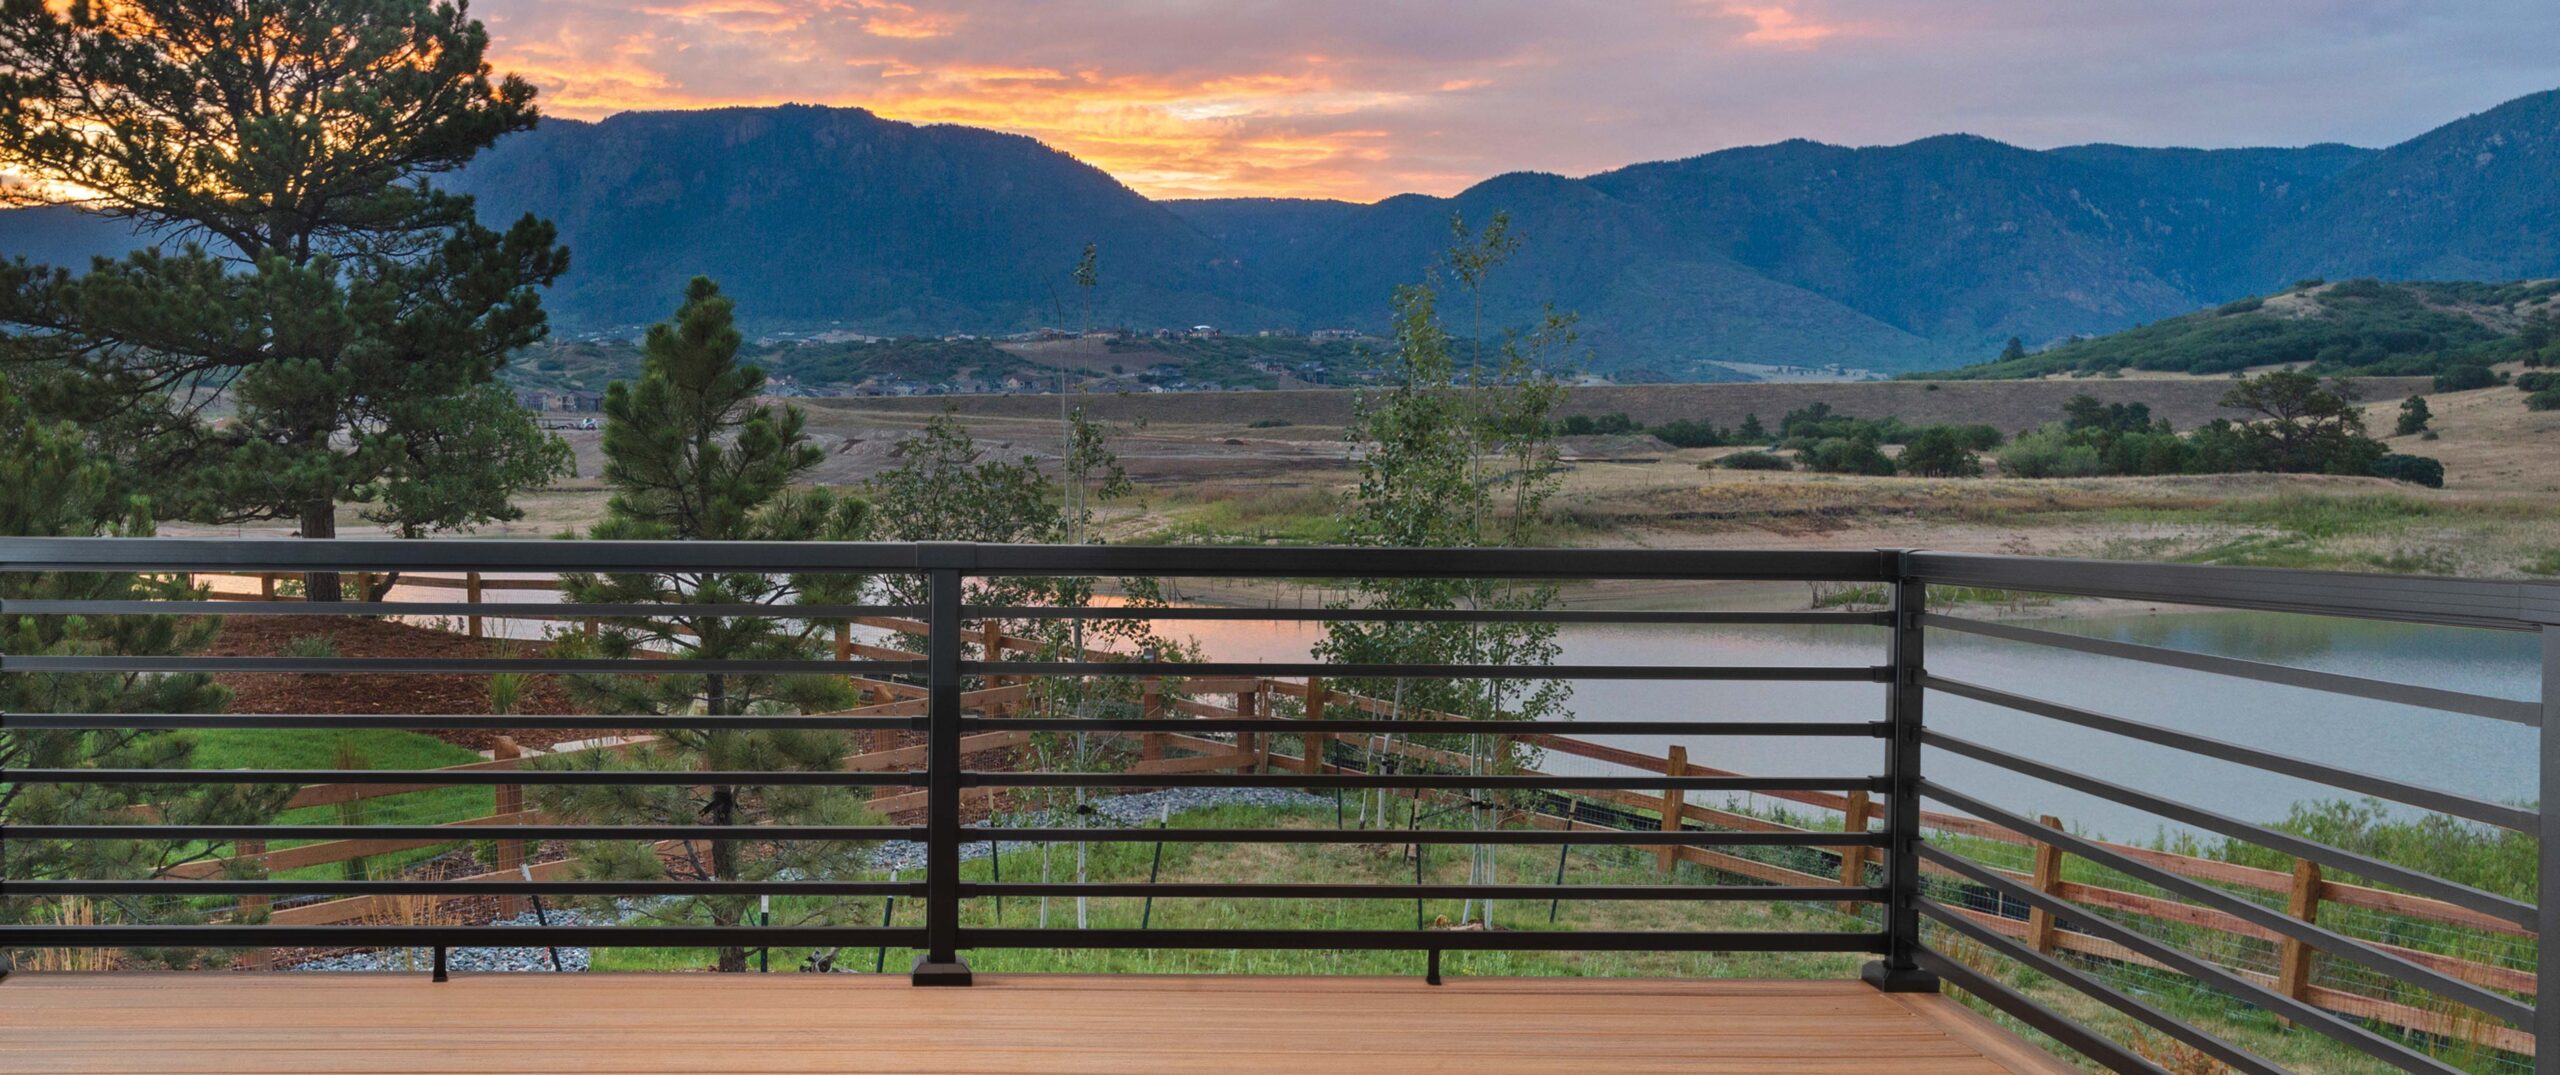
The visual recipe here is about quiet confidence: 70% natural elements + 30% sharp, modern lines. The warm wood deck, the distant mountains, and the expansive water and sky make up the vast majority of the visual field. The black horizontal railing acts as a subtle, but strong, counterpoint. Its clean, dark lines slice through the organic softness, adding definition and a touch of human-made order. This balance prevents the deck from feeling too rustic and the railing from feeling too severe; they complement each other perfectly.
|
📋 Copy HEX 🔗 Share |
A custom-fabricated metal railing like this can be pricey. To get this look for less, you can find pre-made, modular horizontal bar railing kits at big-box stores like Home Depot or online retailers. A DIY-installed kit can cost between $50 and $90 per linear foot, whereas a custom job might run $150-$300+. For an even cheaper alternative, you could create a similar horizontal effect using stained 1×4 wood slats instead of metal bars, though it will require more maintenance over time. Sourcing from a local metal fabricator for just the raw materials can also cut costs if you have welding skills.
8. Sleek and Serene: Glass Panel and Stainless Steel Railing
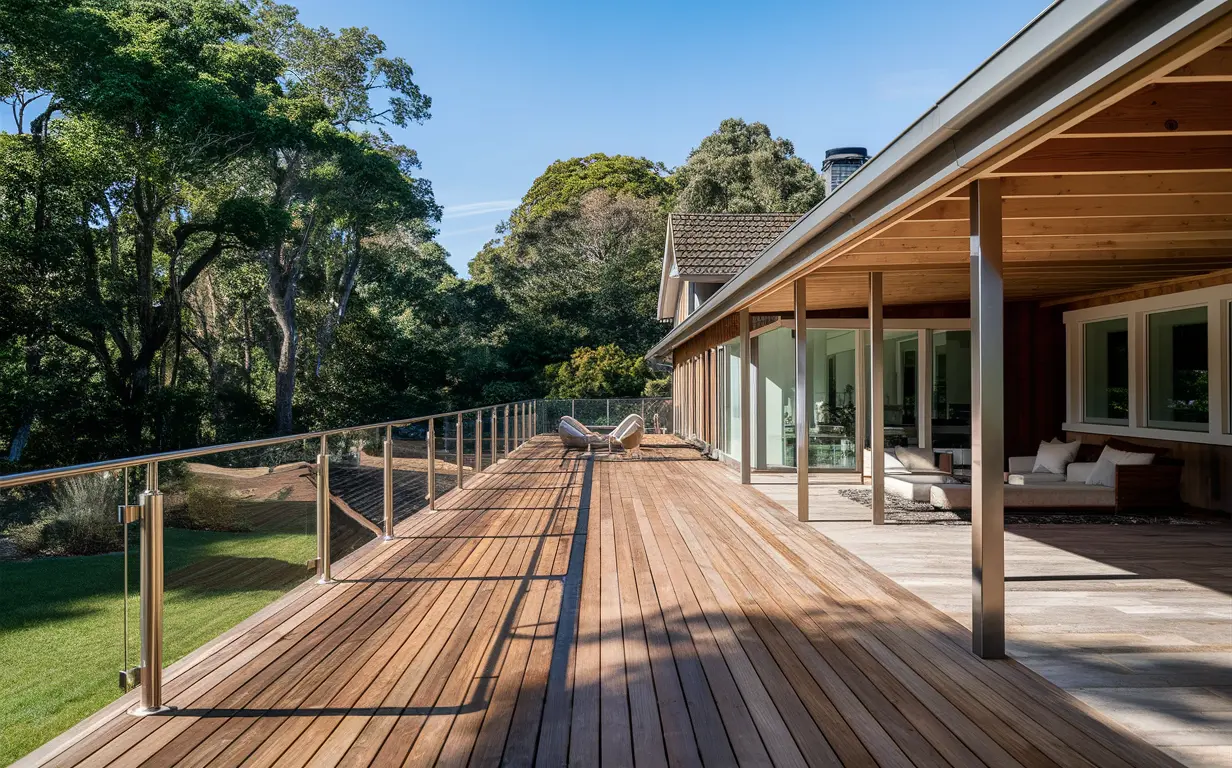
Let’s be honest: a glass railing is the definition of high maintenance. While it offers a completely unobstructed view, it’s a magnet for fingerprints, water spots, pollen, and dust. If your deck is near trees that drop leaves or pollen, or if you have kids or pets, you’ll be cleaning these panels constantly to keep them looking pristine. A squeegee and a bottle of glass cleaner will need to be a permanent part of your deck maintenance kit. It’s a trade-off: you get a million-dollar view, but you have to work to keep it that way. The final effect is stunning, but not for everyone.
|
📋 Copy HEX 🔗 Share |
This is a premium look with a price tag to match. Expect to pay a significant amount for the materials and likely professional installation.
- Tempered Glass Panels (8mm-10mm thick): $100 – $250 per linear foot
- Stainless Steel Posts and Handrail: $80 – $200 per linear foot
- Professional Installation Labor: $70 – $150 per hour
- TOTAL (for a 20-foot section): $4,000 – $9,000+
Budget alternative: There really isn’t a cheap way to do glass. However, you can use acrylic (Plexiglas) panels instead of tempered glass to save 30-40% on materials, but be aware that acrylic scratches much more easily and can yellow in direct sunlight over time.
9. Multi-Level Deck with Classic White & Black Stair Railing
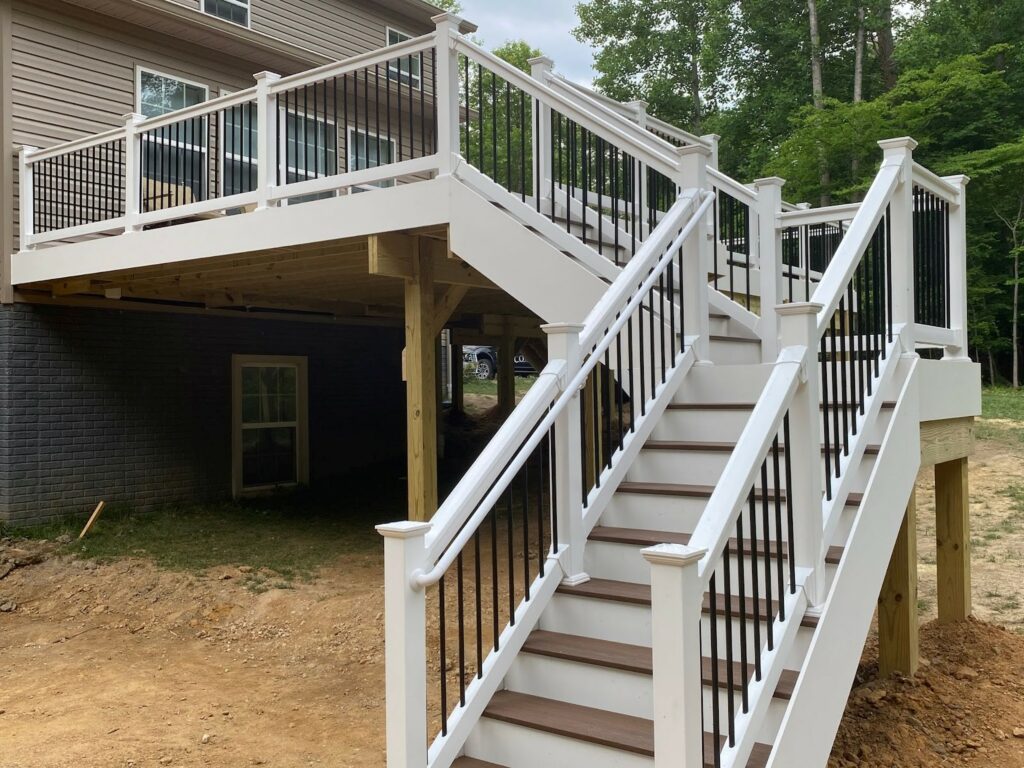
The high contrast between the crisp white composite and the stark black balusters creates strong visual lines that guide the eye and define the space. On a multi-level structure like this, that clarity is essential. It prevents the deck from looking like a cluttered jumble of stairs and platforms. The repetition of this black-and-white theme from the upper deck down the staircase and to the ground level makes the entire build feel like a single, cohesive unit. The brown stair treads add just enough warmth to keep it from feeling too sterile and connect it to the natural surroundings.
|
📋 Copy HEX 🔗 Share |
When planning a staircase railing, function is just as important as form. For a long flight of stairs like this one, ensure your handrail is continuous and easy to grip from top to bottom. Notice how the top rail here is a consistent height and profile all the way down. Also, the choice of black balusters is a smart safety feature—they are less reflective than white or metal-finish balusters, reducing glare from the sun and making it easier to see the steps themselves as you walk up or down.
10. Inviting White Vinyl Deck Railing With Integrated Lighting
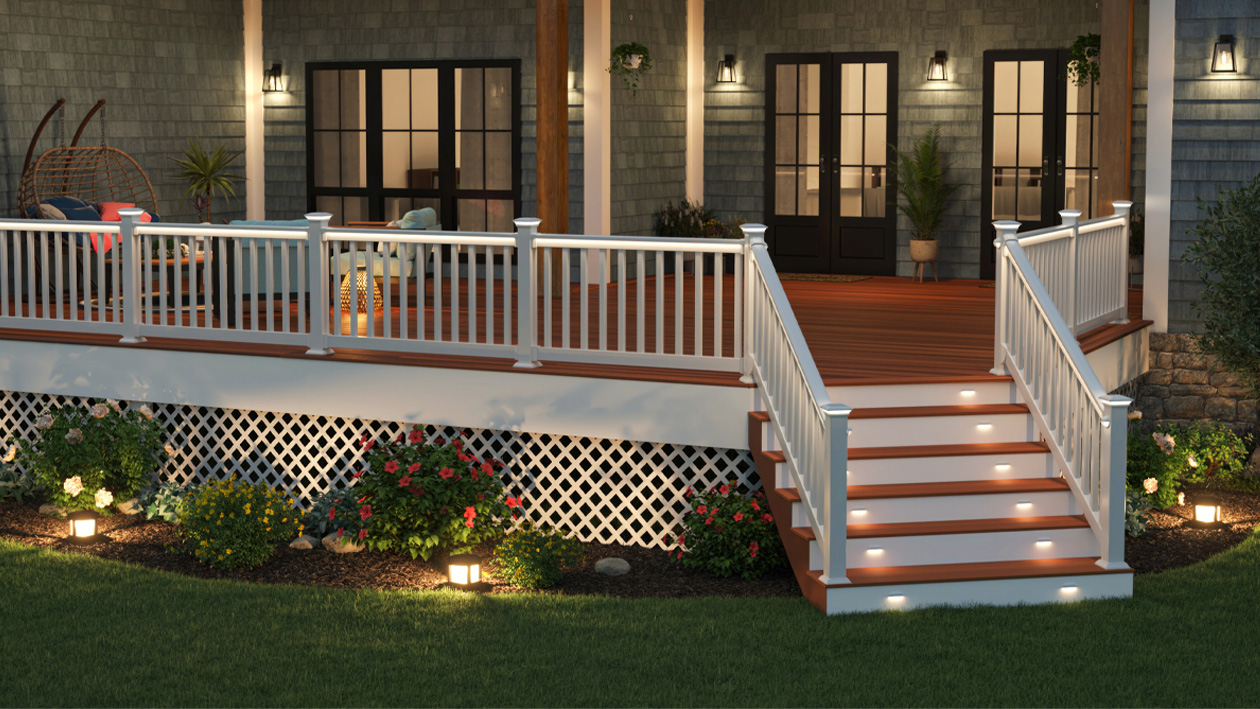
The integrated lighting is what elevates this deck from standard to spectacular. During the day, it’s a clean, classic white vinyl railing. But at night, it completely transforms. The lights on the posts and under the top rail provide a soft, ambient glow that makes the space usable and magical after dark. More importantly, the recessed step lights are a crucial safety feature, ensuring confident footing. This single addition extends the deck’s usable hours, enhances its atmosphere, and boosts its safety, providing a massive return on investment.
|
📋 Copy HEX 🔗 Share |
Installing low-voltage lighting into a vinyl railing system is a very achievable DIY project. Here’s a quick guide to adding post cap lights:
- Time Estimate: 2-4 hours for 6-8 posts
- Material Cost: $150 – $400
- Step 1: Purchase a low-voltage lighting kit with a transformer, wire, and the correct number of post cap lights designed for your post dimensions (e.g., 4×4 or 5×5).
- Step 2: Mount the transformer near an outdoor GFCI outlet. Plan the wiring path, usually under the deck boards.
- Step 3: Drill small holes through the deck surface near the base of each post to run the wire up.
- Step 4: Connect the wires to the light fixture in the cap, then attach the cap to the post. Use wire-nut connectors and wrap with electrical tape for moisture protection.
- Step 5: Run the main low-voltage cable back to the transformer and connect it. Plug in and enjoy!
11. Classic Entryway with Two-Tone Painted Wood Stairs
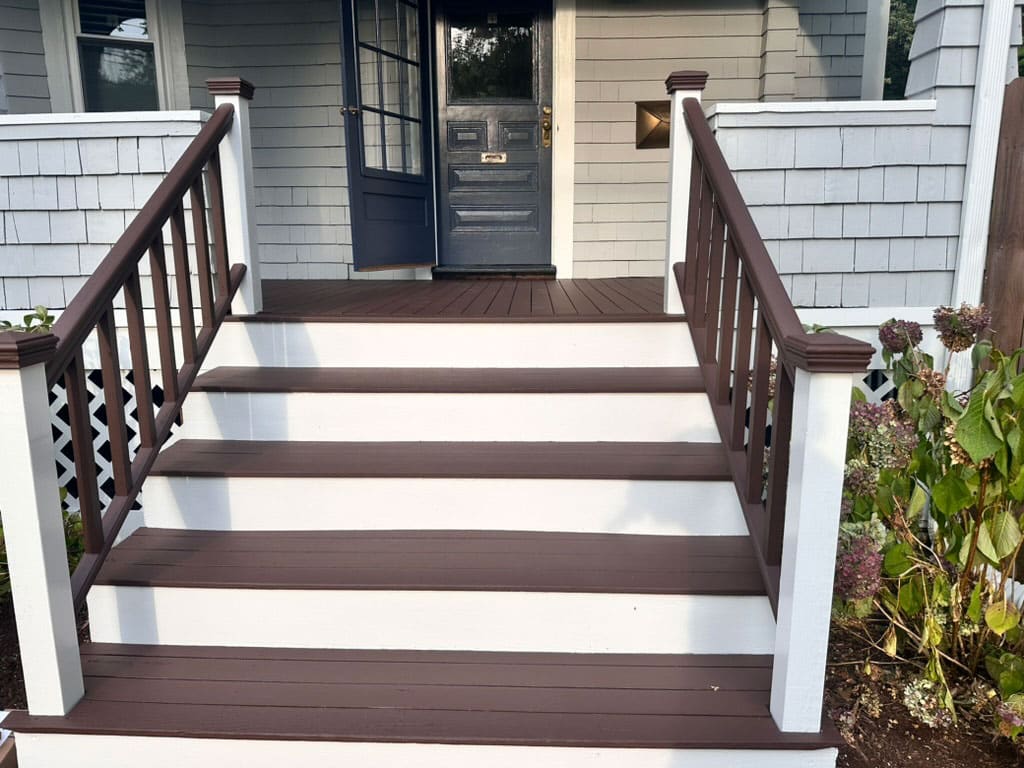
This look is a masterclass in using paint to create a custom, high-end look on a budget. The formula is approximately 60% sophisticated neutrals (light gray siding, white trim) + 30% grounding dark color (the brown stair treads and top rail) + 10% bold accent (that gorgeous dark blue door). The dark brown grounds the entry, hiding dirt on the most-trafficked surfaces, while the white keeps it feeling bright and clean. The pop of blue is the personality, drawing your eye to the front door. It’s a timeless, perfectly balanced color scheme.
|
📋 Copy HEX 🔗 Share |
A painted wooden staircase outdoors requires consistent upkeep to look this sharp. The horizontal surfaces—the stair treads and the top handrail—will take the most beating from foot traffic and weather. Expect to do touch-ups on these surfaces every year and a full sand-and-repaint every 2-3 years. The white vertical surfaces are more protected but will still need a good cleaning every season to remove dirt and mildew buildup. Using high-quality exterior porch and floor paint is non-negotiable for durability. Compare this to the low-upkeep composite in Idea #9.
12. Straightforward DIY Wood Deck Railing
This is the quintessential budget-friendly railing. Using standard pressure-treated lumber (4×4 posts, 2×4 rails, and 2×2 balusters) is the most cost-effective way to build a strong, code-compliant railing. You can buy all the materials at any home improvement store for roughly $15-$25 per linear foot. The key to making it look good is in the details: take the time to sand all the wood smooth, and apply a quality semi-transparent stain or a solid paint. Leaving it unfinished saves a few hours, but a good finish protects the wood and makes it look ten times more expensive.
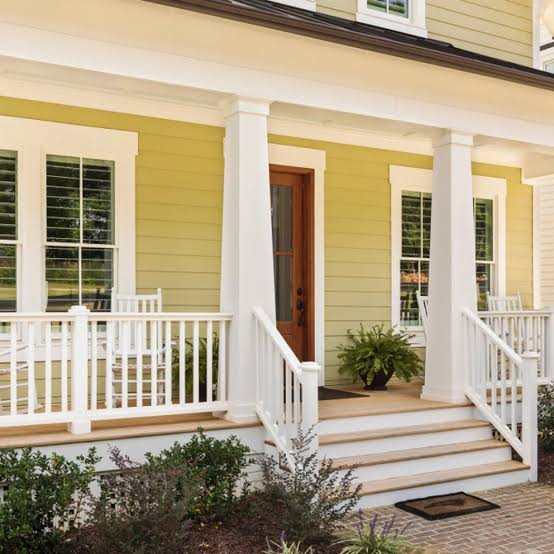
|
📋 Copy HEX 🔗 Share |
When building a classic wood railing, cover these bases to ensure a smooth project:
- Check Local Codes: Confirm your municipality’s requirements for railing height (usually 36″ or 42″), baluster spacing (must not allow a 4″ sphere to pass through), and post footing requirements. Don’t guess!
- Measure Twice, Cut Once: Carefully measure the perimeter of your deck to calculate a precise materials list. Don’t forget to account for stairs!
- Choose Your Finish: Decide on your paint or stain color beforehand. This choice impacts the final look significantly and should coordinate with your home’s exterior.
- Tool Check: Do you have a miter saw for clean, angled cuts, a power drill, a level, and clamps? Having the right tools is half the battle.
13. Clean and Open: White Vertical Baluster Railing with Gray Deck
This railing design works because of its simplicity and lightness. The all-white color of the railing itself helps it blend with the sky and prevents it from feeling like a heavy barrier. This makes the deck feel more open and connected to the expansive lawn beyond. The simple, square vertical balusters are a timeless choice that doesn’t distract the eye. Pairing this with a neutral gray deck floor grounds the space without introducing a jarring color, keeping the whole atmosphere calm, fresh, and airy. It’s a look that maximizes the feeling of space.
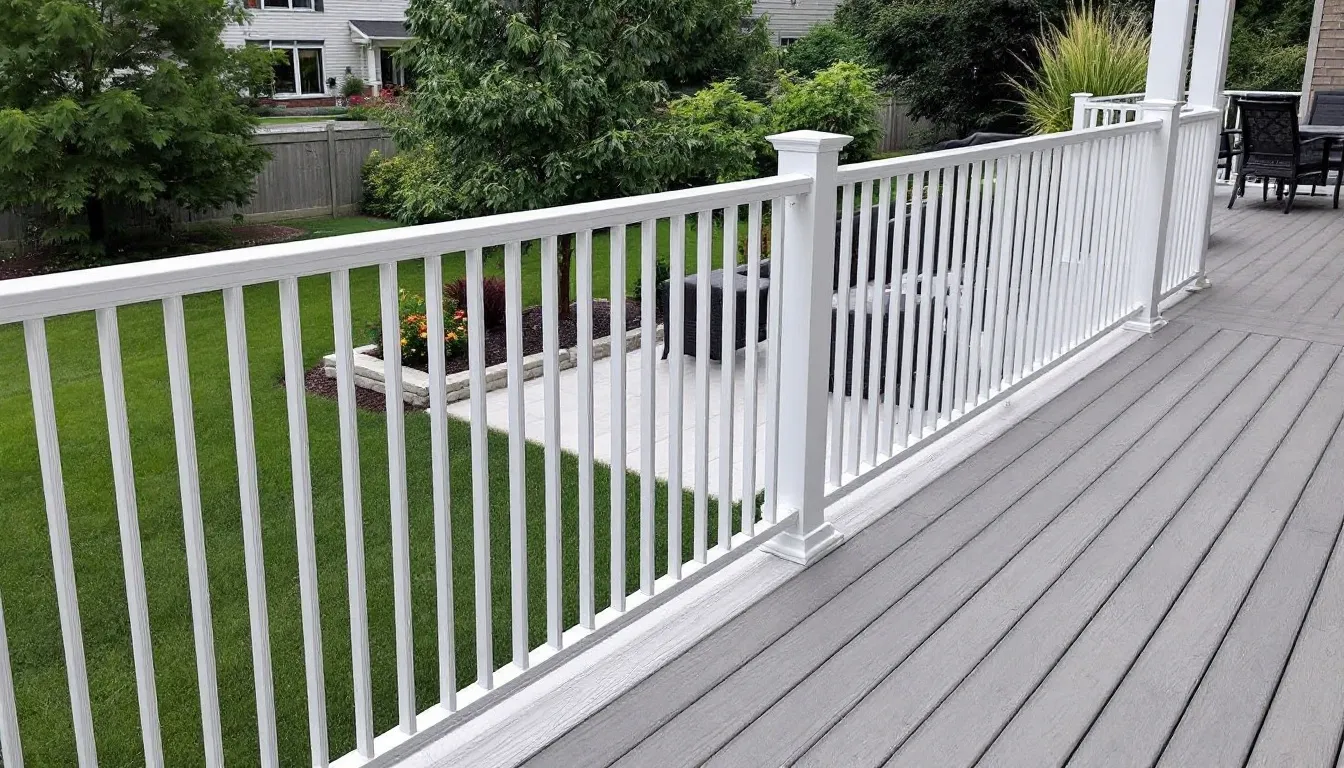
|
📋 Copy HEX 🔗 Share |
A simple, straight railing like this is incredibly versatile and works well for almost any size of deck, from a small 10×10 patio to a large, rectangular elevated space of 300+ sq. ft. Its clean lines and unobtrusive design are particularly effective for small to medium-sized decks (150-250 sq. ft.) because they don’t create visual clutter. Unlike the curving railing in Idea #3, which requires a large footprint to look right, this design provides safety and style without overwhelming a more modest outdoor area.
14. An Easy and Approachable Deck Railing Design
The easiest way to make a simple deck railing look more polished is to add a ‘top cap’ or ‘drink rail’ to your 2×4 top rail. Simply fasten a flat 1×6 or a piece of 5/4 deck board on top of the structural rail. It instantly gives the railing a more substantial, chunkier, and finished appearance. It also provides a convenient spot to place a drink or a small pot of herbs or to lean on comfortably. This one small addition elevates the entire look from basic construction to a thoughtful design feature for very little cost.
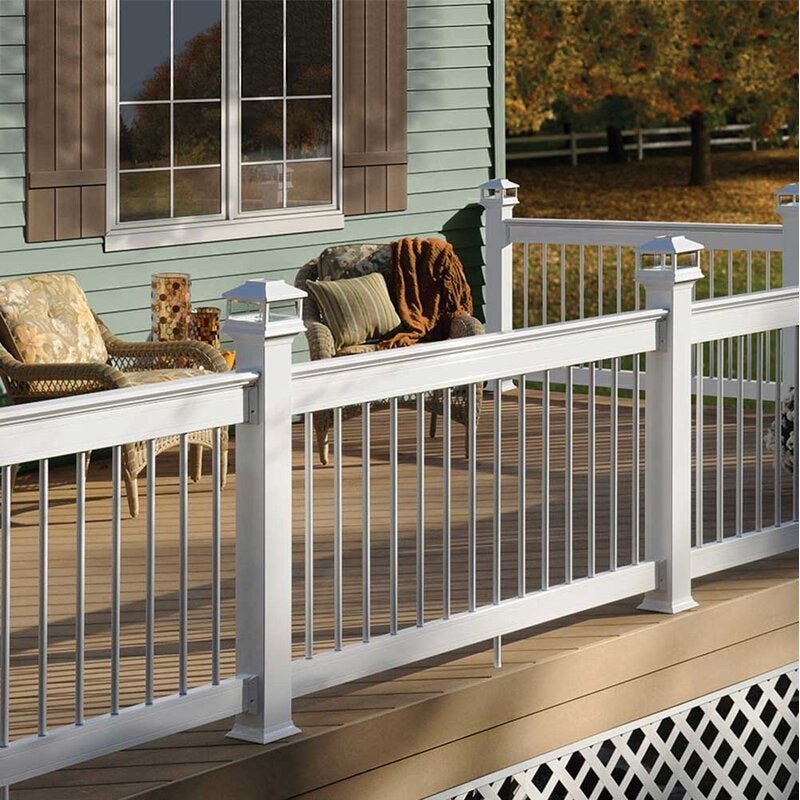
|
📋 Copy HEX 🔗 Share |
Here’s how to build a basic, sturdy section of wood railing, perfect for a DIY weekend project.
- Time Estimate: 3-5 hours for a 10-foot section.
- Material Cost: $100 – $180 (pressure-treated pine).
- Step 1: Securely attach 4×4 posts to the deck frame, no more than 6-8 feet apart. Ensure they are perfectly plumb (vertical) using a level.
- Step 2: Measure and cut your top and bottom 2×4 rails to fit snugly between the posts.
- Step 3: Attach the bottom rail, typically 3.5 inches up from the deck surface. Attach the top rail to the top of the posts.
- Step 4: Cut your 2×2 balusters to size. Attach them to the inside of the rails, using a spacer block (e.g., a 3.5″ wide piece of wood) to ensure consistent spacing that meets local code.
15. The Fundamentals of a Basic Picket Railing
Let’s be real about the classic wood picket railing: its biggest enemy is neglect. If you use pressure-treated pine and don’t apply a protective stain or paint within a few months of installation, it will start to look old, fast. The wood will turn a blotchy gray, it can splinter, and it may even start to warp or twist. A cheap railing only stays looking good with a bit of sweat equity. Plan to spend a weekend sanding and finishing it properly from the start, and then budget for a re-coat every 2-3 years. The upfront cost is low, but the maintenance is non-negotiable.
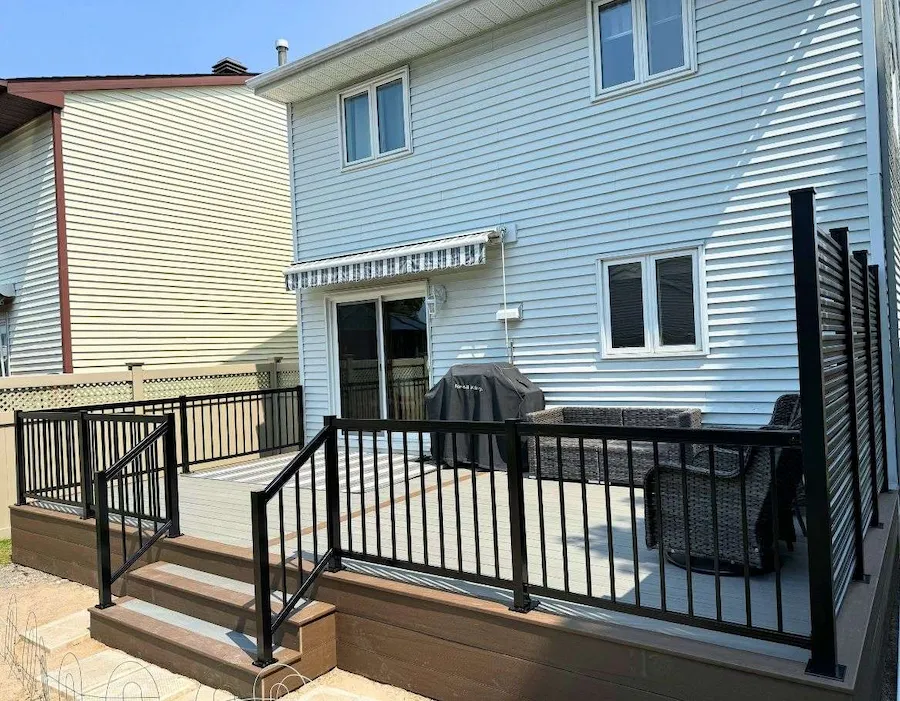
|
📋 Copy HEX 🔗 Share |
What makes or breaks a basic picket railing is consistency. It’s not about fancy materials; it’s about precision. The spacing between every single picket must be identical. Your posts must be perfectly vertical, and your rails must be perfectly level. Even a small deviation, a picket that’s a half-inch off, will stick out like a sore thumb and make the whole project look amateurish. A simple spacing jig and a good quality level are the most important tools for getting this timeless design right. Without that disciplined execution, the simplicity is lost.
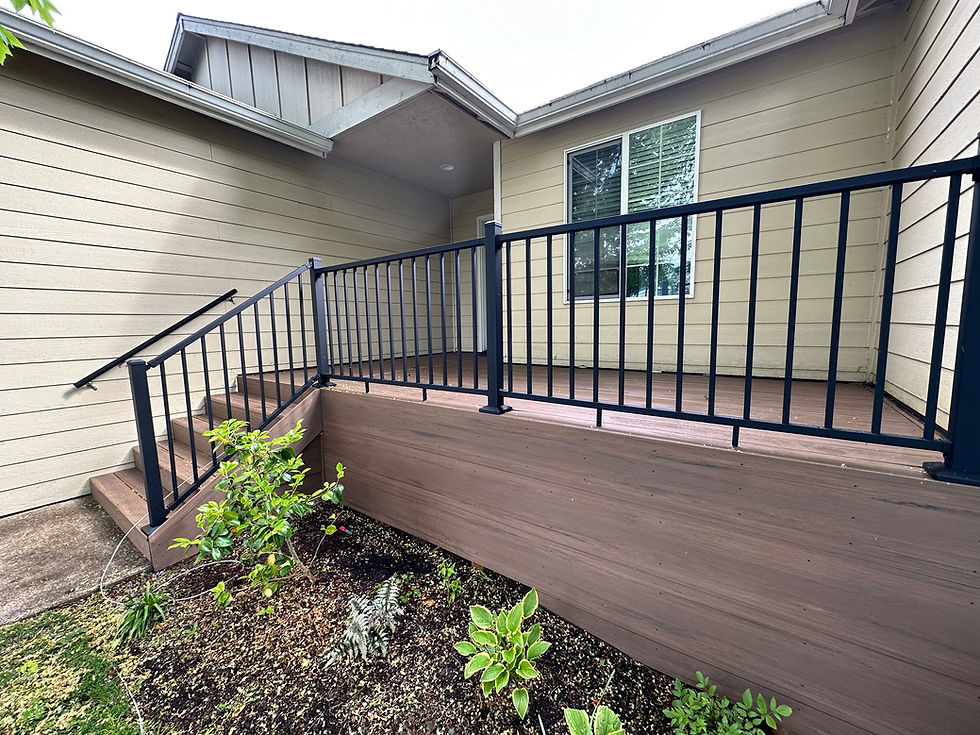
16. Understated Staircase with Dark Metal Balusters and Wood Treads
This design is effective because it prioritizes function and durability in a very subtle way. The dark metal of the balusters and handrails is incredibly practical—it doesn’t show dirt and provides a slender profile that maximizes visibility. This is paired with composite wood-look planks for the walking surfaces, which offers great traction and weather resistance. The overall effect doesn’t scream for attention; instead, it feels robust, secure, and thoughtfully designed for everyday use. The unity of color between the stair and deck railing creates a pleasingly cohesive look.
|
📋 Copy HEX 🔗 Share |
This style of railing is ideal for staircases and decks that are attached to the house and see regular, functional foot traffic, rather than being a standalone decorative feature. It’s perfect for widths from a standard 3-foot staircase to a wider 5-foot set of steps. The simplicity of the design means it won’t overwhelm a smaller deck (100-200 sq. ft.) but is also substantial enough to look appropriate on a larger one. Its visual weight is low, making it a great choice when you don’t want the railing to be the main focal point of your home’s exterior.
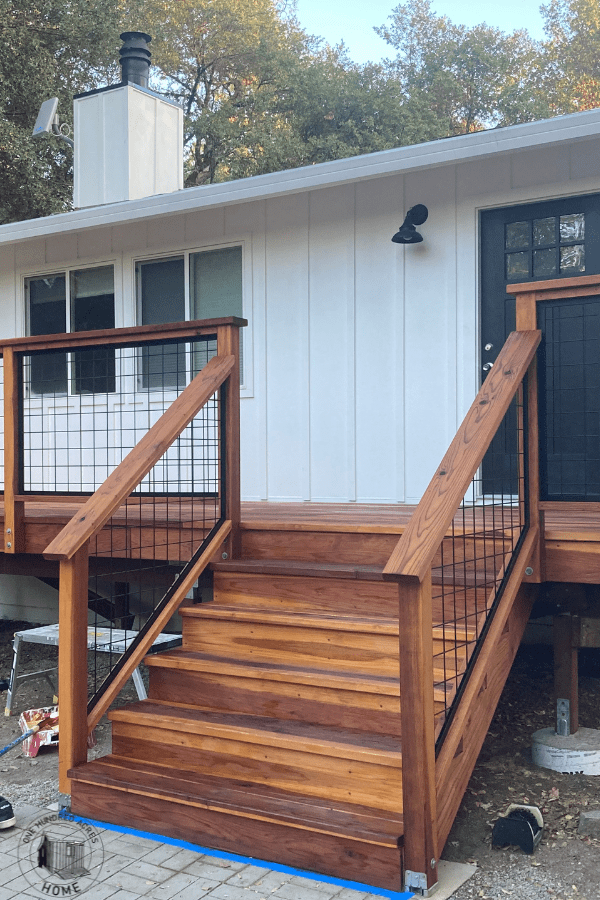
17. Modern Wood Deck with Black Metal Grid Railing
The black metal grid infill is the element that gives this deck its unique character. It’s a brilliant compromise between solid panels and individual balusters. The grid provides a sense of security and containment that you don’t get from cable or thin spindles, but it’s still open enough to let in light and air, preventing the deck from feeling boxed in. It strikes a perfect balance between modern industrial style and a more traditional sense of enclosure, and the black color offers a sharp, graphic contrast to the warm wood and white siding.
|
📋 Copy HEX 🔗 Share |
Those pre-made metal grid (or ‘hog wire’) panels can be found at farm supply stores or home improvement centers and are a surprisingly affordable way to get a high-end look. A standard 4’x8′ panel can cost between $40 and $80. You simply build a basic wooden frame for the railing using 4×4 posts and 2×4 rails, and then staple or sandwich the metal grid panel inside. It’s a much faster installation than individual balusters and gives you the same modern, rustic vibe you see here for a fraction of the cost of a custom-welded system.
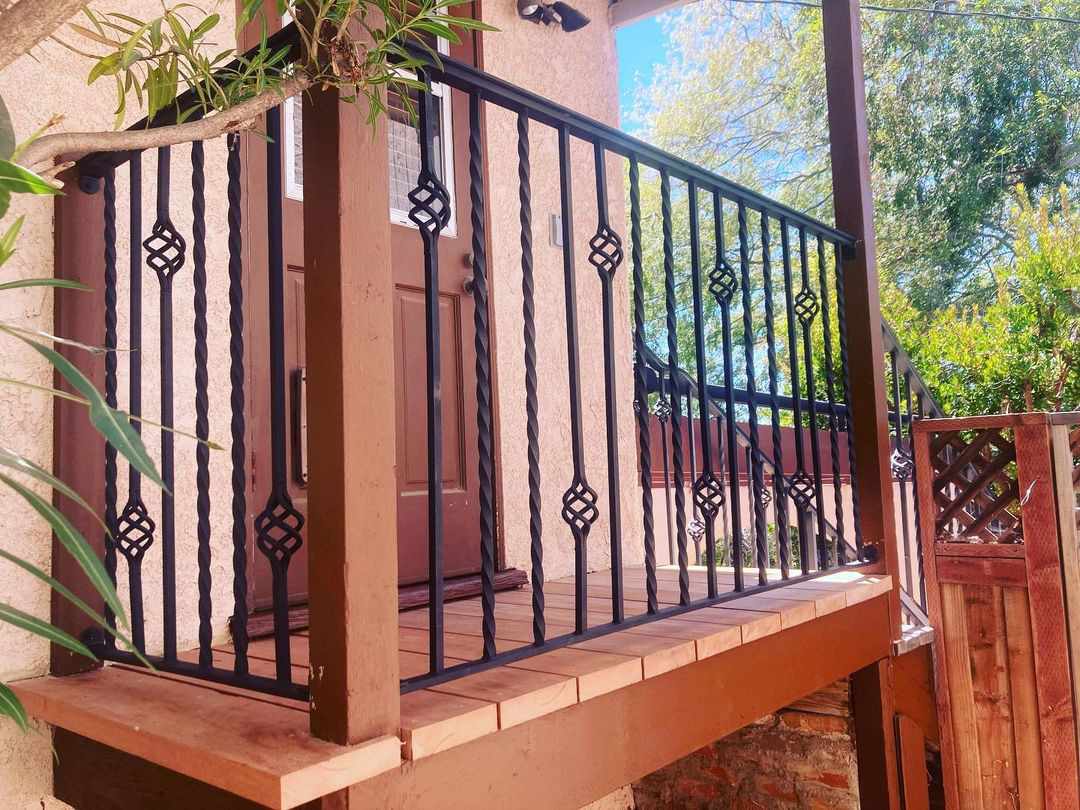
18. Ornamental Black Metal Balusters with a Touch of Celtic Knotwork
When using ornamental balusters, less is more. Notice how this design doesn’t use the decorative interlocking knot baluster for every single spindle. Instead, it alternates: two or three simple straight or twisted balusters for every one
|
📋 Copy HEX 🔗 Share |
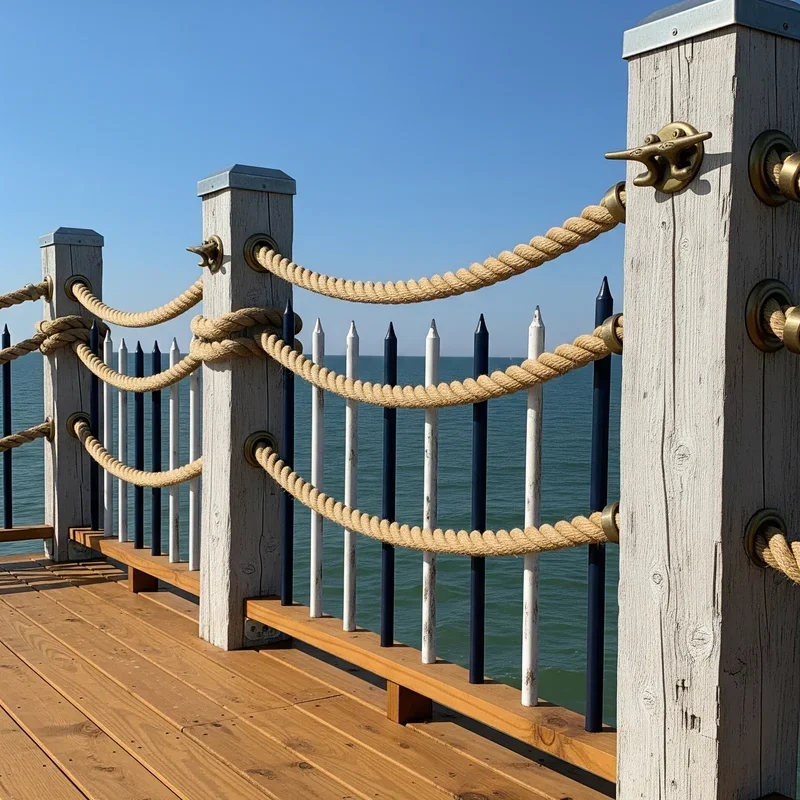
19. Nautical Deck with Weathered Posts and Rope Railing
As homeowners continue to embrace outdoor living, we’re seeing a huge trend towards creating highly specific ‘moods’ or ‘themes’ in exterior spaces. This nautical railing is a perfect example. It’s not just a barrier; it’s a piece of storytelling. The weathered gray posts, thick rope, and brass details instantly transport you to a New England harbor. It’s part of a larger movement away from generic, purely functional outdoor design and towards creating personal, transportive backyard escapes. This is especially popular for homes near water, but it’s being adopted everywhere as a way to get that permanent-vacation feeling at home.
|
📋 Copy HEX 🔗 Share |
Threading a rope railing is easier than it looks and creates a huge visual impact. Here’s a basic guide:
- Time Estimate: 2 hours for 4 posts.
- Material Cost: $80 – $200 (depending on rope and hardware).
- Step 1: Securely install your wooden posts. For this look, a 6-foot spacing is ideal.
- Step 2: Mark the desired height for each of your three rope rows. Drill holes through the posts that are slightly larger than your rope’s diameter.
- Step 3: For a cleaner look, install brass or stainless steel eyelets (grommets) into the holes.
- Step 4: Starting at one end, thread the rope through the top row of holes, pulling it taut as you go. Secure the end by knotting it or using a cleat.
- Step 5: Repeat the process for the middle and bottom rows. That’s it!
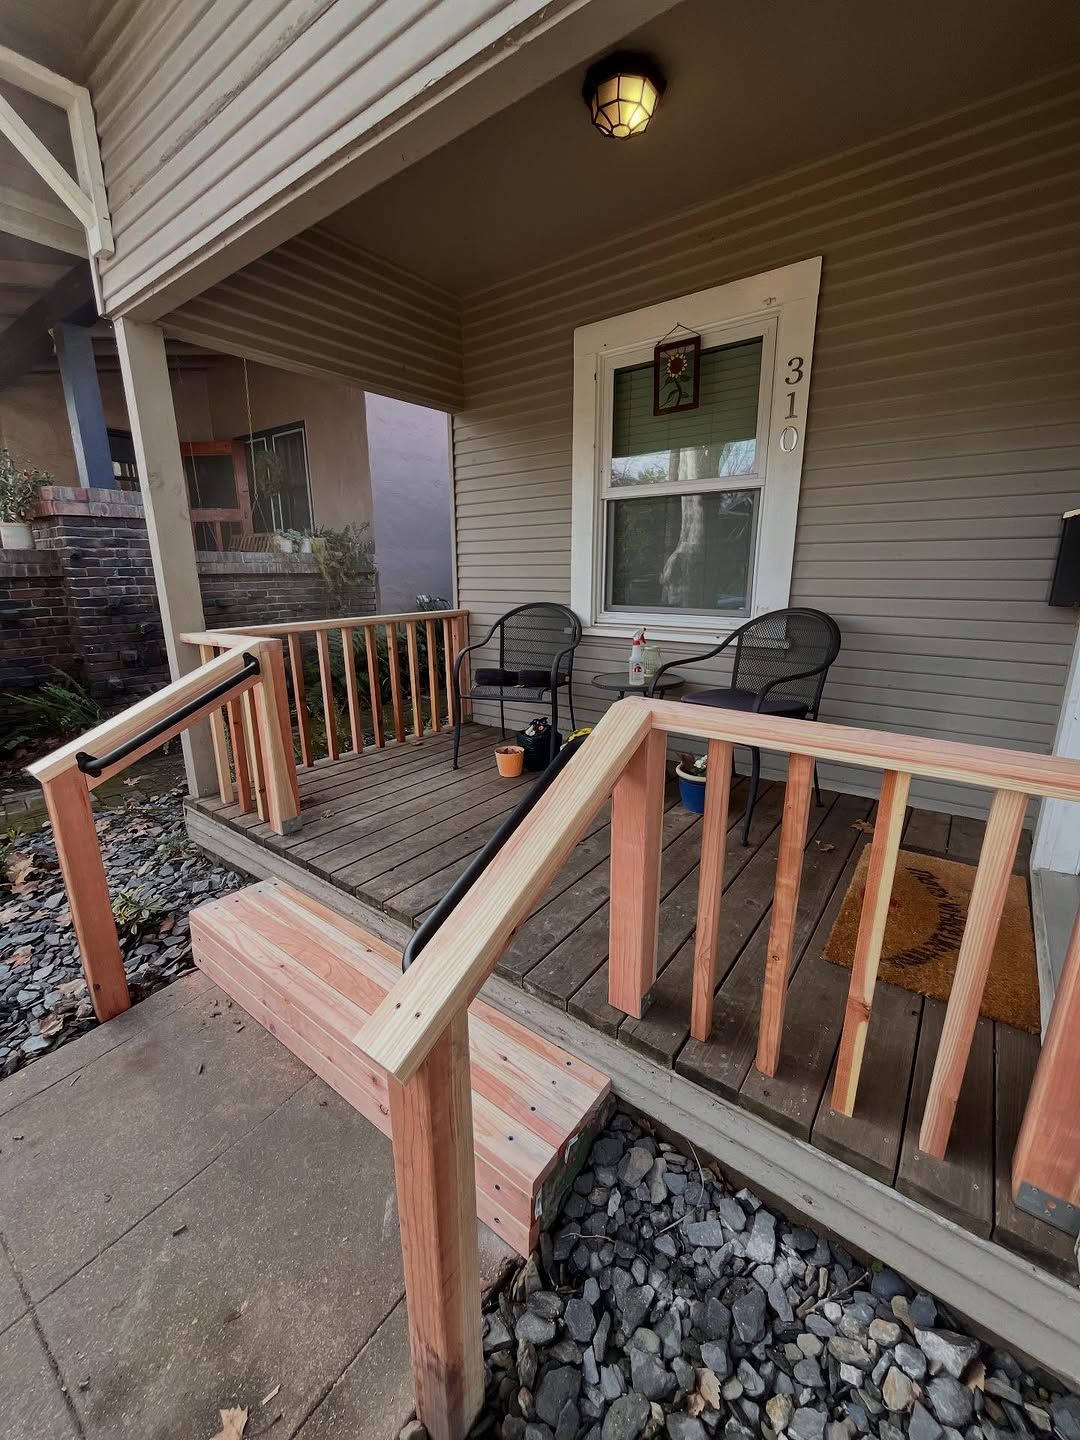
20. Simple Unfinished Wood Railing with Black Pipe Handrail
The single element that makes this design work is the black metal pipe handrail. Without it, this would be a very basic, almost forgettable unfinished wood railing. The pipe adds a touch of industrial contrast, a different texture, and a much more comfortable and secure gripping surface than the top of a 2×4. It’s a simple, inexpensive addition that elevates the entire structure from purely functional to intentionally styled. It demonstrates how one thoughtful detail can completely change the character of a simple build. It feels both rustic and a little bit modern at the same time.
|
📋 Copy HEX 🔗 Share |
Let’s be direct: choosing to leave wood unfinished outdoors, even pressure-treated pine, is a bold move with consequences. While it gives a very raw, rustic look, the wood is completely exposed to the elements. It will gray unevenly, be more prone to splintering, and absorb moisture, which can lead to warping and mildew over time. This look is best suited for arid, dry climates. In a wet or humid area, this railing will age very quickly and not in a charming way. At a minimum, consider a clear water-sealing treatment to give it some protection without changing the color.
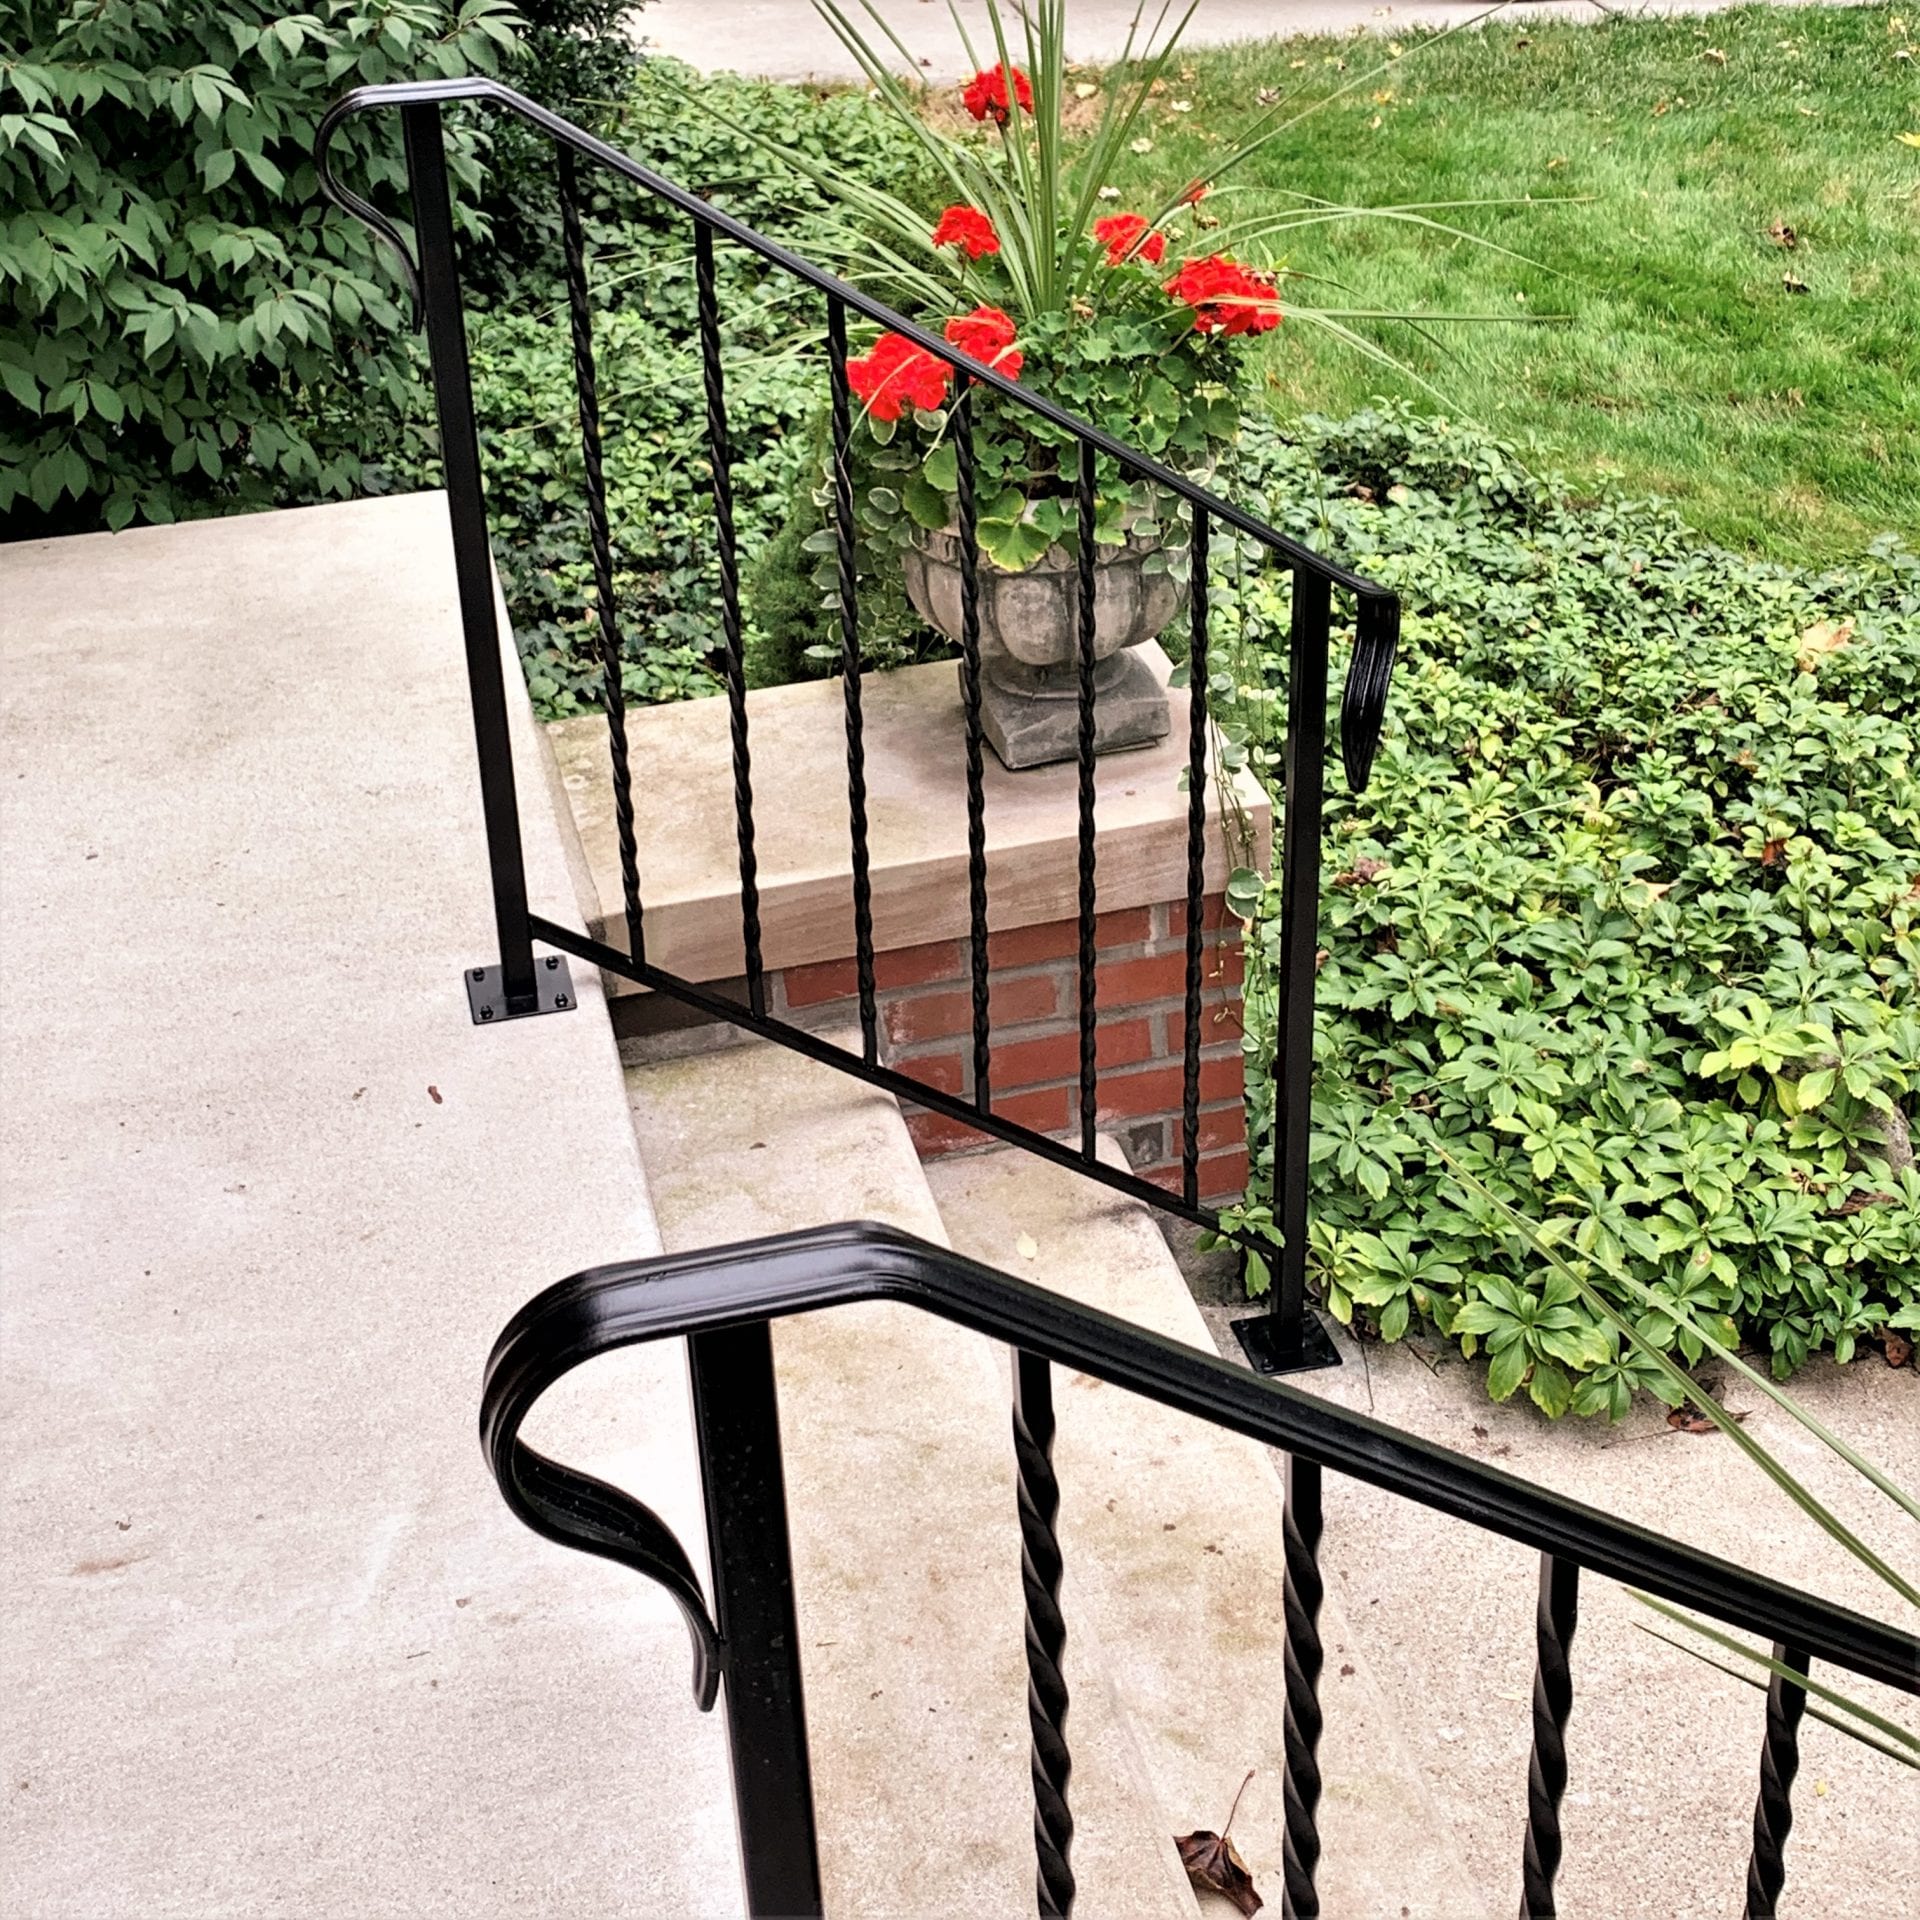
21. Traditional Black Wrought Iron Railing on Concrete Steps
The success of this entrance lies in the interplay between heavy and light materials. The concrete steps and brick pillar are solid, heavy, and grounded. The wrought iron railing, by contrast, is visually light and airy. Despite being made of strong metal, its thin profile, twisted spindles, and open design prevent it from looking bulky. This contrast makes the entryway feel both incredibly sturdy and secure, yet still open and welcoming. The traditional curve of the handrail adds a touch of elegance that softens the hard lines of the masonry.
|
📋 Copy HEX 🔗 Share |
Custom wrought iron can be expensive. For a more budget-friendly approach, look for pre-fabricated, modular wrought iron or powder-coated aluminum railing kits online or at home improvement stores. These kits come in standard lengths (e.g., 6 or 8 feet) and often include adjustable brackets to handle the slope of stairs. While you might not get the same custom curves, you can achieve a very similar sturdy, traditional look for $40-$80 per linear foot, a significant saving compared to the $150-$300+ per foot for a fully custom job.
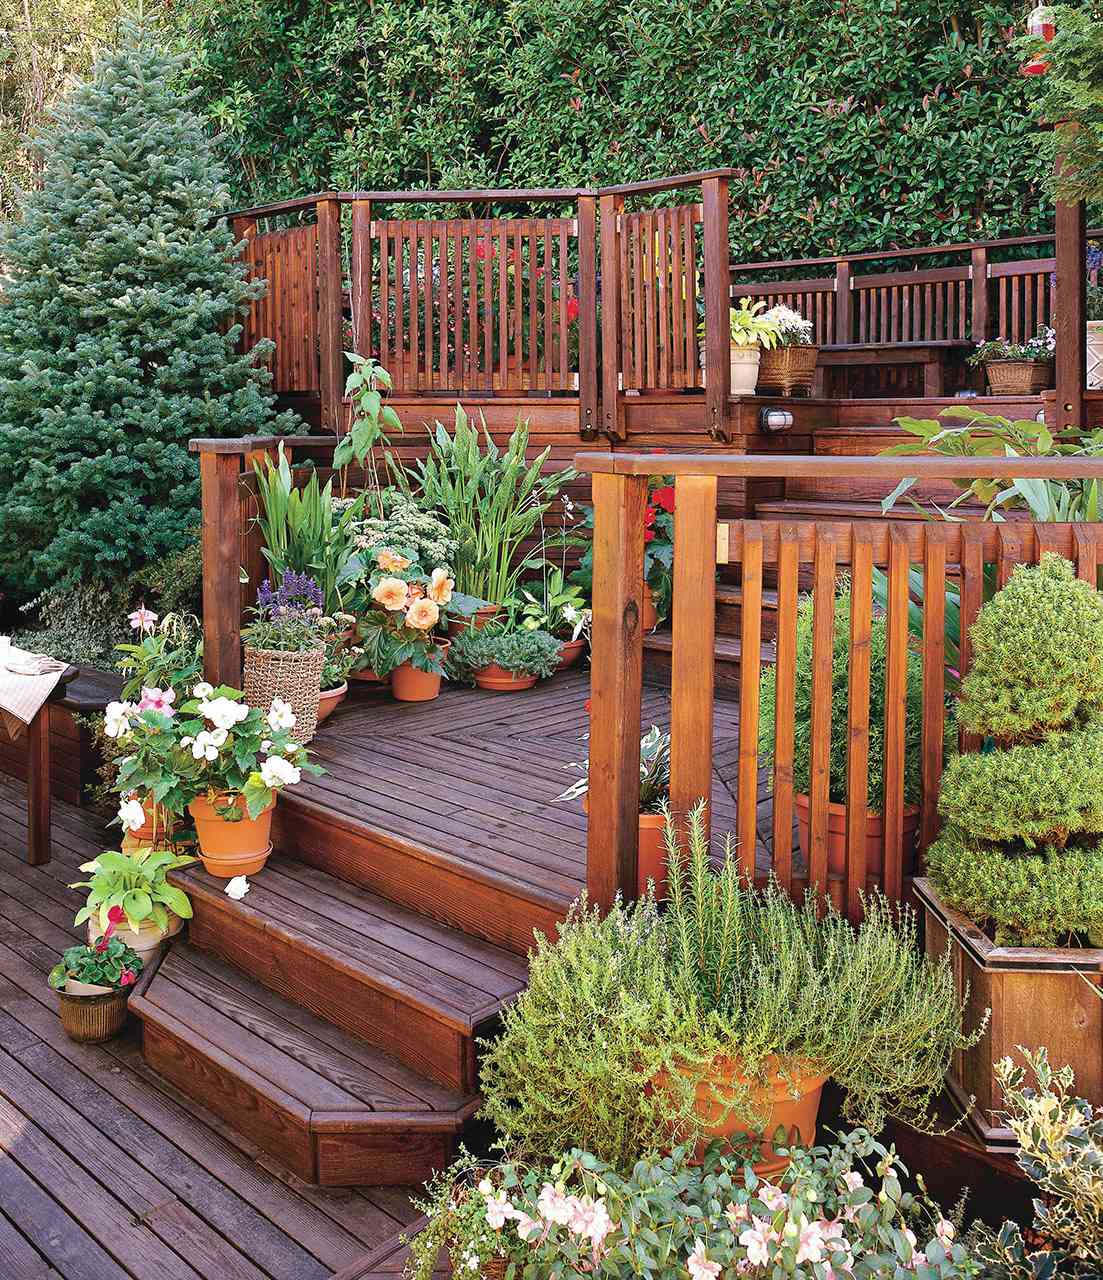
22. Lush, Plant-Filled Deck with Dark-Stained Vertical Slats
When you have a deck that’s heavily focused on plants and container gardening, your railing should be a quiet, supporting actor, not the star of the show. Staining the wood a very dark brown or near-black is a brilliant move. This dark, neutral color recedes into the background, making the vibrant greens of the foliage and the bright colors of the flowers pop. A lighter wood or a white railing would create a busy, striped effect that would compete for attention with the plants. The dark stain provides a simple, elegant backdrop that lets the garden shine.
|
📋 Copy HEX 🔗 Share |
This lush, jungle-like vibe follows a simple ratio: 70% organic elements + 30% simple structure. The overwhelming majority of the visual information comes from the plants—the green leaves, colorful flowers, and terracotta pots. The deck and railing are just simple, dark, vertical, and horizontal lines that provide order and a place for the organic chaos to live. You could change the deck stain to a soft gray or even change the railing to a simple black metal design, and as long as you keep the plant-to-structure ratio, you’ll maintain the same inviting, natural atmosphere.
23. Classic White Painted Baluster Railing in a Garden Setting
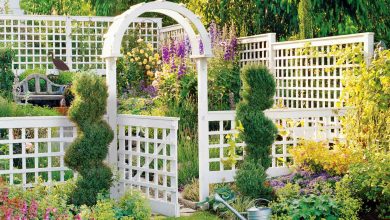
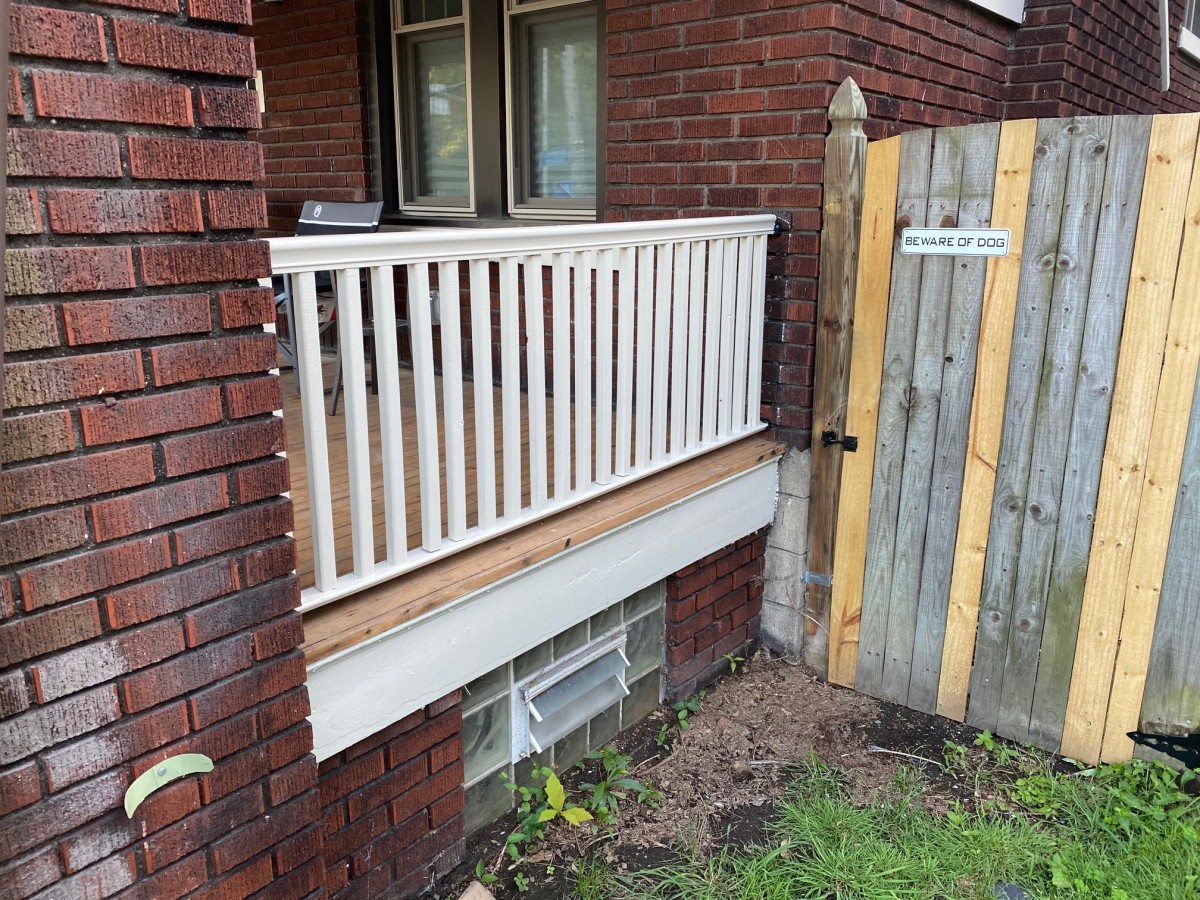
Don’t underestimate the cleaning commitment of a white railing next to a brick wall and foliage. White looks incredibly crisp and clean when it’s first painted, but it’s a magnet for dirt, pollen, and mildew. Rain splashing off the red brick can stain the base of the balusters, and decomposing leaves from nearby trees can leave tannins that are tough to remove. To keep this looking fresh, you’ll need to give it a thorough scrub with a deck cleaner and soft brush at least once a season and likely do paint touch-ups every single year.
|
📋 Copy HEX 🔗 Share |
Thinking of adding a classic white railing? Walk through this list before you buy the paint.
- Material Check: Is your existing wood in good enough shape to paint? Paint can trap moisture and accelerate rot in old, soft wood. Make sure your surfaces are sound, dry, and clean.
- Primer is Non-Negotiable: Are you prepared to prime? Applying a quality exterior oil-based or stain-blocking primer is essential, especially over pressure-treated wood or knots, to prevent bleed-through.
- Light Conditions: How much direct sun does the area get? In a very shady, damp corner, a white-painted surface will be a constant battle against mildew. A darker color might be more practical.
- The Gate Plan: Notice the weathered gate here. If you’re adding a gate, how will its style and finish coordinate? An intentional contrast, like the one here, looks great, but an accidental mismatch doesn’t.
24. Sustainable Outdoor Spaces with Recycled Deck Railings
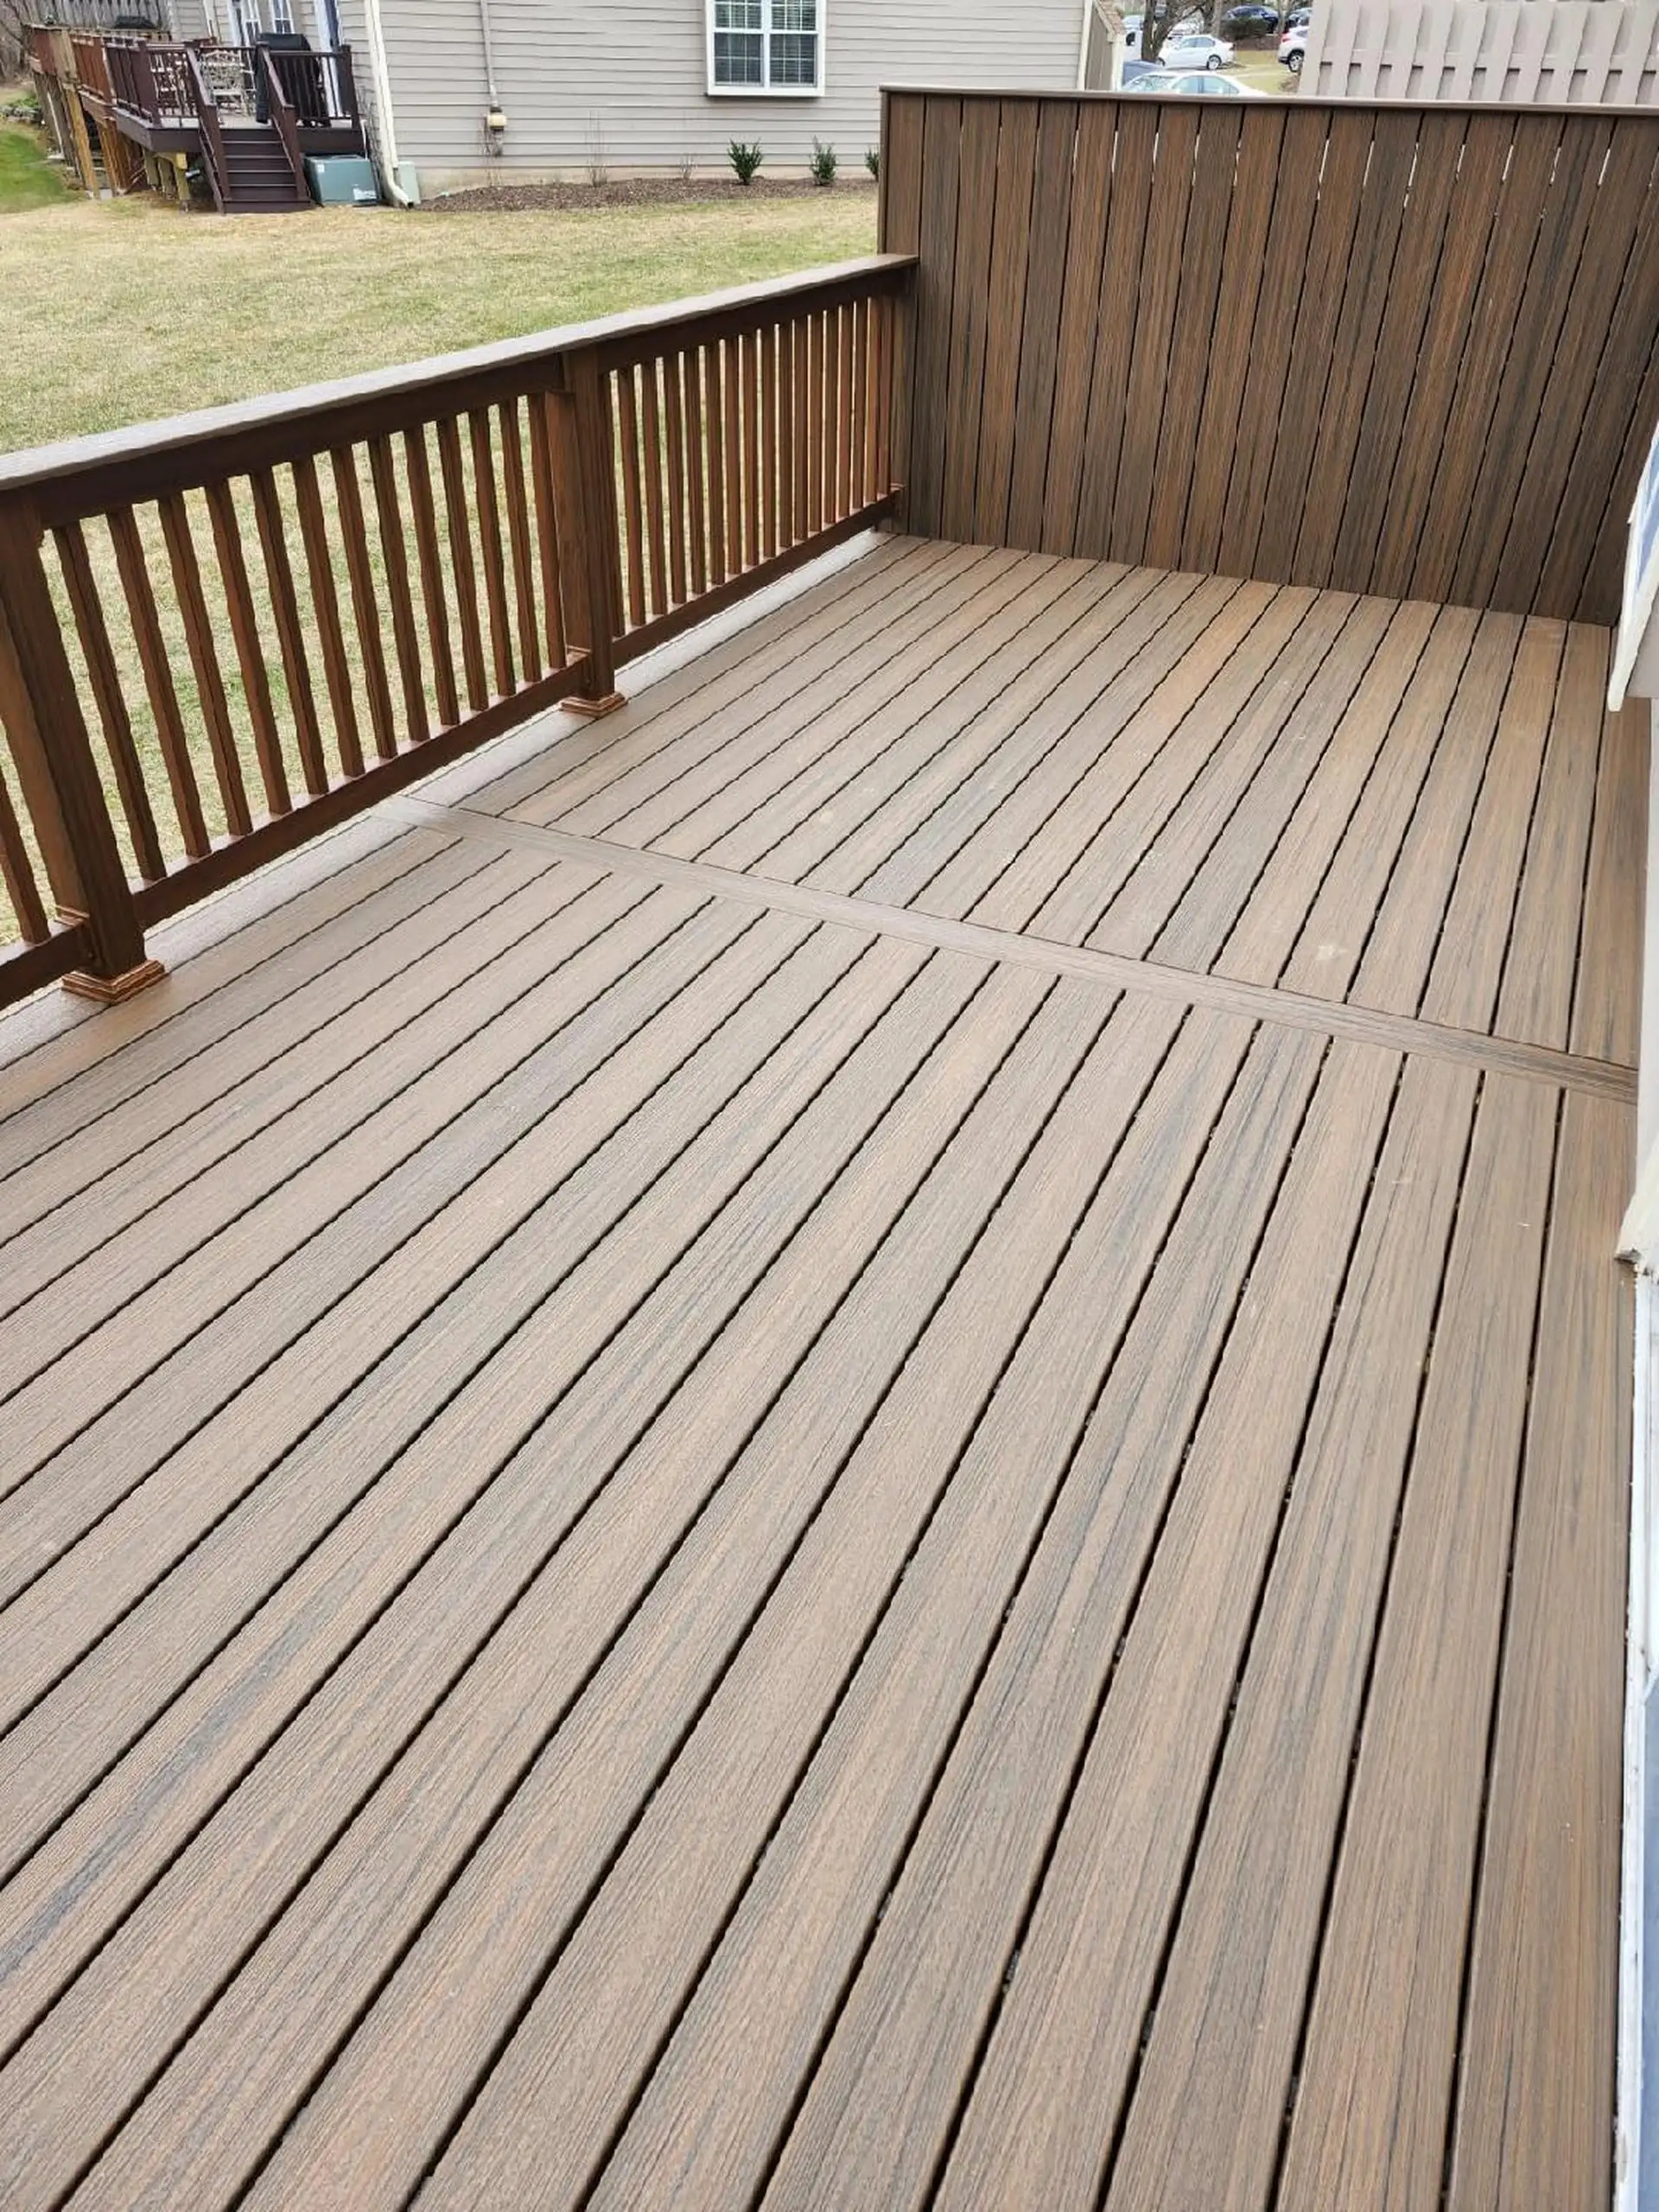
As eco-consciousness becomes less of a trend and more of a permanent value for homeowners, the demand for recycled and composite materials is stronger than ever in 2026. People want durable, low-maintenance outdoor spaces that don’t contribute to deforestation. Composite railings, often made from a mix of recycled plastics and wood fibers, fit this need perfectly. They offer the look of wood without the environmental impact or the intense upkeep, which is a major driver of their popularity on Pinterest and in new builds.
|
📋 Copy HEX 🔗 Share |
The single most compelling aspect of choosing a railing made from recycled materials (like composite or PVC) is its longevity. Unlike wood, it will not rot, warp, or splinter. It resists insect damage and, once installed, requires virtually no upkeep beyond occasional cleaning. This ‘install it and enjoy it’ quality is a massive lifestyle upgrade. You’re not just buying a railing; you’re buying back the future weekends you would have spent sanding, staining, or replacing weathered wooden boards. This long-term, hassle-free value is its biggest selling point.
25. Secure and Stylish: White Vinyl Railing with a Matching Gate
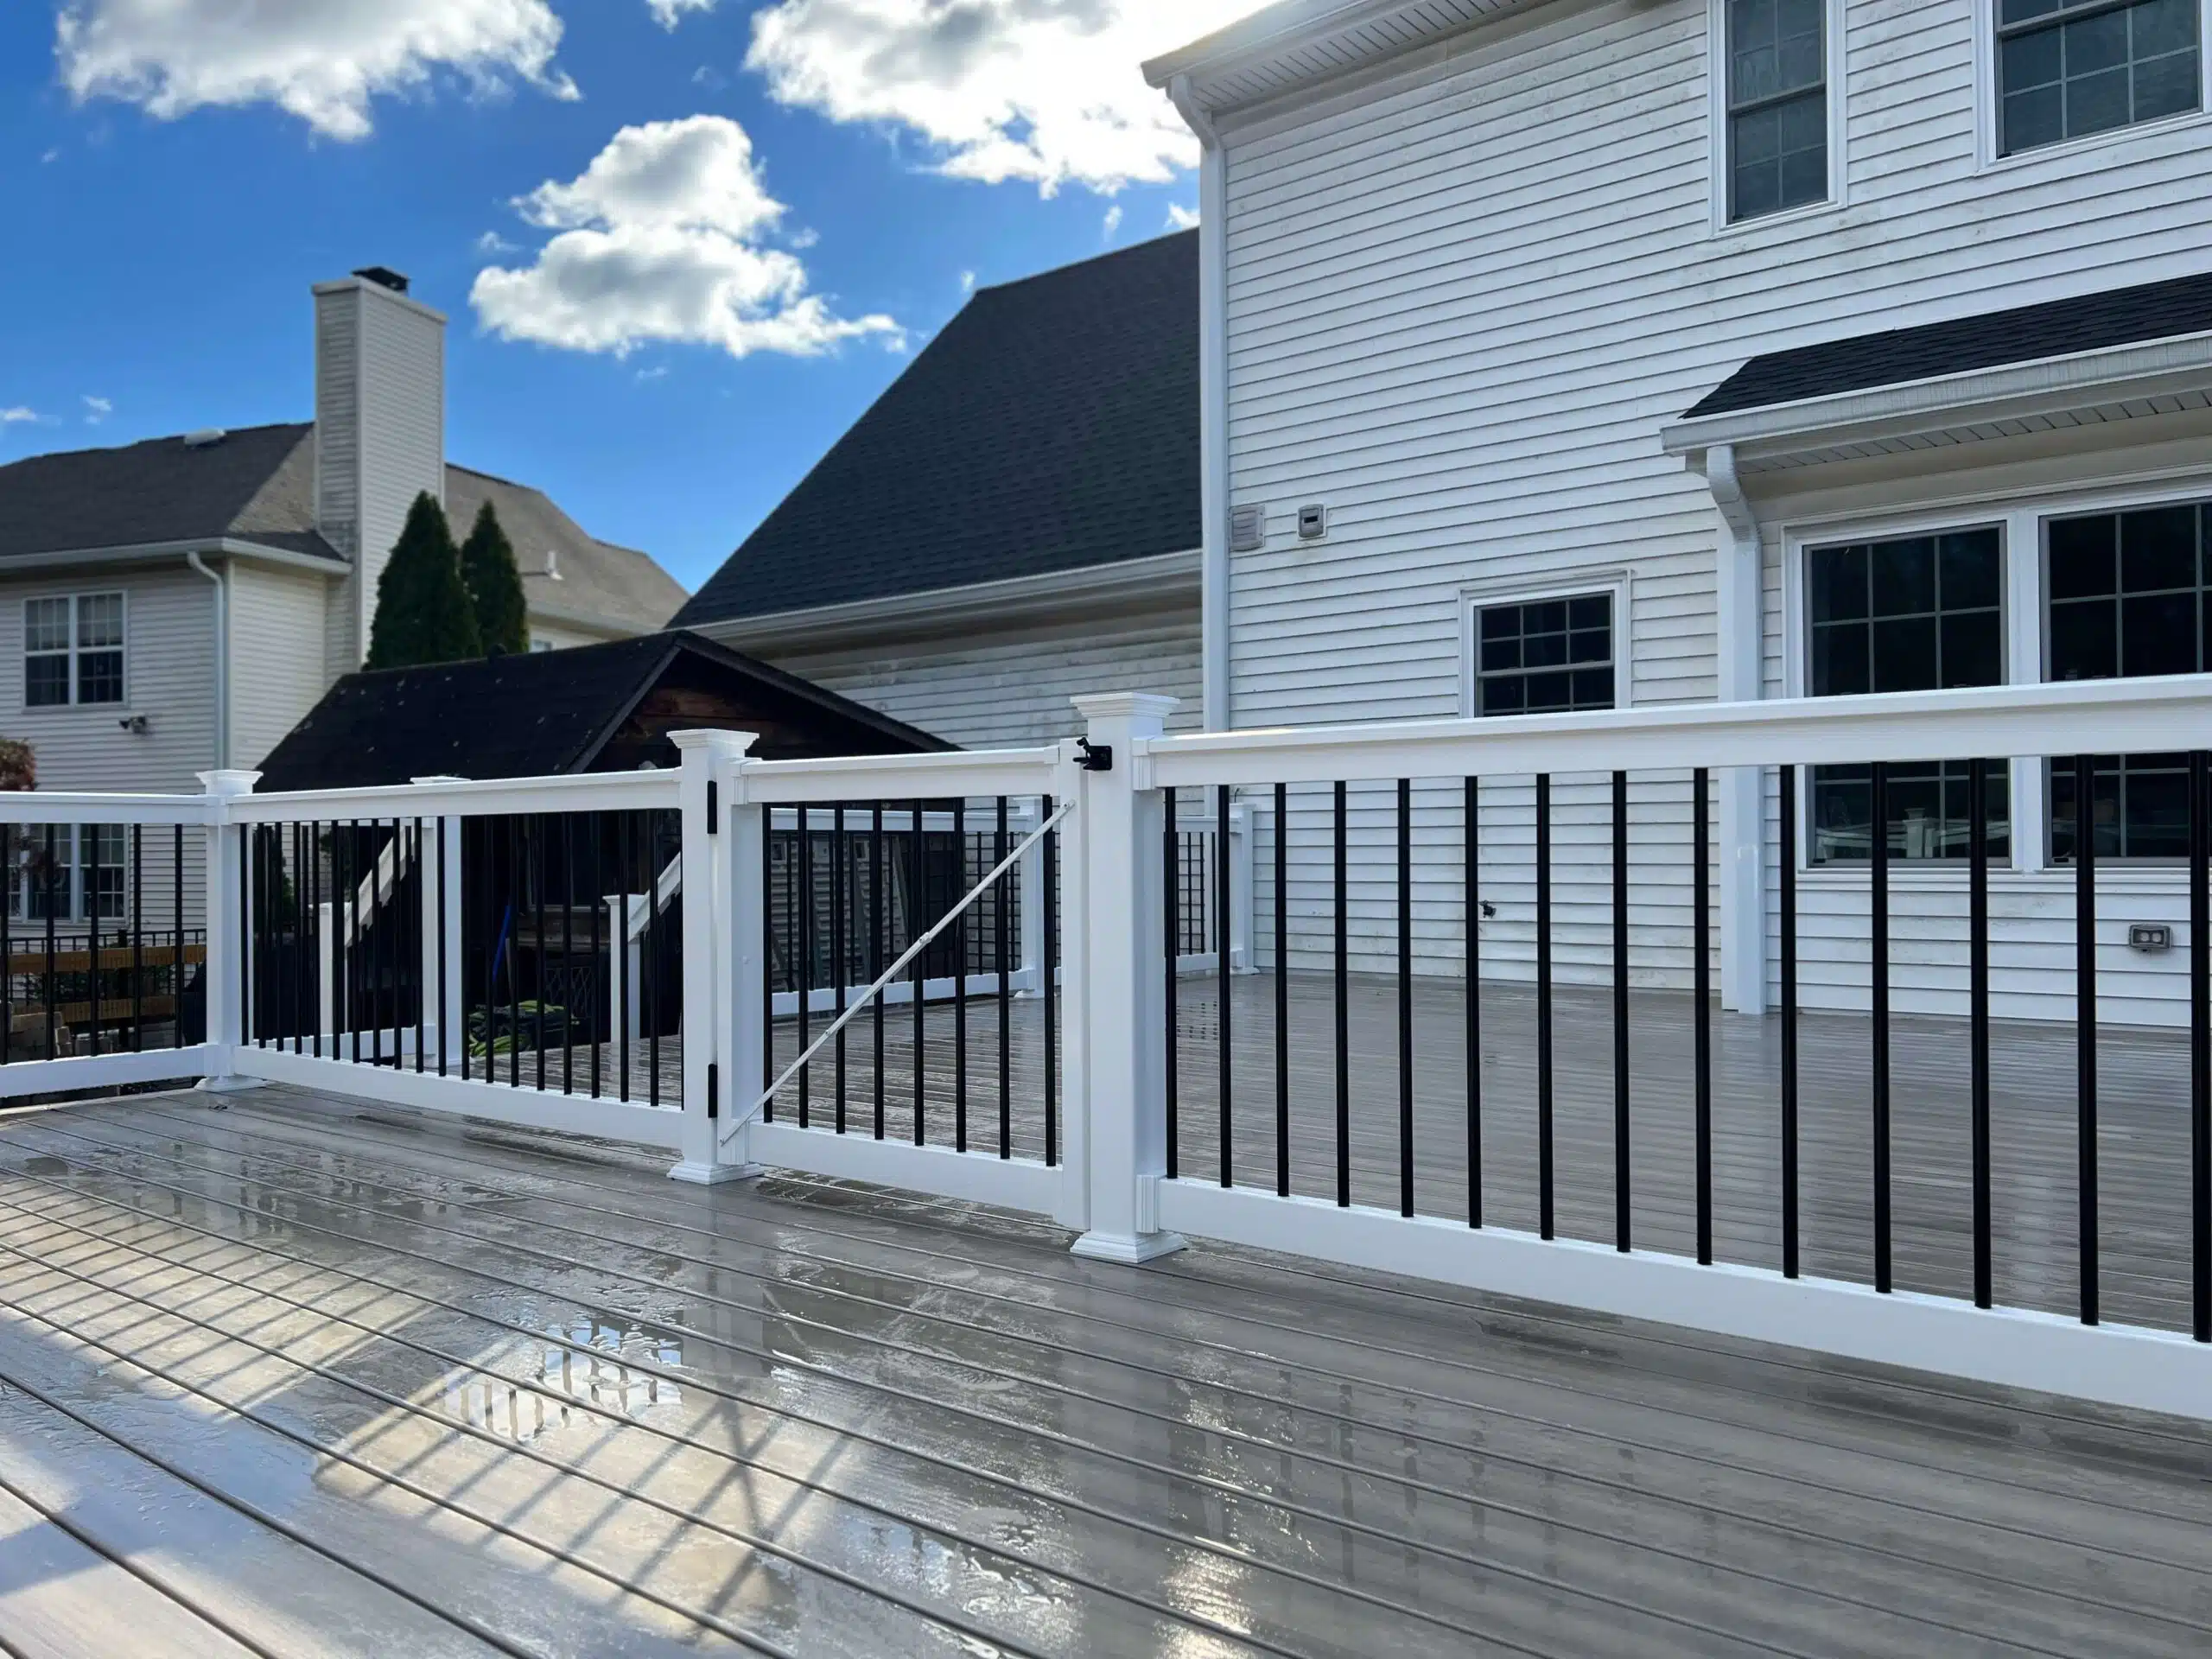
When installing a gate within a railing system, the hardware is just as important as the gate itself. Don’t skimp here. Use high-quality, adjustable hinges that allow you to fine-tune the gate’s alignment over time, as posts can sometimes settle. Also, choose a latch that is self-latching and, if needed for safety, lockable. Here, the choice of black hardware is a smart design move. It turns a functional necessity into a deliberate, stylish accent that echoes the black balusters, tying the whole system together beautifully.
|
📋 Copy HEX 🔗 Share |
The combination of a railing and a matching gate works to create a strong sense of safety and defined space, which is especially important for elevated decks or homes with pets and small children. The visual consistency is key; because the gate is made from the exact same white vinyl and black balusters as the railing, it blends in seamlessly when closed, preserving the clean, continuous lines of the deck’s perimeter. The diagonal support bar on the gate is a critical functional detail, preventing sag and ensuring it will close properly for years to come.
26. Affordable Modernity with a Deck Railing Wire Kit
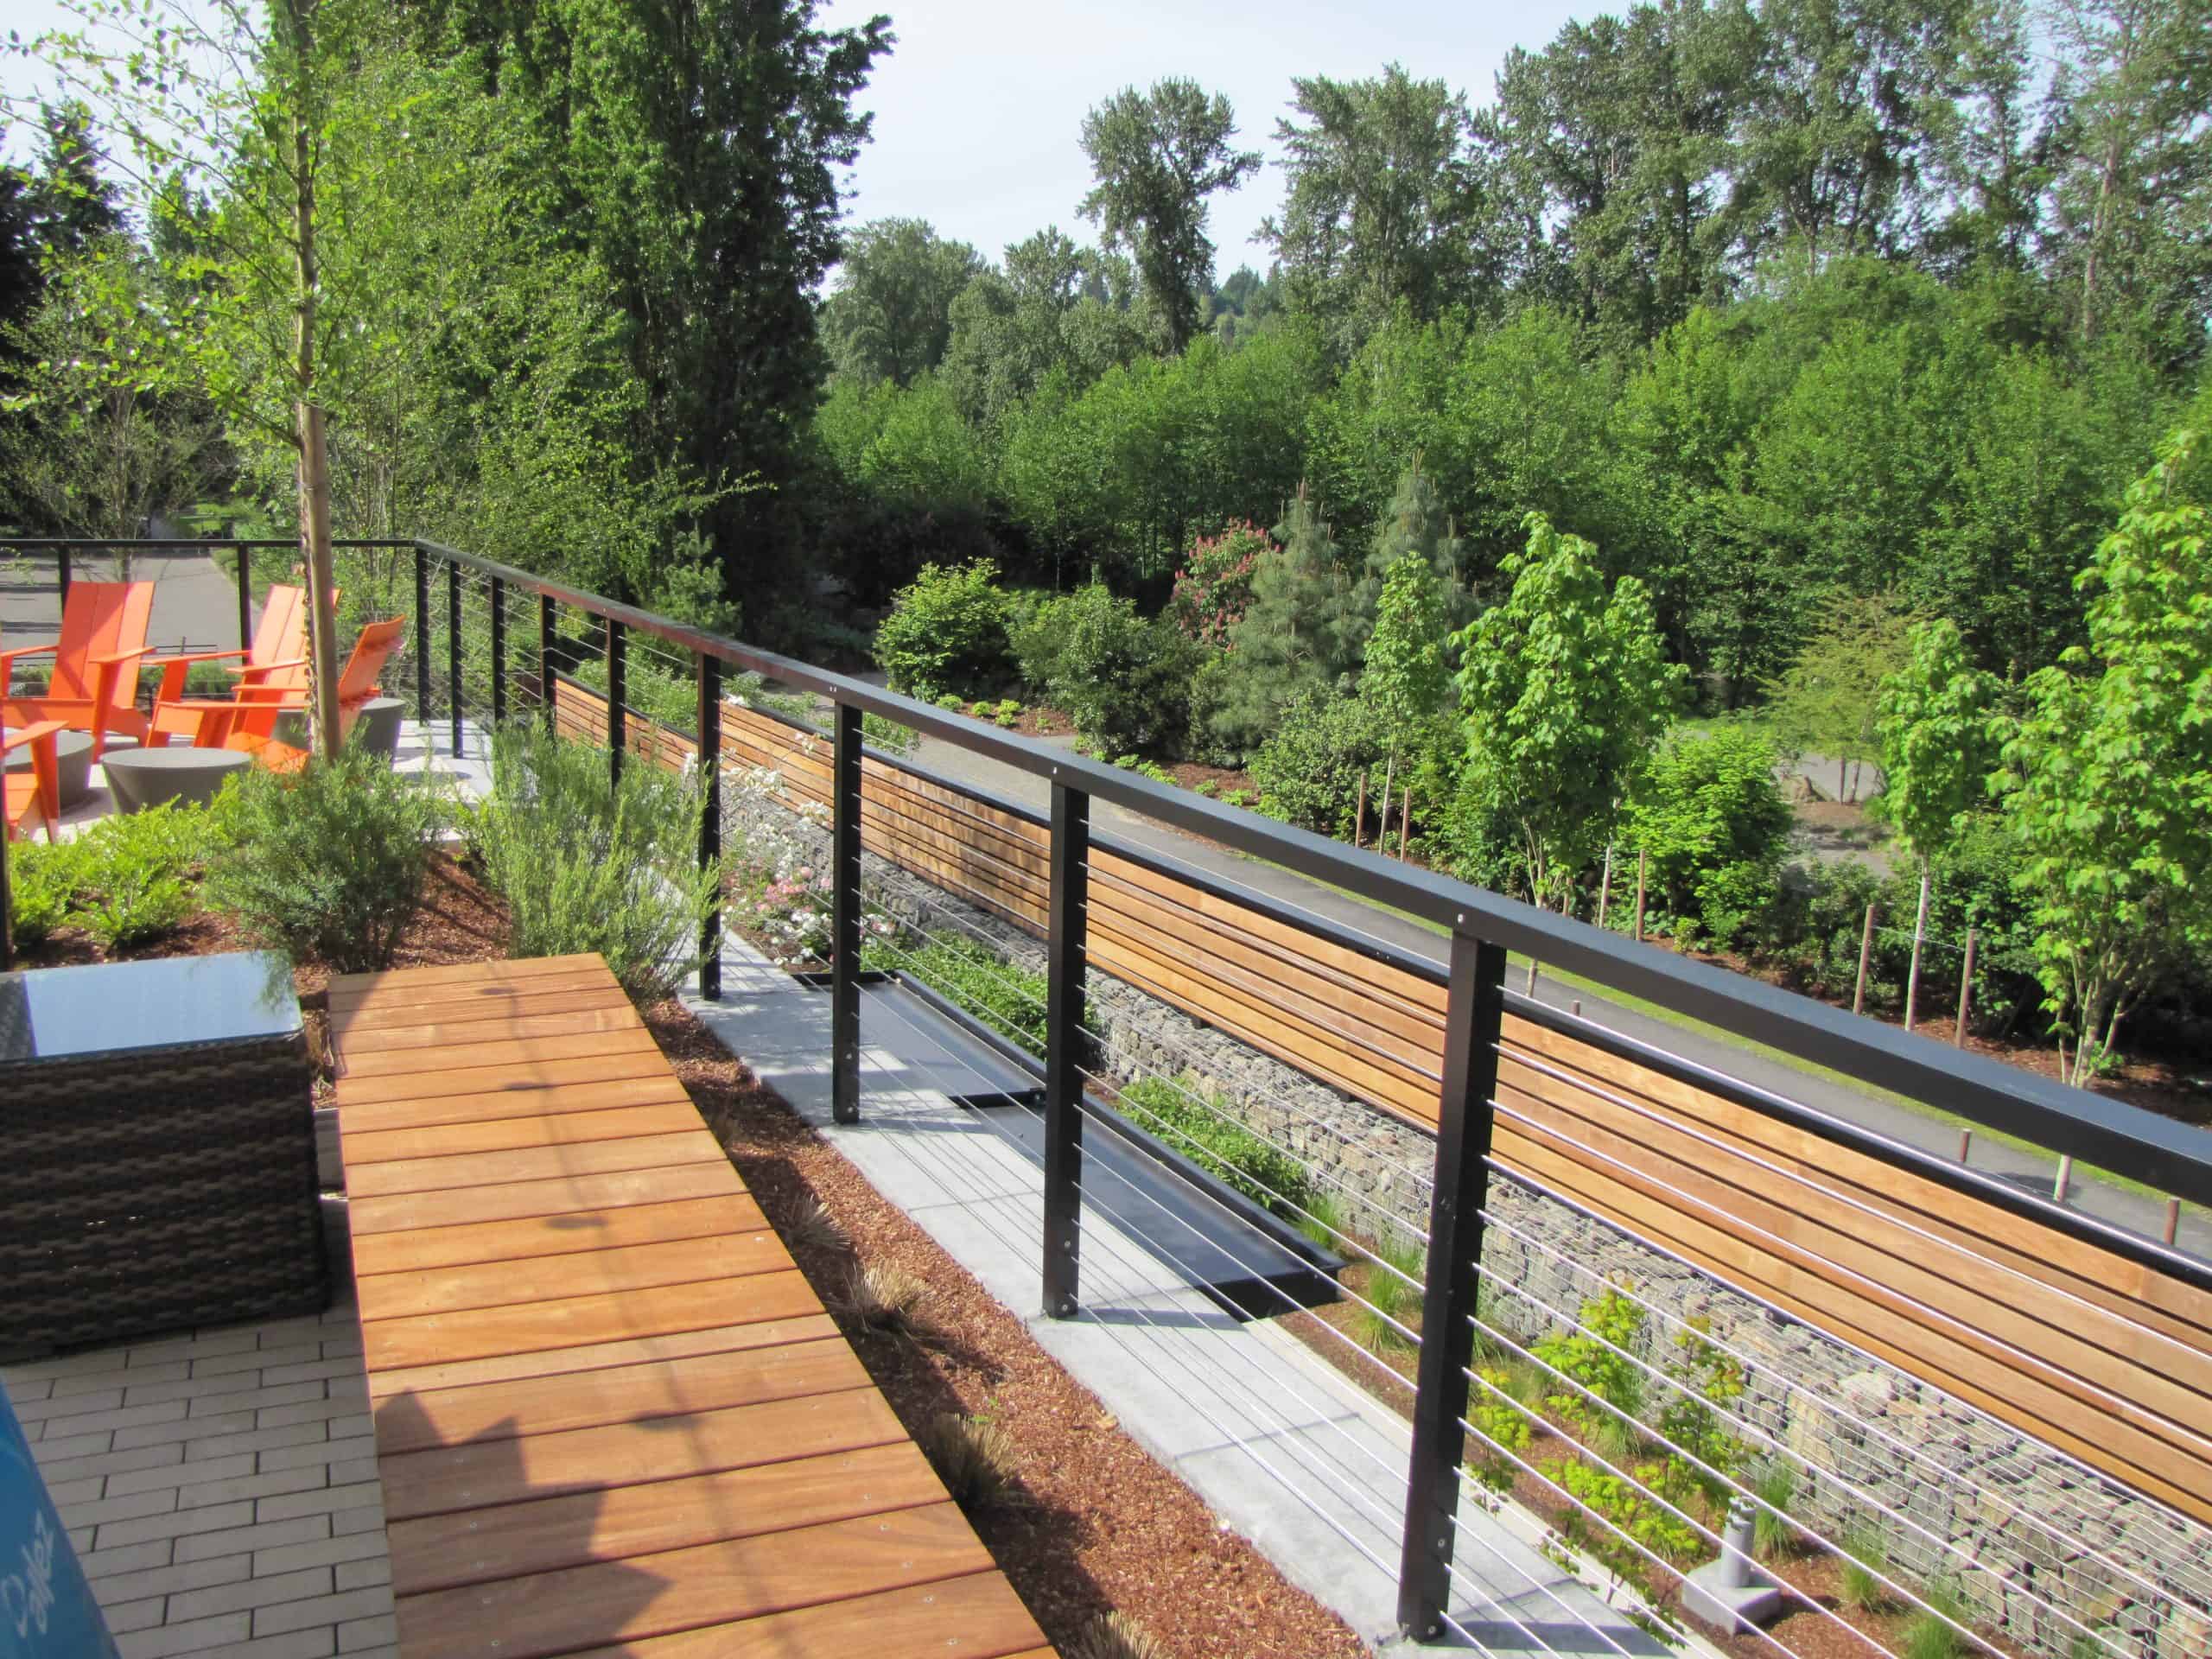
A full custom cable railing system can be costly and complex. The budget-friendly secret is to search for a ‘deck railing wire kit.’ These all-in-one packages typically include the spools of stainless steel wire, tensioners, and connectors you need. You simply provide the wooden or metal posts yourself. This allows you to get the sleek, modern look of a cable railing for as little as $20-$40 per linear foot in materials, plus the cost of your posts. It’s a hybrid approach that saves hundreds, or even thousands, over a fully integrated system. Pair a wire kit with simple pressure-treated 4×4 posts for a seriously affordable modern look.
|
📋 Copy HEX 🔗 Share |
Before you commit to a cable railing kit, run through this quick checklist:
- Post Material: Cable railings put posts under extreme tension. Are your posts wood or metal? Wood posts need to be substantial (at least 4×4, but 6×6 is better for corners) and securely blocked to prevent bowing.
- Corner Strategy: How will you handle corners? Most basic kits are designed for straight runs. You may need specialized corner hardware or to use a double-post system at each corner to maintain tension.
- Tool requirements: Do you have the necessary tools? You’ll need a good drill, a sharp cable cutter (not just wire snips!), and often a tensioning wrench.
- Code Check: While the cables are thin, the system still needs to be rigid. Check your local code for specifics on cable tension and spacing to ensure your final installation will pass inspection.
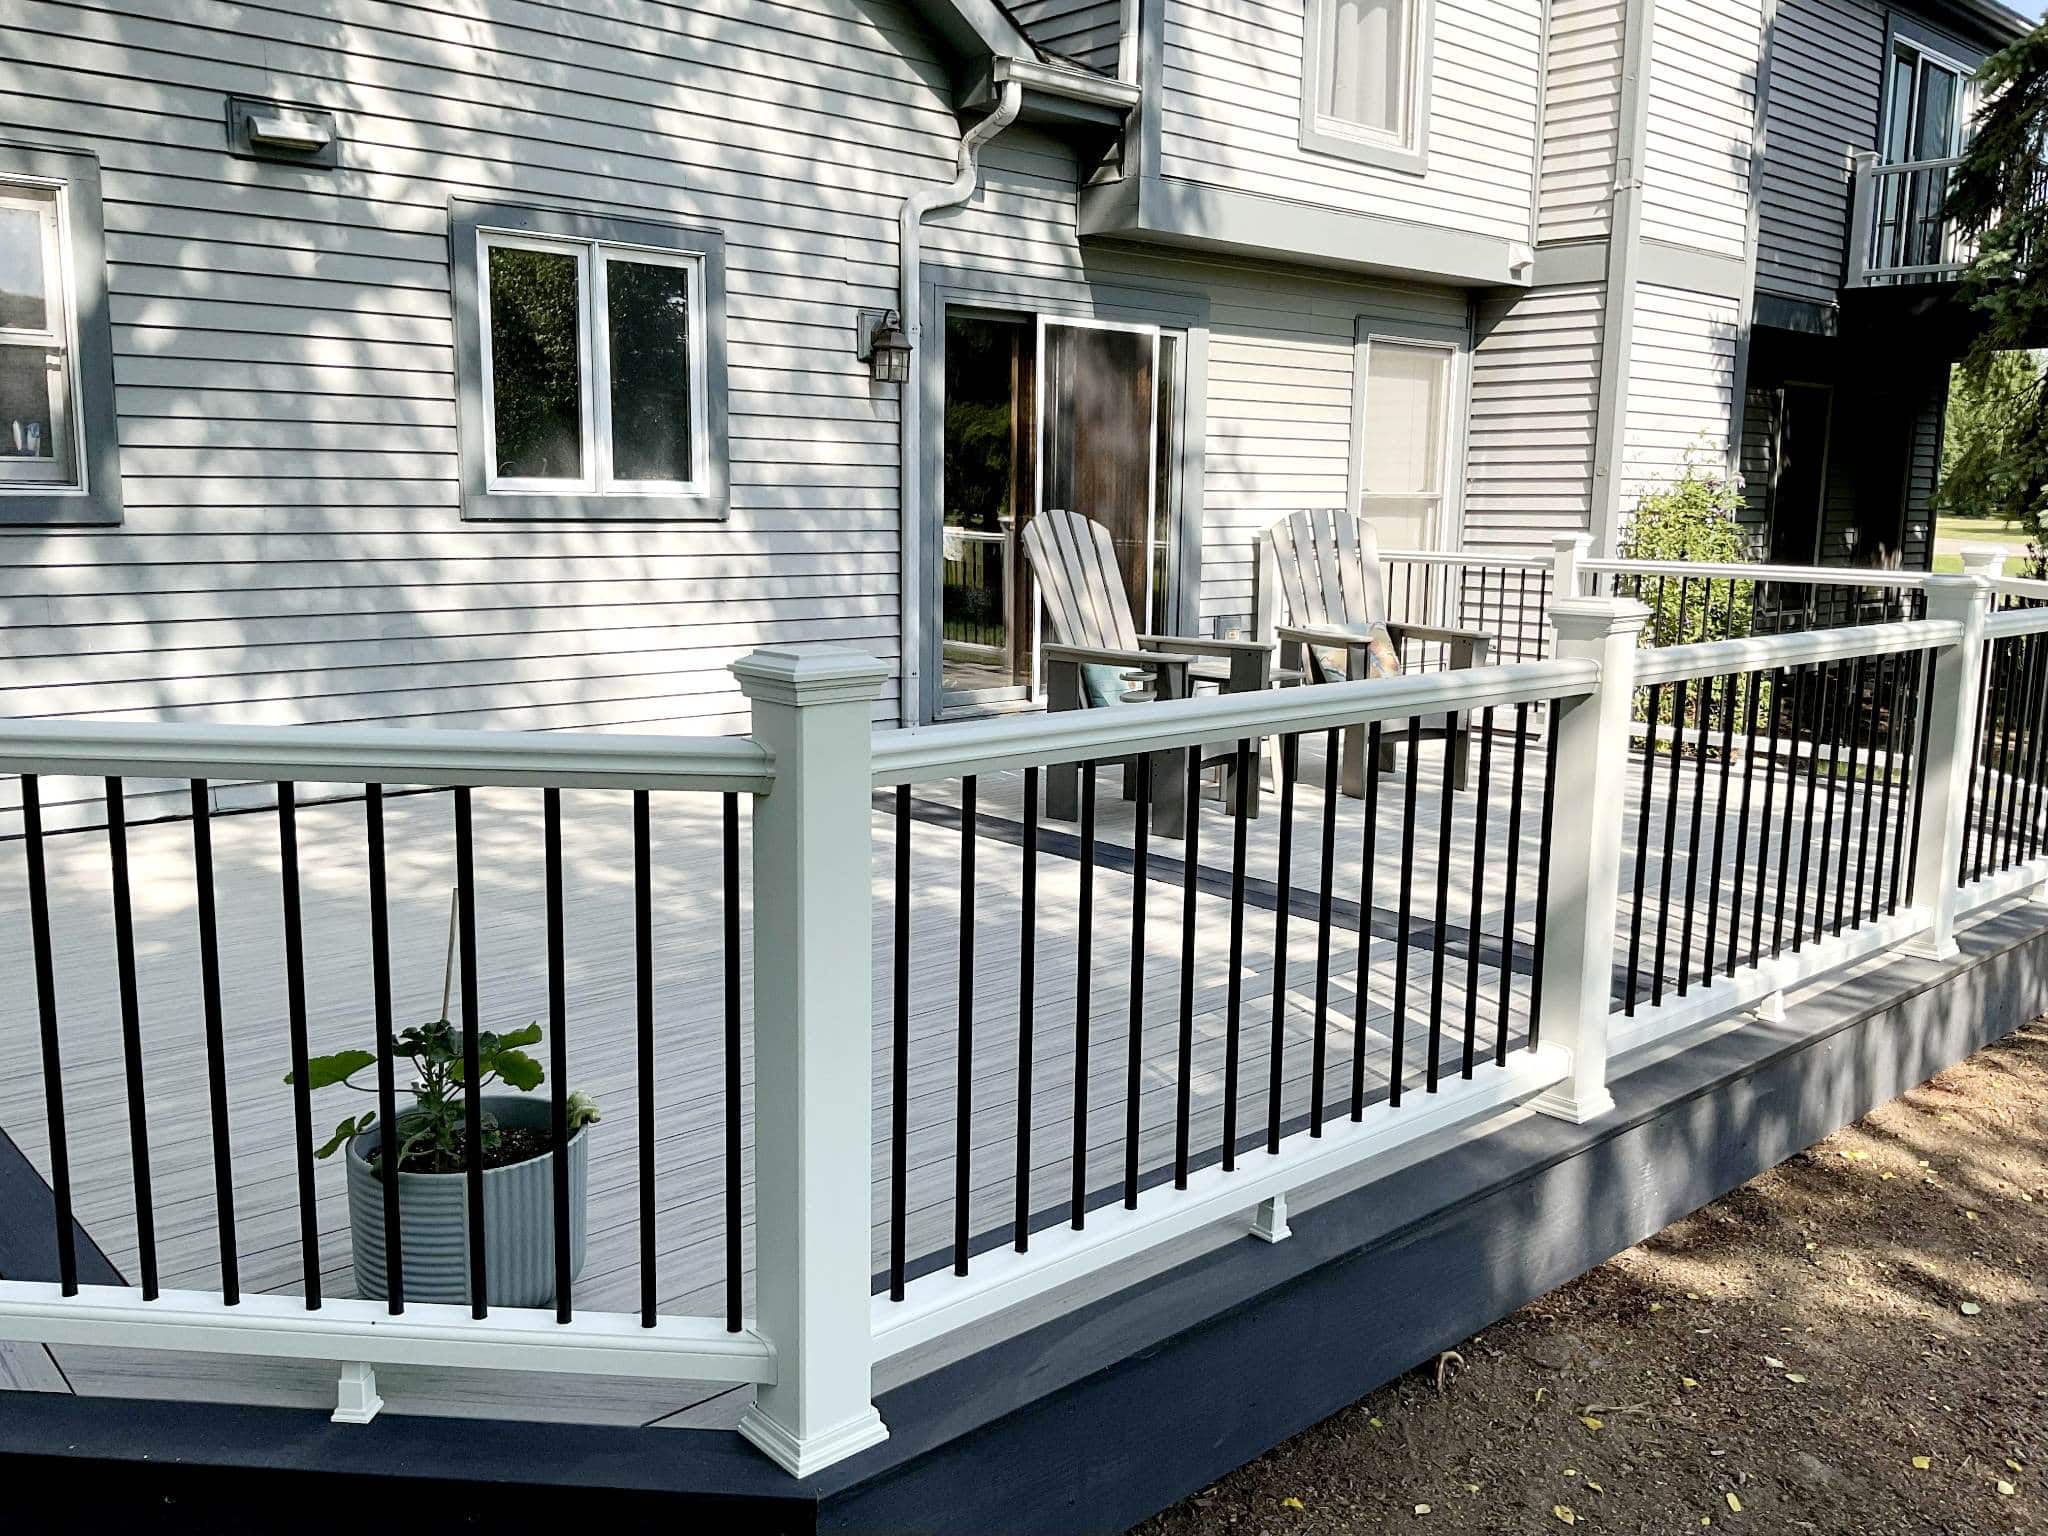
27. Clean Contrast: White Composite Railing on a Gray Deck
The visual formula here is a study in modern neutrals: 50% crisp white + 40% soft gray + 10% sharp black. The chunky white composite railing provides a bright, substantial frame. The light gray composite deck flooring is a perfect mid-tone that grounds the space without feeling heavy or dark. It also hides dirt better than a pure white or dark brown surface. The 10% of black in the slender balusters adds the final touch of graphic punch and sophistication. This balanced, three-color palette is almost impossible to get wrong and coordinates with nearly any style of outdoor furniture.
|
📋 Copy HEX 🔗 Share |
A white composite railing looks fantastic, but be aware of ‘composite shadow.’ On a sunny day, the thick top and bottom rails, along with the posts, can cast strong, dark shadows on your deck surface. This effect is more pronounced with chunky profiles like the one shown here. It’s not necessarily a bad thing, but it does create a very graphic, striped pattern of light and shadow that moves throughout the day. If you prefer a more uniform, uninterrupted surface of light, a leaner railing profile or a cable system like in Idea #5 might be a better fit.
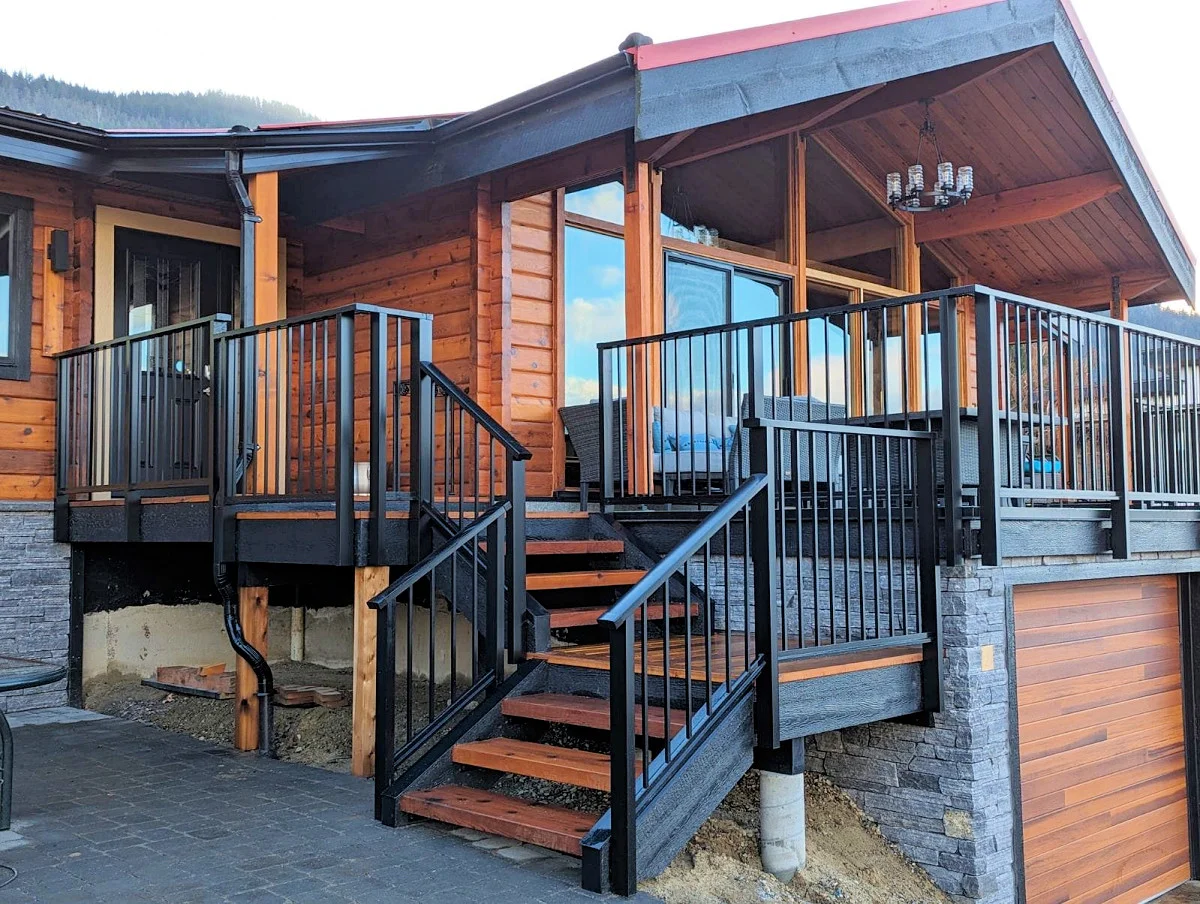
28. Modern Rustic Deck with Black Picket Railing
This design excels by mixing rustic and modern materials in a confident way. You have the warm, natural, horizontal wood siding of the house, creating a rustic backdrop. This is contrasted by the clean, sharp, vertical lines of the black metal picket railing—a distinctly modern touch. The design then brings in a third and fourth texture: the smooth dark gray composite on the deck and the rugged, earthy stacked stone veneer on the foundation. It’s this layering of four distinct materials (wood, metal, composite, and stone) that gives the space its rich, custom-designed feel.
|
📋 Copy HEX 🔗 Share |
This kind of multi-material, sturdy design works best on homes that already have a substantial feel. It’s perfectly suited for two-story homes or single-story homes with an elevated foundation that can accommodate the visual weight of the stone veneer. The railing itself is quite versatile, but the overall composition looks best on a medium-to-large deck (200-400 sq. ft.) where the different materials have space to be appreciated. On a very small porch, the combination of wood, metal, and stone might feel a bit too busy.
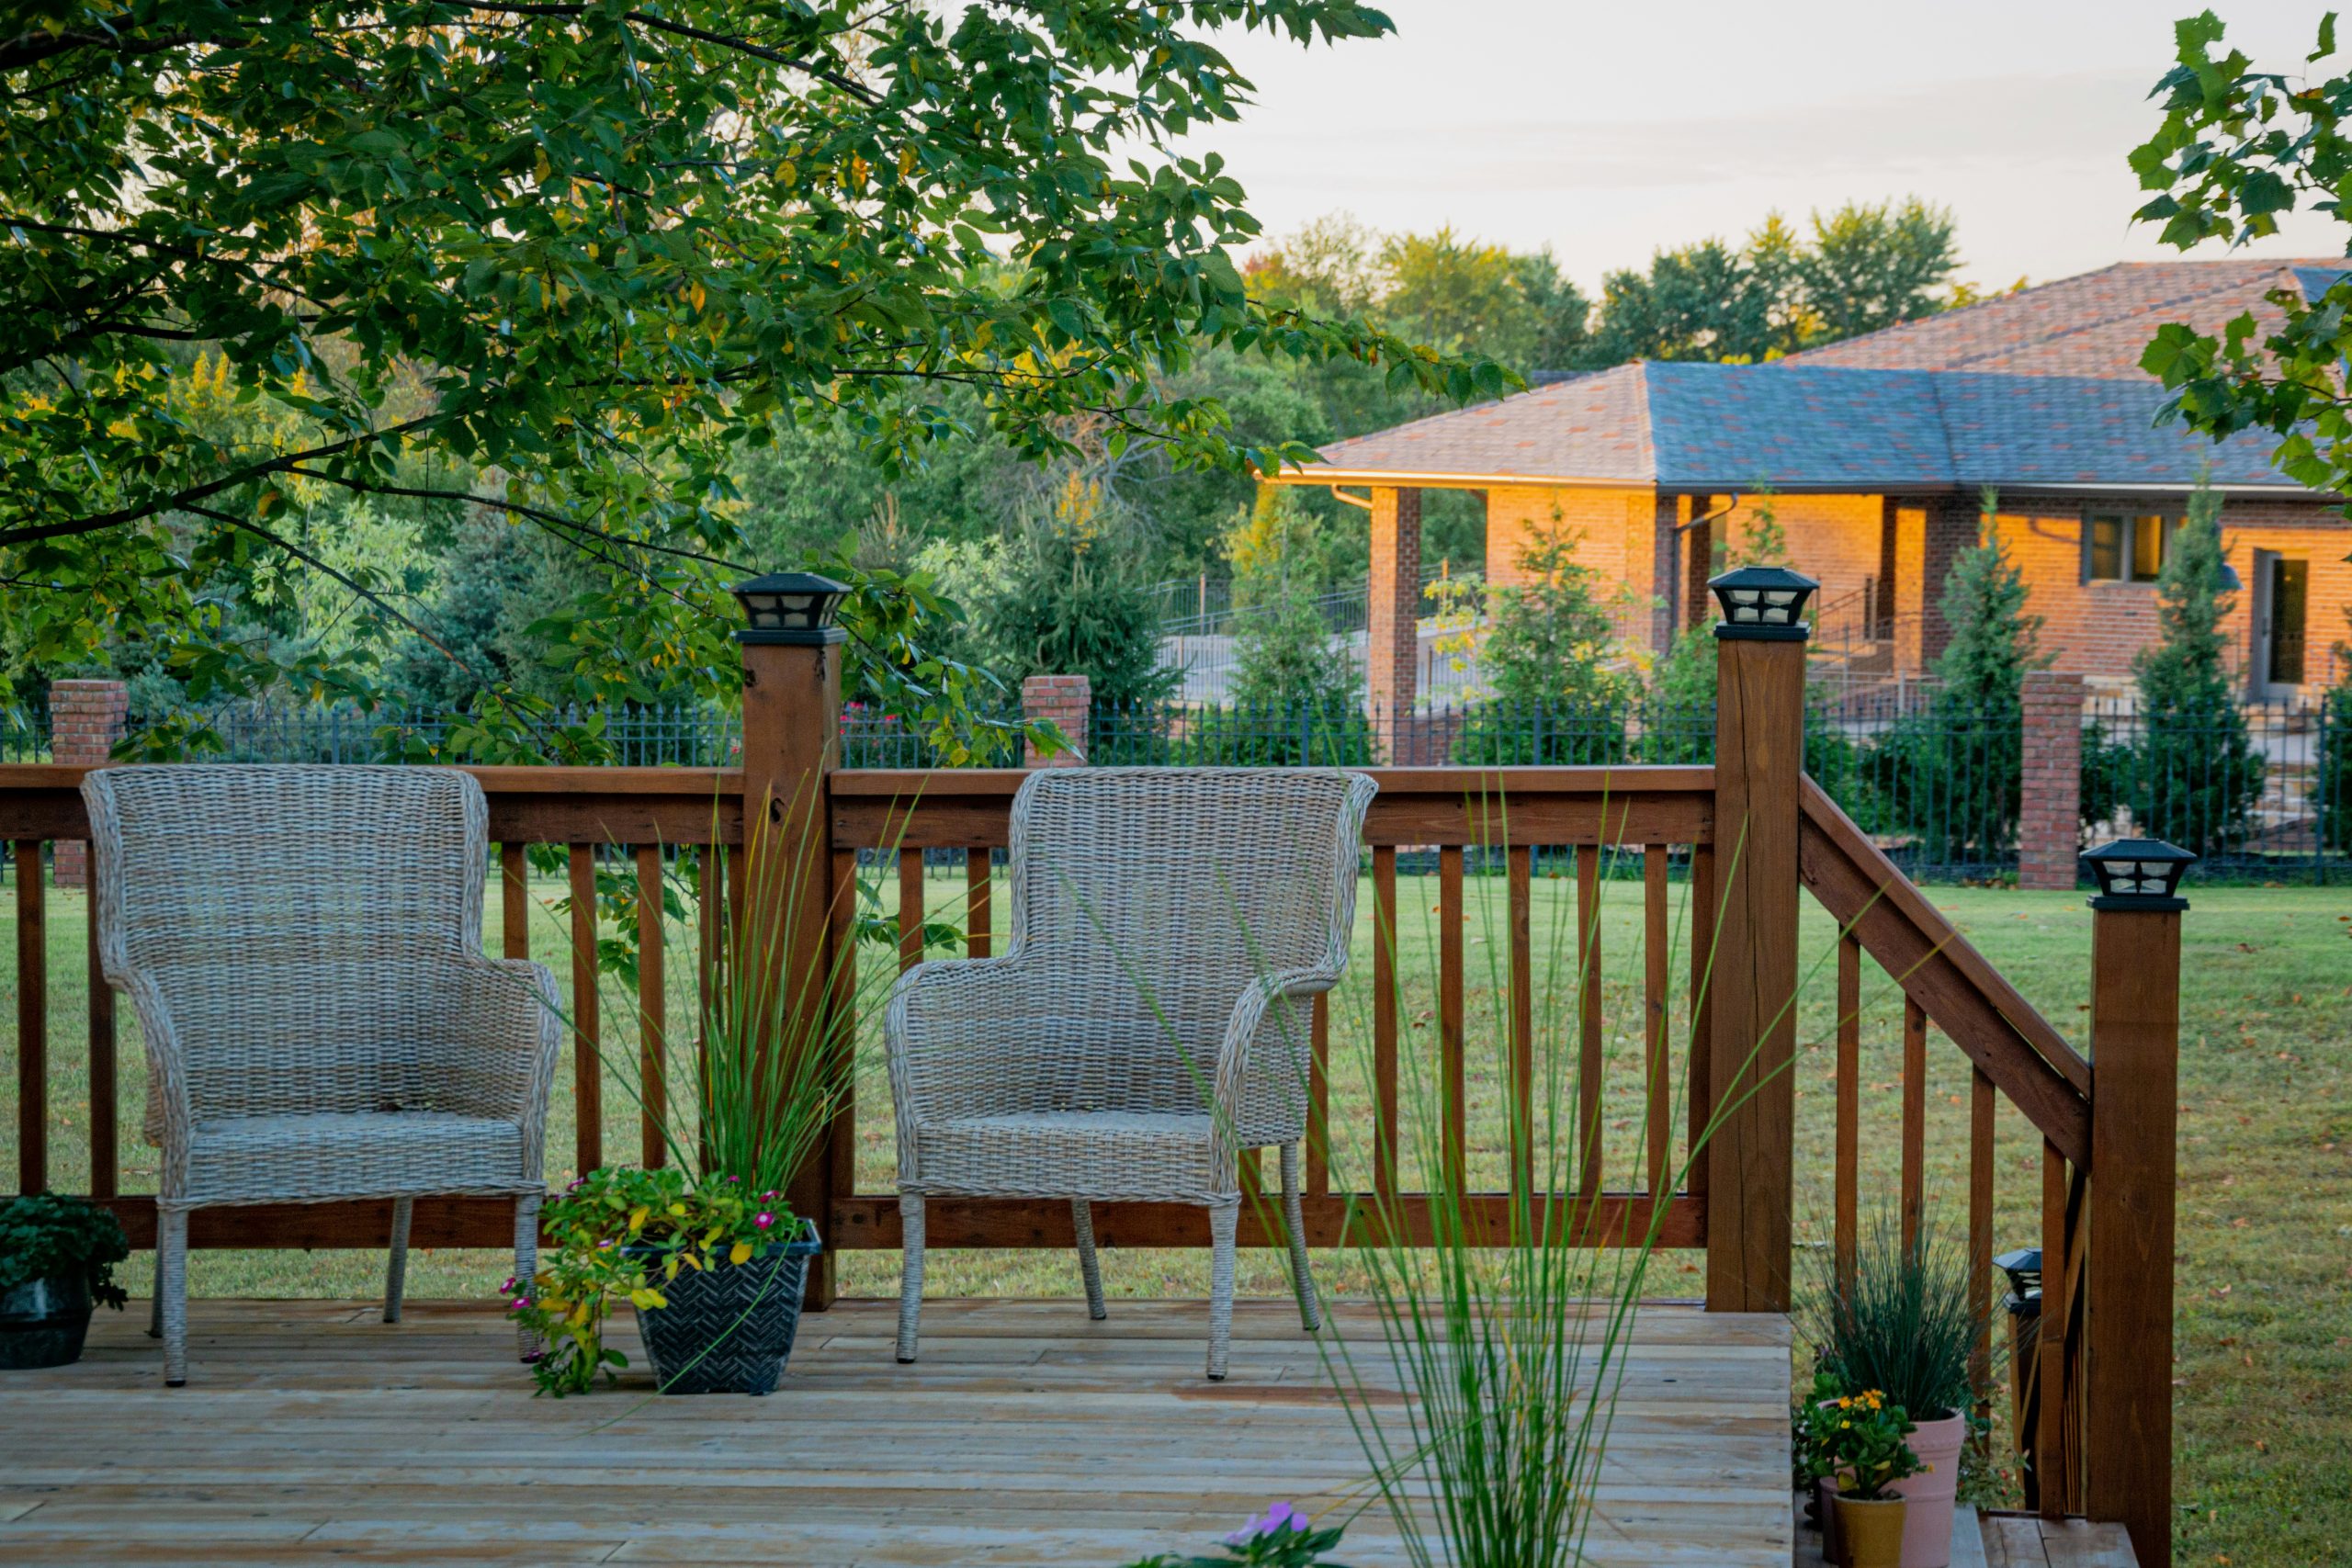
29. Rustic Stained Wood Railing with Solar Post Cap Lights
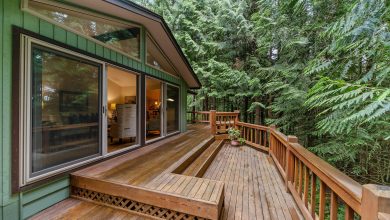
This entire look is the definition of affordable and effective. The railing itself is constructed from standard, inexpensive pressure-treated pine, but it’s elevated by a warm, semi-transparent stain. The real budget hack here is the solar post cap lights. For just $10-$20 per light, they add priceless ambiance and safety for evening use. You get the high-end feel of integrated lighting, as seen in Idea #10, for a tiny fraction of the cost and with zero wiring required. Add a couple of affordable wicker chairs from Target or Walmart, and you have a complete, inviting look on a shoestring budget.
|
📋 Copy HEX 🔗 Share |
When staining a wooden deck and railing, always apply the stain to the railings first, starting from the top and working your way down. This means staining the top rail, then the balusters, then the bottom rail. By doing this, any drips that fall will land on unfinished wood below. If you were to stain the deck floor first, you would inevitably have to deal with drips and splatters from the railing work, forcing you to do touch-ups. Work from top to bottom, and save the deck floor for the very last step.
Your Deck’s New Look Awaits
That perfect, affordable deck railing isn’t just a photo on a Pinterest board anymore—it’s a totally achievable weekend project waiting to happen. Whether you go for a classic wood look or a modern cable system, the right railing will completely redefine your outdoor space. So pick your favorite, make a plan, and get ready to enjoy your deck in a whole new way.
Feeling inspired? Pin your favorite ideas from this article to your own board to keep them handy for when you’re ready to start!