You know that feeling when you finally find the corner landscaping idea that looks exactly right for your space? That little “aha!” moment when a photo on Pinterest stops your scroll. The problem is turning that inspiration into a reality that fits your yard, your budget, and your weekend availability. We get it. That forgotten corner of your yard has been staring back at you, full of potential but stubbornly empty.
We’ve done the digging for you, curating 26 distinct corner landscaping ideas that are inspiring and, more importantly, achievable. From lush, natural escapes to structured, modern designs, there’s a concept here for every style and space. And stay until the end — we break down the most common mistakes that can ruin these looks. 📌 Save this to Pinterest for later — you’ll want to revisit these ideas.
1. Create a Lush Woodland Corner with a Stone Path
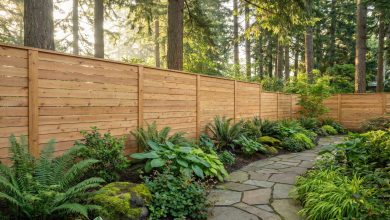
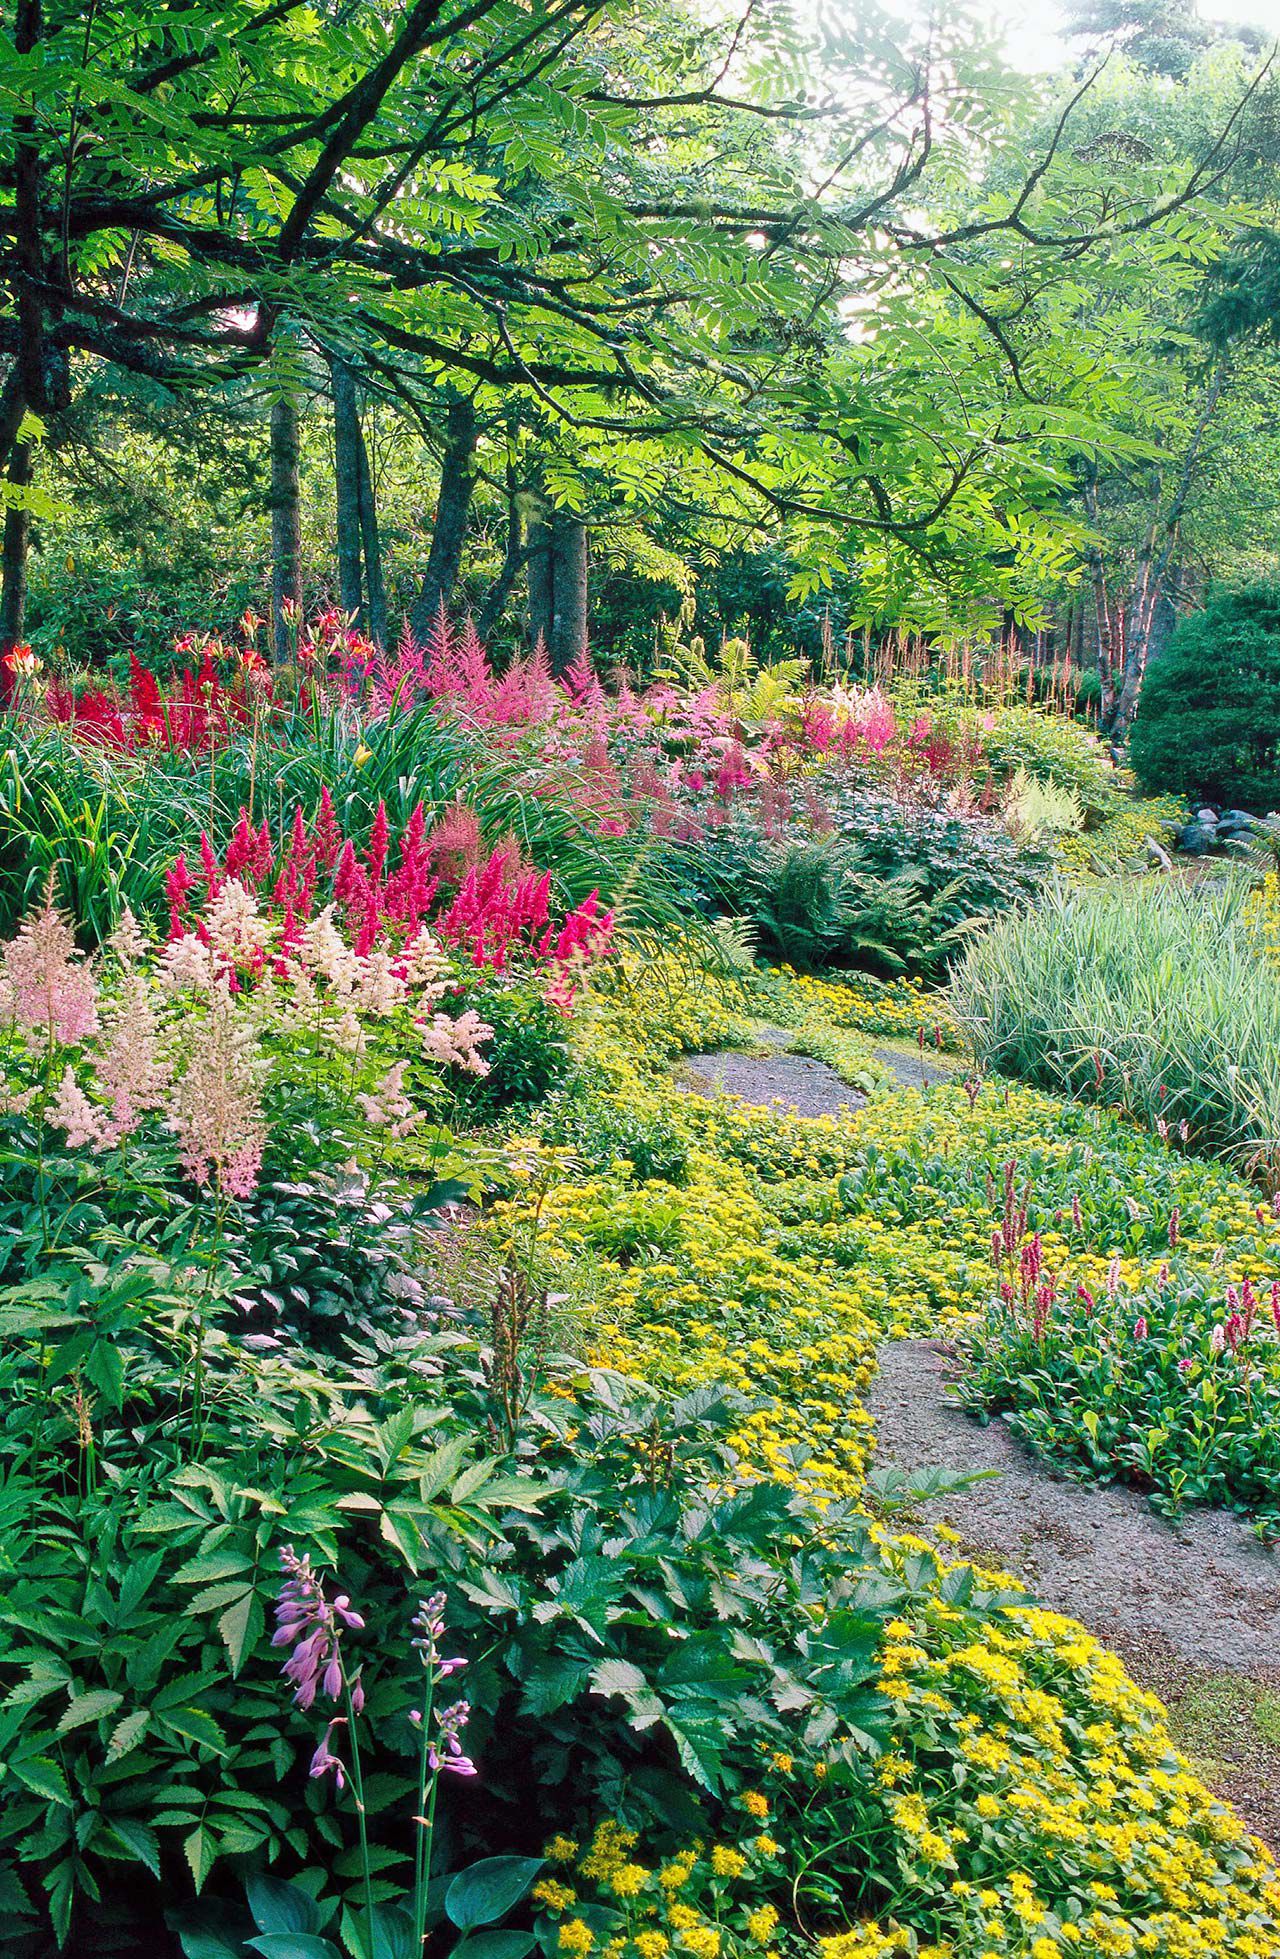
This design leans into a woodland fantasy, and the secret is creating layers of life from the ground up. It works because it mimics nature’s own design principles. You have the tall tree canopy providing a sense of enclosure and dappled light, a mid-layer of vibrant astilbe and ferns for texture and color, and a low-level groundcover of bright yellow flowers that ties everything together. The winding stone path isn’t just for walking; it’s a visual cue that invites you to slow down and look closer, making the corner feel like a destination.
|
📋 Copy HEX 🔗 Share |
A garden this dense and natural-looking requires a specific kind of care. While it looks wild, it isn’t zero-maintenance. The biggest task will be seasonal weeding to ensure the groundcover and desired perennials aren’t choked out by aggressive intruders. You’ll also need to monitor the Astilbe, which prefers consistently moist soil, especially under a tree canopy that can block rain. Expect to spend an hour or two each week during the growing season tidying edges and ensuring the stone path remains clear and safe to walk on.
2. Frame a Traditional Home with Climbing Roses and a Stone Patio
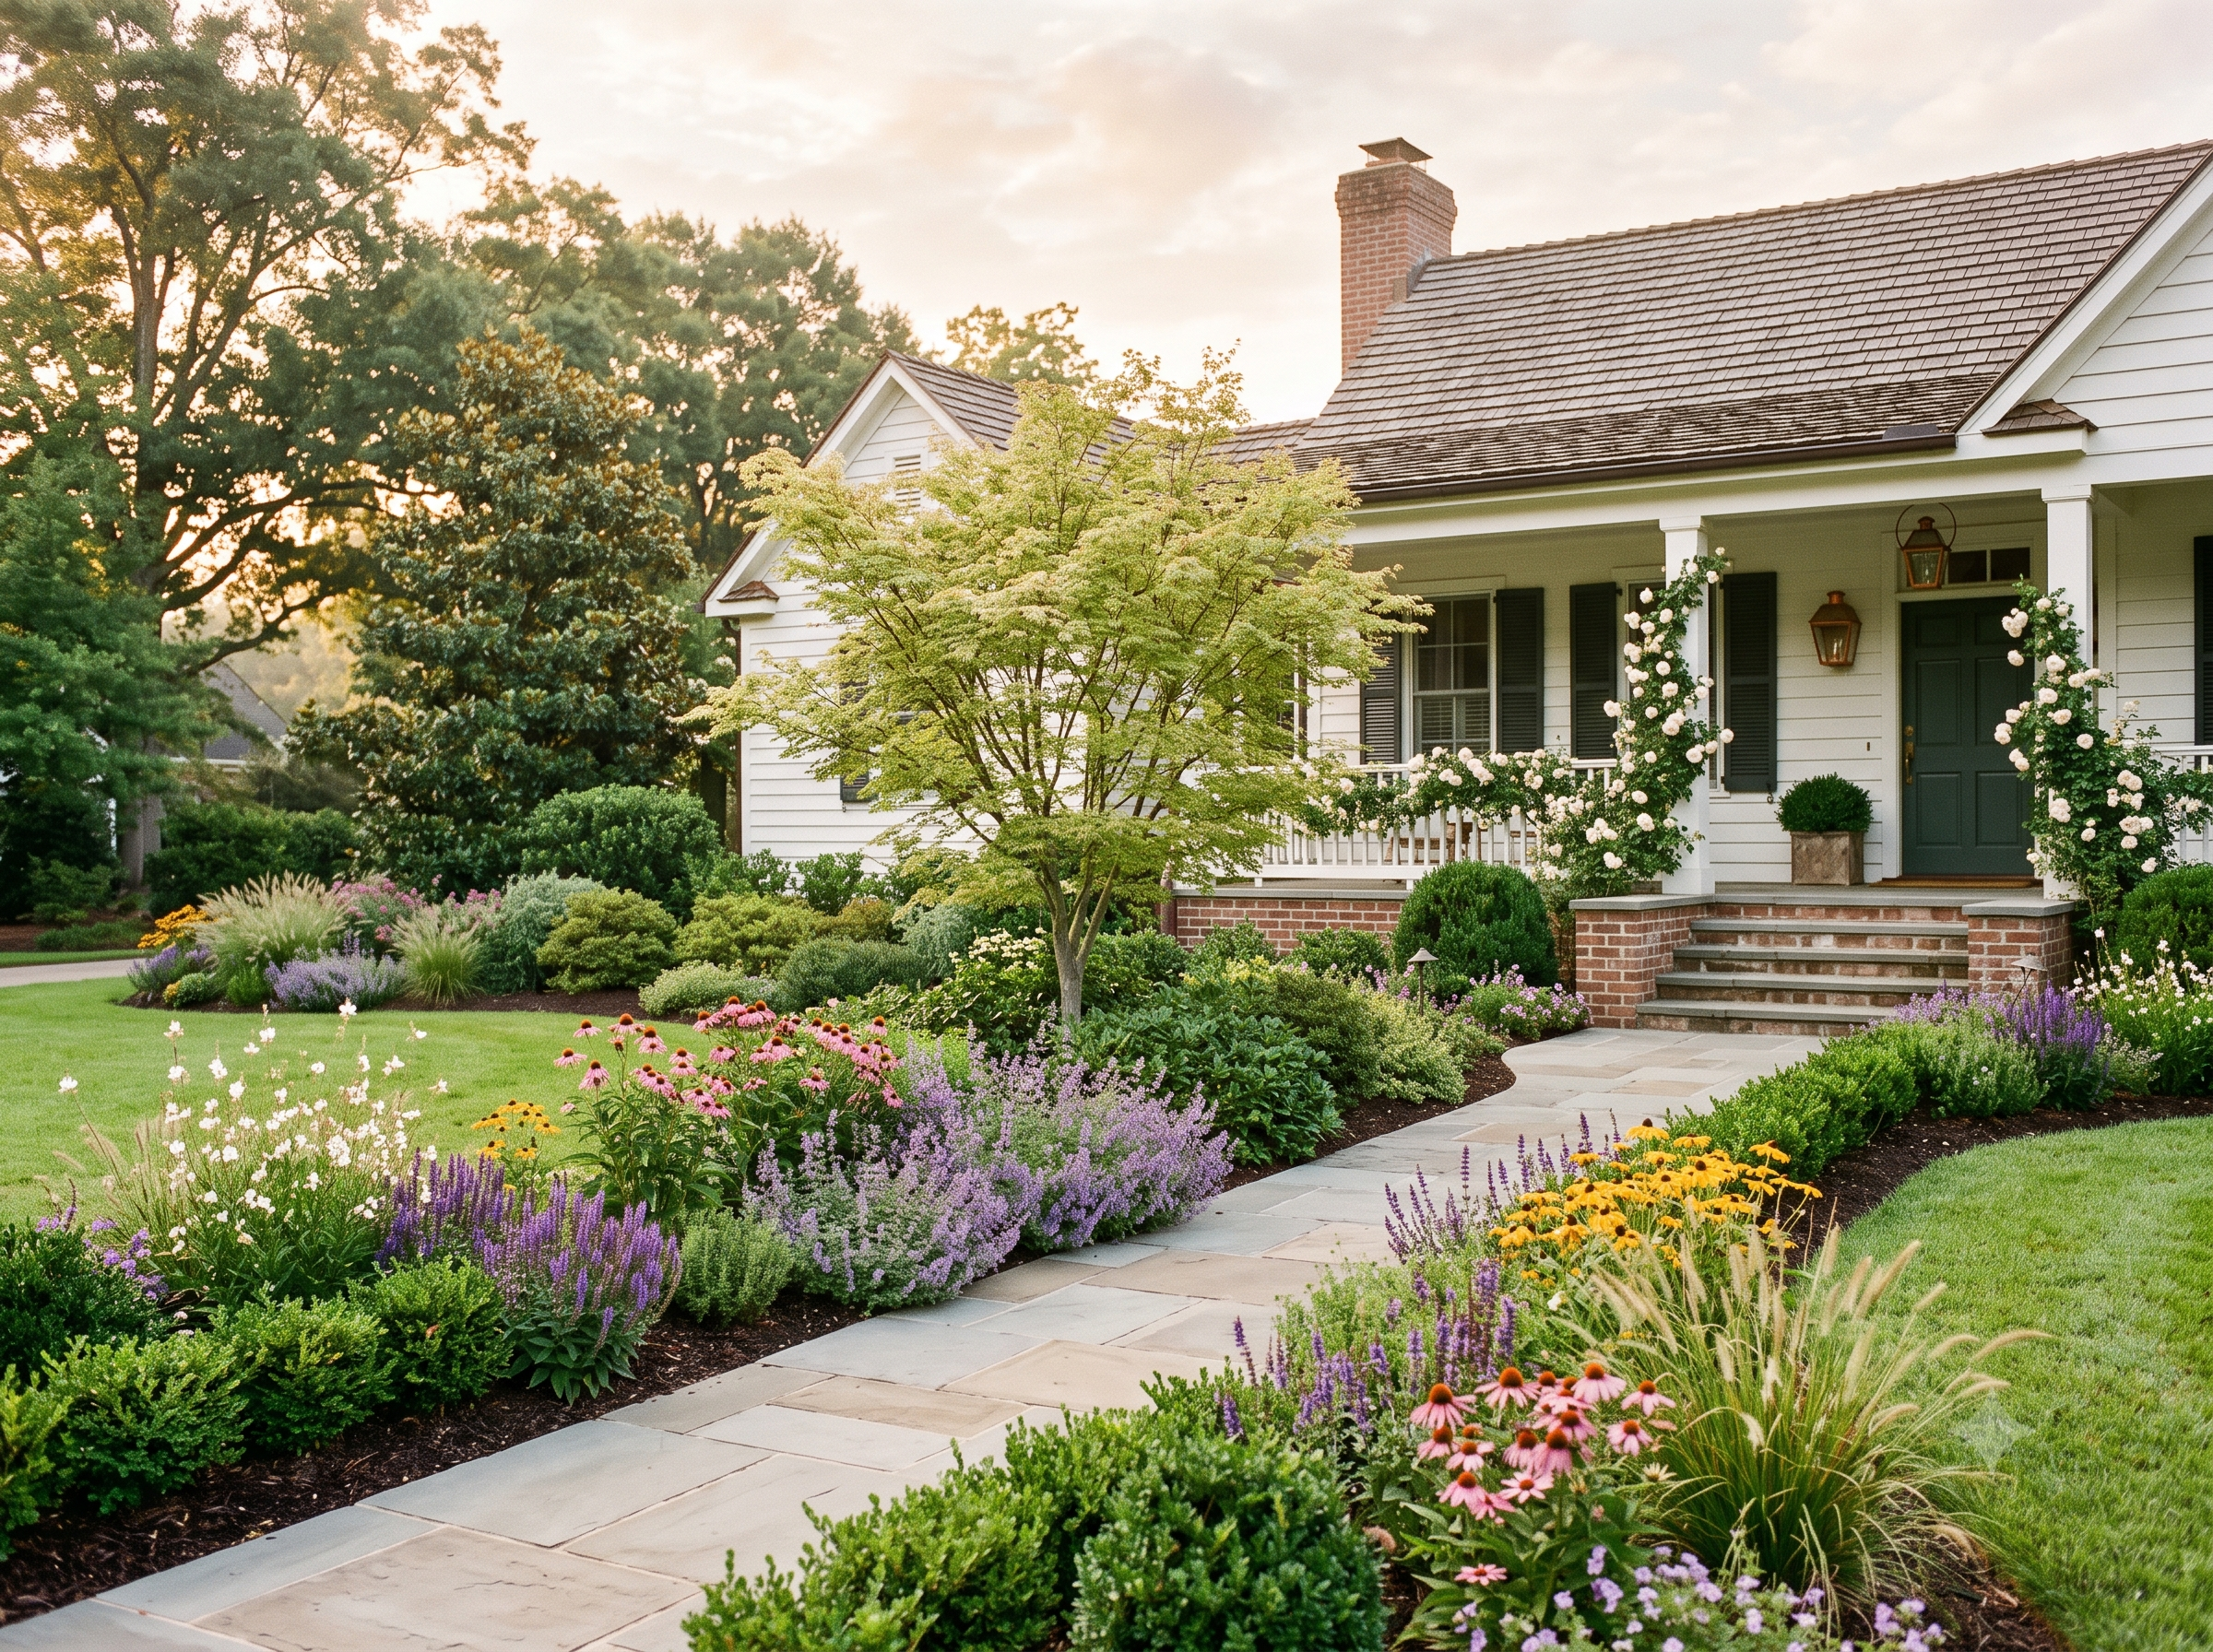
This look is a masterclass in classic curb appeal, and it breaks down into a simple formula: 50% classic architecture (the white siding and dark shutters), 40% lush, layered plantings, and 10% hardscape structure (the stone path and steps). The key is the balance between the formal house and the slightly informal, abundant garden. You can swap the white roses for another climbing flower like clematis or change the stone to brick, but maintaining that ratio of classic structure to abundant nature is what makes it feel so timeless and welcoming.
|
📋 Copy HEX 🔗 Share |
When training climbing roses on a porch column, don’t just wrap the canes tightly around it. Instead, install a discreet wire or nylon trellis with about 2-3 inches of space between it and the column. Gently tie the main canes to the trellis in a spiral pattern. This improves air circulation, which is crucial for preventing fungal diseases like black spot and powdery mildew. It also makes it much easier to prune and maintain the rose without scraping your knuckles on the column.
3. Use a Symmetrical Gravel Path to Highlight a Bold Red Door
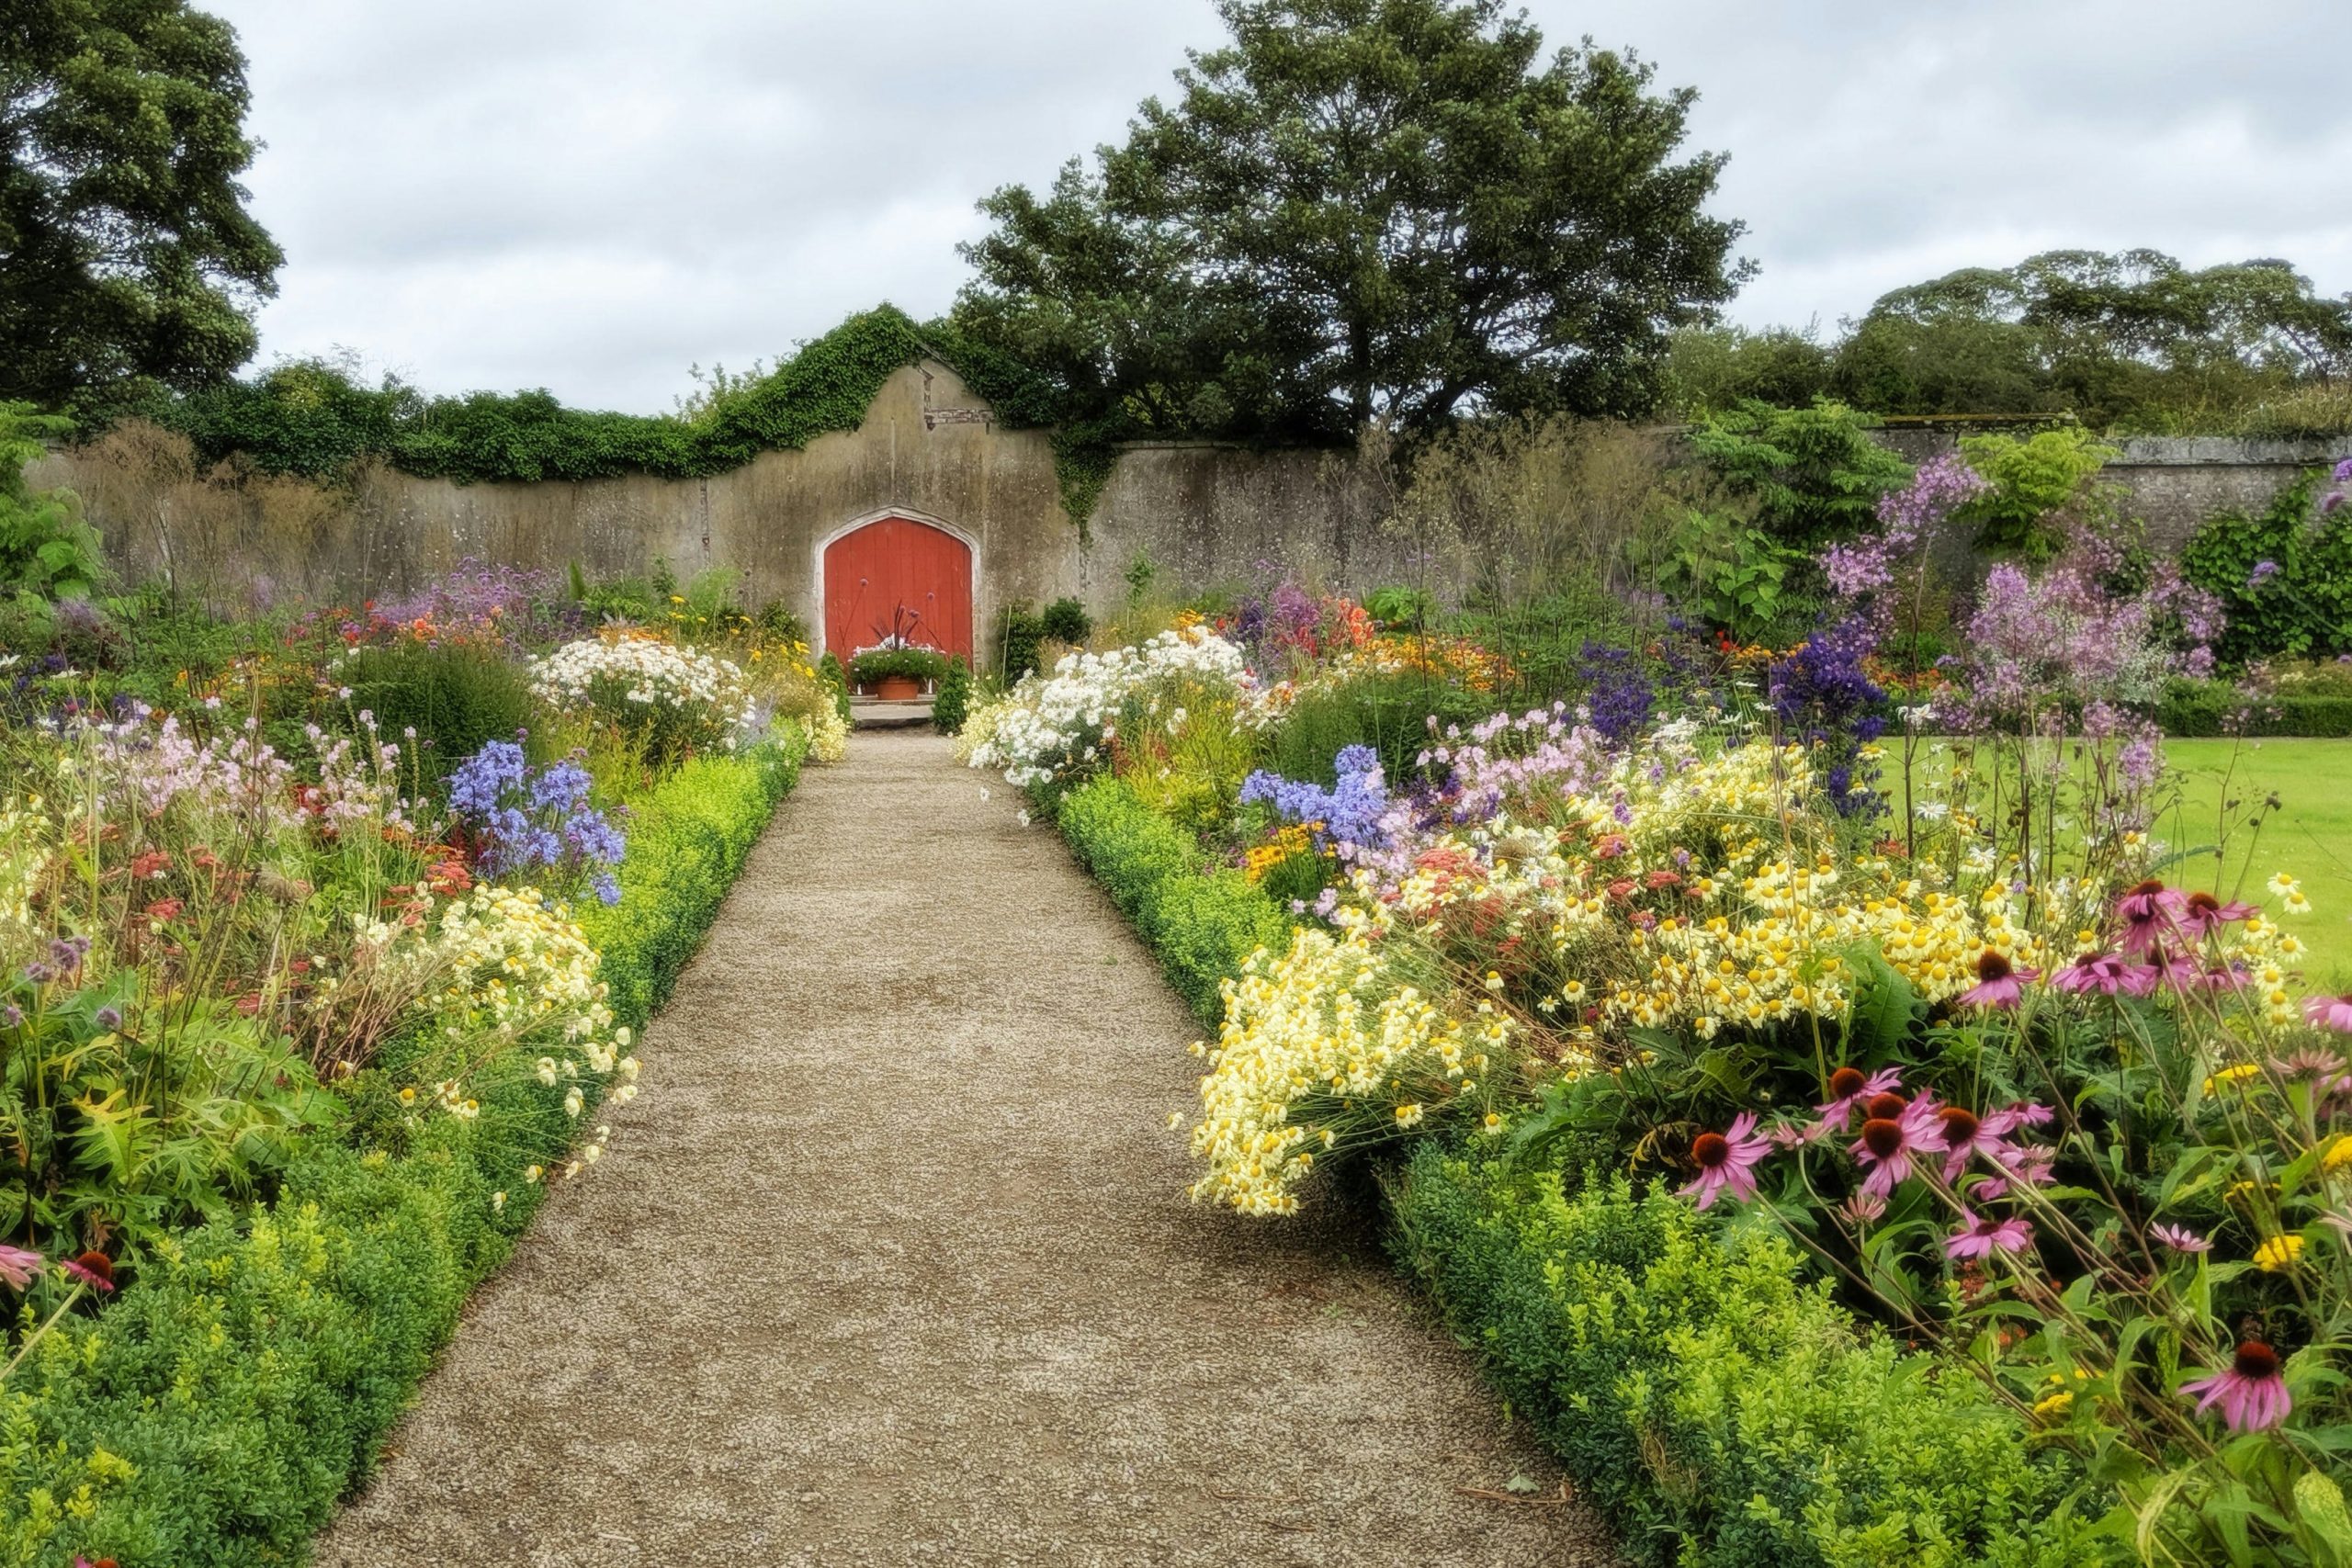
The single element holding this entire scene together is the arched red door. Without it, you have a pleasant but somewhat generic garden scene. The door provides a powerful focal point, a destination for the eye to travel down the gravel path. Its warm, bold color contrasts sharply with the cool greens and grey stone, creating a sense of drama and intrigue. It transforms the space from a simple garden into a story, making you wonder what lies beyond that enchanting entrance. Every other element is designed to lead you there.
|
📋 Copy HEX 🔗 Share |
A gravel path is beautiful, but it isn’t a set-it-and-forget-it feature. Gravel travels. It will get kicked into the flower beds, and leaves or dirt will inevitably mix in. To keep it looking crisp, you’ll need to rake it back into place periodically and use a leaf blower (on a low setting!) to clear debris. Weeds are also a constant battle. Even with a weed barrier underneath, determined seeds will find a way. Plan on hand-weeding the path at least a few times during the growing season to keep it looking pristine.
4. Define a Corner with Brick Pillars and a Wrought Iron Fence
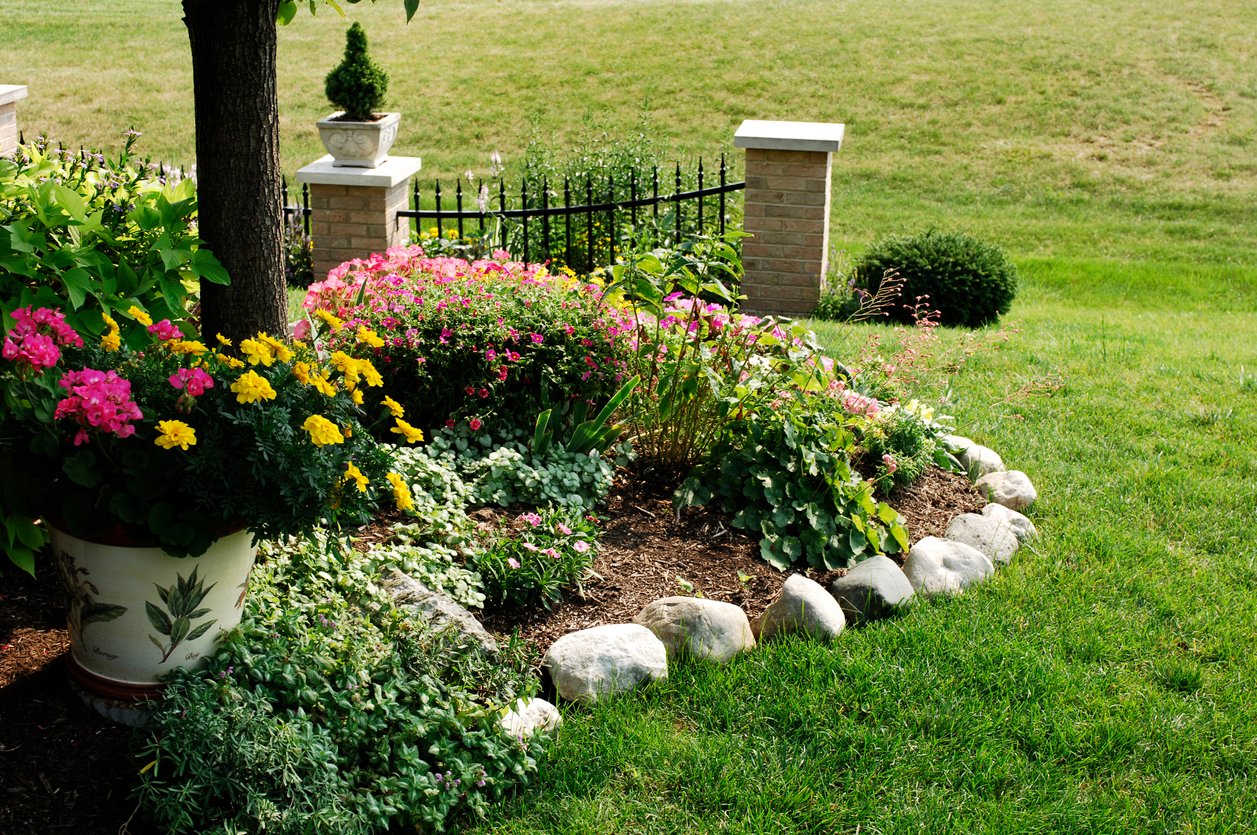
Before you commit to building permanent structures like brick pillars, there are a few things to cross off your list. This isn’t a weekend whim; it’s a mini-construction project. Don’t start without a clear plan.
- Check local codes: Verify property line setbacks and any height restrictions for fences and pillars in your municipality. A permit may be required.
- Map underground utilities: Before digging footers for the pillars, call 811 to have gas, water, and electric lines marked. It’s free and it’s the law.
- Confirm your materials: Make sure the brick, caps, and wrought iron style match the aesthetic of your home and neighborhood to ensure a cohesive look.
|
📋 Copy HEX 🔗 Share |
This design is incredibly versatile, but it works best for defining a front yard corner on a medium- to large-sized lot, typically 1/4 acre or more. The visual weight of brick pillars requires enough surrounding space to not feel cramped. A minimum of 15 feet from the corner to the nearest house wall is a good rule of thumb. For smaller yards or townhouses, consider scaling down the idea: use just one pillar as a corner accent or opt for a thinner, pre-fabricated column to avoid overwhelming the space. The key is for the pillars to feel like an anchor, not an obstacle.
5. Embrace a Clean, Modern Corner Landscape
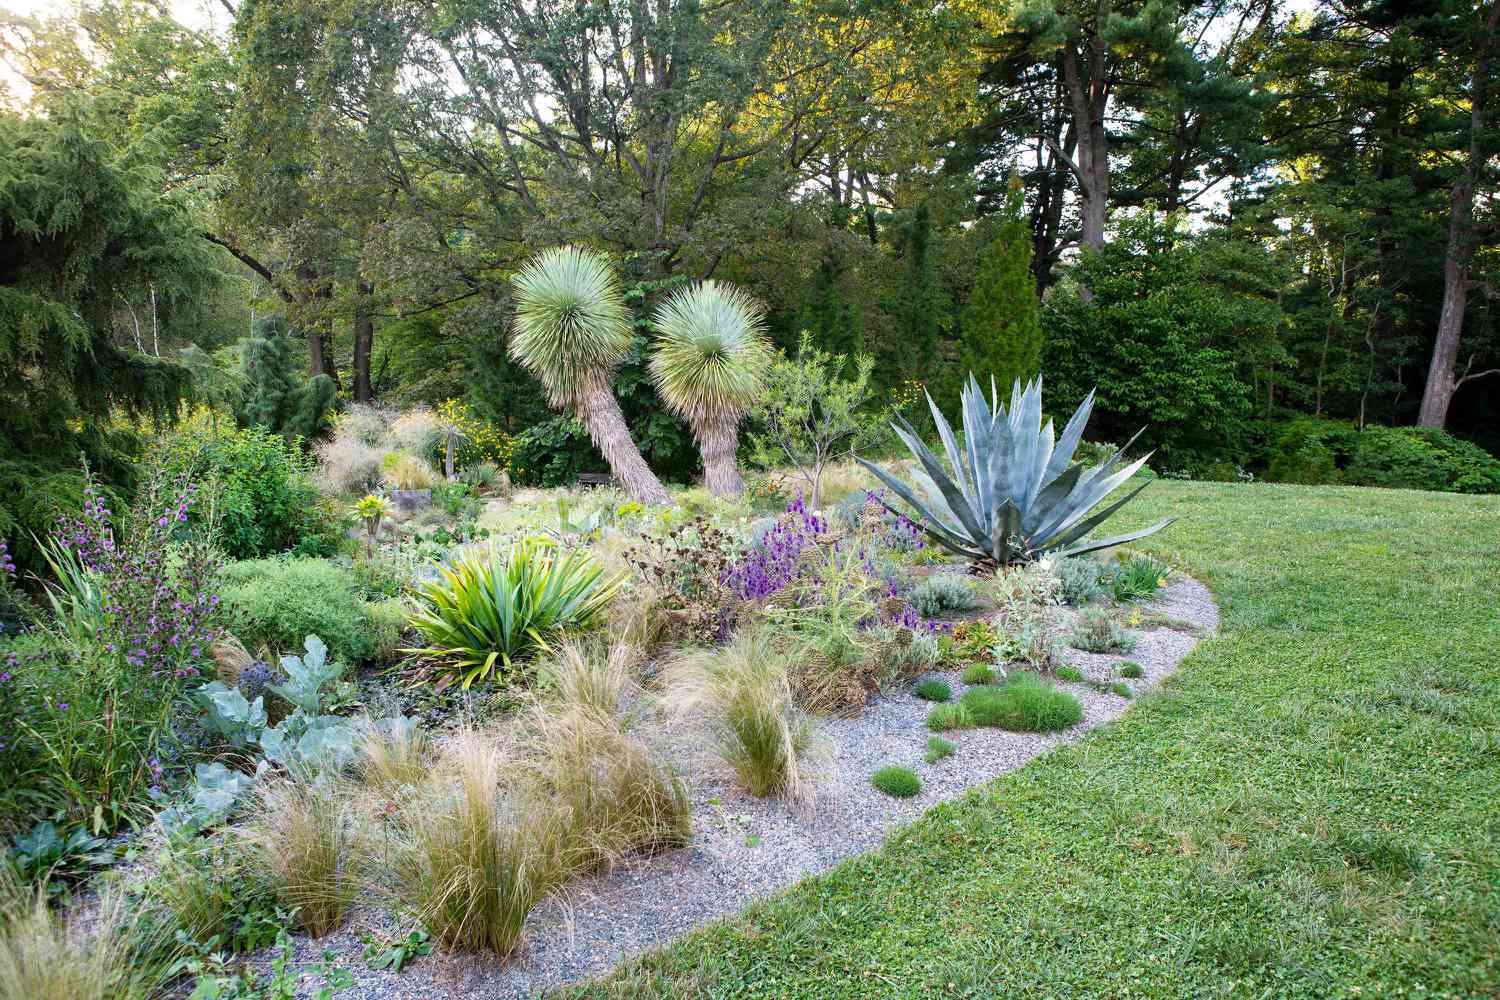
Modern landscape design is all about restraint and the celebration of form. To achieve this, focus on a limited plant palette with strong architectural shapes. Think ornamental grasses, conical evergreens, or hostas with dramatic leaves. Plant in groups or lines rather than in a scattered cottage style. Use a simple, high-contrast hardscape material like dark mulch, grey river rock, or poured concrete pavers to create clean lines and negative space, which allows the shape of each plant to be appreciated.
|
📋 Copy HEX 🔗 Share |
The move towards modern, minimalist gardens is a direct reaction to our busy lives. Homeowners are looking for landscapes that are beautiful but don’t demand constant tending. This style has staying power because it’s rooted in the principle of “less is more.” It reduces visual clutter, which can have a calming psychological effect. As our lots get smaller and our lives get more complicated, these clean, structured outdoor spaces will continue to be a popular choice for creating a personal oasis.
6. Anchor a Classical Garden with a Stone Water Feature
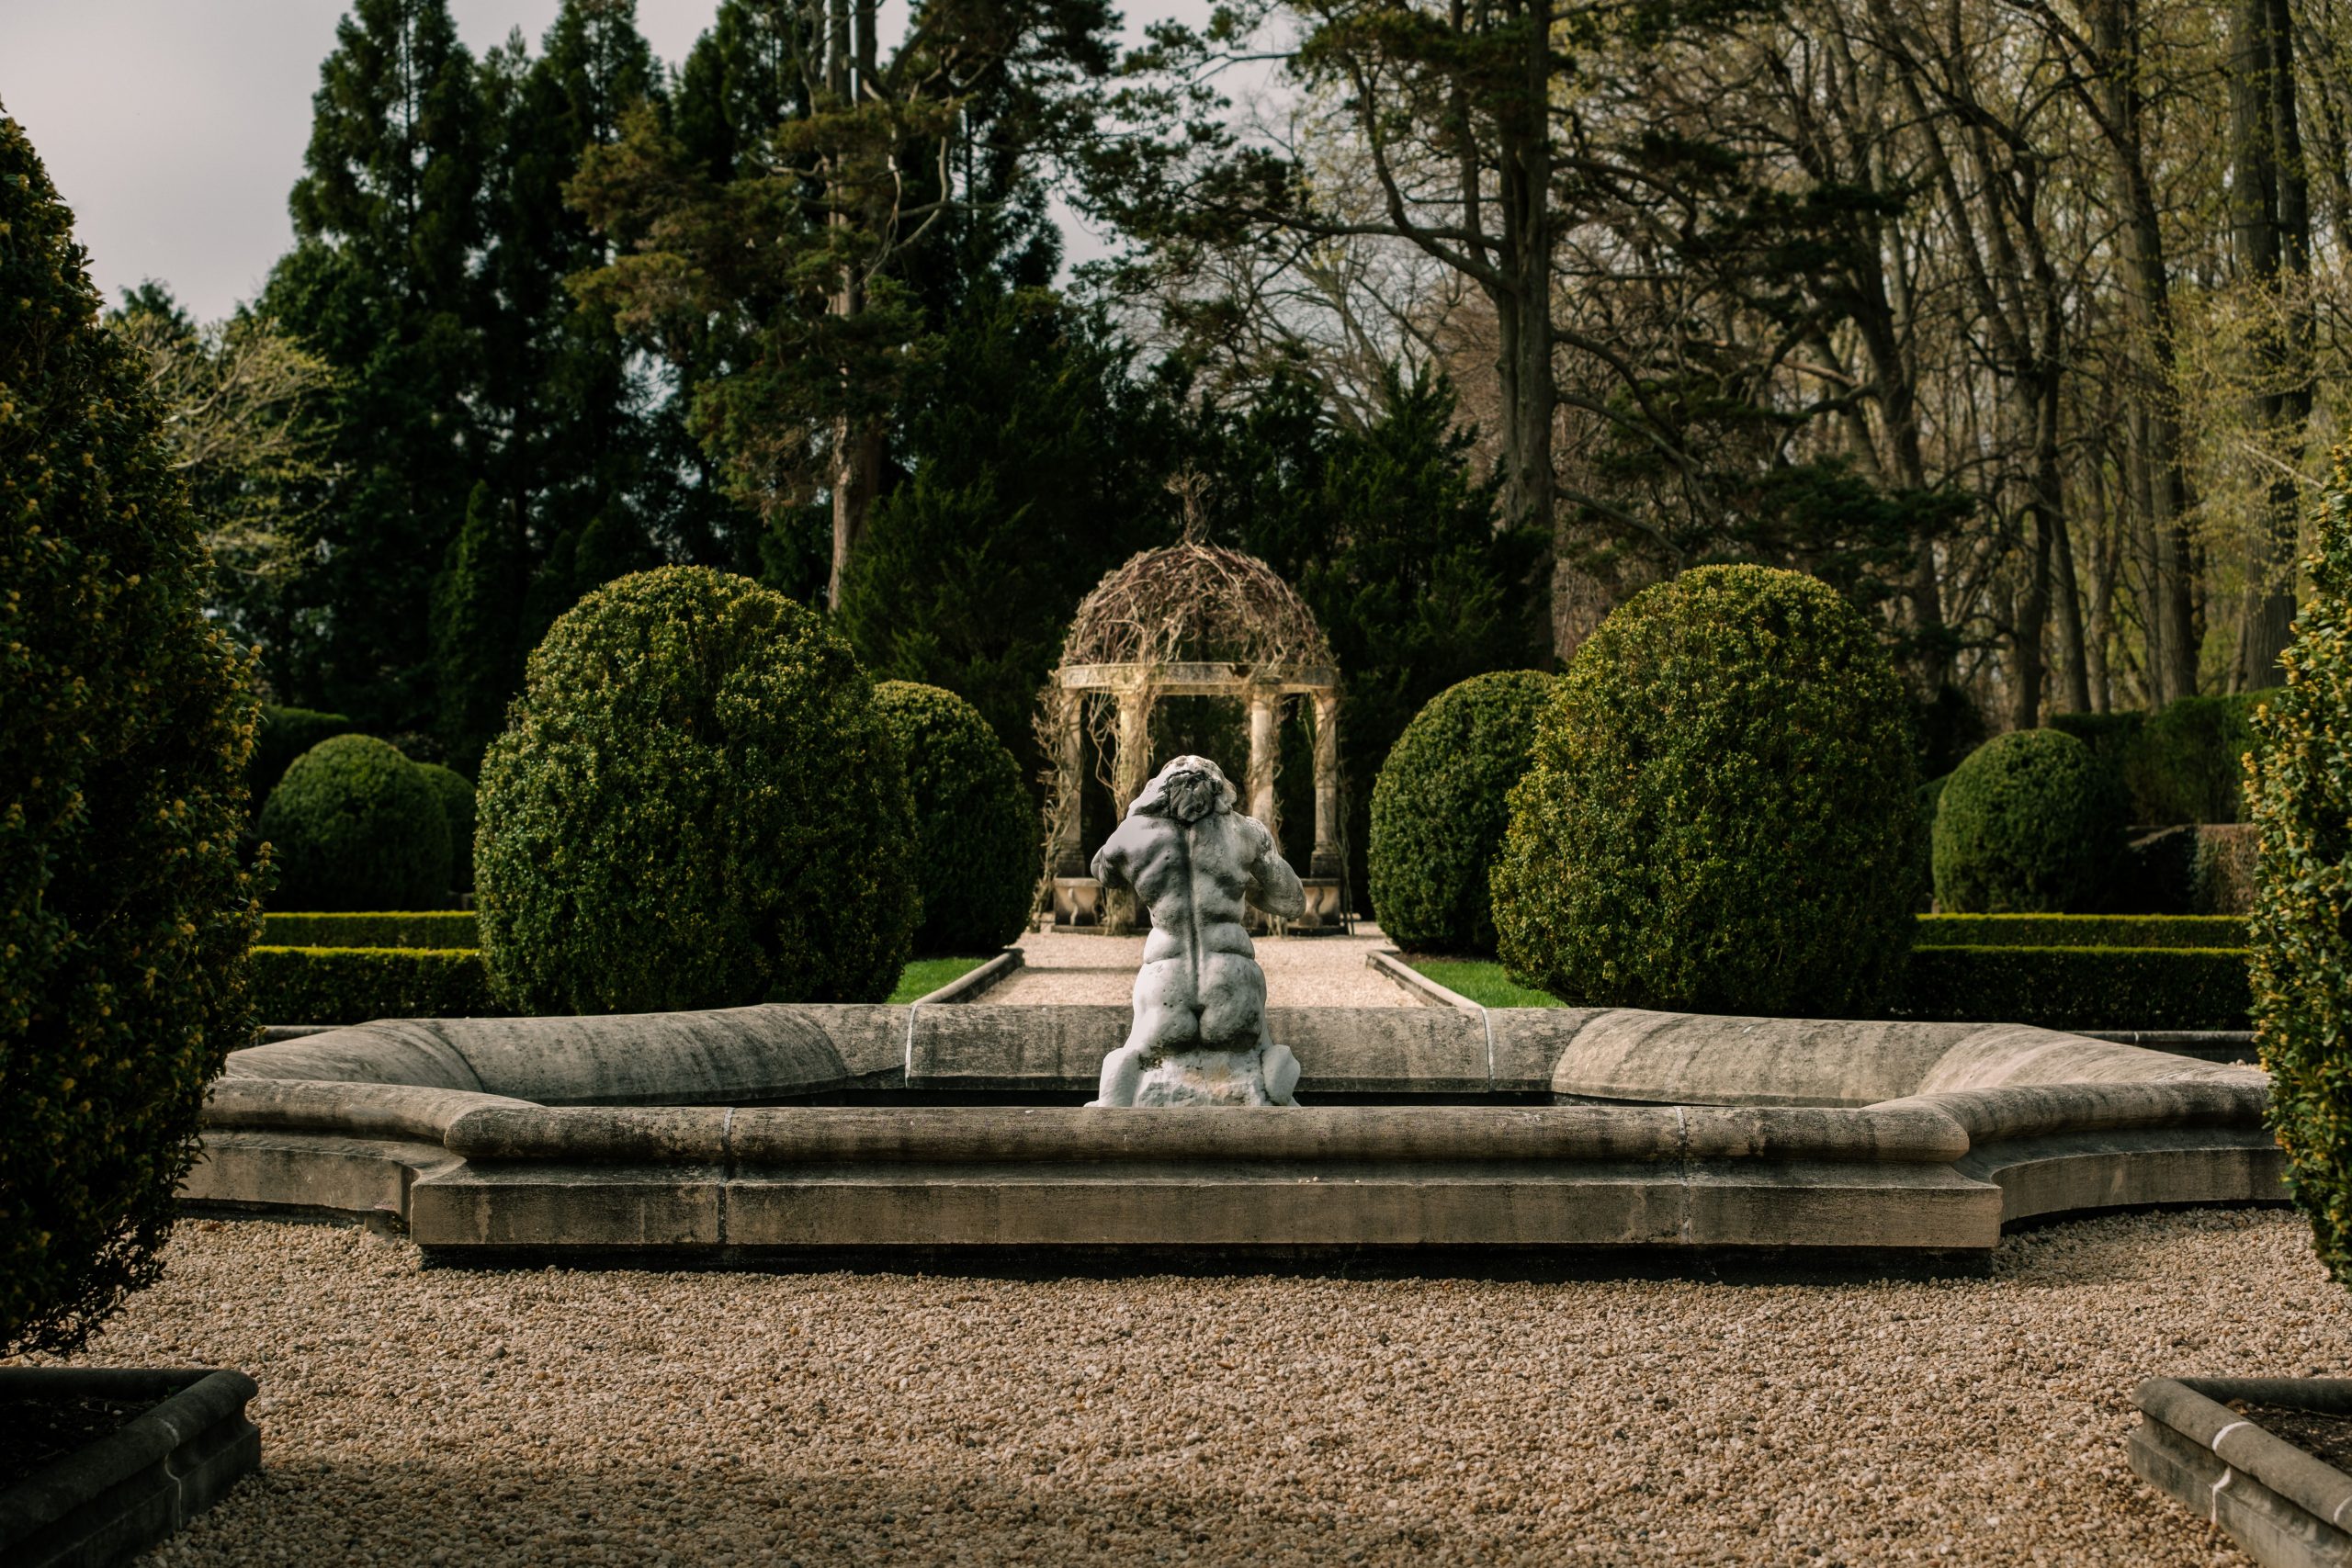
This design succeeds through its masterful use of geometry and structure. The ornate stone basin acts as a central, circular hub from which everything else radiates. The meticulously shaped green bushes create strong lines and a sense of order, while the gravel path provides a crisp, textural border. The genius is in the contrast between the rigid, formal elements (the trimmed hedges, the statue) and the soft, natural backdrop of the tall trees. It creates a feeling of a secret, cultivated world hidden within a larger, wilder one.
|
📋 Copy HEX 🔗 Share |
A classical water feature like this is a stunning focal point, but it comes with a consistent chore list. Standing water is a magnet for algae and mosquito larvae. To keep the water clear and healthy, you’ll need a recirculation pump and a filtration system. Expect to clean the filter monthly and treat the water with an algaecide every few weeks during warm weather. In the fall, you’ll need to remove leaves and debris, and in colder climates, you must properly winterize the pump and basin to prevent cracks from freezing water.
7. Marry Formal Boxwoods with Cascading Ivy on a Historic Facade
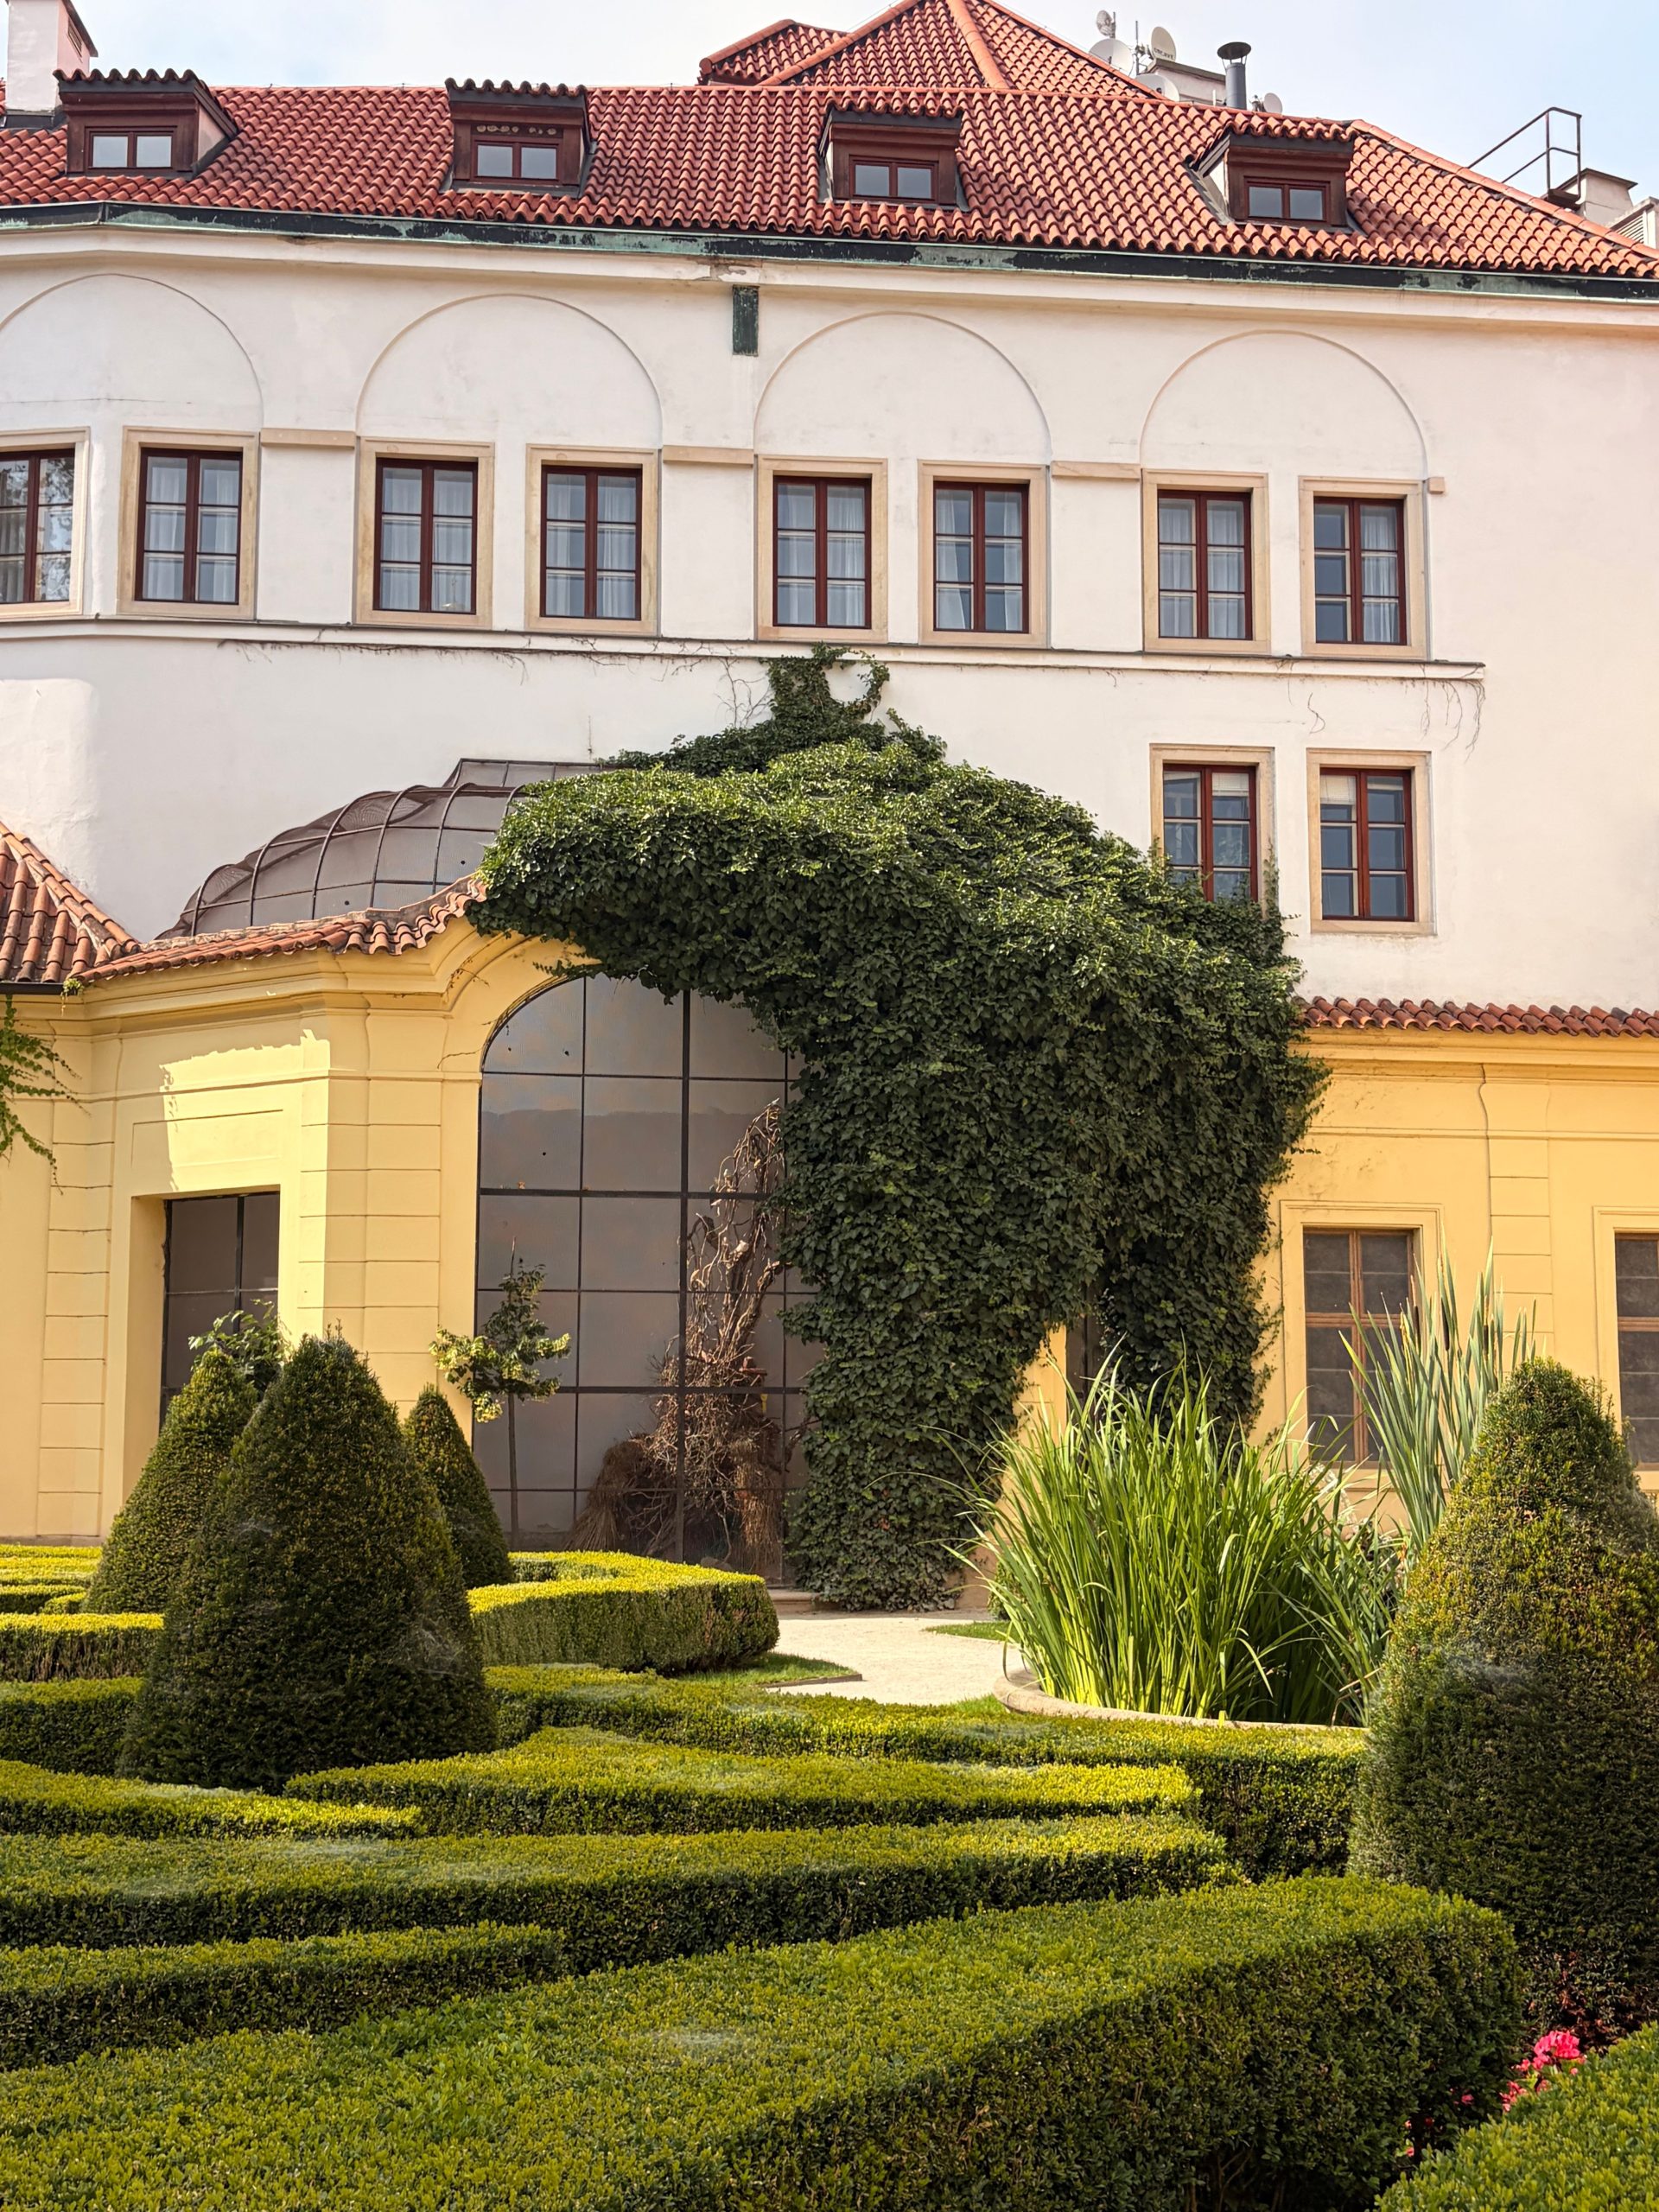
The single most impactful element here is the cascading ivy. Without it, you have a beautiful but stern formal garden. The ivy is what breathes life and romance into the scene. It softens the hard lines of the architecture and structured hedges, blurring the boundary between the man-made and the natural. It adds a sense of age, history, and enchantment, making the entire composition feel less like a modern planting and more like a timeless, established estate that has grown more beautiful with every passing year.
|
📋 Copy HEX 🔗 Share |
This is a grand statement that demands a grand canvas. This idea is best suited for properties with significant architectural features and high ceilings or walls, typically found on two-story homes or larger estates. You need a vertical surface of at least 15-20 feet for the ivy to truly make a dramatic impact. For a standard single-story ranch, this look would be out of proportion. The tiered boxwoods also require a generous bed, at least 8-10 feet deep, to create the proper layered effect without looking cramped against the building.
8. Build a Layered Rock Wall Garden with Integrated Steps
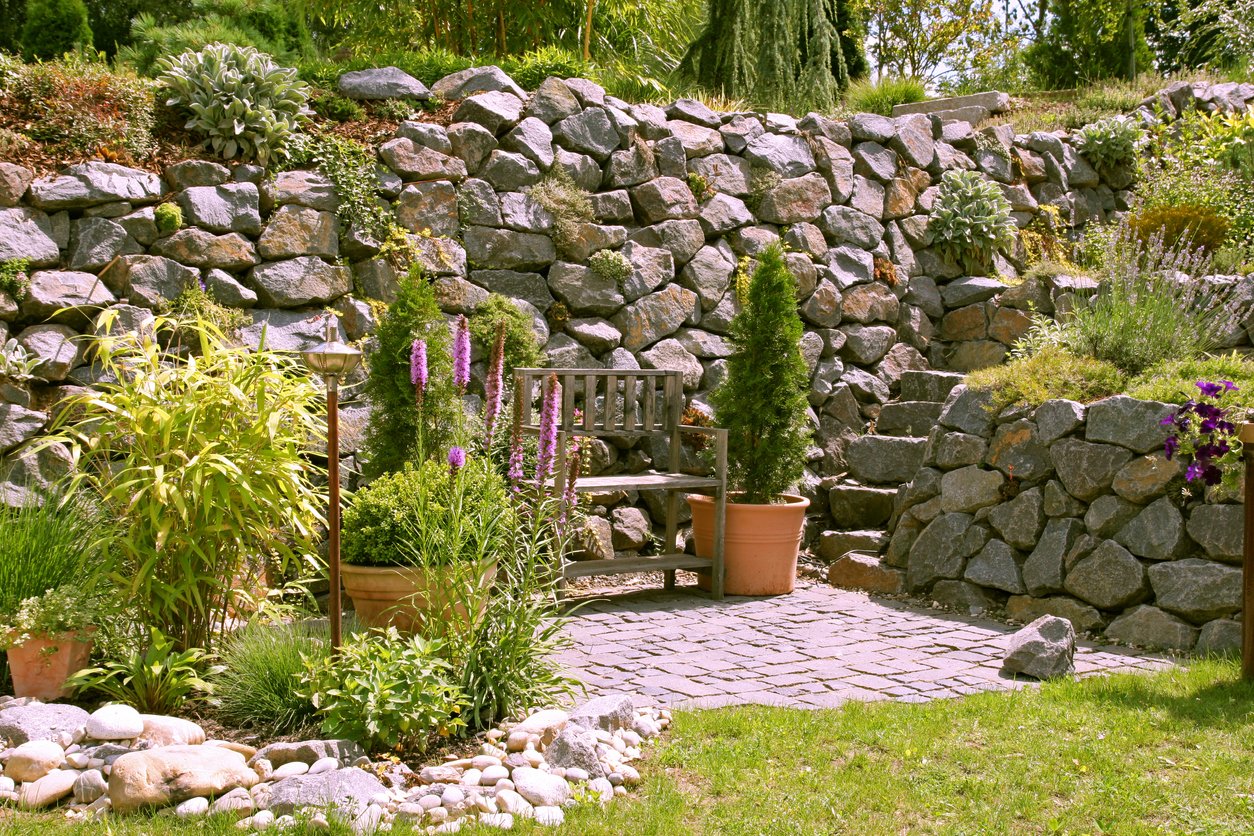
Building a dry-stacked wall is more about patience and physics than mortar. Here’s a mini-guide to creating a small section:
- Lay the foundation: Dig a shallow trench (about 6 inches deep) and fill it with packed gravel to create a stable, level base.
- Sort your stones: Separate your rocks into large, medium, and small piles. The largest, flattest stones will be your base layer.
- One over two, two over one: As you lay each course, ensure every stone rests on at least two stones below it, staggering the joints like you would with bricks.
- Backfill as you go: After every course, fill in the space behind the wall with gravel and soil to relieve pressure.
- Cap it off: Use your flattest, most uniform stones for the top layer to create a finished look.
Time estimate for a 10-foot-long, 2-foot-high wall: 1-2 weekends. Cost: $200-$500 for stone.
|
📋 Copy HEX 🔗 Share |
Instead of buying expensive quarried stone, you can get a similar rustic vibe for a fraction of the cost. Check Facebook Marketplace or Craigslist for people giving away free fieldstone or leftover material from a construction project. Another fantastic option is “urbanite”—broken pieces of concrete sidewalk. If you stack it with the broken edges facing out, it develops a surprisingly natural, quarried look over time. This approach reuses materials and can bring the cost of your wall down to nearly zero if you haul it yourself. Compare this look with the more manicured stone walls in Idea #23.
9. Weave a Stepping Stone Path Through a Dense Flower Garden
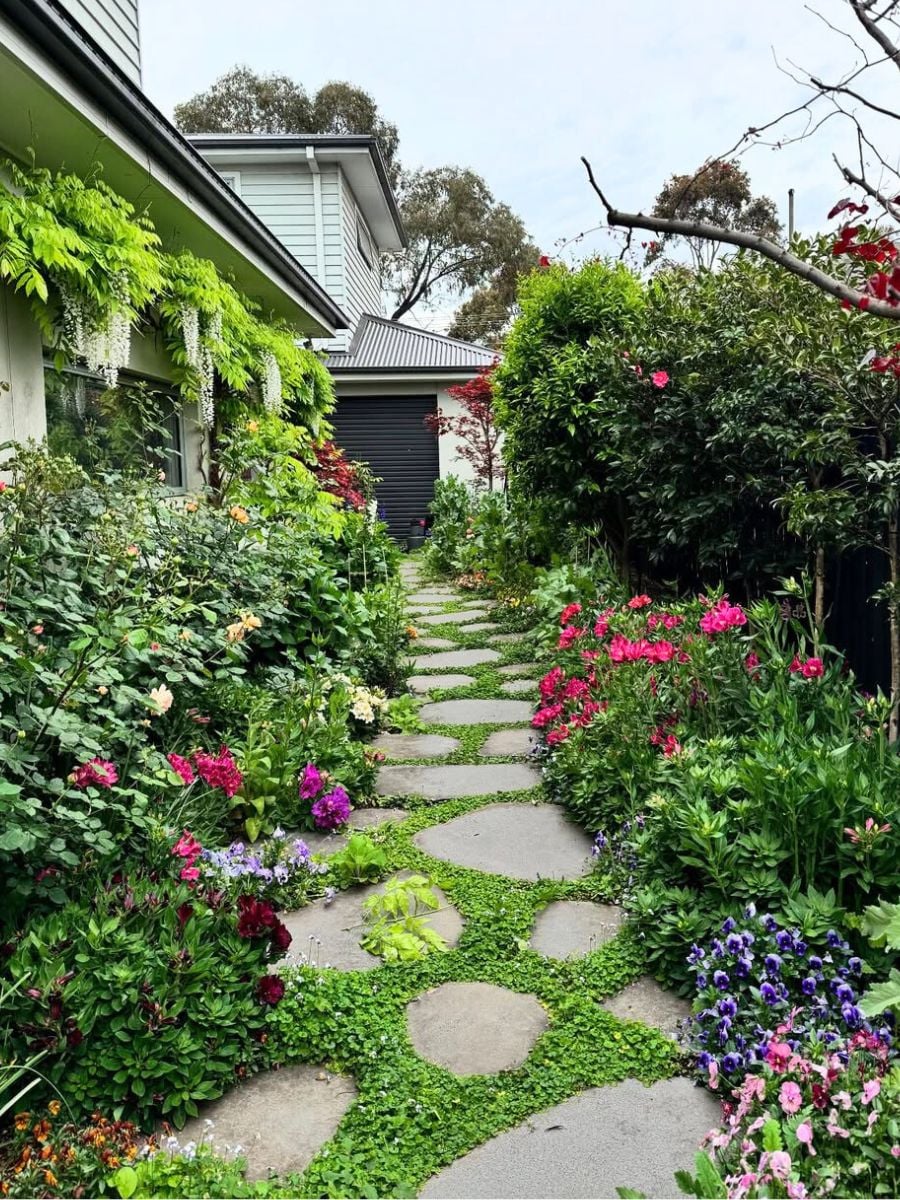
This charmingly lush pathway is a game of textures. The formula is roughly 70% soft, mounding foliage and flowers, 20% flat, hard surfaces (the stepping stones), and 10% creeping groundcover to soften the edges. The visual interest comes from the contrast between the billowy chaos of the plants and the solid, predictable presence of the stones. You can change the entire color palette—say, to yellows and oranges—but if you maintain that 70/20/10 ratio of soft plants to hard stones to creeping fillers, you will preserve the magical, inviting feeling.
|
📋 Copy HEX 🔗 Share |
When placing stepping stones, don’t just guess the distance. Walk the path naturally and place a stone where your foot lands on each step. The average comfortable stride is about 18 to 24 inches from the center of one stone to the center of the next. Placing them too close together looks awkward and busy, while placing them too far apart makes the path a literal pain to walk on. Once placed, live with them for a day or two before setting them permanently to ensure the path feels natural and comfortable for everyone in the household.
10. Design a Modern Nook with a Pergola and Concrete Wall
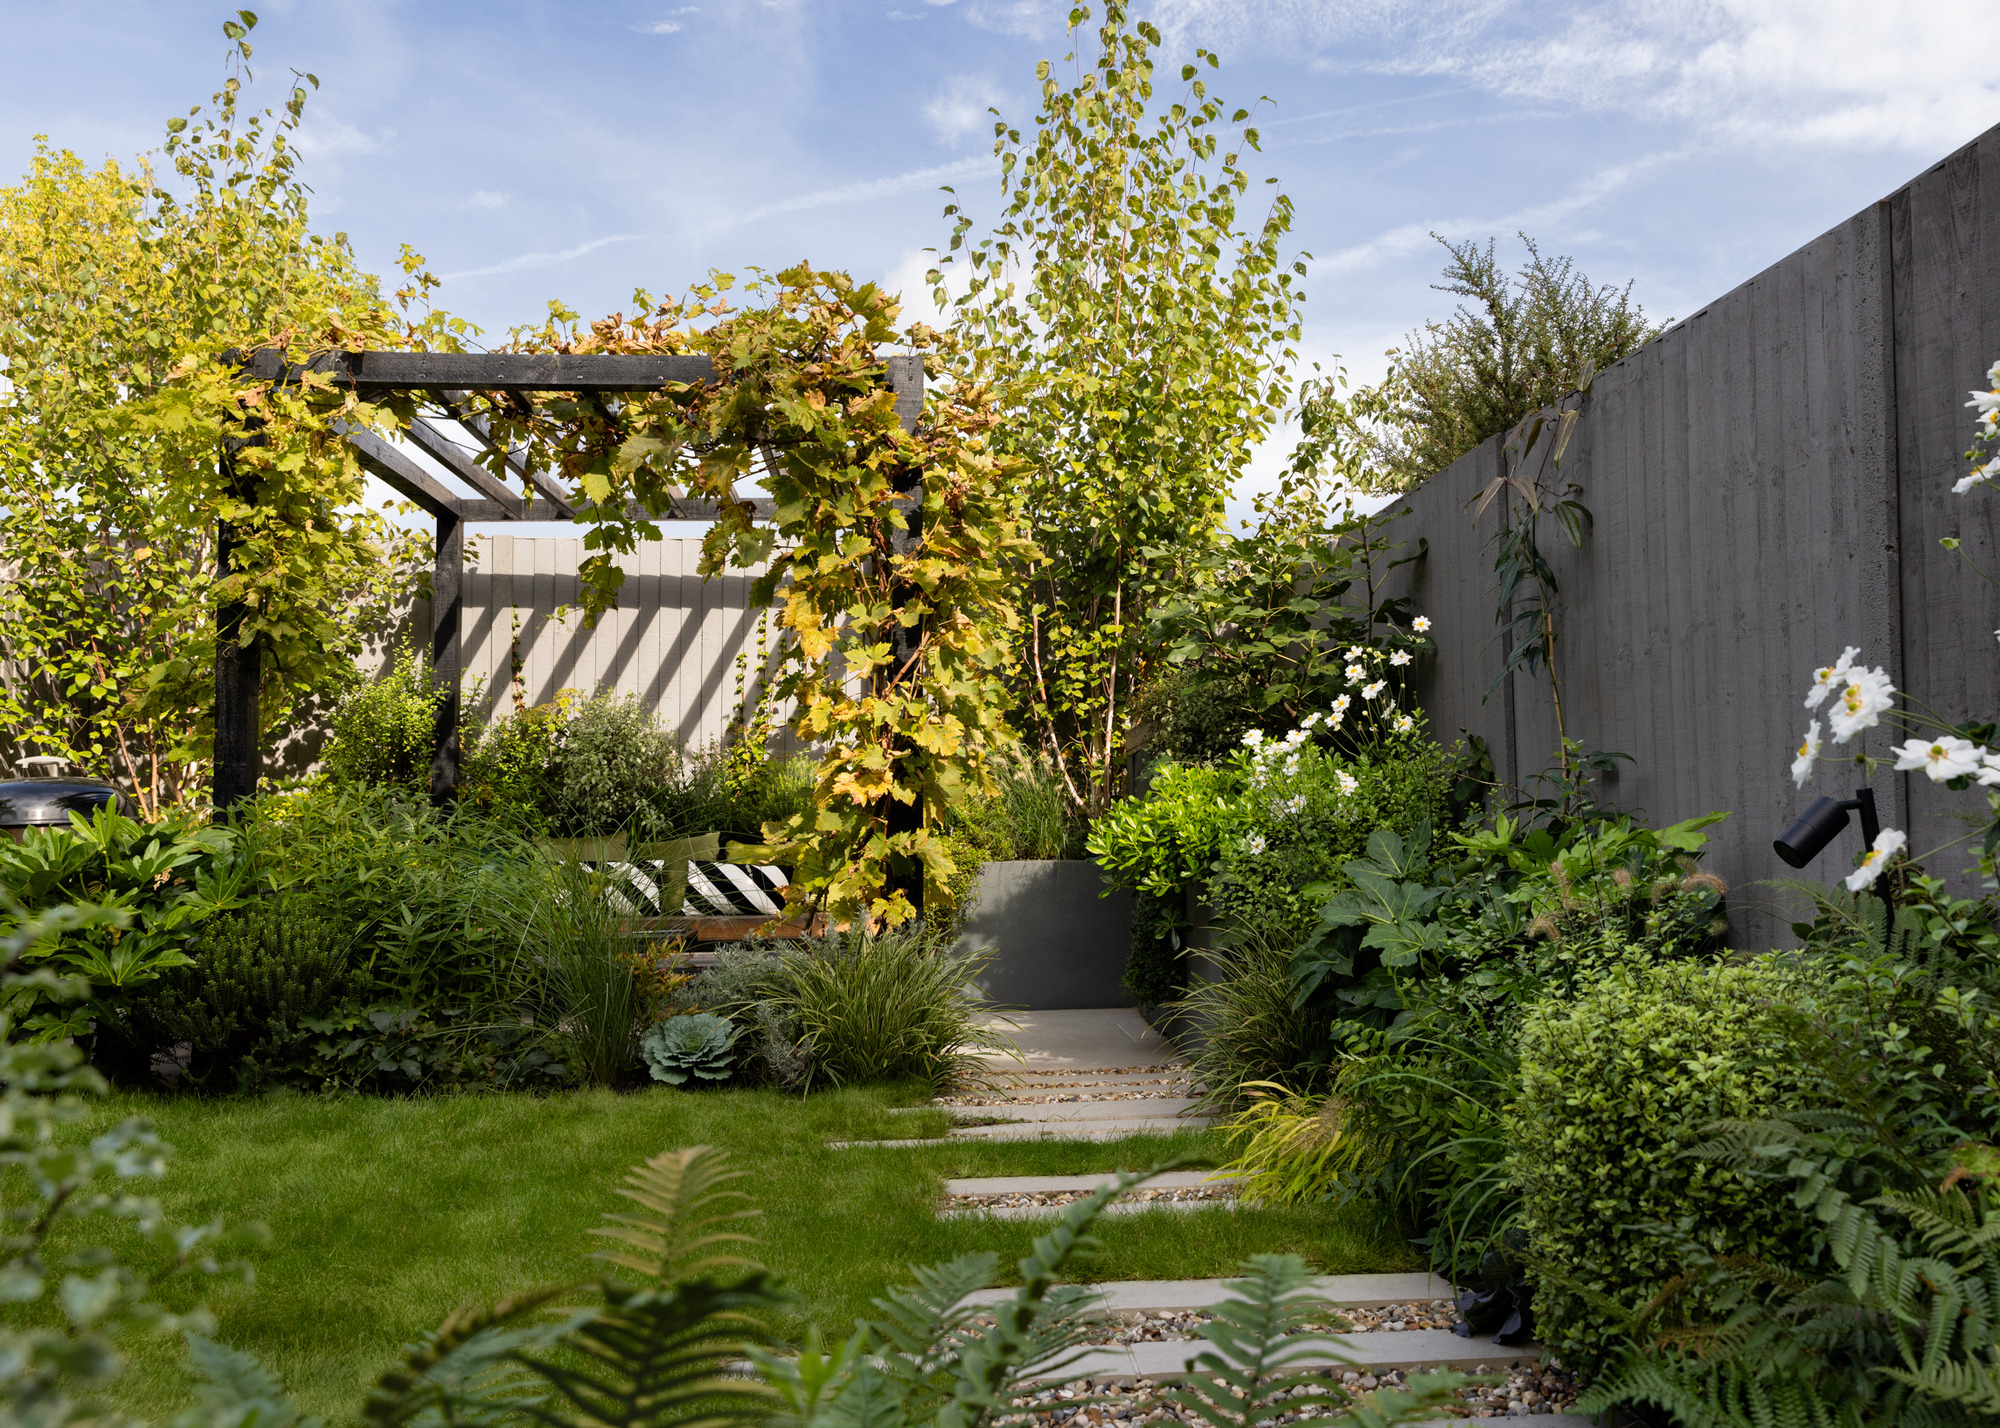
This design is a stunning example of contrasting materials creating a harmonious whole. It works because of the tension between the cold, hard modern elements and the soft, wild plantings. The dark wood of the pergola and the smooth grey concrete wall provide a strong, geometric frame. Inside that frame, the lush, untamed greenery is allowed to thrive, creating a feeling of a contained oasis. The curved path of pavers and pebbles breaks up the straight lines, adding a touch of organic flow that keeps the space from feeling too sterile. It feels both protected and connected to nature. For a different take on modern design, see the tropical corner in Idea #19.
|
📋 Copy HEX 🔗 Share |
A concrete retaining wall is a fantastic modern element, but it has its challenges. Concrete is porous and can show water stains or efflorescence (a white, powdery deposit) over time, especially in damp climates. Depending on your soil and climate, you may also need to install a French drain behind the wall to prevent hydrostatic pressure from causing cracks or bowing. And let’s be honest: while beautiful, a concrete wall and pergola are significant investments that often require professional installation, making this one of the higher-budget ideas in our list.
11. Combine an Ivy-Covered Wall with a Stone Water Feature
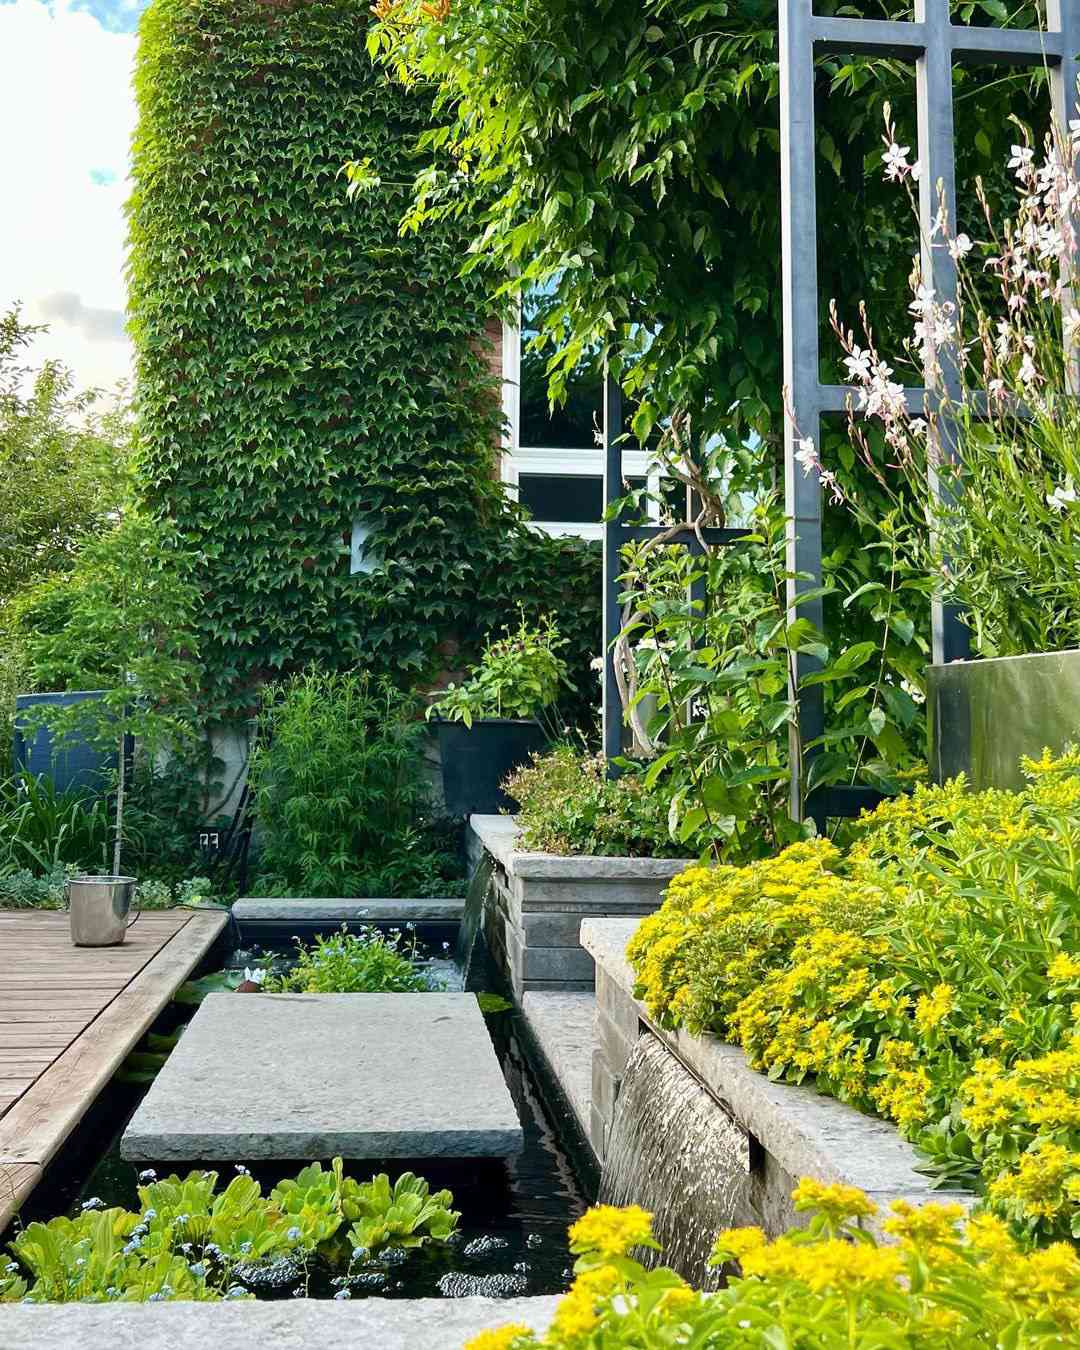
The element that truly makes this corner special is the multi-level water feature. The ivy-covered wall is beautiful, but it’s the sound and movement of the water cascading over the stone slabs that transforms the space into a sensory experience. It introduces an element of tranquility and cools the air on a hot day. The water also reflects the light and the surrounding greenery, adding another layer of visual complexity and making the corner feel more dynamic and alive. The yellow flowers are just the perfect finishing touch.
|
📋 Copy HEX 🔗 Share |
An ivy-covered wall is a romantic and dramatic look, but it’s a serious commitment. Ivy, especially English Ivy, can be aggressive. Its aerial rootlets can work their way into mortar, damage wood siding, and provide a highway for pests to access your home. You must be prepared for diligent annual pruning. This means trimming it away from windows, gutters, and the roofline at least twice a year to maintain control. If you love the look but fear the damage, consider using a sturdy metal trellis set a few inches away from the wall to support the vines instead.
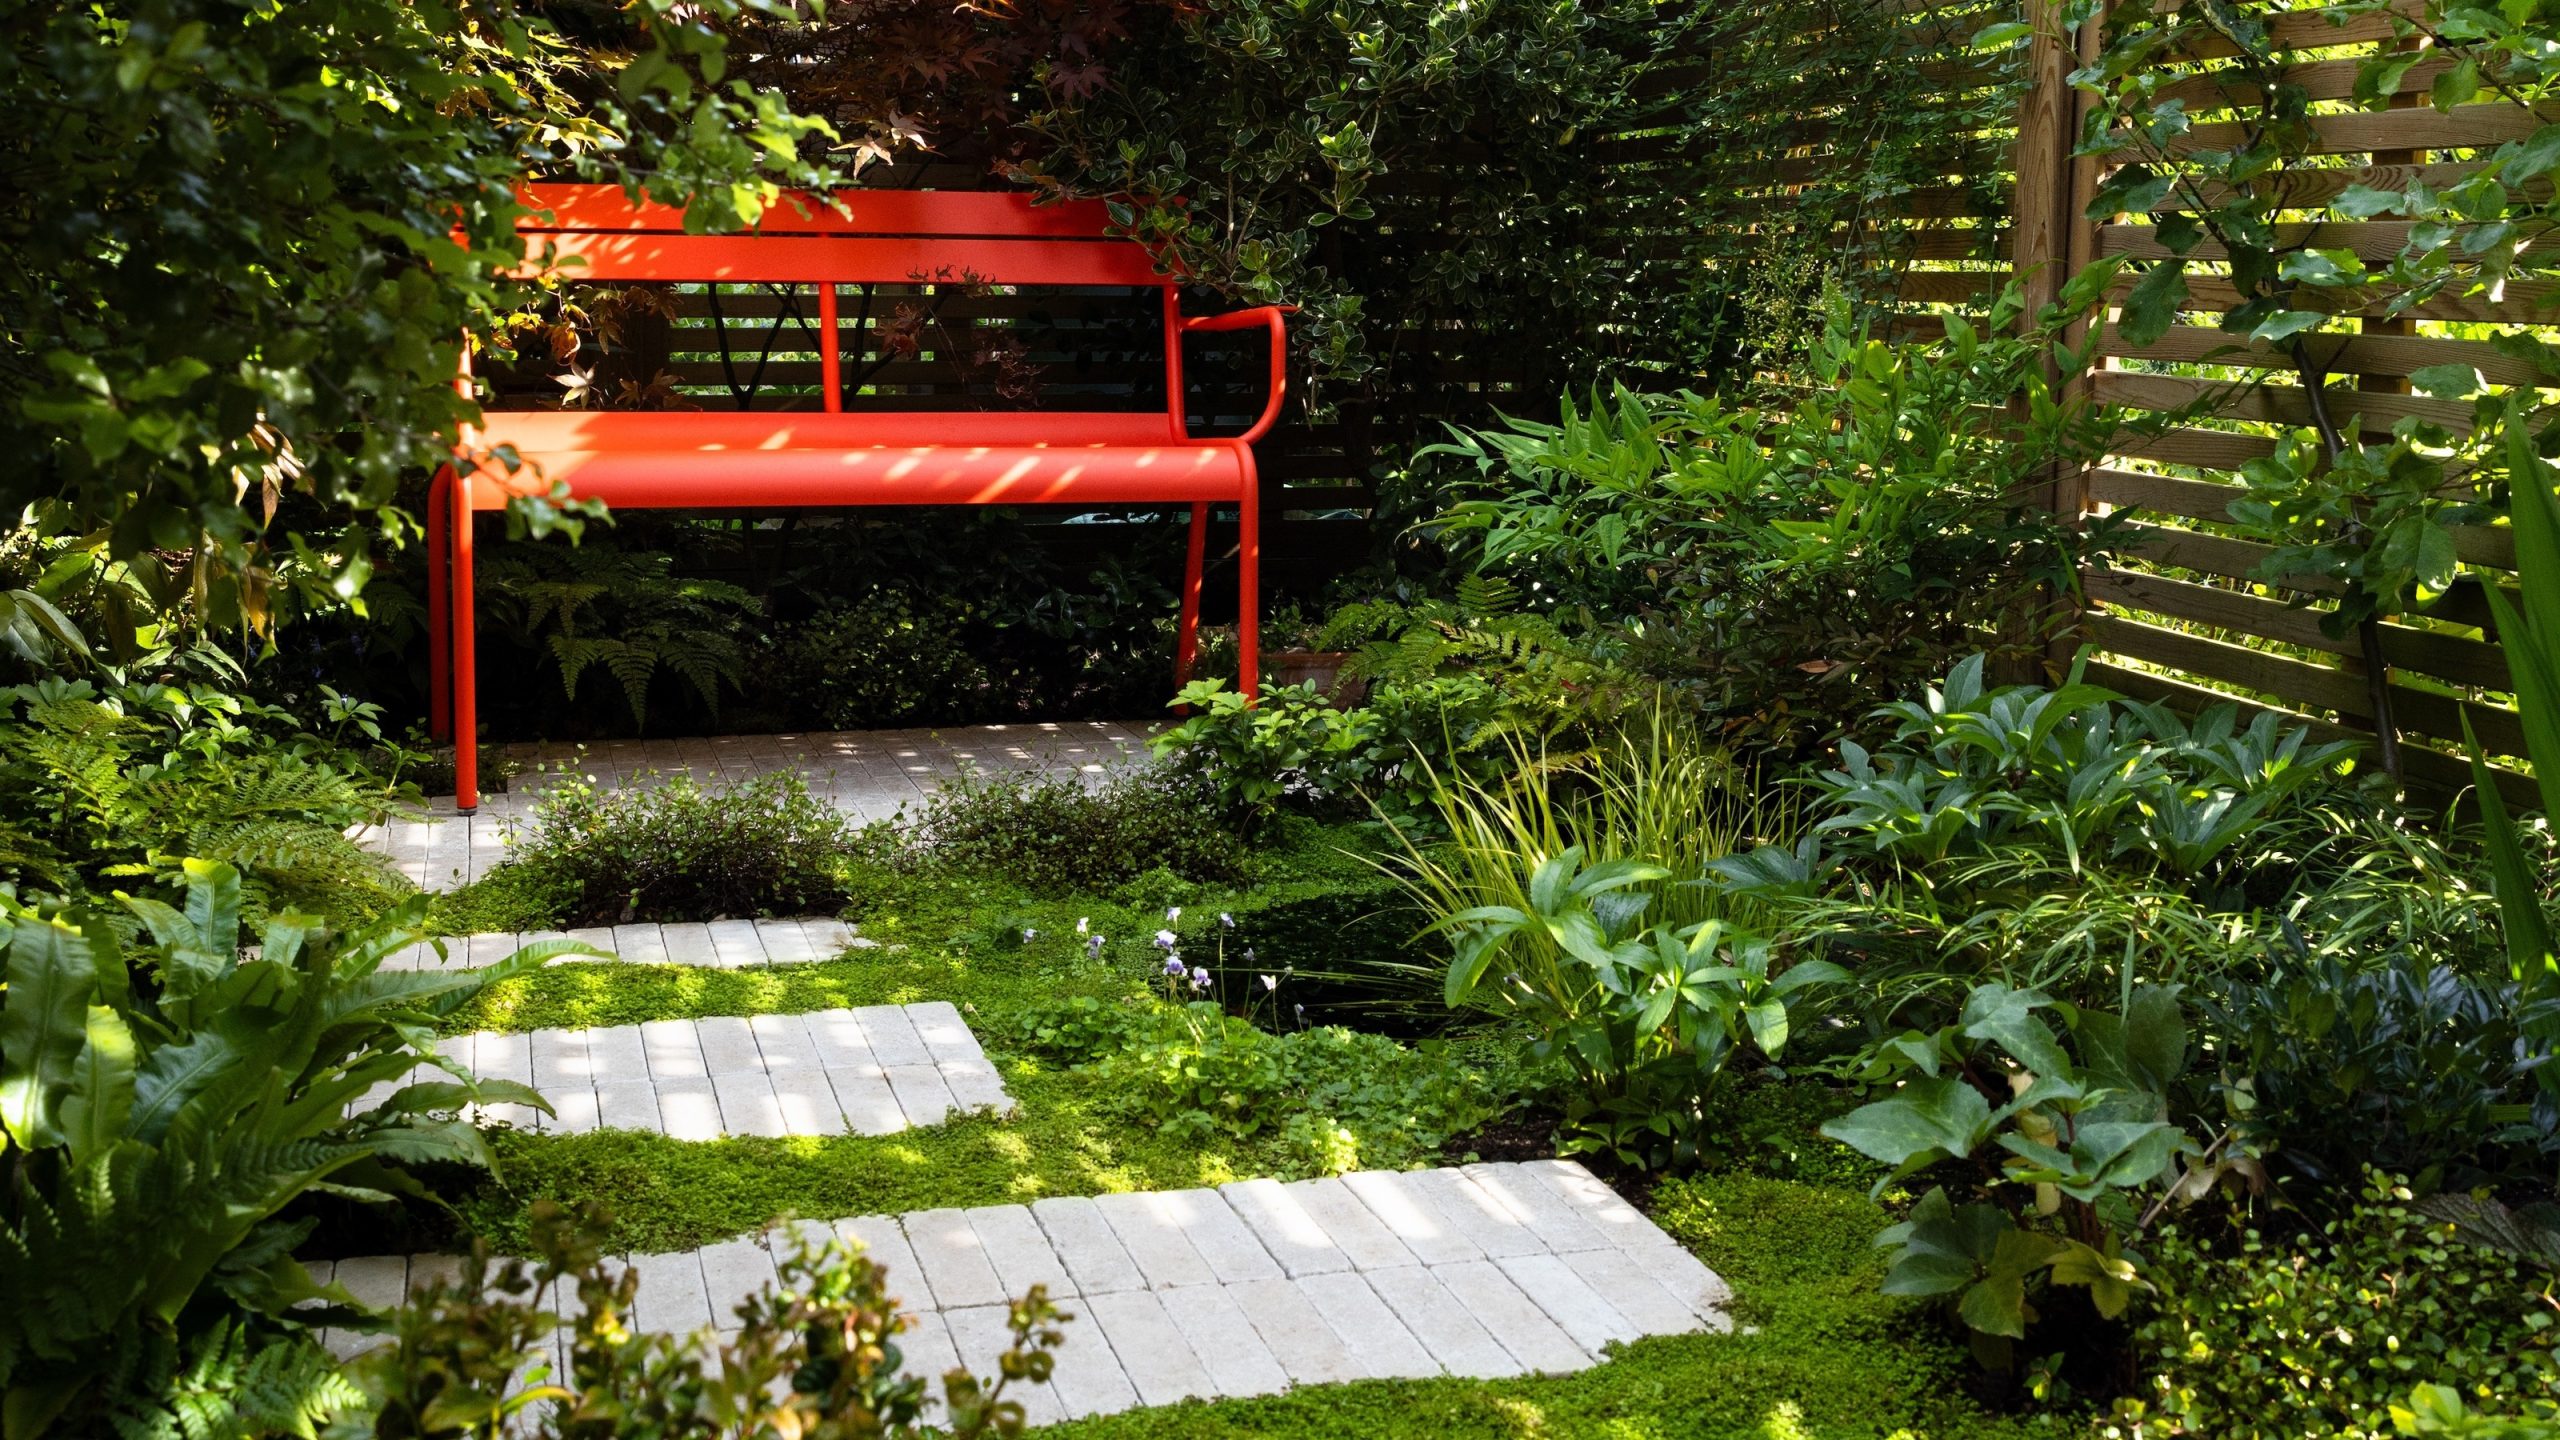
12. Add a Pop of Color with a Red Bench in a Green Garden
This striking look is all about a simple but powerful equation: 95% Monochrome Green + 5% Bold Color Pop. The overwhelming sea of green, with all its varied textures from ferns to ground cover, creates a serene, unified backdrop. This allows the single splash of vivid red to have maximum impact. It doesn’t have to be a red bench; it could be a cobalt blue planter, a bright yellow sculpture, or a pair of orange chairs. The key is the confidence to commit to one single, dramatic accent against a lush, green canvas. This is a much more vibrant and modern take on a lush garden than the one seen in Idea #1.
|
📋 Copy HEX 🔗 Share |
You don’t need a designer budget to nail this high-contrast look. The hero piece is the red bench, and you can find affordable metal or wood garden benches at places like Target, Walmart, or Home Depot for around $100-$150. If you find one in a different color on clearance or at a thrift store for $30, even better! A can of high-quality outdoor spray paint in a glossy, fire-engine red (like Rust-Oleum’s “Regal Red”) will cost you about $8 and a little bit of weekend DIY time. The result is a high-impact design piece for a tiny fraction of the cost.
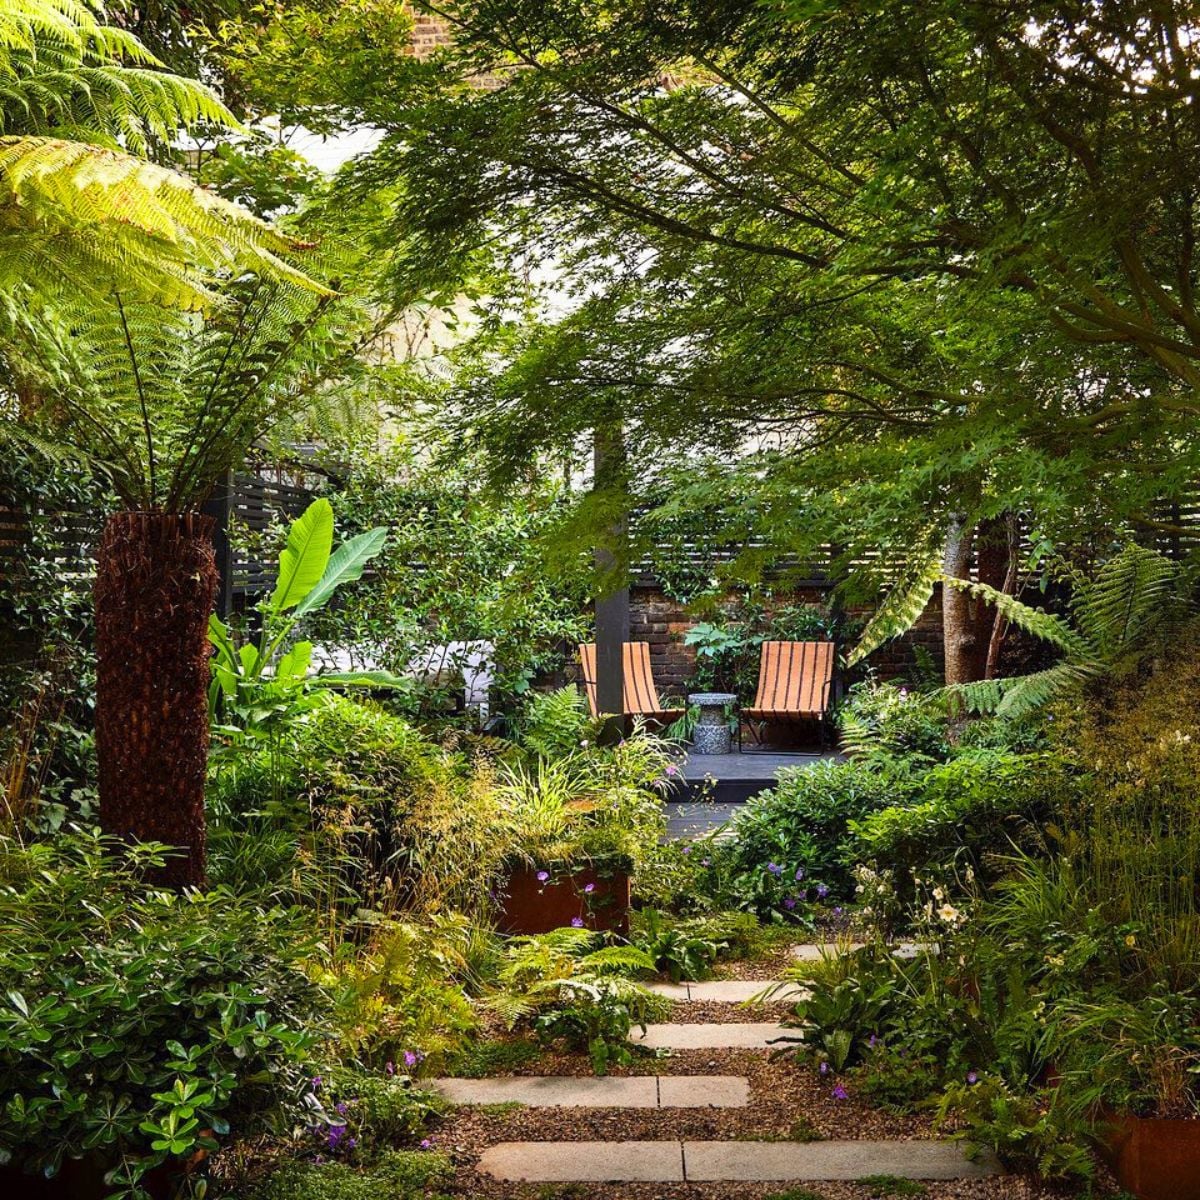
13. Carve Out a Secluded Seating Area with a Raised Wooden Deck
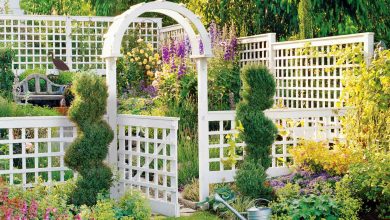
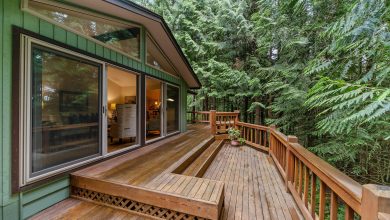
This intimate deck idea is perfect for smaller, enclosed spaces, like the corner of a townhouse backyard or a side yard. It works best in a space that is at least 8 feet by 8 feet to comfortably fit the deck, two chairs, and surrounding plants without feeling claustrophobic. The key is having a pre-existing “backbone” like a fence or wall to build against, which enhances the sense of privacy and enclosure. For a larger, more open yard, this concept might feel too small unless you use dense plantings to create the illusion of a secluded “room.”
|
📋 Copy HEX 🔗 Share |
This design creates such a strong sense of sanctuary because it uses vertical space to its advantage. Elevating the seating area, even by just one step, subtly separates it from the rest of the yard and designates it as a special place. The dense, tall foliage and lattice fence that surround the deck aren’t just background; they function as living walls, creating privacy and muffling sound. The entire composition is designed to draw you in and give you a protected, cozy spot to unwind, completely hidden from the outside world.
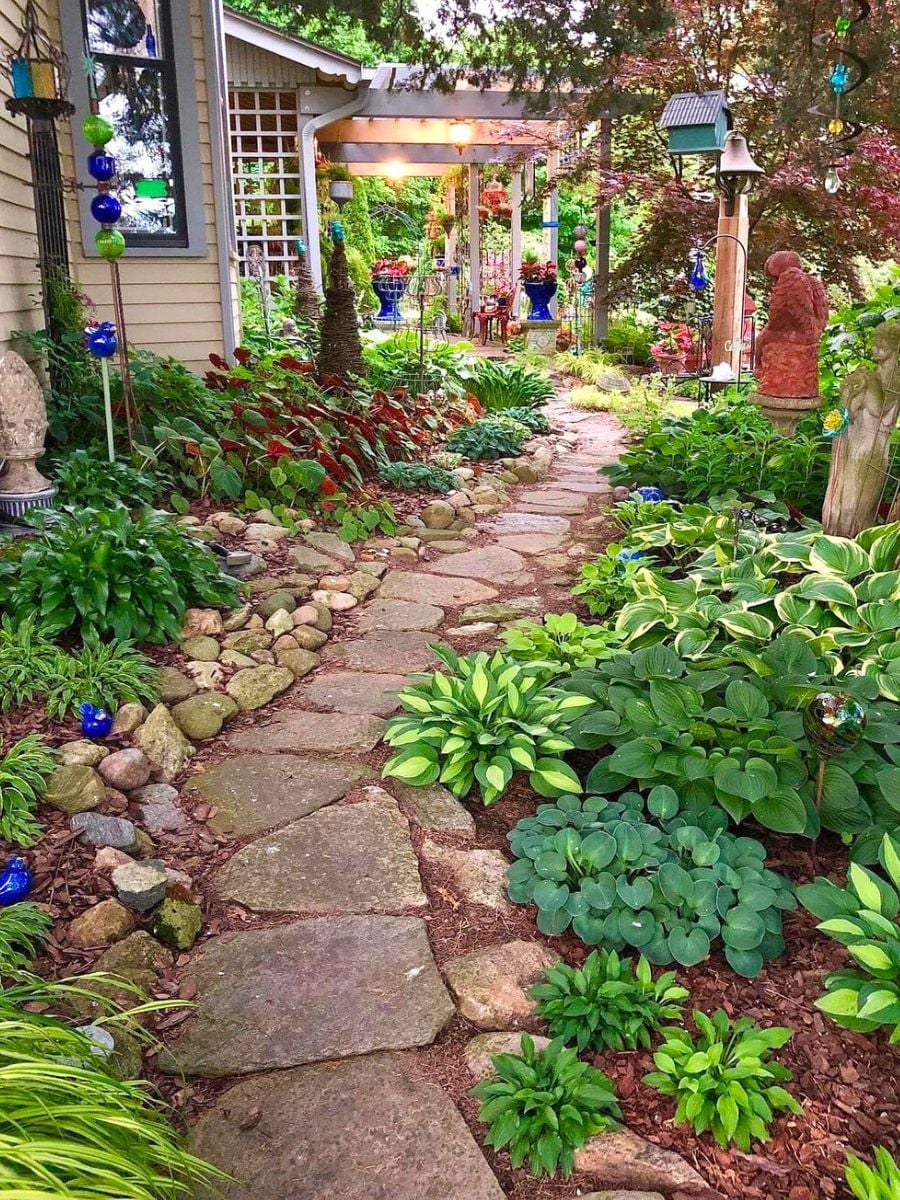
14. Personalize Your Garden with Eclectic Statues and Glass Art
When incorporating decorative objects into a garden, the secret to avoiding a cluttered look is to create small “vignettes.” Don’t scatter items randomly. Instead, group a few related objects together—like a statue, a gazing ball, and a particularly interesting plant—to create a mini focal point. Place these vignettes where the path curves or at the back of a border to reward exploration. Use repetition to create harmony; for instance, the use of several blue glass spheres in different spots ties the whole garden together visually.
|
📋 Copy HEX 🔗 Share |
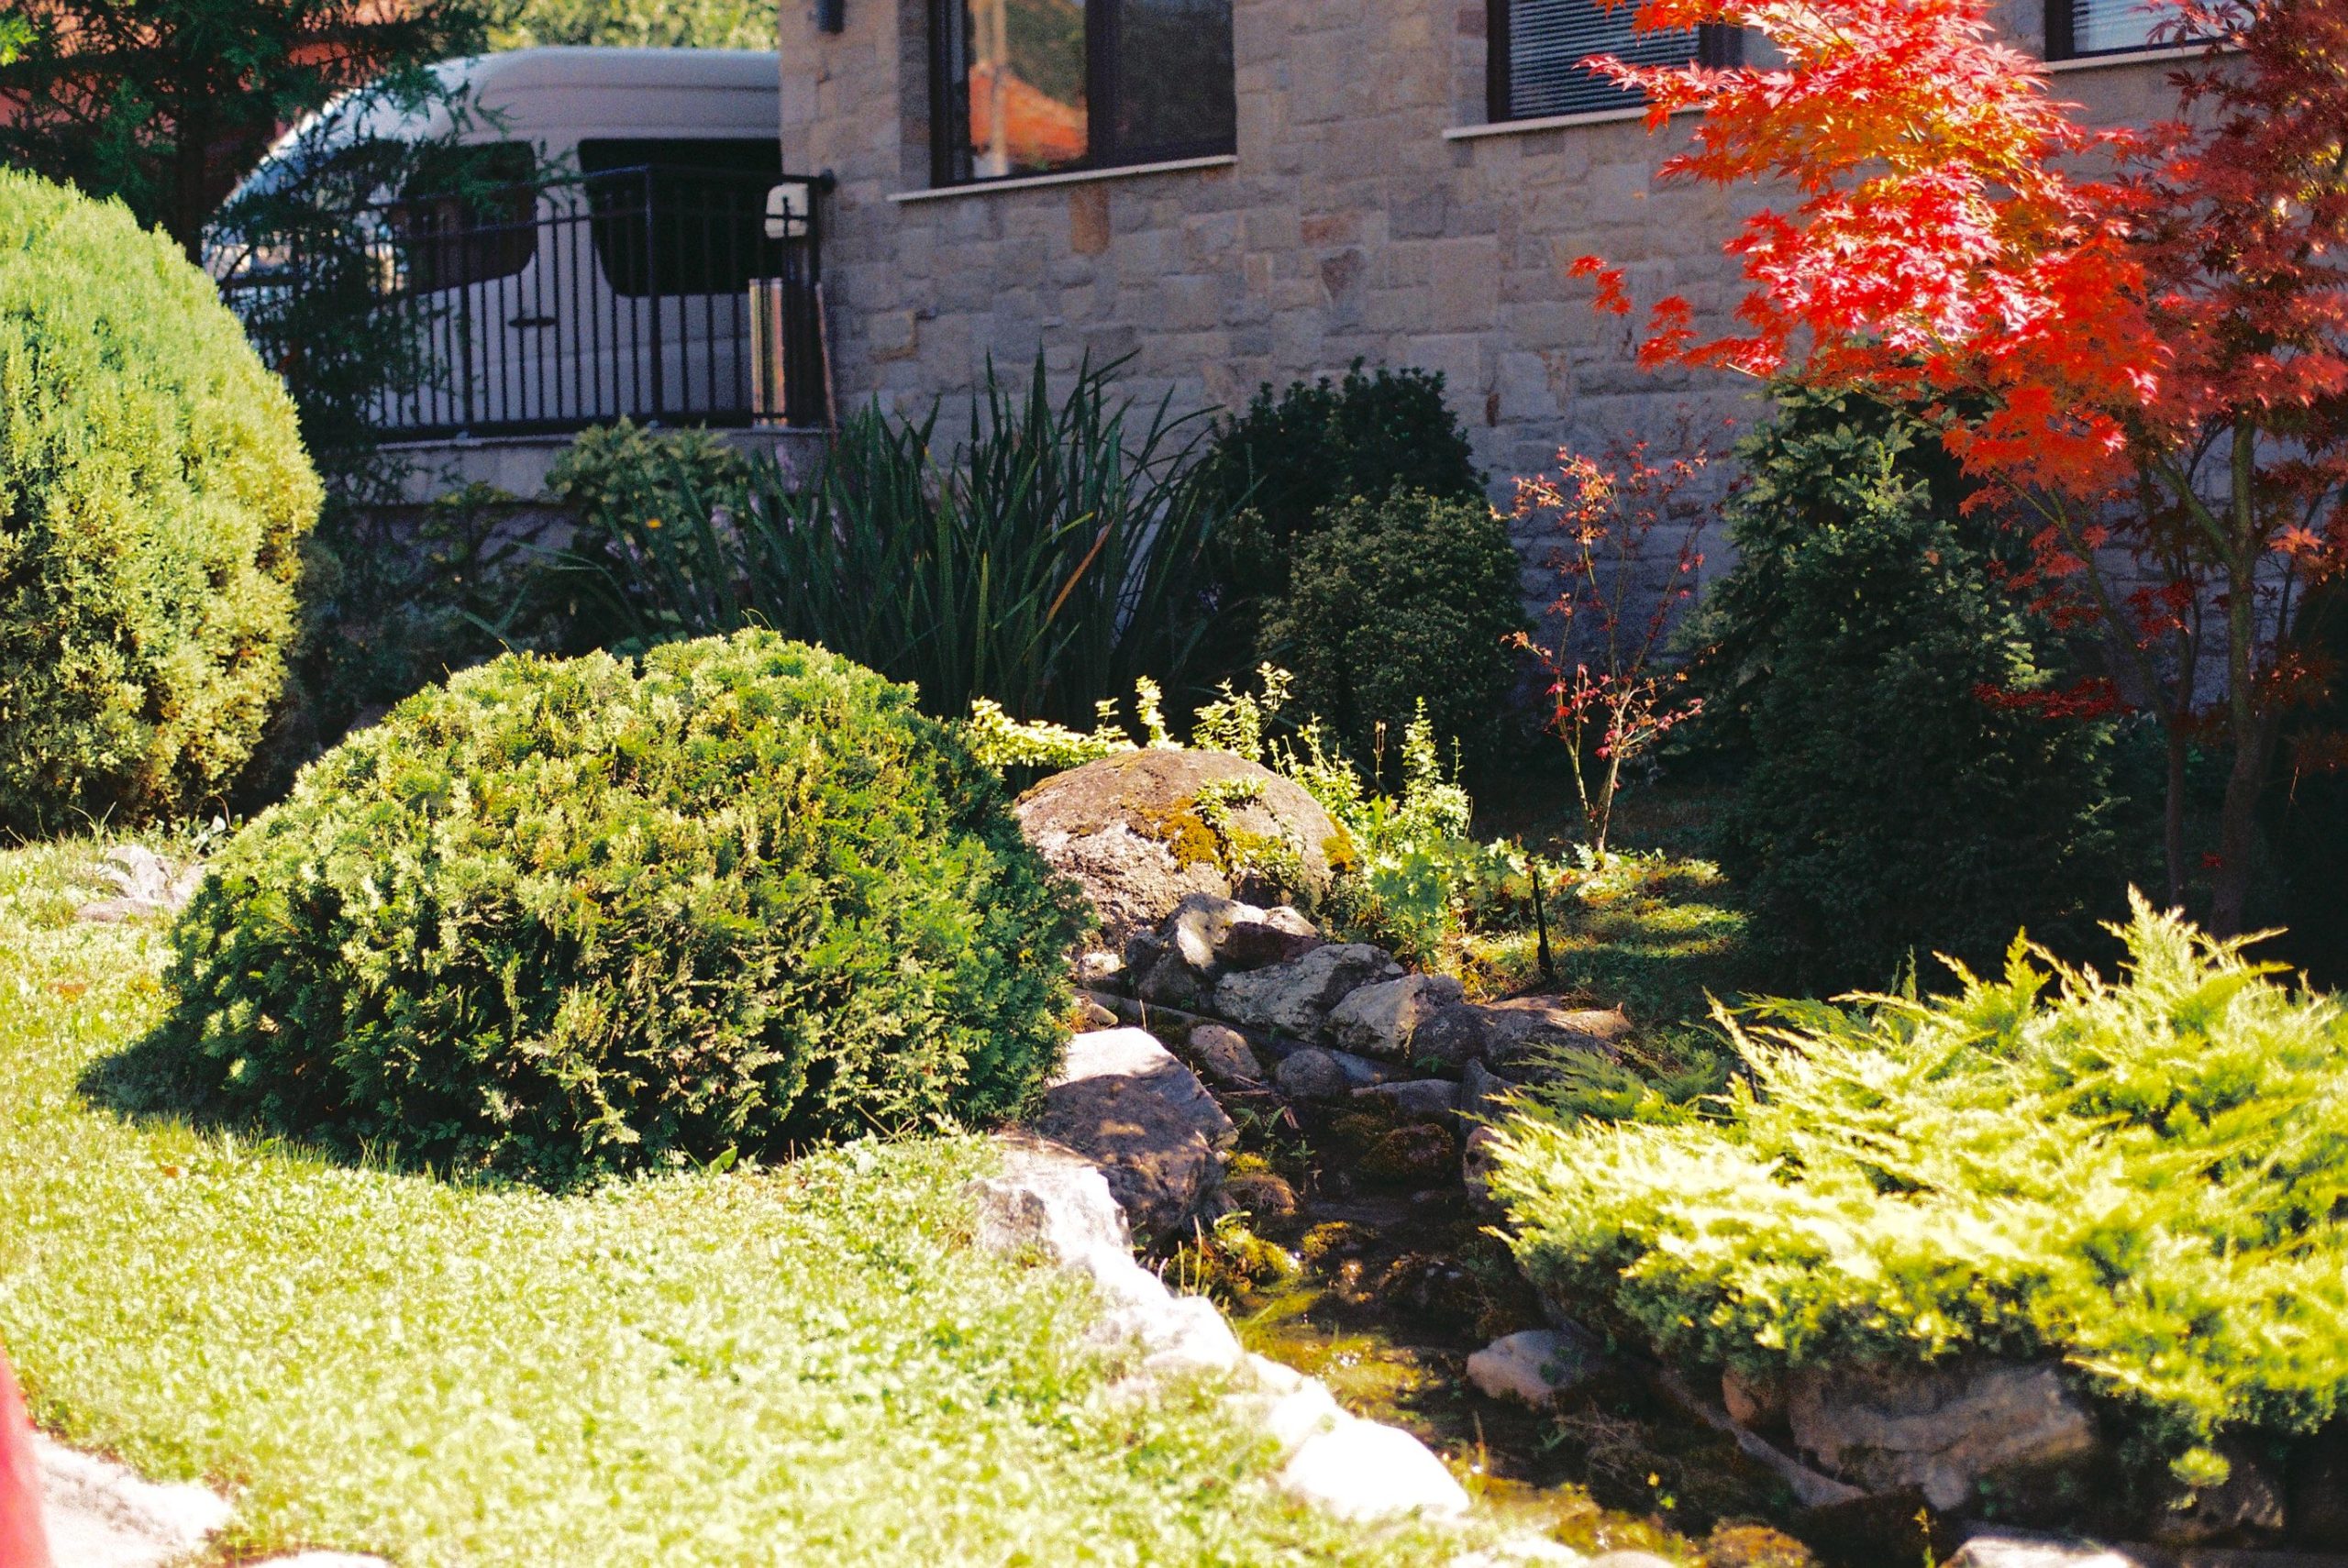
15. Incorporate a Rocky Stream into a Mixed Shrub Border
The single element that elevates this garden corner from pleasant to captivating is the rocky stream bed. Even without constantly flowing water, a well-designed dry stream bed adds a powerful sense of movement and naturalism. It provides a strong diagonal line that draws the eye through the scene, connecting the different planting areas. The grey stones offer a rugged, textural contrast to the soft foliage of the shrubs and the vibrant leaves of the red tree, making both elements stand out more. It’s the piece of “wild nature” that makes the cultivated garden feel more authentic.
|
📋 Copy HEX 🔗 Share |
A dry stream bed looks effortless, but it requires careful planning to appear natural. Before you start digging, lay out the path of your stream with a garden hose or rope to get the curves just right. Also, consider the journey of actual water.
- Assess Drainage: Does this corner of your yard actually get runoff during a storm? Your stream bed can be a beautiful and functional way to direct that water purposefully.
- Vary Rock Size: A natural stream has a mix of large boulders, medium-sized rocks, and small pebbles. Gather more than you think you need to create this variation.
- Plan for depth: Your stream should meander and have deeper and shallower points, just like a real one, to be convincing.
16. Plant a Cheerful Zinnia Bed Along a Picket Fence
This classic cottage look is a simple recipe for happiness. It breaks down to 40% clean, structural white (the picket fence); 40% vibrant, chaotic color (the mixed zinnias); and 20% natural texture (the river rock border and mulch). The crisp white fence acts like a perfect gallery wall, making the bright colors of the flowers pop. The river rocks provide a rustic, informal edge that keeps the design grounded and relaxed. You could swap the zinnias for cosmos or dahlias, and the formula would still create that same joyful, welcoming vibe. Compare this informal rock border with the more formal brick edging in Idea #17.
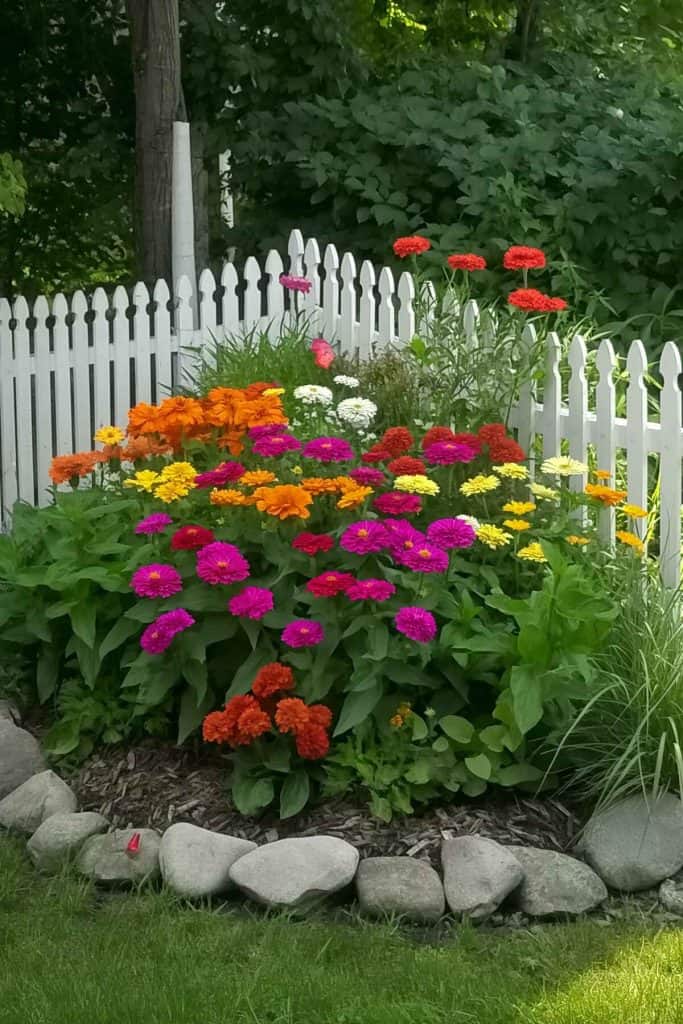
|
📋 Copy HEX 🔗 Share |
Starting a zinnia bed from seed is one of the most rewarding garden projects. They grow fast and bloom all summer long. Here’s how:
- Wait for warm soil: Plant zinnia seeds directly into the garden after all danger of frost has passed. They need warm soil (70°F+) to germinate well.
- Prepare the bed: Choose a spot with full sun (6+ hours a day). Rake the soil to a fine texture.
- Planting depth: Sow seeds about 1/4-inch deep and space them according to the packet instructions (usually 6-12 inches apart).
- Water gently: Keep the seedbed consistently moist until seedlings emerge in 7-10 days.
- Thin them out: Once seedlings are a few inches tall, thin them to the final recommended spacing. This gives them room to branch out and produce more flowers.
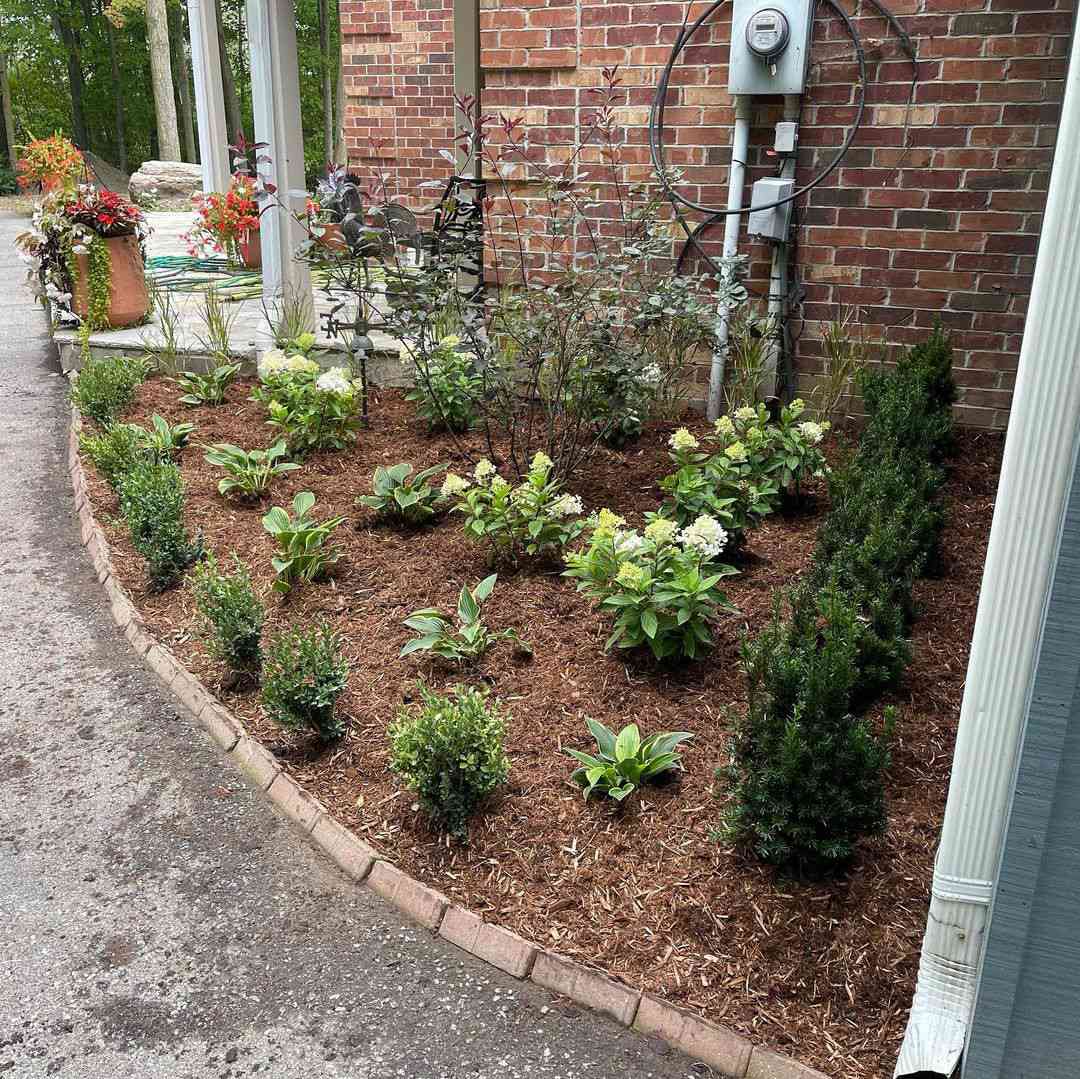
17. Edge a Driveway with a Curved Bed of Hostas and Hydrangeas
To recreate this lush and established look for a 25-foot curved bed, here’s a realistic cost estimate. Remember that buying smaller, younger plants will save you money but require a few seasons to fill in.
- Main Plants: 5-7 large hostas ($20-$30 each), 3-4 hydrangeas ($30-$50 each), 10-12 small boxwoods ($15-$25 each) = $370-$680
- Edging: ~75 terracotta bricks ($0.50-$1.50 each) = $40-$115
- Ground Cover: 1 cubic yard of dark brown mulch (delivered) = $75 – $120
- Soil & Compost: To amend the bed = $50 – $100
- TOTAL: $535 – $1,015
Budget alternative: Buy “bare root” hostas and hydrangeas online, grow boxwoods from cuttings, and source free bricks on Facebook Marketplace to achieve this look for under $200.
|
📋 Copy HEX 🔗 Share |
The key to a professional-looking brick edge is a perfectly prepared trench. Before you lay a single brick, use a flat spade or edger to dig a clean trench about 4 inches deep and 4 inches wide. Fill the bottom with an inch of sand or gravel and tamp it down firmly. This creates a stable, level base that will keep your bricks from heaving and shifting out of place during freezes and thaws. Setting the bricks at a slight angle, as shown here, also helps lock them in place.
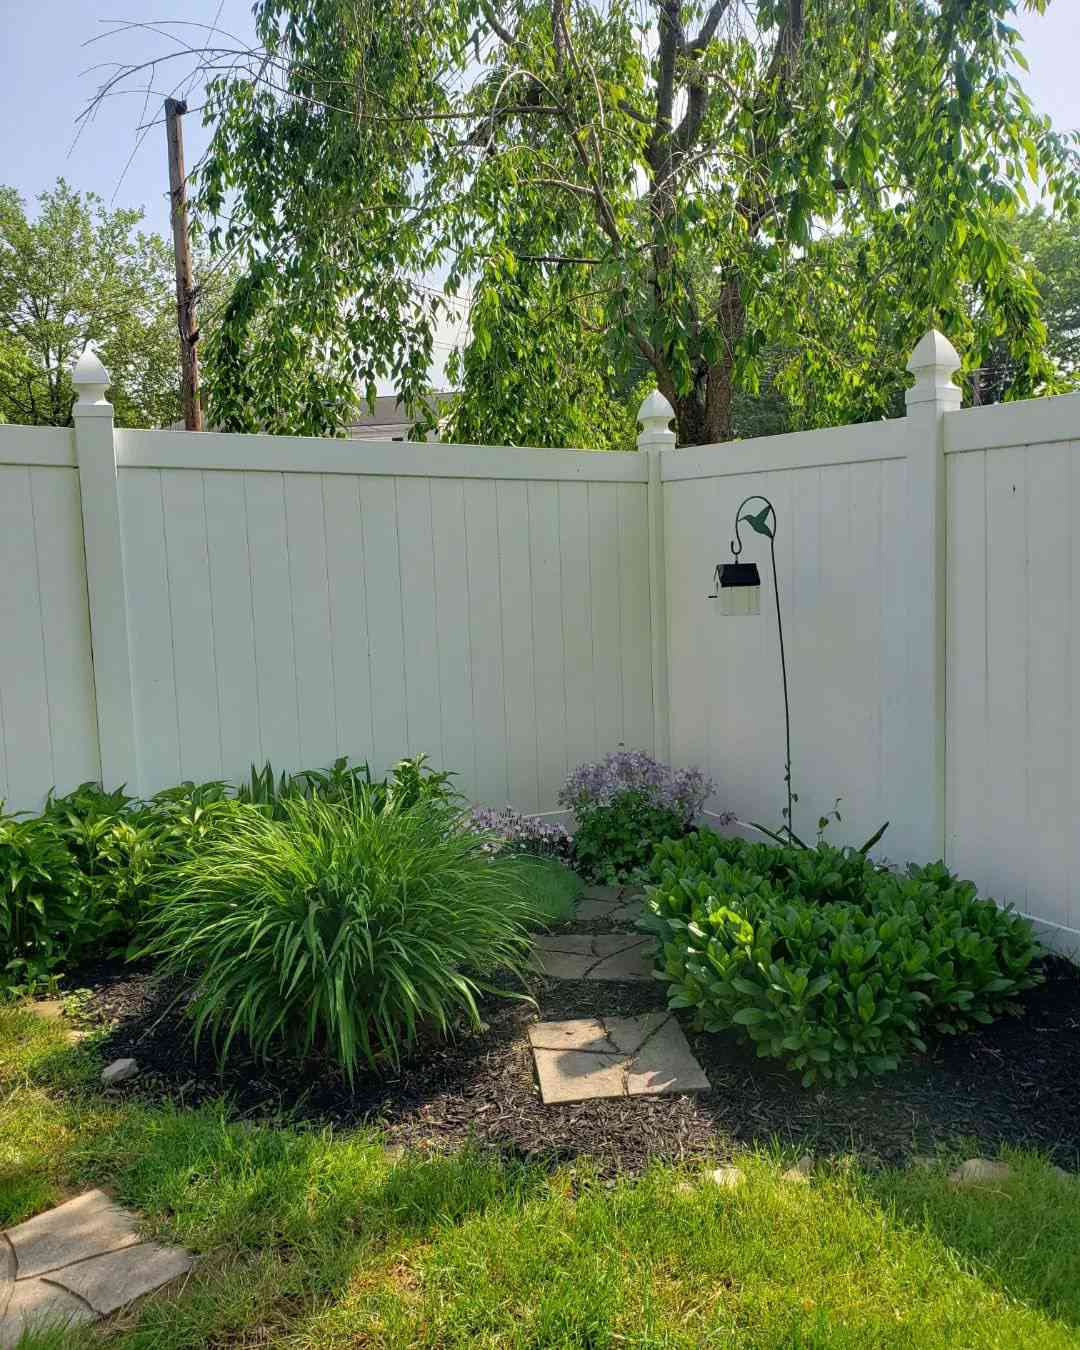
18. Create a Simple Corner with a White Vinyl Fence and Mulch Bed
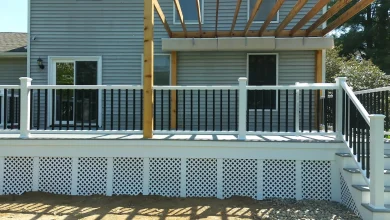
This is a clean, simple, and highly achievable landscape design. The most expensive part is the vinyl fence, but you can get this entire look for much less. Instead of a new vinyl fence, look for reclaimed wood to build a rustic fence for a fraction of the cost. For the plants, check your local nursery’s end-of-season clearance sales, where you can often get perennials for 50-75% off. The ornamental grass, the star of this corner, can often be gotten for free by asking a neighbor if you can divide a clump of theirs in the spring. A bag of mulch is about $4, and stepping stones can be found for a few dollars each at any home improvement store.
|
📋 Copy HEX 🔗 Share |
While a white vinyl fence is incredibly low-maintenance compared to wood (no painting!), it is not “no maintenance.” It’s a magnet for green algae and mildew, especially on the north side of a house or in shady, damp corners. To keep it looking bright white, you’ll need to give it a good scrub at least once a year. A solution of water, a little dish soap, and a bit of white vinegar with a soft-bristle brush usually does the trick. For tougher stains, a pressure washer on a low setting is effective, but be careful not to use too much pressure, which can damage the surface.
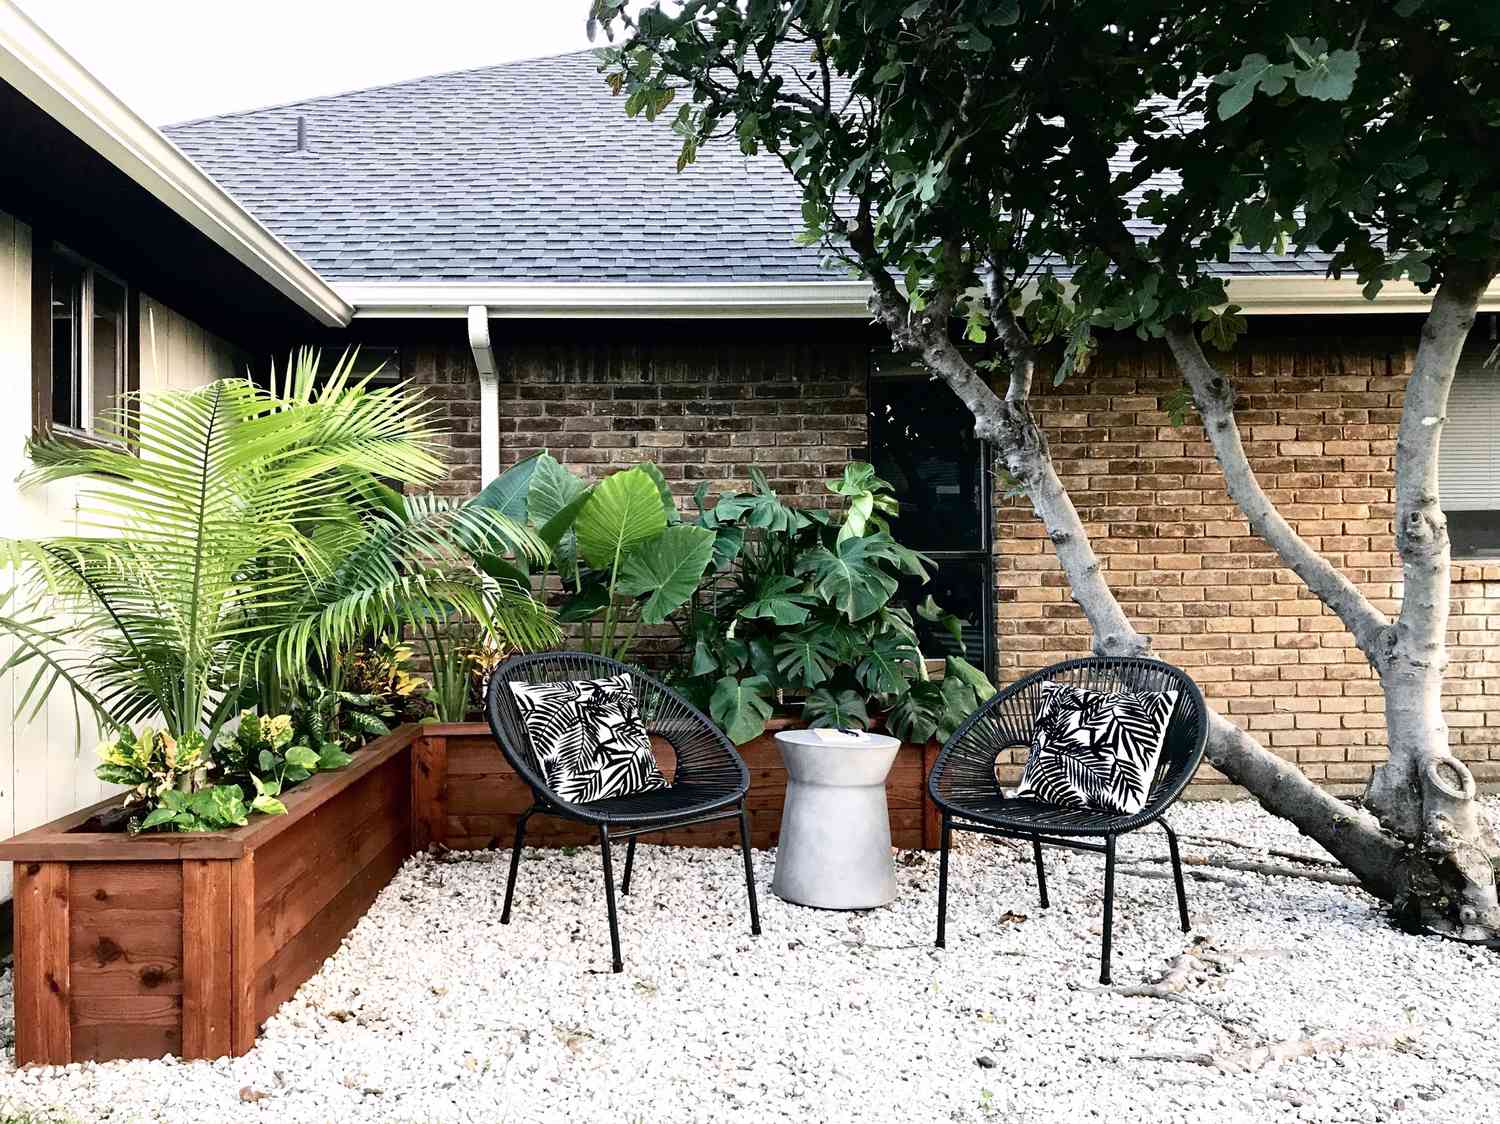
19. Stage a Tropical Seating Nook with Planters and Wire Chairs
This cozy corner proves you don’t need a huge yard to create a stylish escape. The design works because of its smart use of contained elements. The wooden planters allow you to introduce a lush, tropical vibe without committing to in-ground plantings, while the white gravel defines the “room” and keeps it looking clean and modern. The key is the curated selection of items: the chairs, pillows, and side table are all lightweight and visually transparent, which prevents the small space from feeling cluttered. It’s a perfect example of creating a destination in a tiny footprint. This feels like a more contained, accessible version of the grand tropical entrance in Idea #22.
|
📋 Copy HEX 🔗 Share |
This idea is tailor-made for small, awkward spaces. It’s perfect for a little-used patio corner, a small city backyard, or even a spacious balcony. All you need is a corner that is roughly 6 feet by 6 feet. This provides enough room for two comfortable chairs, a small side table, and a couple of large planters without feeling cramped. The use of gravel ground cover is perfect for areas where grass won’t grow. It’s a high-impact solution for spaces that might otherwise be overlooked and forgotten.
20. Select the Right Plants for a Creative Backyard Corner
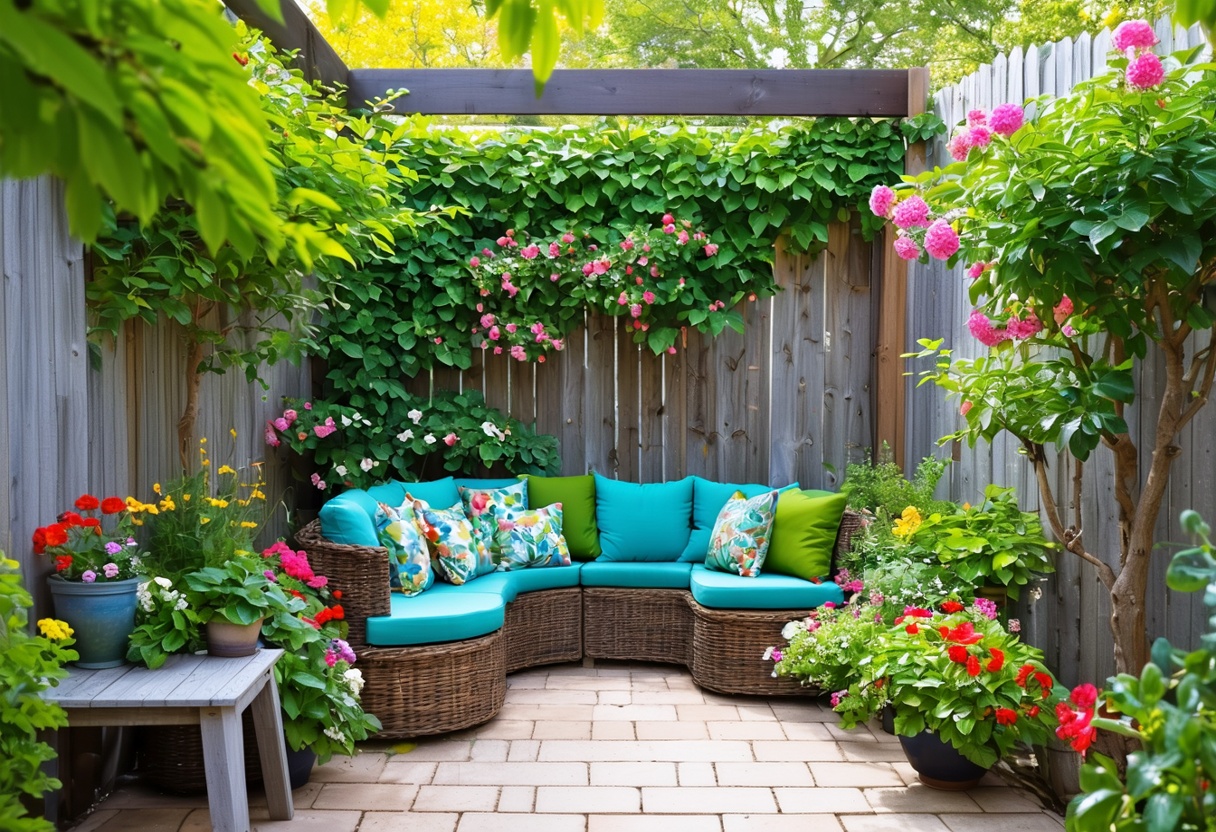
The “thriller, filler, spiller” method is a foolproof recipe for designing stunning container or corner plantings. The “thriller” is your tall, dramatic focal point plant (like an ornamental grass or a canna lily). The “filler” is a mounding plant that surrounds the thriller and fills the space (like coleus or pentas). The “spiller” is a trailing plant that cascades over the edge of the bed or container (like sweet potato vine or wave petunias). Following this simple structure gives your corner design height, fullness, and graceful lines every time.
|
📋 Copy HEX 🔗 Share |
There’s a huge trend right now towards “hyper-local” gardening—choosing plants that are not just native to your region but thrive in the specific microclimate of your own yard. People are realizing that fighting to keep a sun-loving plant alive in a shady corner is a losing battle. Instead, the focus is on observing your space—noting the hours of sunlight, the soil type, and the moisture levels—and then selecting plants that naturally want to be there. This shift leads to healthier, lower-maintenance, and more successful gardens.
21. Design a Structured Corner with Layered Evergreens and a Low Stone Wall
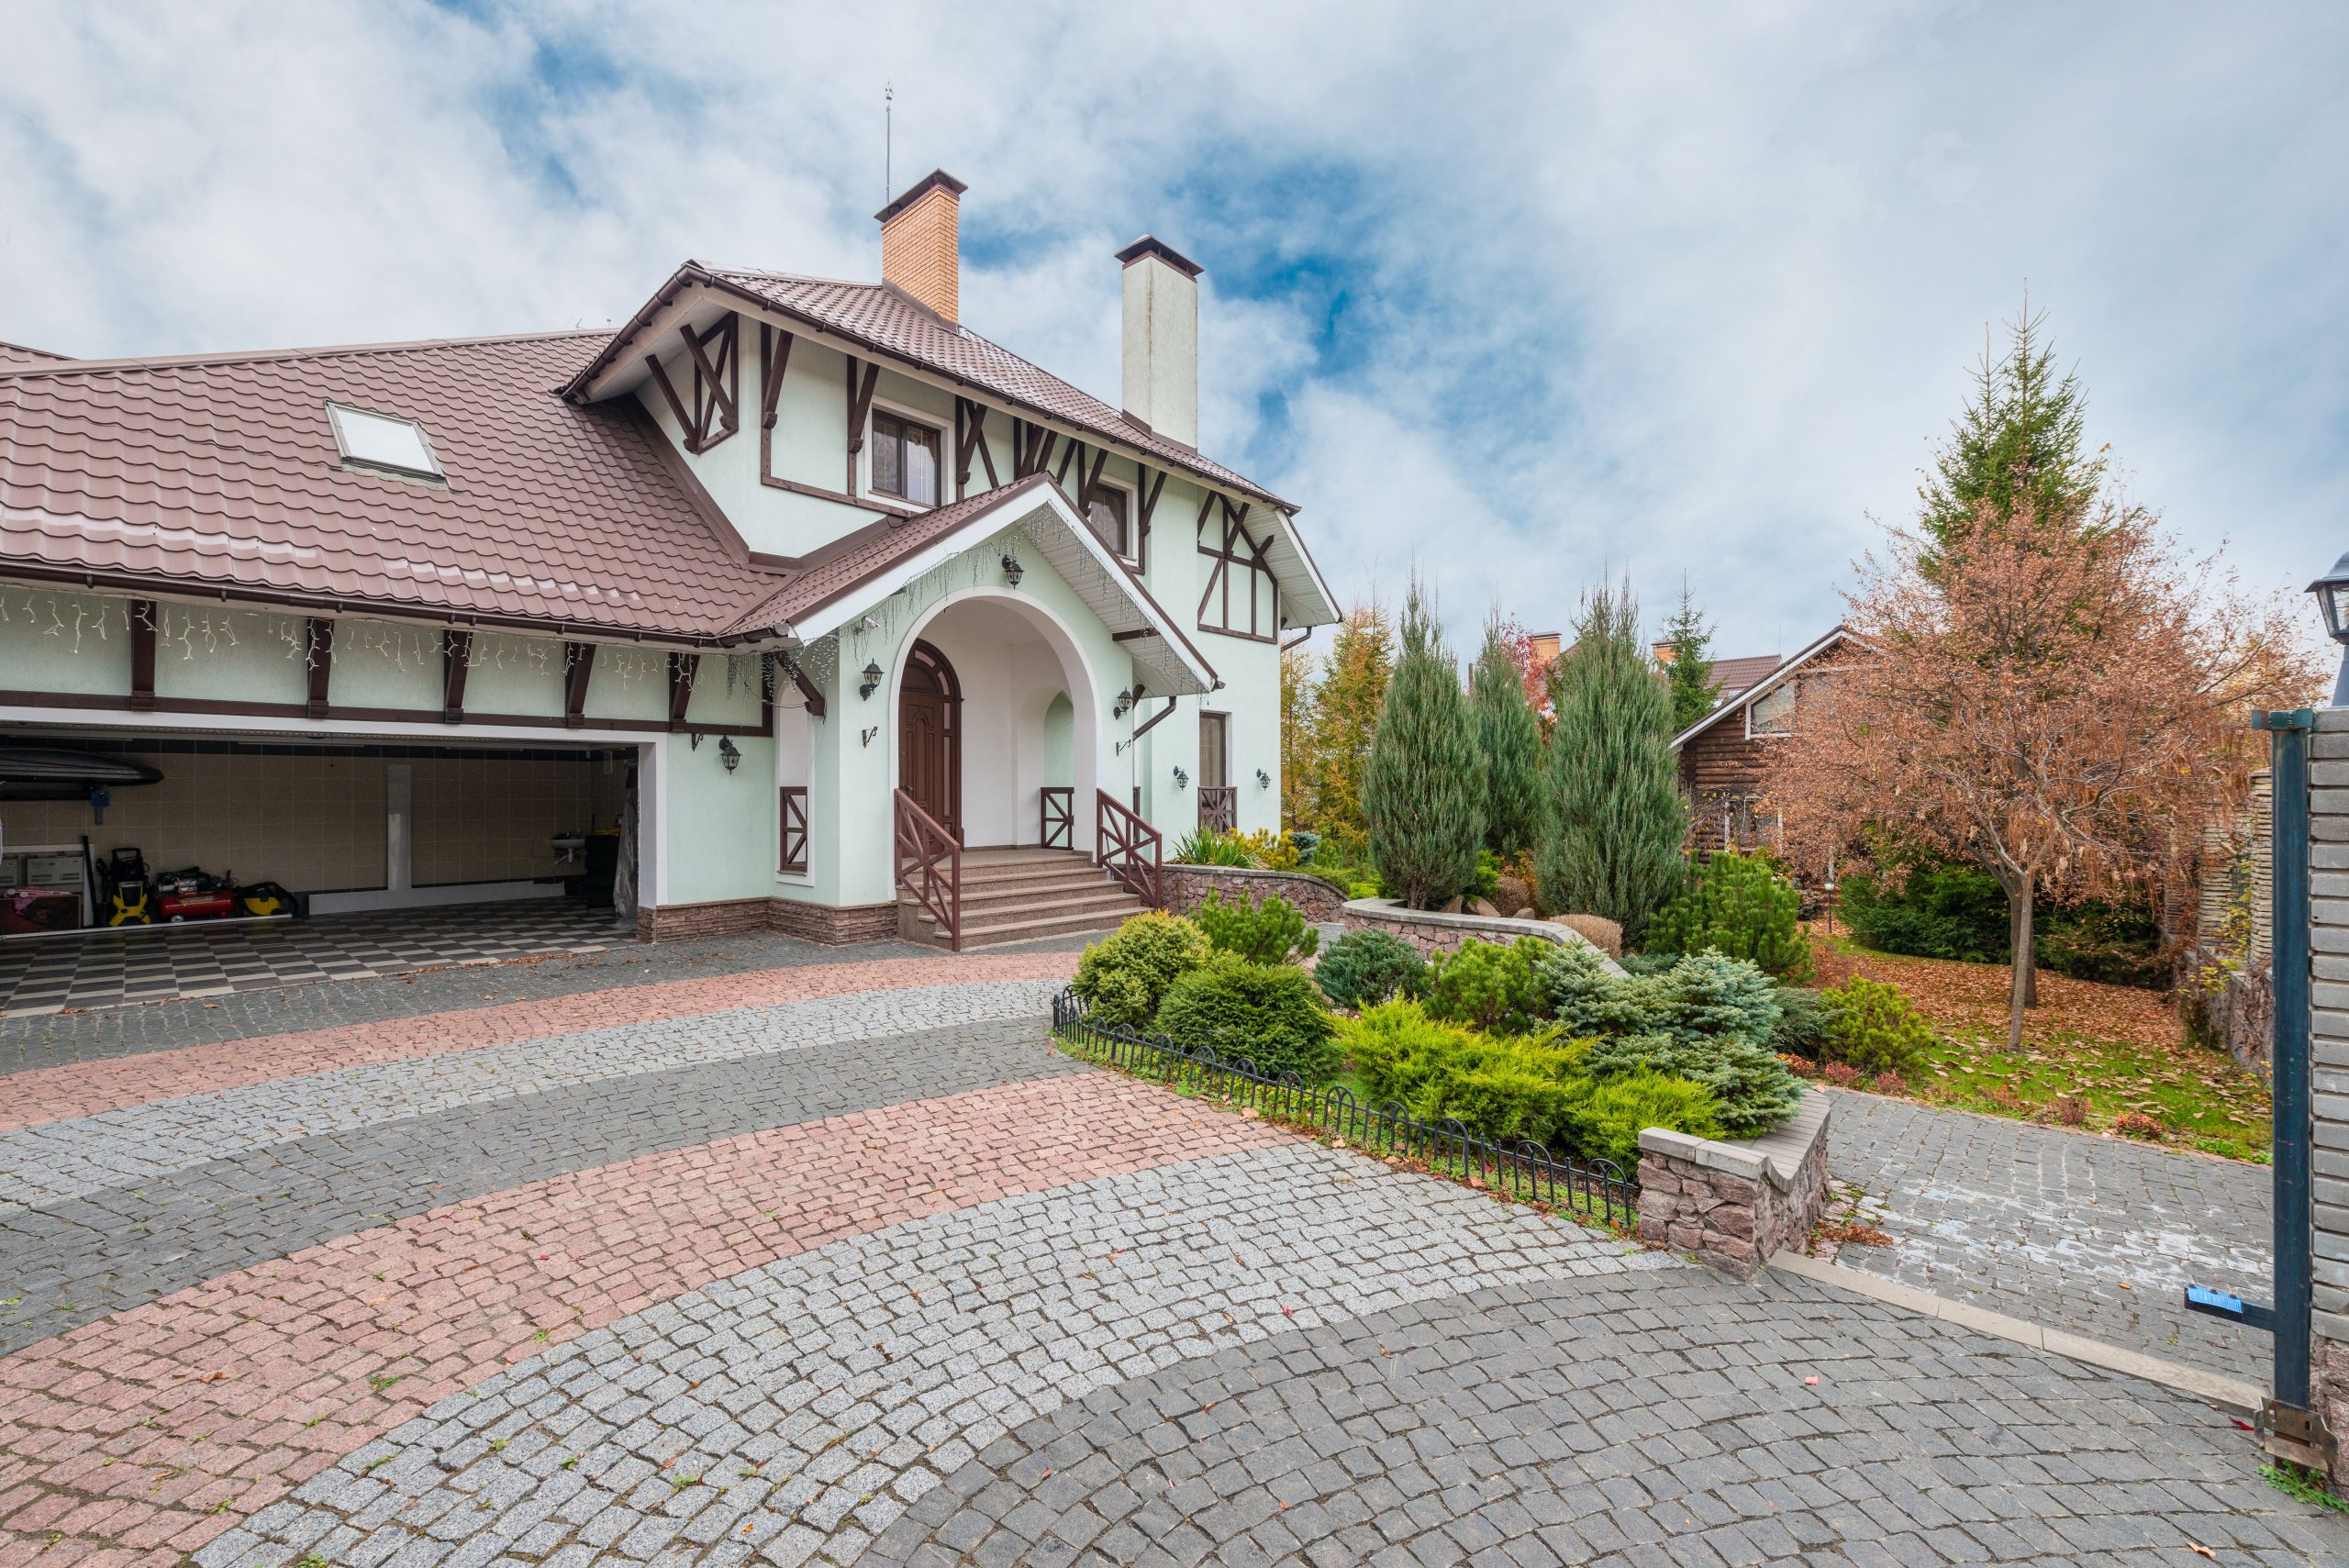
This is a landscape of pure structure, texture, and subtle color variation. The formula is approximately 60% evergreen foliage, 20% hardscape (stone wall and fence), and 20% deciduous color/lawn. The repetition of conical evergreen shapes in different sizes creates rhythm and a formal feel, while the deep green provides a year-round backbone. The low stone wall isn’t just a border; it’s a horizontal line that grounds the entire design and makes the vertical shapes of the trees feel more intentional. The reddish-brown cobblestones add just a touch of warmth to the otherwise cool palette.
|
📋 Copy HEX 🔗 Share |
An all-evergreen landscape is often touted as “low-maintenance,” but that isn’t entirely true. While you won’t be raking leaves from them, many evergreens, especially the manicured conical types, require annual pruning to maintain their shape and density. Without it, they can become sparse or grow into an awkward, lopsided shape. You’ll also need to monitor for pests like bagworms or spider mites, which can damage evergreens quickly. In winter, heavy snow can break branches, so you may need to gently brush it off after a storm.
22. Create a Grand Tropical Entrance with Palms and Colorful Shrubs
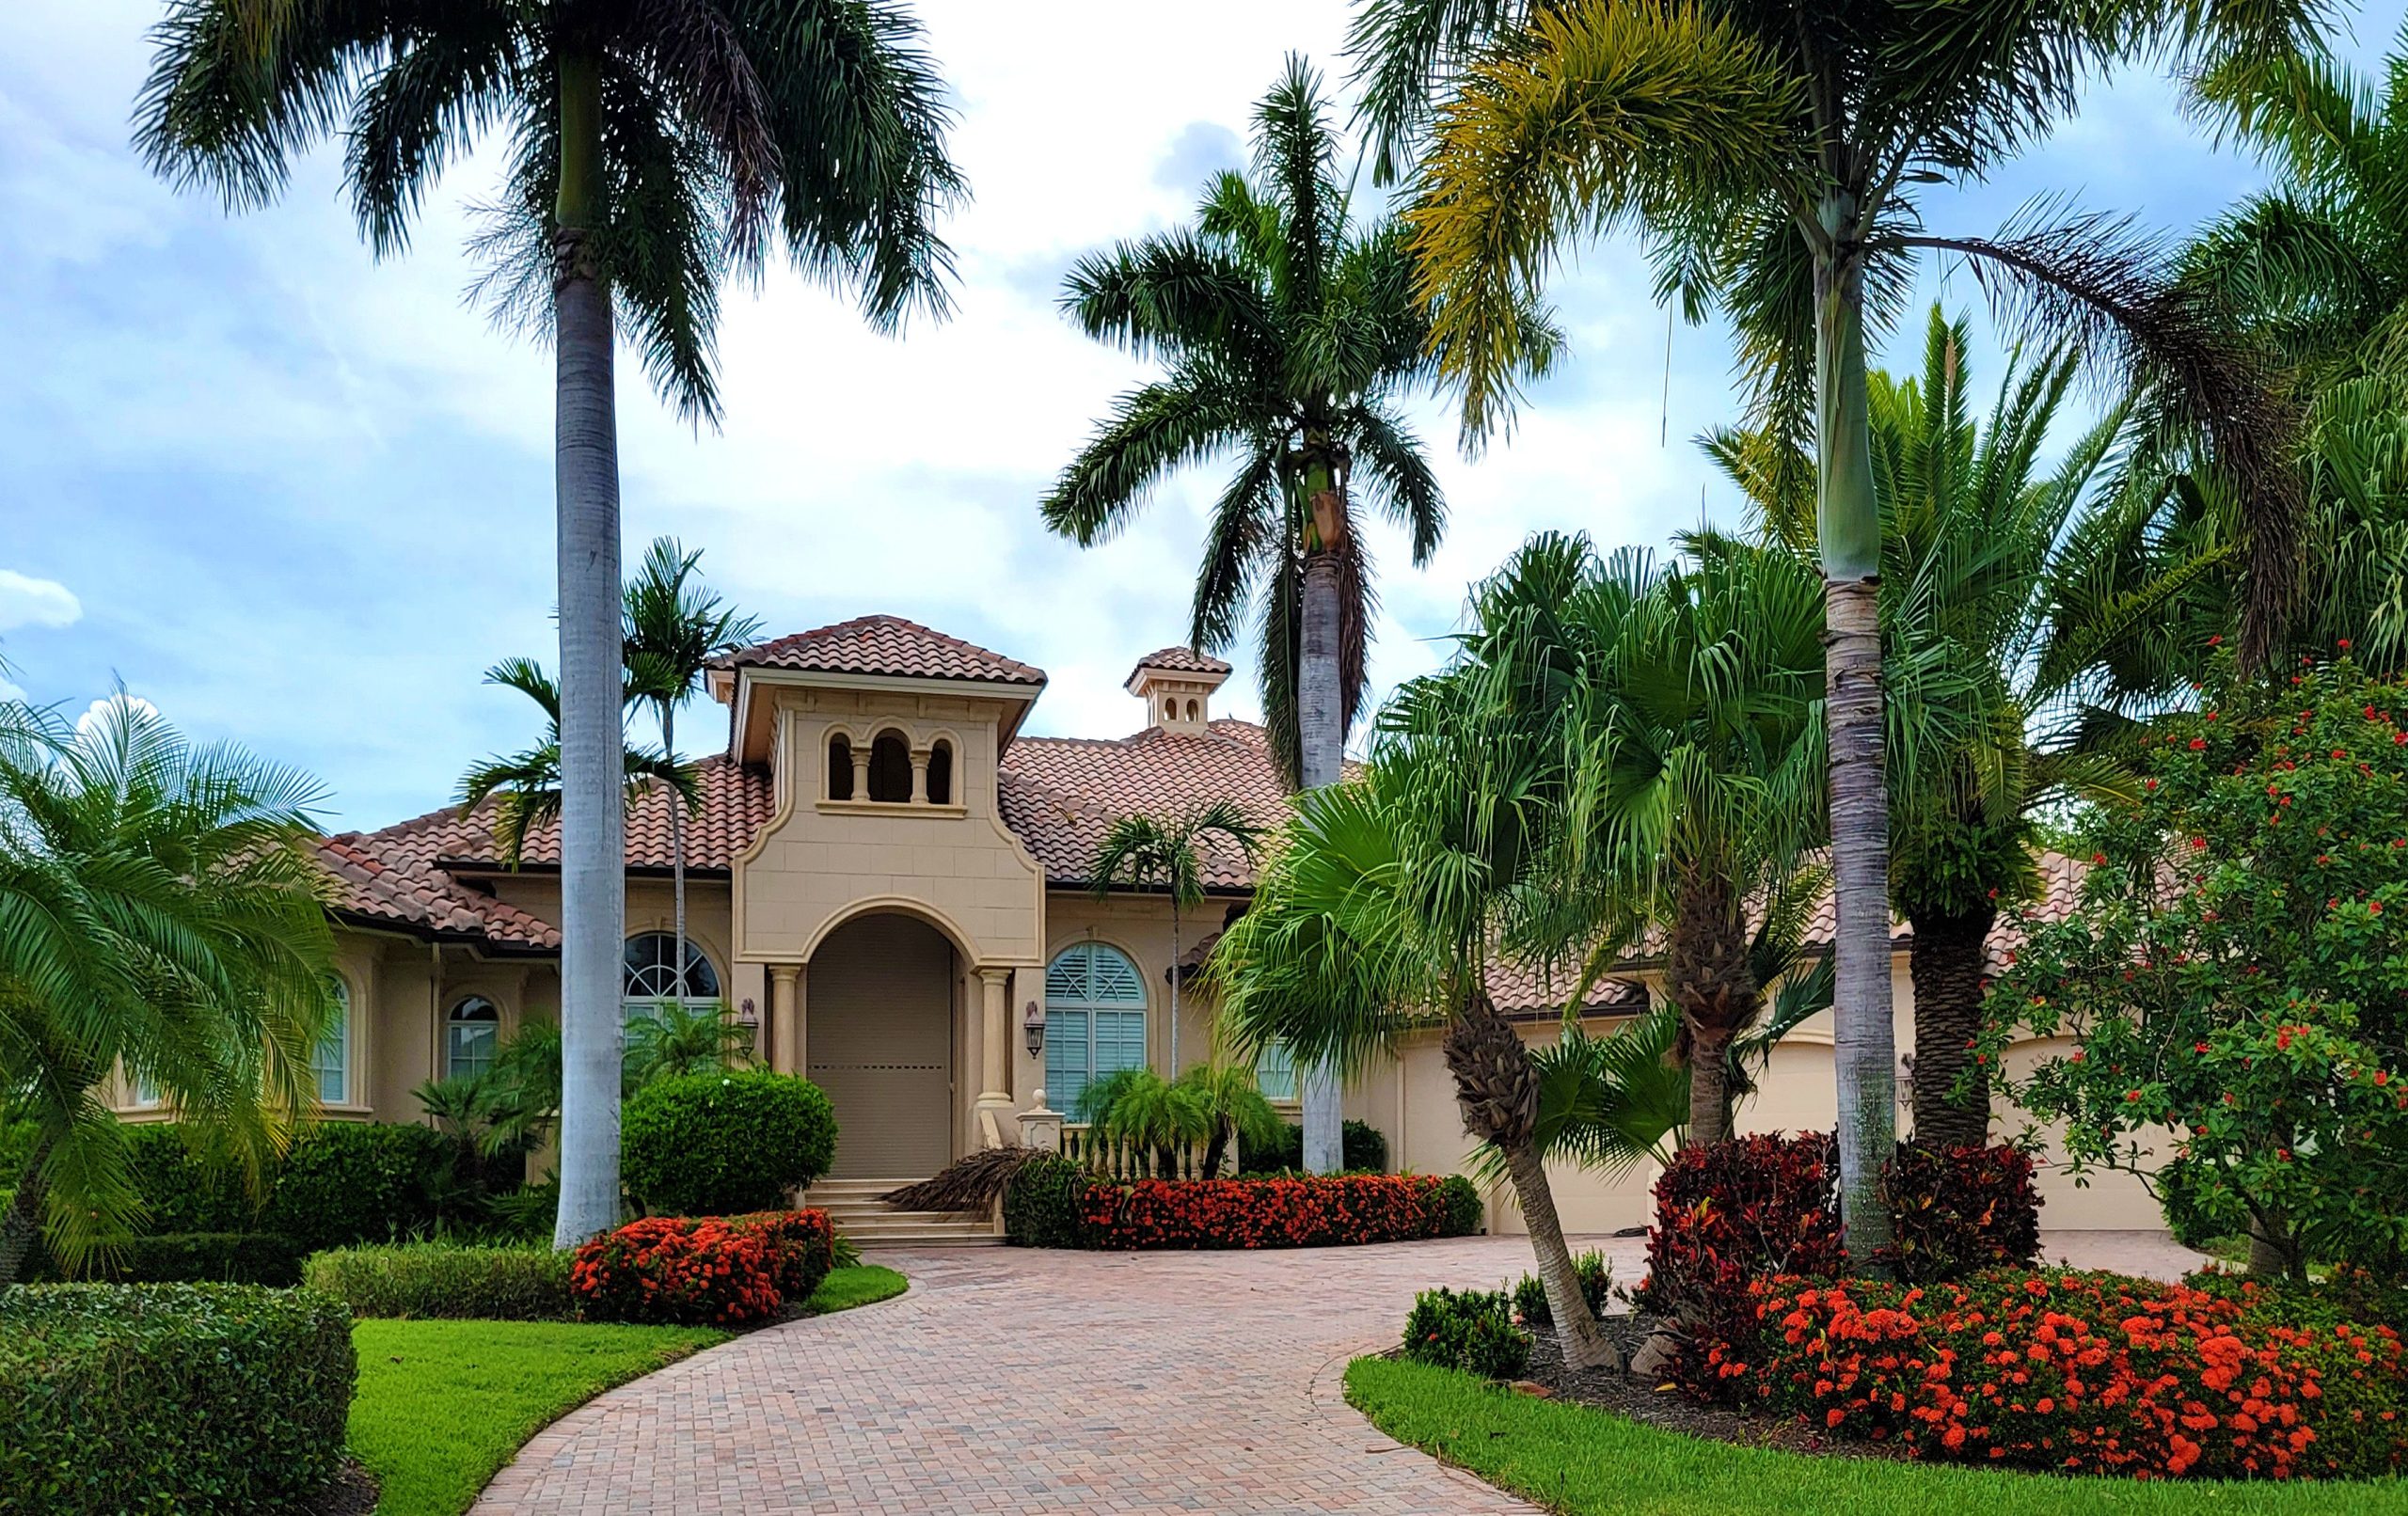
The single element that defines this entire landscape is the collection of tall palm trees. They are the primary architectural feature of the garden. Their height and distinctive silhouette immediately signal a tropical, resort-like atmosphere that no other plant could achieve. They create a dramatic sense of arrival and scale, making the house feel like it’s nestled in a lush, established paradise. Everything else, from the vibrant Ixora shrubs to the curving driveway, is designed to support and complement the grandeur of the palms.
|
📋 Copy HEX 🔗 Share |
This is not a look for a small suburban lot. The scale is everything here. To pull off a palm-lined driveway and large beds of flowering shrubs, you need a substantial front yard, typically found on properties of a half-acre or larger. The palm trees need ample room to grow without their fronds hitting the house or roof, and the sweeping curves of the driveway and garden beds require a wide canvas to look graceful rather than forced. For a smaller-scale tropical feel, see the contained patio in Idea #19.
23. Sculpt Your Yard with Tiered Garden Beds and Curved Stone Walls
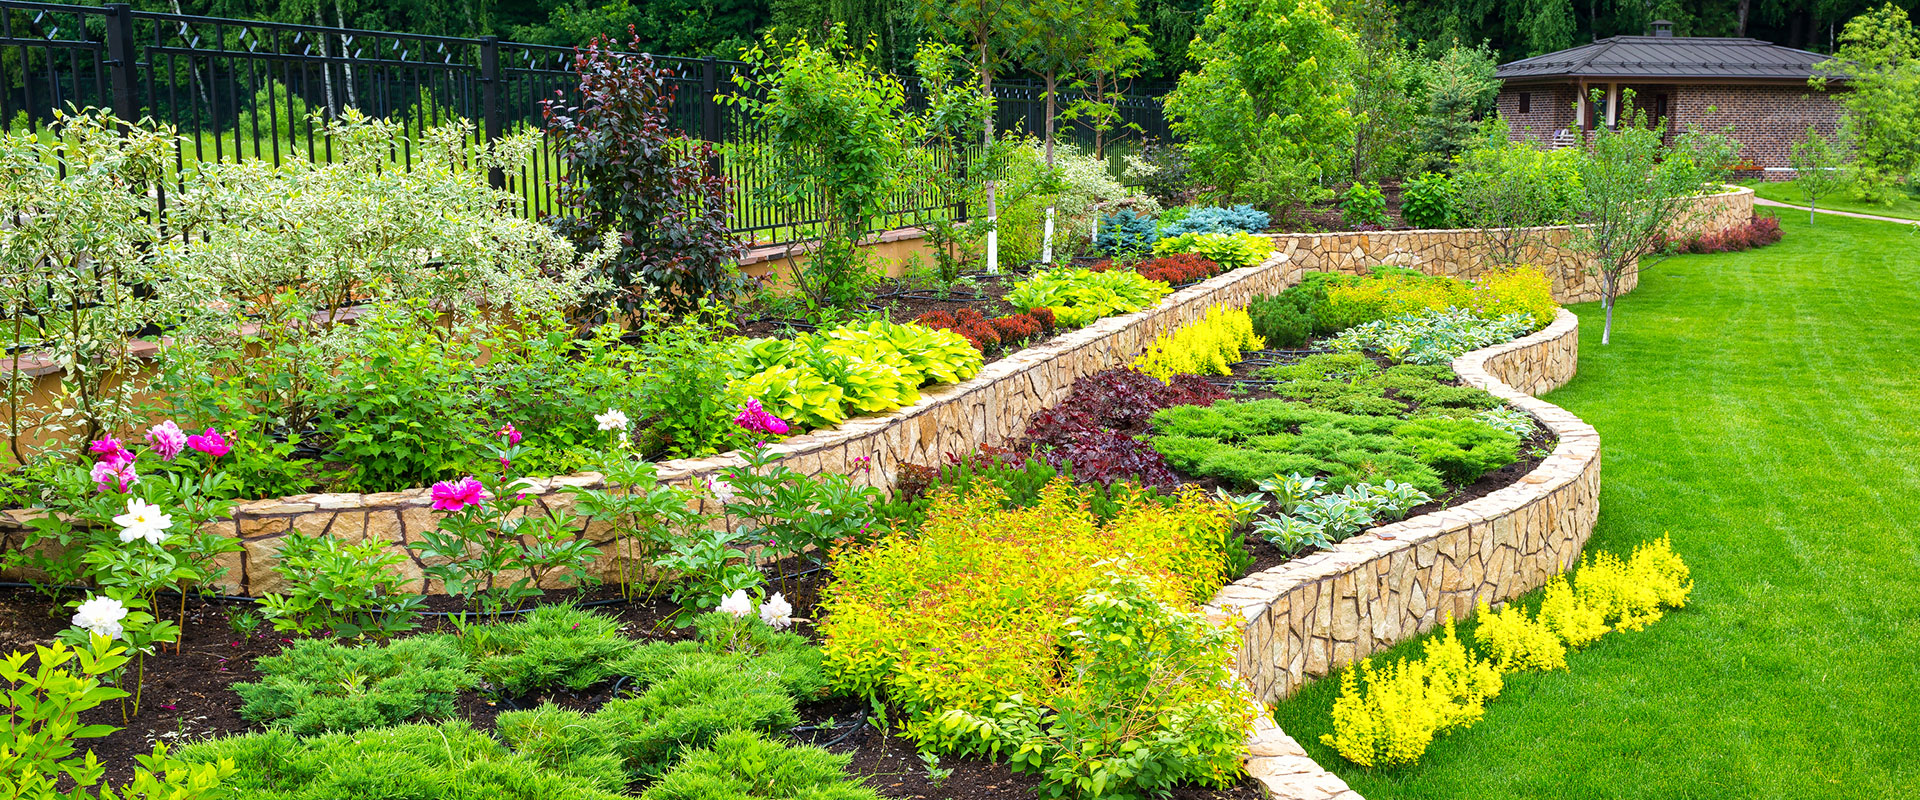
This design beautifully solves the problem of a sloped yard by transforming it into a stunning feature. It works by creating a series of graceful, curved terraces. These curves are inherently more natural and pleasing to the eye than straight, rigid lines. They create a sense of movement and flow, guiding your gaze gently through the landscape. By planting each tier with a different mix of textures and colors—from soft ground covers to spiky shrubs and vibrant peonies—the design achieves a rich, layered look that has depth and interest from every angle. Contrast this with the more rustic rock wall in Idea #8.
|
📋 Copy HEX 🔗 Share |
When building curved retaining walls, always start with the lowest wall first and work your way up the slope. Fully build and backfill the first wall before you even begin to excavate for the second. This ensures that you are always working from a stable, compacted base. Trying to build from the top down is a recipe for instability and erosion, as the soil from the upper levels will constantly be sliding down onto your work area. It’s more work upfront, but it’s the only way to ensure a safe and long-lasting structure.
24. Soften a Stone Path with a Lush, Mixed-Border Planting
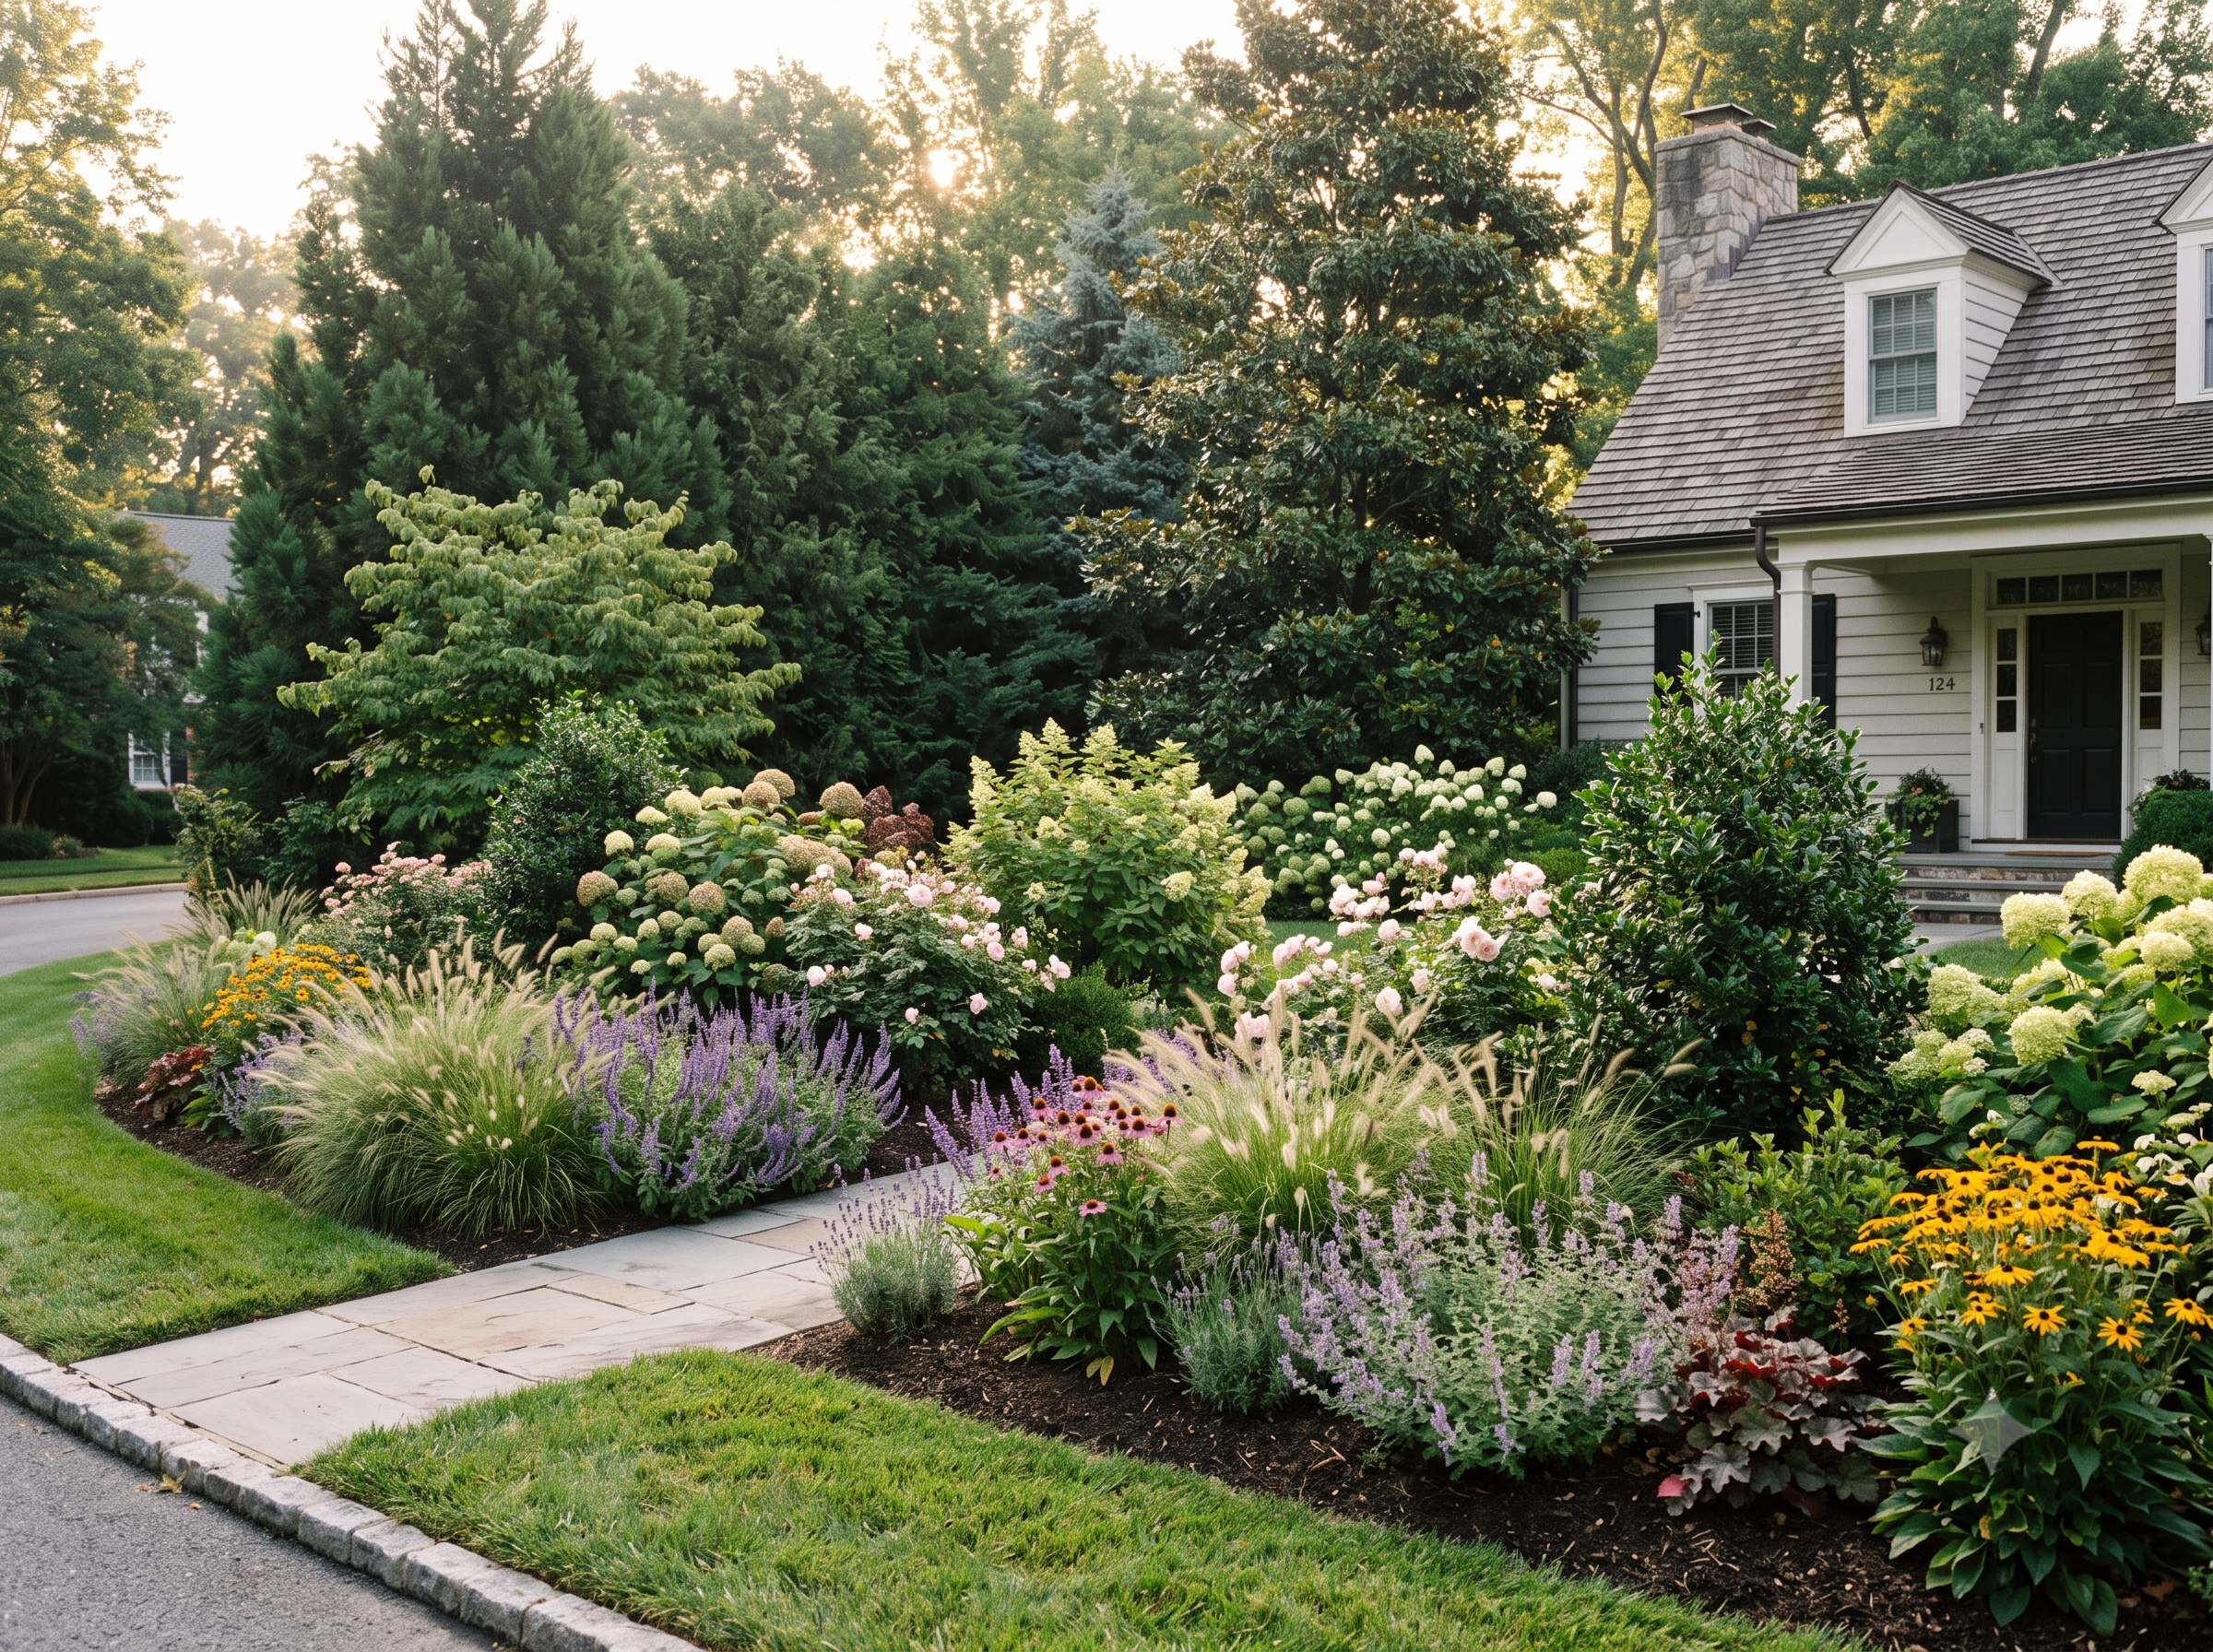
You don’t need to hire a landscape designer to get this abundant, natural look. The secret is buying small, inexpensive perennials and letting them fill in over time. Instead of buying large, expensive shrubs, buy 1-gallon pots for $10-$15 each. Visit your local nursery and look for perennial “plugs” or small pots of ornamental grasses, lavender, and coneflowers. Many of these plants spread or self-seed, meaning your investment will multiply over the years. Flagstone can be pricey, but you can often find cheaper, irregular pieces in the “boneyard” section of a stone supplier. It’s a more patient approach, similar to the path in Idea #9.
|
📋 Copy HEX 🔗 Share |
A “lush, full” garden border is beautiful, but it can also become a battleground for plants. This style of planting, where plants are placed closely to achieve a full look quickly, requires a firm hand. You will need to be vigilant about editing and dividing. Fast-spreading plants like some ornamental grasses or bee balm can quickly bully and smother their slower-growing neighbors. A yearly routine of digging up and dividing overgrown clumps (and sharing them with friends!) is essential to maintaining the beautiful balance and preventing a few aggressive species from taking over the entire bed.
25. Line a Driveway with Hedges of Fragrant Lavender
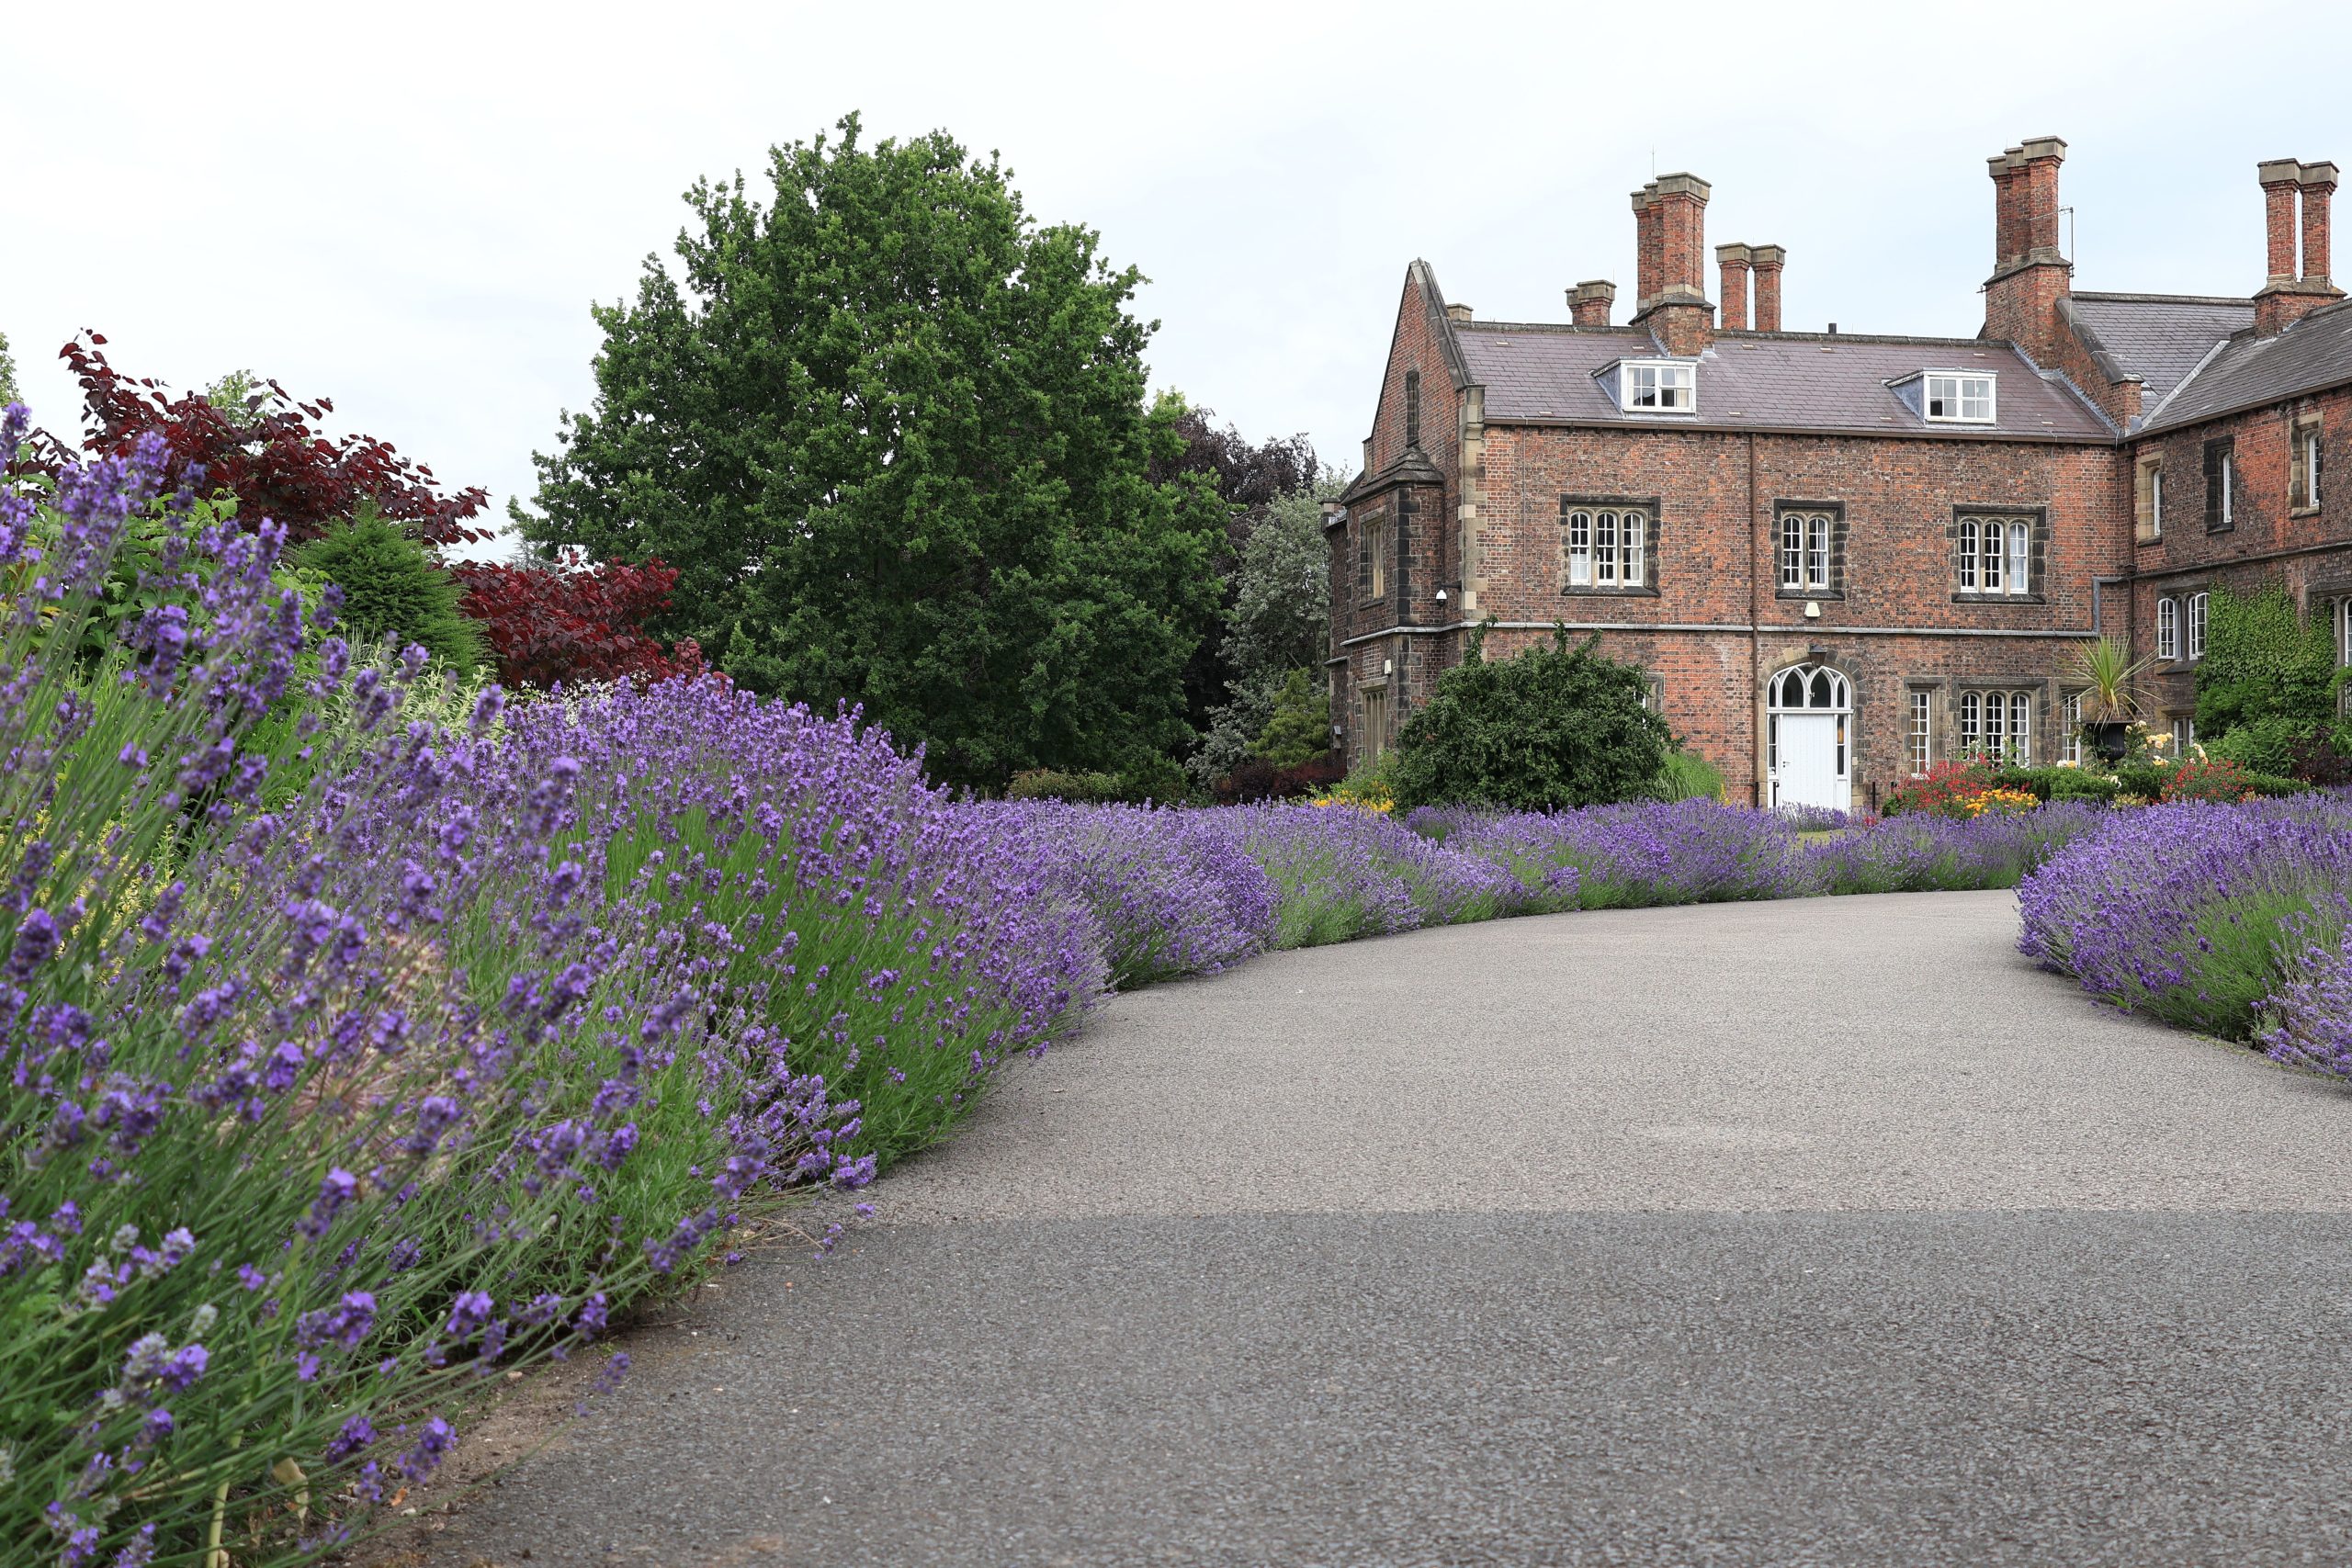
The lavender is everything in this design. Take it away, and you have a stately home with a simple driveway. But with the two thick, billowing rows of purple, the entire experience is transformed. It’s not just a visual. It engages multiple senses: the vibrant color, the famous calming fragrance, and the buzzing of happy bees. It turns a mundane transit space—the driveway—into a dramatic, elegant, and romantic journey. It’s a bold statement that requires very few other elements to feel complete because the lavender itself is so powerful.
|
📋 Copy HEX 🔗 Share |
The rise of gardens that engage more than just the sense of sight is a significant trend. People are craving more immersive, sensory experiences in their own backyards. Lavender, with its iconic fragrance and texture, is at the forefront of this movement. It’s also drought-tolerant and attractive to pollinators, which aligns with the growing desire for more sustainable, eco-friendly landscapes. This isn’t just a pretty flower; it’s a plant that meets the moment for beautiful, functional, and mindful garden design.
26. Design a Cozy Courtyard with Wooden Benches and Potted Plants
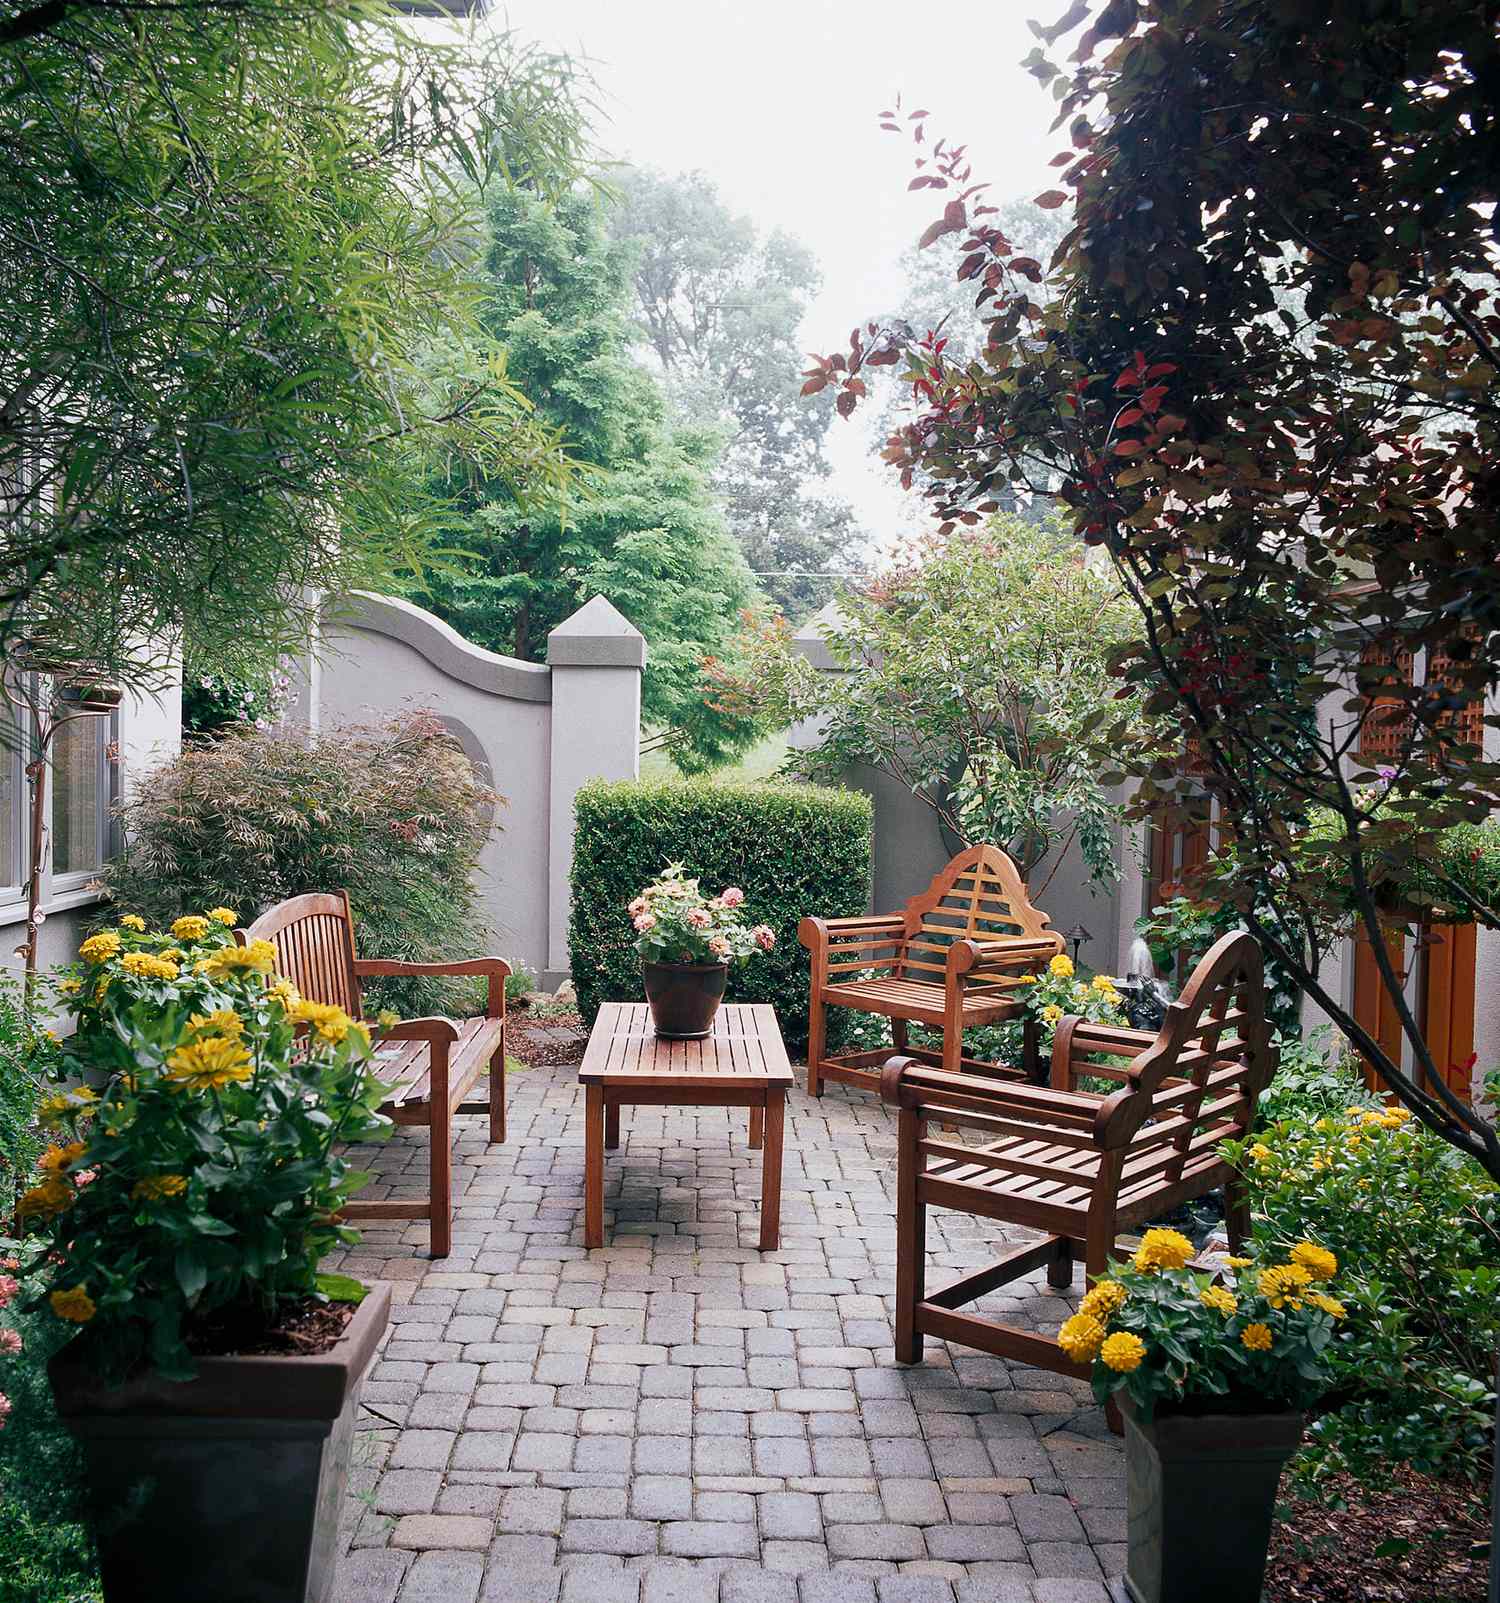
This inviting little courtyard follows a simple but effective design formula: 50% hardscape (the cobblestone patio and wall), 30% coordinated furniture, and 20% container plantings. The grey pavers and wall create a neutral, textured box. The matching wooden benches and table provide warmth and function, clearly defining the purpose of the space. The final 20% is the life: the potted yellow flowers and green shrubs soften all the hard surfaces and keep the courtyard from feeling sterile. This balance of texture, warmth, and life is what makes it so successful.
|
📋 Copy HEX 🔗 Share |
You can build a simple, slatted outdoor bench like this in a single weekend. Here’s the quick version:
- Get your lumber: Purchase weather-resistant wood like cedar or redwood. You’ll need thicker boards (like 2x4s) for the frame and legs, and thinner boards (like 1x3s) for the seat slats.
- Build the base: Construct two rectangular or square leg frames using pocket holes and outdoor wood glue for strength.
- Connect the legs: Attach long support beams between the two leg frames to create the main bench structure.
- Attach the slats: Cut your seat slats to length and attach them to the top of the frame, using a spacer (like a pencil) to ensure even gaps.
- Sand and seal: Give everything a good sanding to smooth sharp edges, then apply a quality outdoor wood sealer to protect it from the elements.
Cost: $80-$150 in lumber and supplies.
Your Corner, Your Sanctuary
That forgotten corner of your yard doesn’t have to be an eyesore or a patch of weedy grass. Think of it as a blank canvas for a small moment of beauty, a tiny private park, or a pop of color that makes you smile when you pull into the driveway. Start small, pick one element you love, and let it grow from there.
Ready to start planning? Head over to Pinterest and start your own board—you’ll be surprised how quickly your perfect corner comes together.