You know that feeling when you finally find the DIY landscape design that looks exactly right for your space, but the idea of starting feels… huge? It doesn’t have to be. After filtering through hundreds of real home projects, we narrowed it down to 31 ideas that actually deliver. Inside you’ll find inspiration for every style—from modern minimalist yards to lush tropical escapes and natural rock gardens—all achievable on a real-world budget. We’re seeing a huge shift in 2026 towards creating personal, serene outdoor retreats, and these designs nail that feeling perfectly. And stay until the end—we break down the most common mistakes that can ruin these looks. 📌 Save this to Pinterest for later—you’ll want to revisit these ideas.
1. Wind a Serene Path Through a Lush Tropical Garden
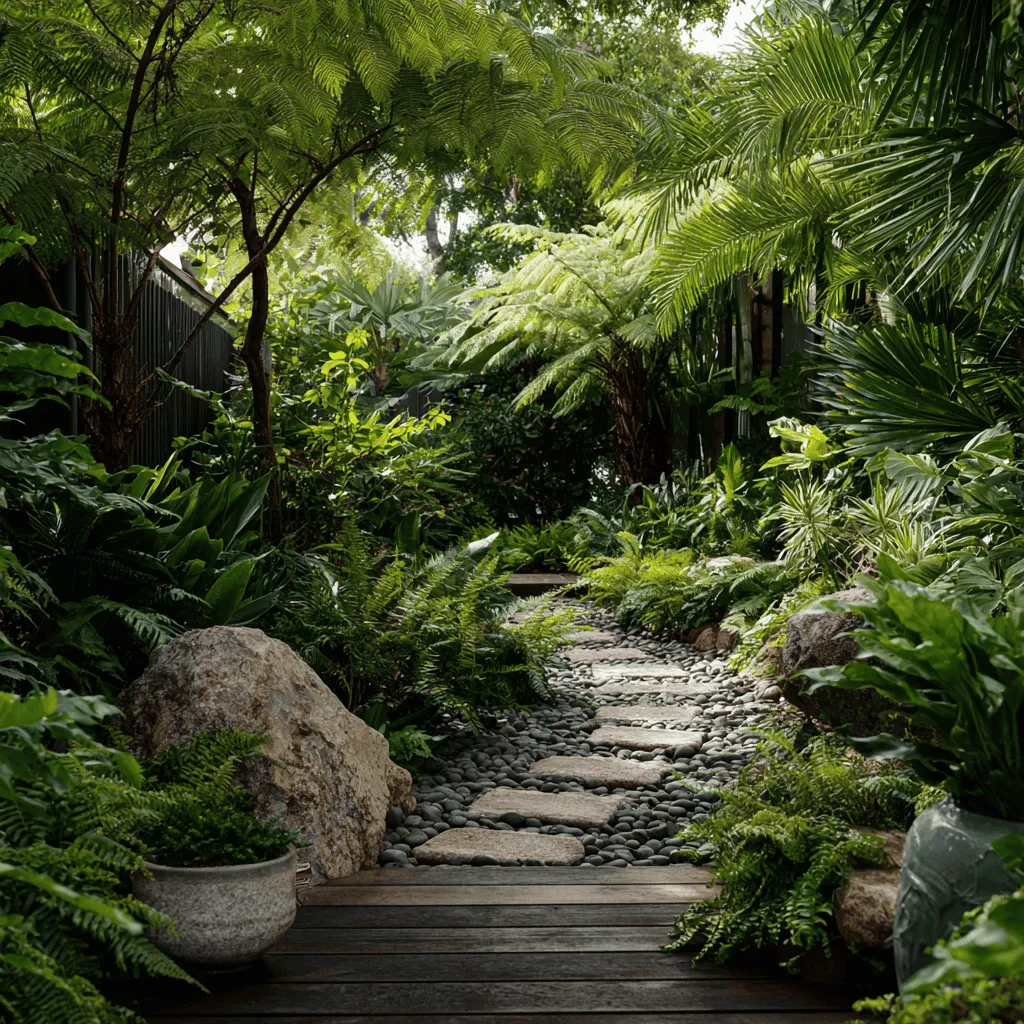
This design feels like a hidden escape because it masterfully plays with contrast. The clean, straight lines of the rectangular stepping stones provide a sense of order and a clear path forward, while the wild, untamed energy of the dense ferns and tropical plants spills over the edges. This push-and-pull between the structured and the organic is what creates that secret garden feel. The path doesn’t just cut through the yard; it invites you on a journey, with the canopy of trees creating a natural ceiling that makes the space feel intimate and secluded.
|
📋 Copy HEX 🔗 Share |
When laying stepping stones for a path like this, stability is everything. Don’t just place them on top of the soil. For a professional, long-lasting result, excavate the ground about 3-4 inches deep for each stone. Lay down a 2-inch layer of compacted paver base (crushed gravel), followed by a 1-inch layer of leveling sand. Set your stone on top, wiggling it into place until it’s perfectly level and doesn’t rock. This small bit of extra work prevents wobbly, sinking stones later on.
2. A Modern Gravel Yard with Bold Rectangular Pavers
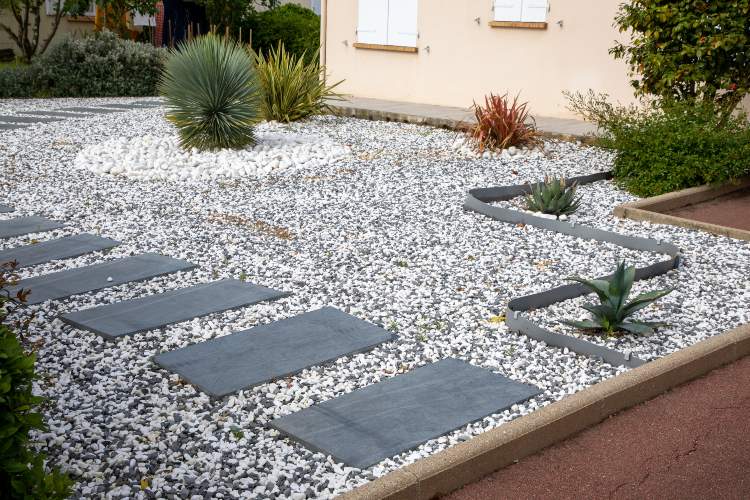
The formula here is deceptively simple and incredibly effective for a clean, contemporary look. Think of it as 70% neutral ground cover + 20% hardscape structure + 10% sculptural greenery. The white and gray gravel is the dominant neutral base, creating a bright, clean canvas. The large, dark gray pavers provide strong geometric lines and a clear sense of direction. Finally, the spiky grasses and succulents act as living sculptures, adding texture and life without overwhelming the minimalist aesthetic. You could swap the white gravel for black or tan, and it would still work because the ratio is what matters.
|
📋 Copy HEX 🔗 Share |
Let’s be honest: white gravel is a high-maintenance relationship. It looks stunning when it’s clean, but it shows every fallen leaf, twig, and speck of dirt. You’ll need to commit to regular leaf blowing (at least weekly) to keep it looking pristine. Over time, the gravel can also get kicked around or thin out, requiring occasional top-ups. If you love the look but not the work, consider a medium-gray gravel instead—it’s much more forgiving with debris.
3. Layer a Front Yard with Curved Stone Edging and Mixed Plantings
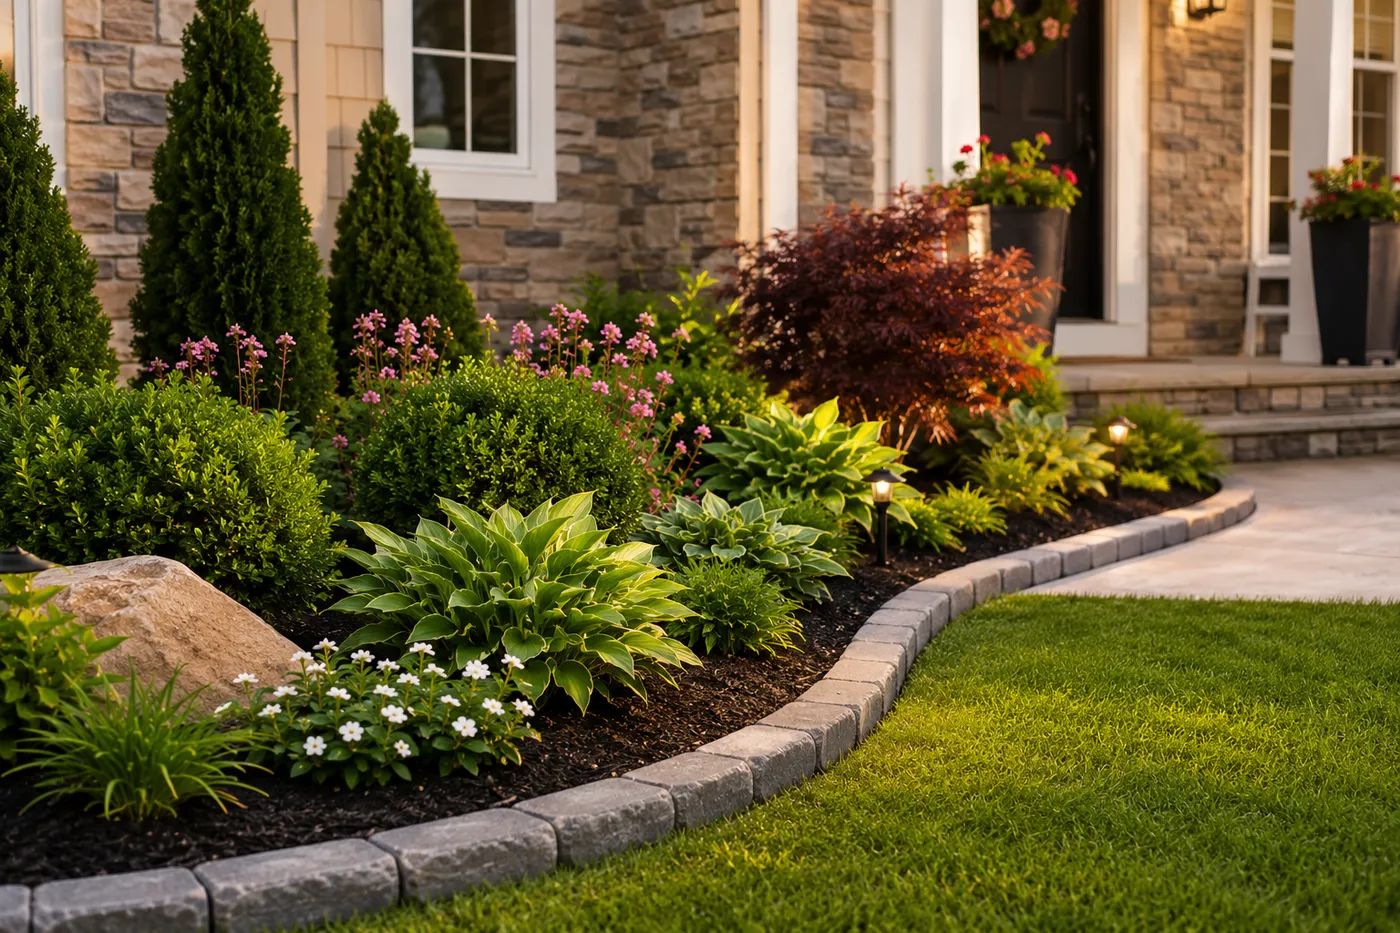
- Stacked Stone Edging: $200 – $500
- Mulch: $100 – $250 (for 3-5 cubic yards)
- Main Tree (e.g., Japanese Maple): $150 – $400
- Shrubs & Perennials (Hostas, Evergreens): $300 – $700
- Landscape Lighting: $100 – $300 (for a DIY kit)
- TOTAL: $850 – $2,150
- Budget alternative: Use a simple trench edge instead of stone, buy smaller/younger plants that will grow over time, and look for end-of-season sales at local nurseries to save 40-60%.
|
📋 Copy HEX 🔗 Share |
This design succeeds by balancing three key principles: curve, color, and texture. The gentle curve of the stacked stone border softens the straight lines of the house and driveway, creating a more organic and welcoming flow. Color is used strategically—the deep green of the evergreens provides a year-round backdrop, while the chartreuse hostas and reddish Japanese maple add pops of visual interest that change with the seasons. Finally, the variety of plant textures, from the fine needles of the conifers to the broad leaves of the hostas, adds depth and complexity that makes the entire landscape feel lush and established.
4. Create a Meditative Zen Garden with Raked Gravel and Boulders
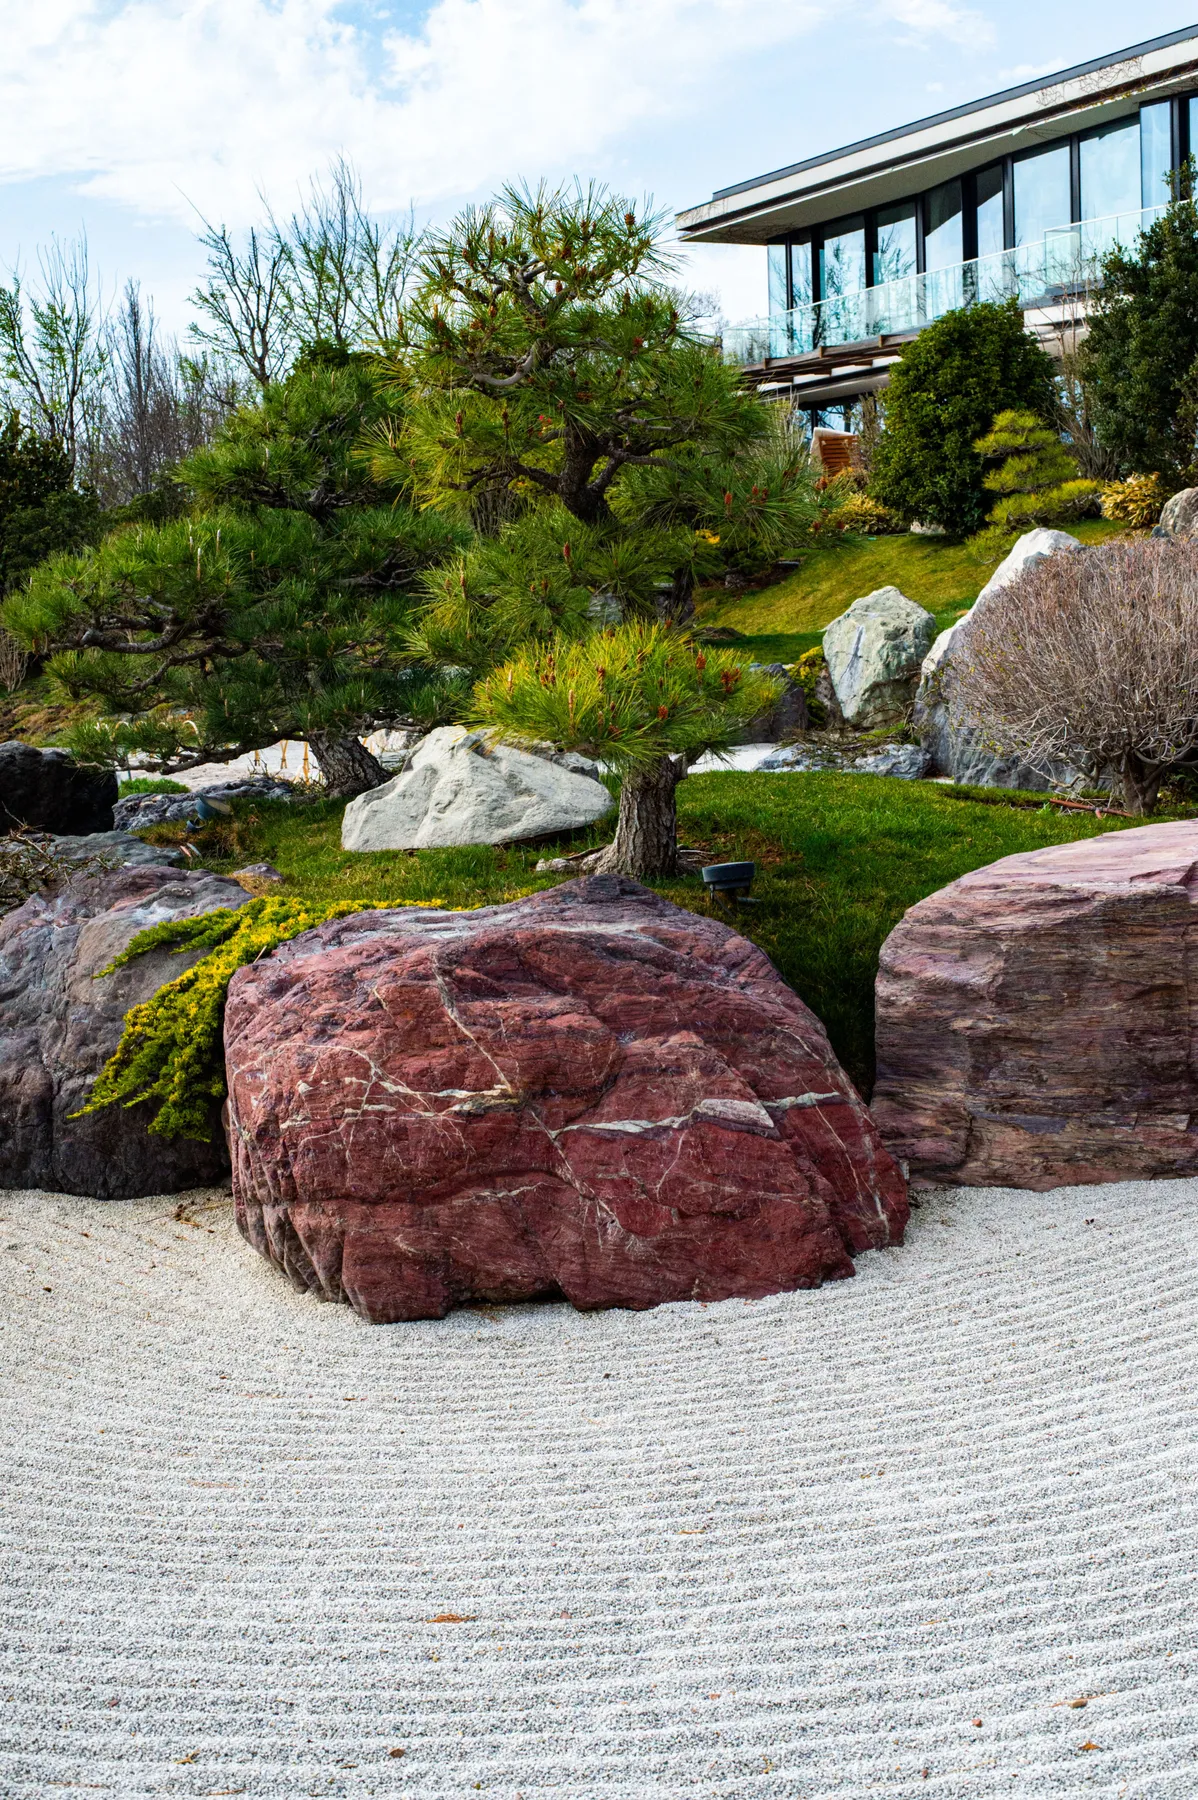
That truly makes this Zen garden work: the raked gravel. Without it, you just have some rocks and trees on a slope. The meticulous act of raking the gravel into patterns is not just about aesthetics; it’s a meditative practice that imbues the space with a sense of calm and intention. The flowing lines represent water, creating a symbolic landscape that encourages contemplation. Removing the raked element would erase the garden’s core purpose, turning it from a space of tranquility into a simple rock arrangement. It’s the human touch of the rake that gives it a soul.
|
📋 Copy HEX 🔗 Share |
A true Japanese-style rock garden is a commitment to minimalism and maintenance. That perfectly raked white gravel? It needs to be re-raked regularly, especially after rain, wind, or visits from neighborhood cats who think you’ve built them a luxury litter box. Fallen leaves and debris are extremely noticeable on the white surface, so daily tidying is often required to maintain the pristine look. This isn’t a ‘set it and forget it’ landscape; it’s a living art piece that requires consistent care and attention.
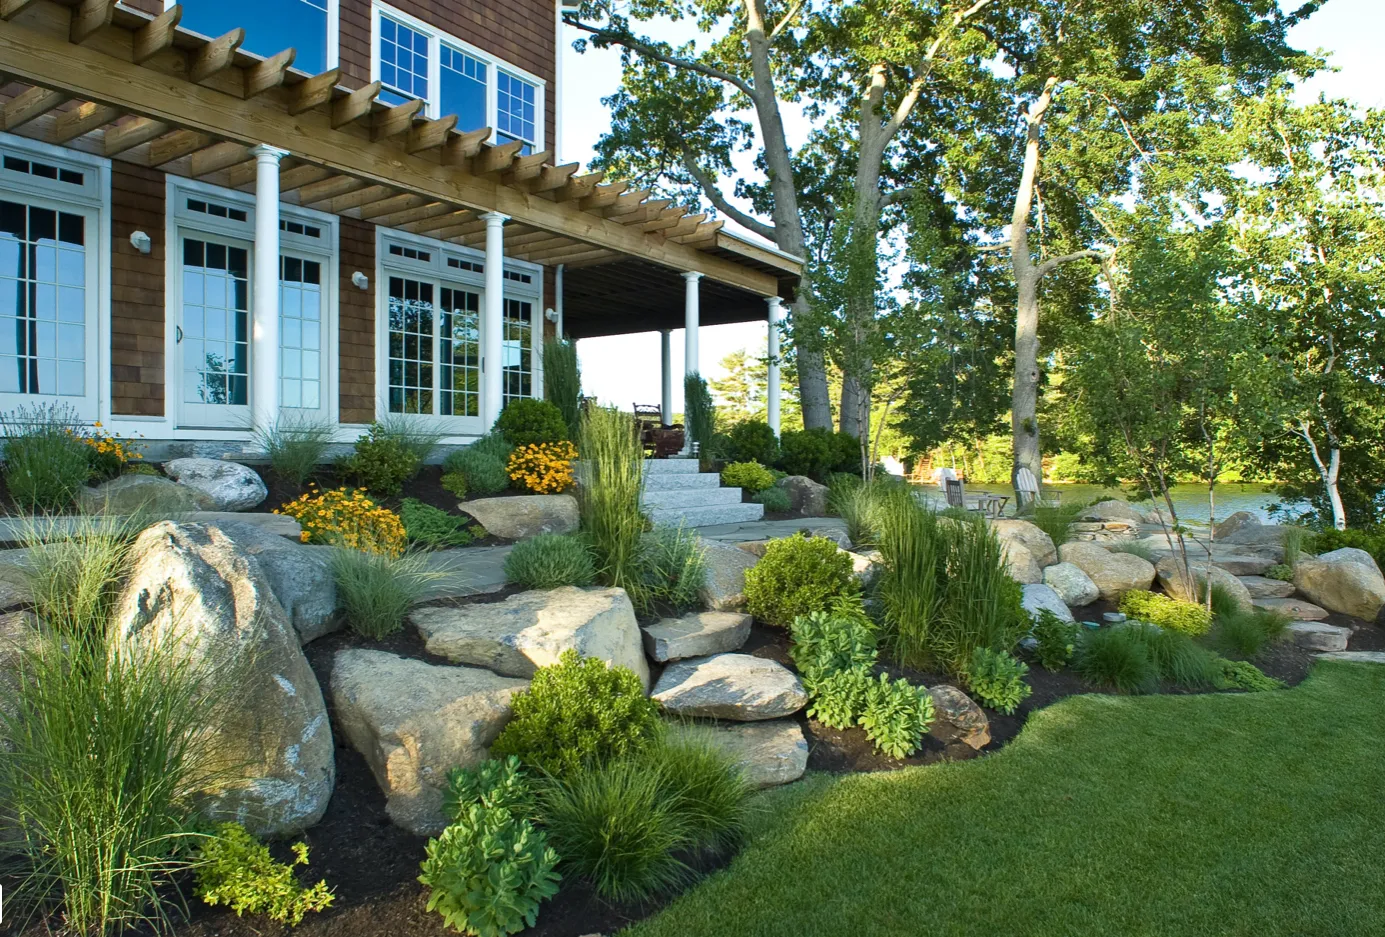
5. Build a Natural Retaining Wall with Large Boulders and Grasses
When building a retaining wall with large, irregular boulders, the secret to a stable, natural look is to “bury the smile.” Every boulder has a flattest, widest side—its “bottom.” Make sure at least one-third of the boulder is buried below the grade of the soil in front of it. This anchors the rock and makes it look like it’s emerging naturally from the earth, rather than just sitting on top. Also, always tilt the boulders back slightly into the slope you are retaining for added stability against soil pressure.
|
📋 Copy HEX 🔗 Share |
This landscape feels so integrated and grand because of its masterful use of scale. Instead of using many small rocks, the designer chose massive boulders that are proportional to the multi-story home and the expansive lawn. This creates a sense of permanence and natural drama. The soft, flowing texture of the ornamental grasses contrasts beautifully with the hard, rugged surfaces of the stone, preventing the design from feeling too harsh or static. The repetition of these grasses throughout the different tiers unifies the entire slope.
6. A Modern Backyard with Raised Concrete Planters
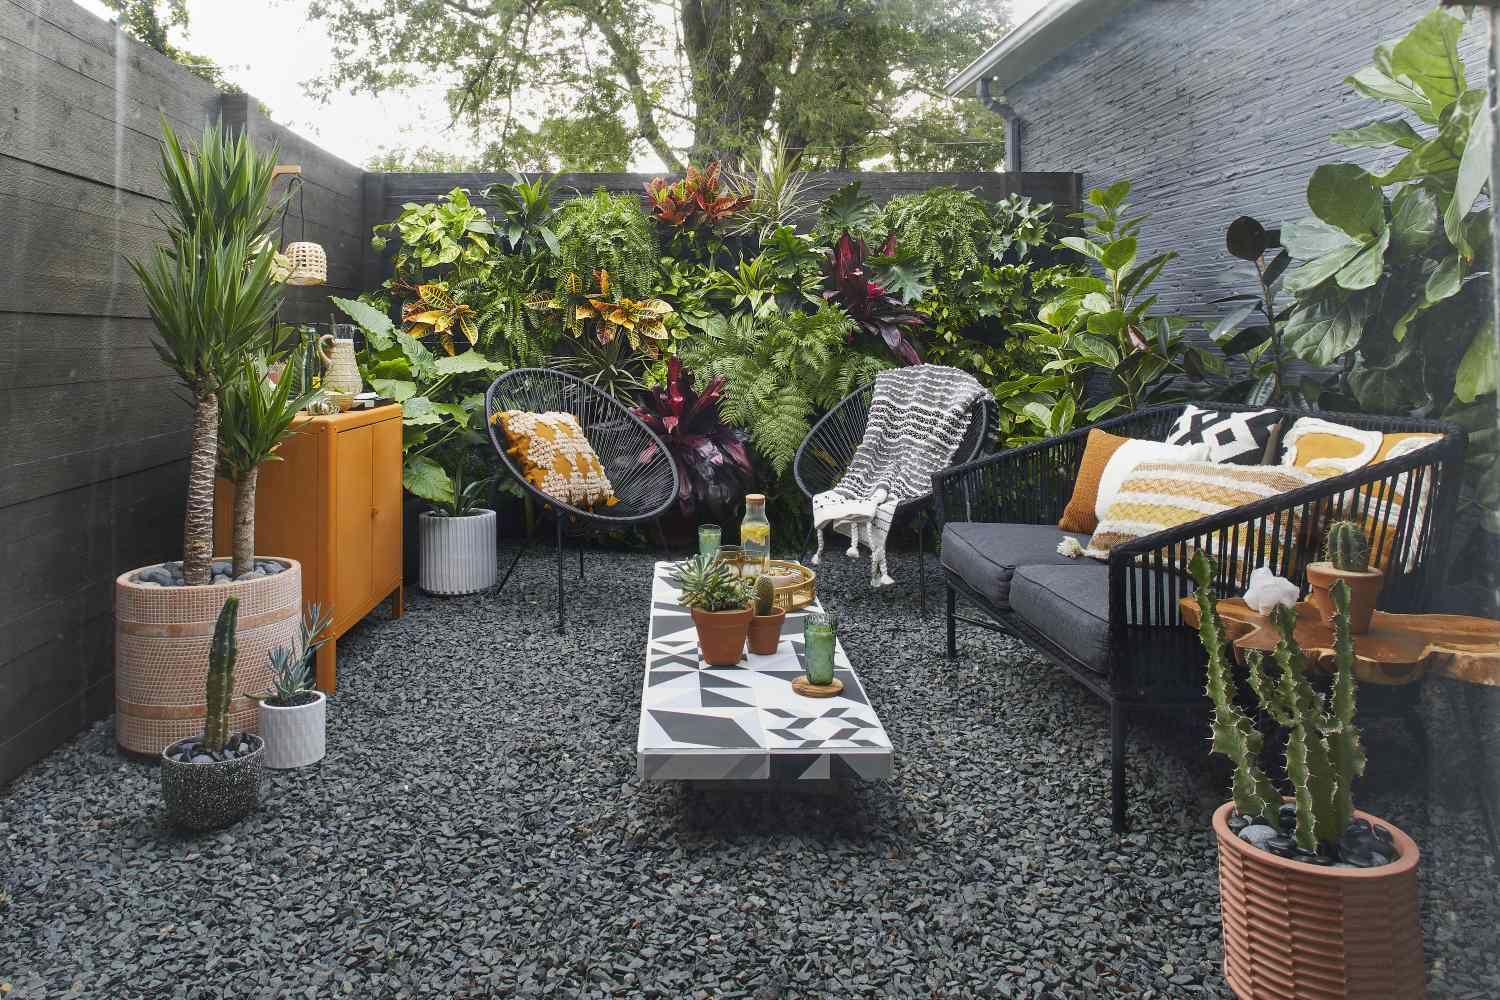
This look is pure architectural geometry. The formula is roughly 50% graphic hardscape (the concrete planters and pavers) + 40% textural ground cover (the pale gray gravel) + 10% soft greenery (the ornamental grasses). The key is the strong, clean lines of the concrete, which define the space and create intentional focal points. The gravel acts as a neutral, unifying field that emphasizes the planters’ forms. The grasses are crucial for softening the hard edges without compromising the modern aesthetic. This balance feels deliberate and calming. It’s a very similar approach to the one seen in Idea #1, but with a focus on height and structure.
|
📋 Copy HEX 🔗 Share |
This design is incredibly versatile but truly shines in small to medium-sized yards (400 to 1,500 sq. ft.). In a tiny space, a single, well-placed raised planter can define a seating area. In a larger yard, you can use multiple planters to create distinct rooms or pathways. The key is maintaining at least 3-4 feet of clear pathway space around the planters to avoid a cramped feeling. A minimum ceiling height isn’t an issue, but this style works best when viewed against a clean backdrop, like the dark horizontal fence shown here.
7. Minimalist Courtyard with Raised Wooden Planter Boxes
You can get this high-end look for significantly less. For the raised planters, skip the custom carpentry and opt for pre-fabricated kits from stores like Home Depot or even large galvanized steel stock tanks from a farm supply store for an industrial-modern twist ($100-$250 each). Instead of poured concrete pavers, use large-format 24×24 inch pavers from Lowe’s, spaced out over your gravel base ($15-$25 each). For the gravel, buy pea gravel in bulk from a local landscape supply yard—it’s drastically cheaper than buying it in bags from a big-box store. Total cost could be under $800 instead of $3,000+.
|
📋 Copy HEX 🔗 Share |
Wooden planters look gorgeous, but they are in constant contact with damp soil, which means rot is a real risk. To extend their life, you absolutely must line the inside with heavy-duty plastic sheeting (like a pond liner), making sure to poke drainage holes at the bottom. Staple the plastic along the inside top edge. This creates a barrier between the wet soil and the wood. You should also plan to re-stain or re-seal the exterior every 2-3 years to protect it from sun and rain. Cedar or redwood are naturally more rot-resistant but will still benefit from this prep work.
8. Design a Vibrant Tropical Flower Bed Using Red Mulch
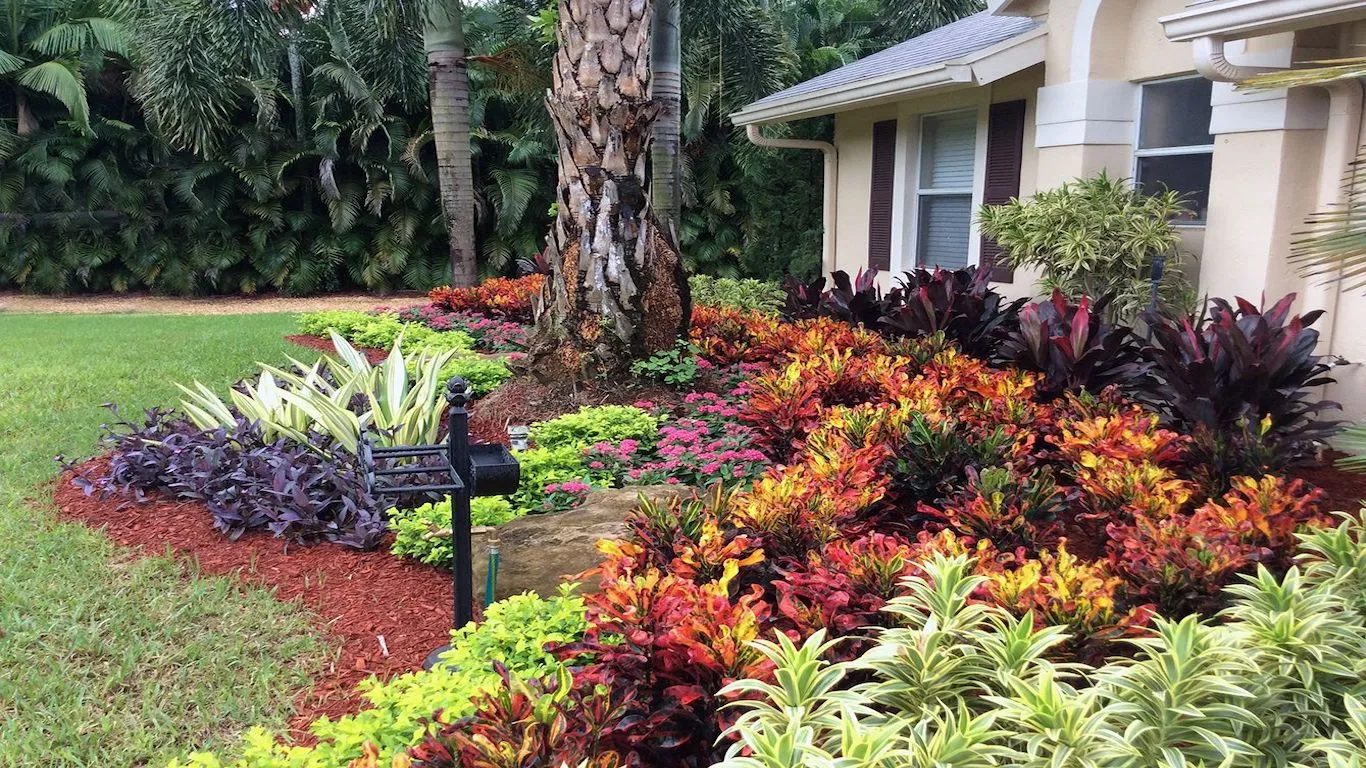
The single most impactful element here is the red mulch. Take it away and replace it with standard brown or black mulch, and the entire design loses its fire. The red mulch acts as a color echo for the fiery reds and oranges in the croton leaves, amplifying their intensity and making the whole bed vibrate with energy. It creates a warm, earthy base that makes the greens look greener and the purples look richer. It’s a bold, slightly risky choice that pays off by unifying the diverse plant palette into one cohesive, unapologetically tropical statement.
|
📋 Copy HEX 🔗 Share |
This design is a masterclass in using foliage as the main event, not just flowers. It works because of extreme color and texture contrast. The deep purple ground cover creates a dark, moody base that makes the bright, variegated leaves of the other plants pop. You have the spiky texture of palm fronds, the broad, waxy leaves of the crotons, and the delicate, patterned foliage of the green-and-white plants. This variety keeps the eye moving and engaged. It’s a carefully curated collection of plants chosen for their year-round visual interest, not just for a fleeting bloom.
9. Cultivate a Lush Woodland Garden with a Stone Patio
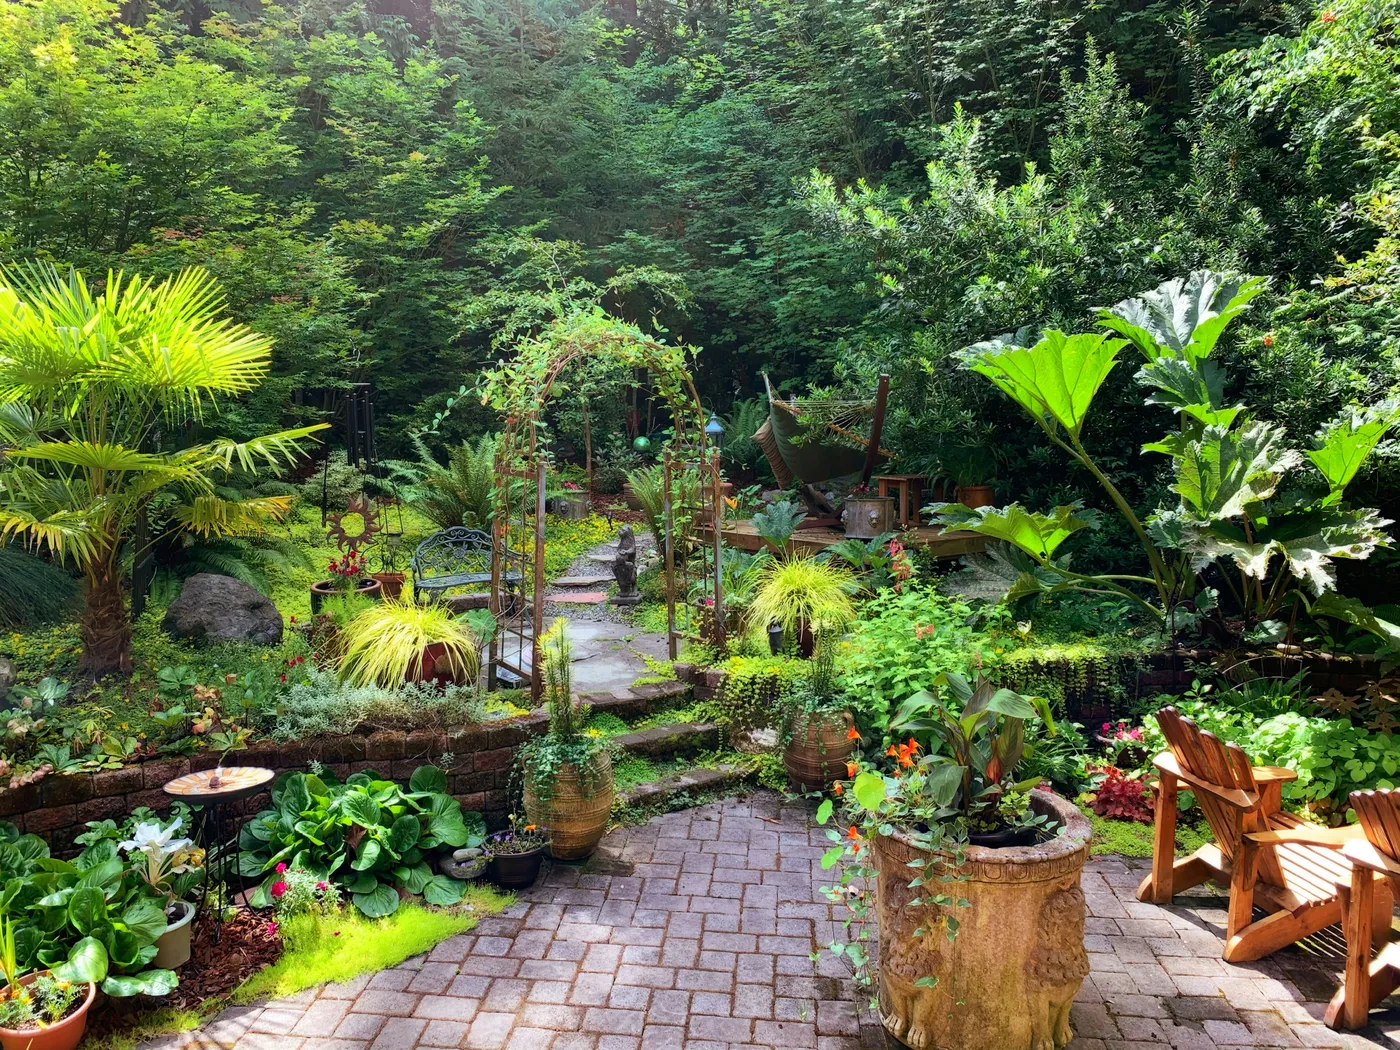
This enchanting, slightly overgrown look is trending hard right now under the name ‘cottagecore’ or ‘rewilding’. It’s a direct reaction against years of sterile, minimalist design. People are craving gardens that feel alive, natural, and a bit magical—a place to escape rather than just admire from a distance. The style embraces imperfection, encourages biodiversity, and prioritizes the feeling of being immersed in nature. The inclusion of cozy seating like Adirondack chairs and elements like garden arches points to a desire to use the garden as an outdoor living room, not just a manicured landscape.
|
📋 Copy HEX 🔗 Share |
To achieve this lush, layered look without it just looking messy, you need to think in threes: height, texture, and color. When planting, group different plants together to create visual triangles. Place a tall plant in the back, a medium-sized plant with a contrasting texture in front of it, and a low-growing or spilling plant at the very front. For example: a tall fern, a medium hosta with broad leaves, and a low, creeping ground cover. Repeating these triangular groupings with different plants throughout the garden creates a rich, intentional, and cohesive wild look.
10. Start Your Landscape Design by Sketching a Master Plan
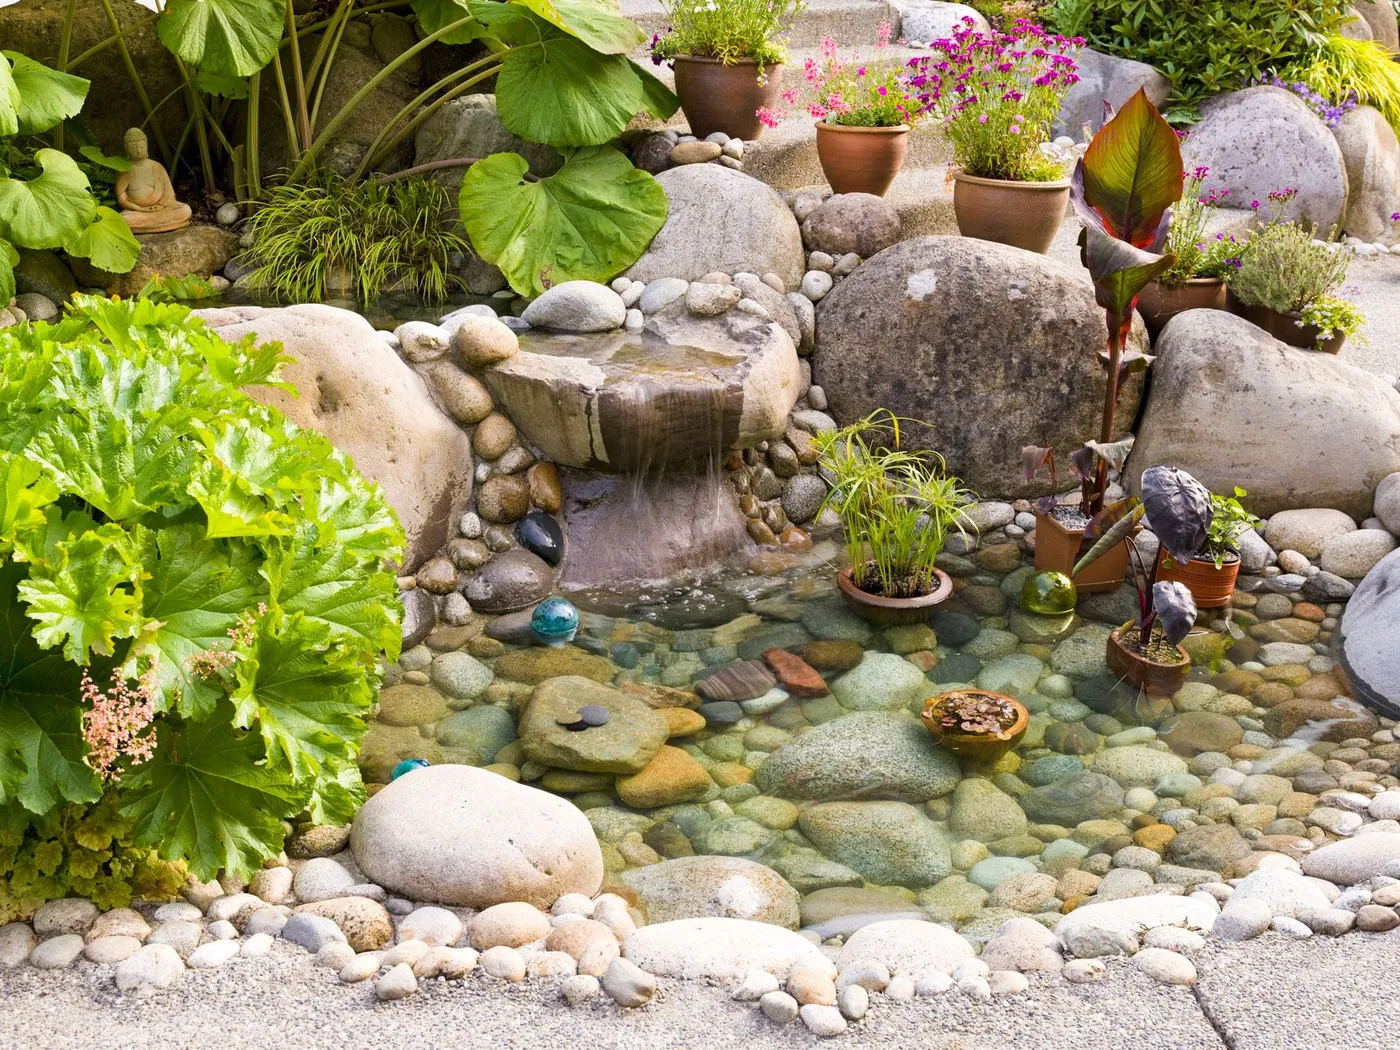
Before you dig a single hole, creating a simple sketch can save you a world of headache and money. This doesn’t require artistic talent—just a pen and paper. It’s the single best way to visualize your ideas and catch problems before they happen.
|
📋 Copy HEX 🔗 Share |
- Measure and Draw Your Base Map: Use a measuring tape to get the dimensions of your yard. Sketch these onto a piece of paper, noting the location of the house, driveway, existing trees, and other permanent features.
- Track the Sun: Spend a day observing your yard. Use dotted lines to mark areas that get full sun, and shaded areas for part-sun or full-shade zones. This is critical for plant selection.
- Create a Bubble Diagram: Don’t draw plants yet! Just draw rough circles or ‘bubbles’ to represent functional areas. Where do you want a patio? A play area? A vegetable garden? A quiet reading nook?
- Flesh it Out: Now, within those bubbles, start sketching in the shapes of garden beds, paths, and features. Think about how you’ll move between the spaces. This is your master plan!
Before you even put pen to paper, get a handle on the fundamentals of your space. This simple checklist will ensure your plan is grounded in reality.
- What is my total budget for the entire project?
- Which direction does my yard face (North, South, East, West)? This determines your light conditions.
- What existing features absolutely must stay (e.g., a healthy large tree, the AC unit)?
- What are the primary functions I need this yard to serve (e.g., kids’ play, entertaining, quiet relaxation)?
- Where are my utility lines? Call 811 before you plan any major digging to have them marked.
11. Install a Winding Dry Creek Bed with River Rocks
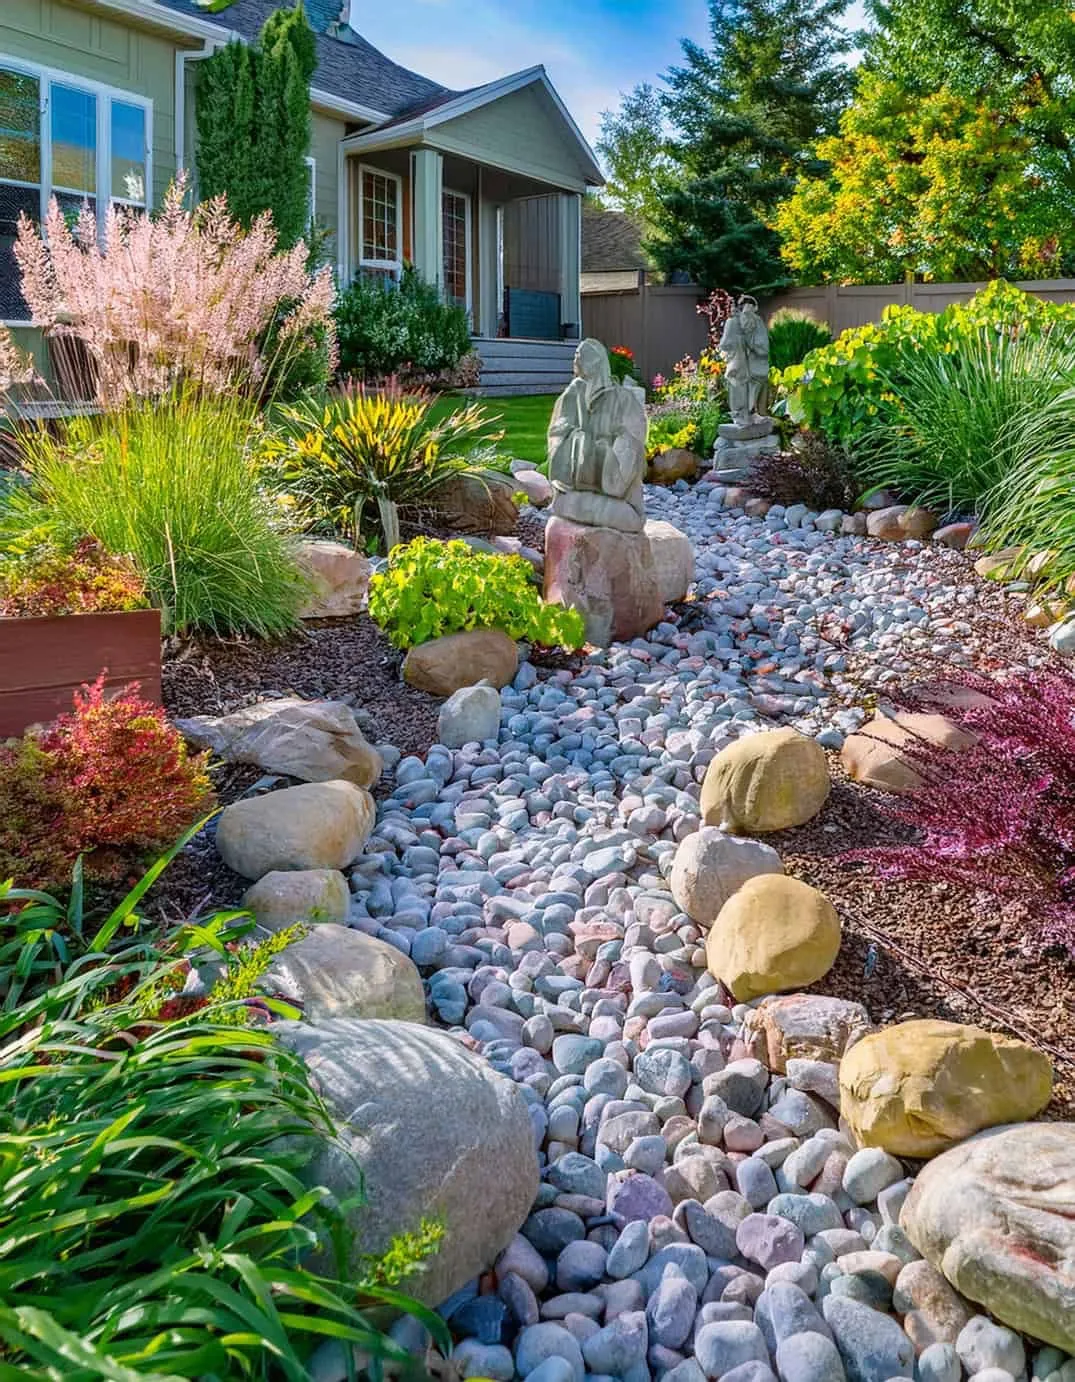
This dry creek bed looks so natural because it mimics how water actually flows. Notice the gentle, meandering curves rather than a straight line. The design also uses a variety of rock sizes—large, smooth boulders define the banks of the creek, while smaller river stones fill the center, just as you’d find in a real stream. The way the ornamental grasses and perennials spill over the edges softens the rock and integrates it into the garden, making it feel like it has been there forever. The carved statues add a touch of personality and a clear focal point within the scene.
|
📋 Copy HEX 🔗 Share |
Big landscape boulders can be pricey and require heavy equipment to move. To get a similar effect on a tight budget, source your rocks for free! Check Facebook Marketplace or Craigslist under Free for people who are excavating their own yards and need to get rid of rocks. You can also visit construction sites (with permission!) to see if they have excess stone you can haul away. For the creek bed filler, buying pea gravel or river rock in bulk from a landscape supply yard is always cheaper than bagged stone from a big-box store.
12. A Minimalist Zen Garden with Raked Gravel and a Bonsai
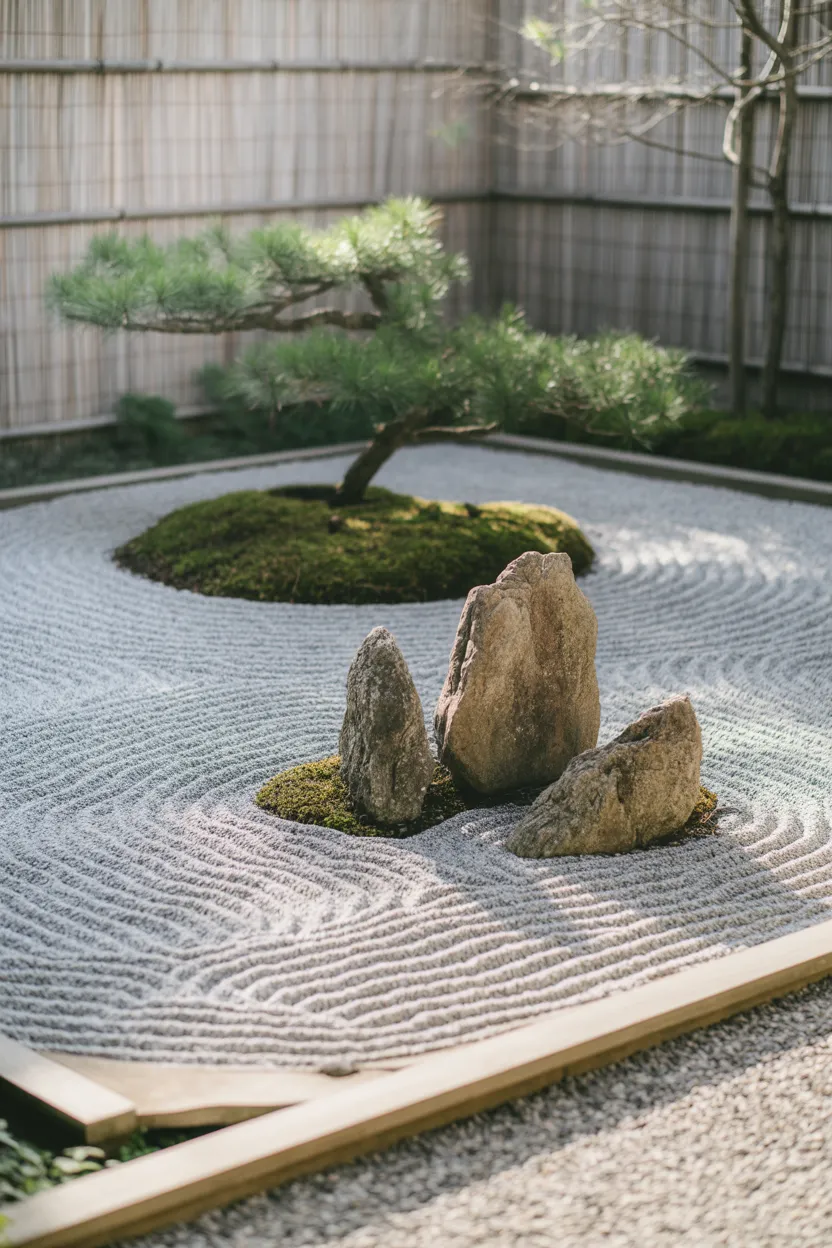
The entire composition hinges on the single, sculpted bonsai tree. It serves as the undisputed focal point, the subject of the landscape painting. Its aged, gnarled form suggests history and resilience, contrasting with the smooth, transient patterns in the raked gravel. The mossy mound it sits on elevates it, giving it status and importance. If you were to remove the bonsai, the garden would lose its heart. The rocks and gravel would become a pleasant but aimless background. The tree provides the narrative and the emotional anchor for the entire space. It’s a much more focused version of the broader Zen garden seen in Idea #3.
|
📋 Copy HEX 🔗 Share |
For those perfect, flowing gravel patterns, you need the right tool and the right material. Don’t use standard garden rakes; they are too harsh. You need a specialized wooden Zen garden rake, or you can make one yourself from a 1×4 board by drilling holes and inserting dowels. The gravel itself is also key. Don’t use common pea gravel; it’s too rounded and won’t hold a pattern. You need crushed granite gravel, often sold as decomposed granite or chat, in a small size (1/4 inch or less). Its angular shape allows the stones to lock together and hold the raked lines.
13. Design a Backyard Oasis with Stone Waterfalls and a Pool
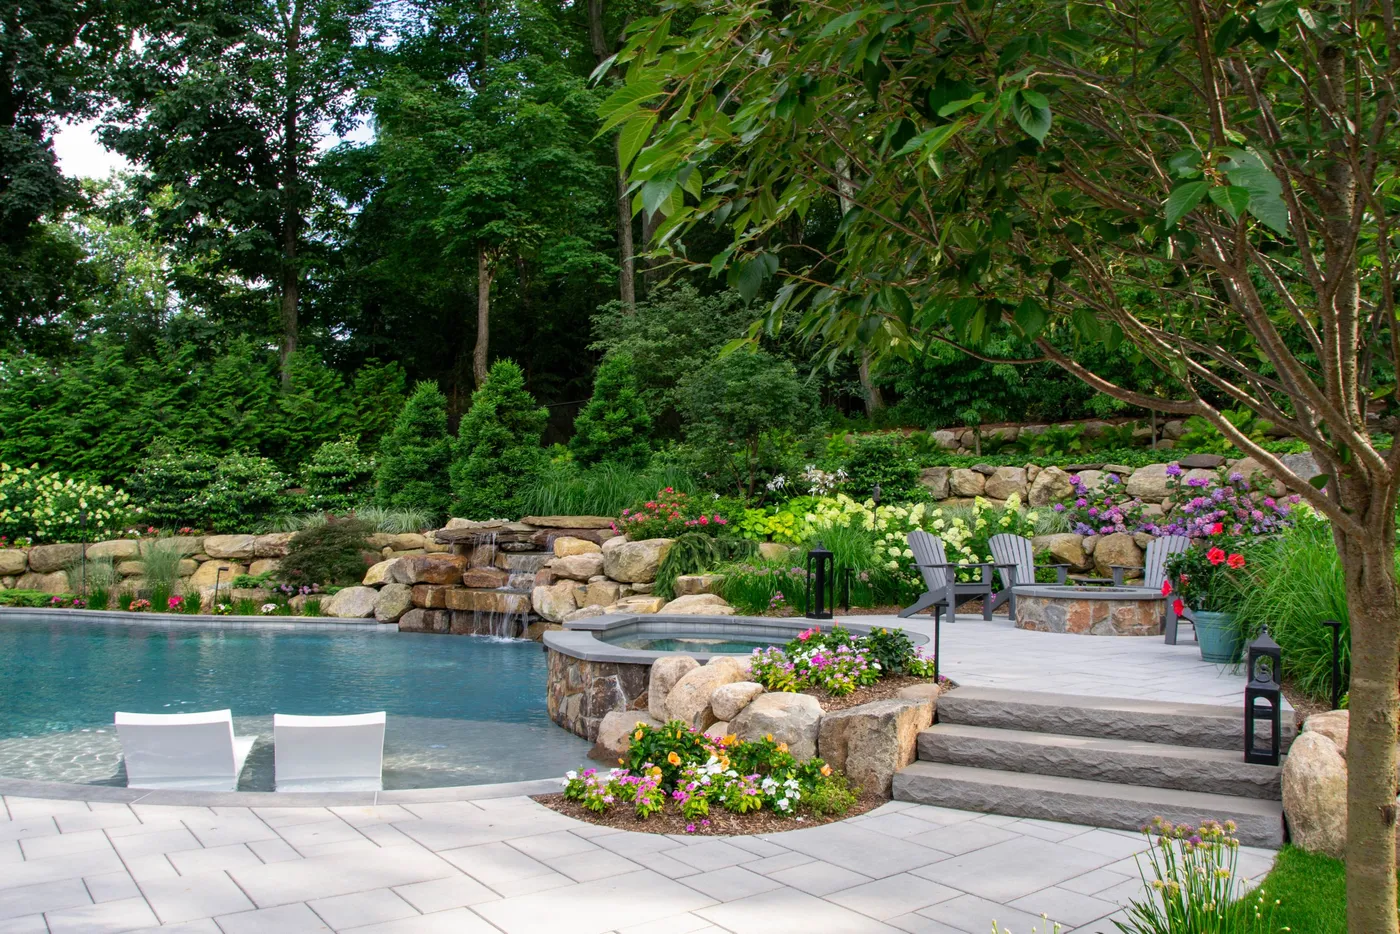
A multi-level design with a pool and integrated spa requires significant space. For a layout of this complexity, you’re looking at a minimum of 2,000 to 3,000 square feet of usable backyard area. The key is allowing for proper circulation and ‘breathing room’ around each feature. You’ll need at least a 4-foot wide clearance around the entire pool deck for safe passage, and the patio area should be large enough to comfortably fit chairs without feeling cramped (at least 12×12 feet). The retaining walls and waterfalls add vertical dimension, so a yard with a natural slope is ideal, though one can be created with grading.
|
📋 Copy HEX 🔗 Share |
This is a stunning, resort-like landscape, but it is absolutely not a DIY-for-beginners project. The complexity of grading, plumbing for the pool and spa, running gas lines for a potential heater, and constructing stable, load-bearing retaining walls requires licensed professionals. A project of this scale involves multiple permits, inspections, and a significant budget (well into the six figures). While you can certainly DIY the planting and placement of Adirondack chairs, the core infrastructure is a job for experienced contractors. Dream big, but hire smart for a project like this.
14. Create Structured Tree Beds with Large River Rocks
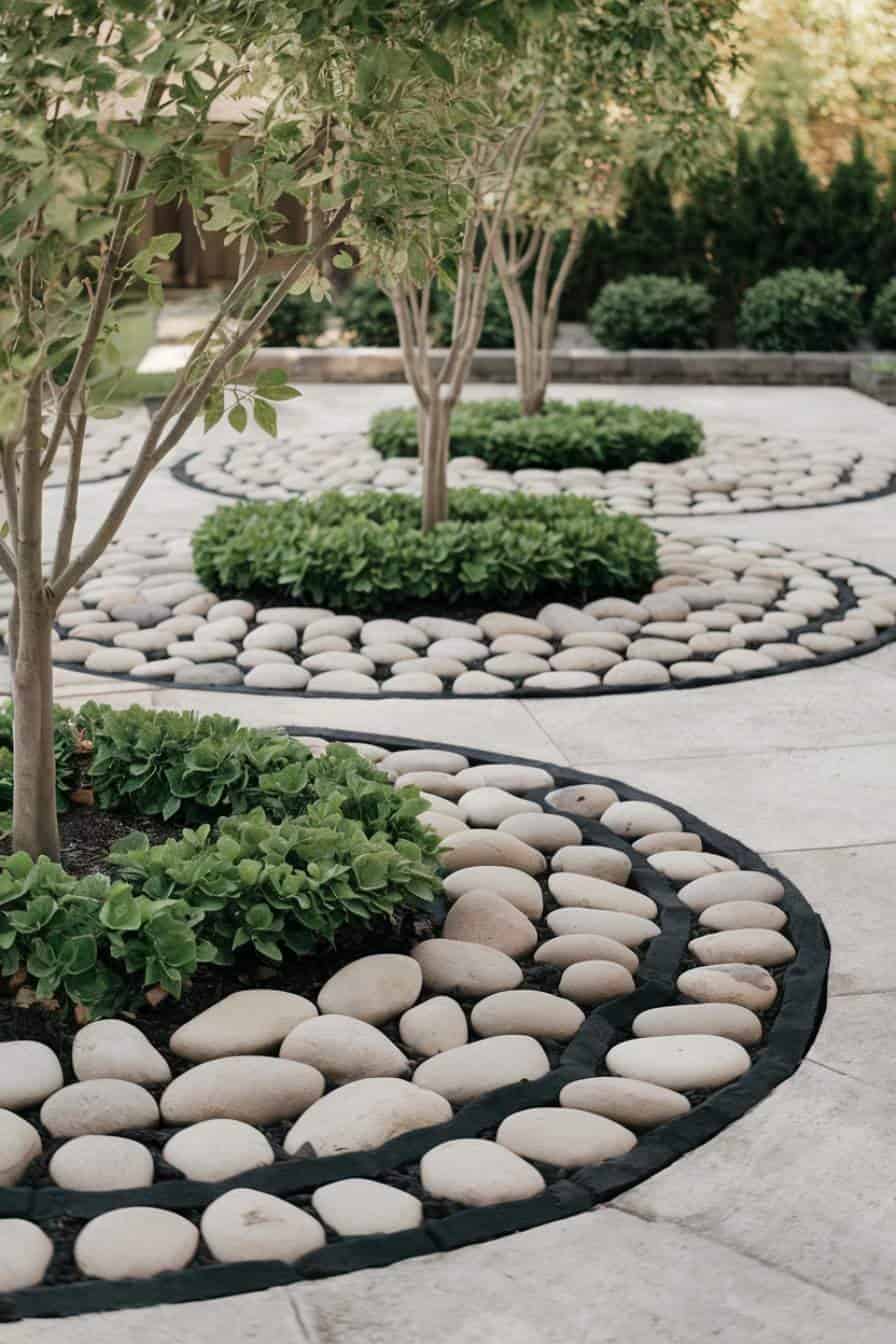
- Check your tree type: Is it a species that tolerates having its root flare covered? Many trees are sensitive to this and it can cause rot. This design is best for new plantings where you can set the root ball at the correct height from the start.
- Measure your circle: Will the final diameter of the rock bed be large enough to accommodate the tree’s mature root system? A small circle can girdle a growing tree.
- Plan for water: How will water penetrate the dense layer of rocks to reach the tree’s roots? You may need to install a simple irrigation pipe.
- Source your rocks: Do you have a supplier for a large quantity of uniformly sized and colored river rocks? Consistency is key to this look.
|
📋 Copy HEX 🔗 Share |
The power of this design lies in repetition and geometry. By repeating the exact same circular pattern, the landscape feels intentional, clean, and rhythmic. The perfect circles of the tree beds contrast sharply with the grid-like pattern of the square patio pavers, creating visual interest through opposing shapes. Using large, smooth river rocks as mulch adds a layer of texture that is both natural and highly structured. It’s a very controlled, almost sculptural way to integrate green space into a hardscape patio, turning each tree into a deliberate piece of art.
15. Define Garden Beds with Simple, Crisp Spade Edging
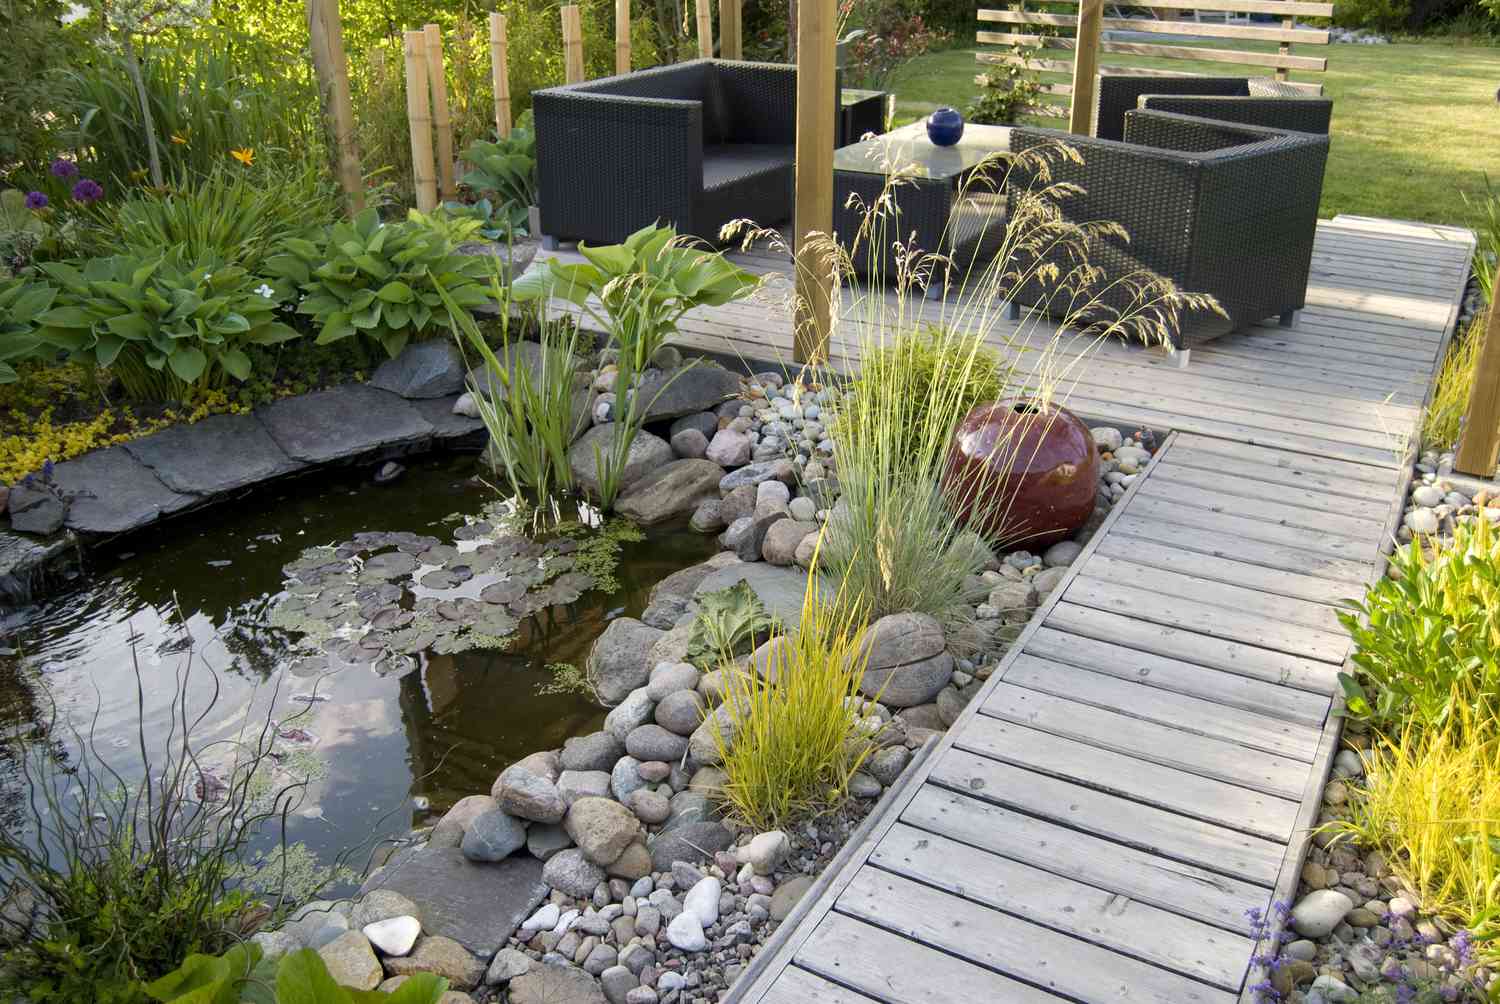
Sometimes the most effective design element is also the cheapest. A clean, trenched edge between your lawn and garden bed creates a professional look for zero material cost. It’s all about the technique.
|
📋 Copy HEX 🔗 Share |
- Mark Your Line: Lay out a garden hose or rope to define the curve or line you want. Step back and look at it from all angles before you start digging.
- Make the First Cut: Using a straight-bladed spade or a half-moon edger, plunge the tool straight down about 4-6 inches along your marked line.
- Angle the Second Cut: From the garden bed side, angle your spade at about 45 degrees and dig in to meet the bottom of your first vertical cut. This will remove a V-shaped trench of sod.
- Clean the Trench: Remove the loose sod and soil from the trench. You can add it to your compost pile.
- Add Mulch: Fill the garden bed with mulch right up to the edge of the trench. The gap provides a clean line and acts as a barrier to stop grass from creeping in.
A natural spade edge looks fantastic and costs nothing but your time. However, it is not a one-and-done project. Grass will constantly try to jump the gap and grow into your mulch beds. To keep the edge looking sharp and clean, you’ll need to re-define it with your spade or edger about 2-3 times per growing season. It’s a quick job once the initial trench is established—maybe 30 minutes for an average-sized bed—but it is a recurring task on your garden to-do list. If you want a lower-maintenance solution, you’ll need to install a physical barrier like metal or stone edging.
16. Landscaping a Slope with Boulders and Pine Trees
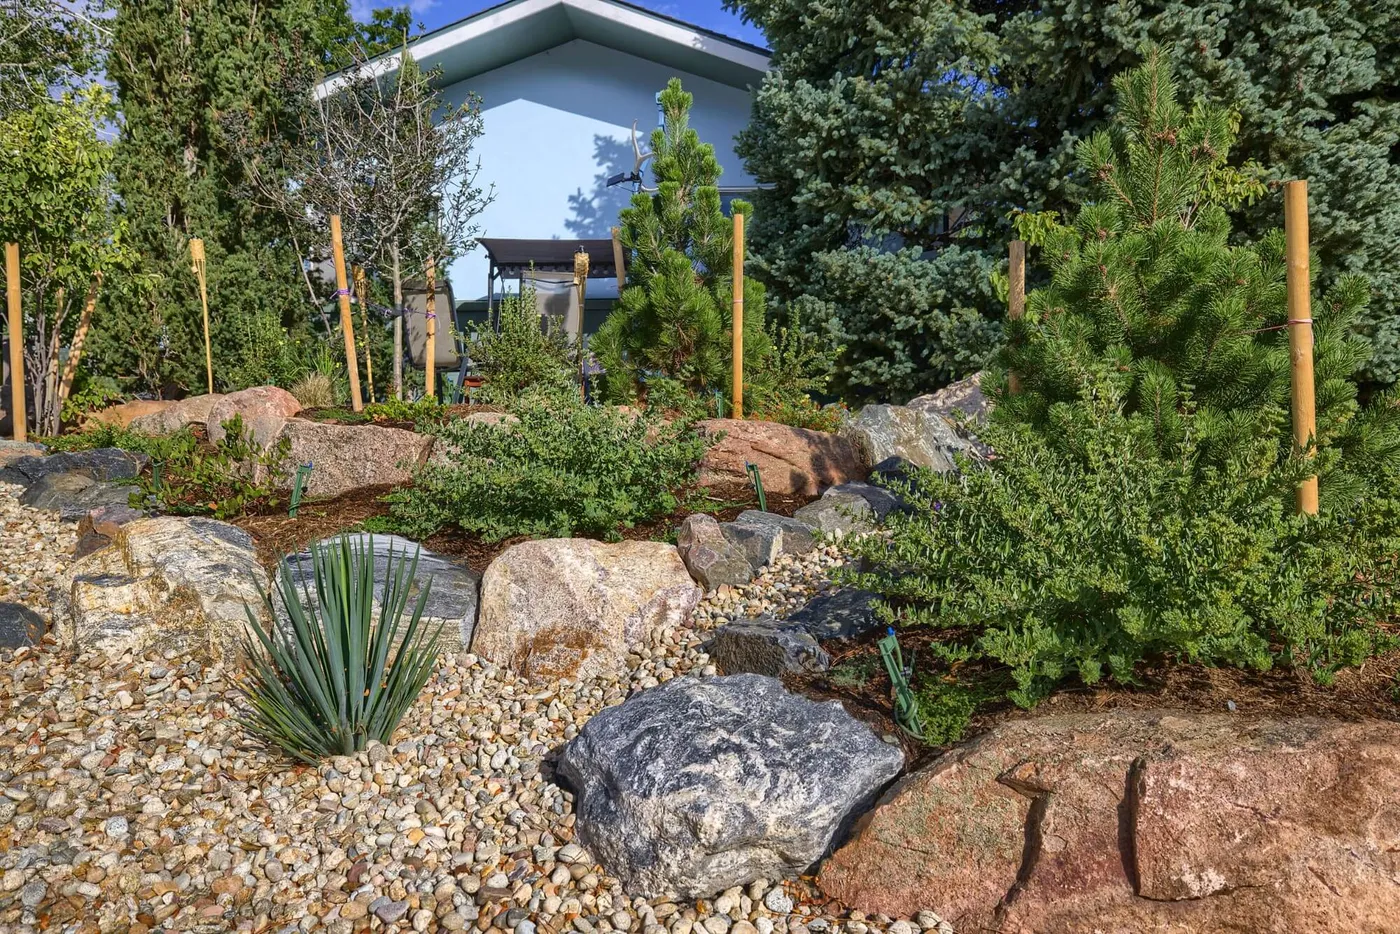
When placing boulders on a slope, think in groups of odd numbers—typically three or five. Arrange them in a tight, triangular cluster with varying sizes: one large ‘mother’ stone, a medium-sized companion, and a smaller accent. Bury the bottom third of each boulder into the hillside and tilt them back slightly. This grouping method looks far more natural than scattering individual rocks evenly across the slope, which tends to look like random polka dots. The clusters create pockets for planting and look like natural rock outcroppings.
|
📋 Copy HEX 🔗 Share |
Landscaping a slope is physically demanding work. Moving soil, mulch, and especially large rocks up and down a hill is exhausting and can be dangerous if you lose your footing. You’re fighting gravity at every step. This isn’t a casual weekend project. Be realistic about your physical ability and consider renting equipment or hiring help for the heavy lifting, like placing the boulders. Also, erosion can be a major issue. Until your plants are fully established with strong root systems, a heavy rain could wash away your topsoil and mulch.
17. Unify Your Garden Beds with a Consistent Mulch Layer
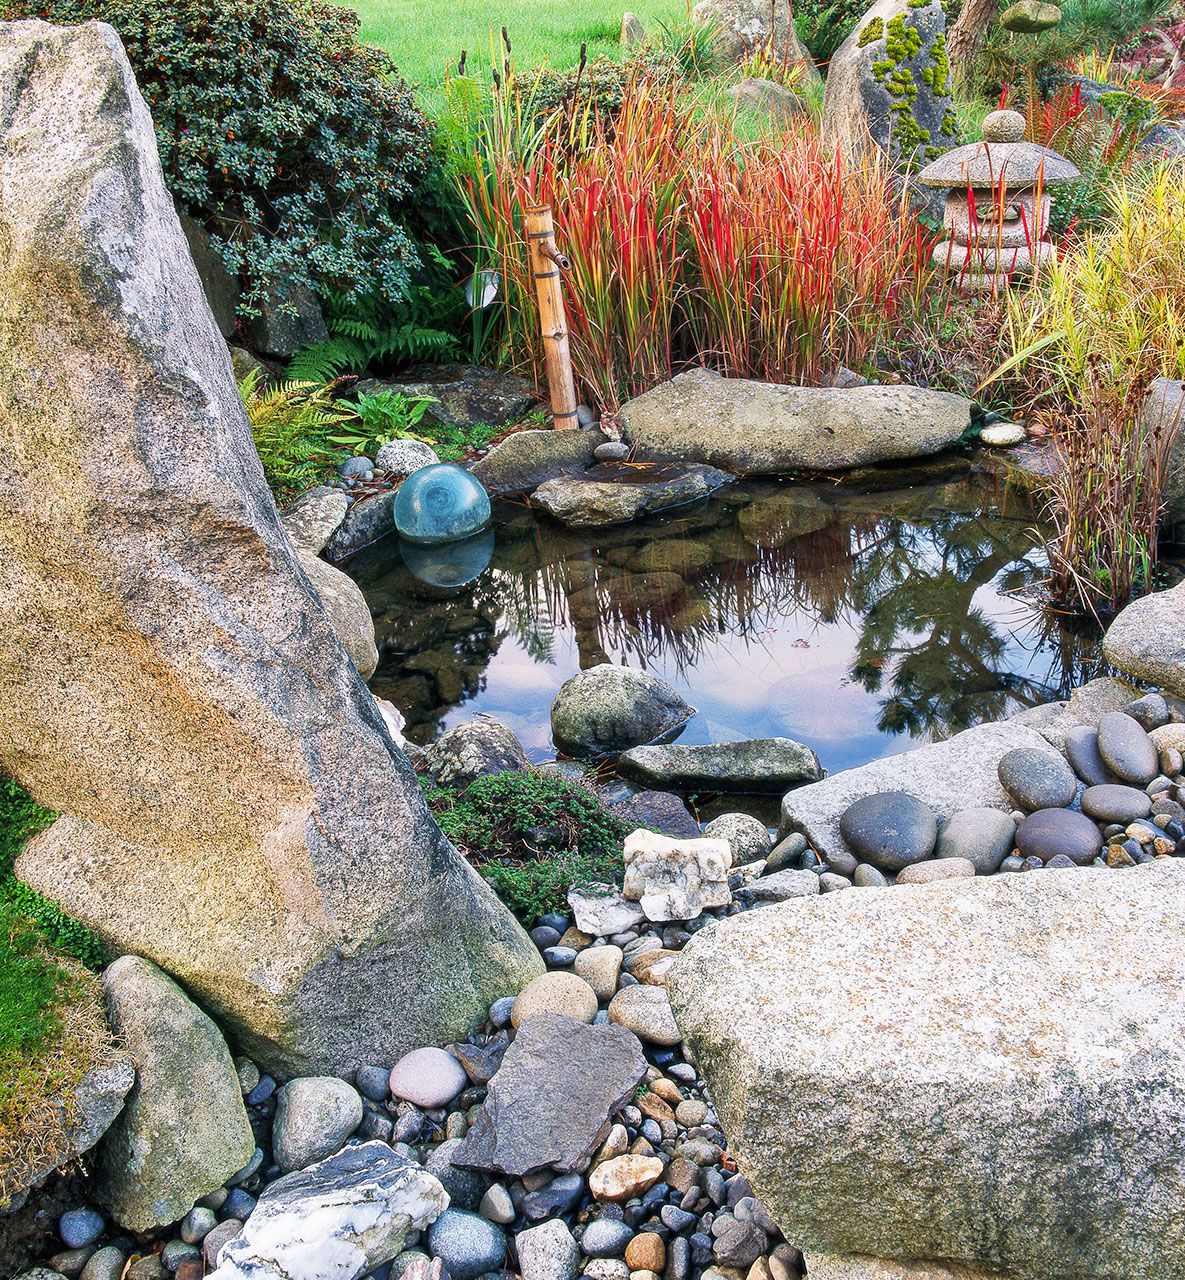
The secret ingredient that makes a collection of disparate plants look like a cohesive landscape design is mulch. It’s the one thing that ties everything together. A consistent layer of mulch serves as a neutral, unifying backdrop that makes your plant’s colors and textures pop. It creates a clean, ‘finished’ look by suppressing weeds and defining the shape of your garden beds. Without mulch, the ground looks bare and unfinished, and the plants can feel disconnected from one another. It’s the landscaping equivalent of a beautiful area rug that pulls a whole room together.
|
📋 Copy HEX 🔗 Share |
- Shredded Hardwood or Cedar Mulch: $50 – $120 (per cubic yard, delivered)
- Pine Straw Bales: $5 – $10 per bale
- Rubber Mulch: $200 – $400 (per cubic yard, more expensive but lasts for years)
- Tools (Wheelbarrow, Rake, Shovel): $100 – $200 (one-time purchase)
- TOTAL (for a 200 sq. ft. area at 3″ depth): $150 – $450
- Budget alternative: Call local tree trimming services in late winter or early spring. They often have huge piles of wood chips they will deliver for free just to get rid of them. It’s not as uniform as bagged mulch, but it’s incredibly effective and the price is right.
18. Build Modern Raised Planters with Geometric Stone
This design feels both contemporary and timeless because it relies on the classic combination of geometry and greenery. The sharp, rectangular forms of the raised stone planters and the large concrete pavers create a strong, organized grid. This hard structure is then softened by the soft textures of the plants within. The tightly clipped boxwood shrubs echo the geometric shapes, while the looser foliage provides a gentle contrast. It’s a balanced composition where the man-made and the natural are in perfect dialogue. The consistent use of gray tones in the stone and concrete unifies the entire space.
|
📋 Copy HEX 🔗 Share |
This style, with its strong geometric lines, is ideal for defining spaces in medium to large backyards (800 sq. ft. and up). The raised planters work beautifully to frame a patio, enclose a seating area, or create a transition between a deck and a lawn. For the large pavers to have impact, they need space. Plan for a walkway that’s at least 4 feet wide. In a very small yard (under 400 sq. ft.), this exact look might feel too bulky. Instead, you could adapt it by using just one or two smaller raised planters as focal points. Compare this to the more compact approach in Idea #6.
19. Create a Natural Backyard Pond with a Tiered Waterfall
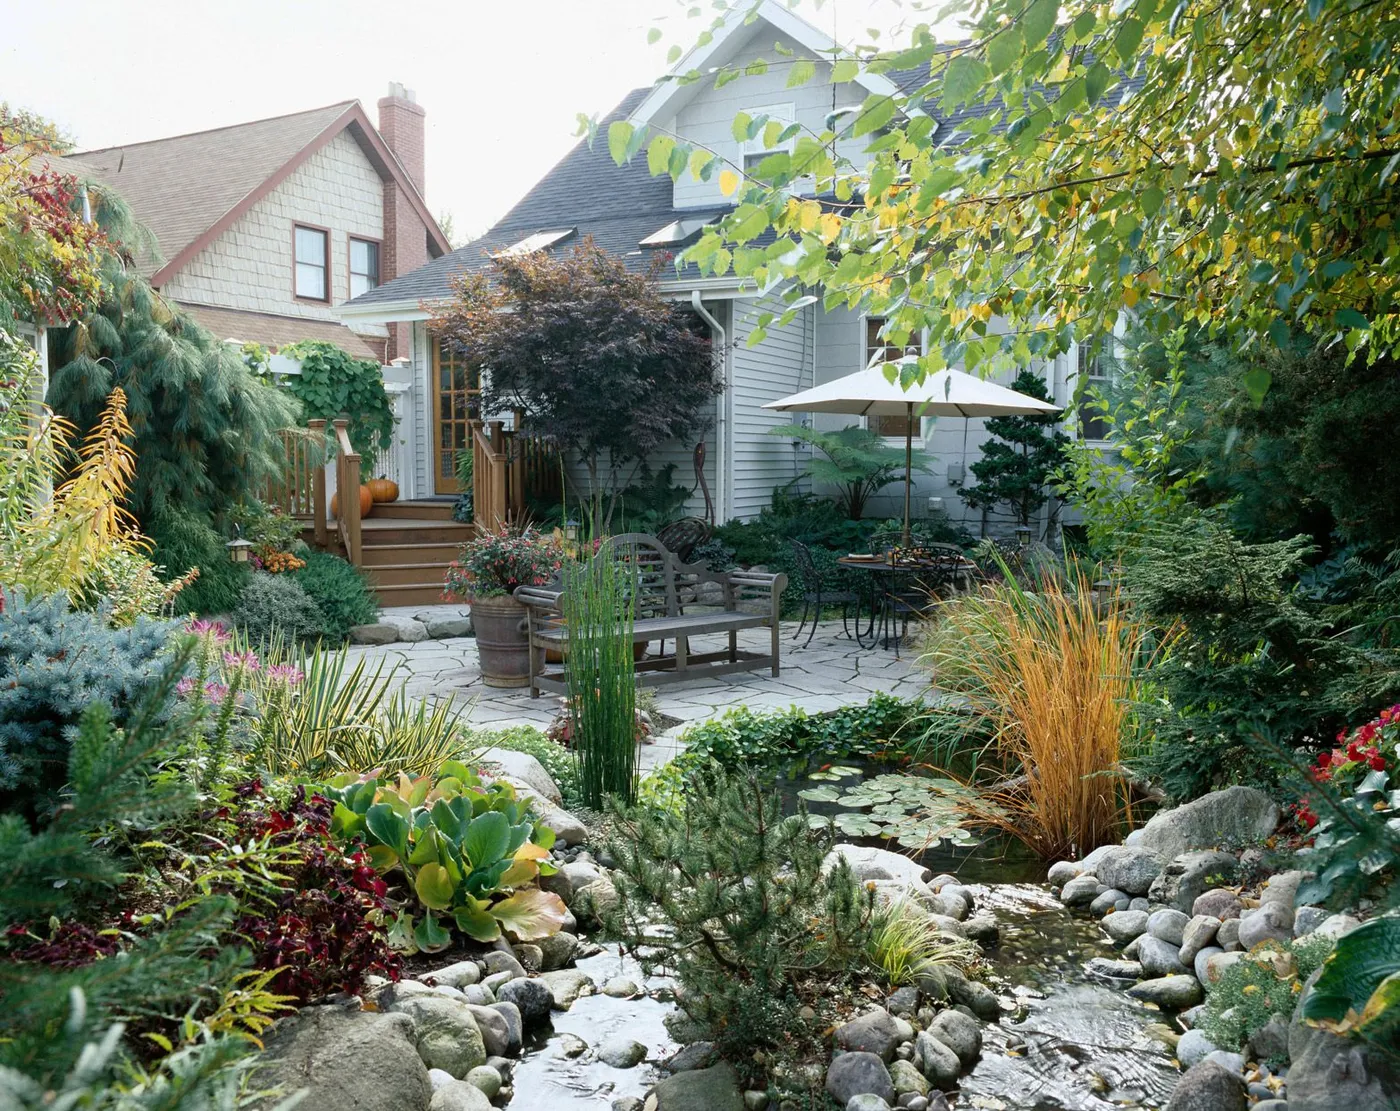
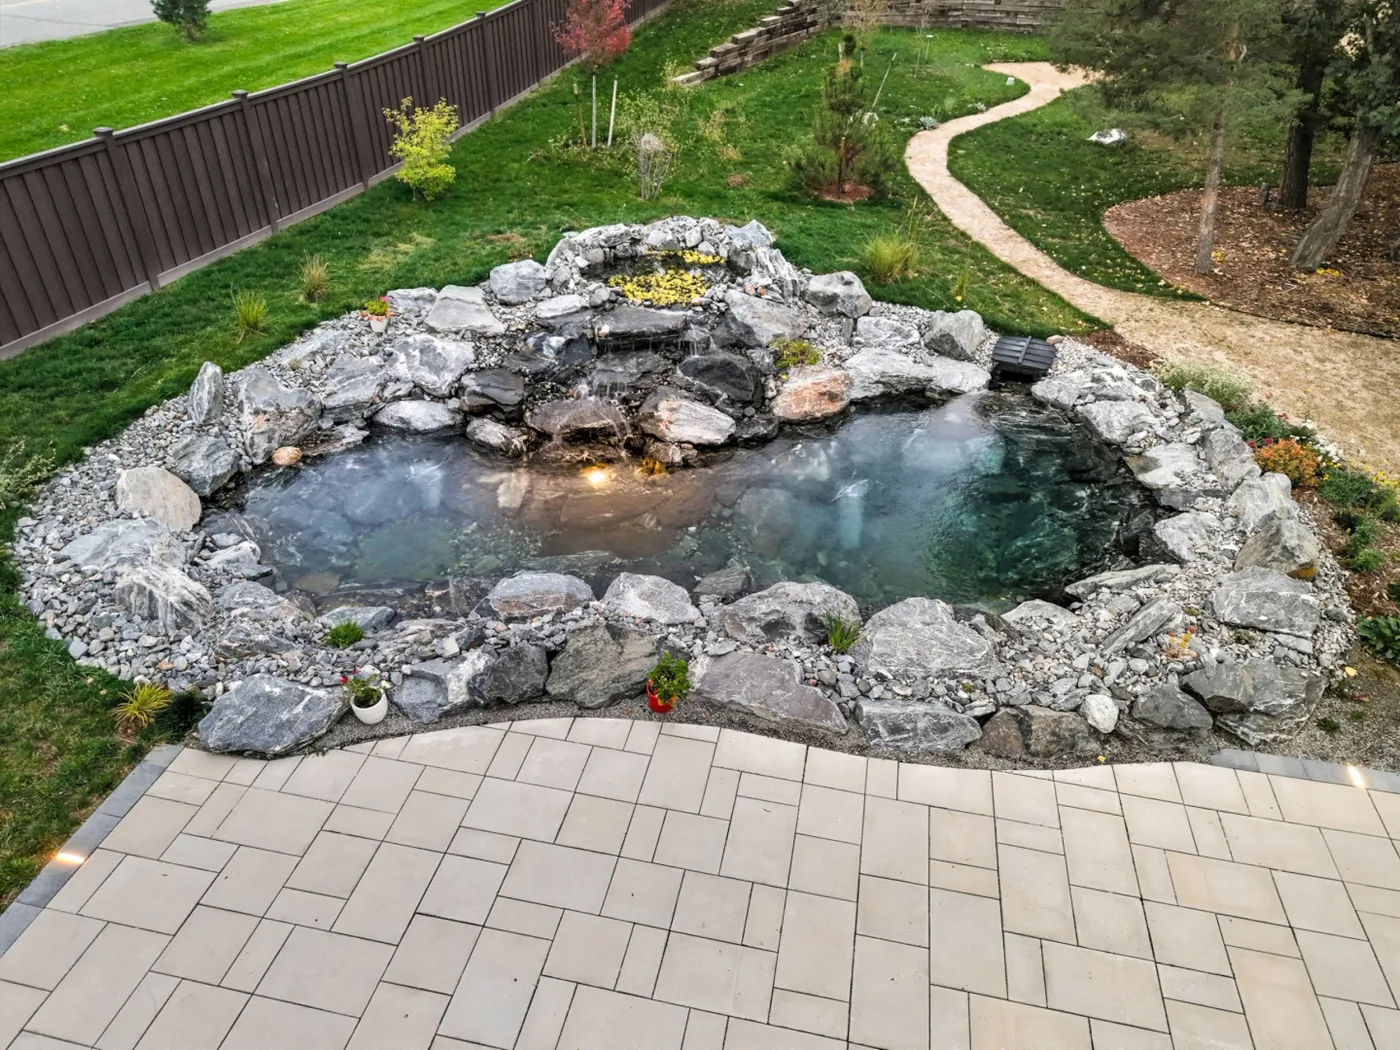
The key to a natural-looking waterfall is to create ‘spill rocks’. These are flat, wide stones that you position at the edge of each tier of your waterfall. The water will flow over this flat surface in a beautiful sheet rather than just trickling down randomly. To install one, use landscape mortar or black waterfall foam to secure the spill rock in place, ensuring it has a slight downward tilt. Hide the mortar or foam with smaller pebbles and gravel to maintain the natural look. A well-placed spill rock is the difference between a random leak and an intentional cascade.
|
📋 Copy HEX 🔗 Share |
Building a backyard pond and waterfall is a fantastic DIY project. Here’s a simplified version of the process for the pond itself.
- Excavate the Hole: Dig out the pond shape, creating different levels or shelves for plants. The deepest part should be at least 18-24 inches for fish to survive winter in colder climates.
- Install Underlayment and Liner: Remove any sharp rocks, then lay down a protective fabric underlayment, followed by a flexible EPDM rubber pond liner. Leave plenty of excess liner around the edges.
- Place Rocks: Start placing larger boulders on the shelves to hold the liner in place. Then, cover the remaining liner with river rocks and gravel to hide it completely.
- Edge the Pond: Fold the excess liner up and trim it. Use your flagstone or paver edging to cover the liner’s edge, creating a finished look.
- Install Pump & Fill: Place your submersible pump in the deepest part of the pond, run the tubing to your waterfall, and start filling with water!
20. A Modern Walkway with Pavers, Gravel, and a Sunken Fire Pit
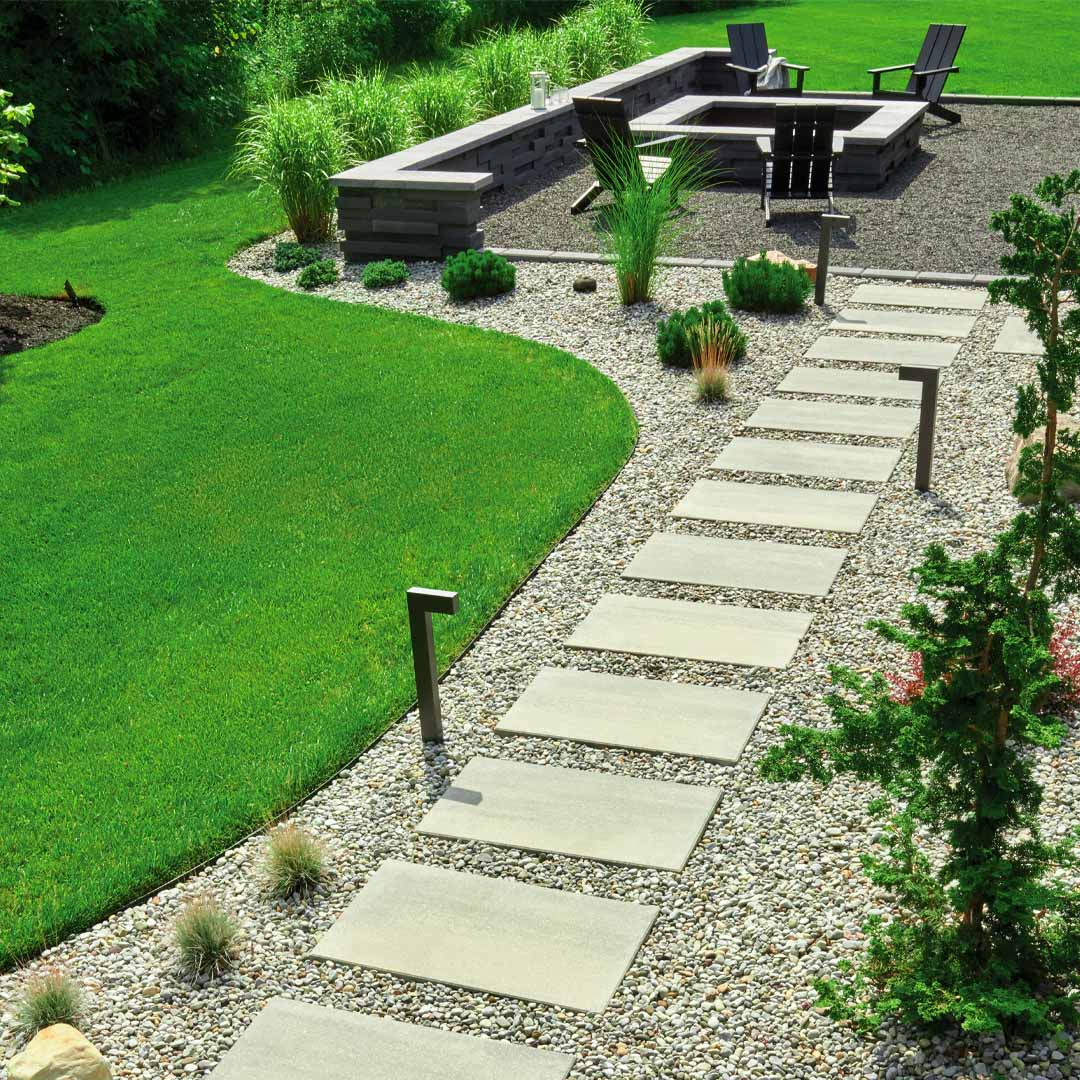
This landscape design works so well because it expertly balances straight lines with gentle curves. The large, rectangular stone pavers create a strong, linear path, guiding the eye and foot forward. This geometric rigidity is beautifully softened by the sweeping, curved edge of the green lawn. This contrast creates a dynamic tension that is visually appealing and feels both modern and natural. The low, modern path lights reinforce the line of the walkway, while the circular form of the sunken fire pit provides a clear and inviting destination.
|
📋 Copy HEX 🔗 Share |
The visual recipe here is about texture and clean separation. It’s approximately 40% Manicured Lawn + 30% Gravel/Paver Path + 30% Destination Zone (the fire pit and retaining wall). The key is the crisp division between materials. The vibrant green of the lawn is a block of color, the gray gravel path is a block of texture, and the stone fire pit area is a block of mass. By keeping these zones distinct, the design feels organized and intentional. Swapping the lawn for a mass planting of a single groundcover would achieve a similar, though less traditional, effect.
21. Design a Low-Maintenance Bed with River Rock and Shrubs
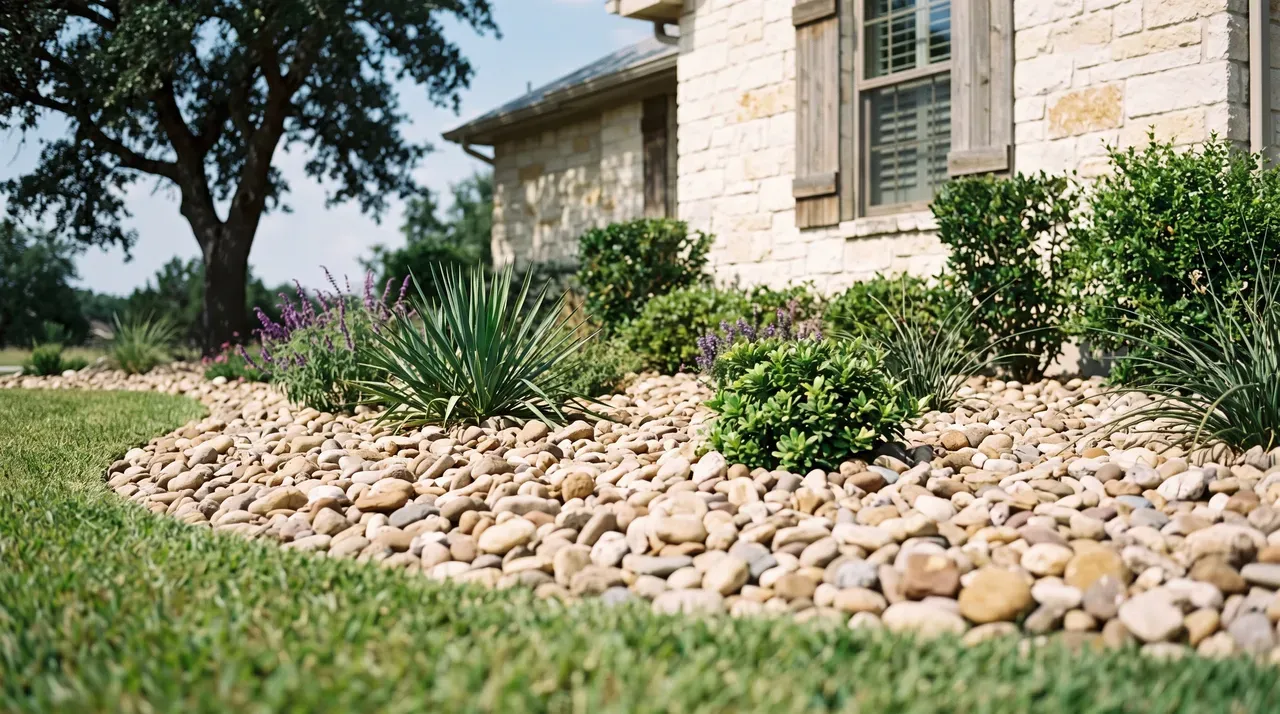
River rock beds are often sold as a ‘no-maintenance’ alternative to mulch, but that’s not quite true. While you won’t have to reapply it every year, rock beds are magnets for dirt, dust, and airborne weed seeds. Over time, soil builds up between the rocks, creating the perfect environment for weeds to sprout. Pulling weeds from a rock bed is much harder than from mulch. To keep it looking clean, you’ll need to use a leaf blower regularly to remove debris before it decomposes. It’s lower maintenance, not zero maintenance.
|
📋 Copy HEX 🔗 Share |
The single element that makes this idea successful is the bold, sweeping curve of the bed’s edge. A straight bed along the foundation would have felt rigid and predictable. The generous curve adds a sense of flow and grace to the front of the house, making the entrance feel more dynamic and welcoming. It breaks up the boxy shape of the house and lawn, introducing an organic line that guides the eye along the landscape. Without that strong curve, the design would be far less impactful.
22. A Coastal Xeriscape with a White Pebble Dry River Bed
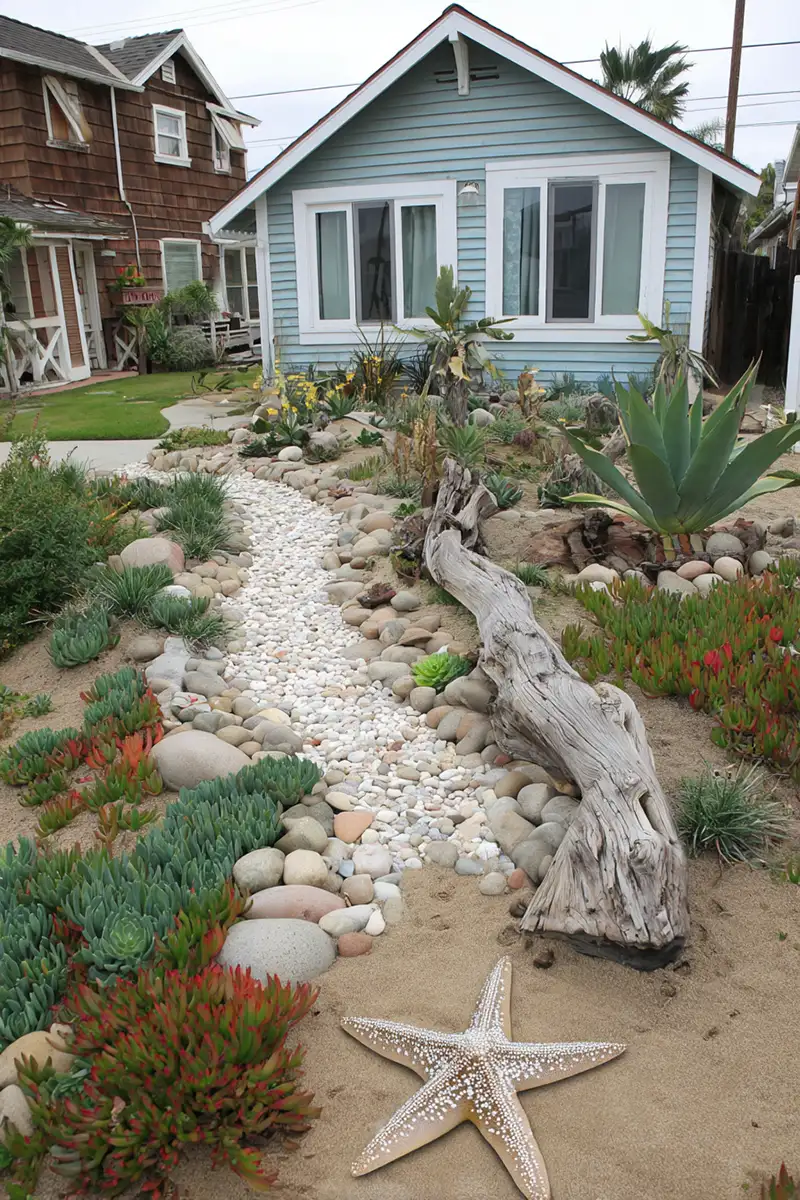
This design perfectly captures a coastal vibe by embracing natural textures and forms. The curving dry river bed of white pebbles mimics the look of a stream or tidal wash, instantly creating a sense of movement. The use of a large, weathered driftwood log is a brilliant touch, acting as a natural sculpture that immediately says beach. The plant choice is also key: drought-tolerant succulents with fleshy leaves and spiky forms evoke the hardy plants you’d find on coastal dunes. The decorative starfish is the final, playful nod that solidifies the theme. It is a more themed version of the creek bed in Idea #10.
|
📋 Copy HEX 🔗 Share |
To prevent your beautiful white pebbles from mixing with the surrounding sand and soil, a hidden edge is crucial. Before you fill your dry river bed with pebbles, install a flexible, low-profile plastic or metal landscape edging along the border. Make sure the top of the edging sits about half an inch below the final grade of your sand or soil. This creates an invisible underground barrier that keeps the materials separate, ensuring your clean white line stays crisp and doesn’t become a muddy mess after the first rain.
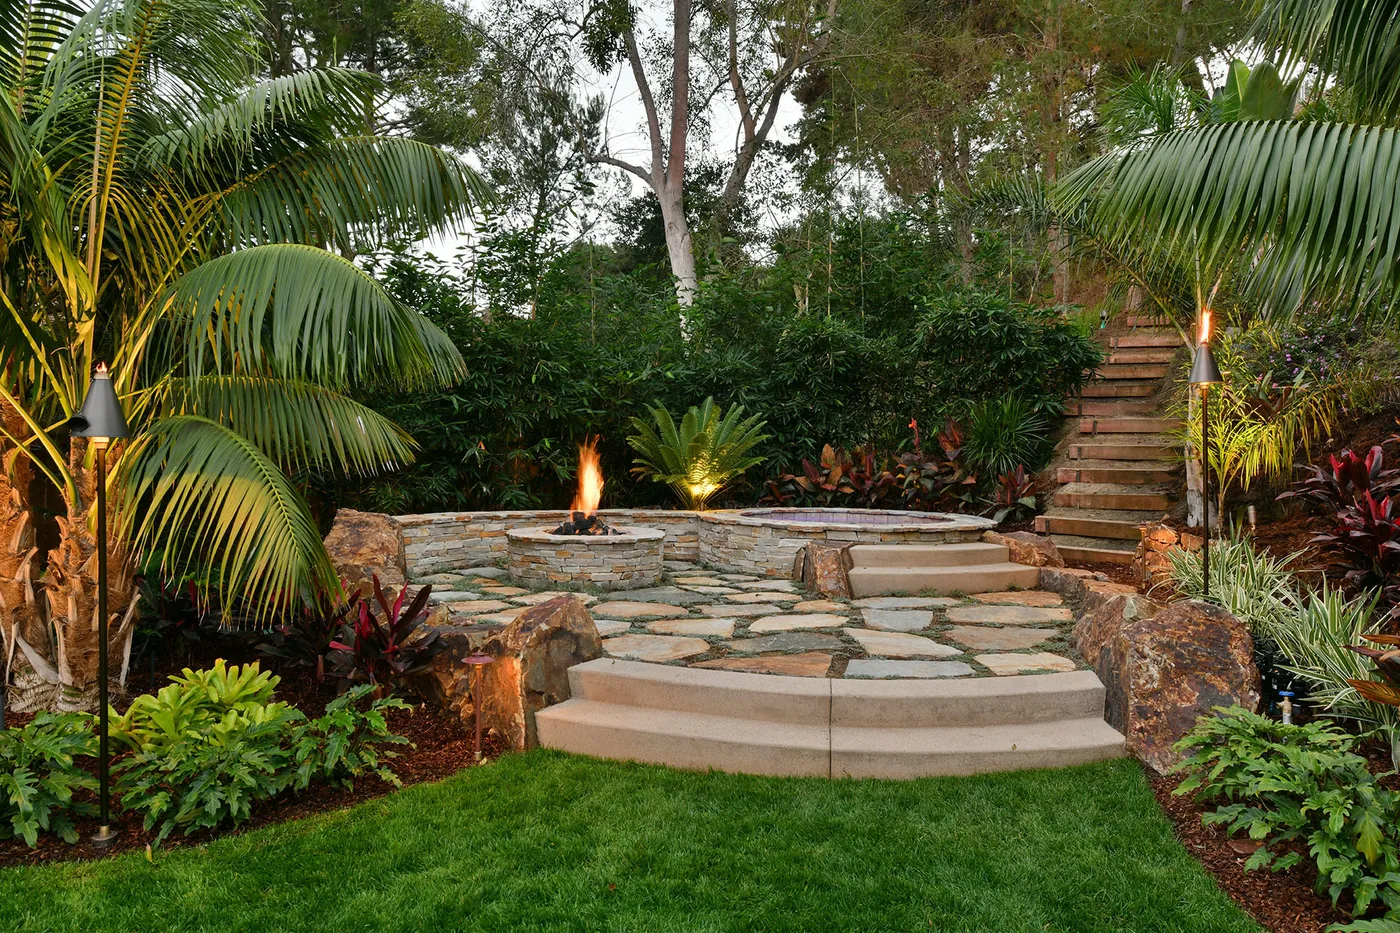
23. A Lush Tropical Patio with a Stone Fire Pit and Spa
Creating a lush, tropical paradise like this requires one thing above all: the right climate. Those gorgeous, dense tropical plants and palm trees are not going to survive a harsh winter in most of the country. This look is best suited for USDA Zones 9-11 (think Florida, Southern California, the Gulf Coast). If you live in a colder climate, you can achieve a similar feel for the summer by using large potted tropicals (like elephant ears and cannas) that you can bring indoors during the winter. It’s a lot of work, but it’s the only way to protect your investment.
|
📋 Copy HEX 🔗 Share |
This cozy, inviting atmosphere is a perfect blend of hard and soft elements. Let’s call the formula 50% Warm Hardscape + 50% Lush Greenery. The flagstone patio, stone fire pit, and raised spa create a solid, functional ‘room’ with warm, earthy tones. The other half of the equation is the explosive greenery. The dense, layered tropical plants completely surround the patio, creating a sense of privacy and enclosure. This balance is crucial; with less greenery, the patio would feel exposed and harsh. With less hardscape, it would feel untamed and unusable.
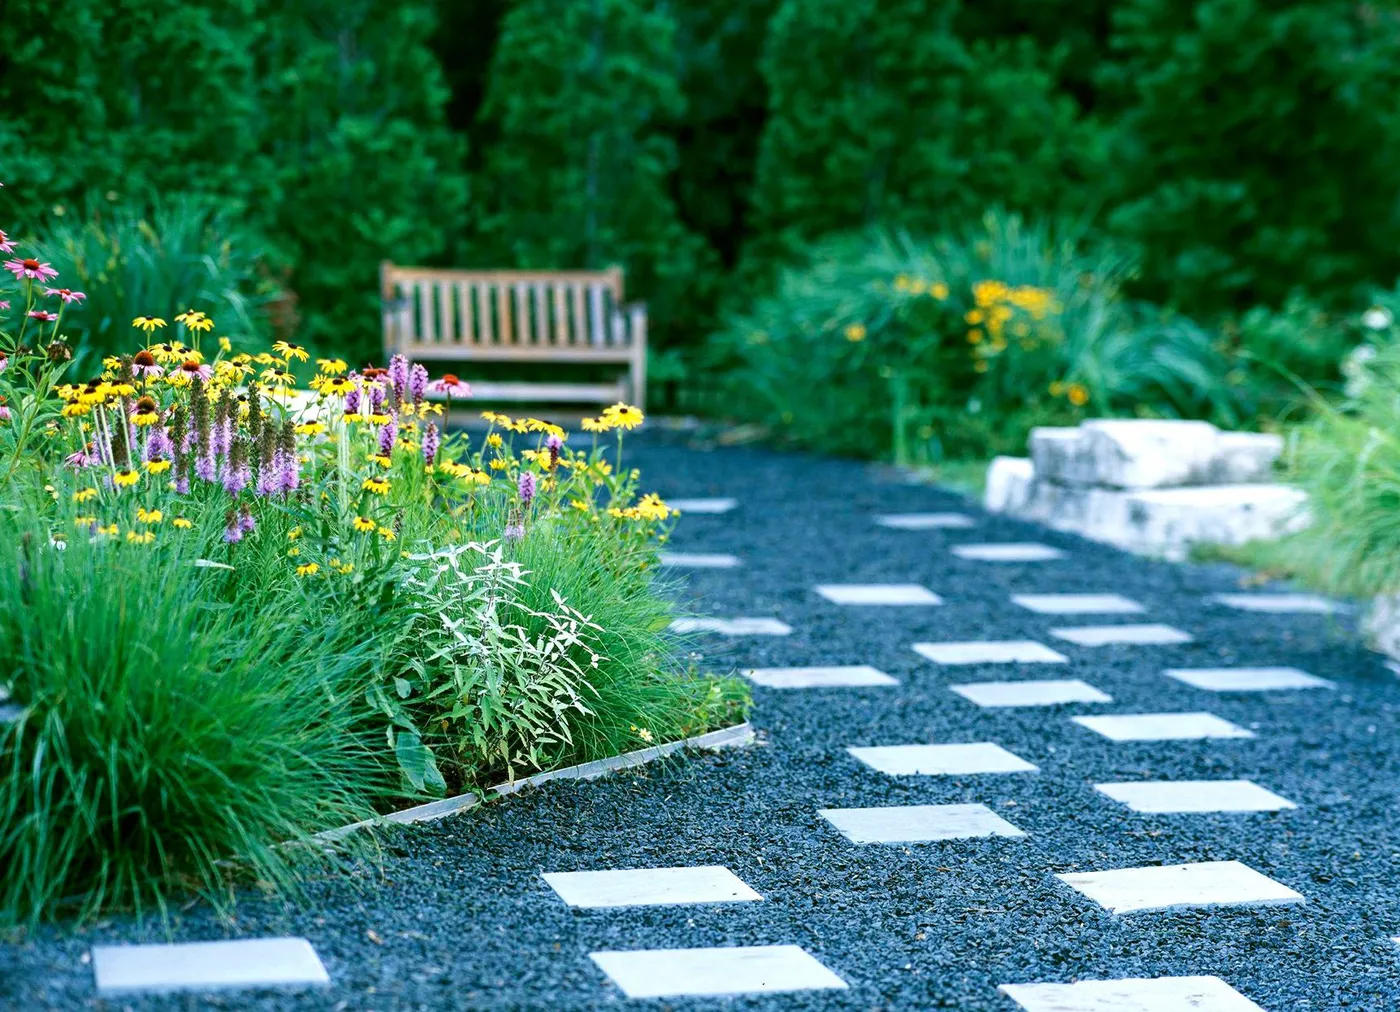
24. Design a Minimalist Courtyard with Gravel and Concrete Pavers
This courtyard feels so serene because of its strict adherence to a limited palette and simple geometry. The design uses only a few materials: concrete, dark gravel, and green plants. The color palette is tight: warm beige, dark grey, and natural green. This restraint prevents the space from feeling busy or chaotic. The strong grid created by the square concrete pavers provides a sense of order and calm, while the ornamental grasses in the planter add a touch of softness and life. It’s a highly controlled environment, designed to be calming to the eye. Compare its straight lines with the similar materials in Idea #19.
|
📋 Copy HEX 🔗 Share |
This high-end look can be achieved for much less. Instead of custom-poured concrete planters, use off-the-shelf rectangular planters from IKEA or Target, or build simple boxes from pressure-treated lumber and paint them a dark grey ($100-$300). The large square pavers can be purchased individually from Home Depot or Lowe’s for $15-$30 each; you don’t need a contractor to place them. For the ground cover, buy the dark grey gravel in bulk from a landscape supplier—it’s dramatically cheaper than buying it in bags. With some sweat equity, you could replicate this look for under $1,000.
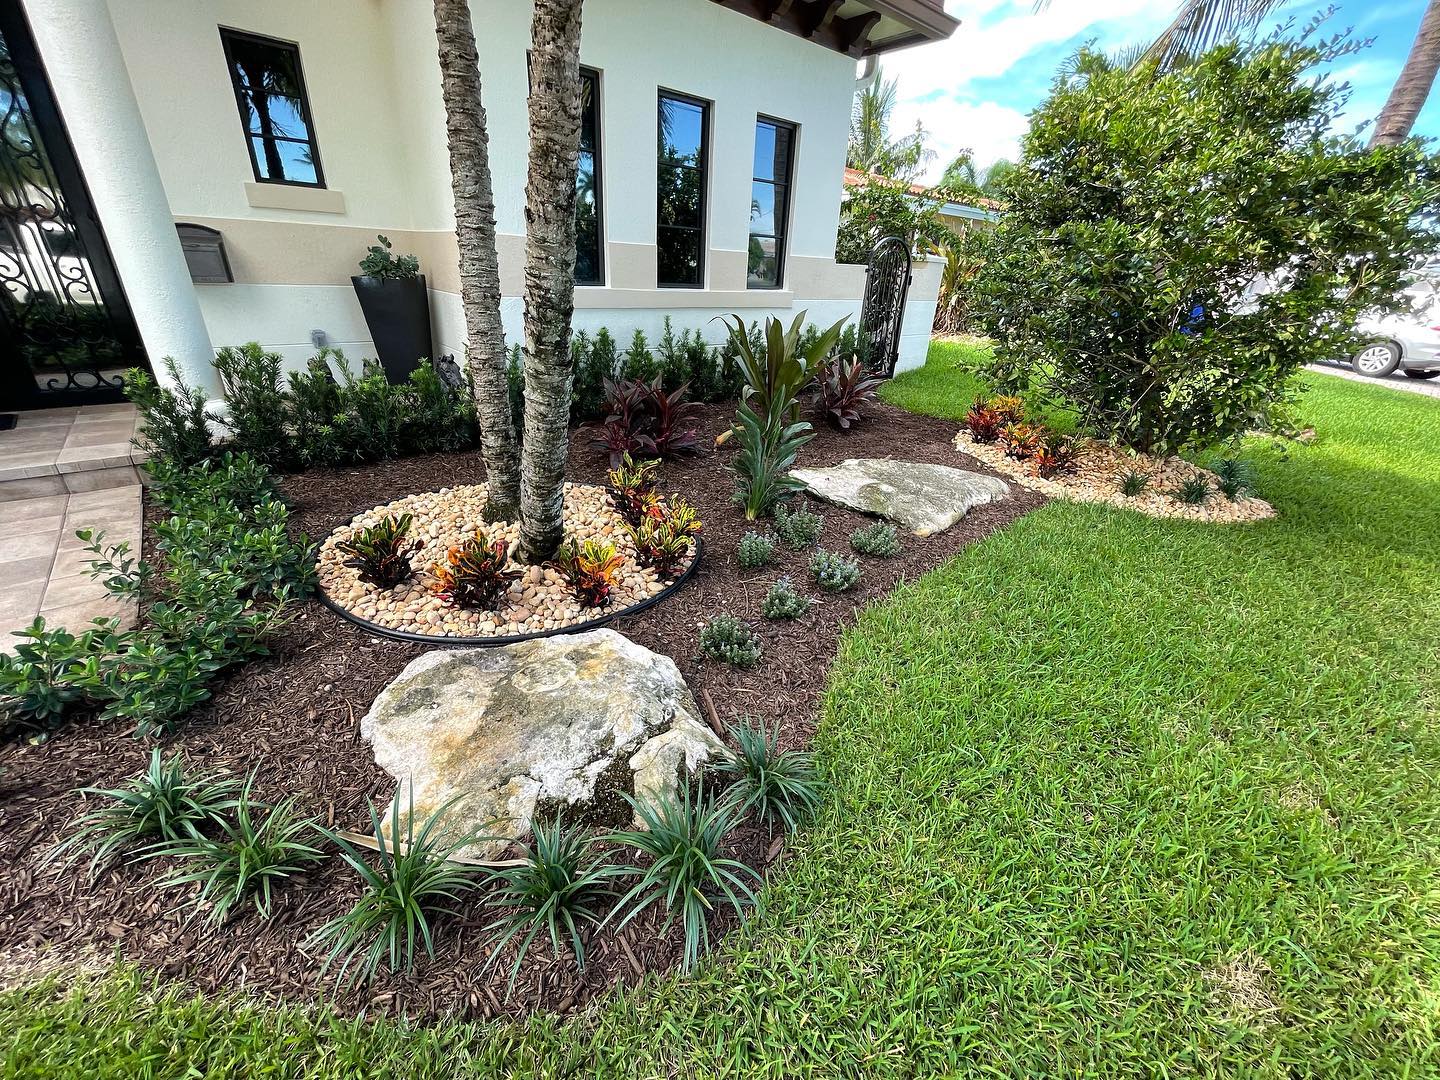
25. A Modern Front Yard with Mulch, Boulders, and River Rock
- Dark Brown Mulch: $150 – $300 (for 4-6 cubic yards)
- Light Tan River Rock: $100 – $250 (for accents)
- Large Boulders: $300 – $800 (price varies wildly by size and delivery)
- Palm Trees & Shrubs: $400 – $1,000 (depending on maturity)
- Sod/Grass: $200 – $500
- TOTAL: $1,150 – $2,850
- Budget alternative: Source boulders for free from construction sites (with permission) or Facebook Marketplace. Buy much smaller, immature plants and let them grow in. Use grass seed instead of sod. This can cut the cost by 50-70%.
|
📋 Copy HEX 🔗 Share |
When creating a bed with both mulch and rock, the secret is a clean separation. After laying out your bed shapes, dig a 4-inch deep trench along the line where the two materials will meet. Install a high-quality, rigid plastic or metal edging in the trench. This physical barrier will prevent the smaller mulch particles from washing into the rock and the rocks from spilling into the mulch. Backfill against the edging on both sides. This small step is the difference between a crisp, professional look and a messy mix that lasts one season.
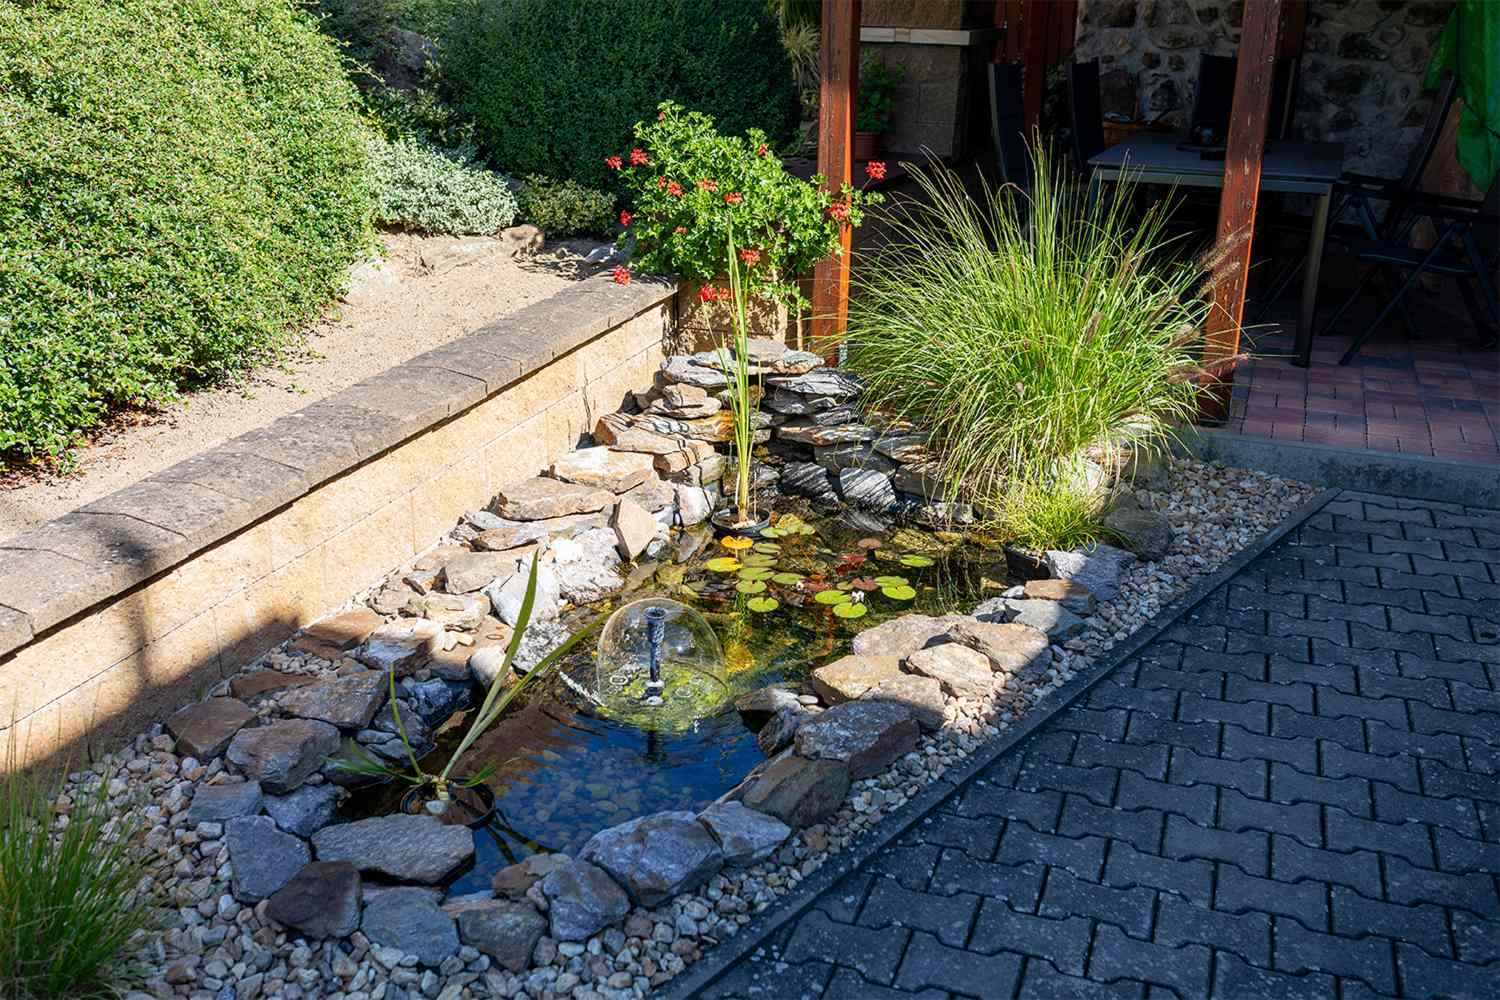
26. A Minimalist Path with Stepped Concrete Pavers and Gravel
Those oversized, poured-in-place concrete pavers look incredible, but this is an advanced DIY project. Mixing and pouring that much concrete is heavy, messy work. You need to build sturdy forms, get the mixture right, and finish the surface smoothly before it sets. If you’re a beginner, a much more manageable approach is to use large, pre-cast concrete pavers from a landscape supply store. You’ll get a very similar look without the stress and potential for costly mistakes that comes with pouring your own. The architectural feel is similar to Idea #17, but on a more horizontal plane.
|
📋 Copy HEX 🔗 Share |
The success of this design is rooted in its bold, architectural simplicity. It’s a study in scale and line. The pavers are intentionally oversized, making a strong statement and slowing down the experience of walking the path. The low concrete retaining wall reinforces this strong horizontal line, creating a layered, terraced effect. The choice of architectural plants—like the structured ornamental grasses—complements the clean lines of the hardscape. There’s nothing fussy or extraneous; every element is chosen for its form and contributes to the serene, modern whole.
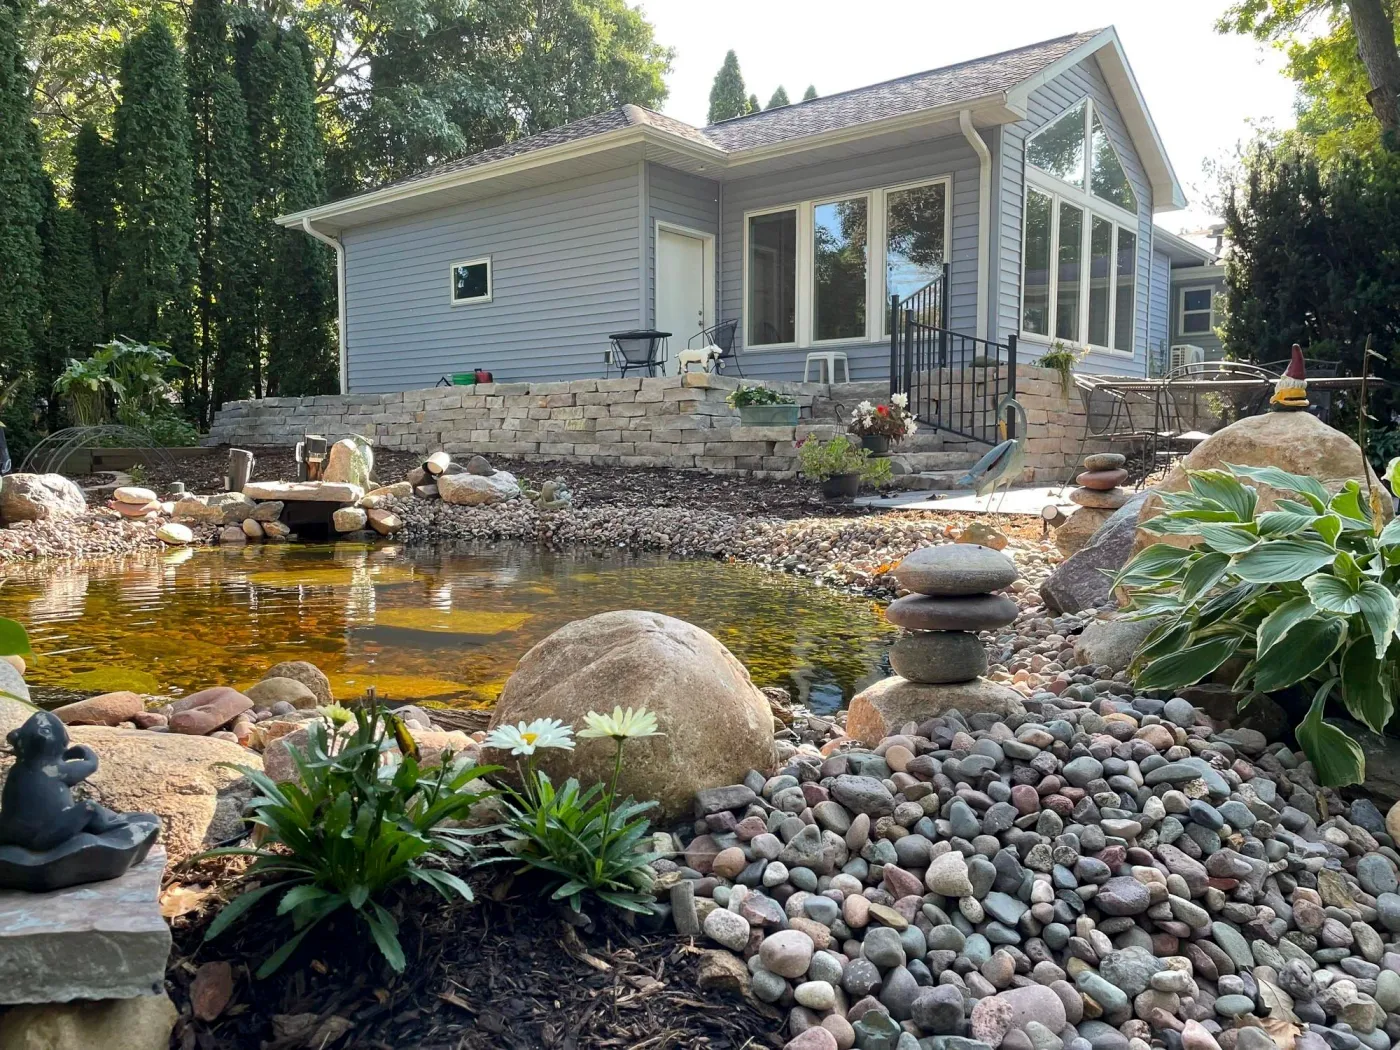
27. A Naturalistic Backyard Pond with a Stone Retaining Wall
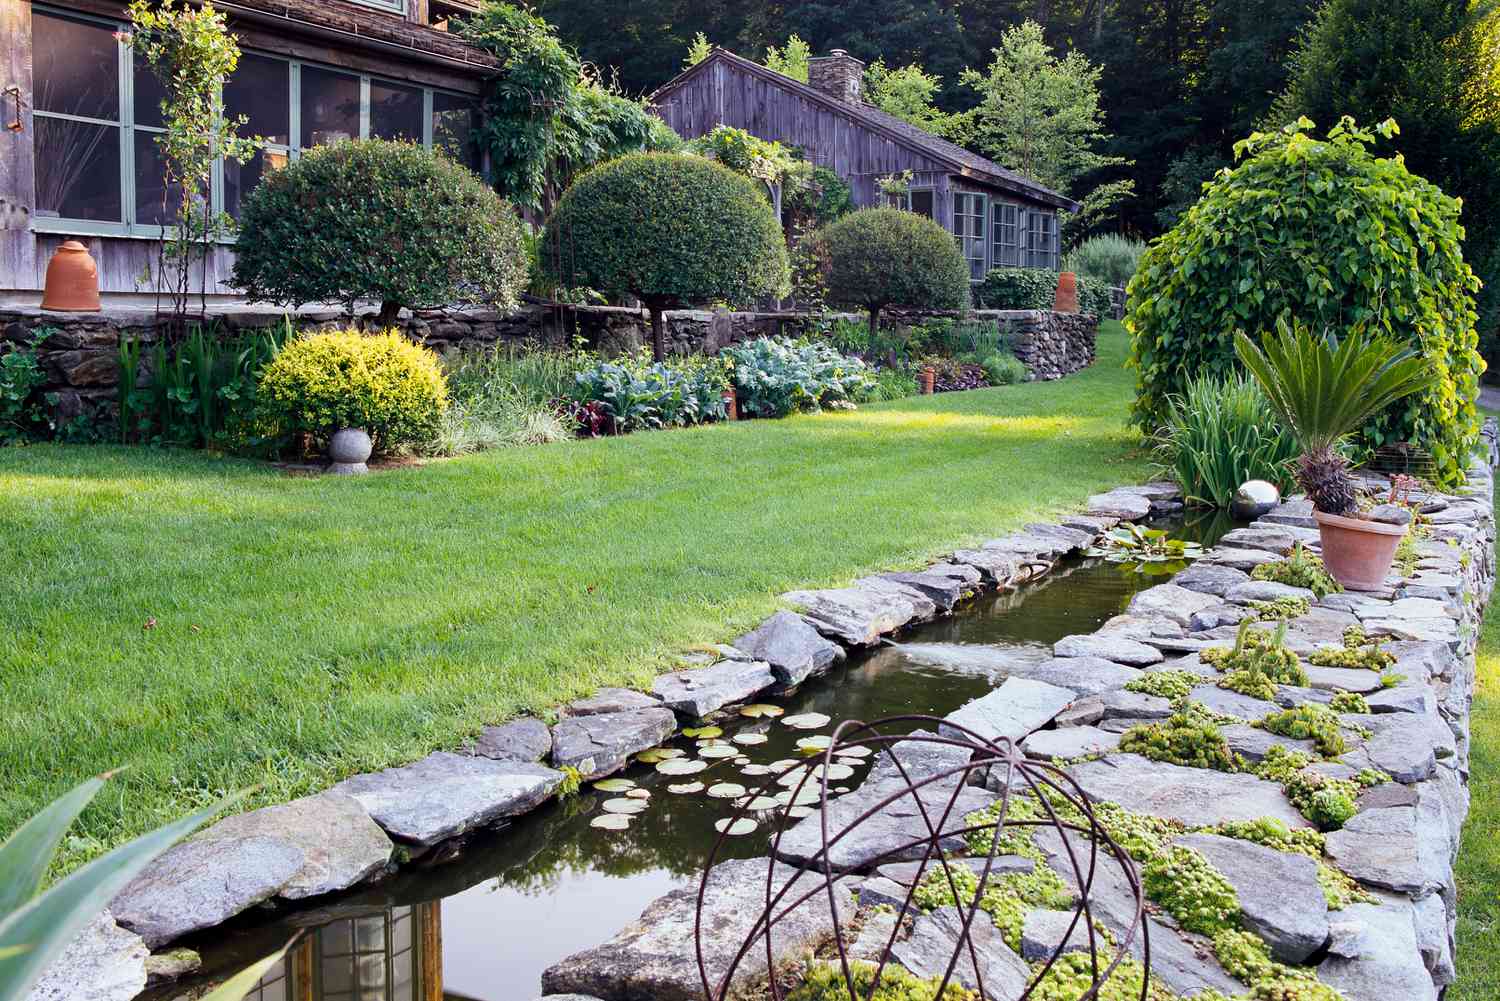
The single element that elevates this from just a pond to a complete landscape is the stacked stone retaining wall. It provides a crucial sense of structure and backdrop for the entire scene. The wall terracing the yard creates different levels of interest and makes the pond feel nestled and protected, rather than just sitting in a flat lawn. It also provides planting pockets and a place for the house to sit above the water feature, creating a more dynamic view from the windows. Without the wall, the pond would feel less integrated and significant.
|
📋 Copy HEX 🔗 Share |
A natural-looking pond is a living ecosystem, and it requires balancing. In the spring, you’ll have to clean out winter debris and check your pump. In the summer, you’ll need to manage algae growth, either by adding beneficial bacteria, using UV clarifiers, or ensuring you have enough plant coverage (around 60% of the surface) to out-compete the algae for nutrients. In the fall, you’ll need to cover the pond with a net to keep falling leaves out, as they can decompose and harm water quality. It’s a beautiful feature, but it’s more like owning a pet than installing a patio.
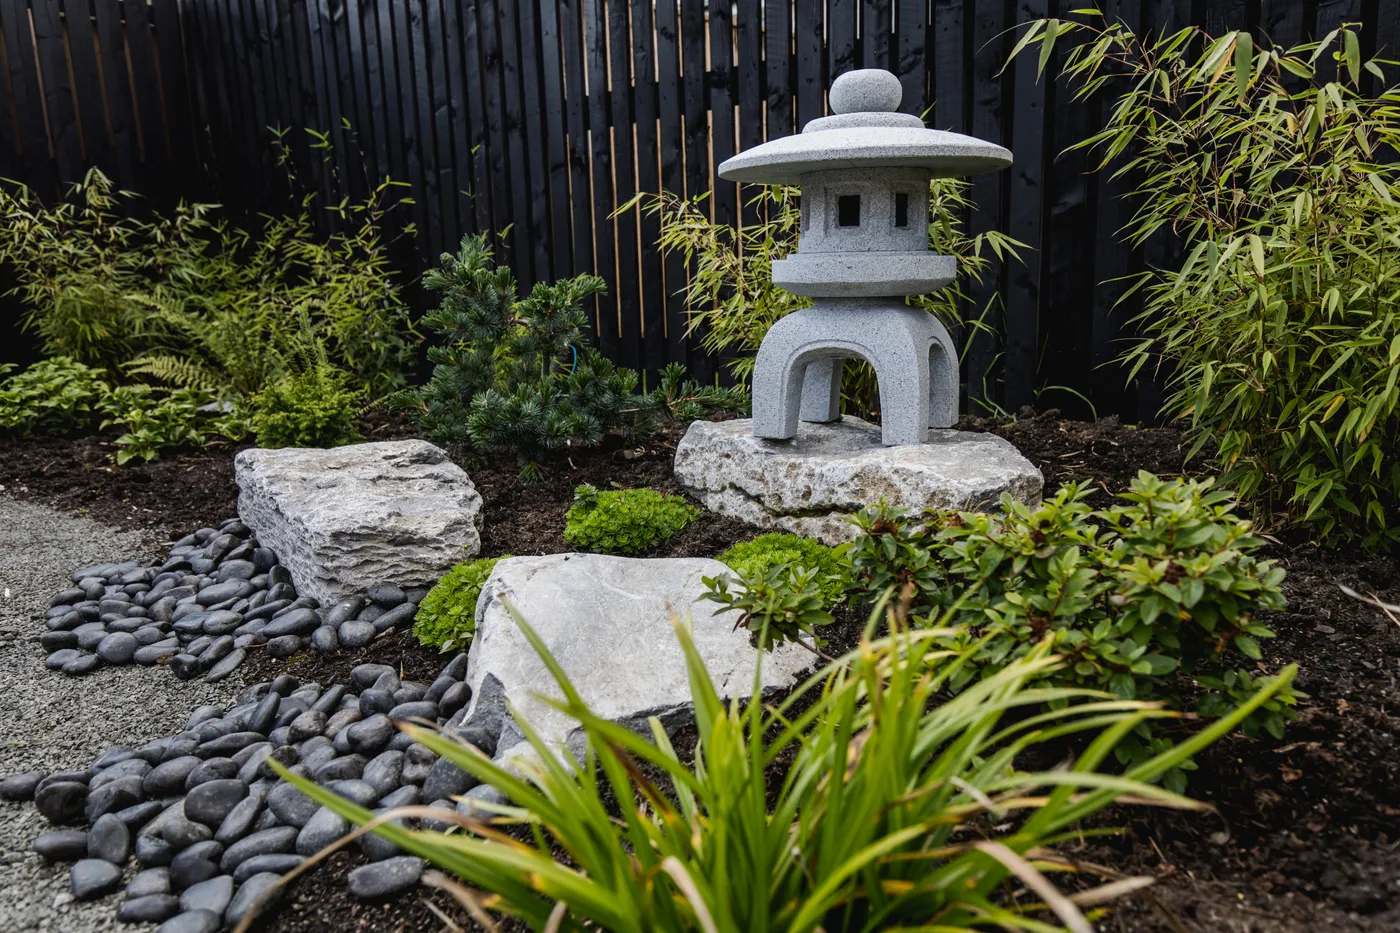
28. Create a Modern Zen Corner with a Stone Lantern and Black Fence
For a modern, high-contrast look like this, don’t be afraid to go truly black. Many black exterior stains are actually very dark brown or charcoal. For the sharp, contemporary feel seen here, you want a solid-color acrylic stain in a true black with a flat or matte finish. It will provide an opaque, even coating that makes the green foliage and grey stone pop dramatically. Before you stain, make sure the wood is perfectly clean and dry. Apply two thin coats for the most durable and consistent finish. The starkness of the black is what makes this design work.
|
📋 Copy HEX 🔗 Share |
This small corner packs a big design punch because of its powerful use of contrast. First, you have the texture contrast: the smooth, polished river rocks against the rough, organic shape of the larger boulders and the fine texture of the evergreen foliage. Second, there’s color contrast: the deep black of the fence makes the vibrant green of the plants and the cool grey of the stone lantern appear more vivid. Finally, there’s a contrast in form: the strong vertical lines of the fence and bamboo are balanced by the rounded, horizontal shapes of the stones.
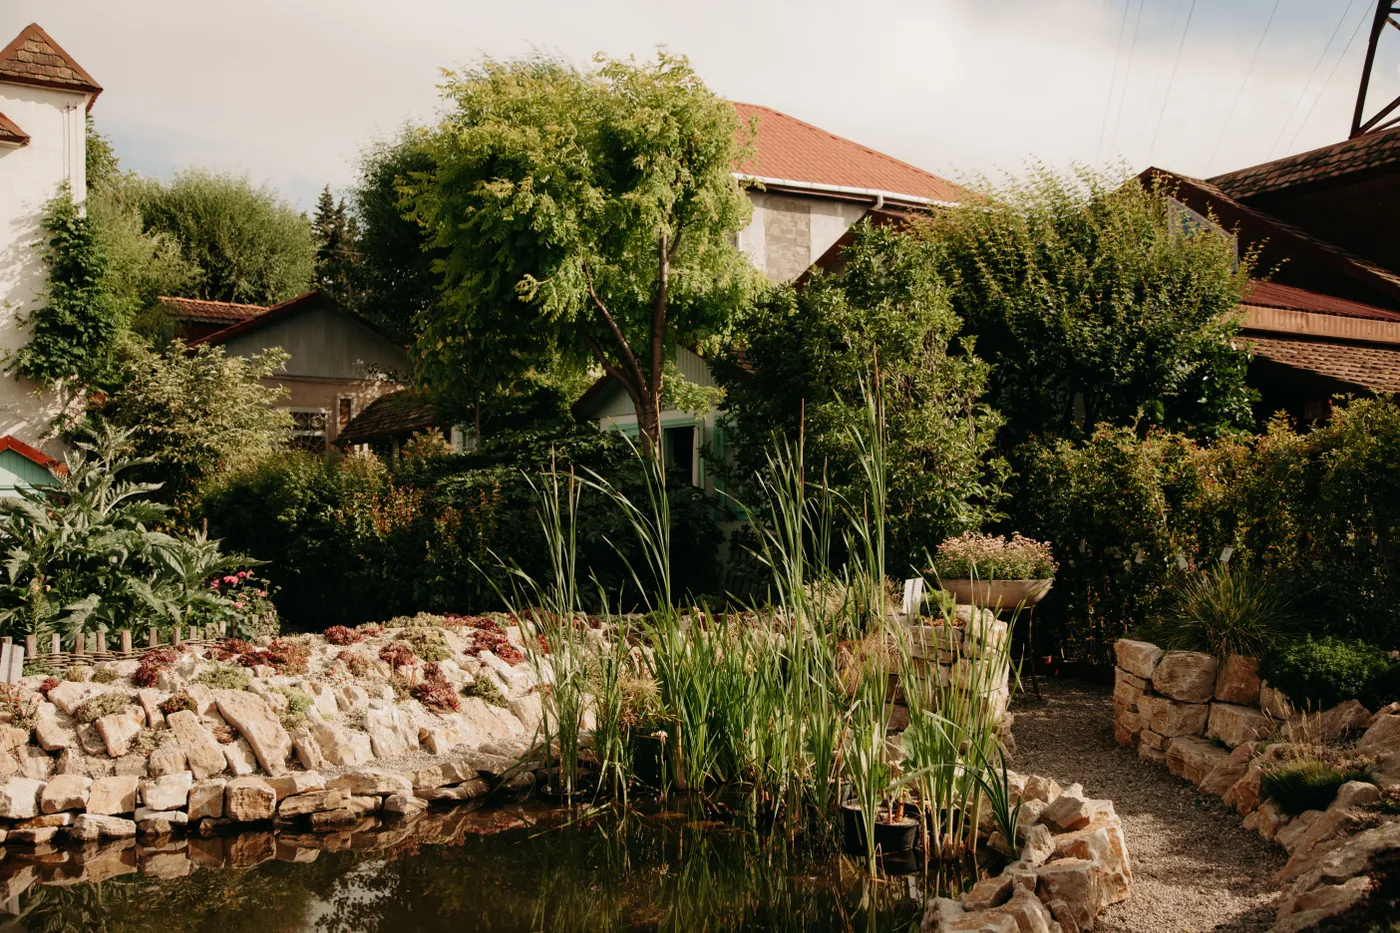
29. Edge a Natural Garden Pond with Stacked Stone
When stacking stones for a pond edge, it’s tempting to use mortar to lock everything in place. Resist that urge if you want a truly natural look. Mortared joints look artificial and can crack over time with ground movement. A dry-stack method, where you carefully fit the stones together like a puzzle, allows for small shifts and creates a much softer, more organic appearance. It also creates tiny crevices where moss and small plants can grow, further integrating the stone into the landscape over time. Stability comes from fitting the stones snugly, not from glue.
|
📋 Copy HEX 🔗 Share |
Creating a stable, attractive dry-stacked stone edge for your pond is an art, but it’s very achievable. Here’s the basic process:
- Create a Solid Foundation: Dig a shallow trench around your pond liner, about 6 inches deep and 12 inches wide. Fill it with 4 inches of compacted gravel to create a stable, level base for your first course of stones.
- Lay the First Course: Select your largest, flattest stones for the first layer. Place them on the gravel base, making sure they are level and don’t rock.
- Stack and Stagger: Begin your second course, ensuring you stagger the joints, just like with brickwork. The stone above should span the gap between the two stones below it.
- Lean In: As you build up, slightly angle each course of stones back towards the bank. This ‘batter’ gives the wall strength against soil pressure.
- Finish the Top: Use wide, flat capstones for the final layer to create a finished look and a stable edge.
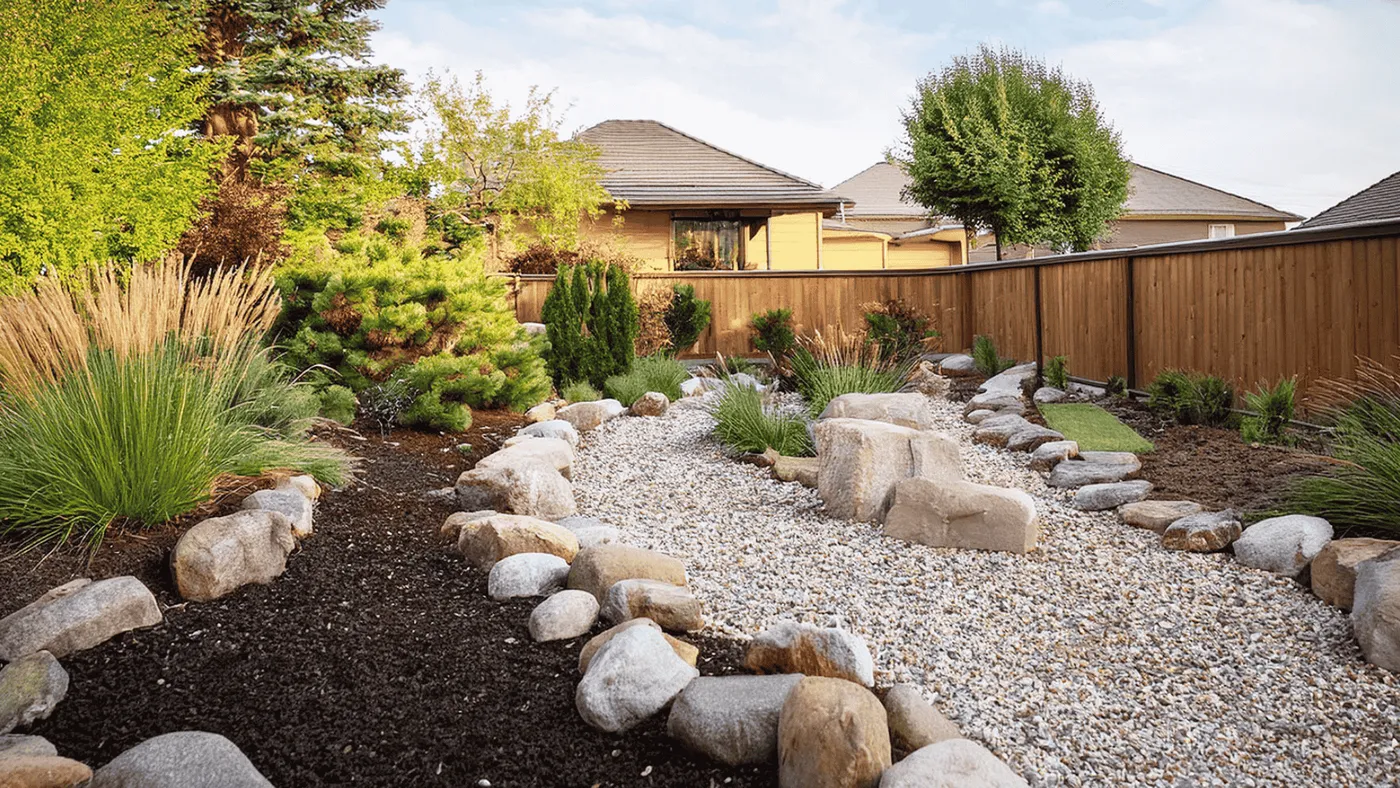
30. Craft a Backyard Dry Riverbed with Boulders and Gravel
This dry riverbed looks convincing because it successfully mimics nature’s variety and flow. The channel isn’t a uniform width; it widens and narrows along its path, just like a real stream. The use of different rock scales is also crucial: massive boulders anchor the ‘banks’ and create focal points, while the smaller gravel fills the center to represent the faster-flowing part of the stream. Flanking the entire feature with dark mulch and soft ornamental grasses helps to frame the riverbed and integrate it into the rest of the yard, preventing it from looking like it was just dropped on top of the lawn.
|
📋 Copy HEX 🔗 Share |
Before you lay a single stone for your dry riverbed, you must put down high-quality landscape fabric first. This is non-negotiable. The fabric acts as a barrier to prevent weeds from growing up through your gravel and, just as importantly, prevents your expensive gravel and boulders from slowly sinking into the soil over time. Overlap the seams by at least 6 inches and secure the fabric with landscape staples. This foundational step will save you countless hours of weeding and the cost of adding more rock in the future.
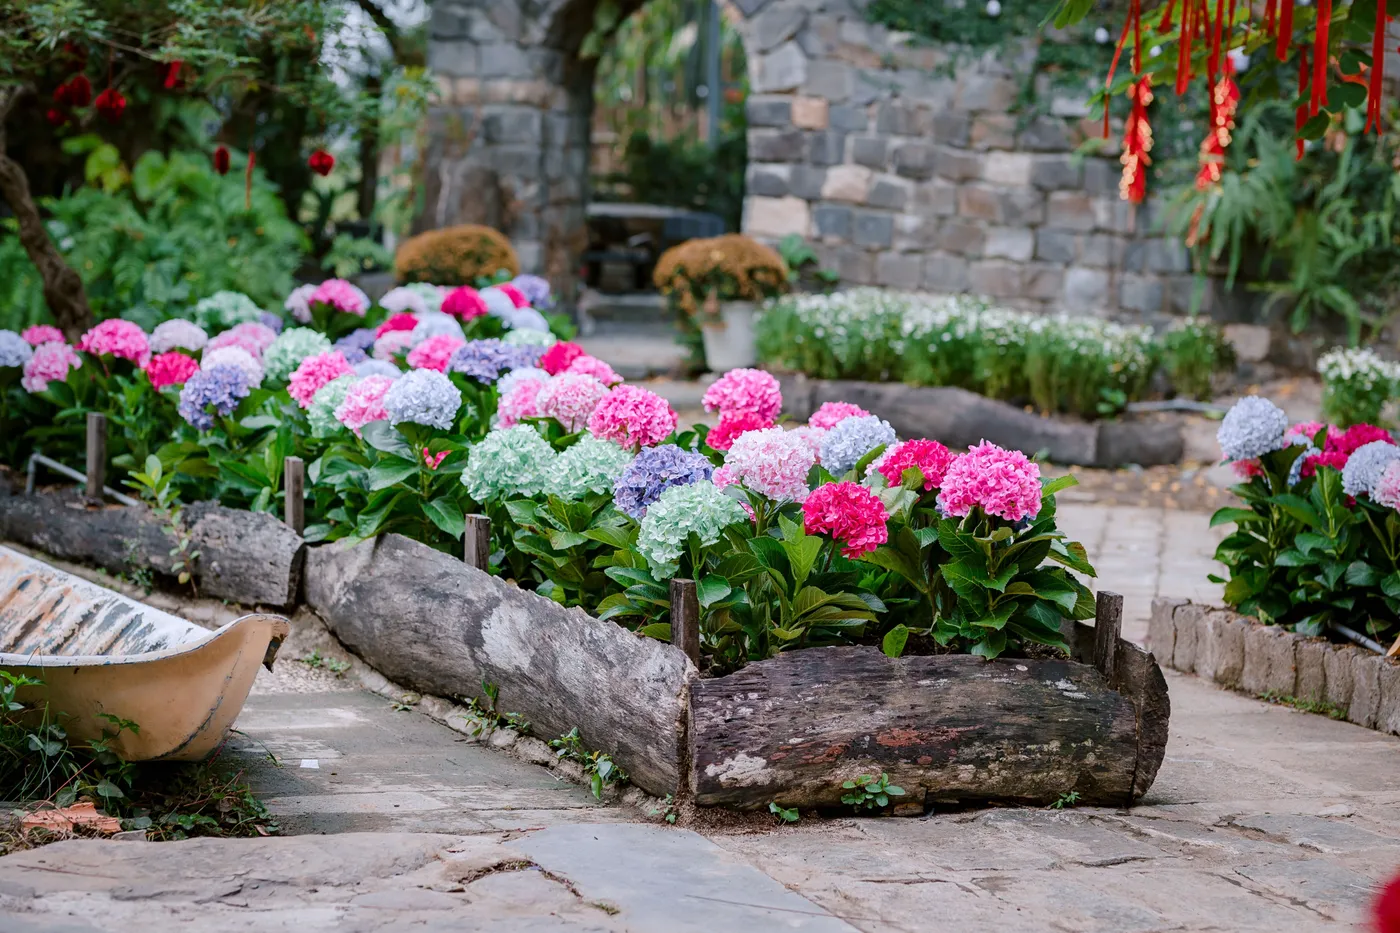
31. Edge a Garden Bed with Rustic Logs and Colorful Hydrangeas
The single element that gives this garden its rustic soul is the weathered log edging. If you replaced the logs with tidy concrete pavers or sharp metal edging, the entire feeling would shift from a charming country garden to something more formal and manicured. The dark, textured, slightly imperfect logs provide an earthy, organic frame for the vibrant flowers. They feel found and natural, connecting the planted bed to the surrounding woodland environment. The log edging tells a story of time and nature that a manufactured border simply can’t.
|
📋 Copy HEX 🔗 Share |
This look taps directly into the ‘English cottage garden’ and ‘naturalistic planting’ movements that are hugely popular. It’s all about celebrating abundance, color, and a slightly untamed beauty. Hydrangeas, in particular, are having a major moment because new cultivars offer incredible color ranges (like the pinks, blues, and purples seen here) and are more reliable bloomers. This style feels generous and joyful, a welcome contrast to the more austere minimalist gardens that have dominated for the past decade. It’s about creating a personal, romantic escape right in your own backyard.
Your Dream Yard Is a Weekend Away
See? A beautiful landscape isn’t some unobtainable secret reserved for the pros. It’s about finding an idea that speaks to you and breaking it down into manageable steps. Whether you’re starting with a blank slate or just want to tackle one small corner, you’ve got this. Now, go save your favorites to your Pinterest board and start planning your project!