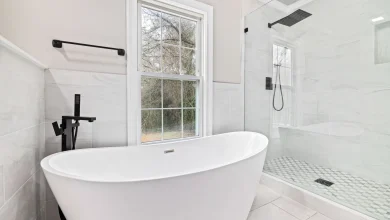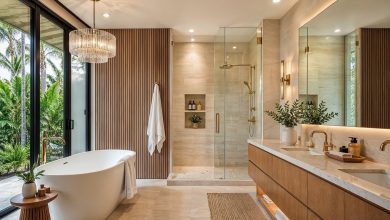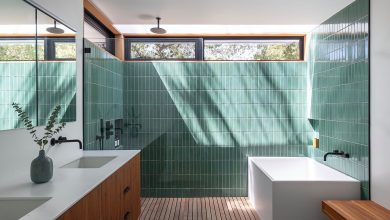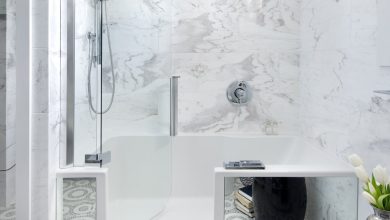

You know that feeling when you finally find the one? That perfect bathroom photo you just can’t stop thinking about? We get it. After filtering through hundreds of options, we’ve narrowed it down to the 26 bathroom remodel ideas that truly stand out for 2027. Inside, you’ll find everything from sleek modern escapes and natural, spa-like retreats to timeless classic designs that feel both fresh and familiar.
We’ve curated these looks to inspire you, whether you’re tackling a tiny guest bath or a full primary suite overhaul. And stay until the end—we break down the most common mistakes that can ruin these looks. 📌 Save this to Pinterest for later—you’ll want to revisit these ideas.
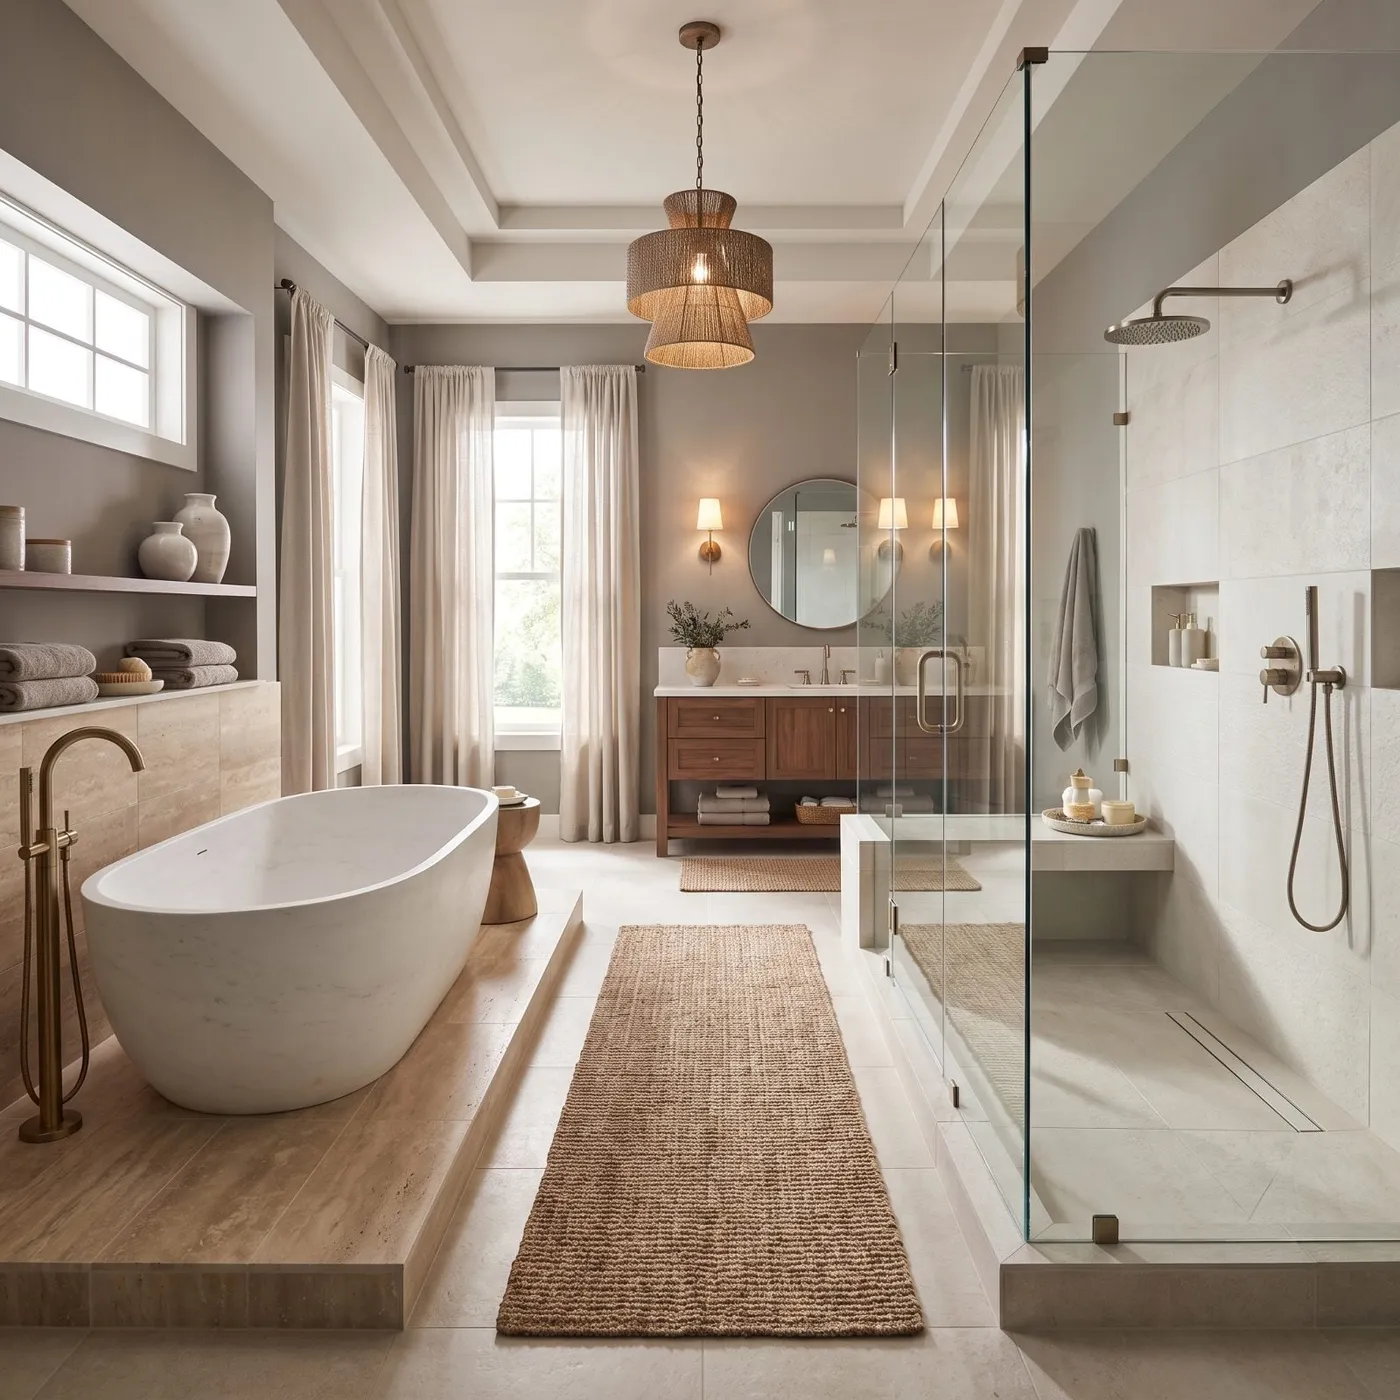
1. A Serene Escape with a Freestanding Tub and Woven Textures
This bathroom nails the sophisticated spa vibe by masterfully layering textures. You have the smooth, cool surface of the freestanding oval tub, the subtle grid of the beige wall tiles, and the warmth of the dark wood vanity. But the real magic comes from the organic touches: the woven pendant light and the jute runner. These elements add a soft, natural quality that keeps the modern design from feeling cold or sterile, creating a space that feels both clean and deeply calming.
|
📋 Copy HEX 🔗 Share |
The elevated platform for the tub is another smart move. It doesn’t just add visual interest; it designates the tub as a special destination within the room, a clear focal point for relaxation.
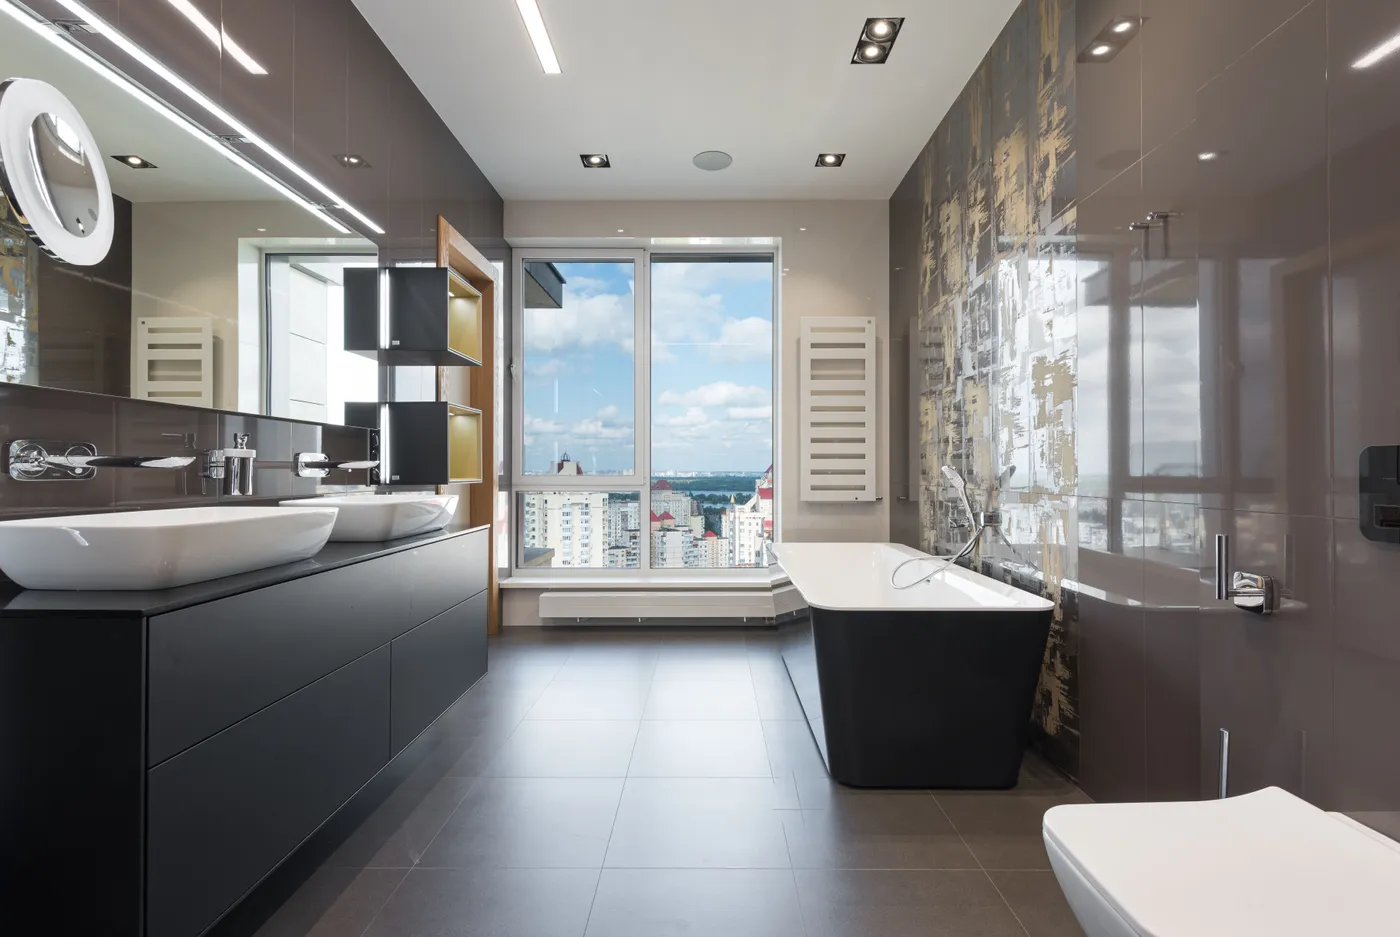
2. Urban Luxury with a Black Bathtub and Panoramic City Views
What makes this bathroom unforgettable is the floor-to-ceiling window. Take it away, and you still have a sleek, modern bathroom with a cool black tub and interesting tile. But with the window, the entire space is transformed. It brings the dynamic energy of the cityscape right into this private retreat, creating a stunning juxtaposition between the serene interior and the bustling world outside. The glossy brown tiles even reflect the city lights at night, making the view an active part of the design.
|
📋 Copy HEX 🔗 Share |
A look this bold needs room to breathe. This design works best in a primary bathroom of at least 150-200 square feet with ceiling heights of 9 feet or more. The large scale of the window, the freestanding tub, and the double vanity all require generous proportions to avoid feeling cramped. For smaller spaces, consider a similar palette but with a floating single vanity and a built-in tub to maximize floor space.
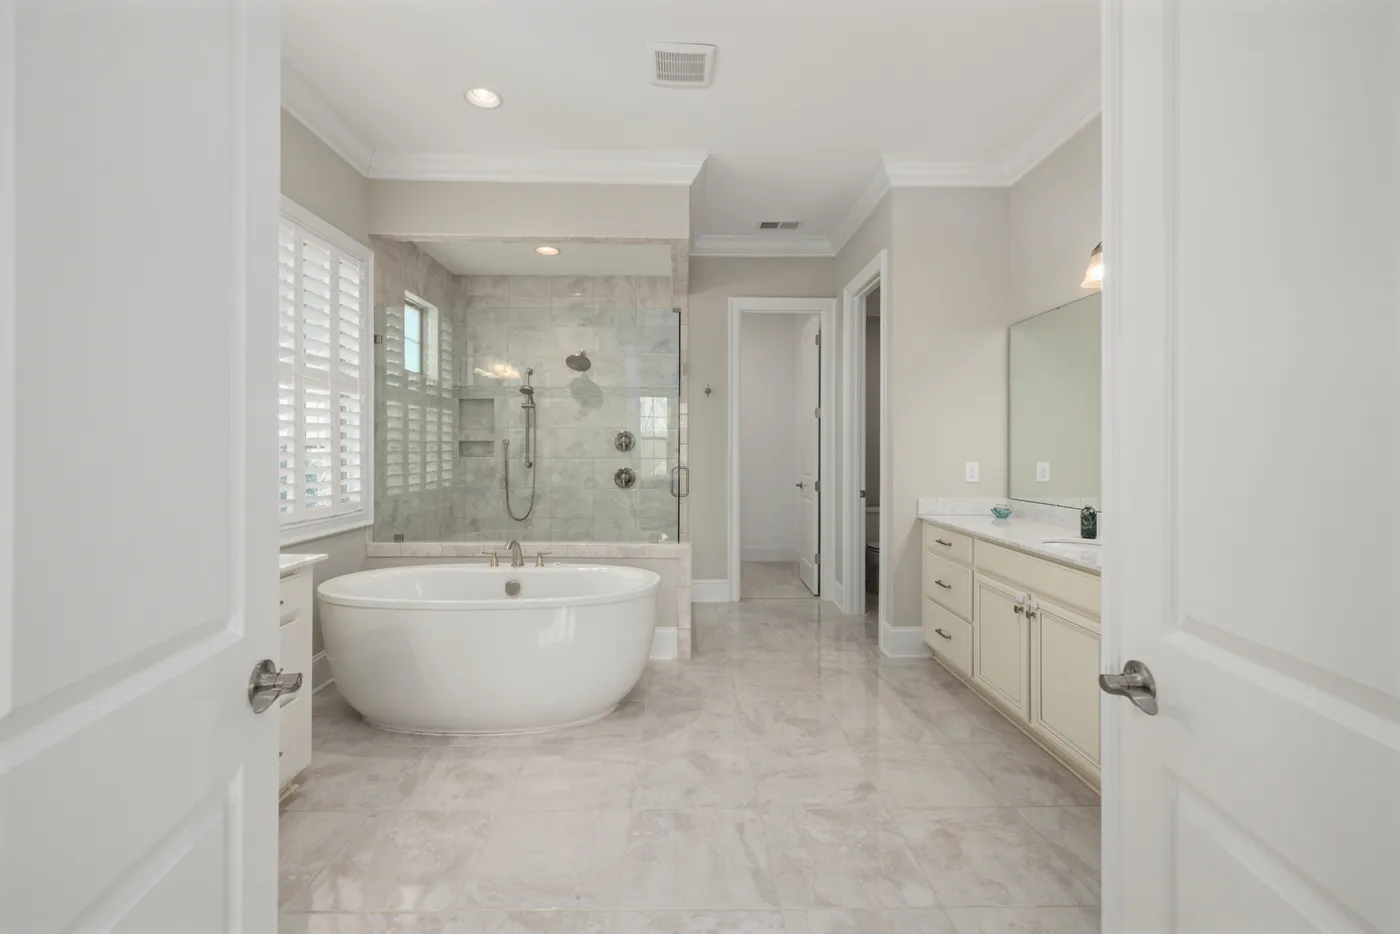
3. Classic Serenity with a Cream and Gray Palette
The formula here is all about quiet balance. Think of it as: 50% Soft Grays (on floor and shower tiles) + 40% Creamy Whites (on vanity, tub, and shutters) + 10% Brushed Nickel (fixtures and hardware). This high-neutral approach creates a timeless and airy feel. The key is the subtle variation in the whites and grays; they aren’t flat, which adds depth. The brushed nickel provides a soft metallic touch without the high contrast of black or the warmth of brass, maintaining the room’s serene, understated elegance.
|
📋 Copy HEX 🔗 Share |
You don’t need a custom budget to get this clean, classic vibe. Instead of marble countertops, look for a high-quality quartz or even laminate with a subtle pattern. Big-box stores like Lowe’s or Home Depot offer similar cream-colored shaker vanities at a fraction of custom prices. For fixtures, check out online retailers for well-priced brushed nickel options. You can achieve this look for $5,000-$7,000, a significant saving from a high-end $20,000+ remodel. This offers a more traditional take on the neutral palette in Idea #0.
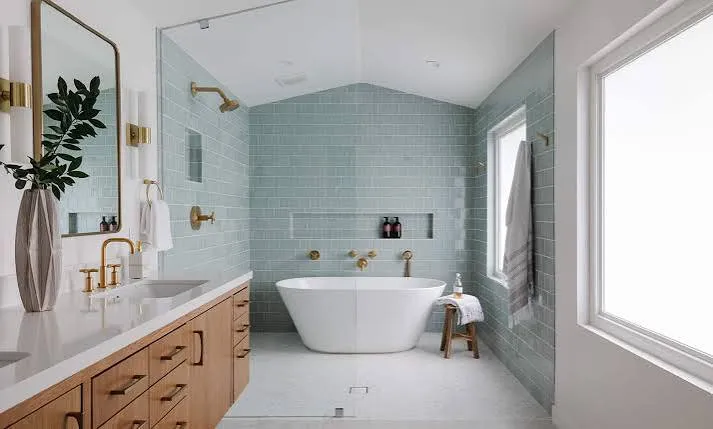
4. How to Make a Small Primary Bath Feel Like a Spa
One way to instantly add a spa-like feel is with organized, accessible storage. Here’s how to install simple floating shelves for your towels and toiletries.
|
📋 Copy HEX 🔗 Share |
- Measure and Mark: Decide on shelf placement. Use a level and pencil to mark where your brackets will go. Aim for 18-24 inches of vertical space between shelves.
- Locate Studs: Use a stud finder to locate wall studs. This provides the most secure anchor. If no studs are available, use heavy-duty drywall anchors.
- Install Brackets: Drill pilot holes and secure the brackets to the wall.
- Attach Shelves: Place your wooden shelves onto the brackets and secure them from below.
- Style Away: Roll fluffy white towels, add a small plant, and place your favorite products in nice glass or ceramic containers.
Time estimate: 1-2 hours. Cost: $50-$150.
Let’s be honest: a spa feels relaxing because it’s completely uncluttered. Bringing that vibe home requires a commitment to organization. If you’re not naturally tidy, open shelving can quickly become a source of stress, displaying a chaotic collection of half-empty plastic bottles. Before you commit to this look, make sure you have adequate closed storage (like a medicine cabinet or vanity drawers) for the less-than-beautiful necessities. A spa is about curated simplicity, not putting everything on display.
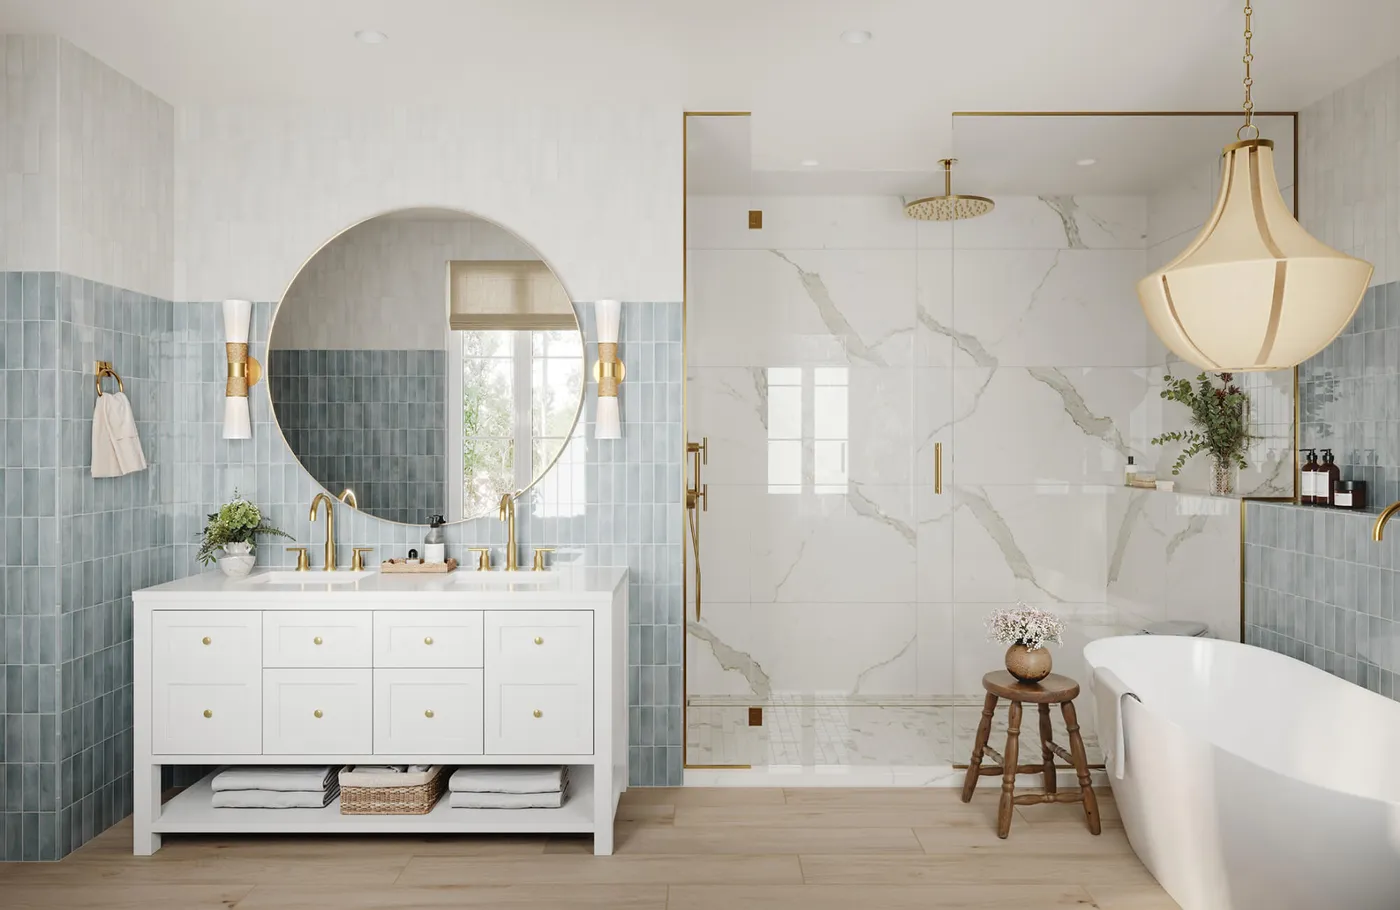
5. A Fresh Take on Modern with Blue-Green Tile and Brass
This bathroom feels so fresh and elegant because of its masterful use of contrast and repetition. First, there’s the color contrast between the cool, serene blue-green subway tiles and the warm, glowing brass fixtures. It’s a classic pairing that feels both energizing and sophisticated. Then, there’s the repetition of circular shapes—the large round mirror, the curves of the tub, the globe-like chandelier—which softens the straight lines of the vanity and tile, creating a harmonious and balanced composition.
|
📋 Copy HEX 🔗 Share |
Brass and gold fixtures are beautiful, but they do require a bit more attention than their chrome or nickel cousins to keep them looking their best. Here’s a realistic cleaning schedule:
- Weekly: Wipe down faucets and handles with a soft, damp microfiber cloth to remove water spots and fingerprints. Avoid harsh, abrasive cleaners, which can damage the finish.
- Monthly: For a deeper clean on unlacquered brass that has started to tarnish, use a dedicated brass cleaner or a paste of lemon juice and baking soda. Test on an inconspicuous area first.
- Annually: Inspect the finish for any signs of wear or chipping, especially in the shower where it’s constantly exposed to water.
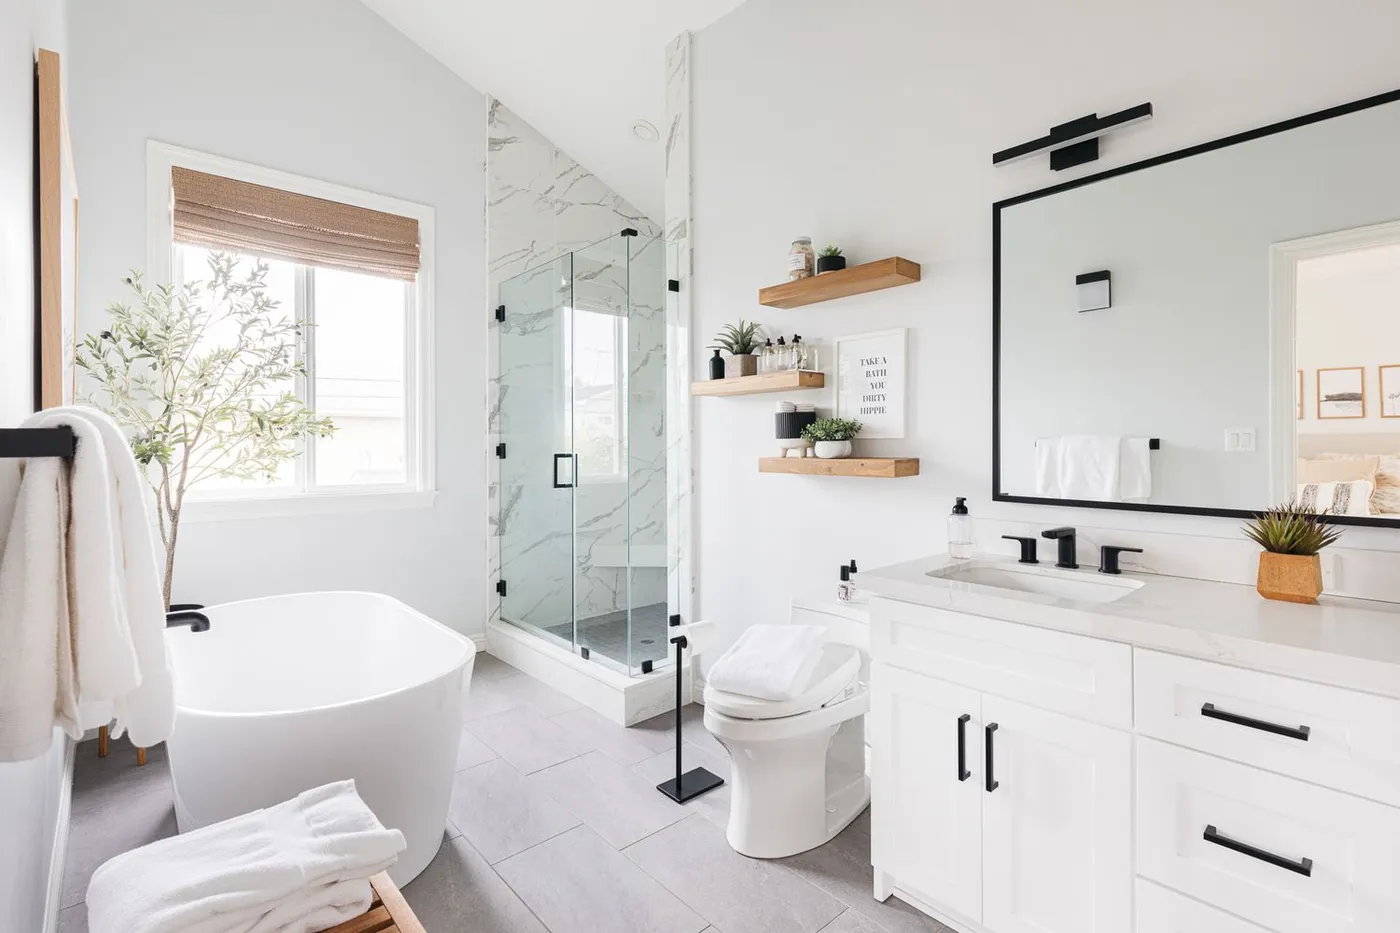
6. High-Contrast Style with a Marble Shower and Matte Black Accents
The visual recipe here is bold and simple: 60% bright white (walls, tub, vanity) + 20% Marble-Look Tile (shower) + 15% Matte Black (fixtures, hardware) + 5% Natural Wood (shelves). The dominant white creates a clean, gallery-like canvas. The matte black acts as punctuation, drawing your eye to key functional points like the faucet and showerhead. It’s a high-impact, graphic look that feels incredibly current. The small dose of natural wood is crucial; it prevents the black-and-white scheme from feeling too stark and adds a necessary touch of warmth.
|
📋 Copy HEX 🔗 Share |
The single element holding this entire design together is the matte black hardware. If you swapped all the black fixtures for chrome or nickel, the room would still be nice, but it would lose its entire personality. The black provides the graphic punch and modern edge that defines the space. It’s the confident choice that elevates a simple white bathroom into a statement. The matte black fixtures here are a bold, modern choice. For a warmer metal, check out the gold accents in Idea #8.
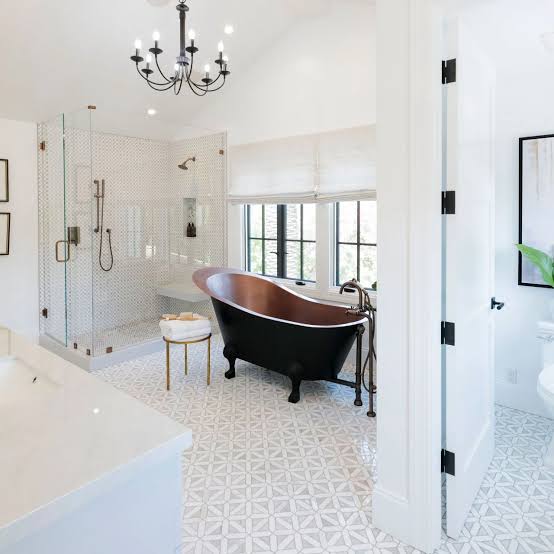
7. Achieving a Luxurious Master Bath Renovation
A high-end, luxurious bathroom is all about investing in quality materials and thoughtful details. The cost can add up quickly, but the result is a space that feels truly special and custom. Here’s a sample breakdown for a high-end renovation of this caliber:
|
📋 Copy HEX 🔗 Share |
- Main Furniture (Custom Vanity, Tub): $5,000 – $15,000
- Lighting (Sconces, Chandelier): $1,000 – $4,000
- Textiles (high-end towels, rug): $500 – $1,500
- Decor/Accessories: $500 – $2,000
- Tile & Fixtures (natural stone, high-end brass): $8,000 – $20,000+
- TOTAL: $15,000 – $42,500+
Budget alternative: Get a similar luxury feel with porcelain tile instead of marble, a ready-made vanity with upgraded hardware, and lighting from a design-forward retailer for a total of $7,000 – $15,000.
Want to make your bathroom feel instantly more luxurious? Pay attention to the temperature of your lighting. Instead of cool, blue-toned LEDs, opt for bulbs in the 2700K to 3000K range. This is considered a ‘warm white,’ and it casts a soft, flattering glow that mimics candlelight or incandescent bulbs. It makes skin tones look better and creates a relaxing, high-end hotel ambiance. Also, always, always put your vanity lights on a dimmer switch. You don’t need a full-blast light first thing in the morning.
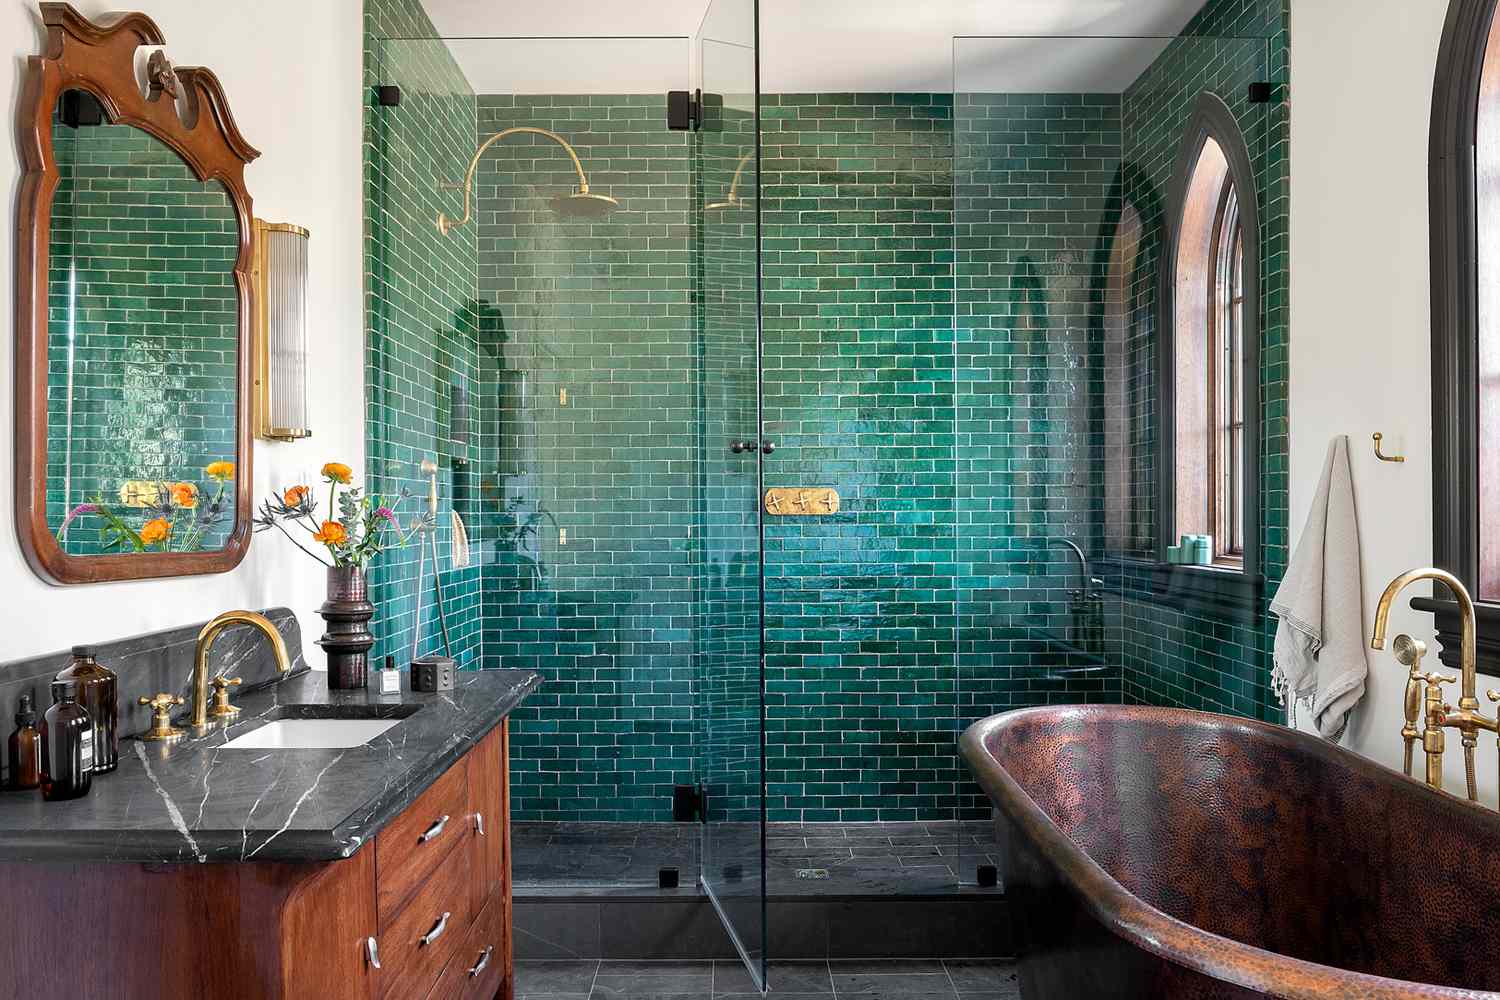
8. A Jewel-Box Bathroom with Emerald Green Tile and a Copper Tub
This look is a direct and beautiful rebellion against years of all-white-everything bathrooms. We’re seeing a huge trend towards rich, saturated color and materials with history and patina, like this emerald green tile and warm copper tub. It’s part of a larger design movement embracing “new traditionalism” and a more layered, personal aesthetic. People want their homes to feel collected and unique, not like a sterile catalog. This style has staying power because it’s based on classic materials, just used in a bolder, more confident way.
|
📋 Copy HEX 🔗 Share |
While undeniably stunning, a copper tub is not a low-maintenance choice. It will naturally develop a patina over time, which can be beautiful if you like a living finish. However, if you want it to stay bright and shiny, it will require regular polishing. Also, be careful about what cleaners you use, as acidic or abrasive products can damage the surface. The emerald green tile is gorgeous, but the grout lines will require sealing and regular cleaning to prevent mildew, especially in a high-use shower.
9. Sophisticated Drama: Dark Wood Vanity and Gold-Framed Mirrors
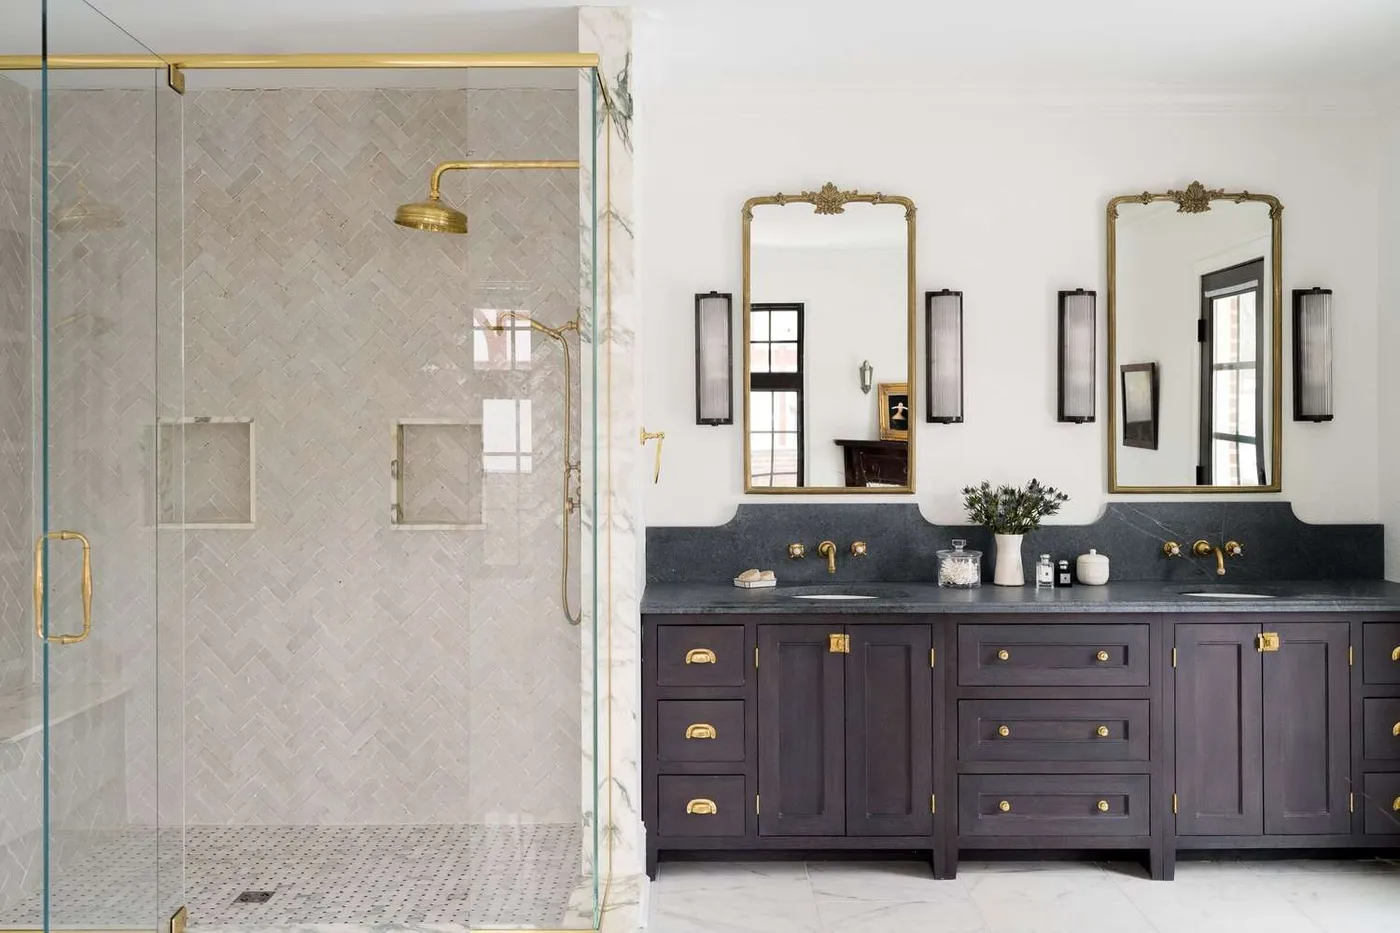
This design succeeds by perfectly balancing dark and light elements. The heavy, dark wood double vanity and gray stone countertop could easily overwhelm the space. However, they are lifted and brightened by several key choices: the two large, ornate gold-framed mirrors, the crisp white of the sinks, and the light gray herringbone tile in the shower. The gold acts as jewelry, adding sparkle and a touch of glamour, while the light tile provides a bright, reflective backdrop. It’s a study in balanced contrast.
|
📋 Copy HEX 🔗 Share |
Before you commit to a dark and moody bathroom, check these boxes to make sure it will work in your space:
- Check Your Light Source: Does the room have a large window with ample natural light? If not, you’ll need to plan for a robust layered lighting scheme with bright vanity lights, overhead lights, and shower lighting to keep it from feeling like a cave.
- Consider the Size: Dark colors can make a small room feel even smaller. This look is best suited for a medium to large primary bathroom where the dark vanity won’t feel visually oppressive.
- Test Your Paint: Don’t just pick a dark color from a chip. Paint a large swatch on the wall and see how it looks in the morning, afternoon, and evening light.
10. Modern Bathroom with Mixed Materials and Glass Vessel Sinks
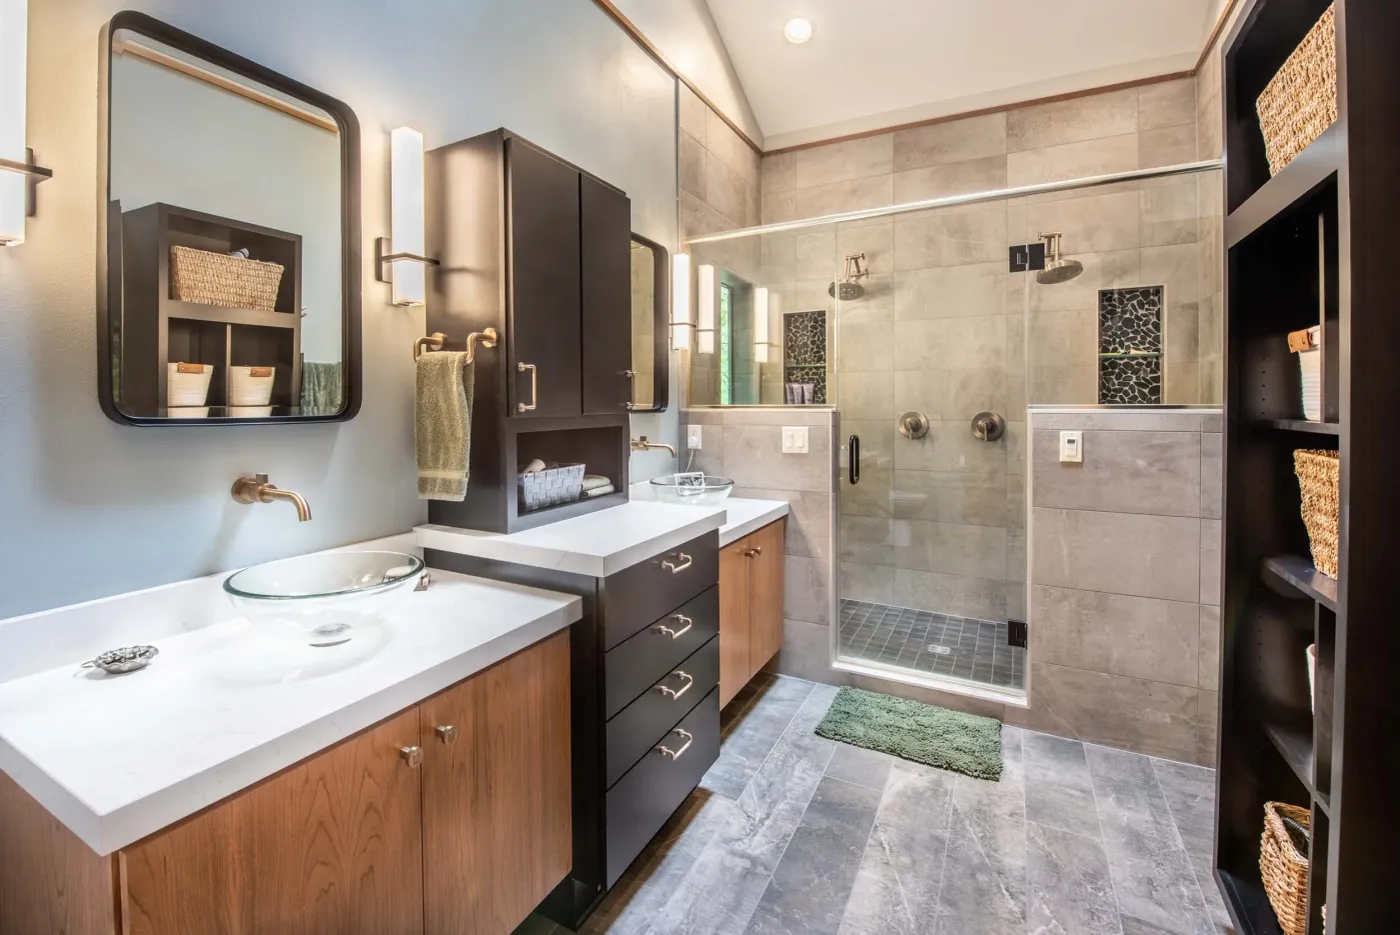
The clear glass vessel sinks are the defining feature of this bathroom. They are a sculptural and unexpected choice that adds an immediate sense of custom design. While a standard undermount sink would have been perfectly functional, the vessel sinks elevate the entire vanity into a focal point. They add a layer of transparency and lightness that contrasts beautifully with the solid wood and dark gray cabinetry beneath, and their height makes the wall-mounted brass faucets a necessity, further enhancing the modern, high-end feel.
|
📋 Copy HEX 🔗 Share |
This design is well-suited for a primary or guest bathroom that is at least 100 square feet. The double vanity requires a wall width of at least 60-72 inches, and you’ll want at least 36 inches of clear floor space in front of it for comfortable use. The glass shower also adds to the feeling of spaciousness, but the overall composition with multiple materials and a separate shelving unit works best when it’s not crammed into a tiny room. For smaller spaces, a single vessel sink on a 36-inch vanity would capture the same spirit.
11. Bright and Airy Bathroom with Natural Wood Cabinetry
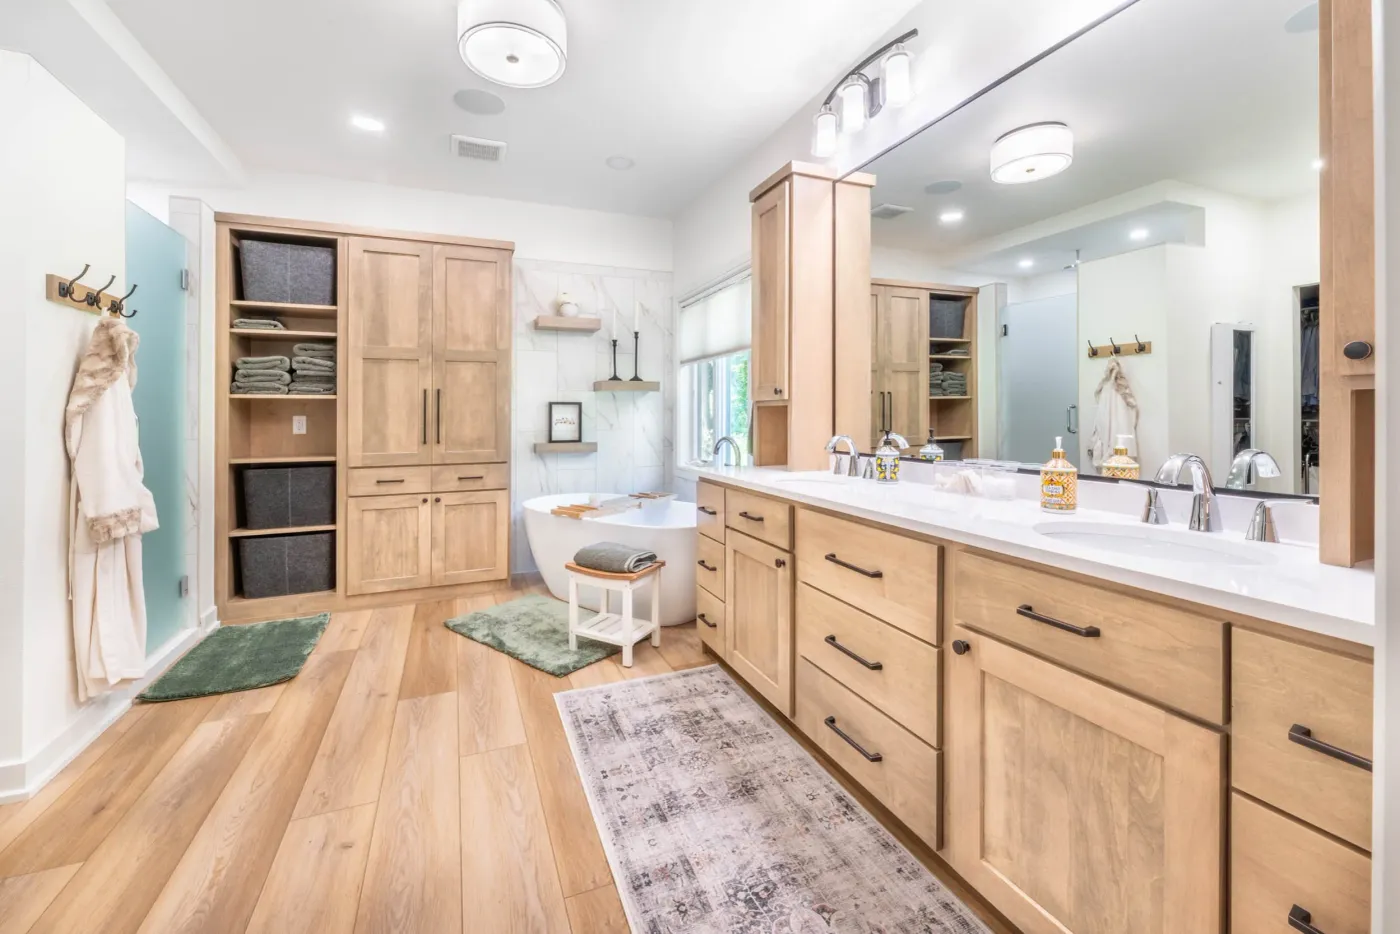
The formula for this serene space is: 50% Light Natural Wood (vanity, flooring) + 30% Crisp White (walls, tub, countertop) + 15% Marble-Look Tile (accent wall) + 5% Mixed Metals (chrome and bronze). The heavy use of light wood on both the floor and the extensive cabinetry creates a warm, cohesive envelope that feels organic and calming. The white elements keep the wood from feeling too heavy, bouncing light around the room. The marble-look accent wall adds a touch of quiet luxury without overwhelming the simple palette.
|
📋 Copy HEX 🔗 Share |
You can get this light and natural look without the price tag of custom wood cabinetry and marble tile. Look for a stock vanity in a light oak finish from a store like IKEA or Wayfair. For the floor, luxury vinyl plank (LVP) offers an incredibly realistic wood look that’s waterproof and much more affordable than hardwood. On the accent wall, use a ceramic or porcelain subway tile with a marble effect. This combination delivers the same aesthetic for probably 40-50% less. The light, natural wood here creates a bright and airy feel. Compare this with the darker, more dramatic wood vanity in Idea #21.
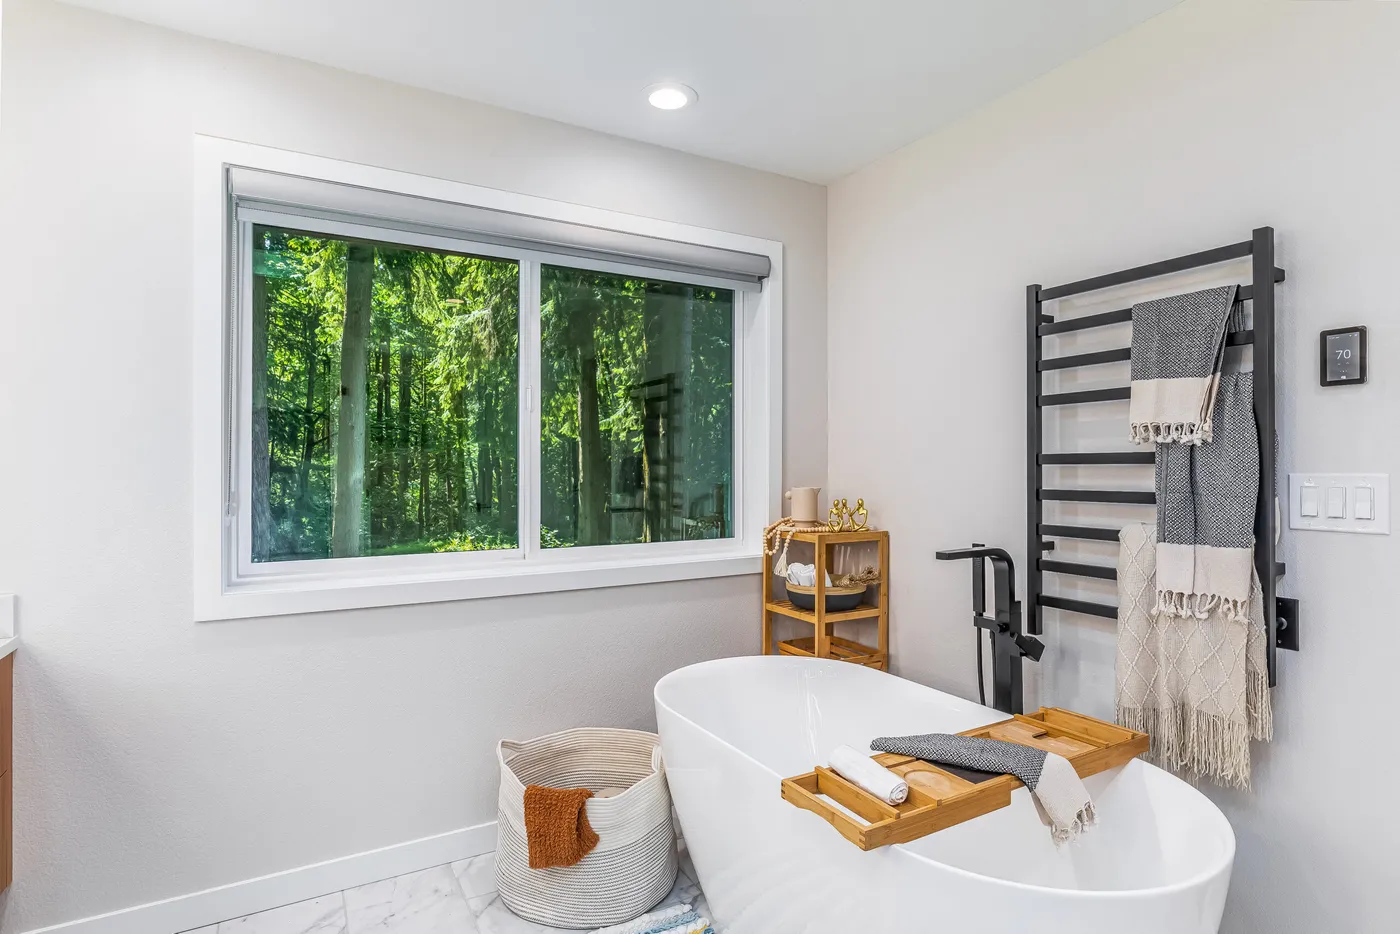
12. Minimalist Retreat with a Forest View and Matte Black Fixtures
This room is a masterclass in minimalism because it understands that the view is the main event. Every design choice is made to support and frame the lush green forest outside the window. The color palette is a simple, quiet trio of light grey, white, and black. The fixtures are sleek and unadorned. Even the storage is minimal and textural (the wooden shelving unit, the woven basket). By keeping the interior so restrained, the design allows the vibrant, complex beauty of nature to be the primary artwork in the space.
|
📋 Copy HEX 🔗 Share |
When designing a bathroom with a prominent window, position the tub to maximize the bather’s experience of the view. Instead of placing it parallel to the window, consider centering it directly in front, as shown here. This creates a cinematic, immersive experience. If privacy is a concern, opt for bottom-up shades that can cover the lower portion of the window while still preserving the view of the sky and treetops. Or, for a high-tech solution, install smart privacy glass that can turn opaque with the flick of a switch.
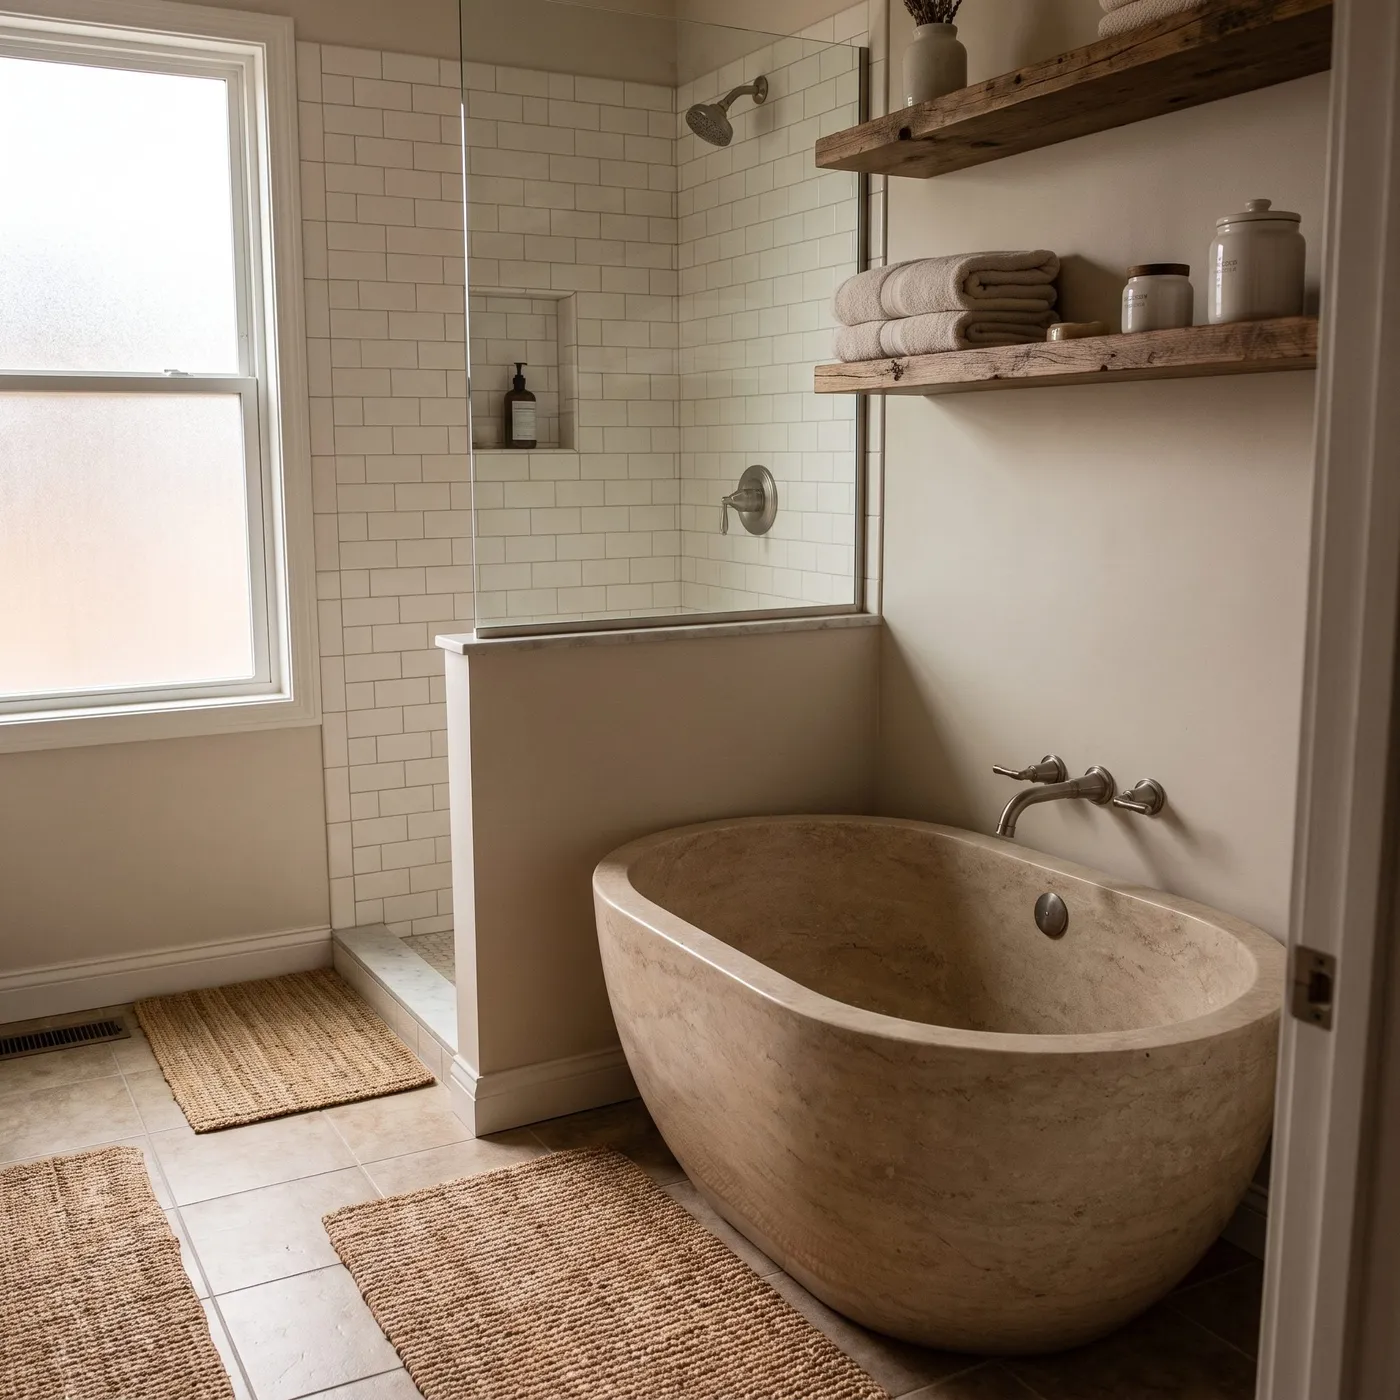
13. A Warm, Rustic Bathroom with a Beige Stone Tub
The absolute centerpiece of this bathroom is the freestanding stone tub. Its organic shape and warm, earthy beige tone set the mood for the entire room. Unlike a standard white acrylic tub, this piece feels ancient and grounded, like it was carved from the earth. It has a weight and presence that elevates the simple room into something truly special. The rustic wood shelves and woven mats are complementary players, but the tub is the undeniable star that gives the space its unique, natural character.
|
📋 Copy HEX 🔗 Share |
A natural stone tub is a luxury, and it comes with specific care requirements. Stone is porous and must be sealed periodically (usually once a year) to prevent staining and water absorption. Clean it only with pH-neutral stone cleaners; avoid acidic products like vinegar or harsh chemicals which can etch the surface. While durable, it can be scratched or chipped, so be mindful of dropping heavy objects. The trade-off for this maintenance is a one-of-a-kind piece with unmatched thermal properties that will keep your bathwater warm for a very long time.
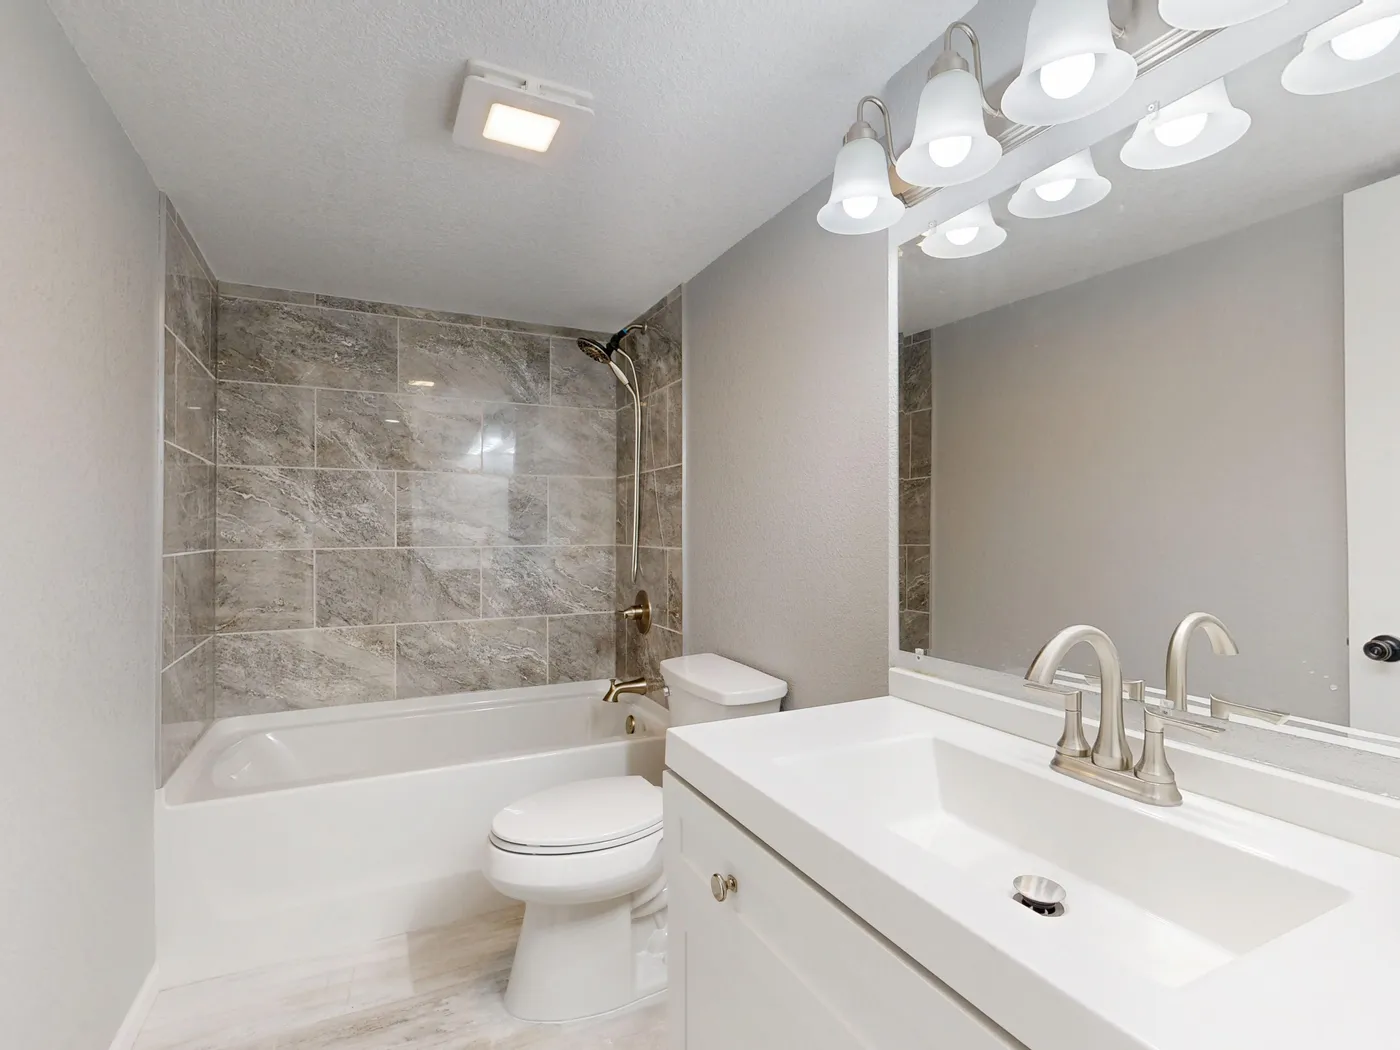
14. Clean and Modern with Gray Stone Shower Tile
The mix of metals—brushed nickel at the vanity and brass in the shower—is an intentional choice that adds a layer of sophistication. Here’s a quick guide to mixing metals correctly in a bathroom:
|
📋 Copy HEX 🔗 Share |
- Choose a Dominant Metal: Pick one finish to be your primary. Here, it appears to be the brushed nickel on the faucet and lighting.
- Select a Secondary Accent Metal: Choose one other metal to use in a distinct zone. The brass-toned shower fixtures are a great example.
- Repeat Each Metal at Least Once: To make it look intentional, use each metal more than once if possible. If not, use it in one significant application, like all the shower hardware.
- Tie It Together with a Neutral: Having a dominant neutral color like the white and gray in this room helps the different metal tones coexist peacefully.
Mixing metals is a great designer trick, but it can go wrong if it looks accidental. The key is to be deliberate. Don’t mix a brass faucet with a chrome drain and a nickel showerhead all in one jumble. Create zones. For example, everything in the shower zone is brass, while everything at the vanity is nickel. Also, pay attention to finish. Mixing a matte black with a polished brass works well, but mixing five different shiny finishes can just look chaotic and unplanned.
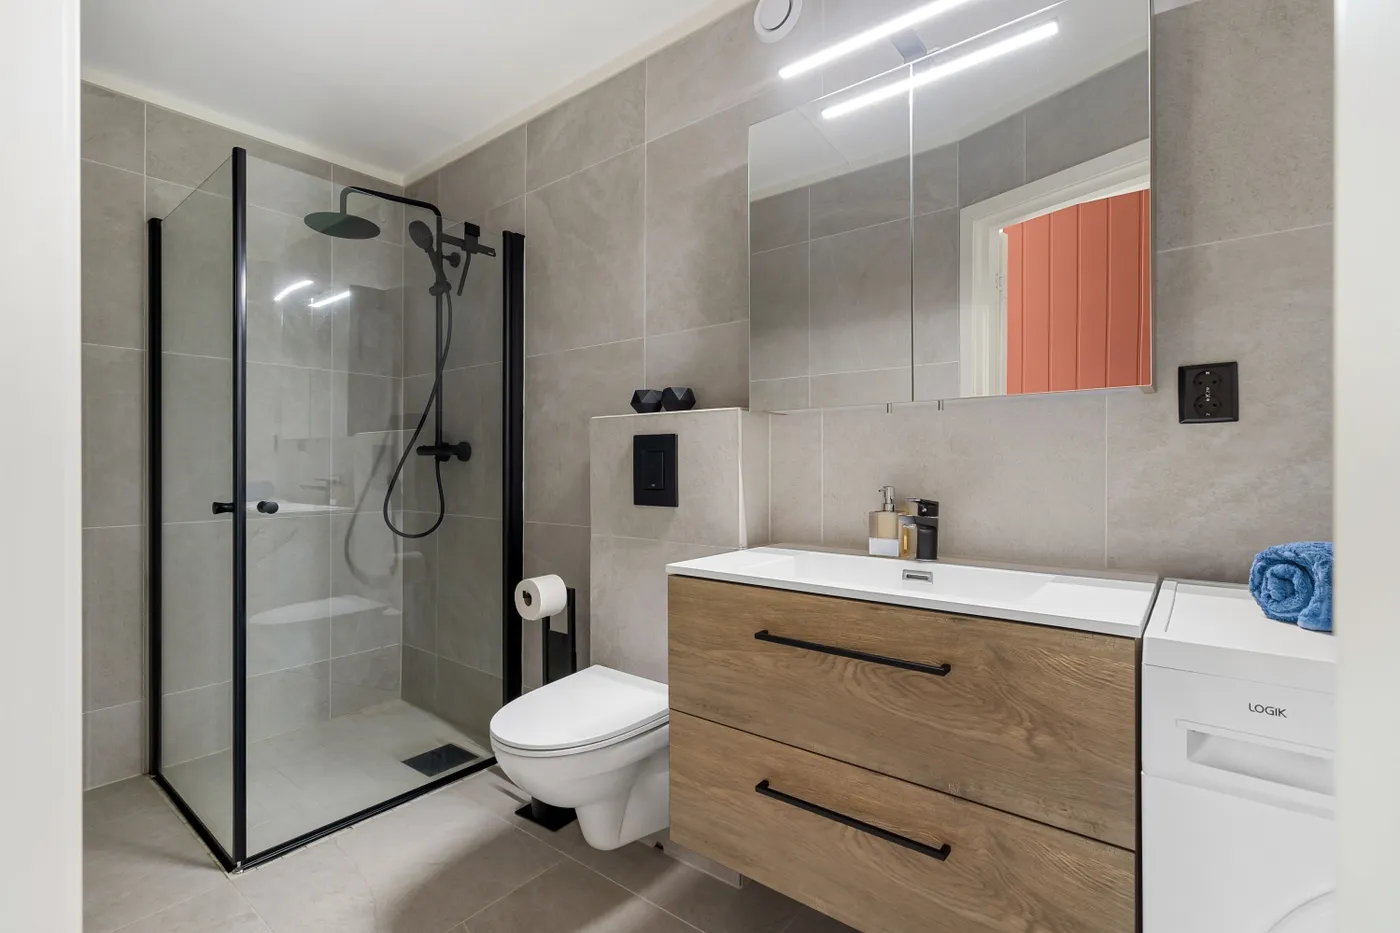
15. A Functional Layout with Large Grey Tiles and a Wood Vanity
This bathroom achieves its clean, modern look with a simple but effective formula: 60% Monochromatic Gray Tile (on floors and walls) + 20% Light Wood (vanity) + 10% Crisp White (countertop, toilet) + 10% Matte Black (accents). Using the same large-format gray tile on both the floor and walls creates a seamless, expansive feel. The light wood vanity injects warmth and organic texture, preventing the gray from feeling too industrial. The matte black fixtures and frame act as sharp, graphic details that define the space.
|
📋 Copy HEX 🔗 Share |
This layout is a fantastic model for a full bathroom in the 75-100 square foot range. The floating vanity and wall-mounted toilet are key space-saving elements, as they expose more floor area and make the room feel larger and easier to clean. The frameless glass shower panel, as opposed to a full enclosure or curtain, also maintains an open line of sight. This is a brilliant design for a long, narrow bathroom. This is a fantastic layout for a functional, medium-sized bathroom. If you have less space to work with, see how Idea #16 handles a similar aesthetic in a tighter footprint.
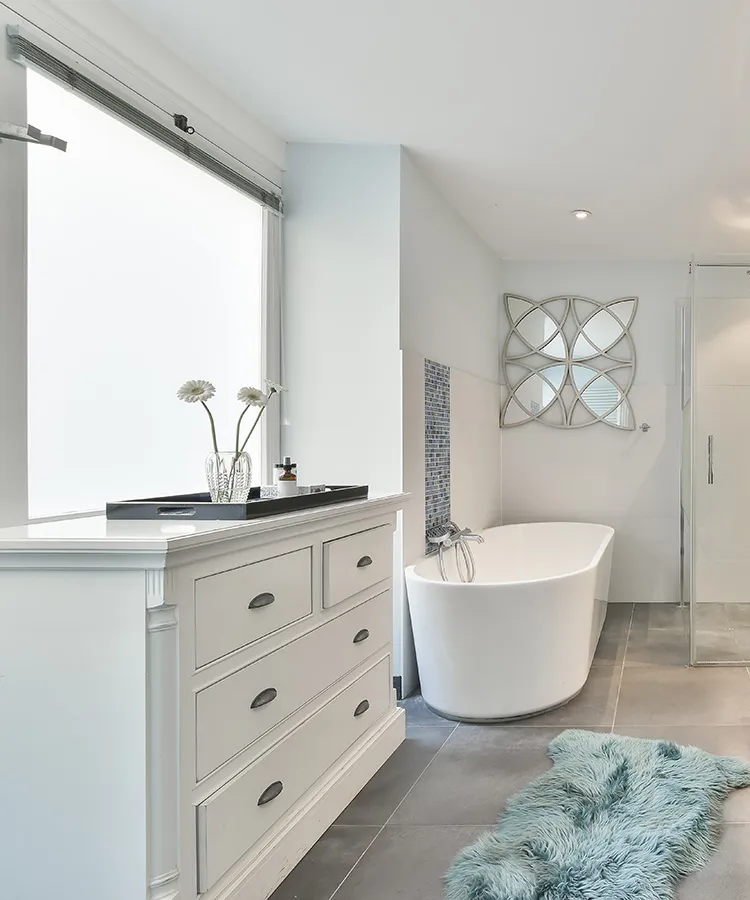
16. Soft Modernism with a Blue Mosaic Accent Tile
That beautiful vertical strip of blue mosaic tile is a high-impact feature that doesn’t have to break the bank. Mosaic tiles can be expensive per square foot, but since you’re only using them for a narrow accent, the total cost remains low. You can find similar glass or ceramic mosaic sheets at hardware stores for $15-$30 per sheet. For a 9-foot ceiling, you might only need 9 sheets, for a total material cost of around $135-$270. It’s a brilliant way to add color and a custom look for a relatively small investment.
|
📋 Copy HEX 🔗 Share |
When using a strong accent tile, a little goes a long way. The trick is to use it to highlight an architectural feature. Here, it creates a vertical stripe that draws the eye up, emphasizing the height of the room and creating a perfect backdrop for the freestanding tub. Don’t place accent tile randomly. Use it to frame a vanity, line the back of a shower niche, or create a ‘waterfall’ effect on a single wall. One well-placed accent is powerful; multiple accents will just compete and create visual noise.
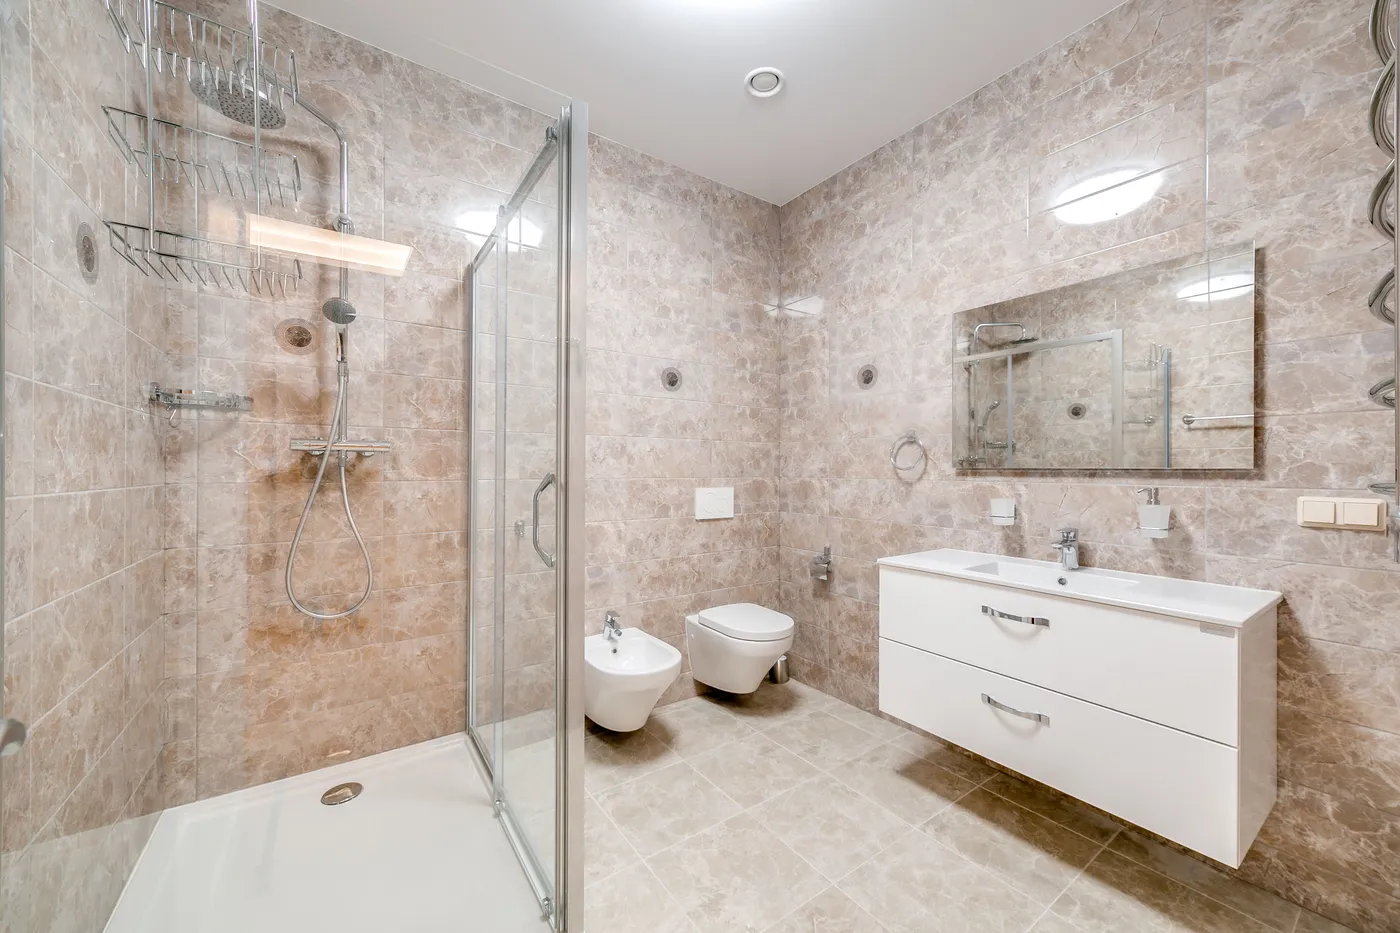
17. Streamlined and Bright with Beige Marble-Look Wall Tile
This bathroom feels so clean and spacious because of the commitment to a single wall material. By cladding the entire room—floor to ceiling—in the same large-format, polished beige marble-look tile, the design eliminates visual clutter. There are no awkward transitions from tile to drywall, which makes the room feel larger and more cohesive. The floating vanity and wall-mounted toilet enhance this effect by keeping the floor clear, creating an uninterrupted flow of tile that’s both luxurious and easy to clean.
|
📋 Copy HEX 🔗 Share |
The floating vanity is the key element that makes this small-space design work so well. By lifting the cabinet off the floor, it creates an illusion of more space. The eye can see the flooring extend all the way to the wall, which tricks the brain into perceiving a larger room. It also provides a lighter, more modern aesthetic than a traditional floor-mounted vanity, which would feel much bulkier in this context. It’s a perfect blend of form and space-saving function.
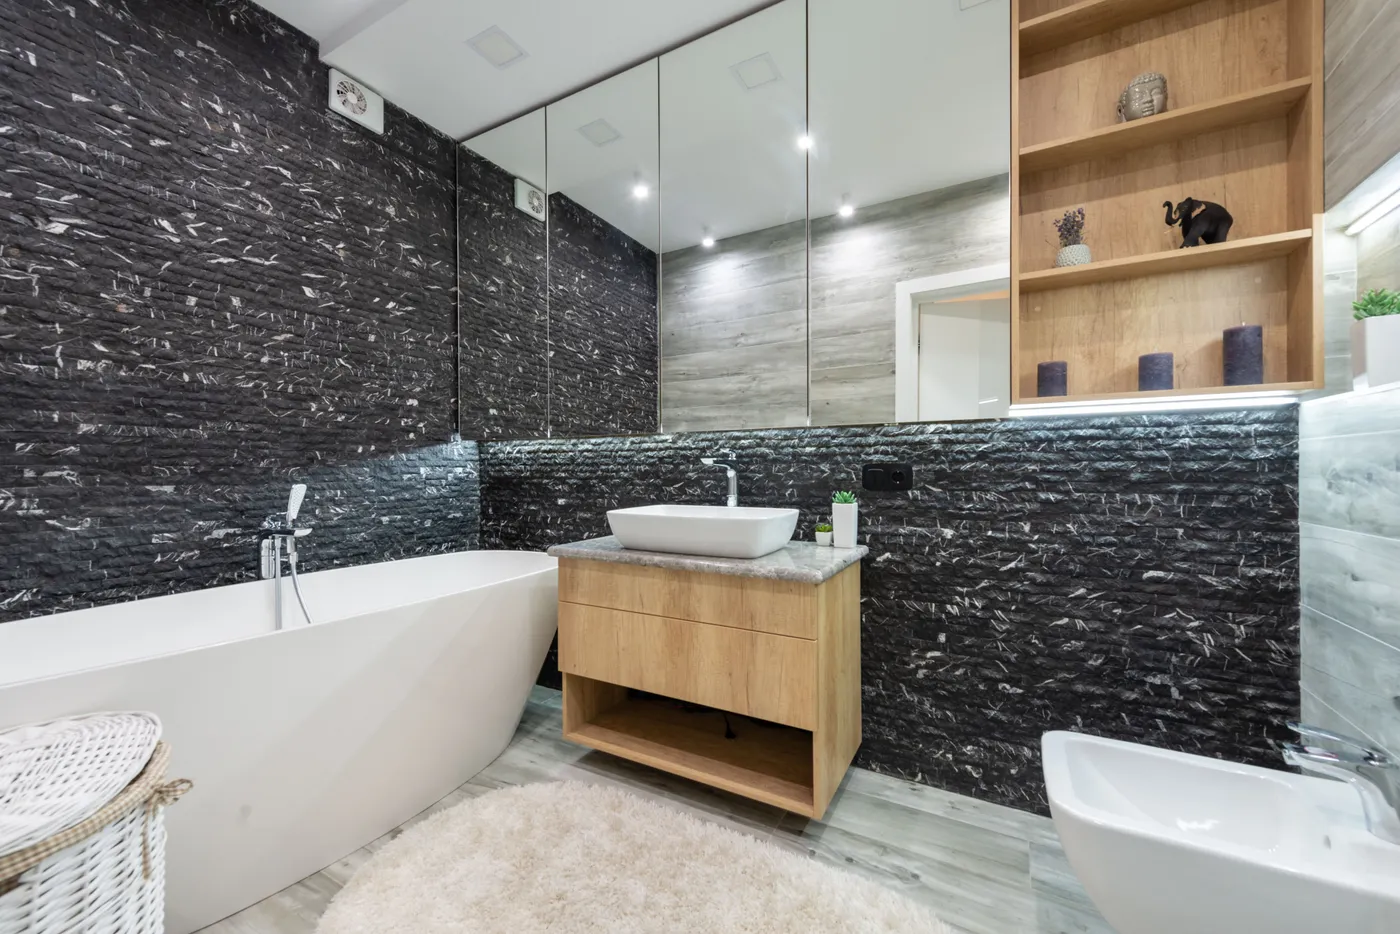
18. High-Contrast Elegance with a Textured Black Stone Wall
We’re seeing a major trend towards using large-scale, dramatic natural stone slabs as feature walls, and this is a perfect example. It’s a move away from small, busy tiles towards bold, singular statements. This look signals a return to organic luxury, where the inherent beauty of a material like this veined stone is the main decoration. It feels both elemental and incredibly sophisticated. This trend has legs because it’s rooted in timeless natural materials, but the application—as a full, seamless wall—feels very fresh and modern.
|
📋 Copy HEX 🔗 Share |
A textured stone wall like this is stunning, but it’s not the most practical surface for a ‘wet zone’ like directly behind a sink or in a shower without proper sealing and consideration. The uneven surface can be harder to wipe down than smooth tile, and it can trap dust and moisture in its crevices. In a bathroom, this means you’ll need to be diligent about ventilation to prevent mildew. It’s a surface that prioritizes dramatic beauty over easy-peasy maintenance. This is a high-commitment, high-reward design choice.
19. Clean Lines and Natural Warmth with a Floating Wood Vanity
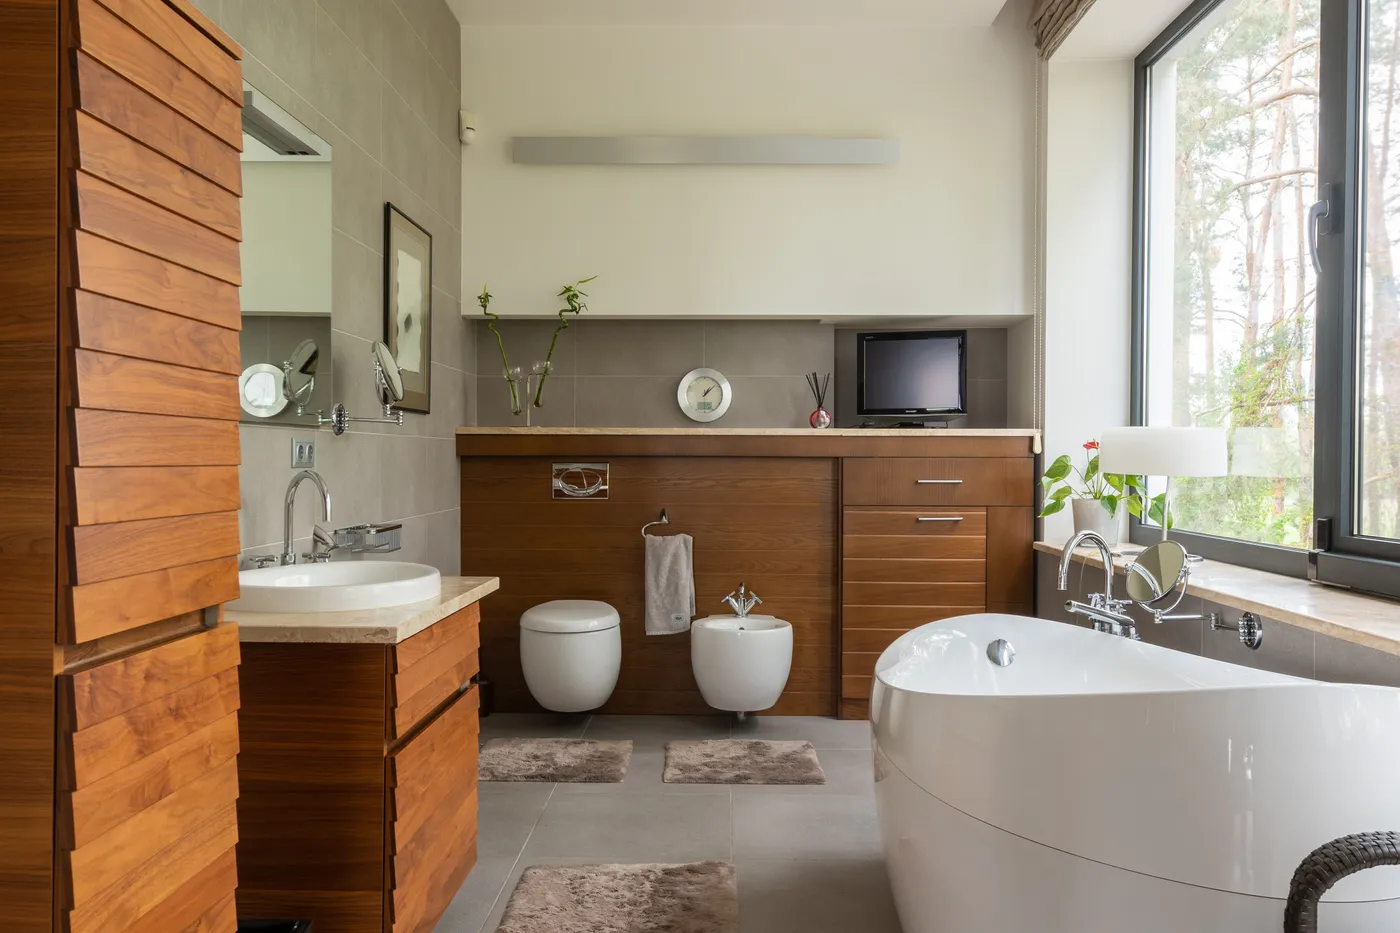
For a super clean and minimalist look, mount your vanity faucet directly to the wall, as seen here. This requires planning ahead, as the plumbing needs to be run inside the wall before any tile or drywall goes up. The standard height for a wall-mounted faucet is 4-6 inches above the countertop or sink rim. This not only creates a sleek, uncluttered countertop but also makes wiping down the area behind the sink a breeze. It’s a detail that signals a high-end, custom renovation.
|
📋 Copy HEX 🔗 Share |
This bathroom’s spacious feel is due to its generous proportions. It’s ideal for a room that is at least 8 feet wide and 10 feet long. This allows for a comfortable 36-inch walkway between the vanity and the freestanding tub. The wall-mounted toilet and bidet also benefit from having adequate space, typically requiring a width of at least 60 inches for the pair. In a smaller bathroom, you could achieve a similar feel by using a shorter floating vanity and opting for a built-in tub instead of a freestanding one.
20. Earthy Modern Bathroom with a Muted Green Accent Wall
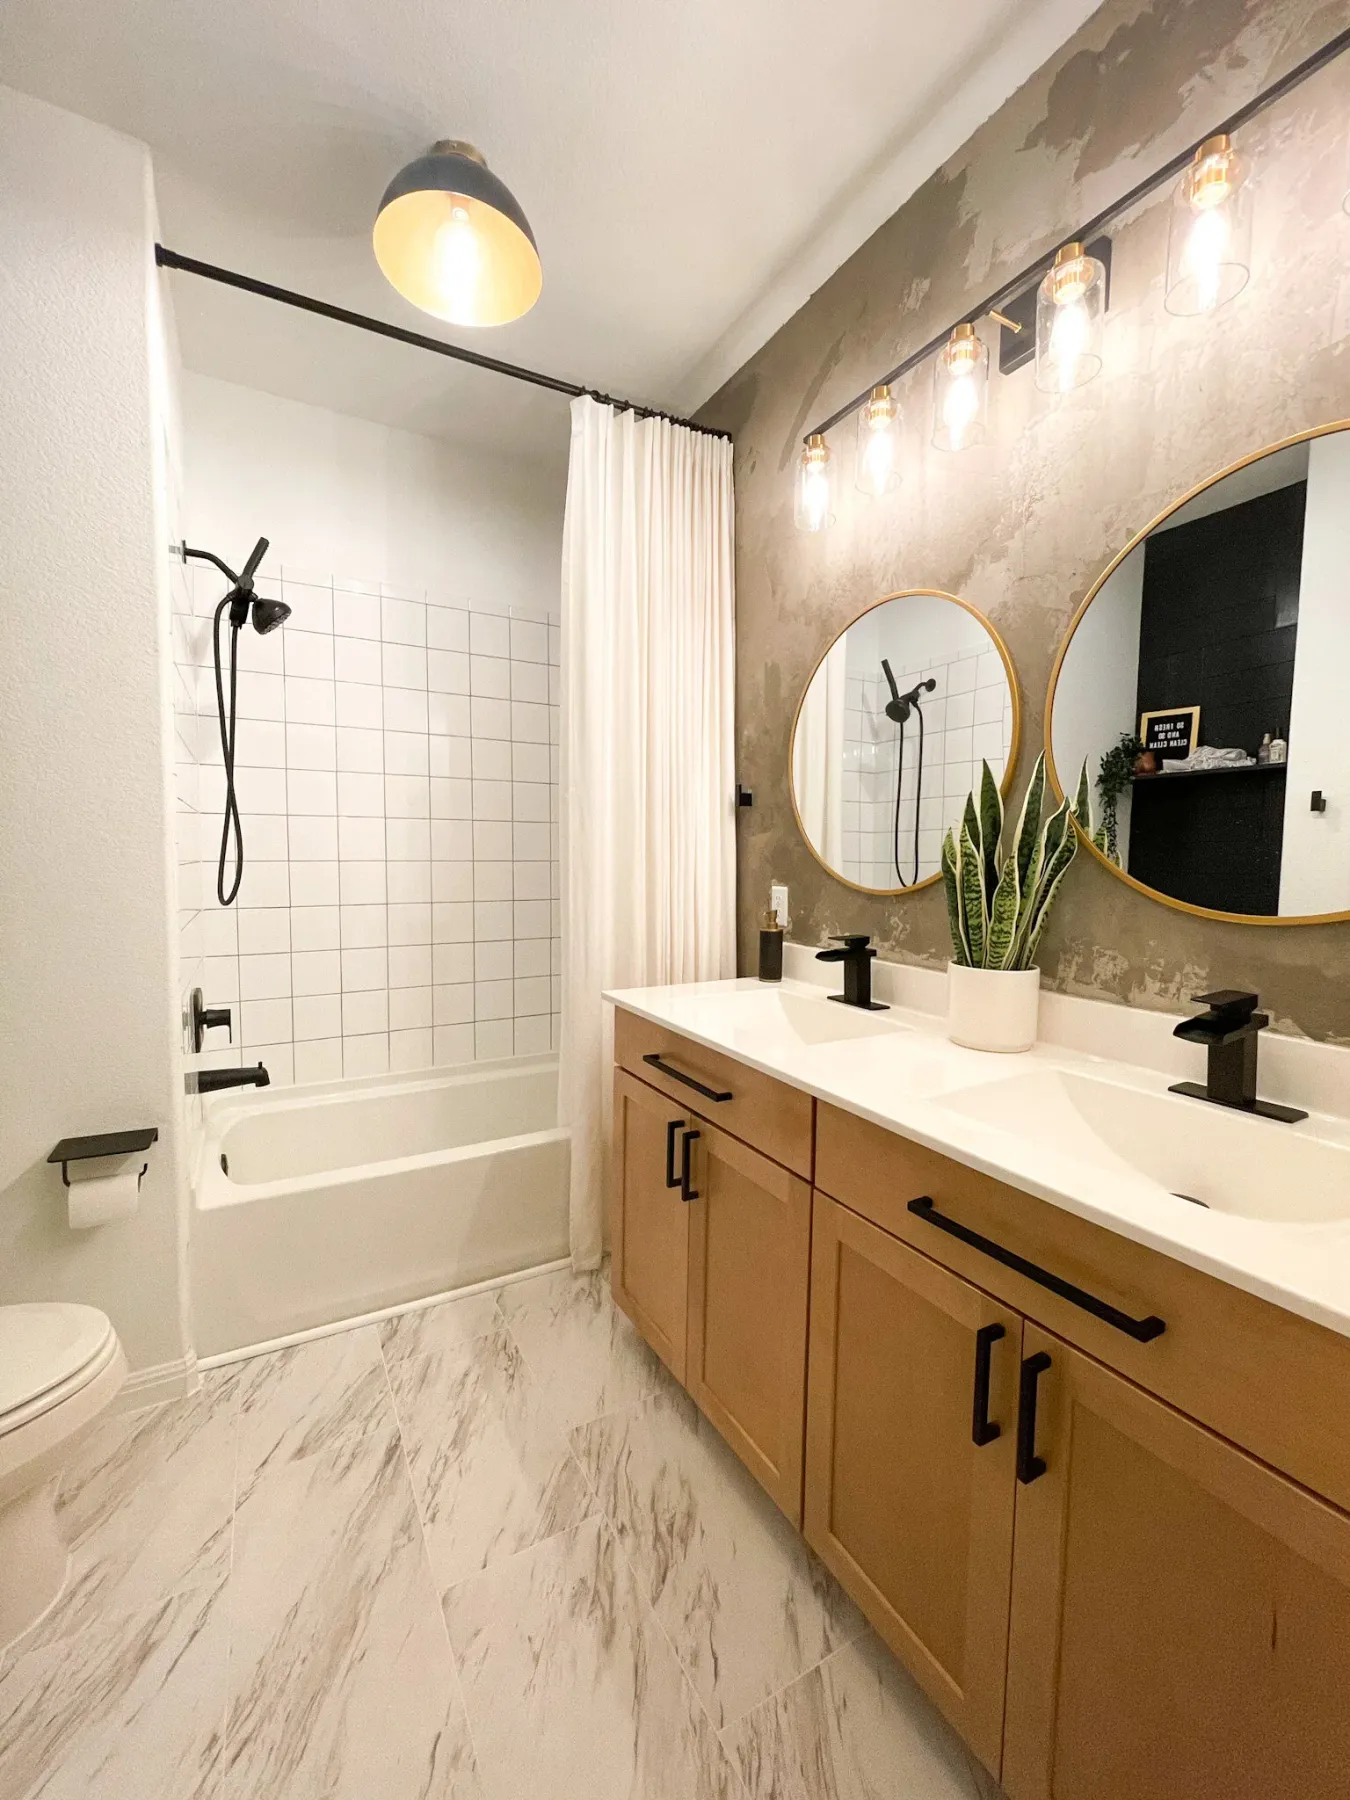
This look is a beautiful exercise in balancing warm, cool, earthy, and modern elements. The formula is approximately: 40% White (subway tile, countertops, floor) + 30% Light Wood (vanity) + 20% Muted Green (accent wall) + 10% Black & Gold (fixtures and mirrors). The white and wood provide a classic, neutral base. The muted green wall adds a dose of soft, earthy color that feels very current. The matte black fixtures ground the space with modern contrast, while the gold-framed mirrors add a touch of warmth and glamour to tie it all together.
|
📋 Copy HEX 🔗 Share |
Love this look? Run through this checklist before you start buying materials:
- Confirm Your Vanity Size: A double vanity like this is typically 60 or 72 inches wide. Measure your wall to ensure you have enough space, leaving a few inches on either side.
- Check Your Lighting Plan: This design relies on two sconces flanking the mirrors (not shown) or overhead lights. Make sure your electrical plan accommodates this setup.
- Sample the Green: Muted greens can look very different depending on the light. Get a paint sample and try it on your wall to see how it looks in your bathroom’s natural and artificial light before committing.
- Get Tile Samples: Order samples of your chosen floor and wall tile to see how they look next to each other and your vanity.
21. Classic and Functional with a Speckled Brown Granite Countertop
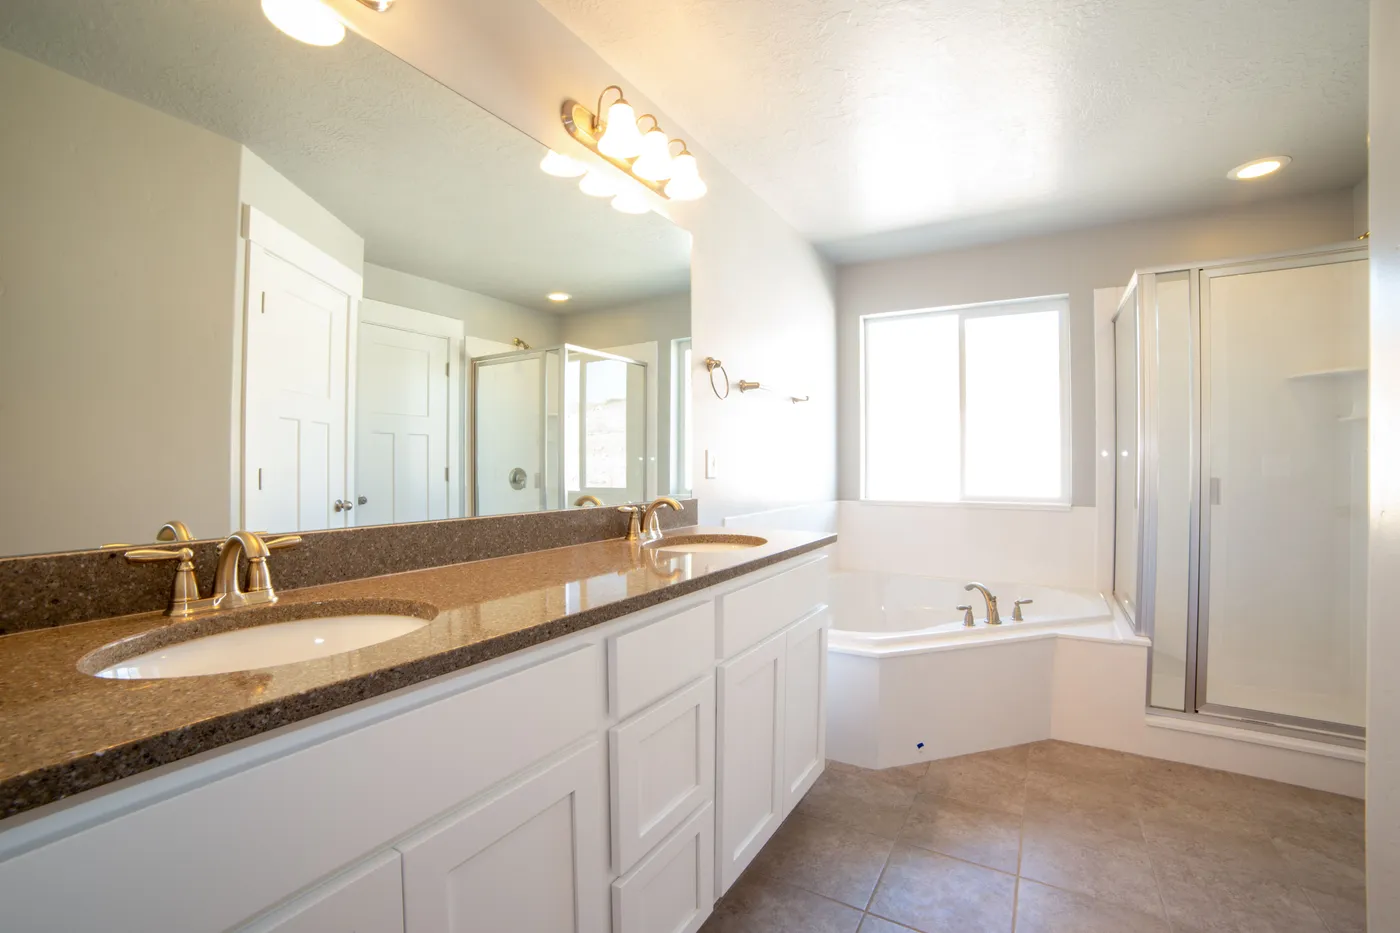
This bathroom design feels so bright and functional because it leans into classic choices that are proven to work. The white shaker-style cabinets are timeless and reflect light, making the room feel bigger. The large, single mirror spanning the entire double vanity also visually doubles the space. While speckled granite isn’t the trendiest choice today, its warm brown tones tie in with the floor tile, creating a cohesive and harmonious color scheme. The brushed gold fixtures add a modern touch that updates the traditional elements.
|
📋 Copy HEX 🔗 Share |
This is a great example of a handsome, functional primary bathroom that can be achieved on a mid-range budget. The costs here are driven by solid, reliable choices rather than high-end splurges.
- Main Furniture (Stock Double Vanity & Countertop): $1,500 – $3,500
- Lighting (Vanity light bar): $150 – $400
- Fixtures (Faucets, Shower Trim): $500 – $1,200
- Corner Soaking Tub: $800 – $2,000
- Tile (Floor and Shower): $1,000 – $3,000 (materials only)
- TOTAL: $3,950 – $10,100 (materials, not including labor)
Budget alternative: Opt for a cultured marble top with integrated sinks and chrome fixtures to bring the total material cost down to the $2,500-$5,000 range.
22. Timeless Elegance with a Geometric Marble Floor and Black Tub
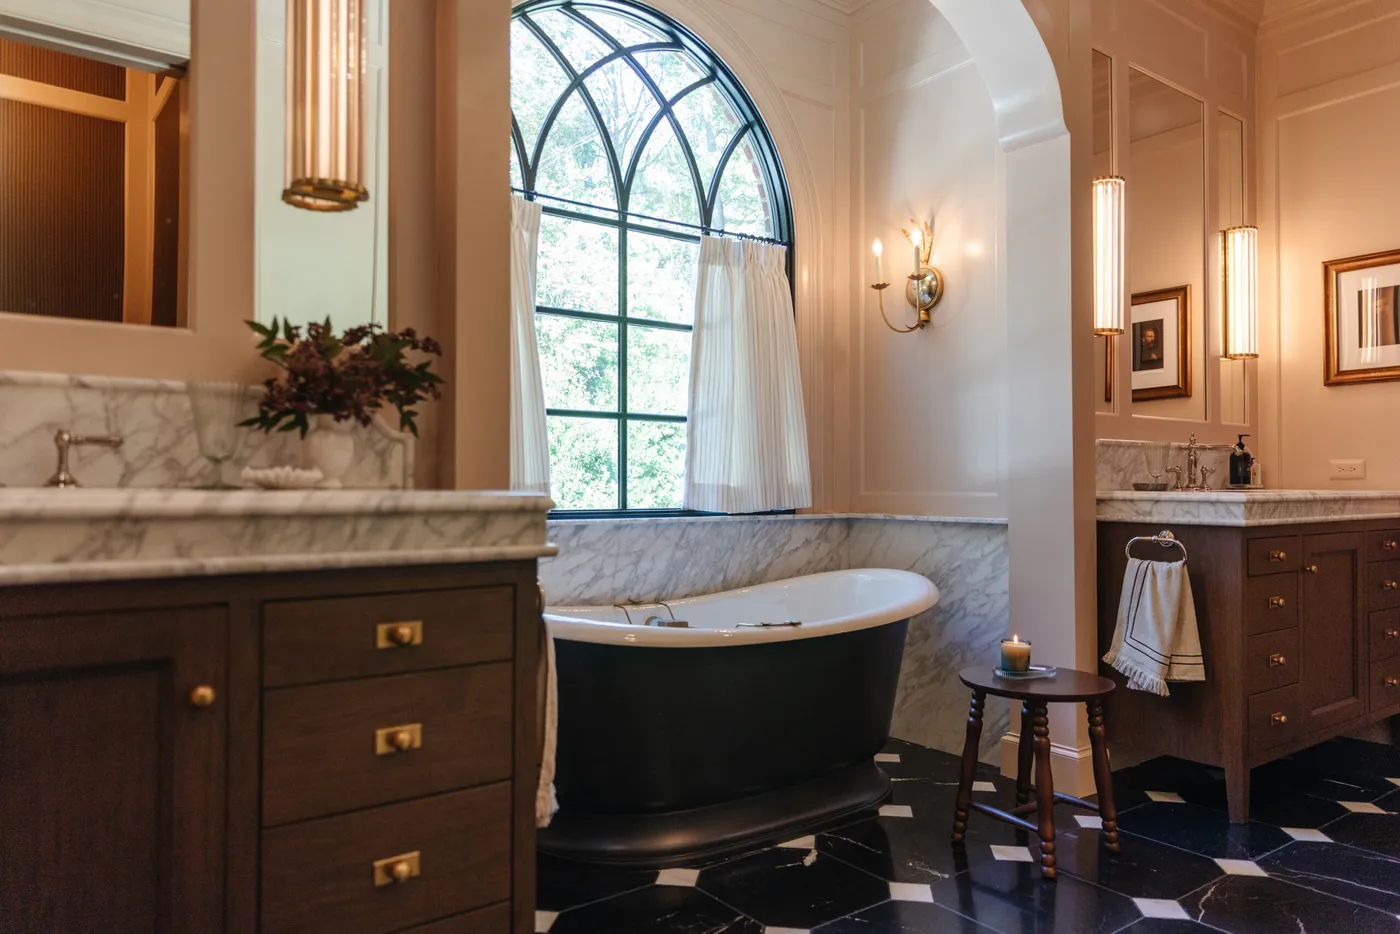
The single element that defines this luxurious bathroom is the black and white geometric marble floor. It’s the foundation upon which the entire design is built. It adds a bold, graphic pattern and a sense of historic elegance that elevates every other choice in the room. The black freestanding tub, the dark wood vanities, and the arched window all complement the floor, but without that striking pattern underfoot, the room would lose its dramatic soul and unique character. It’s a statement of pure confidence.
|
📋 Copy HEX 🔗 Share |
When you have a very bold pattern on the floor, keep the other large surfaces relatively simple to avoid overwhelming the eye. Notice how the walls here are a soft, solid neutral color, and the marble countertops have subtle, quiet veining. This allows the floor to be the star of the show. If the walls were also covered in a busy wallpaper, the whole room would feel chaotic. It’s all about creating a visual hierarchy. Let one element be the hero.
23. Modern Farmhouse Charm with a Clawfoot Tub and Subway Tile
The herringbone pattern on the shower floor adds a custom, high-end touch to standard tile. Here’s a simplified guide to laying it out:
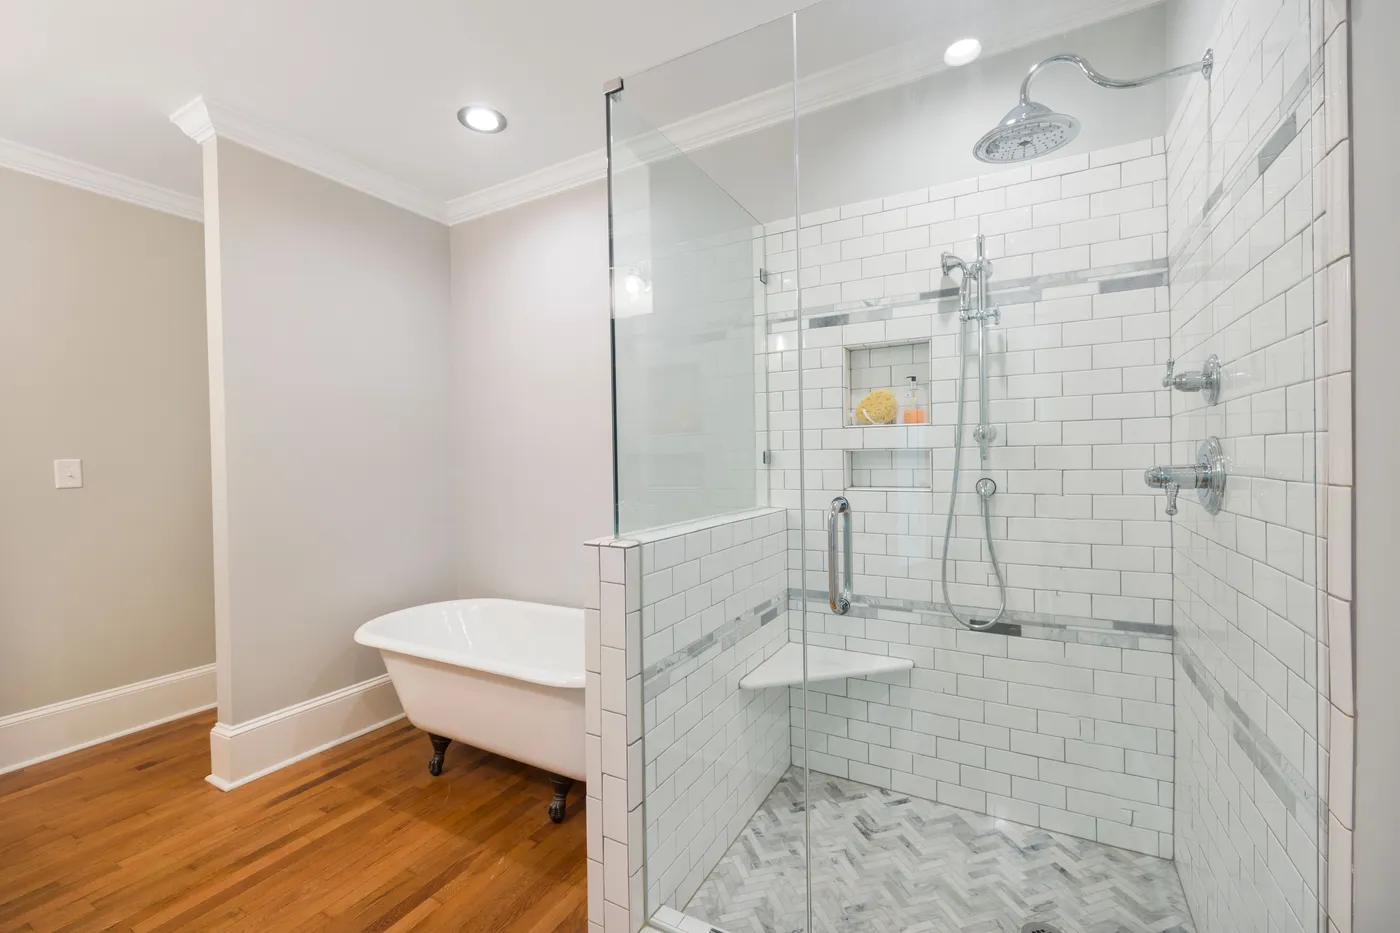
|
📋 Copy HEX 🔗 Share |
- Find the Center: Snap a chalk line down the center of your shower floor. This will be your main guide.
- Set the First Tile: Place the corner of your first tile directly on the centerline at a 45-degree angle.
- Build the Pattern: Place the next tile at a 90-degree angle to the first, creating the first ‘V’ of the herringbone. Continue building out from this center point.
- Make Your Cuts: As you reach the edges, you’ll need to use a tile saw to cut tiles at an angle to fit against the walls and drain.
- Grout and Seal: Once the mortar is dry, grout the tiles and seal the grout to protect it from moisture.
The classic clawfoot tub is the star here. For a more modern take on a freestanding tub, look at the sleek silhouette in Idea #11.
This classic, charming look is very achievable on a budget. White ceramic subway tile is one of the most affordable tile options available, often costing just a few dollars per square foot. For the floor, instead of real hardwood (which can be risky in a wet bathroom), consider a wood-look luxury vinyl plank (LVP). It’s waterproof, durable, and provides that same warm aesthetic for less money and zero maintenance worries. You can find beautiful reproduction clawfoot tubs made of acrylic, which are much lighter and more affordable than their cast-iron ancestors.
24. Bright and Traditional with Cream Cabinets and Brass Fixtures
This bathroom’s warm, traditional charm comes from a carefully balanced equation: 50% Creamy Neutrals (walls, cabinets) + 30% Bright White (tub, countertops) + 15% Polished Brass (fixtures, mirrors) + 5% Dark Accents (towels, decor). The layering of cream and white creates a soft, inviting backdrop that feels classic and light. The polished brass is the key ingredient, adding warmth, shine, and a touch of vintage elegance. Without the brass, the room would feel much more generic; it’s the element that gives it personality.
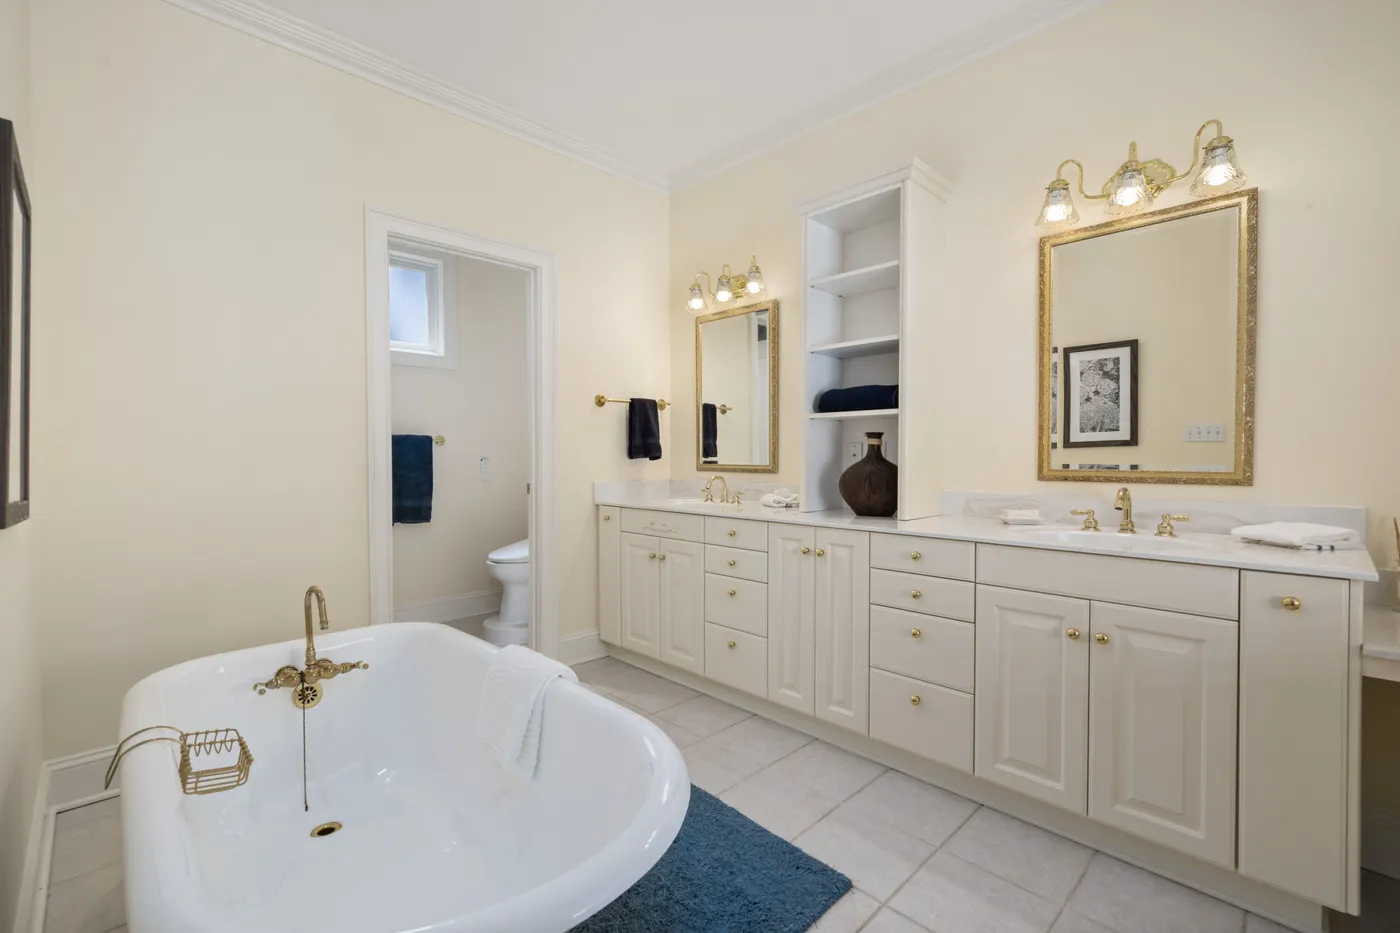
|
📋 Copy HEX 🔗 Share |
An all-cream-and-white bathroom is beautiful, but it can be a challenge to keep looking pristine, especially in a family home. White countertops, particularly natural marble, can be prone to staining from things like makeup or colored soaps. Grout lines on light-colored floor tiles will also show dirt more readily and require regular scrubbing and sealing. If you love this look but worry about upkeep, consider a quartz countertop instead of marble and opt for a slightly darker grout color (like a very light gray or beige) to hide everyday grime better.
25. A Clean, Contemporary Bathroom with Gray Marbled Tile
The success of this bathroom lies in its cohesive and consistent use of materials. The designer chose a gray marbled-look tile and used it in two different formats: large rectangular tiles in the shower and large square tiles on the floor. This creates a subtle variation in pattern while maintaining a unified color palette. The simple white double vanity and satin nickel fixtures complement the gray tones without competing, resulting in a space that feels clean, calm, and thoughtfully put together. There are no jarring elements, which is the hallmark of good contemporary design.
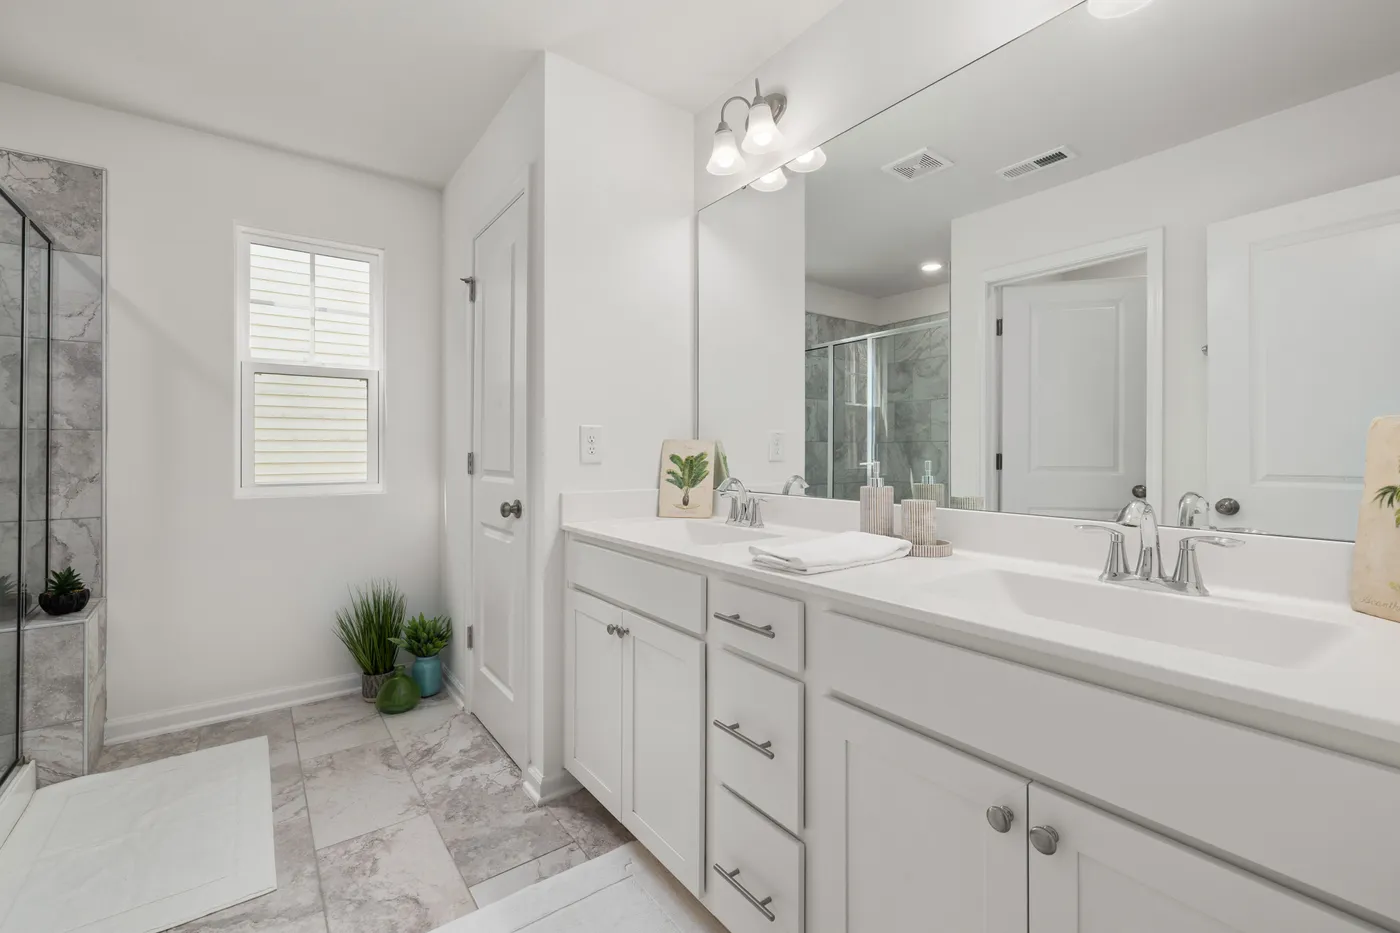
|
📋 Copy HEX 🔗 Share |
This layout is a workhorse for a standard American full bathroom, fitting comfortably in a space from 60 to 90 square feet. A 60-inch double vanity is a common size that fits well in a 5-foot alcove. The glass-enclosed shower next to it maximizes the feeling of space in a relatively compact footprint. This is a highly practical and repeatable design for many homes. The wall-to-wall marble in Idea #25 is pure luxury, but if you’re worried about the upkeep, this mix of tile and paint offers a more practical alternative.
26. Expansive and Luxurious with Wall-to-Wall Marble-Look Tile
The single most impactful decision in this bathroom was to use the same large-format, white marble-look tile on every single surface—the floors and all four walls. This technique, known as cladding, creates an incredibly seamless and expansive look. It erases the visual boundaries between floor and wall, making the room feel significantly larger and more luxurious. It’s a bold and minimalist choice that transforms the room into a serene, light-filled marble box, where the fixtures almost seem to float.
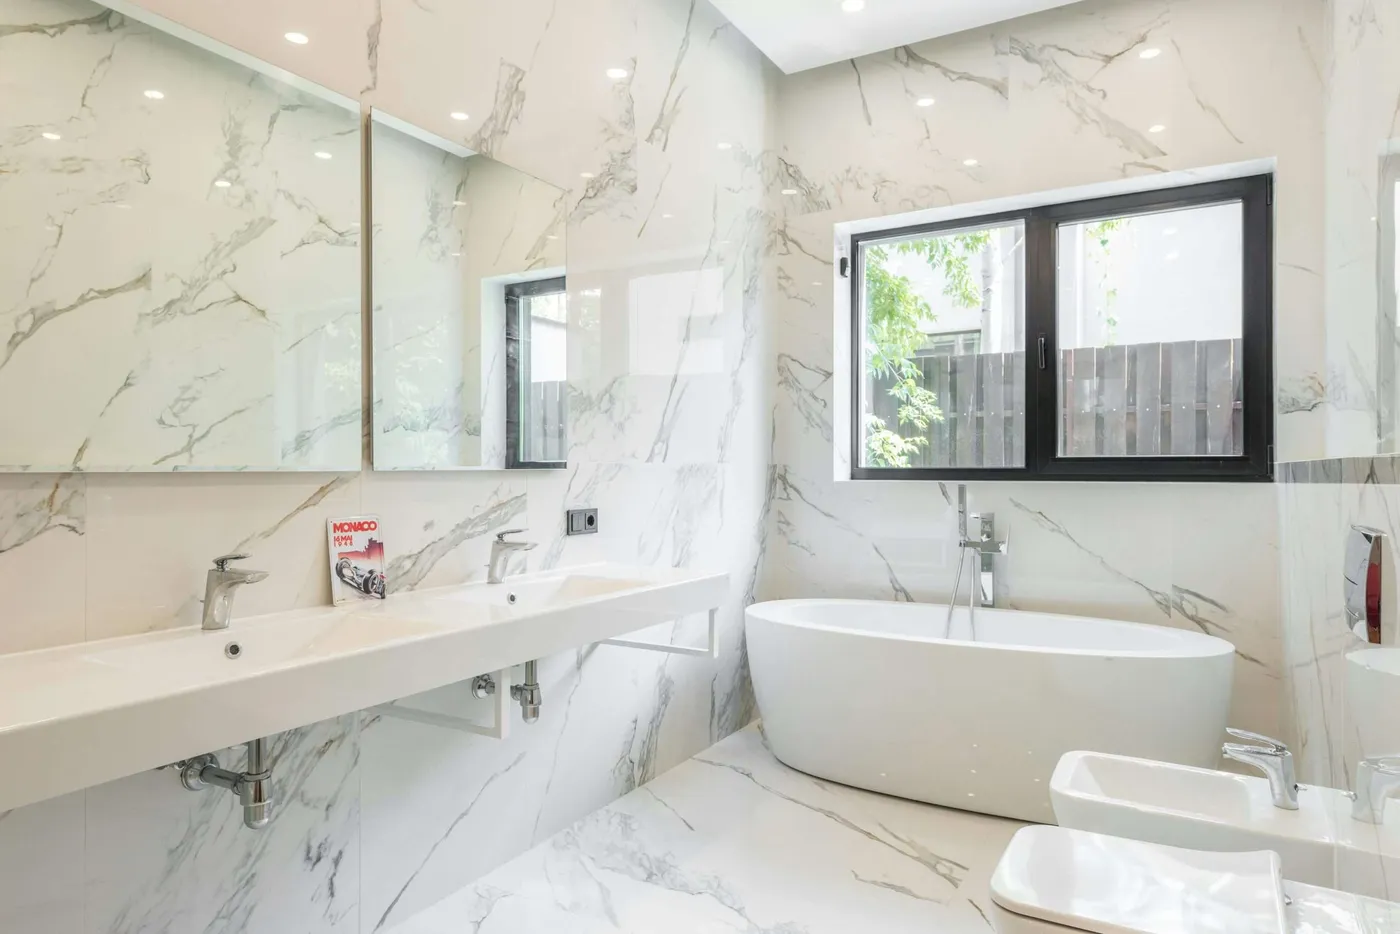
|
📋 Copy HEX 🔗 Share |
While stunning, a full marble or marble-look porcelain bathroom requires some specific care. The sheer number of grout lines means that sealing them upon installation is non-negotiable to prevent discoloration and mildew. For cleaning, stick to pH-neutral cleaners specifically designed for tile and stone. Polished surfaces can show water spots and smudges, so a quick squeegee of the shower walls after use can save a lot of cleaning effort later. The good news is that high-quality porcelain tile is non-porous and extremely durable, giving you the luxe look of marble without the staining worries of the real thing.
Your Spa Moment Awaits
Feeling inspired? We hope these ideas have sparked some excitement for what your bathroom could be. Whether you’re planning a gut renovation or a simple weekend update, the perfect refresh is within reach.
Don’t forget to save your favorite looks to your Pinterest board to start building the bathroom you’ve been dreaming of!