You know that feeling when you finally find the deck fascia idea that looks exactly right for your space? It’s that final puzzle piece that takes a deck from just ‘done’ to ‘designed.’ After filtering through hundreds of options from specialty suppliers to big-box stores, we narrowed it down to 24 ideas that actually deliver. We’ve got looks that range from simple DIY upgrades to high-end custom builds, covering everything from classic white fascia and warm wood planks to modern composite designs with integrated lighting. In 2026, the focus is on treating our decks like true extensions of our homes, and a finished fascia is the detail that pulls it all together. And stay until the end—we break down the most common mistakes that can ruin these looks. 📌 Pin this guide for later—your future self will thank you when it’s time to actually do this.
Just a heads-up: this post contains affiliate links, which means we may earn a small commission if you make a purchase.
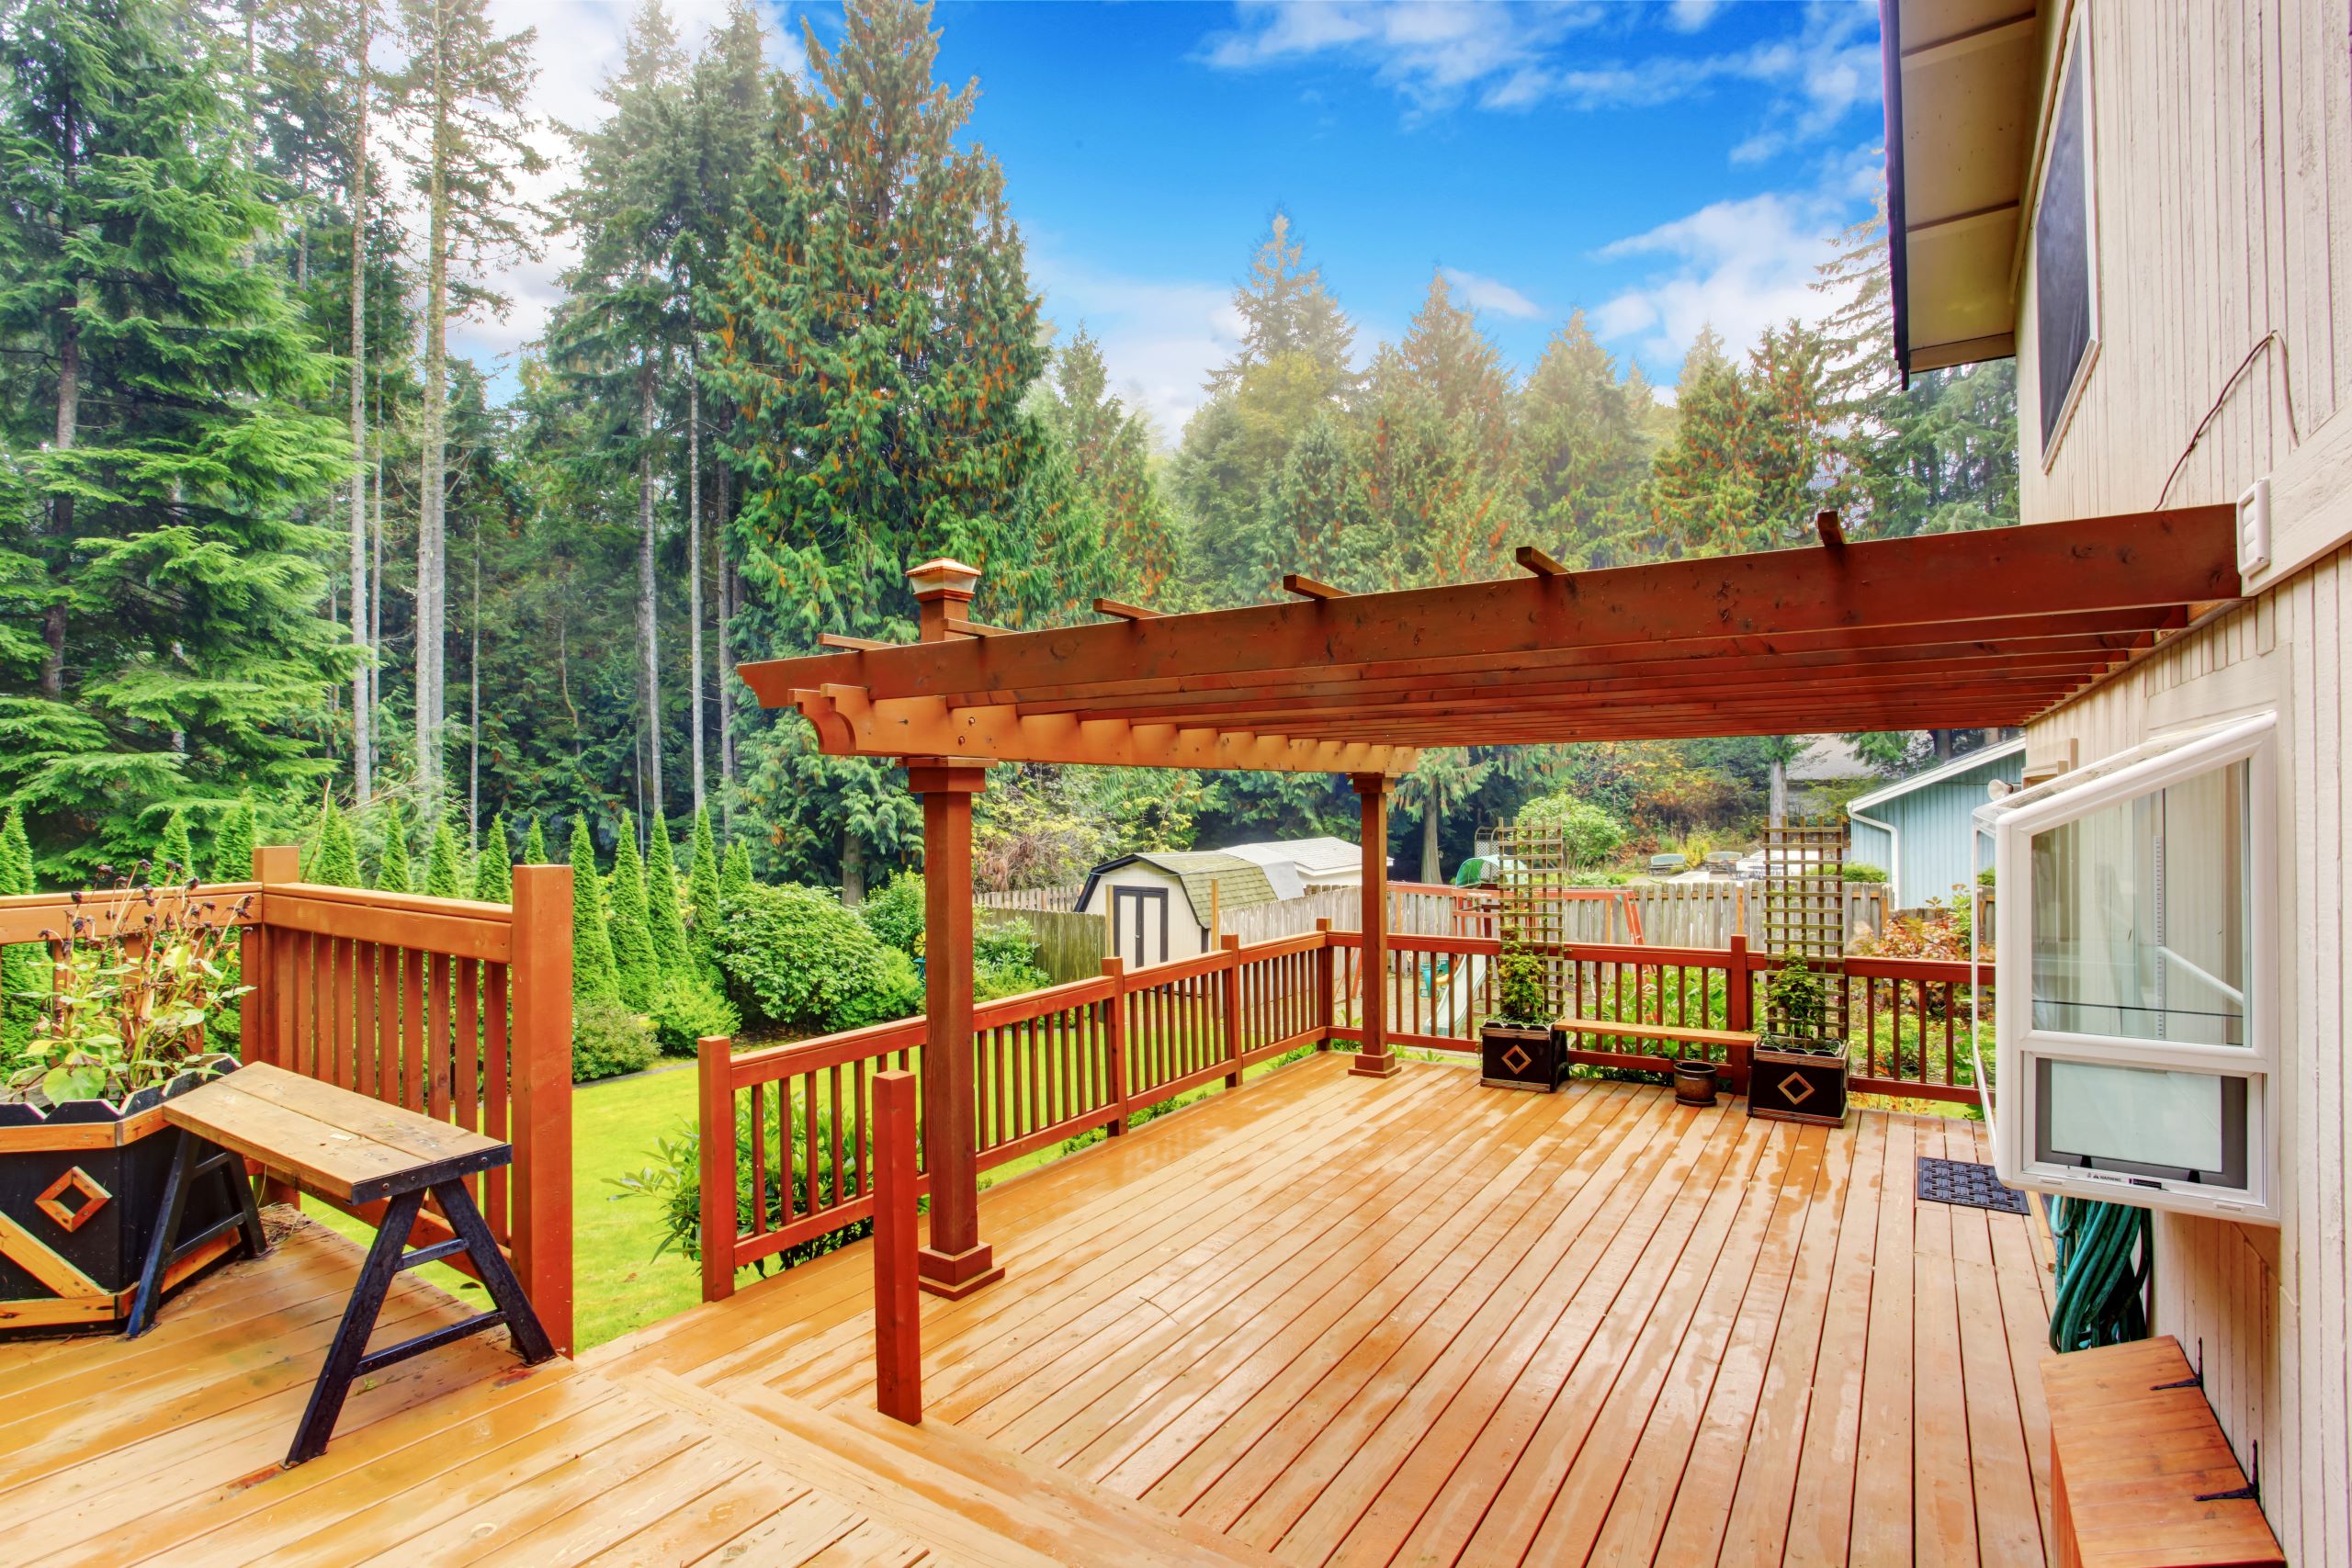
1. Frame a Rustic Retreat with Reddish-Brown Wood Fascia and Pergola
This design feels so cohesive because of its commitment to a single material and color family. The warm, reddish-brown stain is used on the deck boards, the fascia, the railings, and the overhead pergola, creating a unified structure that feels intentional and robust. This repetition of color makes the entire space feel larger and more integrated with the natural surroundings. The dark planters act as grounding points, echoing the darker tones in the distant evergreen trees and preventing the wood from feeling monotonous. It’s a masterclass in using a limited palette to achieve a rich, layered look.
|
📋 Copy HEX 🔗 Share |
When working with natural wood for a deck fascia, especially a warm-toned one like this, your stain is everything. Don’t just pick a color off a chip. Buy samples and test them on a scrap piece of your actual deck wood. Apply at least two coats and let it dry fully in the sun to see the true final color. For a look like this reddish-brown cedar or redwood, you’ll want a semi-transparent oil-based stain. It will penetrate the wood for better protection and let the natural grain show through, which is exactly what gives it this high-end, rustic character.
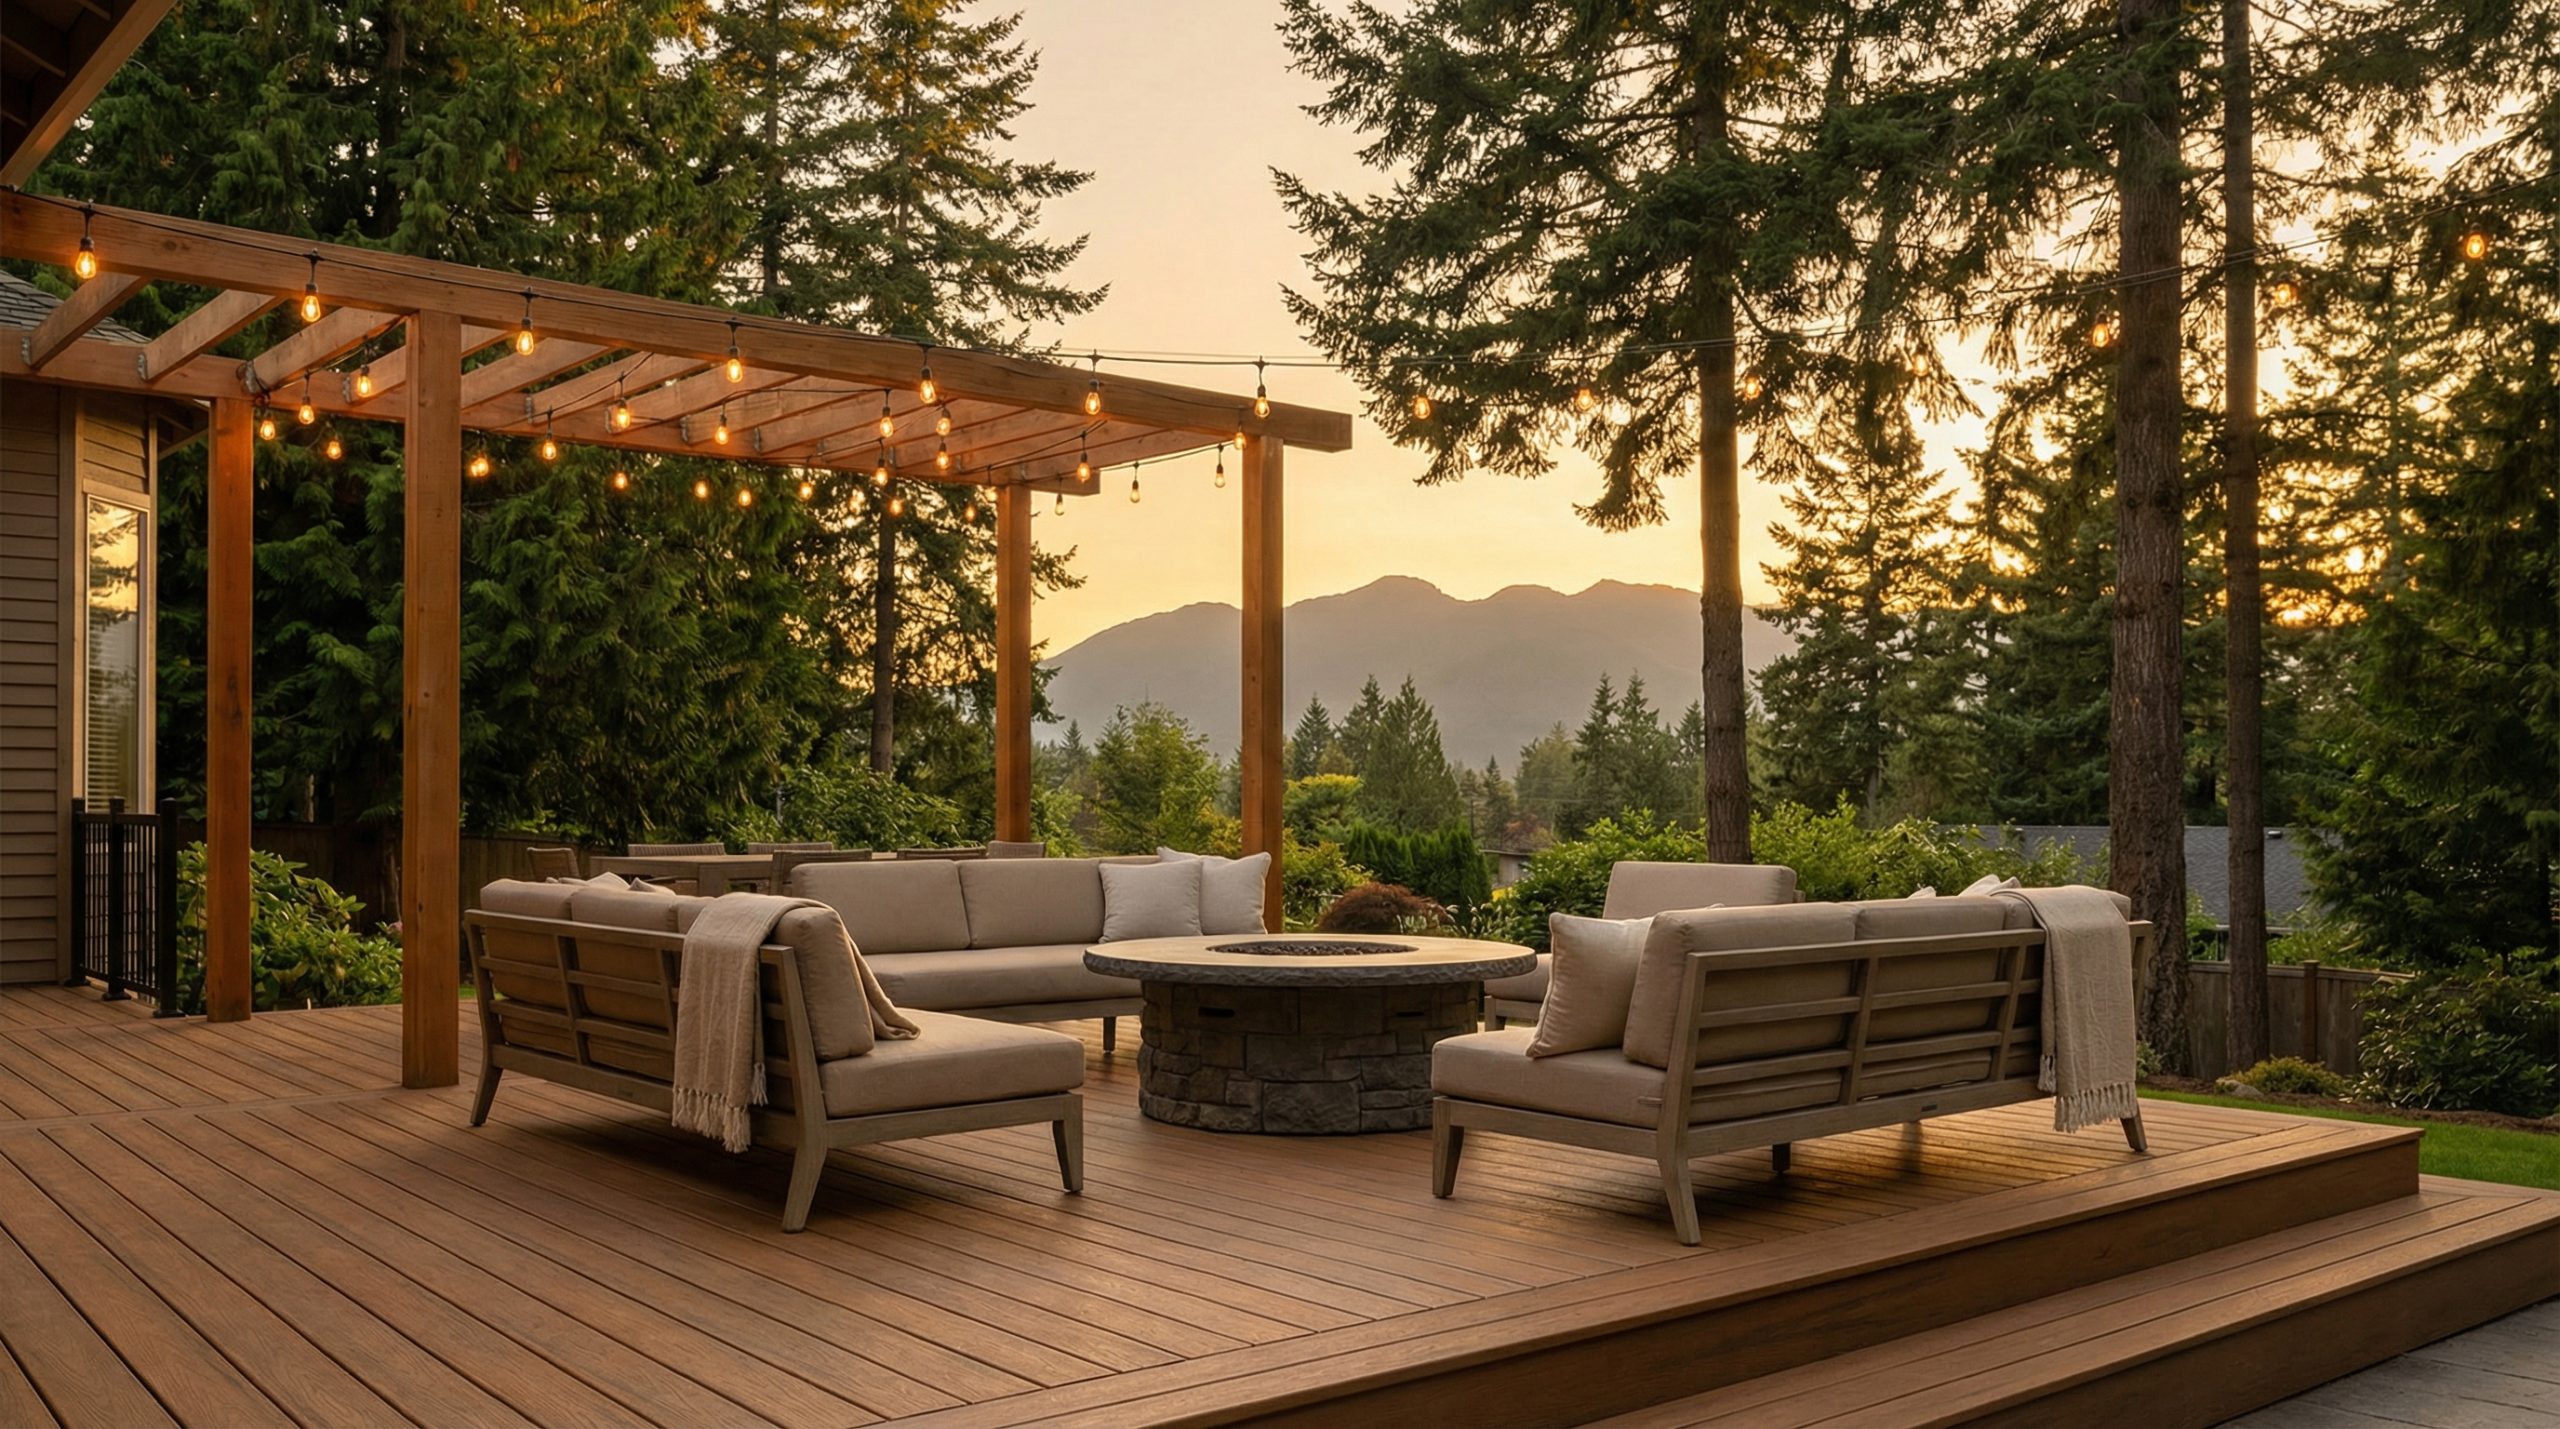
2. Go Cohesive with Matching Composite Fascia and Steps
The visual success here is a simple formula: 70% Monochromatic Decking + 20% Natural Texture + 10% Soft Furnishings. The deck, fascia, and steps are all the same warm brown composite, creating a seamless, expansive base. The natural texture comes from the rough-hewn wooden pergola and the rugged grey stone fire pit, which keep the composite from looking too uniform. The final 10% is the soft beige sectional, which adds comfort and a light-colored focal point. You could swap the brown composite for a grey one, but you’d want to keep the formula by using a coordinating stone and a warm wood pergola to maintain the balance.
|
📋 Copy HEX 🔗 Share |
A big, beautiful composite deck like this is a dream, but let’s talk about heat. Darker composite boards, especially in a reddish-brown shade, can get surprisingly hot in direct, all-day sun. If your deck is south-facing with no shade, it might become uncomfortable for bare feet in the peak of summer. The pergola and string lights suggest this is used more in the evening, which is smart. If you plan to use your deck midday, consider a lighter-colored composite, or make sure you have a large umbrella or shade sail planned in your budget.
3. Achieve an Airy, Coastal Vibe with Light Wood Fascia
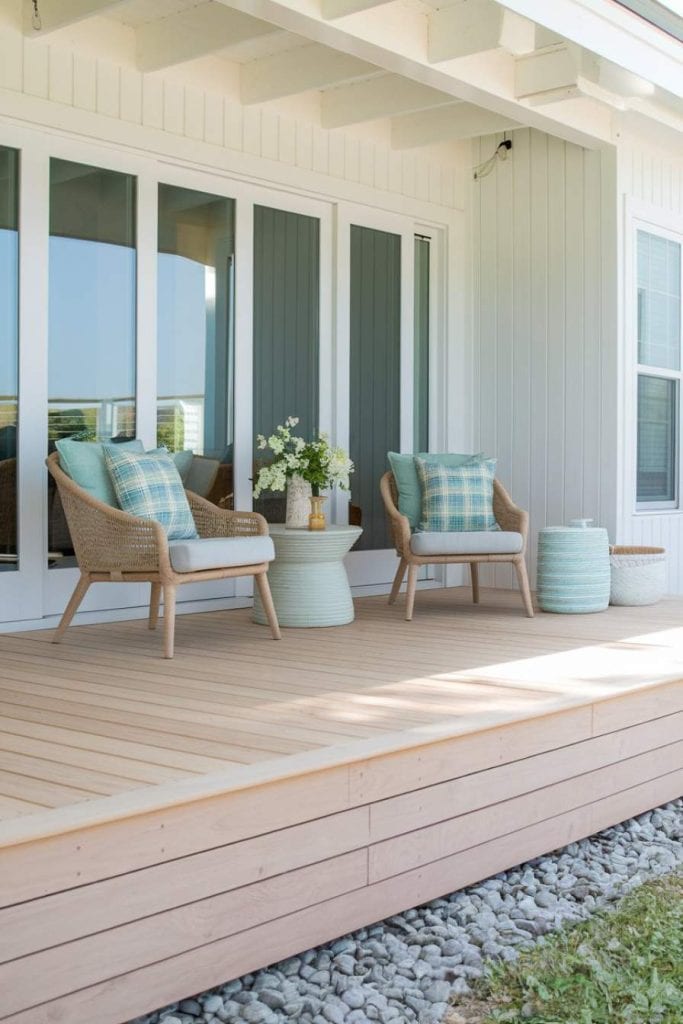
The single most important element here is the use of stacked, horizontal fascia boards. Instead of one single, thick board, using three or four narrower planks creates a refined, layered look that feels more architectural. This detail elevates the entire deck, making it look custom and high-end. It mirrors the horizontal lines of the house’s siding and the deck surface itself, creating a pleasing visual rhythm. If you were to replace this with a single piece of trim, you’d lose that texture, and the design would instantly feel more basic and less intentional. It’s a subtle choice with a huge impact.
|
📋 Copy HEX 🔗 Share |
A light-toned wood like cedar or Ipe can be pricey. To get this airy, modern look for less, use standard pressure-treated pine boards for your fascia. The trick is in the prep work. Let the wood dry out for a few months after installation, then use a wood cleaner and brightener. Finish it with a high-quality, light-colored semi-transparent stain in a ‘natural’ or ‘light oak’ shade. This will give you that pale, sun-bleached look without the premium wood cost. You can get the materials for a 50-foot perimeter for around $200-$300, versus $800+ for cedar. For an even more budget-friendly approach, check out the wood used in Idea #7.
4. Contrast Light Brown Composite with Crisp White Fascia and Railings
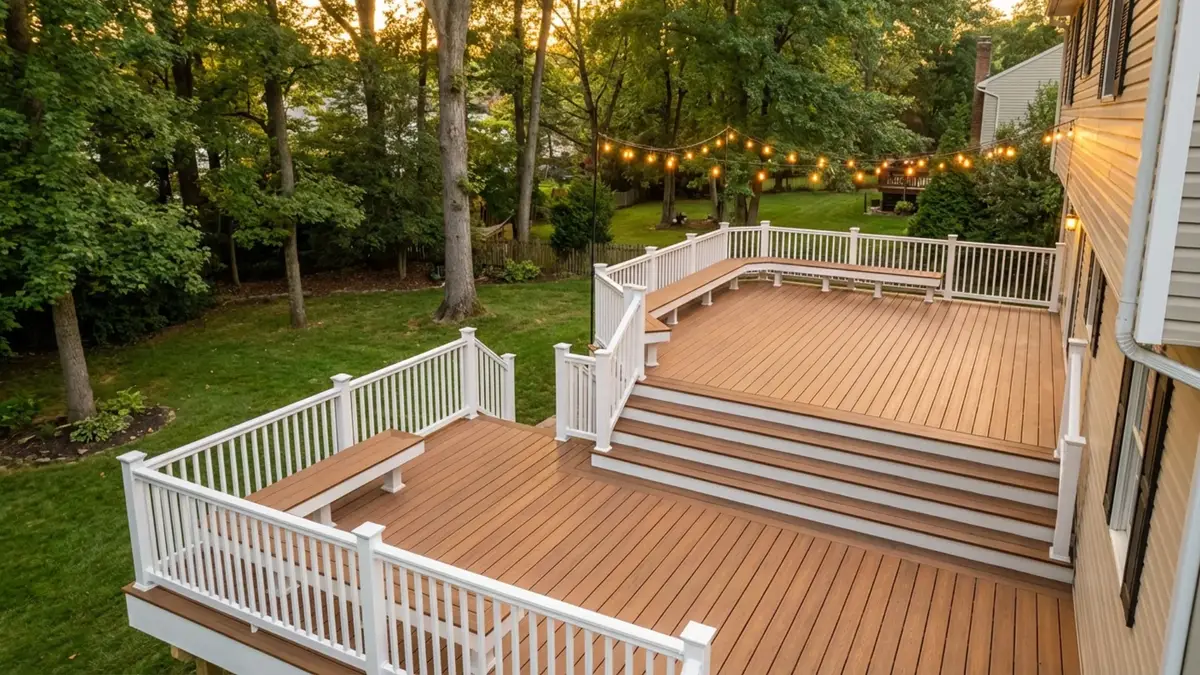
A multi-level deck of this size is a significant investment, but the clean contrast of white and brown offers timeless appeal. The white fascia and railings make the structure pop against the green lawn.
- Main Decking & Benches (Composite): $8,000 – $15,000
- White Fascia & Railing System (PVC/Composite): $4,000 – $7,000
- Structural Framing & Labor: $10,000 – $20,000
- Lighting (string lights, wiring): $300 – $800
- TOTAL: $22,300 – $42,800
Budget alternative: Use pressure-treated wood for decking and framing, painted white for fascia and railings. This could bring the total cost down to the $10,000 – $18,000 range.
|
📋 Copy HEX 🔗 Share |
This expansive, multi-level design is best suited for a medium to large backyard where it won’t overwhelm the space. You’ll need a minimum footprint of about 300-400 square feet to accommodate the different levels, steps, and integrated benches without feeling cramped. The visual weight of the white railings and fascia works well here because there’s enough surrounding green space to balance it. In a smaller yard, this much white structure could feel imposing. For a more compact but equally stylish version of this color palette, take a look at the design in Idea #5.
5. Frame a Brown Composite Deck with a Clean White Fascia
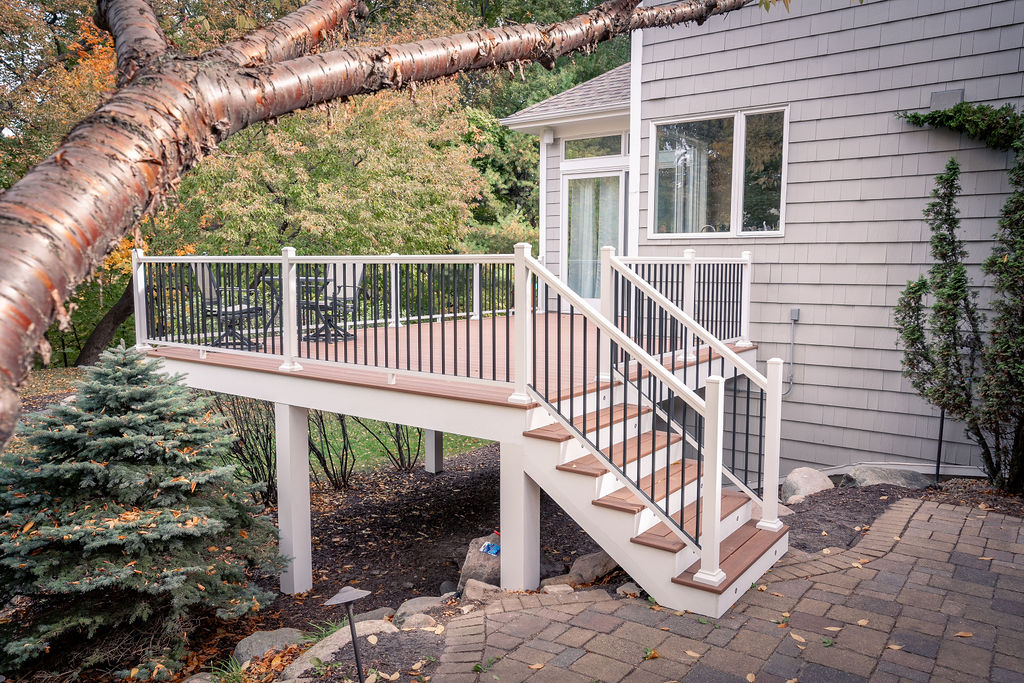
White fascia looks incredibly sharp and clean… when it’s new. The reality is that white, especially near the ground, is a magnet for dirt, mud splatter from rain, and grass clippings from your lawnmower. Plan on giving it a good scrub with a mild detergent and a soft-bristle brush at least twice a year, once in the spring and once in the fall. If you have mulch beds directly underneath, you may get tannin stains that require a more specific cleaner. Using a PVC or composite fascia board (instead of painted wood) is your best bet here, as it’s non-porous and much easier to wipe clean.
|
📋 Copy HEX 🔗 Share |
To ensure your white fascia looks permanently crisp and never needs repainting, don’t use wood. Use cellular PVC trim boards, like those from Azek or Wolf. They cut and install just like wood but are completely impervious to moisture, rot, and insects. For corners, instead of a simple mitered joint, which can open over time, use two boards overlapping in a butt joint and sealed with a high-quality exterior PVC adhesive. It creates a stronger, cleaner corner that will look perfect for decades, justifying the slightly higher material cost upfront.
6. Transition Seamlessly with a Tiered Gray Composite Deck
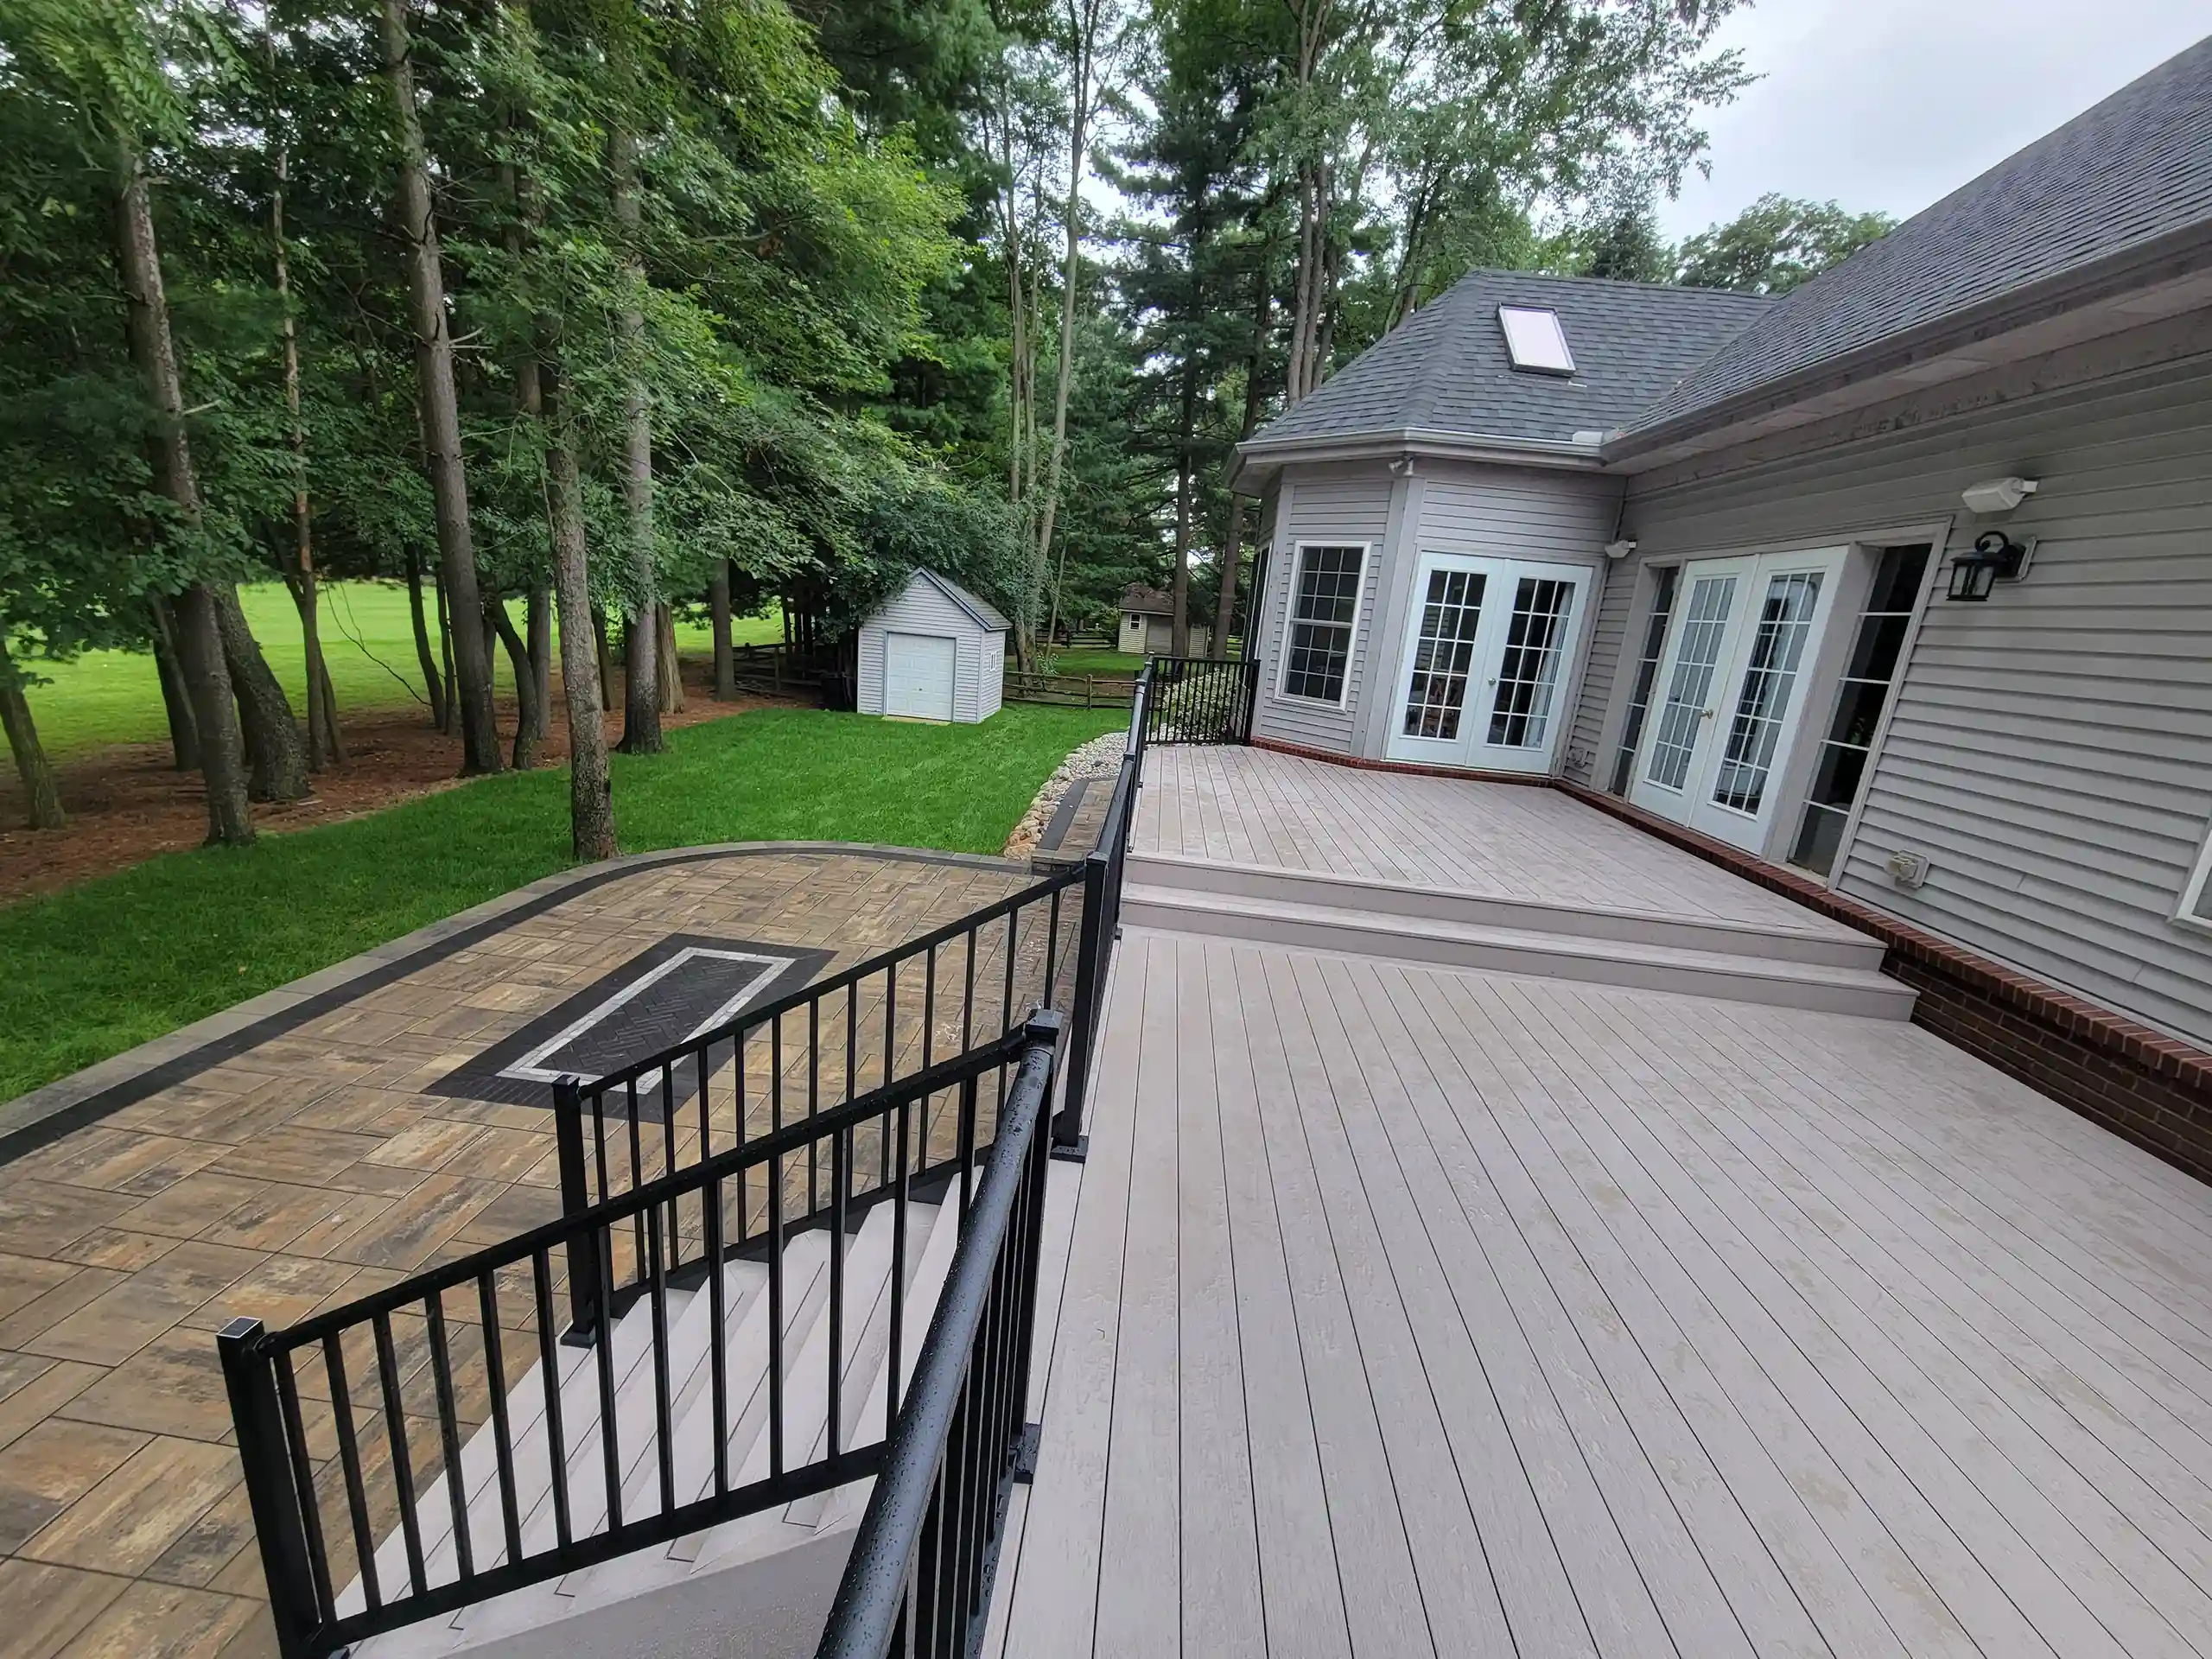
This design nails the transition from house to yard. The light gray composite deck acts as a perfect mid-tone between the light gray house siding and the darker accents in the paver patio. This is called ‘color bridging,’ and it creates a smooth visual flow. The black metal railings provide a sharp, modern contrast that defines the deck’s perimeter without obstructing the view, and their vertical lines are a nice counterpoint to the horizontal deck boards and siding. The choice to use integrated, wide steps rather than a separate staircase makes the deck feel more like a natural extension of the patio space.
|
📋 Copy HEX 🔗 Share |
The move toward seamless indoor-outdoor living is more than just a buzzword; it’s a fundamental shift in how we use our homes. This design is trending because it perfectly embodies that concept. The coordinated gray palette and the direct, step-down transition to a paver patio erase the traditional boundary between ‘deck’ and yard. It creates a single, large, multi-functional outdoor room. Homeowners are increasingly willing to invest in composite materials and hardscaping to create these polished, low-maintenance spaces that feel as finished as any room inside the house.
7. Embrace Natural Wood with a Cohesive Multi-Level Deck
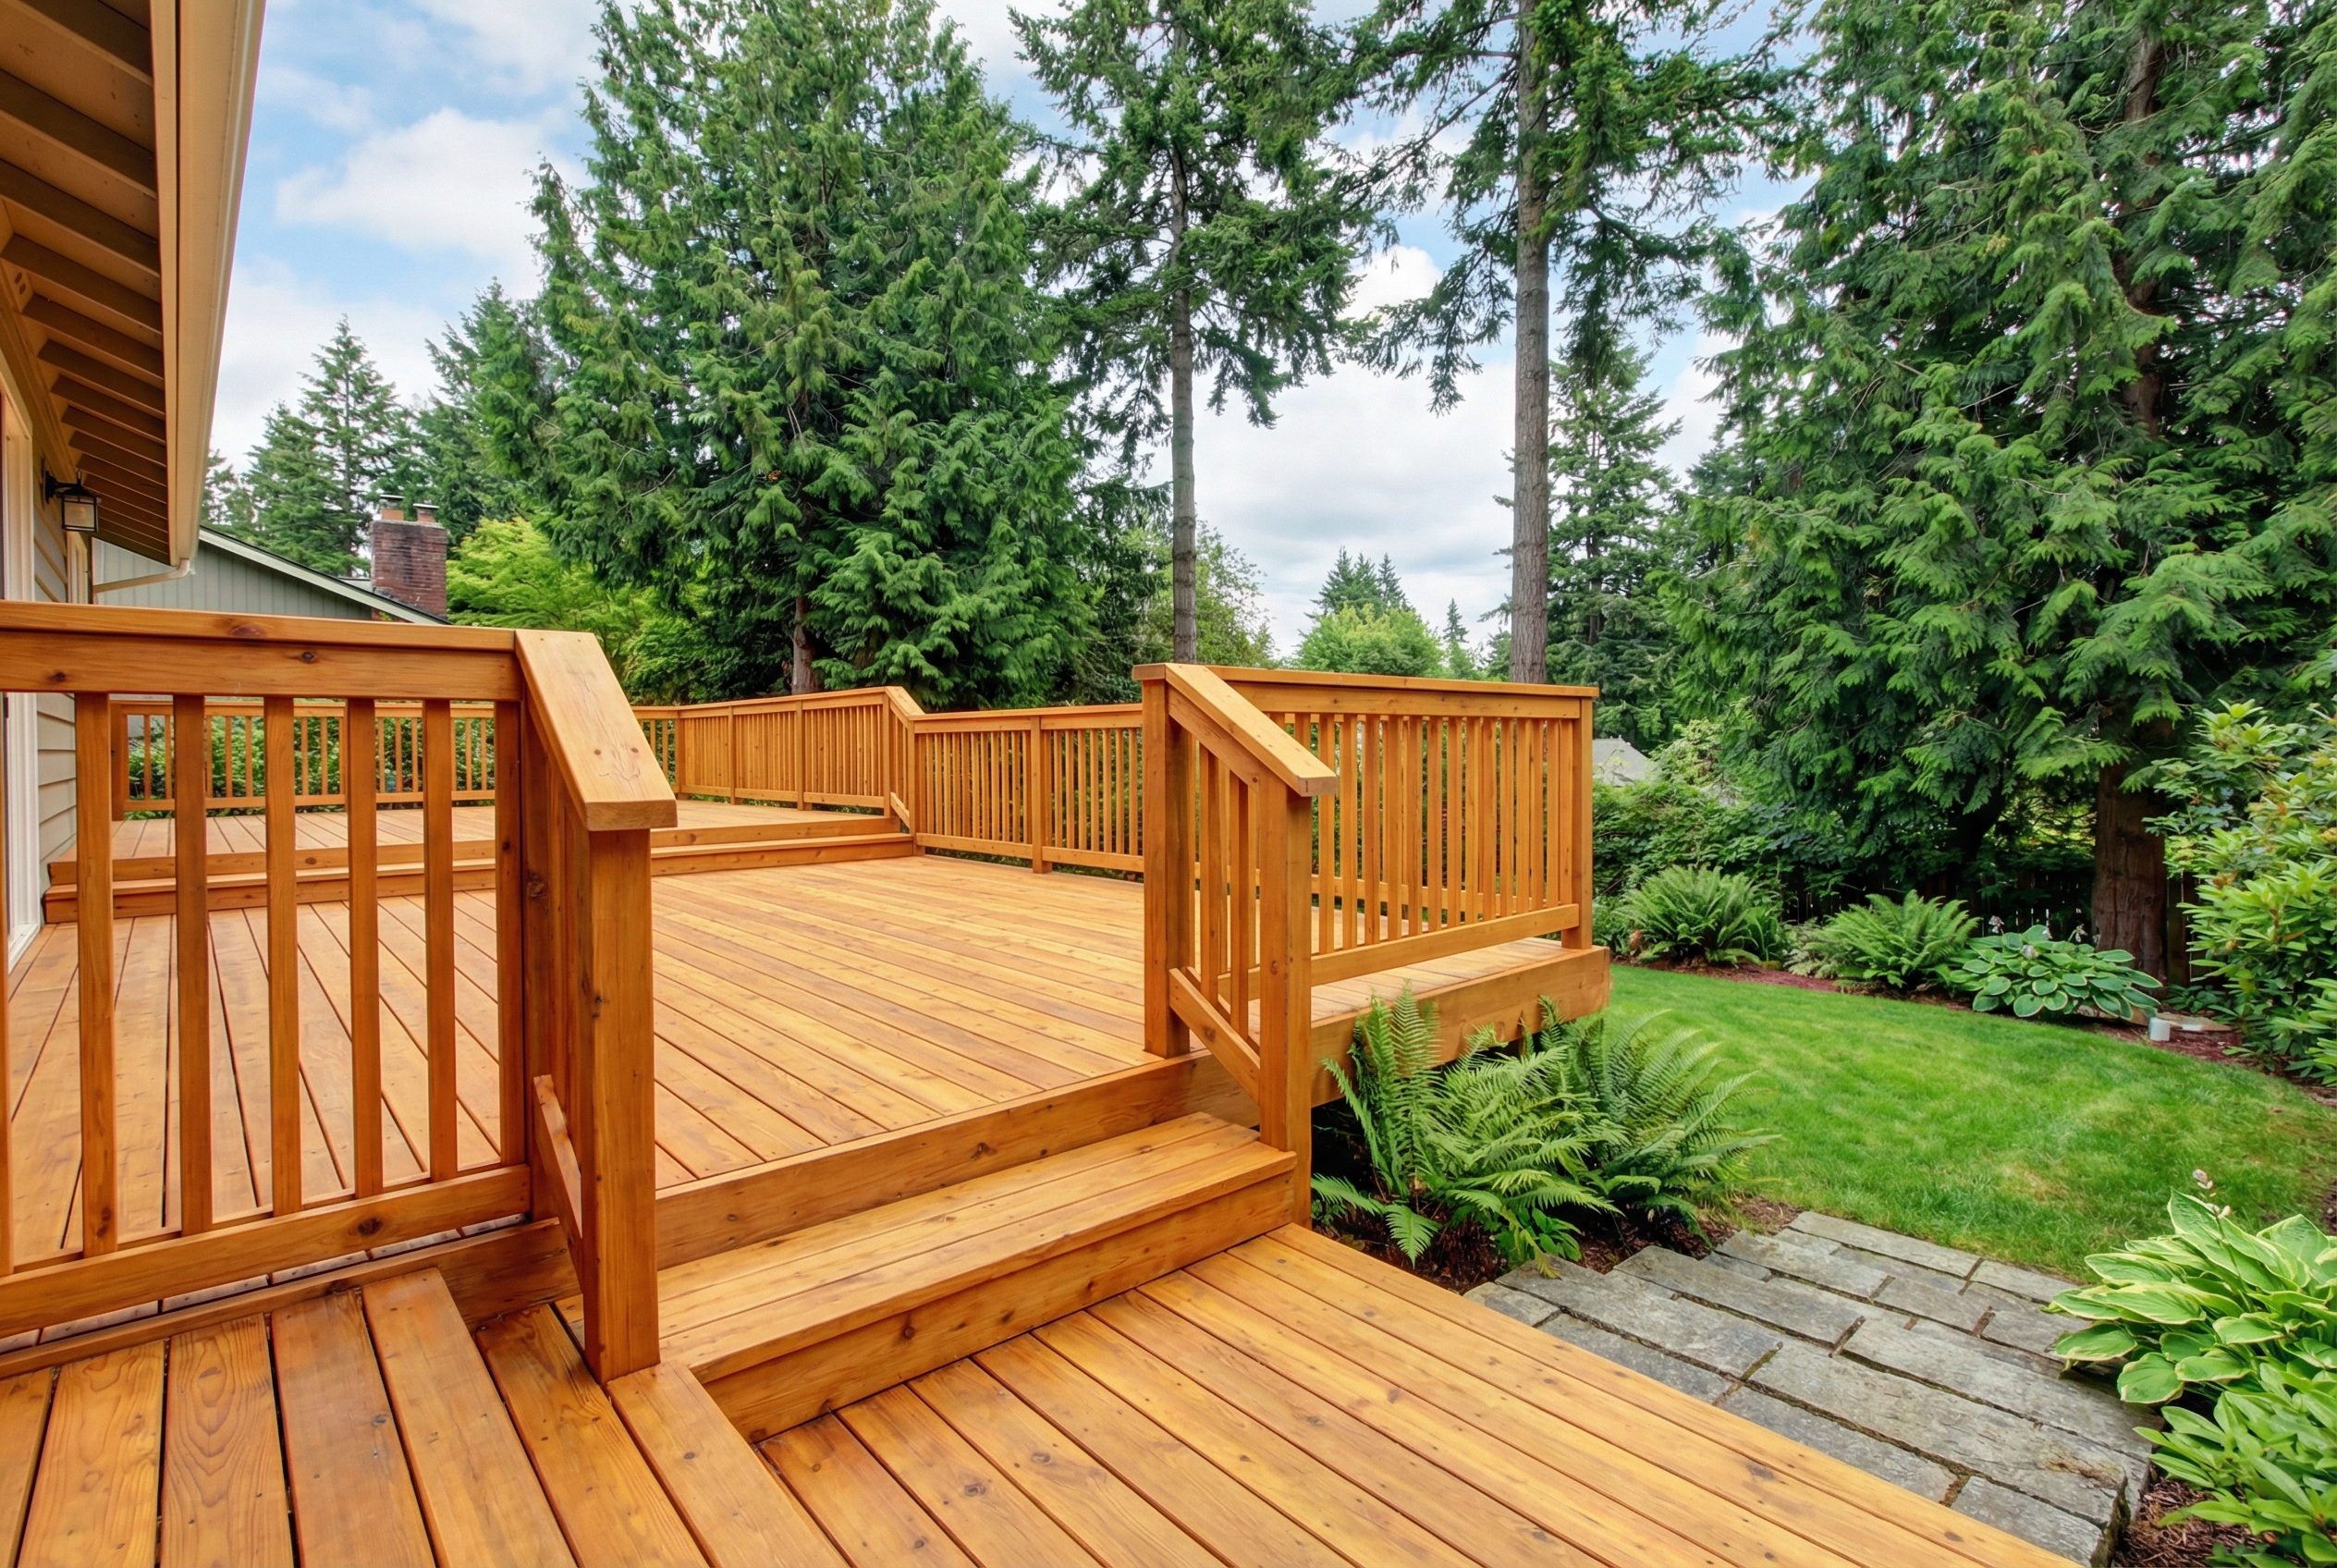
The absolute key to this design’s serene, natural beauty is the unwavering consistency of the wood. The same light brown planks are used for the deck surface, the broad steps, and the horizontal fascia boards that wrap every level. This commitment to a single material makes the complex, multi-level structure feel like a single, elegant piece of woodwork that has been gently placed into the landscape. If different materials or colors were used for the fascia or steps, the design would fracture, losing its powerful, calming sense of unity with the surrounding green space.
|
📋 Copy HEX 🔗 Share |
This look is all about letting nature be the star. The formula is approximately 80% natural wood + 20% lush greenery. The deck’s simple, clean lines and uniform light-brown color provide a warm but neutral stage. The real visual interest comes from the vibrant, multi-textured greens of the lawn, ferns, and trees that envelop the structure. By keeping the man-made elements so consistent and understated, the design allows the organic shapes and colors of the garden to take center stage. You could achieve a similar feel with a gray-toned wood, as long as the surrounding foliage remains the dominant visual element.
8. Define Your Space with a Curved Deck and Integrated Lighting
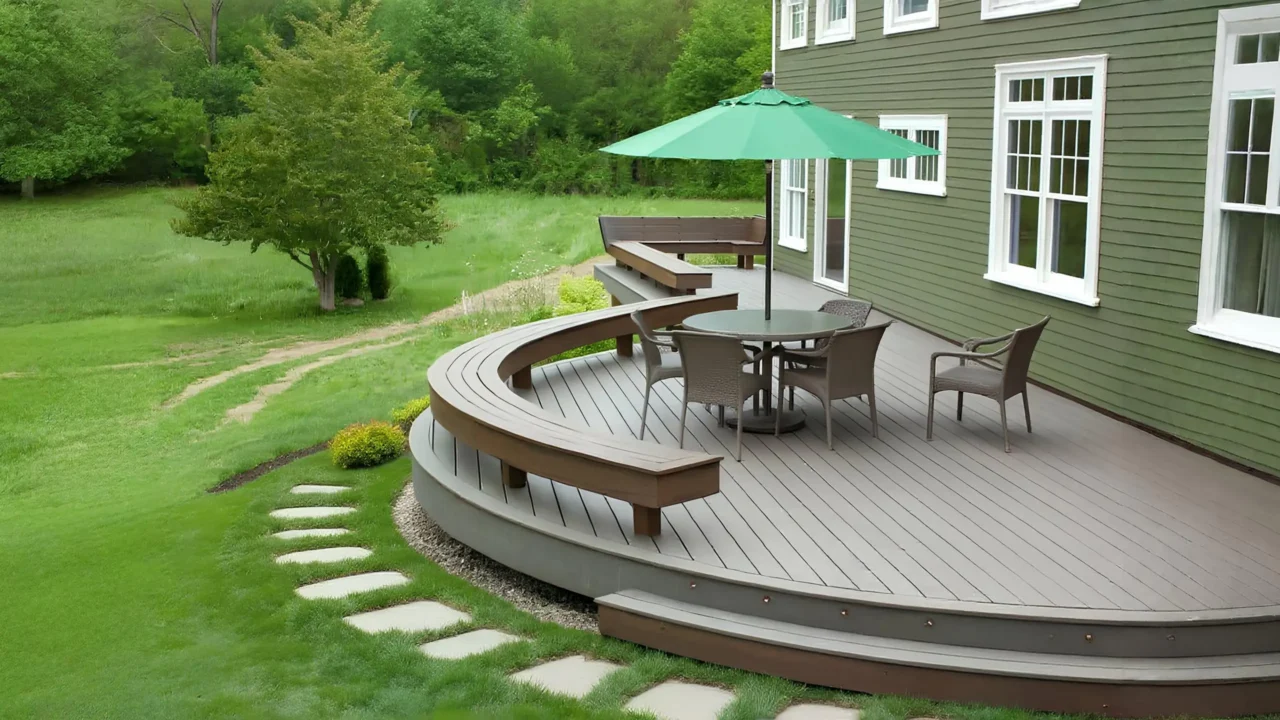
When designing a curved deck, the fascia is what sells the illusion. For a smooth, professional curve like this, you can’t use standard rigid fascia boards. The pros use composite fascia that has been heat-formed. This involves using specialized heating blankets to make the board pliable, then bending it around a pre-built form that matches your deck’s curve. Once it cools, it holds the shape permanently. For a DIY approach, you can create the curve by kerf-cutting the back of a composite or PVC board—making a series of cuts that allow it to bend—but a heat-formed application will always give the cleanest result.
|
📋 Copy HEX 🔗 Share |
Installing simple step lights like these is a surprisingly manageable weekend project. Here’s a quick guide:
- Plan Your Layout: Decide on light placement before you build. Typically, one light every other step, staggered, is sufficient. Mark the center point for each light.
- Choose Your Lights: Select low-voltage (12V) LED hardscape lights. They are safe, energy-efficient, and designed for this purpose. Cost: $20-$50 per light.
- Drill the Holes: Use a Forstner bit or hole saw sized to your specific light fixture to drill a clean hole through the fascia or riser.
- Run the Wires: Before securing the final fascia boards, run the low-voltage cable, connecting each light. Leave a little slack.
- Connect to Transformer: Run the main cable to a low-voltage transformer, which plugs into a standard GFCI outlet.
- Test and Secure: Test the system before you fully secure all your boards and hide the wires. Total time: 4-6 hours.
9. Add Detail with White Paneled Fascia and Diamond Accents
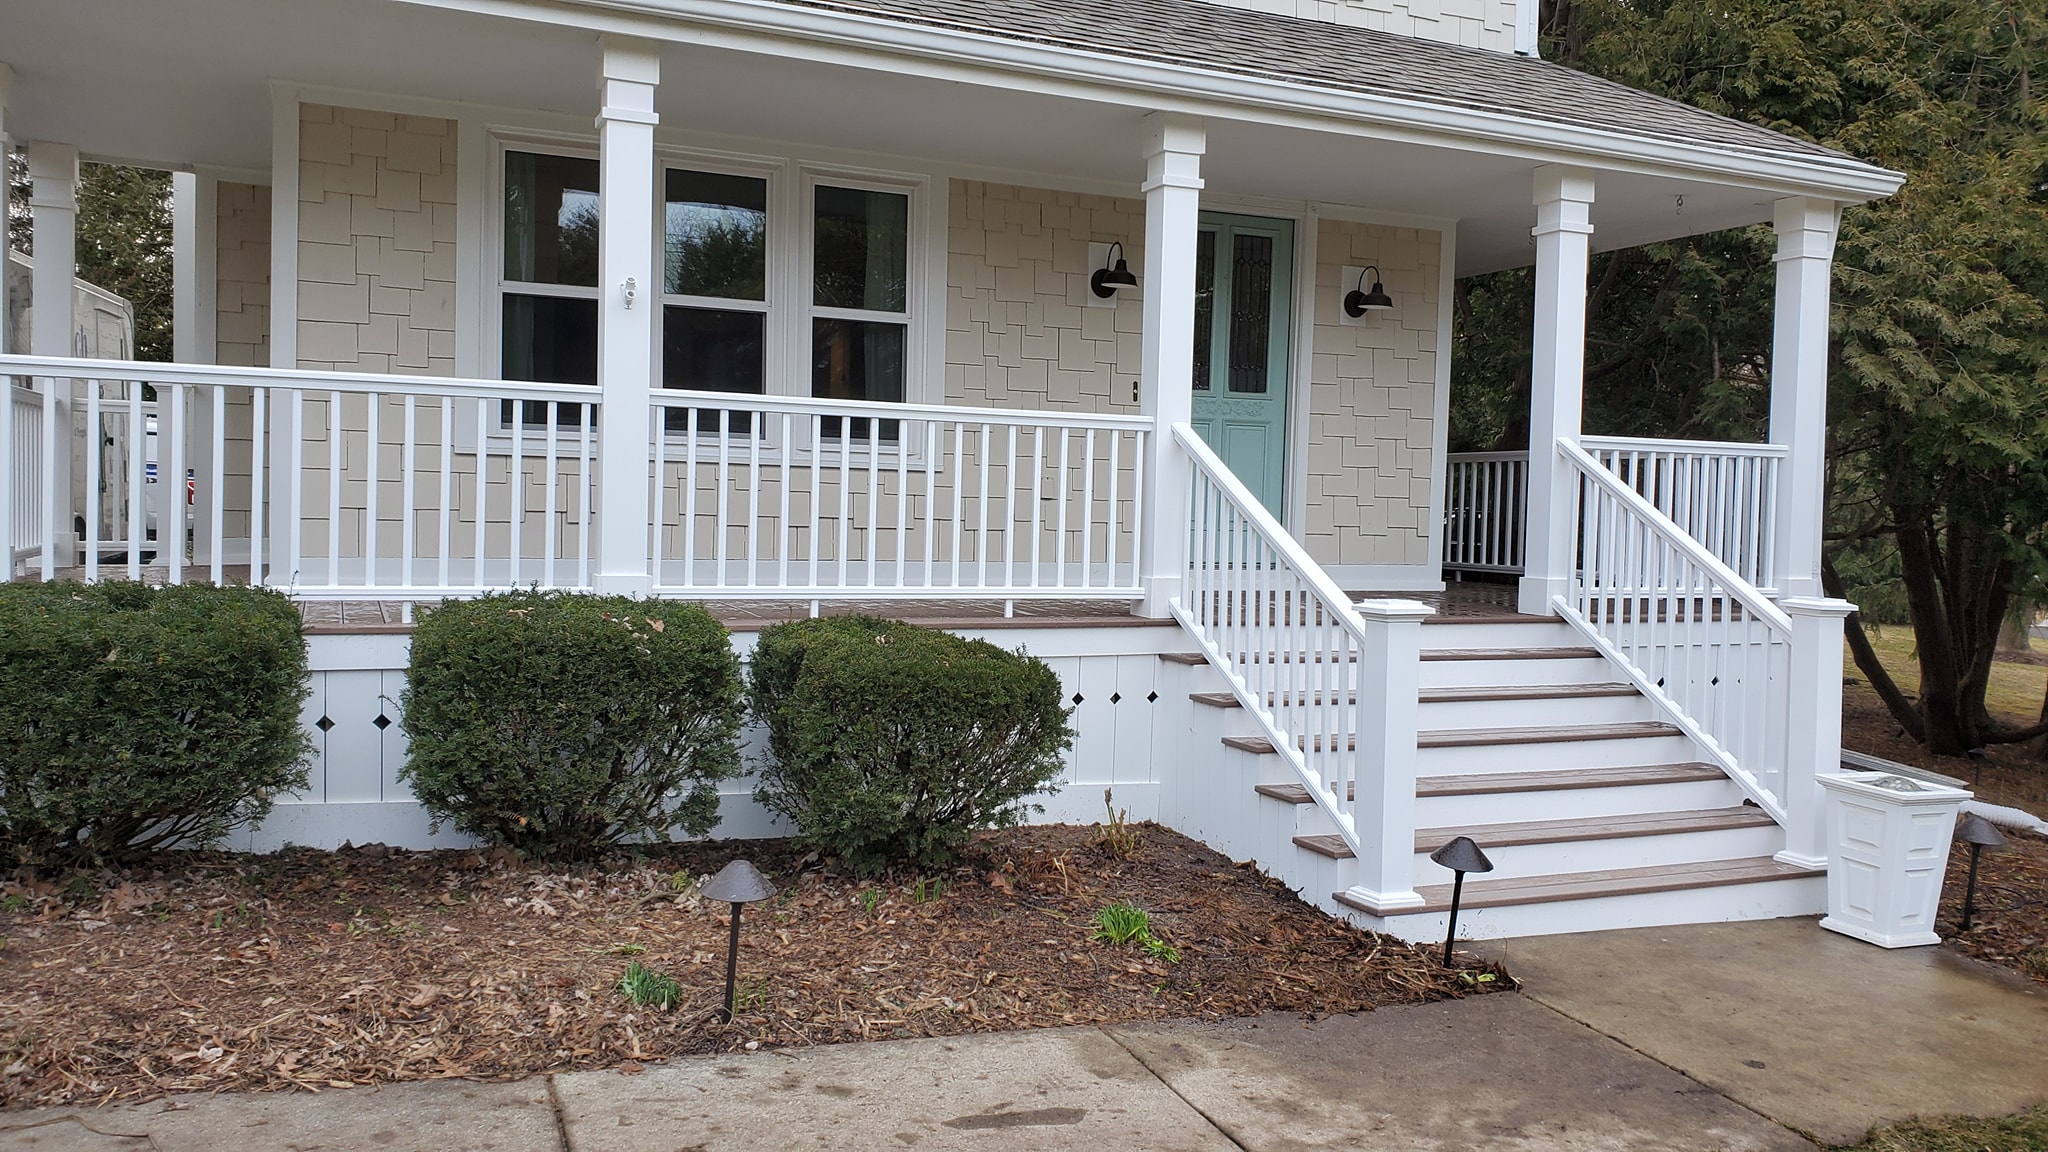
This porch design works because it layers details to create a classic, welcoming feel. The primary element is the clean, white paneled fascia, which provides a solid, traditional base. The magic, however, is in the secondary detail: the small, dark, diamond-shaped cutouts. This subtle touch breaks up the solid white expanse, adding a hint of craftsmanship and personality. The contrast between the white fascia and the brown decking provides a clear visual separation between the vertical and horizontal planes, making the entire structure feel well-defined and thoughtfully designed. It’s a great example of how a small decorative element can have a big impact.
|
📋 Copy HEX 🔗 Share |
You can achieve this custom look on a budget. Instead of expensive pre-milled panels, start with standard 1×8 PVC trim boards for your fascia. Create a simple diamond template from cardboard. Use a pencil to trace the diamond shape at regular intervals along your board (e.g., every 36 inches). Then, using a jigsaw with a fine-tooth blade, carefully cut out the shapes. Behind the cutouts, fasten a small piece of black aluminum screen or a thin piece of black-painted wood to create the dark accent. The entire custom look can be achieved for little more than the cost of the plain PVC boards themselves.
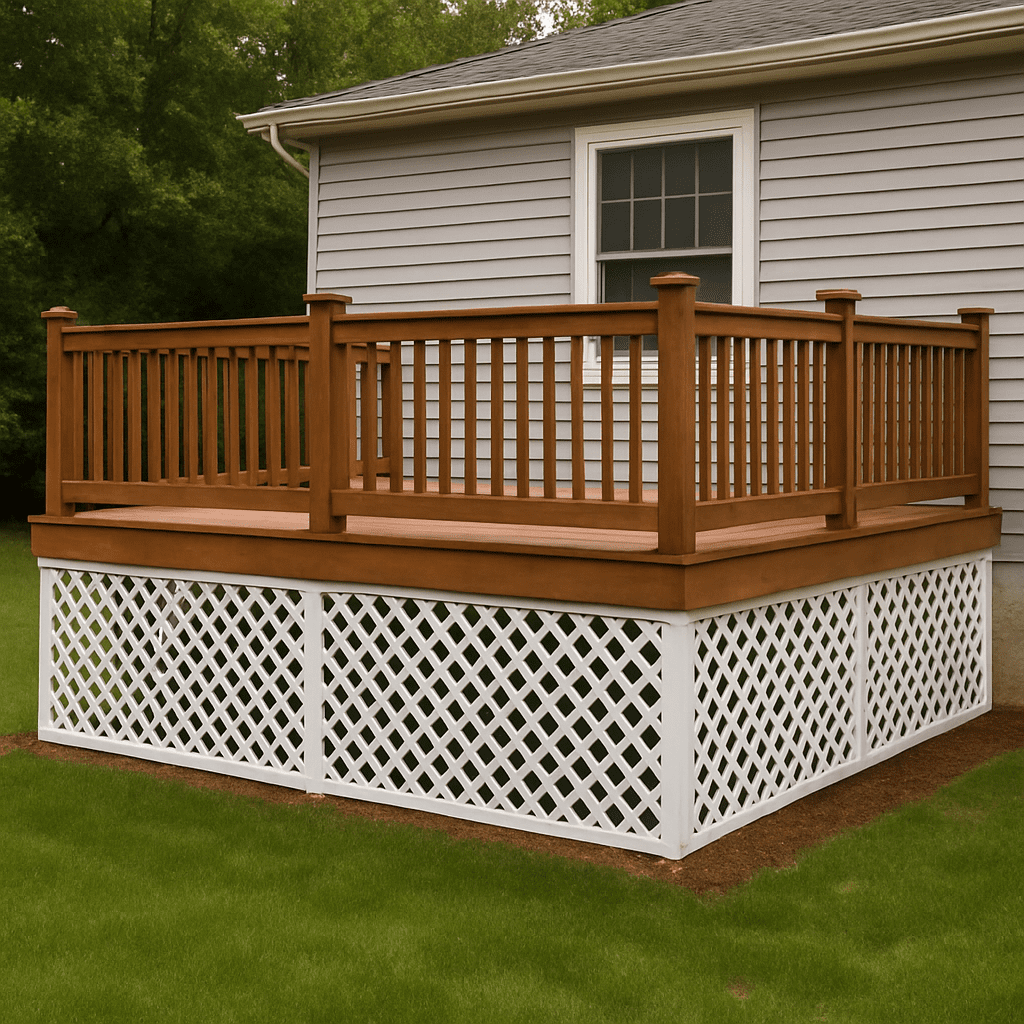
10. Enclose Your Deck with Traditional White Lattice Skirting
Vinyl lattice is a popular choice for a reason: it’s affordable and low-maintenance compared to wood. However, that white surface is prime real estate for green algae and mildew, especially on the side of the house that gets less sun. You’ll need to plan for an annual cleaning with a pressure washer on a low setting or a good scrub with a deck brush and a bleach-based outdoor cleaner. Also, the diamond pattern is great for ventilation but can be a pain to trim around with a string trimmer. That clean mulch line shown is key to making maintenance easier and preventing the lattice from getting damaged.
|
📋 Copy HEX 🔗 Share |
Let’s be honest: while lattice is practical for closing off the underside of a deck, it can sometimes read as dated or a bit cheap if not done right. The key to making it look intentional is framing. Here, the lattice panels are neatly contained by the ground and a solid brown fascia board above. Without that crisp frame, it can look flimsy. Also, consider what’s behind the lattice. If it’s just dirt and stored junk, it will be visible. For a cleaner look, either keep the under-deck area tidy or tack black landscape fabric to the inside of the lattice to obscure the view.
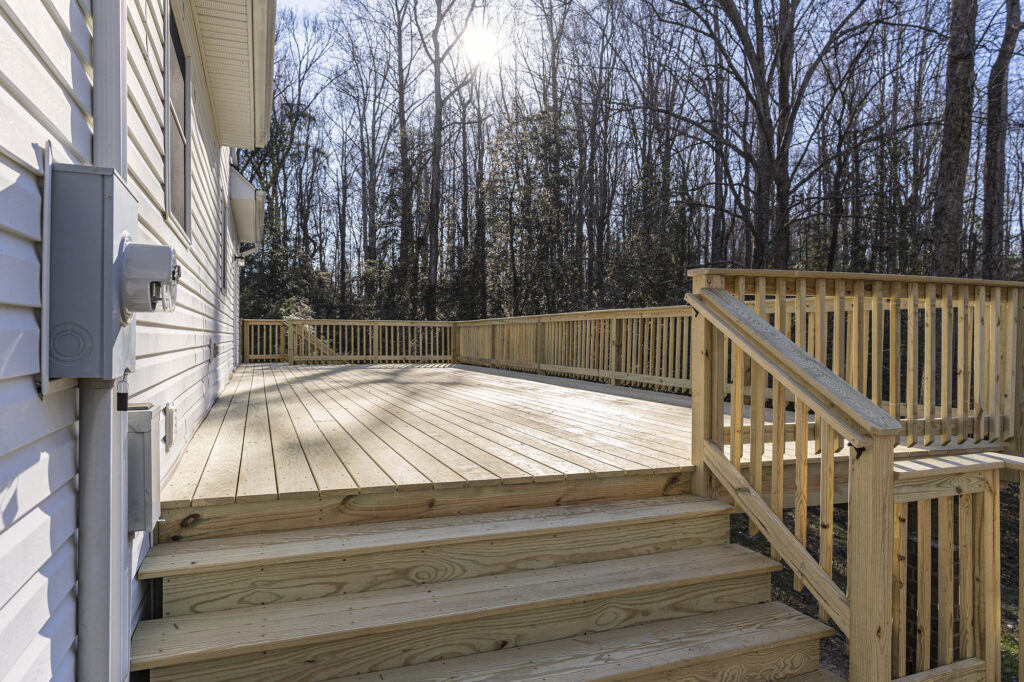
11. Keep It Clean with a Simple, Matching Light Wood Fascia
The defining feature of this deck is its refreshing simplicity. In a world of complex, multi-material designs, the choice to use a single, simple horizontal board for the fascia—perfectly matching the light, natural wood of the deck and railings—is a statement in itself. It’s an honest design. It doesn’t try to be anything it’s not. This approach puts the focus on the quality of the wood and the craftsmanship of the build. It results in a bright, clean, and functional space that feels both modern and timeless, proving that sometimes the simplest solution is the most elegant one.
|
📋 Copy HEX 🔗 Share |
A simple wood fascia is a great choice, but a few checks will ensure a perfect result. Before you commit, run through this list:
- Check Your Joist Height: Is your rim joist a standard size (e.g., 2×8 or 2×10)? Make sure the fascia board you choose is wide enough to cover it completely for a clean look.
- Material Match: Can you source a fascia board that is the exact same species and grade as your deck boards? A slight mismatch will be very noticeable in this simple design.
- Plan for Fasteners: Decide if you will use color-matched screws or a hidden fastener system. Visible stainless steel screws can look great if placed deliberately and consistently.
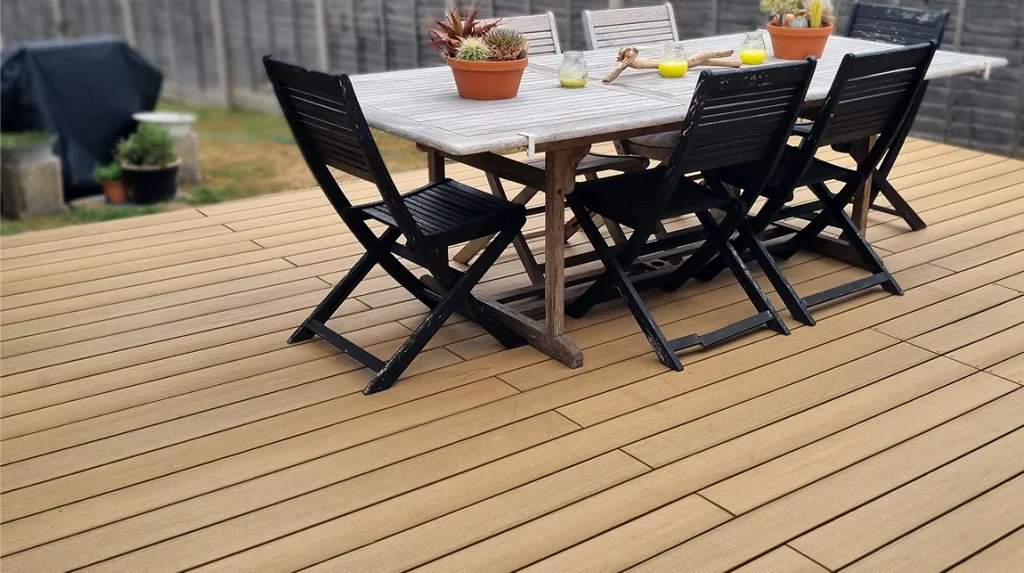
12. Opt for a Ground-Level Deck Without a Vertical Fascia
This fascia-free look works best on low-profile decks that are no more than one step (about 6-8 inches) off the ground. The goal is to create a seamless transition from the deck to the surrounding landscape, making it feel more like a patio. This design is ideal for smaller backyards or courtyards where a raised deck with a visible fascia and railings would feel bulky and confining. By keeping the deck surface almost level with the garden, you create an illusion of more space. It’s a great solution for creating a functional outdoor floor without introducing too much vertical structure.
|
📋 Copy HEX 🔗 Share |
When building a deck this low to the ground, proper ventilation is non-negotiable. Without adequate airflow underneath, moisture will get trapped, leading to rot, mold, and insect problems, even with pressure-treated lumber. Ensure you have at least 4-6 inches of clear, unobstructed airspace between the bottom of your joists and the ground. The deck should not be sitting directly on the soil. Using a gravel base, as seen in Idea #15, is an excellent way to promote drainage and discourage weeds from growing underneath your new outdoor living space.
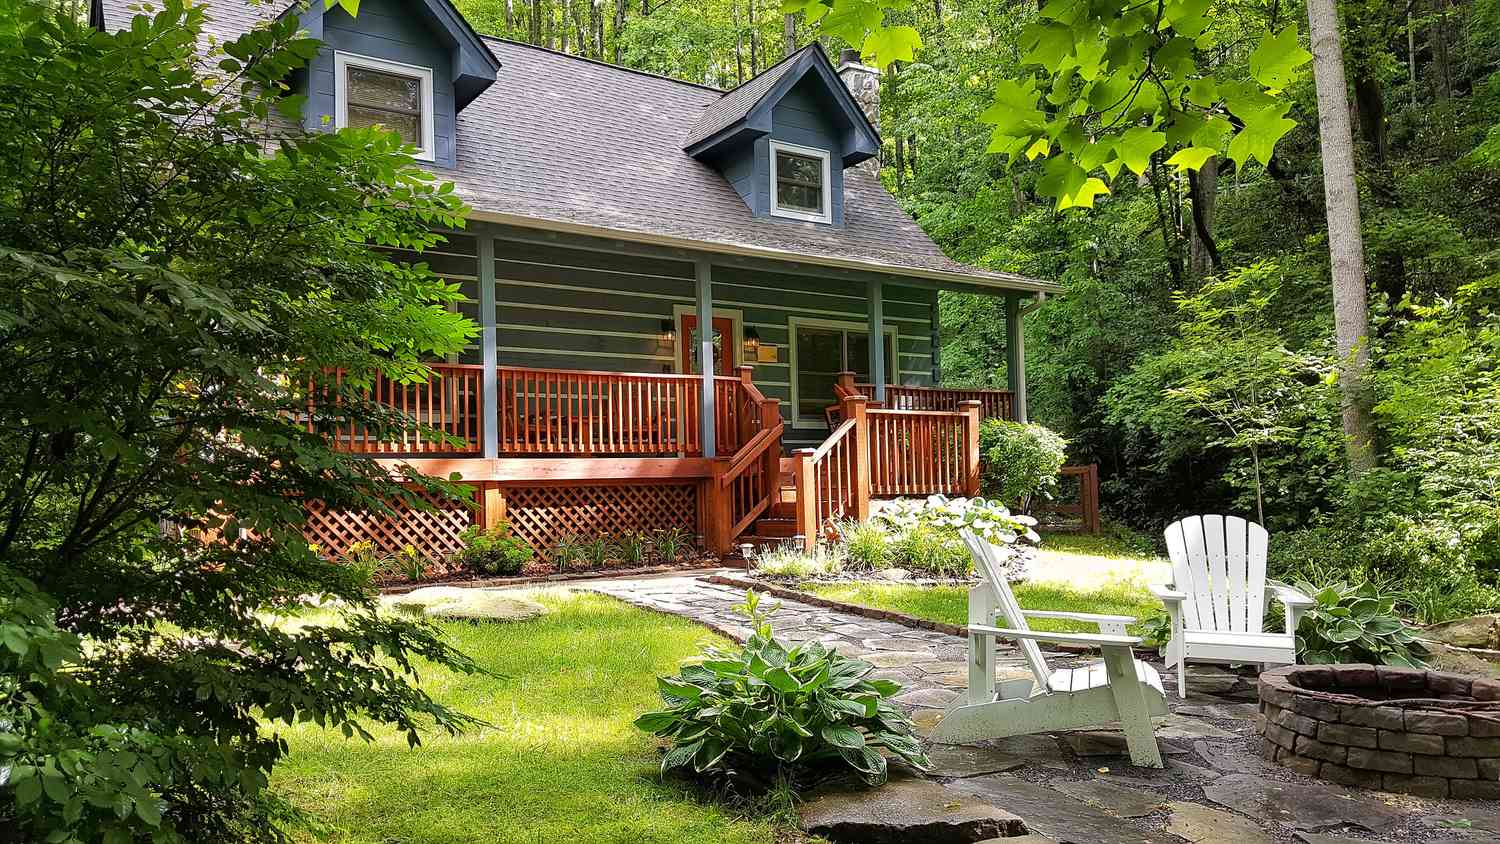
13. Create Modern Drama with a Dark Fascia and Under-Rail Lighting
This design is all about high contrast and smart lighting. The nearly black fascia board creates a strong, dark horizontal line that cleanly defines the deck’s edge. This dark band makes the lighter, natural wood-toned deck surface appear to float above it, especially at night. The masterstroke is the integrated lighting strip tucked just under the railing. Instead of harsh overhead lights, this provides a warm, indirect glow that washes across the deck surface, highlighting its texture and creating an intimate, sophisticated ambiance. It’s functional art for your outdoor space.
|
📋 Copy HEX 🔗 Share |
Integrated LED lighting is one of the biggest deck trends right now, and this is a perfect example of why. As we spend more time entertaining outdoors in the evening, lighting has shifted from a purely functional necessity to a key design element. Homeowners want to create a resort-like, moody atmosphere. Under-rail and in-fascia lighting allows for a seamless, built-in look that feels luxurious and intentional. It’s a feature that directly enhances the usability and enjoyment of the deck after sundown, making the investment feel worthwhile. For another take on integrated lights, see the post cap version in Idea #23.
14. Curate a Chic Lounge with a Grey Composite Deck
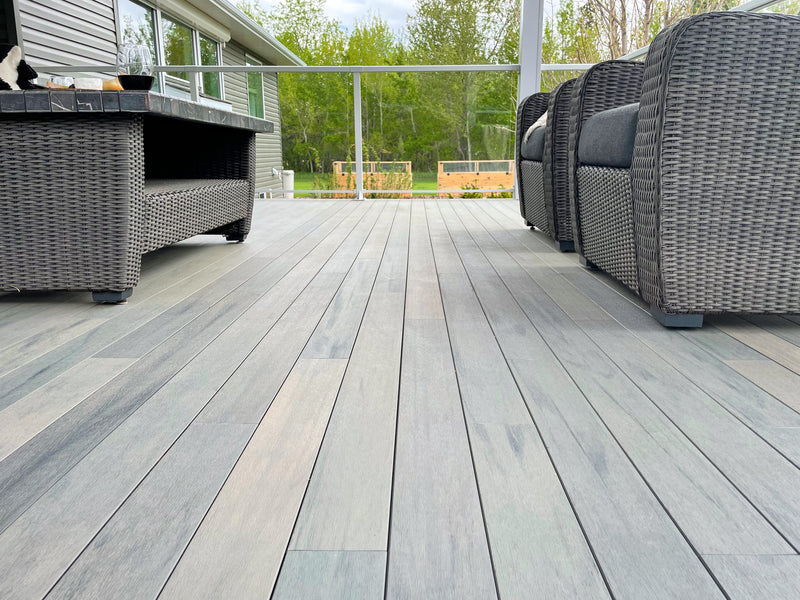
The sophisticated, monochromatic look of this deck is achieved with a clear formula: 50% light grey decking, 40% dark grey accents, and 10% natural green. The light grey composite boards provide a neutral, modern foundation. The deep grey is then layered in through the woven furniture and cushions, creating depth without introducing a new color. The clear glass railing is a key part of this, as it prevents the grey from feeling too heavy or blocky. The final touch is the surrounding greenery, which provides the only pop of color needed, keeping the overall palette cool and serene.
|
📋 Copy HEX 🔗 Share |
Glass railings look absolutely stunning and are perfect for preserving a view. However, they are not a ‘set it and forget it’ feature. They will show every fingerprint, pollen speck, and water spot. If you live in an area with hard water, you’ll be battling spots after every rain shower. You’ll need to clean them regularly with a squeegee and glass cleaner to keep them looking this pristine. Also, be mindful of birds. Sometimes, adding a few subtle decals or patterns can help prevent bird strikes on a very clear, reflective glass panel.
15. Modernize with a Horizontal Slatted Light Wood Fascia
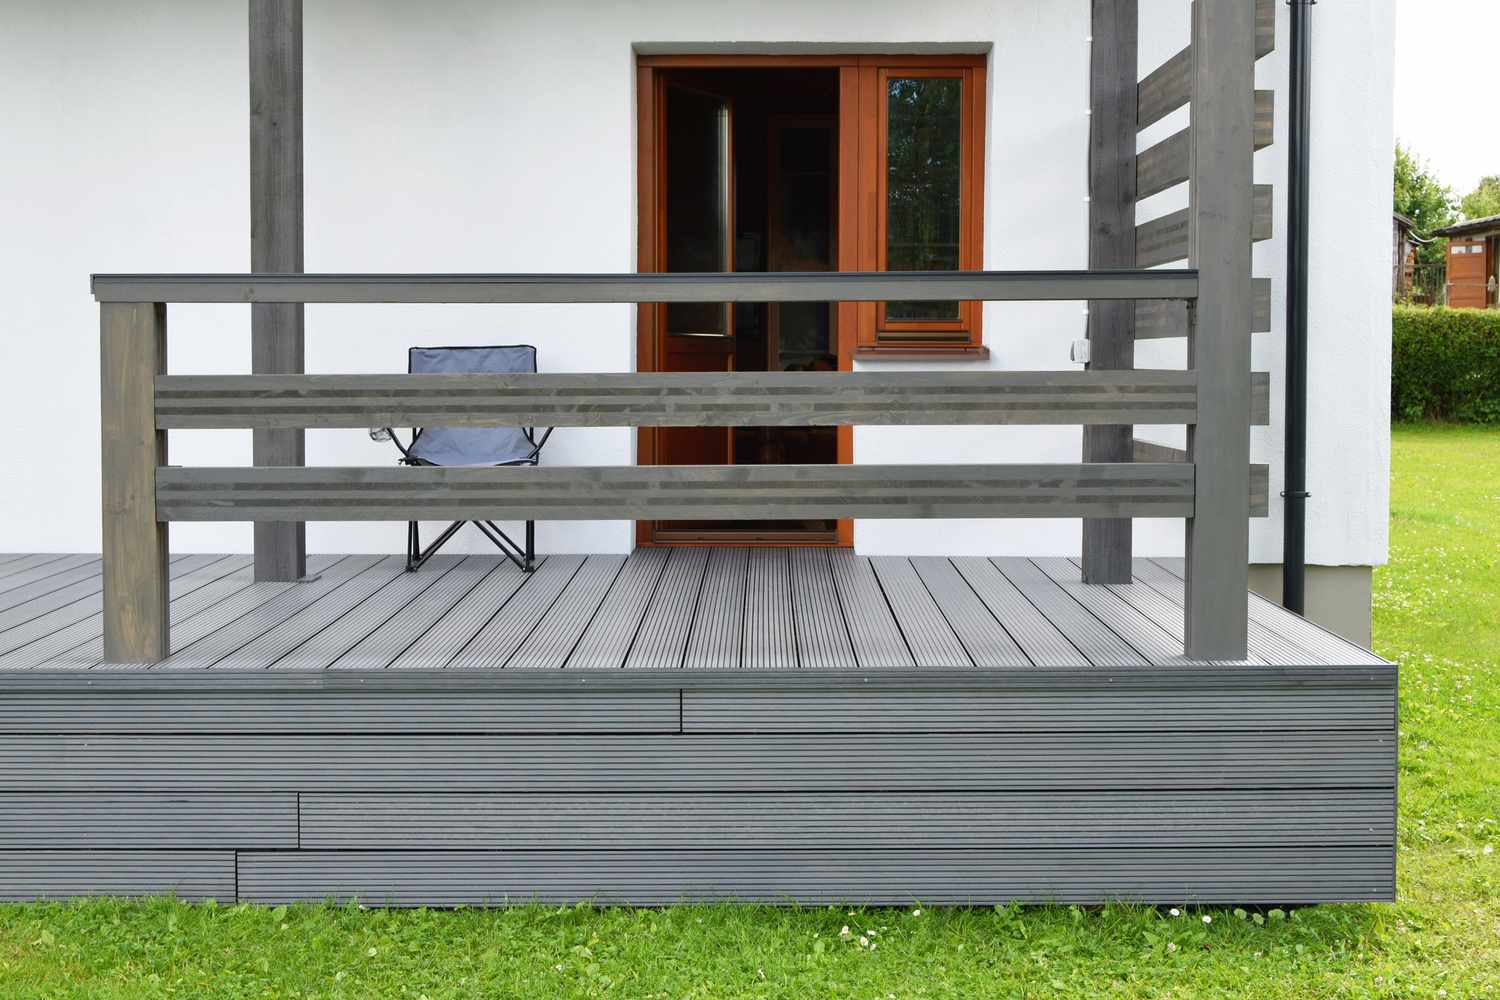
Building a slatted wood fascia is a great way to add a modern touch. Here’s how to get those clean, even gaps:
- Material Choice: Use straight, high-quality 1×4 or 1×6 cedar or Ipe boards that are less likely to warp.
- Install the First Board: Attach the top board perfectly level, flush with the top of your deck surface. This is your guide for everything else.
- Use Spacers: The secret to perfect gaps is using spacers. Cut several small blocks from scrap wood to your desired gap size (e.g., 1/2 inch). Place them along the bottom of the installed board to position the next one.
- Fasten Securely: Attach the next board, pressing it firmly against your spacers. Use two screws per joist to prevent twisting. Remove the spacers and repeat.
- The Bottom Board: You may need to rip the final bottom board to a custom width for a perfect fit.
This takes patience, but the result is worth it. Time: 4-8 hours for a medium deck. Cost: $8-$15 per linear foot for cedar.
|
📋 Copy HEX 🔗 Share |
This clean, minimalist look is more affordable than you might think, as the cost is primarily in the wood and your time. Let’s estimate for a 10×12 foot deck (44 linear feet of perimeter):
- Light Brown Wood (Cedar 1x4s): $350 – $600
- Exterior Screws (Color-matched): $50 – $80
- Gravel for Under-Deck Bed (1/2 cubic yard): $40 – $70
- Weed Barrier Fabric: $30 – $50
- TOTAL: $470 – $800
Budget alternative: Use pressure-treated 1x4s and a semi-transparent stain. This could reduce the wood cost to $150-$250, bringing the project total to under $400.
16. Illuminate a Multi-Level Deck with Geometric Privacy Screens
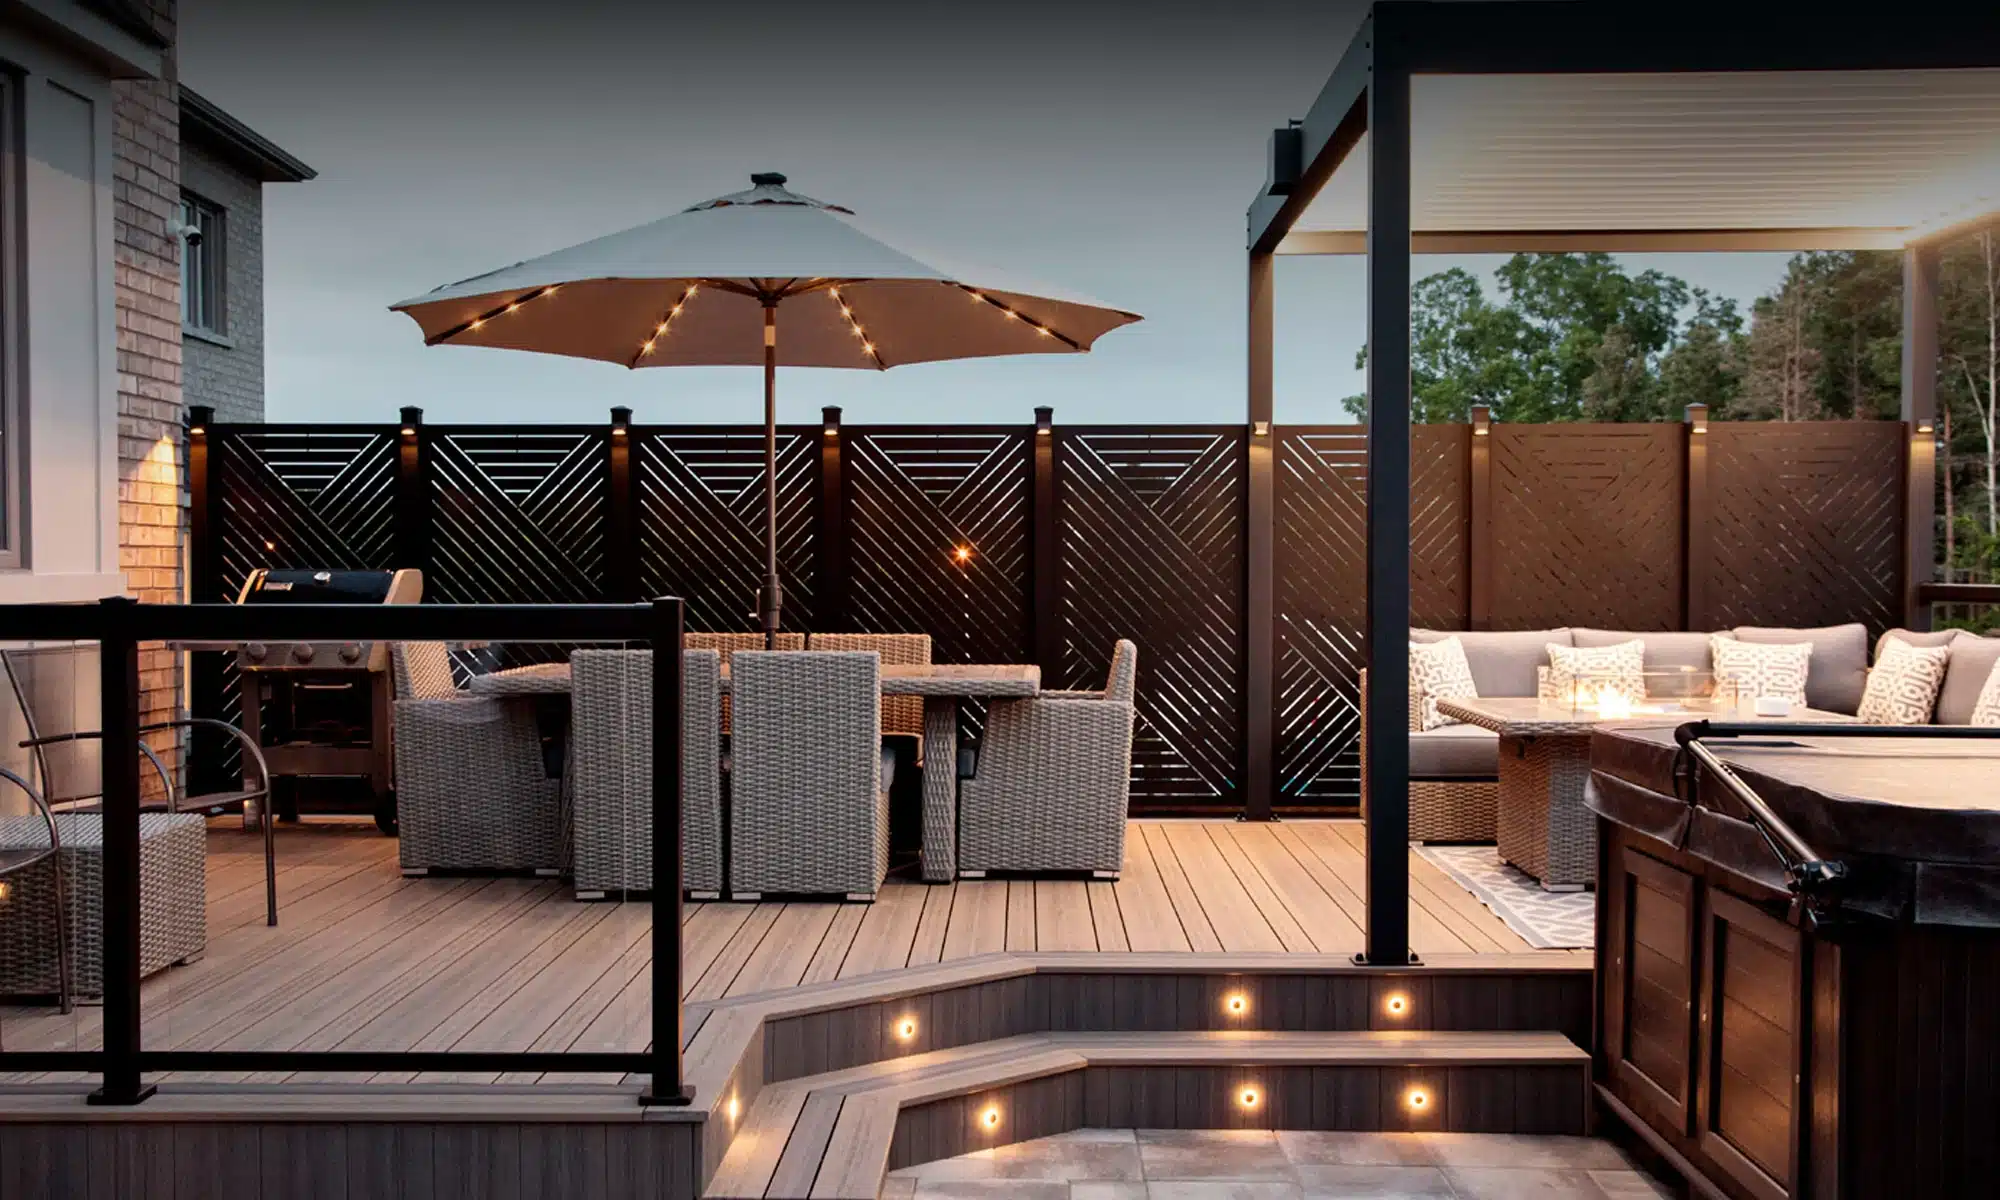
When using multiple colors and materials on a deck, a ‘picture frame’ border is your best friend. Notice how the main light wood-look decking is framed by a single darker grey board around the perimeter. This dark border board then directly ties into the color of the fascia and step risers. This technique creates a clean, finished edge, defines the different zones of the deck, and makes the transition between the light deck surface and the dark fascia feel deliberate and polished, rather than abrupt. It’s a professional touch that pulls the entire multi-tonal design together seamlessly.
|
📋 Copy HEX 🔗 Share |
This design excels by creating ‘rooms’ within a large, open space. The geometric privacy screens aren’t just for privacy; they act as accent walls, defining the dining and lounge areas. The integrated lighting within these screens adds a warm glow, making them a focal point after dark. The use of a darker color for the fascia, risers, and railings grounds the structure, while the lighter deck surface keeps it from feeling too heavy. This interplay of light and dark, combined with the creation of distinct zones, makes a large deck feel both expansive and intimate.
17. Get a Classic Look with a Stacked Natural Wood Fascia
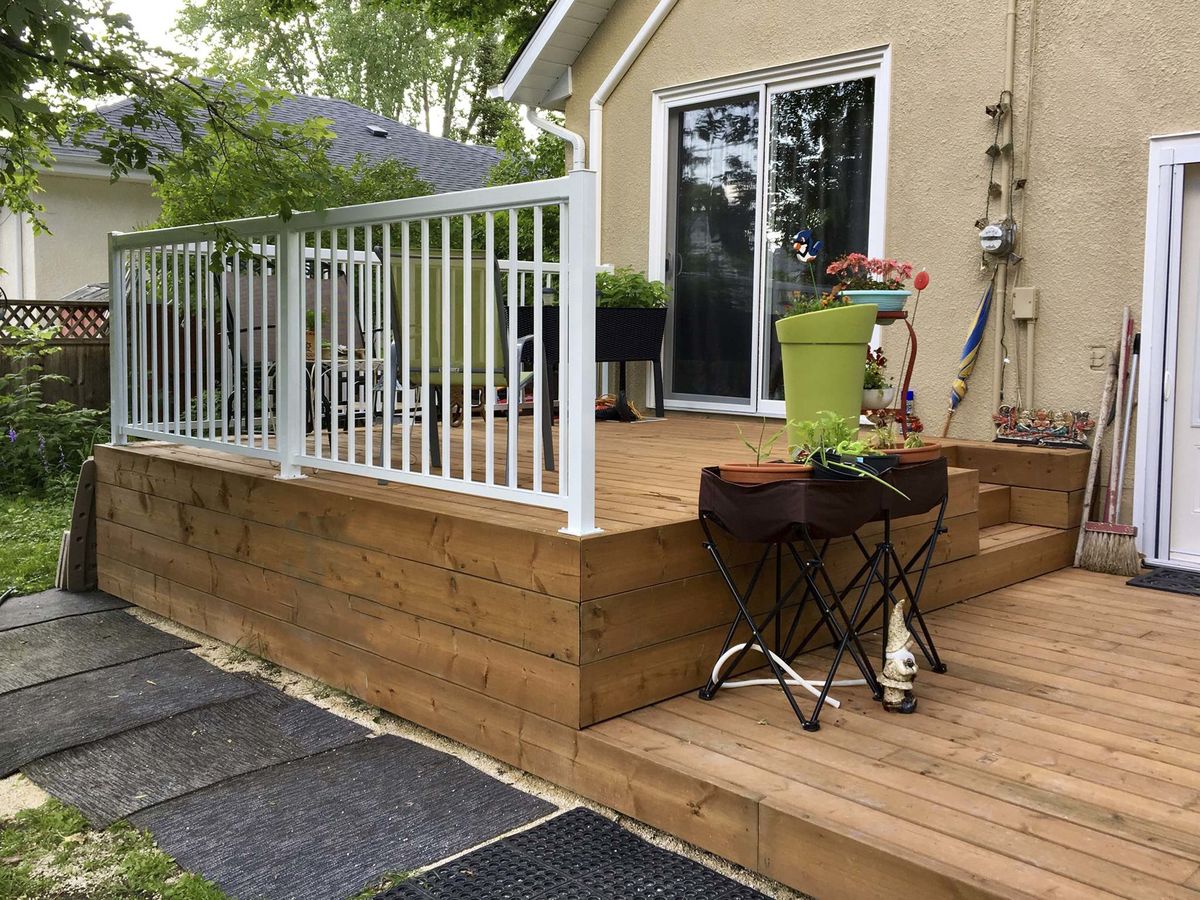
The single element that gives this deck its sturdy, traditional character is the stacked horizontal fascia. Using three individual wood planks, rather than one wide board or a sheet of plywood, creates texture and visual weight. It communicates a sense of solid, honest construction. This method harks back to classic carpentry techniques, giving the deck a timeless, homey feel that complements the white picket railings and tan stucco house. Remove this detail and replace it with a single flat board, and the deck would lose much of its substantial, handcrafted charm.
|
📋 Copy HEX 🔗 Share |
A stacked wood fascia like this works beautifully on decks that are moderately elevated, typically between 18 inches and 4 feet off the ground. This height is enough to make the stacked boards a noticeable and substantive feature. On a very low ground-level deck, the effect would be lost. On a very high second-story deck, it might start to look too busy. This design is perfect for that ‘in-between’ height, providing a visually pleasing solution to hide the underpinnings of the deck frame while adding significant architectural character to the structure.
18. Mix Materials with a Grey Deck, White Rails, and Black Balusters
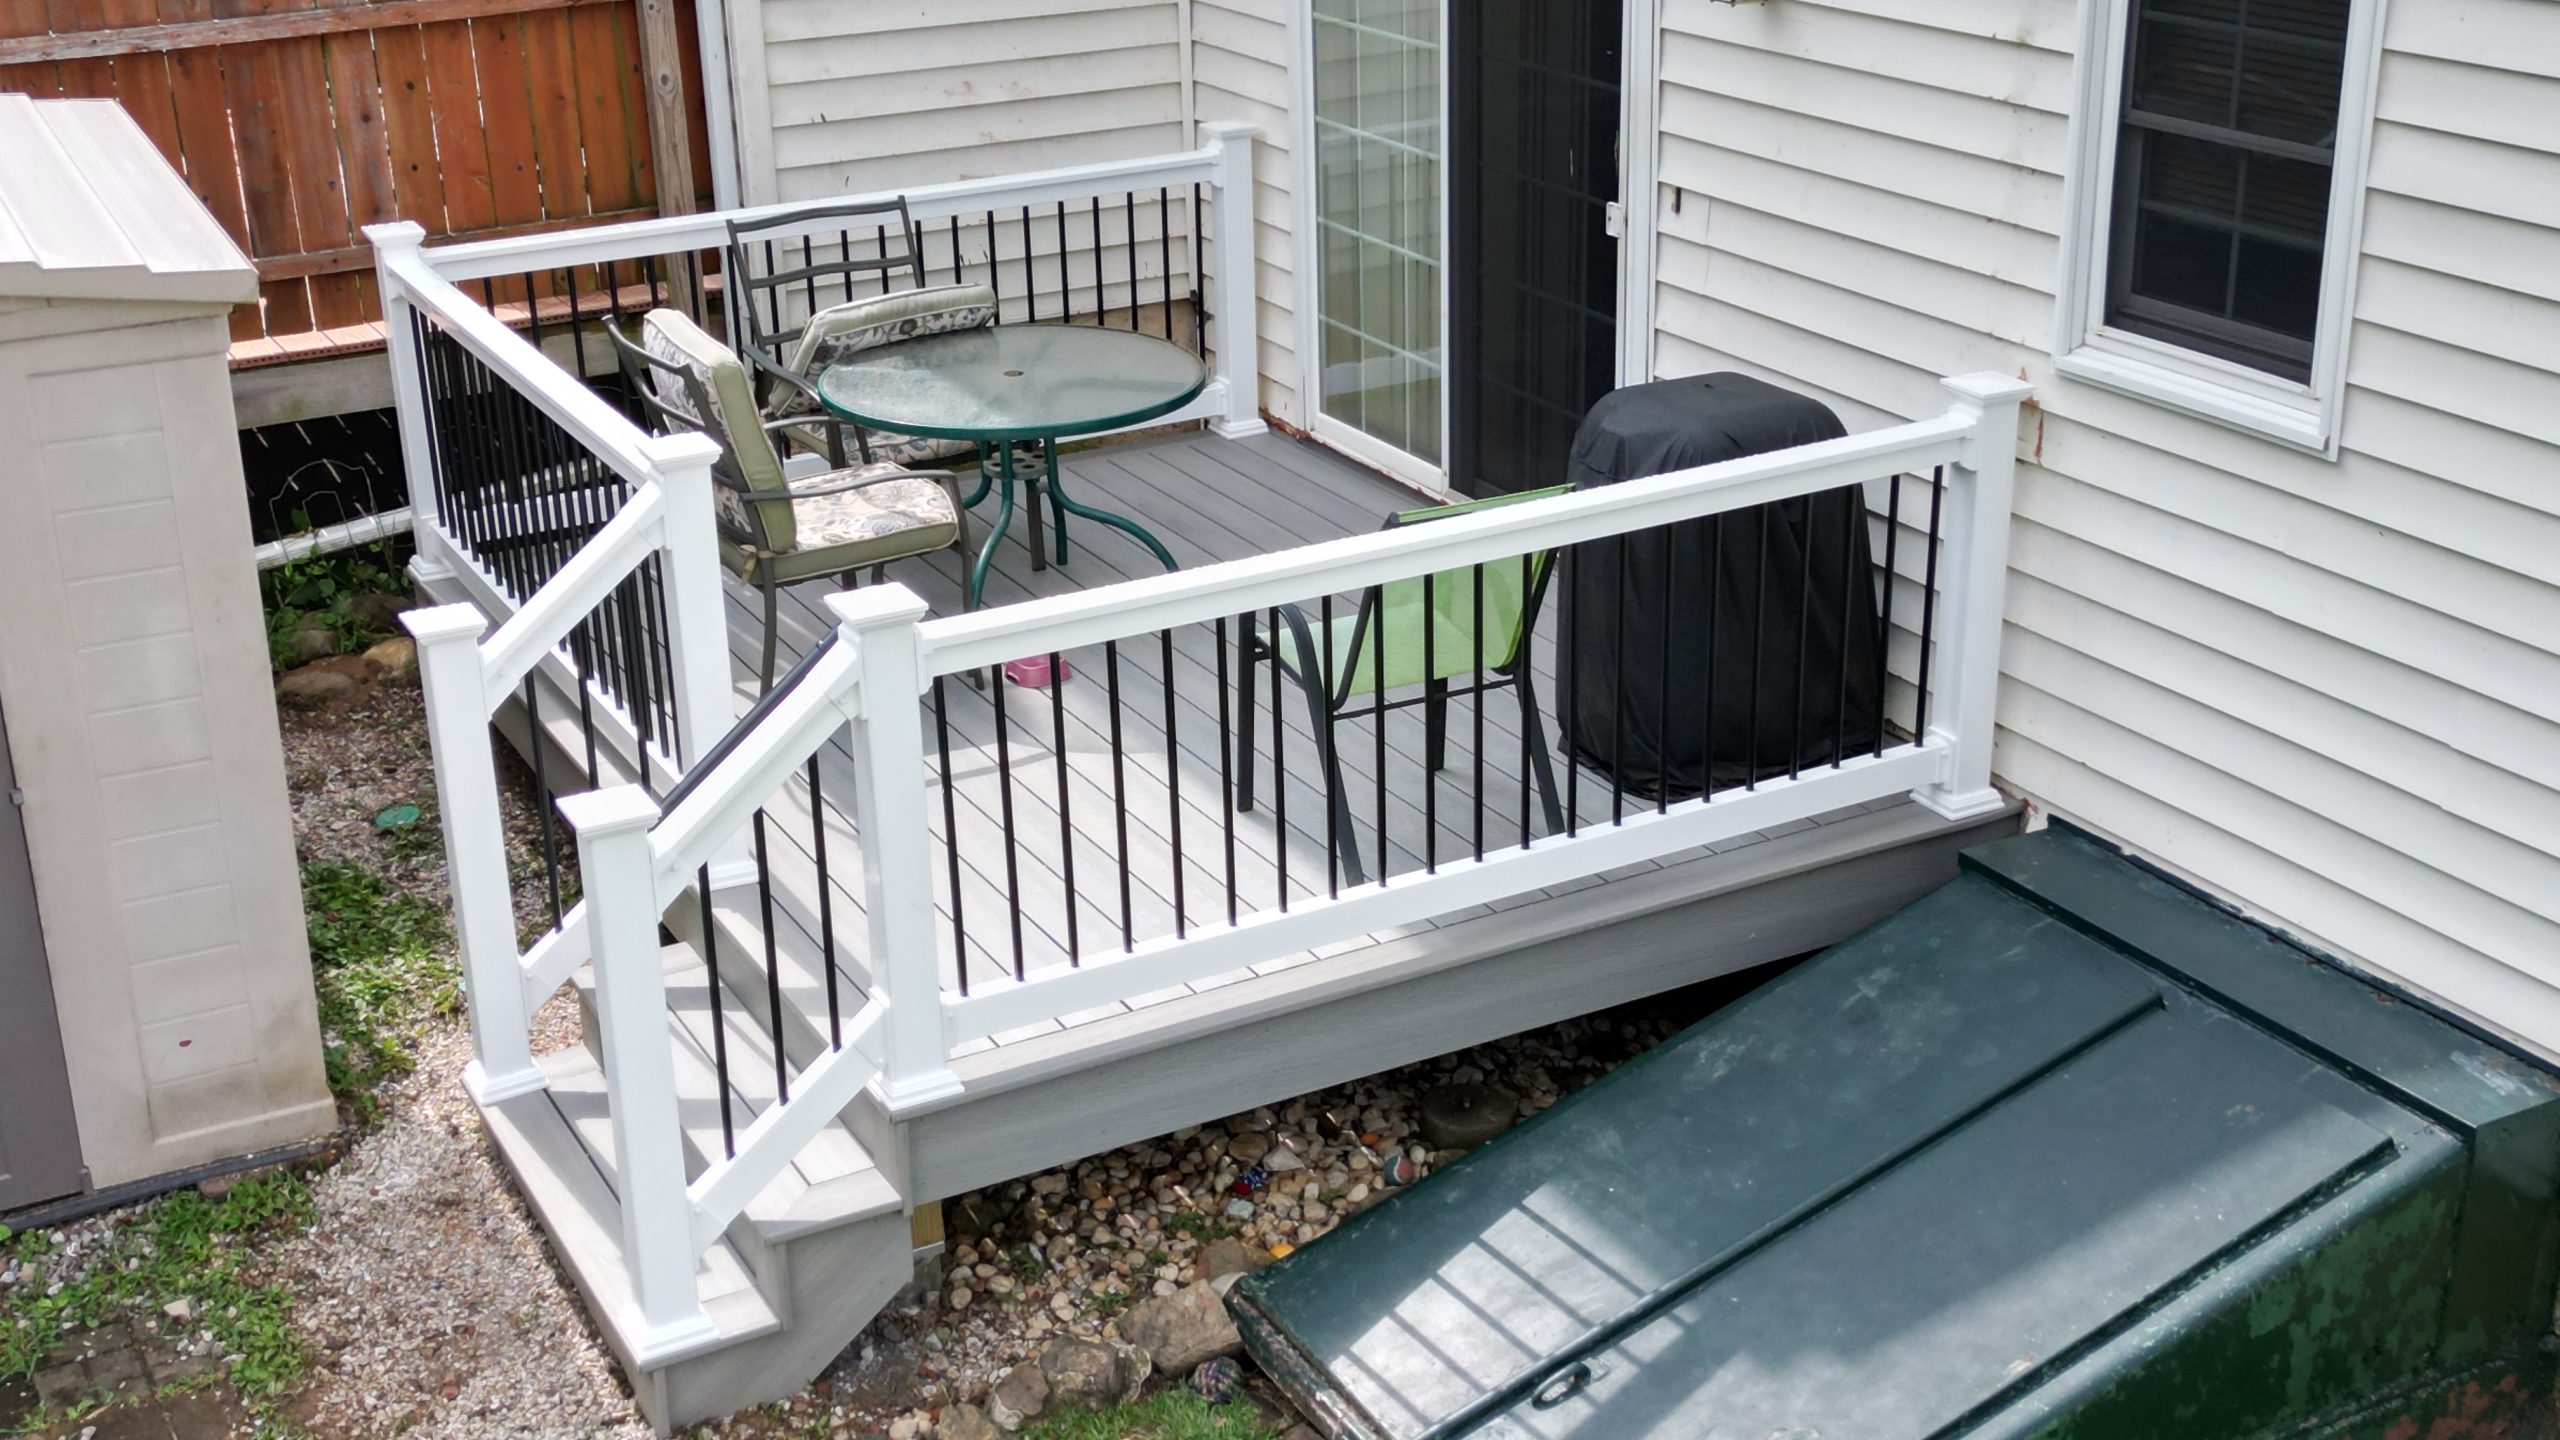
This combination of grey composite, white vinyl, and black metal is a go-to for a reason: it’s clean and low-maintenance. But a word of caution on mixing brands and materials. While the colors may look right online, the finishes can clash in person. A matte grey deck next to a high-gloss white railing can look disjointed. When possible, try to source your railing and fascia from the same manufacturer to ensure a perfect match in sheen and color temperature. If you must mix, get physical samples and look at them together outside in both direct sun and shade before you buy everything.
|
📋 Copy HEX 🔗 Share |
A full composite and vinyl system can be costly. You can get this exact same color palette for a fraction of the cost with wood. Use standard pressure-treated deck boards and paint them with a high-quality solid deck stain in a modern light grey. For the railings and fascia, use pressure-treated lumber painted with a durable exterior white paint. The slim black balusters are actually quite affordable, whether you use metal or wood ones painted black. This approach requires more long-term maintenance (repainting), but it can save you 50-60% on upfront material costs.
19. Extend Your Living Space with a Deck and Built-in Bench
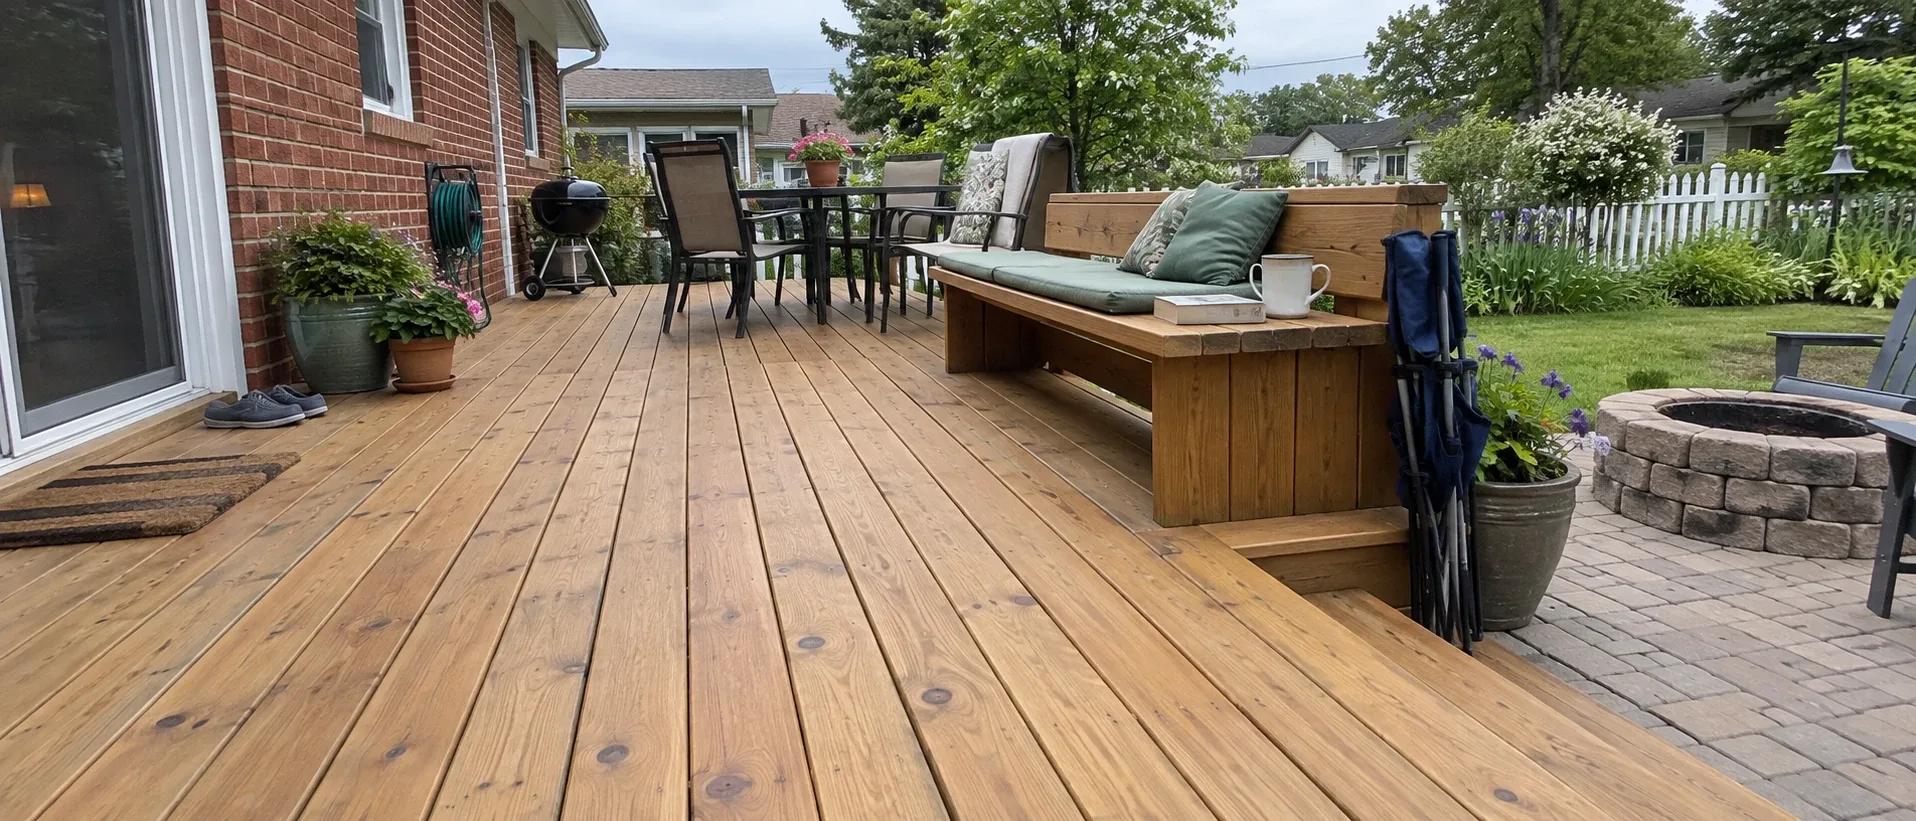
This inviting backyard scene is a study in texture and color harmony. The formula is roughly 40% warm wood, 30% red brick, 20% cool gray pavers, and 10% green accents. The light brown deck provides a warm, organic surface that complements the rustic texture of the red brick house. The cool gray pavers of the patio offer a modern contrast that prevents the warm tones from becoming overwhelming. Finally, the green cushions and surrounding foliage inject life and a pop of soft color, tying the whole scheme together. It’s a balanced mix of warm, cool, hard, and soft elements.
|
📋 Copy HEX 🔗 Share |
When building a bench into your deck, think about comfort. A standard dining chair has a seat depth of about 16-18 inches. For a lounge-style bench like this one, aim for a depth of at least 20-24 inches to allow room for plush cushions and comfortable leaning. The seat height should be around 16-18 inches from the deck surface, including the cushion. Also, slightly angling the backrest by about 5-10 degrees, rather than making it perfectly vertical, makes a world of difference for comfortable seating.
20. Capture Mountain Views from a Deck with Black Metal Railings
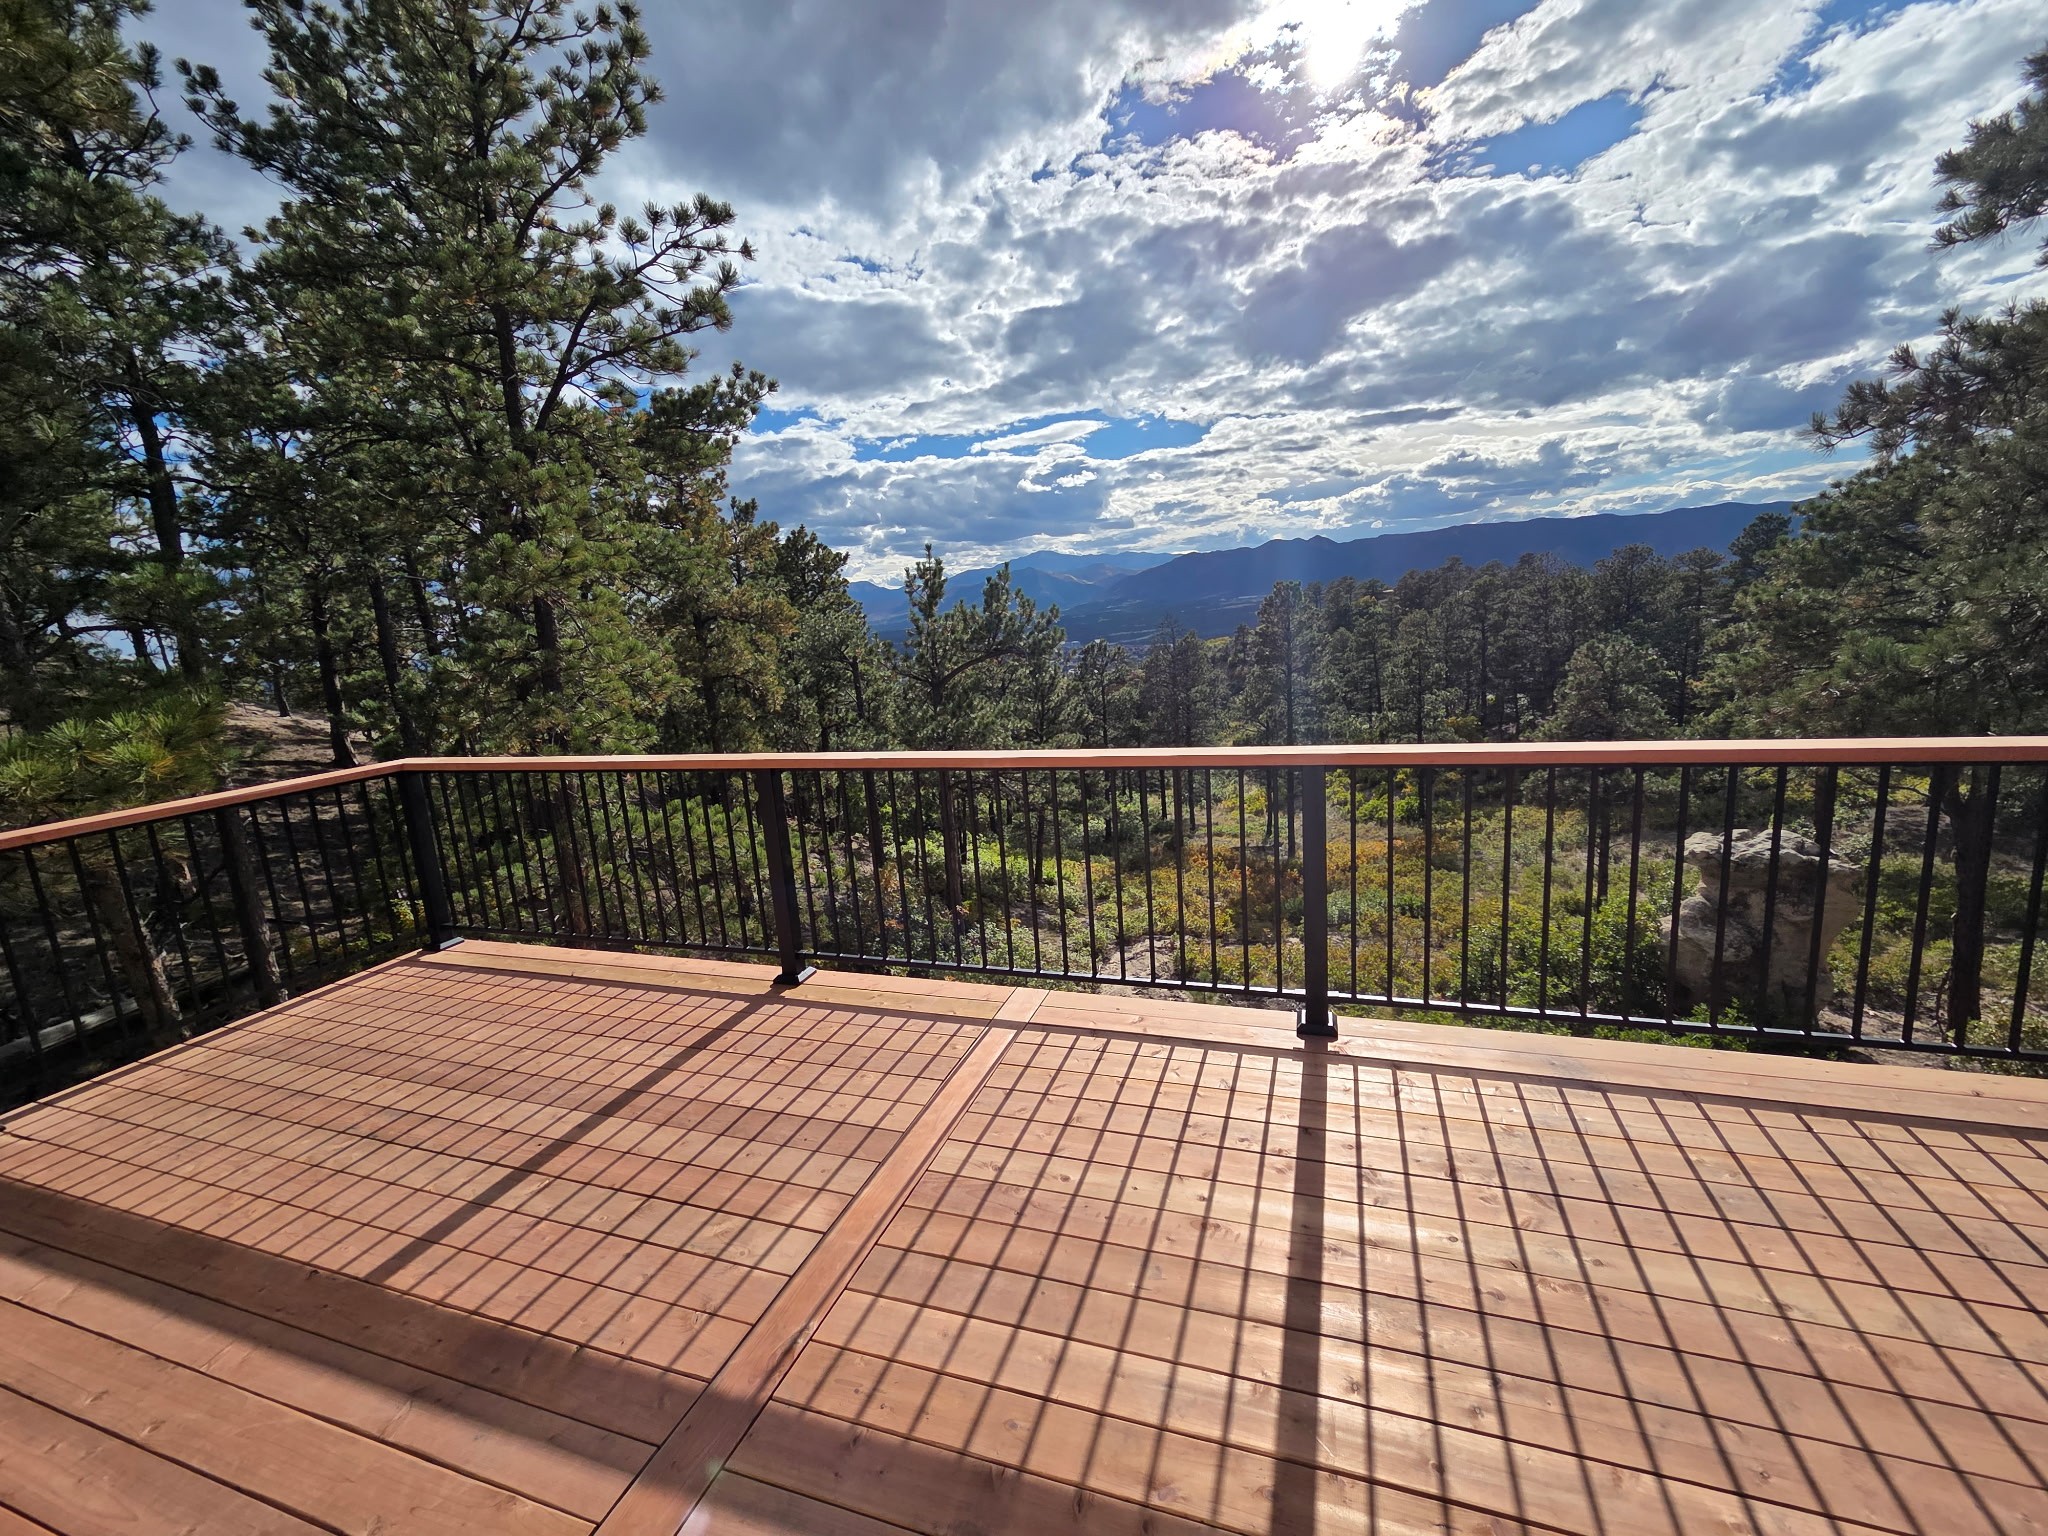
This deck design is successful because it knows its job is to not get in the way of the view. The choice of thin, black vertical metal balusters is critical. Black is a recessive color in landscape design; it tends to visually disappear, allowing your eye to travel right past it to the scenery beyond. The warm wood top rail provides a comfortable place to rest your hands and drink, while also tying back to the wood of the deck floor. This creates a frame for the view that is both secure and visually unobtrusive. Any other choice, like thick wood or white vinyl balusters, would have created a visual cage.
|
📋 Copy HEX 🔗 Share |
The single element that makes this entire scene work is the expansive, unobstructed view. The deck itself is beautifully constructed, with warm wood and clean lines, but its primary purpose is to serve as a platform for experiencing the landscape. It’s a front-row seat to the forest and mountains. Without the dramatic backdrop, it would still be a nice deck. But with the view, it becomes an experience. This is a powerful reminder that sometimes the best design feature isn’t something you build but something you frame.
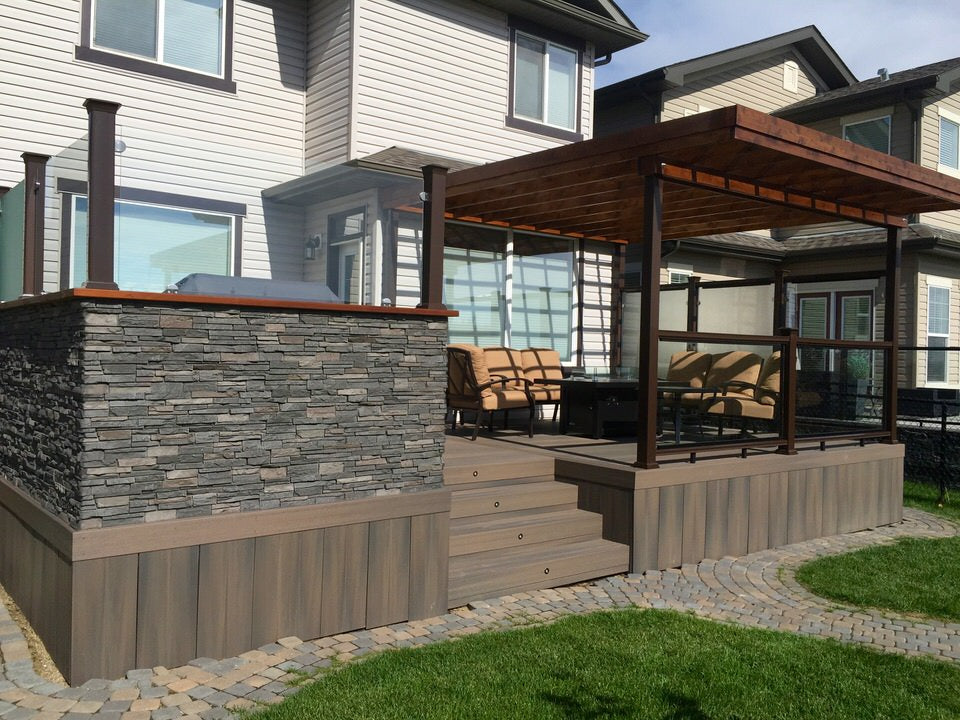
21. Combine Composite, Stone Veneer, and a Wood Pergola
A multi-material design like this requires careful planning. Before you even order materials, confirm these key points:
- Check Material Compatibility: Ensure your proposed stone veneer is rated for exterior use and freeze/thaw cycles in your climate. Confirm the flashing details where the wood pergola meets the house.
- Foundation Plan: The stacked stone wall, even if it’s a veneer over a block wall, carries significant weight. You will need a proper concrete footing below the frost line to support it and prevent heaving or cracking.
- Utility Lines: If your built-in grill is gas, have a licensed professional run the line before you build the wall. Same goes for any electrical wiring for outlets or lighting.
|
📋 Copy HEX 🔗 Share |
This is a stunning, high-end look, but it comes with a varied maintenance schedule. The composite fascia and decking are the easy part—a simple wash-down once or twice a year. The dark brown wood pergola will require the most attention. To keep it from fading to a silvery gray, you’ll need to clean and reapply a UV-protecting stain every 2-3 years, depending on your sun exposure. The stacked stone veneer is fairly low-maintenance, but you should inspect the cap and joints annually for any cracking or loose mortar that might let water in.
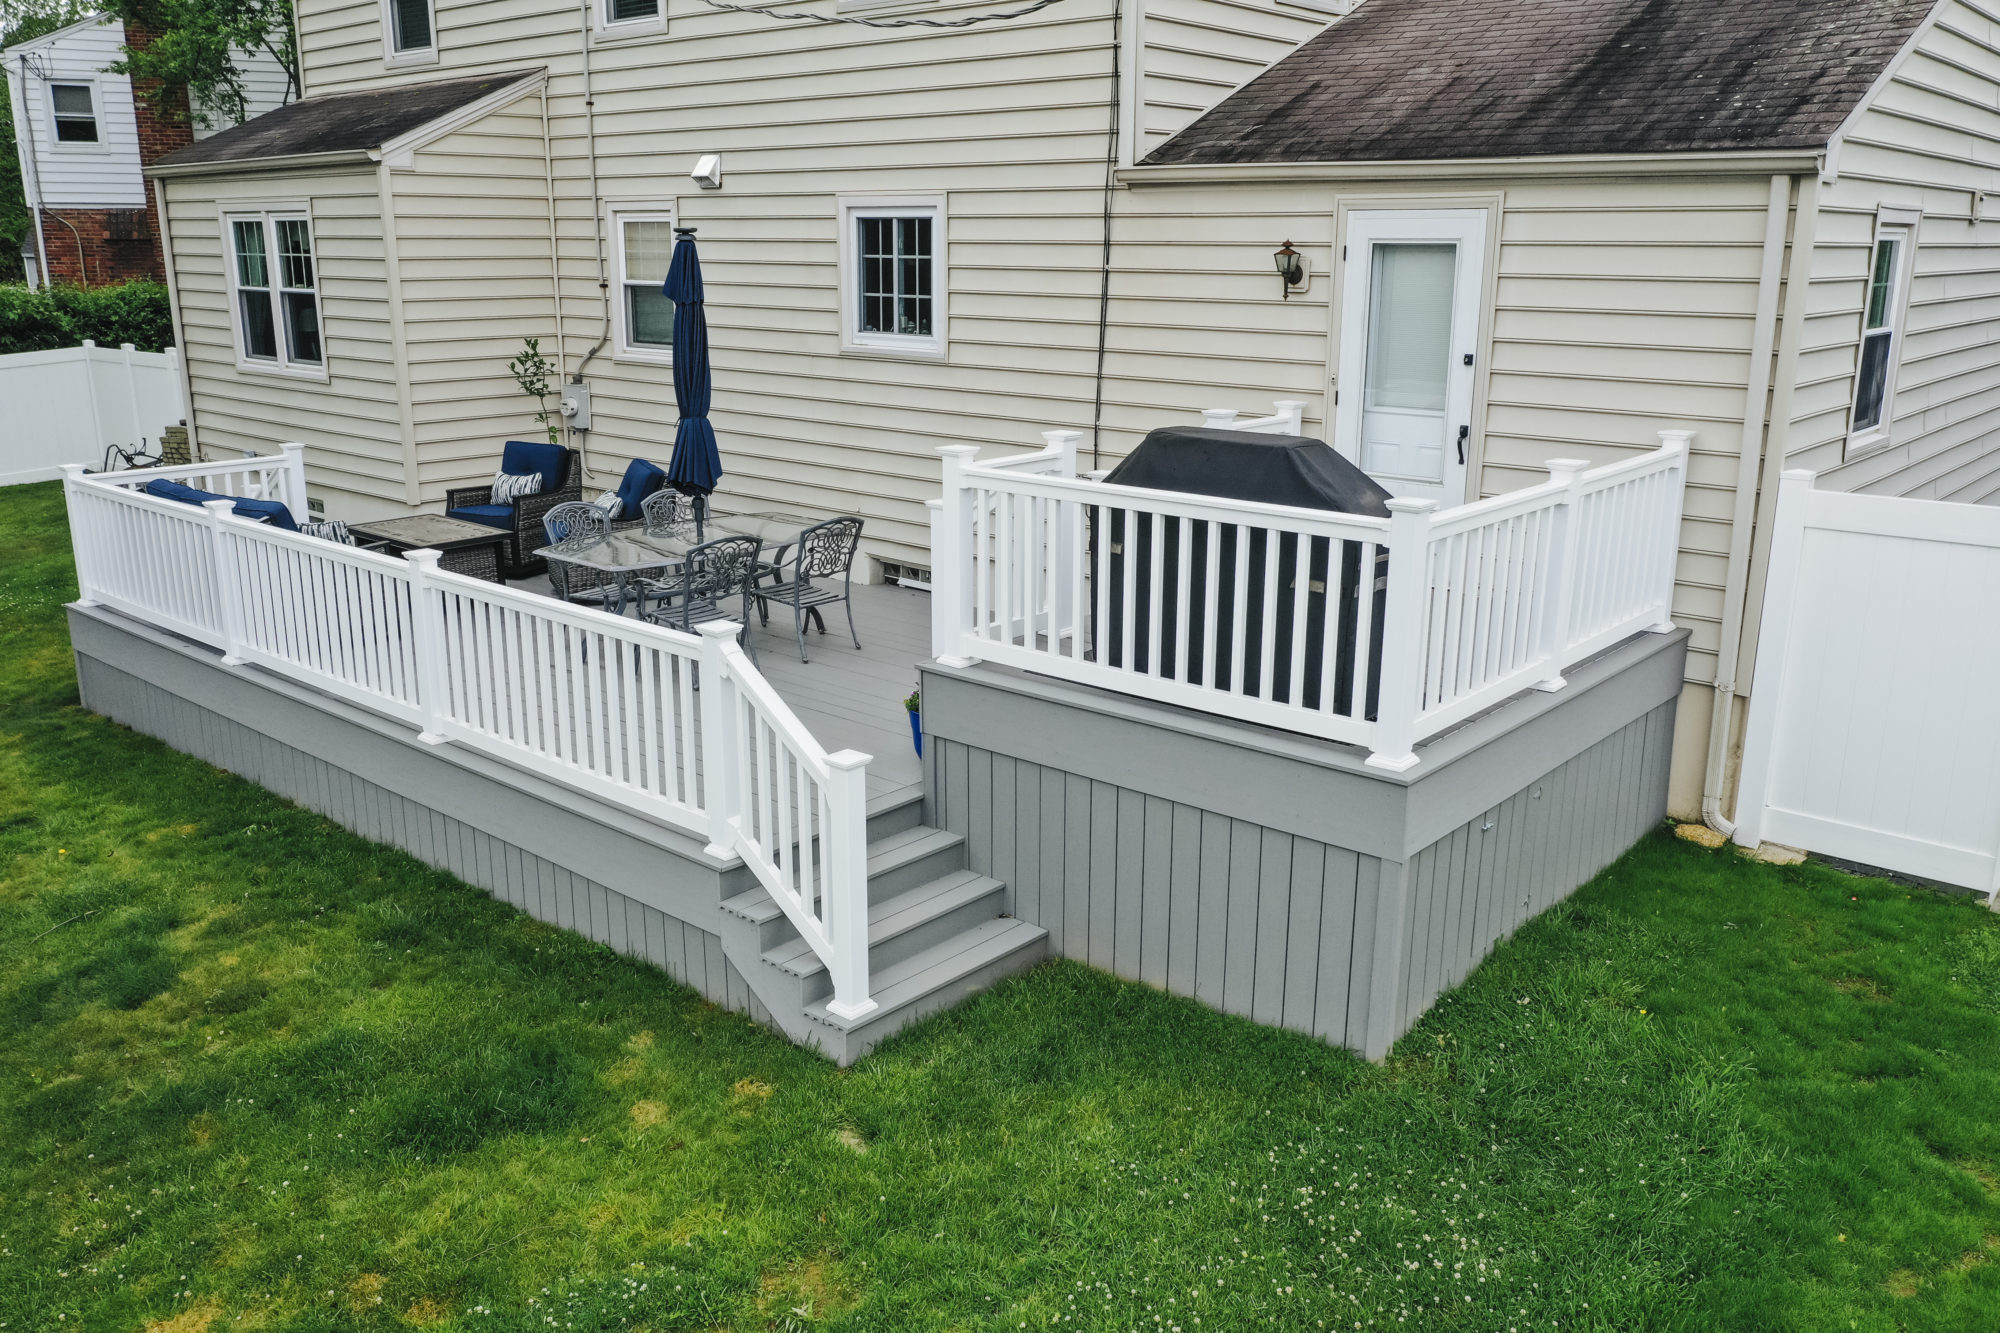
22. Choose a Classic Gray Deck with Vertical Plank Fascia
A classic gray and white deck is a timeless choice that suits many house styles. Here’s a rough cost estimate for a medium-sized (12×16) elevated deck like this, assuming professional installation.
- Decking (Gray Composite): $2,500 – $4,500
- Fascia & Stairs (Matching Gray Composite): $800 – $1,500
- Railing System (White Vinyl): $2,000 – $3,500
- Structural Framing & Labor: $6,000 – $11,000
- TOTAL: $11,300 – $20,500
Budget alternative: Use pressure-treated wood for all components. Stain the deck and fascia gray, and paint the railings white. This could lower the total project cost to the $5,000 – $9,000 range, with the trade-off of regular maintenance (repainting/re-staining).
|
📋 Copy HEX 🔗 Share |
Going with vertical fascia boards instead of horizontal ones is a distinct stylistic choice. It can look really sharp, creating a subtle pinstripe effect. However, it’s often more labor-intensive to install. You have to cut each board to the exact height, and you’ll have more seams and potential for unevenness compared to running one long horizontal board. It also requires an extra piece of blocking behind the seams for proper support. Be sure your contractor is comfortable with this method, or if you’re DIY-ing, that you’re prepared for the extra time and precision required to make it look right.
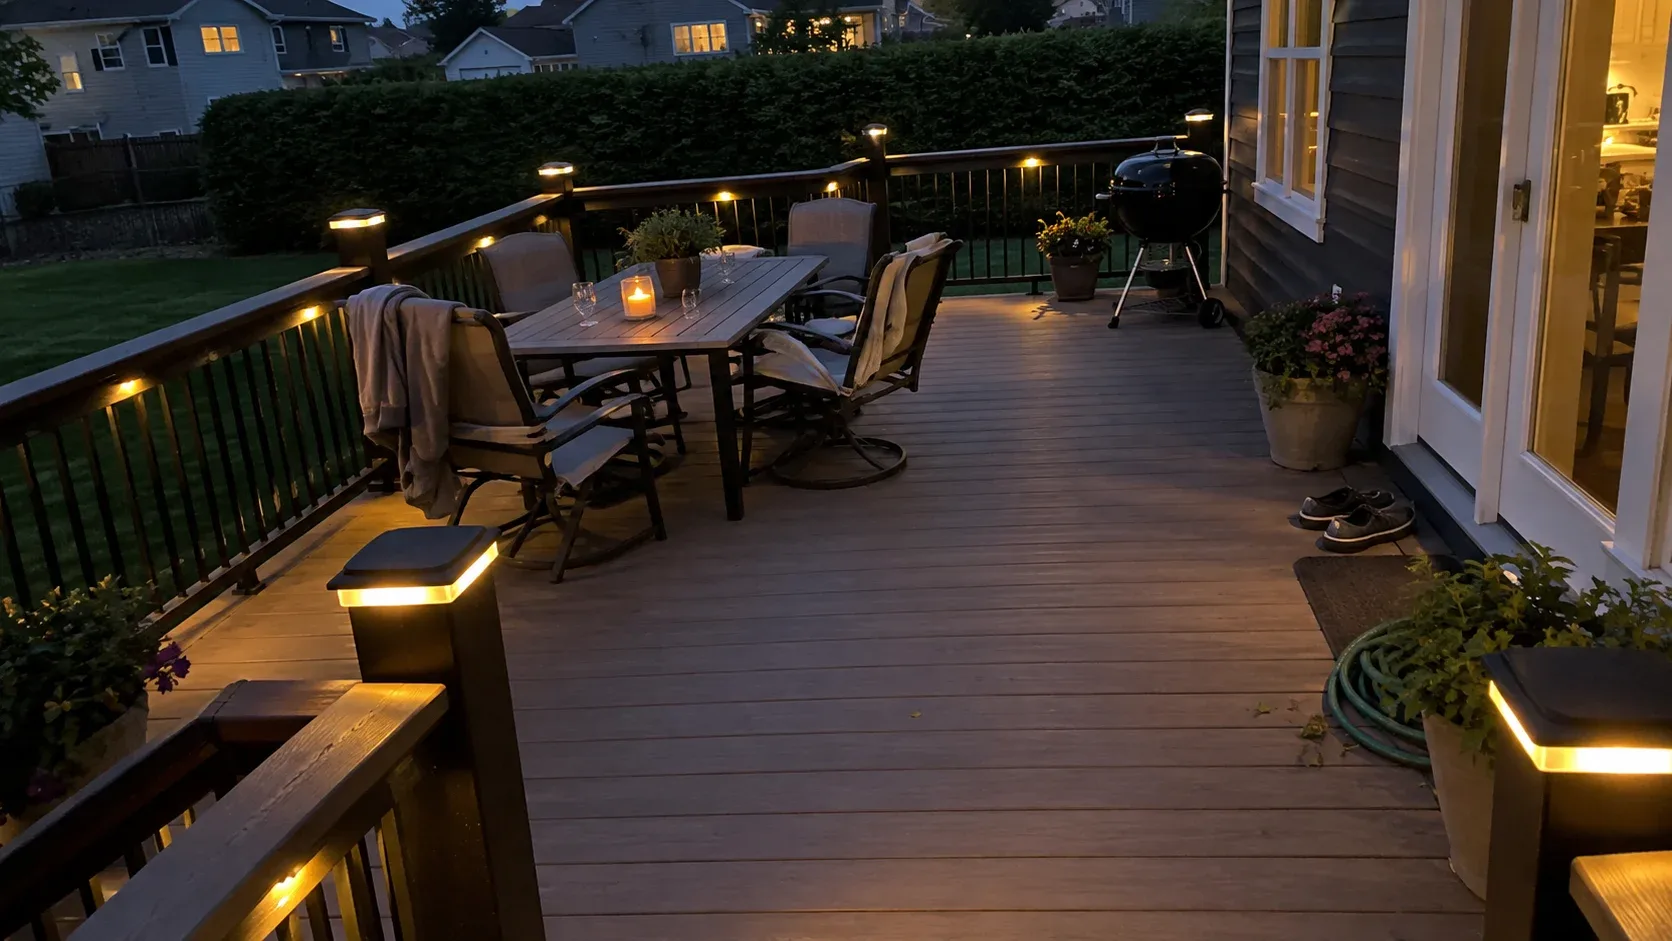
23. Create Evening Ambiance with Integrated Railing and Post Cap Lights
Installing low-voltage post cap lights is one of the easiest ways to add a high-end feel to your deck. It’s a perfect DIY project.
- Choose Your Lights: Buy post cap lights that are specifically designed to fit the dimensions of your railing posts (e.g., 4×4 or 5×5). Solar options are the easiest, but low-voltage wired lights like these provide more reliable, brighter light.
- Run the Wire: Before installing the top rail, drill a small hole through the center of each post you want to light. Run a continuous low-voltage wire up from under the deck and through the posts.
- Make Connections: At each post, use the simple clip-on connectors that typically come with the wiring kits to attach the light’s pigtail to the main wire.
- Mount the Cap & Transformer: Secure the light fixture to the top of the post, usually with a couple of small screws. Connect the main wire to your low-voltage transformer and plug it into a GFCI outlet.
Total time: 2-3 hours for 6-8 lights.
|
📋 Copy HEX 🔗 Share |
A fully integrated lighting system from a major decking brand can be expensive. For a similar warm, inviting glow on a budget, skip the built-in systems. Instead, purchase several sets of high-quality, warm-white LED outdoor string lights. A 48-foot strand often costs less than $50. Carefully staple or clip them to the underside of your top railing and run them down the stair stringers. While you’ll see the wires and bulbs, the effect from a distance is very similar. For post caps, solar-powered versions from Target or Walmart can be as little as $5-$10 each and require zero wiring.
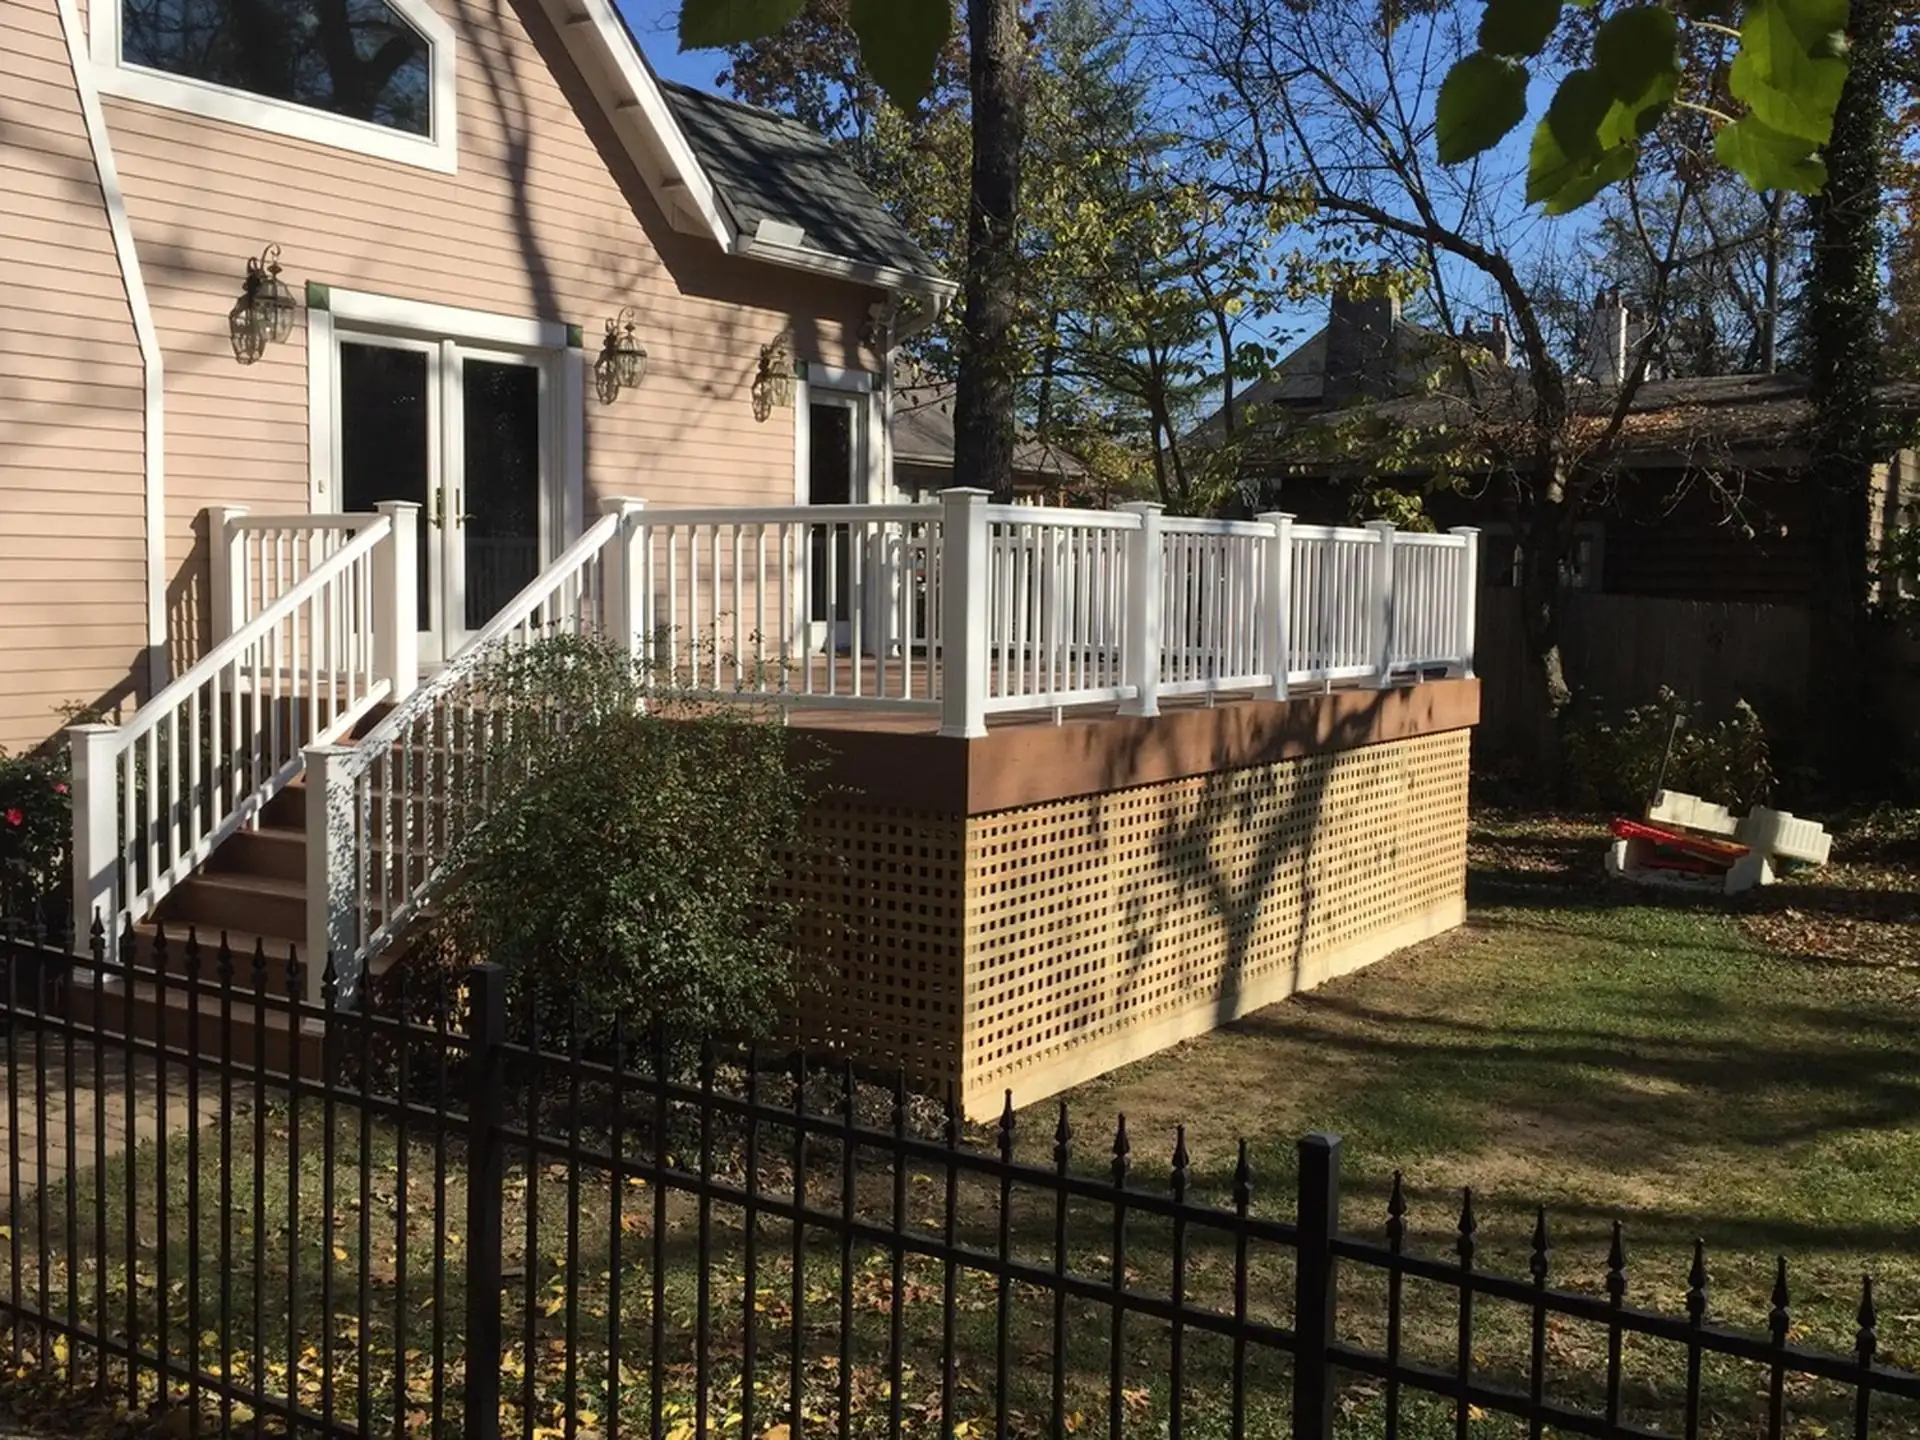
24. Use Lattice Skirting with a Contrasting Dark Fascia Board
This design successfully elevates standard lattice skirting by using the principle of framing. The light wood lattice is visually contained and defined by the dark brown fascia board above it and the concrete foundation below. This dark cap provides a crisp, intentional border that makes the entire assembly feel more finished and architectural. It draws a clear line between the deck structure and the skirting. The contrast between the dark, solid fascia and the light, airy pattern of the lattice creates visual interest and keeps the skirting from looking like an afterthought. Compare this to the all-white version in Idea #10.
|
📋 Copy HEX 🔗 Share |
When installing lattice skirting, don’t attach the panels directly to your deck’s support posts. Instead, build a simple, removable frame for each section out of pressure-treated 2x2s. Attach the lattice to this frame, and then attach the framed panel to the deck posts with a few exterior screws. This makes a world of difference. When you need to retrieve something that rolled under the deck, or if you need access for maintenance or pest control, you can simply unscrew and remove an entire panel in minutes instead of having to pry off nailed-on lattice strips.
Your Deck’s Finishing Touch Awaits
Now that you’ve seen the possibilities, from sleek composite with integrated lights to the timeless beauty of natural wood, the perfect fascia is within reach. This isn’t just a piece of trim; it’s the final detail that ties your whole outdoor space together and shows a real commitment to design. Don’t forget to save your favorite looks to your Pinterest board to keep the inspiration flowing for your project!