28 Jaw-Dropping Small Backyard Ideas You Need to Try to Transform Your Outdoor Space

You know that feeling when you finally find a small backyard idea that looks exactly right for your space? That’s what this guide is all about. We’ve filtered through hundreds of real homes to bring you 28 brilliant, achievable ideas for turning your tiny patch of green into a personal oasis, covering everything from modern patios to lush, natural gardens. And stay until the end—we break down the most common mistakes that can ruin these looks. 📌 Save this to Pinterest for later—you’ll want to revisit these ideas.
1. A Modern Retreat with a Built-in Bench and Dark Garden Shed
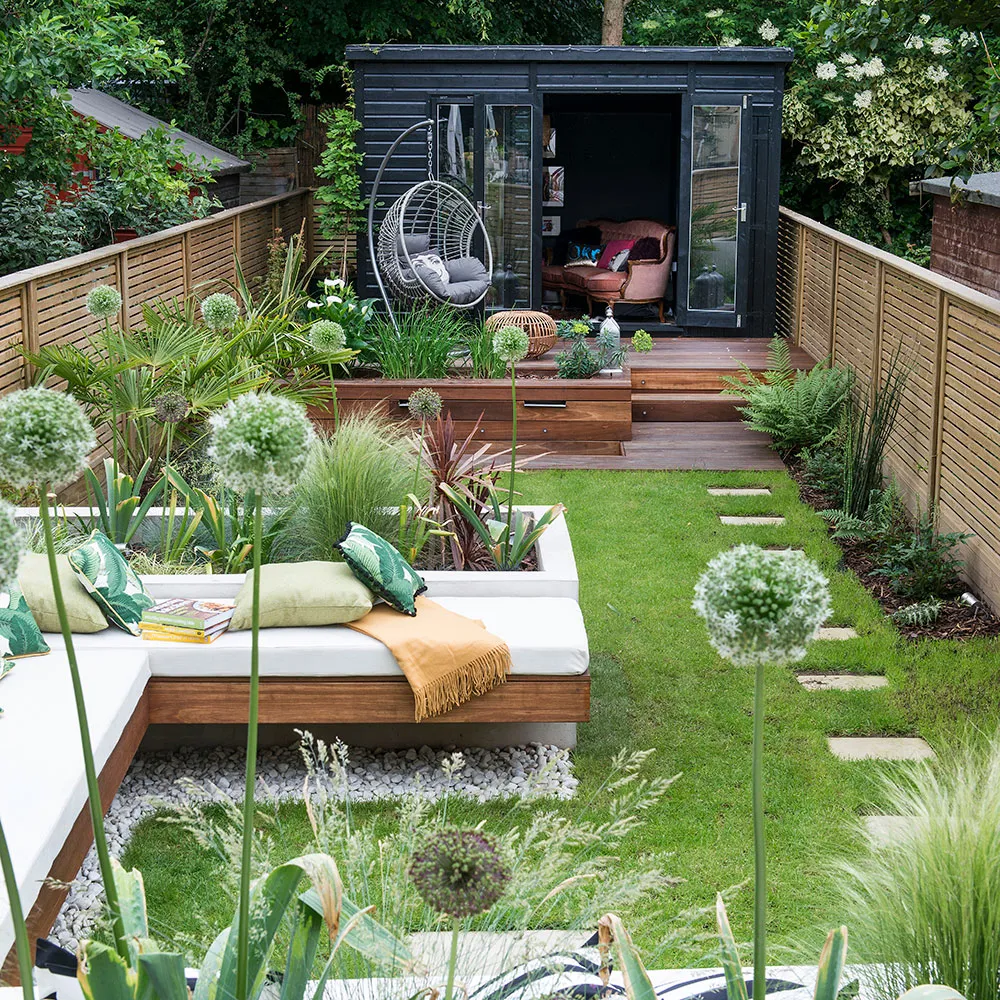
This design is so successful because it uses every square inch with intention. The long, L-shaped built-in bench not only provides ample seating but also acts as a retaining wall for the raised planter, creating clean, continuous lines that make the space feel larger. It brilliantly defines zones: a soft lawn for play, a hardscape deck for lounging, and a dedicated seating area, all leading to the functional and stylish dark shed that serves as a visual anchor.
|
📋 Copy HEX 🔗 Share |
When planning a built-in bench, aim for a seat depth of at least 18 inches for comfort without back cushions, or 22-24 inches if you plan to use thick back pillows. The height should be around 16-18 inches from the ground, which is standard for seating and allows you to comfortably rest your feet on the ground. Any shallower and it will feel like a perch, not a place to relax.
2. Create Cozy Zones with Tiered Stone Planters and String Lights
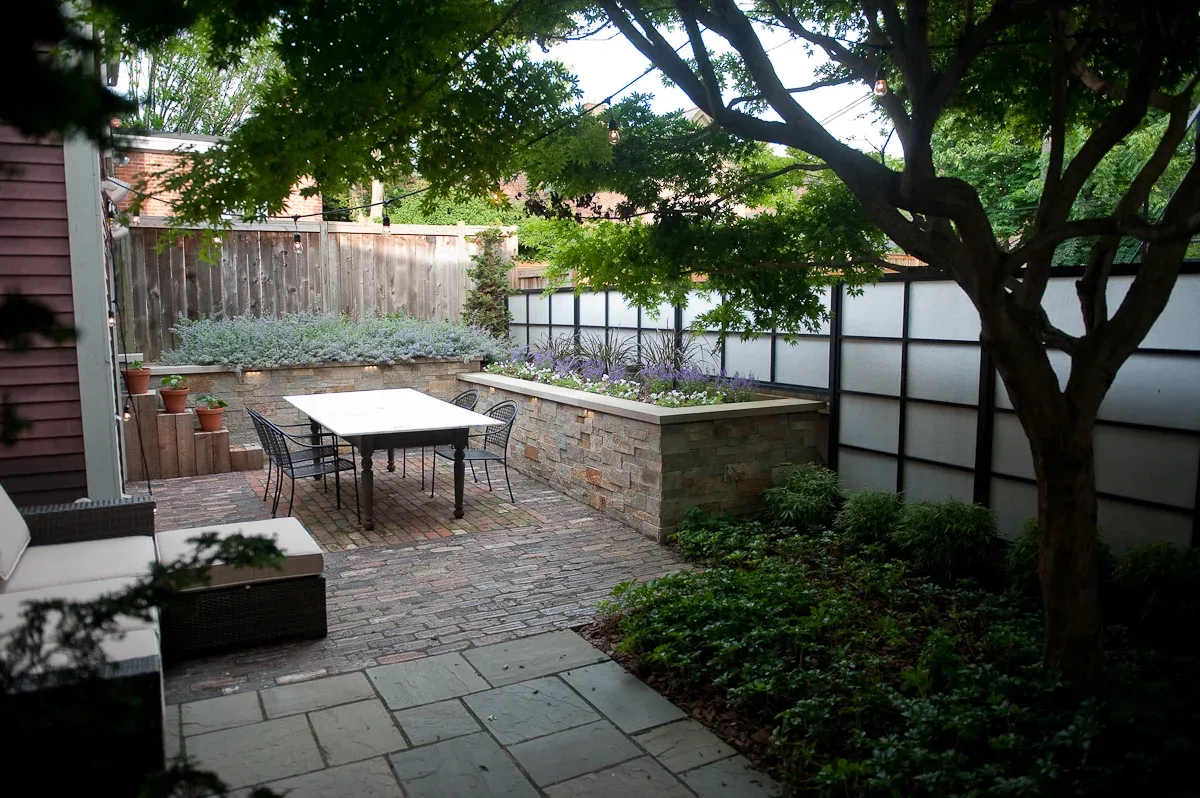
The tiered, stacked stone planters are the absolute hero of this backyard. Without them, the space would just be a flat, confusing mix of pavers. These planters introduce crucial verticality and texture, creating a lush, ‘enclosed’ feeling that fosters intimacy. They work to separate the dining area from the lounge space organically, without needing walls or screens, and provide the perfect opportunity to soften all the hardscaping with cascading greenery and colorful flowers.
|
📋 Copy HEX 🔗 Share |
To successfully create distinct dining and lounging zones like this, you’ll need a minimum width of about 15 feet. This allows for a 7-foot-wide zone for a small dining table and chairs with passthrough space and an 8-foot-wide zone for a compact outdoor sofa and coffee table. Anything less and the two areas will feel like they are crammed on top of each other, losing their distinct purpose.
3. Incorporate a Serene Water Feature on a Modern Pergola Patio
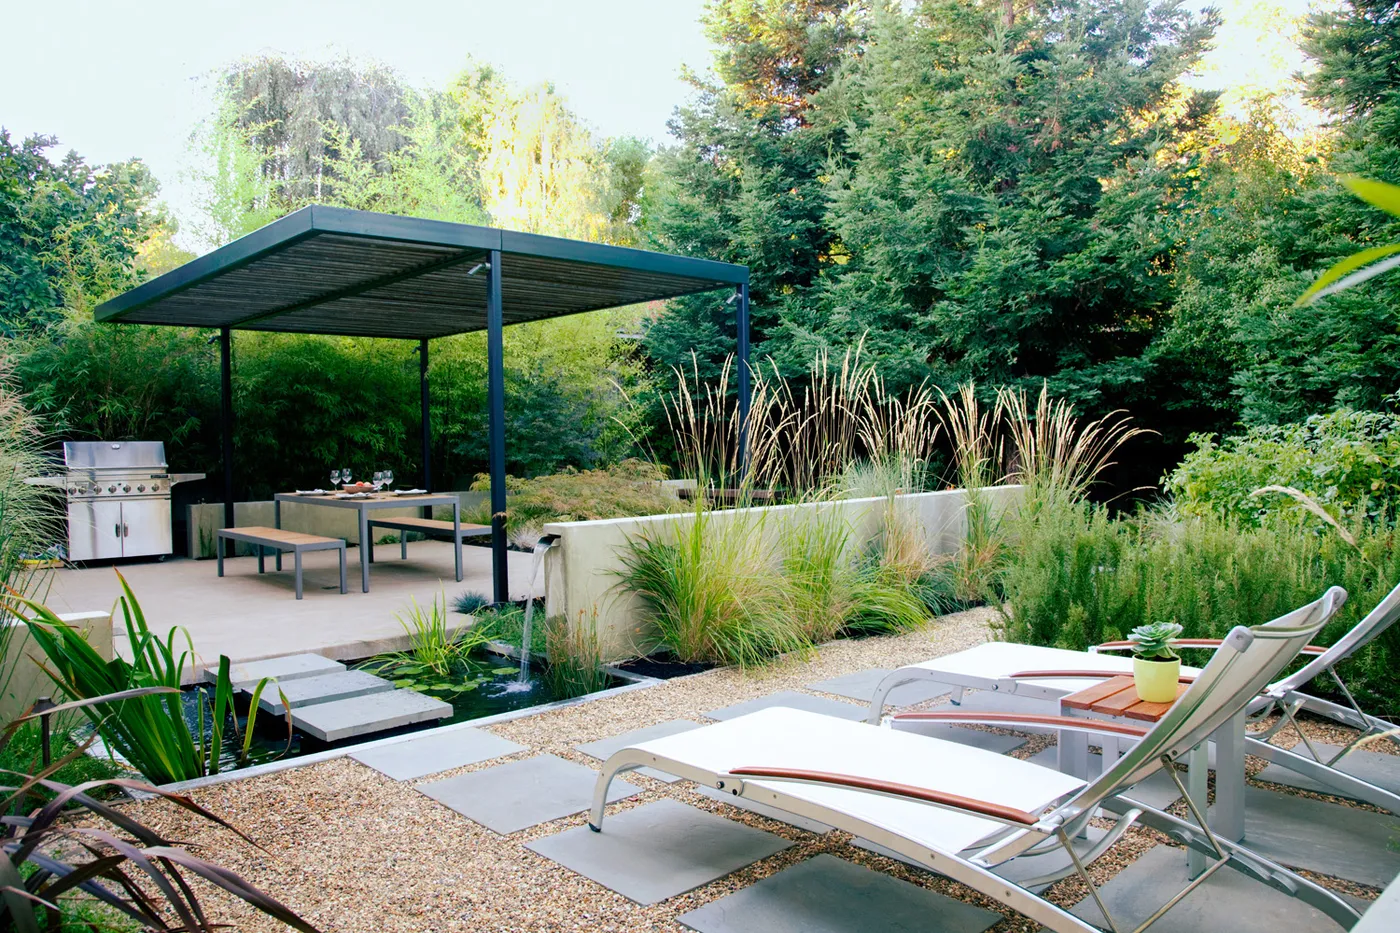
The visual formula here is a masterclass in modern balance: 50% structured hardscape (the concrete patio and pavers) + 20% architectural elements (the dark pergola) + 30% natural textures (gravel, water, and plants). The stark, dark lines of the pergola provide a strong frame, while the water and gravel soften the look and add sensory elements. You could swap the concrete for travertine pavers or the dark pergola for natural cedar and achieve a similar balance, just with a warmer feel.
|
📋 Copy HEX 🔗 Share |
A water feature is a beautiful addition, but it’s not a set-it-and-forget-it element. Here’s what you’re signing up for:
- Pump & Filter Cleaning: Monthly checks are necessary to clear debris and ensure the pump isn’t clogged, which can cause it to burn out.
- Algae Control: Especially in sunny spots, you’ll be battling algae. This may require regular water treatments or the addition of algae-eating fish or plants.
- Water Levels: You’ll need to top off the water weekly due to evaporation, more often in hot, dry climates.
4. Layer Lush Plantings with Brick Pavers and a Winding Gravel Path
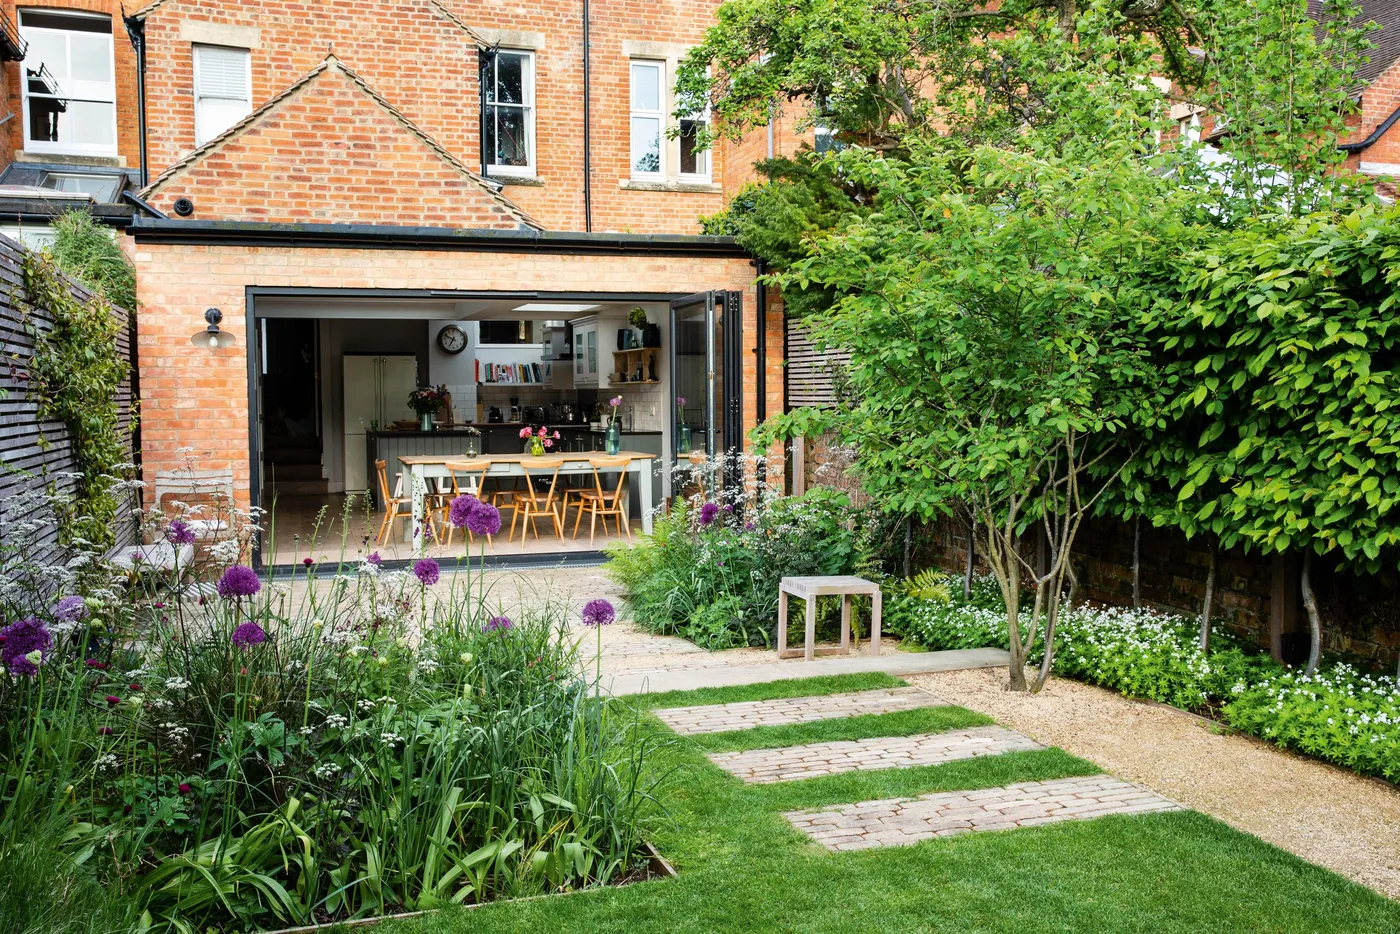
This garden feels so full and inviting because of the masterful use of texture and layering. The design avoids a single, monotonous surface by combining a smooth paved patio, a soft lawn, traditional brick, and crunchy gravel. The winding paths aren’t just for walking; they force your eye to move slowly through the space, making the yard feel larger and more mysterious. The tall purple alliums poking through the lower greenery add a critical vertical layer that gives the whole composition depth and a touch of whimsy.
|
📋 Copy HEX 🔗 Share |
Let’s be honest about gravel paths: they look amazing, but the gravel never stays perfectly in place. It will get kicked into the lawn, making mowing a pain, and it can be tricky to roll a stroller or wheelbarrow over. You’ll also need to rake it back into place periodically and pull the inevitable weeds that find a way through. It’s a commitment, but the textural and auditory payoff is huge.
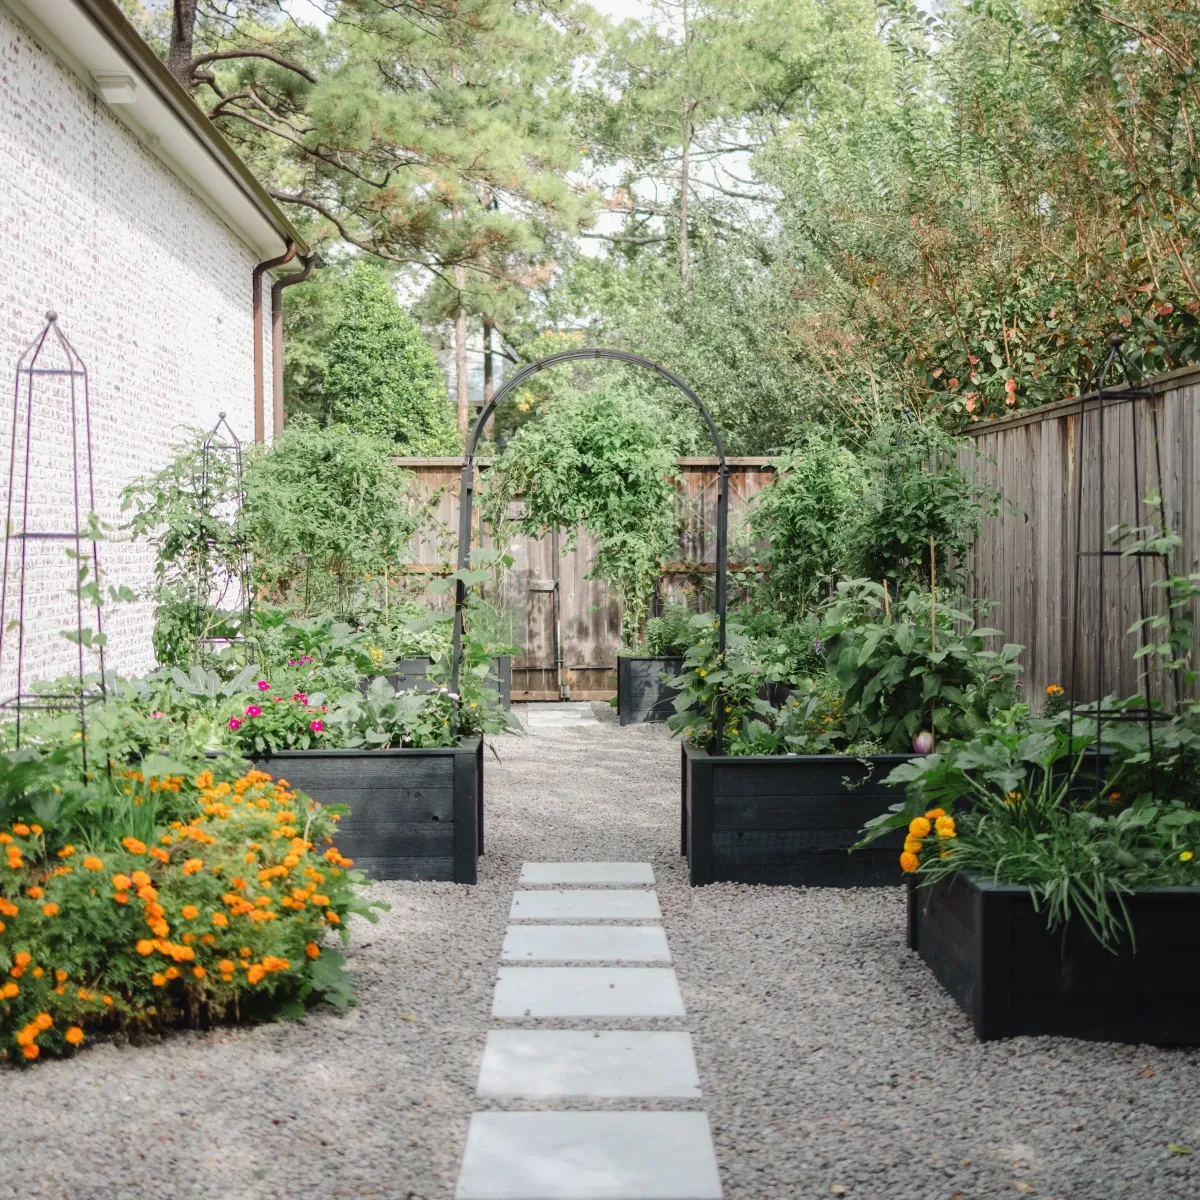
5. Organize an Edible Garden with Dark Raised Beds and a Garden Arch
Building a simple raised garden bed is a weekend project that pays dividends all season. Here’s a quick guide:
- Measure and Cut: Get four 2×8 boards. Cut two to your desired length (e.g., 6 feet) and two to your desired width (e.g., 3 feet).
- Assemble the Frame: On a level surface, stand the boards on their edges to form a rectangle. Use a drill and 3-inch exterior-grade screws to fasten the corners together. Use at least two screws per corner.
- Position and Level: Move the frame to its final sunny spot. Use a level to ensure it’s flat, digging out or adding soil underneath as needed.
- Line and Fill: Line the bottom with cardboard to suppress weeds. Fill with a mix of garden soil, compost, and peat moss. Total time: 2-3 hours. Cost: $60-$100.
|
📋 Copy HEX 🔗 Share |
Those dark-stained planter kits can be pricey. You can get this exact look for a fraction of the cost. Check Facebook Marketplace for people giving away old, untreated deck boards or fence pickets. A weekend of sanding and a $30 can of non-toxic exterior stain will give you the same high-end look. For an even more rustic and affordable option, consider building your beds from cinder blocks—no tools required! It’s a different vibe from the classic kitchen garden in Idea #15 but just as productive.
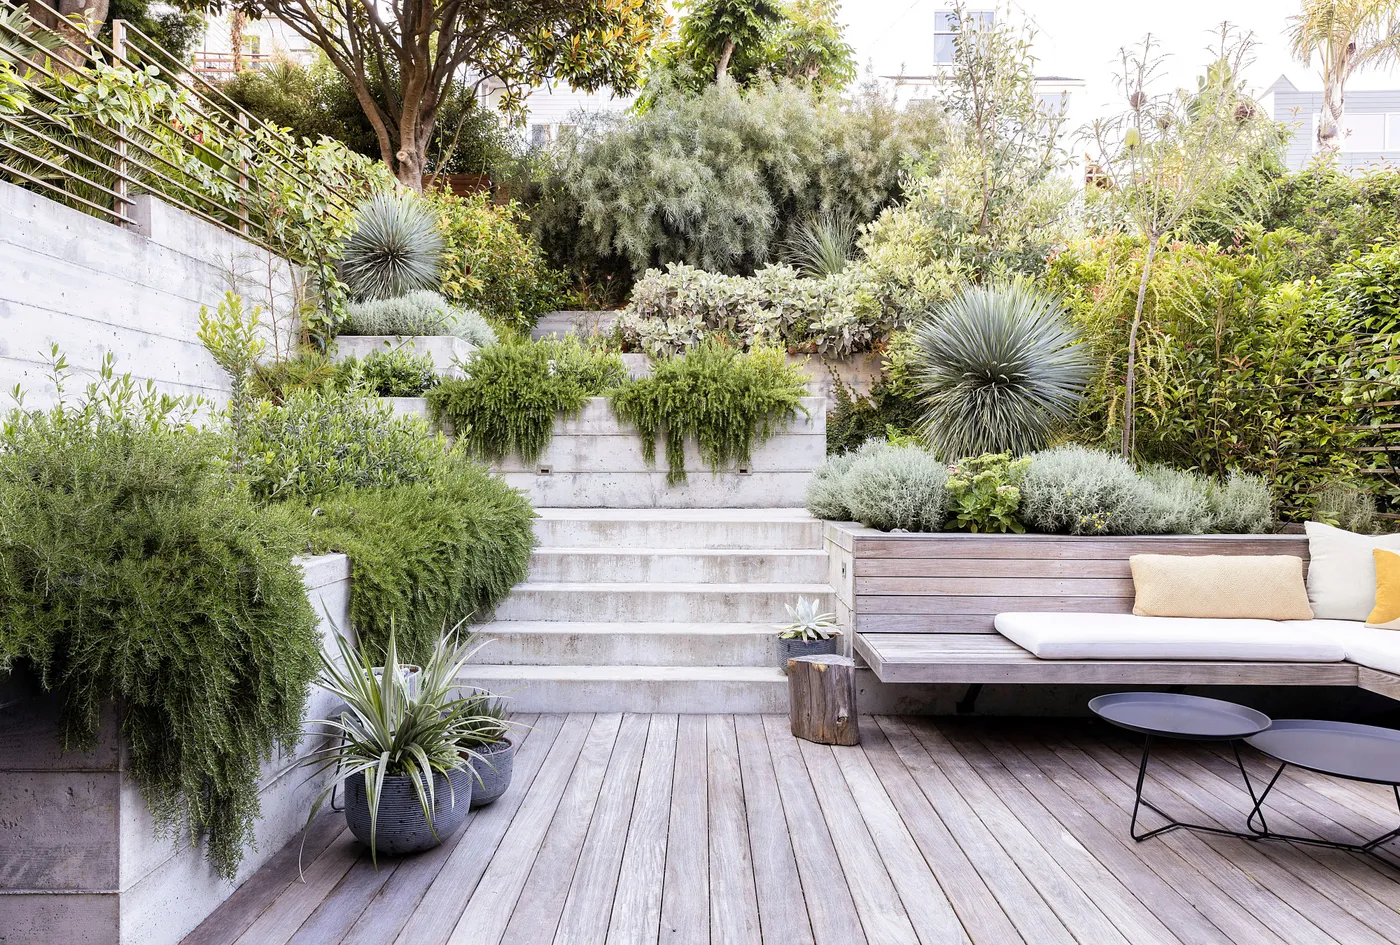
6. Conquer a Slope with Tiered Concrete Walls and a Built-In Wood Bench
When designing steps for a sloped yard, comfort and safety are key. Follow the landscape architect’s rule of thumb: two times the riser height plus the tread depth should equal 26 inches (2R + T = 26). For outdoor spaces, a gentle 5-inch riser with a 16-inch deep tread is much more comfortable and less strenuous than a steep, interior-style staircase. This encourages a leisurely stroll rather than a climb.
|
📋 Copy HEX 🔗 Share |
A tiered approach like this is ideal for yards with a moderate to steep slope, specifically a grade change of 20% or more (a 2-foot drop over a 10-foot run). For gentler slopes, you might get away with a simple winding path, but this structured solution turns an unusable hillside into multiple flat, functional levels for planting and seating. It’s a much more architectural solution than the stone steps in Idea #24.
7. Host Dinners Under a White Pergola with String Lights
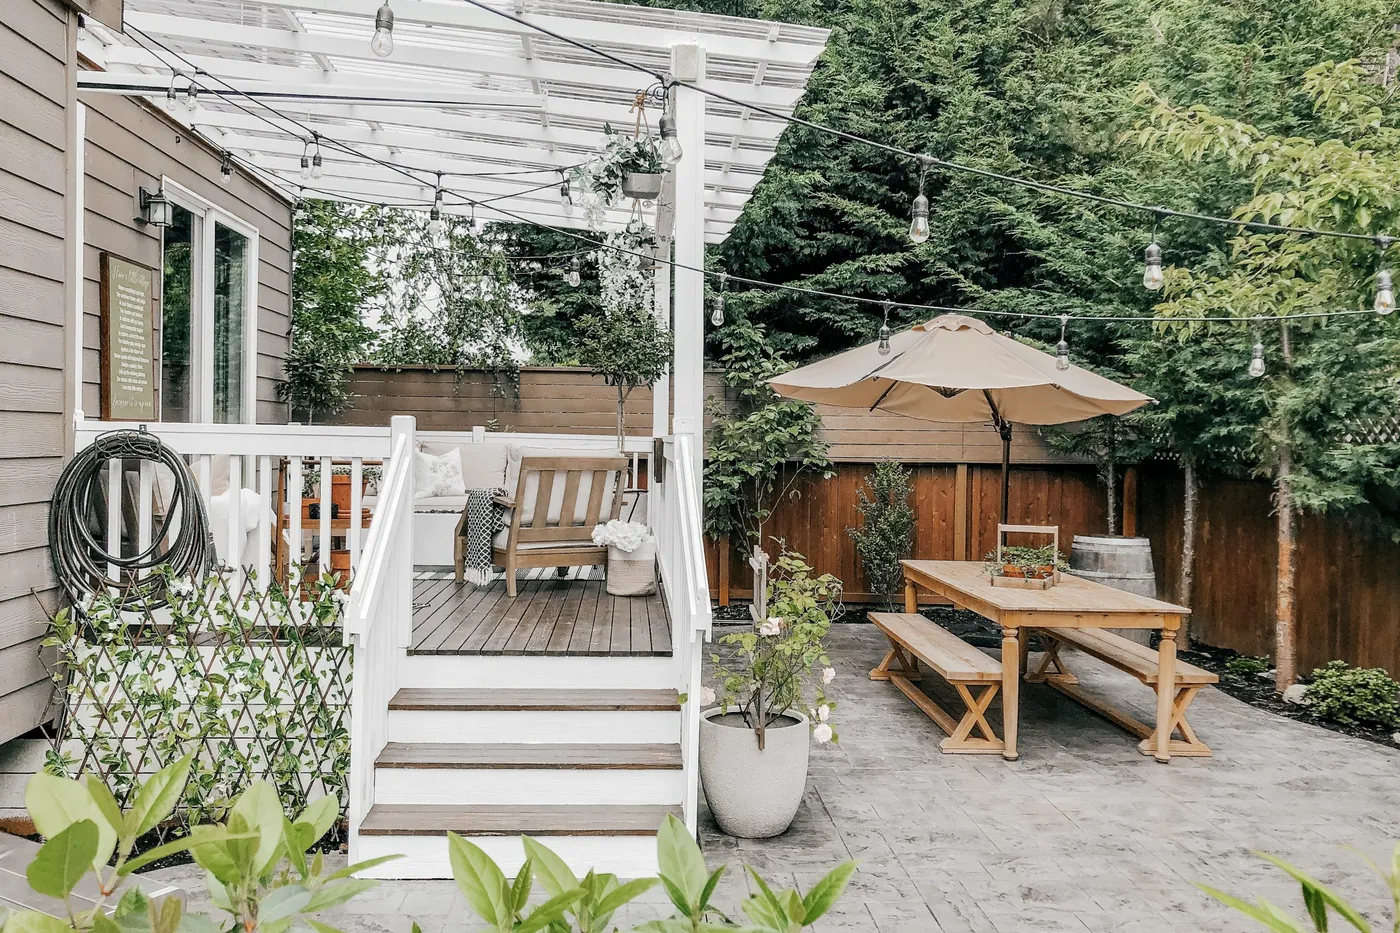
The single element that makes this space work is the white pergola. It performs a brilliant design trick: it defines the dining area as a distinct ‘room’ without adding heavy visual weight or blocking light. A dark or natural wood pergola would have felt heavier. The white color keeps the space feeling airy and bright, reflecting sunlight during the day and beautifully catching the glow from the string lights at night. It’s architecture without walls.
|
📋 Copy HEX 🔗 Share |
The idea of the al fresco lifestyle isn’t new, but its popularity has skyrocketed as we seek to maximize our living space. A pergola is the key piece of the puzzle for creating a true outdoor room. It signals that this isn’t just a patio; it’s a dining room. Pinterest searches for ‘outdoor dining rooms’ are up because people want their backyard to be as functional and thoughtfully designed as their interior, and a structure like this provides the necessary framework.
8. Energize a Patio with a Sectional and Vibrant Green Cushions
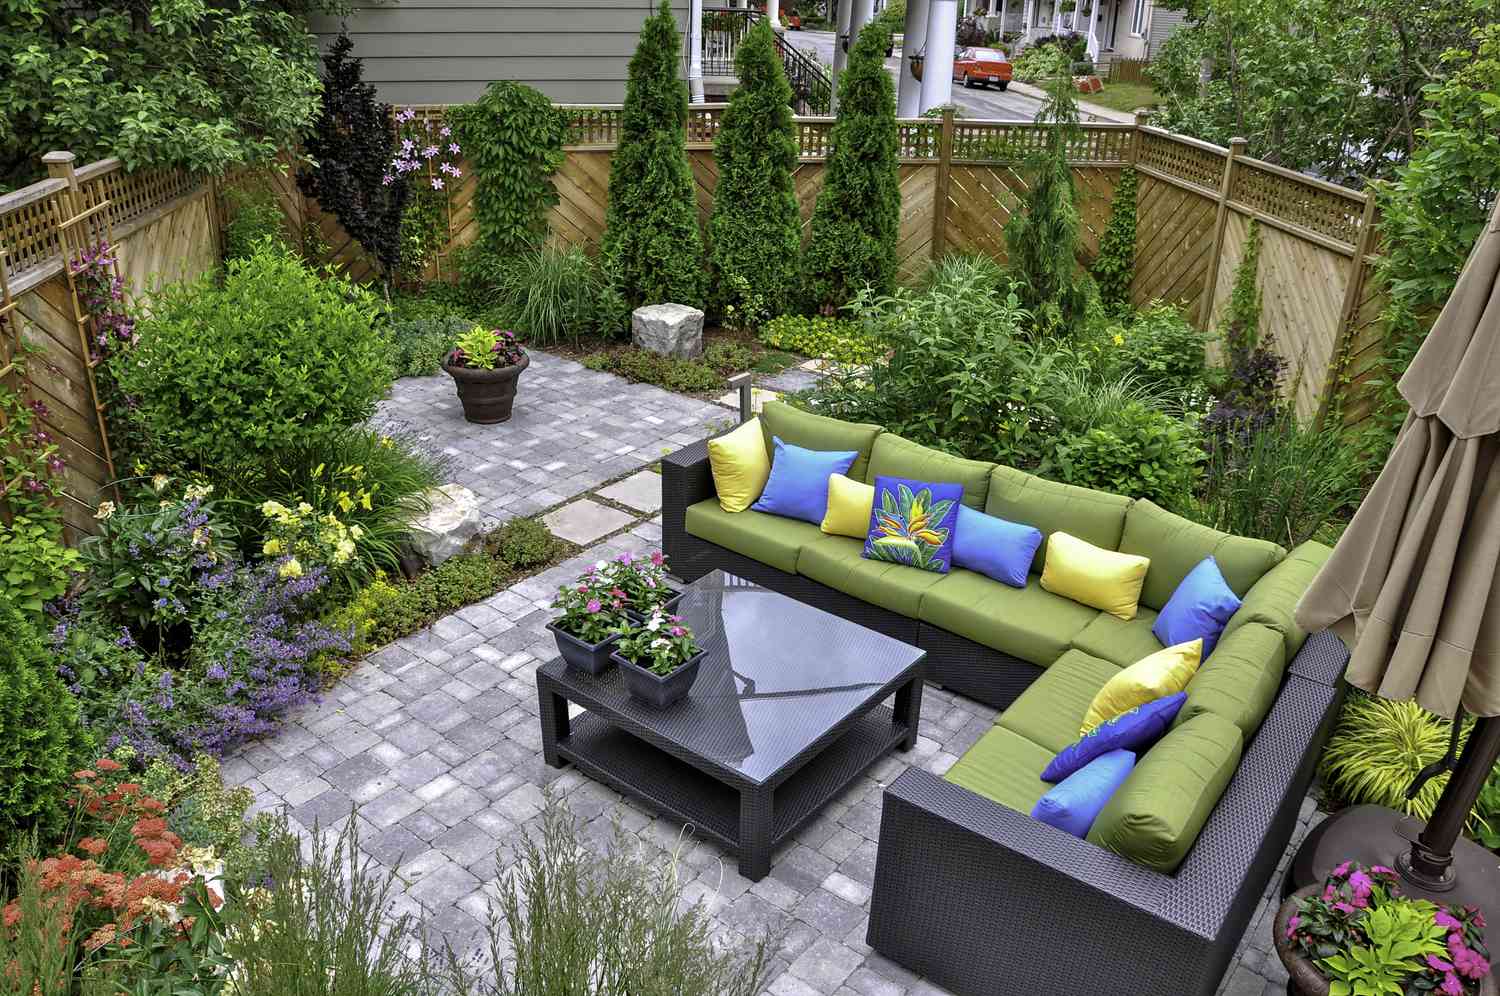
This patio’s energy comes from a simple but effective formula: 70% neutral foundation + 30% saturated color. The dark woven sofa, gray pavers, and wood fence create a calm, neutral backdrop. This allows the vibrant green cushions to take center stage without overwhelming the small space. The pops of yellow and blue pillows act as secondary accents, adding another layer of interest. You could easily swap the green for a bold orange or a deep magenta and achieve the same dynamic effect.
|
📋 Copy HEX 🔗 Share |
You don’t need a high-end sectional to get this look. Scour Facebook Marketplace or a local consignment shop for a used outdoor sectional with good bones—people often sell them for a steal at the end of the season. The frame is what matters. Then, invest in new cushion covers. You can find affordable, vibrant options on Amazon or at Target for around $20-$40 per cover, completely transforming the piece for a fraction of the cost of buying new.
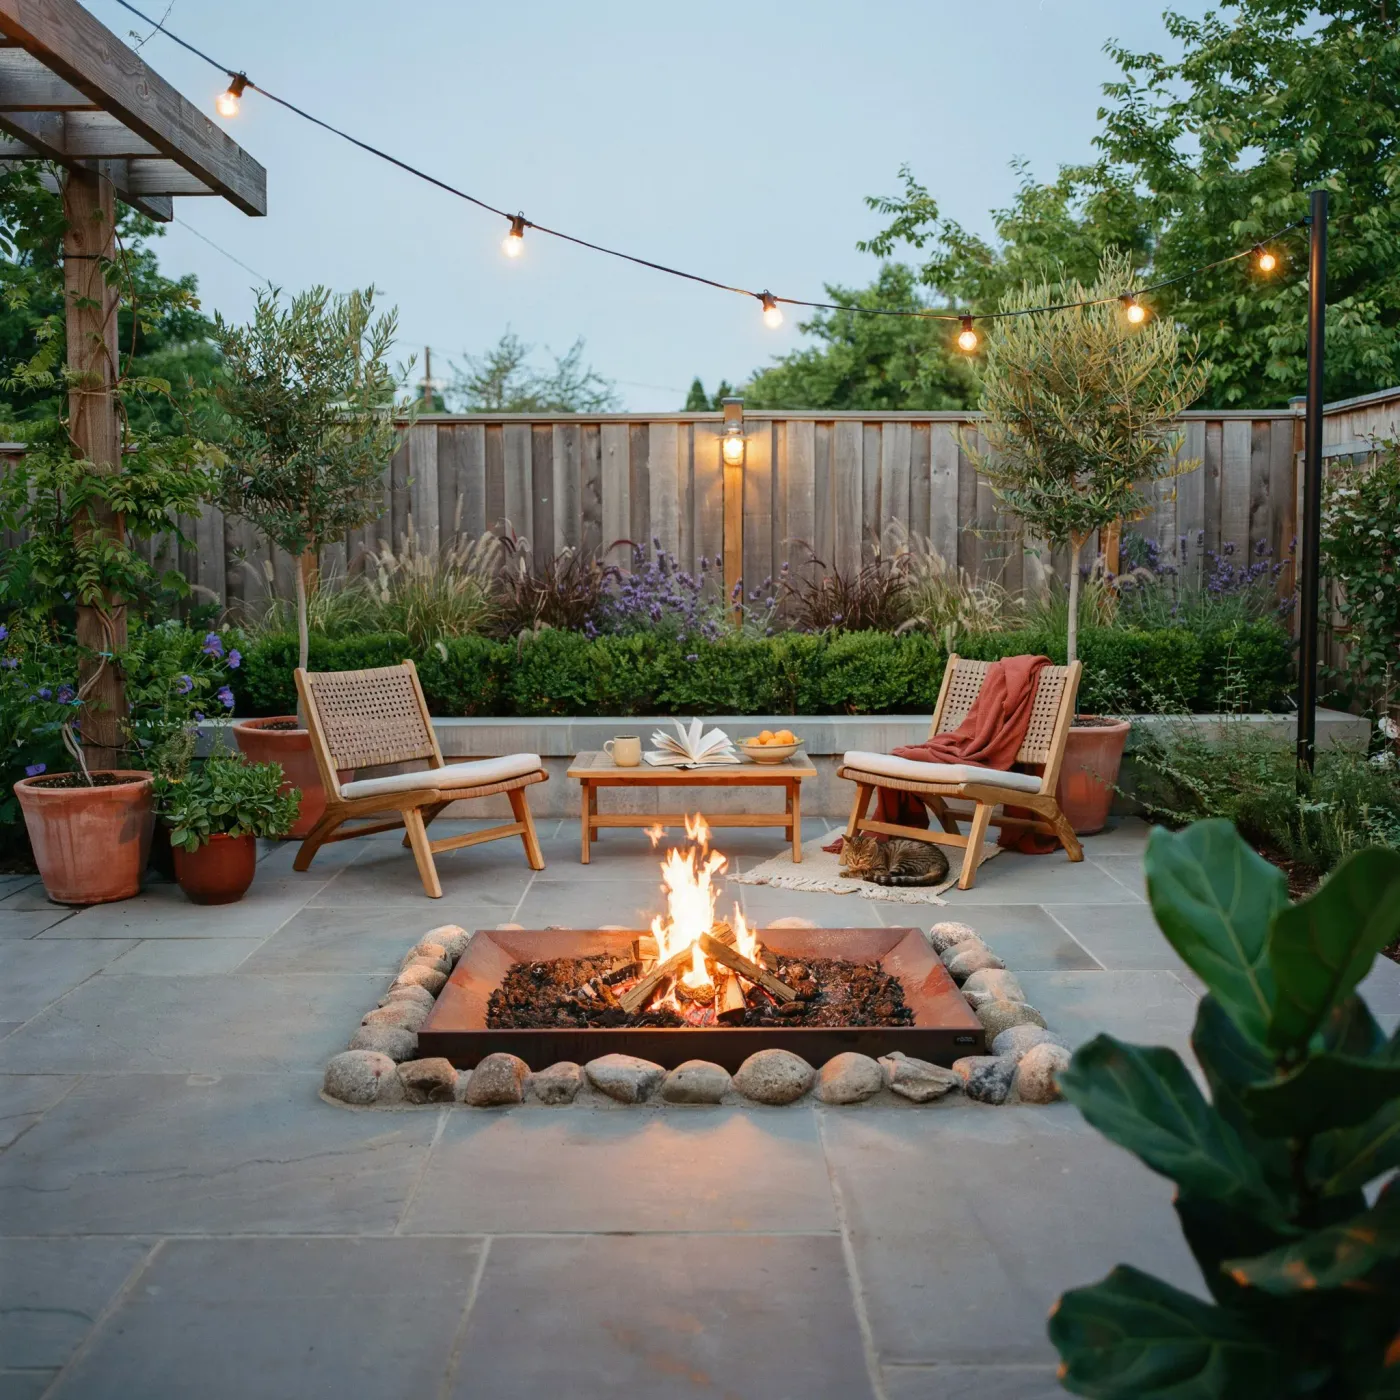
9. Gather Around a Corten Steel Fire Pit on a Stone Paver Patio
Corten steel is gorgeous, but it has a secret: it’s designed to rust. That beautiful patina is literally a layer of rust that protects the steel underneath. The downside? That rust can (and will) run off and stain the surface below it, especially in the first couple of years. The river stones here are a brilliant solution because they camouflage any rust runoff. If you place a Corten fire pit directly on light-colored concrete pavers, be prepared for orange stains.
|
📋 Copy HEX 🔗 Share |
Before you commit to any fire pit, wood-burning or gas, do this homework:
- Check Local Codes: Your city or HOA has rules about fire pits, including required distances from your house, fences, and trees. Look up the specific regulations for your area before you buy.
- Assess Your Surface: Is your patio made of a flammable material like wood or composite decking? You’ll need a non-combustible pad underneath the fire pit.
- Look Up: Check for low-hanging branches, umbrellas, or pergola roofs directly above your desired fire pit location. You need clear vertical space.
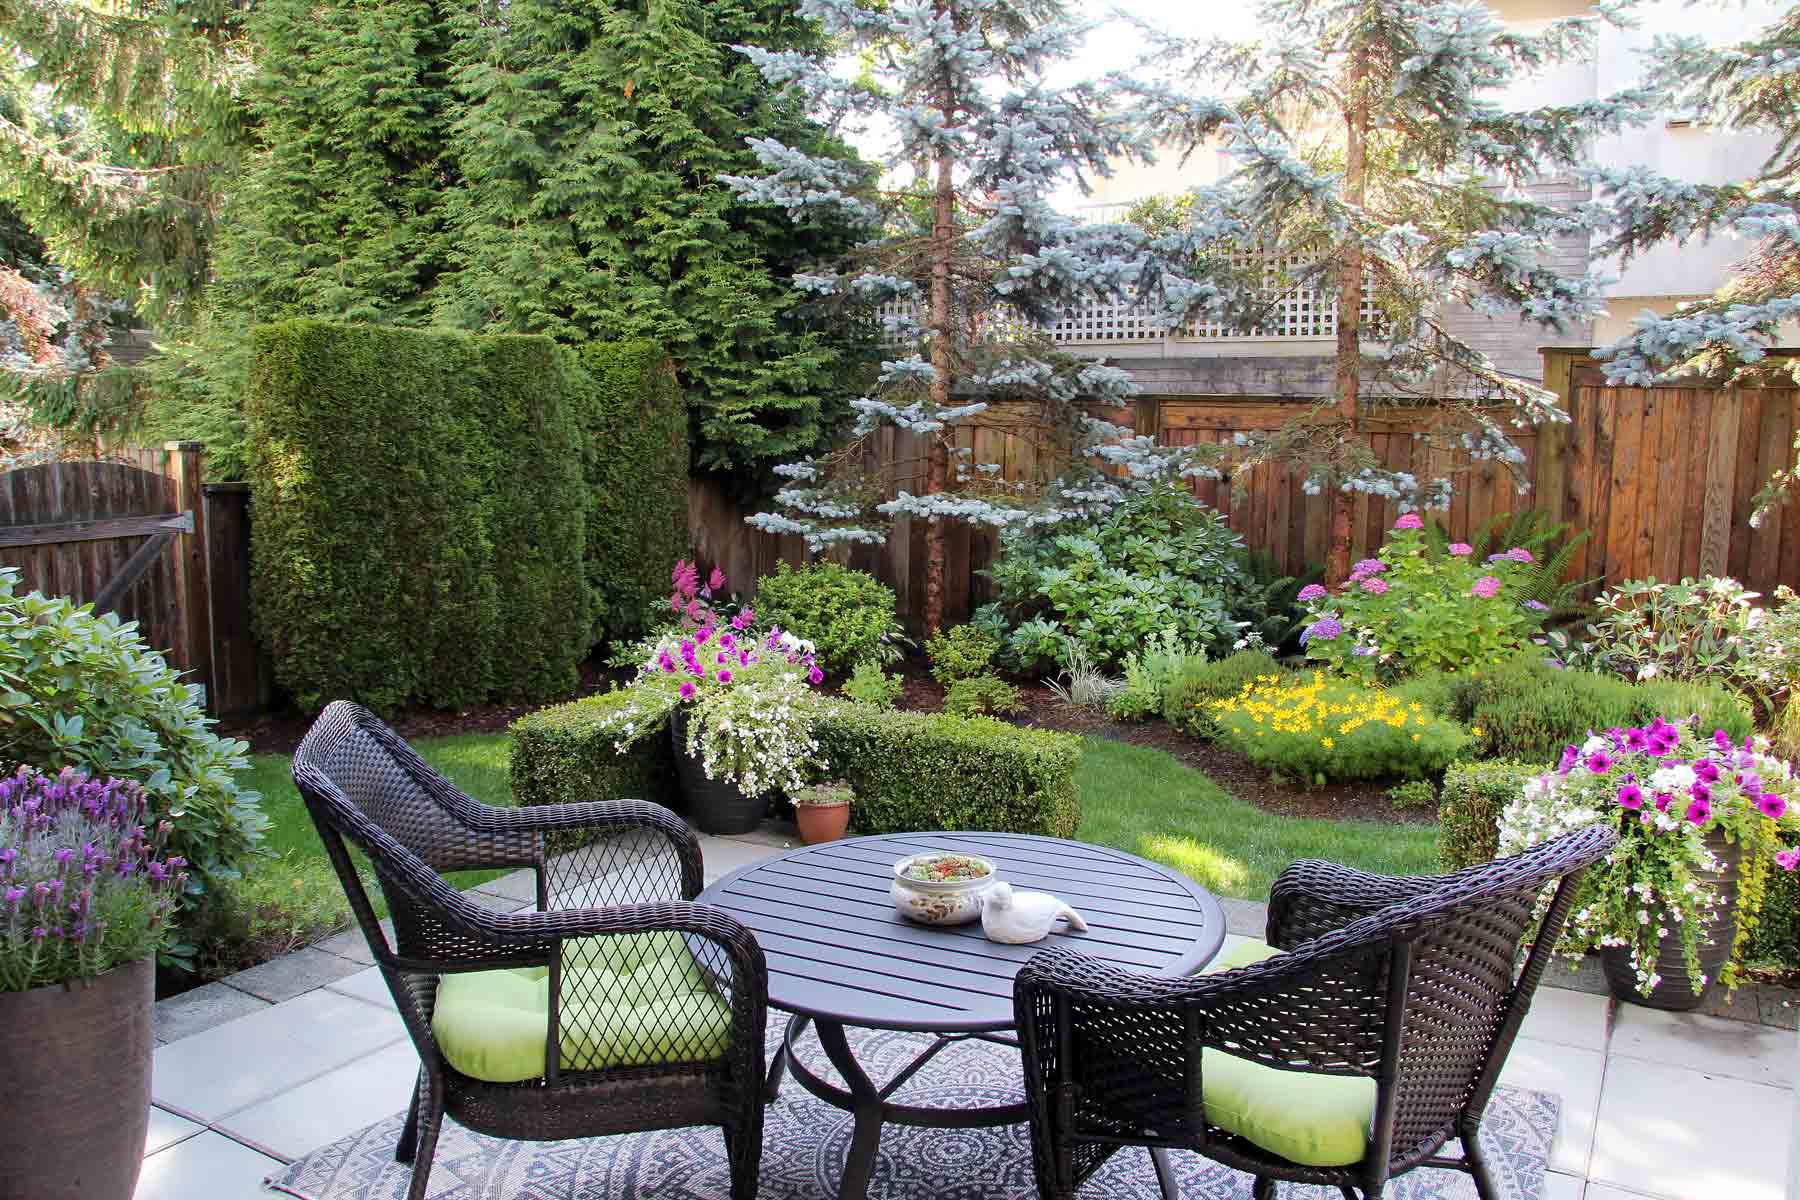
10. Carve Out a Dining Nook Amidst a Lush, Layered Garden
This little nook feels like a secret garden escape because the plantings aren’t just a border; they’re the walls. Using tall shrubs and layered perennials to enclose the patio on at least two sides creates a powerful sense of privacy and intimacy. The brain registers this as a protected, room-like space. The mix of evergreen structure with softer flowering plants ensures it looks good year-round, not just for one season. It’s a masterclass in creating a destination within a small yard.
|
📋 Copy HEX 🔗 Share |
In a small, defined area like this, an outdoor rug is your best friend. It acts as a visual anchor, clearly marking the floor of your outdoor dining room. A 5×7 or 6×9 rug is usually perfect for a small bistro set like this. It helps group the furniture, adds a layer of texture and color, and makes the space feel much more intentional and finished. Choose a low-pile, easy-to-clean polypropylene rug that can handle the elements.
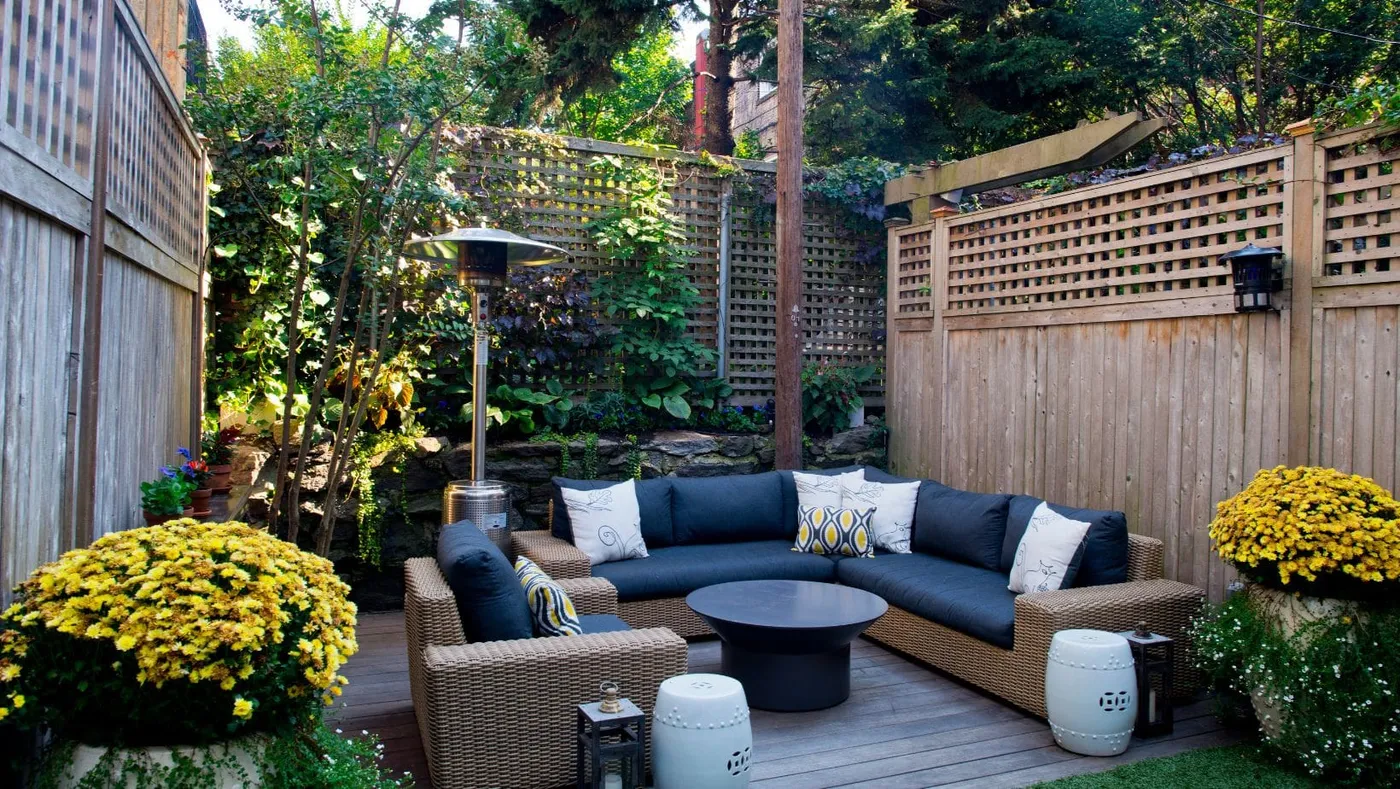
11. Create Privacy with a Wicker Sectional and a Foliage-Covered Trellis
The trellis is the game-changer here. A solid wooden fence would have felt imposing and boxy in such a small space. The trellis, however, provides the necessary privacy from neighbors while still feeling light and airy. By covering it with climbing plants, you get a ‘living wall’ that adds softness, texture, and a dose of nature. It blurs the boundaries of the yard, making it feel less confined and more like a lush, green sanctuary. Without it, the cozy vibe would be completely lost.
|
📋 Copy HEX 🔗 Share |
A simple trellis wall is an easy DIY. Here’s how to create one:
- Set Your Posts: Sink two 4×4 posts into concrete, about 6-8 feet apart, ensuring they are plumb.
- Attach the Trellis: Buy a pre-made lattice panel from a home improvement store. Attach it to the posts using exterior-grade screws.
- Choose Your Plant: Select a fast-growing, non-invasive vine suitable for your climate, like clematis or jasmine.
- Plant and Train: Plant the vine at the base of the trellis. Gently weave the initial stems through the lattice to encourage it to start climbing. Water regularly!
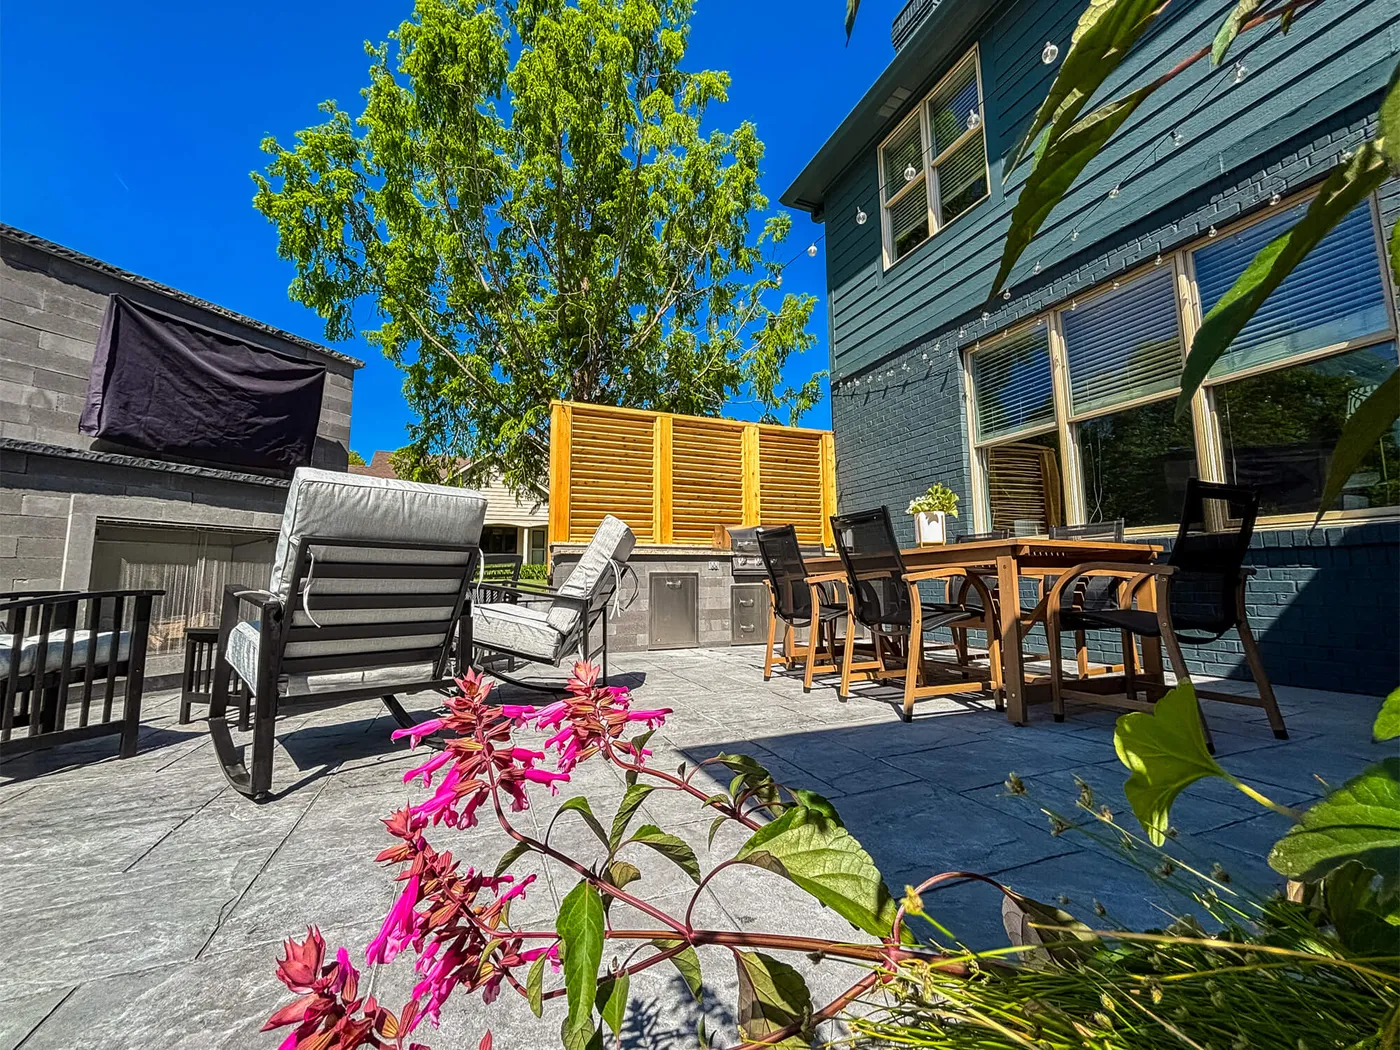
12. Build a Functional Outdoor Kitchen on a Stamped Concrete Patio
Creating a functional outdoor kitchen zone involves more than just a grill. Here’s a rough estimate for recreating this specific setup:
- Main Furniture (Dining Table & Chairs): $700 – $2,500
- Appliances (Mid-range built-in grill): $1,000 – $3,000
- Counter/Storage Unit: $1,500 – $4,000
- Lighting (String lights): $50 – $200
- Privacy Screen (Wood slats & labor): $800 – $2,000
- TOTAL: $4,050 – $11,700
- Budget Alternative: A standalone grill ($400), a stainless steel prep cart ($200), and a freestanding privacy screen ($150) can give you a similar function for under $1,000.
|
📋 Copy HEX 🔗 Share |
To comfortably fit an outdoor kitchen and a separate dining area for four, you need a patio that is at least 12 feet deep and 20 feet long. This allocates roughly 12×8 feet for the kitchen zone (including grill, counter space, and clearance to open doors/lids) and 12×12 feet for the dining table and chairs, allowing people to pull out their chairs and walk around the table without feeling squished.
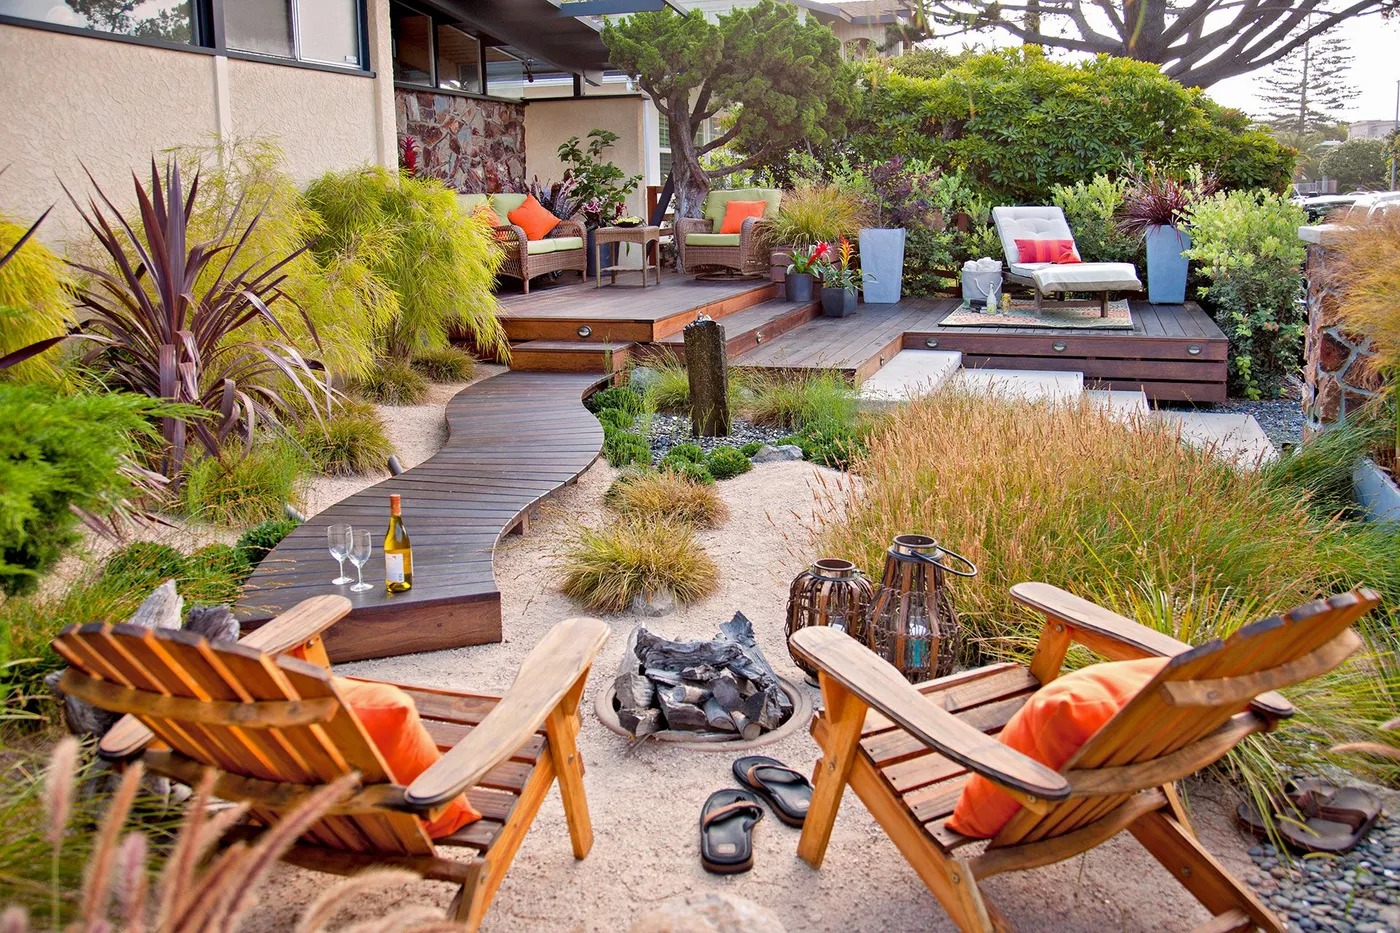
13. Design a Multi-Level Oasis with a Winding Path to a Fire Pit
This backyard feels expansive because it’s designed as a journey with distinct destinations. Instead of one large, flat deck, the different levels and materials create separate rooms—a lounge area on the upper deck, a transition space on the path, and a cozy fire pit zone below. The winding path is key; it slows down the experience and creates a sense of discovery. This clever separation of zones makes the overall space feel much larger and more interesting than it actually is.
|
📋 Copy HEX 🔗 Share |
Having sand or fine gravel right next to a dark-stained wooden deck can be a maintenance headache. The light-colored sand will inevitably get tracked onto the dark deck, making it look constantly dusty and requiring frequent sweeping or blowing. Also be mindful of drainage; you want to ensure the lower fire pit area doesn’t turn into a puddle every time it rains, which could splash mud onto the beautiful wooden path.
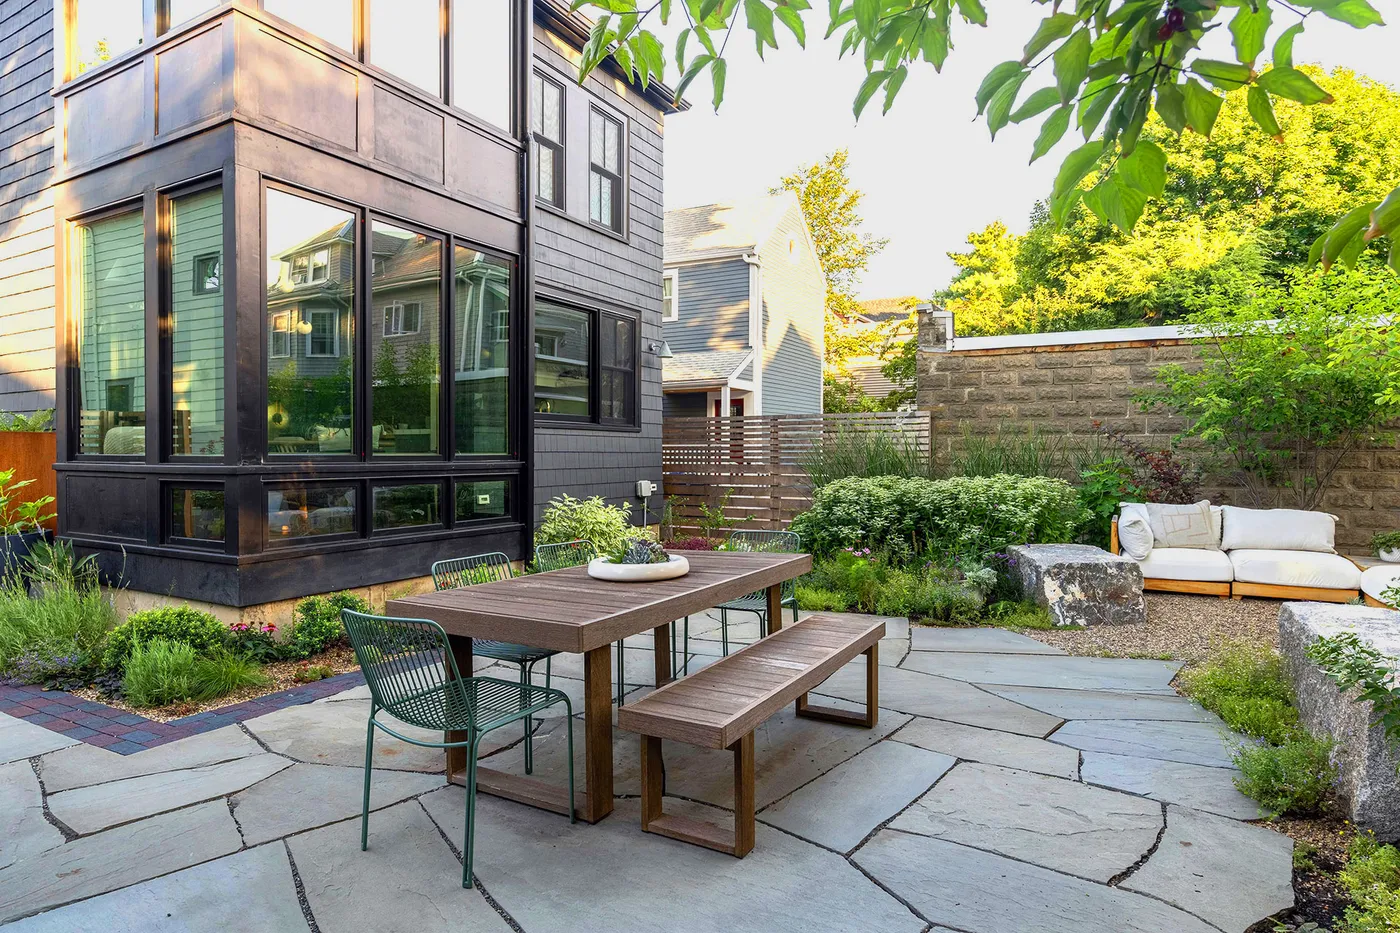
14. Mix Natural Materials with a Flagstone Patio and Green Metal Chairs
This look is a beautiful equation of natural and modern elements. It breaks down to: 40% organic hardscape (the irregular gray flagstone) + 30% warm wood (the dining set) + 20% lush, low-lying greenery + 10% unexpected color (the green metal chairs). The pop of color on the chairs keeps the scene from feeling too muted and adds a playful, contemporary edge. It proves you don’t need flowers to bring color into a garden space.
|
📋 Copy HEX 🔗 Share |
An irregular flagstone patio has a wonderful, organic feel, but it comes with some upkeep. Weeds are determined to grow in the gaps between the stones, so you’ll need to stay on top of weeding or use a polymeric sand filler. The naturally uneven surface can also make chairs and tables a bit wobbly. You might need to experiment with furniture placement to find the most stable spots. It’s a trade-off for that beautiful, natural texture.
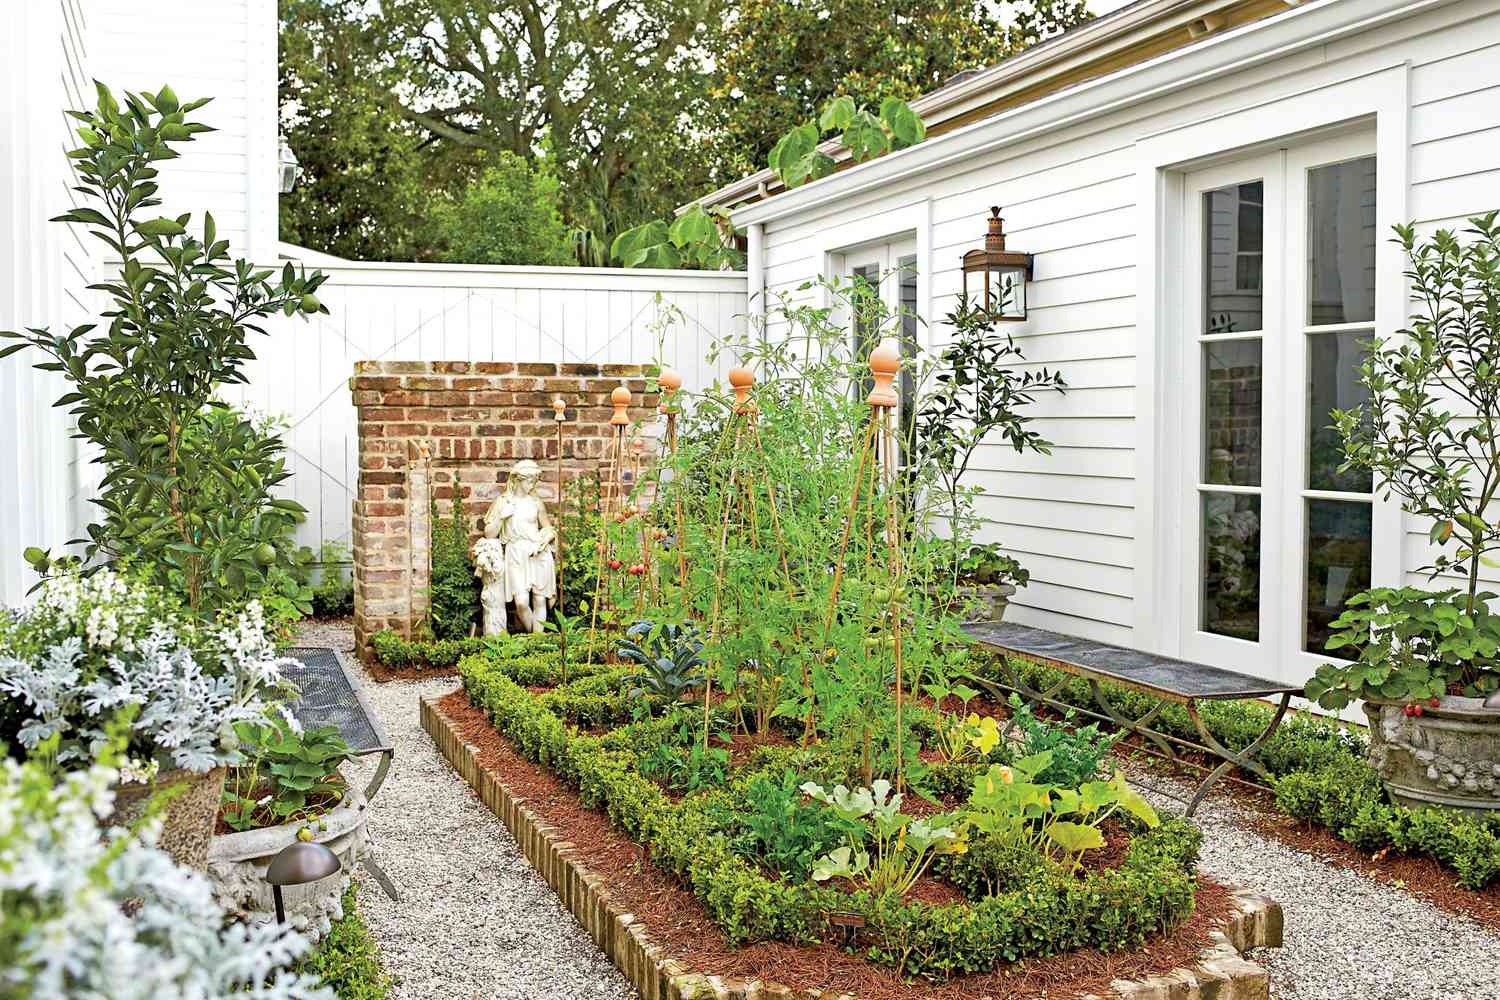
15. Plant a Classic Kitchen Garden Against a White Shiplap Wall
When you have a bright, reflective backdrop like this white shiplap, use it to your advantage. Choose plants with deep, saturated colors or interesting textures. The rich green of the boxwood hedges and the bright red of the tomatoes pop dramatically against the white. Variegated leaves or dark purple foliage would also look stunning. Avoid plants with pale, silvery leaves, as they’ll get visually lost against the light-colored wall.
|
📋 Copy HEX 🔗 Share |
The return of the potager, or kitchen garden, is a trend with real heart. It’s tied to a larger cultural shift towards sustainability, healthier eating, and finding joy in simple, productive hobbies. People are craving a connection to their food source, and even a tiny plot like this one can provide fresh herbs, tomatoes, and lettuce. It’s about making your yard not just beautiful, but useful and rewarding, too. It’s a more formal take than the rustic raised beds in Idea #5.
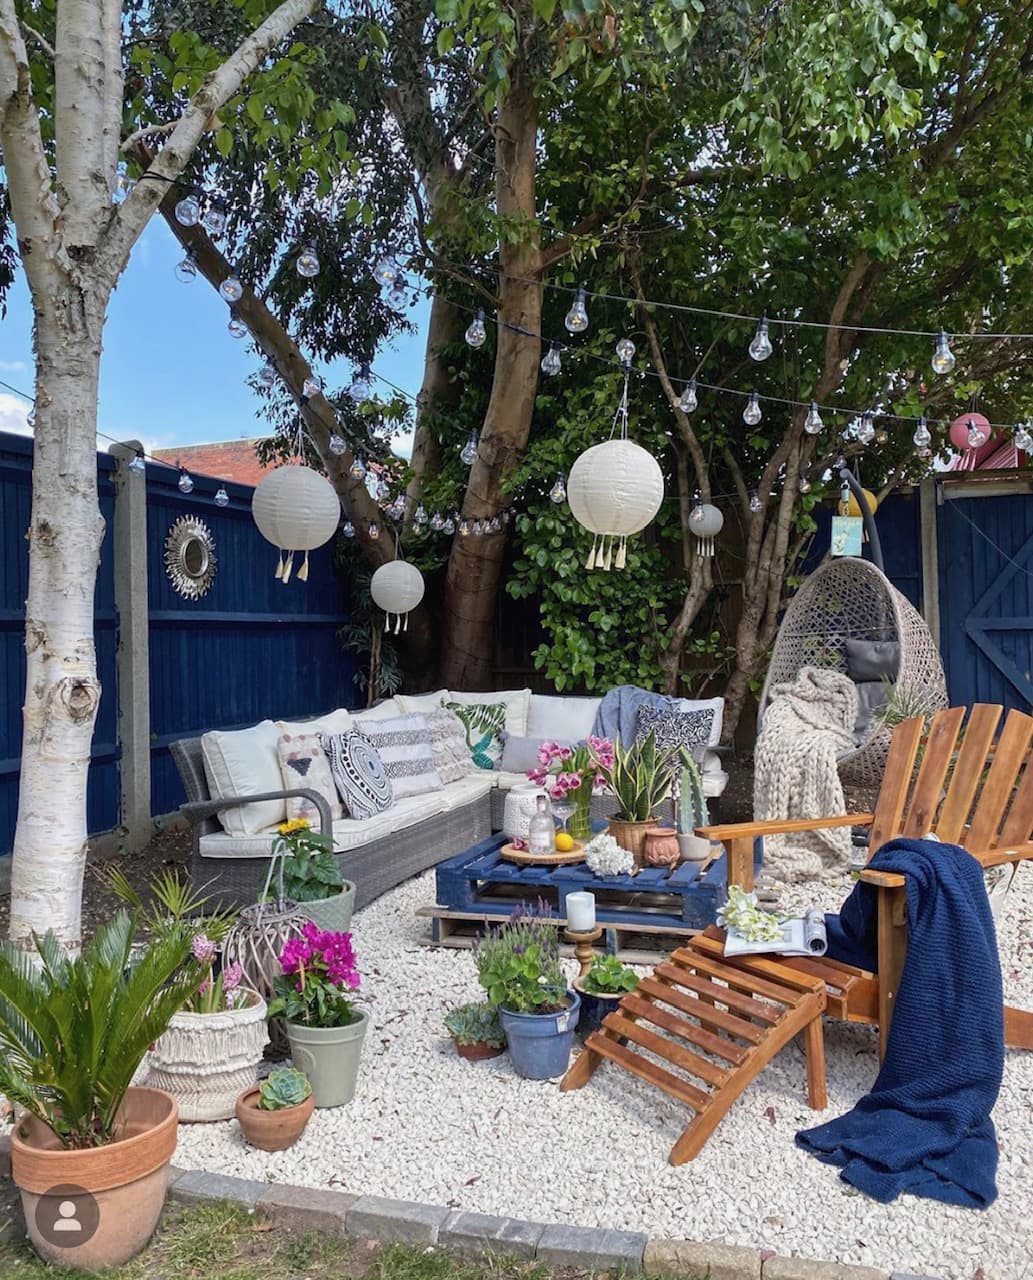
16. Craft a Bohemian Hangout with a Pallet Table and Paper Lanterns
This entire look is the definition of get this look for less! It’s built on creativity, not cash. The coffee table is a simple wooden pallet, likely sourced for free and painted a fun color (cost: $15 for a paint sample). The seating is a mix-and-match of thrifted or secondhand pieces. The magical lighting comes from affordable paper lanterns ($2-5 each) and basic string lights. This proves you can create a high-impact, super cozy space for well under $500 if you’re willing to hunt and DIY.
|
📋 Copy HEX 🔗 Share |
Okay, let’s get real. Paper lanterns look magical, but a single rainstorm will turn them into a sad, mushy mess. They are for dry climates or special occasions only, not a permanent lighting solution. Also, white gravel is a commitment. It shows every leaf and bit of dirt, and it can be a pain to keep clean and contained. It’s a great look, but it’s not as low-maintenance as it seems.
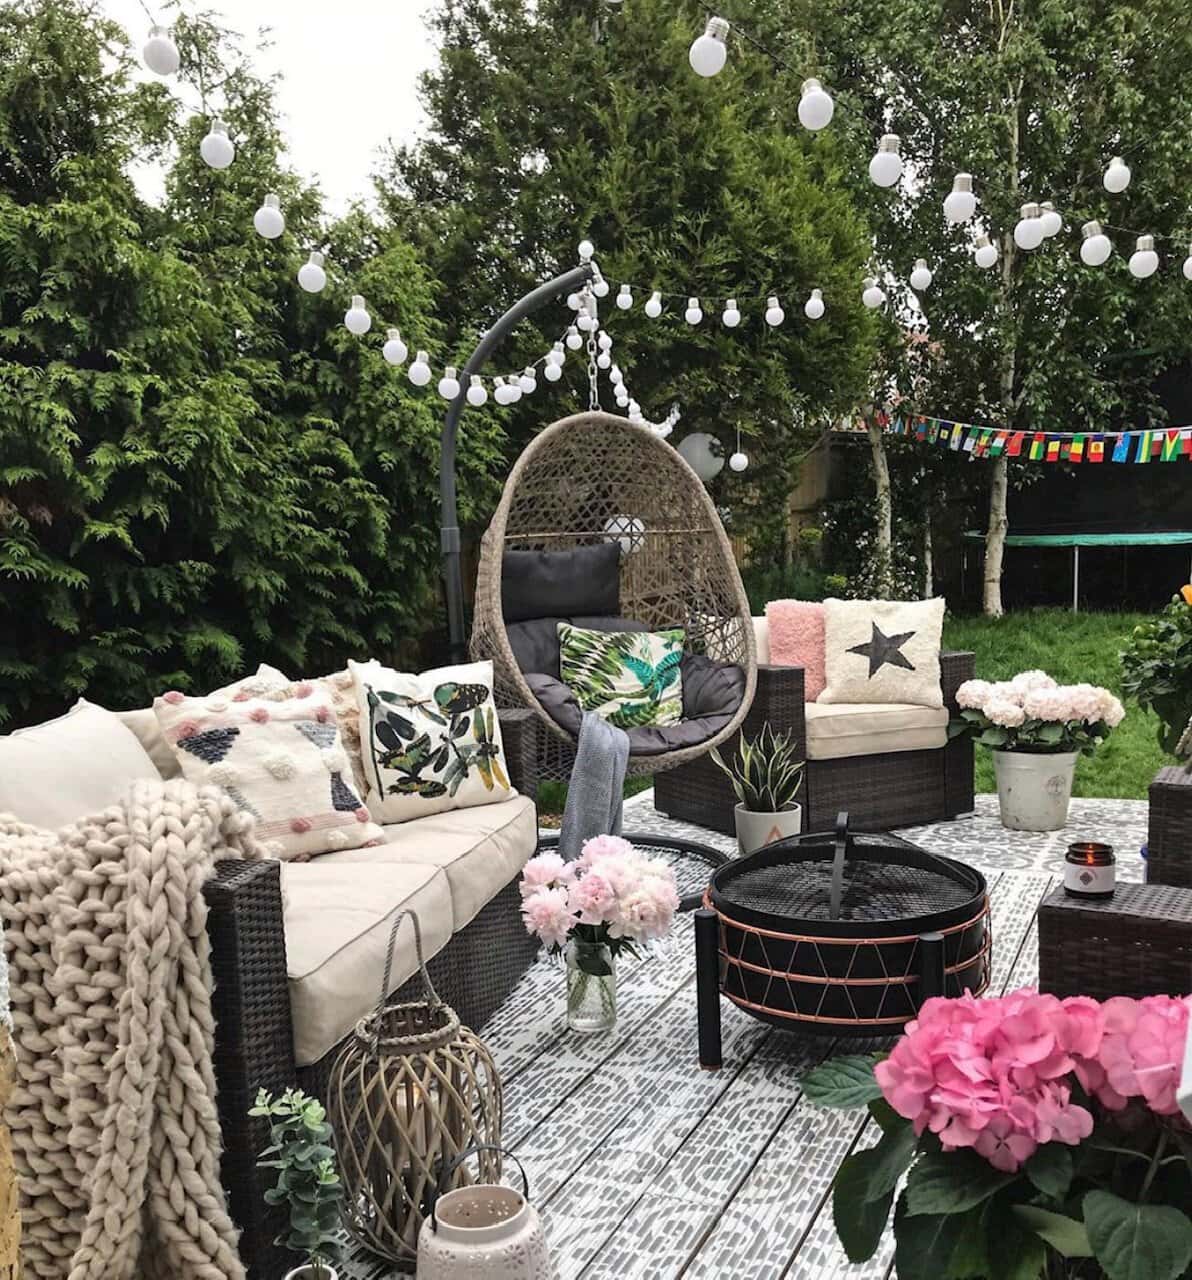
17. Create a Cozy Rattan Lounge with a Patterned Deck Floor
The patterned deck floor is what elevates this from a simple patio set to a fully designed outdoor room. It functions exactly like an area rug, defining the lounge space and adding a huge dose of personality. But unlike a rug, it’s a permanent, durable feature that won’t get dirty or need to be stored in the winter. It’s a bold choice that anchors the entire design and makes the space feel custom and thoughtfully curated. This is a much more permanent alternative to the rug used in Idea #10.
|
📋 Copy HEX 🔗 Share |
Painting a pattern on your deck is a high-impact DIY project. Here’s the plan:
- Prep is Everything: Thoroughly clean your deck with a deck cleaner and a power washer. Let it dry completely for 24-48 hours. Sand any rough spots.
- Apply a Base Coat: Roll on 1-2 coats of a solid color porch and floor paint. This will be your grout color. Let it cure as directed.
- Stencil Your Pattern: Secure a large floor stencil with painter’s tape. Use a small roller or stencil brush to apply your second color. Use a dry brush technique with minimal paint to prevent bleeding.
- Repeat and Seal: Carefully move the stencil, aligning it with the previously painted section, and repeat until the area is covered. Once fully cured, apply a clear outdoor-rated sealant for durability.
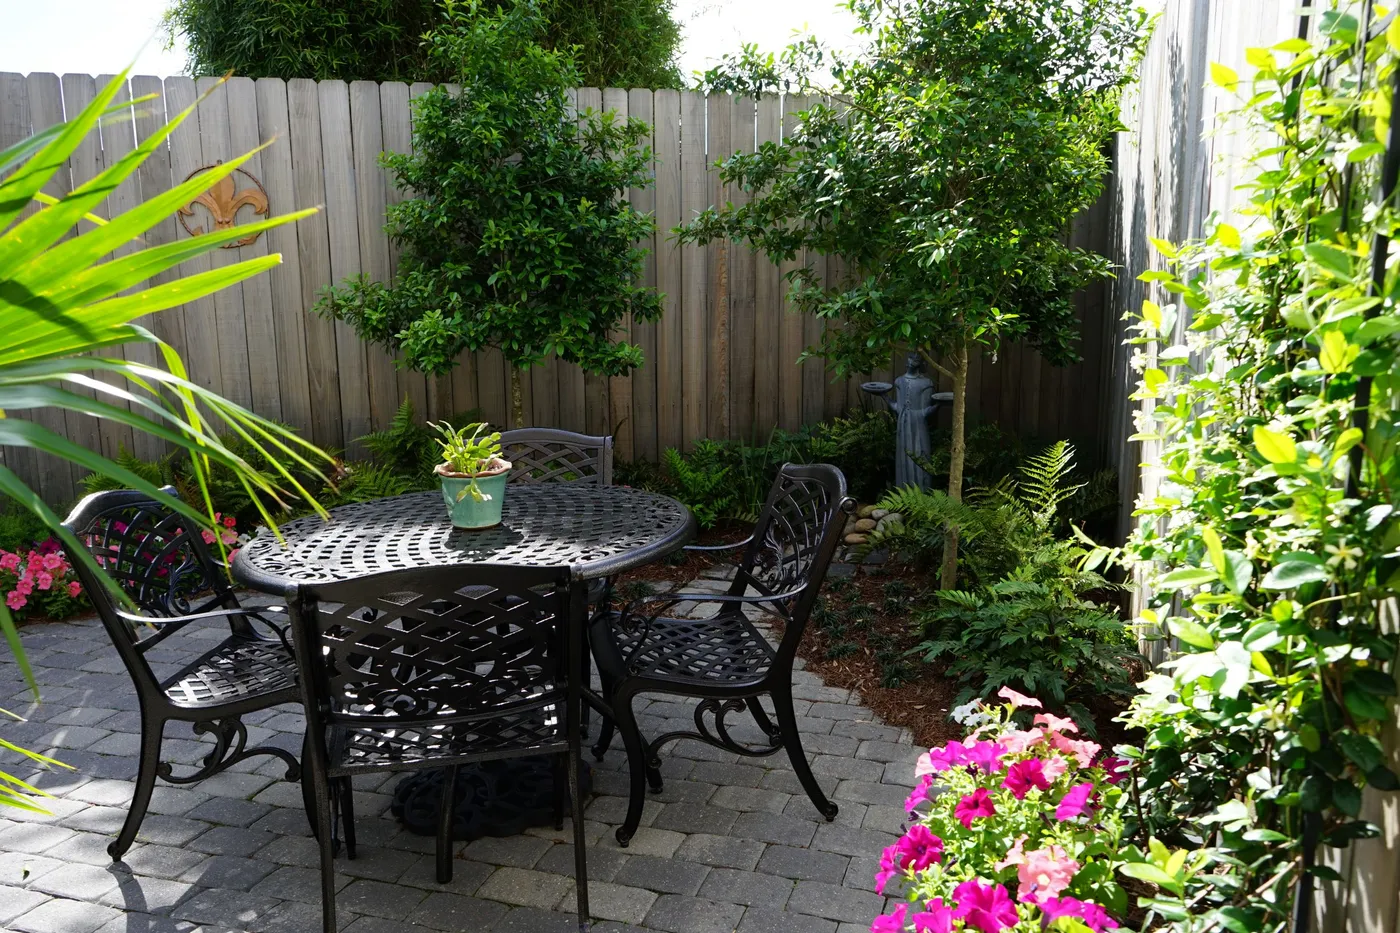
18. Set Up a Classic Dining Nook with a Black Cast Iron Bistro Set
This setup works so well because of the beautiful contrast between the delicate, dark lines of the cast iron set and the soft, lush, organic shapes of the surrounding greenery. A bulky wooden or wicker set would have visually filled and overwhelmed this small patio. The open, airy design of the metal furniture allows you to see through it to the garden beyond, making the space feel less crowded and more integrated with the plants.
|
📋 Copy HEX 🔗 Share |
Cast iron is incredibly durable, but it’s not invincible—its main enemy is rust. To keep a set like this looking great for years, you’ll need to perform some annual maintenance. At the beginning of each season, inspect it for any chips in the paint. Lightly sand any rusty spots, wipe them clean, and touch them up with a rust-inhibiting metal paint like Rust-Oleum. It’s a 30-minute job that will prevent small spots from becoming big problems.
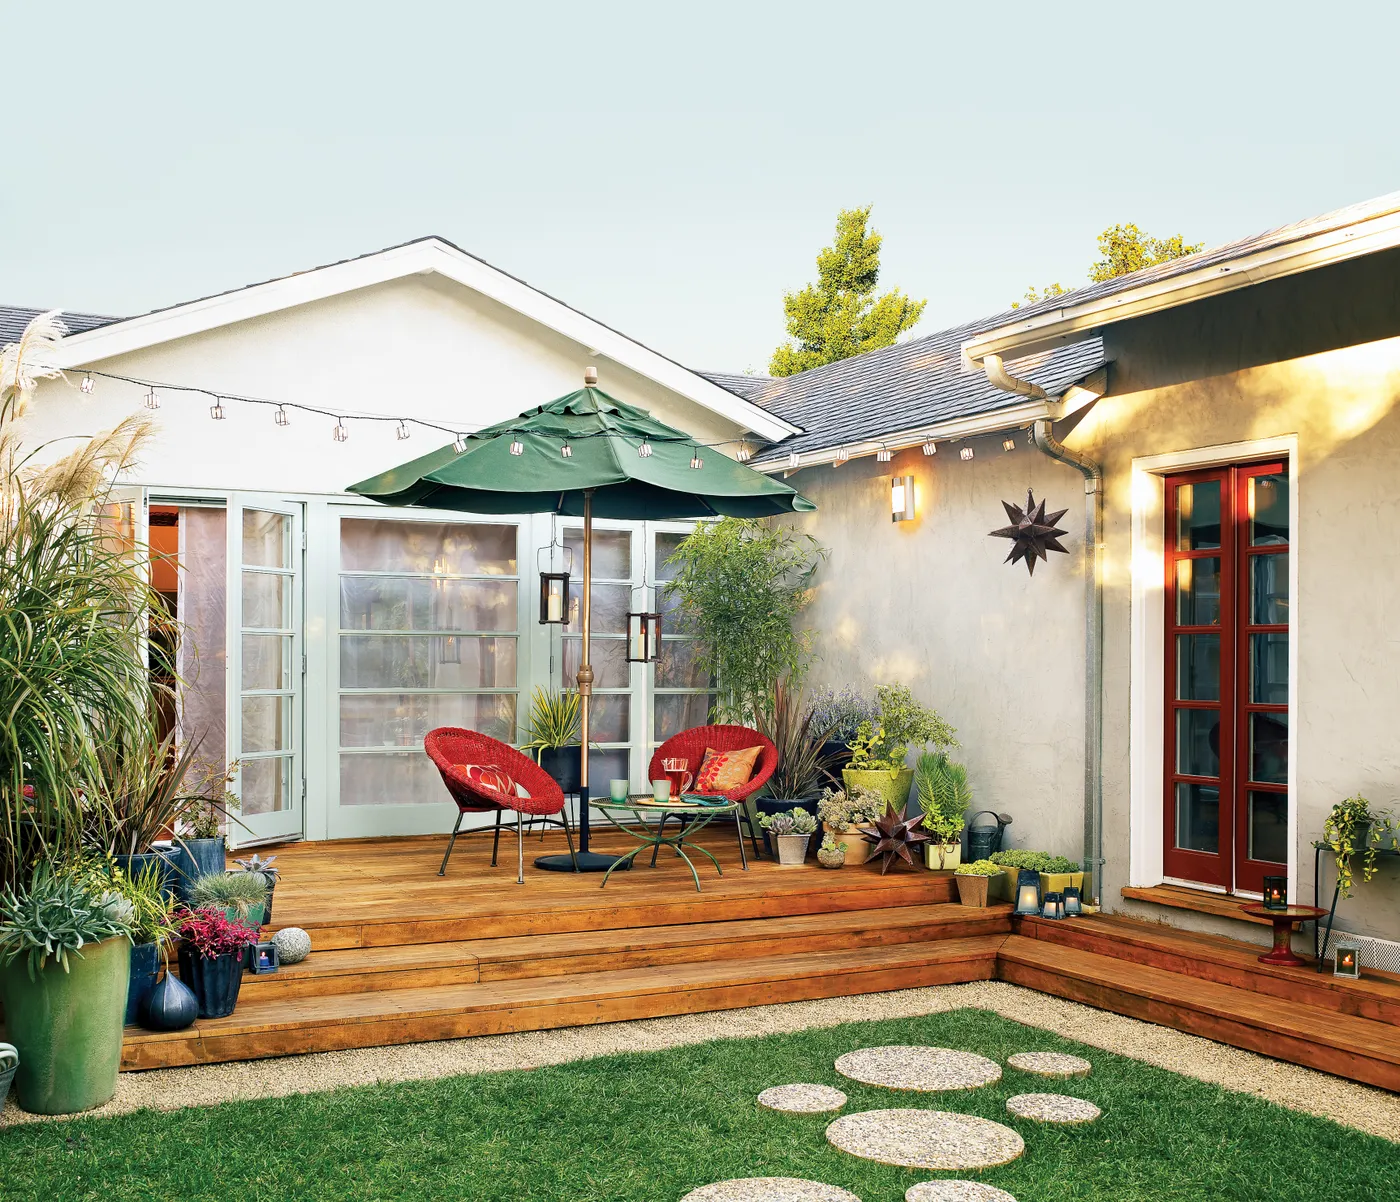
19. Brighten a Split-Level Deck with Red Wicker Chairs
The formula for this vibrant space is simple: 60% warm neutrals + 30% varied greens + 10% bold color. The brown wood deck and light stucco of the house provide a calm, neutral canvas. The abundance of potted plants and surrounding lawn add life and texture. Then, the bold red chairs deliver that final 10% of energy, creating a focal point and injecting personality into the scene. Take away the red, and the space is pleasant but forgettable.
|
📋 Copy HEX 🔗 Share |
When you have a deck with multiple levels, use potted plants to soften the transitions. Place taller plants at the corners where levels meet and use smaller pots along the edges of the steps. This breaks up the hard architectural lines of the deck, blurs the distinction between the levels, and makes the whole structure feel more integrated with the surrounding garden.
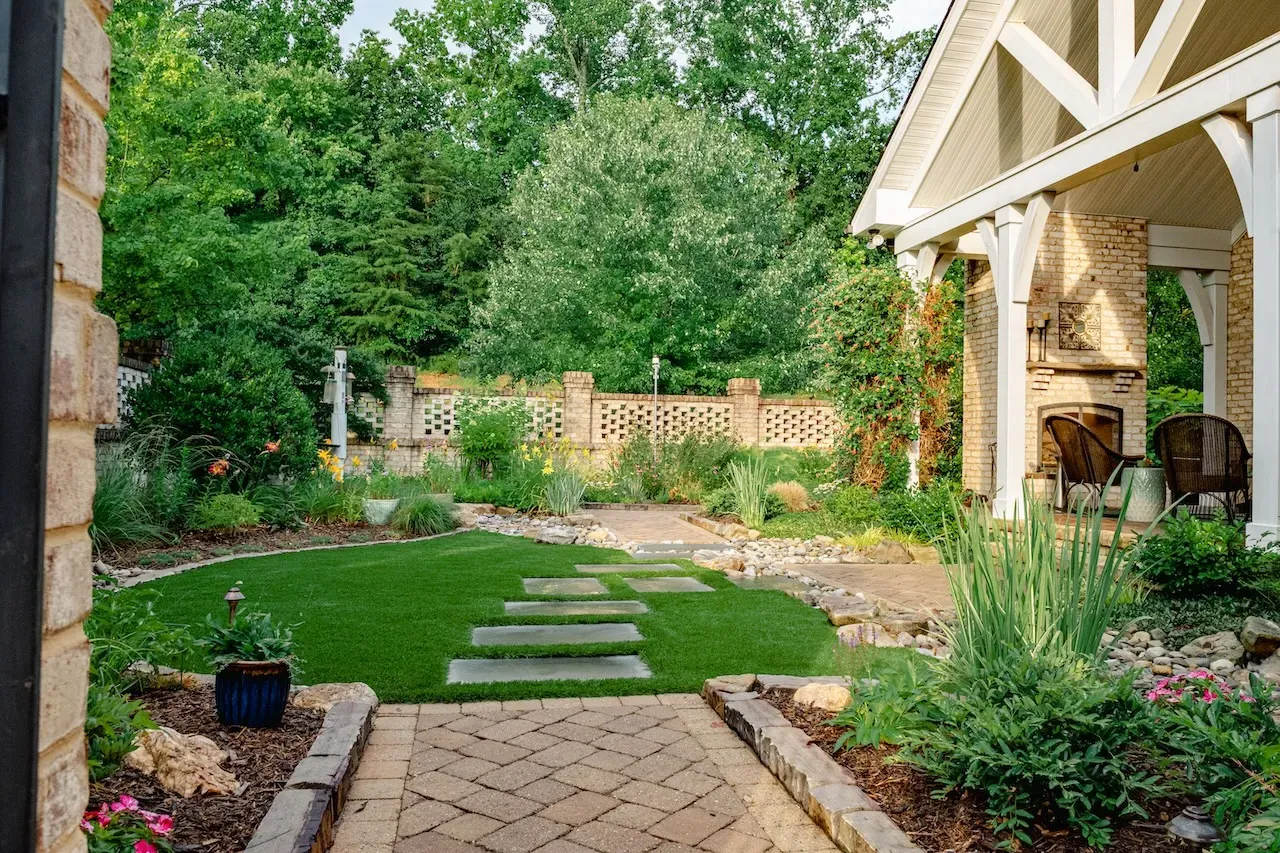
20. Define a Lush Yard with a Herringbone Brick Path and Outdoor Fireplace
The herringbone brick pathway is the single element that lends this yard its timeless, established character. While the stepping stones in the lawn are functional, the patterned brick path feels substantial and intentional. It draws the eye through the landscape towards the covered patio and fireplace, creating a sense of journey and destination. The classic pattern adds texture and a touch of formality that elevates the entire design from a simple backyard to a curated garden.
|
📋 Copy HEX 🔗 Share |
An outdoor fireplace is a significant structural element, both visually and physically. To avoid it overwhelming your yard, it needs adequate breathing room. As a rule of thumb, this type of feature works best in yards that are at least 30 feet wide and 500 square feet total. You’ll need at least 10-12 feet of clear patio space in front of it for seating, plus safe clearance from any combustible structures or property lines.
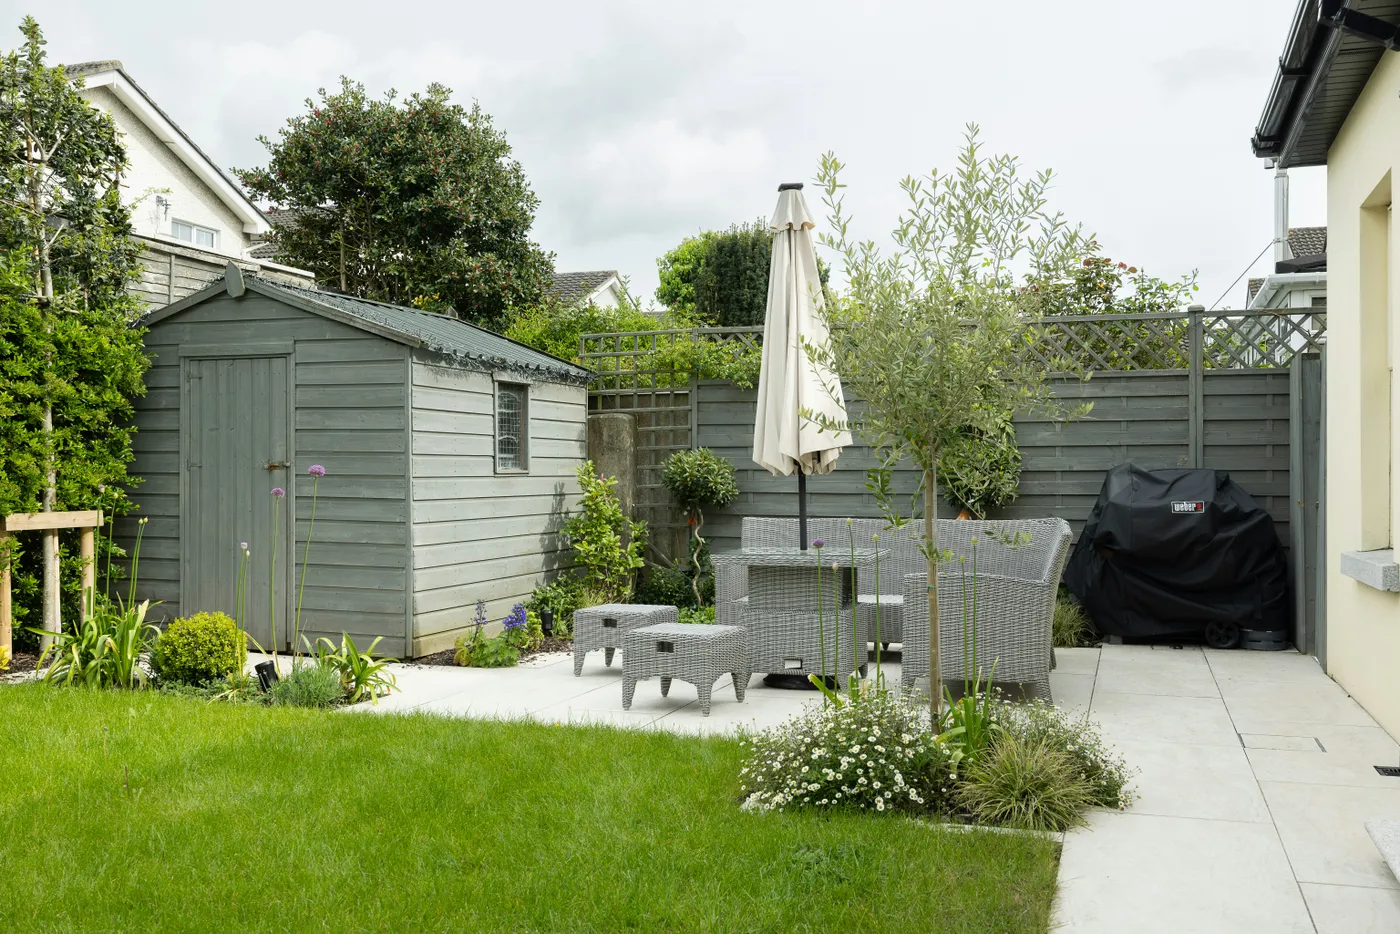
21. Coordinate a Tidy Backyard with a Gray Shed and Matching Furniture
This backyard feels so calm and put-together due to its disciplined, monochromatic color palette. Sticking to shades of gray—light gray on the shed, dark gray on the fence, and mid-tone gray on the wicker furniture—creates a sophisticated and cohesive look. The repetition of color connects the functional storage area (shed) with the leisure area (patio), making the entire space feel like one unified design rather than separate, disjointed parts. The limited palette also allows the green of the lawn and plants to really pop.
|
📋 Copy HEX 🔗 Share |
This is a fantastic budget-friendly alternative to a design with custom elements, like the built-in bench in Idea #1. A pre-fabricated shed from a home improvement store ($800-$2,000) and a mid-range patio set from Wayfair or Target ($600-$1,500) give you a highly functional and stylish space. The key is to coordinate the colors. You can even paint an existing shed and fence to match new furniture, achieving this cohesive look for just the cost of paint.
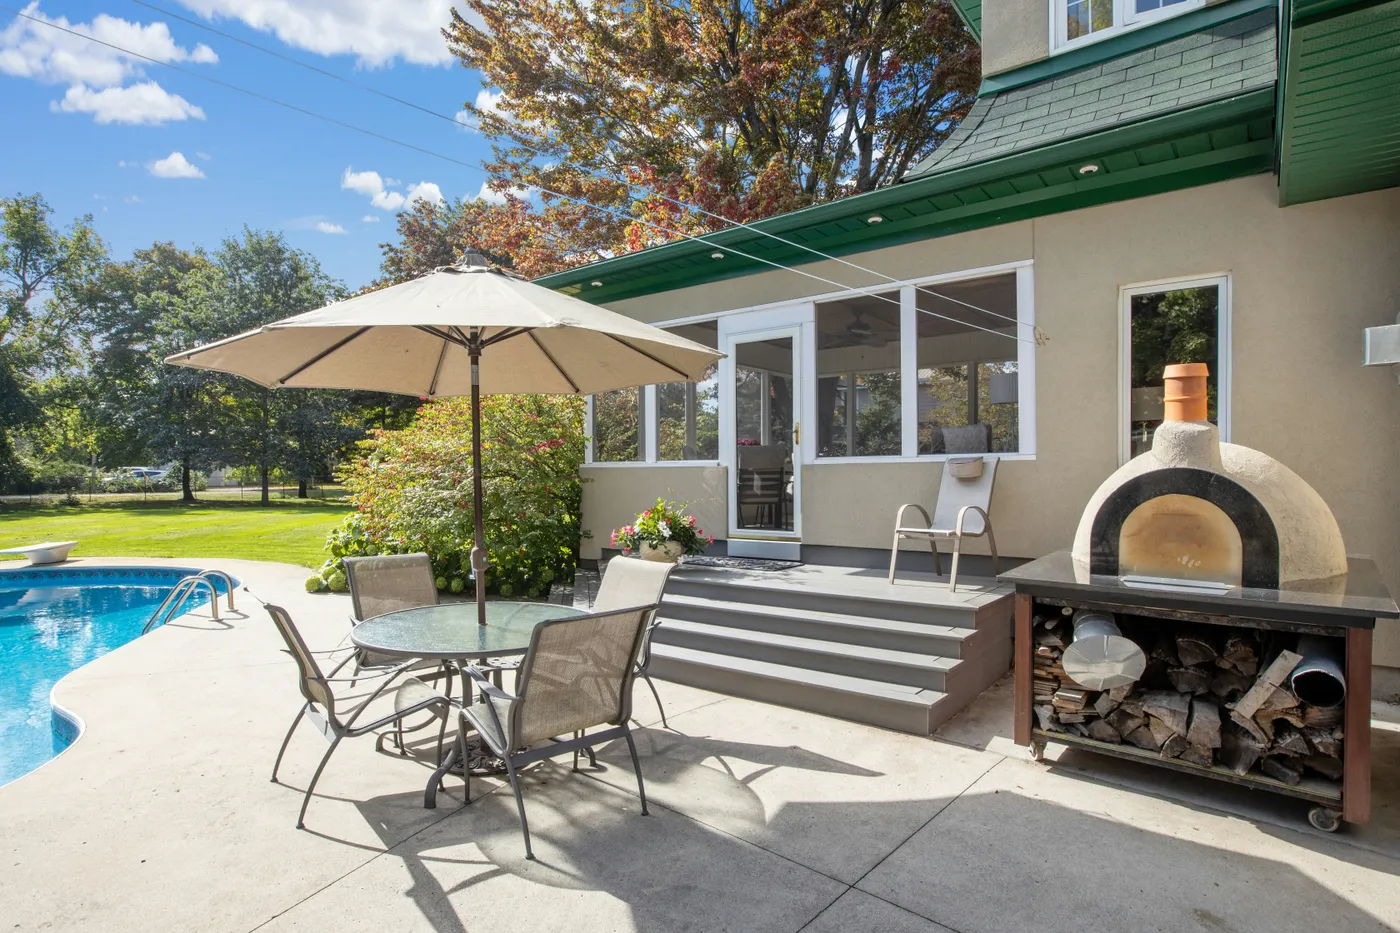
22. Add Poolside Dining and a Built-in Pizza Oven
A wood-fired pizza oven is an incredible feature, but be brutally honest with yourself about your lifestyle before you invest. They aren’t as simple as firing up a gas grill. They require a significant preheating time (often 60-90 minutes) to get the stone hot enough, and you’ll need a steady supply of seasoned hardwood. If you’re a spontaneous, last-minute cook, you might find you don’t use it as often as you imagine. It’s a commitment, not just a cooking appliance.
|
📋 Copy HEX 🔗 Share |
Installing a built-in pizza oven is a serious investment. Let’s look at the numbers for a setup like this:
- Pizza Oven Kit (refractory dome, floor, etc.): $2,000 – $5,000
- Counter/Base Construction (materials & labor): $3,000 – $7,000
- Patio Dining Set (table, chairs, umbrella): $800 – $2,500
- TOTAL: $5,800 – $14,500
- Budget Alternative: You can get fantastic results from a portable countertop pizza oven (like an Ooni or Gozney) for $400 – $800, placed on a sturdy outdoor prep table.
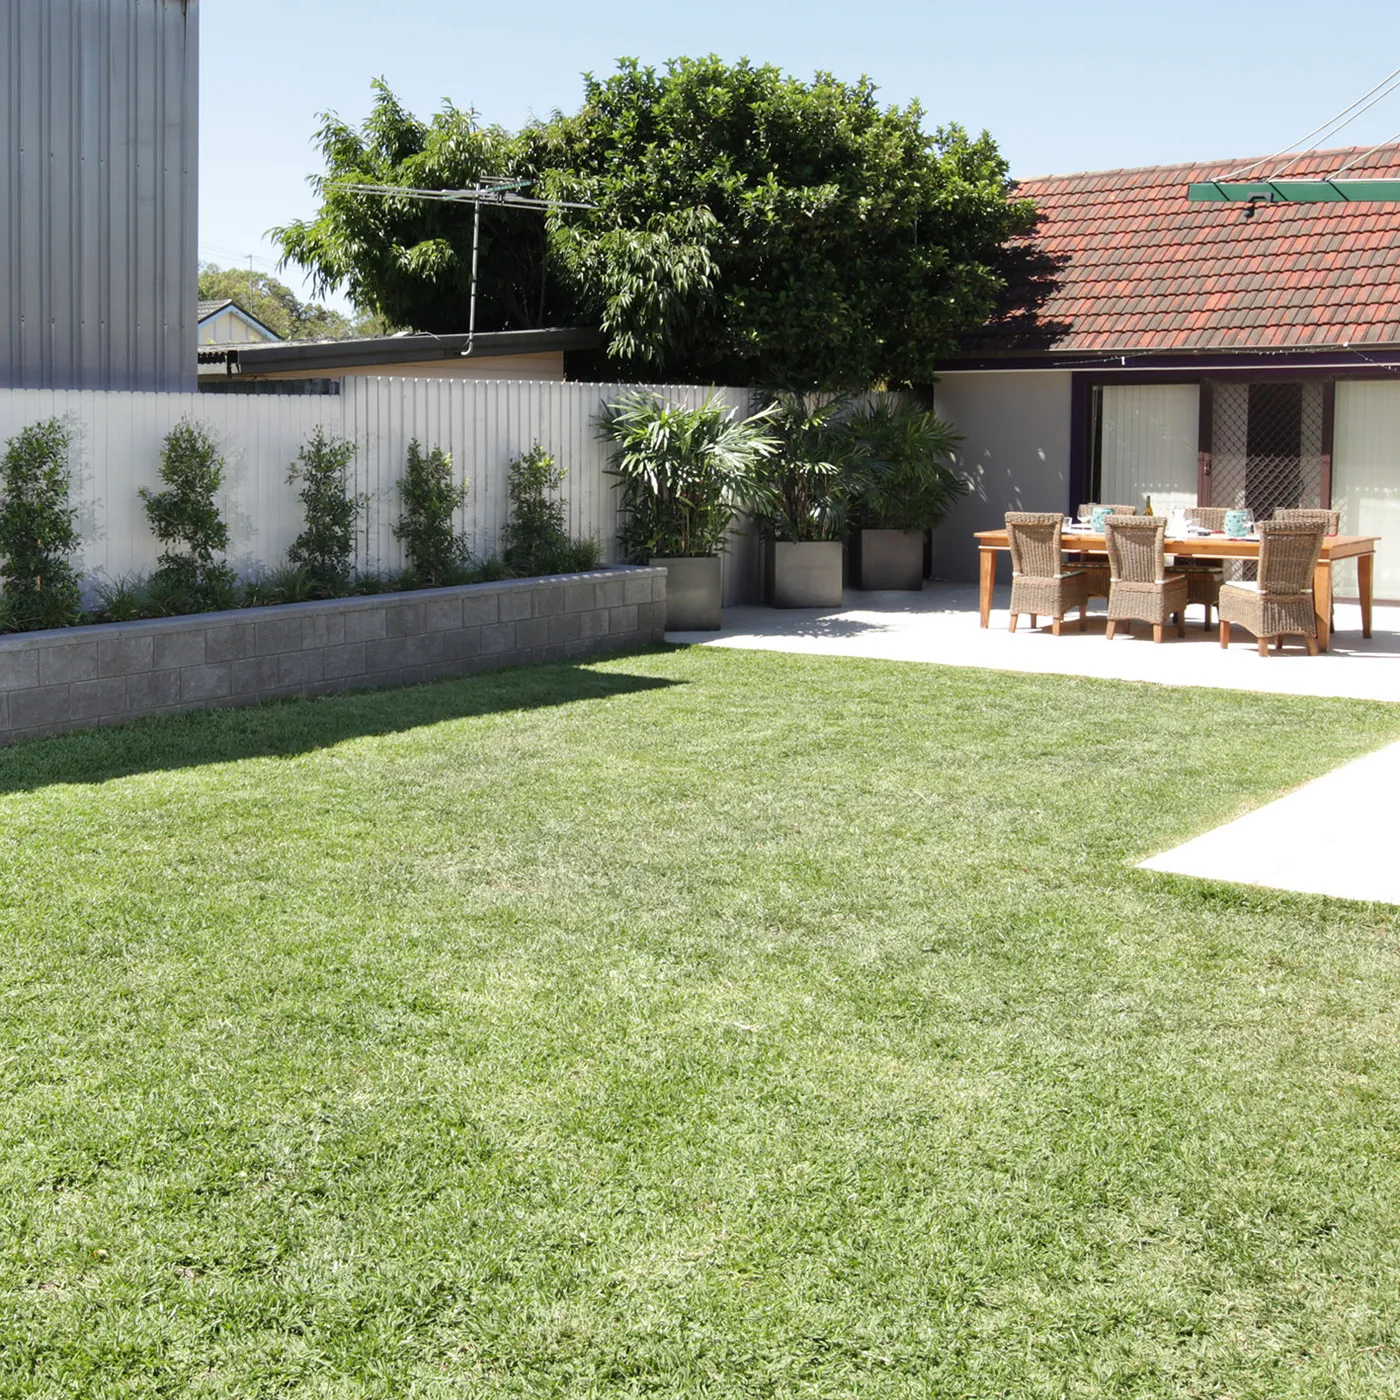
23. Use a Concrete Block Planter Wall for a Modern Border
If you choose to use corrugated metal for fencing, make sure the corrugations run horizontally, not vertically. This is a key detail that shifts the look from industrial shed to modern architectural feature. The horizontal lines trick the eye into seeing a wider, more expansive space, which is a huge benefit in a small backyard. It creates a dynamic, linear pattern that works beautifully as a backdrop for plants.
|
📋 Copy HEX 🔗 Share |
You can create a simple, modern planter wall like this with dry-stacked concrete blocks—no mortar required.
- Lay a Level Foundation: Dig a shallow trench and fill it with a few inches of compacted gravel to create a stable, level base.
- First Course: Lay your first layer of blocks on the gravel, ensuring they are level both front-to-back and side-to-side.
- Stagger the Joints: For the second course, start with a half-block so the joints are staggered, just like a brick wall. This adds strength.
- Backfill and Secure: As you build, fill the block cores and the space behind the wall with gravel for drainage. For walls over 2 feet, consider using a construction adhesive between layers.
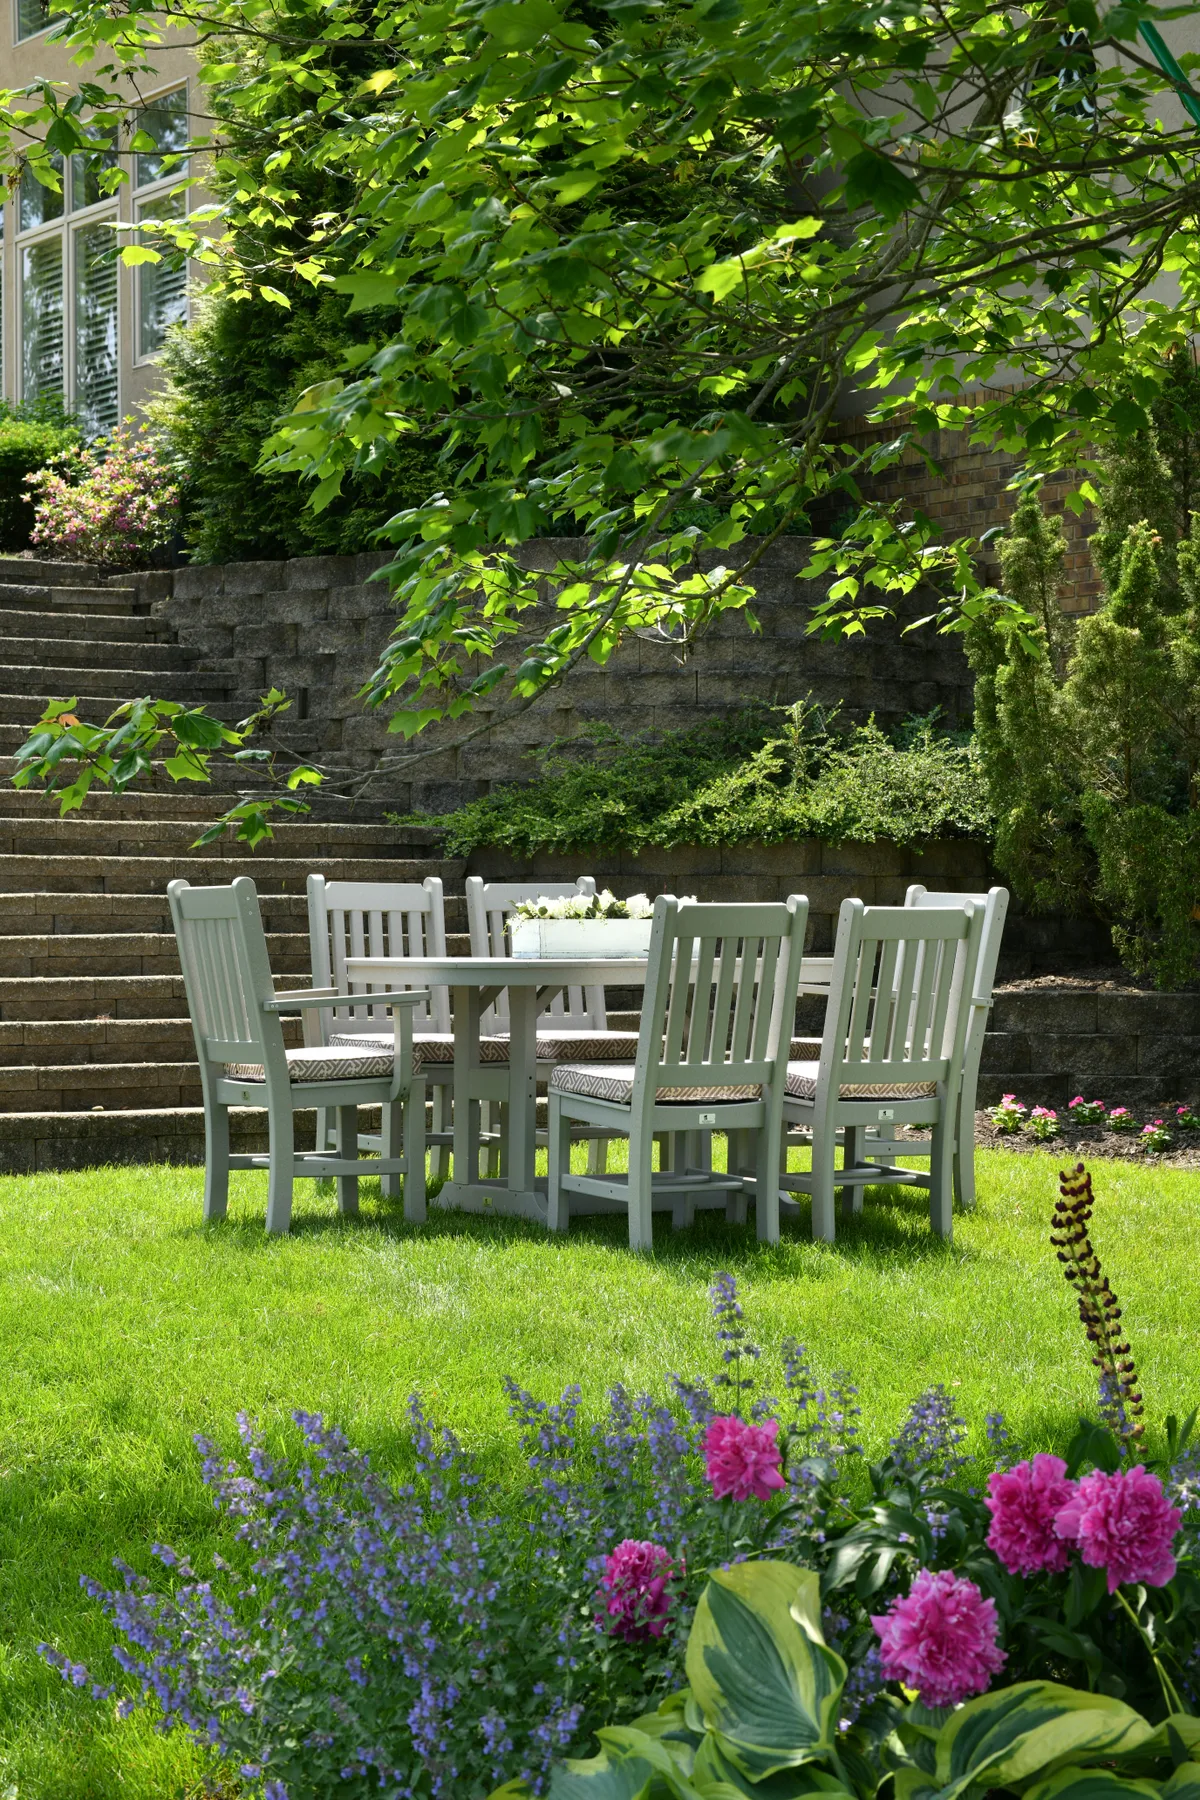
24. Place Your Dining Set Directly on the Lawn for an ‘Al Fresco’ Feel
This setup works because it’s charmingly unexpected. We’re conditioned to see outdoor furniture on a hard patio, so placing it directly on the grass creates an instant garden party or picnic vibe. It feels romantic and carefree. The simple, light gray dining set doesn’t try to compete with its surroundings; it allows the vibrant green of the lawn and the texture of the stone wall to be the main attractions. It’s about creating a moment, not a permanent dining room.
|
📋 Copy HEX 🔗 Share |
While this looks absolutely dreamy for a photoshoot or a special event, it’s not a practical long-term solution. The legs of the chairs and table will sink into the soft turf, making them wobbly and leaving indentations in your lawn. The grass underneath the furniture will eventually die from lack of sunlight. And, of course, you’ll have to move the entire set every single time you need to mow the lawn. Enjoy this look for a party, but plan for a proper patio for everyday use.
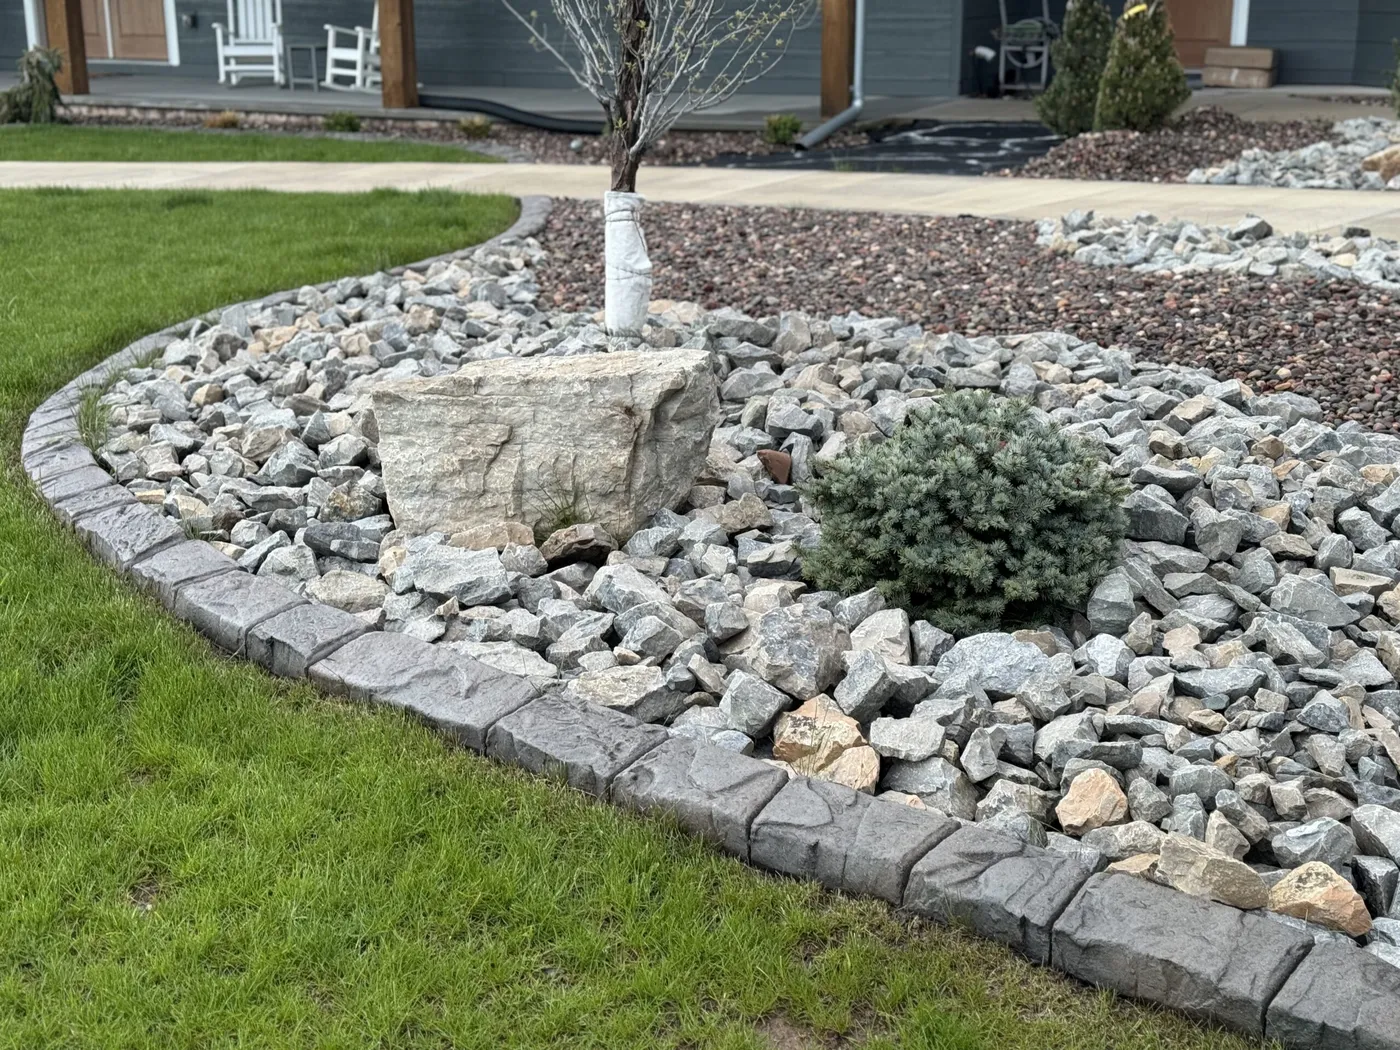
25. Design a Low-Maintenance Rock Bed with Concrete Curb Edging
Low-maintenance is not the same as no-maintenance. While you won’t be mowing or mulching, a rock bed requires its own type of upkeep. Weeds will eventually find their way through the landscape fabric, and you’ll have to pull them by hand. Leaves and other organic debris will collect on top of the rocks and need to be removed with a leaf blower to prevent them from breaking down into soil. The crisp look depends on it staying clean.
|
📋 Copy HEX 🔗 Share |
Custom-poured concrete curbing can be expensive, often running $10-$20 per linear foot. You can achieve a similar clean edge for much less. Simple black plastic landscape edging costs less than $1 per foot and is easy to install yourself. For a more substantial look, consider pre-cast concrete scallop or brick-look edgers from a big box store. They provide a solid border at a fraction of the cost of custom curbing.
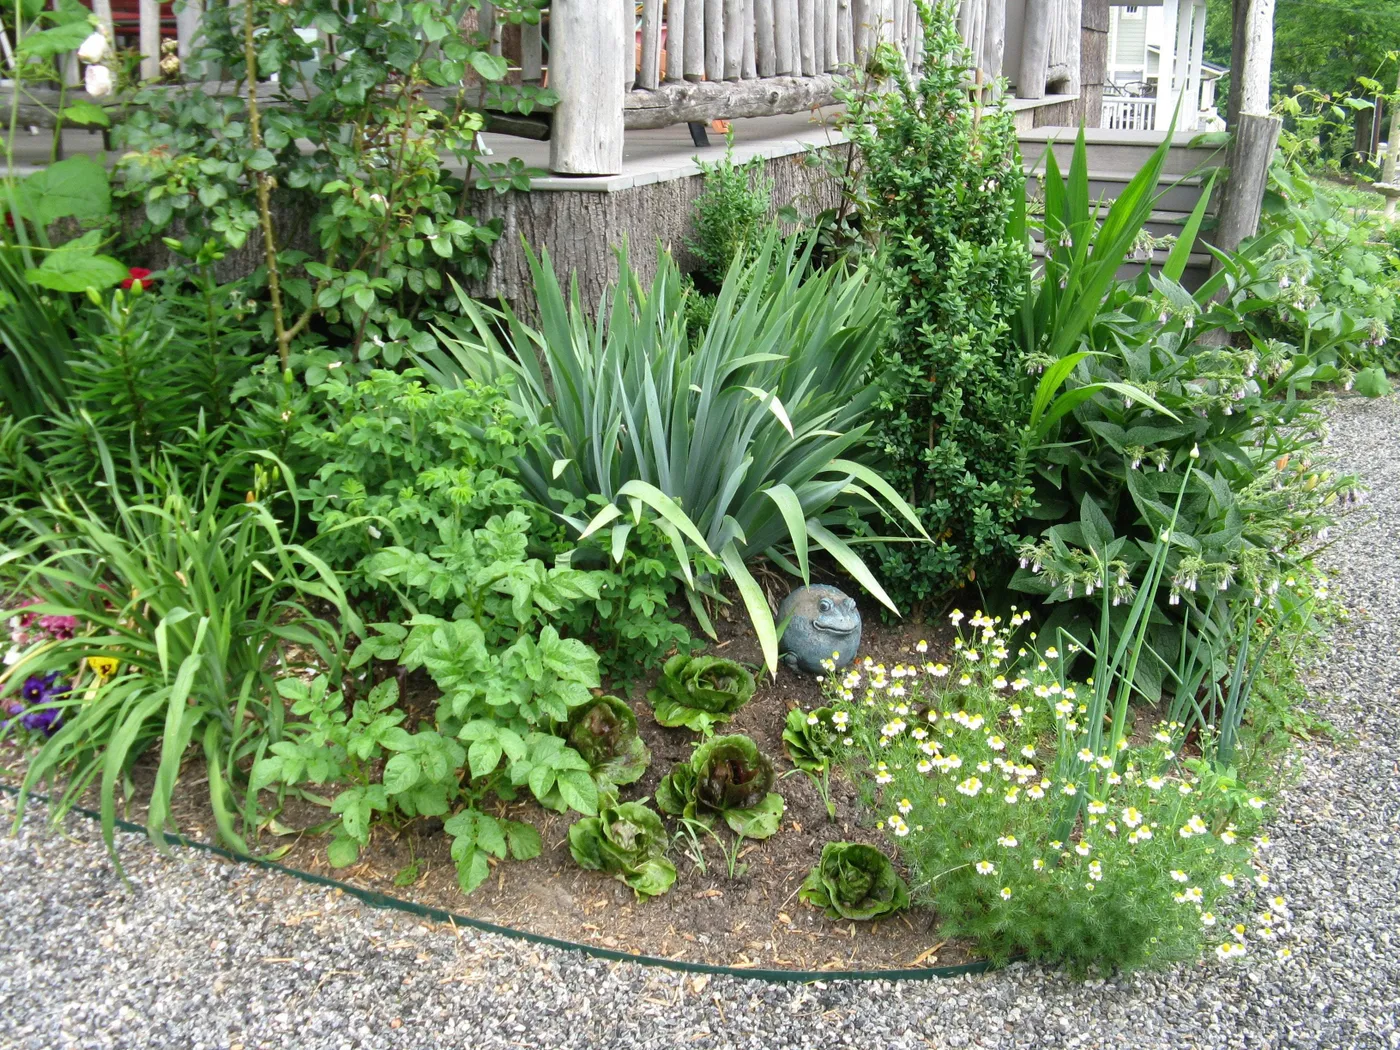
26. Soften an Entrance with a Curved Gravel Path and Rustic Log Posts
The curve in the gravel path is the most important detail in this small space. A straight, rigid path would feel harsh and utilitarian. The gentle curve, however, feels organic and inviting. It slows you down and encourages your eye to wander over to the garden bed. In landscape design, curves create a sense of mystery and make a space feel larger because you can’t see the entire path from the starting point. It turns a simple walkway into a small journey.
|
📋 Copy HEX 🔗 Share |
Do not skip the landscape fabric under your gravel path. It’s a non-negotiable step for long-term success. A high-quality, permeable geotextile fabric does two critical things: it prevents weeds from growing up from the soil below, and it stops the gravel from slowly sinking into the dirt over time. Without it, your pristine path will become a weedy, muddy mess within a season or two. It’s the unseen foundation that makes the whole look work.
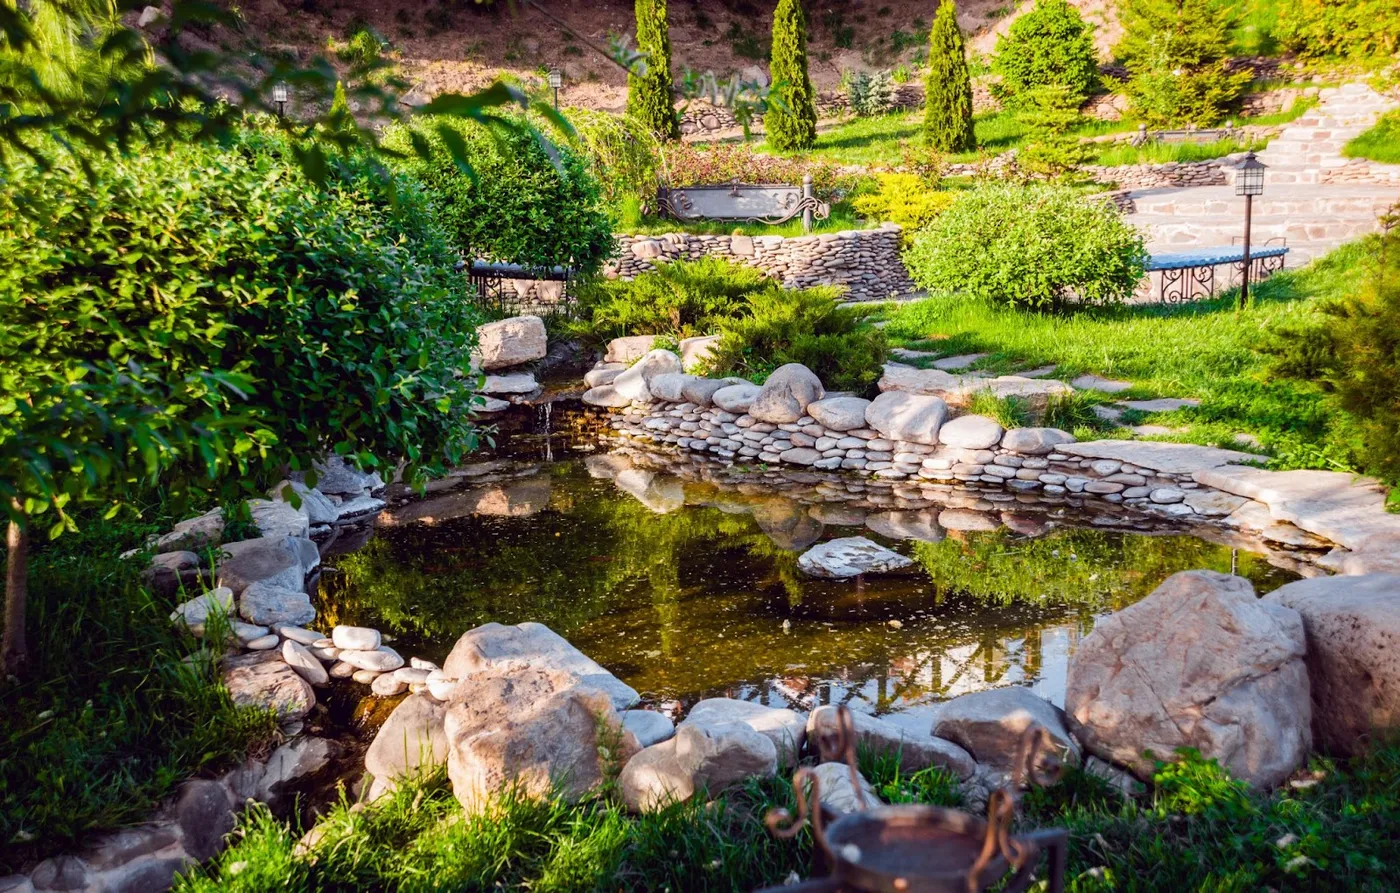
27. Create a Naturalistic Layered Pond with River Stones
This pond feels so natural because it expertly mimics how water exists in nature. The designer used a wide variety of rock sizes, from large boulders to define the edge to smaller river pebbles that line the shallows. This variation is crucial—a ring of uniform-sized rocks always looks artificial. The lush plantings are allowed to grow right up to and even into the water’s edge, further blurring the line between the man-made feature and the surrounding garden. This is a much more organic take than the modern basin in Idea #3.
|
📋 Copy HEX 🔗 Share |
A pond is a miniature ecosystem, and it requires work to keep it balanced and healthy. Be prepared for regular tasks like cleaning out the pump filter, skimming leaves from the surface, managing algae growth (especially in spring), and topping off the water level. Ponds can also be a safety concern if you have small children or pets, so you may need to consider fencing or a safety grate. It’s a beautiful hobby, but it is definitely a hobby, not just a landscape feature.
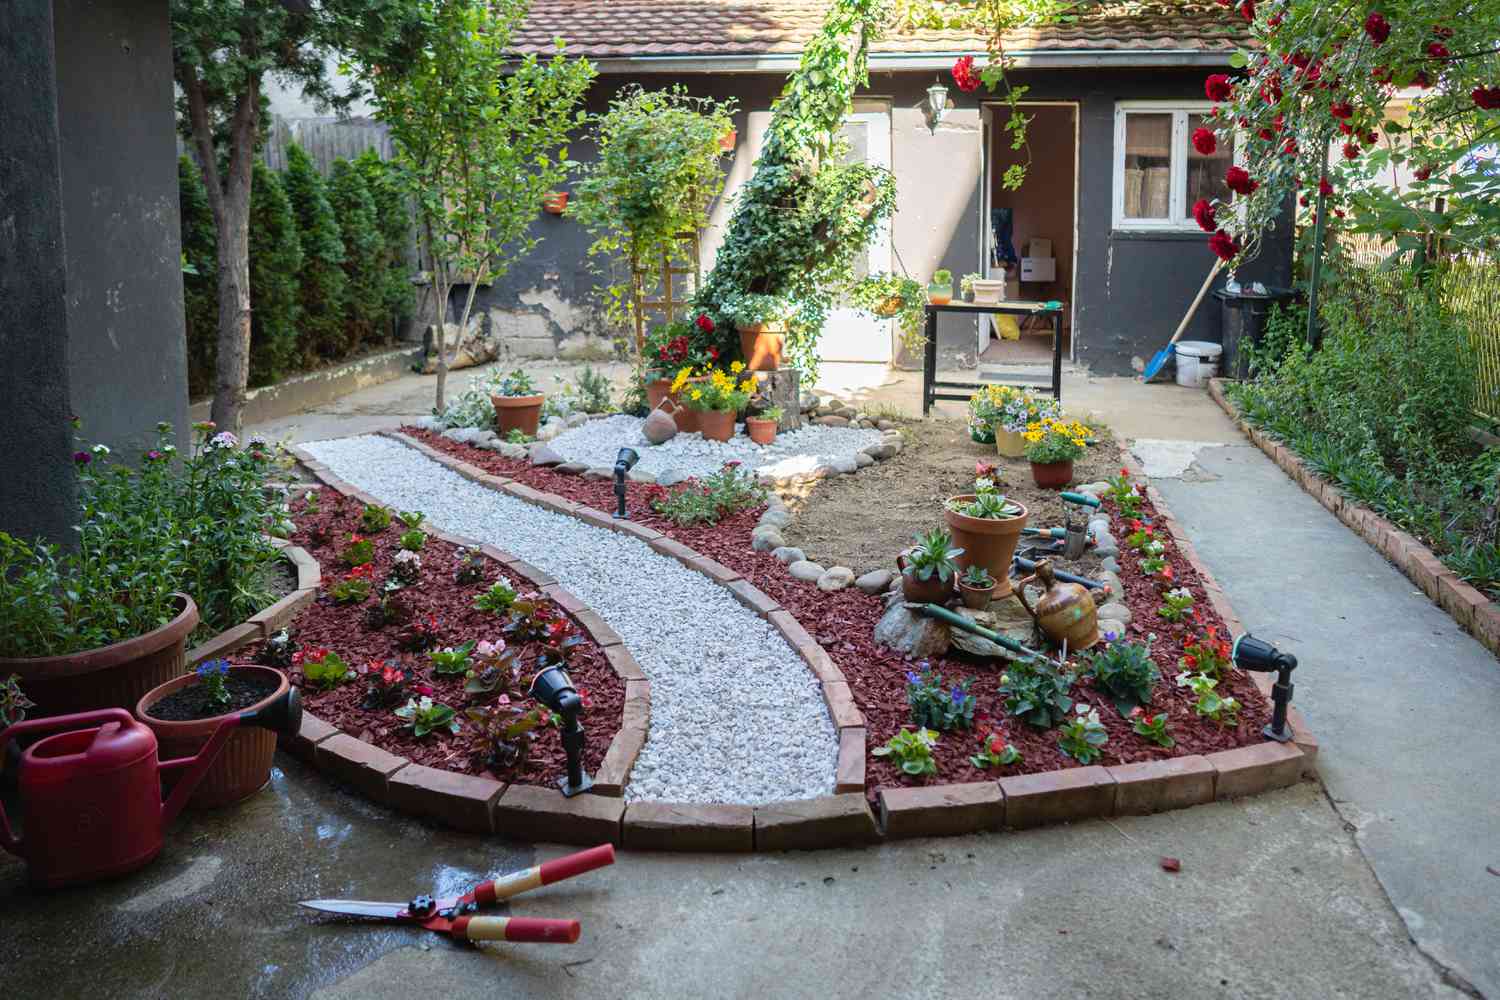
28. Edge a Curved Gravel Path with Red Bricks for a Classic Look
This charming garden follows a classic formula for cottage style: 40% soft, mounding plantings + 30% warm, traditional materials + 30% neutral hardscape. The flowers and foliage provide the lushness. The red brick edging and terracotta pots bring in warmth and a sense of history. The light gray gravel path provides a neutral, textural base that keeps the look from becoming too busy. It’s a perfect balance of structured and unstructured elements.
|
📋 Copy HEX 🔗 Share |
Setting brick edging is a satisfying project that creates a clean, timeless border for your garden path. Here’s the quick version:
- Dig a Trench: Use a flat-edged spade to dig a trench along your path that is slightly wider than your brick and about 4-5 inches deep.
- Add a Base: Fill the trench with 2 inches of paver base or sand and compact it firmly with a tamper or a piece of 2×4.
- Set the Bricks: Place your bricks one by one on the sand base, tapping them into place with a rubber mallet. Use a level to ensure they are even with each other.
- Backfill: Once all the bricks are set, sweep more sand into the joints and backfill with soil or mulch on the garden side to lock them in place.
Your Backyard Story Begins Now
With these 28 ideas, your small backyard doesn’t have to be an afterthought—it can be the most loved room of your house. Pick one detail that sparked your imagination and start there. The perfect outdoor oasis is just a few decisions away. Don’t forget to save your favorite ideas to your Pinterest board to keep the inspiration flowing!