You know that feeling when you finally find the deck furniture layout that looks exactly right for your space, only to realize you have no idea how to pull it off? We’ve all been there, endlessly saving pins and screenshots. Well, your search stops here.
After filtering through hundreds of options across Crate & Barrel, Pottery Barn, and Wayfair, we narrowed it down to the looks that actually deliver. We’re covering everything from expansive modern layouts to cozy, natural nooks, with price points from around $800 to over $12,000.
Inside, you’ll find 30 distinct, real-home deck layouts to inspire your own outdoor refresh. More and more, we’re treating our outdoor spaces as true extensions of our homes, so getting the flow and function right is key for 2026. And stay until the end—we break down the most common mistakes that can ruin these looks.
📌 Save this to Pinterest for later—you’ll want to revisit these ideas.
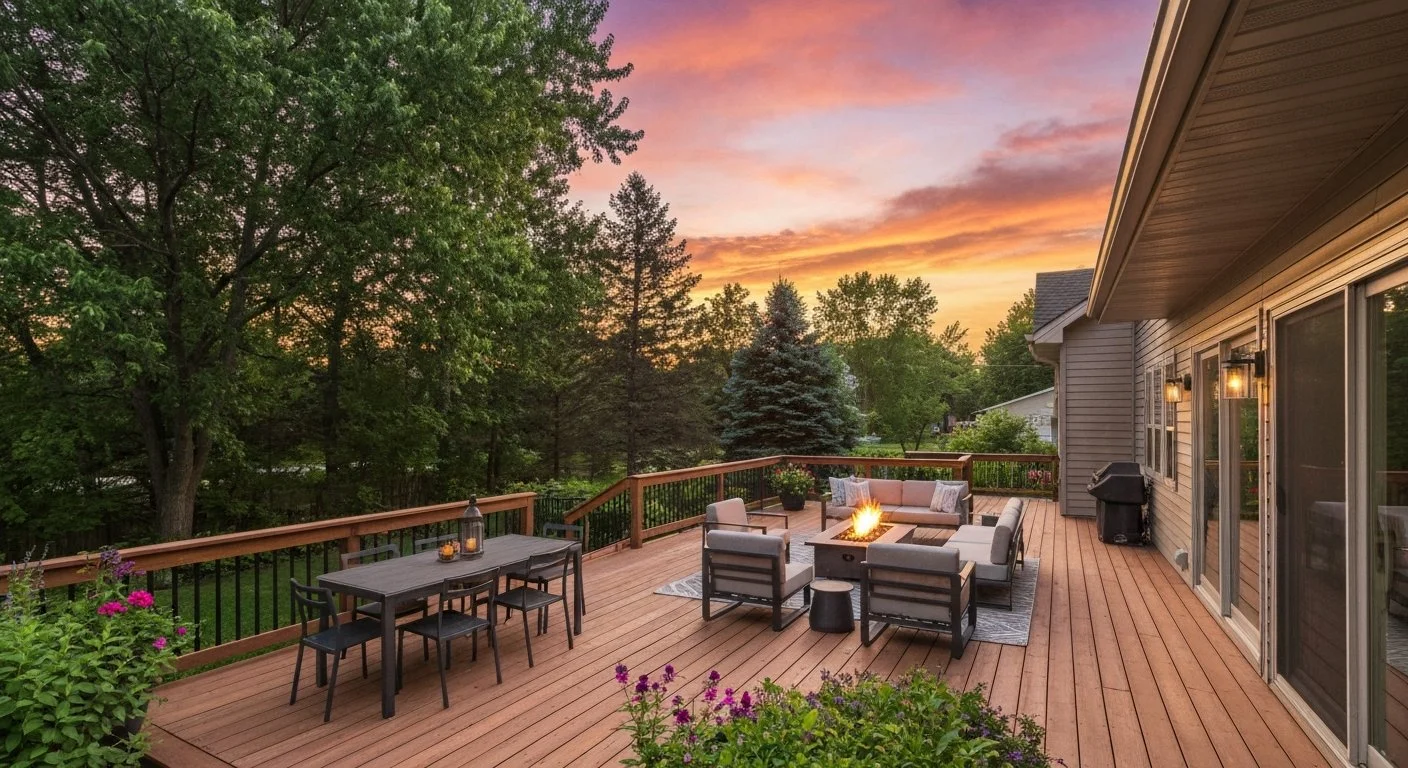
1. Spacious Deck with Distinct Dining and Fire Pit Lounge Zones
Creating a multi-zone deck like this involves some key investments. The fire pit lounge is the main event, followed by the dining set. Expect costs to vary based on brand and material quality.
- Main Furniture (Sectional, Dining Set): $4,000 – $9,500
- Fire Pit Table: $800 – $2,500
- Textiles (Cushions, Pillows): $500 – $1,200
- Lighting & Decor (Sconces, etc.): $300 – $800
- TOTAL: $5,600 – $14,000
Budget alternative: Source a similar sectional from a big-box store and find a dining set on Facebook Marketplace. You could achieve a comparable vibe for $2,500 – $5,000.
This layout succeeds because it clearly defines separate ‘rooms’ on a single surface. The large sectional carves out a cozy conversation pit around the fire, physically and visually separating it from the more formal dining area. The use of a consistent color palette—dark gray metal and neutral cushions—across both zones makes the entire deck feel cohesive, not chaotic. Finally, the low profile of the furniture preserves the stunning sunset view over the forest, ensuring the landscape remains the star of the show.
2. L-Shaped Sectional and Lounge Chairs on a Waterfront Deck
The single element that makes this deck work is the clear glass railing. Without it, the entire experience would be compromised. A traditional wood or metal railing, no matter how stylish, would create a visual barrier, chopping up the incredible water view. The glass panels allow the eye to travel seamlessly from the deck to the horizon, making the space feel infinitely larger and more luxurious. It’s an investment, but it’s the key to that feeling of being fully immersed in the landscape.
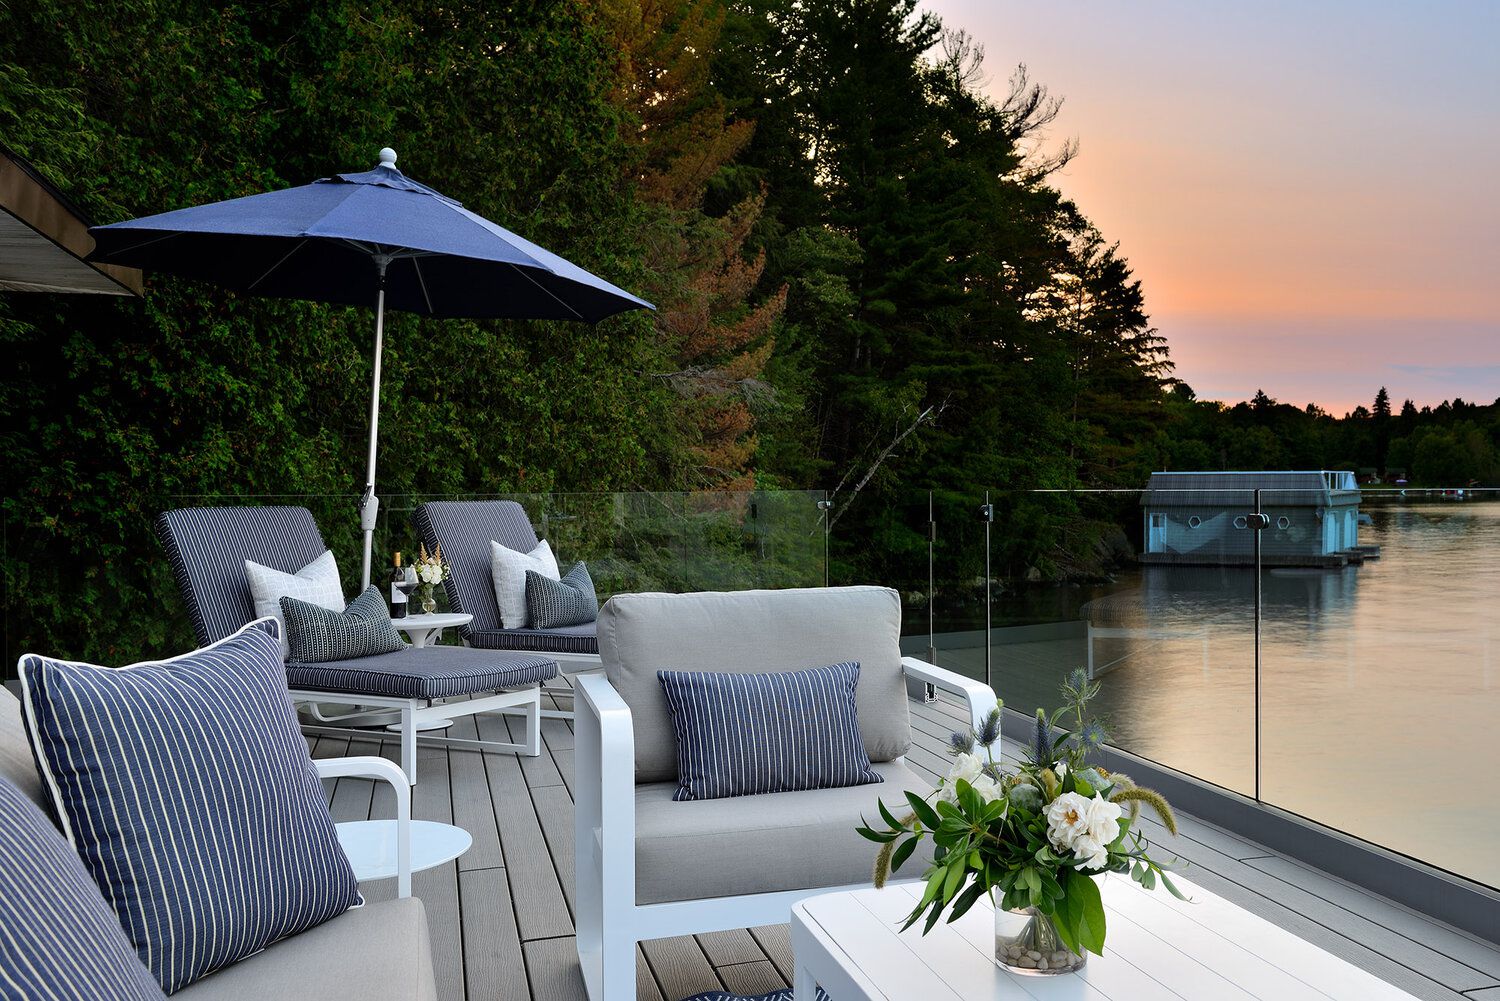
When working with an L-shaped sectional this large, always add at least two separate chairs to create a more welcoming conversation area. Placing chairs opposite the ‘L’ closes the loop and prevents the layout from feeling like a waiting room. Ensure there’s a minimum of 48 inches of walkway space behind the main sectional to allow for easy movement without anyone feeling trapped. For the coffee table, a round shape is perfect here, as it softens the hard angles of the sectional and improves traffic flow.
3. Multi-Level Deck with Gray and White Furniture Zones
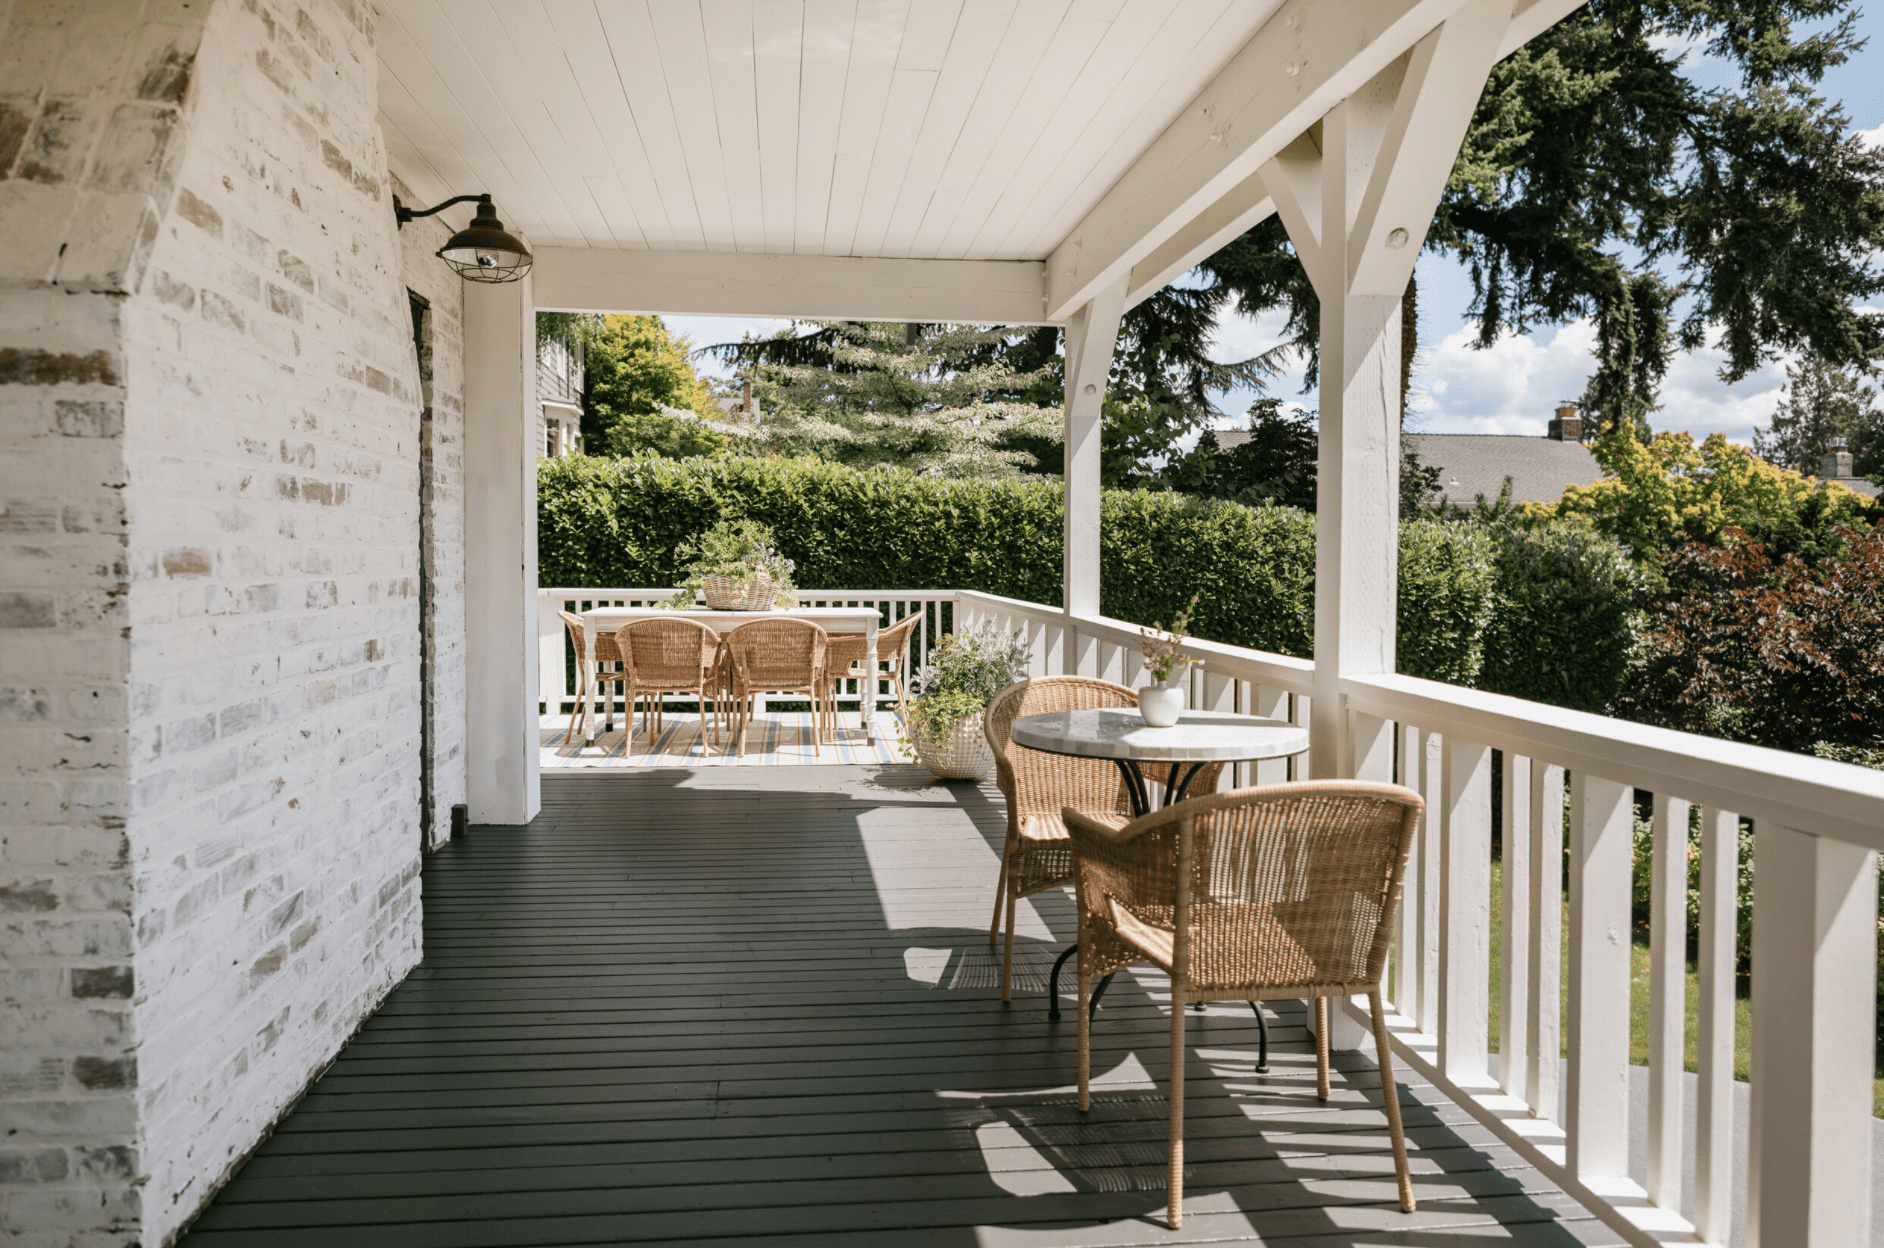
A multi-level deck like this is ideal for larger, sloped backyards where a single flat deck might feel awkward or require extensive grading. This design works best on a footprint of at least 300 square feet (e.g., 15×20 feet) to allow for distinct zones without feeling cramped. The upper level should be a minimum of 12×12 feet to comfortably house a dining set or lounge area. The change in elevation, even just one or two steps, is a powerful tool for creating psychological separation between activities, like dining versus relaxing in the Adirondack chairs.
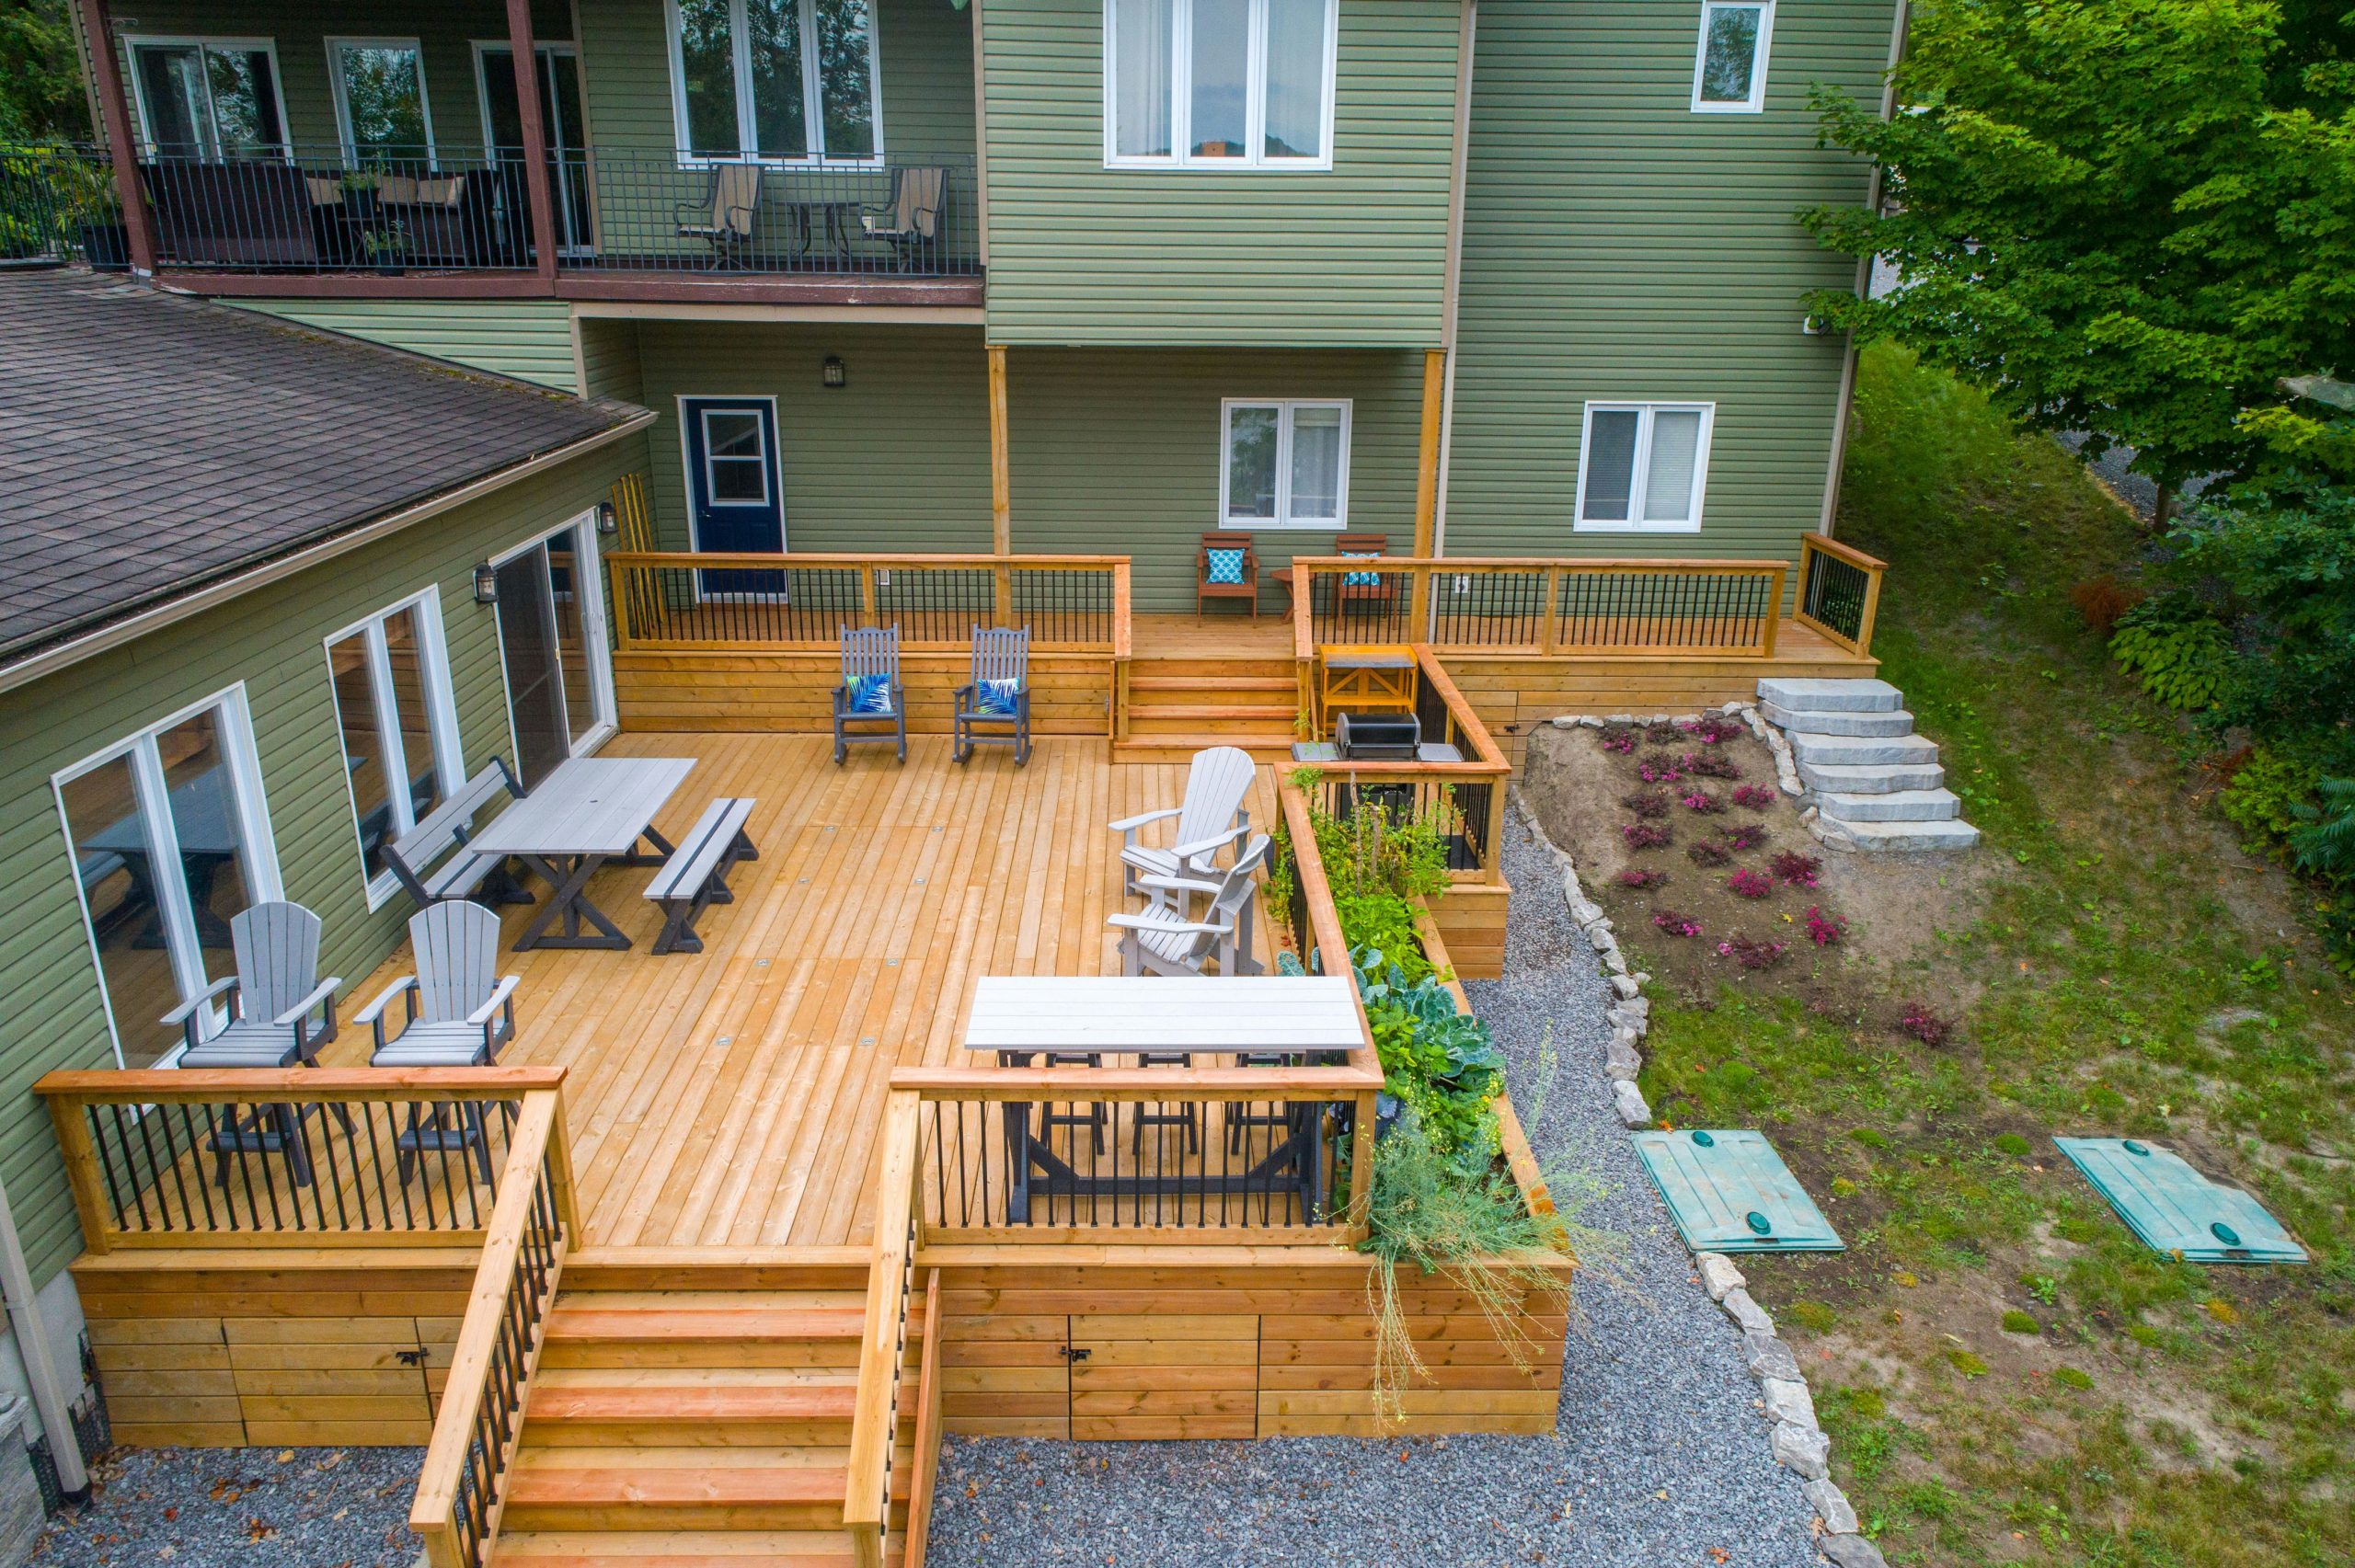
Let’s be honest: a multi-level wood deck is a significant maintenance commitment. You’re not just staining one flat surface; you’re dealing with stairs, multiple edges, and railings. Those built-in planters are gorgeous, but they can trap moisture against the wood, potentially accelerating rot if not properly constructed with drainage and waterproofing. Also, be mindful that multiple levels can be a challenge for guests with mobility issues or for families with very young children.
4. Four Adirondack Chairs on a Wet Deck Facing Misty Mountains
The formula here is pure, distilled tranquility. It’s about 70% natural view, 20% classic seating, and 10% minimalist structure. The power comes from what isn’t there: no busy patterns, no clutter, no competing elements. The four identical Adirondack chairs provide comfortable symmetry, while the clean lines of the black horizontal railing frame the misty mountain view like a piece of art. You could swap the wood chairs for a dark composite material or change the railing to a cable system, and the peaceful equation would still hold true.
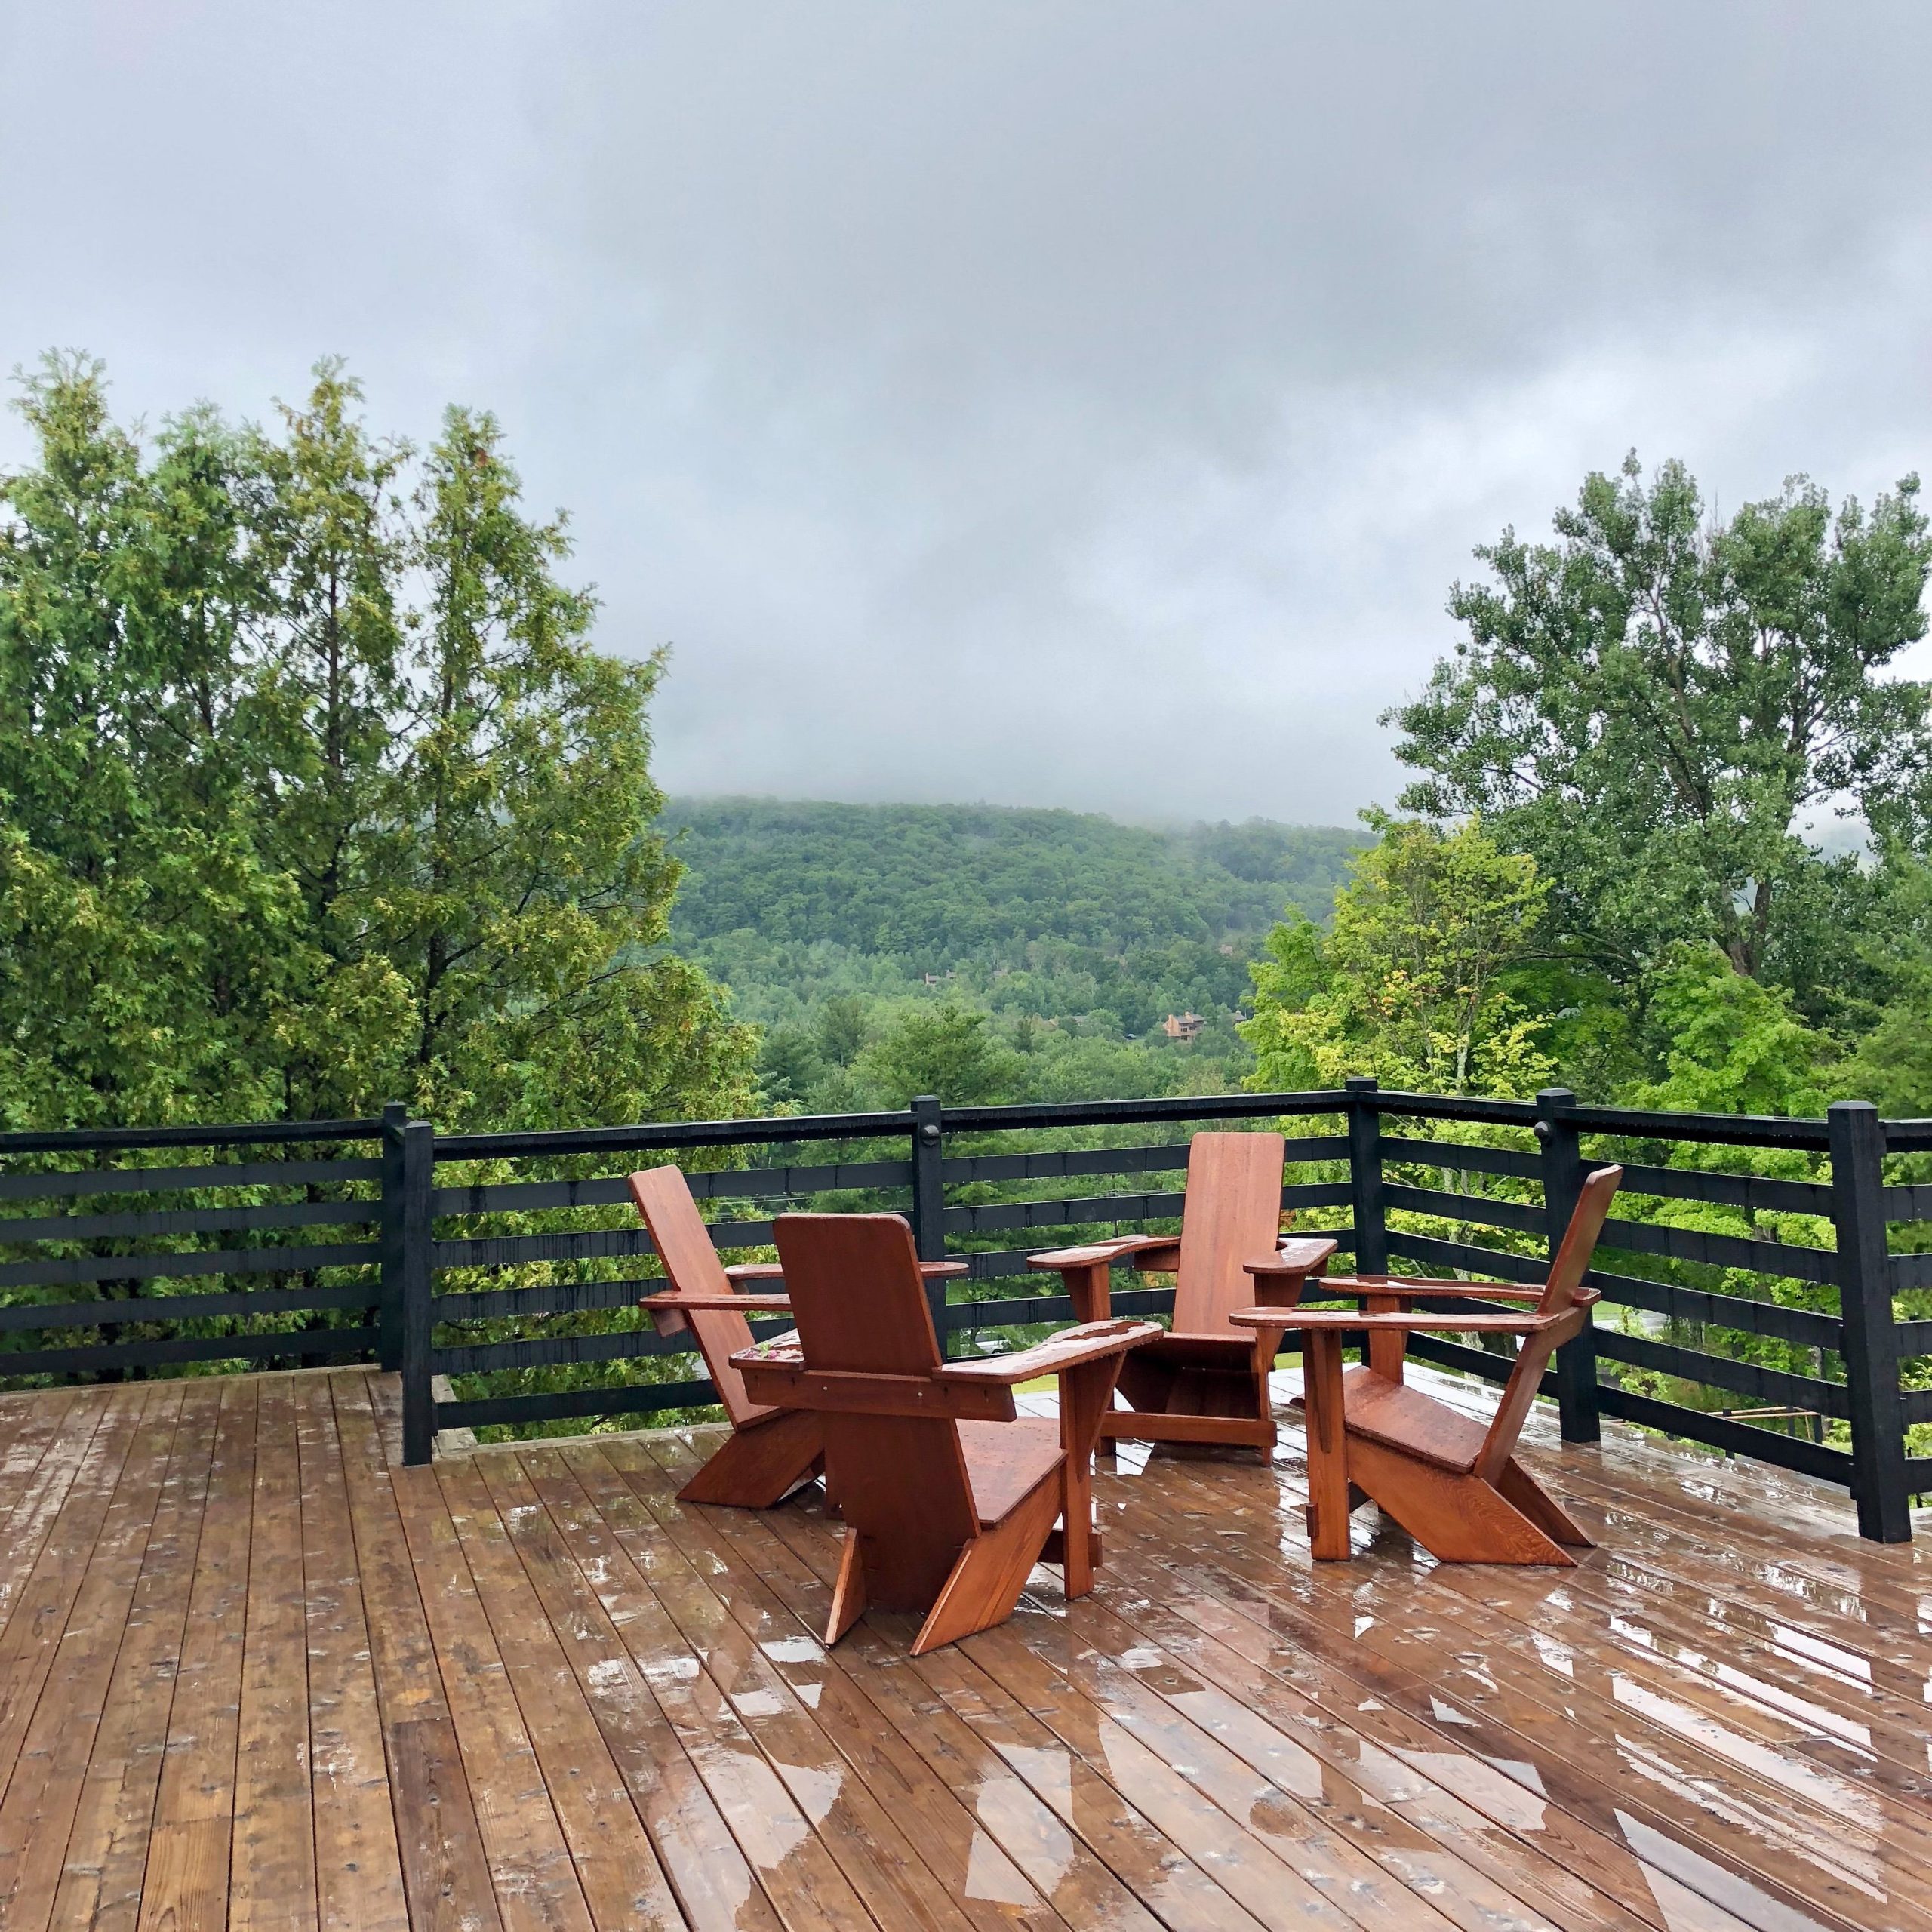
A wet, wooded environment means you’re fighting a constant battle with mildew, moss, and algae on that beautiful wood deck. To keep it looking good and, more importantly, safe to walk on, you’ll need to pressure wash it annually (gently!) and re-stain or reseal it every 2-3 years. The wooden Adirondack chairs will also require regular attention—either a yearly coat of protective sealant or acceptance of a weathered, gray patina over time. The black-painted railing will likely need touch-ups every few years to deal with chips and fading.
5. Modern Deck with Dining, Lounge, and Poolside Areas
This layout masters the art of zoning on a grand scale. It works because it assigns a clear purpose to each area while maintaining a unified aesthetic. The dining set is grouped under the umbrella, the sectional creates a dedicated conversation space, and the poolside loungers offer a spot for sunbathing. The repetition of the dark gray frames and light cream cushions across all three zones is the secret sauce. It tells your brain, ‘This all belongs together,’ creating a calm, resort-like feel instead of a jumble of disconnected furniture. This is a far more functional approach than what’s shown in Idea #1, tailored for poolside use.
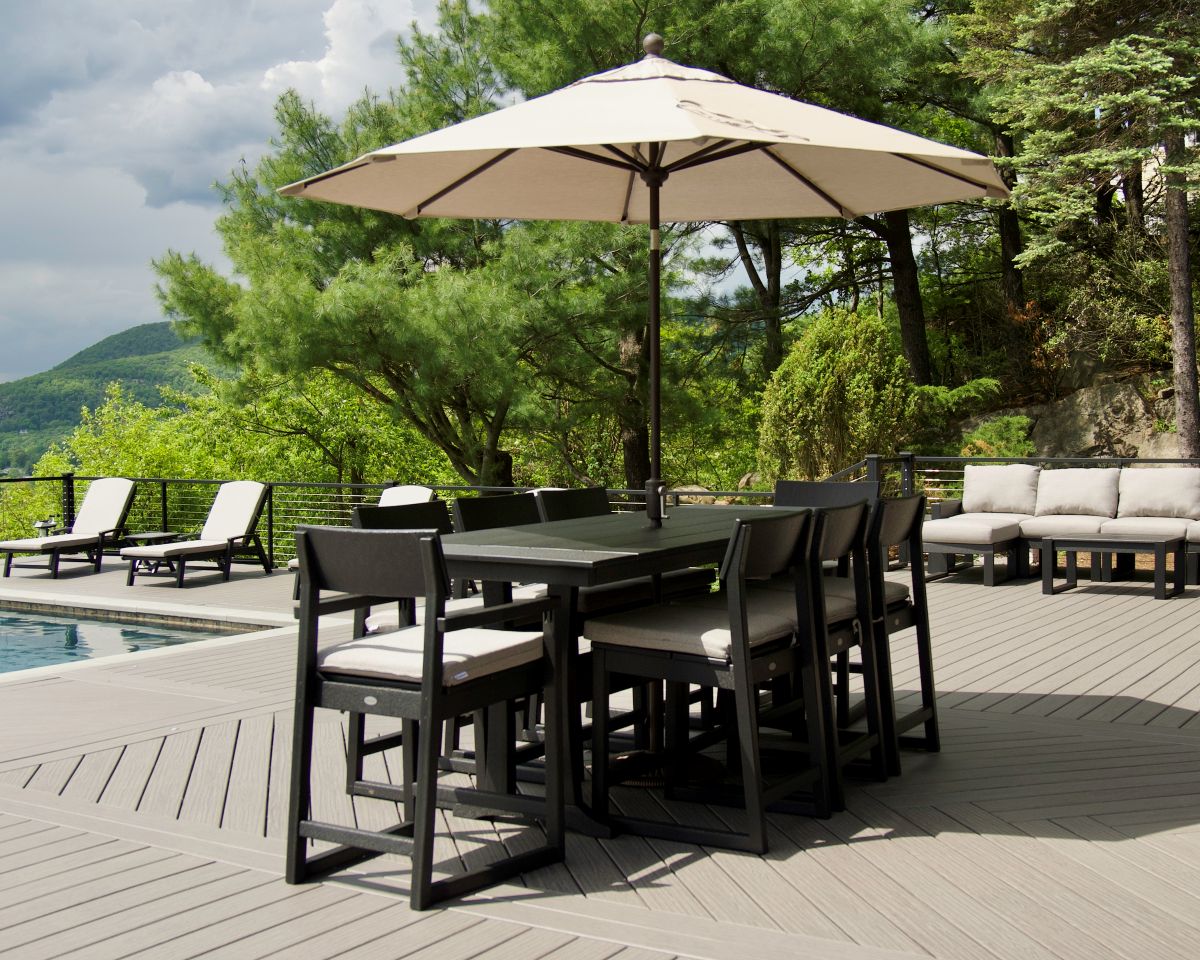
To create functional zones on a large deck, use large outdoor rugs to anchor your seating and dining areas. A rug visually defines the space and makes it feel more like an intentional ‘room. ‘For a dining area that seats eight, you’ll want a rug that’s at least 9×12 feet, allowing all chairs to remain on the rug even when pulled out. For the lounge area, the rug should be large enough that at least the front legs of all seating pieces are on it. This simple addition makes a massive difference in how organized the space feels.
6. Compact Woven Dining Set Overlooking a Forest
This entire look is incredibly achievable on a tight budget. It’s all about embracing simplicity. A folding bistro set like this one, made of all-weather wicker or resin, can be found at Target, Walmart, or IKEA for $150 – $300. The key is to find something with a clean, dark finish that recedes into the natural backdrop. You don’t need a huge deck; this setup works beautifully on a small 6×6 foot patio or even an apartment balcony. The focus is on the experience—a quiet coffee, a simple meal—not on extravagant furniture.
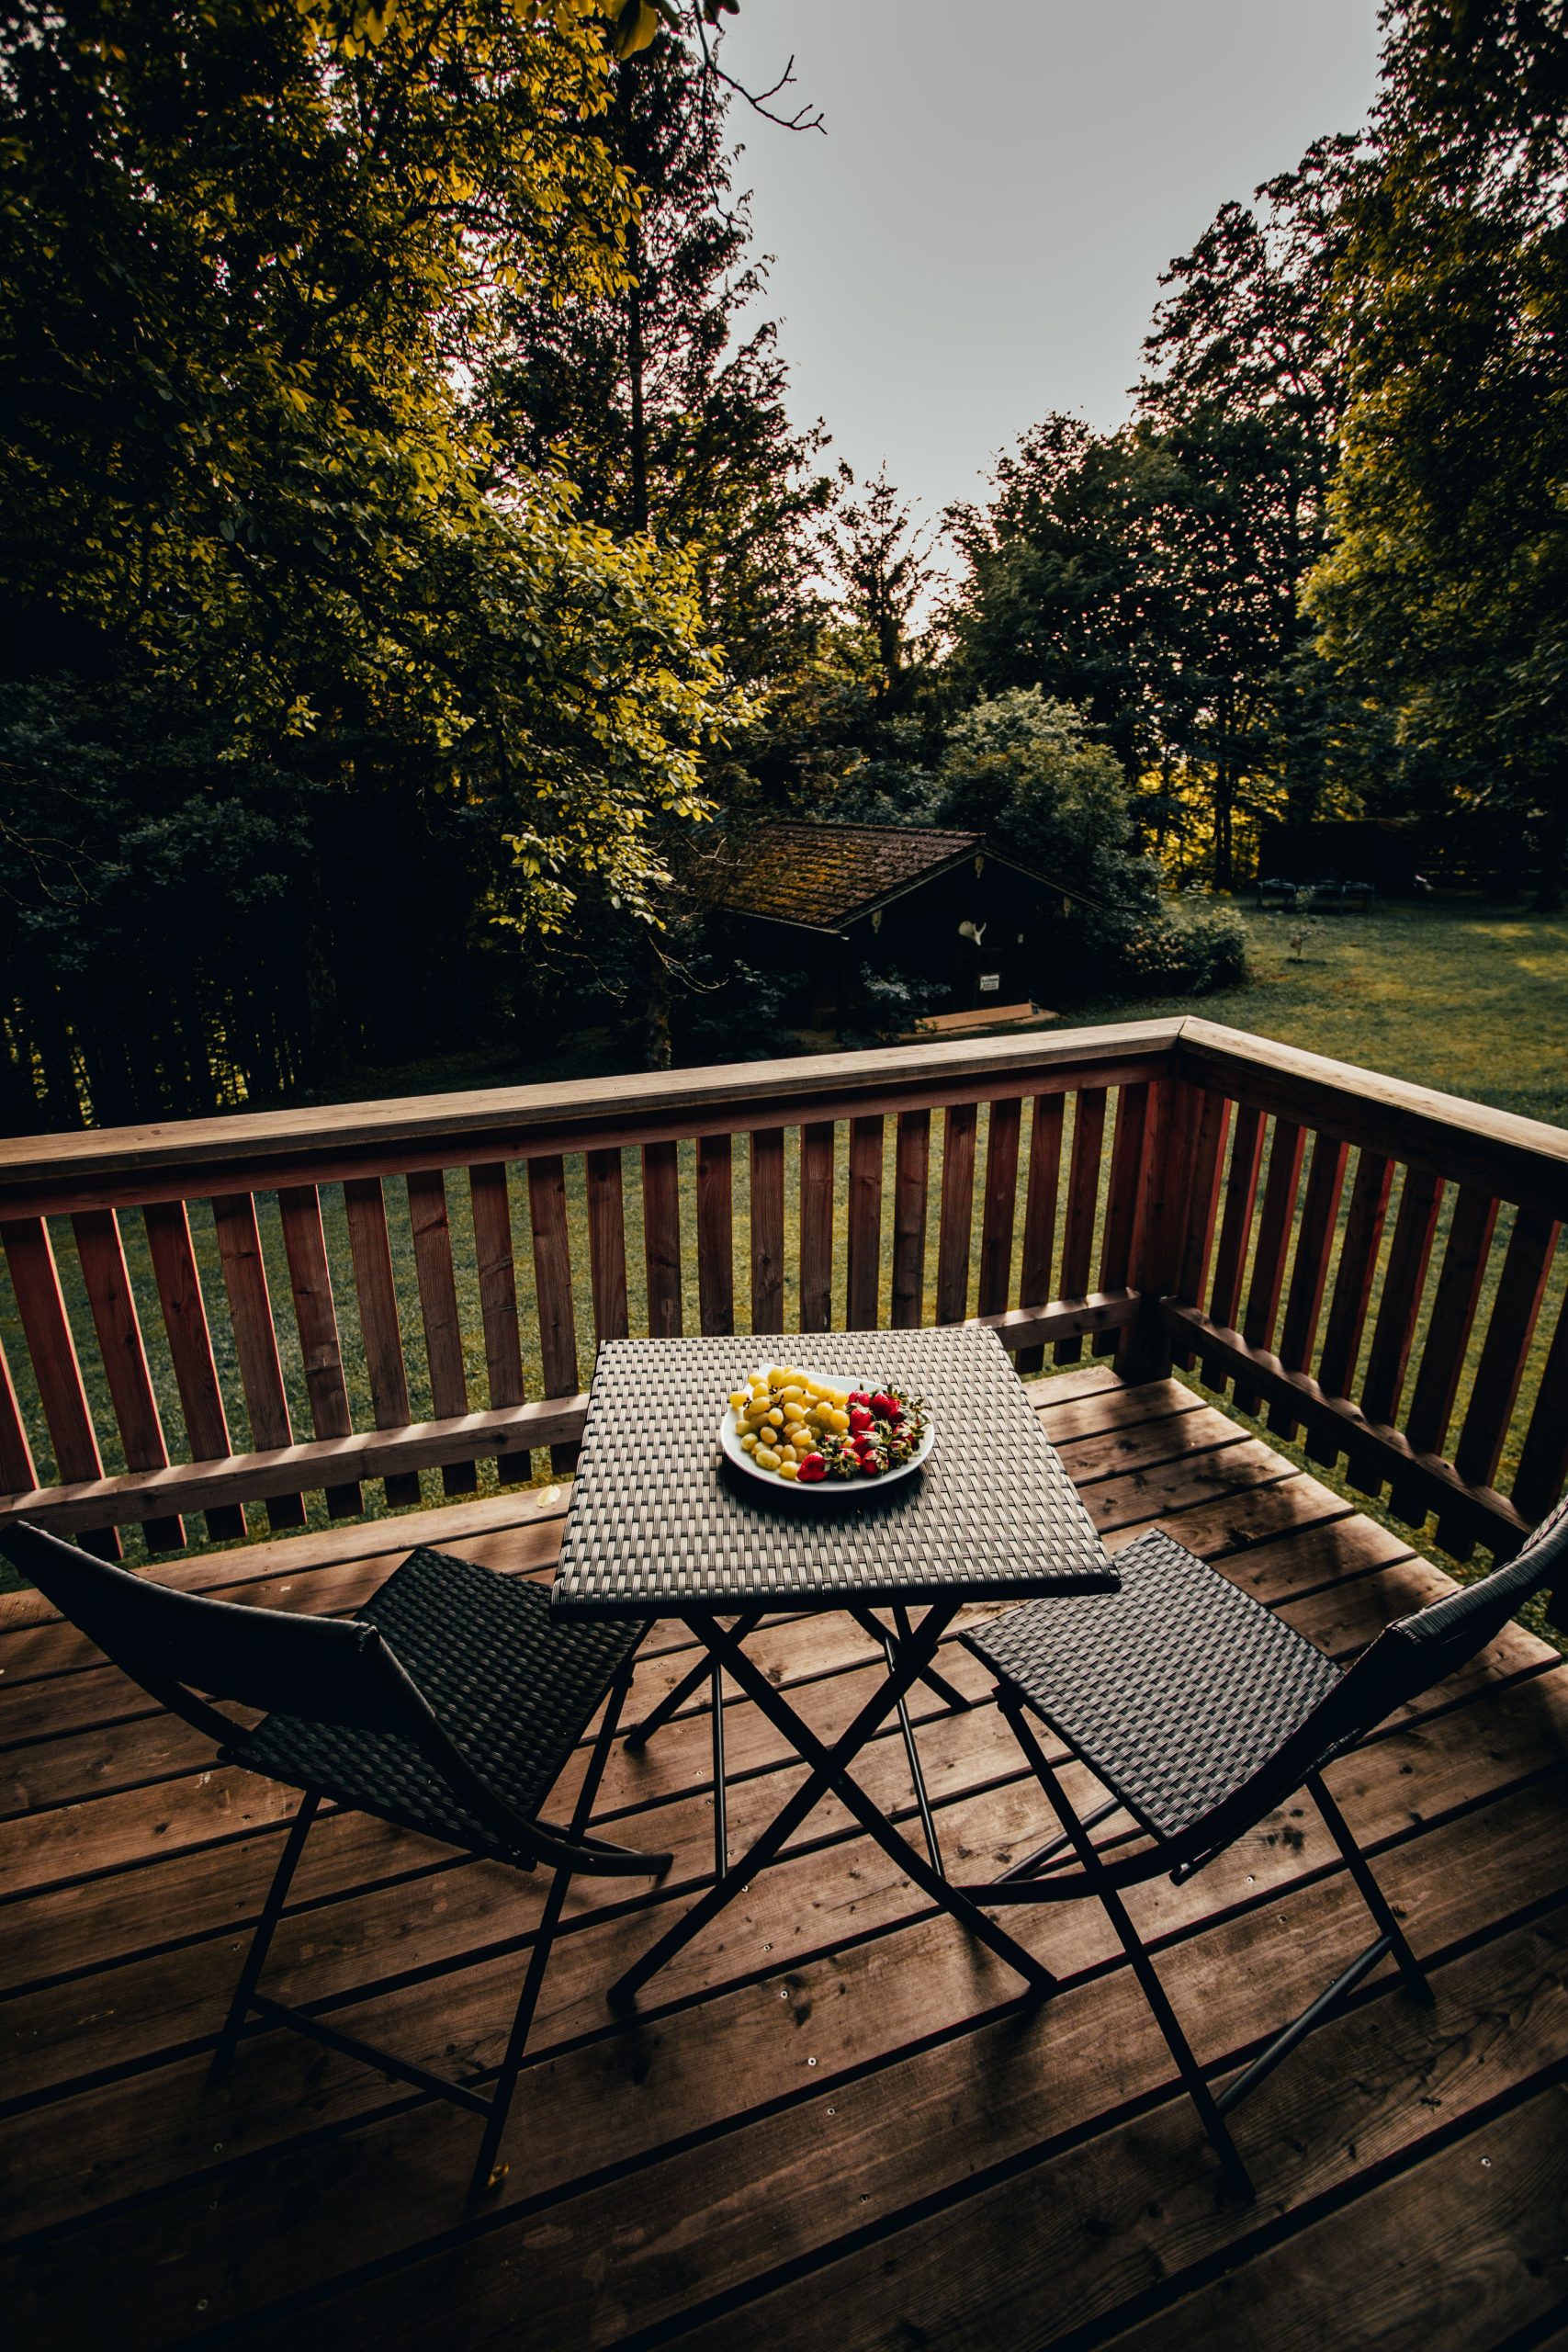
The most important element here is restraint. In a small space with a huge view, the temptation is to do more. Add more chairs, a bigger table, and more plants. But the power of this setup is its minimalism. The small, dark table and chairs are just enough to be functional without distracting from the main event: that lush, dense forest backdrop. By keeping the furniture footprint tiny, the deck feels more like a viewing platform, a quiet perch to take in the scenery. Removing that sense of simplicity would ruin the entire peaceful mood.
7. Modern Sofas Under a Cantilever Umbrella on a Tiled Patio
Setting up a cantilever umbrella for maximum shade and stability is key. Here’s a quick guide:
- Choose Your Spot: Position the base where it won’t obstruct traffic but will allow the canopy to cover the entire seating area when extended. Usually, this is off to a corner behind a sofa.
- Assemble the Base: Most require assembly and then need to be filled with sand or water. Use sand, not water. It’s heavier and won’t evaporate or freeze. You’ll need about 200-400 lbs of play sand.
- Attach the Mast: Securely bolt the main umbrella mast to the weighted base. This is a two-person job.
- Test Operation: Open the canopy and test the tilt and rotation functions to ensure you can easily adjust it as the sun moves.
Time: 1 hour. Cost for sand: $20-$40.
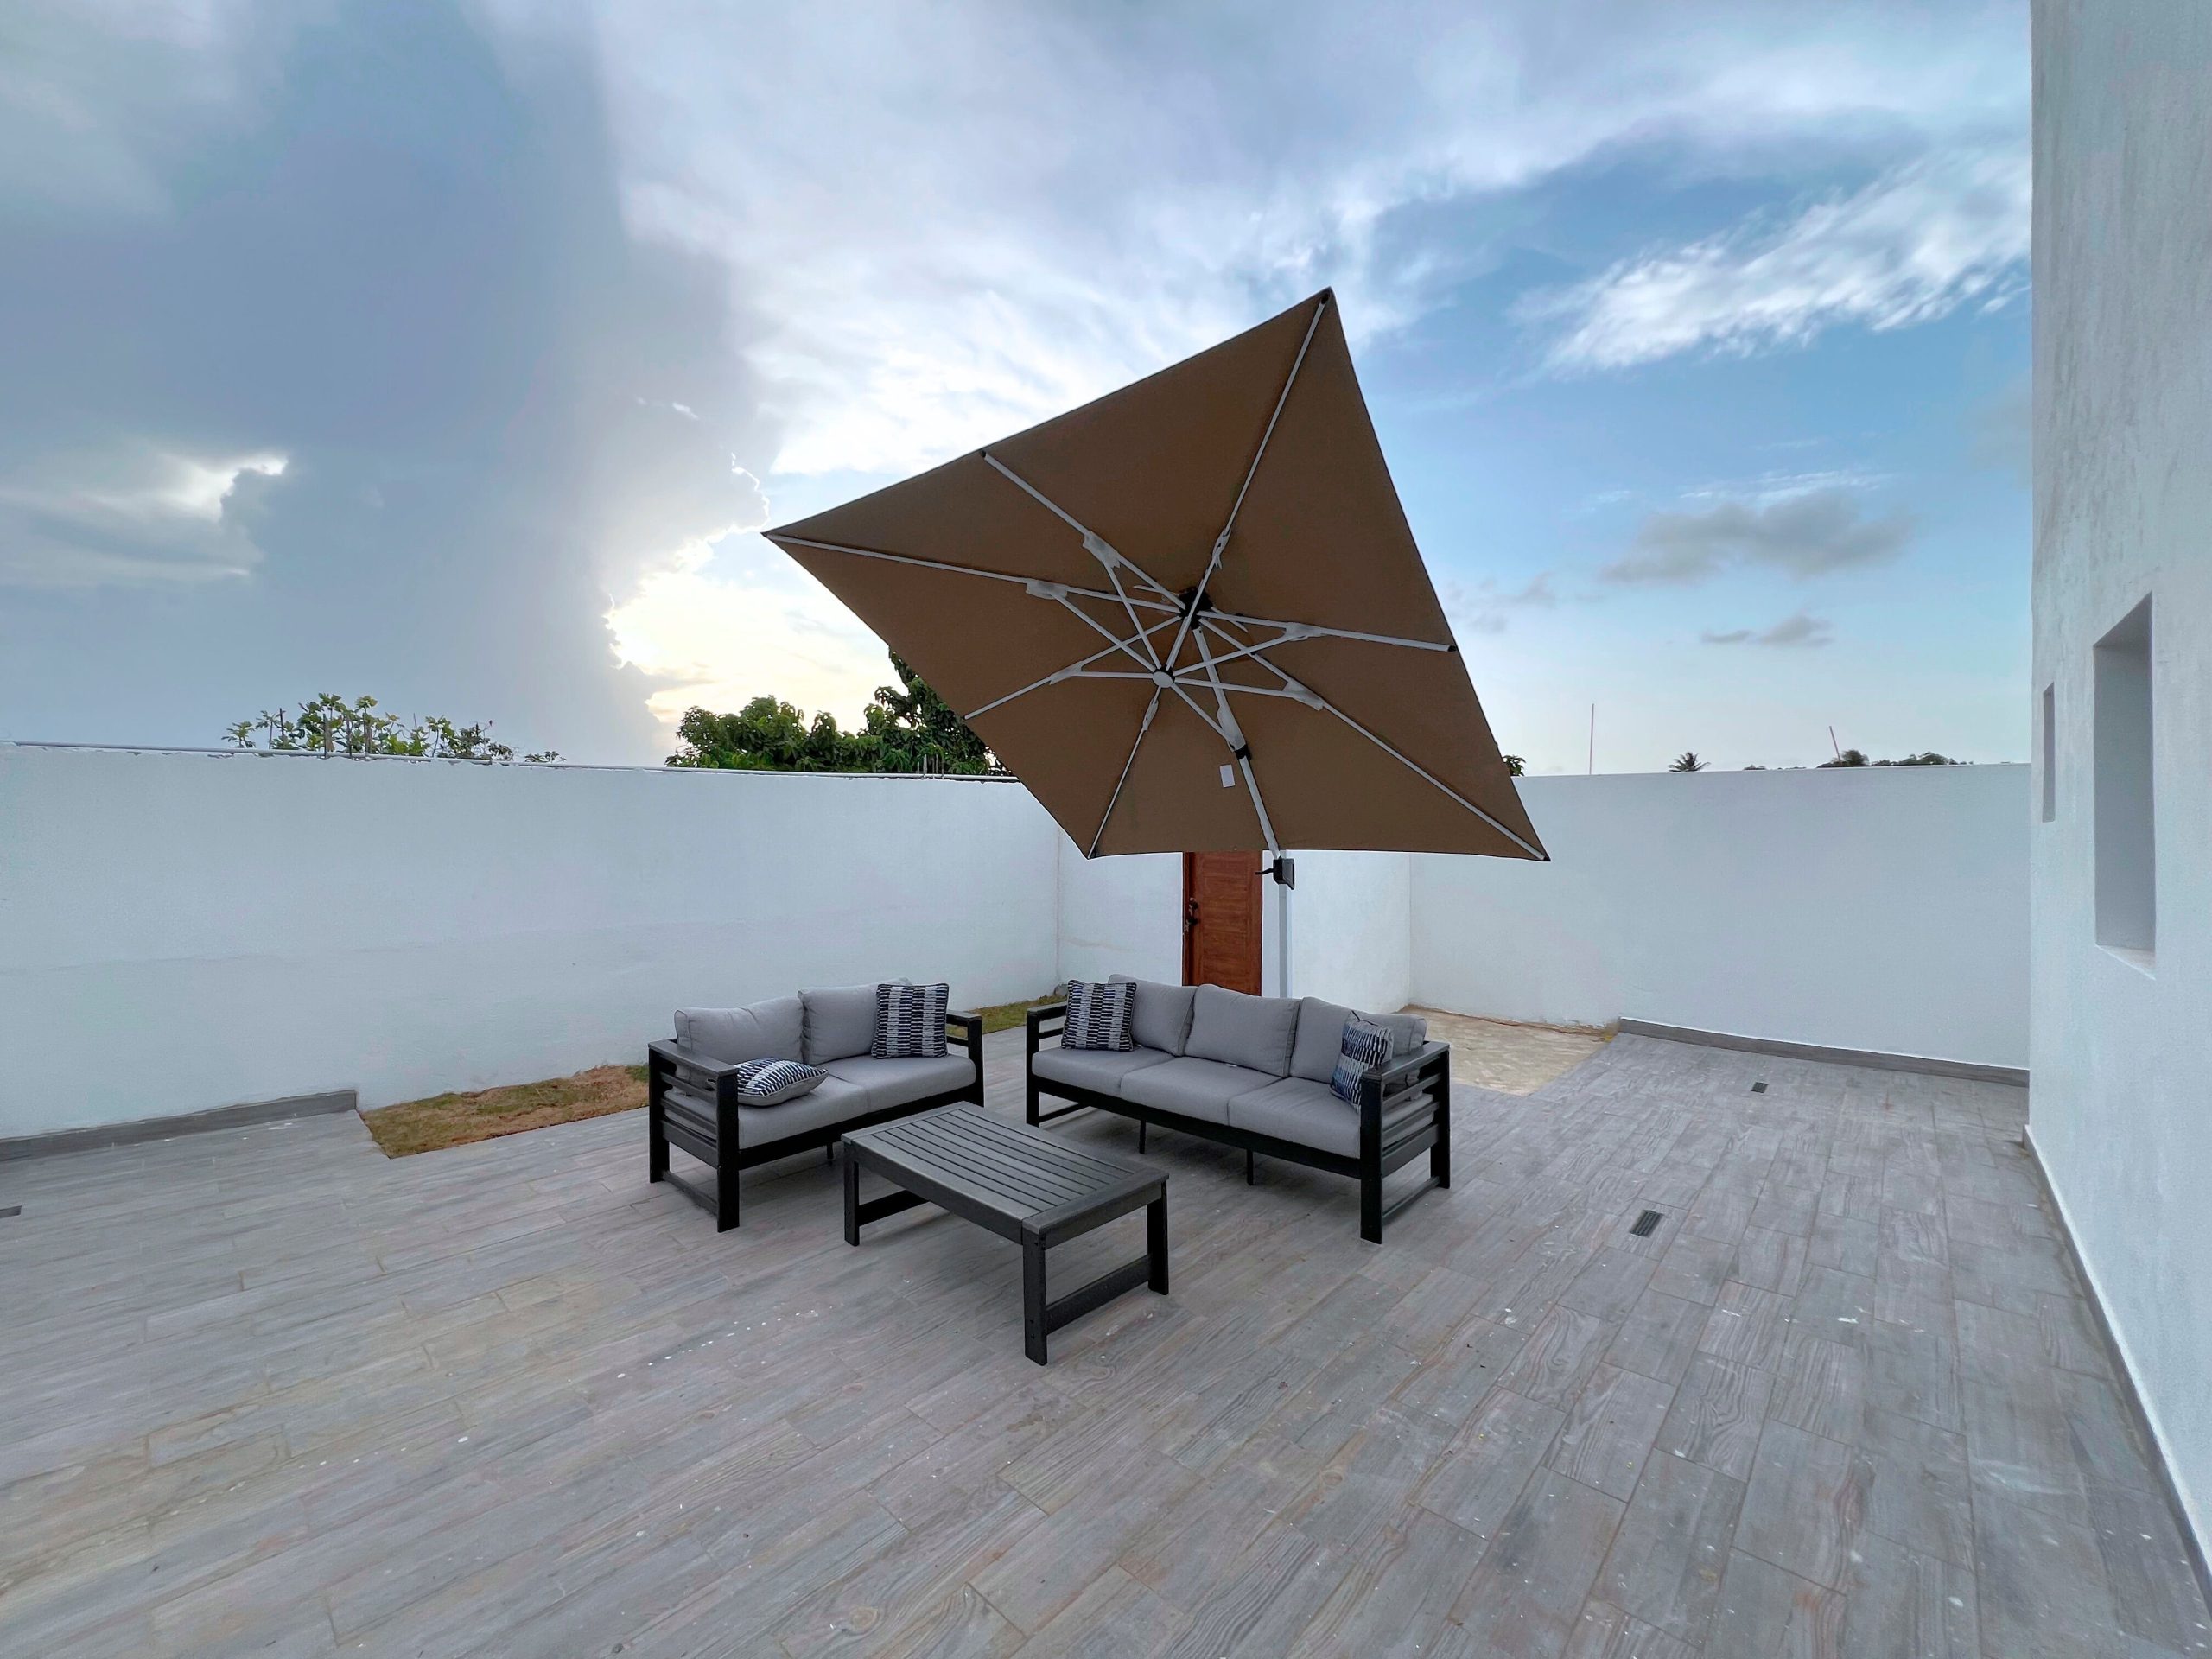
The rise of the high-quality cantilever umbrella is a direct response to our desire for truly functional outdoor living rooms. For years, the standard patio umbrella stuck through the center of a table was clumsy and offered limited shade. The cantilever design, with its offset base and articulating arm, is a game-changer. It allows for flexible, uninterrupted seating arrangements and provides a huge pool of shade, making patios usable even in the high-noon sun. It’s less of an accessory and more of an architectural element, which is why you’re seeing them all over Pinterest.
8. Open-Plan Corner Sofa and Lounge Chair on a Wooden Deck
This U-shaped conversation layout is perfect for a square or wide rectangular deck, roughly 16×16 feet or larger. You need enough depth to place the separate lounge chair opposite the sectional without cramping the walkway. Aim for at least 5-6 feet between the sectional and the opposing chair to allow for a coffee table and comfortable legroom. The key is the outdoor rug; for a layout this size, an 8×10 or 9×12 foot rug is essential to define the zone and make it feel intentional. For a much smaller space, consider the simple setup in Idea #5.
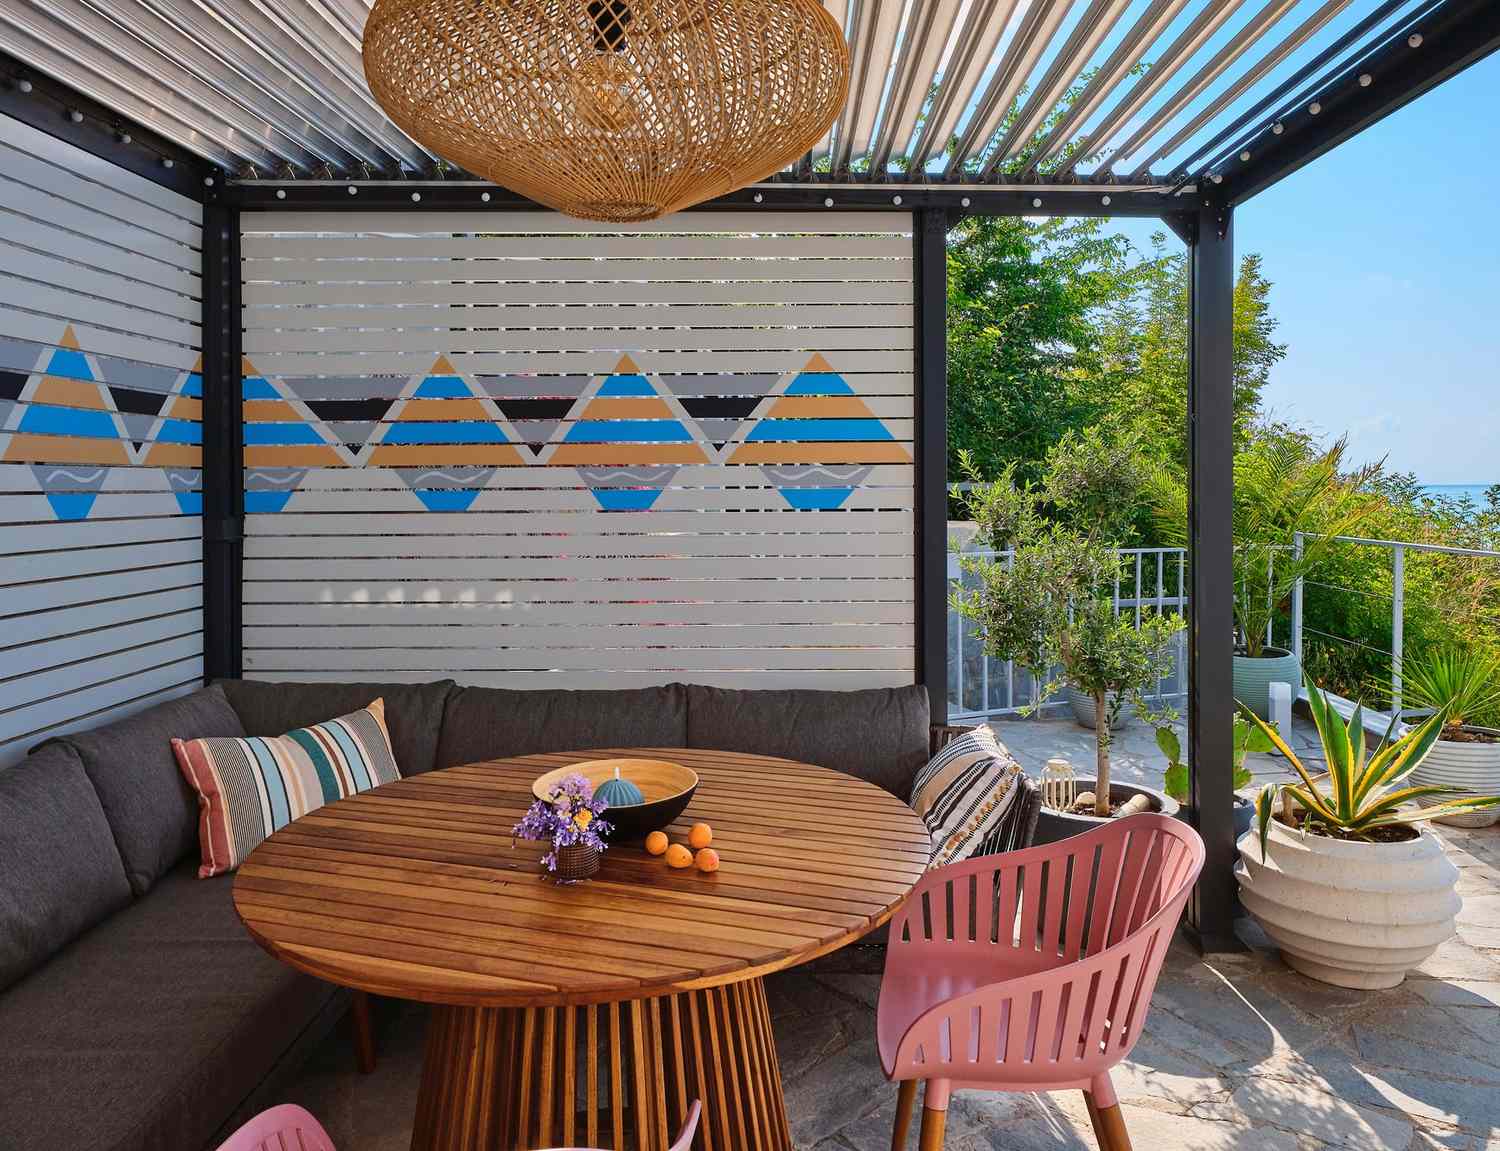
Those beautiful, light-fabric cushions are a magnet for dirt, pollen, bird droppings, and spilled rosé. While they look serene and high-end, they require commitment. You’ll need to invest in good-quality, quick-drying foam and true performance fabrics (like Sunbrella) that are stain, mold, and fade-resistant. Even then, you’ll be running outside to bring them in before a storm or buying sizable waterproof covers. If you have pets, kids, or nearby trees that drop a lot of debris, a darker cushion color might save your sanity.
9. Vibrant Deck Dining with Orange and Turquoise Woven Chairs
This look is a masterclass in fearless color. The formula is 60% neutral foundation (gray wood deck and wall) + 30% bold color block (turquoise and orange chairs) + 10% soft accents (light blue cushions and pillows). The gray wood acts as a perfect, moody canvas that allows the bright colors to pop without being overwhelming. The white tables and bench provide a crisp, clean break. You could swap the orange and turquoise for any other high-contrast pair, like hot pink and navy, and the energetic, modern formula would still work perfectly.
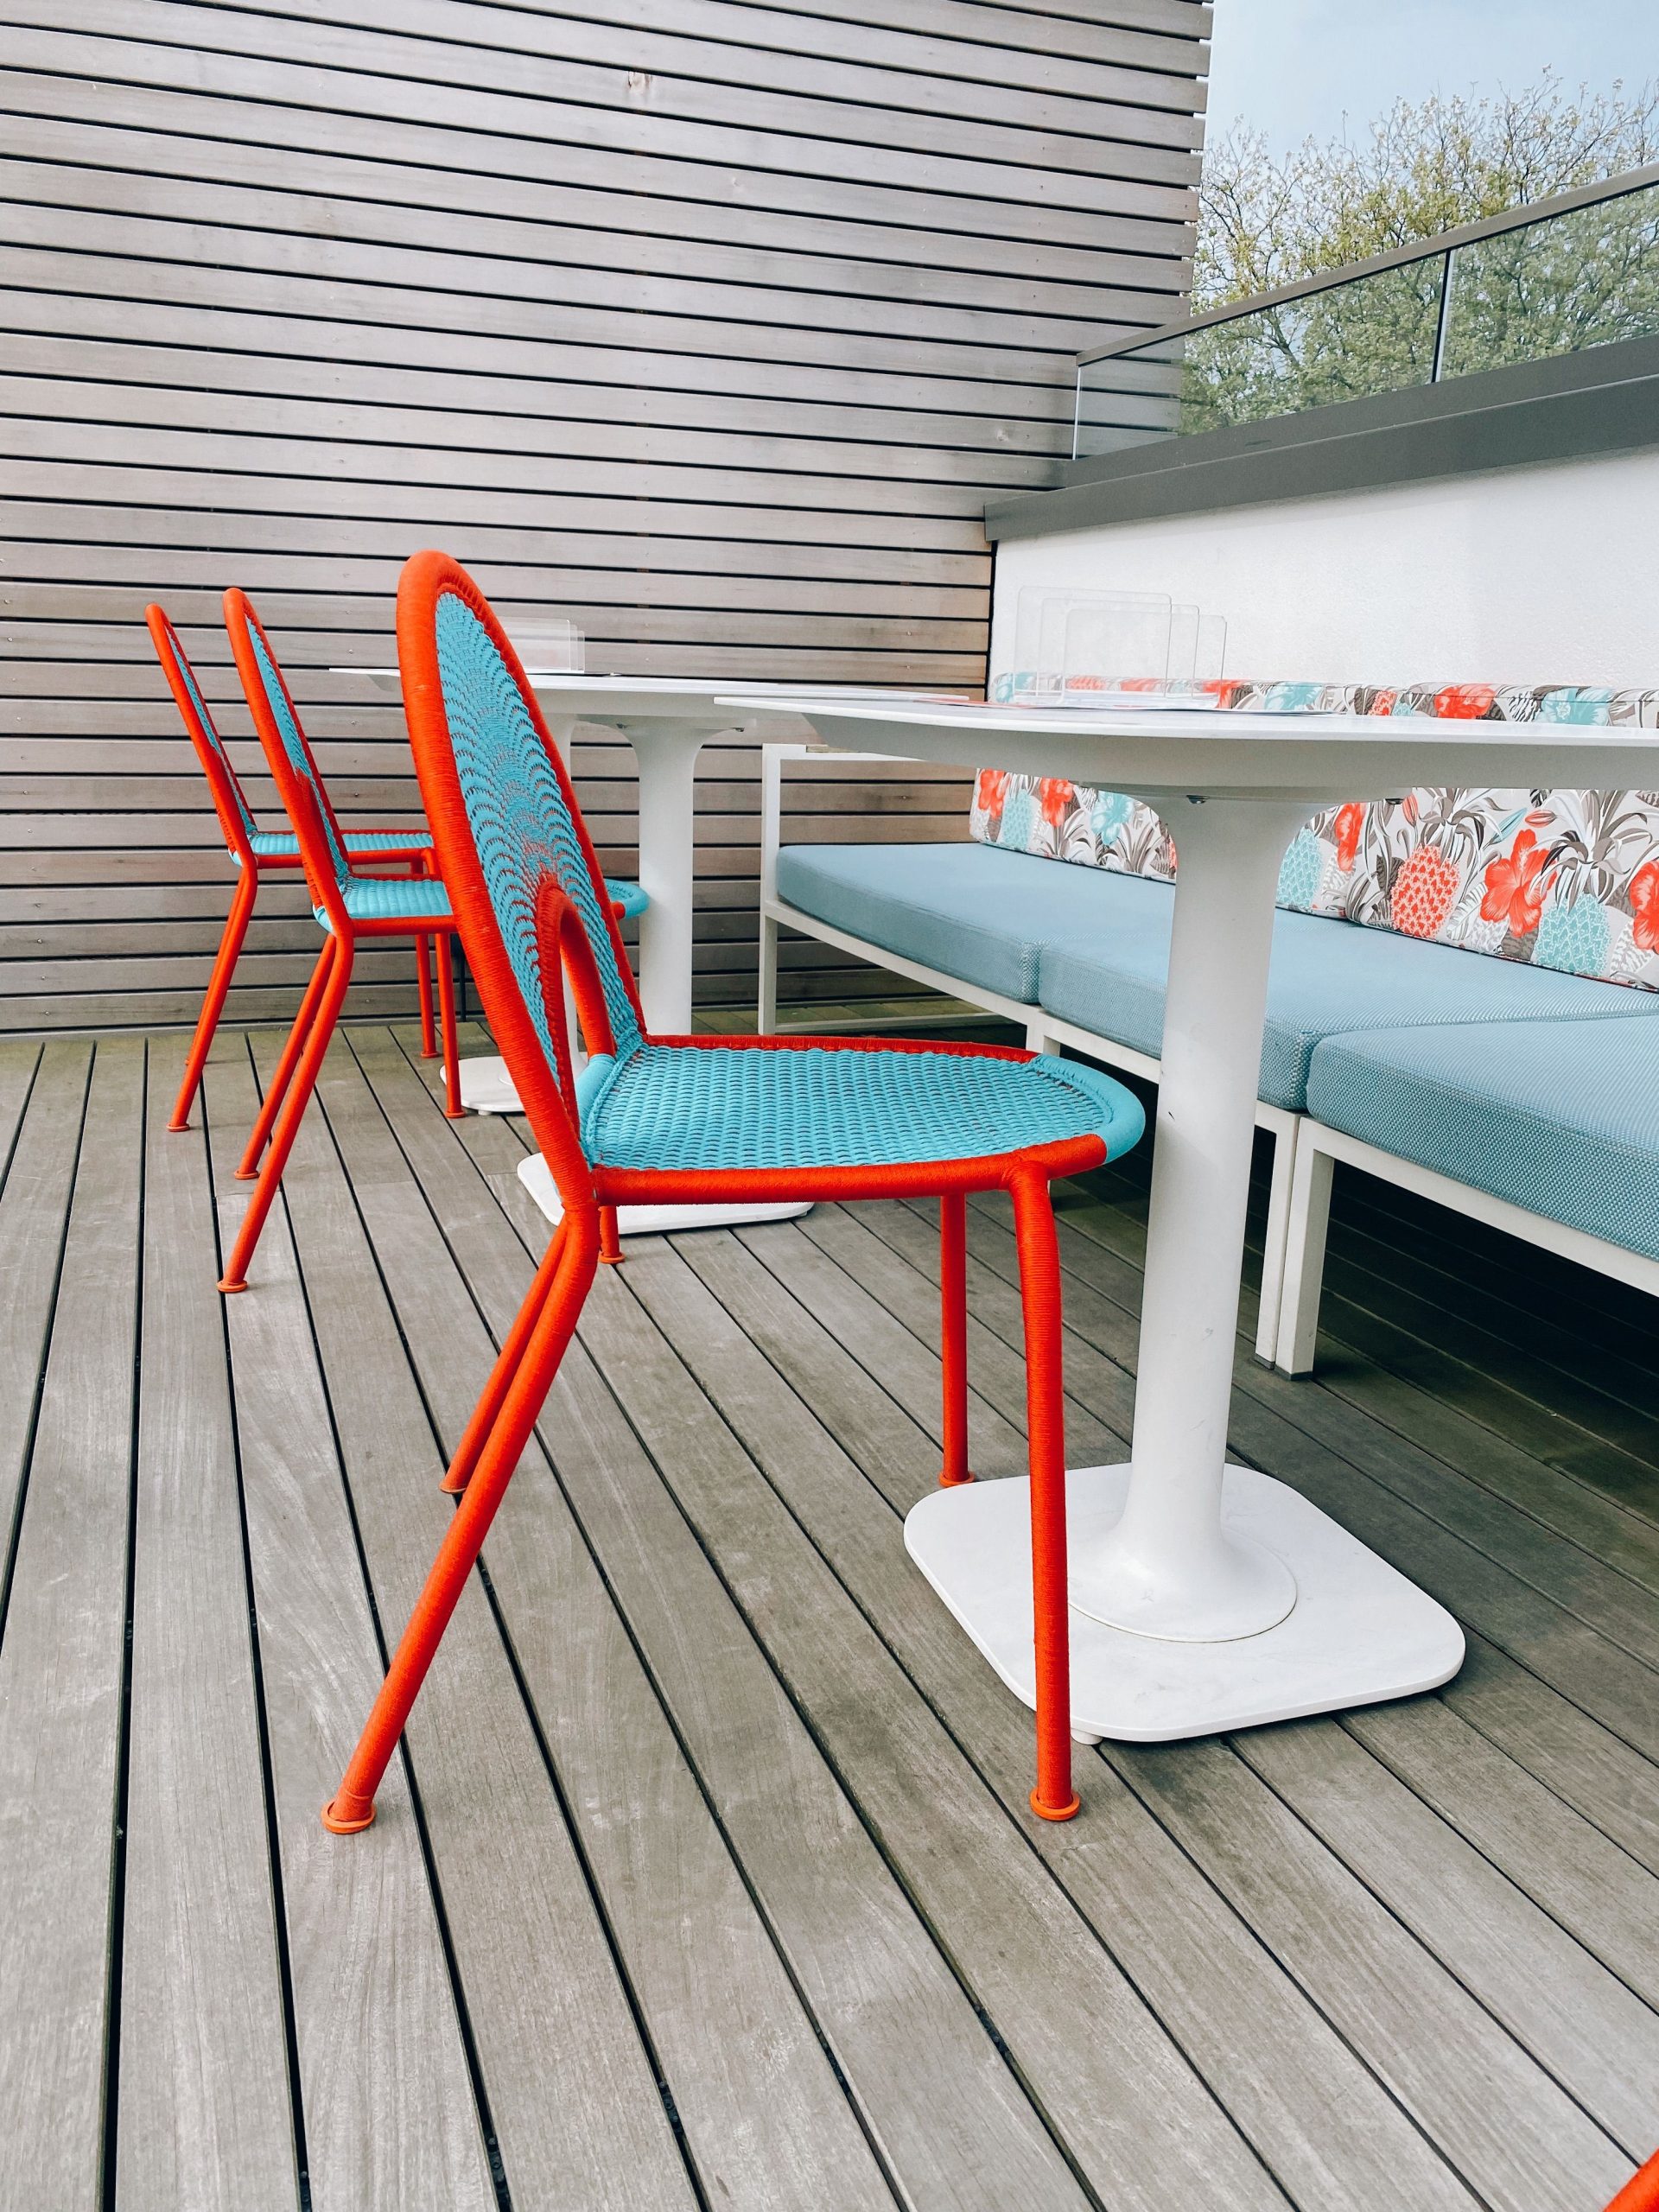
This design feels so fresh because of its smart use of repetition and contrast. The repetition of the woven texture on the chairs creates a cohesive rhythm, even with two different colors at play. The contrast is threefold: the bright, saturated colors pop against the muted gray wood; the clean, modern lines of the pedestal tables contrast with the more detailed woven chairs; and the soft textiles of the bench cushions and pillows balance the hard surfaces of the tables and decking. It’s a dynamic and visually interesting space.
10. Casual Metal Dining Set with Orange Cushions on Wood Deck
A black metal dining set is a fantastic, long-lasting budget choice. You can find a 5-piece set (table and four chairs) at stores like Home Depot or Wayfair for $400 – $700. The real trick to making it look more expensive is in the styling. Invest in a quality outdoor rug like the blue and white one here—it instantly defines the space. Then, add comfortable, brightly colored cushions. The cushions and rug are where you can inject personality and a sense of thoughtful design without breaking the bank on the furniture itself.
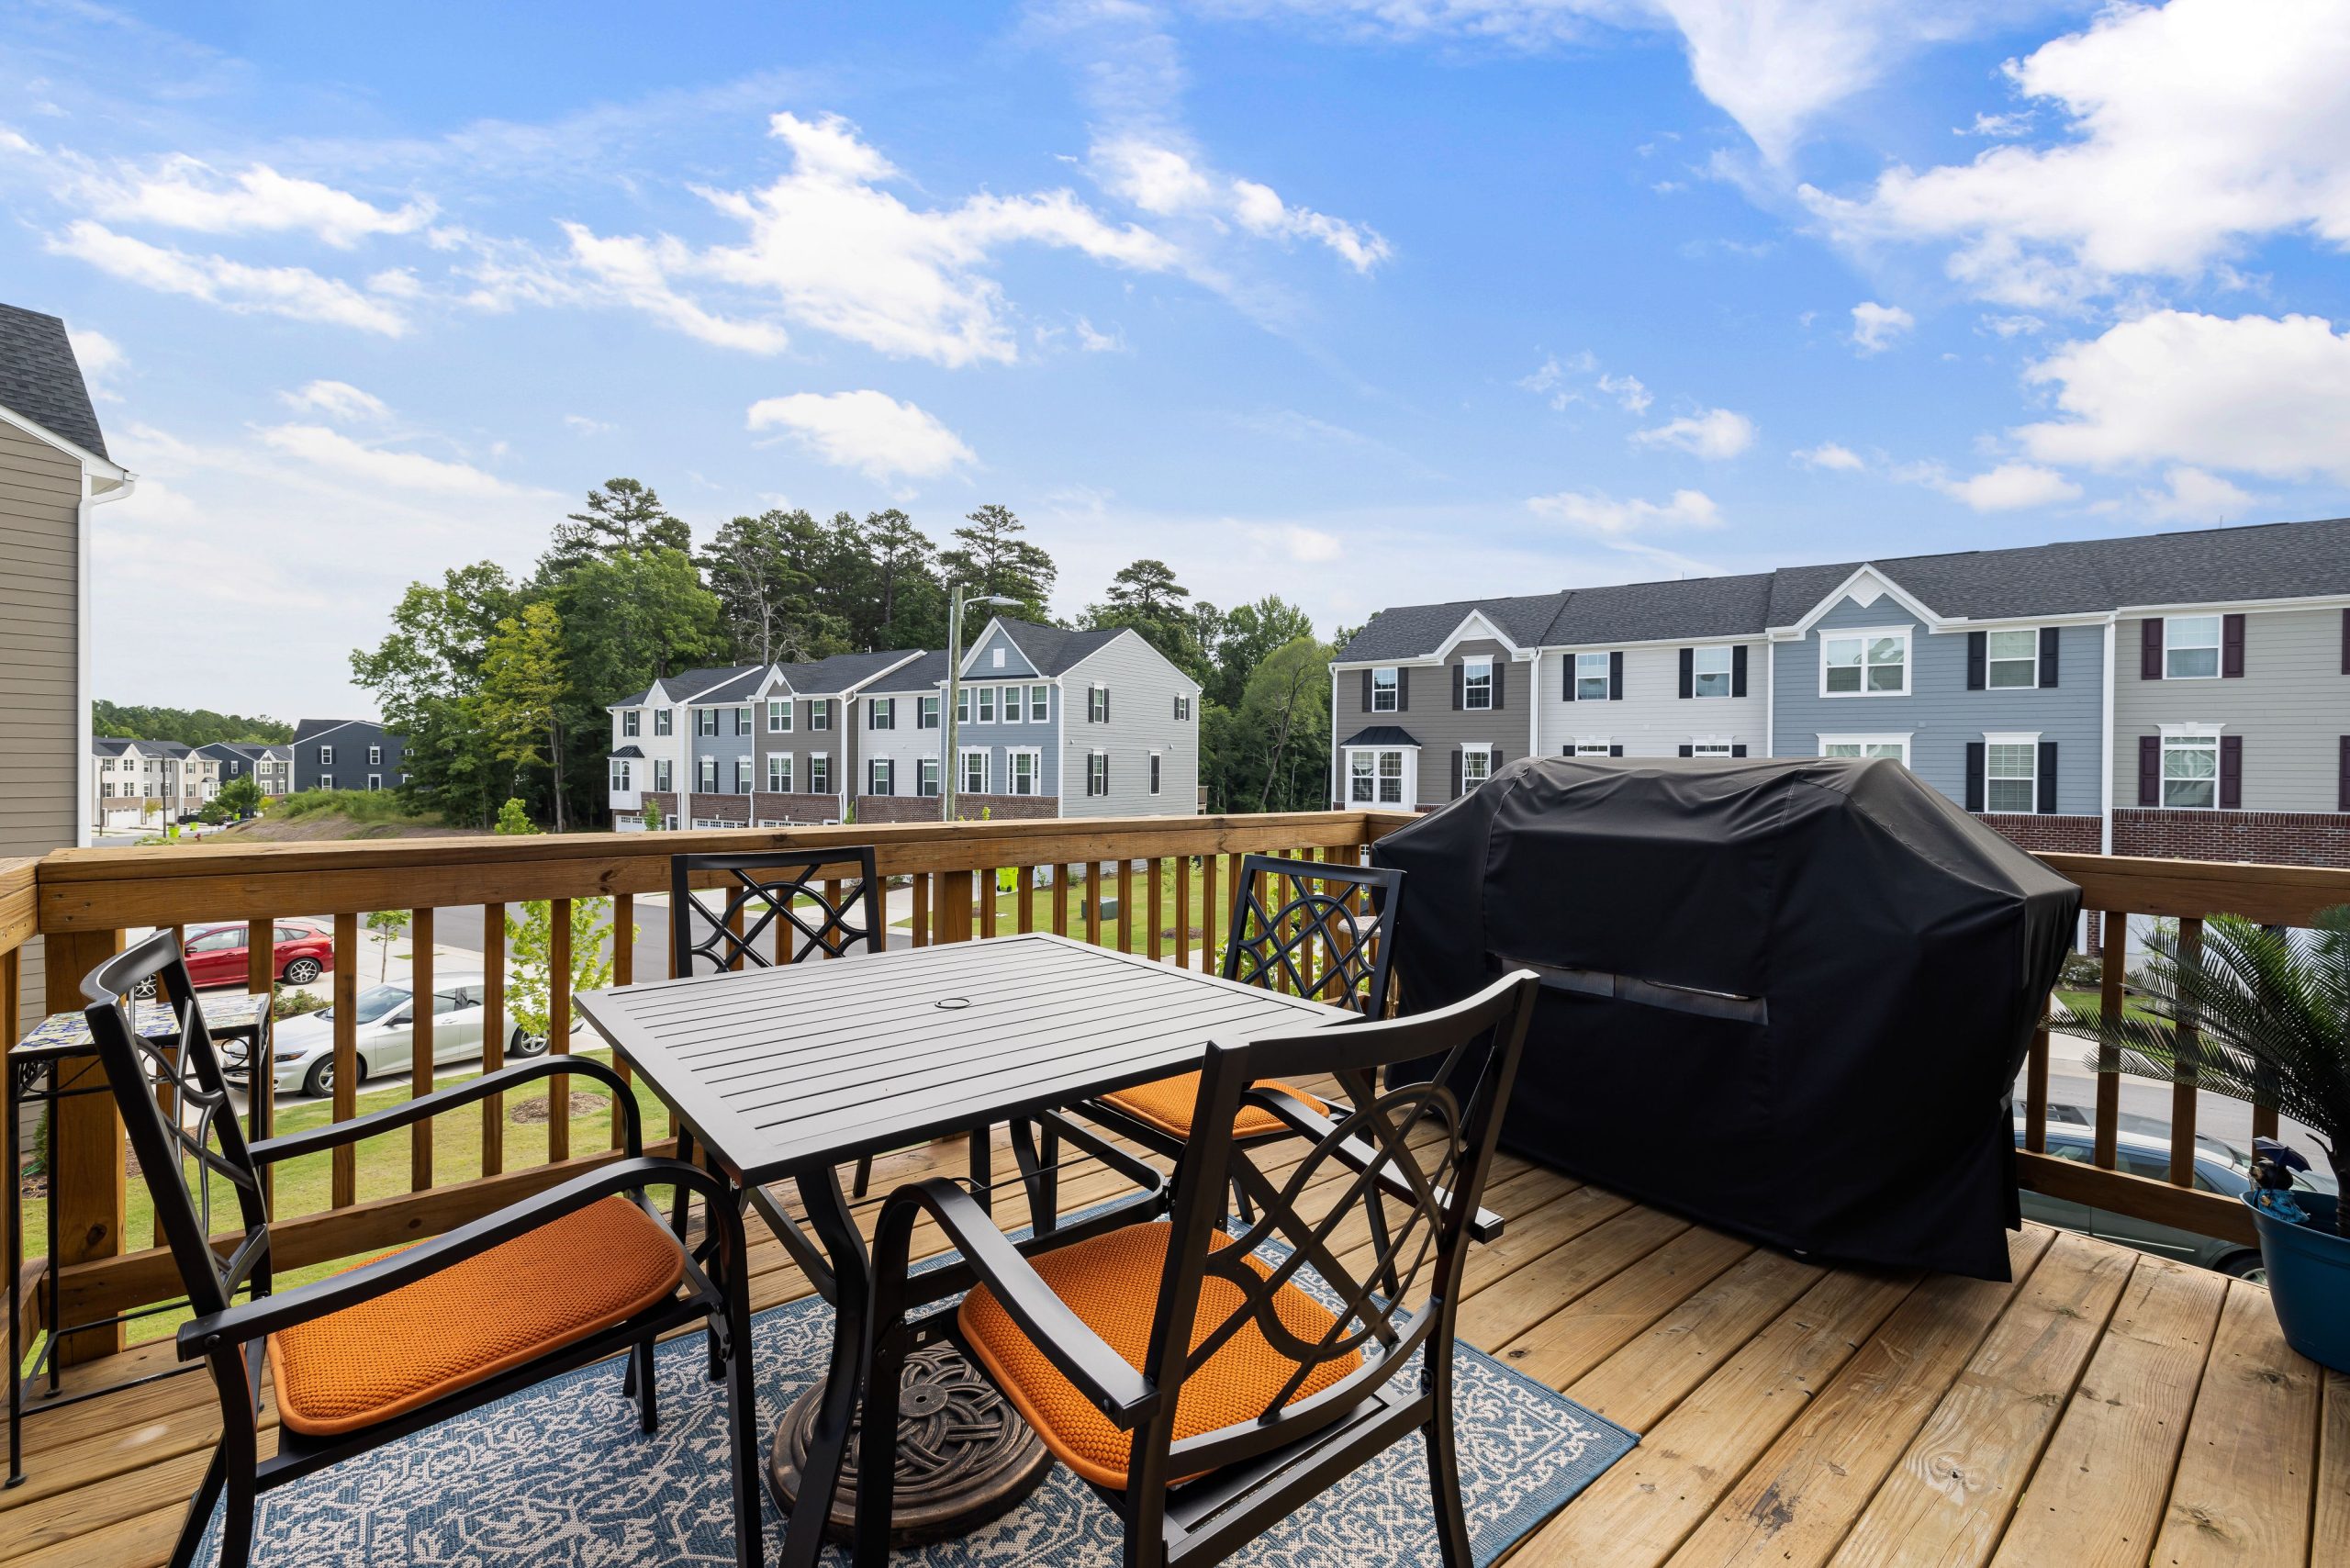
When placing a grill on a wooden deck, safety is paramount. Always keep the grill at least 10 feet away from your home’s siding and any deck railings. Never place it under a covered porch or near low-hanging branches. A high-quality grill mat is non-negotiable; it protects your wood deck from grease stains, stray embers, and heat damage. Make sure the mat is larger than the footprint of your grill. This simple $30-$60 purchase can save you from costly deck repairs down the line.
11. Sprawling L-Shaped Sectional with Potted Plants on a Wood Deck
The most crucial element in this scene is the abundance of potted plants. Without them, you’d have a nice, but sterile, seating area. The plants are what bridge the gap between the man-made deck and the natural landscape beyond. They soften the hard lines of the furniture and railings, add layers of texture and color, and make the space feel alive and truly part of the outdoors. The variety in pot sizes, shapes, and plant types is key to achieving this lush, curated-over-time look.
A deck full of potted plants looks amazing, but it requires a gardener’s discipline. You’ll be watering daily, especially in peak summer. Large pots are heavy when filled with wet soil, so decide on their placement before you plant. You’ll also need to deal with drainage; water runoff can stain your wooden deck over time, so use pot feet or saucers to allow for airflow and catch drips. And don’t forget, those beautiful light cushions will show every speck of dirt you transfer from your gardening efforts.
12. Modern Dining with Slatted Wood Table and Woven Benches
This layout achieves its serene, organic-modern feel with a simple ratio: 50% natural texture + 30% hardscape + 20% minimalist architecture. The natural wood and woven rattan-look bases provide warmth and texture. The large-format gray pavers offer a cool, solid foundation. The stark white walls of the building and the clean lines of the concrete planters bring in the minimalist, structural element. The secret is the balance; too much wood and it’s rustic, and too much concrete and it’s cold. The mix is what feels current and sophisticated.
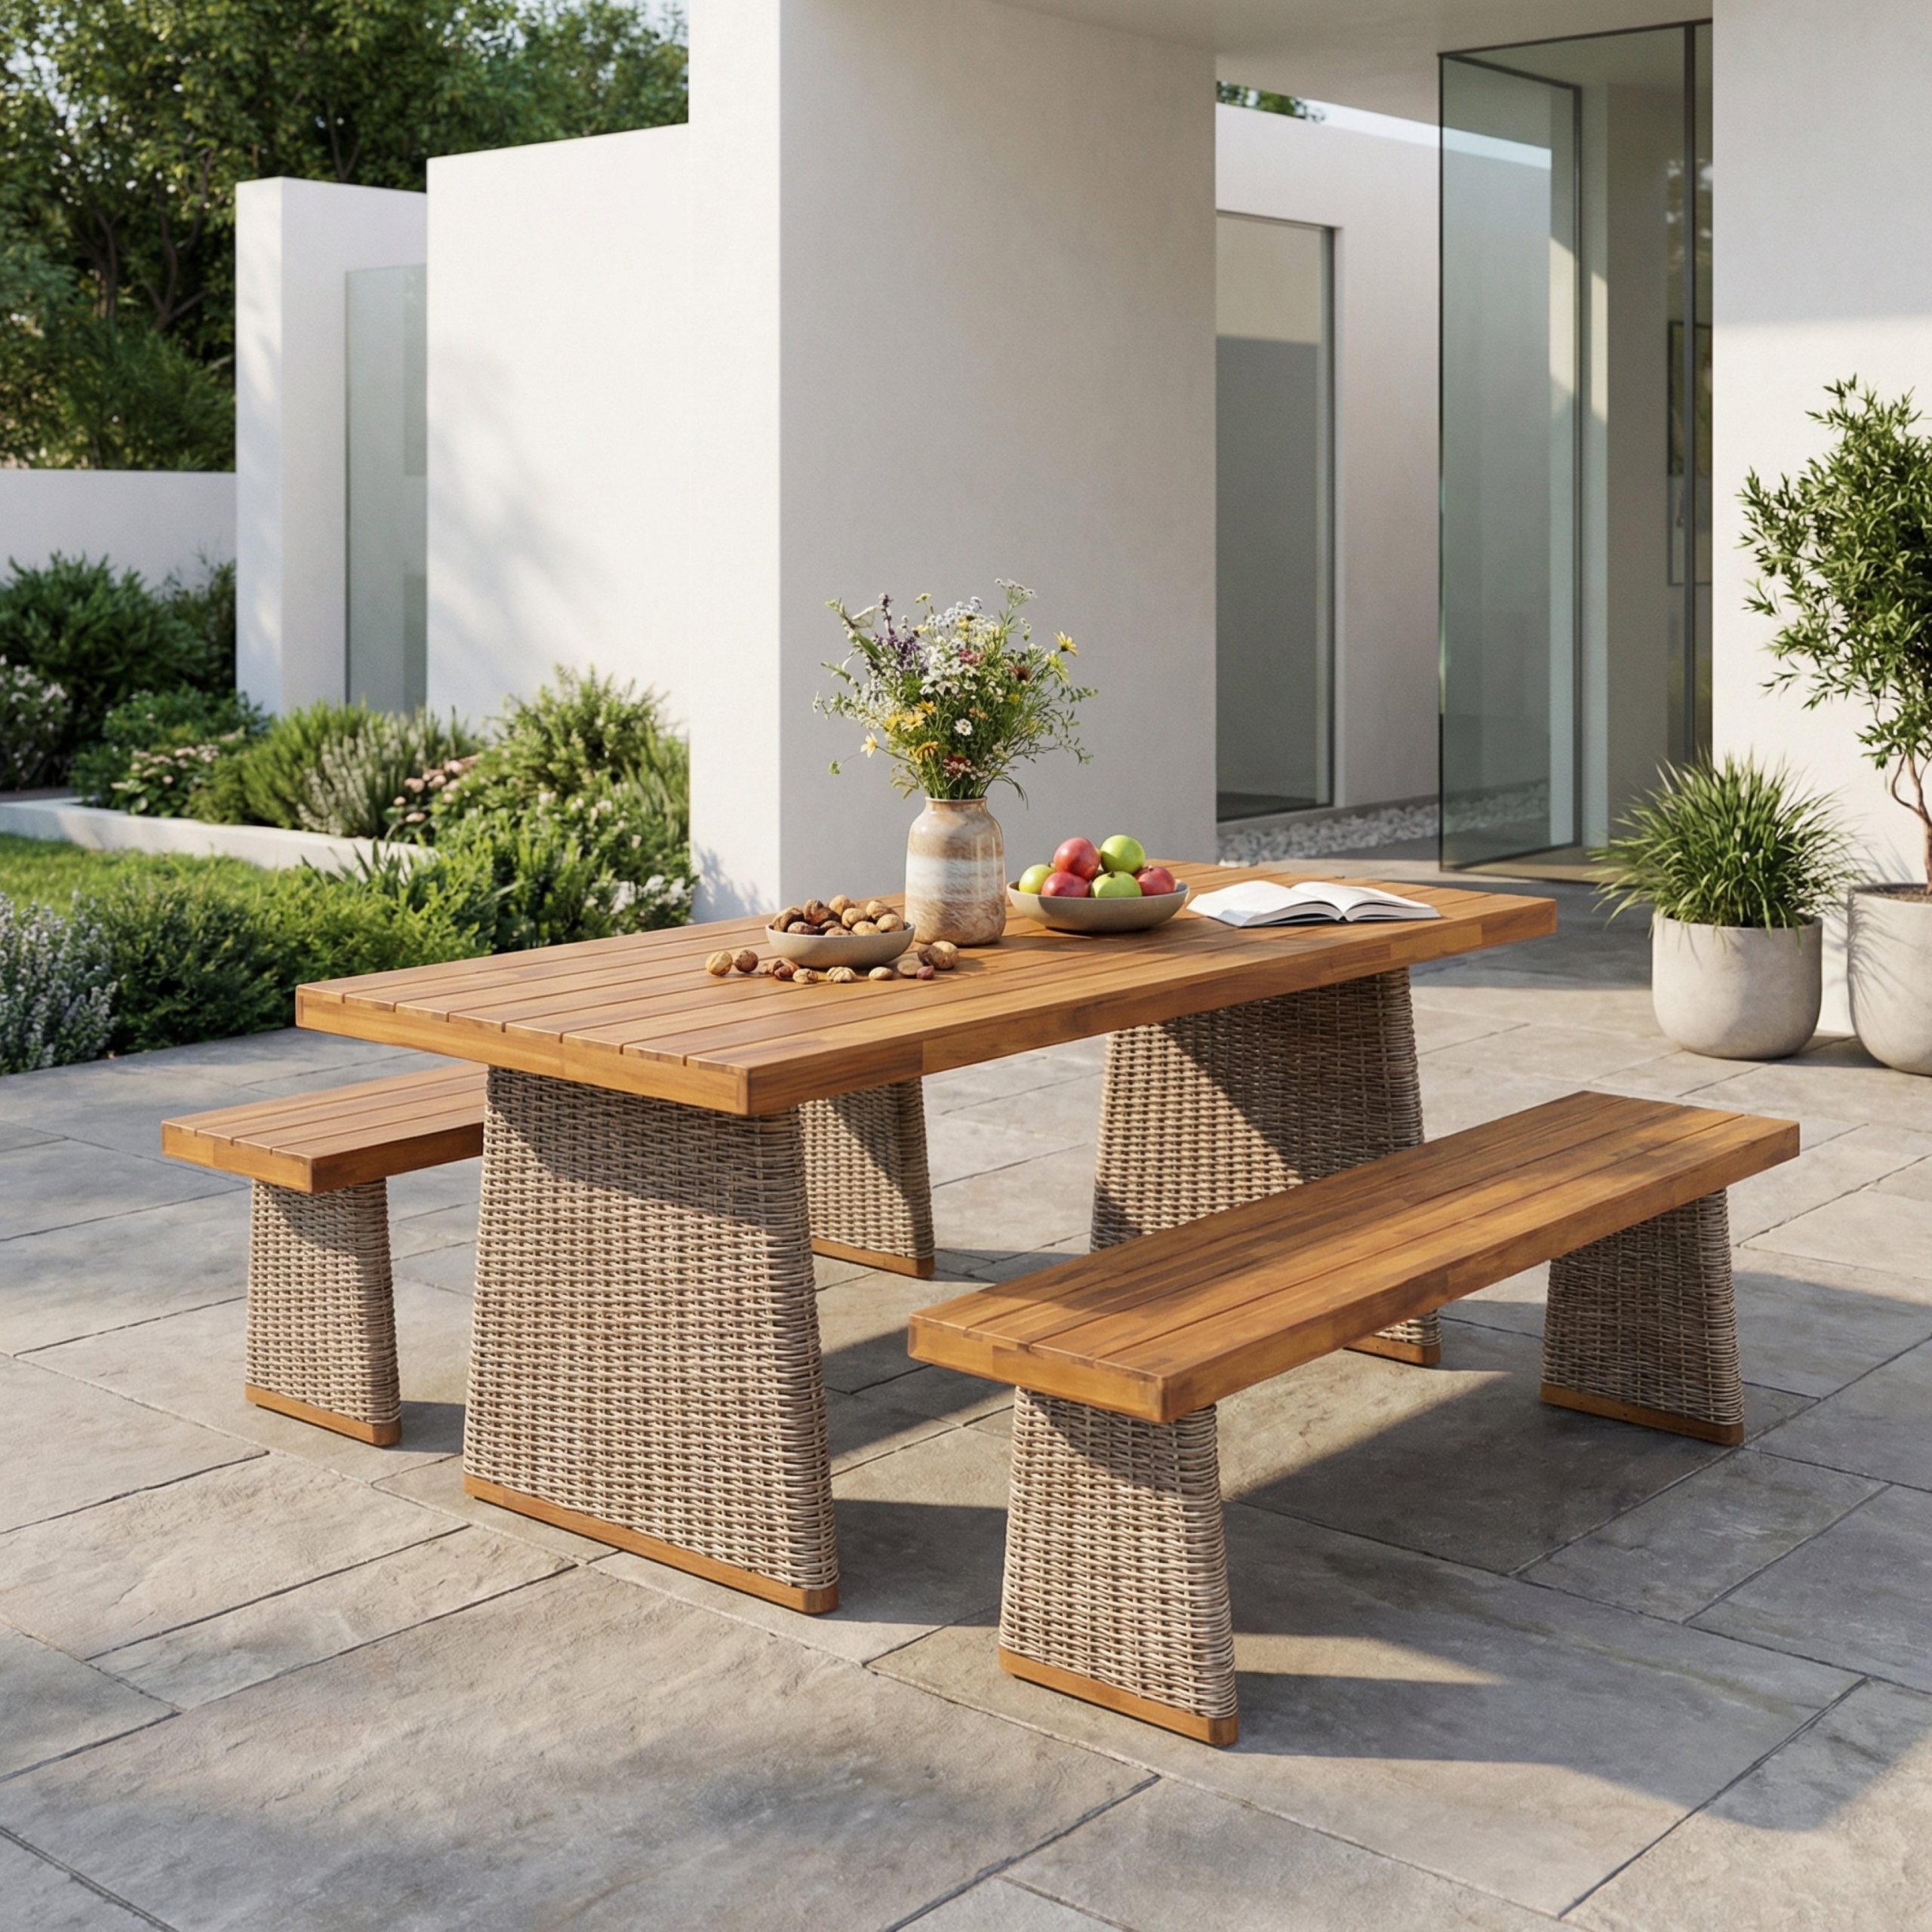
Before committing to large-format pavers for your patio, there are a few things to check. First, ensure your ground is properly graded and compacted; these large tiles are unforgiving of an uneven base and can crack. Second, consider the climate. In very hot, sunny locations, light gray pavers will be much cooler underfoot than dark ones. Finally, map out your furniture placement beforehand. The clean grid of the pavers looks best when furniture arrangements respect their lines, rather than sitting awkwardly across them.
13. Cozy Rattan Lounge with Deep Blue Cushions and a Fire Pit
A full rattan conversation set with a fire pit is a significant but worthwhile investment for creating a go-to gathering spot. Quality all-weather rattan and thick, durable cushions drive the cost.

- Woven Furniture Set (Sofa, 2 Chairs, 2 Ottomans): $2,500 – $6,000
- Fire Pit Table: $700 – $2,000
- Textiles (cushions included, plus accent pillows/throw): $300 – $800
- Lighting (string lights, lanterns): $150 – $400
- TOTAL: $3,650 – $9,200
Budget alternative: Look for a 4-piece set (sofa, 2 chairs, coffee table) without the ottomans for around $1,200-$1,800 and add a smaller, portable fire pit for $200.
Deep blue cushions look incredibly sharp, but be aware that dark colors are more prone to noticeable fading in direct sunlight than lighter neutrals. If your deck gets blasted with sun all day, you’ll want to invest in top-tier performance fabrics and consider covering the furniture or storing the cushions when not in use to prolong their life. Also, while woven rattan is durable, it can be a pain to clean, as dust and debris get trapped in the weave. A leaf blower on a low setting is your best friend here.
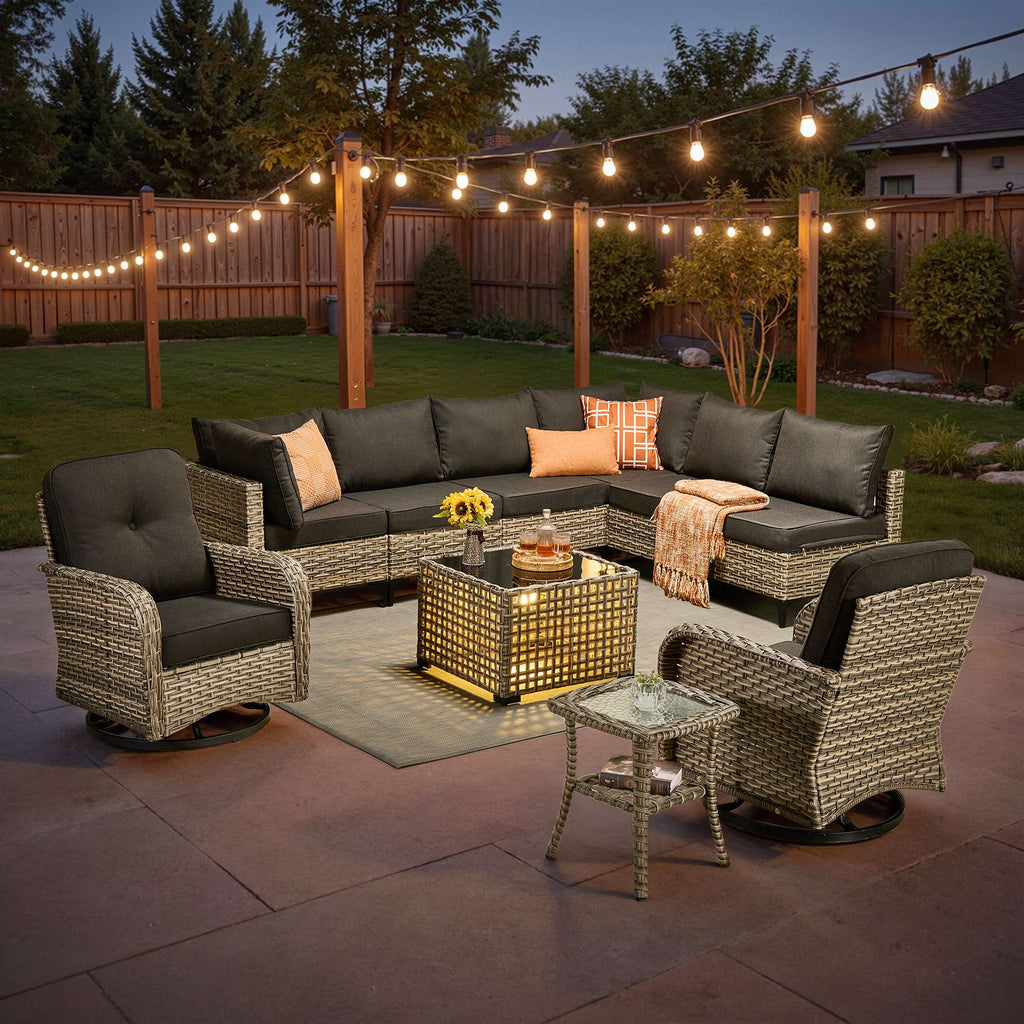
14. Woven Wicker Sectional and Swivel Chairs Patio Layout
Incorporating swivel chairs into a large seating arrangement is a pro move. They add a dynamic, flexible element that static chairs can’t offer. Guests can easily turn to chat with someone on the sectional, then swivel to face the yard or another conversation group without awkwardly shuffling furniture. When planning your layout, place swivel chairs where they can take advantage of multiple focal points. In this setup, they can face the sectional for a cozy chat or turn outwards to enjoy a broader view of the yard.
|
📋 Copy HEX 🔗 Share |
Hanging outdoor string lights can instantly transform your patio’s ambiance. Here’s the basic process:
- Plan Your Path: Decide where you want the lights to run. A zigzag pattern across the seating area is classic. Use a string to measure the total length needed.
- Install Anchor Points: Securely install screw hooks into sturdy structures like your house eaves, a pergola, or fence posts. For open spans, you may need to install 4×4 posts set in concrete.
- Add Guide Wires: For spans longer than 15 feet, run a galvanized steel guide wire between your anchor points. This prevents sagging and takes the tension off the light cord itself.
- Hang the Lights: Use zip ties or carabiners to attach the string light cord to the guide wire every 1-2 feet.
Time: 2-3 hours. Cost: $50-$200 depending on length and posts needed.
15. Minimalist Concrete and Wood Deck with Linear Fire Pit
This design is a triumph of material harmony and clean lines. It works because of the intentional repetition of materials—the gray concrete of the fire pit, benches, pavers, and planters creates a monolithic, unified foundation. The warm wood slats on the benches are then introduced as a necessary, contrasting element, adding warmth and tactile comfort. The low, horizontal orientation of every piece—the benches, the fire pit, the planter wall—creates a serene, grounded feeling and directs the eye outward toward the view. Compare this sleek look to the more traditional fire pit in Idea #25.
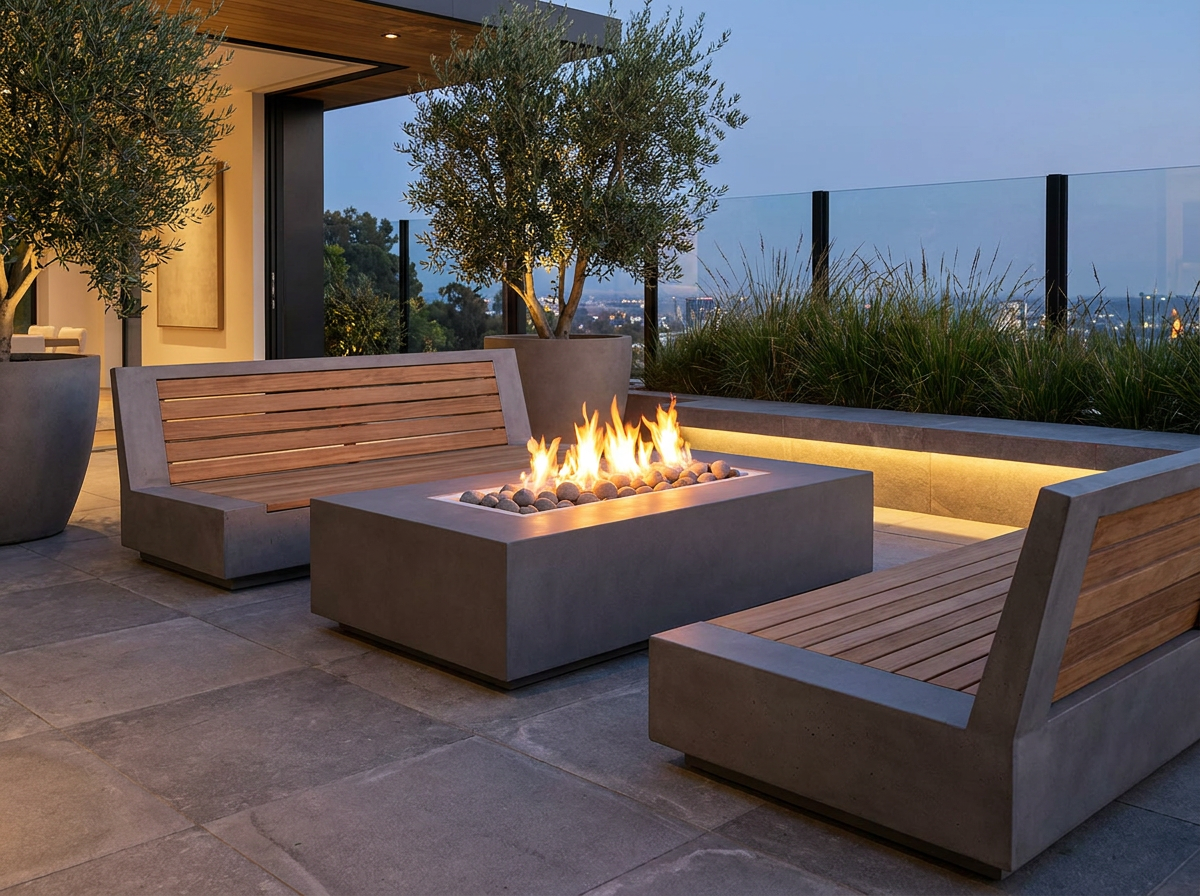
A built-in concrete feature like this is a major structural and financial commitment. Before you start, you must check these boxes:
- Foundation: Have a structural engineer confirm your ground can support the weight of poured concrete without cracking or shifting. A proper concrete slab or footing is essential.
- Gas Lines: For a fire pit like this, you’ll need to have a licensed professional run a natural gas or propane line. This is not a DIY job.
- Drainage: Ensure the design incorporates proper drainage for the fire pit itself (weep holes) and the surrounding pavers to prevent water damage.
- Budget: This is a custom job. Get multiple quotes, but expect a project of this scope to start in the tens of thousands of dollars.
16. Intimate Deck with Dark Wood Furniture and String Lights
The single element that makes this space feel so magical is the lighting. Take away the warm glow of the string lights and the central rattan lantern, and you’re left with a perfectly nice but unremarkable seating area. The lighting is what creates the intimacy and the irresistible cozy ambiance. It lowers the visual ‘ceiling’ of the space, making it feel like a protected, glowing room within the larger darkness of the evening. It’s an emotional and atmospheric tool, not just a practical one.
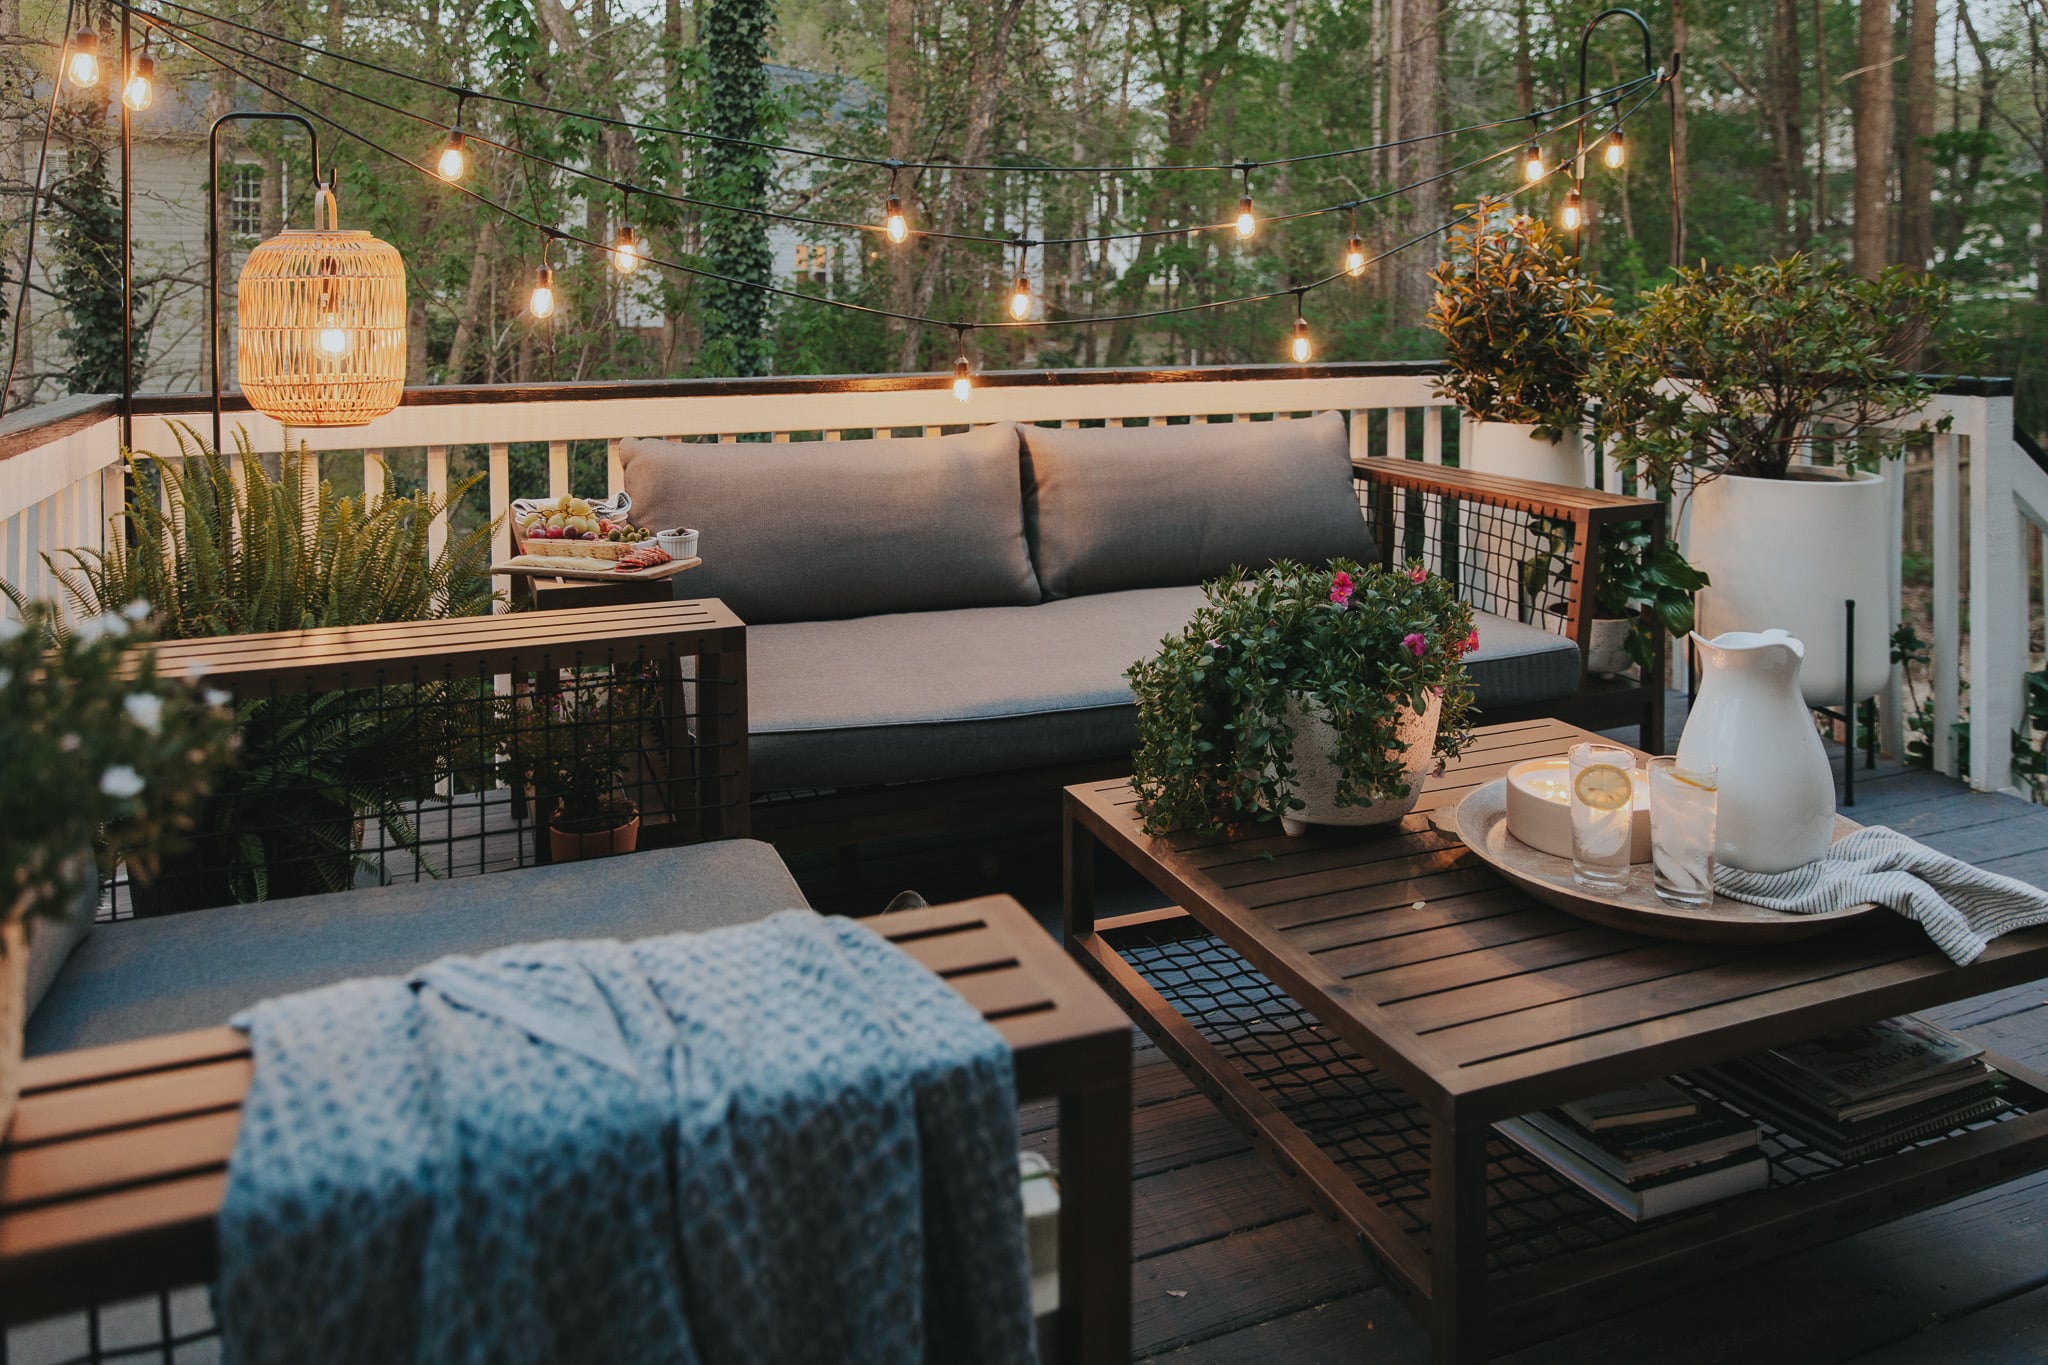
This cozy lounge concept is perfect for smaller decks, from 10×10 to 12×14 feet. The key is using apartment-scaled or ‘small space’ outdoor furniture. A loveseat instead of a full sofa, and a couple of side tables instead of a large coffee table, keep the footprint manageable while still providing plenty of comfort and function. Using vertical space is also smart—the hanging lantern draws the eye up, and placing potted plants at different levels adds depth without cluttering the floor.
17. Covered Porch with Two-Toned Counter-Height Dining Set
Counter-height outdoor dining is trending for a reason. It creates a more casual, social atmosphere than a standard-height table, feeling more like a relaxed bar or bistro. It’s also great for porches with a view, as the higher seating position allows you to see over the railing more easily. The two-tone look—in this case, white frames with gray slats—is part of the modern farmhouse aesthetic that continues to dominate Pinterest, blending traditional forms with a fresh, updated color palette.
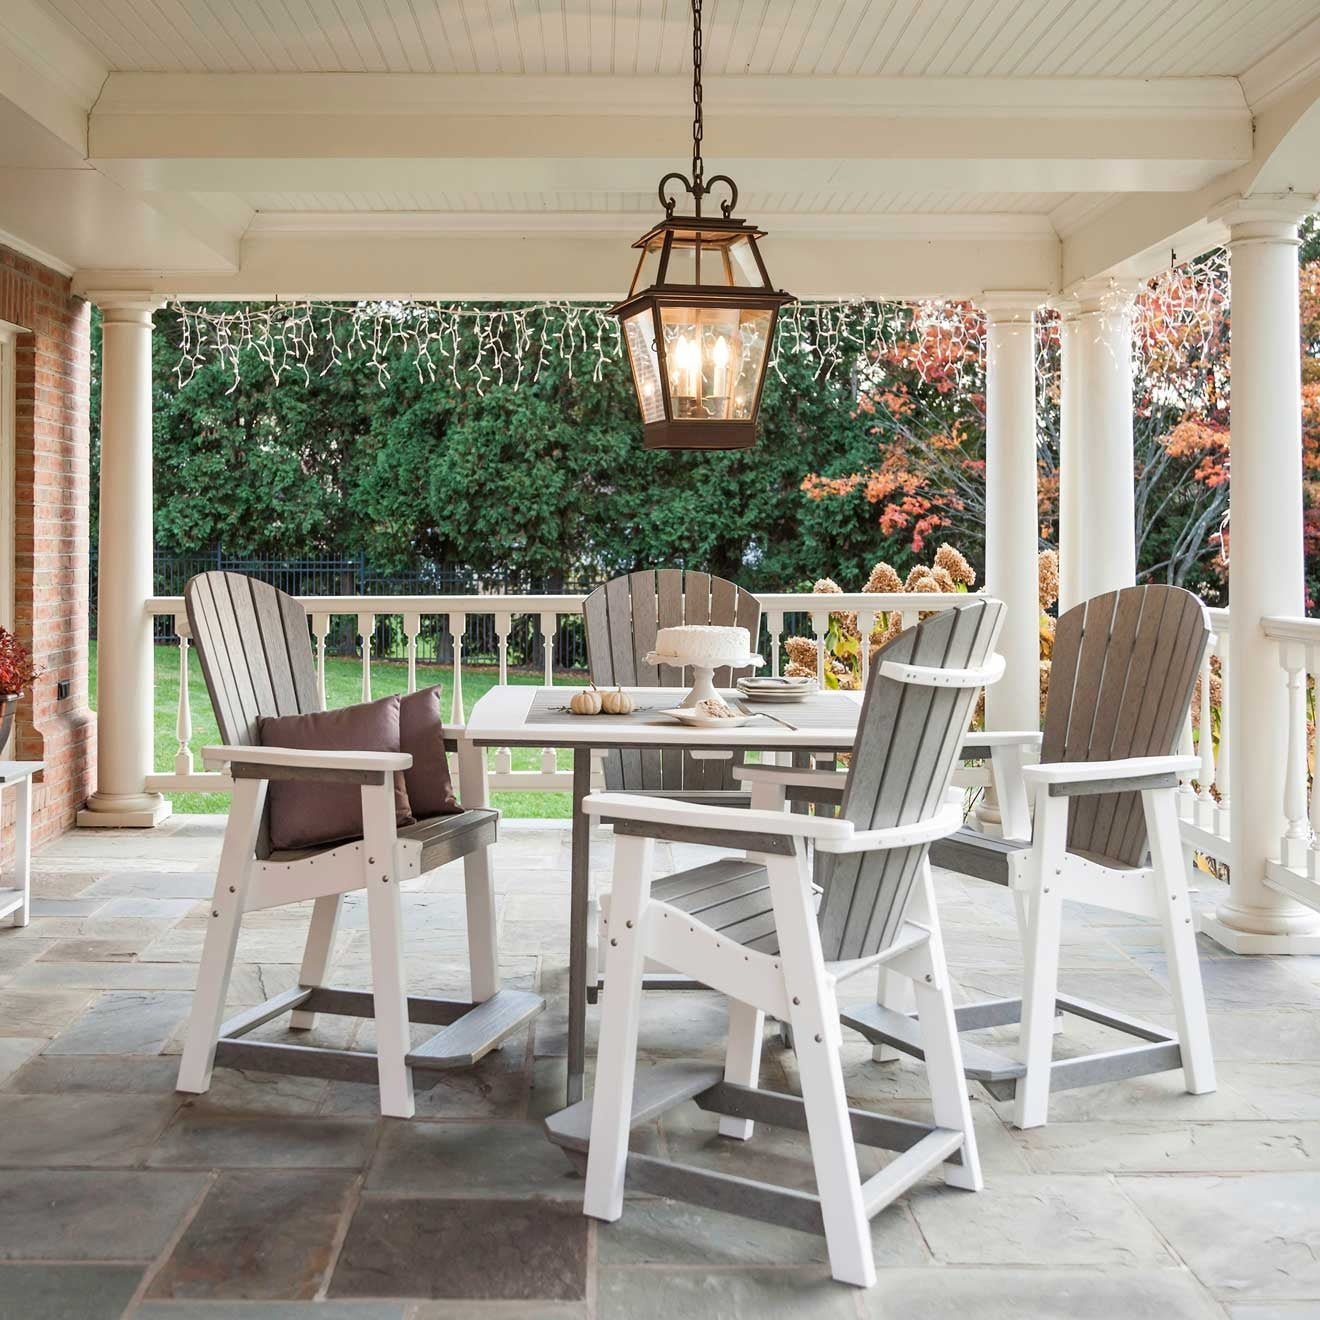
You don’t need a custom-built porch to get this look. You can create a similar vibe on an existing patio or deck. Look for counter-height dining sets at big-box stores like Lowe’s or online at Overstock, where a 5-piece set can range from $500 to $1,200. The key elements to replicate are the two-tone color scheme and the Adirondack-inspired chair design. Add a bronze-finish outdoor pendant light (a plug-in version if you don’t have wiring) and some string lights to capture that cozy, layered lighting feel.
18. Outdoor Dining and Bar Area Under an Illuminated Vine Pergola
When designing a combined dining and bar area, circulation is everything. Ensure there is a clear, 4-foot-wide path between the back of the dining chairs (when pulled out) and the front of the bar stools. This prevents a traffic jam and allows people to move freely between the two zones. Also, orient the bar to be social. Here, the stools face a large window into the house, but they could also face the main yard or the dining area, allowing the ‘bartender’ to be part of the action rather than facing a blank wall.
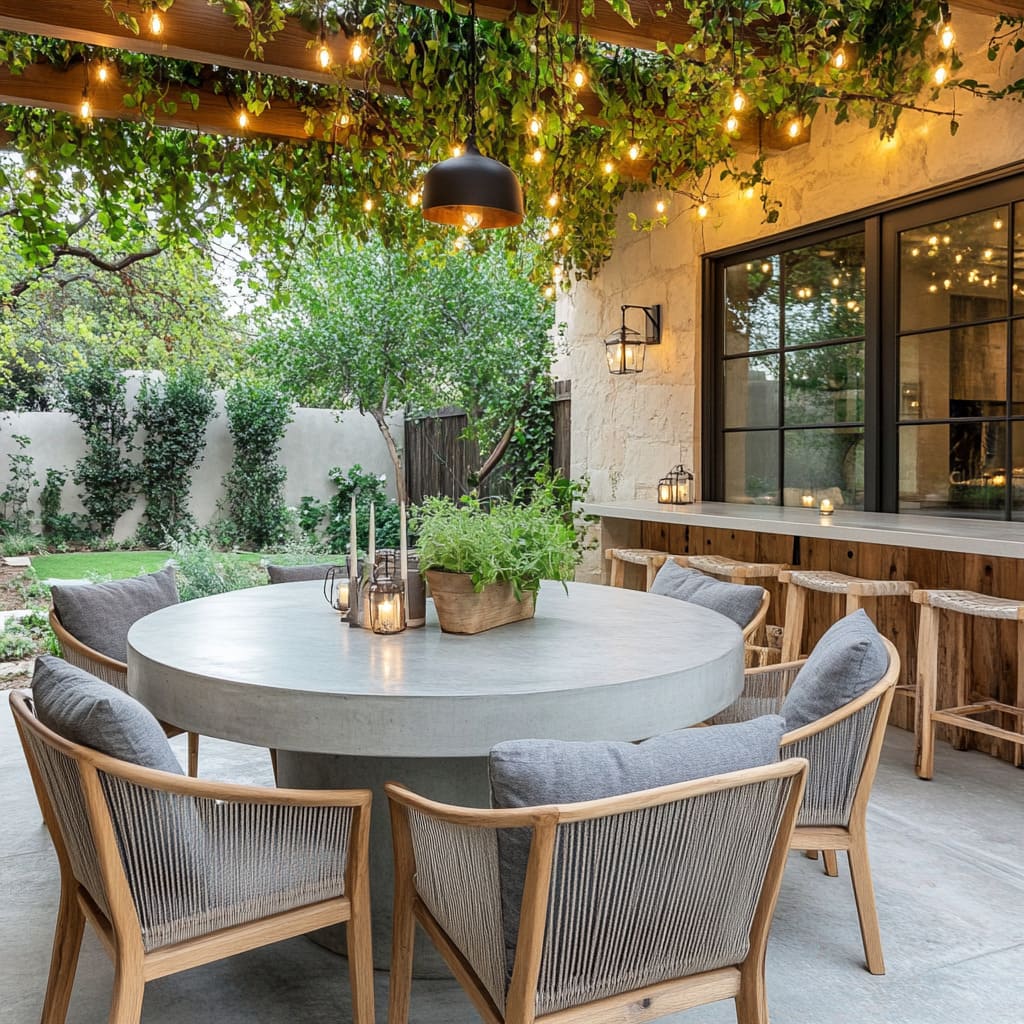
This enchanting space follows a beautiful ‘Old World Modern’ formula: 40% rustic texture (stone wall, wood bar) + 30% organic element (vines, greenery) + 20% modern form (concrete table, clean chair lines) + 10% ambient glow (string lights). The magic is in the mix. The roughness of the stone and the warmth of the wood are balanced by the sleek, cool concrete of the table. The wildness of the vines is contained by the structure of the pergola. It feels both ancient and completely of the moment.
19. Covered Deck with Separate Wicker Lounge and Wood Dining
To comfortably fit both a dining and a lounge zone on one rectangular deck, you’ll need a space that’s at least 12 feet deep and 24 feet long. This allows for roughly a 12×12 square for each ‘room.’ A dark gray outdoor rug under the lounge set helps to visually contain that zone and separate it from the dining area. Placing the dining set closer to the house (and kitchen) is often more practical, while the softer lounge seating can be positioned to take better advantage of the backyard view. A deep-covered roof makes it feel like a true outdoor room.
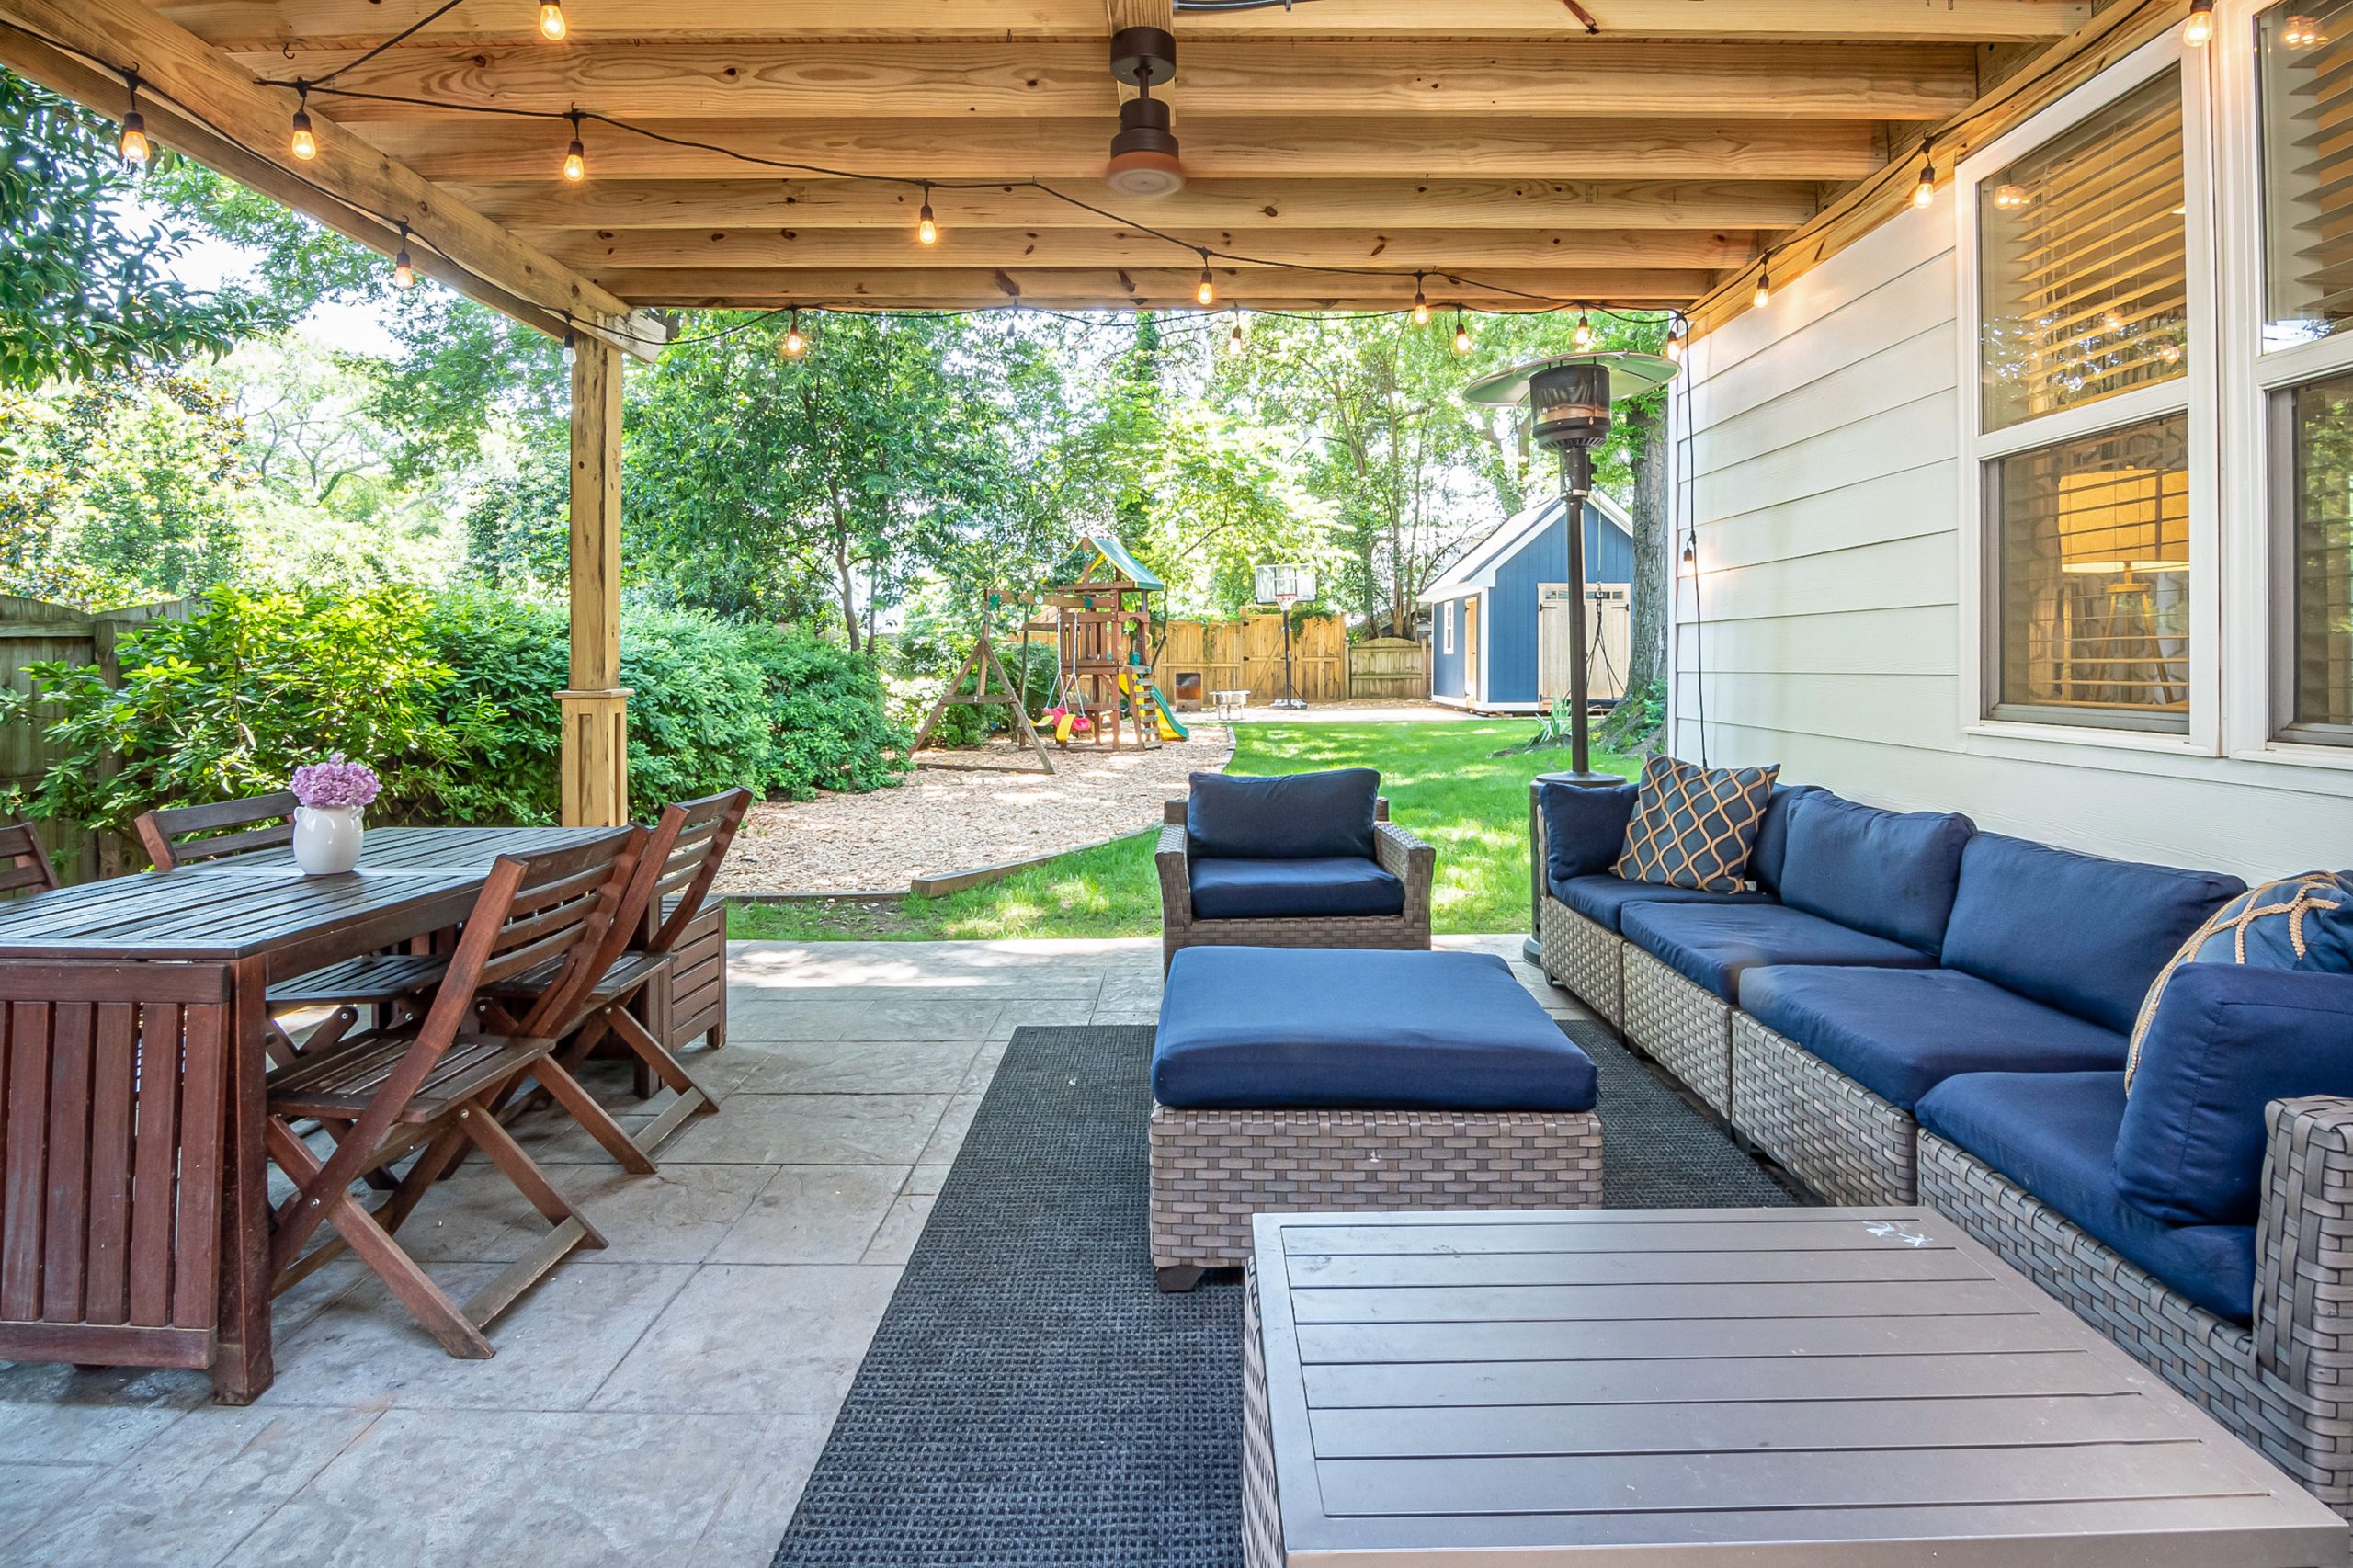
This layout works because it uses different materials to signal different functions. The lounge area uses soft, dark blue cushions and woven wicker-style seating, which reads as ‘relax.’ The dining area uses harder, slatted dark wood, which reads as ‘eat.’ This material distinction does the work of walls, creating two distinct psychological zones. The consistent gray floor pavers and white house siding act as a neutral backdrop that ties the two distinct areas together into one cohesive outdoor living space.
20. Covered Patio with Wicker Seating, Fireplace, and String Lights
Mounting a TV over an outdoor fireplace looks great on Pinterest, but it comes with real-world considerations. First, you need a TV specifically rated for outdoor use, which is significantly more expensive than indoor models, to withstand moisture and temperature swings. Second, heat rises. Even with a proper mantel, the heat from the fireplace can damage the electronics over time. Finally, glare can be a huge issue during the day, making the screen difficult to see. It’s a high-maintenance, high-cost feature that needs careful planning.
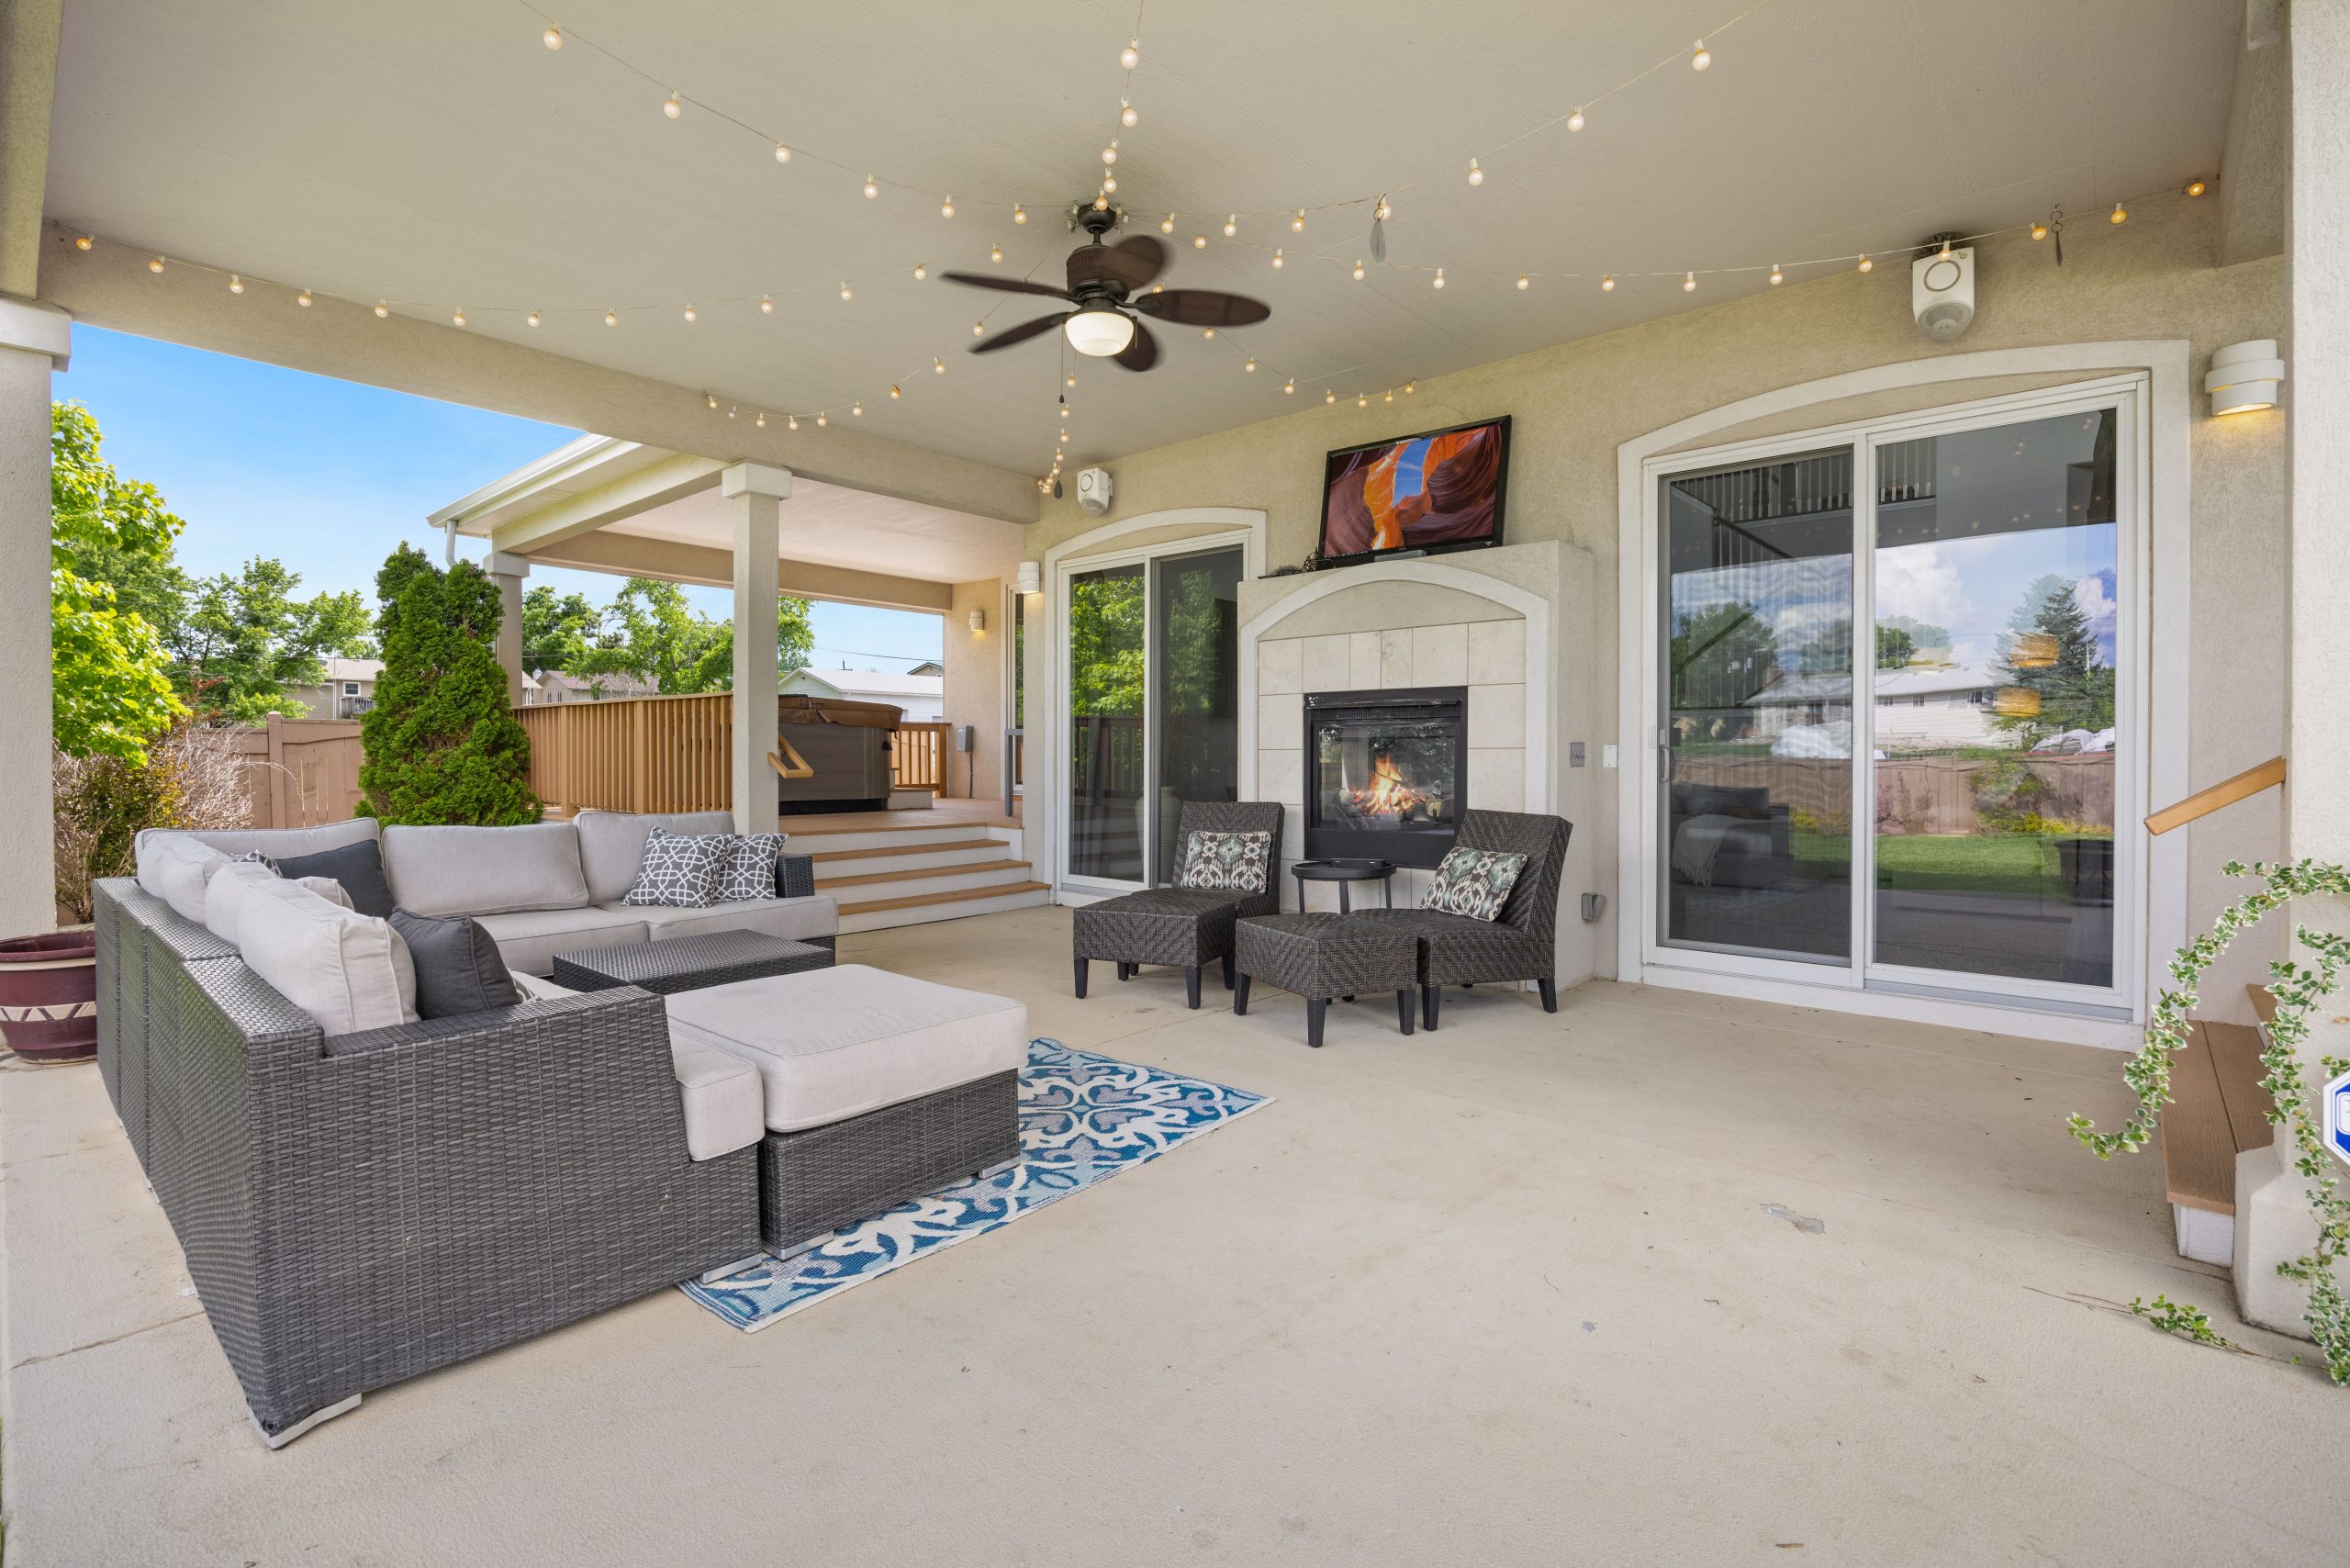
Creating a cozy, all-season covered patio like this is a serious upgrade. The fireplace is the biggest ticket item by far.
- Built-in Fireplace & TV Installation: $8,000 – $20,000+
- Wicker Sectional & Ottoman: $2,000 – $5,500
- Outdoor Rug: $200 – $600
- Ceiling Fan & String Lights: $400 – $1,000
- TOTAL: $10,600 – $27,100+
Budget alternative: Skip the built-in and opt for a high-quality portable propane fire pit ($500-$1500) and forget the TV. You’ll get 80% of the cozy ambiance for a fraction of the cost.
21. Woven Patio Conversation Set with Geometric Pillows
The throw pillows are the single element that elevates this from a standard patio set to a thoughtfully designed space. Without them, the matching gray woven furniture and gray cushions would look monotonous. The introduction of the bold geometric patterns and the solid pop of orange adds personality, visual interest, and a contemporary edge. It’s the easiest, most affordable, and most impactful way to inject your personal style into a basic furniture set. It’s proof that the small details are everything.
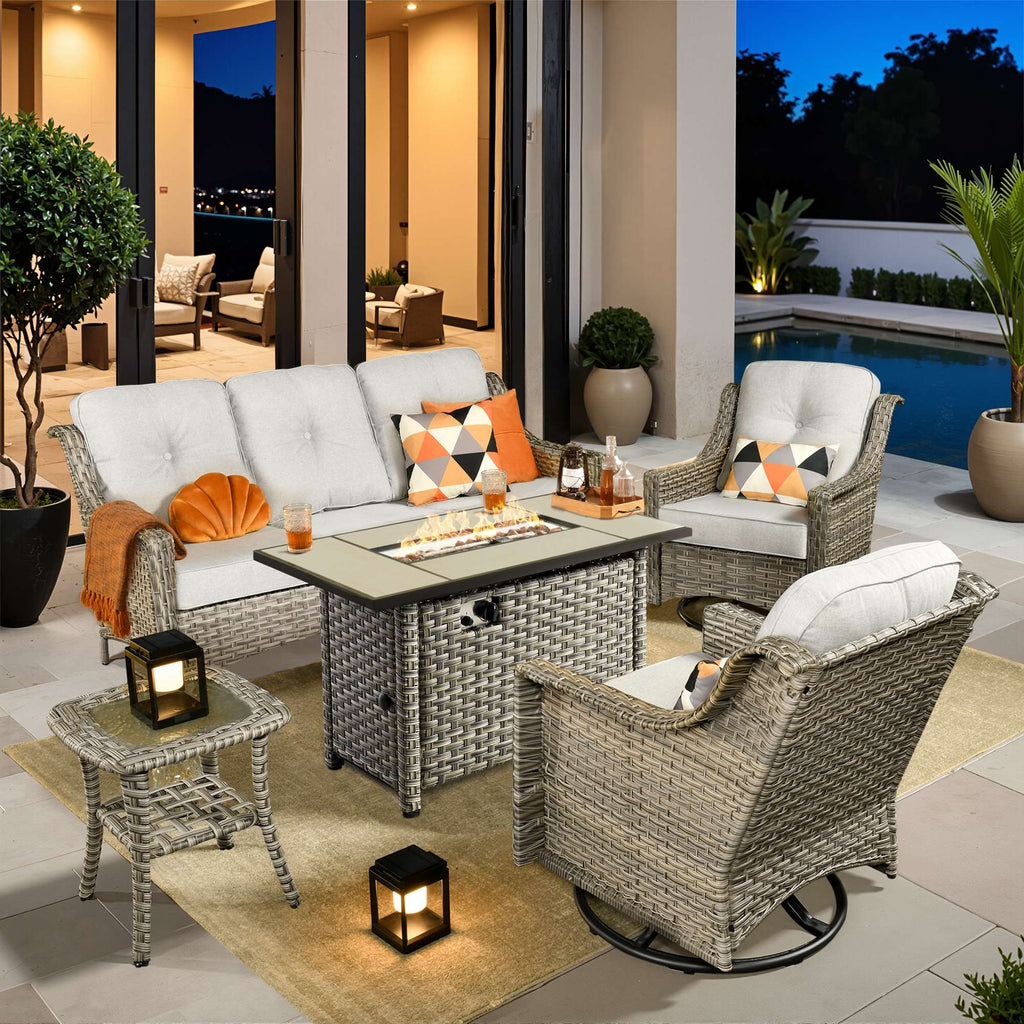
Styling pillows on an outdoor sofa is an art. Here’s a foolproof method for a polished look:
- Start with the Corners: Place your largest pillows (around 22″-24″) in the far corners of the sofa. These are your anchors. Solid colors or large-scale patterns work best.
- Layer In: Next, place slightly smaller pillows (18″-20″) in front of your anchor pillows. This is where you can introduce a complementary pattern or texture.
- Add a Lumbar: In the center of the sofa, or on an armchair, add a rectangular lumbar pillow. This breaks up all the squares and adds another layer of interest.
- The ‘Chop’: For a final designer touch, give the top of your non-overstuffed pillows a gentle ‘karate chop’ to create a crease.
It’s a small detail that makes the arrangement look relaxed and inviting.
22. Light Wood Sectional as a ‘Chat-and-Dine’ Combo
This ‘chat-and-dine’ setup, where a dining-height table is paired with a comfortable sectional, is a brilliant space-saver. The key to making it work is table height and depth. The table should be around 30 inches tall, standard dining height. Crucially, it must be narrow enough (around 30-36 inches) that you can easily converse with people on the other side. Too deep, and it feels like a boardroom. The ottomans that tuck underneath are genius, providing extra seating without taking up floor space. Also, compare this cozy version with the much larger dining setup in Idea #4.
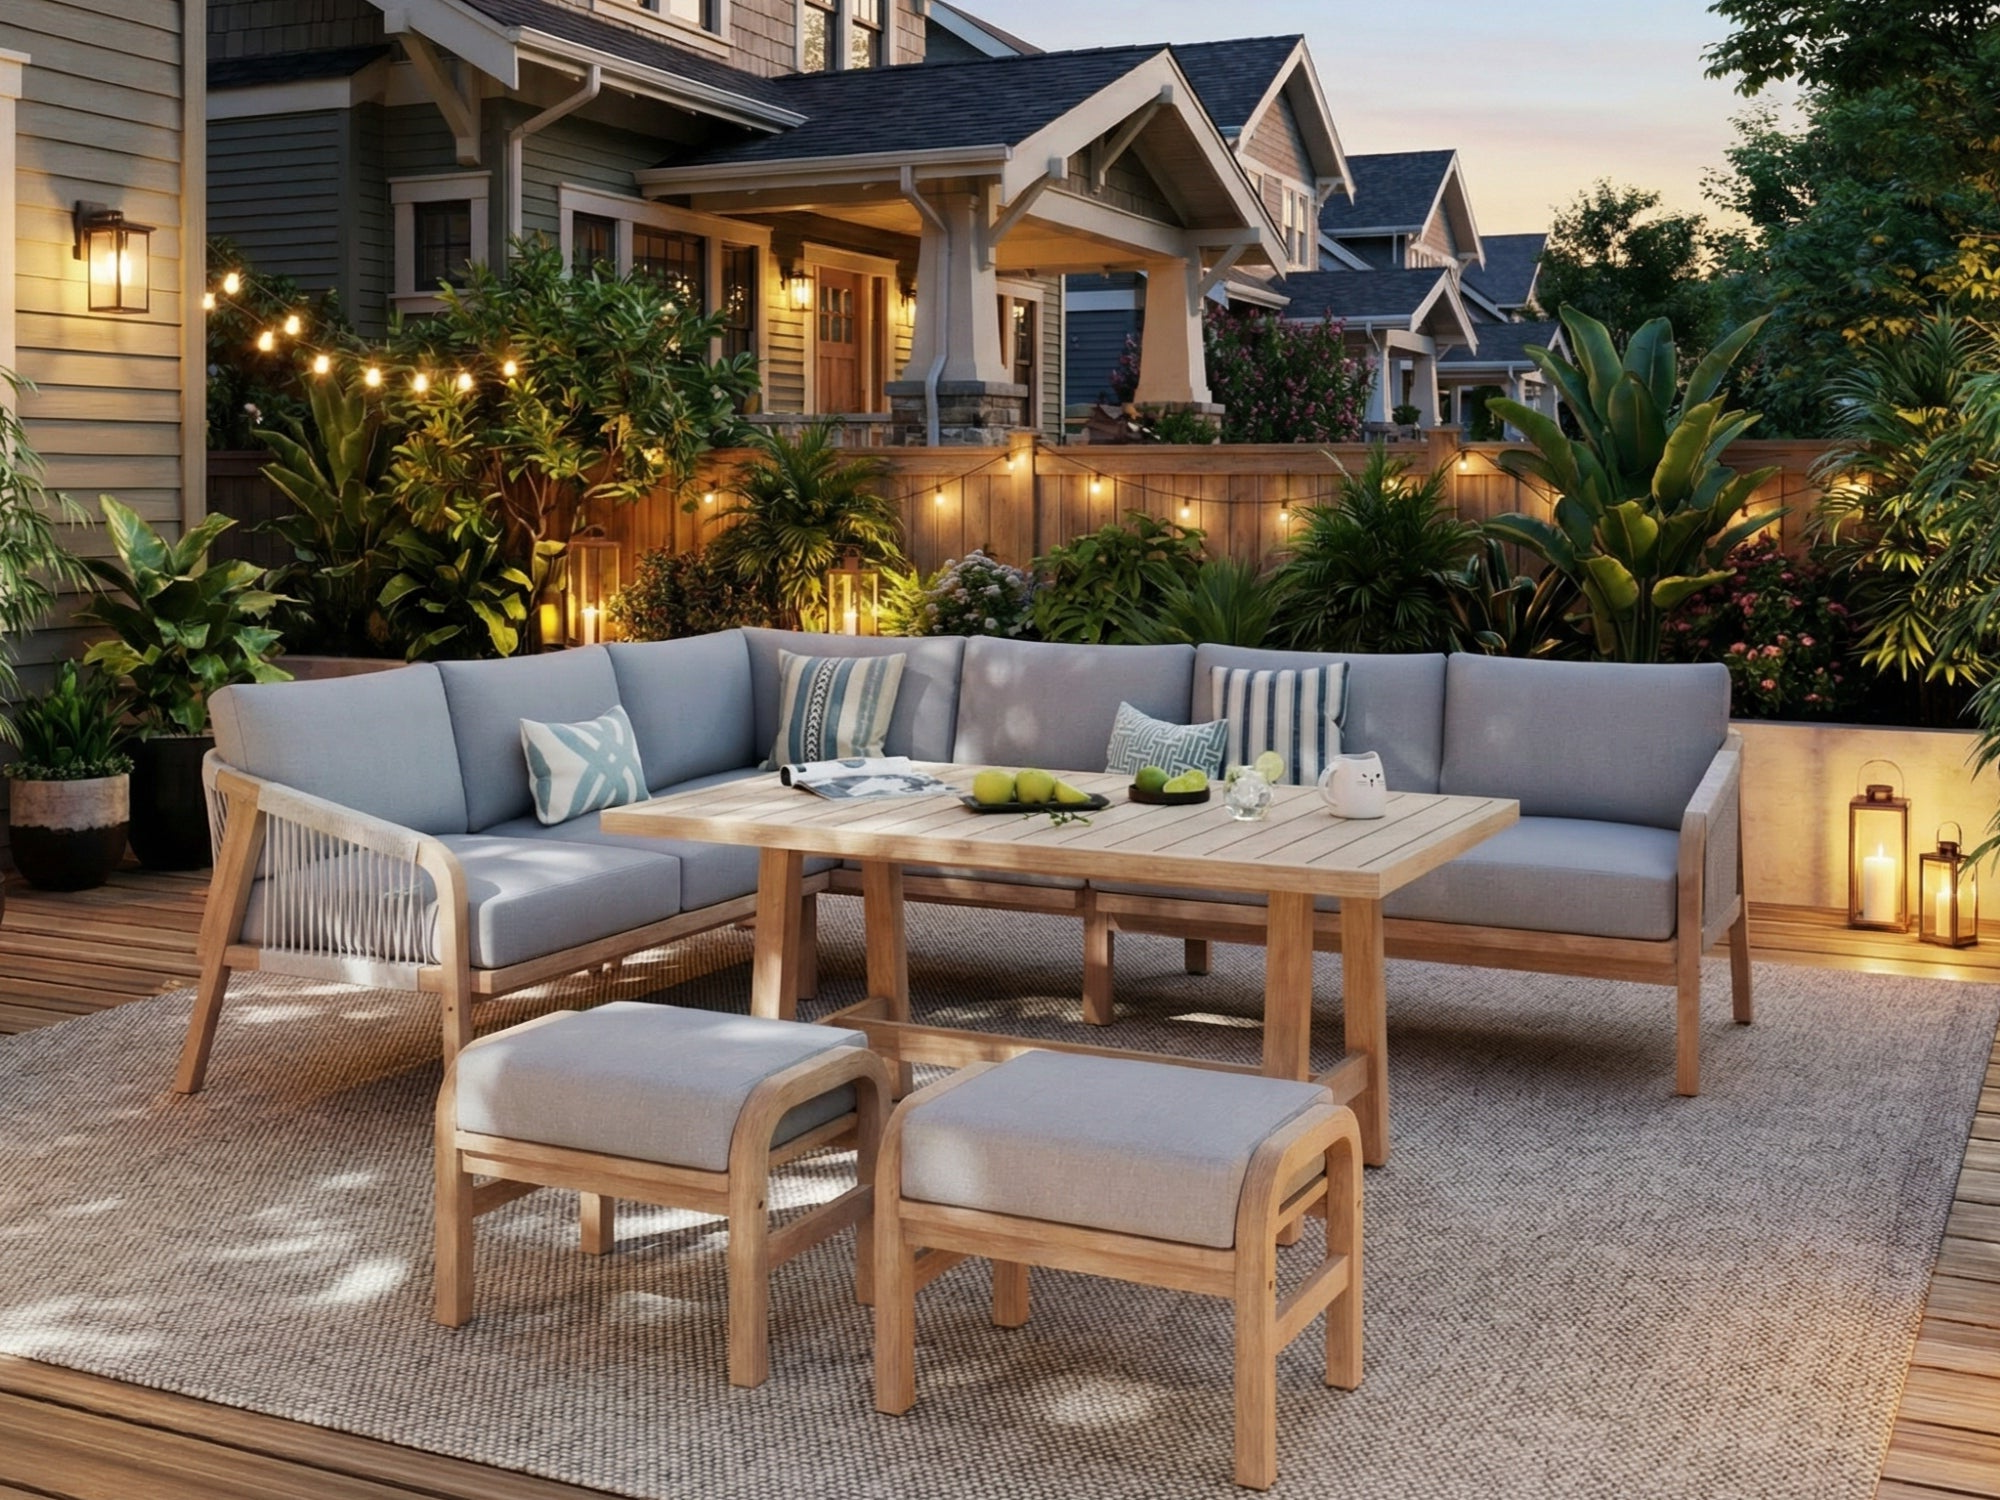
Light-colored natural wood furniture like this is stunning, but it demands diligence in an outdoor setting. Unprotected, it will quickly weather to a silvery gray and can be susceptible to mildew and rot. To maintain that warm, fresh-from-the-store look, you will need to sand and reseal it with a UV-protecting marine-grade finish at least once a year, possibly twice if you live in a harsh climate. The textured outdoor rug will also require regular vacuuming and occasional hosing down to remove trapped dirt and debris.
23. Two-Tone Adirondack Bistro Set on a Flagstone Patio
This charming bistro setup is proof that you don’t need a massive budget or a huge space to create a delightful outdoor moment. You can find similar 3-piece sets (two chairs, one table) made from durable poly-resin for $300 – $600 from brands like Polywood or at local garden centers. The two-tone finish gives it a custom look. The real savings come from the scale; by creating a small, intimate vignette, you can splurge a little on great wine and cheese for the slate platter. It’s about creating an experience, not just filling a space.
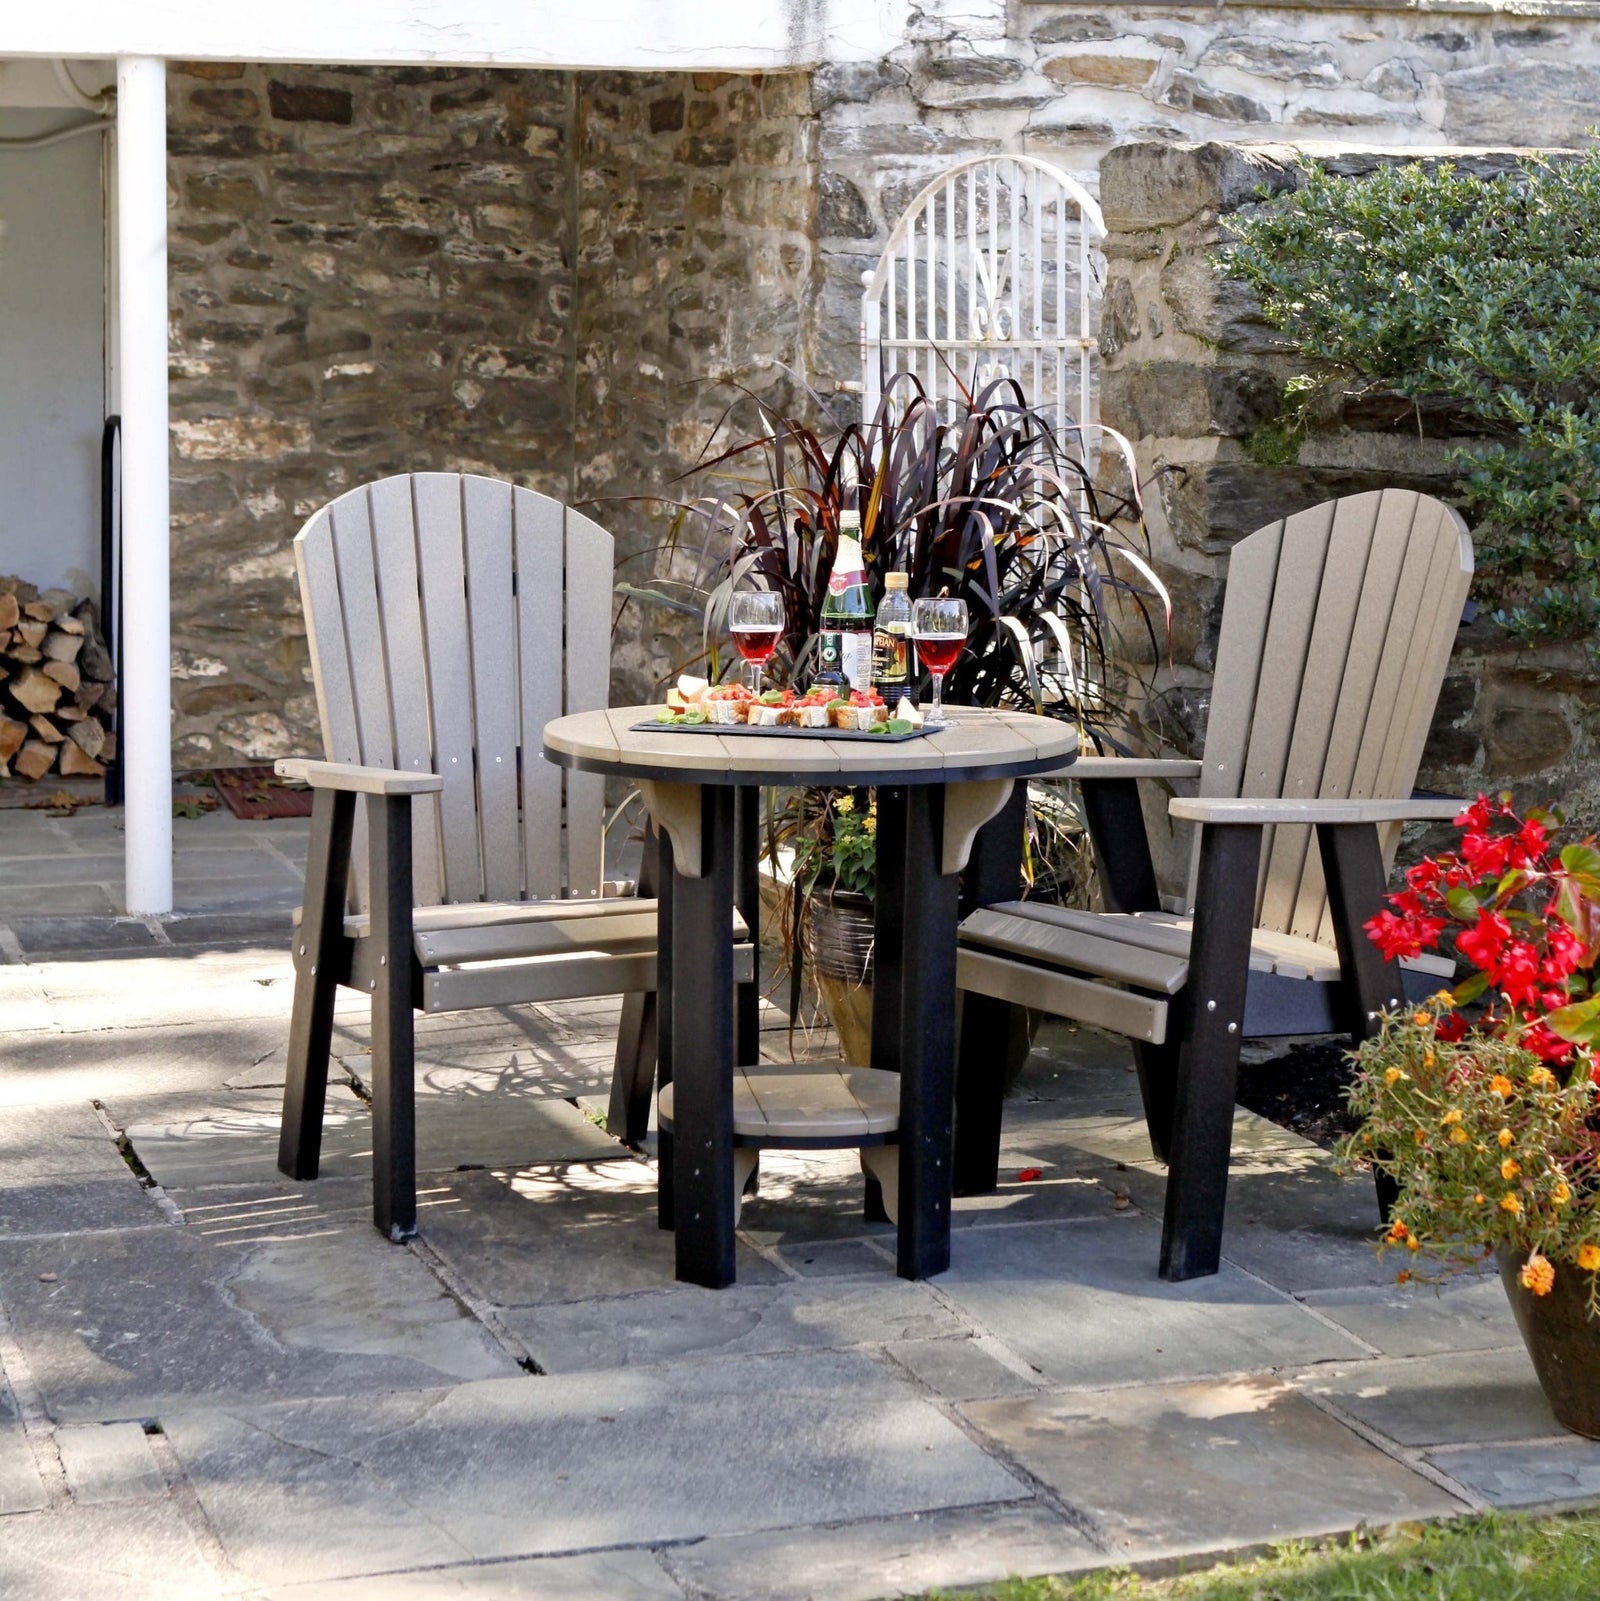
An irregular flagstone patio looks beautiful and rustic, but it can be a little wobbly for furniture. The uneven surfaces and wide grout lines mean you might have to hunt for a stable spot for your table and chairs. A tippy wine glass is a real risk! When setting up, check that each piece of furniture has all four feet on solid stone, not teetering on an edge or in a grout line. For a more stable but still natural look, consider thermal-cut flagstone, which has a uniform thickness and lays much flatter.
24. Deck with Woven Rattan Lounge and Dining Under Pergola
The success of this design lies in its sophisticated texture play and clear zoning. The woven rattan furniture in both the lounge and dining areas creates a strong, cohesive through-line. However, the function of each zone is differentiated by form: a soft, low-slung L-shaped sofa for relaxing versus upright chairs for dining. The pergola is the hero element, defining the entire area as an outdoor ‘room’ and casting beautiful, dynamic shadows that add another layer of texture to the clean, light gray floor tiles.
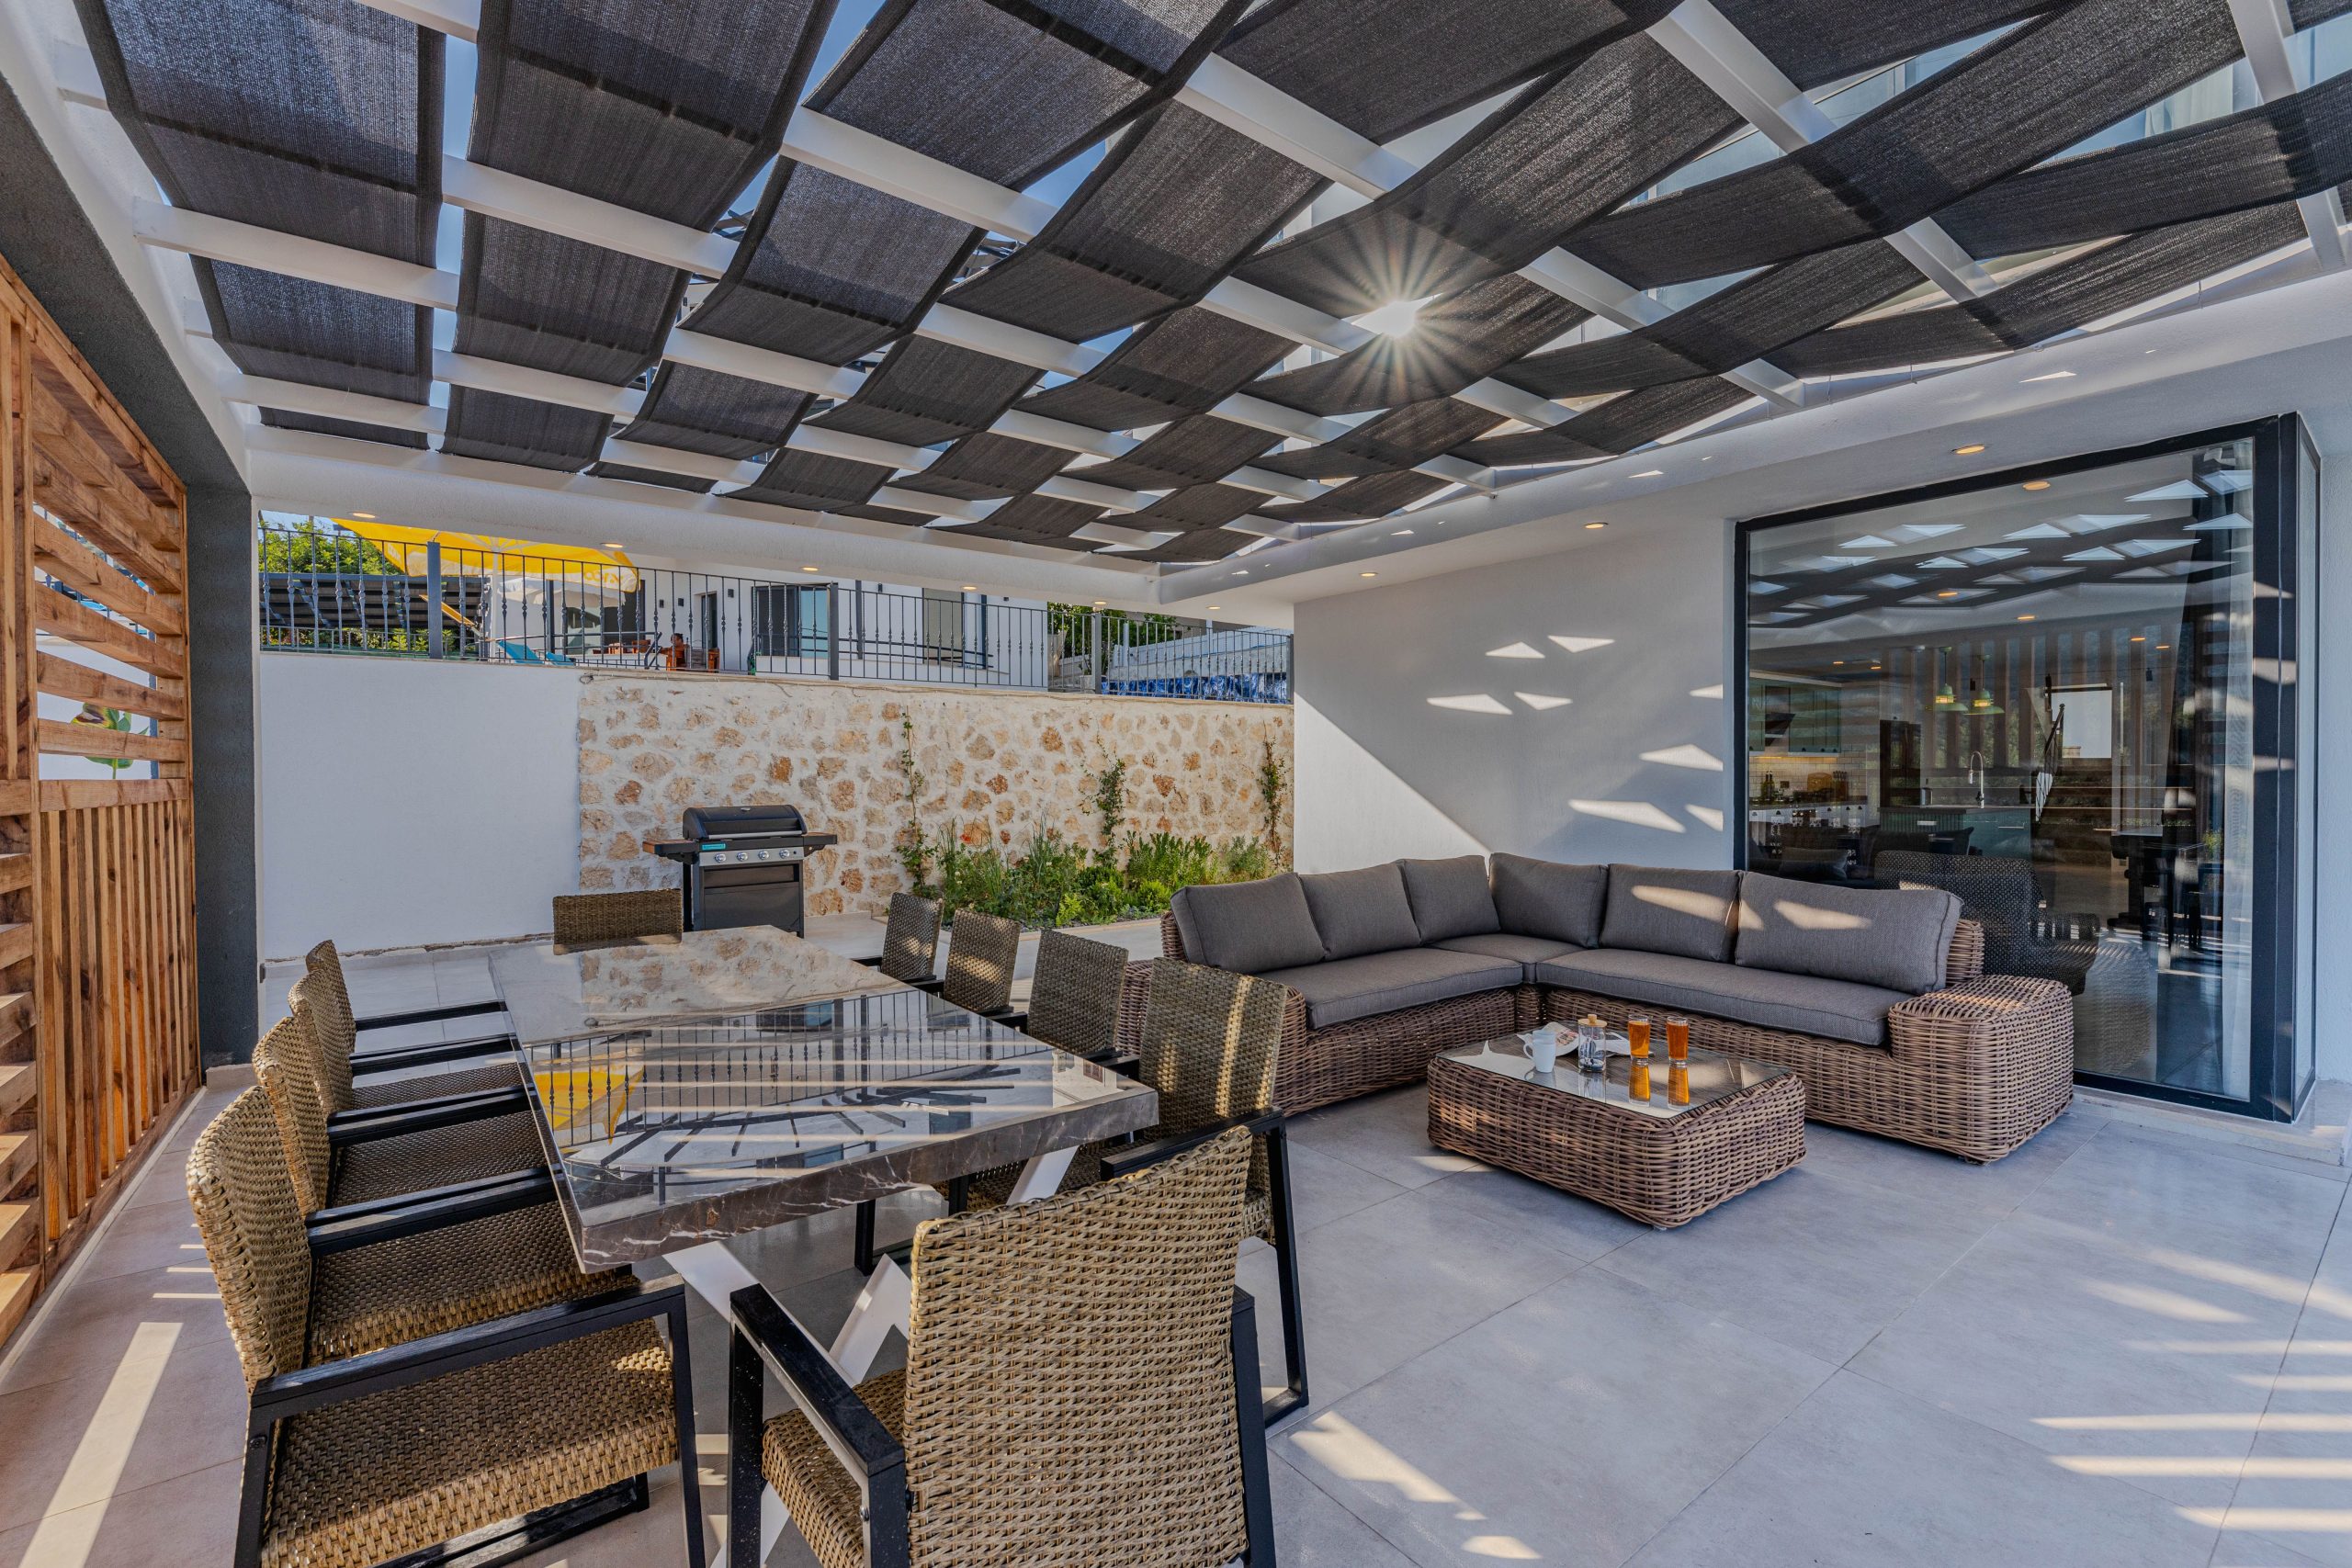
A dual-zone layout of this magnitude requires a substantial footprint, ideally a space that is at least 16 feet deep by 25 feet wide. This provides enough room for a full dining set and a generous sectional without feeling crowded. The pergola structure should be scaled to cover both zones to make the entire space feel intentional. A minimum ceiling height of 9 feet for the pergola is recommended to maintain an open, airy feeling and to accommodate a ceiling fan if desired.
25. Circular Fire Pit with Black Adirondack Chairs on a Brick Patio
Laying a brick patio in a herringbone pattern is a challenging but rewarding project. Here is a simplified overview:
- Excavate and Prep Base: Dig out 6-8 inches of soil. Fill with 4-6 inches of paver base (crushed gravel), compacting it firmly with a plate compactor.
- Add Sand Layer: Add a 1-inch layer of paver sand and screed it perfectly level. This is the crucial step for a flat surface.
- Lay the Bricks: Start laying your bricks in the 90-degree herringbone pattern, tapping them into the sand with a rubber mallet. Work from one corner outwards.
- Install Edging: Secure the perimeter with paver edging to prevent the bricks from shifting.
- Fill Joints: Sweep polymeric sand into the joints, mist with water to activate, and let it cure.
Time: 2-4 days for a 12×12 area. Cost: $5-$15 per sq. ft.
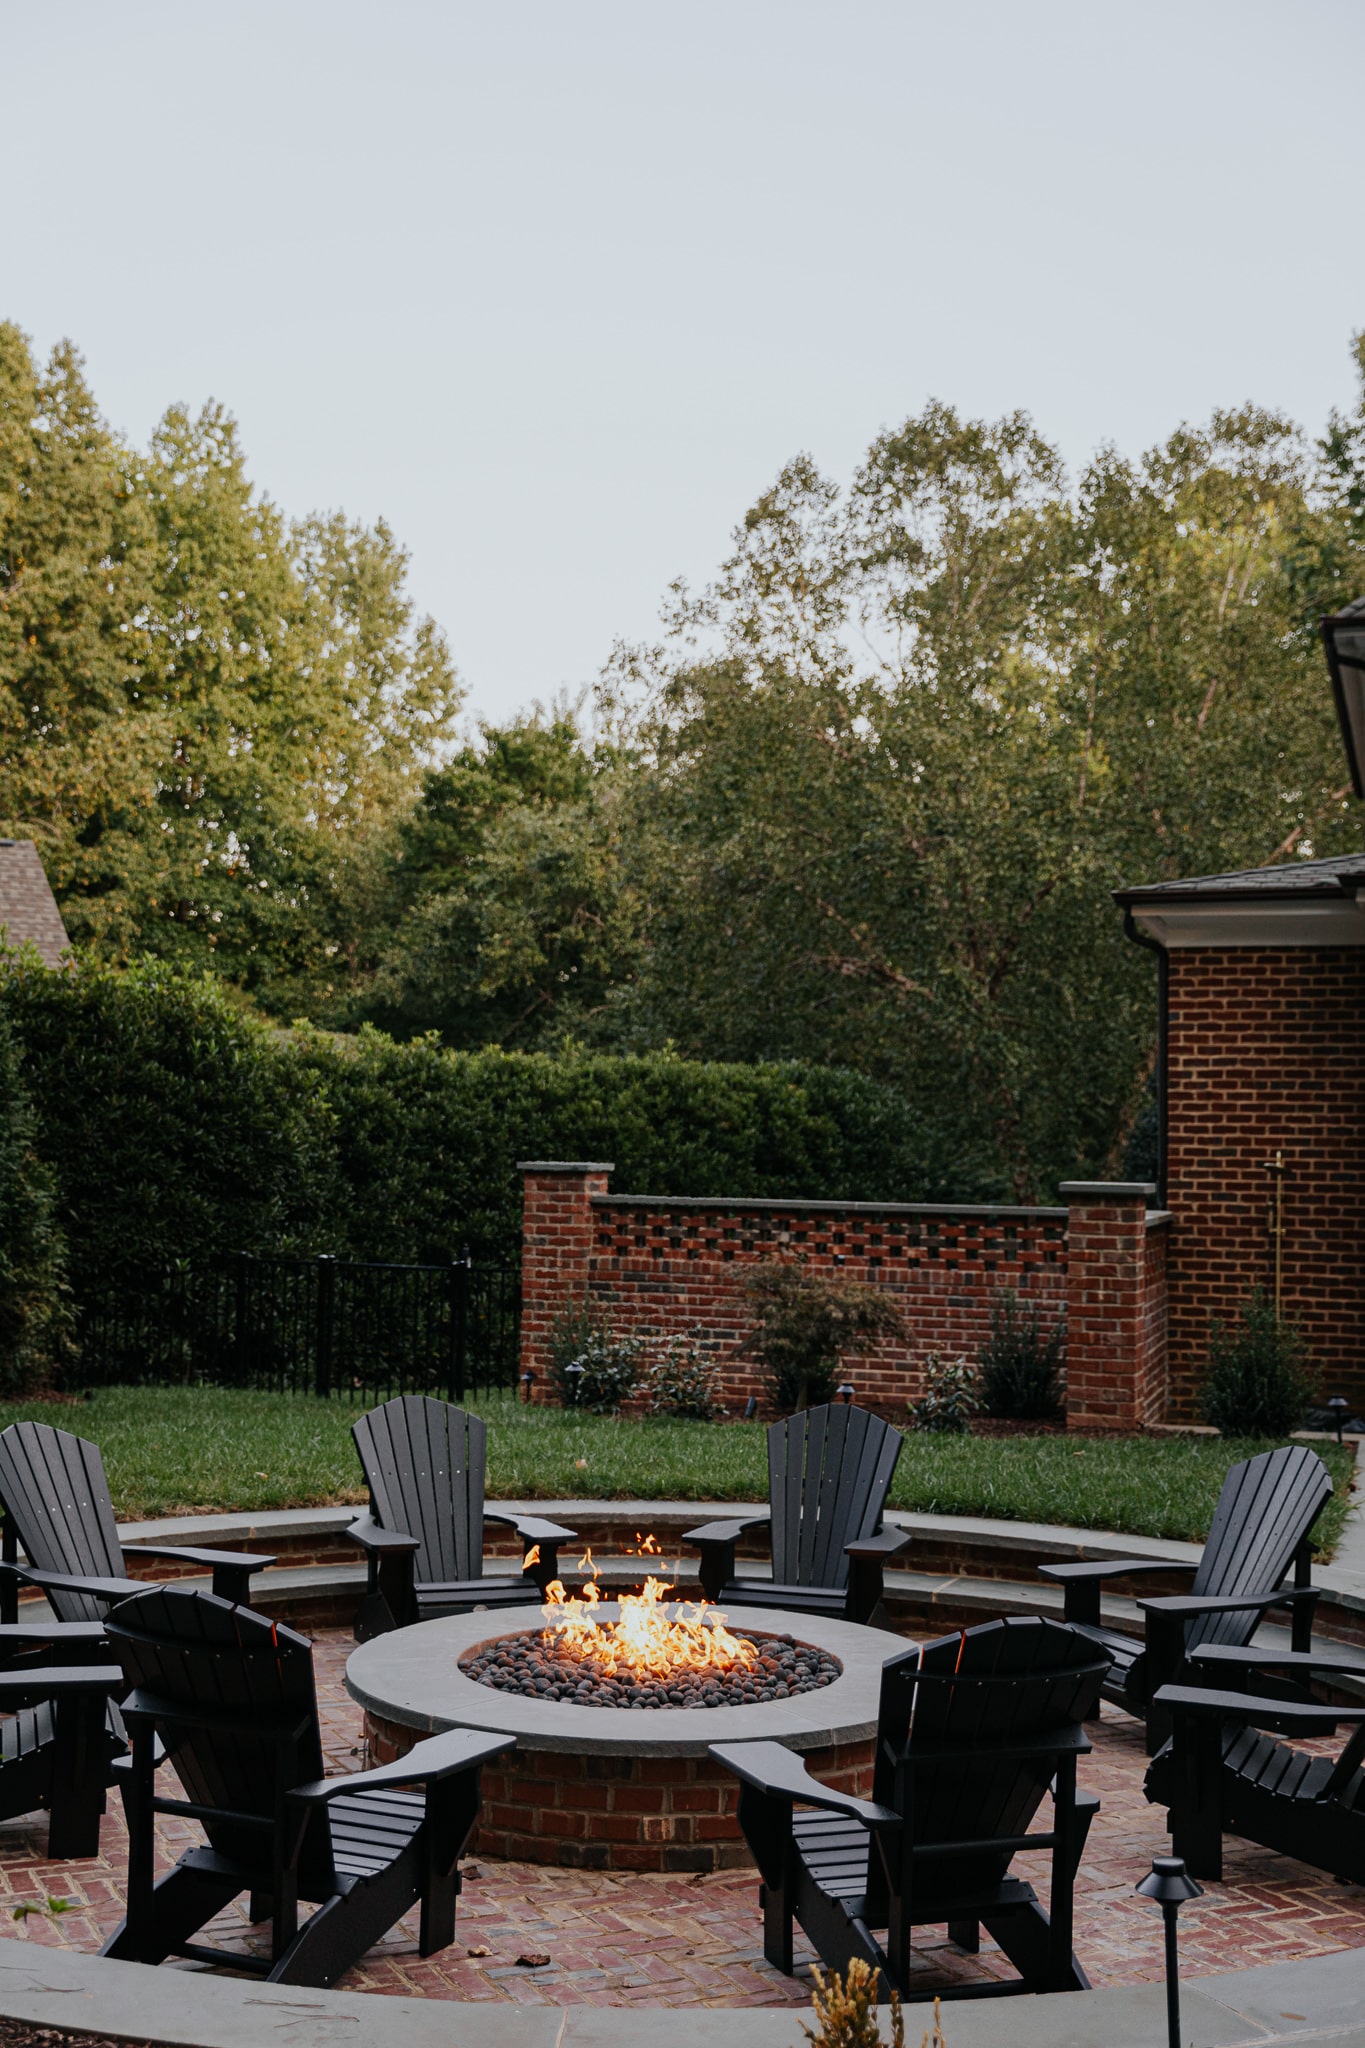
The herringbone brick patio is the undeniable star of this show. You could have any number of chairs or fire pits, but it’s the rich color, classic pattern, and texture of the brick that gives this space its timeless, established character. It feels permanent and substantial. The circular arrangement of the chairs and fire pit perfectly contrasts with the angular, geometric pattern underfoot, creating a dynamic visual tension that is incredibly satisfying. Take away that brick, and the entire soul of the space is gone.
26. Screened Deck with Woven Lounge Chairs and Ceiling Fan
For a screened-in porch, choose furniture with an open, airy construction to maximize the feeling of space and light. The woven seating and open wood frames of these lounge chairs are perfect because they don’t feel heavy or block views. Also, every screened porch needs an outdoor-rated ceiling fan. It’s a non-negotiable for air circulation on still, humid days, and it also helps to keep flying insects at bay. Size it to the room: for a porch up to 225 sq ft, a 52-inch fan is usually appropriate.
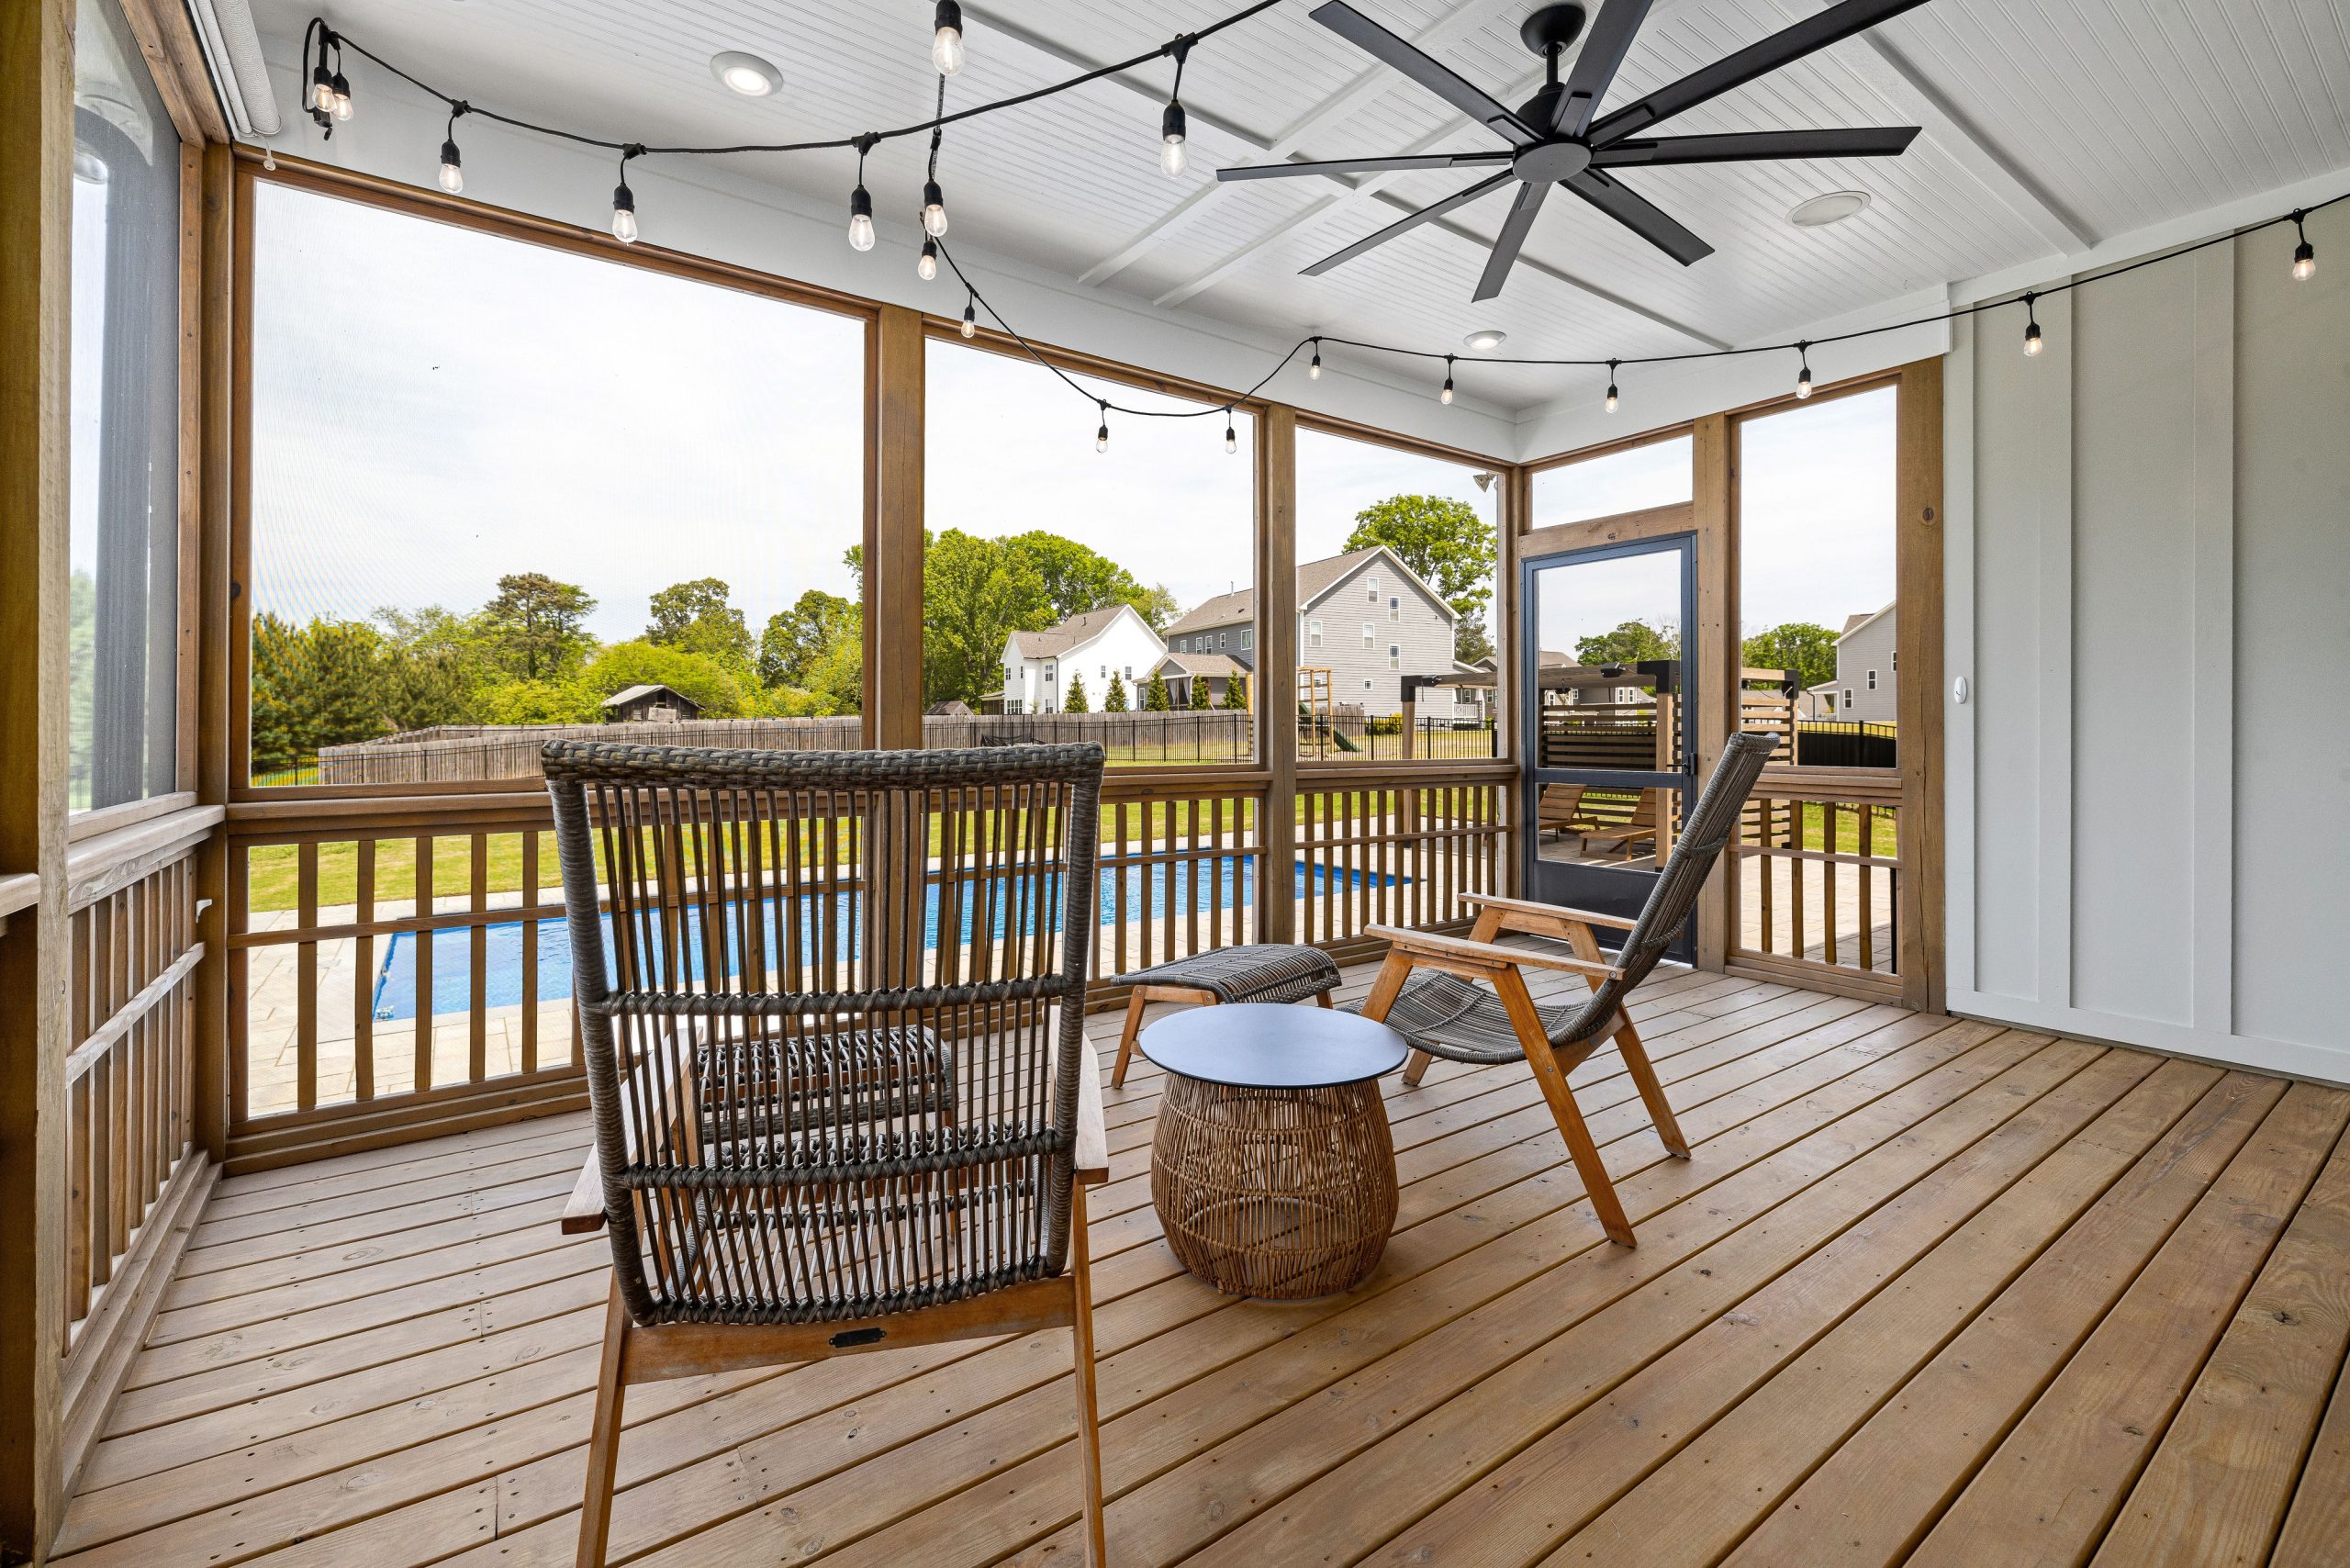
The screened-in porch is having a major renaissance. We’re realizing that to truly use our outdoor spaces, we sometimes need a buffer from the elements—be it relentless sun, rain, or, most importantly, bugs. A screened porch offers the best of both worlds: you get the breeze and the views of being outdoors, but with the comfort and protection of an indoor room. It’s the ultimate solution for extending your living space, creating a three-season room that’s perfect for lounging, dining, or just listening to the rain without getting wet.
27. Vibrant Orange and White Poolside Deck Lounge
This poolside paradise runs on a high-energy formula: 50% crisp white + 30% bold orange + 20% natural accents. The white furniture and planters provide a clean, modern base that acts like a blank canvas. The vibrant orange, used strategically in the large rug and pillows, brings an immediate sense of fun and energy. The wood deck and woven planters add just enough natural texture to keep the look from feeling too stark or clinical. The sparkling blue of the pool is the final, perfect complementary color.
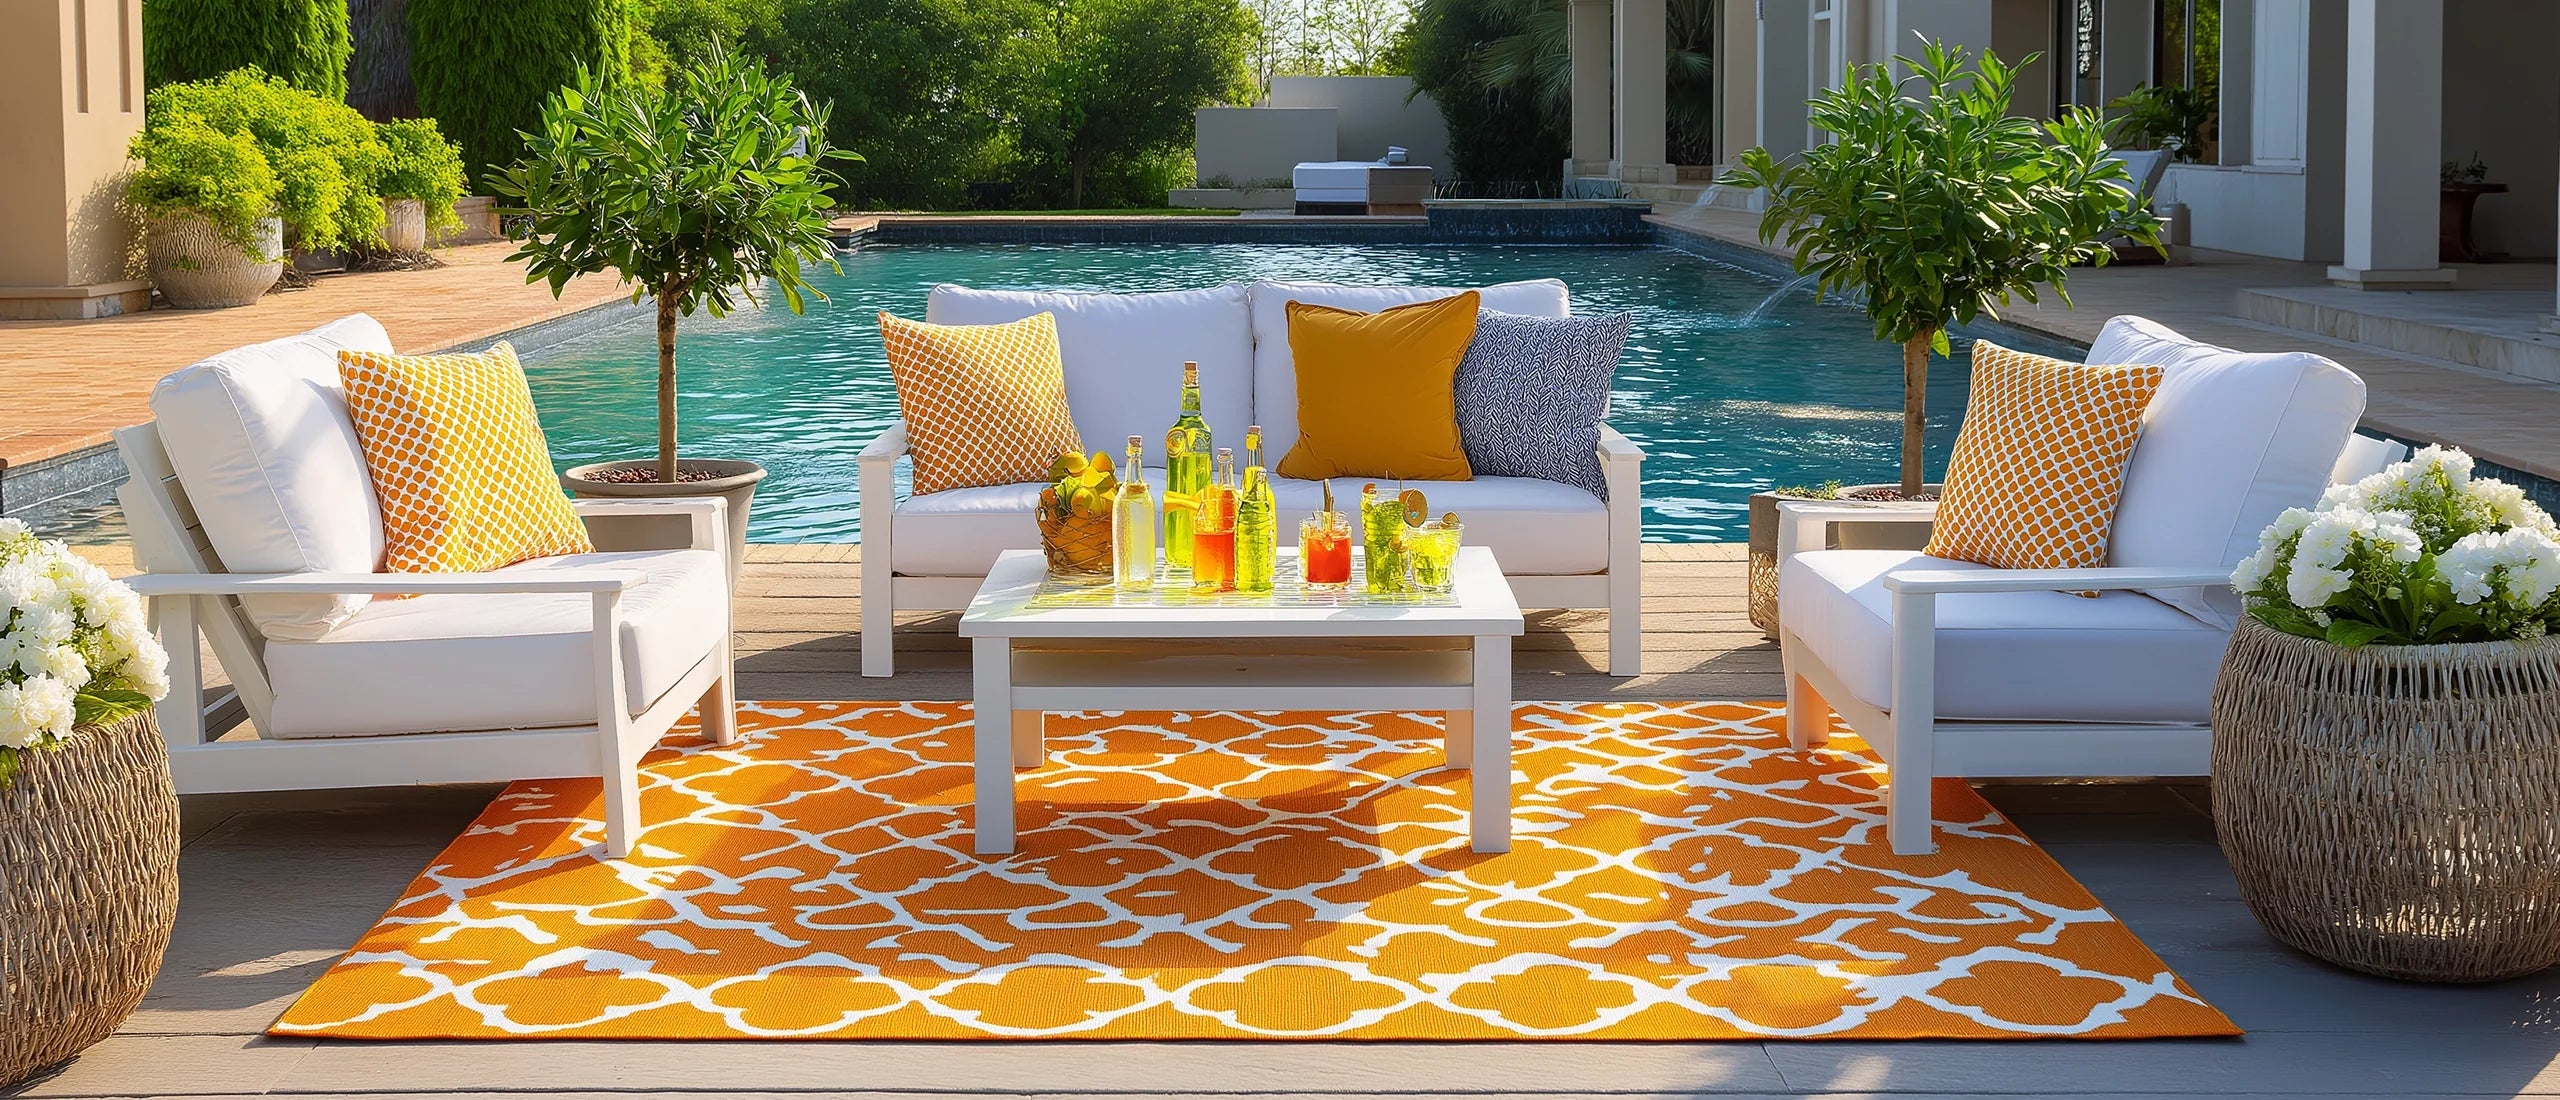
You can get this cheerful, modern look for less. Start with a basic white or light gray outdoor sofa set from IKEA or Target’s seasonal collection for around $800-$1,500. The key is to find one with simple, clean lines. Then, go all-in on the accessories. Find a bold orange geometric outdoor rug on a site like Rugs USA or Wayfair for $150-$300. Load up on orange and yellow pillows from home goods stores. It’s the color, not the price tag of the sofa, that makes the statement here.
28. Woven Rattan Armchairs Paired with a Modern White Sofa
This arrangement is successful because it rejects the ‘matchy-matchy’ patio set in favor of a curated, layered look. The contrast between the two main seating elements is key. The woven rattan armchairs bring in natural, bohemian texture and a classic shape. In contrast, the modular white sofa is sleek, low-profile, and distinctly modern. By pairing these two different styles, the space feels more like an intentionally designed living room that happens to be outdoors. The round gray ottoman serves as a soft bridge between the two styles.
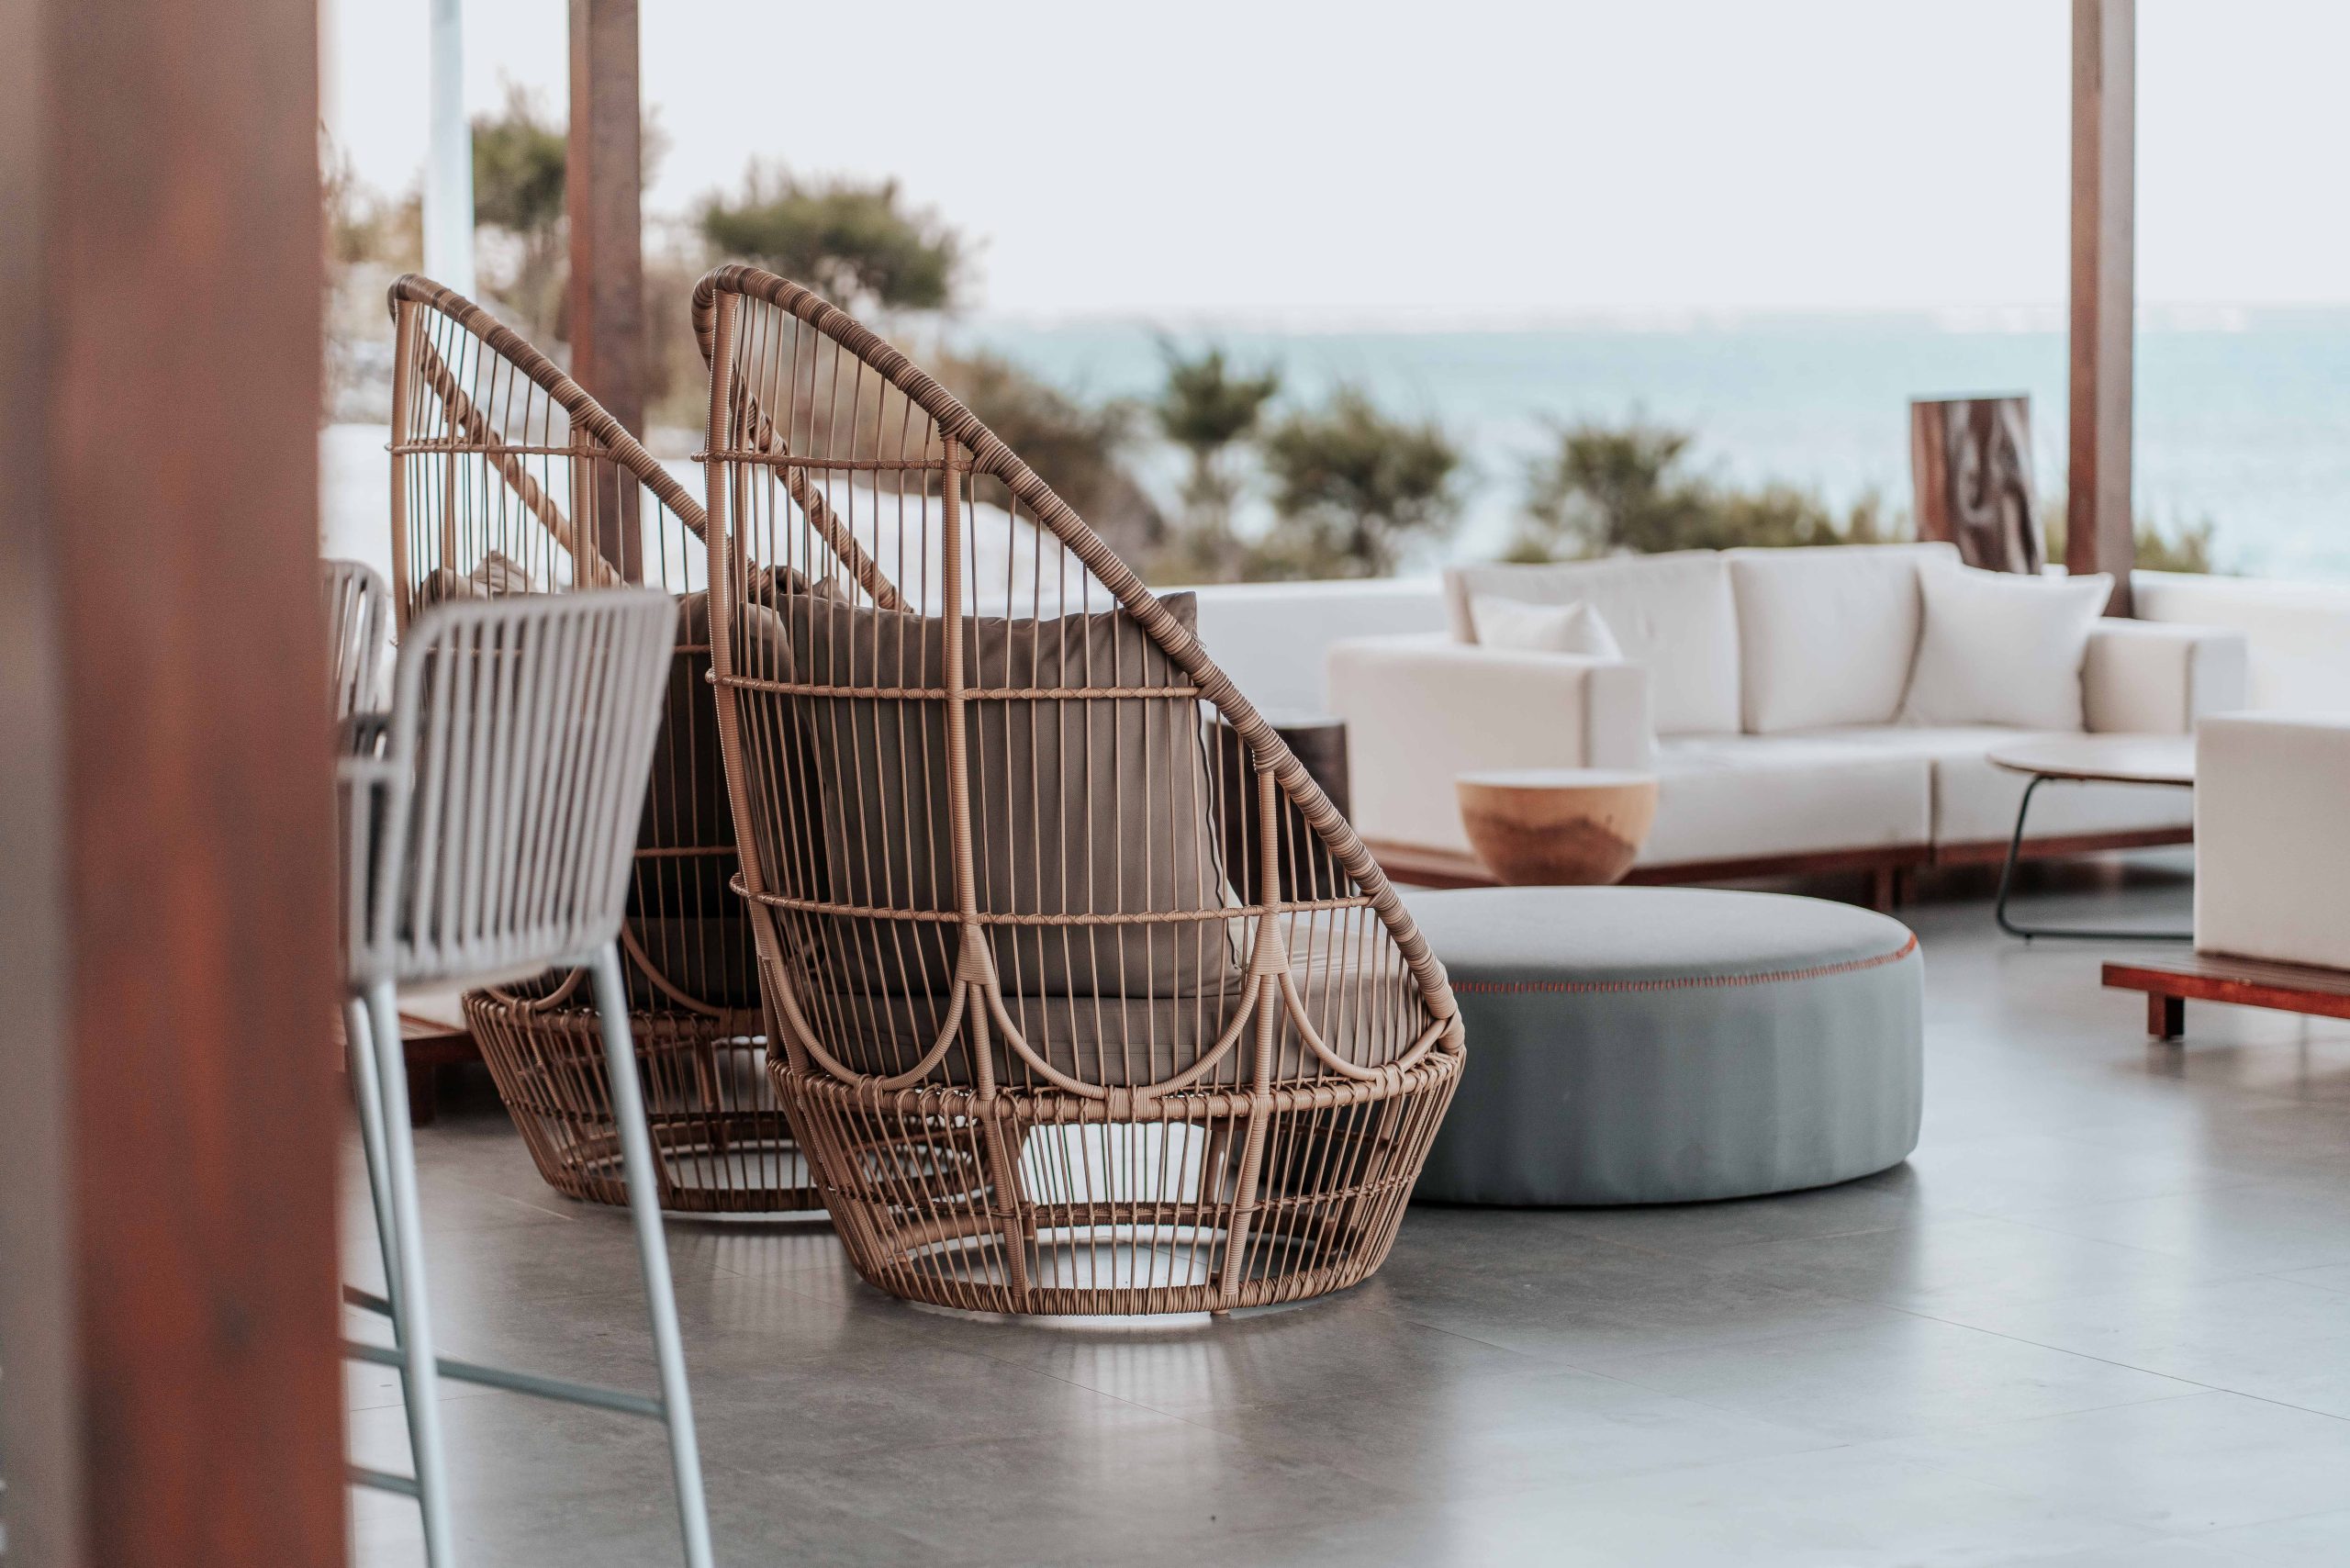
A white outdoor sofa is the ultimate style statement, but it is also the ultimate maintenance challenge. Forget spills—pollen, dust, bird droppings, and leaves will be your sworn enemies. You absolutely must use furniture covers every single time you’re done using it, or be prepared to store the cushions indoors. Even with performance fabrics, dirt will find a way to settle in. If you’re not prepared for that level of commitment, opt for a light gray or beige sofa instead. You’ll get a similar airy feel with a lot more grace for real life.
29. Patio with Stone Fireplace, High-Top Dining, and Chaise Lounge
A multi-zone patio anchored by a massive stone fireplace is a dream feature, with a price tag to match. The stonework is the primary cost driver. This setup mixes high and low for a complete outdoor living solution.
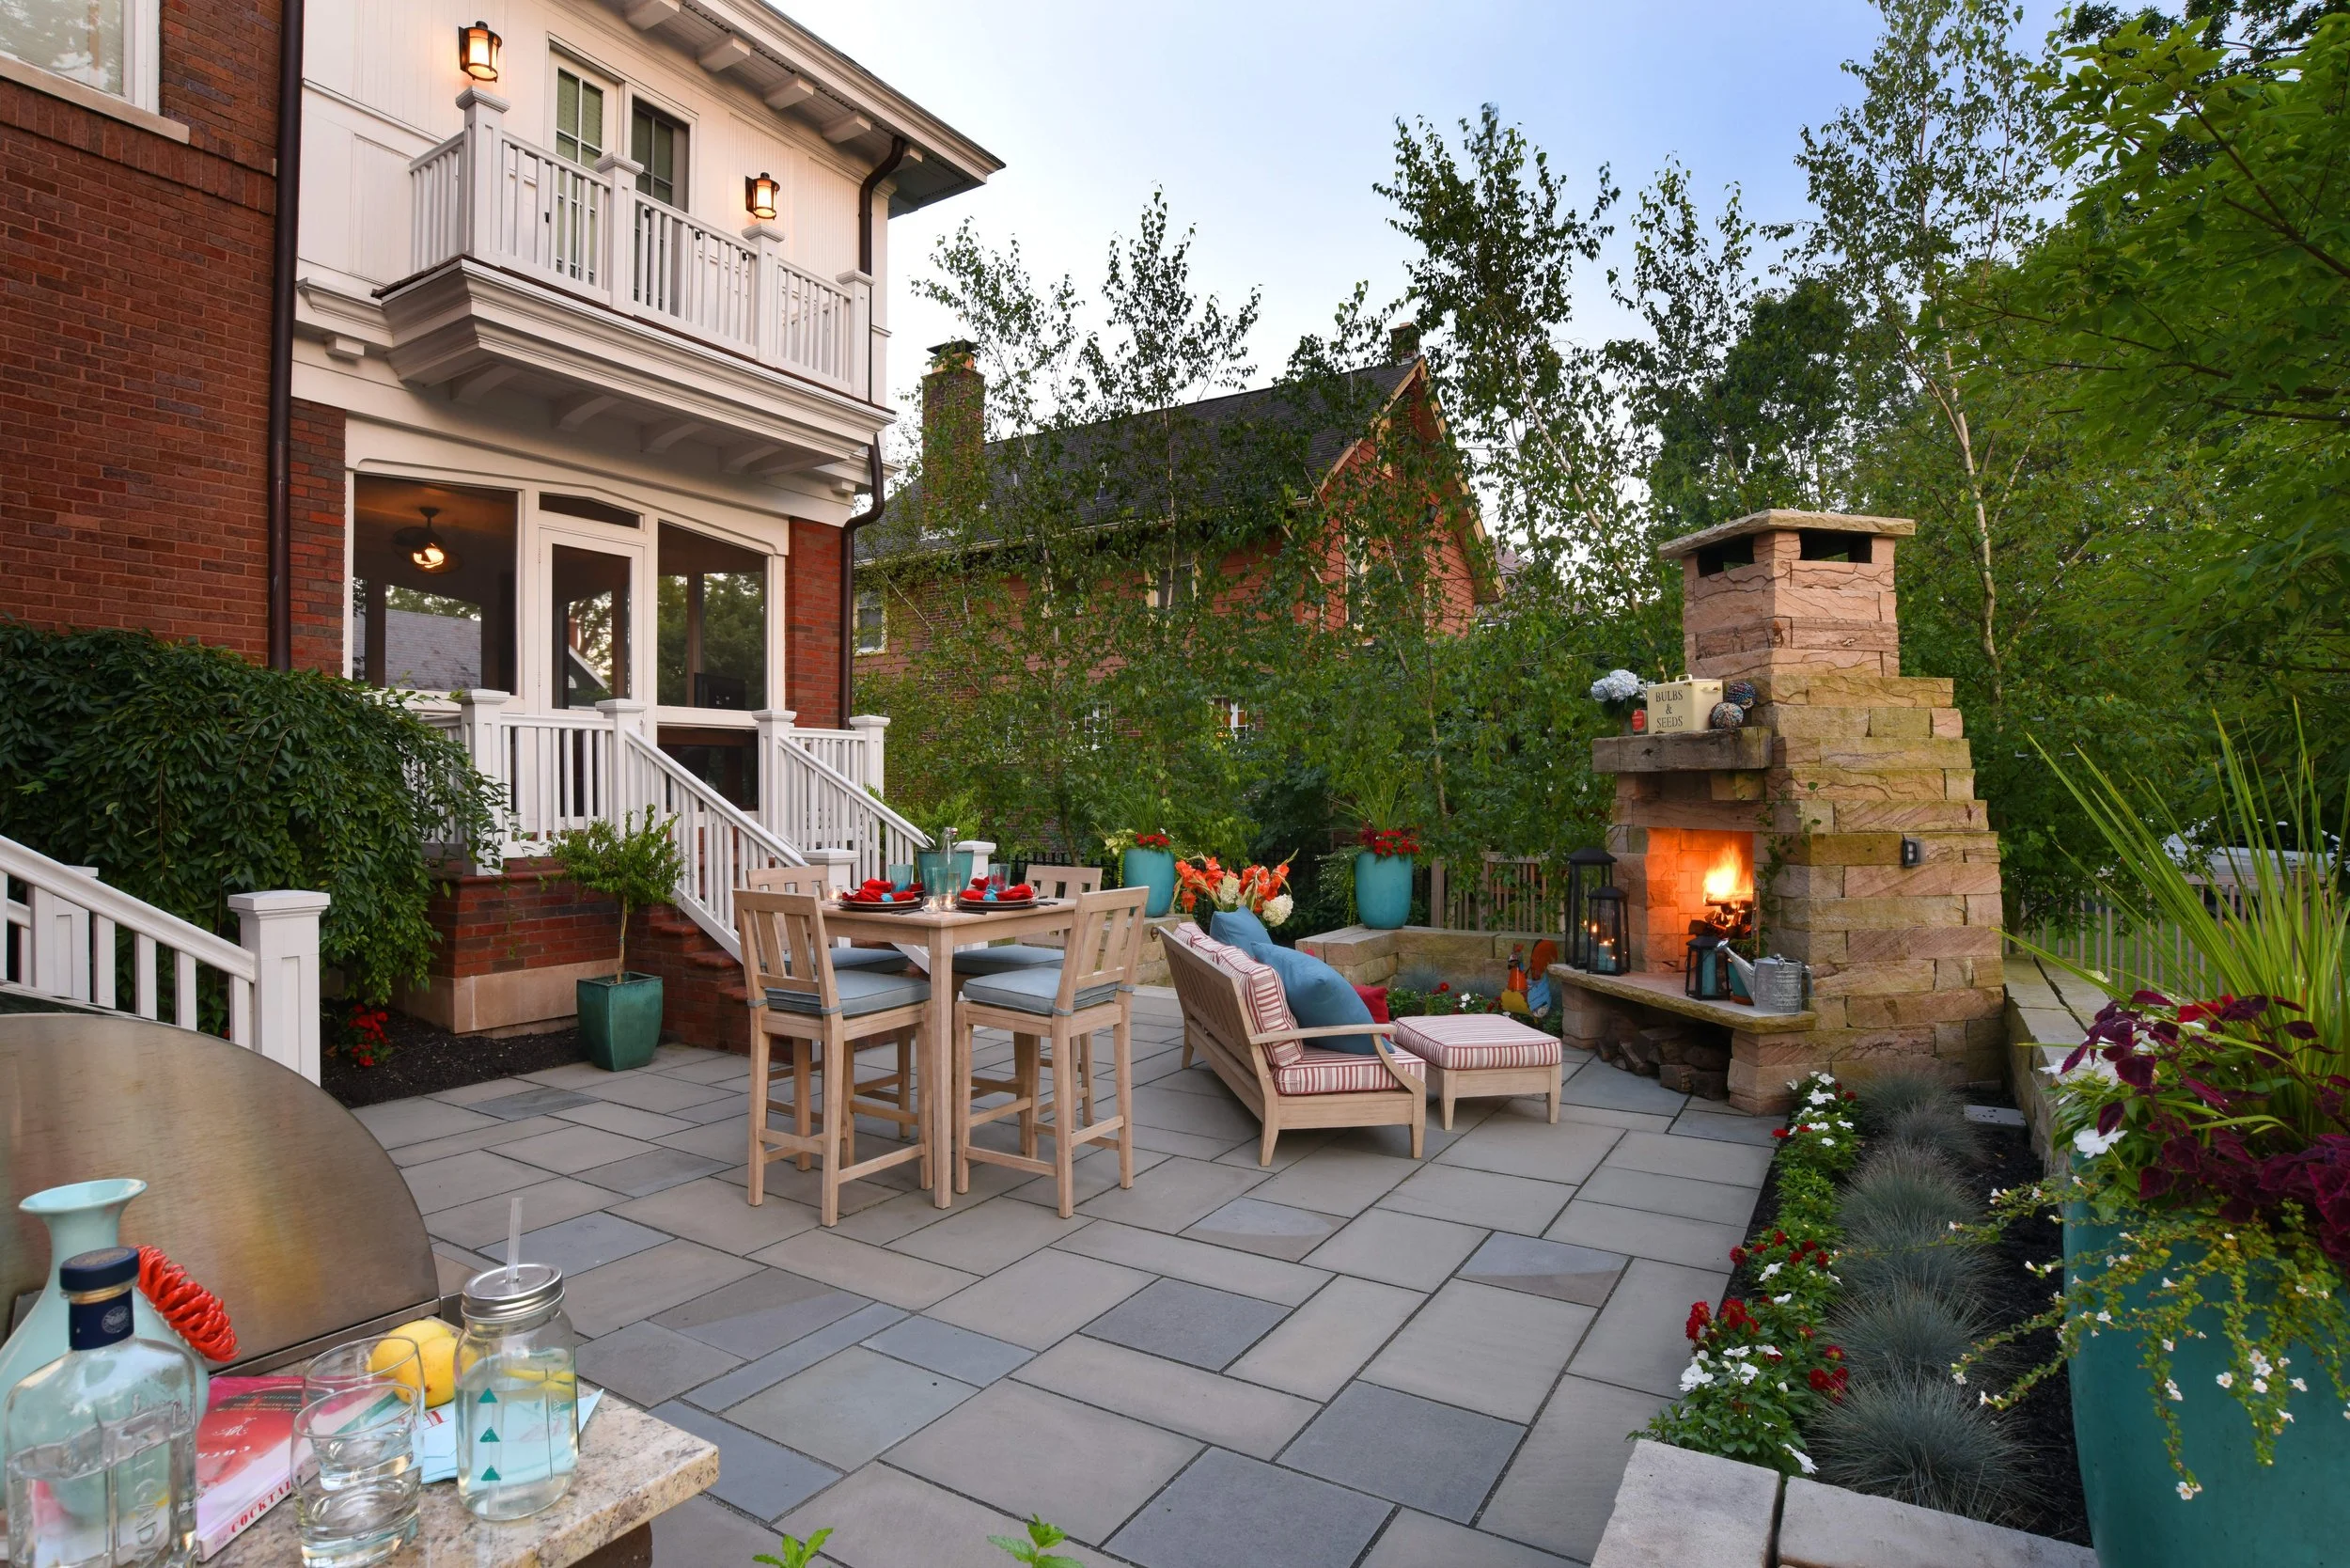
- Stacked Stone Fireplace (Installed): $15,000 – $30,000+
- High-Top Dining Set: $800 – $2,500
- Chaise Lounge & Ottoman: $700 – $2,000
- Pavers, Lighting, and Planters: $2,000 – $5,000
- TOTAL: $18,500 – $39,500+
Budget alternative: Instead of a built-in fireplace, a large, prefabricated stone fire pit kit can be installed for $2,000-$4,000, giving you a similar focal point for a fraction of the cost. The other elements are much more affordable.
This is a layout for a truly large outdoor space, requiring a minimum of 400 square feet, ideally a rectangle around 20×25 feet or larger. The massive fireplace needs breathing room to not overwhelm the space. You need to allocate about 10×10 feet for the dining area and another 8×10 for the lounge zone, plus generous 4-foot-wide circulation paths between all areas. This is not a small-scale solution; it’s a full-blown outdoor room. Compare it with the more compact, single-zone approach in Idea #15.
30. Serene Gray Wicker Sectional on a Composite Deck
Before investing in a light-colored furniture and rug combo, take stock of your environment. It’s a beautiful look, but maybe not for everyone. Ask yourself these questions:
- What’s overhead? Are there trees that drop sap, pollen, or berries directly onto your deck? If so, a darker palette might be more practical.
- What’s your climate? Do you live in a dusty area or a place with frequent rain? Light colors will show dirt and water spots more readily.
- What’s your lifestyle? Do you have pets with muddy paws or kids who love popsicles? Be honest about how much cleaning you’re willing to do.
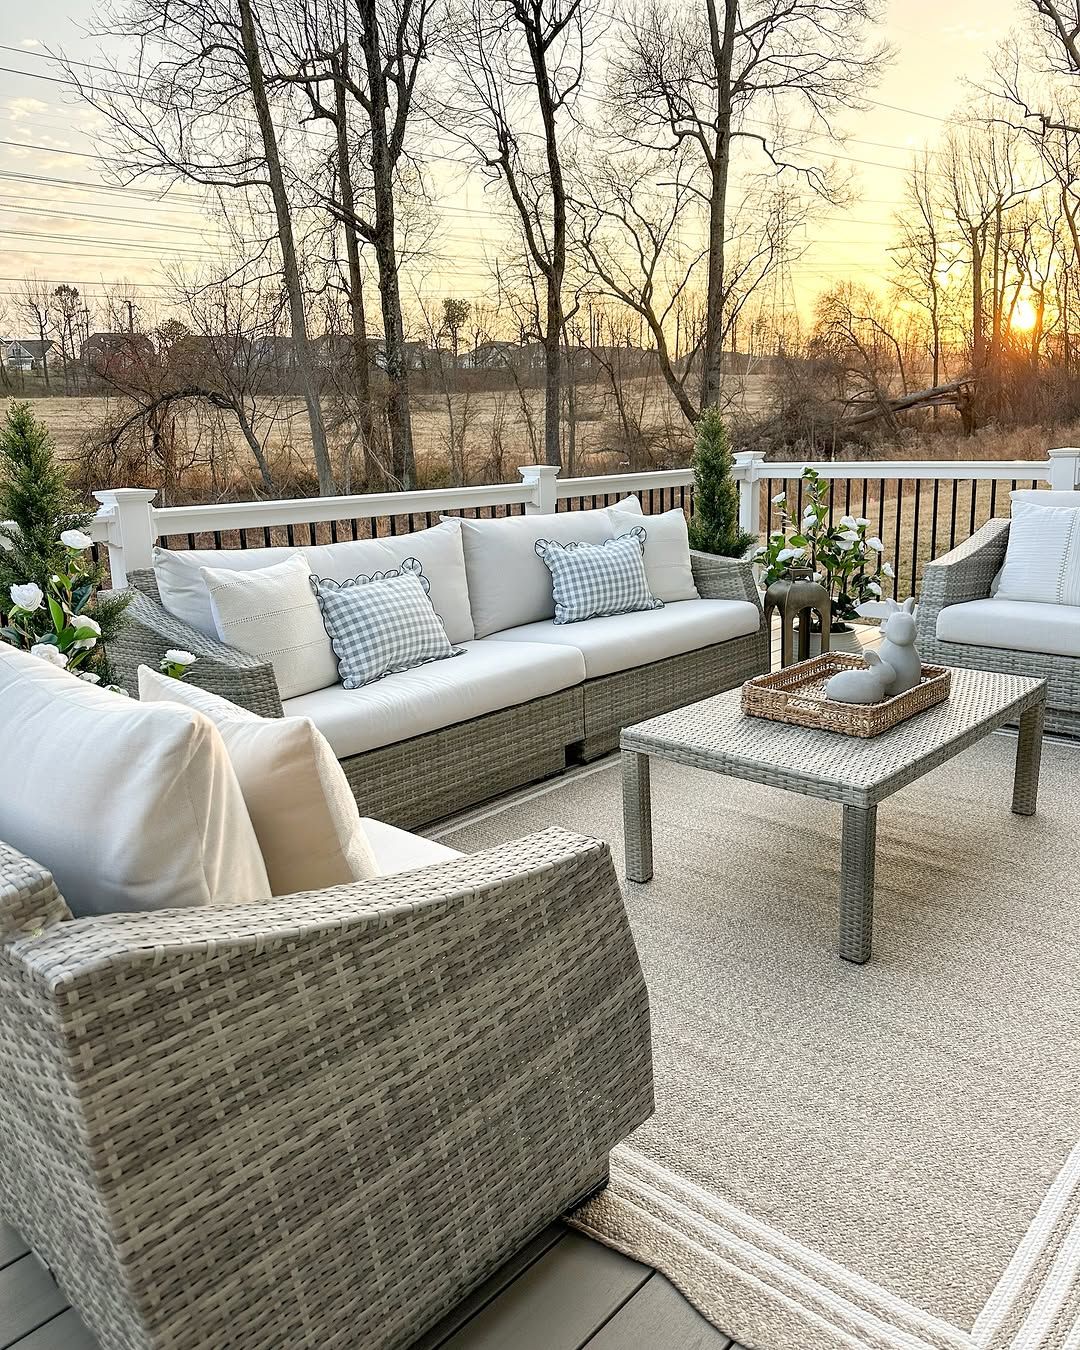
When buying a sectional for a deck with railings, measure carefully. You want to leave at least 18-24 inches of space between the back of the sofa and the railing. This ‘breathing room’ prevents the layout from feeling crammed against the edge. It also provides a practical benefit: it gives you space to walk behind the sofa to retrieve a dropped item, clean the deck, or access a water spigot. This small gap makes a surprisingly large difference in how comfortable and functional the space feels.
Your Deck’s Next Chapter Starts Now
Your deck isn’t just leftover space; it’s an opportunity to create your favorite ‘room’ in the house. Whether you’re dreaming of a quiet morning coffee spot or a place to host the whole neighborhood, the right layout makes all the difference.
Feeling inspired? Pick your favorite idea, start measuring, and don’t forget to save your best finds to a dedicated Pinterest board. Happy decorating!