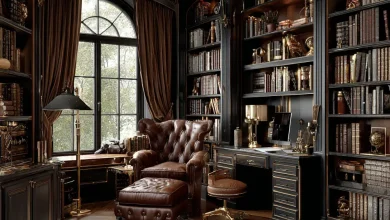
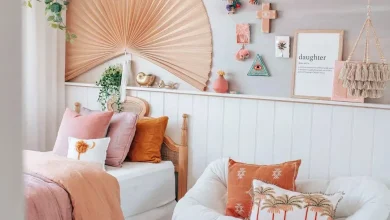
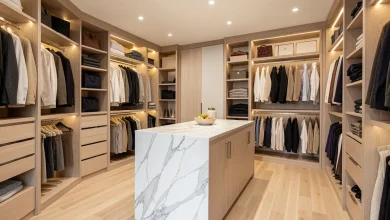
You know that feeling when you finally find the basement shelving idea that looks exactly right for your space? That little spark when you see the perfect blend of function and style? Basements are so much more than storage dungeons now; they’re becoming playrooms, offices, and cozy retreats. That potential is exactly what we’re diving into today.
We’ve filtered through hundreds of options to bring you 30 incredible shelving ideas that work for real homes and real budgets. This isn’t just a list of pretty pictures; we’re looking at everything from high-end custom built-ins to clever DIY solutions you can find at places like IKEA and Target, with costs ranging from a simple $50 setup to over $5,000 for a full custom wall.
You’ll find inspiration for every type of basement, whether it’s completely unfinished or a polished living area, covering styles from modern industrial to cozy rustic. And stay until the end — we break down the most common mistakes that can ruin these looks. 📌 Save this to Pinterest for later — you’ll want to revisit these ideas.
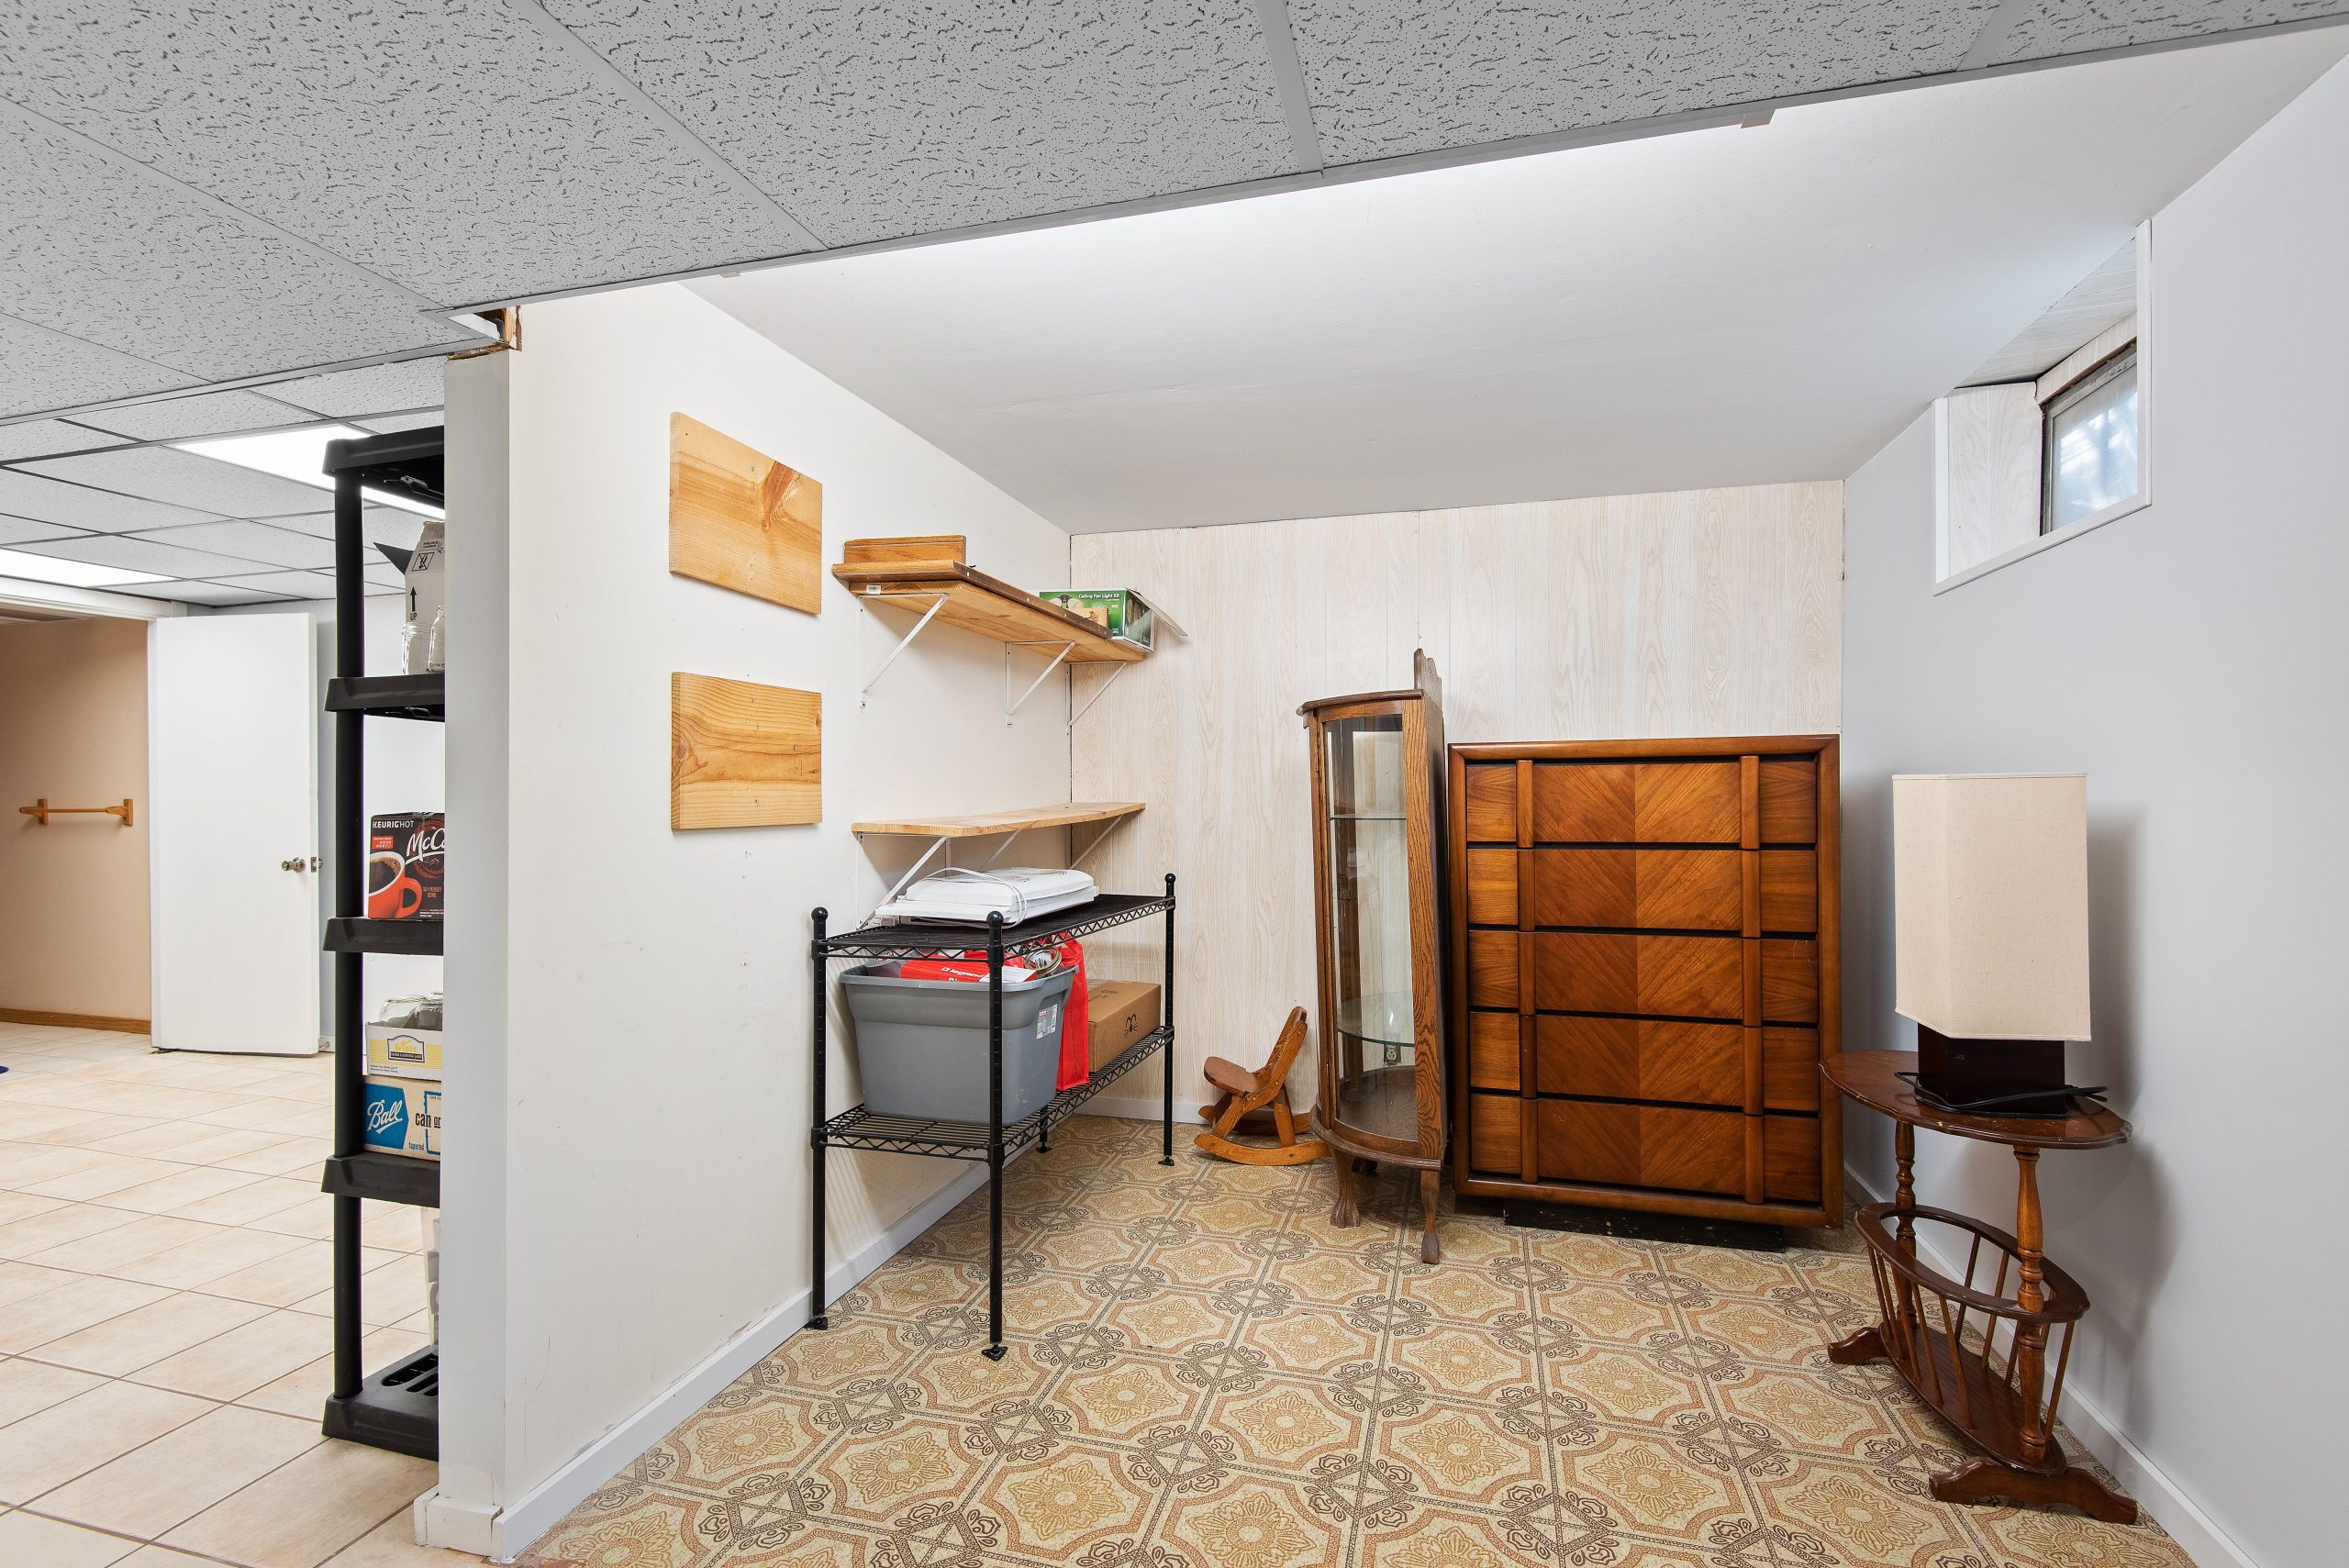
1. Combine Vintage Finds with Basic Utility Shelving
Let’s be honest: not every basement is destined for a design magazine cover, and that is perfectly okay. This approach is all about function over curated form. Combining different types of shelving—wire, plastic, and floating shelves—with secondhand furniture creates a purely practical space. The main challenge here is visual clutter. Without a cohesive system, it can quickly feel disorganized and chaotic, making it hard to find what you need. Be prepared for a space that works hard but doesn’t necessarily look polished.
|
📋 Copy HEX 🔗 Share |
You can get this purely utilitarian look for next to nothing. The key is to embrace mismatched pieces. Start at Facebook Marketplace or your local Buy Nothing group—people are constantly giving away basic plastic or wire shelving units for free or under $25. Supplement with simple wood planks and basic brackets from a hardware store for about $30-50. Don’t worry about matching wood tones or metal finishes; the goal here is 100% practical, low-cost storage, not aesthetic perfection. It’s functional at its most frugal.
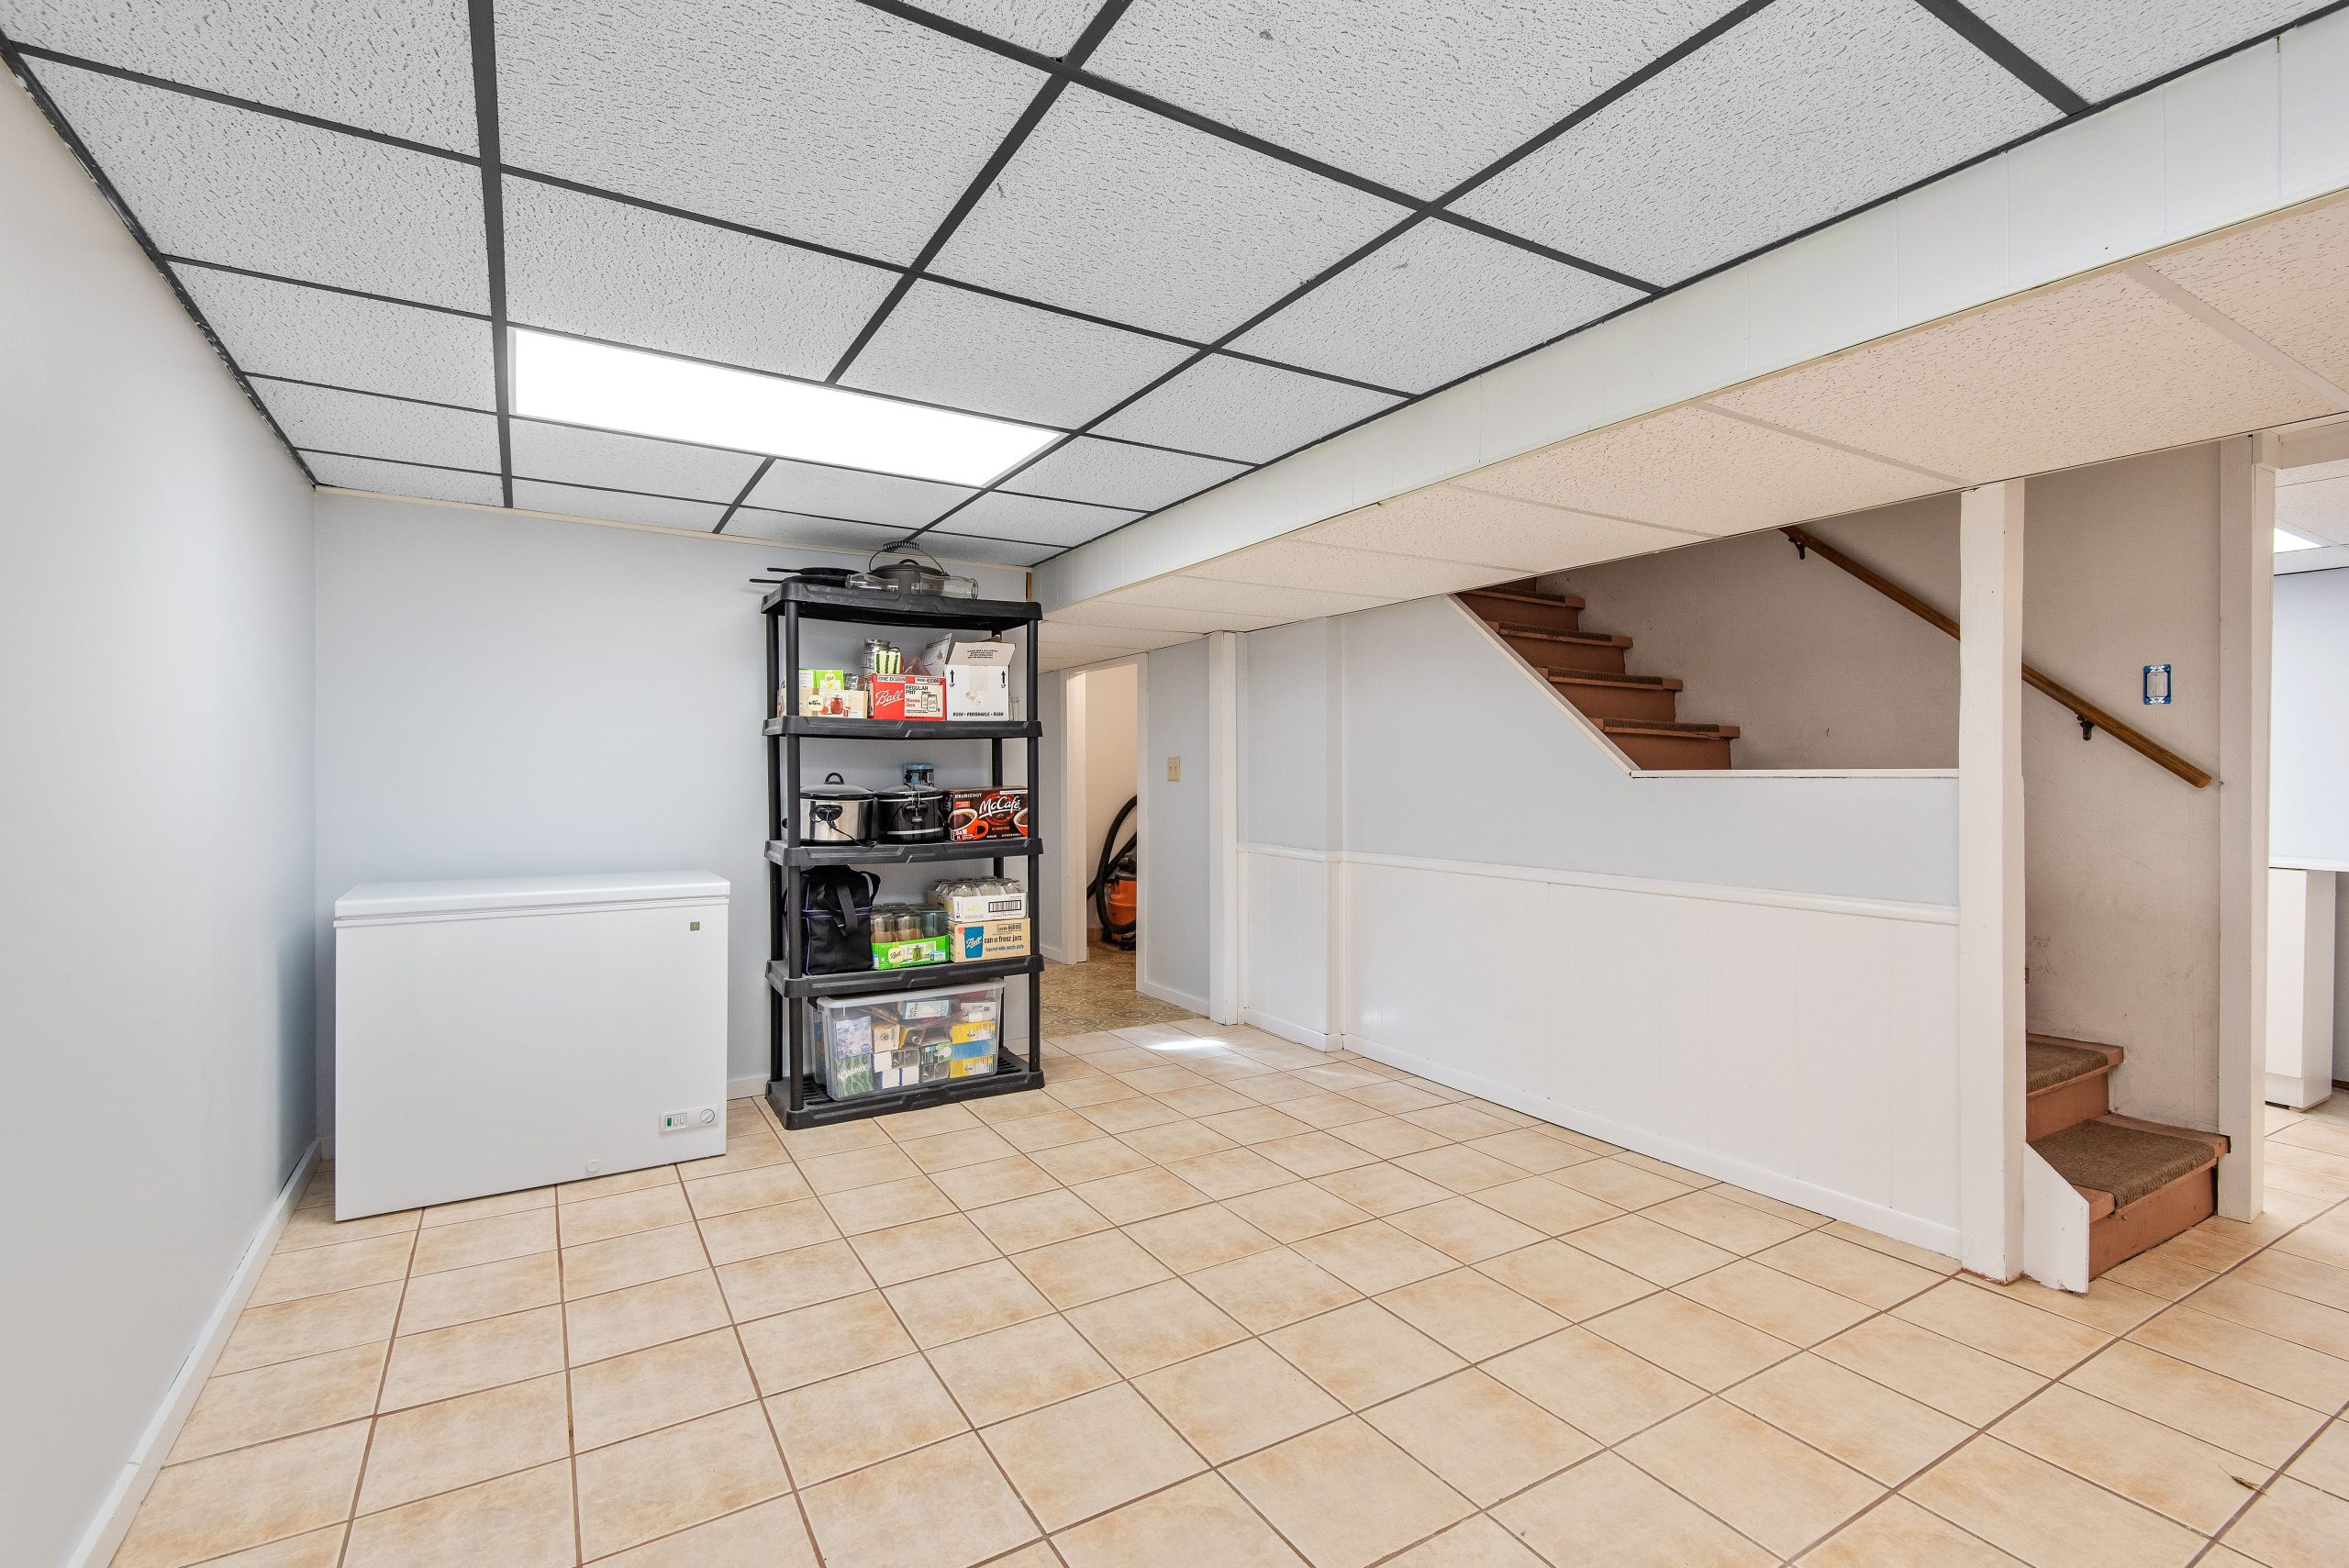
2. Pair a Chest Freezer with Simple Plastic Shelving
This is the workhorse of basement storage, and its beauty is in its simplicity. A black plastic shelving unit is a surprisingly sturdy and low-maintenance choice for an unfinished basement. It won’t rust in a damp environment, it’s incredibly easy to wipe clean, and it won’t be damaged by minor leaks or spills from pantry items. The tan-brown floor tiles are also a smart, practical choice, as they do an excellent job of hiding dirt and dust. This setup requires almost no upkeep beyond an occasional wipe-down, making it ideal for a purely functional space.
|
📋 Copy HEX 🔗 Share |
This idea is perfect for smaller, dedicated storage zones, especially in unfinished basements. You only need a footprint of about 6 feet by 3 feet to accommodate both the shelving unit and a standard chest freezer. The key is vertical space. A standard 8-foot basement ceiling is more than enough. Because the elements are freestanding, this setup works well in oddly shaped corners or along a single wall, leaving the rest of the basement open for other uses. It’s a compact solution that delivers a ton of storage without a large footprint.
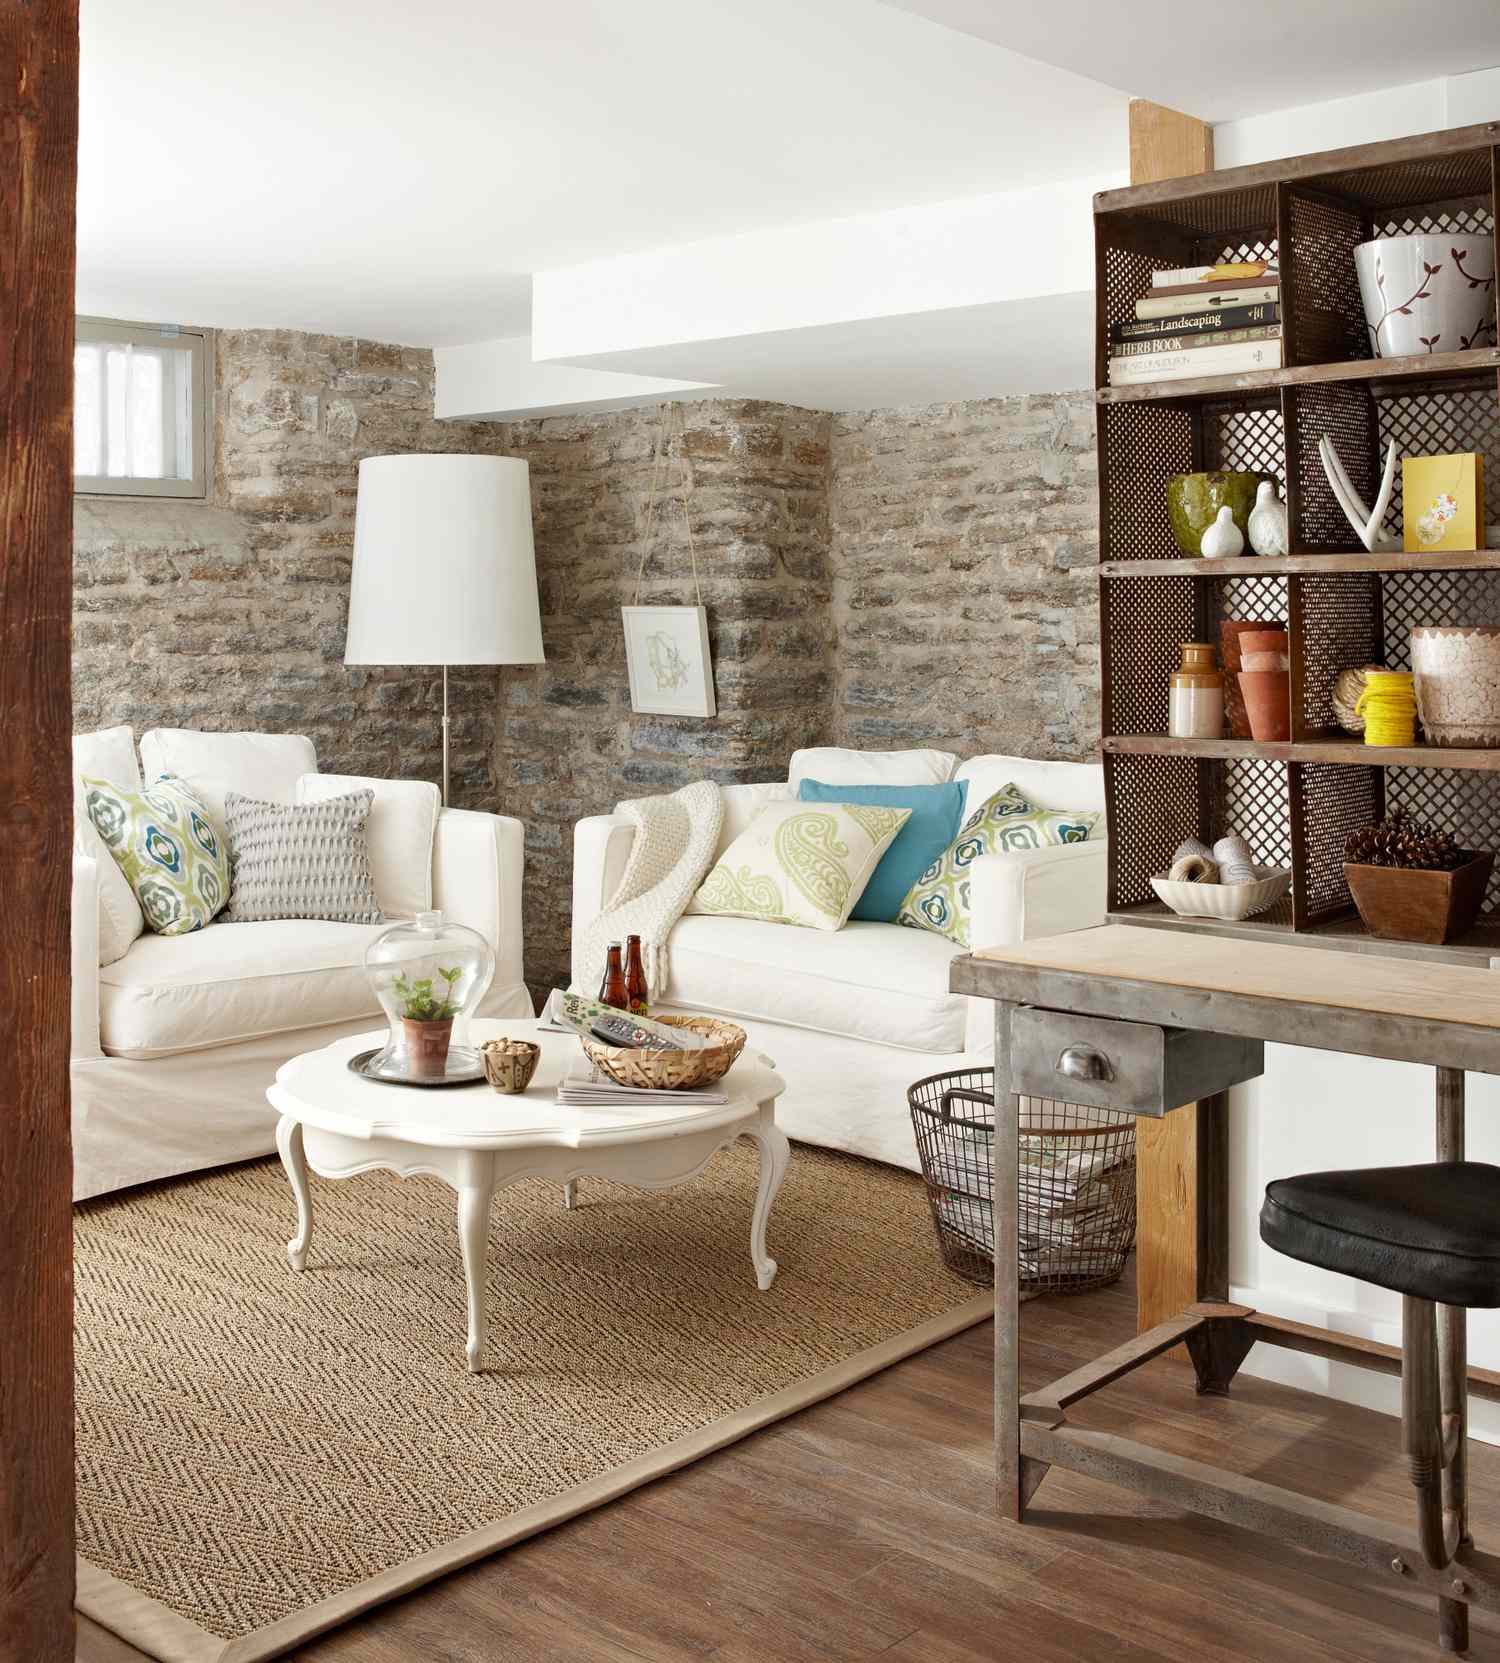
3. Contrast Industrial Grid Shelving Against a Rustic Stone Wall
This look is a masterclass in textural contrast. The magic happens where the cool, rigid geometry of the industrial metal grid shelving meets the organic, irregular texture of the rustic stone wall. The dark metal of the shelves provides a strong graphic outline that pops against the varied gray tones of the stone, preventing it from feeling too busy. Meanwhile, the soft, light-colored sofas and woven rug prevent the industrial and rustic elements from feeling cold, adding a necessary layer of warmth and comfort. It’s this balance of hard and soft, old and new, that makes the room feel so inviting.
|
📋 Copy HEX 🔗 Share |
When you have a dominant feature like a stone wall, don’t fight it—lean into it. But to avoid a heavy, castle-like feeling, you need to introduce elements with negative space. This metal grid shelving unit is the perfect example. Because you can see through it, it provides ample storage and visual interest without adding bulk or blocking the view of the beautiful stonework behind it. This keeps the room feeling open and airy, even with a massive feature wall. Also, consider this for your general basement shelving ideas for a finished basement.
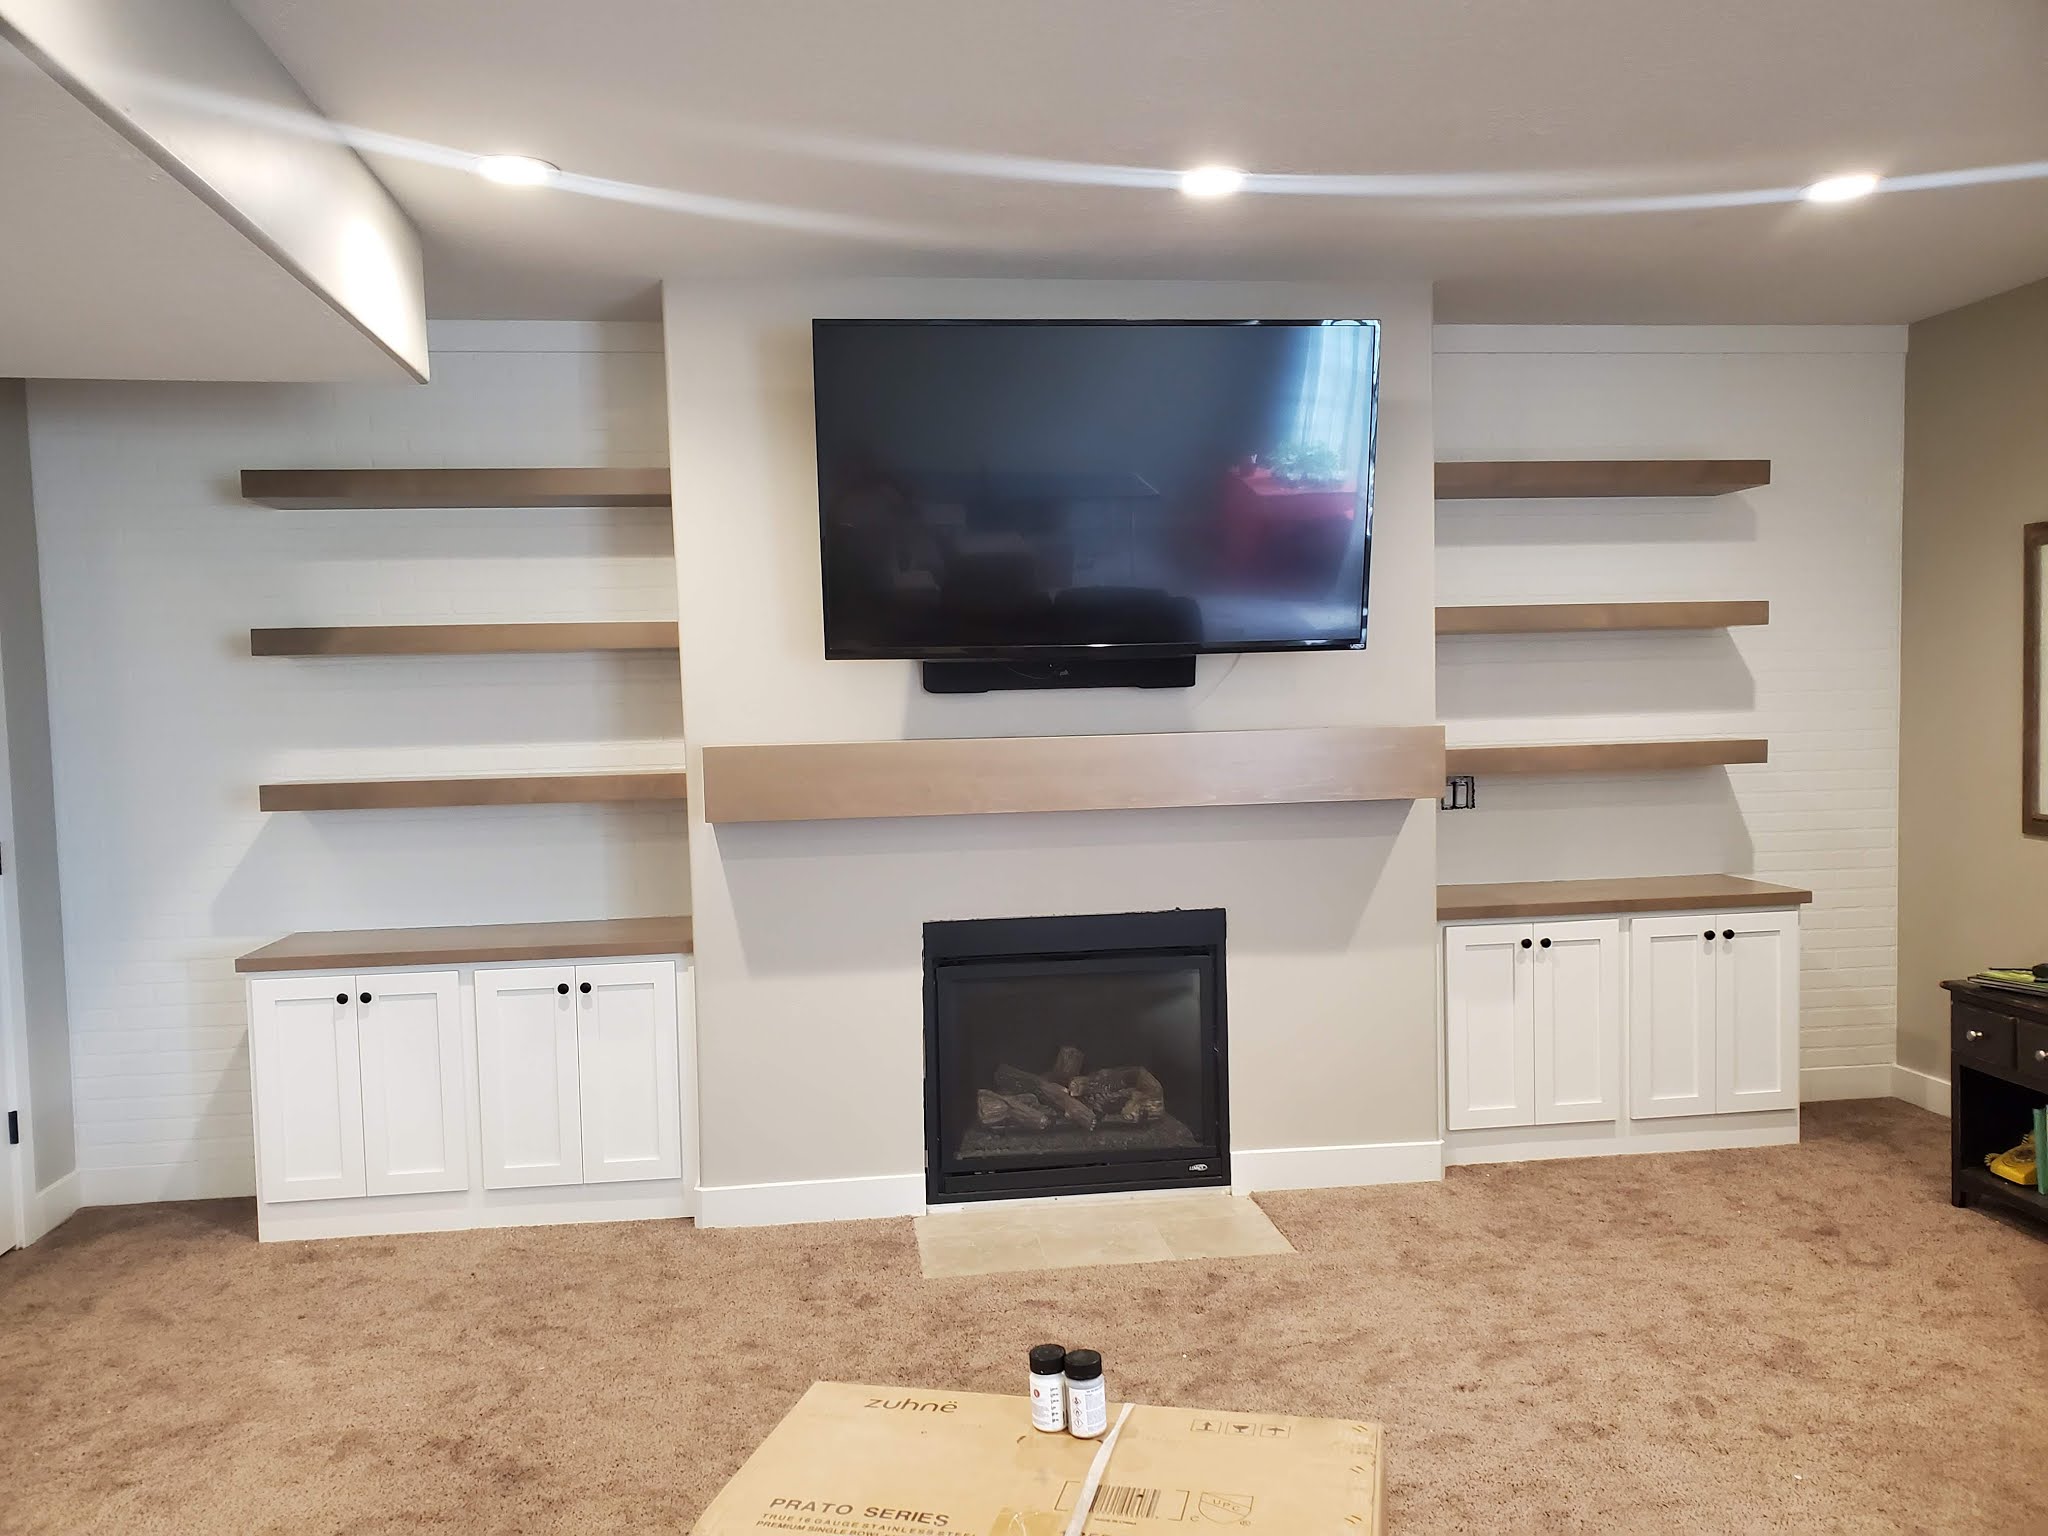
4. Frame a Modern Fireplace with Floating Shelves and White Cabinets
The formula here is clean, balanced, and easily adaptable. Think of it as 50% neutral structure, 30% natural texture, and 20% dark accent. The white cabinets and light-colored walls provide the neutral base. The light wood floating shelves and wood-look counters bring in that essential warmth and texture. Finally, the black fireplace trim, dark cabinet knobs, and the television itself act as sharp, modern accents that ground the space. You could easily swap the light wood for a darker walnut or the white cabinets for a soft gray and still maintain the same successful balance.
|
📋 Copy HEX 🔗 Share |
Installing floating shelves so they look seamless and can hold weight is a weekend project. Here’s a quick guide:
- Time: 2-3 hours. Cost: $50-$150 (for shelves & hardware).
- Use a stud finder to locate and mark the studs in your wall. This is non-negotiable for strength.
- Hold your mounting bracket against the wall, use a level to ensure it’s perfectly horizontal, and mark your drill holes over the studs.
- Drill pilot holes into your marks.
- Secure the mounting bracket to the wall using the heavy-duty screws provided with your shelf kit.
- Slide the hollow shelf onto the bracket. Most have small set screws underneath to lock the shelf in place. Done!
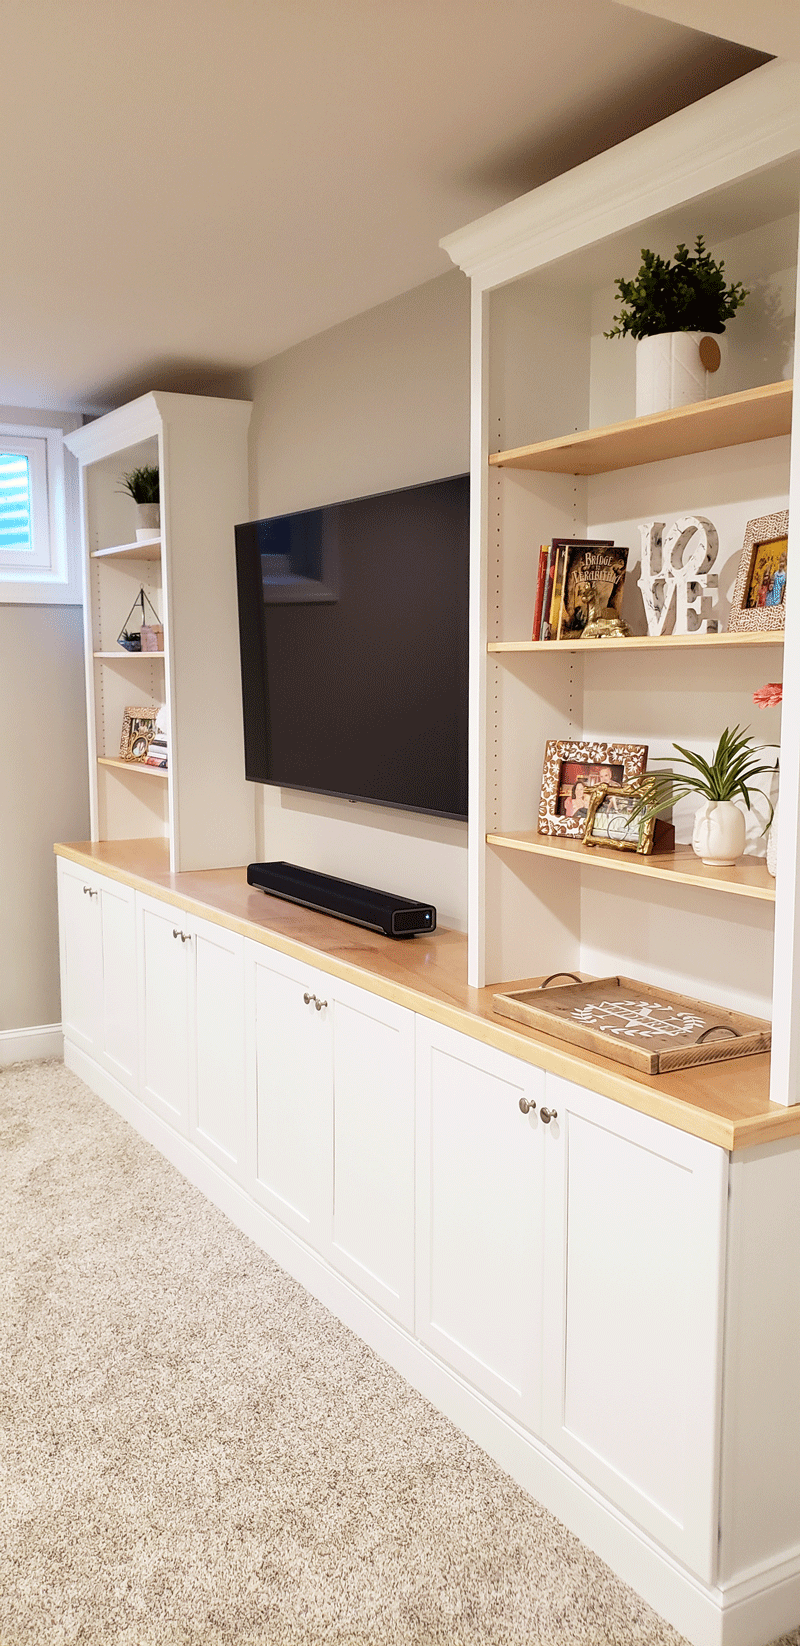
5. Go Wall-to-Wall with White & Light Wood Built-in Media Storage
The single element that makes this design work so beautifully is the light natural wood countertop that runs the entire length of the unit. It visually connects the two tall shelving towers and the base cabinets into one cohesive piece of furniture. Without it, you’d just have a collection of separate white boxes. This continuous wooden surface adds warmth, breaks up the monotony of the white Shaker doors, and provides a beautiful, durable surface for decor. It elevates the entire wall from a simple storage solution to a sophisticated, custom-built feature.
|
📋 Copy HEX 🔗 Share |
This kind of wall-to-wall built-in is perfect for long, uninterrupted walls in a finished basement, typically those measuring at least 12 to 15 feet wide. It requires a standard 8-foot ceiling height to achieve the right proportions without feeling cramped. This is a large-scale solution, unlike the more focused nook in Idea #10. If your basement is smaller or has interruptions like windows or doors, consider the more modular approach seen in Idea #3, which still offers significant storage but with more placement flexibility. This is a great basement shelving idea for family rooms.
6. Integrate Classic Built-in Bookshelves with Crown Molding
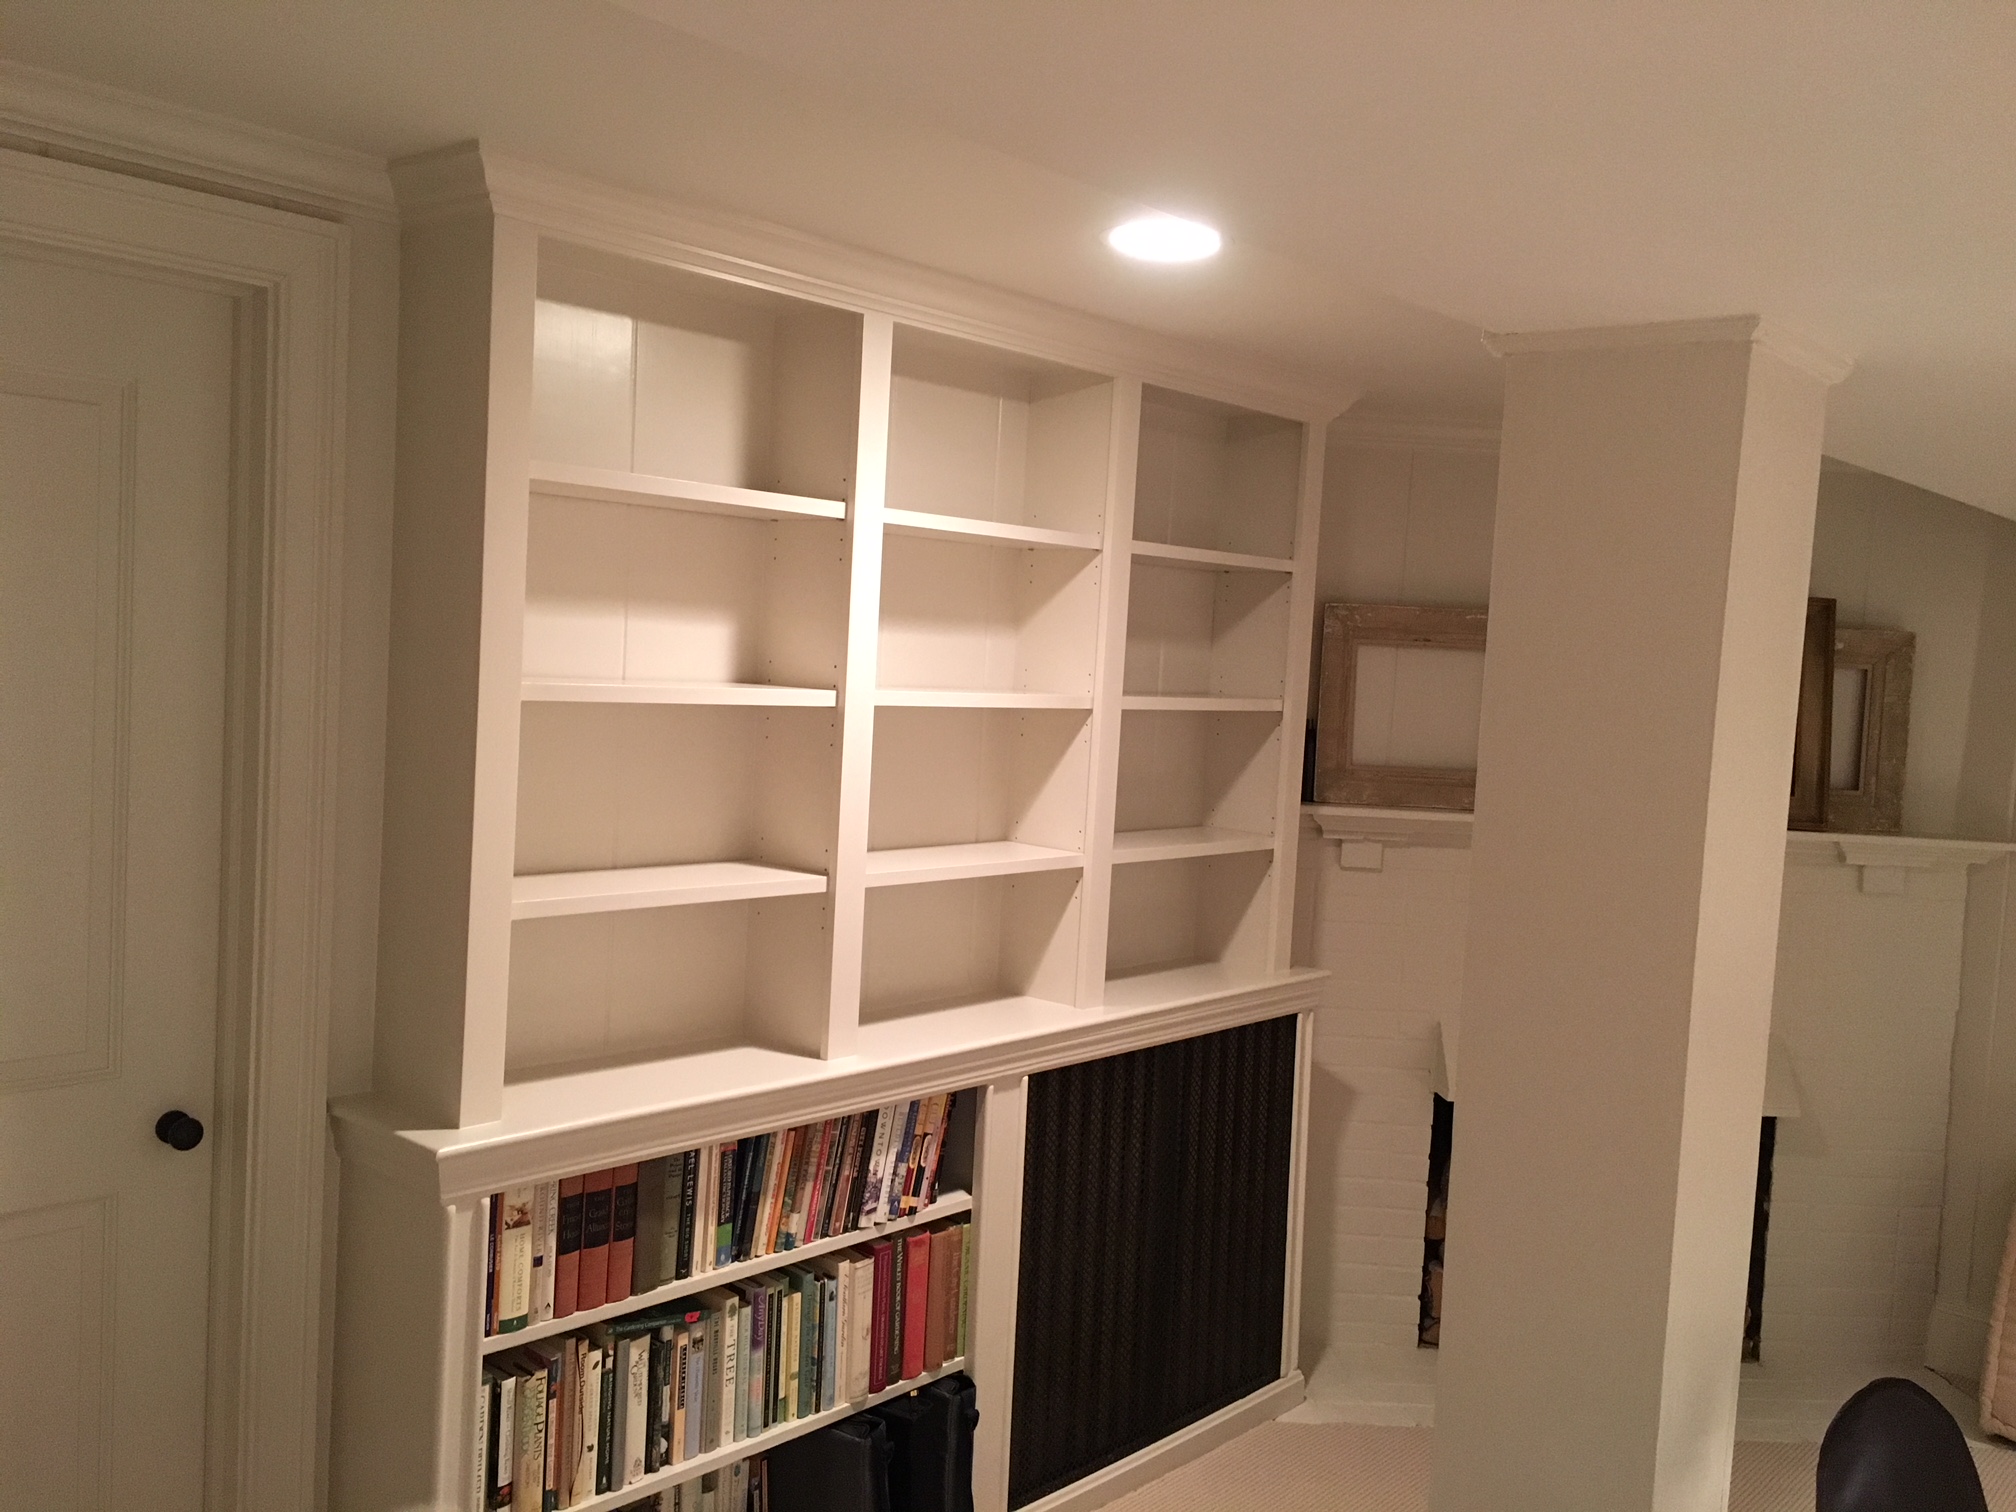
To make built-in shelving look truly integrated and expensive, the secret is in the trim. Don’t just slap a bookshelf against the wall; frame it out with baseboards at the bottom and crown molding at the top that matches the rest of the room. Here, the crown molding runs seamlessly from the wall across the top of the shelving unit, making it look like it was part of the original architecture. Ask your carpenter to scribe the side trim pieces to fit snugly against any irregularities in the wall for a truly gap-free, professional finish.
|
📋 Copy HEX 🔗 Share |
A wall of beautiful white built-ins is a dream, but you have to be realistic about what you’ll put on them. An entire wall of open shelving can look incredible when styled by a pro with curated objects, but in real life, it can become a magnet for clutter. That’s why the lower section here is so smart—it provides both an open book display and a closed louvered panel. Be honest with yourself: if you have a lot of stuff that isn’t display-worthy, make sure your design includes plenty of closed storage to hide it away.
7. Embrace Warm Minimalism with Light Wood Laminate Built-ins
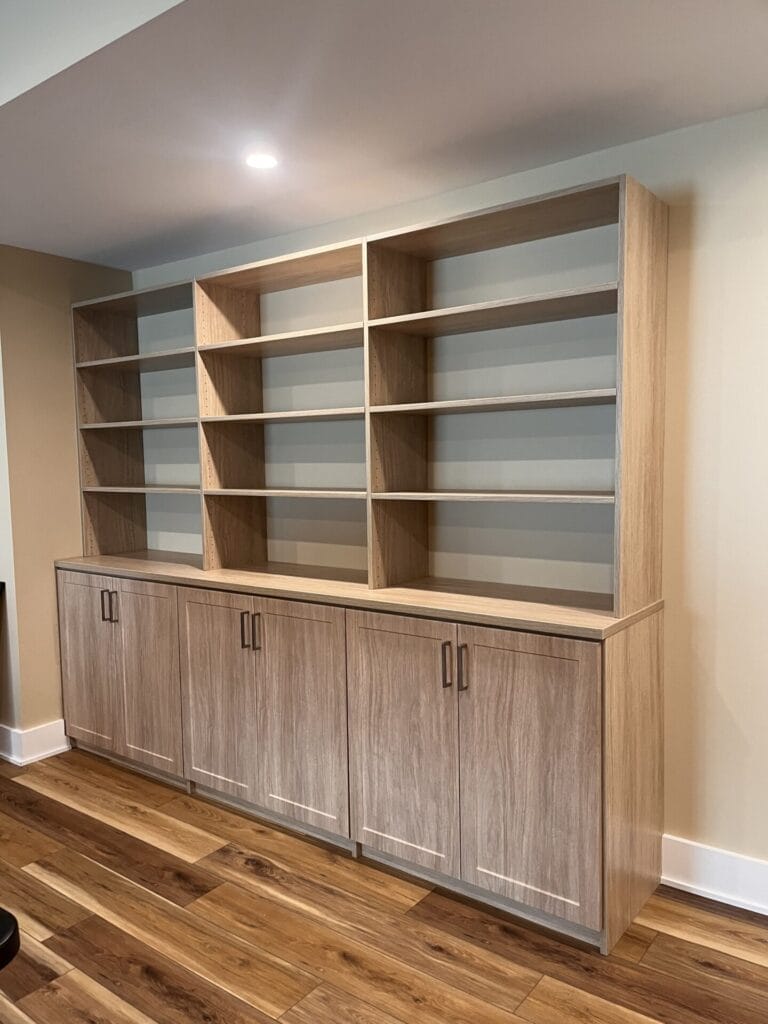
Modern laminate has come a long way. This light wood-grain laminate offers the clean, warm look of real wood without the maintenance headaches. It’s resistant to scratches, fading, and warping, which is a major plus in a basement environment where temperature and humidity can fluctuate. Cleaning is as simple as wiping it down with a damp cloth. The only downside is that deep scratches or chips are difficult to repair, unlike solid wood, which can be sanded and refinished. However, for everyday use, its durability is a huge asset.
|
📋 Copy HEX 🔗 Share |
Recreating this sleek, wall-to-wall unit is more accessible than it looks, thanks to laminate materials. It looks custom, but you can achieve a similar effect with modular systems.
- Modular Cabinets & Shelves: $1,500 – $3,000 (IKEA systems like PLATSA or BESTÅ)
- Lighting: $100 – $250 (for integrated LED strips)
- Hardware (handles): $50 – $150
- Professional Installation: $500 – $1,200
- TOTAL: $2,150 – $4,600
Budget alternative: Use a series of stacked, off-the-shelf laminate bookcases and lower cabinets from a big box store for around $800-$1,200 total.
8. Make a Statement with Floor-to-Ceiling Navy Blue Built-ins
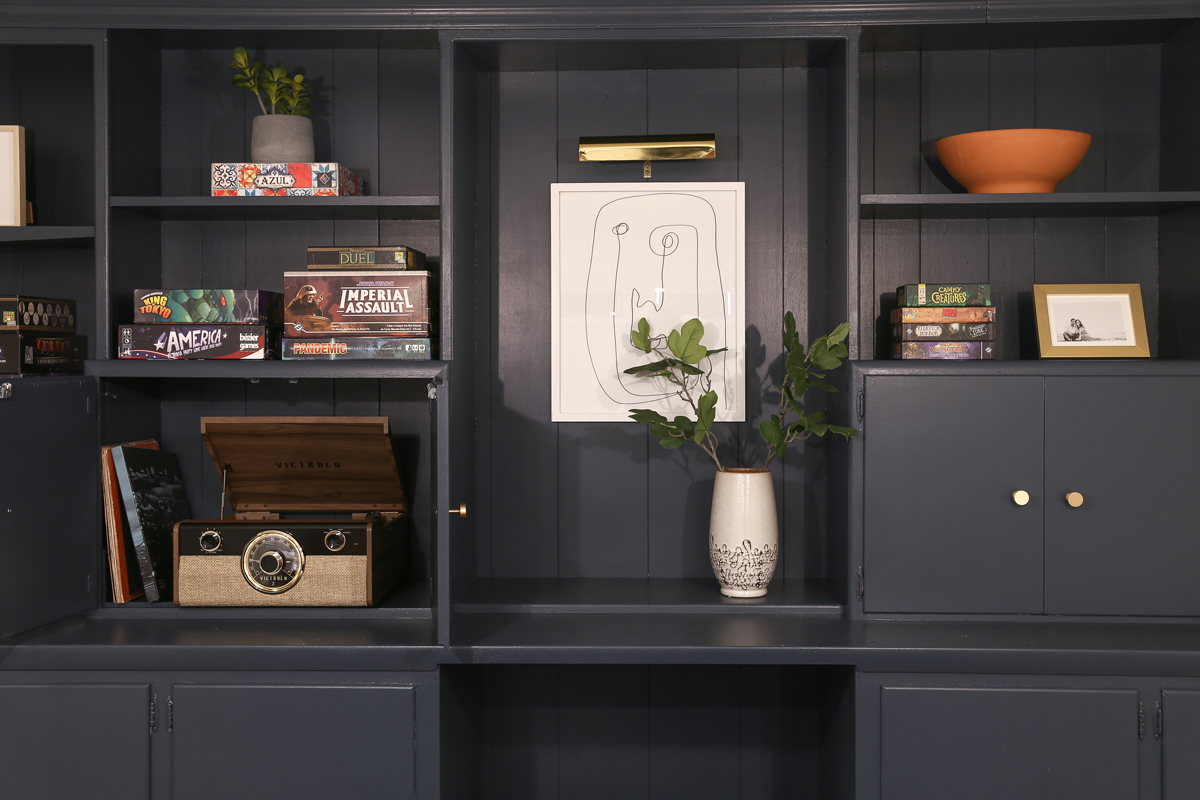
This room works because the bold, saturated navy blue is treated almost like a neutral. It’s a concept called “color drenching,” where a strong color used en masse creates a sophisticated, immersive feeling rather than a jarring accent. The brass hardware and picture light act like jewelry, their warm metallic glow cutting through the deep blue. Finally, the carefully curated items on the shelves—with their pops of white, terracotta, and natural greenery—provide necessary visual relief and personality, preventing the dark color from feeling overwhelming.
|
📋 Copy HEX 🔗 Share |
It’s the color. Absolutely, 100%, the bold navy blue paint is what transforms this from a standard built-in to a showstopping design feature. Painting the entire unit—back, sides, and shelves—in this single, dramatic color creates a monolithic, custom look that feels incredibly high-end. If this unit were white, it would be perfectly nice, but it wouldn’t have this same depth, character, or confidence. The color is what tells the story here, turning simple storage into a personal style statement. It’s a brave choice that pays off big time.
9. Build a Basement Bar with Corrugated Metal and Open Shelving
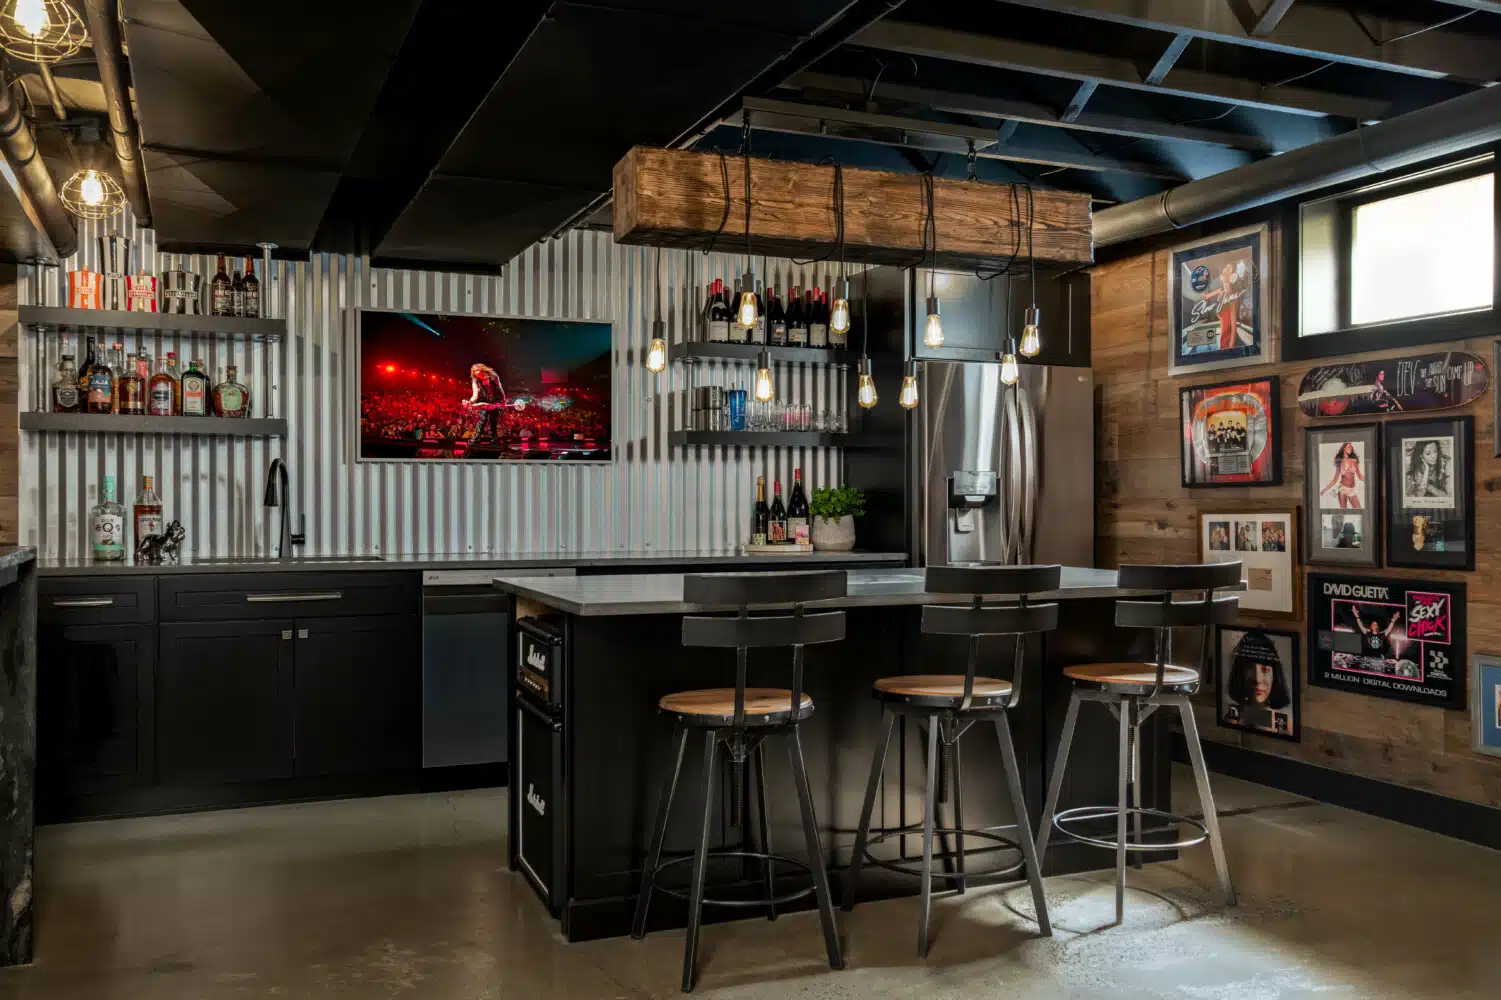
The formula for this industrial hotspot is all about texture and raw materials. It breaks down to roughly 40% wood, 30% metal, and 30% dark neutrals. The wood comes from the paneled wall and the massive beam light fixture, providing warmth. The metal is the star, with the corrugated accent wall and barstools bringing that raw, industrial edge. Finally, the black cabinets, dark countertop, and black accents provide a neutral, grounding base that ties it all together. You could swap the corrugated metal for reclaimed wood and still get a great rustic look with the same formula.
|
📋 Copy HEX 🔗 Share |
Before you commit to a full basement bar, map out your needs. You don’t want to just copy a pretty picture. Ask yourself these questions:
- Plumbing: Do I need a sink? Running water lines will significantly increase the cost and complexity of the project. A bar without a sink is much simpler.
- Appliances: Will I need a mini-fridge, an ice maker, or a wine cooler? Measure your desired appliances and plan your cabinetry around them from the start.
- Lighting: Basements are often dark. Do you have a plan for task lighting (over the counter) and ambient lighting (like that cool beam fixture)? A lighting plan is not an afterthought.
- Seating: How many people do you realistically want to seat at the bar? This will determine the length of your counter and the necessary clearance behind the stools.
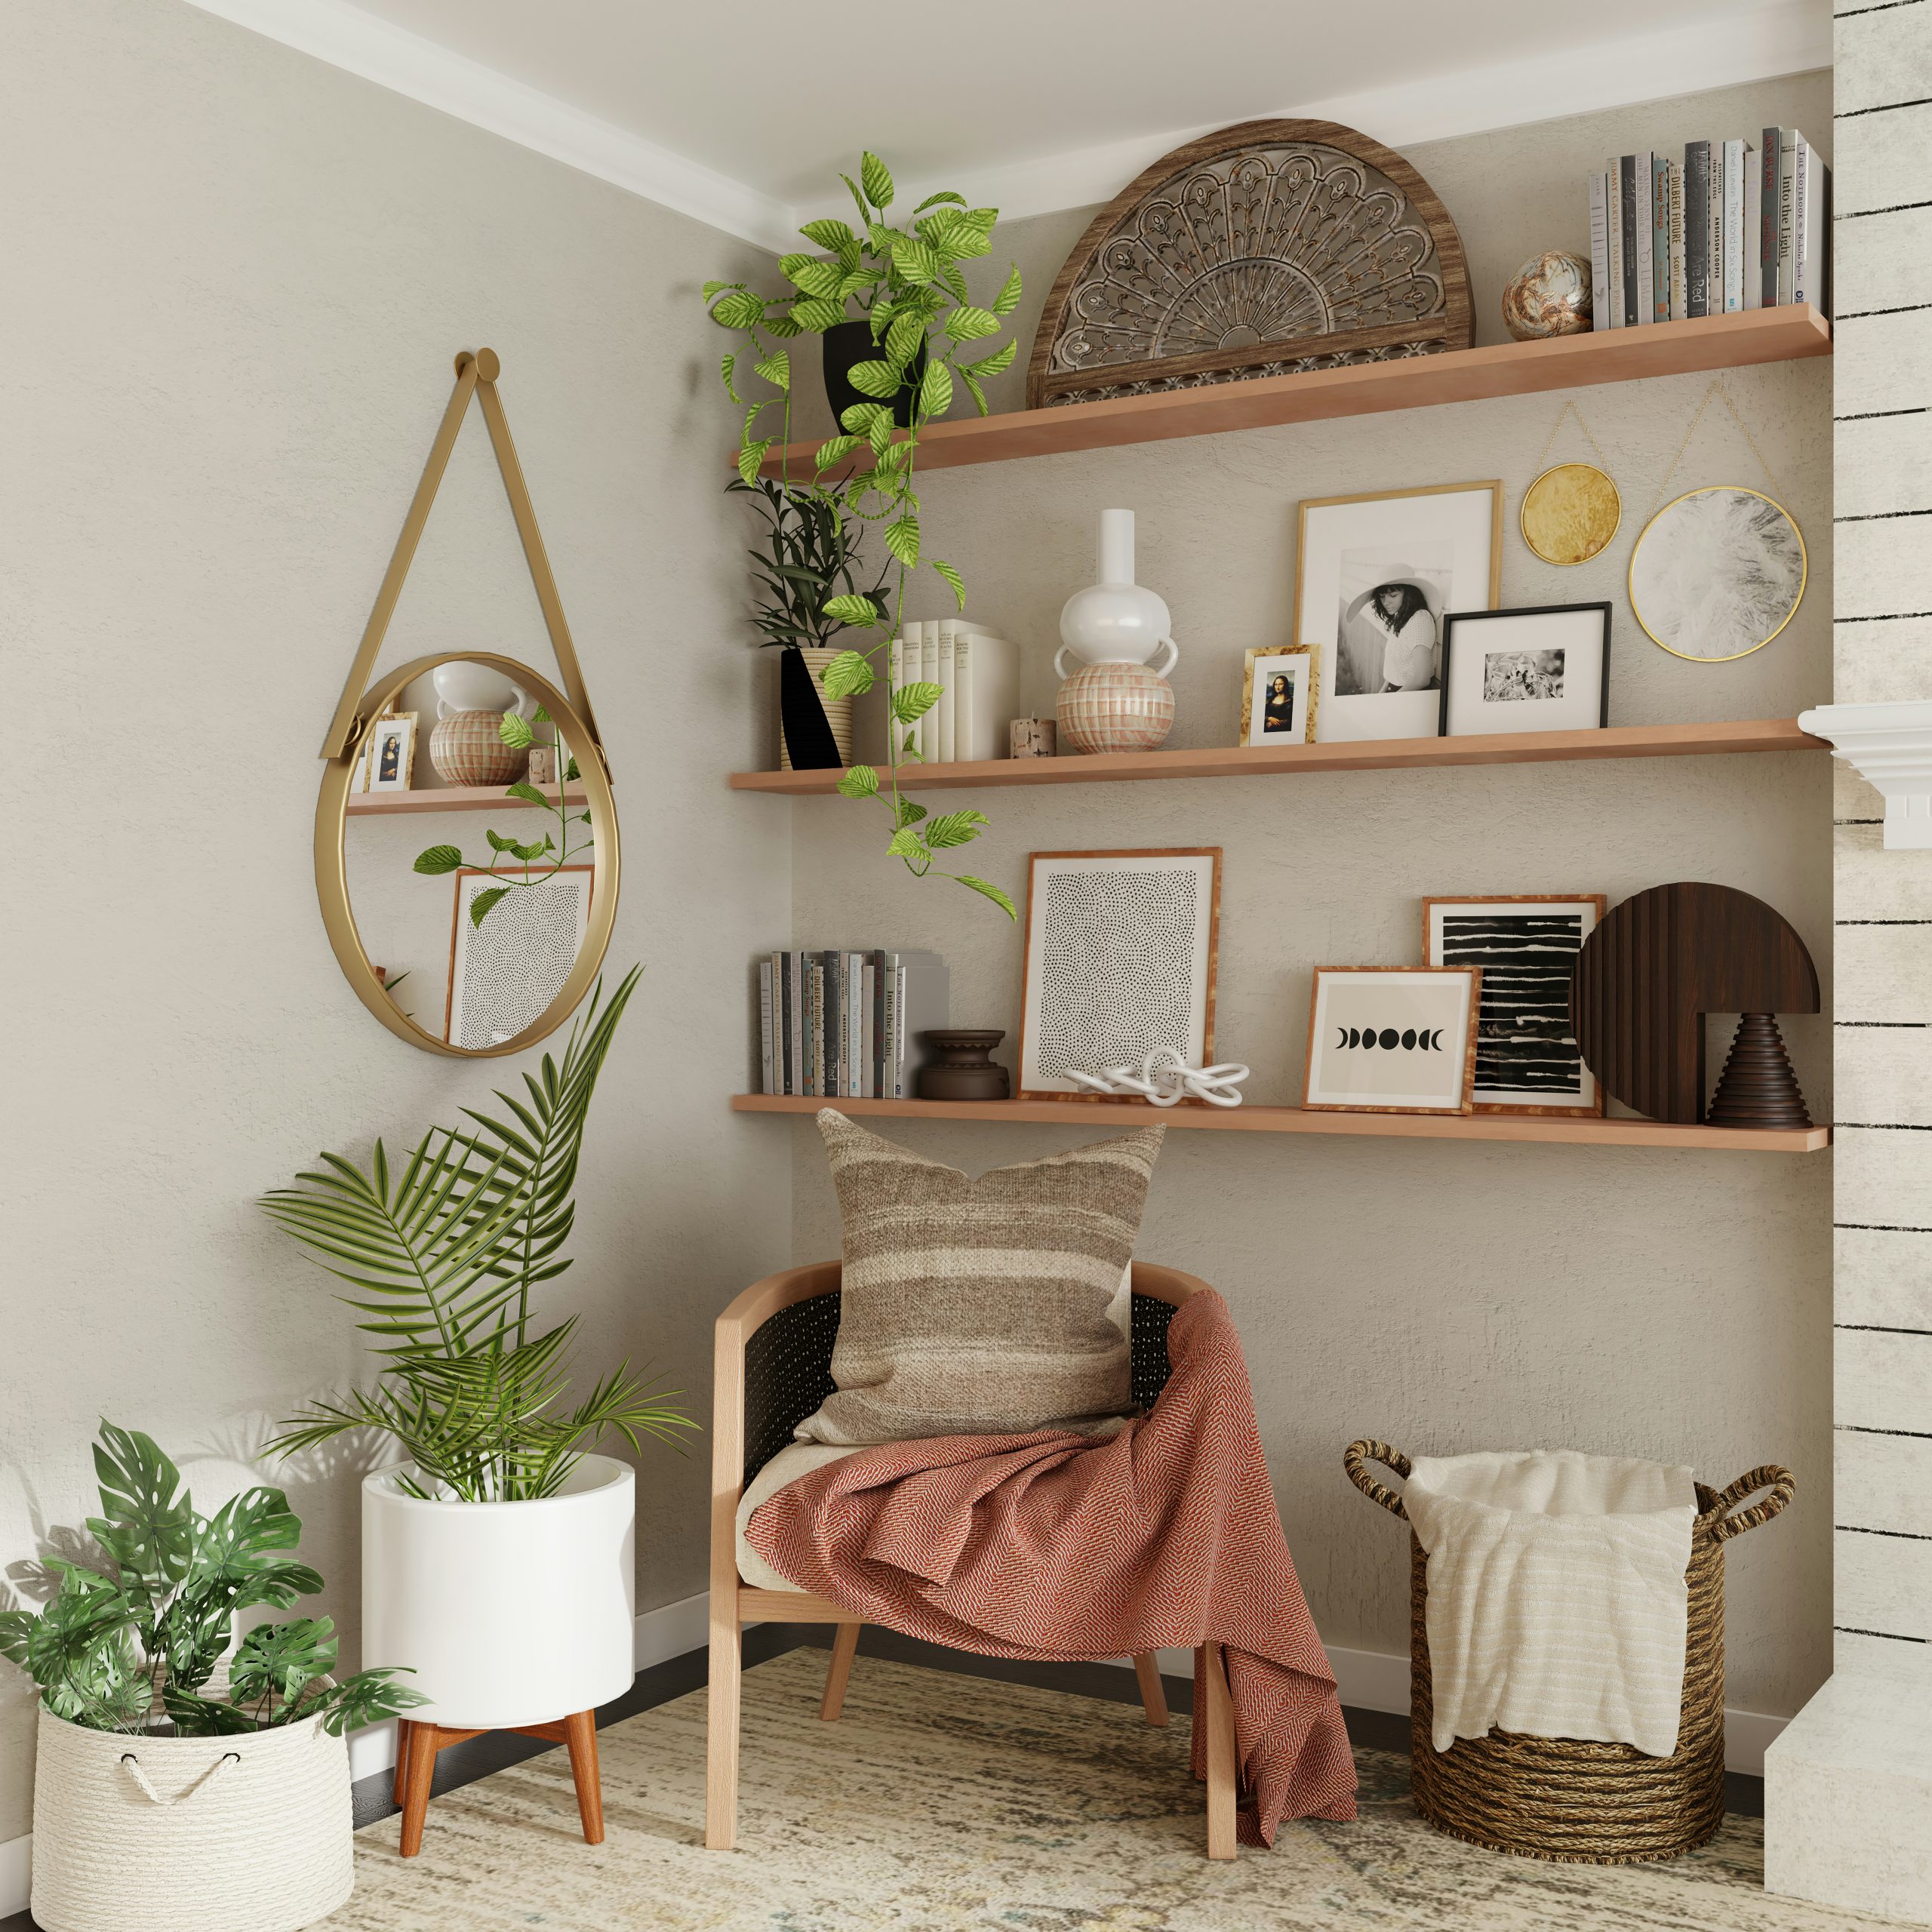
10. Create a Cozy Reading Nook with Blonde Wood Floating Shelves
When styling decorative shelves like these, think in triangles. Place your most significant items (like the stack of books, the largest plant, or the round mirror) in a triangular formation across the different shelves. This forces the eye to move around the entire arrangement, making it feel balanced and dynamic. Then, fill in the gaps with smaller items of varying heights and textures. Notice how the round mirror, the art print on the top shelf, and the terracotta throw create a perfect visual triangle that anchors this whole corner.
|
📋 Copy HEX 🔗 Share |
The rise of the “cozy corner” or “reading nook” is a direct reaction to our increasingly digital lives. In 2026, people are craving small, dedicated analog zones within their homes—places to unplug and unwind. This isn’t about a huge space; it’s about carving out a personal sanctuary. The use of natural materials like the blonde wood, woven textures, and lots of plants reflects the broader biophilic design trend, which is all about bringing the calming, grounding elements of nature indoors. This look has staying power because it caters to a fundamental need for comfort and peace.
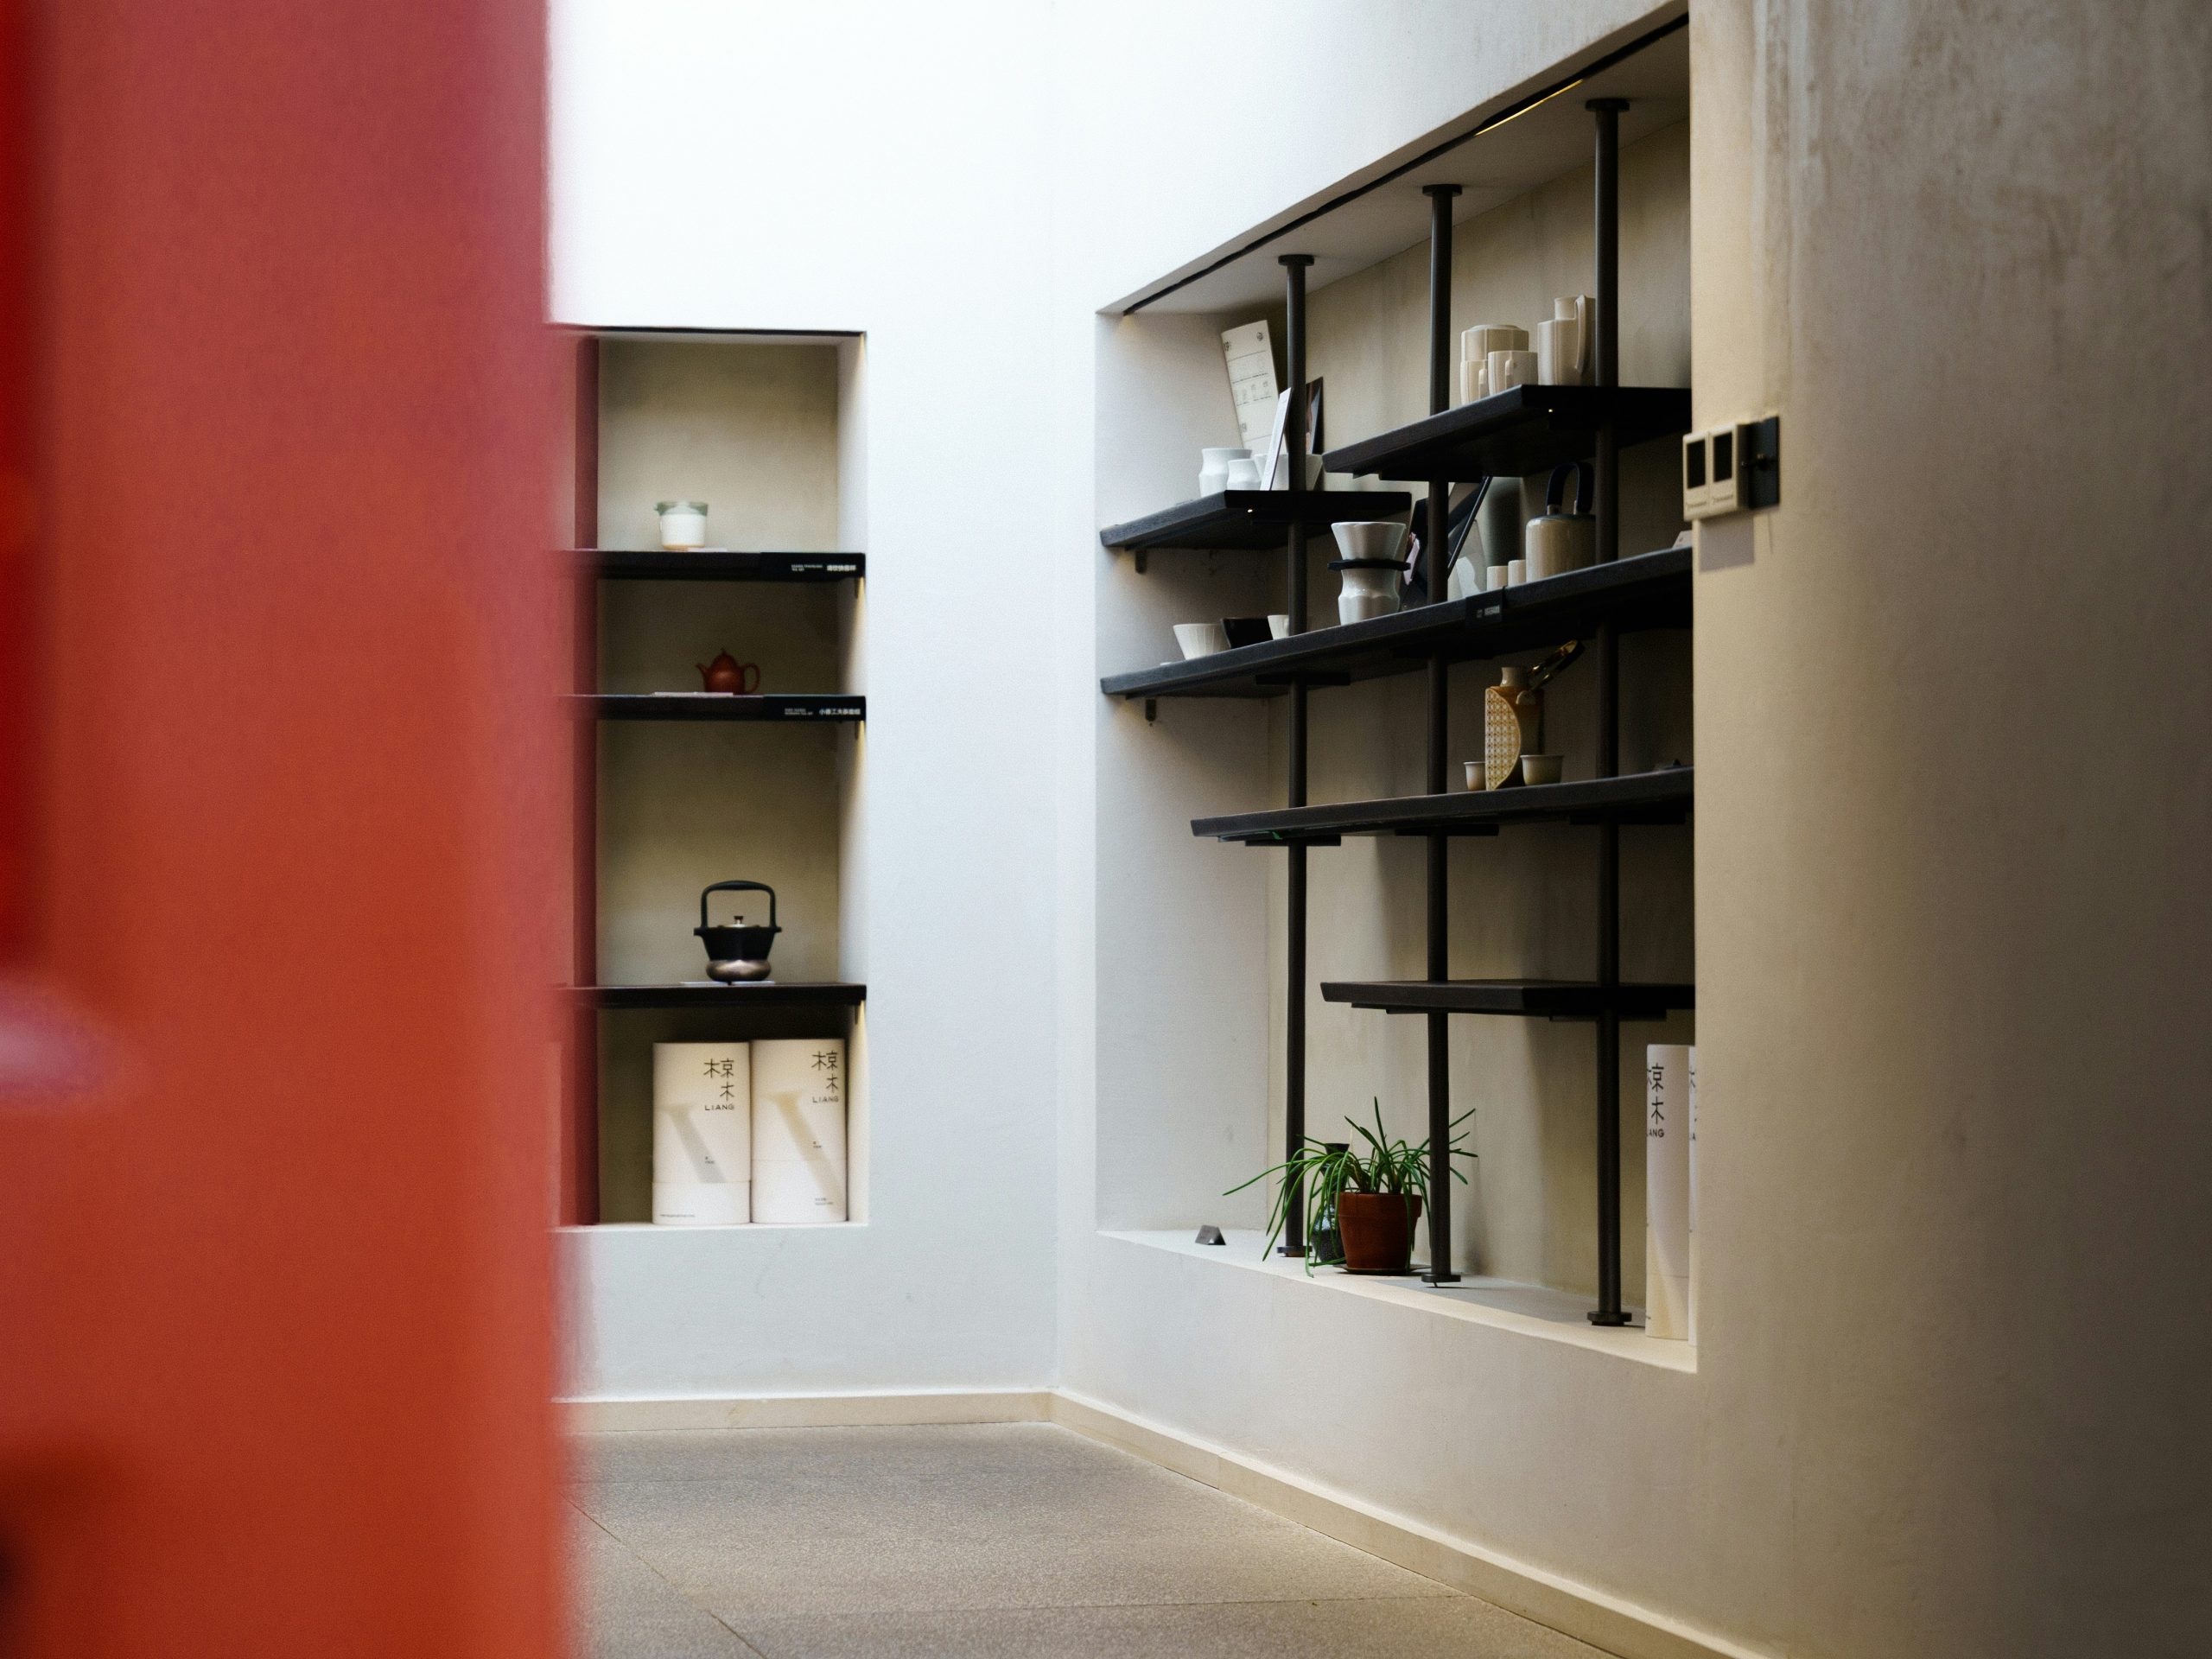
11. Contrast Recessed Wall Niches with a Freestanding Black Unit
This space is a study in positive and negative space. The recessed wall cubbies are negative space—carved out of the wall. The freestanding black shelving unit is positive space—an object placed in the room. Playing these two ideas off each other creates a dynamic, gallery-like feel. The white, minimalist niches feel architectural and serene, while the tall, black grid unit feels graphic and bold. The contrast in color (black vs. white) and form (full vs. empty) is what gives this simple room its sophisticated, artistic energy.
|
📋 Copy HEX 🔗 Share |
Recessed shelving niches are fantastic space-savers, but they only work in specific situations. You need a wall that is either extra thick (like a plumbing wall) or one where you can afford to build it out by about 4-6 inches. They are ideal for narrow hallways or smaller rooms where a protruding bookshelf would obstruct the path. The freestanding unit, by contrast, needs more floor space—at least a 3-foot by 5-foot area with enough clearance to walk around it. This is a great example of how to get display space in either a very small or a very large room.
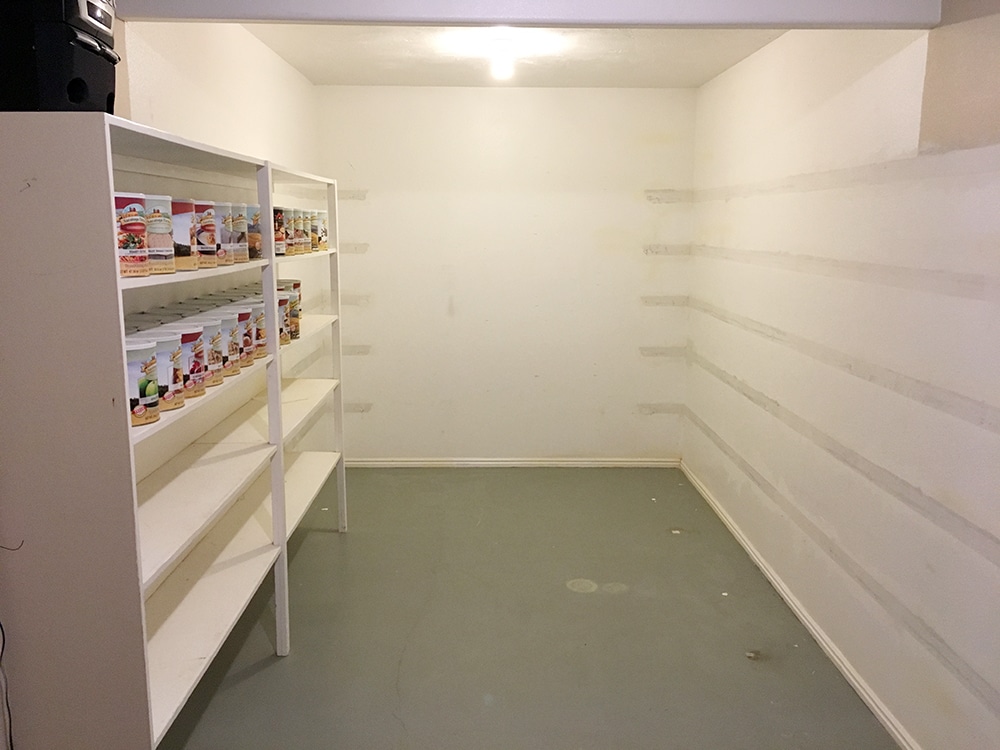
12. Plan for Future Storage with a Wall-Mounted Track System
Getting a track shelving system perfectly level is key to a professional-looking and stable result. It’s a simple but precise job.
- Time: 1-2 hours. Cost: $75 – $200 (for tracks and standards).
- Start with the horizontal top track. Use a stud finder to locate all wall studs and mark them.
- Place the top track against the wall, and use a 4-foot level to get it perfectly horizontal. Mark where the screw holes land on your stud marks.
- Drill pilot holes, then securely screw the horizontal track to the wall, hitting as many studs as possible.
- Hook the vertical standards (the long slotted rails) onto the top track. They will hang perfectly plumb.
- Use one screw to secure the bottom of each vertical standard to the wall so they don’t shift. Now you’re ready for brackets and shelves.
|
📋 Copy HEX 🔗 Share |
While this kind of adjustable track shelving is incredibly versatile, its weak point is a non-level installation. If the main horizontal track is even slightly off-kilter, all your shelves will be slanted. This might not be noticeable at first, but over time, items can shift and slide. It’s also critical to screw the tracks into studs. Using only drywall anchors is a recipe for disaster, especially in a utility space where you might be storing heavier items like canned goods or bulk supplies. Take the extra 30 minutes to find the studs and use a long level. It will save you a huge headache later.
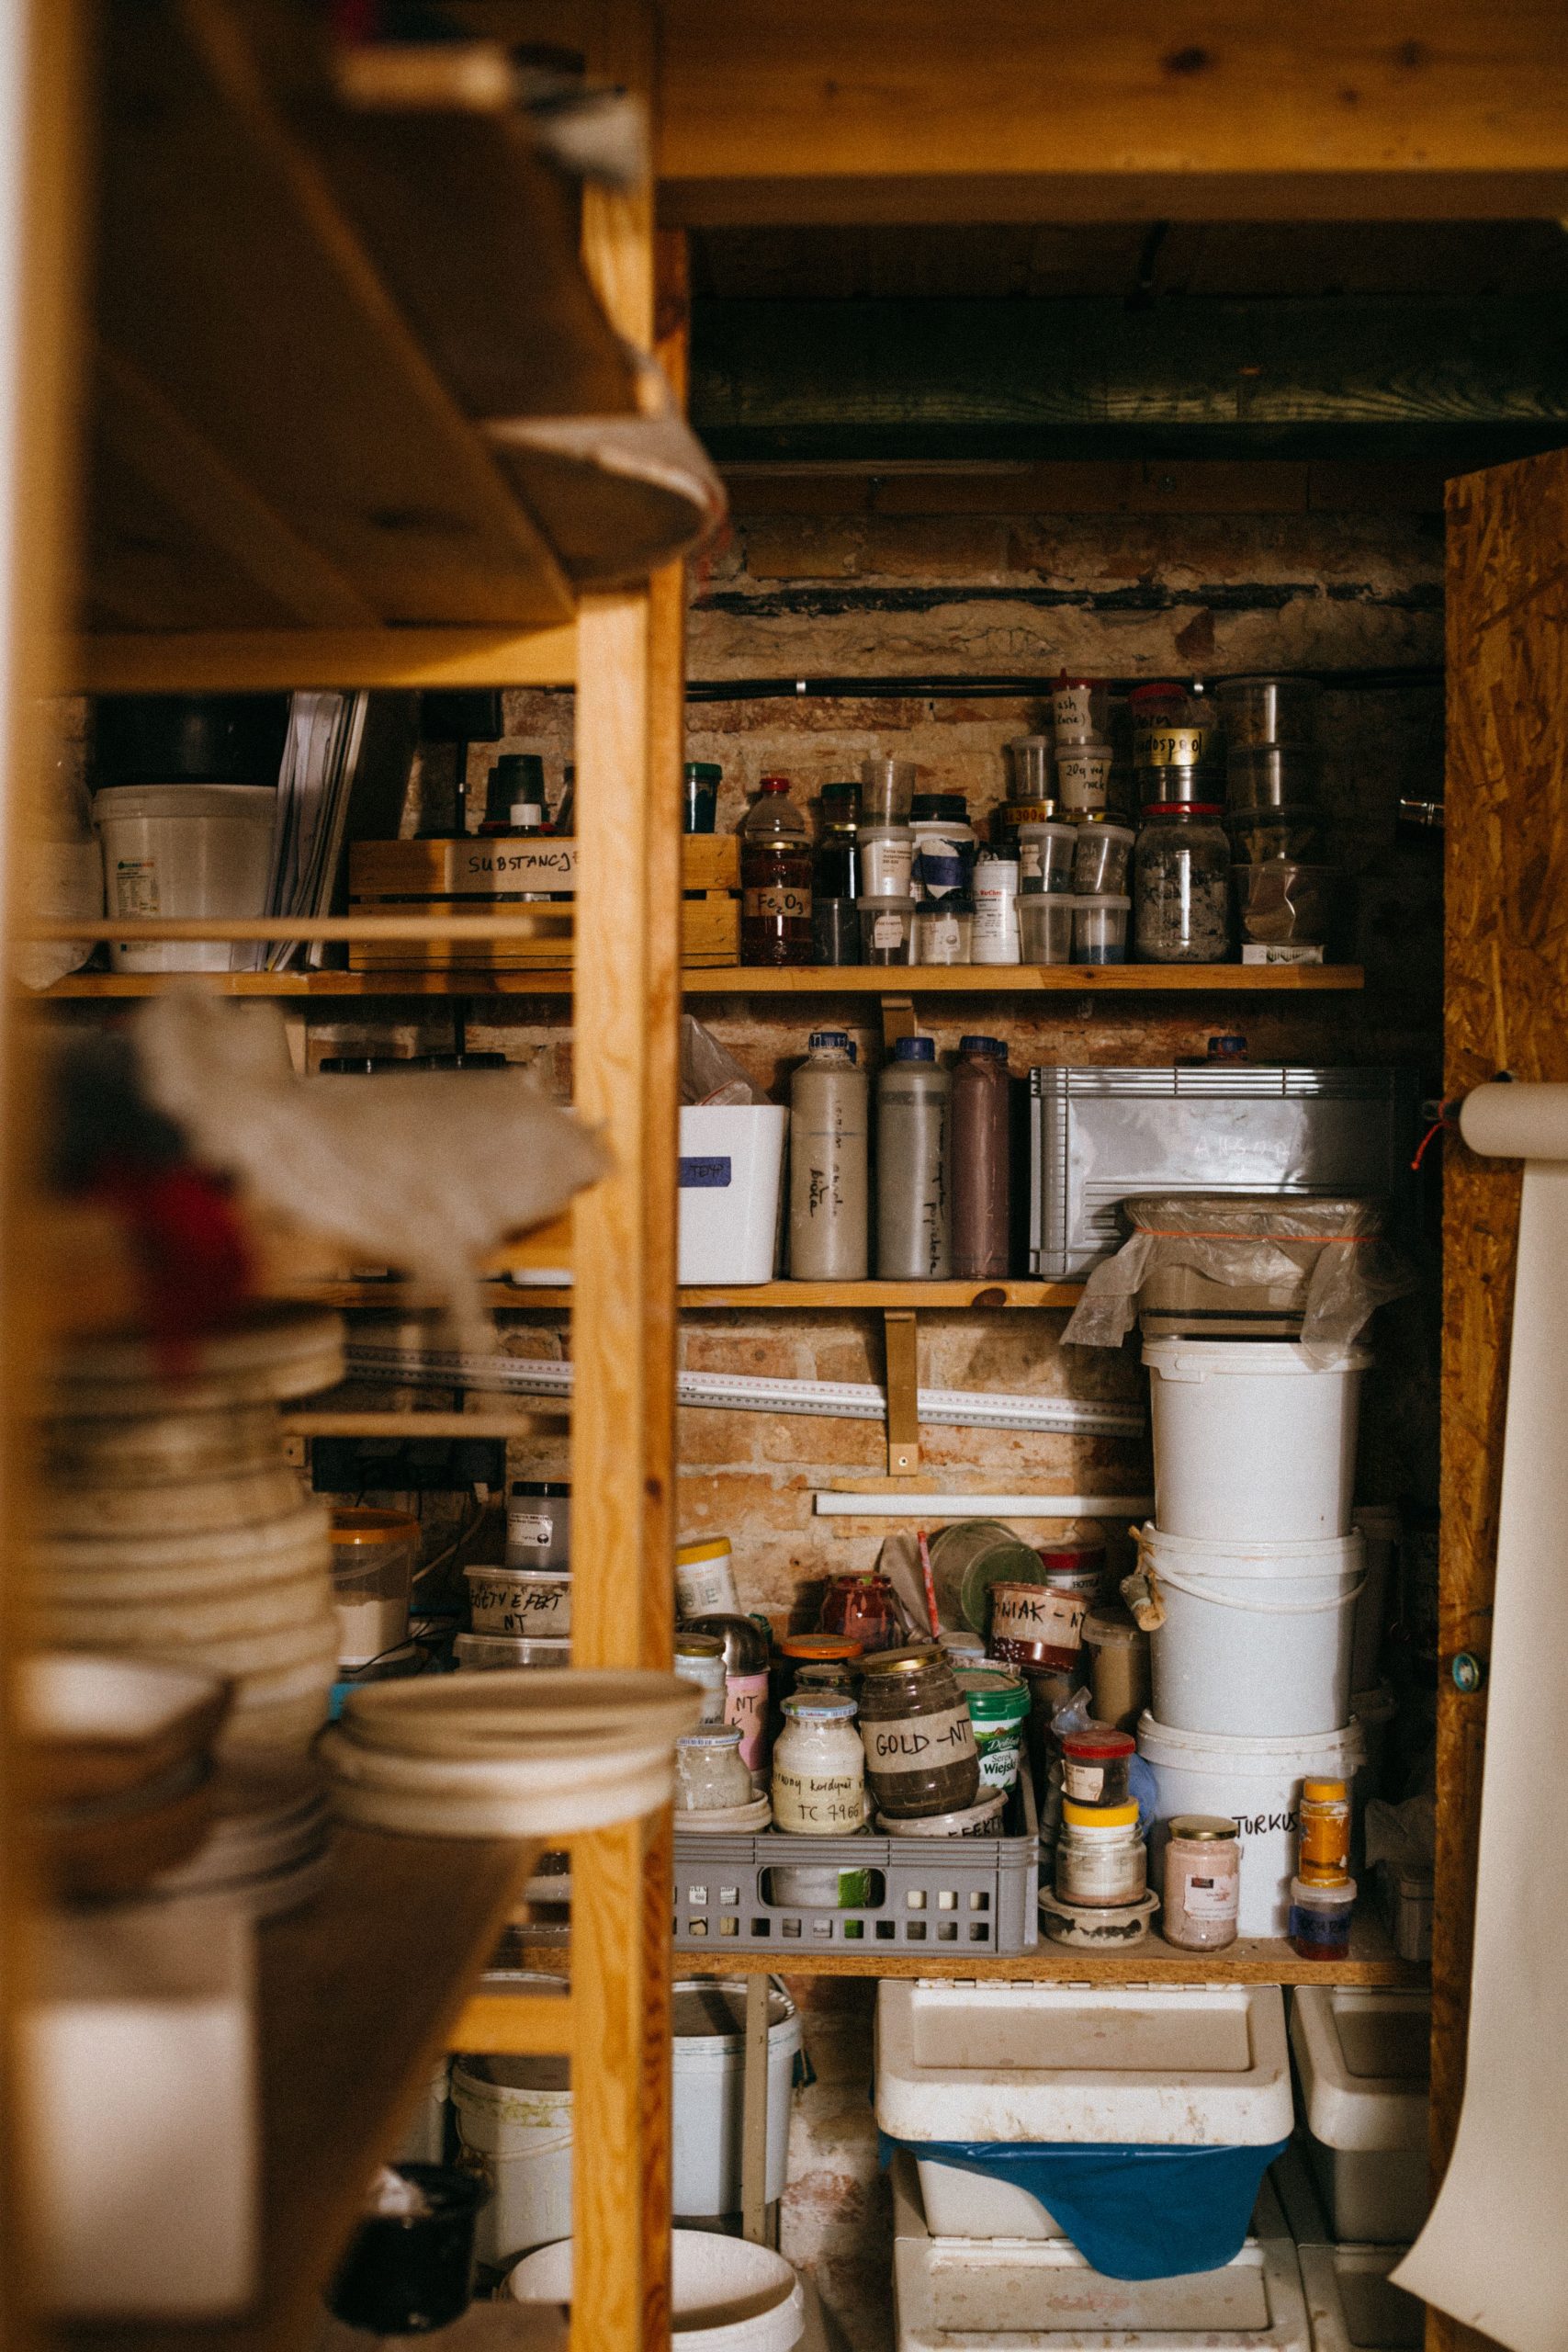
13. Embrace a Raw, Utilitarian Look with Shelves on Exposed Brick
An exposed brick wall brings incredible texture and character to a basement, but it also brings dust. Brick and mortar are porous and can shed fine dust over time. The rough surface of both the brick and the rustic wooden shelves can also be tricky to clean. You can’t just wipe them down; you’ll need a vacuum with a brush attachment to get into all the nooks and crannies. Sealing the brick with a matte-finish sealant can significantly cut down on the dust and make cleaning easier, but it’s an extra step and cost to consider upfront.
|
📋 Copy HEX 🔗 Share |
Want this look without having an actual brick wall? You can get surprisingly realistic brick paneling from home improvement stores for about $40-$60 per 4×8 sheet. For the shelves, skip the expensive reclaimed lumber and use standard pine boards from a place like Home Depot. Distress them yourself by lightly hitting them with a hammer or chains, then apply a dark wax or stain to age them. You can achieve a very similar raw, practical vibe for a fraction of the cost of real brick and vintage wood. It’s about capturing the texture and tone on a budget.
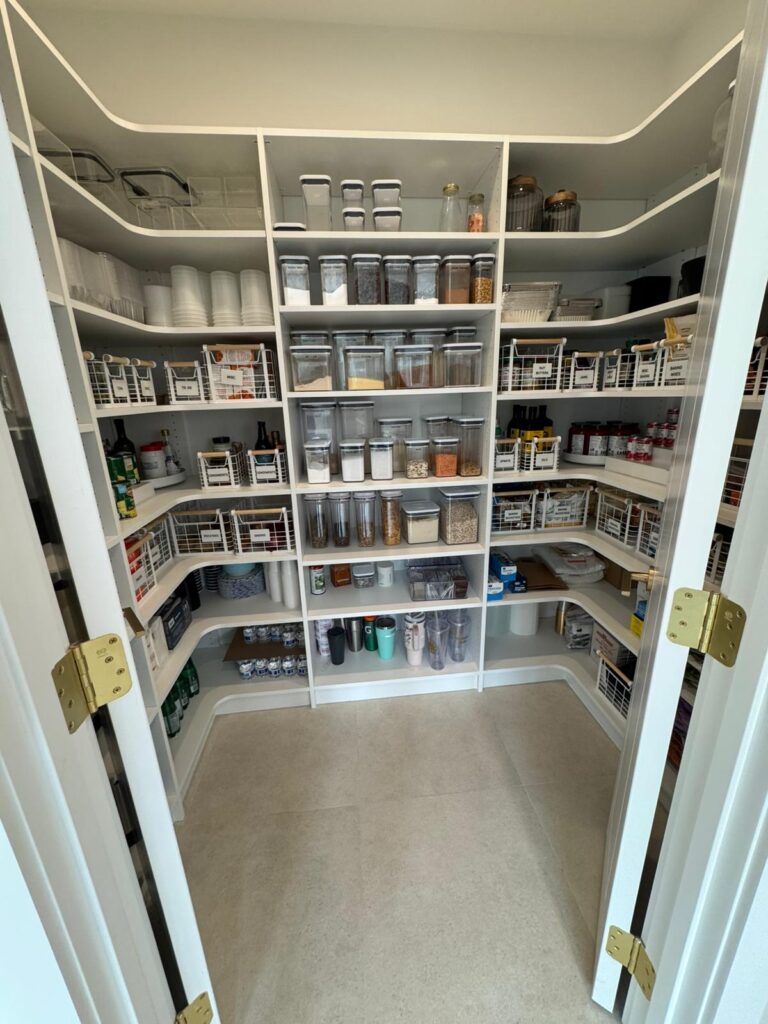
14. Design the Ultimate Walk-in Pantry with Wrap-Around White Shelving
The single most important element in this hyperorganized pantry isn’t the shelving itself but the army of clear plastic containers. They are the true heroes of this space. By decanting everything from pasta to cereal into uniform, transparent bins, you instantly eliminate visual clutter from loud packaging. It allows you to see exactly what you have at a glance, reducing food waste and making grocery lists a breeze. Without the containers, this would just be a wall of messy boxes and bags. The discipline of decanting is what creates this pristine, functional result. Compare this to the more relaxed utility of Idea #29.
|
📋 Copy HEX 🔗 Share |
Creating a pantry this pristine involves investing in both the structure and the organization. Here’s what a space like this could cost:
- Custom MDF or Plywood Shelving (Materials): $400 – $900
- Paint and Primer: $100 – $200
- Labor/Installation (if not DIY): $800 – $2,000
- Organization Bins & Baskets: $500 – $1,500 (this is the big one!)
- Lighting (Recessed LEDs): $150 – $400
- TOTAL: $1,950 – $5,000
Budget alternative: Use freestanding white wire shelving units ($100 each) and collect matching containers over time from stores like HomeGoods or Target.
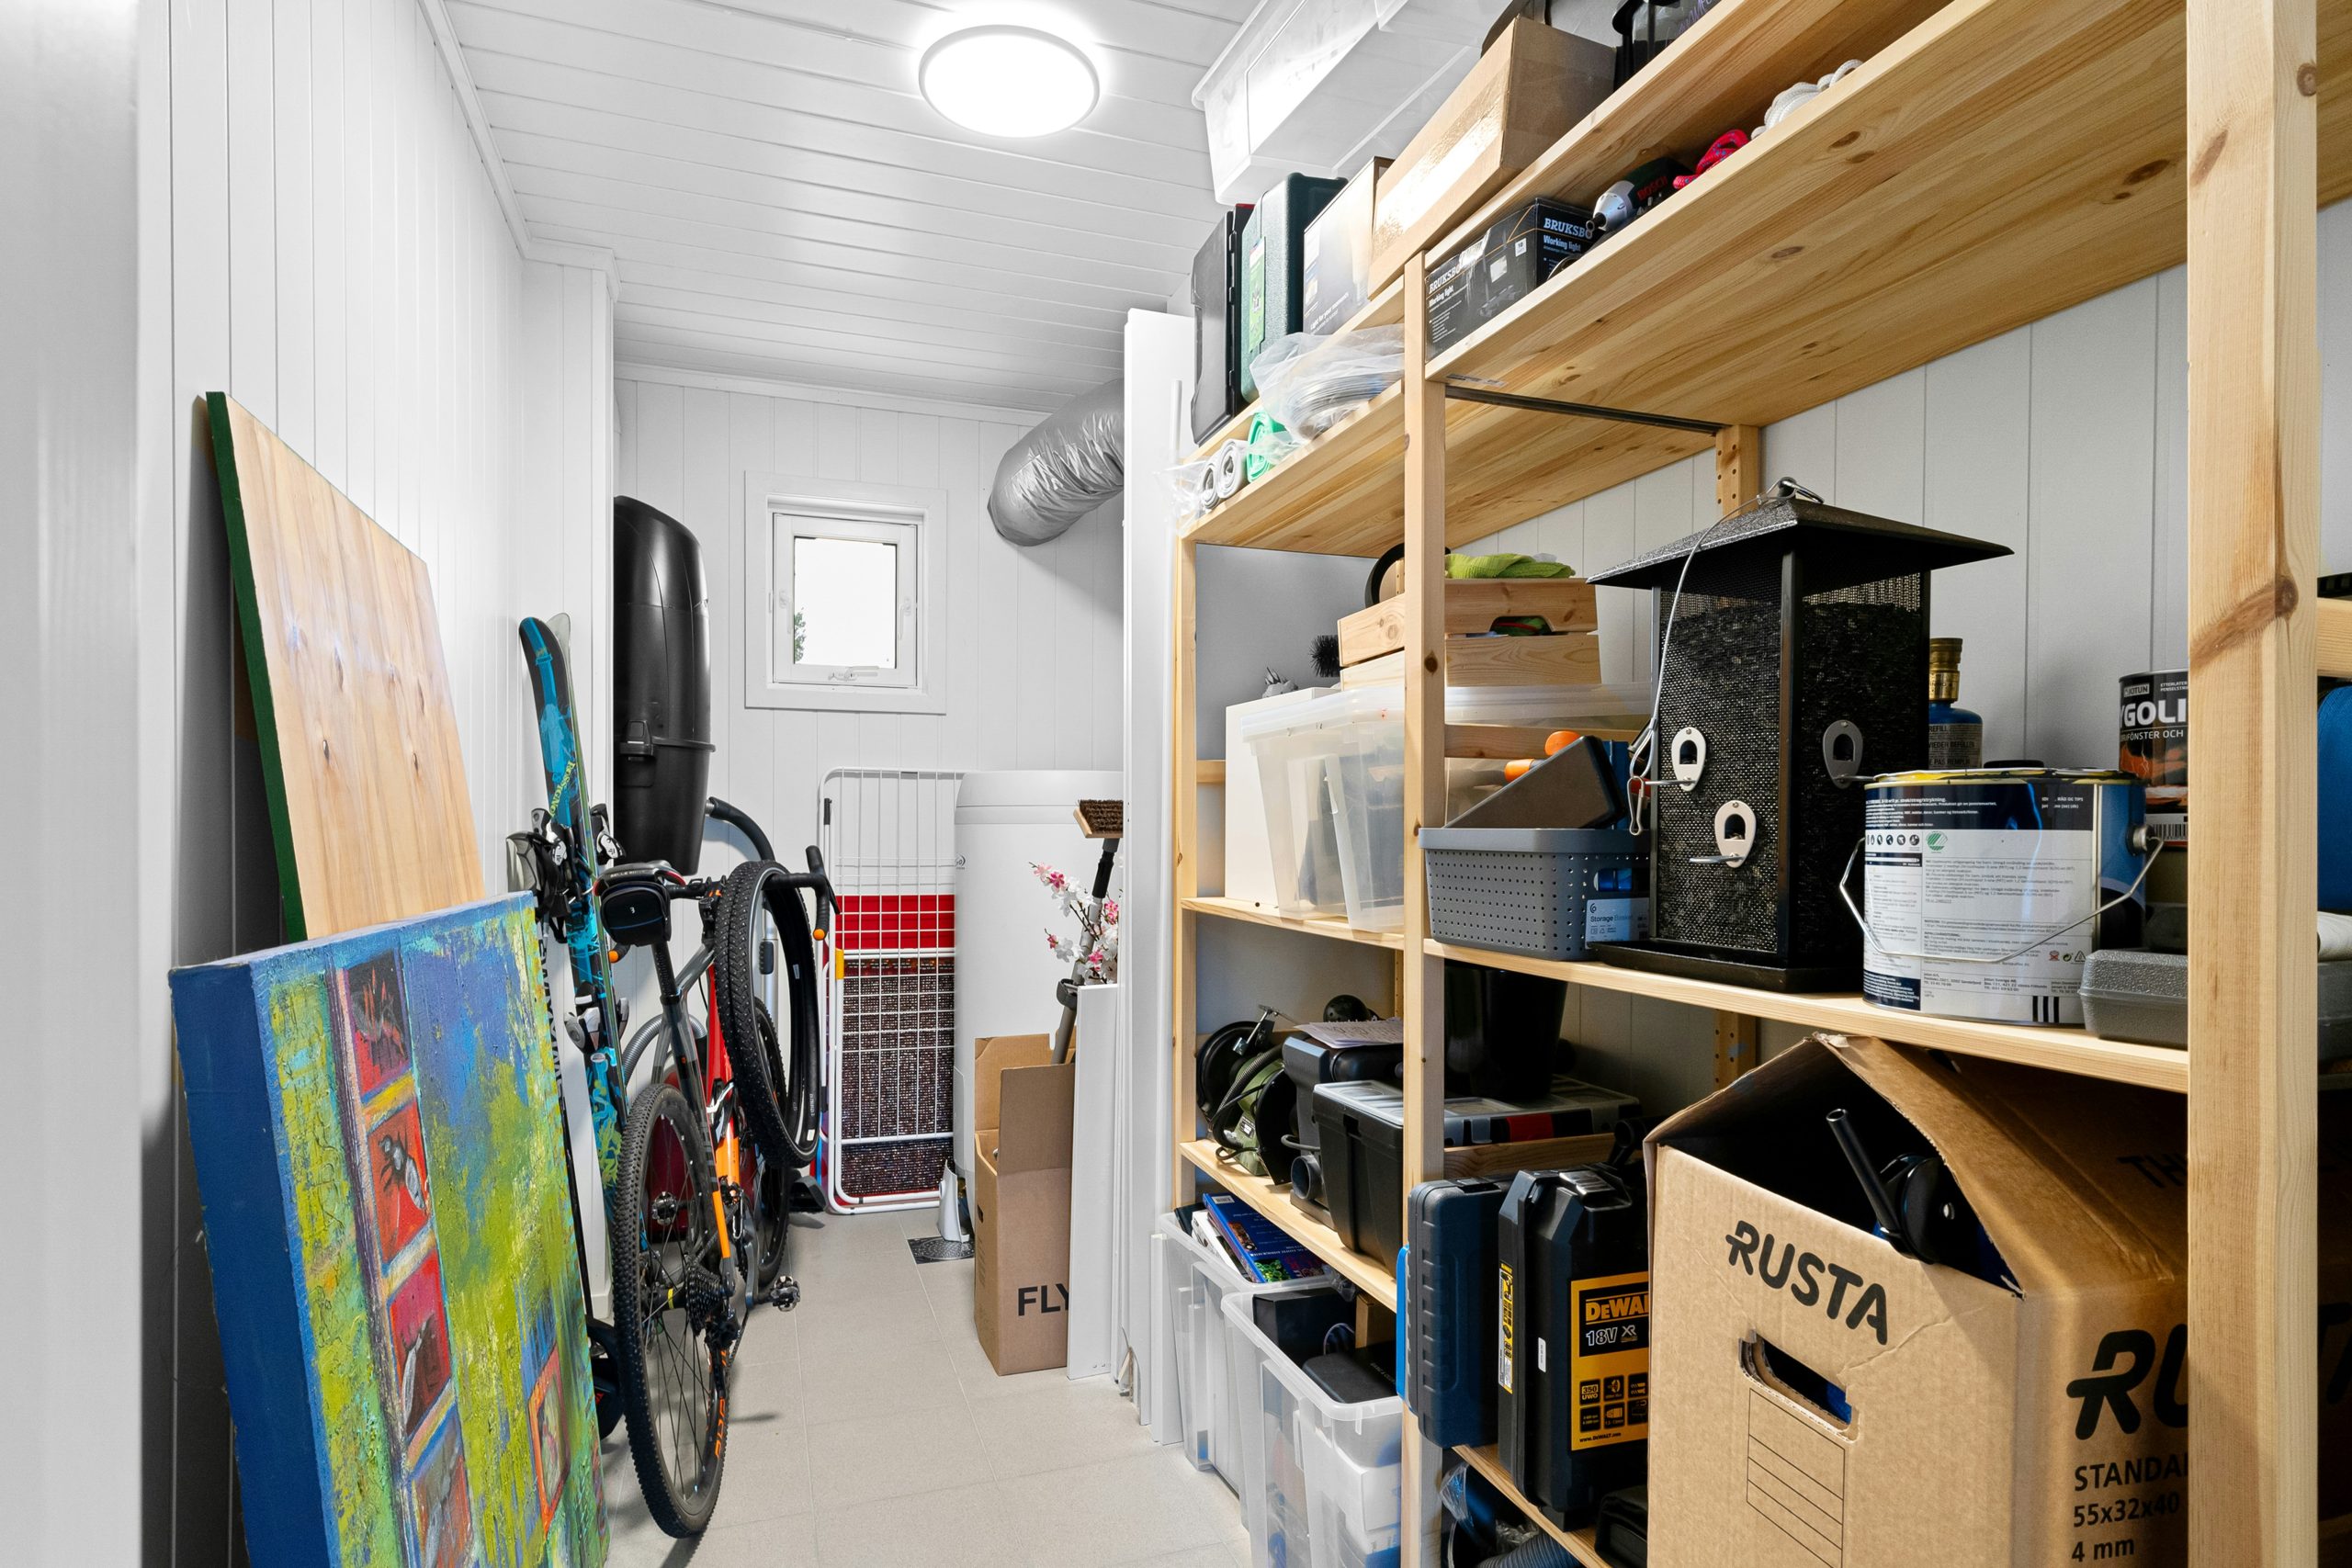
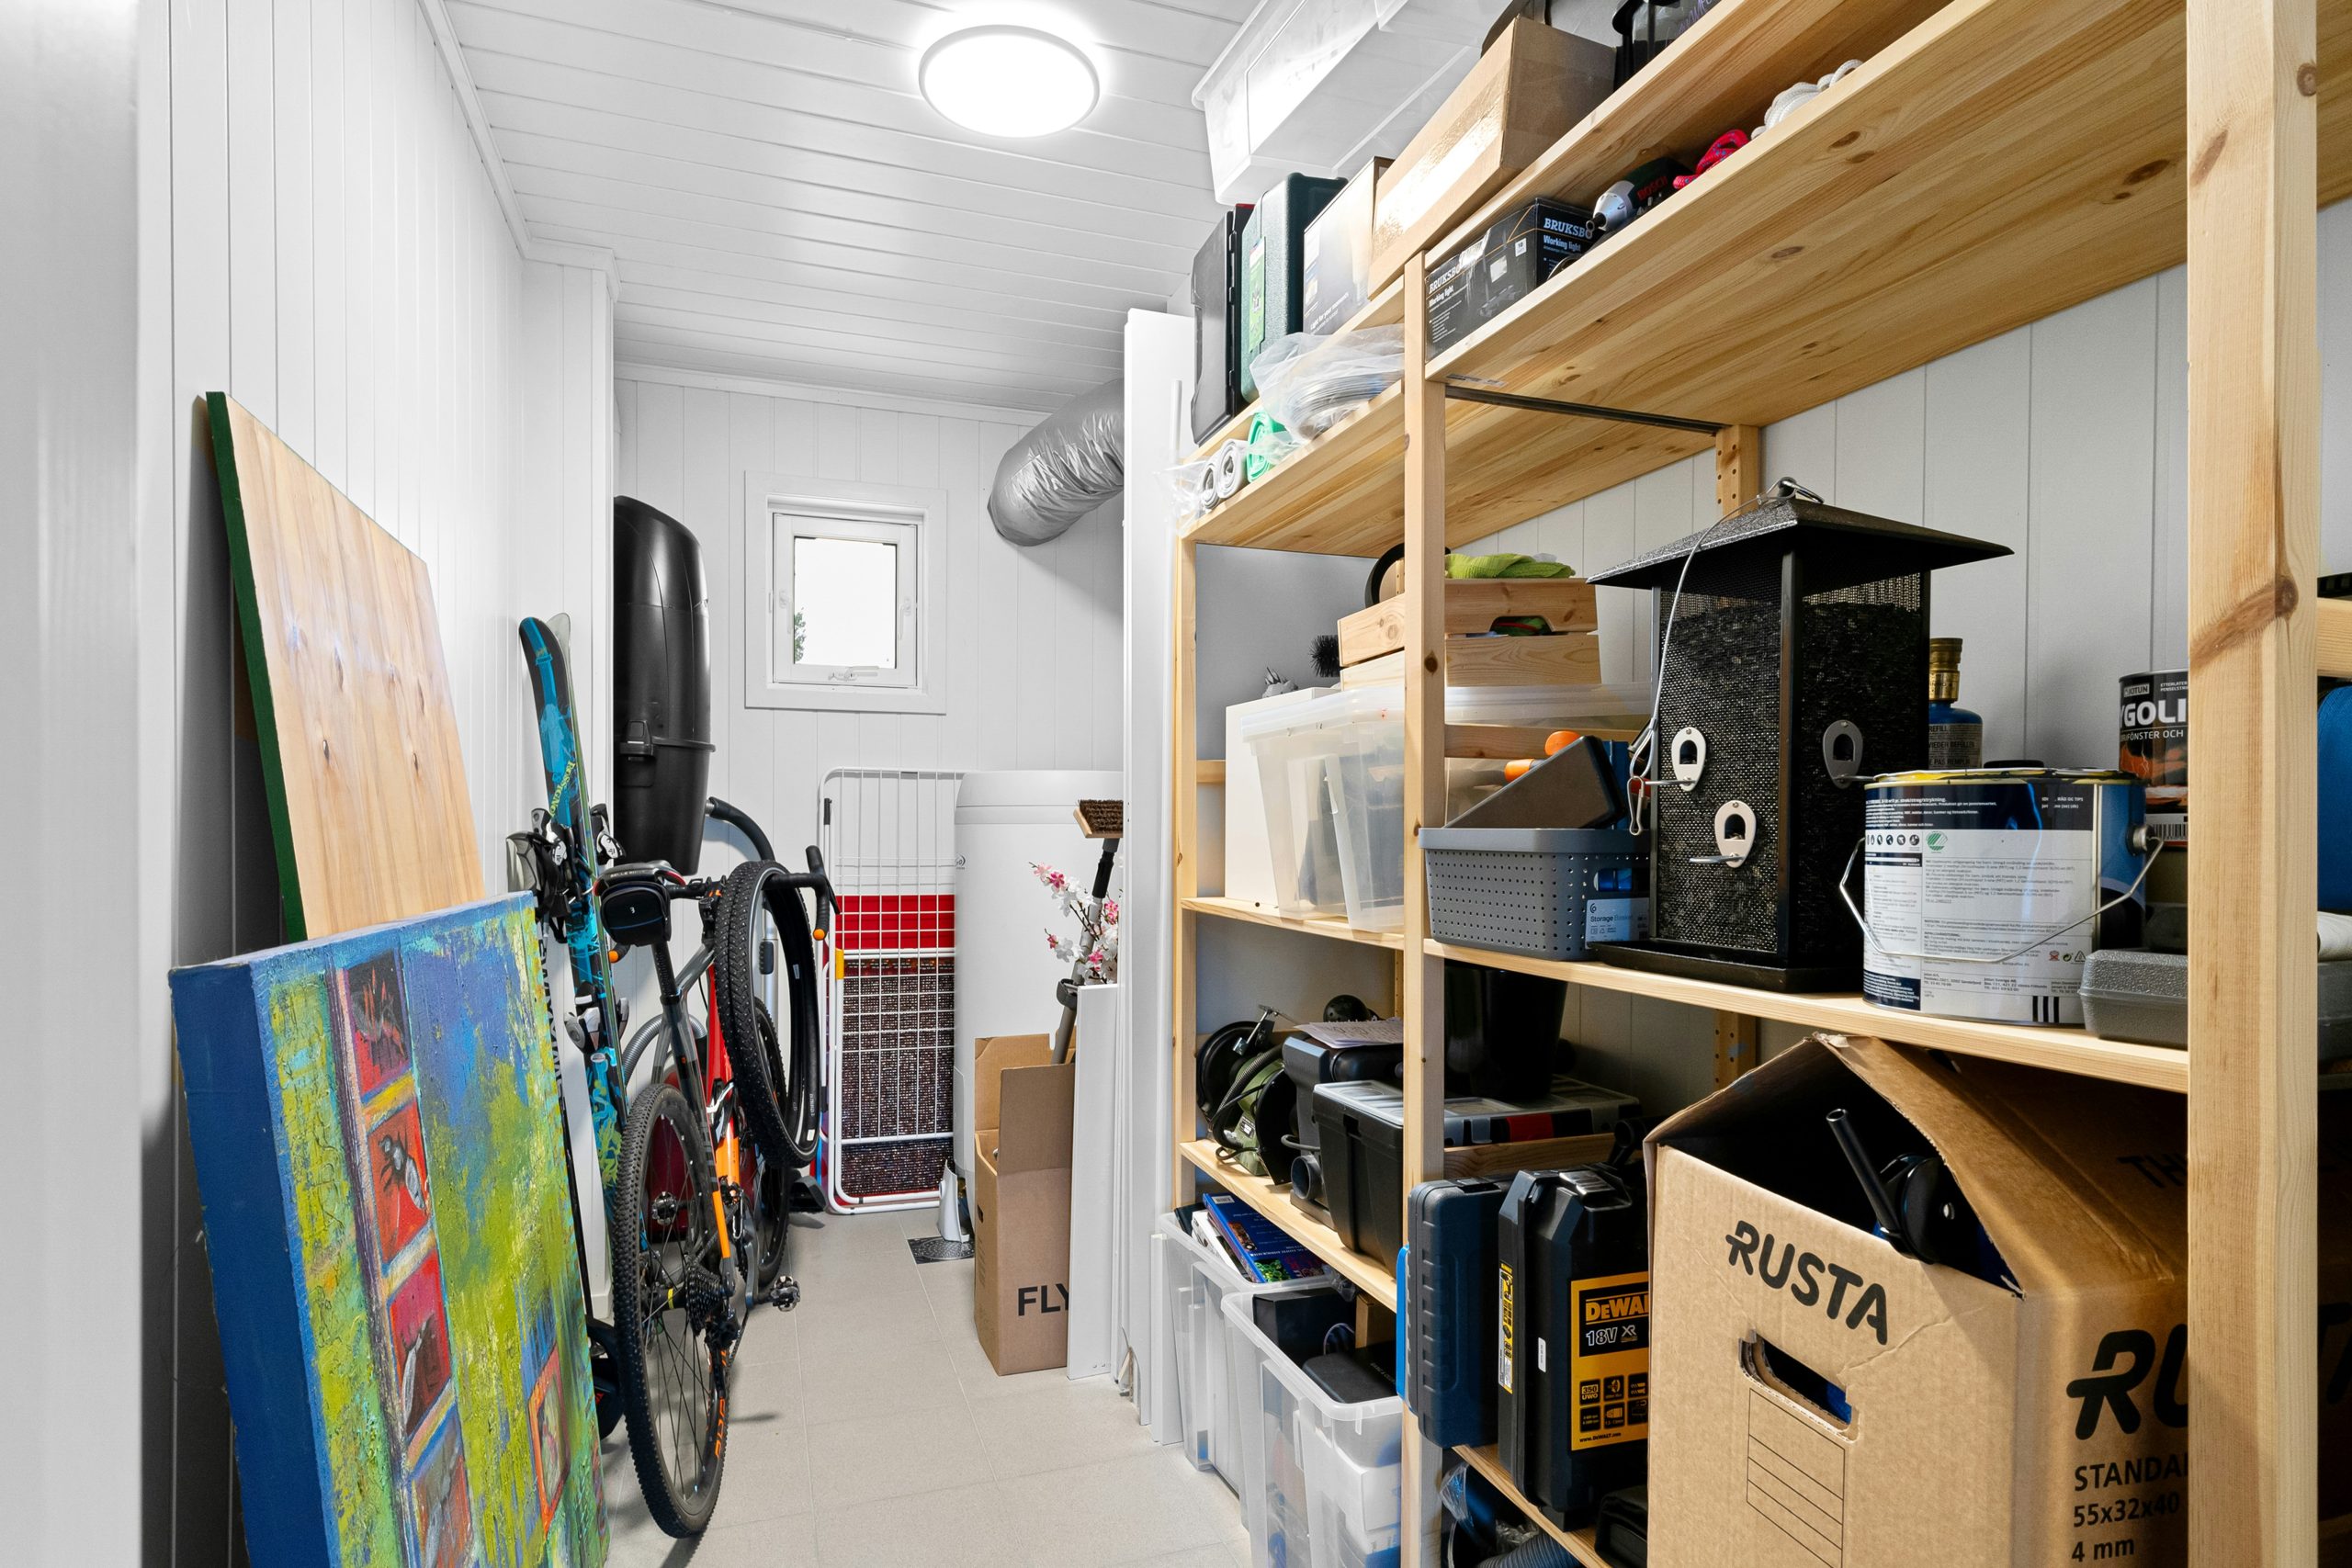
15. Brighten a Utility Space with White Paneling and Wood Shelves
In a narrow, long room like this, lighting is everything. Notice how the wall and ceiling paneling are installed in different directions. The vertical planks on the walls make the ceiling feel higher, while the horizontal planks on the ceiling draw the eye down the length of the room, making it feel longer. This is a clever visual trick. When painting paneling in a small space, always use a satin or semi-gloss finish. The slight sheen will bounce light around far more effectively than a flat or matte paint, making the entire room feel brighter and larger than it actually is.
|
📋 Copy HEX 🔗 Share |
This approach works best in a long, narrow basement space, what some might call a “bowling alley” room, typically around 6-8 feet wide and 15-20 feet long. The key is to keep the storage confined to one long wall, as shown here. This leaves a clear path for walking and accessing items on the opposite wall, like the bikes and skis. If you tried to put deep shelving on both sides of a room this narrow, it would feel incredibly cramped and difficult to navigate. The design maintains an open feeling by committing the storage to a single side.
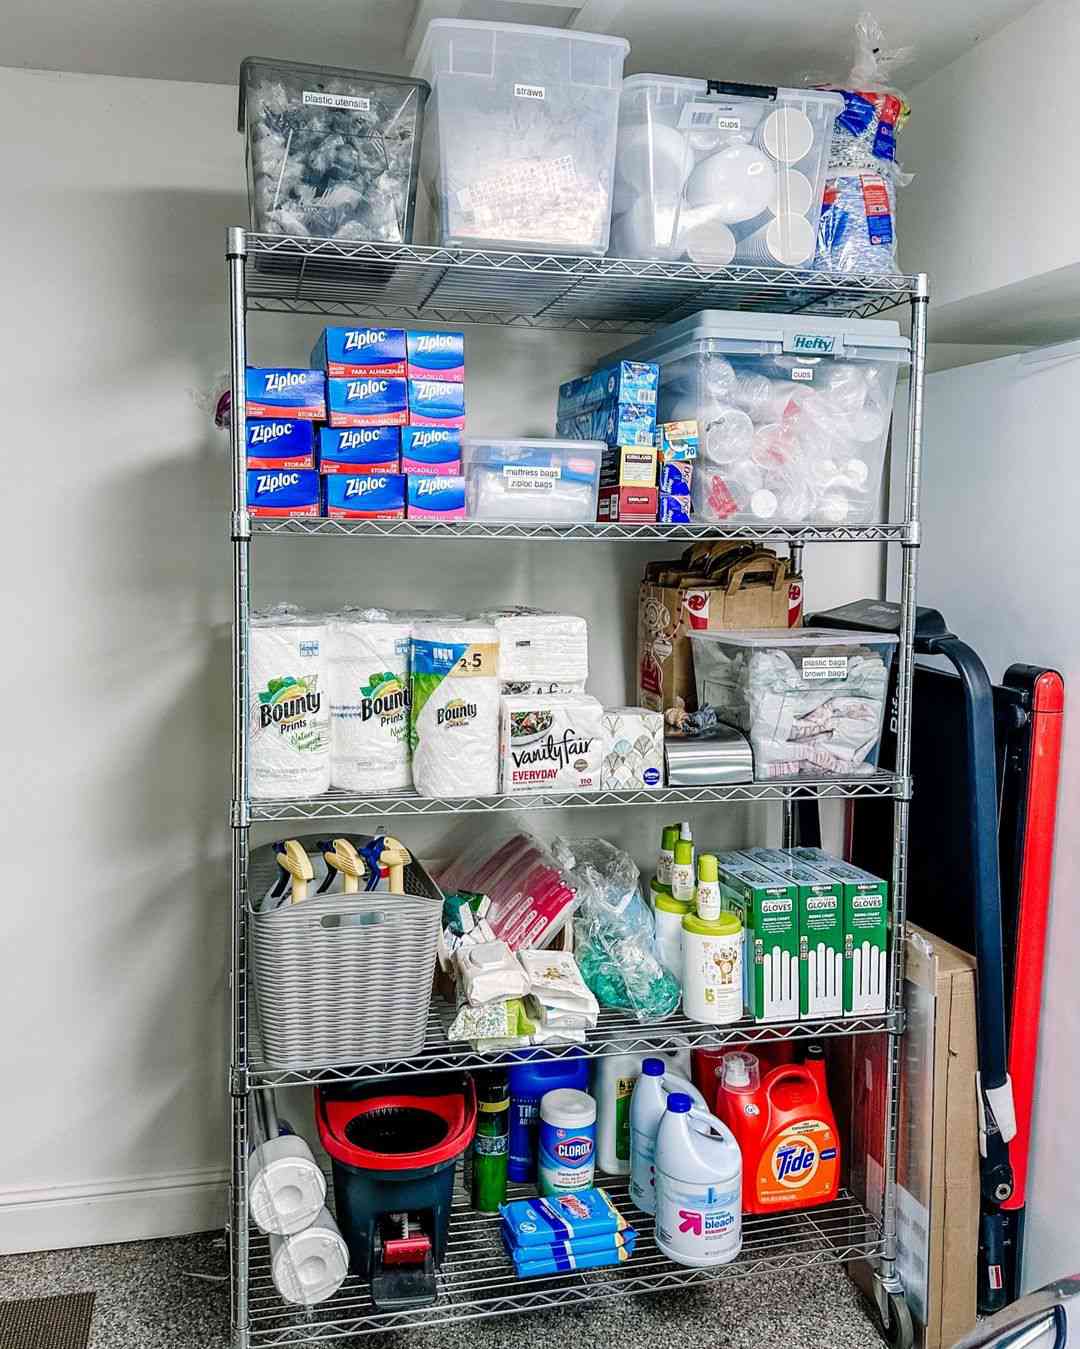
16. Organize Supplies Vertically with a Chrome Wire Shelving Unit
Chrome wire shelving is a budget superstar, but you can get this exact same level of organization for even less. Keep an eye out for these units at warehouse club stores like Costco or Sam’s Club, where heavy-duty versions often go on sale for $70-$90. For the all-important clear bins, Walmart’s Mainstays brand and Target’s Brightroom line offer excellent, affordable options. A shopping list to replicate this look:
- 5-Tier Wire Shelving Unit: $70 – $100
- Large Clear Bins with Lids (4-pack): $30 – $40
- Shoebox Bins (10-pack): $25 – $35
- Label Maker or Labels: $15 – $25
For well under $200, you can create a seriously organized tower of storage.
|
📋 Copy HEX 🔗 Share |
This setup is so satisfying because it follows the number one rule of good organization: visibility creates accessibility. Using a combination of wire shelves and clear plastic bins means you can see almost everything you own at a single glance. There’s no digging through opaque tubs or wondering what’s in that cardboard box in the back. The wire construction allows light to filter through, illuminating the items on lower shelves, which is a huge advantage in a typically dark basement. It’s a system that reduces the mental energy required to find, use, and put away your stuff.
17. Pair Heavy-Duty Metal Shelving with a Pegboard Tool Wall
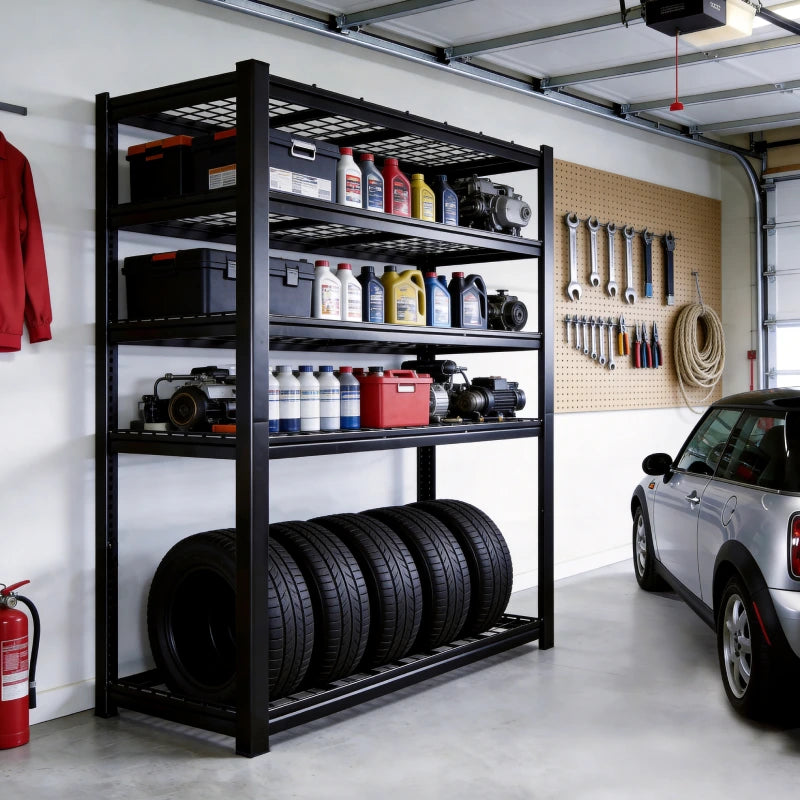
The visual recipe for this ultra-organized garage space is 60% industrial function, 20% raw material, and 20% high-visibility accents. The black metal shelving and concrete floor provide the industrial, no-nonsense base. The light brown pegboard offers a touch of raw, textural warmth, preventing the space from feeling too cold and sterile. Finally, the strategic pops of red on the fire extinguisher and jacket, along with other colorful labels and containers, serve as important accents that draw the eye and add a bit of personality to the utilitarian scheme.
|
📋 Copy HEX 🔗 Share |
A setup like this looks fantastic, but it only stays fantastic with discipline. Pegboard, in particular, requires a commitment to putting things back in their designated spot every single time. It’s very easy for a pegboard to become a chaotic jumble of tools that have lost their homes. This level of organization is a lifestyle, not a one-time project. If you’re naturally inclined to toss tools into a drawer, be honest with yourself. This system might create more frustration than harmony. If you love methodical systems, however, this is your paradise.
18. Maximize Garage Storage with Matching Heavy-Duty Black Metal Units
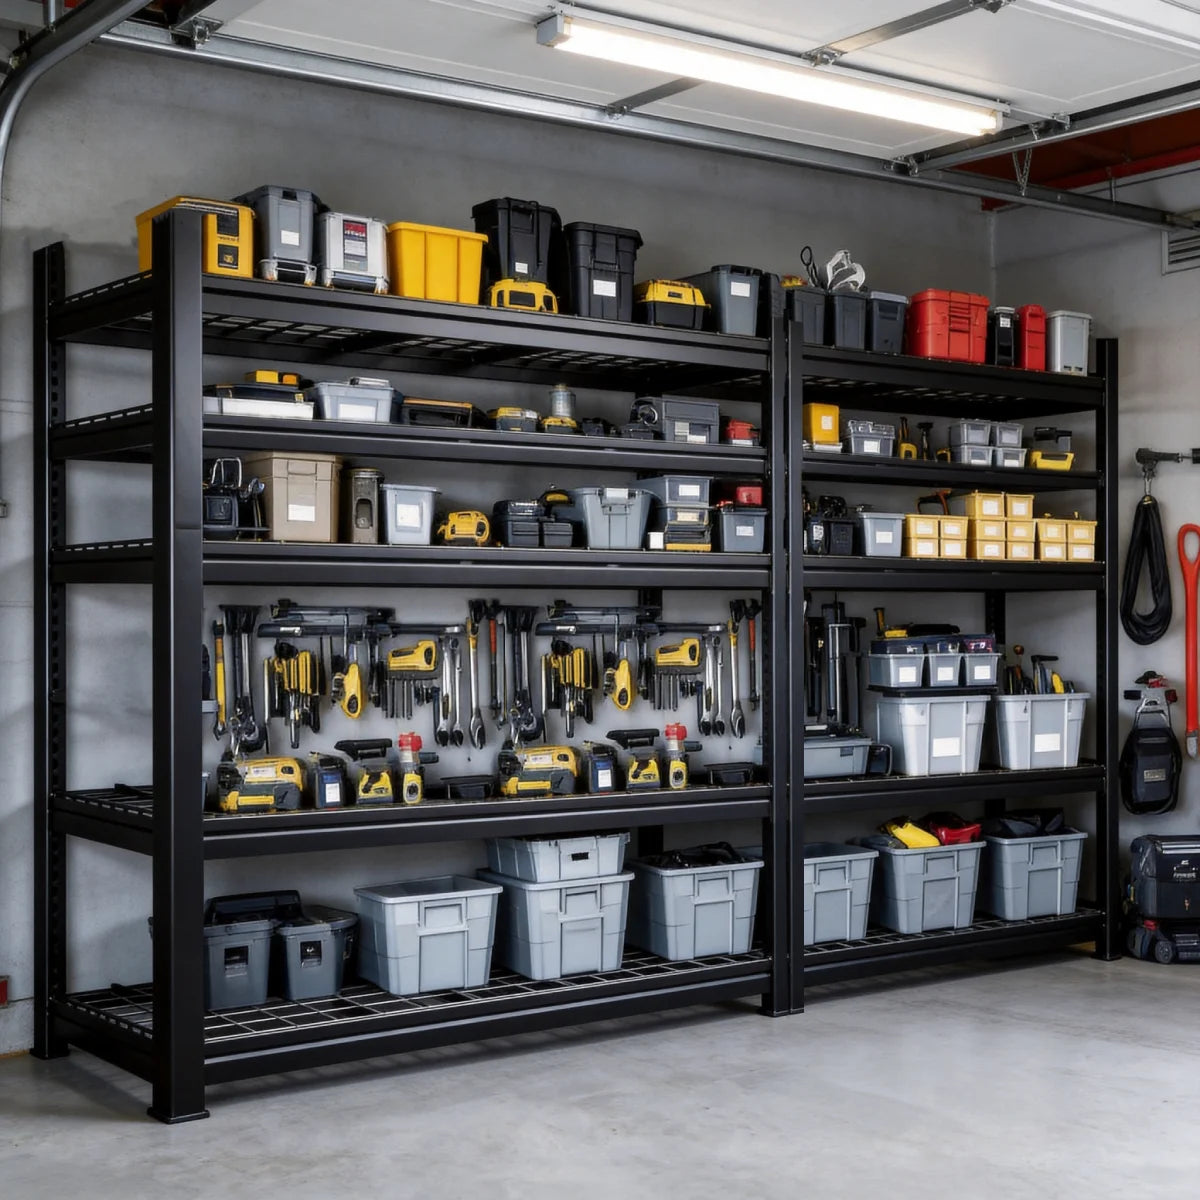
Corralling small items in a large storage space is a constant battle. A bin system is the answer. Follow this simple process for a tidy result:
- Time: 2 hours. Cost: $50 – $300+ (depending on how many bins).
- Group Like Items: Pull everything off your shelves and sort items into logical categories (e.g., painting supplies, plumbing parts, electrical, etc.). Be ruthless and get rid of duplicates or dried-up products.
- Choose Your Bins: Select uniform bins. Using matching gray and black bins, as seen here, creates a calming, cohesive look. Opaque bins are great for hiding visual clutter.
- Label Everything: This is the most crucial step. Use a label maker or simple masking tape and a sharpie to clearly label the front of every single bin.
- Create Zones: Place your labeled bins back on the shelves, keeping related categories together. Put frequently used items at eye level.
|
📋 Copy HEX 🔗 Share |
The single most effective element here is repetition. Using two identical black metal shelving units and a consistent color palette of gray, black, and yellow for the storage bins creates a powerful sense of order and intention. If the shelves were different styles or the bins were a random assortment of colors and sizes, the space would feel chaotic, even if it held the same amount of stuff. The repetition of form and color is what elevates this from a simple storage dump to a highly organized and visually pleasing system.
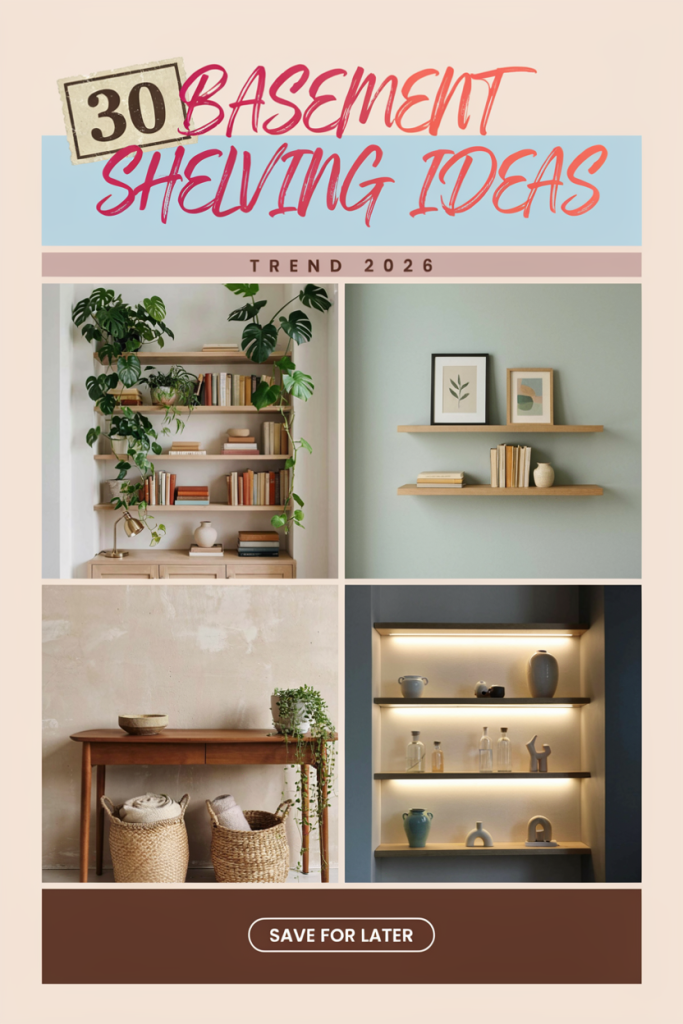
19. Soften Industrial Shelving with Warm Wood Surfaces
This style of heavy-duty shelving, typically 48 inches wide and 18-24 inches deep, is a perfect fit for a standard garage or unfinished basement. You need a wall that is at least 5 feet long to accommodate a single unit comfortably. Crucially, pay attention to ceiling height. These units are often 72 inches tall or more. While they’ll fit under a standard 8-foot ceiling, make sure to account for any overhead pipes, ductwork, or lighting fixtures in a basement that might reduce your vertical clearance in certain spots. Measure your height before you buy.
|
📋 Copy HEX 🔗 Share |
The combination of a black metal frame and wood shelf surfaces is a popular one for a reason—it looks great. However, be aware of your basement’s climate. The shelf surfaces are often made of particleboard or MDF with a wood-look veneer. In a damp or humid basement, these surfaces can absorb moisture over time, leading to swelling, warping, or even mold growth. If your basement is prone to dampness, you might be better off with an all-metal unit, like the chrome version in Idea #16, or sealing the wood surfaces with a waterproof polyurethane sealer before assembly.
20. Create an Industrial Display on an Empty Black Metal Shelf Unit
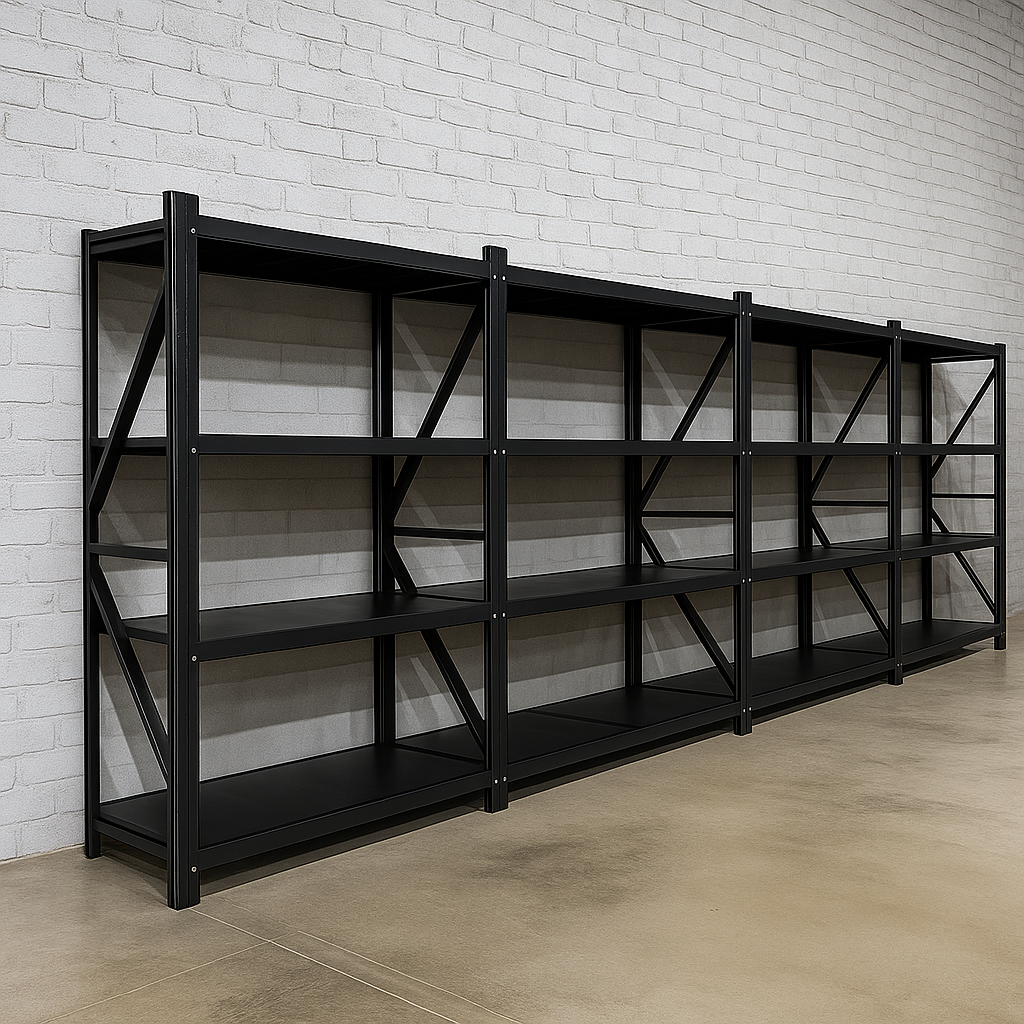
The striking visual power of this setup comes from its stark simplicity and graphic quality. The black metal frame creates a strong grid against the textured white brick wall, essentially acting as a three-dimensional line drawing. The ‘X’ of the cross bracing adds a dynamic, geometric element. By leaving the shelves completely empty, the focus shifts from the contents of the shelf to the form of the shelf itself. It becomes a sculptural object, a piece of industrial art rather than just a piece of furniture. Compare this to the very full industrial shelving in Idea #3.
|
📋 Copy HEX 🔗 Share |
An empty shelving unit can be a bold decorative statement, but you have to check a few things before committing to this minimalist look. Is the wall behind it interesting enough to be framed? A plain, flat drywall might not have the same impact as this painted brick. Also, consider the room’s function. In a space that demands a lot of storage, dedicating a large shelving unit to be purely sculptural might not be practical. This works best in a finished basement or a living area where you can afford to sacrifice storage for style.
21. Soften a Rustic Leaning Shelf with Cat-Patterned Fabric Pockets
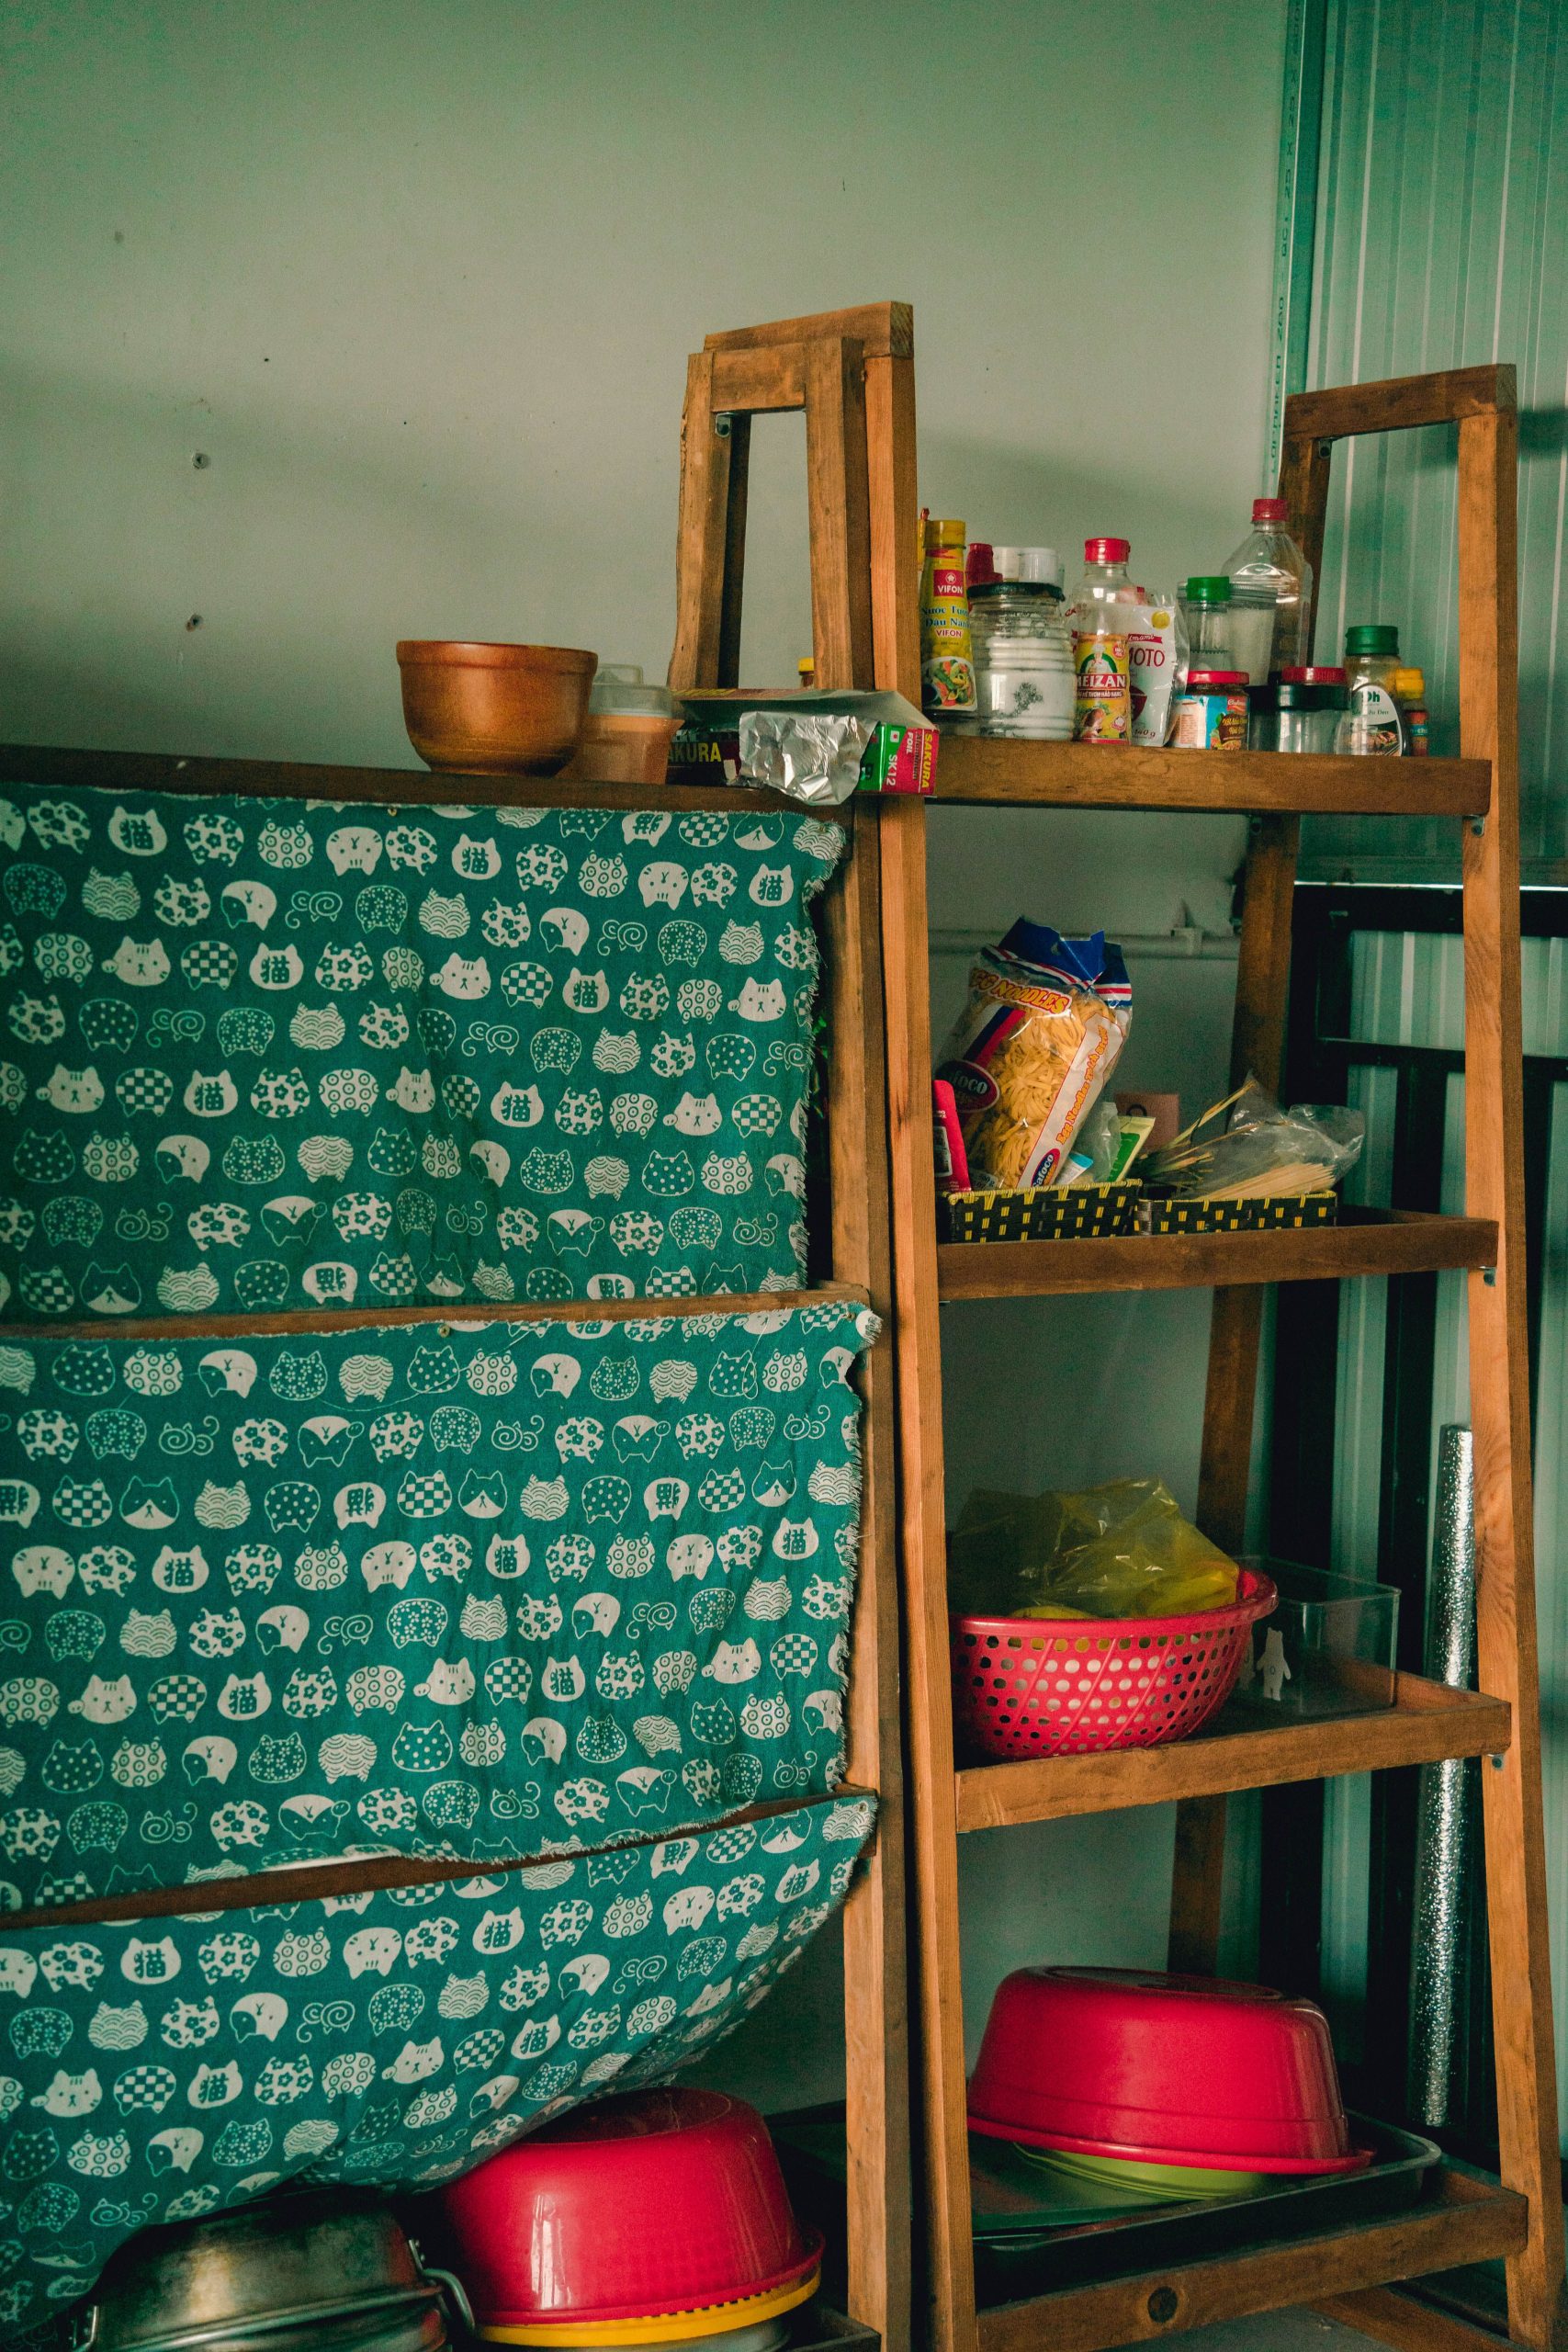
Leaning shelves can sometimes feel a bit unstable or sparse. The addition of custom fabric pockets is a brilliant way to add softness, color, and more versatile storage. To do this, simply choose a fun, durable fabric (like canvas or cotton duck), cut it to the width of your shelf section, and sew simple loops on the top and bottom. Then, slide the dowels or support rods of the shelf through the loops before you complete the assembly. It’s a simple, no-sew alternative to use fabric glue or staples, turning open spaces into handy slings for mail, magazines, or produce.
|
📋 Copy HEX 🔗 Share |
You don’t need to buy a special kit to get this look. Any basic leaning bookshelf from IKEA (like the LERBERG) or Target for around $40-$60 can be the starting point. The real magic comes from the fabric, which you can find at any craft store like JOANN for about $10-$15 a yard. For under $75, you can create a completely customized piece with far more personality than the original. Look for remnant fabric bins to find unique patterns at a steep discount, adding an even more eclectic and budget-friendly touch.
22. Embrace the Chaos: Mix Cardboard Boxes and Plastic Bins
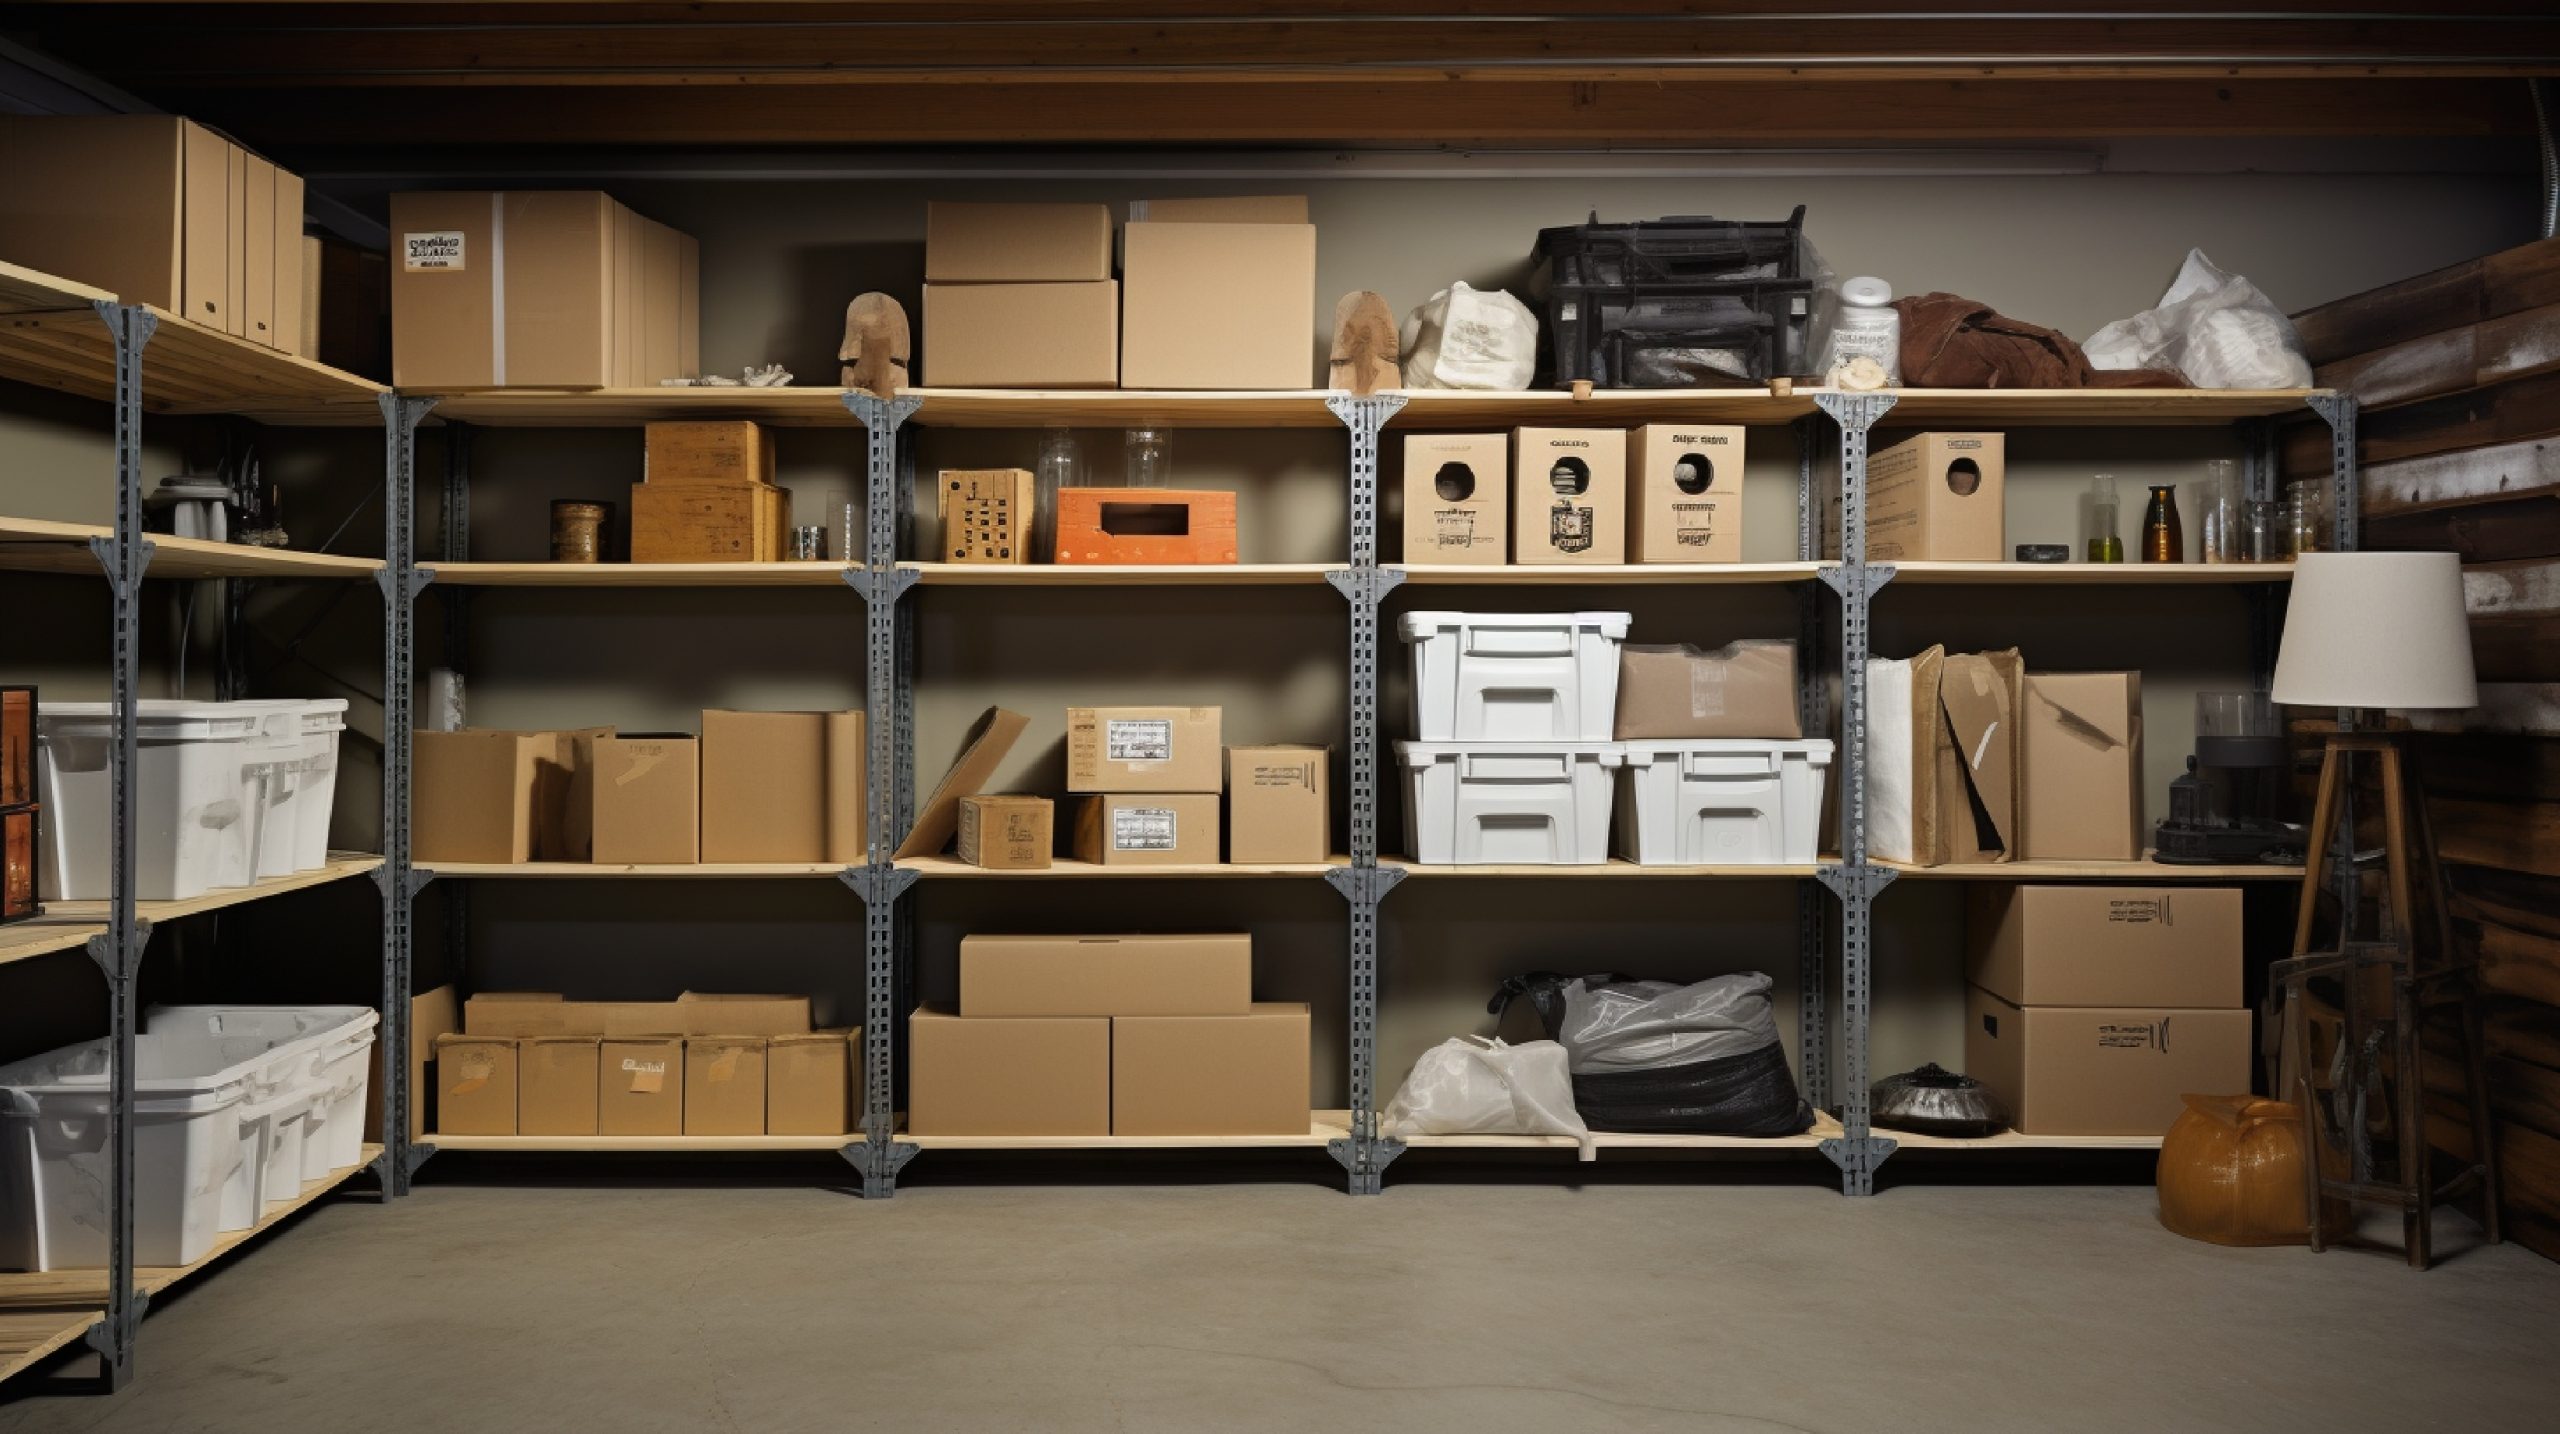
Here is the unvarnished truth of most basement storage: it’s a mix of cardboard boxes from your last move, plastic bins you bought on sale, and random loose items. And that’s okay. The critical factor for making this work is having sturdy, deep shelving that can handle the weight and varied sizes. The biggest risk here is entropy. Without a system, things get shoved wherever they fit. The solution? At the very least, take a thick marker and clearly label the contents on the outside of every single box. It’s the one small step that separates functional chaos from a frustrating mess.
|
📋 Copy HEX 🔗 Share |
The visual formula here is pure function: 80% stored items, 20% shelving structure. The goal isn’t aesthetics; it’s capacity. The mix of warm brown cardboard, semi-transparent white plastic, and the light gray metal of the shelves creates an unintentional, utilitarian palette. The key to keeping this from looking like a total disaster is the shelving itself. The uniform, industrial metal units provide a rigid, orderly grid that contains the chaos of the mixed boxes. Without that strong structure, it would just be a pile of stuff.
23. Add a Pop of Color with Sage Green and Wood Utility Shelves
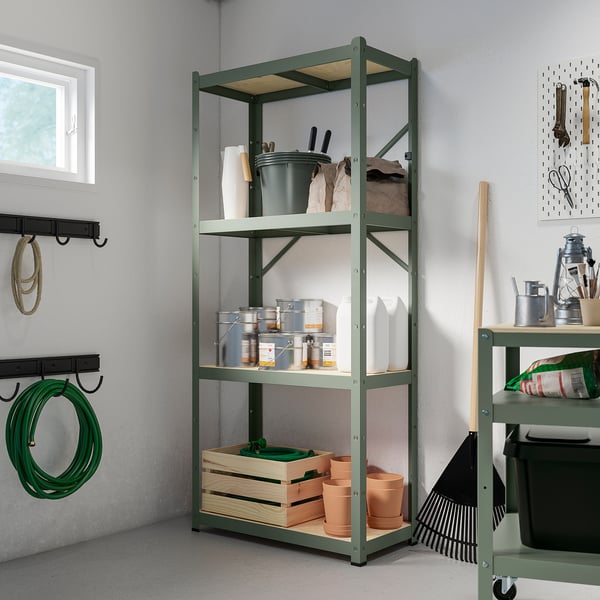
The sage green frame is hands-down the element that makes this utility area shine. In a space that could easily be dominated by the cold gray of concrete and the white of drywall, this soft, earthy green adds a welcome touch of warmth and personality. It proves that functional items don’t have to be boring. The color connects visually with the terracotta pots and the greenery of plants, creating a subtle but pleasing garden-inspired palette. If this shelf were standard black or gray, it would be just another storage unit; the green makes it a design choice.
|
📋 Copy HEX 🔗 Share |
For years, utility shelving was only available in industrial gray, black, or chrome. The recent trend of offering these practical items in more decorative colors like sage green, navy blue, and even terracotta is a game-changer for homeowners. It reflects a major shift in design: the belief that every part of the home, even the storage and utility areas, deserves to feel intentional and joyful. This trend has serious staying power because it empowers people to bring their personal style into the most functional corners of their house without sacrificing durability or practicality.
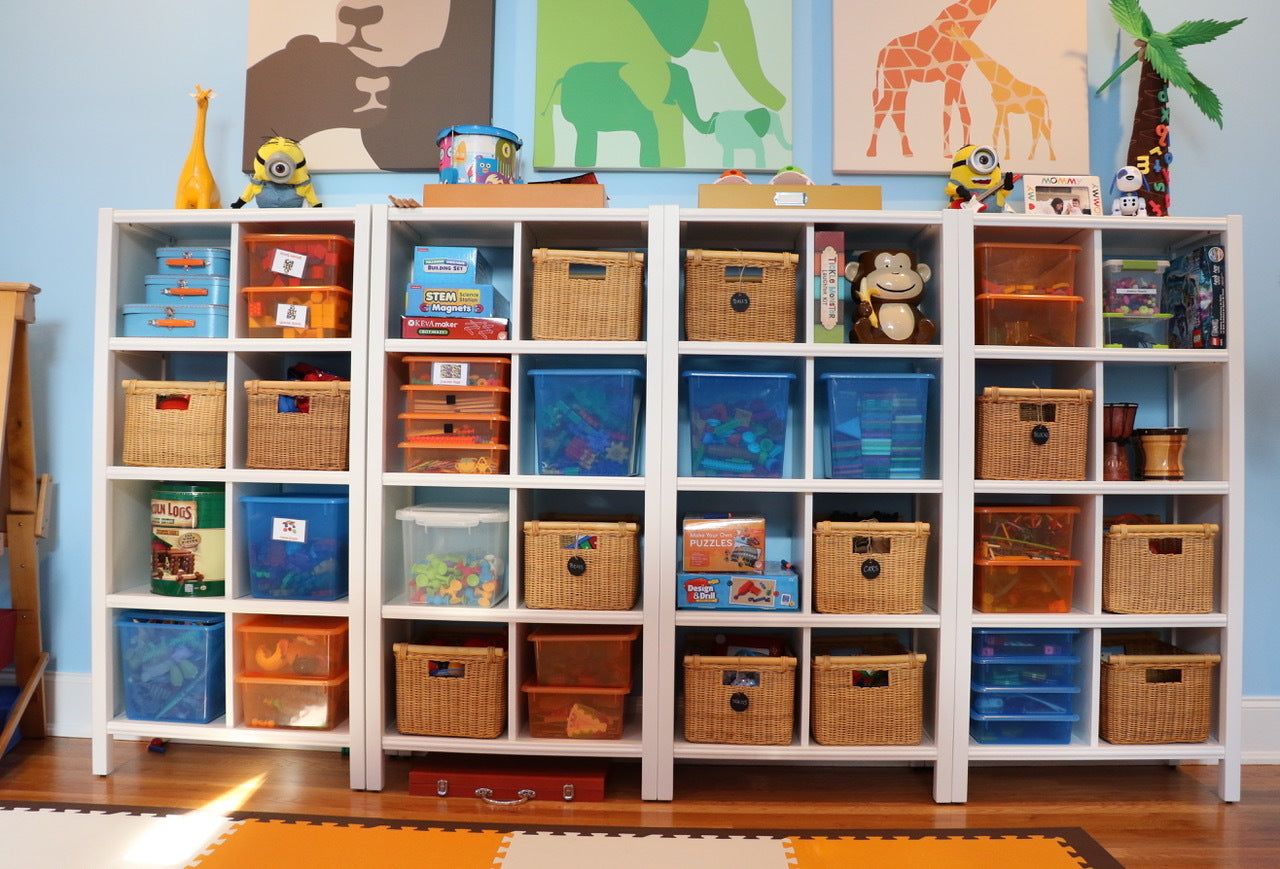
24. Organize a Play Area with White Cube Shelving and Woven Baskets
When using cube shelving in a kid’s space, create zones for easy cleanup. Dedicate specific cubes or baskets to specific types of toys. For example, one basket for building blocks, one for dolls, and one for art supplies. Use picture labels on the front of the bins for pre-readers so they know exactly where everything goes. The combination of open cubes for books and bins for smaller toys works perfectly. By giving every single toy a clear and accessible home, you empower kids to participate in tidying up, which is a win for everyone.
|
📋 Copy HEX 🔗 Share |
This happy and organized play space is one of the most affordable and effective ways to tackle toy storage. Cube shelving is famously budget-friendly.
- White Cube Shelving Unit (e.g., IKEA KALLAX): $90 – $250 depending on size
- Woven Baskets: $15 – $30 each (The cost can add up!)
- Plastic Bins: $5 – $10 each
- Wall Paint & Decals: $75 – $150
- Playmat: $40 – $80
- TOTAL: $300 – $700
Budget alternative: Look for cube units on Facebook Marketplace where they are abundant. Mix and match thrifted baskets for a more eclectic, low-cost approach.
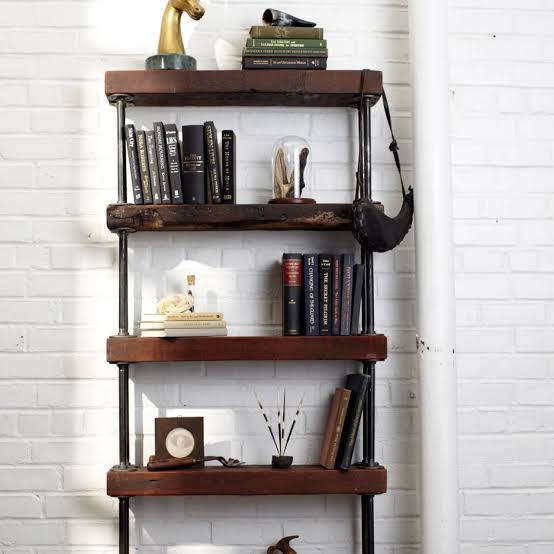
25. Achieve an Industrial Rustic Vibe with DIY Pipe and Wood Bookshelves
Building your own industrial pipe shelving is a classic DIY project that delivers a high-end look. Here’s the basic rundown:
- Time: 4-6 hours. Cost: $200-$400.
- Plan Your Design: Sketch out your shelf layout, including shelf height and width. This determines the lengths of pipe you’ll need.
- Gather Materials: Buy black iron pipes and fittings (flanges, tees, elbows, nipples) from a hardware store. Have them cut and threaded in-store if needed. Get your wooden planks cut to size.
- Clean and Seal: The black pipes come covered in grease. Clean them thoroughly with a degreaser, then spray with a matte clear coat to prevent rust.
- Assemble the Frame: Hand-tighten all the pipe pieces together on the floor to build the frame.
- Mount and Level: Attach the frame to the wall, using a level and ensuring the flanges are screwed into studs for strength. Then, simply place your wood shelves on the supports.
|
📋 Copy HEX 🔗 Share |
This look is a perennial favorite because it perfectly balances two different styles: the cold, hard lines of industrial design with the warm, natural texture of rustic wood. The black iron pipes provide a strong, graphic structure with a vintage, mechanical feel. The wooden planks soften this hardness, making the piece feel more approachable and suitable for a home environment. It’s the design equivalent of a tough exterior with a heart of gold, creating a look that is both stylishly edgy and comfortably familiar. Check out the bar version in Idea #9.
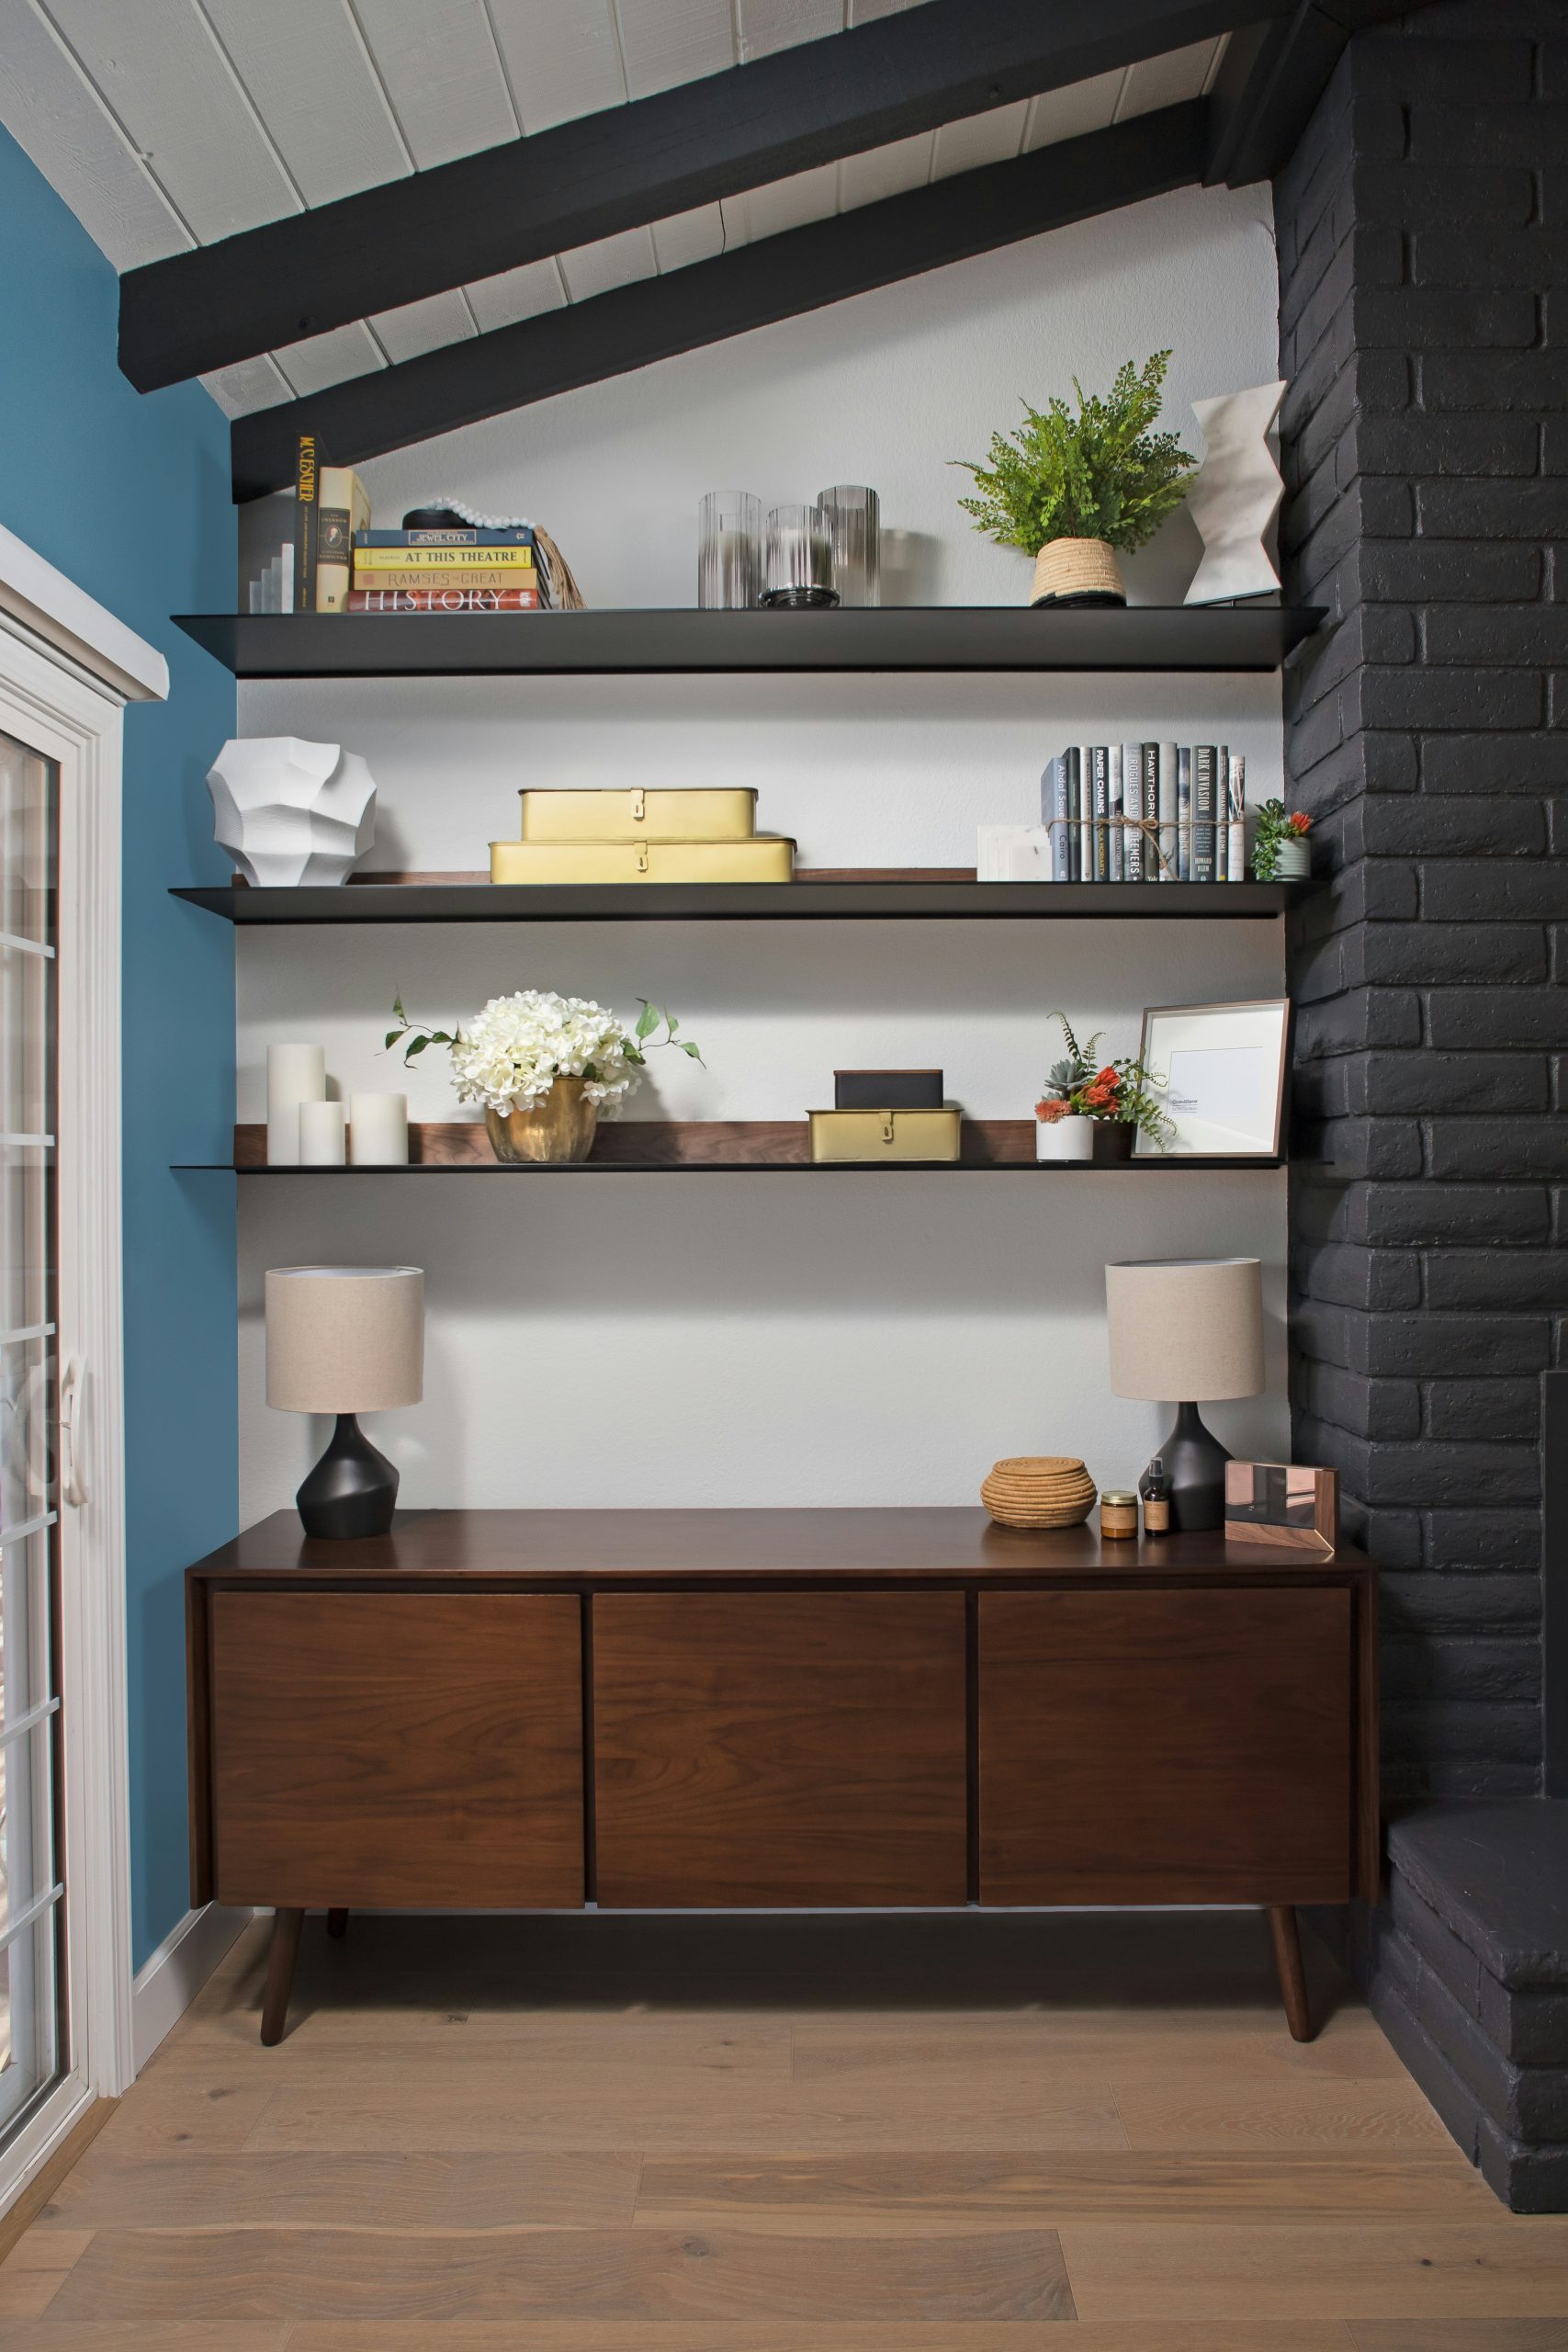
26. Layer Thin Floating Shelves Above a Mid-Century Modern Console
The stylish formula here is about layering and contrast. Think 50% solid anchor + 30% airy verticality + 20% bold color. The dark wood, low-slung mid-century console provides a heavy, solid anchor for the entire composition. The four thin, dark metal floating shelves add verticality without adding visual weight, drawing the eye upwards. Finally, the vibrant teal blue accent wall acts as a dramatic backdrop, making both the dark wood and the white wall pop. The exposed brick and ceiling beams add an extra layer of texture that completes the look.
|
📋 Copy HEX 🔗 Share |
This idea is all about proportion. It works best in a room with at least a 9-foot ceiling to allow for enough breathing room between the console, the shelves, and the ceiling. The console should be significantly wider than the shelving arrangement above it. A good rule of thumb is for the shelves to occupy about two-thirds of the width of the console. This creates a stable, pyramid-like composition. If the shelves were wider than the console, the whole vignette would feel top-heavy and visually unstable.
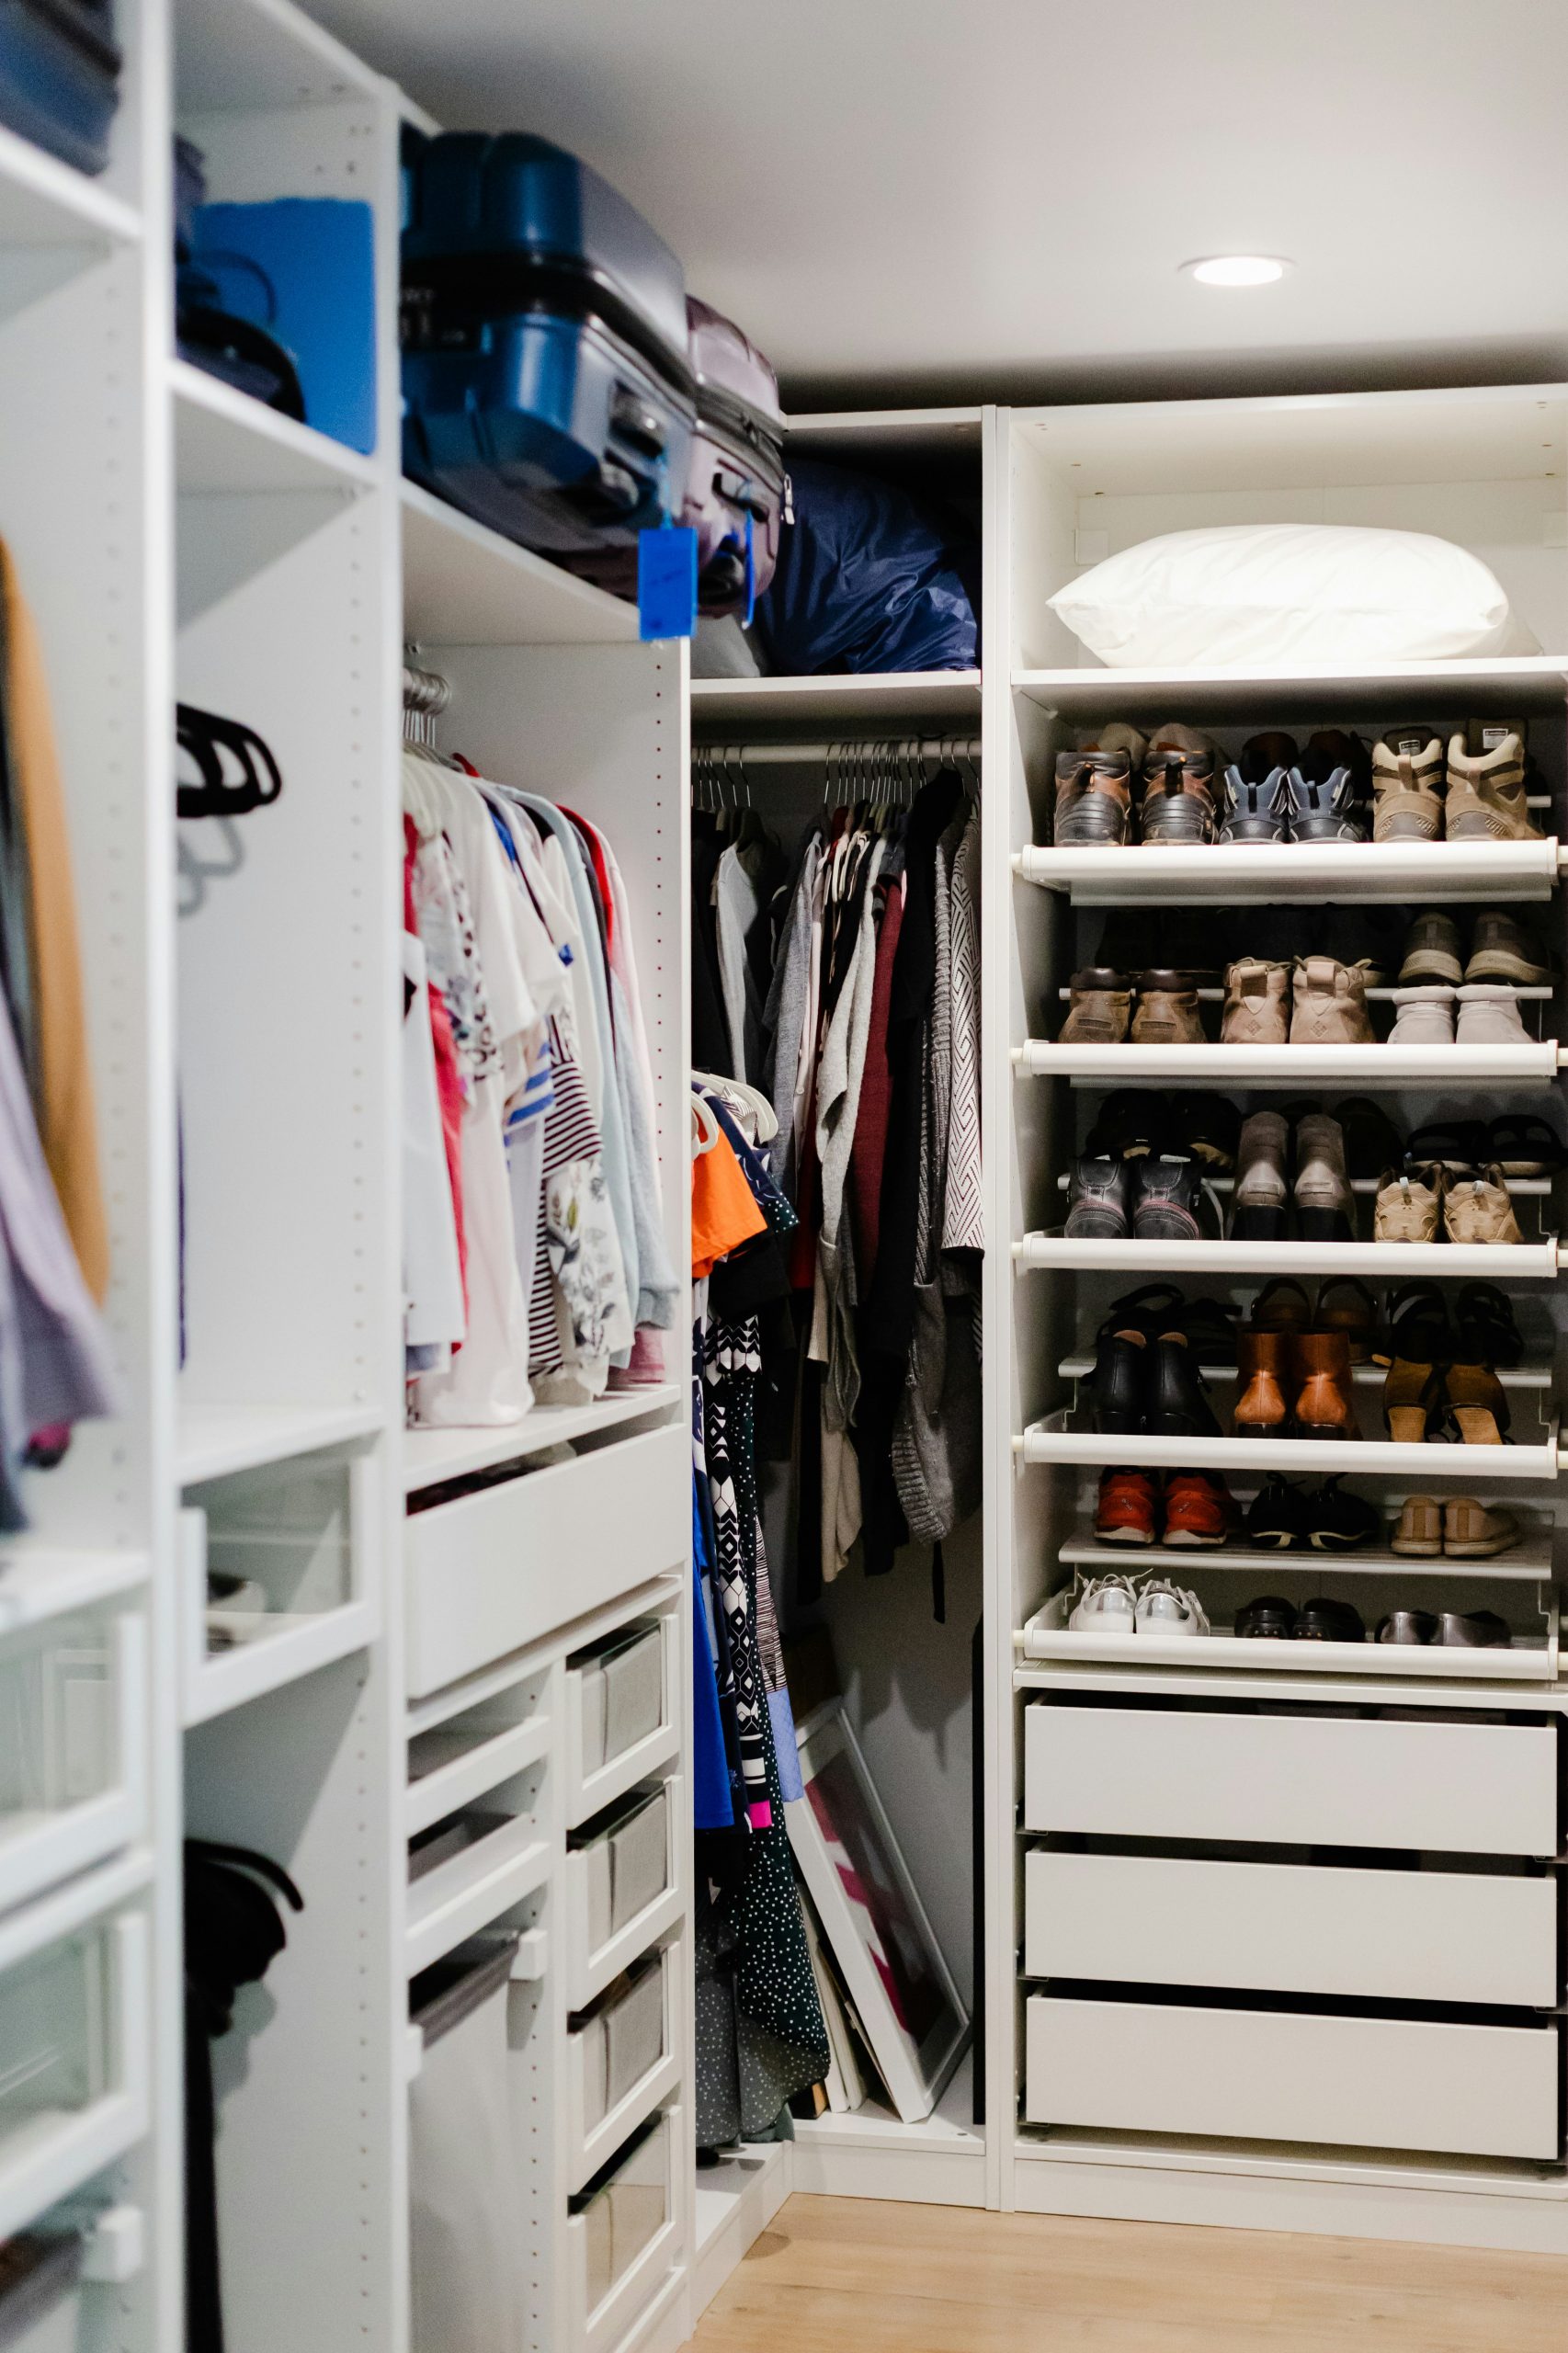
27. Build a Custom Walk-in Closet with a White Modular System
The most brilliant part of this closet system is its specialization. It’s not just a wall of shelves. It’s a thoughtful combination of different types of storage, each designed for a specific purpose. You have double-hang rods for shirts, single-hang areas for dresses, open shelves for folded sweaters, drawers for small items, and dedicated pull-out racks for shoes. This level of specialization is what transforms a simple closet into a high-functioning dressing room. It ensures that every single item has a logical, accessible home, which is the ultimate goal of any organization system.
|
📋 Copy HEX 🔗 Share |
A modular closet system offers a custom look without the full custom price tag. These systems are designed for DIY installation, but the components can add up.
- Basic Frames/Towers: $100 – $200 each (you might need 3-5)
- Hanging Rods: $15 – $25 each
- Drawers: $50 – $100 per drawer
- Pull-out Shoe Shelves: $60 – $120 each
- TOTAL: $800 – $2,500+
Budget alternative: Start with one or two basic towers and hanging rods from a system like IKEA’s PAX or ClosetMaid. You can always purchase and add more drawers, shelves, and accessories over time as your budget allows.
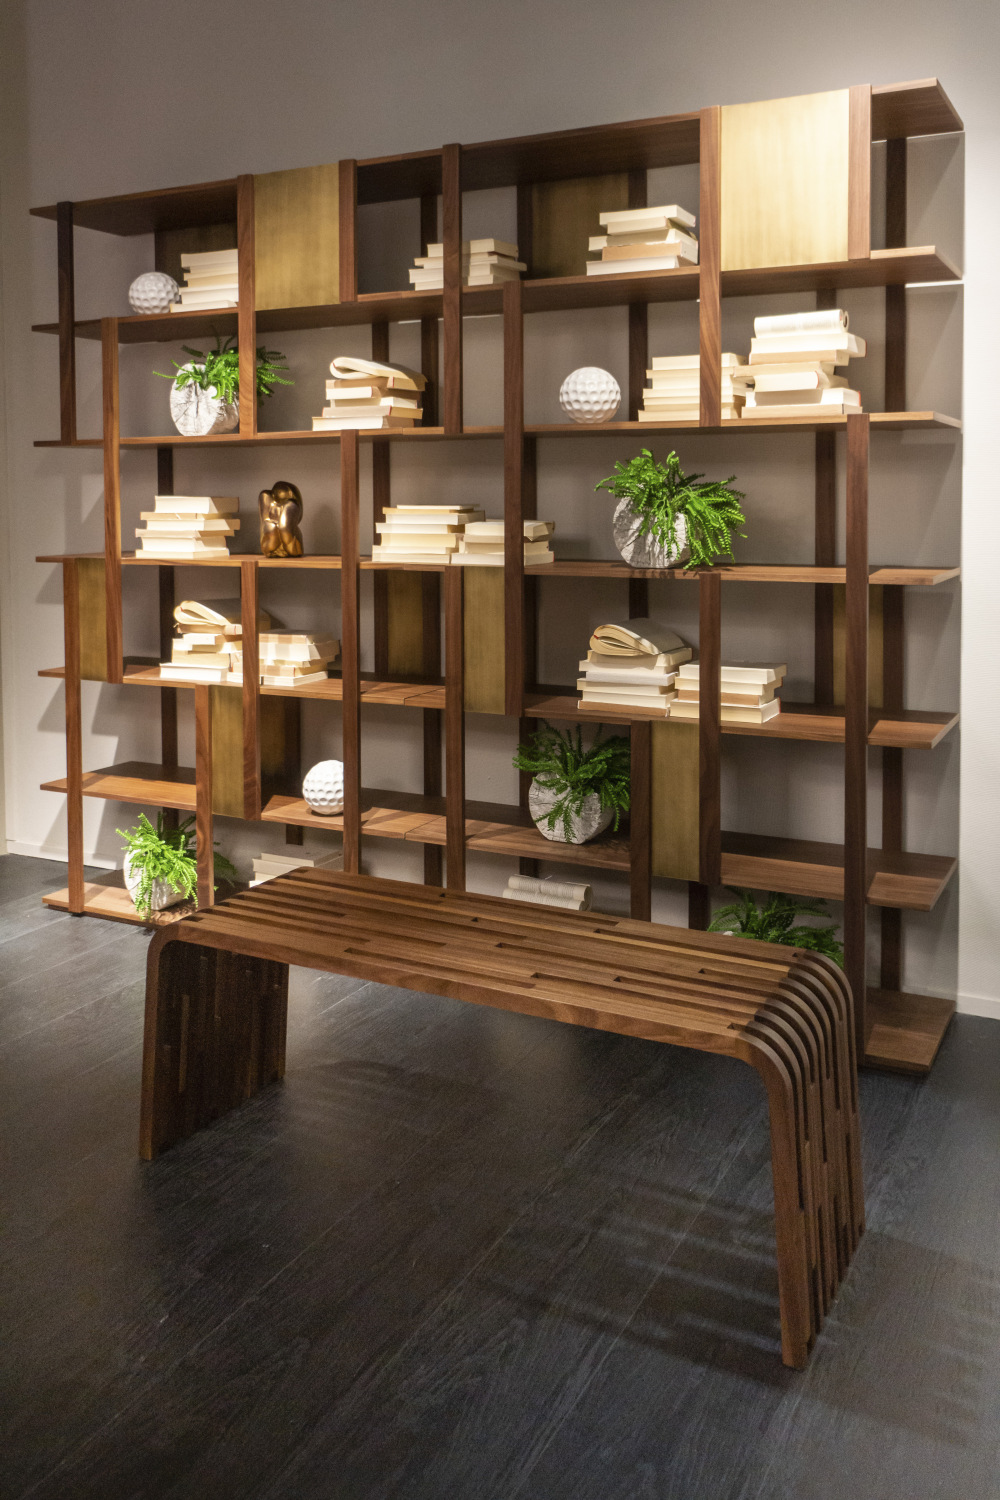
28. Integrate Gold Panels into a Dark Wood Asymmetrical Shelf Unit
This design is a masterclass in balancing symmetry and asymmetry. The overall form is a simple, symmetrical rectangle, providing a sense of stability and order. However, within that frame, the grid of shelves and dividers is completely irregular and asymmetrical. This creates visual excitement and a dynamic, modern feel. The interspersed gold panels are the key; they punctuate the dark wood, adding a touch of glamour and drawing the eye to different points within the grid. The result is a piece that feels both grounded and playful at the same time.
|
📋 Copy HEX 🔗 Share |
When working with a large, open shelving unit like this, the biggest mistake is filling every single cubby. Negative space is just as important as the objects you display. Aim to leave at least 20-30% of the shelf space completely empty. This allows your curated objects—like the white spheres and small plants here—to breathe. It prevents the unit from looking cluttered and turns it from simple storage into an artful display. The empty spaces are rests for the eye, making the piece feel more sophisticated and intentional.
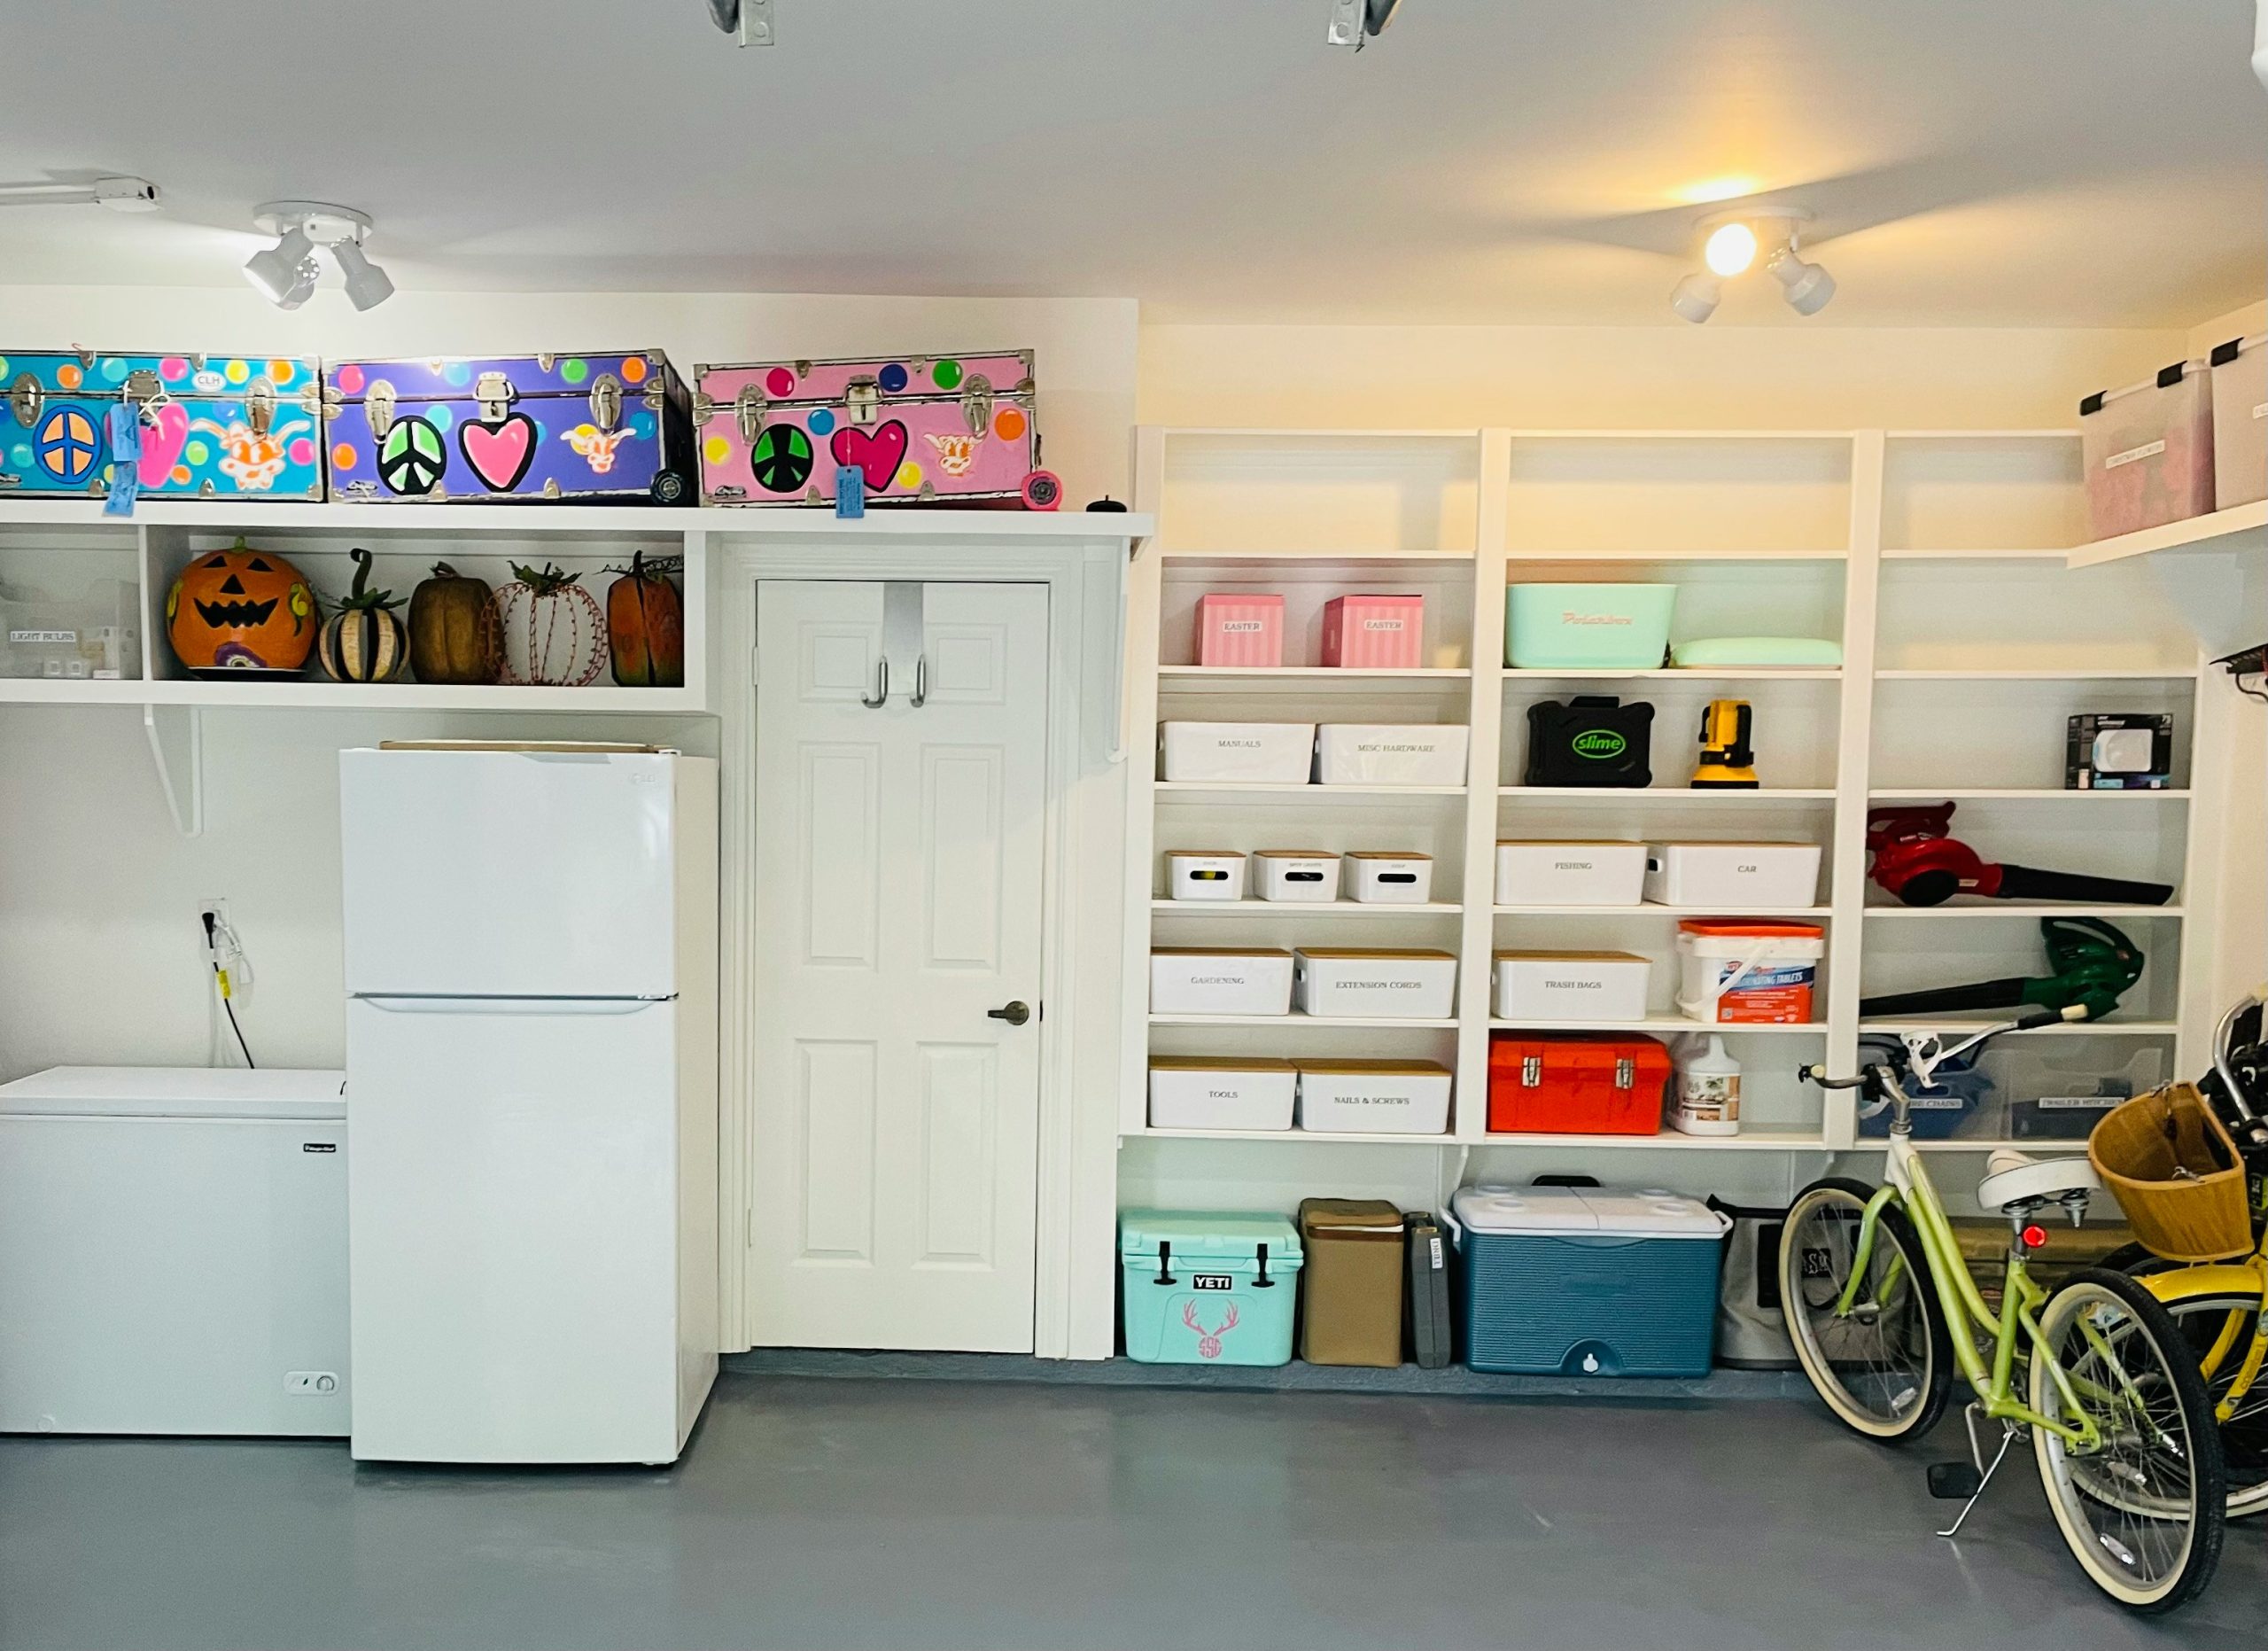
29. Go Floor-to-Ceiling with White Shelves for Maximum Utility
A wall of utility shelving can quickly become a mess. Here’s how to organize it with a box system:
- Time: 3-4 hours. Cost: $100 – $400 for containers.
- Take Inventory: Pull everything out. This is your chance to throw away, donate, or consolidate. Group the keepers into logical categories (e.g., ‘Holiday Decor,’ ‘Painting Supplies,’ ‘Camping Gear’).
- Measure Your Shelves: Measure the height, width, and depth of your shelves before you buy a single container. You want to maximize the space with bins that fit perfectly.
- Buy Uniform Containers: Using matching boxes, like these white ones with wood lids, creates a clean, cohesive look no matter what’s inside.
- Label Everything: The golden rule. Label the front of every box. This is non-negotiable.
- Zone Your Wall: Put heavy, rarely used items on the bottom. Put frequently accessed items at eye level. Use the very top shelves for lightweight, seasonal items like the decorative trunks shown here.
|
📋 Copy HEX 🔗 Share |
This level of organization is incredible, but it’s important to be realistic about accessibility. While floor-to-ceiling shelves maximize every inch of storage, anything stored above the 6-foot mark is going to require a step stool or ladder to access. This is fine for long-term storage or seasonal items (like the trunks at the very top), but it’s not practical for things you need to grab on a weekly or even monthly basis. Be strategic about what you store up high, and make sure you have a sturdy, easily accessible step stool stored nearby.
30. Keep It Simple and Bright with Wood Shelves in a White Paneled Room
This clean, bright, and functional look is highly achievable on a tight budget. The white vertical plank walls are the key to the bright feel, and you can get this look with inexpensive beadboard panels from any home improvement store for about $30 per 4×8 sheet. For the shelving, skip the pre-made units. Buy basic pine boards and a set of simple, functional brackets. The entire shelving unit could be built for under $150. Compare with the similar but more finished look of Idea #15; this version has a more raw, DIY-friendly feel that is very approachable.
|
📋 Copy HEX 🔗 Share |
This setup is perfect for a utility and storage space, but it’s crucial to plan for what you’re storing before you install the shelves. Here’s a quick checklist:
- Measure Your Largest Items: Are you storing bulky plastic totes? Large pieces of sports equipment? Measure your biggest items first to determine the necessary depth and height for your shelves.
- Check for Wall Obstructions: In a basement, you often have to contend with pipes, outlets, or cleanouts. Map these out on the wall before you plan your shelf layout to avoid frustrating placement issues.
- Consider Weight: If you plan to store heavy items like paint cans or bulk food, you’ll need to use heavy-duty brackets and screw them directly into wall studs. Lighter-duty brackets are fine for things like clothing or holiday decor.
Conclusion
With thirty distinct ideas fresh in your mind, from ultra-utilitarian setups to fully finished media centers, the era of the neglected basement is officially over. The question is no longer if you can improve your storage, but how. Hopefully, you’ve found a spark of inspiration that feels right for your home, your budget, and your style.
So, which look will you bring to life? It’s time to stop scrolling and start planning. Head over to Pinterest, create a new board for your project, and start saving the ideas that speak to you. Your basement’s potential is waiting.