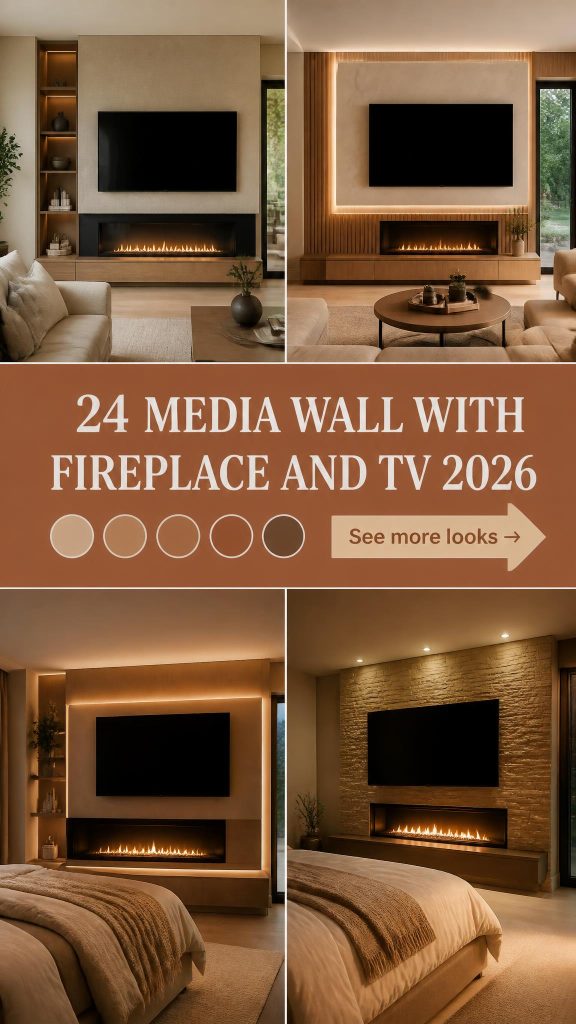
Let’s be real, the perfect media wall with a fireplace and TV is one of those home projects you probably have a whole secret Pinterest board for. It’s the kind of feature that instantly makes a living room feel finished, cozy, and intentional. But scrolling through endless photos can feel overwhelming. Don’t worry, we’ve done the heavy lifting for you, curating 24 distinct ideas that are actually doable and look incredible in a real home, not just a showroom. And stay until the end—we break down the most common mistakes that can ruin these looks.
📌 Save this to Pinterest for later—you’ll want to revisit these ideas.
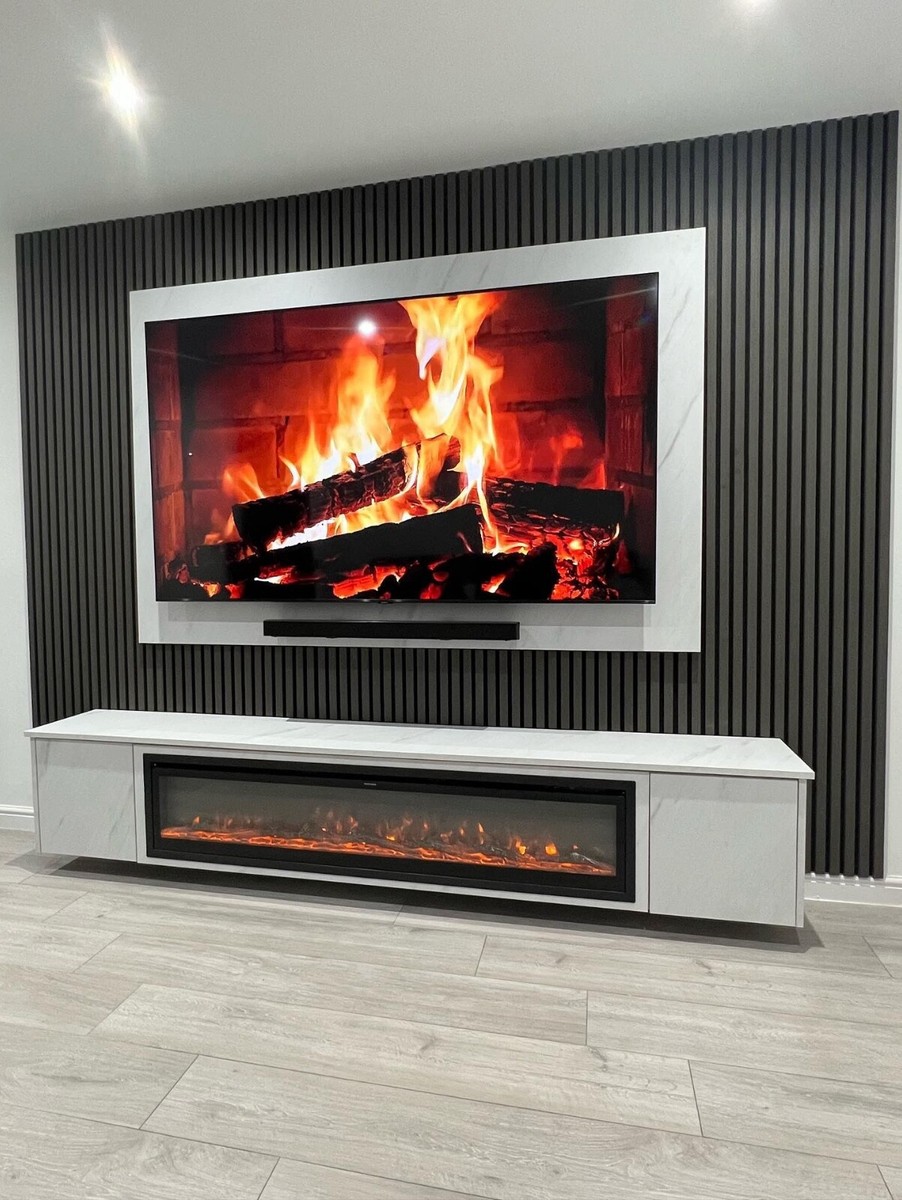
1. Dark Fluted Panels with a Floating Marble-Look Console
This look is all about confident contrast and clean lines. The deep gray of the vertical fluted panels creates a dramatic, textured backdrop that makes the TV and fireplace unit pop. The secret is in the layering of materials: the dark, soft-touch fluting against the sleek, veined marble-look console and frame creates a visual and tactile richness. The floating design of the console adds to the modern feel, making the whole wall feel lighter and less bulky despite its dark color.
|
📋 Copy HEX 🔗 Share |
For a setup like this, the lighting is non-negotiable. To get that perfect moody-but-functional glow, use two types of hidden LED strips. First, a warm white (2700K) strip behind the TV and along the top of the fluted panel wall. Second, a slightly cooler (3000K) strip recessed underneath the floating marble console. This layering of light temperatures adds depth and prevents the dark wall from feeling like a black hole at night. Always install them on dimmers for full control.
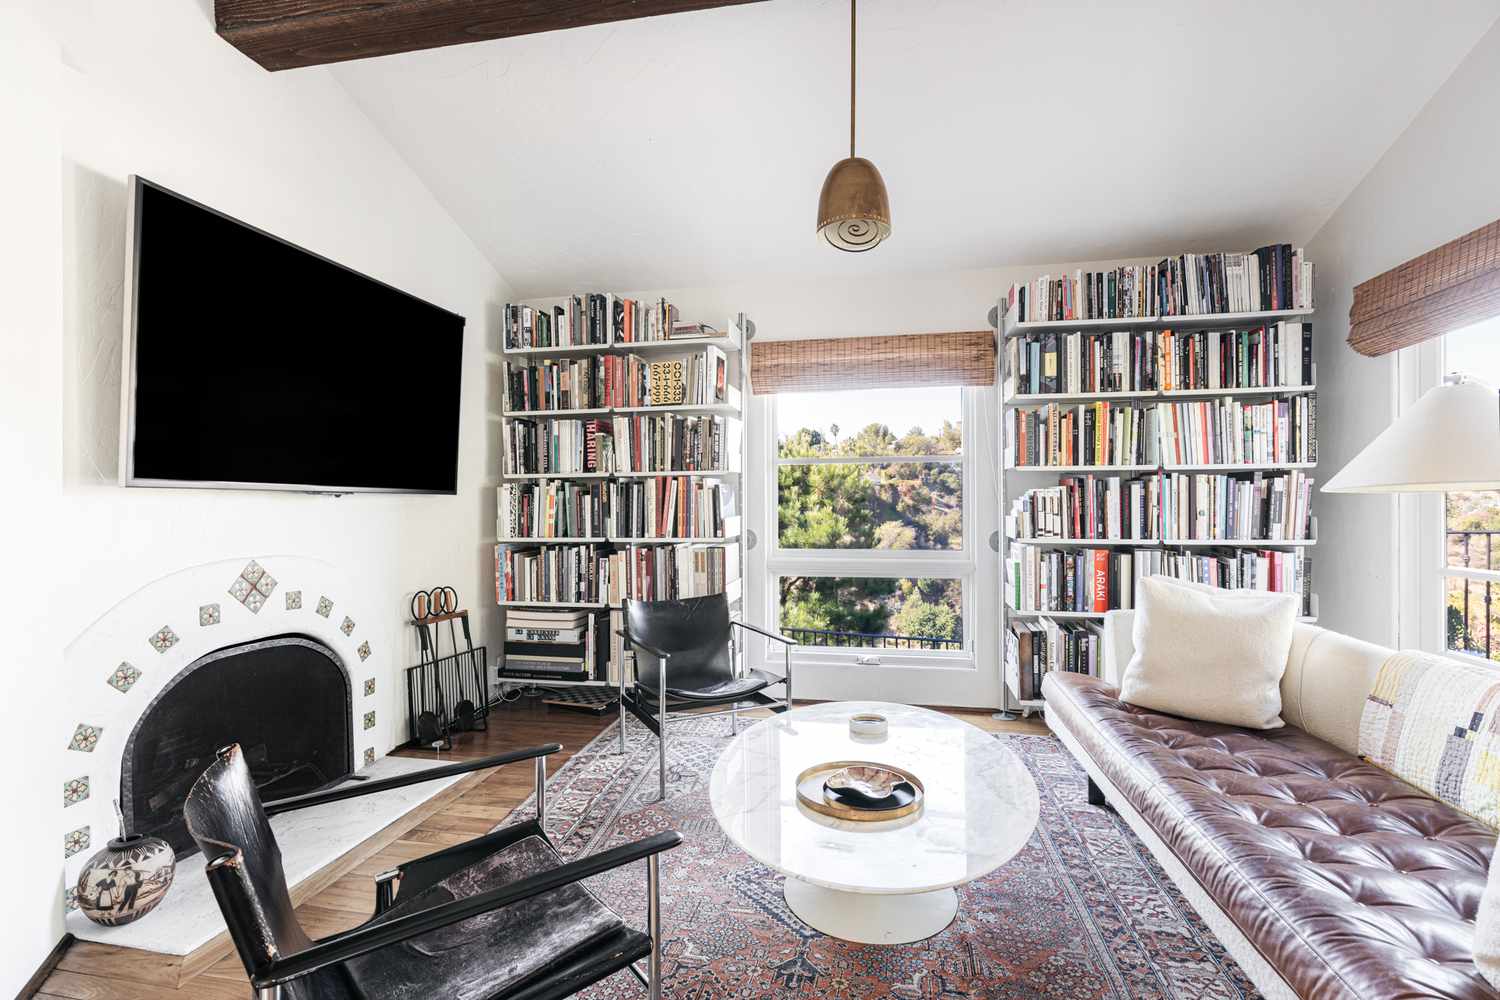
2. Elevating the TV Over a Classic Fireplace
Placing a TV over a fireplace is a classic space-saver, but it comes with a few things to consider. Neck strain is real! Ensure the center of the screen isn’t more than 15-20 inches above your eye level when seated. Also, think about heat. While most modern electric fireplaces are safe for electronics, a traditional wood-burning or gas fireplace requires a proper mantel and heat shield to protect your TV. Check your fireplace and TV manuals for specific clearance requirements before you even think about drilling.
|
📋 Copy HEX 🔗 Share |
The single most important element here is the mantle. It’s not just a shelf; it’s the visual break that keeps the fireplace and the TV from feeling like one awkward, tall rectangle. The mantel acts as a horizontal divider, grounding the composition and providing a logical separation between the heat source below and the electronics above. Without it, the entire setup can look unintentional and top-heavy. Choose a mantel with enough depth (at least 6-8 inches) to create a substantial visual line.
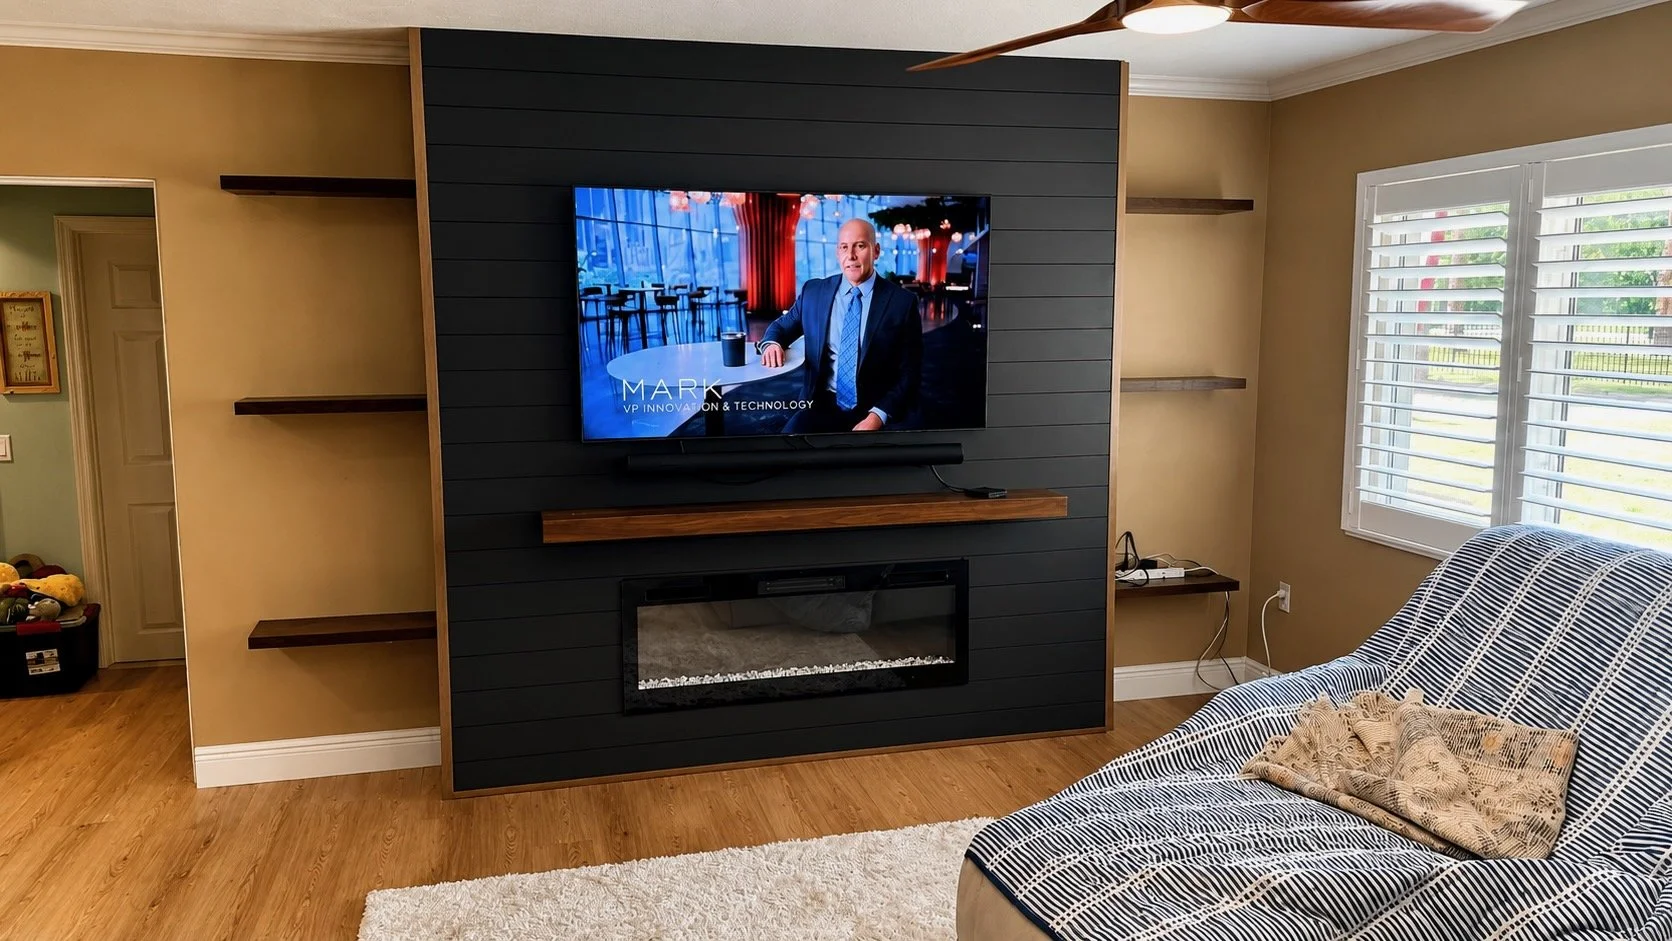
3. Bold Black Shiplap for a Bedroom Media Wall
Think of this dramatic bedroom look as a simple but powerful equation: 60% bold texture + 30% soft neutrals + 10% warm light. The black shiplap provides the dominant texture and color, creating a cozy, cocooning effect. The soft neutrals come from the bedding, rug, and curtains, preventing the black from overwhelming the space. The final 10% is the warm glow from the electric fireplace and any accent lighting, which brings the whole scene to life. You could swap the black shiplap for navy or charcoal gray and get a similar vibe.
|
📋 Copy HEX 🔗 Share |
A dark, full-height feature wall like this works best in bedrooms that are at least 12×12 feet with standard 8-foot ceilings. In a smaller room, a floor-to-ceiling dark wall can feel oppressive. If your room is on the smaller side (say, 10×10), consider taking the shiplap only two-thirds of the way up the wall and painting the top third the same color as your ceiling. This little trick draws the eye upward and creates an illusion of more height and space. Compare this to the lighter approach in Idea #21, which suits smaller rooms better.
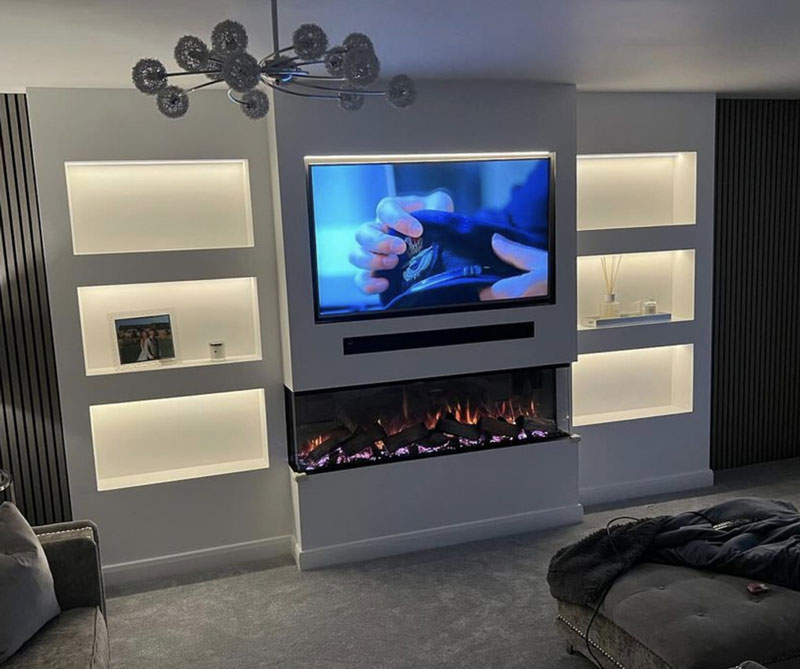
4. Grey and White Media Wall with Illuminated Shelving
Symmetry and light are the heroes of this design. The perfectly balanced recessed shelves flanking the TV create a sense of order and calm, turning everyday objects into a curated display. Each shelf having its own dedicated light source is key; it adds a layer of professional polish and draws attention to your curated items. The contrast between the dark grey slatted panels and the crisp white of the main unit provides a modern, graphic quality that feels both clean and cozy.
|
📋 Copy HEX 🔗 Share |
You don’t need a custom millworker to get this vibe. Start with IKEA’s BESTÅ system for the core structure. Use two tall shelf units flanking a central TV bench. For the recessed shelving, build simple boxes from MDF, paint them, and then mount LED strip lights (like the MITTLED series) inside. For the slatted panels, you can find affordable pre-made acoustic panels online for around $150-$250 per panel. All in, you could recreate this look for under $1,500, a fraction of the cost of a fully custom build-out.
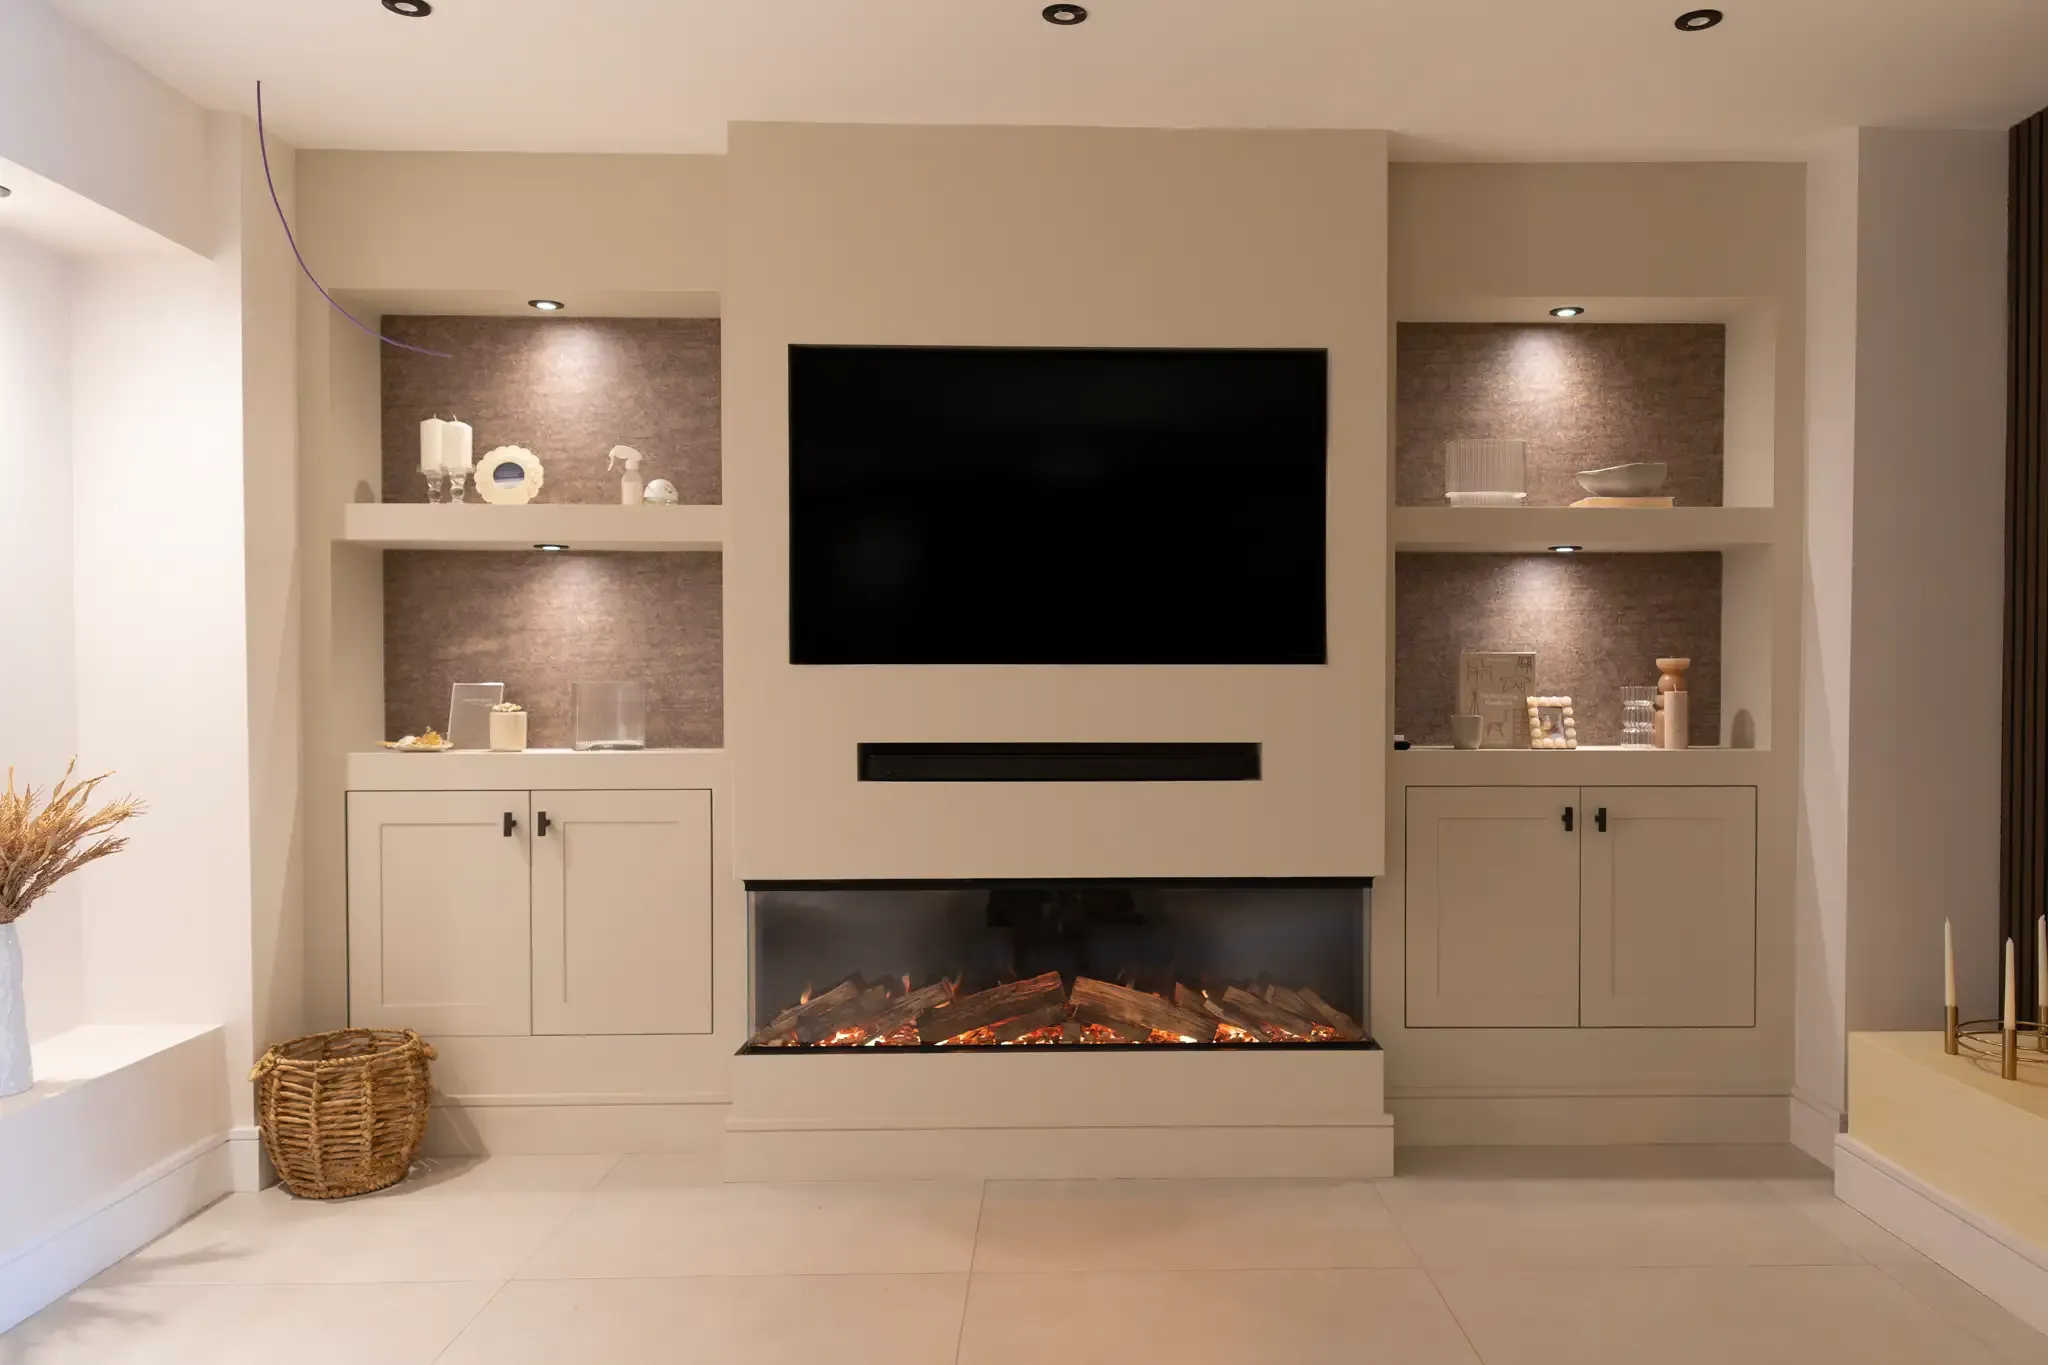
5. Symmetrical Beige Media Unit with Dark Gray Niches
When designing built-ins with display niches, the depth is everything. A common mistake is making them too shallow. For a high-end look, your niches should be at least 12-14 inches deep. This allows you to layer objects—a small vase in front of a leaning piece of art, for example—which creates a much more dynamic and professionally styled feel. Anything less than 10 inches deep tends to look flat and can only hold a single row of small items, which often ends up looking cluttered.
|
📋 Copy HEX 🔗 Share |
The backlit, textured dark gray panels inside the display alcoves are the game-changer here. If you removed them and just had plain, painted niches, the design would lose 90% of its impact. This single choice adds immense depth, texture, and a moody, sophisticated vibe. It turns simple shelves into a true design feature, proving that the details you put inside the storage are just as important as the structure itself. It’s a perfect example of how to make a neutral palette feel rich and interesting.
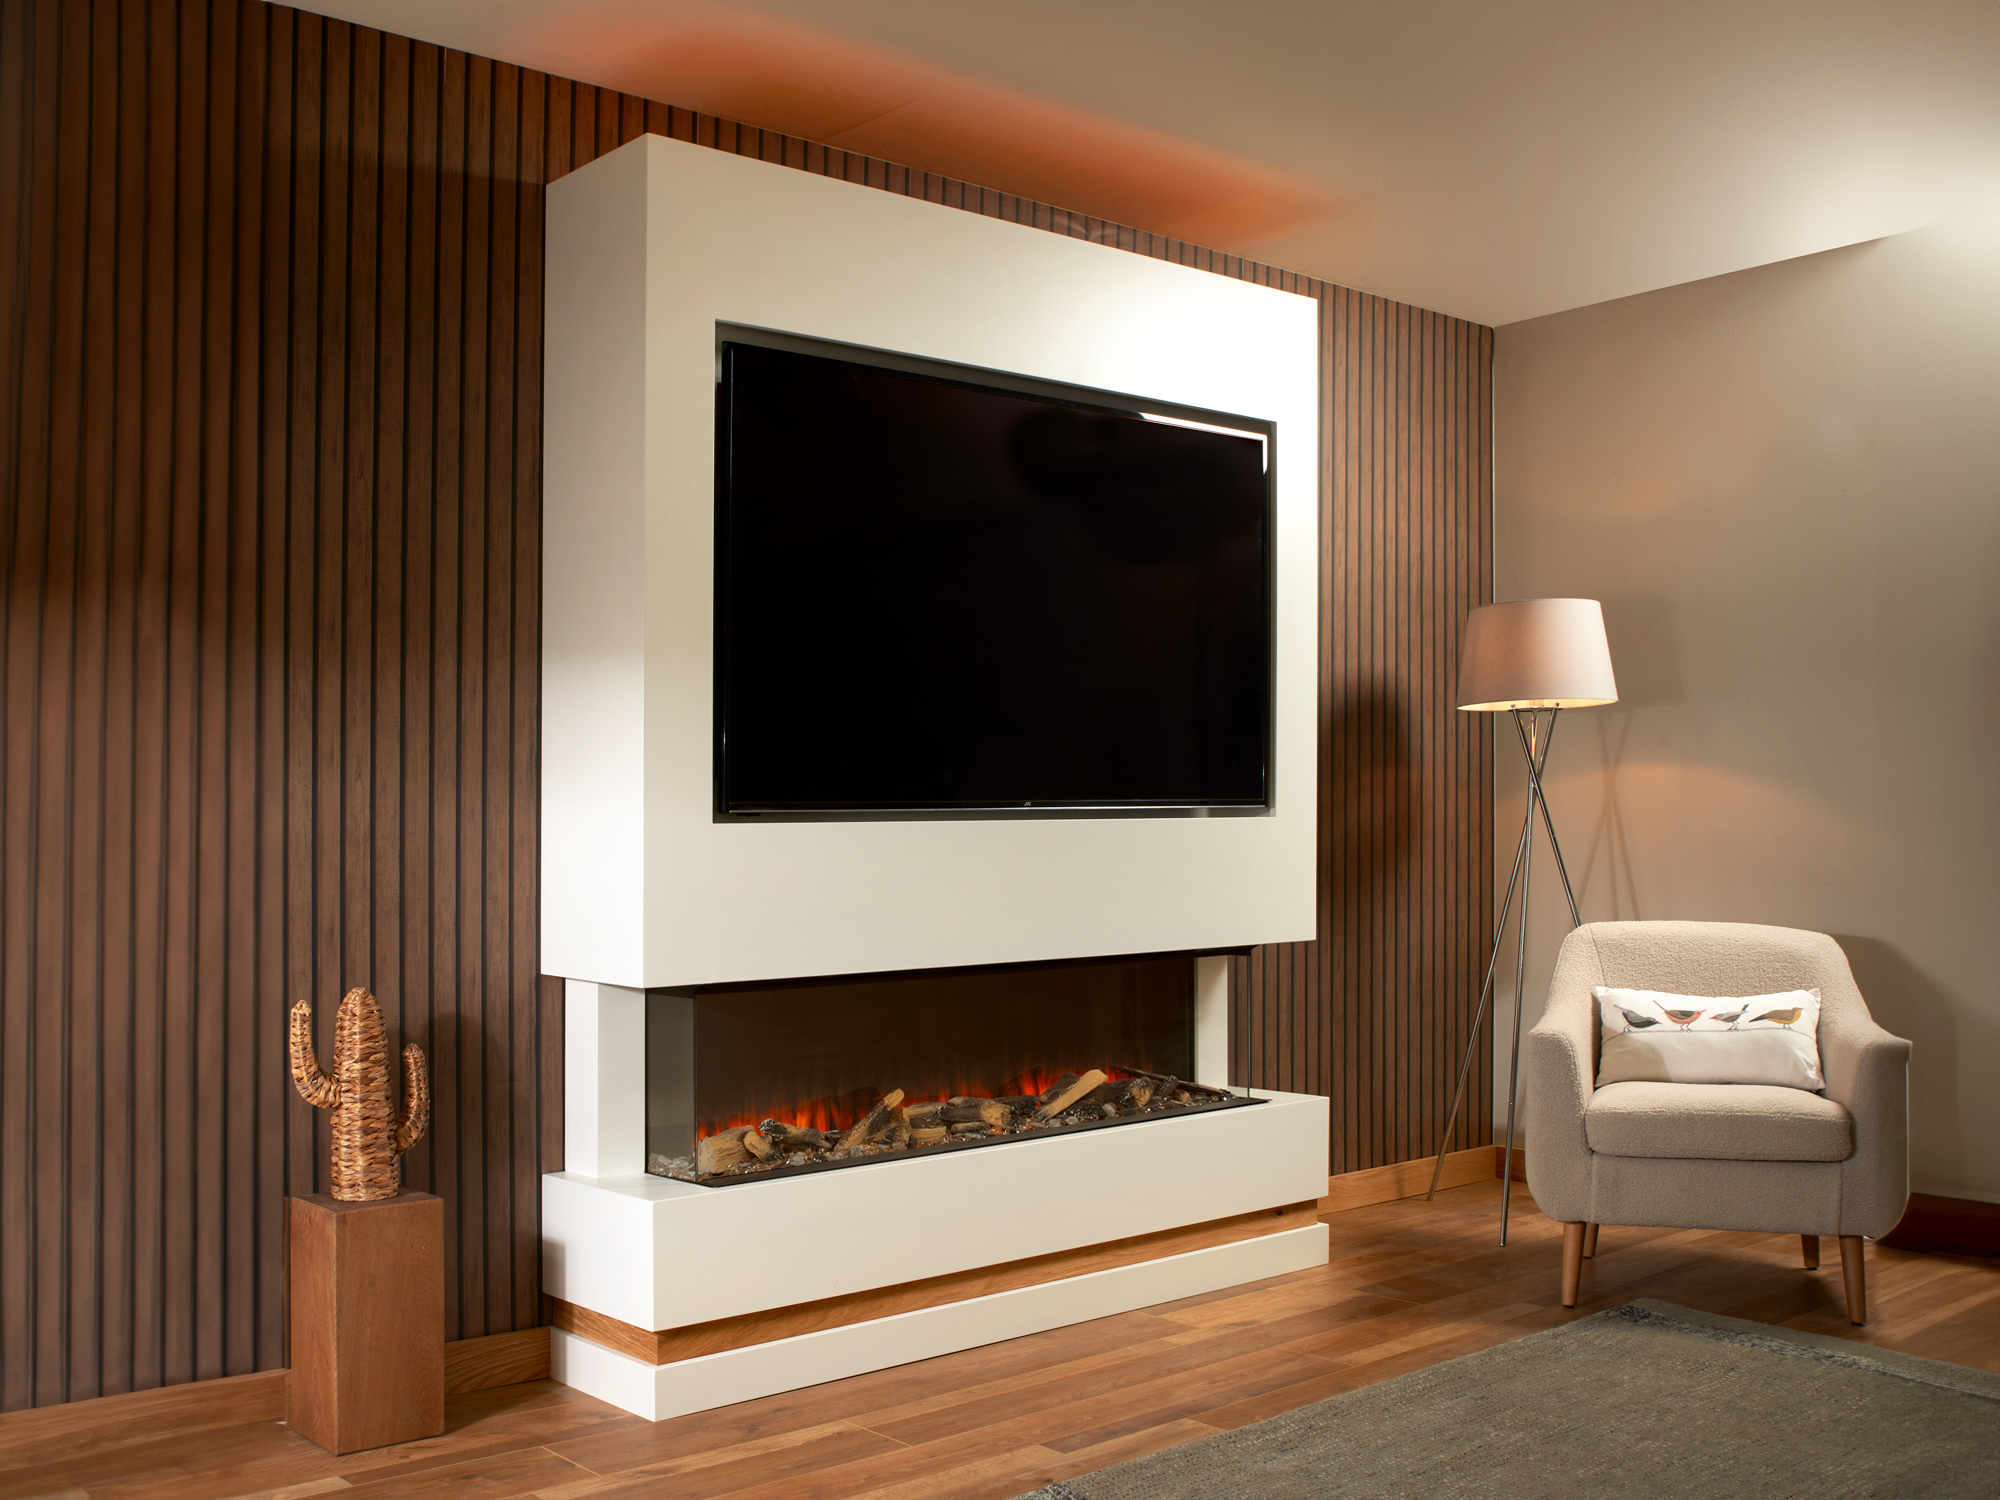
6. Floating White Media Unit Against Dark Wood Slats
This design works because it plays with visual weight and contrast. The dark, vertically slatted wood wall provides a rich, textured backdrop that could easily feel heavy. However, the crisp white media unit appears to float in front of it, creating a sense of lightness that balances the entire composition. The three-sided fireplace adds to this effect, breaking up the solid white form and making the flames visible from multiple angles in the room. The result is modern, warm, and surprisingly airy.
|
📋 Copy HEX 🔗 Share |
A white media unit, especially a floating one, is a dust magnet. Dust and scuffs will be highly visible against the clean surface. Plan on a weekly dusting with a microfiber cloth. The dark wood slatted panels are lower maintenance but can be tricky to clean; a vacuum with a soft brush attachment is your best friend for getting between the slats. Also, be mindful that the area around the fireplace can accumulate a fine layer of dust from air circulation, so pay extra attention there.
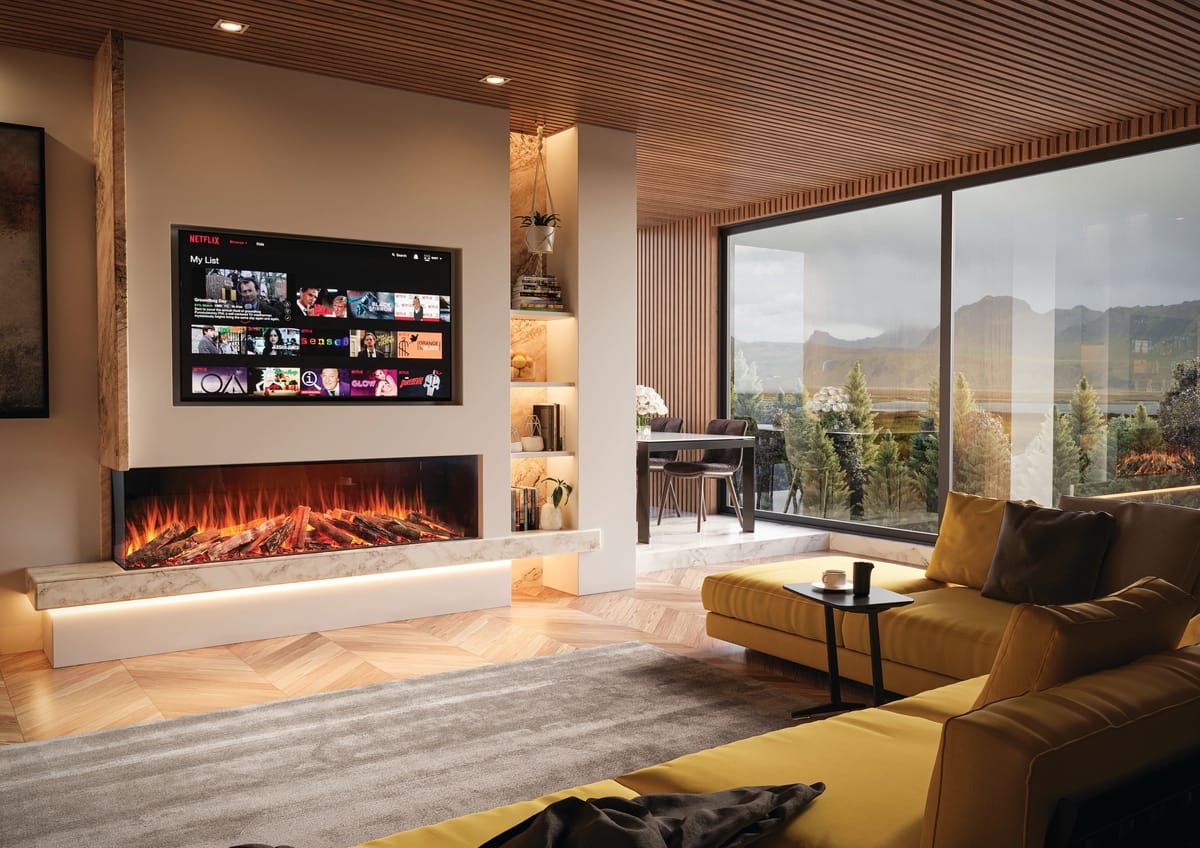
7. Subtle Wall Paneling for an Integrated Look
This is a masterclass in subtlety. The formula is simple: 70% monochromatic base + 20% seamless integration + 10% texture. The wall, the paneling, and the unit are all painted the same color, creating a cohesive, architectural feel. The TV and fireplace are perfectly recessed, reinforcing that seamless look. The texture comes from the subtle dimension of the paneling itself—just enough to add interest without shouting. You can change the paint color from white to charcoal or sage green, and the formula still holds perfectly.
|
📋 Copy HEX 🔗 Share |
Achieving this level of seamlessness requires planning and precision. This isn’t a weekend DIY for a beginner. The recesses for the TV and fireplace need to be framed out perfectly before any drywall goes up, with all electrical and venting planned in advance. Miscalculate by even half an inch, and your expensive new TV won’t fit. If you’re not an experienced contractor, this is a job to hire out to ensure those clean, flush lines that make the whole look work. It’s similar to the precision needed for Idea #19.
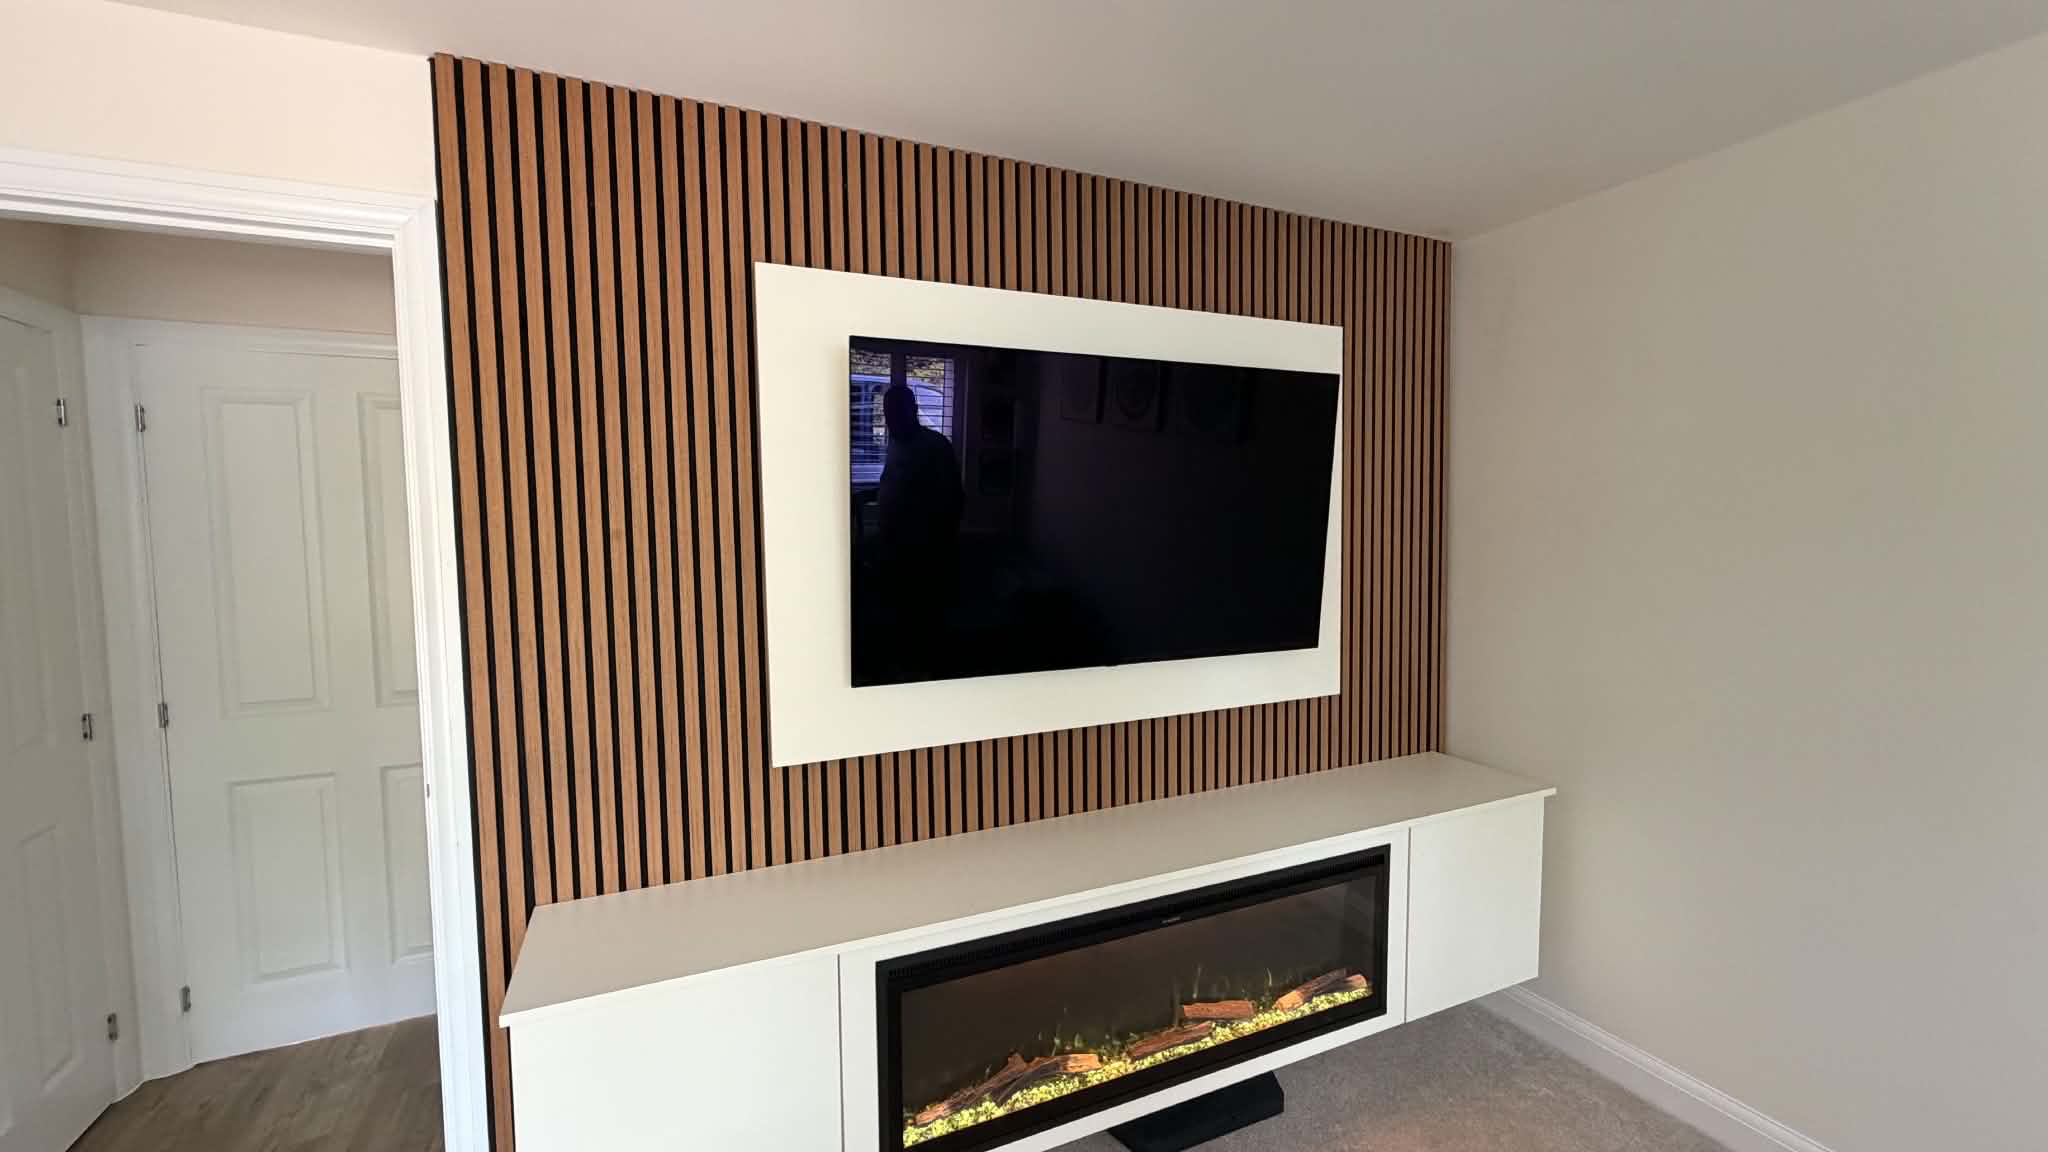
8. Sophisticated Paneling for a Fully Integrated Media Wall
For a truly integrated fireplace, consider a model with a “cool wall” or “heat shift” system. These technologies are designed specifically for media wall installations. They redirect the heat from the fireplace upwards and out through a hidden vent higher up on the wall, often above the TV. This ensures the wall surface around your television remains at a safe, room-temperature level, completely eliminating the risk of heat damage to your electronics. It’s a bigger initial investment but provides total peace of mind.
|
📋 Copy HEX 🔗 Share |
Before you commit to a fully paneled and integrated wall, check these items off your list:
- Confirm your stud locations: You need to know exactly where you can safely anchor the weight of the TV, fireplace, and the paneling structure itself.
- Plan your wiring: Map out where every single cable will run—HDMI, power for the TV, power for the fireplace, speaker wire, everything. Create a conduit so you can add or replace cables in the future without tearing the wall apart.
- Finalize your TV and fireplace models: Get the exact dimensions and installation specs before you start building. Do not work from generic measurements.
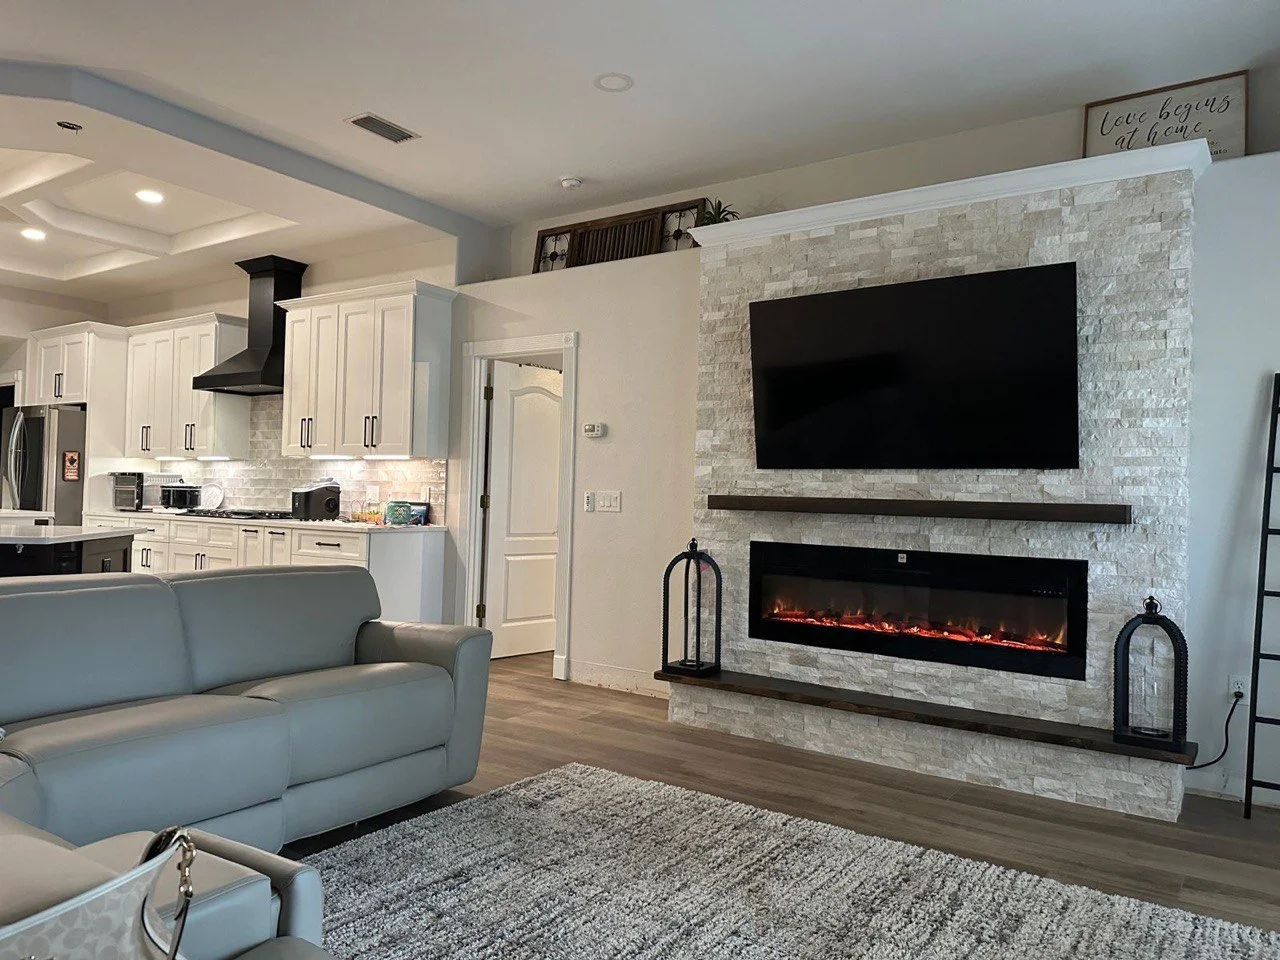
9. Ledger Stone Fireplace as a Media Wall Focal Point
Creating a statement wall with stacked ledger stone is a fantastic way to add texture and a natural, earthy element to a modern living room. Here’s a rough idea of the cost to get this specific look:
- Ledger Stone Panels: $800 – $2,000 (depending on stone type and square footage)
- Electric Fireplace Insert: $500 – $1,500
- Television (65-inch): $700 – $2,000
- Professional Installation (Labor): $1,500 – $3,000
- TOTAL: $3,500 – $8,500
Budget alternative: Use faux stone panels (often made of high-density polyurethane), which cost about 40-50% less and are significantly easier to install for a savvy DIYer.
|
📋 Copy HEX 🔗 Share |
The reason this works so well is the principle of texture contrast. The rough, organic, and varied surface of the ledger stone provides a powerful counterpoint to the smooth, sleek, and uniform surface of the television screen. This contrast makes both elements stand out more. The warmth of the stone’s color palette also helps to visually balance the cool, black rectangle of the TV, making it feel like an integrated part of the design rather than just an electronic box hung on a wall.
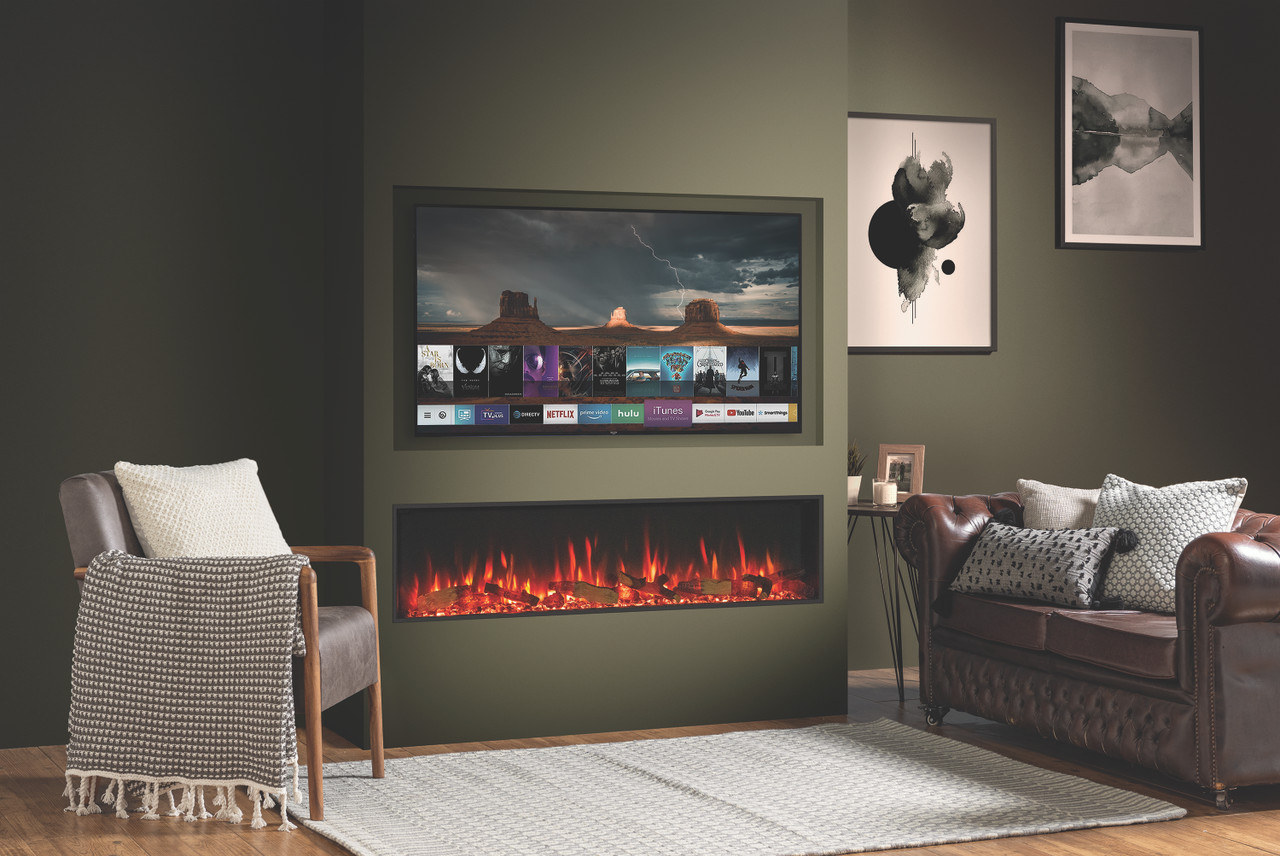
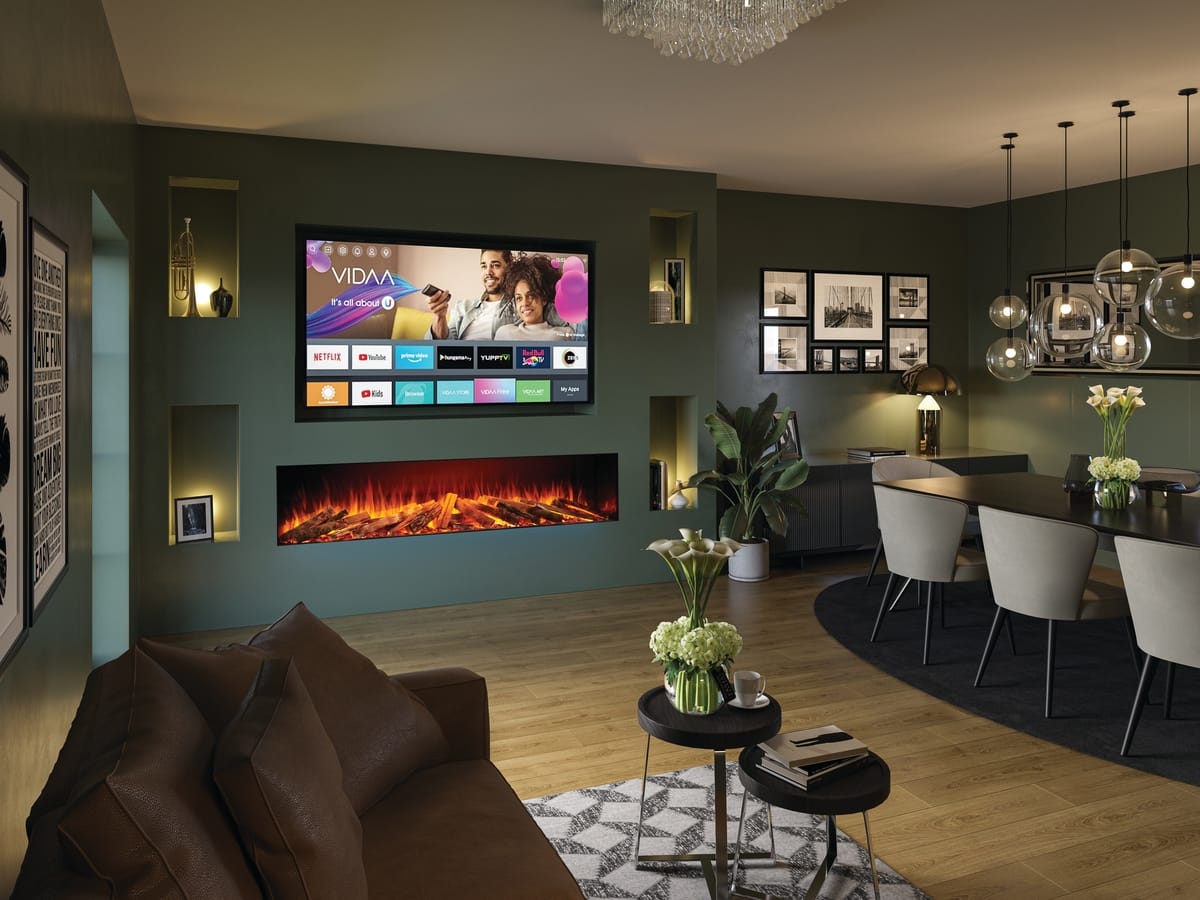
10. Moody Olive Green Media Wall with a Linear Fireplace
The bold, dark olive green paint is everything in this room. Take that away and you have a standard, nice-but-forgettable living room. The green wall color is what gives the space its specific personality—cozy, a little bit moody, sophisticated, and warm. It envelops the TV and fireplace, making them feel like part of a cohesive, intentional design moment rather than just items placed against a wall. It’s a testament to the transformative power of a single can of paint.
|
📋 Copy HEX 🔗 Share |
Want to create that sharp, recessed look for your TV? Here’s a quick guide once your wall is framed.
- Time Estimate: 2-3 hours. Material Cost: ~$50.
- Measure the exact height, width, and depth of your TV. Add a half-inch of wiggle room to the height and width.
- Build a simple box frame out of 1×4 pine boards to match these dimensions.
- Install the box within your wall’s stud framing, ensuring it’s perfectly level.
- Run your electrical and HDMI cables into the back of the box.
- Install drywall around the box, using a corner bead for a crisp edge. Finish with drywall mud, sand, and paint.
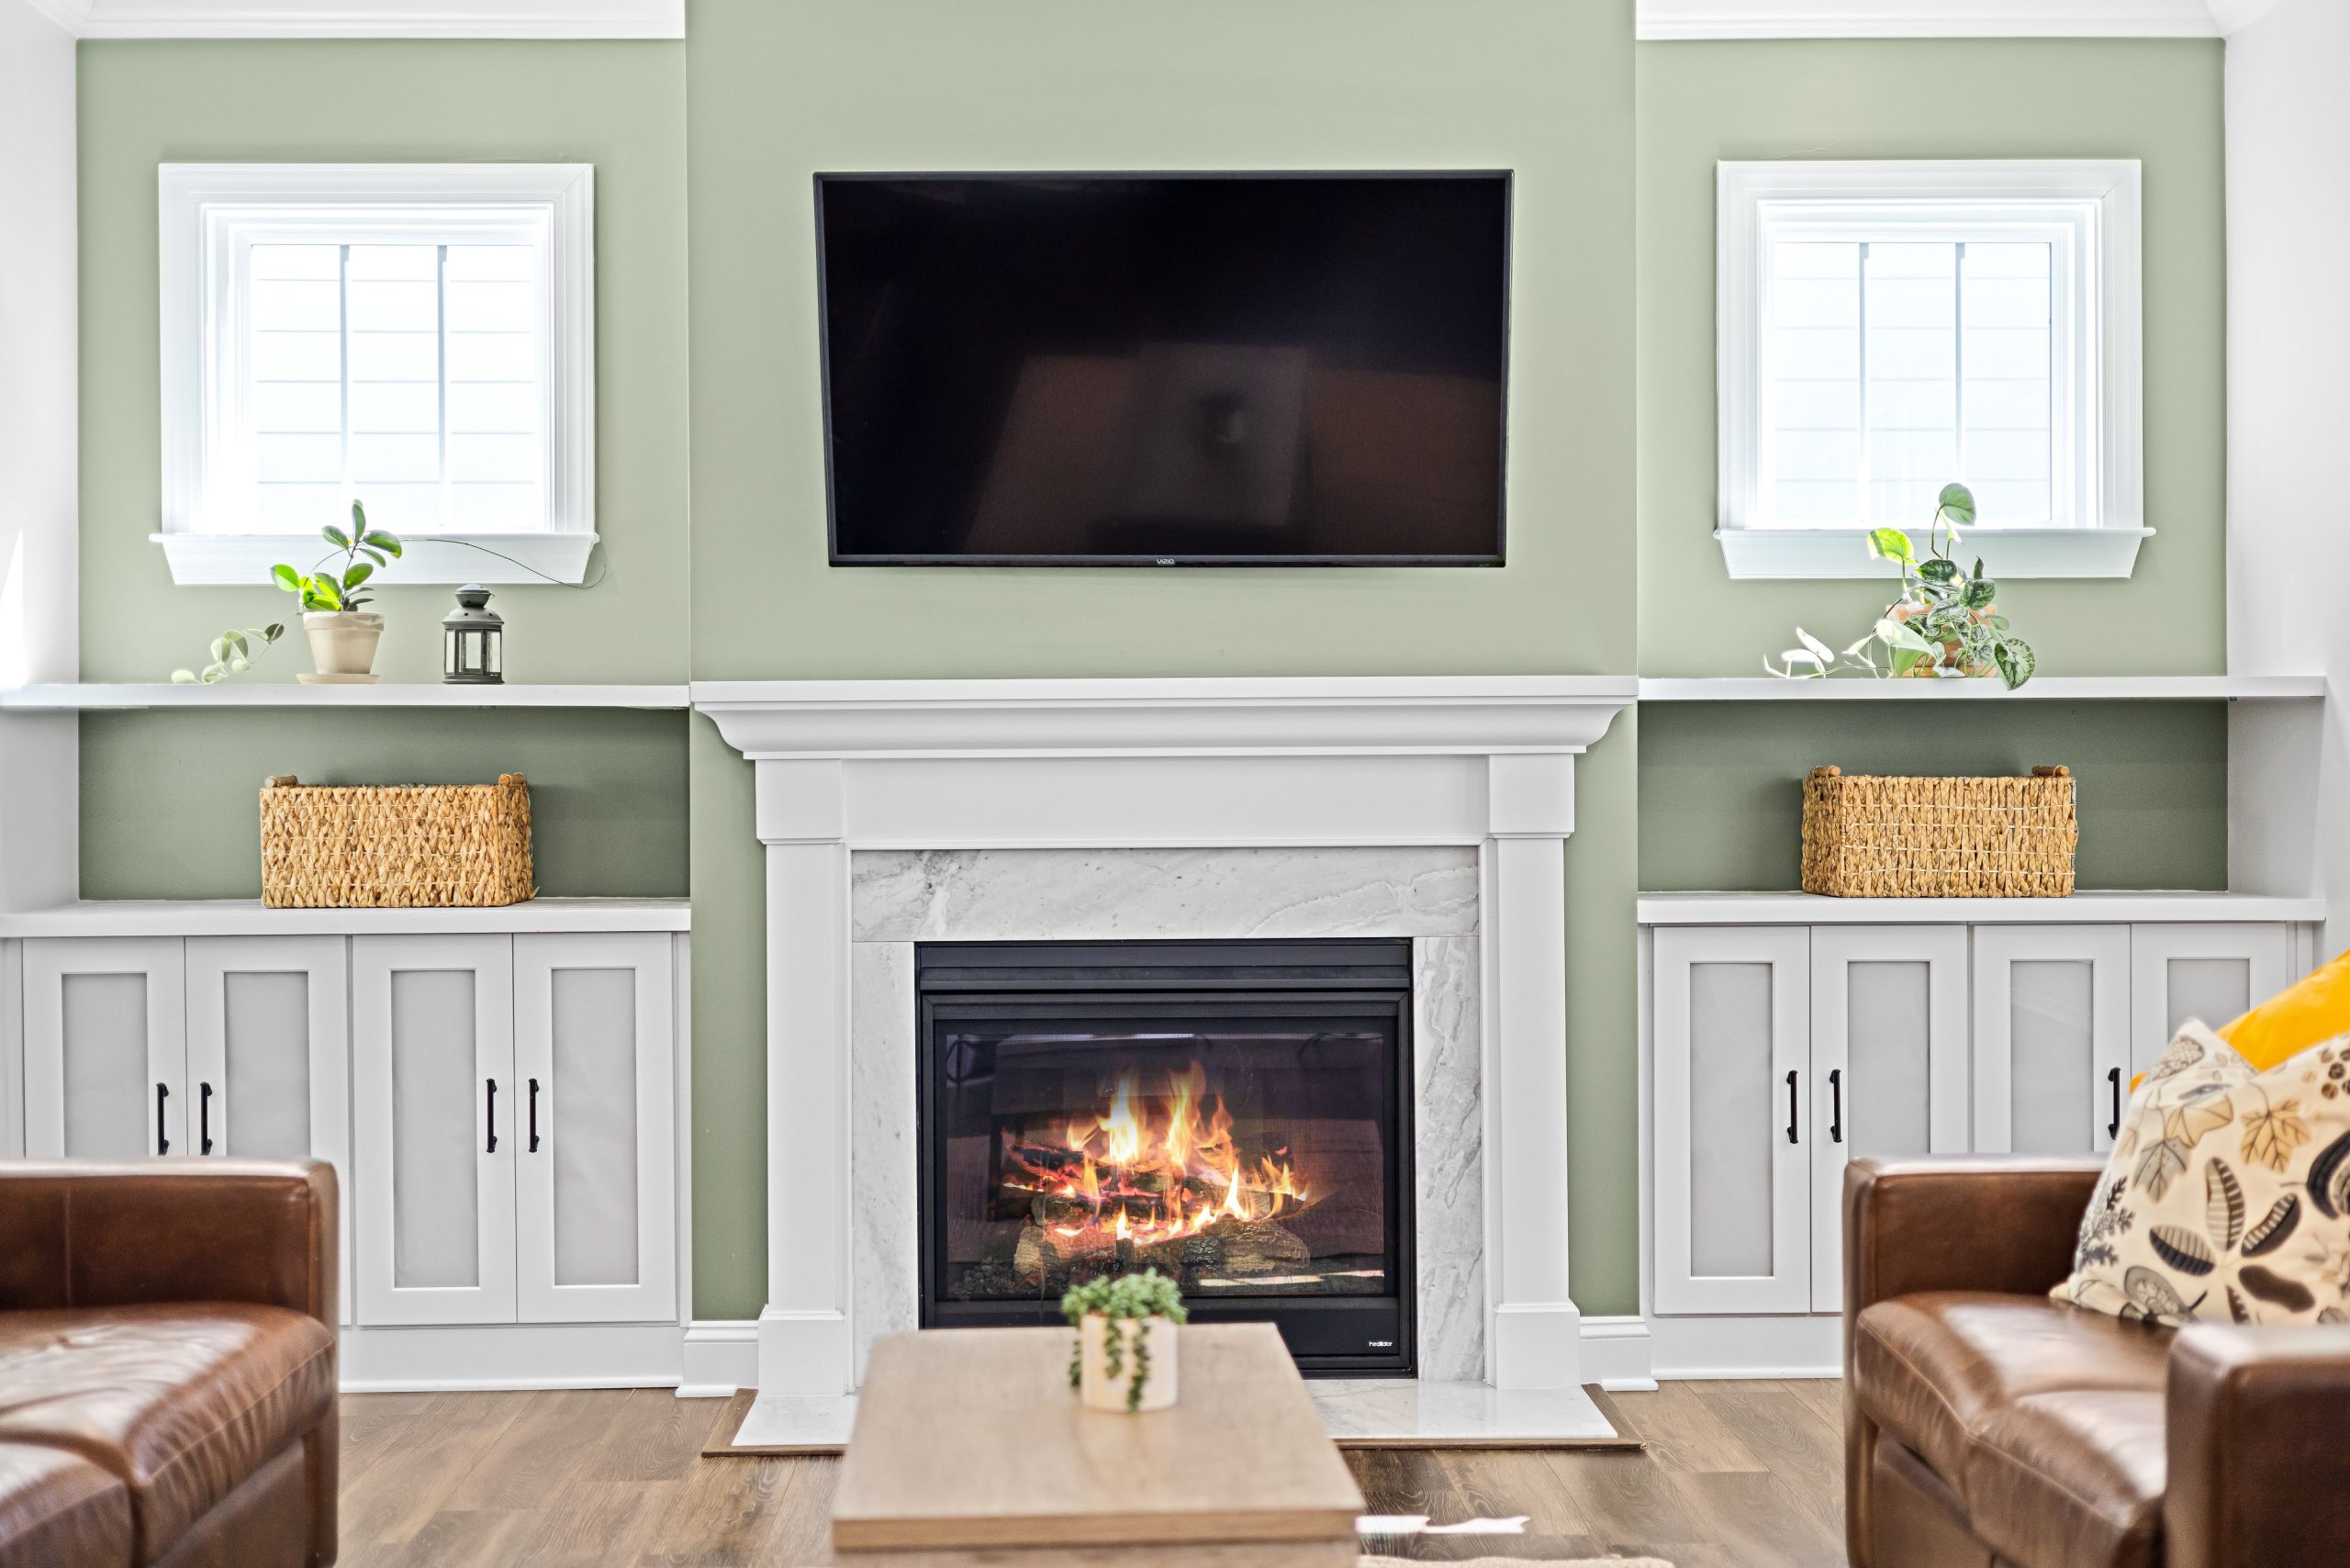
11. Sage Green Wall with White Built-ins and a Traditional Fireplace
This room feels so calm and put-together because of its smart use of repetition and balance. The white of the fireplace and built-ins is repeated, creating a strong, cohesive architectural element. The design is also beautifully symmetrical, with the bookcases acting as perfect counterweights to each other. What really makes it special, though, is how the two windows are incorporated into the built-ins. This move makes them feel intentional and custom, bathing the shelves in natural light.
|
📋 Copy HEX 🔗 Share |
A full wall of built-ins like this is perfect for rooms with generous proportions, ideally a wall width of at least 14 feet to allow for the fireplace and decent-sized bookcases on each side. Ceiling height should be 8 feet or more. In a smaller living room, a similar effect can be achieved by using narrower, pre-made bookcases (like IKEA’s BILLY) on either side of the fireplace. You’ll lose the custom, built-in feel, but you’ll maintain the pleasing symmetry and storage, which is a great compromise for smaller spaces.
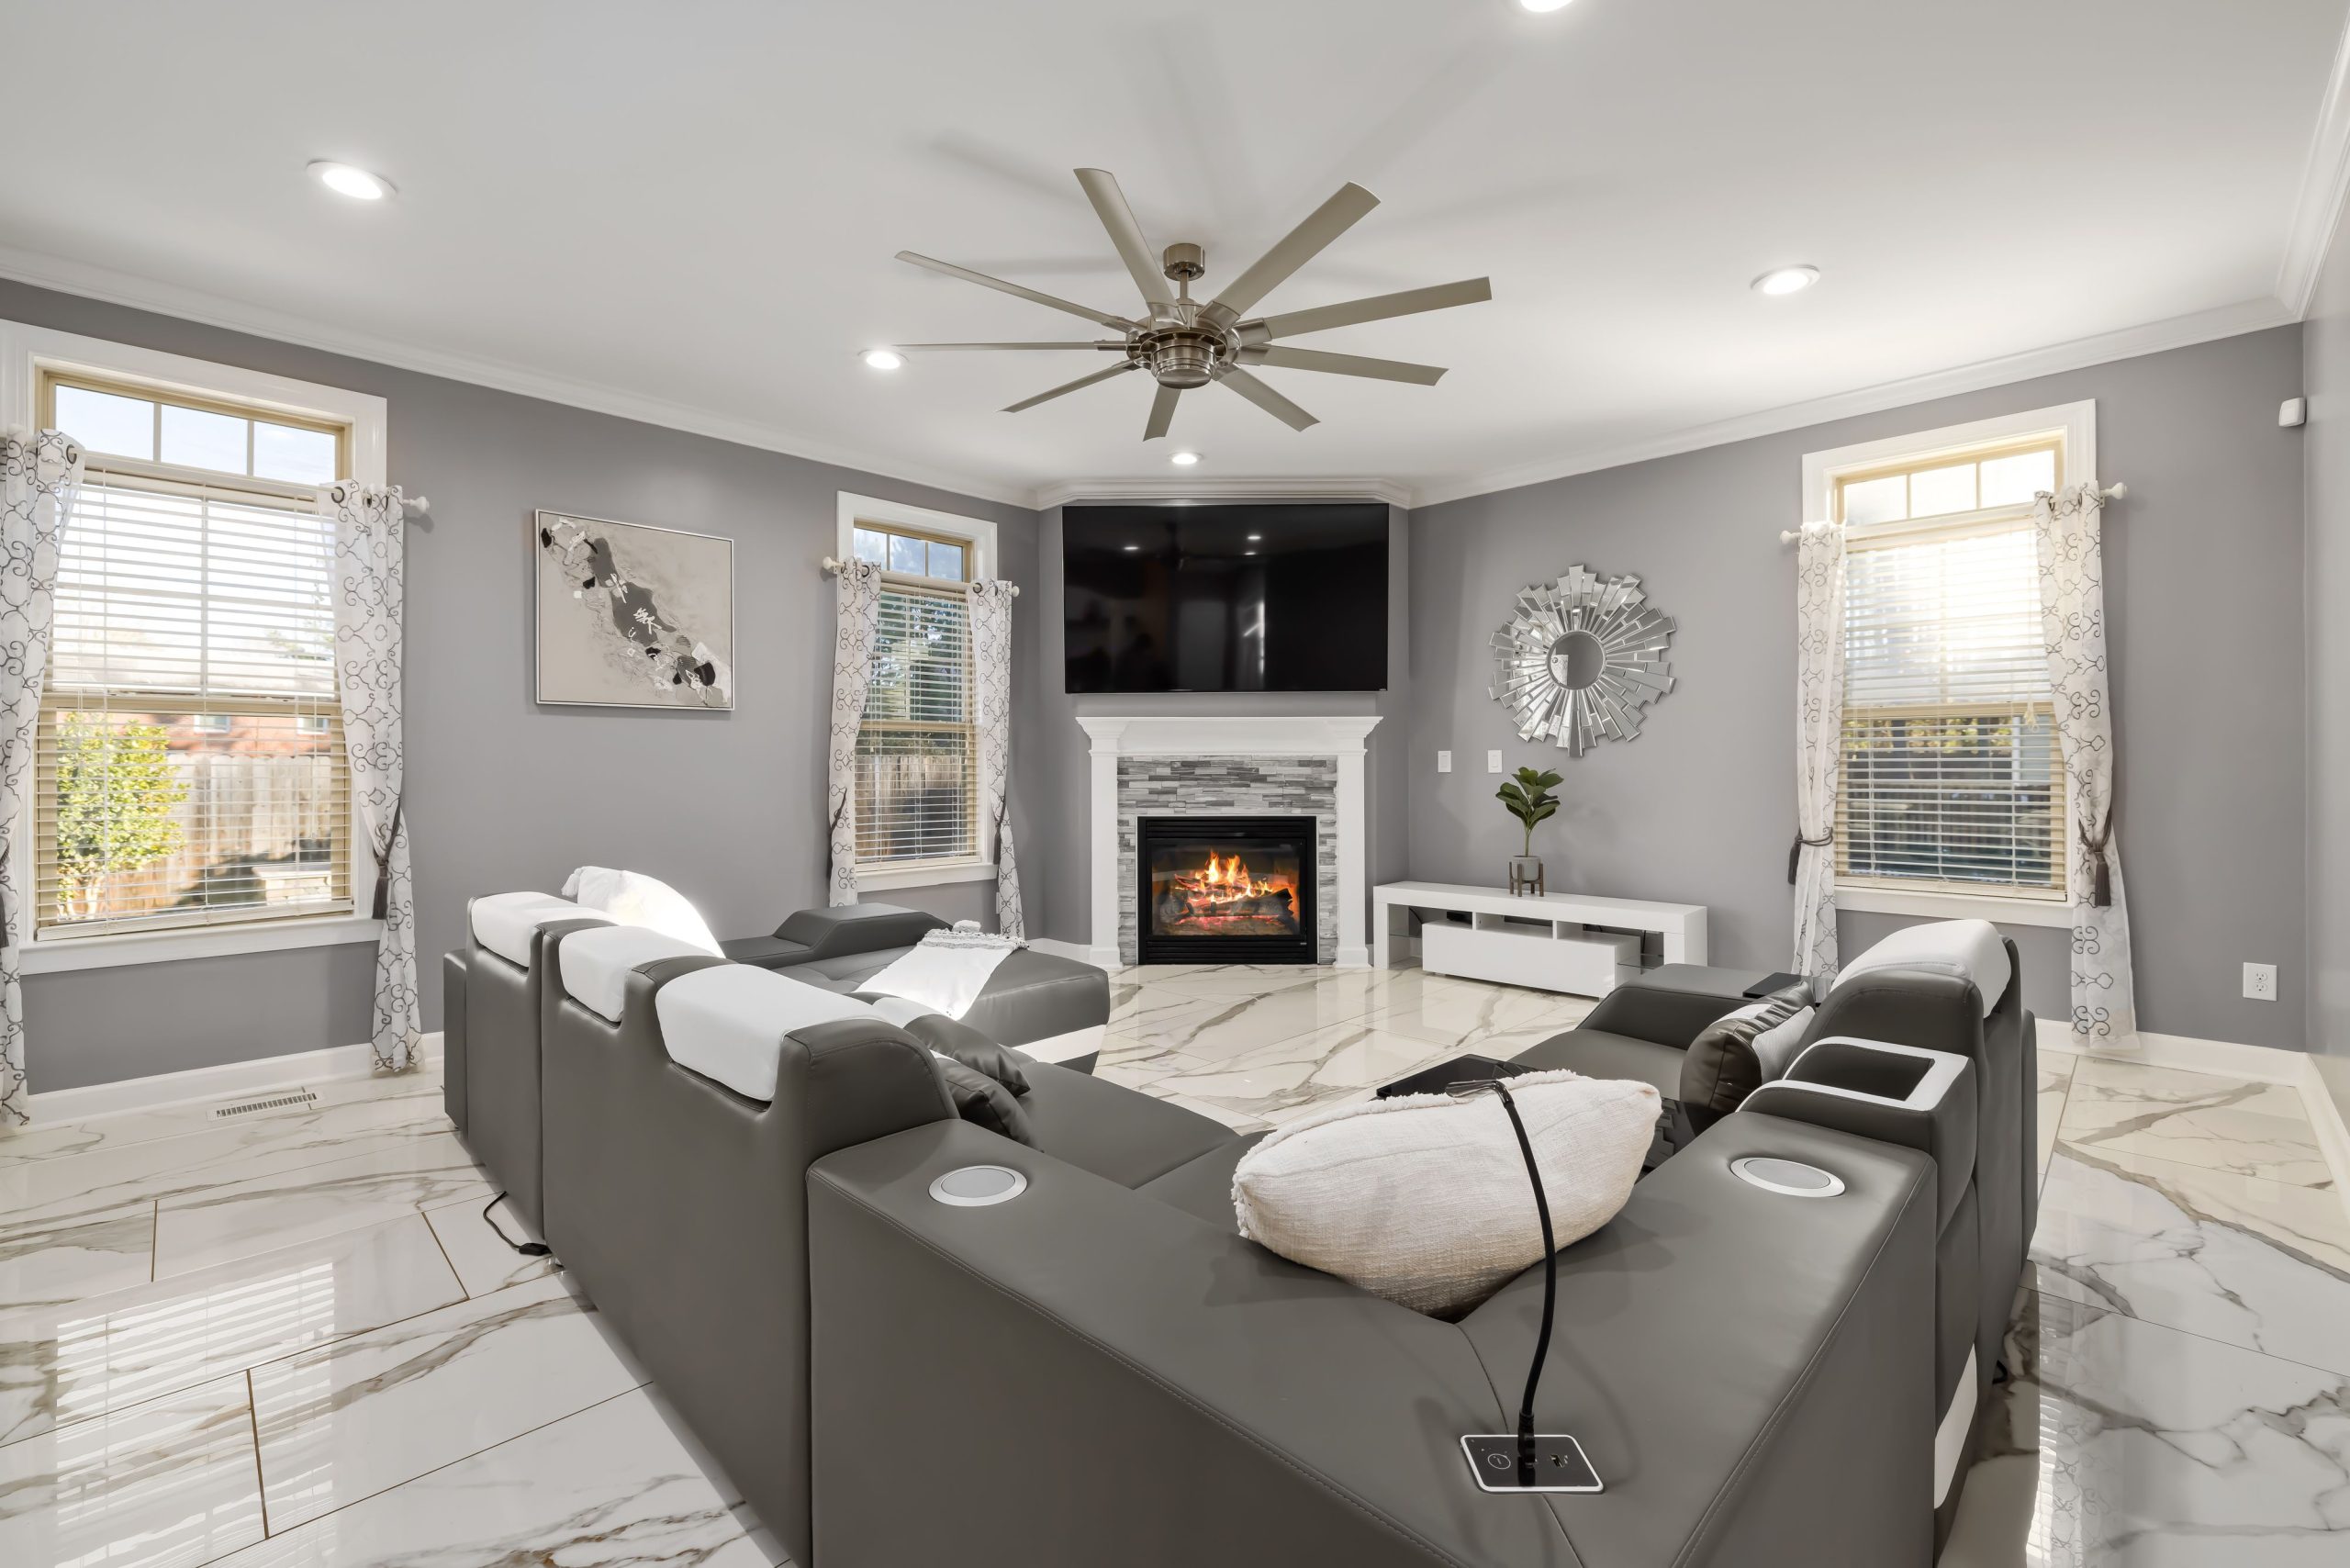
12. Corner Media Wall with Stacked Stone Fireplace
A corner fireplace setup can be a brilliant solution for an awkward room layout, but it presents a viewing angle challenge. Before you commit, place your primary sofa and chairs and have everyone sit down. Can everyone comfortably see the TV without turning their head at a 45-degree angle? If not, you might be creating a room that’s frustrating to actually live in. Consider an articulating TV mount that can be pulled out and angled towards the main seating area when in use.
|
📋 Copy HEX 🔗 Share |
While floor-to-ceiling accent walls have dominated Pinterest for years, we’re seeing a shift towards more functional, zoned-off feature areas like this one. Instead of just a single wall of stone, this design creates a dedicated corner for media and relaxation. It’s a response to our homes working harder post-2020; we want clearly defined zones for different activities. The integration of a sleek media console and a high-tech sectional sofa shows a move toward comfort and convenience, not just aesthetics.
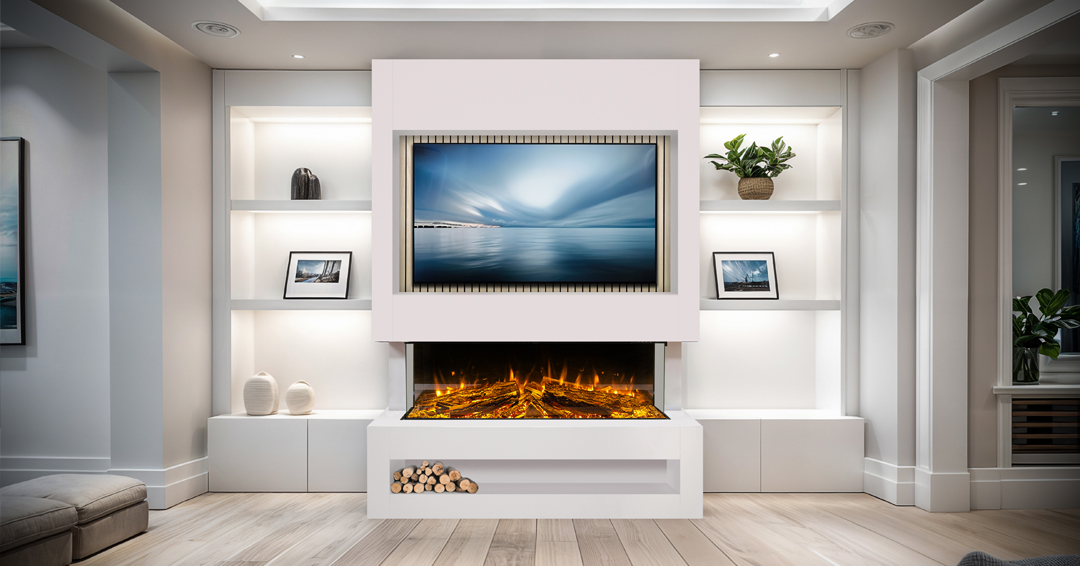
13. Bright White Media Wall with Light Wood Accents
When using light wood as an accent against a white built-in, the tone of the wood is critical. Look for a natural, slightly warm oak or a light maple. Avoid woods that are too yellow or have a pinkish undertone, as they can look dated or clash with the crisp white. The goal is a subtle, organic warmth. The light wood slatted panel behind the TV here is a perfect example—it adds texture and warmth without competing with the clean white structure. A similar effect can be achieved with the lighter wood tones seen in Idea #15.
|
📋 Copy HEX 🔗 Share |
The single element that makes this design feel elevated is the integrated lighting in the open shelving. Without it, the shelves would just be storage. With it, they become a display gallery. The warm light bouncing off the back of the shelves creates depth, highlights the objects you choose to display, and adds a cozy, ambient glow to the entire room in the evening. It’s a feature that takes a standard built-in from good to truly great.
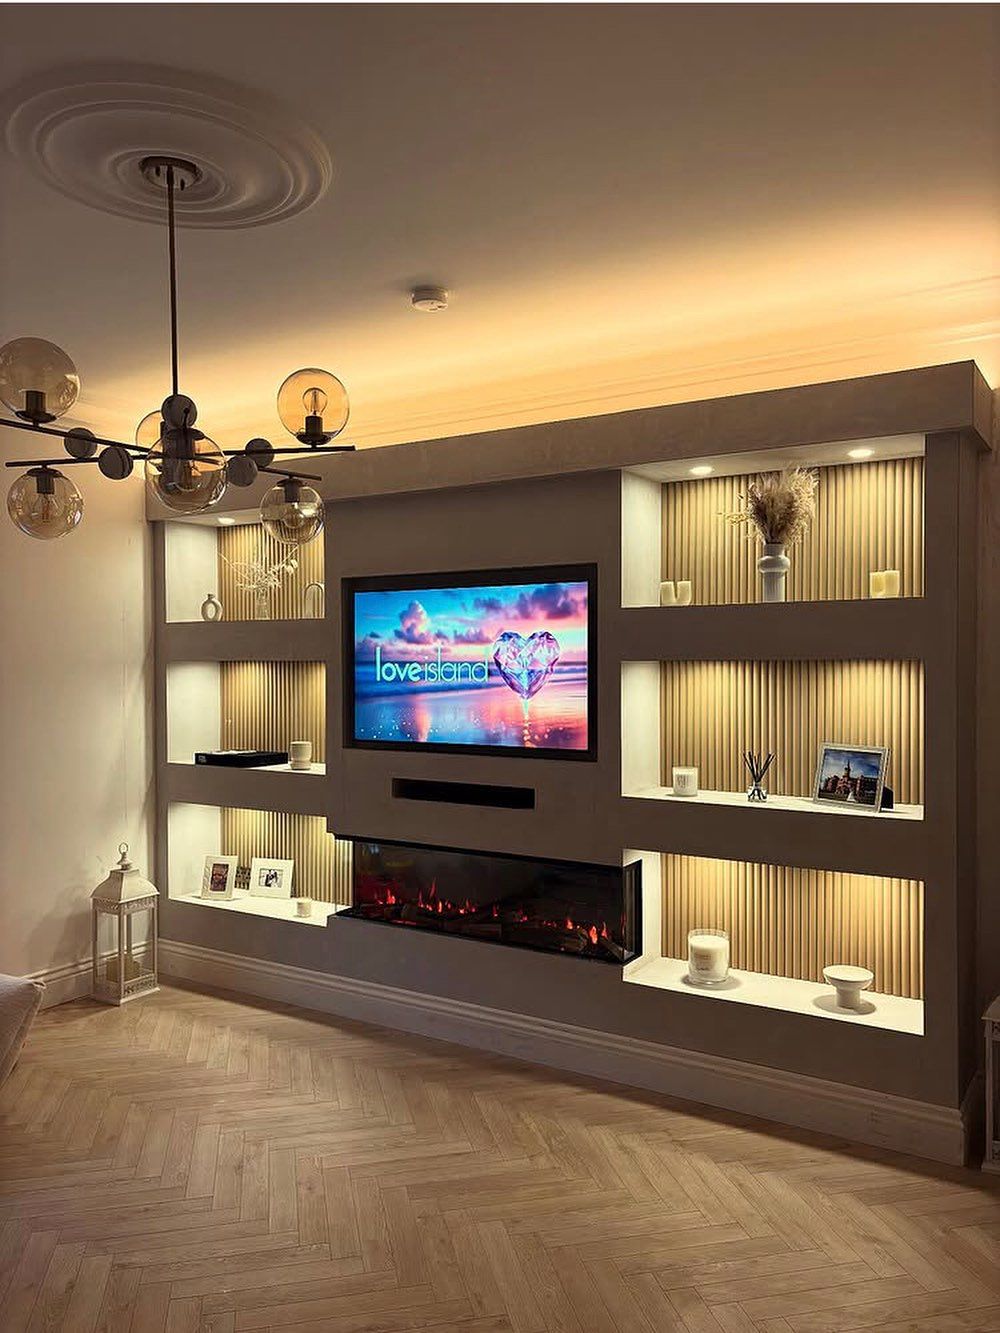
14. Grey Media Wall with Illuminated Fluted Niches
This design is a masterclass in tone-on-tone texture. By keeping the entire unit within the same gray color family, the focus shifts entirely to the interplay of different surfaces. The smooth, matte finish of the main unit contrasts beautifully with the vertical lines of the fluted wood panels inside the niches. The warm backlighting enhances this texture, making the fluting pop and creating a gorgeous, warm glow. The light wood of the herringbone floor provides just the right amount of warmth to keep the gray from feeling cold.
|
📋 Copy HEX 🔗 Share |
You can get this high-end look on a smaller budget. For the main structure, use painted MDF instead of custom cabinetry. You can buy pre-made fluted wall panels (often sold as ‘acoustic panels’) online and cut them to fit your niches. For the lighting, use affordable, stick-on LED tape lights with a diffuser channel for a smooth glow. Instead of herringbone wood floors, which are expensive, consider a luxury vinyl tile (LVT) in a similar pattern for about half the cost per square foot.
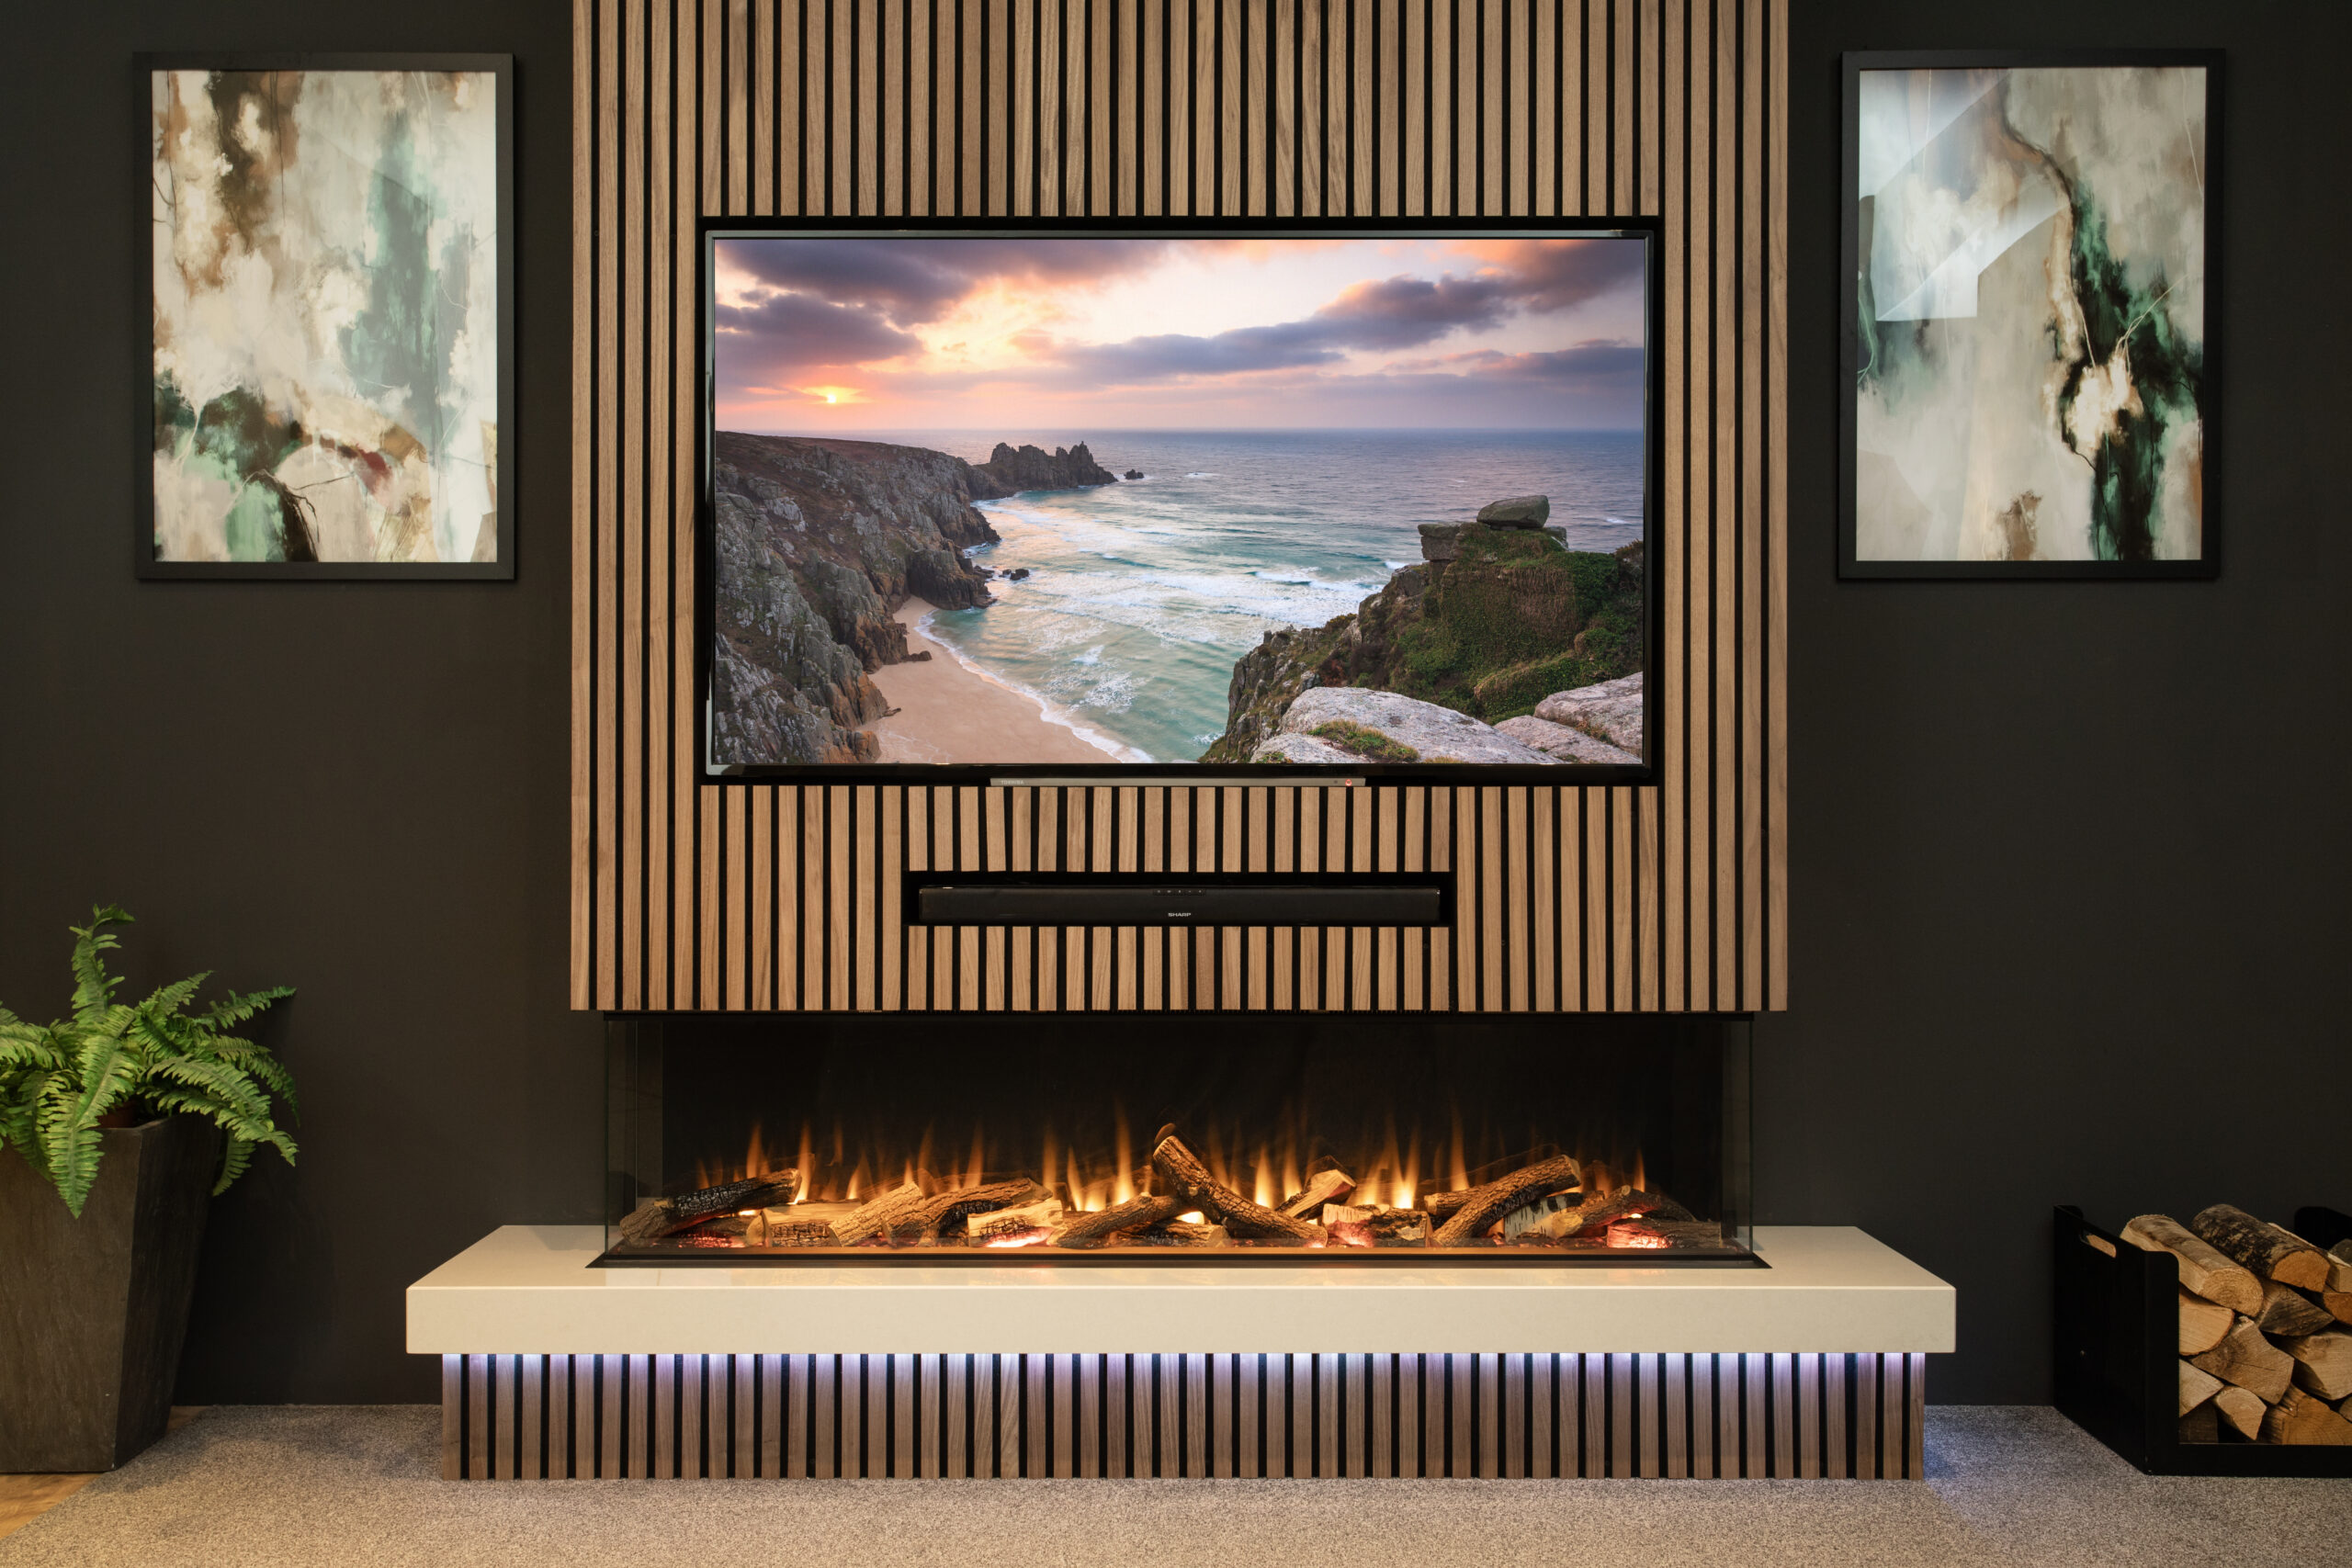
15. Modern Media Wall with Vertical Wood Slats and a Concrete Hearth
Here’s the recipe for this Japandi-inspired look: 50% natural wood texture, 30% industrial element, and 20% dark backdrop. The vertical light wood slats provide the majority of the visual interest and warmth. The concrete hearth adds a cool, industrial, and slightly raw counterpoint. The dark grey wall behind it all makes both the wood and the concrete stand out dramatically. The key is the balance; too much concrete and it feels cold, and too much wood and you lose the edgy contrast.
|
📋 Copy HEX 🔗 Share |
A design with this many integrated elements—TV, fireplace, lighting, multiple materials—has very little room for error. The most common point of failure is the seams where different materials meet. The transition from the wood slats to the fireplace, from the fireplace to the concrete hearth, and from the slats to the surrounding wall must be perfectly executed. Any sloppy gaps or uneven lines will make the entire installation look cheap. This is a project where you should absolutely hire a professional with experience in custom media walls.
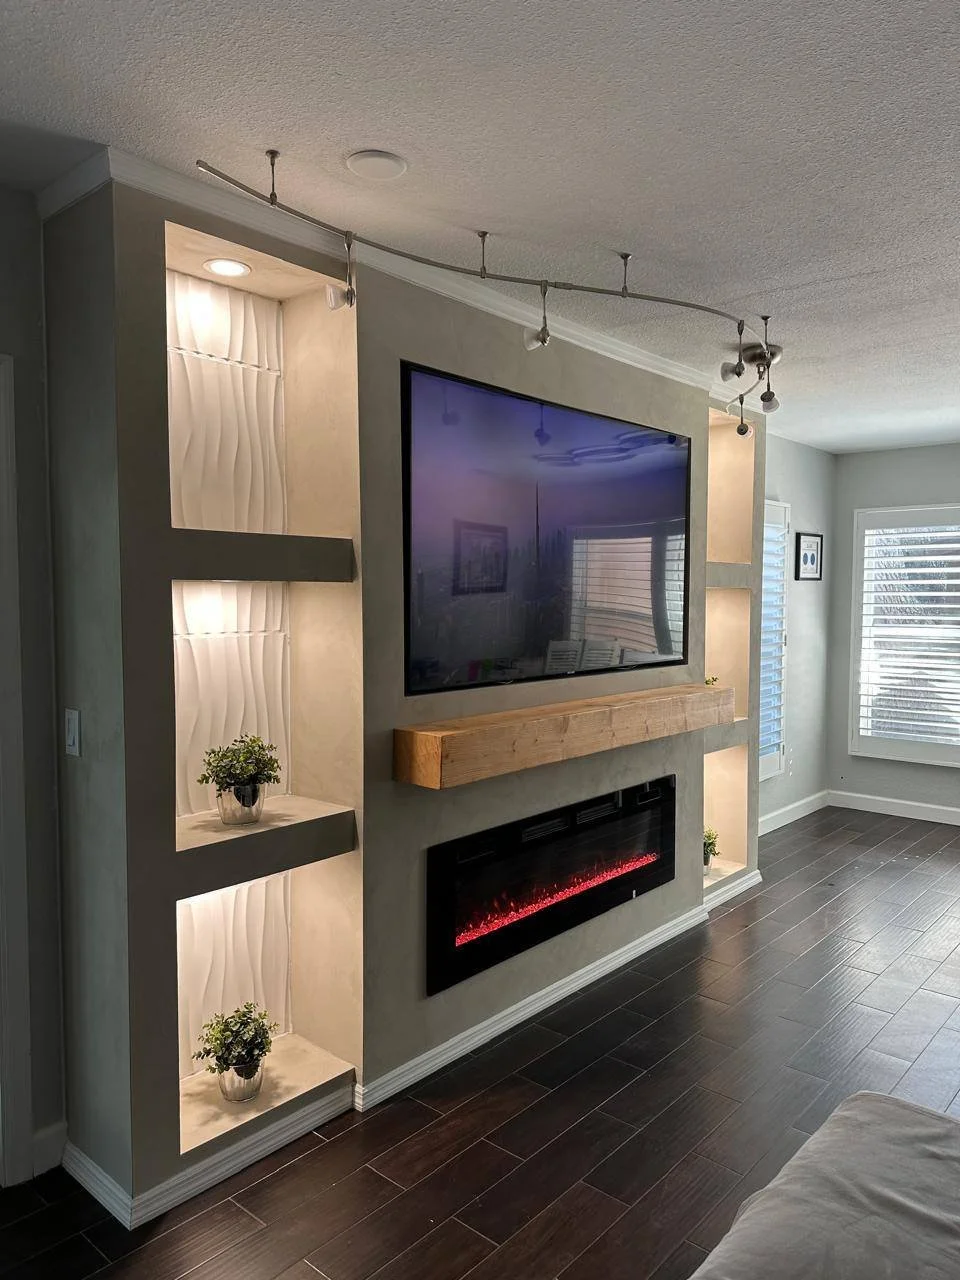
16. Modern Niche Media Wall with Integrated Fireplace
Creating those sharp, professional-looking niches is all about the finishing. Here’s a mini-guide for getting crisp inside corners with drywall.
- Time: 1 hour per niche (plus drying time). Cost: ~$20 for tape and mud.
- After installing the drywall, measure and cut your paper-faced corner bead or drywall tape for all inside corners.
- Apply a thin layer of all-purpose joint compound to the corners.
- Fold the paper tape along its crease and press it firmly into the mud with a 4- or 6-inch putty knife, squeezing out excess mud.
- Let it dry completely (8-24 hours).
- Apply a second, wider, and thinner coat of mud, feathering the edges. Let dry, sand lightly, and apply a final skim coat if needed.
|
📋 Copy HEX 🔗 Share |
This style of media wall, with its strong vertical and horizontal lines, is incredibly versatile. For a grand statement in a room with high ceilings (10ft+), you can extend the niches all the way to the ceiling. For a standard 8ft ceiling, ending the feature wall about a foot below the ceiling line, as shown, can actually make the room feel taller. The minimum wall width for a balanced look with a central TV and two side niches is about 10 feet. Anything less and it will start to feel cramped. This approach is more adaptable than the full built-ins of Idea #11.
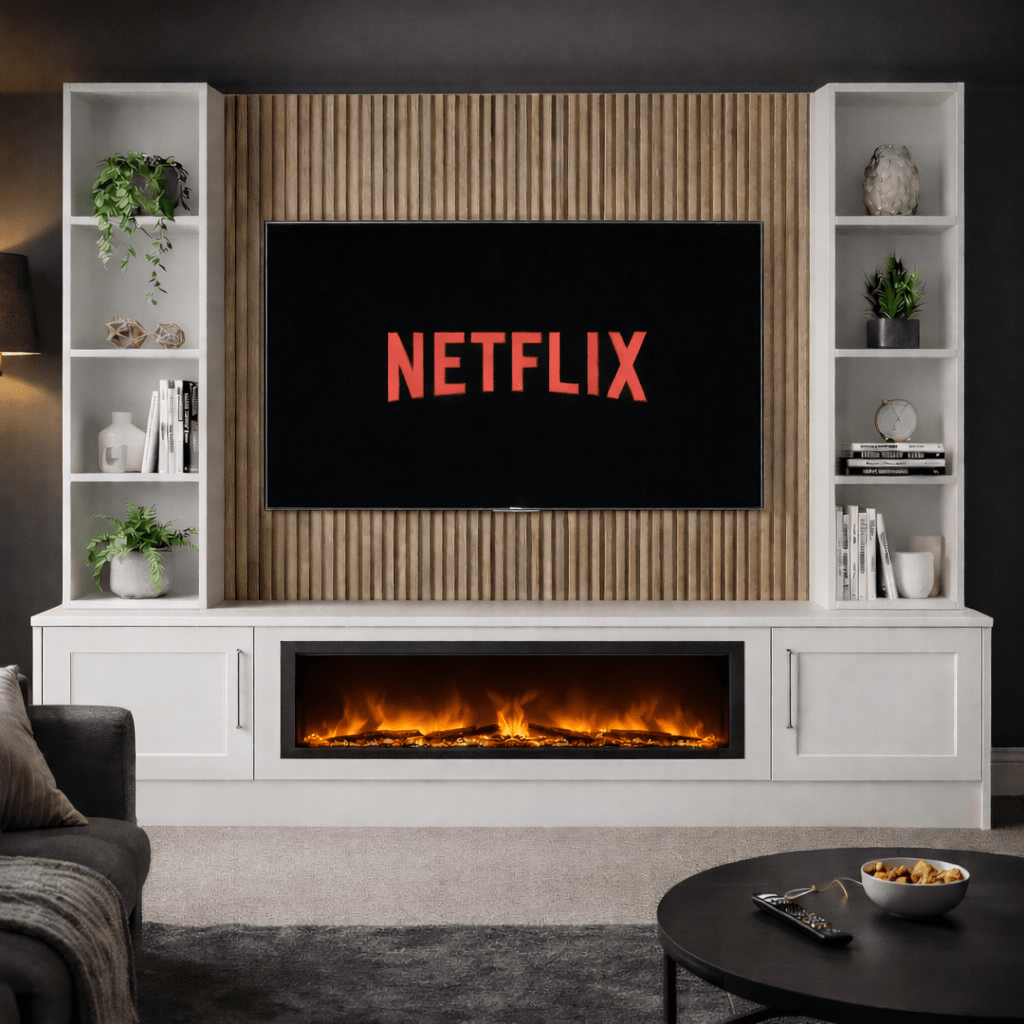
17. White & Wood Media Unit with Fluted Panel Accent
This is a great example of the ‘sandwich’ technique in design. You have a strong, solid element on the top (white shelving unit) and the bottom (white cabinet), which encase a contrasting, textured element in the middle (the fluted wood panel). This creates a visually stable and appealing composition. The dark gray back wall acts as a ‘mat,’ framing the entire white-and-wood unit and making it the undeniable star of the show. The repetition of the white keeps it feeling clean and cohesive.
|
📋 Copy HEX 🔗 Share |
Here’s a cost estimate for creating this popular look using mid-range materials and a handyman for assembly.
- IKEA BESTÅ Cabinets (base and shelving): $600 – $900
- Fluted Wood Panels (Acoustic Panels): $250 – $500
- Electric Fireplace Insert: $400 – $800
- Television (65-inch): $700 – $2,000
- Labor/Installation: $500 – $1,000
- TOTAL: $2,450 – $5,200
Budget alternative: Use paintable, textured MDF panels instead of real wood for the fluted section and look for deals on open-box fireplaces to save 40-60%.
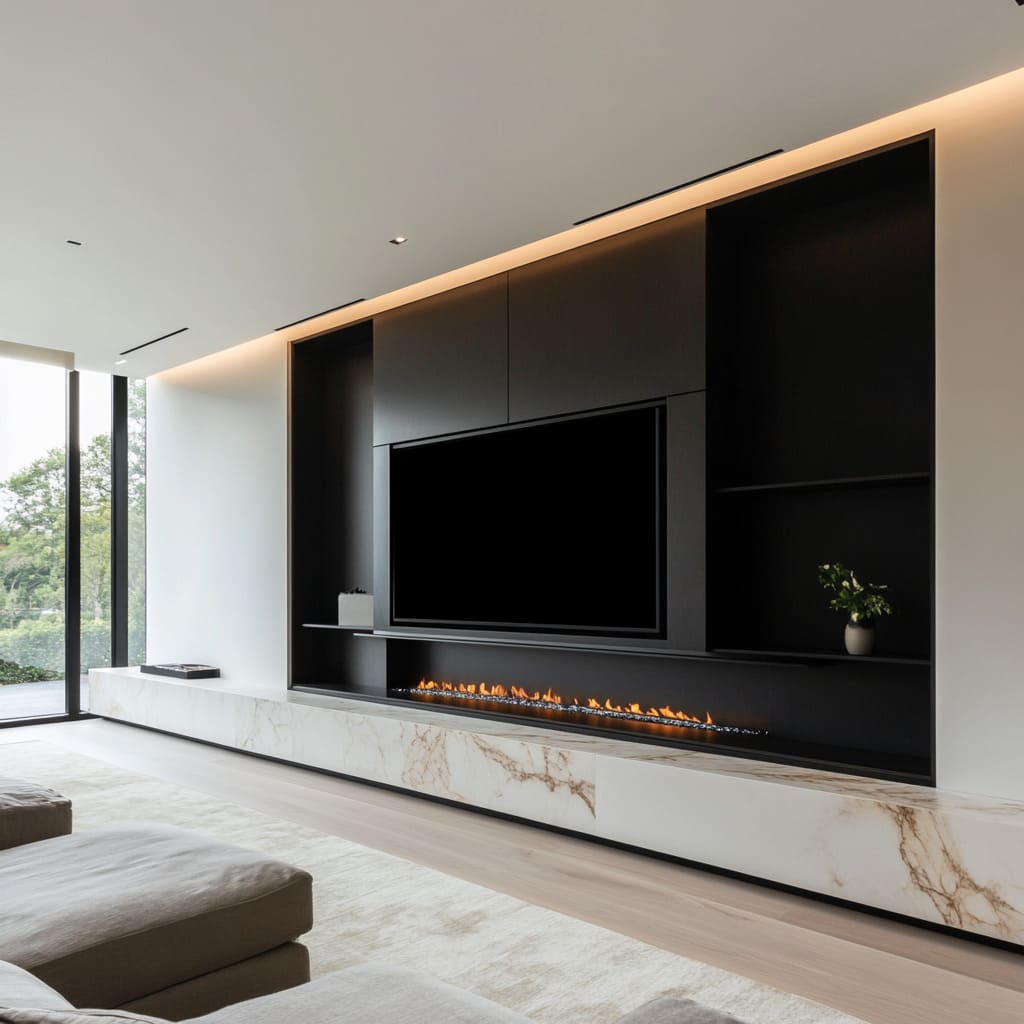
18. Minimalist Black Cabinetry with a Marble Plinth Base
The white marble plinth with its dramatic brown veining is the undeniable showstopper here. Without it, you would have a sleek but somewhat generic black media unit. The marble base elevates the entire design from modern to luxurious. It acts as a heavy, solid anchor for the lighter black cabinetry and fireplace above, creating a stunning material contrast. This single, bold choice dictates the entire mood of the room—it’s pure, unapologetic elegance. Compare its impact to the more subtle hearth in Idea #15.
|
📋 Copy HEX 🔗 Share |
Matte black finishes are stunning, but they are notoriously difficult to keep clean. They show every single fingerprint, speck of dust, and greasy smudge. You’ll need to clean them regularly with a soft, damp microfiber cloth. Avoid harsh chemical cleaners, which can damage the finish. The marble plinth, while durable, is porous and can be stained or etched by acidic liquids (like wine or lemon juice). It should be professionally sealed upon installation and resealed every 1-2 years. Wipe up spills immediately.
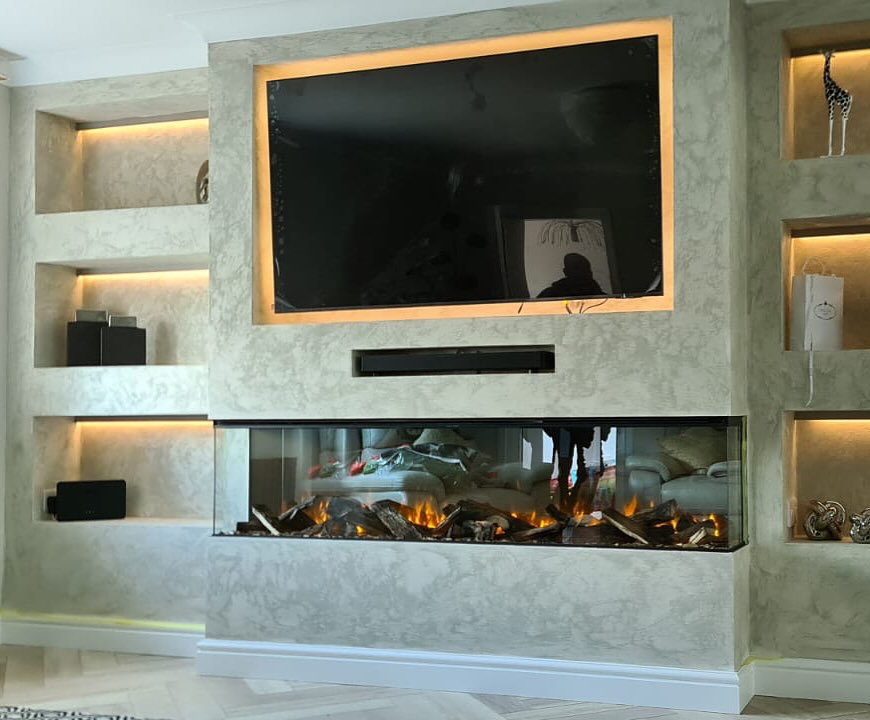
19. Textured Plaster Media Wall with Backlit Shelves
This design feels so cohesive and high-end because it commits to a single material finish for the entire structure. Using the same light grey textured plaster across the whole wall, including the insides of the shelves, creates a seamless, sculptural look. It’s as if the wall were carved from a single block of stone. The warm backlighting is crucial, as it rakes across the textured surface, highlighting its subtle variations and preventing the monochrome scheme from feeling flat. It’s a minimalist’s dream.
|
📋 Copy HEX 🔗 Share |
You can achieve a similar textured plaster look yourself with the right materials. This is for a small to medium-sized accent wall.
- Time: 4-6 hours (plus drying). Cost: ~$150.
- Start with a primed drywall surface.
- Use a product like Roman Clay or a lime wash paint. Apply the first coat thinly with a flexible putty knife or trowel in varied, sweeping motions. Don’t aim for perfection.
- Let the first coat dry completely according to the product’s instructions.
- Apply a second, very thin coat, filling in any gaps and adding more subtle movement.
- Once dry, you can leave it matte or burnish it with the edge of your clean trowel for a slight sheen.
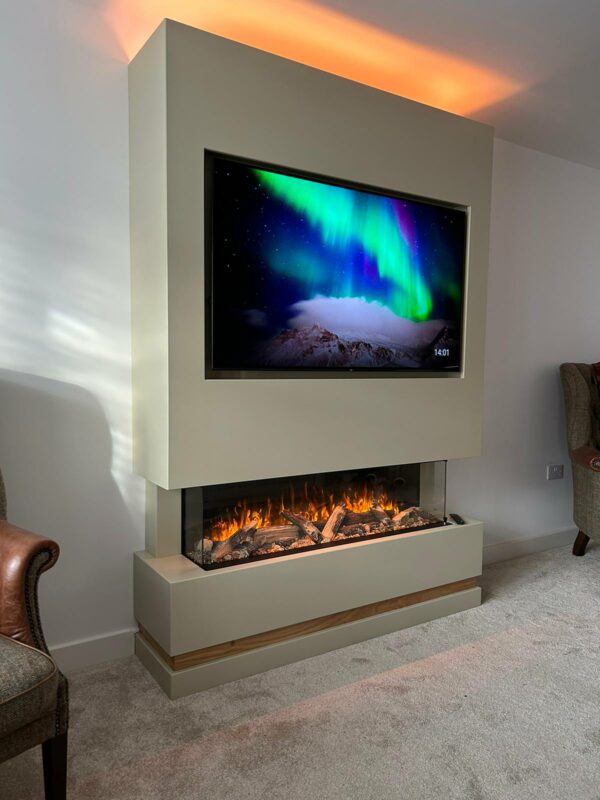
20. Sleek Beige Media Column with a Wood Accent Base
The magic of this design is its verticality. By creating a single, tall column, it draws the eye upward and makes the ceiling feel much higher than it probably is. This column acts as a strong architectural feature, neatly containing the TV and fireplace without dominating the entire wall. This leaves the adjacent walls free for art, furniture, or just negative space, which can make a room feel larger and less cluttered. It’s a clever solution for adding a fireplace without committing to a full wall of built-ins.
|
📋 Copy HEX 🔗 Share |
This column design is exceptionally well-suited for rooms with an obvious vertical element to play off of, like a tall, narrow wall space between two windows or doorways. It also works beautifully in spaces with ceilings of 9 feet or higher, where the verticality can be really emphasized. For a standard 8-foot ceiling, ensure the column width is not too wide (aim for 4-5 feet max) to maintain that sleek, soaring proportion. This is a fantastic option for a bedroom or a smaller living area where a full media wall like Idea #4 would be overwhelming.
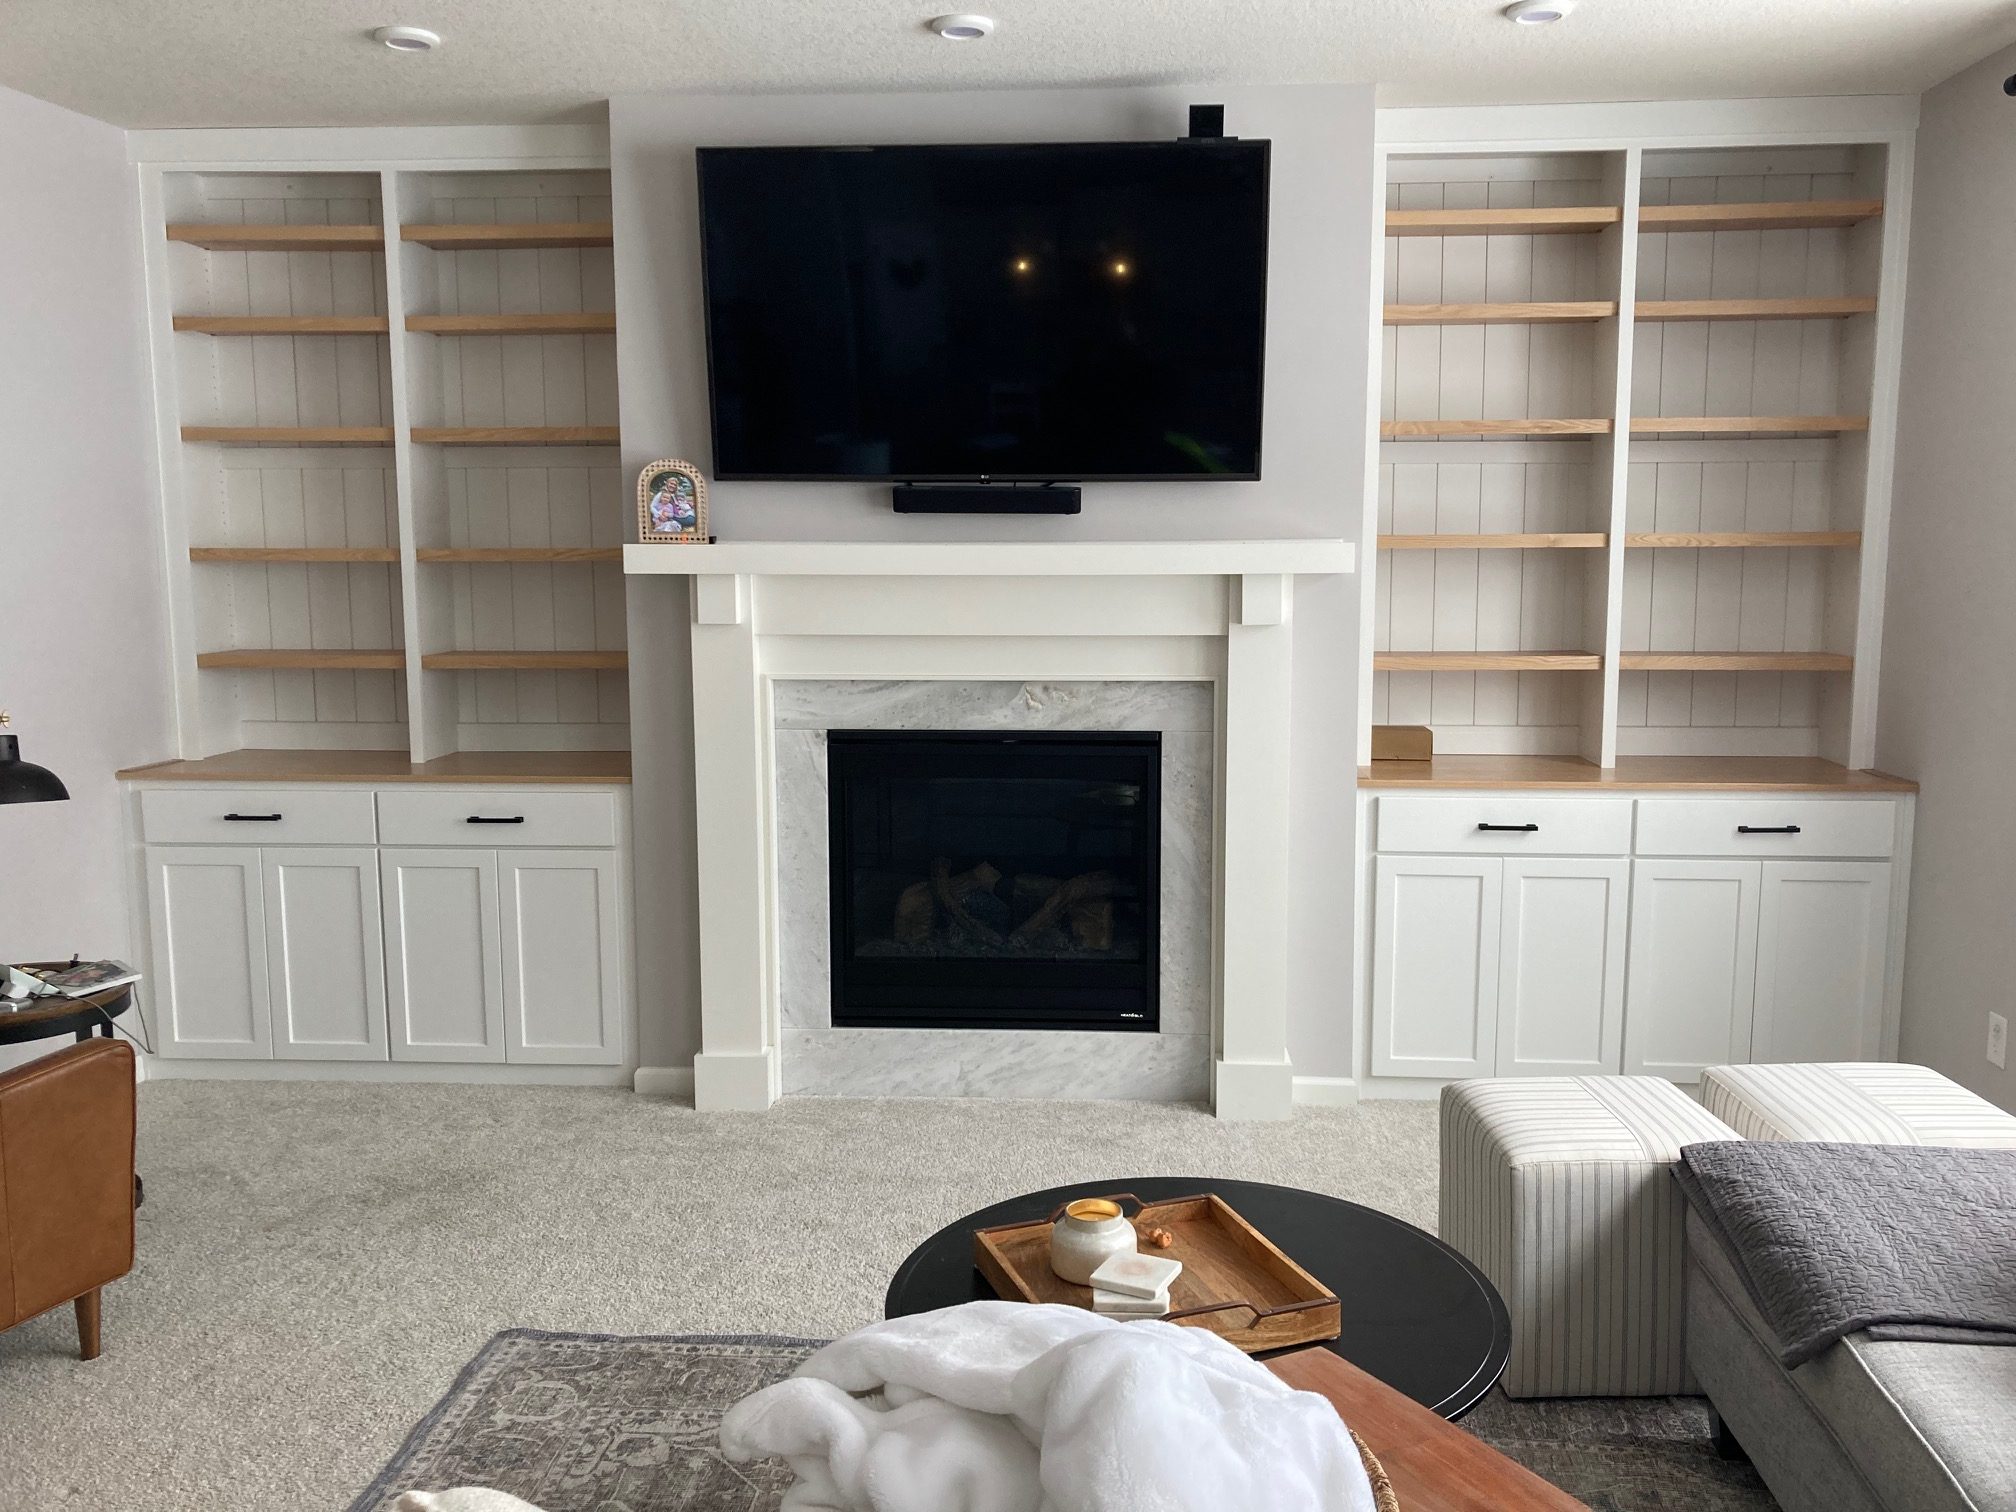
21. Farmhouse-Style Media Wall with Shiplap and Light Wood Shelves
This popular modern farmhouse look follows a reliable formula: 50% crisp white + 30% warm wood + 10% black accents + 10% texture. The white comes from the shaker cabinets and fireplace mantel. The warm wood is in the shelves and countertops. The black provides a graphic punch in the TV, fireplace insert, and cabinet hardware. Finally, the texture is delivered by the shiplap backing in the bookcases. It’s a balanced, inviting, and highly replicable style.
|
📋 Copy HEX 🔗 Share |
Before starting a project with this many components, a checklist is essential.
- Measure your TV’s VESA pattern: This is the screw hole pattern on the back of your TV. Make sure the wall mount you buy is compatible.
- Confirm outlet placement: You’ll want an outlet directly behind the TV and another near the floor for the fireplace insert. Plan this with an electrician before you build.
- Check floor levelness: If your floor is uneven, your base cabinets will need to be shimmed to be perfectly level before the rest of the built-in is constructed on top of them.
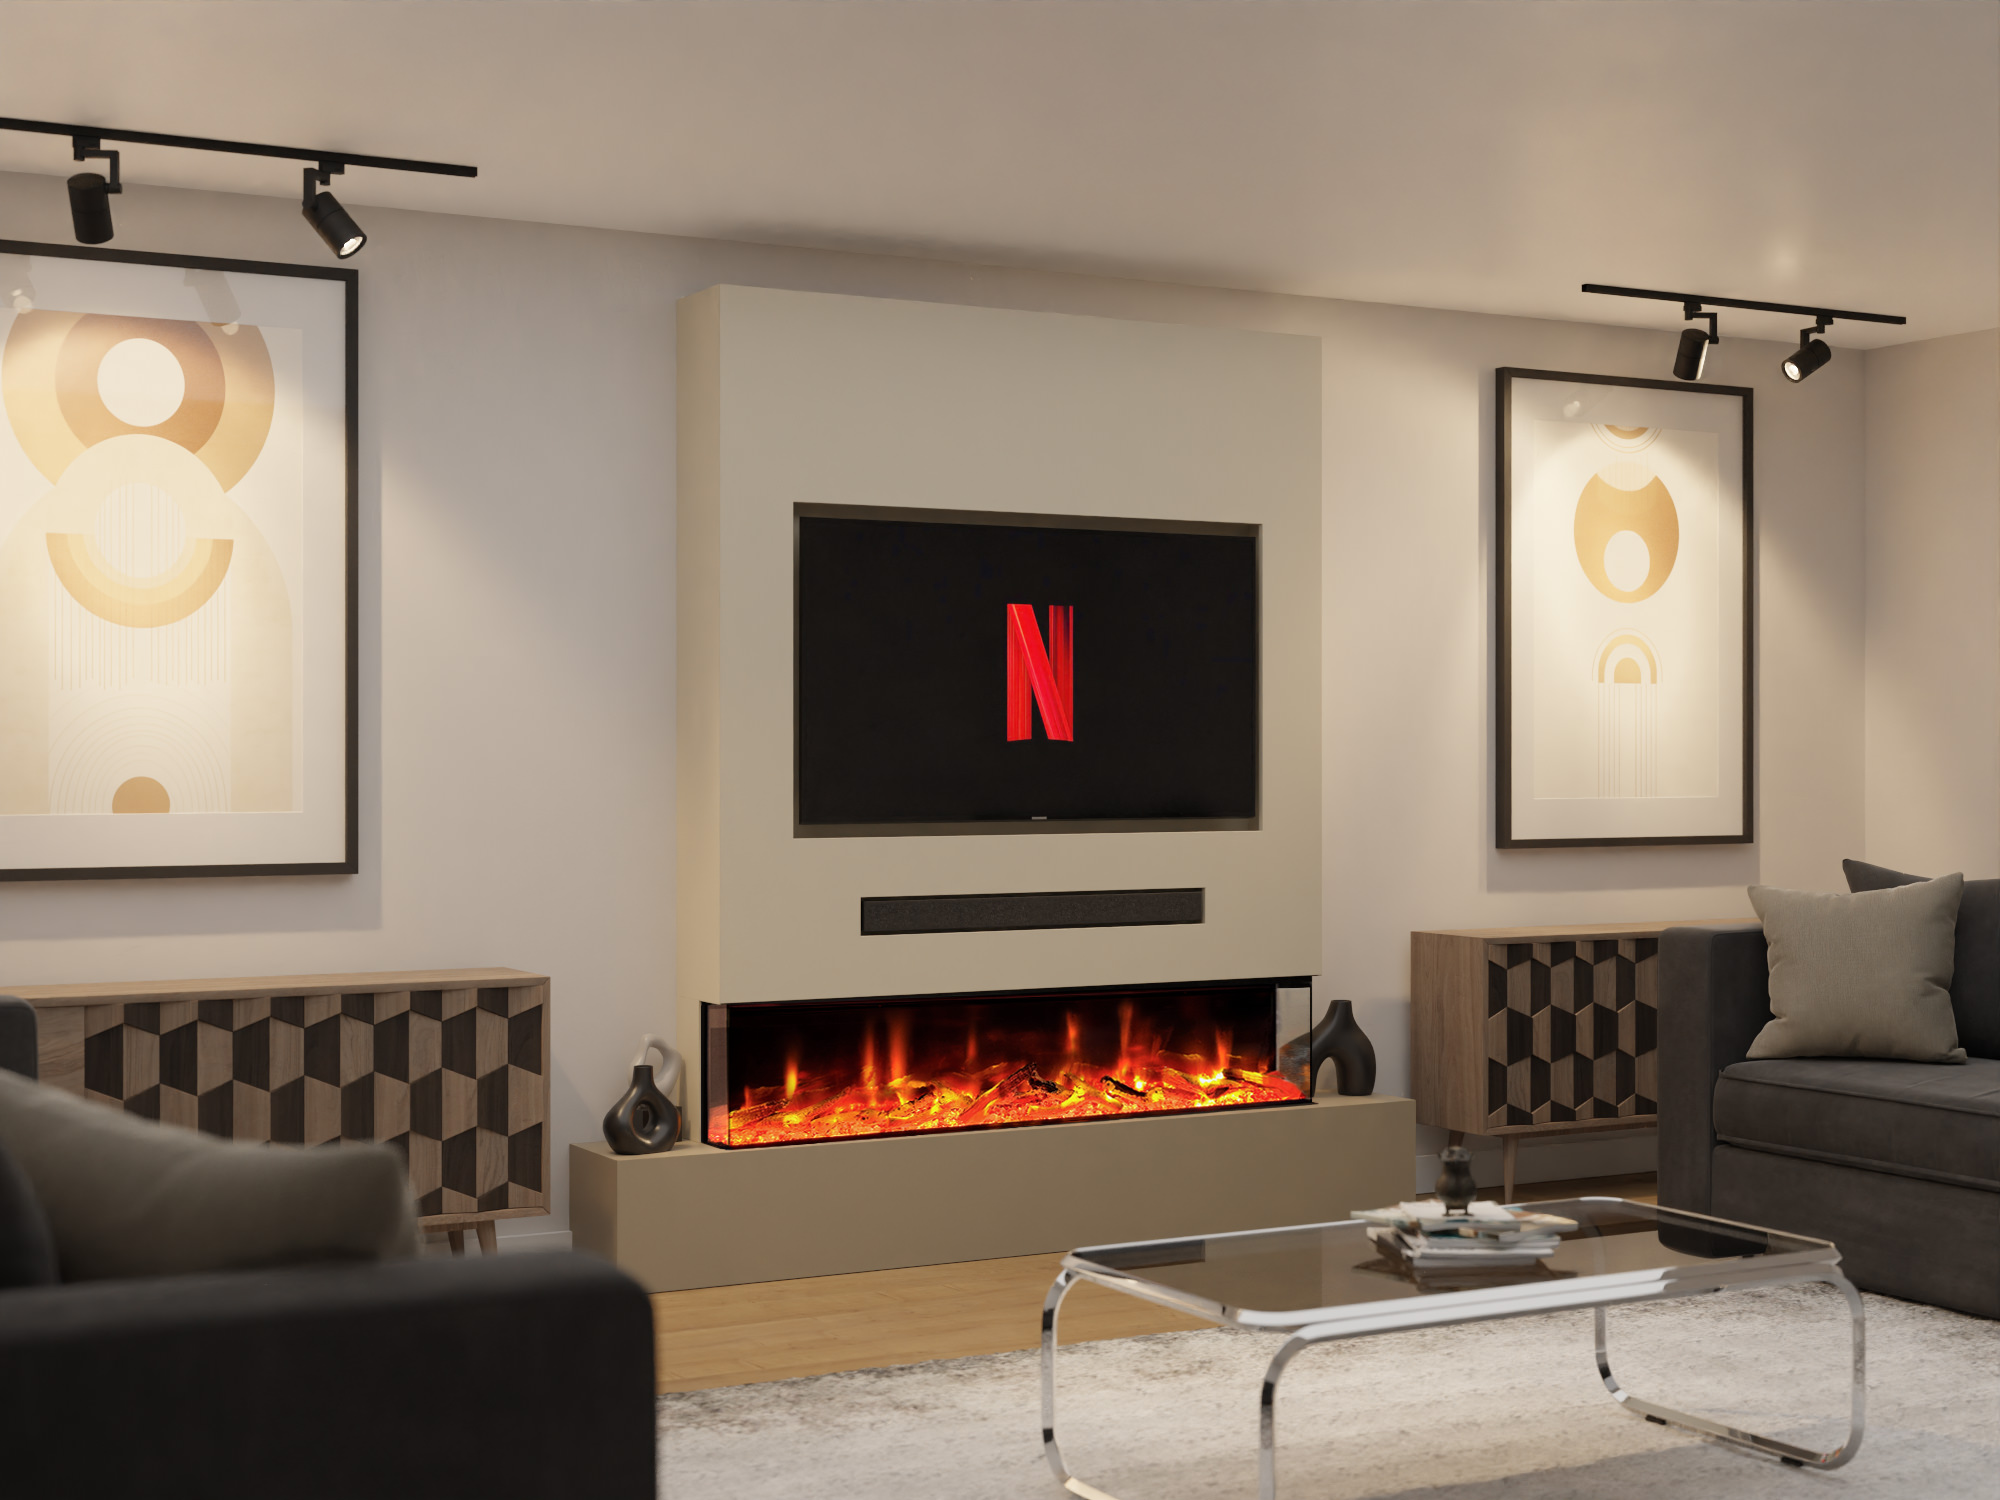
22. Minimalist Light Beige Media Wall with Track Lighting
When using track lighting to illuminate a media wall, aim for ‘wall grazing.’ This means positioning the track relatively close to the wall (12-18 inches) and aiming the heads at a sharp angle down the wall’s surface. This technique brings out the subtle texture of the paint or plaster and creates a dramatic, high-end feel. Use at least three to five heads, and make sure they are ‘flood’ lights, not ‘spot’ lights, for broader, softer beams of light.
|
📋 Copy HEX 🔗 Share |
We’re seeing a huge trend towards ‘soft minimalism’ in interior design, and this room is a perfect example. It has the clean lines and uncluttered feel of minimalism, but it’s not cold or sterile. The warmth comes from the light beige wall color, the natural wood tones in the sideboards, and the cozy texture of the grey sofas. The bright orange flames from the linear fireplace add a vital, energetic element. It’s a livable, comfortable take on modern design that feels very right for 2026.
23. Integrated Fireplace and Media for a Cohesive Living Room
To get a similar integrated feel without the cost of custom construction, you can use paint to your advantage. Purchase a simple, pre-made media console that is wider than your TV. Mount the TV on the wall above it, leaving about 6-8 inches of space. Then, paint the console and the entire section of the wall behind it—from floor to ceiling—in a single, unified color. This ‘color blocking’ trick creates the illusion of a single, cohesive built-in unit for the cost of a can of paint and a console.
|
📋 Copy HEX 🔗 Share |
A fully integrated media wall is a significant commitment. Unlike a standalone console you can move or sell, a built-in is a permanent part of your home’s architecture. Are you sure you’ll love this look in 5-10 years? Also, consider technology changes. Will the new 90-inch holographic TV of 2030 fit in the custom recess you built for your 2026 model? Plan for some flexibility, perhaps by making the TV recess larger than you currently need.
24. Modern Media Wall with Storage and Display Shelves
This kind of custom-built-in offer has a ton of value, but it comes at a price. Here’s a realistic look at the potential costs for a professionally built unit.
- Custom Cabinetry/Millwork: $5,000 – $15,000+ (highly dependent on materials and size)
- Electric Fireplace Insert: $500 – $1,500
- Television (75-inch): $1,000 – $2,500
- LED Lighting & Electrical Work: $800 – $2,000
- Installation Labor: $2,000 – $4,000
- TOTAL: $9,300 – $25,000+
Budget alternative: Combine stock kitchen upper cabinets (for the closed storage) and floating shelves from a big-box store. Frame them out with MDF and paint everything one color to mimic a custom look for 60-70% less.
|
📋 Copy HEX 🔗 Share |
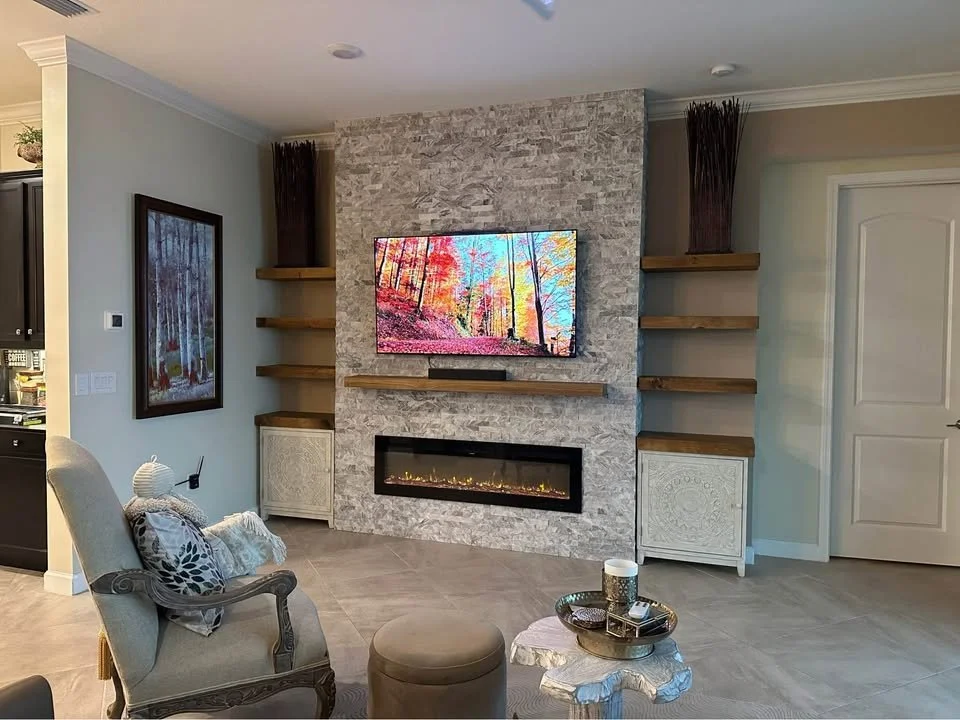
This design succeeds because it perfectly balances three essential functions: media housing, display, and hidden storage. The central column neatly contains the tech. The open, illuminated shelves on the sides are perfect for showing off personal treasures and adding personality. The closed cabinets below hide all the clutter—remotes, game consoles, cables, and board games. It’s a workhorse that looks like a piece of art, which is the ultimate goal of any great built-in. The symmetry here makes it feel calm and organized, even when it’s full of stuff.
Your Cozy, Curated Living Room Awaits
Whew, that was a lot of inspiration! But now you have a real, tangible starting point for creating a media wall that doesn’t just hold your tech but actually enhances your home. Whether you’re drawn to dark and moody or light and airy, the perfect solution is in here somewhere. Now the fun part begins: making it your own.
Ready to start planning for real? Head over to Pinterest and start a board dedicated to your project. You’ll be surprised how quickly your vision comes together once you start saving the ideas that truly speak to you.