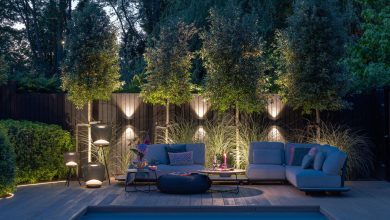
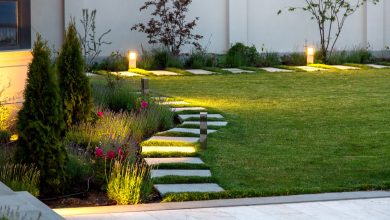
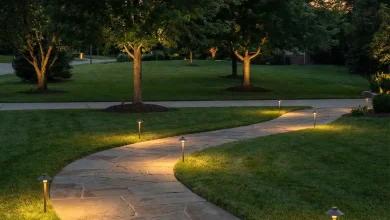
You know that feeling when you finally find the deck lighting idea that looks exactly right for your space, only to realize you have no idea how to actually make it happen? We’ve all been there, endlessly scrolling through Pinterest. After filtering through hundreds of options across places like Home Depot, Amazon, and specialty lighting stores, we narrowed it down to 29 ideas that actually deliver. Inside, you’ll find inspiration for every style, from cozy rustic pergolas to sleek modern rooftops, with details on how to get the look. Deck lighting is having a major moment in 2026 as we continue to invest in our outdoor spaces as true extensions of our homes. 📌 Save this to Pinterest for later—you’ll want to revisit these ideas.
1. Define Levels with Recessed Stair Riser Lights
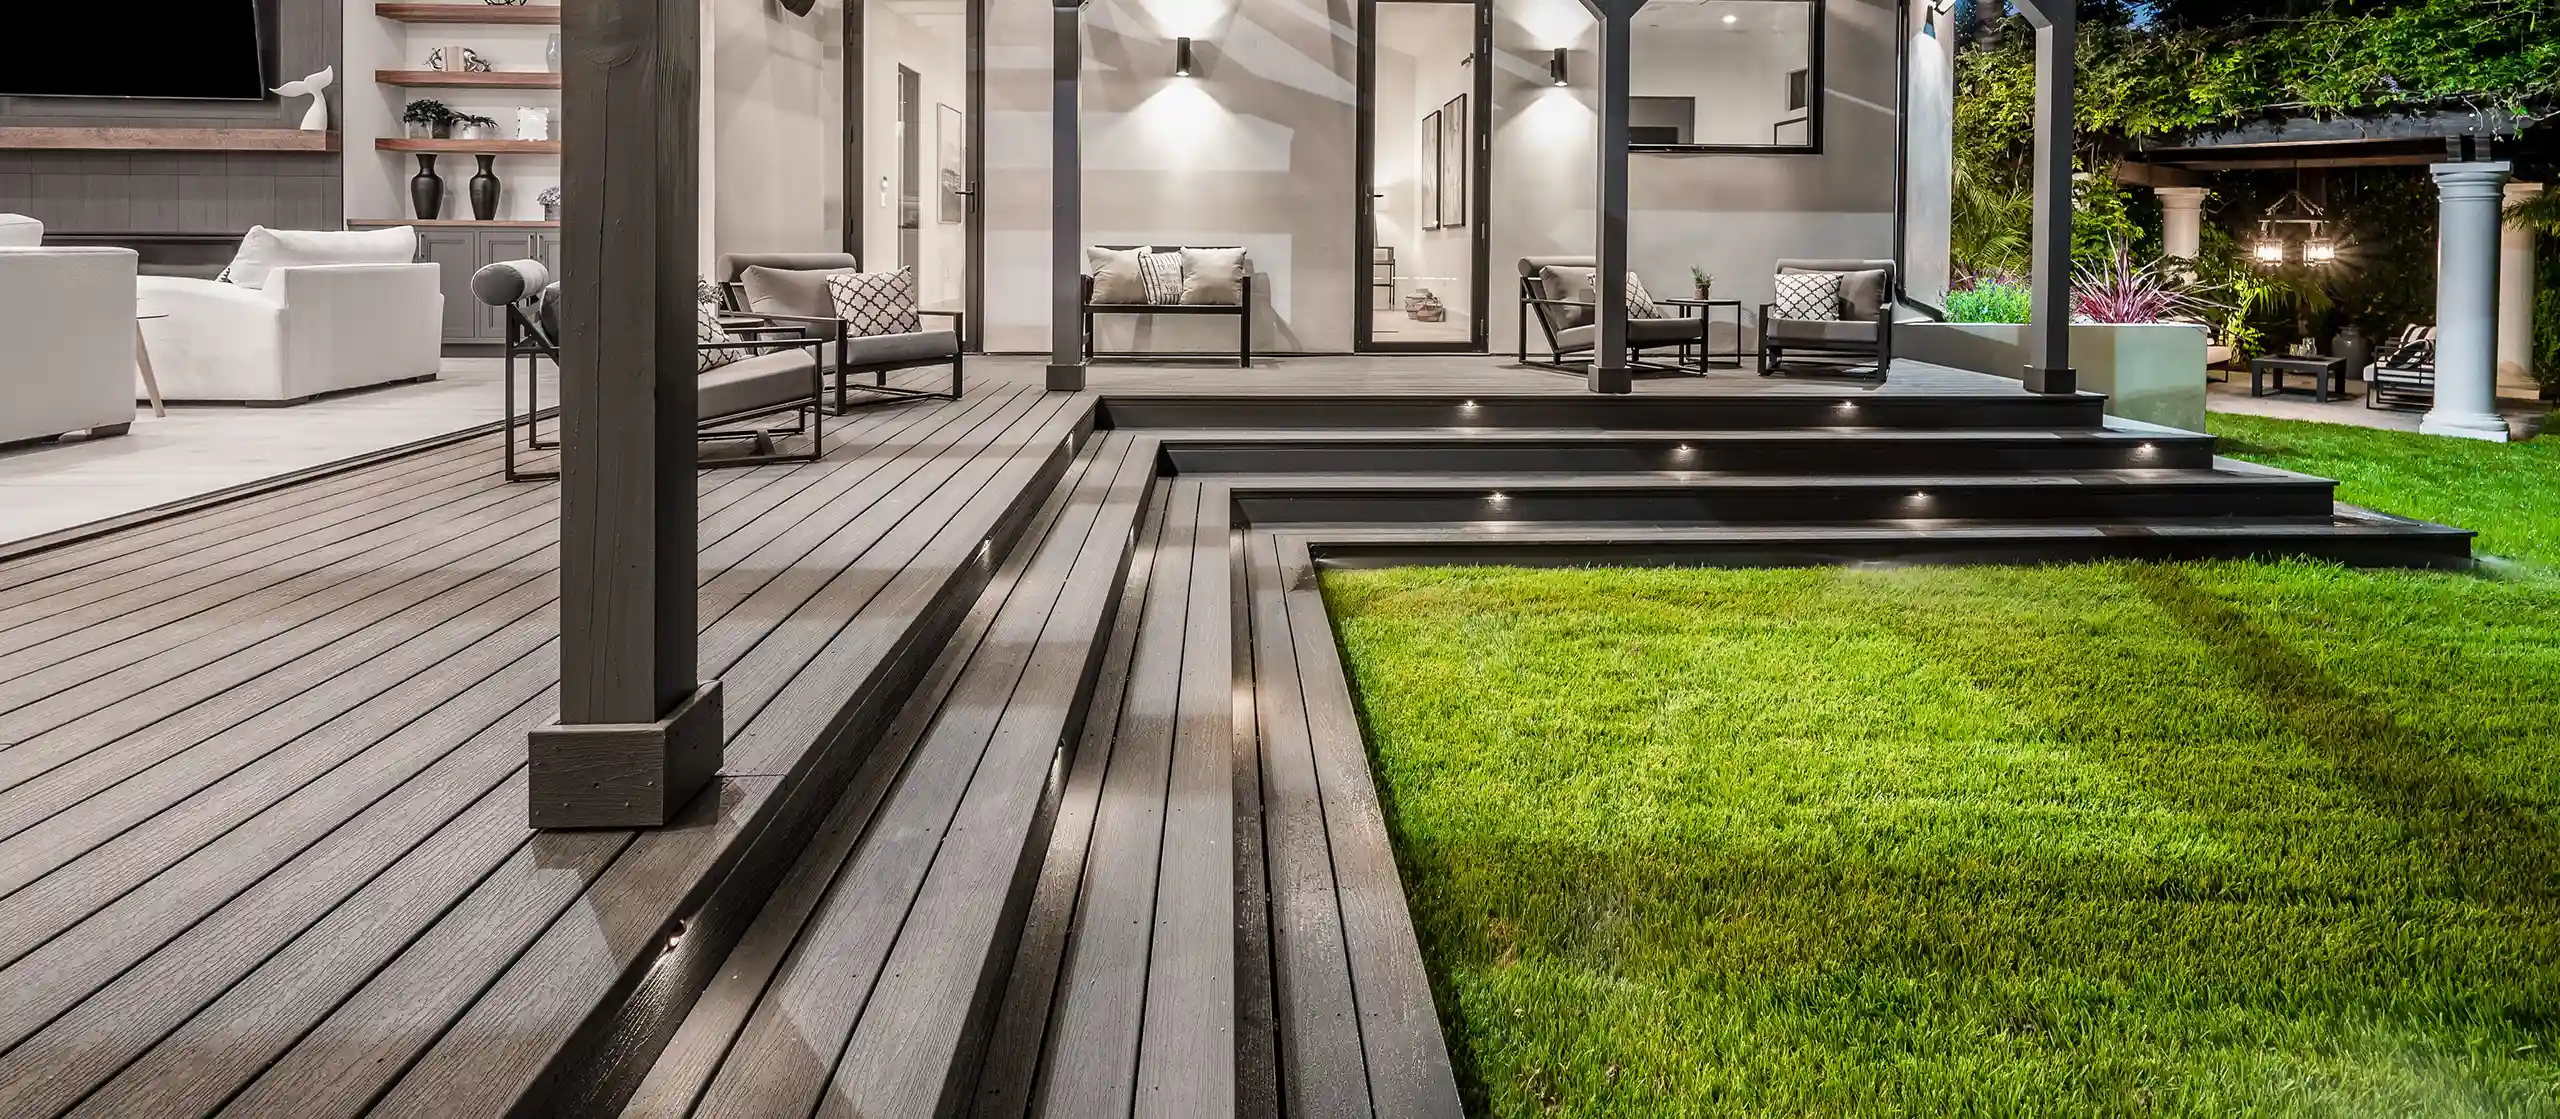
This design is so successful because it perfectly balances form and function. The warm, recessed lights embedded in the stair risers do more than just illuminate the steps for safety; they create strong horizontal lines that accentuate the deck’s modern, multi-level architecture. This technique, called ‘grazing,’ washes the gray wood steps in a soft glow, highlighting the texture and drawing the eye downward. The contrast between the warm white light and the cool gray of the wood and white exterior walls creates a welcoming, sophisticated ambiance without being visually noisy.
|
📋 Copy HEX 🔗 Share |
Here’s a pro tip for getting stair lighting right: the spacing is crucial. For wide steps like these (over 5 feet), placing a recessed light every 3-4 feet prevents dark spots and creates a balanced look. On standard 36-48 inch stairs, a single, centered fixture per step is usually sufficient. Most importantly, always select fixtures with a built-in downward shield or louver. This directs light onto the tread where you need it and prevents the bulb from shining directly into your eyes as you walk up—a common and very annoying mistake.
2. The Most Expensive Mistake: Starting Without a Plan
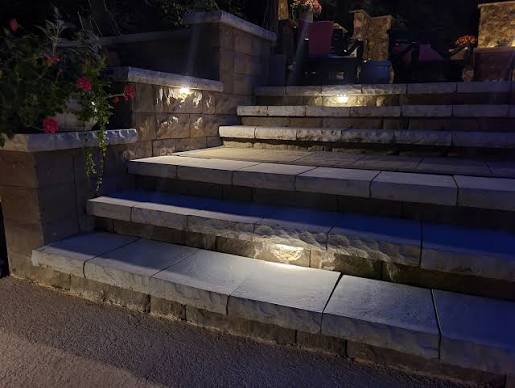
Let’s be honest, this dark, confusing image with a warning icon is exactly what a lighting project feels like when you have no plan. It’s a recipe for frustration. Jumping in and buying fixtures because you like them individually, without a cohesive map for your space, is the fastest way to a disjointed, ineffective, and expensive mess. You end up with awkward dark spots, mismatched light colors, and the painful realization that you need to call an electrician to move things around, doubling your cost. Don’t let your project end up here.
|
📋 Copy HEX 🔗 Share |
That will save you from this fate: a lighting plan. It doesn’t need to be a formal blueprint from an architect. We’re talking about a simple, hand-drawn sketch of your deck on a piece of paper. Mark your seating areas, pathways, stairs, and any features you want to highlight (like a planter or a cool tree). Then, decide what kind of light each area needs: a soft ambient glow, brighter task lighting for cooking, or dramatic accent lighting. This single piece of paper is the most valuable tool you will have.
3. Dine Under a Canopy of Pergola String Lights
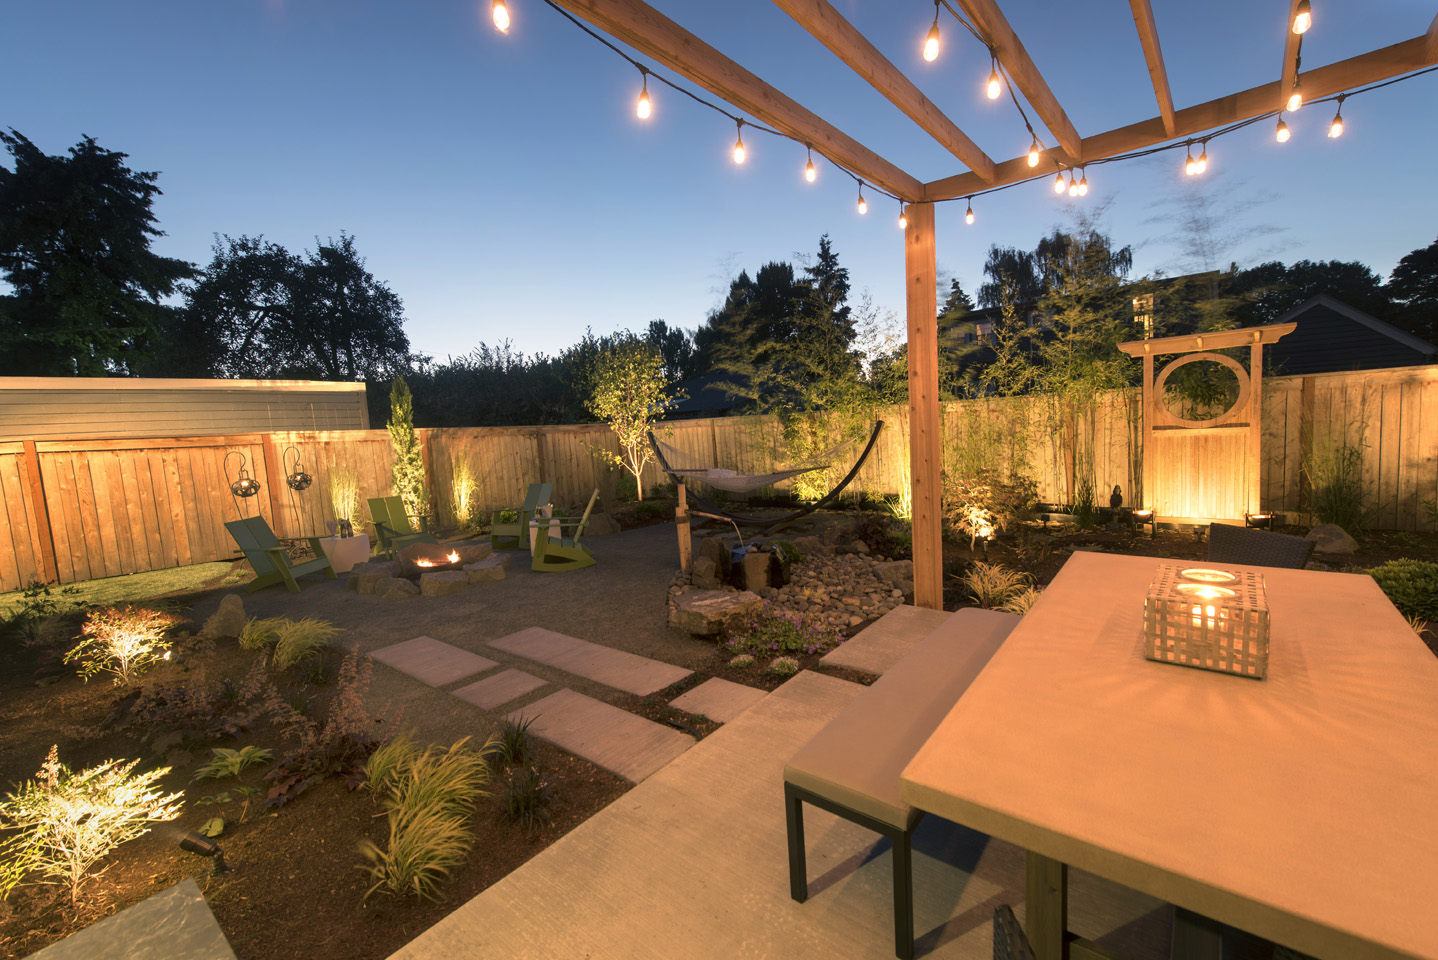
This inviting atmosphere is a perfect formula: 50% overhead ambient light + 30% architectural structure + 20% accent details. The string lights draped across the wooden pergola are the main event, casting a warm, uniform glow that defines the dining zone. The pergola itself and the heavy concrete table provide essential structure and texture. Finally, the small-scale landscape uplighting on the surrounding greenery and the candle lantern on the table add layers and depth. You could swap the concrete for wood, but you must maintain that ratio of broad overhead light to smaller, focused accents to keep the magic.
|
📋 Copy HEX 🔗 Share |
You can absolutely create this cozy dining spot for under $500. Instead of a full pergola, create a frame with four 4×4 wood posts set in heavy planters filled with concrete and soil. A 48-foot strand of heavy-duty string lights from Costco or Amazon will cost about $40. Look for a concrete-finish dining table from Target’s outdoor collection or Wayfair for around $350. Grab a simple wire candle lantern from IKEA for $20 and a few solar-powered spotlights from Amazon to tuck into your plants. Done.
4. Sleek Rooftop Kitchen with Under-Cabinet LED Strips
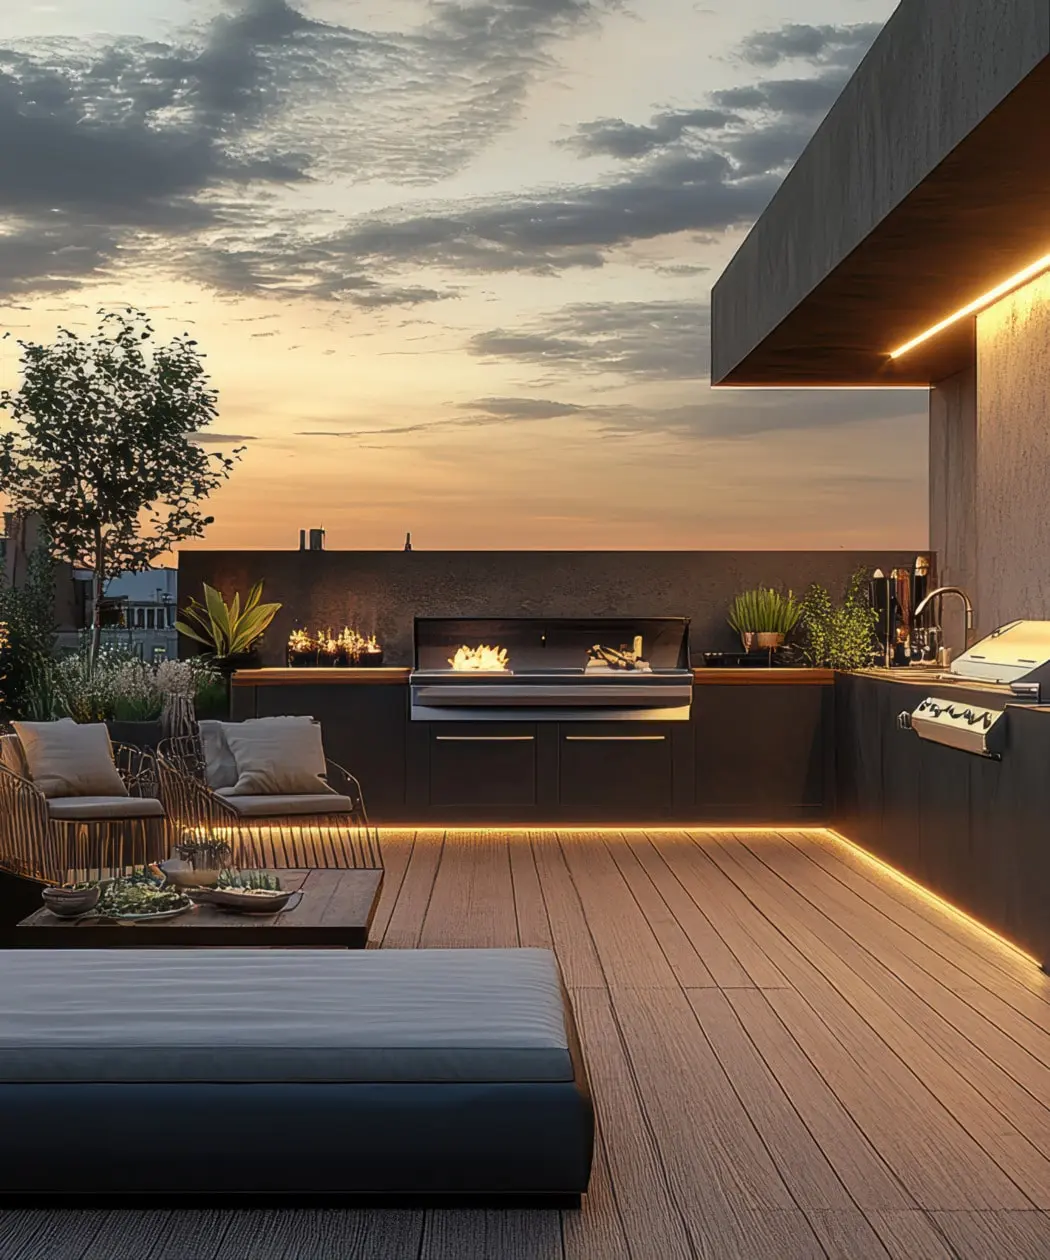
This linear lighting look is ideal for modern rooftop decks and patios ranging from 150 to 400 square feet. The magic of LED strip lighting is its ability to make a space feel wider and more expansive, as the continuous lines of light draw the eye horizontally. It works best when you have a significant built-in element to anchor it, like this outdoor kitchen island or a long, built-in bench. For a much smaller footprint, like a narrow balcony, this can be overkill. In that case, something simpler like the draped string lights in Idea #13 would be more appropriate.
|
📋 Copy HEX 🔗 Share |
Integrated LED lighting looks stunningly seamless, but be warned: repairs aren’t as simple as changing a lightbulb. If a section of the strip fails, you often have to replace the entire length, which can be tricky if it’s installed in a tight channel under a heavy countertop. Always invest in high-quality, outdoor-rated (IP67 or higher) LED strips from a reputable brand with a solid warranty. It’s a higher upfront cost that can save you a massive headache and expense down the road. Also, the channels need to be wiped clean of dust and spiderwebs a few times a year to maintain brightness.
5. Layer Multiple Light Sources for a Luxe Lounge Vibe
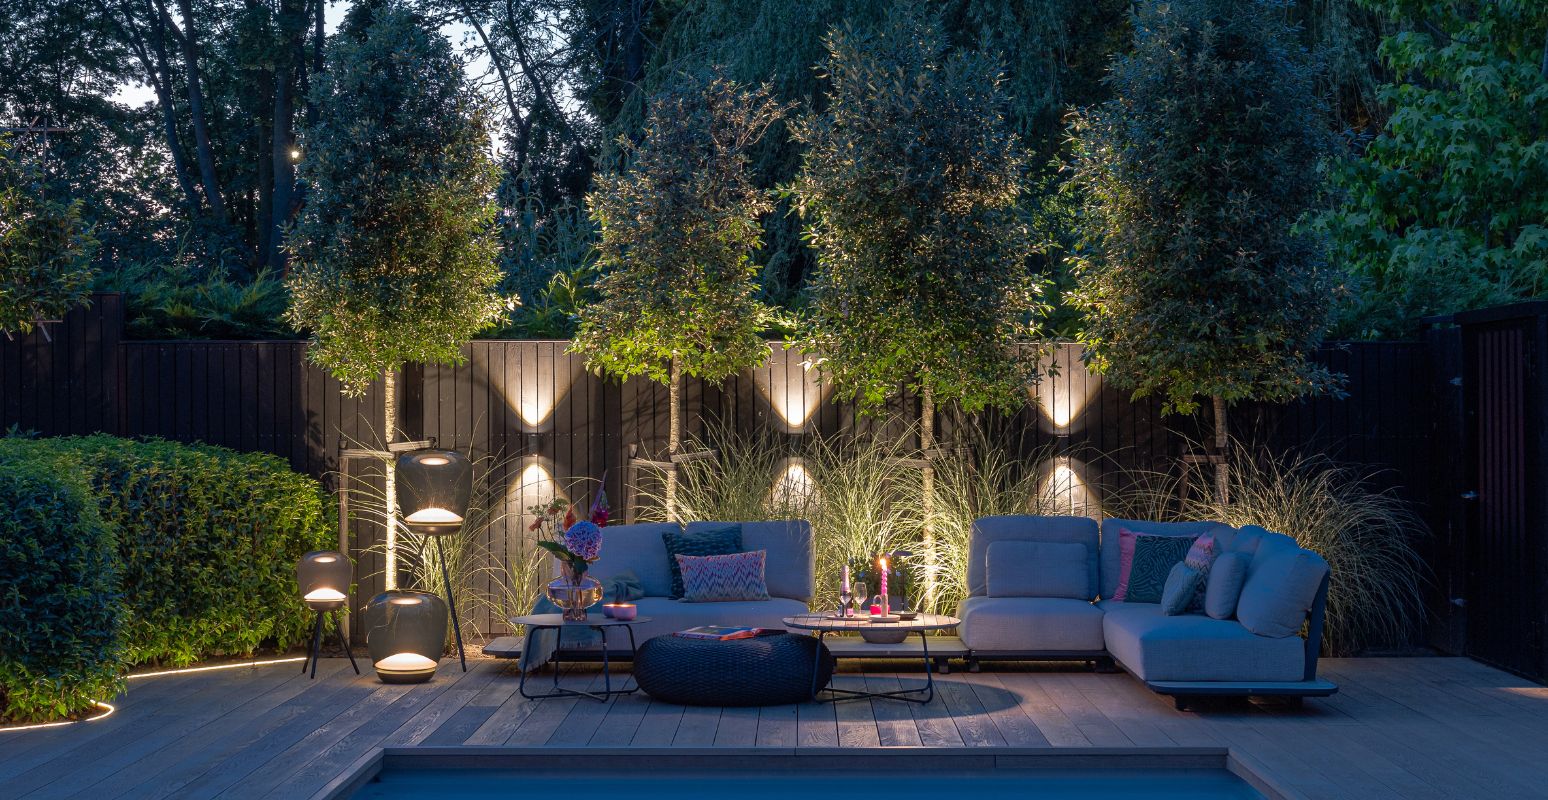
This deck feels so incredibly rich and inviting because it perfectly executes the ‘three layers of light’ design principle. First, the wall-mounted sconces on the dark slatted fence provide soft, general ambient light. Second, the portable floor lanterns and the uplights on the trees create accent lighting—these are the dramatic focal points that add depth and interest. Finally, the low-level strip light along the deck’s perimeter is a subtle form of path lighting for safety and definition. No single light source is trying to do all the work, which is the secret to a layered, high-end look.
|
📋 Copy HEX 🔗 Share |
Before you dive into recreating this layered look, run through this quick checklist:
- Map your power sources: Do you have enough strategically placed, weatherproof exterior outlets to power plug-in lanterns and uplights without running a tangle of extension cords?
- Assess your backdrop: The uplighting on the fence works because the fence is a beautiful feature. Lighting an old, tired fence will only highlight its flaws. Make sure your backdrop is ready for its close-up.
- Measure for furniture: A large sectional sofa needs breathing room. Ensure you have at least a 10′ x 12′ clear deck area to avoid a cramped, cluttered feeling.
- Plan your wiring: For hardwired elements like sconces and in-deck lights, you’ll need to consult an electrician and plan the wiring route before any construction begins.
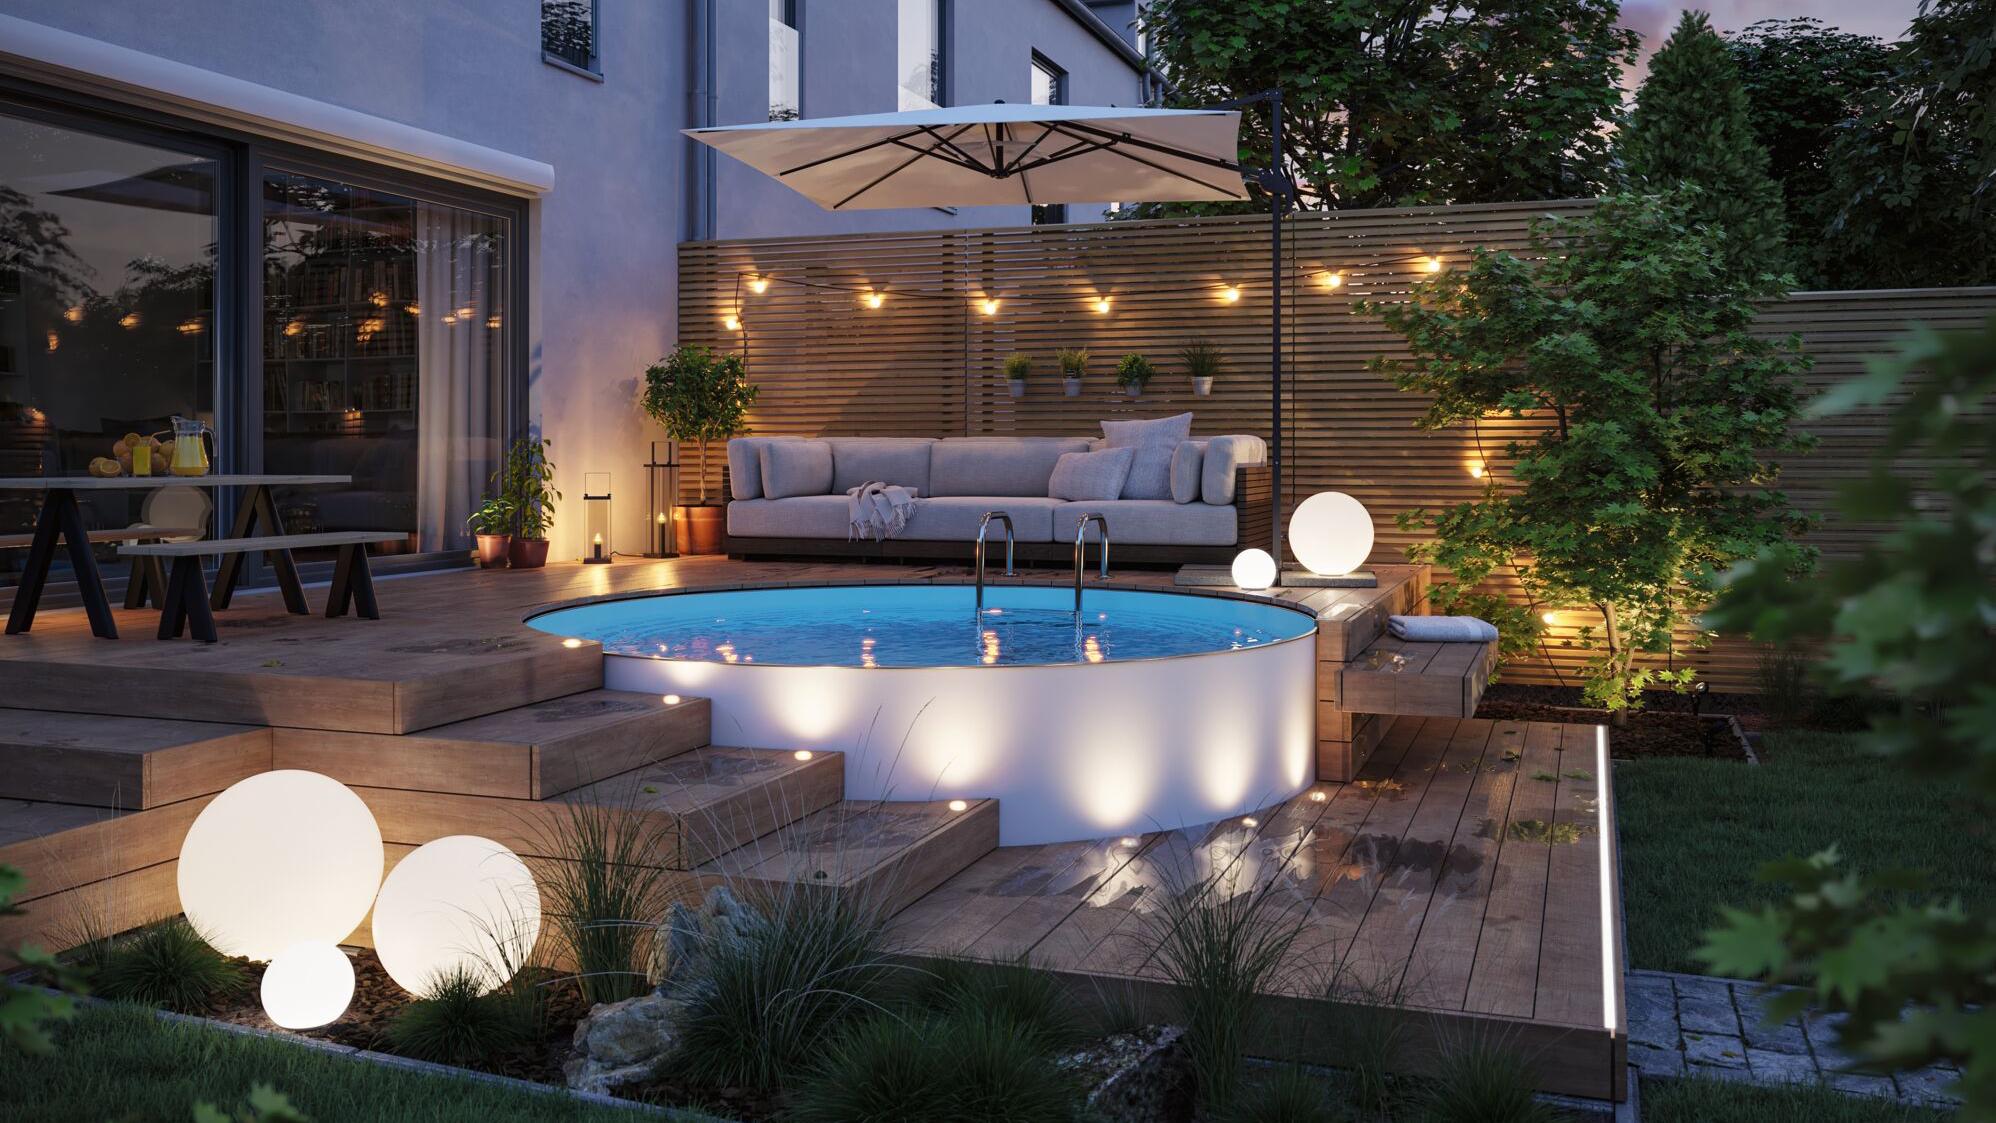
6. Illuminate a Hot Tub with Integrated Base Lighting
Getting this relaxing hot tub and deck look involves layering several lighting types. Here’s a potential cost breakdown for a DIY-savvy homeowner or with professional help:
|
📋 Copy HEX 🔗 Share |
- Main Furniture (Hot Tub): $4,000 – $12,000
- Lighting (LED strip, step lights, string lights, spheres): $500 – $1,500
- Decking & Structure (Wood, screws, footings): $3,000 – $8,000
- Decor (sofa, pillows): $800 – $2,500
- TOTAL: $8,300 – $24,000
Budget alternative: Find a pre-owned hot tub on Facebook Marketplace ($1,000-$3,000). Use more solar-powered string lights and fewer hardwired fixtures to save on electrical work.
A quick reality check on deck-level hot tubs: access for maintenance is key. While building a deck right up to the edge of the tub creates a beautiful, seamless look, you must plan for a removable panel or hatch. Hot tubs have pumps, heaters, and electronics that will eventually need service or replacement. If a technician can’t easily access the service panel (usually on one of the sides), they may have to cut into your beautiful deck to do the repair, which is a costly and heartbreaking scenario. Plan for access from the beginning!
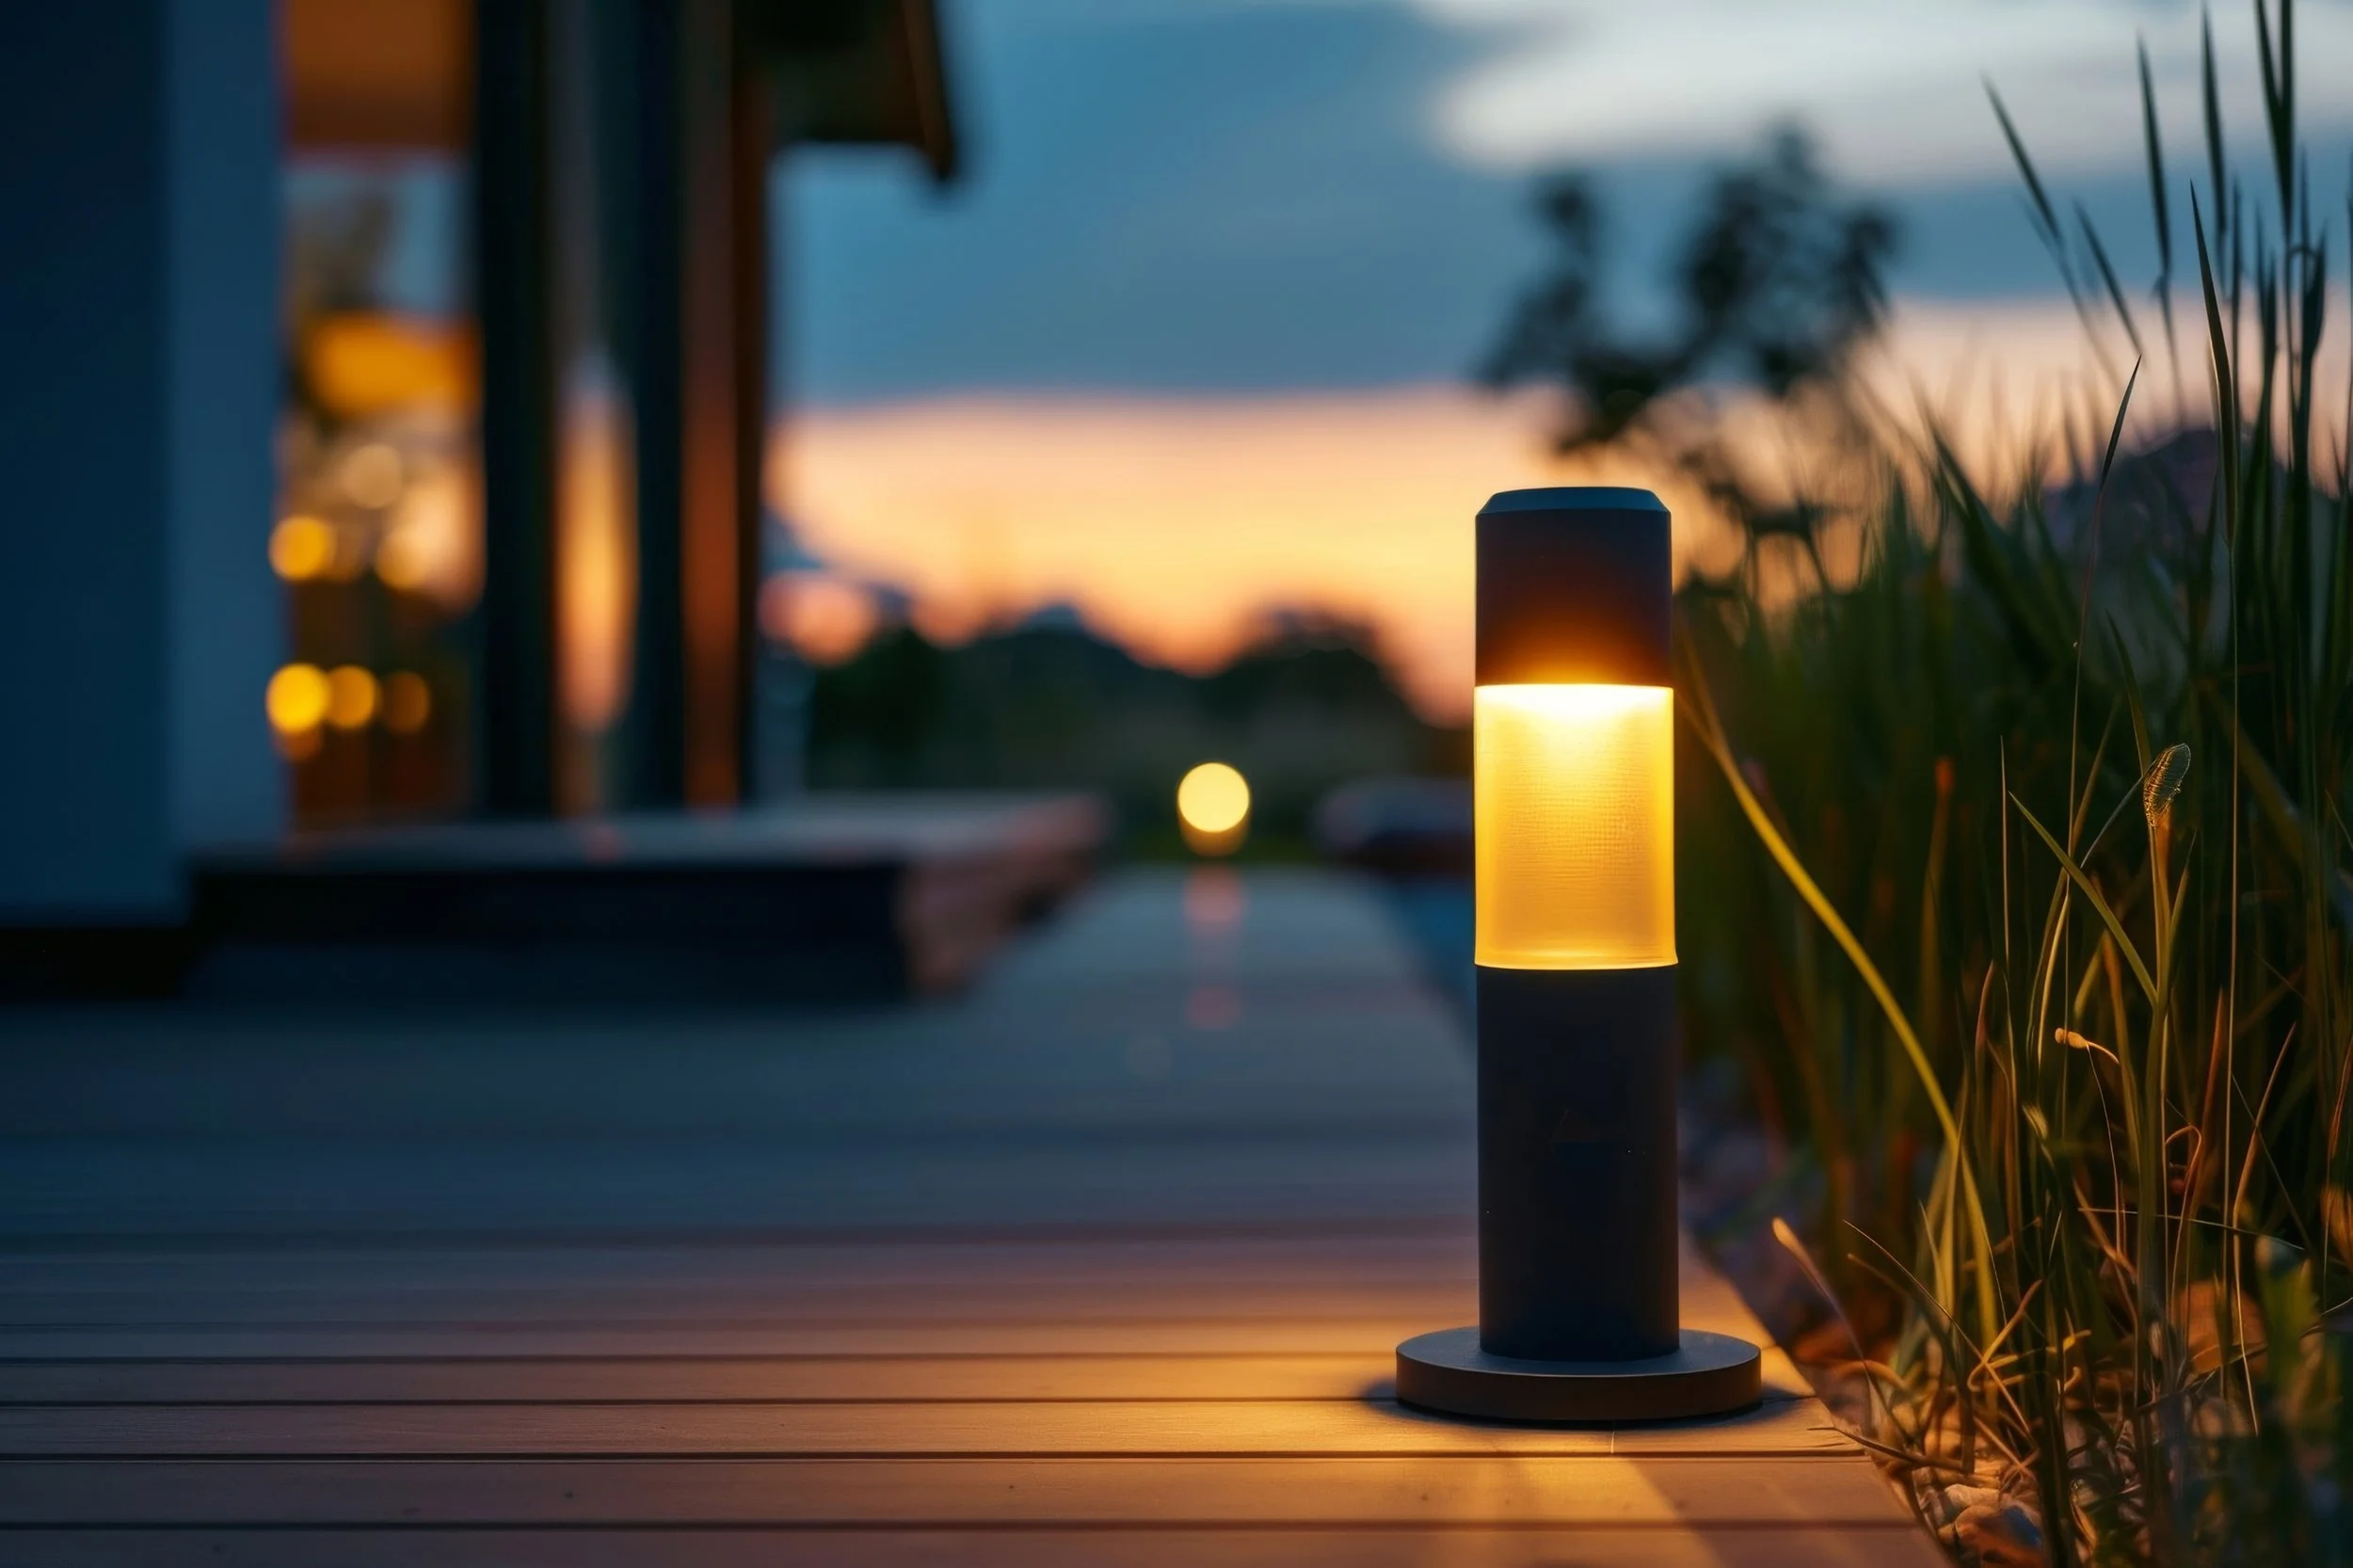
7. Add Modern Flair with Cylindrical Bollard Lights
What elevates this scene from a simple deck to a contemporary landscape is the bollard light itself. Without it, you just have a dark wood surface next to some grass. This single fixture acts as a piece of sculpture, providing functional path lighting while also making a strong style statement. Its clean, cylindrical shape and warm, amber glow are quintessentially modern. It proves that you don’t always need a dozen fixtures; sometimes one perfectly chosen, high-impact light is all it takes to define an entire space and set a serene, inviting mood.
|
📋 Copy HEX 🔗 Share |
Bollard lights are having a major moment right now, and it’s easy to see why. As our design sensibilities move toward cleaner lines and less clutter, these minimalist fixtures fit perfectly. They’re a sophisticated alternative to traditional, fussy path lights. This trend is also driven by advances in solar technology; many high-quality solar bollards are now available that offer the same warm glow and reliability as their hardwired counterparts, making them an easy weekend project. This isn’t a fleeting trend; it’s a new classic for modern landscape design.
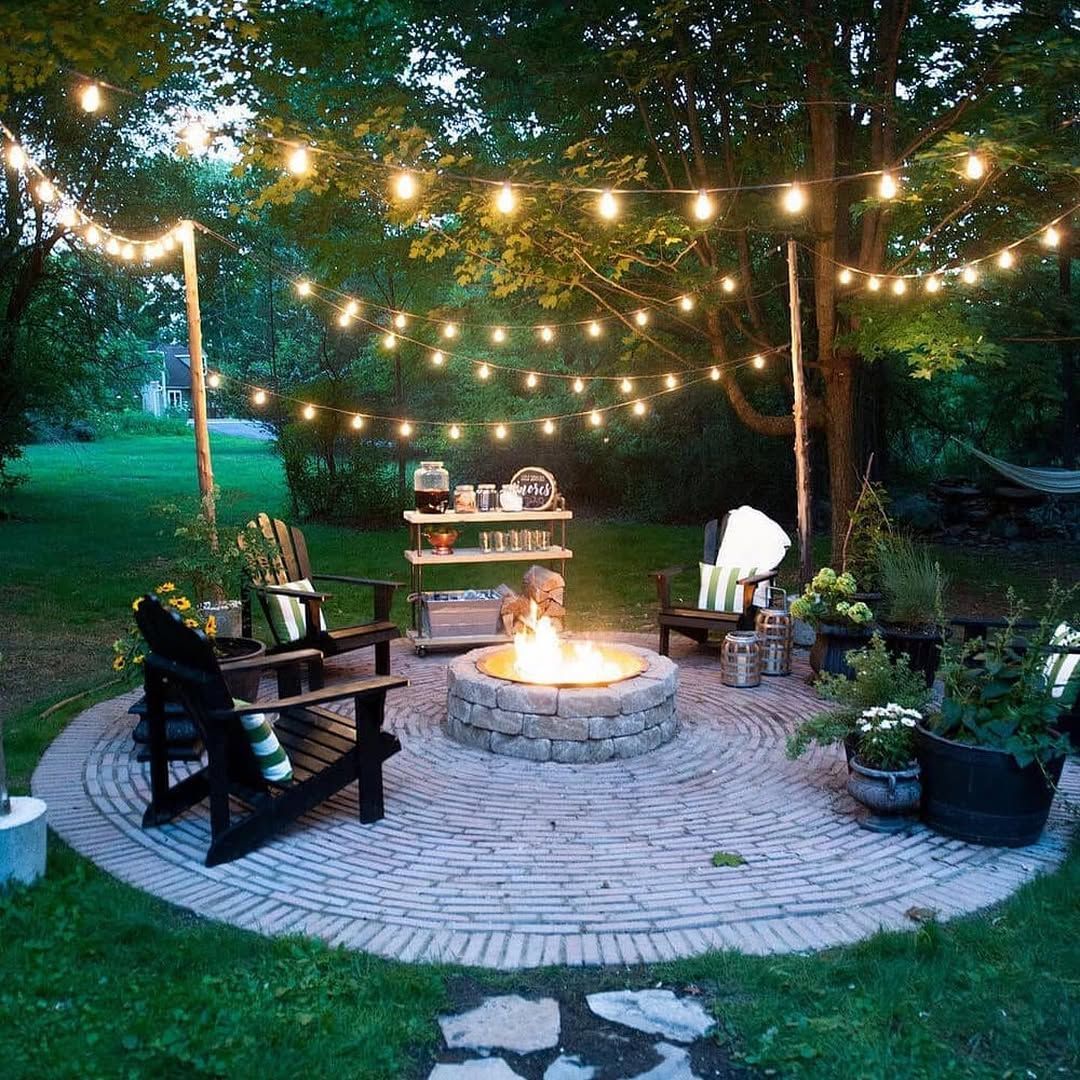
8. Circle Up Under String Lights and a Stone Fire Pit
You can create a similar overhead string light canopy with a few posts. Here’s how:
|
📋 Copy HEX 🔗 Share |
- Time: 3-4 hours
- Materials (est. $150): Four 4x4x10′ wood posts, four bags of concrete mix, four large planters or post-hole diggers, screw hooks, and commercial-grade string lights.
- Step 1: Determine your post locations to form a square or rectangle over your seating area.
- Step 2: Either dig post holes 2-3 feet deep or place posts in large planters and fill with concrete to secure them. Let it cure for 24 hours.
- Step 3: Install large screw hooks near the top of each post, facing inward.
- Step 4: Starting at the post nearest your power source, drape the string lights in a zig-zag or ‘X’ pattern across the space, hooking them as you go.
The formula for this timeless look is 60% cozy ambiance, 30% rustic texture, and 10% comfortable seating. The overhead string lights and the flames from the fire pit are doing the heavy lifting for ambiance. The texture comes from the circular brick pavers and rough-hewn stone of the fire pit itself. The dark Adirondack chairs are the final piece, inviting you to sit down and stay a while. You could swap the chairs for a curved bench, but the combination of firelight, overhead glow, and rough textures is non-negotiable.
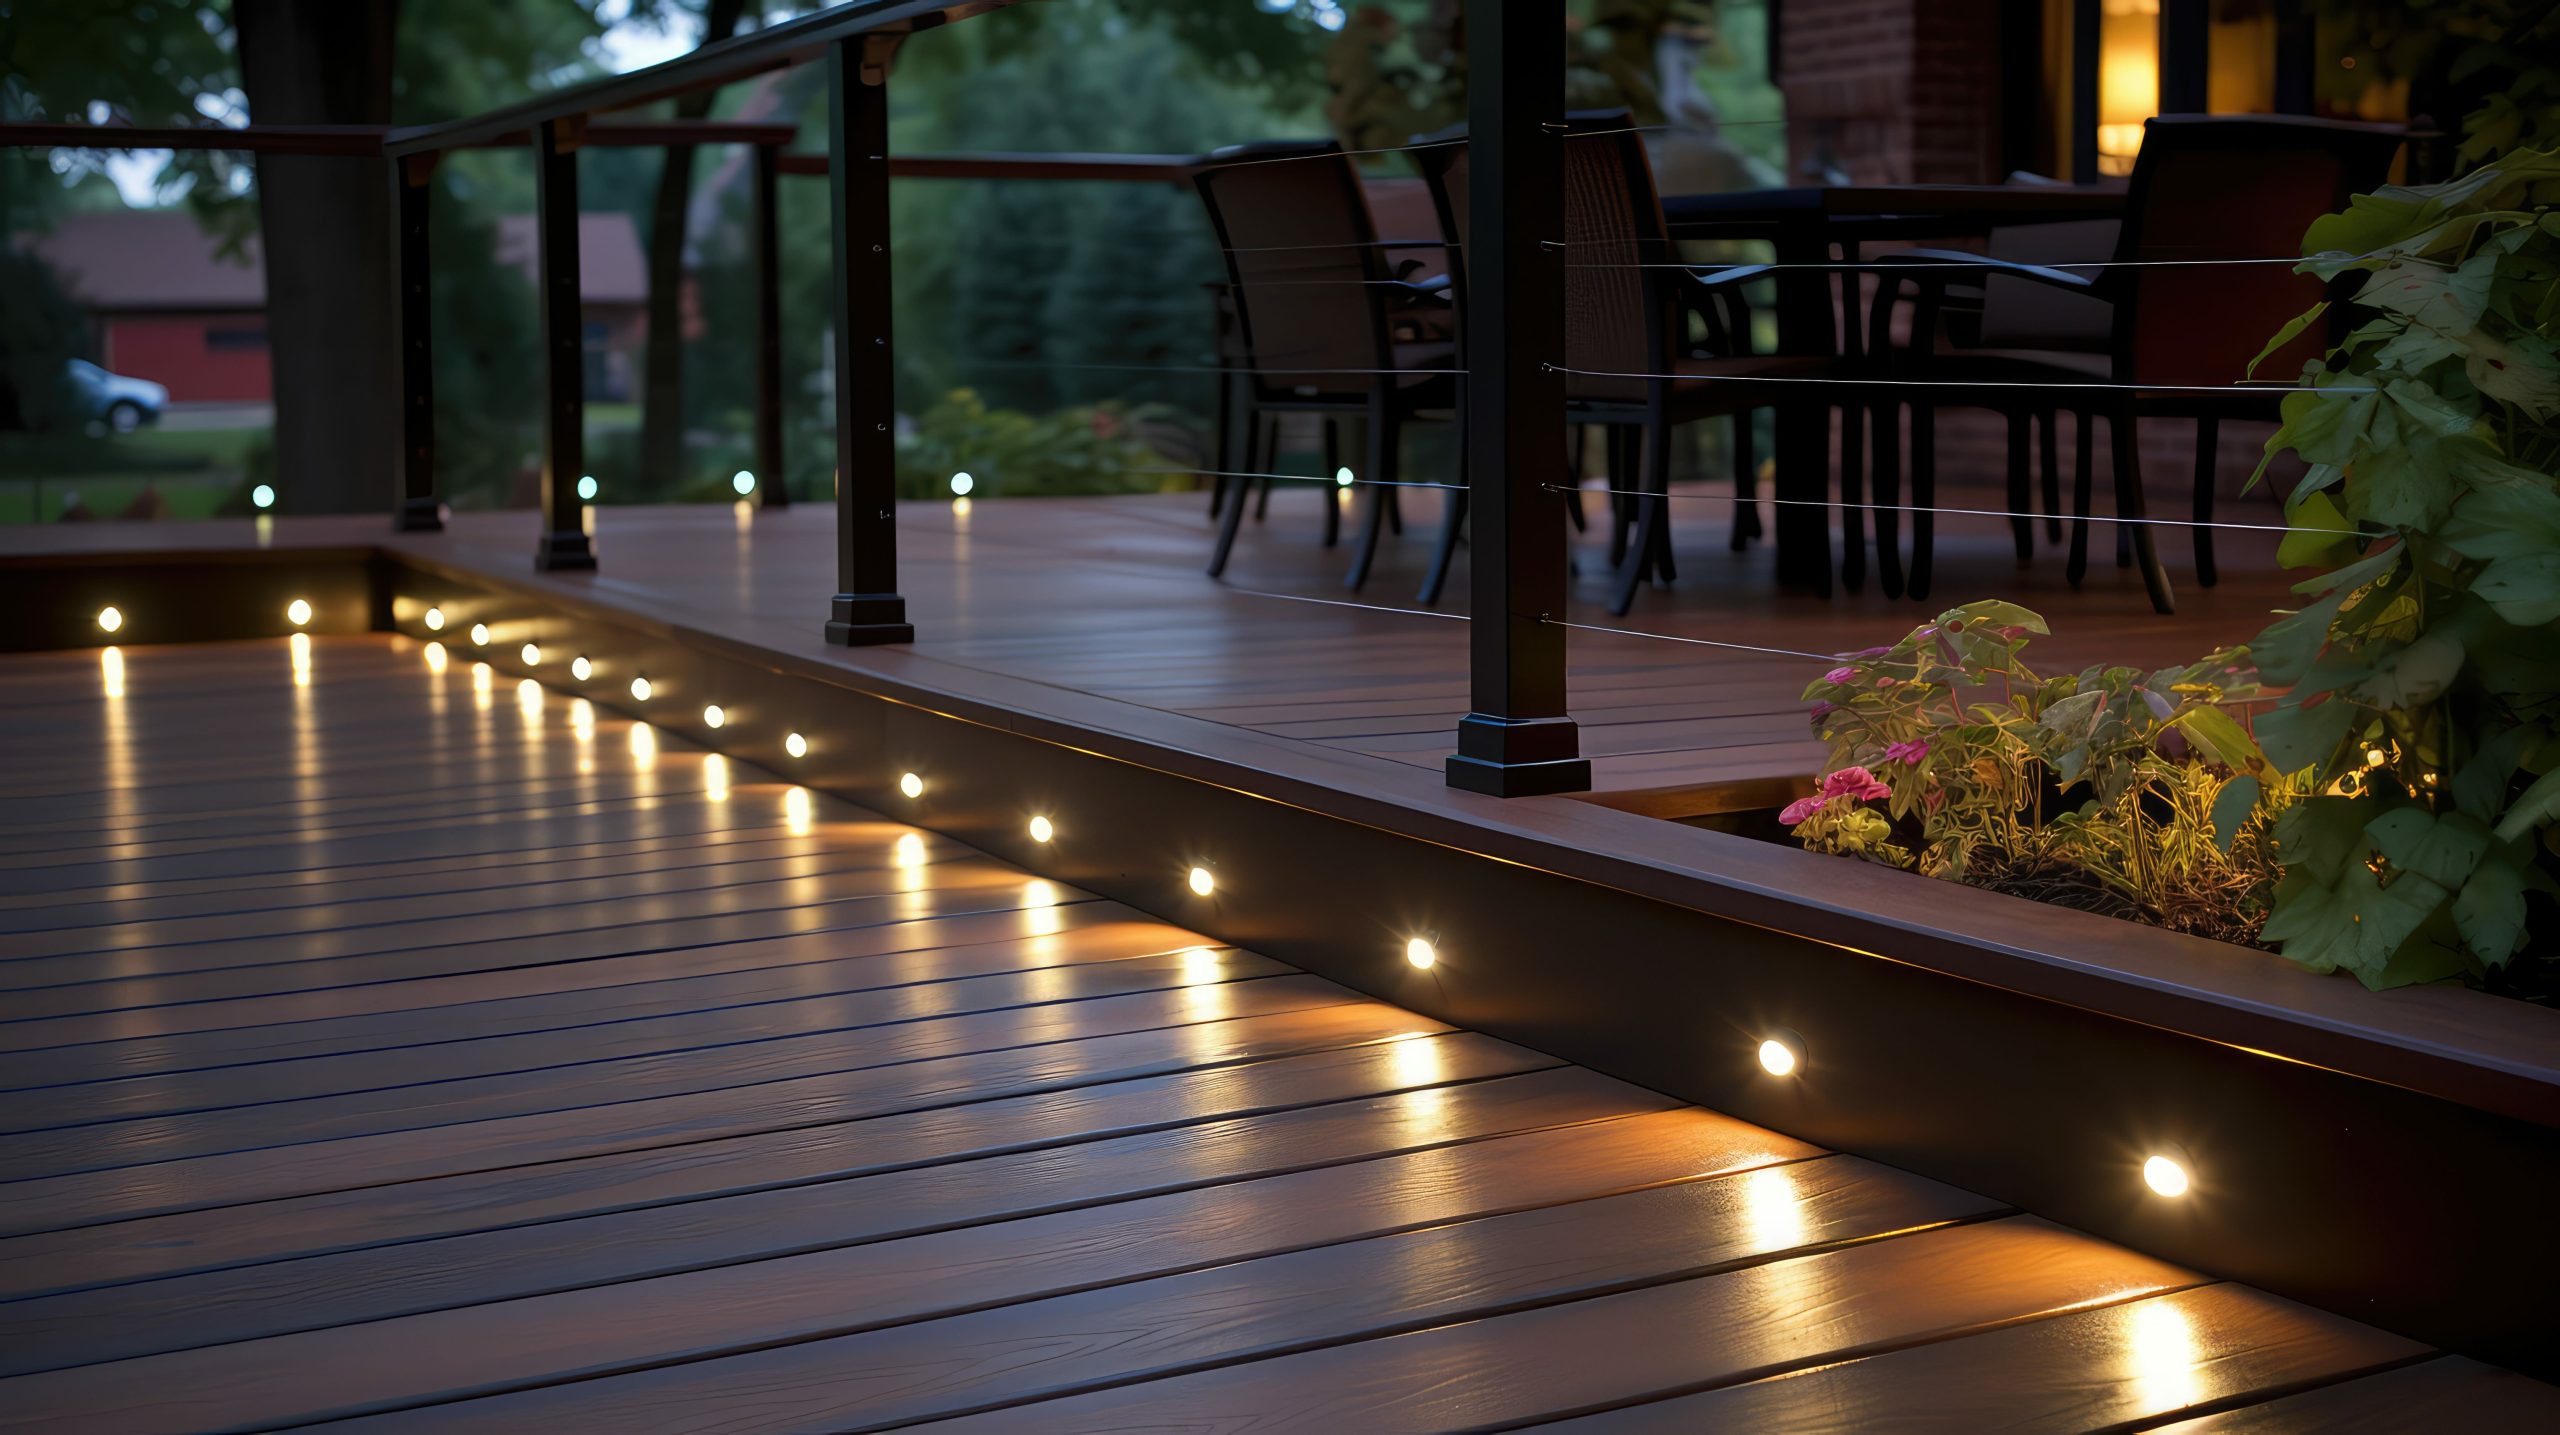
9. Integrate Warmth with Recessed Deck Step Lighting
When installing step lights, color temperature is everything. To get this warm, inviting glow that makes the wood look so rich, you must use bulbs or integrated fixtures in the 2700K to 3000K range. Anything higher (like 4000K+) will start to look blue-white and sterile, giving your cozy backyard the unfortunate vibe of a hospital hallway or a commercial parking garage. Read the box carefully! Most LED packaging now clearly states the color temperature. For wood decks, warm white is almost always the right choice. It complements the natural tones of the wood beautifully.
|
📋 Copy HEX 🔗 Share |
This lighting scheme works because it emphasizes the deck’s architecture without being obvious. The lights are integrated directly into the structure—the stair risers and post bases—so they feel like part of the original design, not an afterthought. This creates a clean, custom look. Furthermore, by lighting the vertical surfaces (the risers), you get a soft, indirect light that reflects off the horizontal surfaces (the treads), providing safe passage while keeping the light source itself subtle and out of sight. Compare this sophisticated effect to the more festive feel of the draped string lights in Idea #19.
10. Highlight Modern Lines with Amber Step Lights
The single element making this design feel so cohesive and high-end is the repetition of horizontal lines. Look closely: you have the horizontal slats of the wood railing, the horizontal lines of the deck floorboards, and finally, the horizontal placement of the recessed lights in the stair risers. This intentional repetition creates a powerful sense of rhythm and order. It turns a simple staircase into a deliberate architectural feature. Without the lights reinforcing that horizontal theme, the whole composition would feel much less impactful.
|
📋 Copy HEX 🔗 Share |
Recessed stair lighting is one of the most versatile ideas, working for almost any deck size, from a small three-step transition between patio levels to a grand, multi-story staircase. The key is scaling the fixture size and quantity to the stair width. For narrow stairs (under 4 feet), a single, small fixture per step is plenty. For wider stairs, as seen here, you might use a wider rectangular fixture or two smaller ones per step to ensure even illumination. The effect is just as powerful on a small deck as it is on a large one like Idea #1.
11. Hang a Row of Sleek, Minimalist Outdoor Pendants
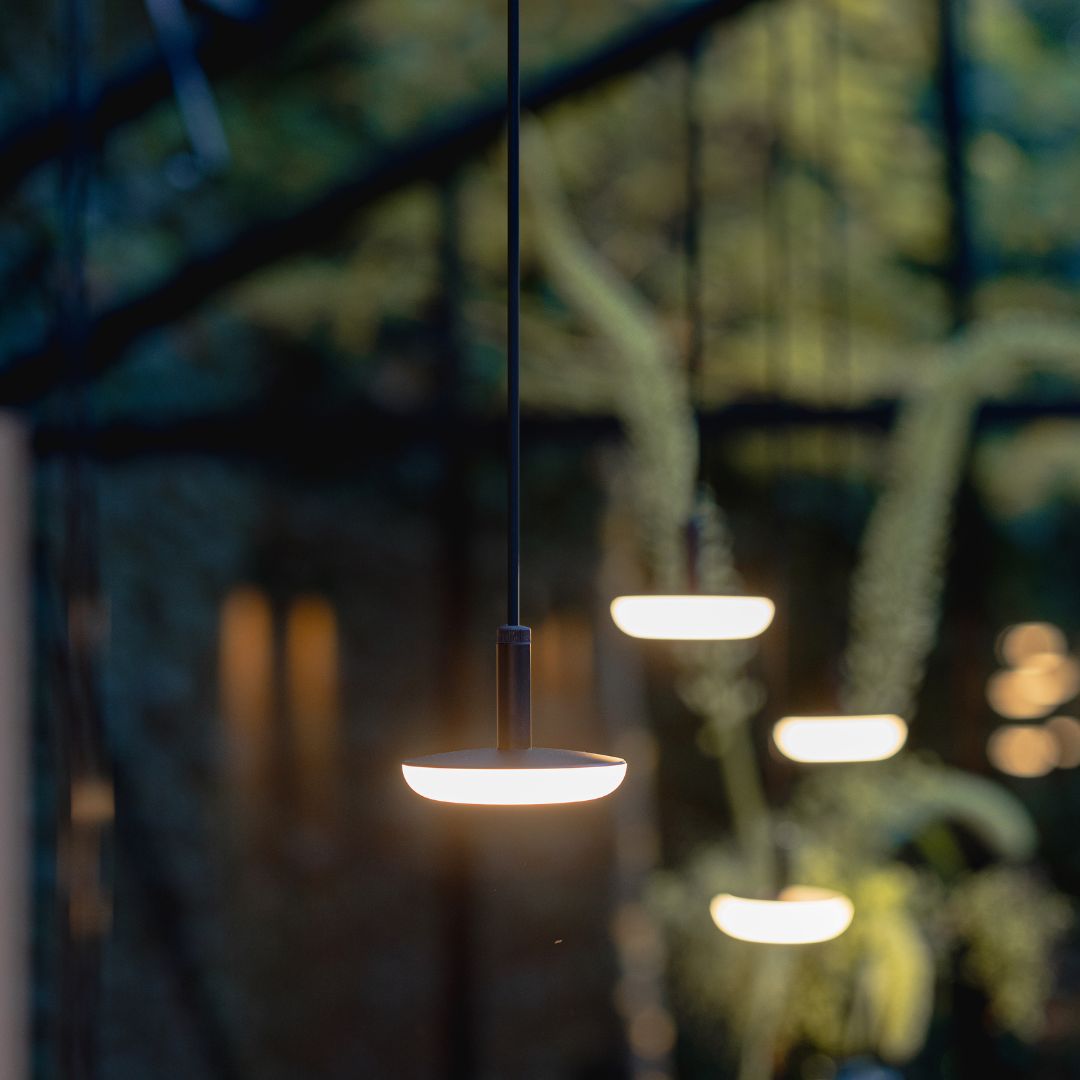
Outdoor pendant lights like these are stunning, but they are not a great choice for every climate. If you live in an area with high winds, hanging fixtures can become a real problem. They can swing, hit each other or the house, and potentially break. Before you fall in love with this look, be honest about your local weather. If strong winds are a regular occurrence, you might be better off with fixed, surface-mounted options like the gooseneck sconces in Idea #17 or recessed ceiling lights like those in Idea #25 to get a similar downward-focused light without the weather-related stress.
|
📋 Copy HEX 🔗 Share |
The power of this image comes from two classic design principles: repetition and negative space. The simple act of hanging three identical pendants in a row creates a pleasing rhythm and a sense of intentionality. One pendant would be a light; three in a row is a ‘statement.’ The design also makes brilliant use of negative space. The dark, blurred background allows the sleek black stems and warm, glowing discs of the lights to stand out as the undisputed focal point. There are no other distractions, which gives the composition a serene and atmospheric quality.
12. Create a Modern Vibe with Multi-Colored Pergola LEDs
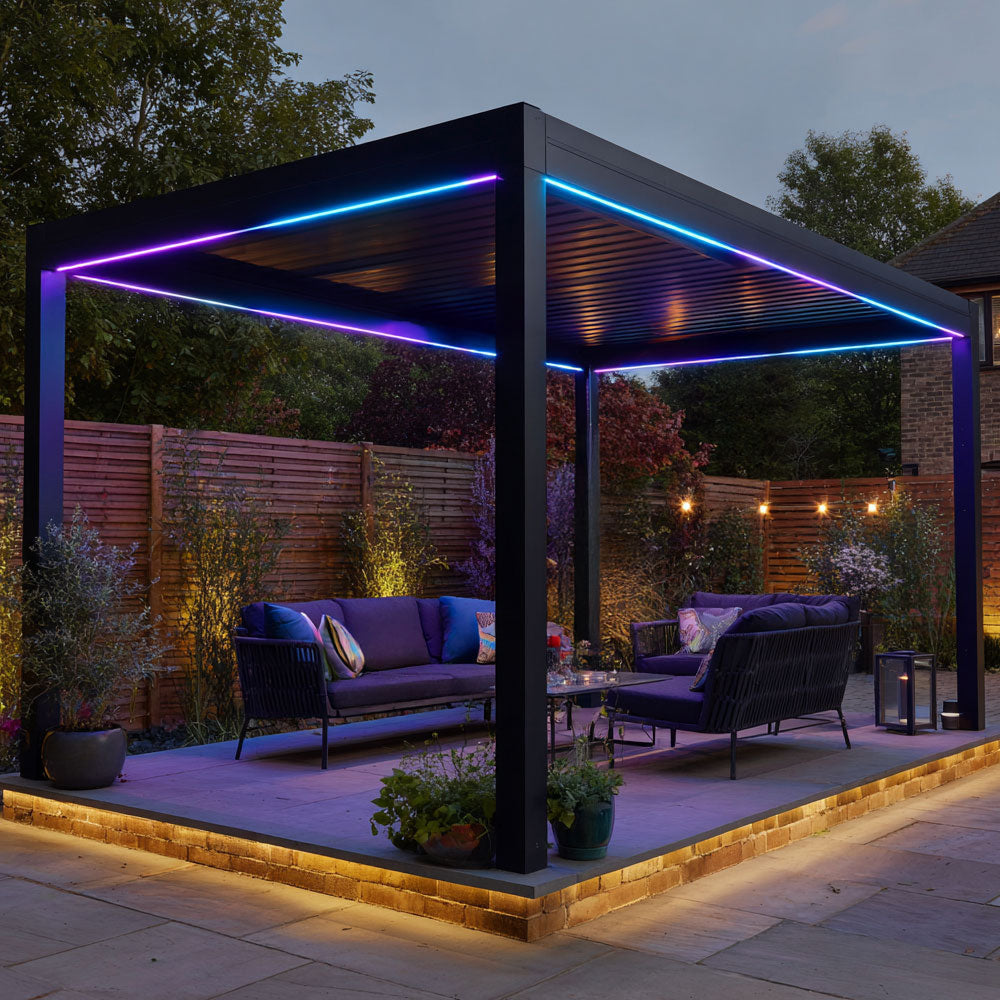
This vibrant, modern look is a calculated mix: 40% colorful accent lighting + 40% neutral base + 20% warm ground lighting. The purple and blue LED strips integrated into the dark pergola provide the ‘wow’ factor and set the party mood. The dark wicker sofas with navy cushions and the charcoal pergola frame provide a sophisticated, neutral foundation that keeps the color from feeling cheap. Finally, the warm, amber-toned strip lighting along the patio’s base adds a crucial layer of warmth and visual balance, preventing the cool-toned LEDs from feeling too cold or clinical.
|
📋 Copy HEX 🔗 Share |
Color-changing LED strip lights are incredibly fun, but they come with a few maintenance points. First, the remote controls or smartphone apps used to control them can be finicky. Keep the remote in a designated waterproof box or be prepared for app updates and connectivity issues. Second, the plastic or silicone casing on the strips can yellow or become brittle over time with sun exposure, even if they are UV-rated. To maximize their lifespan, it’s best to install them in a channel or position them where they are shielded from direct, harsh sunlight for most of the day.
13. Add a Cozy Touch with a Hanging Egg Chair and String Lights
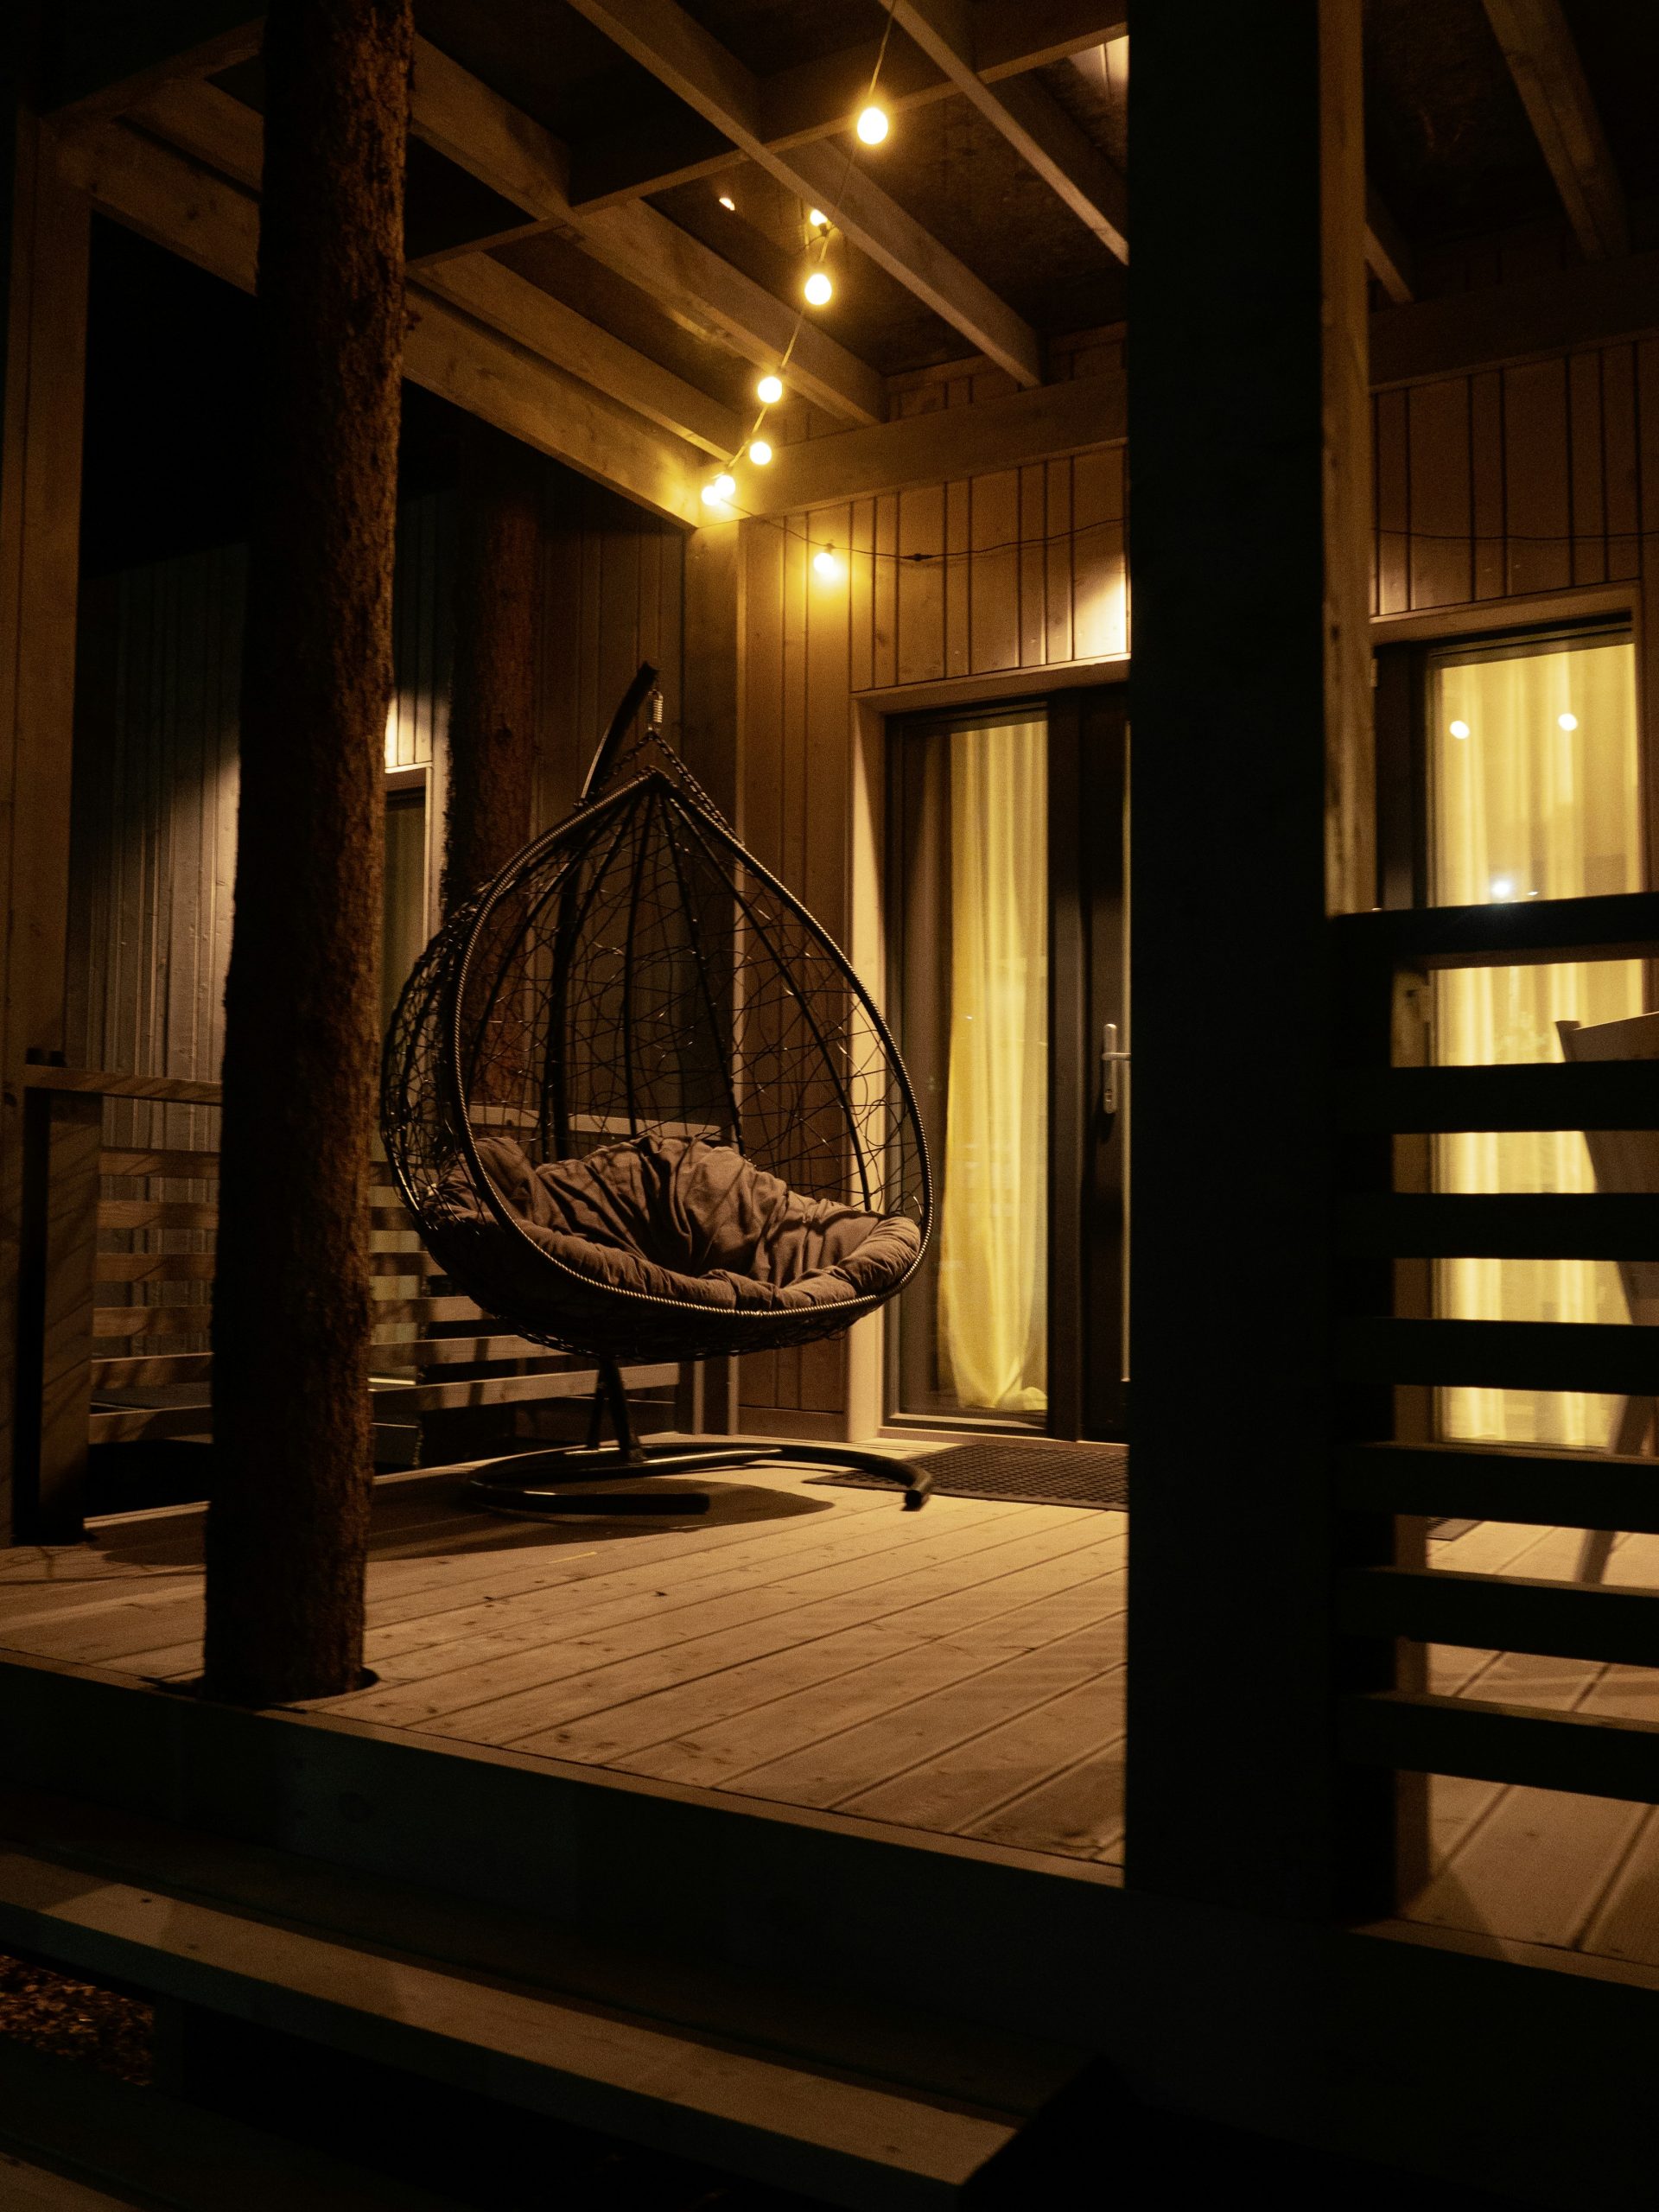
This cozy corner doesn’t have to be expensive. The key elements are all accessible. You can find a similar hanging egg chair at Walmart or on Amazon for $250-$400. A 25-foot string of G40 globe bulbs is less than $20 online. If you don’t have a covered porch, you can buy a freestanding metal stand for the chair. The vertical wood slat wall can be mimicked with pre-made decorative panels from a home improvement store. The entire vibe is achievable for a weekend’s worth of work and a budget of around $500, proving coziness is not about price.
|
📋 Copy HEX 🔗 Share |
The single element that makes this space feel like a true retreat is the string lights. Take them away, and you have a chair on a deck. Add them, and you have a room. The warm glow from the bulbs instantly creates a ceiling, defining the space and making it feel intimate and protected. It’s the psychological effect of creating a canopy of light that transforms a simple seating area into a destination. It signals to your brain that this is a place for relaxation, separate from the rest of the open yard.
14. Create an Intimate Backdrop with Fence-Mounted String Lights
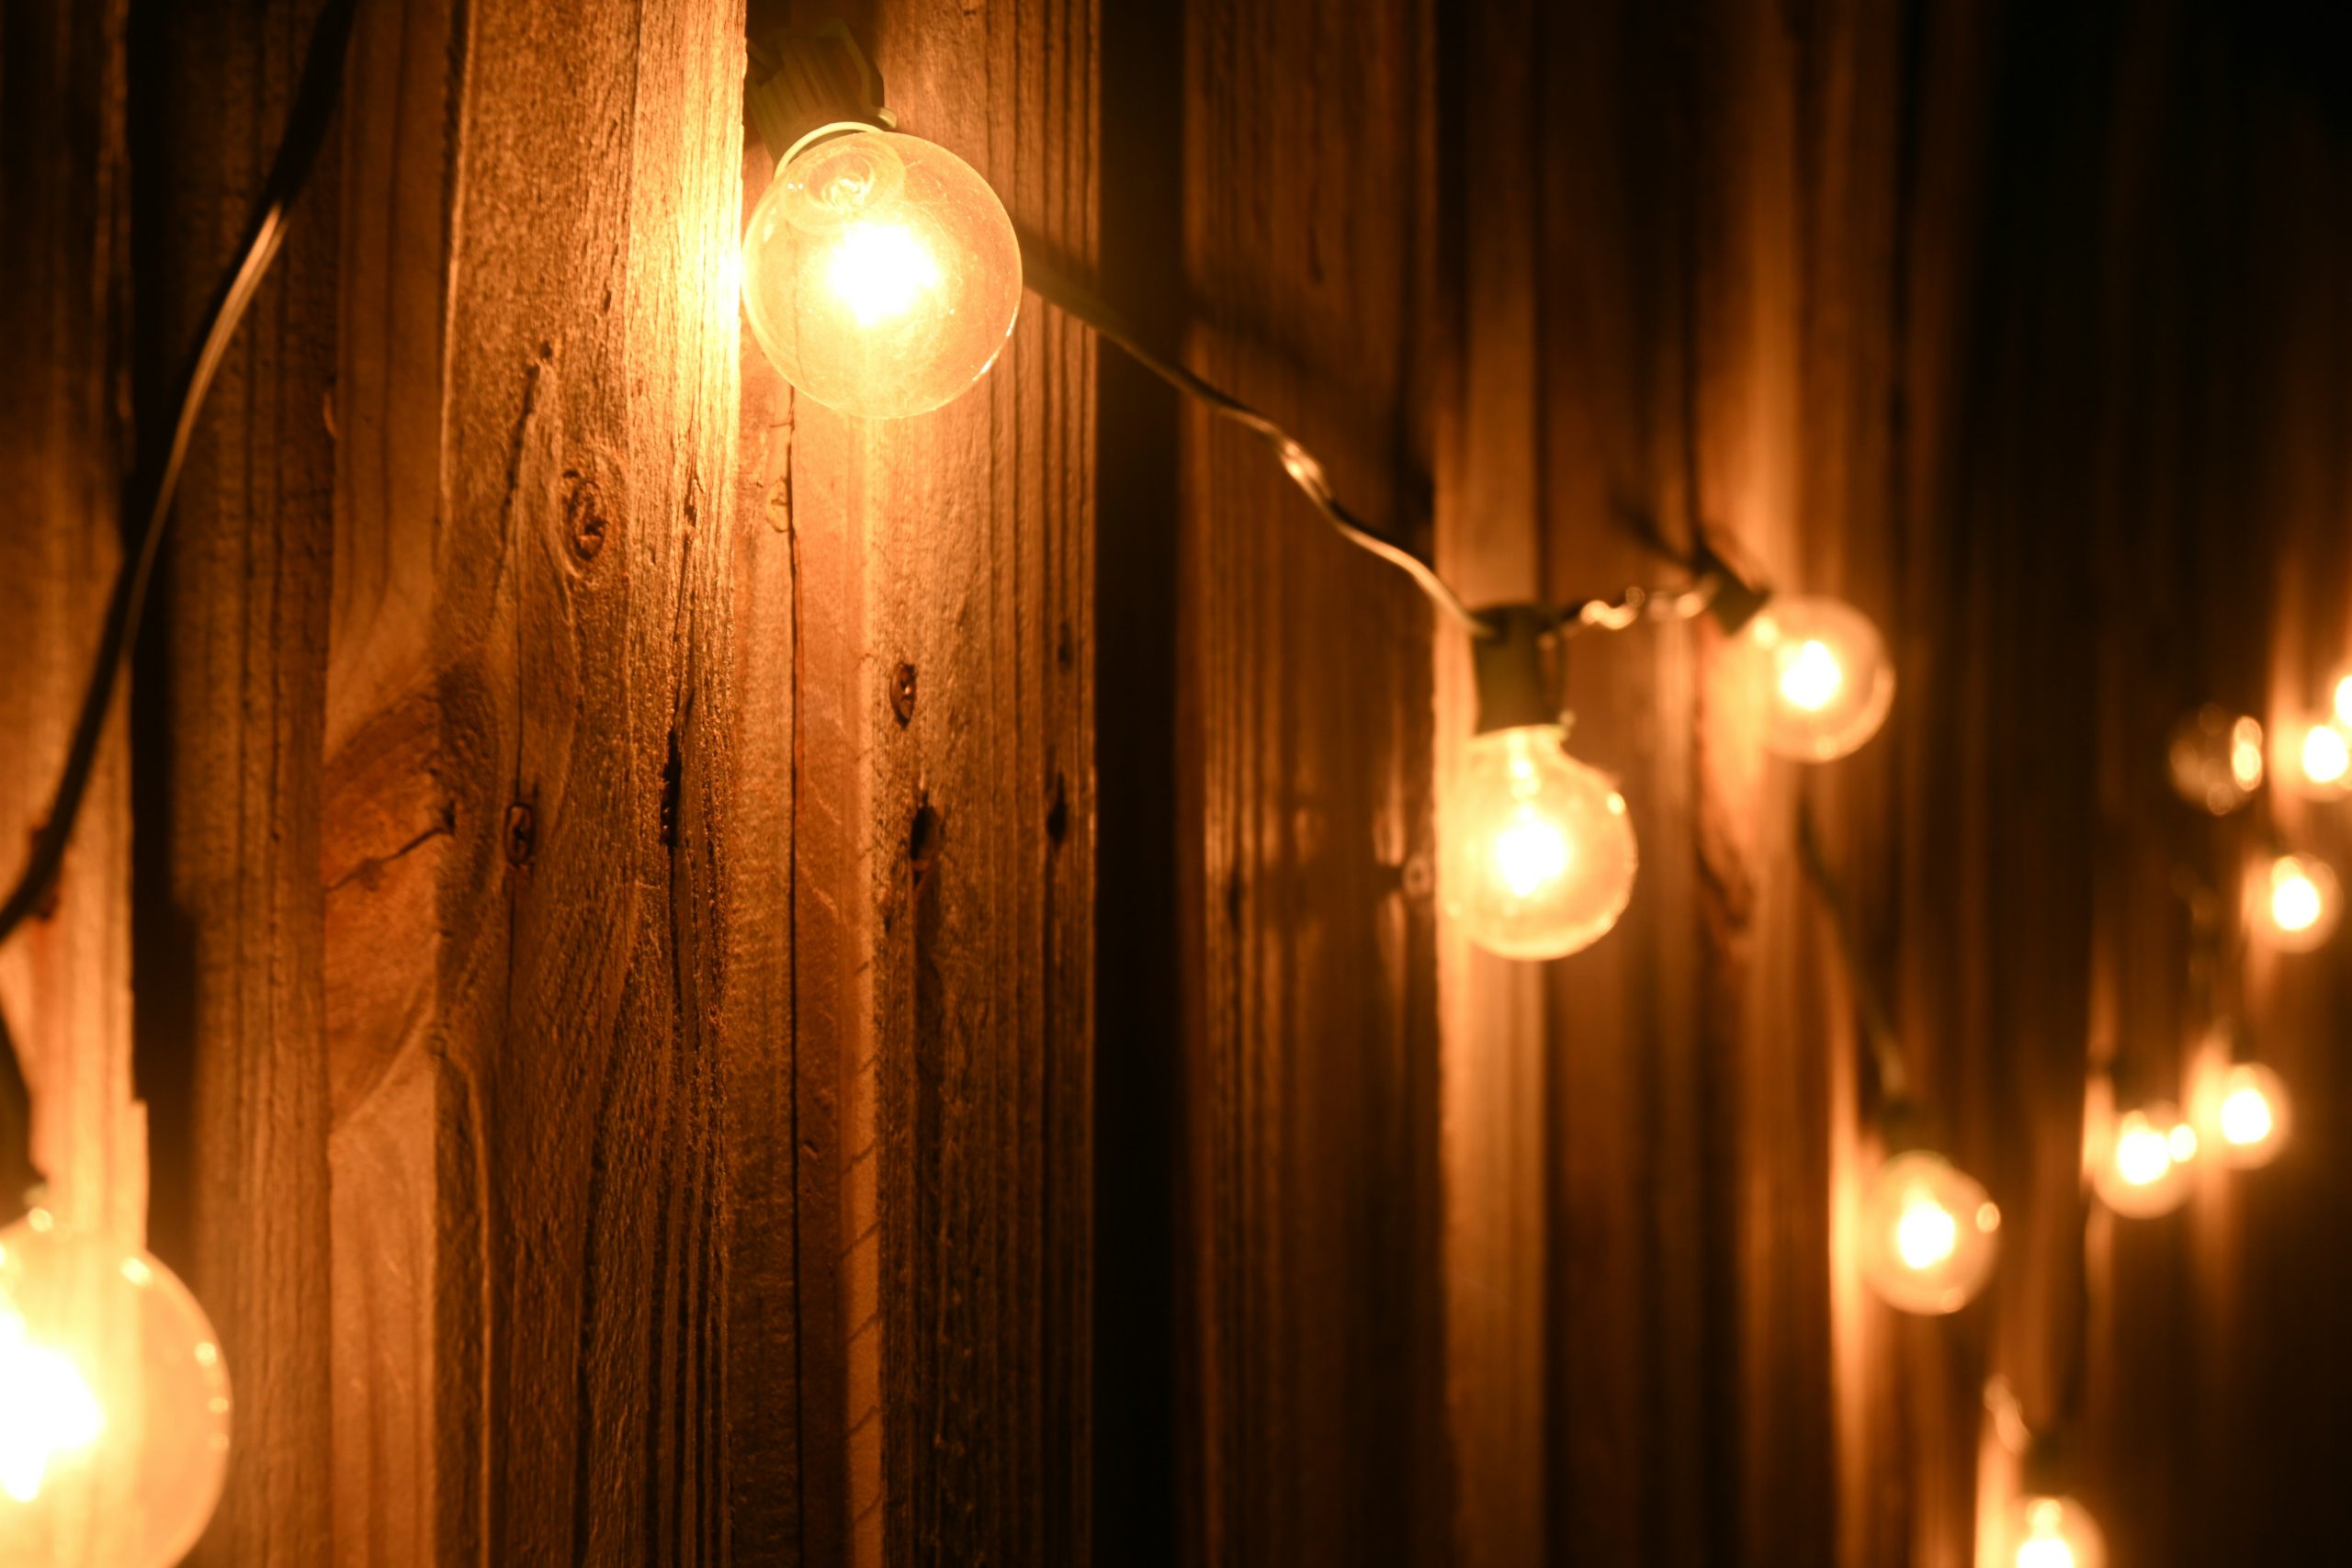
This look is all about creating depth and texture with light. By mounting the string lights directly against the vertical wooden planks of the fence, the warm amber glow ‘grazes’ the surface of the wood. This technique highlights the natural grain and imperfections of each plank, turning a flat, boring fence into a rich, textured backdrop. The shallow depth of field, with the background blurred out, further emphasizes this texture and creates a sense of intimacy. It’s a simple trick that adds a ton of visual interest and warmth to an otherwise utilitarian feature of the yard.
|
📋 Copy HEX 🔗 Share |
When attaching string lights to a wooden fence, don’t just use any old staple gun. The metal staples can easily pierce the wire’s insulation, creating a short circuit or a safety hazard, especially in wet weather. Instead, use insulated cable clips or hooks. For a more temporary or renter-friendly solution, use a series of small cup hooks screwed into the fence every 2-3 feet. This allows you to easily take the lights down for winter storage and prevents any damage to the electrical wiring.
15. Frame the Sky with String Lights on a Metal Canopy
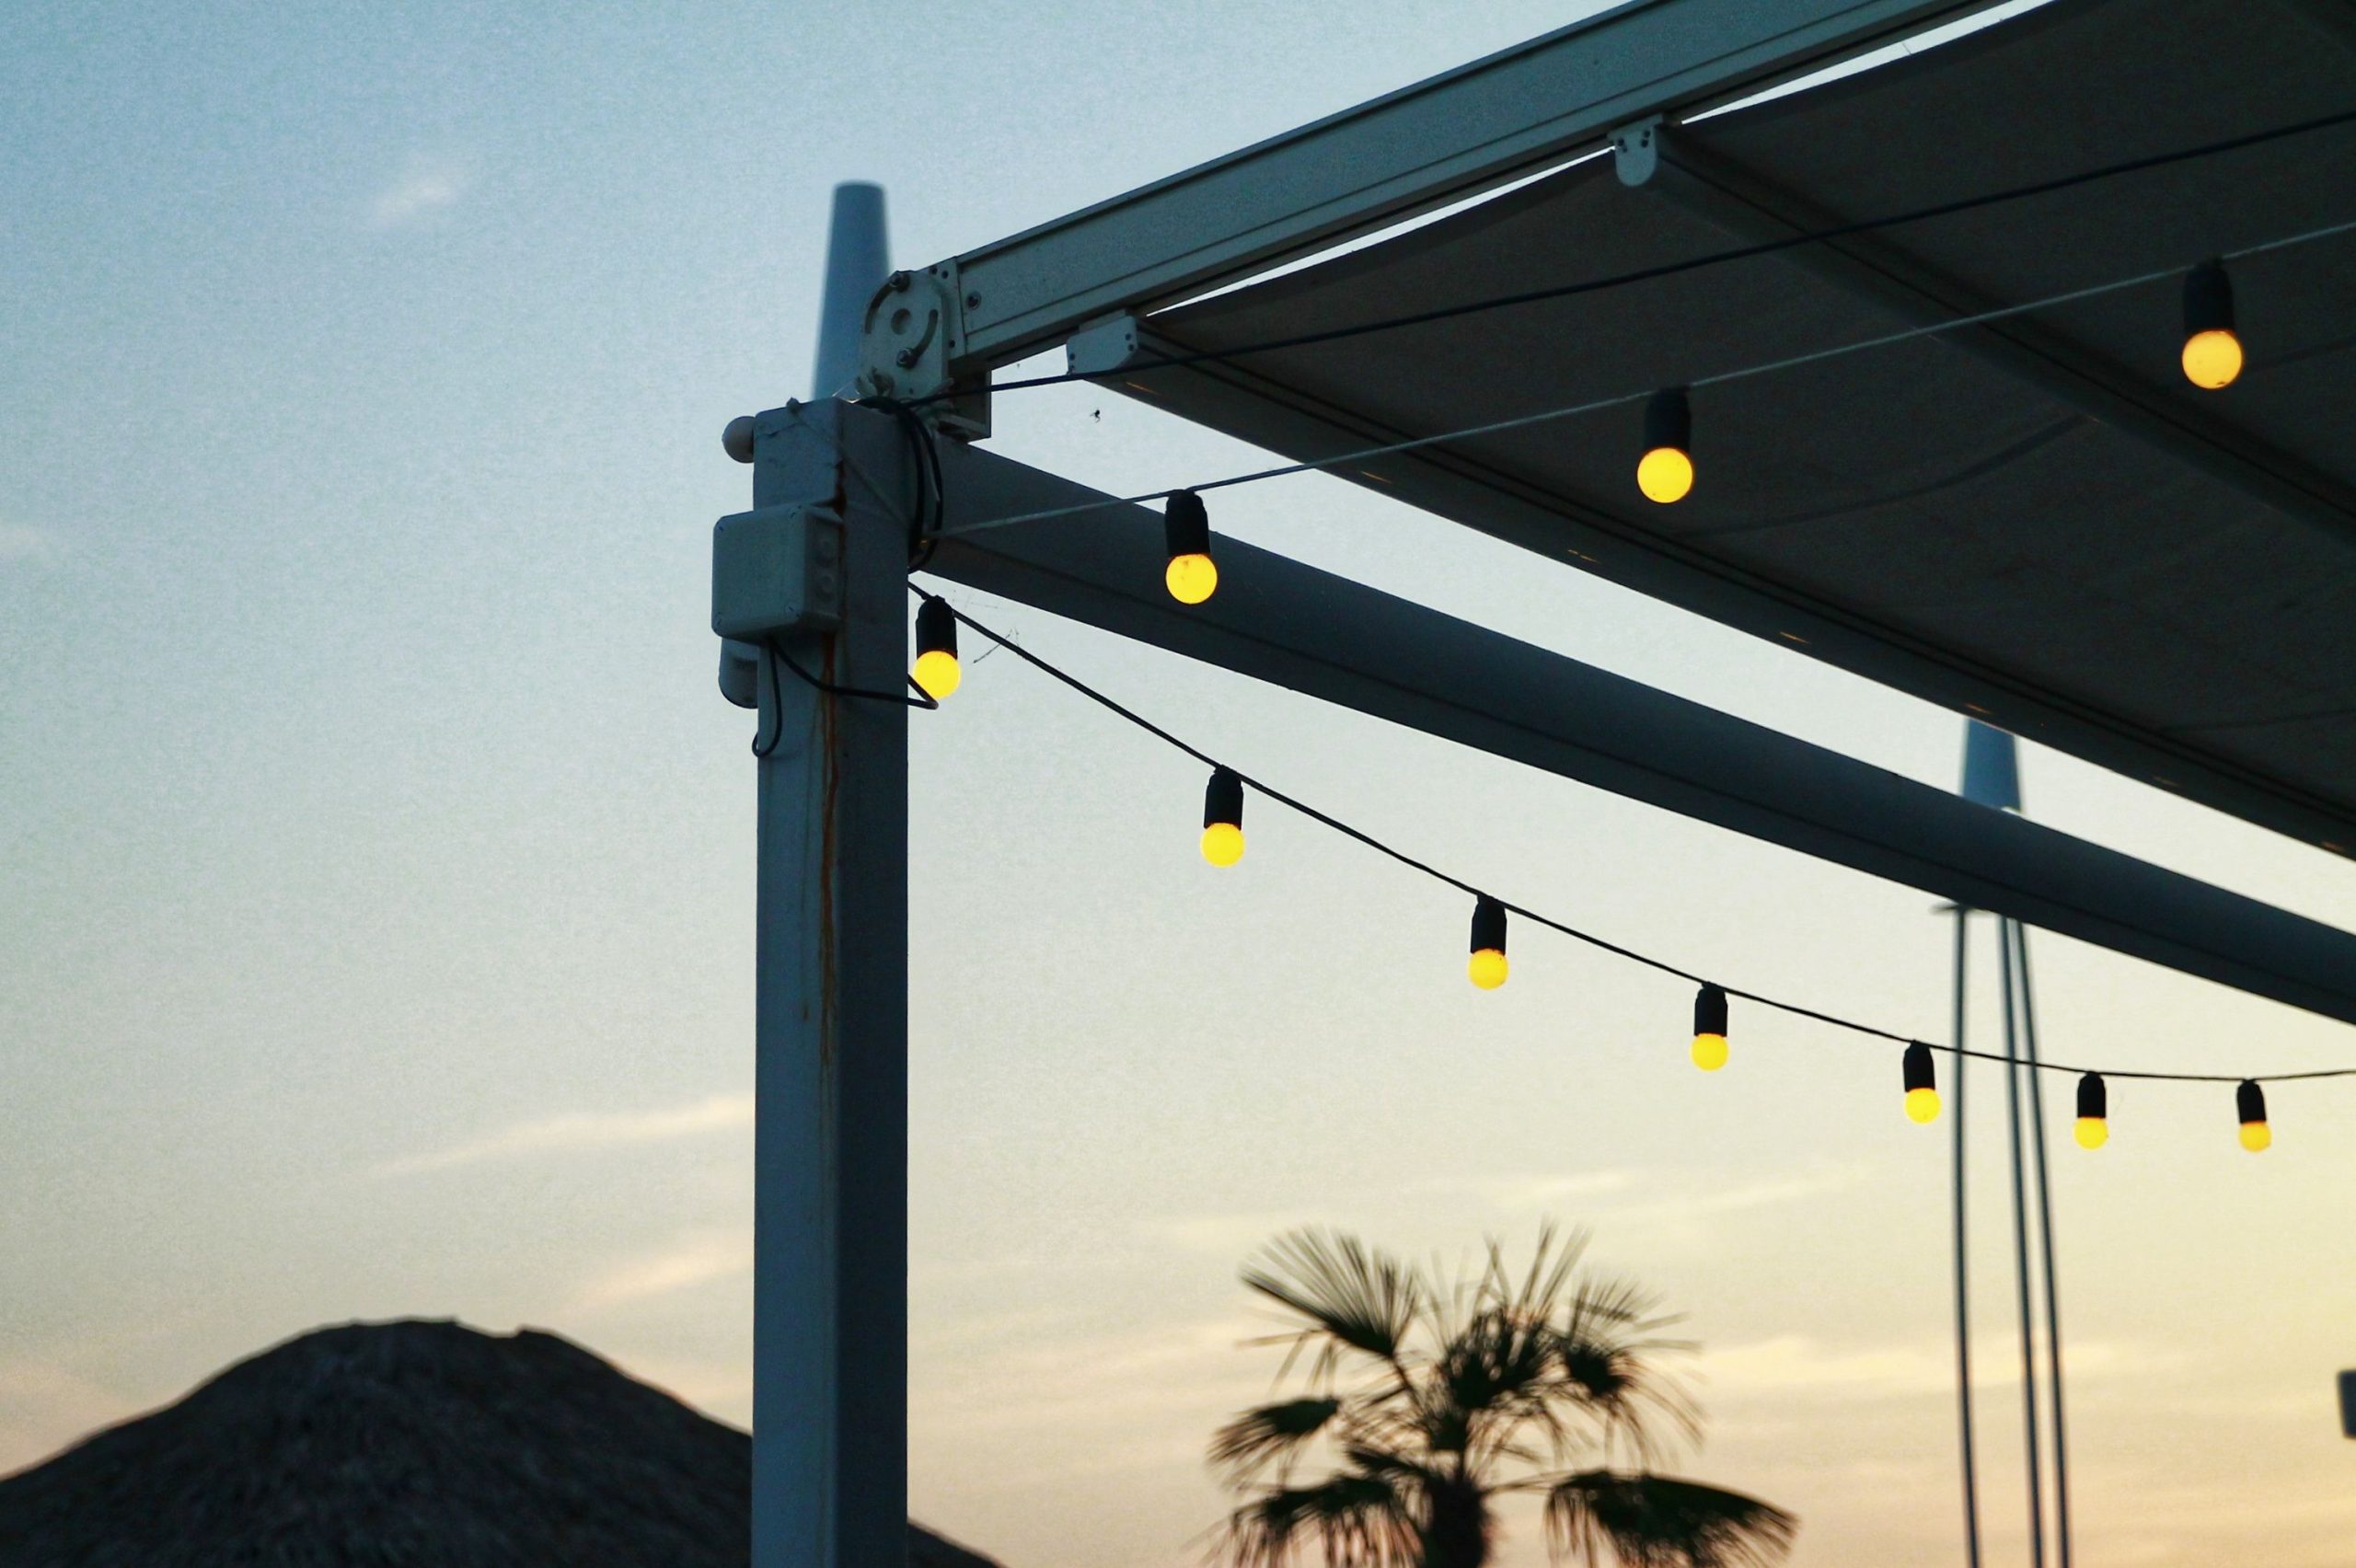
A white metal canopy or pergola is a fantastic way to define an outdoor room, but let’s be real about keeping it clean. White shows everything: dirt, pollen, bird droppings, and mildew. If you live in an area with a lot of trees or dust, be prepared to give this structure a good scrub with a long-handled brush and some soapy water at least two or three times a season. If that sounds like too much work, you might be happier with a darker color like charcoal or black, which is much more forgiving when it comes to everyday grime.
|
📋 Copy HEX 🔗 Share |
This idea is brilliant for defining a zone on a large, open patio or deck without building a full-blown permanent structure. A 10 x 10 or 12 x 12 canopy frame like this is perfect for creating an intimate seating area or dining spot for 4-6 people. It provides a human-scaled ceiling in the vastness of the outdoors. For a much larger space, you could use two canopies side-by-side to create separate lounge and dining zones. The key is to match the canopy size to the furniture grouping you intend to place beneath it.
16. Achieve a Rustic Mood with String Lights on a Wooden Railing
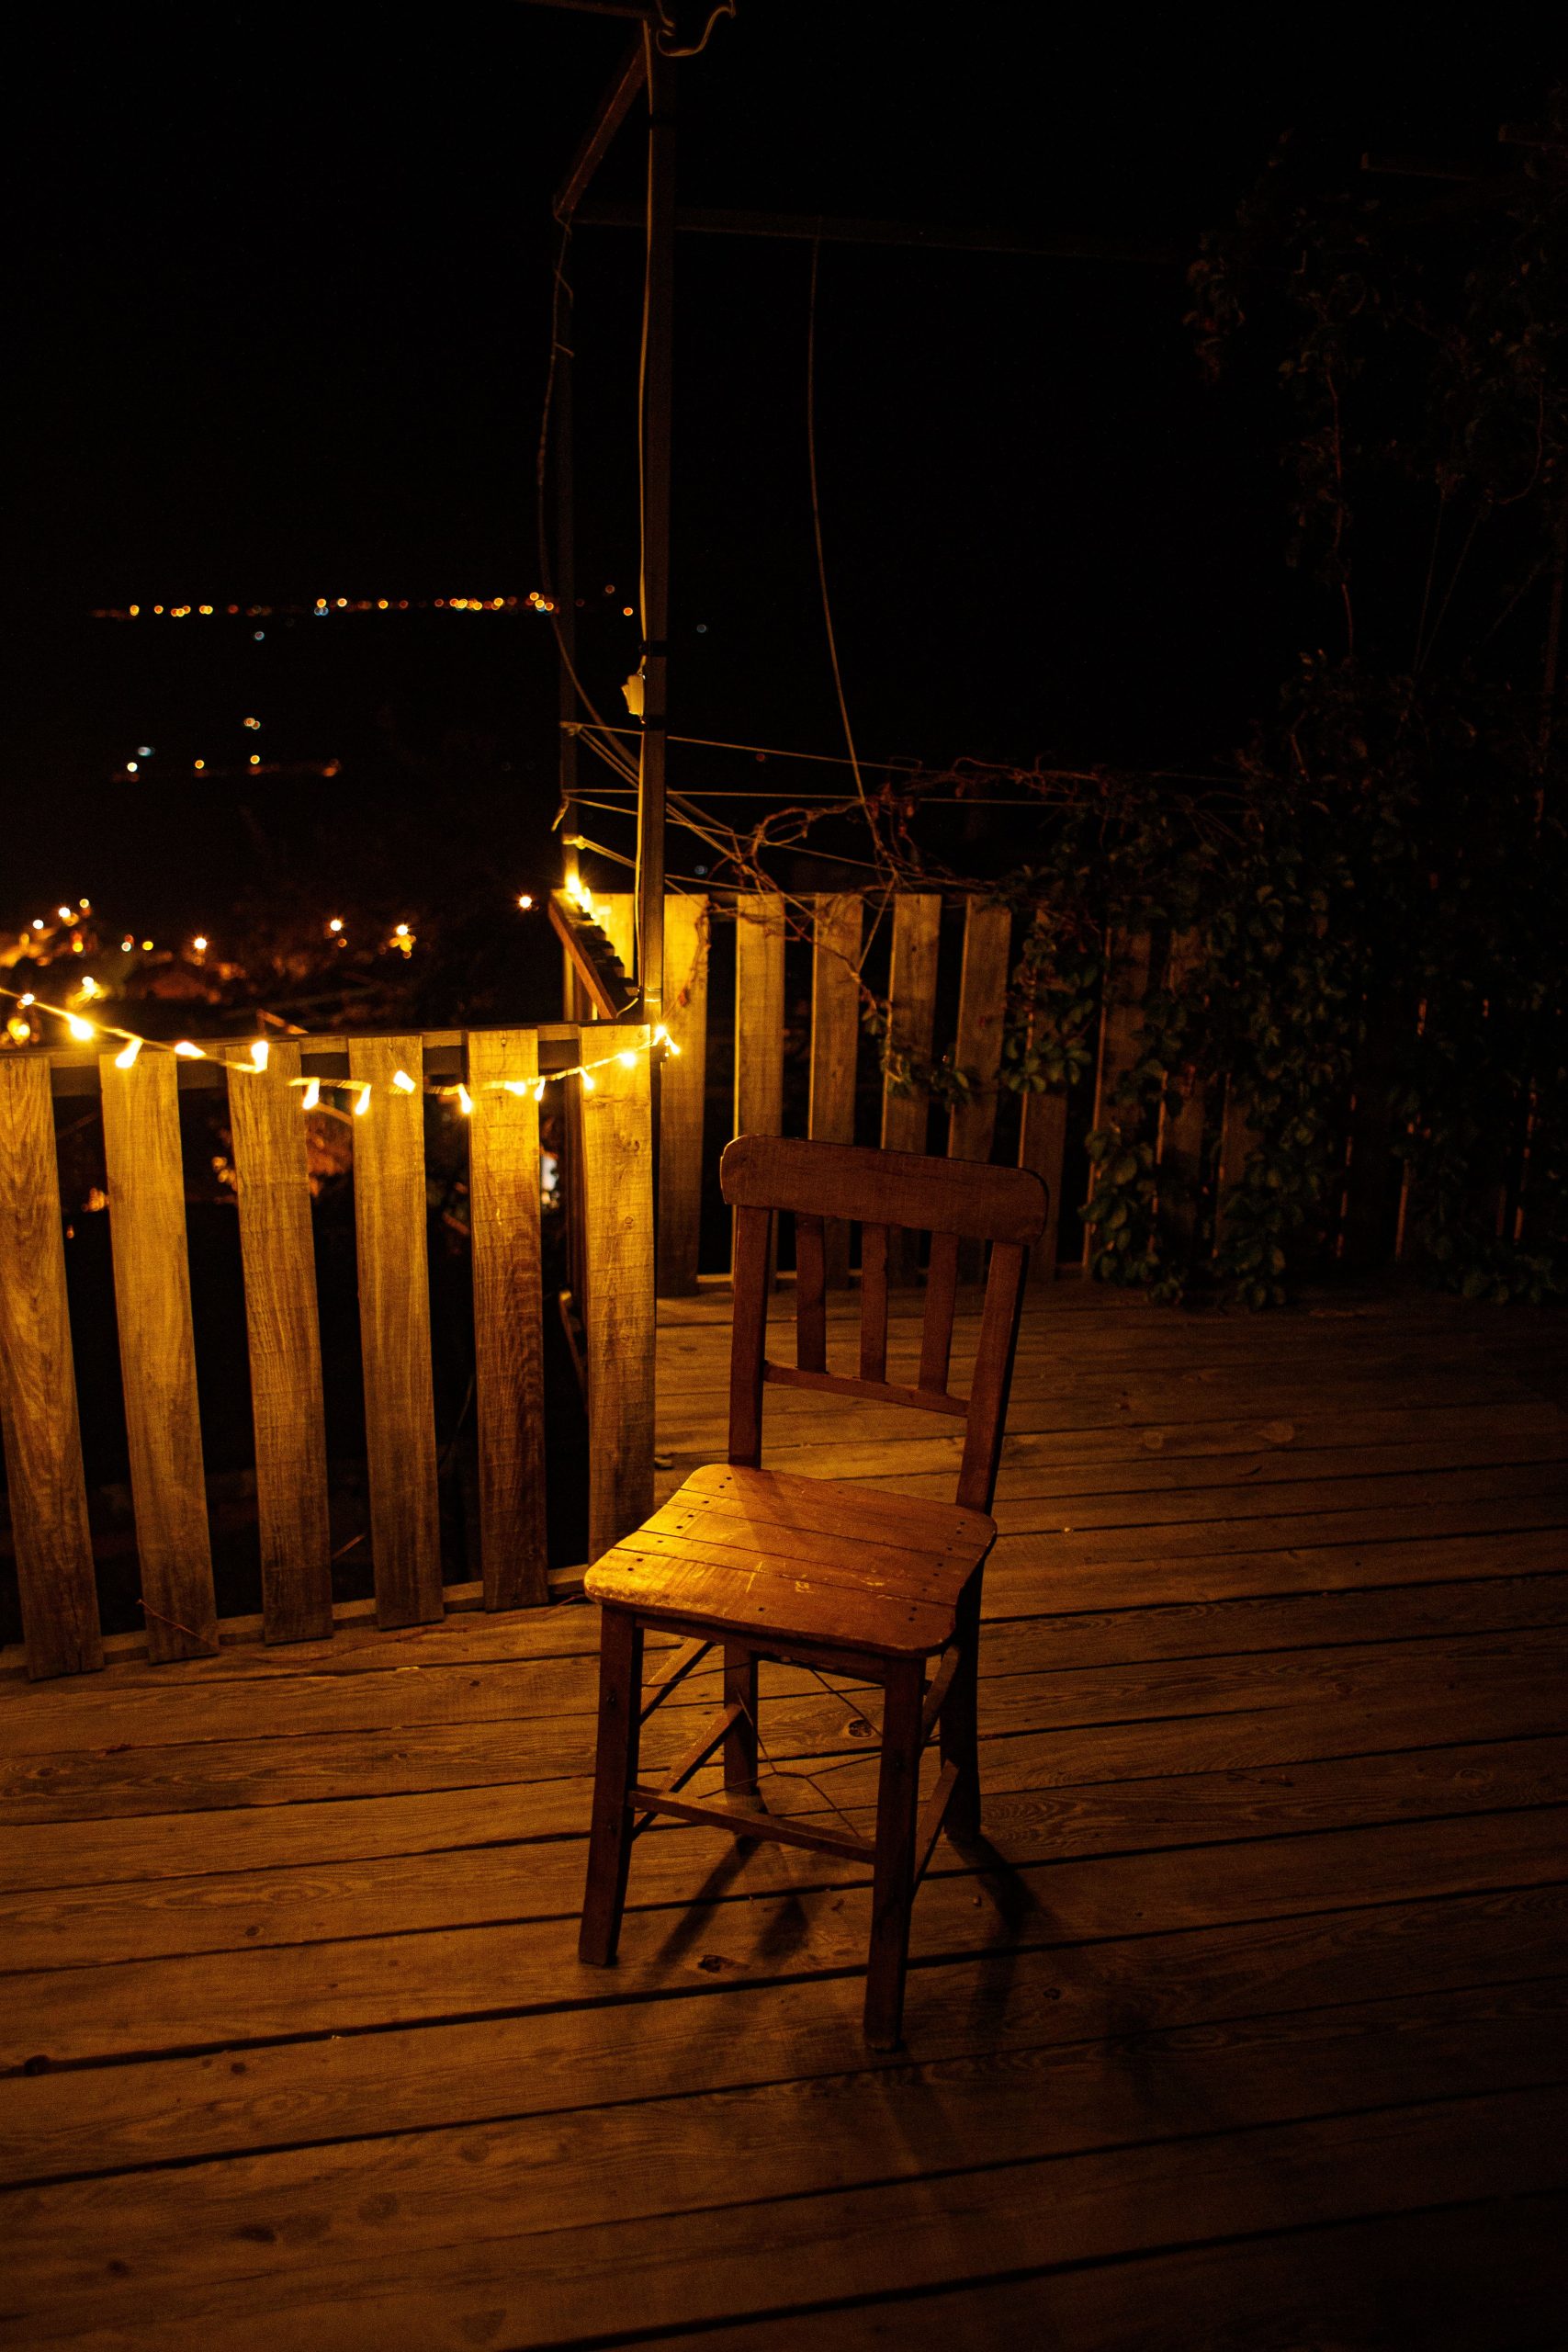
That creates the powerful mood in this scene is the solitude. It’s just a single chair, bathed in light, against the vast darkness. This simple composition tells a story of peace and quiet contemplation. It’s not a party deck; it’s a personal escape. This proves that you don’t need a huge budget or a massive space to create a meaningful outdoor moment. Sometimes, the most impactful design is the simplest: one comfortable chair, a bit of warm light, and a view. It’s an invitation to pause and enjoy the quiet of the night.
|
📋 Copy HEX 🔗 Share |
The magic here comes from the high contrast between light and dark. The warm, amber glow of the string lights is concentrated in one area—the deck railing and the solitary chair. This pool of light is surrounded by the deep, dark black of the unlit deck and the night sky. This dramatic contrast, known as chiaroscuro in art, immediately draws your eye to the focal point and creates a sense of intimacy and drama. The distant, blurred city lights on the horizon add a final layer of depth and context, making the personal space feel even more special.
17. Add Rustic Charm with a Dark Metal Gooseneck Sconce
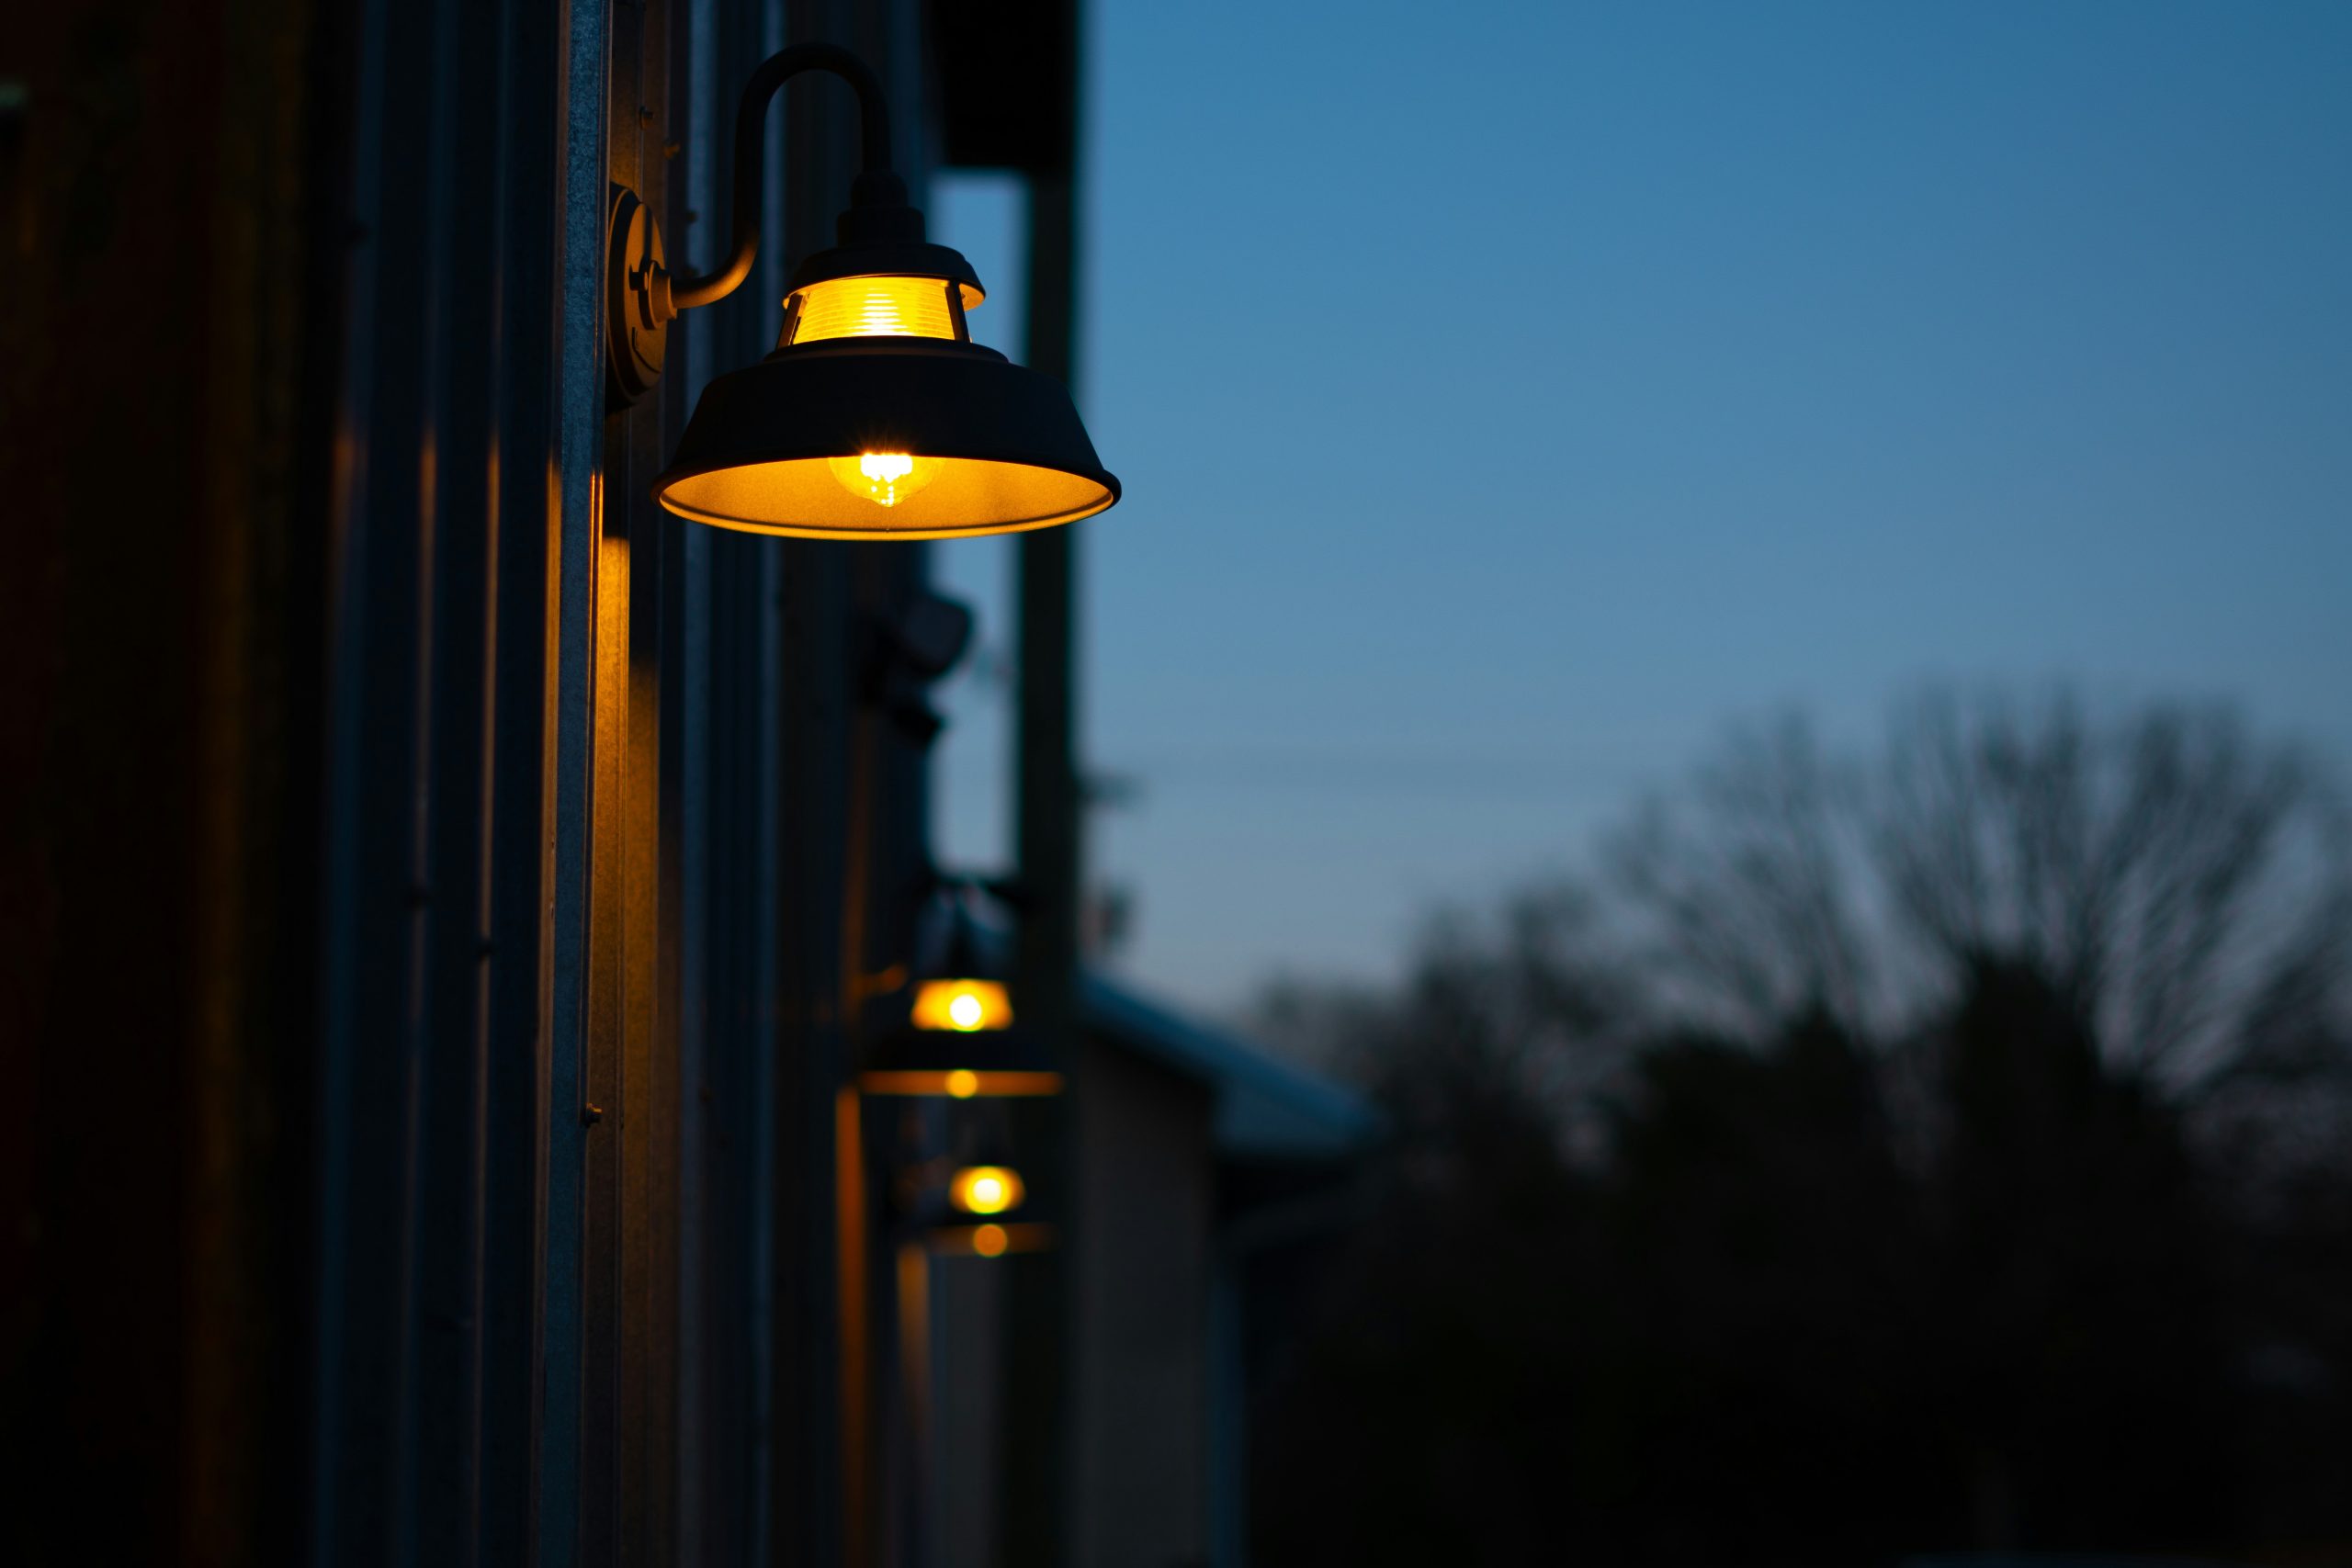
To get this warm, vintage look, the bulb choice is just as important as the fixture itself. You’ll want to find an Edison-style LED bulb with a color temperature of 2200K to 2700K. This range mimics the warm, amber glow of an old-fashioned incandescent bulb. Look for ones with visible ‘filaments’ to complete the vintage aesthetic. Using a standard, cool-white LED bulb in a rustic fixture like this would create a jarring style clash. The bulb is the soul of the fixture, so choose it wisely to nail the cozy, atmospheric vibe.
|
📋 Copy HEX 🔗 Share |
The modern farmhouse trend has been huge for interiors, and now it’s firmly taken root outdoors. Fixtures like this dark metal gooseneck sconce are a hallmark of the style. They blend the utilitarian shape of old barn lighting with a sleeker, more contemporary matte black finish. This look is popular because it feels both timeless and current. It connects to a sense of history and durability while still feeling clean and sophisticated. Paired with corrugated metal or wood siding, it’s a can’t-miss combination for a cozy, rustic-industrial feel.
18. Line a Boardwalk with Recessed Solar Deck Lights
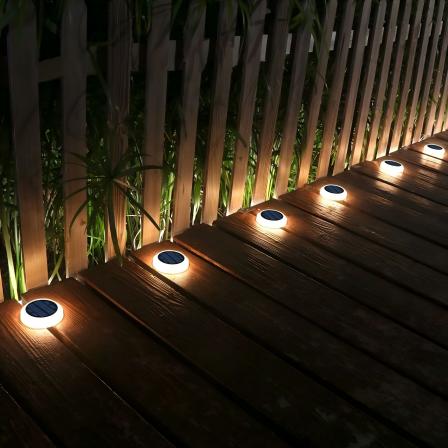
This is one of the most budget-friendly and DIY-friendly lighting ideas out there. A set of 8 to 12 so lar-powered recessed deck lights can be purchased on Amazon for $30-$50. Installation is simple: you just need a drill with a hole saw bit that matches the diameter of the light fixture. There’s no wiring, no electrician, and no increase in your energy bill. For less than the cost of a nice dinner out, you can add a layer of safety and high-end ambiance to your deck or walkway in a single afternoon. It’s maximum impact for minimal investment.
|
📋 Copy HEX 🔗 Share |
Solar lights have come a long way, but they still have limitations. The small solar panel on top of each light needs to be clean to charge effectively. Periodically wipe them down to remove dust, pollen, and water spots. Also, their performance is directly tied to how much direct sunlight they receive. If your deck is in a shady spot, they may not get enough charge to last through the night. Finally, the rechargeable batteries inside have a limited lifespan and will need to be replaced every 1-3 years to maintain brightness.
19. Gather Around a Sunken Fire Pit with Overhead Lighting
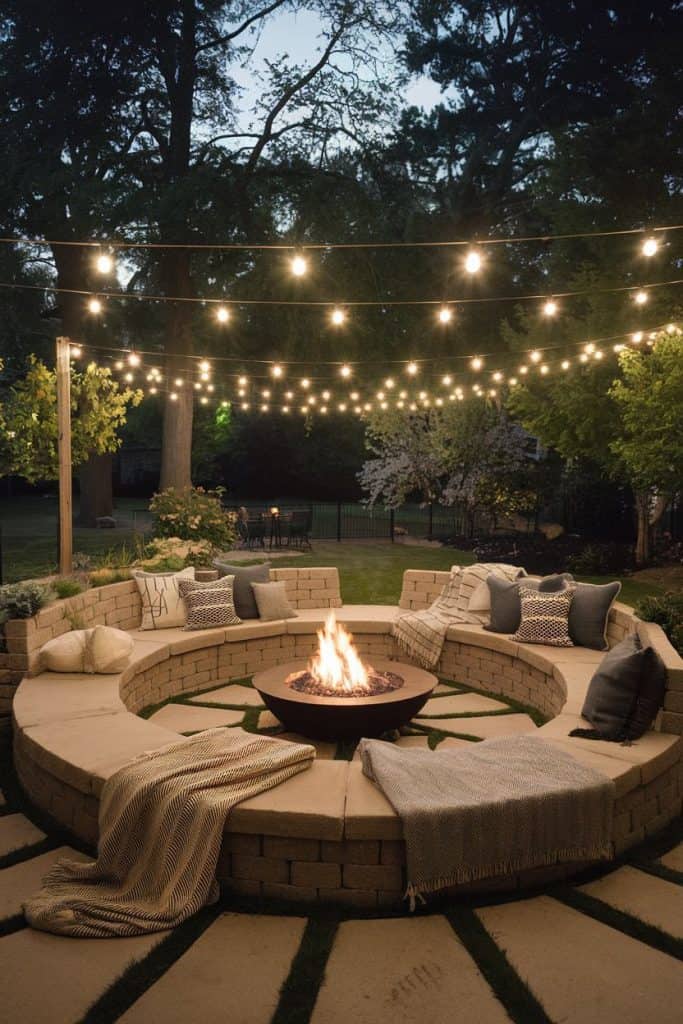
This design is so effective because it uses lighting to create a ‘room’ within a larger space. The sunken stone seating area physically defines the zone, but it’s the canopy of string lights overhead that provides the psychological sense of a ceiling. This combination of physical and visual enclosure makes the space feel incredibly intimate and protected, like a cozy nest. The warm glow from the lights overhead also balances the light from the fire pit below, ensuring that people’s faces are softly illuminated rather than being harshly lit from below.
|
📋 Copy HEX 🔗 Share |
Before you commit to a sunken fire pit area, there are some critical considerations:
- Drainage: This is the most important factor. A sunken area is essentially a bowl. You MUST have a robust drainage system installed at the base to prevent it from turning into a pond every time it rains. This is not a place to cut corners.
- Headroom: If you plan to hang lights, ensure you have enough height. The lights should be at least 7-8 feet above the walking surface to avoid hitting people’s heads.
- Material Choice: The materials for the seating and floor need to be able to withstand the elements year-round. Stone, concrete, and exterior-grade pavers are excellent choices.
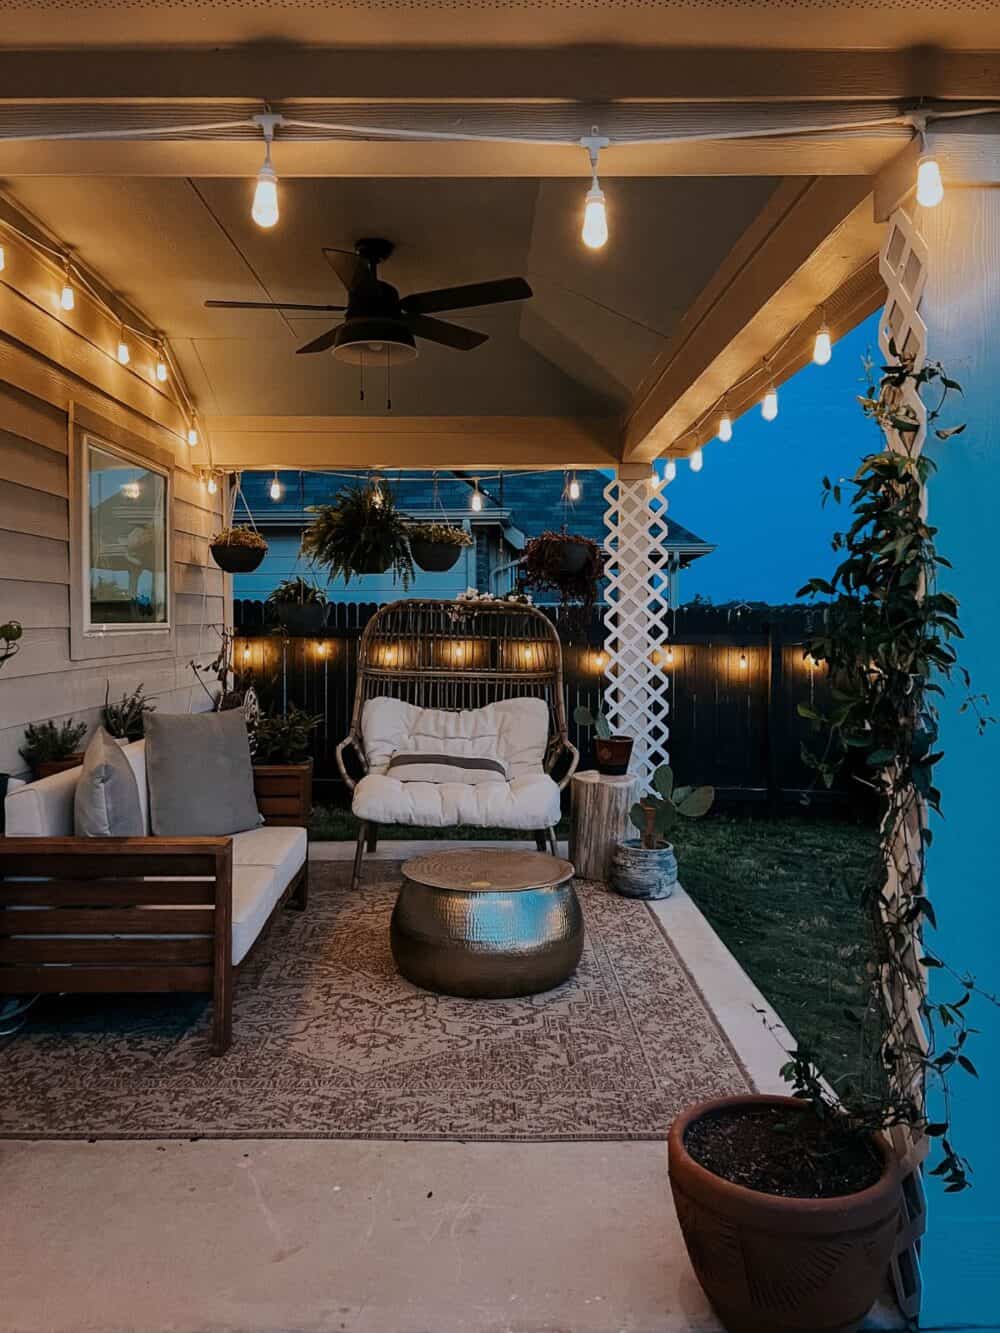
20. Create a Cozy Covered Patio with a Fan and String Lights
This cozy, layered patio look is very achievable. Here’s a sample budget to give you an idea:
|
📋 Copy HEX 🔗 Share |
- Main Furniture (Sofa & Chair Set): $700 – $2,000
- Lighting (string lights, ceiling fan with light): $200 – $600
- Textiles (outdoor rug, pillows): $150 – $400
- Decor (coffee table, planters): $200 – $500
- TOTAL: $1,250 – $3,500
Budget alternative: Shop end-of-season sales at Target and HomeGoods for furniture and decor. A similar rug can often be found for under $100, and pillow covers are an inexpensive way to add color and pattern.
When combining a ceiling fan and string lights on a covered patio, placement is key to avoiding a strobe effect. Do not drape the string lights below the fan blades. When the fan is on, the blades will chop through the light, creating a dizzying, unpleasant strobing effect. Instead, mount the string lights snugly to the ceiling beams, running them between the fan and the edges of the patio. This way, the fan circulates the air without interfering with the ambient glow from the lights. It’s a simple planning step that makes a huge difference in comfort.
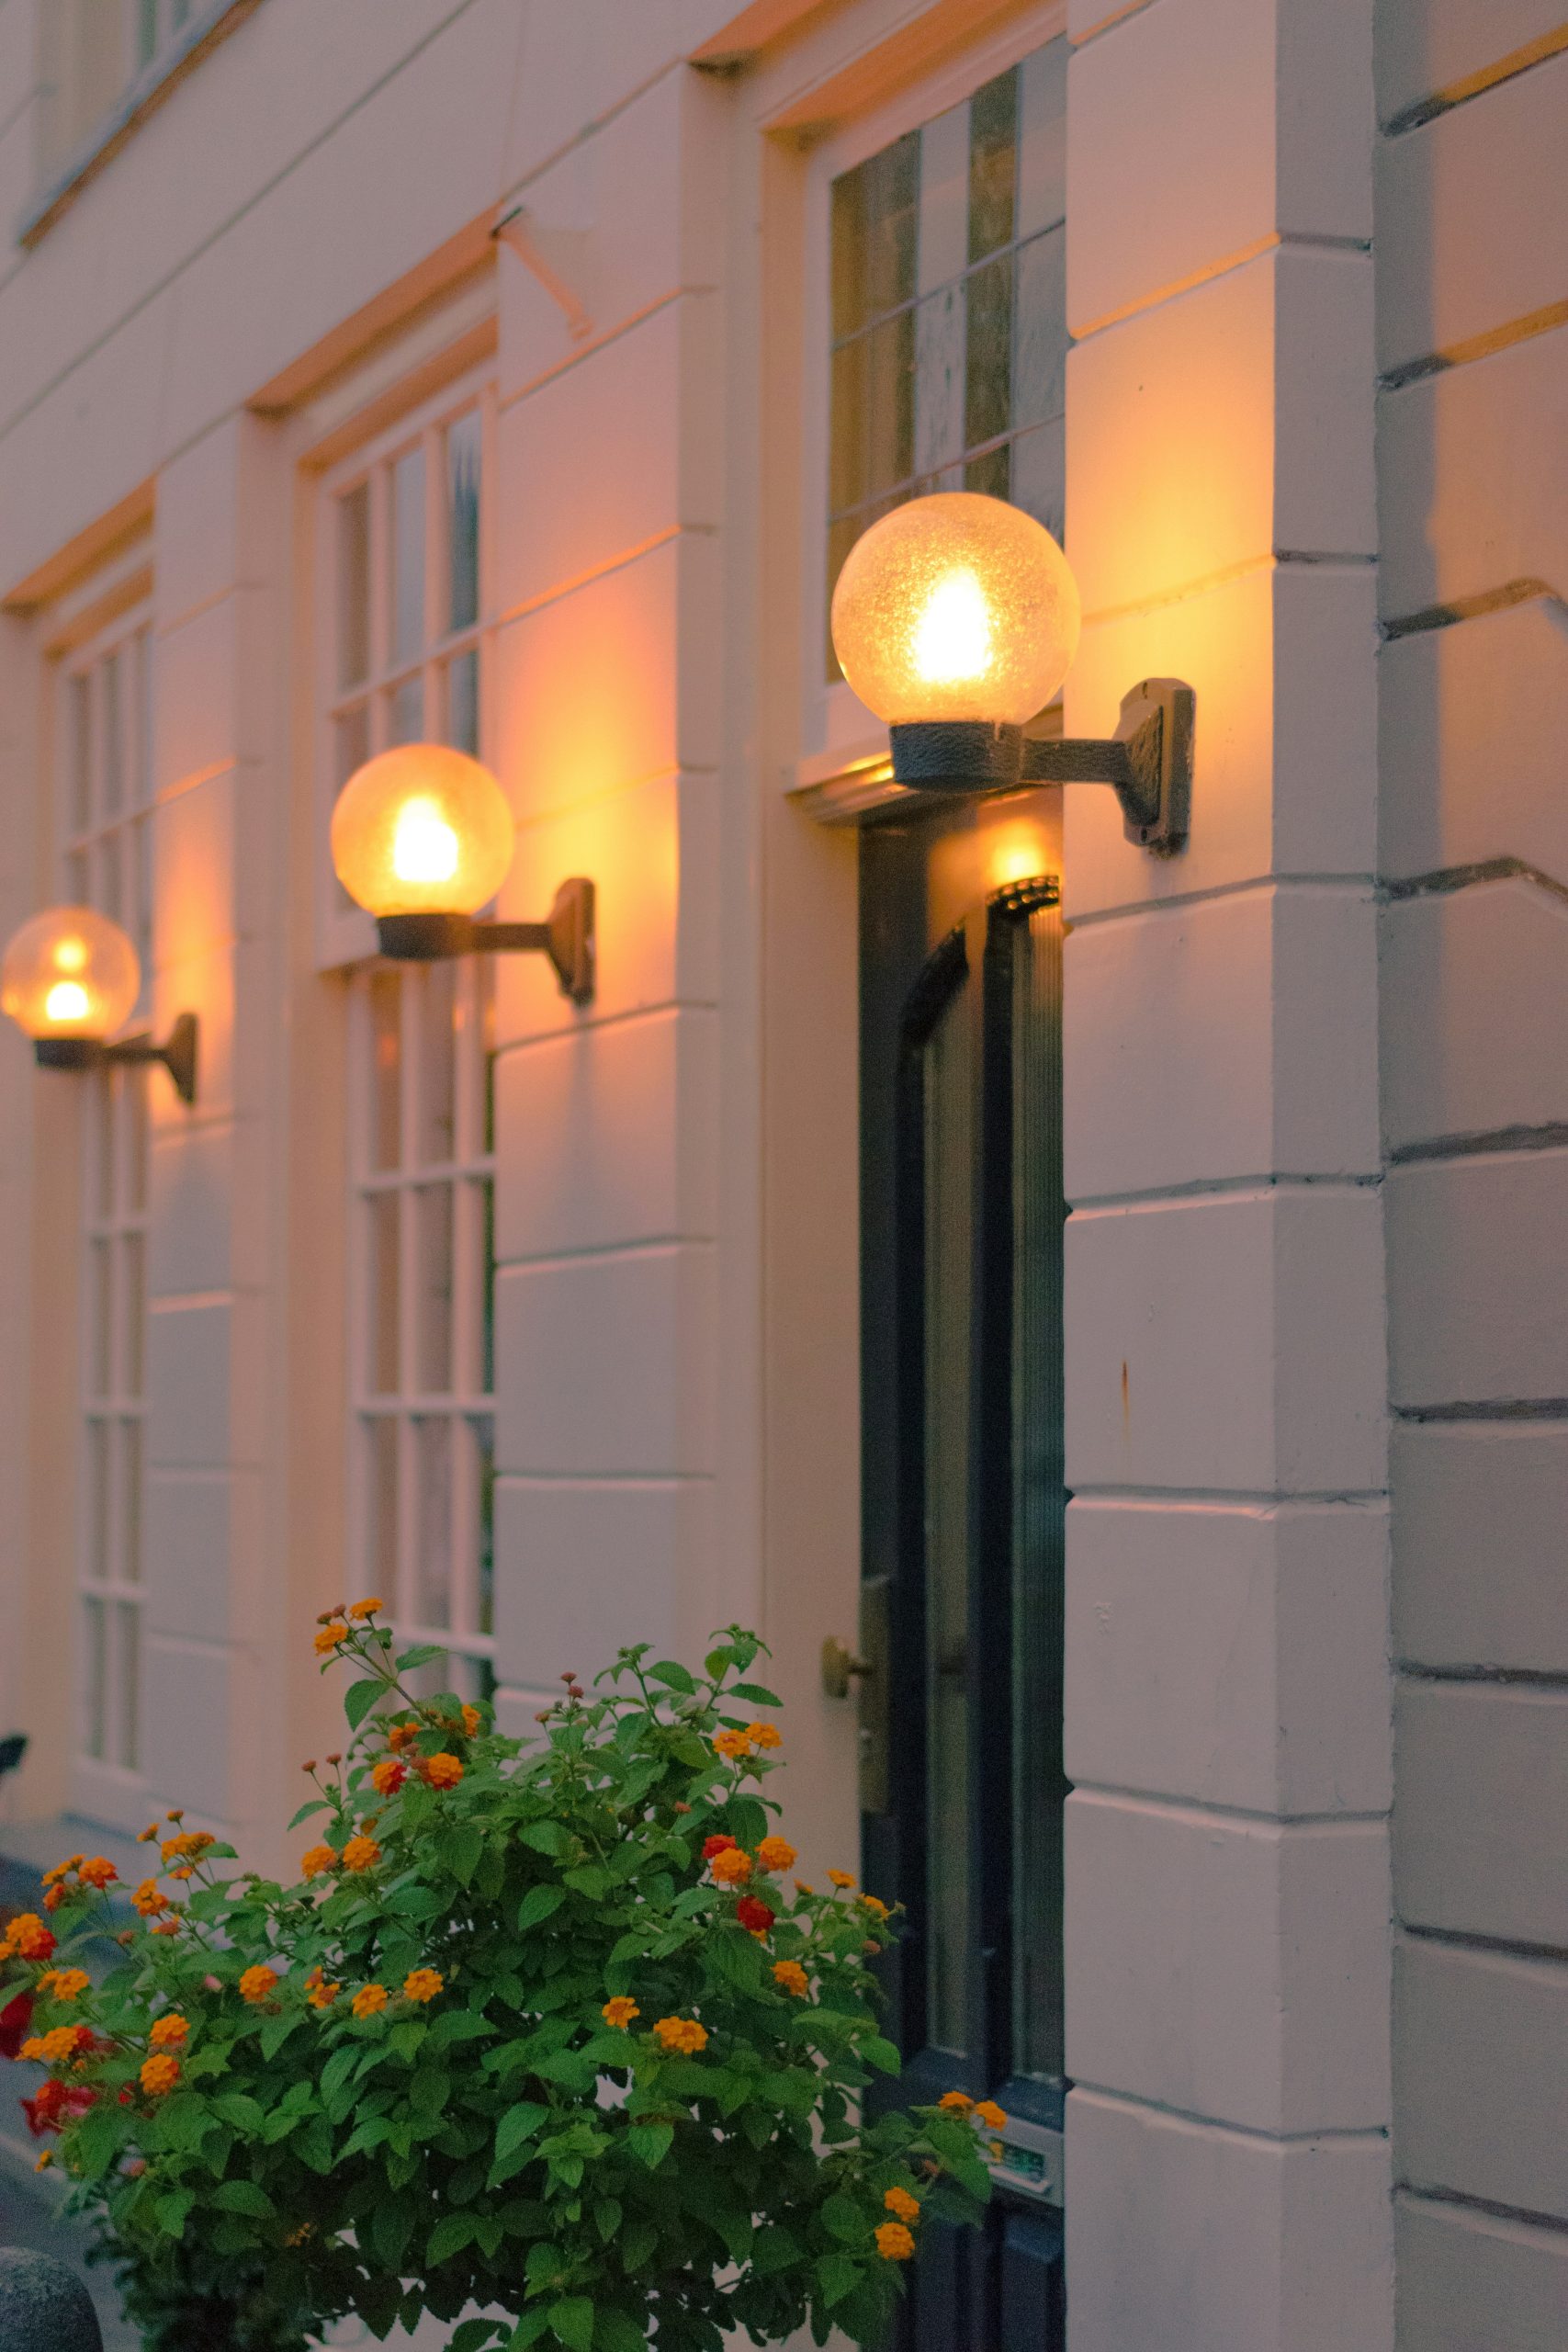
21. Warm a White Facade with Modern Globe Sconces
This welcoming entryway follows a simple but effective design recipe: 70% neutral canvas + 20% warm light + 10% natural color. The textured white stucco walls and white window frames provide a bright, neutral backdrop that makes up the majority of the visual space. The warm, orange glow from the row of globe sconces is the star of the show, injecting vibrant warmth. Finally, the green foliage and small pops of orange-yellow flowers in the planter add a touch of organic color that ties the whole scene together and keeps it from feeling sterile.
|
📋 Copy HEX 🔗 Share |
The repetition of shapes is what makes this design feel so polished and intentional. You have the repetition of the round globe sconces themselves, creating a pleasing rhythm along the wall. This circular motif is subtly echoed in the rounded shapes of the plants and flowers in the planter below. This simple repetition, combined with the strong symmetry of the sconces flanking the windows, creates a sense of balance and order that is deeply satisfying to the eye. It feels calm, collected, and thoughtfully designed.
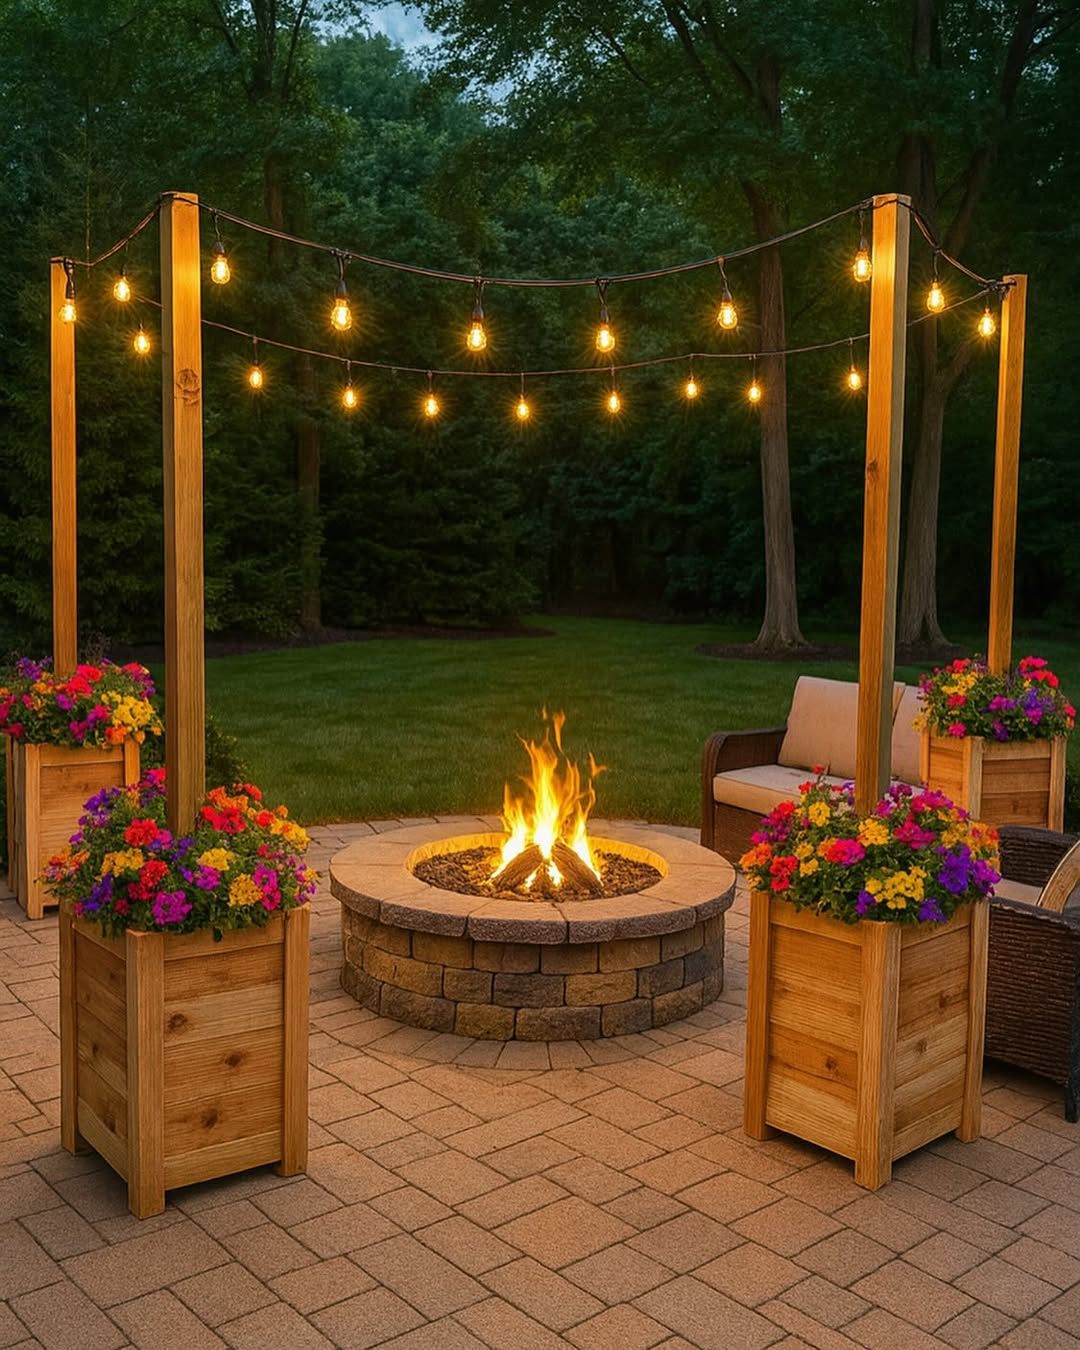
22. Build a Flower-Topped Lighting Structure with Planter Posts
This charming structure is a brilliant DIY project. Here’s a quick overview:
|
📋 Copy HEX 🔗 Share |
- Time: 1 weekend
- Materials (est. $300): Four 4x4x8′ posts, four pre-made wooden planter boxes, wood screws, four bags of concrete, potting soil, flowers, and string lights.
- Step 1: Assemble the planter boxes. Place a post in the center of each and fill with concrete to secure it. Let it cure.
- Step 2: Arrange the four planter posts in a square around your seating area.
- Step 3: Fill the top part of the planters with potting soil and add your flowers.
- Step 4: Install screw hooks near the top of each post and drape your string lights to create a canopy of light over the space. This is a much simpler approach than the full pergola seen in Idea #3.
What makes this idea so special is the integration of lighting and living elements. It’s not just a structure for lights; it’s a vertical garden. The planter boxes at the top of the posts lift the colorful flowers up to eye level and allow them to mingle with the warm glow of the bulbs. This combination of light and life is what elevates the concept from purely functional to truly magical. It feels much more organic and integrated into the garden than a simple metal pole or a plain wooden post.
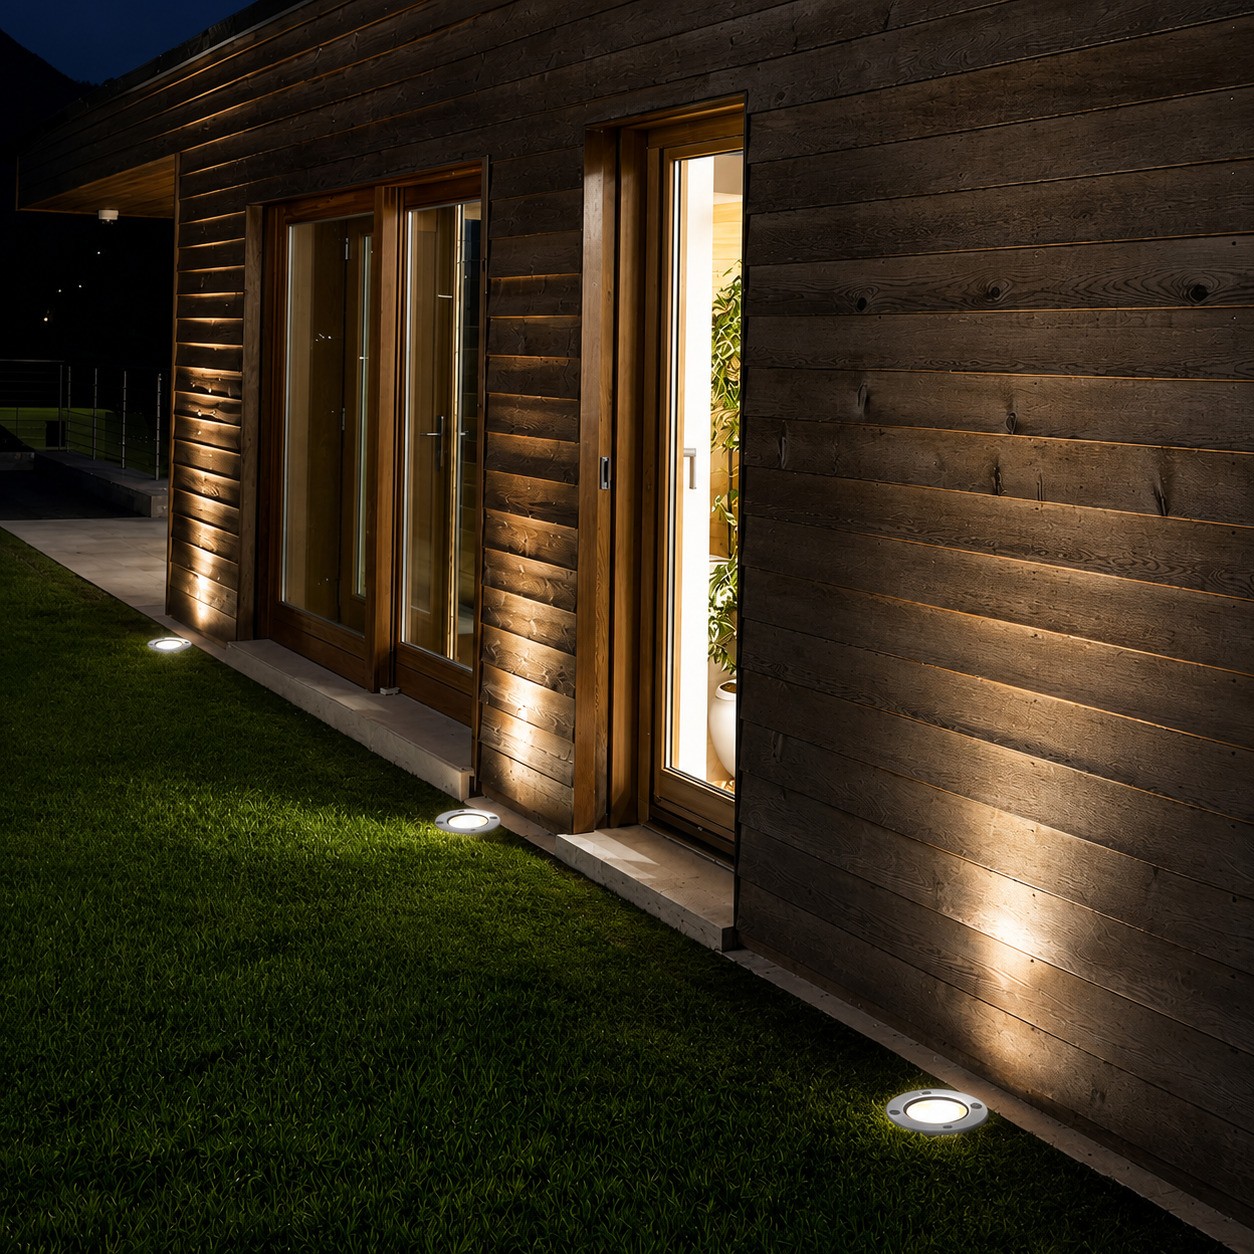
23. Wash a Wooden Wall with Recessed Ground Uplights
When using ground-recessed lights to wash a wall, the placement relative to the wall is critical. To get this soft, grazing effect that highlights the texture of the horizontal wood siding, place the fixtures about 12 to 18 inches away from the wall. If you place them too close, you’ll get harsh, narrow hot spots. If you place them too far away, the light will be too diffuse and won’t create the desired dramatic effect. Also, space the lights about 3 to 5 feet apart for even coverage without creating distracting dark gaps between the beams of light.
|
📋 Copy HEX 🔗 Share |
This technique is perfect for adding nighttime drama to modern homes with interesting exterior materials. It works best on long, unbroken walls where you can create a continuous, rhythmic pattern of light. A wall surface of at least 15 to 30 feet long is ideal to achieve this repeating effect. It’s particularly effective on materials with strong horizontal or vertical lines, like this wood siding, board-and-batten, or corrugated metal. On a plain, flat stucco wall, the effect would be less dramatic, as there’s less texture for the light to catch.
24. Install Recessed Lights Under an Elevated Deck
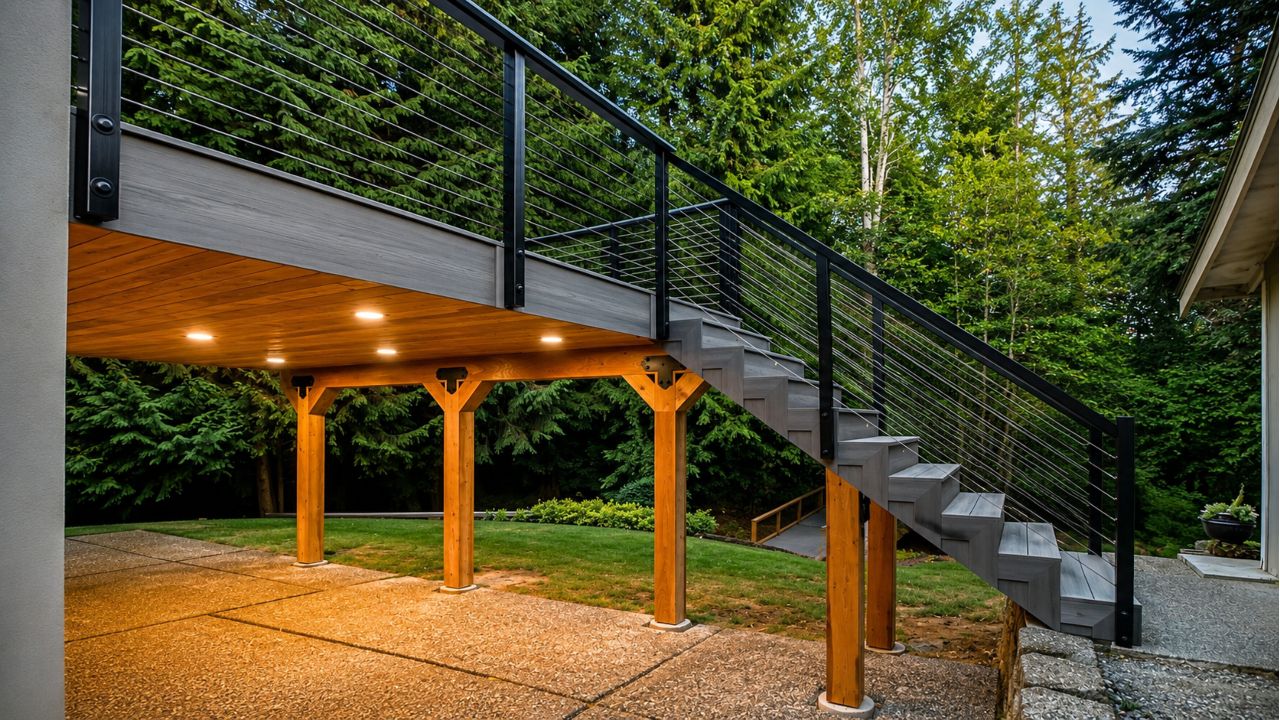
This is such a smart use of space. The recessed ‘pot lights’ transform the typically dark and forgotten area under a second-story deck into a functional and inviting patio. The warm wood plank ceiling (which is the underside of the deck above) reflects the light, creating a warm, ambient glow. The black metal railings and wood posts provide strong, clean lines that give the space a modern, architectural feel. It successfully creates a second, fully usable outdoor room that feels protected and cozy, effectively doubling the home’s outdoor living area.
|
📋 Copy HEX 🔗 Share |
Creating a dry, well-lit space under a deck requires more than just adding lights. The deck above must have a proper water-diversion system installed between the joists. These systems, like Trex RainEscape or other under-deck drainage solutions, catch rainwater that drips through the deck boards and funnel it into a gutter. Without this, water will drip directly onto your lighting fixtures, furniture, and guests below, creating a short-circuit risk and rendering the space unusable in wet weather. This is an absolute must-have for this design.
25. Illuminate Stairs with Modern Solar Wall Lights
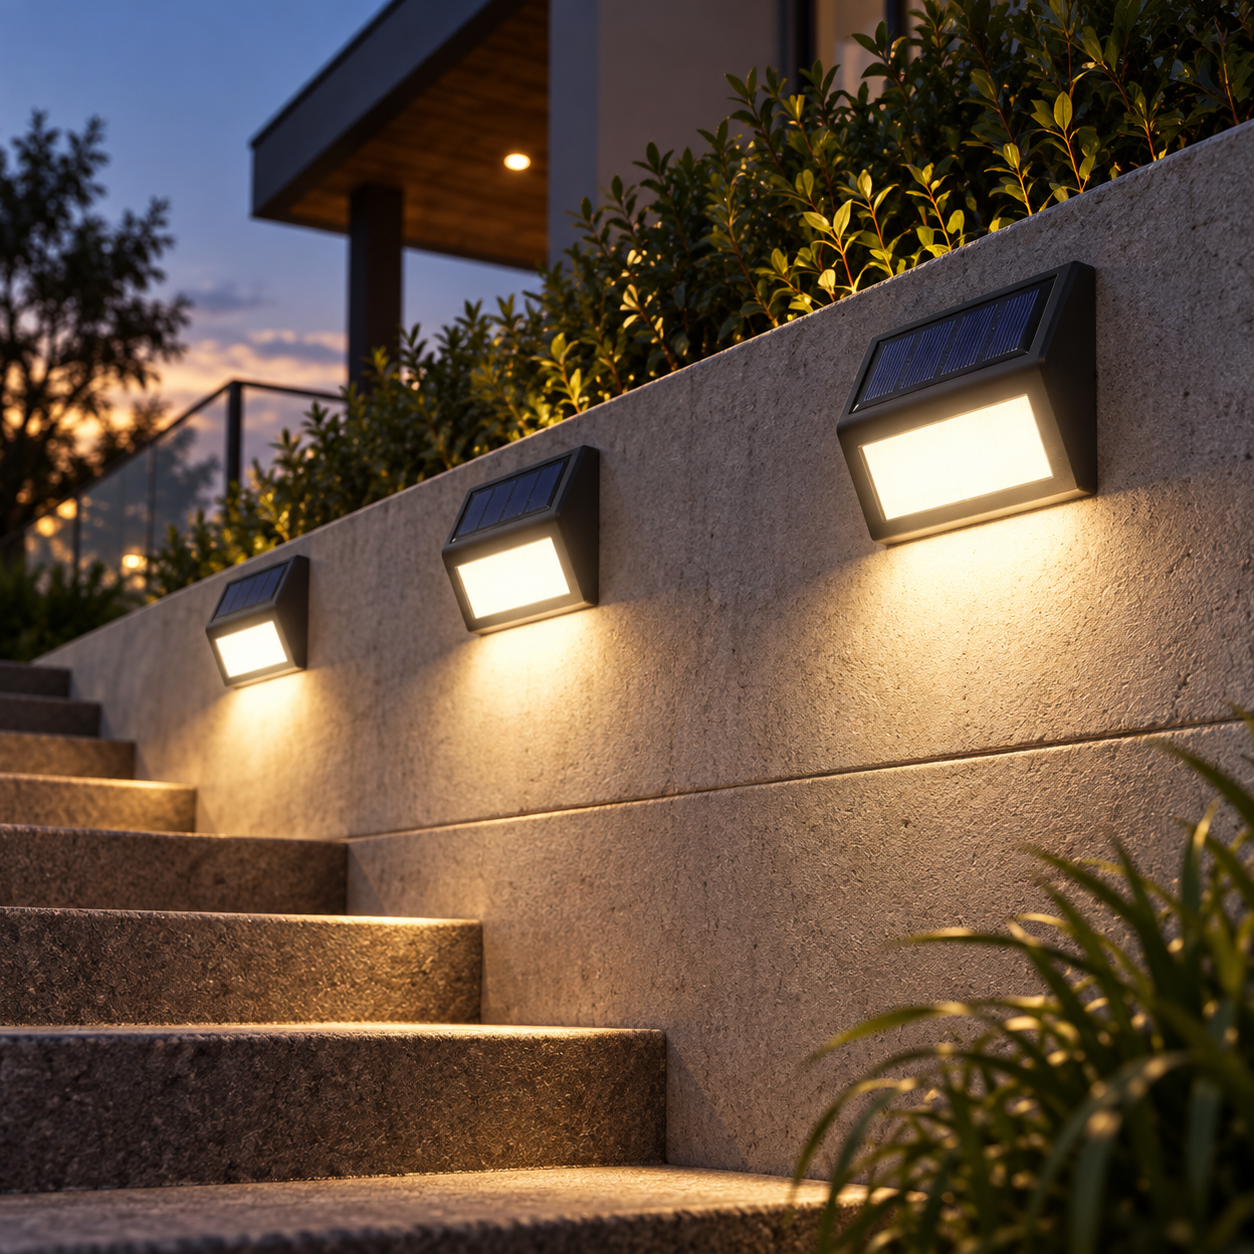
This is a perfect example of getting a high-end look on a shoestring budget. Hardwiring lights into a concrete or stone retaining wall is a major, expensive job requiring a mason and an electrician. These solar-powered wall lights, however, provide a very similar effect for a fraction of the cost and effort. A pack of four can be found on Amazon for under $40. Installation involves drilling two small holes and mounting the fixture with screws. You can get this contemporary, warm, and safe stairway in less than an hour, with no wires and no professionals required.
|
📋 Copy HEX 🔗 Share |
The quality and design of solar lighting have improved dramatically in recent years, which is why we’re seeing it used in more sophisticated applications like this. People want beautiful, effective lighting without the expense and complication of hardwiring. This trend is driven by better battery life, more efficient solar panels, and, crucially, the widespread availability of fixtures that produce a warm white light (around 3000K) instead of the harsh, blue-white light that used to be the only option. This has made solar a viable and stylish choice for design-conscious homeowners.
26. Layer a Cozy Deck with Lanterns and String Lights
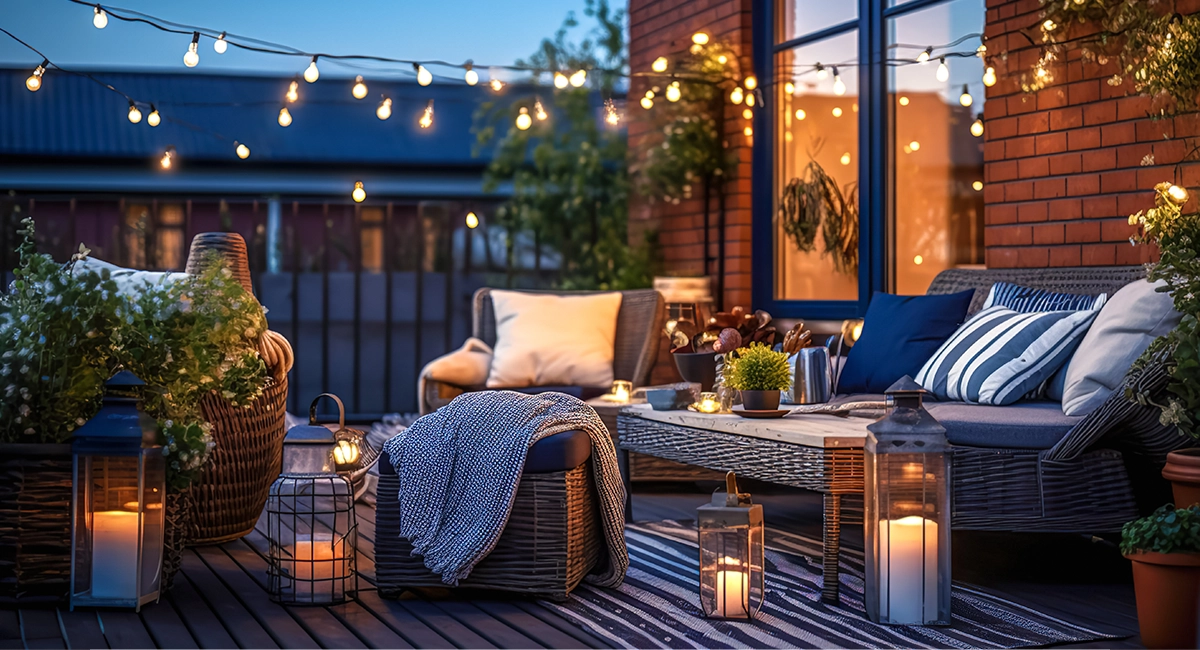
This cozy formula is all about layering textures and light sources. It’s roughly 50% plush textiles, 30% varied lighting, and 20% natural materials. The wicker furniture, striped rug, knit throws, and patterned pillows provide the overwhelming sense of comfort. The light is a mix of overhead string lights for ambiance and floor lanterns with candles for a lower, intimate glow. Finally, the red brick wall, wood deck, and potted plants ground the space with natural texture and color. The combination is a masterclass in creating a relaxing outdoor room.
|
📋 Copy HEX 🔗 Share |
Creating this layered and cozy look can be done at various price points. Here is a realistic estimate:
- Main Furniture (Wicker sofa/chair): $600 – $2,500
- Lighting (string lights, 2-3 large lanterns): $150 – $400
- Textiles (rugs, pillows, throws): $200 – $600
- Decor (potted plants): $100 – $300
- TOTAL: $1,050 – $3,800
Budget alternative: Find wicker furniture on Facebook Marketplace ($200-$500) and refresh it with new cushions. Shop stores like HomeGoods and Target for affordable outdoor rugs and pillows.
27. Create Drama with Uplit Trees and Lantern Groupings
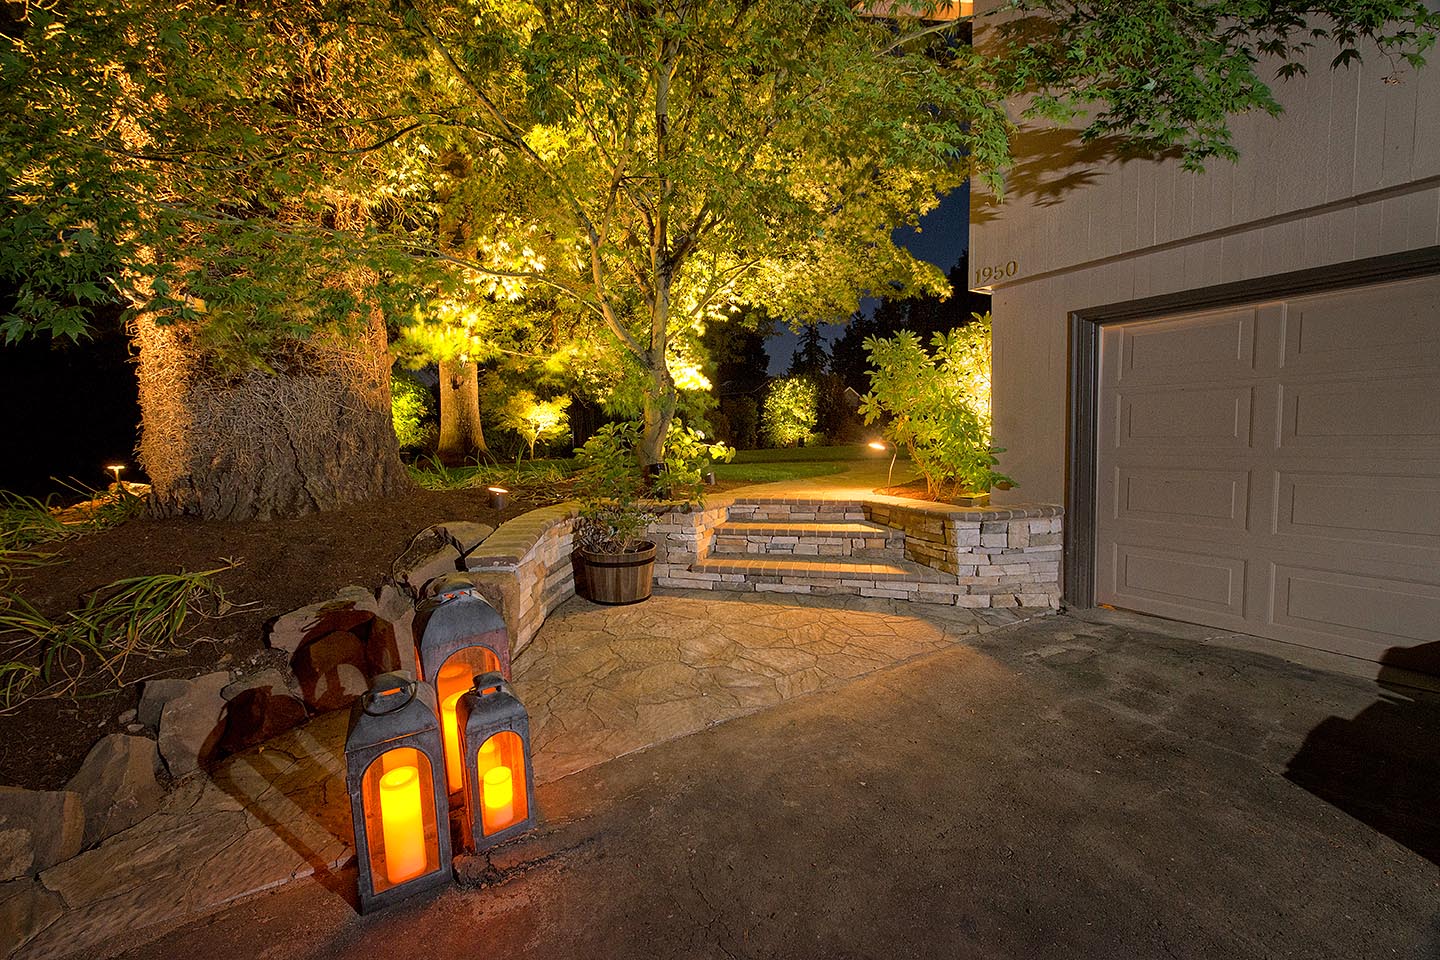
When using uplighting on trees, aim the fixture at the trunk and angle it slightly upwards so the light washes up and into the canopy of leaves. This technique, called backlighting, makes the leaves glow and creates a stunning, dramatic silhouette. For the best effect, use a spotlight with a relatively narrow beam spread (15-30 degrees). For larger, wider trees, you might need two or three fixtures placed around the base to illuminate it fully. This is far more effective than just pointing a floodlight at the whole tree.
|
📋 Copy HEX 🔗 Share |
This landscape lighting scheme works so well because it creates multiple points of interest and guides the eye through the space. The brightly uplit trees in the background create a dramatic focal point and a sense of depth. The cluster of three metal lanterns in the foreground provides a closer, more intimate source of light and anchors the scene. The softly lit stone retaining wall and steps act as a middle ground, connecting the foreground and background. This layering of light at different distances is what gives the landscape a rich, three-dimensional, and professionally designed feel.
28. Use a Built-In Bench with Integrated Under-Seat Lighting
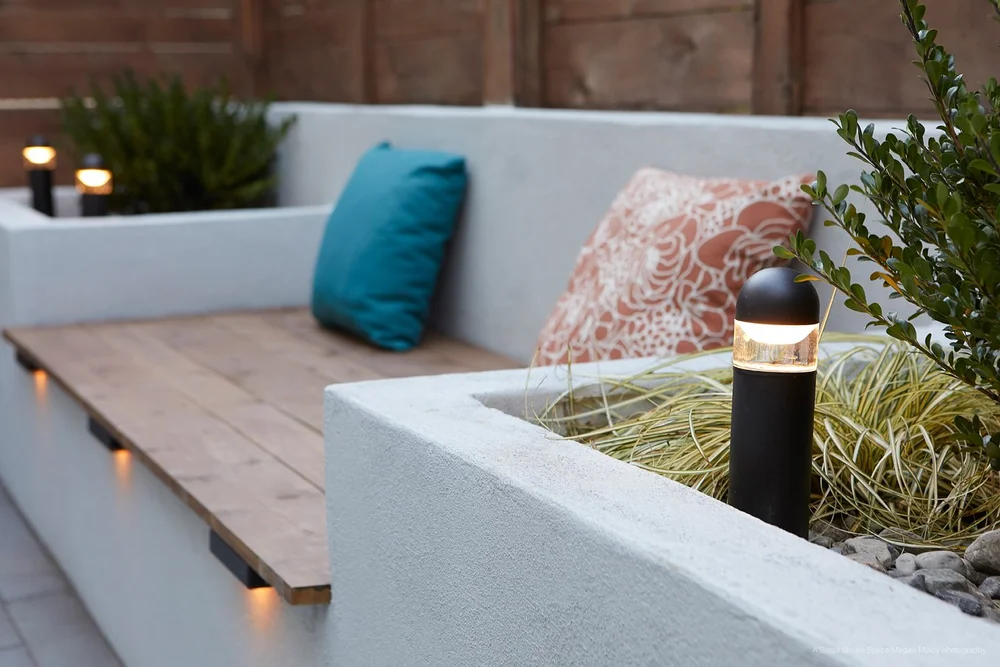
The single element that makes this design feel so custom and architectural is the integrated under-bench lighting. Without it, you would have a perfectly nice stucco and wood bench. With it, the bench appears to float, transformed from a simple piece of seating into a sculptural feature. The downward glow not only provides soft, indirect path lighting but also highlights the transition between the smooth white stucco and the paver patio below. It’s a sophisticated detail that adds a huge amount of visual impact and modern flair.
|
📋 Copy HEX 🔗 Share |
A white stucco bench is stunningly minimalist, but it is not a low-maintenance choice. Stucco is porous and can be easily stained by dirt, fallen leaves, and mildew. You will need to gently scrub it a few times a year with a soft brush and a mild detergent to keep it looking pristine. Also, be mindful of sitting on it with new, dark-wash jeans, as the dye can sometimes transfer onto the light-colored surface. If the upkeep sounds like too much, consider a similar design using smooth-faced concrete or large-format porcelain tiles, which are far less porous and easier to clean.
29. Light a Rooftop Terrace with Linear Ceiling LEDs
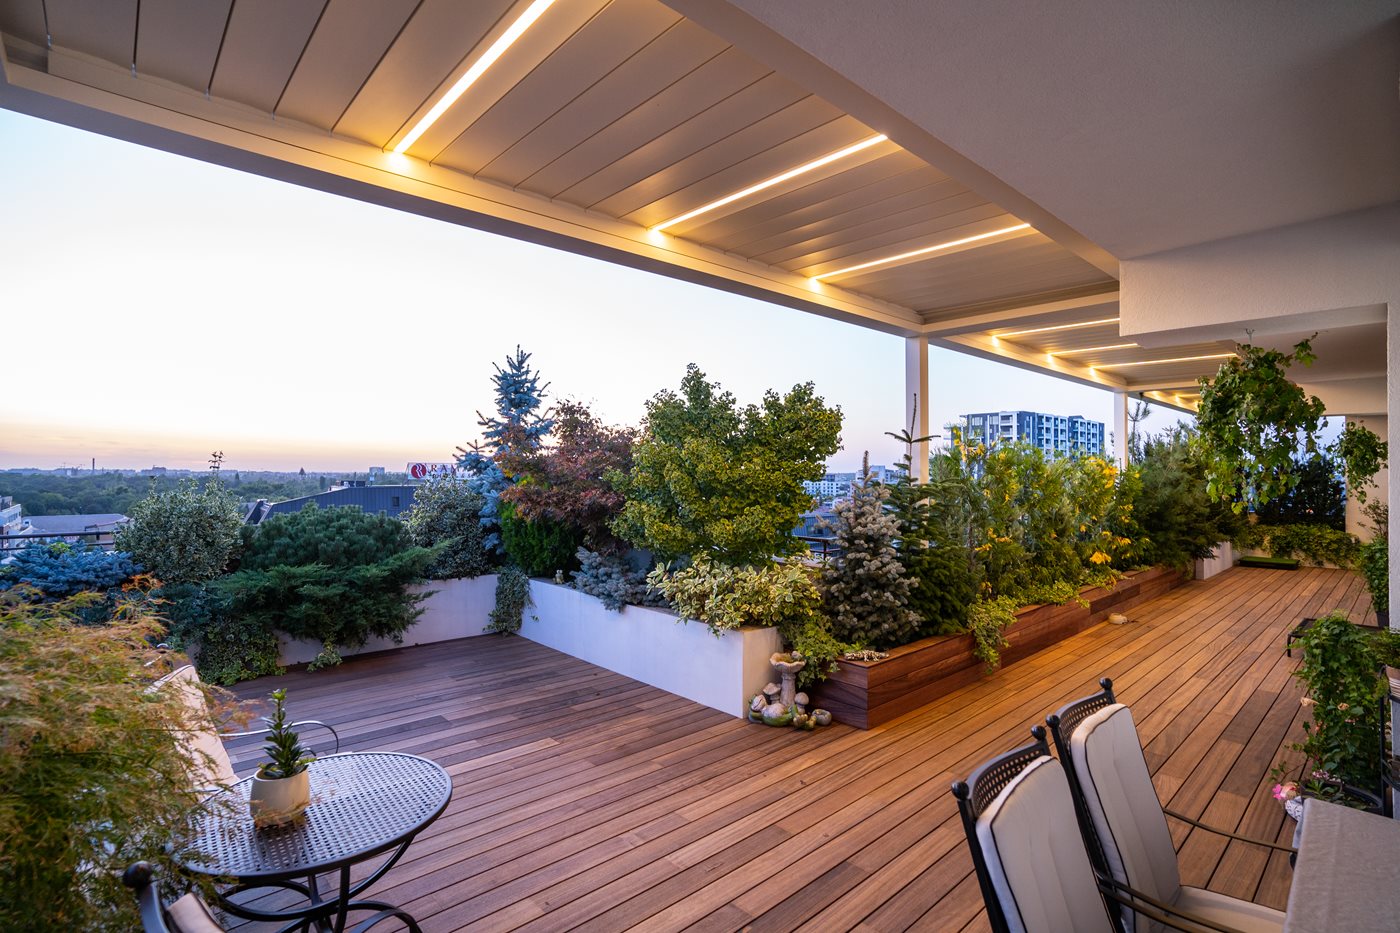
This rooftop terrace feels so serene and expansive due to the brilliant use of linear lighting. The warm LED strips recessed into the overhead pergola ceiling draw the eye upwards and across the length of the space, making it feel larger and more open. The clean, straight lines of the lights mirror the lines of the wooden deck flooring and the built-in planters, creating a cohesive and harmonious architectural language. This repetition of linear forms results in a calm, orderly, and deeply modern aesthetic. Compare this to the playful, zigzagging string lights in Idea #8, which create a totally different, more rustic energy.
|
📋 Copy HEX 🔗 Share |
Integrated ceiling lighting is perfect for large, open rooftop decks and covered patios, especially those over 250 square feet. On a grand scale, the long lines of light provide excellent, even illumination without cluttering the space with hanging fixtures, preserving the open-air feeling and skyline views. For smaller balconies or patios, a full ceiling of linear lights might be overwhelming and cost-prohibitive. In those cases, a single, well-placed outdoor pendant or a few strategically aimed sconces would be a more balanced and budget-conscious choice.
Your Deck’s Glow-Up Starts Here
Whew, that was a lot of inspiration! The right lighting can completely change how you feel about your outdoor space, turning a simple deck into your favorite room in the house. Don’t be afraid to start small—a single string of lights can make a huge difference. Now go ahead and make one of these ideas your own. And don’t forget to save your favorites to your Pinterest board for when you’re ready to get started!