You know that feeling when you finally find the perfect garden lighting idea on Pinterest but have no idea how to make it happen in your yard? We get it. It’s easy to get lost in a sea of pretty pictures that feel totally disconnected from reality. That’s why we did the heavy lifting, sorting through hundreds of options to find inspiration that actually works for real homes.
This post may contain affiliate links. As an Amazon Associate, we earn from qualifying purchases at no extra cost to you.
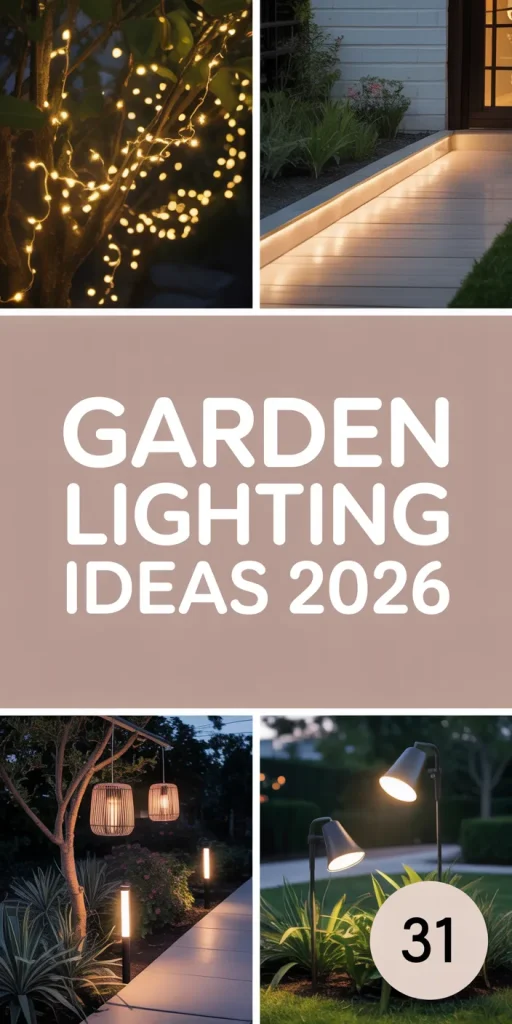
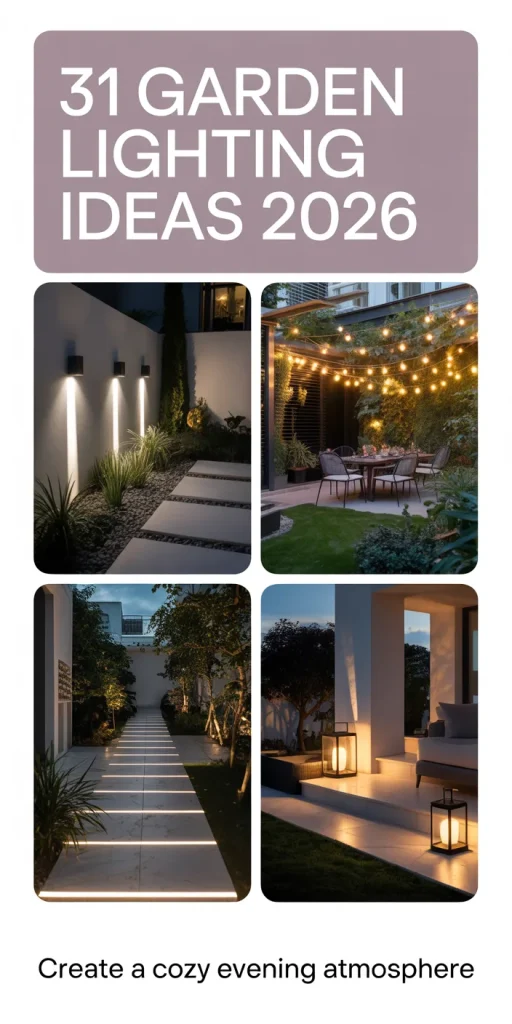
This isn’t just another generic gallery. We’re bringing you 31 highly specific, curated garden lighting ideas for 2026, from epic multi-level landscapes to simple, cozy patios. Whether you’re working with a big budget or looking for a transformative weekend project, we’ve got you covered. Stay until the end, as we break down the most common mistakes that can ruin these looks. 📌 Save this to Pinterest for later — you’ll want to revisit these ideas.
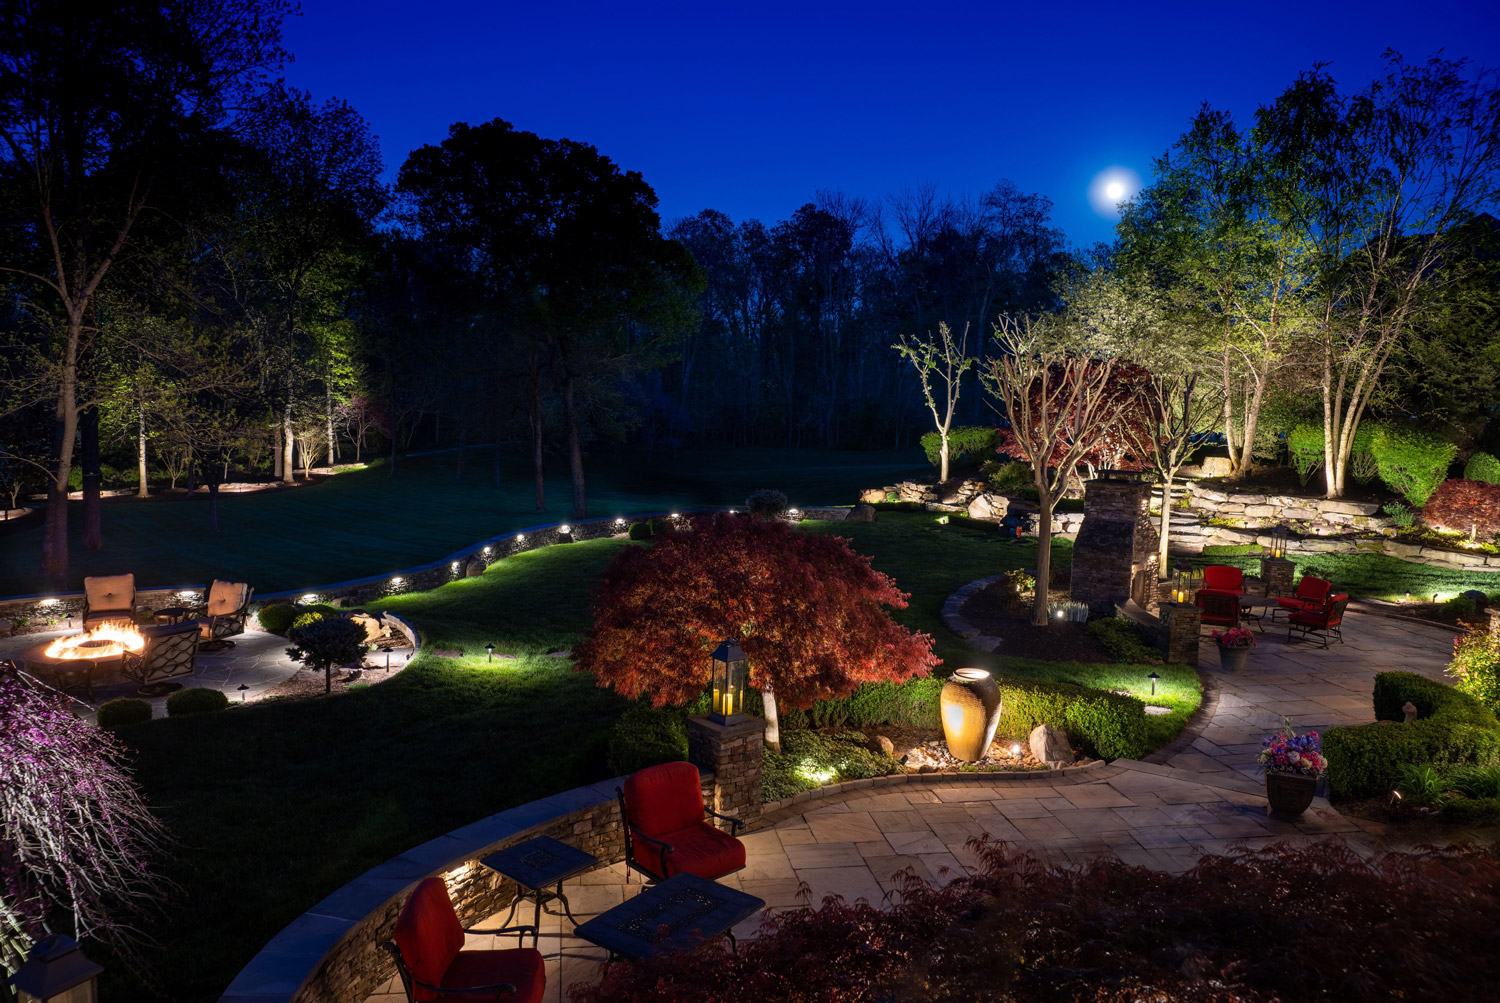
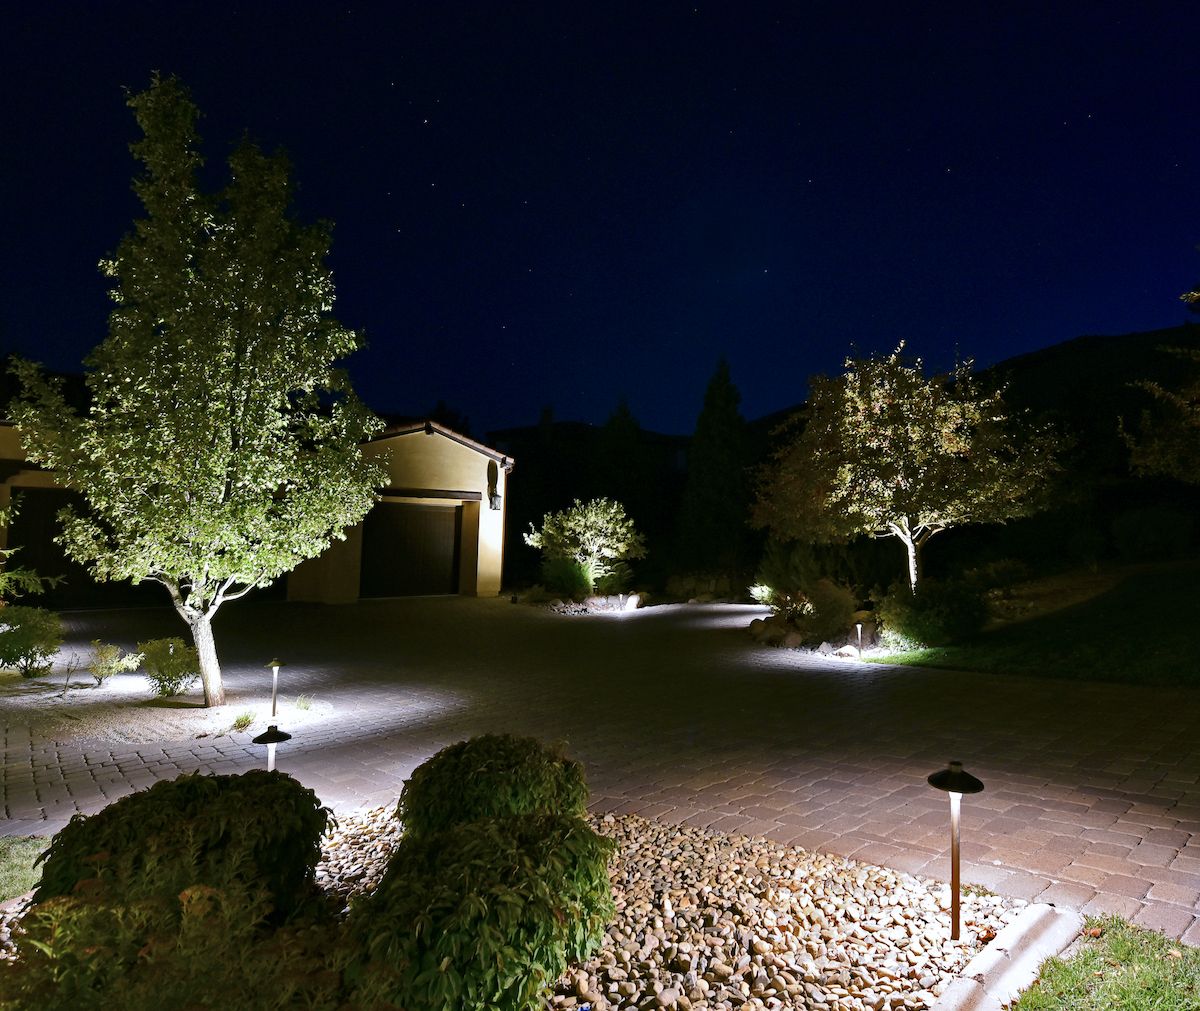
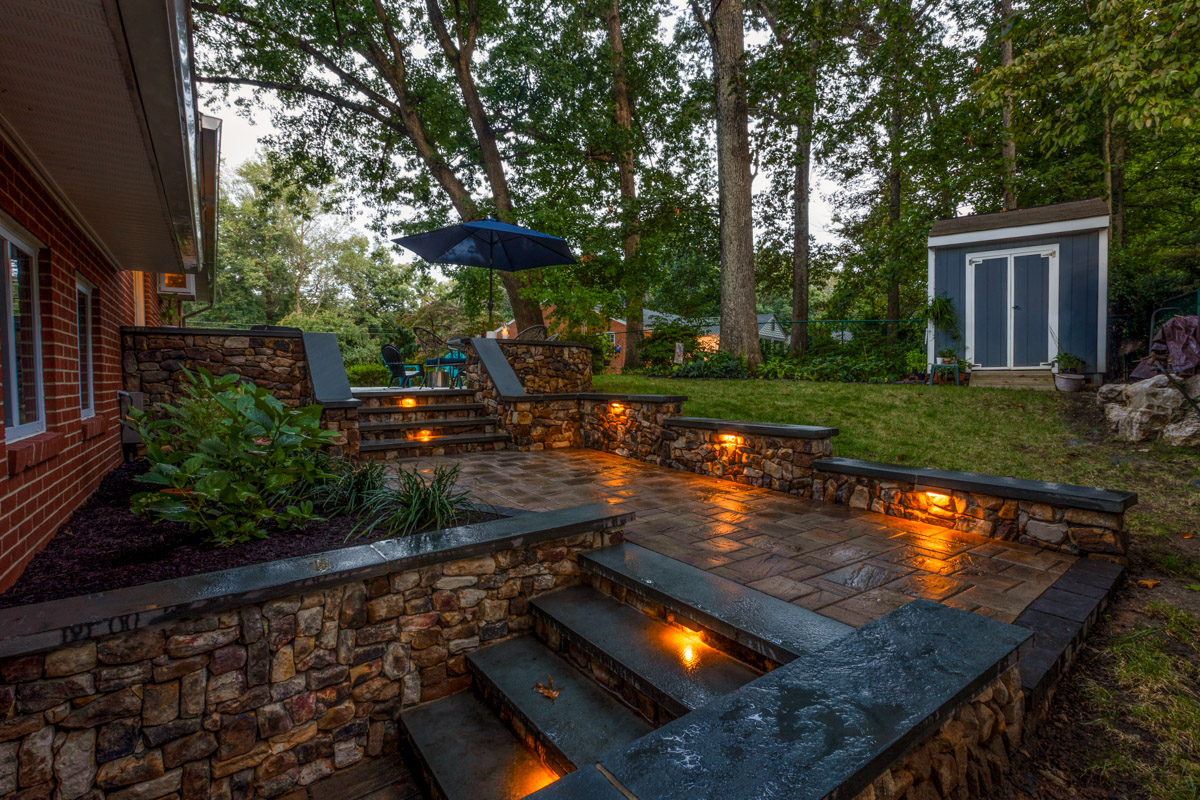
1. Luxe Layered Lighting for a Multi-Level Garden Oasis
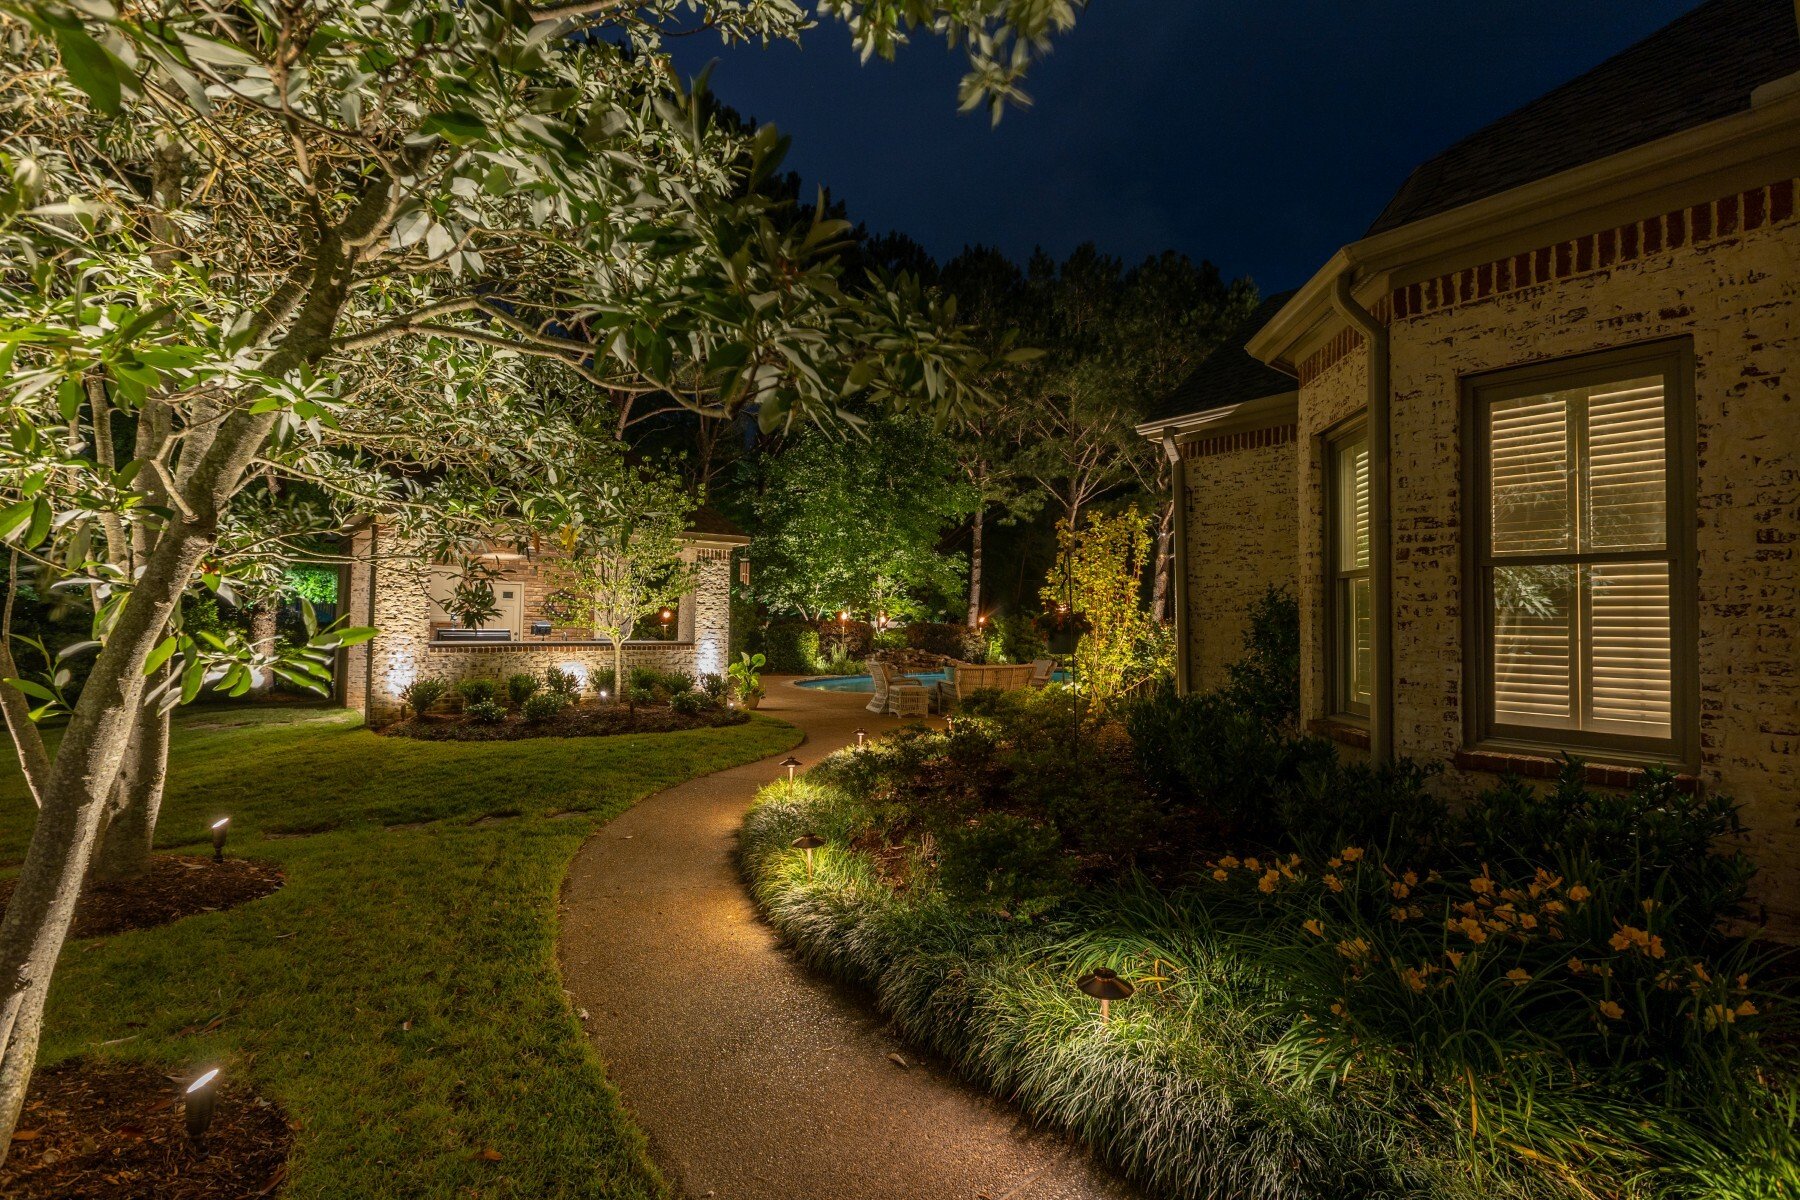
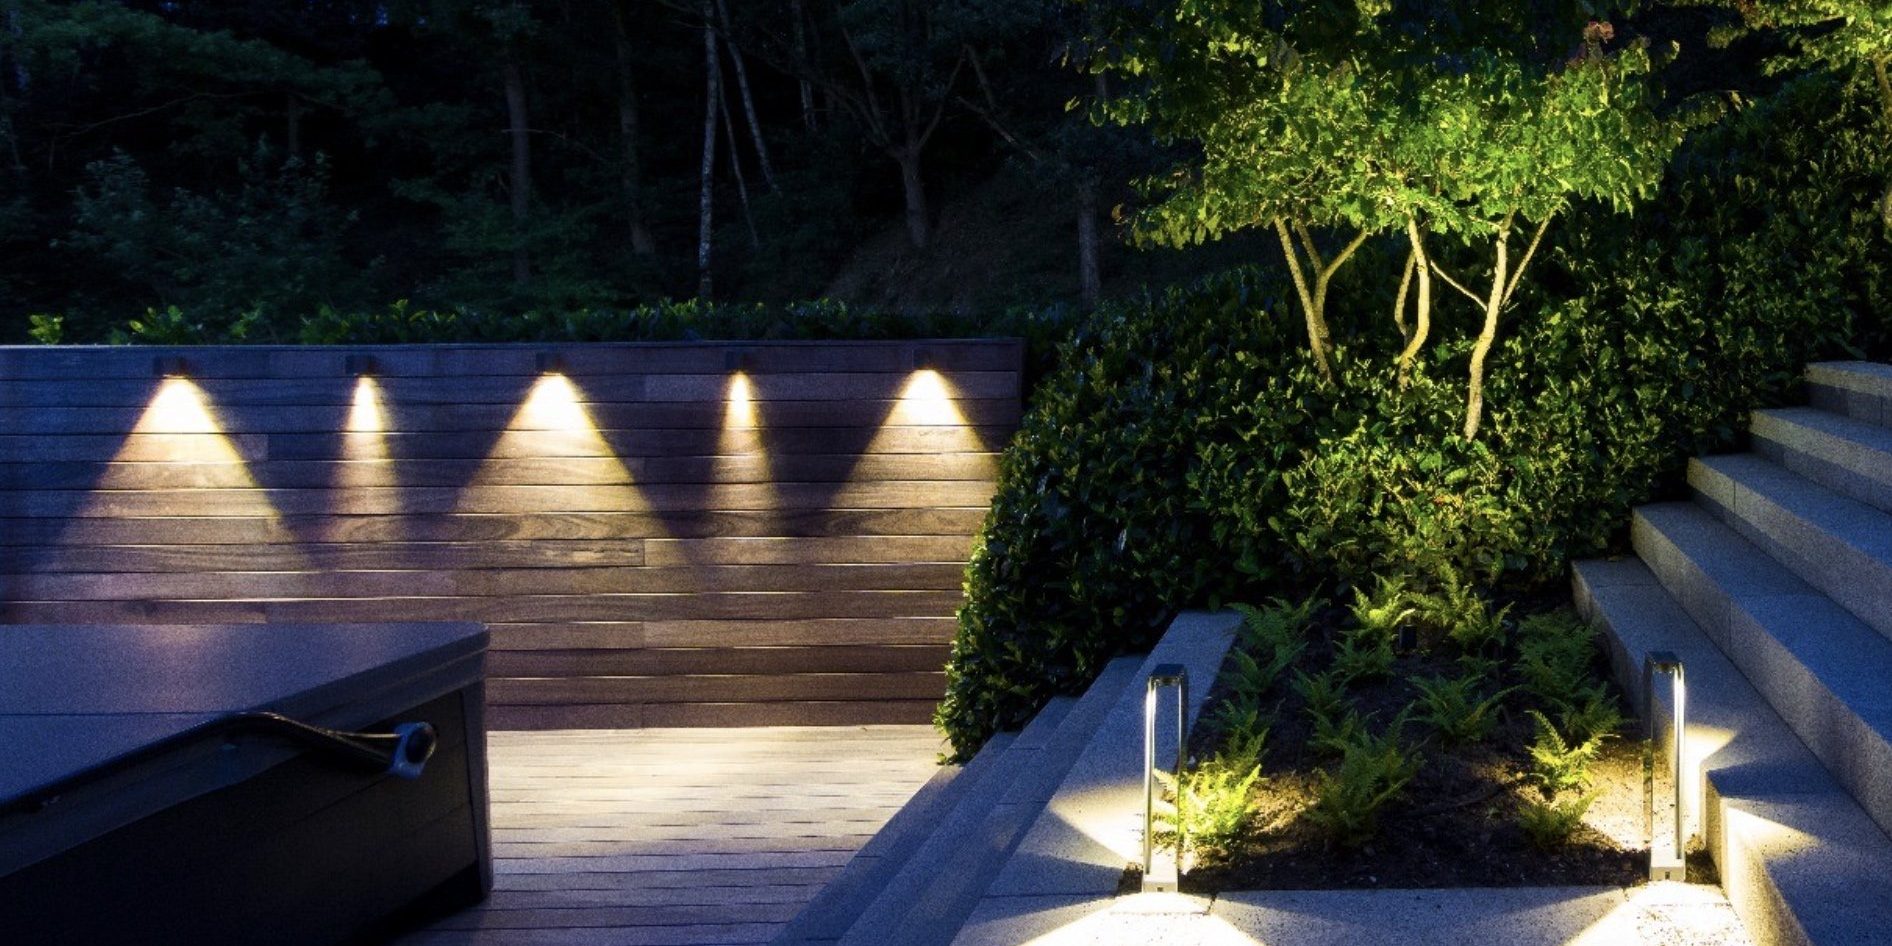
This look is all about creating depth and drama through layers. You have three distinct types of light working together: low-level path lights that make walkways safe and inviting, uplights that turn trees into dramatic sculptures against the night sky, and the ambient glow from the fire features. This separation of tasks creates a professionally designed, luxurious feel in the space. It guides the eye and creates multiple destinations within one large area.
|
📋 Copy HEX 🔗 Share |
|
$309.00
|
$18.88
|
$9.98
|
$379.99
|


Recreating this high-end look is a significant investment, primarily in professional installation and quality fixtures designed to last for years. The magic is in the quantity and placement of the lights that achieve this layered effect.
- Main fixtures (uplights, path lights): $3,500 – $7,000
- Lighting (bulbs, low-voltage transformer): $800 – $1,500
- Professional Installation/Labor: $4,000 – $8,000
- Accent (fire pit, fireplace lighting): $500 – $1,200
- TOTAL: $8,800 – $17,700
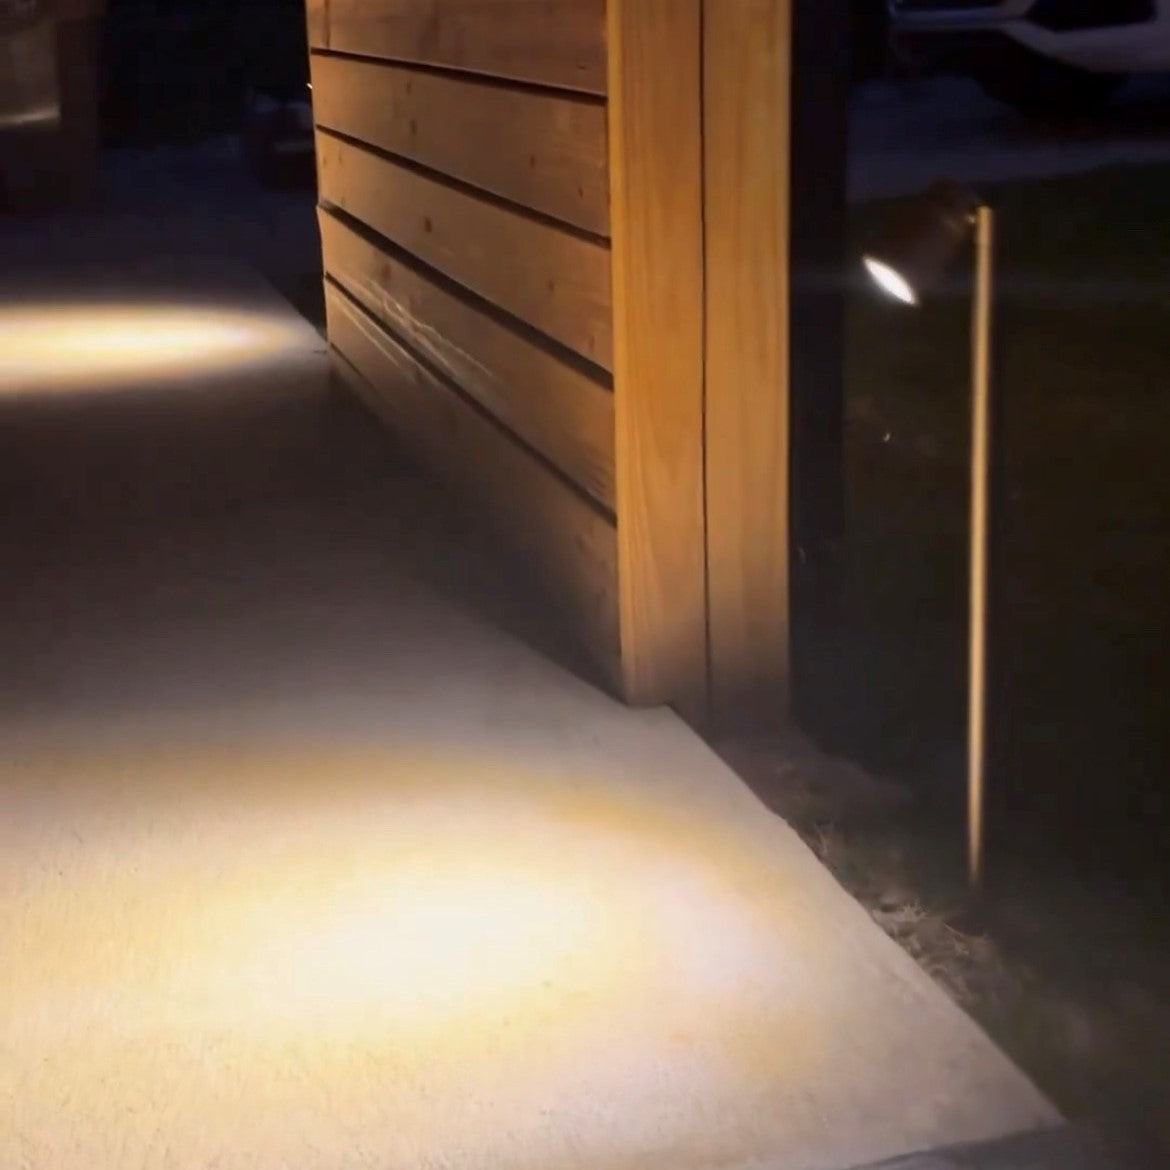
2. Dramatic Uplighting for Brick Facades and Winding Paths
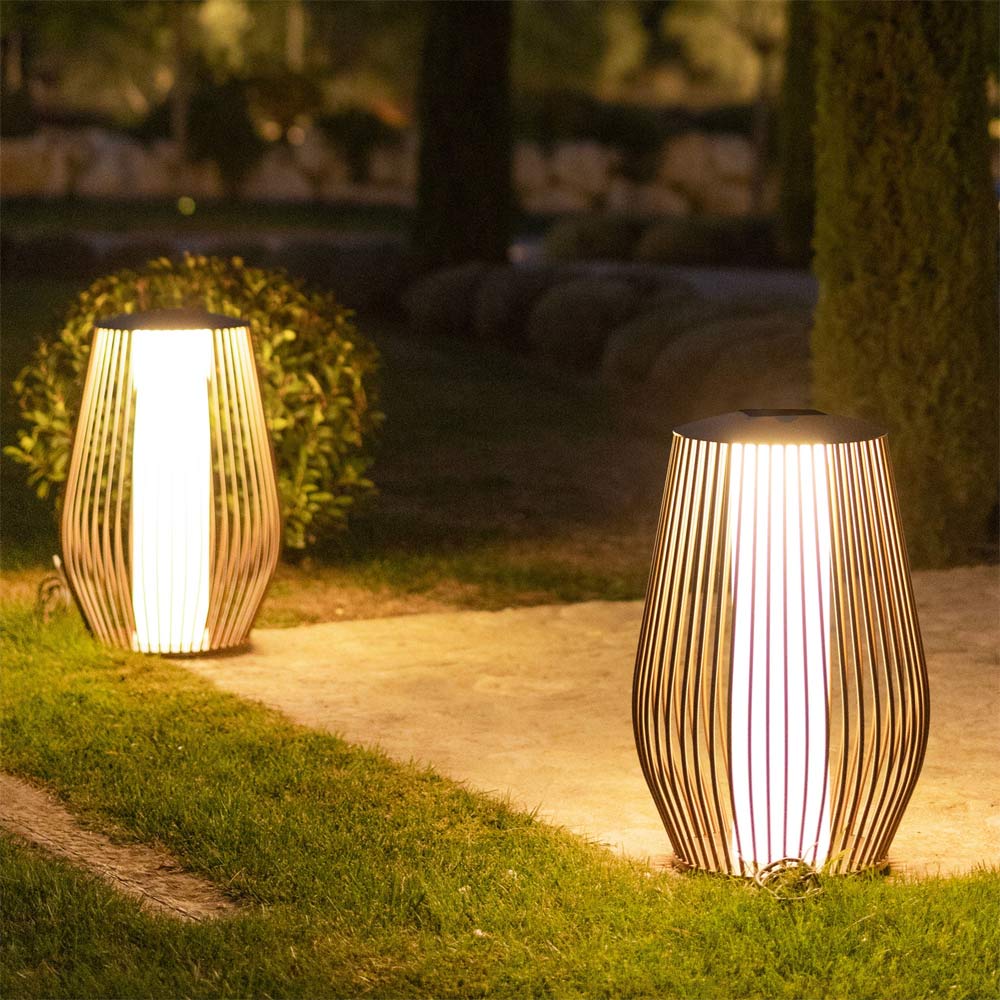
To really make texture pop like you see on this brick, place your uplights close to the wall. For a grazing effect that highlights every bump and crevice, position the fixture 6-12 inches from the facade and aim it almost straight up. This technique turns a flat wall into a dynamic, three-dimensional feature. Using a narrower beam angle (15-30 degrees) will create more dramatic, focused columns of light, while a wider beam will give a more gentle wash.
|
$11.99
|
$29.97
|
$27.99
|
$19.97
|

A setup this extensive requires many fixtures, and that means a higher electricity bill. While modern LED lights are incredibly efficient, illuminating this many trees, paths, and walls all night, every night, will have a noticeable impact on your utility costs. Consider investing in a high-quality astronomical timer that automatically adjusts for sunset/sunrise times and a dimmer system to reduce the intensity (and energy use) after peak evening hours.
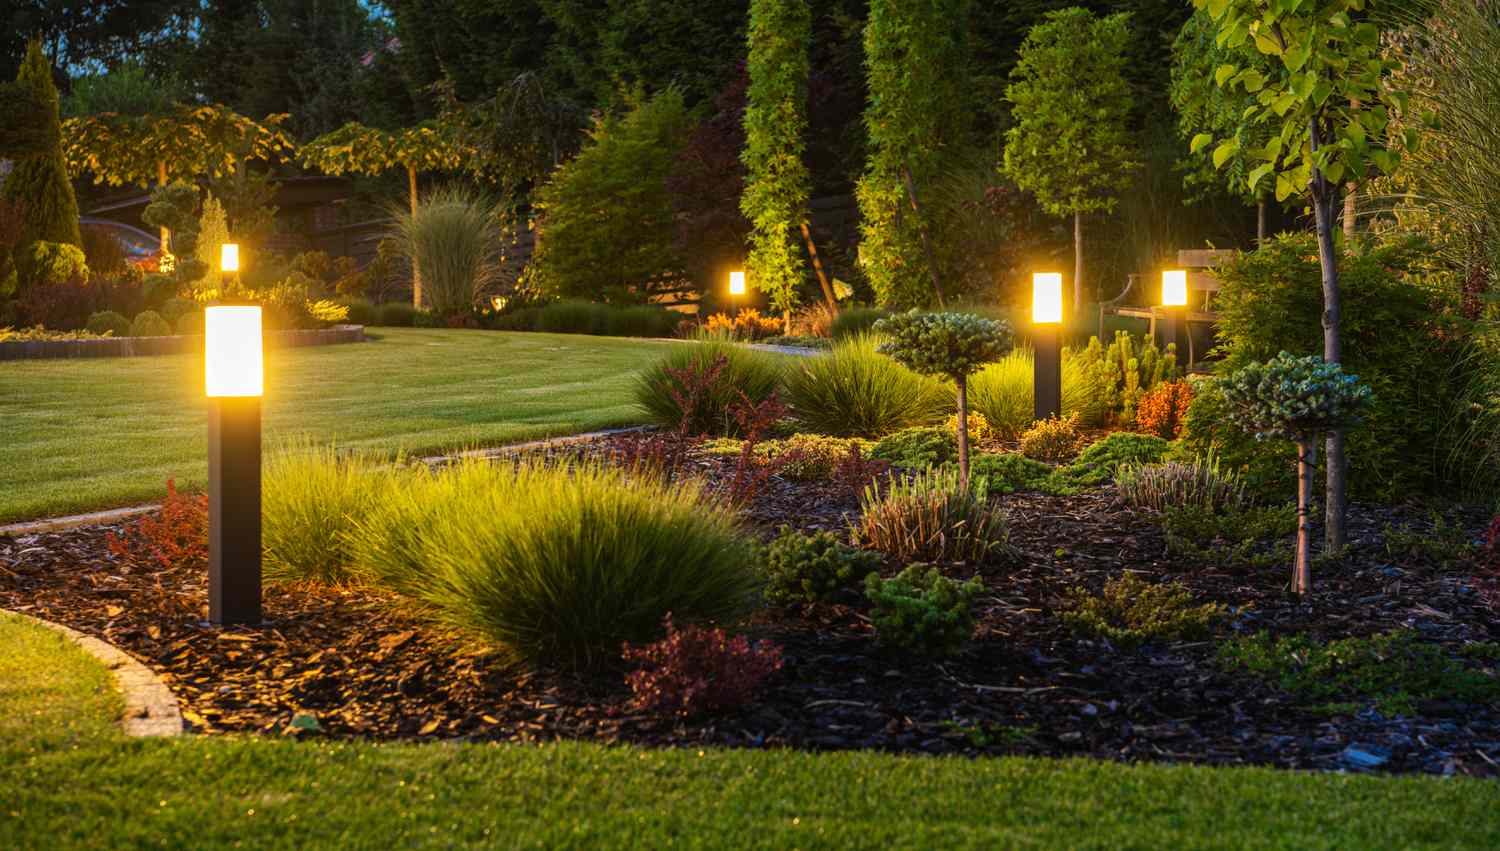
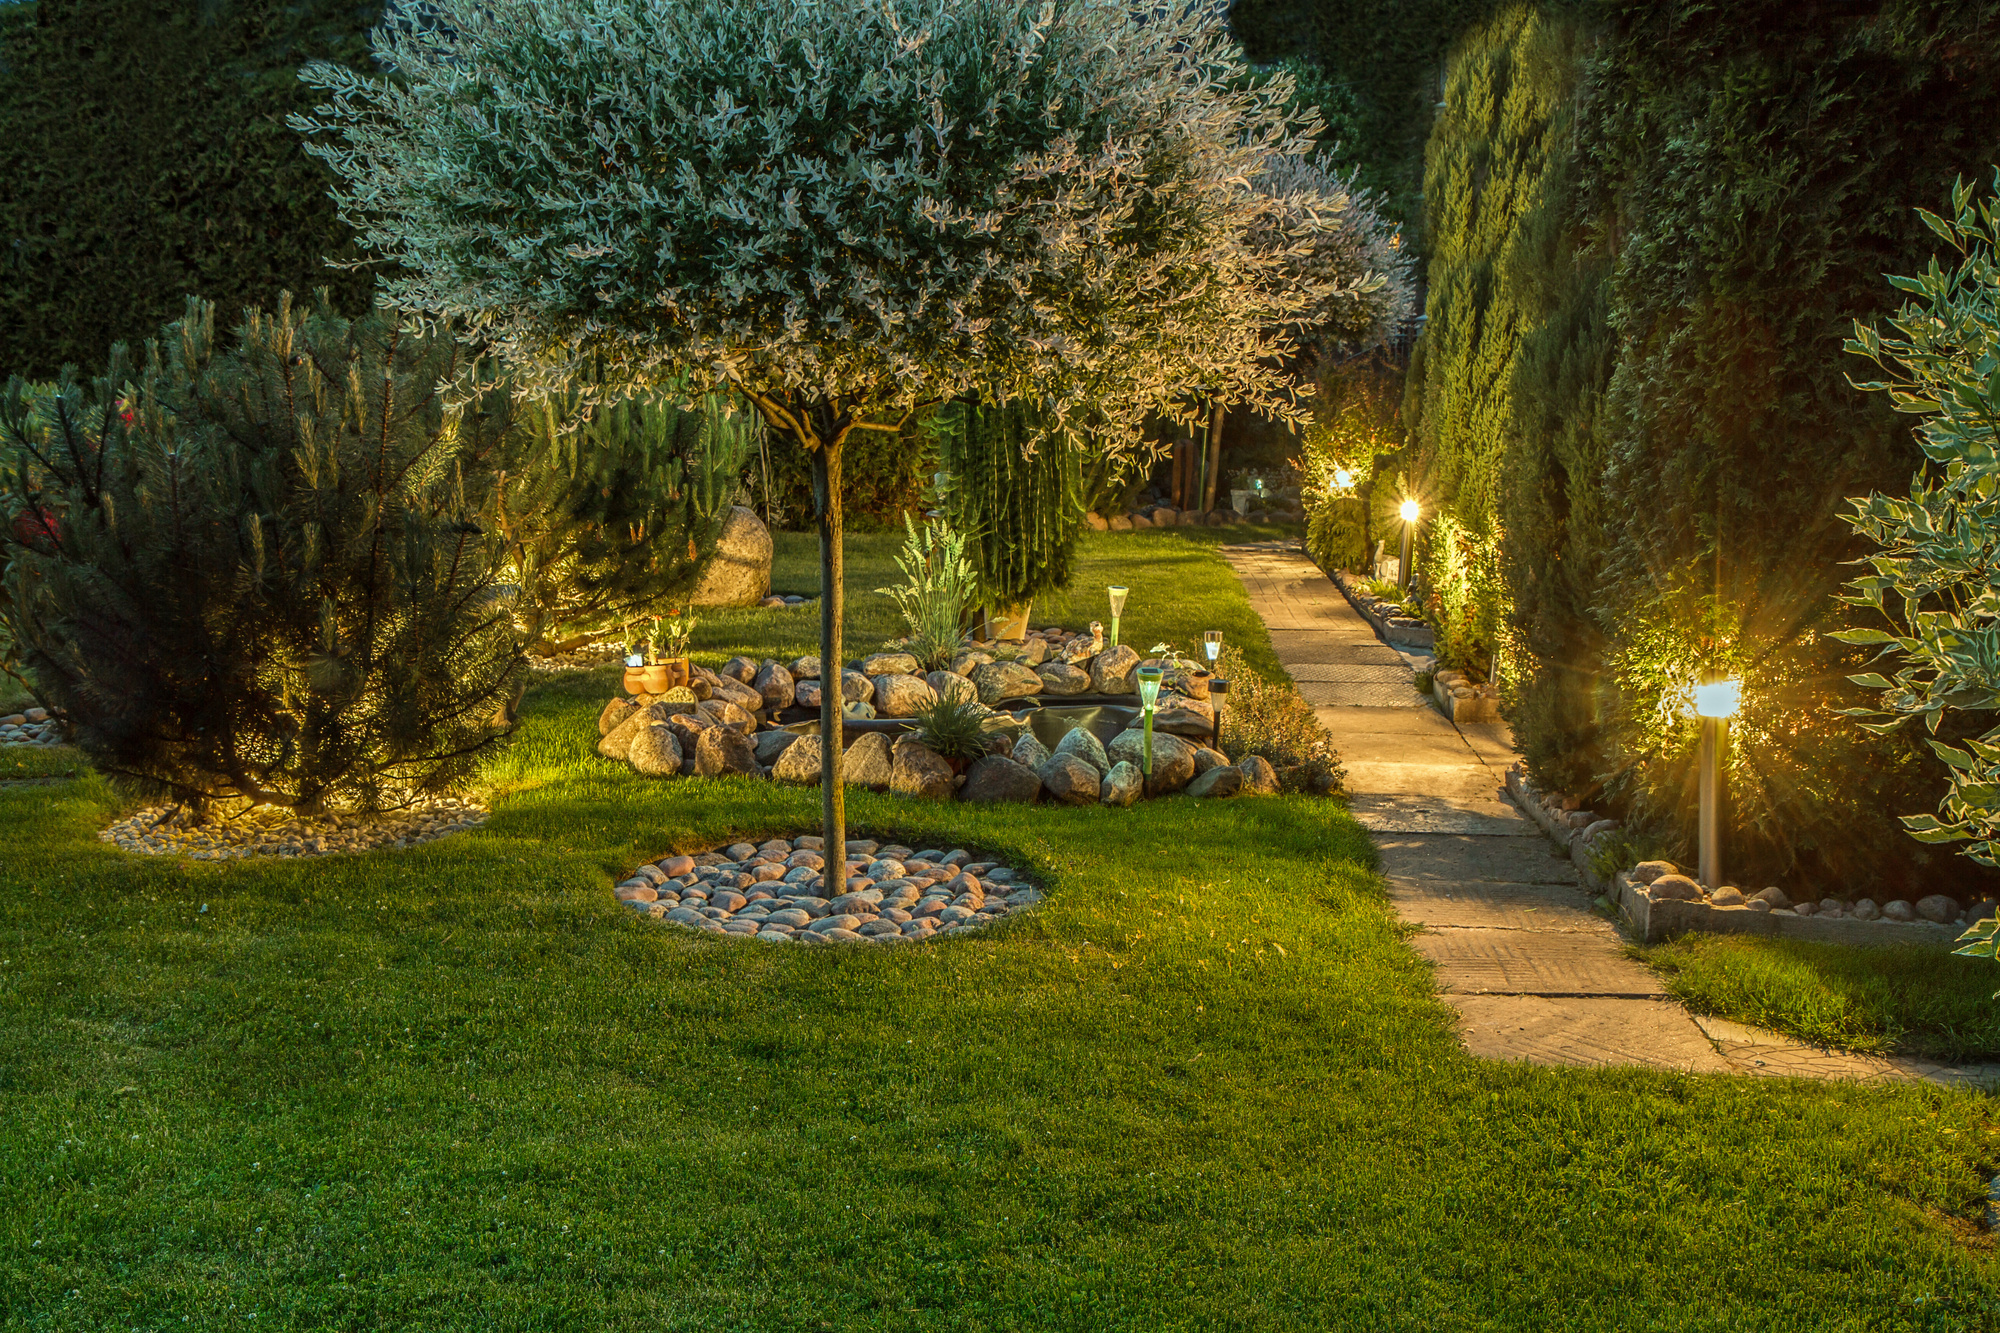
3. Subtle Uplighting Meets a Starry Night Sky
The single most important element here is restraint. It would be easy to flood this entire area with light, but that would thoroughly wash out the beautiful starry sky. Instead, the lighting is intentionally kept low to the ground, focused only on key landscape features—the base of the trees and the edge of the driveway. This selective illumination creates a sense of safety and highlights the home’s best features without competing with the natural beauty of the night sky above.
|
📋 Copy HEX 🔗 Share |
|
$59.69
|
$8.39
|
$89.98
|
$14.50
|
This approach is ideal for larger properties, especially those in suburban or rural areas with less ambient light pollution. You need a minimum of 50–75 feet of driveway or pathway to achieve this stretched-out, layered effect. The key is having enough distance between the light fixtures to create distinct pools of light rather than one continuous, overly bright line. It’s less effective in smaller, compact yards where the lights would be too close together.
4. Warm Welcome: Lighting a Winding Path and Brick Facade
The visual success here is a simple but effective formula: 60% pathway lighting + 40% architectural uplighting. The pathway lights provide the functional, guiding light, while the uplighting adds the aesthetic, emotional layer. The key is ensuring both sets of lights share the same warm color temperature (around 2700K). You could swap the brick for stone or the pavers for gravel; as long as you maintain this 60/40 balance and consistent warmth, you will achieve the same inviting and cohesive result.
|
$20.89
|
$44.99
|
$46.47
|

A hardwired system like this is fantastic for reliability, but it’s not zero-maintenance. Over time, the ground can shift, causing fixtures to tilt. You’ll need to walk the property a few times a year to straighten posts and trim back any overgrown plants that are blocking the light. Bulbs will also eventually need replacing, although with modern LEDs, you can expect 5–10 years of life before that’s a concern. Notice how the uplighting here creates a softer feel than the more dramatic effect in Idea #2.
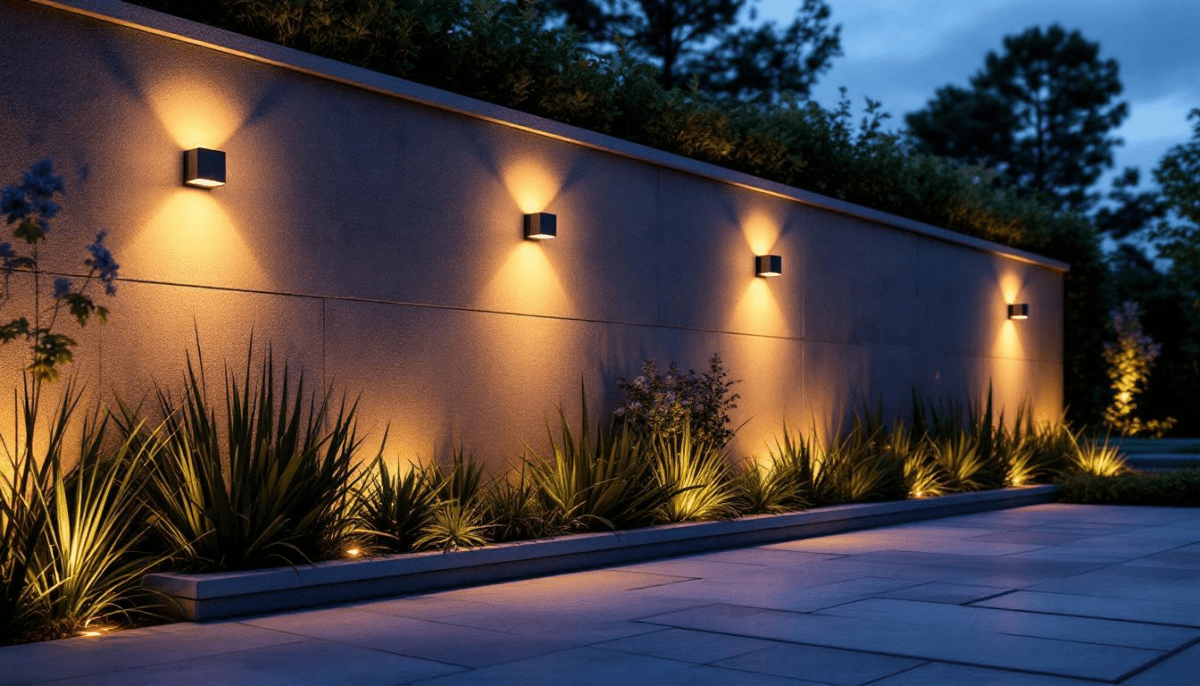
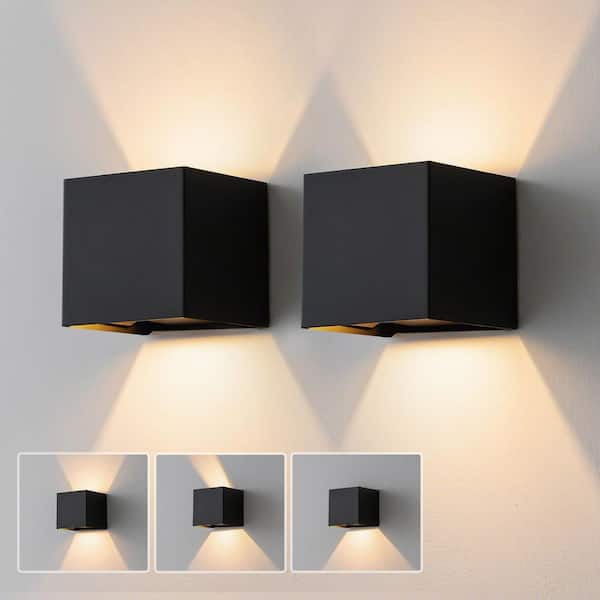
5. Modern Geometry: Up-and-Down Sconces on a Garden Wall
This design nails the modern aesthetic by leaning into clean, geometric forms. The square sconces create sharp, V-shaped beams of light that repeat along the wall, establishing a strong rhythm. The organic, spiky shapes of the plants below perfectly balance this man-made geometry. The contrast between the rigid lines of the architecture and the soft, natural textures of the foliage is what makes this composition so visually satisfying and serene.
|
📋 Copy HEX 🔗 Share |
|
$13.32
|
$34.97
|
$71.49
|
$127.92
|


Want to illuminate plants in a planter bed like this? It’s easier than you think with a low-voltage system. (Time: 2 hours, Cost: $100-$300)
- Plan your layout. Decide where you want your lights to go for the best effect on the spiky plants.
- Install a low-voltage transformer near an outdoor outlet, safely away from direct rain or sprinklers.
- Run your low-voltage cable from the transformer along the inside edge of the planter box. You can hide it just under the soil or mulch.
- Attach your ground lights to the cable using the simple clip-on connectors that come with most kits.
- Bury the fixtures so only the top is visible, and adjust the angle to highlight the plants perfectly.
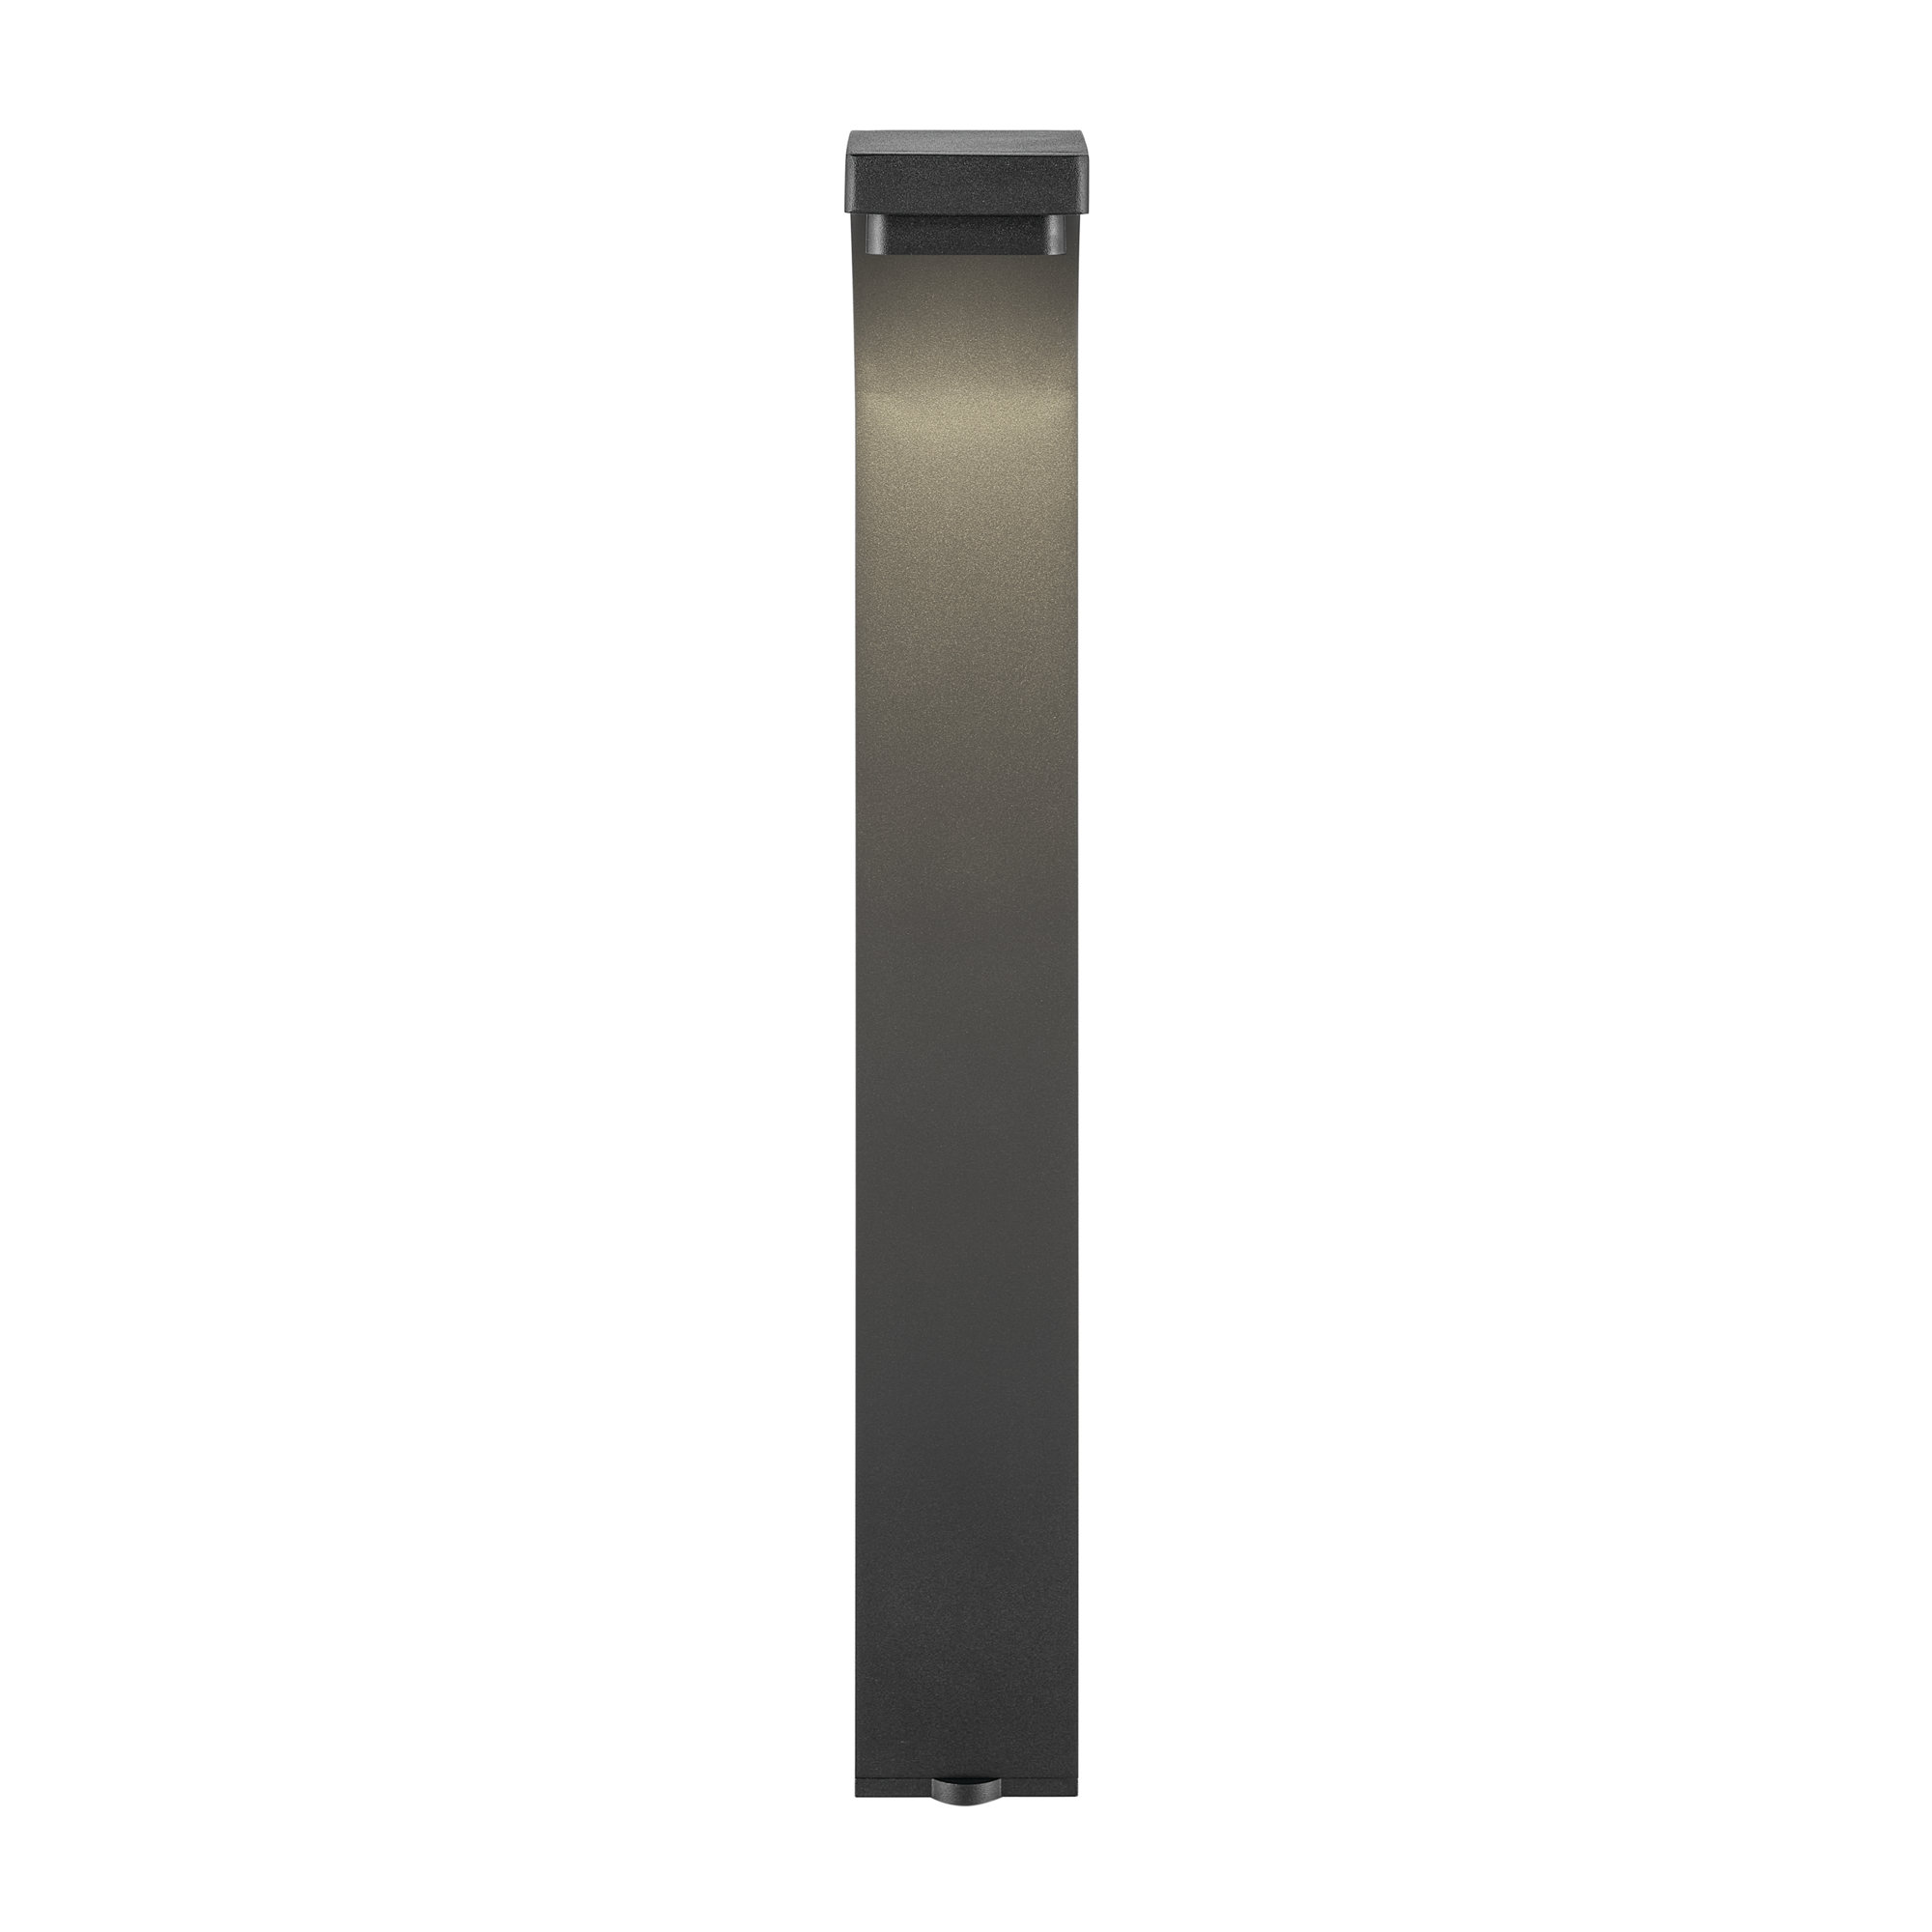
6. Invisible Glow: LEDs Tucked into Stone Walls and Stairs
For integrated lighting in masonry or stairs, planning is everything. Specify these lights *before* construction begins. For stone walls, you’ll want linear LED fixtures that are 1.5 to 2.5 inches deep. Have your mason create channels or leave gaps in the mortar for the fixtures to be recessed. For stair risers, use fixtures specifically rated for stairs; they cast light downwards at an angle to illuminate the tread below without creating glare for the person walking up the steps.
|
$4,478.00
|
$79.98
|
$49.99
|
$210.00
|
This look is a giant trend for 2026. Homeowners are moving away from seeing lights as separate objects and more towards integrating daylight directly into the architecture of the garden itself. It’s a minimalist, high-end look that feels custom and thoughtful. It’s all about making the effect of the light the star, not the fixture. This reflects a broader design shift towards seamless, integrated smart homes and a desire for clean, uncluttered outdoor living spaces.
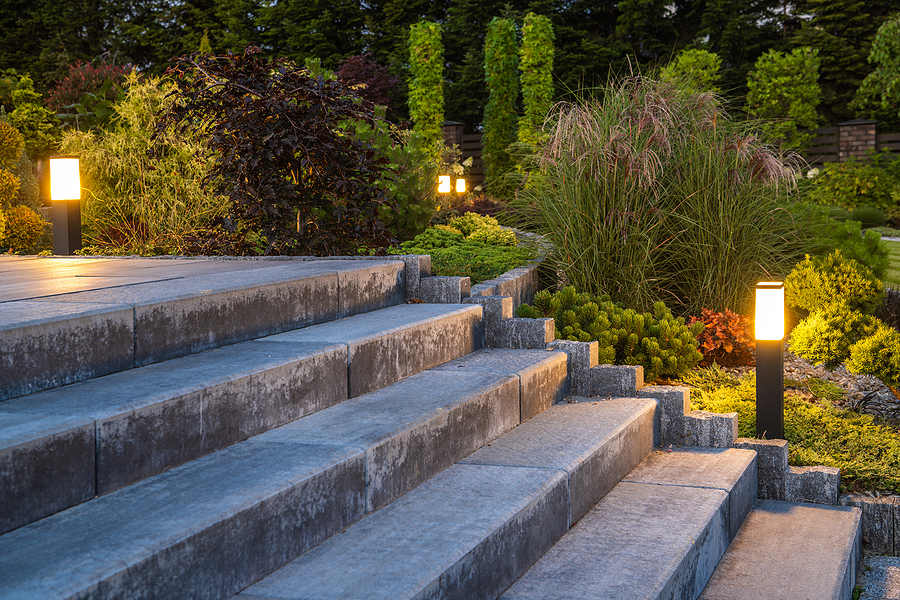
7. Modern Bollards Dotting a Manicured Garden
Take away the bollard lights, and you just have a nicely manicured lawn. The bollards are the crucial element that transforms the space from simple to sophisticated. They aren’t just for light; they are sculptural objects in their own right. Their clean, vertical lines add a touch of modern formality and provide a beautiful contrast to the soft, mounded shapes of the surrounding shrubs. Their warm, glowing tops feel more like floating lanterns than simple path lights.
|
📋 Copy HEX 🔗 Share |
|
$6.97
|
$64.00
|
$2.00
|
$68.76
|


The key to making bollards look deliberate and designed is the spacing. For a gentle, ambient glow along a path or bed, space fixtures 8 to 12 feet apart. If you want to create a more defined, continuous line of light, you can pull them closer to 6 feet apart. Any closer, and you risk the dreaded ‘runway’ effect. This idea works best in moderately sized gardens where you have at least 20-30 feet of length to establish a proper visual rhythm.
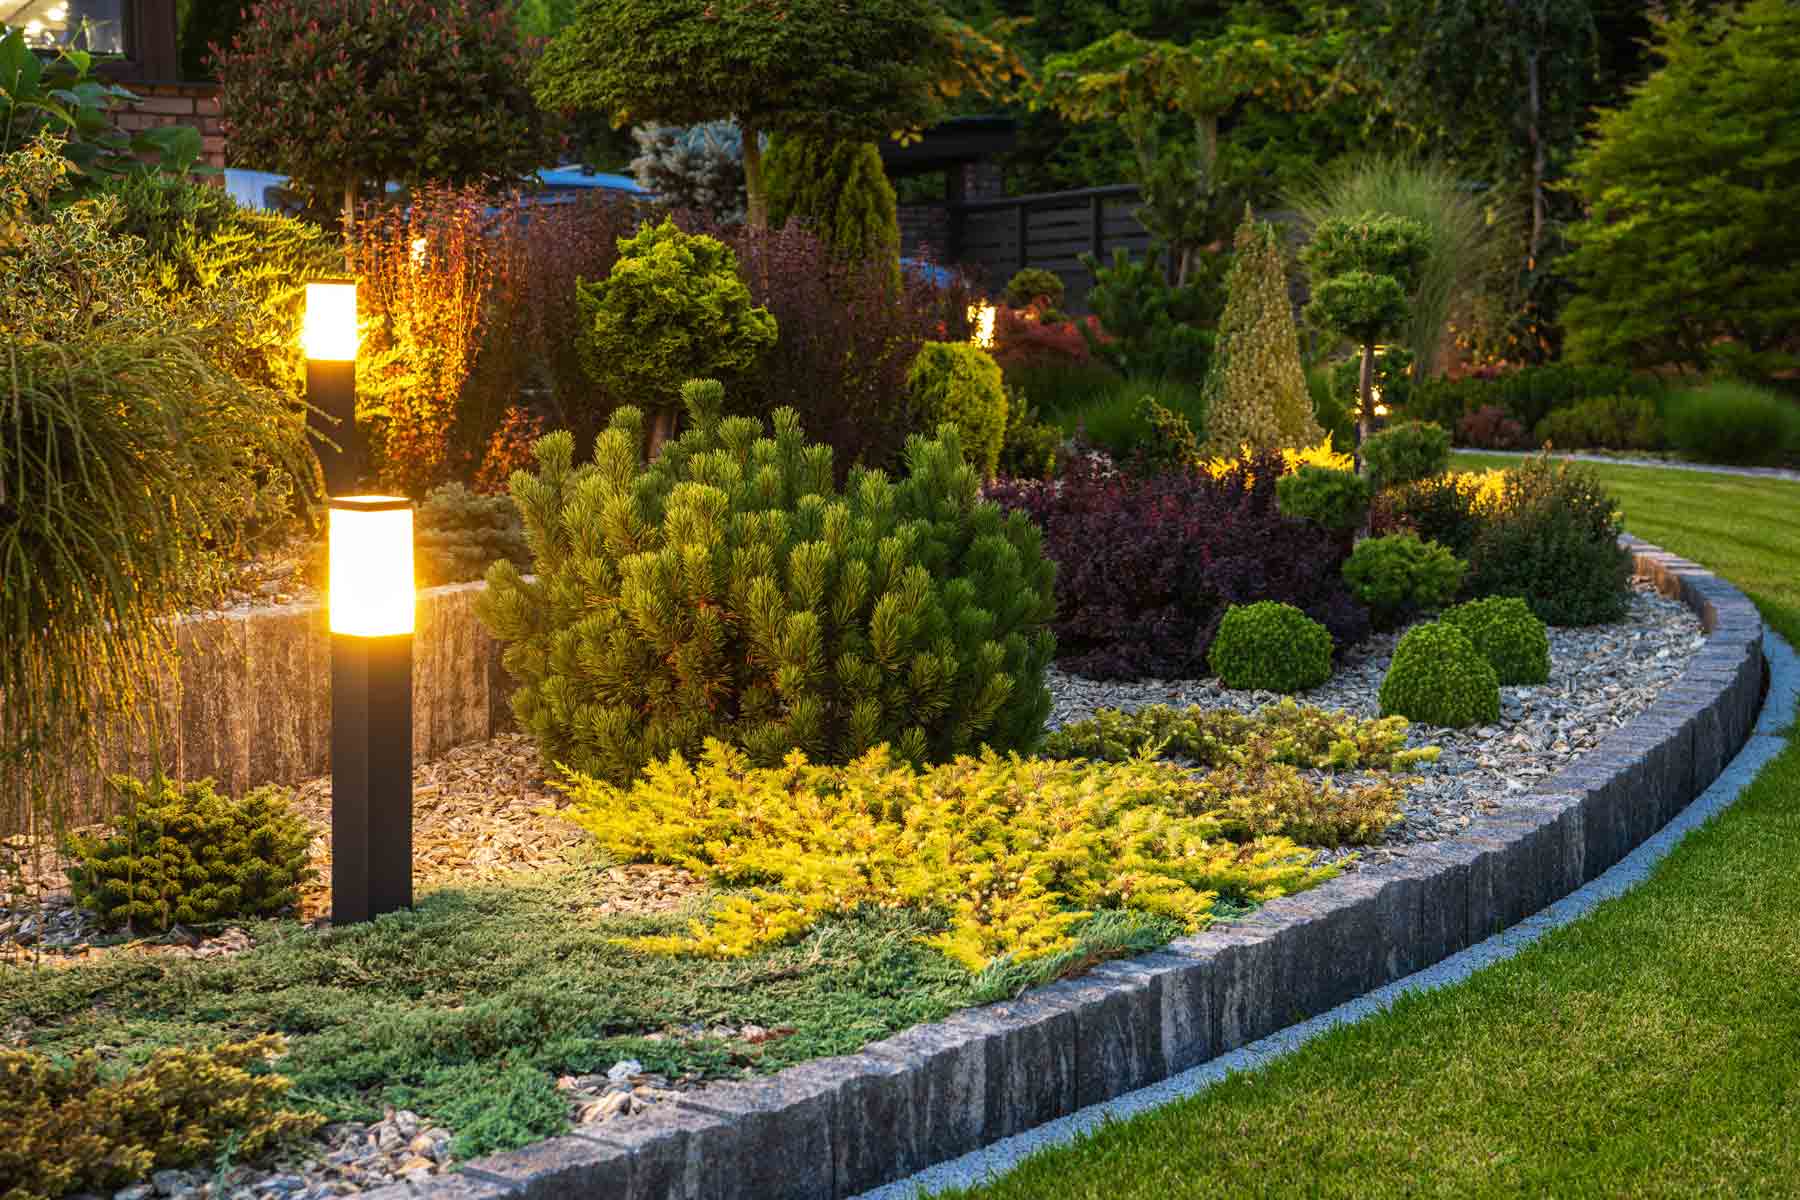
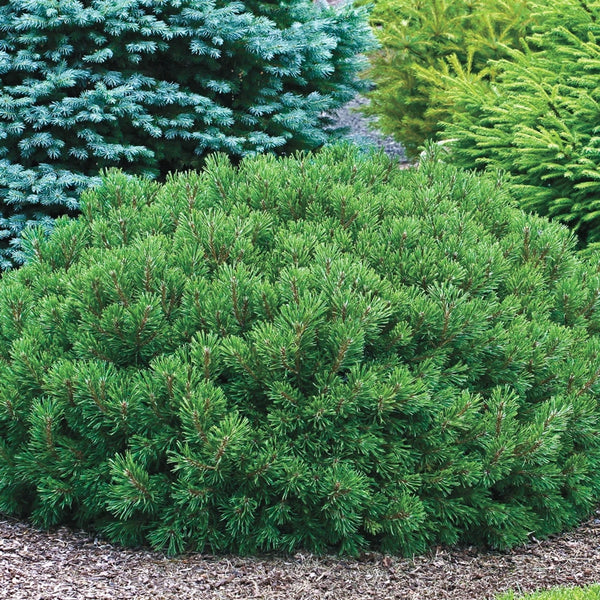
8. Sculptural Bollards in a Colorful, Textured Garden Bed
While placing lights directly within a garden bed creates a beautiful, integrated look, you have to think about the future. That tiny yellow-green conifer will grow! Make sure you place the bollards with enough clearance—at least 18-24 inches—from the center of new plantings. Otherwise, an overgrown shrub will completely swallow your expensive light fixture in a few years, blocking the light and making maintenance a nightmare. Plan for the mature size of your plants, not their current size.
|
$42.00
|
$59.49
|
$3.48
|
$32.85
|
The formula here is all about balancing color and texture: 50% varied foliage (the mix of greens, yellows, and blues) + 30% hardscape (the dark stone border and black bollards) + 20% warm light. The warm white light acts as the perfect bridge, enhancing the yellow tones in the foliage and contrasting beautifully with the dark, cool tones of the stone and metal. These are a more sculptural take on the slender bollards in Idea #7.
9. Guiding the Way: Bollard Lights Along Concrete Steps
The beauty of this design lies in the powerful contrast between hardscape and softscape. The strict, linear forms of the concrete steps and retaining wall are softened by the lush, almost wild plantings surrounding them. The bollard lights mediate between these two worlds. Their simple, modern form echoes the architecture, while their warm, gentle glow enhances the rich colors and textures of the foliage, creating a space that feels both structured and natural at the same time.
|
📋 Copy HEX 🔗 Share |
|
$379.99
|
$30.36
|
$13.97
|
$23.48
|


You don’t need a professionally installed, hardwired system to get this effect. You can achieve a very similar vibe on a budget. And this is a great place to use an unordered list!
- Solar Bollard Lights: Look for models at Target or on Amazon that have a modern, black finish. A set of 4 can cost between $50 and $120.
- Strategic Placement: You won’t need as many as you would with a hardwired system. Place one at the top of the stairs, one at the bottom, and maybe one or two in the middle, nestled into the planting beds.
- The goal is to provide enough light to guide the way and highlight the plants, not to light up the entire path. Total cost could be under $150.
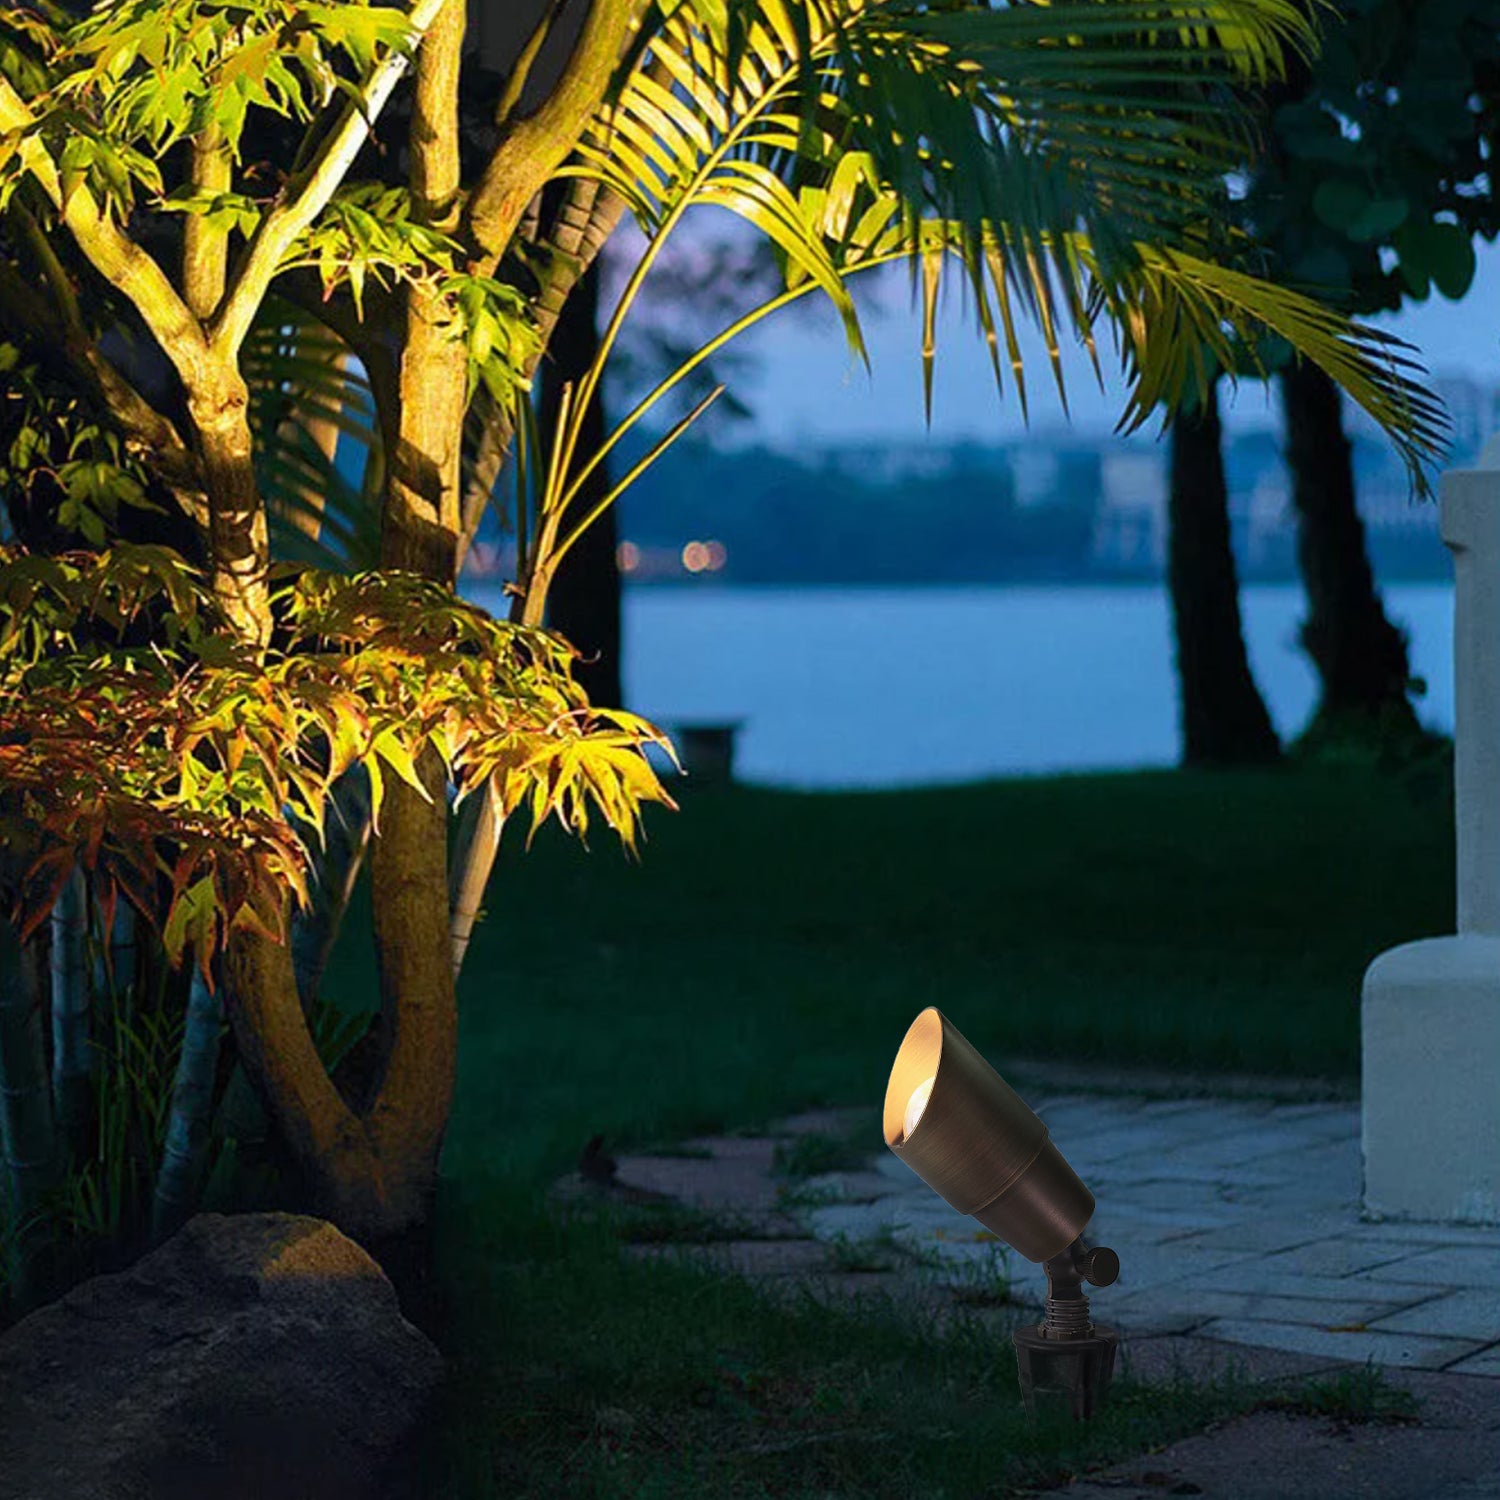
10. An Enchanted Glow with Warm Garden Spotlights
When using spotlights on foliage, think like a painter. Don’t just point a light at the middle of a tree. Instead, try cross-lighting: place two or more lights aimed at the same subject from different angles. This technique eliminates harsh shadows, reveals more of the plant’s form and texture, and creates a richer, more three-dimensional look. For trees with interesting bark, like the silver-leaf trees here, a tight, 15-degree beam angle will really make that texture pop.
|
$159.97
|
$17.76
|
$15.58
|
$84.97
|


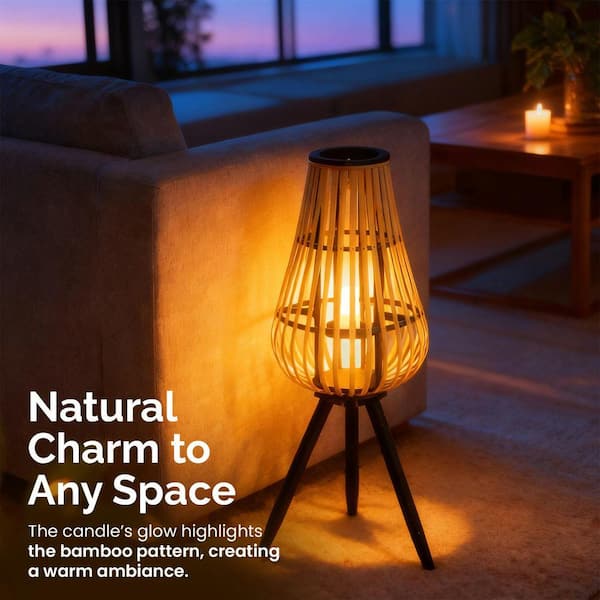
11. Easy Ambiance: Solar Lanterns with a Touch of Lattice
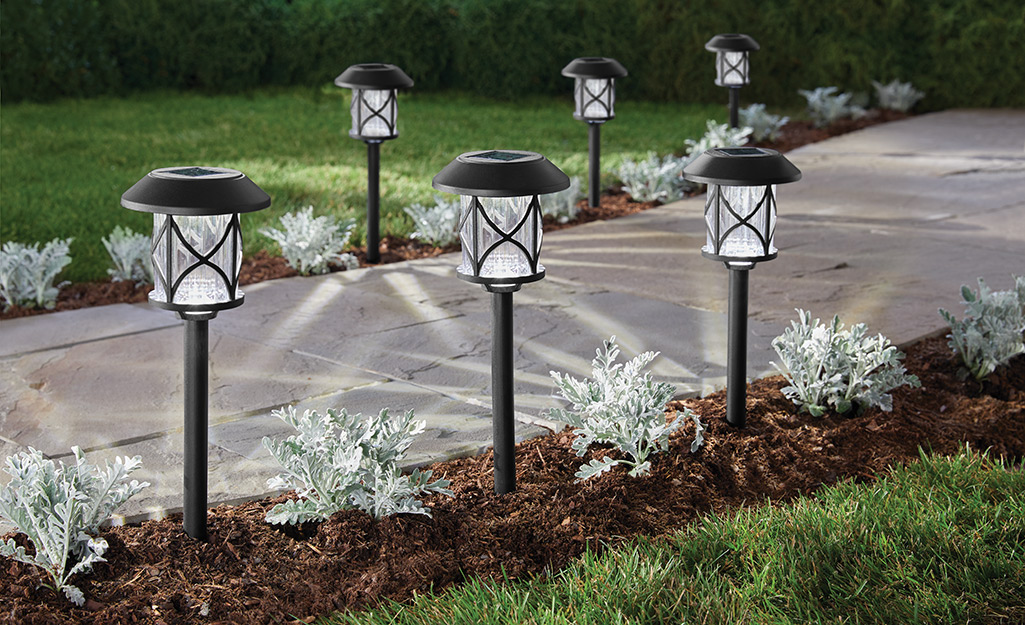
This entire look is the definition of a budget-friendly weekend upgrade. Solar pathway lights require no wiring, no electricians, and no complex planning. You can buy a box of 8 or 10 for $40–$80 from any big-box store like Walmart or Home Depot and have them installed in under an hour. While they don’t provide the power of a low-voltage system, they offer just enough gentle light to define a pathway edge and add a touch of charm to a garden bed for a very minimal investment.
|
📋 Copy HEX 🔗 Share |
|
$13.98
|
$16.85
|
$4.47
|


Let’s be honest about solar lights: their performance is entirely dependent on the sun. On a cloudy day or during shorter winter days, you’ll get a shorter, dimmer glow at night. They also have a limited lifespan; the rechargeable batteries typically wear out after 1-2 years, and the plastic housings can become brittle in the sun. Think of them as a great starting point or temporary solution, not a permanent lighting system.
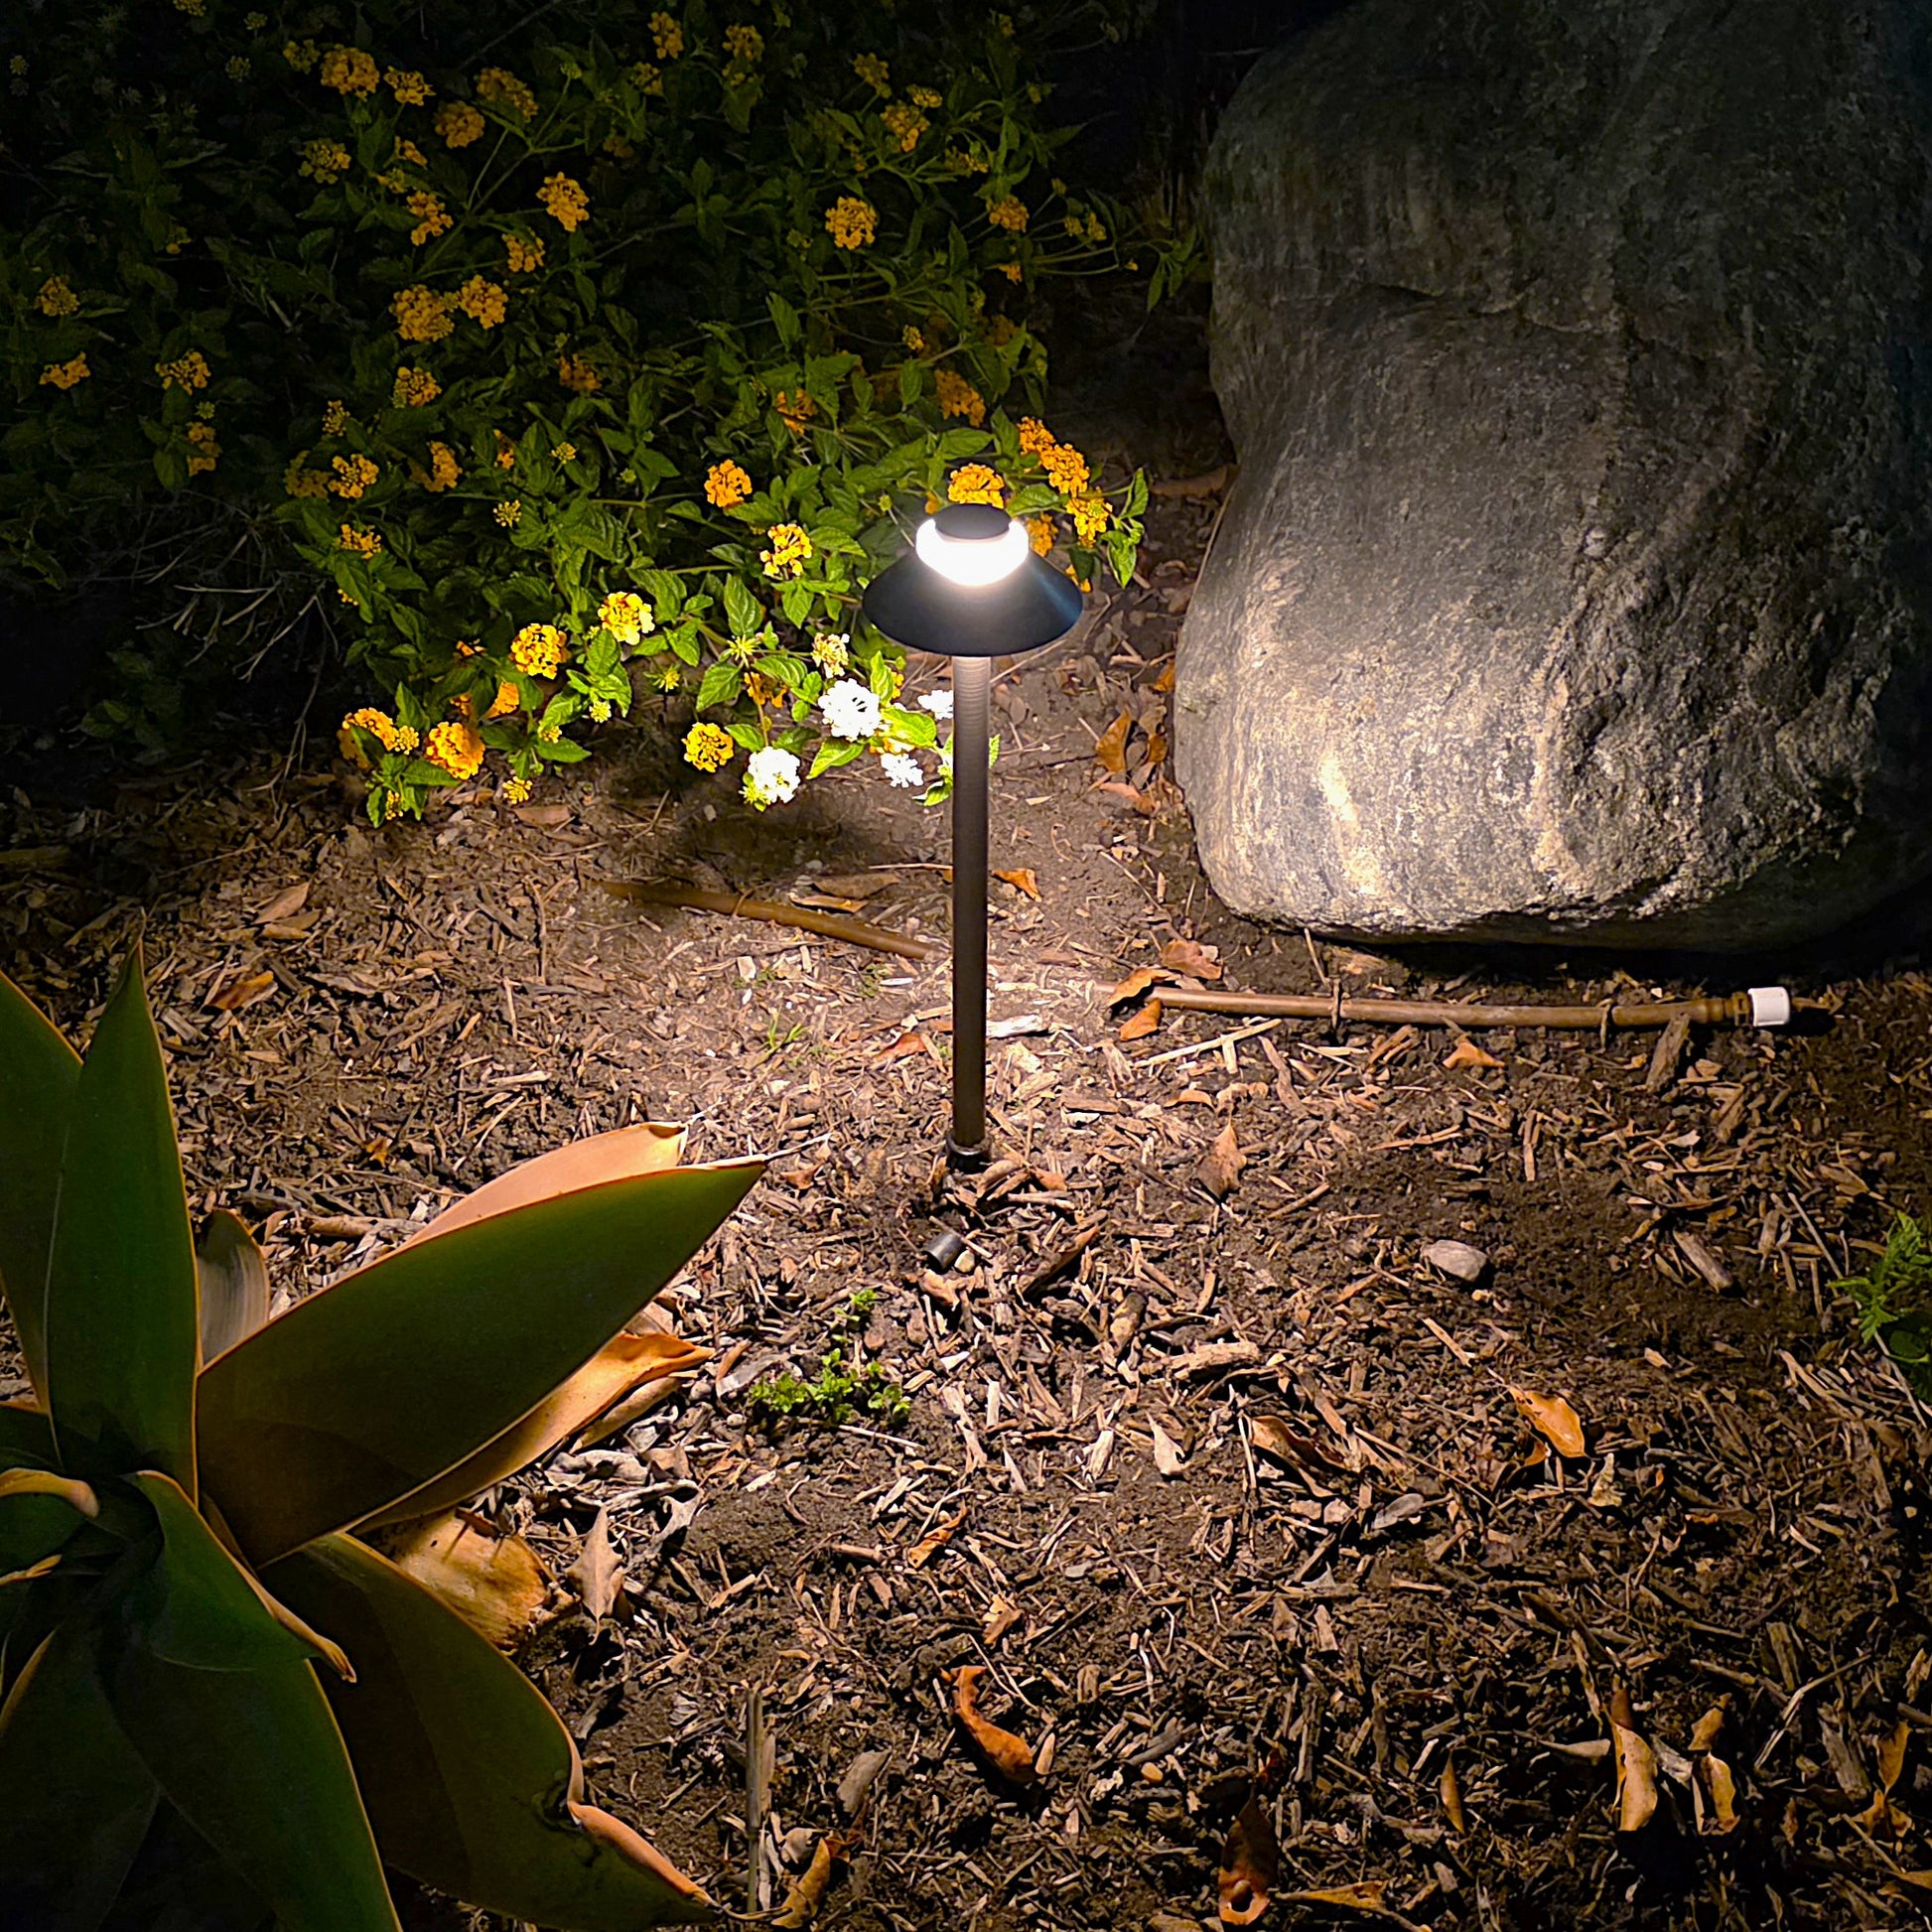
12. A Single Path Light Highlighting Natural Textures
What makes this work is its pinpoint focus. This isn’t about illuminating a whole walkway; it’s about creating a tiny, perfect moment. The single light source is intentionally directed to catch the edge of the large boulder and the delicate petals of the lantana flowers. It’s a move that says, “Look at this.” By focusing on one small, beautiful vignette, the design creates a sense of intimacy and discovery that is far more powerful than flooding an entire area with light.
|
$190.00
|
$61.79
|
$44.97
|
$19.63
|

This is a masterclass in creating a focal point. The path light, the boulder, and the bright flowers form a tight visual triangle. The warm light draws your eye in, the boulder provides a solid, grounding anchor, and the flowers add a splash of color and delicate texture. The surrounding darkness acts as a natural frame, making this little composition feel special and intentional. It’s a perfect example of how one well-placed light can be more effective than a dozen poorly placed ones.
13. Waterside Drama: Uplighting Trees by a Lake or Pond
This technique—using uplights to reflect trees in water—is all about scale and distance. It’s most effective on larger properties with a decent-sized body of water (pond, lake, or slow-moving river). You need enough space for the reflection to fully develop. The lights should be placed back from the water’s edge, aimed up into the canopy of mature trees. The effect is less dramatic with small ornamental ponds or very young trees.
|
📋 Copy HEX 🔗 Share |
|
$575.00
|
$39.95
|
$83.16
|
$4.78
|


For any lighting project near water, there are critical safety and practical steps to consider. Don’t skip these.
- Check Local Codes: Many areas have specific regulations about electrical installations near water, including setback distances and required conduit types.
- Use Water-Safe Fixtures: Ensure all lights, wires, and connectors are IP67 or IP68 rated, meaning they are designed for temporary or continuous submersion. Standard landscape lighting is not safe for this.
- Plan for Reflections: Consider the primary viewing angles. Where will you be looking from? Position the lights to create beautiful reflections from your patio, deck, or windows.
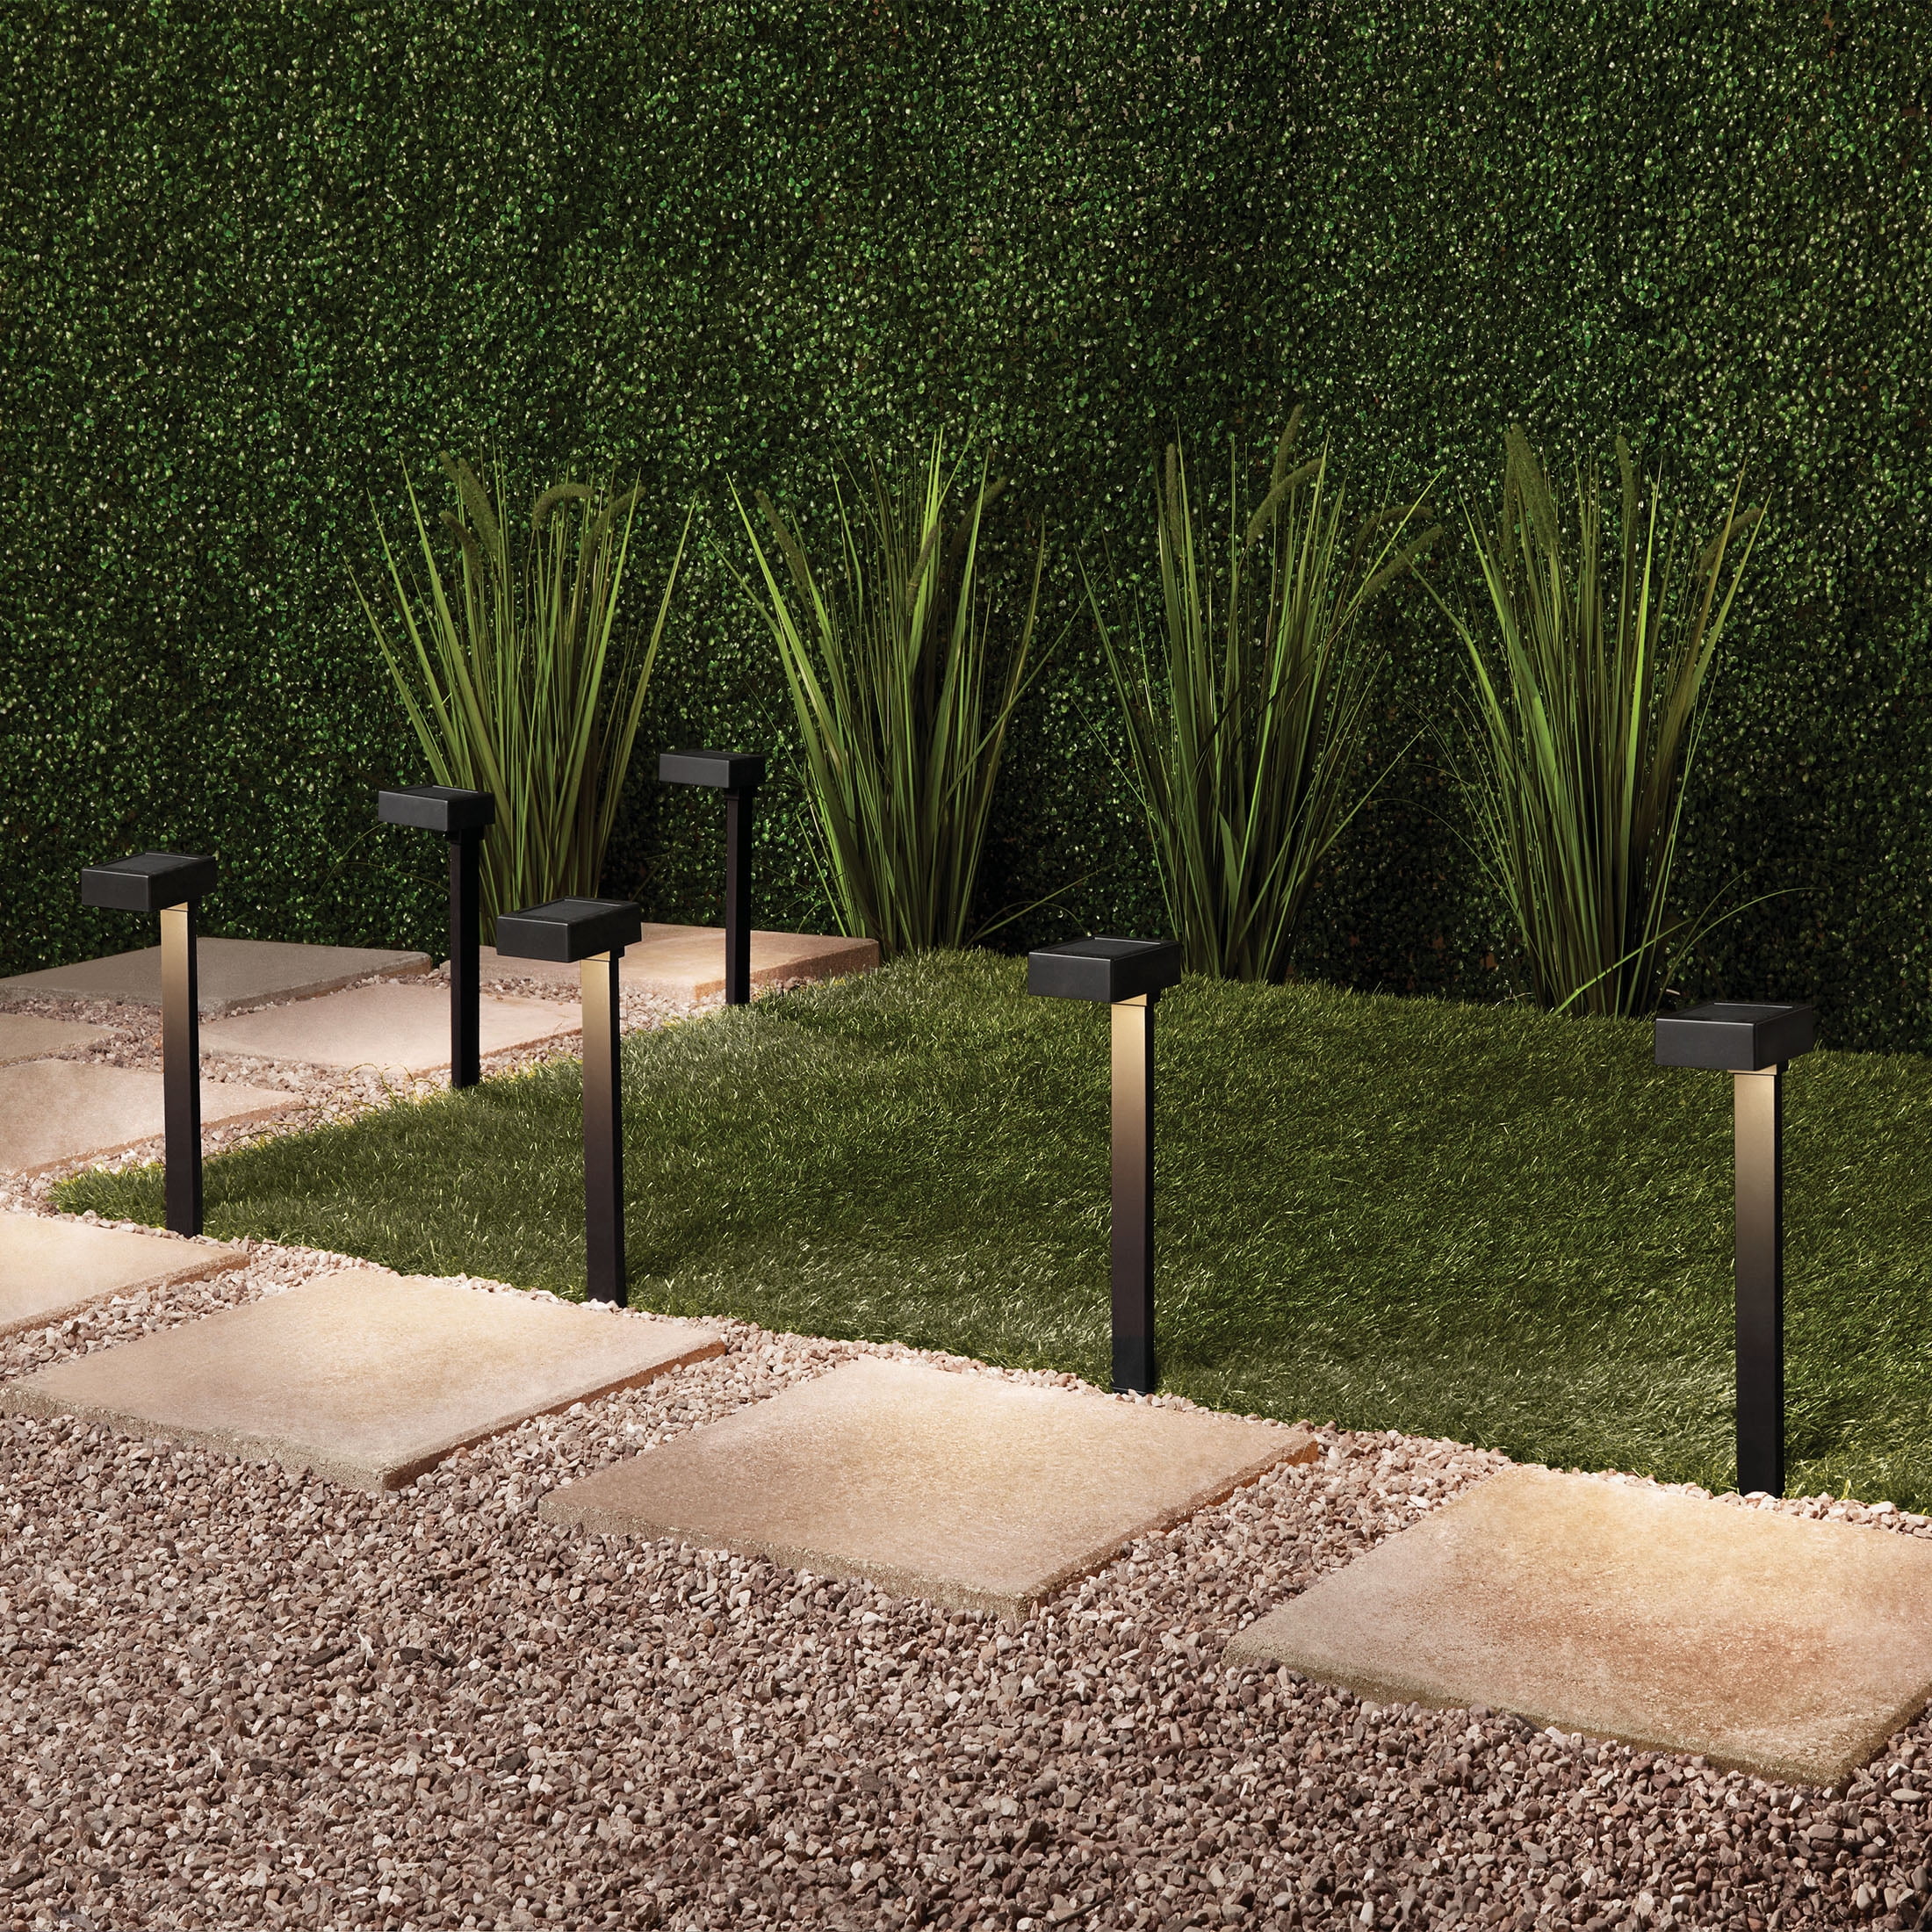
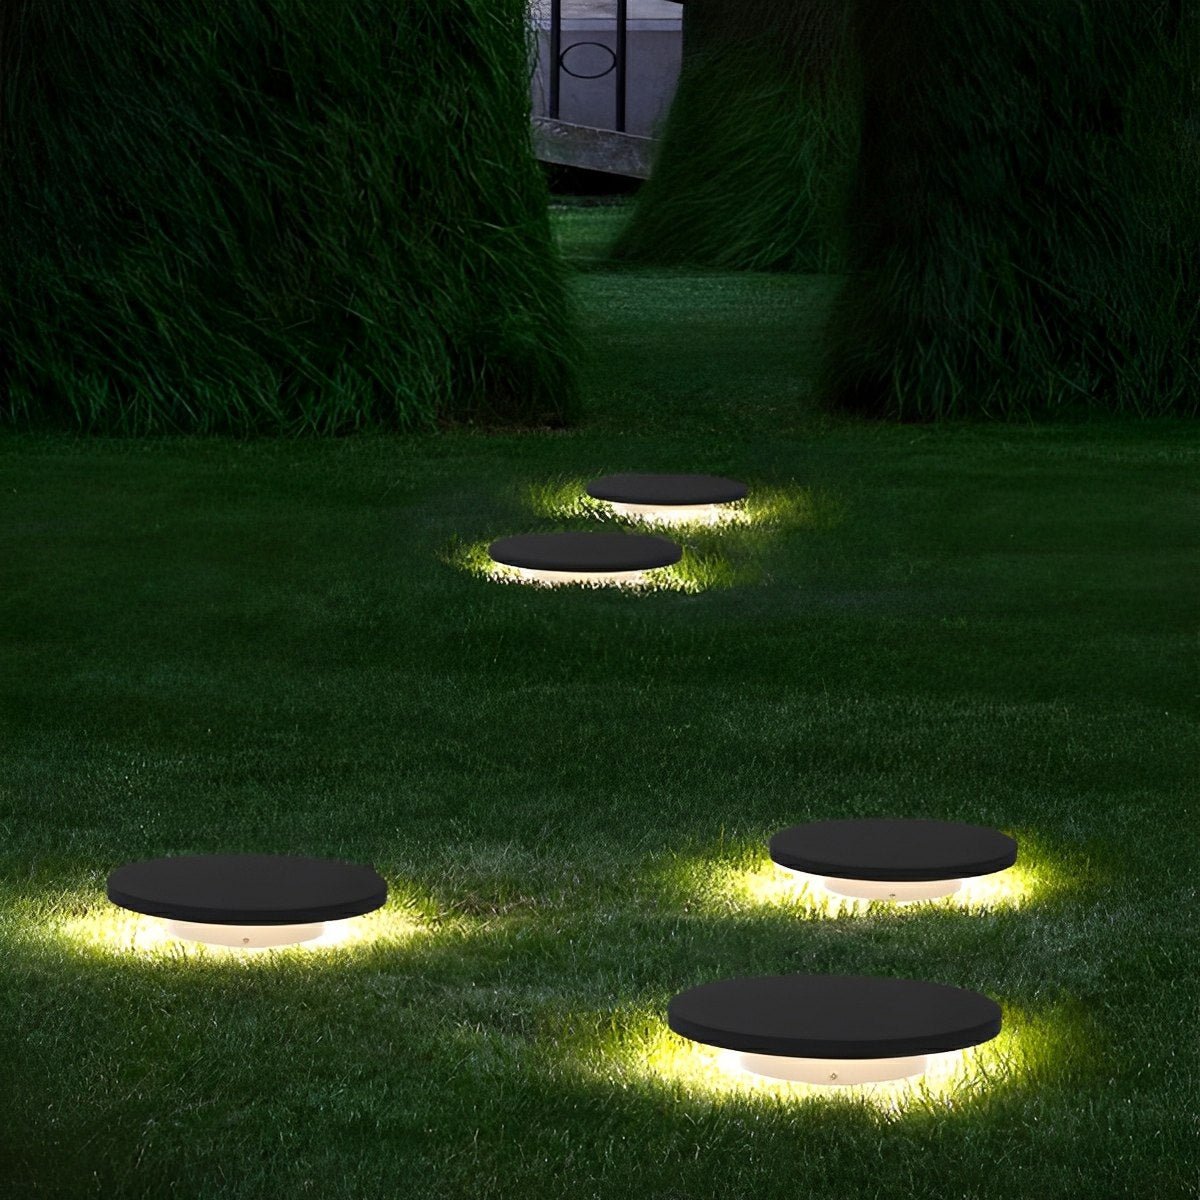
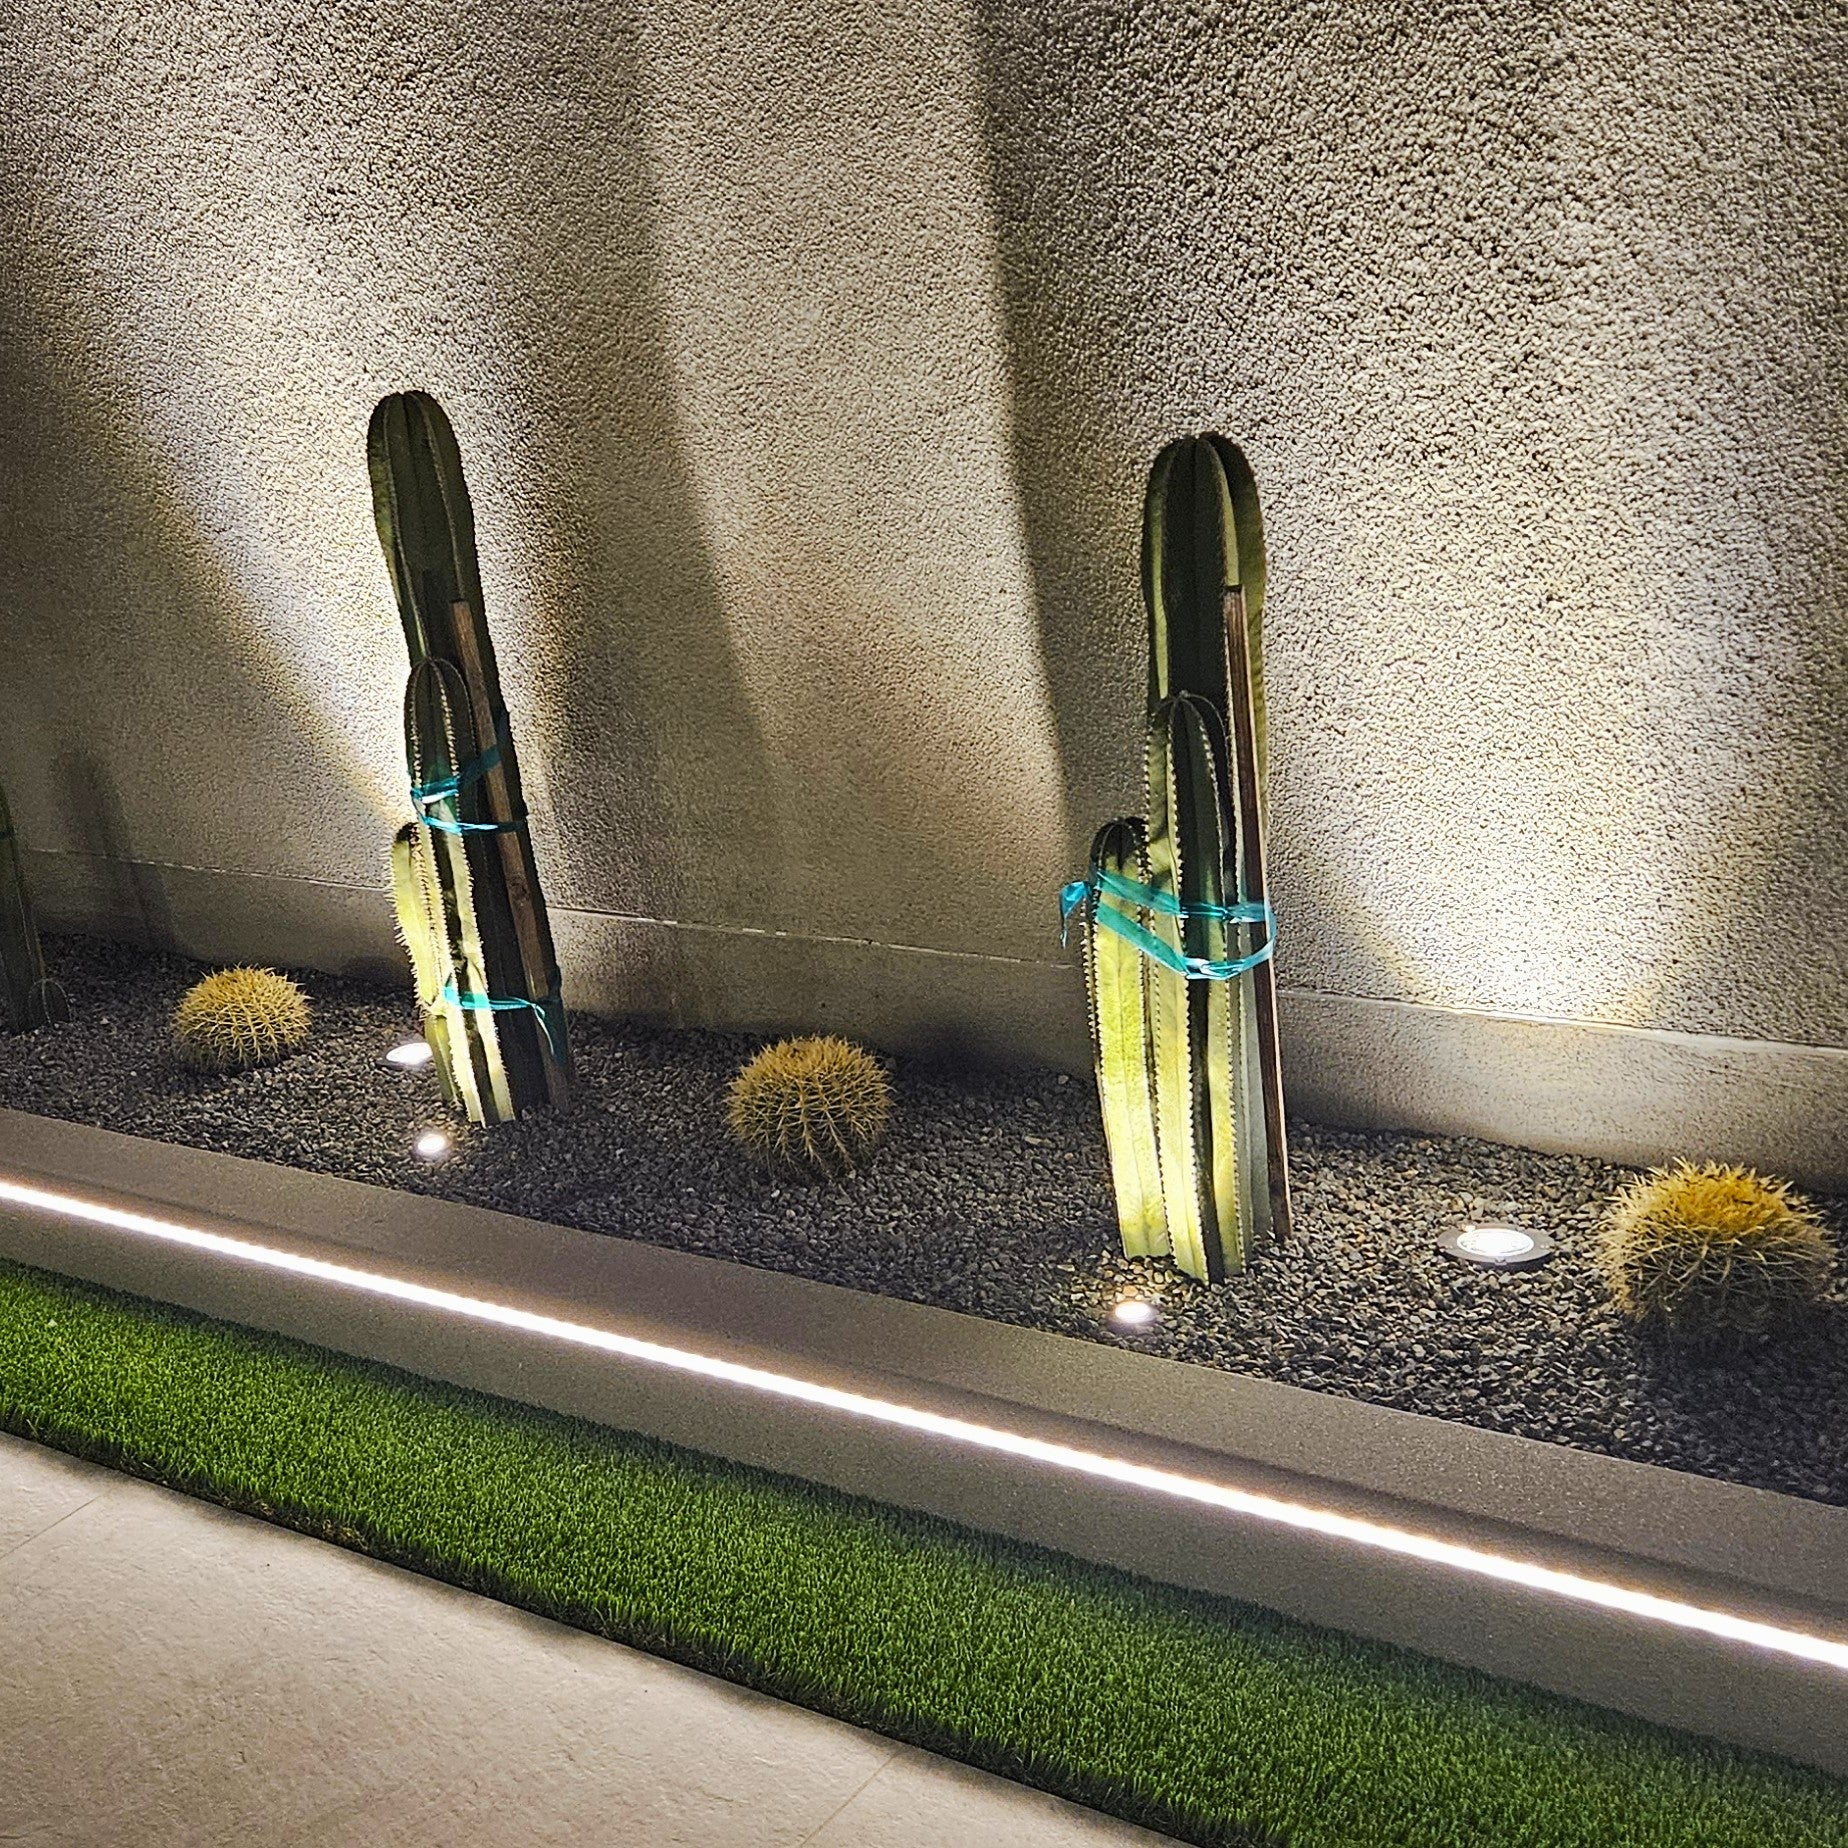
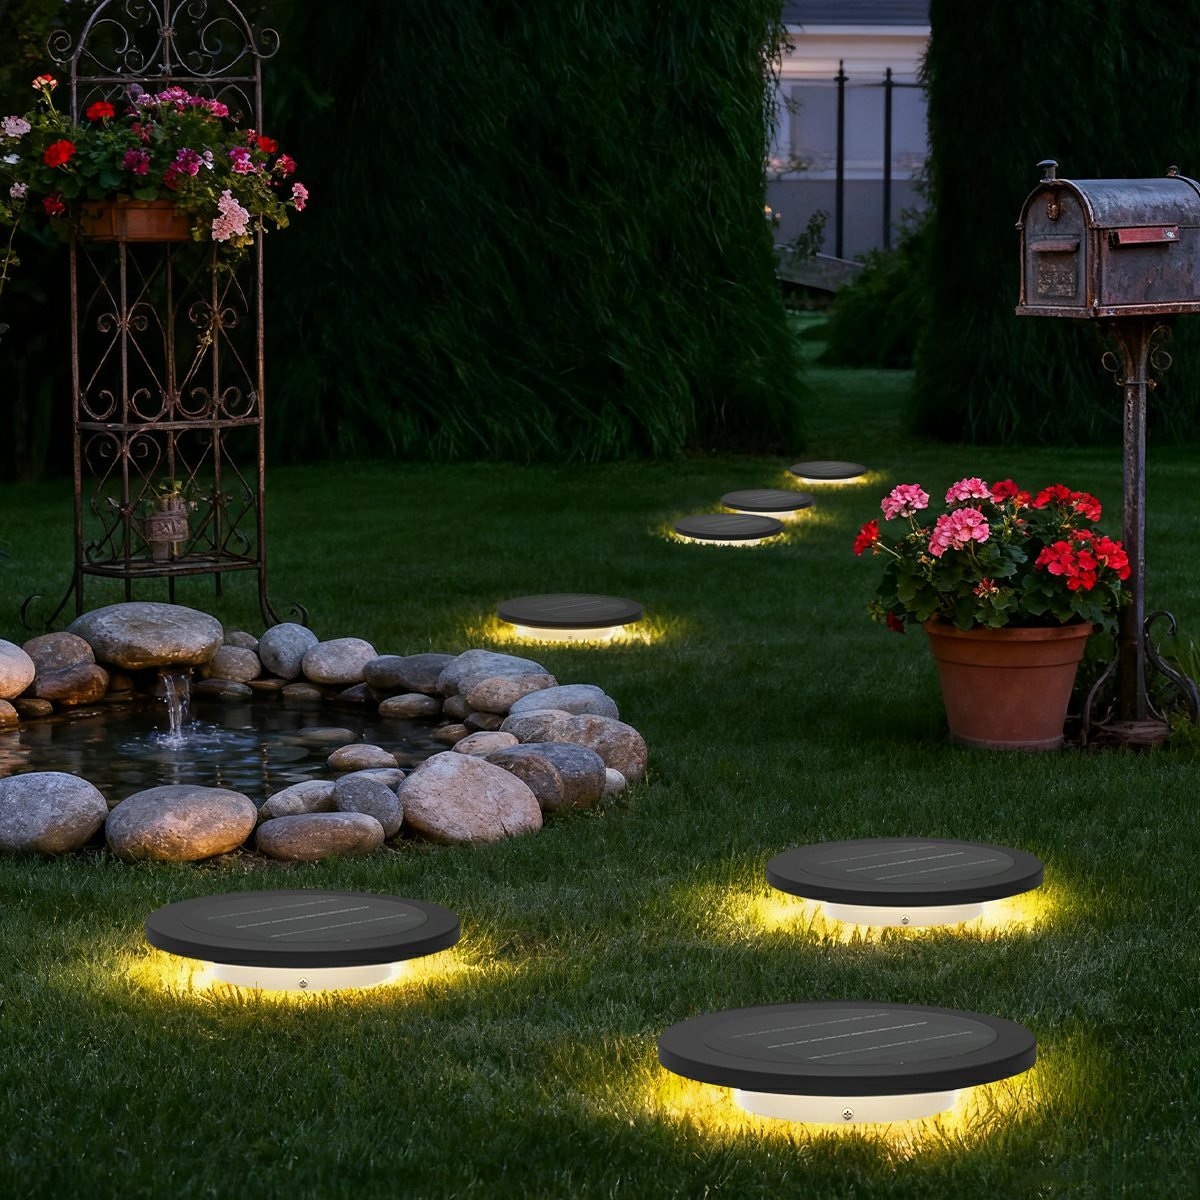
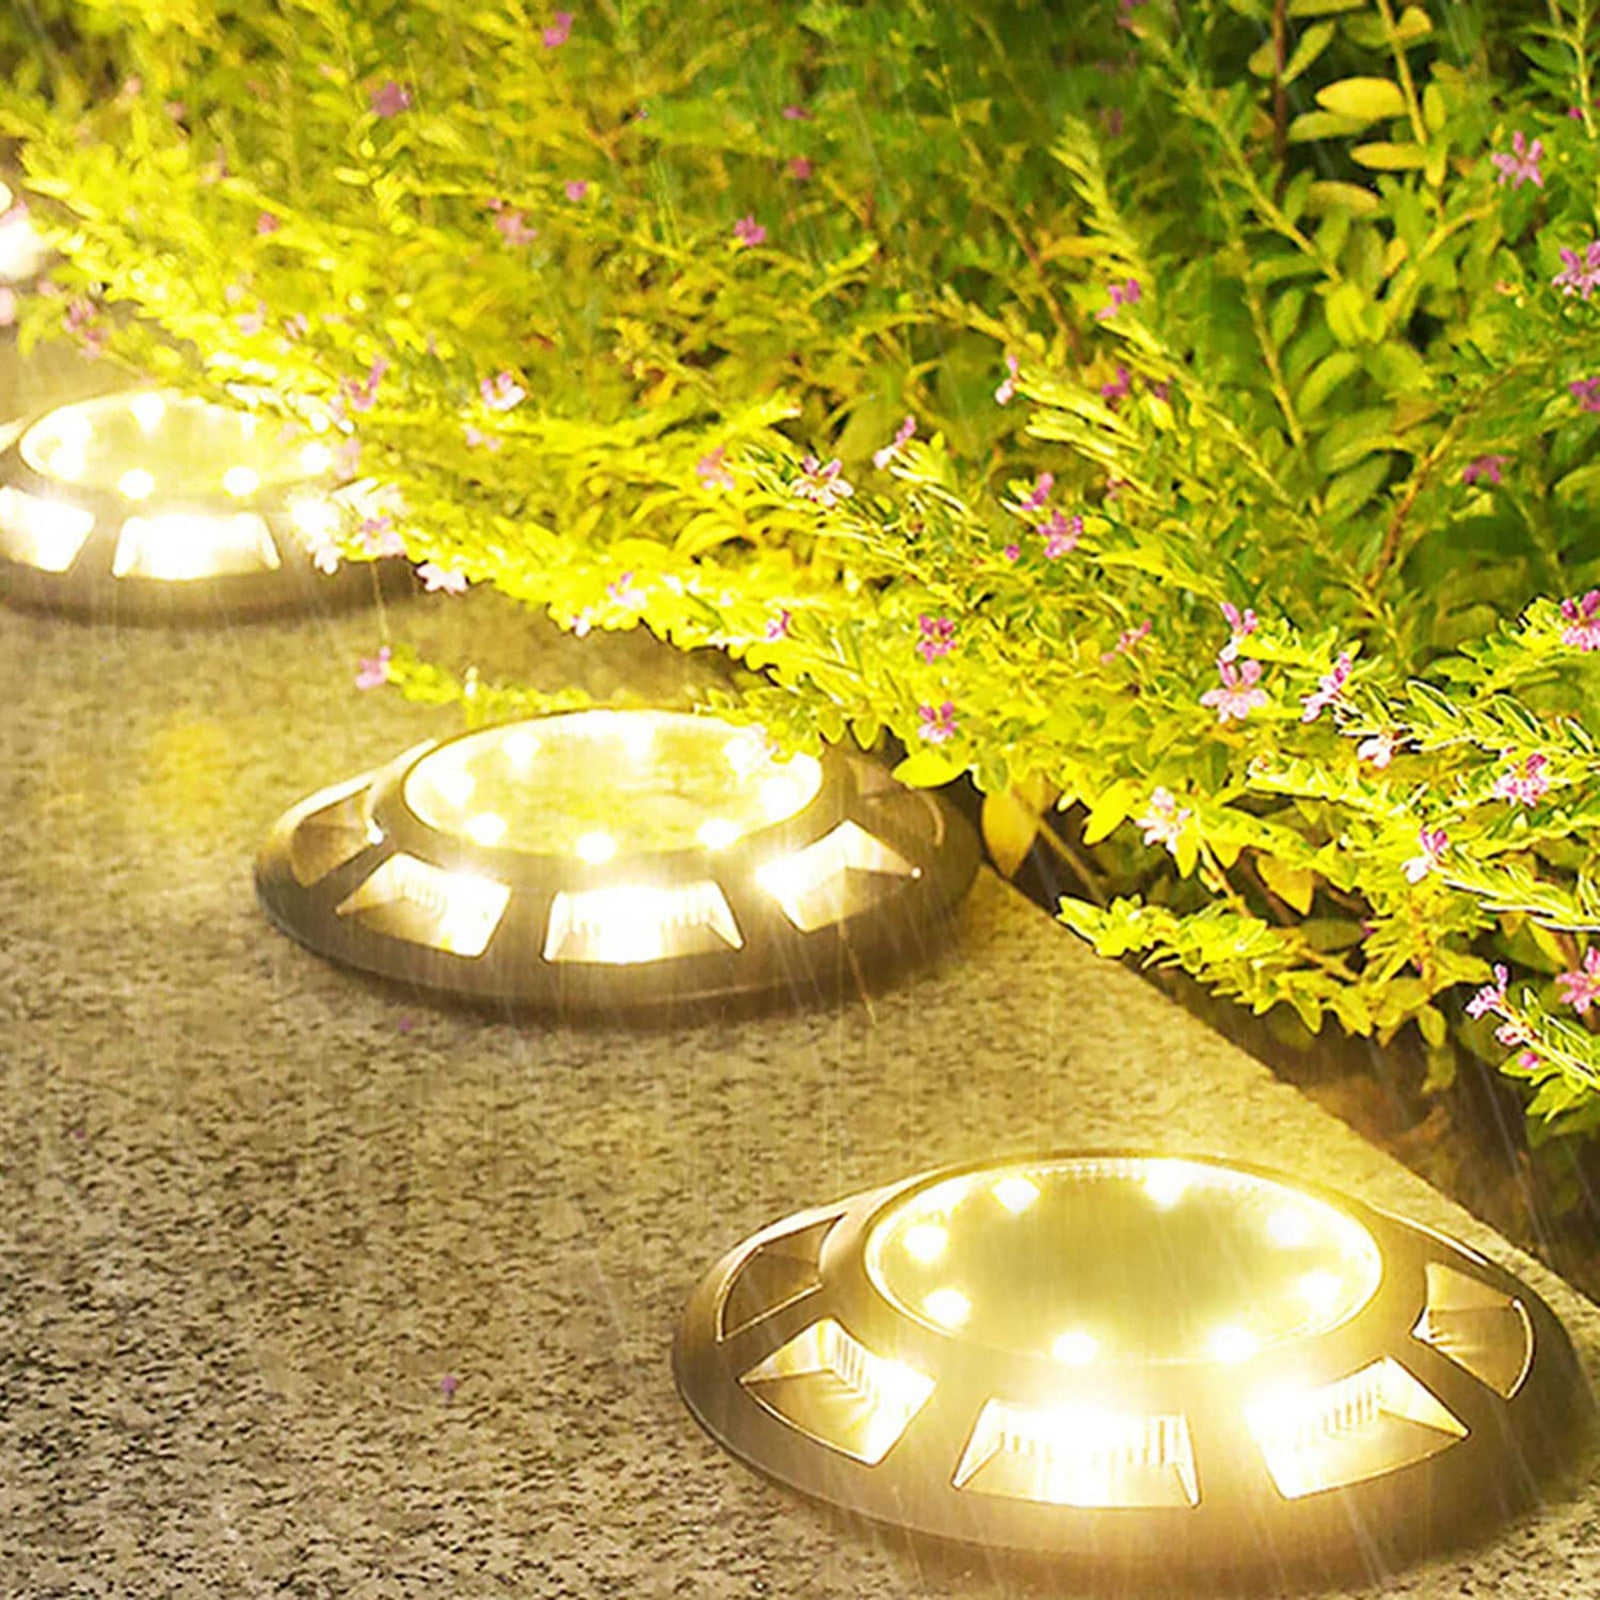
14. Discreet Discs: Low-Profile Lights in a Grassy Path
If you’re installing fixtures like these in a lawn, think about your mower! Choose lights that are specifically rated as ‘drive-over’ or ‘mower-safe.’ Even then, it’s a beneficial idea to install them so the top of the fixture is just slightly below the soil level, not flush with it. This gives your mower blades an extra fraction of an inch of clearance, protecting your investment. During installation, use a small shovel to cut a plug of sod, place the light, and then trim the sod to fit perfectly around it.
|
$1.25
|
$19.98
|
$21.56
|


While these lights look sleek and modern, they are only suitable for pathways with light to moderate foot traffic. They are not designed to be major structural elements. If you have kids who play rough in the yard or if the area is a primary, high-traffic walkway, consider more robust in-ground pavers with integrated lighting. These disc lights are perfect for suggesting a secondary path or creating a soft, ambient effect in a low-traffic area.
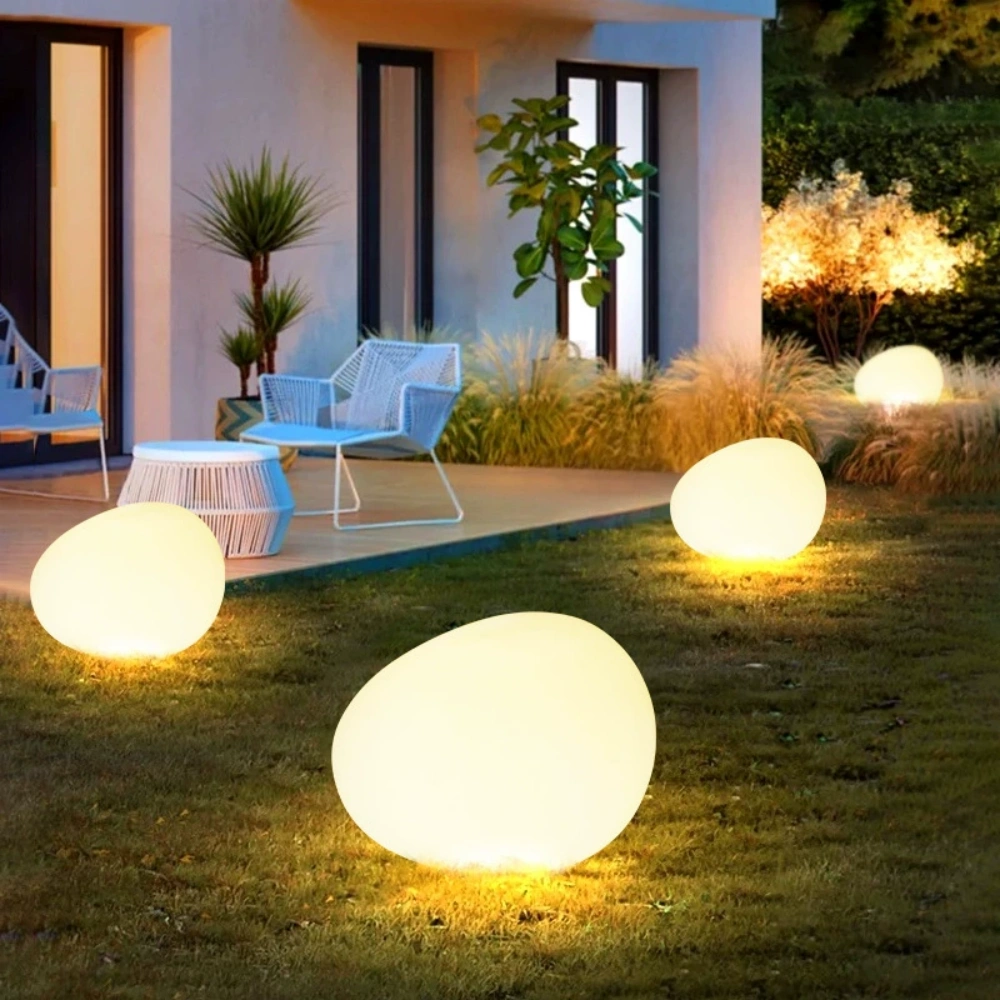
15. Magical Ambiance: Glowing ‘Pebbles’ Scattered on the Lawn
These glowing pebble or orb lights are surging in popularity because they represent a shift towards flexible, almost nomadic, outdoor design. People don’t want to be locked into a permanent, hardwired layout anymore. These are often rechargeable and portable, so you can move them around for a party, cluster them on the patio for dinner, or scatter them across the lawn for a magical feel. They empower you to be your own lighting designer on a whim.
|
📋 Copy HEX 🔗 Share |
|
$75.00
|
$34.75
Restaurant Patio Furniture |
$109.97
|
$74.00
|

The freedom of these portable orbs comes with a bit of effort. Most are rechargeable, meaning you’ll have to gather them up every few days or weeks to plug them in, which can be a hassle. Their smooth, white surfaces also show dirt, grass clippings, and water spots easily, so you’ll need to wipe them down regularly to keep them looking pristine. For a similar but permanent option, look into the hardwired disc lights seen in Idea #14.
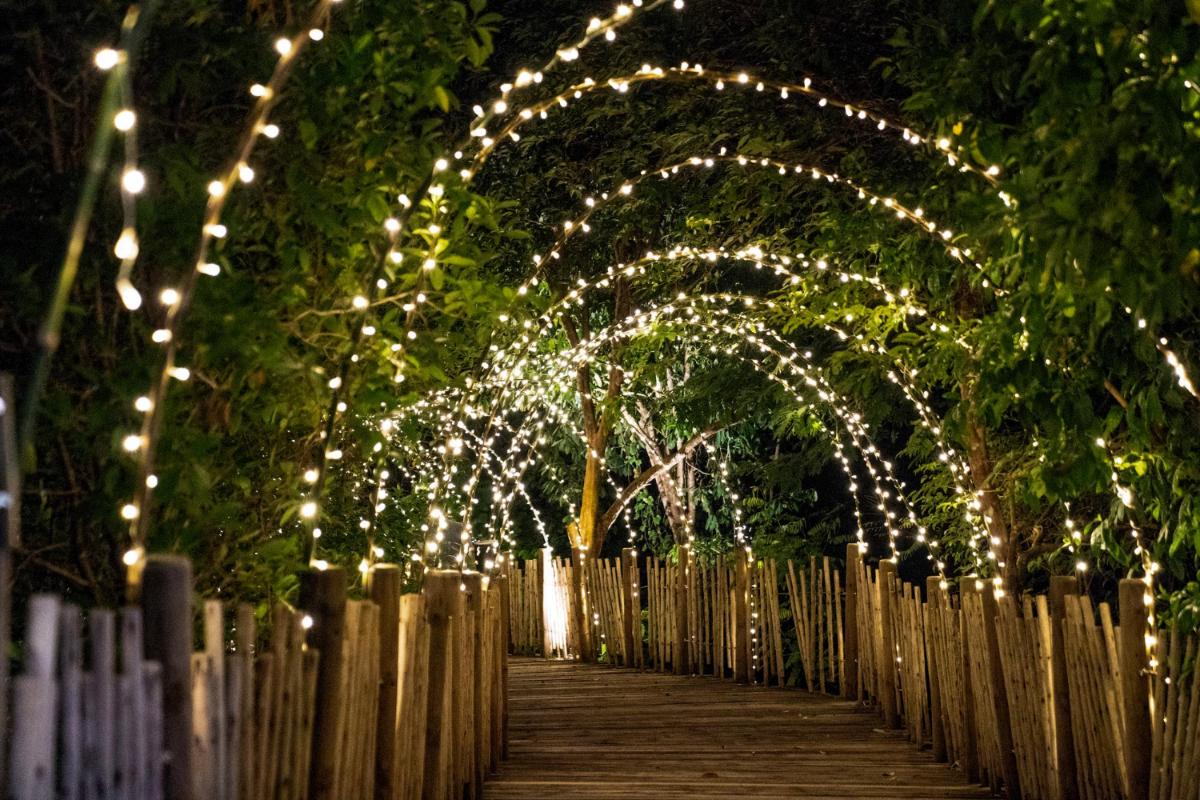
16. Walk Through Wonder: A Fairy Light Tunnel Path
You can build a magical fairy light tunnel in an afternoon. It’s all about creating a simple structure for the lights to follow. (Time: 3 hours, Cost: $100-$250)
- Measure your walkway and decide on the height and width of your tunnel.
- Source your ‘arches.’ You can use flexible PVC pipes, cattle panels, or even sturdy tree branches for a rustic look.
- Install your arches every 4-6 feet along the path. Secure them by driving them into the ground or attaching them to the existing fence.
- Drape your outdoor-rated fairy lights or string lights back and forth between the arches, starting at one end and working your way to the other.
- Use zip ties or garden twine to secure the light strings to the arches to prevent them from slipping.
|
$50.53
|
$39.99
|
$19.97
|

You don’t need an elaborate setup to create this feeling. Even a simple archway or a single tree can become a magical feature. Find a few sturdy branches overhanging a path and simply wrap them with several strands of warm white, outdoor-rated fairy lights (you can find solar-powered versions for as little as $20 a strand). The key is density—use more strands than you think you need, wrapping them tightly to create a concentrated glow. It’s an enchanting look for the price of a few pizzas.
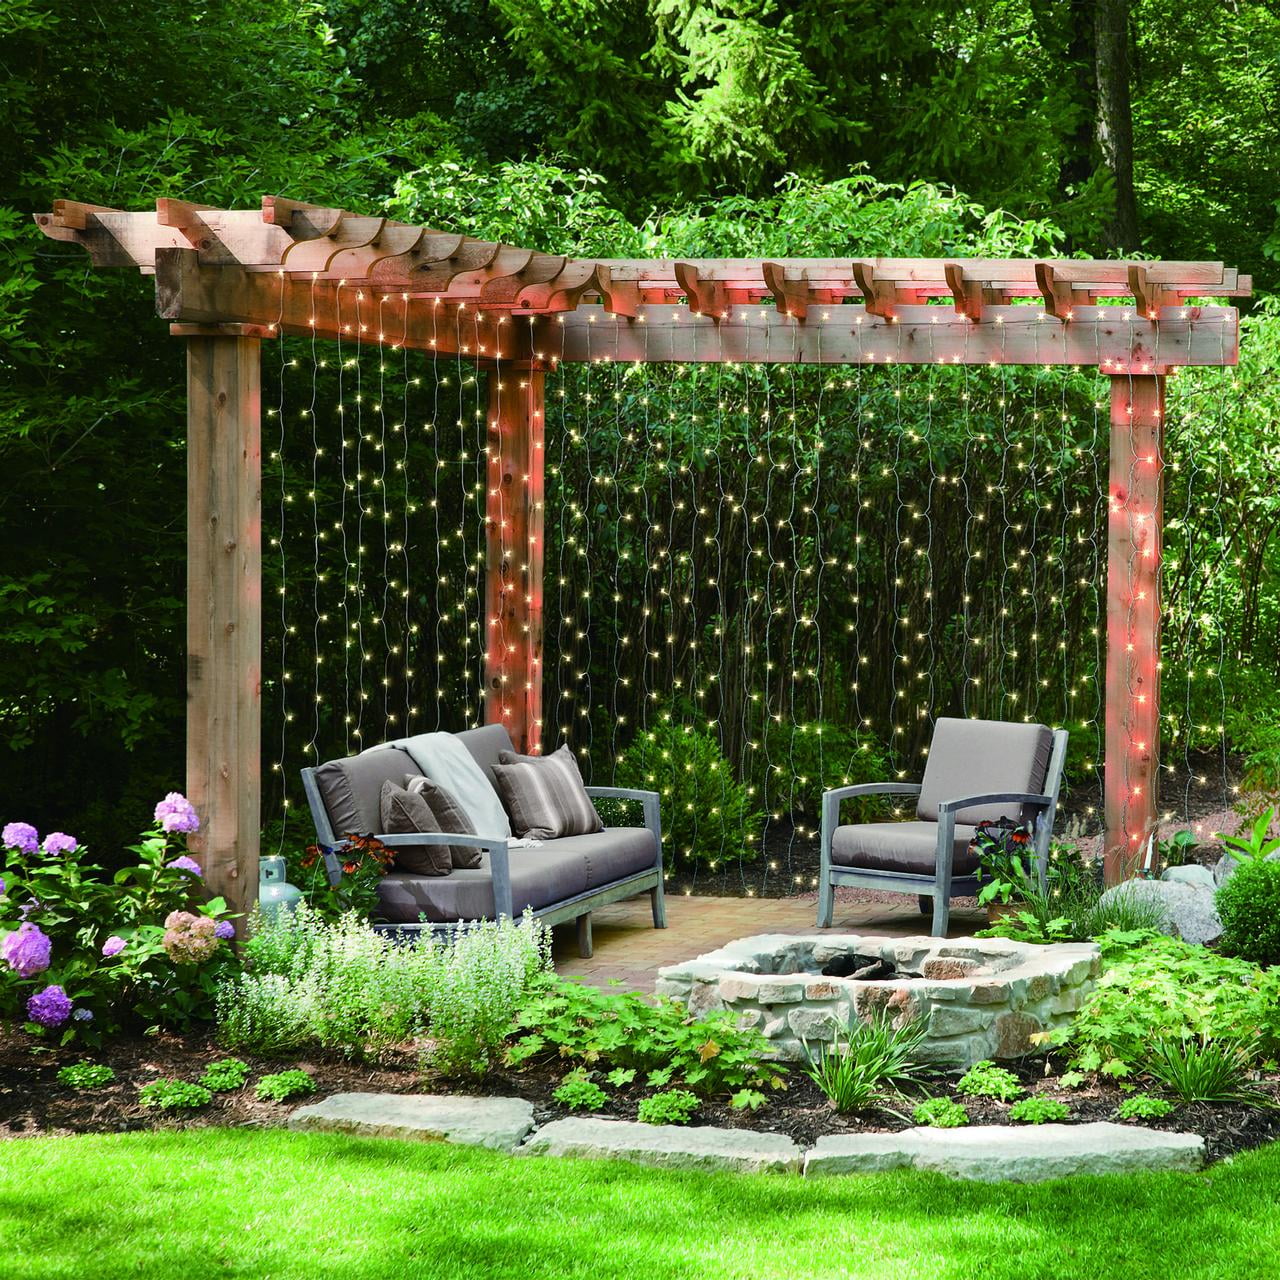
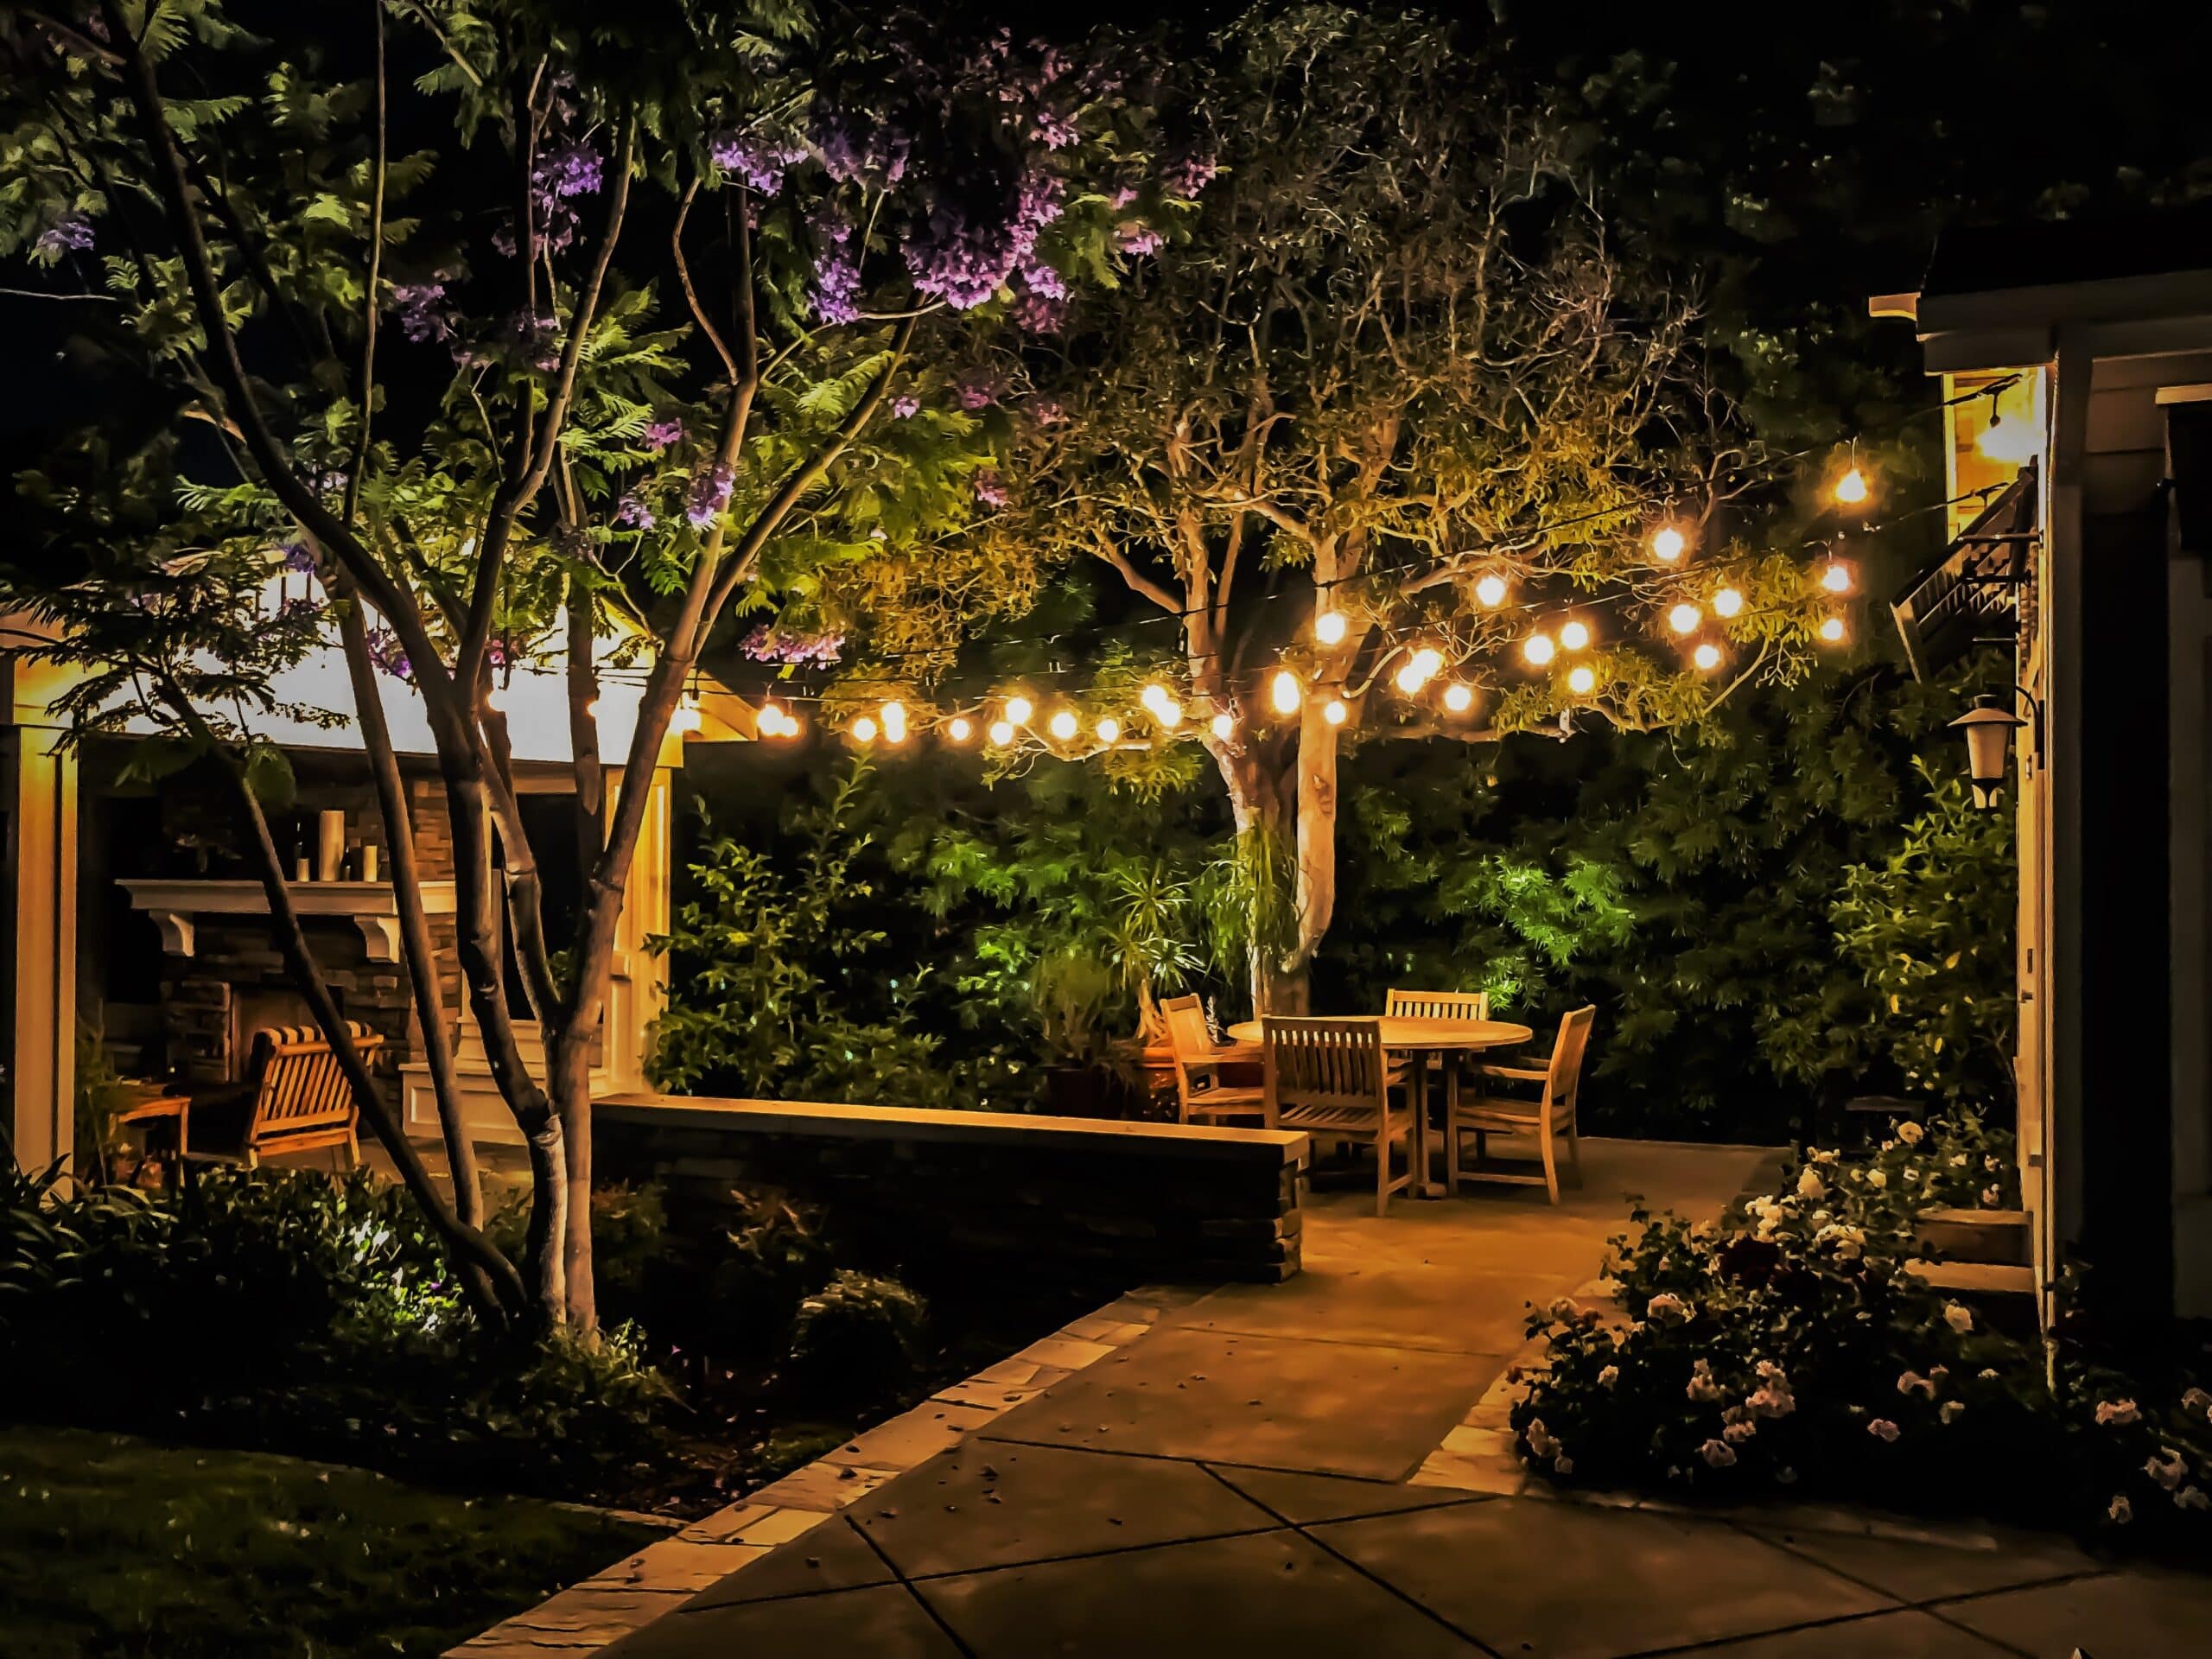
17. Cozy Patio Nights with String Lights and a Fireplace
This cozy scene is a perfect equation for evening ambiance: 40% ambient light (the overhead string lights) + 30% feature light (the flickering fire) + 30% landscape light (the subtle uplights on the trees). No single source is doing all the work. The string lights define the ‘ceiling’ of the outdoor room, the fire provides a warm, central gathering point, and the landscape lights add depth and prevent the surrounding yard from feeling like a dark void.
|
📋 Copy HEX 🔗 Share |
|
$79.99
|
$34.97
|
$4.47
|
$699.99
|


The string lights are the single element holding this entire scene together. Without them, you’d just have a dark patio with a fireplace at one end and some randomly lit trees in the distance. The lights, draped from the large tree across the seating area, create a canopy of light that defines the space and makes it feel like an intentional outdoor room. They provide the warm, human-scale glow that makes you want to pull up a chair and stay a while.
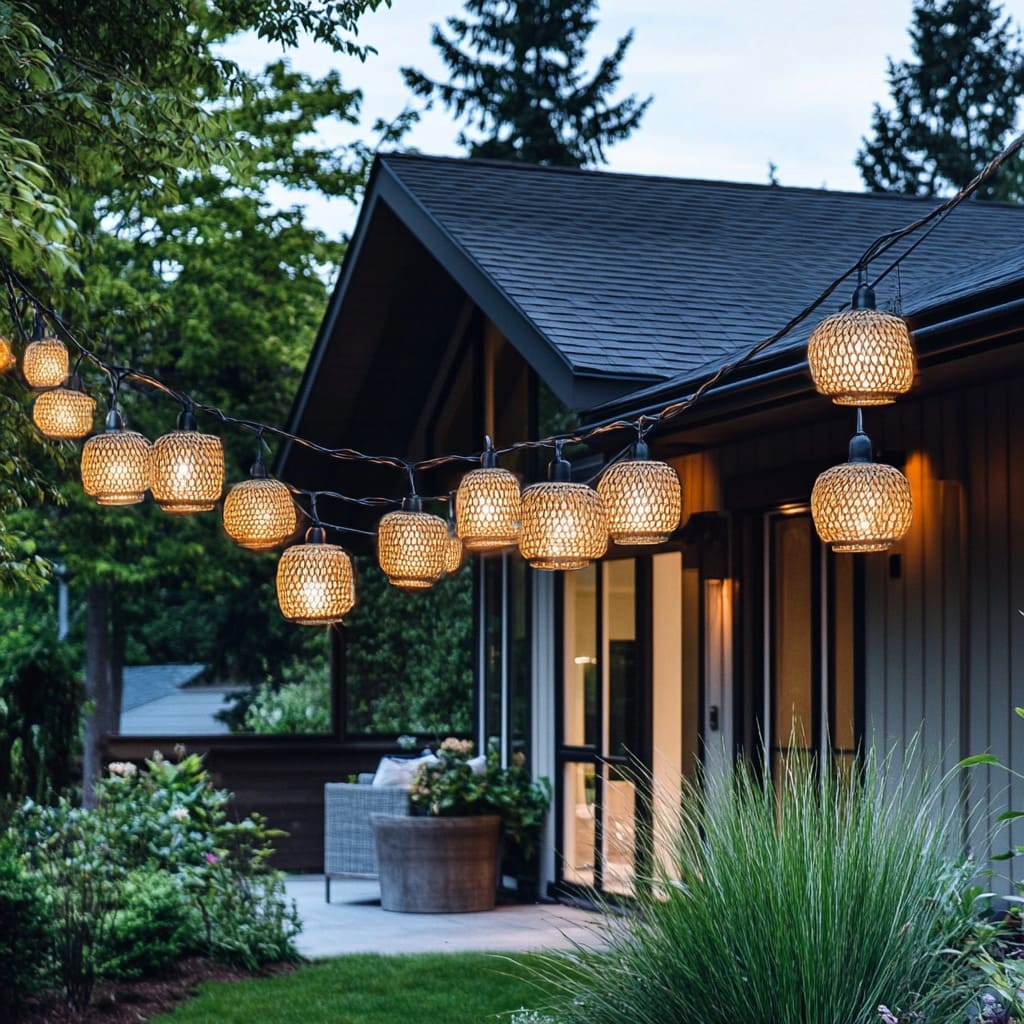
18. Boho Touch: Woven Globe String Lights Over the Patio
This is a wonderful example of how texture can completely change the mood of your lighting. Standard globe lights would look fine, but these woven, basket-like shades add a layer of natural, bohemian texture that makes the space feel infinitely more cozy and curated. During the day, they are decorative objects. At night, they cast a warm, patterned glow that feels softer and more organic than light from a bare bulb. This simple swap adds a huge amount of personality.
|
$17.95
|
$59.99
|
$375.36
|
$12.99
|

Natural materials like rattan or wicker look fantastic, but they require some care when left outdoors. To keep them from degrading, bring them inside during the off-season or during periods of heavy rain or snow. If they are permanently installed, give them a spray with an outdoor UV-protectant sealant at the beginning of each season to prevent fading and cracking. A quick dusting every few weeks will also keep them from looking grimy.
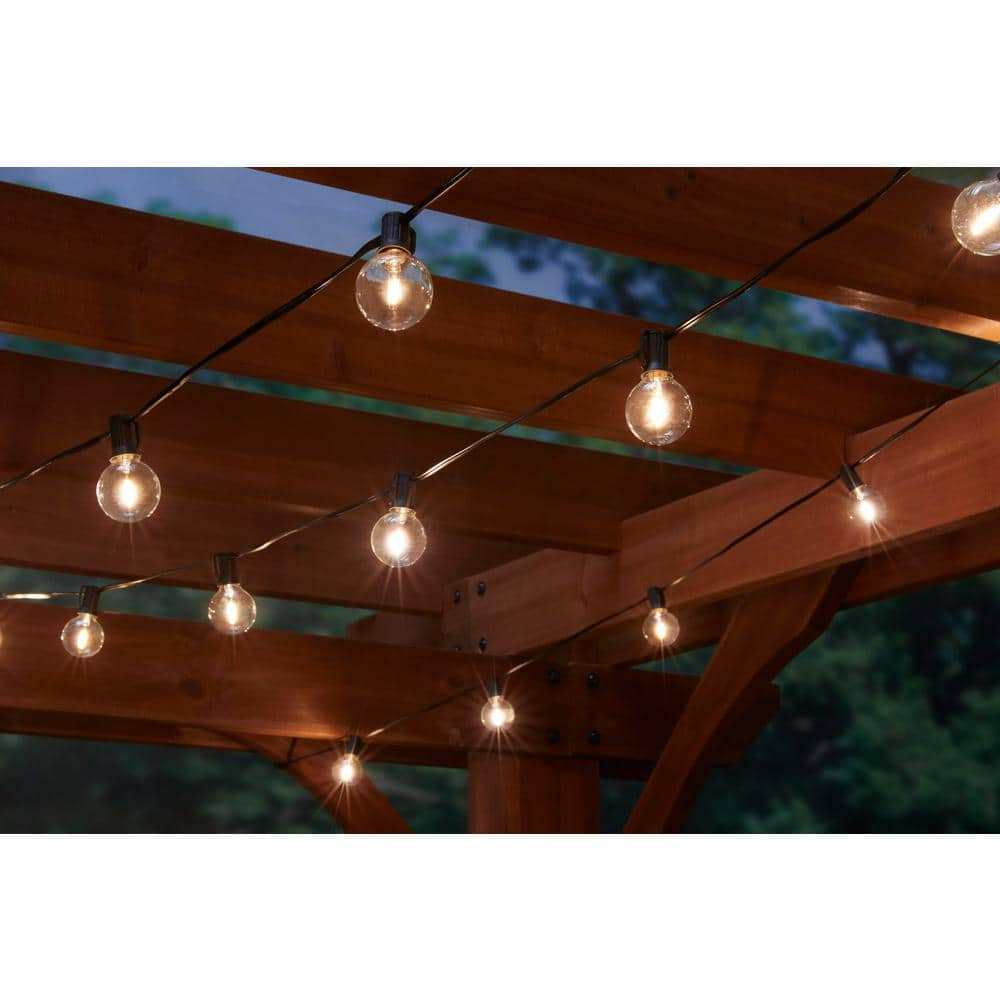
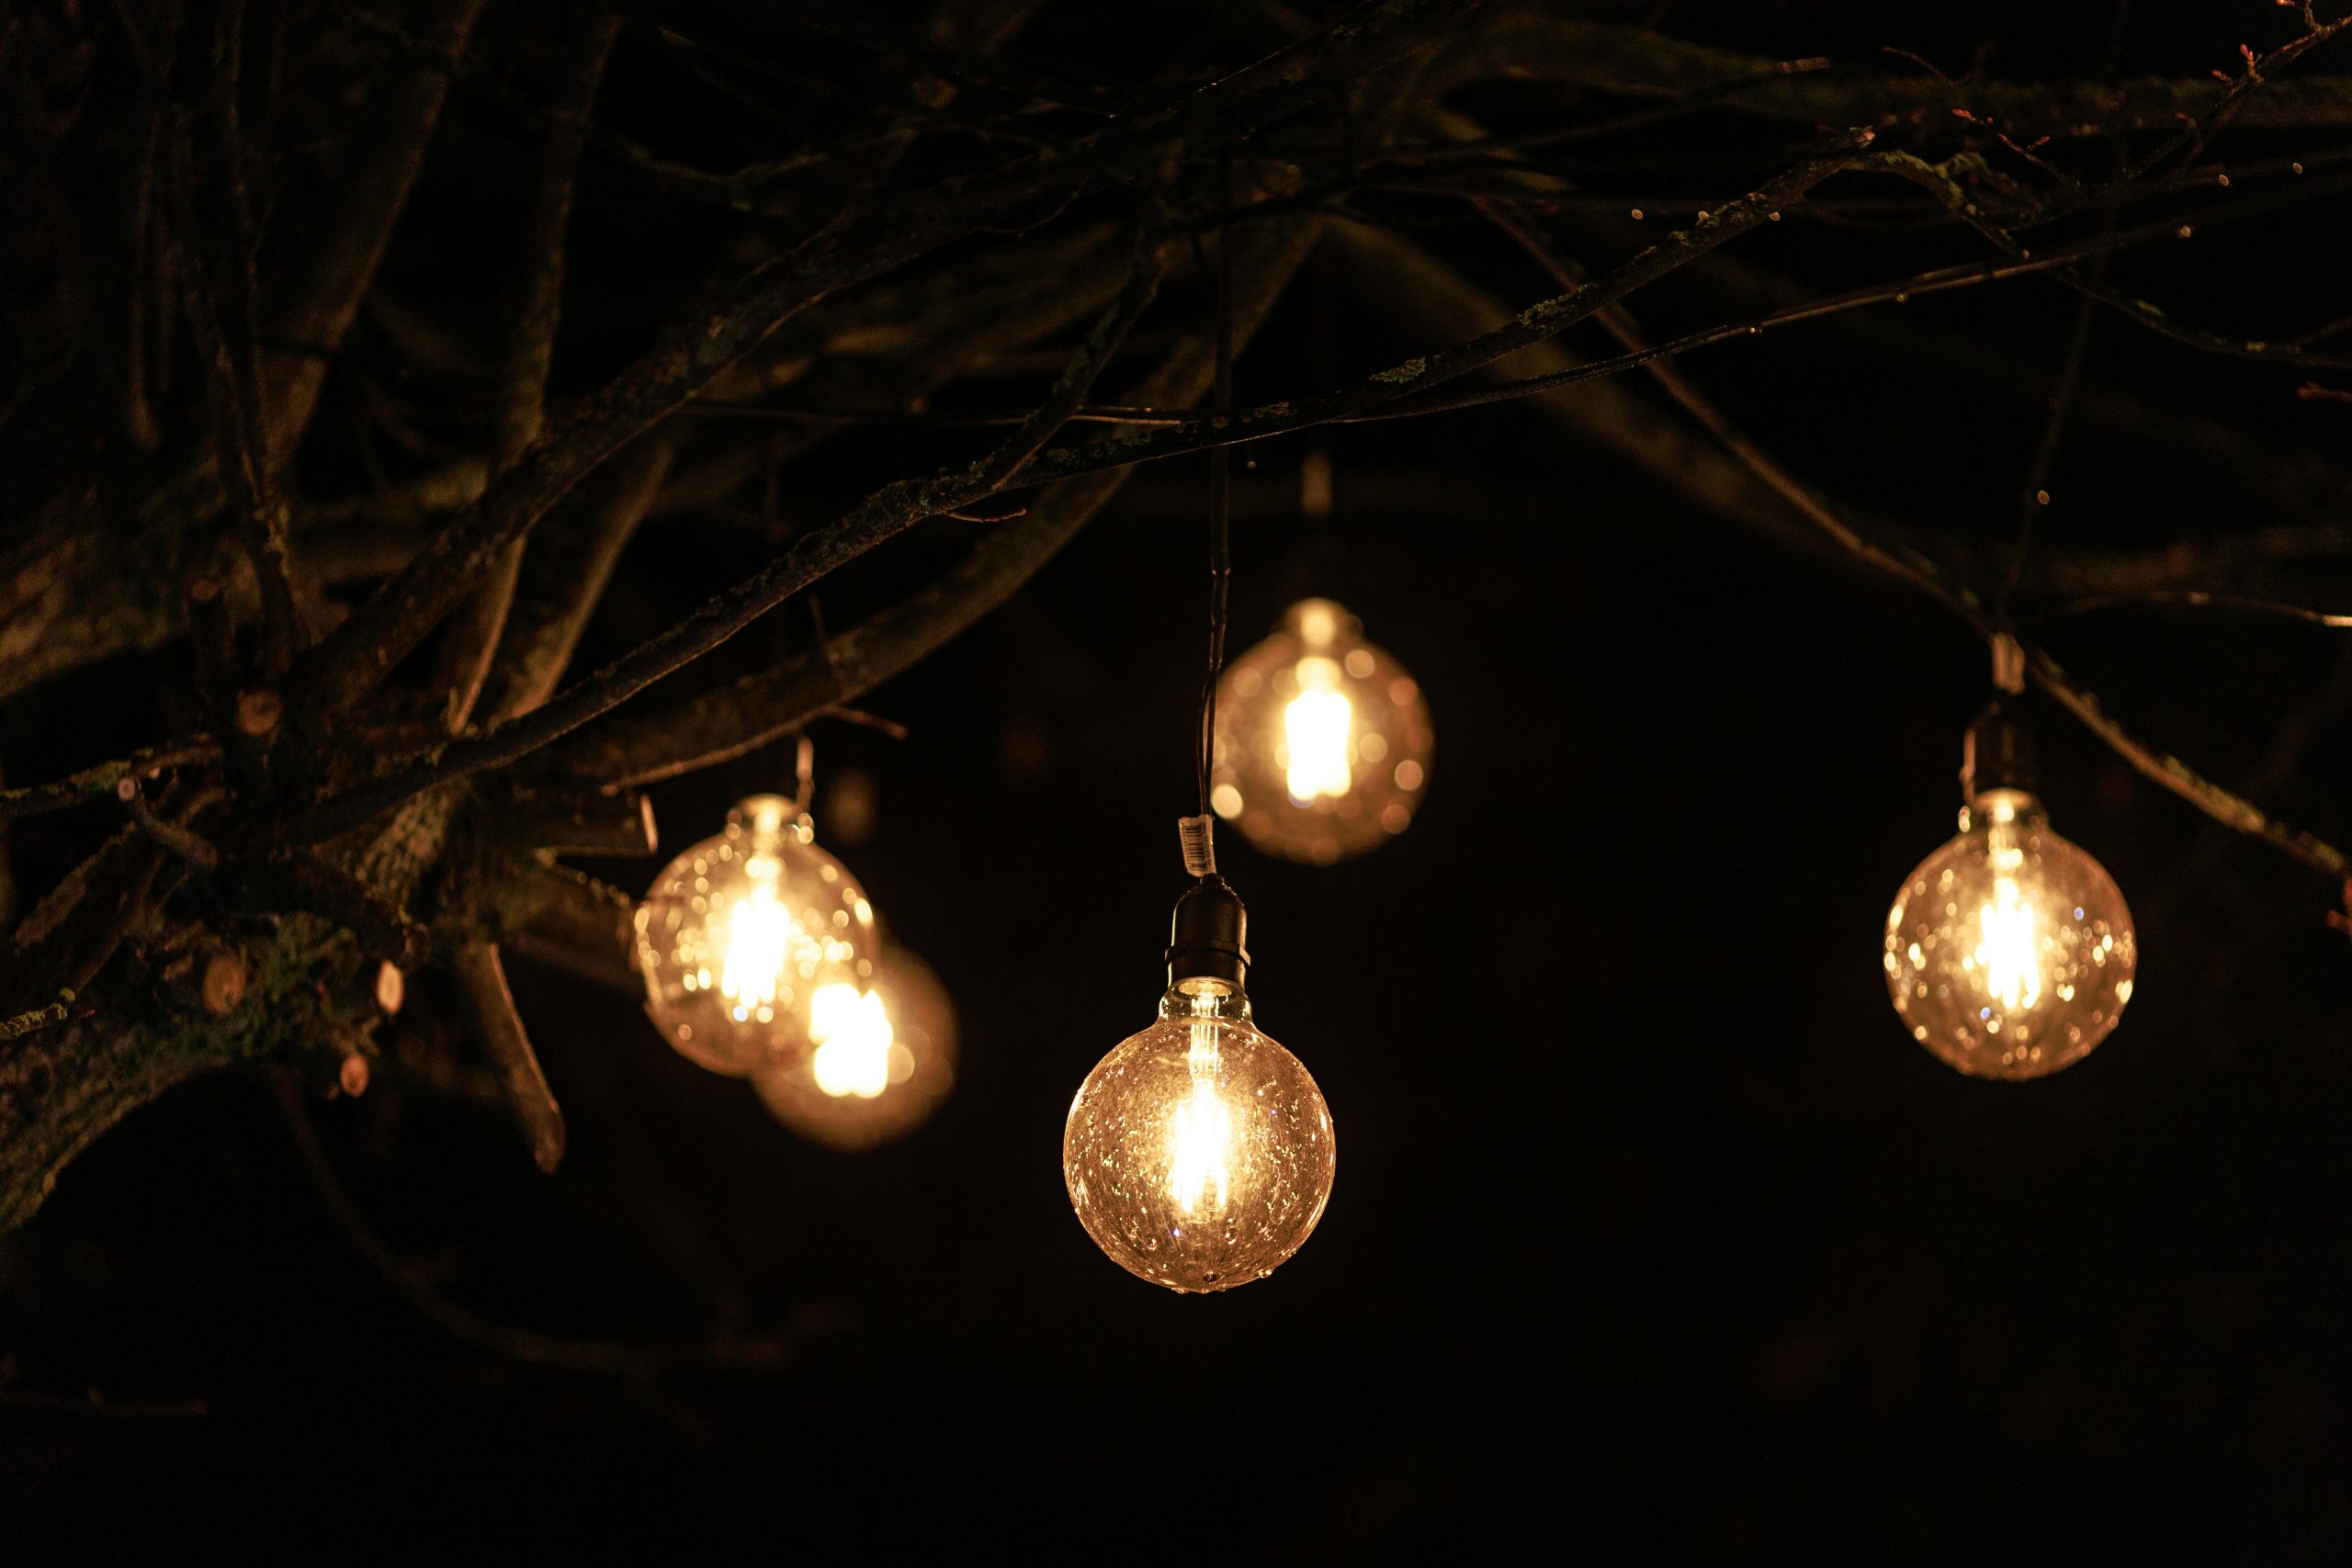
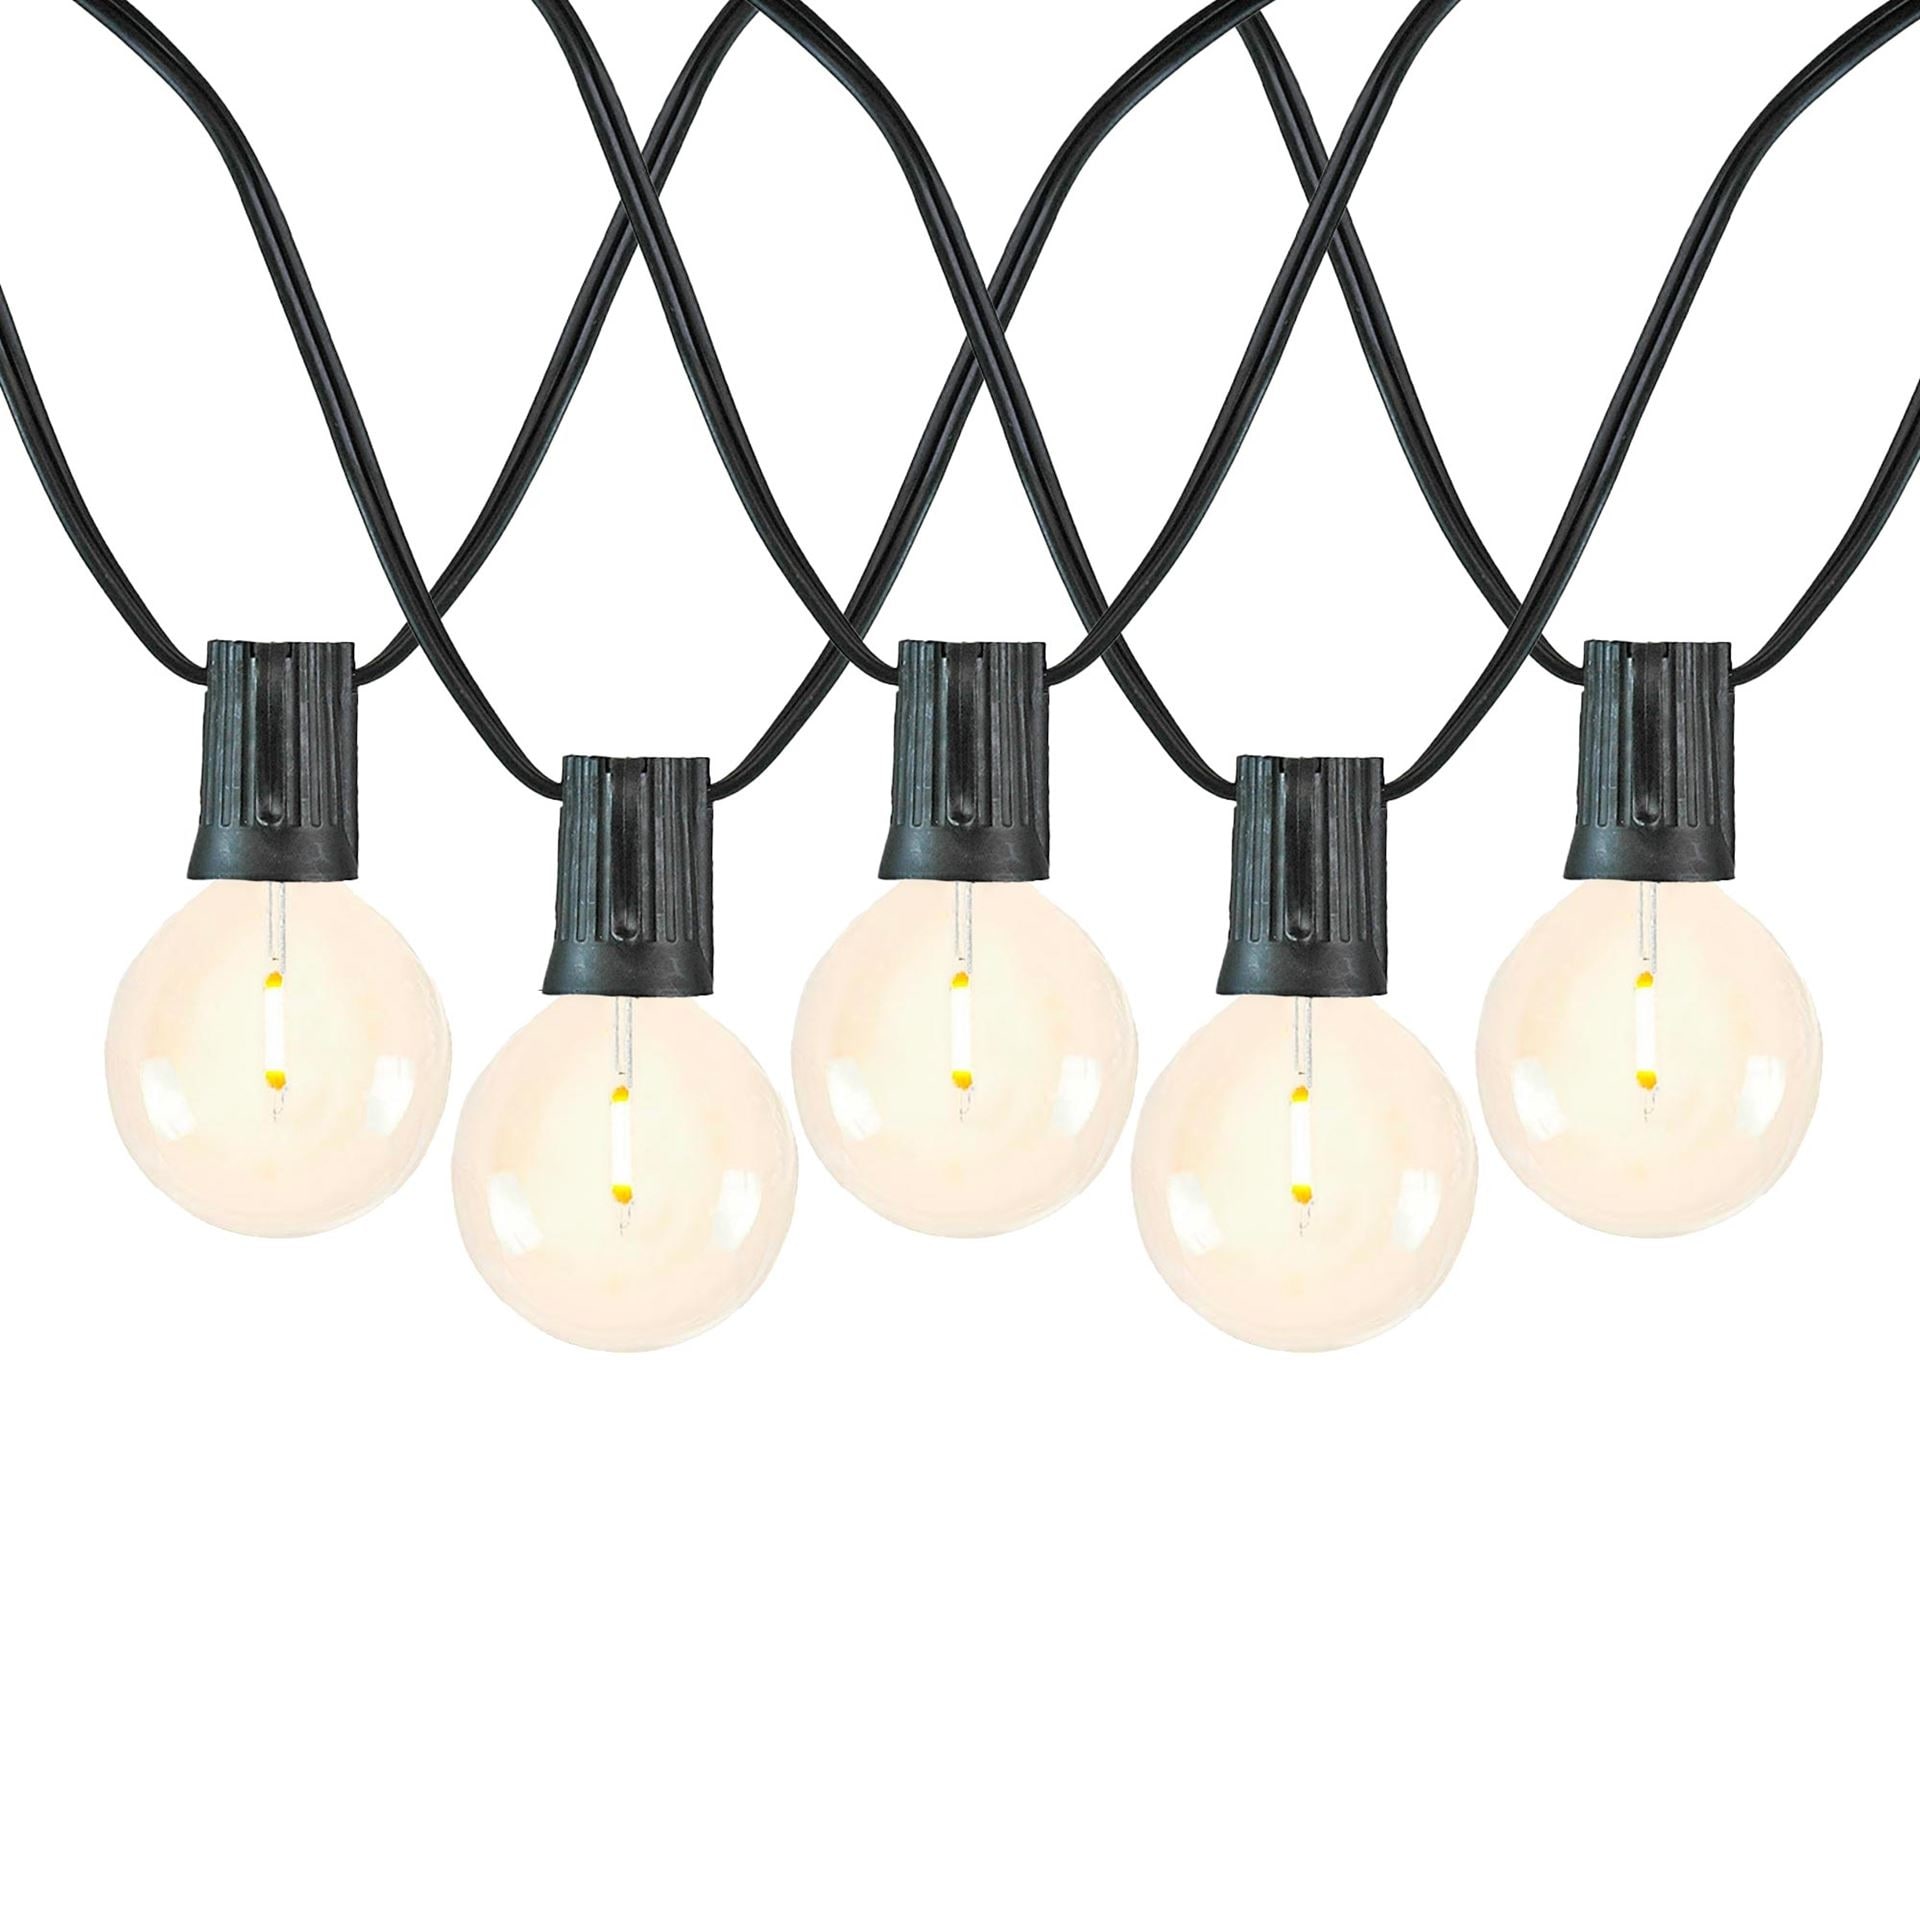
19. Simply Magical: Edison Bulbs Dangling from Tree Branches
To achieve this effortlessly elegant look, the secret is varying the height. Don’t hang all the bulbs at the same level. Instead, use the natural V-shapes and intersections of the branches as your guide. Let some hang down low, just a few feet above a table, and let others stay up high. This variation is what makes it feel organic and magical, not rigid and planned. A good rule of thumb is to have at least 18-24 inches of vertical difference between the lowest and highest bulbs.
|
📋 Copy HEX 🔗 Share |
|
$249.99
|
$49.95
|
$44.22
|
$17.38
|
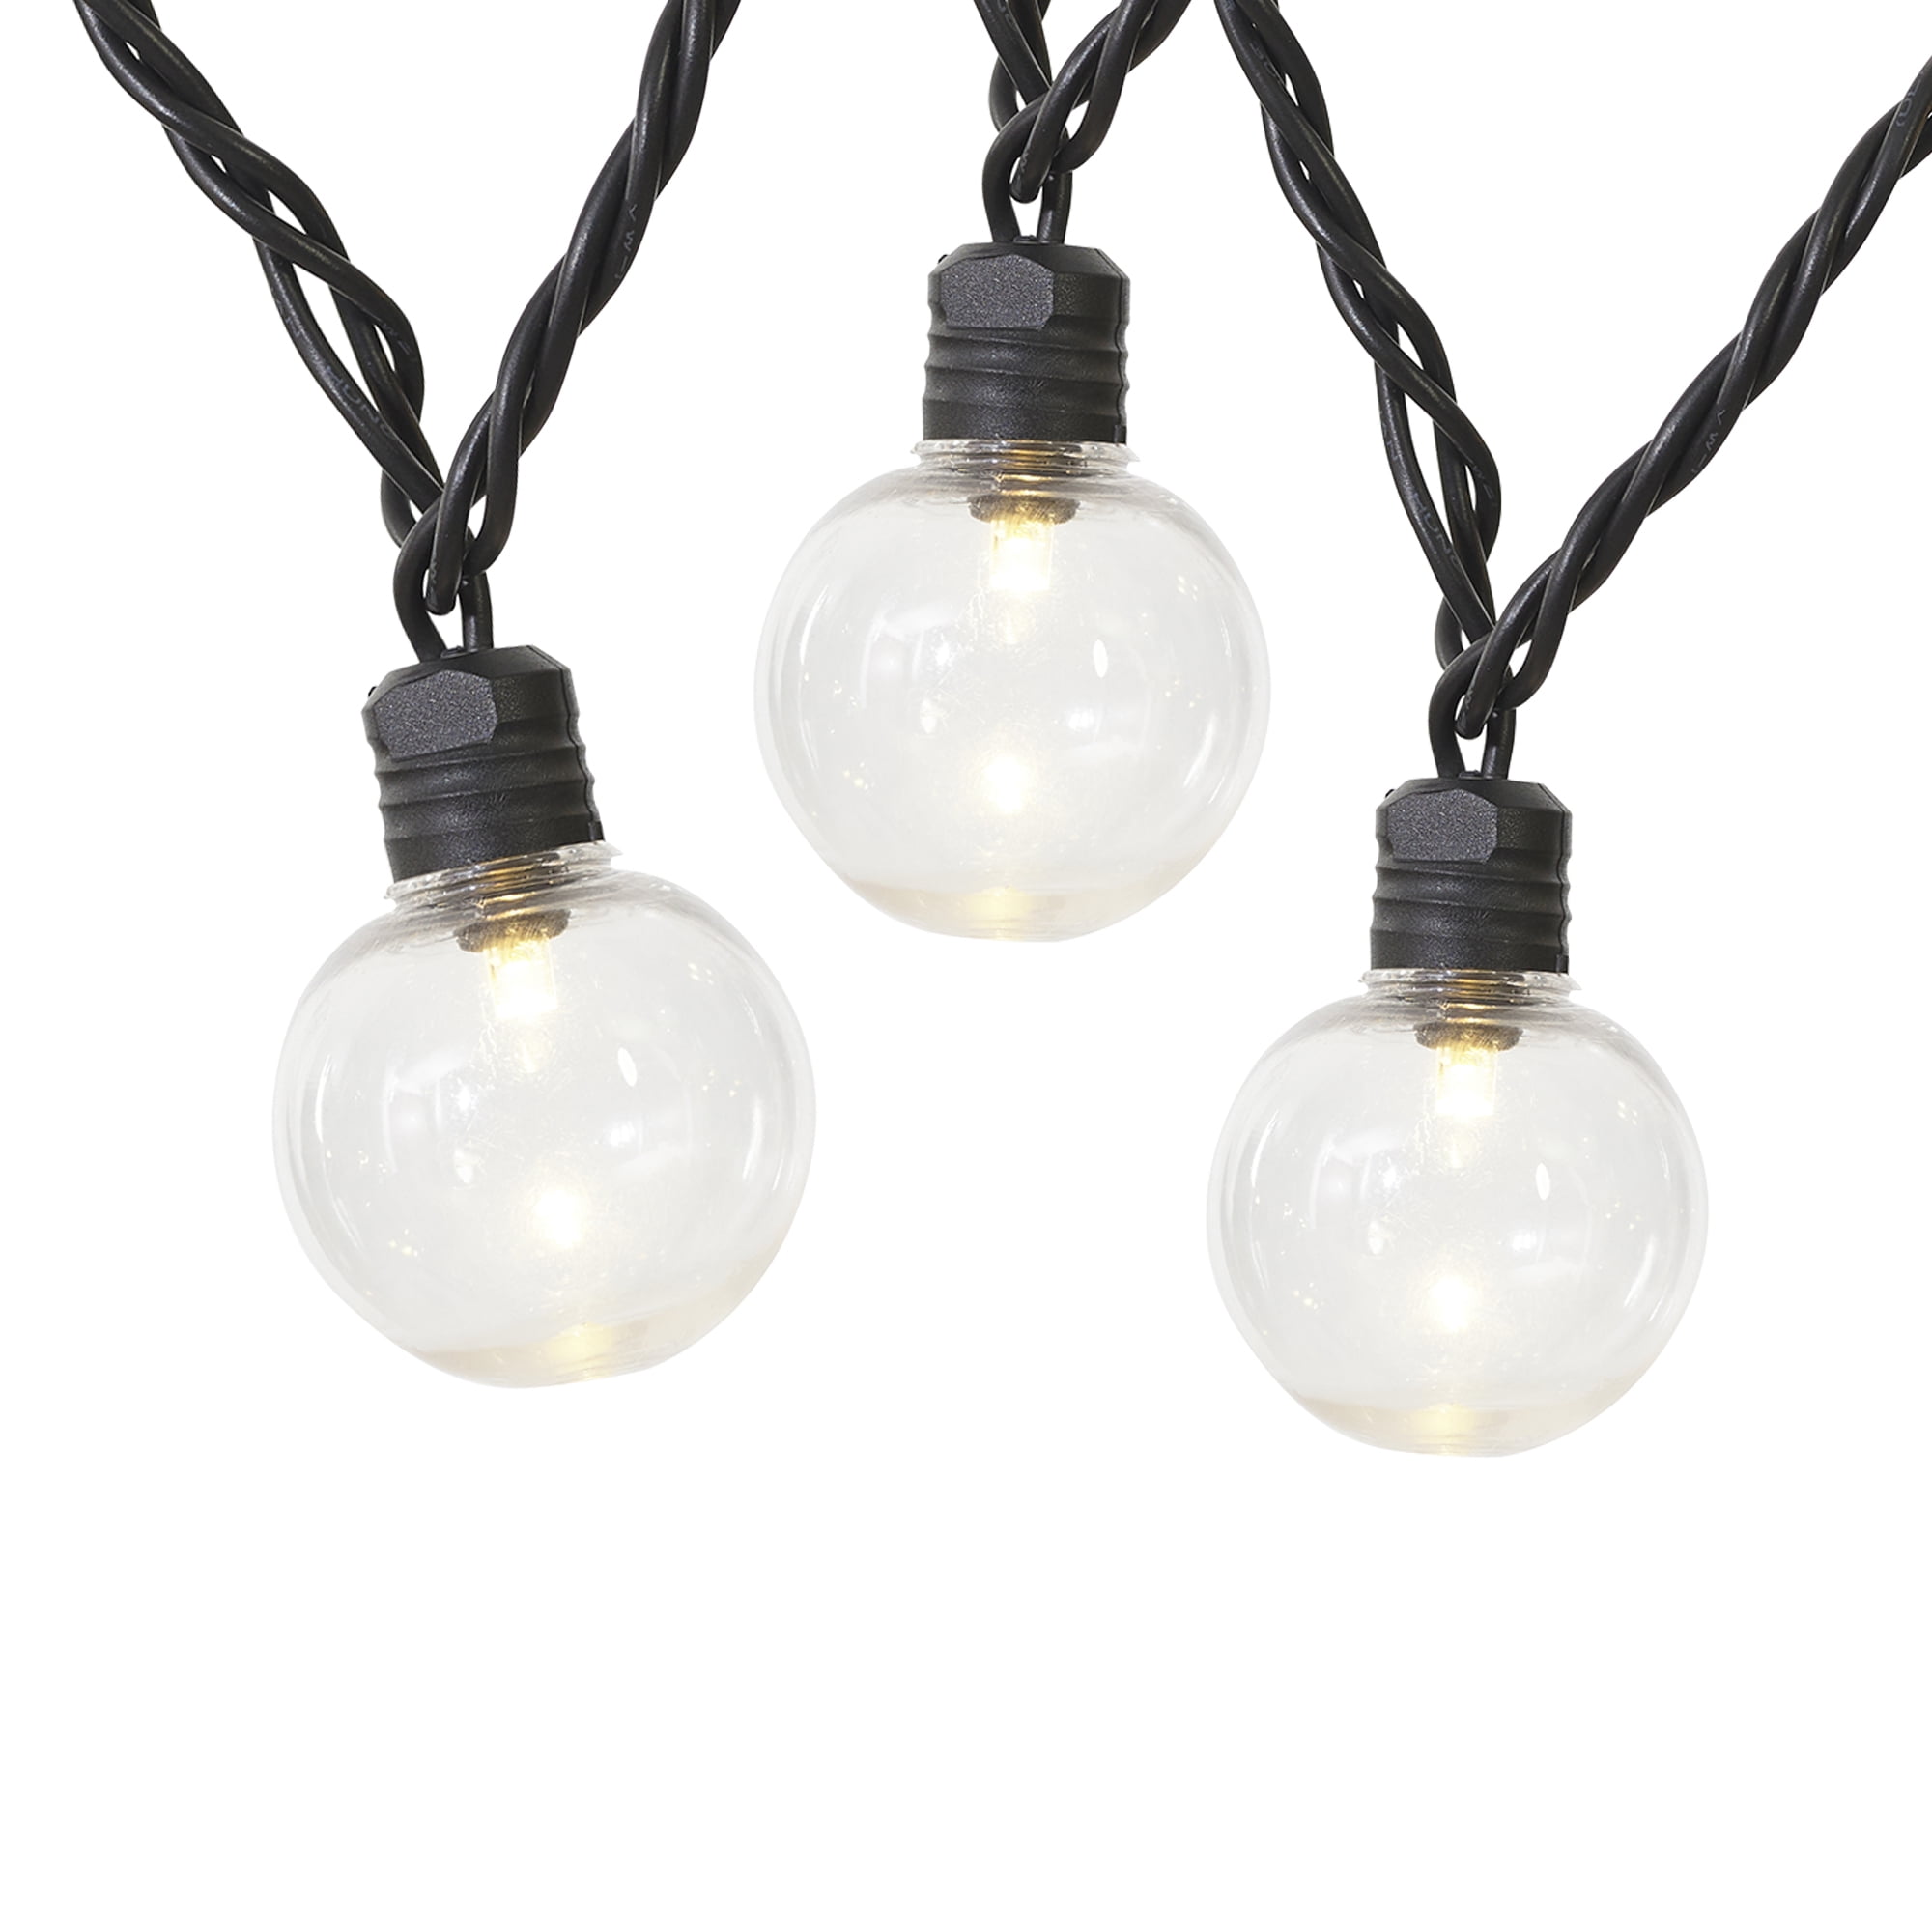
Those beautiful, vintage-style Edison bulbs with the glowing filaments are often incandescent. They create a stunningly warm light but are much more fragile and energy-hungry than their LED counterparts. If you love this look for a high-traffic area or plan to use it often, seek out the LED Edison-style bulbs. They give you the same aesthetic with 90% less energy use and are made of shatterproof plastic instead of glass. For a more whimsical string light idea, check out the fairy light tunnel in Idea #16.
20. A Masterclass in Layered Lighting
This is a perfect execution of the three main layers of landscape lighting. First, you have the ‘architectural’ layer, where the wall sconces wash the slatted wall and highlight its texture. Second is the ‘pathway’ layer, where the modern bollards provide safe, low-level illumination for the steps. Finally, you have the ‘feature’ layer, with uplighting focused on the small trees and shrubs, creating depth and a focal point. Together, these layers make the space feel complete, functional, and visually rich.
|
$114.99
|
$62.99
|
$59.98
|


A multi-layered, professionally integrated system like this is a true luxury feature, and the cost reflects the complexity and quality of the components. The result is seamless and stunning, but it requires a significant upfront investment.
- Fixtures (sconces, bollards, uplights): $2,500 – $6,000
- Low-Voltage Transformer & Wiring: $700 – $1,300
- Professional Design & Installation: $3,000 – $7,000
- TOTAL: $6,200 – $14,300
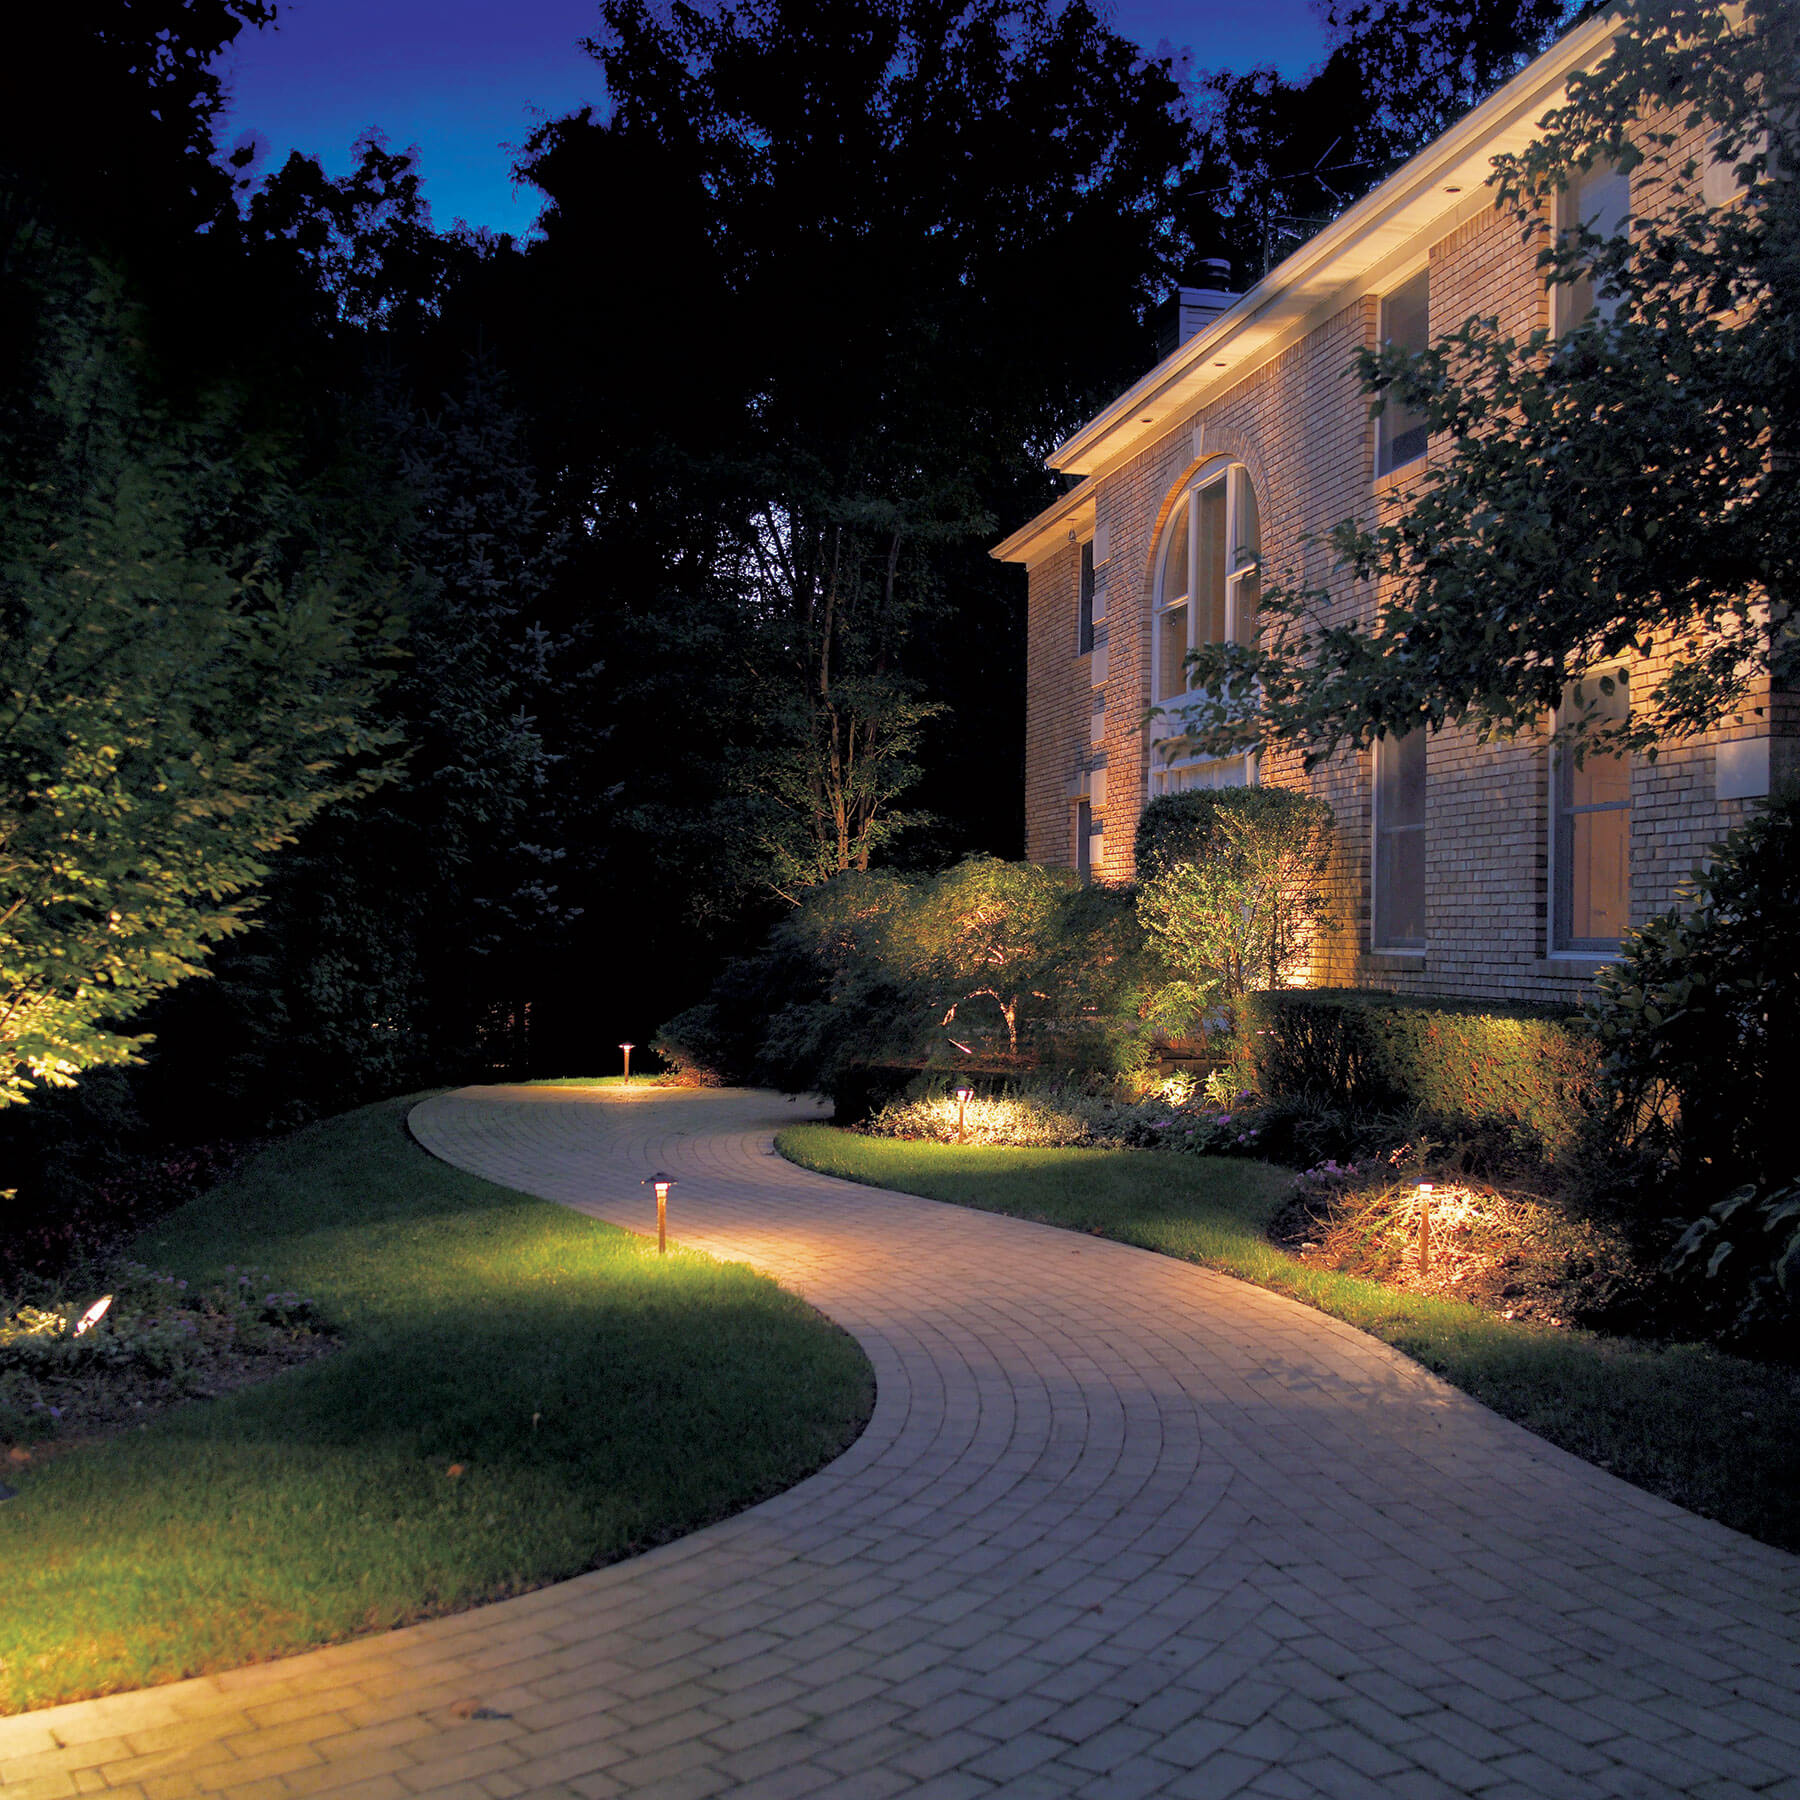
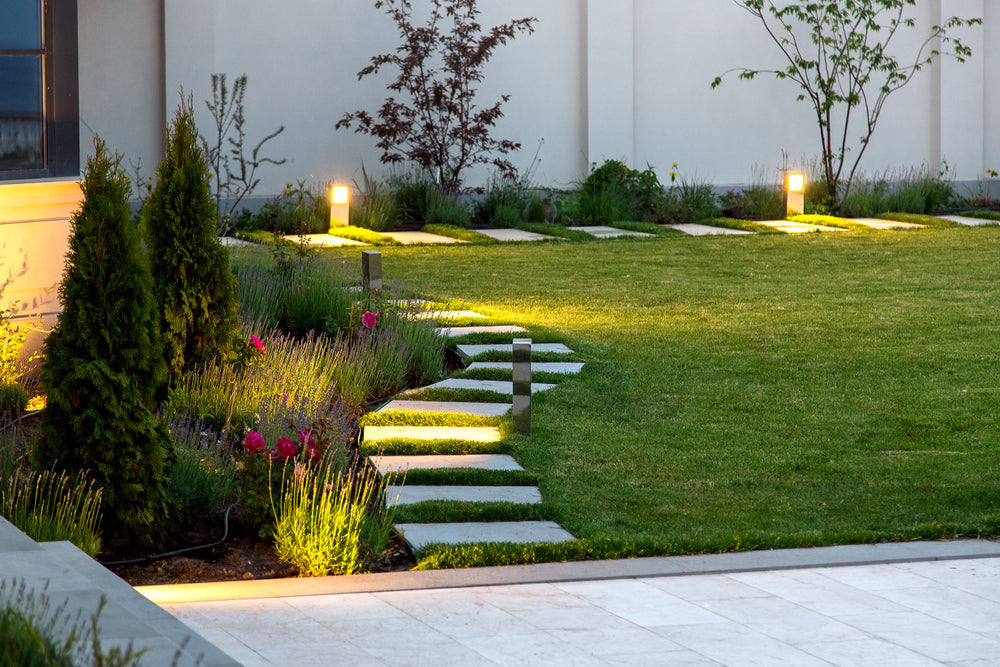
21. Where Path and Plants Glow
The single most captivating element here is the light that seems to emanate from beneath the stone pavers themselves. While the post lights and accent lights are beautiful, that underglow is what creates the magic. It makes the heavy stone slabs appear to float, lending an ethereal, high-end quality to the entire walkway. It’s an unexpected detail that elevates the design from simply “lit” to truly “illuminated.”
|
📋 Copy HEX 🔗 Share |
|
$11.99
|
$18.58
|
$67.83
|
$99.00
|

A design featuring both in-ground/under-cap lights and traditional post lights works best on pathways that are at least 4–5 feet wide. A narrower path can feel cluttered by this many fixtures. The effect of the ‘glowing’ pavers is most pronounced on straight or gently curving paths that are at least 20 feet long, allowing the rhythmic pattern of light to establish itself. It’s a great solution for connecting a patio to a secondary garden feature or entrance.
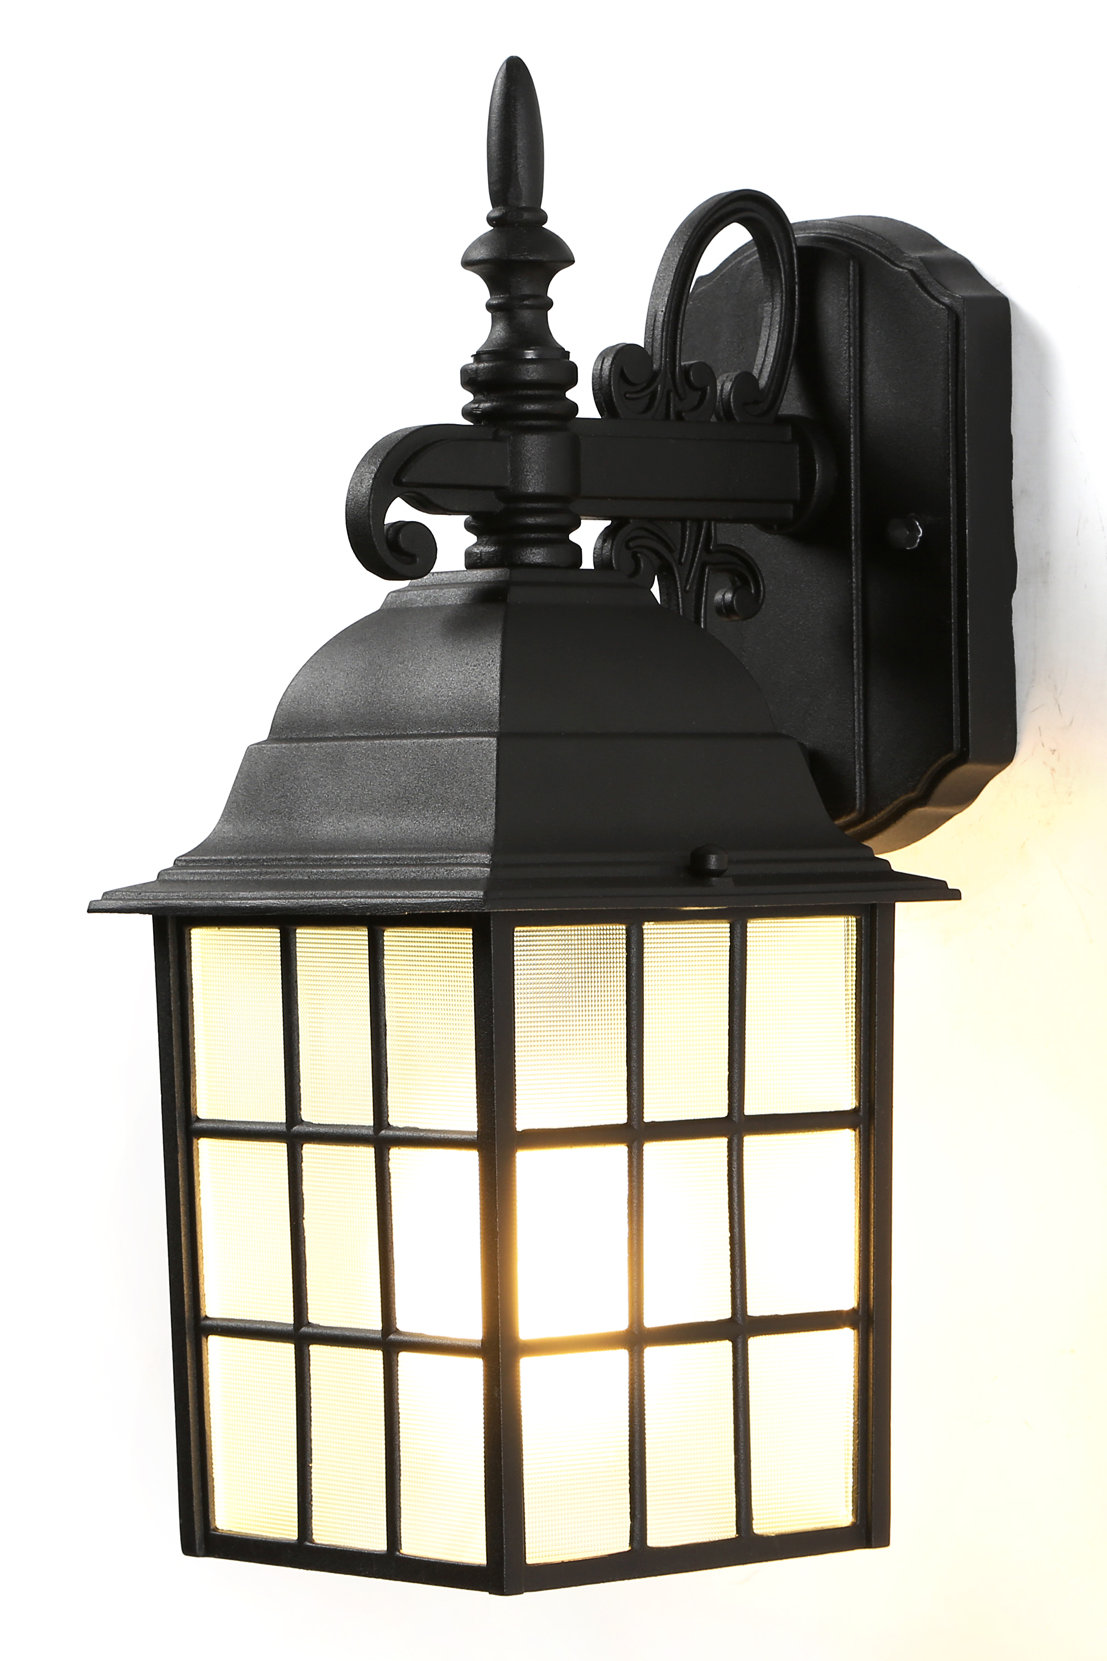
22. A Modern Take on the Classic Black Pathway Lantern
Pay close attention to the color temperature of the light itself. This fixture uses a bright, cool white light (likely around 4000K-5000K). This choice is intentional. A warm yellow light would feel traditional and cozy, but this crisp white light enhances the modern, almost graphic, quality of the black A-frame design. It feels clean, sharp, and contemporary and makes the surrounding green foliage appear even more vibrant in contrast.
|
$39.99
|
$11.99
|
$3.48
|
$74.36
|


The sleek, modern vibe here comes from a specific design equation: (Geometric Form + Monochromatic Color) x Cool-Toned Light. The lantern’s sharp A-frame and cage design provide the geometry. The all-black finish is the monochromatic element. And the bright, white light is the multiplier that elevates the entire look, making it feel crisp and new. If you were to swap in a curvy, bronze fixture with warm light, the entire feeling would shift from modern to traditional.
23. Sculptural Light from Slatted Modern Lanterns
What makes these lanterns so effective is the interplay of light and shadow. They don’t just produce a pool of light on the ground; they sculpt it. The vertical slats break up the light, casting gentle stripes onto the grass and pathway. This adds a layer of texture and pattern that’s far more intriguing than a simple, solid glow. The fixture becomes an active participant in the design, not just a passive source of illumination. These offer a different shadow play than the ornate lanterns in Idea #26.
|
📋 Copy HEX 🔗 Share |
|
$50.73
|
$57.50
|
$4.99
|
$20.48
|


While high-end, hardwired versions of these lanterns can be pricey, the ‘slatted lantern’ style has become very popular for solar lights. You can find similar designs at places like IKEA, Target, or online for a fraction of the cost, often under $50 for a set of two. They won’t be as bright or durable as a low-voltage system, but they are a fantastic way to get this sculptural, modern look in your garden without committing to a major expense.
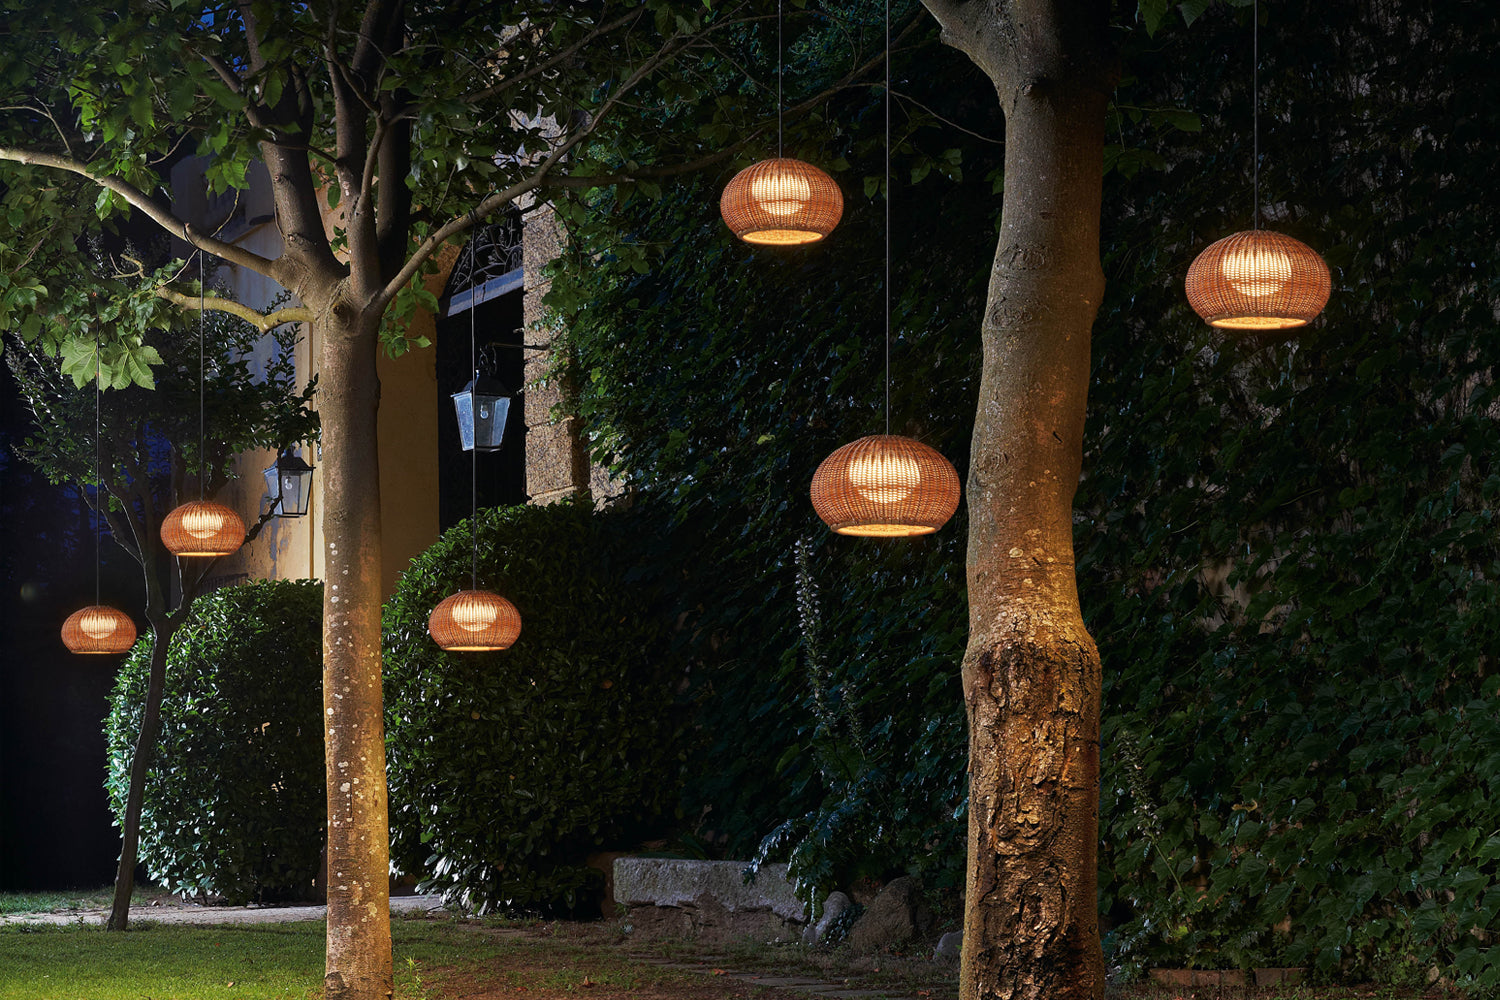
24. Floating Orbs: Woven Pendants Hung from Tree Branches
Hanging powered lights from trees requires care and the right materials to do it safely and without harming the tree. (Time: 2 hours, Cost: $150-$400)
- Choose your fixtures: Use outdoor-rated pendant lights with lightweight shades, like the woven ones shown.
- Protect the branch: Where the cord loops over the branch, use a ‘tree-saver’ strap (found in camping supply stores) or a piece of rubber hosepipe slit open. This prevents the cord from cutting into the bark.
- Secure the cord: Run an outdoor-rated extension cord from your outlet up the trunk of the tree, securing it loosely with UV-resistant zip ties or twine every few feet. Avoid using nails or staples.
- Connect and hang: Connect your pendant cord to the extension cord and drape it over your protected branch, adjusting for height.
|
$169.99
|
$69.97
|
$107.16
|
$19.97
|

This look speaks to a major trend for 2026: treating the outdoors with the same design intentionality as our interiors. For years, outdoor lighting was purely functional. Now, we’re seeing a huge surge in decorative, stylish fixtures like pendants and even ‘chandeliers’ meant for outdoor use. People want their patios and gardens to feel like true living spaces, and borrowing the language of indoor lighting is the fastest way to create that cozy, room-like feeling.
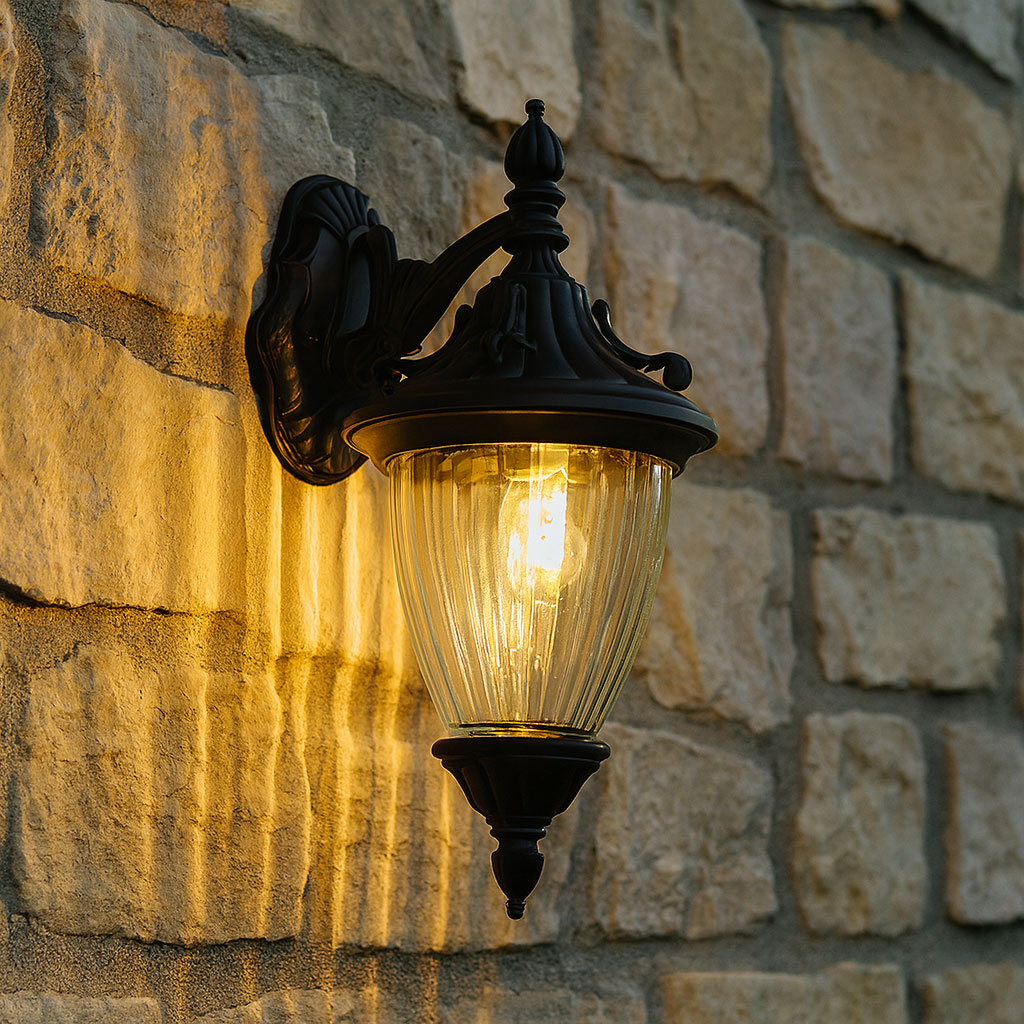
25. Timeless Tradition: An Ornate Lantern on a Stone Wall
The magic here is the classic, can’t-miss pairing of rough-cut stone and black metal. It’s a combination that has worked for centuries for a reason. The stone provides earthy, rustic texture, while the lantern’s ornate metalwork adds a touch of traditional craftsmanship and formal structure. They complement each other perfectly. Removing the lantern would make the wall feel incomplete; swapping the stone for smooth stucco would make the lantern feel out of place. Together, they create a look of enduring, classic elegance.
|
📋 Copy HEX 🔗 Share |
|
$49.95
|
$28.48
|
$38.40
|
$9.97
|


That beautiful ribbed glass looks great, but it’s a magnet for dust, pollen, and tiny insects. To keep the light clear and bright, plan to clean the glass at least twice a year. Use a simple glass cleaner and a soft brush to get into the grooves. Also, be prepared to periodically clear out spider webs and the occasional wasp’s nest from the interior of the lantern, as they are attractive shelters for critters.
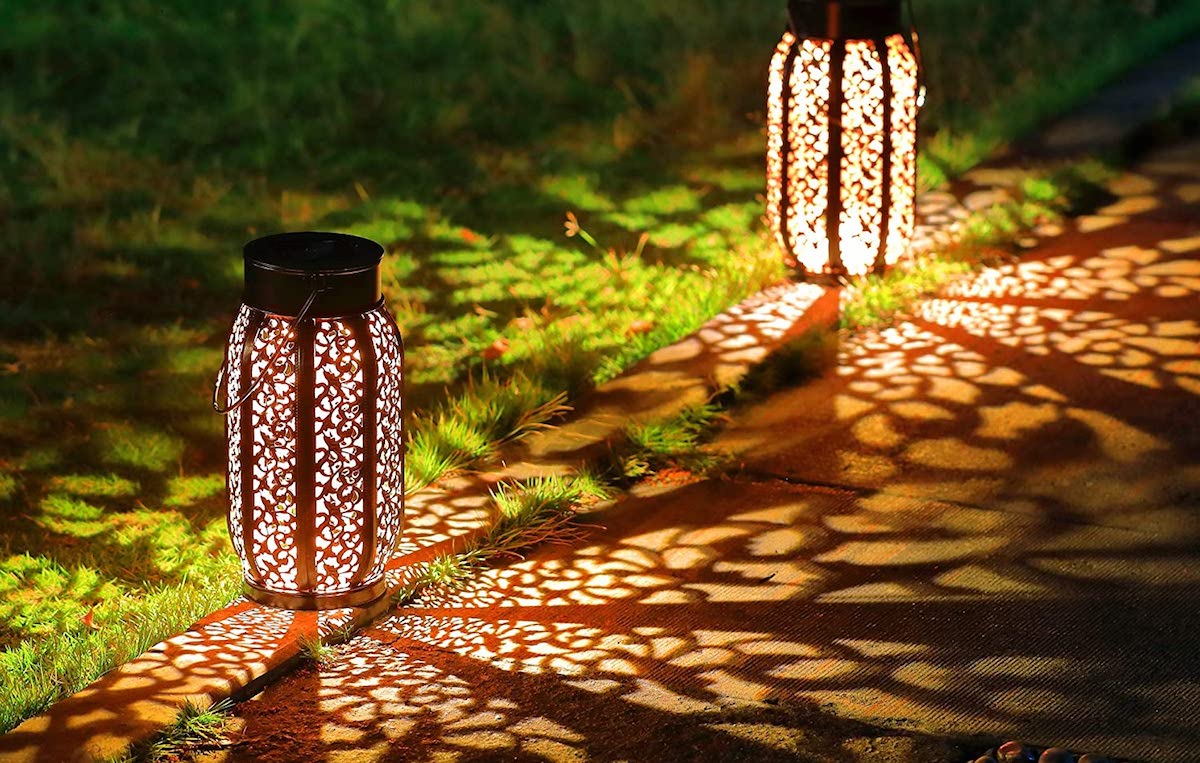
26. Garden Art: Lanterns that Cast Ornate Shadow Patterns
For lanterns that cast patterns, placement is everything. Don’t just stick them in the middle of a lawn. To get the most dramatic effect, place them right next to a lightly colored, flat surface, like a paver path, a gravel bed, or even the base of a plain wall. The light needs a ‘canvas’ to project its shadows on. Place the lantern no more than 1-2 feet away from the surface for the sharpest, most defined patterns. The further away it is, the softer and more blurred the shadows will become.
|
$325.99
|
$32.99
|
$25.73
|
This decorative shadow-casting effect is a hallmark of the solar lighting section at almost any store. Because solar lights aren’t powerful enough for serious illumination, manufacturers lean into decorative features instead. You can find dozens of variations of these cutout lanterns at stores like Target, Walmart, and Amazon, often for as little as $10–$20 per lantern. They’re a perfect, low-cost way to add a bit of personality and warm glow to a small patio or garden bed.
27. A Bed of Light: Globe Lights Tucked into Plantings
Putting electric string lights directly into a garden bed requires a bit of caution. Always use lights and any necessary extension cords that are explicitly rated for outdoor, in-ground, or wet-location use. Water from rain or sprinklers can easily get into the connections. Make sure all plugs are raised off the ground and, ideally, protected by an in-use weatherproof electrical box cover. It’s a beautiful look, but safety has to be the top priority.
|
📋 Copy HEX 🔗 Share |
|
$8.99
|
$30.16
|
$136.49
|
This works because it’s unexpected. We’re used to seeing light come from above (like the moon) or from the side (like a path light). Placing the light source low, on the ground, and within the plantings themselves creates a surprising and magical effect. It makes the plants themselves appear to be the source of the glow. This subverts our expectations and immediately draws the eye, turning a simple patch of green into an enchanting focal point. It’s a totally different way to use string lights compared to hanging them overhead like in Idea #17.
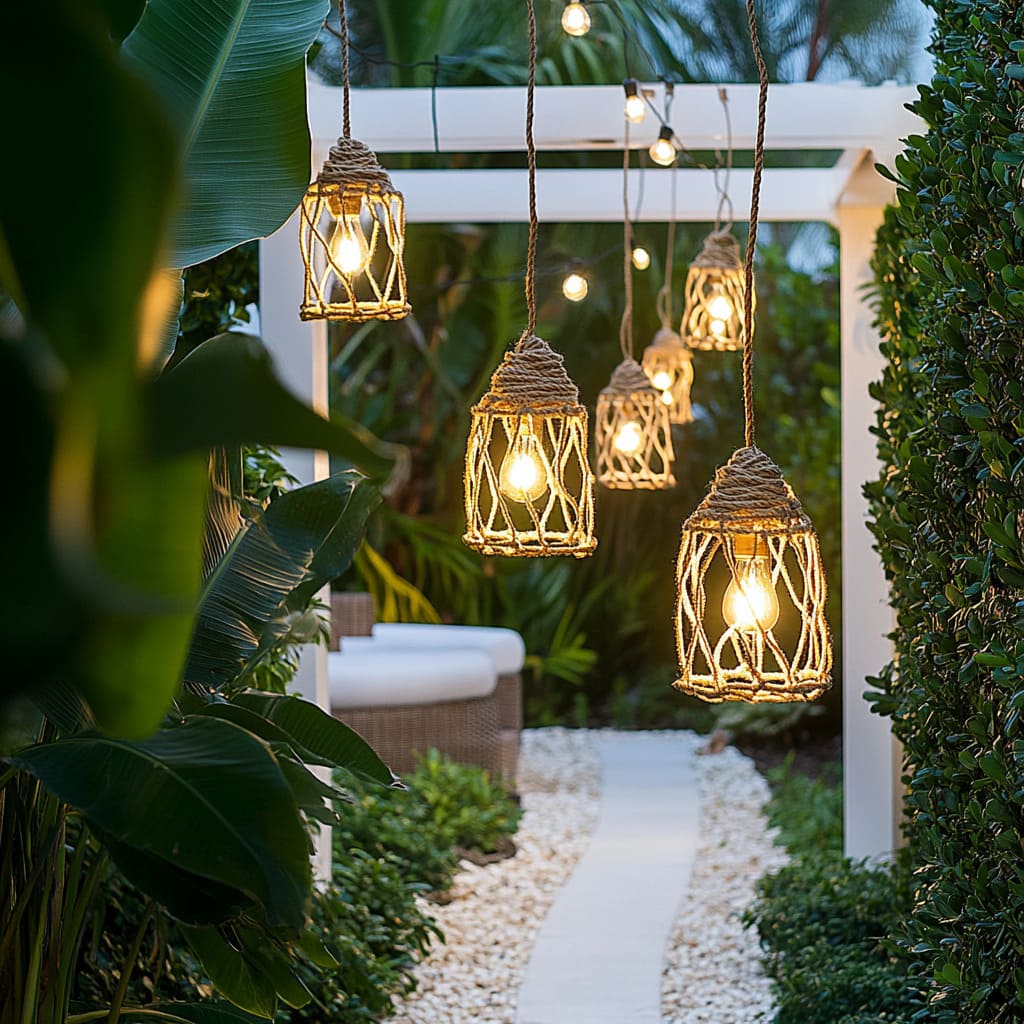
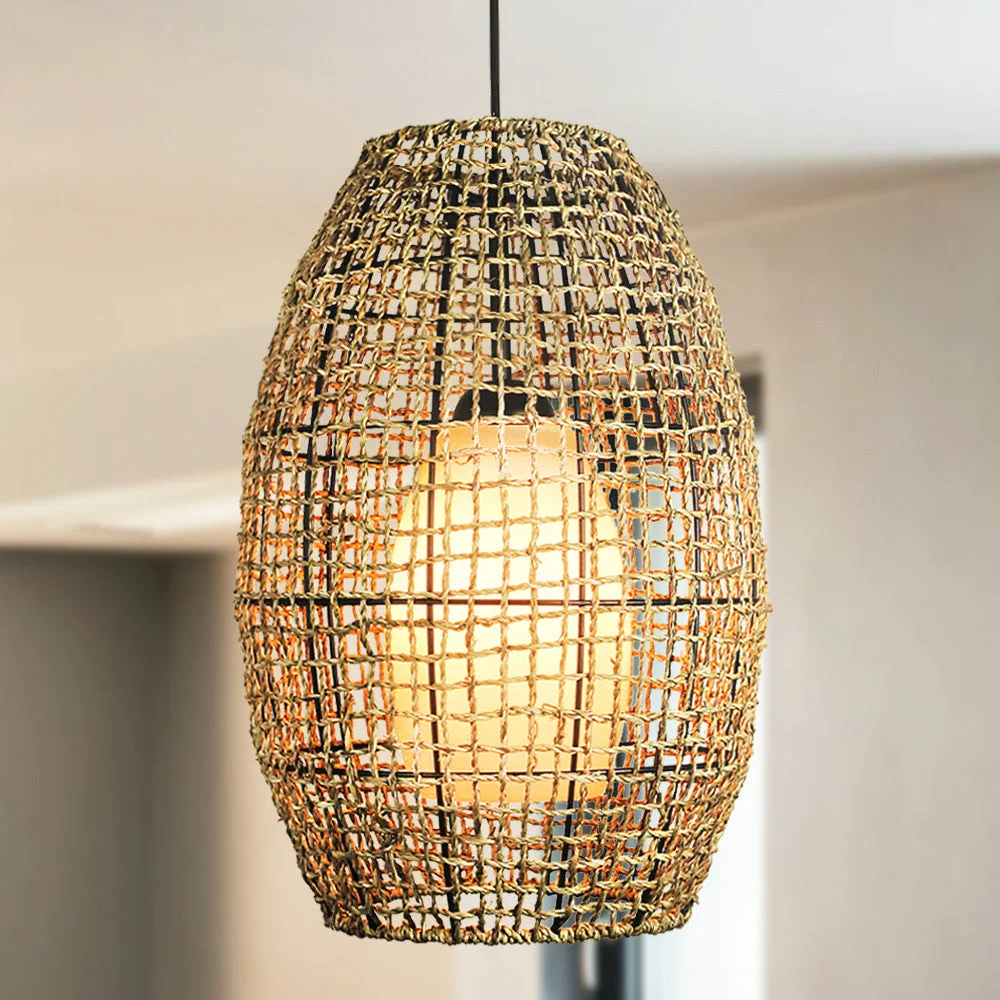
28. Nautical Vibe: Rope-Wrapped Pendants on a Pergola
The laid-back, coastal feel is all in the formula: 60% Natural Texture (the rope) + 30% Bright Structure (the white pergola) + 10% Vintage Detail (the Edison bulbs). The rope is the star, bringing in that nautical, handmade quality. The crisp white of the pergola keeps the look clean and bright, like a seaside cottage. And the warm glow of the Edison bulbs adds just a touch of old-world, rustic charm. It’s a perfect recipe for a relaxed, inviting outdoor space.
|
$169.99
|
$6,590.00
|
$849.00
|
$681.00
|

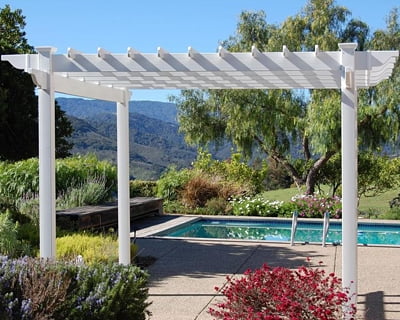
Want to give an existing (and boring) outdoor pendant a quick, high-impact makeover? Try wrapping it in rope. (Time: 1 Hour, Cost: $20)
- Choose your rope. A 3/8-inch or 1/2-inch natural jute or sisal rope works best.
- Unplug the fixture and make sure the bulb is cool. Start at the top or bottom of the cage.
- Apply a dot of strong adhesive like E6000 or use a hot glue gun to secure the end of the rope.
- Tightly wrap the rope around the frame, adding a dot of glue every few inches to keep it secure and taut.
- When you reach the end, cut the rope and secure the final tip with another dot of glue.
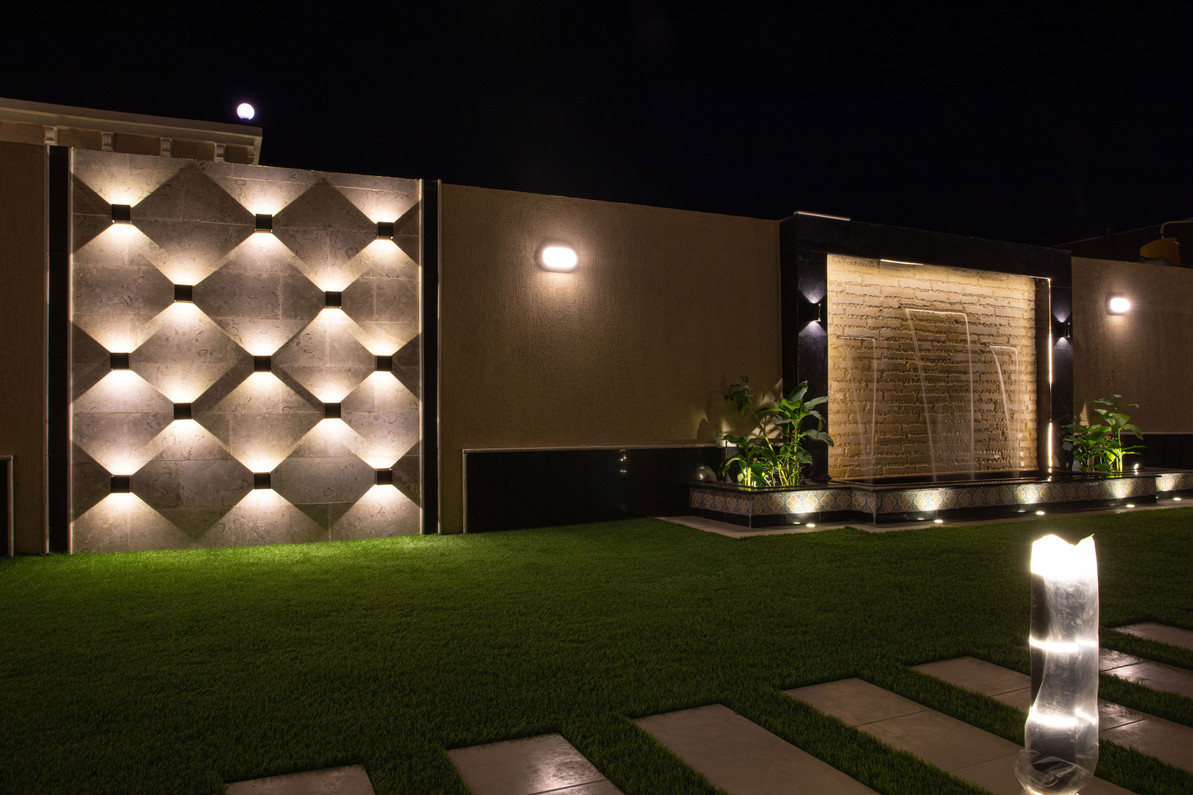
29. Graphic Glow: Diamond-Patterned Lights on a Modern Wall
The entire success of this look hinges on the sharp, graphic diamond patterns cast by the wall lights. Take those away, and you have a dark, uninteresting wall. The lights themselves are invisible; their effect is everything. They function as both illumination and wall art, turning a blank surface into a dynamic, repeating pattern. This is a prime example of using light itself as a decorative material, not just as a means to see in the dark. The sound of the water feature adds another sensory layer.
|
📋 Copy HEX 🔗 Share |
|
$97.49
|
$950.00
|
$220.99
|
$49.97
|


To really appreciate a repeating graphic pattern like this, you need an uninterrupted wall surface of at least 15-20 feet in length and 8 feet in height. It loses its impact on smaller walls or walls that are broken up by windows and doors. The viewing distance also plays a crucial role; one can best appreciate this effect from 20-40 feet away, where the eye can fully absorb the repeating pattern. It’s perfect for a boundary wall at the far end of a yard.
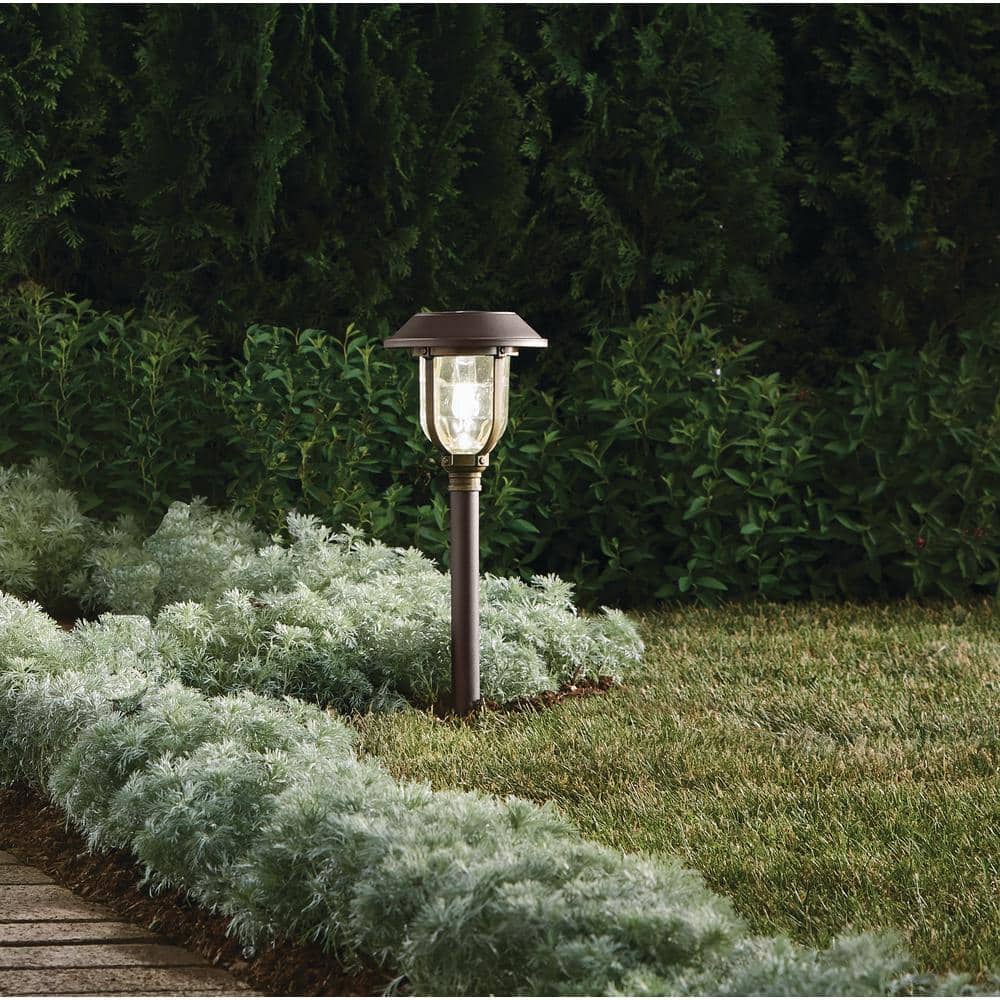
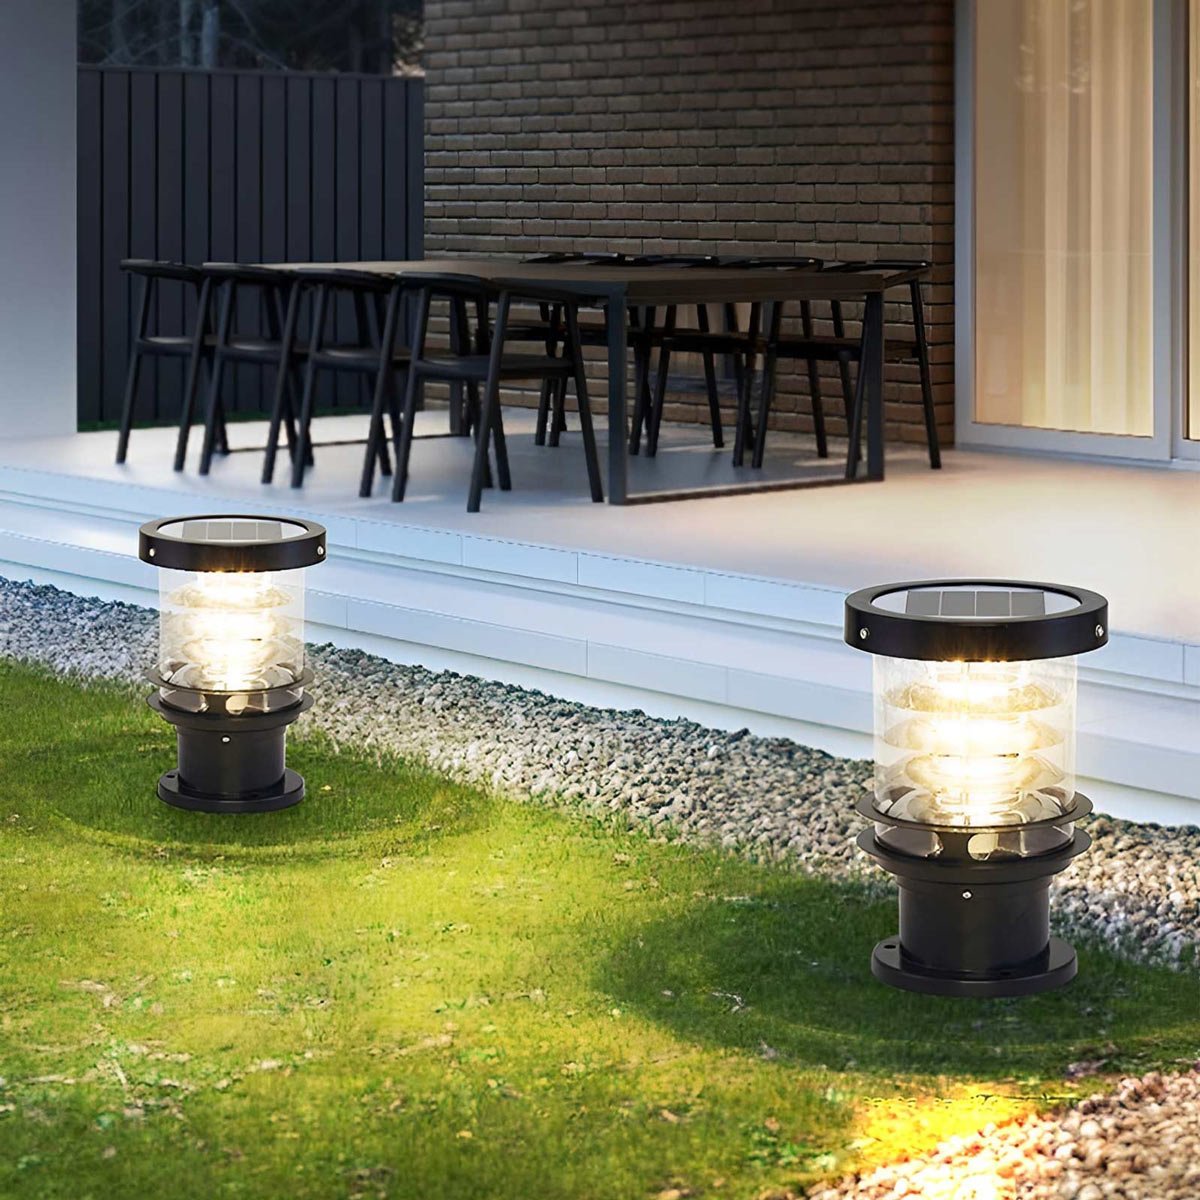
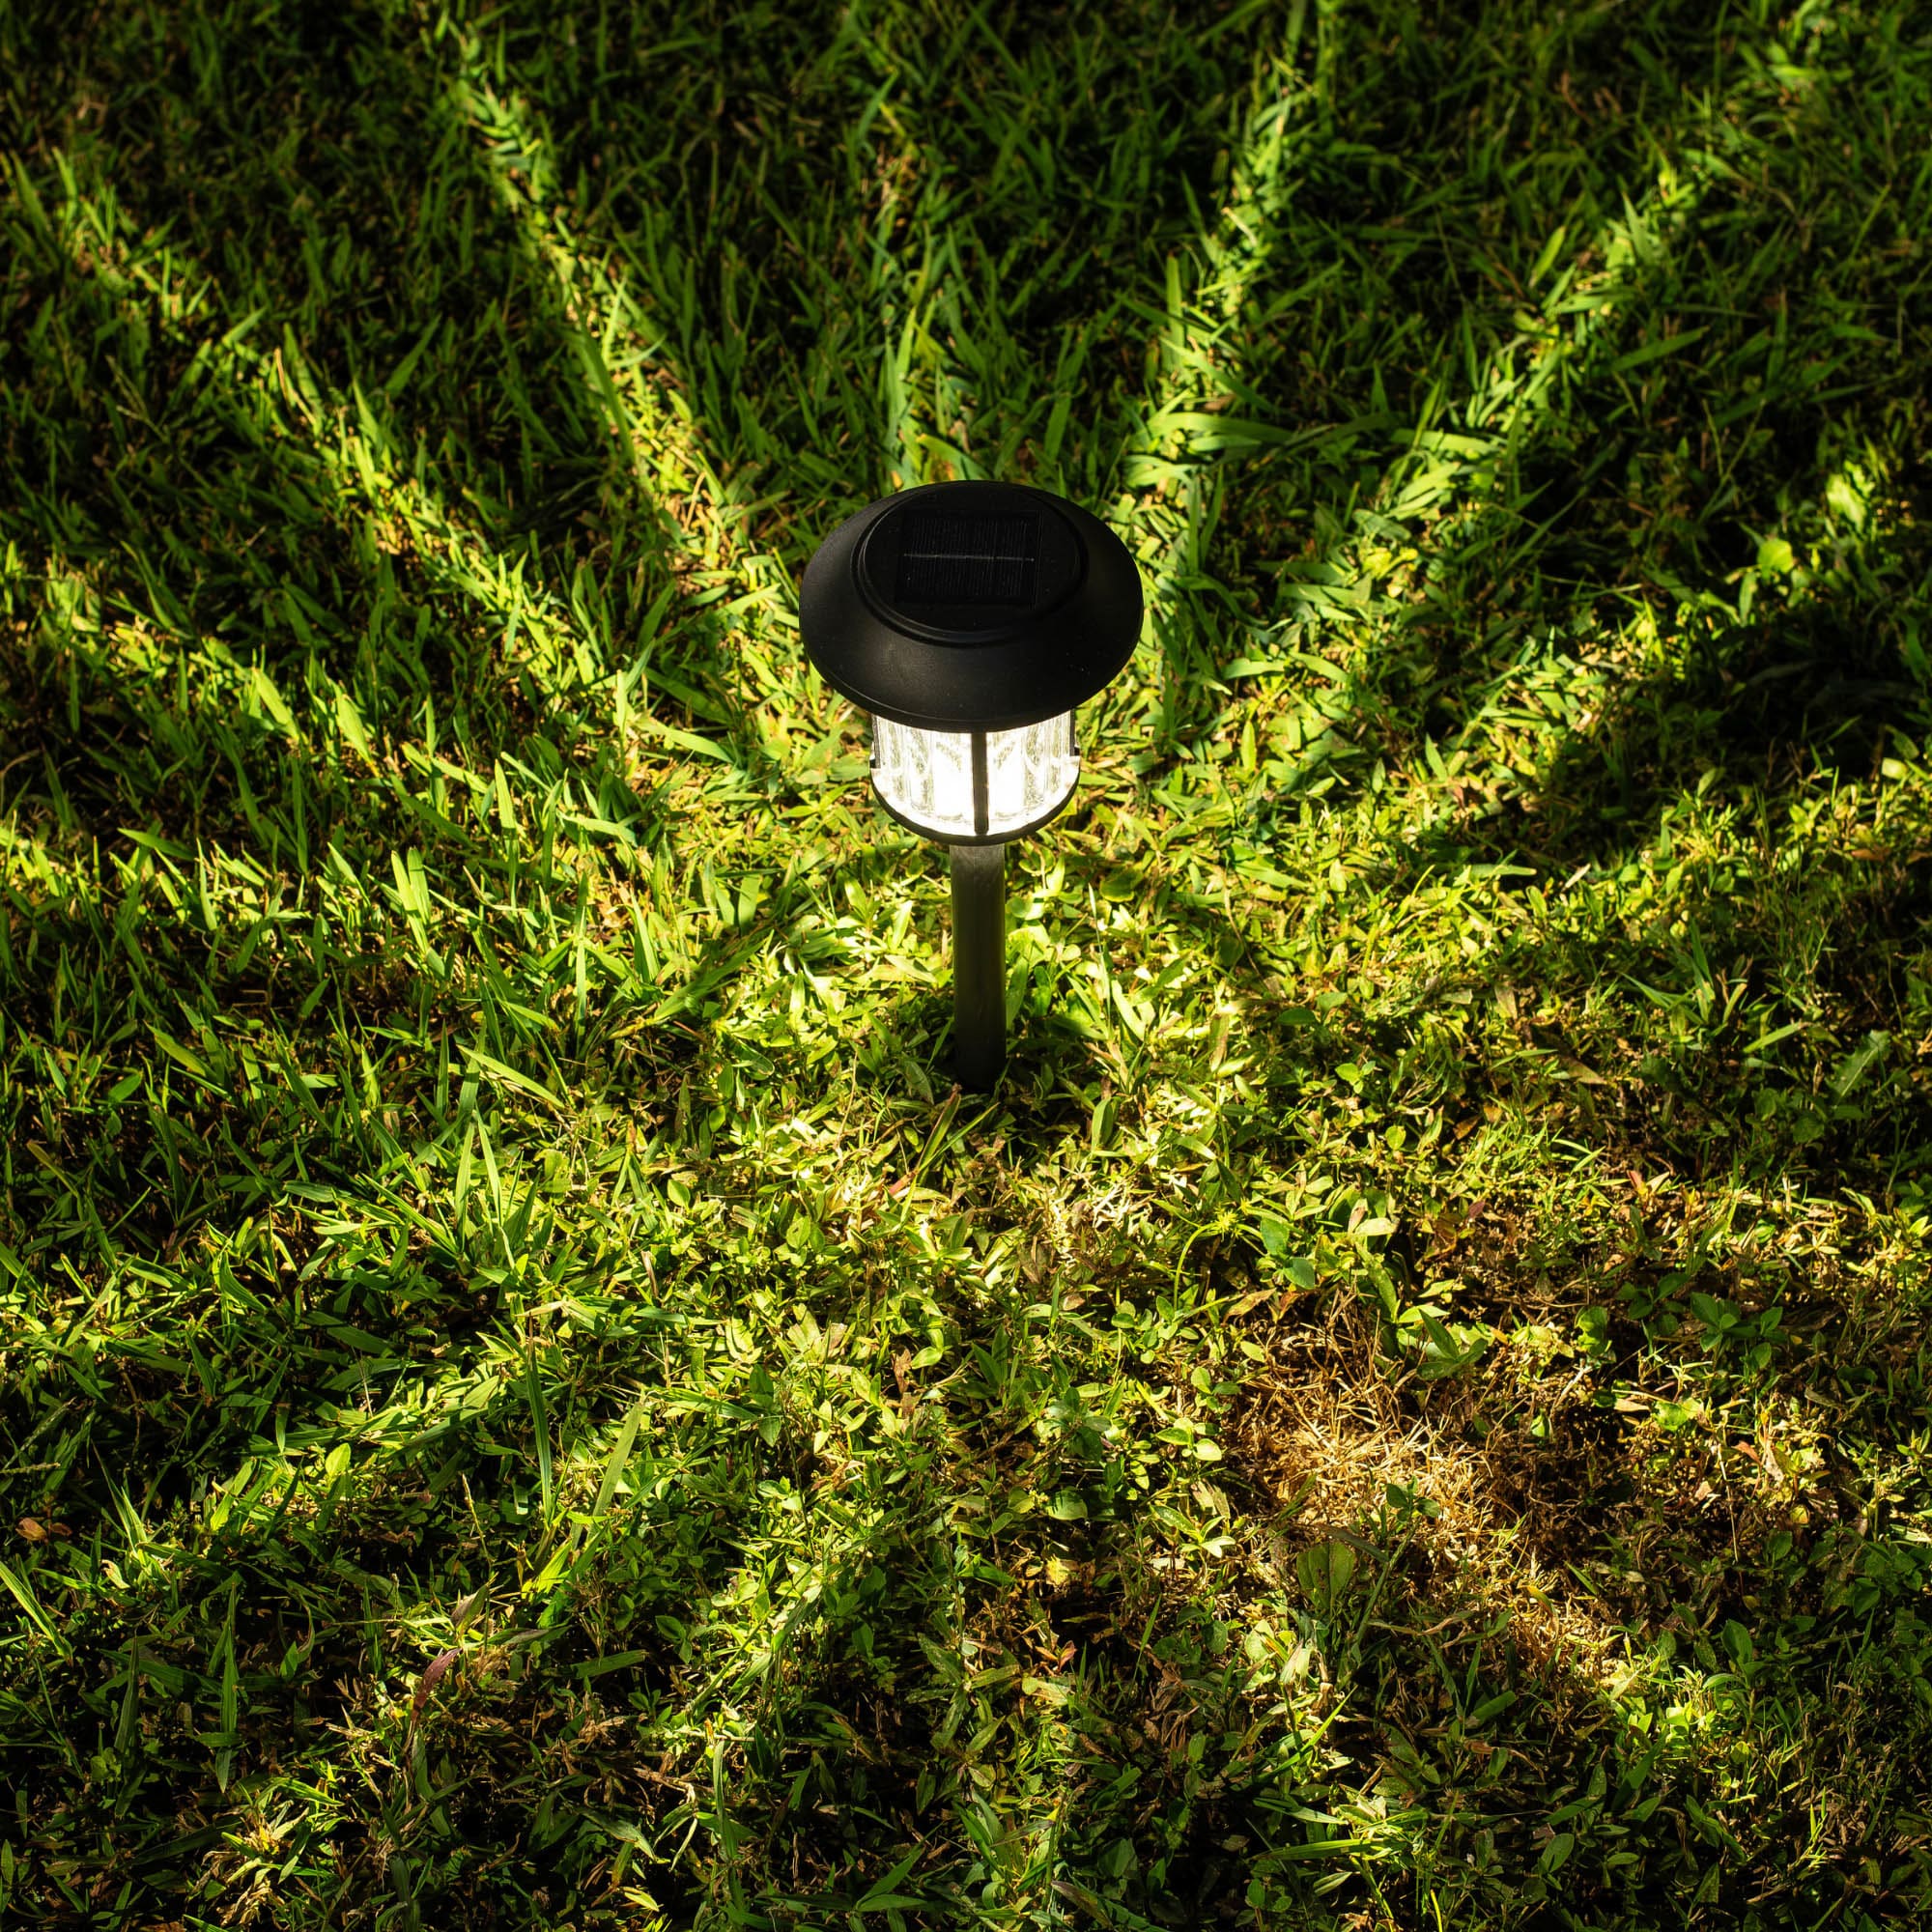
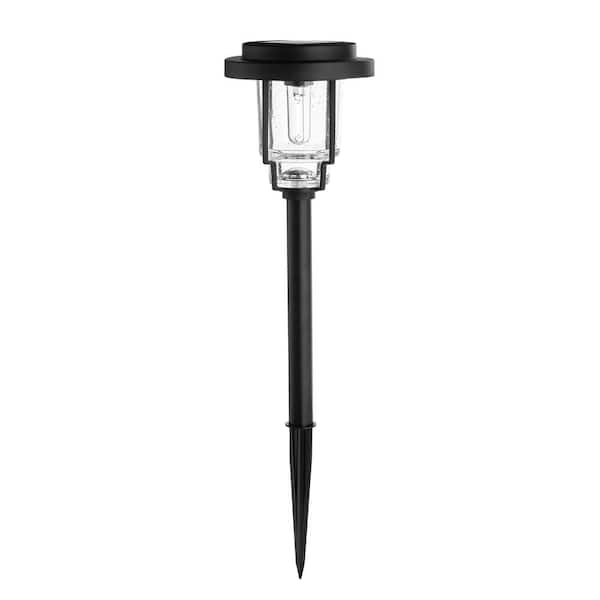
30. The Simple Solar Stake: A Modern Classic
This single solar stake represents the most accessible entry point to landscape lighting. For less than $10 at any hardware store, you can add a small pool of light to a dark corner, mark the edge of a path, or highlight a favorite plant. It requires zero technical skill and provides instant gratification. While it can’t compete with a full system, a handful of these simple stakes can bring a surprising amount of charm and functionality to a small garden or patio on a shoestring budget.
|
$5.66
|
$8.99
|
$19.99
|

Let’s be honest: you get what you pay for. A single, cheap solar light will not be very bright. It will likely only stay lit for a few hours after sunset, and its cool, blue-ish light can sometimes look out of place with warmer house lights. The plastic construction may only last a season or two in harsh weather. Think of it as a great solution for a renter, a temporary fix, or for adding a tiny bit of light to a very dark spot, but don’t expect it to perform like the hardwired system in Idea #1.
31. Golden Hour, All Night: Solar Discs Along a Pond
The beauty of modern solar lights is their versatility. Use them to bring light to areas of your yard that are far from an electrical outlet. Have a favorite bench at the back of your garden? A detached shed or a remote water feature like this pond? Solar disc lights or spotlights are the perfect, cost-effective solution for illuminating these out-of-the-way spots without the massive expense and hassle of digging trenches and running hundreds of feet of electrical cable.
|
📋 Copy HEX 🔗 Share |
|
$13.59
|
$30.50
|
$87.55
|
$51.98
|

This look is effective because of repetition and warmth. The repeated circles of golden light create a clear, rhythmic path for the eye to follow, guiding it through the garden. The warm, almost amber, color of the light feels cozy and natural, wonderfully complementing the greens of the grass and the grays of the stone. This is a solar, golden-toned version of the hardwired discs in Idea #14, and it creates a mood that is enchanting and tranquil.
Conclusion
See? The right lighting is about more than just visibility; it’s about crafting an experience and telling a story with your outdoor space. Pick an idea that speaks to you, start small, and enjoy the magical transformation. Don’t forget to save your favorites to your Pinterest boards to keep the inspiration flowing!
Photo credits: Martha Stewart, American Landscape, HomeGuide, Mid South Outdoor Lighting & Audio, Residence Supply, Lighting Style, PIX11, City Lights SF (In stock), Lamppo (In stock), BulbSquare (In stock), Twin Oaks Landscape, Spectrum Electric Inc., The Spruce, Lowe’s, Flyachilles · In stock: Kingstowne Lawn & Landscape, Flyachilles, Lumiere Lighting, Luxus Home and Garden® Furniture, Fancy House Design, Grassperson, The Home Depot, Pristine Landscaping & Lighting, Color, Outdoor Lighting Perspectives, Arrow Electricals, Holloways of Ludlow, Illuminated Concepts, Southern Lightscapes / Web, Alexander Popadin / Pexels