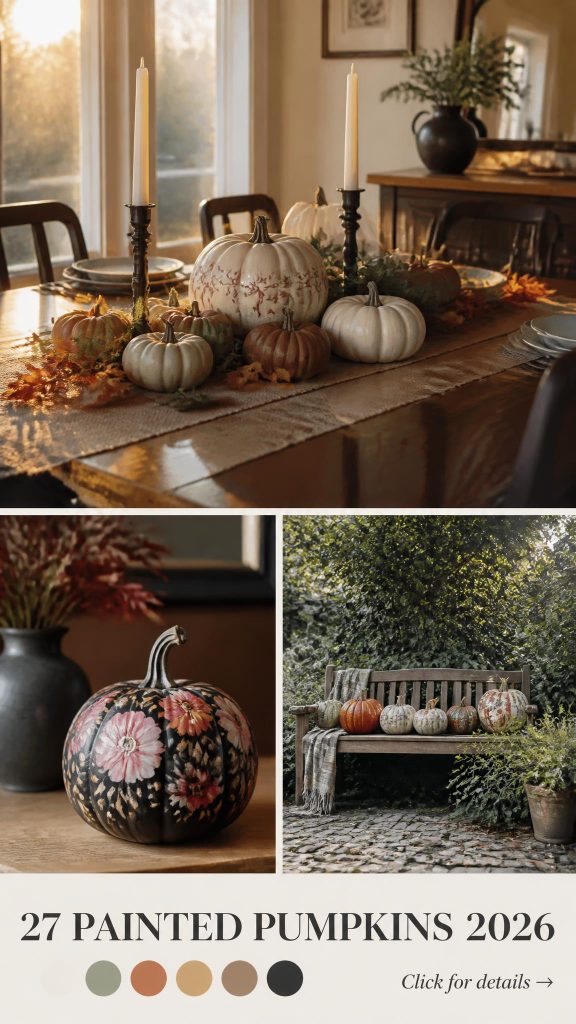
You know that feeling when you finally find the painted pumpkins for 2026 that look exactly right for your space? From Target’s latest drops to Michaels’ current bestsellers, we pulled the best-painted pumpkins 2026 options across every price point—from $5 to $50. After filtering through hundreds of options across Hobby Lobby, Amazon, and local patch finds, we narrowed it down to 27 ideas that actually deliver. Whether you’re into the “pink-o-ween” pastel trend or a more moody, modern aesthetic, we’ve got you covered with both budget-friendly DIYs and high-end looks. Painted pumpkins are having a major moment on Pinterest right now because they offer a mess-free, chic alternative to traditional carving that lasts all season long. Save it now—this one’s worth keeping. And stay until the end—we break down the most common mistakes that can ruin these looks. 📌 Save this to Pinterest for later—you’ll want to revisit these ideas.
1. Autumnal Assortment with Dried Florals and Jack-o’-Lanterns
Mixing organic textures with traditional holiday symbols creates a display that feels elevated rather than kitschy. The juxtaposition of a matte black jack-o’-lantern face against the vibrant orange skin provides a sharp focal point, while the inclusion of a large, muted grey-blue pumpkin tempers the brightness. This palette works because it balances the high-contrast black and orange with earthy tones like yellow and purple from the dried floral background.
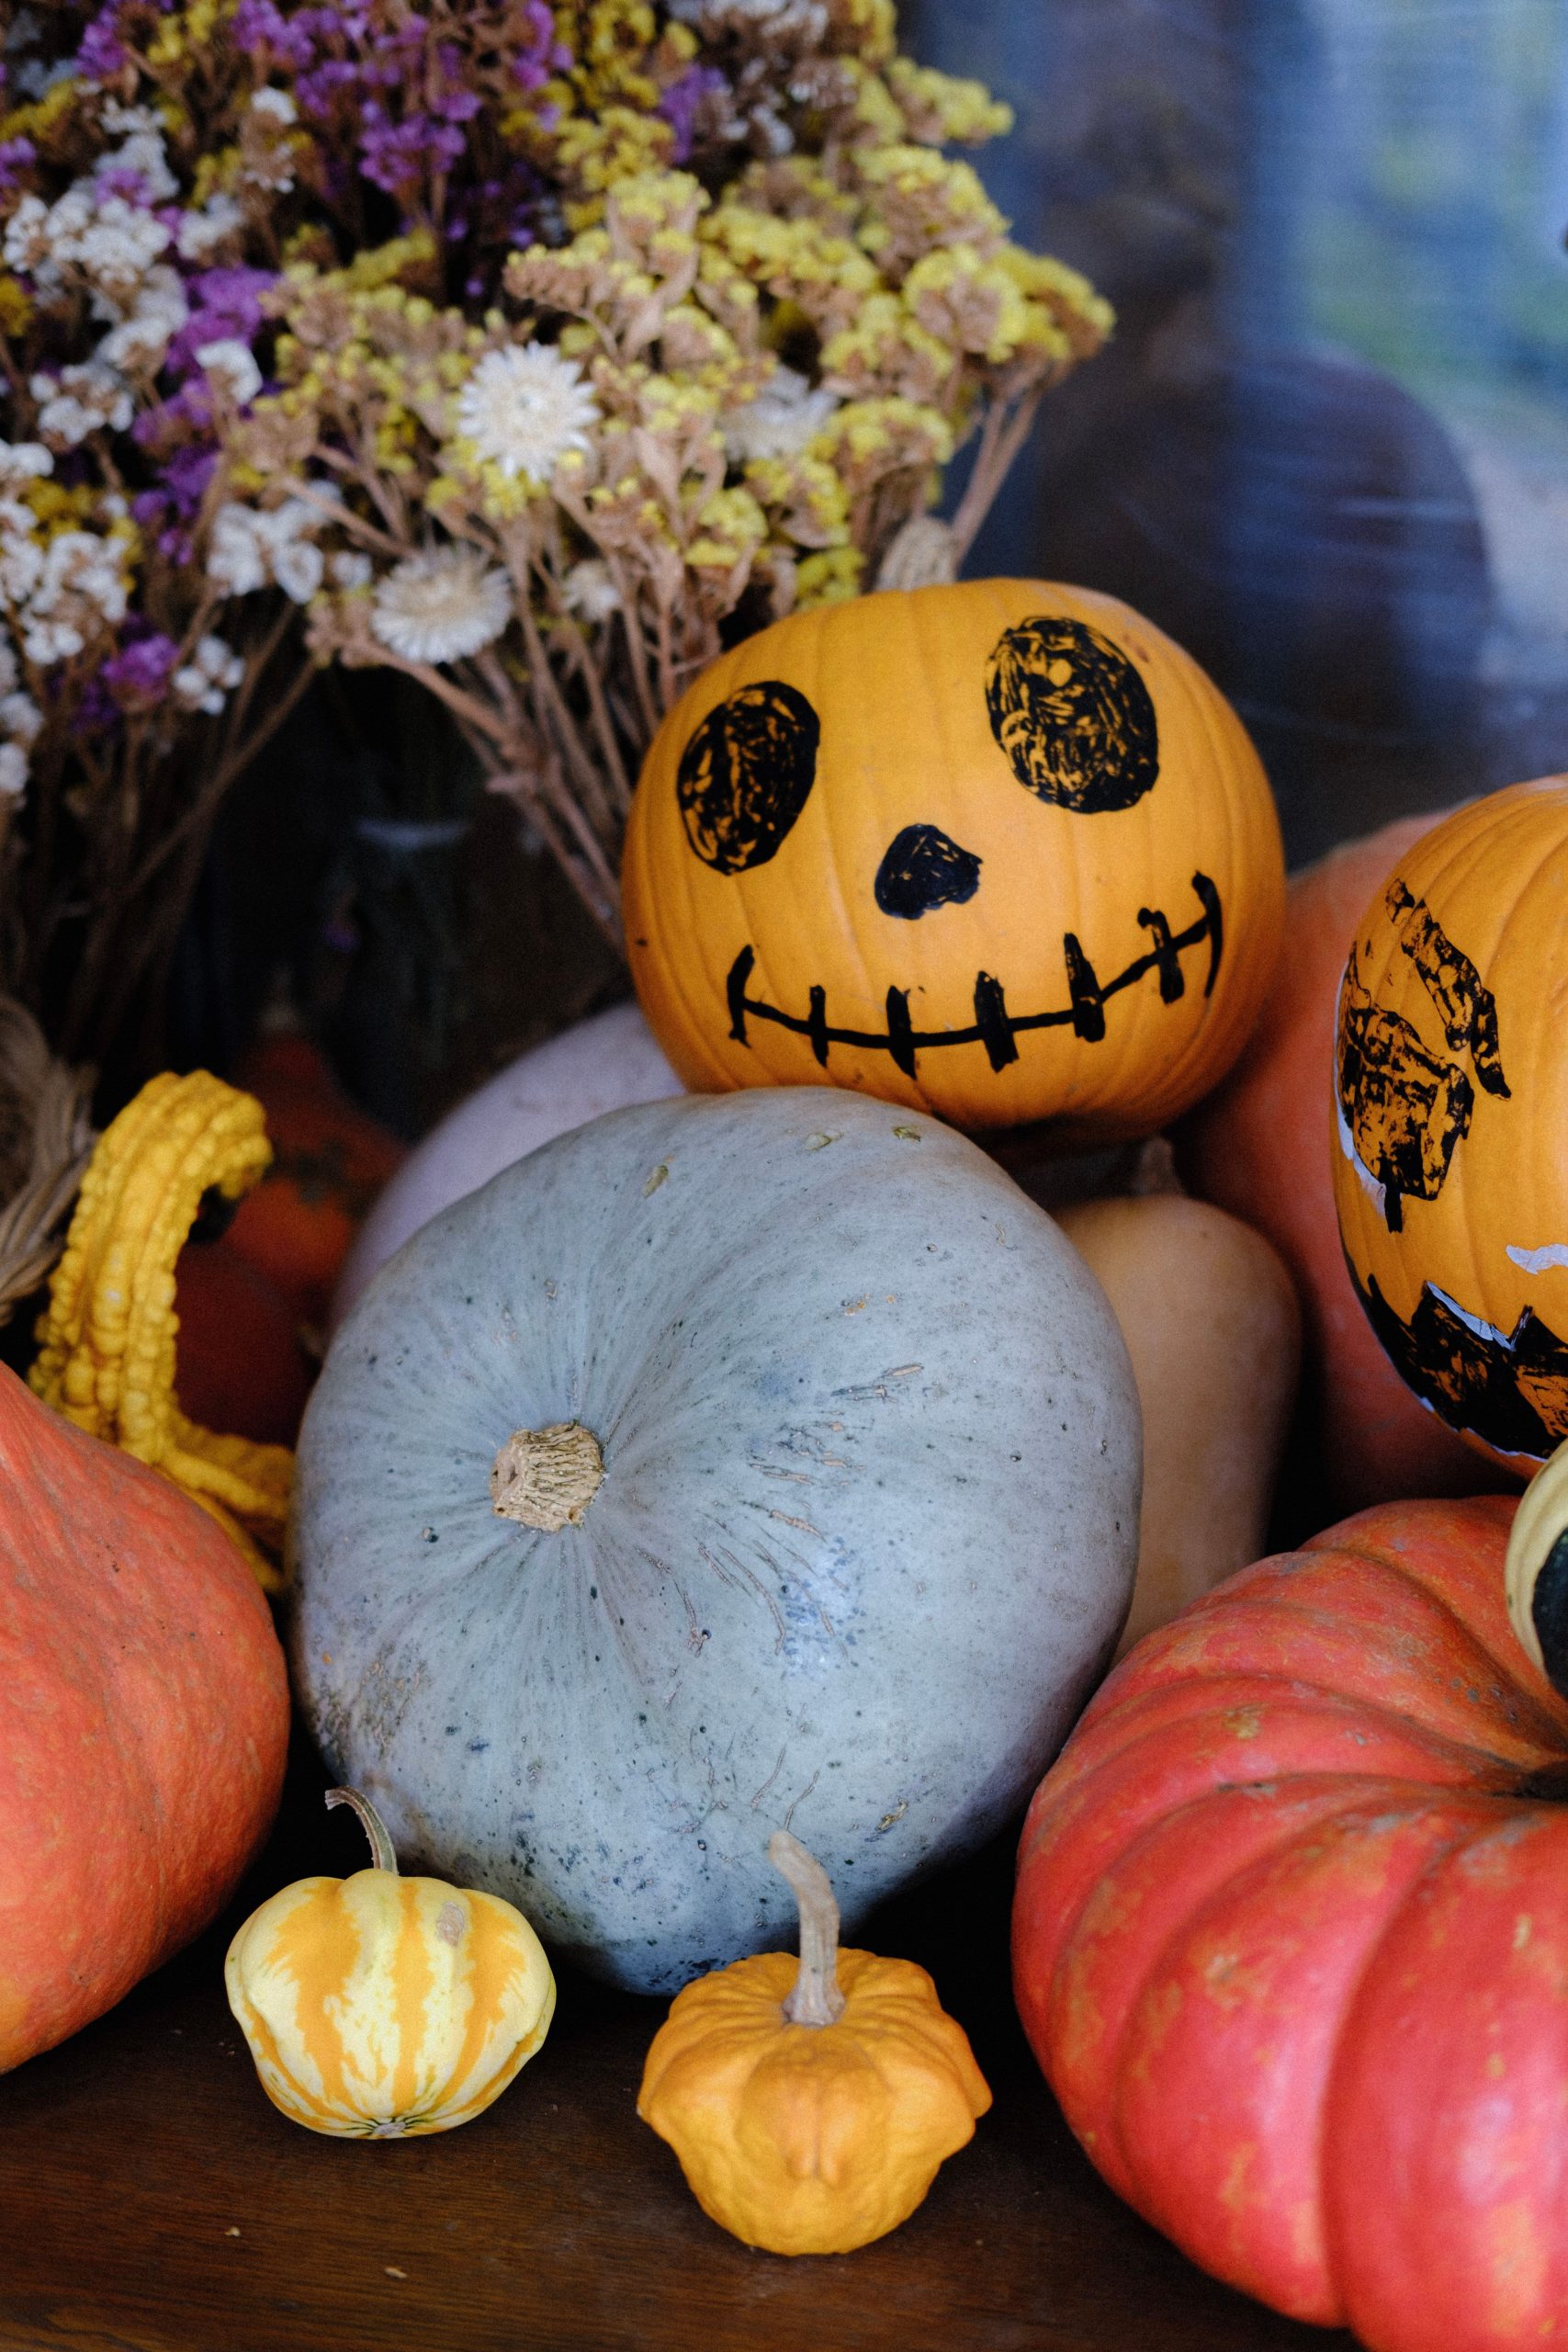
The dried floral arrangement is the secret weapon here. By placing white, yellow, and purple blooms behind the gourds, you add height and a “grown-up” botanical feel that keeps the wooden surface from looking cluttered. It shifts the vibe from a simple craft project to a curated autumnal centerpiece that lasts far beyond October 31st.
2. Whimsical Cartoon Character on Elongated Peach Squash
When working with elongated squashes, use their natural shape to inform the character’s personality. For a whimsical look, keep the eyes large and high on the “head” of the squash. Use a fine-liner brush for the black whiskers to ensure they look intentional rather than messy. If you’re looking for a similar playful energy, Idea #6 shows how a character face can work on a rounder shape.
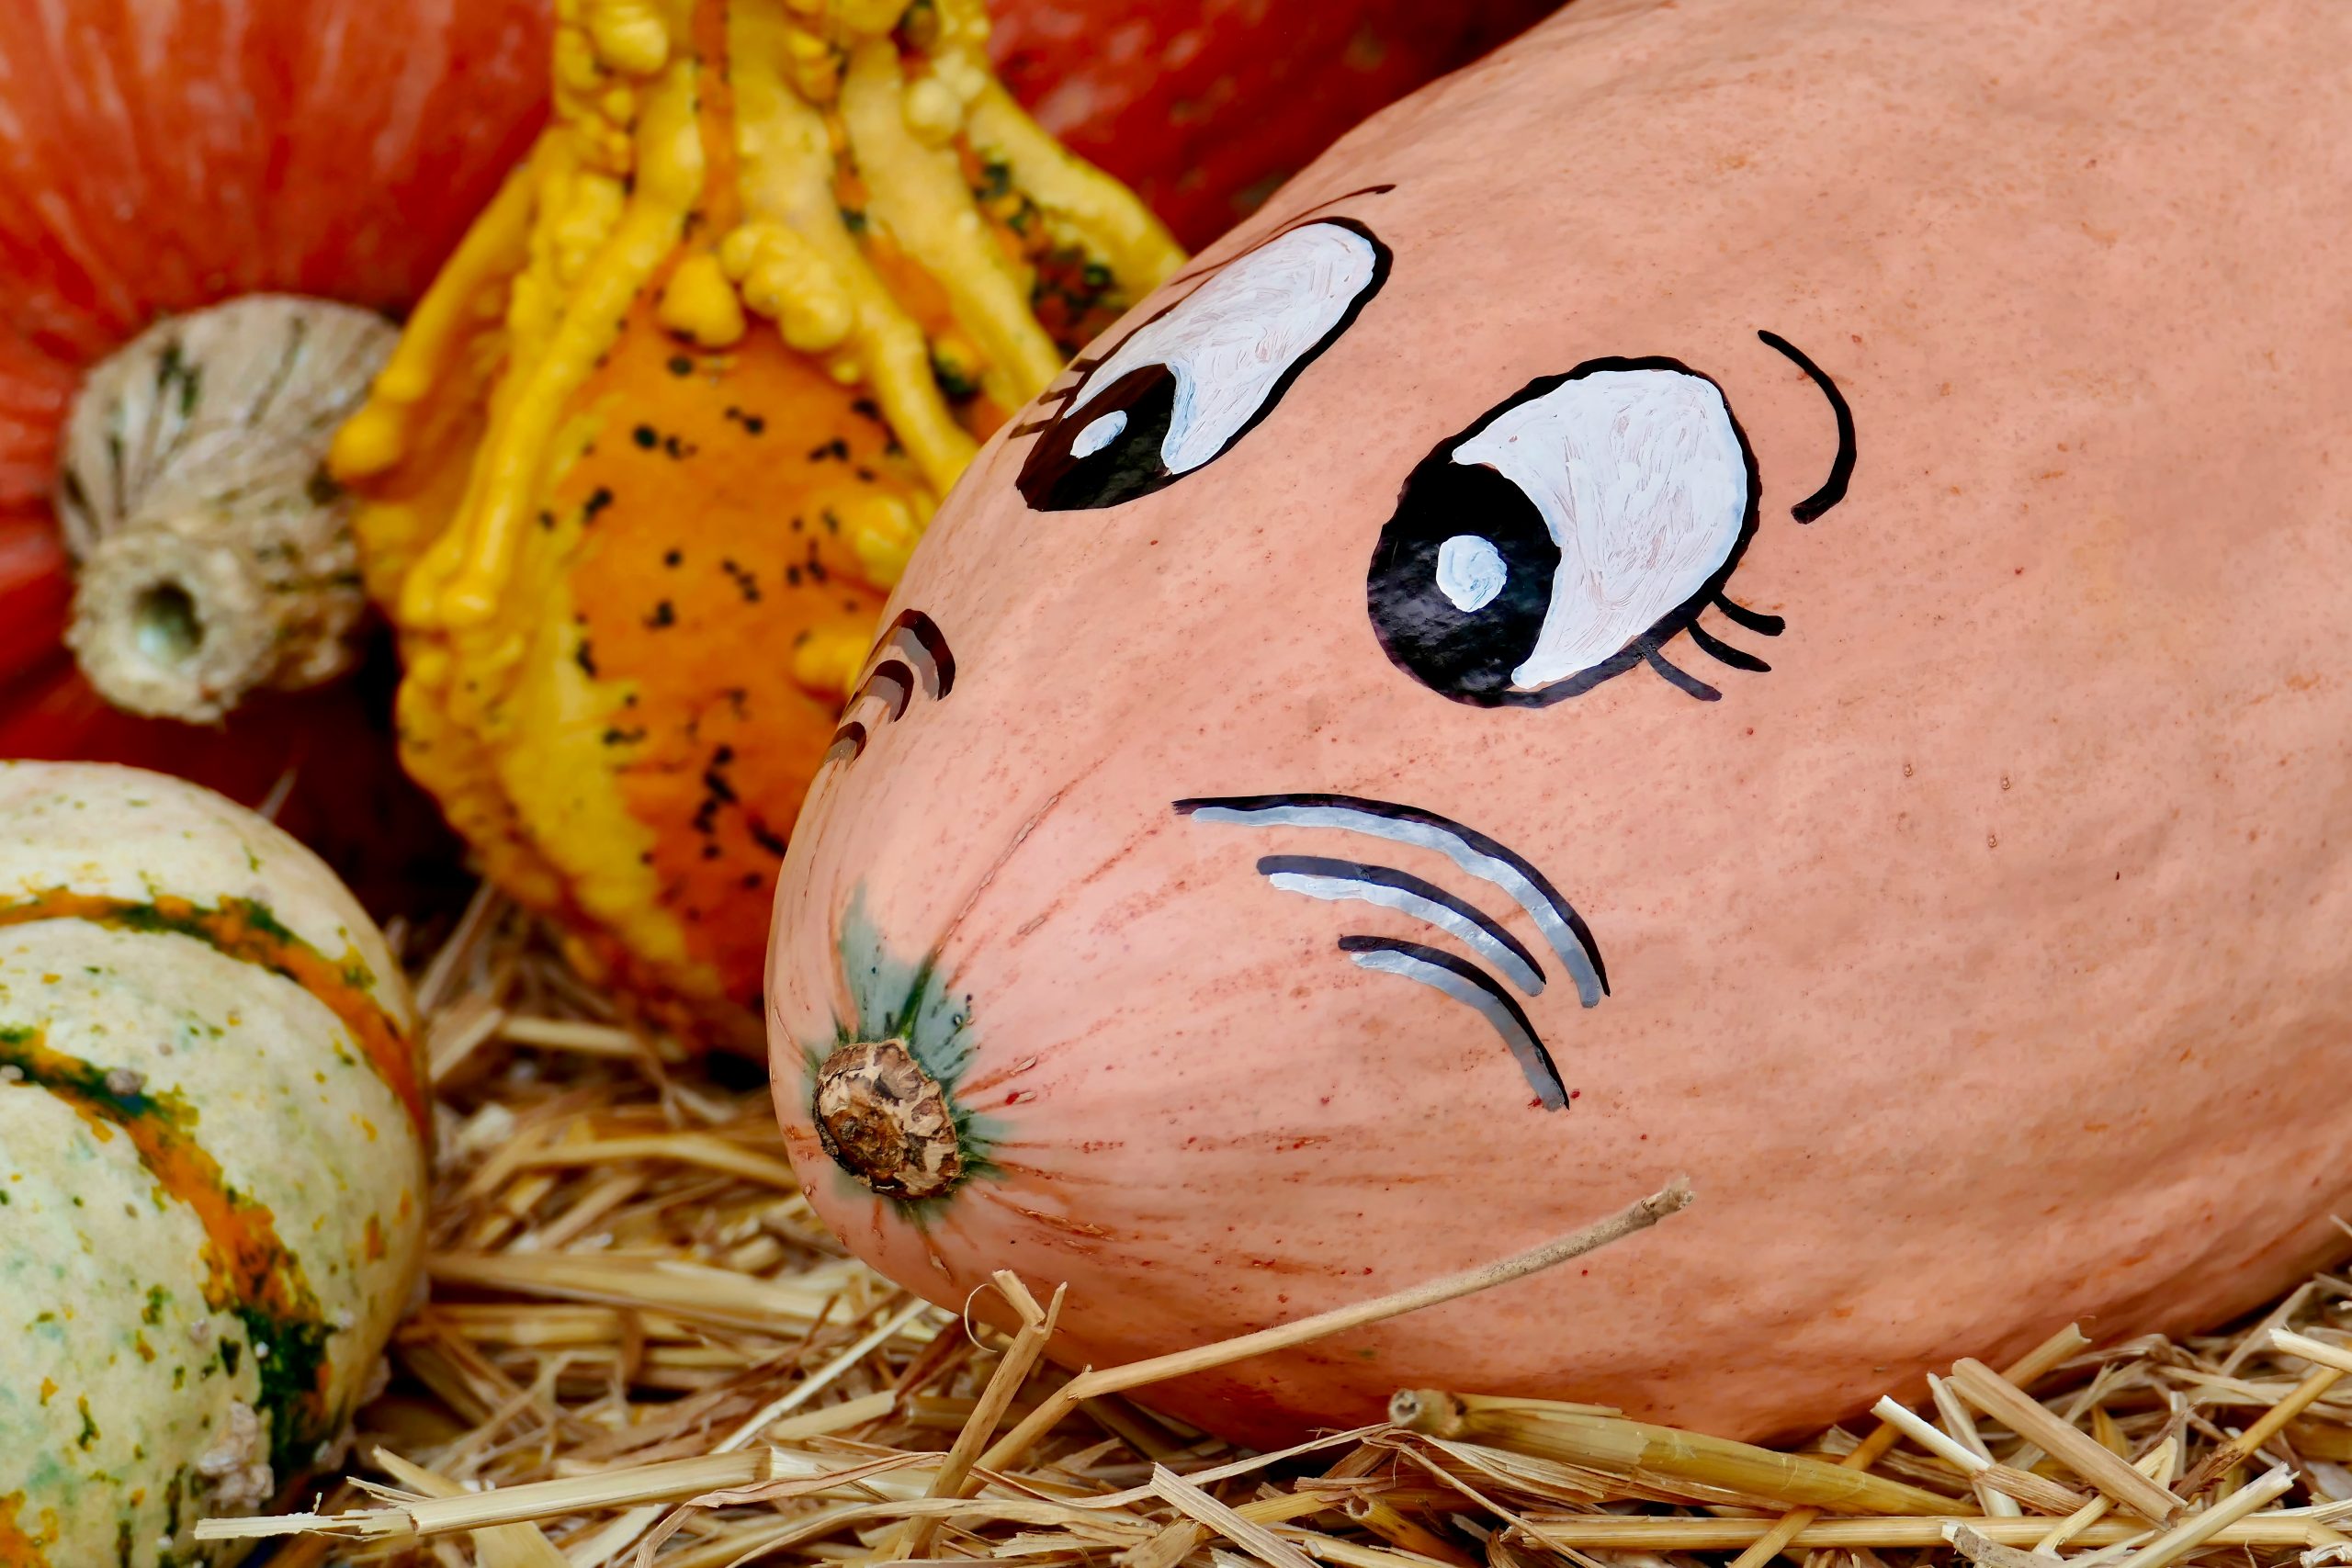
This look follows a simple visual formula: 70% warm base tones (light peach and bright orange) + 20% high-contrast accents (black and white eye details) + 10% texture (the bumpy yellow gourd and natural straw). The straw bedding is essential because it provides a neutral, rustic stage that lets the pops of yellow and peach really stand out without competing for attention.
3. Hand-Painted Ghost Pattern on Classic Orange Pumpkins
Creating these mini white ghosts is a great beginner project because the shapes don’t need to be perfect.
- Start with a clean, dry orange pumpkin.
- Use a medium flat brush to dab white acrylic paint into “blob” shapes.
- Wait for the white to dry completely (about 20 minutes).
- Use a small detail brush or a black paint pen to add two dots for eyes and a small ‘o’ for the mouth.
- Set the pumpkins on a patterned tablecloth to complete the festive scene.
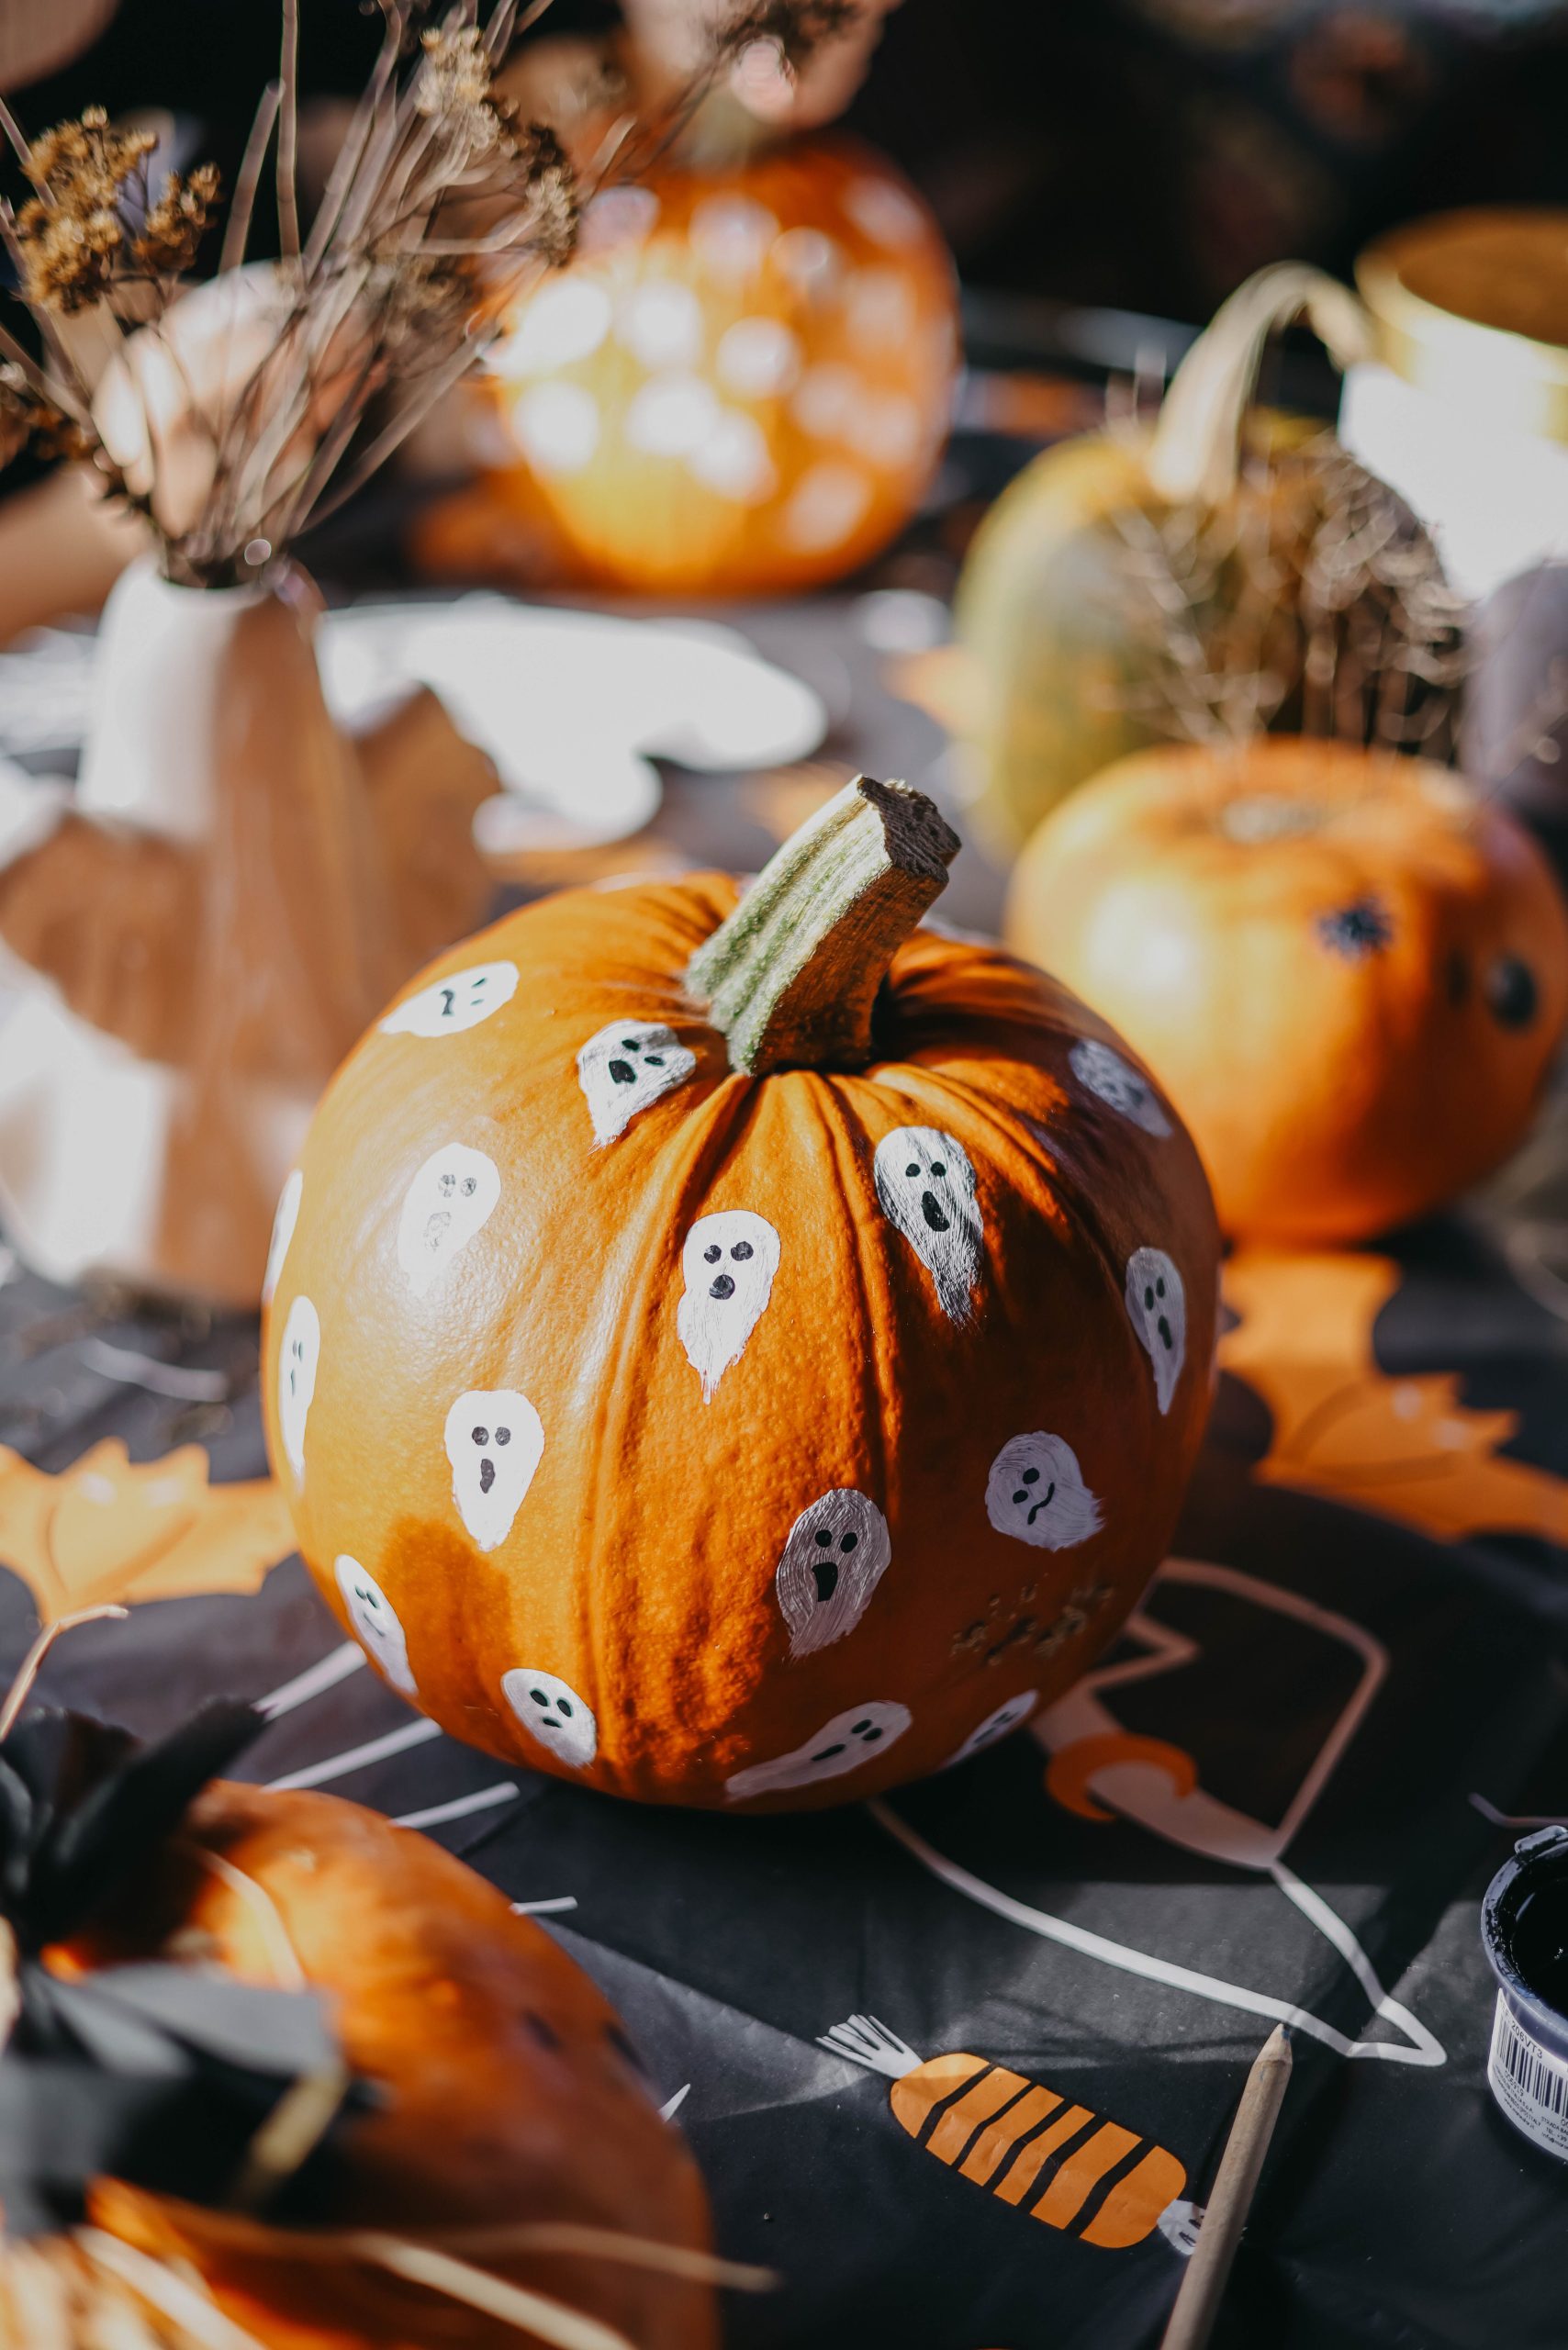
While this looks adorable on a table, keep in mind that hand-painted pumpkins can be sensitive to moisture. If you’re using a dark patterned tablecloth like the one shown here, make sure the paint is fully cured before setting it down, or you might end up with orange stains or paint transfers on your favorite linens. This is a much safer indoor activity than the messy porch setup in Idea #14.
4. Lavender and White Doodled Halloween Motifs
This “Girly Halloween” look is surprisingly affordable if you have a few paint pens on hand.
- White and Lavender Acrylic Paint: $8-$12
- Black Fine-tip Paint Pens: $10-$15
- Two Medium Pumpkins: $10-$16
- Pink Backdrop Fabric: $5 (or use a bedsheet!)
- Total Estimated Cost: $33 – $48
- Budget alternative: Use leftover white wall paint for the base and a Sharpie for the doodles to save $20.
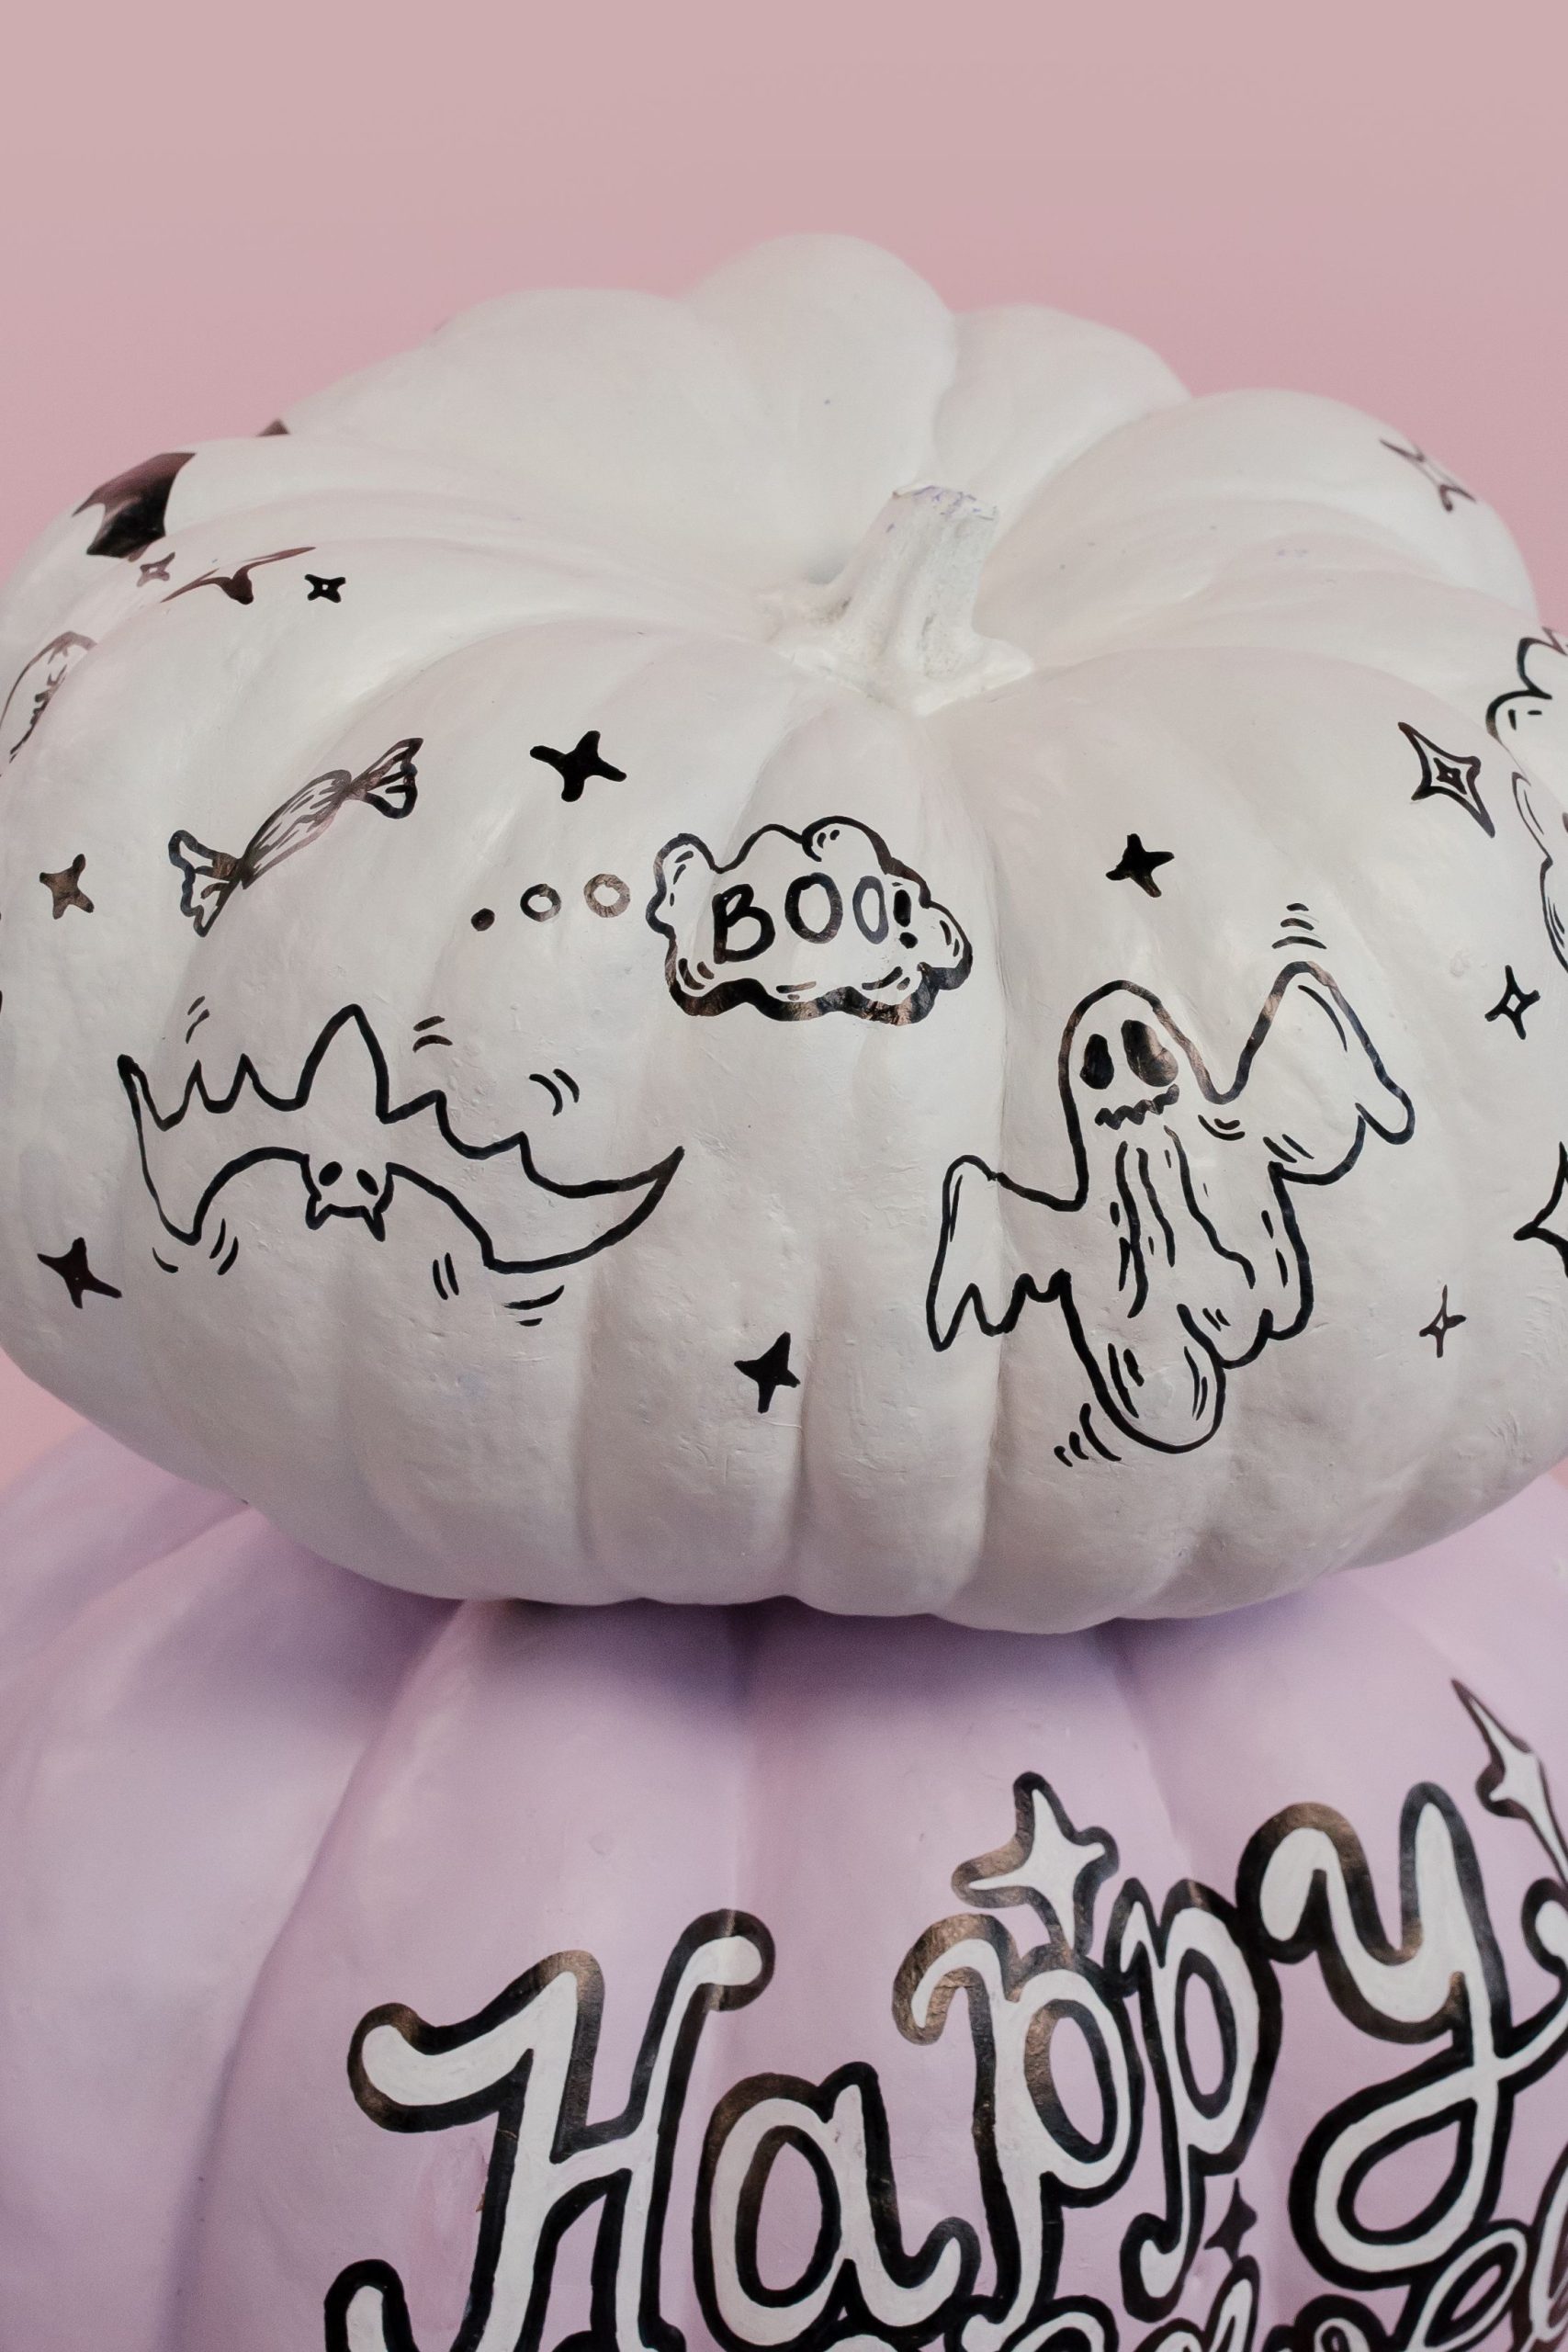
We are seeing a massive shift toward “Halloween Pastels” in 2026. Moving away from the traditional grim aesthetic, this light lavender and white combination leans into the whimsical, doodle-heavy style popular on social media. It’s less about being scary and more about personalization, using tiny bats and ghosts as cute accents rather than frightening icons.
5. Donut-Inspired Mini Pumpkins with Colorful Sprinkles
The “sprinkle” technique is what transforms a basic craft into a sweet treat aesthetic. By using a variety of colors—yellow, blue, and white—against the pink and chocolate-brown “frosting” bases, you create a visual rhythm that feels energetic and fun. It’s the perfect way to utilize those tiny, palm-sized pumpkins that often get overlooked at the patch.
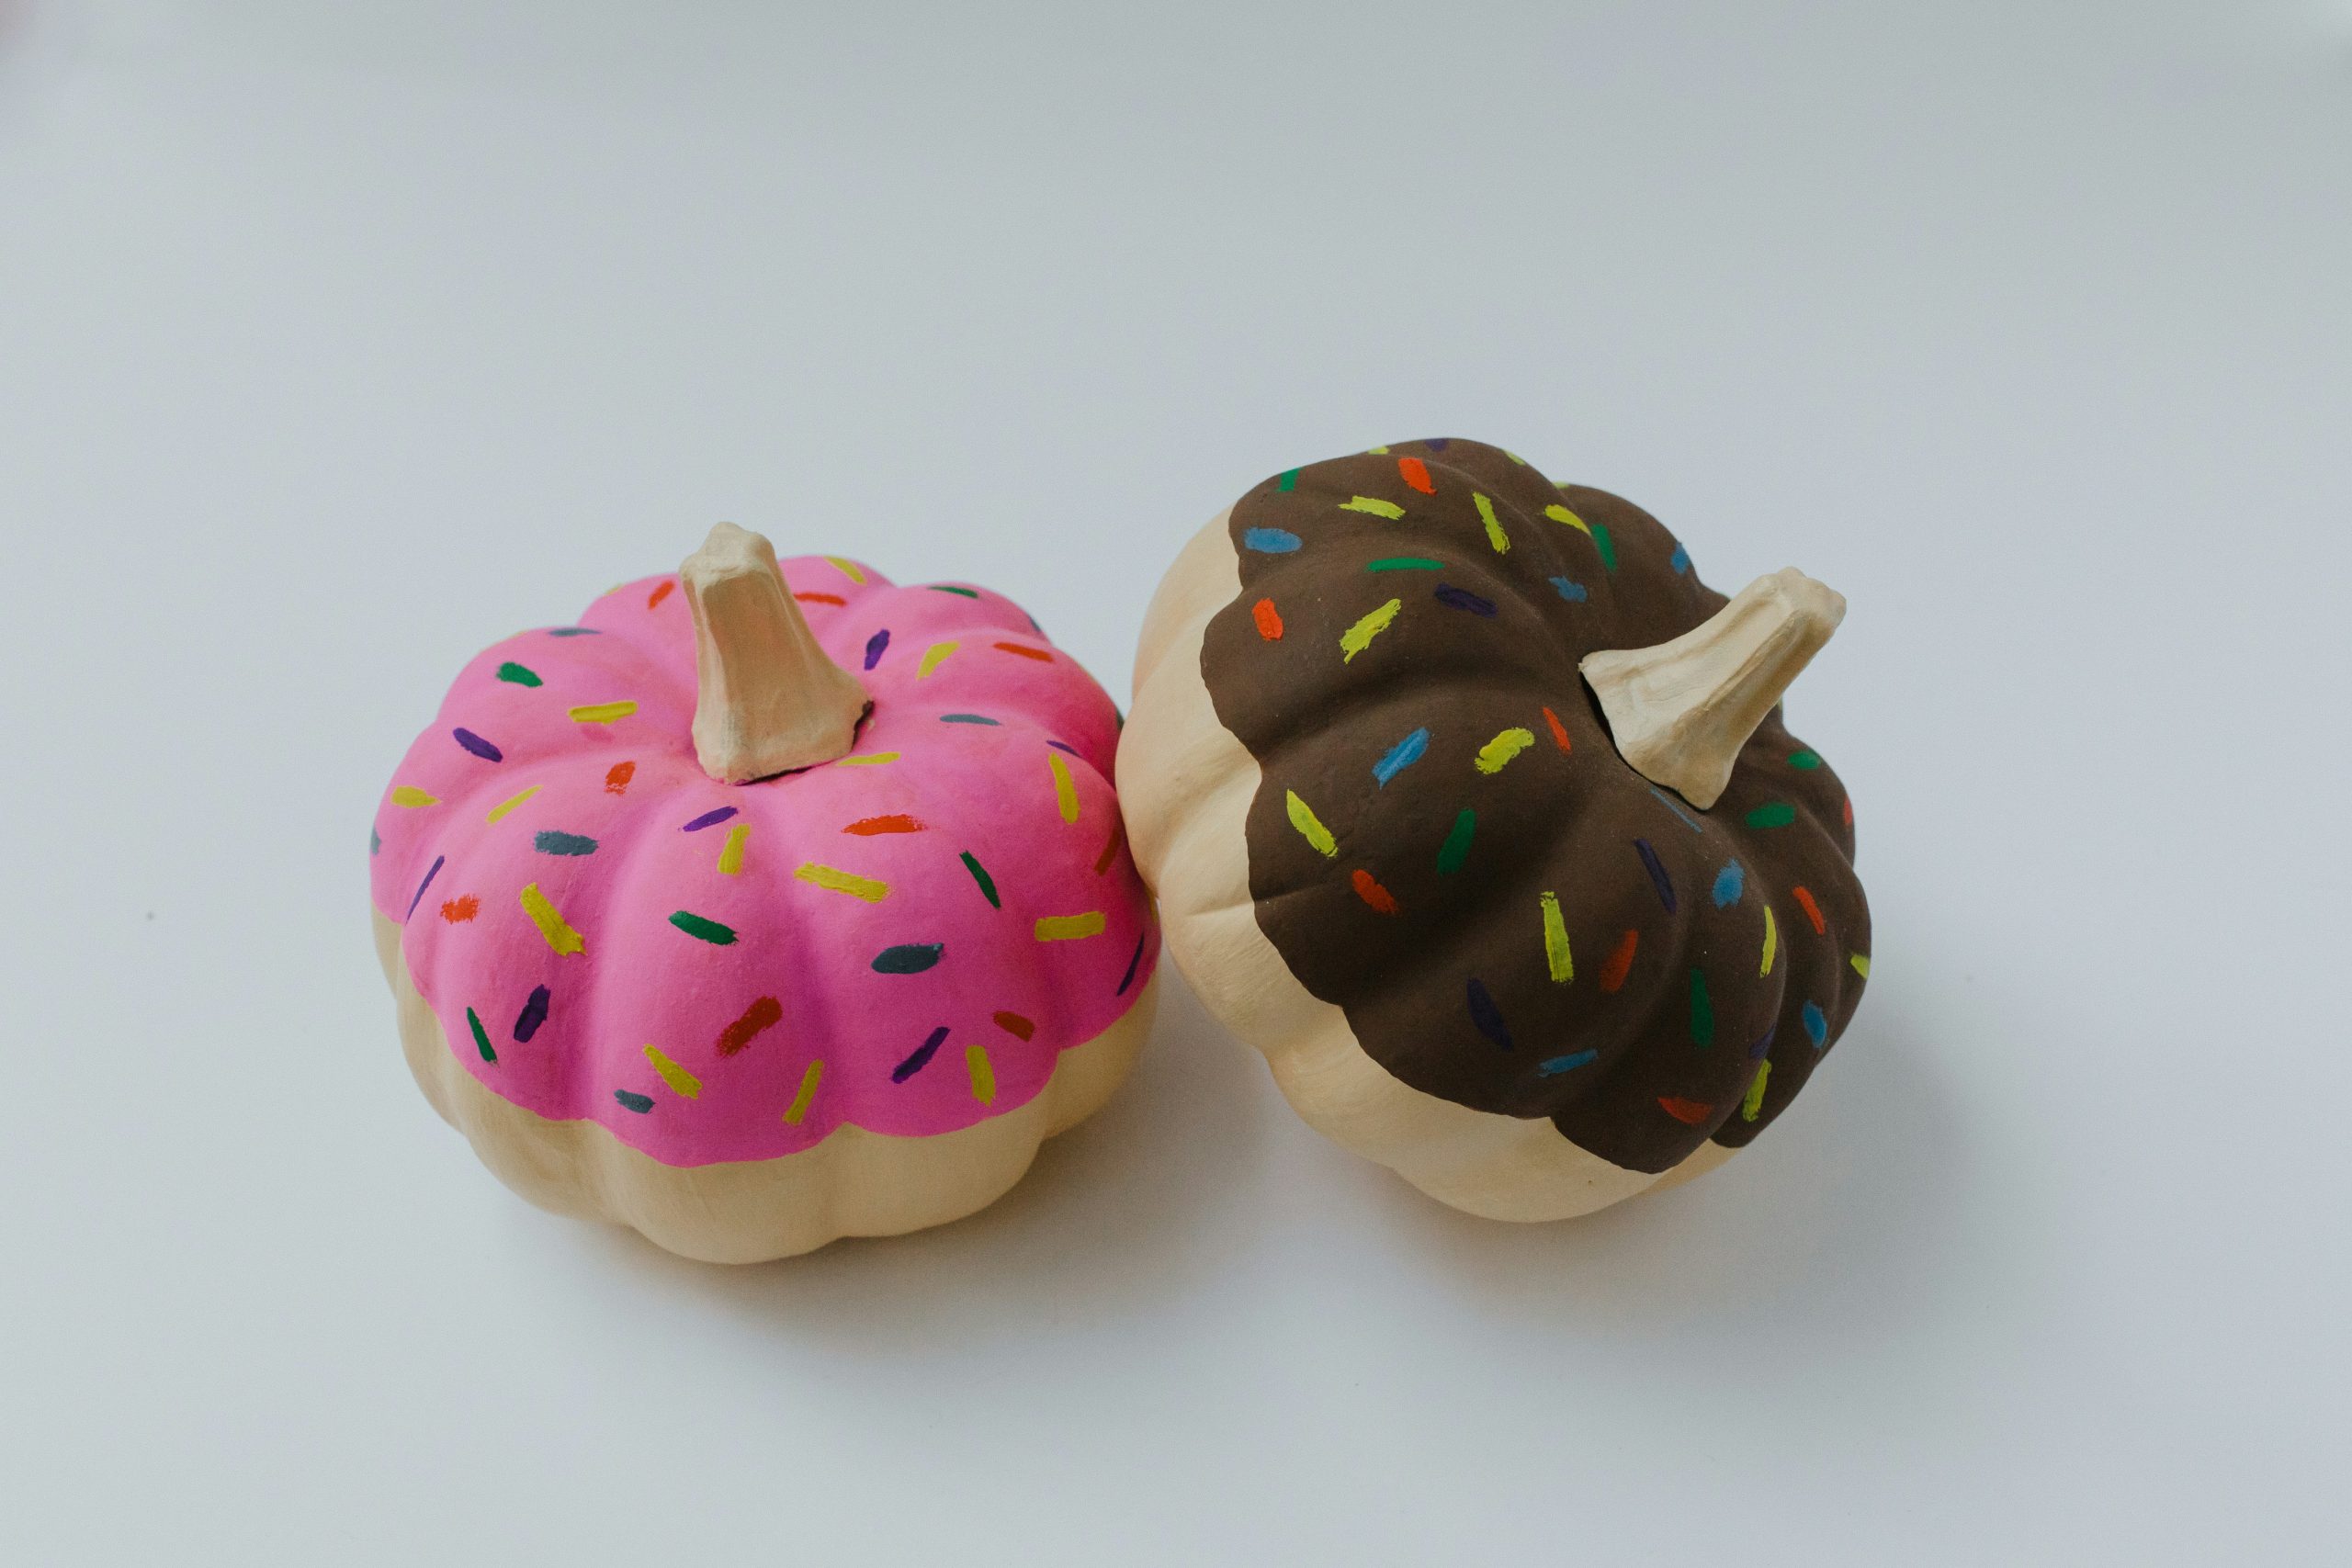
Because these are small and heavily painted, they are prone to “sweating” if kept in a warm kitchen. The thick layers of pink and brown paint can trap moisture against the pumpkin skin, leading to soft spots faster than unpainted gourds. To keep them looking fresh, store them in a cool, dry spot and avoid placing them near heat sources like stovetops or sunny windowsills.
6. Spooky-Sweet Spider Character on Vibrant Orange
This design plays with negative space brilliantly. By painting a large, matte black circular form in the center of the orange pumpkin, you create a high-contrast canvas for the white facial features. The white outlines for the legs and body segments make the character pop against the dark background, while the natural orange of the pumpkin acts as a warm, vibrant border that frames the whole piece.
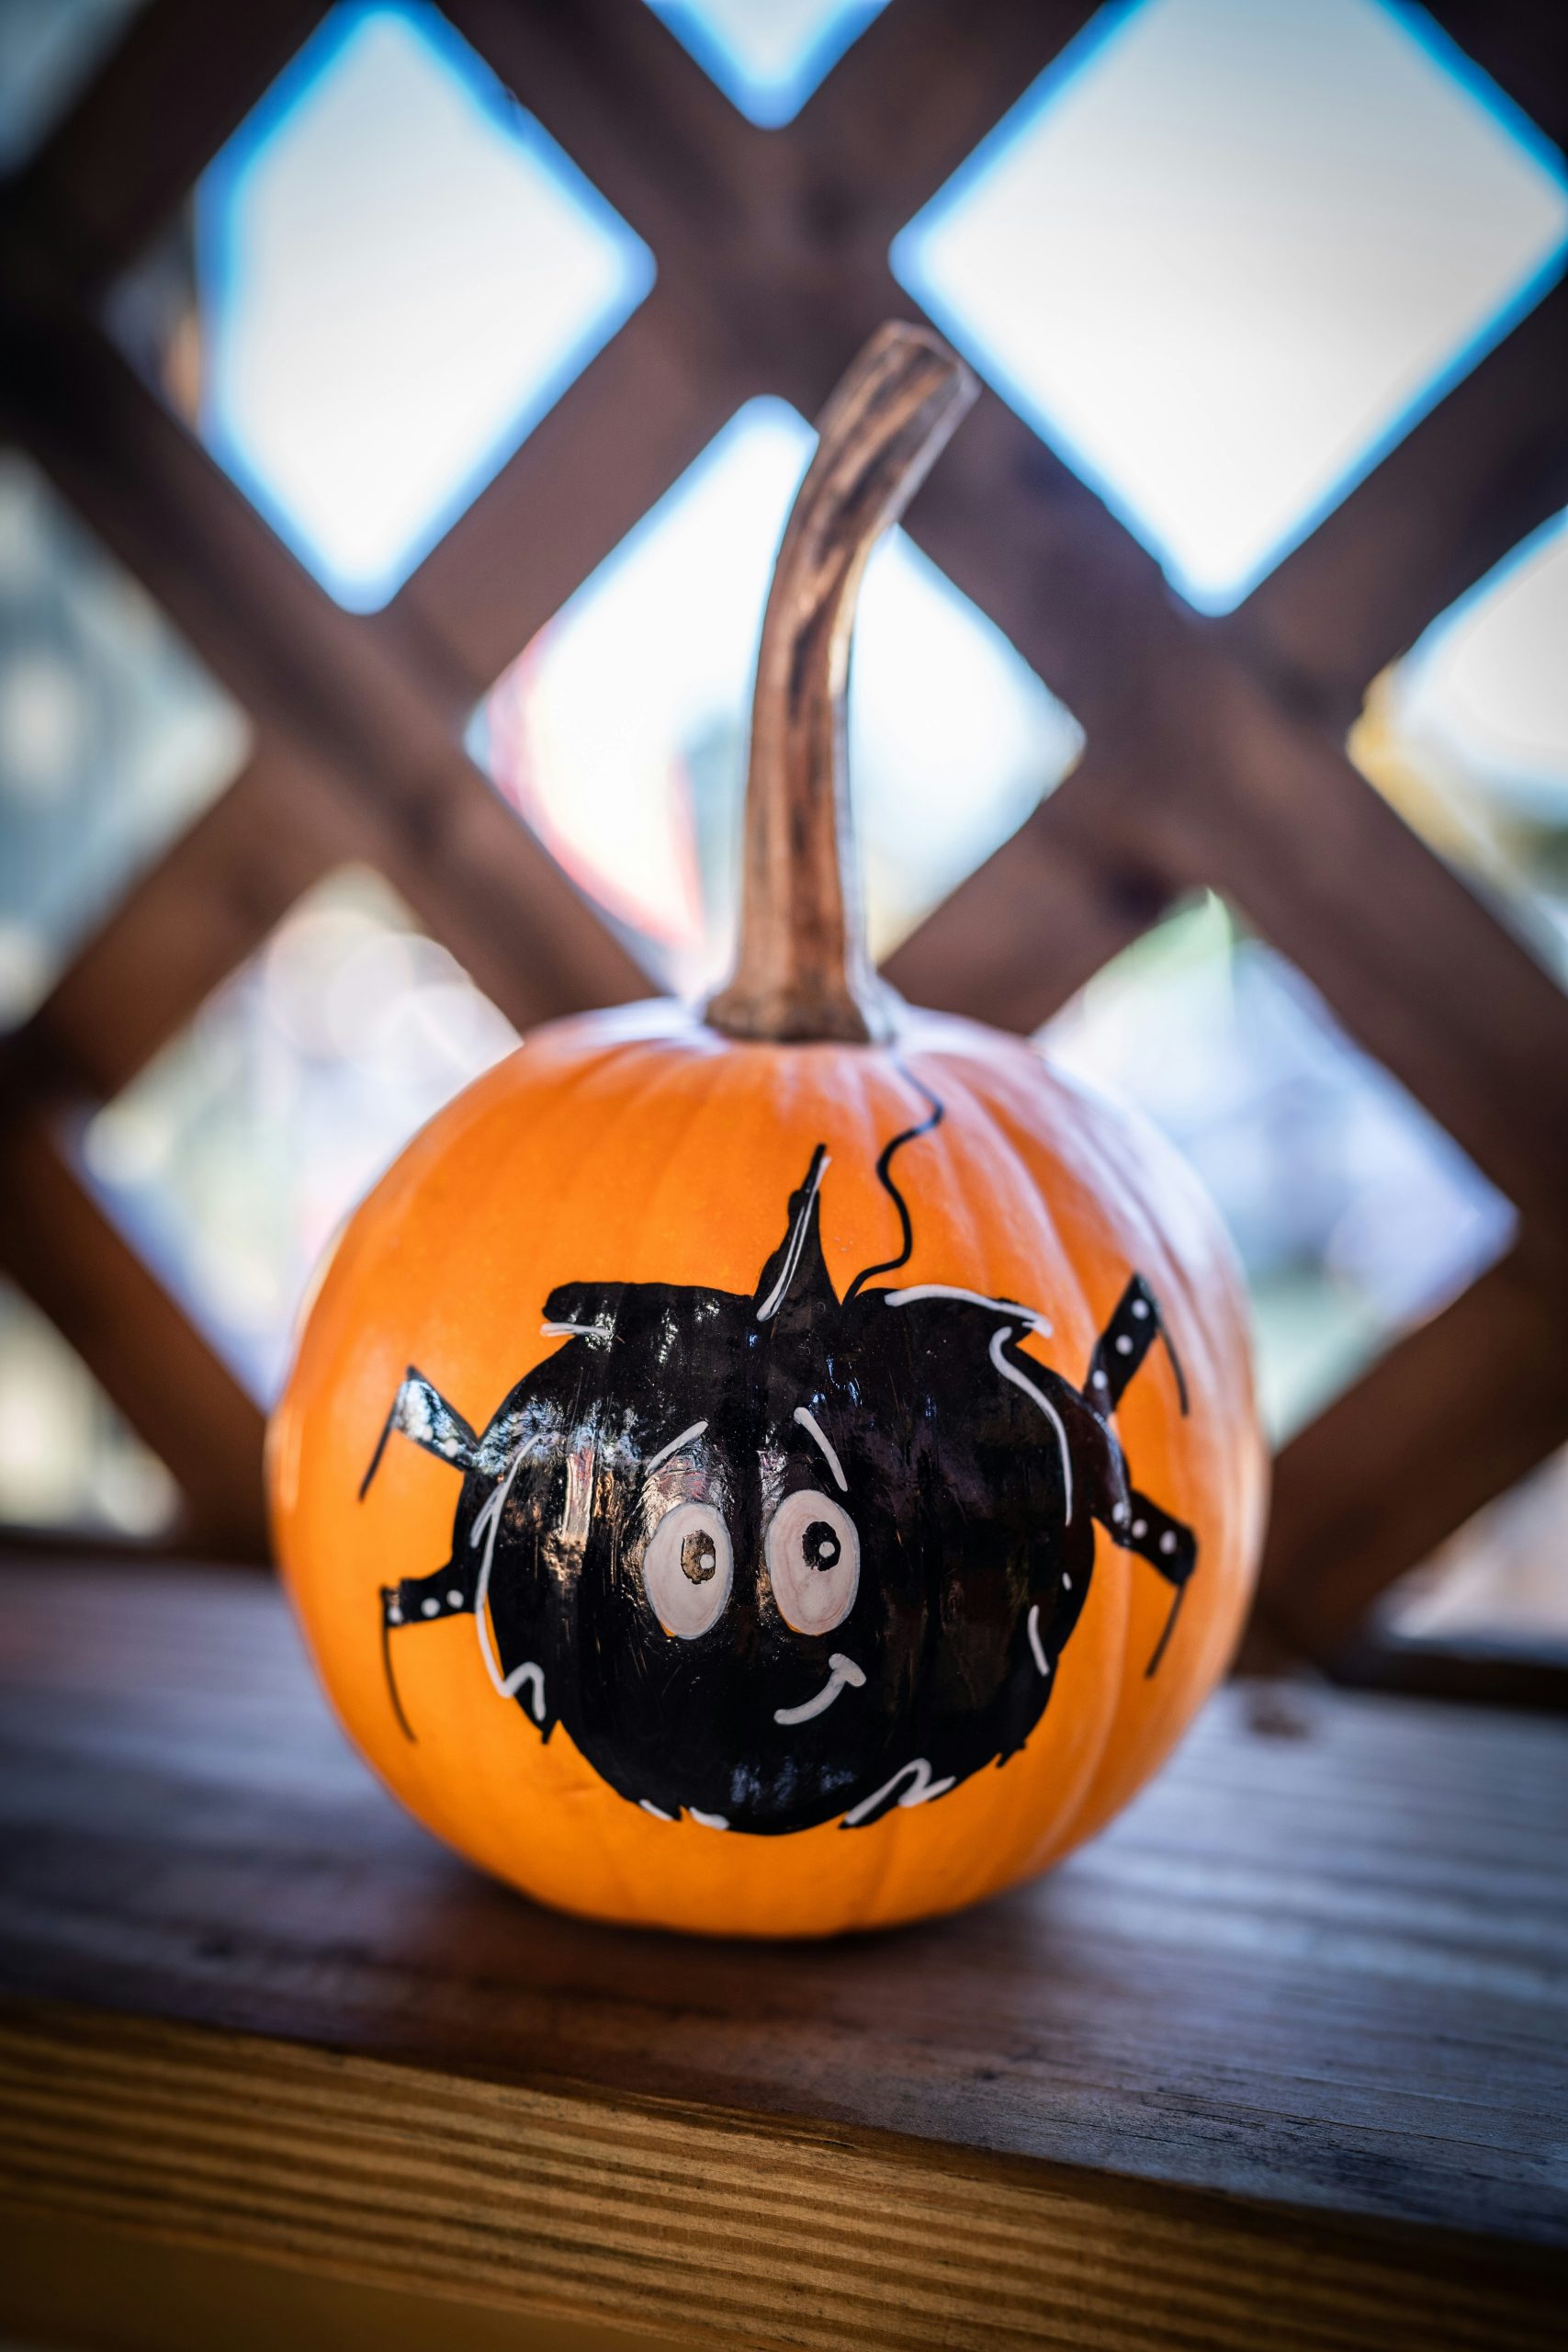
To get those crisp white lines over the black paint, don’t use a brush. Use a broad-tip acrylic paint marker. It gives you much more control over the “segmented” leg details and ensures the white stays opaque rather than streaky. For a similar high-contrast look on a different scale, check out the script work in Idea #13.
7. Modern Monochrome Pumpkins with Fresh Floral Accents
Modern Halloween style is all about the mix: 40% monochrome (black and white pumpkins) + 30% natural accents (orange stems) + 30% organic color (fresh pink and yellow florals). The abstract background with blue-green circles and white drips adds a sophisticated art-gallery vibe that balances the playful drawn faces on the foam pumpkins.
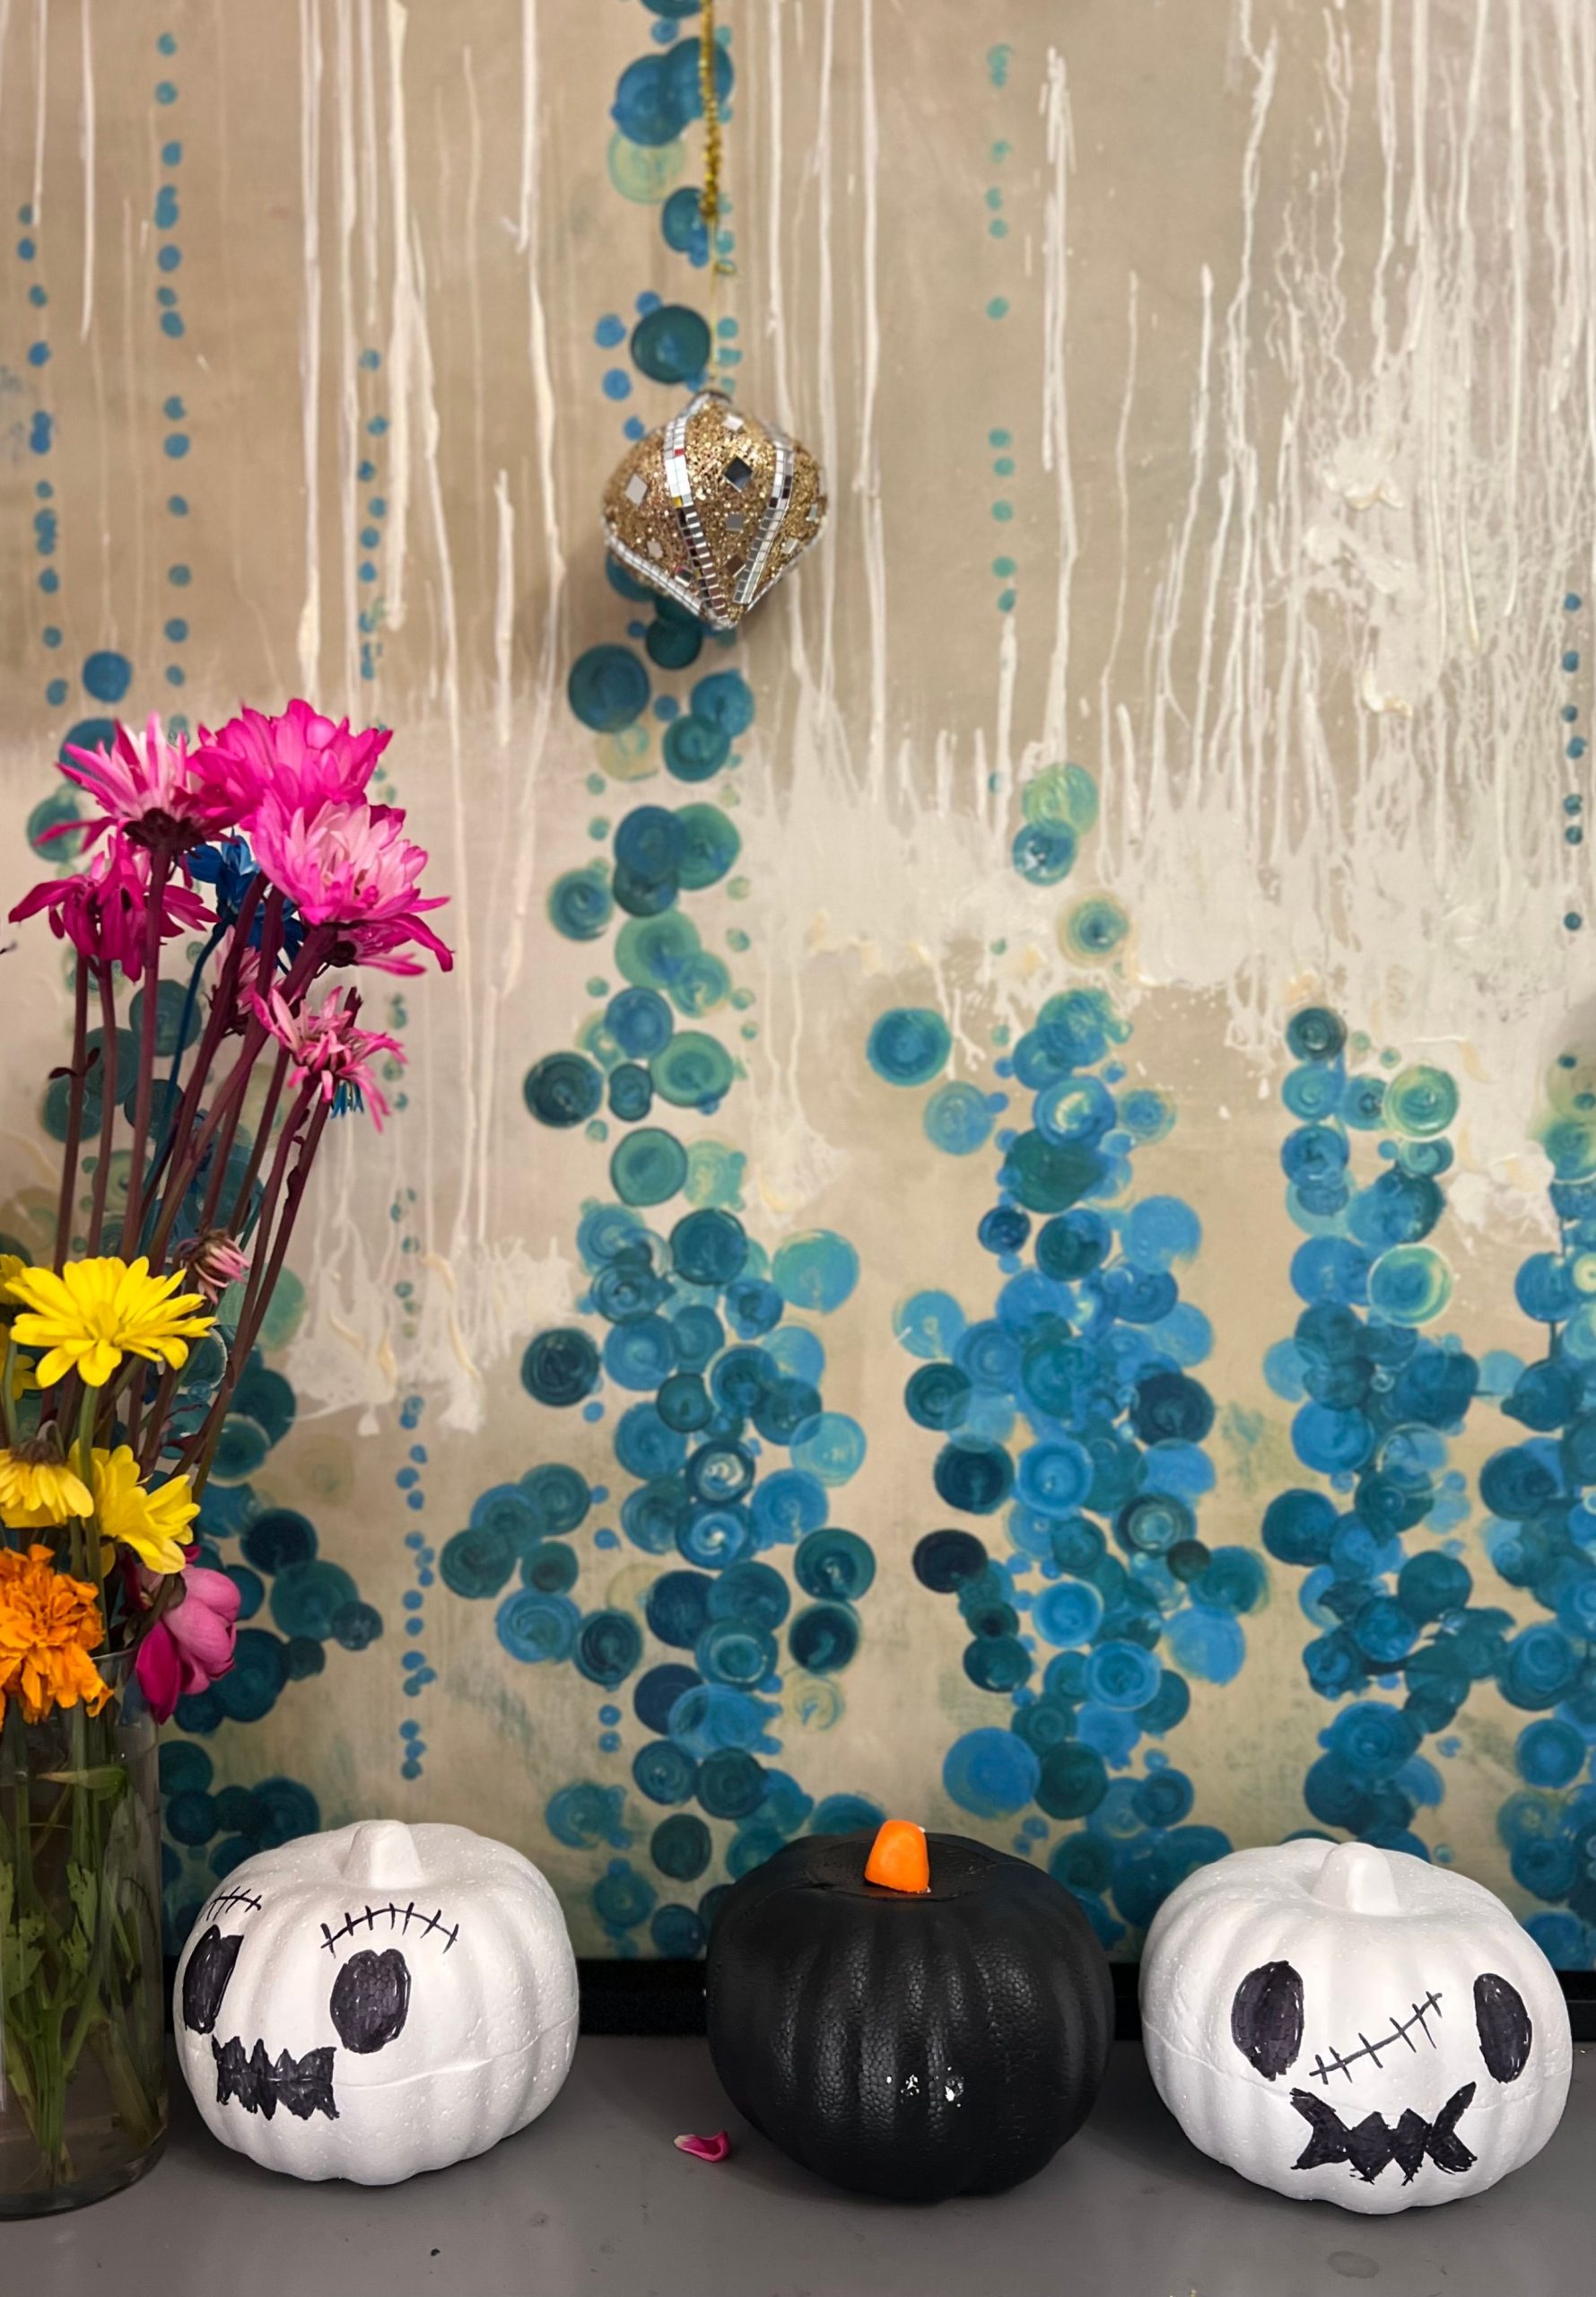
Before you commit to this colorful display, check your inventory:
- Do you have a clear vase that won’t distract from the pumpkin faces?
- Is your surface dark enough to let the white pumpkins pop?
- Do you have fresh flowers in hot pink or yellow to provide that essential color contrast?
8. Stacked Pastel Pumpkins with Edgy Skeleton Graphics
This vertical stack is ideal for narrow spaces like entry consoles or tight corners in a studio apartment. You only need about 10 inches of horizontal surface area since the impact comes from the height. The light purple and white pumpkins create a soft silhouette that doesn’t feel heavy, making it a great choice for smaller, brightly lit rooms. Compare this to the sprawling horizontal arrangement in Idea #1.
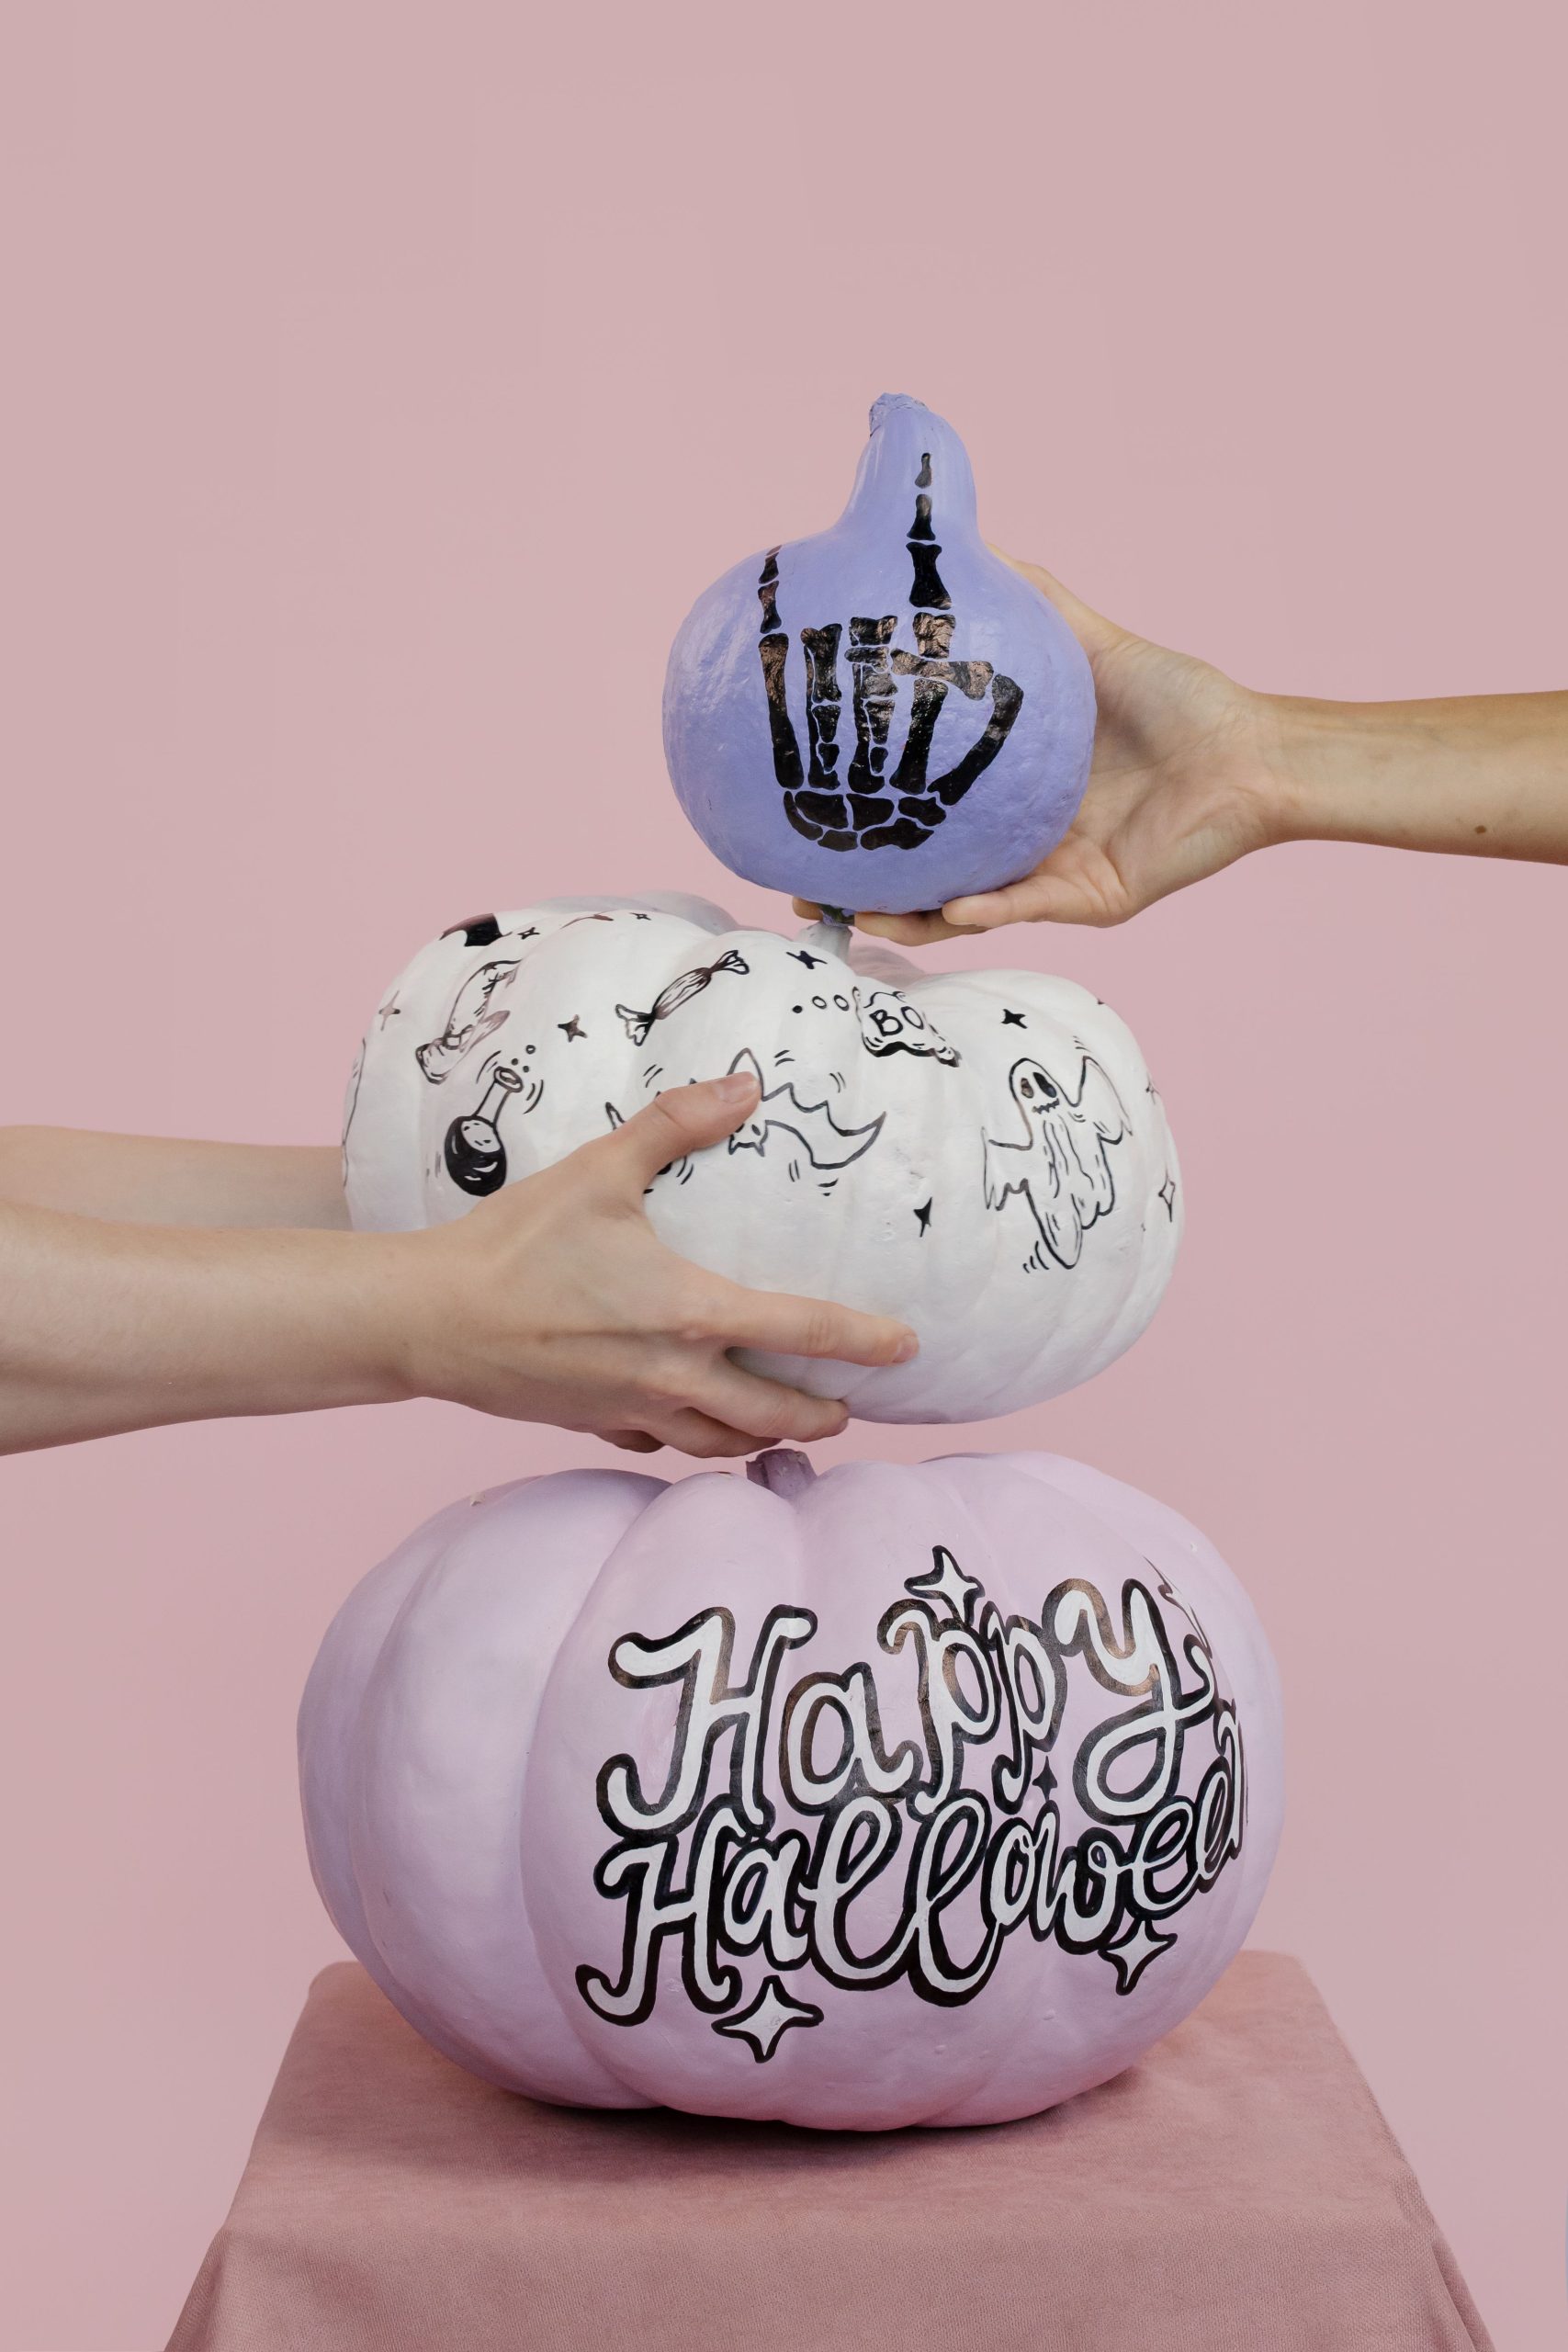
The “Rock On” skeleton hand is the breakout graphic of the 2026 season. It bridges the gap between traditional spooky elements and a modern, edgy attitude. Pairing this tough graphic with a soft, light purple palette is exactly how designers are refreshing the holiday look this year—it’s all about that unexpected contrast between the motif and the color.
9. Mixed Pastel Gourd Collection with Metallic Accents
Mixing metallic foils with pastel paint looks stunning, but be warned: silver and gold leaf can be incredibly finicky to apply to a curved, textured gourd surface. If you’re going for this “mix-and-match” pastel look, stick to acrylics for the base colors (baby blue, lavender, and pink) and use the foil sparingly on just one or two small pumpkins to avoid a craft-room-catastrophe.
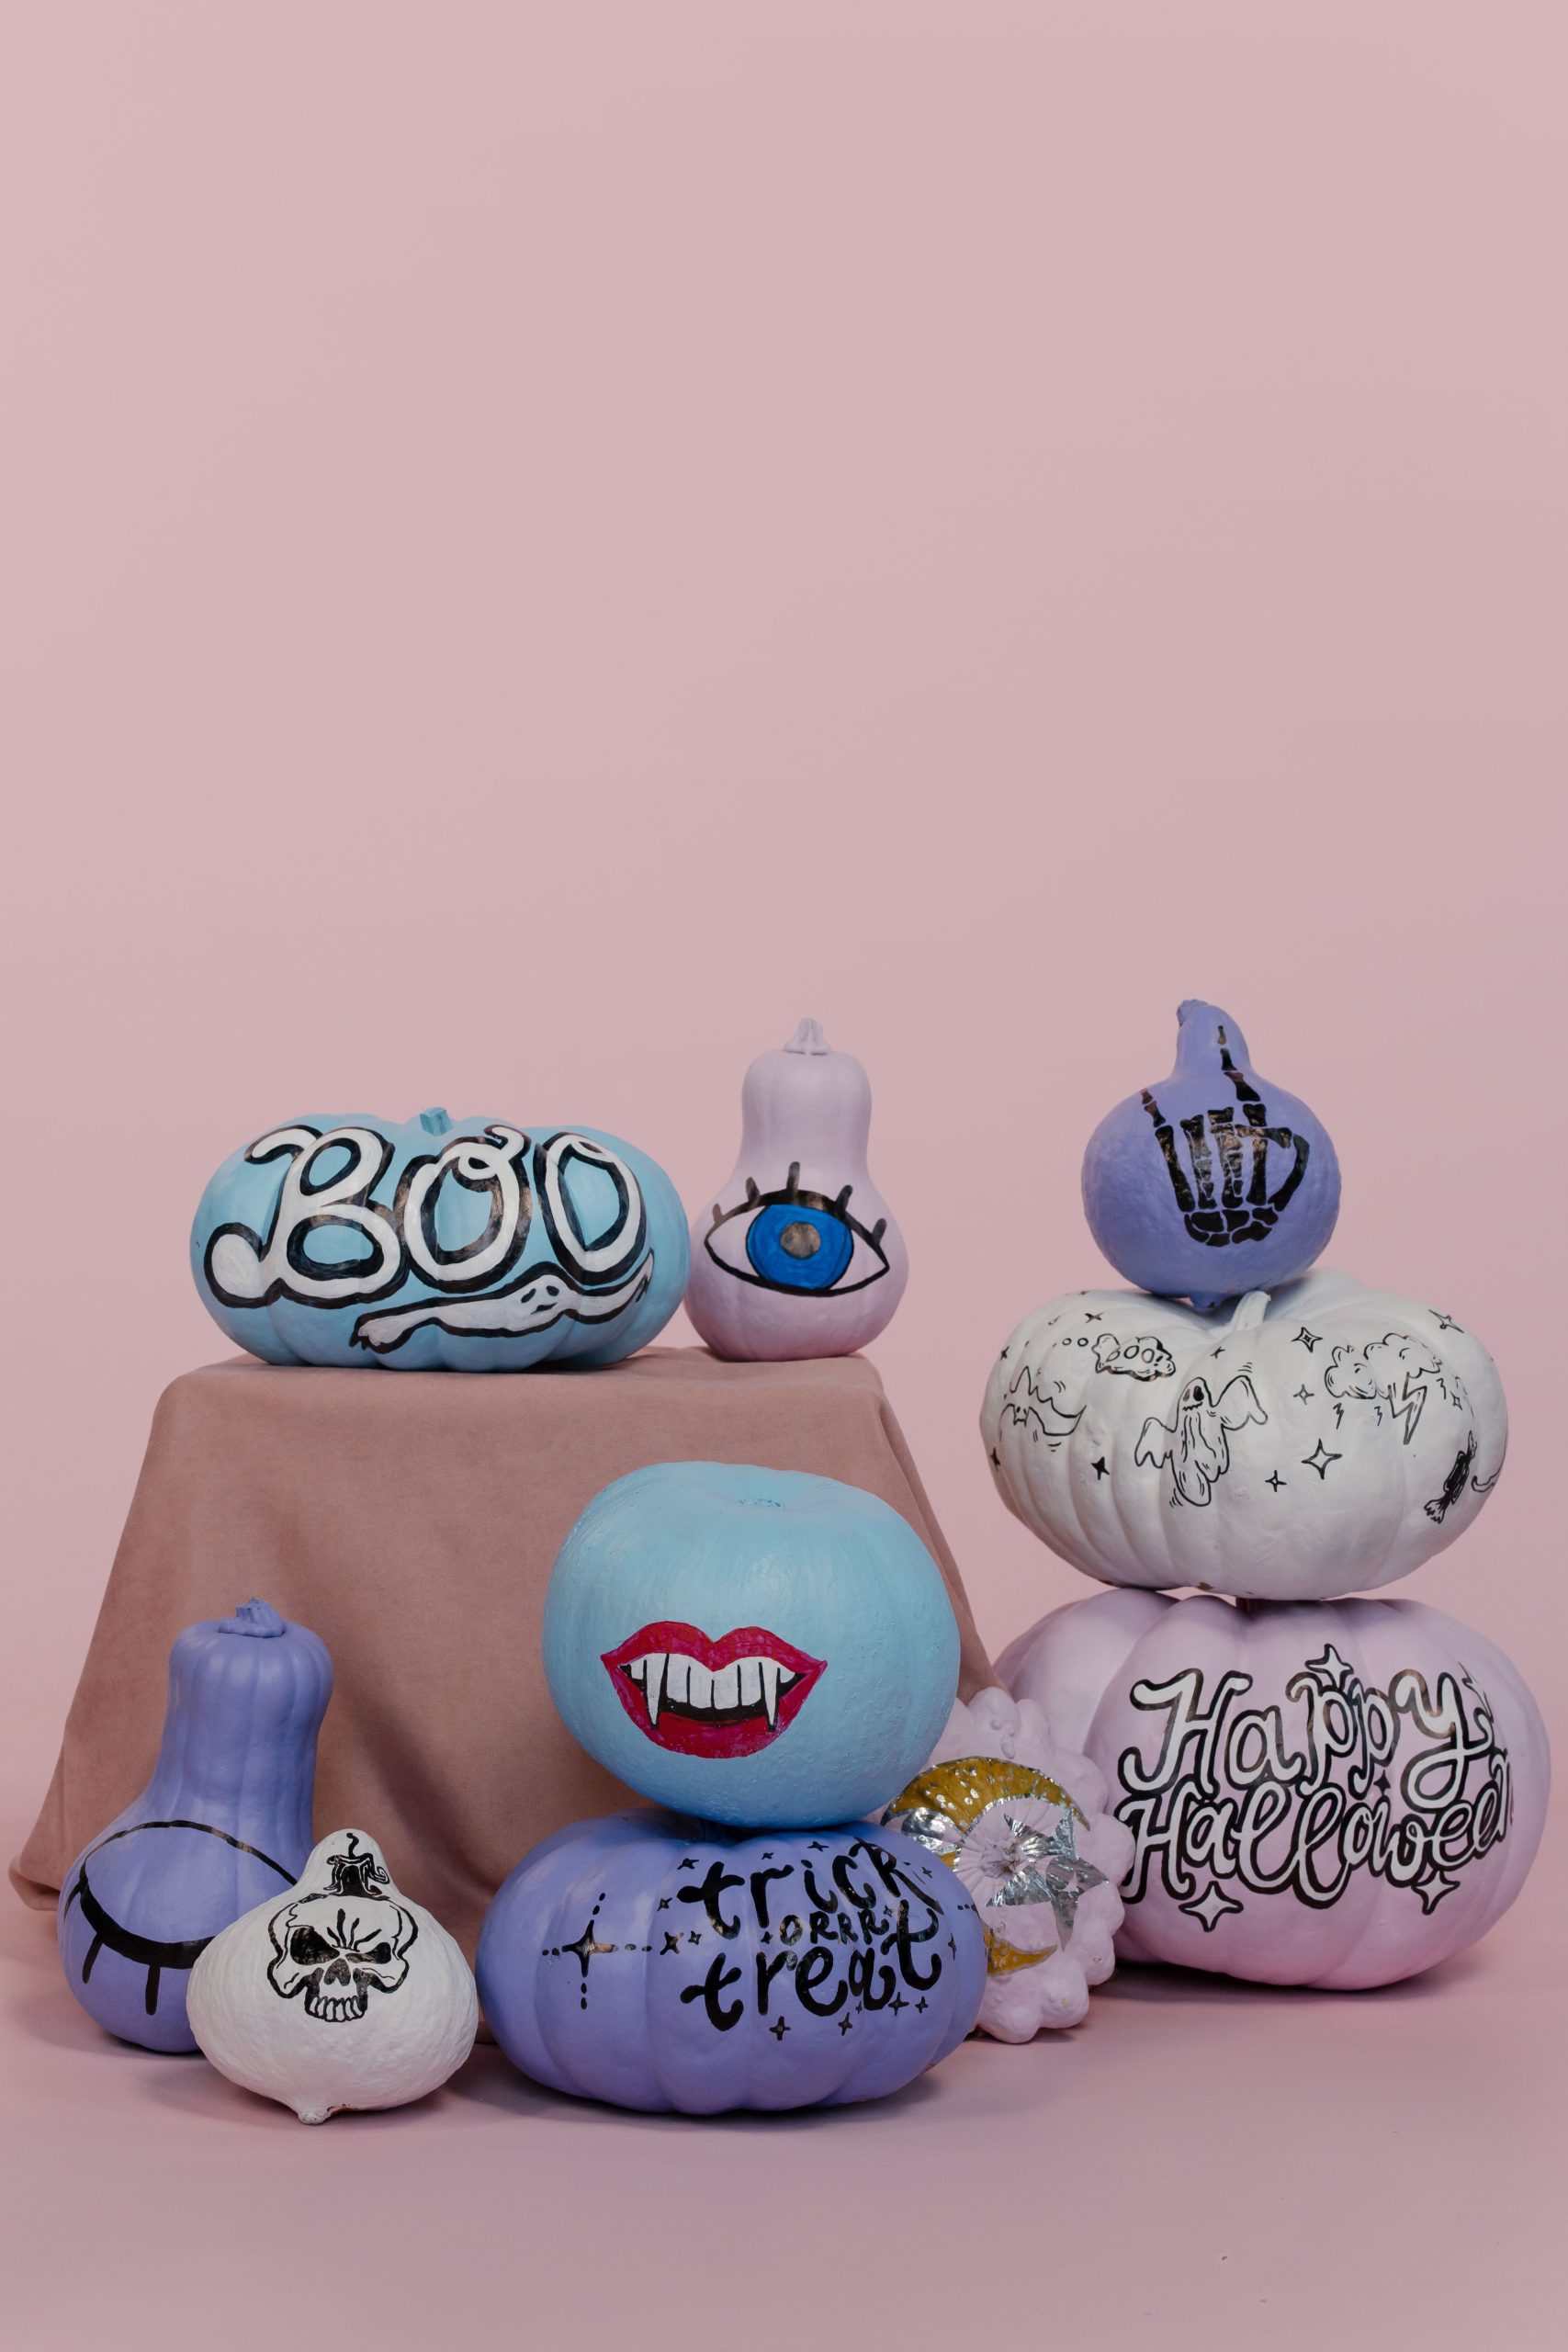
You can easily recreate this high-end pastel look using sample-size paint pots from the hardware store for about $5 each.
- IKEA or Target often carry cheap ceramic pumpkins you can paint once and keep forever.
- Use a $2 silver paint pen instead of real foil for the metallic accents.
- Total spend: Under $25 for a full multi-color collection.
10. Cheerful Orange Pumpkin Village on Weathered Shelving
If you’re displaying on rustic, weathered wood, lean into the “farmhouse playful” look by varying your designs. Use bright red for mushroom caps to create a pop against the orange, and use matte black for cat silhouettes. Pro tip: when painting on shelves, place your largest, plain pumpkins on the bottom and keep the detailed “mushroom house” designs at eye level where the artistry can be appreciated.
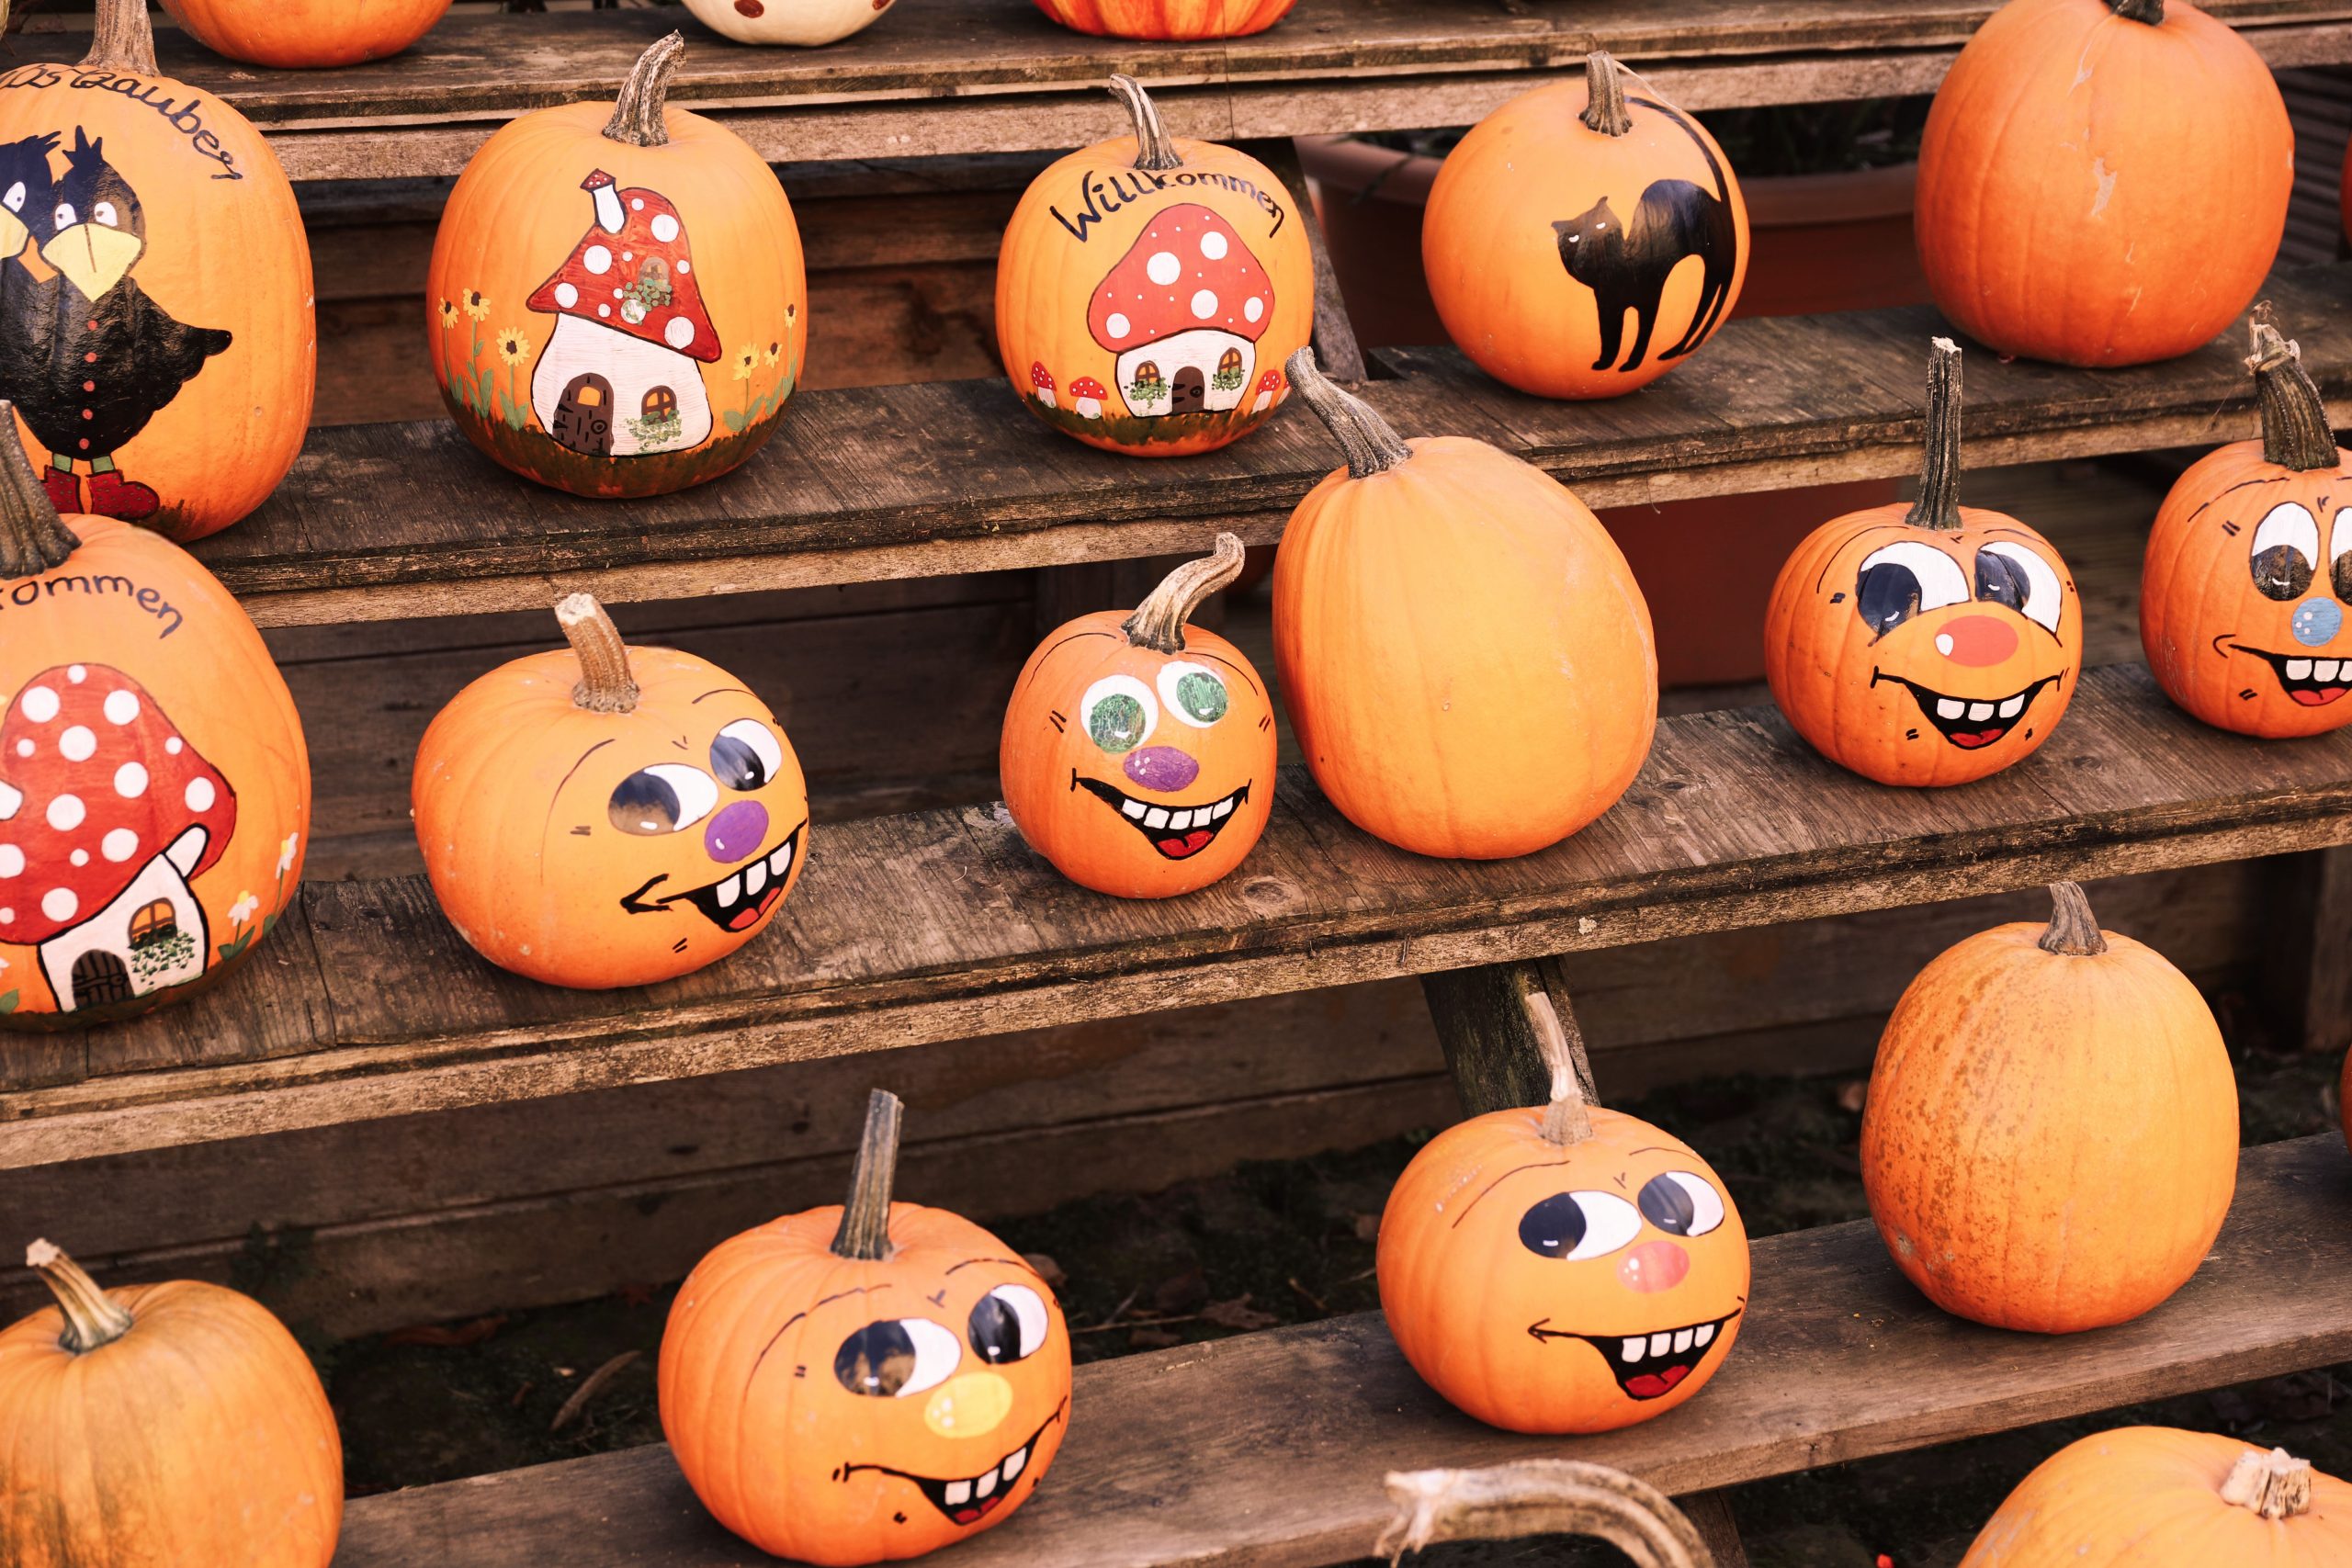
The repetition of the orange base color is what keeps this varied collection from feeling chaotic. Even though the designs range from cats to houses to faces, the consistent green stems and orange skins provide a visual “anchor.” It allows the rustic wood shelves to act as a frame for a cohesive story rather than just a shelf of random objects.
11. Stitched Scarecrow Face on a Rustic Wooden Base Protector
The “stitched” detail is the absolute MVP of this scarecrow design. By adding tiny black perpendicular lines across the edges of the blue eyes and yellow nose, you create the illusion of a fabric patch. This small touch adds a “handmade doll” quality that is much more charming and tactile than a standard flat-painted face.
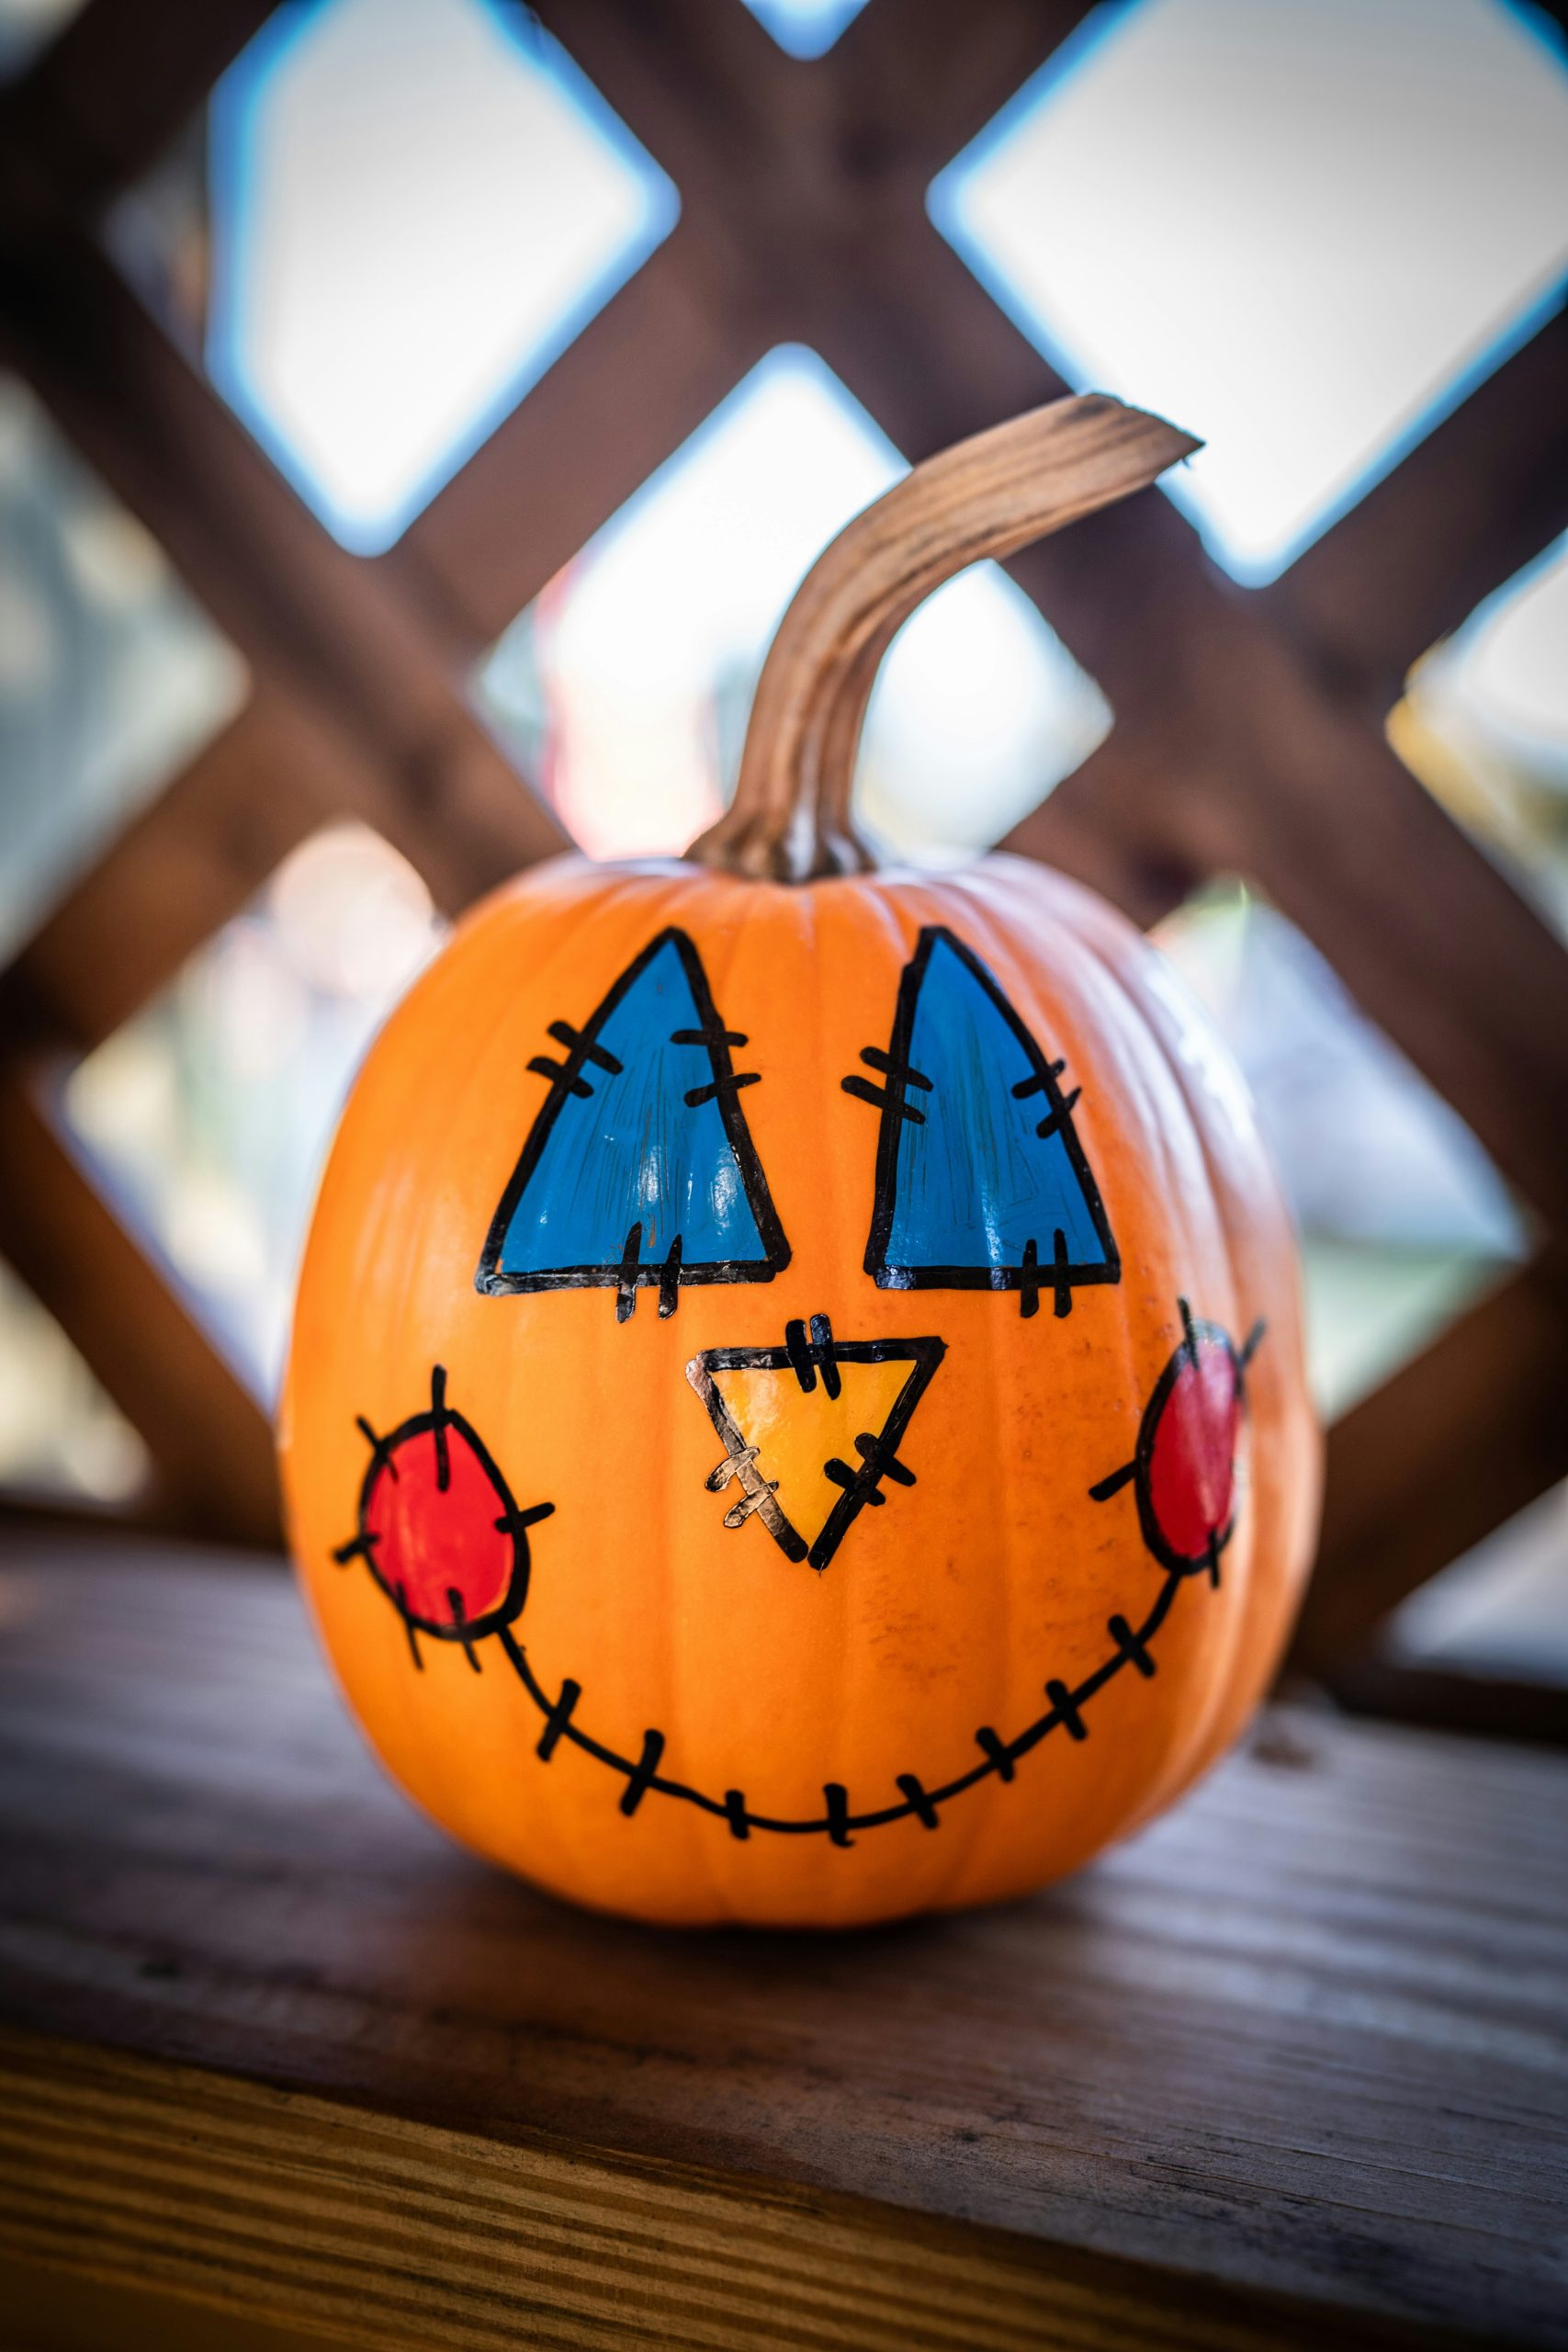
Want to nail the scarecrow look?
- Paint two large blue circles for eyes and a yellow triangle for the nose.
- Add two bright red circles for rosy cheeks.
- Once dry, use a thin black marker to draw a “smile” line and tiny stitch marks everywhere.
- Time: 30 minutes. Cost: Negligible if you have basic paint.
12. Rustic Drip-Paint Pumpkin with Warm Fairy Lights
This rustic setup relies on a specific texture ratio: 50% smooth paint (the white and orange drip pumpkin) + 30% organic texture (burlap, pinecones, wheat) + 20% light (warm fairy lights). The orange drip design on the white pumpkin mimics the look of melting wax, adding a slightly eerie but sophisticated touch to the otherwise traditional fall materials.
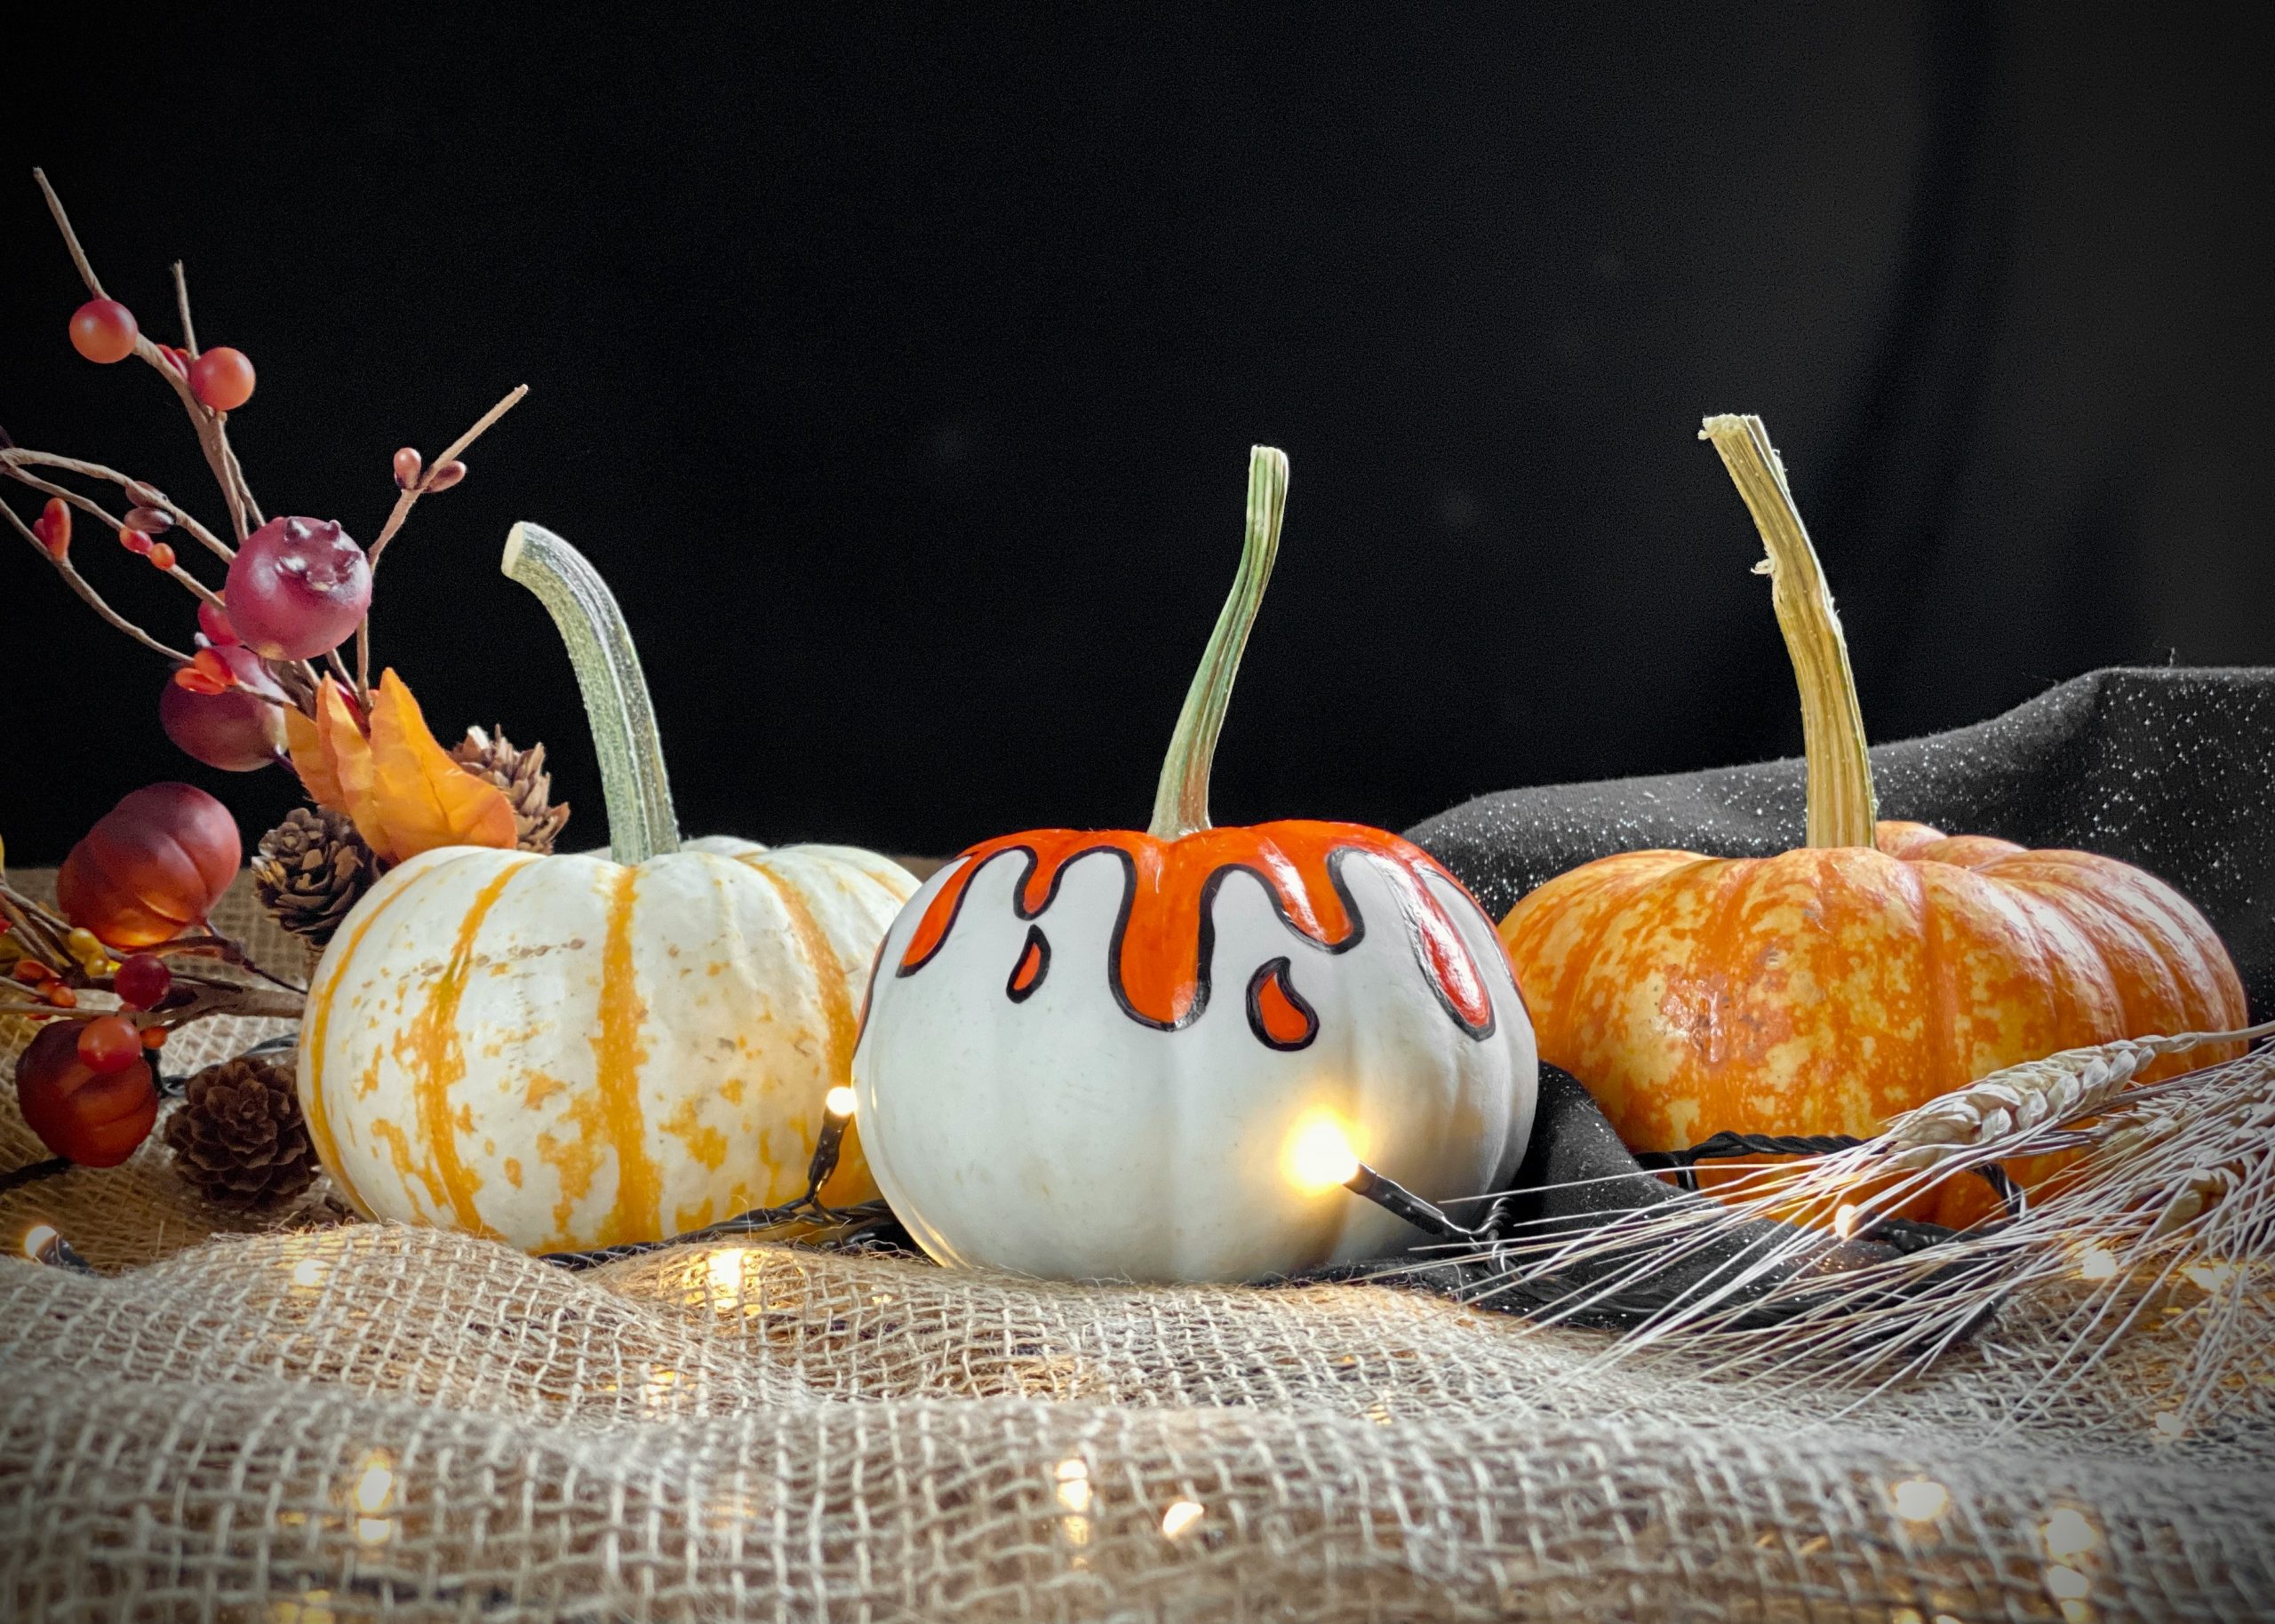
Fairy lights and burlap are a classic combo, but be careful with the heat. While LED string lights are generally safe, don’t leave them bunched up directly against painted pumpkin surfaces for days at a time. The trapped heat can cause the paint to soften or the pumpkin to rot faster underneath. Keep the lights loosely draped around the base for the best effect.
13. Crisp White Script ‘Spooky’ with Dangled Spider Detail
For script lettering like “Spooky,” don’t try to paint it freehand with a brush if you aren’t a calligrapher. Use a white chalk marker first to sketch the lines; it wipes off easily with a damp cloth if you mess up. Once you’re happy with the flow, go over it with white acrylic paint. This gives you that professional, clean look seen on the bright orange skin here.
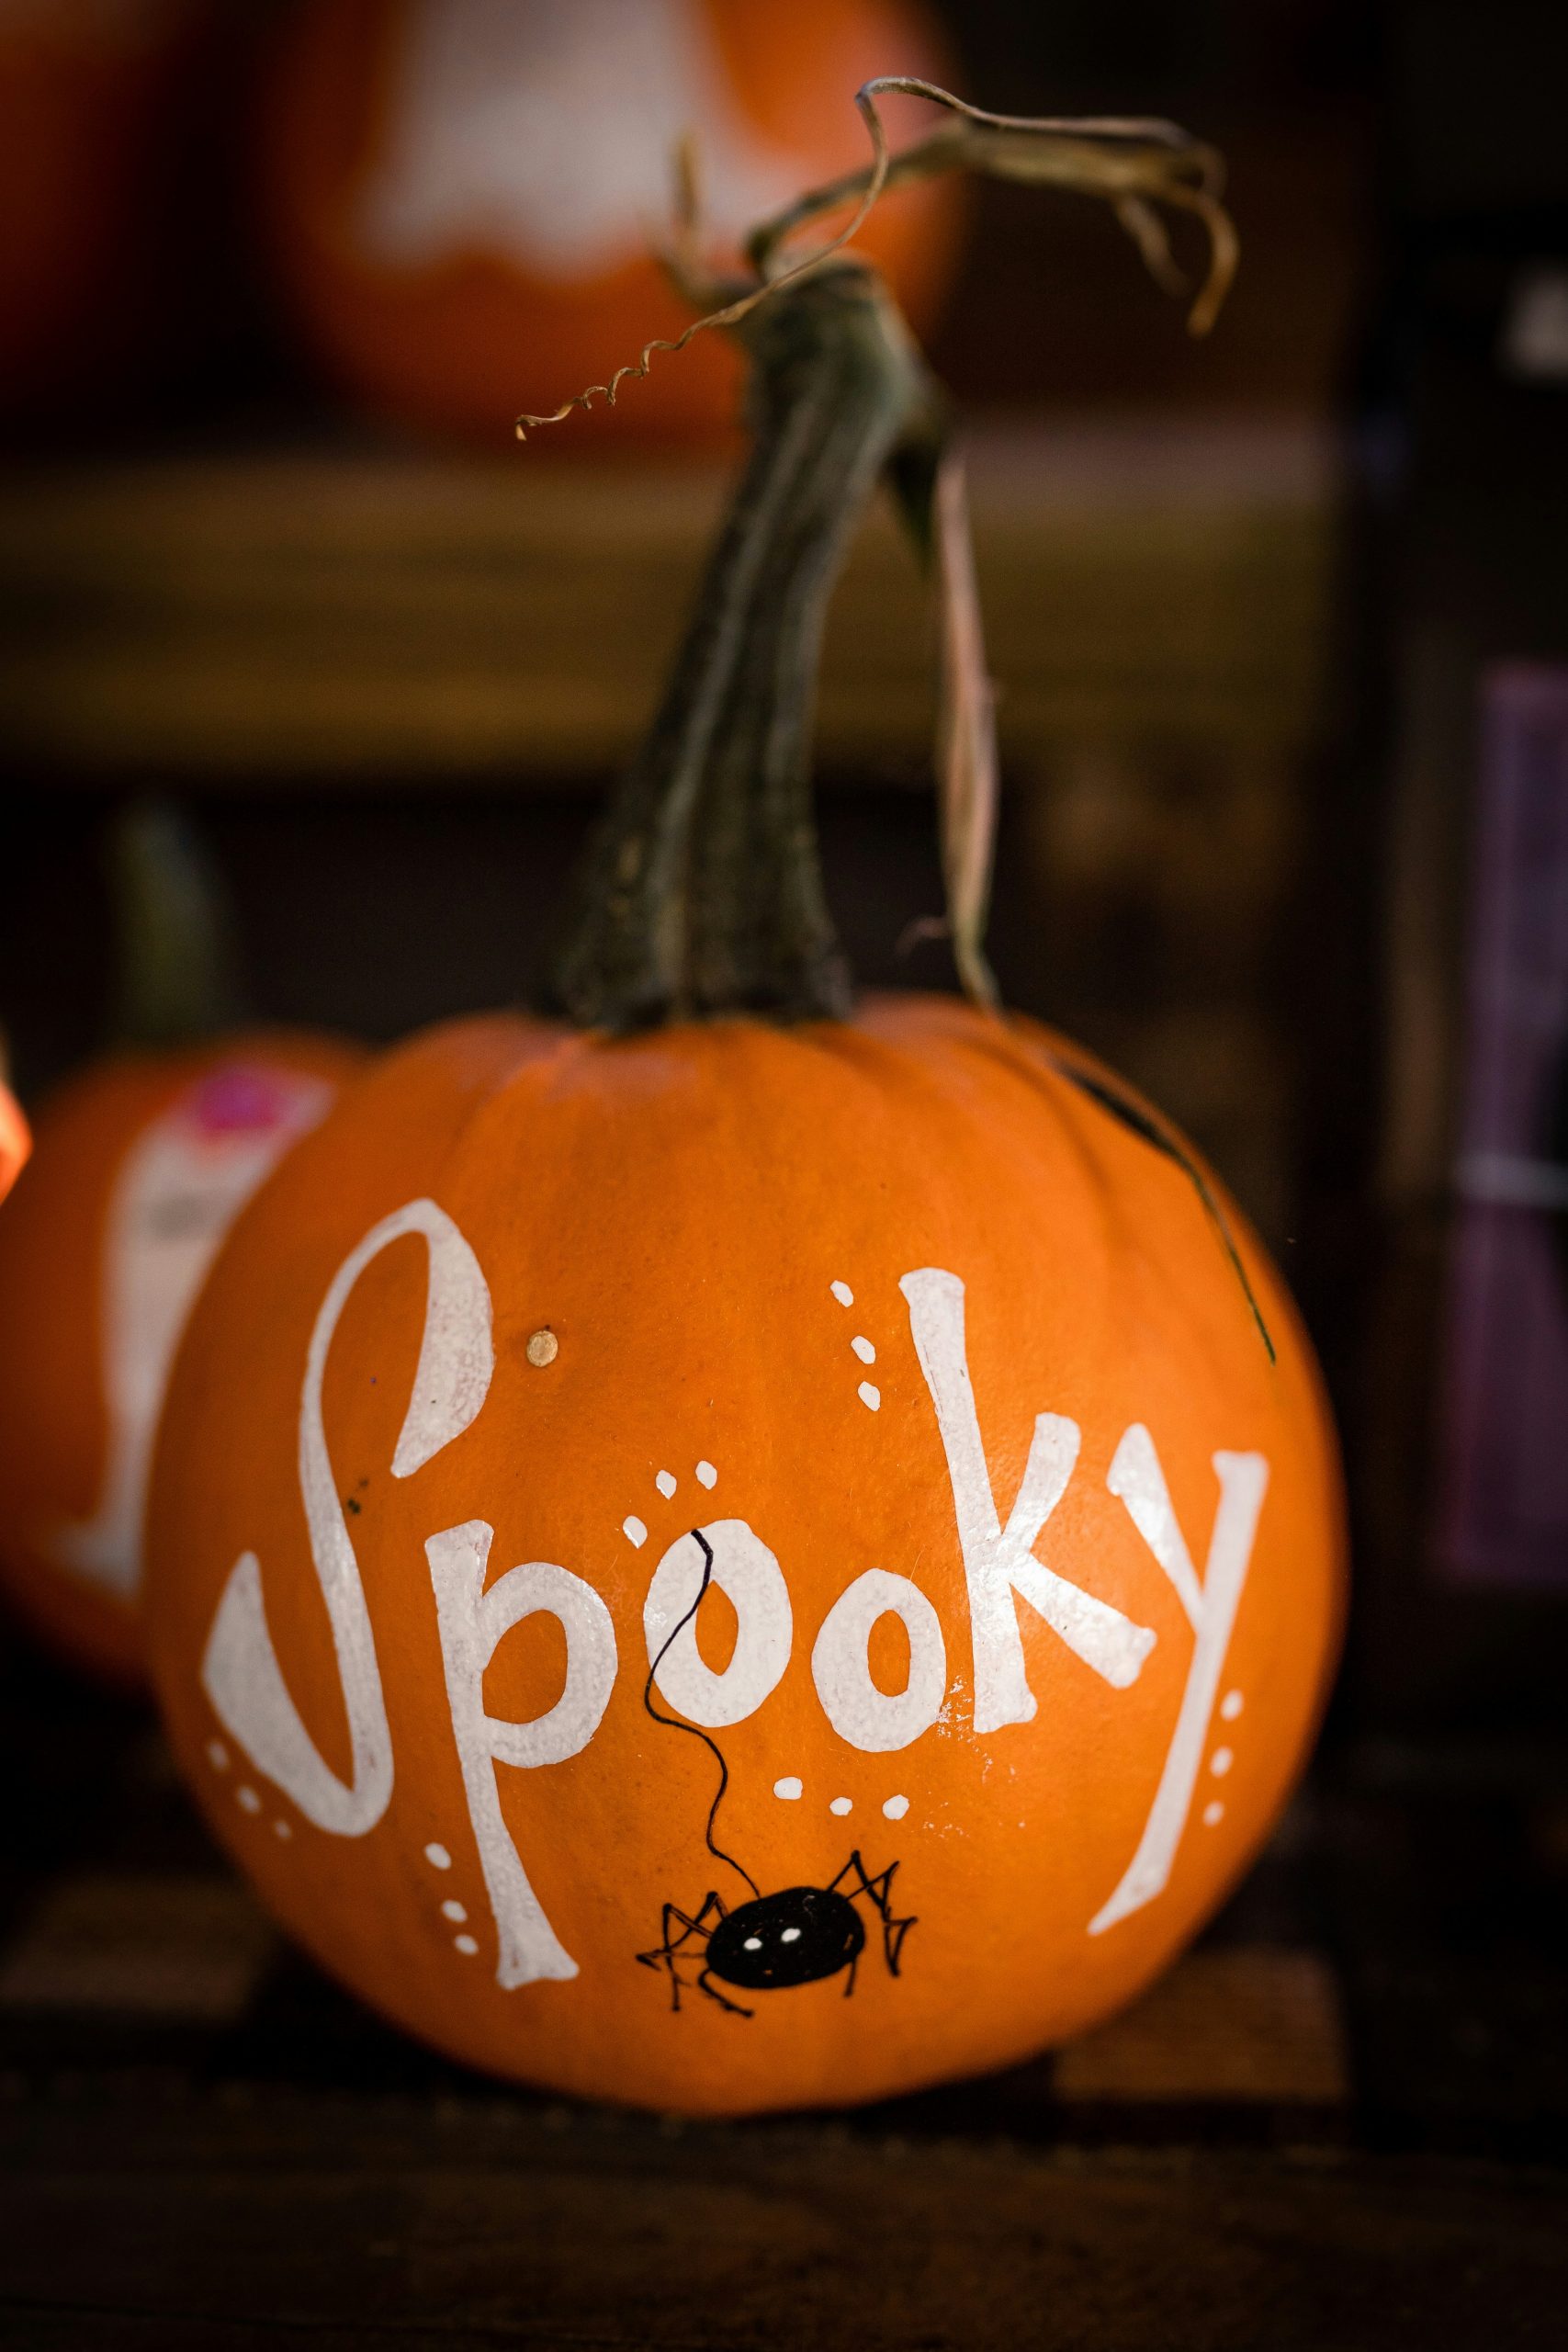
The placement of the spider is a masterclass in balance. By hanging the black spider from the second ‘o’ in “Spooky,” the designer breaks up the horizontal line of the text and adds vertical interest. The tiny white dots scattered around the script act as “visual dust,” filling the empty orange space without making the design feel crowded.
14. Eerie Porch Display with Webbed Faces and Red Accents
This porch display works best in a space with a dark, moody backdrop like a deep red door or brick wall. The orange pumpkins provide the necessary brightness to keep the entryway from feeling like a dark hole. For this level of detail—multiple faces and faux webbing—you’ll want a porch area of at least 15-20 square feet to avoid it looking like a pile of clutter.
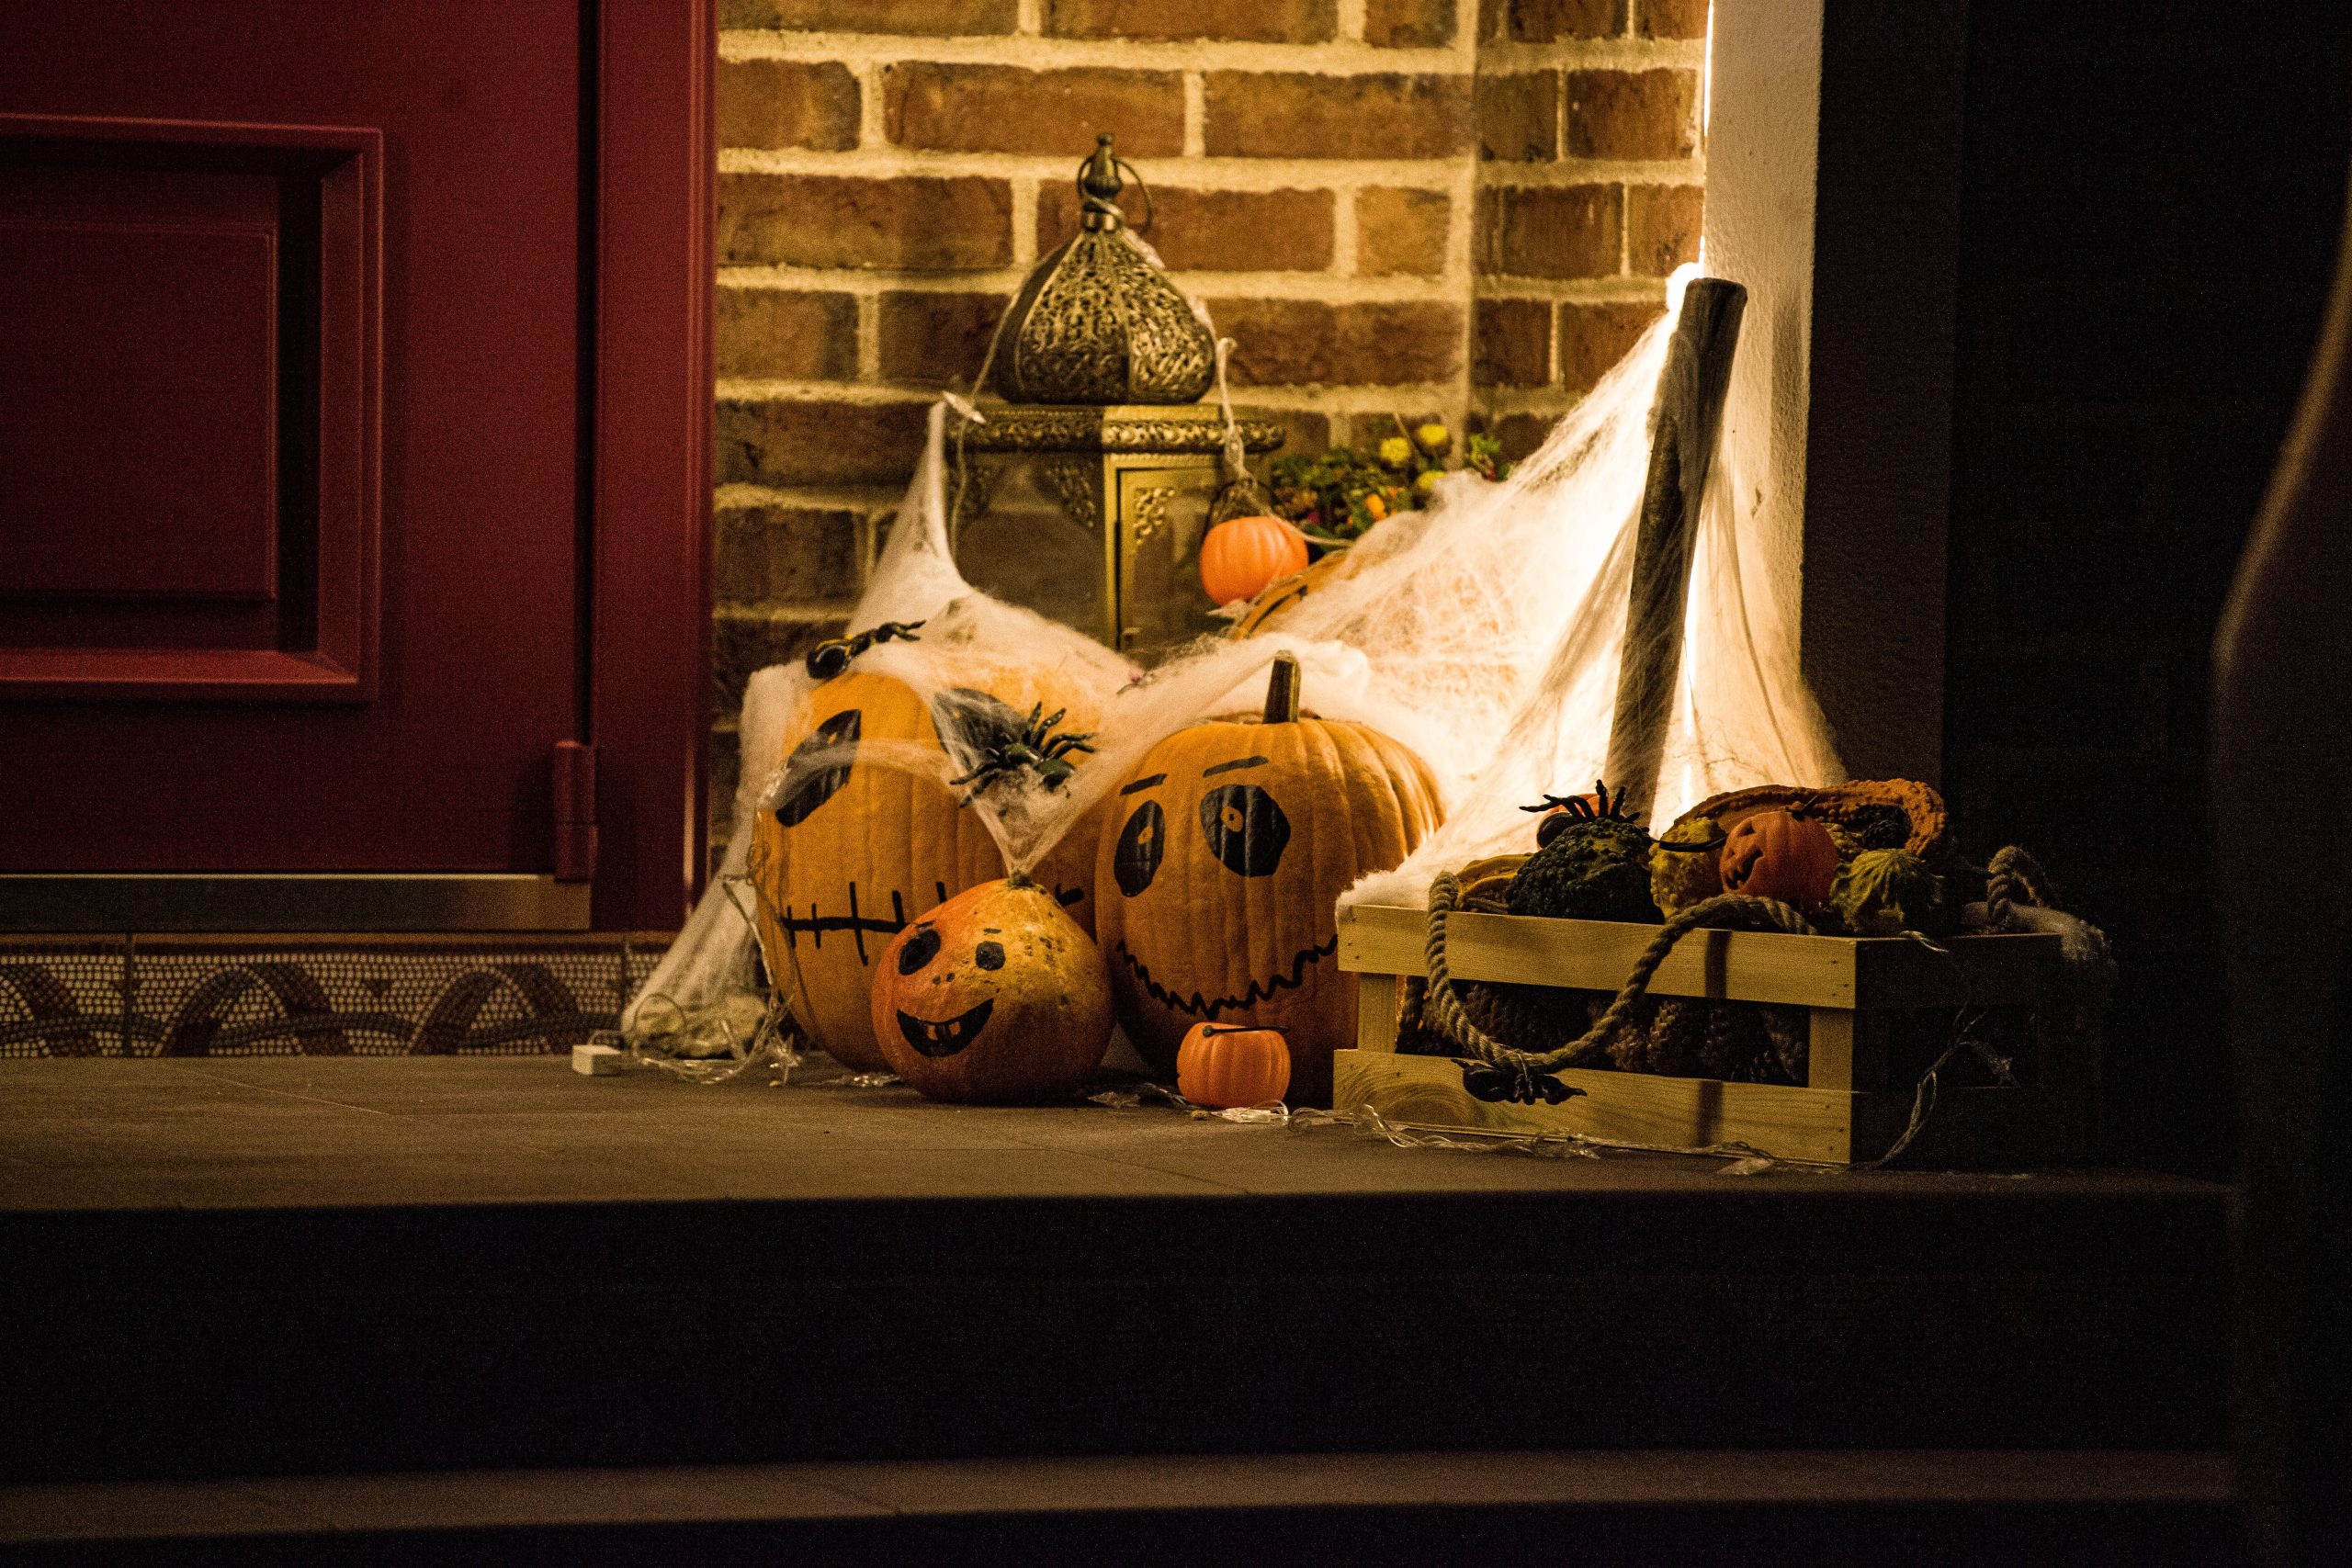
on faux webs: they are a magnet for actual outdoor debris. If you’re putting these on a porch, expect to pick out real leaves and twigs from the webbing every few days. Also, plastic spiders can easily fall off in the wind, so use a dab of hot glue to secure them to the pumpkin skin rather than just tucking them into the web fibers.
15. Hand-Painted Mini Yellow Gourd Characters with Ribbons
Tiny pumpkins are the most budget-friendly way to experiment with character design.
- Bag of 5-6 Mini Pumpkins: $5-$8
- Primary Color Acrylic Set: $10
- Assorted Curly Ribbons: $3
- Total Estimated Cost: $18 – $21
- Budget alternative: Use leftover gift-wrap ribbons and a Sharpie to create the faces for under $10 total.
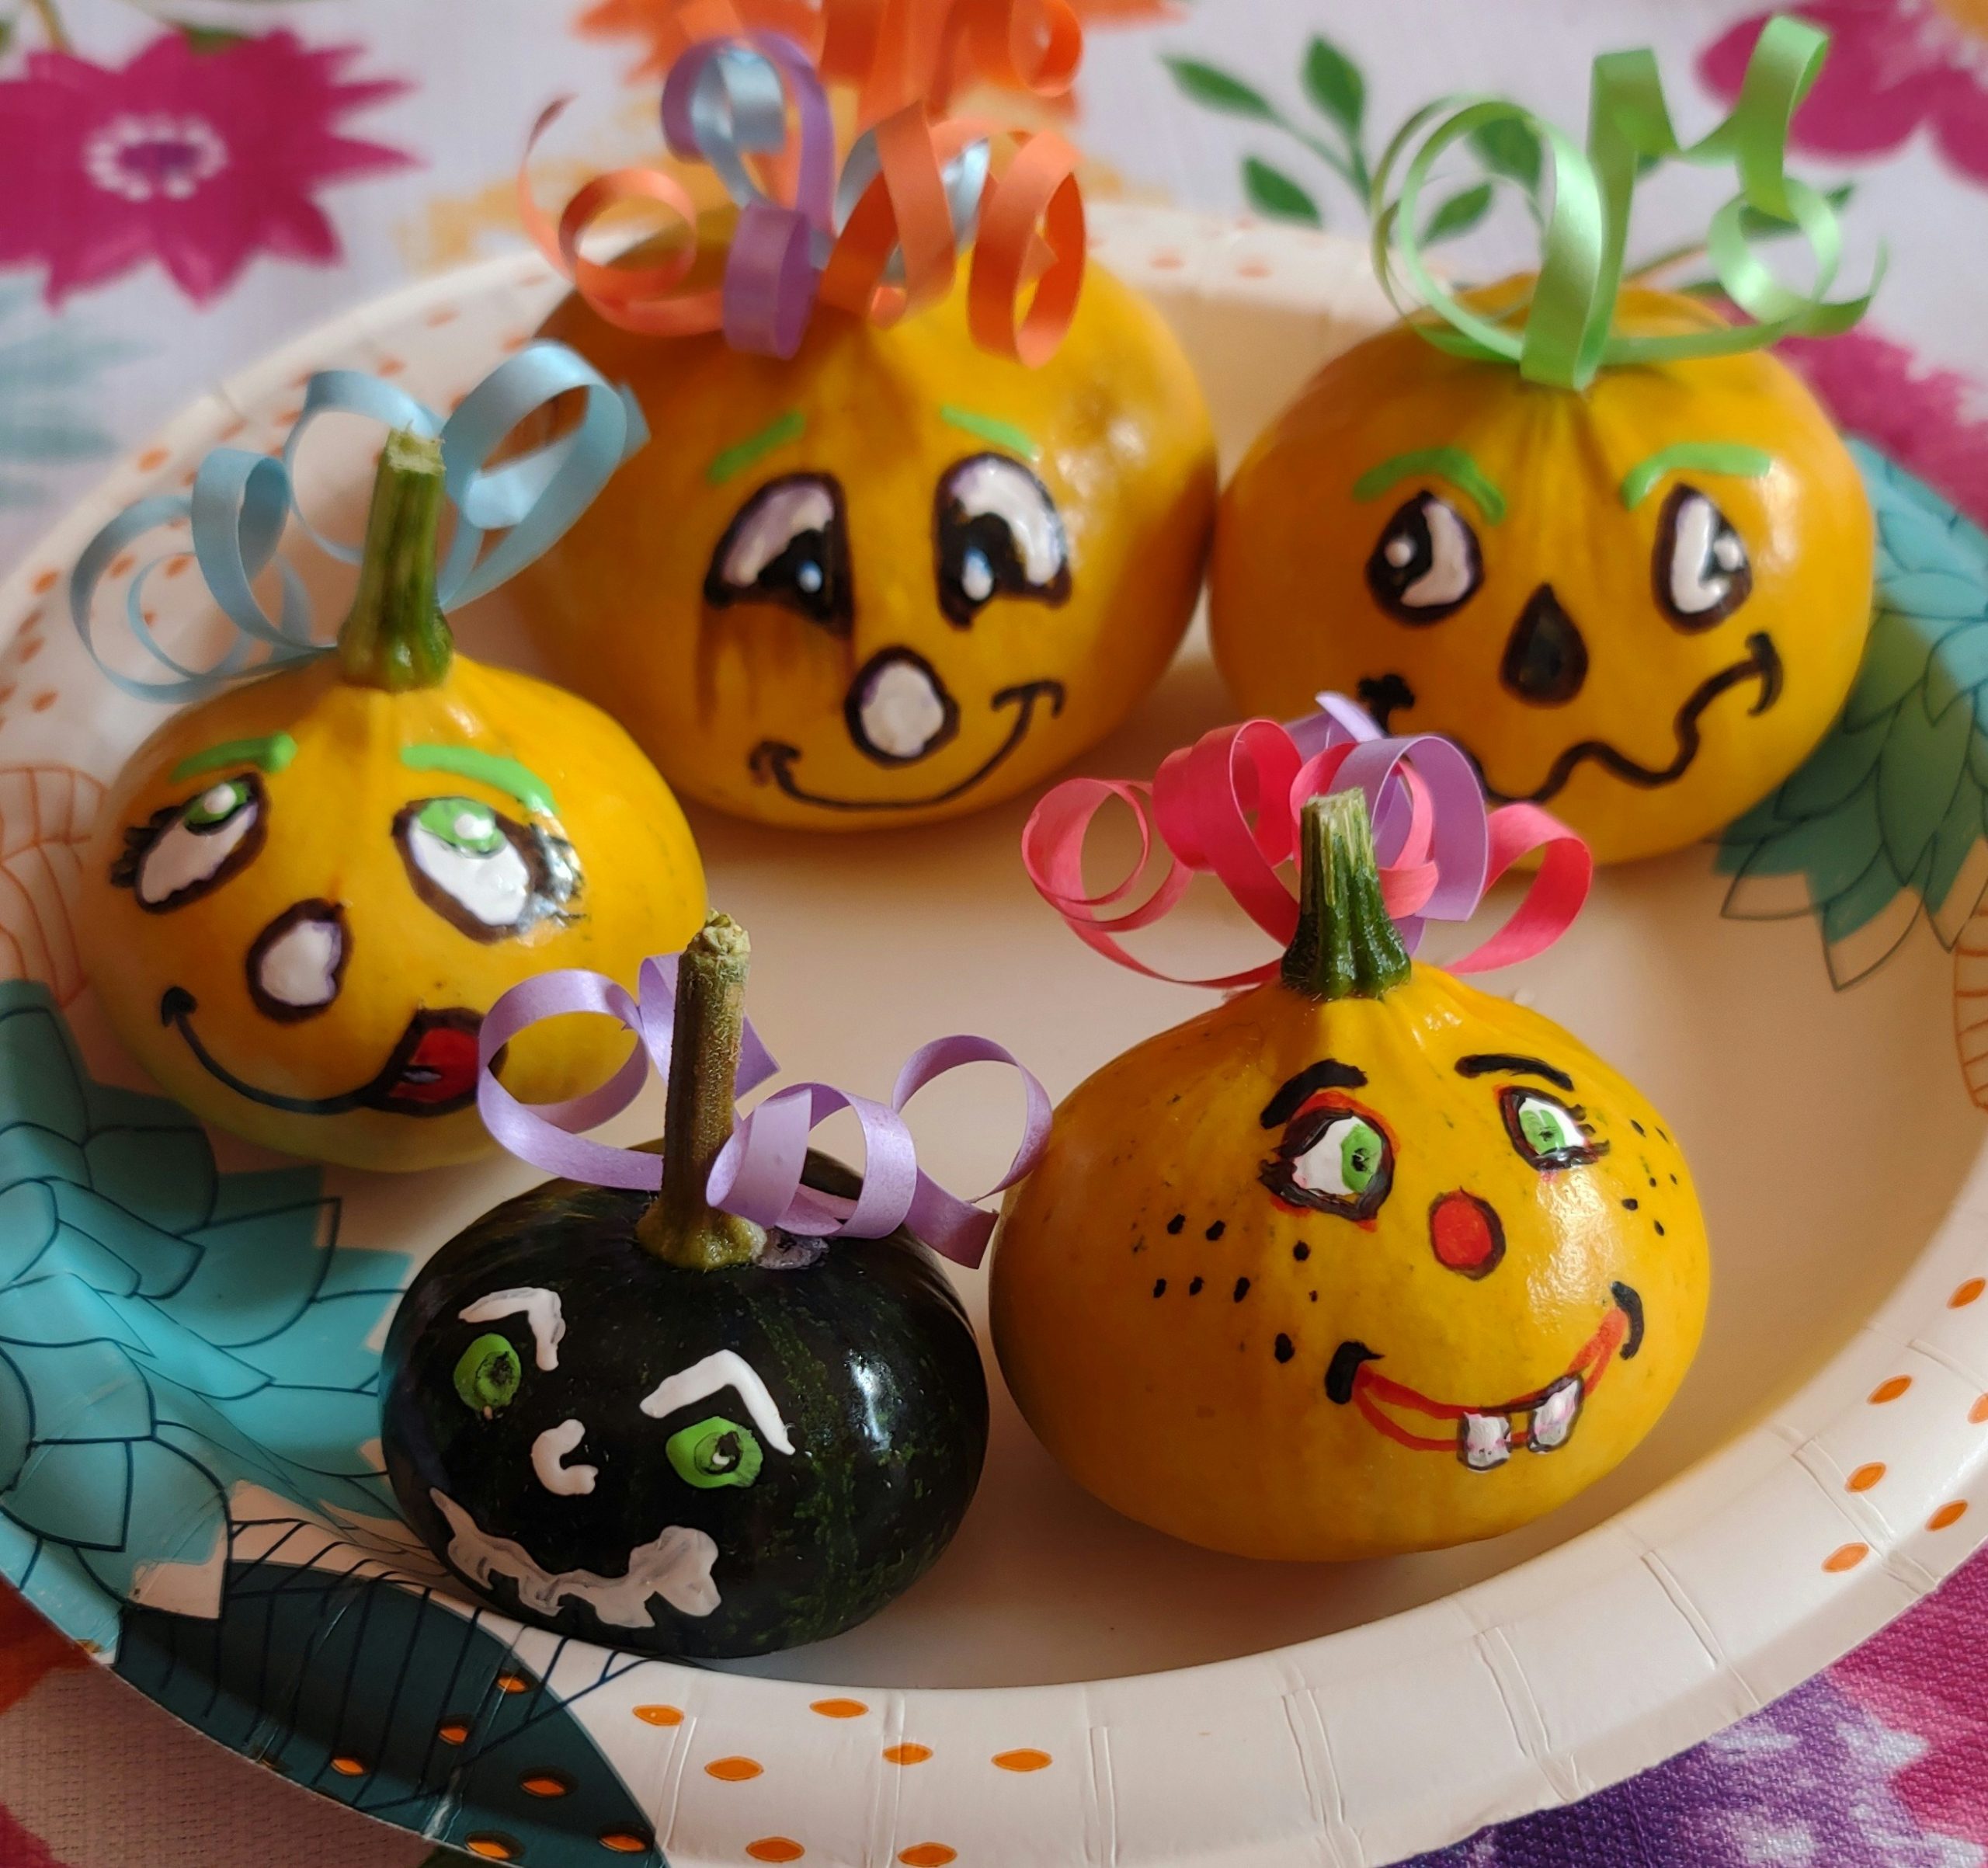
The curly ribbons are the game-changer here. By attaching pink, yellow, or white ribbons near the stems, you give these “character” pumpkins a sense of hair or hats. It adds a 3D element that elevates the simple hand-painted faces, making them feel like little personalities sitting on your plate rather than just decorated vegetables.
16. Comic-Style ‘Boo’ and ‘Whoa’ Pumpkins on Wooden Steps
This staircase look is all about “The Rule of Three”: 60% bold orange base + 30% high-contrast black/white faces + 10% seasonal accents (scarecrow and leaves). The large, blocky text like “Boo!” and “Whoa!” acts as a secondary design element, giving the pumpkins a comic-book feel that works perfectly against the dark, rustic wood of the steps.
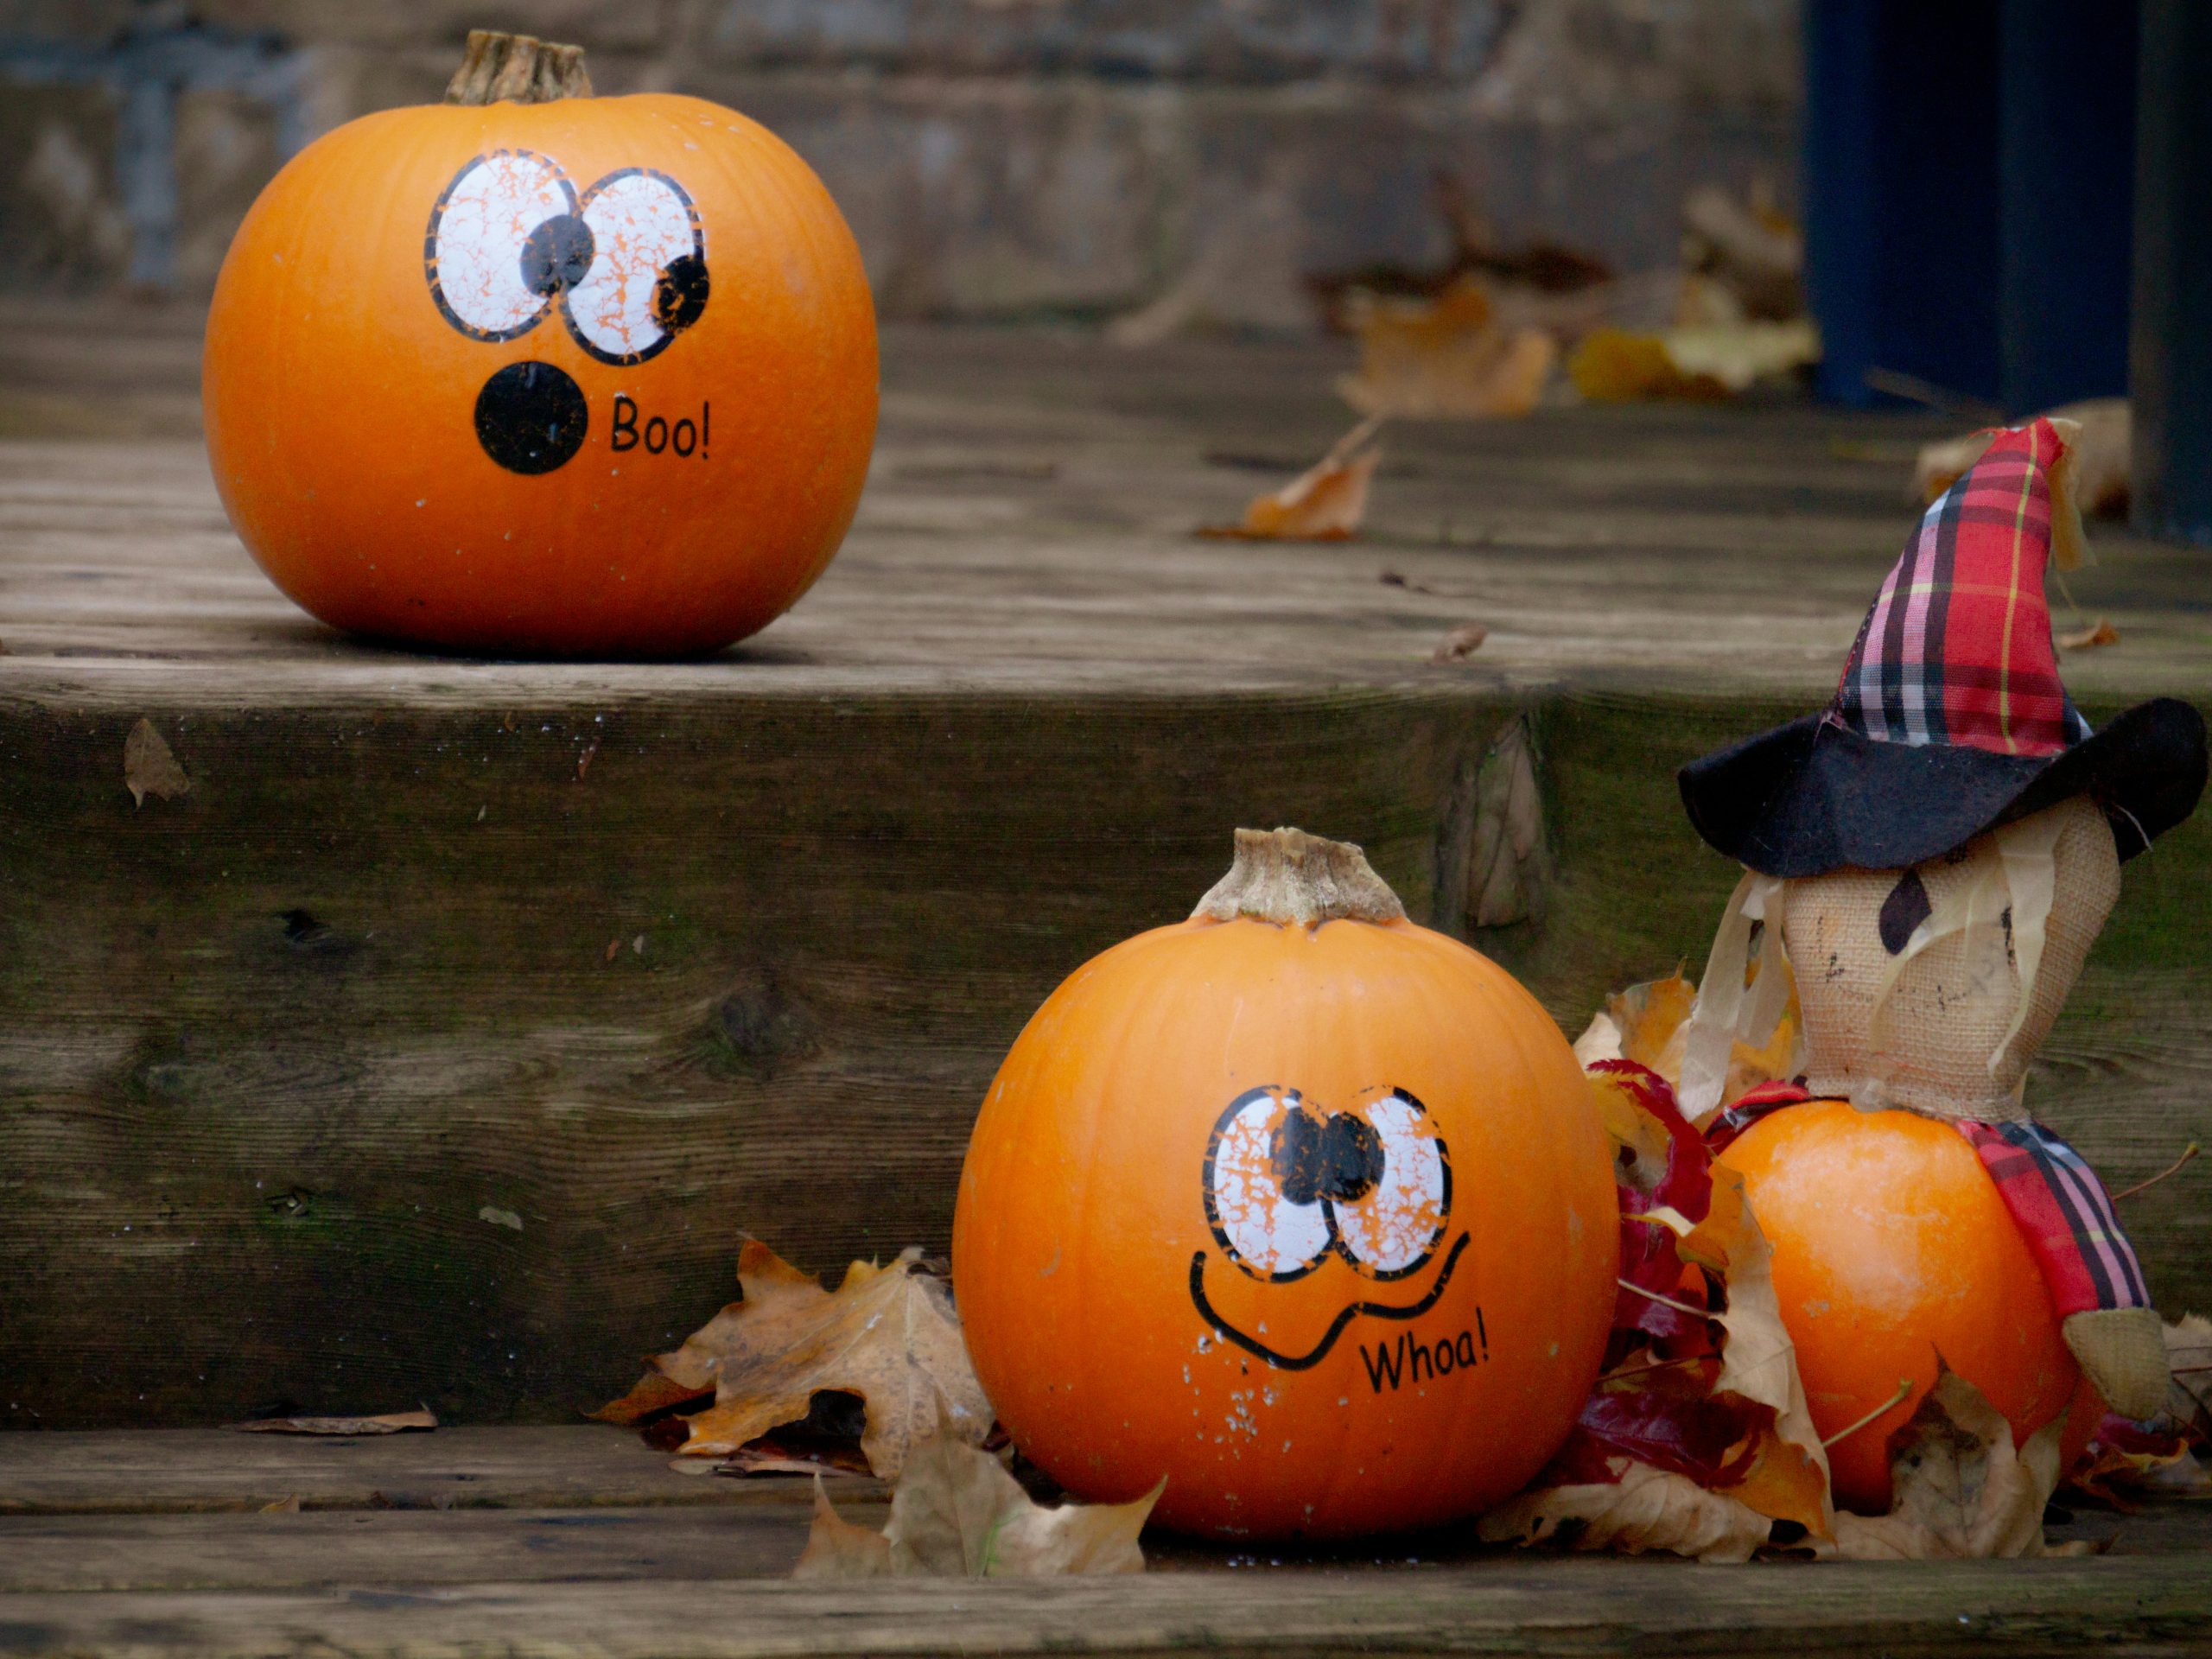
Ready to build your porch stairs crew?
- Clean your pumpkins to ensure paint sticks to the wax.
- Paint two giant white circles for eyes; add large black pupils.
- Stencil or freehand your “speech” words at the bottom.
- Place a small prop, like a plaid-hat scarecrow, nearby for scale.
- Scatter a few dry leaves for a “natural” fallen look.
17. Stitched Spooky Face Paired with Natural Mini Pumpkins
This arrangement works because of the dramatic difference in height and design. The tall, painted pumpkin with the spooky stitched face acts as the “anchor,” while the two smaller, natural pumpkins provide a sense of groundedness. The contrast between the deliberate, artistic stitches and the raw, unadorned skin of the smaller gourds creates a sophisticated “designer” look.
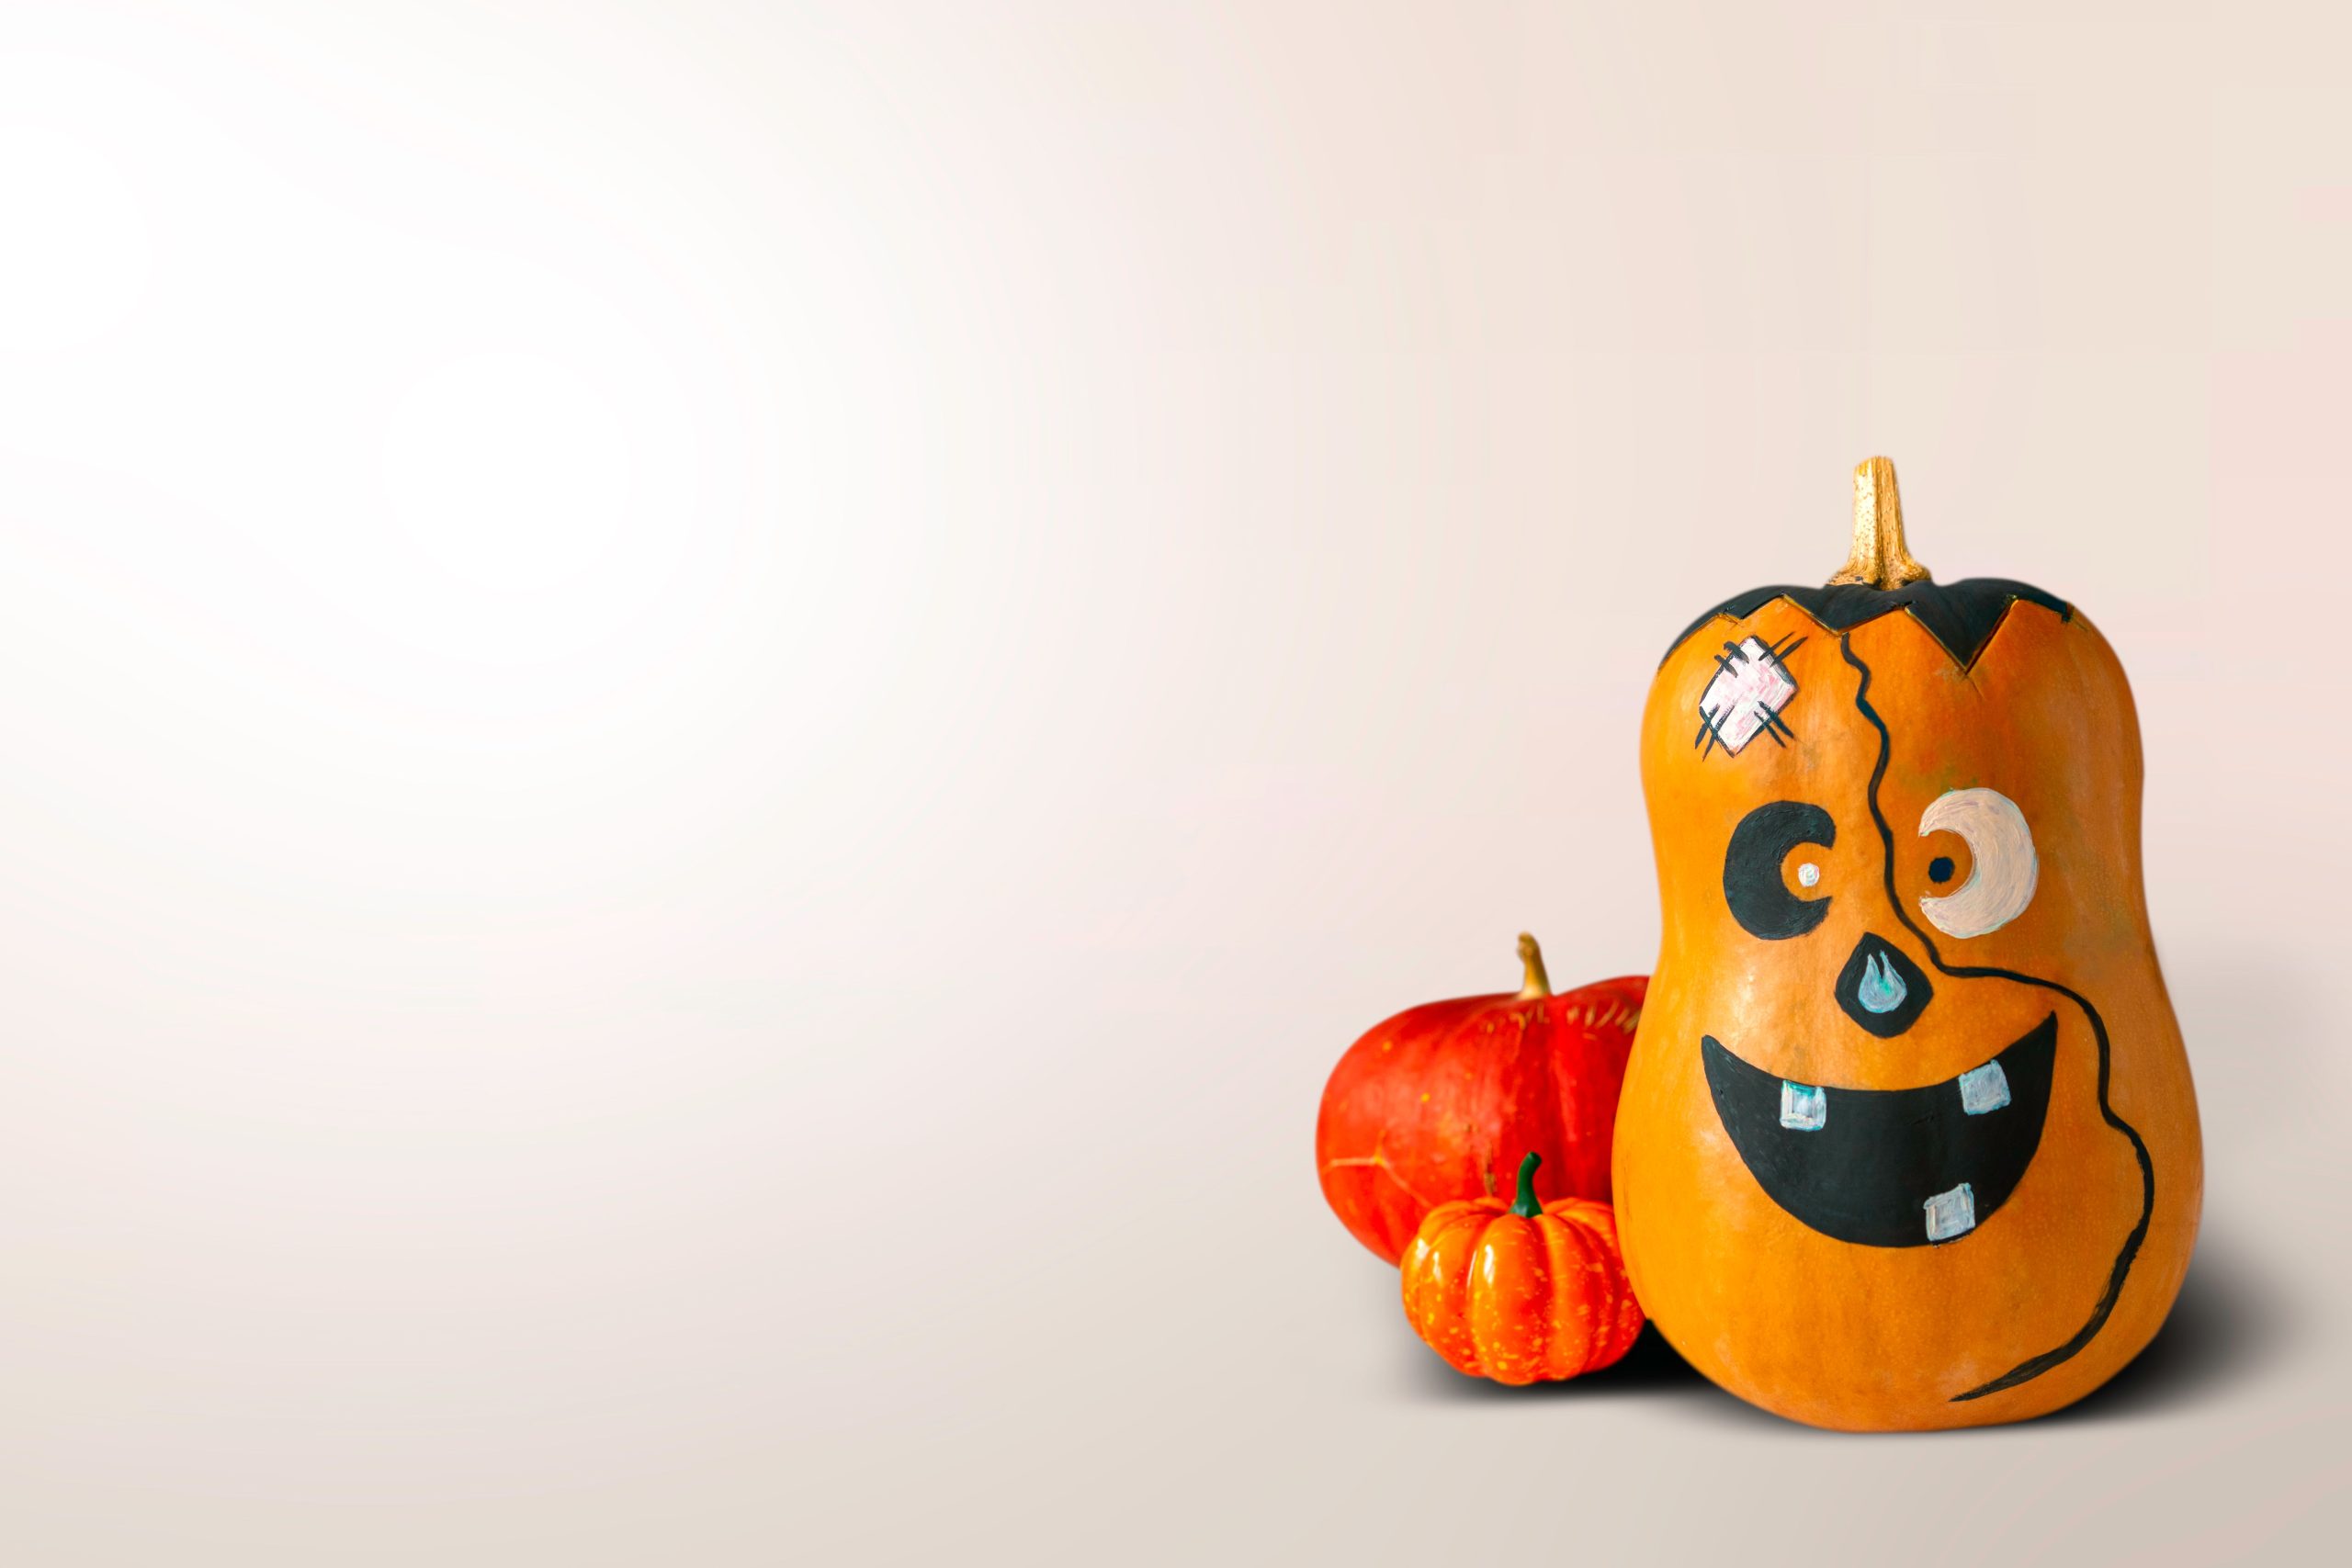
Since this relies on a tall, vertical pumpkin, it’s best for narrow entry tables or as a centerpiece for a small bistro table. It requires very little horizontal space—about 12 inches wide—making it a great alternative to the larger, clustered look in Idea #24. The light, neutral background is key to making the vibrant orange really pop.
18. Goofy-Faced Pumpkin with Confetti Swirls and Dots
To get that goofy, expressive look, don’t be afraid to use bright, non-traditional colors for the facial features. A pink nose and a bright red tongue against the orange skin create a playful, friendly vibe that’s perfect for families. Use a white paint pen for the teeth to get those sharp, clean edges that make the “smile” really stand out.
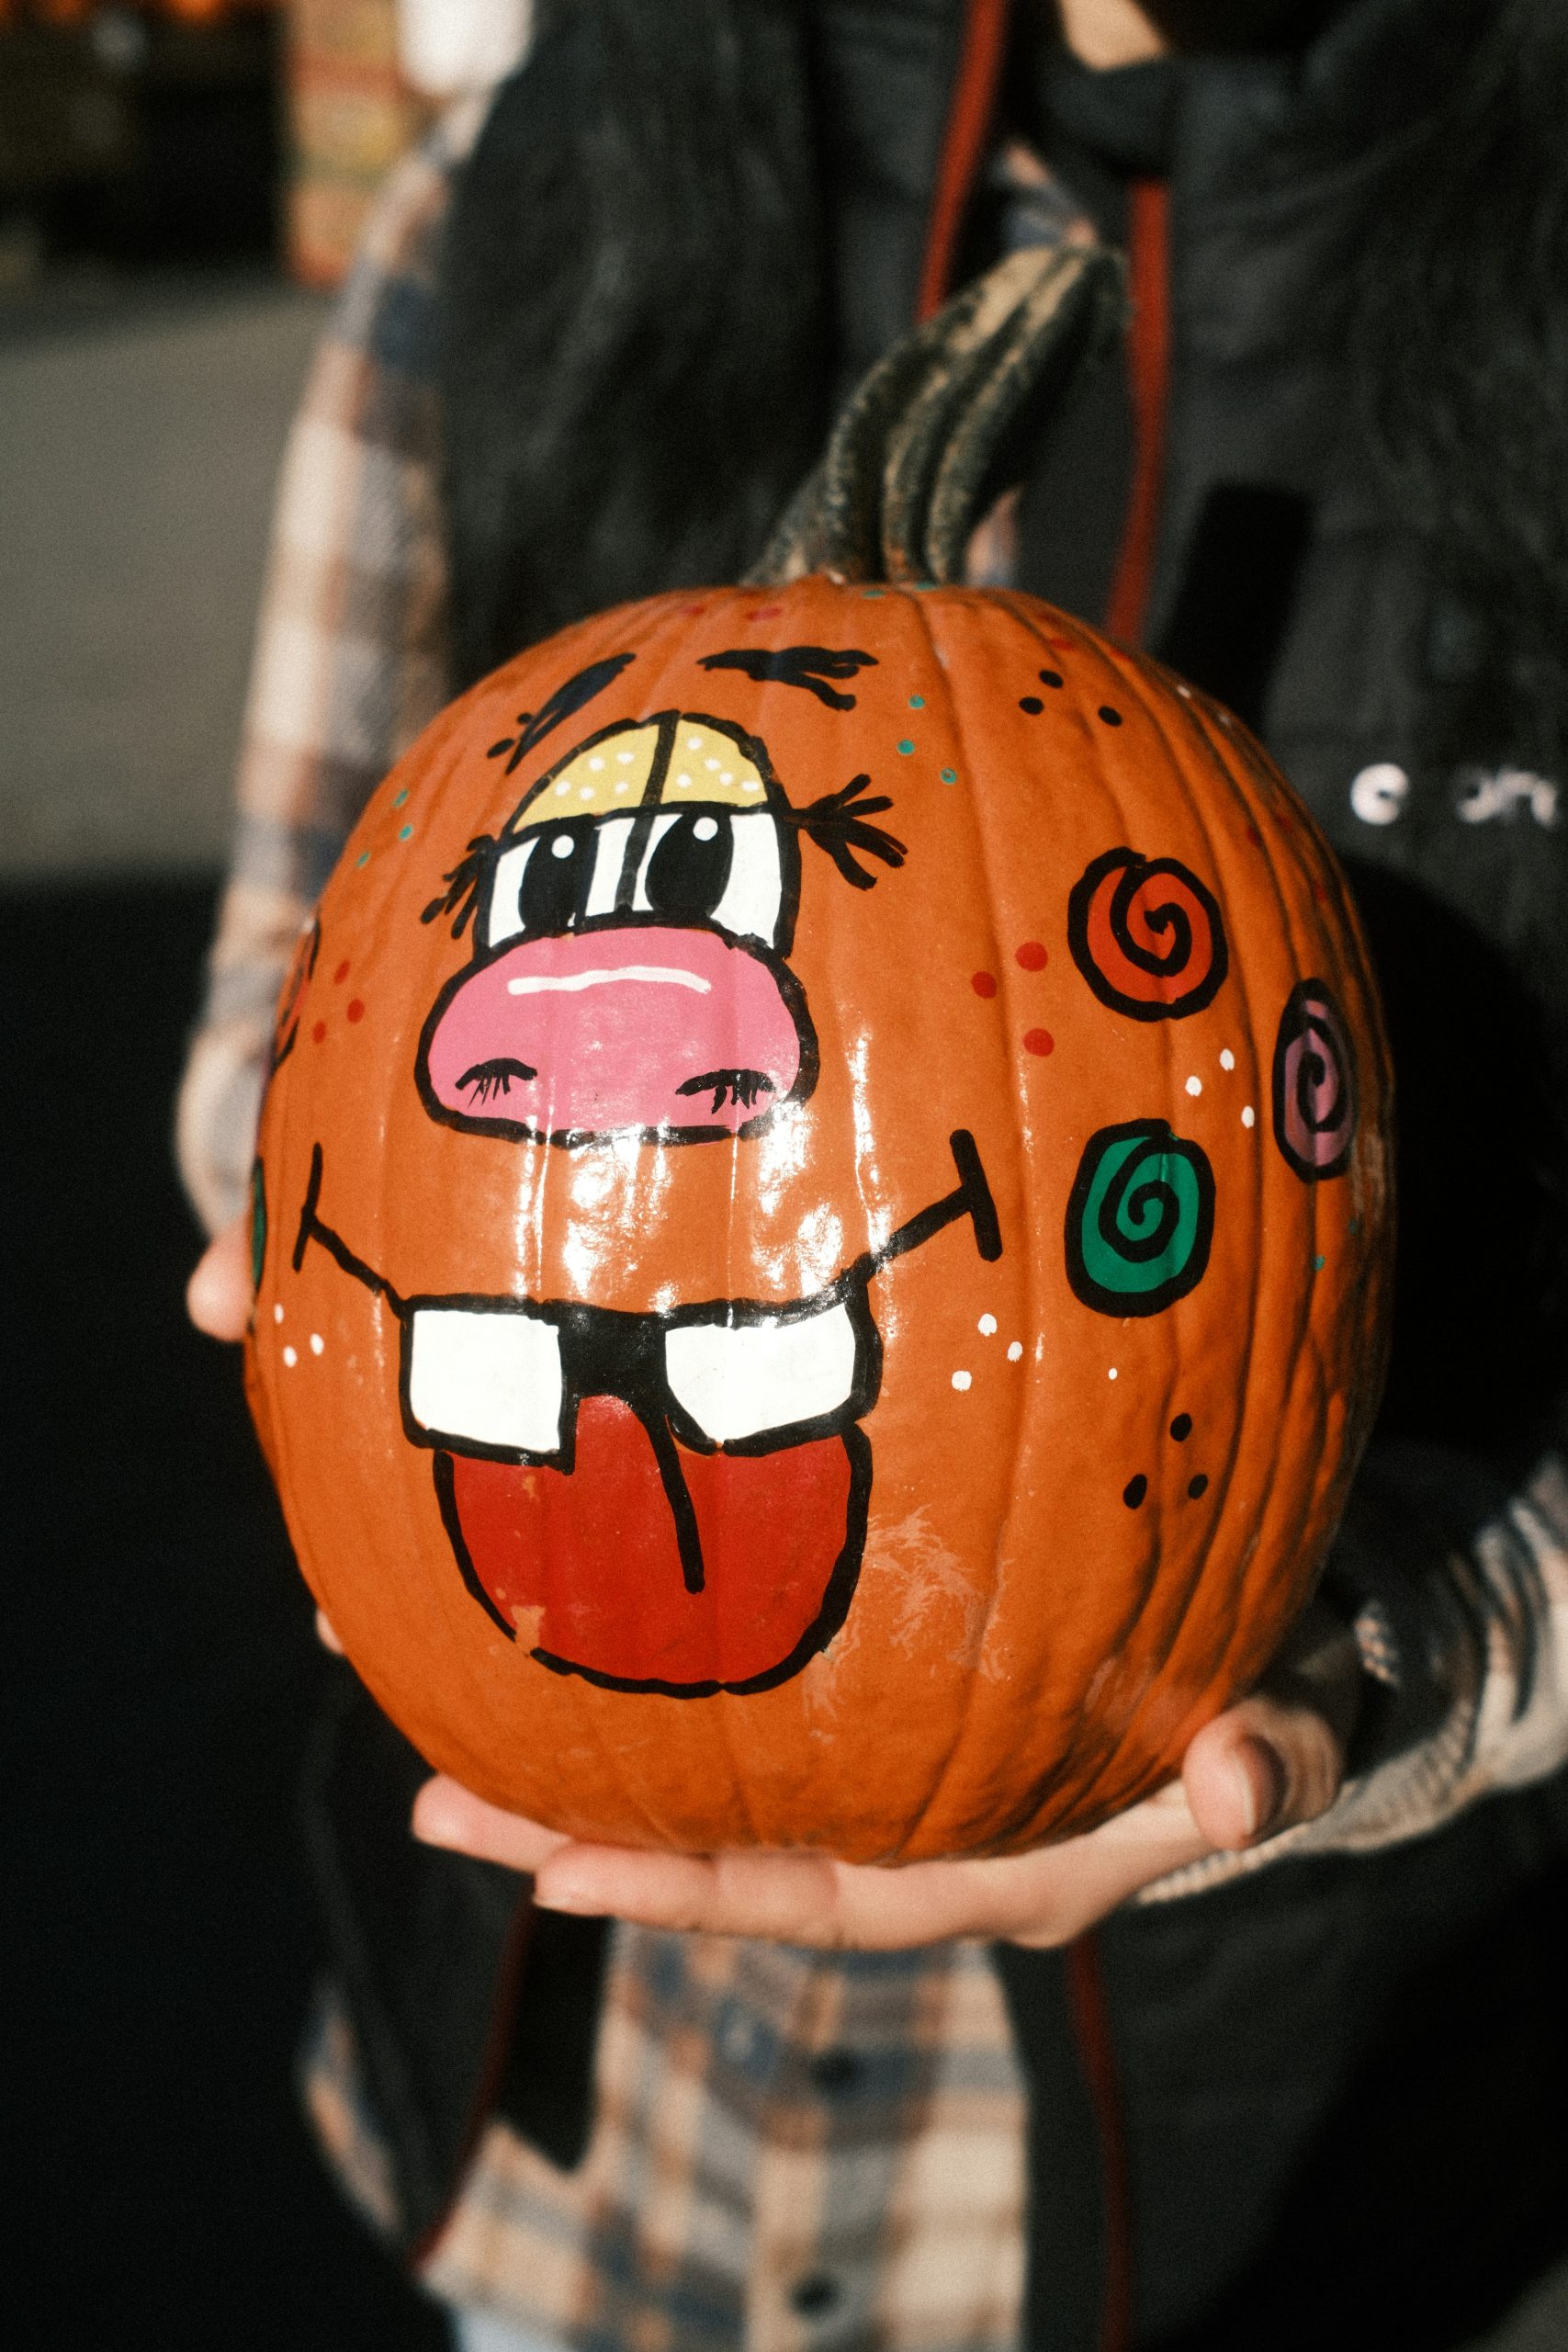
The swirled circles and scattered dots are what make this design feel truly custom. Instead of leaving the rest of the pumpkin blank, adding these abstract, colorful shapes gives it a “confetti” or “party” feel. It’s a great way to hide any small bruises or imperfections on the pumpkin’s skin while adding a layer of whimsical detail.
19. Matte Periwinkle Gourd with Edgy Skeleton Hand Graphic
The “Periwinkle and Pink” combo is a major 2026 trend, moving away from the traditional dark Halloween palette. The matte periwinkle purple provides a cool-toned base that makes the black skeleton hand graphic look edgy and modern. It’s a playful nod to “rock and roll” culture that fits perfectly into a contemporary, light-filled room.
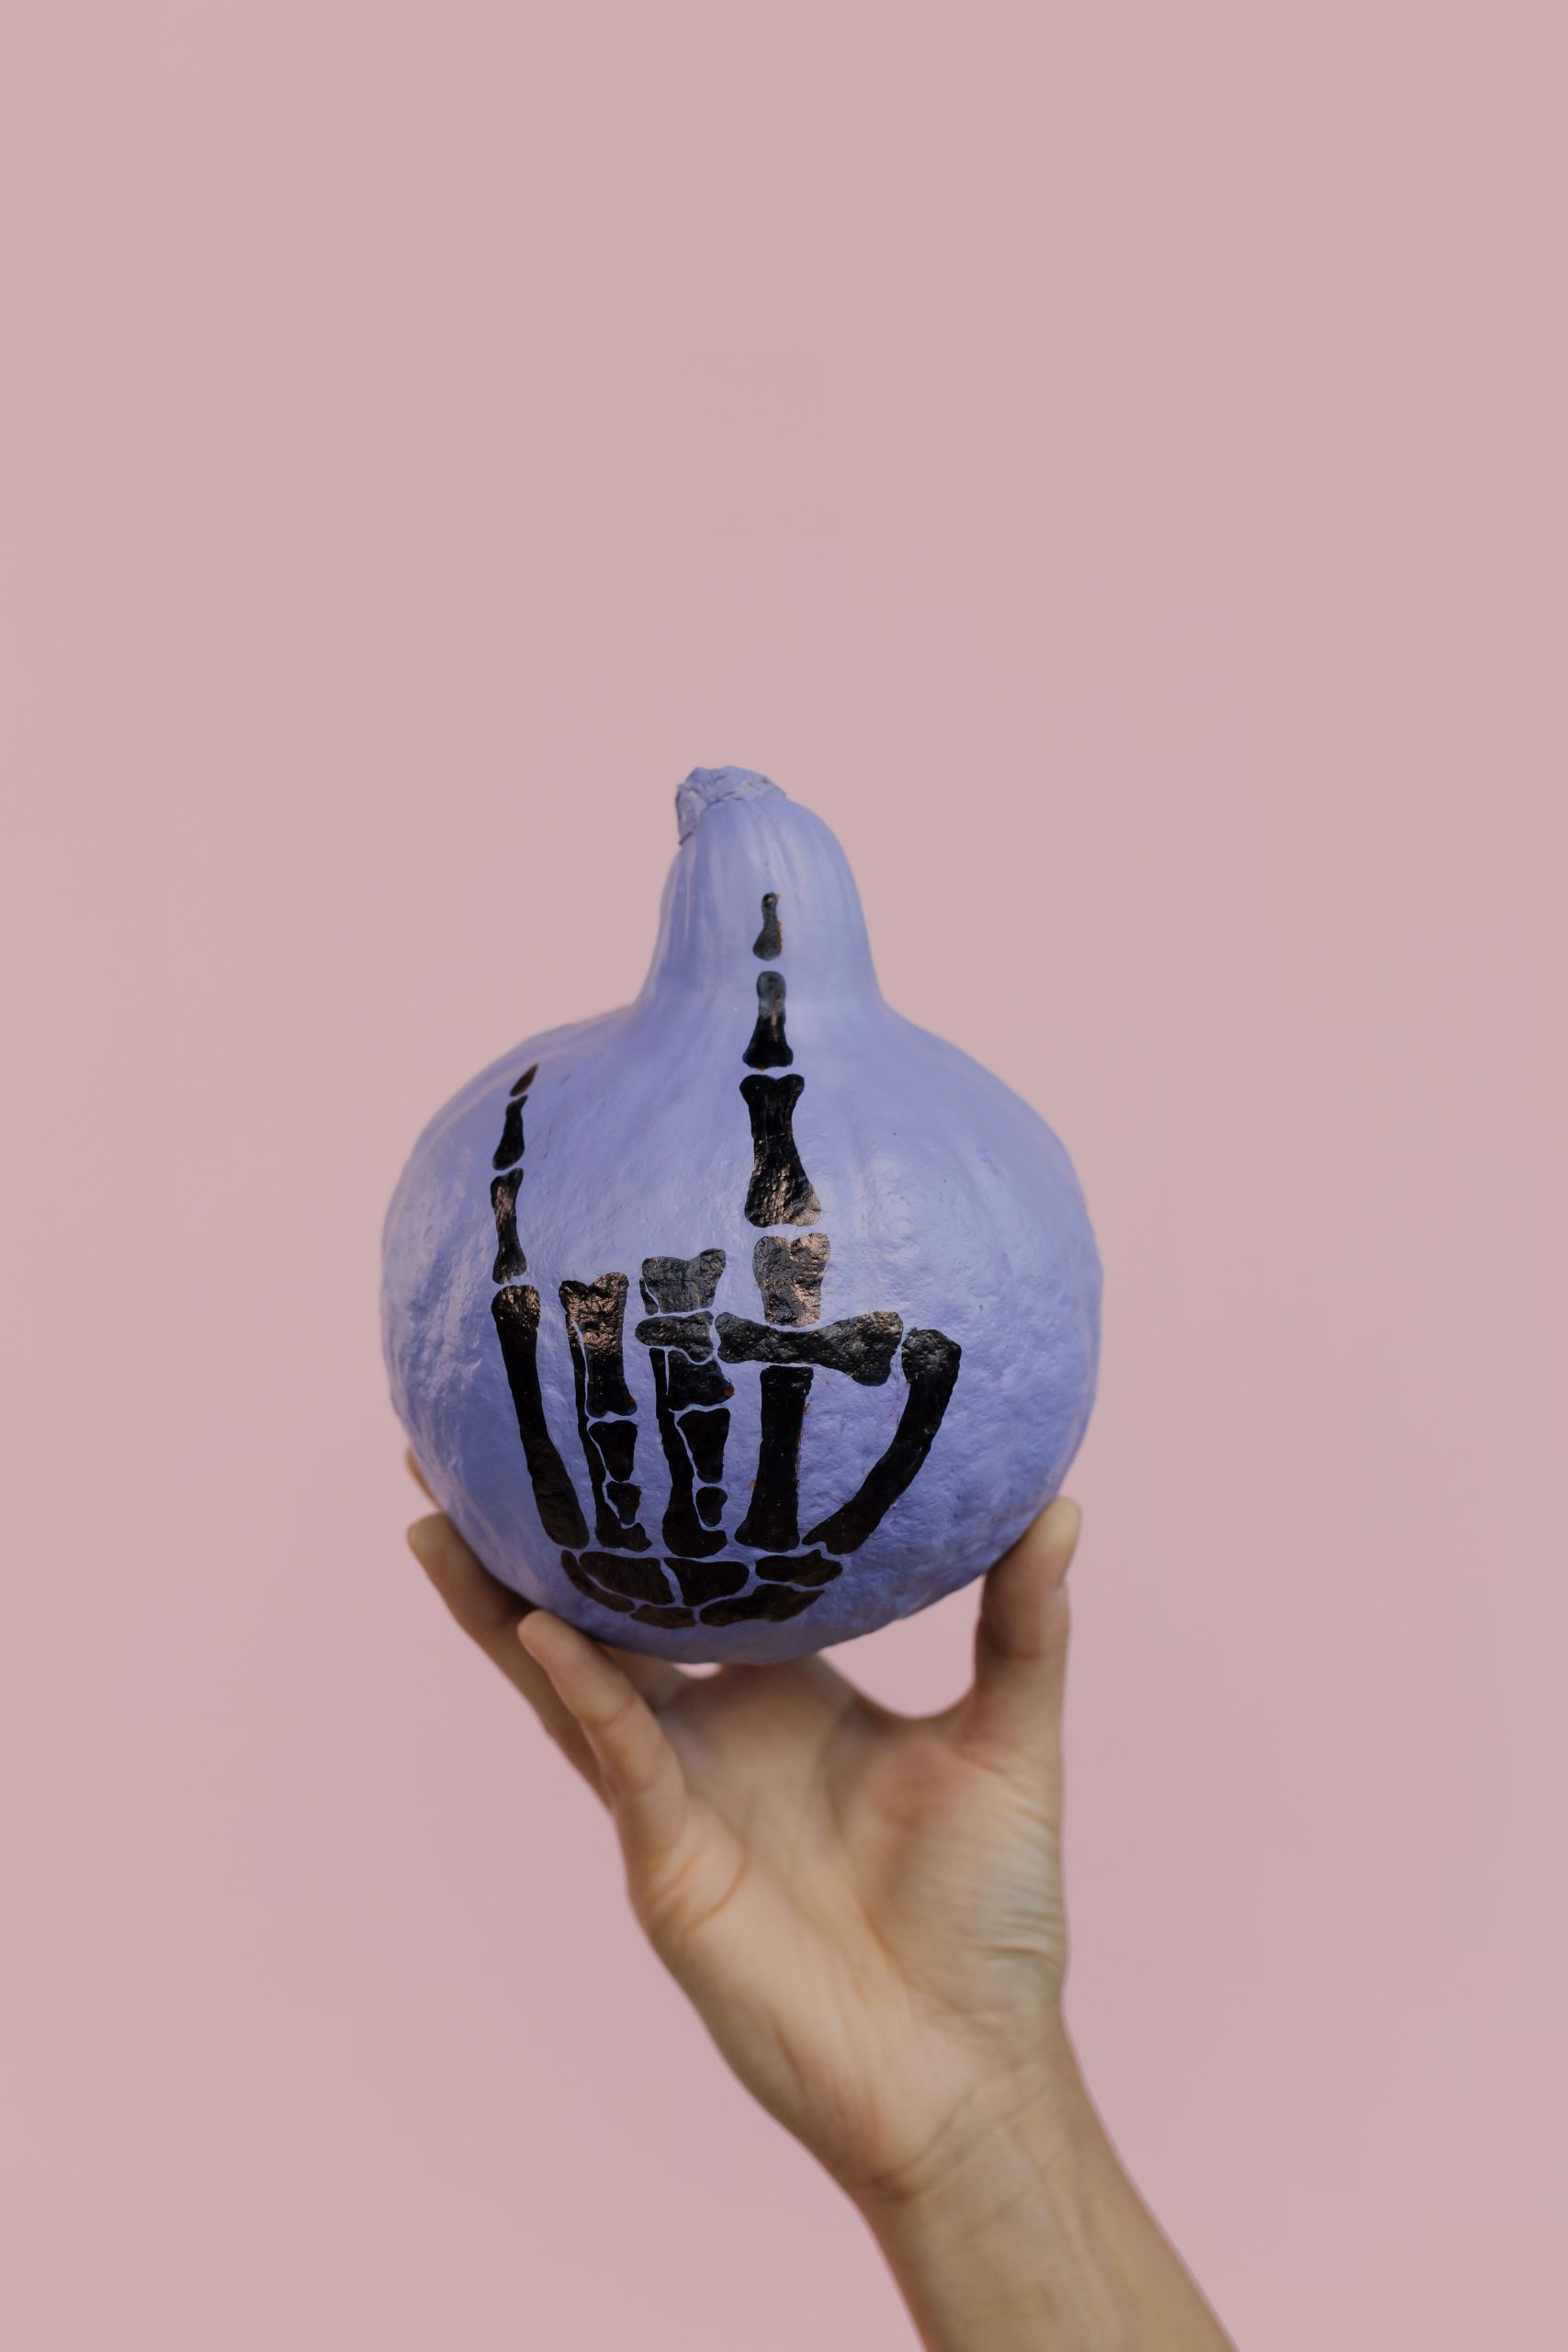
Recreate this edgy look on a dime:
- Pick up a small gourd at the grocery store for $1.
- Use a sample pot of purple paint or even a bottle of matte nail polish.
- A standard black permanent marker works perfectly for the skeleton hand.
- Total cost: Under $5 for a high-impact, trendy decor piece.
20. Surprised Expression Pumpkin Nestled in Natural Hay
Using thick black and white paint for a “surprised” face creates a bold, graphic look, but be careful with the drying time. Thick acrylic paint can take hours to cure, and if you move the pumpkin too soon onto a bed of hay, you’ll end up with straw stuck in the paint. It’s a rustic look, but “hairy” paint isn’t usually the goal!
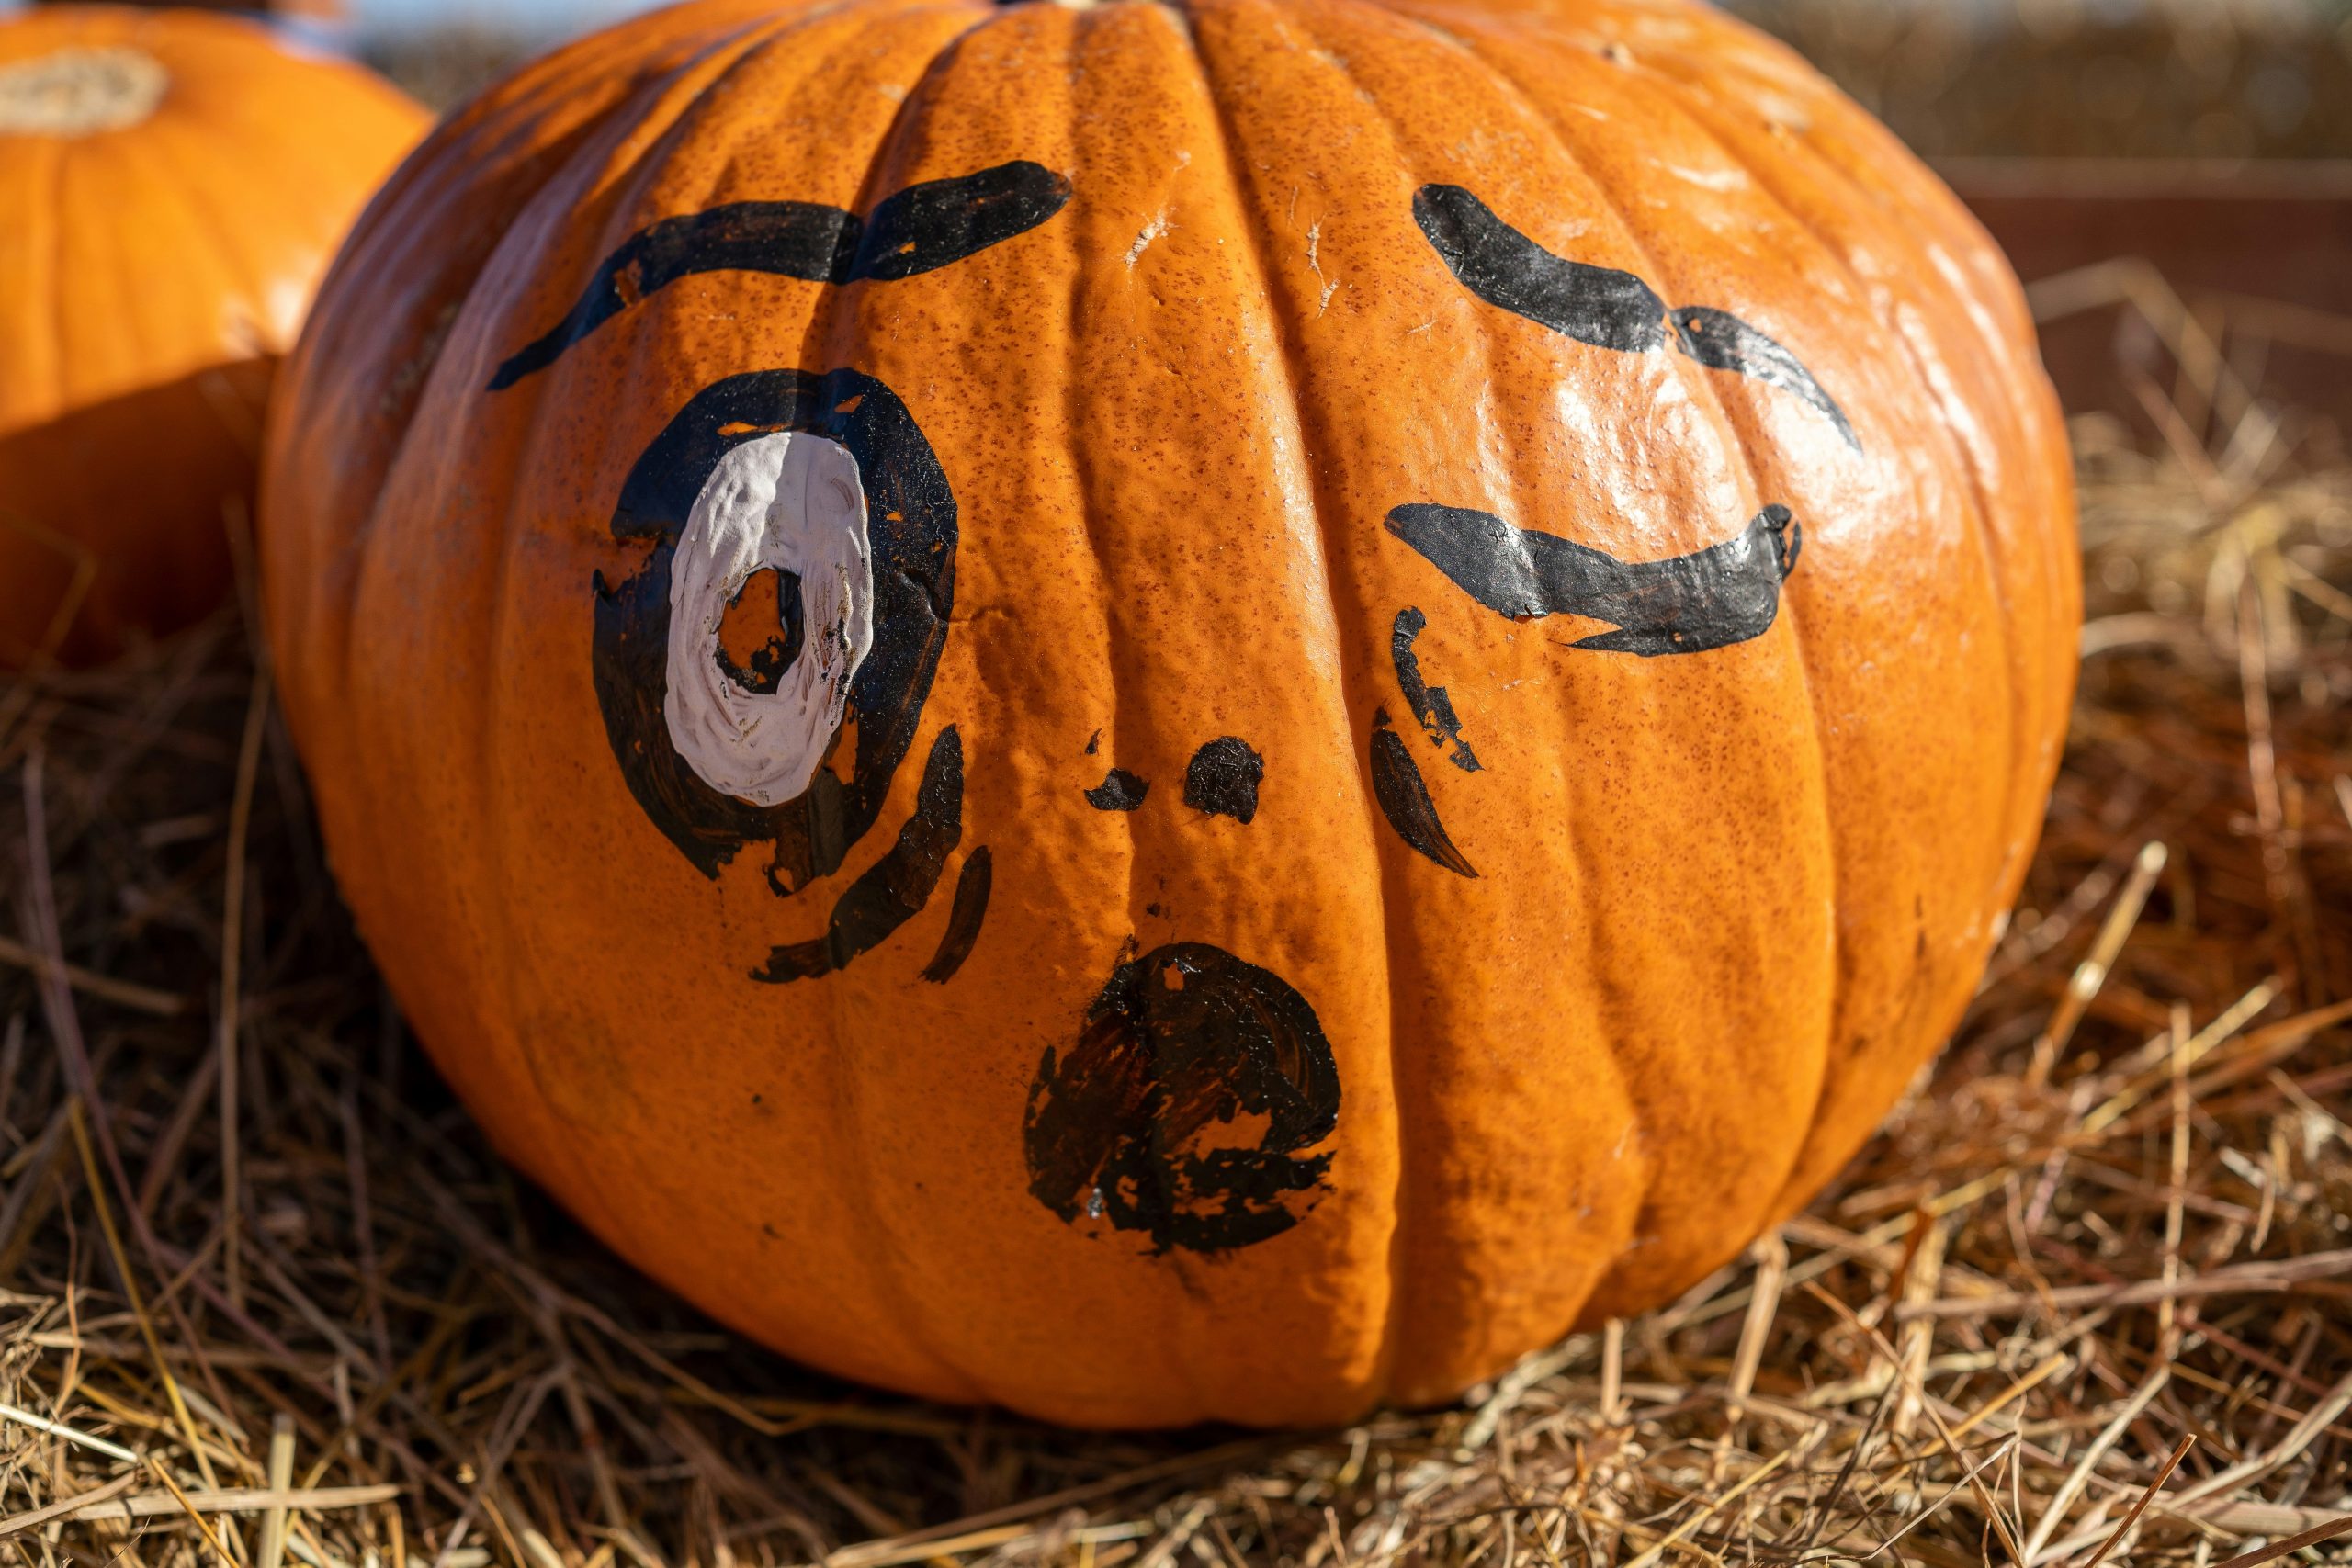
This design succeeds because of the exaggerated features. The high, arched black eyebrows and the large, open mouth create an immediate emotional reaction. Placing it on a bed of light brown hay provides a natural, textured contrast that makes the smooth, bright orange surface of the pumpkin feel even more vibrant and central to the display.
21. X-Eyed Spooky Pumpkin with Mums and Gold Tinsel
This “Spooky-Chic” formula is easy to replicate: 50% orange pumpkin + 20% minimalist black face (X-eyes and zigzag mouth) + 30% seasonal filler (yellow mums and gold tinsel). The gold tinsel adds a surprising touch of glamour that elevates the simple, hand-drawn face, making the whole arrangement feel like a festive party centerpiece.
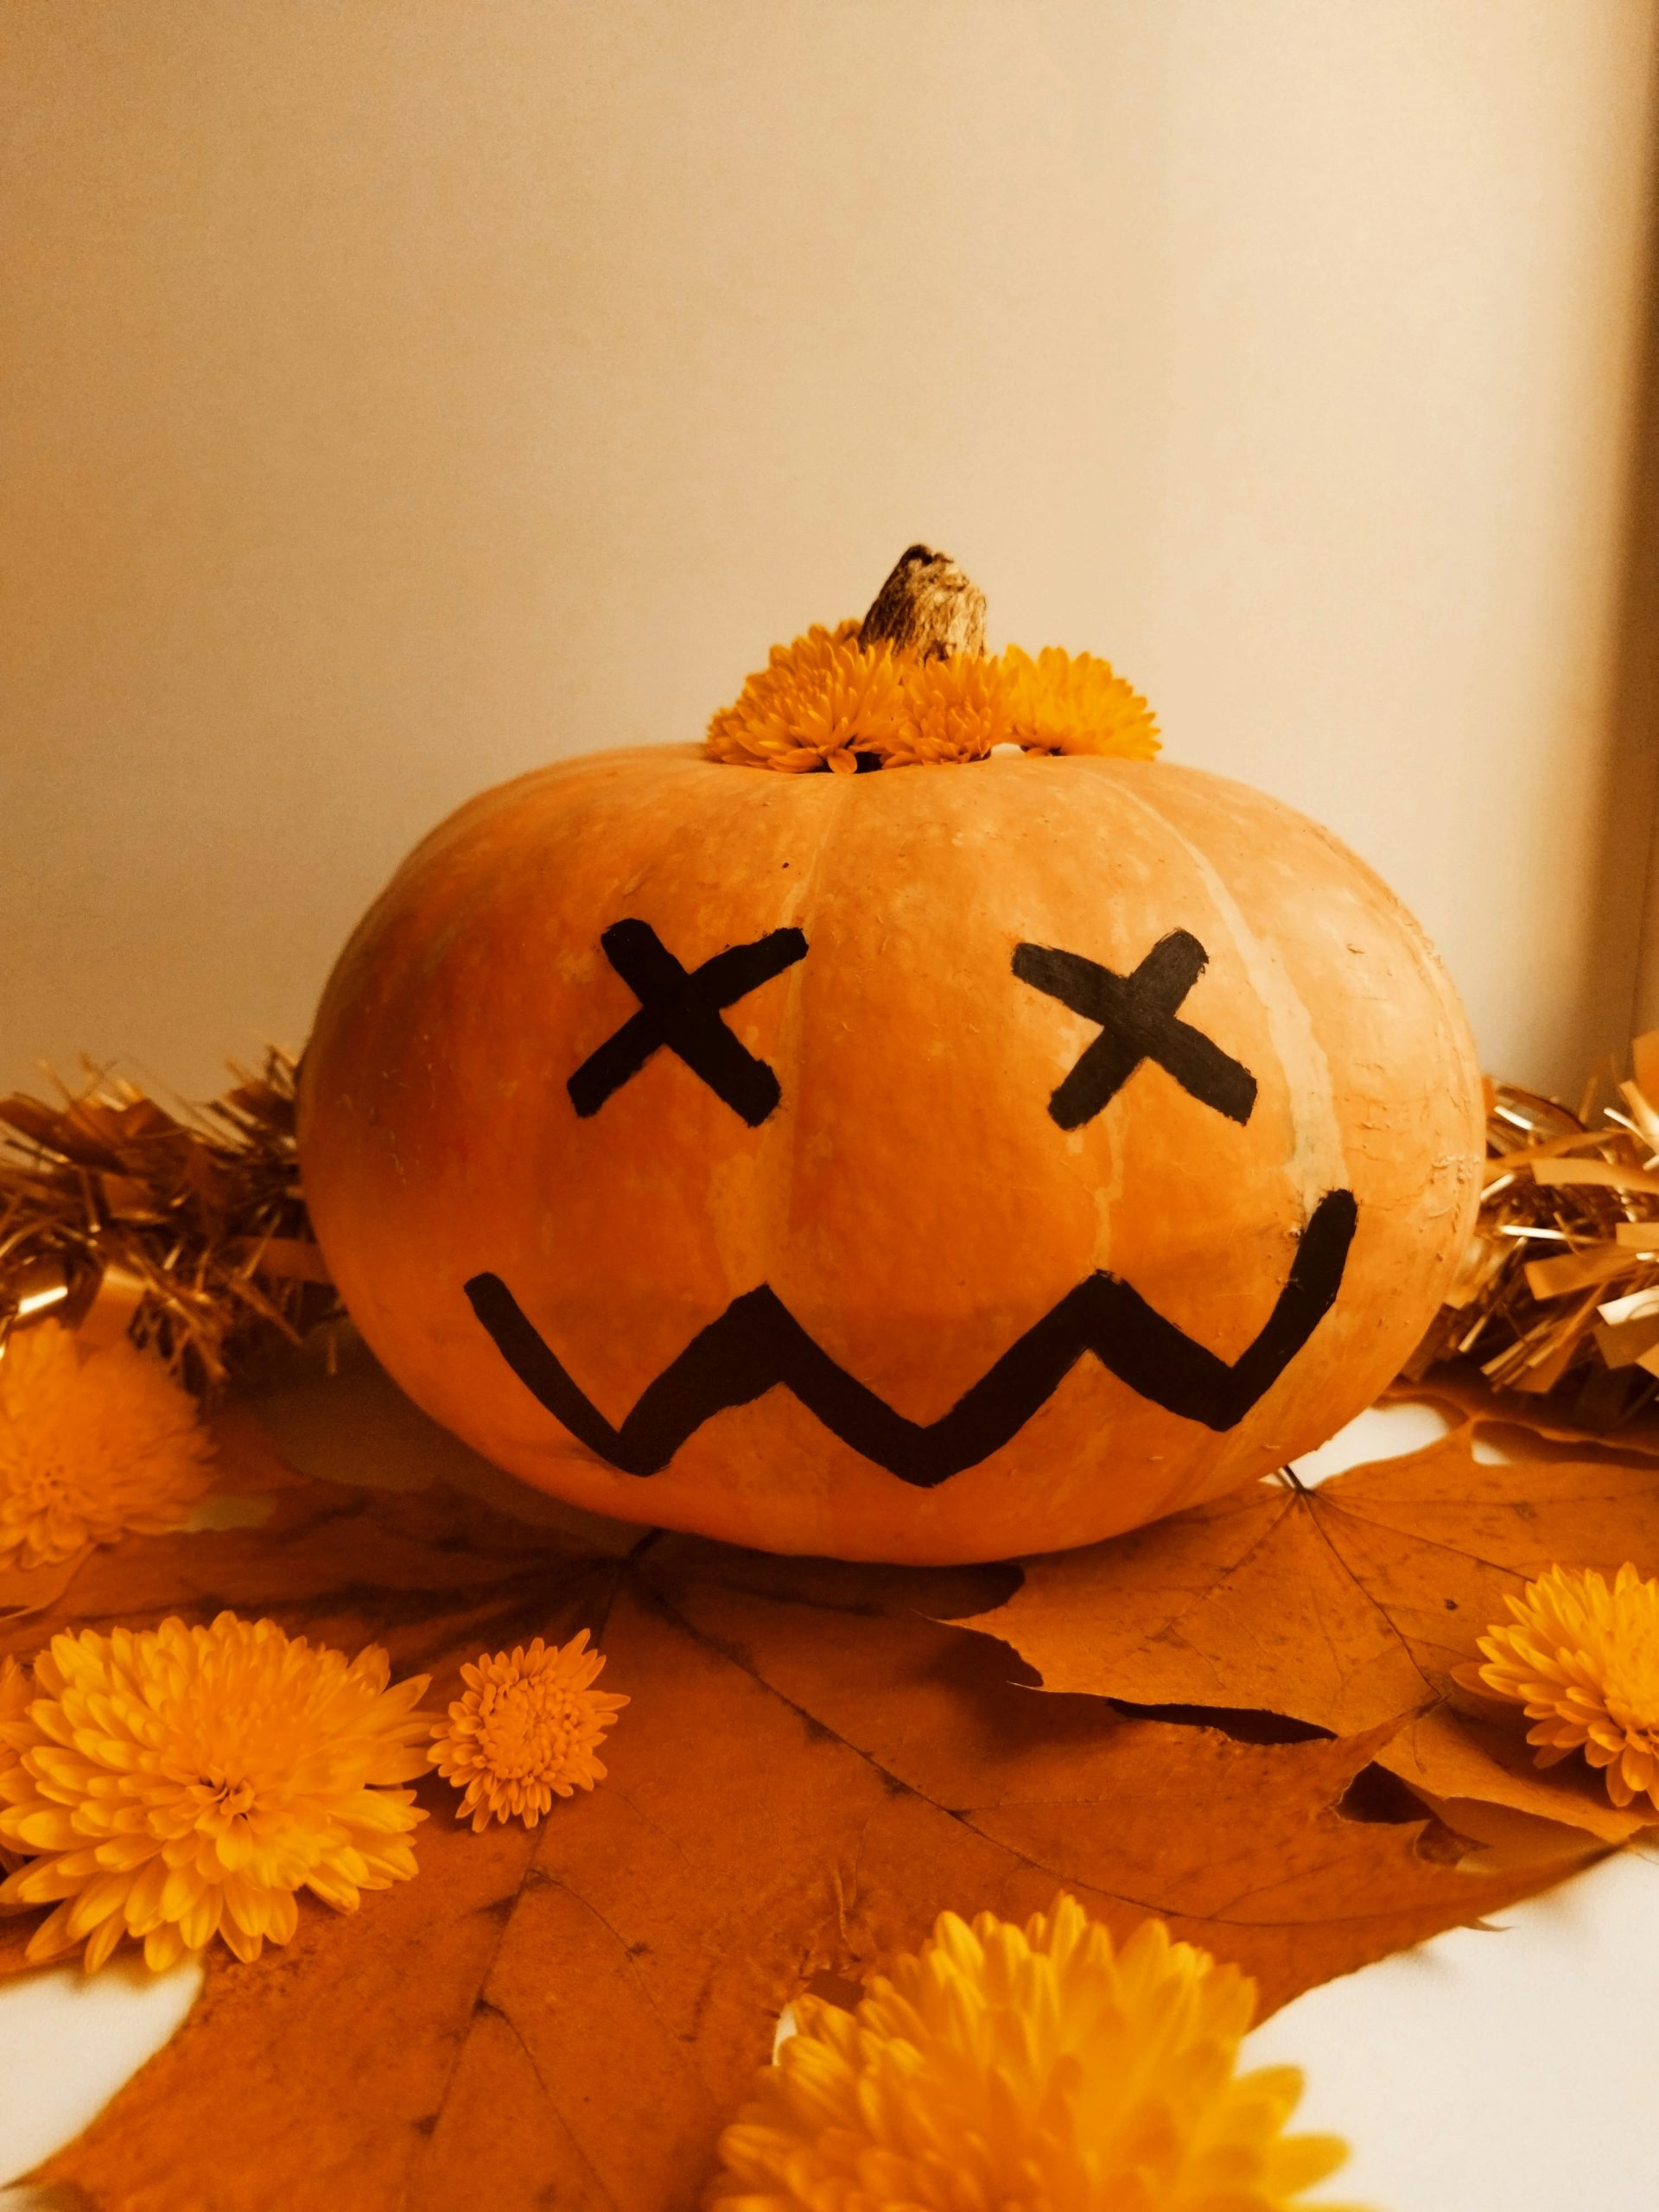
Make sure you have:
- A large, smooth-skinned pumpkin for the best drawing surface.
- Fresh or high-quality faux chrysanthemums in a matching yellow-orange.
- Gold tinsel or garland to add that necessary sparkle.
- A cream-colored cloth or surface to keep the look light and airy.
22. Cozy ‘Sweater Weather’ Script on Vibrant Orange Gourd 2026
For a script like “Sweater Weather,” the secret is in the varying line weights. When you’re drawing your letters, make the downstrokes slightly thicker than the upstrokes. This mimics the look of professional brush calligraphy. Using a white paint pen on the vibrant orange skin provides a crisp, clean contrast that feels cozy and inviting, much like the script in Idea #13.
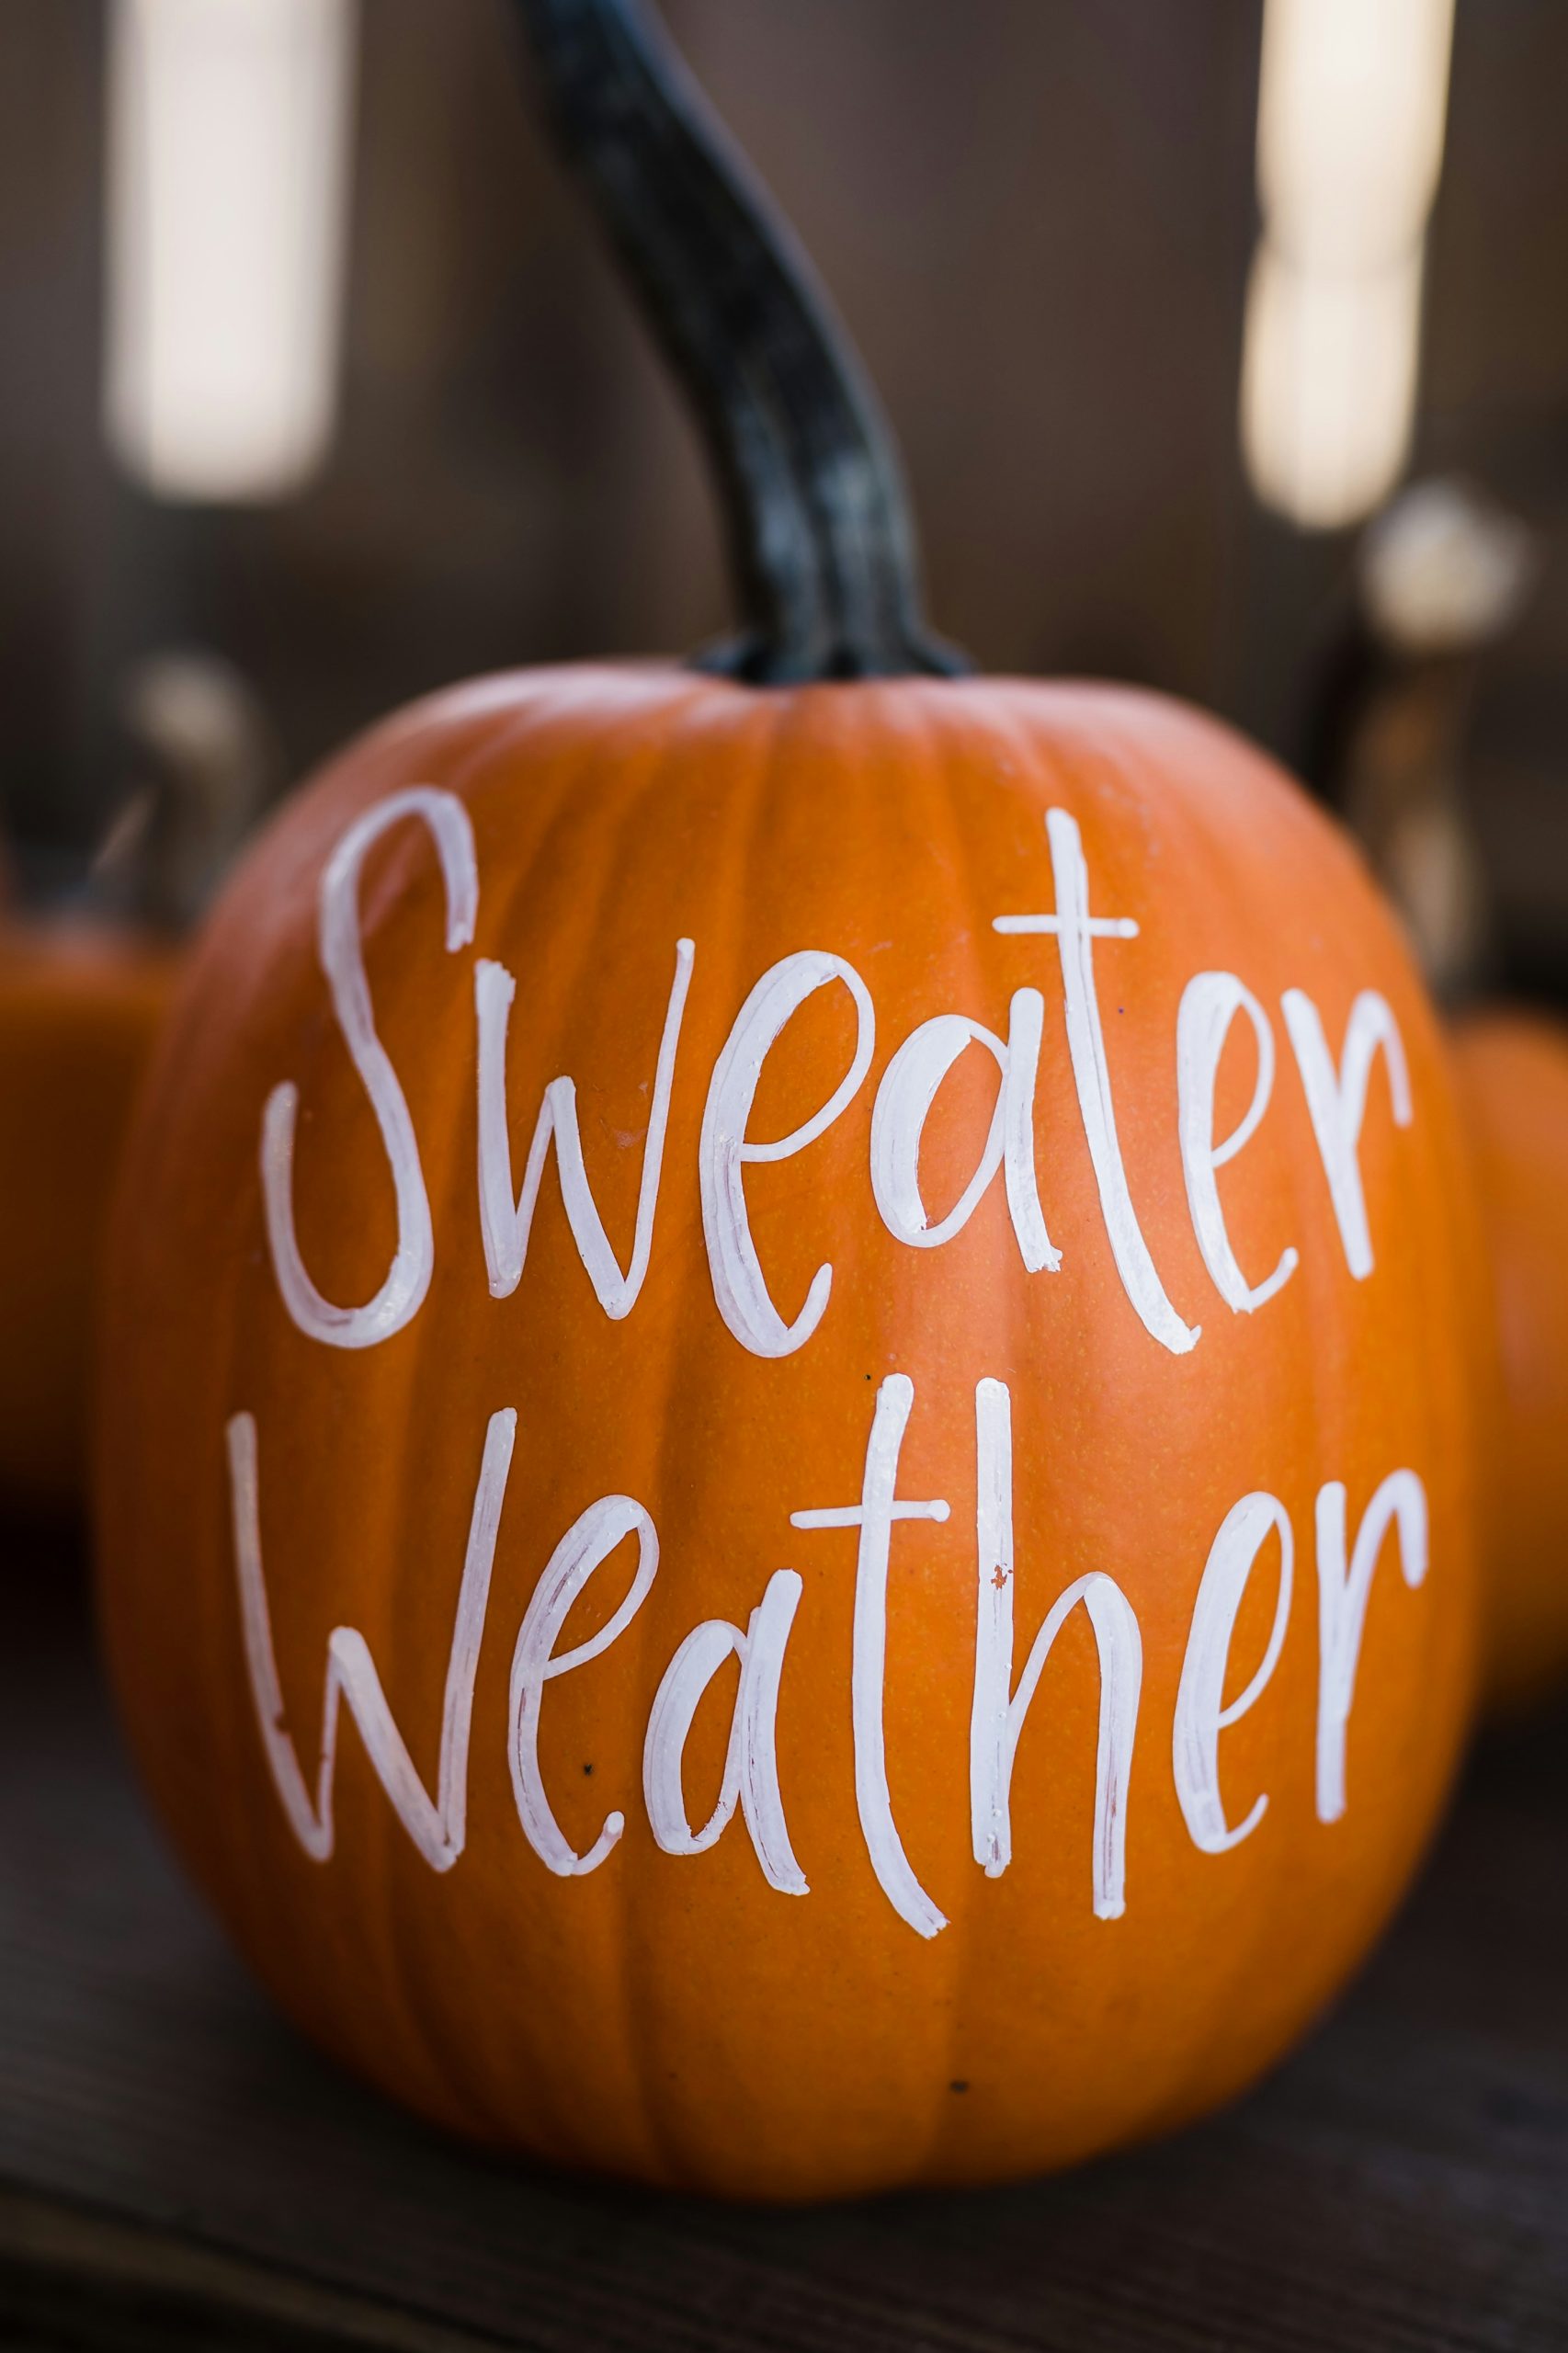
The dark, curved stem is the unsung hero of this look. It provides a natural, dark “crown” that balances the white script at the bottom. The vertical ridges of the pumpkin add a subtle texture that catches the light, making the simple white lettering feel more integrated into the organic shape of the gourd.
23. Quirky Bespectacled Pumpkin Character on a Straw Bale
Creating this quirky character face is all about the layers.
- Paint large white ovals for the eyes and let them dry.
- Add the black glasses frames and pupils over the white.
- Use a pale green for the nose and add tiny light blue “shine” dots.
- Paint a wide black mouth and add sharp white triangles for teeth.
- Place on a straw bale to complete the outdoor look.
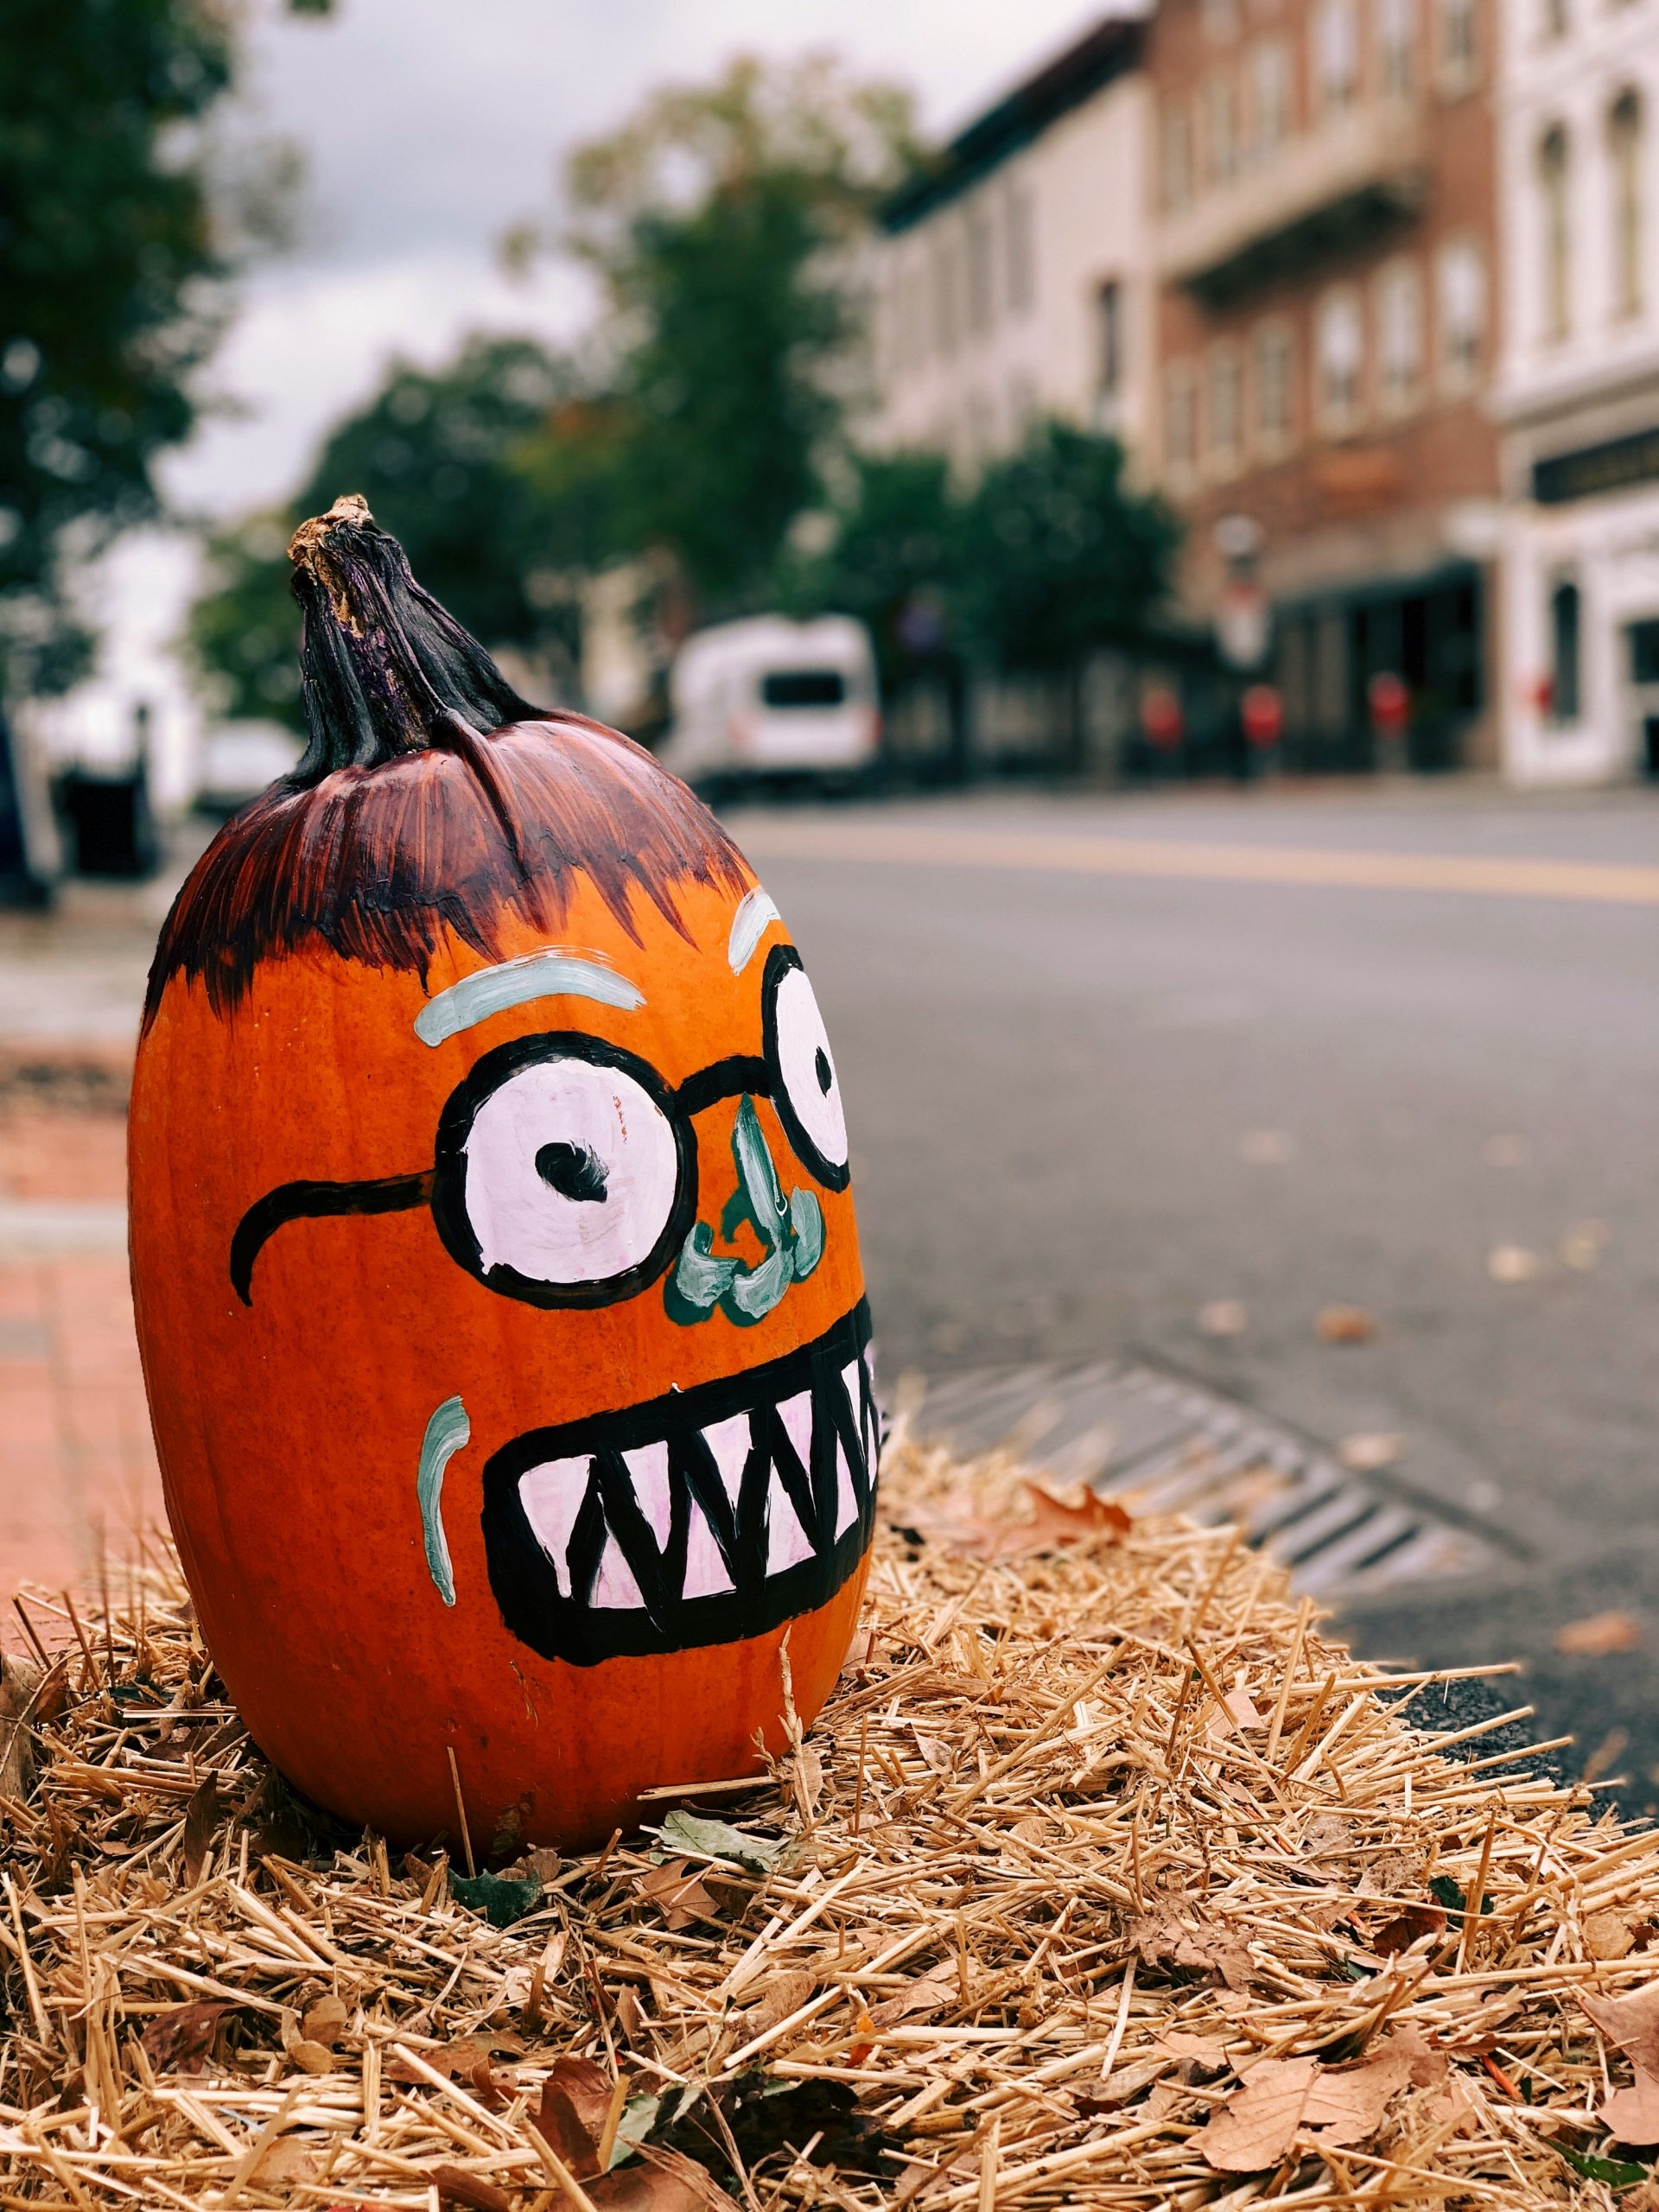
Since this is an outdoor display, keep in mind that rain is your enemy. Acrylic paint is water-resistant once dry, but a heavy downpour can still cause the paint to peel or the pumpkin to soften quickly. If you’re expecting a storm, it’s best to move your quirky friend under a porch or into a garage to preserve the artwork.
24. Smiling Green-Eyed Pumpkin Clustered with Mixed Gourds
This dense, clustered display works because of the variety in color and texture. The large, smiling orange pumpkin acts as the central hub, while the surrounding gourds in reddish-orange, beige, and greenish-gray provide a supporting cast of colors. The mix of smooth and bumpy skins creates a rich, layered look that feels abundant and festive.
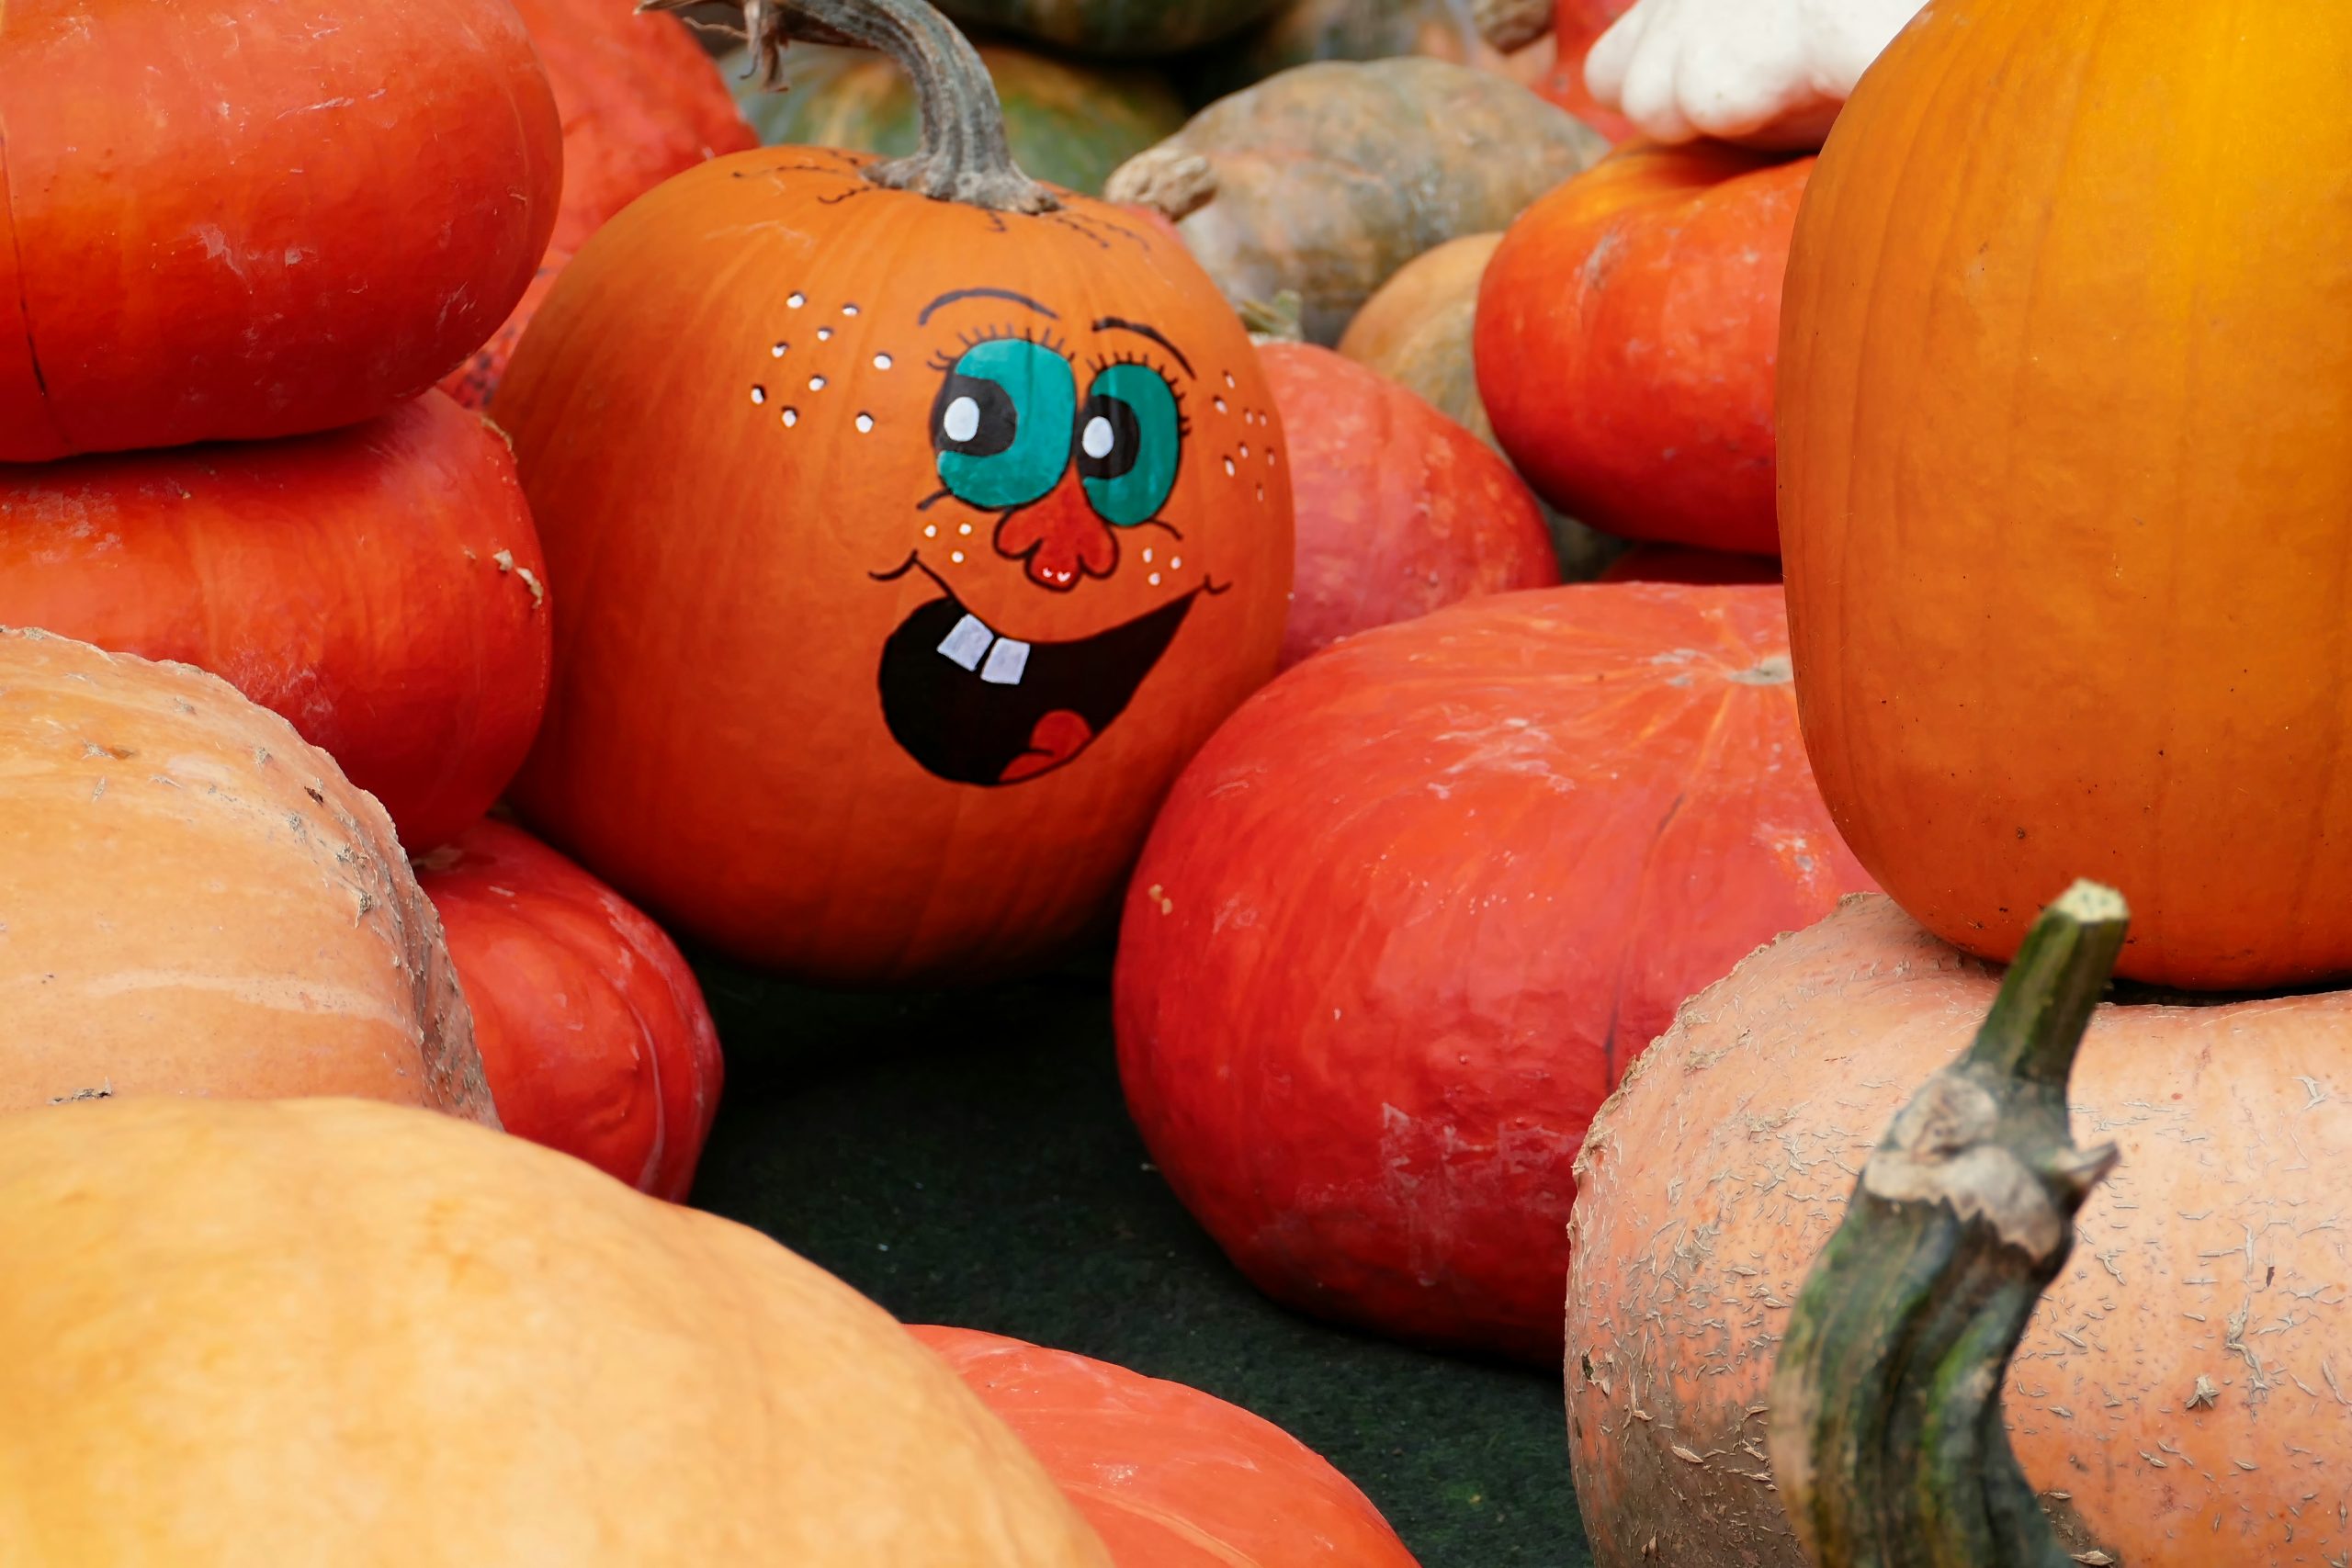
This “cluster” style is perfect for larger spaces like a wide fireplace hearth or a spacious entryway floor. You’ll need at least 3-4 square feet to get this specific “nestled” effect. If you’re working with a smaller space, you might prefer the more streamlined, vertical approach shown in Idea #8.
25. Sugar Skull and Haunted House Silhouette Pumpkins 2026
Creating two distinct “theme” pumpkins is a great way to use a single set of paints.
- Two Large Pumpkins: $15-$20
- Acrylic Paint Set (Black, White, Orange, Red): $12-$15
- Dried Corn and Leaves: $5 or free from the yard!
- Total Estimated Cost: $32 – $40
- Budget alternative: Use a white pumpkin for the sugar skull to skip the white base coat and save on paint.
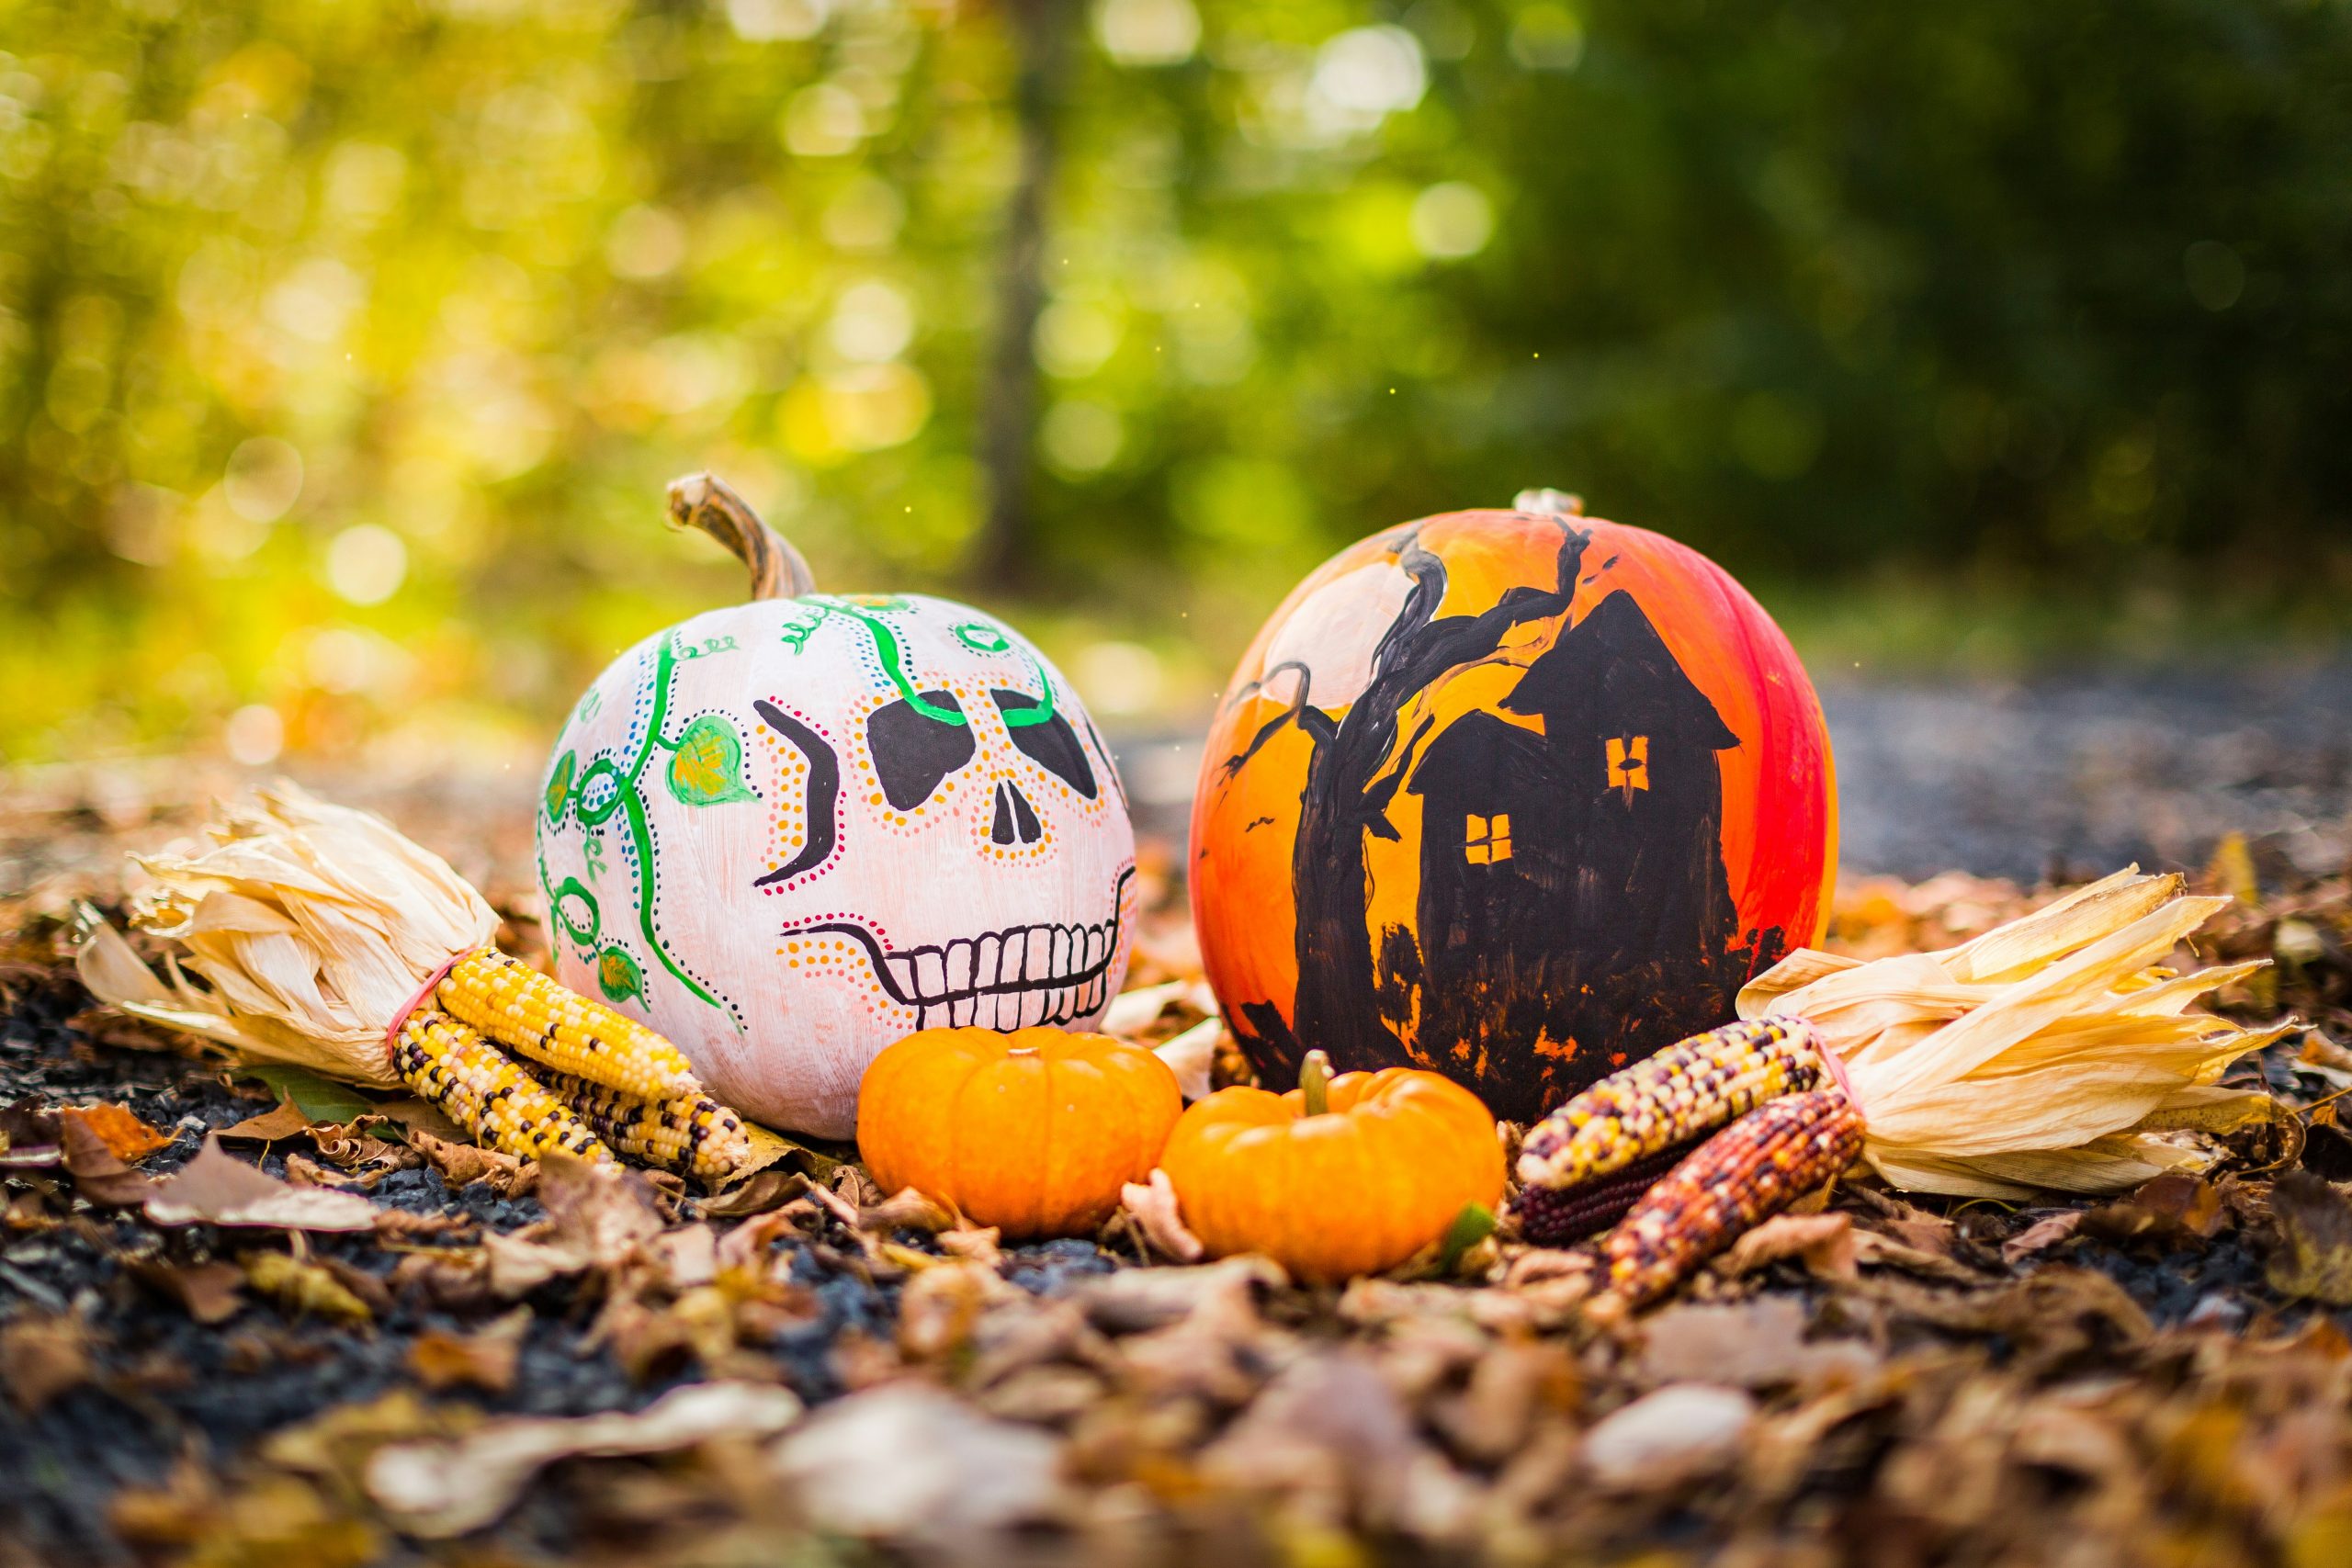
The Dia de los Muertos and Haunted House motifs are perennial favorites that are getting a fresh, graphic update in 2026. By using a white background for the skull and an orange-to-red gradient for the house, you create a sophisticated, “layered” look that feels more like fine art than a simple holiday craft. It’s a great way to honor different cultural traditions and classic spooky themes side-by-side.
26. Carved and Painted Row on an Ornate White Ledge
When displaying pumpkins on an architectural ledge or storefront, consider the viewing angle. Since these are placed high up, the designs need to be bold and large-scale. Use thick black lines for the faces and bright orange or yellow fabric bunting below the ledge to draw the eye upward and tie the whole festive look together.
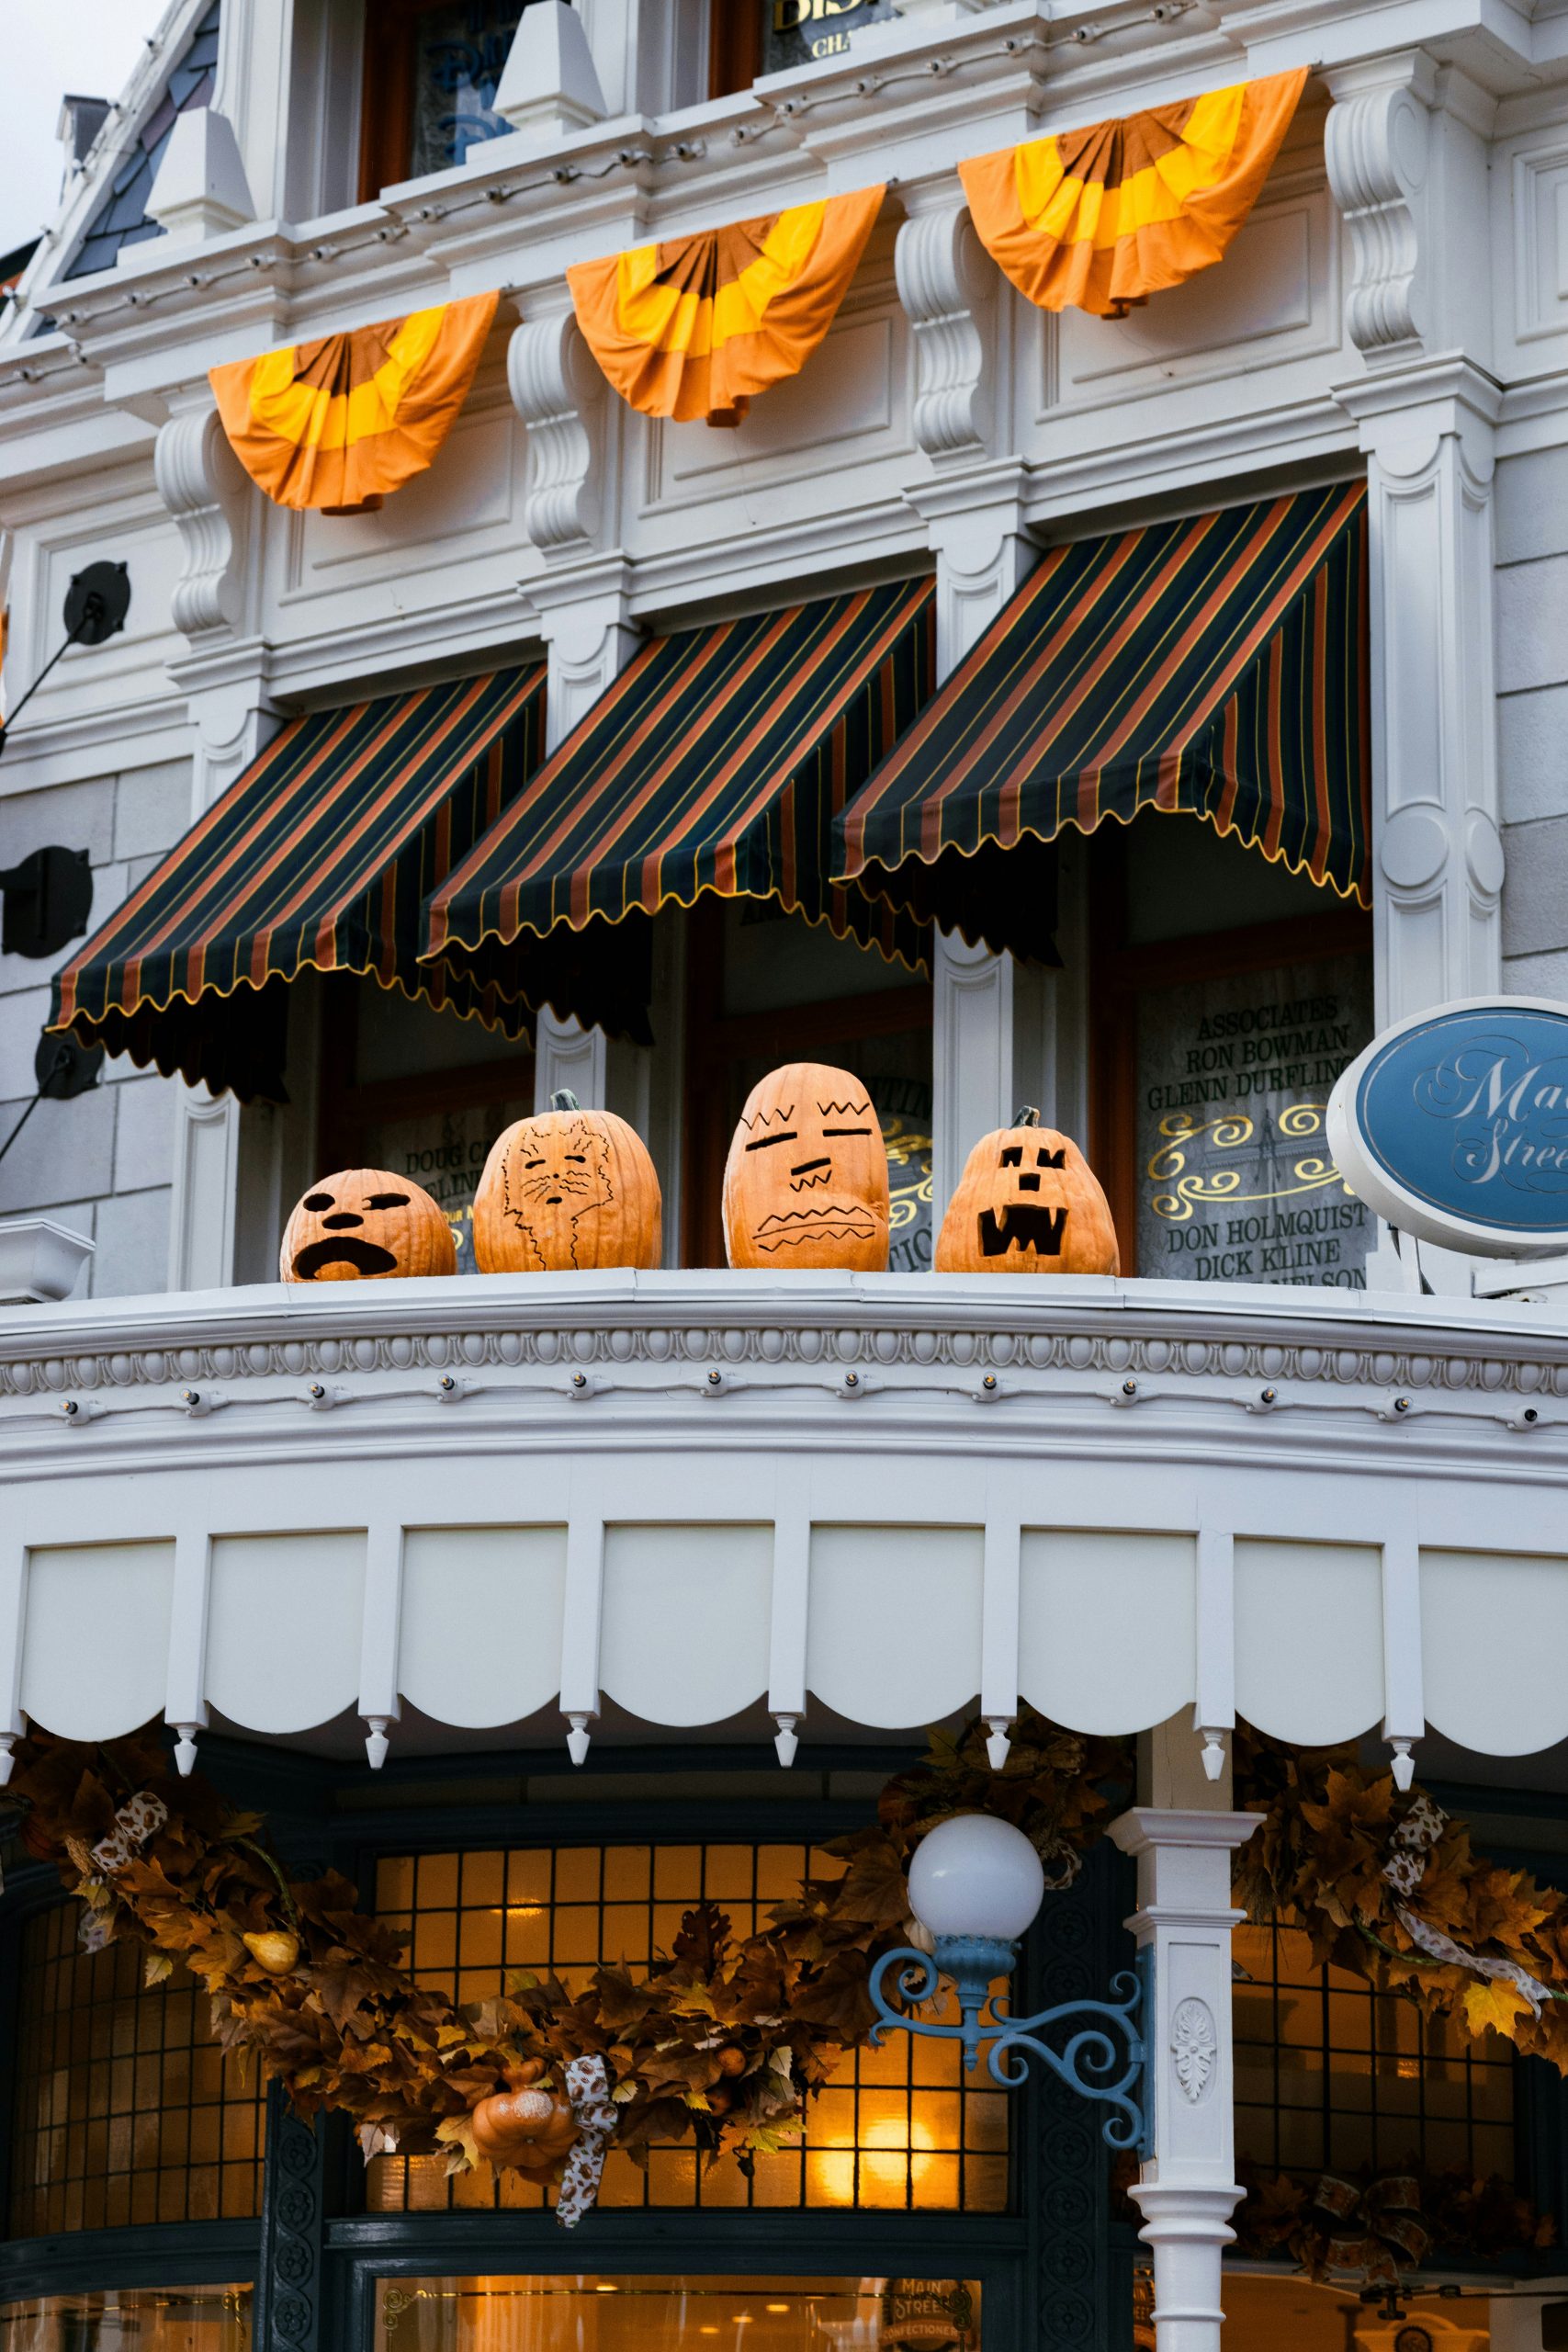
The mix of carved and painted pumpkins is what makes this display special. By alternating between the two techniques, you add depth and variety to the row. The carved pumpkins provide a traditional “glow” (if lit), while the painted ones offer a crisp, graphic detail that stays visible even during the day, making the storefront look festive around the clock.
27. Botanical Orange Pumpkin Centerpiece with Ribbed Gourds
This “Organic Autumn” centerpiece follows a precise formula: 40% vibrant orange base + 30% botanical texture (mums, berries, leaves) + 30% muted, ribbed gourds. The mottled brown and grey-green pumpkins act as a neutral foil to the vivid orange centerpiece, while the red berries and green leaves add a fresh, “just-picked” energy to the distressed wood surface.
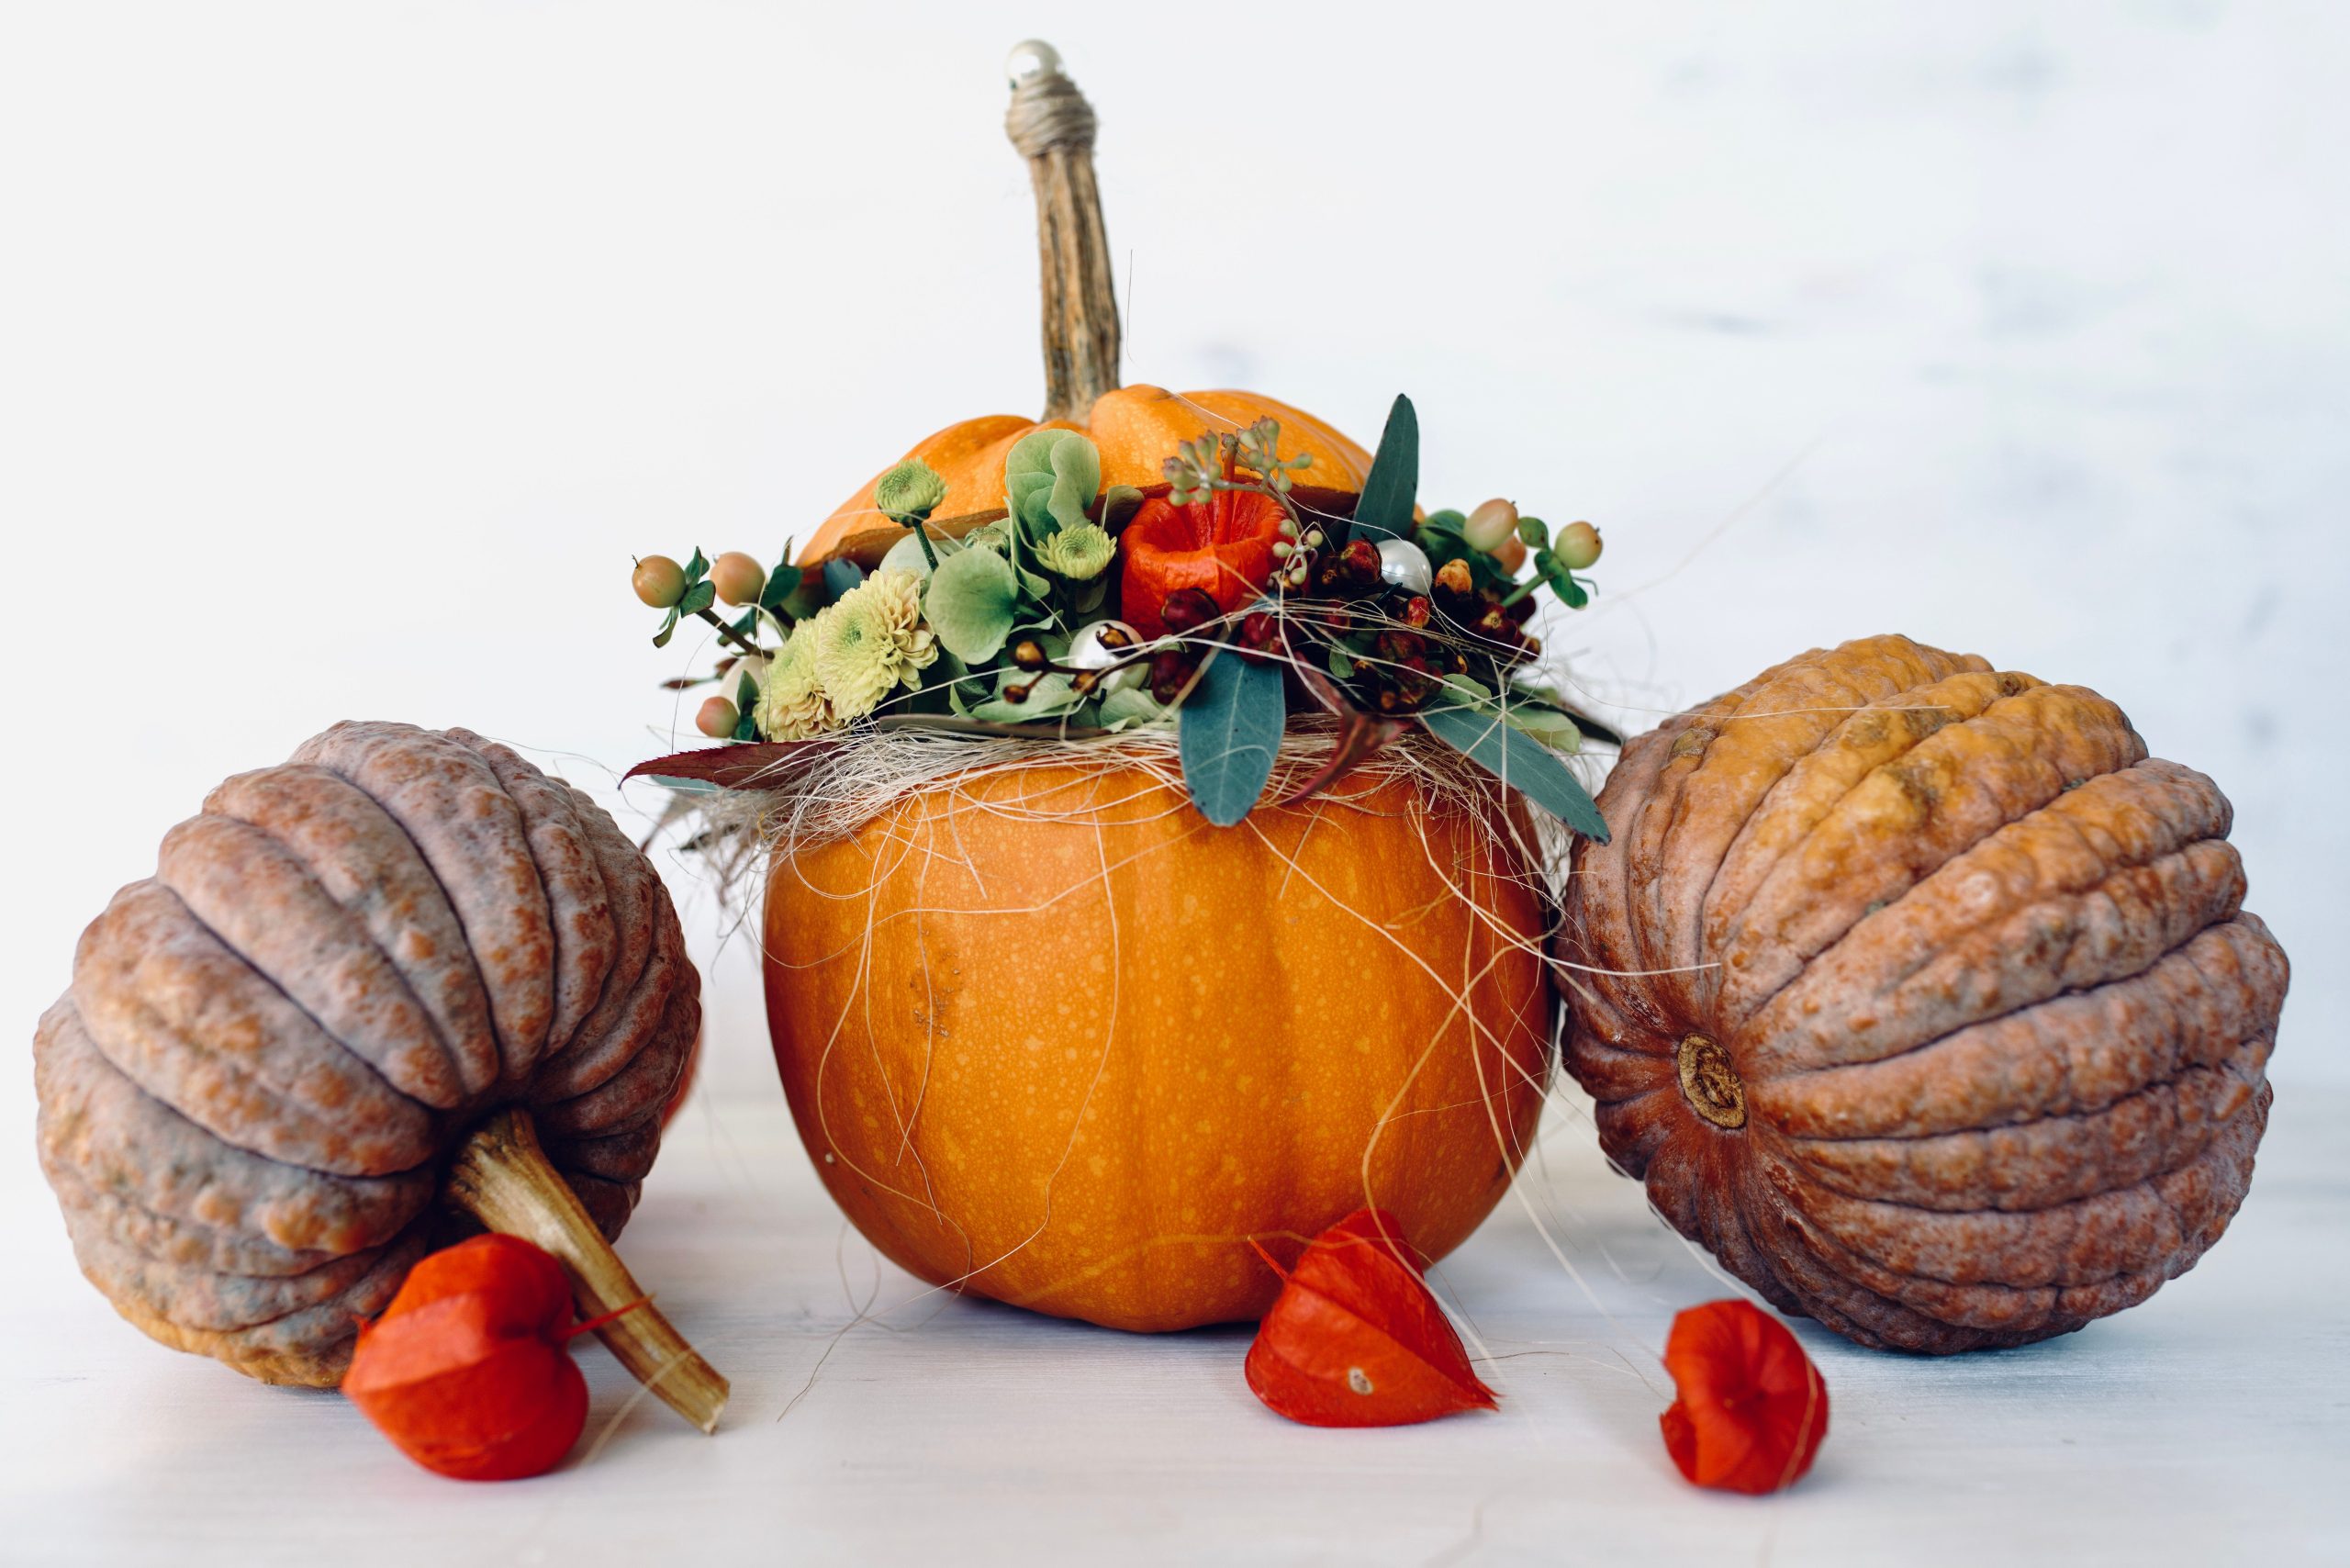
Before you commit to this botanical look, check your materials:
- Do you have a pumpkin with a flat enough top to support the floral arrangement?
- Are your secondary gourds ribbed enough to provide that essential texture contrast?
- Do you have some straw-like fibers or Chinese lantern pods to scatter at the base?
Ready to Paint Your Patch?
Whether you’re leaning into the pastel “pink-o-ween” aesthetic or sticking with the classic moody jack-o’-lantern vibes, these painted designs offer a mess-free way to express your style. There’s no right or wrong way to brush on the personality, so grab your acrylics and let the gourds be your canvas. Don’t forget to pin your favorite looks to your Halloween board so you have the perfect reference when the crafting begins!