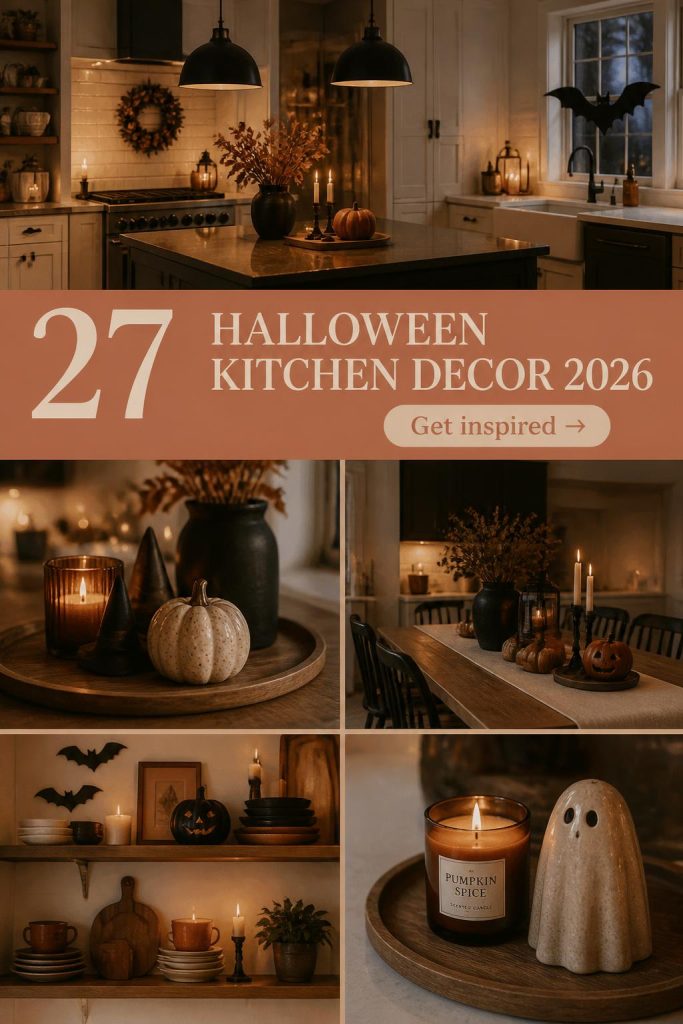
27 Halloween Kitchen Decor Ideas to Elevate Your Chic 2026 Home Aesthetic That You Must Try This Season

You know that feeling when you scroll through Pinterest and finally find the Halloween kitchen idea that feels just right? We’ve chased that feeling for you. After sifting through hundreds of options from Etsy to Target, we’ve curated 27 of the most inspiring looks for 2026. Inside, you’ll find everything from sophisticated gothic tablescapes to whimsical, minimalist accents that won’t take over your entire counter. This year, it’s all about creating an atmosphere that feels intentional and stylish, not just throwing up some cheesy decorations. And stay until the end—we break down the most common mistakes that can ruin these looks. 📌 Save this to Pinterest for later—you’ll want to revisit these ideas.
1. Subtle Pumpkin Accents in a Scandi-Style Kitchen
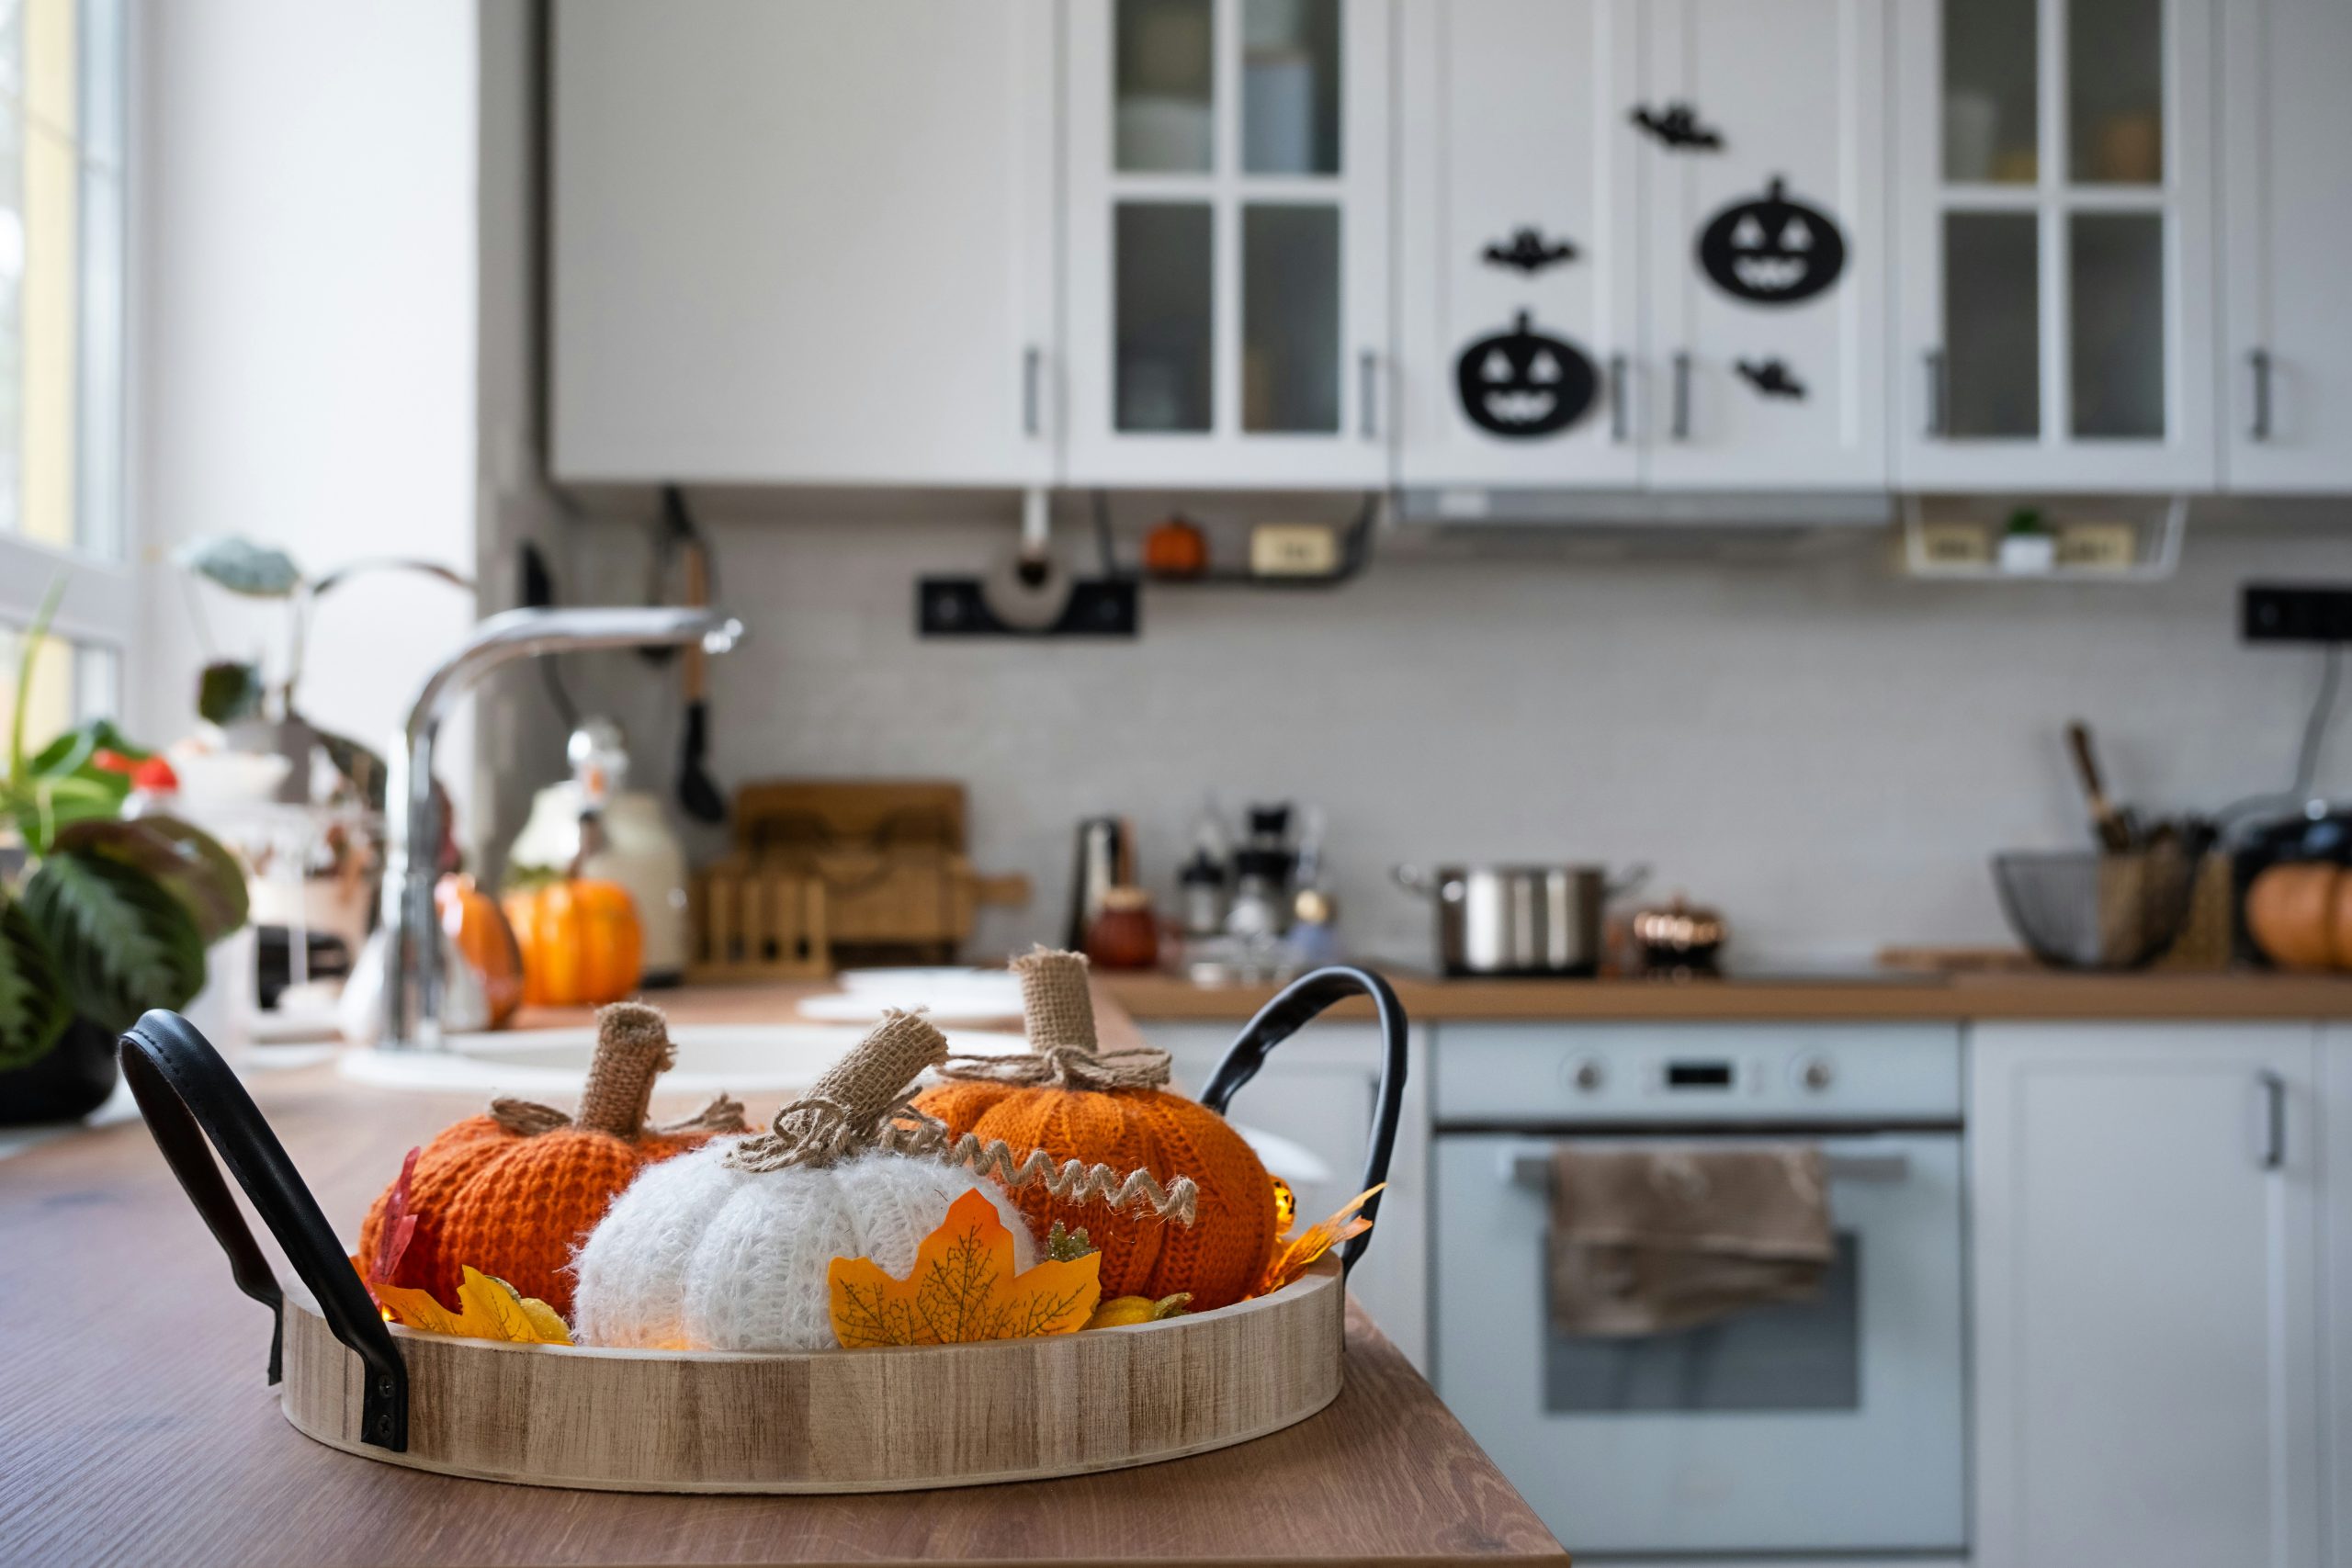
This look leans into the Scandinavian principle of ‘less is more.’ The success here isn’t about the quantity of decor, but its placement. By keeping the pumpkins contained to one area—the countertop—the rest of the clean, white kitchen remains functional and uncluttered. The warmth of the orange pumpkins provides a necessary pop of seasonal color against the neutral background, creating a focal point without overwhelming the serene aesthetic of the space. It’s a gentle nod to the holiday, not a full-blown theme park.
|
📋 Copy HEX 🔗 Share |
A word of caution for those with busy kitchens: grouping decor in a primary prep space can become a hassle. If this is your main chopping and mixing zone, you’ll be constantly moving these pumpkins around. Consider if this setup works for your daily routine or if it’s better suited for a less-used corner of your counter. Also, be mindful of using real pumpkins directly on porous countertops like marble or light-colored quartz, as they can sometimes stain if they start to decompose.
2. Industrial Gothic Skeleton Hanging from a Pulley Light
The single element holding this entire dramatic look together is the use of vertical space. Without the skeleton hanging from the industrial pulley fixture, you just have a plain ceiling. This choice transforms a typically ignored area into the main event. It draws the eye upward, creating a sense of unease and surprise that is perfect for Halloween. The draped fabric and webbing add texture and movement, but the core impact comes from that unexpected, gravity-defying centerpiece. It’s a bold move that pays off in high drama.

|
📋 Copy HEX 🔗 Share |
To get this look right, height and layering are key. Ensure the bottom of the decor hangs at least 7 feet above the floor to avoid it becoming a hazard. Use a combination of different webbing types. Start with a base layer of stretchy ‘cobweb’ material, pulling it thin to look realistic. Then, add thicker, gauze-like fabric for draping. The key is to make it look like it has accumulated over time. Don’t be afraid to let it hang unevenly and cling to different parts of the fixture and the skeleton.
3. Cozy Autumn Vibe with Decorative Pumpkins and Mugs
The formula for this cozy scene is simple and effective. Think 60% warm neutrals (the cabinetry and countertops), 30% classic autumn orange (the pumpkins), and 10% dark accents (the mugs or hardware). This balance ensures the seasonal decor feels integrated, not just placed on top. You could swap the orange for a deep burgundy or forest green and still achieve the same cozy effect, as long as you maintain that 60/30/10 ratio against a neutral backdrop. It’s a timeless recipe for seasonal charm.
|
📋 Copy HEX 🔗 Share |
You don’t need a high-end kitchen to get this look. The core elements are pumpkins and mugs, which are easy to find on a budget. Head to Target or Walmart for a bag of assorted mini pumpkins for under $10. For the mugs, check out HomeGoods or even thrift stores for unique, dark-toned ceramic pieces for $2-$5 each. The entire vibe can be recreated on your own countertop for less than $20. It’s about the thoughtful curation of color and texture, not the price tag of the items.
4. Organized Harvest-Themed Decor Inside a Kitchen Drawer
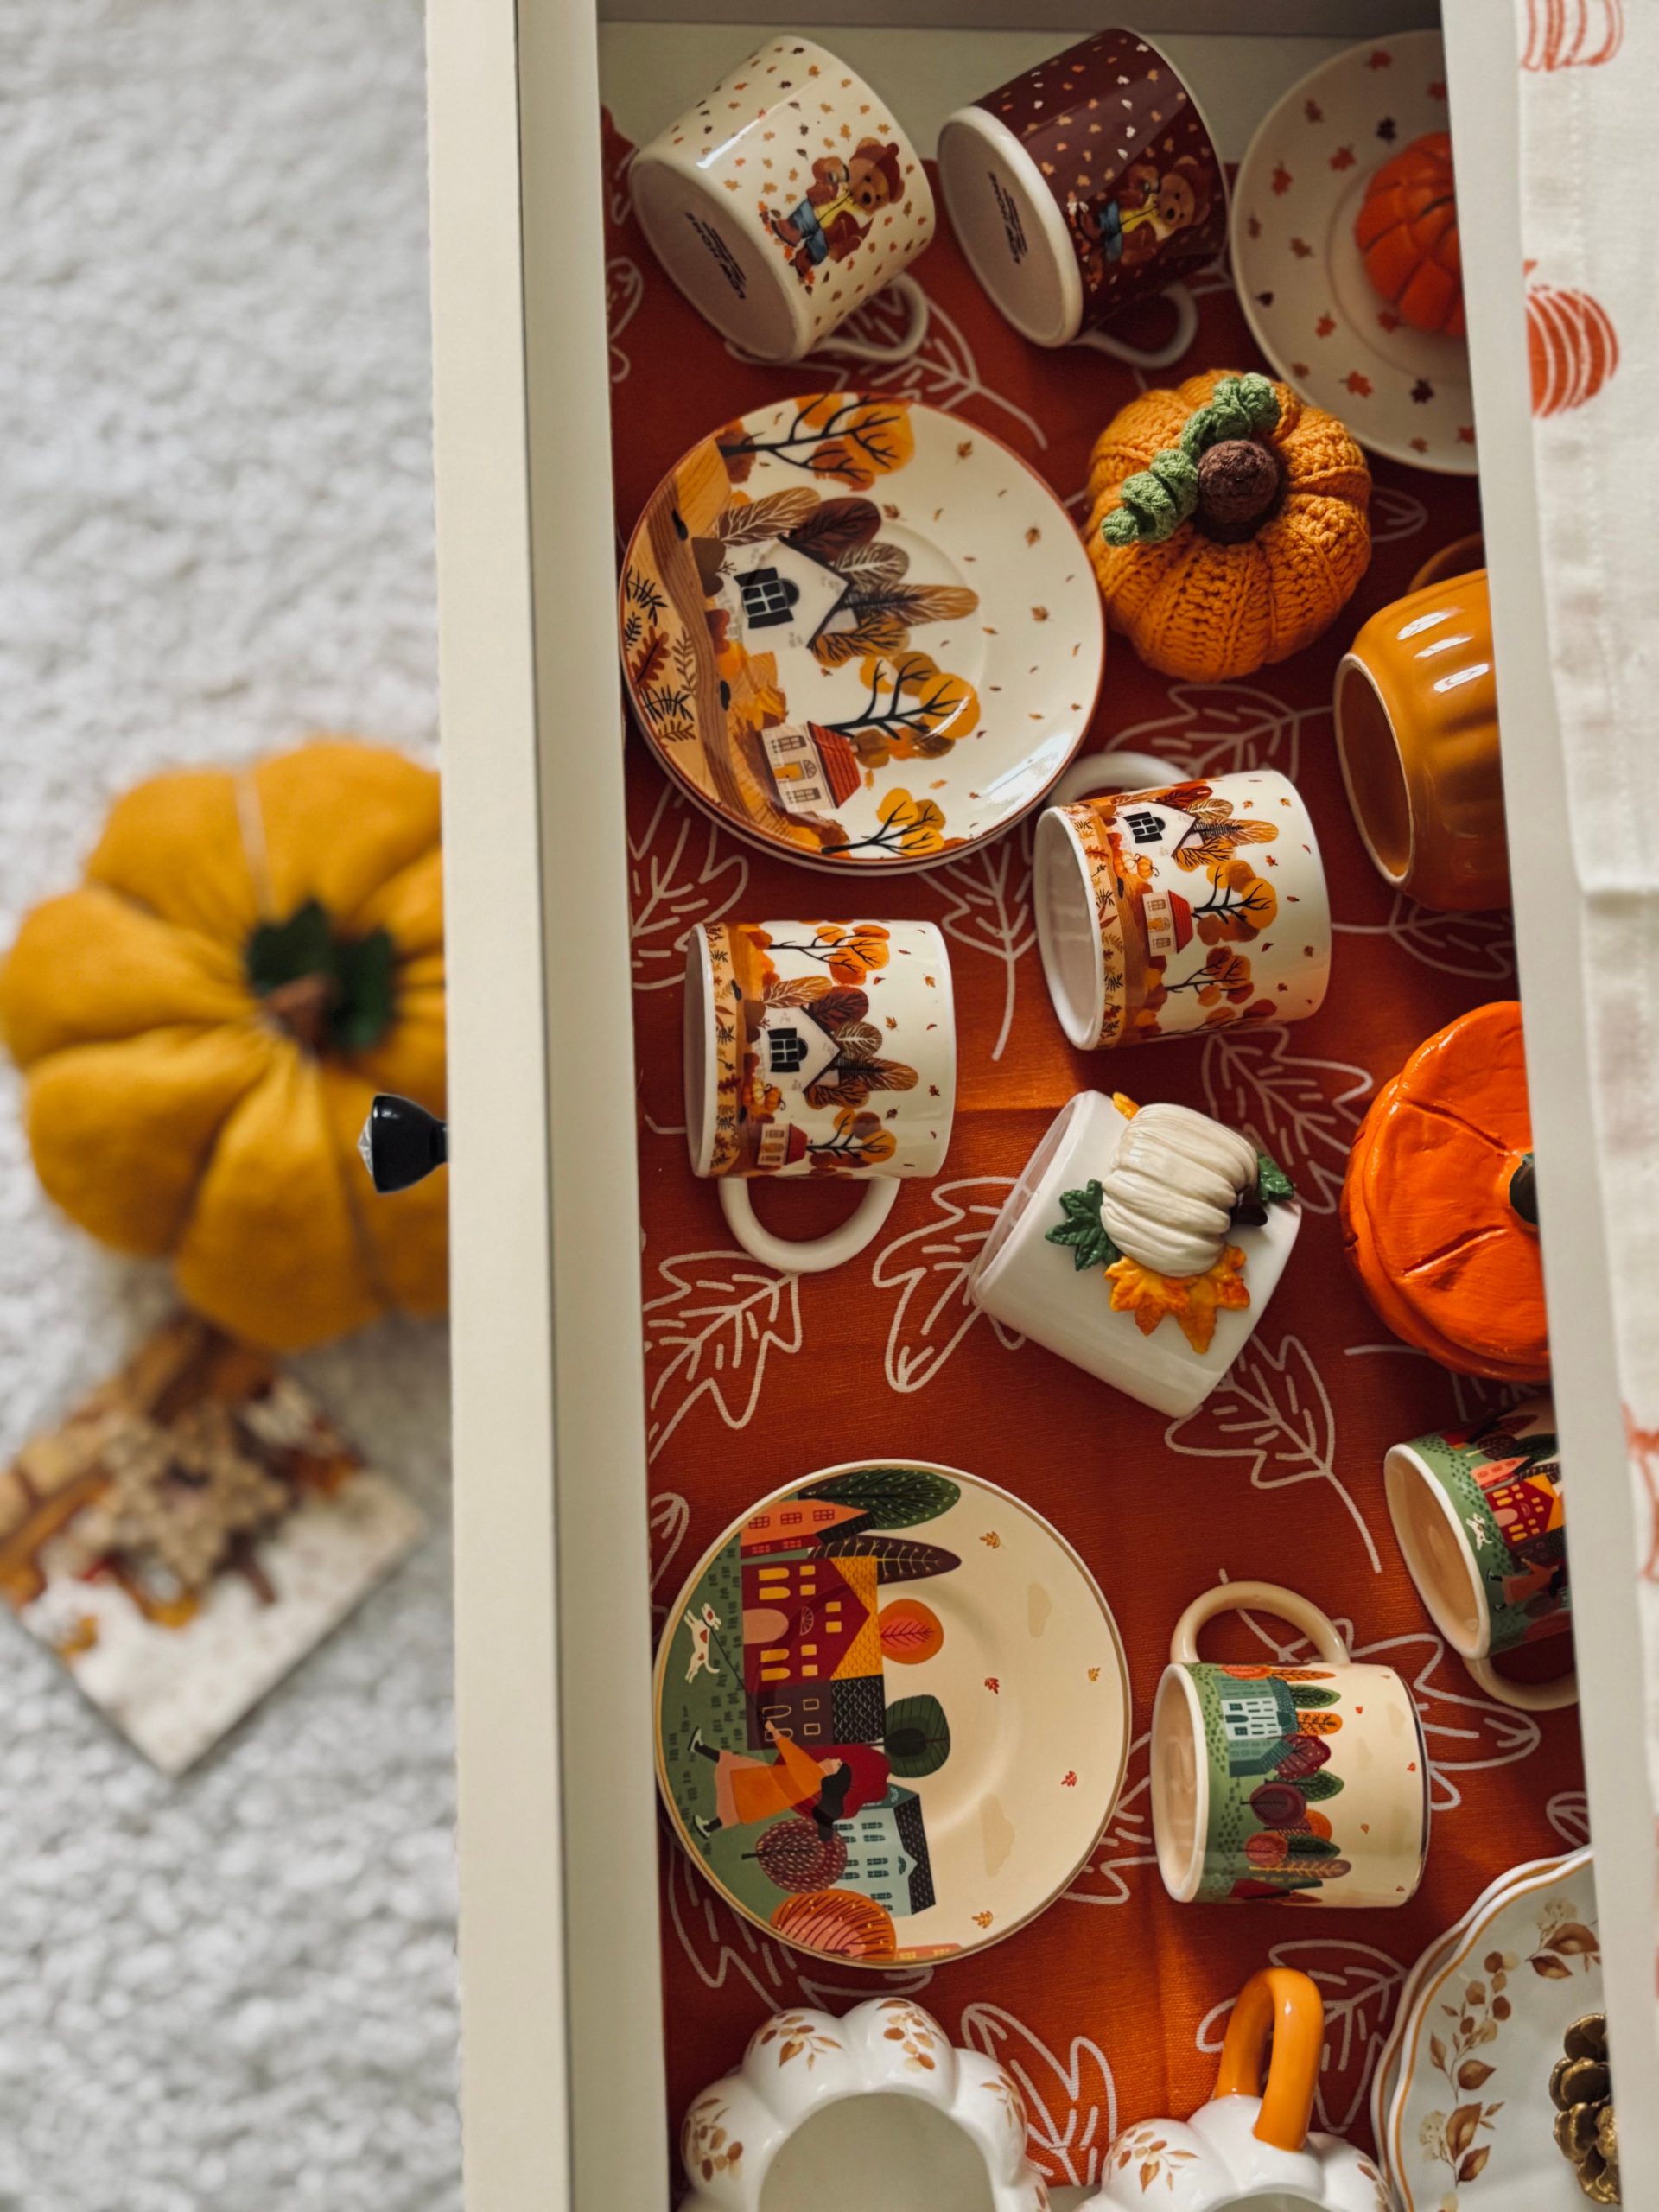
This ‘decor drawer’ is a delightful surprise. Here’s how to create your own in about 30 minutes for under $15.
- First, empty and wipe down your chosen drawer.
- Measure the bottom and cut a piece of festive fabric or even high-quality wrapping paper to size. Use double-sided tape to secure it.
- Gather your seasonal mugs and small dishes. Arrange the largest items first, nesting smaller pieces in the gaps.
- Fill the remaining spaces with textural elements. The hand-knitted miniature pumpkins here are perfect, but you could also use small gourds, cinnamon sticks, or fabric acorns.
- Keep it accessible so you can actually use the mugs!
|
📋 Copy HEX 🔗 Share |
This idea works because it creates a private, curated moment of joy. It’s not for guests or for show; it’s a personal touch that makes a mundane act—opening a drawer—feel special and festive. The contrast between the functional exterior of the cabinet and the whimsical, organized world inside is what creates the magic. It’s a perfect example of how to incorporate seasonal decor in a way that feels personal and unobtrusive, especially in a small kitchen where counter space is at a premium.
5. Styling a Cabinet with Vintage Halloween Finds
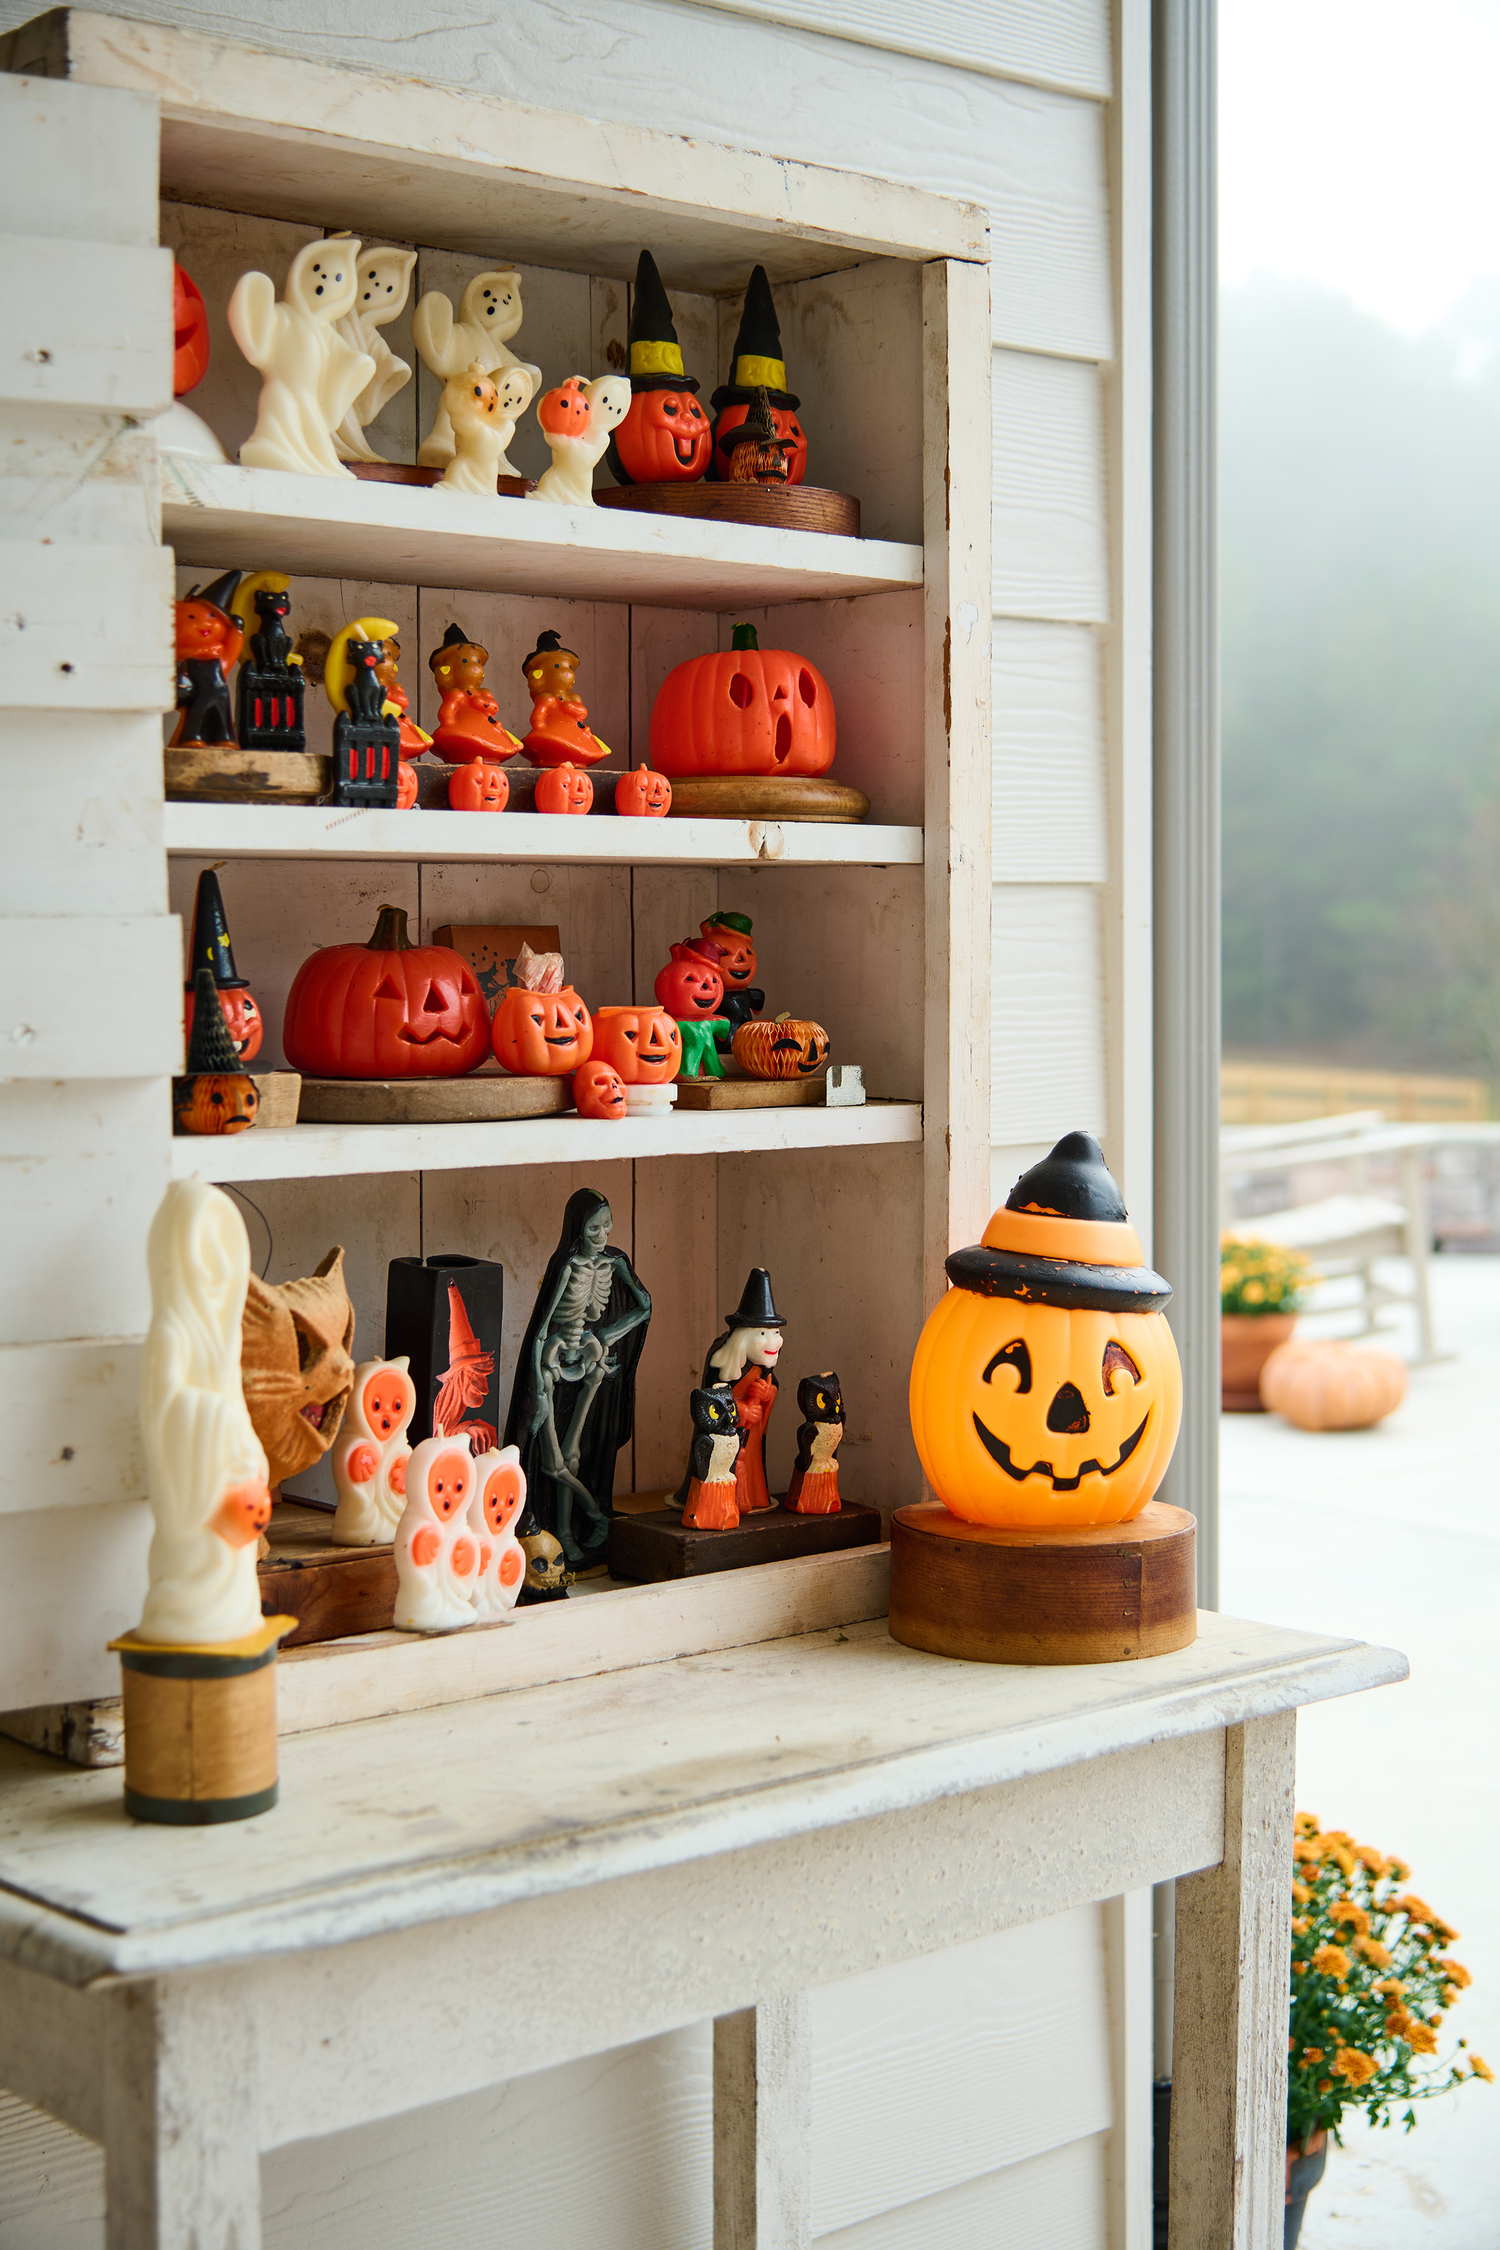
When styling a cabinet with a vintage collection, the key is to create visual rhythm. Avoid lining items up like soldiers. Instead, use the ‘triangle’ method for your arrangements. On each shelf, pick three items of varying heights and create a loose triangular shape with them. Your tallest item is the peak, with two shorter items flanking it. Overlap pieces slightly to create depth. For example, place a shorter, wider jack-o’-lantern slightly in front of a taller, thinner tin. This technique guides the eye through the collection instead of letting it scan aimlessly.
|
📋 Copy HEX 🔗 Share |
Let’s be honest: curating a genuine vintage Halloween collection like this takes time and money. These aren’t items you can just pick up at a big-box store. Building a collection involves scouring flea markets, eBay, and specialty antique shops year-round. It can be a significant investment, and the pieces are often fragile. If you love the look but not the hunt, many brands now offer excellent vintage-inspired reproductions that give a similar nostalgic feel without the hefty price tag or the worry of breaking a genuine antique.
6. Playful Character-Themed Stacked Pumpkin Topiary
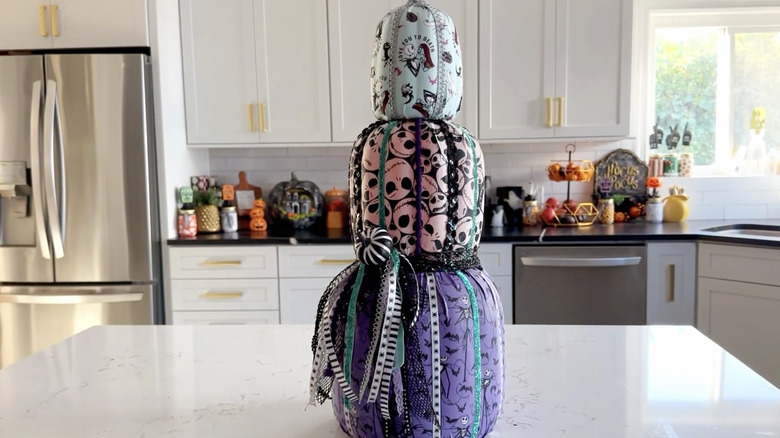
The unexpected color palette is what makes this design feel fresh and modern. By ditching the traditional orange and black for lavender, pink, and teal, the topiary immediately stands out. It’s a whimsical, almost cheeky take on Halloween that feels more playful than spooky. Removing the character-printed fabric and pastel colors would leave you with a standard pumpkin stack, but it’s the bold, unconventional styling and the black-and-white striped ribbon that give it a unique, graphic punch. It proves Halloween decor doesn’t have to be dark to be festive.
|
📋 Copy HEX 🔗 Share |
A statement piece like this needs room to breathe. This topiary works best on a large kitchen island of at least 30 square feet (e.g., 5′ x 6′). Placing it in the center allows it to be the undisputed focal point. In a smaller kitchen, this would feel overwhelming. For spaces with limited counter area, consider a scaled-down version with just two smaller pumpkins, or try the minimalist approach seen in Idea #9, which is better suited for compact surfaces.
7. A Rustic Counter Vignette with a Hand-Painted Pumpkin Board
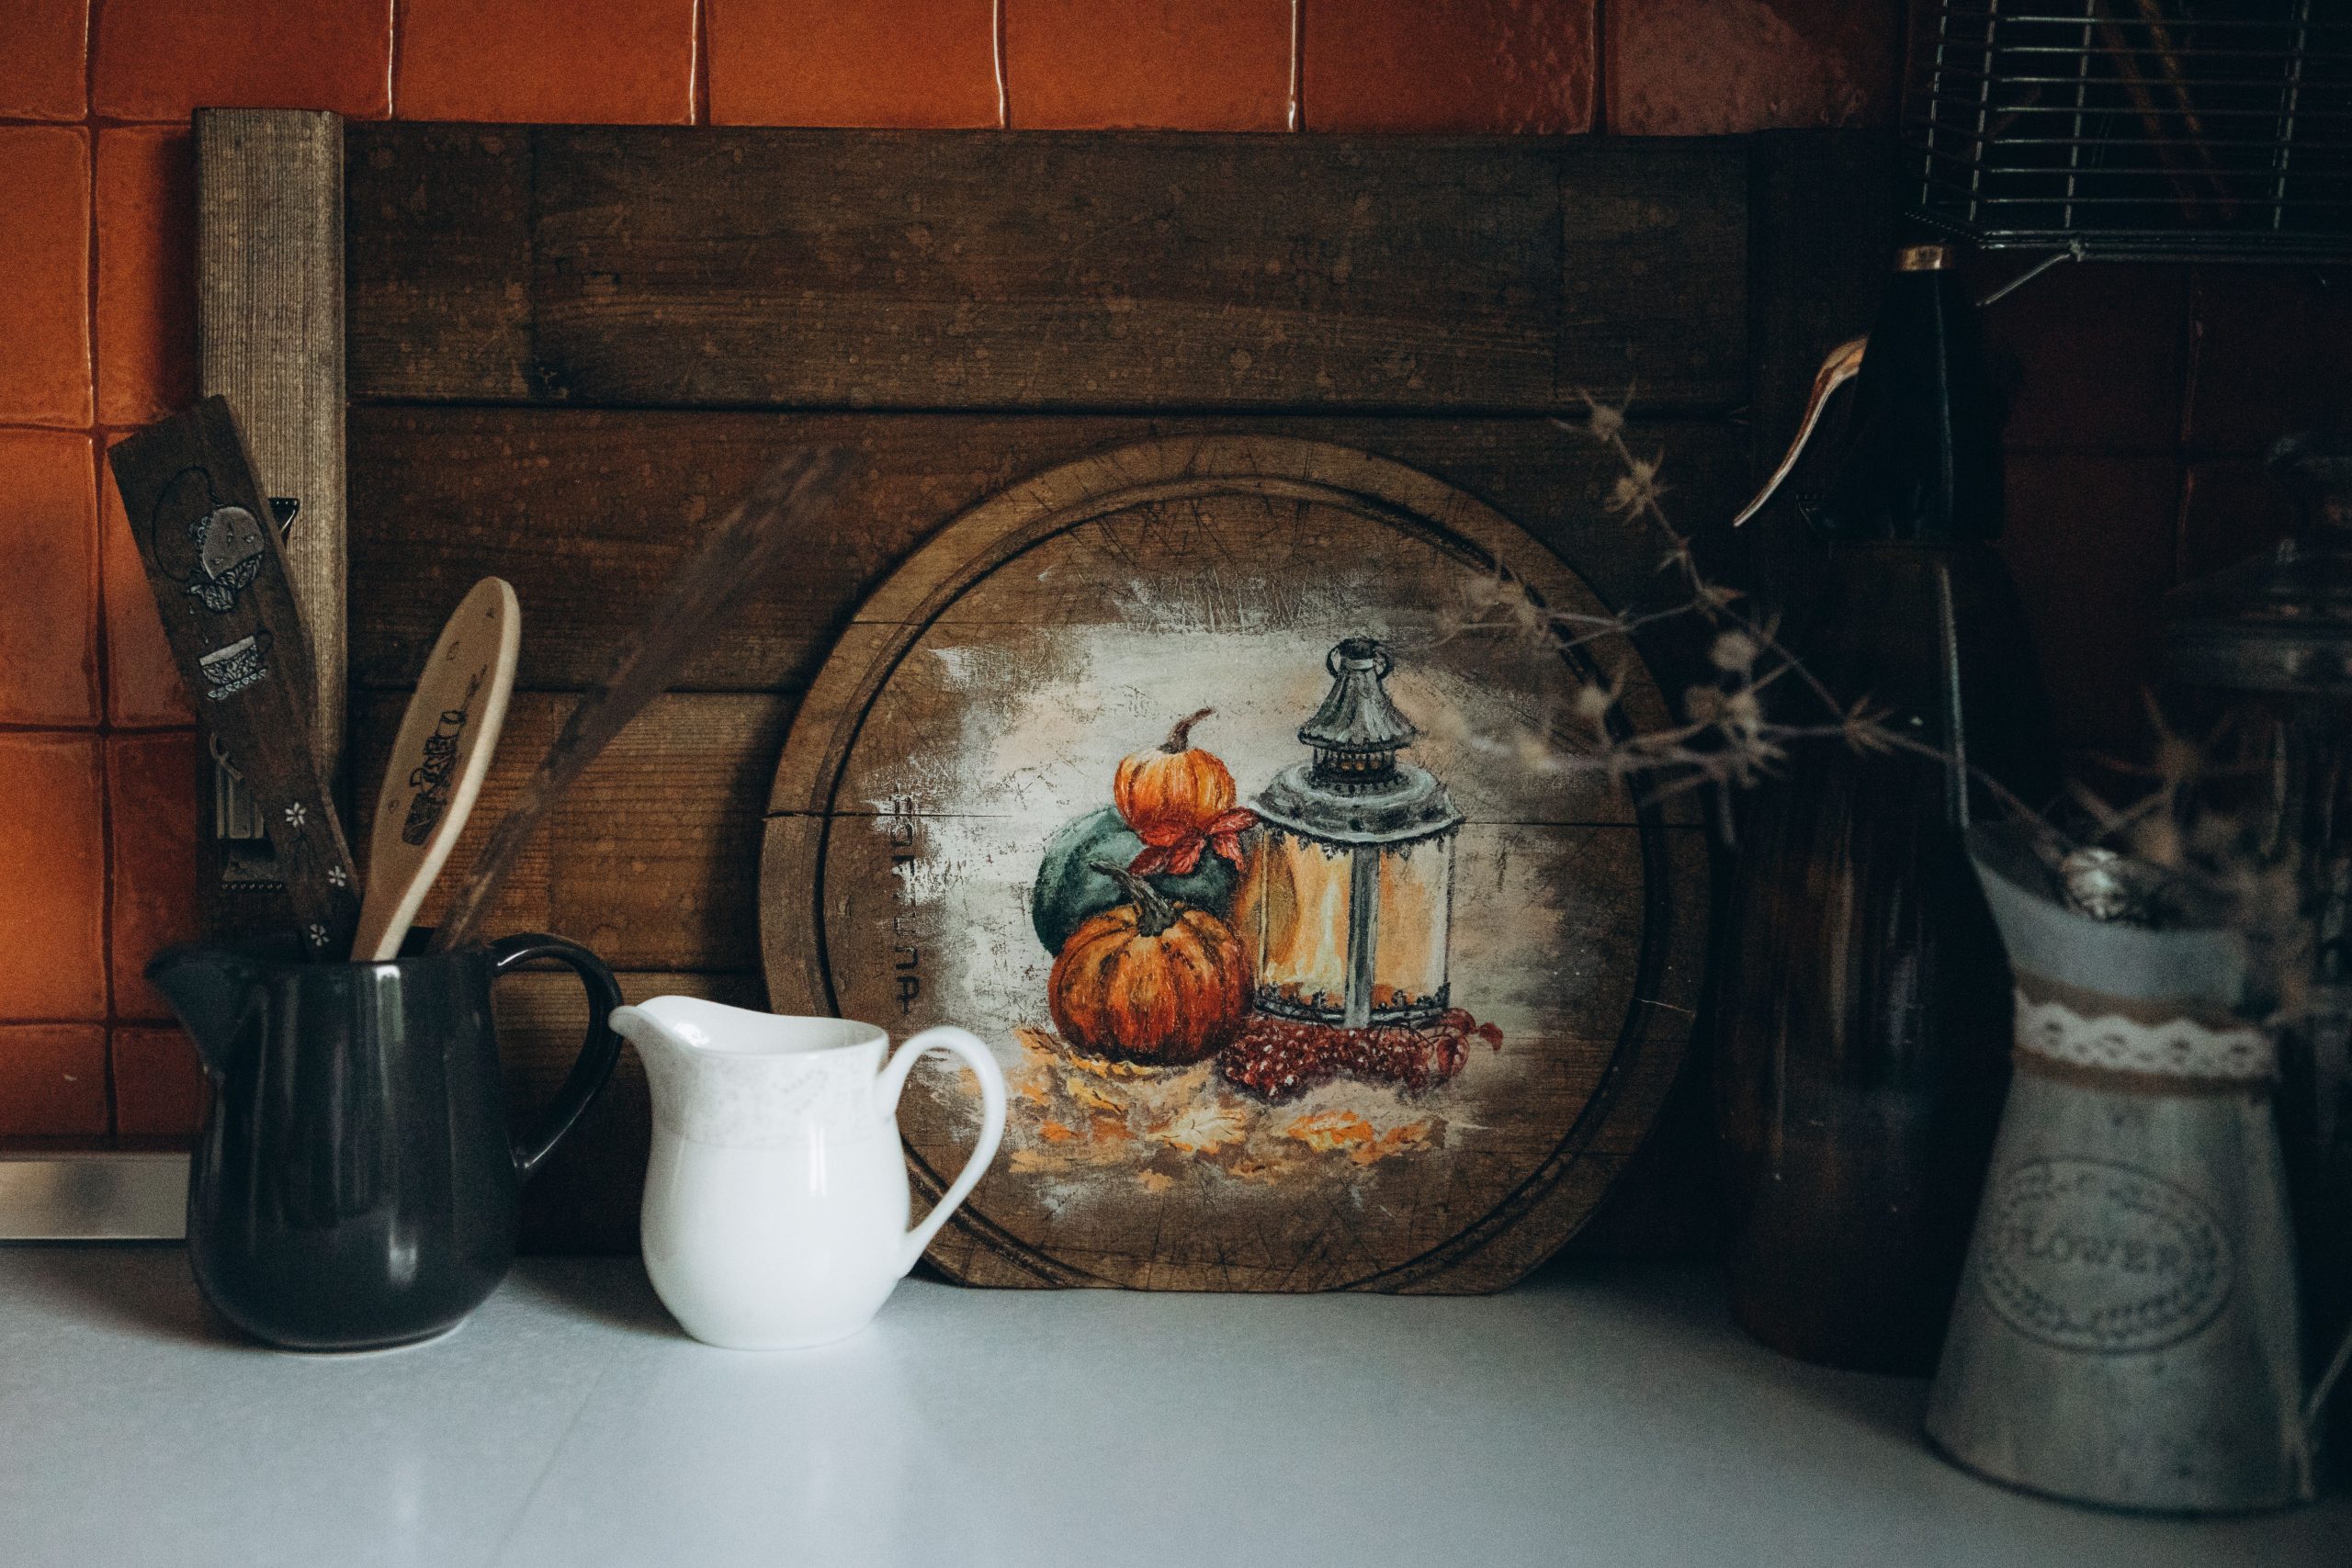
The formula here is all about layering textures. It’s approximately 40% raw/dark wood (the backdrop planks), 30% painted wood (the round board), 20% glossy ceramic (the pitchers), and 10% matte color (the orange wall tiles). This combination of materials is what gives the vignette its depth and rustic charm. The smooth ceramics contrast beautifully with the rough wood, and the hand-painted element adds a personal, crafty touch. You are seeing a masterclass in texture mixing.
|
📋 Copy HEX 🔗 Share |
While charming, painted wooden decor requires some care, especially in a kitchen. If the board is purely decorative, a light dusting is all it needs. However, if you plan to use it as a serving board (for non-wet foods like bread or crackers), ensure it’s sealed with a food-safe finish. Avoid cutting on it, as that will damage the paint. The distressed metal bucket can be prone to rust if it gets wet, so make sure it’s completely dry if you use it as a vase with a liner inside. A quick wipe-down after any kitchen splatters will keep this looking great.
8. A Pop of Orange on a Traditional Kitchen Chandelier
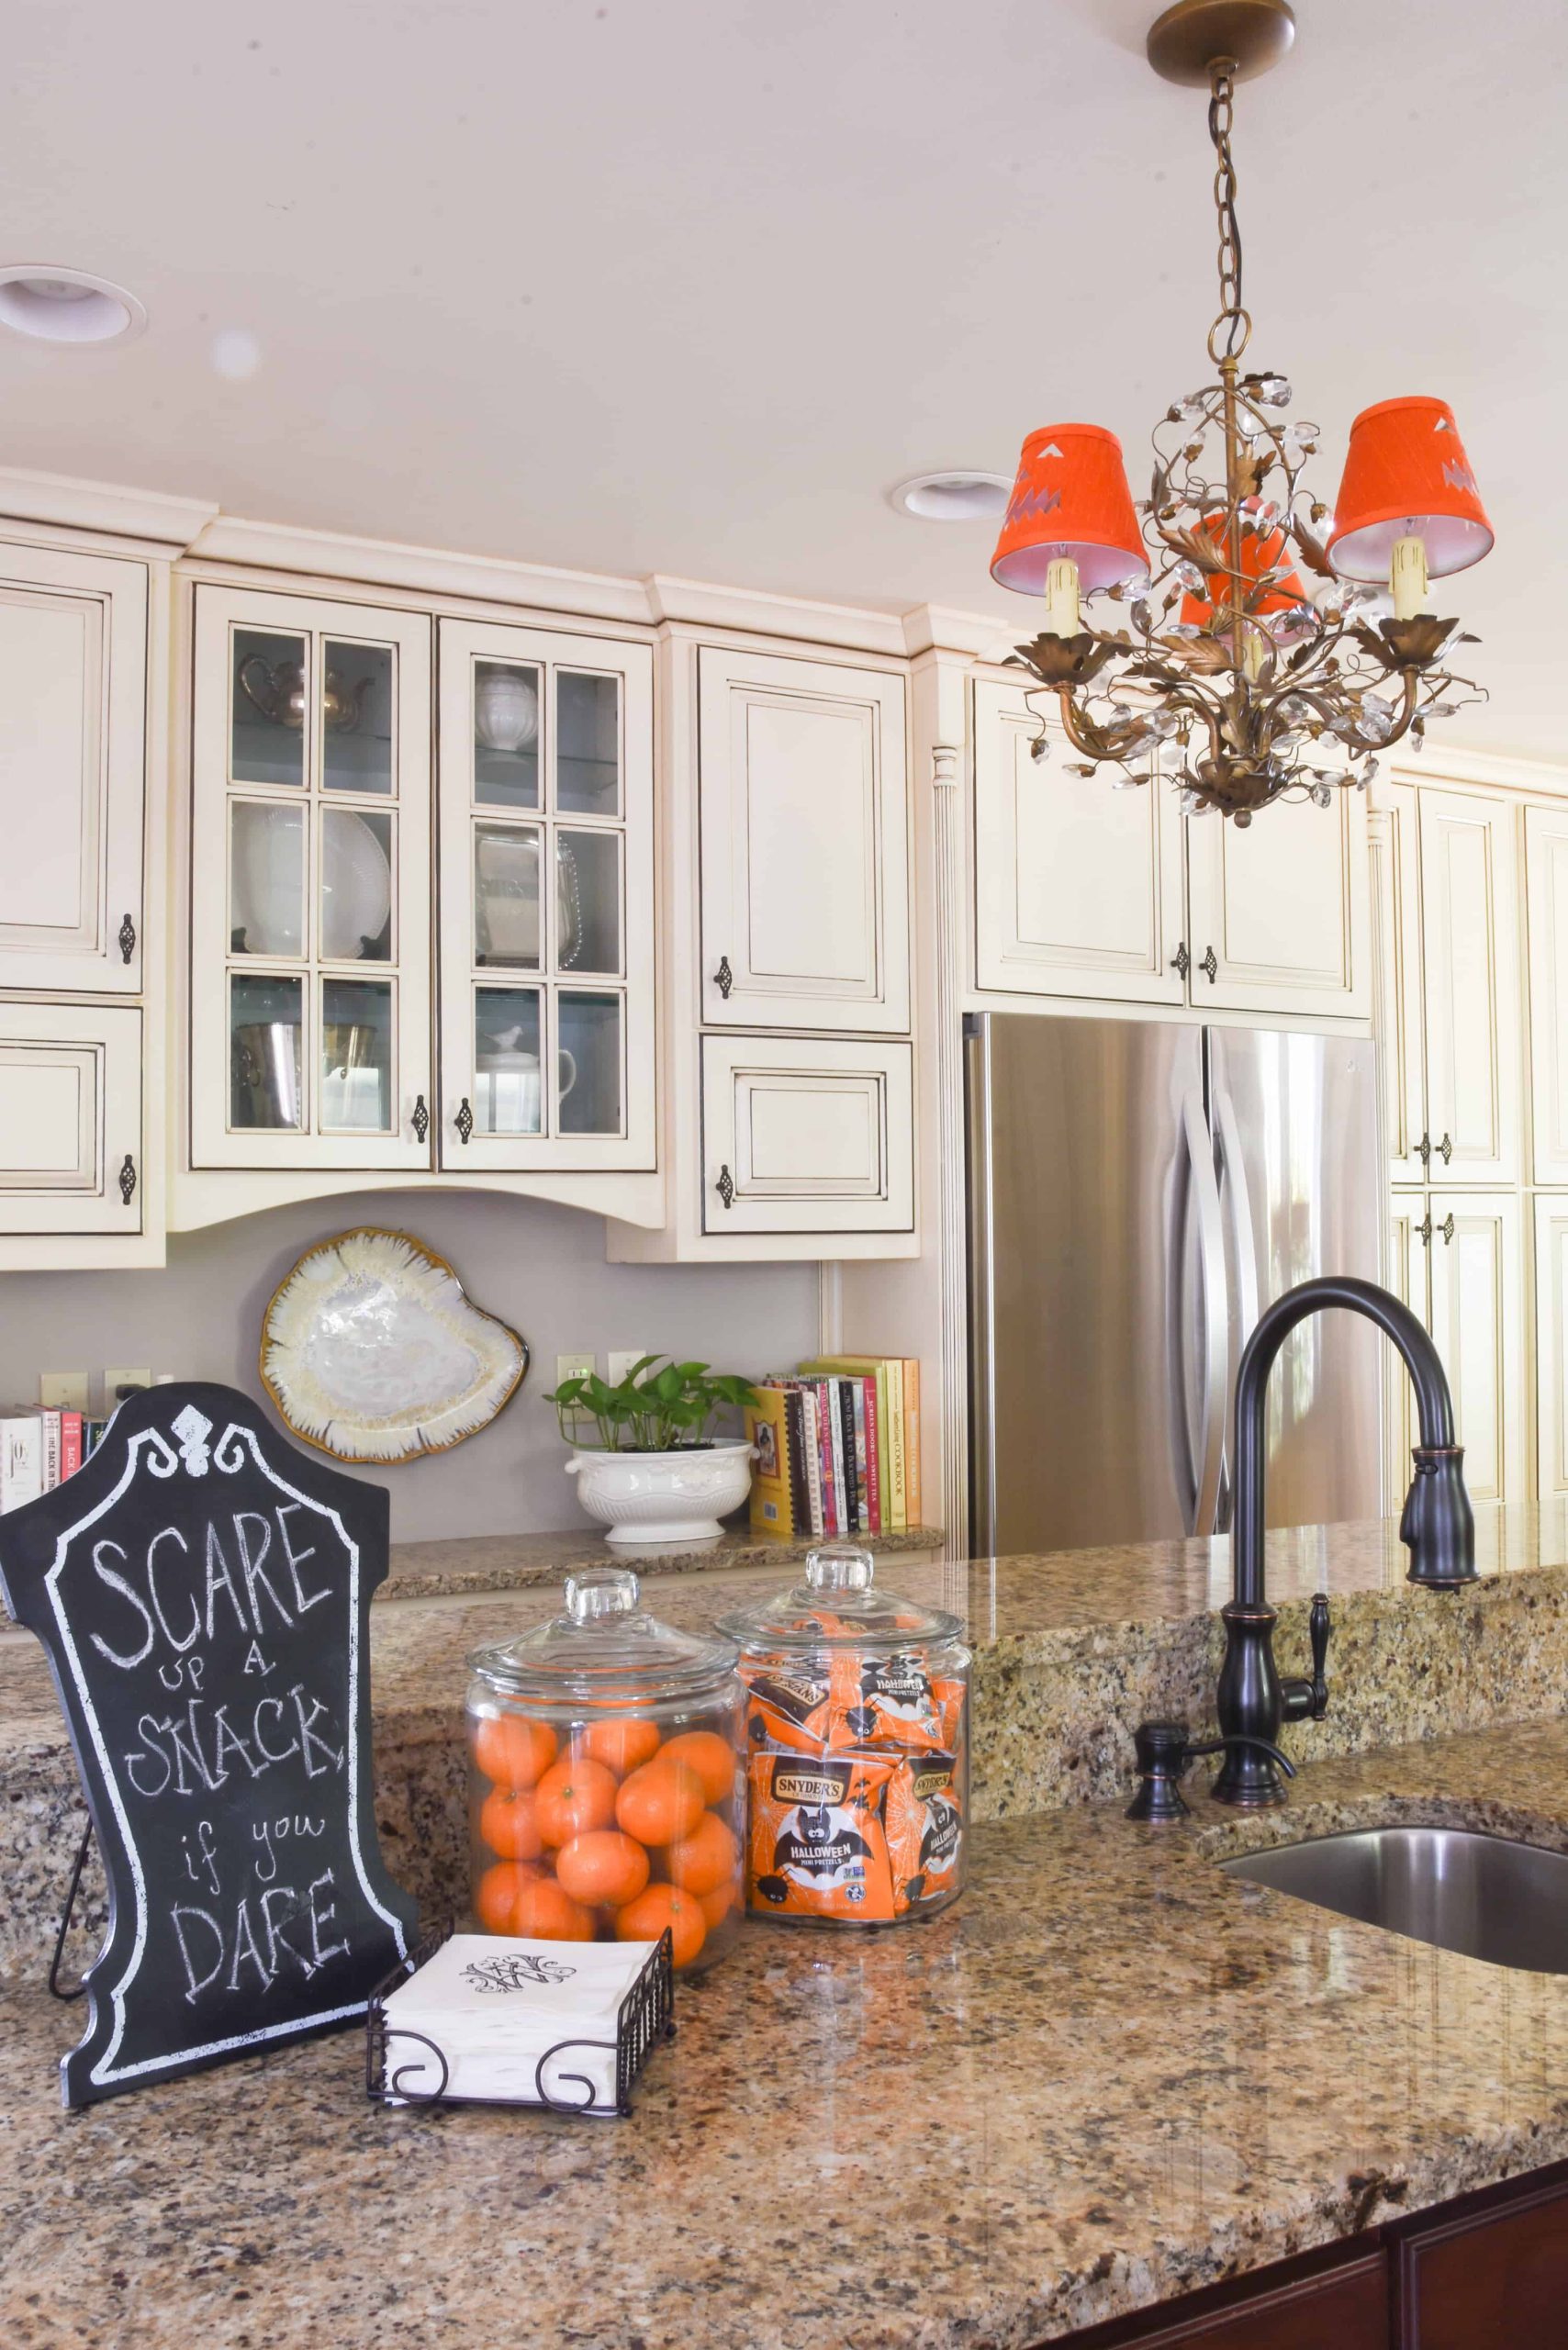
This works because it’s a high-impact, low-effort change. The kitchen’s foundation is classic and neutral—cream cabinets and traditional hardware. By swapping the standard chandelier shades for vibrant orange ones, the entire room is instantly transformed for the season. It’s a brilliant example of using an existing feature as your decorative canvas. The color is repeated subtly in the glass jars on the counter, tying the whole look together without adding clutter. It feels intentional and sophisticated, not kitschy. Compare this bold use of color to the more subtle approach in Idea #1.
|
📋 Copy HEX 🔗 Share |
You don’t need a crystal chandelier to pull this off. This concept works on almost any light fixture with shades. Find a simple drum or empire shade at a thrift store or on Amazon for $10-$15. You can either buy it in orange or get a white one and cover it yourself with orange fabric or even spray paint. This simple swap gives you the same seasonal pop of color for a fraction of the cost of buying a whole new fixture. The ‘Scare Up A Snack’ sign can be easily DIY-ed with a small chalkboard from a craft store.
9. Minimalist Tabletop Still Life with White Pumpkins and Gold Accents
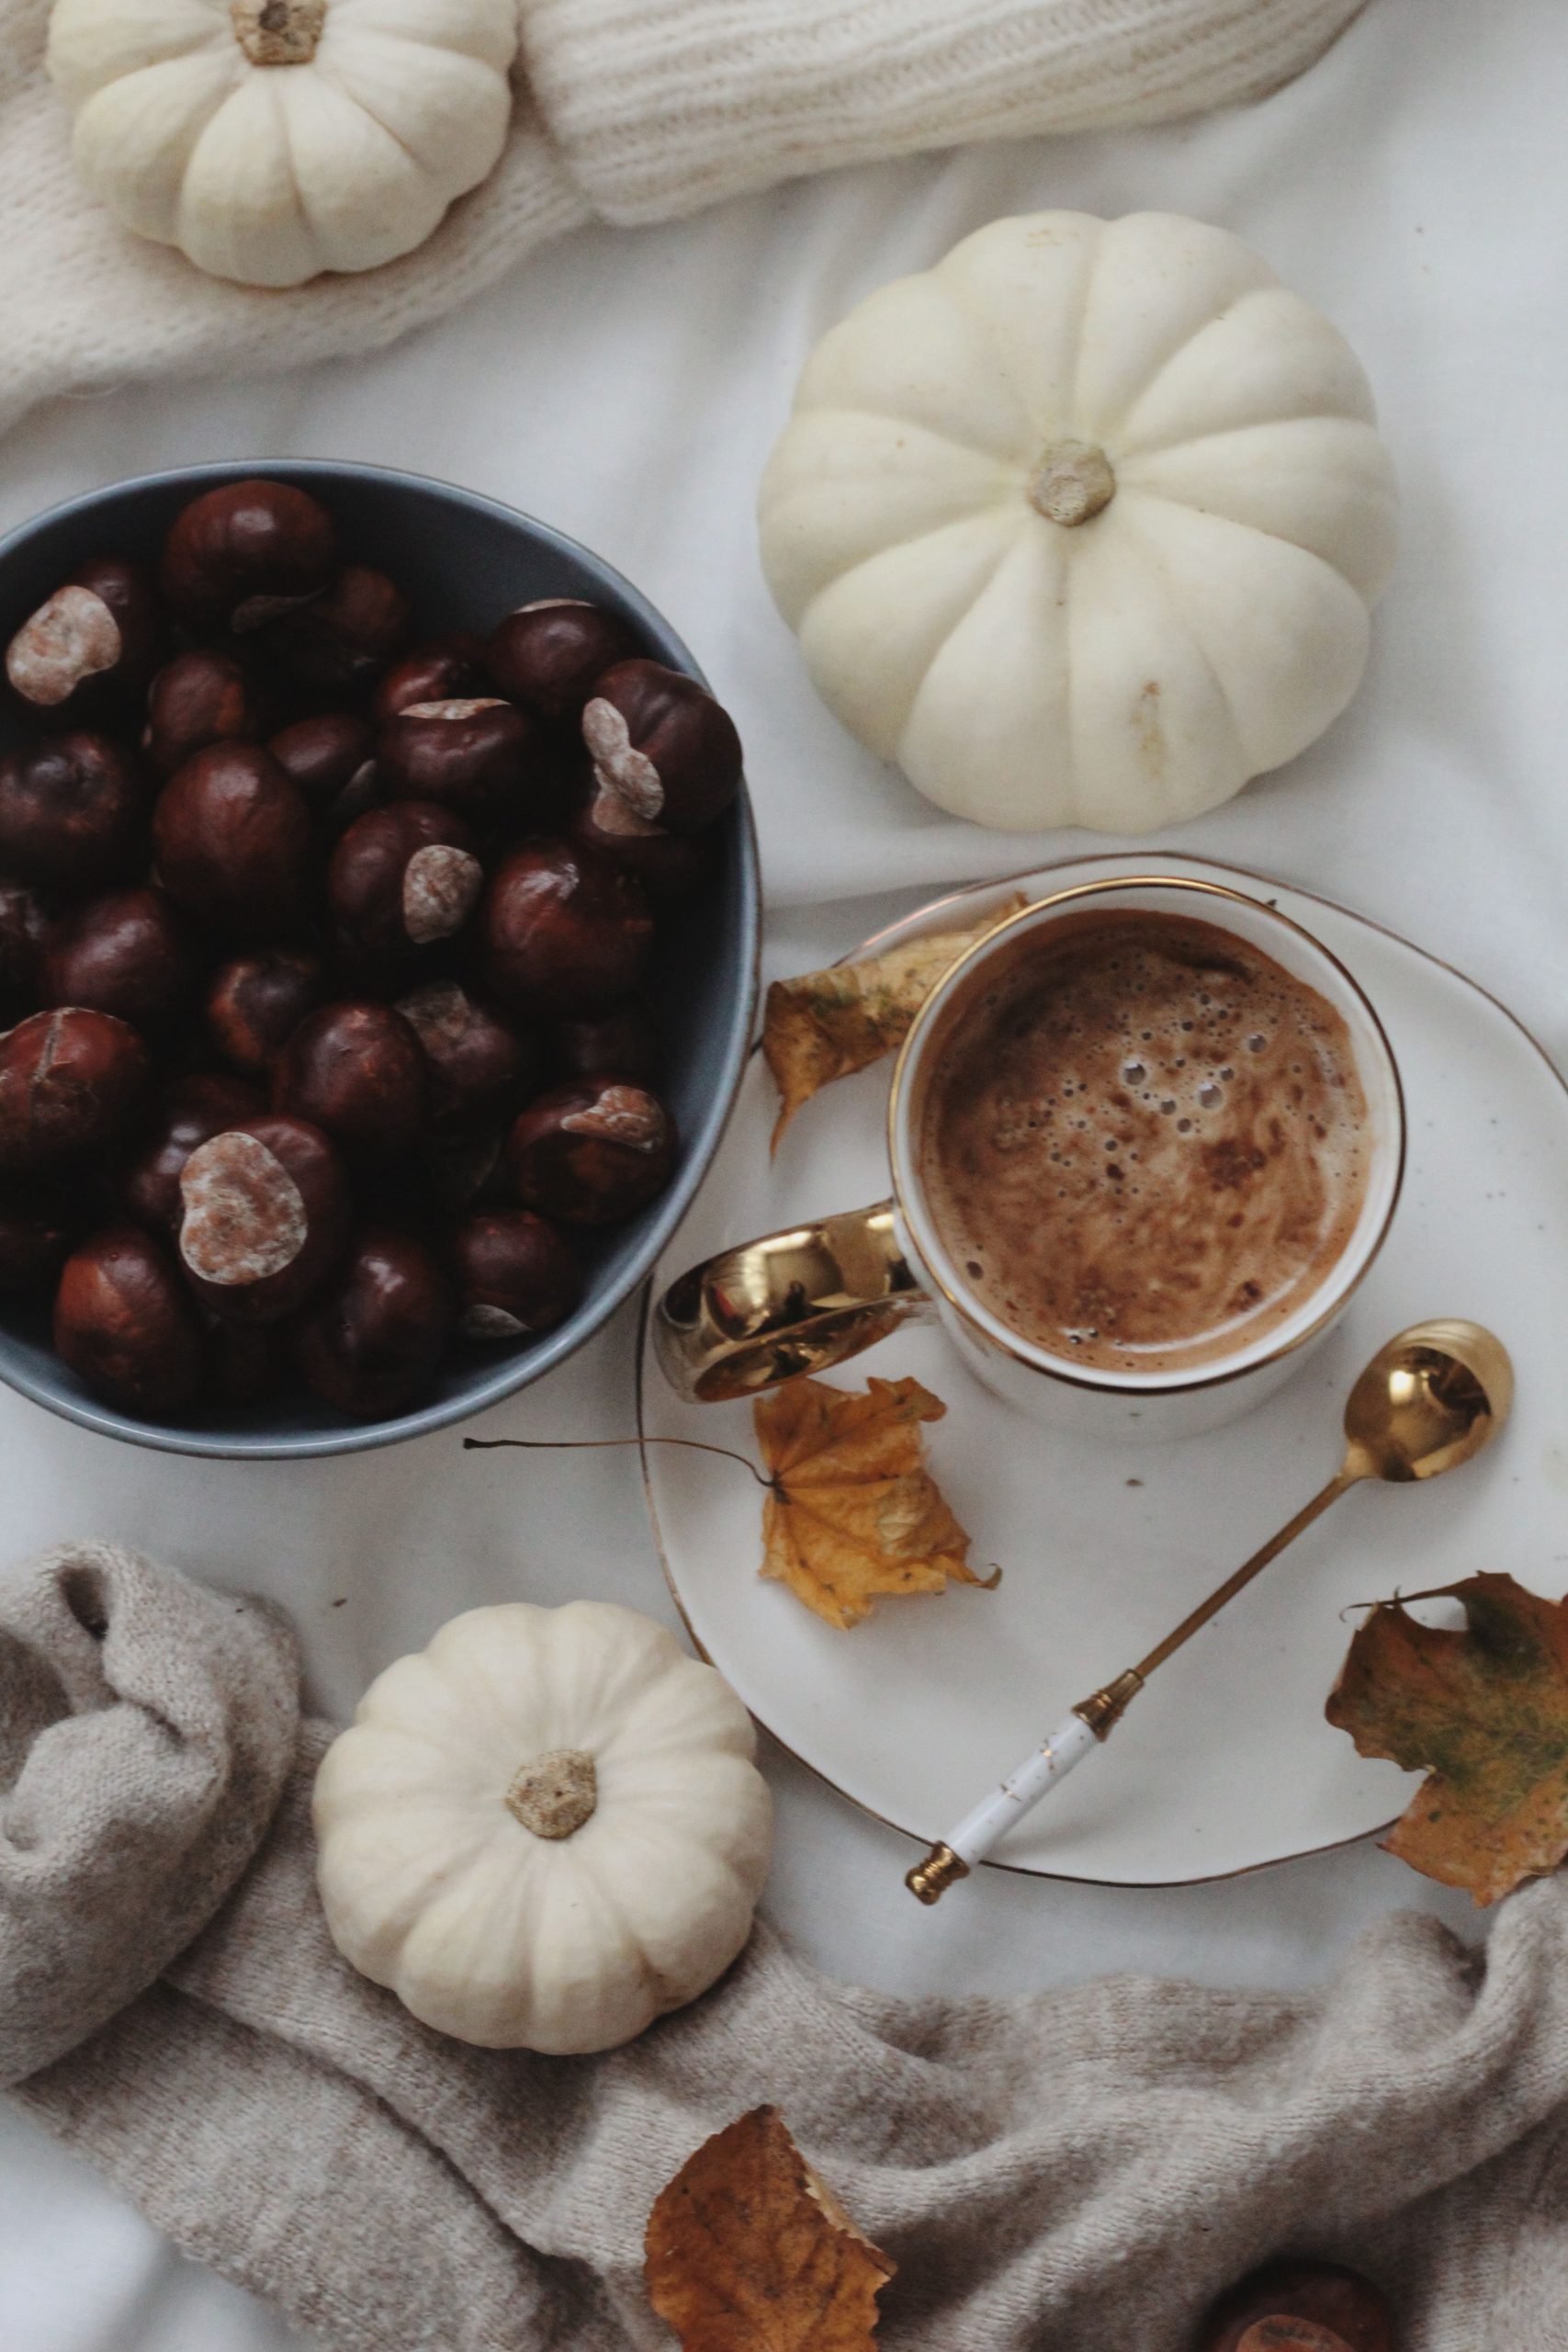
The single element that elevates this from a simple collection of items to a styled vignette is the gold-rimmed coffee cup and spoon. Without that touch of metallic warmth, the scene would be a pleasant but flat mix of neutral textures. The gold introduces a hint of luxury and reflects light, adding a necessary point of contrast against the matte pumpkins and soft knit fabric. It connects with the dried leaves and adds a layer of sophistication that makes the entire arrangement feel deliberate and chic.
|
📋 Copy HEX 🔗 Share |
When styling a neutral, minimalist scene, texture is your best friend. To avoid a flat or boring look, you need to mix at least three distinct textures. Here, we see the smoothness of the ceramic pumpkins, the chunkiness of the knit fabric, the roughness of the chestnuts, and the crispness of the dried leaves. When you limit your color palette, you have to dial up the textural variation. Run your hand over the items you’ve chosen; if they all feel the same, swap one out for something with a different finish—rough, smooth, shiny, or nubby.
10. A Cozy Autumn Coffee Nook with a Sculptural Pumpkin Mug
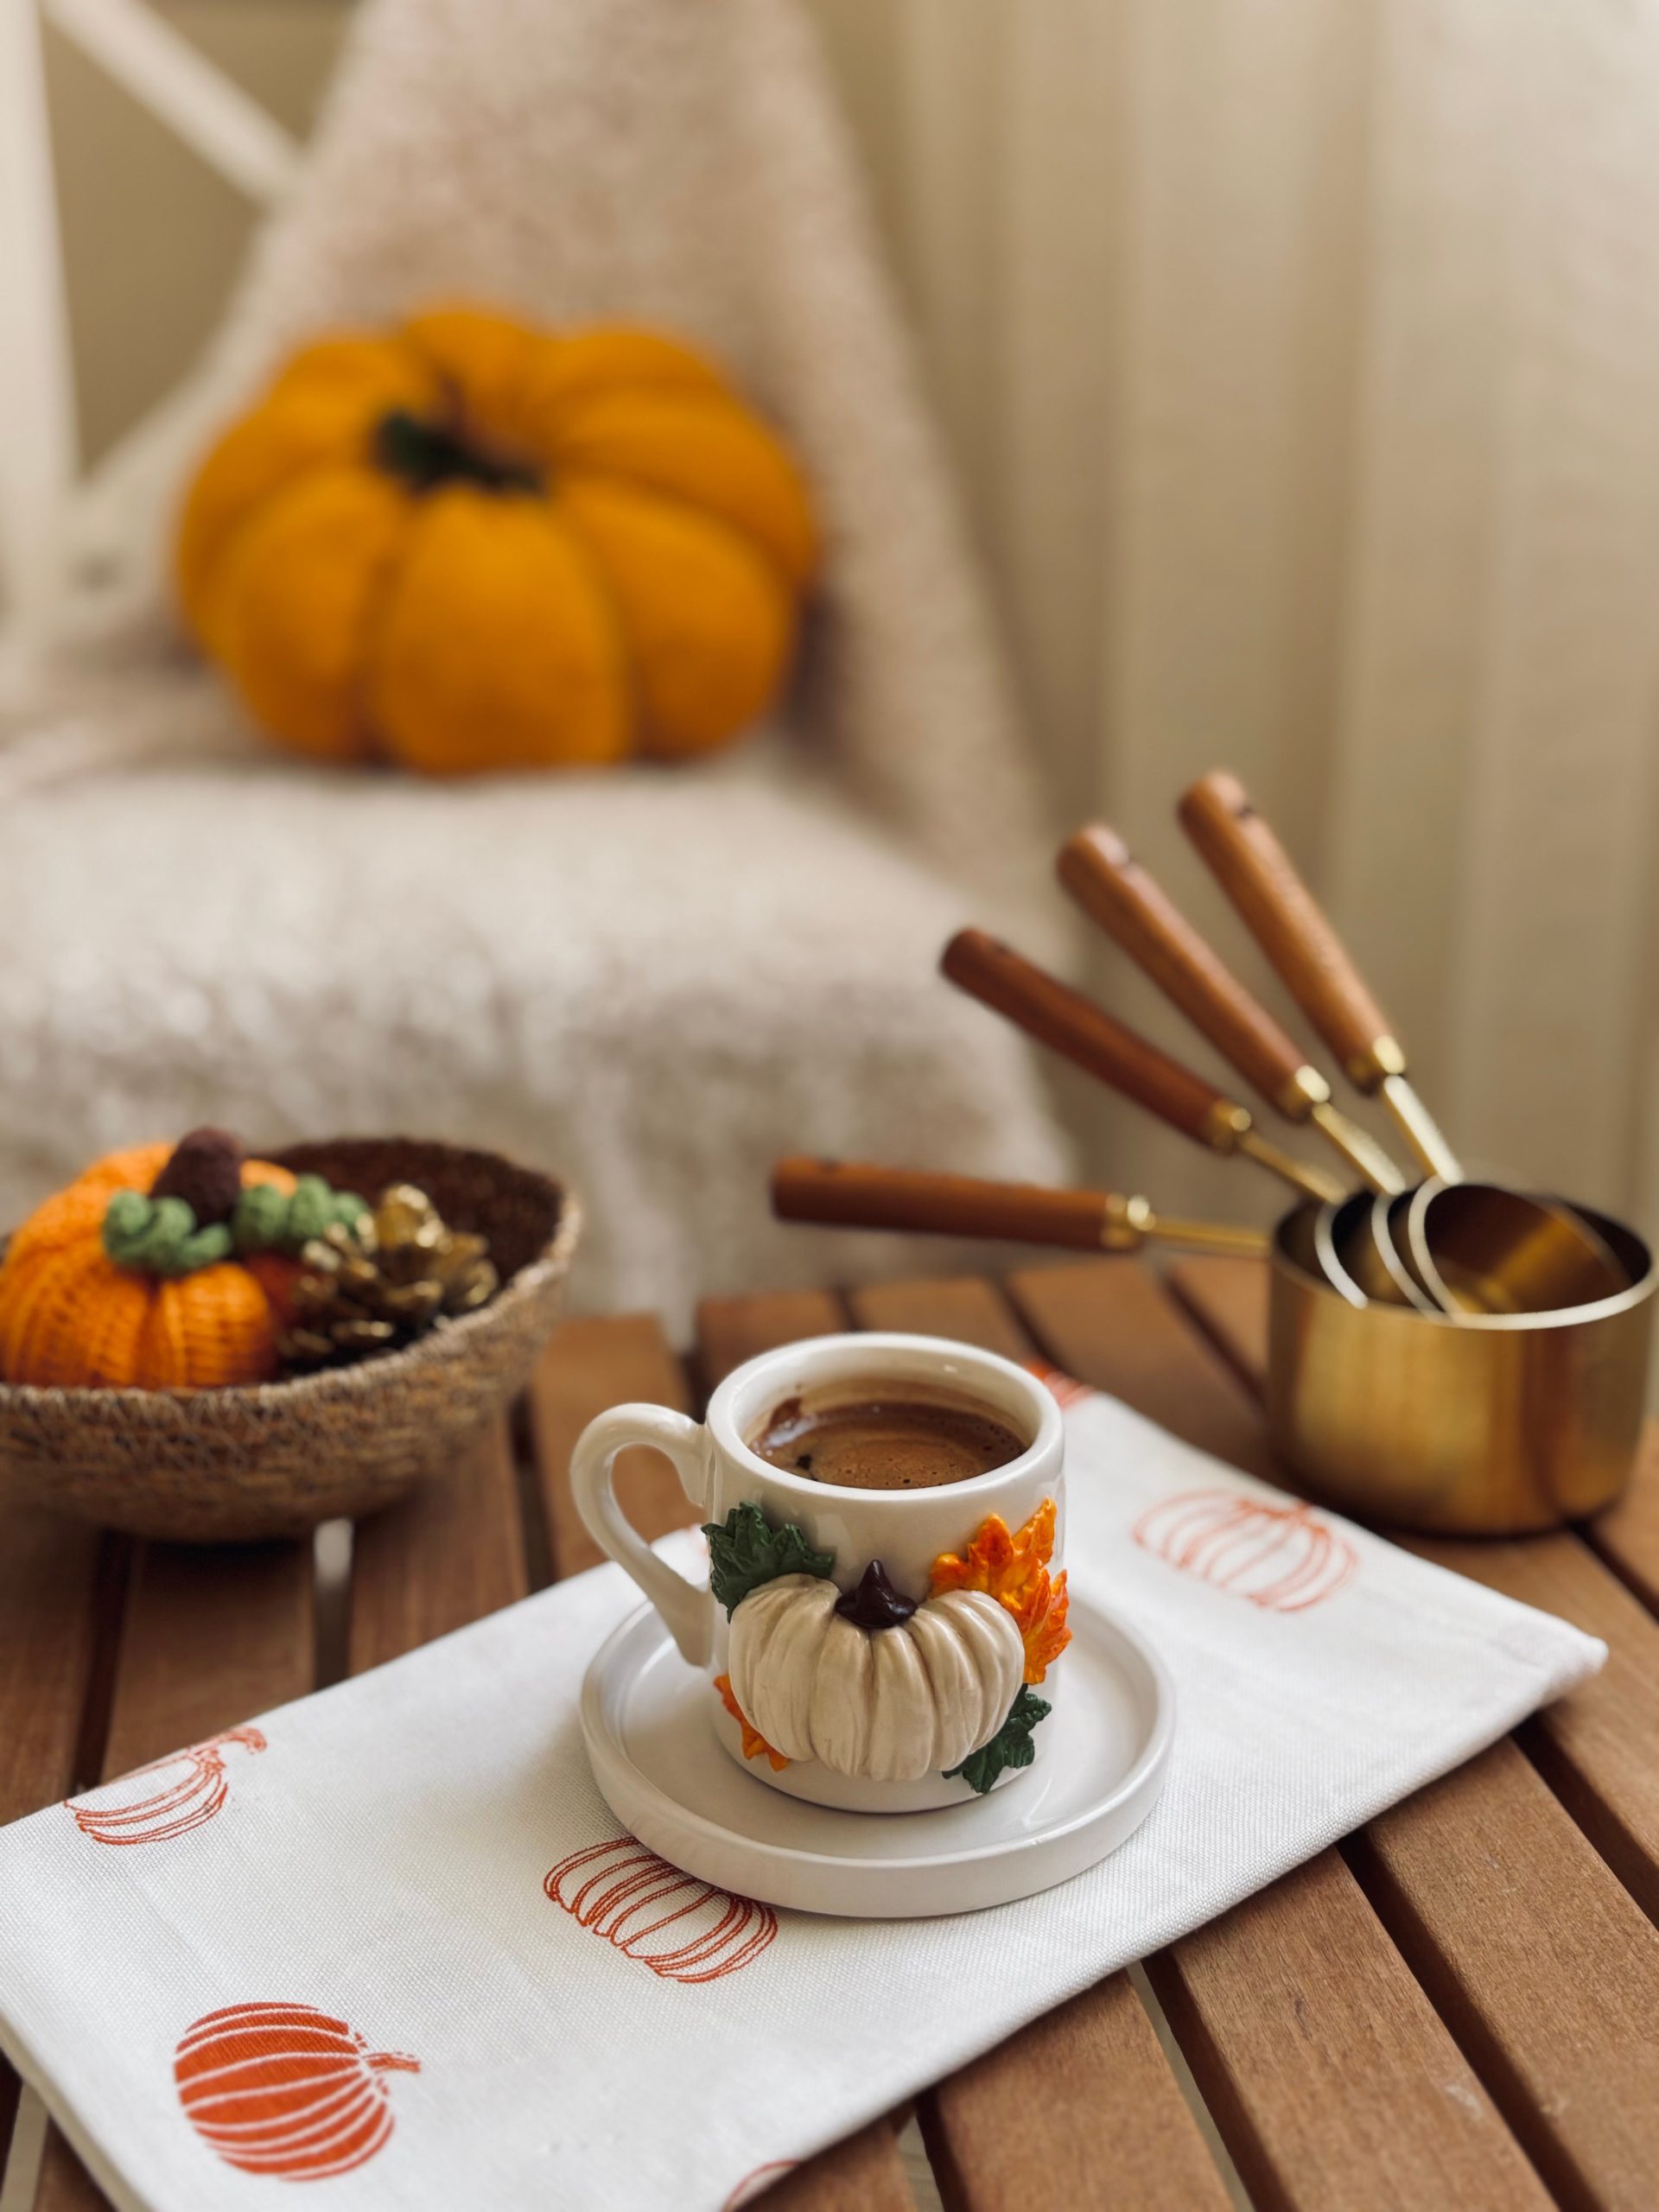
Creating this cozy little corner is more about curation than cost. The magic is in combining a few special pieces.
- Main Furniture (Small table/chair): $75 – $300
- Lighting (if needed): $30 – $80
- Textiles (towel, pillow): $20 – $50
- Decor/Accessories (mug, pumpkins, bowl, brass cups): $50 – $150
- TOTAL: $175 – $580
Budget alternative: Use a small stool you already own, find a mug at HomeGoods ($8), find a towel at Target ($5), and use real mini pumpkins from the grocery store ($6). You can achieve the same feeling for under $25.
|
📋 Copy HEX 🔗 Share |
This idea is perfect for small spaces. It proves you don’t need a giant kitchen to create a festive moment. This works best in a space of about 9-16 square feet—think the corner of a studio apartment kitchen, a small breakfast nook, or even just the end of a countertop. The key is the compact, layered arrangement. In a large, open kitchen, this setup would get lost. It thrives on intimacy. If you have a bigger space, consider expanding the concept with a larger chair or a small bar cart instead of a table, like in Idea #20.
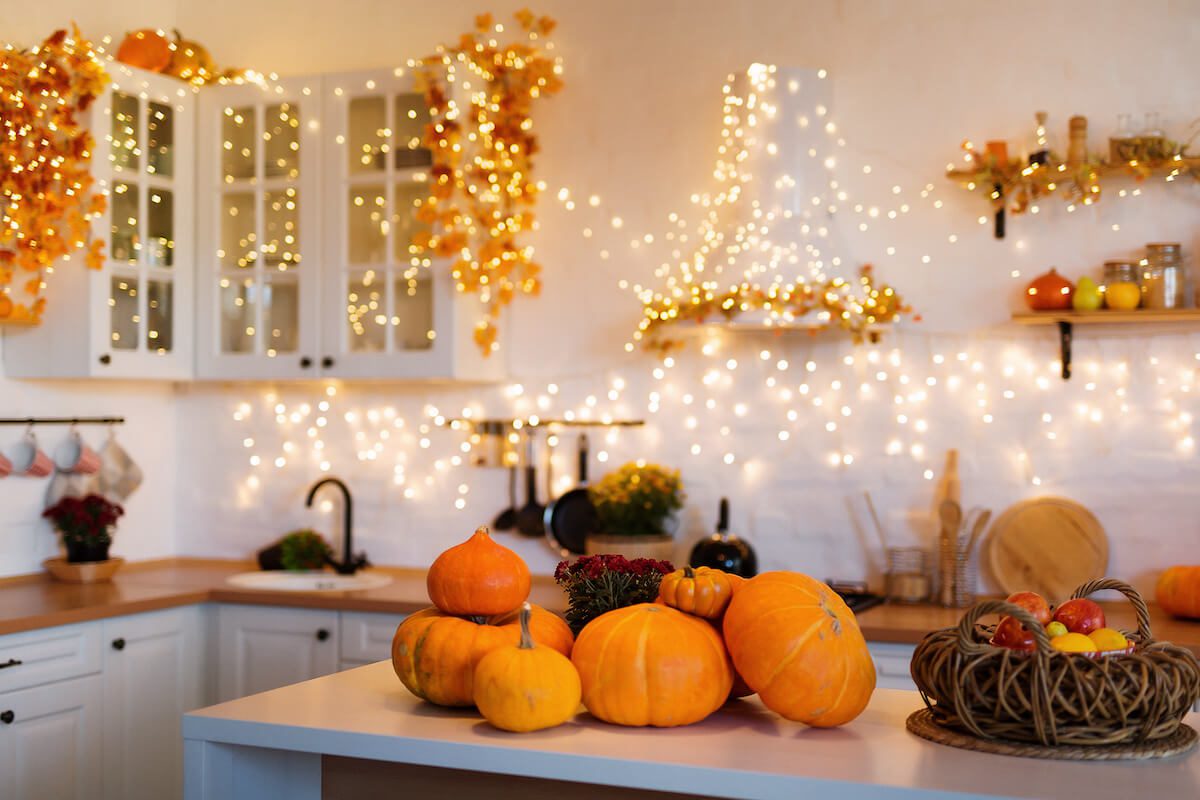
11. Draping an Entire Kitchen in Warm Fairy Lights
This looks absolutely magical, but let’s be real about the execution. Draping this many lights is a commitment. You’ll be dealing with cords, finding outlets, and spending a good amount of time on a stepladder. It can also make cleaning your cabinets and countertops more difficult. Most importantly, use only high-quality, UL-listed LED fairy lights, as they generate very little heat. Keep them away from direct contact with paper or fabric, and never leave them on when you’re not home. Safety is paramount for a look this extensive.
|
📋 Copy HEX 🔗 Share |
Ready to create this glow? Here’s a quick guide to hanging fairy lights without damaging your cabinets. This should take about 1-2 hours and cost $30-$60.
- Start by purchasing warm-white LED fairy lights on a thin wire (copper or silver looks best). You’ll likely need multiple strands.
- Use small, clear, removable adhesive hooks (like Command hooks for lights). Plan your path and place hooks every 2-3 feet along the tops of cabinets and under counters.
- Start draping your first strand, plugging it in near your starting point. Don’t pull the wire taut; allow for gentle swoops and curves for a more organic feel.
- When one strand ends, plug the next one into it, hiding the connection point behind a cabinet trim piece or on top of the cabinets.
- Tuck and weave the lights around objects like your fruit basket to integrate them into the scene.
- Use clear tape to secure any loose spots if needed.
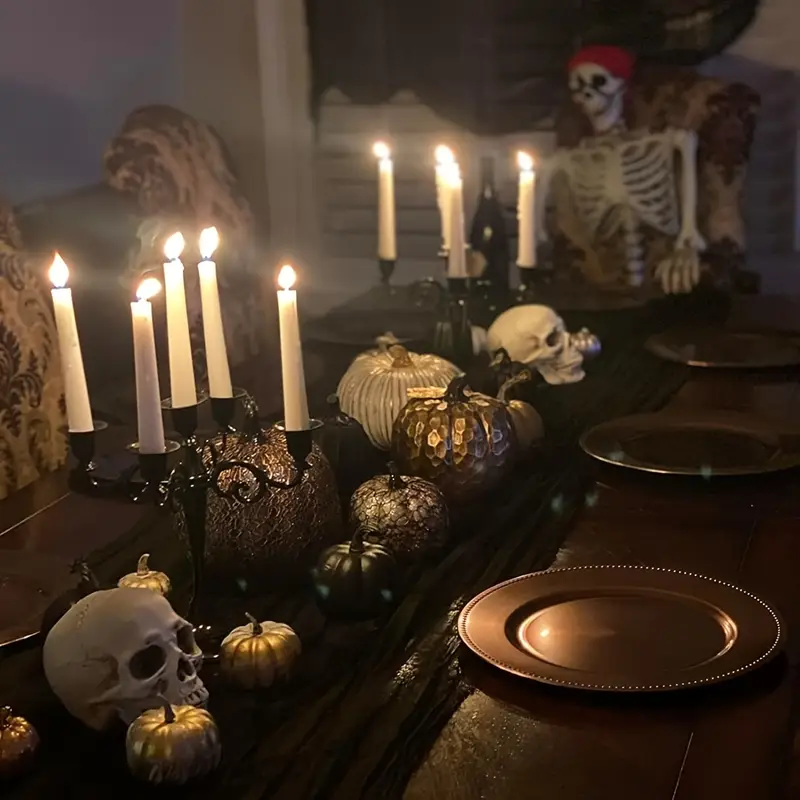
12. Sophisticated Gothic Tablescape with Skulls and a Candelabra
This moody setting works because it commits fully to a dark, atmospheric theme. The design uses repetition and a restrained color palette to create a cohesive and sophisticated look. Notice the repetition of skulls and metallic finishes (the pumpkins and charger plates), which creates a sense of rhythm. The height of the candelabra and taper candles draws the eye up, adding drama and preventing the tablescape from feeling flat. The warm candlelight is essential, as it contrasts with the cool black and metallic tones, adding life and movement through flickering shadows.
|
📋 Copy HEX 🔗 Share |
A look this dramatic comes with some practical considerations. Using real taper candles means you will have wax drips. While it adds to the gothic aesthetic, be prepared for cleanup on your table runner and candelabra. To minimize this, use dripless candles. The metallic pumpkins and skulls will need a gentle dusting before and after the season, as they can show fingerprints and dust easily. If you’re hosting, remember that a centerpiece this large and dark can make conversation across the table a bit more difficult, so it’s best for creating a moody vibe rather than a bright, social dinner party.
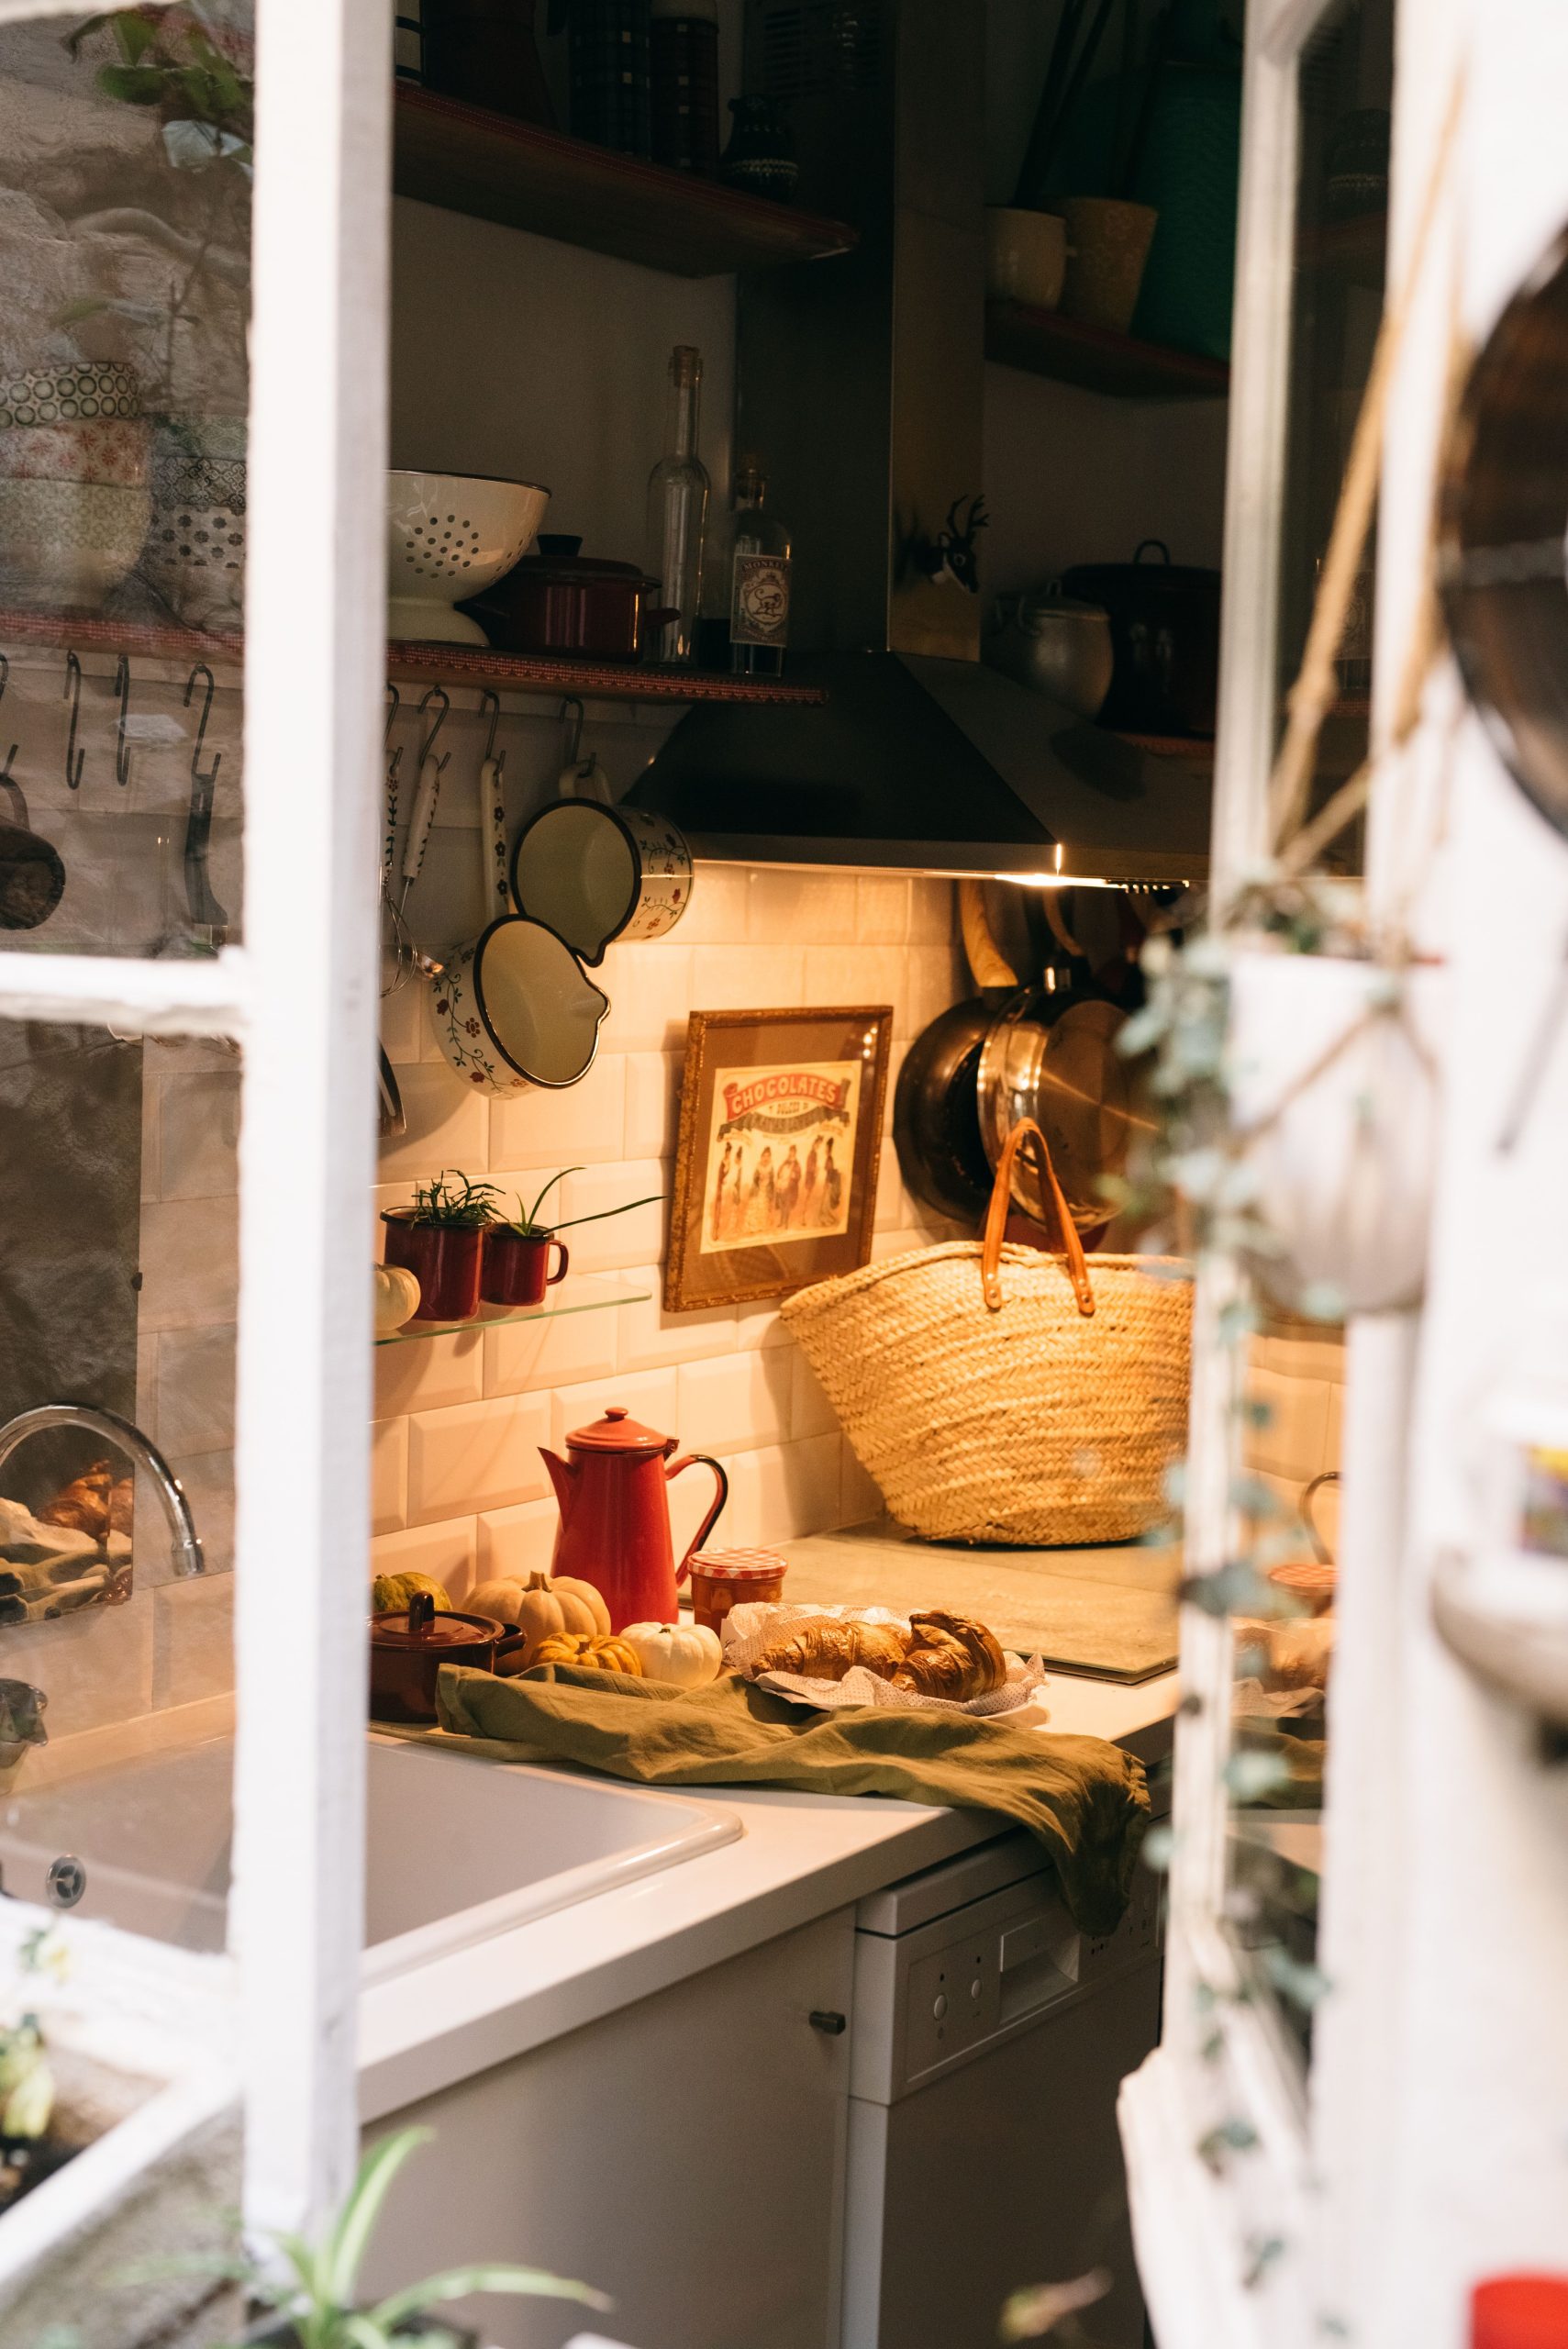
13. Warm Autumn Accents Against a White Subway Tile Backsplash
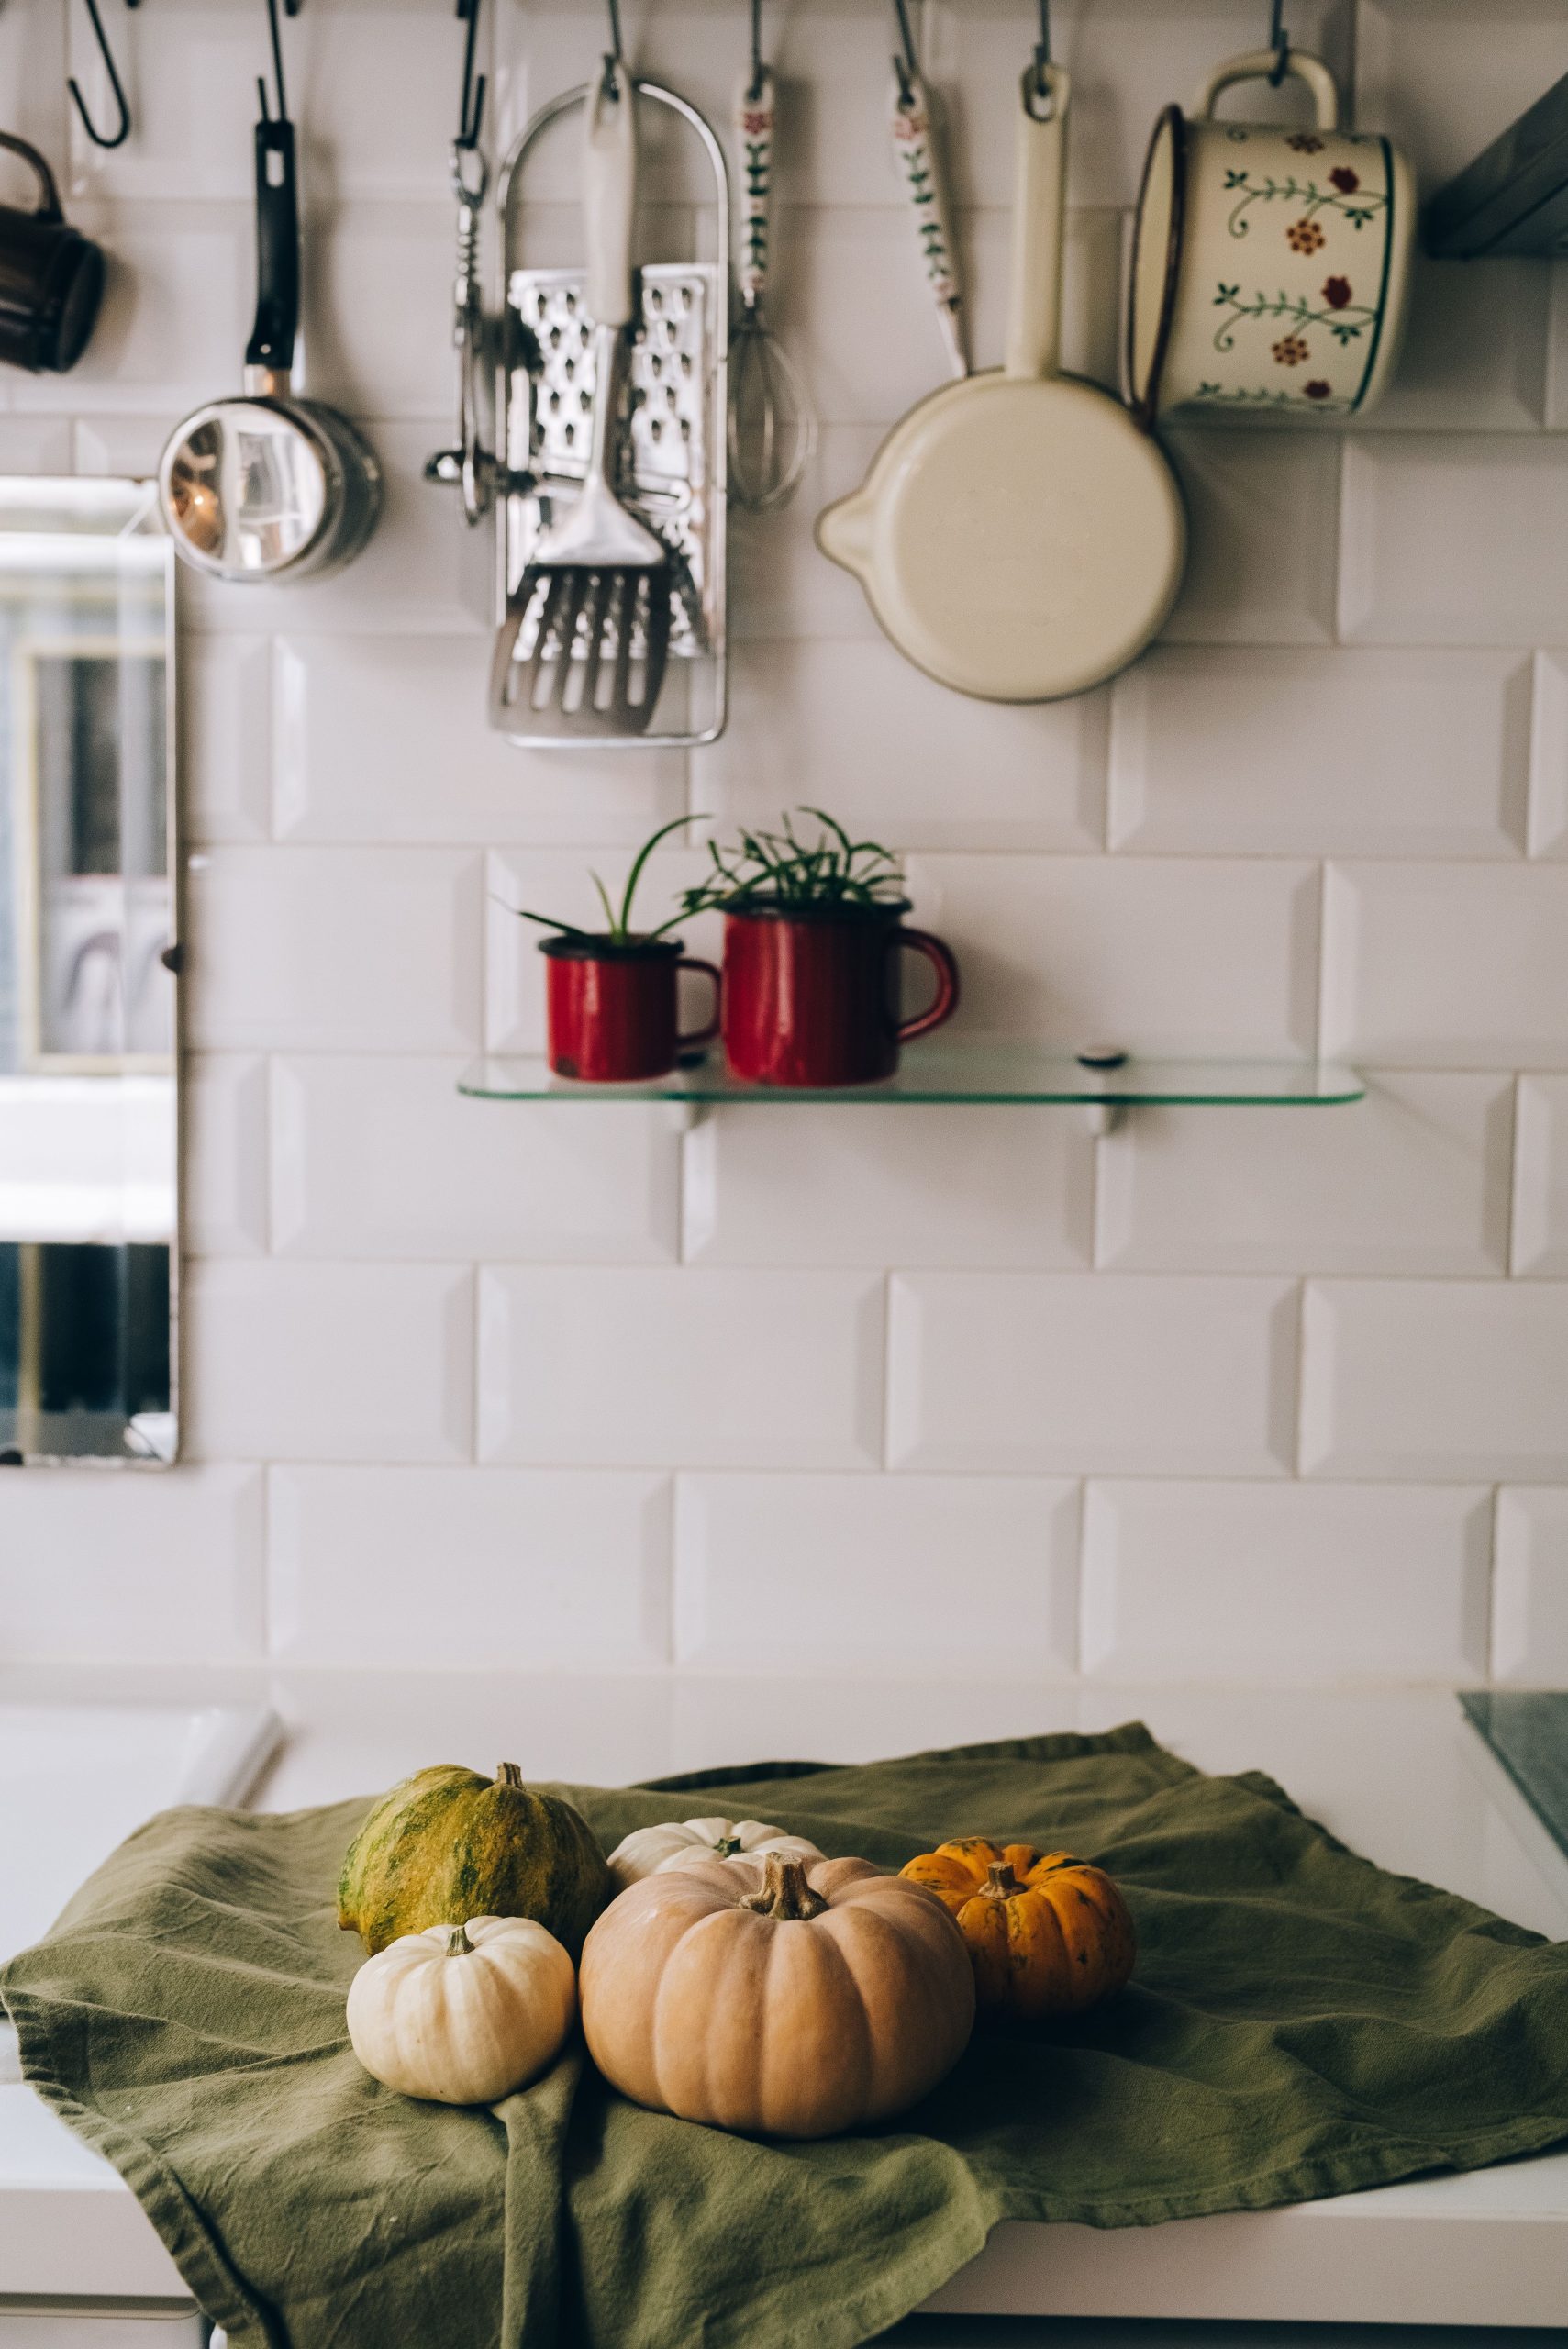
The visual recipe here is about warming up a classic base. The formula is 70% crisp, clean lines (the white subway tile and countertops), 20% rustic texture (the straw market bag, linen cloth, and mini pumpkins), and 10% a single, bold color accent (the red enamel teapot). The under-cabinet lighting is the secret ingredient, highlighting the textures and making the entire vignette glow. By keeping the decor items small and contained, the kitchen feels festive but still open and functional.
|
📋 Copy HEX 🔗 Share |
This look is incredibly achievable on a tight budget, as it’s built from simple, accessible pieces. The straw market bag can be found at thrift stores or on Facebook Marketplace for under $15. Mini pumpkins are a grocery store staple in the fall. The red teapot provides the color punch, but you could get the same effect with a red dish towel, a bowl of apples, or a small vase of red flowers. This entire countertop vignette can be pulled together for less than $30 if you shop smart. It’s a fantastic alternative to the more elaborate setup in Idea #7.
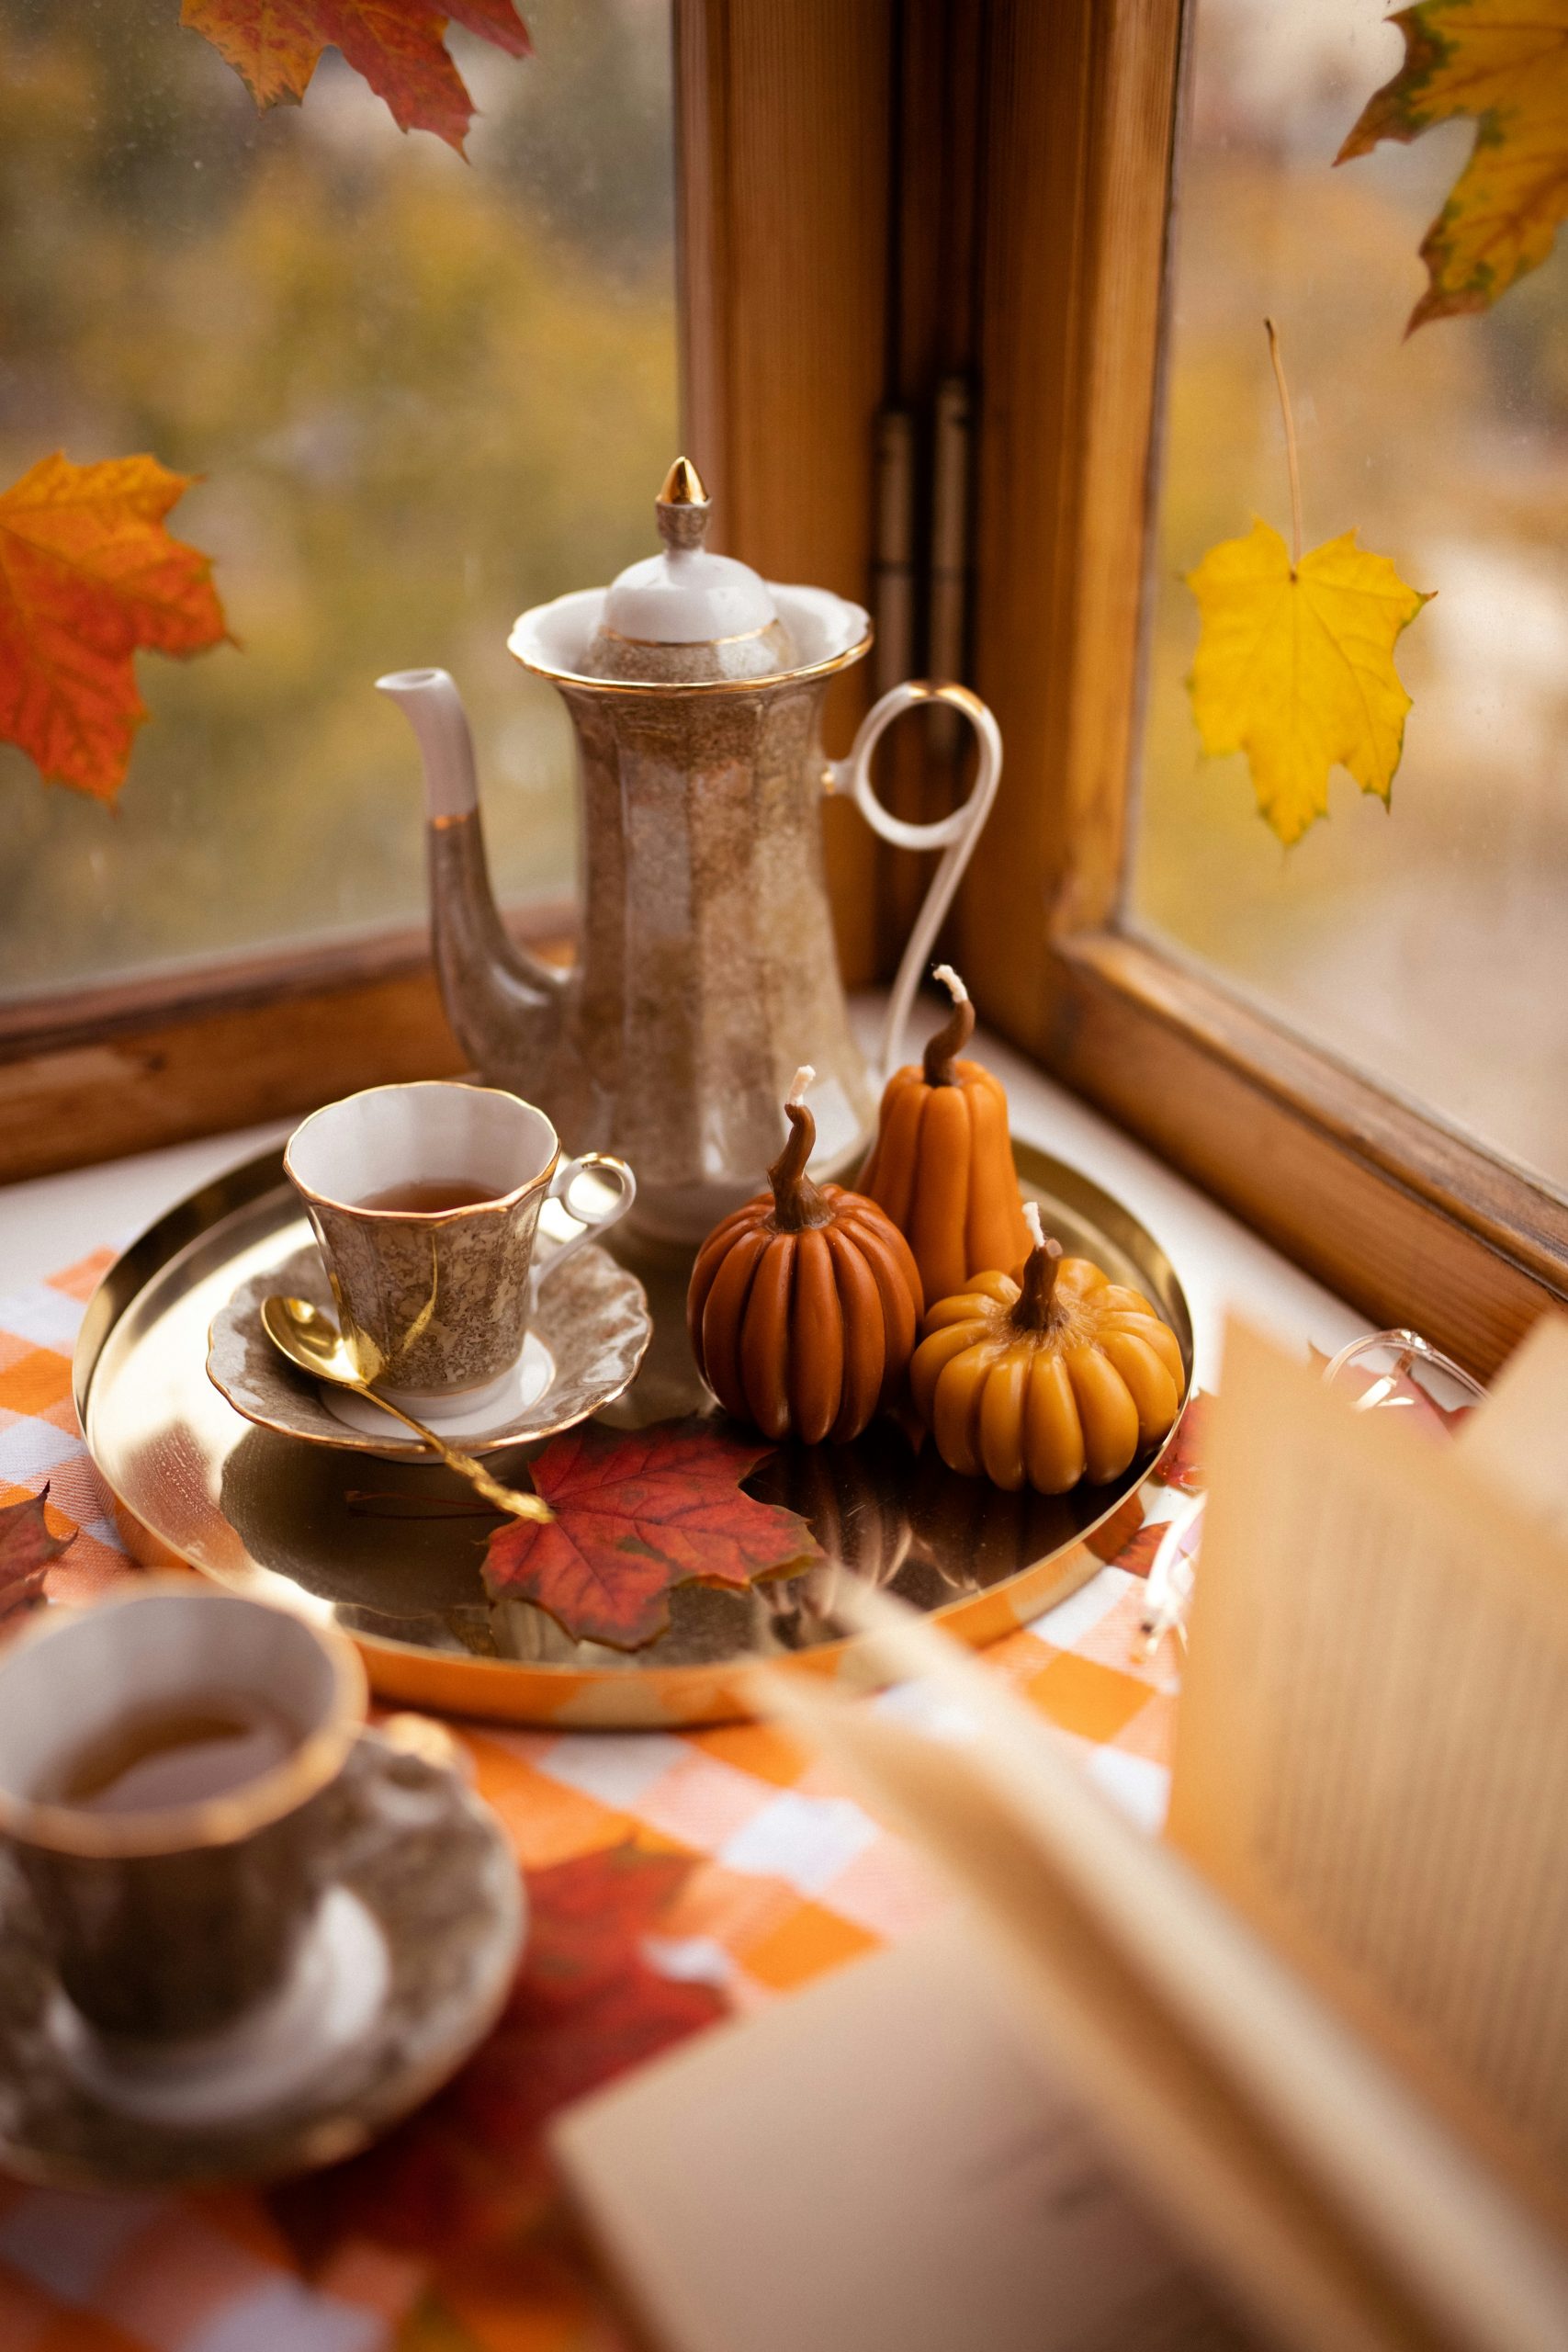
14. A Nostalgic Autumn Tea Setting on a Wooden Windowsill
The brass serving tray is the quiet hero of this entire scene. While the pumpkin candles and ornate teacups are charming, the tray is what elevates the arrangement from a casual collection of items to an intentional, curated moment. It corrals the objects, provides a warm metallic shine that complements the orange and yellow tones, and adds a touch of vintage elegance. Without it, the items would feel a bit lost on the wide wooden windowsill. The tray provides structure and a sense of occasion, turning a simple tea setting into a story.
|
📋 Copy HEX 🔗 Share |
There’s a growing movement towards ‘quiet festive’ decor, and this is a perfect example. In 2026, people are tired of loud, disposable decorations. Instead, there’s a huge trend on Pinterest for creating small, beautiful, and useful moments that celebrate the season. This isn’t about decking out the whole house; it’s about curating a personal, atmospheric vignette that you can actually interact with. This tea setting feels authentic and livable, tapping into the desire for cozy, nostalgic experiences over grand, impersonal displays.
15. A Minimalist Flat Lay with Pumpkin and Bat-Shaped Cookies
When shooting or styling a flat lay like this, negative space is your most powerful tool. Notice how the cookies and gourds aren’t crammed together. There is breathing room around each element, which allows the eye to appreciate the individual shapes and colors. A common mistake is to fill the entire frame. Instead, place your main subject (the bowl) slightly off-center, then scatter a few supporting elements in a loose, diagonal line across the frame. This creates a sense of casual, effortless style.
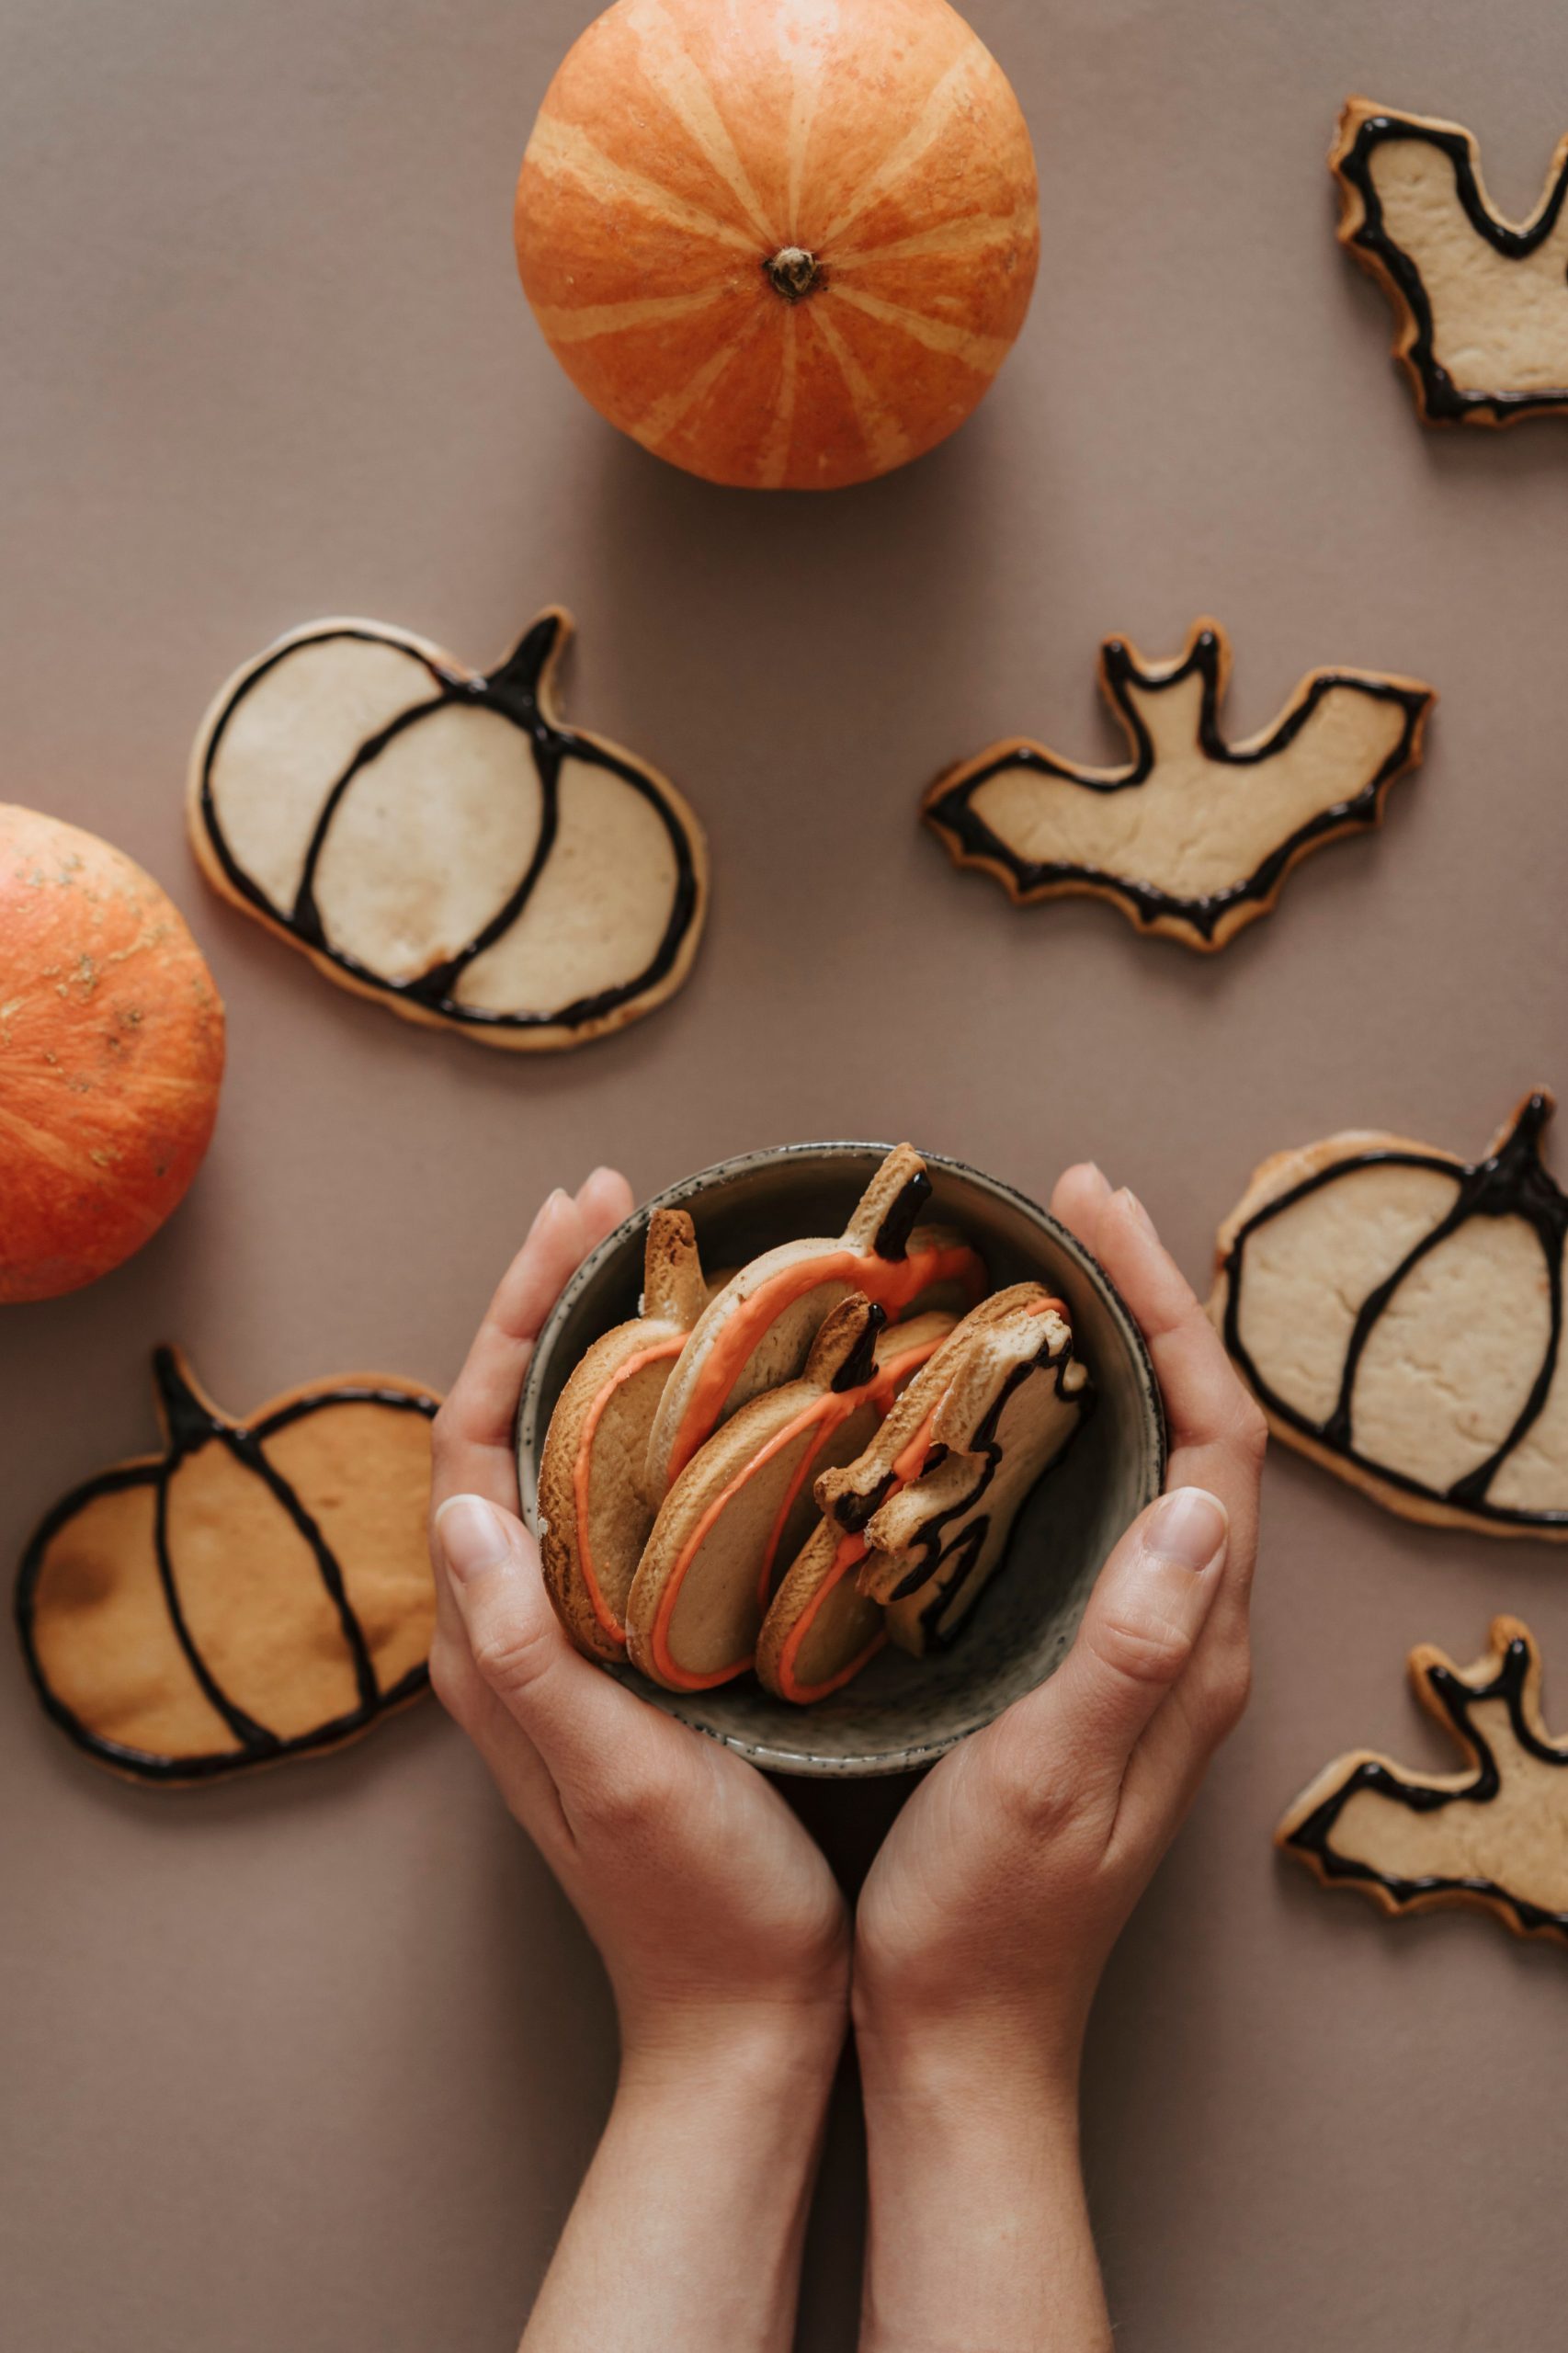
|
📋 Copy HEX 🔗 Share |
This look is successful because of its extremely tight color story. The entire composition is built from a palette of taupe, beige, burnt orange, and dark brown. This restraint is what makes it feel so sophisticated and calm. By removing all other competing colors, the focus remains entirely on the playful shapes of the cookies and the simple, organic forms of the gourds. It’s a lesson in how a limited palette can actually make a stronger visual impact than a riot of color. It feels modern, edible, and perfectly autumnal.
16. An Inviting Fall Tablescape with Iced Scones and Pumpkins
This warm and rustic look is all about layering affordable, charming pieces. It’s proof that a beautiful tablescape doesn’t have to be expensive.
- Main Furniture (Table runner): $15 – $40
- Serveware (scalloped cake stand): $20 – $50
- Textiles (if any beyond runner): $10 – $25
- Decor/Accessories (Pumpkins, pinecone, spoon): $15 – $35
- Food Items (Scones, almonds): $10 – $20
- TOTAL: $70 – $170
Budget alternative: Use a simple white plate instead of a pedestal, forage for pinecones in your backyard, and use pumpkins from the grocery store. You can get this look for under $30, especially if you bake the scones yourself!

|
📋 Copy HEX 🔗 Share |
Let’s be honest: while beautiful, this setup is purely for presentation. The scattered almonds and the placement of the pumpkins are not practical for actually serving food or having people eat at the table. This is a perfect vignette for a buffet table, a kitchen island, or as a centerpiece before a meal is served. If you plan to have guests eat here, you’ll need to clear away the smaller decorative elements first. Think of it as a ‘staged’ moment designed to welcome guests, rather than a functional dining setup.
17. Rustic Spooky Signage Mounted on Birch Branches
Want to make your own rustic sign display? It’s easier than it looks. You’ll need about an hour and maybe $40 in materials.
- Source your branches. Find 2-3 sturdy birch branches about 4-5 feet tall. You can buy faux ones at a craft store or find real ones.
- Create your signs. Use thin craft wood or even stiff cardboard painted black. Use a white paint pen or stencils to add your spooky text.
- Attach the signs. Use a hot glue gun or small nails to affix the arrow signs to the birch branches at varying heights and angles.
- Drape and decorate. Weave faux autumn leaves and a strand of battery-powered fairy lights through the branches.
- Add a final touch. The black skull mask adds a perfect spooky element, but a large faux spider or a rubber bat would also work well.
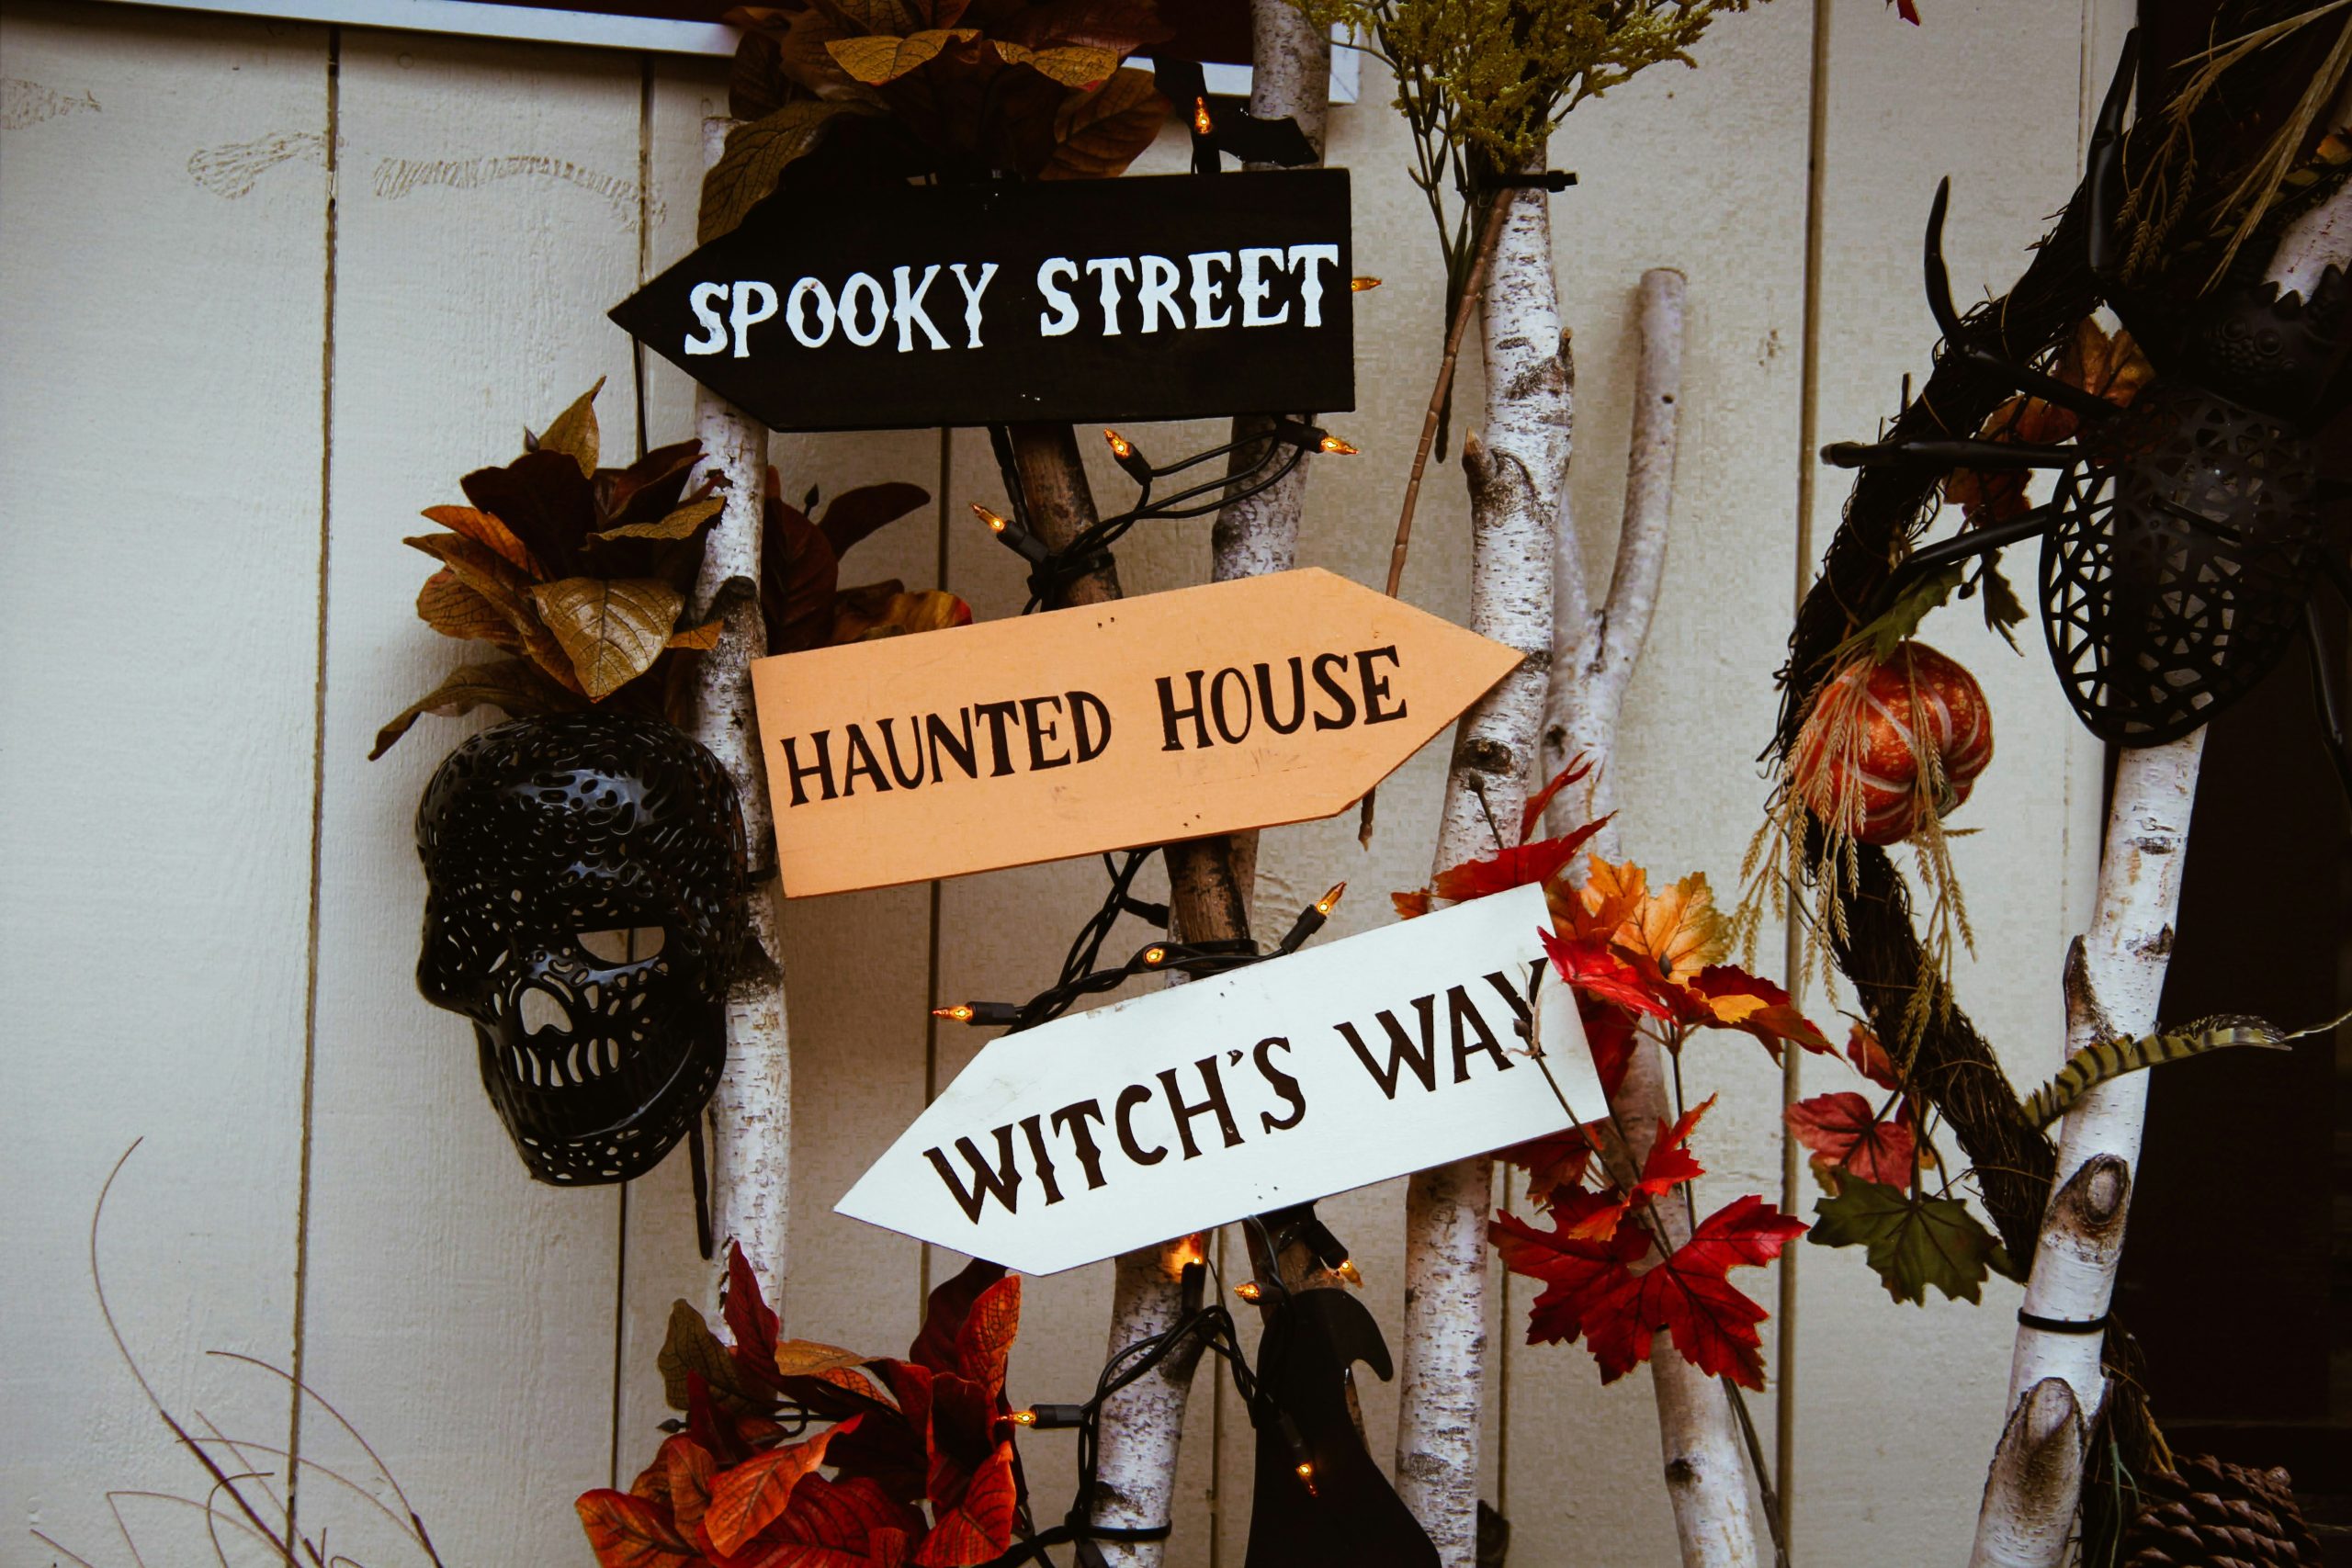
|
📋 Copy HEX 🔗 Share |
This vertical decor element is fantastic for narrow spaces and corners. Because it draws the eye up, it doesn’t take up valuable floor or counter space. It’s ideal for an entryway, the end of a cabinet run, or a blank wall in the kitchen that needs a festive touch. You need a ceiling height of at least 8 feet to accommodate the verticality of the branches. For lower ceilings, you could adapt this into a horizontal arrangement hung over a doorway or window. A similar vertical piece is the skeleton in Idea #2, but this version has a much more rustic, handmade feel.
18. An Atmospheric Still Life with Muted Heirloom Pumpkins
The magic here is the color palette. Instead of bright, classic orange, this arrangement uses muted, complex tones: ochre, slate blue, and deep forest green. This sophisticated palette is what makes the scene feel atmospheric and painterly, like a Dutch still life. The low-key, directional lighting from the side enhances the textures of the pumpkins and casts long shadows, adding to the moody and intimate feeling. It’s a grown-up, artistic take on pumpkin decor.
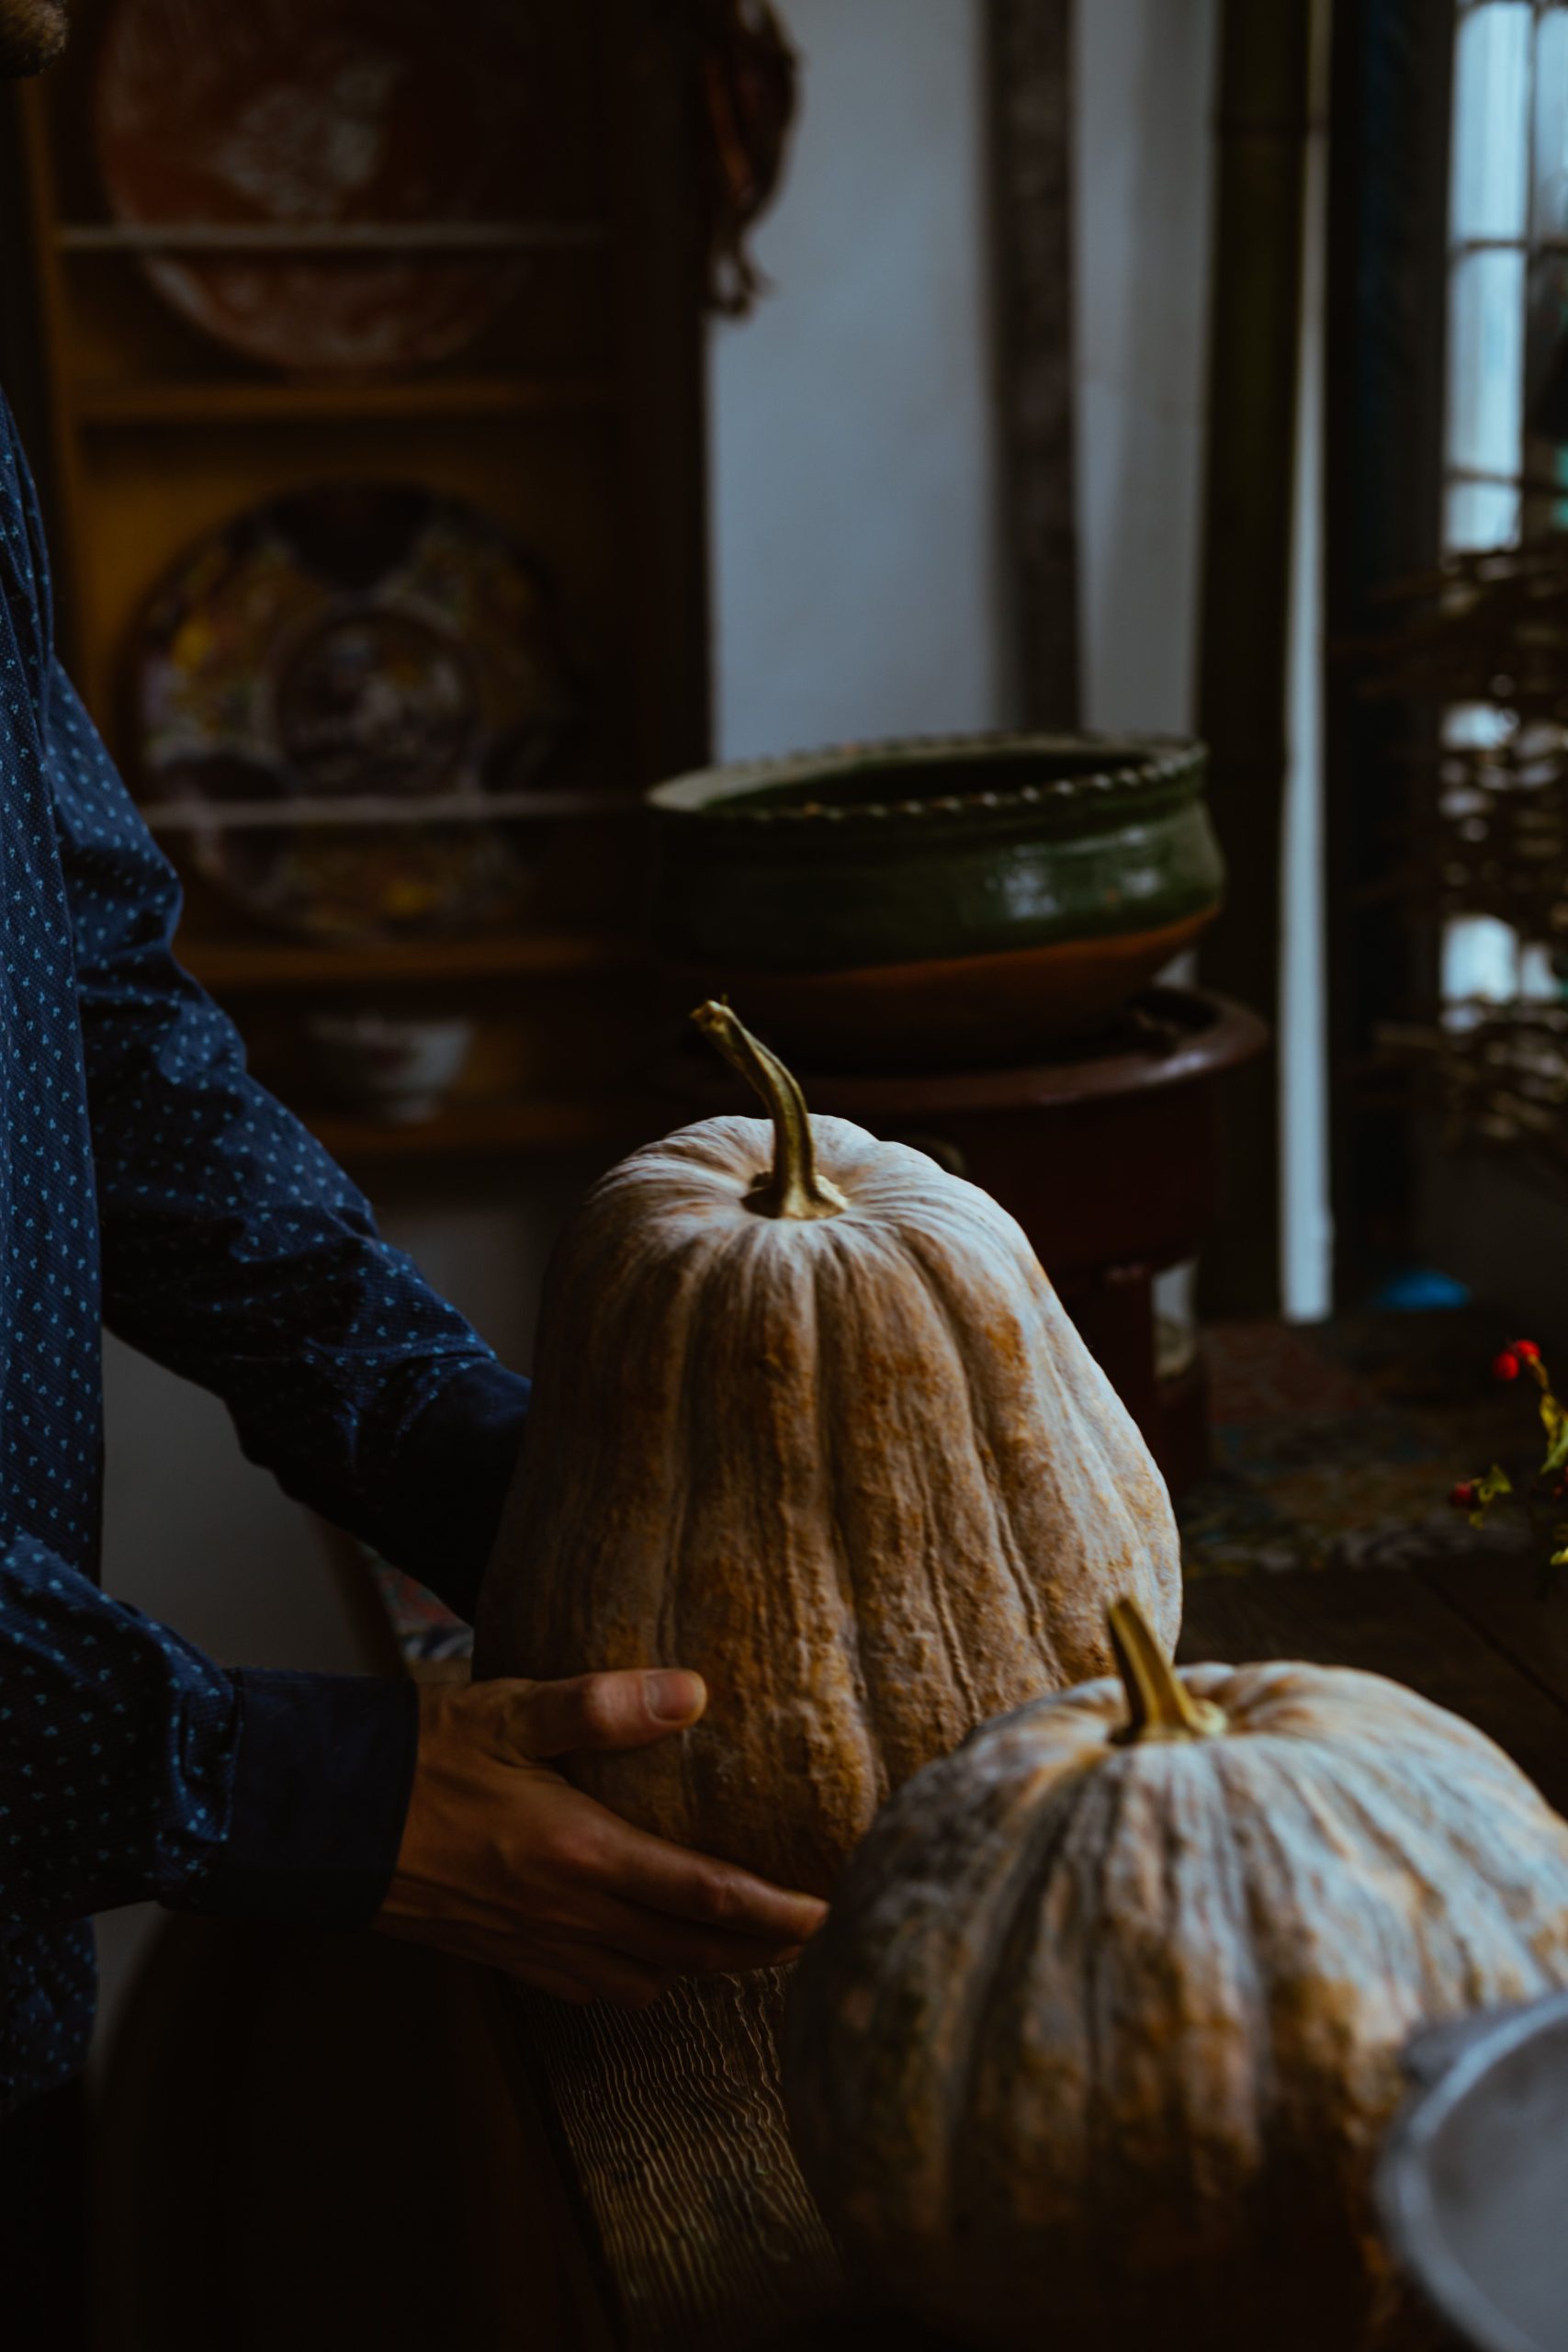
|
📋 Copy HEX 🔗 Share |
To create an atmospheric photo or vignette like this, lighting is everything. Avoid direct, overhead light. Instead, use a single light source from the side, like a window with indirect light or a single lamp with the shade removed. This is called ‘sidelighting,’ and it’s what creates those beautiful highlights and deep shadows that reveal texture. Position your objects, then move your light source around until you see the shapes and textures pop. It’s the secret to making simple objects look dramatic and important.
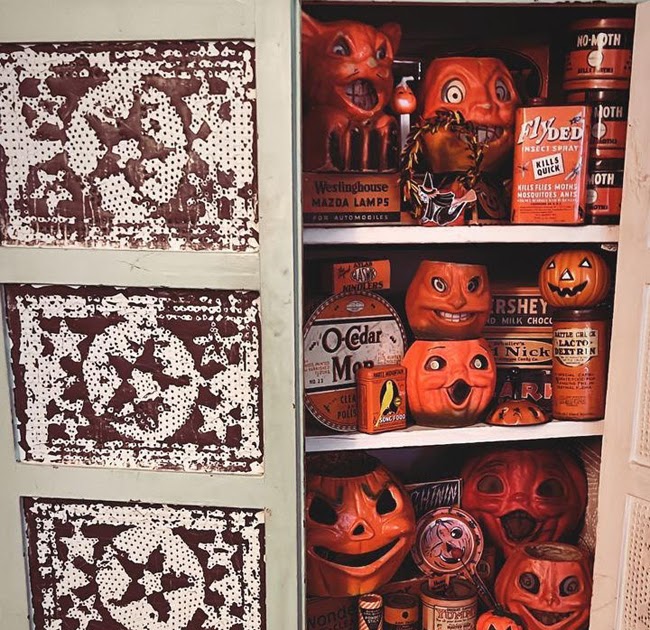
19. A Curated Collection of Vintage Jack-o’-Lanterns in a Distressed Cabinet
The cabinet itself is the star of this show. While the collection of vintage jack-o’-lanterns is impressive, it’s the distressed cream frame and oxidized metal door panels that provide the perfect stage. The dark, star-patterned grates offer a tantalizing peek at the bright orange collection inside, creating intrigue and contrast. The cabinet acts as a frame, containing the cheerful chaos of the pumpkins and elevating them from simple decorations to a curated museum-quality display. Without this specific piece of furniture, the collection wouldn’t have nearly the same impact.
|
📋 Copy HEX 🔗 Share |
This look taps directly into the ‘dark academia’ and ‘eclectic grandpa’ trends that are dominating home decor in 2026. People are craving spaces that feel collected, personal, and full of stories. This isn’t about buying a coordinated set of decor from one store; it’s about the thrill of the hunt and displaying treasured finds. This style celebrates nostalgia, imperfection, and the beauty of objects with a past. It’s a direct rebellion against years of sterile minimalism, and it shows no signs of slowing down.
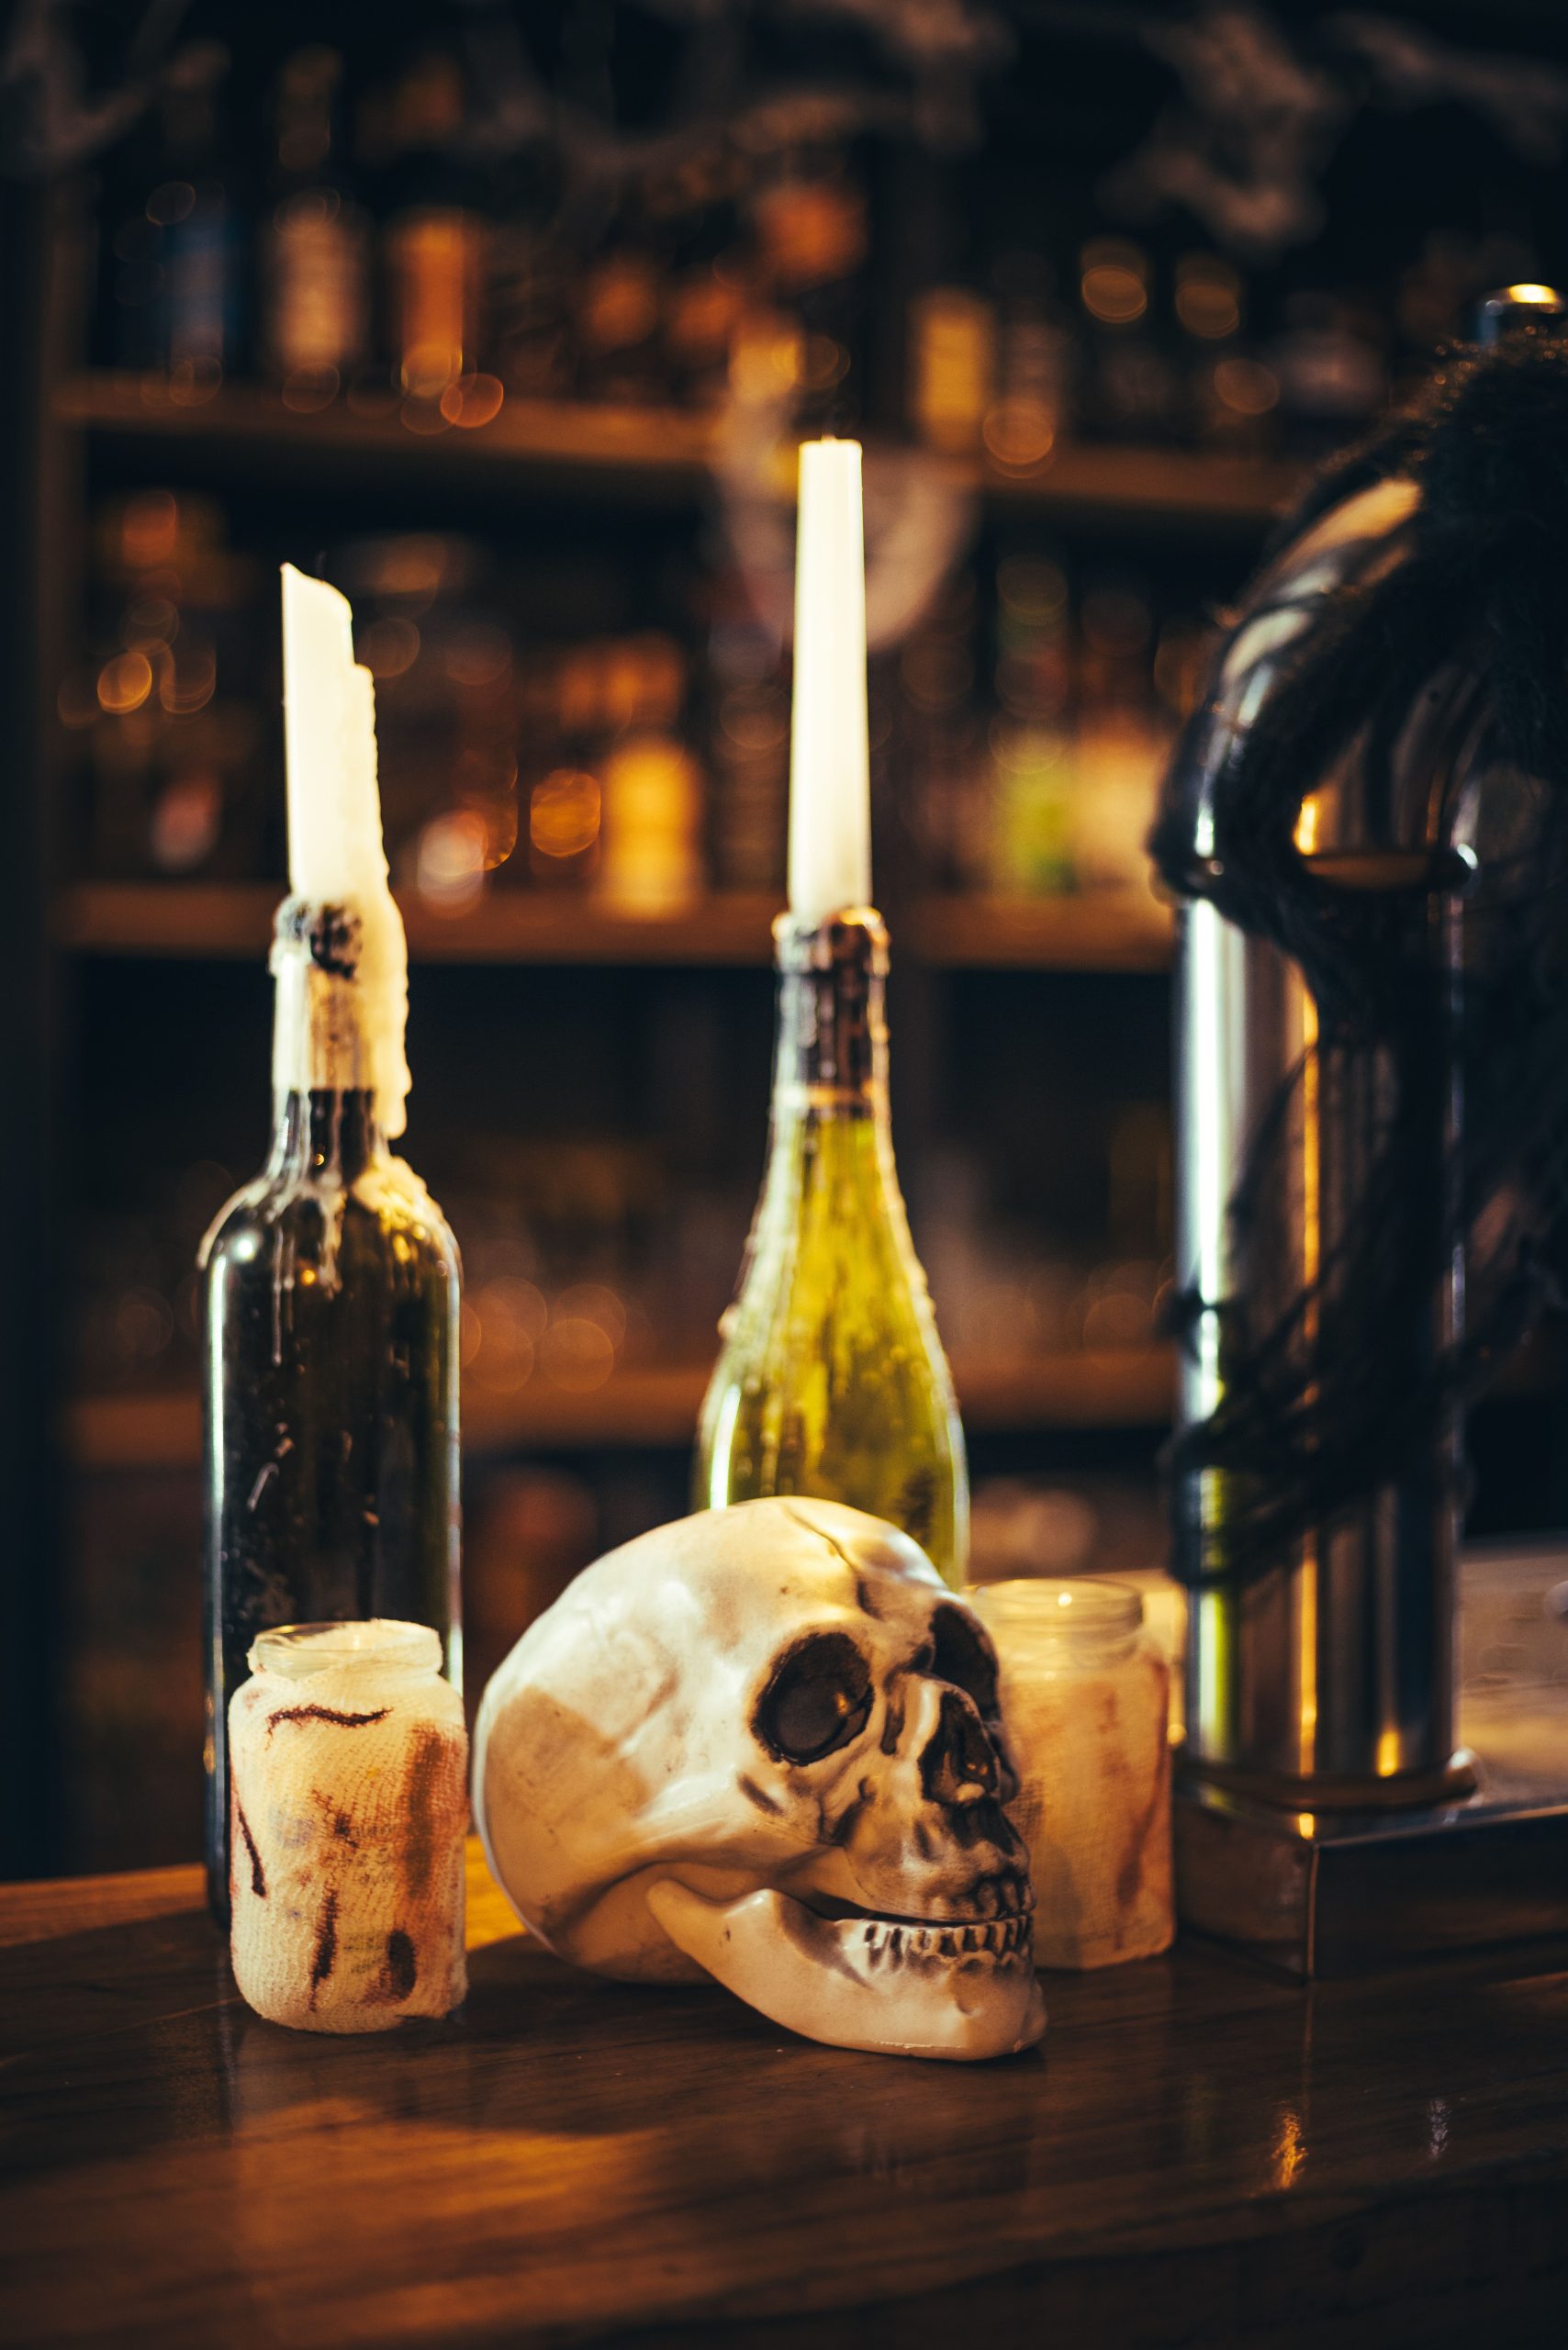
20. A Macabre Bar Counter Display with a Skull and Drip Candles
A quick reality check on this moody vibe: fire safety. Using wine bottles as candle holders is a classic gothic look, but it can be unstable. Make sure the bottles are heavy and have a flat, sturdy base. More importantly, never leave burning candles unattended, especially when they’re surrounded by flammable materials like gauze and cobwebs. For a safer but equally atmospheric option, use high-quality, flickering LED taper candles. You’ll get the same moody glow without any of the risk. You can even melt some wax around the top of the LED candle to mimic the drip effect.
|
📋 Copy HEX 🔗 Share |
The formula for this macabre scene is all about texture and shadow. It’s roughly 50% smooth, hard surfaces (the skull, glass bottles), 30% rough, aged textures (the gauze, cobwebs), and 20% metallic accents (the bar tap). The color palette is almost entirely monochromatic—bone white, black, and gray—which allows the textures to take center stage. The warm, flickering candlelight is the key ingredient that brings it all to life, creating dancing shadows that make the scene feel dynamic and spooky.
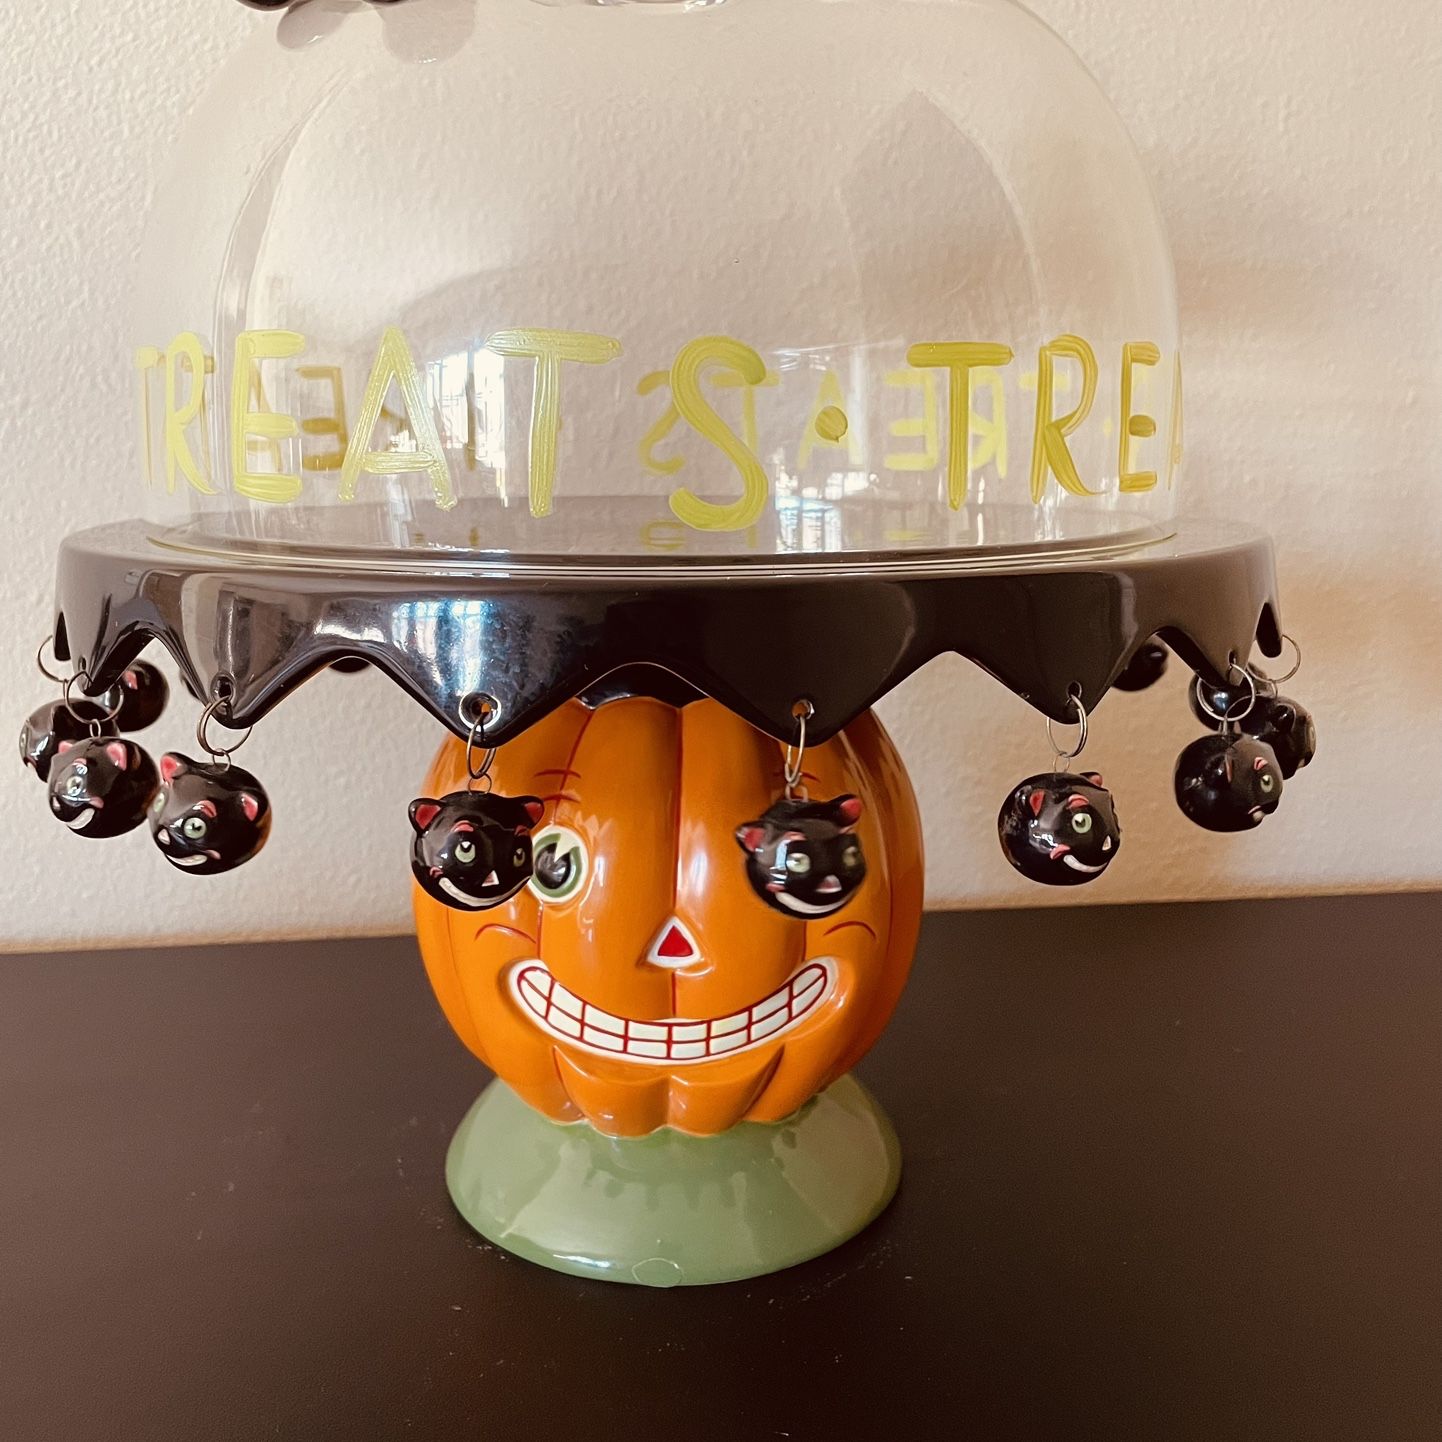
21. A Whimsical Pumpkin Treat Stand with Hanging Black Cats
The tiny, hanging black cat charms are what make this piece truly special. The ceramic pumpkin base is cute, and the scalloped tray is classic, but the addition of those dangling cats adds a layer of playful detail and movement that is completely unexpected. It transforms a simple cake stand into a miniature, interactive piece of art. It’s a small detail that shows a high level of design thought and captures a sense of whimsical, retro fun that feels both nostalgic and fresh.
|
📋 Copy HEX 🔗 Share |
We’re seeing a huge resurgence of 90s-inspired, slightly kitschy holiday decor, and this piece fits right in. After years of sleek, serious minimalism, people are ready to have fun with their decorations again. This treat stand has a charming, almost cartoonish quality that evokes the playful Halloween decor of our childhoods. It’s not trying to be overly sophisticated or scary; it’s just pure, joyful fun. This trend is all about embracing bold colors, graphic shapes, and a sense of humor in your home.
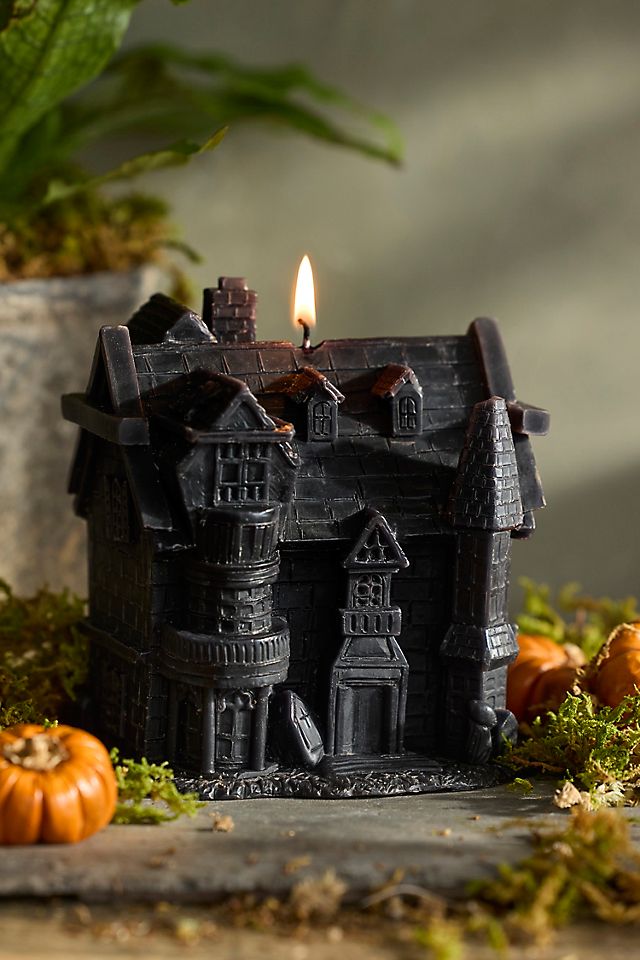
22. A Gothic Haunted House Candle as a Table Centerpiece
When using a single, highly detailed object as a centerpiece, the key is to create a ‘grounding’ element for it. Don’t just place the candle on the table. Here, the artificial moss and miniature pumpkins create a base that frames the haunted house, making it look like it’s rising out of a spooky landscape. This not only adds color and texture but also defines the space the centerpiece occupies. You can achieve this with a piece of slate, a dark wood charger, or even a scrap of black velvet fabric. It makes the object feel important and intentional.
|
📋 Copy HEX 🔗 Share |
A sculptural candle like this is perfect for smaller surfaces where a large spread would be overwhelming. It’s ideal for a round cafe table (30-36 inches in diameter), a console table in an entryway, or as a focal point on a fireplace mantel. Because of its verticality, it provides a lot of visual impact without taking up a huge footprint. For a long, rectangular dining table, you might want to use three of them in a row to match the scale of the table or use it as one component of a larger tablescape like the one in Idea #12.
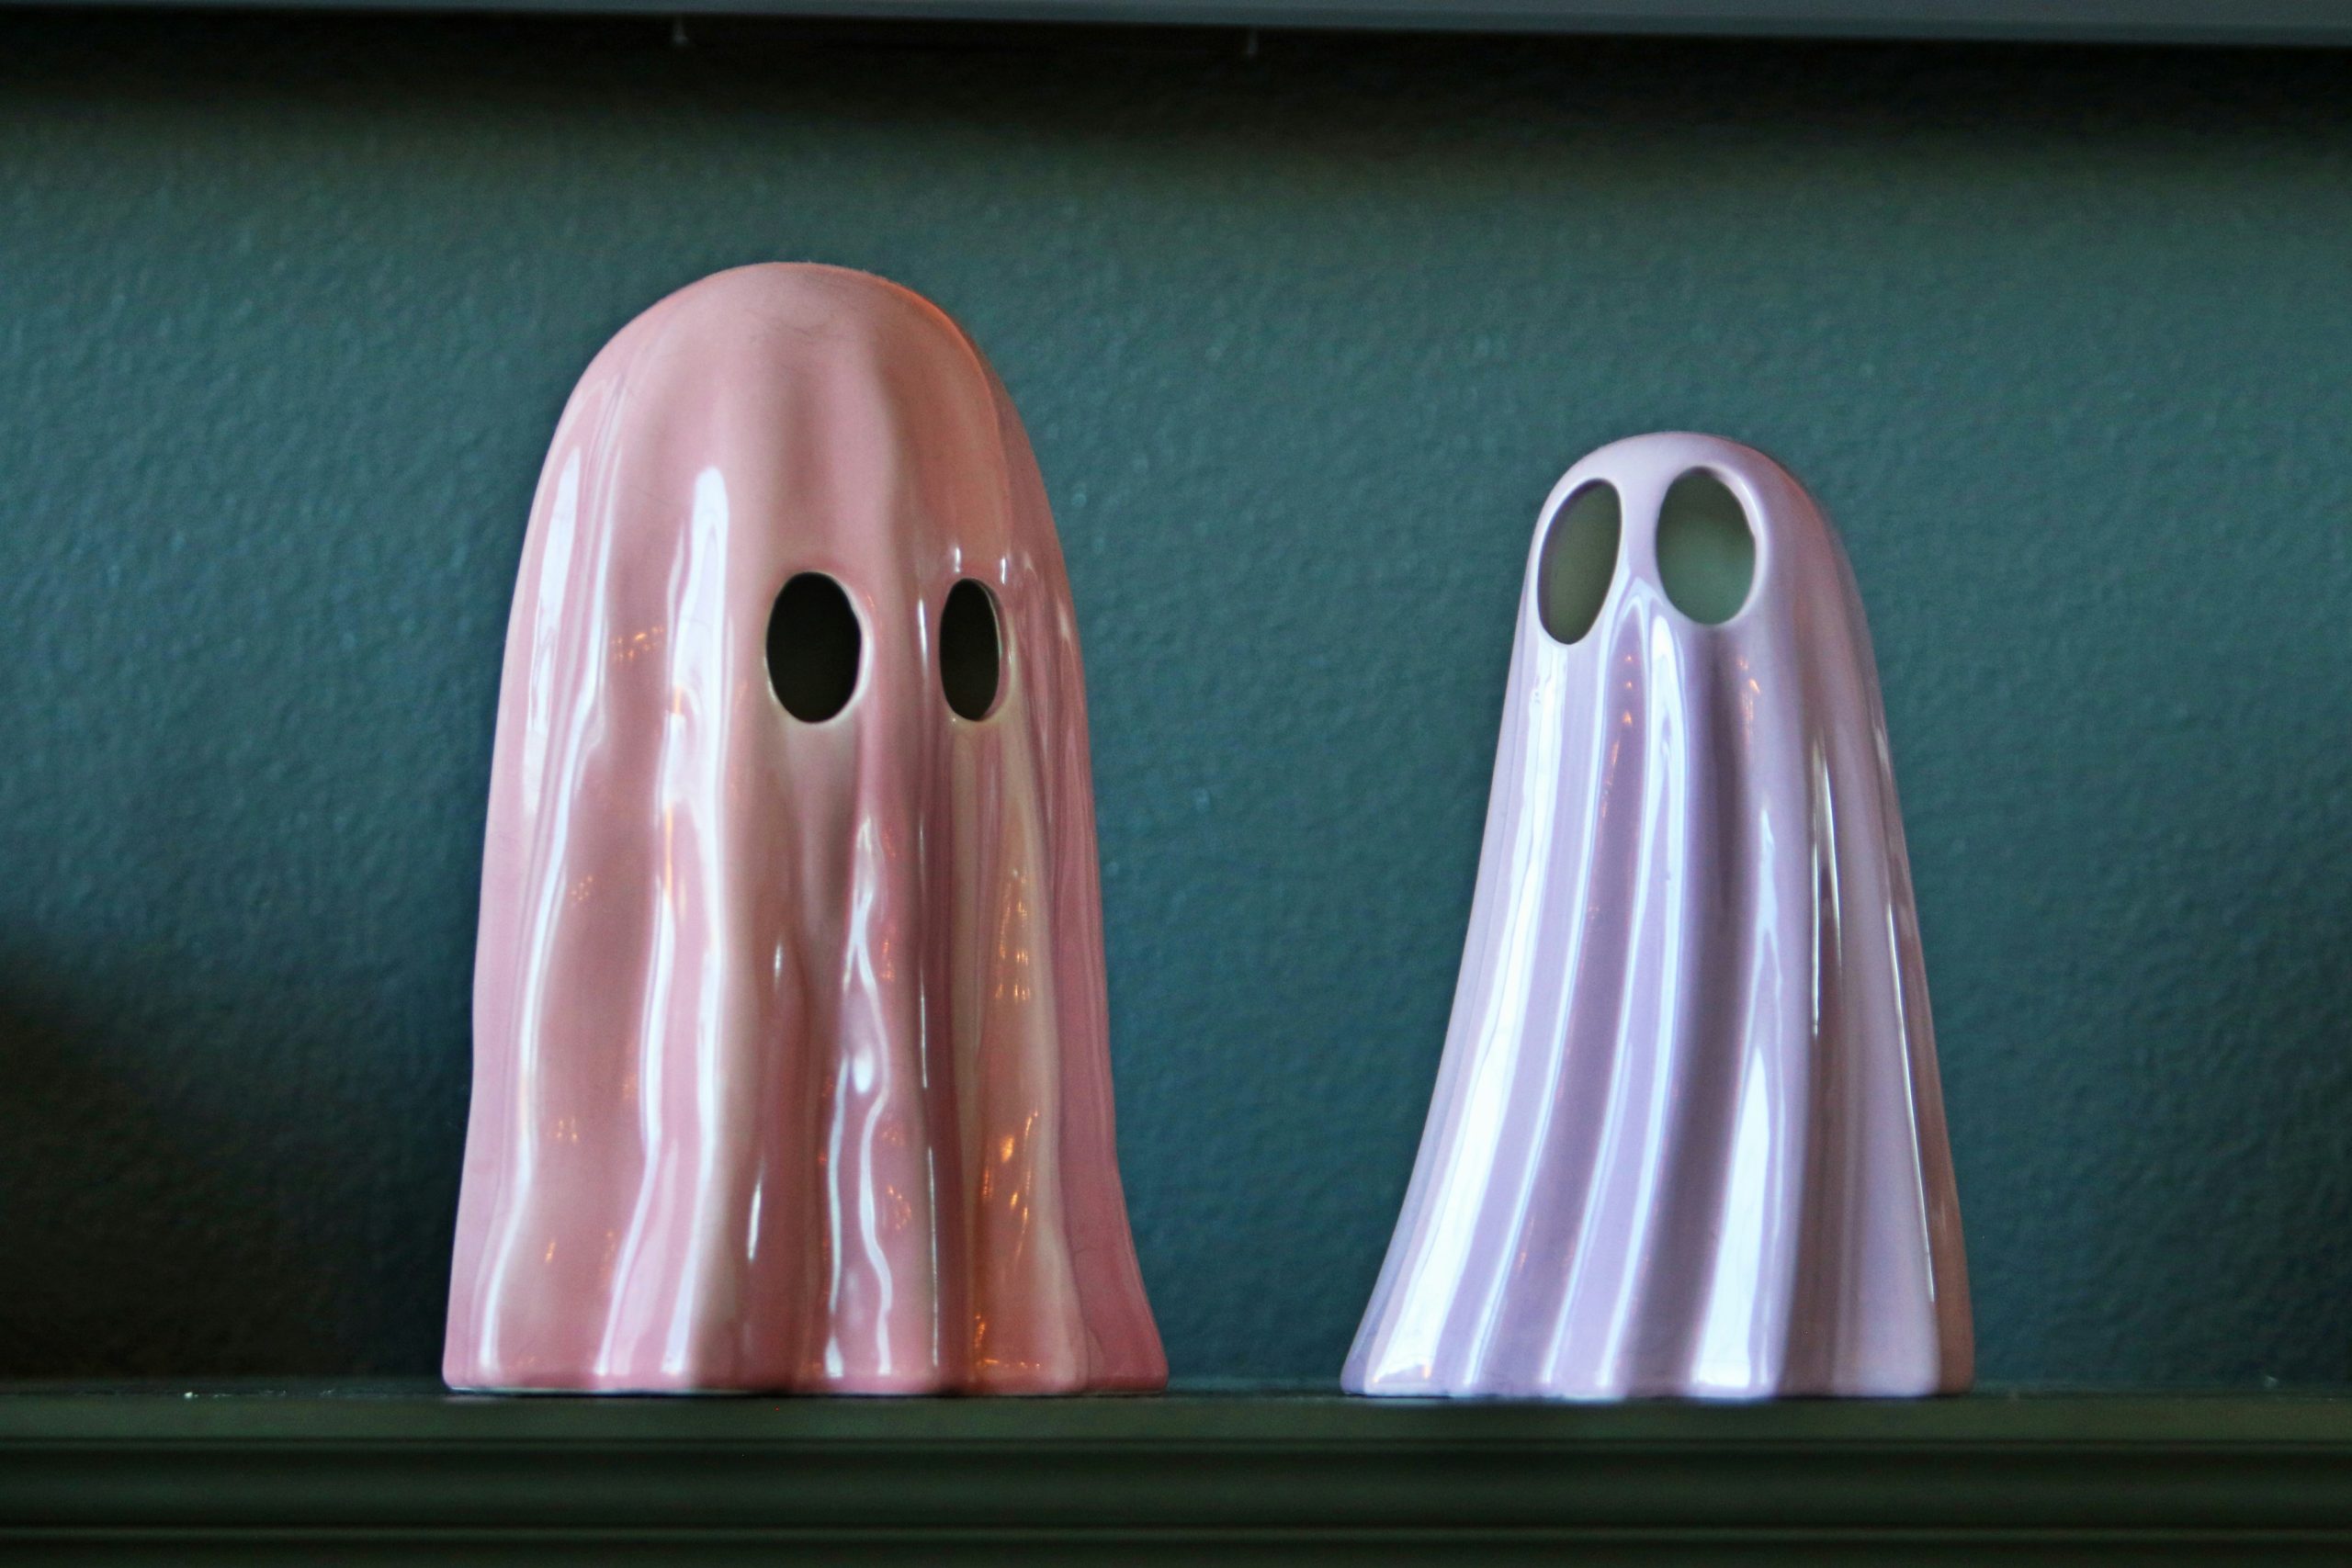
23. Playful Pastel Pink and Purple Ceramic Ghosts
The genius of this look is the high-contrast combination of color and backdrop. The sweet, glossy pastel ghosts would look washed out against a white wall. But placed on a dark shelf against a matte dark teal wall, they pop. The deep, moody background makes the pink and lavender feel vibrant and intentional, not childish. It’s a sophisticated play on expectations, mixing a traditionally ‘cute’ color palette with a ‘spooky’ subject and a ‘serious’ backdrop. This tension is what makes the design so visually interesting and modern.
|
📋 Copy HEX 🔗 Share |
You can get this trendy pastel-goth look for less. Search for ‘ceramic ghost’ on Etsy—you’ll find countless independent artists making similar figures at various price points, often under $20. For the backdrop, you don’t need to paint a whole wall. A simple fix is to get a piece of foam board from a craft store and paint it a deep teal, navy, or charcoal gray. Prop it up behind your shelf for an instant, high-contrast display. This is a great way to experiment with the trend without a major commitment. This is a much more colorful take than the minimalist ghost in Idea #28.
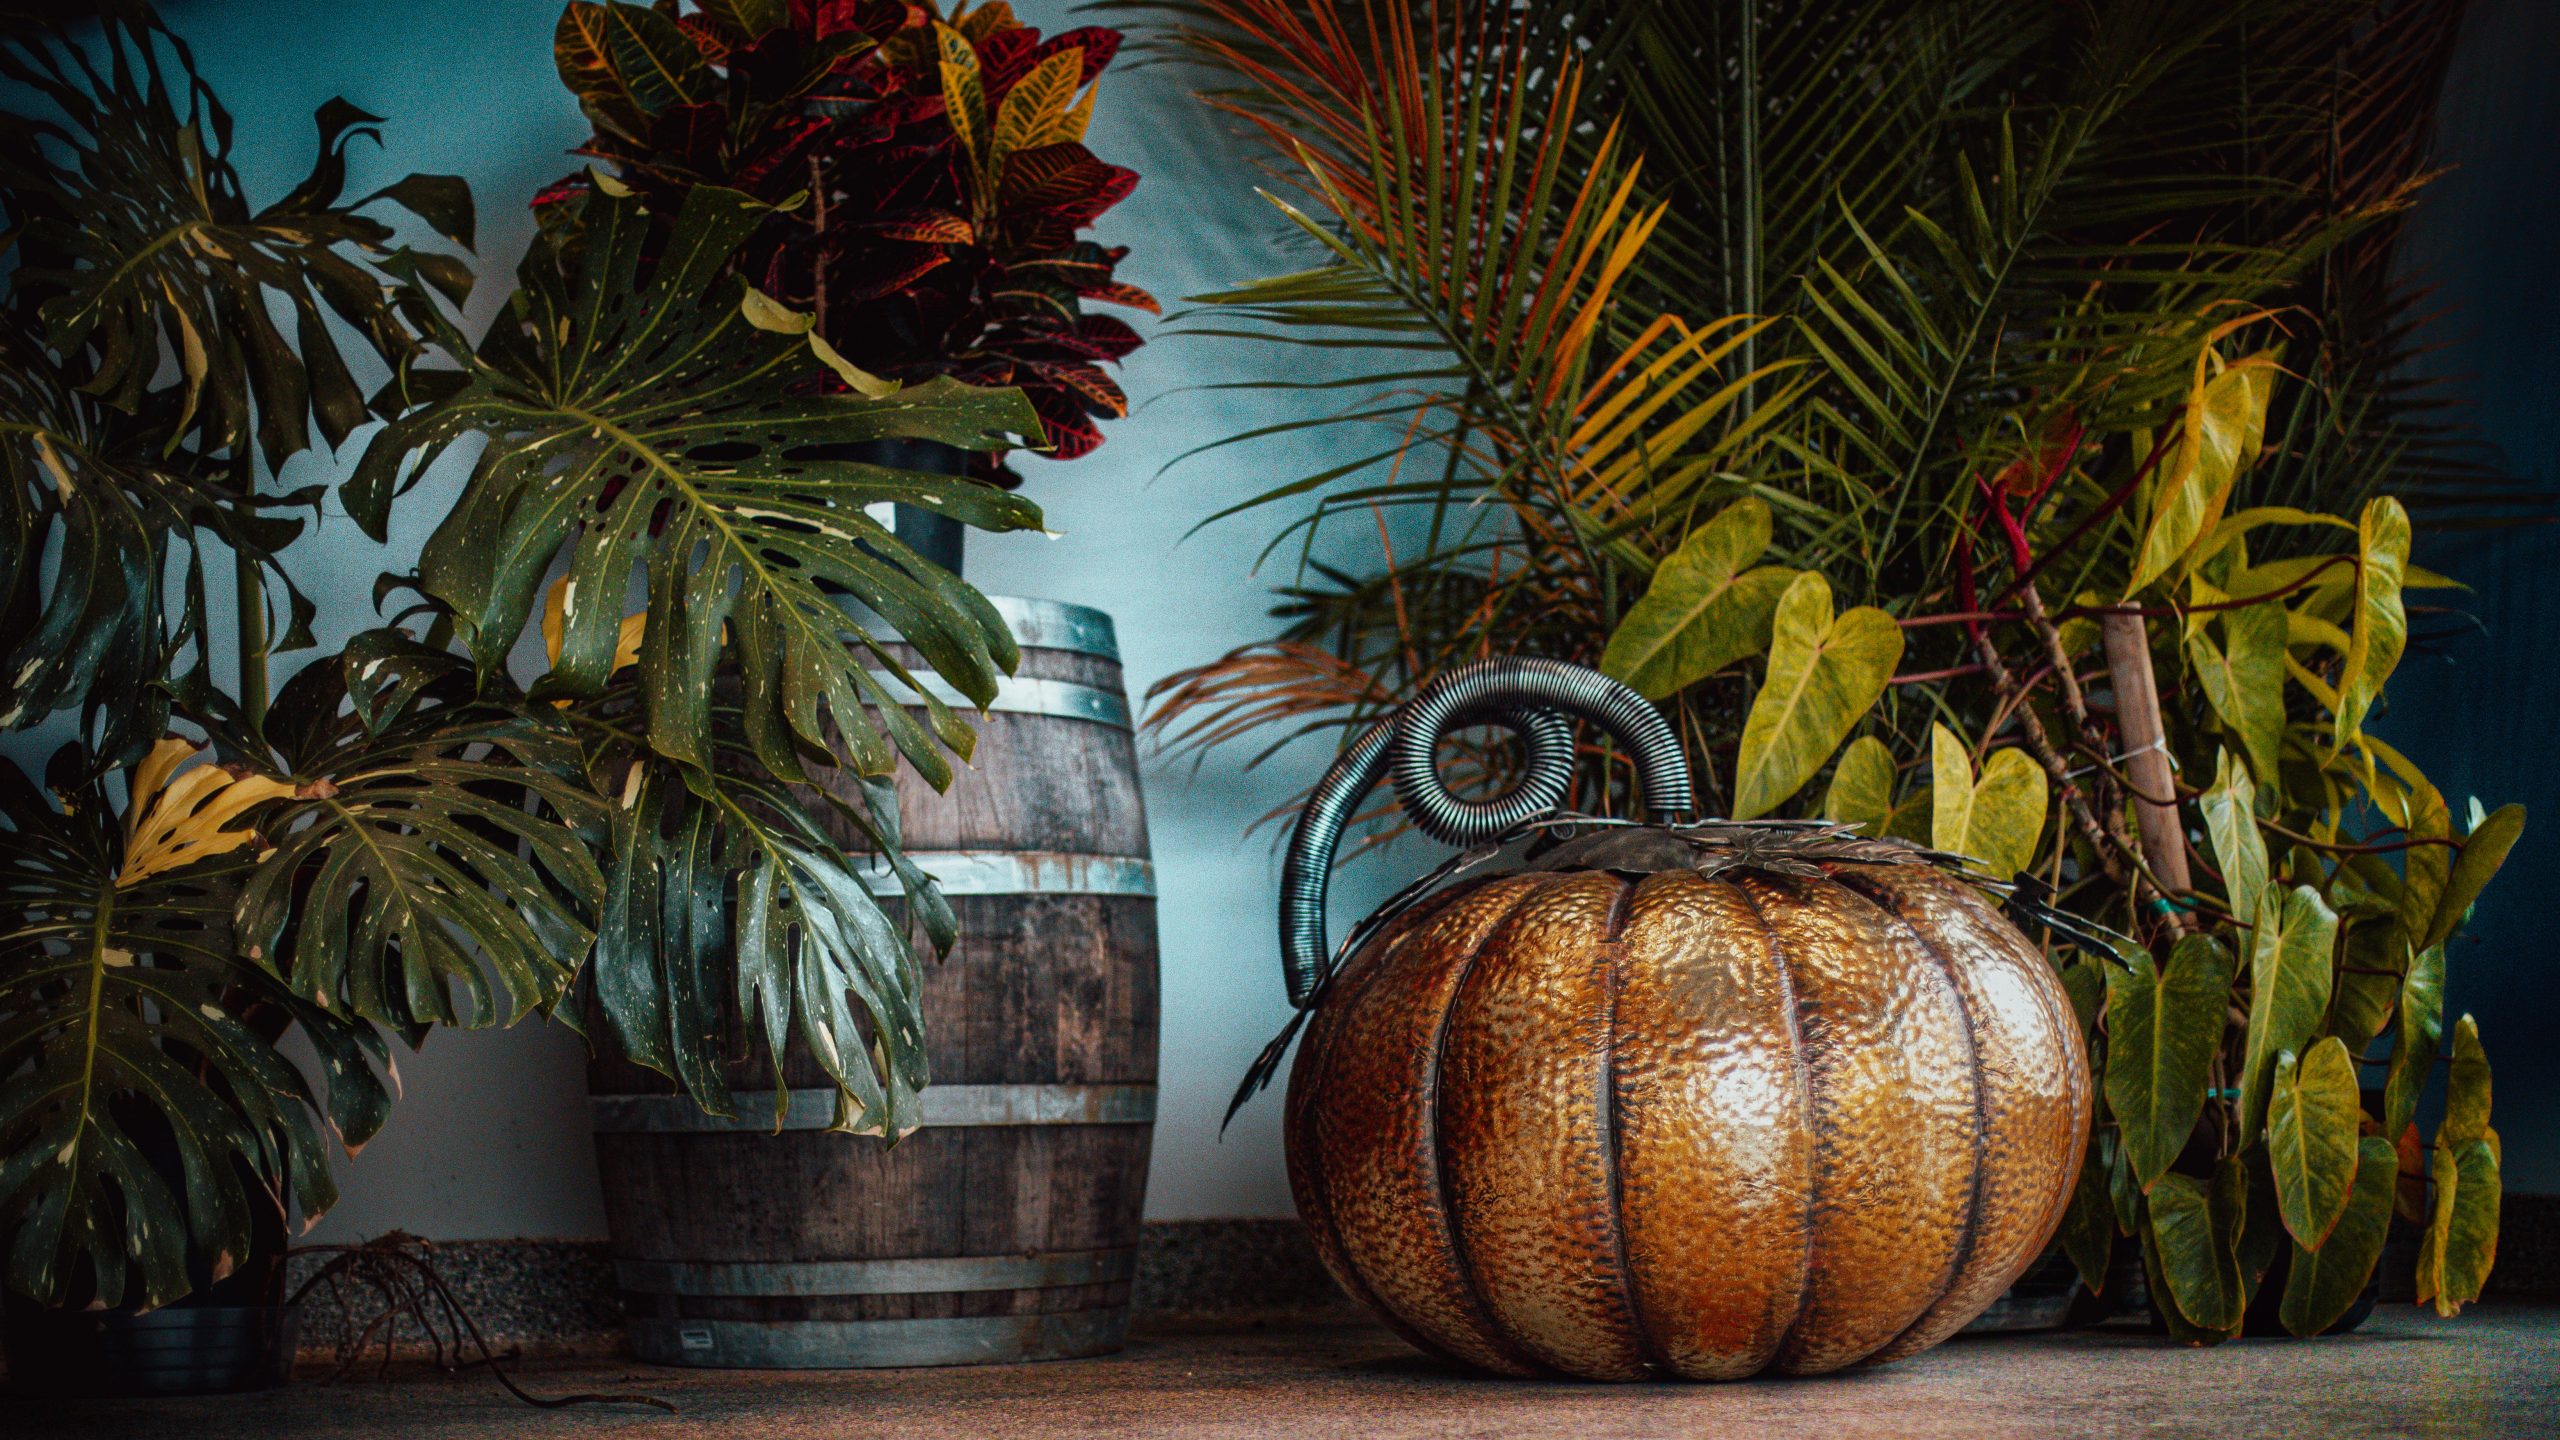
24. Classic Carved Pumpkin Paired with a Rustic Wooden Barrel
A quick reality check on using large props like wooden barrels: they can be heavy and awkward to move. Also, if you’re using a real carved pumpkin, it will start to decompose within a week or two, especially indoors. To prevent it from staining the wood of the barrel, place a small plate or a piece of plastic wrap underneath it. For a longer-lasting display, consider using a high-quality foam ‘carvable’ pumpkin from a craft store. You’ll get the same look, but it will last the entire season without any mess or rot.
|
📋 Copy HEX 🔗 Share |
This look is a simple formula of rustic textures. Think 50% weathered wood (the barrel), 30% organic material (the pumpkin and plants), and 20% negative space. The key is the variation in texture between the rough-hewn wood and the smooth skin of the pumpkin. The plants add a touch of life and a different shade of green. It’s a classic, no-fail combination for an autumnal, harvest-inspired feel that leans more rustic than spooky. It’s timeless and works almost anywhere.
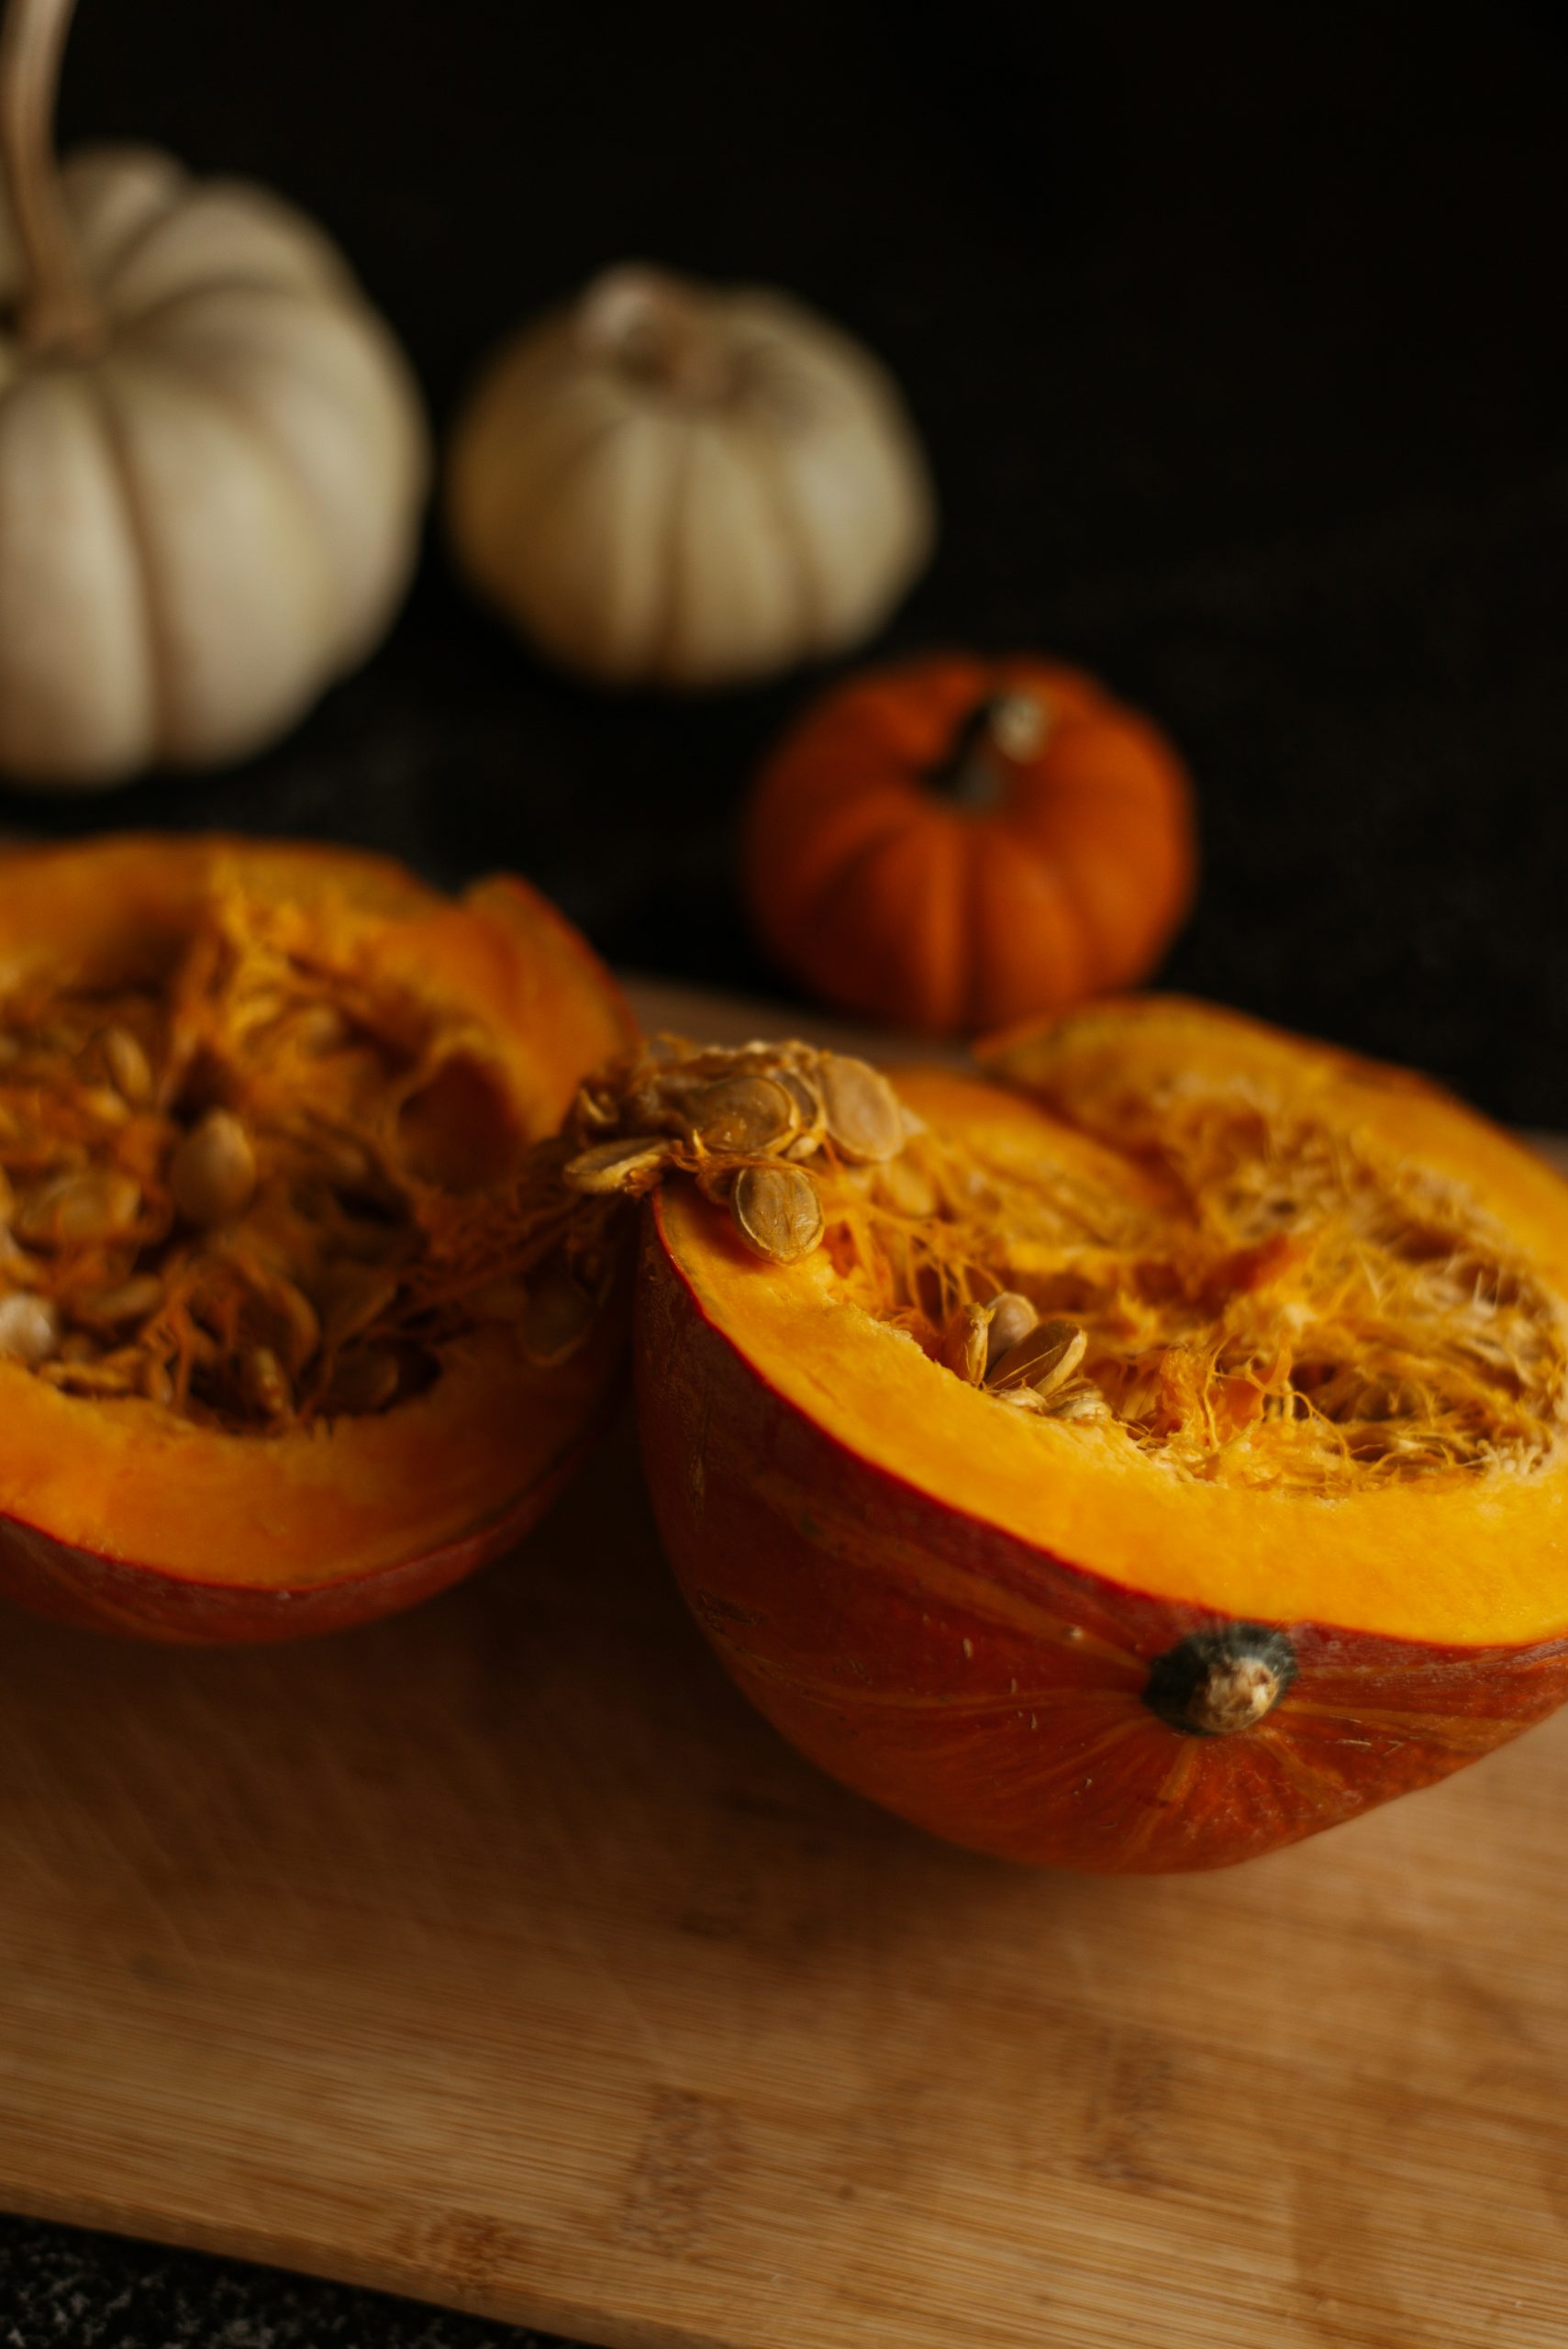
25. The Simple Power of a Single, Well-Placed Pumpkin
What makes this approach work is confidence. Placing a single pumpkin as your sole decoration is a bold, minimalist statement. It communicates that you don’t need a mountain of decor to celebrate the season. The pumpkin itself becomes a piece of sculpture. Its color, shape, and texture are the entire focus. This requires choosing your pumpkin carefully—look for one with a great shape, a vibrant color, and an interesting stem. Its simplicity is its strength, and it’s a refreshing antidote to the often-cluttered feel of holiday decor.
|
📋 Copy HEX 🔗 Share |
Before you commit to a single-pumpkin look, run through this quick checklist:
- Does the surface have enough negative space around it? Placing a lone pumpkin on an already cluttered counter won’t have the same impact.
- Is the pumpkin’s scale right for the space? A tiny pumpkin on a huge island will look lost. A giant pumpkin on a tiny table will look comical.
- Is the color right for your kitchen? A classic orange pumpkin is great, but maybe a white, green, or blue heirloom pumpkin would better complement your existing color scheme.
- Does the surface need protection? Place a mat or plate under a real pumpkin on porous stone or wood.
26. A Dramatic Jack-o’-Lantern Head on a Life-Sized Skeleton
This high-impact display is surprisingly affordable to assemble, especially if you snag the skeleton during post-Halloween sales for next year.
- Main Prop (life-sized portable skeleton): $50 – $150
- Textiles (draped fabric/curtain): $20 – $60
- Decor/Accessories (Carved jack-o’-lantern, small pumpkin): $10 – $25
- Lighting (optional spotlight): $15 – $30
- TOTAL: $95 – $265
Budget alternative: Find a skeleton on Facebook Marketplace after Halloween. Use an old black sheet for the draping and a real pumpkin from the grocery store. You can create this entire dramatic scene for under $75.

|
📋 Copy HEX 🔗 Share |
Putting this Pumpkin King together is a quick and fun project. It should take you about 30 minutes.
- Position your skeleton. Decide if you want it sitting or standing. Use a sturdy chair or prop it against a wall.
- Drape the backdrop. Hang a deep red or black curtain or piece of fabric behind the skeleton to create a theatrical, moody setting.
- Carve your jack-o’-lantern. Make sure the opening at the bottom is wide enough to sit securely on the skeleton’s neck peg.
- Place the head. Gently position the carved pumpkin onto the skeleton’s neck.
- Add the final touch. Carefully place the small, whole pumpkin within the skeleton’s rib cage for that extra macabre detail.
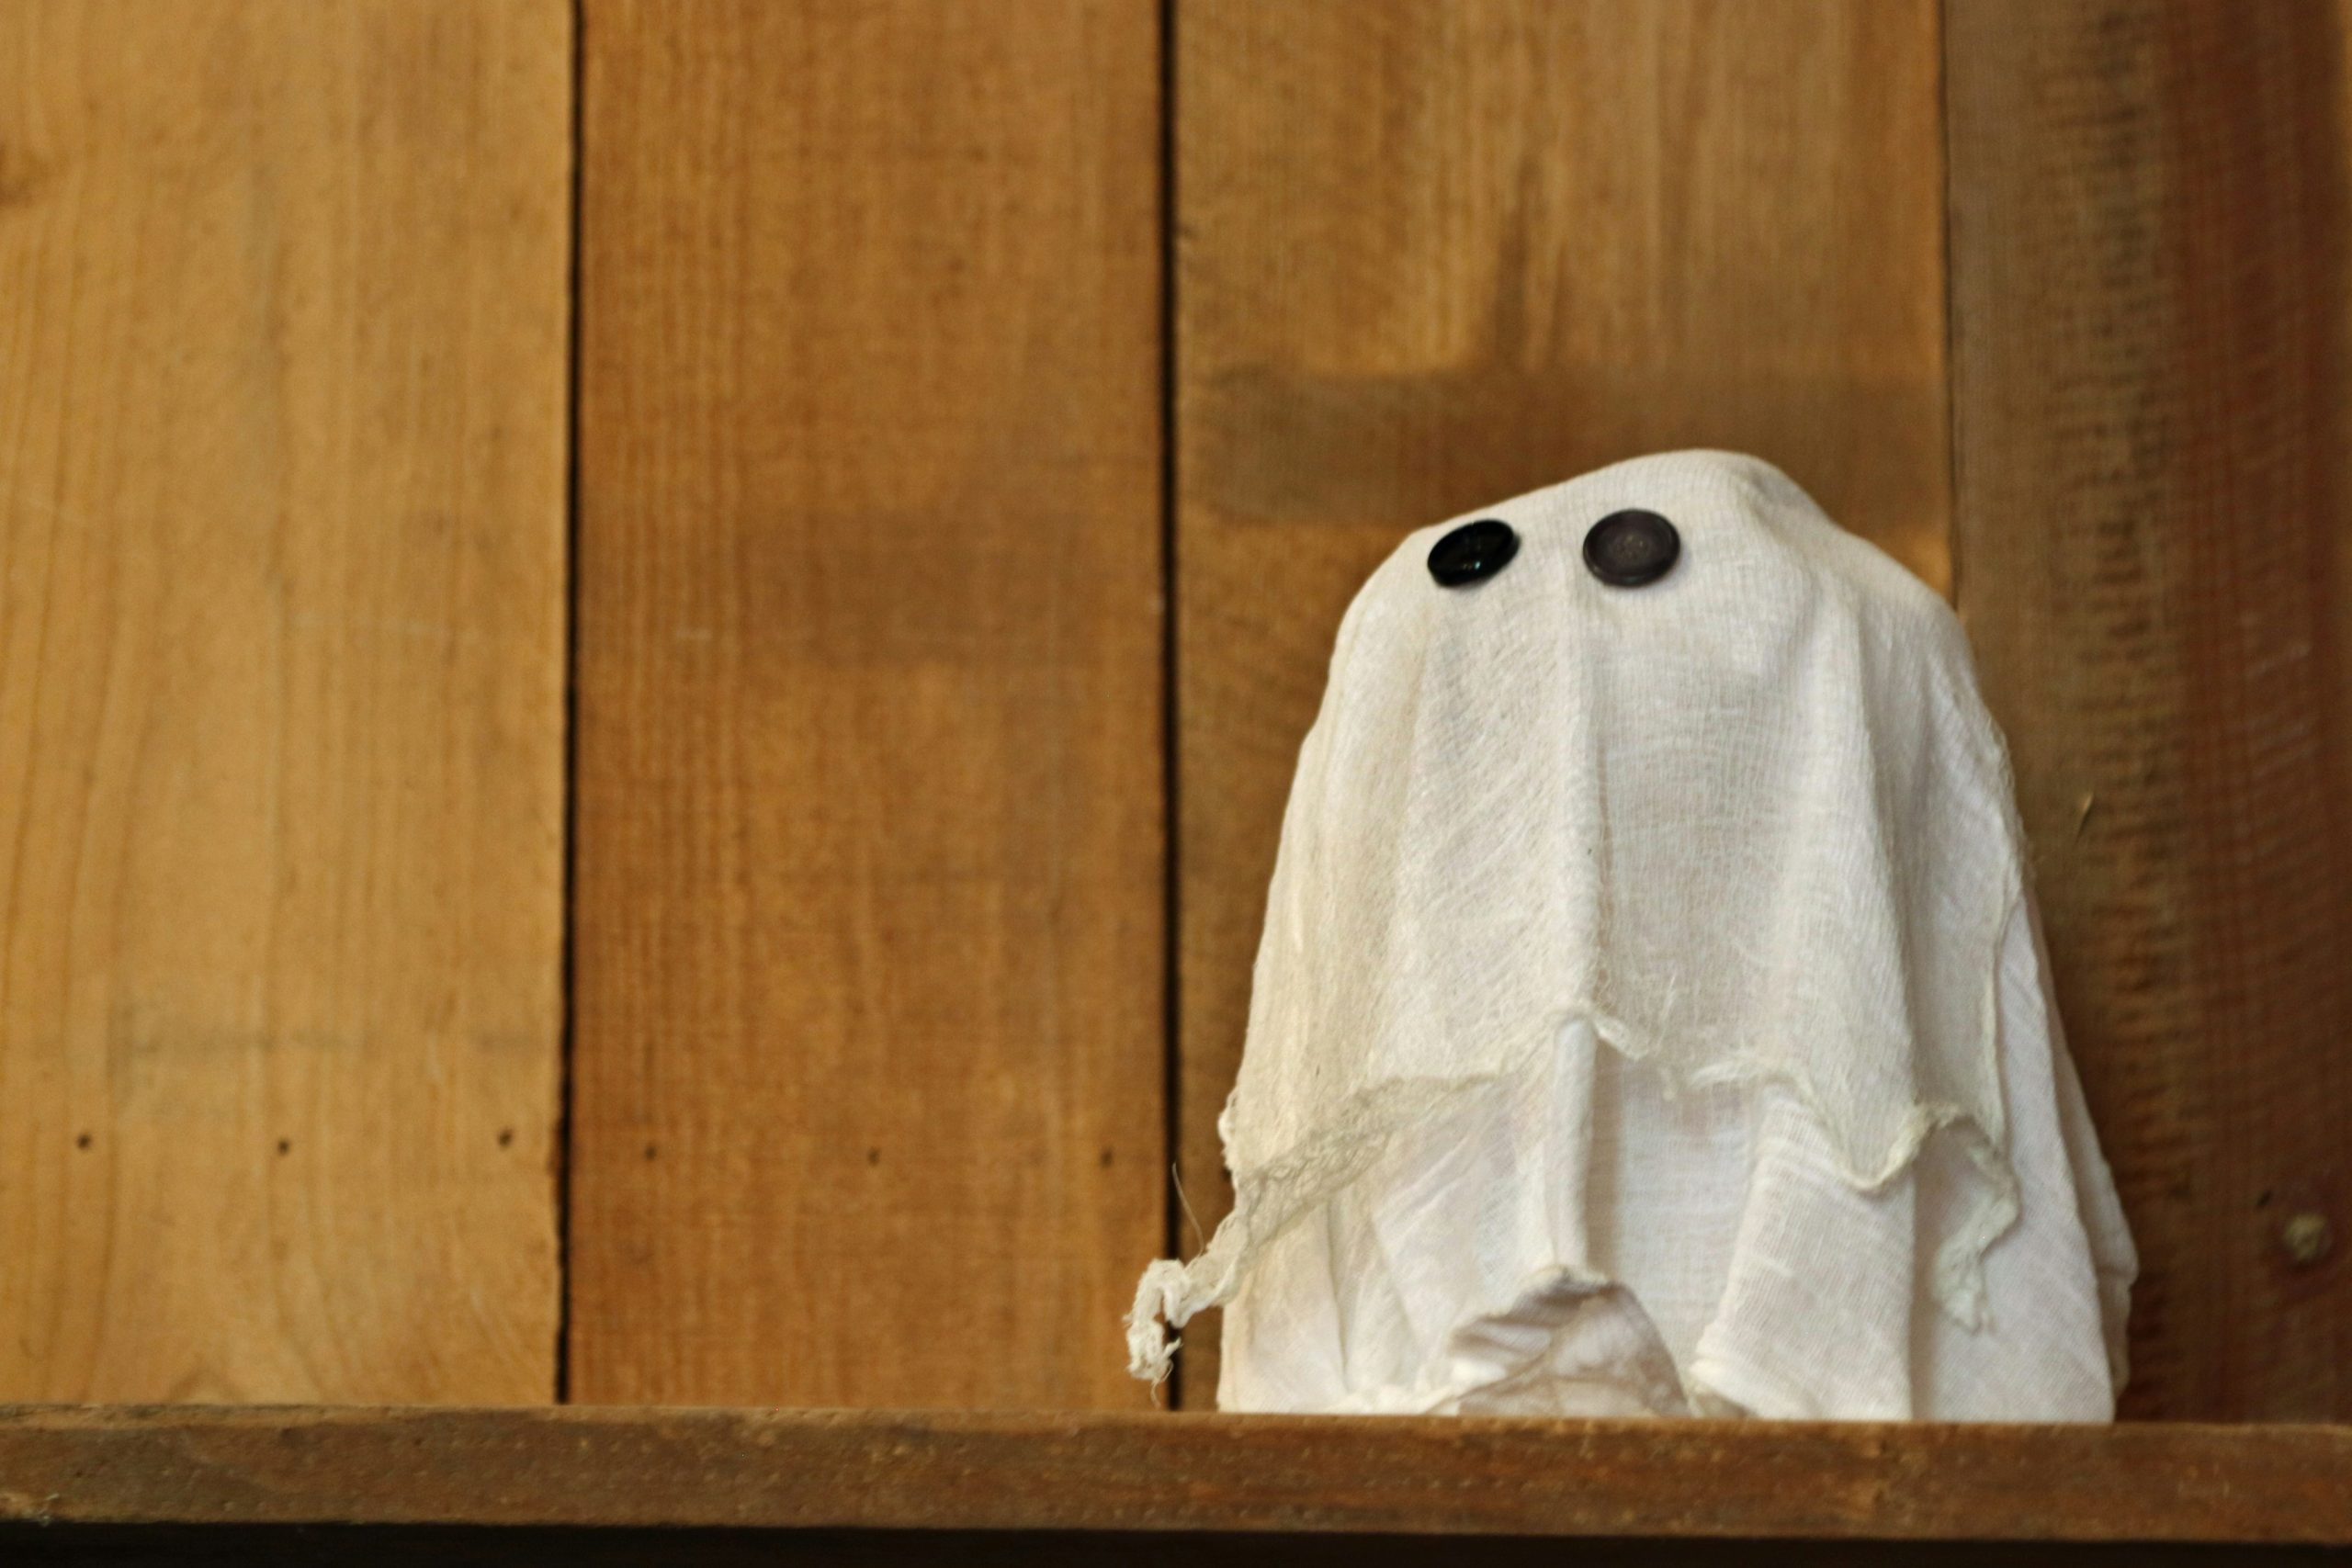
27. A Handmade Cheesecloth Ghost on a Rustic Shelf
To make a cheesecloth ghost like this, use a mixture of 1 part school glue to 1 part water. Create a form using a small bottle or a ball of aluminum foil on a stick. Drape the glue-soaked cheesecloth over the form, arranging the folds how you like them. Let it dry completely for 24 hours. Once it’s stiff, remove the form, and it will hold its shape perfectly. The secret is to not oversaturate the cloth; it should be damp, not dripping, for the best result. Adding dark button eyes gives it that perfect handmade charm.
|
📋 Copy HEX 🔗 Share |
This simple decor works because of the power of texture and suggestion. The rough, rustic wood shelf provides the perfect contrast to the light, airy, and slightly transparent cheesecloth. Your brain fills in the blanks—the simple draped shape and two button eyes are all that’s needed to scream ‘ghost.’ It’s minimalist, nostalgic, and a little bit whimsical. It doesn’t need to be scary or complex to be effective. It feels personal and crafty, tapping into a desire for decorations with heart. Compare this to the glossy, modern ghosts in Idea #24.
Your Kitchen’s Spooky Story Starts Now
You don’t have to tackle a full-blown transformation worthy of a haunted house. Pick one idea from this list that really speaks to you and start there. The best designs are always personal, so have fun with it and create a space that feels like your version of Halloween. Now go save your favorites to your Pinterest board and get planning!