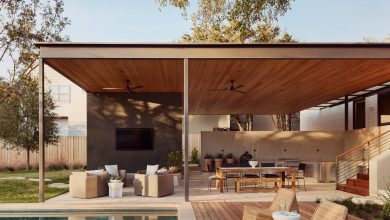
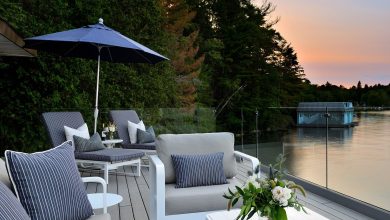
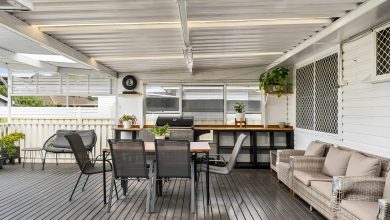
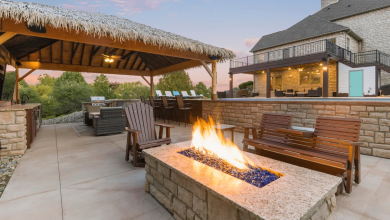
You know that feeling when you finally find the cement patio idea that looks exactly right for your backyard? That ‘Aha!’ moment is what this guide is all about. We’ve filtered through hundreds of real homes and designer projects to bring you the 27 most inspiring cement patio ideas for 2026. Inside, you’ll find everything from sleek modern pads and rustic stamped patterns to multi-level entertaining zones, with ideas for every budget. For 2026, the trend is all about creating outdoor ‘rooms’ that feel like a true extension of your home, and the right concrete foundation is the key. And stay until the end — we break down the most common mistakes that can ruin these looks.
📌 Save this to Pinterest for later — you’ll want to revisit these ideas.
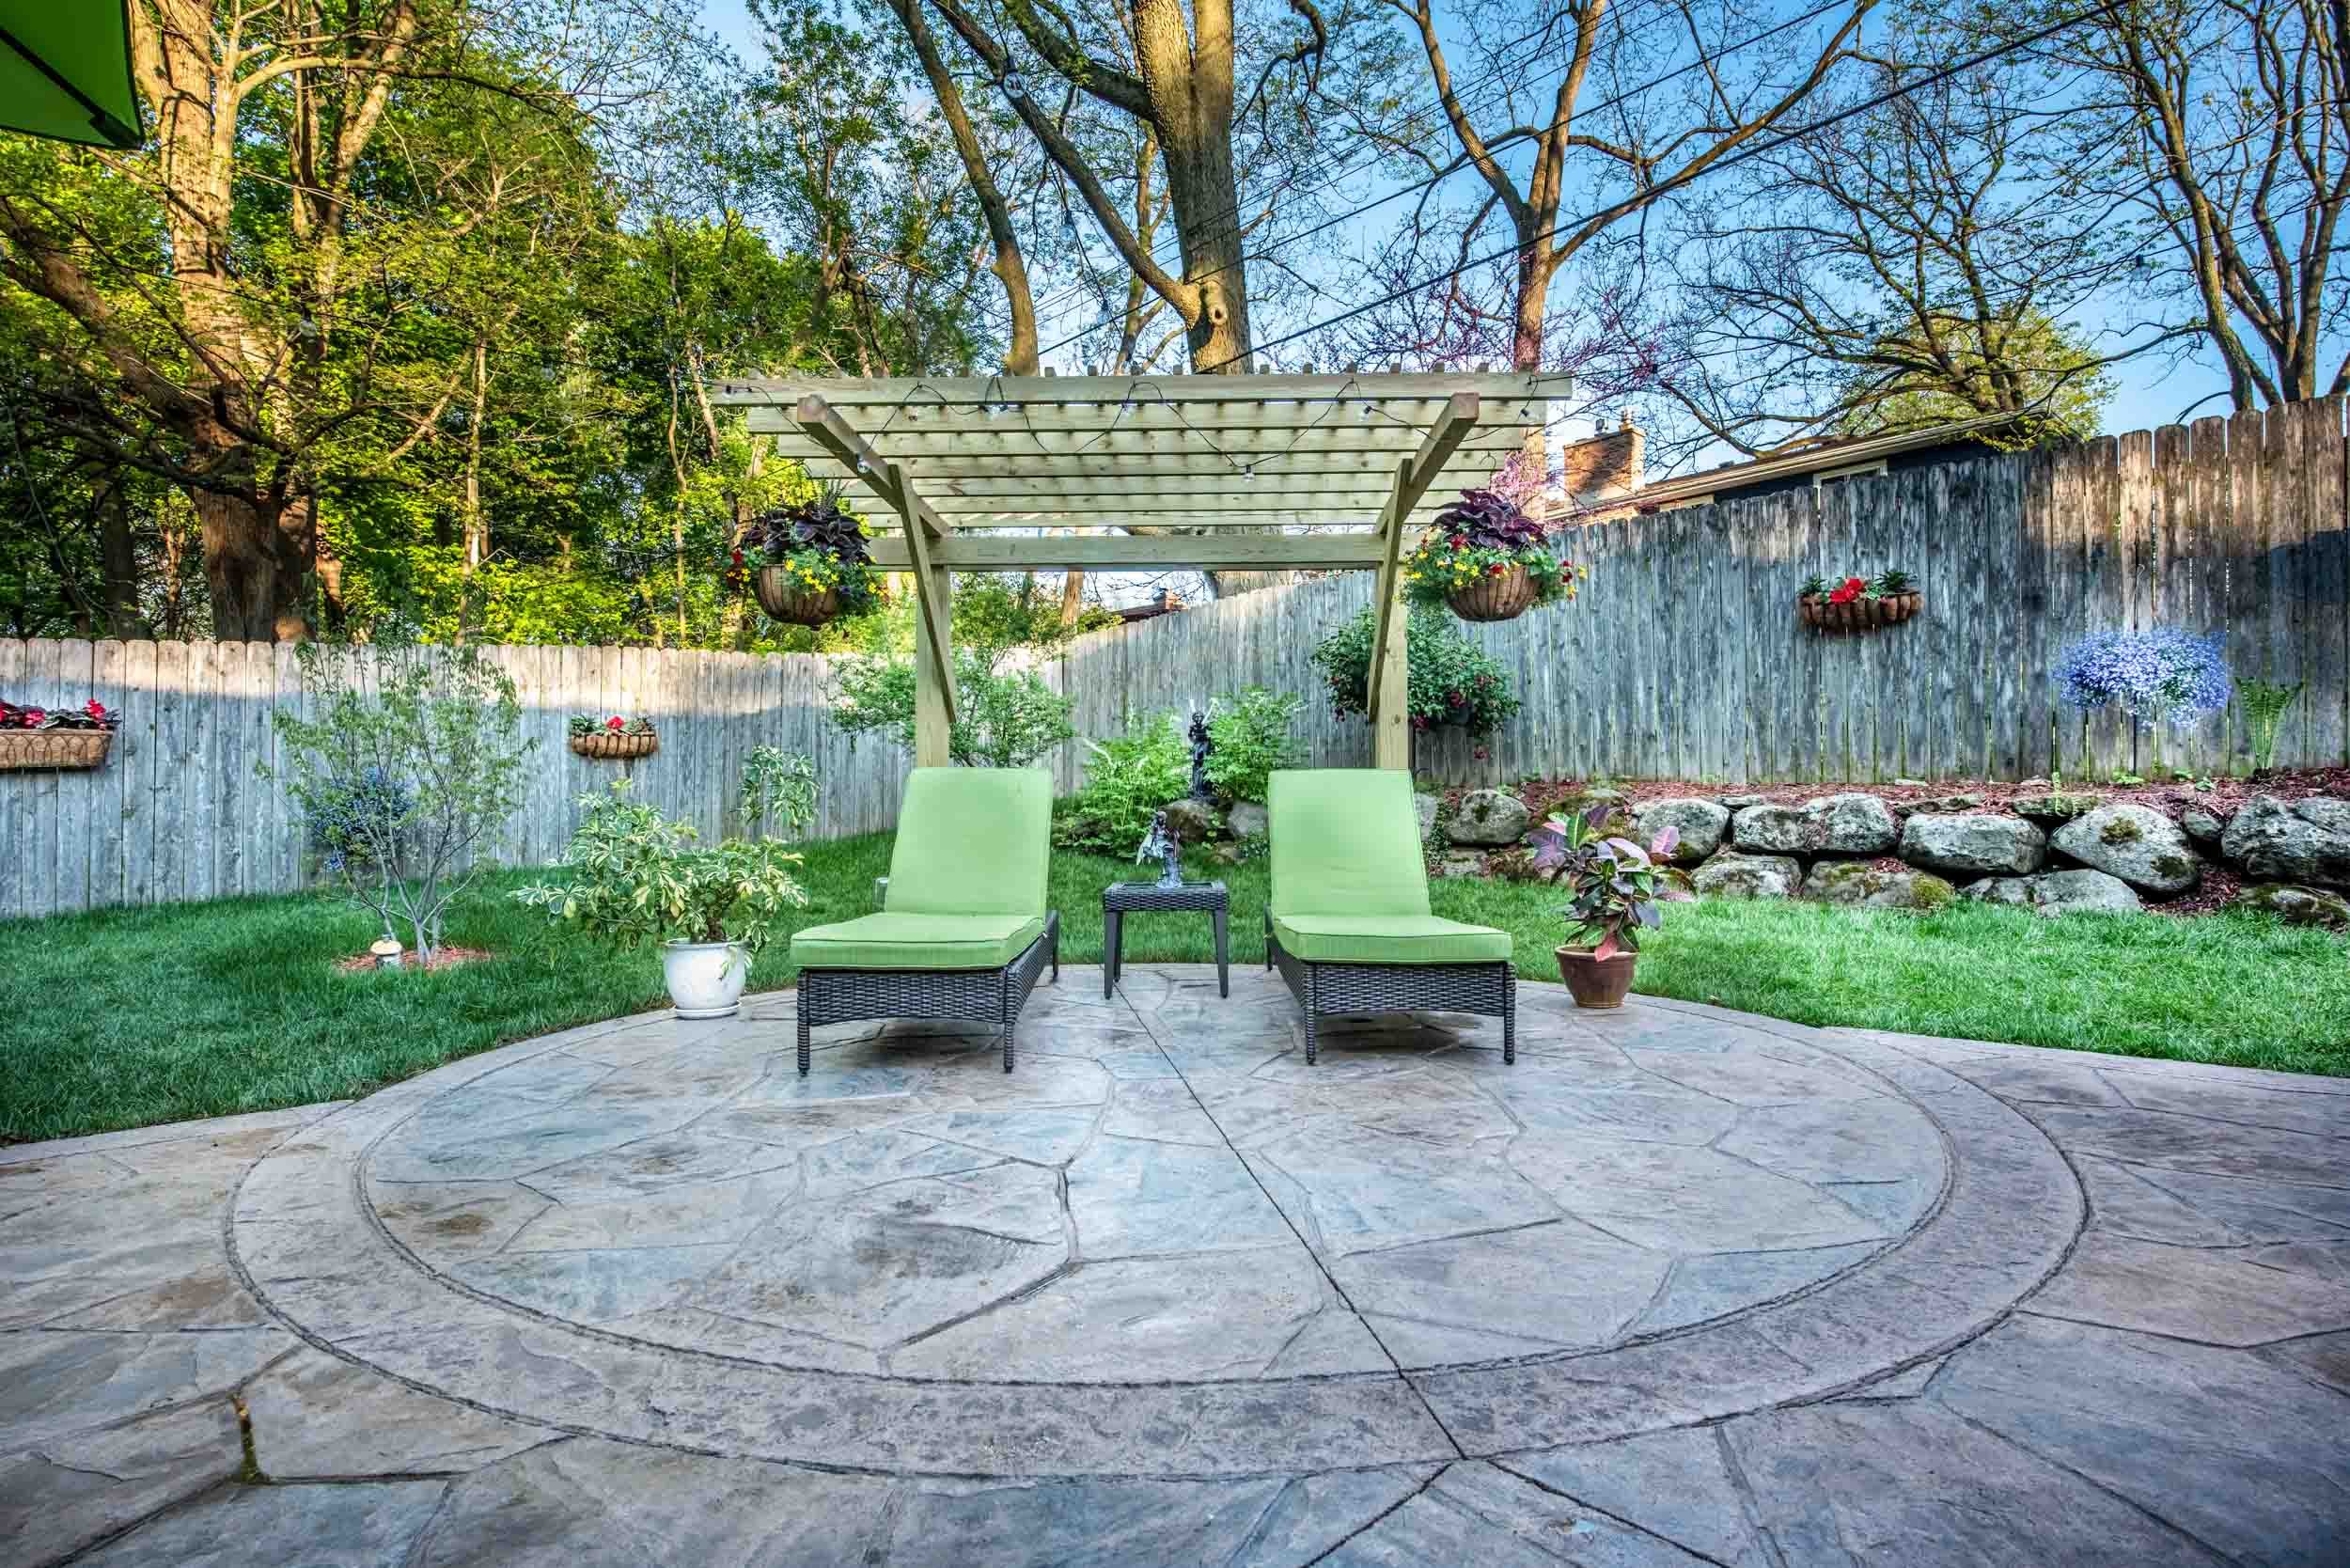
1. A Circular Stamped Concrete Patio Shaded by a Pergola
This design succeeds by contrasting strong geometry with soft, natural elements. The rigid square grid of the wooden pergola plays against the organic, circular shape of the stone-patterned patio below. This creates visual tension that is then beautifully resolved by the lush green lawn and overflowing hanging planters. The clearly defined border on the patio acts like a frame, making the entire setup feel like a deliberate outdoor room rather than just a slab of concrete. It’s a perfect marriage of structure and nature.
|
📋 Copy HEX 🔗 Share |
For a pergola to feel generous and airy, aim for a minimum overhead clearance of 8 feet, but push it to 9 or 10 feet if you can. It makes a surprising difference. For the main support posts, the rule of thumb is to bury at least one-third of the post’s total length in a concrete footer. For a 12-foot post, that means having 4 feet underground. This ensures it’s stable enough to handle wind, climbing plants, and hanging baskets without worry.
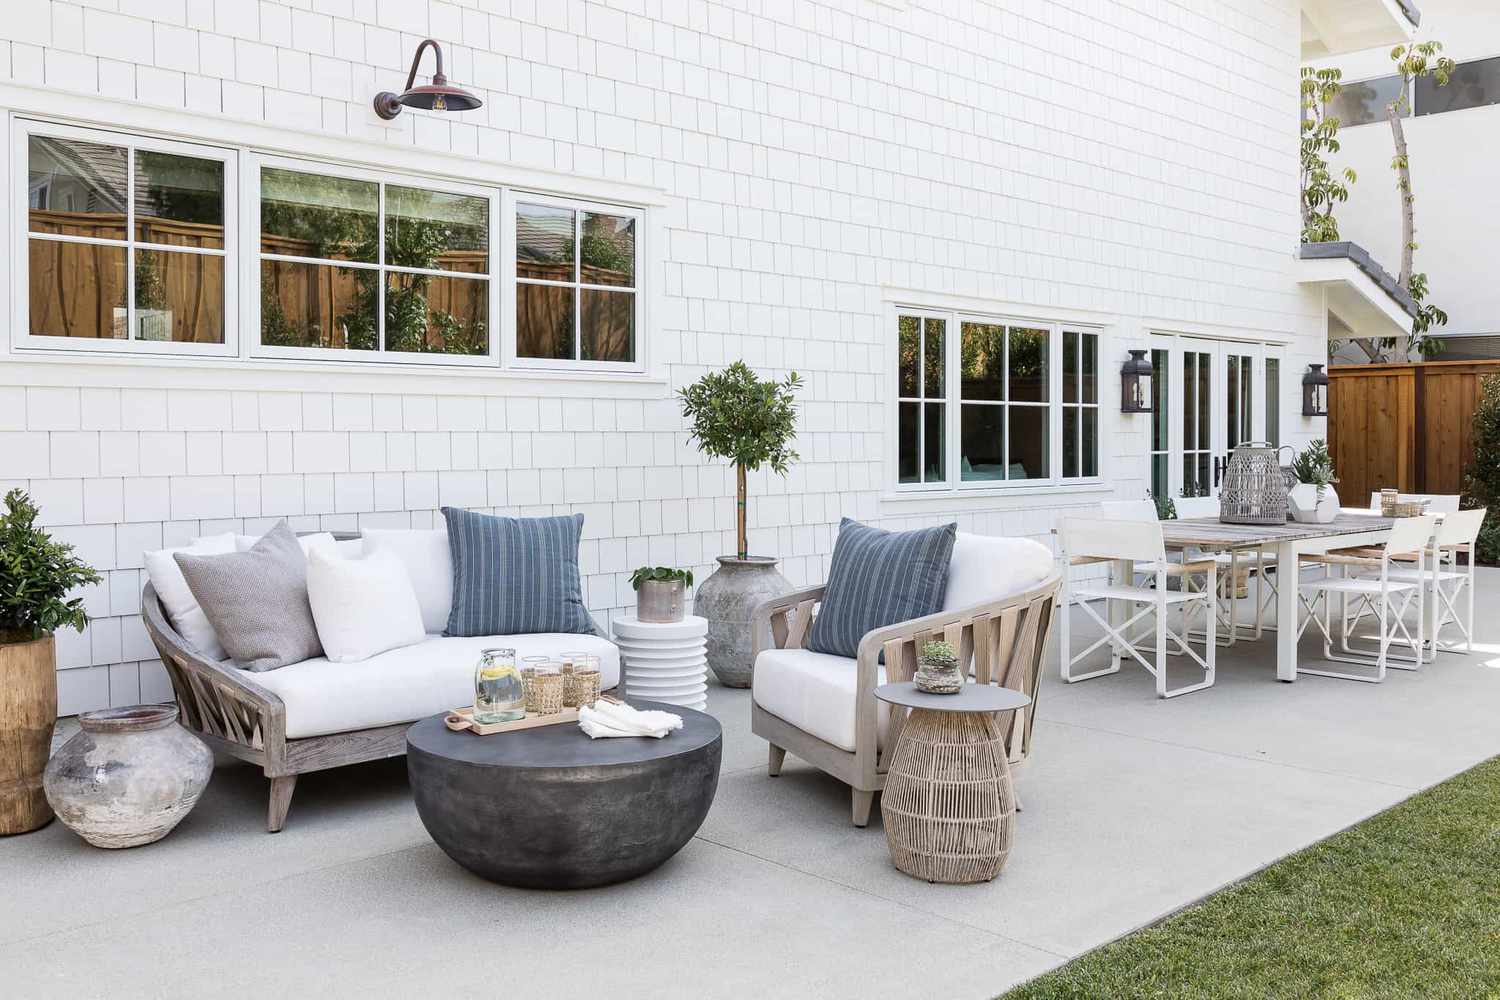
2. A Modern Cement Patio with Natural Wood Accents
The formula for this serene look is about clean lines and warm textures. Think 60% light grey cement as a neutral, unobtrusive base, 30% warm, light wood on the furniture and fencing to add organic warmth, and 10% dark grey or black accents (like that statement coffee table) for a touch of graphic punch. The surrounding greenery isn’t just a backdrop; it’s the final 5% that brings the whole composition to life. You could swap the light wood for teak, but you’d need lighter cushions to maintain the airy vibe.
|
📋 Copy HEX 🔗 Share |
Light-colored cement is stunningly chic, but it can be a magnet for stains. One clumsy guest with a glass of red wine or a greasy burger can lead to a permanent mark. You absolutely must have it professionally sealed upon installation and plan to reseal it every 1-2 years. Also, that incredible rounded cement coffee table is seriously heavy. Decide exactly where you want it to live before it’s delivered, because you will not want to move it later.
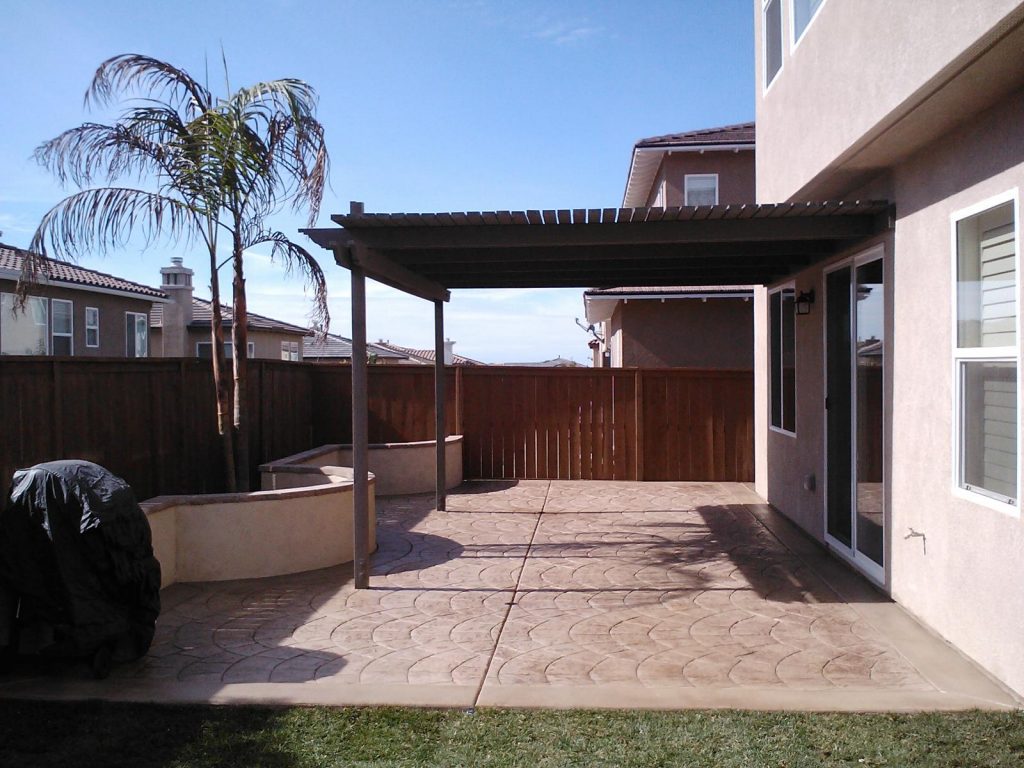
3. Stamped Concrete with a Pergola and Curved, Built-in Planters
The integrated, curved planters are the single element that elevates this entire project. Without them, you’d have a perfectly nice but standard stamped patio. With them, the hardscape feels completely custom and thoughtfully designed. The curves soften the straight lines of the fence and pergola, and physically building the garden into the patio edge creates a seamless transition from the man-made zone to the natural one. It’s a detail that spells ‘high-end.’
|
📋 Copy HEX 🔗 Share |
- What is the sun’s path? Track it for a few days to determine where the pergola will provide the most effective shade and which plants will thrive in your built-in planters.
- Where will water go? A slight grade is crucial. Ensure your plan directs rainwater away from your home’s foundation and includes drainage for the planters.
- Do you need irrigation? If you want to run a drip line to those planters, the tubing needs to be laid *before* the concrete is poured.
- Have you checked with your HOA? Submit plans for structures and material colors before you hire a contractor to avoid a costly tear-down order.
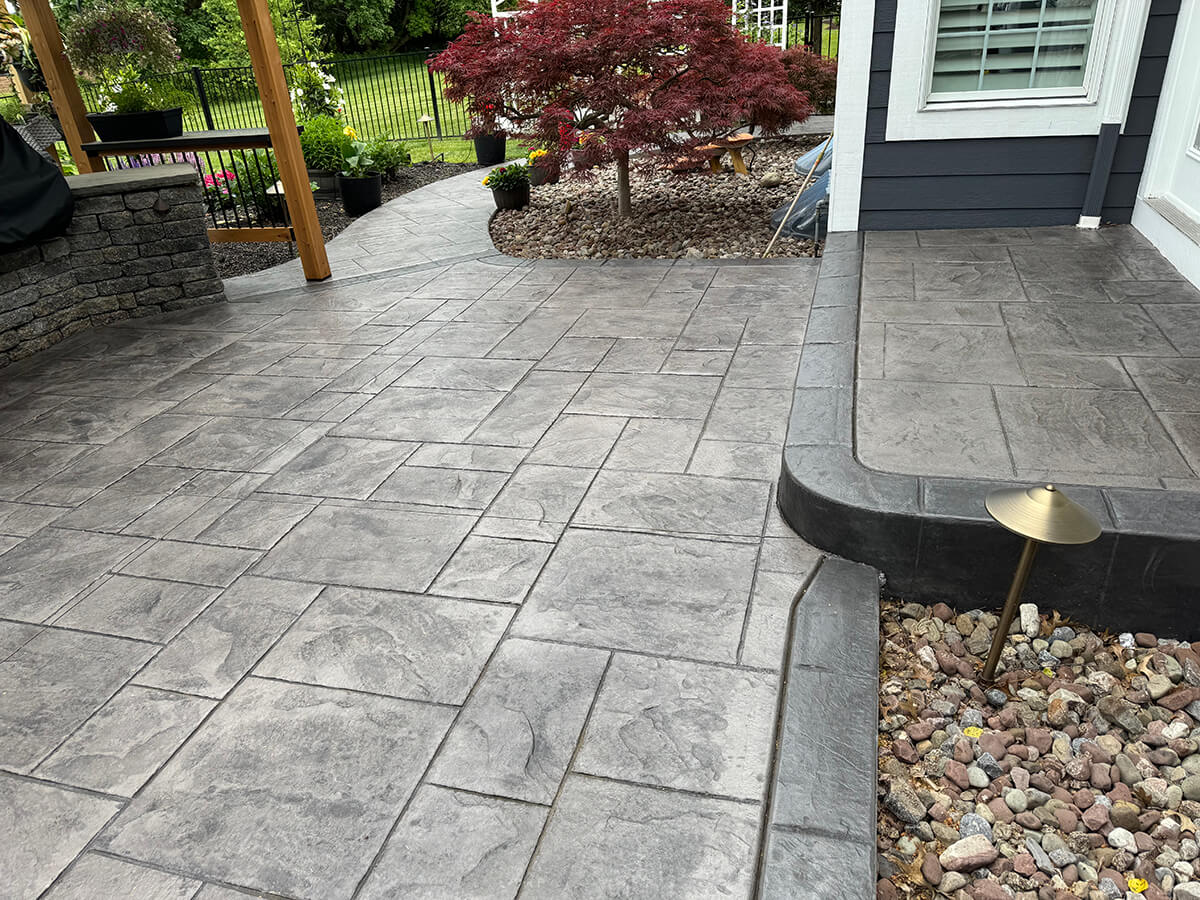
4. A Dark Gray Stamped Patio with a Contrasting Border
This design is all about definition. The contrasting darker gray border acts like a picture frame, clearly defining the ‘floor’ of this outdoor room and separating it from the surrounding landscape. This makes the space feel more intentional and tidy. The choice of a varied rectangular tile stamp, rather than a uniform pattern, adds texture and movement, preventing the dark color from feeling too heavy or monolithic. The pop of red from the Japanese maple is the perfect finishing touch, cutting through the gray with a burst of color.
|
📋 Copy HEX 🔗 Share |
Dark, stamped concrete can show scratches and scuffs more readily than lighter colors, especially if you’re dragging heavy furniture around. It also absorbs more heat, so it can get quite hot on bare feet in direct summer sun. To keep the color rich and prevent fading from UV exposure, you’ll need to clean it and apply a high-quality sealer every two years. The sealer also provides that slight sheen, which helps accentuate the texture of the stamp.
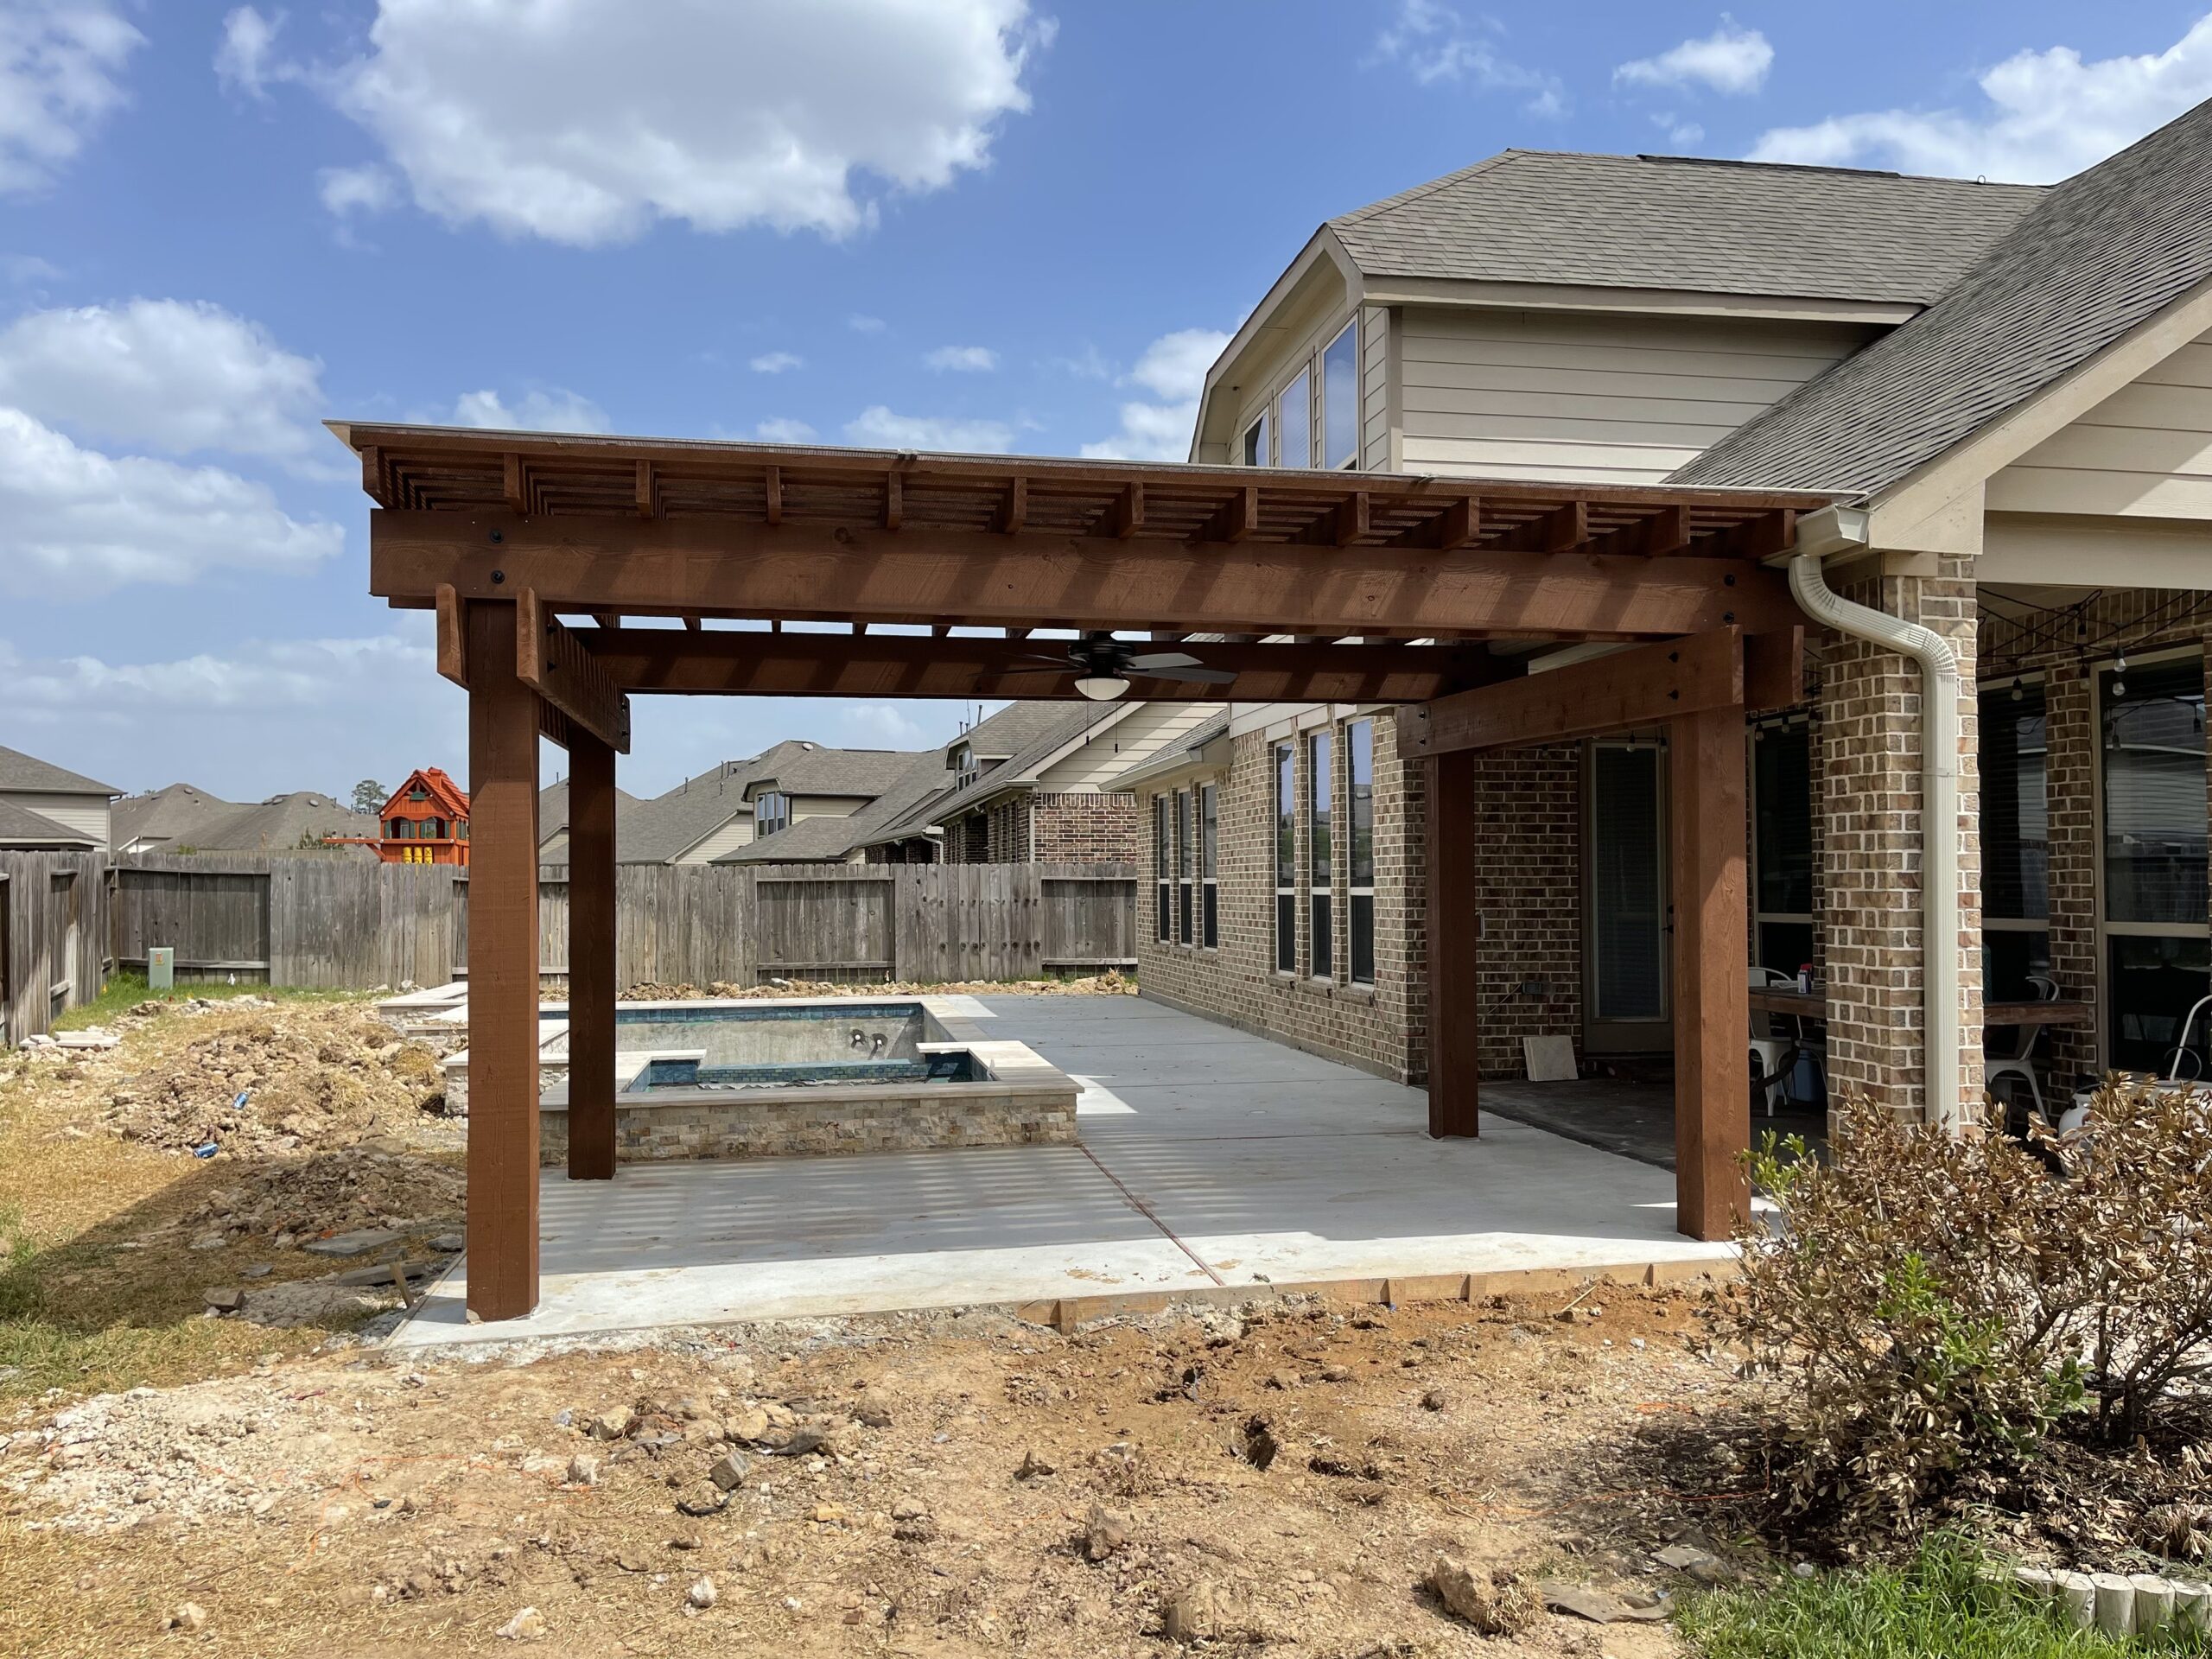
5. A Spacious Cement Patio with a Dark Wood Pergola and Spa
A multi-zone setup like this, with a large patio, a full-sized pergola, and an integrated spa, demands a significant amount of space. You’ll need a minimum backyard area of at least 800-1000 square feet to accommodate these elements without feeling cramped. The patio itself should be at least 400 sq. ft. to allow for clear circulation paths around the spa and future furniture. For comparison, the simpler dining patio in Idea #14 could work in a yard half this size.
|
📋 Copy HEX 🔗 Share |
- Main Furniture (lounge set, dining set): $3,000 – $8,000
- Lighting (Pergola wiring, fan): $1,000 – $2,500
- Textiles (cushions, rugs): $500 – $1,500
- Structure (Pergola & Spa): $15,000 – $40,000+
- Concrete & Installation: $8,000 – $15,000
- TOTAL: $27,500 – $67,000+
- Budget alternative: A pre-fabricated pergola kit ($2,000) and an above-ground hot tub ($5,000) can provide a similar experience for a fraction of the custom-built cost.
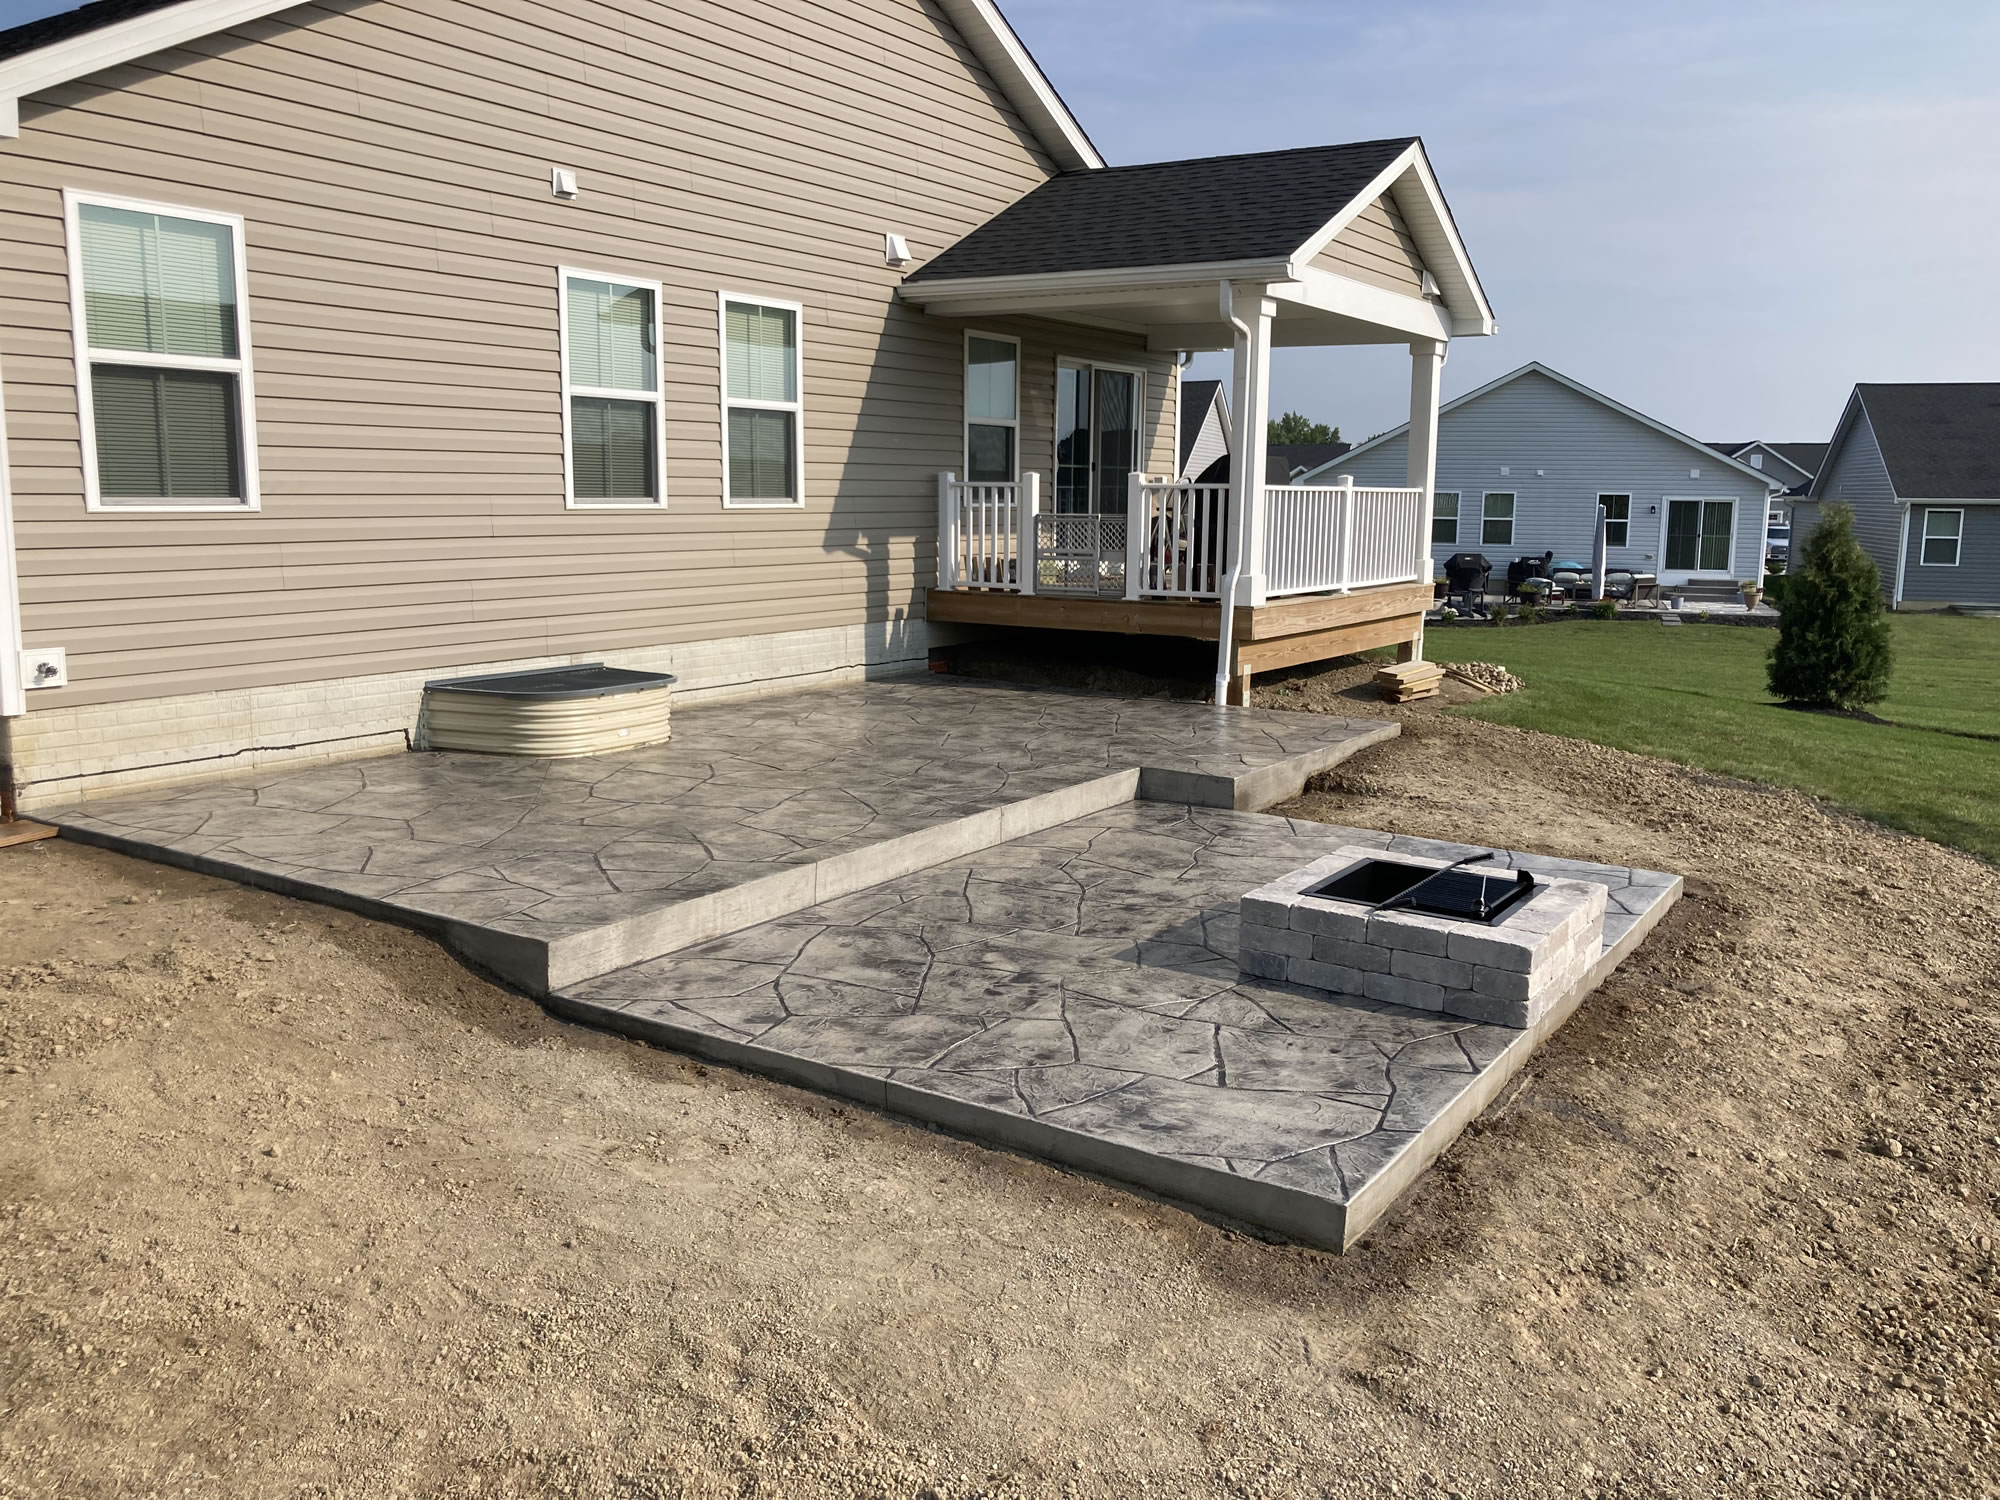
6. A Split-Level Stamped Concrete Patio with an Integrated Fire Pit
When designing a split-level patio, the height of the step is critical for both safety and comfort. A single step should ideally be between 6 and 7.5 inches high. Anything shorter is a trip hazard, and anything taller feels awkward to climb. For a more gradual transition and a grander feel, consider creating two shorter steps of 5-6 inches each. Always include landscape lighting in or near the steps to ensure they’re visible at night.
|
📋 Copy HEX 🔗 Share |
The level change here is more than just a way to navigate a slope; it’s a design tool. It cleverly separates the backyard into distinct ‘zones’ without needing walls or railings. The upper level, connected to the house deck, feels like a transitional space, while the lower level, with its built-in fire pit, becomes a dedicated destination. This separation makes the overall area feel larger and more organized, offering two different ways to experience the same backyard.
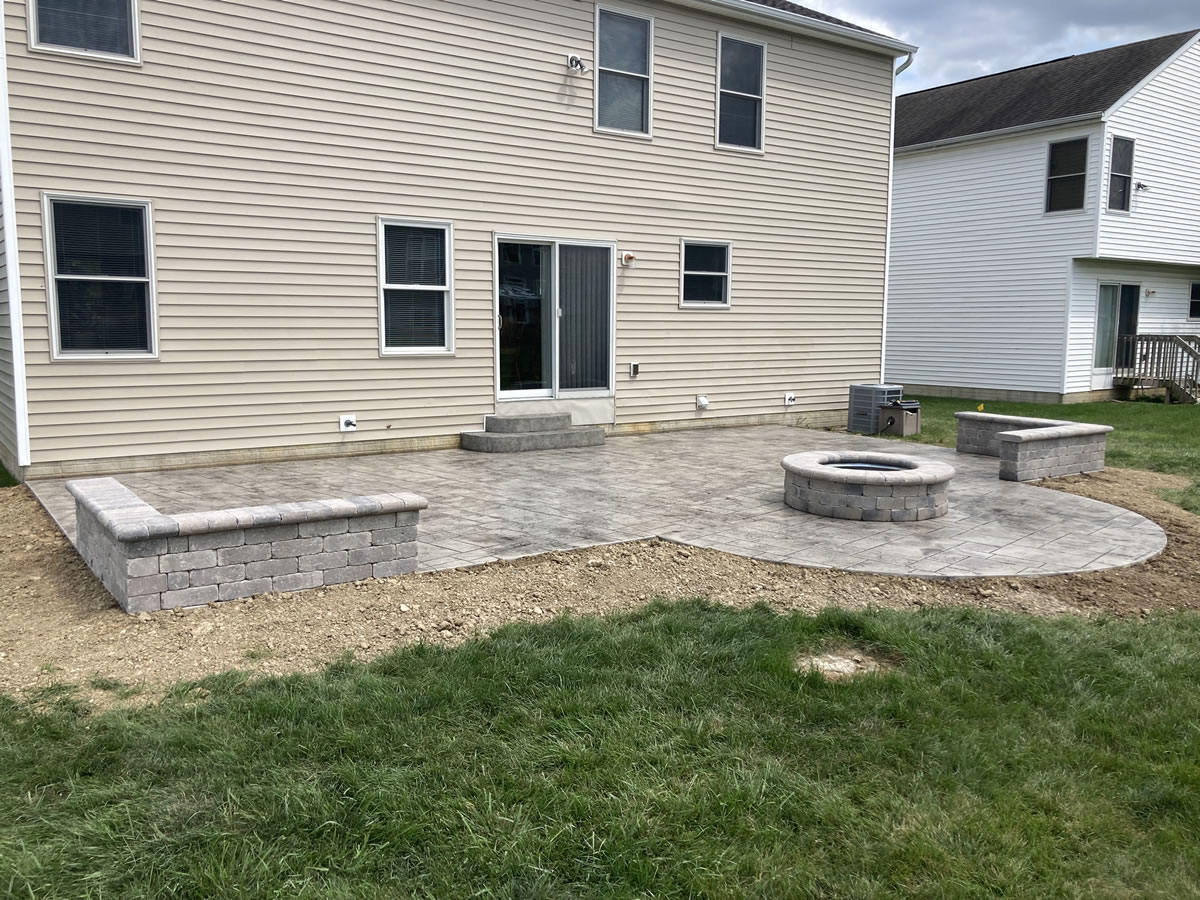
7. Slate-Textured Stamped Concrete with an Outdoor Fire Pit
A glossy sealer on stamped concrete amplifies the texture and protects the color, but it can be surprisingly slippery when wet, especially on a very smooth ‘slate’ pattern. If you live in a rainy climate or have kids who run around barefoot, ask your installer to mix a fine, sand-like grit additive into the final sealer coat. You won’t see it, but it provides crucial traction underfoot without dulling the look of the stamped surface.
|
📋 Copy HEX 🔗 Share |
A custom-built, gas-powered stone fire pit can cost thousands. To get that cozy fire pit vibe on a budget, look to Target or Walmart for a wood-burning metal fire bowl, which you can often find for $100-$300. Surround it with a few classic Adirondack chairs (around $100 each), and you’ve created a similar gathering spot for about 10% of the cost of a fully integrated, custom-built feature.
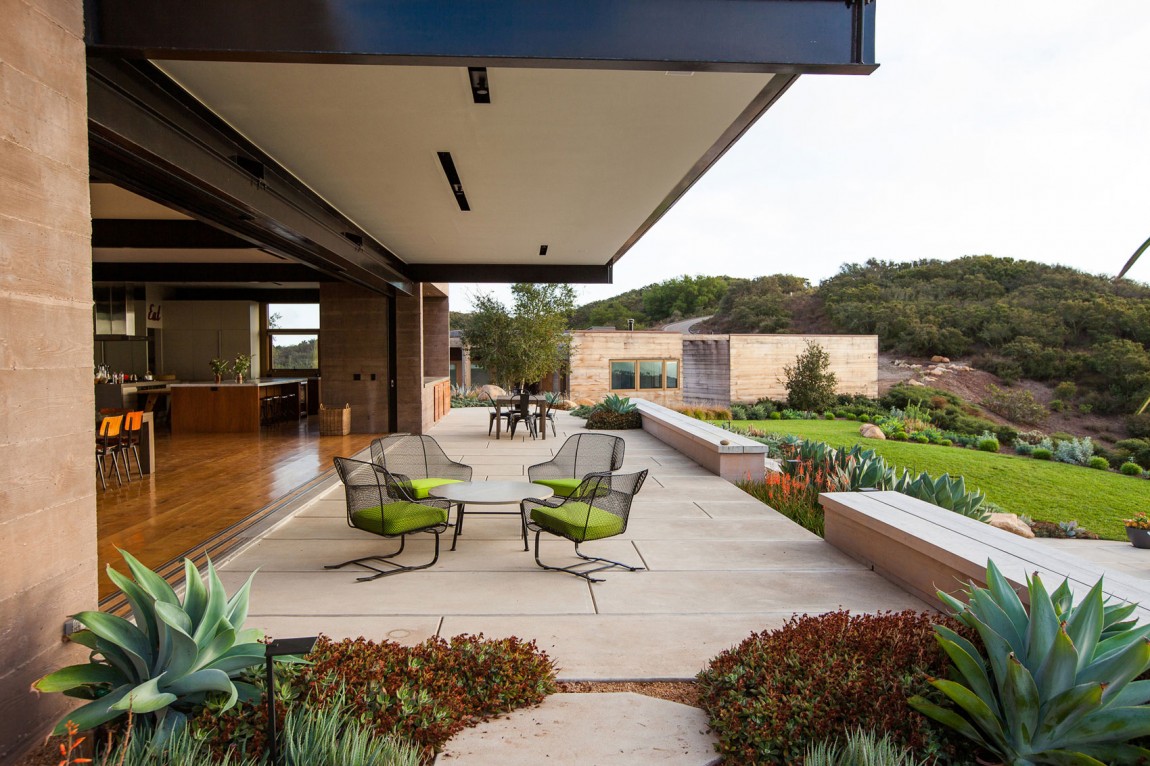
8. A Modern Concrete Patio with Integrated Seating
The integrated concrete-and-wood benches are the star of this show. They’re what transform the patio from a simple surface into a piece of functional architecture. This built-in seating maximizes usable space by eliminating the need for bulky freestanding sofas along the perimeter. It also creates a clean, minimalist aesthetic that feels both modern and permanent. The wood tops are a clever touch, providing a warmer, more comfortable seating surface than bare concrete. It’s a much more intentional design than the equally modern but less-integrated space in Idea #2.
|
📋 Copy HEX 🔗 Share |
An expansive design with large-format concrete slabs and integrated features needs room to breathe. This look is best suited for larger, open backyards of at least 700 square feet. The large size of the pavers (likely 24″x36″ or larger) helps to make the space feel grand and uncluttered. Using this paver size in a small, narrow yard (under 300 sq. ft.) can feel awkward and out of proportion, making the space seem even smaller than it is.
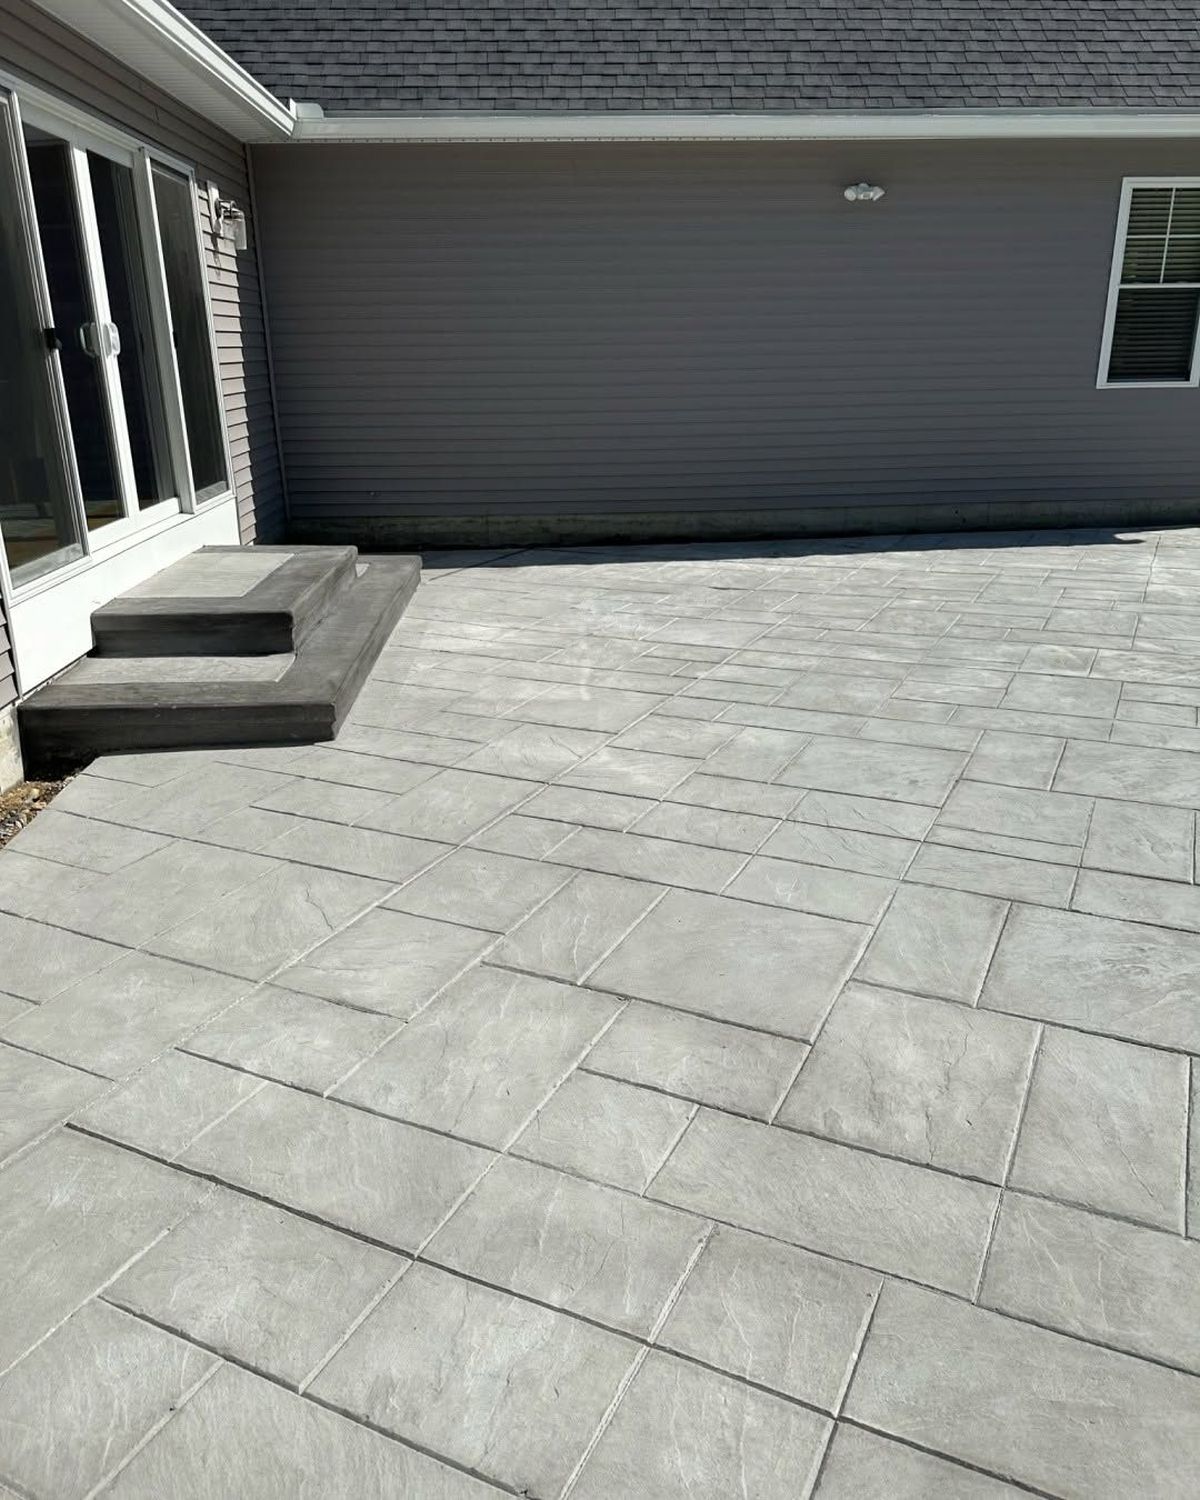
9. A Stamped Concrete Patio Mimicking Large Tiles
Stamping concrete to look like large format tiles is a great way to get a high-end look for less, but the ‘grout lines’ are the detail that gives it away. Make sure your contractor uses a dark-colored release agent or a secondary stain to give those lines depth and shadow, just like real grout. If the lines are the same color as the ’tile’ surface, the whole effect looks flat and less convincing. The quality of the illusion is all in the details.
|
📋 Copy HEX 🔗 Share |
The anachronism of material and pattern creates interest. We expect large, clean-lined tiles to be paired with a modern home, but here they are, up against traditional dark gray lap siding. This unexpected combination works because the color palette is so cohesive. The light gray of the concrete perfectly complements the dark gray of the house and the charcoal of the roof, creating a unified, monochromatic scheme that feels sophisticated and intentional, despite the mix of styles.
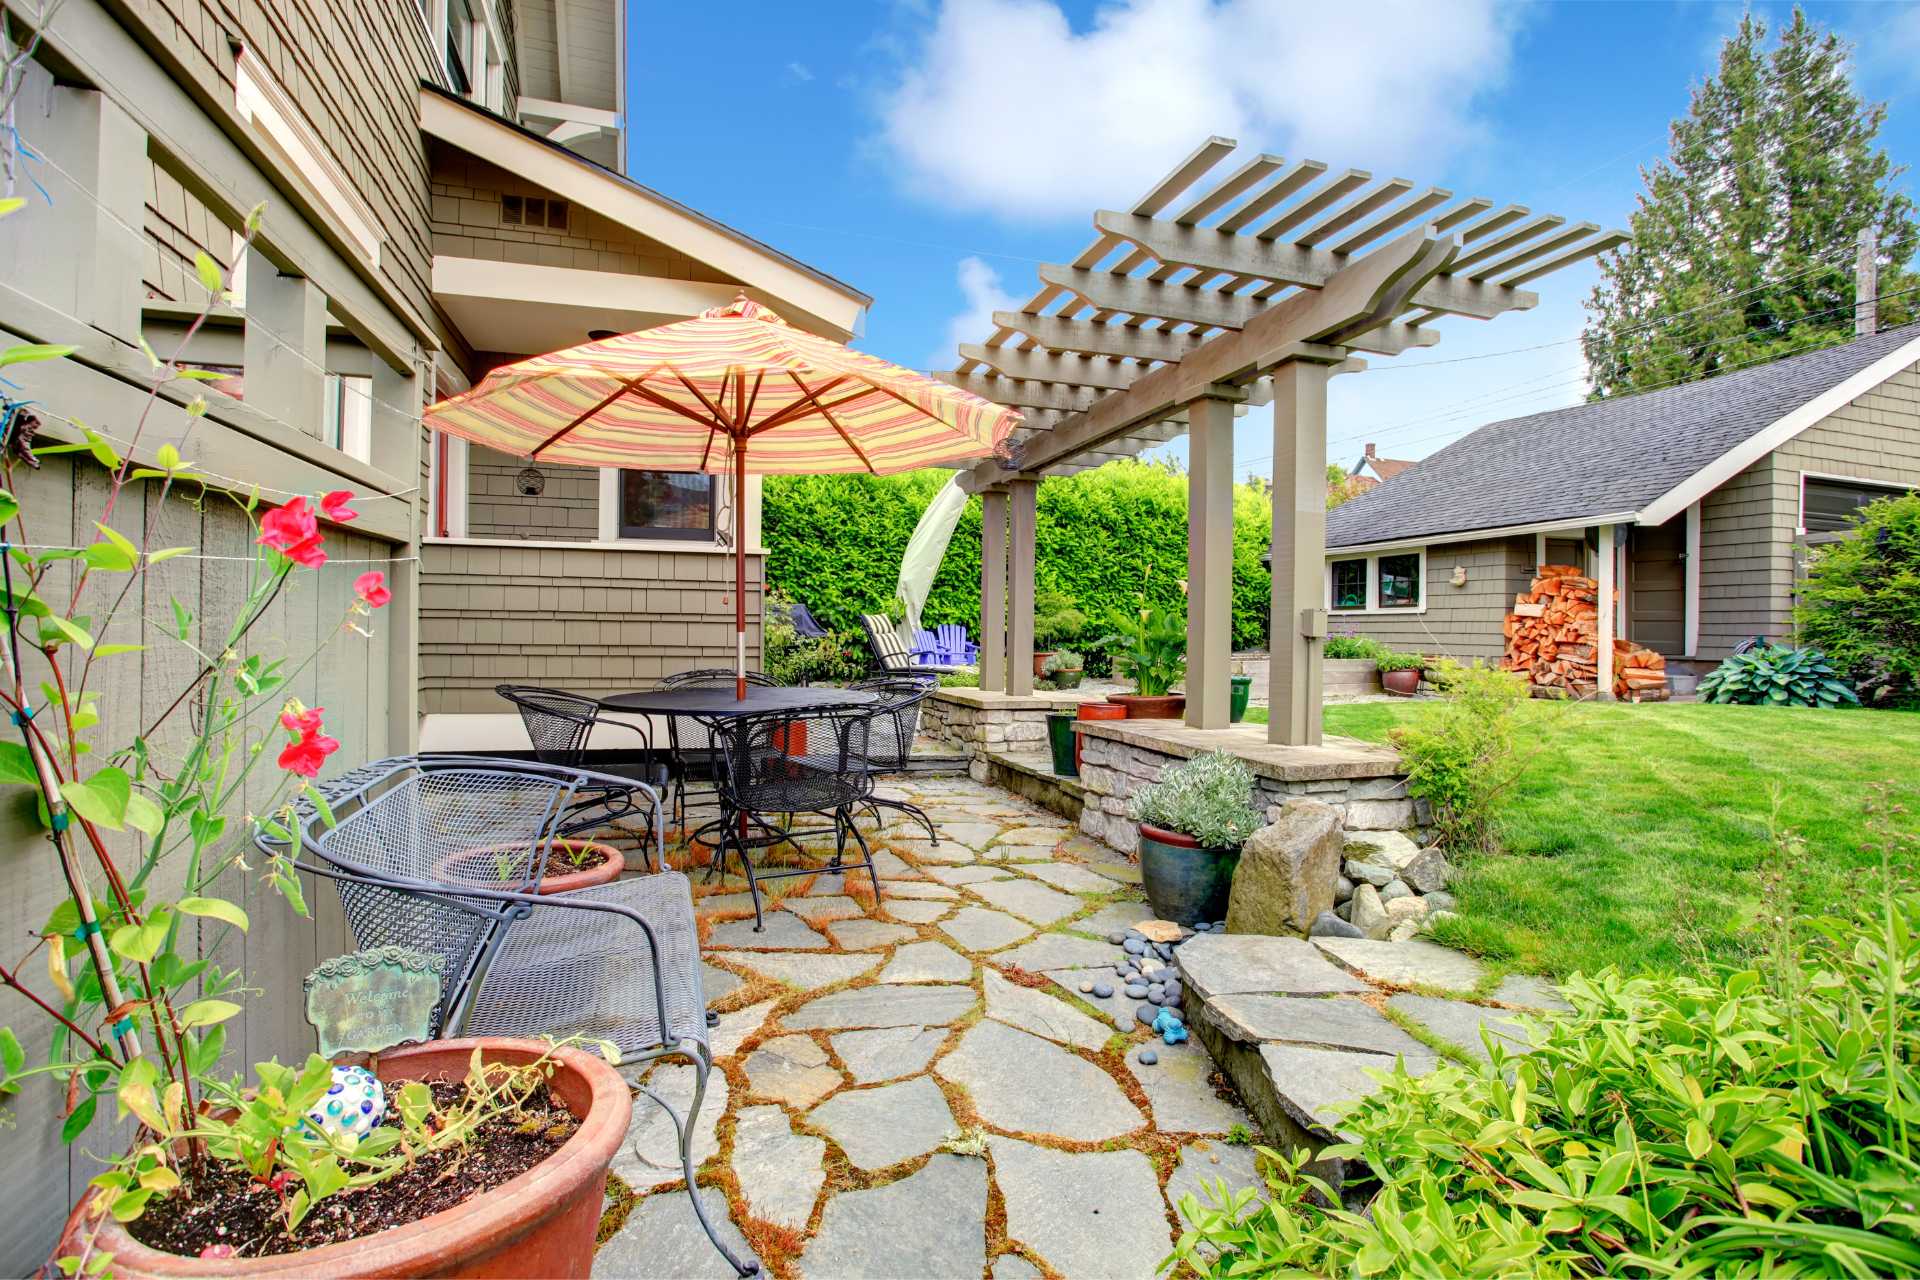
10. A Flagstone Patio with a Rustic Wooden Pergola
This look taps directly into the ‘cottagecore’ and ‘English garden’ trends that are dominating Pinterest. It’s a move away from perfectly manicured, hard-edged patios and toward a more romantic, relaxed, and natural aesthetic. The grass and moss growing between the irregular stones aren’t a sign of neglect; they’re a deliberate feature. Homeowners are embracing imperfection and creating outdoor spaces that feel like they’ve been there for generations, even if they were just installed last year.
|
📋 Copy HEX 🔗 Share |
The formula here is charmingly imperfect: 70% natural, irregular flagstone (to set a rustic base) + 20% weathered wood and dark metal (for sturdy, timeless structure) + 10% curated chaos in the form of potted plants, climbing vines, and colorful textiles like the striped umbrella. The key is that nothing is too perfect. The charm lies in the slightly faded paint, the mix of different pot styles, and the plants spilling over their containers. It’s planned, but it looks effortless.
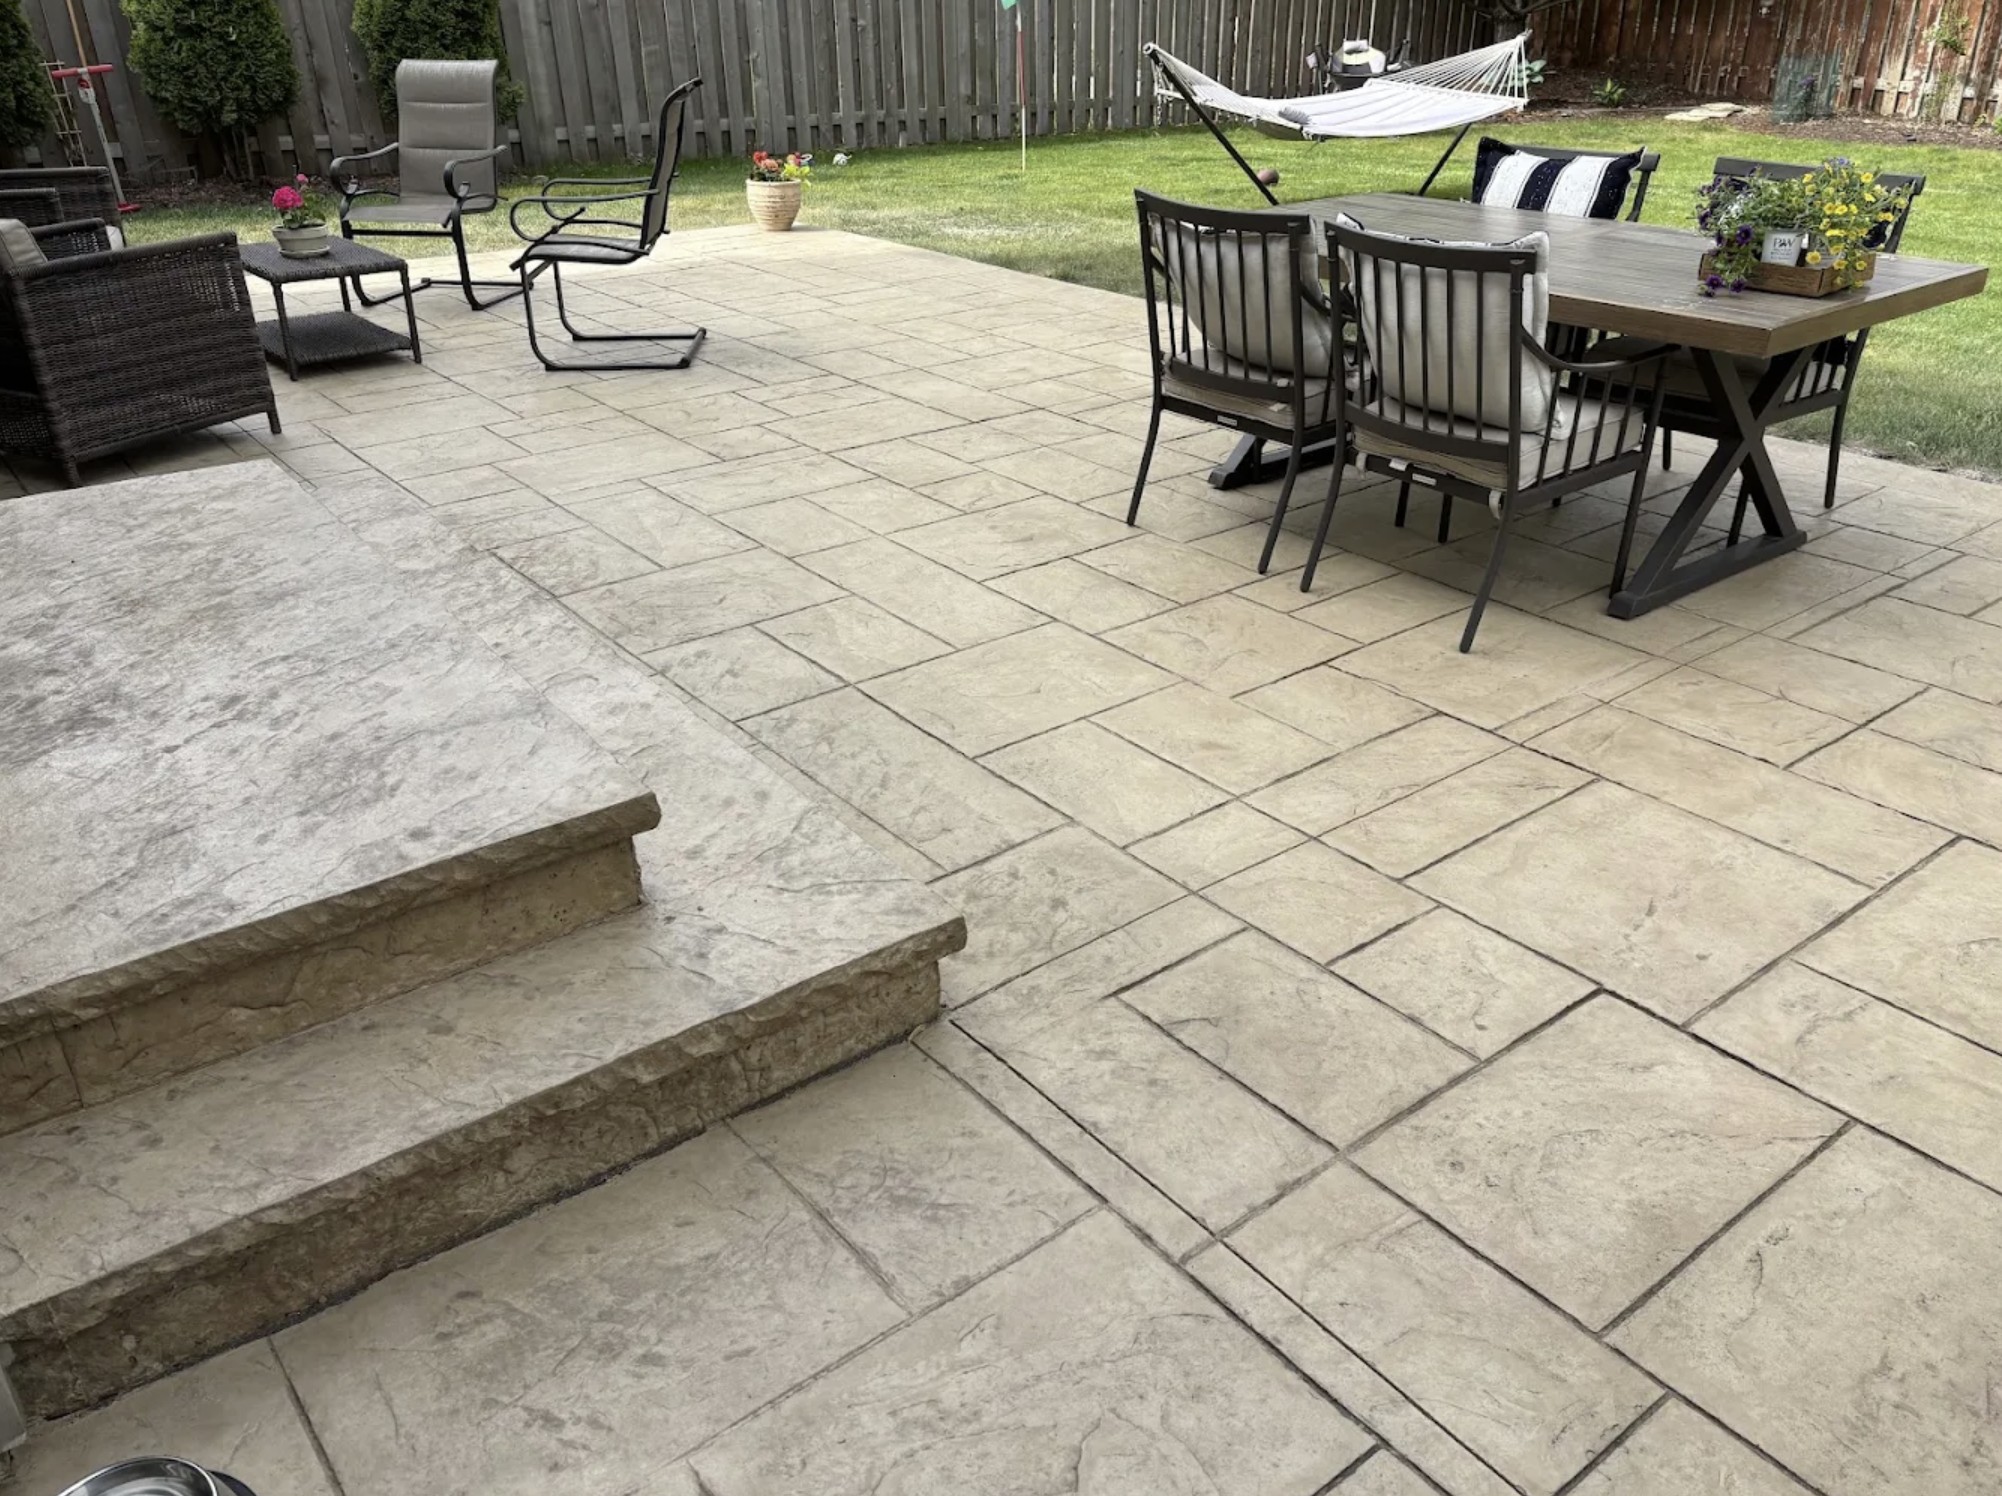
11. A Textured Stamped Concrete Patio with Woven Furniture
budget_breakdown:
- Main Furniture (Dining set & lounge chairs): $2,500 – $6,000
- Lighting: $0 (in this example)
- Textiles (cushions, hammock): $400 – $1,000
- Decor/Accessories (Planters): $150 – $400
- Concrete & Installation (approx. 400 sq.ft.): $4,800 – $8,000
- TOTAL: $7,850 – $15,400
- Budget alternative: Look for similar woven furniture sets on Facebook Marketplace at the end of the season for 50-70% off retail. A DIY concrete stain kit ($100) can refresh an existing patio.
|
📋 Copy HEX 🔗 Share |
A heavily textured stamped concrete surface does a great job of hiding dirt and imperfections, but it can be a challenge for furniture. Chairs and tables with narrow feet can feel wobbly or catch in the deeper grooves of the pattern. When choosing furniture for a surface like this, opt for pieces with wider, sled-style bases or solid platforms instead of four skinny legs. It will make your dining table and lounge chairs feel much more stable and secure.
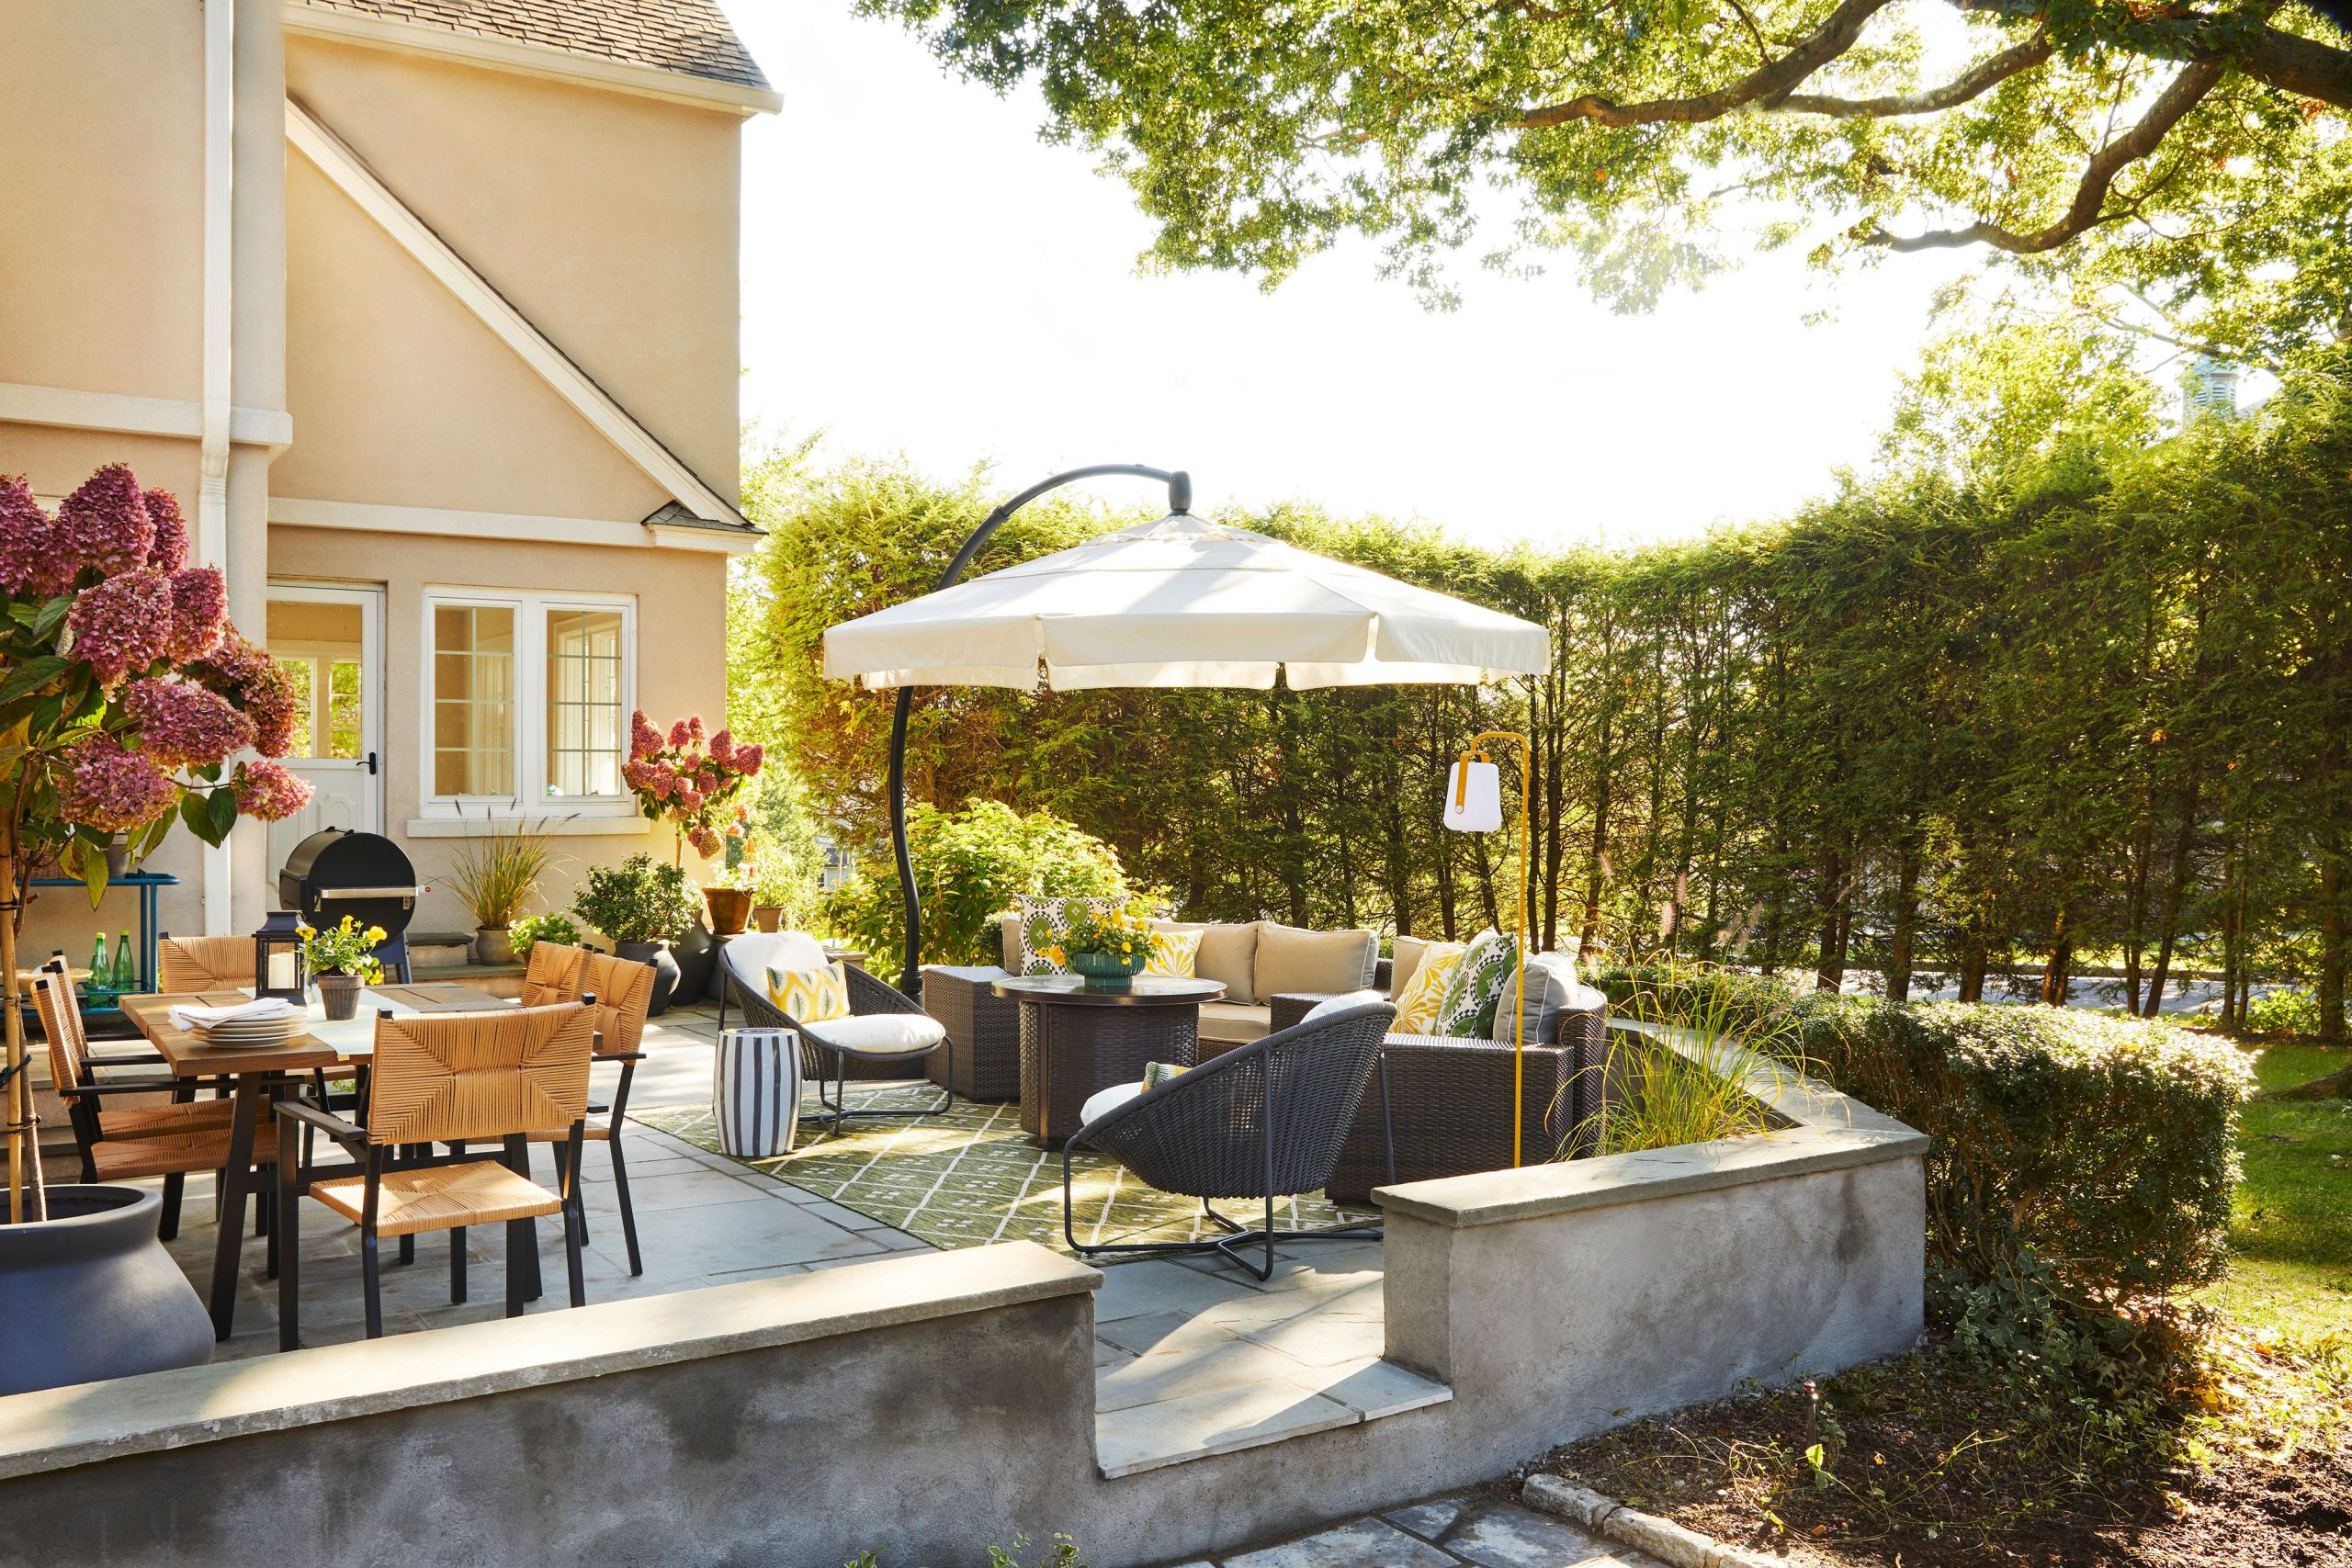
12. A Cozy Split-Level Patio with Dining and Lounge Areas
This design masterfully uses visual cues to define its ‘rooms.’ The large cantilever umbrella acts as a ‘ceiling’ for the wicker lounge area, making it feel intimate and protected. Down on the lower level, a large outdoor rug sits under the dining set, clearly marking the boundary of the ‘dining room.’ These two elements—the umbrella and the rug—do the work of walls, creating distinct zones on an open patio and making the entire space feel more organized and functional.
|
📋 Copy HEX 🔗 Share |
When choosing an outdoor rug for a dining area, make sure it’s large enough so that the back legs of the chairs remain on the rug even when they’re pulled out from the table. A good rule of thumb is to measure your table’s dimensions and add at least 24 inches on all sides. For a 40″x72″ inch table, you’d want a rug that’s at least 88″x120″ (which translates to an 8’x10′ or 9’x12′ standard size).
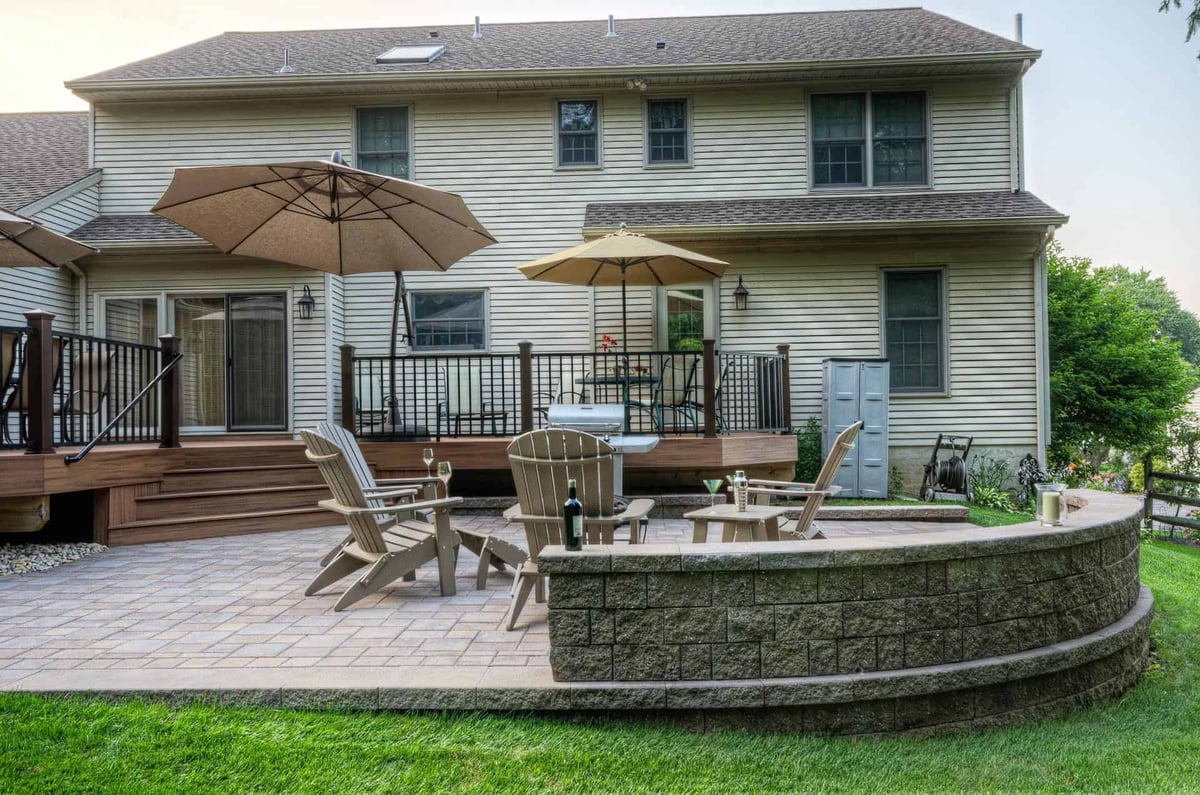
13. A Multi-Level Outdoor Living Area with a Stone Retaining Wall
The curved stone retaining wall is the undeniable heart of this design. It’s a workhorse, managing the slope of the yard while also serving as a beautiful, textural backdrop for the lower patio. The gentle curve is a sophisticated choice that softens the entire landscape, guiding the eye and creating a natural-feeling boundary. Without this wall, you’d have an unusable grassy hill; with it, you have a gracefully tiered outdoor living space. Take note of the Adirondack chairs, a classic choice also seen in Idea #20.
|
📋 Copy HEX 🔗 Share |
A professionally built, mortared stone wall is a significant investment ($50-$100+ per square foot). To get a similar tiered effect on a budget, consider using stackable concrete retaining wall blocks from a big-box store like Lowe’s or Home Depot. These systems are DIY-friendly and cost around $5-$8 per block. While less organic-looking, a curved wall built this way can create the same functional levels for a fraction of the price of natural stone.
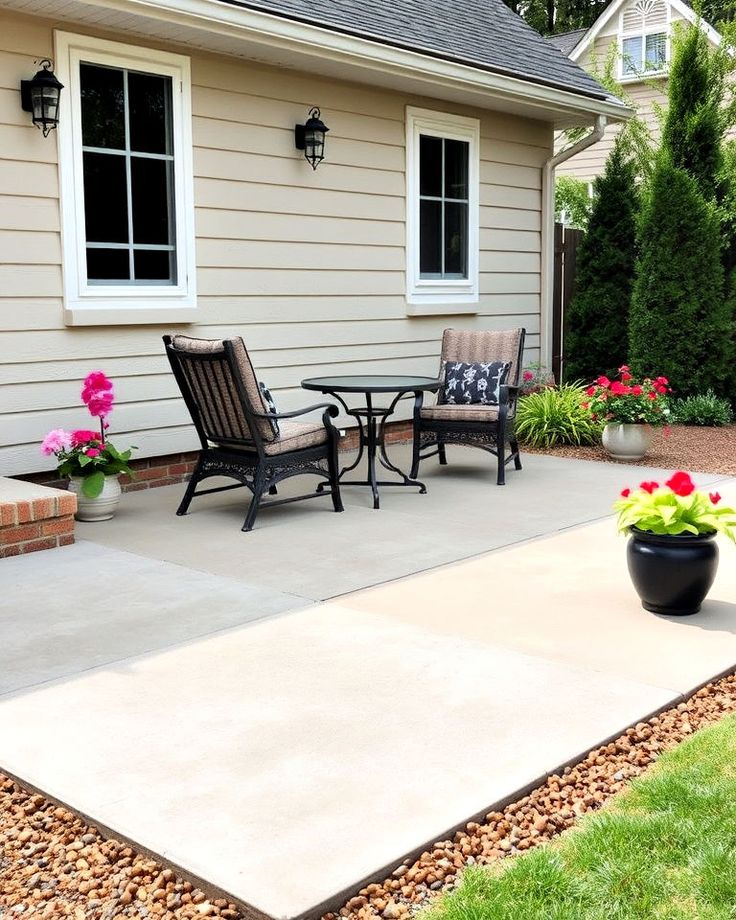
14. A Simple Concrete Patio with Classic Wrought Iron Furniture
This is timeless patio math: 80% simple, functional hardscape (the concrete slab) + 15% classic, durable furniture (the wrought iron set) + 5% vibrant, colorful life (the potted flowers). It’s a formula that never goes out of style. The beauty is in its simplicity. You can change the ‘accent’ 5% every year by planting different flowers, swapping out the seat cushions, or adding a colorful umbrella. It’s a versatile base that can be easily updated. This is a great budget-friendly alternative to the much grander space in Idea #19.
|
📋 Copy HEX 🔗 Share |
This space feels comfortable and inviting because of its careful attention to detail. The patterned cushions soften the hard lines of the wrought iron. The small border of river gravel neatly separates the patio from the lawn, preventing grass from creeping over the edge. The potted plants are generously sized and bursting with color, making the space feel loved and tended-to. It’s a reminder that you don’t need a huge budget or a sprawling space to create a charming outdoor spot.
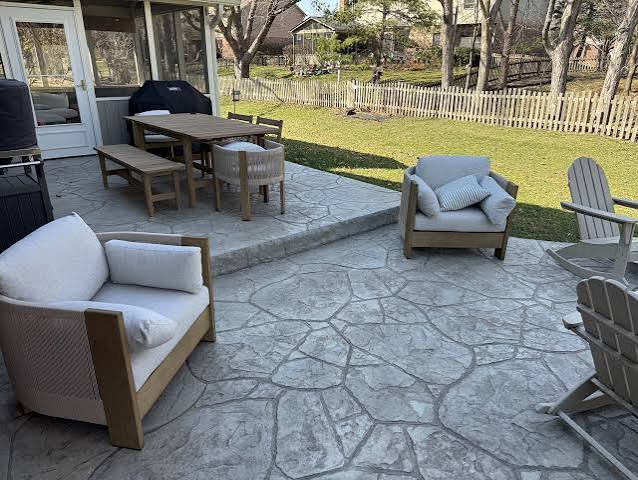
15. A Lightly Stamped Concrete Patio with Multiple Seating Zones
White or very light-colored outdoor cushions look incredible when they’re brand new, but they are a constant battle against nature. Pollen, bird droppings, mildew, and dirt from trees will make them look dingy in no time. If you love the light and airy look, choose fabrics that are specifically designed for outdoor use (like Sunbrella) and have removable, machine-washable covers. And be honest with yourself: are you really going to bring the cushions inside every time it rains?
|
📋 Copy HEX 🔗 Share |
The key to making multiple seating areas feel cohesive is to use a consistent color palette and material family. Notice how the light grey of the cushioned armchairs speaks directly to the grey of the stamped concrete. The light wood of the dining set and rocking chairs creates a warm, repeated accent. Even though there are three distinct zones (dining, lounging, rocking), they feel connected because they share a common visual language.
16. A Concrete Patio with a Curved Paver Path and Stone Fire Pit
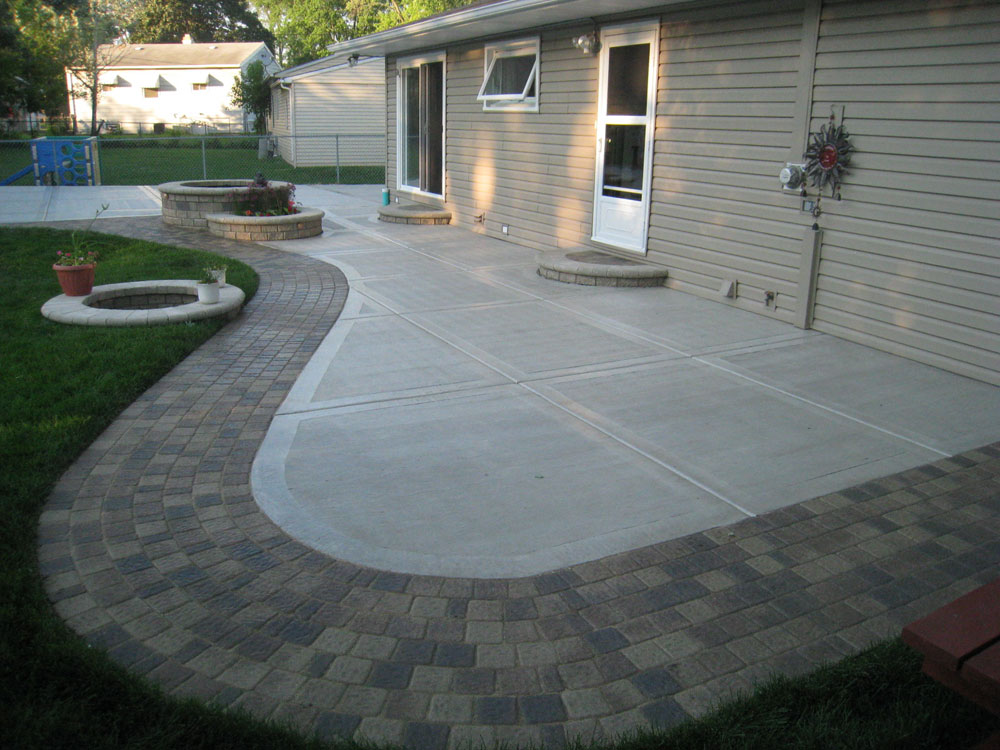
The success of this design lies in the interplay between straight and curved lines. The main concrete patio is laid out in a strong, linear grid, which provides a solid, stable foundation against the house. In contrast, the interlocking paver path meanders in a gentle curve out into the yard. This juxtaposition creates visual interest and a more natural, less rigid flow through the landscape. The round planters and fire pit further echo the softer, curved geometry, balancing the straight lines of the patio.
|
📋 Copy HEX 🔗 Share |
The curved paver path is what makes this design special. It breaks the monotony of a single, large concrete slab. It creates a sense of journey and discovery, leading the eye (and feet) from the main patio area toward another destination in the yard—in this case, the fire pit. It’s a simple but incredibly effective landscaping device that makes the entire backyard feel more dynamic and thoughtfully planned.
17. An Expansive Stamped Concrete Patio with a Pergola
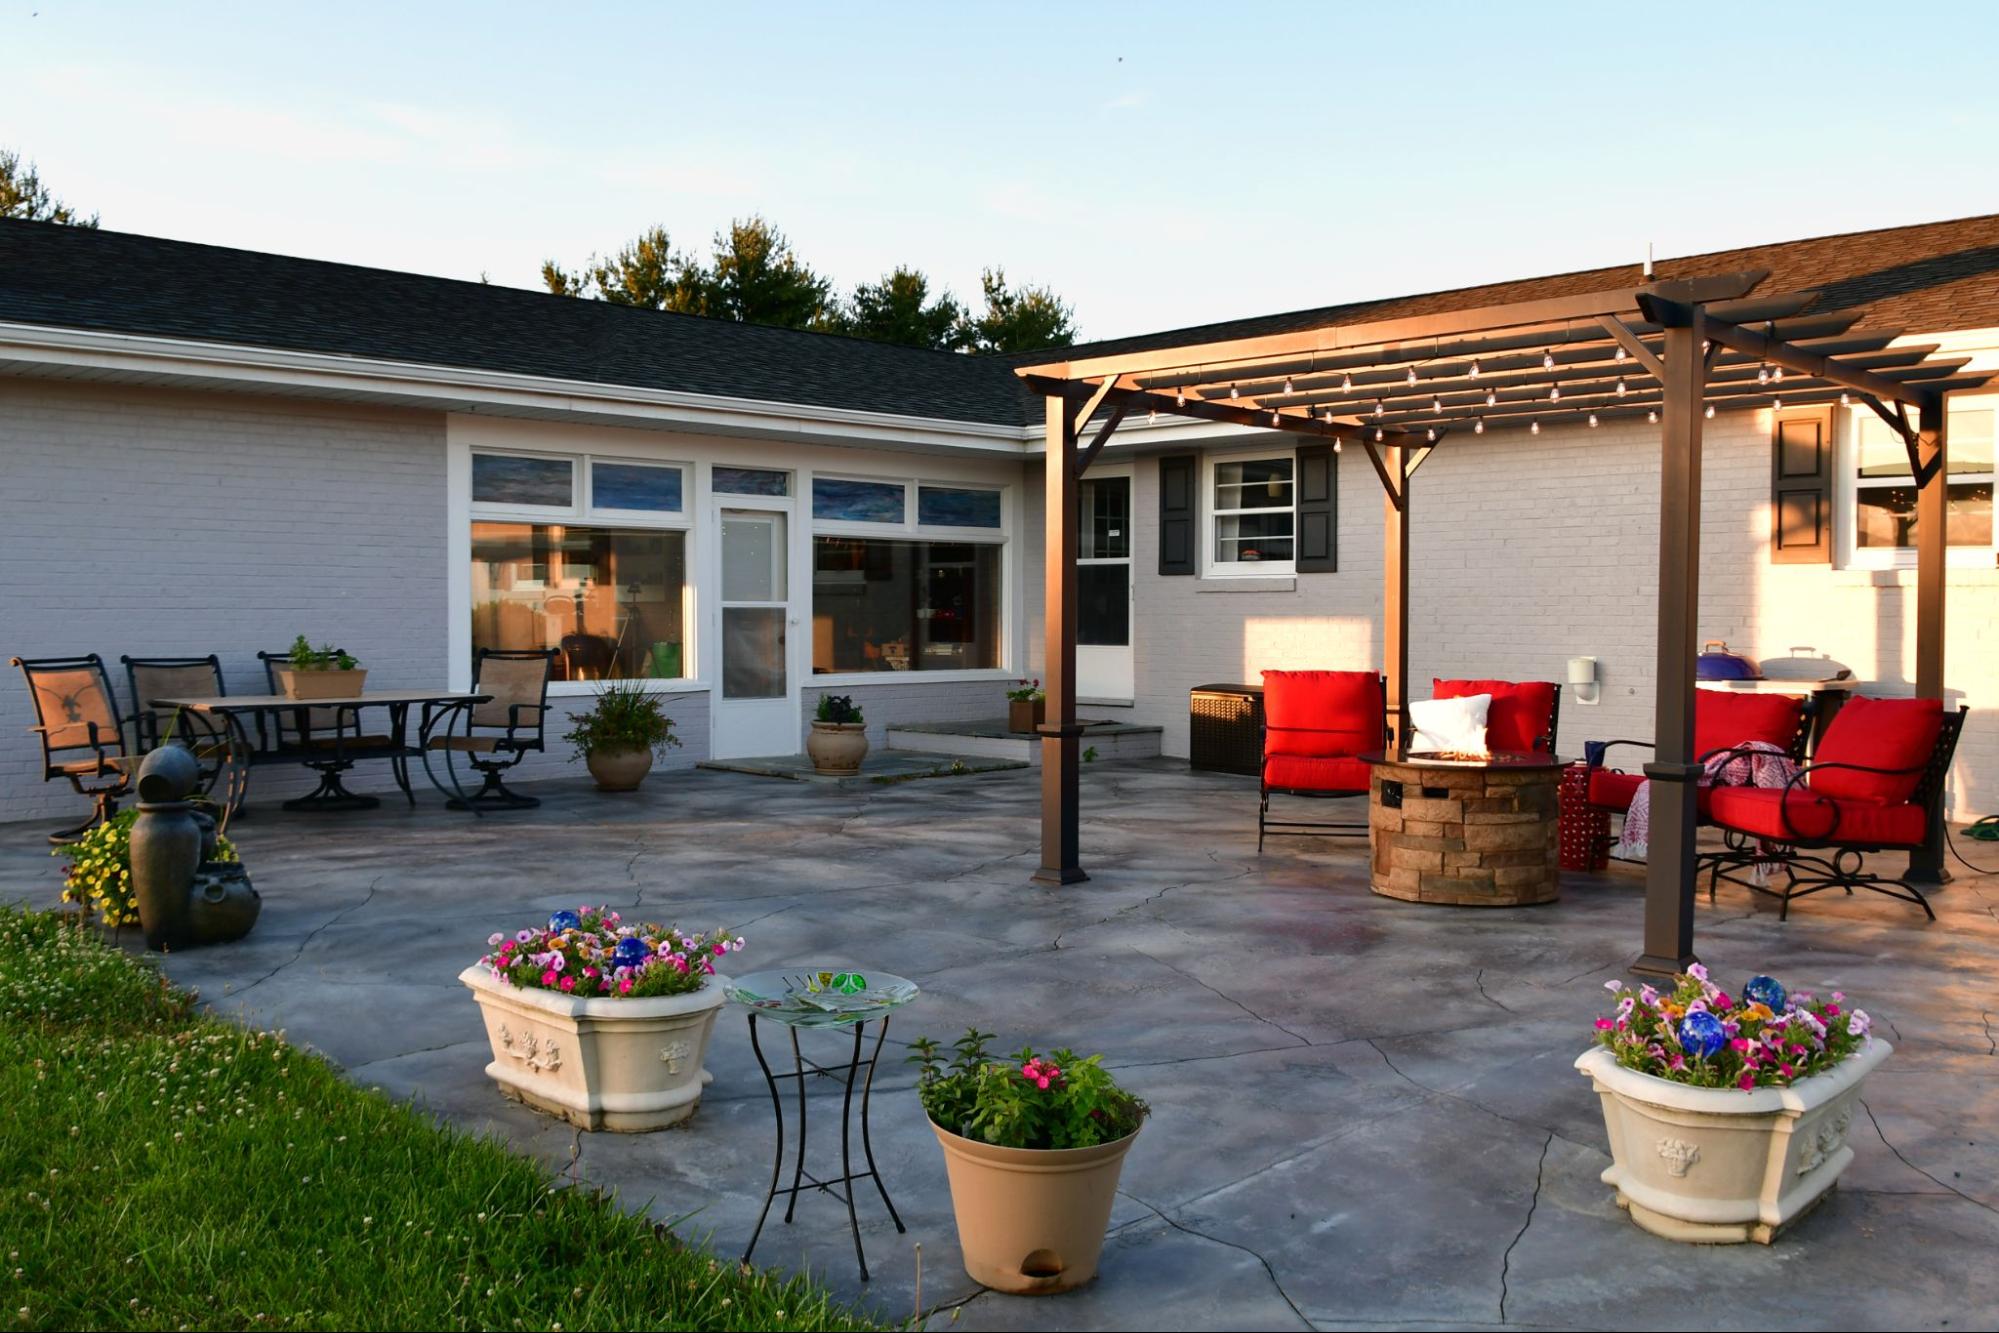
An expansive, multi-zone patio like this one works best in a generous backyard, typically 600 square feet or more. The key is to ensure each ‘zone’ has enough space to function properly. The dining area needs at least a 10×12 foot area, while the fire pit seating requires a circle about 12-14 feet in diameter to feel comfortable. A pergola of this size, covering a full seating arrangement, should be at least 14 x 16 feet. Trying to cram all these features into a smaller footprint will result in a cluttered and awkward space.
|
📋 Copy HEX 🔗 Share |
This inviting setup follows a classic formula: 60% neutral, textured hardscape (the gray stamped concrete) + 20% dark, grounding structure (the brown pergola and furniture frames) + 20% bold, warm accent color (the deep red cushions and potted plants). The neutral base allows the accent color to truly pop without overwhelming the senses. You could easily swap the red for a deep navy blue or a vibrant teal to completely change the mood without altering the core structure of the design.
18. A Cozy Outdoor Living Room with a Stamped Concrete Floor
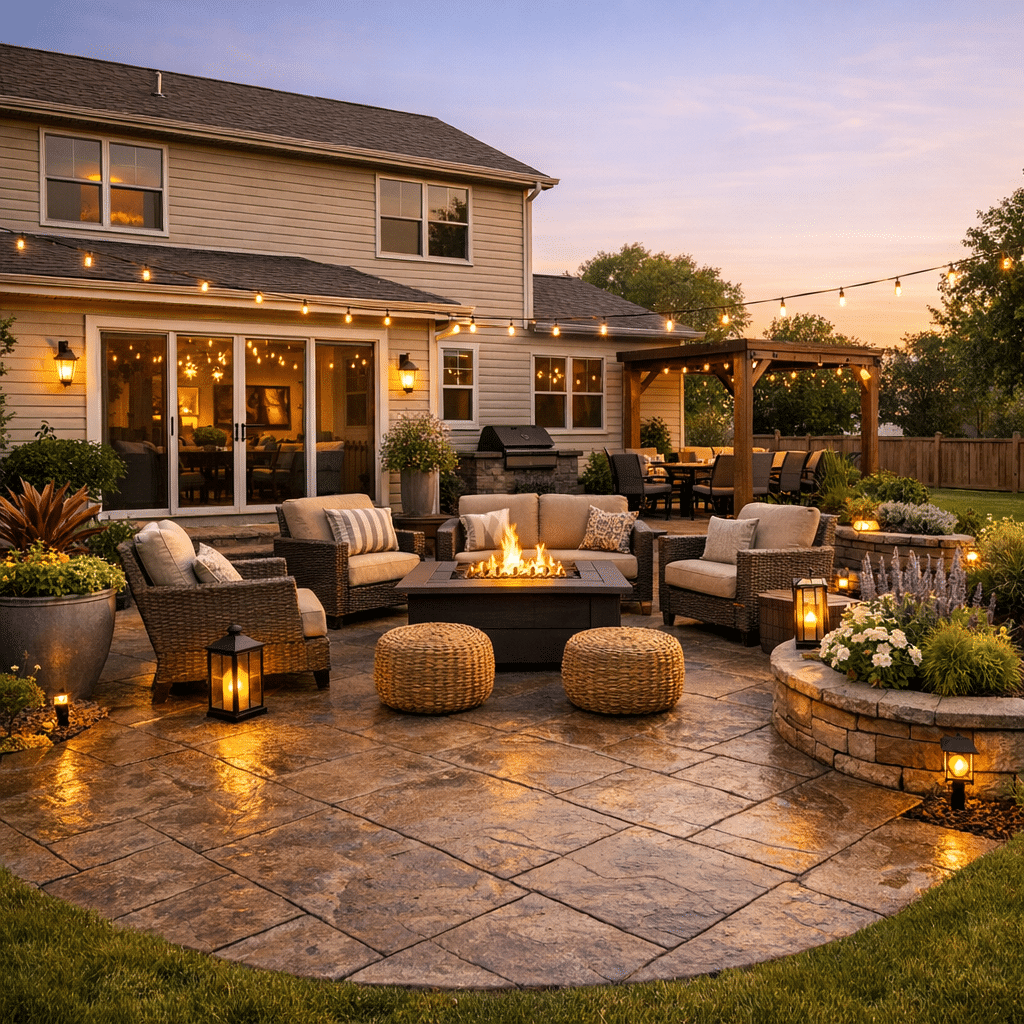
To hang outdoor string lights for a cozy glow, follow these steps. This project takes about 2-3 hours and costs $50-$200.
- Plan your layout: Zig-zag across the space or create a fan shape starting from one corner.
- Install anchor hooks: Use galvanized or stainless steel screw hooks. Drill pilot holes and install them into sturdy structures like your house’s fascia board, pergola beams, or securely planted 4×4 posts.
- Use guide wires: For spans longer than 15 feet, run a thin steel cable between your anchor points. This prevents the light strands from sagging over time.
- Attach the lights: Use zip ties or carabiners to clip your string lights onto the guide wire. This takes the tension off the light cord itself.
- Connect to power: Use a heavy-duty outdoor extension cord connected to a GFCI outlet.
|
📋 Copy HEX 🔗 Share |
Wicker-look resin furniture can be pricey. To get a similar cozy, conversation-starting setup, search Facebook Marketplace or Craigslist for a used set; people often sell them for a steal when they move. For another great fire pit option, check out Idea #21. A new set of cushion covers ($150-$300) can make a used set look brand new, and a couple of inexpensive woven poufs from Target ($50 each) can add texture and extra seating.
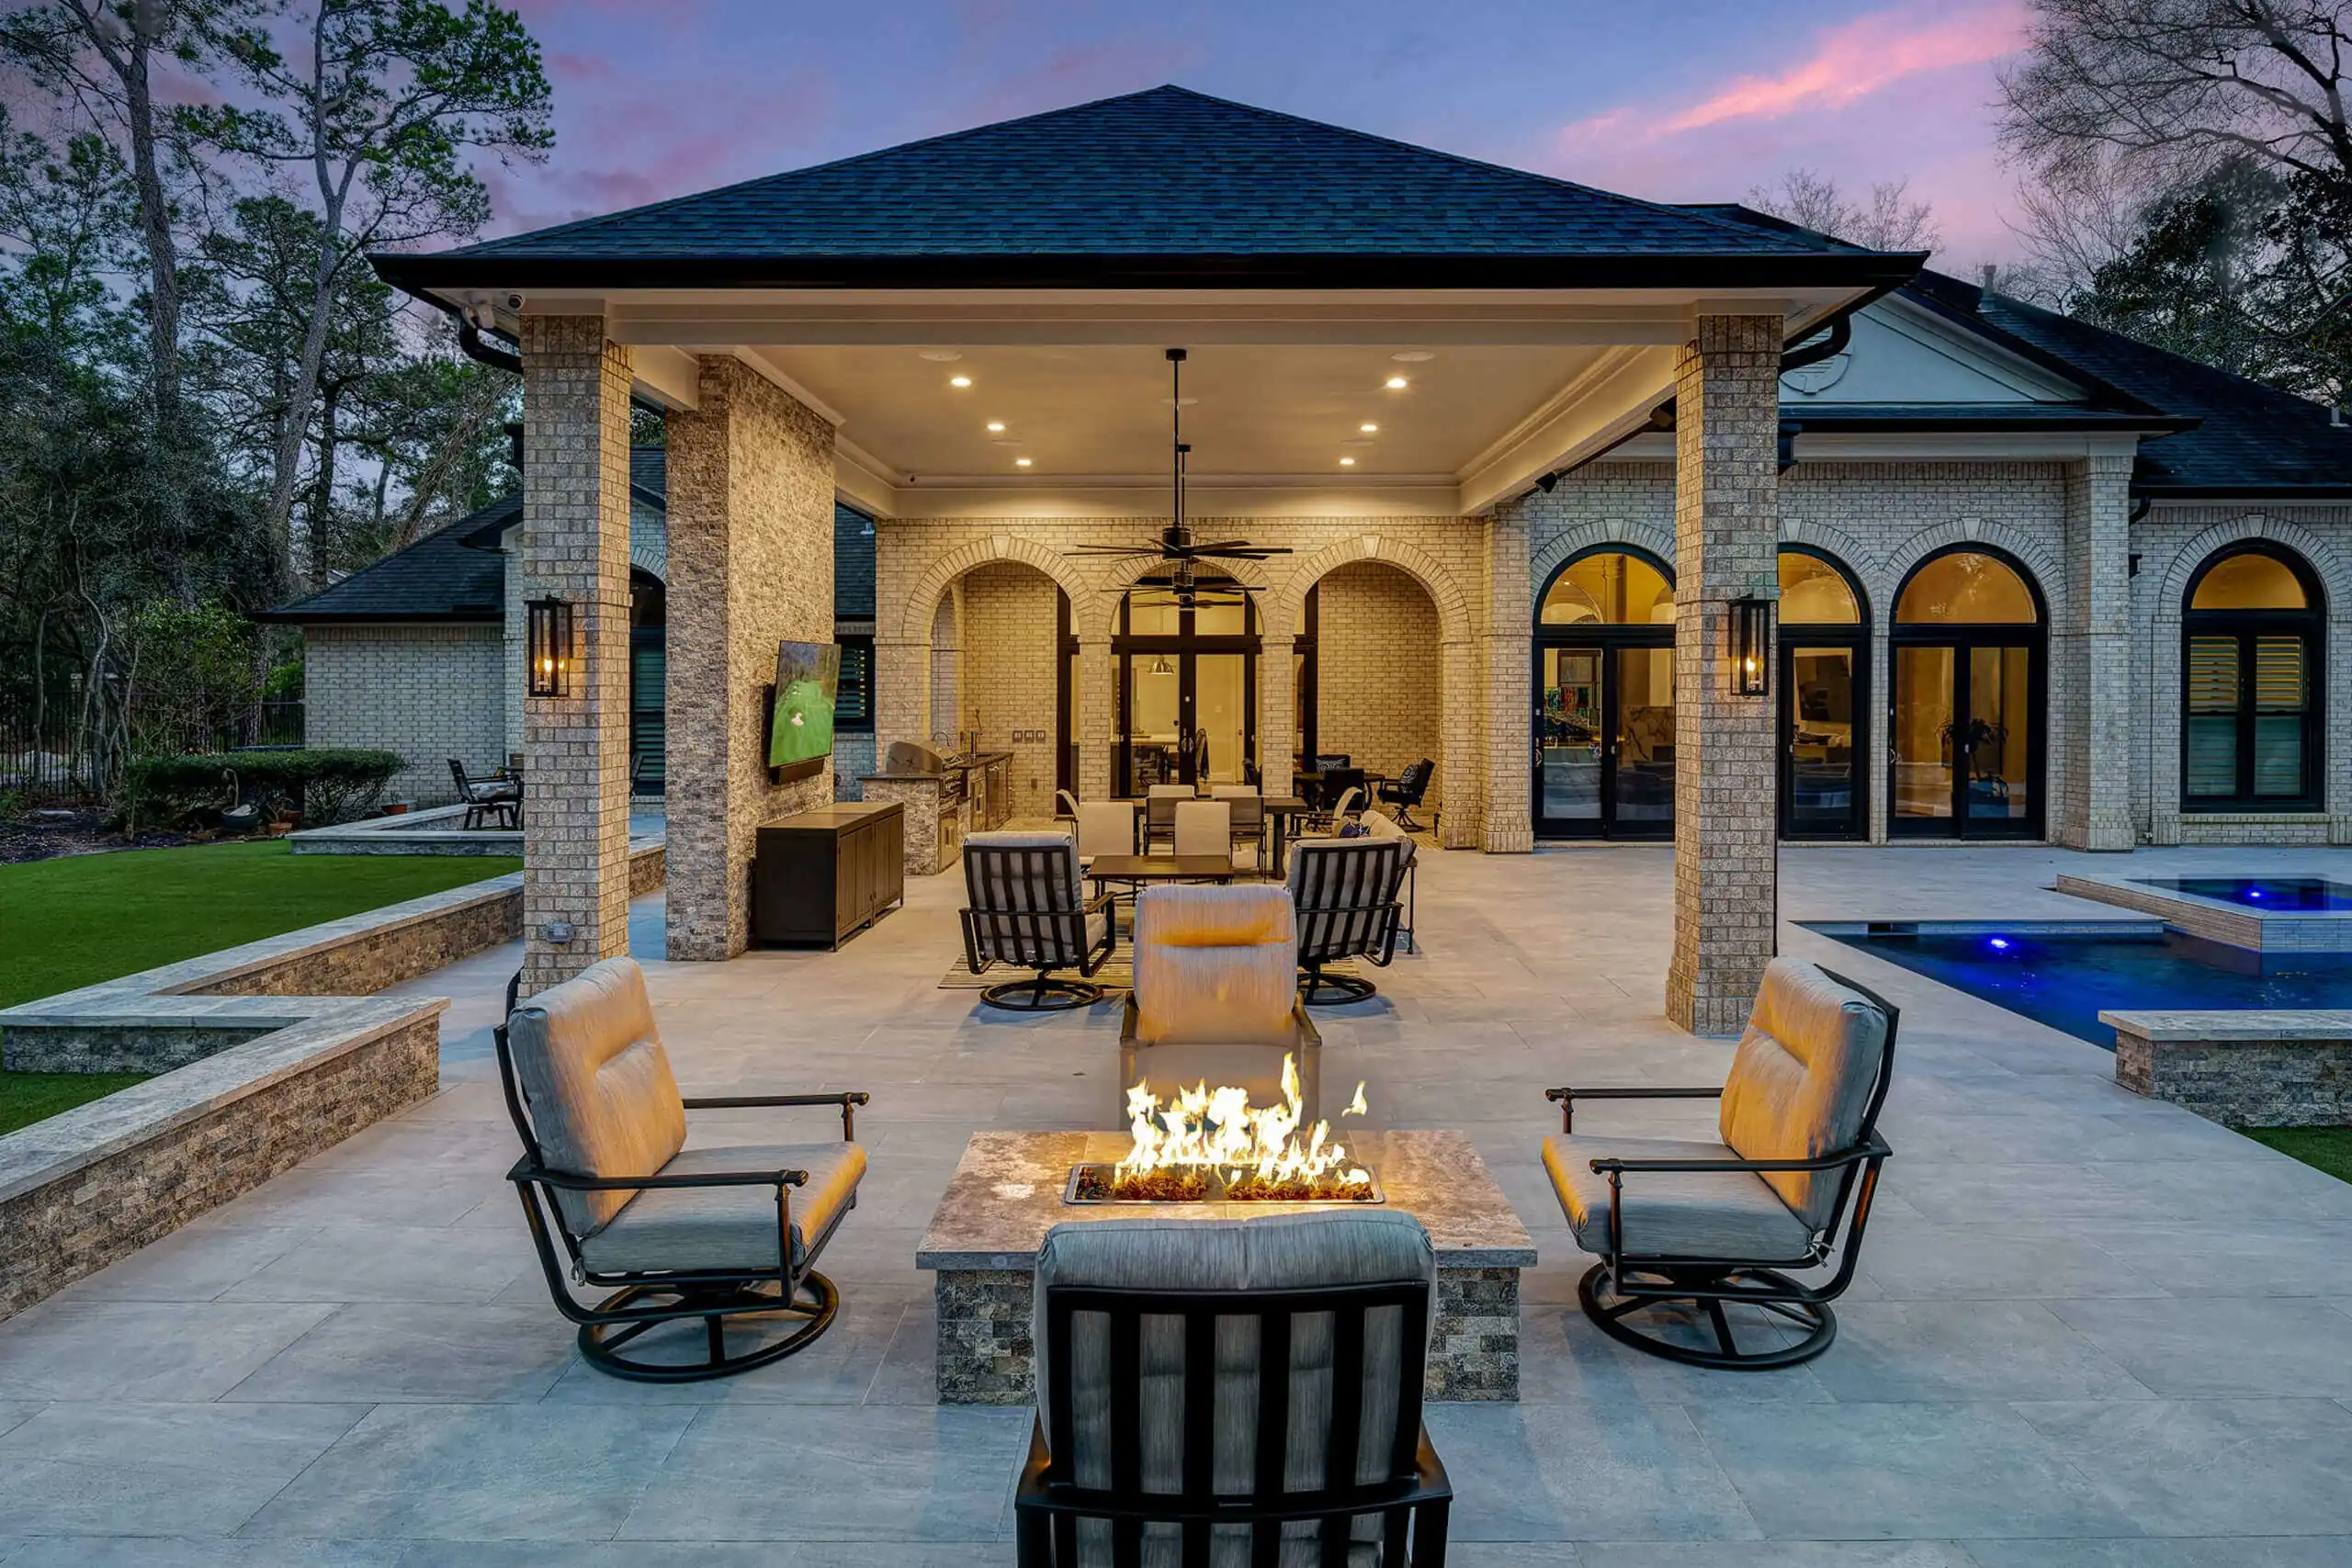
19. A Modern Patio with a Linear Fire Pit and Arched Brickwork
This space is a masterclass in blending modern and classical architecture. The clean, sharp lines of the rectangular pavers and the minimalist linear fire pit feel very contemporary. However, these modern elements are set against the soft, traditional elegance of the light brick arches. The design succeeds because it doesn’t try to hide this contrast—it celebrates it. The consistent, light color palette of grays and beiges ties the two styles together, creating a sophisticated and timeless outdoor resort feel.
|
📋 Copy HEX 🔗 Share |
Linear fire pits are a major trend in high-end outdoor design for 2026. They provide a more contemporary, streamlined alternative to the traditional round fire bowl. This style is popular because it functions more like a ‘fire table,’ offering a focal point for conversation areas and providing a more even distribution of heat for people sitting in a line. We’re seeing them in luxury homes and boutique hotels, and now they are becoming more accessible for residential projects.
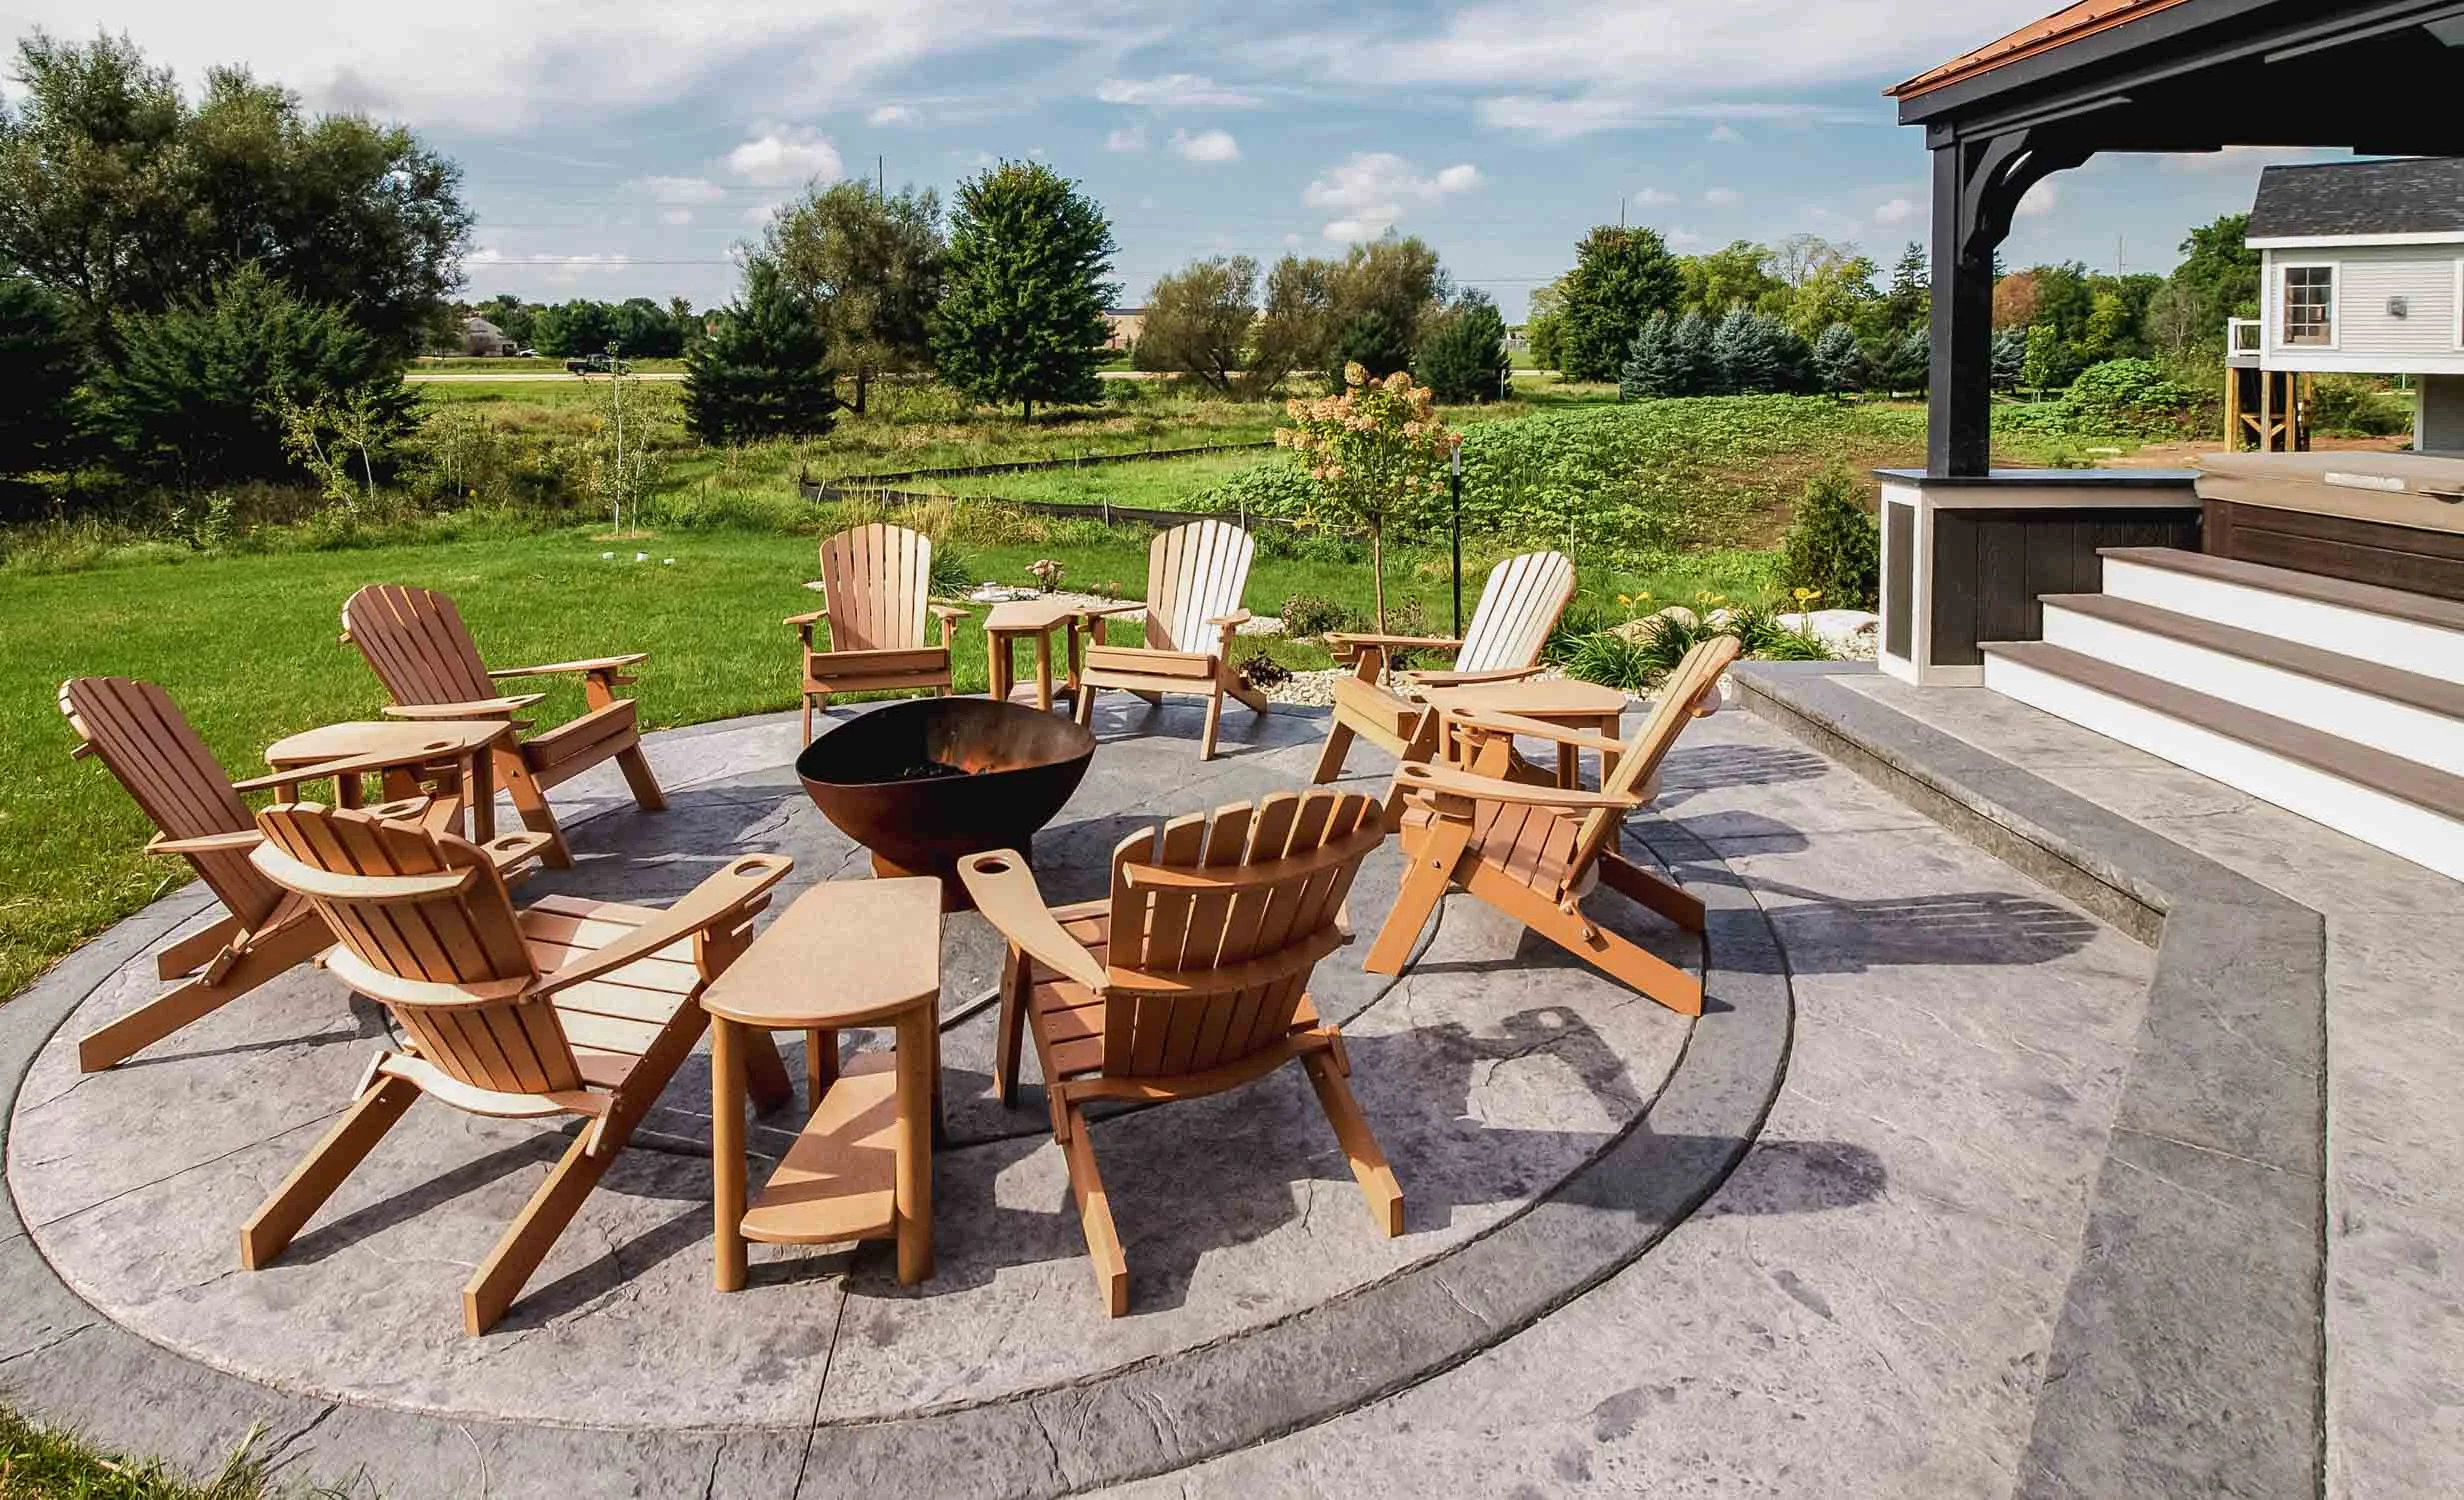
20. A Stamped Concrete Patio Featuring a Fire Pit and Adirondack Chairs
The Adirondack chairs are the key to this patio’s relaxed, inviting character. You could place any type of outdoor furniture here, but the specific choice of this classic, all-American chair style instantly signals comfort, leisure, and a connection to nature. Their low-slung, reclined posture encourages you to lean back and stay a while. The natural wood finish adds a crucial touch of warmth against the cool gray tones of the extensive concrete work, similar to the chairs used in Idea #13.
|
📋 Copy HEX 🔗 Share |
When arranging chairs around a fire pit, create a ‘conversational circle’ with a diameter of about 10-12 feet. This leaves enough room for a 3-4 foot fire pit in the center and ensures there’s about 3 feet of space between the edge of the pit and the front of the chairs. This is a comfortable distance for warmth without being too hot, and it leaves enough room for people to safely walk behind the seated guests.
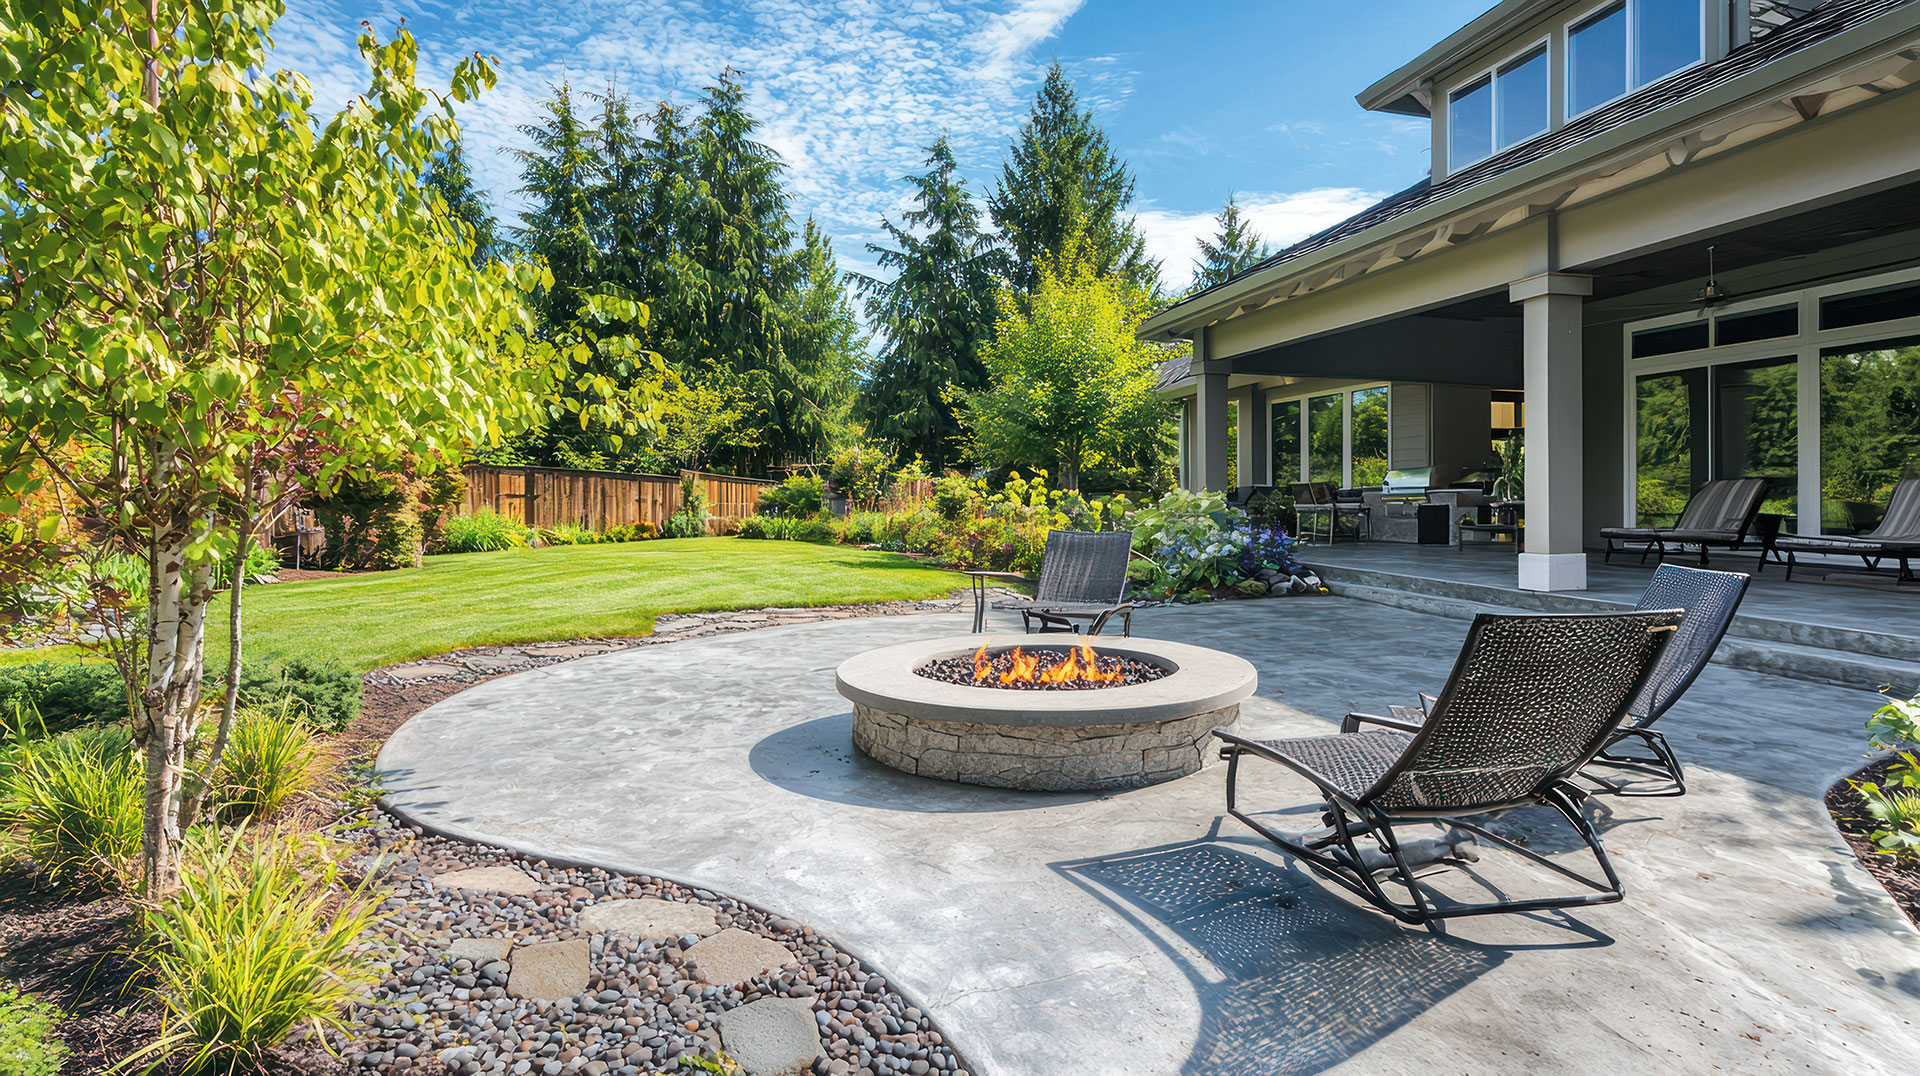
21. A Curved Concrete Patio Centered on a Stone Fire Pit
The design uses a ‘call and response’ between the patio and the landscaping. The wide, sweeping curve of the concrete patio edge is mirrored by the curved border of the manicured lawn and the rounded shape of the stone fire pit. This repetition of a single geometric motif—the curve—makes the entire backyard feel harmonious and intentionally designed. It guides the eye smoothly from the covered patio out towards the fire pit and the lawn, creating a sense of flow and connection. For another great fire pit scene, see Idea #18.
|
📋 Copy HEX 🔗 Share |
A real wood-burning fire pit is wonderfully atmospheric, but be a good neighbor. The smoke can be a major nuisance to others, especially in densely populated suburban areas. Before you build, check your local city and county ordinances regarding open flames and setback requirements from structures and property lines. Always be mindful of wind direction, and consider using a smokeless fire pit insert or opting for a propane-powered version to get the flame without the neighborhood friction.
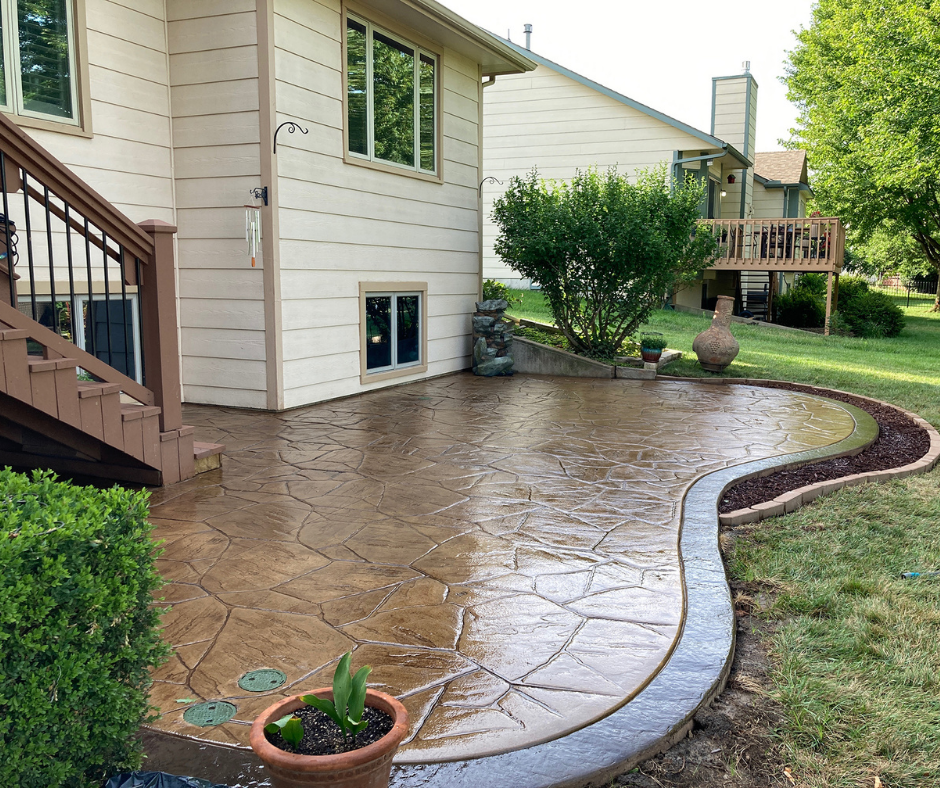
22. A Glossy Stamped Concrete Patio with Curved Edging
That beautiful, glossy ‘wet look’ on stamped concrete comes from a solvent-based acrylic sealer. While it does a great job of protecting the concrete and making the colors pop, it needs to be reapplied every 1-3 years, depending on your climate and sun exposure. Over time, the sealer can get cloudy or yellow. To fix this, you’ll need to use a chemical stripper to remove the old layers before applying a fresh coat. It’s a bit of work, but it’s necessary to maintain that rich, glossy finish.
|
📋 Copy HEX 🔗 Share |
A raised concrete edge like this, called ‘mow-over curbing,’ is a fantastic long-term investment for your yard. By setting the top of the curb at the same height as your lawn mower’s blade, you can run one wheel of the mower right on the curb. This creates a perfectly manicured edge every time you mow, completely eliminating the tedious chore of using a string trimmer along the entire perimeter of your patio and garden beds.
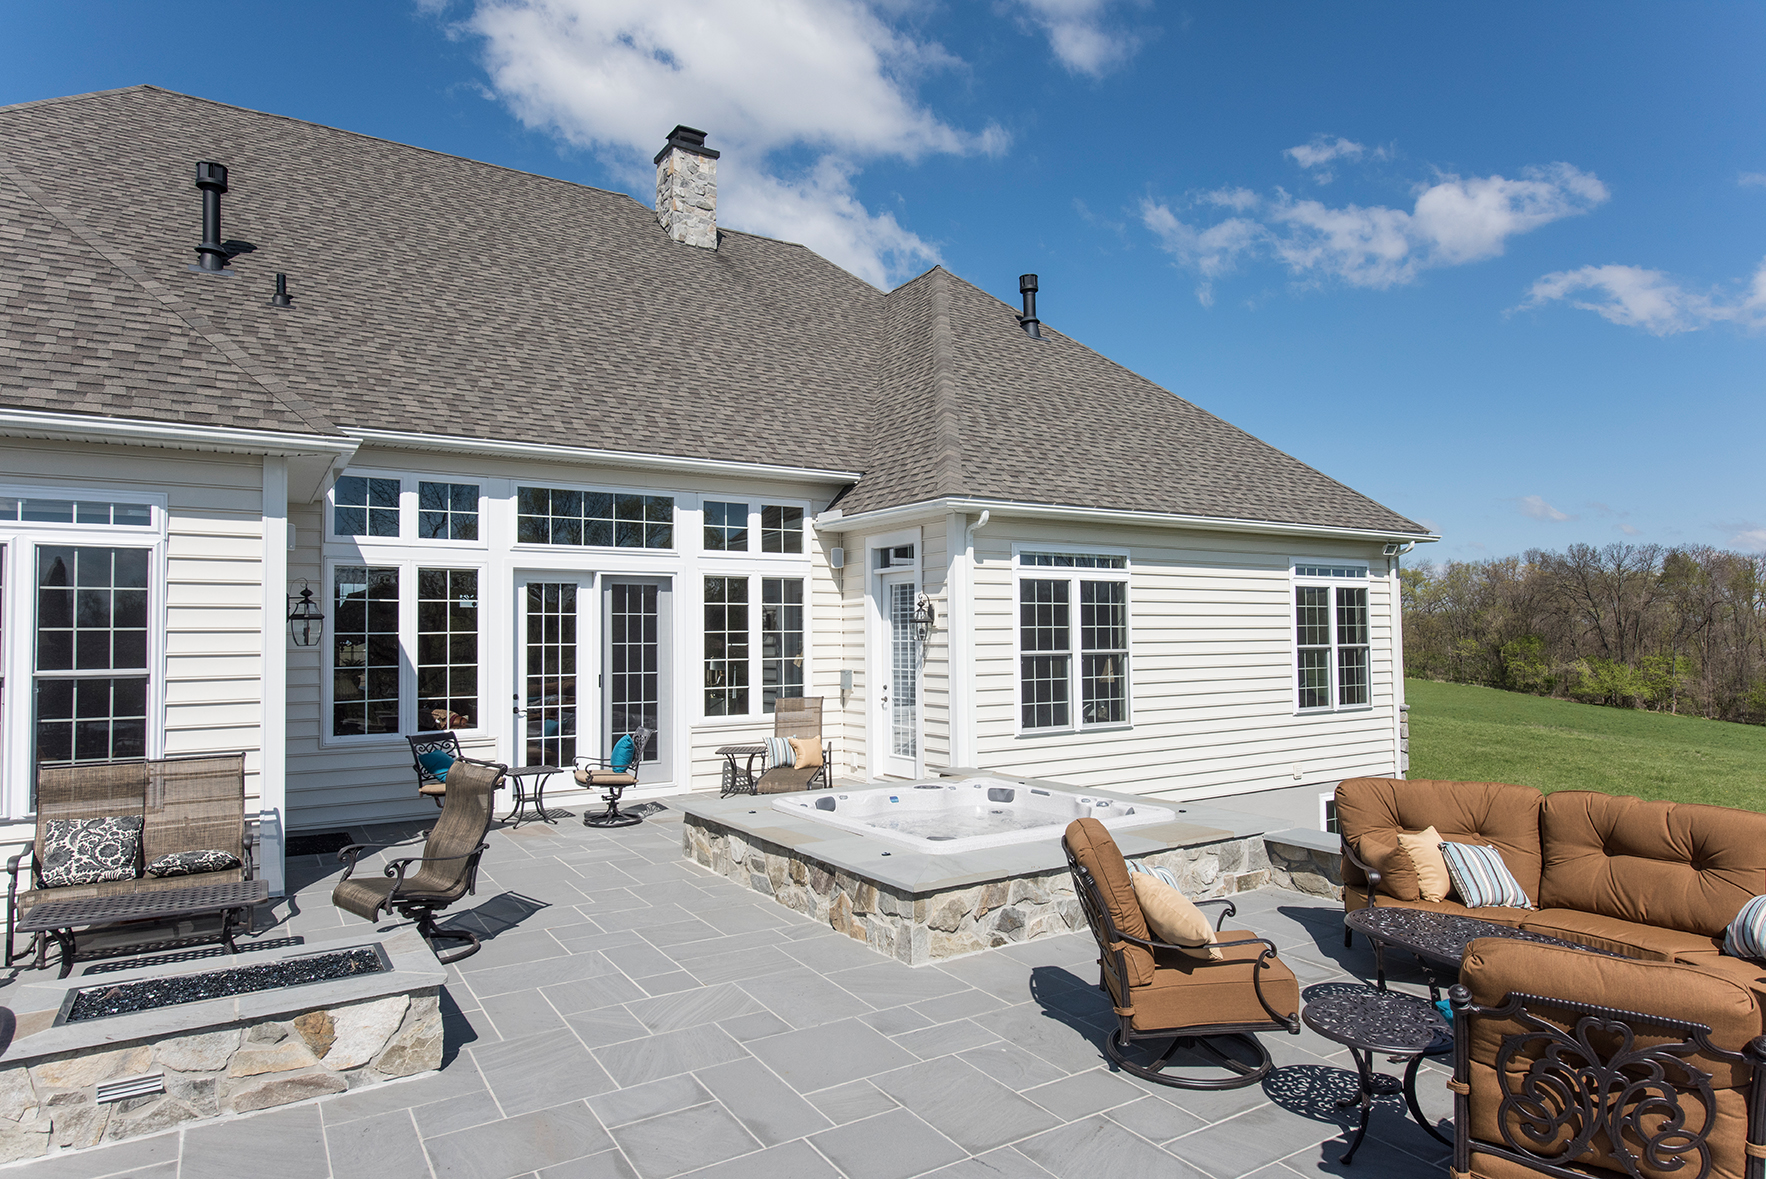
23. An Expansive Patio with a Hot Tub and Natural Stone Details
The formula for this luxurious but comfortable space is about balancing hard and soft textures. It’s roughly 50% smooth, light-gray patio tiles for a clean, expansive foundation + 30% rustic, textured stacked stone on the walls and features to add earthy character + 20% soft, comfortable textiles like the deep brown cushions and plush towels. The black wrought iron furniture adds a classic, graphic touch that grounds the arrangement. The key is the rich texture of the stone, which keeps the large patio from feeling cold or sterile.
|
📋 Copy HEX 🔗 Share |
An integrated, in-ground hot tub is the height of luxury, but it’s also a significant commitment in terms of cost and maintenance. The filtration, heating, and chemical balancing systems are more complex than those of a self-contained unit. Be prepared for higher utility bills to keep it heated and regular water testing. Also, get multiple quotes—the cost for excavation, plumbing, electrical, and masonry for a custom spa can easily exceed $25,000.
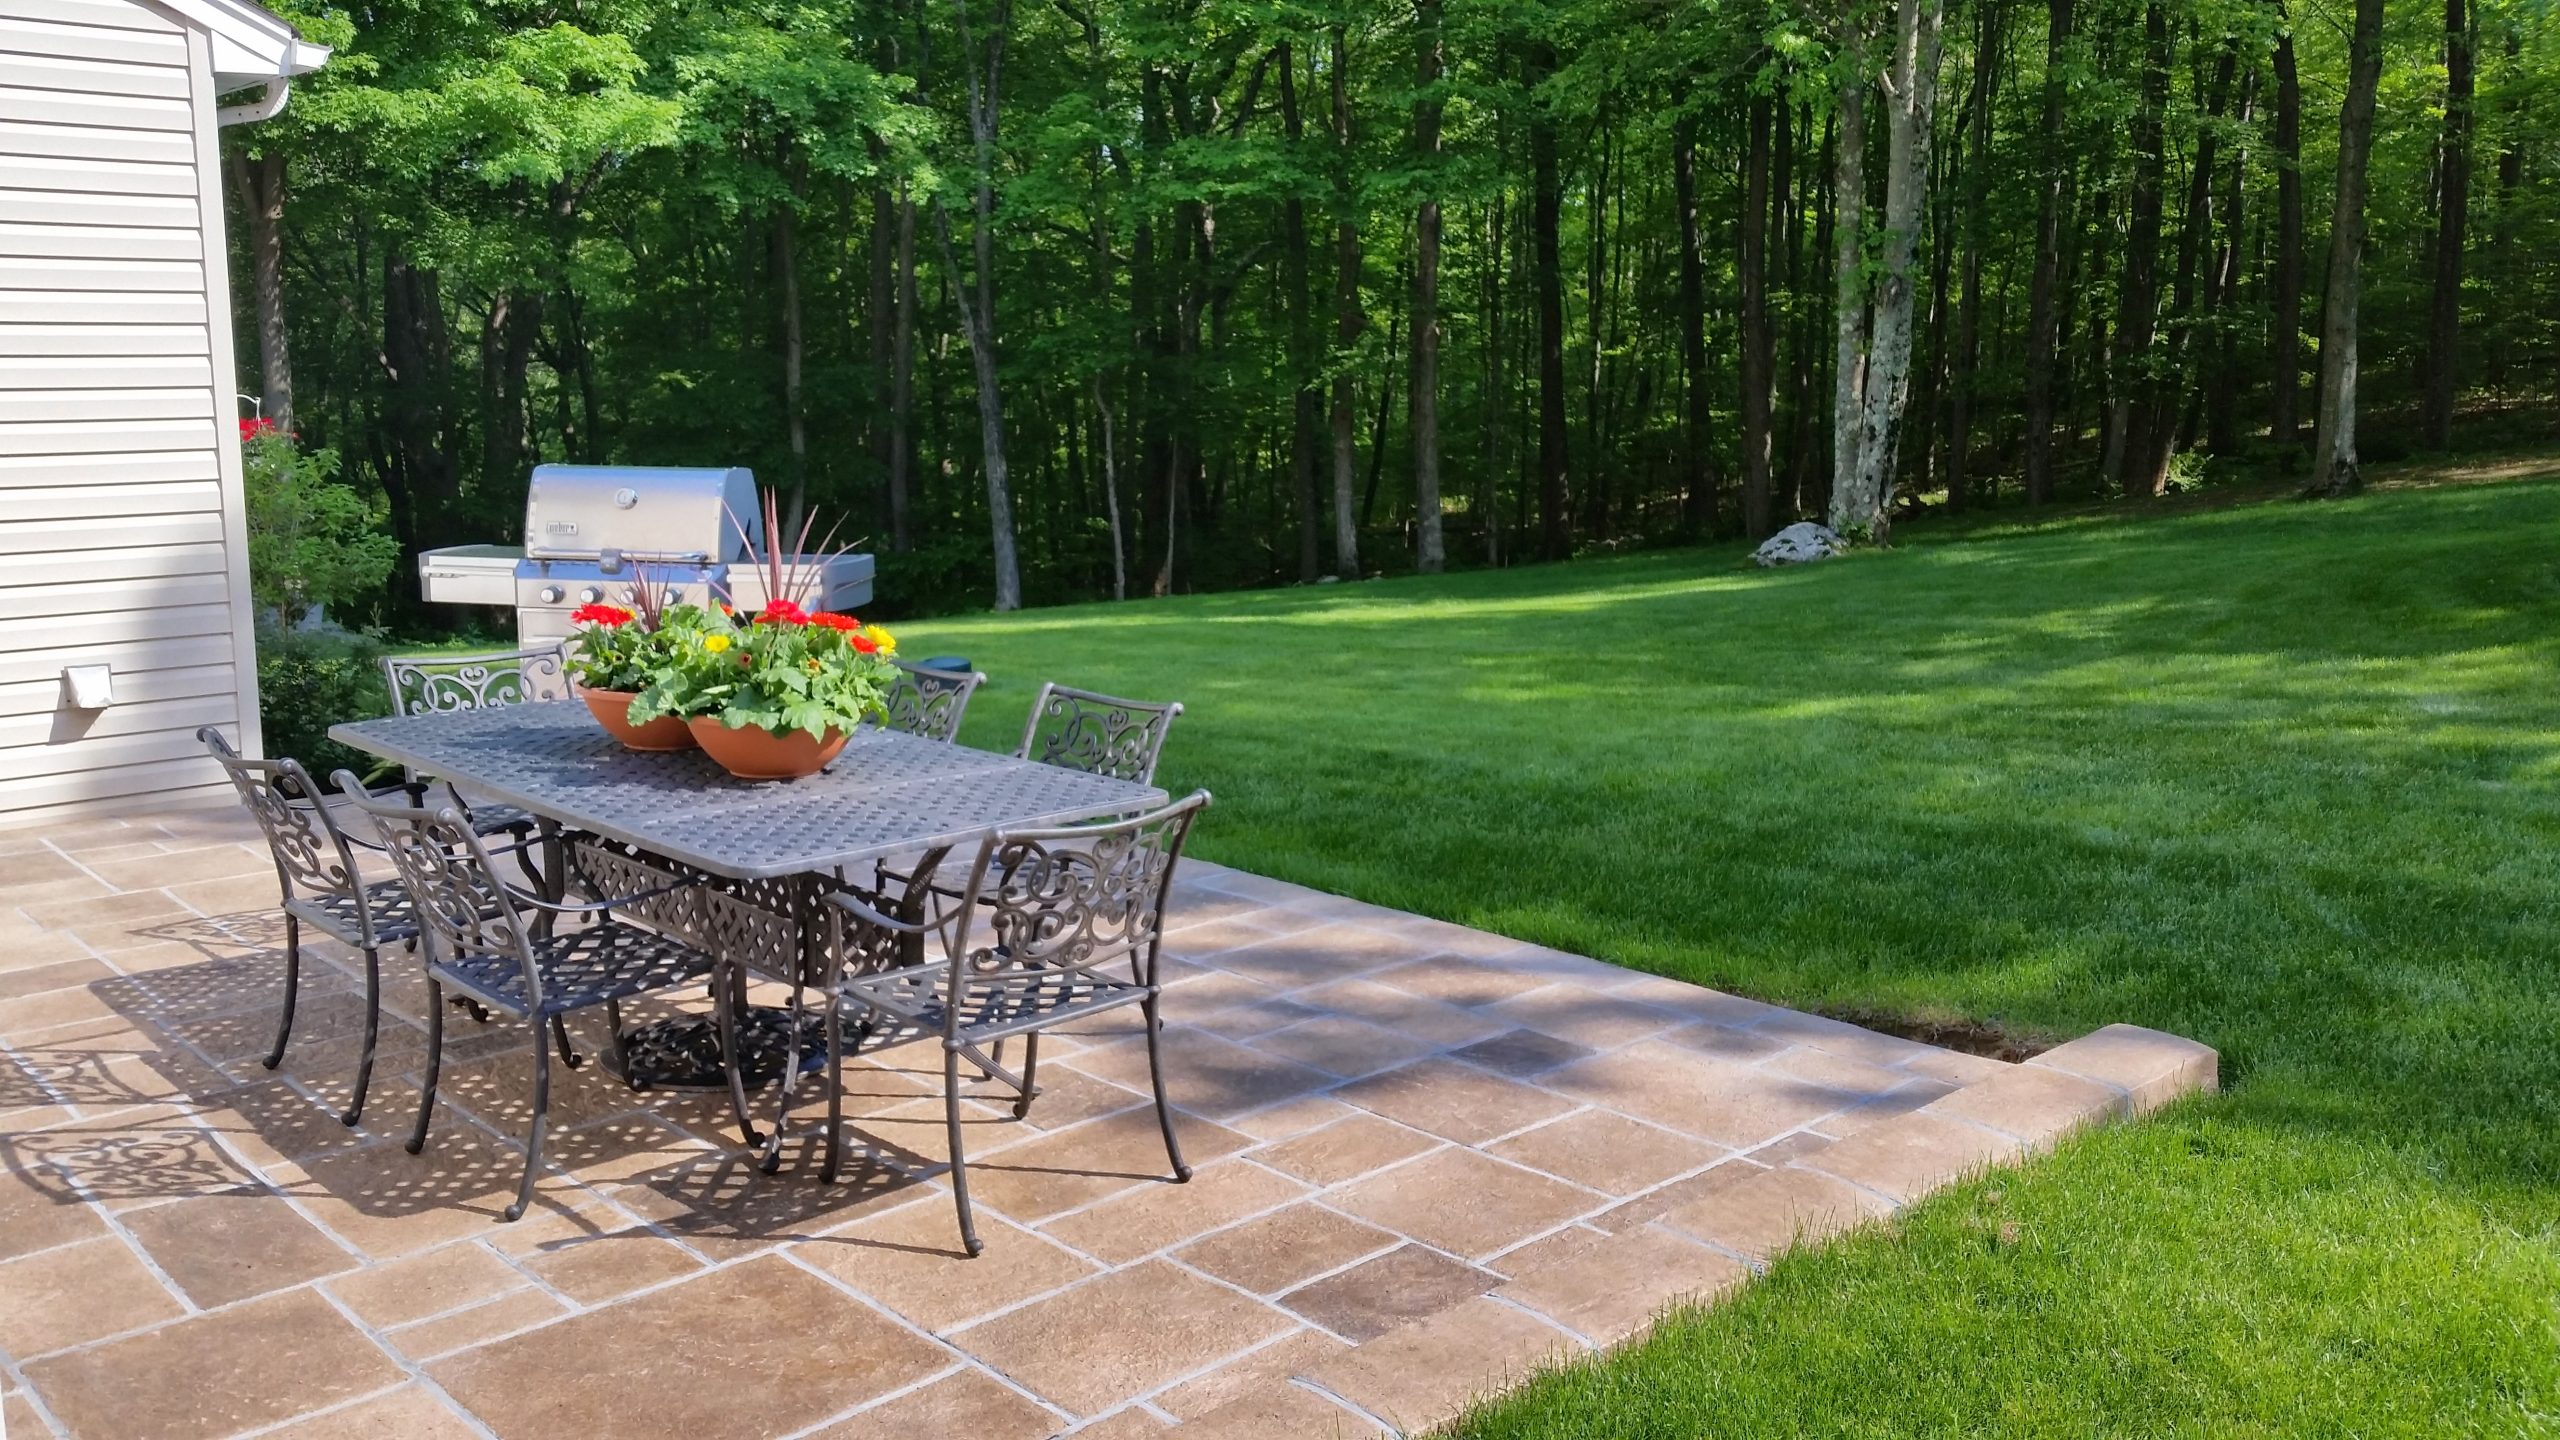
24. A Stenciled Concrete Patio with Classic Garden Furniture
Instead of tearing out an old, boring concrete slab, you can give it a new life with stenciling. Concrete stencil kits are available online or at home improvement stores for under $100. The process involves cleaning the patio, laying down the stencil, and applying a concrete stain or paint with a roller. It’s a weekend project that can completely transform the look of your space for a tiny fraction of the cost of new pavers or stamped concrete.
|
📋 Copy HEX 🔗 Share |
Here’s a quick guide to creating beautiful container gardens like the ones shown. This takes about 1-2 hours and costs $50-$150.
- Choose your pot: Ensure it has a drainage hole. Terracotta is classic but dries out quickly.
- Add filler: For very large pots, fill the bottom third with empty plastic bottles or packing peanuts to save soil and weight.
- Use good soil: Fill with a quality potting mix, not garden soil, which is too dense.
- Follow the ‘Thriller, Filler, Spiller’ rule: Place a tall, dramatic plant (the thriller) in the center, surround it with mounding plants (the filler), and add trailing plants that hang over the edge (the spiller).
- Water thoroughly: Water until it runs out the bottom drainage hole.
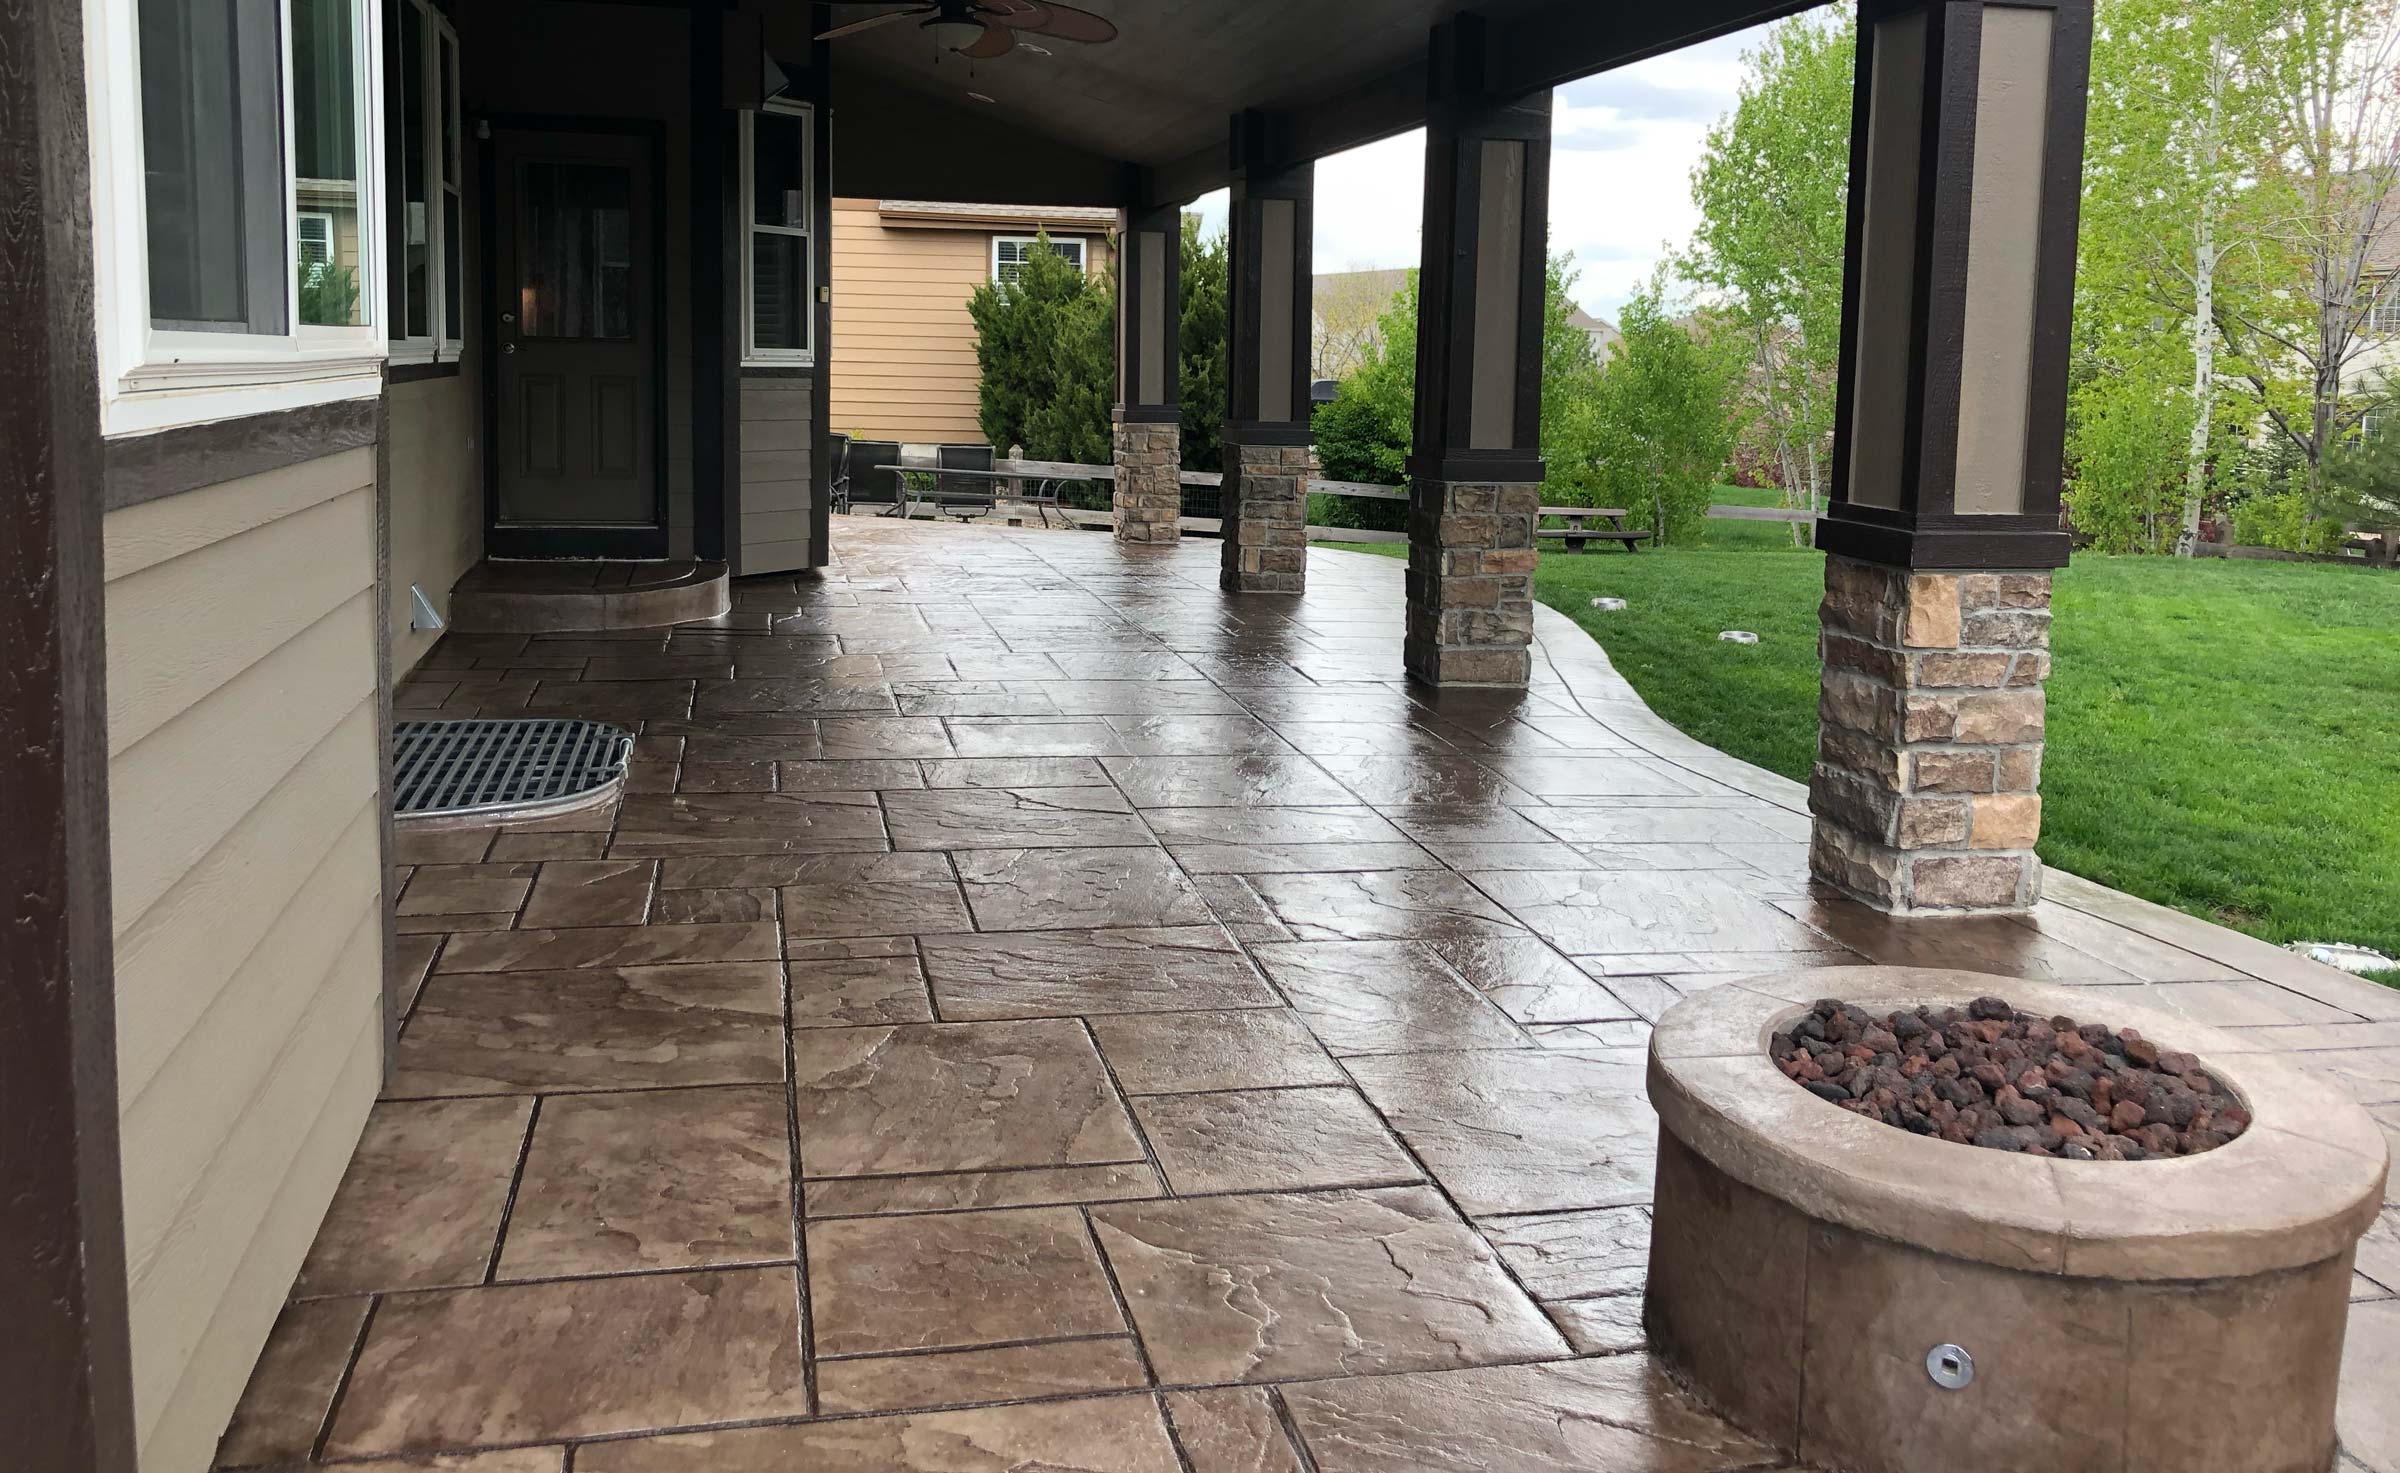
25. A Covered Patio with a Dark Brown Stamped Concrete Floor
The design commits fully to a warm, earthy color palette, creating a seamless and immersive environment. The dark brown of the stamped concrete floor is echoed in the dark wood of the columns and the matching dark brown ceiling. This monochromatic color scheme makes the entire covered patio feel like a single, cohesive ‘room.’ The lighter beige of the house siding and the gray tones in the stone column bases provide just enough contrast to keep the space from feeling too dark, resulting in a cozy, lodge-like atmosphere.
|
📋 Copy HEX 🔗 Share |
A covered patio protects your concrete from the worst of the sun and rain, which extends the life of the sealer. However, covered patios are prone to collecting dust, pollen, and cobwebs. The random stone pattern, with its many crevices, is great at hiding dirt, but it will require a thorough sweeping or hosing down every few weeks to keep it looking fresh. The lava rocks in the fire pit can also collect leaves and debris, so a periodic cleaning with a shop vac is a good idea.
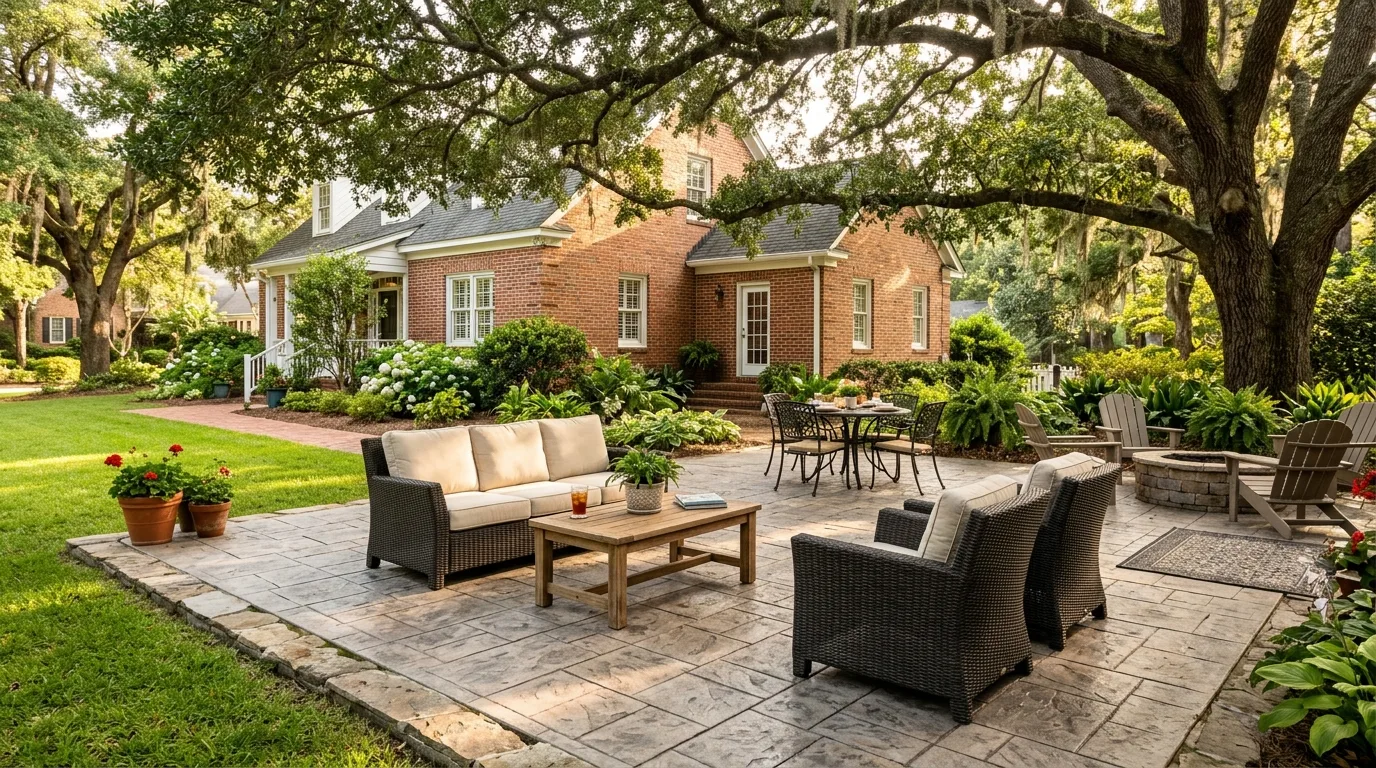
26. An Expansive Stamped Concrete Patio with Multiple Zones
When designing a large, multi-zone patio, use furniture and landscaping to create ‘invisible walls.’ Here, the large woven sofa clearly defines the edge of the main conversation area. A row of large terracotta pots separates the lounge space from the fire pit circle. The cast iron dining set is grouped under a mature tree, using the shade canopy as a natural ceiling. These subtle divisions make the huge expanse of concrete feel more intimate and purposeful. For other fire pit arrangements, see Idea #18.
|
📋 Copy HEX 🔗 Share |
This sprawling, multi-function patio demonstrates that stamped concrete can unify a very large space, well over 1,000 square feet. It’s a great choice for big backyards where you want to connect several different outdoor ‘rooms’—a dining area, a lounge, and a fire pit circle—without the busy look of multiple different paving materials. The single, continuous surface makes the entire yard feel connected and intentionally designed. This approach is less effective in small yards, where a single material can feel overwhelming.
27. A Modern Patio with a Clean, Geometric Concrete Pattern
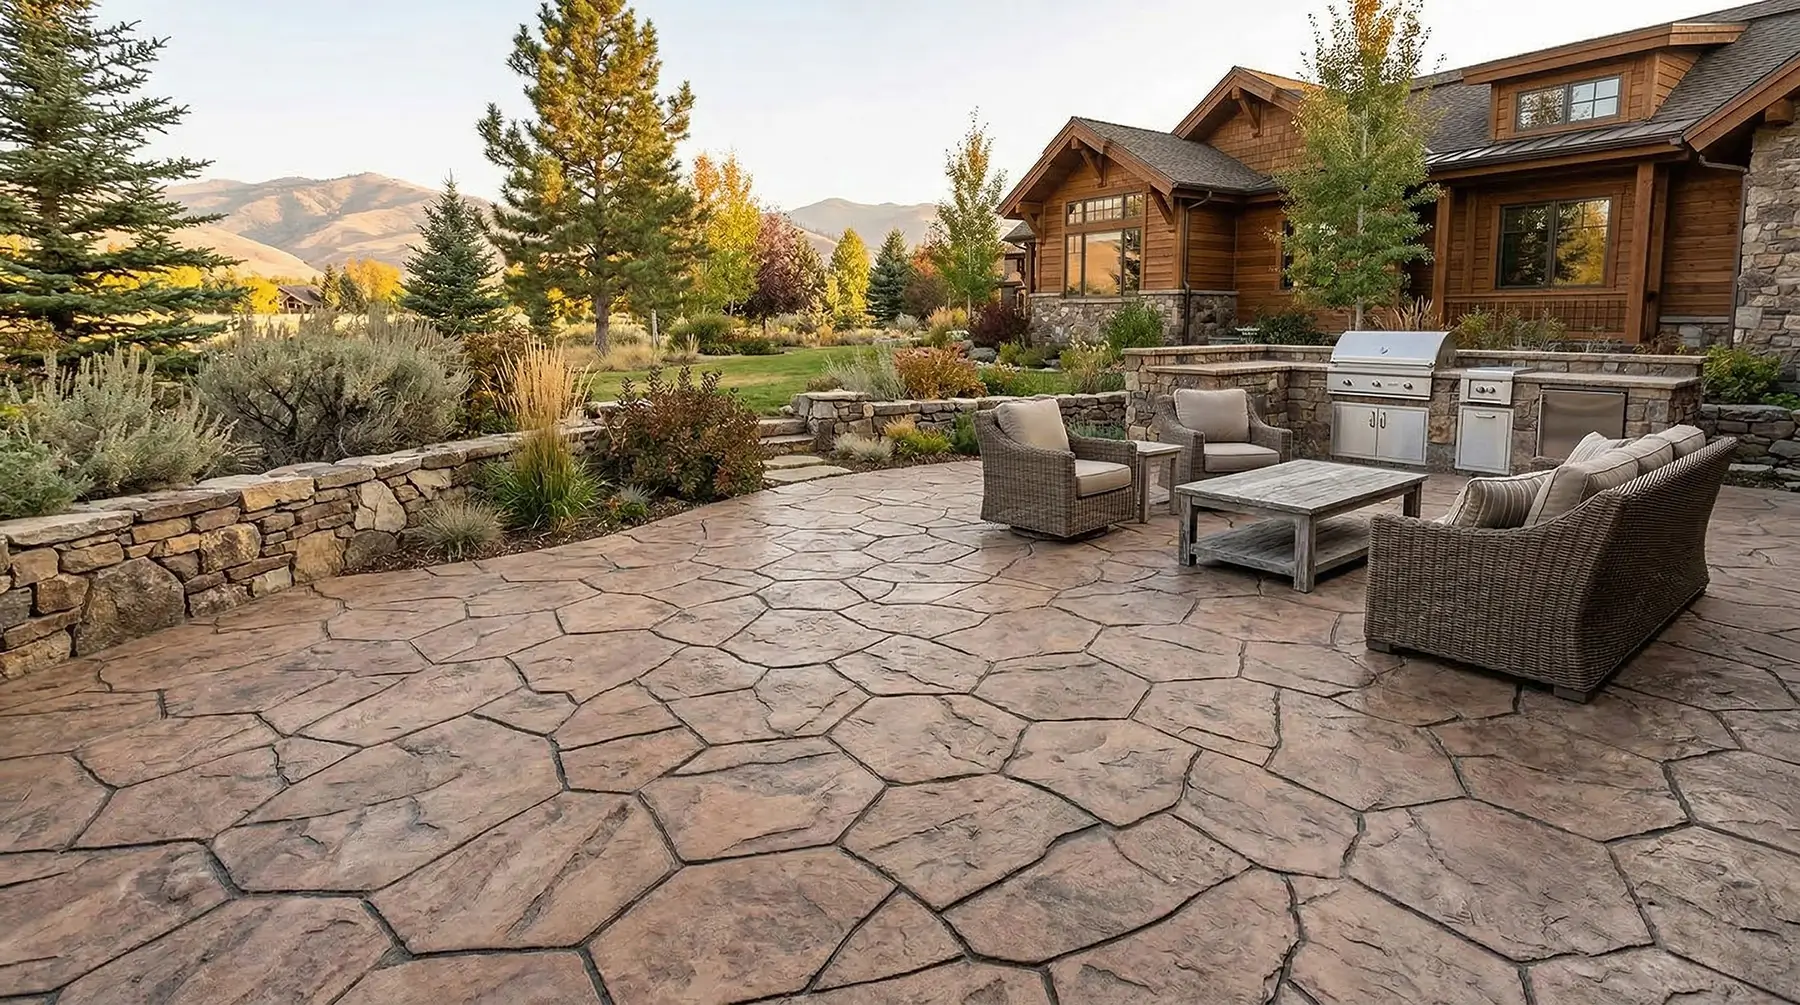
The move towards bold, geometric patterns in hardscaping is a direct reaction to years of more organic, random patterns like faux flagstone. Homeowners are looking for ways to make a graphic statement, and the patio floor is the new ‘fifth wall.’ This look, inspired by classic tilework and modern art, feels fresh, intentional, and confident. It’s popular in contemporary and mid-century modern homes where the hardscaping is treated as a key element of the architectural design, not just a surface to walk on.
|
📋 Copy HEX 🔗 Share |
A bold geometric pattern is a big commitment. Before you pour, consider these points:
- Is the pattern timeless? What looks trendy today might look dated in ten years. A classic checkerboard or a simple linear pattern has more staying power than a complex, busy design.
- Does it fit your home’s style? A bold geometric pattern works best with modern, contemporary, or minimalist architecture. It can clash with a very traditional or rustic home.
- How will it look with furniture? Remember that much of the pattern will be covered by tables and chairs. Make sure the scale of the pattern is large enough to still be appreciated when furnished.
Your backyard story starts here.
Whether you’re starting with a bare patch of grass or reimagining an old, tired slab, the right concrete patio is the foundation for years of outdoor memories. We hope these 27 real-world examples have sparked your imagination for what’s possible in your own space.
Go ahead and start a new board on Pinterest—it’s time to gather the looks you love and start planning the backyard you’ve always wanted.