Basement Organization Ideas 2026 are having a major moment on Pinterest right now—and we know exactly why. That neglected downstairs space is the final frontier of your home, and claiming it feels like a massive win. After filtering through hundreds of options across IKEA, Target, and Walmart, we narrowed it down to 27 ideas that actually deliver. We pulled the best Basement Organization Ideas 2026 options across every price point—from $50 to $5000. Inside, you’ll find 27 curated ideas covering modern, industrial, rustic, and playful themes. For 2026, it’s all about creating ultra-specific, functional zones—not just a sea of storage totes. And stay until the end — we break down the most common mistakes that can ruin these looks. 📌 Save this to Pinterest for later—you’ll want to revisit these ideas.
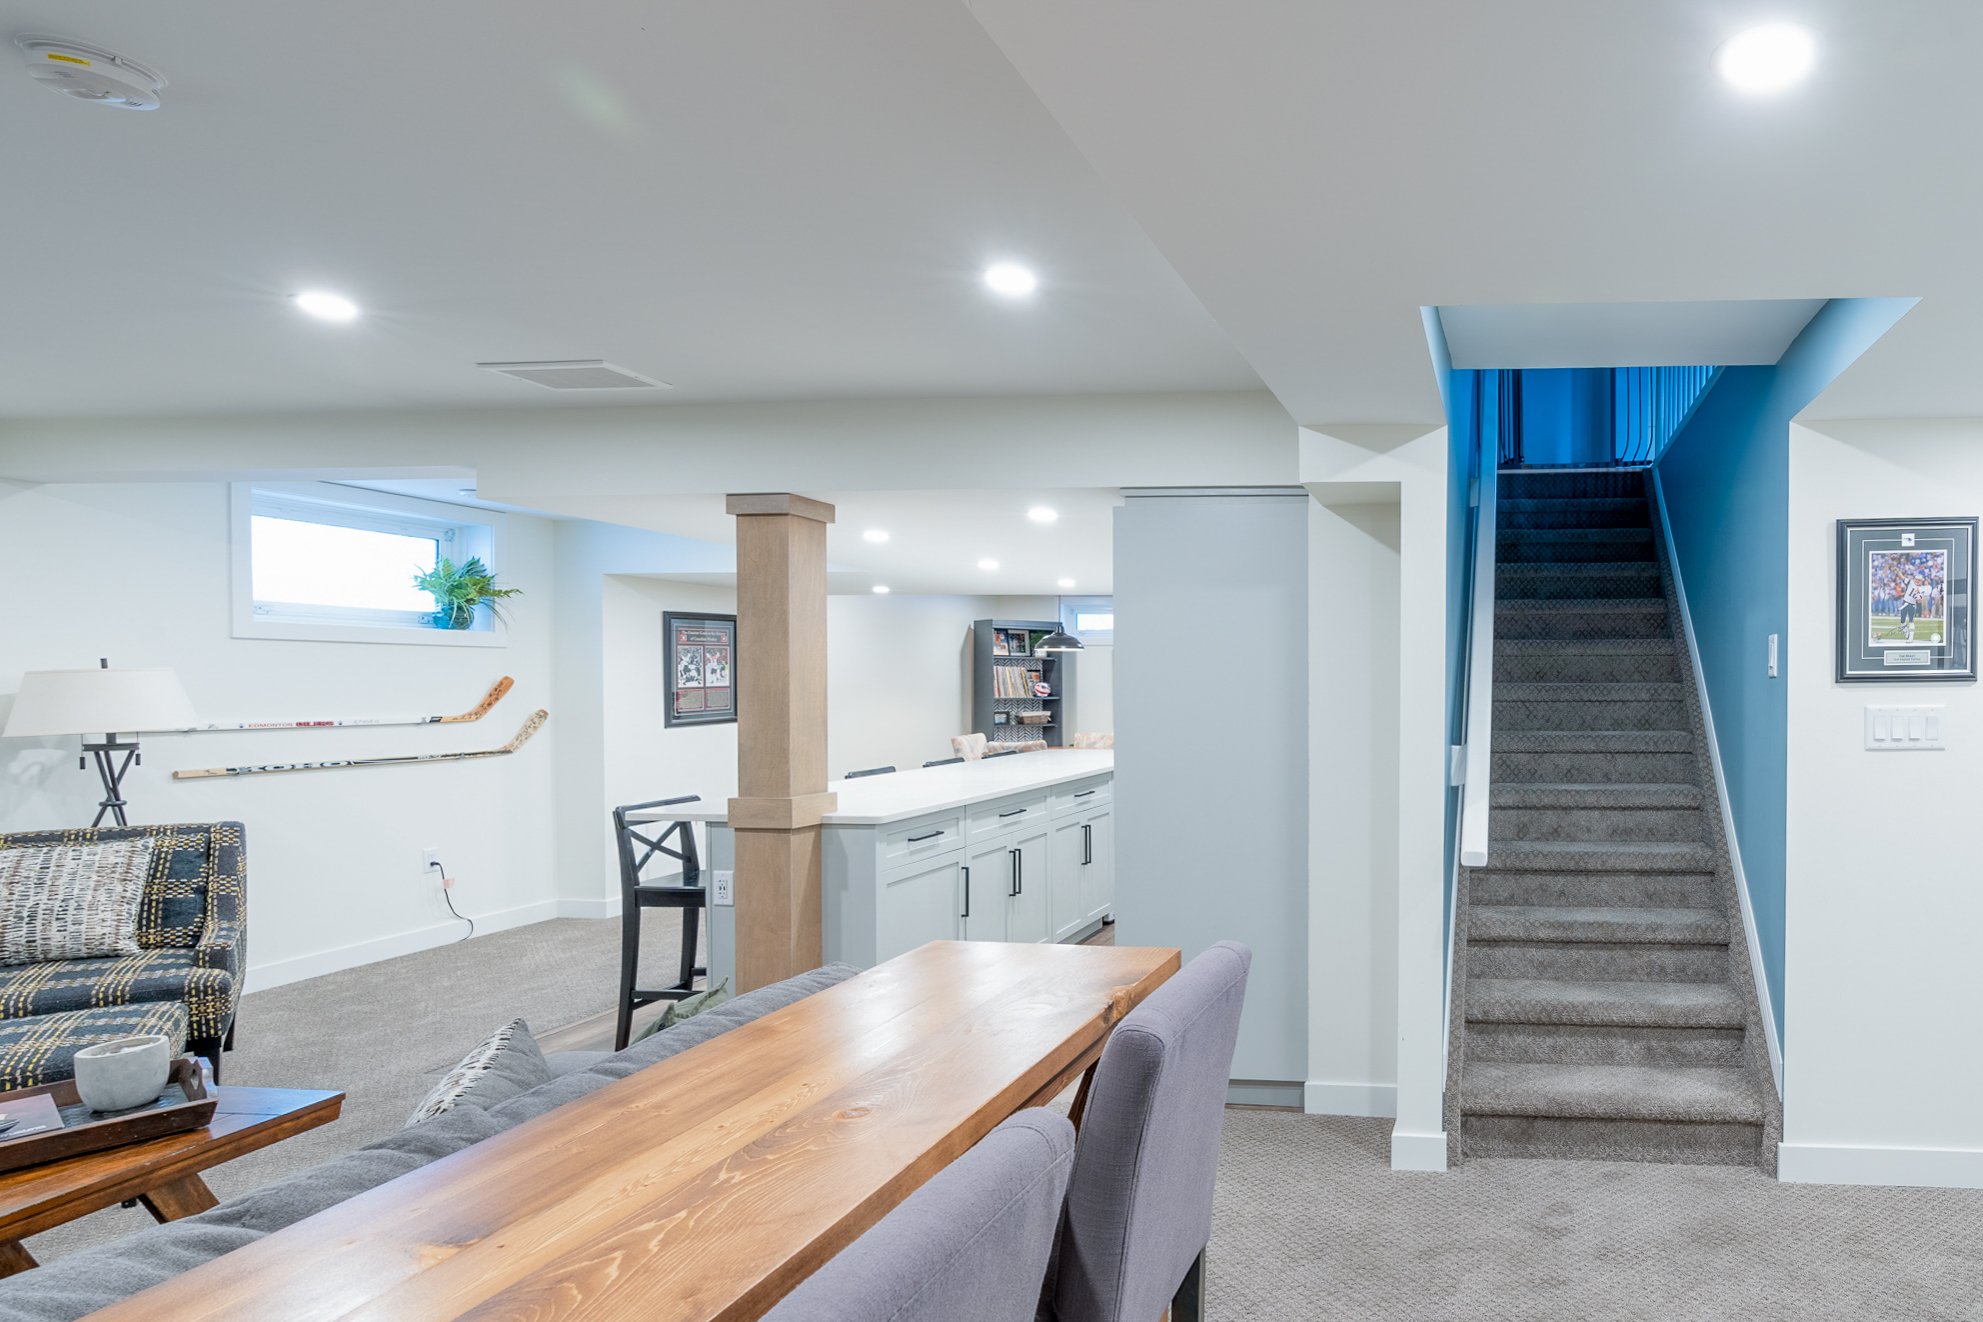
1. Modern Basement Bar with a Blue Accent Stair Wall
This design nails the concept of zoning without walls. The light wood bar acts as a stylish divider, clearly separating the lounge area from the rest of the basement. What makes it work so well is the balance of color and texture. The cool, bold blue on the staircase wall provides a striking focal point and a dose of personality, while the warm wood of the bar top adds natural texture and prevents the space from feeling cold. The light gray carpet serves as a neutral, unifying base that ties everything together seamlessly.
|
📋 Copy HEX 🔗 Share |
When creating an accent wall for a staircase, opt for a paint with an eggshell or satin finish. It’s significantly more durable and easier to clean than a flat finish, which is crucial for a high-traffic area where hands will inevitably touch the walls. To make the accent truly pop, choose a color that is at least three shades deeper than your main wall color. This creates intentional depth and draws the eye. Make sure to have excellent lighting, like the recessed fixtures here, to keep the dark color from feeling gloomy.
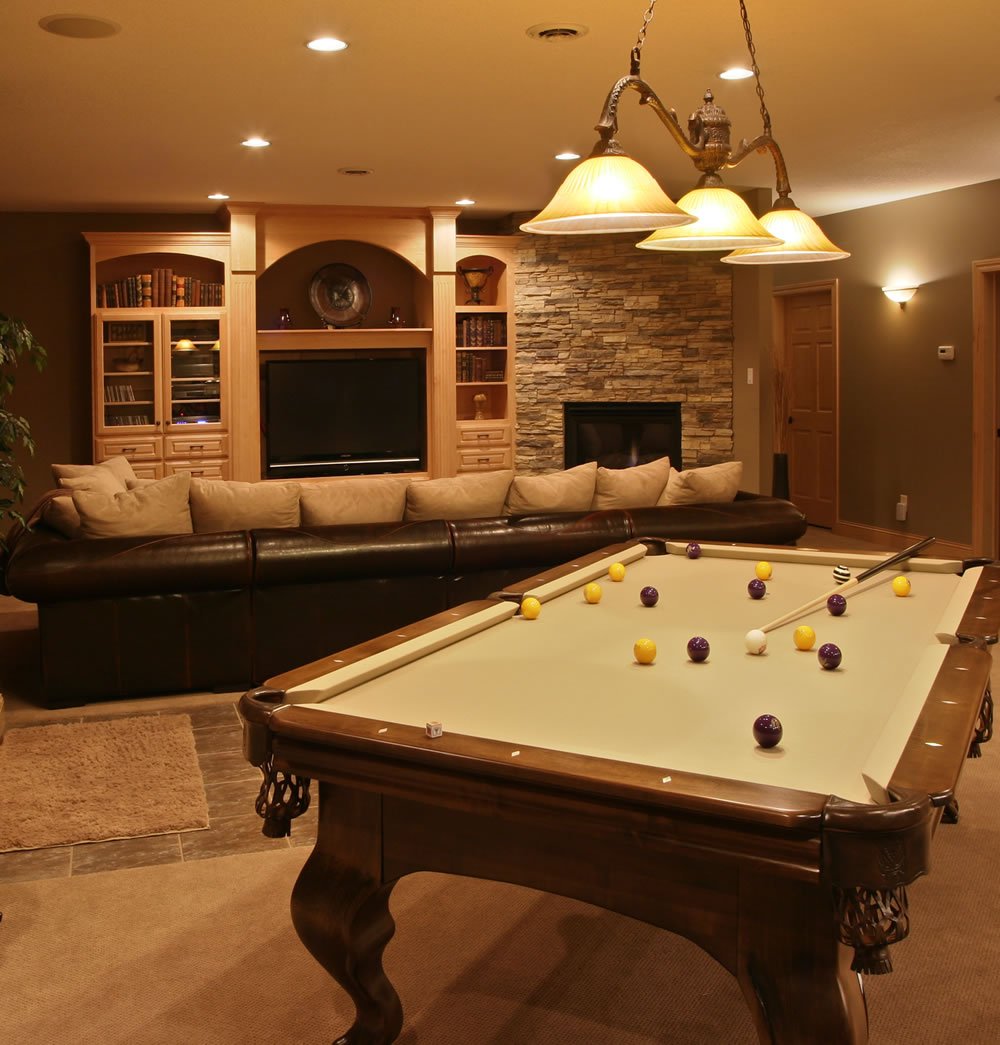
2. Unfinished Basement Storage Room Essentials
Let’s be honest: not every basement needs to be a fully finished media room. Sometimes, you just need a place to put stuff, and that’s perfectly fine. For an unfinished space, the primary concerns are moisture, dust, and pests. Before you buy a single shelf, invest in a good dehumidifier. Concrete floors and walls are porous and can let in dampness that will ruin your belongings. Also, consider the lighting. A single bare bulb isn’t going to cut it when you’re looking for that one specific box. Add a couple of inexpensive LED shop lights.
|
📋 Copy HEX 🔗 Share |
- Measure your space three times. Know the height, width, and depth available for shelving, and don’t forget to account for any pipes, ducts, or support columns.
- Assess your inventory. What are you actually storing? Holiday decor, old files, sports equipment? The type of storage you need depends on what you have.
- Check for moisture. Tape a 12×12 inch square of plastic sheeting to the floor and walls. If condensation forms underneath after a few days, you have a moisture issue that needs addressing first.
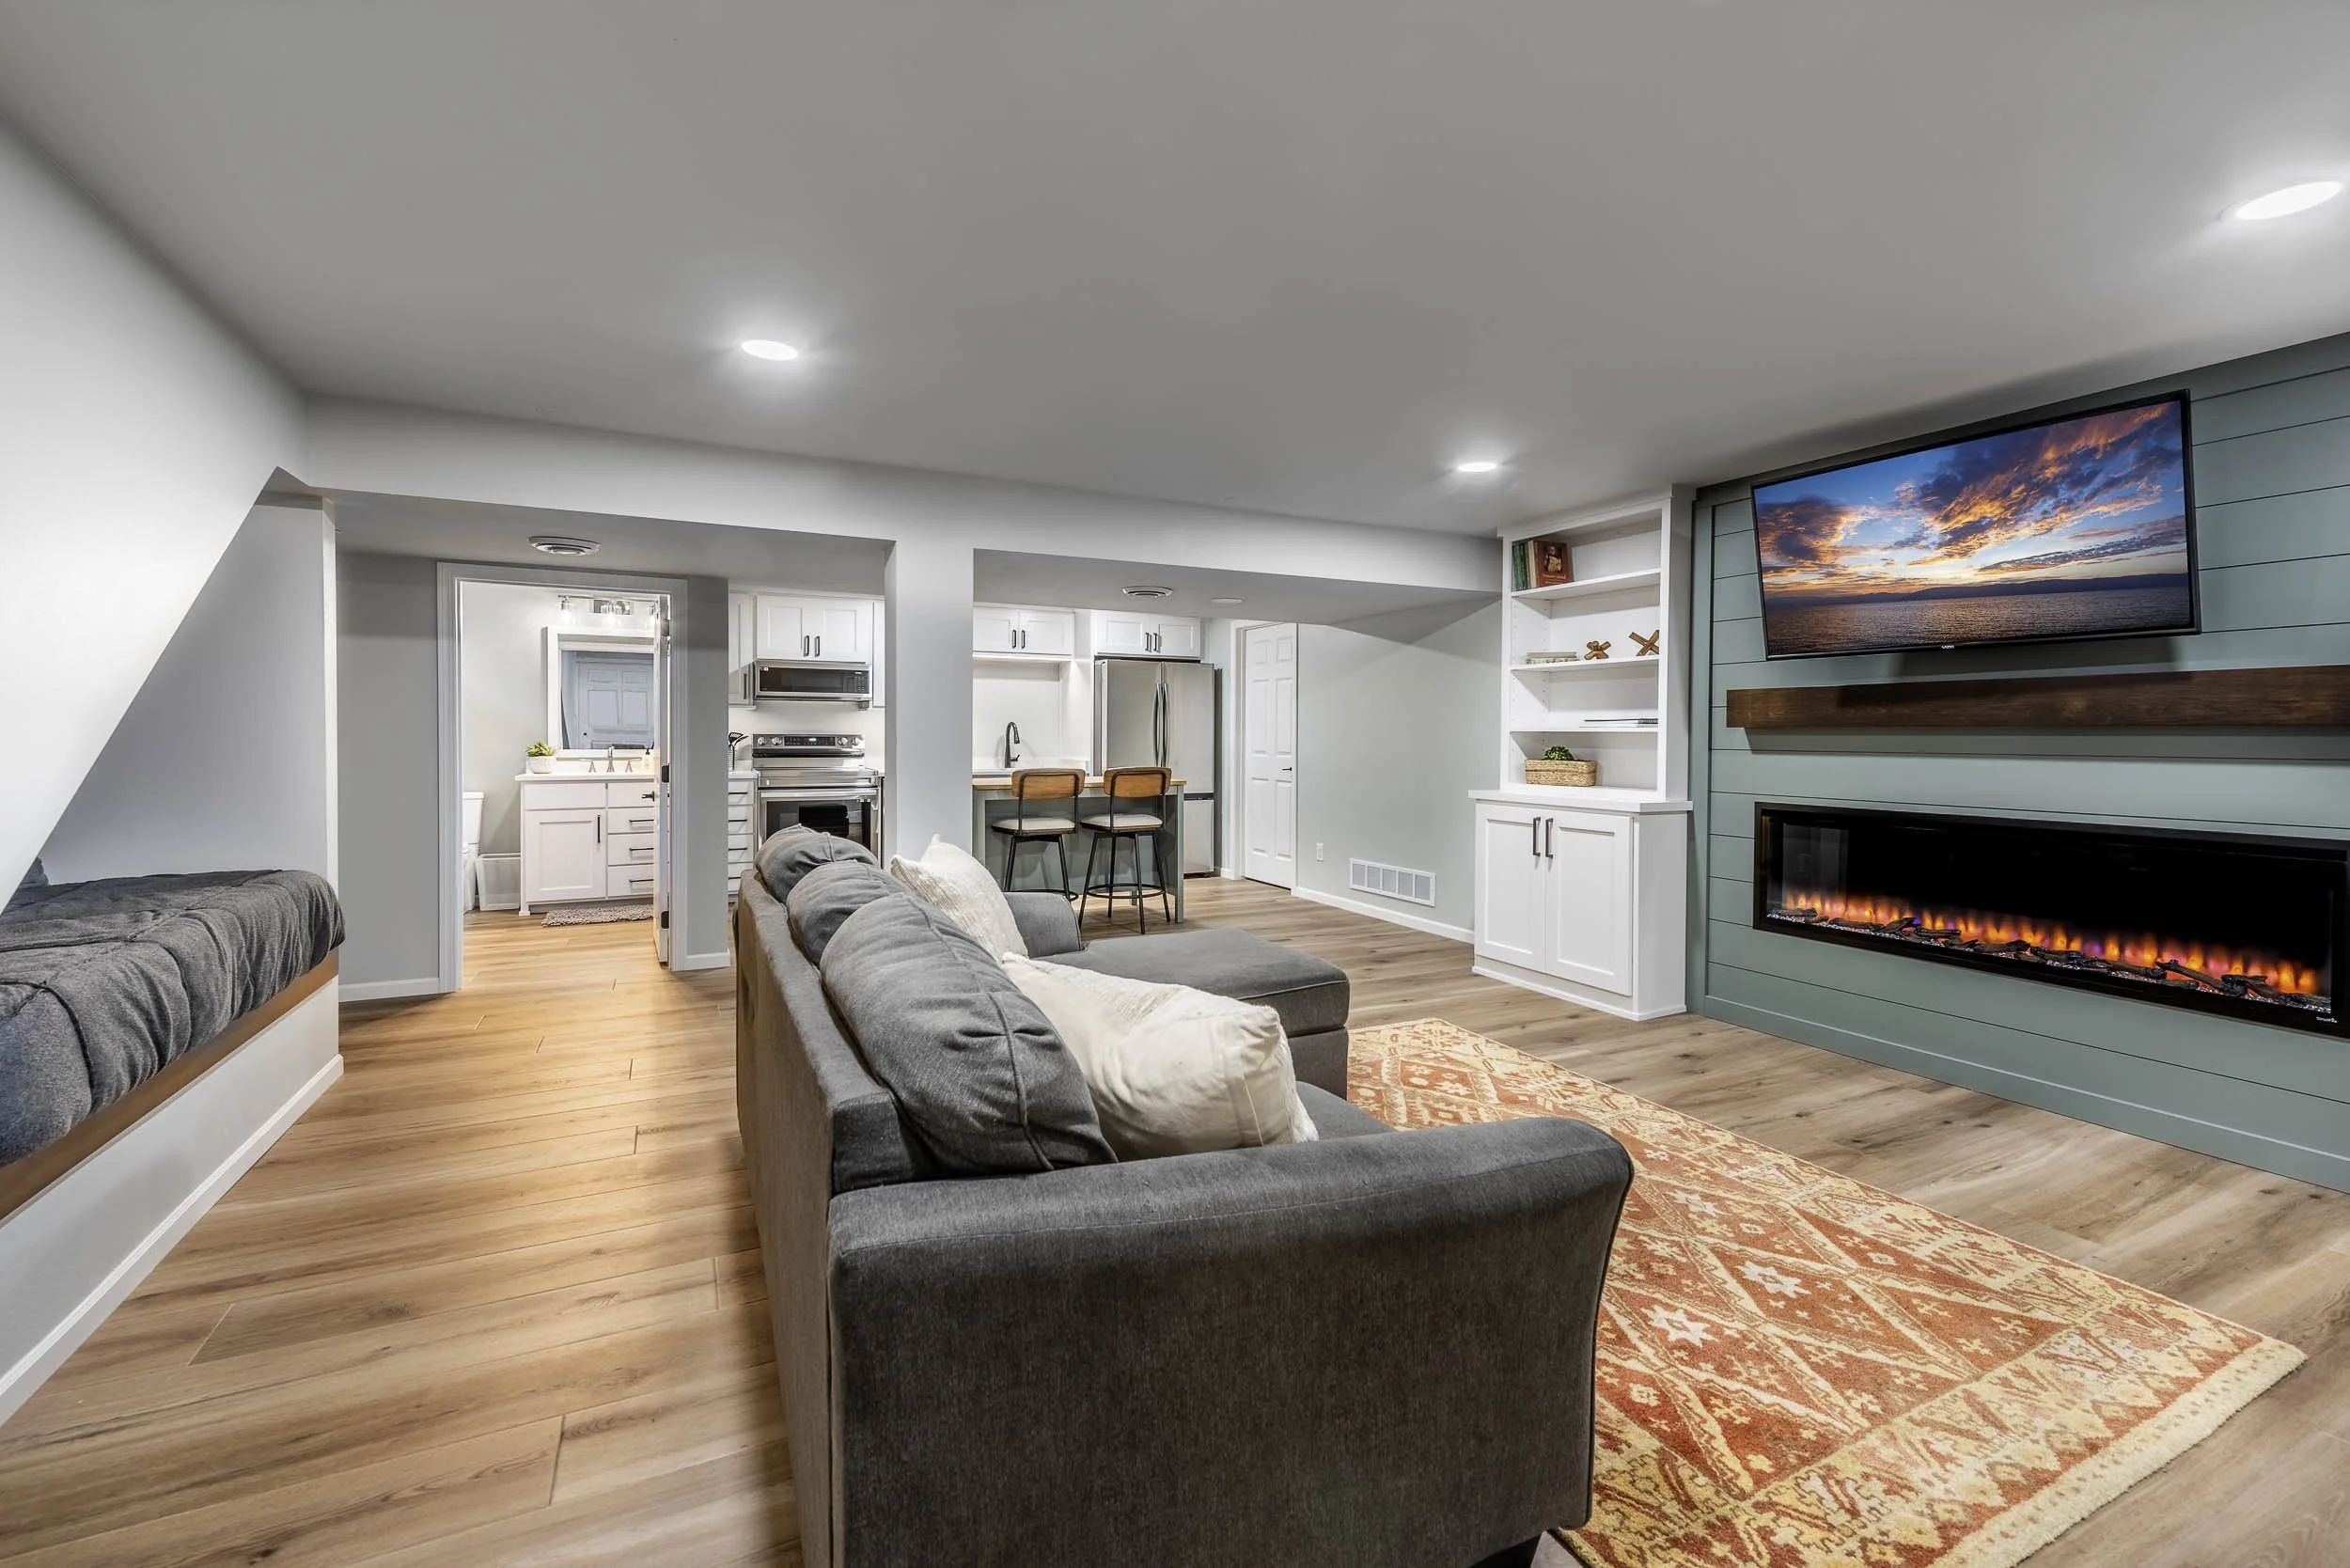
3. Multi-Zone Basement with Teal Shiplap Entertainment Wall
What makes this entire basement work is the teal shiplap accent wall. It’s more than just a pop of color; it’s a brilliant design anchor. It immediately defines the entertainment zone, gives the TV a purpose-built home instead of just being a black rectangle on a wall, and integrates the electric fireplace for a cozy focal point. By concentrating all the color and texture in this one area, the rest of the basement can remain neutral and open, allowing the kitchenette and nook to feel spacious and uncluttered.
|
📋 Copy HEX 🔗 Share |
An ambitious, multi-zone design like this requires a decent amount of square footage. You’ll need a minimum of 400-500 square feet to pull this off without it feeling cramped. The living area alone, with that large grey sectional, needs about a 12×15-foot area. The kitchenette requires dedicated plumbing and electrical, so it’s best planned along a wall where hookups are accessible. Standard ceiling height of 8 feet is fine, but if you have lower ceilings, avoid bulky furniture and opt for more streamlined pieces to maintain a sense of openness.
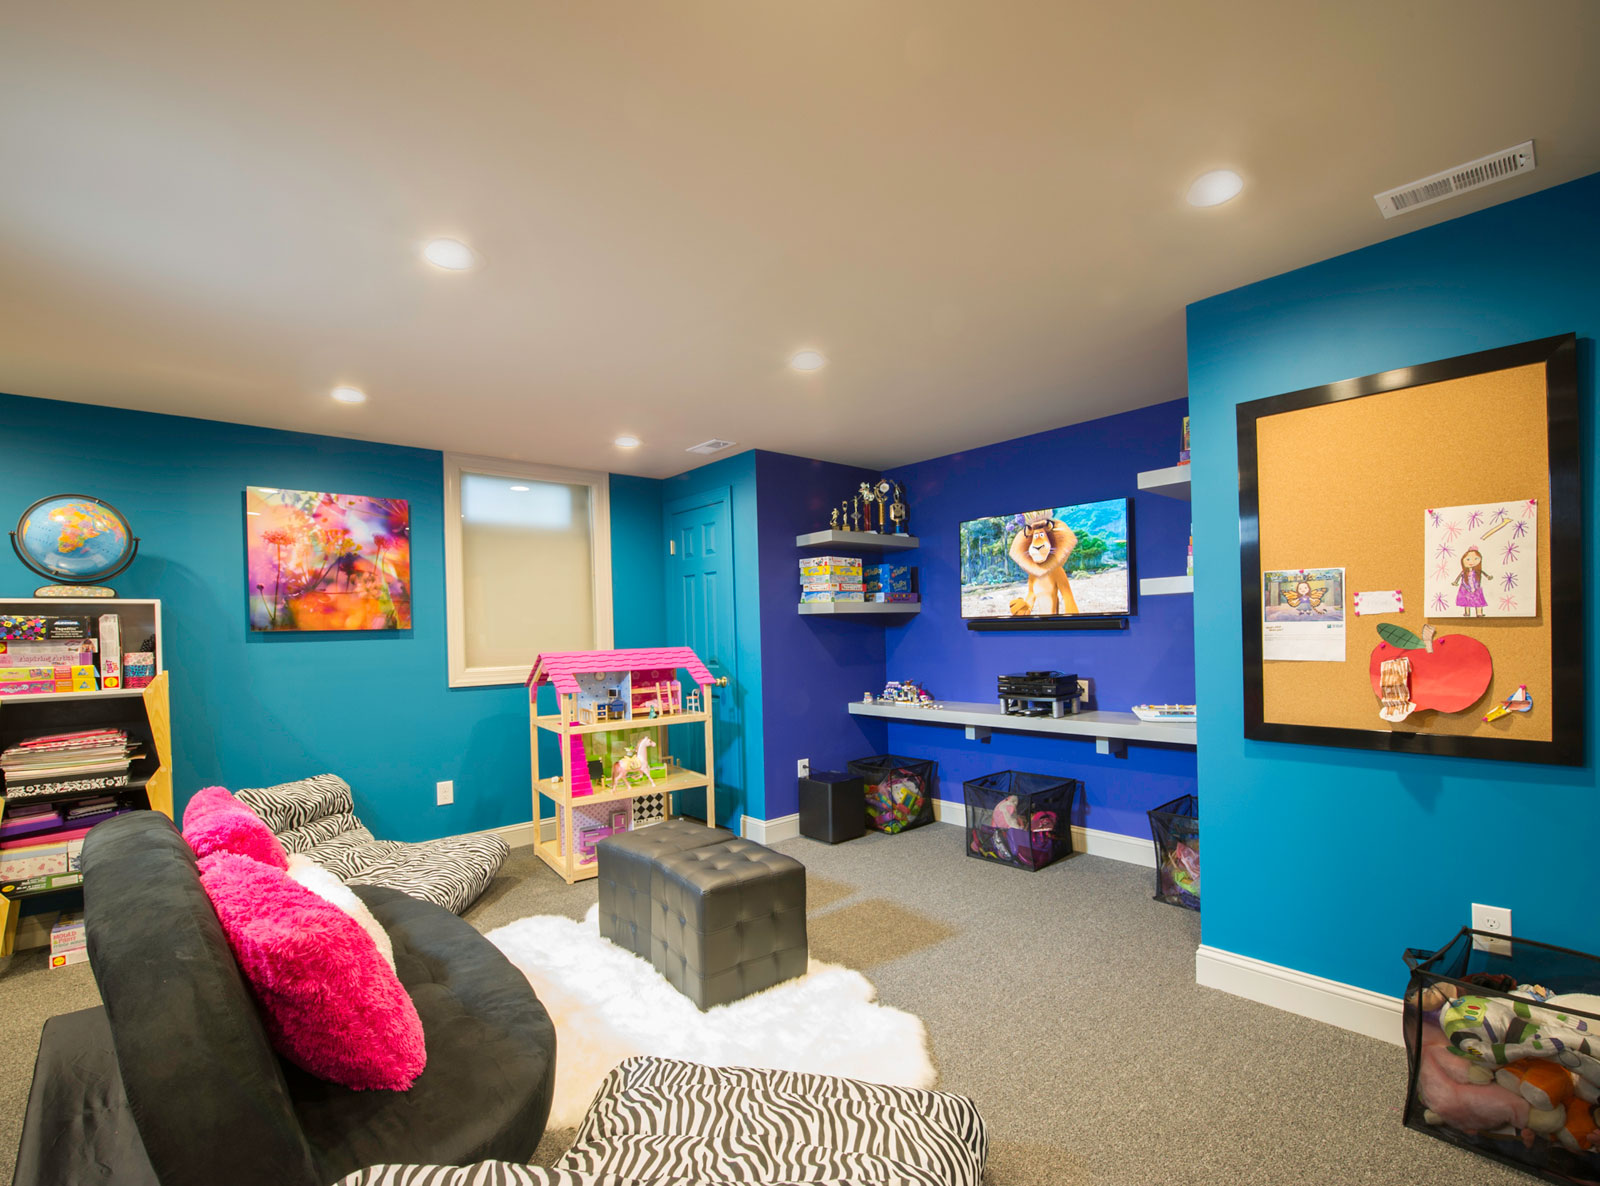
4. Vibrant Kids’ Playroom with Bold Blue Walls
This room’s energy comes from a confident color formula. Think of it as 60% bold color + 30% neutral base + 10% playful accents. The deep blue and teal walls make up the confident majority. The gray carpet and black loveseat provide the neutral foundation that keeps the bright walls from being overwhelming. Finally, the hot pink pillows and zebra-print cushions are the 10% of pure fun, adding that essential kid-friendly vibe. You could easily swap the palette: try emerald green walls with a beige carpet and pops of yellow for a different but equally vibrant feel.
|
📋 Copy HEX 🔗 Share |
A room this bold is a commitment. While the deep blue walls are stunning, they can make a small or poorly lit basement feel like a cave. This look works because of the ample recessed lighting. Before you paint, check your light sources. You’ll need more than just one or two ceiling fixtures. Also, dark paint shows scuffs and fingerprints more than lighter colors, so using a washable, durable paint sheen is non-negotiable in a kid’s space. Be prepared for touch-ups or embrace the lived-in look!
5. Contemporary Basement Bar and Lounge with Mixed Materials
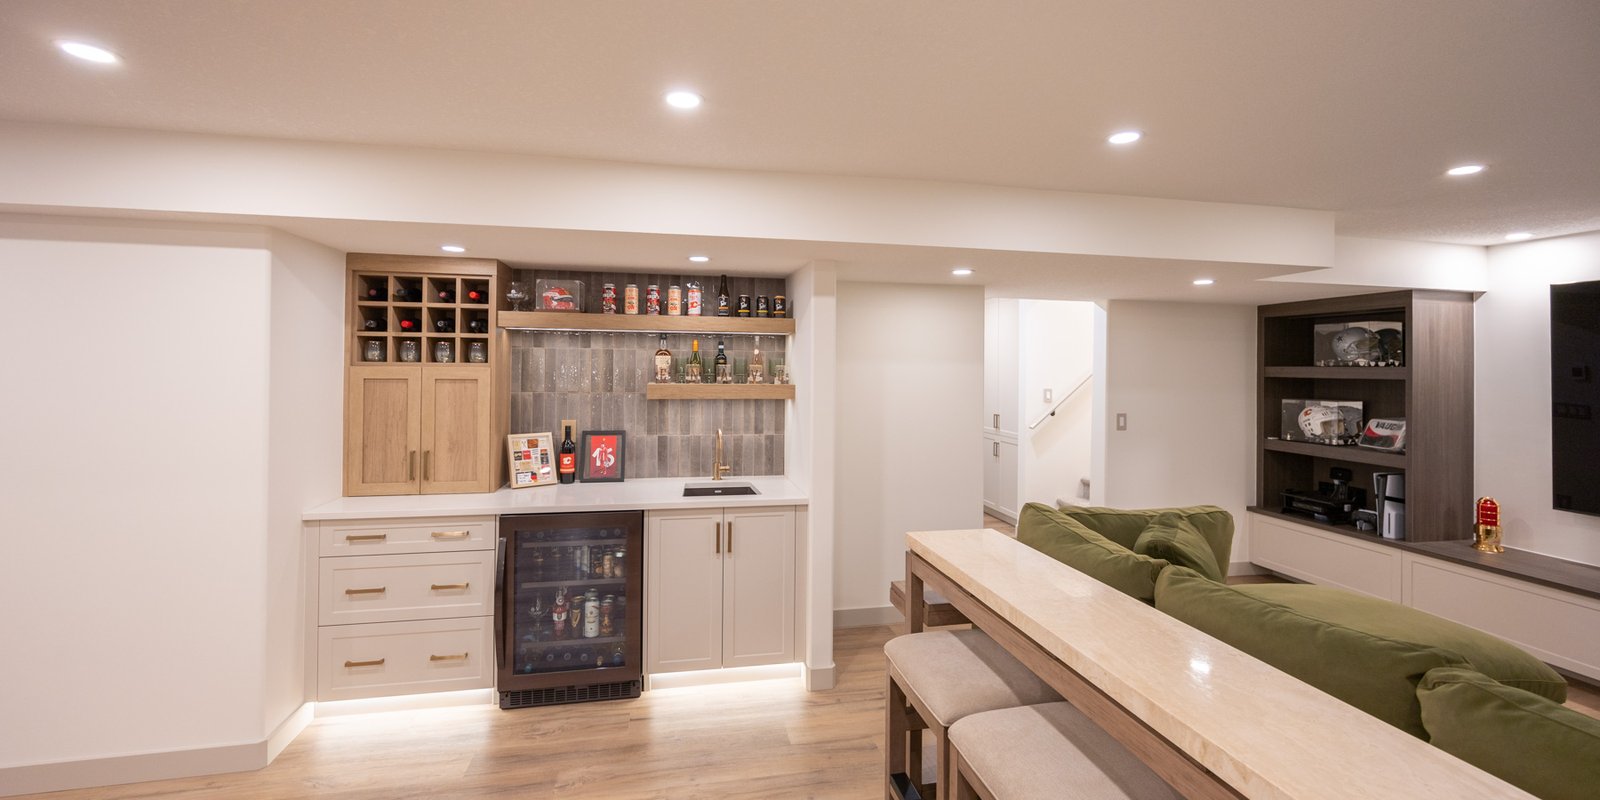
This space feels so cohesive because it masterfully mixes materials while sticking to a clear ‘zone’ strategy. The bar area is defined by its hard, practical surfaces: the tiled backsplash, the light wood cabinetry, and the cool metal of the fridge. It’s all about function. The lounge area, just steps away, shifts to warmer, softer materials with the dark wood built-ins and plush sofa. The long console table acts as a perfect transition piece between the two zones. It’s a great example of how you can have multiple functions in one open space without it feeling chaotic.
|
📋 Copy HEX 🔗 Share |
You can get this sophisticated vibe for way less. Instead of custom built-ins, look for a dark wood bookcase and media console from IKEA’s BILLY or BESTÅ series (around $200-$400). For the bar, a standalone bar cart from Target or Wayfair ($150-$300) can provide a similar function to the built-in cabinetry. Use peel-and-stick tiles for the backsplash ($50-$100) to get the look of a custom install without the cost. The key is to mimic the material and color blocking, not necessarily the custom construction.
6. Sleek Basement Landing with Built-in Wine Refrigerators
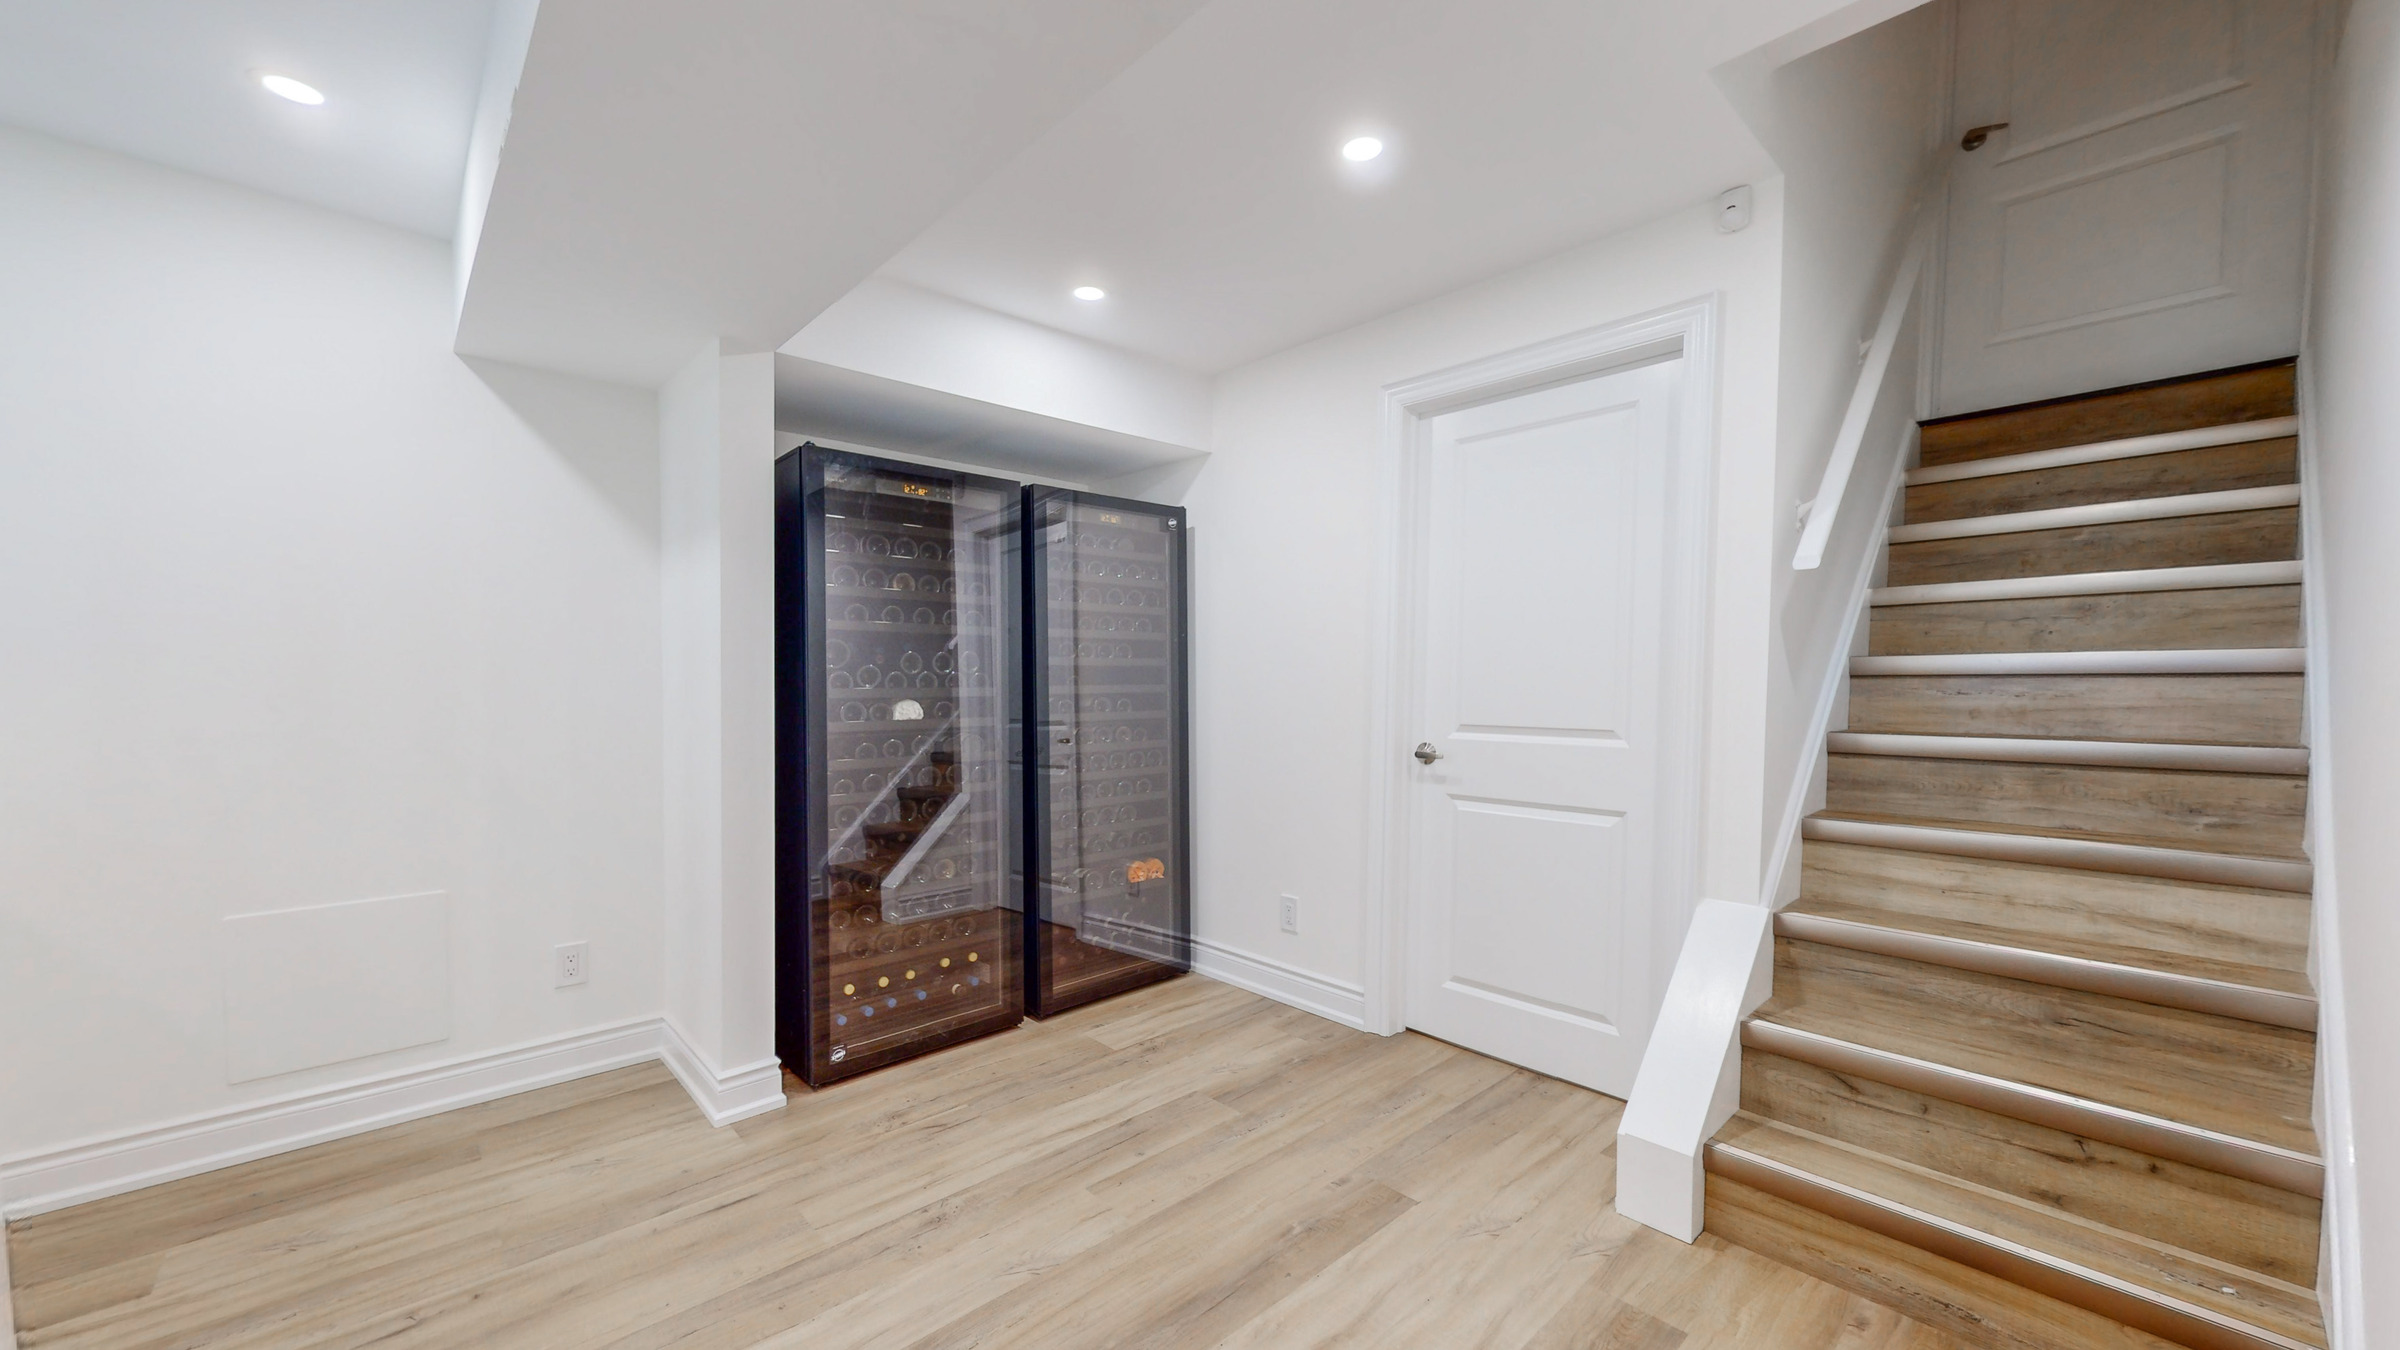
A built-in wine fridge wall is a statement, but it’s not zero-maintenance. The glass doors will show every fingerprint and smudge, so be prepared for regular cleaning with a microfiber cloth and glass cleaner, especially in a high-traffic spot like a landing. Annually, you should pull the units out to vacuum the condenser coils on the back; dust buildup can make them run inefficiently and shorten their lifespan. Also, be mindful of the heat they generate. The recess needs proper ventilation to prevent the units from overheating, which is a key detail to plan with your contractor.
|
📋 Copy HEX 🔗 Share |
The single element that elevates this from a simple basement hallway to a design moment is the perfect integration of the wine fridges. By building them into a dedicated recess, they become a deliberate architectural feature rather than just two appliances sitting against a wall. This thoughtful touch makes the storage itself a form of decoration. It signals that this isn’t just a pass-through space; it’s a curated part of the home. Removing them would turn this into a very plain, forgettable corridor. For a similar but more affordable concept, check out Idea #10‘s shelving.
7. Whimsical Playhouse and Climbing Wall Adventure Zone
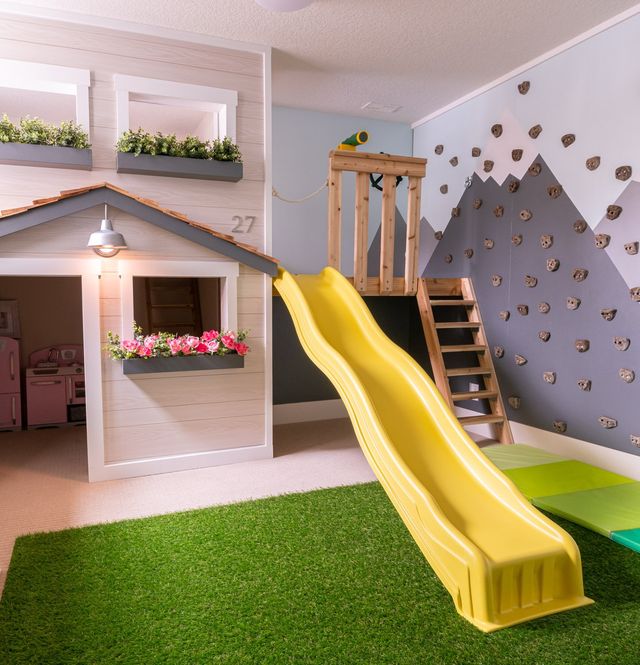
Want to recreate that mountain mural? It’s easier than it looks. Total time: 3-4 hours. Cost: $50-75 for paint samples and brushes.
|
📋 Copy HEX 🔗 Share |
- Start with a light blue base coat on the entire wall. Let it dry completely.
- Use painter’s tape to mask off your mountain ridgelines. Create 2-3 overlapping peaks. Don’t aim for perfection; jagged and varied are more realistic.
- Paint the mountain shapes with a medium gray. For the ‘snow caps,’ use a small brush and white paint, feathering the edges.
- Once dry, remove the tape. Add a few subtle, lighter gray lines within the mountains to suggest depth.
- After the mural is fully dry, you can install your climbing holds according to the manufacturer’s instructions.
This is a dream setup, but it demands vertical space. You’ll need a minimum ceiling height of 9 feet to make a climbing wall and slide worthwhile for kids over age 5. The footprint is also considerable; the playhouse, climbing wall, and slide landing zone will occupy a space roughly 15 feet long by 8 feet wide. This is not an idea for a small or low-ceilinged basement. If you have less space but still want a play zone, consider the more compact designs in Idea #8 or Idea #9.
8. Neutral Playroom with Beadboard Cabinets and a Pop of Blue
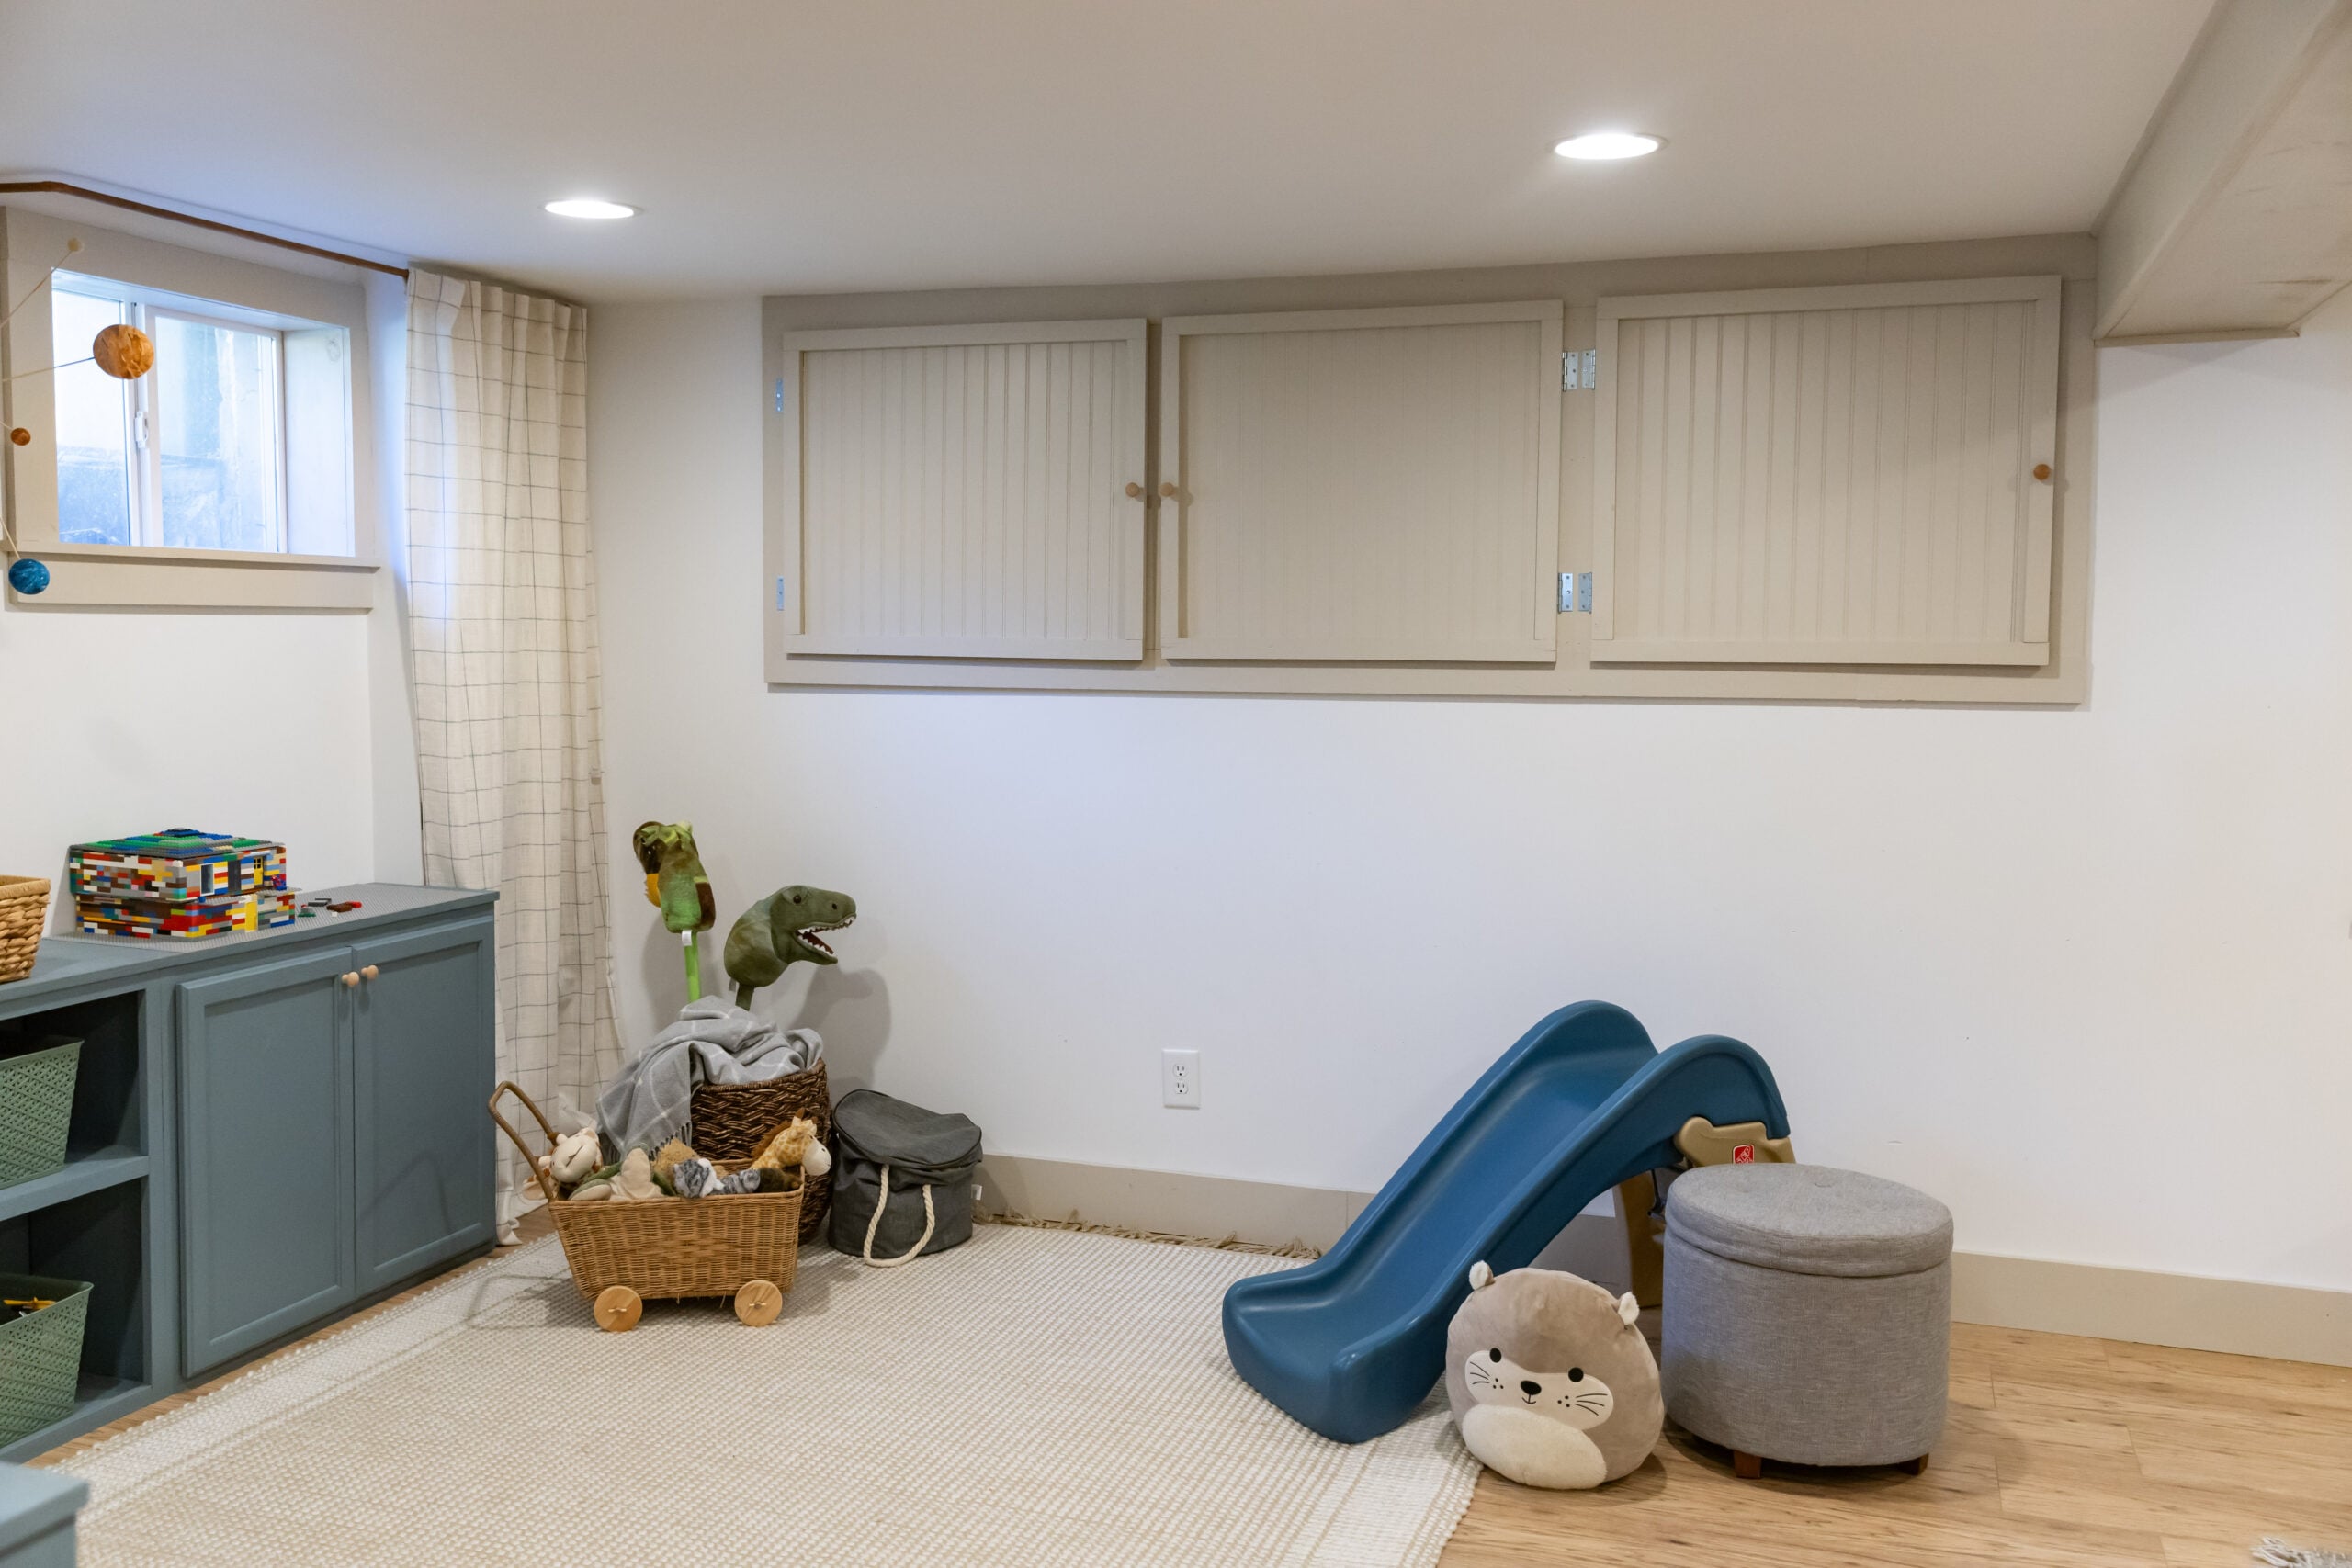
This playroom feels both serene and fun, which is a tough balance to strike. It works because it follows a ‘calm shell, playful core’ principle. The walls, flooring, and even the large storage cabinets are all in a calm, neutral palette of white and light wood. This creates a visually quiet backdrop. The ‘playful core’ comes from the carefully chosen accessories: the bright blue slide, the blue storage cabinet, and the patterns on the rug. By keeping the big, permanent items neutral, the room can easily grow with the child—just swap out the colorful accessories as their tastes change.
|
📋 Copy HEX 🔗 Share |
You don’t need custom built-ins to get this organized and airy feel. A row of IKEA’s STUVA or SMÅSTAD cabinets with doors ($300-$500) will give you that seamless, hidden storage look of the beadboard cabinets. That adorable blue slide has many similar versions on Amazon or at Target for under $100. The key is the large, patterned rug, which you can find affordably at sites like Rugs USA or even on Facebook Marketplace. The principle is the same: invest in neutral, long-lasting storage and have fun with the less expensive, replaceable decor items.
9. Bright, Modular Playroom with Colorful Accents
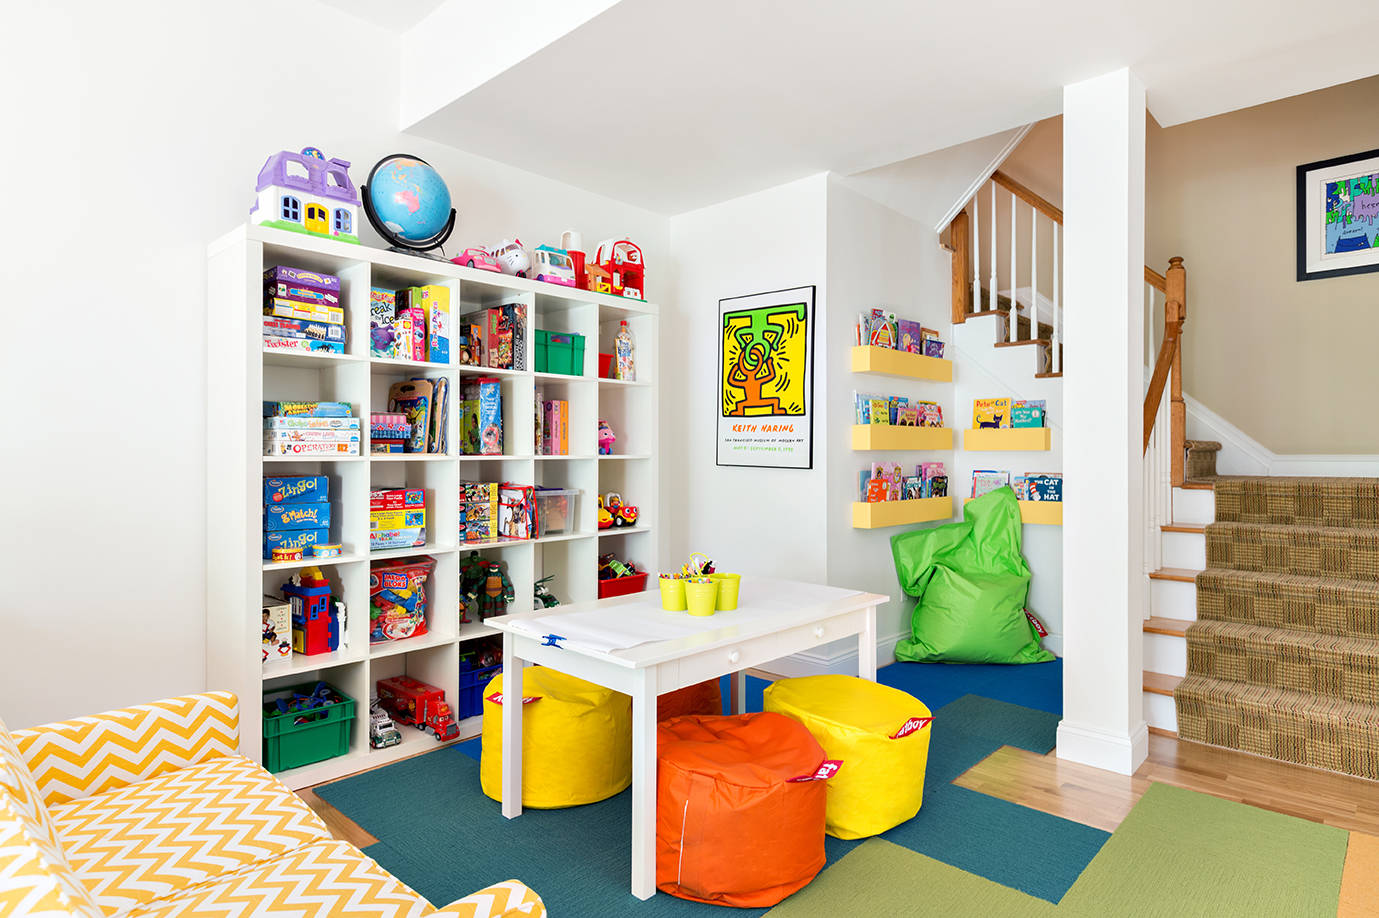
The modular white cubby shelving is the undeniable hero of this space. It’s a workhorse that provides an incredible amount of storage, but because it’s white and has a simple grid pattern, it doesn’t feel heavy or overwhelming. It acts as a blank canvas, allowing the colorful toys, books, and storage bins to become the decoration. This single piece of furniture solves the number one problem in any playroom: containing the chaos. Without it, this room would just be a pile of toys on a rug. It proves that great organization is the foundation of great design.
|
📋 Copy HEX 🔗 Share |
When using modular carpet tiles like the ones shown, order 15% more than your measurements require. This gives you extras for cutting to fit the room’s edges and, more importantly, allows you to replace a single tile if it gets stained or damaged beyond repair. This is a lifesaver in a kids’ area. Arrange the tiles in a few different patterns on the floor before you stick them down to see what you like best. A random configuration, like the one here, is often the most forgiving and visually dynamic option.
10. Industrial-Meets-Rustic Laundry Room with Metal Shelving
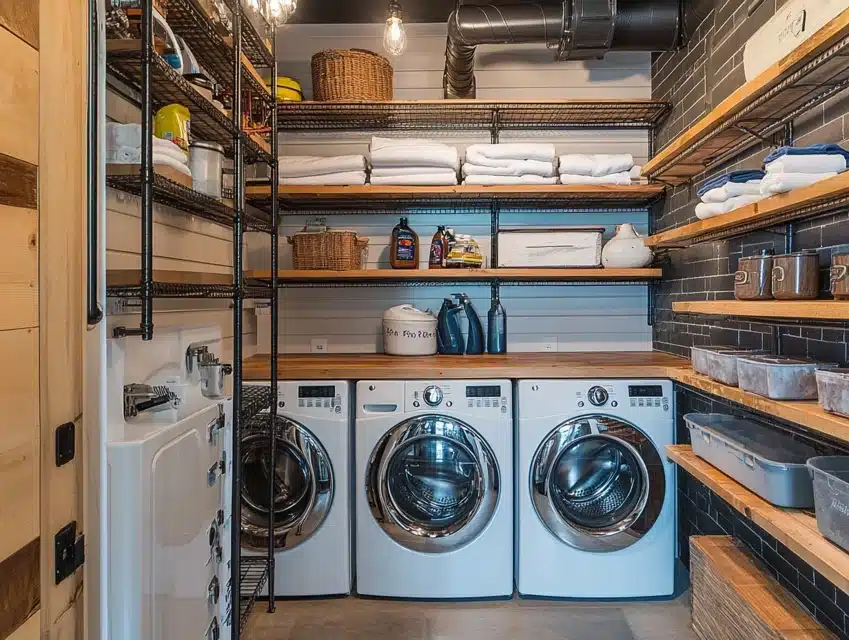
The formula for this cool, modern-utilitarian look is simple: 40% industrial metal + 30% rustic wood + 30% clean white. The black metal shelving and exposed ductwork provide the strong, industrial backbone. The light wood countertops add a dose of rustic warmth, preventing the space from feeling like a commercial laundromat. The crisp white of the shiplap walls and washing machines provides the clean, bright base that ties it all together. You could shift the balance—more wood for more rusticity, or more metal for a harder industrial edge—but this 40/30/30 split is perfectly balanced.
|
📋 Copy HEX 🔗 Share |
Exposed shelving in a laundry room looks amazing, but it requires discipline. Lint and dust are a constant, and they love to settle on open shelves. You’ll need to commit to weekly dusting, especially on the lower shelves near the machines. Using baskets helps contain smaller items, but the baskets themselves and the items on top will collect dust. If you love the look but hate cleaning, consider using open shelving for only the top, less-used shelves and opt for closed cabinets below the counter.
11. Organized Entryway with a Dark Wood and Cane Cabinet
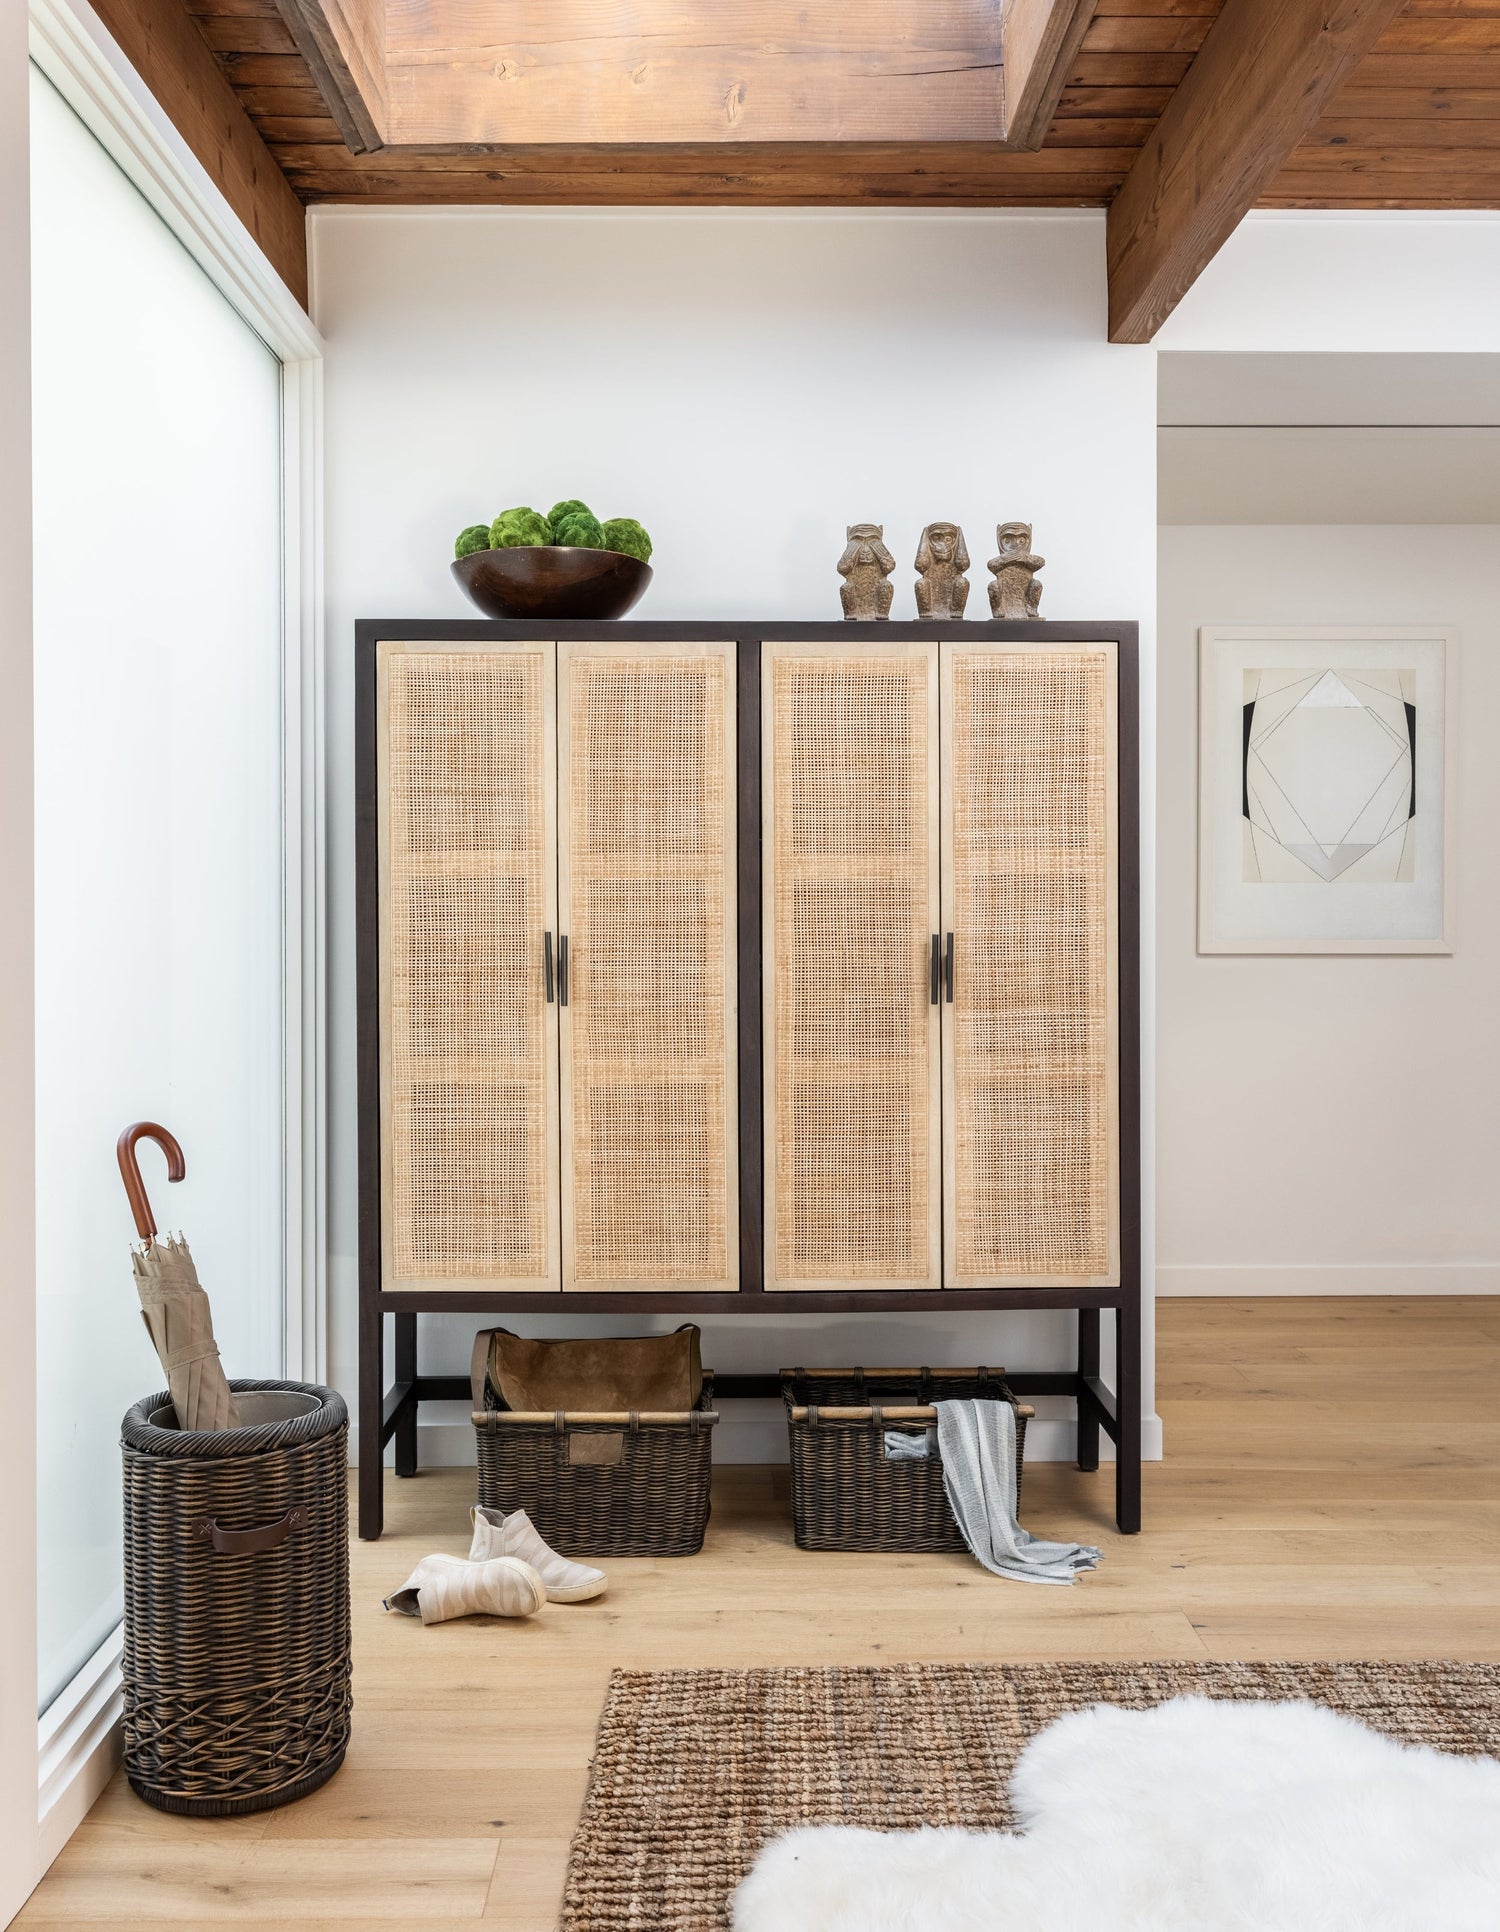
This setup is so satisfying because it balances textures beautifully. The star is the cane cabinet, which introduces a layer of woven, natural material that feels both retro and incredibly current. This texture is repeated in the wicker umbrella stand and storage baskets, creating a pleasing sense of repetition. This organic warmth is contrasted with the clean white walls, the smooth light wood floor, and the strong, dark frame of the cabinet itself. It’s a masterclass in mixing materials to create a look that is organized, warm, and visually interesting.
|
📋 Copy HEX 🔗 Share |
Cane, rattan, and wicker have been trending for a few years, and they show no signs of slowing down. This isn’t just about a ‘boho’ look anymore. In 2026, it’s about biophilic design—our desire to bring natural, organic materials and textures indoors to create a sense of calm. The cane doors on this cabinet are a perfect example. They provide visual texture and warmth, and the semi-transparent nature of the weave keeps the large cabinet from feeling too heavy or solid in the space. It’s a trend with staying power because it’s rooted in how we want our homes to feel, not just how we want them to look.
12. Playful and Tidy Cubby Storage for Kids’ Items
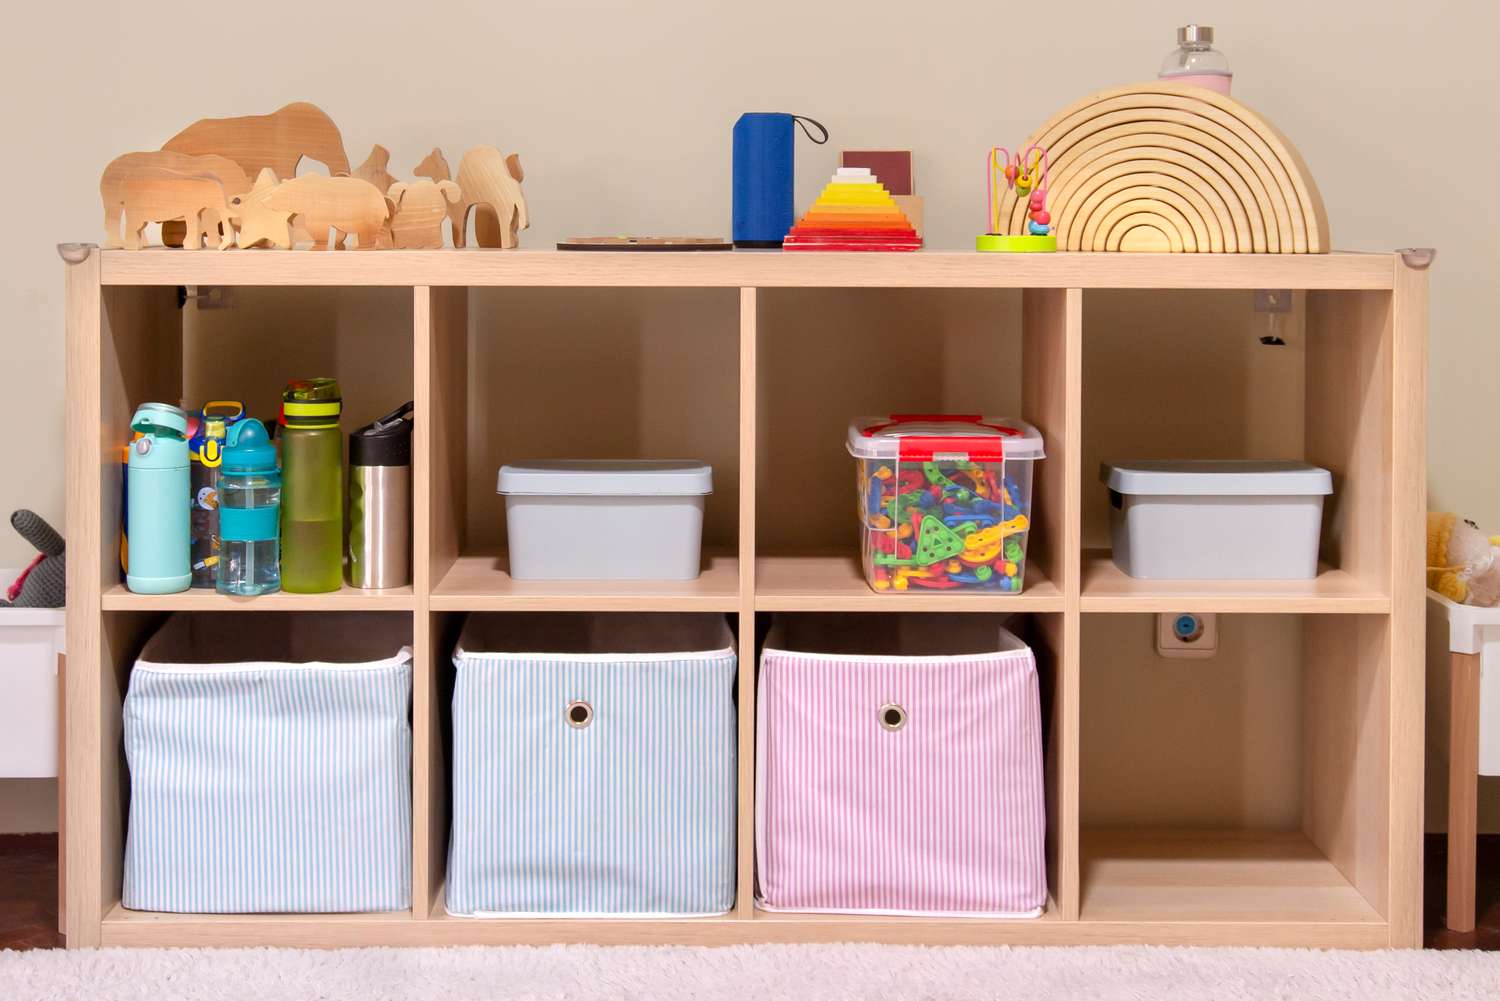
This is a super achievable and effective storage setup for any kid-centric space. The light wood cubby unit itself is the main investment, but the real magic is in the bins and accessories.
|
📋 Copy HEX 🔗 Share |
- Main Furniture (Cubby Unit): $150 – $400
- Textiles (Fabric Bins): $40 – $80
- Decor/Accessories (Wooden Toys): $30 – $70
- Storage (Plastic Bins): $20 – $50
- TOTAL: $240 – $600
- Budget alternative: Look for a similar cubby unit on Facebook Marketplace for 40-60% less. You can often find IKEA KALLAX units for a steal.
When organizing a cubby system for kids, labeling is your best friend. But instead of just text labels that pre-readers can’t use, create picture labels. Take a quick photo of the items that belong in each bin (e.g., a photo of LEGOs, a photo of doll clothes), print them out, and tape them to the front of the corresponding bin. This empowers little ones to help with cleanup because they can visually match the toys to their homes. It turns tidying into a fun matching game rather than a chore.
13. Functional Utility Basement with Black Plastic Shelving
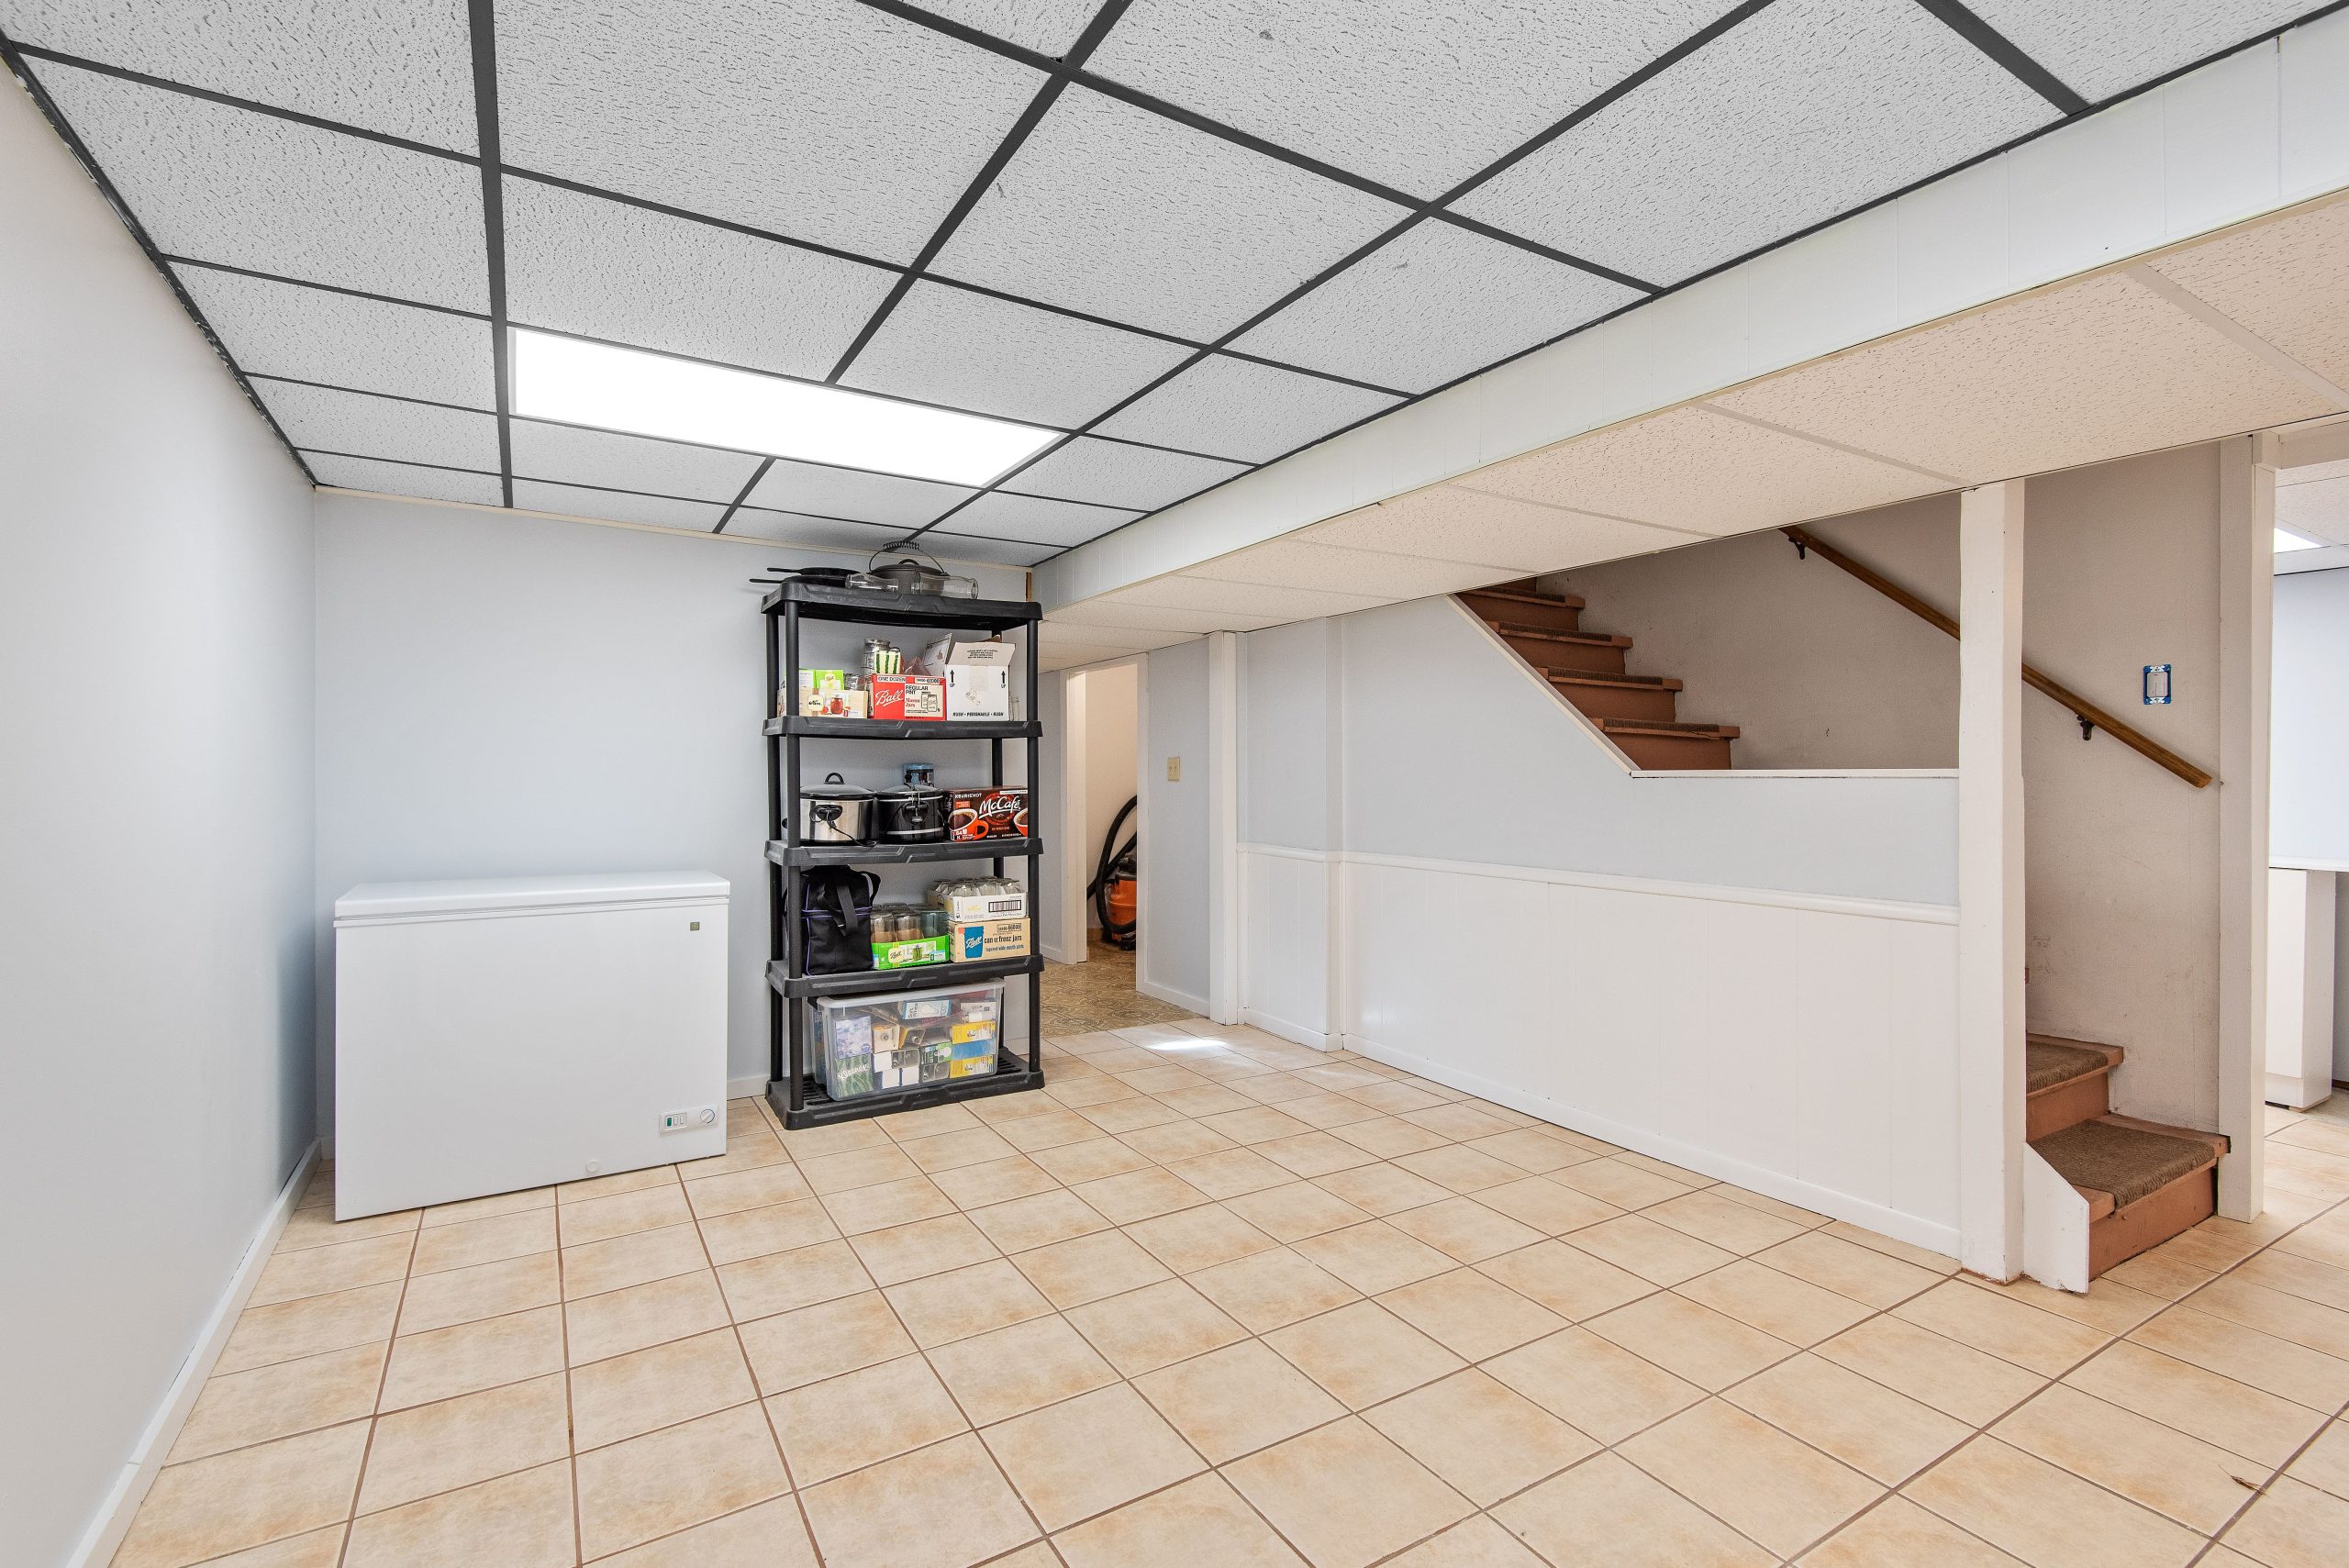
Here’s the reality of many basements: they are functional, a bit dated, and have a mix of finishes from different eras. And that’s okay! This space with its drop ceiling, wainscoting on one wall, and beige-orange tiles isn’t going to win any design awards, but it does its job. The key to making a space like this work is embracing its utilitarian nature. Heavy-duty black plastic shelving is a smart, inexpensive choice. It won’t be damaged by dampness, it’s easy to clean, and it can hold a lot of weight. Don’t try to fight the room’s character; lean into its practical purpose.
|
📋 Copy HEX 🔗 Share |
Don’t spend a fortune trying to make a purely utilitarian space look like a finished living area. You can achieve excellent organization on a tiny budget. A set of those sturdy black plastic shelves from a home improvement store like Home Depot or Lowe’s costs about $50-$80. Instead of buying all new matching bins, reuse cardboard boxes from deliveries—just label them clearly with a thick marker. A chest freezer, often found secondhand for under $100 on Craigslist, adds tons of practical food storage. This space is about function over form, and you can achieve peak function for less than $200. Contrast this with the high-finish storage in Idea #5.
14. Unfinished Laundry Nook with Open Joist Ceiling
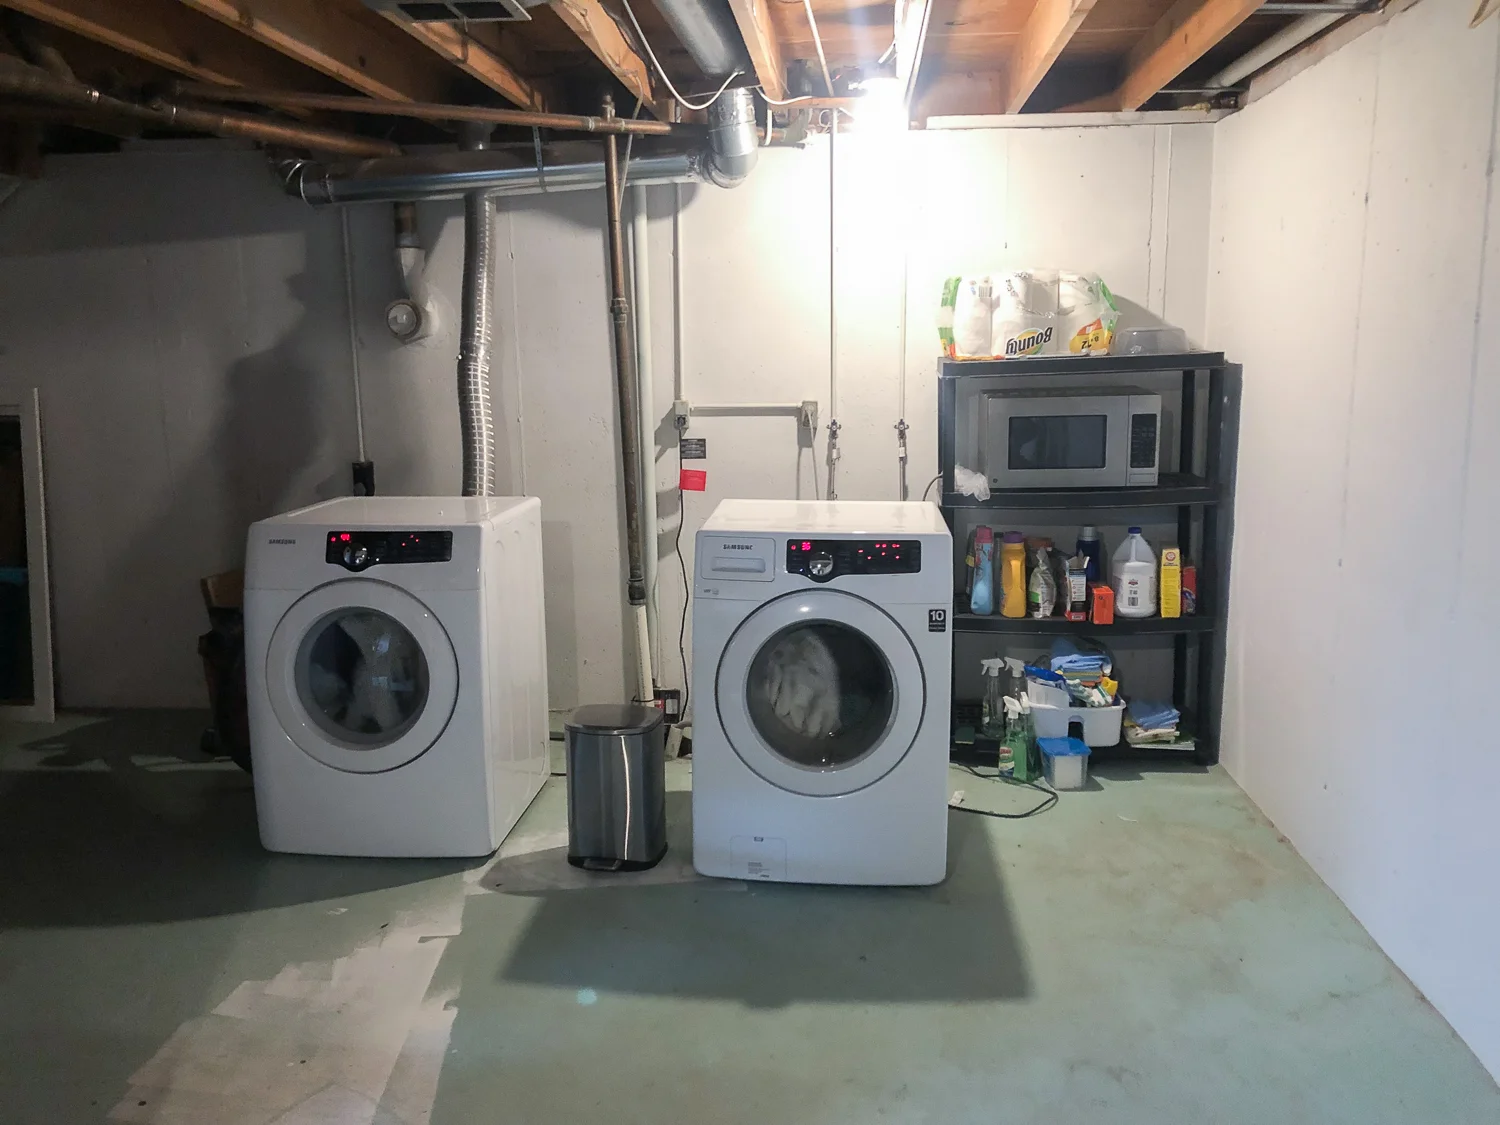
This setup, while simple, works because it doesn’t pretend to be something it’s not. The unfinished concrete walls and exposed wooden ceiling joists are embraced, creating a raw, industrial vibe that is honest and functional. The black shelving unit is a perfect choice, as its dark color recedes into the background and its simple form echoes the utilitarian nature of the space. By keeping the storage consolidated to one vertical unit, the area around the machines and sink remains clear and usable. It’s a no-frills approach that prioritizes function, and its simplicity is its strength.
|
📋 Copy HEX 🔗 Share |
What makes this space truly functional is the black plastic shelving unit. In an unfinished basement, you need storage solutions that are impervious to the environment. Unlike wood, which can warp or grow mold in damp conditions, or cardboard boxes that can disintegrate, this plastic shelving will stand up to potential moisture and temperature fluctuations. It’s inexpensive, lightweight, and won’t rust like metal. It is the single most practical and intelligent choice for raw basement storage, providing a safe and organized home for laundry supplies and other items.
15. Practical Storage on a Black Metal Shelving Unit
- Measure the depth, width, and height of your largest storage bin or box. This is your ‘module’. Your shelving unit must be deep and tall enough to accommodate this size.
- Assess weight. Are you storing heavy books, files, or just lighter seasonal decor? Check the weight capacity per shelf for any unit you’re considering to avoid collapses.
- Plan for access. Position the shelving unit so you can easily access items from at least one side. Don’t shove it into a corner where half the items become impossible to reach.
- Consider your flooring. A fully loaded shelf is heavy. On a softer floor or in a damp area, place a board underneath the legs to distribute the weight and prevent it from sinking or rusting.
|
📋 Copy HEX 🔗 Share |
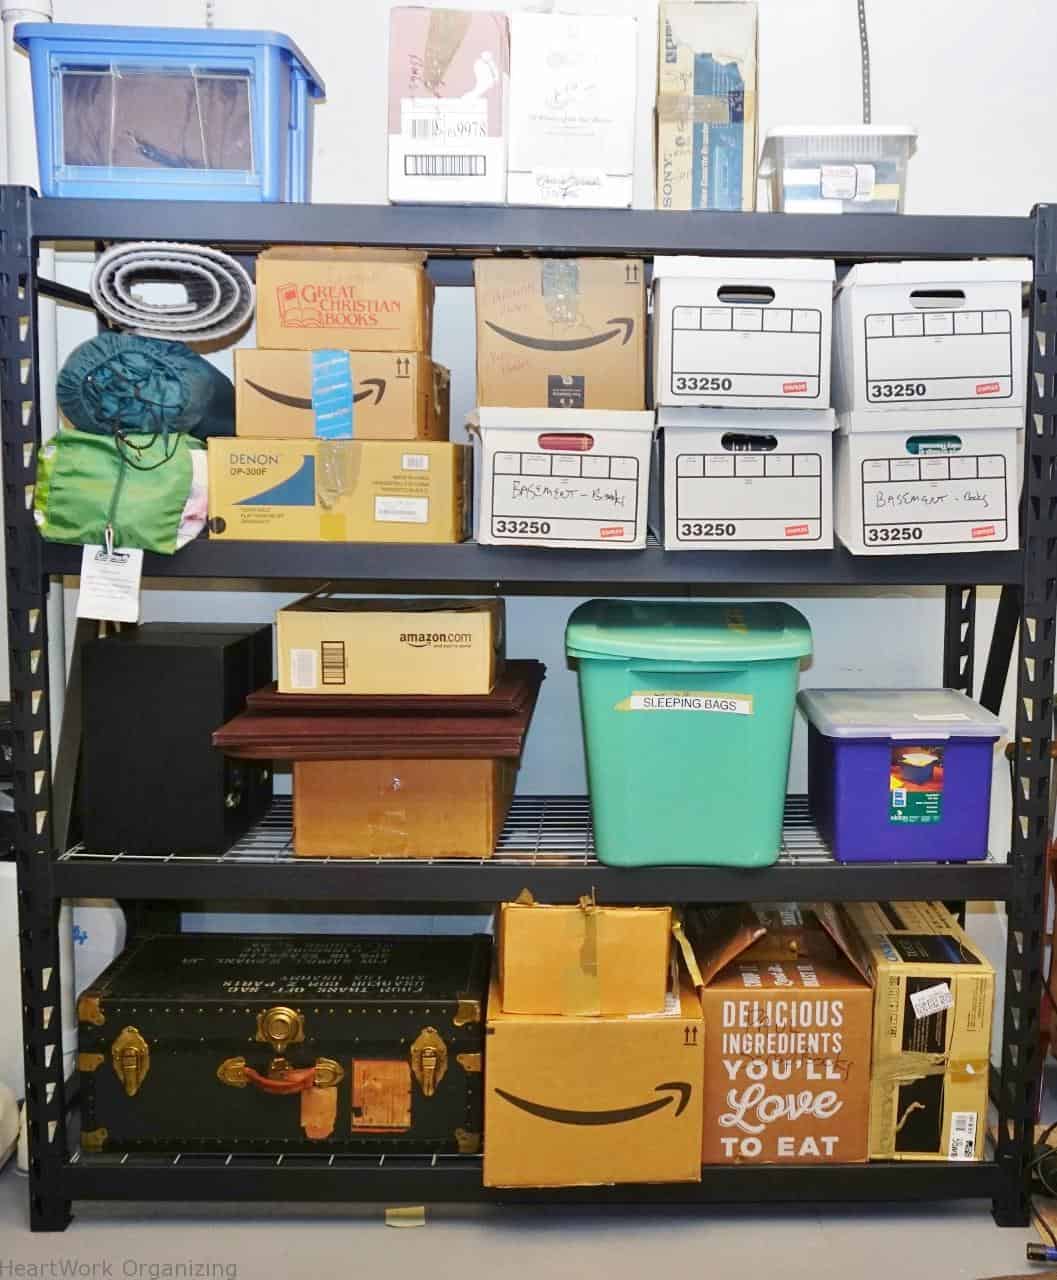
Want to get your boxes organized for long-term storage? Here’s a quick system. Total time: 1 hour (plus packing). Cost: $20 for supplies.
- Use uniform boxes when possible, like the white filing boxes shown. They stack better and look neater.
- Develop a simple color-coding system. Use different colored dot stickers or markers. For example: Red for Holiday, Blue for Kitchen, Green for Documents.
- Create an inventory sheet or use a simple notes app. Assign each box a number. Under that number, list the key contents and the color code. (e.g., Box #1, Red: Christmas Ornaments, Tree Skirt).
- Place labels on at least two sides of the box so you can identify it without having to turn it around.
16. Rustic Storage Shelves Against an Exposed Brick Wall
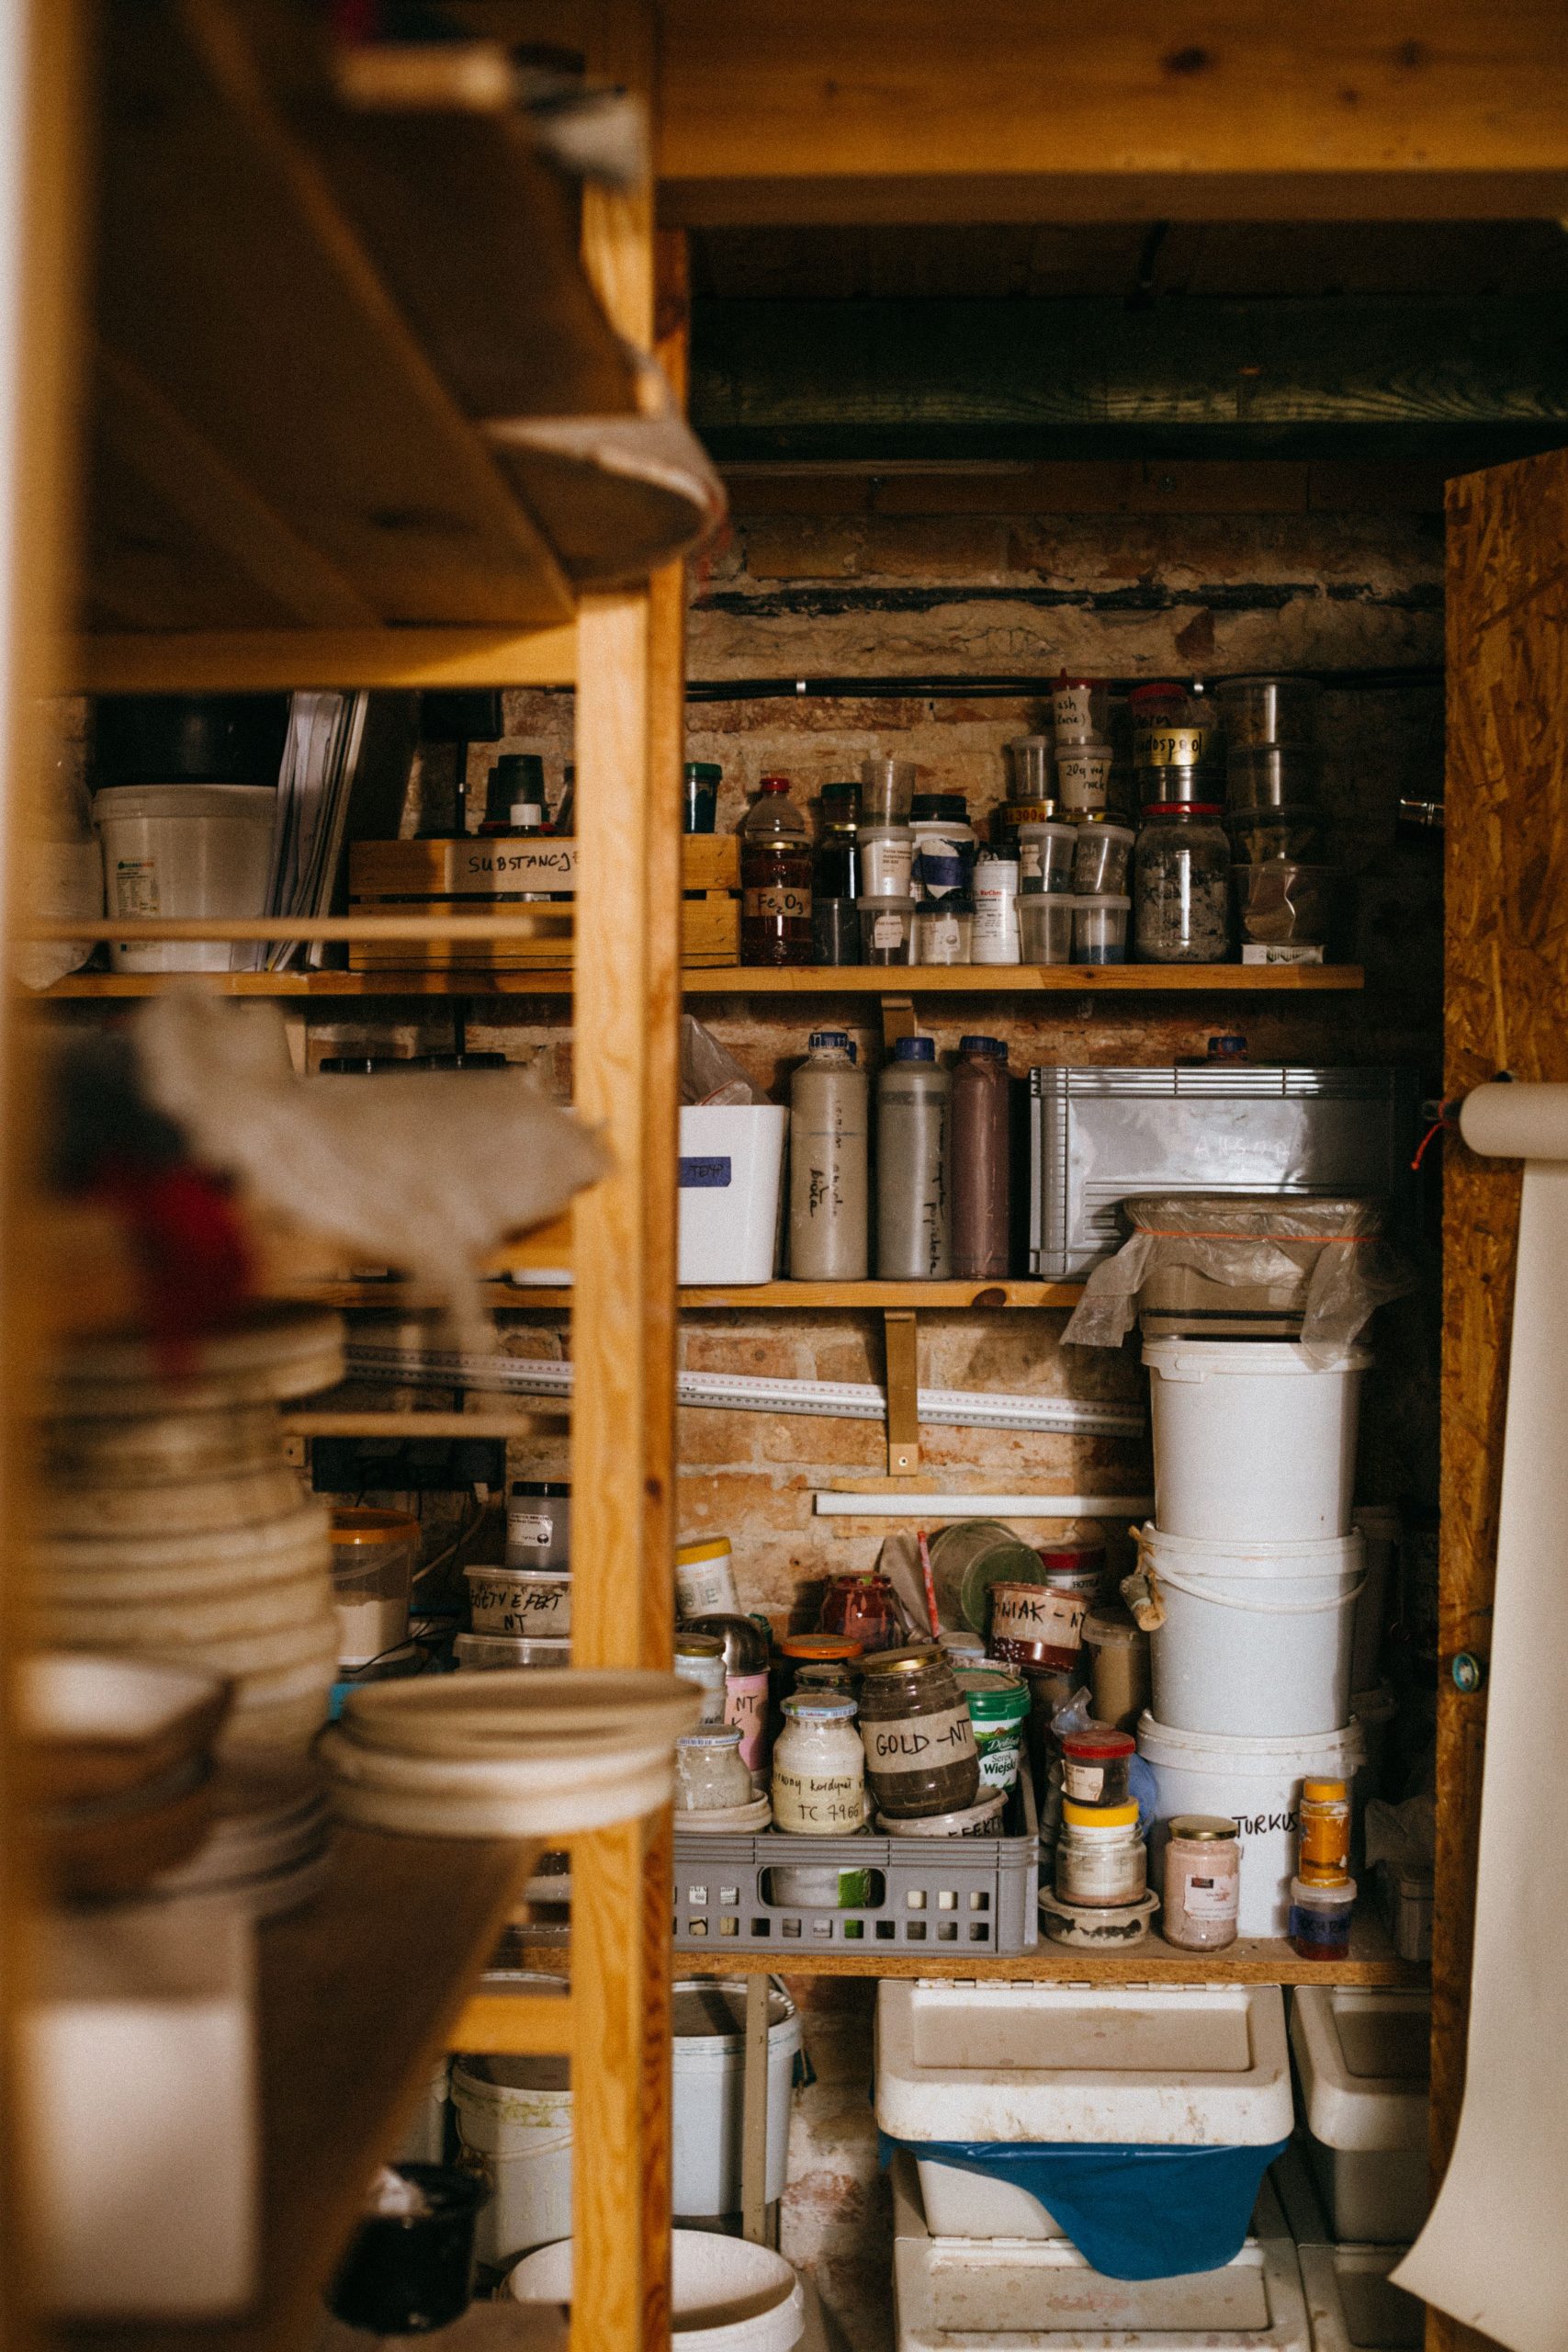
The charm here comes from the beautiful dialogue between the raw, historic texture of the brick and the simple, functional nature of the wooden shelves. The red-brown tones of the brick provide a warm, character-filled backdrop that makes even the most utilitarian items—like jars and buckets—feel curated. The unfinished wood of the shelves complements the rustic feel perfectly. It’s a reminder that you don’t always need to cover up your home’s original features. Sometimes, the most stylish choice is to let the bones of the building be the star.
|
📋 Copy HEX 🔗 Share |
Exposed brick is gorgeous, but it’s not maintenance-free, especially in a basement. The porous nature of old brick can allow moisture to seep through, leading to a white, powdery substance called efflorescence. It can be brushed off, but its presence indicates a potential moisture issue that might need sealing. The brick can also shed a fine red dust. Before installing shelves and storing items, give the wall a thorough scrub with a stiff brush and vacuum it well. You may even want to apply a clear, matte sealant to lock in the dust and provide a barrier against moisture.
17. Heavy-Duty Industrial Shelving with Wood and Metal
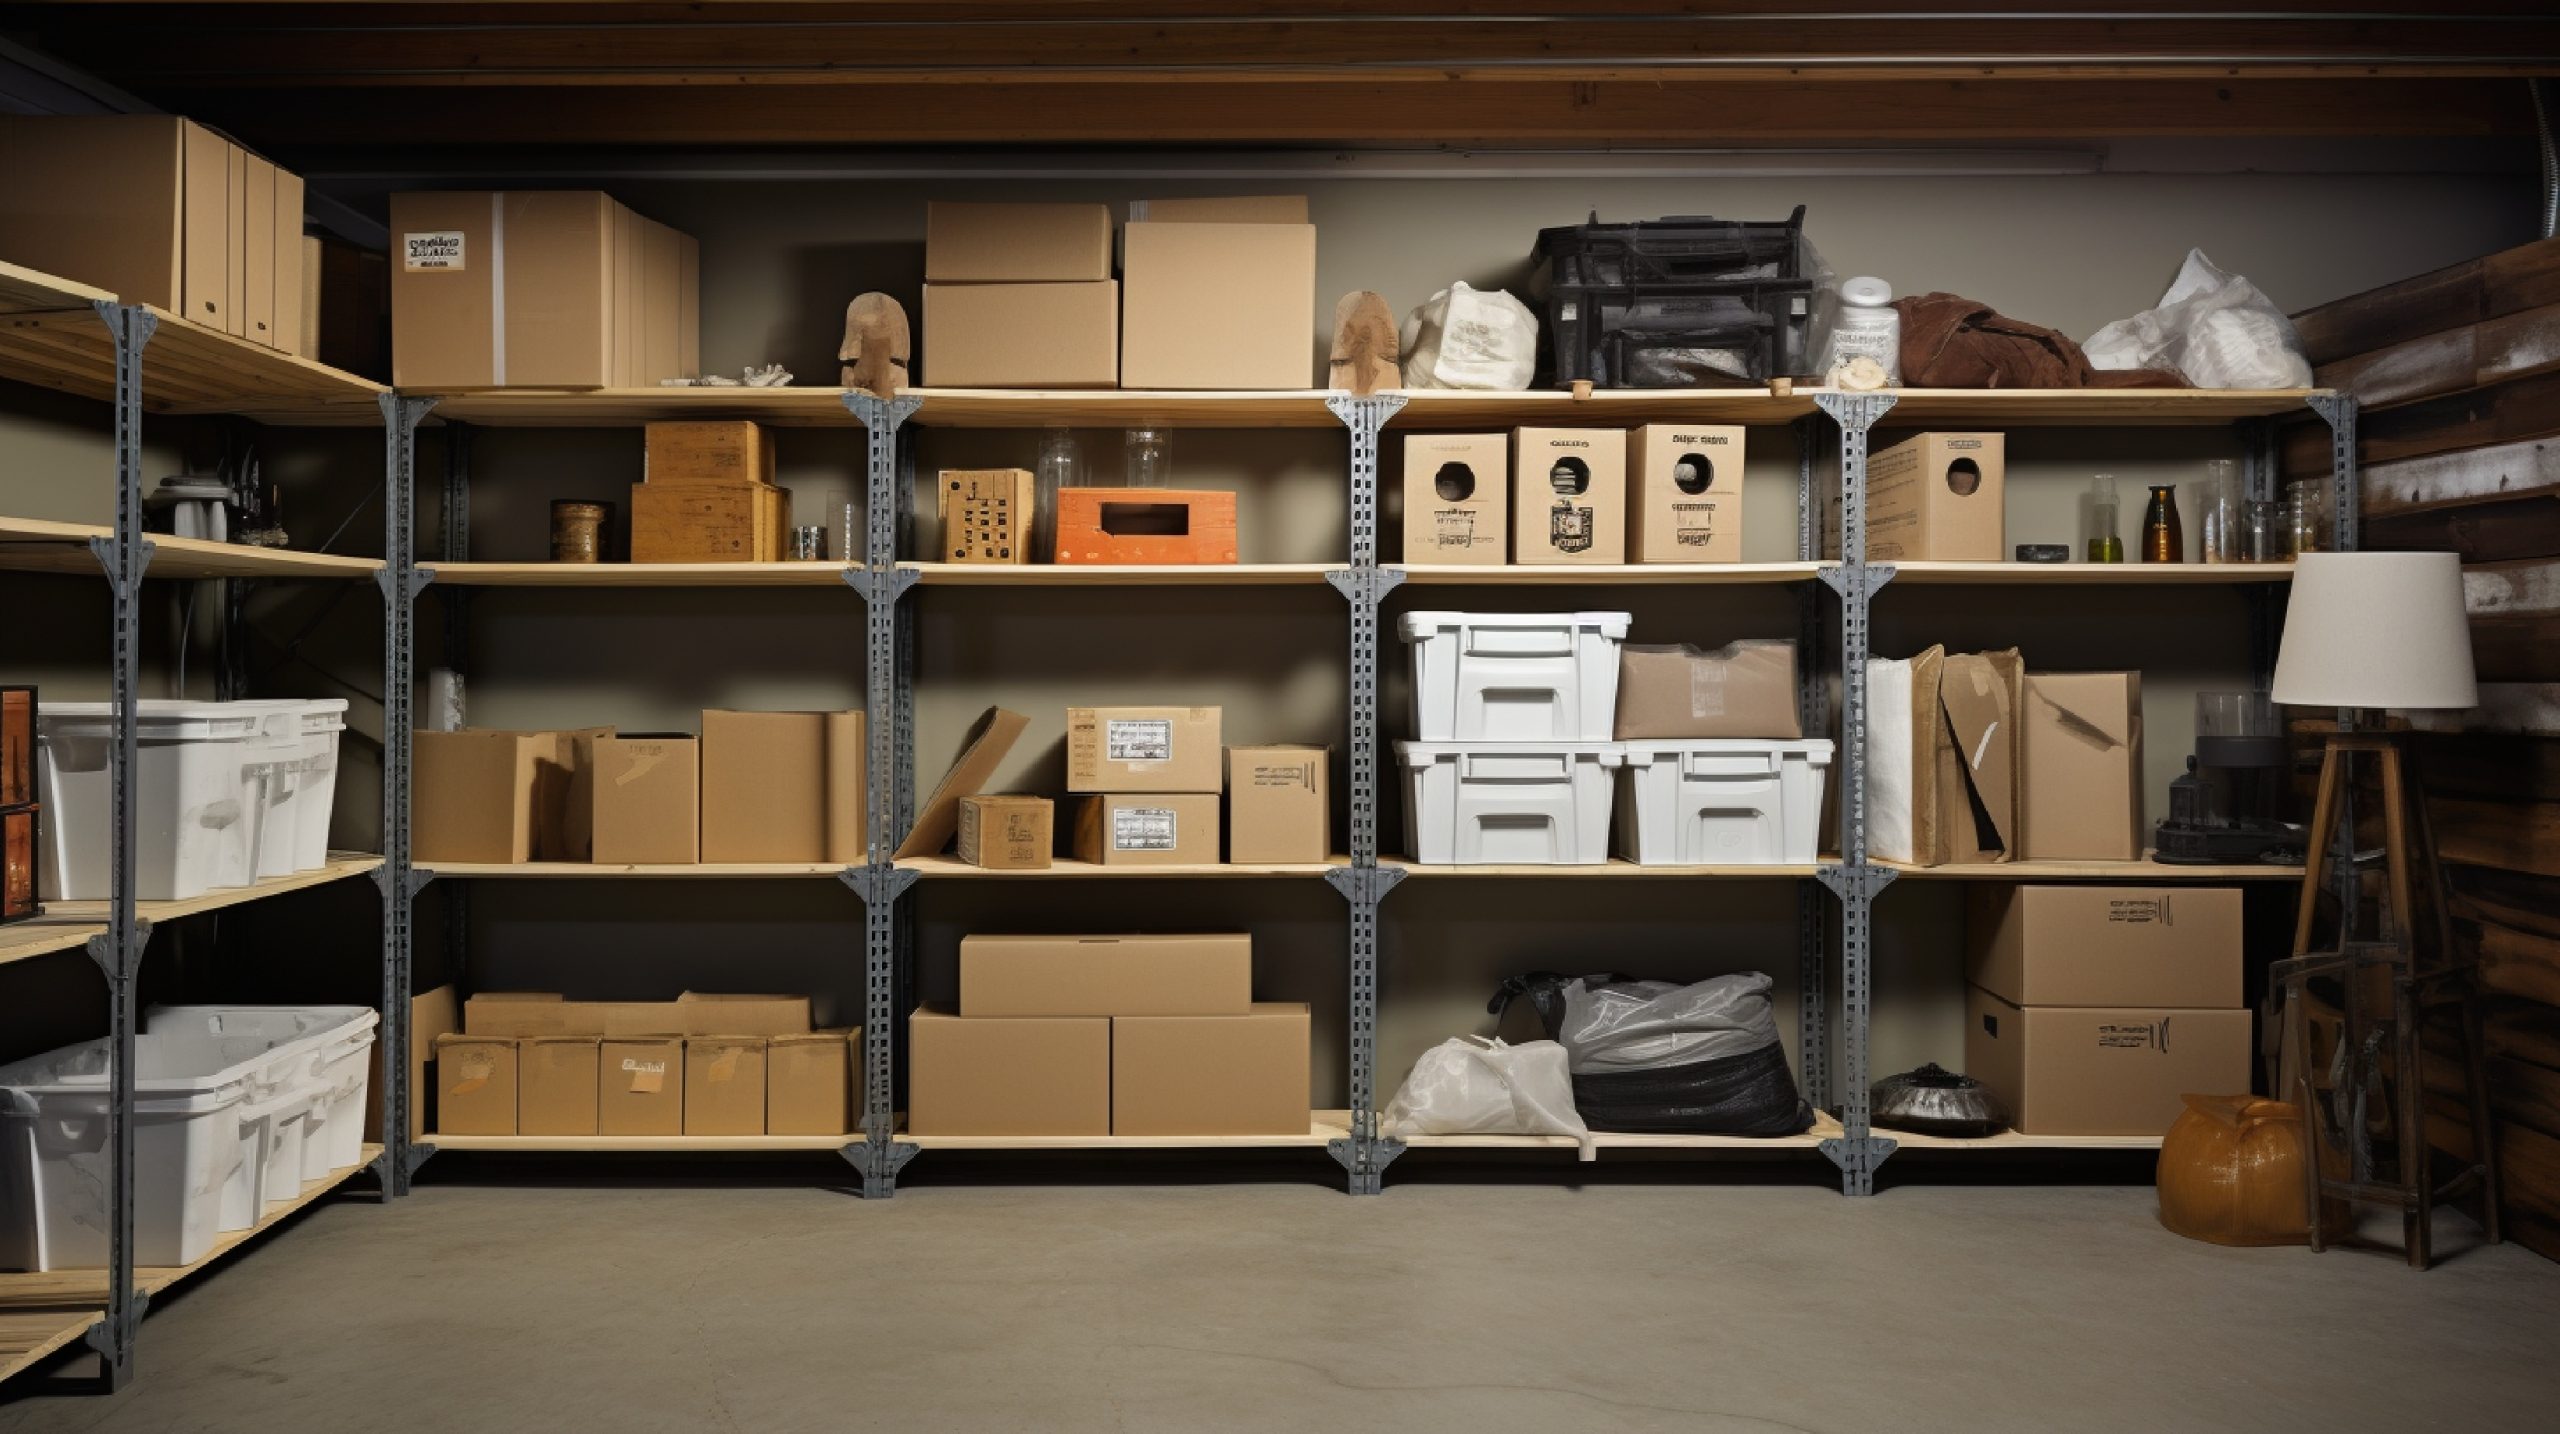
For this type of industrial shelving, always anchor the units to the wall, even if they feel sturdy. A fully loaded unit can become top-heavy, and in a basement with a potentially uneven concrete floor, the risk of tipping is real. Use the L-brackets and hardware that come with the unit, or purchase a furniture-anchoring kit from any hardware store. Drill into the wall studs for the most secure hold. If you’re attaching to a concrete wall, you’ll need a hammer drill and concrete anchors. It’s a 15-minute safety step that can prevent a huge mess and potential injury.
|
📋 Copy HEX 🔗 Share |
The key to this entire storage system is the sheer, unapologetic capacity of the industrial shelving. This isn’t about hiding things away in pretty baskets; it’s about maximizing storage density. The robust combination of metal frames and thick wood shelves allows for heavy items to be stored safely, from cardboard boxes full of books to bins of tools. Unlike flimsier plastic or wire shelving, this setup provides a solid, reliable platform for just about anything. It’s the raw functionality that makes it so effective and visually powerful in a utility space.
18. Narrow Basement Passage with White Shelving and Exposed Ceiling
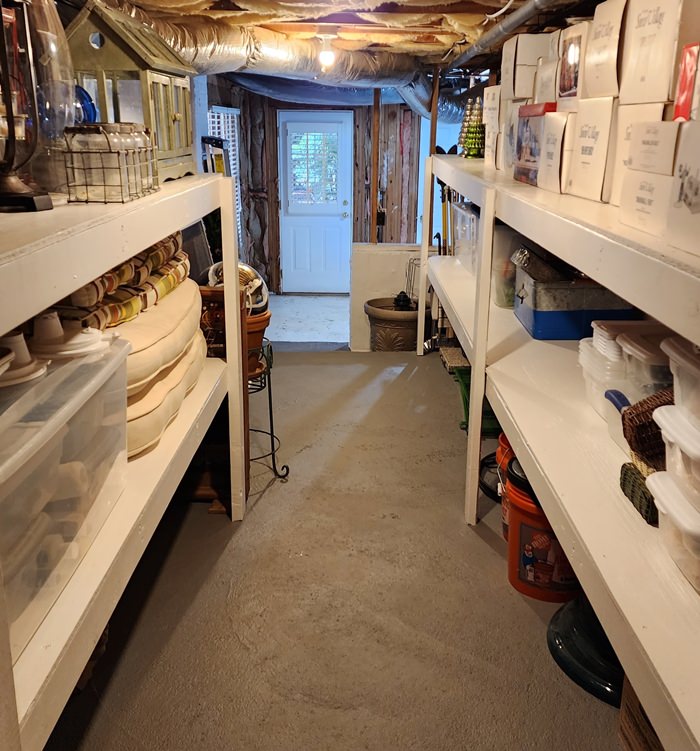
This image is a great reality check for basement organization. Not everyone has a huge open space. Many basements are a maze of passages, pipes, and ducts. The solution here is smart: shallow, white-painted wooden shelving lines the walls, providing lots of storage without completely choking the walkway. Painting the shelves white helps them recede and makes the narrow space feel a bit wider and brighter than it would with dark or raw wood shelving. It’s a practical solution for an imperfect space. However, be realistic about dust and cobwebs from that exposed ceiling insulation!
|
📋 Copy HEX 🔗 Share |
This space proves that organization can be achieved with a very simple visual formula: 70% bright neutral + 20% raw texture + 10% utility color. The white paint on the shelves, door, and some walls makes up the vast majority of the visual space, reflecting light and creating a sense of cleanliness. The raw texture comes from the exposed ceiling insulation and ductwork. The final 10% is the pop of utility color, like the orange buckets, which adds a bit of visual interest without disrupting the functional aesthetic. It’s a practical and visually effective composition.
19. Modern Game Room with Billiards and an Arcade Machine
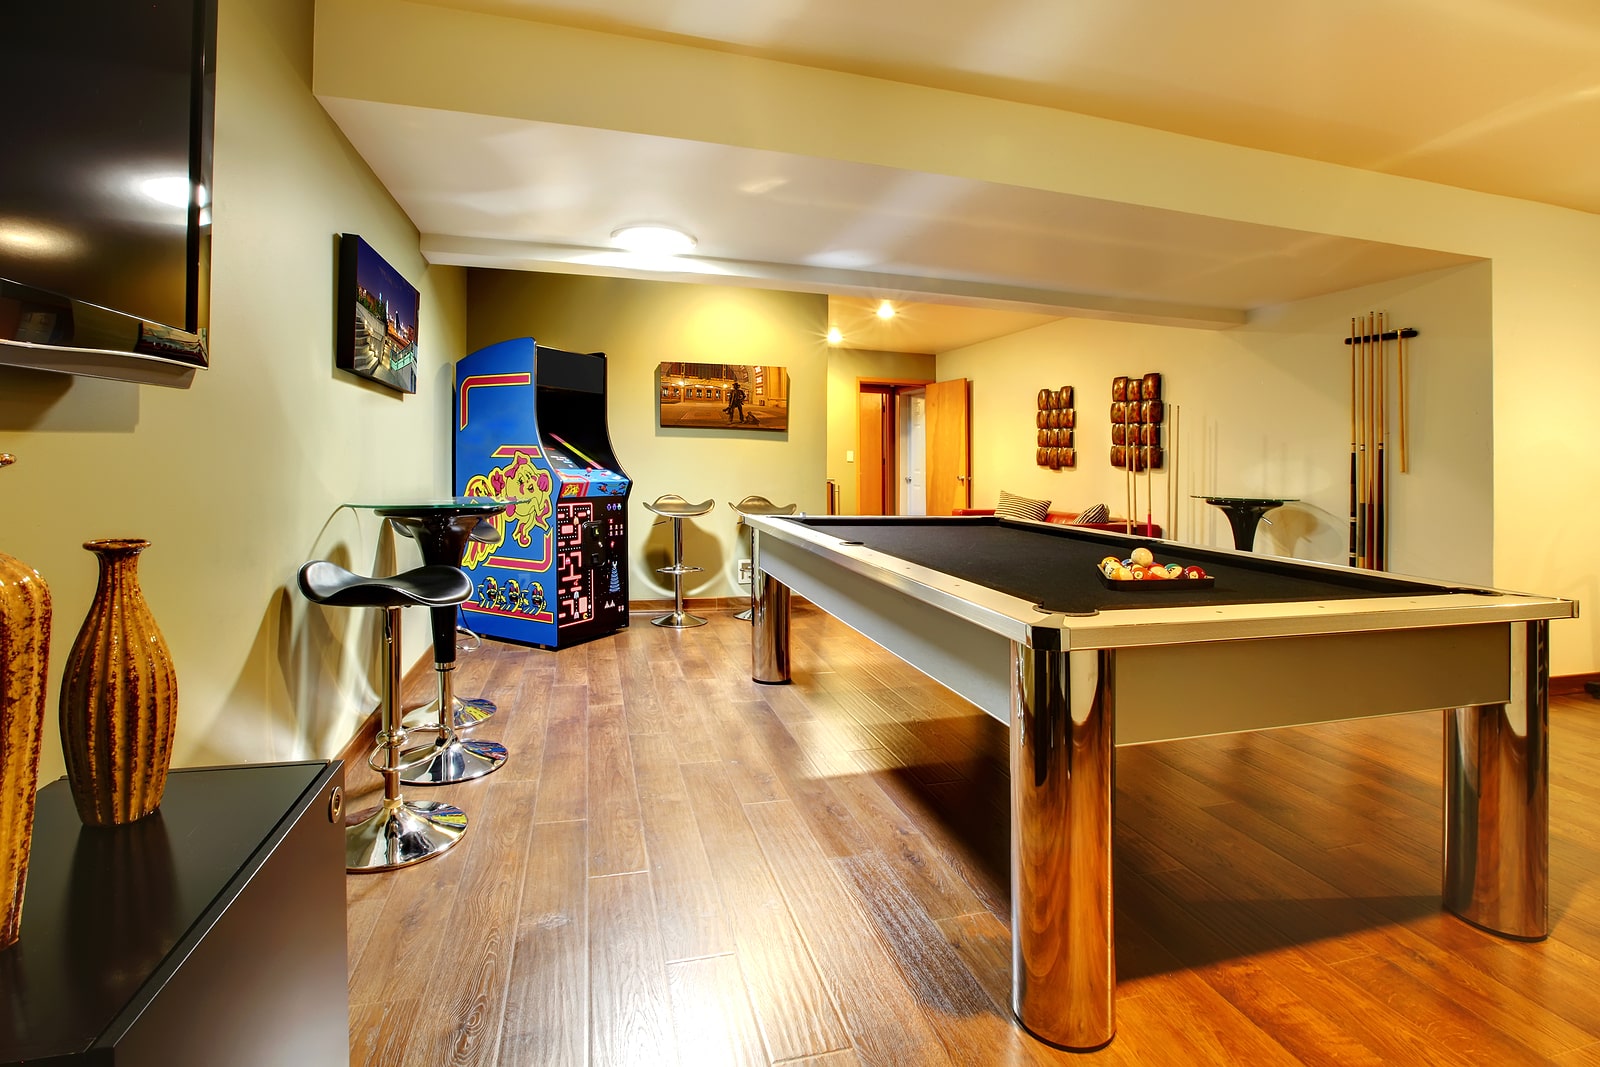
A game room like this is all about having enough space to play comfortably. For a pool table, the standard rule is to have at least 5 feet of clear space around the entire perimeter of the table. A typical table is about 4×8 feet, so you’re looking at a minimum room size of 14×18 feet just for the billiard area. Arcade machines have a smaller footprint, but you still need about 3-4 feet in front of them for a player to stand. This setup would work best in a long, rectangular basement of at least 400 square feet to accommodate the pool table, bar, and a small seating area without feeling crowded.
|
📋 Copy HEX 🔗 Share |
Recreating a full-on game room is an investment, but the pieces can be acquired over time. The pool table is the biggest ticket item.
- Main Furniture (Pool Table): $1,500 – $5,000+
- Lighting (Game Room Fixture): $200 – $600
- Decor/Accessories (Arcade Machine, Cues, Stools): $500 – $3,000+
- Seating (Sofa/Chairs): $800 – $2,500
- TOTAL: $3,000 – $11,100+
- Budget alternative: Look for used pool tables on Facebook Marketplace—they are often sold for a fraction of the price, though you’ll need to budget for professional movers.
20. Whimsical Dress-Up Nook with a Cloud Mural
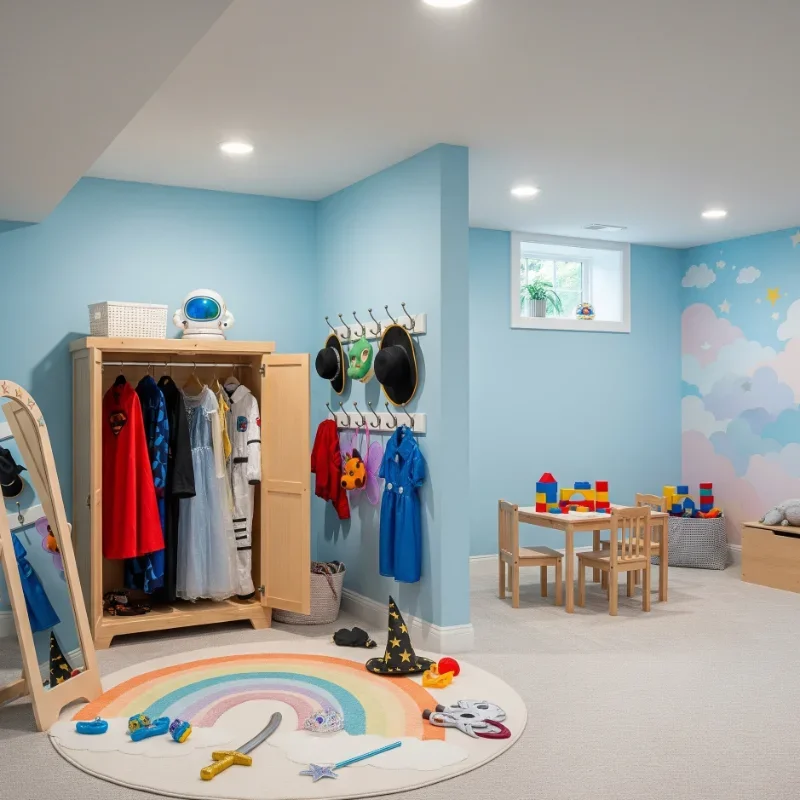
This little corner is pure magic because it uses simple, affordable tricks to create a fully immersive play world. The light blue walls and hand-painted cloud mural immediately signal that this is a special space, separate from the rest of the basement. The key is making storage part of the play. The wooden armoire isn’t just storage; it’s a ‘costume closet.’ The wall hooks aren’t just for hanging things; they are a display for hats and capes, making them easily accessible and part of the decor. By turning organizational elements into props for imagination, the space becomes both tidy and inspiring.
|
📋 Copy HEX 🔗 Share |
You don’t need a fancy armoire to create a great dress-up station. Find a small, used dresser or bookshelf on Facebook Marketplace for under $50. Paint it a fun color and add a tension rod inside for hanging costumes. Simple wall hooks from Target or Walmart are inexpensive and perfect for displaying hats, masks, and accessories. The cloud mural can be a fun DIY project with a can of white paint and a sponge. The entire ‘look’ can be achieved for well under $100 if you’re resourceful, offering a huge imaginative payoff for a small investment.
21. Sensory-Friendly Playroom with Bright Yellow Walls
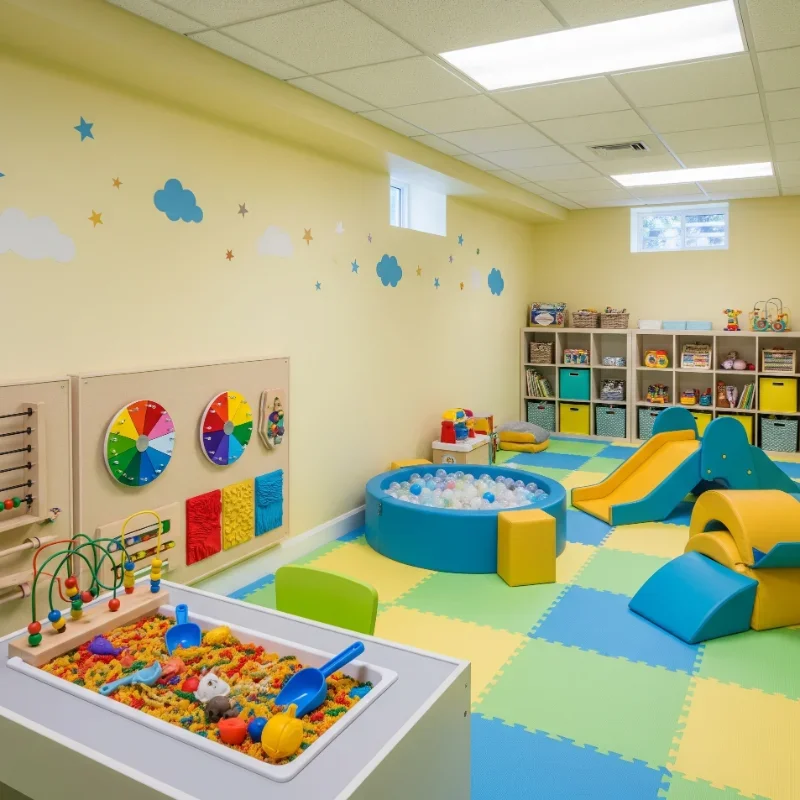
The cheerful energy in this room follows a clear visual recipe: 50% warm, energizing color + 40% soft, safe surfaces + 10% interactive elements. The light yellow walls provide a sunny, happy backdrop that’s stimulating without being overwhelming. The interlocking foam floor mats and soft play climbers make up the large percentage of soft surfaces, encouraging safe and active play. The final 10% comes from the interactive activity boards and ball pit, which provide focused points for sensory engagement. This balance ensures the room is both exciting and comforting.
|
📋 Copy HEX 🔗 Share |
While foam floor mats are a fantastic, safe flooring solution for a playroom, they are a magnet for dirt, crumbs, and liquids. The seams between the tiles love to trap everything. This is not a low-maintenance floor. You will need to vacuum it daily, and periodically, you will have to take all the tiles apart for a deep clean of the tiles themselves and the floor underneath. Also, be aware that pets, sharp toys, or even some types of furniture can easily puncture or tear the foam surface, so it’s best suited for a dedicated, shoe-free, pet-free play zone.
22. Creating a Functional Fixture Wall
- Identify the Wall’s Purpose: Is this for a TV, shelving, displaying art, or a combination? The function will determine the type of fixtures and reinforcements you need.
- Locate Studs: Use a stud finder to mark the location of all vertical supports within the wall. This is non-negotiable for hanging anything heavy.
- Plan Electrical Needs: Do you need outlets for a TV, power for lighted shelves, or charging stations? Plan the placement of new electrical boxes before any drywall work begins.
- Consider Blockings: If you know you want to hang a heavy TV or floating shelves but there isn’t a stud in the perfect spot, you can add ‘blocking’—horizontal pieces of wood—between the studs for a secure mounting surface.
|
📋 Copy HEX 🔗 Share |
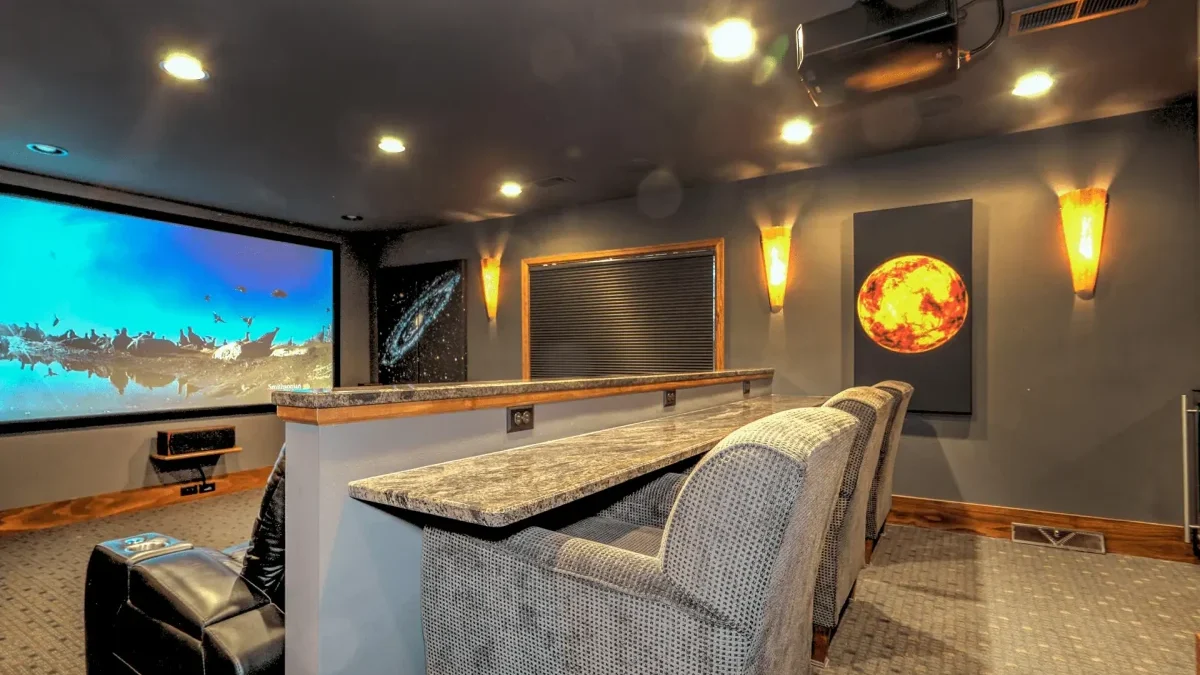
When planning a fixture wall, think in layers. Your first layer is the wall treatment itself—paint, shiplap, or wallpaper. The second layer is your fixed, heavy hardware, like a TV mount or large shelving brackets, which need to be secured to studs. The third layer is your adjustable or lighter elements, like smaller picture frames or adjustable shelf planks. By planning in this order, you ensure that the foundational elements are secure before you move on to the decorative finishing touches. It prevents you from having to move a critical mount because it conflicts with a decorative choice.
23. Eclectic Basement Storage with Vintage Finds
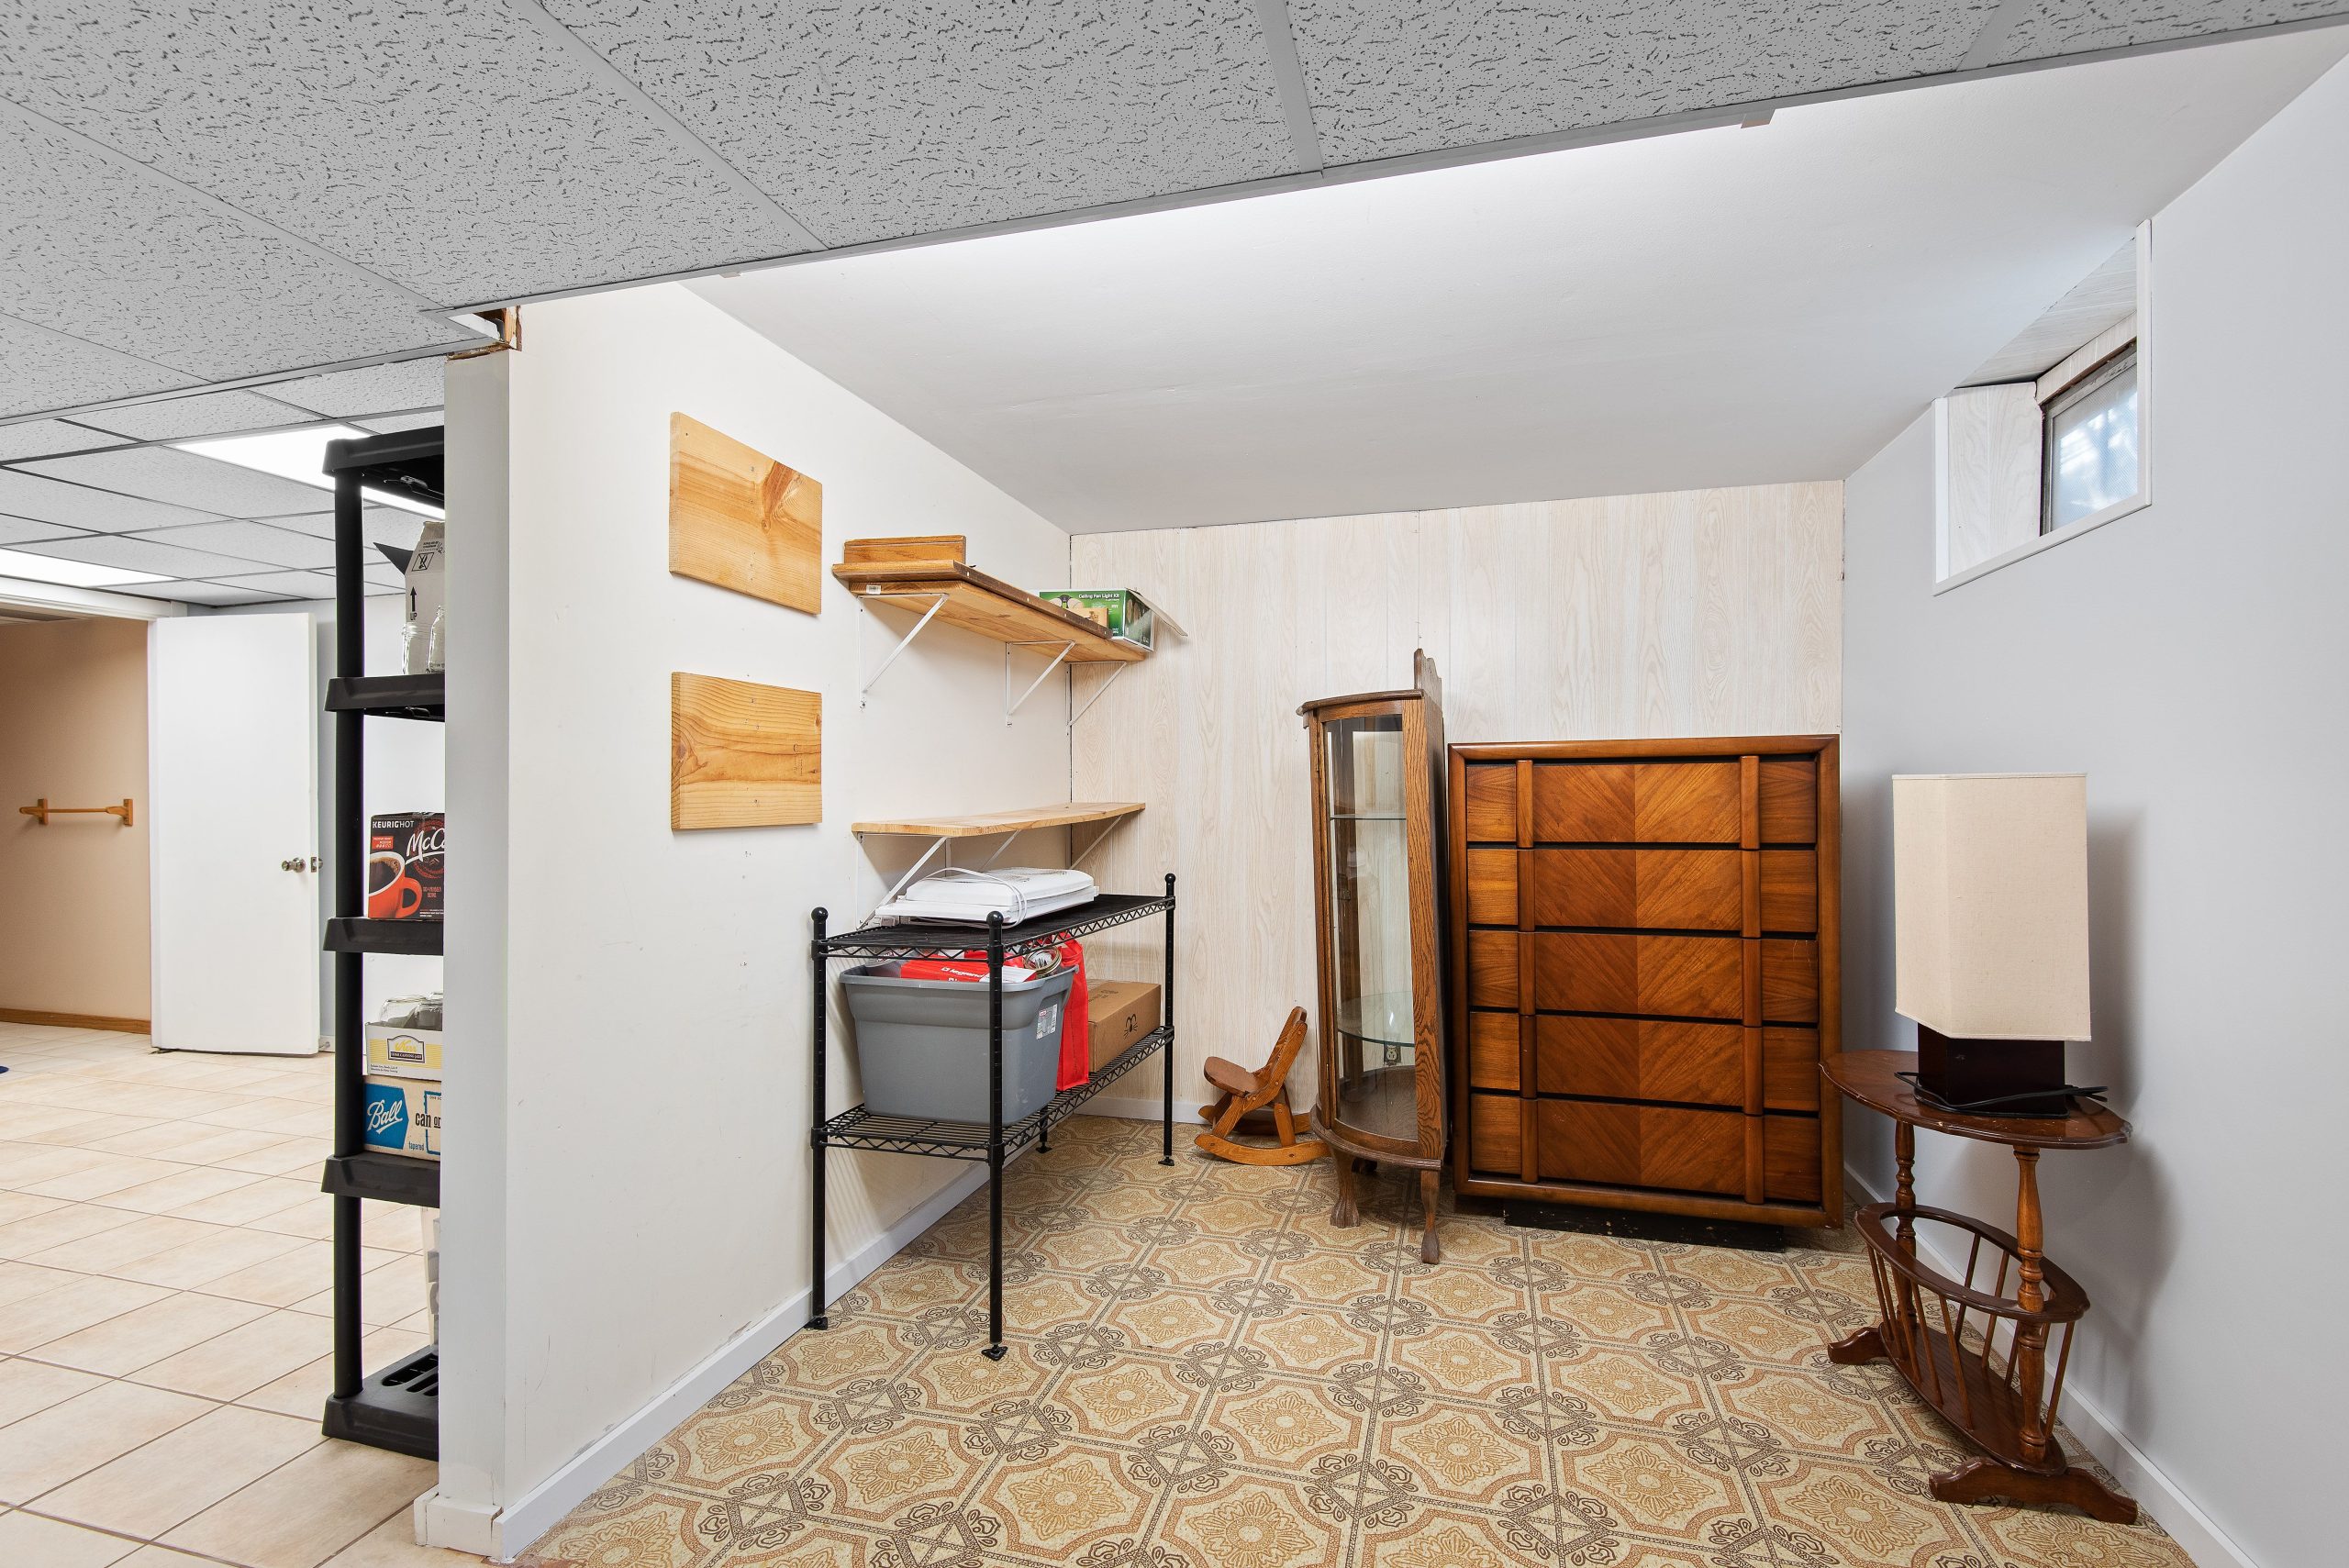
This image showcases a very common basement reality: a collection of hand-me-down furniture and miscellaneous storage solutions acquired over many years. The drop ceiling, wood paneling, and patterned linoleum might feel dated, but it’s a functional space. The challenge here is the lack of cohesion. Mixing wire shelving, a vintage china cabinet, and a wooden dresser for storage can work, but it can also feel chaotic. If this is your situation, the best first step is to declutter mercilessly. A less-crowded, eclectic space feels charming; a jam-packed one just feels messy.
|
📋 Copy HEX 🔗 Share |
This entire look is the definition of a budget-friendly basement. It’s built on found objects and repurposed furniture. Embrace it! Scour Facebook Marketplace, thrift stores, and even curbs on trash day. A vintage dresser or china cabinet, even if it has some scratches, can offer fantastic, dust-free storage for under $75. The black wire shelving is a classic, affordable choice. You can create a highly functional storage area like this for a couple hundred dollars, especially if you’re willing to embrace a mix-and-match aesthetic rather than buying all new, uniform items.
24. Cozy Living Area with Exposed Stone and Industrial Shelves
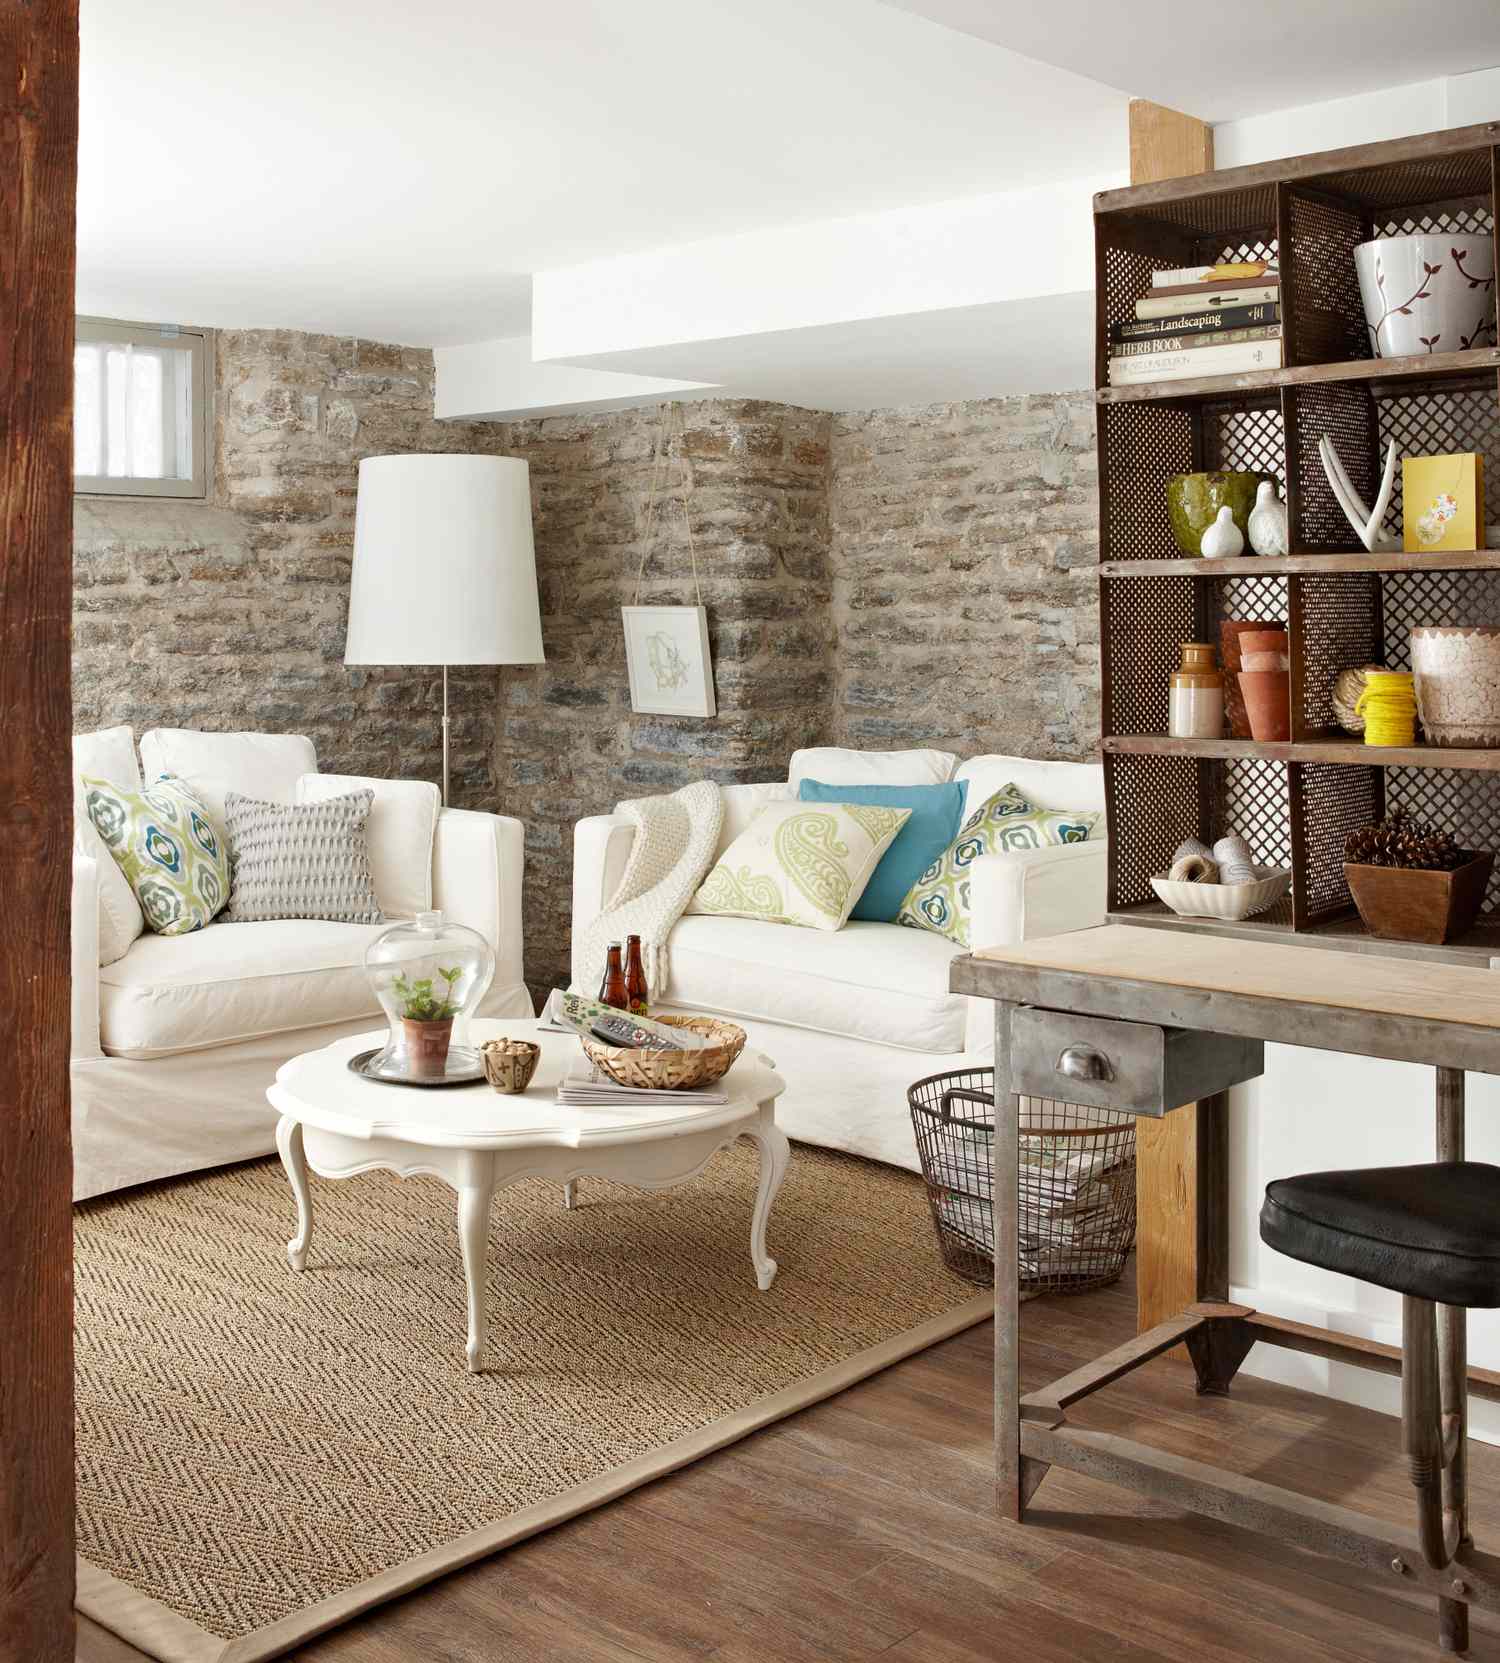
This room is a masterclass in texture mixing. The rough, cool tones of the exposed stone walls provide a dramatic, rustic backdrop. This could easily feel cold, but it’s perfectly balanced by the warmth of the wood-look flooring and the softness of the white upholstered sofa and jute rug. The black industrial metal shelving unit adds a sharp, modern edge that keeps the look from becoming too ‘country cottage.’ It’s the tension between these different materials—hard and soft, rough and smooth, rustic and industrial—that makes the space so compelling and sophisticated.
|
📋 Copy HEX 🔗 Share |
An exposed stone wall is a stunning feature, but it can be a source of dust and crumbling mortar, especially if it’s original to an older home. You’ll likely need to clean the baseboards below it more often. It’s also not the best surface for insulation, so the room might feel cooler in the winter. The deep crevices can also be a haven for spiders and other critters. A good cleaning and sealing with a proper masonry sealant can help mitigate some of these issues, but it’s a feature that comes with a bit more upkeep than a simple drywall surface.
25. Utilitarian Storage for Sports Gear on a Concrete Wall
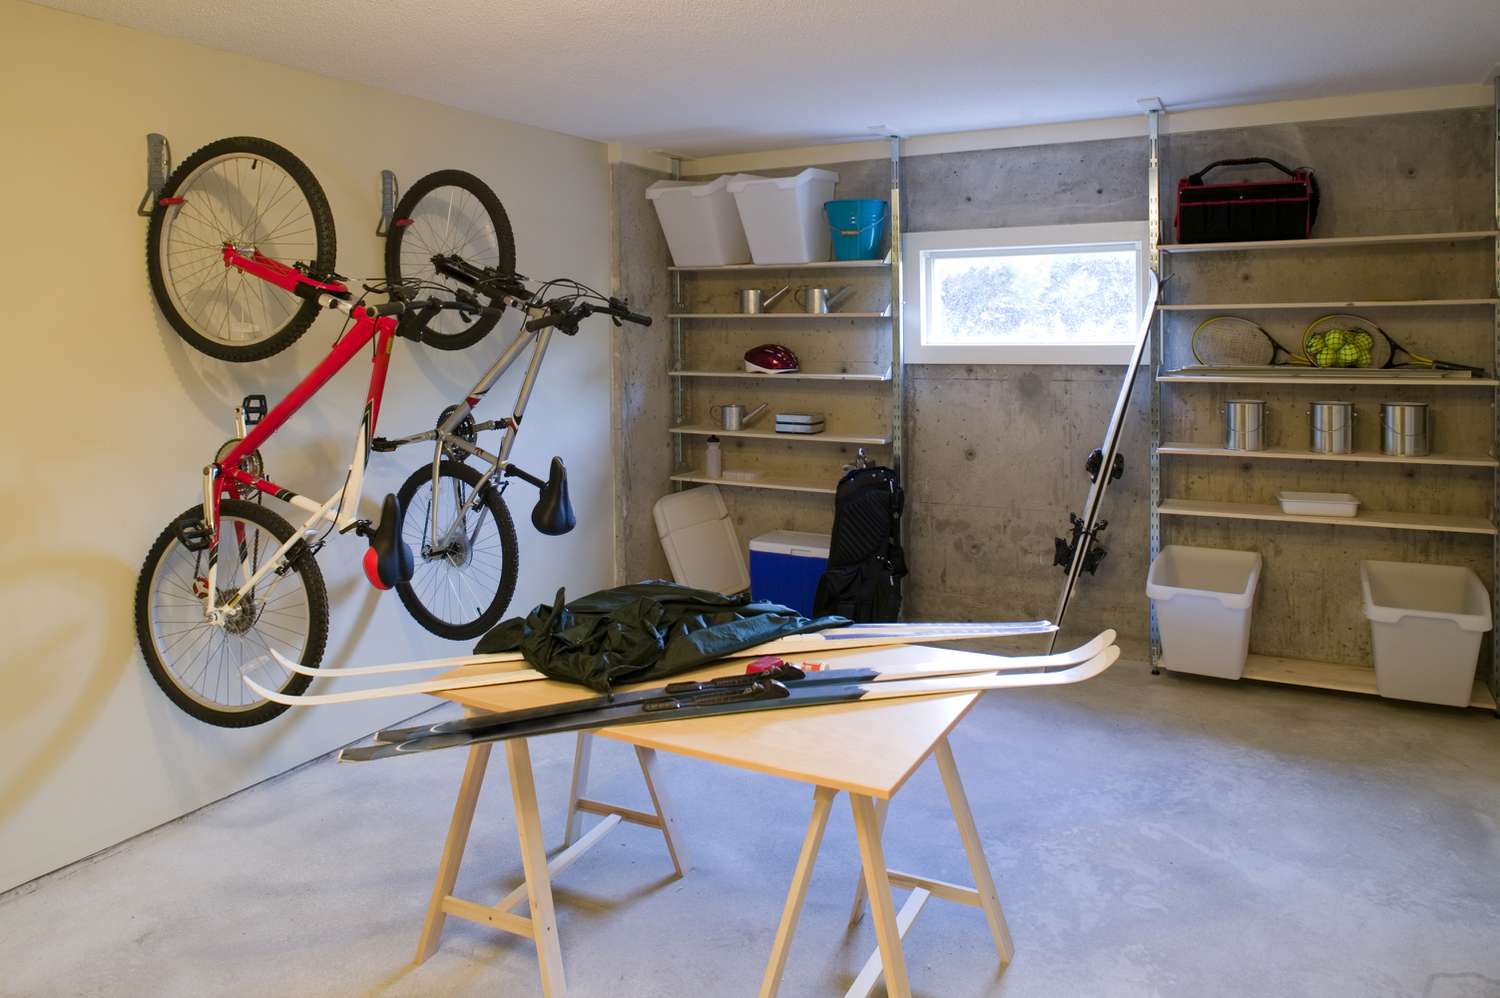
The single most effective element in this room is the use of vertical wall space. By getting the bicycles up off the floor and onto the wall, a massive amount of floor area is reclaimed. This is the cardinal rule of basement and garage organization: go vertical whenever you can. It not only frees up space for foot traffic or, in this case, a workspace like the sawhorse table, but it also makes the items easier to see and access. It turns the gear itself into a kind of functional wall art, which is a far better solution than a tangled pile in the corner.
|
📋 Copy HEX 🔗 Share |
When mounting heavy items like bicycles to a wall, make sure your hooks are rated for the weight. For drywall, you must drill into a stud. For a concrete wall like the one shown, you’ll need a hammer drill to make a pilot hole and use appropriate concrete anchors (like a sleeve or wedge anchor) to secure the hook. Don’t just use a regular drill and a plastic anchor; the weight and leverage of a bicycle will pull it right out of the wall over time. A little extra effort upfront ensures your gear stays securely on the wall and not on top of your car.
26. Playful and Organized with Bold Teal Built-in Shelving
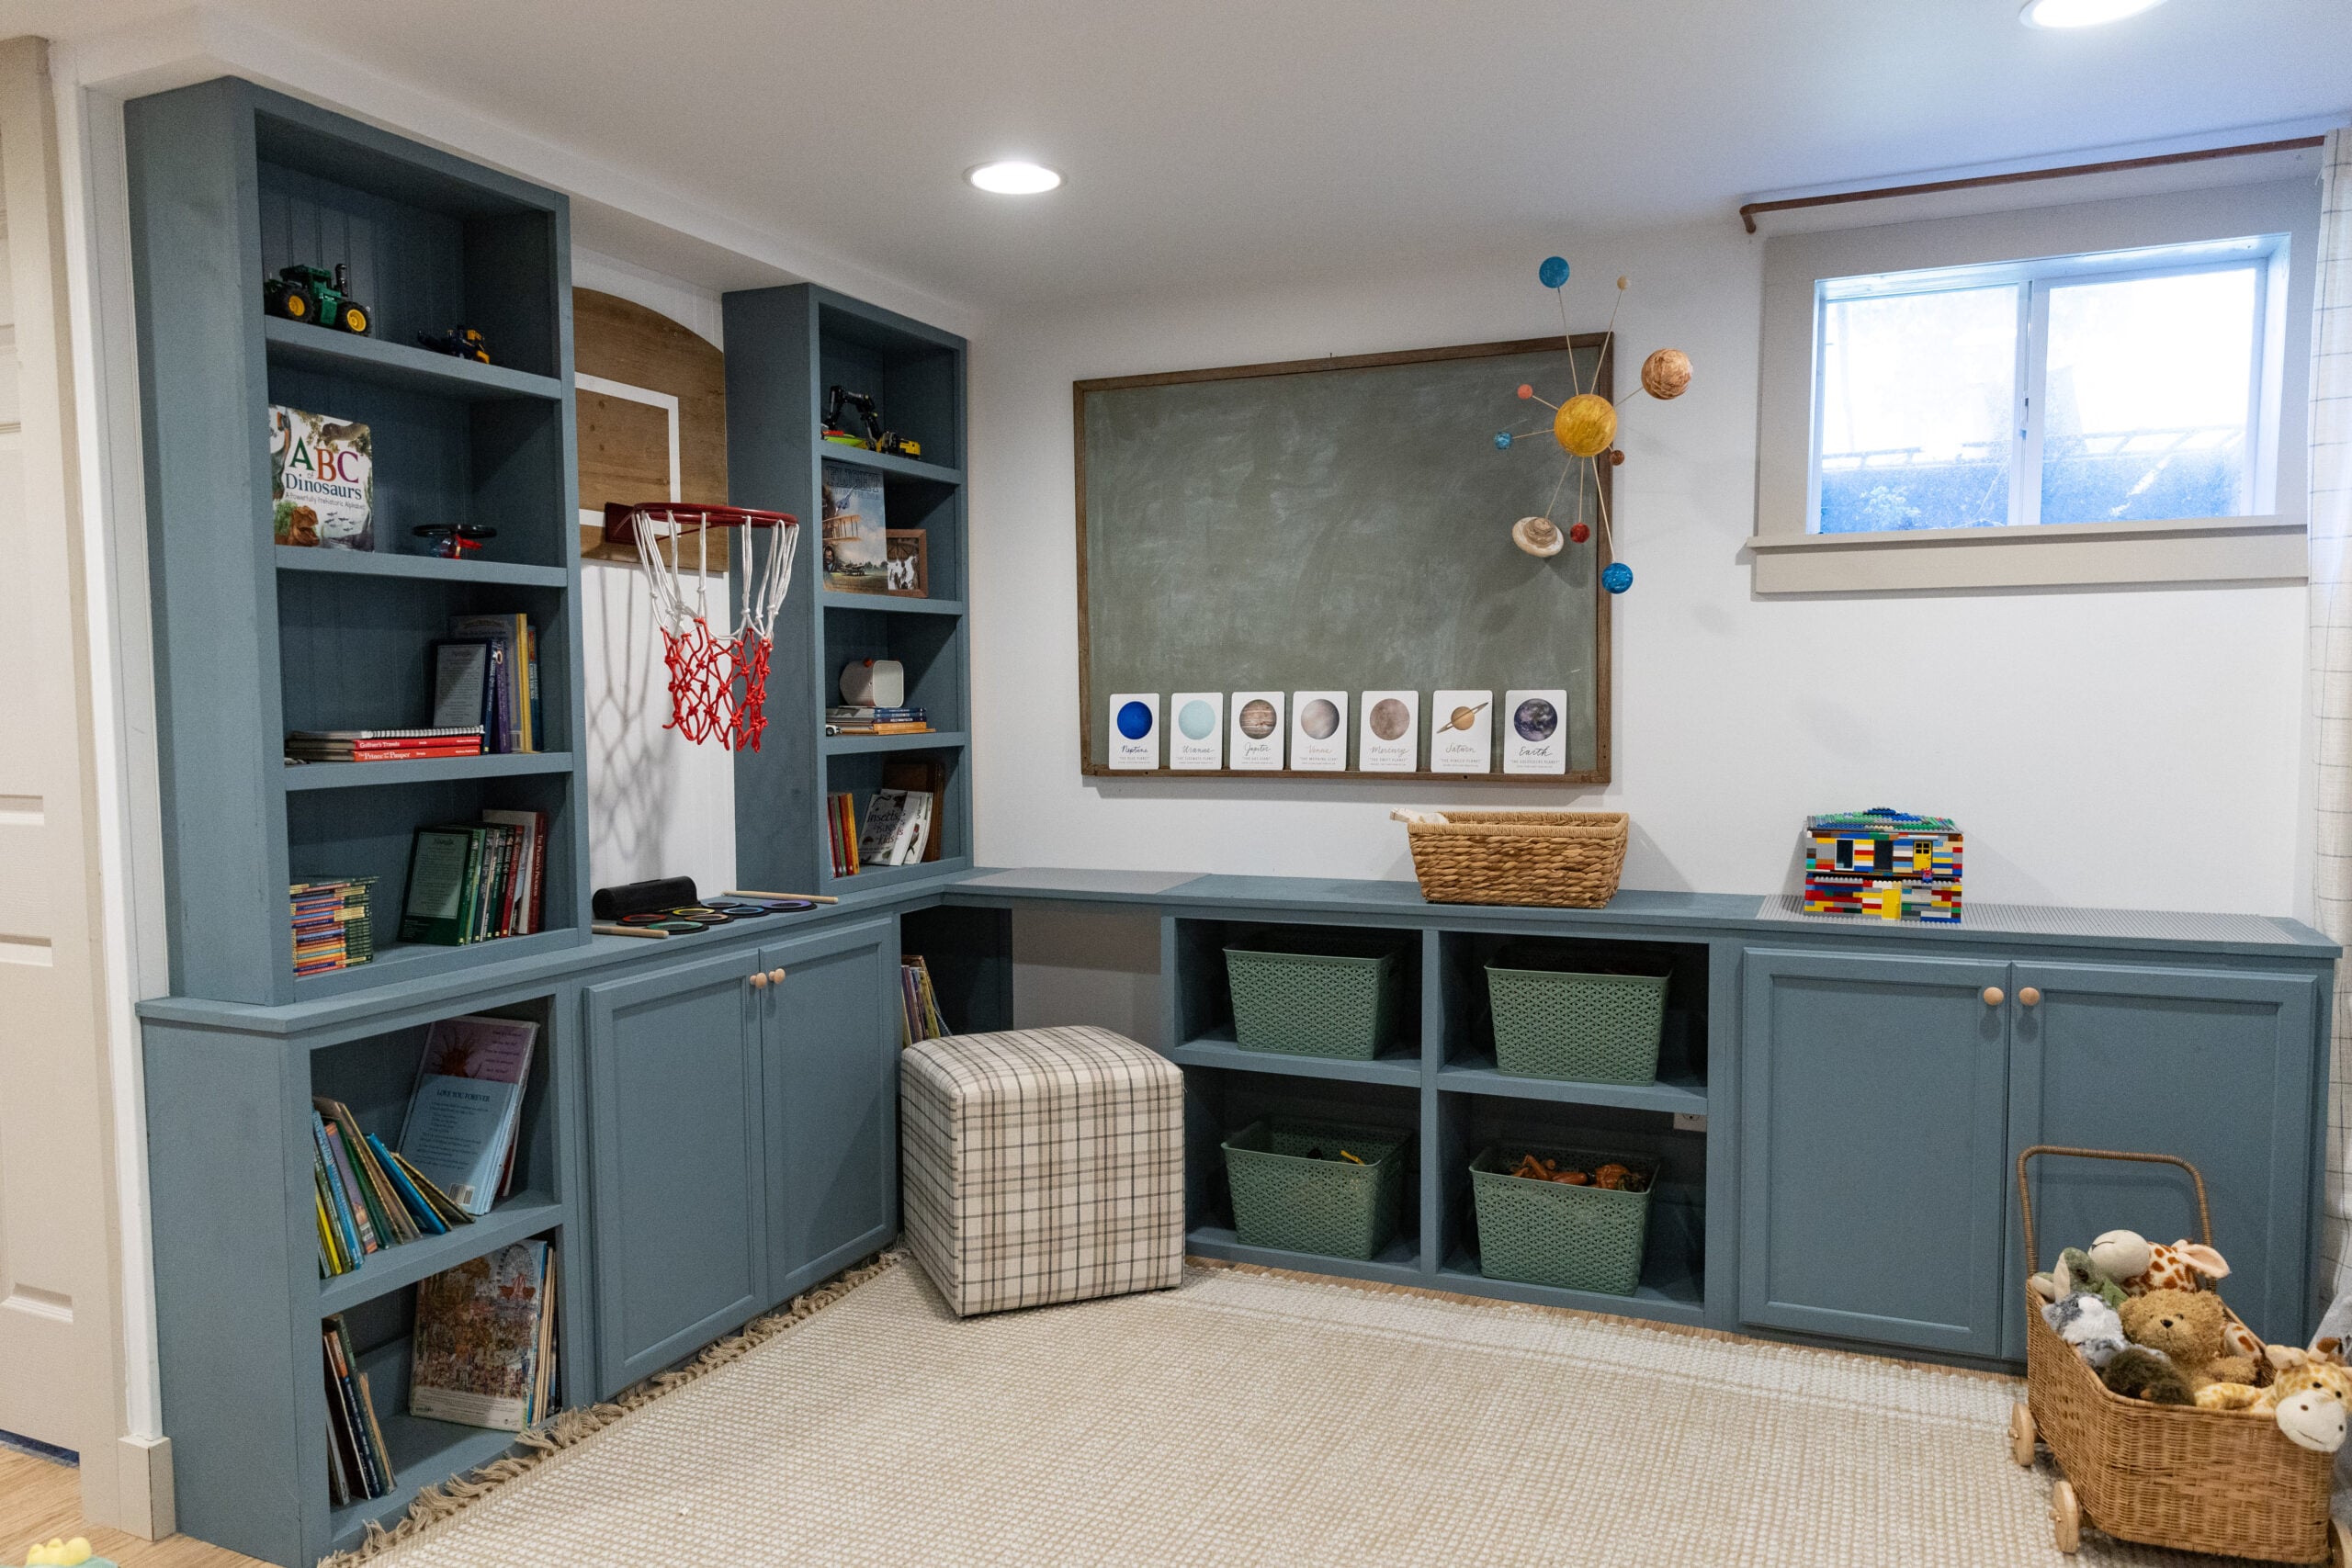
This room’s successful design lies in a simple but powerful formula: 70% bold, functional cabinetry + 20% neutral buffer + 10% playful details. The extensive teal built-ins are the dominant feature, providing both a massive amount of storage and a huge dose of color. The light-colored textured rug and off-white walls act as a crucial neutral buffer, preventing the teal from overwhelming the space. Finally, the plaid ottoman, chalkboard, and basketball hoop are the fun, personal touches that make it feel like a kid’s room, not a storage showroom.
|
📋 Copy HEX 🔗 Share |
Custom built-ins are a fantastic, high-impact storage solution, but they are a permanent decision. That vibrant teal is amazing now, but will you still love it in five years? Or will a future homebuyer? Painting custom woodwork is a much bigger and more expensive job than just repainting a wall. If you’re not in your “forever home,” you might consider achieving a similar look with freestanding bookcases painted in a bold color. This gives you the same vibe but with more flexibility for the future. Compare the permanence here with the modular approach in Idea #9.
27. Charming Play Nook with a House-Shaped Entrance
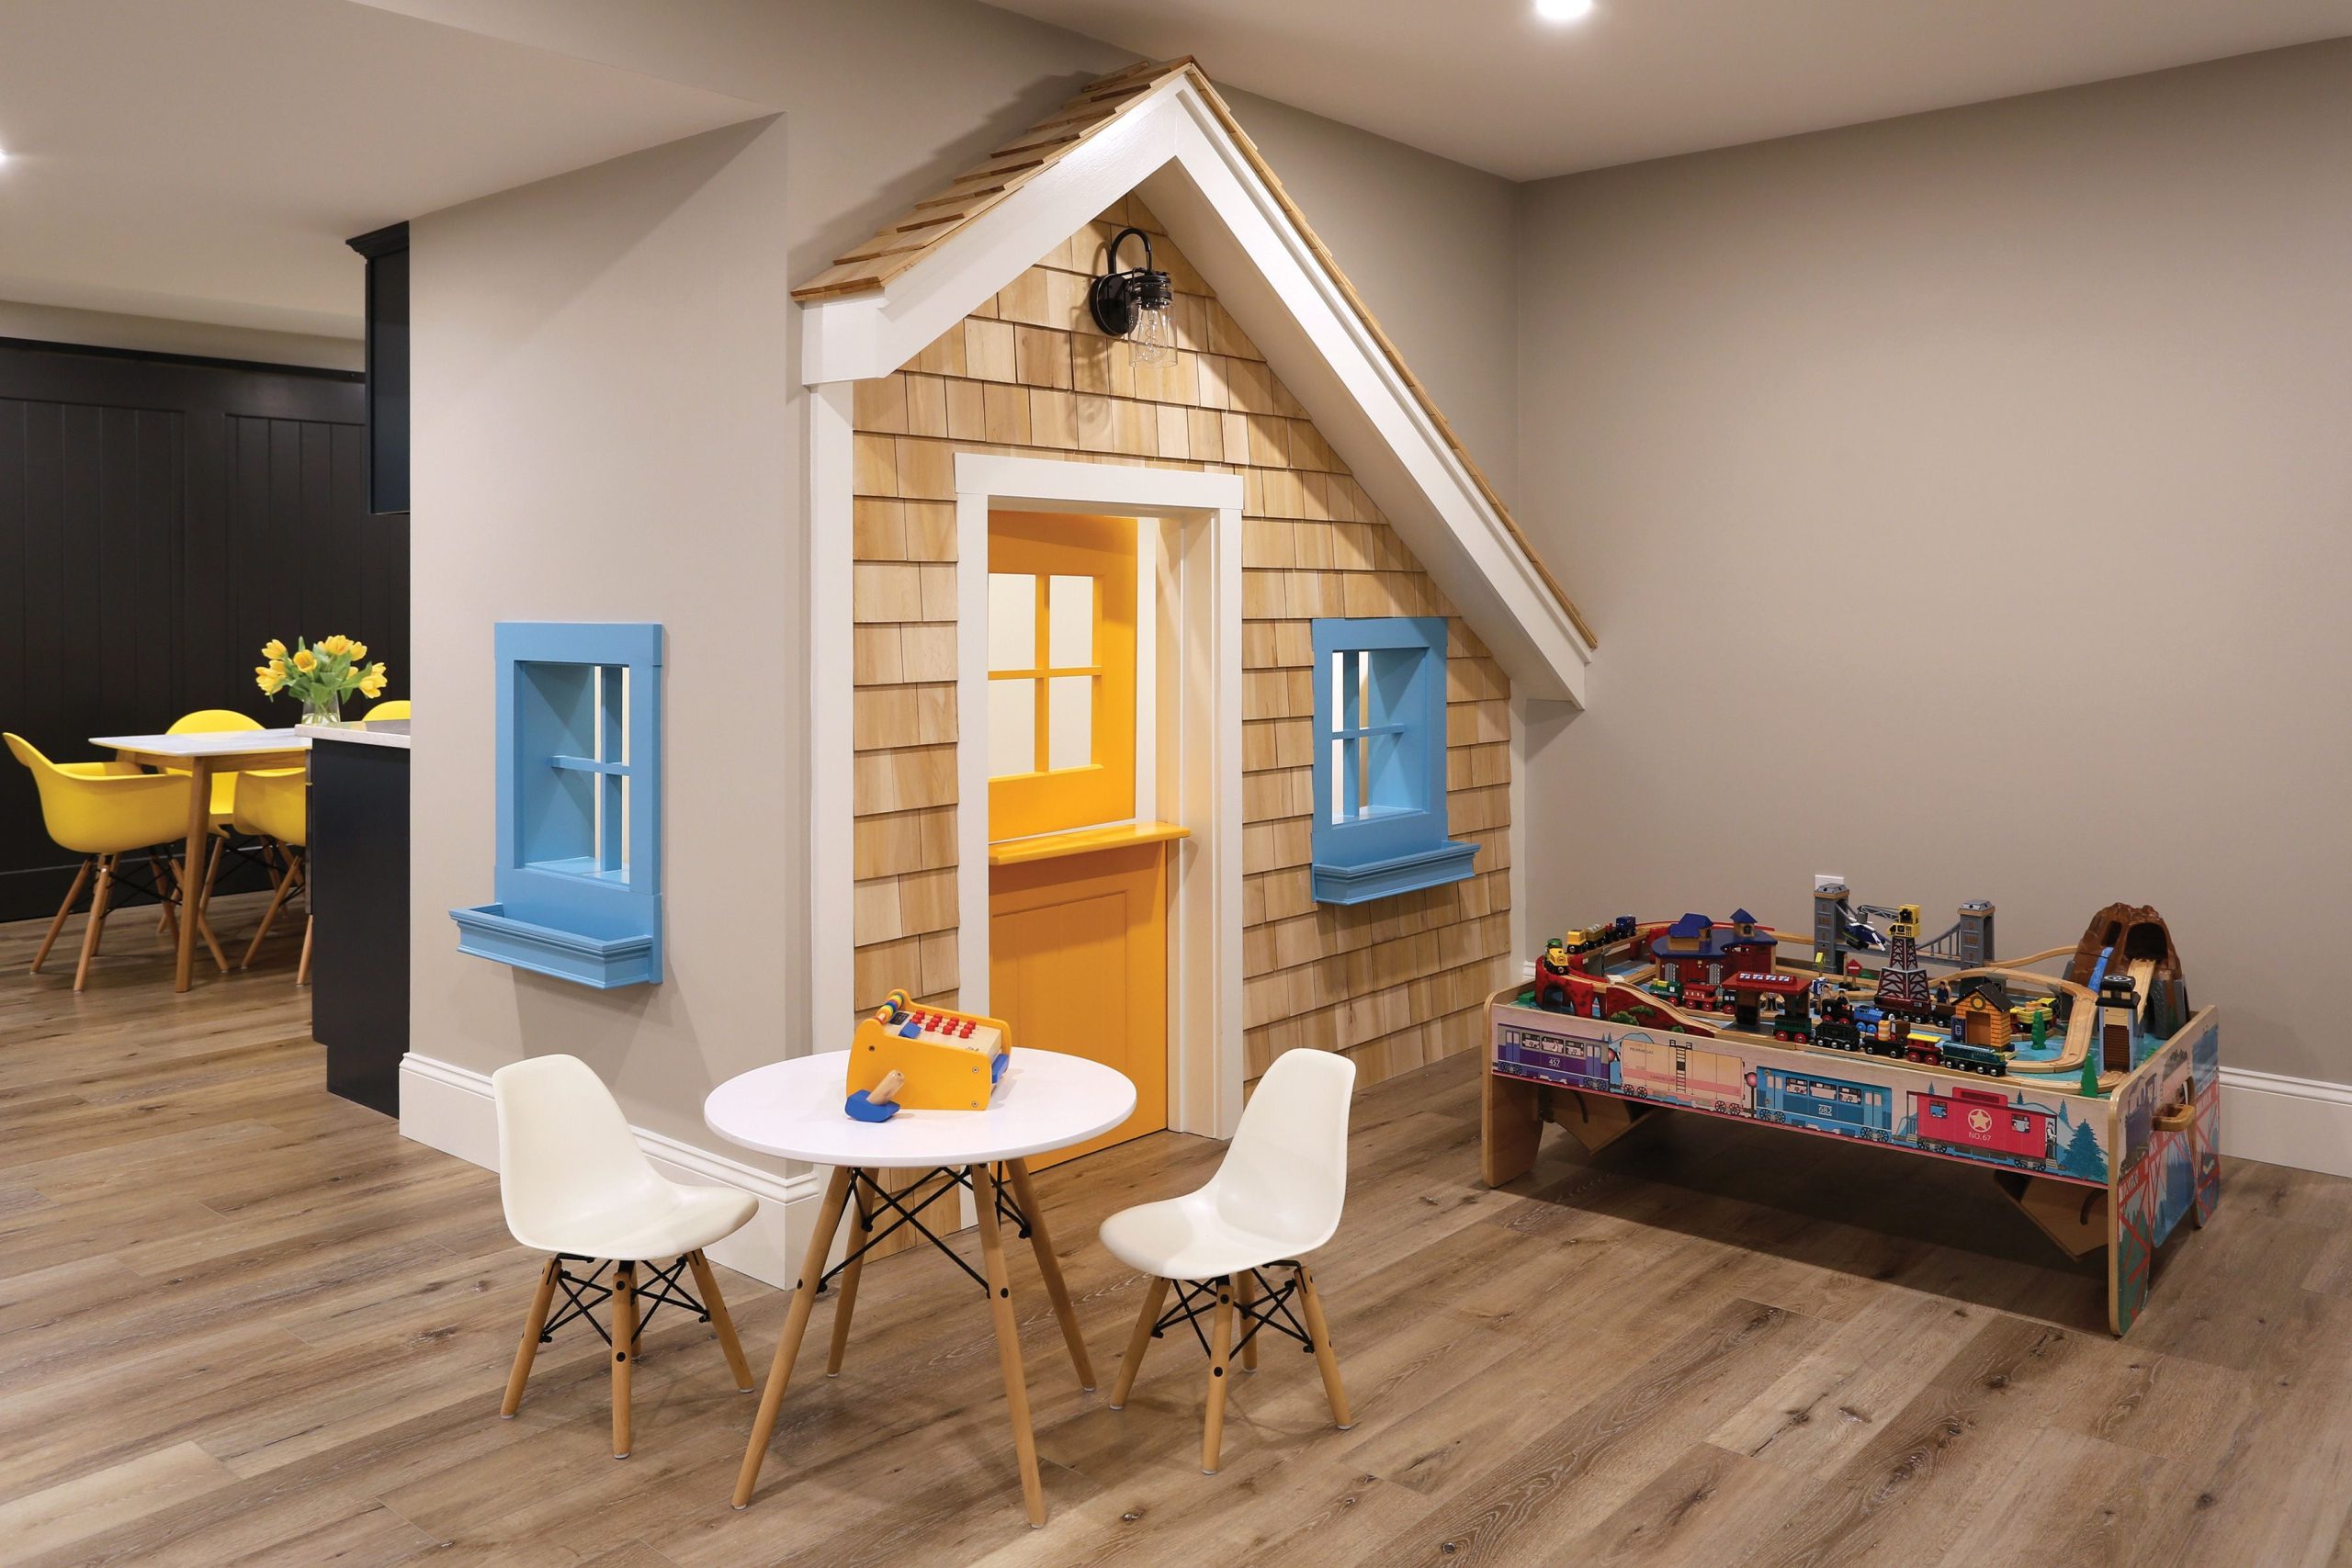
This idea is brilliant because it carves out a dedicated, magical space for play without closing off the room. The house-shaped nook, complete with cedar shingles and a bright orange door, acts as a powerful psychological cue. It tells a child, “This space is for you. This is a space for imagination.” By creating this defined ‘mini-house’ within the larger basement, it contains the imaginative play (and some of the mess) in one area, while allowing the rest of the basement to serve other functions, like the dining area visible in the background. It’s a perfect blend of playful design and practical spatial division.
|
📋 Copy HEX 🔗 Share |
Want to add those charming cedar shingles to a playhouse or accent wall? It’s a great weekend project. Total time: 4-5 hours. Cost: $100-$200.
- Purchase cedar shingle panels. These are sheets where shingles are pre-attached, which is much faster than individual shingles.
- Measure your wall space and mark a level starting line for your first course at the bottom.
- Apply construction adhesive to the back of the first panel. Press it into place along your level line.
- Use a finish nailer with 1-inch brad nails to secure the panel to the wall, nailing into the top portion that will be covered by the next course.
- Stagger the seams and repeat until you reach the top. You can cut panels to size with a handsaw or circular saw.
Conclusion
Hopefully, these 27 ideas have sparked some serious inspiration for your own downstairs domain. The best basement is one that serves your family’s real-life needs, whether that’s a quiet retreat, a rambunctious play zone, or just a really, really organized place for your stuff. Pick your favorite idea, start a mood board, and get ready to reclaim your basement’s potential. Now, what are you waiting for? Head over to Pinterest and start planning your project!