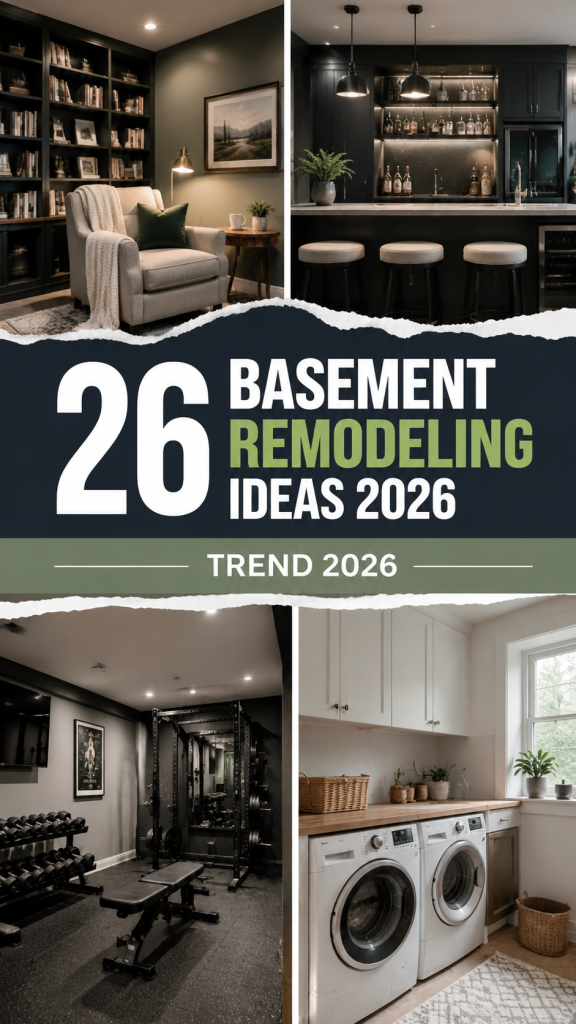
That moment when you find the perfect basement remodel idea on Pinterest but have no idea how to make it happen in your own home? We’ve all been there. It feels like an impossible dream, but turning that underused space into your favorite room is more achievable than you think. After filtering through hundreds of designs from places like West Elm, Home Depot, and even Facebook Marketplace, we narrowed it down to 26 ideas that actually deliver on style and function. We’re covering everything from modern home theaters to rustic home bars, with ideas for every price point—from a $2,000 DIY refresh to a $50,000 custom build.
For 2026, the trend is all about creating multi-functional basements that feel just as thoughtfully designed as the main floor, moving away from the “afterthought” rumpus room of the past. And stay until the end — we break down the most common mistakes that can ruin these looks.
📌 Save this to Pinterest for later — you’ll want to revisit these ideas.
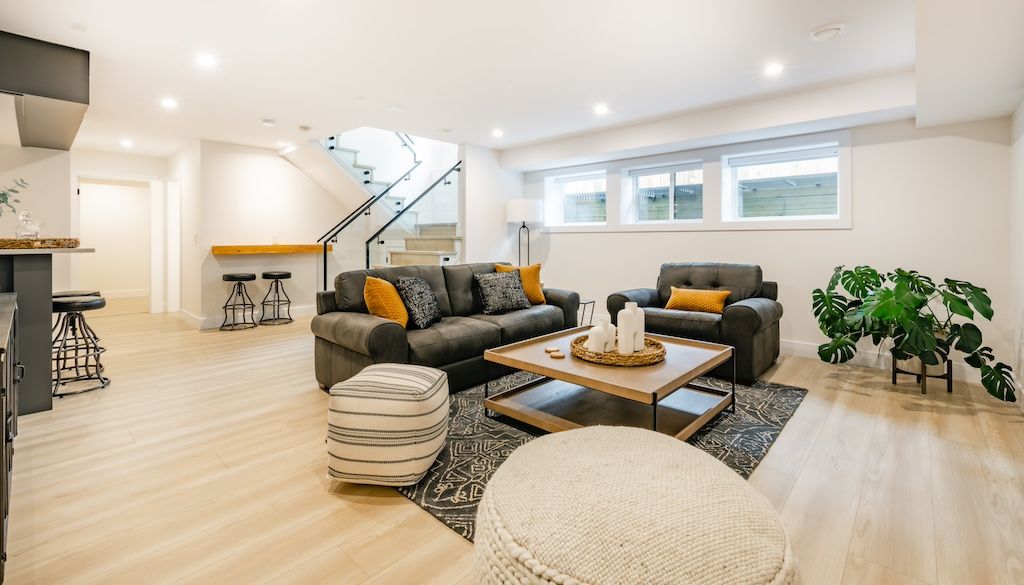
1. Contemporary Living Room with an Airy Glass Staircase
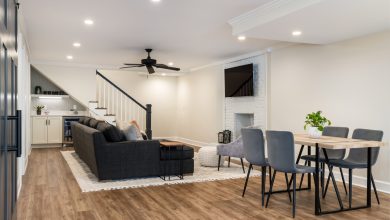
This design succeeds by mastering the art of high contrast and clean lines. The dark gray sofa and black metal staircase create strong, confident shapes against the bright white walls and light wood flooring. This isn’t just a random color choice; it’s a deliberate strategy that makes the space feel bigger and more architectural. The glass panels on the staircase are crucial—they maintain an open sightline, preventing the stairs from feeling like a heavy, room-dividing block. The touches of mustard yellow in the decor add just enough warmth to keep the modern aesthetic from feeling cold.
|
📋 Copy HEX 🔗 Share |
Don’t underestimate the power of flooring to unify an open-concept basement. The key here is the continuous run of light wood planks throughout the living and bar areas. To get this right, always install basement flooring over a proper subfloor with a vapor barrier. For vinyl plank or engineered hardwood, aim for planks at least 5 inches wide to create a sense of spaciousness. This visual continuity makes the entire floor feel like one large, cohesive space rather than a series of small, disconnected zones.
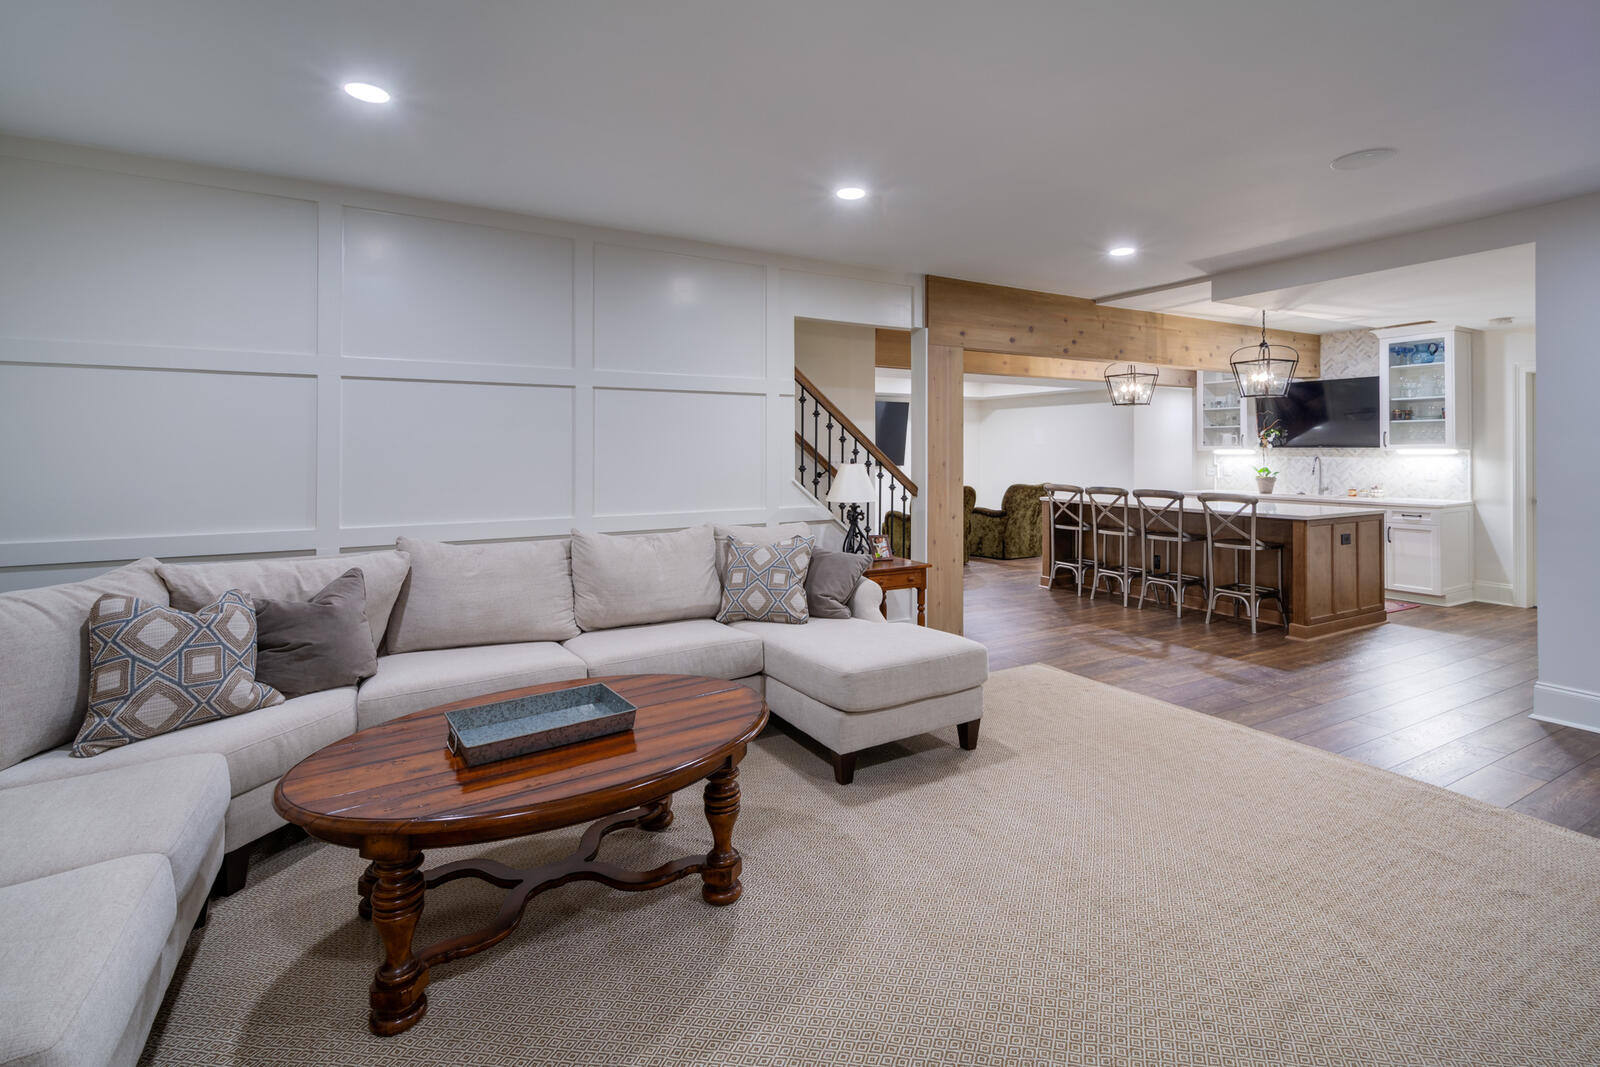
2. Open-Concept Basement with a Board and Batten Accent Wall
This look follows a simple but effective formula: 60% warm neutrals (the light beige sofa and white walls), 30% natural wood tones (the oval coffee table, exposed beam, and bar island), and 10% dark accents (the charcoal-colored bar area). This ratio creates a calm, layered look that feels intentional and cozy. You can easily adapt this by swapping the wood tones; imagine a darker walnut for a more dramatic feel or a pale maple for an airy, Scandinavian vibe, all while keeping the 60/30/10 balance intact.
|
📋 Copy HEX 🔗 Share |
That gorgeous exposed wood beam is a fantastic feature, but it needs to be an authentic structural element. Don’t try to fake this with purely decorative box beams unless your ceiling height is generous (9 feet or more). In a standard 7- or 8-foot basement, a fake beam can make the ceiling feel oppressively low. If you want a similar rustic touch without sacrificing headroom, consider using reclaimed wood as a feature wall or to wrap a support column instead.
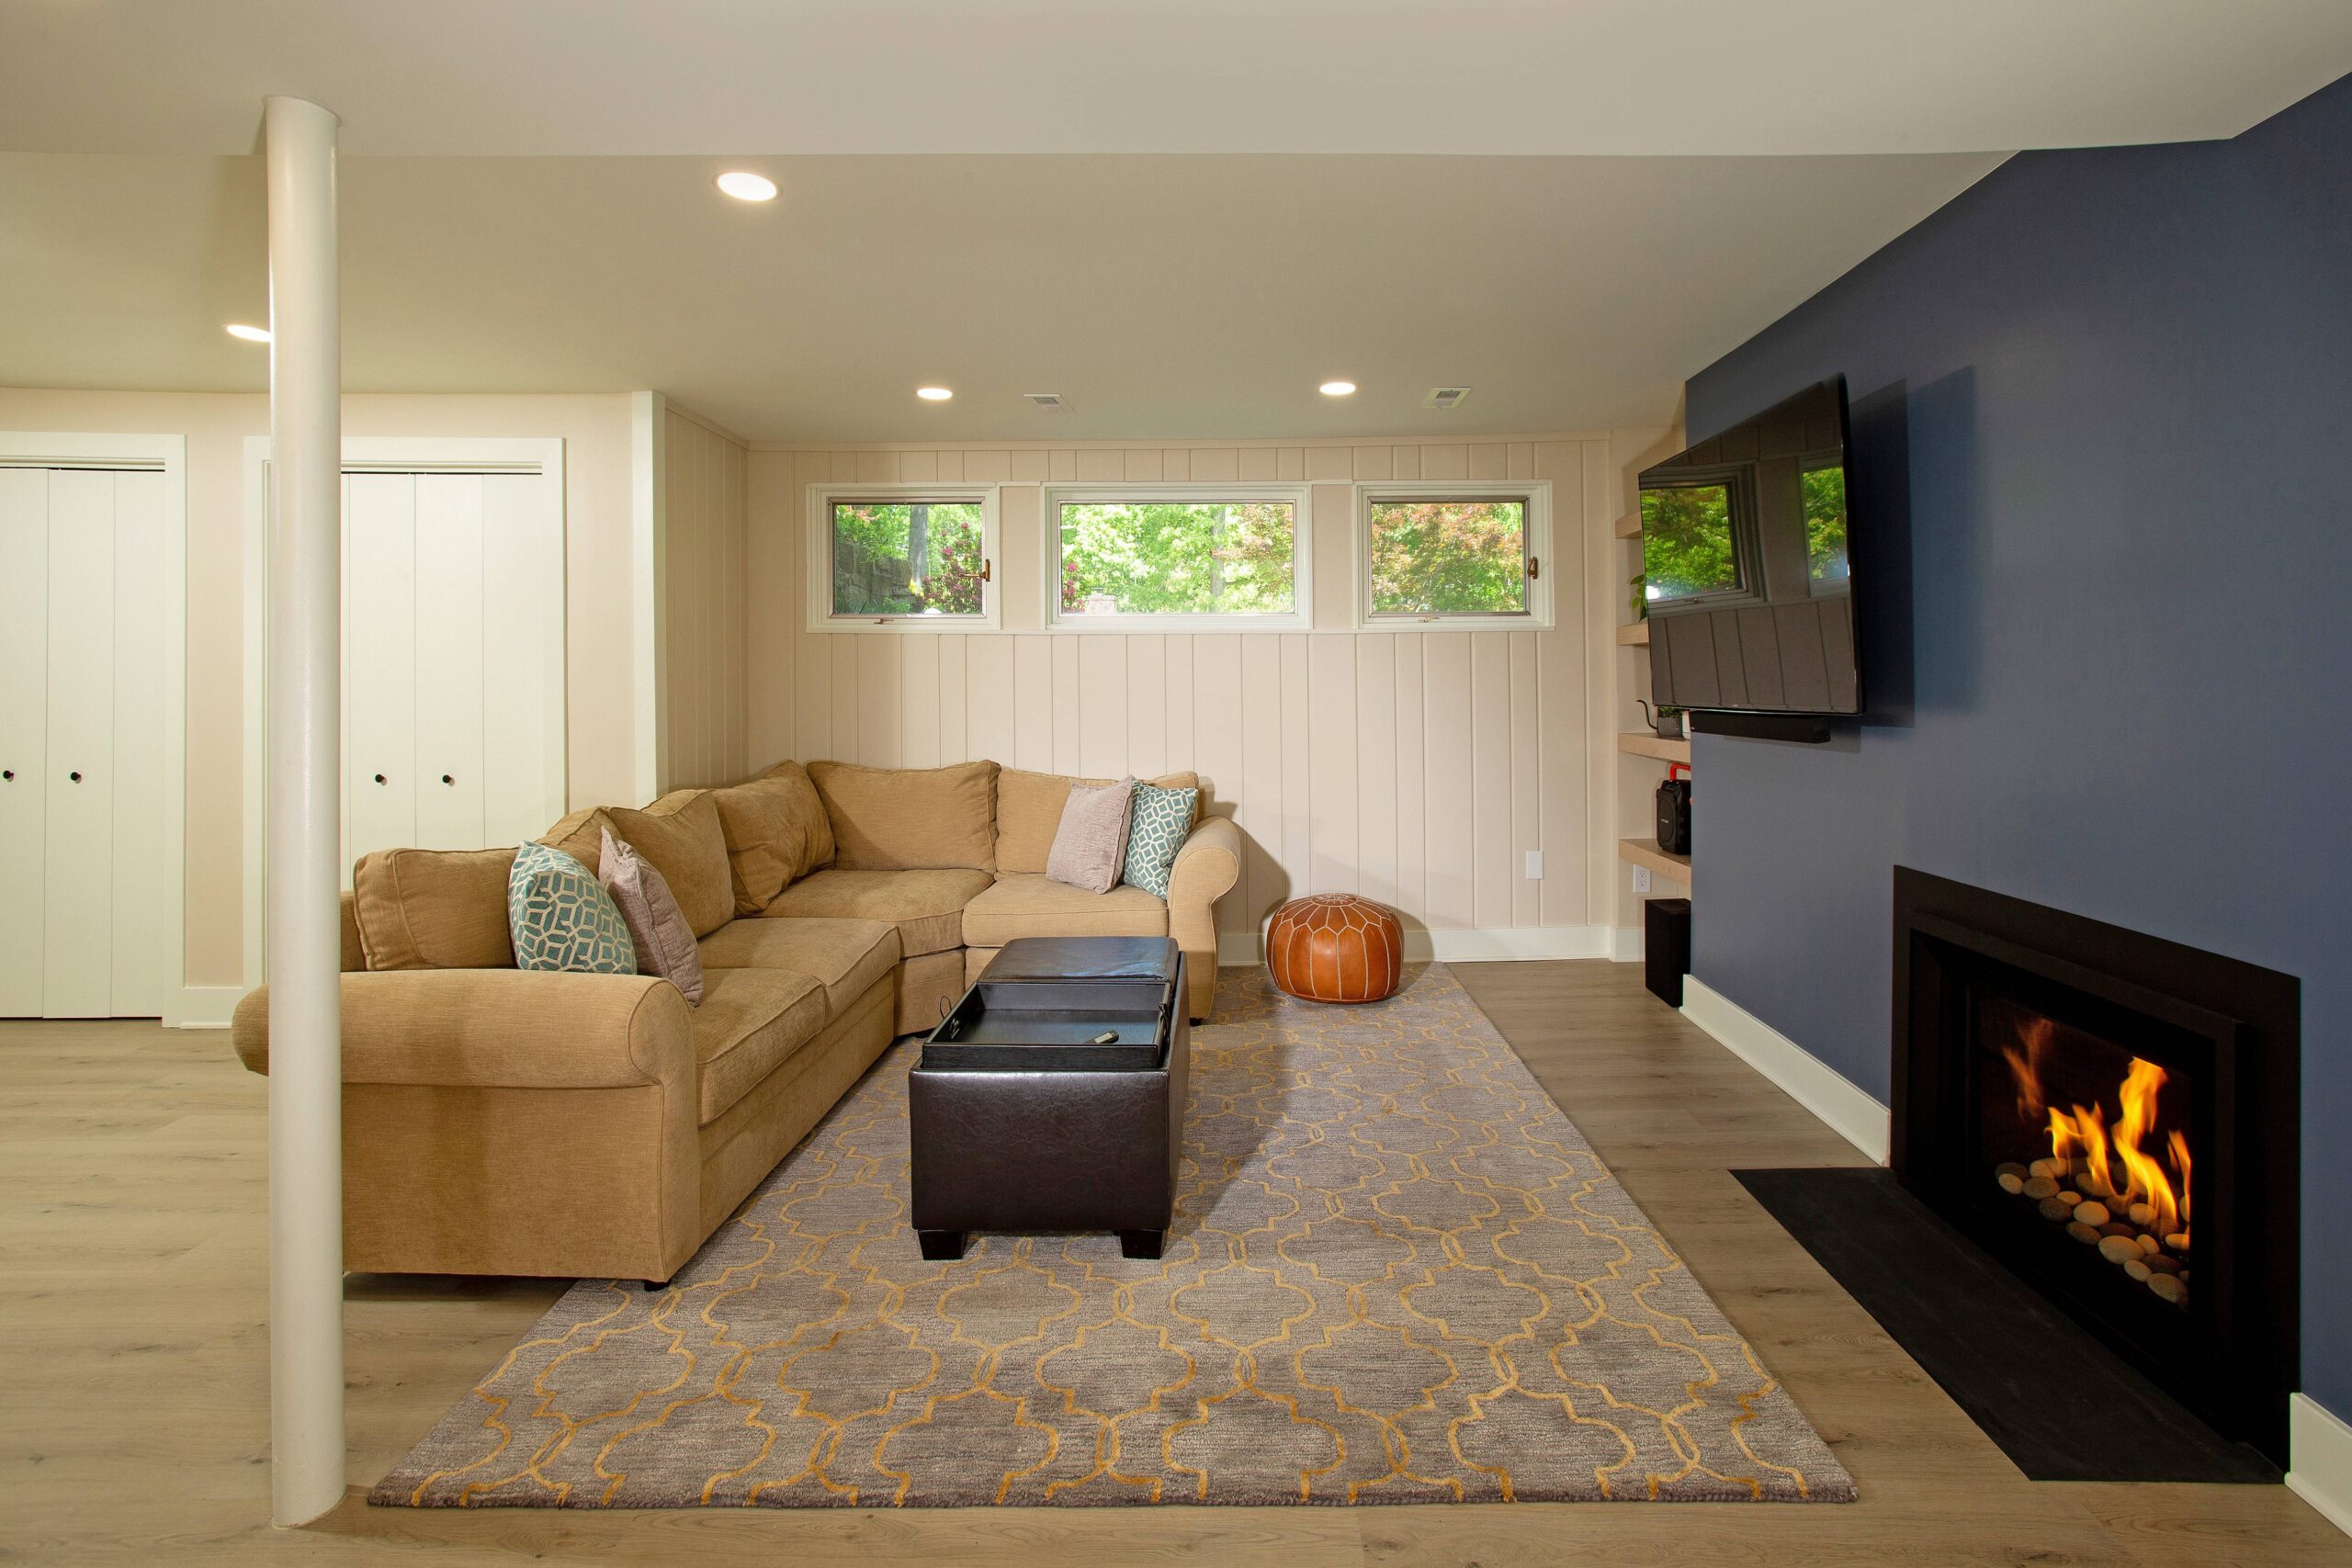
3. Cozy Living Area with a Navy Blue Fireplace Wall
The single element holding this entire design together is the bold navy accent wall. Without it, the room would be a pleasant but forgettable sea of beige and light wood. The deep, saturated blue provides a necessary focal point, adds a touch of drama, and makes the built-in fireplace feel much more substantial and integrated. It’s the perfect example of how a gallon of paint can completely redefine a space, creating depth and a high-end, custom look. The way the gold in the rug pattern plays off the navy is just a chef’s kiss.
|
📋 Copy HEX 🔗 Share |
This idea is perfect for a medium-sized rectangular basement, roughly 15 by 25 feet. The L-shaped sectional works best when it can run along two walls without blocking major traffic paths. You need at least 12 feet of uninterrupted wall space for a similar fireplace and TV setup to feel balanced. If your basement is smaller, you might try a scaled-down version of this, perhaps with a smaller sofa and a more compact electric fireplace. For a larger space, you could even add a second armchair to complete the conversation area.
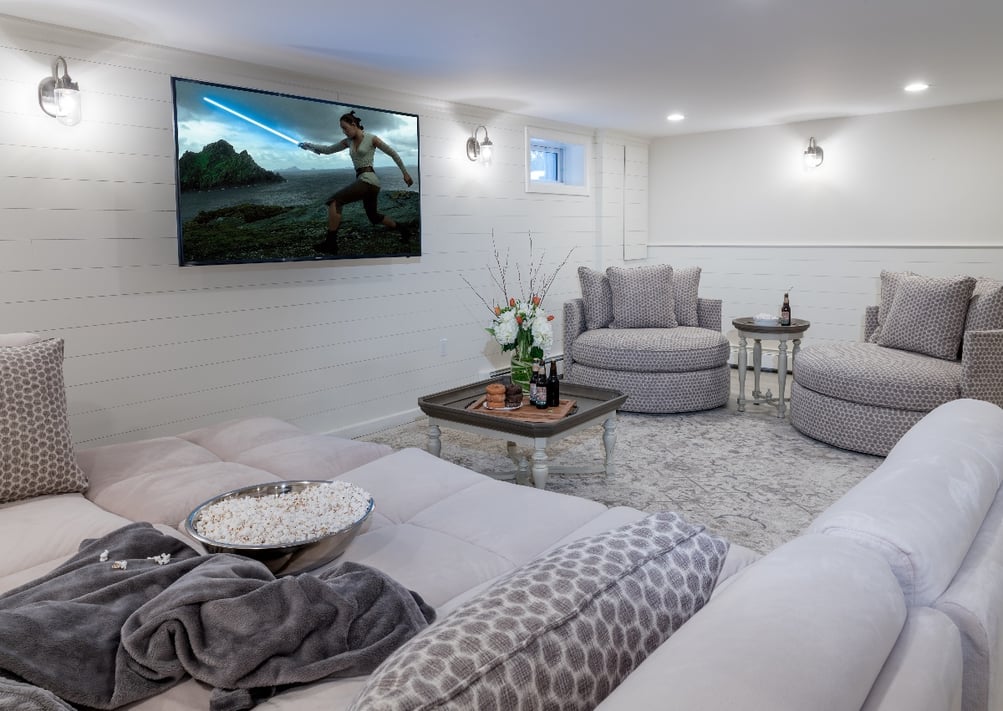
4. Relaxed Home Theater with White Shiplap Walls
White shiplap walls bring a ton of texture and a breezy, almost coastal feel to a basement, but they are a magnet for dust and scuffs. The horizontal grooves will require regular dusting with a microfiber cloth or a brush vacuum attachment, especially in a basement environment. Because it’s painted white, any scuffs from furniture or playful kids will be immediately visible. A magic eraser will be your best friend for spot cleaning, and you should plan on a fresh coat of paint every 3-4 years to keep it looking crisp and clean.
|
📋 Copy HEX 🔗 Share |
You don’t need a custom sectional to get this cozy theater vibe. Look for a modular light gray sofa from IKEA or Target—their blocky shapes and simple lines are a great match for this style. For the shiplap, save money by using 1/4-inch plywood ripped into 6-inch planks instead of pricier pre-made MDF boards. And the rustic tables? That’s a prime opportunity for a weekend DIY project or a lucky find on Facebook Marketplace. With some smart shopping, you could recreate this entire seating area for under $2,500.
5. The Smart, Budget-Savvy Basement Finish
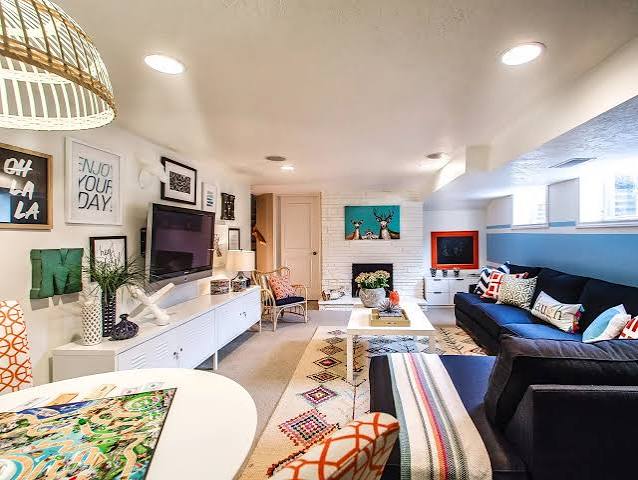
Finishing a basement on a tight budget is all about smart material choices and sweat equity. This approach prioritizes function and clean, simple finishes over expensive custom work. Think durable, affordable flooring and versatile paint colors.
|
📋 Copy HEX 🔗 Share |
- Flooring (Luxury Vinyl Plank): $1,200 – $2,500
- Wall Framing & Drywall: $2,500 – $4,000
- Basic Electrical & Lighting: $1,500 – $3,000
- Paint & Primer: $500 – $800
- Secondhand Furniture & DIY Decor: $800 – $1,500
- TOTAL: $6,500 – $11,800
Budget alternative: Get the price down by 40% by painting the existing concrete floor, leaving ceilings exposed (just paint everything a uniform white or black), and furnishing entirely with thrifted pieces. Compare this with the more built-out approach in Idea #15 to see the difference.
You can create an industrial-chic exposed ceiling on a budget. Time: 1-2 weekends. Cost: $200-$400.
- First, thoroughly clean everything between the joists: wires, pipes, and wood. A shop vac with a brush attachment works wonders.
- Address any loose wires or plumbing. Secure them neatly to the joists with cable staples.
- Spray everything with a good-quality oil-based primer. This is crucial for preventing stains and ensuring the paint adheres properly.
- Use a paint sprayer (you can rent one) to apply two coats of flat black or white paint. Spraying is much faster and gives a more uniform finish than rolling.
- Install your new light fixtures once the paint is fully cured.
6. A Neutral Multi-Zone Basement with Gold Accents
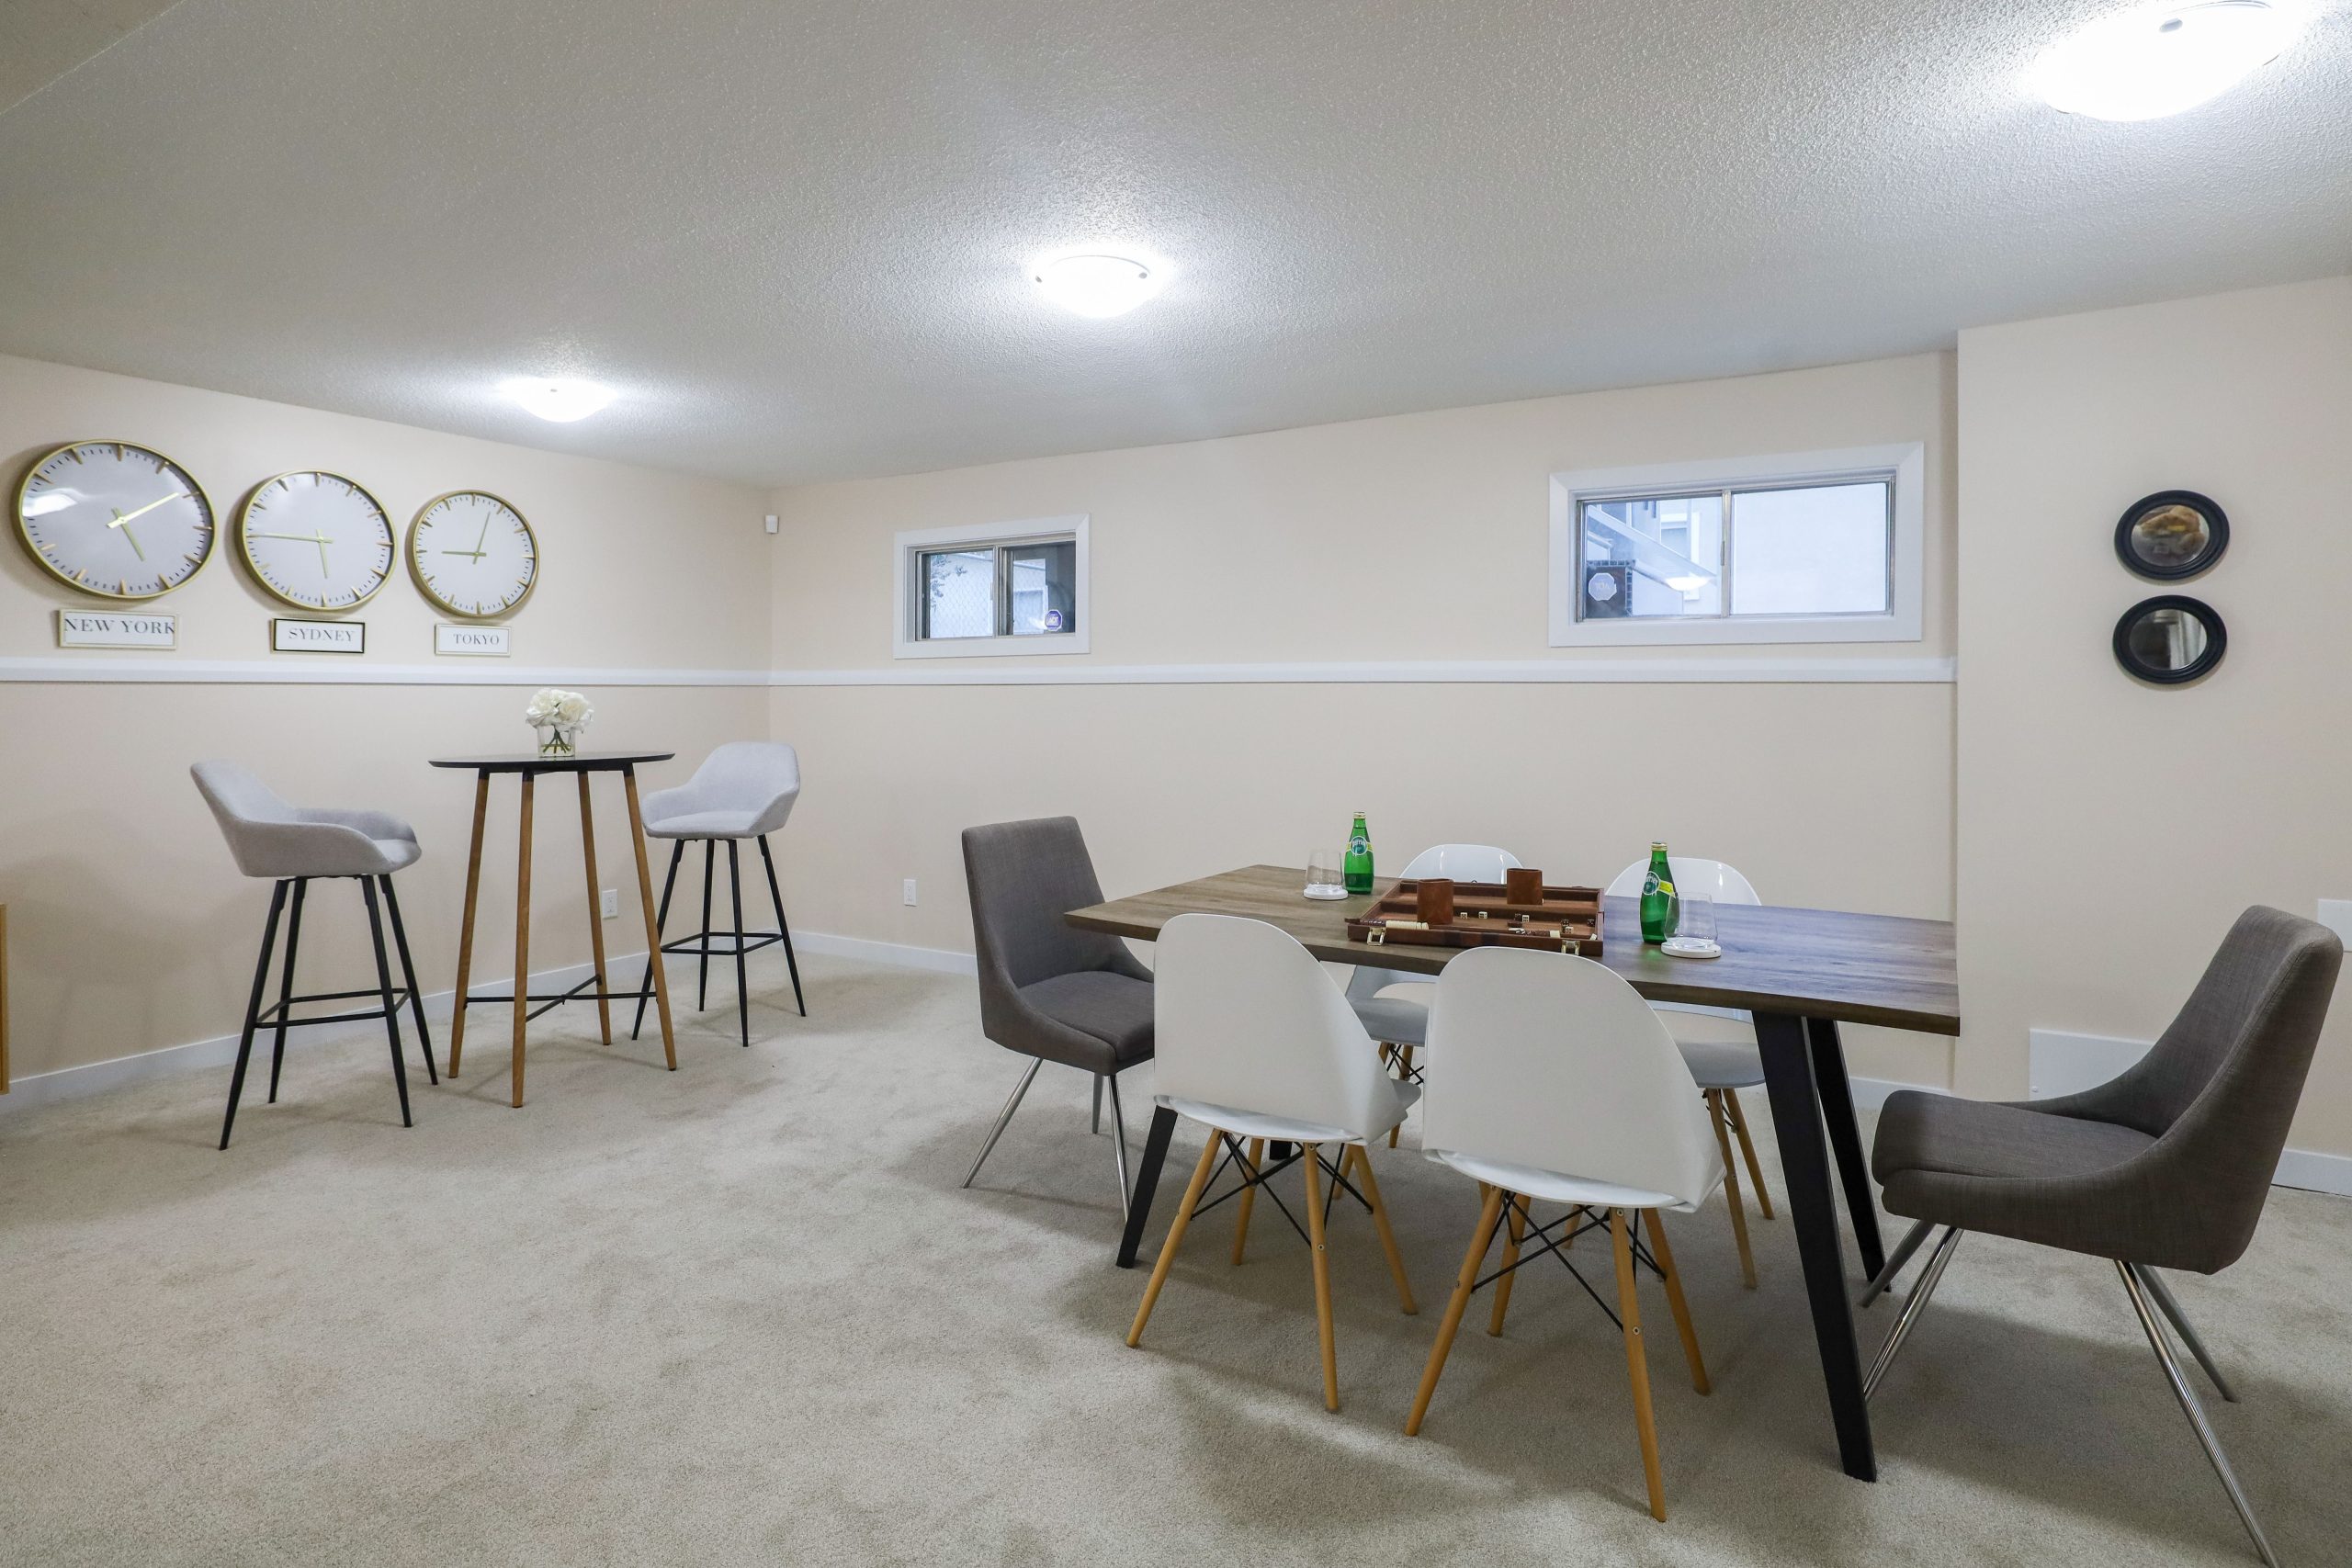
This basement design cleverly uses furniture to create distinct ‘zones’ without putting up walls. The high-top bar table and stools signal a casual social area, while the lower dining table and chairs define a more formal eating space. This creates a highly functional, hotel-lounge feel. The consistent color palette of beige, grey, and white across both zones is key to making the open space feel cohesive rather than chaotic. The three identical gold-framed clocks act as a stylish, repetitive art element that ties the zones together visually.
|
📋 Copy HEX 🔗 Share |
When you have a long, rectangular basement, a chair rail is your secret weapon. Installing one, as seen here, breaks up the visual height of the walls, preventing that ‘bowling alley’ effect. For basements with standard 8-foot ceilings, the ideal height for a chair rail is between 30 and 34 inches from the floor. Paint the area below the rail in a slightly darker shade than the top to add depth, or paint the chair rail and the wall the same color for a more subtle, textural look.
7. Strategic Layouts for Boosting Home Value
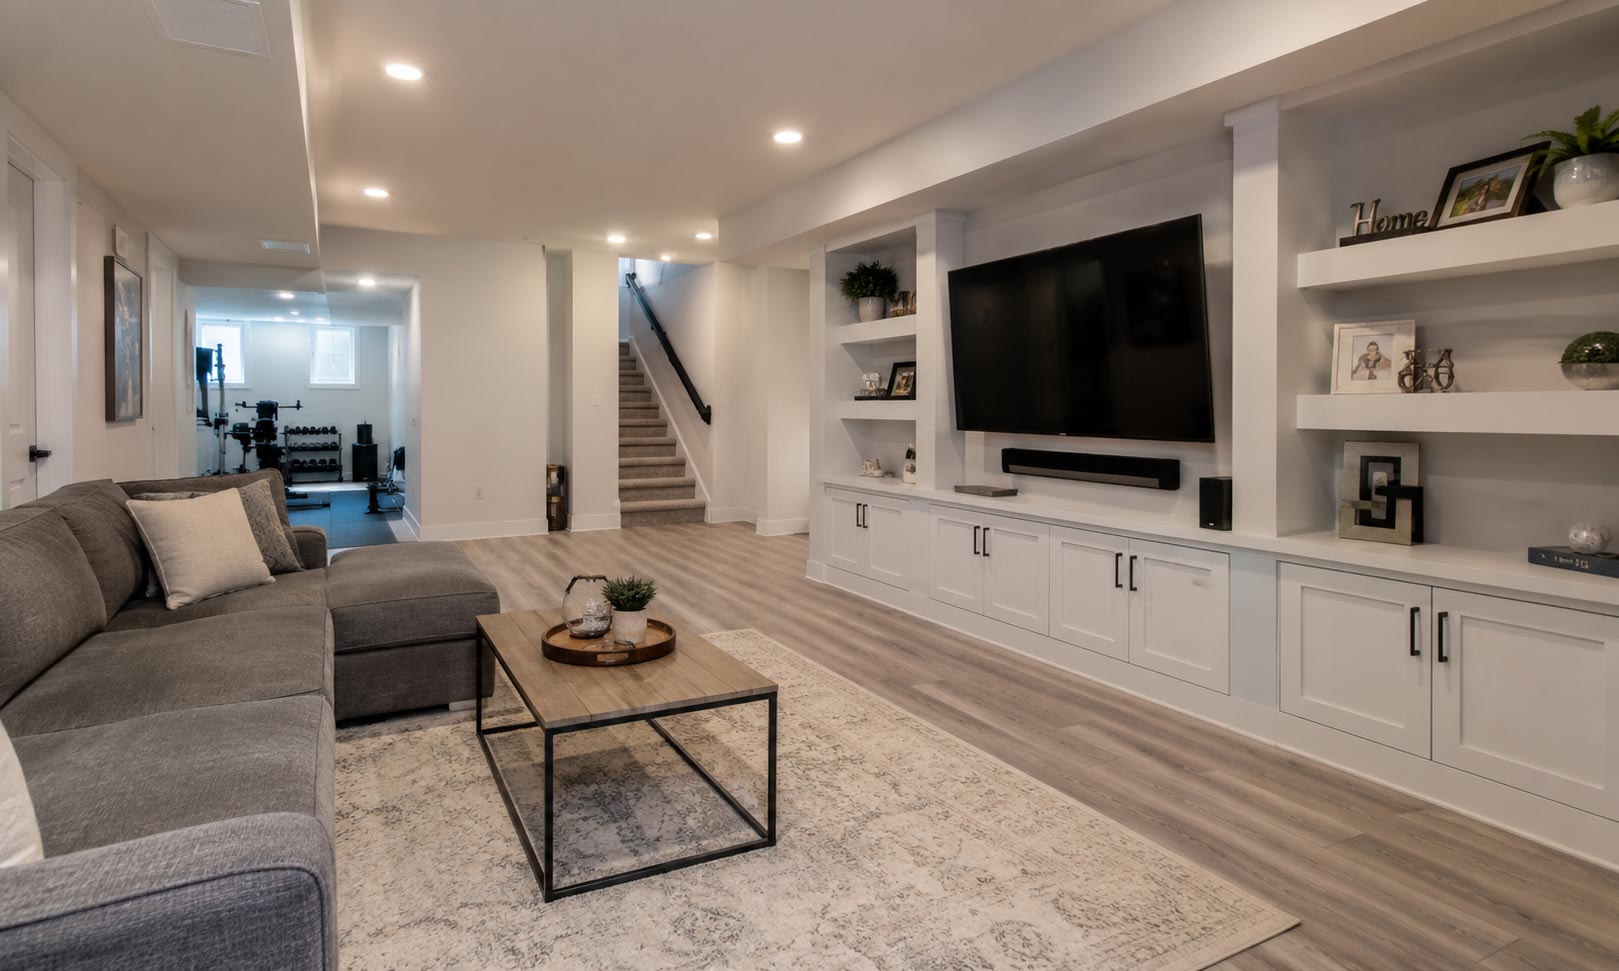
A smart layout isn’t just about looks; it’s about return on investment. This concept works best in basements with at least 600 square feet and a clear, open floor plan. To maximize value, you must create defined, functional zones. A great starting point is a 50/30/20 split: 50% for a primary living/media area, 30% for a secondary function like a home gym or office, and 20% for a wet bar and storage. This layout appeals to the widest range of potential buyers by showcasing how the space can adapt to different needs.
|
📋 Copy HEX 🔗 Share |
framing walls, run through this quick checklist to ensure your layout plan is solid:
- Measure Everything Twice: Note the location of support columns, pipes, ductwork, and the furnace. Plan your layout around these immovable objects.
- Map Your Footpaths: Use painter’s tape on the floor to mark out furniture placement and walkways. Ensure there’s at least 3 feet of clearance for major traffic paths.
- Locate Your Egress: Identify your emergency exit window or door. Building codes require a clear path to it, which will dictate the layout of at least one wall.
- Check for Moisture: Tape a 2×2-foot square of plastic sheeting to the concrete floor and walls. If condensation forms underneath after a few days, you need to address moisture issues before any finishing.
8. Creating a Functional and Stylish Basement Space
One of the best tricks for designing a functional basement is to think in terms of ‘destinations.’ Instead of one big, open room, create specific zones with a purpose. For example, anchor one end with a large sectional and TV, creating a ‘media destination.’ In another corner, place a game table or a small bar to create a ‘social destination.’ Connect these zones with clear pathways and consistent flooring. This approach makes a large space feel more intimate and usable, guiding people on how to enjoy the room. It’s a simple mental shift that makes layout planning much easier.
|
📋 Copy HEX 🔗 Share |
Remember that even the most stylish basement needs to account for the unglamorous stuff. Before you fall in love with a layout, know exactly where your sump pump, water heater, and main shut-off valves are. Your final design MUST allow for easy, clear access to these components for maintenance and emergencies. Boxing them in without an access panel is a costly mistake waiting to happen. It might mean sacrificing a corner of your dream layout, but it will save you a massive headache down the road.
9. Relaxed Media Room with a DIY Cinder Block Console
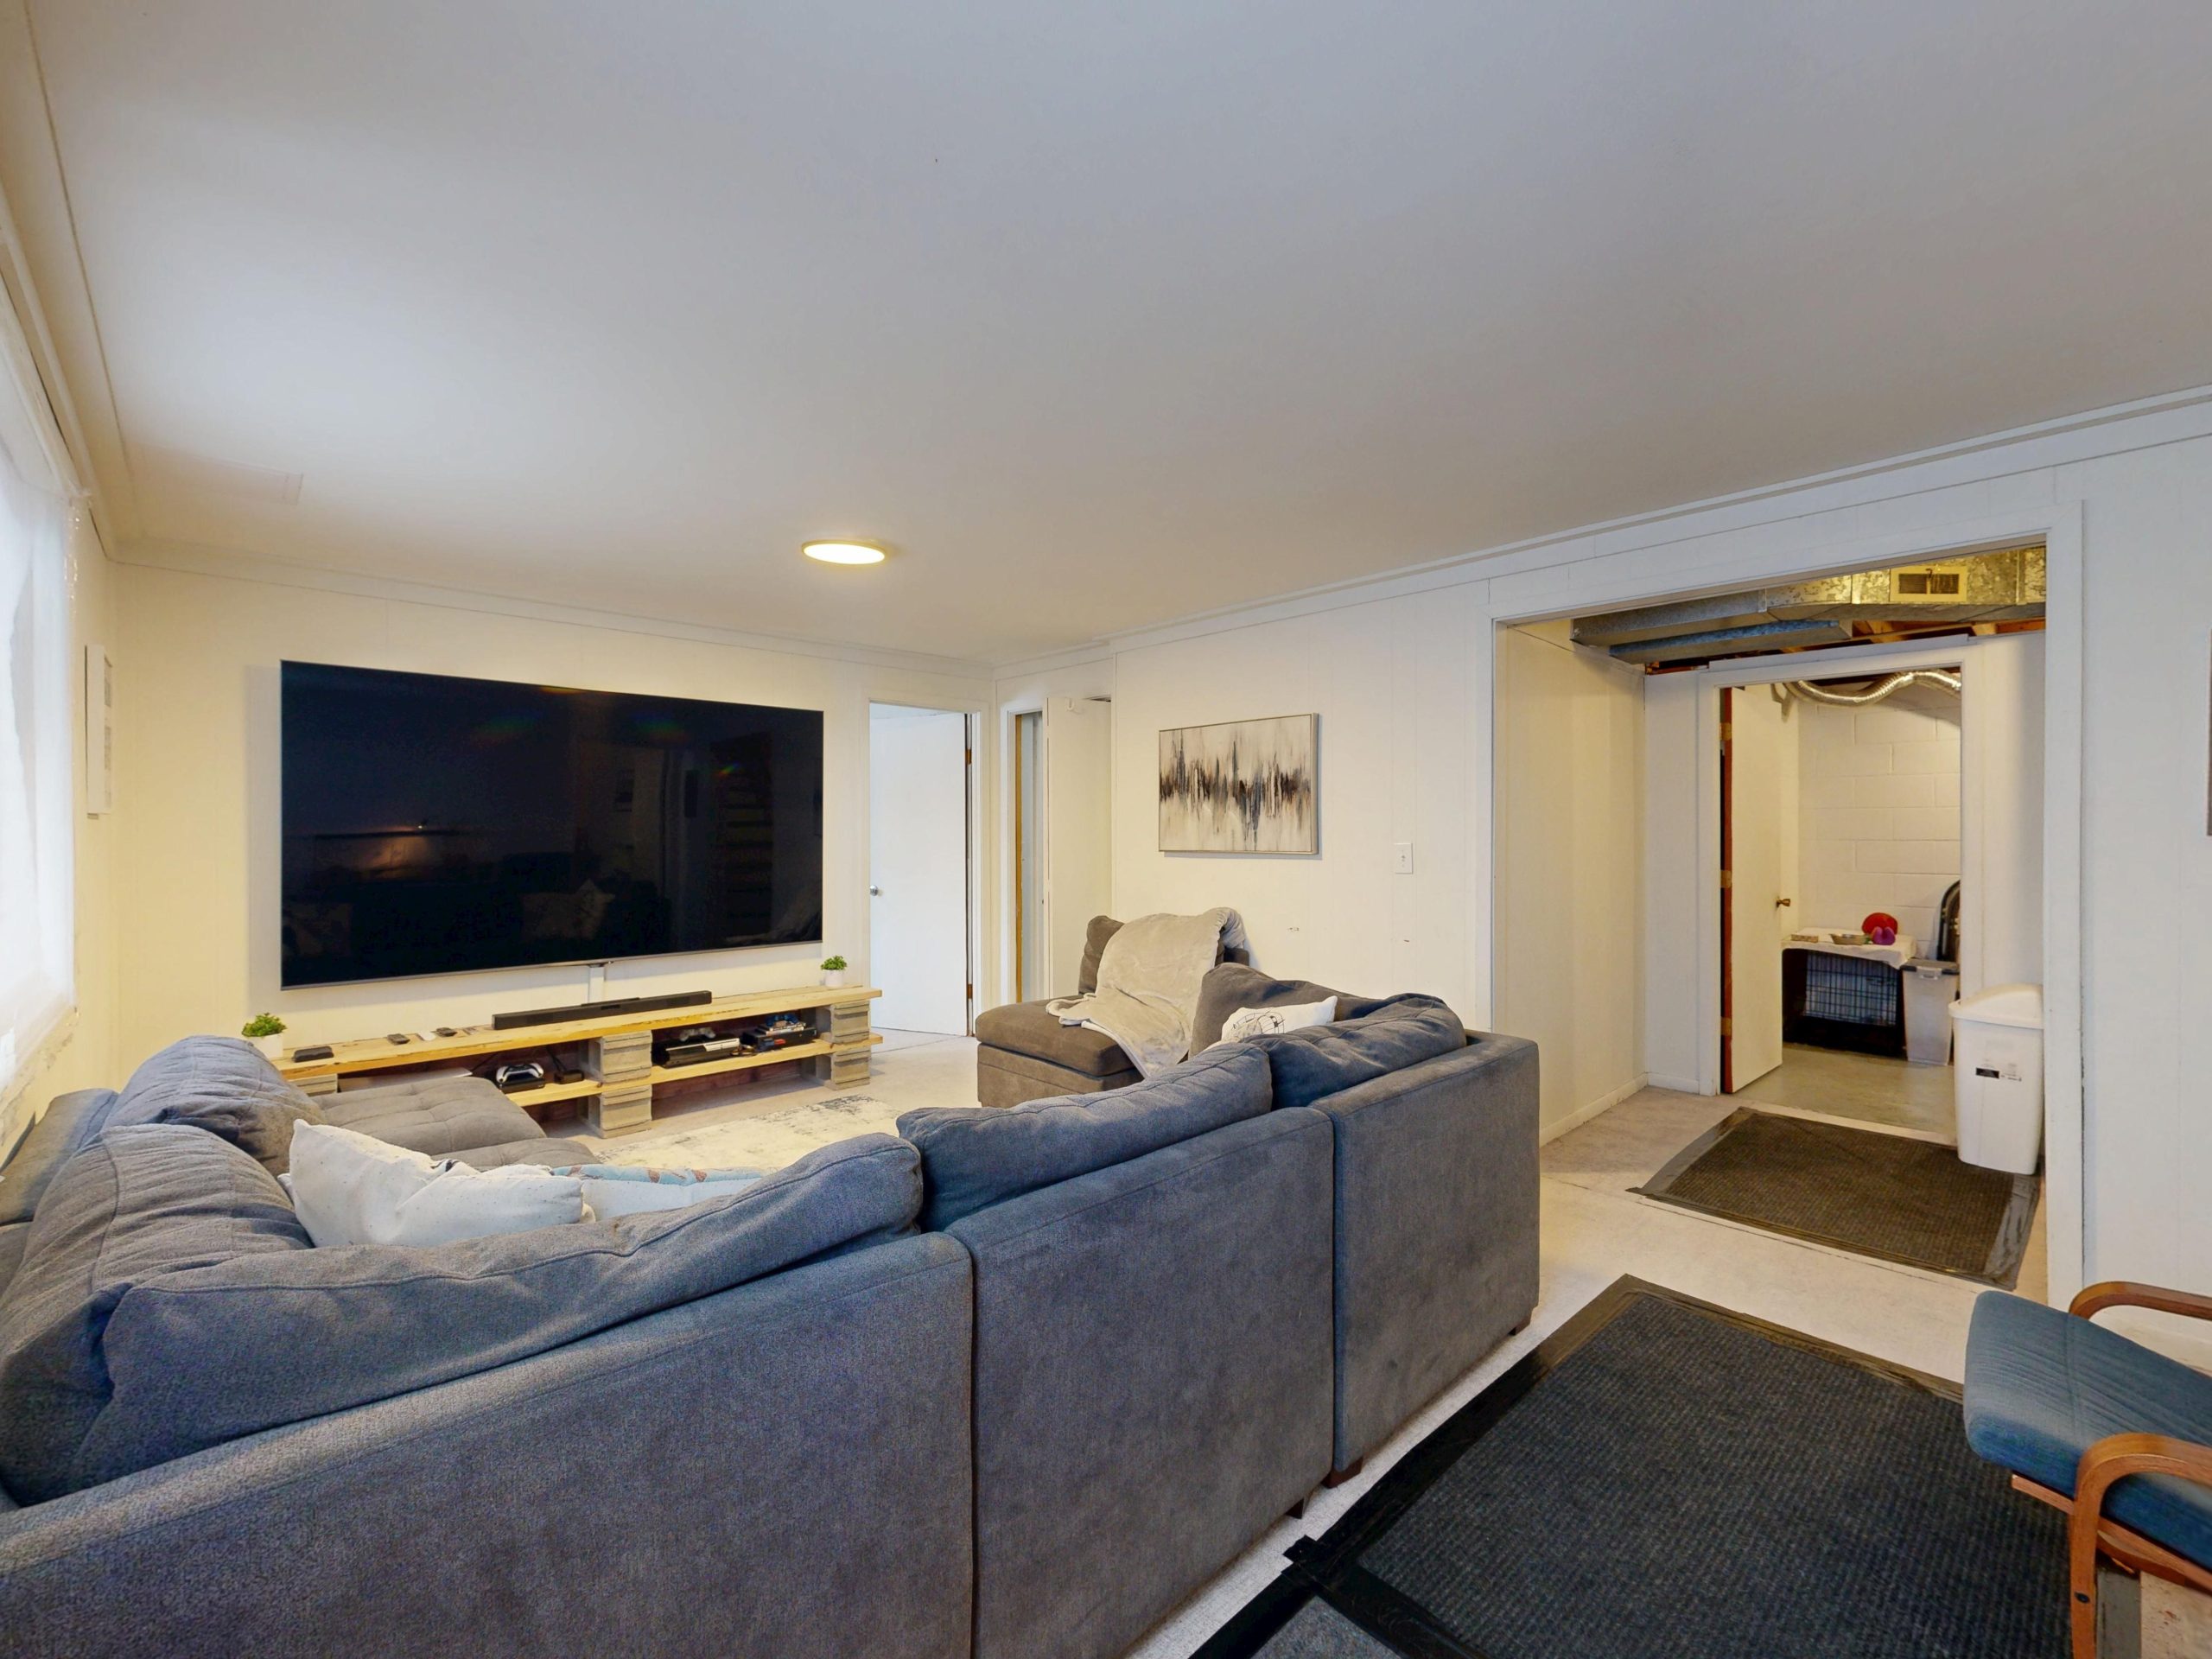
The star of this room, without a doubt, is the DIY television stand. It’s a genius move that injects a huge dose of personality and industrial edge into an otherwise simple, cozy space. Removing it would leave you with a generic sectional-and-TV setup. This stand proves that you don’t need expensive furniture to make a statement. It’s a conversation starter that shows creativity and resourcefulness, setting the tone for the entire room as a relaxed, unpretentious, and personal hangout spot. The raw texture of the cinder blocks is a perfect contrast to the soft sofa.
|
📋 Copy HEX 🔗 Share |
This entire look is incredibly budget-friendly. The sectional is a standard gray model you can find at any value furniture store or even secondhand. But the real savings are in the details. The TV console costs less than $100 to make with blocks from Home Depot and some stained pine boards. The abstract art could be a DIY canvas painting project. By focusing on a few impactful, low-cost elements like these, you free up budget for something more important, like comfortable seating or a larger TV. This is a great alternative to the built-in bar seen in Idea #14.
10. Sophisticated Bar with Dark Wood and Architectural Arches
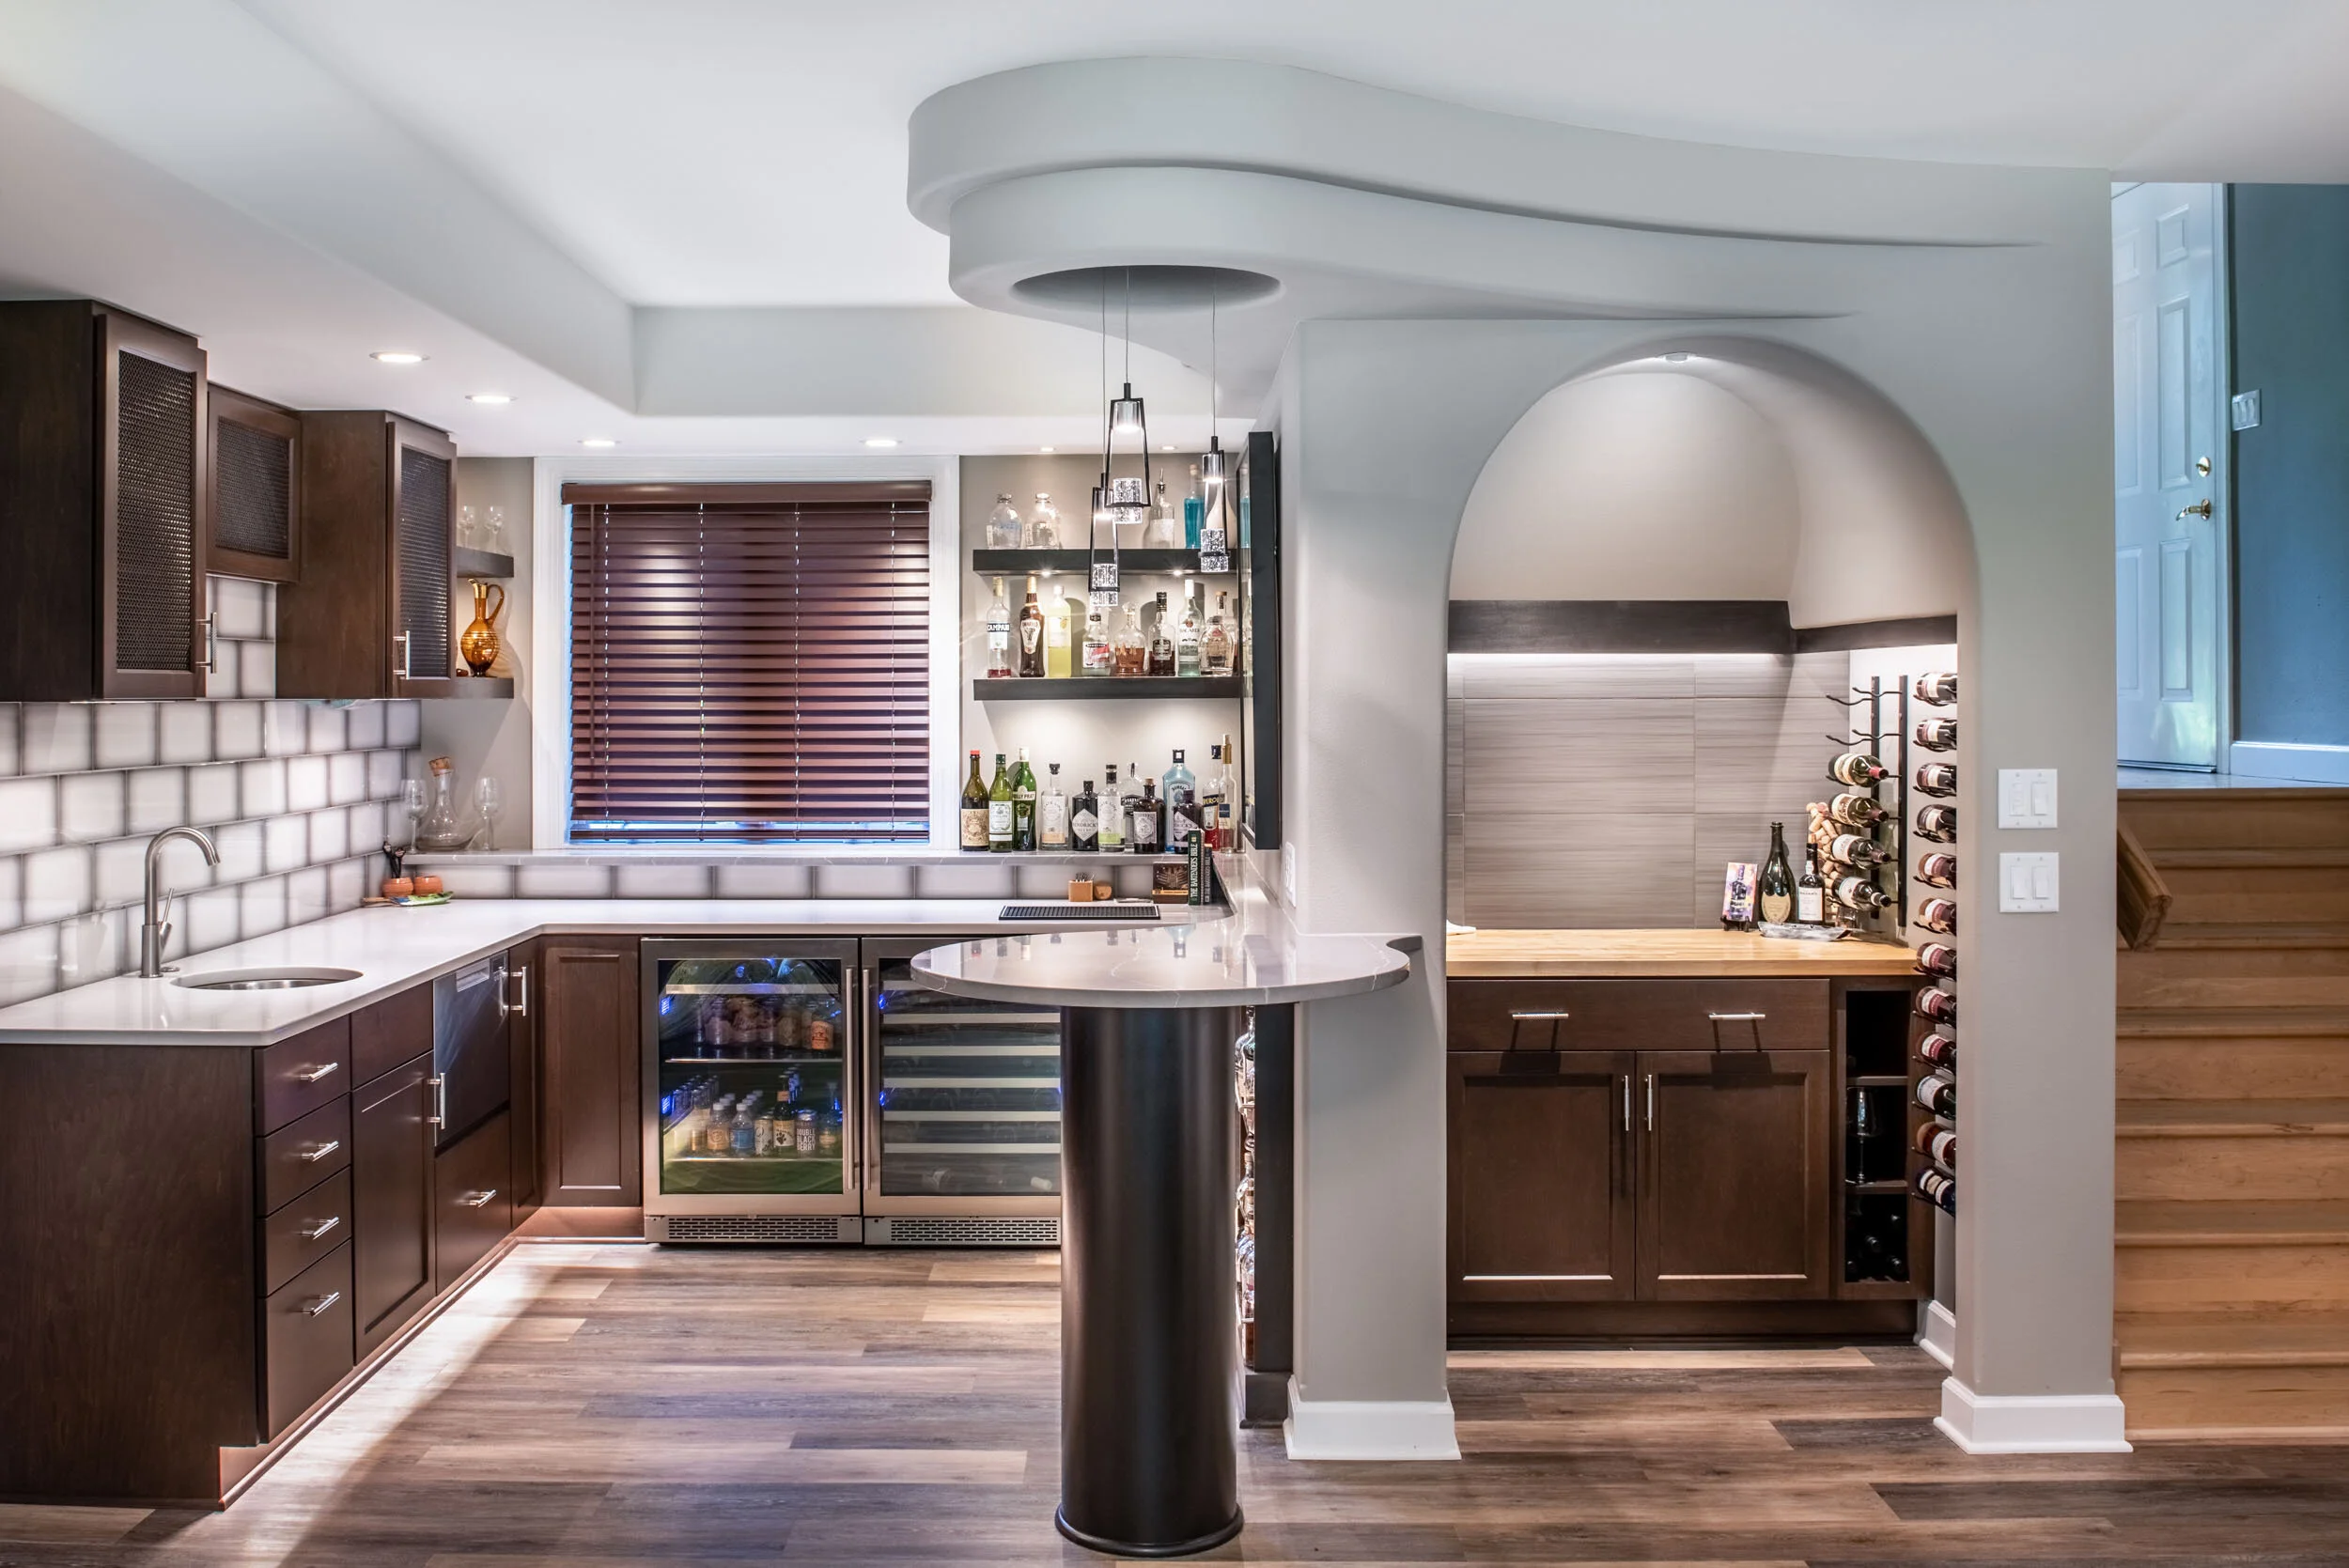
The success of this design lies in its repetition of shapes and sophisticated lighting. The prominent archways are echoed in the curve of the bar table and even the rounded edges of the countertops, creating a sense of rhythm and architectural harmony. This isn’t a collection of random parts; it’s a thoughtfully composed space. The lighting is layered beautifully, with recessed lights for general ambiance, task lighting under the cabinets, and accent lighting within the wine rack arch to turn it into a glowing feature.
|
📋 Copy HEX 🔗 Share |
A full bar with integrated appliances like this requires mindful upkeep. The white countertops, while beautiful, will be prone to staining from red wine or citrus. Keep a good stone-safe cleaner on hand and wipe up spills immediately. The mesh inserts in the cabinetry look great but will collect dust more than solid doors; plan to vacuum them with a brush attachment monthly. Also, remember to pull out the under-counter refrigerators once or twice a year to clean the coils, ensuring they run efficiently and last longer.
11. Modern Entertainment Lounge with a Full Wet Bar
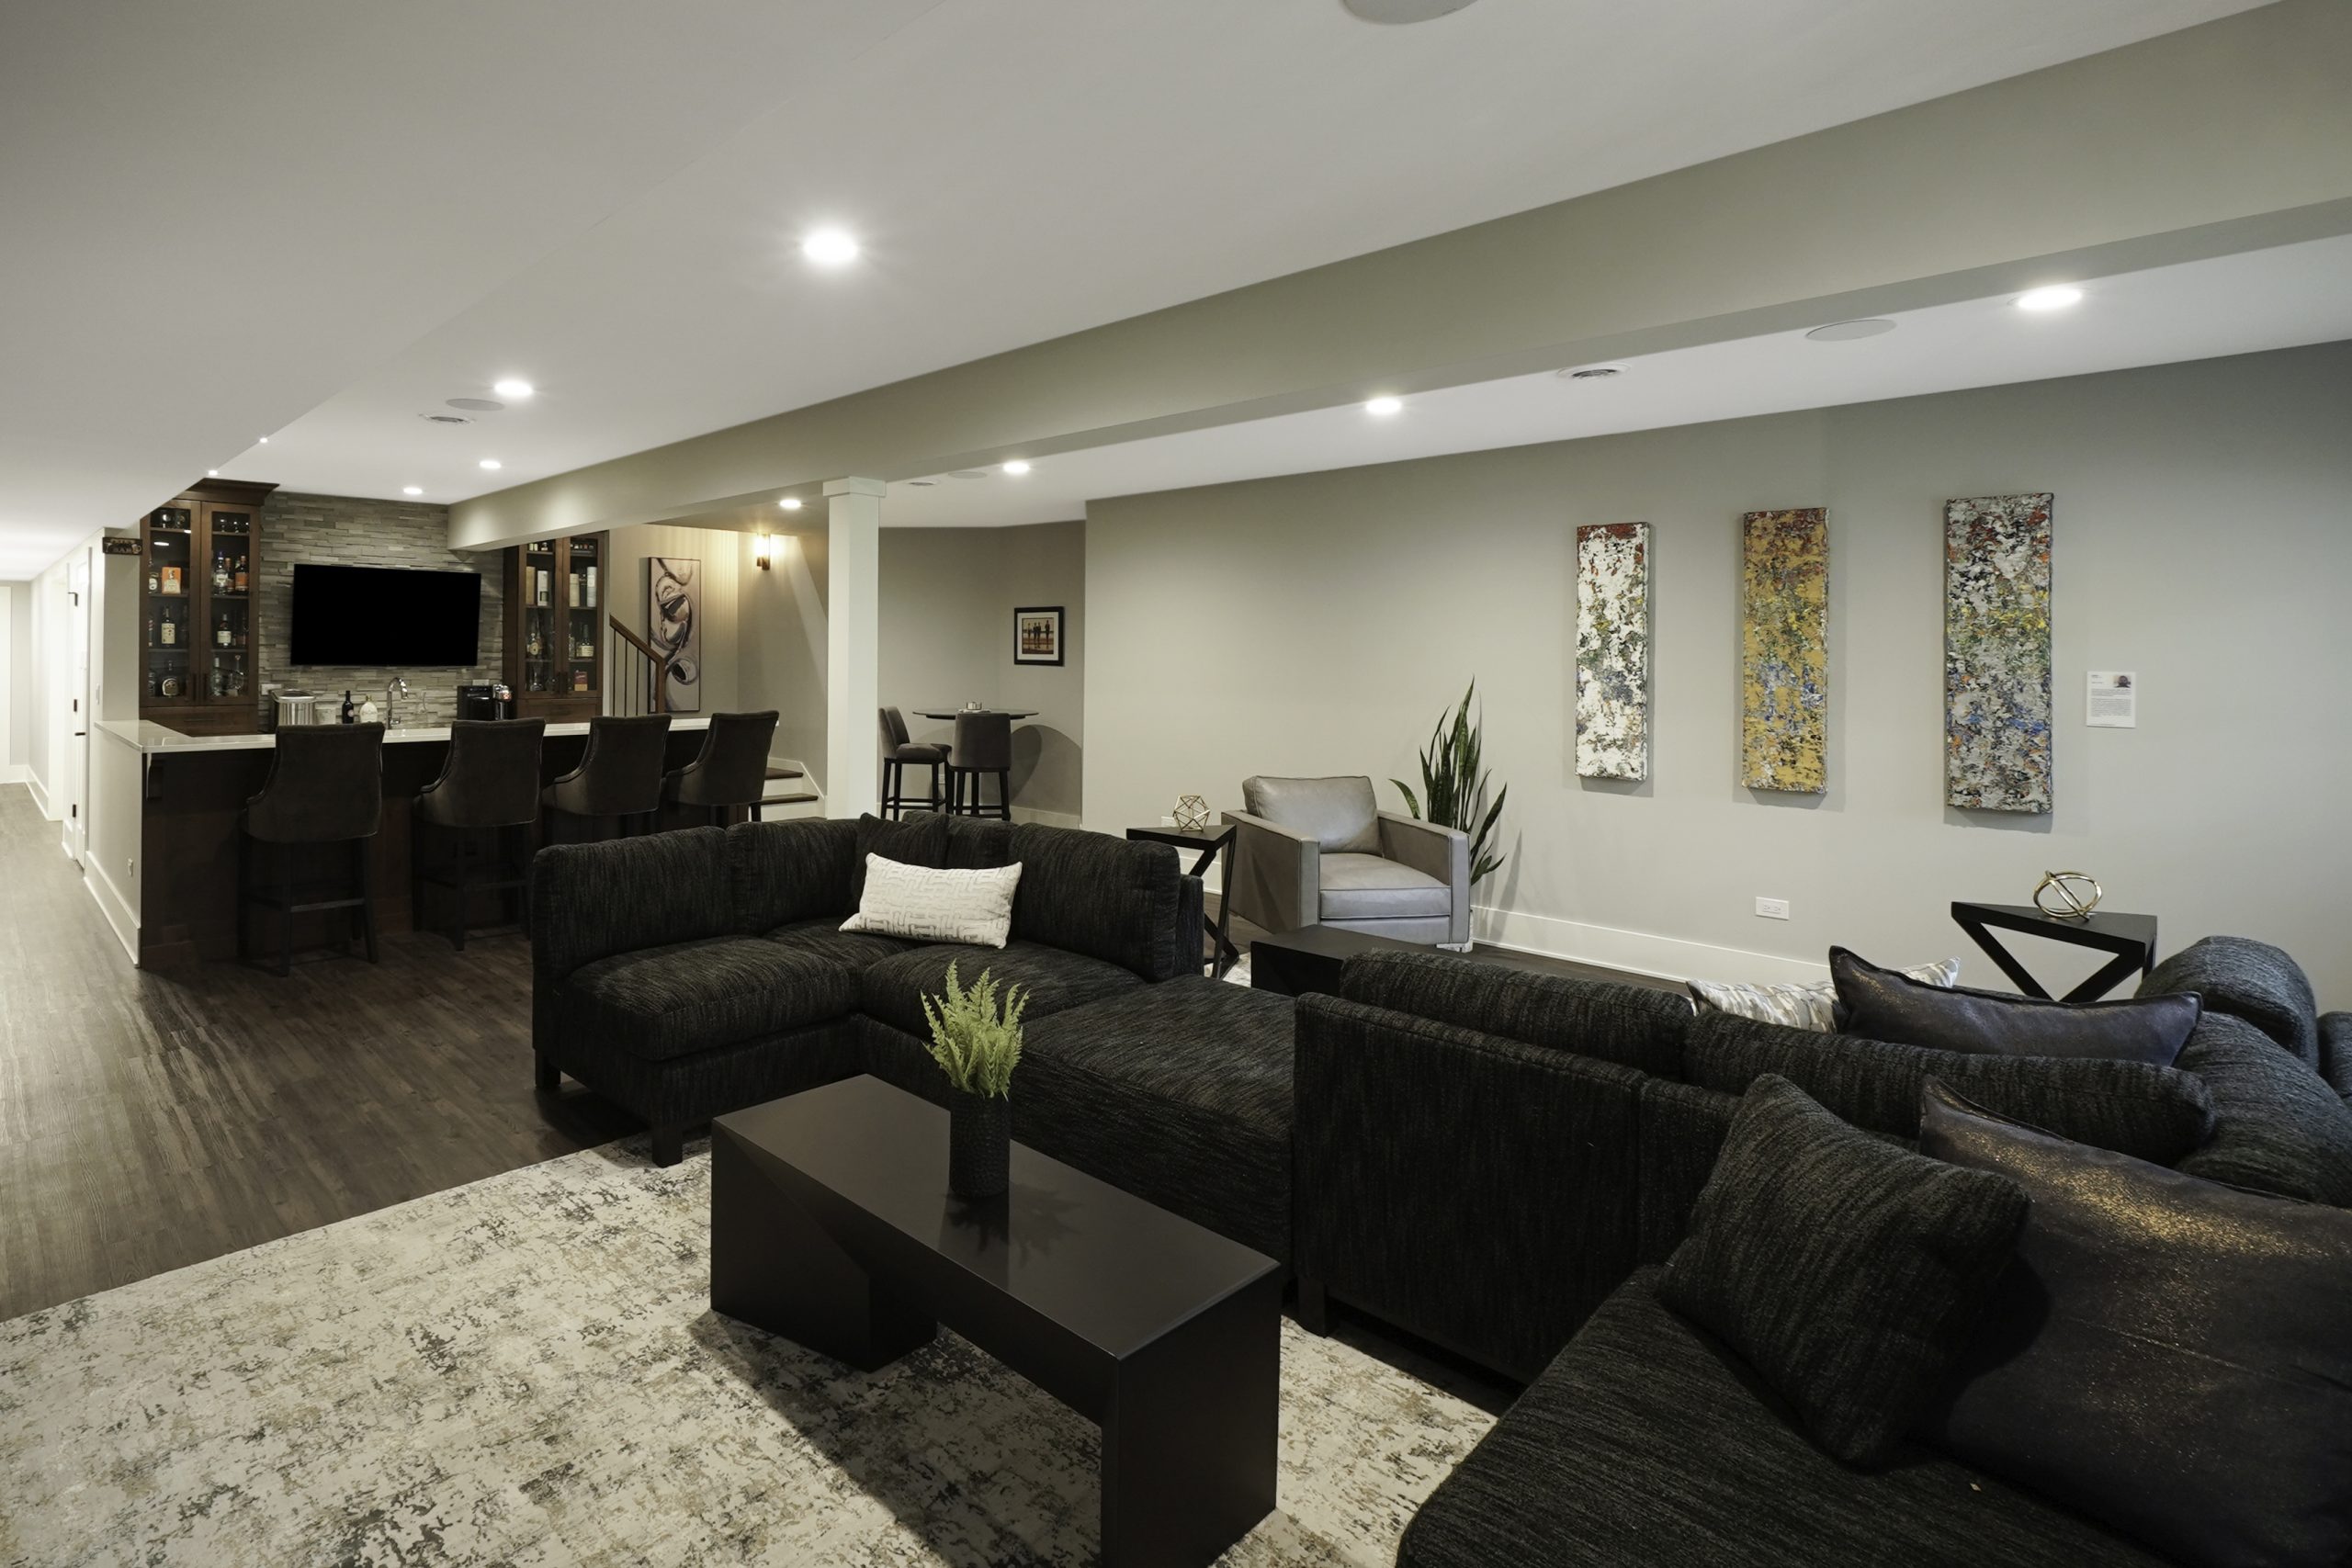
This basement achieves a balanced, modern feel by following a clear material formula: 50% soft textures, 30% dark wood, and 20% rugged stone. The soft elements—the dark sectional sofa and the large gray rug—create a comfortable, inviting lounge core. The dark espresso wood of the bar and sofa frame provides a sleek, contemporary structure. Finally, the stacked stone accent wall behind the bar introduces a raw, textural element that prevents the design from feeling too flat or one-note. It’s a perfect recipe for a space that’s both cozy and chic.
|
📋 Copy HEX 🔗 Share |
A multi-zone setup like this demands significant square footage. To comfortably fit both a full-sized sectional lounge and a functional wet bar of this scale, you’ll need a rectangular space that is at least 18 feet wide and 30 feet long. This allows for ample seating, a proper bar with back-wall clearance, and a comfortable 4-foot walkway between the two zones. Trying to cram this into a smaller footprint will result in a space that feels cramped and awkward, where the two zones are competing instead of complementing each other.
12. Sports-Themed Rec Room with a Reclaimed Wood Ceiling
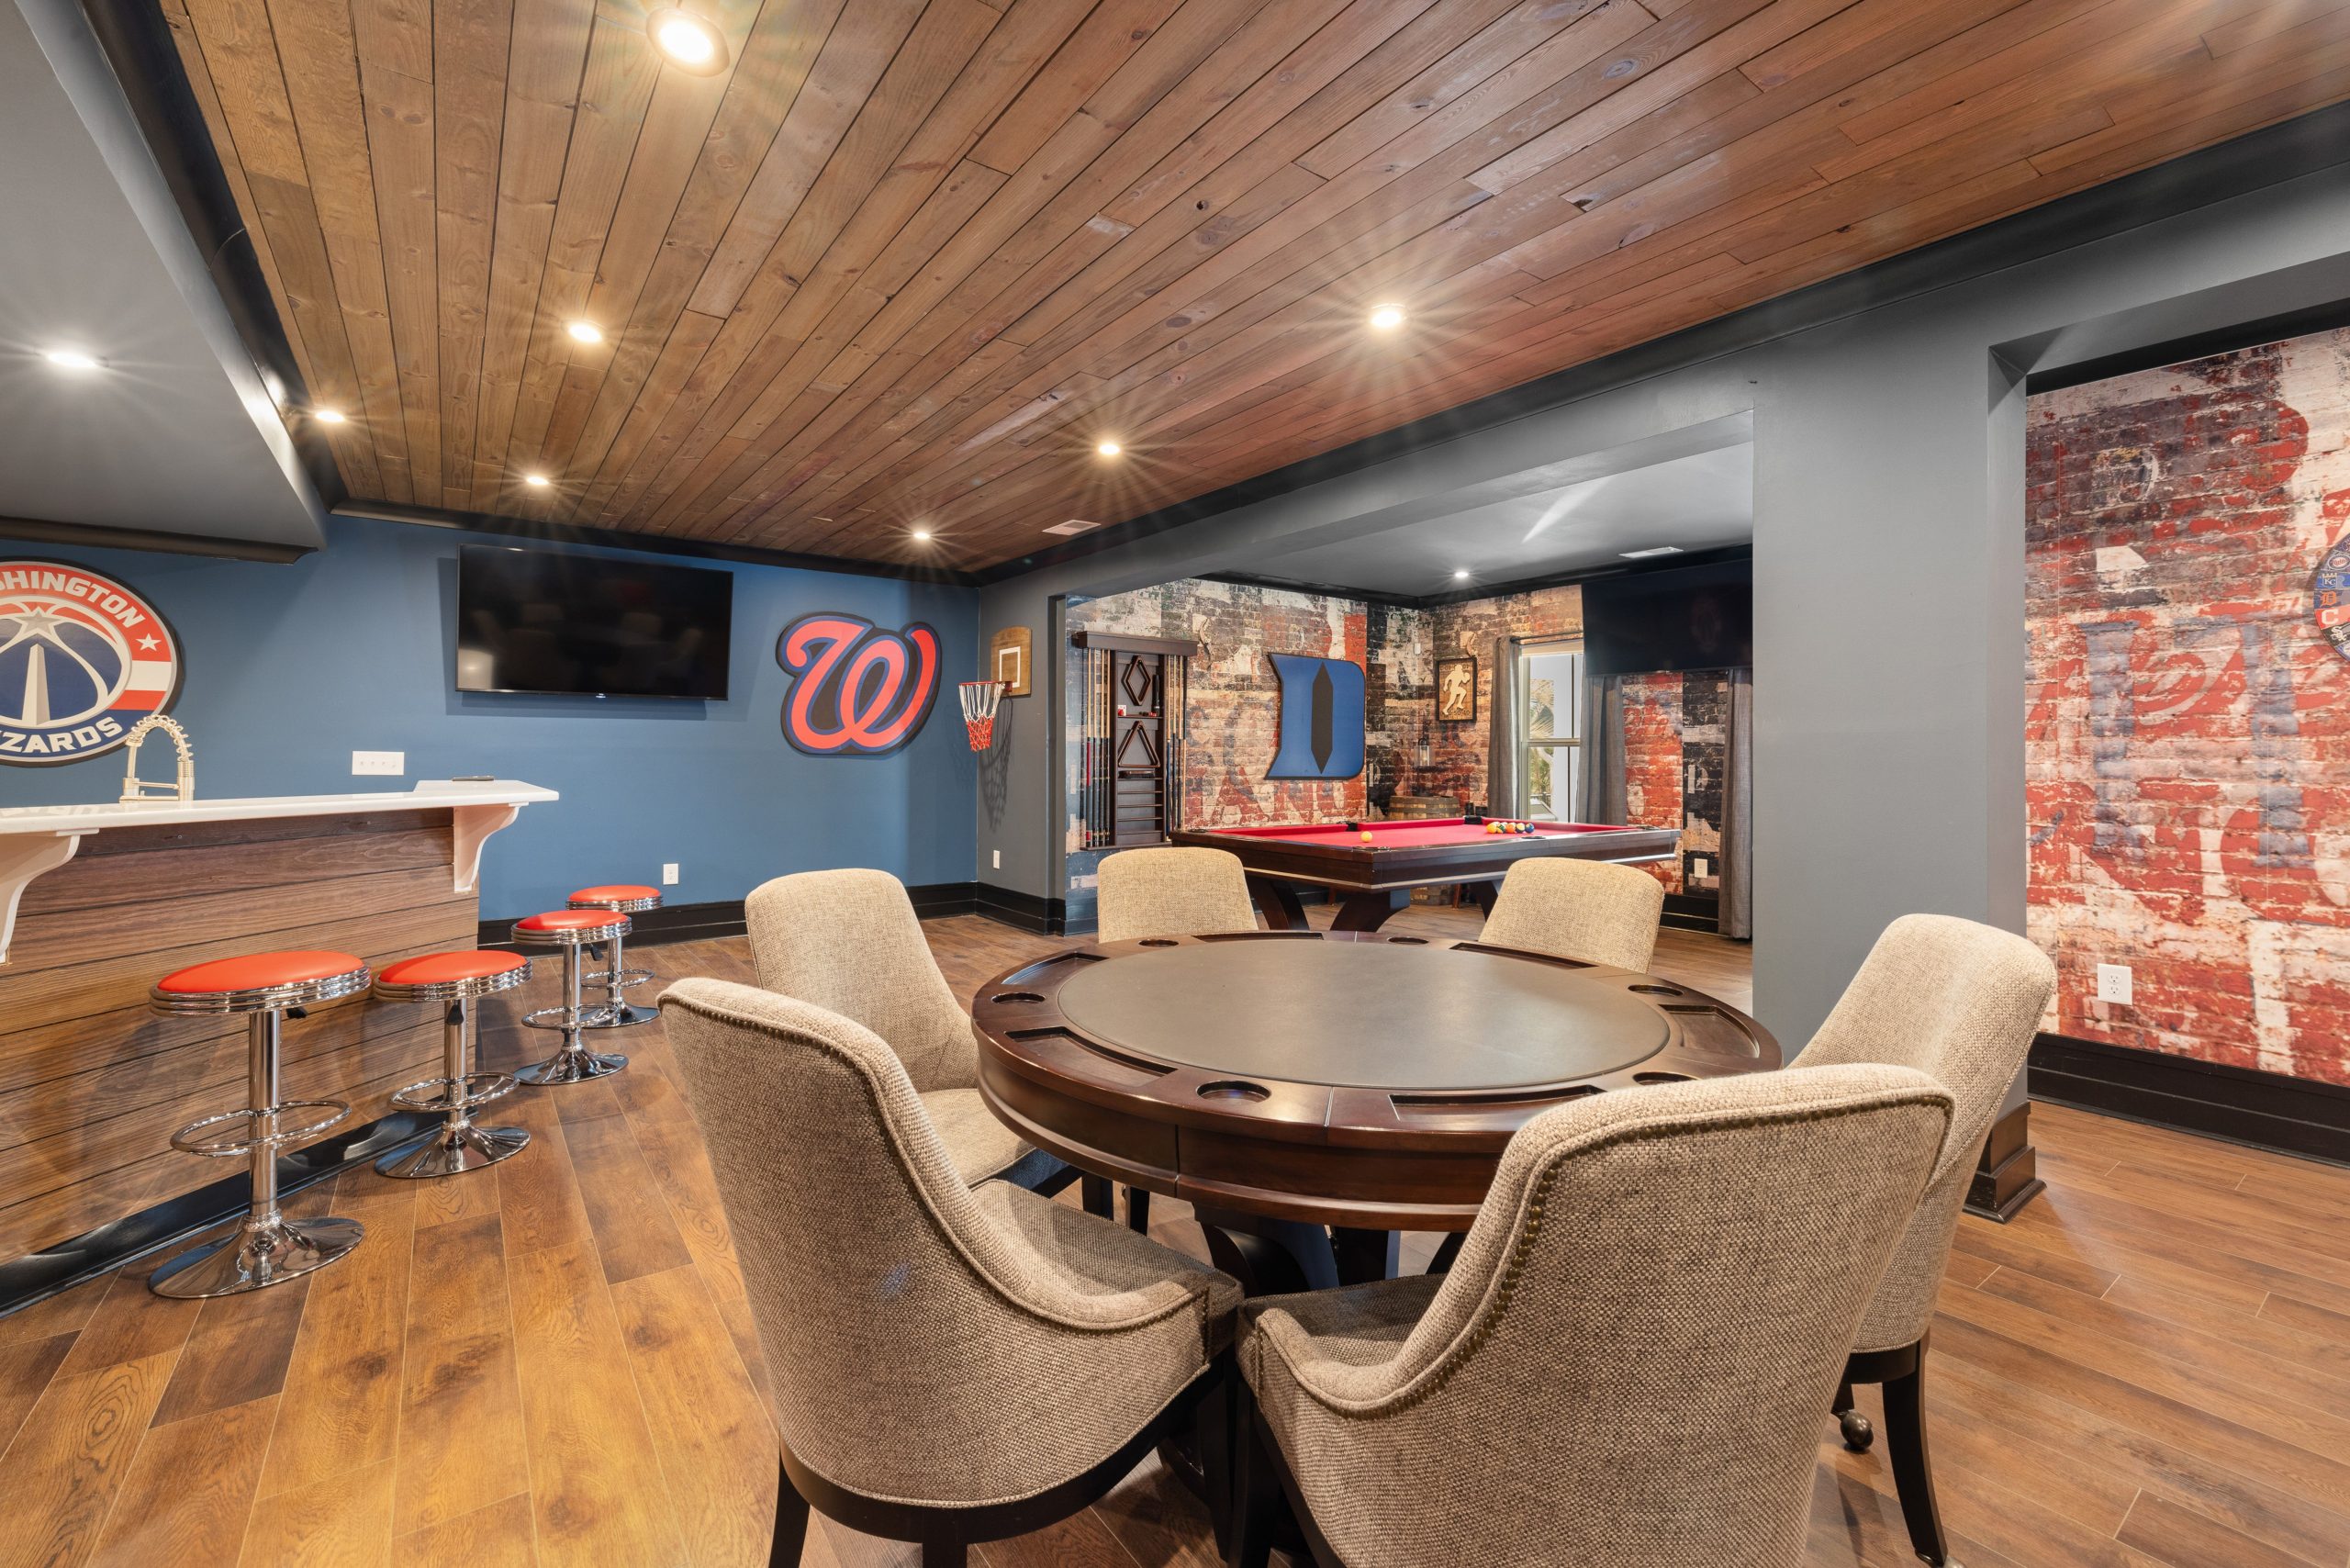
The single element that elevates this basement from a typical fan cave to a design-forward space is the slatted wood ceiling. It brings an incredible amount of warmth and texture, balancing the bright blue walls and sports logos with a touch of rustic sophistication. If you replaced it with a standard drywall or drop ceiling, the room would lose its architectural soul. It draws the eye upward, makes the recessed lighting feel more integrated, and provides a rich, cohesive element that ties the bar, game table, and lounge areas together.
|
📋 Copy HEX 🔗 Share |
Man caves and fan zones are evolving. In 2026, it’s less about just plastering logos everywhere and more about integrating team spirit into a genuinely well-designed room. This space is a perfect example. It uses the team color (that bold blue) as a legitimate design choice and balances it with mature, rustic materials like the wood ceiling and brick accent wall. It’s a space that says ‘I love my team,’ but also ‘I have great taste.’ This elevated approach is what people are pinning now—it feels more permanent and stylish.
13. Cozy Lounge with Navy Bar and Floating Gallery Shelves
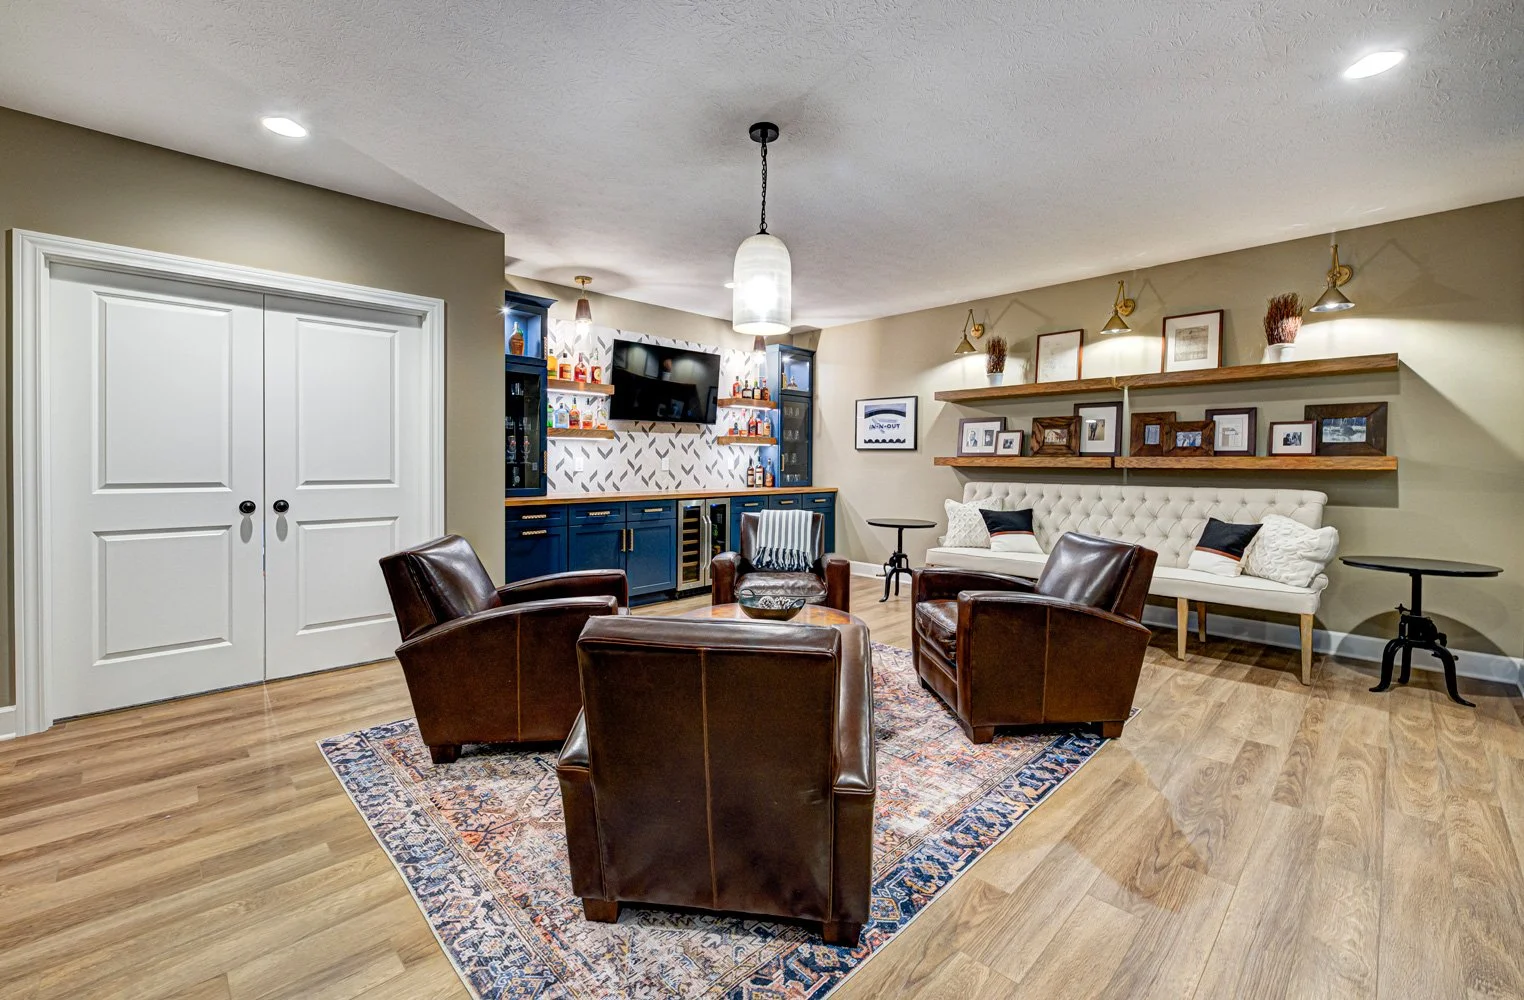
When creating a gallery wall with floating shelves, the trick is to vary the height, depth, and spacing. Don’t just line them up in a perfect grid. Here, the shelves are staggered, creating a more dynamic and organic feel. To get this right, plan your layout on the floor first. Mix objects of different scales: a few large art prints, some smaller personal photos, and a handful of decorative objects. Maintain a consistent color palette within the items to keep the collection from looking cluttered. The navy, cream, and warm wood tones here are a perfect example.
|
📋 Copy HEX 🔗 Share |
Here’s how to create that inviting, conversation-focused seating arrangement. Time: 30 minutes. Cost: Free (with existing furniture).
- Start with your area rug. It’s the foundation that defines the zone. For four armchairs, you’ll want at least an 8×10-foot rug.
- Place the four armchairs so their front legs are all on the rug. This visually connects them.
- Angle the chairs slightly toward each other to create a circular, inward-facing orientation. You’re encouraging conversation, not staring at a TV.
- Ensure there’s about 4-5 feet of space in the center. Don’t place a coffee table; the negative space is what makes it feel open and easy to walk through.
- Make sure each chair has access to a small side table for drinks. The arrangement should feel both intimate and practical.
14. Navy Wet Bar with Herringbone Backsplash and Gold Hardware
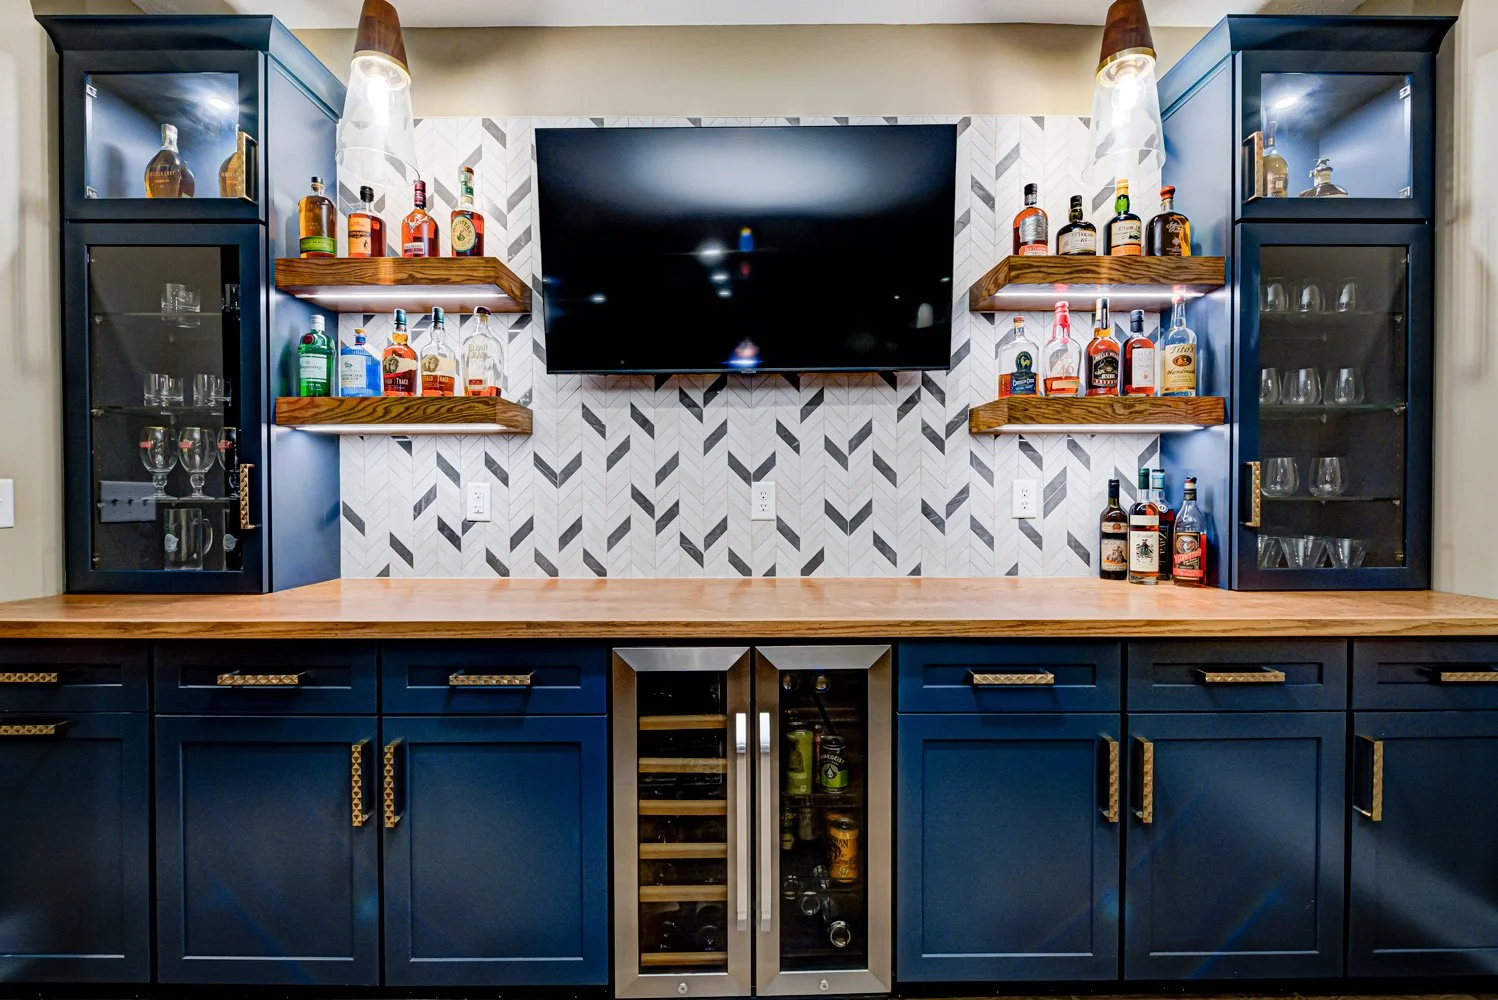
Achieving this sophisticated, high-contrast bar look involves investing in key finishes. The cost is driven by the semi-custom cabinetry, quality countertops, and designer-look details like the backsplash and hardware.
|
📋 Copy HEX 🔗 Share |
- Navy Blue Cabinetry (semi-custom): $3,000 – $6,000
- Light Wood Countertop (butcher block): $600 – $1,200
- Herringbone Tile & Installation: $800 – $1,500
- Floating Shelves with LED Lighting: $400 – $900
- Under-Counter Beverage Fridges (2): $1,000 – $2,500
- Gold Cabinet Hardware: $200 – $400
- TOTAL: $6,000 – $12,500
Budget alternative: Get this look for under $3,000 by using IKEA cabinets painted navy blue, a laminate countertop, peel-and-stick backsplash tiles, and basic floating shelves from a big-box store.
This design is a masterclass in texture and finish mixing. You have the smooth, matte finish of the navy cabinets, the natural grain of the light wood countertop, the geometric pattern of the glossy tile, and the warm gleam of the gold hardware. Each material choice is distinct, yet they all work together. The key is the controlled color palette. By sticking to navy, wood tones, white/gray, and gold, the variety of textures feels curated and intentional rather than chaotic. The integrated lighting on the shelves is the final touch, highlighting the textures and making the display sparkle.
15. Rustic-Refined Lounge with a Stacked Stone Bar
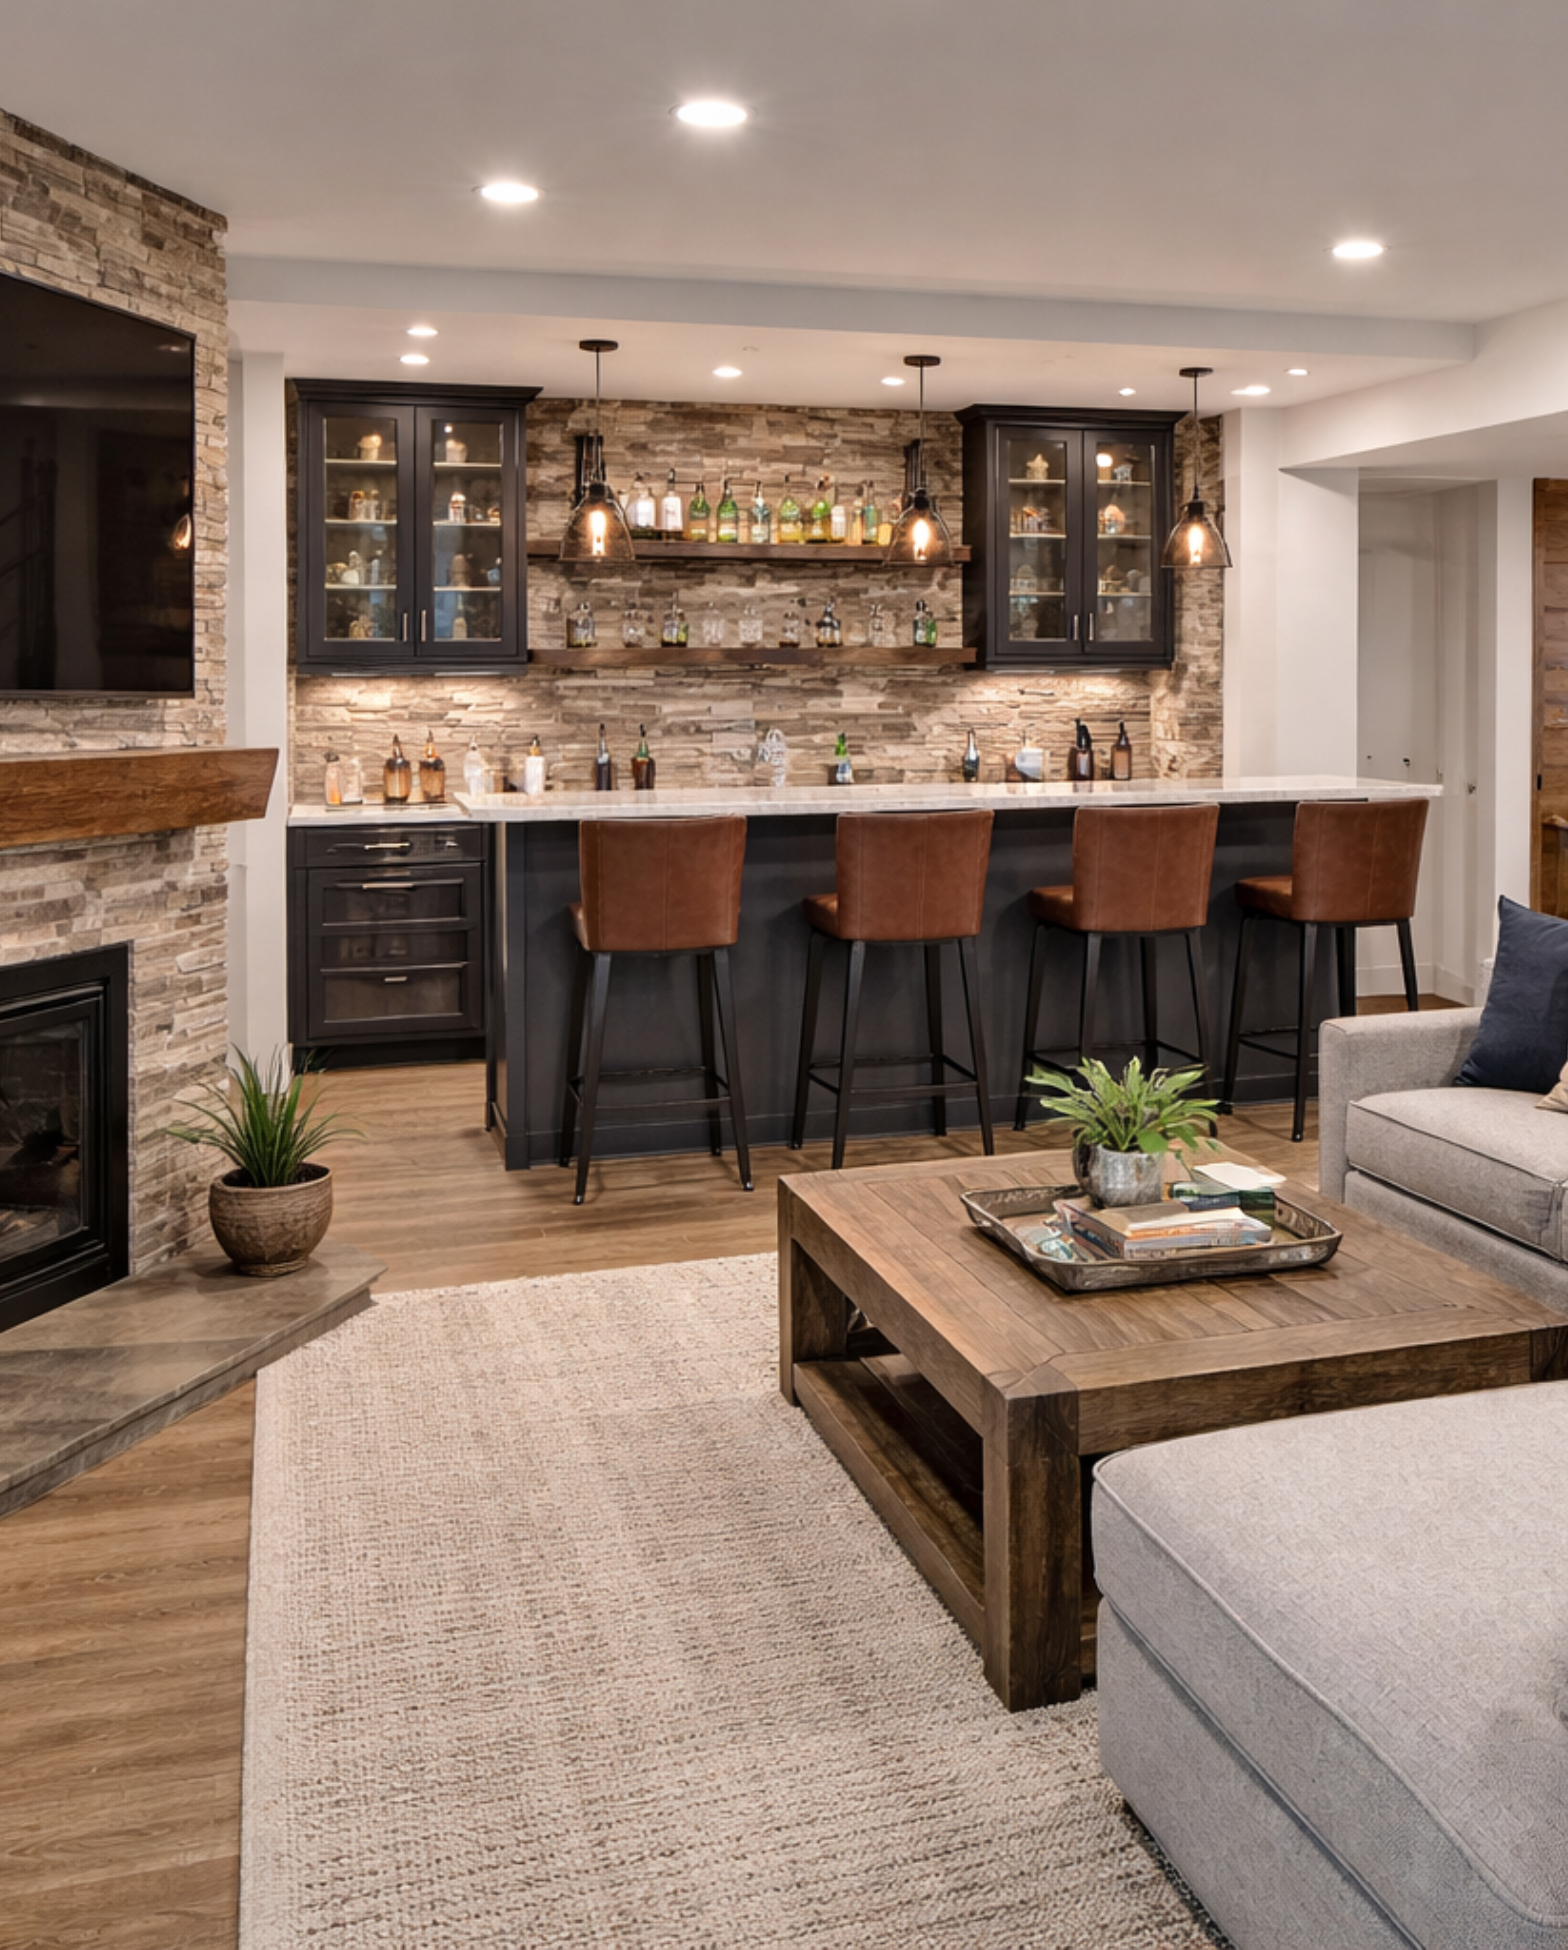
This cozy, upscale lodge aesthetic is built on a specific formula: 40% rugged texture (the stacked stone wall), 40% warm comforts (the light grey sectional, brown leather stools, and soft rug), and 20% sleek finishes (the dark wood cabinets and light marble countertop). This balance is crucial. Too much stone and it feels like a cave; too much soft upholstery and you lose the rustic edge. The sleek bar elements provide a touch of refinement that keeps the look from becoming a pastiche. It’s a great formula to follow for a warm and inviting entertainment space.
|
📋 Copy HEX 🔗 Share |
A stacked stone accent wall is a major commitment, both in budget and in style. It’s not something you can easily change in a few years if you get tired of it. Before you install one, be absolutely certain this is the look you want long-term. Also, consider the dust factor. The rough, uneven surface of stacked stone is a natural dust collector and can be tricky to clean. It requires regular vacuuming with a soft brush attachment to keep it looking fresh. It’s a beautiful feature, but it’s not low-maintenance. A similar look with less upkeep can be found in Idea #11.
16. Modern Basement with a Frosted Glass Barn Door
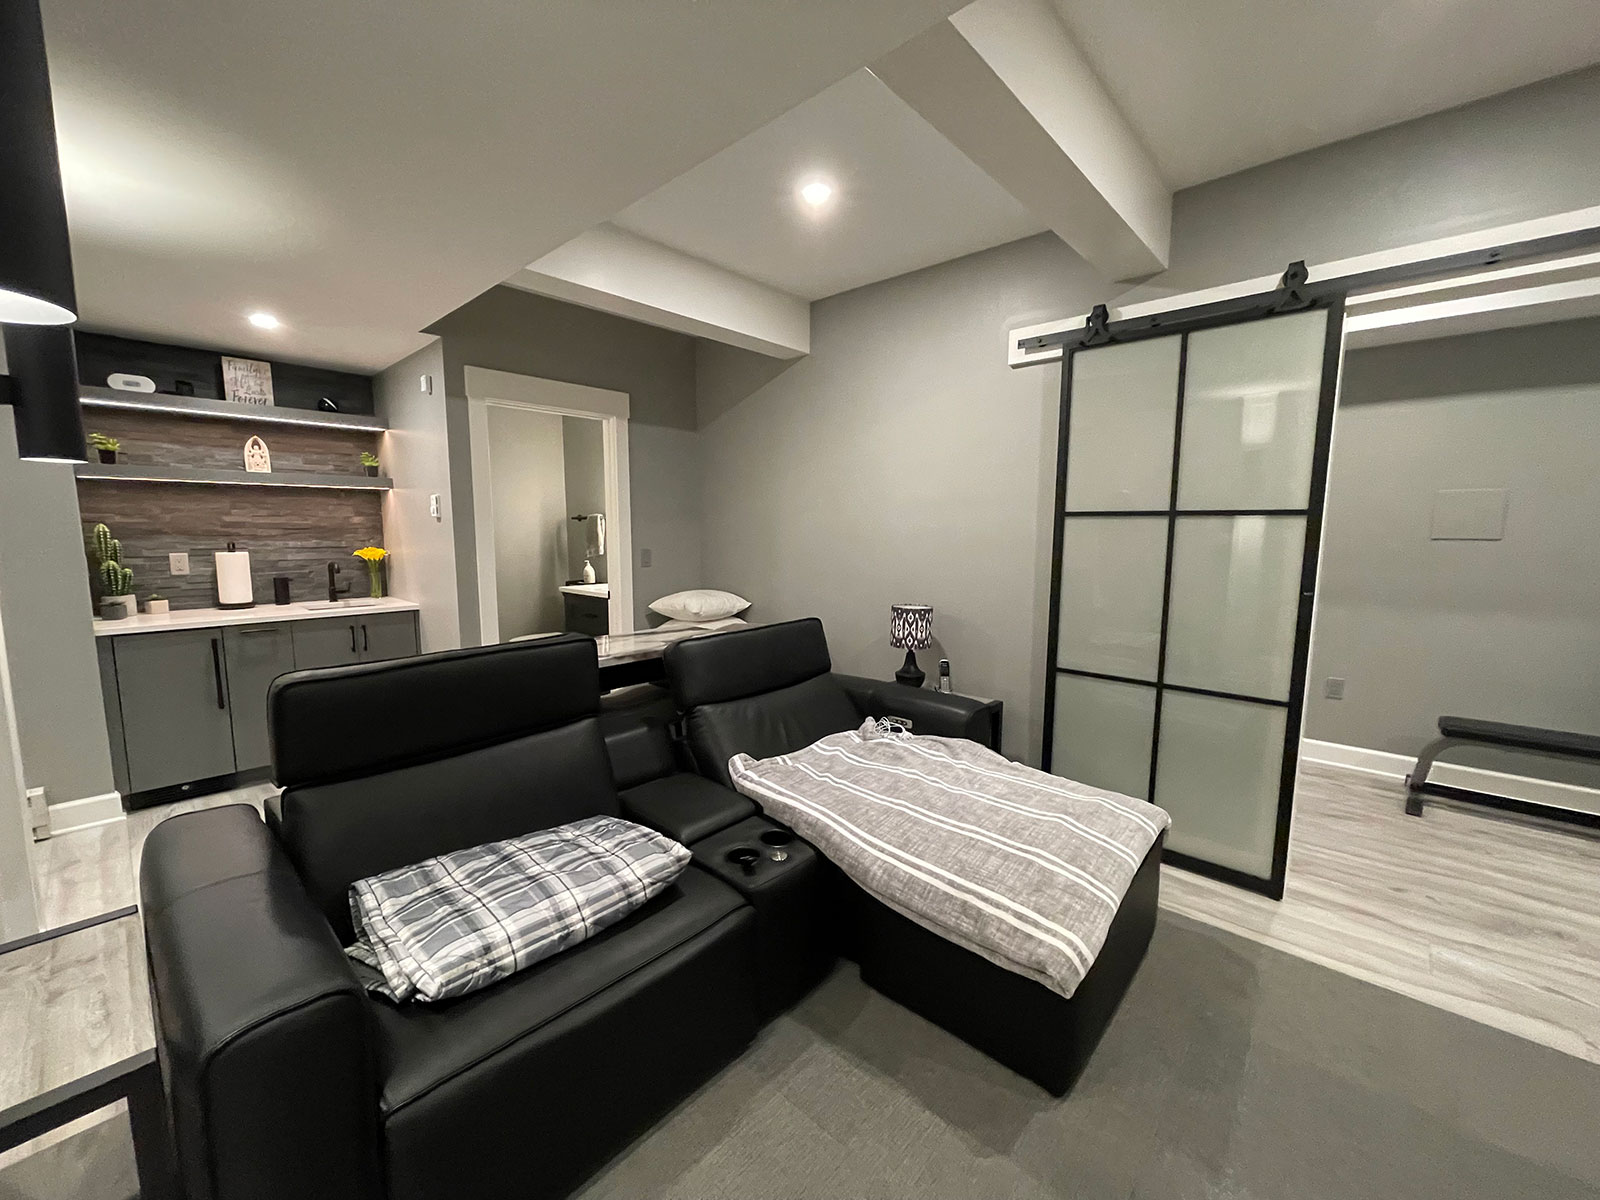
The single element that defines this room’s modern, slightly industrial character is the sliding barn door with frosted glass. It’s both a functional room divider and a major style statement. It solves the classic basement problem of needing to close off a space (like a storage room or utility area) without sacrificing light or making the main area feel smaller. The black metal hardware and clean lines are perfectly in sync with the sleek gray cabinetry and black leather sectional, tying the whole industrial-chic look together.
|
📋 Copy HEX 🔗 Share |
When installing a wet bar with wood slat accents like this, lighting is everything. The key is to wash the wall with light from above using a hidden LED strip channel. Install the channel at the top of the slat wall, aimed downwards at a slight angle. This will create a dramatic grazing effect, highlighting the texture and dimension of the wood slats. Simply using recessed ceiling lights a few feet away won’t achieve the same effect; you need the light source to be close and parallel to the surface to get that beautiful light-and-shadow play.
17. Warm and Inviting Den with Stone Fireplace and Built-ins
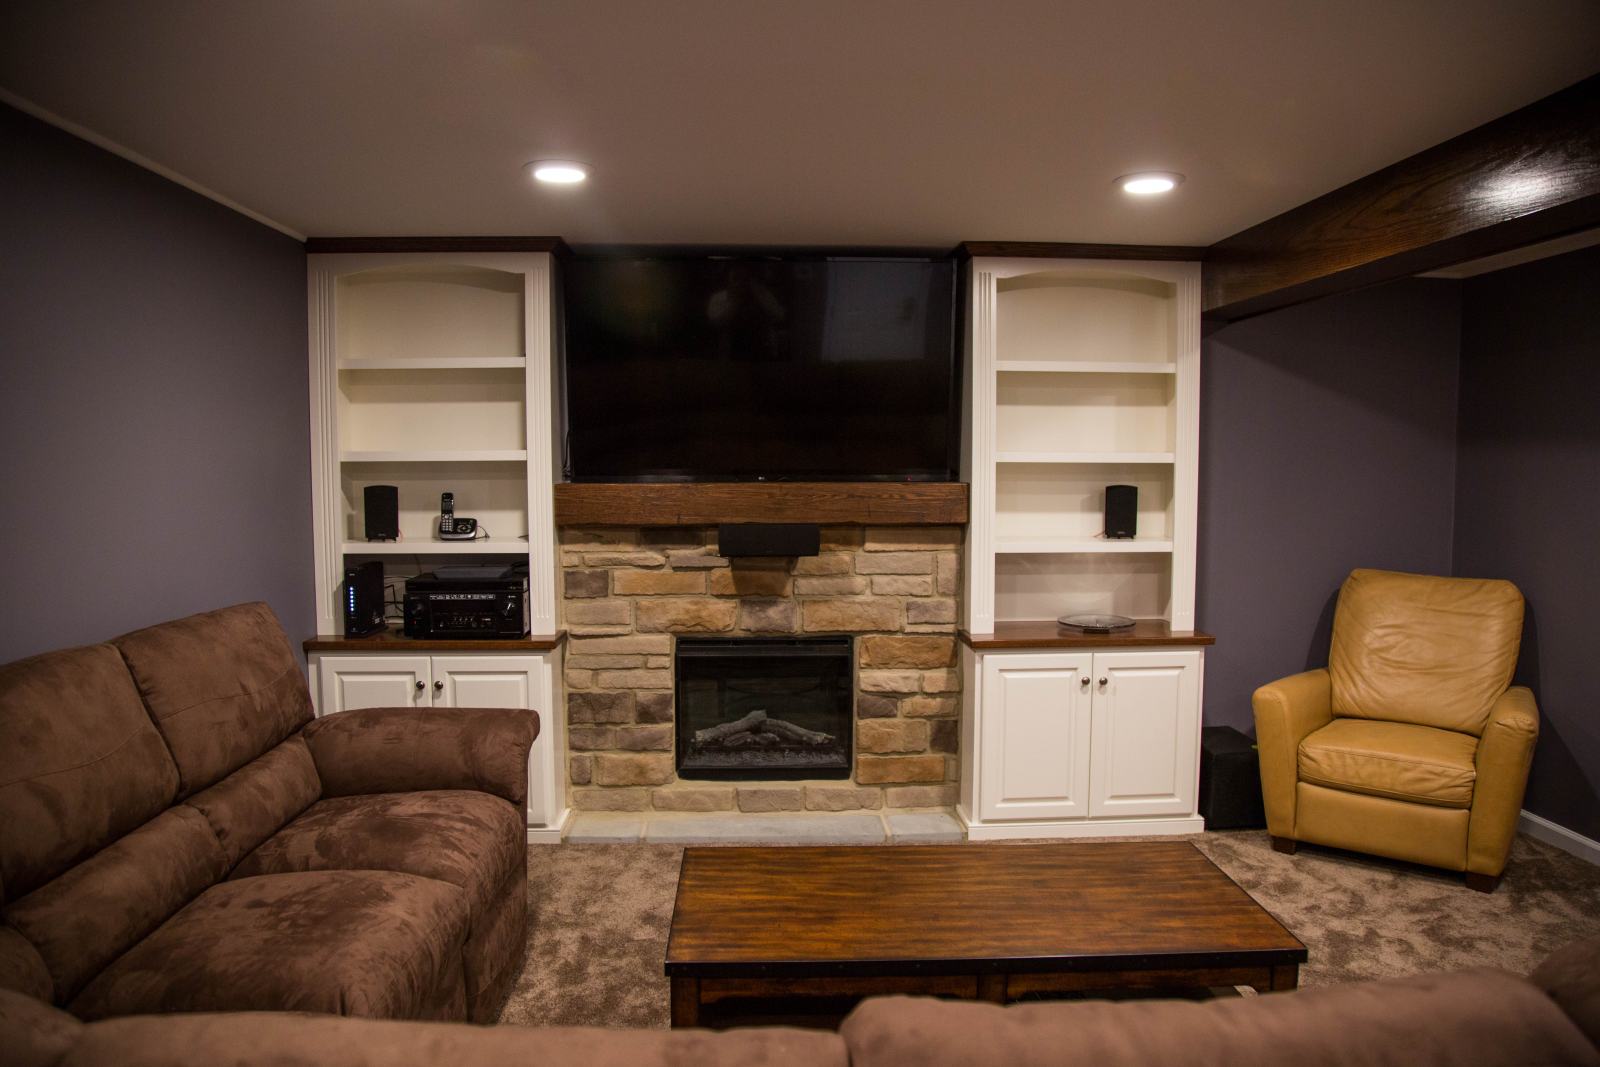
This room feels so incredibly cozy because of its masterful use of symmetry and texture. The fireplace is the undeniable focal point, and the identical white built-in shelving units on either side create a pleasing sense of balance and order. This symmetry makes the room feel calm and intentionally designed. The textural contrast is also key: the rough, organic feel of the stone fireplace plays beautifully against the smooth, crisp lines of the white cabinets and the dark, moody paint on the walls. This combination of balance and texture is a classic recipe for a timeless, inviting space.
|
📋 Copy HEX 🔗 Share |
A full-wall fireplace and built-in feature like this requires a decent amount of space to not feel overwhelming. This idea is best suited for a basement with a long, uninterrupted wall of at least 14-16 feet. This allows for a 5-6 foot wide fireplace centerpiece and 4-5 feet of built-in cabinetry on each side. The room’s depth should be at least 15 feet to allow for comfortable seating placement without feeling cramped in front of the hearth. For a more compact approach, compare this to the fireplace in Idea #3.
18. Sleek Modern Basement with Polished Concrete Floors
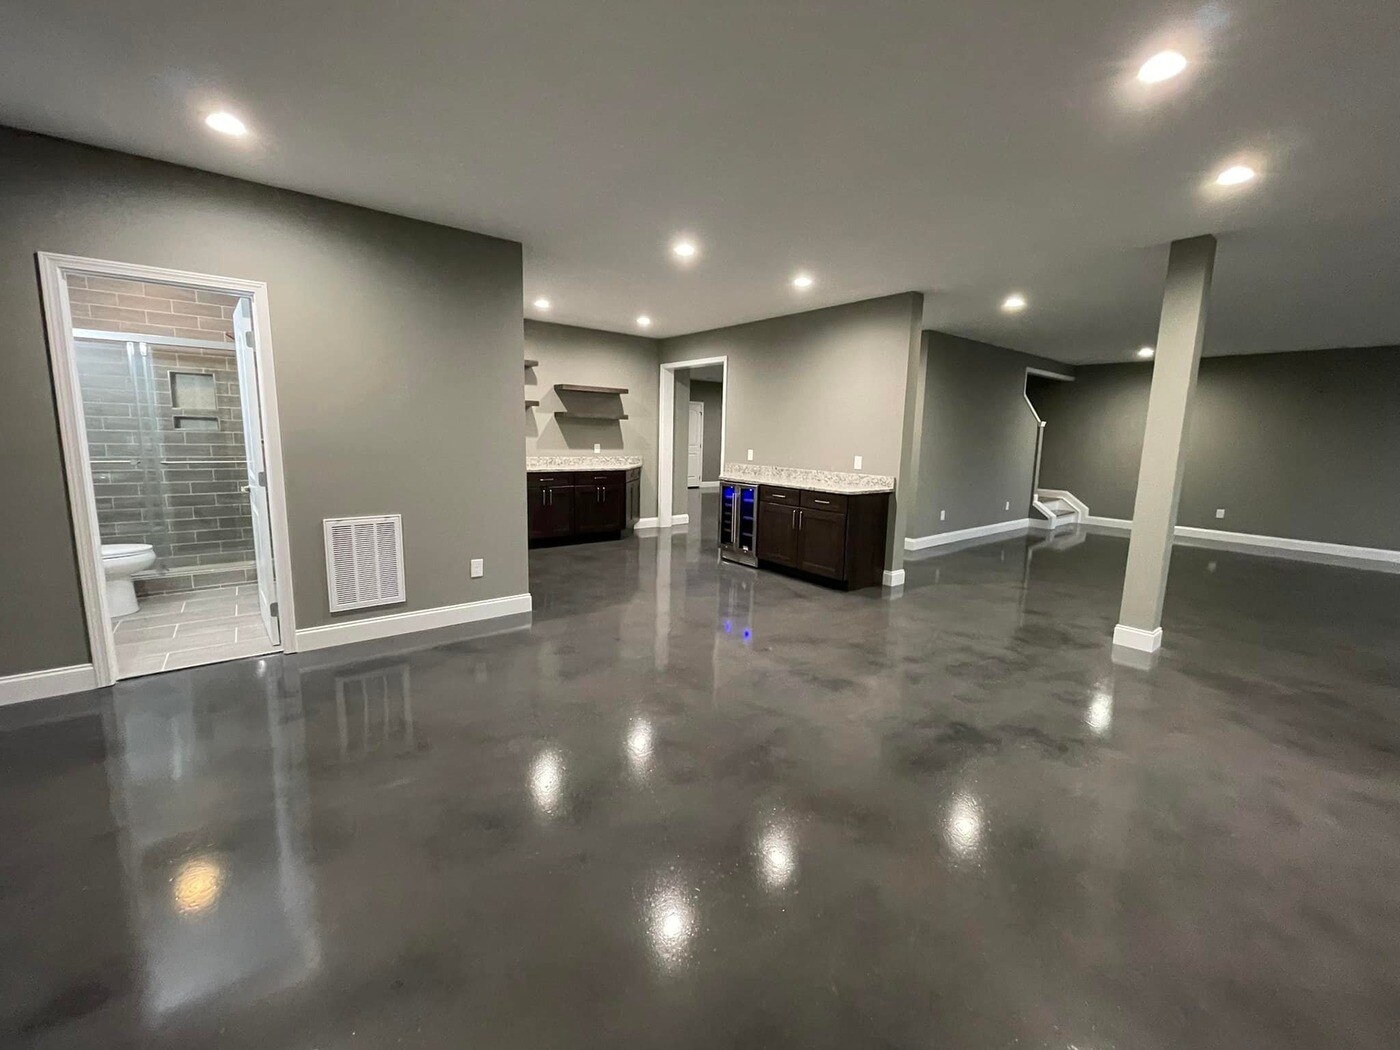
Polished concrete floors are incredibly durable, but they’re not indestructible or maintenance-free. To keep their sheen, they need to be resealed every 2-3 years, especially in a higher-traffic area like a basement. The dark gray color is great for hiding dirt, but it will show scratches from dragged furniture, so felt pads on all your furniture are non-negotiable. For cleaning, avoid harsh chemicals like bleach or ammonia, which can etch the sealer. Stick to a pH-neutral cleaner and a microfiber mop. Also, be aware that concrete is hard underfoot, so large area rugs are essential for comfort and sound absorption.
|
📋 Copy HEX 🔗 Share |
Want that polished concrete look without the hassle and expense of grinding and polishing your existing slab? You can get a very similar aesthetic for a fraction of the cost. The secret is to use a high-quality concrete floor paint in a dark gray satin or gloss finish. After thoroughly cleaning and prepping the slab, apply two or three thin, even coats. The result is a seamless, modern, and durable surface that provides about 80% of the visual impact for 20% of the price. Spend the money you saved on a larger, plusher area rug.
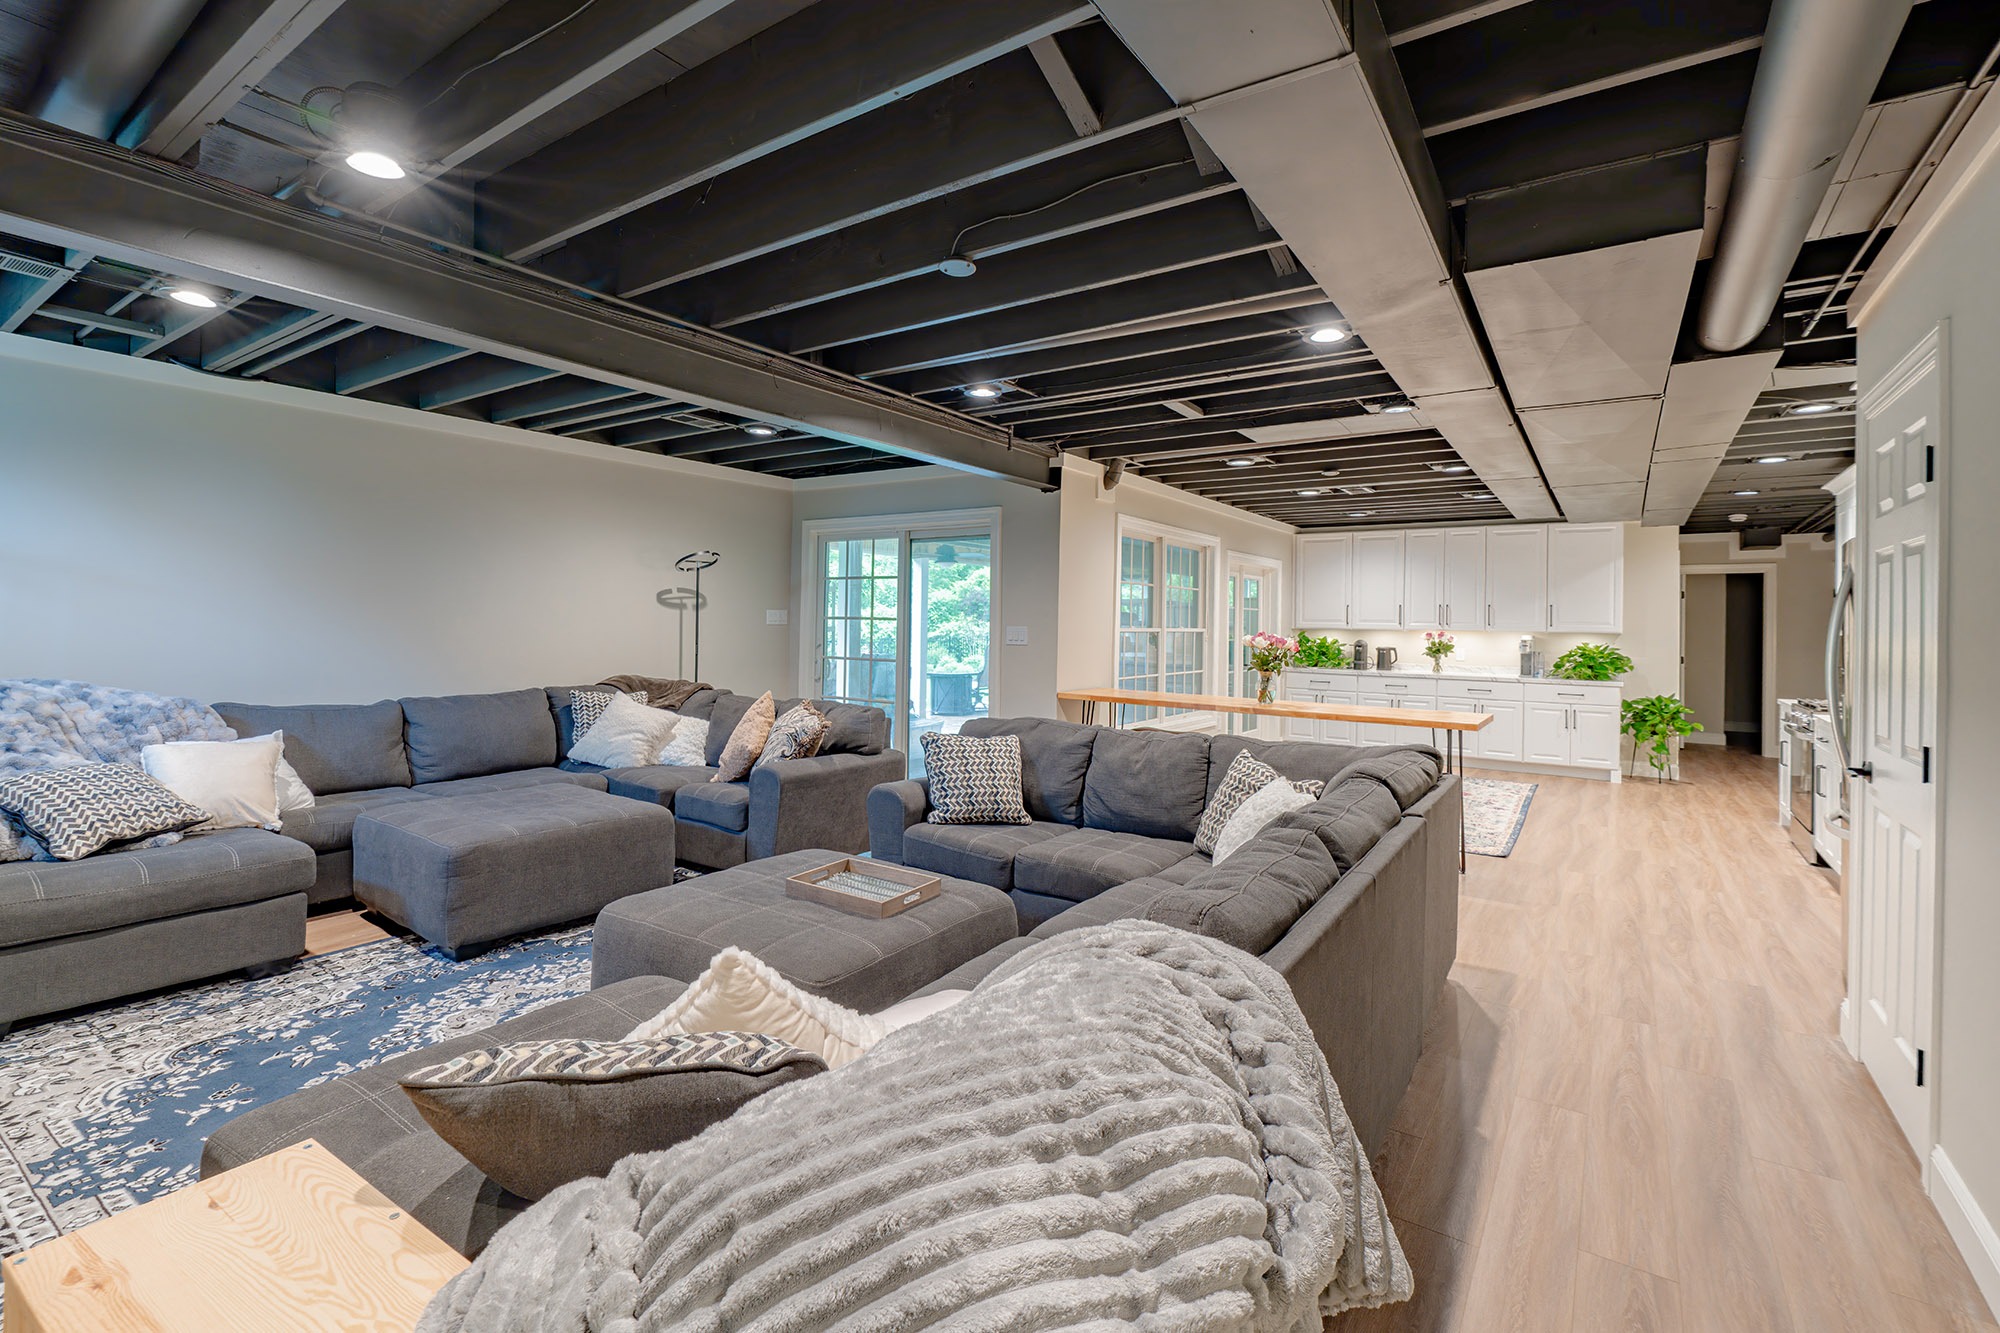
19. Inviting Living Area with a Black Exposed Ceiling
The formula for this striking modern look is about bold contrasts: 50% light and airy (the cream walls and white kitchen cabinets), 40% dark and dramatic (the black-painted ceiling and charcoal sectional), and 10% natural warmth (the light wood floors and blue-patterned rug). Painting the ceiling black is a daring move that pays off, making the large space feel more intimate and cohesive while hiding ductwork and pipes. The light walls and floor are essential to keep the room from feeling like a dungeon, providing the necessary balance.
|
📋 Copy HEX 🔗 Share |
An exposed, painted ceiling is a fantastic industrial-chic look, but it has implications for sound. Without a traditional ceiling with insulation and drywall, sound will travel much more easily between the basement and the floor above. If you have kids playing in the basement while you’re trying to work upstairs (or vice-versa), the noise transfer can be significant. While painting the joists and subfloor black helps visually unify the space, it does nothing for acoustics. Consider adding large, thick area rugs and soft furnishings to help absorb some of the sound.
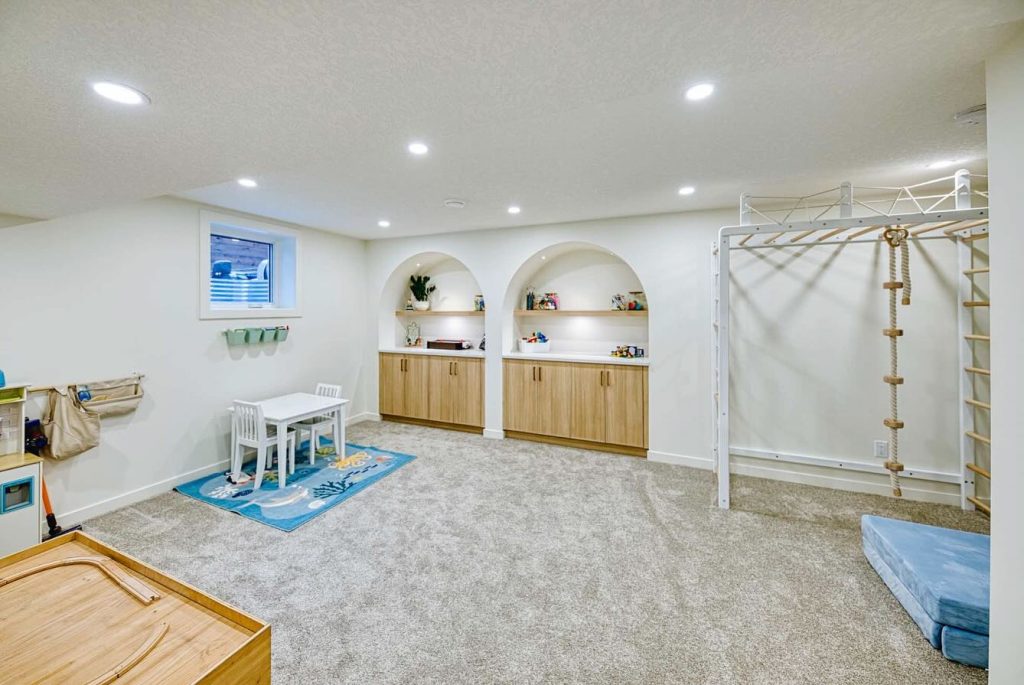
20. Bright Playroom with Arched Bookshelves and Monkey Bars
What makes this playroom truly special are the two arched built-in units. They elevate the space from a simple play area to a beautifully designed room with architectural character. The soft, curved lines of the arches provide a whimsical, grotto-like feel that’s perfect for a child’s space, while the light wood cabinets below offer sophisticated, hidden storage. They act as both a playful design element and a practical solution for keeping toys and books organized, proving that kids’ spaces can be both fun and incredibly stylish.
|
📋 Copy HEX 🔗 Share |
Want to recreate those elegant arched built-ins? Here’s a simplified approach for one unit. Time: 2-3 days. Cost: $400-$700.
- Start with a standard prefab base cabinet from a home improvement store. Secure it to the wall.
- Build a simple rectangular box frame out of 2x4s on top of the cabinet, reaching your desired height. Cover the front with drywall.
- Create the arch using a flexible arch kit or by cutting a curve into a piece of plywood that fits the top of your opening.
- Install the arch and finish the opening with drywall and corner bead, then mud and sand until smooth.
- Install shelves inside the niche. Paint the entire unit to match your walls for a seamless, built-in look.
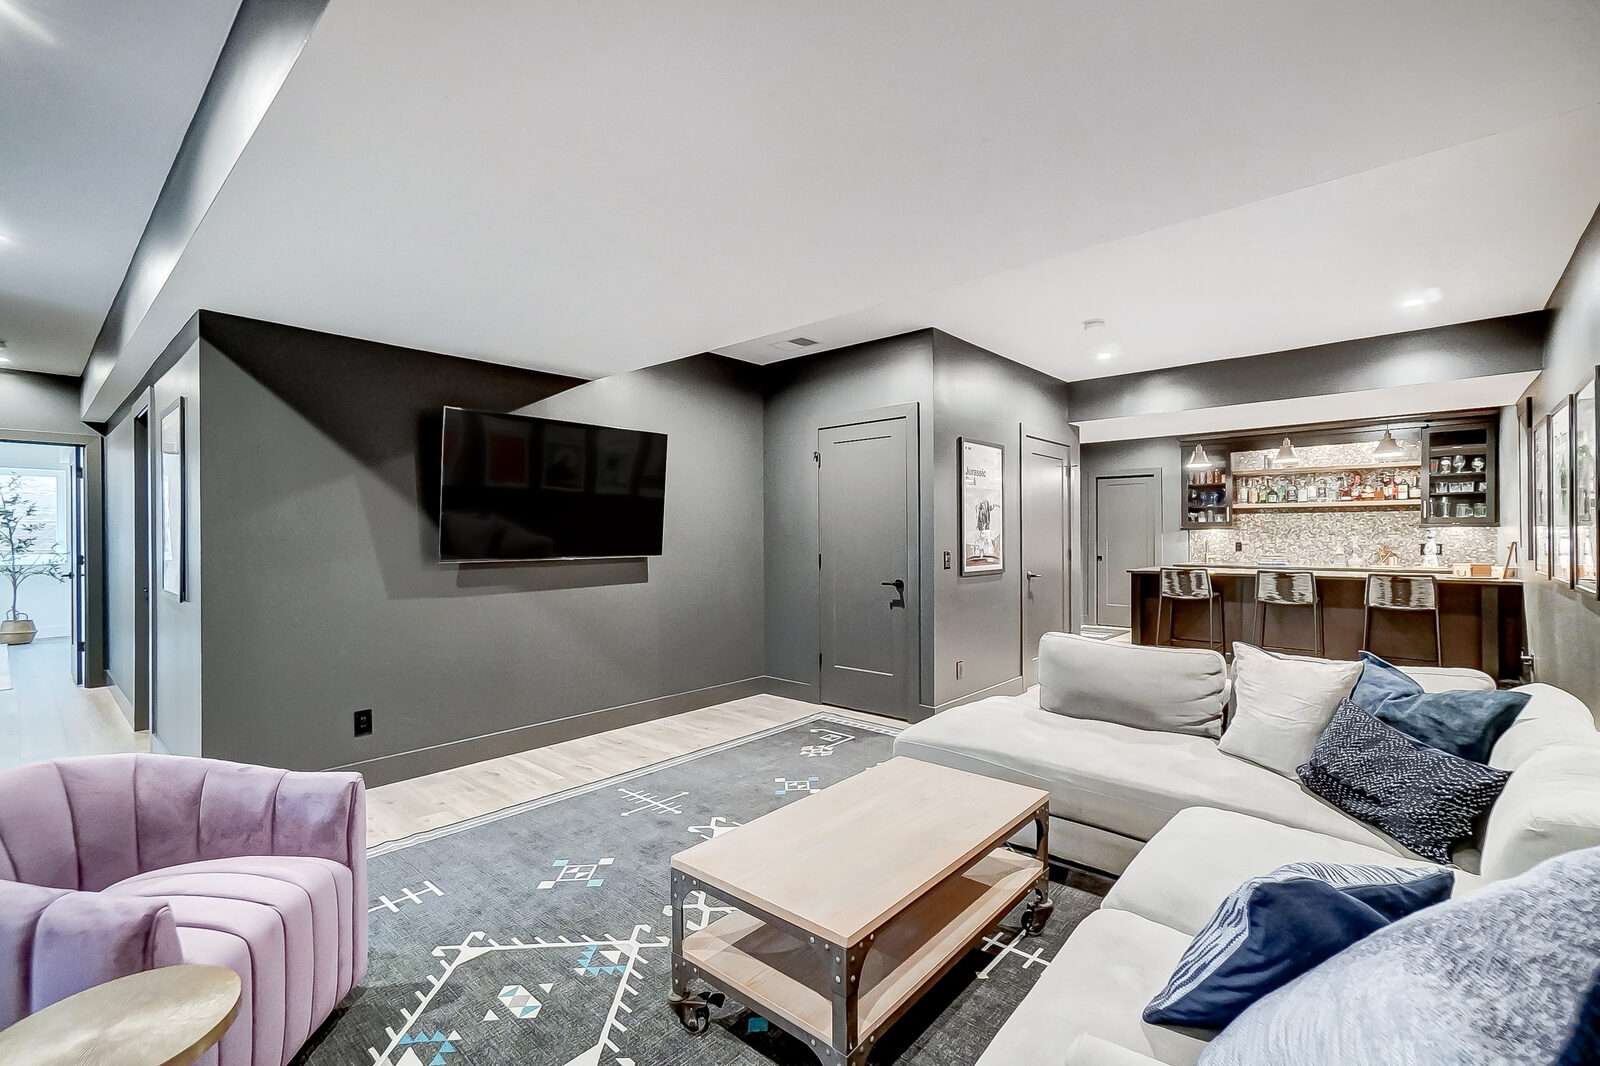
21. Cheap & Chic: Finishing Your Basement with Style
A high-style, low-budget basement is all about imitation and smart shopping. Get the look of expensive wood paneling with modern peel-and-stick wallpaper, which can create a stunning accent wall for under $200. Instead of custom built-ins, use IKEA’s BESTA or KALLAX systems, which can be configured to look surprisingly high-end. For flooring, luxury vinyl tile (LVT) offers the appearance of wood or stone at a much lower price point and with better moisture resistance. Hunt for secondhand furniture on Facebook Marketplace—you can often find high-quality sectionals for a steal. The key is to splurge on one thing (like a great light fixture) and save on everything else. A similar, more DIY approach is detailed in Idea #5.
|
📋 Copy HEX 🔗 Share |
Let’s be honest: the ‘cheap’ part of a ‘cheap basement remodel’ can go wrong quickly. The biggest risk is cutting corners on the non-visible prep work. If you don’t properly address any moisture issues, seal cracks in the foundation, or install a proper subfloor, you’ll be tearing out your cheap finishes in a year or two. No amount of stylish, budget-friendly decor can fix a mold problem or cover up for flooring that’s buckling due to dampness. Spend the necessary money on waterproofing and preparation first. That is the only ‘cheap’ remodel that will actually last.
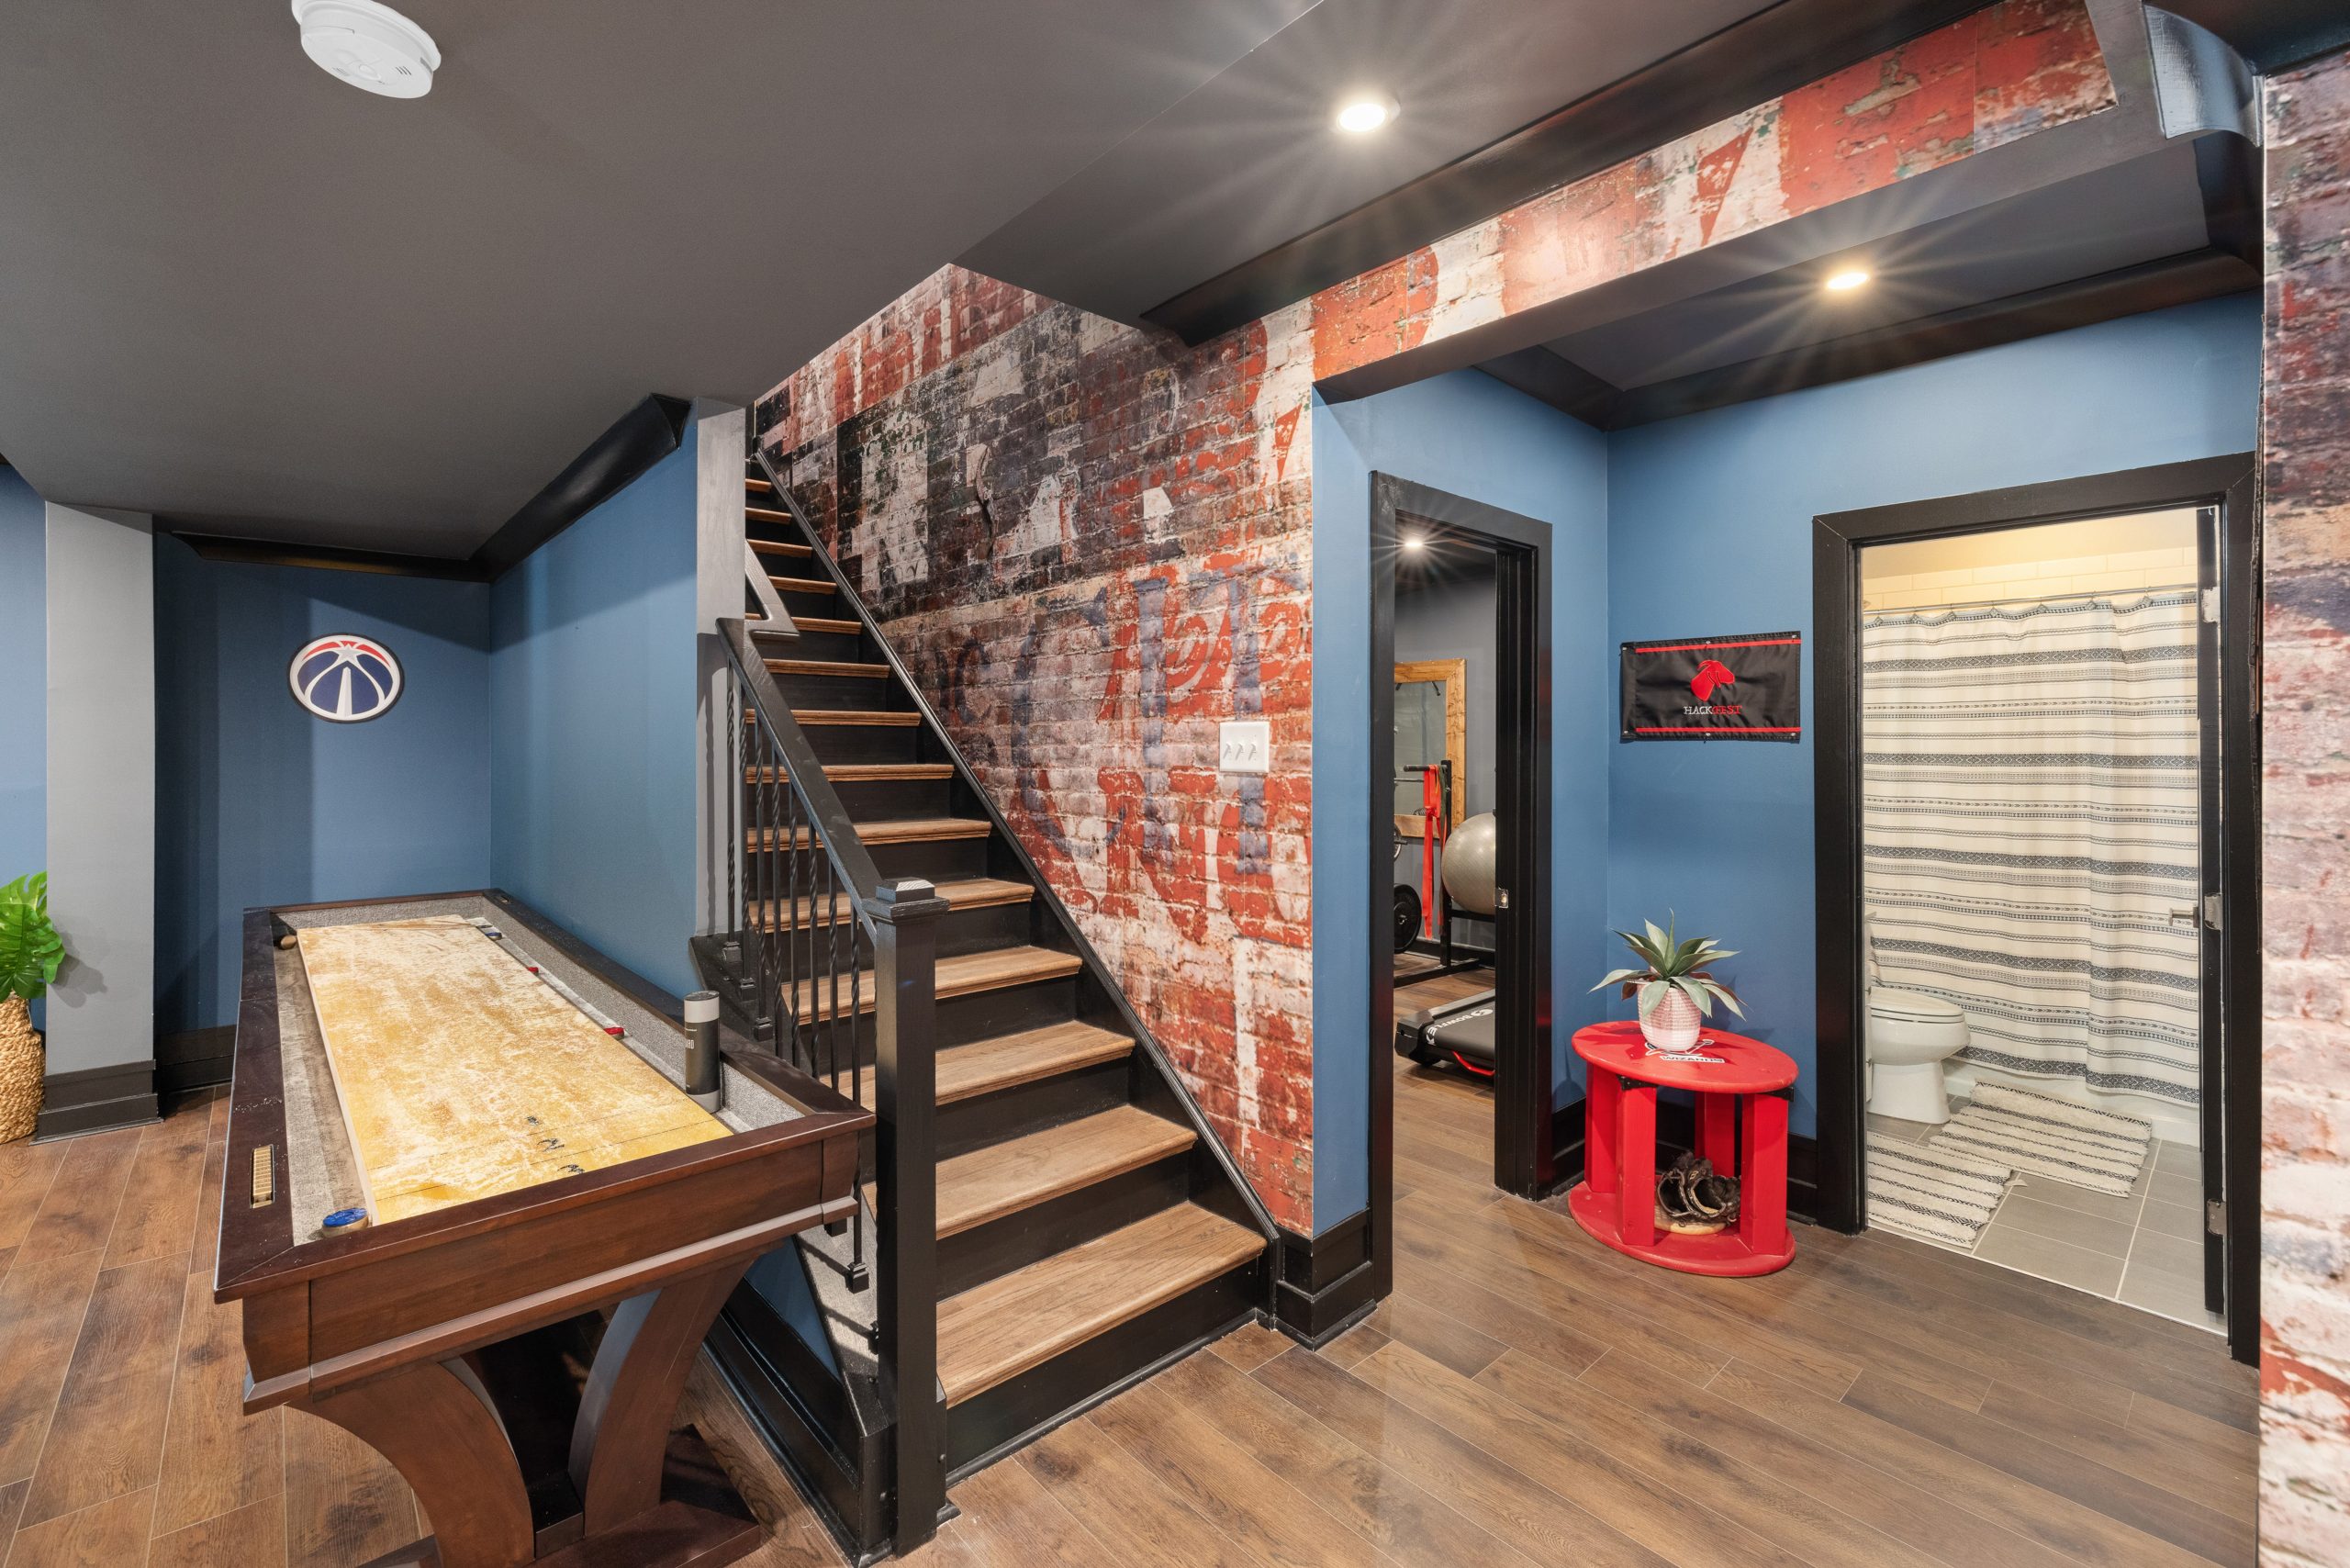
22. Industrial Play-Zone with Exposed Brick and Blue Walls
When using a bold, vibrant color like this bright blue, the key to making it feel intentional is to pair it with strong neutrals and textures. The black trim and dark gray ceiling act as a grounding frame, containing the energy of the blue and giving it a sophisticated, graphic quality. The exposed brick wallpaper and dark wood flooring add necessary warmth and texture, preventing the blue and black from feeling too stark or cold. Don’t just paint one wall blue; commit to it in a defined zone and then balance it carefully.
|
📋 Copy HEX 🔗 Share |
The idea of the ‘single-purpose’ basement is dead. We’re seeing a huge trend towards multi-functional, eclectic spaces that cater to the whole family’s hobbies. This room is a perfect example, seamlessly blending a game zone (shuffleboard), a fitness area, and a general lounge space. The industrial-eclectic aesthetic, with its mix of bold color, raw textures (like the brick), and dark accents, is the perfect backdrop for this trend. It feels energetic, informal, and highly personalized, which is exactly what people want from their homes in 2026.
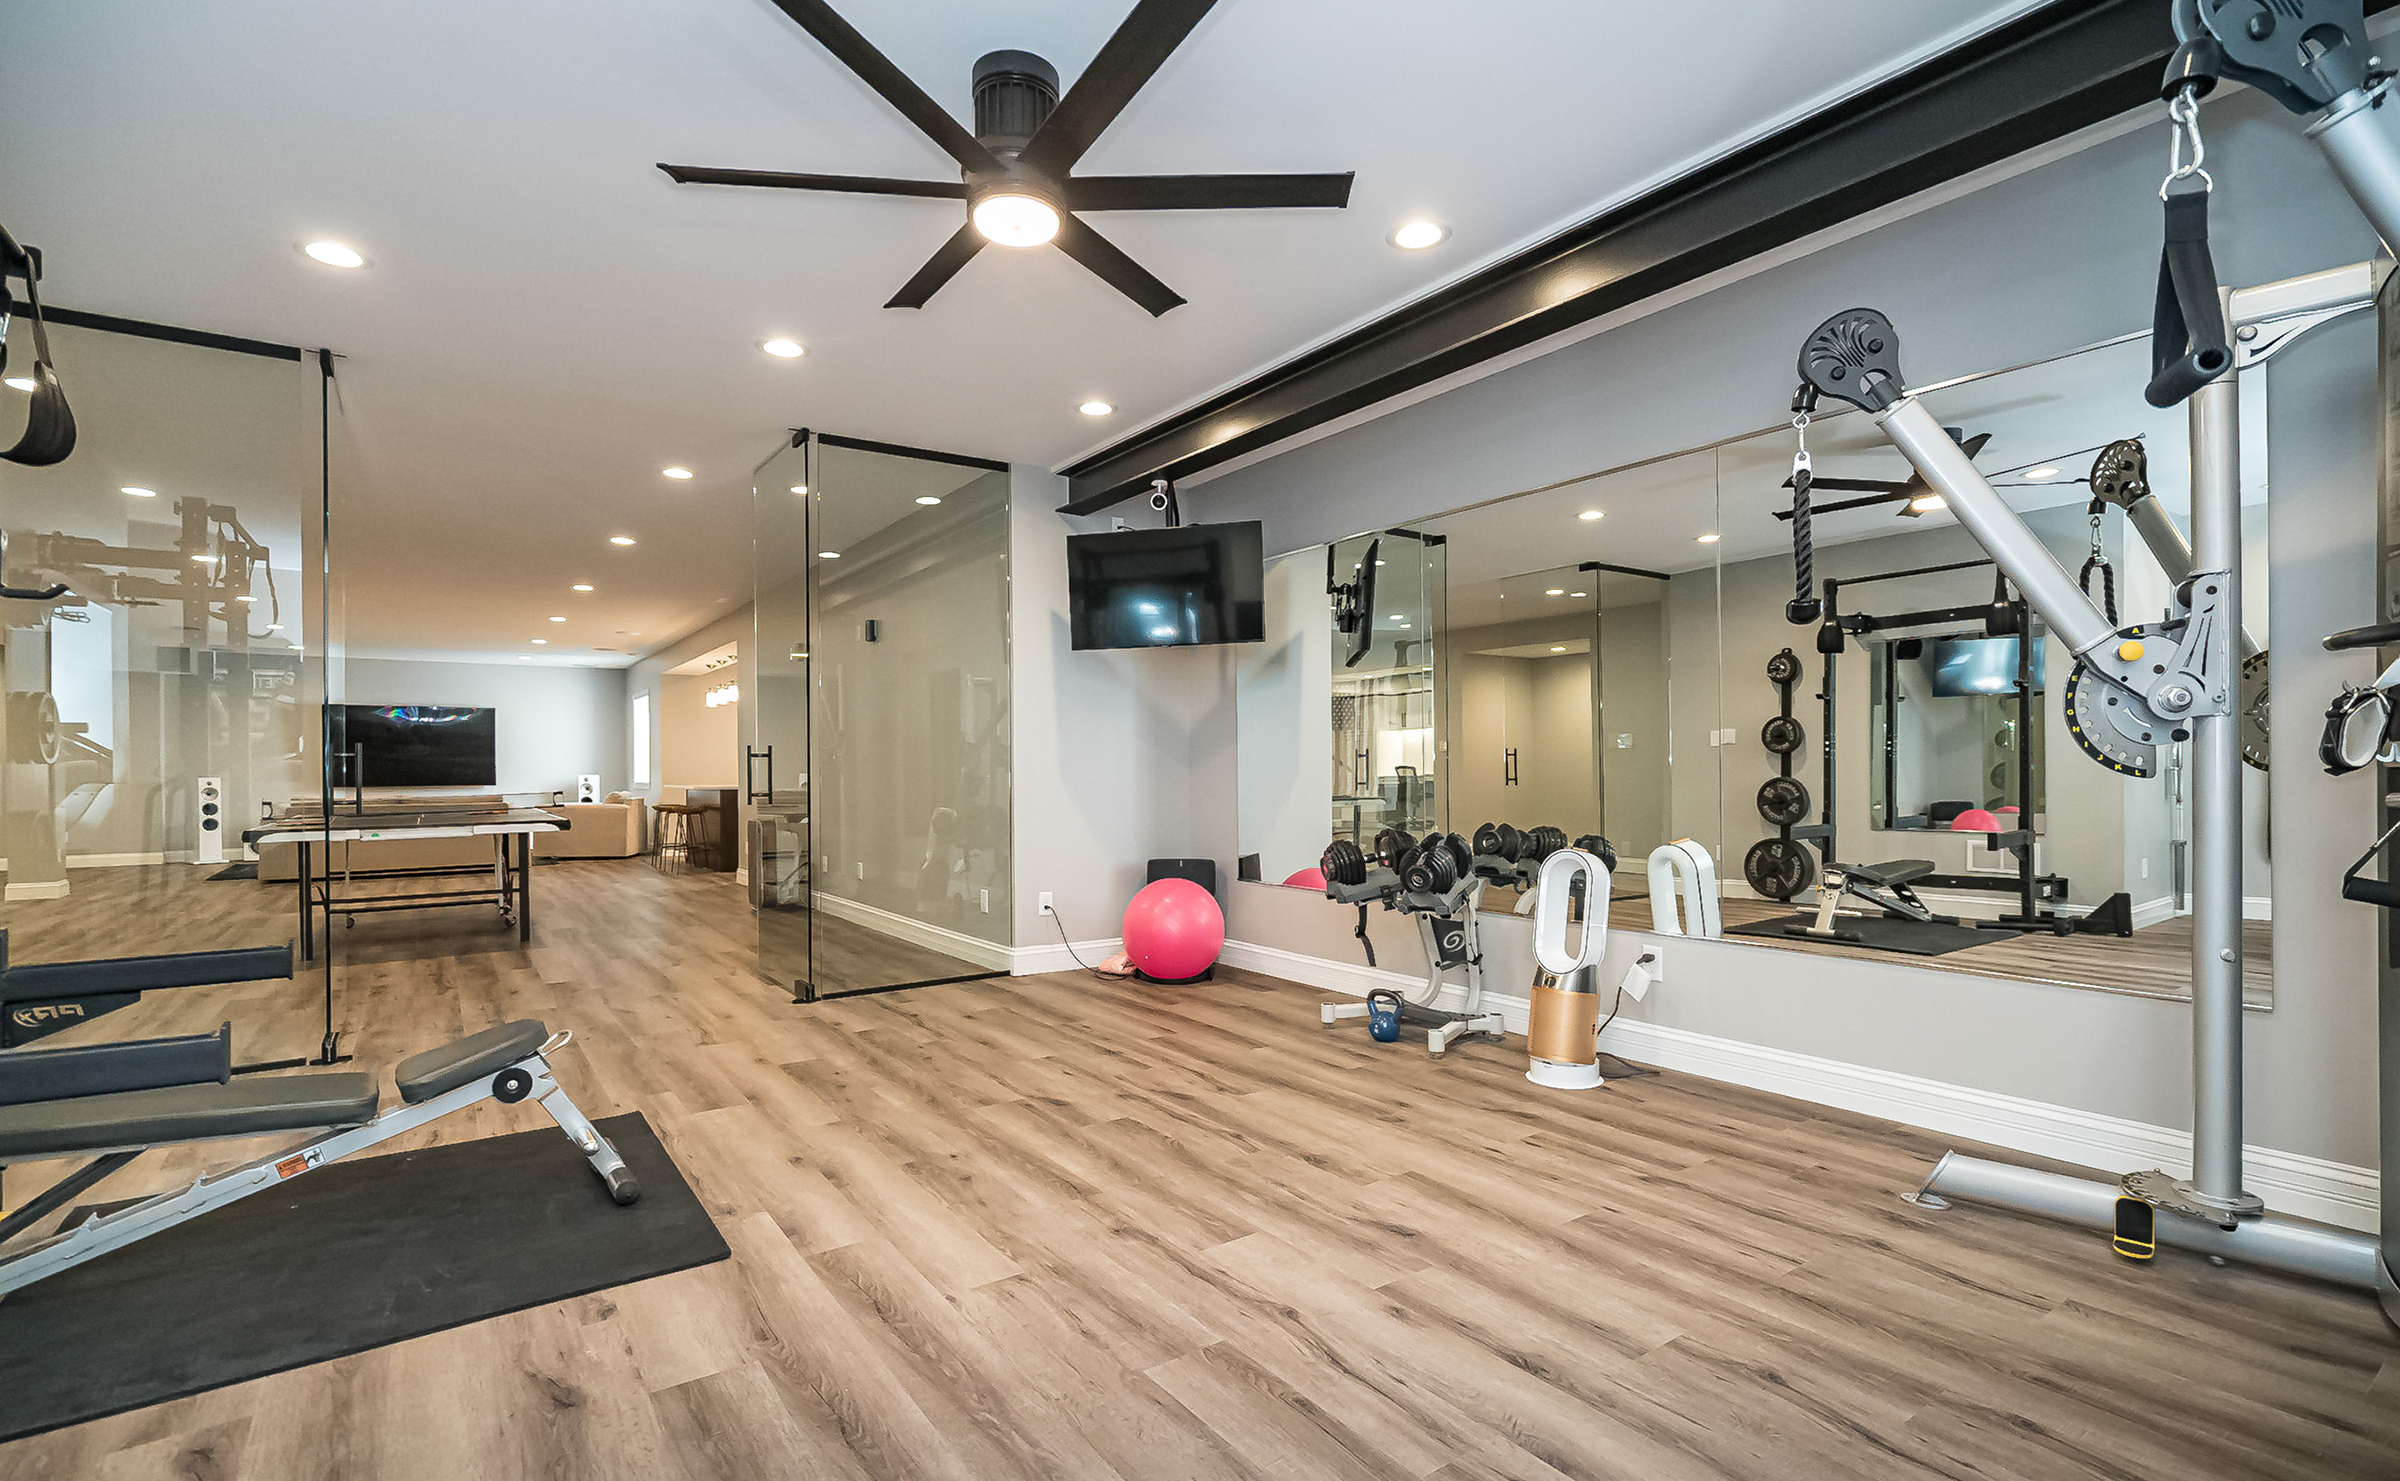
23. Choosing the Right Flooring for Your Basement
Basement flooring isn’t just about looks; it’s a technical choice. Your number one enemy is moisture. For this reason, solid hardwood is almost always a bad idea. Luxury Vinyl Plank (LVP) is the reigning champion for a reason: it’s 100% waterproof, durable, and comes in incredibly realistic wood or stone looks. Engineered hardwood is a viable but pricier option if you have a very dry basement. Carpet tiles are another great choice, as you can easily replace a single tile if it gets stained or damaged. Polished concrete, as seen in Idea #18, is stylish and durable but hard underfoot.
|
📋 Copy HEX 🔗 Share |
Here’s a general cost comparison for flooring a 500-square-foot basement, including basic installation. Prices can vary significantly based on your location and the specific product quality.
- Luxury Vinyl Plank (LVP): $1,500 – $4,000
- Carpet Tiles: $1,000 – $3,500
- Polished Concrete: $2,000 – $6,000
- Engineered Hardwood: $4,000 – $8,000
- Paint/Epoxy: $500 – $1,500
Budget alternative: The most affordable and moisture-proof option is to thoroughly clean and paint the existing concrete slab and then add large, cozy area rugs.
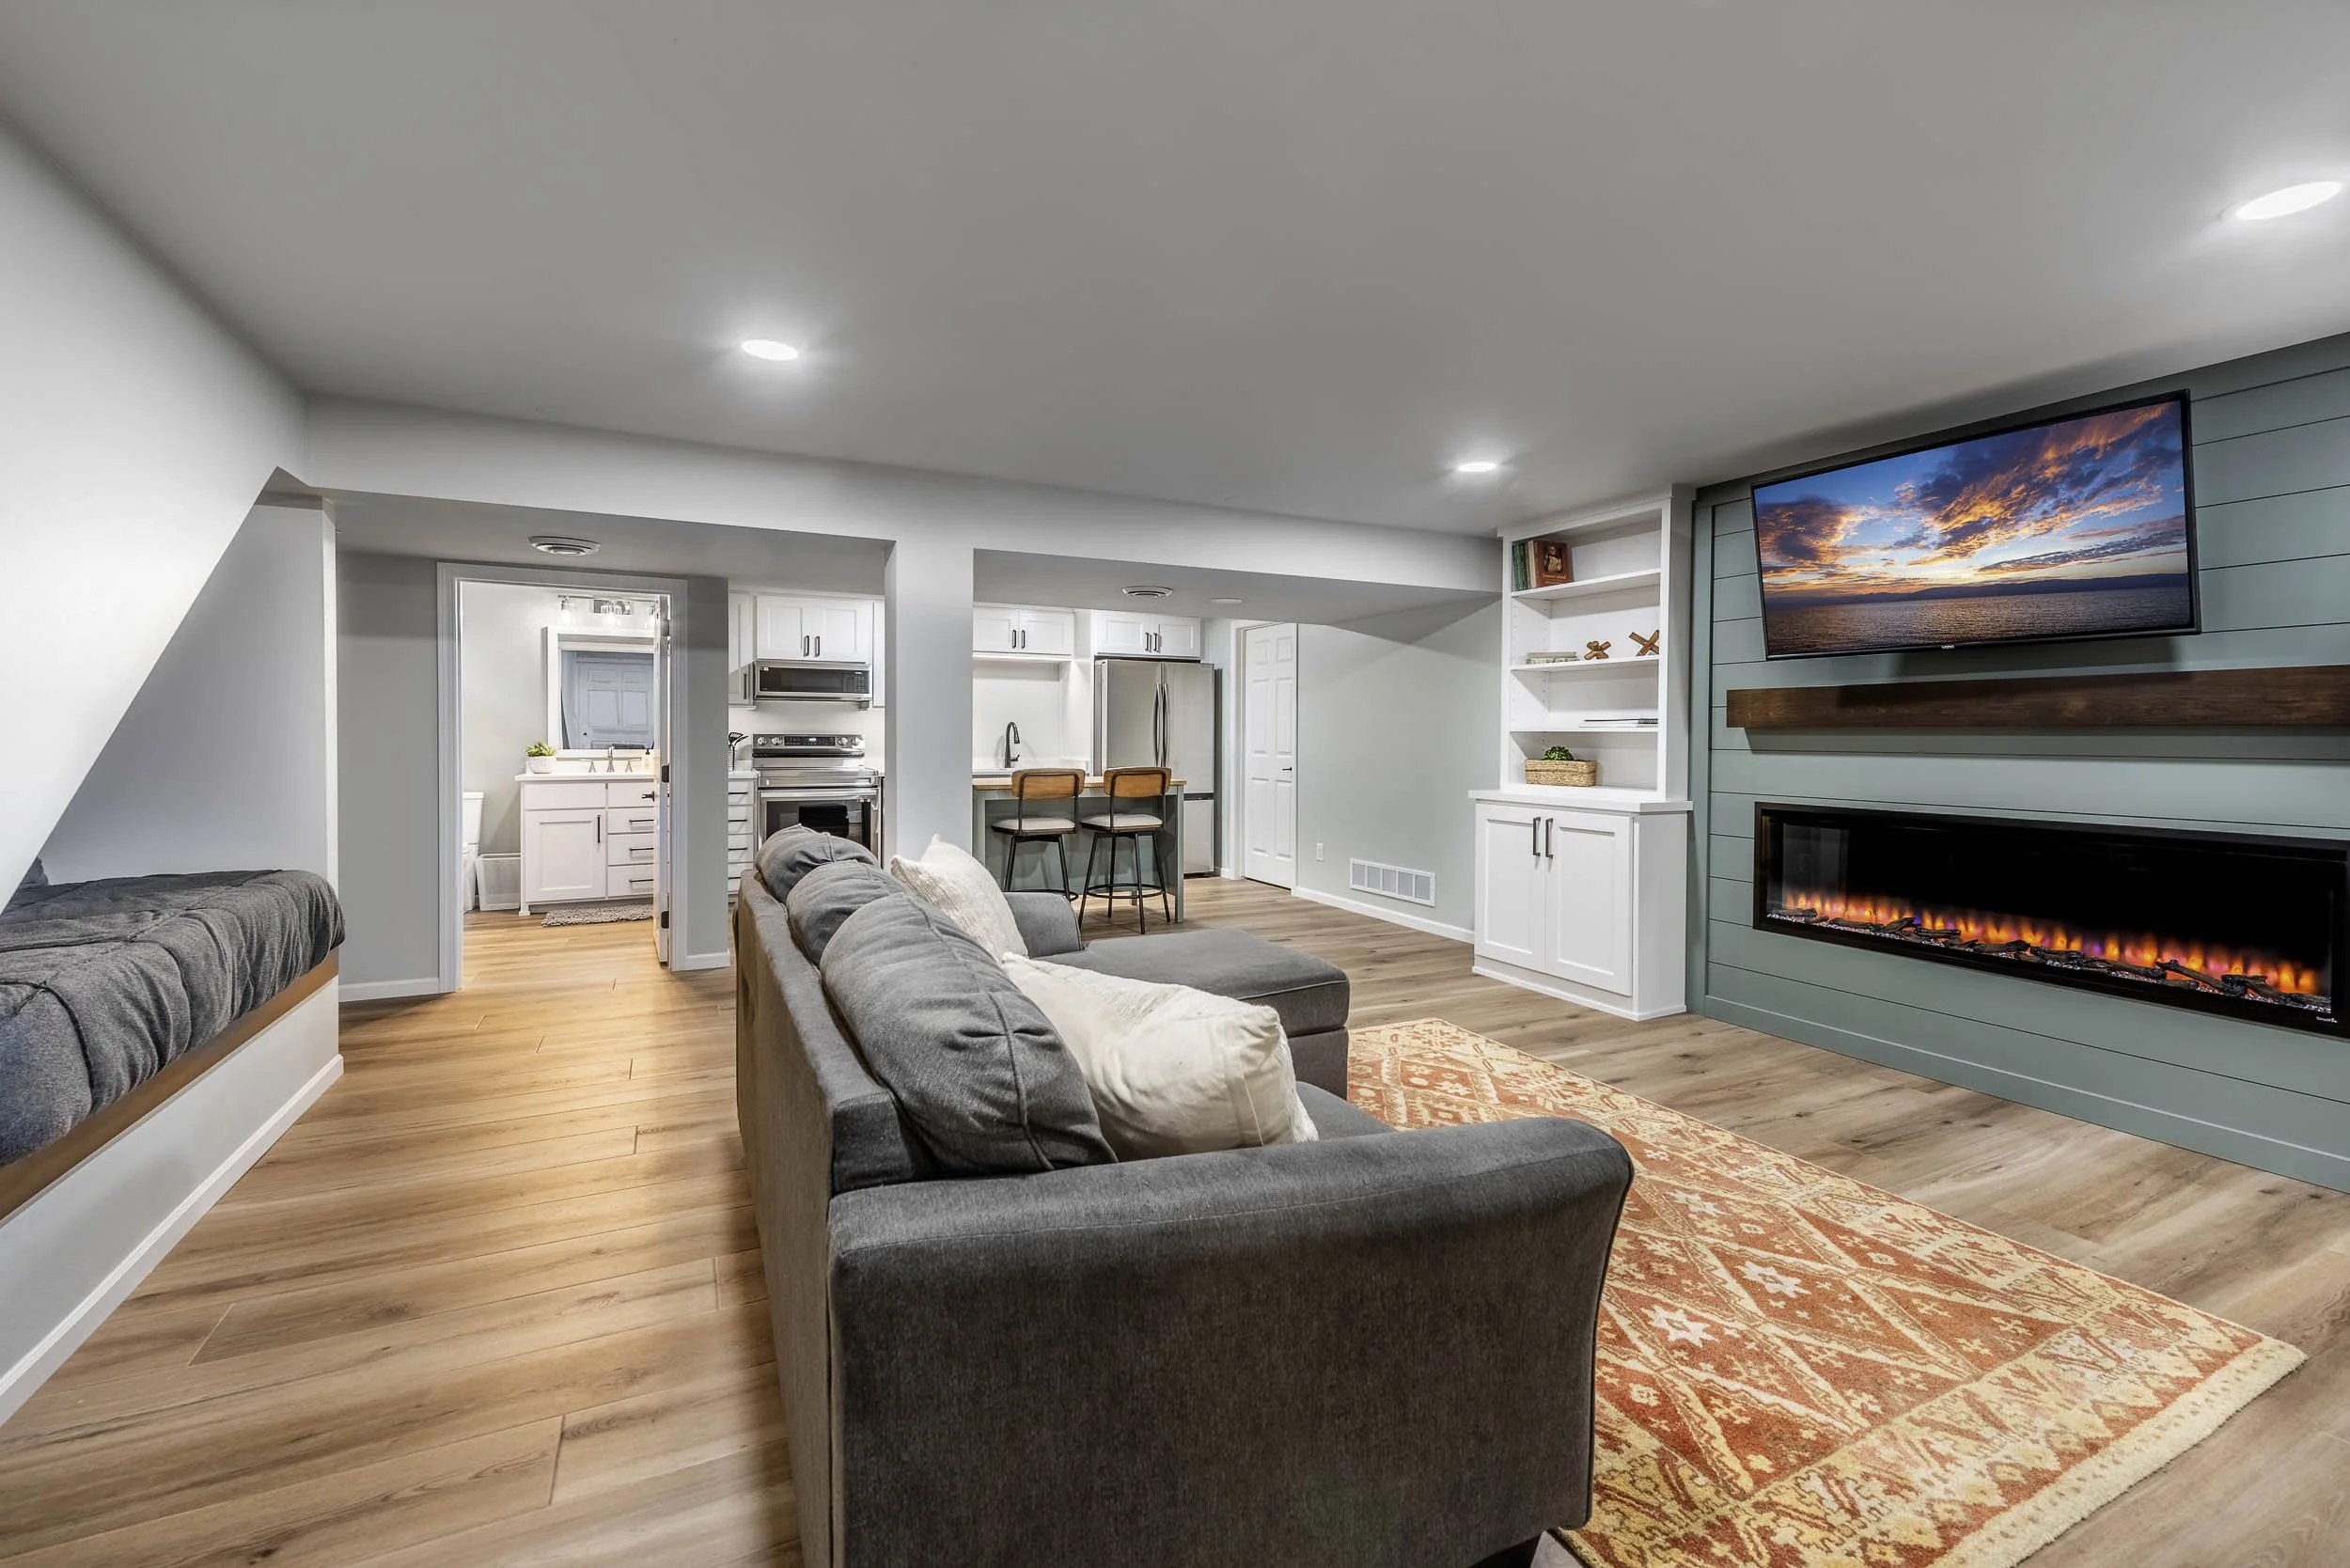
24. Open-Concept Suite with a Sage Green Shiplap Fireplace
This design brilliantly creates a multi-functional studio apartment feel within a single open space. The key is the smart use of a ‘hero’ feature and consistent materials. The sage green shiplap fireplace wall serves as the anchor for the entire basement, a strong focal point that defines the primary living zone. The light wood-look flooring and light gray walls flow seamlessly through the living, kitchenette, and sleeping areas, making the whole space feel unified and intentional. The dark gray sectional provides a strong grounding element in the center of the plan.
|
📋 Copy HEX 🔗 Share |
This all-in-one living concept is ideal for a long, relatively narrow basement of around 400-600 square feet. It’s a perfect layout for creating an in-law suite or a guest apartment. The key is to place the three zones—living, kitchen, and sleeping—in a logical linear progression. Typically, you’d enter into the living area, with the kitchenette adjacent, and the more private sleeping nook tucked away at the far end. This requires careful planning around plumbing for the kitchenette and ensuring the sleeping nook has a nearby egress window.
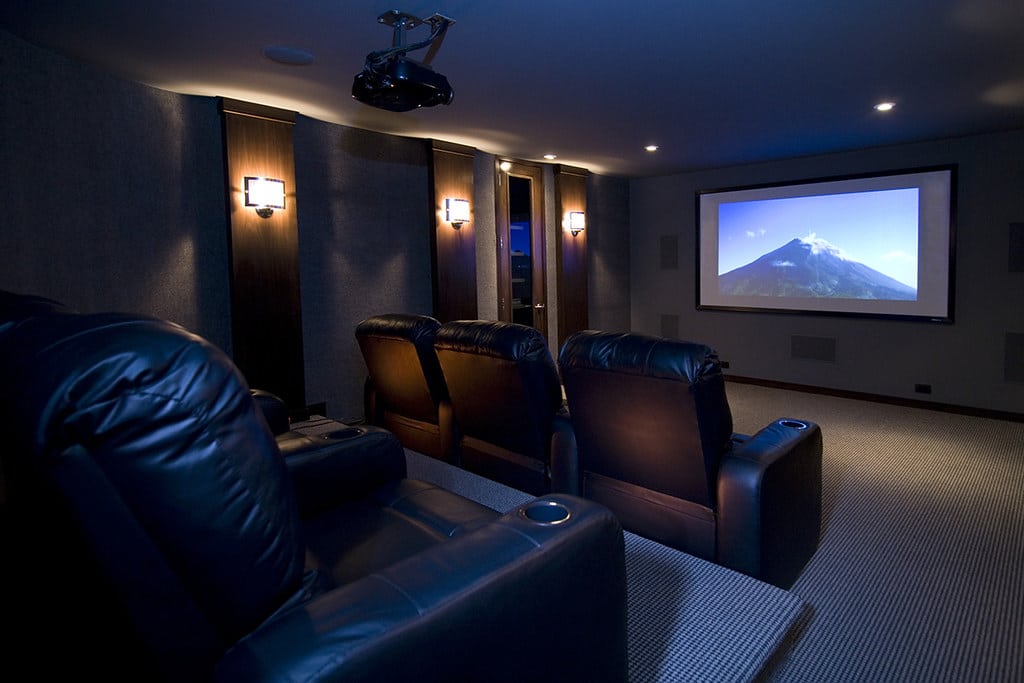
25. Immersive Home Theater with Tiered Recliner Seating
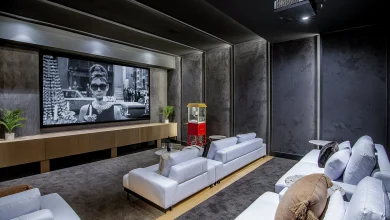
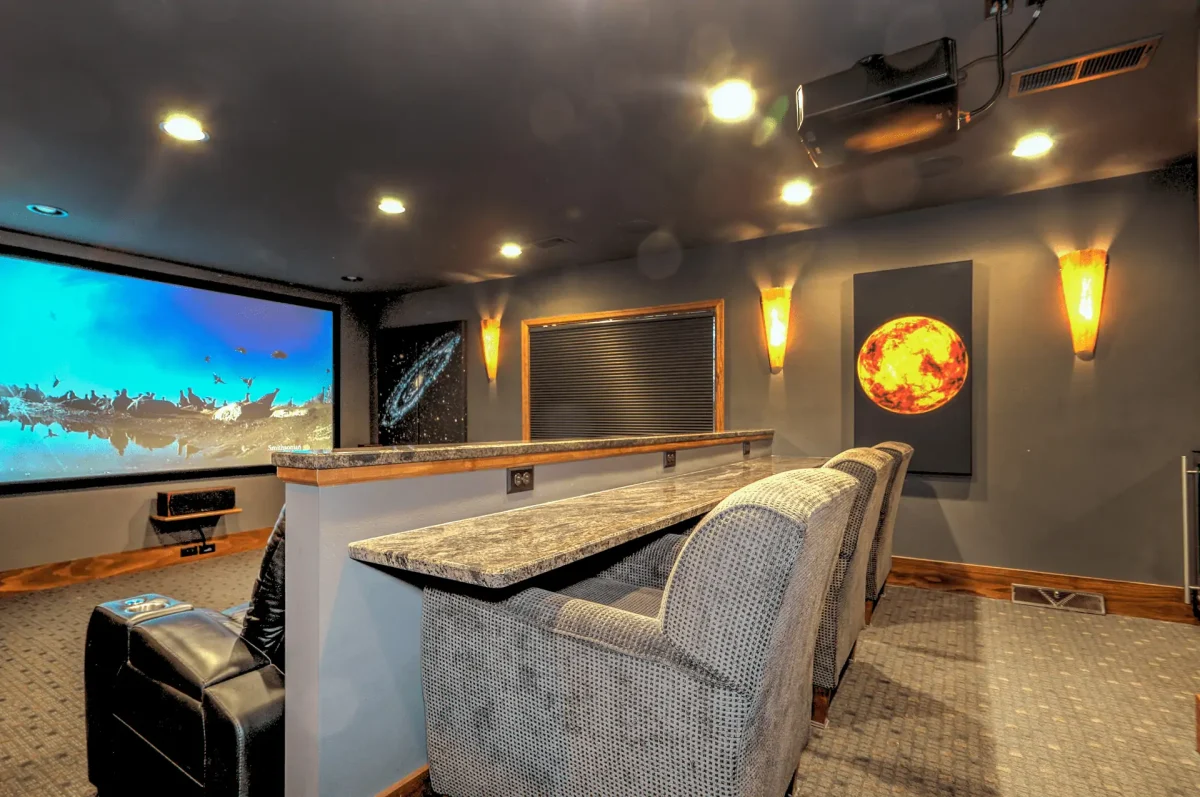
The single most important element for creating a true cinematic experience, as shown here, is the tiered seating. Without the raised platforms, this would just be a room with a big screen. The tiers ensure that every seat has a clear, unobstructed view, mimicking the layout of a real movie theater. This commitment to sightlines is what separates a casual media room from a dedicated home theater. It’s a structural choice that dictates the entire function and feel of the space, prioritizing the viewing experience above all else.
|
📋 Copy HEX 🔗 Share |
When designing a tiered home theater, getting the platform height right is crucial. A good rule of thumb is to raise the back platform by 12 to 18 inches. Before you build, test your sightlines. Set up chairs on stacks of books or boxes at your proposed platform height. Sit in the back row and ensure you can comfortably see the bottom of the screen over the heads of people sitting in the front row. Don’t forget to account for the height of the recliner in its fully upright position. It’s a lot of work to test, but it’s much more work to rebuild a platform that’s too low.
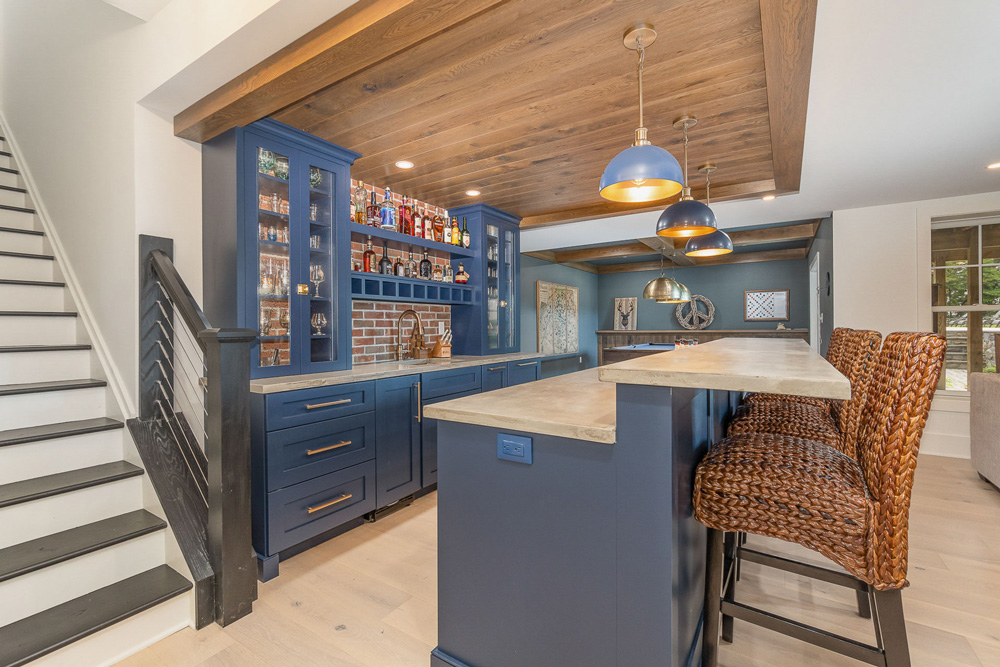
26. Refined Rustic Bar with Navy Cabinets and a Brick Backsplash
This handsome look is a carefully balanced equation: 40% rustic charm (the exposed brick and wood plank ceiling), 40% modern sophistication (the sleek navy cabinets and light countertops), and 20% industrial hardware (the brass pendants and metal beam elements). The brick and wood provide warmth and texture, while the navy blue adds a bold, contemporary color. The brass/gold accents are the jewelry that ties it all together, adding a touch of luxe. By sticking to this formula, you achieve a space that feels both timelessly rustic and perfectly current.
|
📋 Copy HEX 🔗 Share |
A built-in bar is a fantastic feature, but it requires planning. Tick these boxes before you start building:
- Plumbing Access: Is there a nearby water line and drain for a sink? Relocating plumbing is expensive, so plan your bar’s location around existing infrastructure if possible.
- Dedicated Electrical: Bar equipment like mini-fridges and ice makers needs dedicated circuits. Consult an electrician to ensure you have enough power available in your chosen spot.
- Ventilation Check: Basements can be damp. Ensure the area has adequate airflow or a dehumidifier to protect your wood cabinetry and prevent musty smells. Compare this with the simpler setup in Idea #9 if plumbing seems too complex.
Conclusion
That dark, forgotten space downstairs has so much potential, and now you have 26 distinct paths you can take to reclaim it. Whether you’re dreaming of a cozy family media room or a sophisticated bar for entertaining, the right plan can turn your basement into the most loved room in the house.
Feeling inspired? Pick your favorite look and save it to your Pinterest board. It’s the first step to making it real!