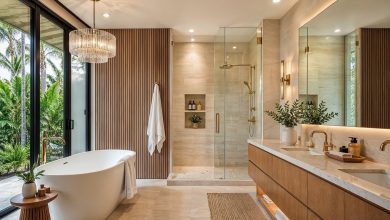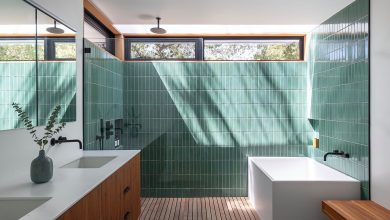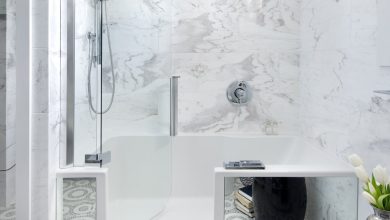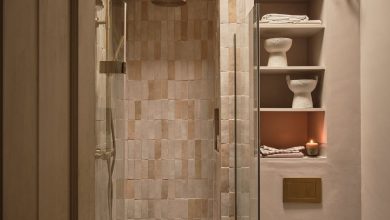

You know that feeling when you finally find the bathroom color idea that looks exactly right for your space? It’s like a little design jackpot. We spent serious time browsing IKEA, Target, and Wayfair to bring you only what’s worth your attention this year. After filtering through hundreds of options, we narrowed it down to these 29 ideas that actually deliver. Inside, you’ll find curated looks covering everything from modern farmhouse to dark and moody spaces. For 2027, it’s all about creating personal sanctuaries, and the right color is the first step. And stay until the end—we break down the most common mistakes that can ruin these looks. 📌 Save this to Pinterest for later—you’ll want to revisit these ideas.
1. Embrace Calm with a White and Natural Wood Bathroom
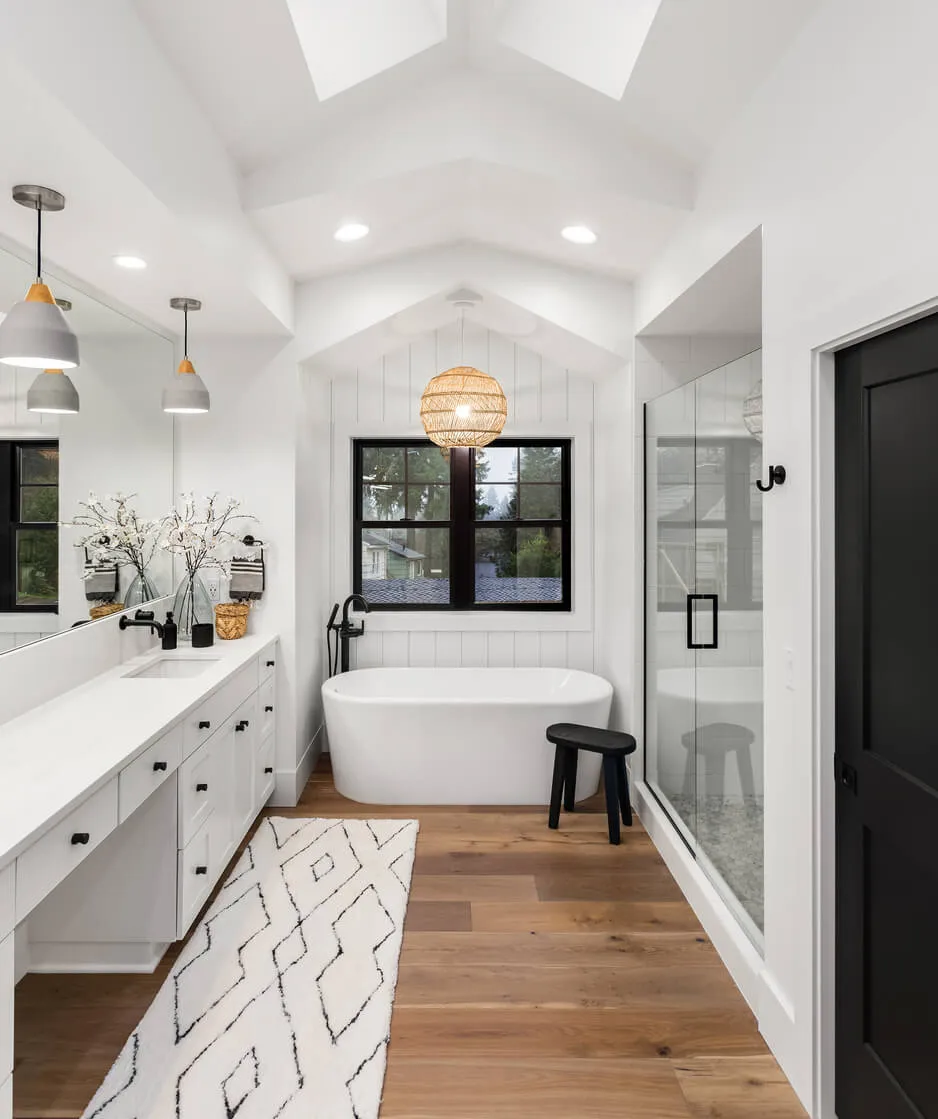
This bathroom is a masterclass in texture and warmth within a minimalist framework. The success here lies in the careful balance of materials. The crisp white shiplap walls and vanity provide a clean, bright canvas, which could feel sterile on its own. However, the introduction of light-colored wood flooring injects immediate warmth and an organic feel underfoot. The bold, black accents—seen in the window frames and shower hardware—act as punctuation, grounding the airy space and adding a touch of modern graphic contrast.
|
📋 Copy HEX 🔗 Share |
When you’re working with a largely neutral palette, lighting is everything. Notice the woven pendant light fixture? It does more than just illuminate; its natural material echoes the warmth of the wood floor, creating a cohesive look. To get this right, ensure your pendant light is rated for damp locations. A standard living room fixture won’t hold up to the humidity. Aim for a fixture that hangs at least 8 feet above the tub or 3 feet away from the tub’s edge for safety and visual balance. This placement keeps it from feeling crammed and allows it to be a true centerpiece.
2. Go for Sleek Contrast with White Marble and Matte Black Fixtures
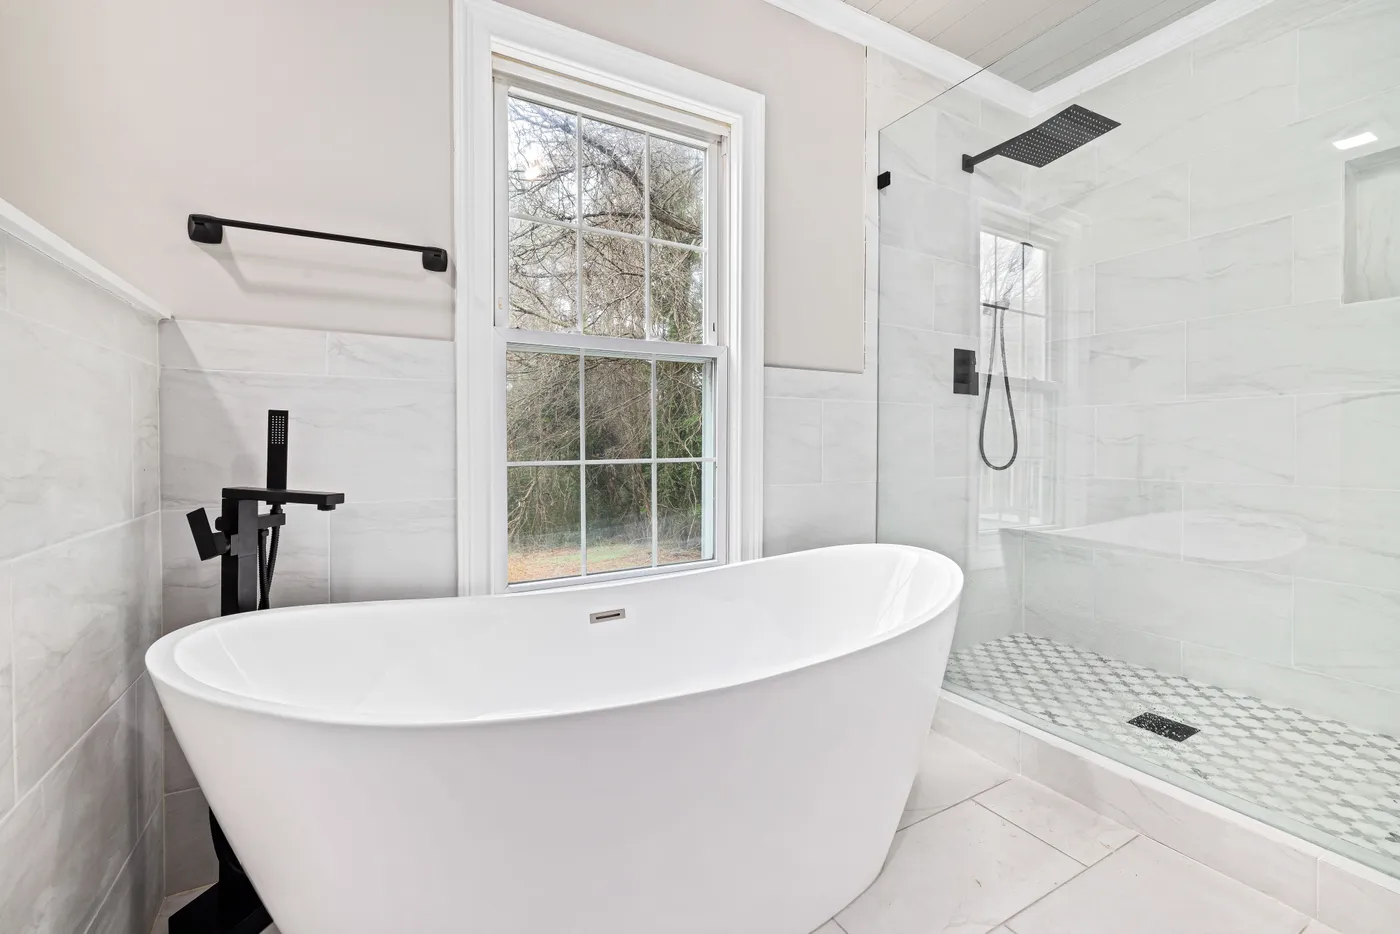
The formula here is simple but incredibly effective: 70% luminous white + 20% organic texture + 10% matte black. The white comes from the large-format marble-look tiles on the walls and floor, creating a seamless and expansive feel. The 20% texture is a surprise hero—the light wood slat ceiling prevents the room from feeling like a sterile box by drawing the eye upward and adding natural warmth. The final 10% of matte black fixtures provides that sharp, modern edge that keeps the design feeling current and sophisticated. You could swap the wood ceiling for a painted one and still have a great look, but you’d lose that crucial textural layer.
|
📋 Copy HEX 🔗 Share |
Let’s be honest: while large-format marble-look porcelain tiles are stunning and easier to maintain than real marble, those vast white surfaces will show every single stray hair and speck of dust. If you’re not someone who enjoys a quick daily wipe-down, this might drive you a little crazy. Also, matte black fixtures look incredibly chic, but they can be prone to showing water spots and fingerprints more than chrome or brushed nickel. A quick wipe with a microfiber cloth after use is the secret to keeping them looking sharp.
3. Add Warmth to Marble with Polished Gold Fixtures
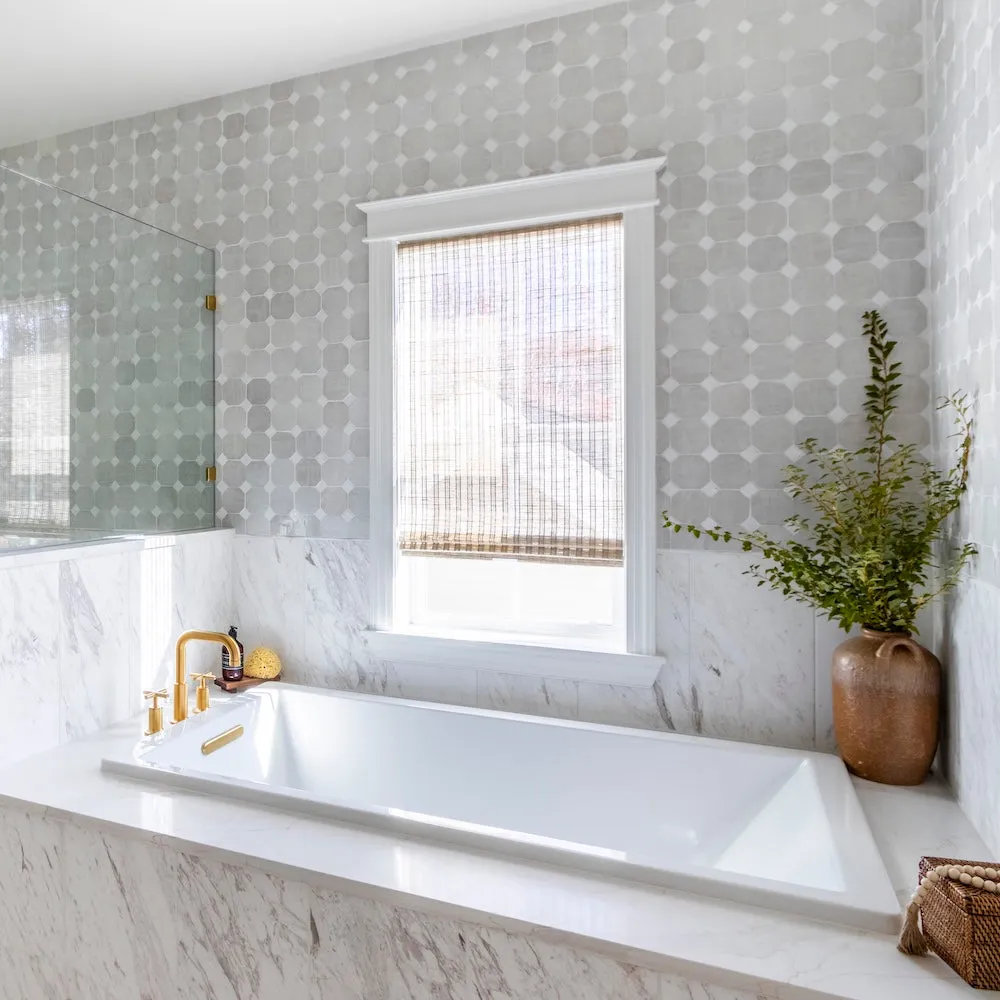
The single element that makes this bathroom sing is the choice of polished gold for the fixtures. Without it, the space would be a beautiful but conventional mix of white marble and light gray tile. The gold faucet and handles introduce a necessary element of warmth and luxury that elevates the entire room. They act like jewelry, catching the light and creating a striking contrast against the cool tones of the stone and tile. It’s a deliberate choice that says “elegant” rather than just “clean.”
|
📋 Copy HEX 🔗 Share |
That polished gold hardware is a showstopper, but it requires a bit of care to stay that way. Polished finishes are notorious for showing fingerprints and water spots. To keep them looking their best, you’ll need to wipe them down regularly with a soft, dry cloth. Avoid harsh abrasive cleaners or scrub brushes, as they can scratch the finish. A gentle soap and water solution is all you need for deeper cleaning. The same goes for the glass shower partition—a squeegee after every shower is your best friend in the fight against hard water stains.
4. Pair a Deep Green Vanity with Ornate Gold Accents
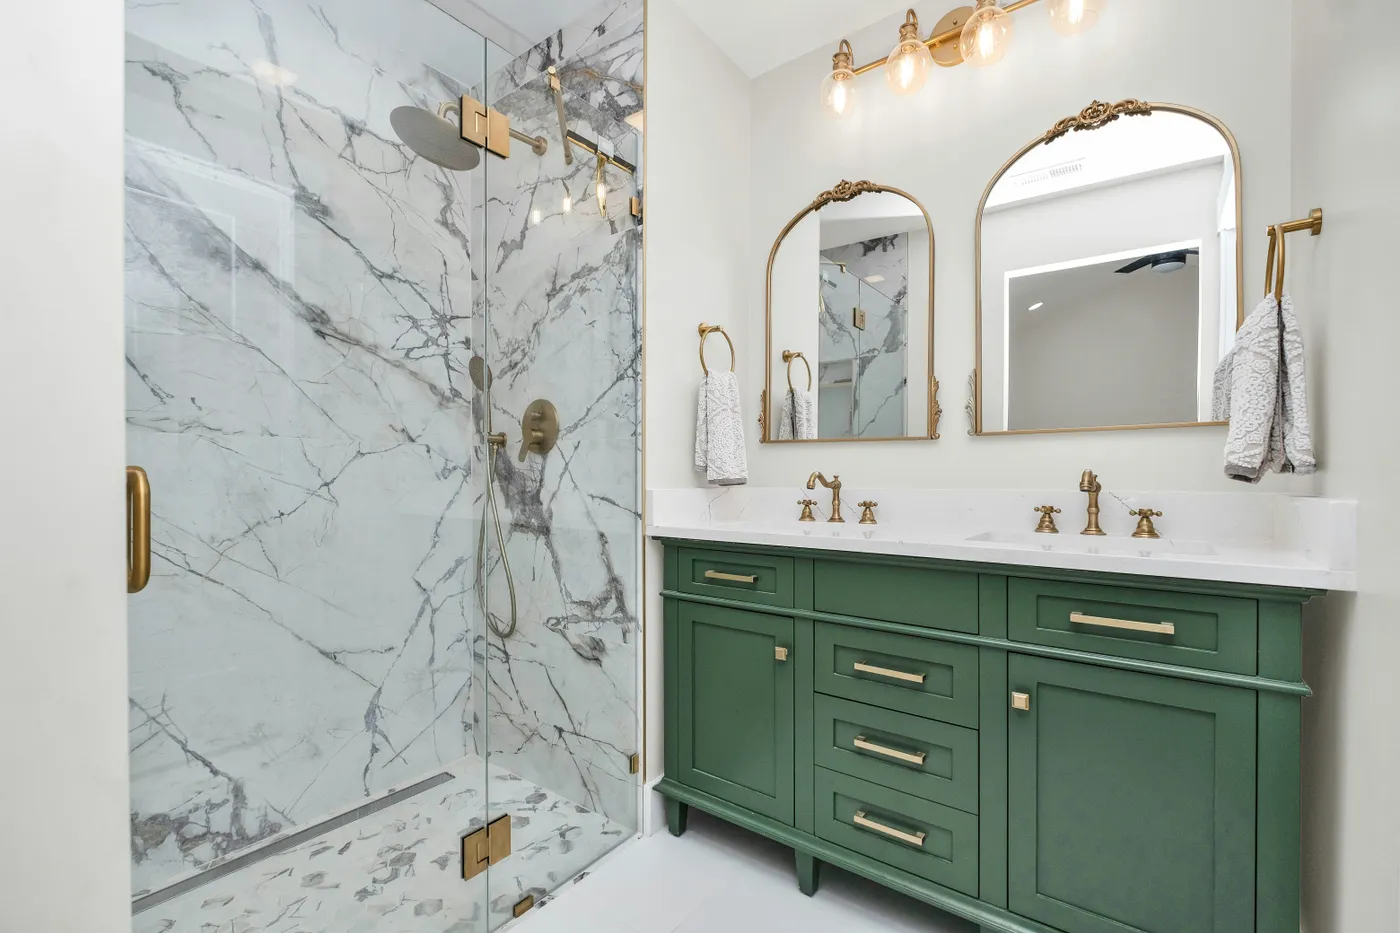
A look this luxurious has a few key cost centers. The deep green double vanity and marble countertop are the stars and where a good chunk of the budget will go. Gold-toned fixtures and ornate mirrors add that classic, high-end touch.
|
📋 Copy HEX 🔗 Share |
- Main Furniture (Vanity & Countertop): $2,500 – $6,000
- Lighting (Sconces): $400 – $900
- Fixtures (Faucets, Shower System): $800 – $2,500
- Tile (Shower Walls & Floor): $1,500 – $4,000 (materials only)
- Decor (Mirrors, Hardware): $500 – $1,200
- TOTAL: $5,700 – $14,600+
- Budget alternative: Find a secondhand vanity on Facebook Marketplace and paint it a deep green (like Benjamin Moore’s ‘Salamander’). Opt for brass-plated fixtures instead of solid brass, and choose a high-quality quartz that mimics marble for about 40% less.
This design really shines in a primary bathroom with at least 100-120 square feet of floor space. The double vanity alone requires a wall length of 60-72 inches, plus clearance on either side. You also need enough depth to accommodate the spacious glass-enclosed shower without making the room feel cramped. A minimum ceiling height of 8 feet is recommended, but 9 feet or more would be ideal to let those gorgeous arched mirrors breathe. For a smaller space, consider the single-vanity approach in Idea #13, which uses a similar color family.
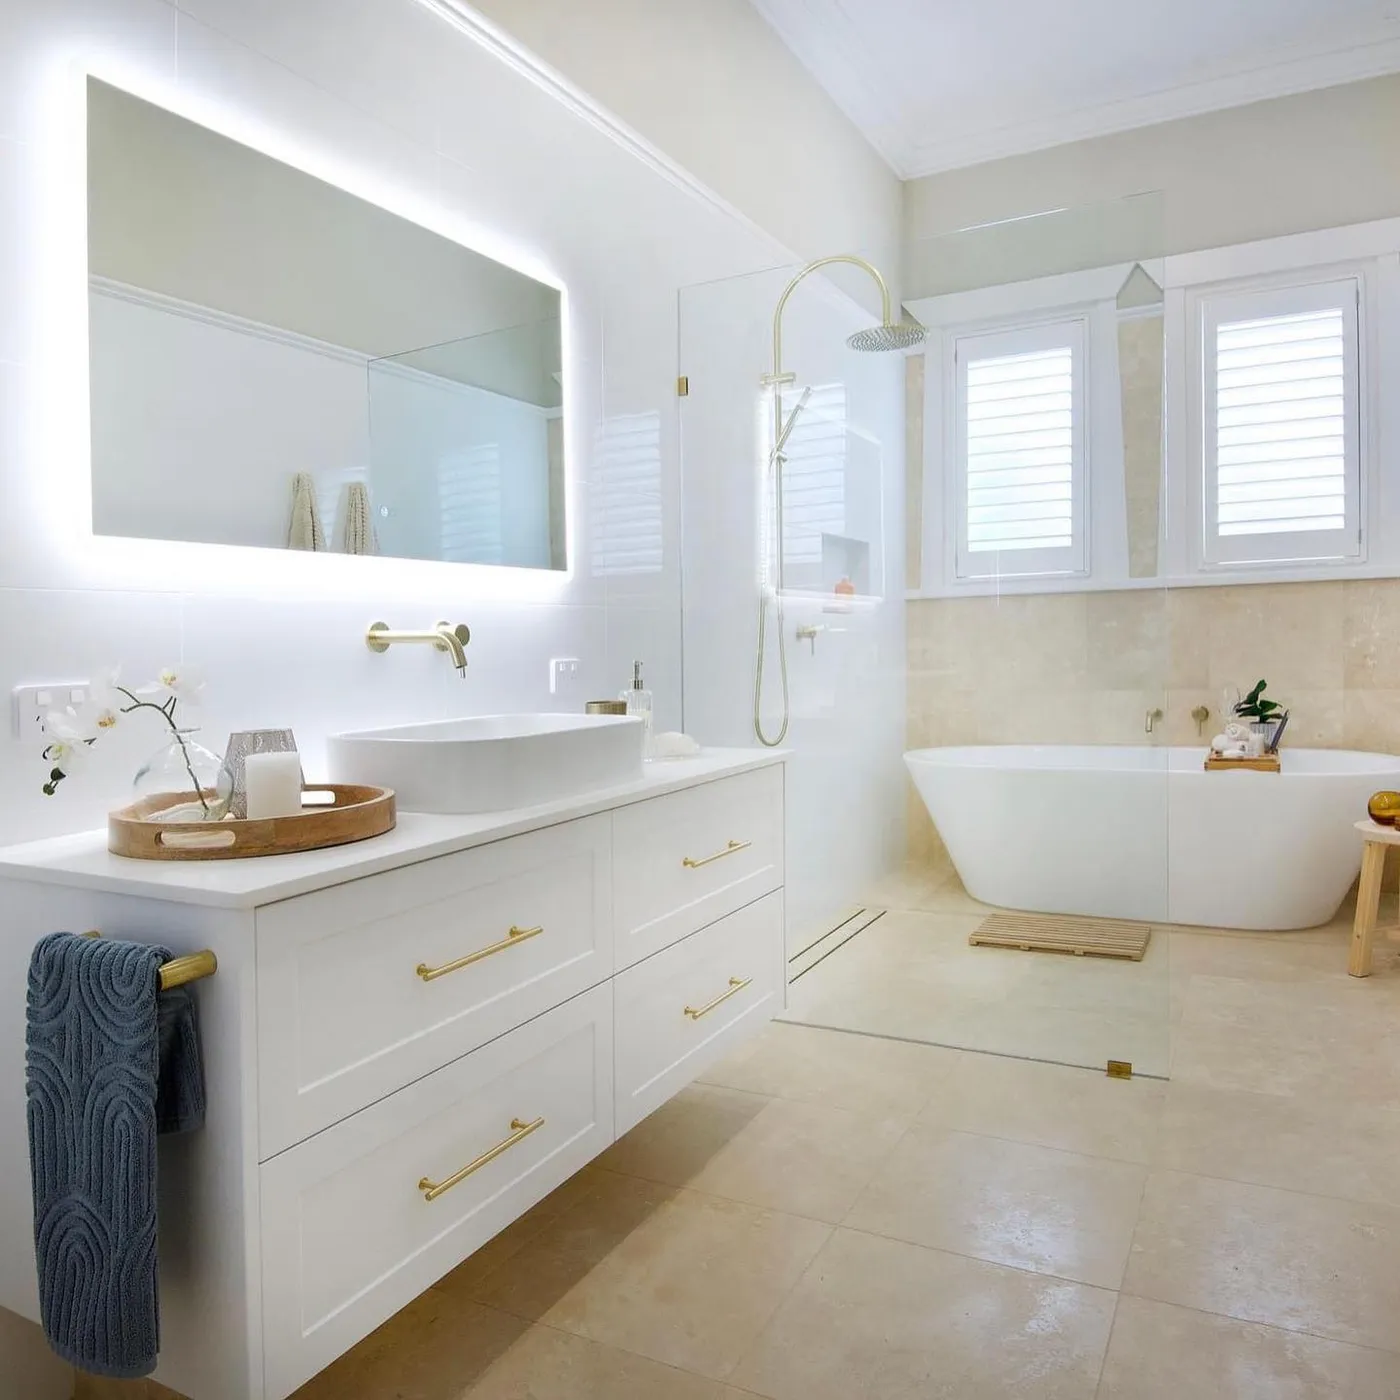
5. Create a Bright Oasis with Creamy Tiles and Gold Hardware
When using large-format tiles like the cream-colored ones on the floor and walls, grout color is a critical decision. To achieve this seamless, expansive look, match the grout color as closely as possible to the tile itself. Using a contrasting grout would create a grid-like pattern, visually breaking up the space and making it feel smaller. For these tiles, a light beige or alabaster grout would be perfect. This trick makes the surfaces look more like solid slabs of stone, which reads as more luxurious and serene.
|
📋 Copy HEX 🔗 Share |
This bathroom feels so inviting because it masters the art of tone-on-tone layering. Instead of a stark white, the design uses a palette of white, cream, and beige. The white subway tile, floating vanity, and tub provide a crisp base, while the large-format cream tiles on the floor and back wall add softness and depth. The gold fixtures are the perfect finishing touch, as their warm metallic sheen complements the creamy undertones beautifully, tying the whole look together. It’s a subtle but powerful way to create a room that feels both bright and incredibly warm.
6. Mix Cool Grey Cabinetry with Edgy Matte Black Fixtures
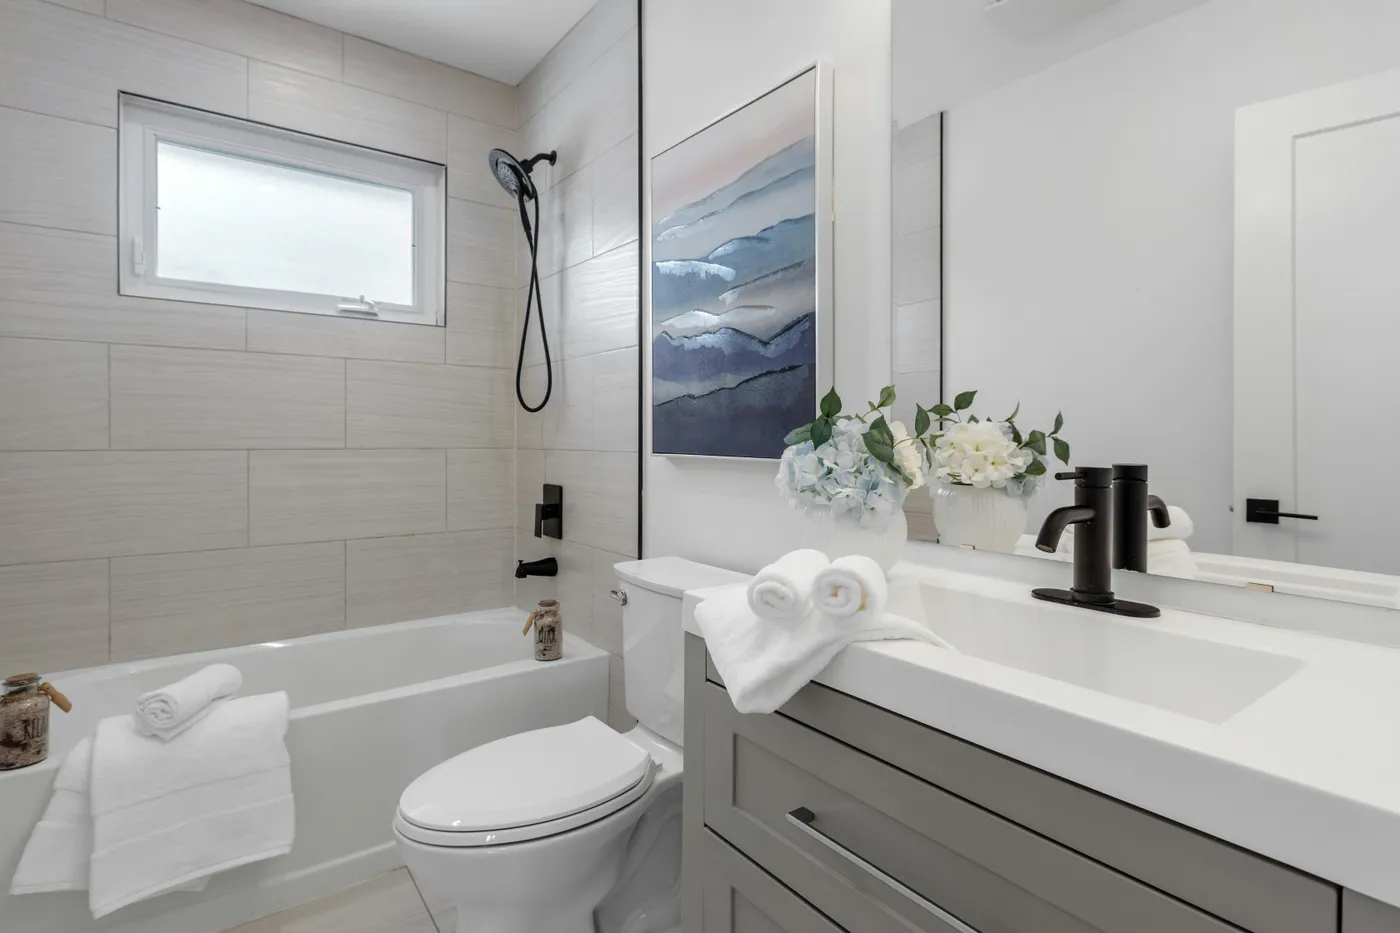
You don’t need a custom vanity to get this clean, modern look. Start with a stock grey shaker-style vanity from a big box store like Home Depot or Lowe’s, which can run you $400-$800. Pair it with affordable matte black hardware from Amazon or Target for under $50. The real star, the light grey rectangular wall tiles, can be found for $4-$8 per square foot. Finish with a simple matte black faucet ($100-$200) and a piece of abstract art from a site like Society6 or even a local thrift store to bring in that pop of color without a huge investment.
|
📋 Copy HEX 🔗 Share |
This combination of soft grey and matte black has become a new classic for a reason. It’s the perfect evolution from the all-white and farmhouse trends of the late 2010s. The grey feels calming and sophisticated, while the matte black provides a graphic punch that feels modern and a bit industrial. This look has serious staying power because it’s a neutral base that can be easily updated with different accent colors through towels, art, and accessories. It’s a safe but stylish bet for the long haul.
7. Achieve a Clean Look with a Light Gray Vanity and Subway Tile
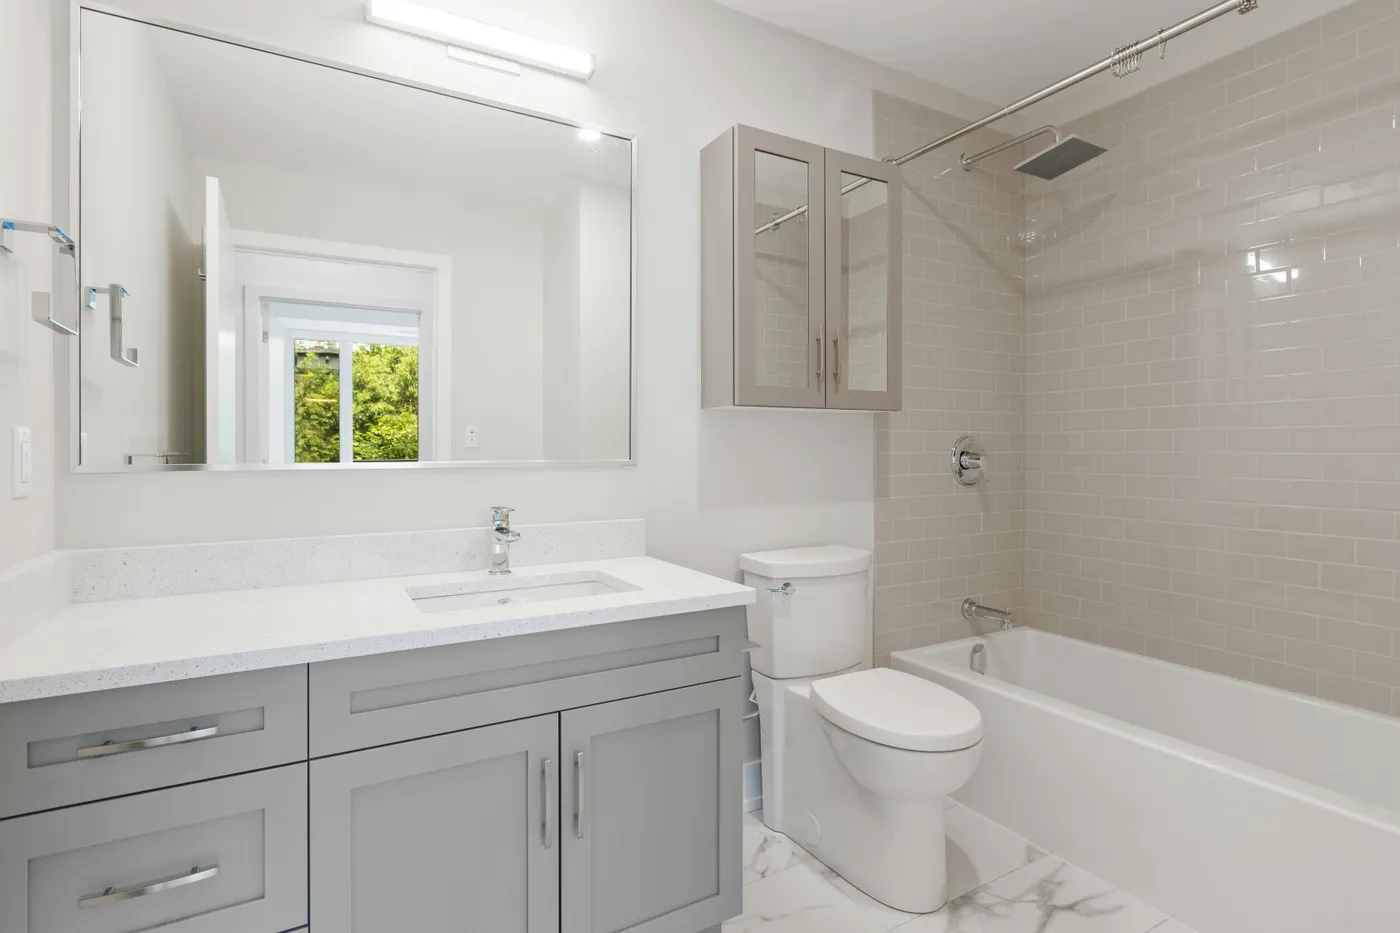
This bathroom’s serene vibe comes from a simple formula: 50% light gray + 40% bright white + 10% reflective chrome. The light gray vanity provides a soft, neutral anchor for the room. The white is deployed across multiple surfaces—the speckled countertop, marble-look floor tiles, and walls—to maximize brightness. The final 10% of chrome in the hardware and rain showerhead adds a polished, modern sparkle that keeps the space from feeling flat. The beige subway tiles in the shower add a hint of warmth, subtly tweaking the formula without disrupting the overall cool-toned peace.
|
📋 Copy HEX 🔗 Share |
A large, unframed mirror like this one is fantastic for making a small bathroom feel bigger and brighter. However, it also means there’s no medicine cabinet for hidden storage. Before you commit to this minimalist look, be brutally honest about your storage needs. If you have a lot of products, you’ll need to account for them with drawers in the vanity or nearby shelving. Otherwise, your beautiful, clean countertop will quickly become a cluttered mess, defeating the entire purpose of this calm aesthetic.
8. Add Subtle Movement with Grey Wavy Wallpaper
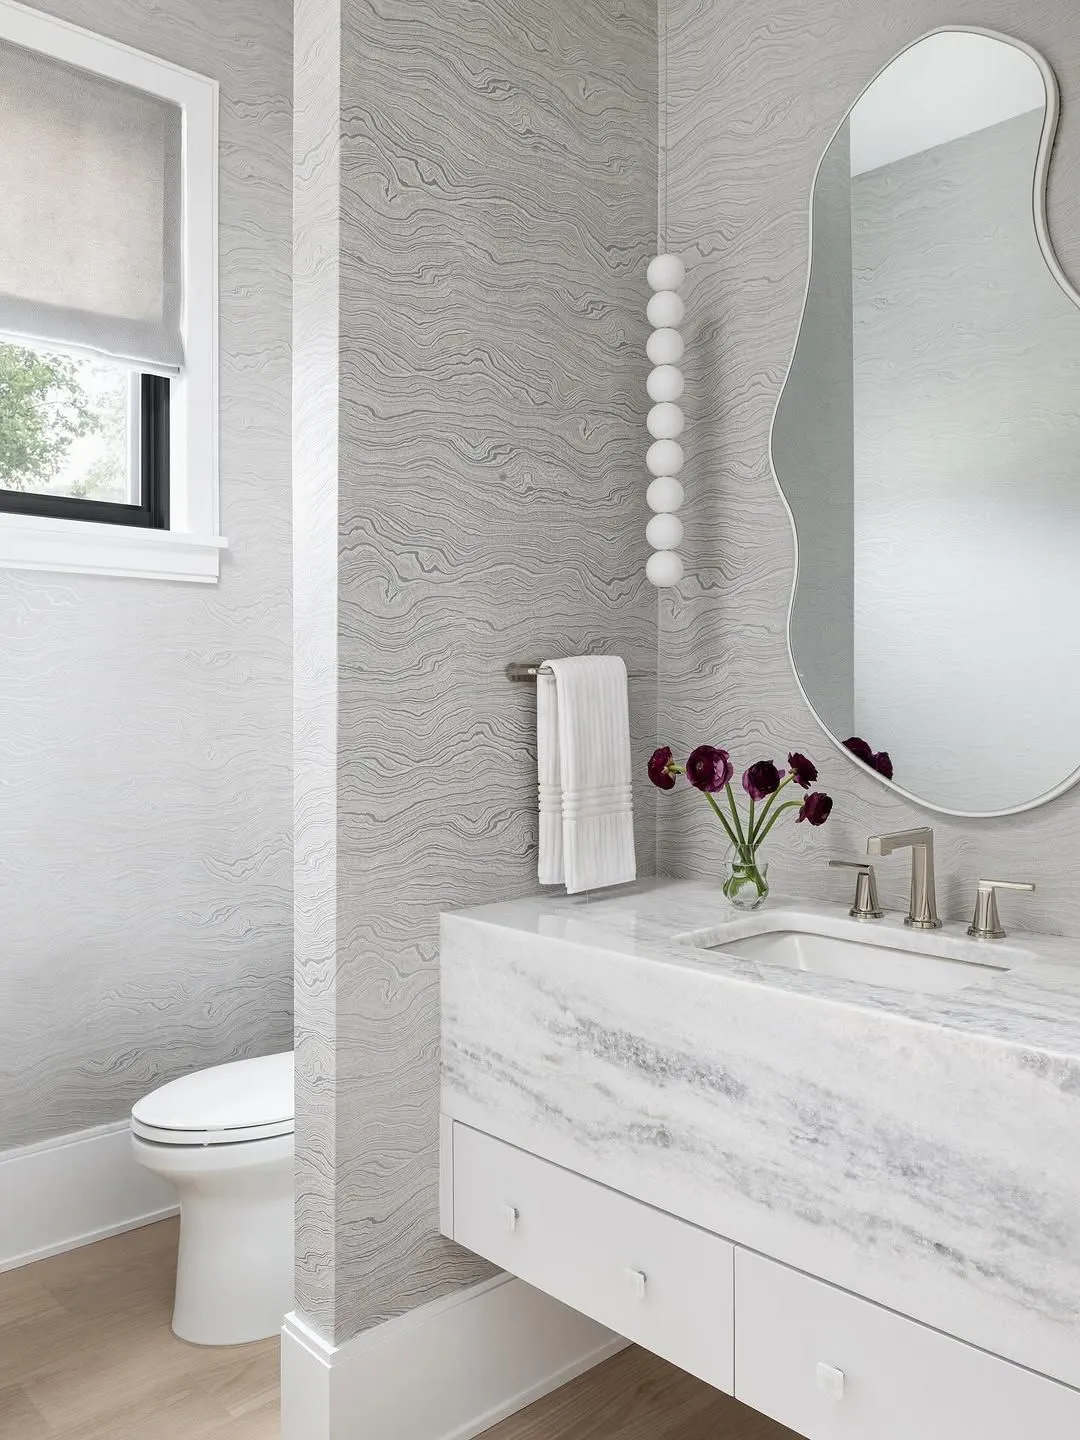
The absolute standout feature here is the grey wavy wallpaper. It’s what gives the room its unique personality and sense of calm. Without it, you’d have a lovely but standard modern bathroom. The wallpaper introduces a soft, organic pattern that mimics the movement of water, which is perfect for a bathroom setting. It adds visual interest and texture without overwhelming the space, and it pairs beautifully with the other modern elements like the floating vanity and the sculptural light fixture.
|
📋 Copy HEX 🔗 Share |
Installing a vertical light fixture like this one is a great way to add a sculptural element. Here’s a quick guide:
- Turn off the power to the circuit at your breaker box. Safety first!
- Remove the old fixture and disconnect the wires.
- Install the new mounting bracket that came with your spherical light fixture to the electrical box in the wall, making sure it’s level.
- Connect the fixture’s wires to the corresponding wires in the wall (black to black, white to white, ground to ground), securing them with wire nuts.
- Carefully tuck the wires into the electrical box and attach the fixture’s base to the mounting bracket.
- Screw in the bulbs, restore power, and enjoy your new statement light. This should take about 30-60 minutes and cost around $150-$400 for the fixture itself.
9. Try a High-Contrast Monochrome Bathroom with Subway Tiles
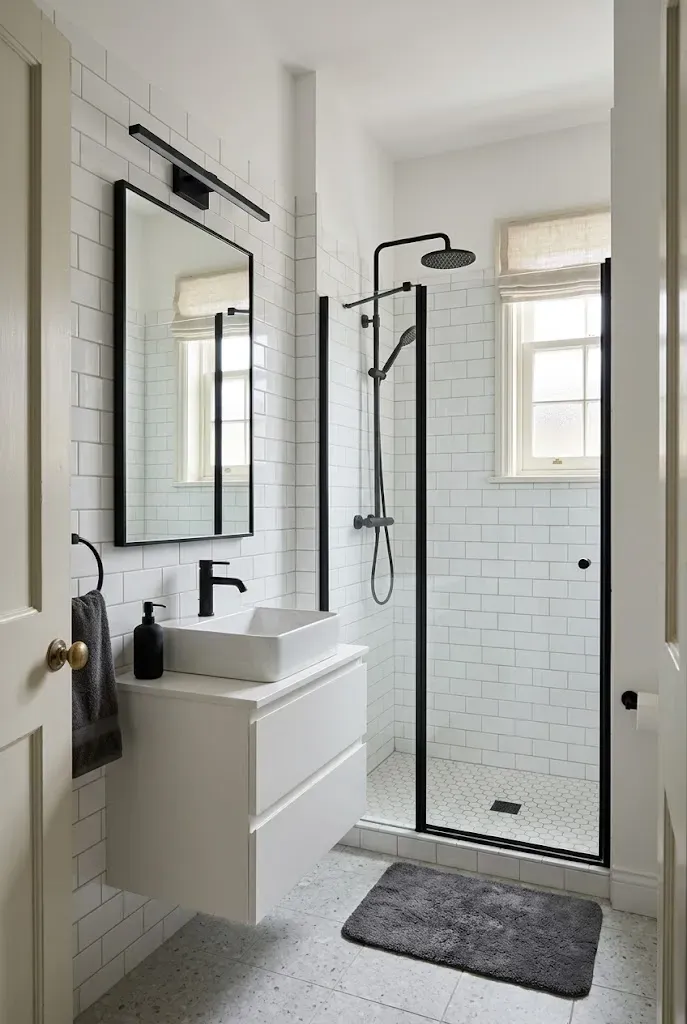
The power of this design is in its unapologetic use of contrast. The crisp white of the subway tiles and floating vanity creates a bright, clean foundation. Against this, the matte black fixtures, mirror frame, and shower enclosure create strong, graphic lines that command attention. This isn’t a soft, blended look; it’s sharp and intentional. The light gray speckled floor tiles act as a visual mediator, bridging the gap between the stark black and white elements and preventing the contrast from feeling too jarring. Compare this to the softer monochrome in Idea #20.
|
📋 Copy HEX 🔗 Share |
This high-contrast black and white scheme is incredibly versatile and works well in bathrooms of almost any size. In a small bathroom (around 35-50 sq ft), the white subway tiles and floating vanity will help the space feel larger and more open. In a medium to large bathroom (60+ sq ft), you have more room to play with the balance of black and white. You could even consider a black accent wall or a larger black vanity to make a bolder statement without worrying about overwhelming the space. An 8-foot ceiling is sufficient for this look to succeed.
10. Combine Teal Vertical Tiles with a Dark Reeded Vanity
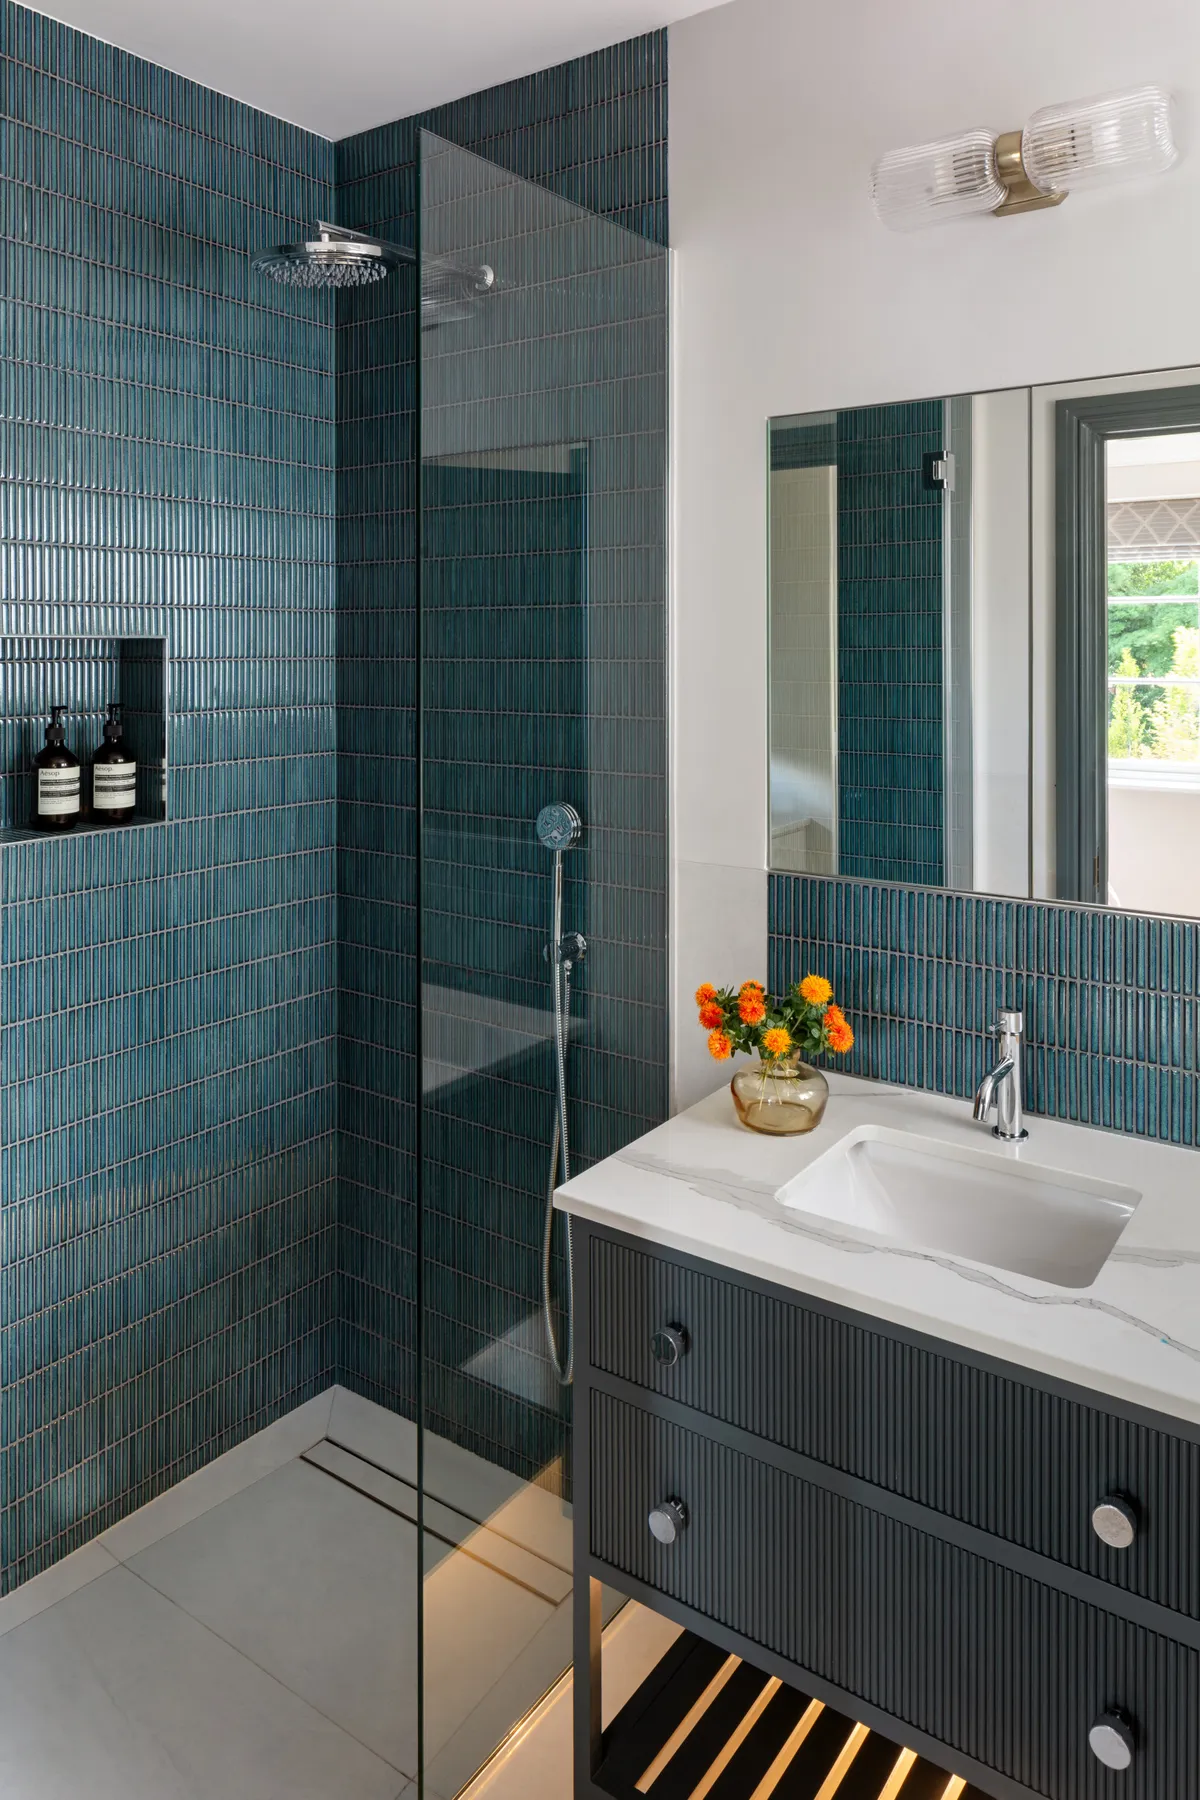
When using a bold tile like this teal subway tile, consider its orientation. Laying them vertically, as shown here, draws the eye upward and can make a standard 8-foot ceiling feel taller. This is a fantastic trick for smaller bathrooms or those with lower ceilings. It also gives a classic material like subway tile a fresh, modern twist. To make the color pop even more, use a light-colored, low-contrast grout like a soft grey or off-white. This defines the shape of the tiles without creating a busy grid pattern.
|
📋 Copy HEX 🔗 Share |
A dark, reeded vanity is undeniably chic, but that texture can be a magnet for dust and, in a bathroom, stray hairs or powder spills. You’ll want to have a soft-bristled brush or a vacuum with a brush attachment handy for regular cleaning to keep it from looking grimy. Also, the combination of chrome and gold-toned metals is very on-trend, but be mindful of water spots on the chrome faucet and shower fixtures. A quick wipe-down after use will keep them looking pristine.
11. Mix Light Wood, Marble, and Blue Herringbone Tiles
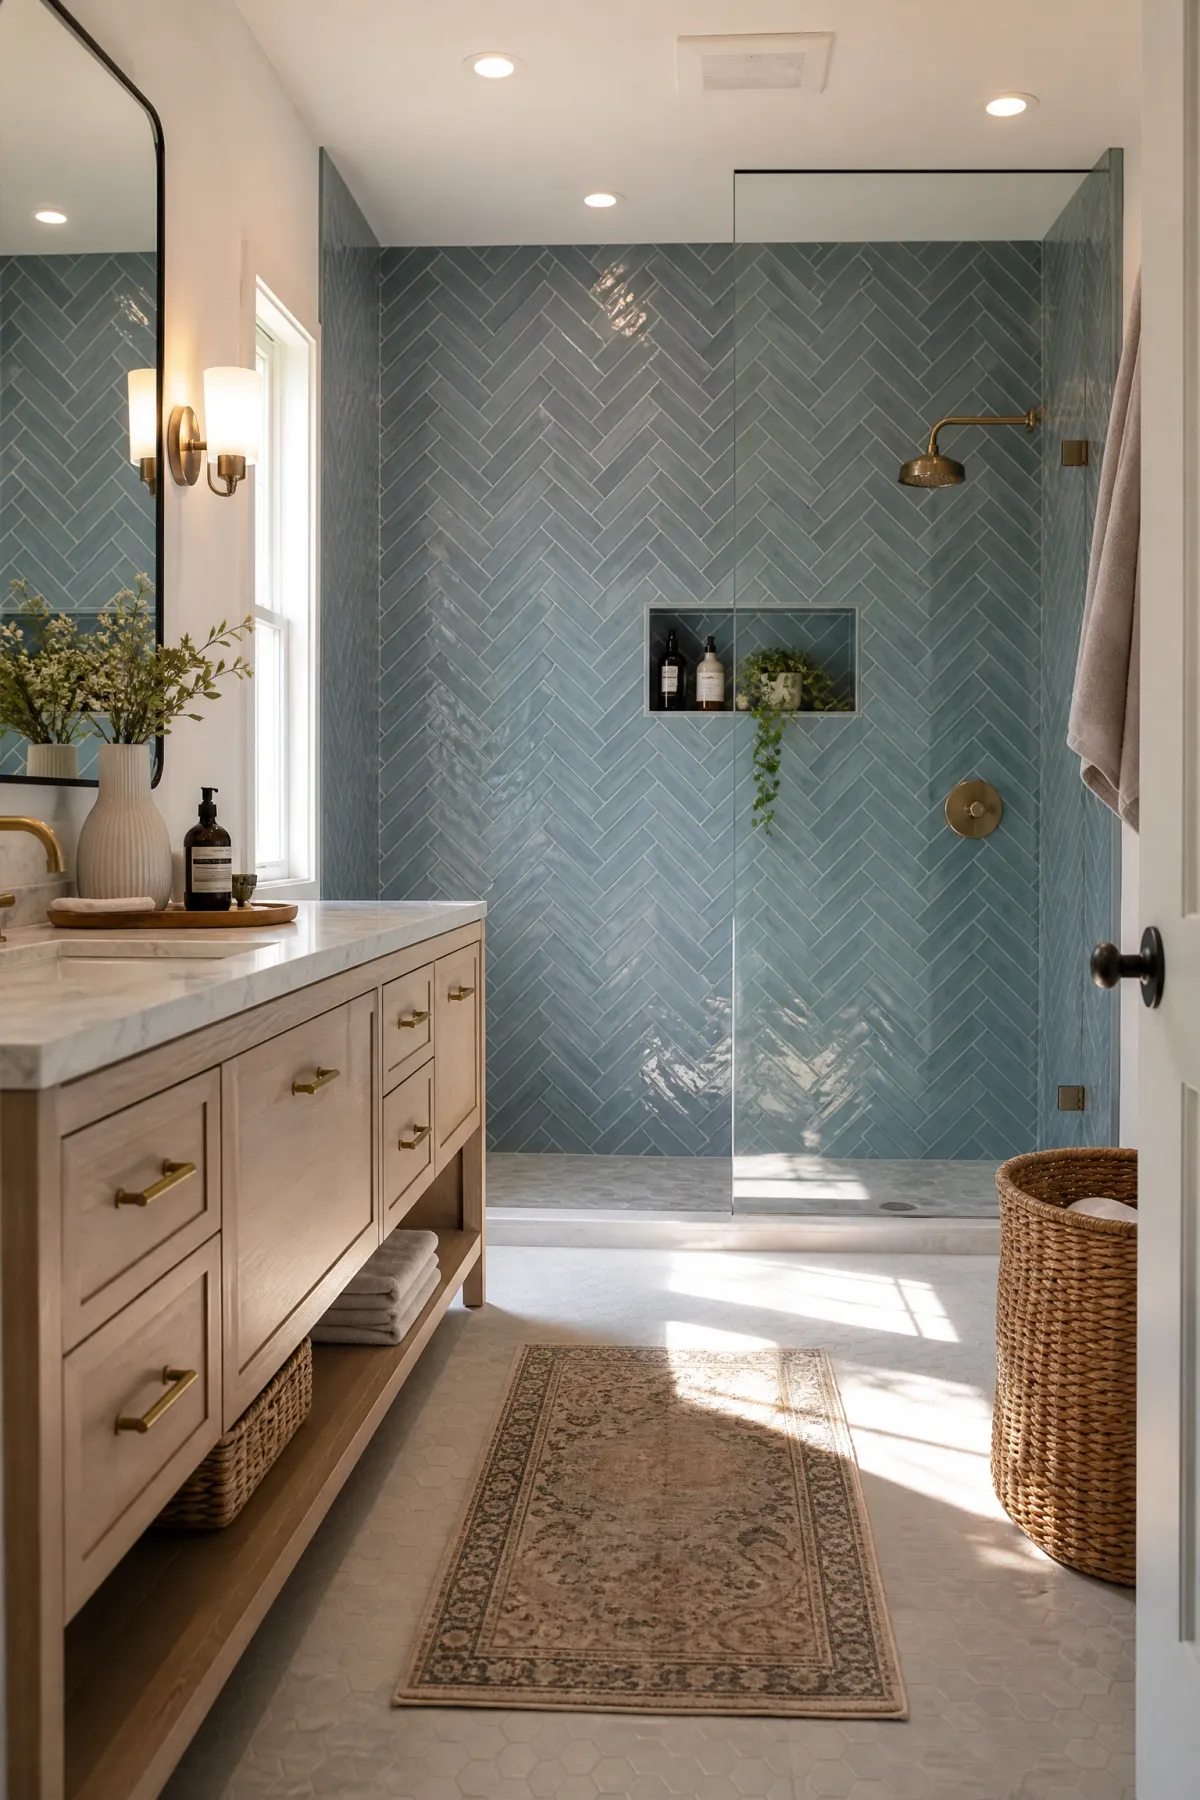
This bathroom achieves its fresh-yet-elegant feel by following a clear recipe: 40% natural wood + 30% crisp white + 20% accent color + 10% metallic warmth. The light wood double vanity provides a substantial, organic base. The white marble countertop and hexagonal floor tiles keep the space feeling bright and clean. The glossy blue herringbone tiles are the show-stopping accent, adding personality and a touch of coastal cool. Finally, the brushed gold fixtures provide that 10% of warmth and luxury, tying everything together. Swap the blue for a soft green or even a terracotta for a completely different vibe with the same balanced feel.
|
📋 Copy HEX 🔗 Share |
Before you commit to a look this layered, check these boxes to make sure your space can handle it:
- Measure your vanity wall. Do you have at least 60 inches to accommodate a double vanity without it feeling cramped?
- Check your light source. Does the room get enough natural light to support the medium-toned blue tiles without feeling dark?
- Confirm your plumbing layout. Are the water lines already in place for a double sink, or will you need to budget for a plumber to add them?
- Get tile samples! Herringbone patterns can look very different in person. Order samples of your floor and wall tile to see how they look together in your bathroom’s light.
12. Create Drama with Deep Teal Walls and Gold Accents
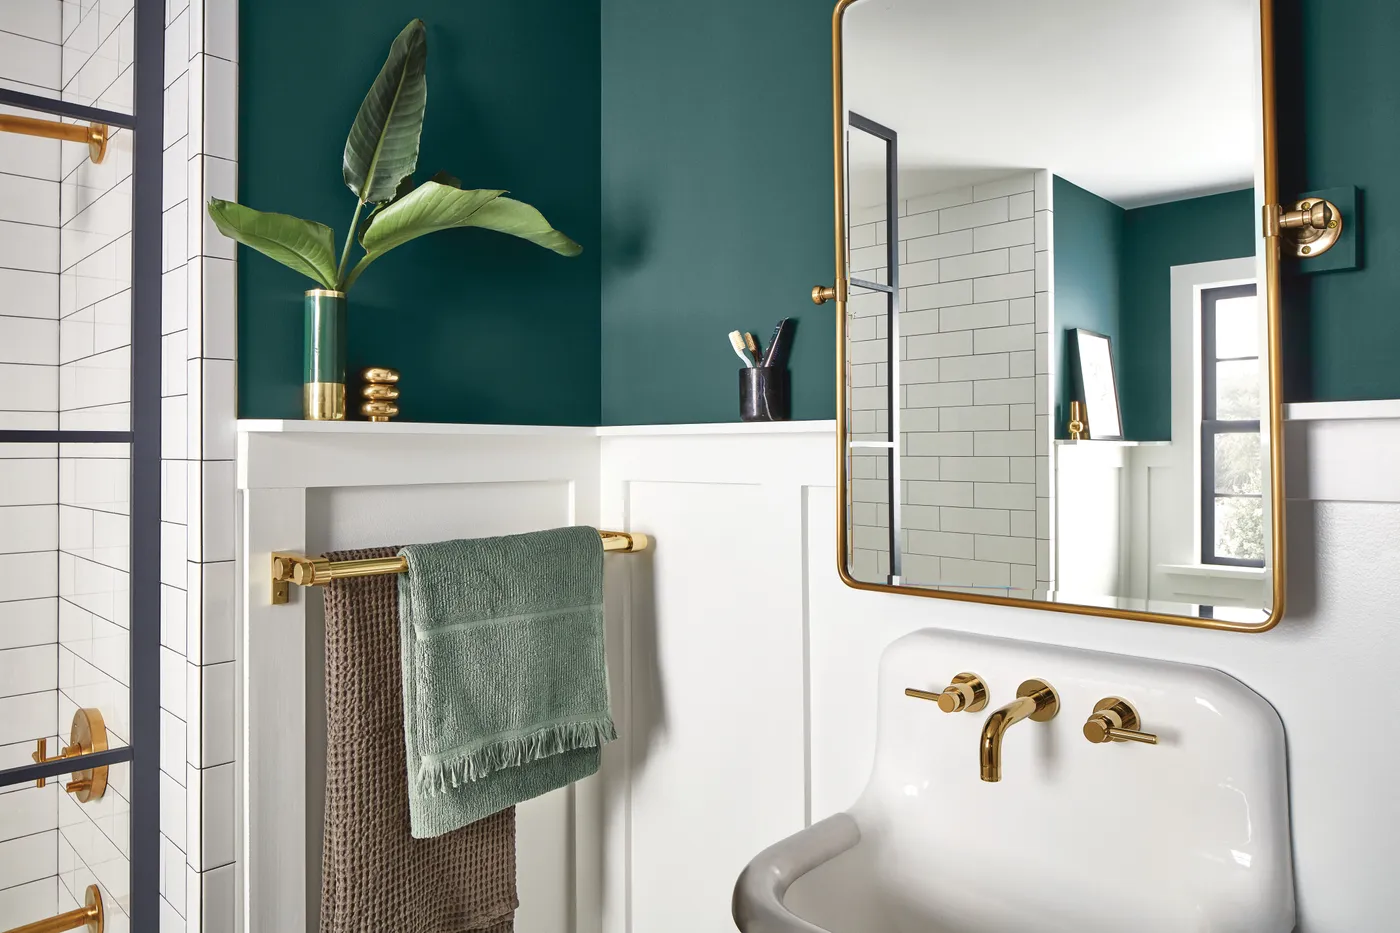
The deep teal wall color is unequivocally the heart of this design. It’s a bold, confident choice that instantly injects personality and drama into the space. Without this rich color, the white wainscoting and subway tile would be perfectly nice, but predictable. The teal creates a jewel-box effect, making the gold fixtures pop and the white elements look even crisper. It proves that you don’t need to tile every surface to make a huge impact; sometimes, a can of paint is the most powerful tool you have.
|
📋 Copy HEX 🔗 Share |
You can get this high-end, elegant look on a surprisingly small budget. A gallon of quality deep teal paint (like Sherwin-Williams Cascades) will cost about $60-$80. Instead of a pricey custom gold-framed mirror, find a vintage one at a thrift store and give it a new life with a can of metallic gold spray paint for under $15. Budget-friendly gold faucets and towel bars can be found online at places like Wayfair or Amazon for $100-$250. The white subway tile is a classic for a reason—it’s incredibly affordable, often costing less than $3 per square foot.
13. Use Emerald Green Square Tiles for a Classic, Vibrant Shower
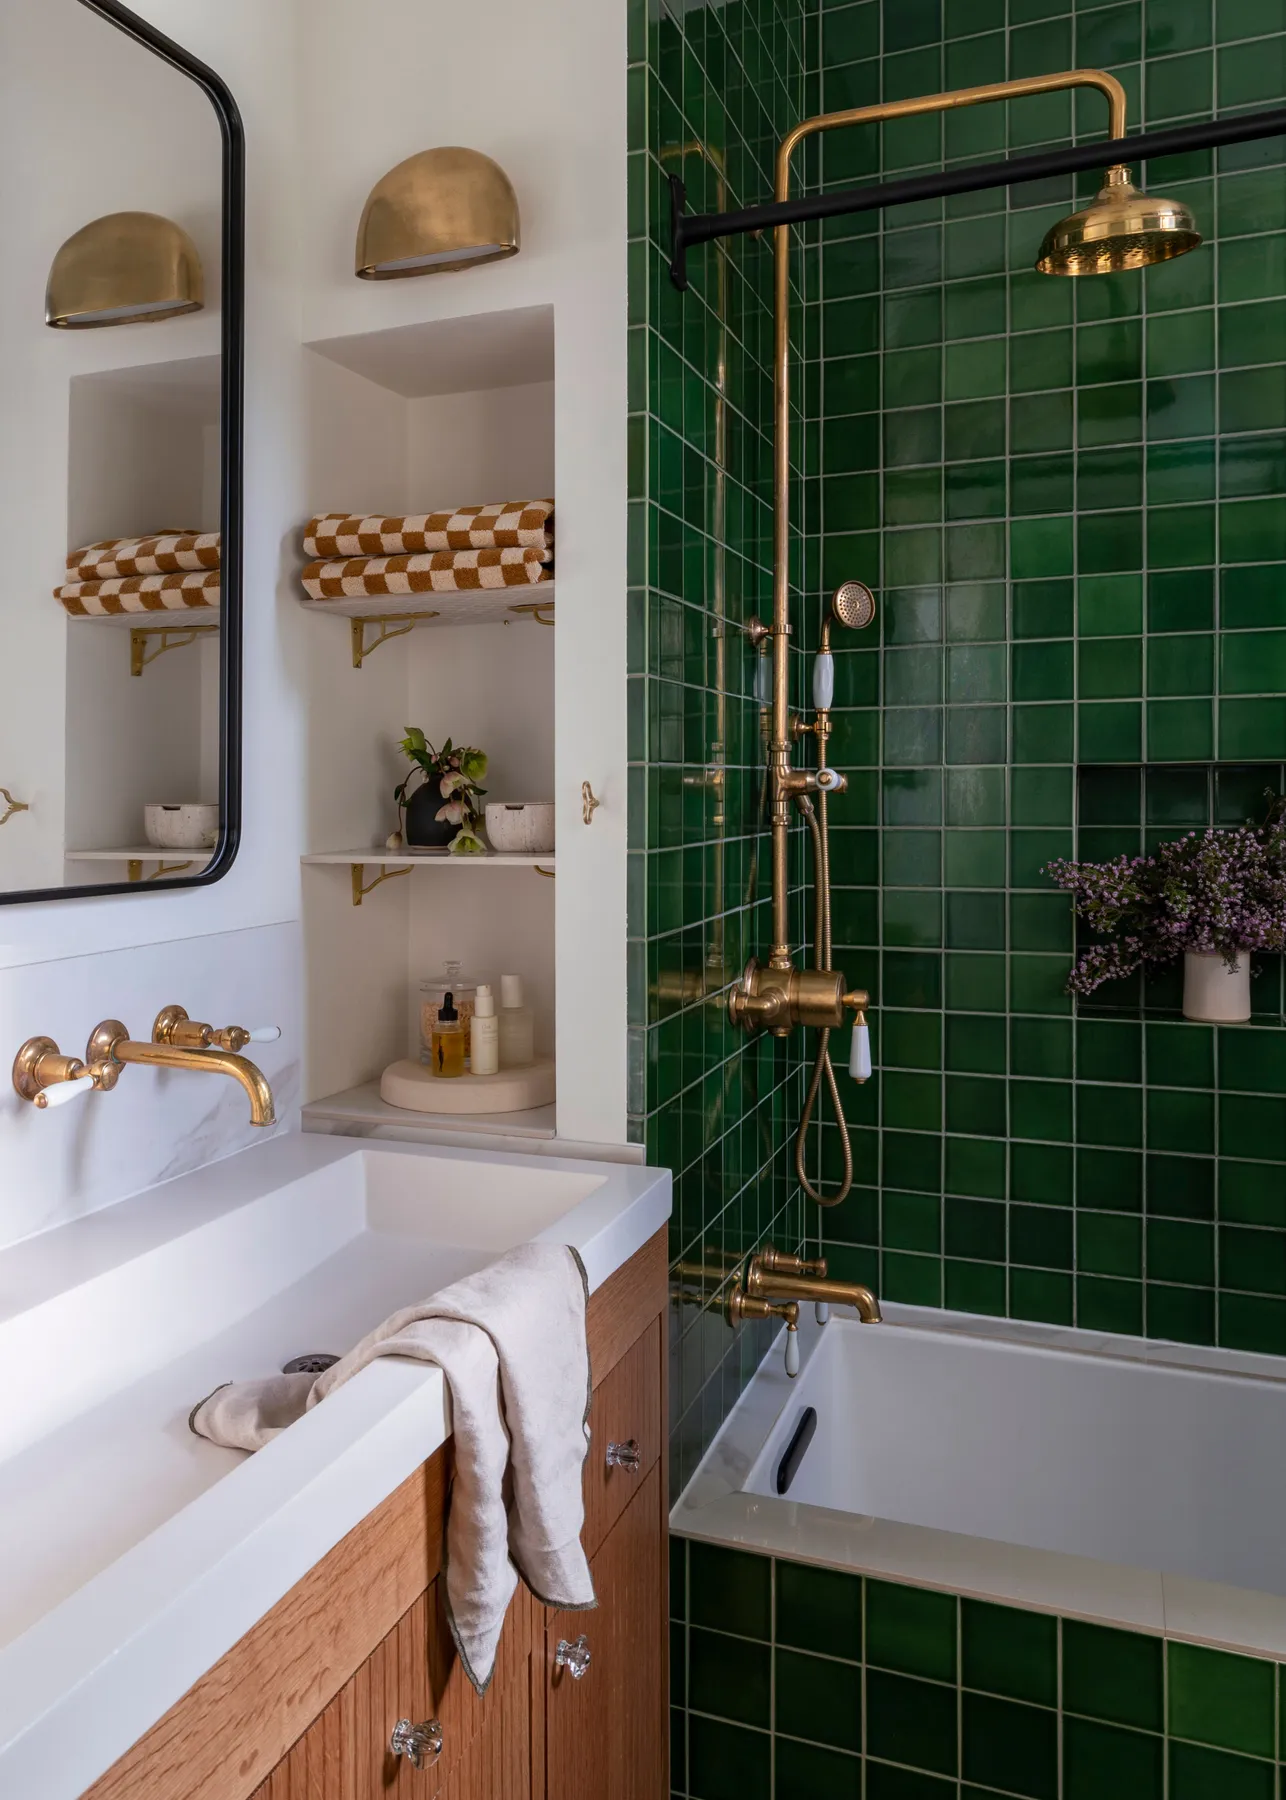
This design works because it expertly pairs a bold, saturated color with warm, natural materials. The emerald green square tiles provide a stunning focal point, rich with vintage charm. The key is that they are balanced by the warmth of the oak vanity and the antique brass fixtures. The brass acts as a bridge between the cool green and the warm wood, creating a cohesive and inviting palette. The use of simple white for the sink and shelving prevents the look from becoming too heavy or dated, keeping it fresh and bright.
|
📋 Copy HEX 🔗 Share |
Creating those clean, functional built-in shelves is a great weekend project. Here’s how to tackle it:
- Measure your nook and cut your shelf boards (usually 1-inch thick pine or poplar) to size.
- Sand the boards smooth and apply two coats of high-quality semi-gloss white paint suitable for bathrooms.
- Use a stud finder to locate the wall studs where you’ll hang your shelves. Mark their locations with a pencil.
- Install your brass brackets, making sure they are level and securely screwed into the studs. A typical shelf can hold about 25-40 lbs if installed correctly.
- Place your painted shelf boards on top of the brackets and secure them from below with small screws.
- Style with towels, bath products, and a small plant! This should take 3-4 hours and cost around $50-$100 in materials.
14. Go Moody and Sophisticated with a Navy Blue Vanity
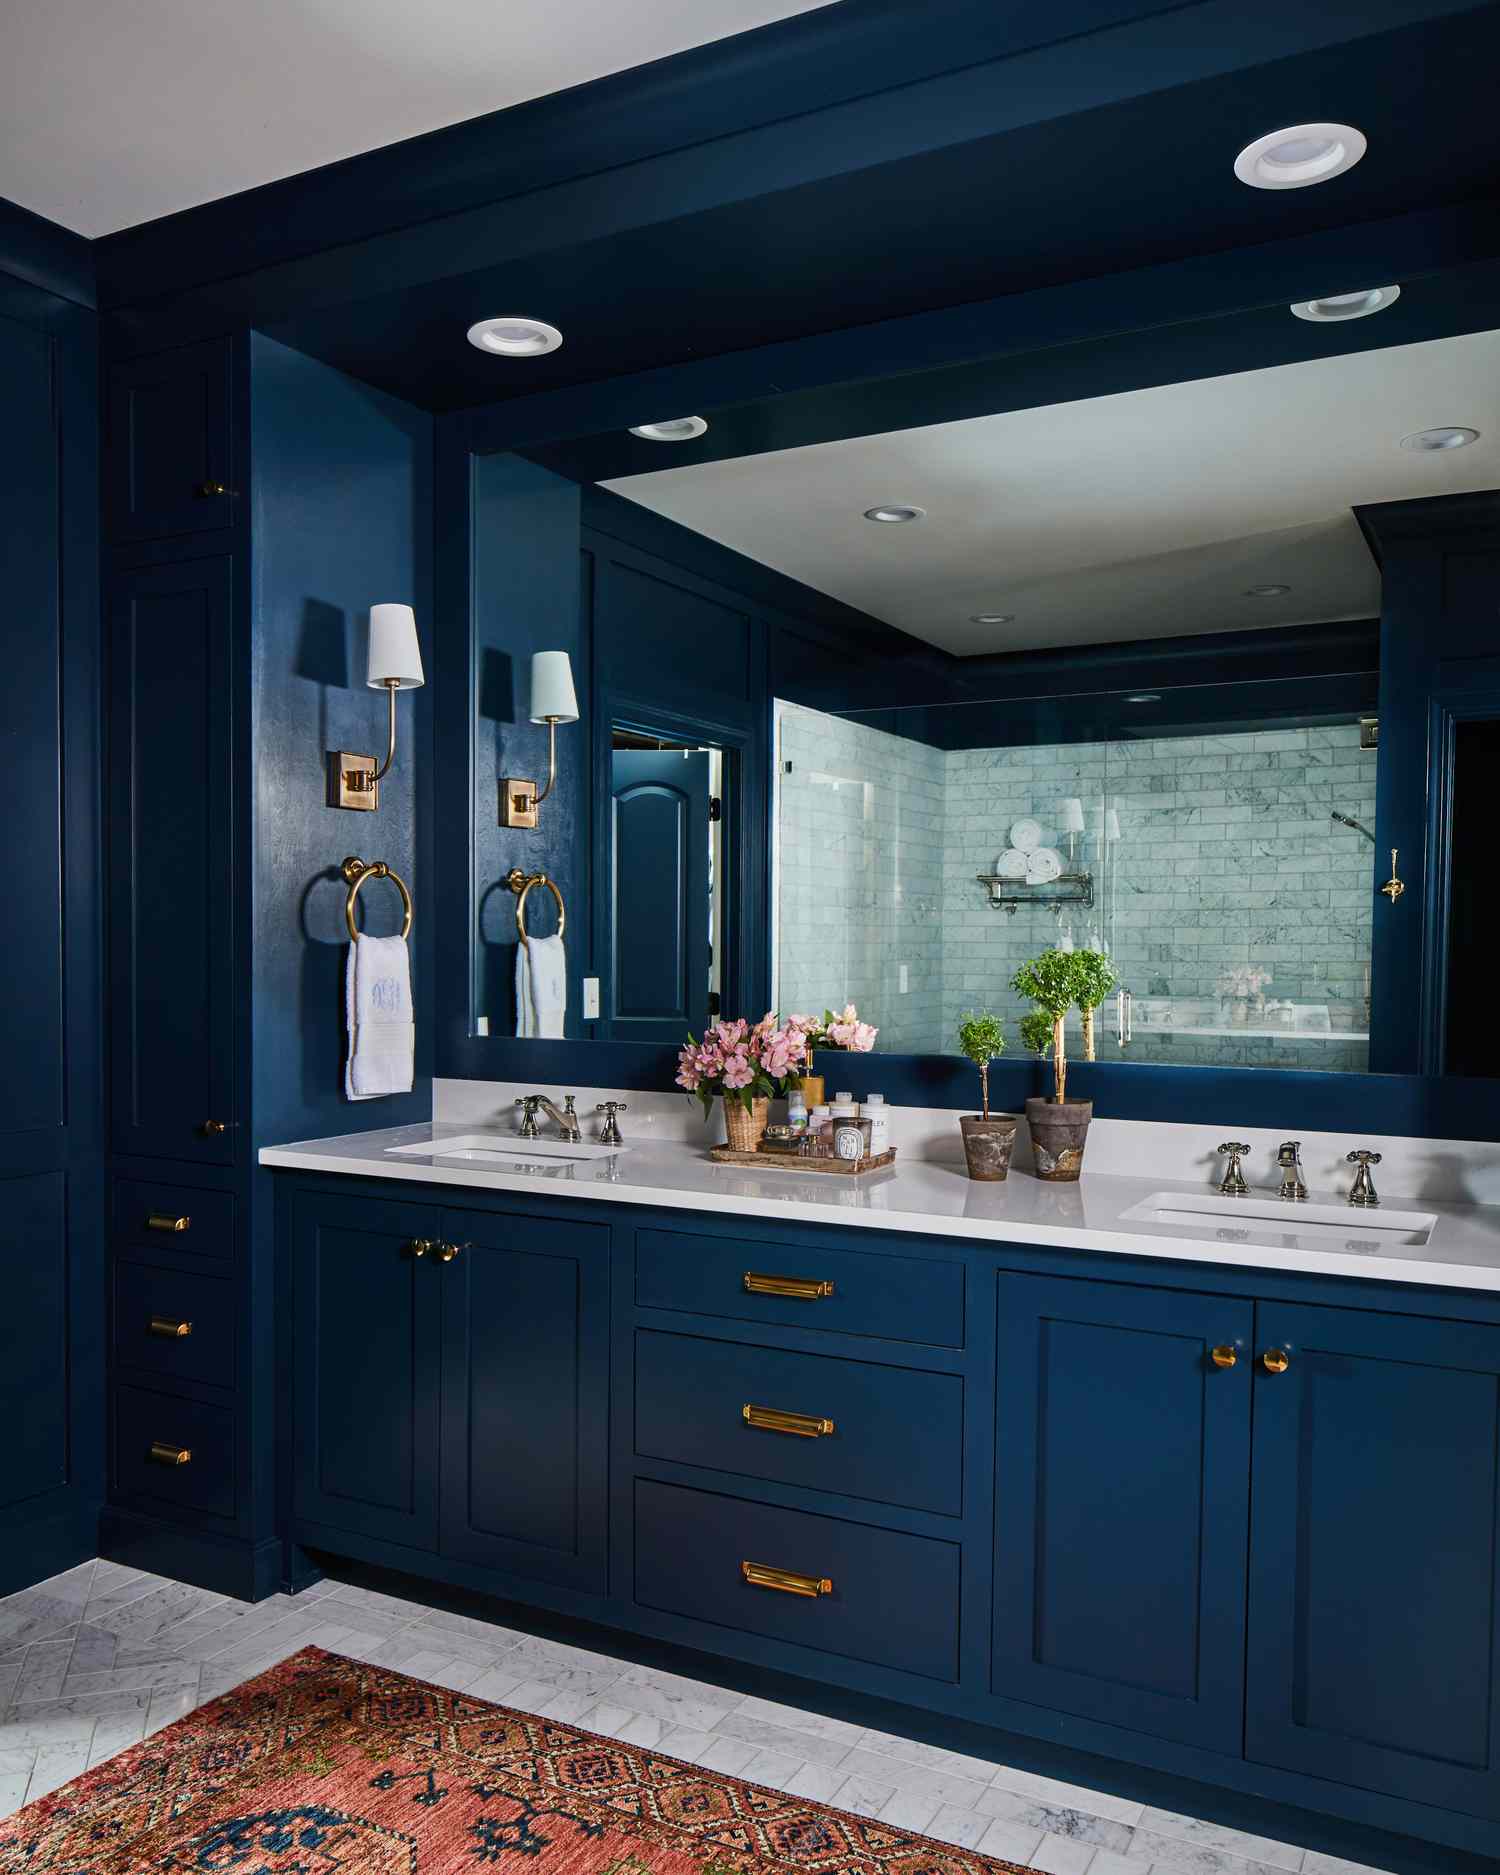
This sophisticated, layered look involves several high-end materials and finishes. The custom-looking navy blue paneled cabinetry and wall treatment are the largest investment, followed by the marble countertops and floor tiles.
|
📋 Copy HEX 🔗 Share |
- Main Furniture (Paneled Vanity & Walls): $3,000 – $8,000
- Lighting (Brass Sconces): $500 – $1,500
- Fixtures (Faucets, Towel Rings): $600 – $2,000
- Tile & Stone (Marble Countertops & Floor): $2,000 – $6,000 (materials only)
- Decor (Rug, Accessories): $200 – $700
- TOTAL: $6,300 – $18,200+
- Budget alternative: Paint existing cabinetry navy blue and add panel molding from a hardware store. Use a marble-look quartz for the countertop and porcelain tile for the floor to get a similar vibe for about 50% less.
A dark, moody color like navy blue can be absolutely stunning, but it requires good lighting to work. This bathroom succeeds because it has multiple light sources: the brass sconces flanking the mirrors provide flattering task lighting, and likely there’s an overhead source as well. In a bathroom with only a single, weak overhead light, this much navy could feel gloomy and cave-like. Before you commit to a dark color, assess your lighting situation. You may need to budget for adding sconces or upgrading your main fixture to ensure the space feels sophisticated, not just dark.
15. Create an Artistic Vibe with a Blue Ombre Accent Wall
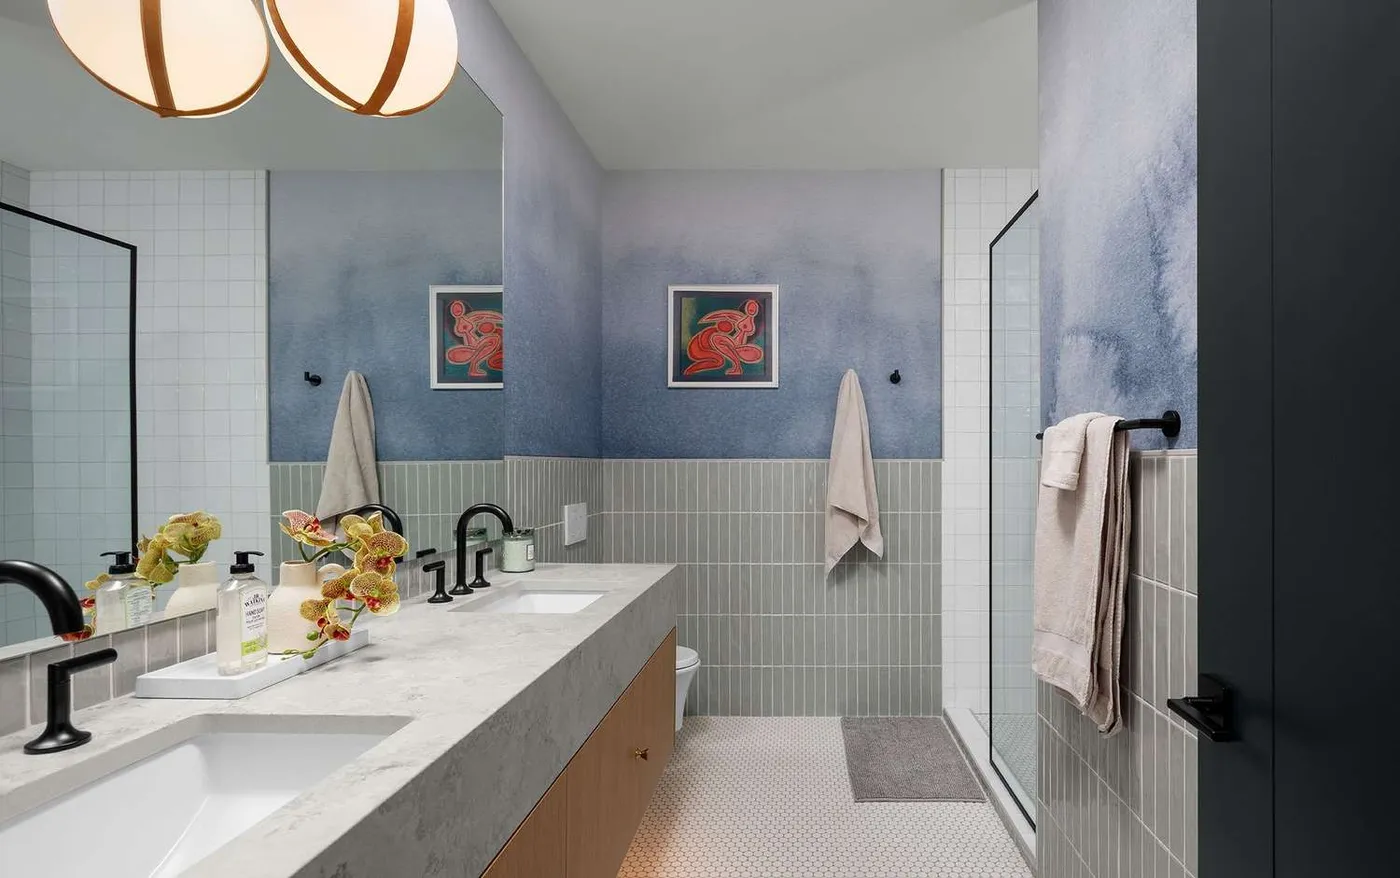
Ombre and color-wash wall treatments are surging in popularity as people move away from flat, single-color walls and look for ways to add personality and depth to their spaces. This look feels particularly fresh in a bathroom, where it can evoke the feeling of water or a misty sky. It’s part of a larger trend towards Artisanal Modern, where unique, handcrafted-feeling details are prioritized over mass-produced perfection. This isn’t a fleeting fad; the desire for personalized, unique spaces has real staying power.
|
📋 Copy HEX 🔗 Share |
Achieving a smooth ombre effect with paint requires a bit of technique. You’ll need three shades of your chosen color (light, medium, dark), three rollers, and a good quality paintbrush for blending. Start by painting the entire wall with the lightest shade. Then, paint the bottom third with the darkest shade and the middle third with the medium shade. While the paint is still wet, use a clean, dry brush or a new roller to lightly blend the transition lines between the colors. Work quickly and use soft, feathery strokes to create a seamless gradient.
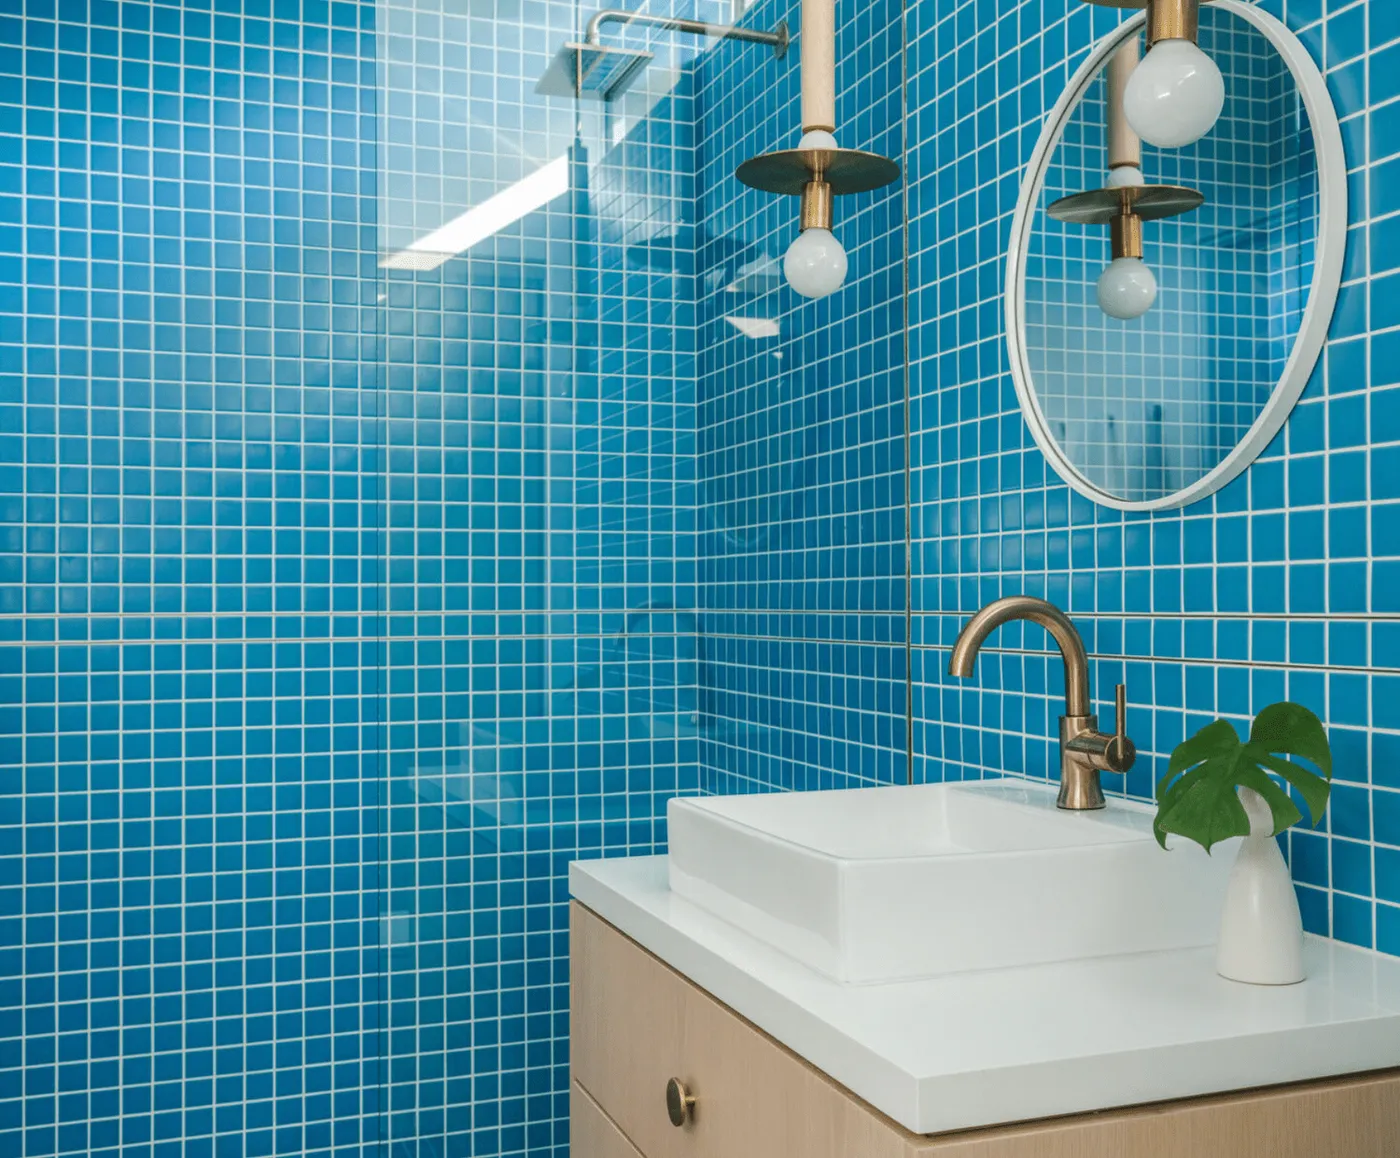
16. Make a Splash with Vibrant Blue Mosaic Wall Tiles
This bathroom’s playful energy comes from a bold formula: 80% saturated color + 15% natural wood + 5% crisp white. The bright blue square mosaic tiles are the undeniable star, covering the walls to create an immersive, ocean-like experience. The light wood vanity is crucial; its natural grain and warm tone prevent the blue from feeling overwhelming and cold. The final 5% of white, seen in the vessel sink, countertop, and grout lines, adds just enough crispness to keep the look clean and modern. The white grout is key—a dark grout would have made the wall look too busy.
|
📋 Copy HEX 🔗 Share |
A bold, all-over mosaic tile like this is surprisingly versatile. It can work wonders in a small powder room or guest bath (30-50 sq ft), where it can create a jewel-box effect that feels intentional and luxurious. In a tight space, the small scale of the tiles adds texture without looking busy. It also works beautifully in a larger primary bath, as shown, where it can serve as a stunning feature wall behind a vanity or a freestanding tub. You just need to ensure you balance it with grounding elements like the wood vanity to keep it from feeling chaotic.
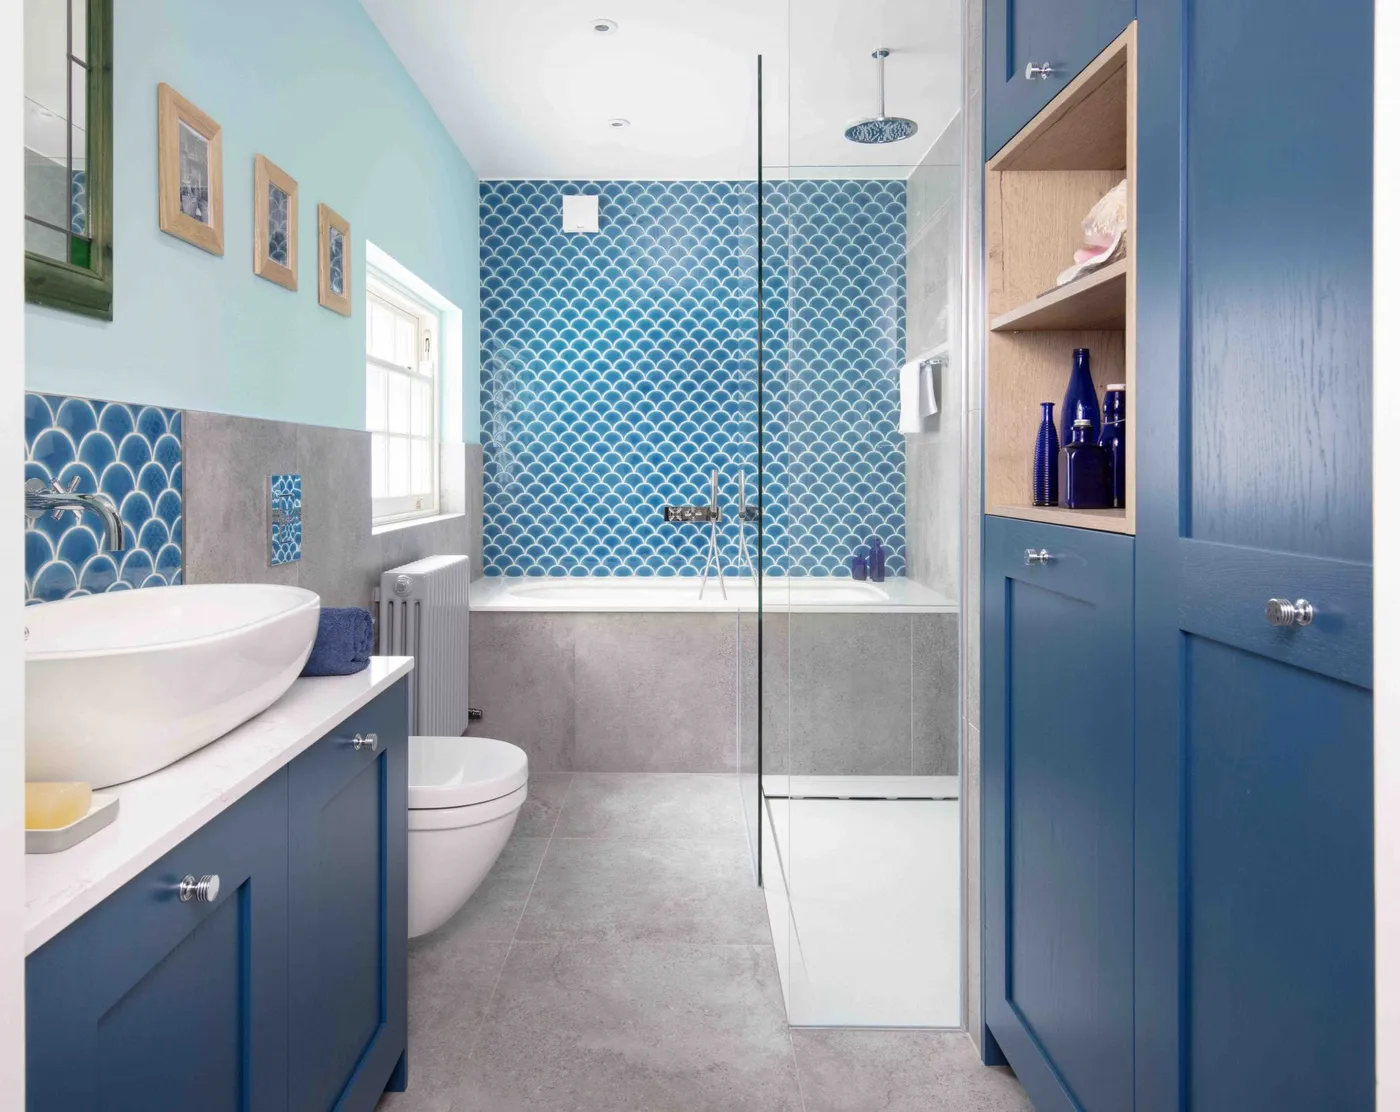
17. Channel Coastal Vibes with Marine Blue and Concrete-Effect Tiles
The standout feature here is the wall of vibrant blue mermaid scale tiles. It’s a playful and sophisticated choice that immediately sets a coastal, refreshing tone. This single element provides all the pattern and texture the room needs, allowing the other surfaces to be more subdued. It elevates the space from a simple blue and gray bathroom to a design with a strong, memorable personality. Without these tiles, the room would be nice, but it wouldn’t have that ‘wow’ factor that makes you stop and look.
|
📋 Copy HEX 🔗 Share |
This bathroom design succeeds by skillfully blending different textures and shades within the same color family. The matte, industrial feel of the grey concrete-effect tiles provides a cool, modern backdrop that makes the glossy, saturated blue of the mermaid tiles and vanity pop. The light blue painted upper walls create a sense of airiness, preventing the darker blues and greys from feeling too heavy. The small touch of oak on the storage cabinet adds just the right amount of natural warmth to balance all the cool tones.
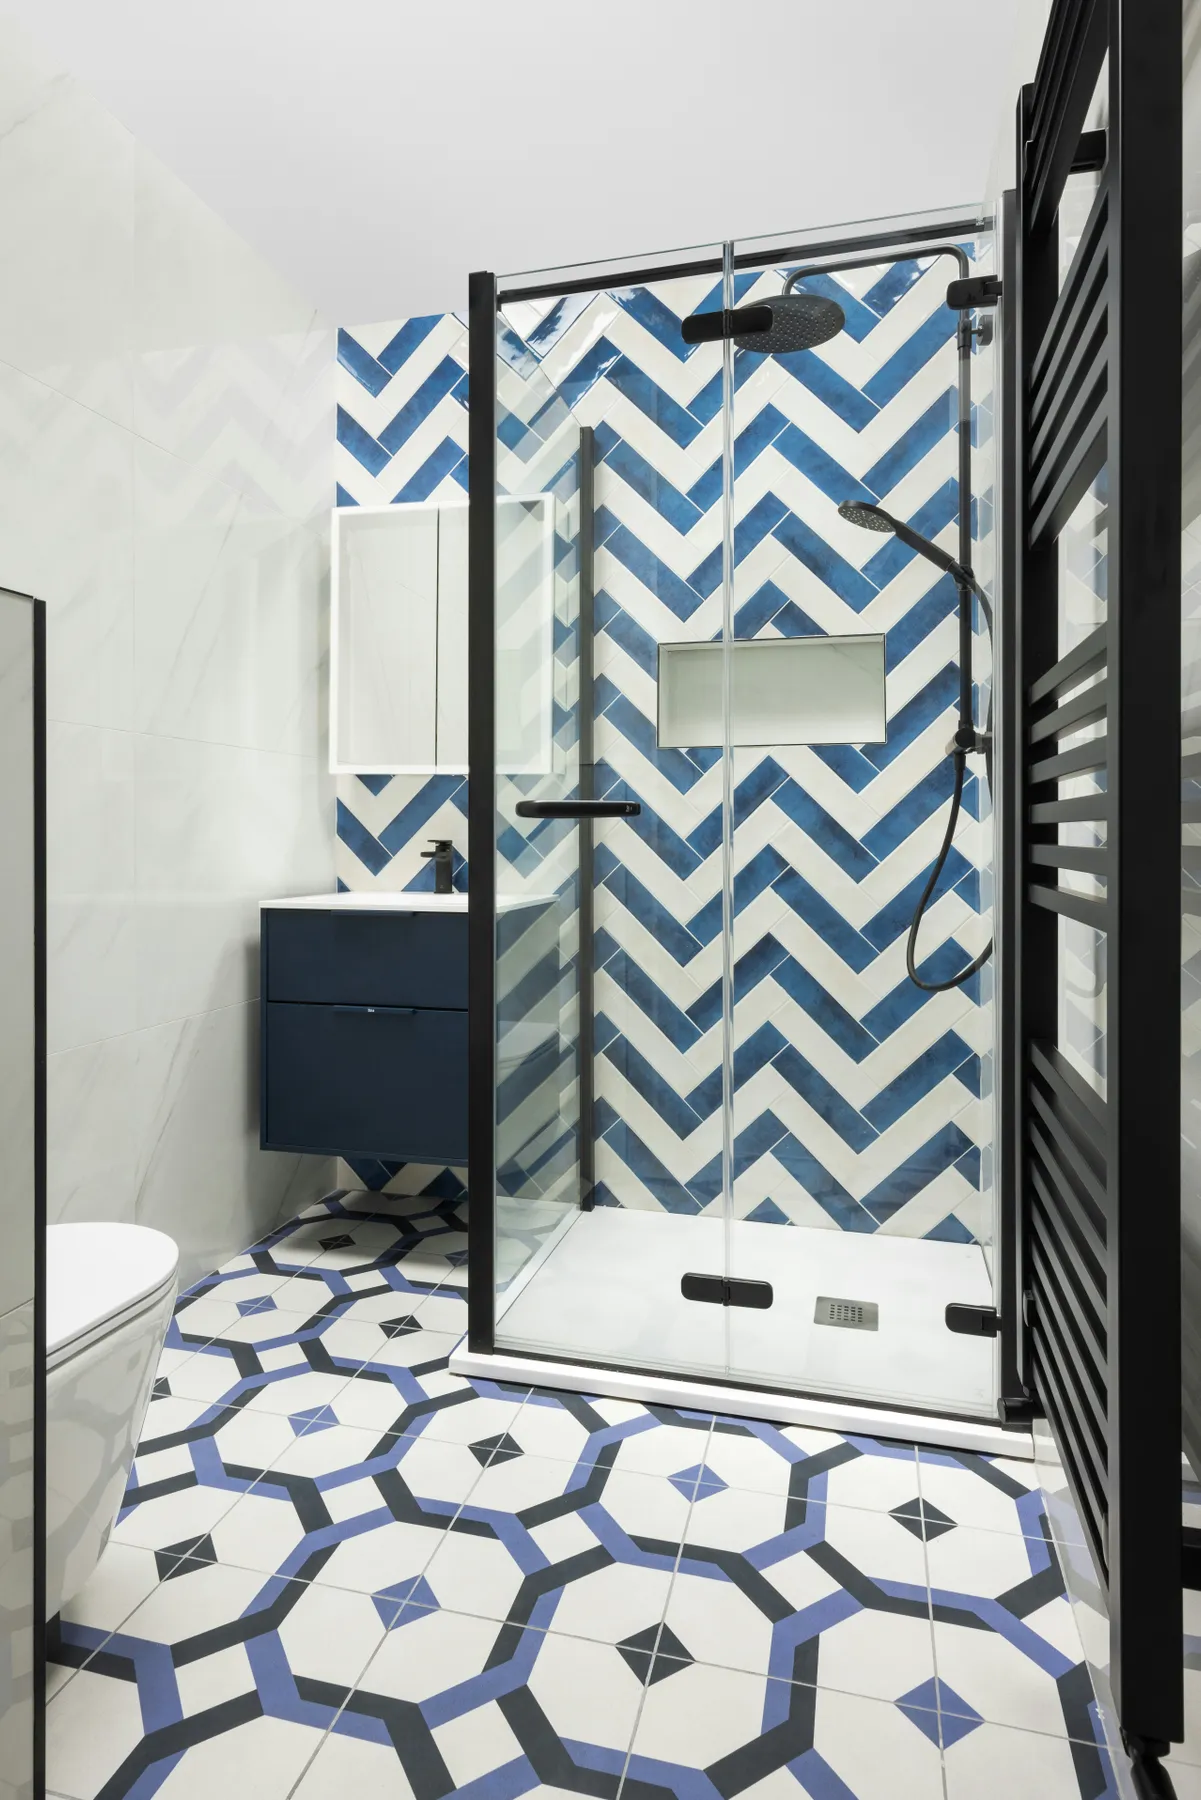
18. Go Bold with Blue Chevron and Geometric Floor Tiles
Love this dynamic look but not the price tag of designer tile? You’re in luck. Both chevron and geometric patterns are widely available in affordable ceramic and porcelain options. Check out online retailers like Wayfair or big-box stores like Floor & Decor, where you can find similar styles for $5-$10 per square foot. For the floating vanity, consider an IKEA ‘GODMORGON’ cabinet ($200-$400) and paint it a deep blue. Matte black fixtures are also readily available at budget-friendly price points, making this a very achievable high-impact look.
|
📋 Copy HEX 🔗 Share |
Pairing two bold patterns like this chevron shower wall and geometric floor requires a confident eye and careful planning. The key to making it work is a consistent color palette and varying the scale of the patterns. Here, both tiles share the same blue and white, which unifies them. However, if the patterns are too similar in scale or clash in color, the result can be visually chaotic and overwhelming, especially in a small space. Always get samples and lay them out together before you commit to the full installation.
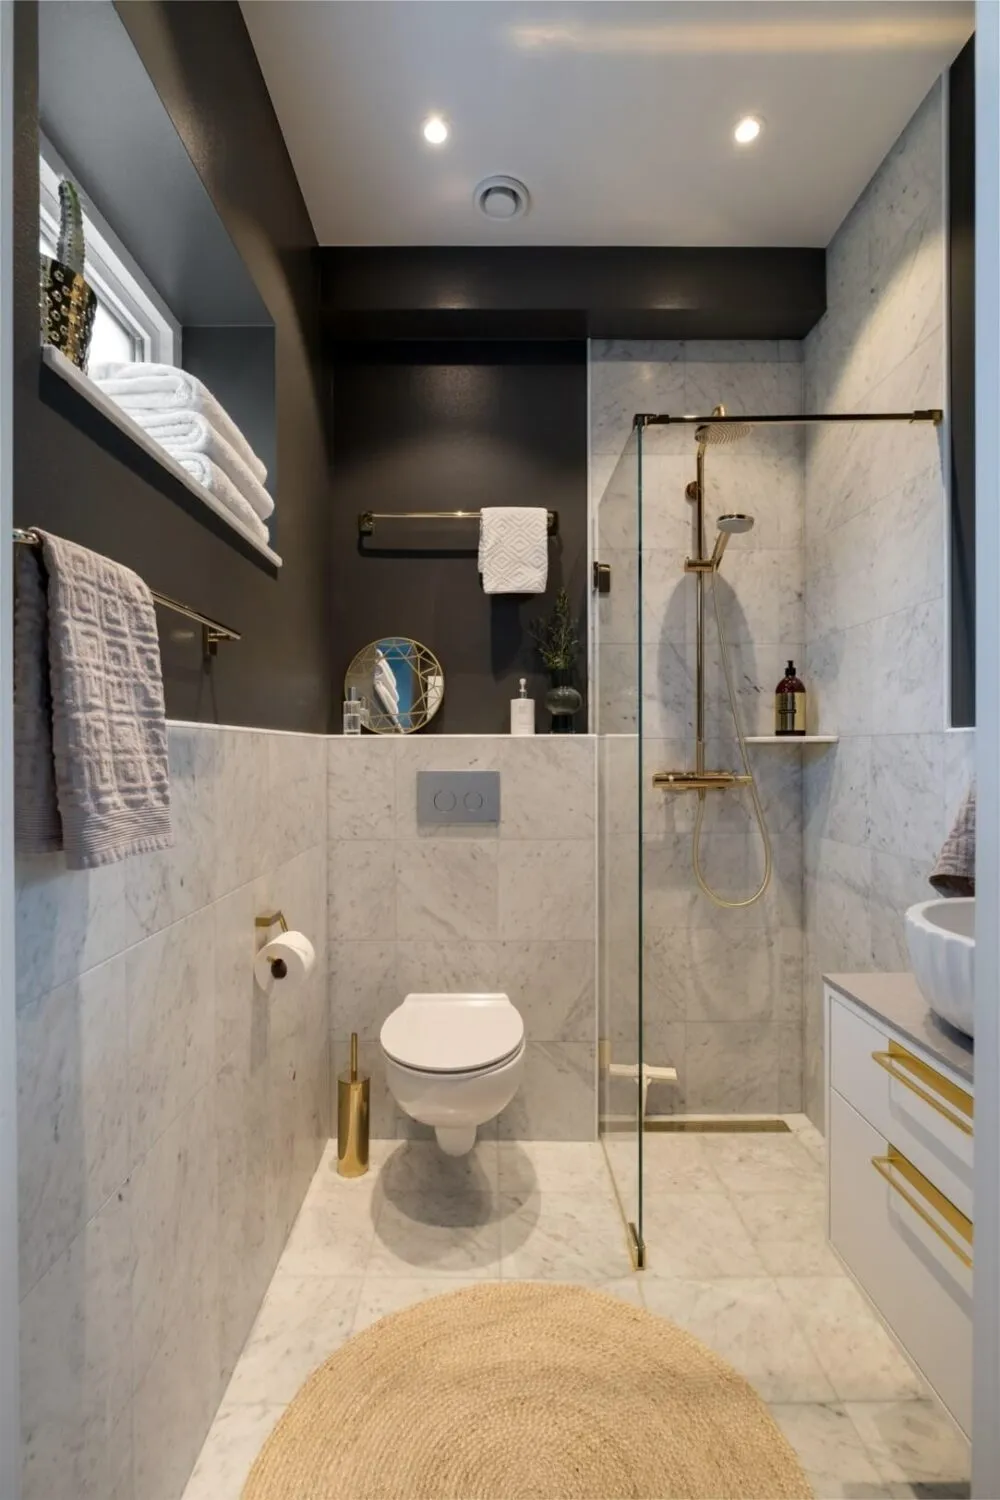
19. Mix Dark Gray Walls and White Marble for Elegant Contrast
When splitting a wall horizontally with two different finishes like this, the rule of thirds is your best friend. Notice how the white marble tile doesn’t just come up halfway? It covers the bottom two-thirds of the wall, while the dark grey paint covers the top third. This 2:1 ratio is visually more pleasing and sophisticated than a simple 50/50 split. It makes the ceiling feel higher and the design feel more intentional. You can also reverse it, with paint on the bottom two-thirds and tile on top, for a different but equally balanced effect.
|
📋 Copy HEX 🔗 Share |
White marble with grey veining is timeless and beautiful, but it’s also a natural stone that requires some upkeep. Marble is porous, so it needs to be sealed upon installation and then resealed periodically (usually once a year) to protect it from stains and moisture. It’s also sensitive to acidic cleaners, so you’ll need to use a pH-neutral stone cleaner. The gold-toned fixtures will also show water spots, so a quick wipe-down is recommended to keep them looking their best. It’s not high-maintenance, but it’s not zero-maintenance either.
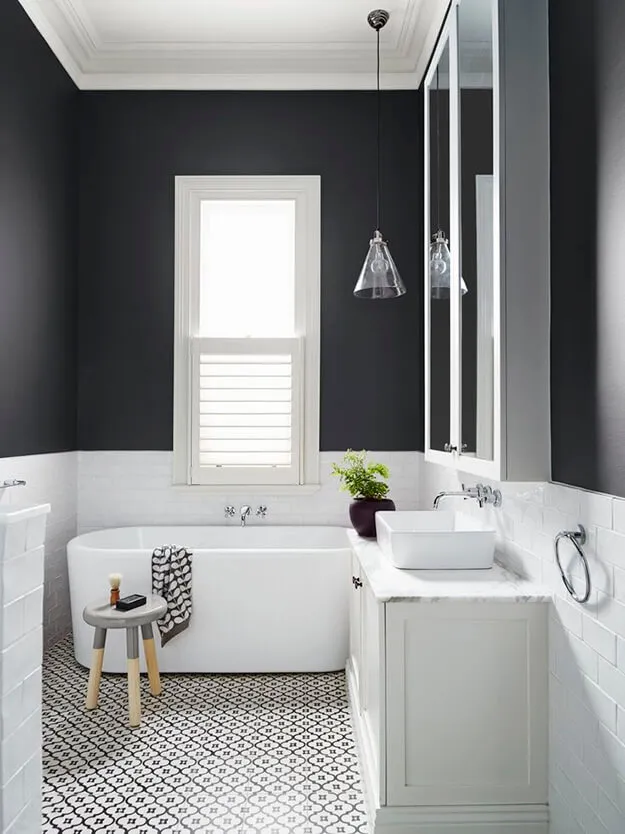
20. Ground a Monochromatic Room with a Patterned Floor
This bathroom is a perfect example of the 60-30-10 rule in action. About 60% of the space is white (the tub, vanity, subway tile), creating a bright and clean base. 30% is a dark, dramatic charcoal gray on the walls, providing depth and contrast. The final, crucial 10% is the black and white patterned floor. This element is what gives the room its personality and flair. It prevents the simple color scheme from feeling boring and serves as a fantastic focal point that ties the black and white elements together. This is a much bolder take than the similar palette in Idea #8.
|
📋 Copy HEX 🔗 Share |
Installing a wainscot of subway tile adds instant classic charm. Here’s a quick rundown:
- Plan your height. A typical wainscot height is 36-42 inches from the floor. Use a level to draw a guideline around the room.
- Apply a thin layer of tile adhesive (thin-set mortar) to a small section of the wall with a notched trowel.
- Press your subway tiles into the mortar, using tile spacers to ensure even grout lines. Use a tile cutter for pieces around outlets or corners.
- Let the mortar cure for 24 hours.
- Remove the spacers and apply grout over the tiles, pressing it into the gaps with a grout float.
- After 20-30 minutes, wipe away the excess grout with a damp sponge. Finish the top edge with a piece of decorative tile trim.
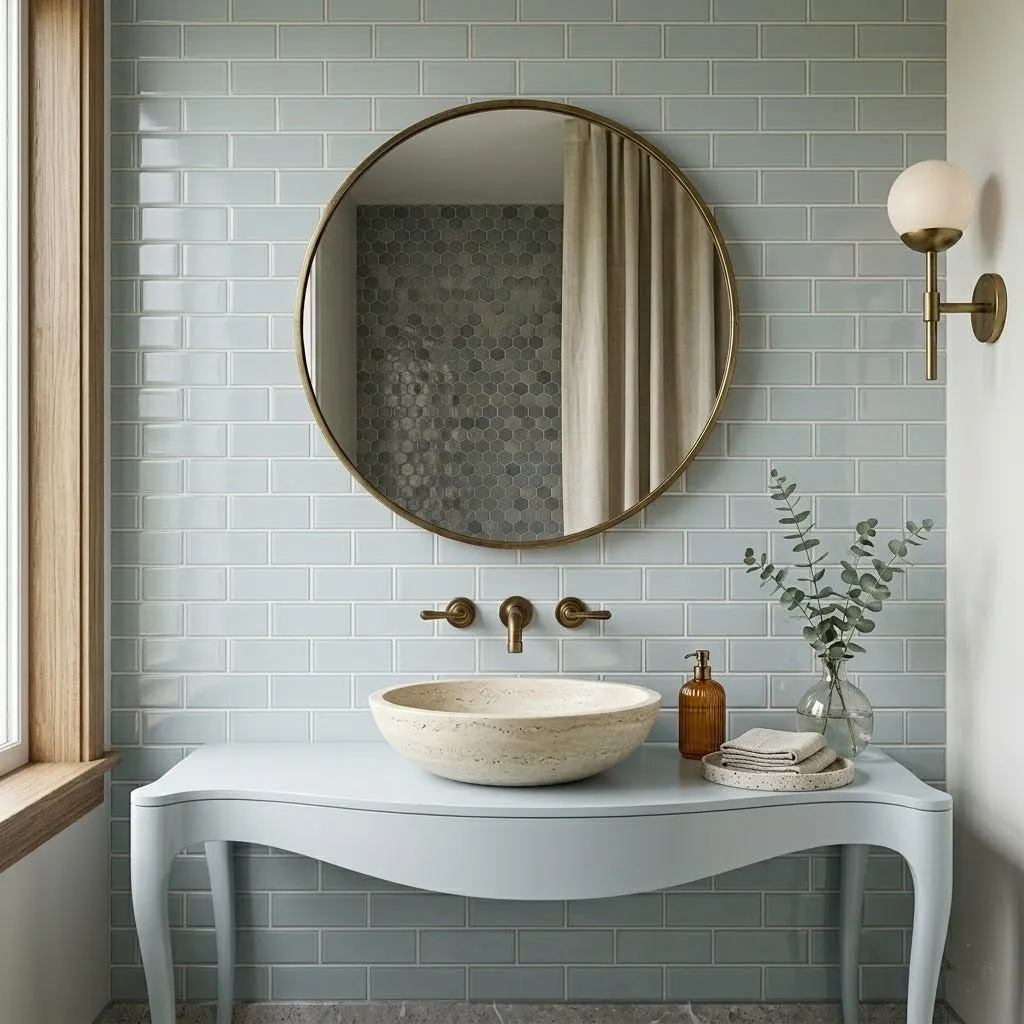
21. Pair Soft Blue Subway Tiles with a Travertine Sink
The visual recipe for this serene space is 60% soft color + 30% natural stone + 10% warm metal. The glossy light blue subway tiles and matching console vanity create a calming, cohesive backdrop. The travertine vessel sink introduces a beautiful, earthy texture that keeps the blue from feeling too sweet or one-note. The final touch is the antique brass of the wall-mounted faucet and mirror, which adds a touch of vintage warmth and elegance. It’s a sophisticated and unexpected combination of materials.
|
📋 Copy HEX 🔗 Share |
The travertine vessel sink is the hero piece in this bathroom. It’s an element of raw, natural beauty that provides a perfect contrast to the smooth, glossy finish of the subway tiles. Its warm, creamy tones and subtle texture ground the space and add a layer of organic sophistication. If you were to swap it for a standard white ceramic sink, the bathroom would still be pretty, but it would lose that unique, high-design character that makes it feel special and curated.
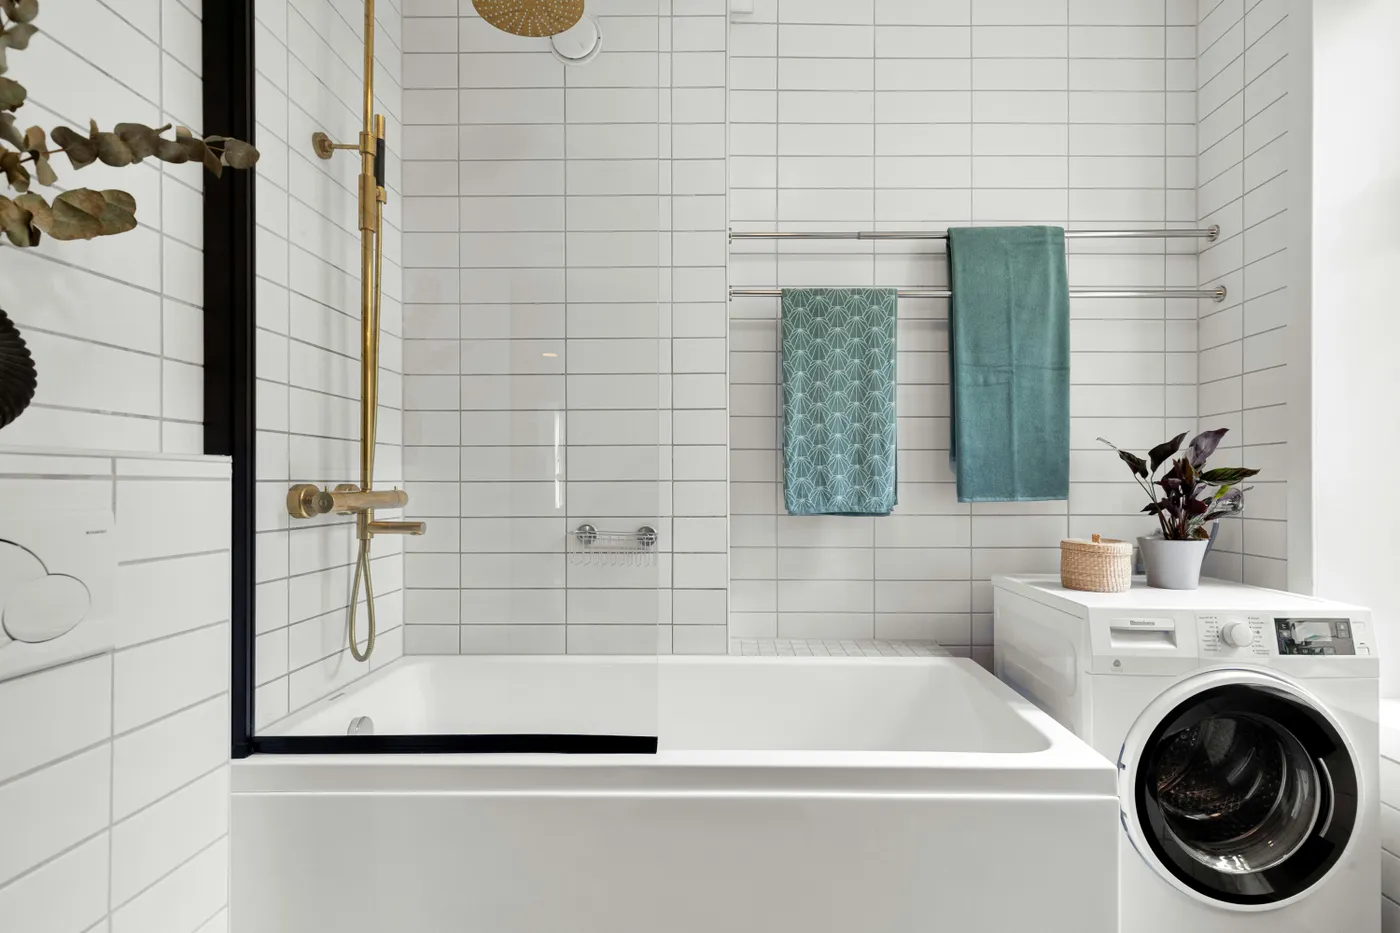
22. Add a Pop of Color with Teal Towels and Brass Fixtures
This is one of the easiest and most affordable ways to introduce color into a neutral bathroom. If you have a base of white tile, you can completely change the room’s vibe with accessories. A set of high-quality teal towels like these will run you $40-$80. If you don’t want to change your main fixtures, you can introduce brass through smaller, less expensive items like a soap dispenser, toothbrush holder, or a small tray on the counter for under $50. It’s a low-commitment, high-impact way to play with color and trends.
|
📋 Copy HEX 🔗 Share |
This accent color approach works in literally any size bathroom. In a tiny powder room (20-30 sq ft), a single, vibrant hand towel can make a huge statement. In a standard guest bath (40-60 sq ft), a bath mat and a set of towels in a coordinating color are enough to create a cohesive look. In a larger primary bathroom, you can layer in the accent color with towels, a robe, a piece of art, and accessories on the vanity. The key is to keep the main surfaces neutral so the accent color can really shine.
23. Use A Gray Double Vanity in a Modern, Bright Bathroom
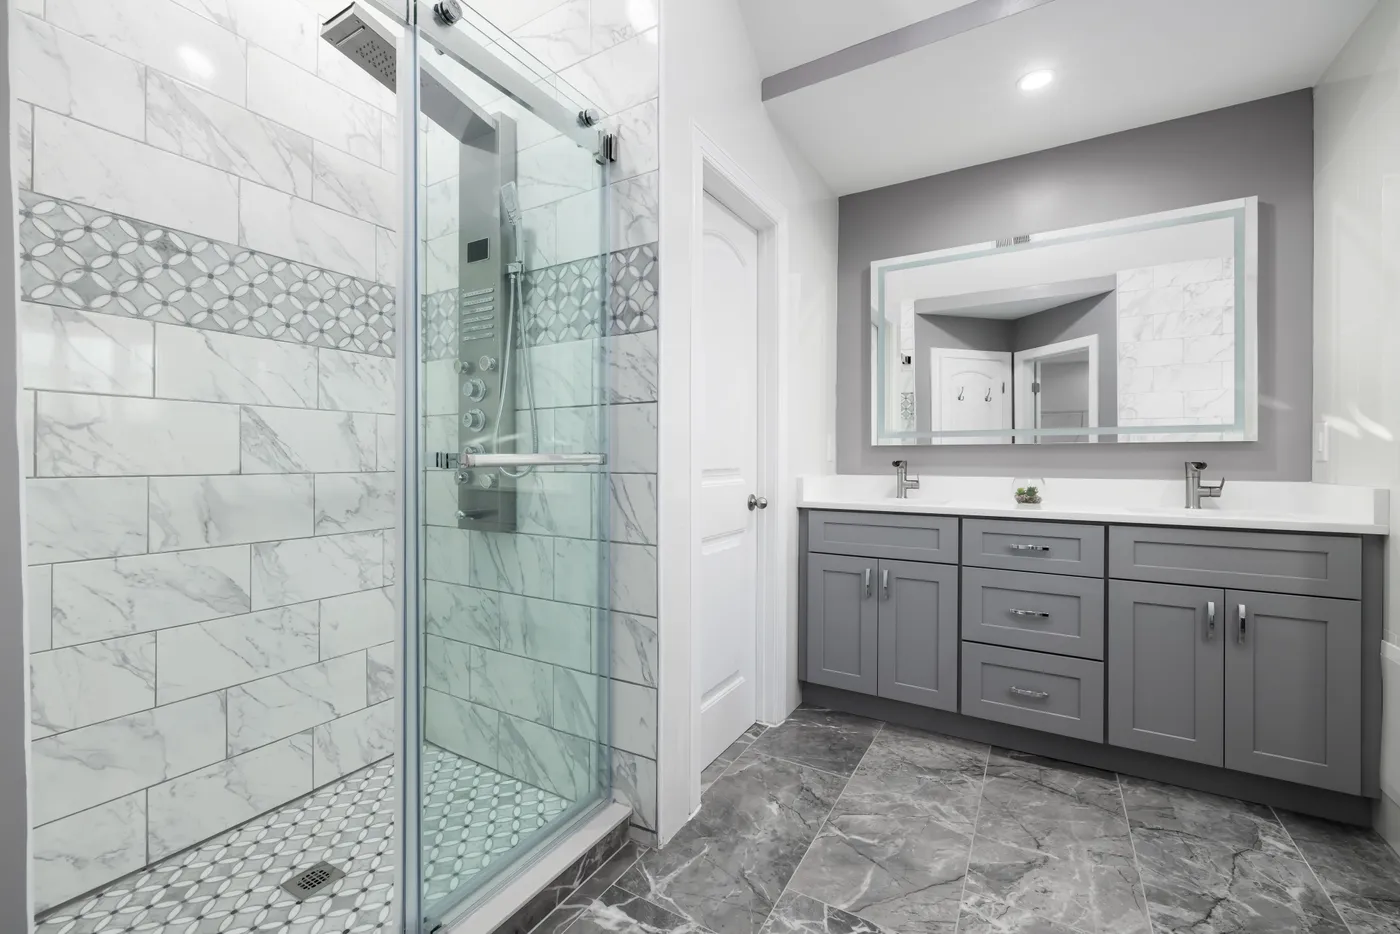
The design of this bathroom is successful because it sticks to a tight, cohesive color palette while using a variety of shapes and textures to create interest. The light gray of the double vanity is repeated in the dark gray floor tiles and the geometric mosaic accent tile in the shower. This repetition makes the design feel intentional and harmonious. The white marble-look subway tiles keep the shower area bright, while the large, backlit mirror adds a layer of soft, ambient light, making the whole room feel modern and sophisticated.
|
📋 Copy HEX 🔗 Share |
Planning a shower with a decorative accent tile? Here are a few things to consider before you start:
- Decide on the placement. A horizontal band at eye level is classic, but you could also do a vertical stripe or tile a whole niche.
- Check tile thickness. Ensure your accent tile is the same thickness as your main field tile. If it’s not, your installer will have to build up the wall behind the thinner tile, adding time and cost.
- Order enough. Always order 10-15% extra of both your field tile and your accent tile to account for cuts, mistakes, and future repairs.
- Grout choice matters. Consider if you want the same grout color for both tiles to unify them, or different colors to make the accent pop.
24. Design a Chic Space with Blush Pink, Black, and Terrazzo
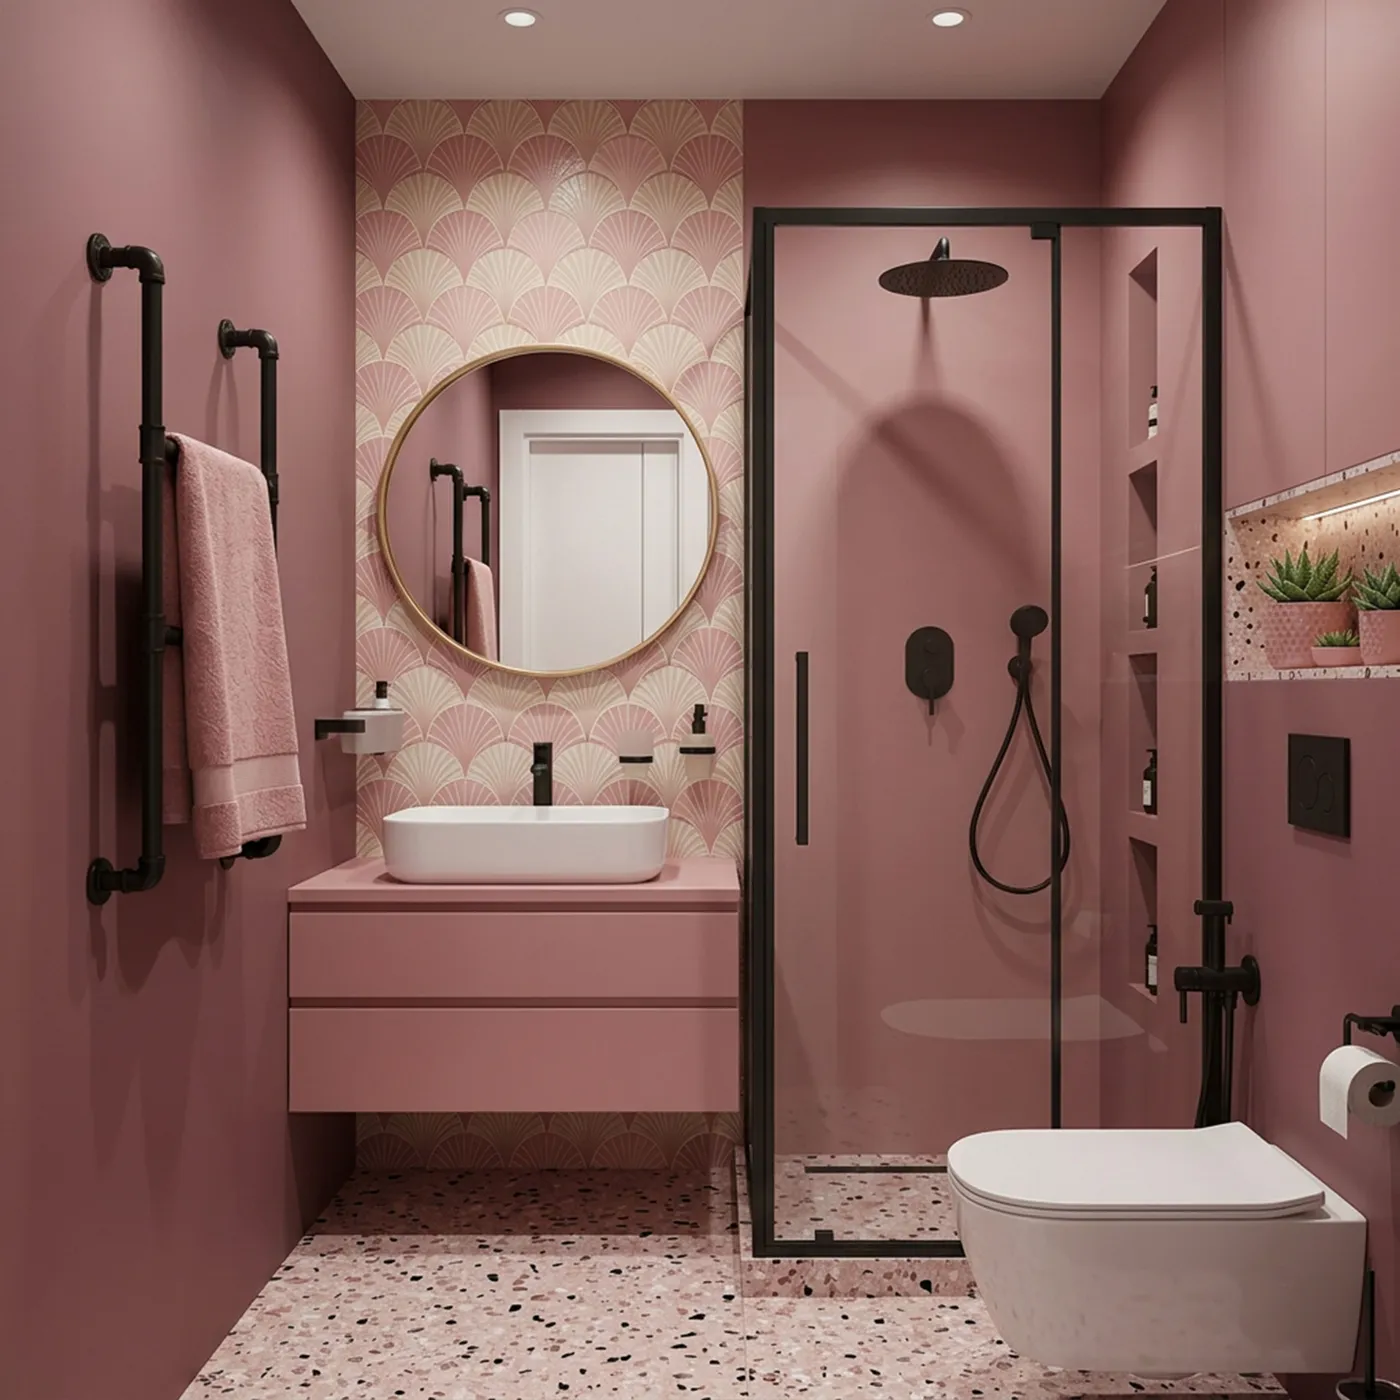
This bathroom is hitting on several major trends at once, but in a way that feels cohesive and fun. Blush pink has moved from a trendy accent to a sophisticated new neutral, especially when paired with edgy black fixtures. Terrazzo is also having a major resurgence, loved for its playful, graphic quality and durability. The combination feels very current, tapping into the desire for spaces that are personalized, colorful, and don’t take themselves too seriously. This isn’t a fleeting look; these materials have classic roots, just updated for a modern sensibility.
|
📋 Copy HEX 🔗 Share |
A floating pink vanity and a white vessel sink look incredibly chic, but they present some practical challenges. Floating vanities typically offer less storage than their floor-mounted counterparts, so you need to be realistic about how much space you need. Also, vessel sinks sit on top of the counter, which can create a splash zone behind and around the sink. You’ll be wiping down that area more frequently than you would with an undermount sink. It’s a trade-off of form over function that you should be aware of before you commit.
25. Mix Teal Subway Tile with a Bold Geometric Floor
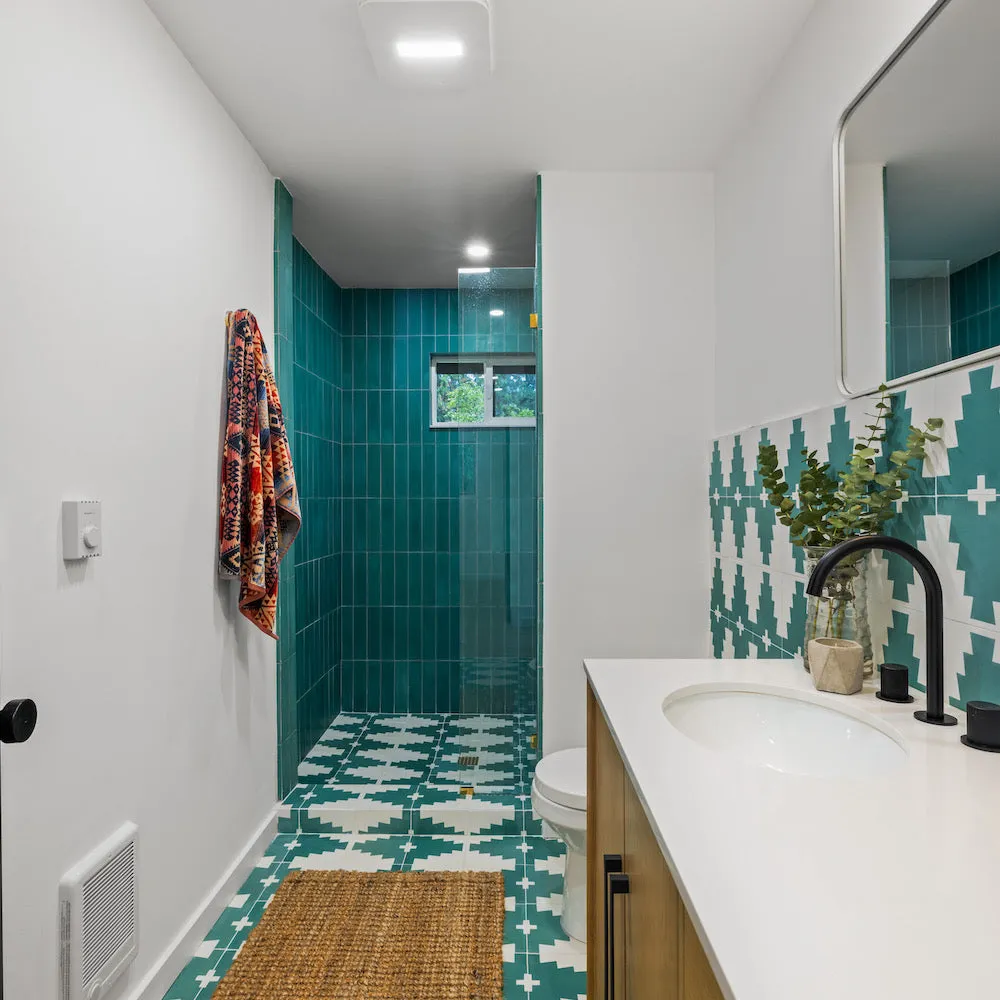
When you have a bold, graphic floor tile like this, let it be the star. The key to making this work is to pull one of the colors from the pattern and use it in a more solid block elsewhere in the room. Here, the teal from the geometric tile is repeated in the subway tiles in the shower. This creates a strong sense of connection and makes the design feel deliberate and cohesive, rather than like two random ideas competing for attention. The simple wooden vanity and white countertop provide a neutral resting place for the eye.
|
📋 Copy HEX 🔗 Share |
This look feels custom, but it can be recreated on a budget. Cement-look porcelain tiles with geometric patterns are now widely available and much more affordable than true cement tiles, often coming in at $8-$15 per square foot. The teal subway tile is also a budget-friendly classic. Look for a simple, clean-lined wooden vanity from a big-box store or IKEA; the HEMNES open vanity would give a similar feel for around $250. Pair it with affordable matte black fixtures from online retailers to complete the look for less.
26. Create a Focal Point with a Blue Geometric Accent Wall
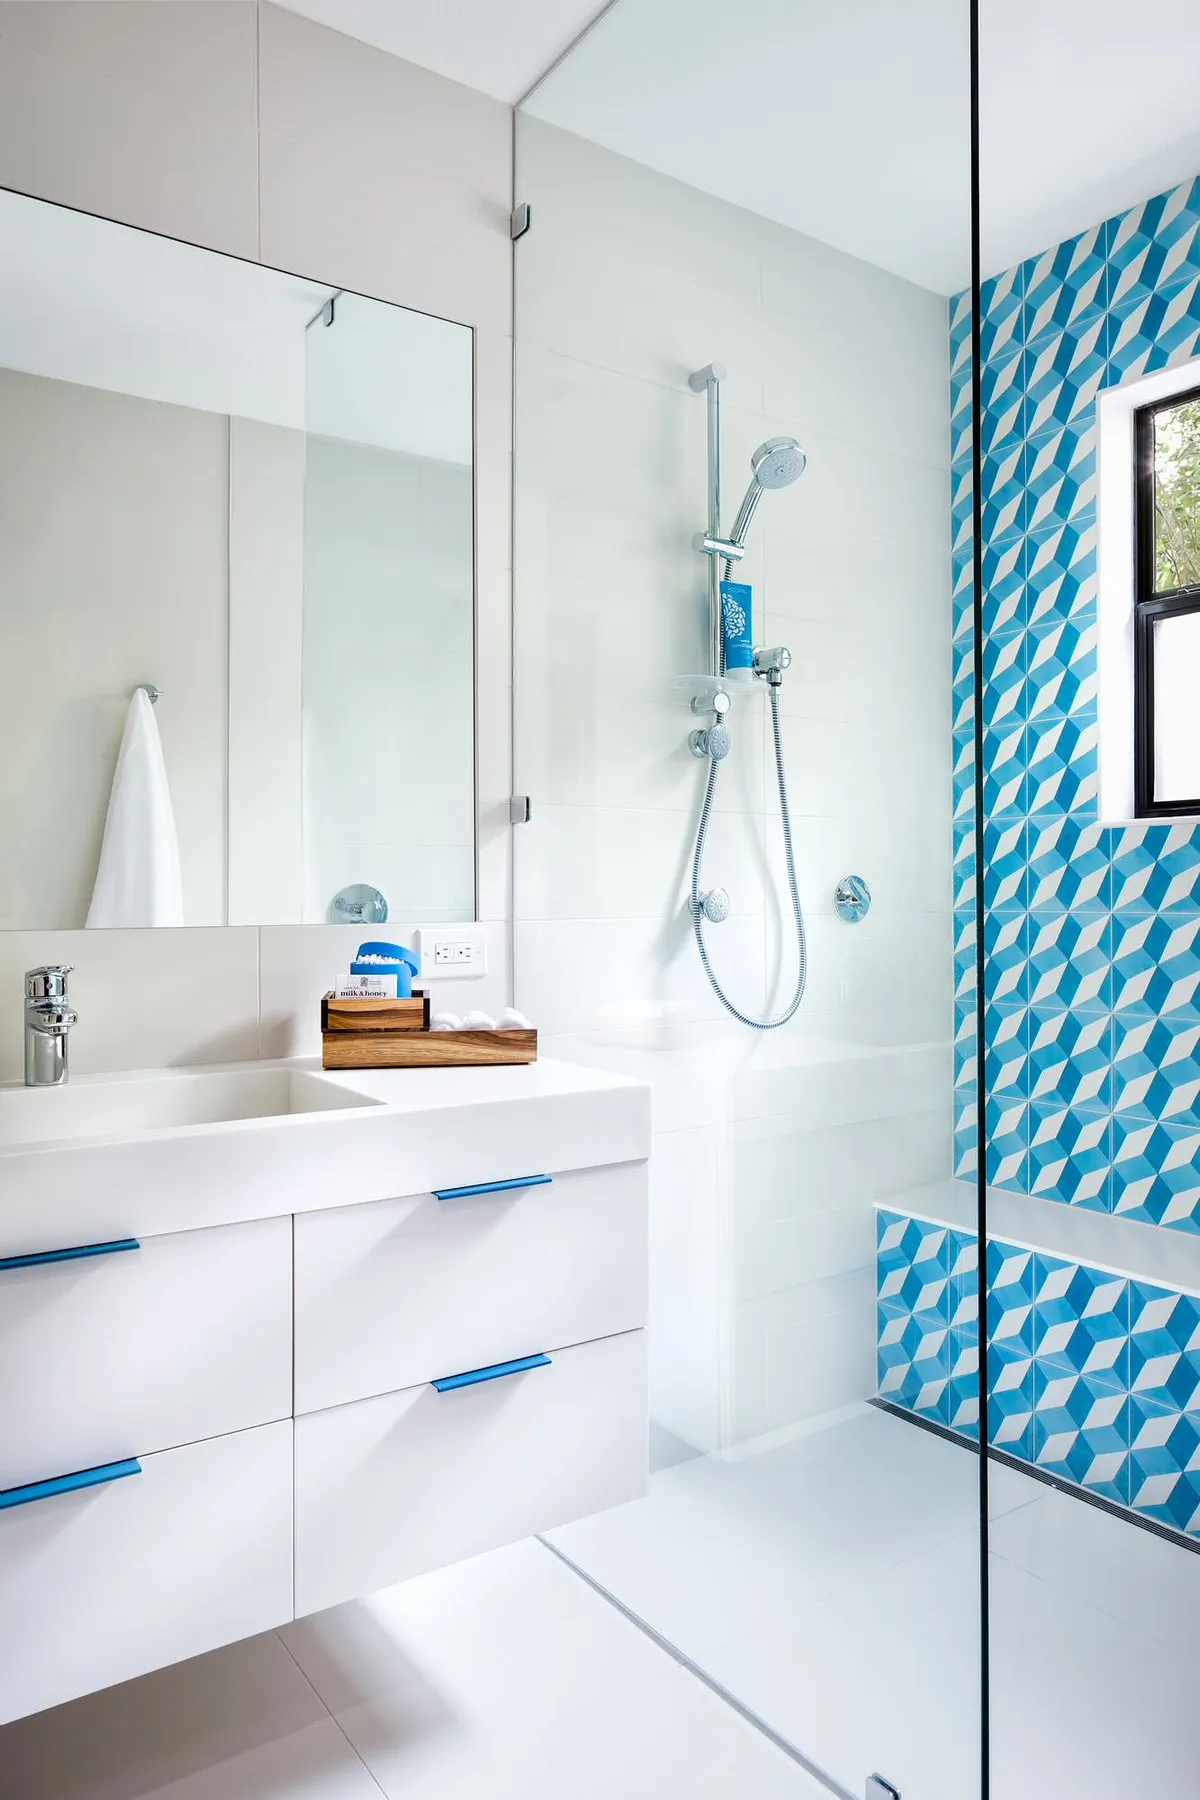
The formula for this bright and modern bathroom is simple: 80% clean white + 20% bold pattern. The vast majority of the space—the walls, floor, and vanity—is a crisp, clean white. This creates an almost gallery-like backdrop that feels expansive and airy. Then, 20% of the visual space is dedicated to the vibrant blue and white geometric accent tile in the shower. This concentrated dose of pattern and color provides all the personality the room needs without overwhelming it. The blue handles on the vanity are a perfect touch, tying the two zones together.
|
📋 Copy HEX 🔗 Share |
The geometric accent wall is, without a doubt, the element that makes this bathroom memorable. If you replaced it with plain white subway tile, the room would be perfectly functional and clean, but it would lose all of its playful character. The accent tile turns the shower into a deliberate design feature and the focal point of the entire room. It’s a powerful demonstration of how tile can be used as art to completely define the mood of a space.
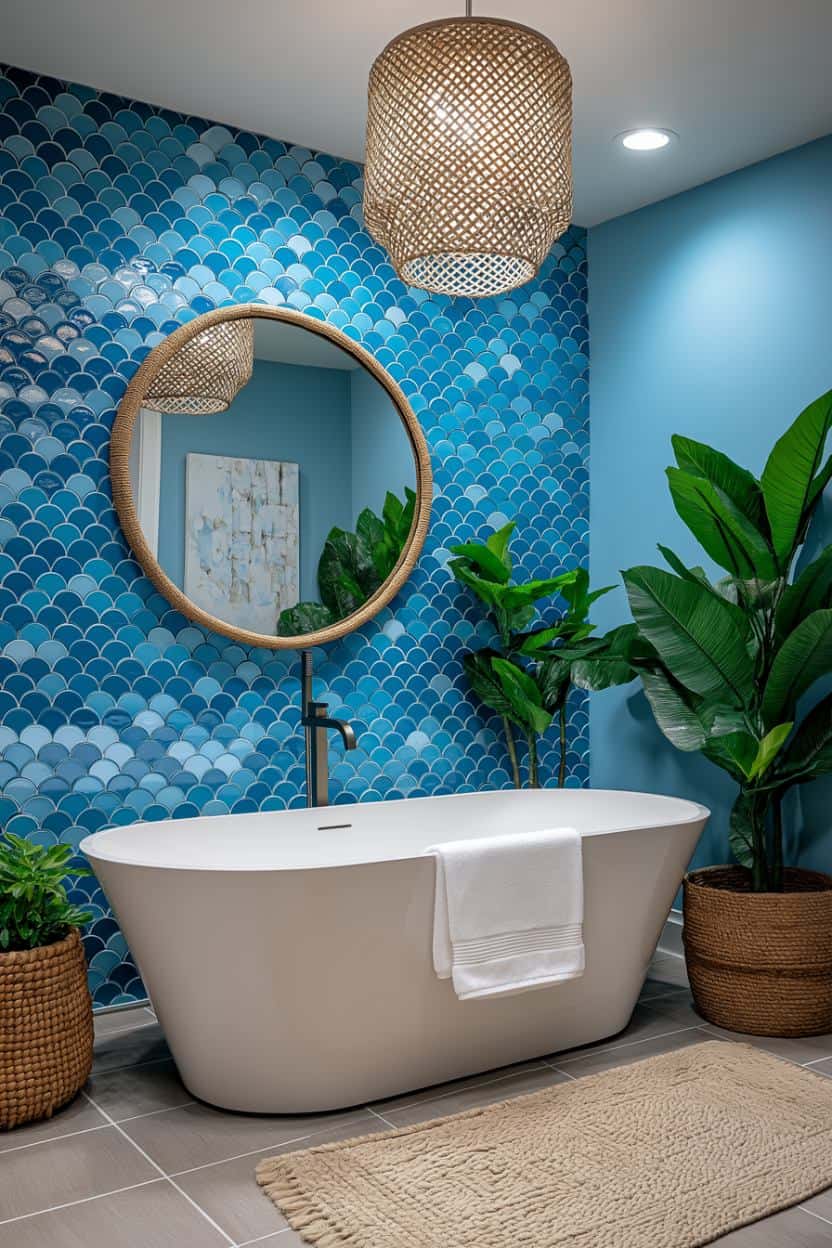
27. Use Blue Mermaid Tiles for a Serene, Coastal Accent Wall
Tiling an accent wall with mermaid or fish scale tiles is a fantastic way to add texture and movement. Here’s a quick guide:
- Start with a clean, waterproofed backer board.
- Find the center of your wall and draw a vertical plumb line. This will be your guide.
- Begin your first row at the bottom center, applying tile adhesive with a notched trowel and pressing the tiles into place. Many scalloped tiles come on mesh sheets, which makes this easier.
- Work your way outwards and upwards, using tile spacers consistently.
- Use a wet saw to make cuts around the edges of the wall and any fixtures. This is the trickiest part with curved tiles, so take your time.
- Let it cure for 24-48 hours, then grout the tiles and seal if necessary. This is a moderate-difficulty DIY project.
|
📋 Copy HEX 🔗 Share |
This space feels so calming because it masterfully blends a strong focal point with natural, grounding textures. The blue mermaid tiles create a stunning, water-inspired backdrop for the freestanding tub. The design genius here is in the supporting characters: the woven frame of the mirror, the woven pendant light, and the plant baskets. These elements add a layer of earthy, textural warmth that prevents the blue and grey from feeling too cold. It’s a perfect balance of coastal color and bohemian texture.
28. Combine Soft Grey Marble with Fluted Wood Paneling
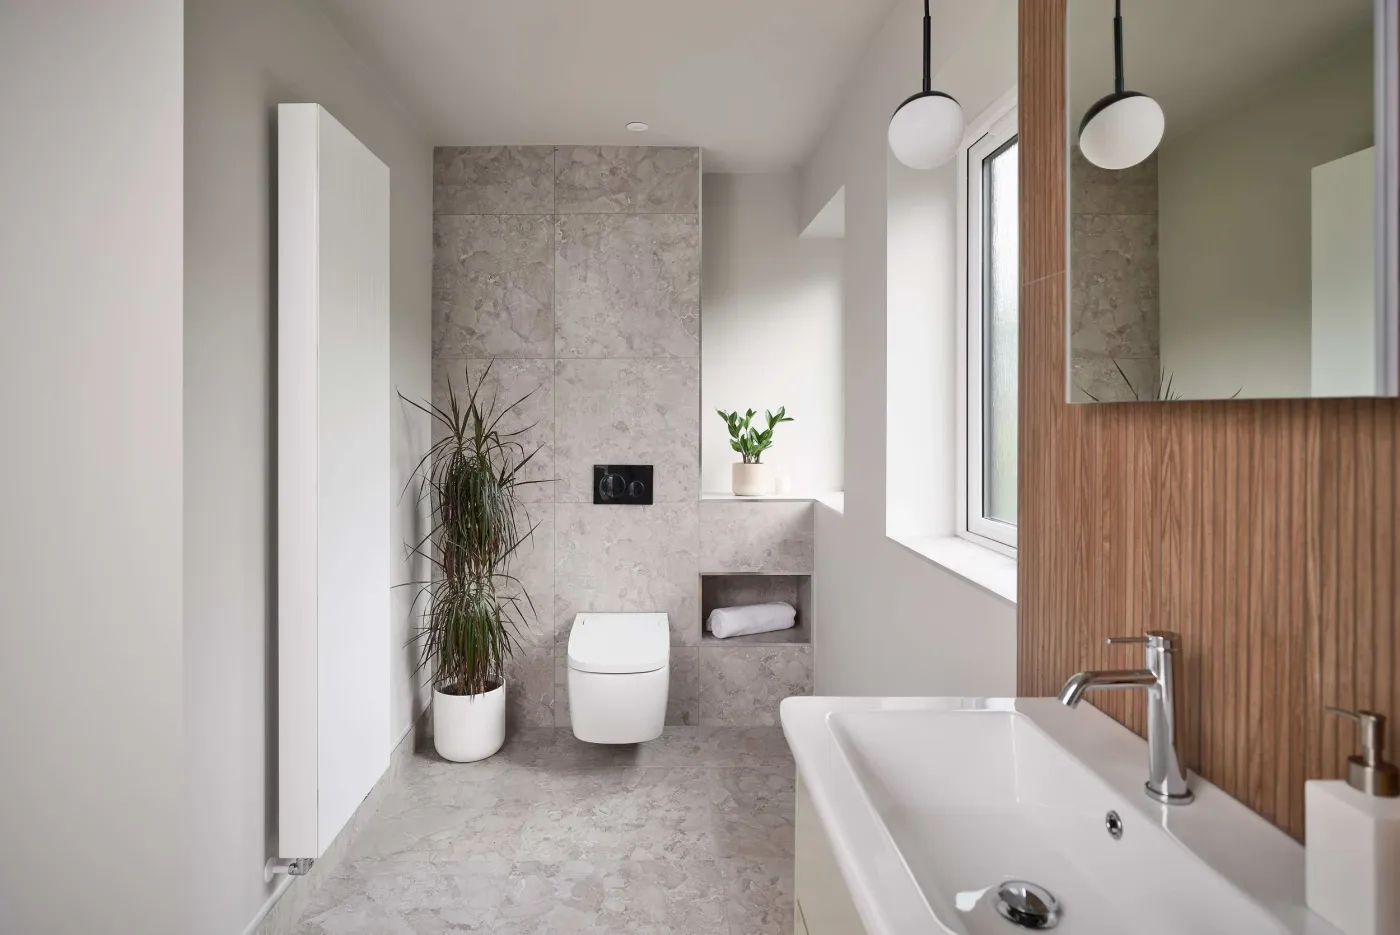
Wood paneling in a bathroom adds incredible warmth, but it requires careful consideration. Ensure the wood is properly sealed with a high-quality polyurethane or marine varnish to protect it from moisture and humidity, which can cause warping or mold. The area directly behind the sink is a splash zone, so you’ll need to be diligent about wiping it down. Alternatively, consider using wood-look porcelain tile for the paneling—it offers the same visual effect with zero water-related worries. The light grey marble-effect porcelain tiles are, by contrast, incredibly low maintenance.
|
📋 Copy HEX 🔗 Share |
This sleek, minimalist aesthetic is ideal for a moderately sized bathroom, from 60 to 100 square feet. The use of large-format marble-effect tiles on both the walls and floor creates a seamless look that helps the space feel larger. The vertical fluted wood paneling draws the eye up, which is great for rooms with standard 8-foot ceilings. The wall-mounted toilet is another space-saving trick, as it frees up floor space and makes the room feel less cluttered. It’s a design that feels spacious and airy, even in a compact footprint.
29. Warm Up a Modern White Bathroom with Wood Cabinets
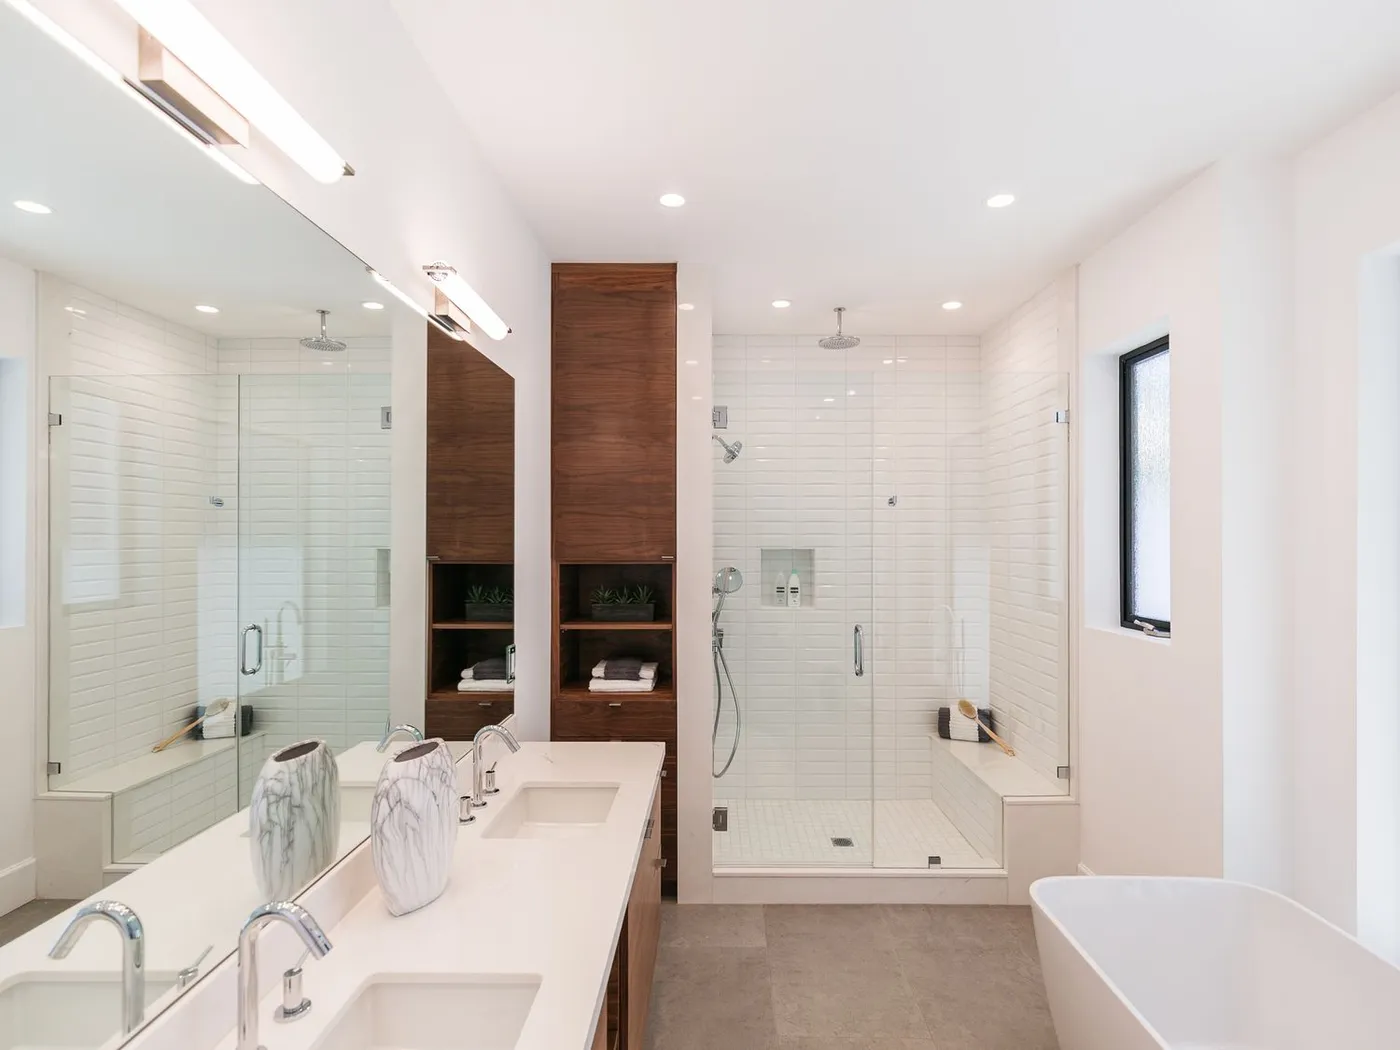
When designing a bathroom with tall, built-in storage like this, don’t underestimate the power of open shelving. While closed cabinets are essential for hiding clutter, incorporating a few sections of open shelves breaks up the visual bulk of the cabinetry. It provides a place to display decorative items, folded towels, or pretty baskets. This makes the storage wall feel less like a monolithic block and more like a thoughtful piece of furniture, adding to the room’s overall style and warmth.
|
📋 Copy HEX 🔗 Share |
A full bathroom renovation with built-in features can add up. The custom-look wooden cabinetry is a significant portion of the budget here, along with the plumbing for a double vanity and freestanding tub.
- Main Furniture (Double Vanity & Built-in Cabinets): $4,000 – $10,000
- Fixtures (Faucets, Tub, Shower System): $2,000 – $5,000
- Lighting (Vanity Lights): $300 – $700
- Tile (Shower & Floor): $1,500 – $4,000 (materials only)
- Decor (Mirror, etc.): $400 – $800
- TOTAL: $8,200 – $20,500+
- Budget alternative: Use IKEA kitchen cabinets with wood-look fronts (like the ‘TORHAMN’ series) to create a custom built-in for a fraction of the price. Opt for a more affordable drop-in tub instead of a freestanding one.
Your Perfect Bathroom Color Awaits
Whew, that was a lot of color! But hopefully, you’re feeling more inspired than overwhelmed. The right shade can completely change the feeling of your space, turning a purely functional room into a personal retreat. Now, which one are you pinning? Go ahead and save your favorites to your board so you don’t lose them.