It’s a familiar story: you have a Pinterest board bursting with gorgeous closet shelf ideas, but when you look at your own closet, you feel… stuck. That’s because most inspiration is generic. It doesn’t account for your actual space, budget, or the stuff you need to store. We get it. That’s why we dove deep into the real products and systems people are using now to find out what truly works. After filtering through hundreds of options, we narrowed it down to these 30 standout ideas that deliver on both style and function.
Inside, you’ll find everything from full-scale custom built-ins to clever, budget-friendly modular systems. We’re covering all the bases: modern, minimalist, traditional, and even some rustic-industrial vibes. The goal for 2026 isn’t just organizing; it’s about creating a personal, smooth-running system that makes getting ready feel less like a chore and more like a moment of calm. And stay until the end — we break down the most common mistakes that can ruin even the best-laid plans.
📌 Save this to Pinterest for later — you’ll want to revisit these ideas.
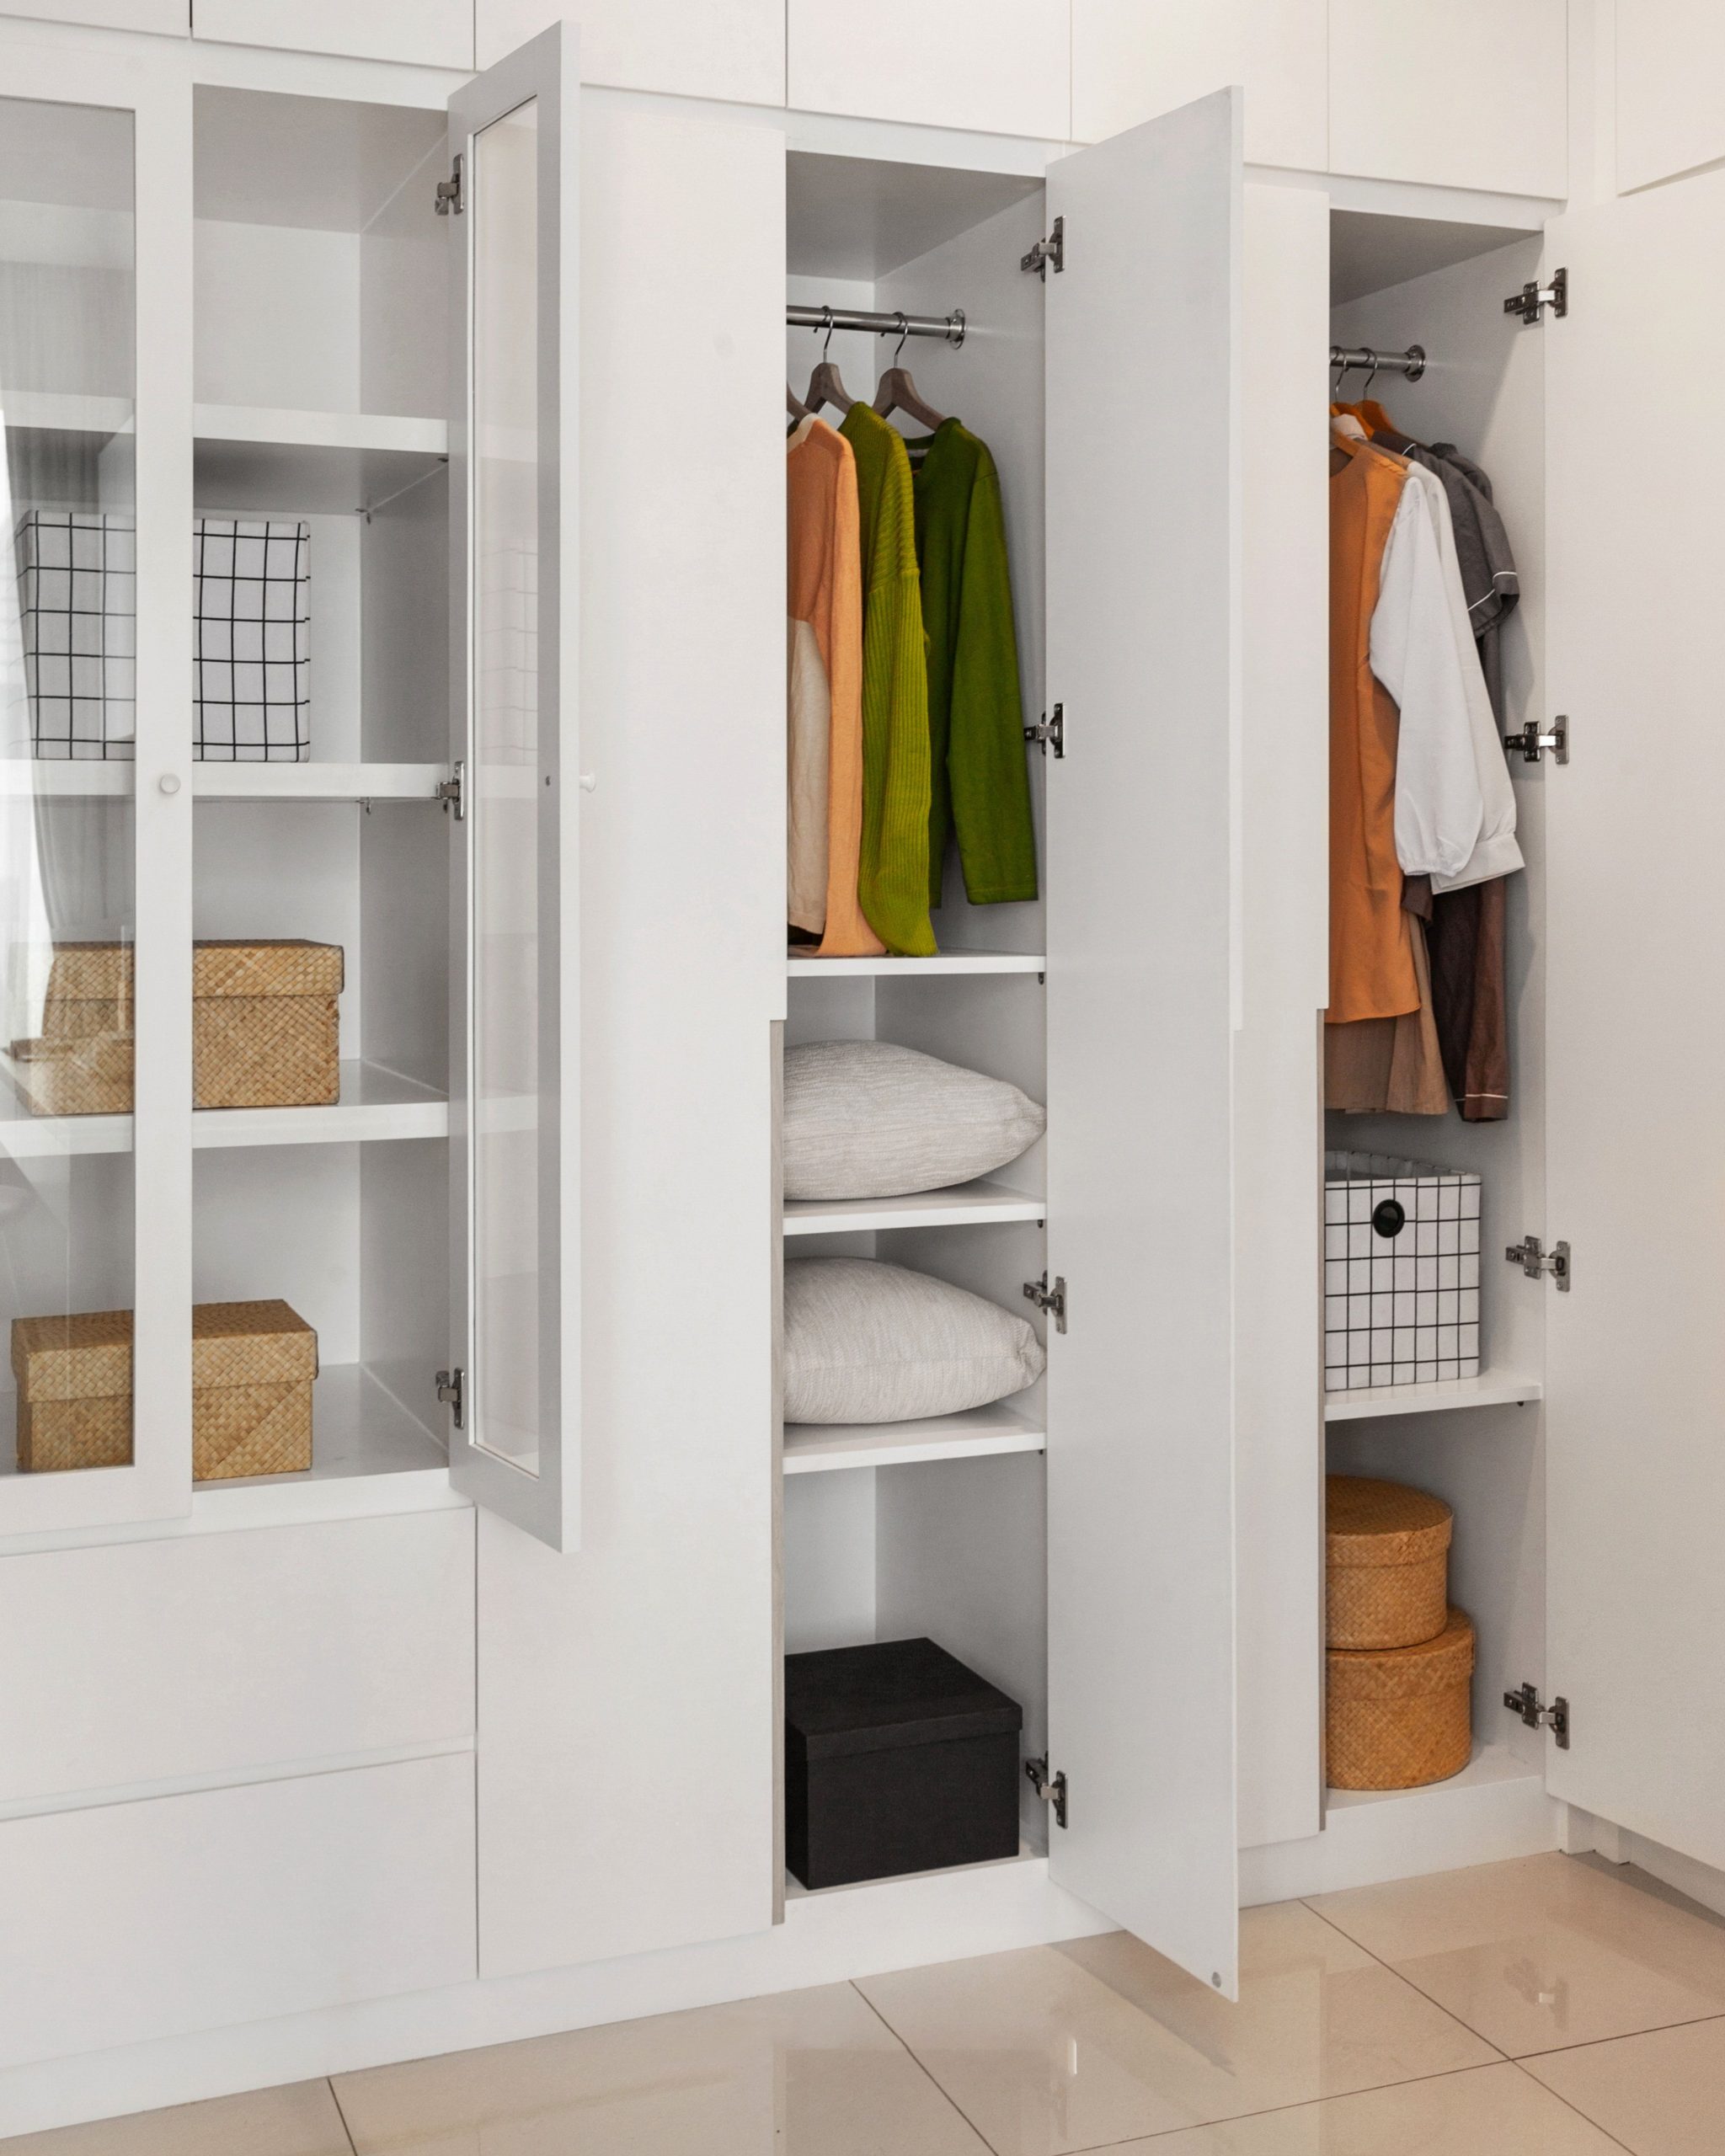
1. White Built-In with Glass-Front Cabinets and Woven Baskets
What makes this system so effective is its brilliant mix of storage types. You have hanging space for daily wear, open shelves for frequently used items like sweaters, and drawers for things you want tucked away. But the real stars are the glass-front upper cabinets. They let you see what you own without creating the visual clutter of totally open shelving, which keeps the large unit from feeling heavy or overwhelming. The woven baskets add a crucial touch of warmth and texture, breaking up the all-white cabinetry and making the space feel more personal and less sterile.
|
📋 Copy HEX 🔗 Share |
Recreating a custom built-in of this scale is a significant investment, but it pays dividends in organization and home value. Here’s a general cost estimate:
- Main Cabinetry & Shelving: $3,500 – $7,000
- Glass-Front Doors: $800 – $1,500
- Drawers & Hardware: $700 – $1,200
- Lighting (if added): $300 – $600
- Accessories (baskets, bins): $200 – $400
- TOTAL: $5,500 – $10,700
- Budget Alternative: Use stacked IKEA PAX wardrobes with glass-door options and a mix of interior organizers for a similar look at around $2,000 – $3,500.
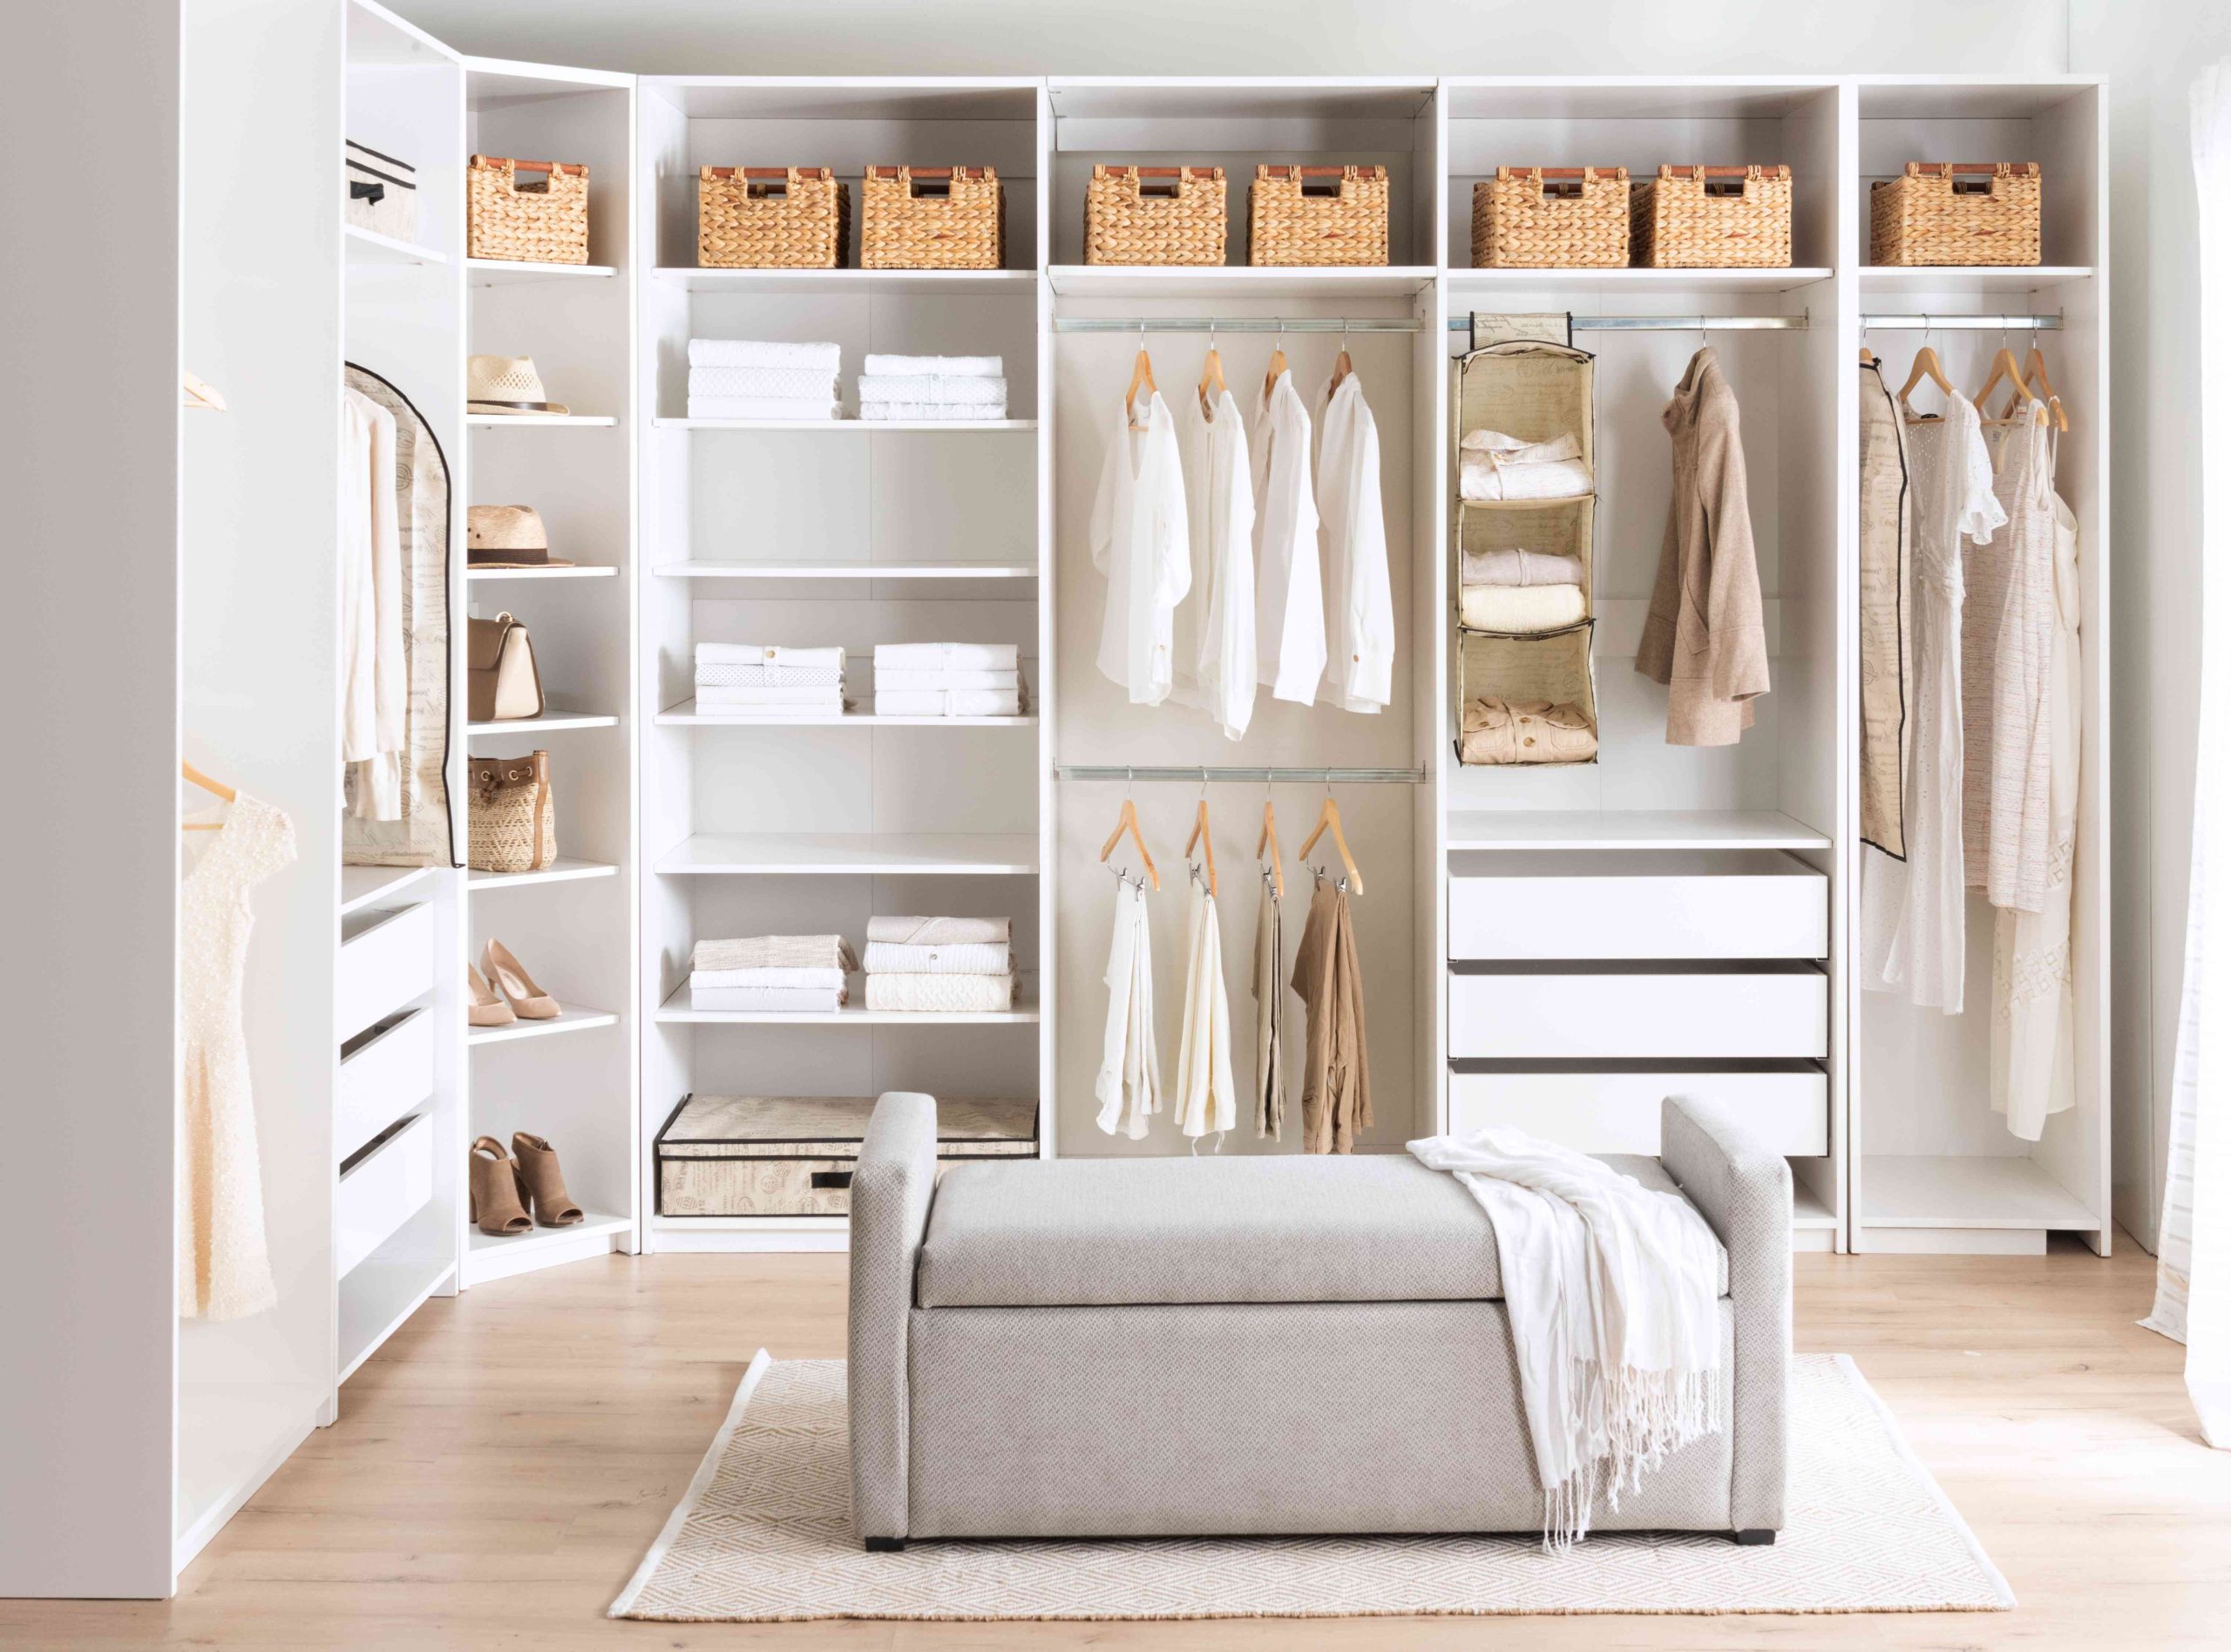
2. L-Shaped Modular Closet with a Central Storage Bench
If you have a walk-in, adding a bench or ottoman is a game-changer. It provides a spot to sit while putting on shoes and often includes valuable bonus storage. The key is to choose the right size. For a comfortable walkway, ensure you have at least 30-36 inches of clearance on all sides of the bench. If your bench is against a wall, you still need that clearance in front of it to easily access drawers and shelves. Opt for a storage bench rather than a standard one to maximize every square inch of your space.
|
📋 Copy HEX 🔗 Share |
This L-shaped layout with a central bench is ideal for square or slightly rectangular walk-in closets. To pull this off without feeling cramped, you’ll need a room that is at least 8 feet by 8 feet. Anything smaller and the bench will become an obstacle rather than a feature. For narrower, rectangular closets, consider the galley-style layout seen in Idea #21, which uses the full length of the walls without a central piece of furniture. This setup works beautifully with ceilings of 8 feet or higher.
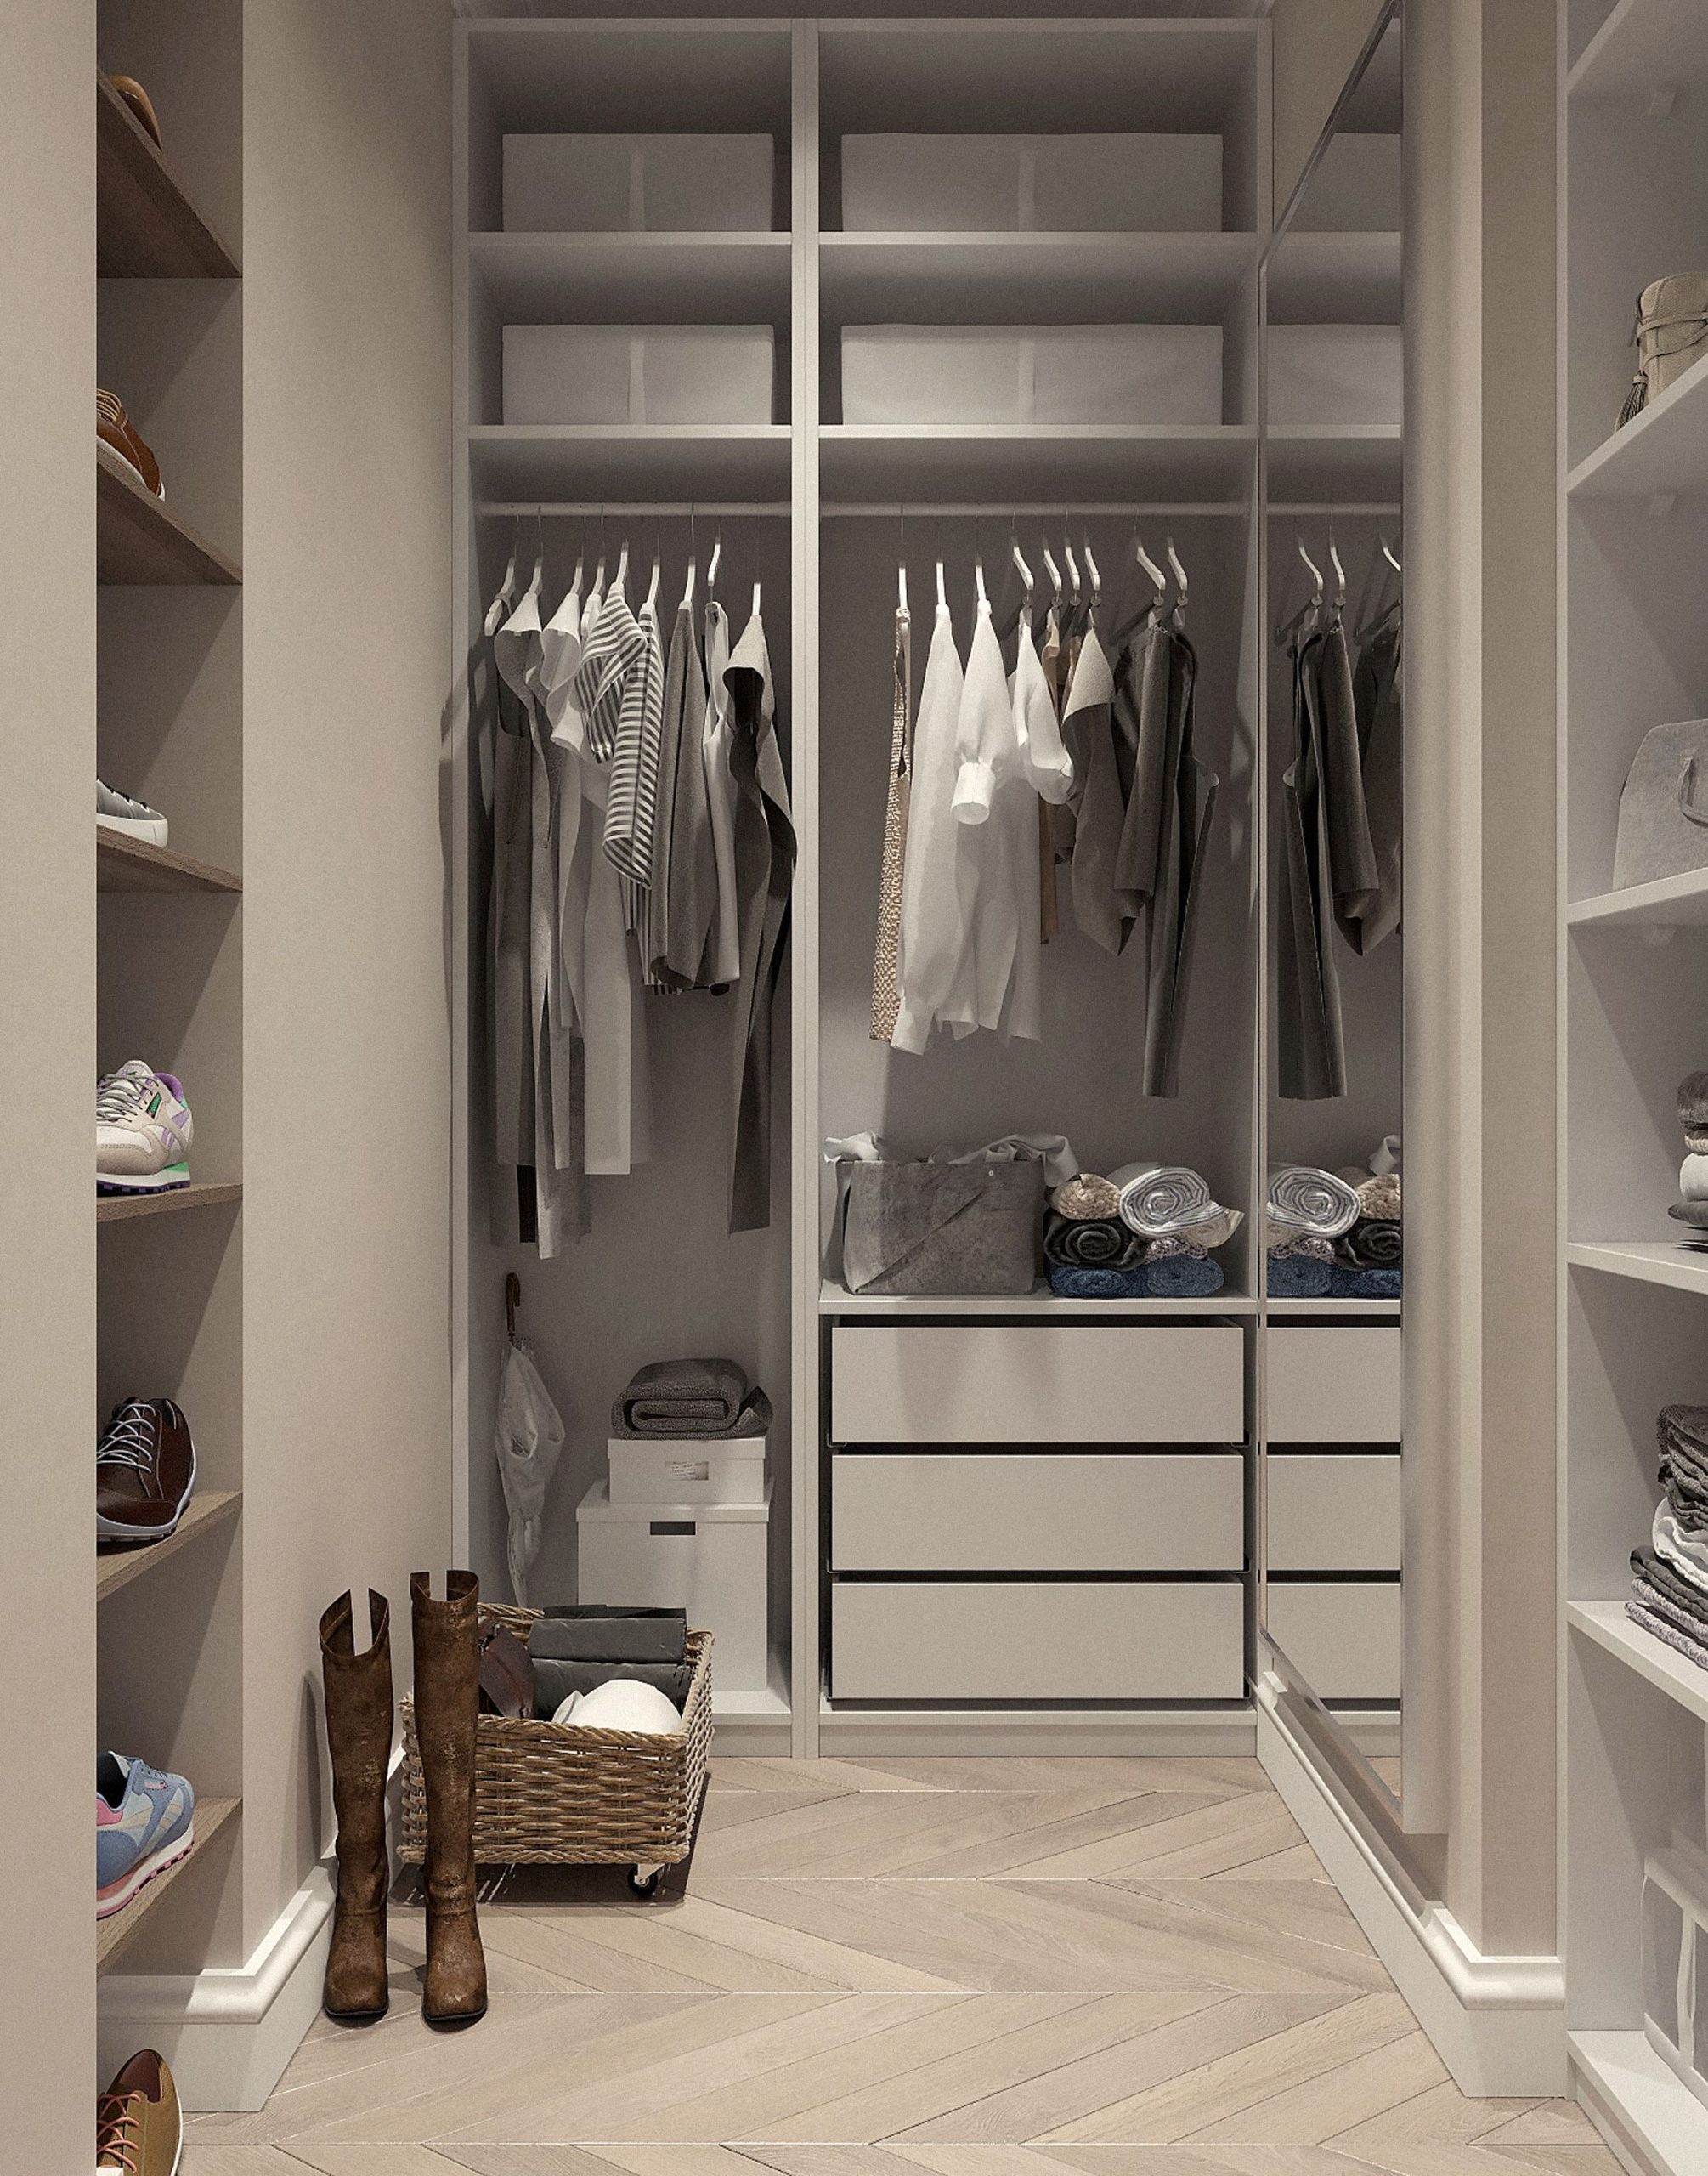
3. Taupe Walk-In with an Integrated Full-Length Mirror Panel
The single element that elevates this closet from merely functional to truly smart design is the integrated full-length mirror. It’s not just an afterthought hung on a wall; it’s built directly into the cabinetry. This move is brilliant for two reasons. First, it’s a massive space-saver, eliminating the need for a floor or wall mirror that would eat up valuable storage or walking room. Second, it bounces light around the space, making the entire closet feel brighter and more expansive. If you were to remove it, the closet would still work, but it would lose that seamless, custom-designed feel.
|
📋 Copy HEX 🔗 Share |
Let’s have some real talk about a setup this pristine. A full-length, frameless mirror will show every single fingerprint and smudge, so keep a microfiber cloth handy for frequent wipe-downs. That beautiful herringbone wood floor is stunning, but the grooves can trap dust and lint from clothing. Plan on vacuuming with a soft brush attachment at least once a week to keep it looking sharp. While beautiful, this is a design that shines brightest when it’s kept impeccably clean, which is something to consider if you’re not a fan of constant upkeep.
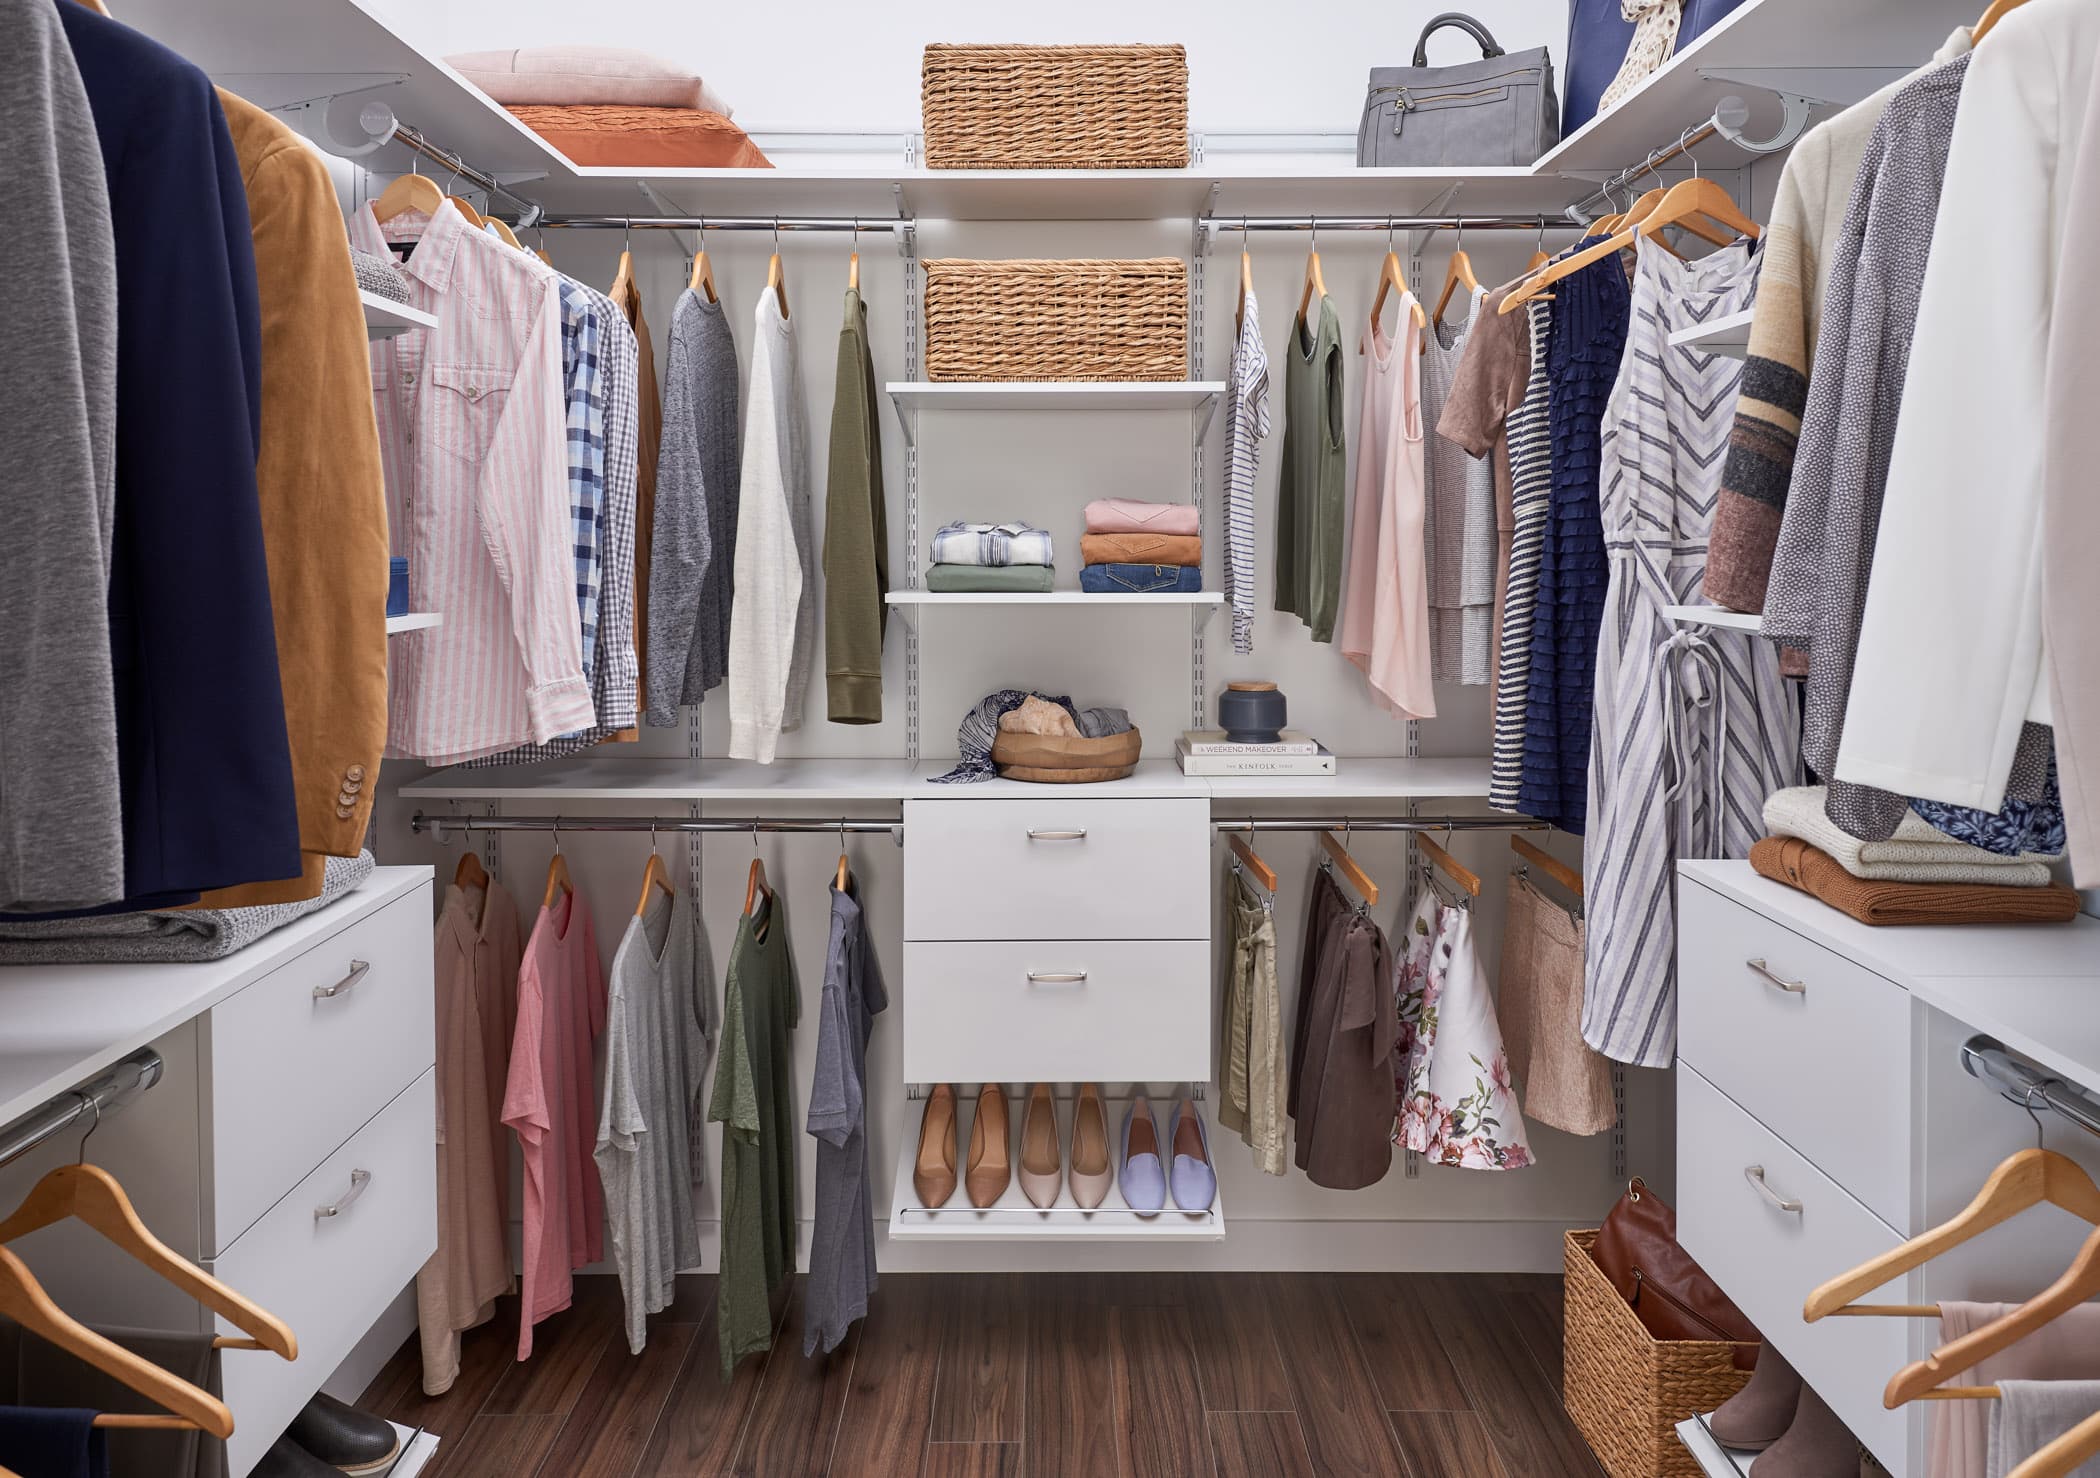
4. Modern Adjustable System with Pull-Out Shoe Racks
A pull-out shoe rack feels like pure luxury but is a surprisingly achievable DIY upgrade. Here’s how to add one to an existing closet system:
|
📋 Copy HEX 🔗 Share |
- Measure Your Space: Carefully measure the width, depth, and height of the cabinet section where you want to install the rack. Most pull-out organizers are designed for standard cabinet widths (e.g., 24 and 30 inches).
- Purchase the Kit: Buy a pull-out shoe rack kit (available at hardware stores or online). Ensure the slide mechanism’s length matches your cabinet depth.
- Install the Slides: Following the manufacturer’s instructions, attach the drawer slides to the interior walls of your closet section. Use a level to ensure they are perfectly parallel.
- Attach the Rack: Connect the shoe rack to the slides. Test the gliding mechanism to make sure it moves smoothly without catching.
This design’s success comes from its intelligent use of specialized accessories within a simple, adjustable framework. The system isn’t just about static shelves; it incorporates dynamic elements like the pull-out shoe rack and deep drawers, which allow for denser, more accessible storage. The contrast between the clean white structure and the dark wood flooring creates a sharp, modern look, while the woven baskets introduce a softer, organic element that prevents the design from feeling cold or clinical. It’s a perfect balance of form, function, and material contrast.
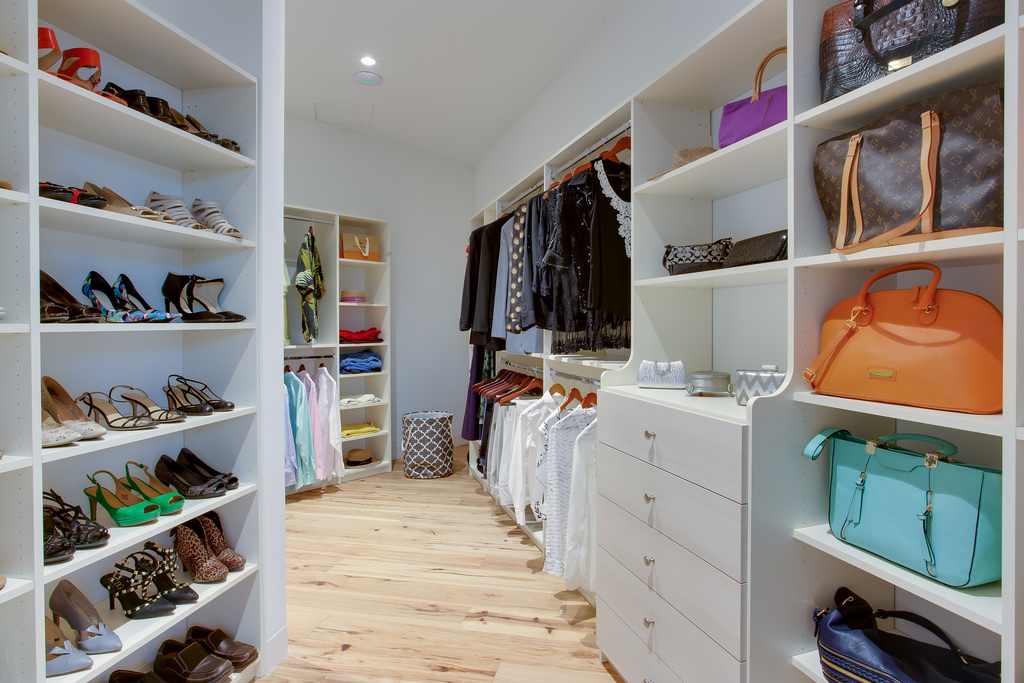
5. Elevate a Basic Closet with High-End Hardware and Accessories
Think of your closet design as a simple equation: 50% basic shelving + 30% statement hardware + 20% strategic lighting. You can use an affordable, simple shelving system like the ones from IKEA or The Container Store for the foundation. The magic happens when you swap out the standard-issue knobs, pulls, and hanging rods for higher-quality, more stylish options. A chunky brass pull or a sleek leather tab can completely change the perceived value of an inexpensive drawer unit. Don’t just stop at handles; consider a custom-cut hanging rod in a unique finish like matte black or brushed gold.
|
📋 Copy HEX 🔗 Share |
While upgrading hardware is a fantastic way to customize a closet, be prepared for the costs to add up quickly. A single high-end knob can cost anywhere from $10 to $50. If you have 20 drawers, that’s a significant investment. Also, be mindful of installation. Some custom hardware might not align with the pre-drilled holes in a modular system, requiring you to drill new holes, which can be intimidating. Always double-check screw spacing and measurements before you buy to avoid a frustrating return trip to the store.
6. The All-in-One White Adjustable Closet System
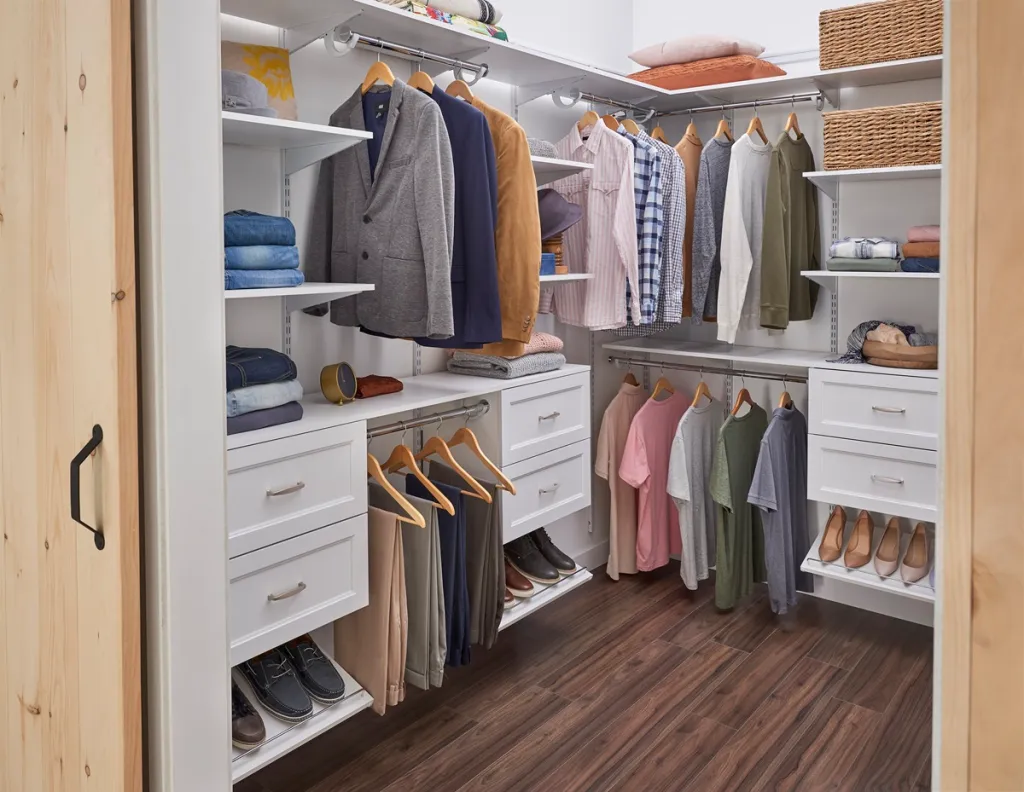
The single most important feature of this closet is adjustability. The entire system is built on a track-based standard that allows shelves, drawers, and rods to be moved up, down, or reconfigured with minimal effort. This is not a static, one-and-done installation. This flexibility means the closet can evolve with your needs. If your shoe collection doubles, you can add more shoe shelves. If you transition to a job that requires more hanging clothes, you can swap out shelves for another rod. It’s a ‘forever’ system because it’s never truly finished; it adapts to you.
|
📋 Copy HEX 🔗 Share |
While a professionally installed system like this can be pricey, you can get a very similar look and almost all the functionality for much less. The IKEA BOAXEL or ALGOT systems are fantastic, affordable alternatives that use the same wall-mounted, adjustable track concept. A sample configuration might cost:
- Wall uprights and mounting rails: $100 – $150
- Shelves: $150 – $250
- Drawers/Baskets: $100 – $200
- Hanging Rods: $30 – $50
- TOTAL: $380 – $650
7. Sleek Custom Closet with Integrated LED Strip Lighting
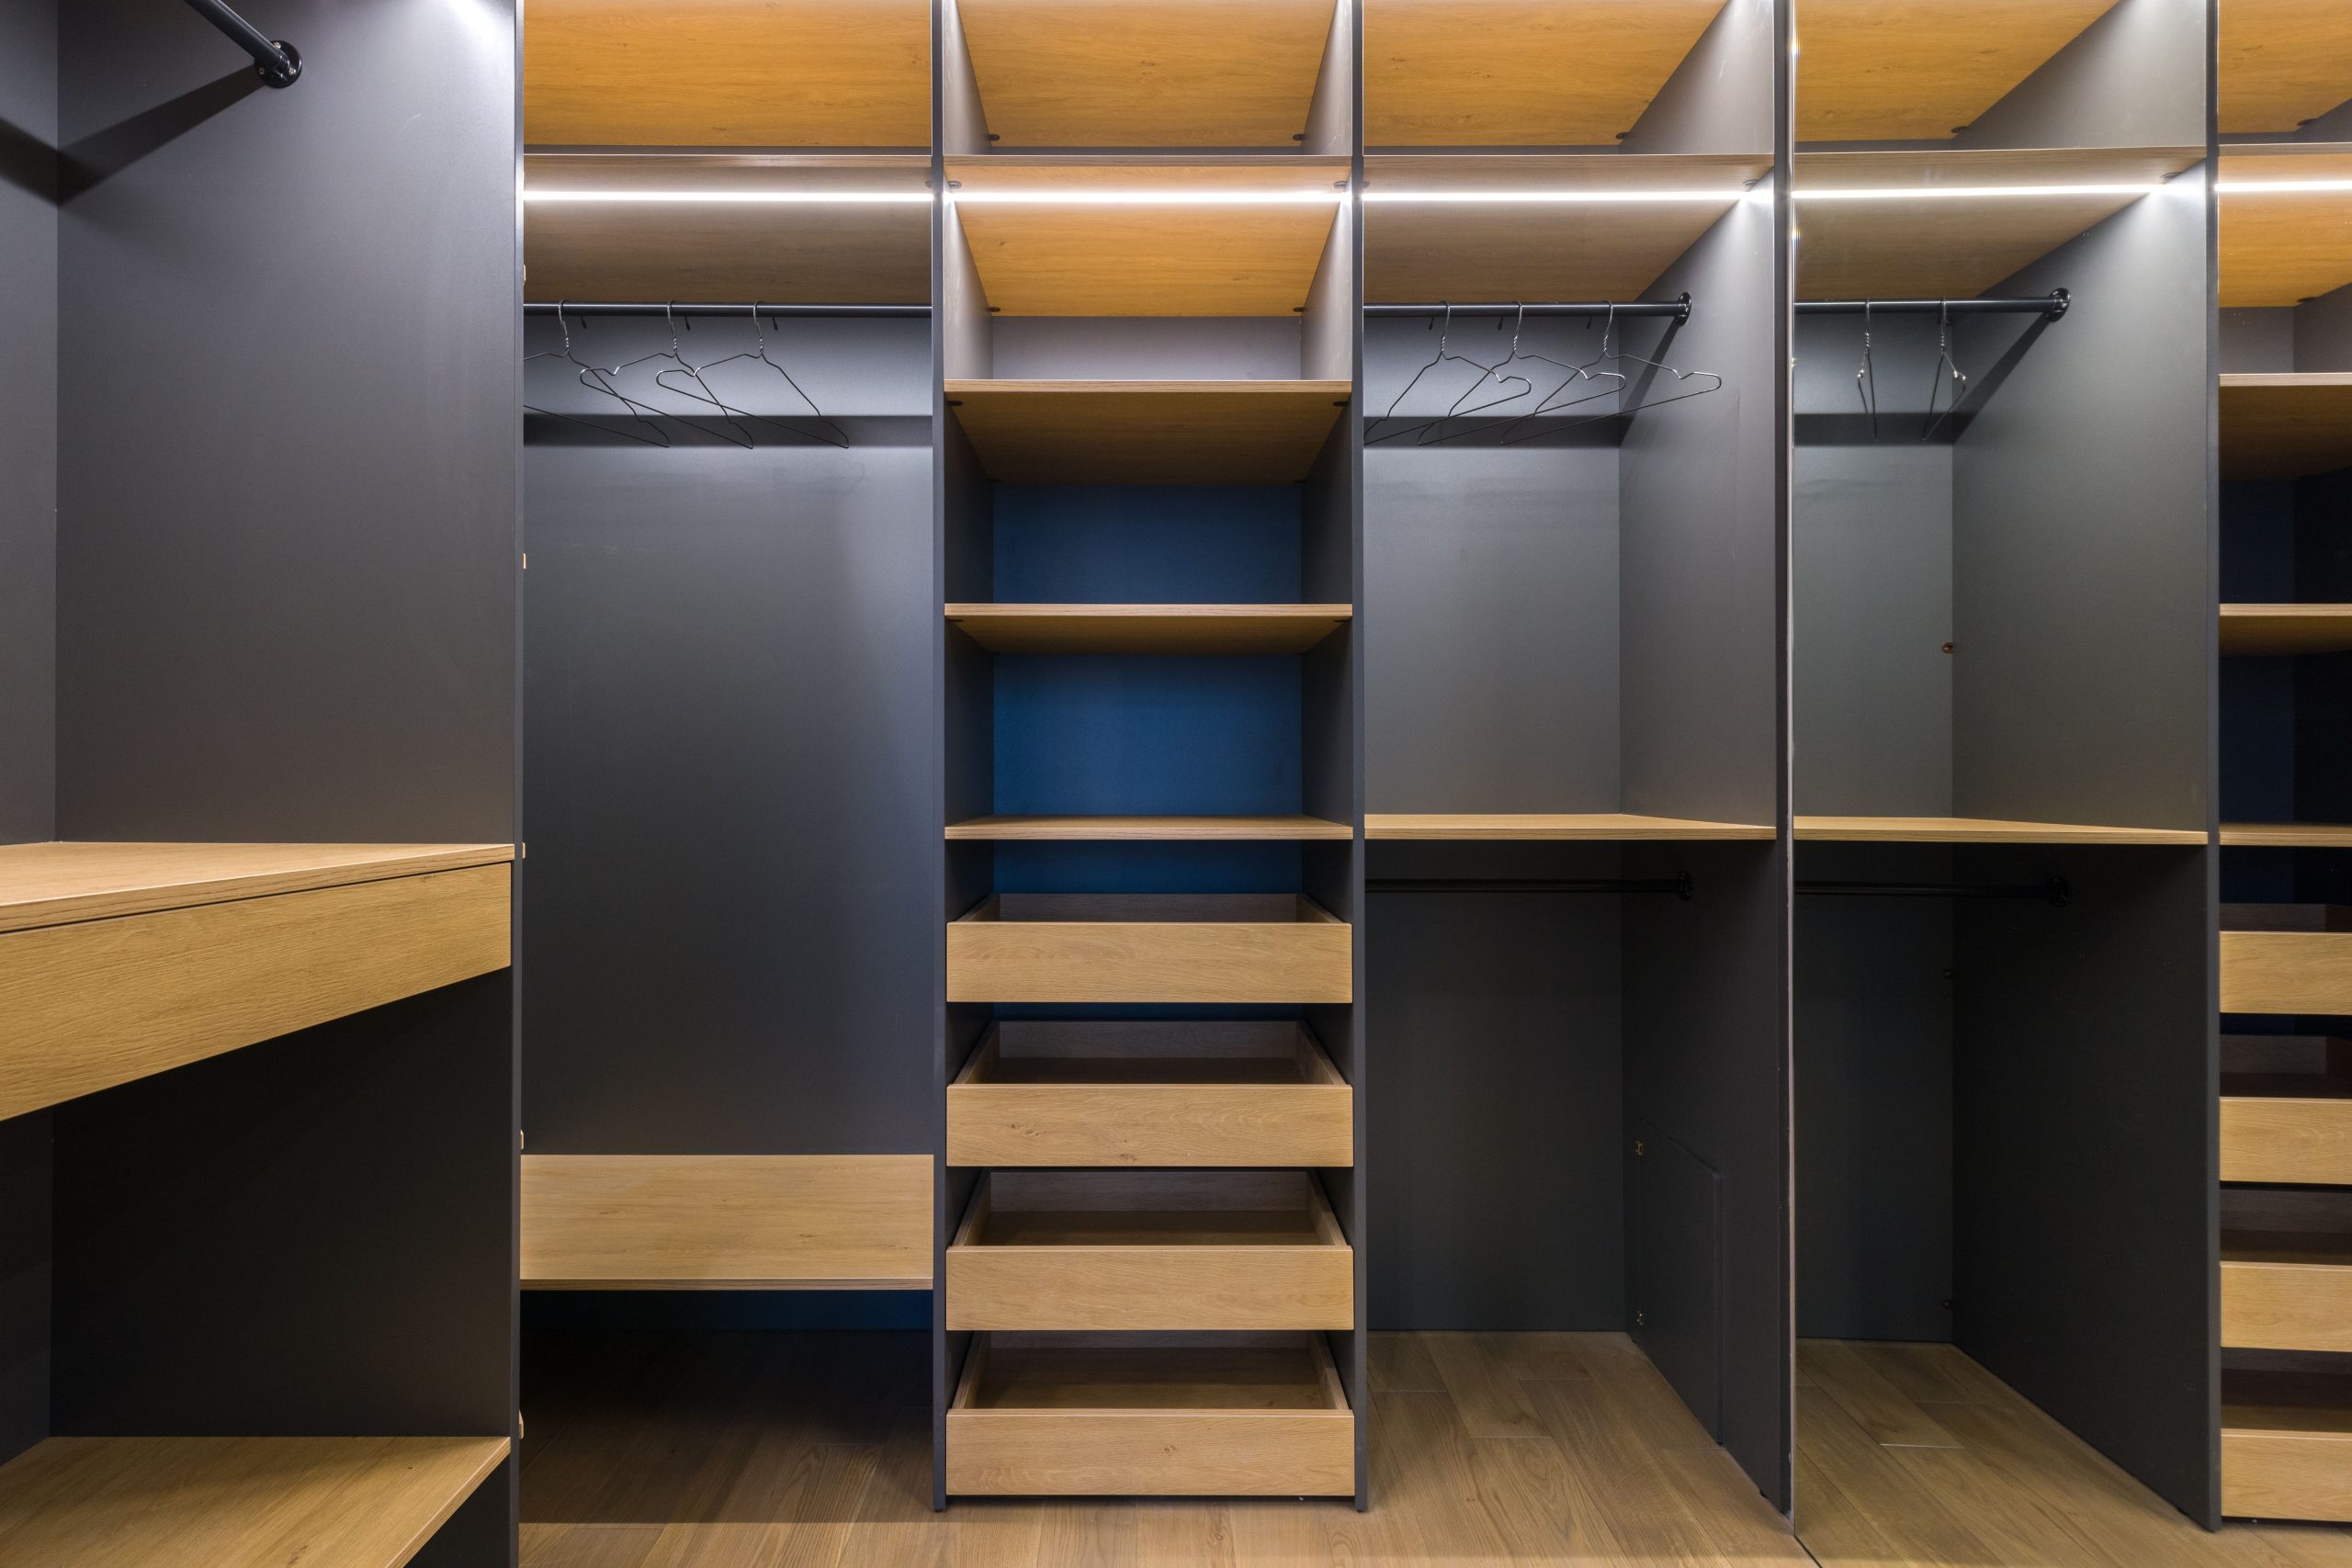
This design is a masterclass in contrast and ambiance. The dark gray framework creates a moody, sophisticated backdrop that makes the lighter natural wood of the shelves and drawers pop. But the true genius is the integrated LED lighting. By recessing light strips along the top of each section, the design achieves a gallery-like effect, highlighting the items on display and eliminating the dark shadows that plague most closets. This turns a purely functional space into a dramatic showcase. The mirror paneling is the final touch, adding depth and reflecting the light for maximum impact.
|
📋 Copy HEX 🔗 Share |
Before you commit to a high-end, custom look with integrated lighting, run through this quick checklist:
- Electrical Access: Is there a power source nearby, or will you need to hire an electrician to run wiring? This can be a significant hidden cost.
- Material Samples: Get physical samples of the wood, gray finish, and any hardware. Colors on a screen are deceptive, and textures are impossible to judge online.
- Measure Your Inventory: Don’t just measure the room. Measure the height of your boots, the width of your longest dresses, and how much linear space your folded sweaters take up. A custom closet should be tailored to your actual wardrobe.
8. Combine Open Shelves, Baskets, and Fabric Bins for a Soft, Organized Look
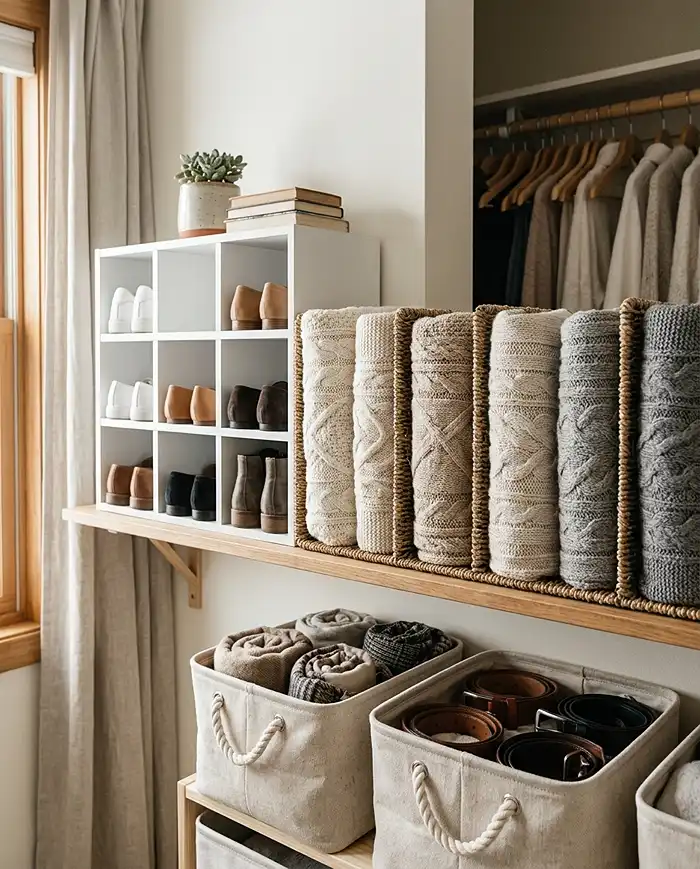
The visual formula here is all about layered softness: 40% hard surfaces (white and wood shelves) + 40% woven textures (braided baskets) + 20% soft fabrics (linen-look bins). This combination is what gives the closet its calm, serene vibe. The hard shelving provides structure and order, while the baskets and fabric bins introduce a tactile, cozy quality. You could easily swap the materials while keeping the formula: try dark wood shelves, black wire baskets, and gray felt bins for a more industrial take on the same principle.
|
📋 Copy HEX 🔗 Share |
There’s a reason this look is all over Pinterest right now. It ties into the larger ‘soft minimalism’ trend, which moves away from stark, cold organization and embraces a more livable, textural approach. People are tired of sterile, all-white spaces and are craving warmth and personality, even in functional areas like closets. This style, with its focus on natural fibers and tactile materials, feels more like curating a personal boutique than just storing clothes. It has staying power because it’s both beautiful and deeply practical.
9. Industrial Vibe with Rustic Wood and Pipe Shelving
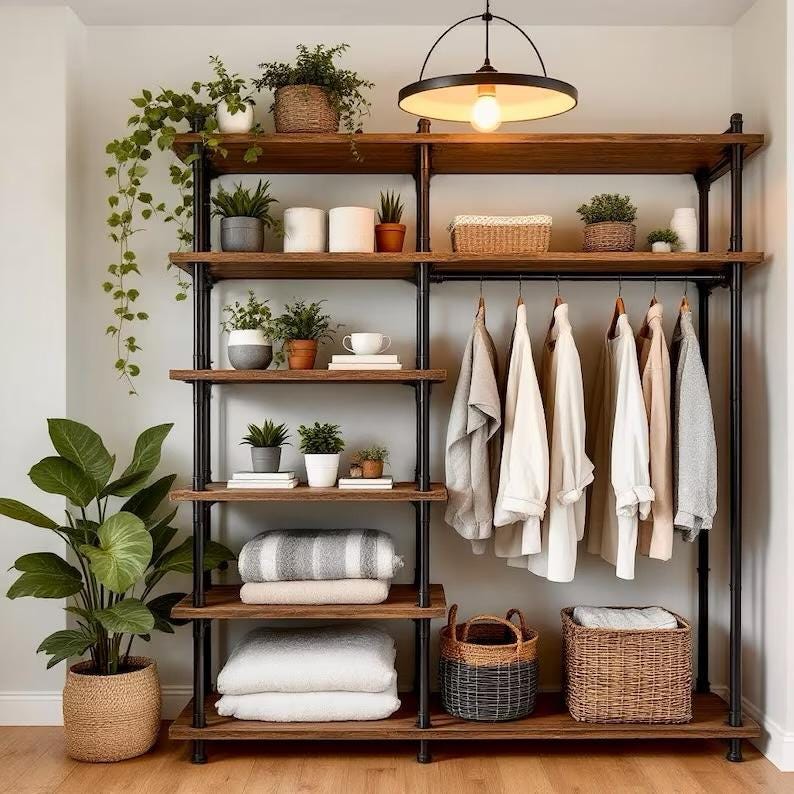
Open pipe shelving brings a cool, industrial edge to a closet, but it comes with a specific set of maintenance tasks. The raw wood shelves, while beautiful, are often softer and more porous than factory-finished melamine. Use paste wax once a year to protect them from moisture and make dusting easier. The metal pipes themselves are a dust magnet; a microfiber duster or the brush attachment on your vacuum is your best friend here. Because everything is so open, there’s nowhere for dust to hide, so you’ll likely find yourself dusting more often than you would with a closed cabinet system.
|
📋 Copy HEX 🔗 Share |
You can create a custom pipe shelf unit with a quick trip to the hardware store. Here’s a mini-guide:
- Design & Measure: Sketch your design. Determine the length of your shelves and the height between them.
- Buy Materials: Purchase black iron pipes and fittings (flanges, elbows, and tees) and wooden boards (pine or fir works well). Have the store cut the pipes to your required lengths.
- Prep the Wood: Sand and stain or seal the wooden boards. Let them dry completely.
- Assemble the Pipes: Clean the pipes to remove any grease, then assemble the pipe structure. It’s like building with LEGOs!
- Mount and Secure: Mount the pipe flanges to the wall (use wall anchors!), and then secure the shelves to the structure.
Time Estimate: 4-6 hours. Material Cost: $150-$400 depending on size.
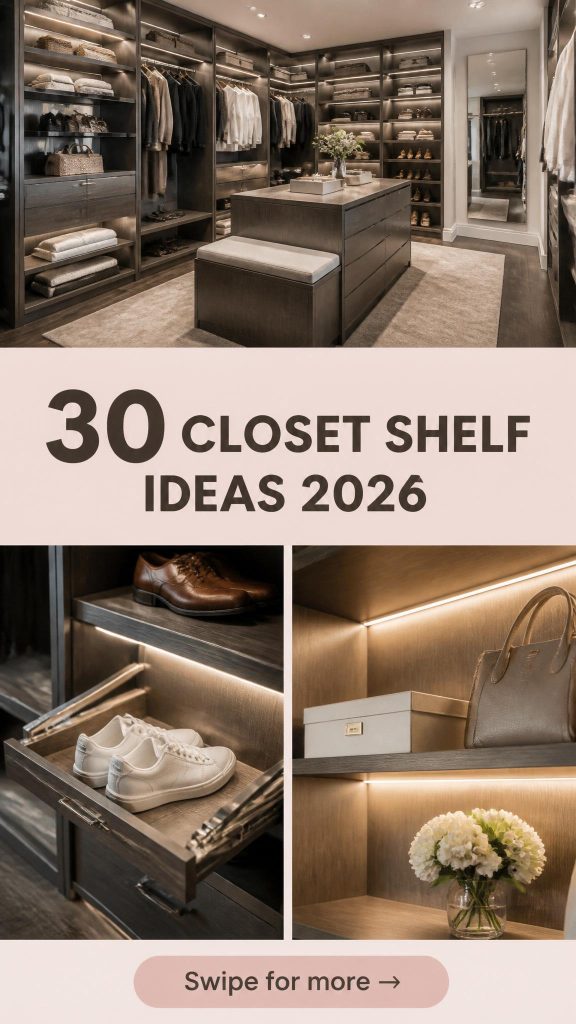
10. Understanding Different Closet System Types for Your Home
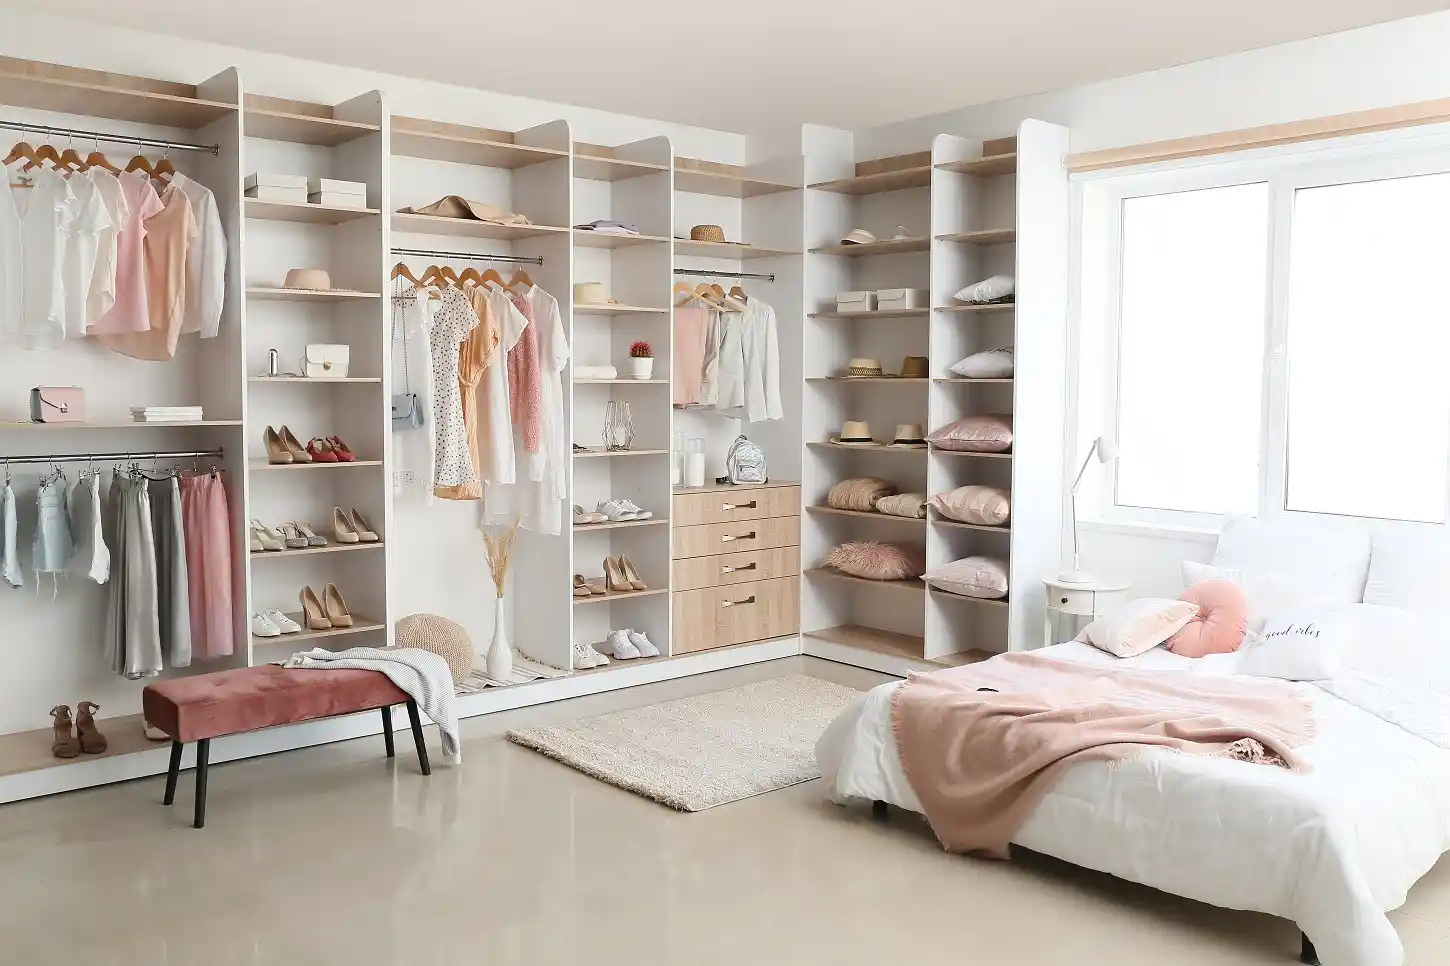
When selecting a closet system, the most important decision is choosing between floor-based and wall-mounted. A floor-based system, like the one in Idea #3, rests on the floor and is secured to the wall for stability. It feels more like built-in furniture and can often support more weight. A wall-mounted system hangs from tracks attached to the wall studs, like in Idea #11. This creates a lighter, more modern look and keeps the floor completely clear, which makes cleaning a breeze and can make a small space feel larger.
|
📋 Copy HEX 🔗 Share |
The type of system you choose depends heavily on your room and walls. Wall-mounted systems require solid anchoring into wall studs. If you have older plaster walls or metal studs, installation can be much more complex, and a floor-based unit might be a safer bet. For walk-in closets larger than 60 square feet, a floor-based system can feel more substantial and luxurious. For smaller reach-in closets or closets under 40 square feet, a wall-mounted system is often superior because it maximizes perceived space by lifting everything off the floor.
11. Bright Walk-In with Modular Shelves and a Dedicated Shoe Cubby
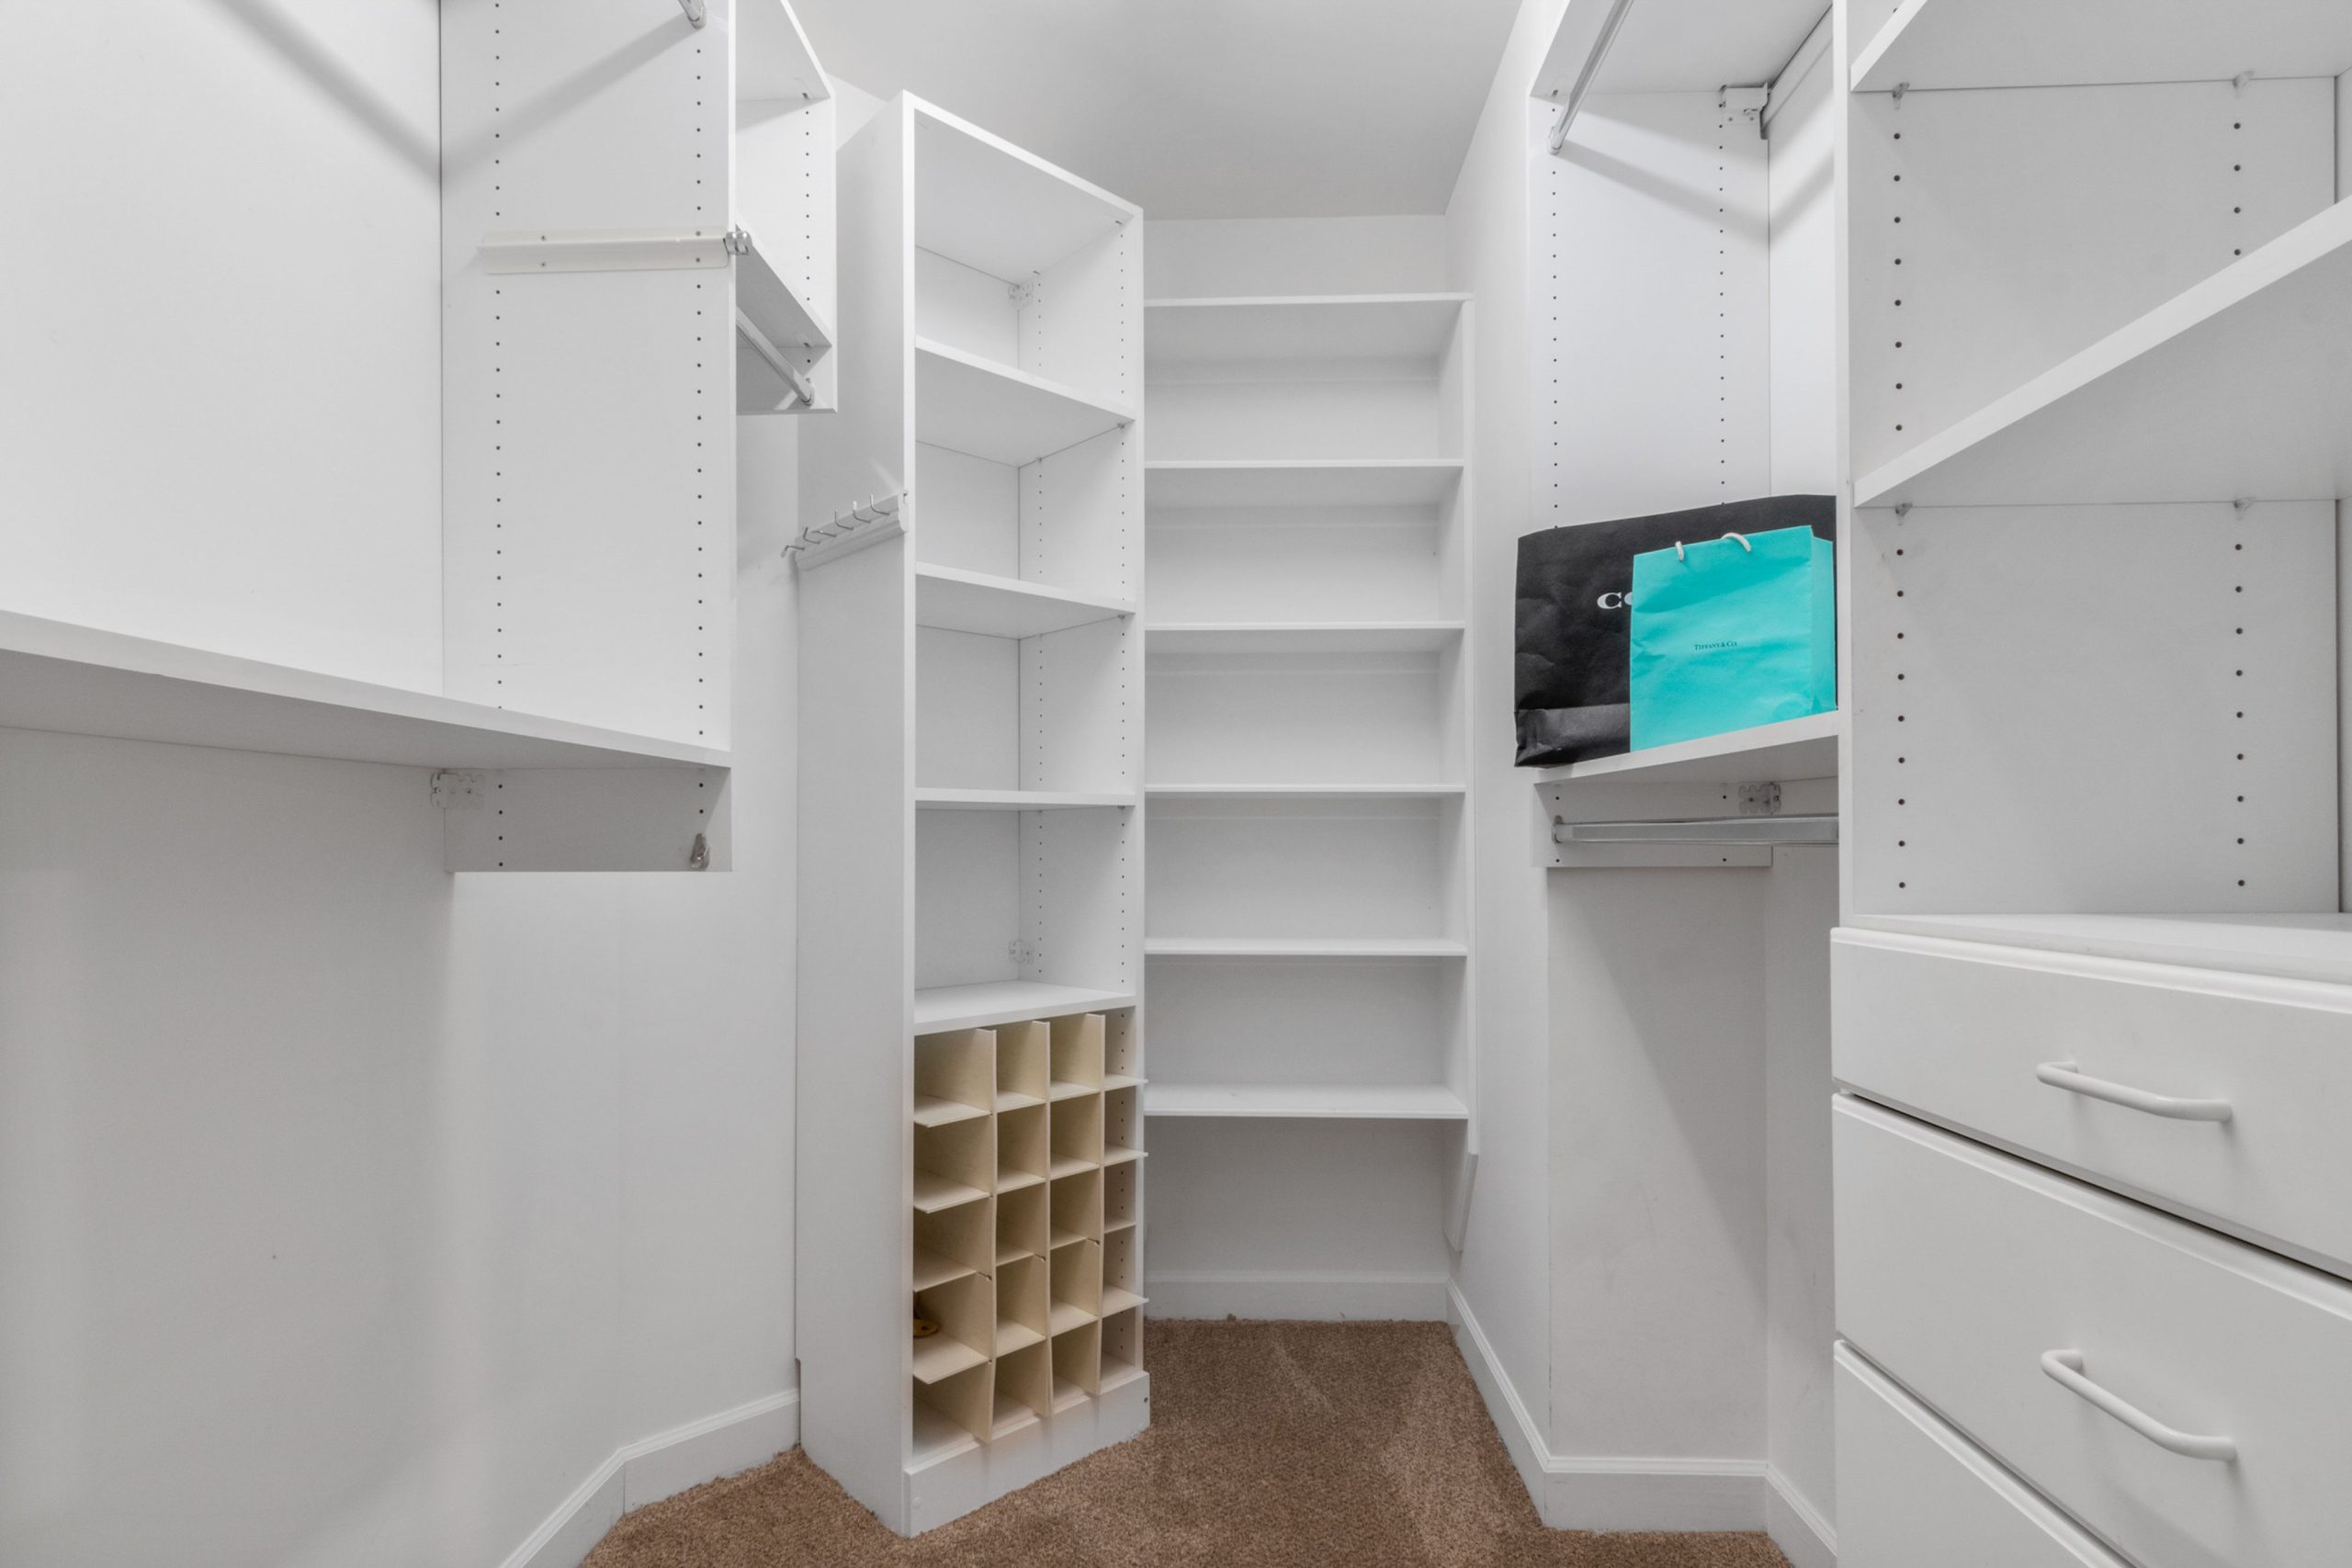
The simplicity of this design is its strength. By using a single, consistent color (white) for all the modular components—shelves, drawers, and shoe cubby—the space feels cohesive, bright, and uncluttered. This creates a neutral, gallery-like canvas that allows the colors and textures of the clothing and accessories to stand out without competing with the structure. The built-in shoe organizer is a key feature; by giving each pair its own dedicated cubby, it prevents the dreaded pile-up of shoes on the floor, which is the fastest way to make a closet look messy.
|
📋 Copy HEX 🔗 Share |
This looks like a custom or semi-custom system, but you can achieve this exact level of organization using off-the-shelf components. Target’s Brightroom collection and IKEA’s PAX system both offer all the pieces you see here. You can buy shoe-cubby inserts, drawer units, and open shelves and combine them within a wardrobe frame or as standalone pieces. A similar setup from these retailers would likely cost between $500 and $900, a significant saving compared to custom closet companies, which could charge upwards of $3,000 for the same configuration.
12. Functional U-Shaped Closet with Light Grey Wire Shelving
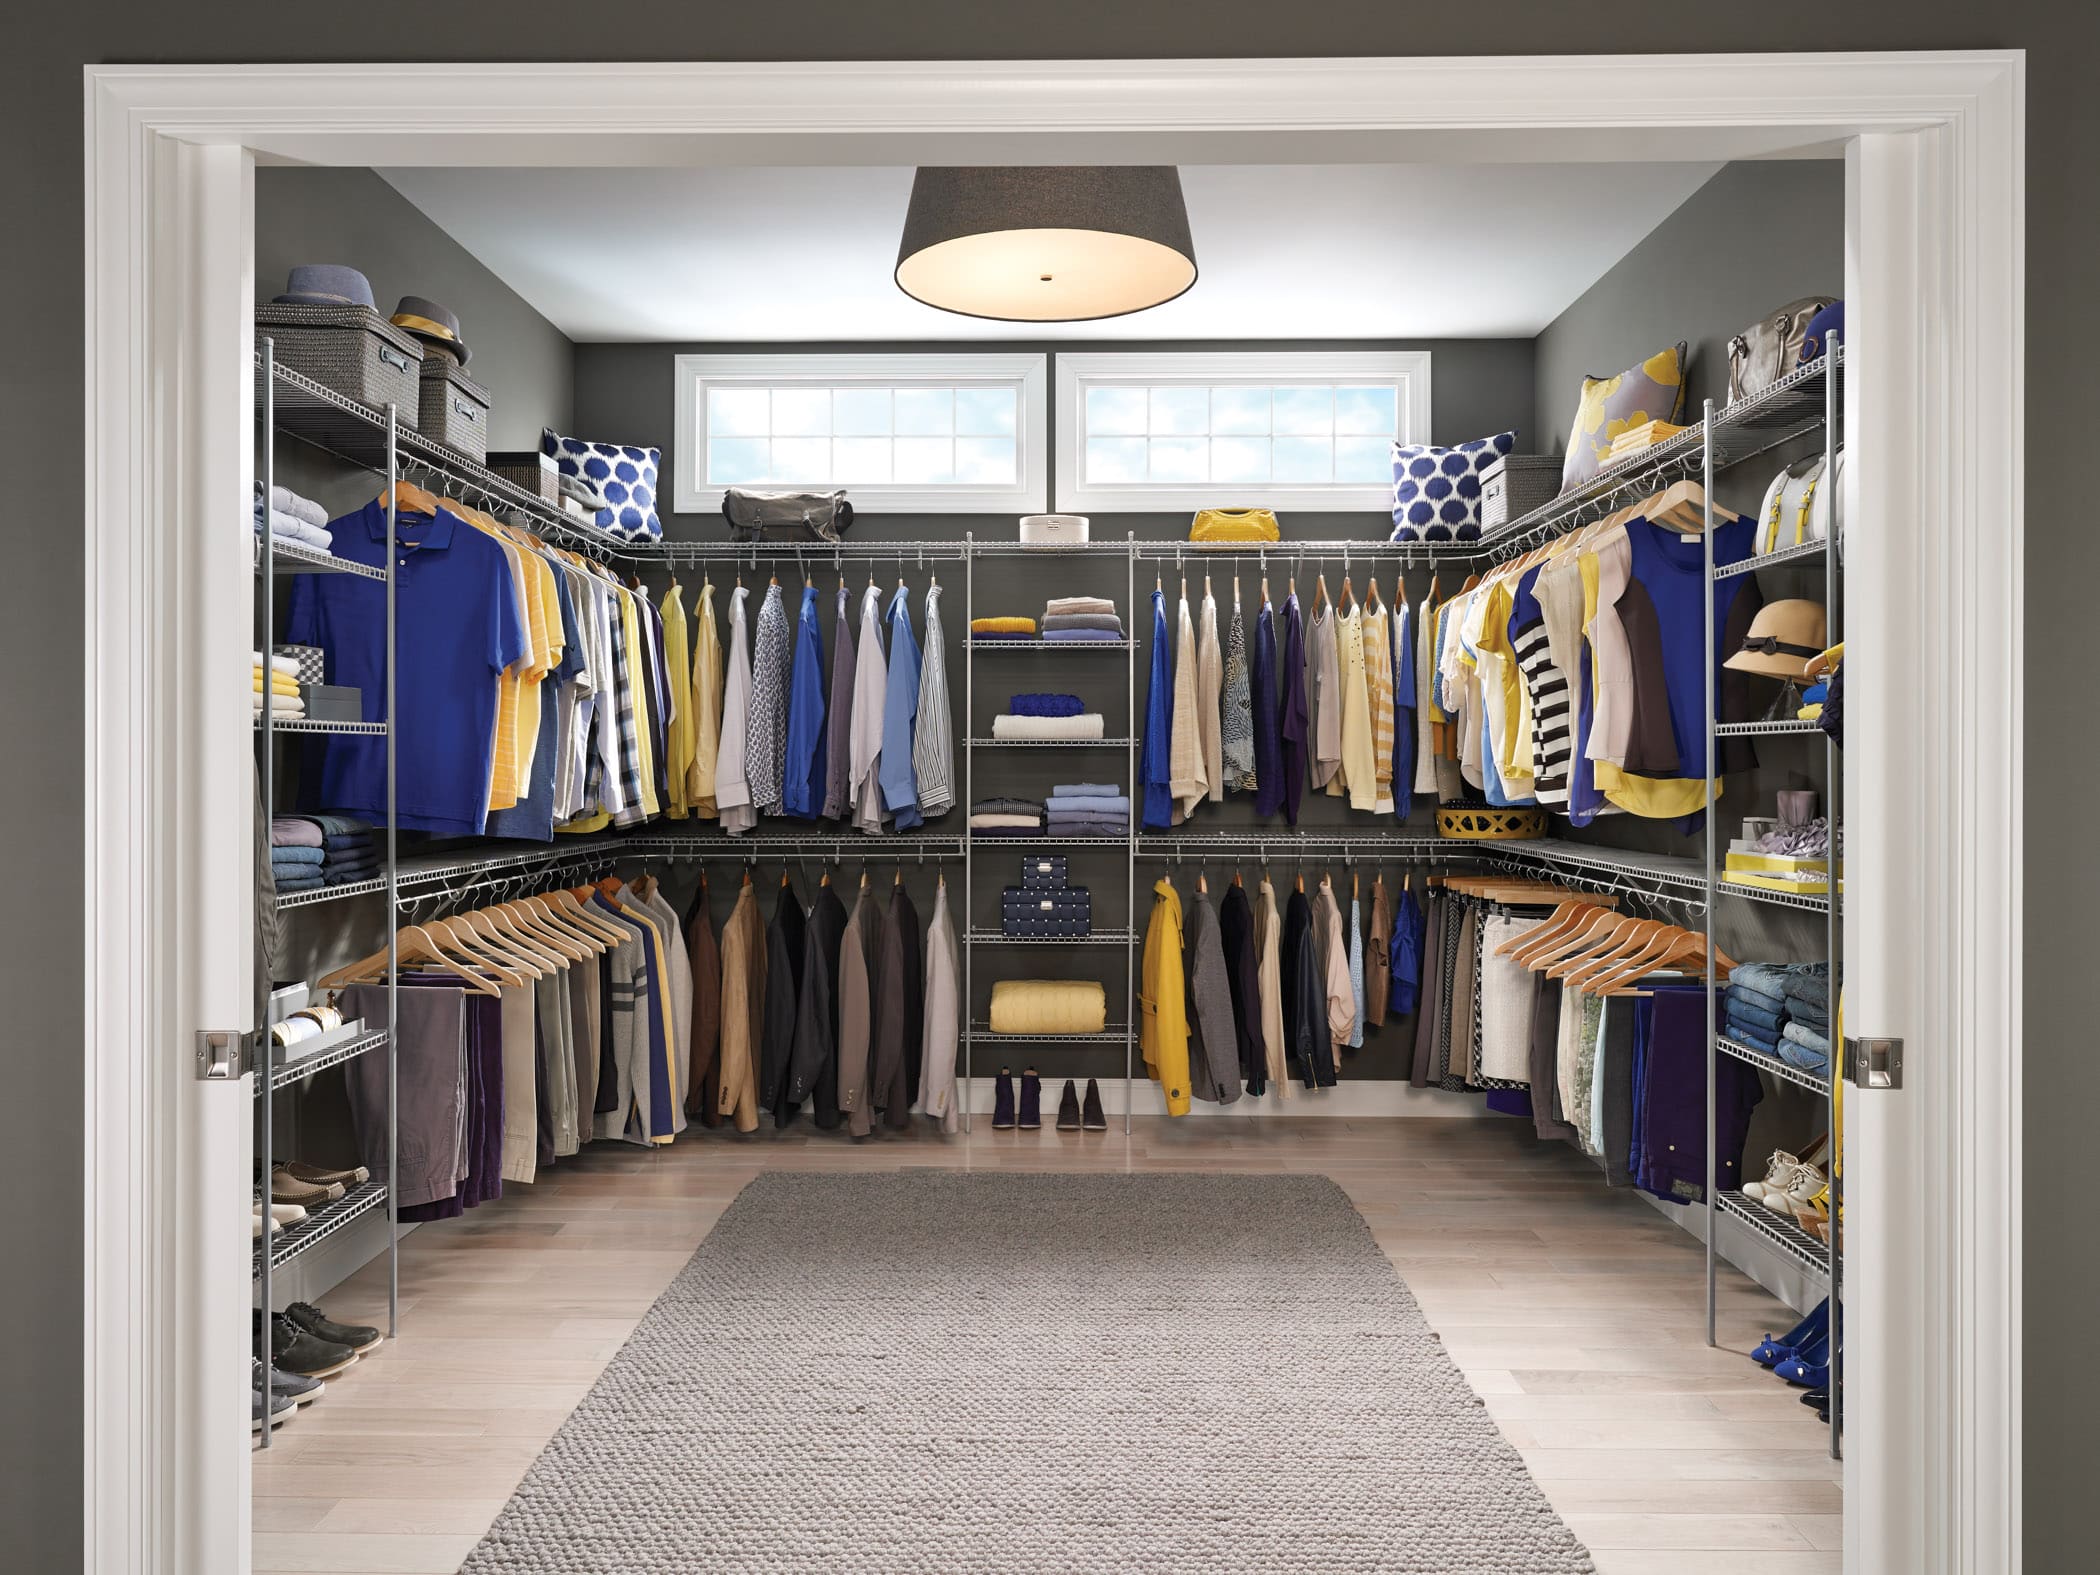
Wire shelving is incredibly practical and cost-effective, but let’s be honest about its downsides. First, it can leave subtle line indentations on soft garments like sweaters if they’re left folded on the wire for too long. Consider using plastic shelf liners to create a solid, smooth surface. Second, smaller items can fall through the gaps, which can be frustrating. This is where decorative baskets and bins become essential, not just for aesthetics but for pure functionality. Finally, over time, the plastic coating on cheaper wire shelves can yellow or chip, so it’s worth investing in a reputable brand.
|
📋 Copy HEX 🔗 Share |
What makes this affordable wire system work so well is the thoughtful space planning. By using a U-shaped configuration, the design maximizes every inch of the three walls, creating an impressive amount of storage in a relatively small footprint. The corners are handled intelligently, allowing for continuous storage rather than becoming dead zones. Without this efficient layout, the same amount of wire shelving arranged differently would feel chaotic and far less effective. The layout is the true hero here, not the material itself.
13. Customizing a Closet System with Specialized Inserts
The secret to a truly organized closet lies in the ‘guts’ of the system, not just the main shelves. Before you finalize a design, think about the specific items you own. Do you have a lot of jewelry? Add a velvet-lined, partitioned drawer insert. A large collection of ties or scarves? A pull-out specialty rack is worth its weight in gold. These small additions can dramatically increase your closet’s efficiency. A pro tip: plan for at least two ‘specialty’ zones, even if it’s just a set of drawer dividers, to handle your most challenging items.
|
📋 Copy HEX 🔗 Share |
Let’s estimate the cost for a high-end custom reach-in closet, which often focuses more on clever internal components:
- Basic Shelving & Rods: $1,200 – $2,500
- Drawer Units (3-4): $800 – $1,500
- Specialty Pull-outs (e.g., tie rack, valet rod): $300 – $700
- Upgraded Hardware & Finishes: $400 – $800
- Professional Installation: $500 – $1,000
- TOTAL: $3,200 – $6,500
- Budget Alternative: Use a basic wire system and add targeted organizers like hanging sweater bags and fabric drawer units for about $250 – $500. See Idea #17 for inspiration.
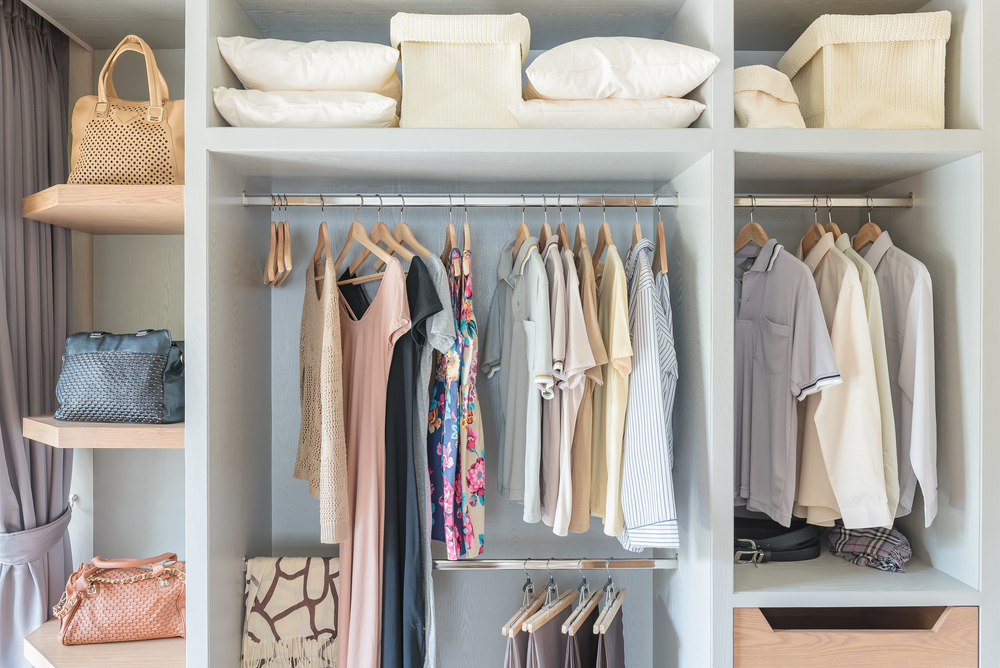
14. Mastering the Reach-In Closet with Smart Organization
Reach-in closets present a unique challenge: they are often wide but shallow. This idea demonstrates the perfect solution. The key is vertical division. This typically works in a space that’s 4-8 feet wide and 24-30 inches deep. By dividing the closet into zones—a double-hang section on one side for shirts and pants, and a single-hang section on the other for dresses, with shelving in the middle—you can effectively double your storage capacity compared to a single-rod-and-shelf setup. This modular approach is the gold standard for reach-ins of any size.
|
📋 Copy HEX 🔗 Share |
Transform your basic reach-in with this 3-step organization blitz:
- Empty and Categorize: Take everything out. This is non-negotiable! Sort every item into categories: long-hang, short-hang, folded, accessories, etc. This shows you what kind of storage you actually need.
- Design Your Zones: Based on your inventory, purchase a system that creates zones. Elfa from The Container Store or ClosetMaid kits are great for this. Plan for a mix of double-hang rods and shelves.
- Use Smart Containers: Use clear or labeled bins for the top shelf. This ‘attic’ space is perfect for out-of-season items, but only if you can easily see what’s inside without needing a ladder.
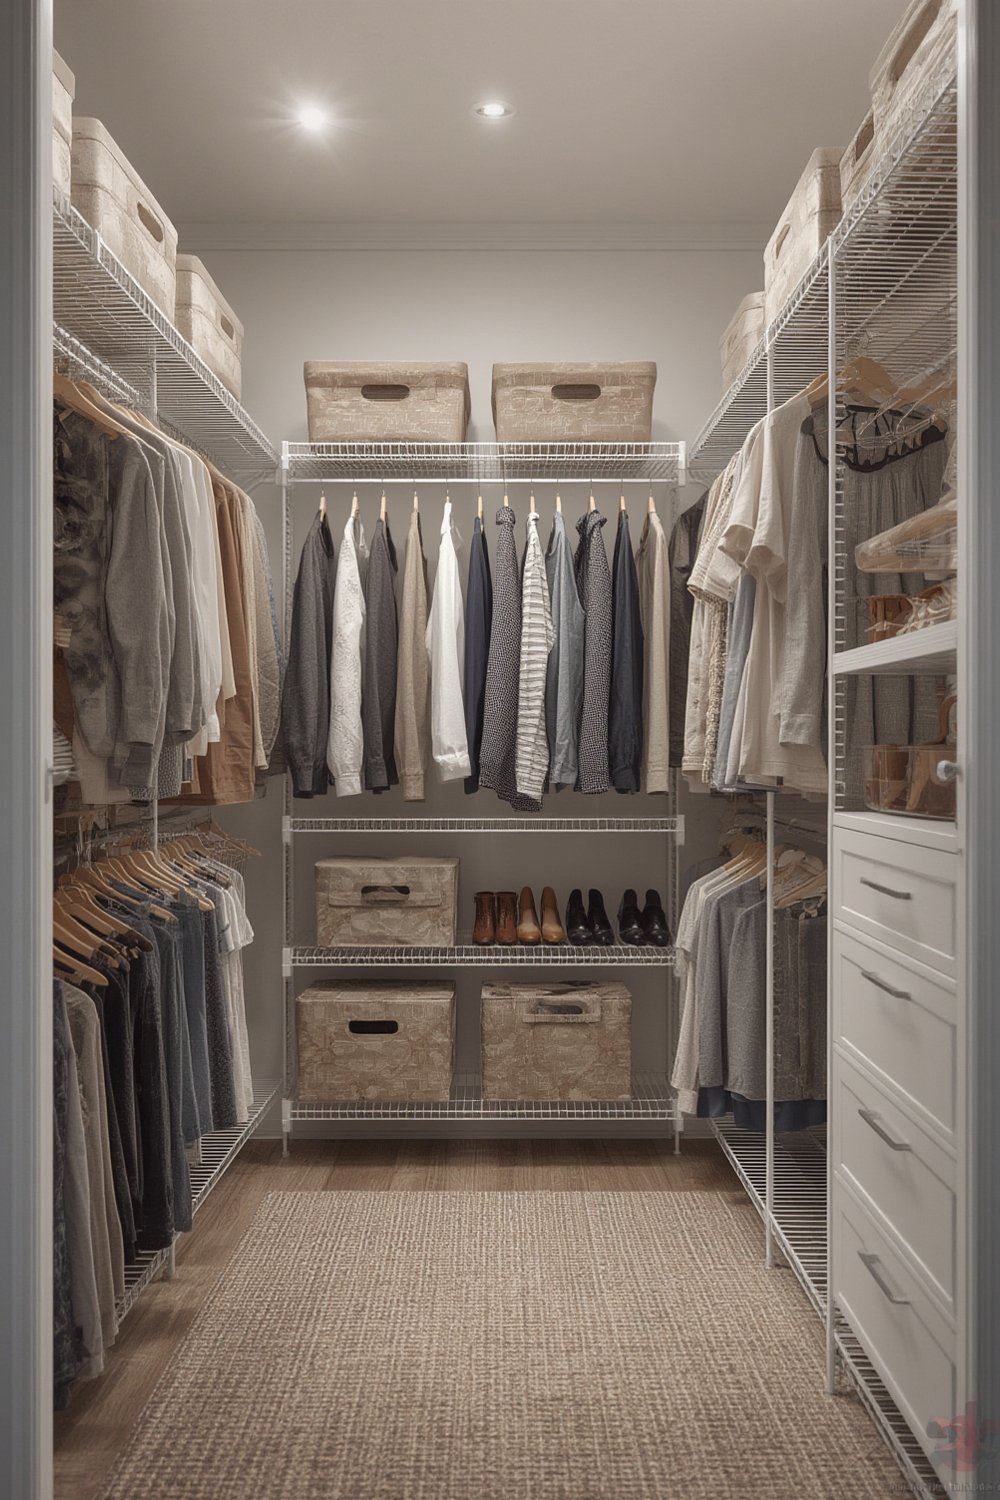
15. Affordable Organization with Wire Shelving and Cohesive Storage Boxes
This is the budget-friendly closet organization we love to see. It proves you don’t need expensive built-ins for a space to look incredibly neat and functional. The hero here is uniformity. By using identical beige patterned storage boxes throughout the space, the closet achieves a calm, cohesive look that hides a multitude of sins. You can get these boxes for $10-$20 each at Target, Walmart, or Amazon. A full U-shaped wire shelving system from a hardware store can cost as little as $200-$400, making this entire polished look achievable for under $600.
|
📋 Copy HEX 🔗 Share |
This setup works because it leans into the strengths of a wire system while mitigating its weaknesses. Wire shelving is fantastic for allowing air circulation, which is great for clothes. Its weakness is visual clutter, as you can see everything. The matching storage boxes solve this perfectly, creating clean, solid blocks of color that calm the space down. The textured beige rug adds a touch of softness and warmth, making the functional space feel more comfortable and finished. It’s a smart, high-impact, low-cost solution. Compare this to the more luxurious built-in approach in Idea #25.
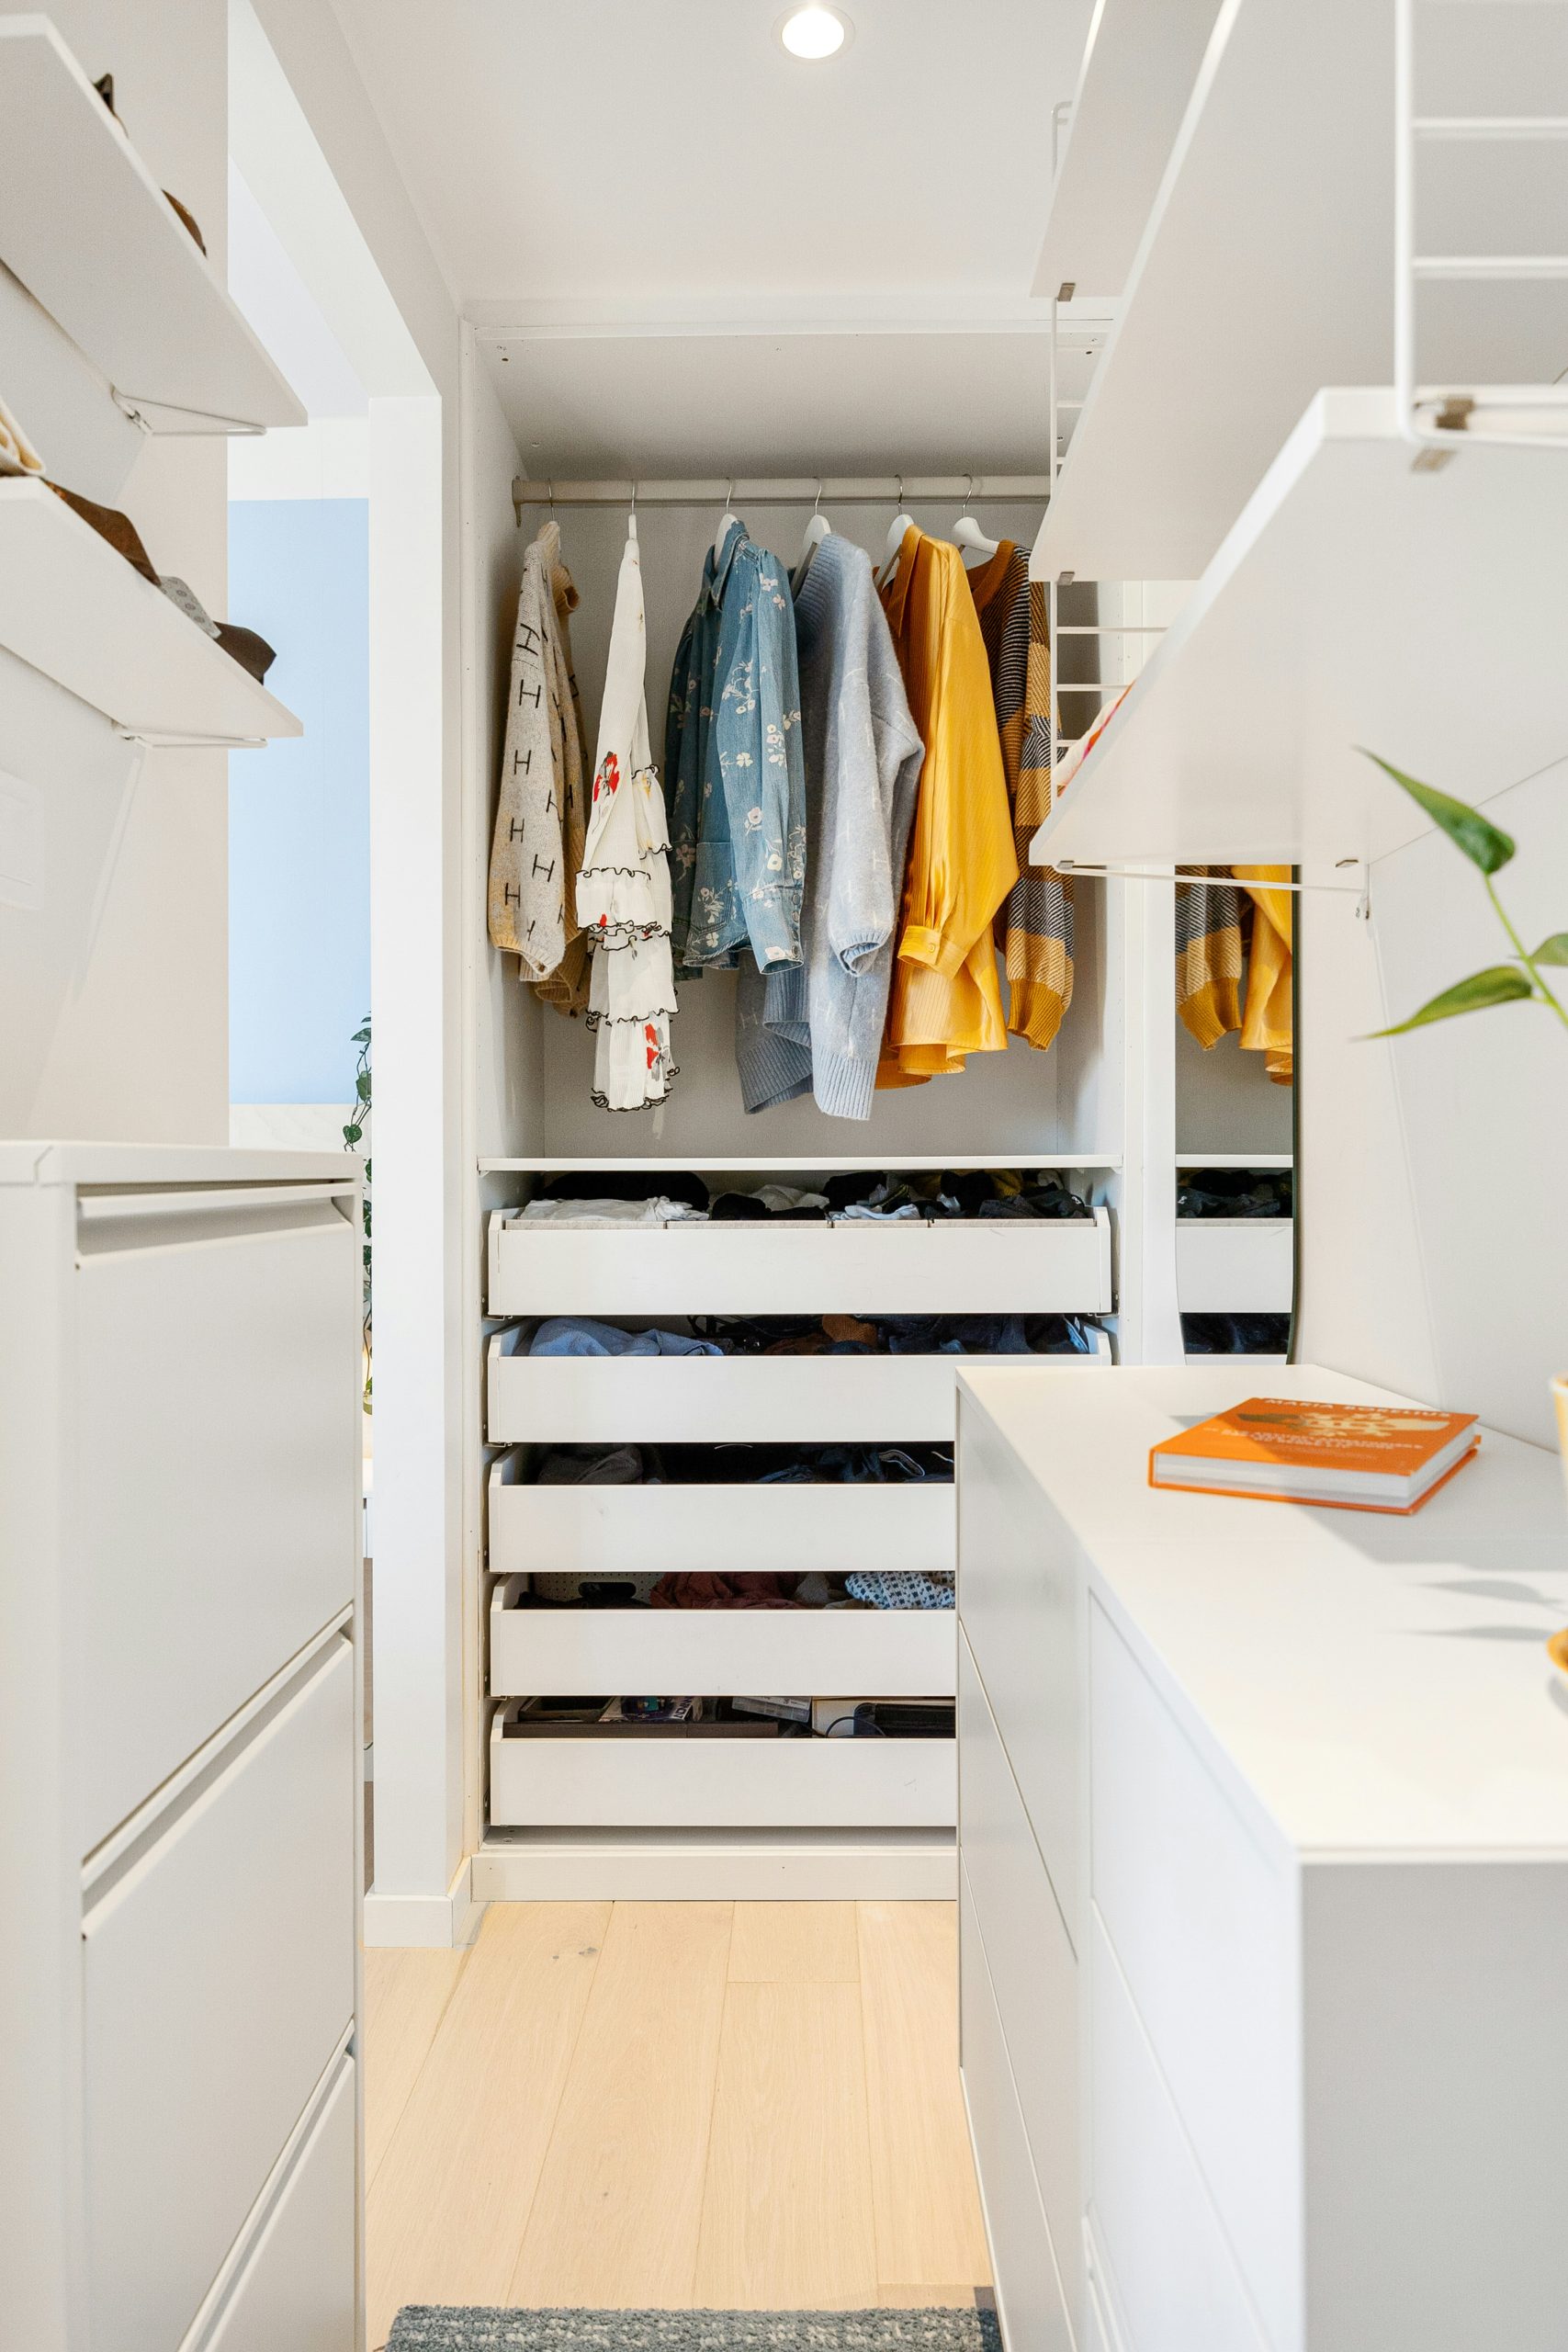
16. Minimalist White Closet with Central Hanging Rod and Drawers
What defines this closet’s minimalist aesthetic is the generous use of negative space. The shelves aren’t crammed full, the hanging rod isn’t overstuffed, and there’s clear, open space on the floor. This intentional breathing room is a core principle of minimalism. It suggests a curated wardrobe and a calm, deliberate approach to storage. Removing that space—by adding more clothes or clutter—would instantly transform the look from serene and high-end to simply functional and mundane. The emptiness is the most important feature.
|
📋 Copy HEX 🔗 Share |
The visual formula for this clean look is about restraint: 70% closed storage (drawers) + 20% open storage (shelves) + 10% display (the hanging rod). By tucking the majority of items away in the clean-fronted white drawers, the space maintains its uncluttered feel. The few open shelves are for neatly folded, color-coordinated items, and the hanging rod acts as a small, curated display. You could change the finish from white to a dark charcoal for a moodier take, but as long as you keep the ratio of closed-to-open storage, you will preserve the minimalist DNA.
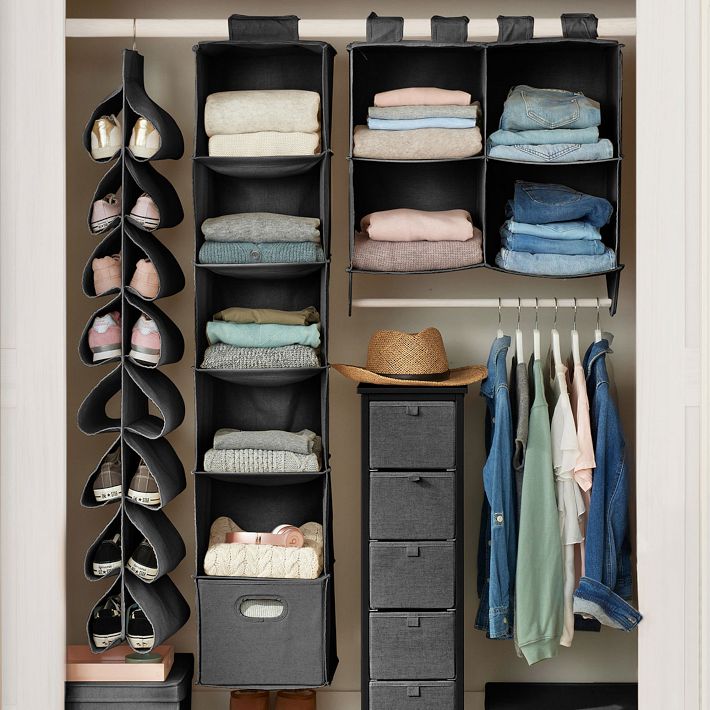
17. Maximize a Small Closet with Fabric Hanging Organizers
If you’re in a rental or on a tight budget, these fabric organizers are your best friends. They are the ultimate no-install upgrade. A multi-compartment hanging shelf for sweaters might cost $15, a hanging shoe organizer is about $20, and a fabric drawer unit can be found for under $40 at stores like Walmart or Amazon. For less than $100, you can add a huge amount of structured, partitioned storage to a basic-builder closet that has nothing but a single rod and shelf. It’s a perfect solution for dorm rooms, kids’ rooms, or first apartments.
|
📋 Copy HEX 🔗 Share |
Here’s the real talk on fabric organizers: they have their limits. The cardboard inserts that give them structure can bend or break if you overload them with heavy items like jeans or books. They are best for lighter clothing like t-shirts, sweaters, and accessories. Also, the fabric can absorb dust and odors over time, so they may need to be vacuumed or aired out occasionally. While they are a fantastic, affordable solution, don’t expect them to have the same longevity or weight capacity as a permanent wood or wire system.
18. Bring Order to Shelves with Simple Shelf Dividers
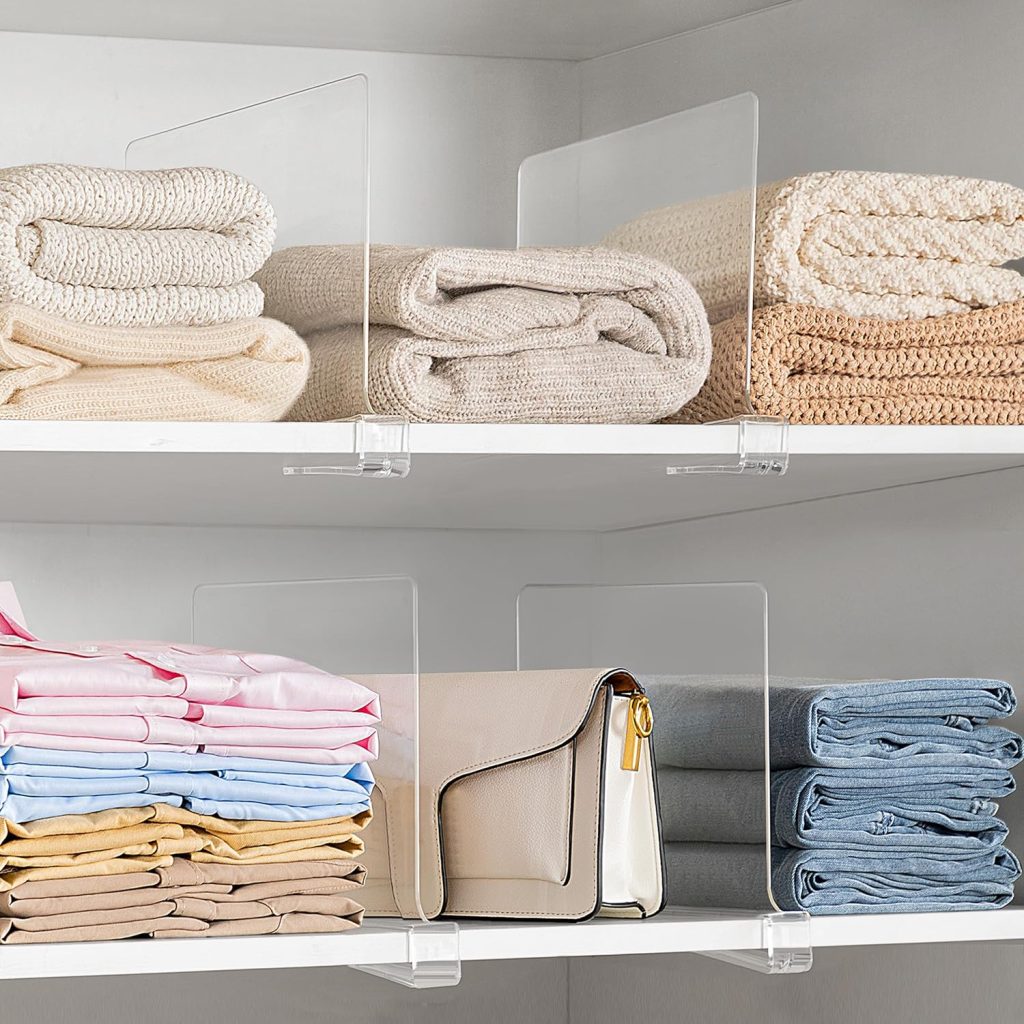
Shelf dividers are a small but mighty tool for closet organization. Here’s a pro tip for using them effectively: place your dividers slightly narrower than the width of your folded items. For example, if your folded sweaters are 12 inches wide, set your dividers 11.5 inches apart. This slight compression keeps the stacks tidy and prevents them from toppling over. For purses, use one divider per bag to create ‘stalls’ that help them stand upright and keep their shape. Don’t be afraid to use multiple dividers on a single shelf to create custom-sized compartments.
|
📋 Copy HEX 🔗 Share |
This simple solution works because it introduces vertical boundaries on a horizontal plane. A long, open shelf invites clutter. Stacks of clothing inevitably start to lean and merge into one another, creating a messy pile. By adding these simple dividers, you create visual and physical ‘lanes’ that contain each category. It forces you to maintain neat stacks and makes it much easier to pull one item from the middle of a stack without disrupting the entire pile. It’s a classic example of how a small, inexpensive tool can enforce a system of order.
19. Tidy Up with Stackable, Slanted Storage Bins
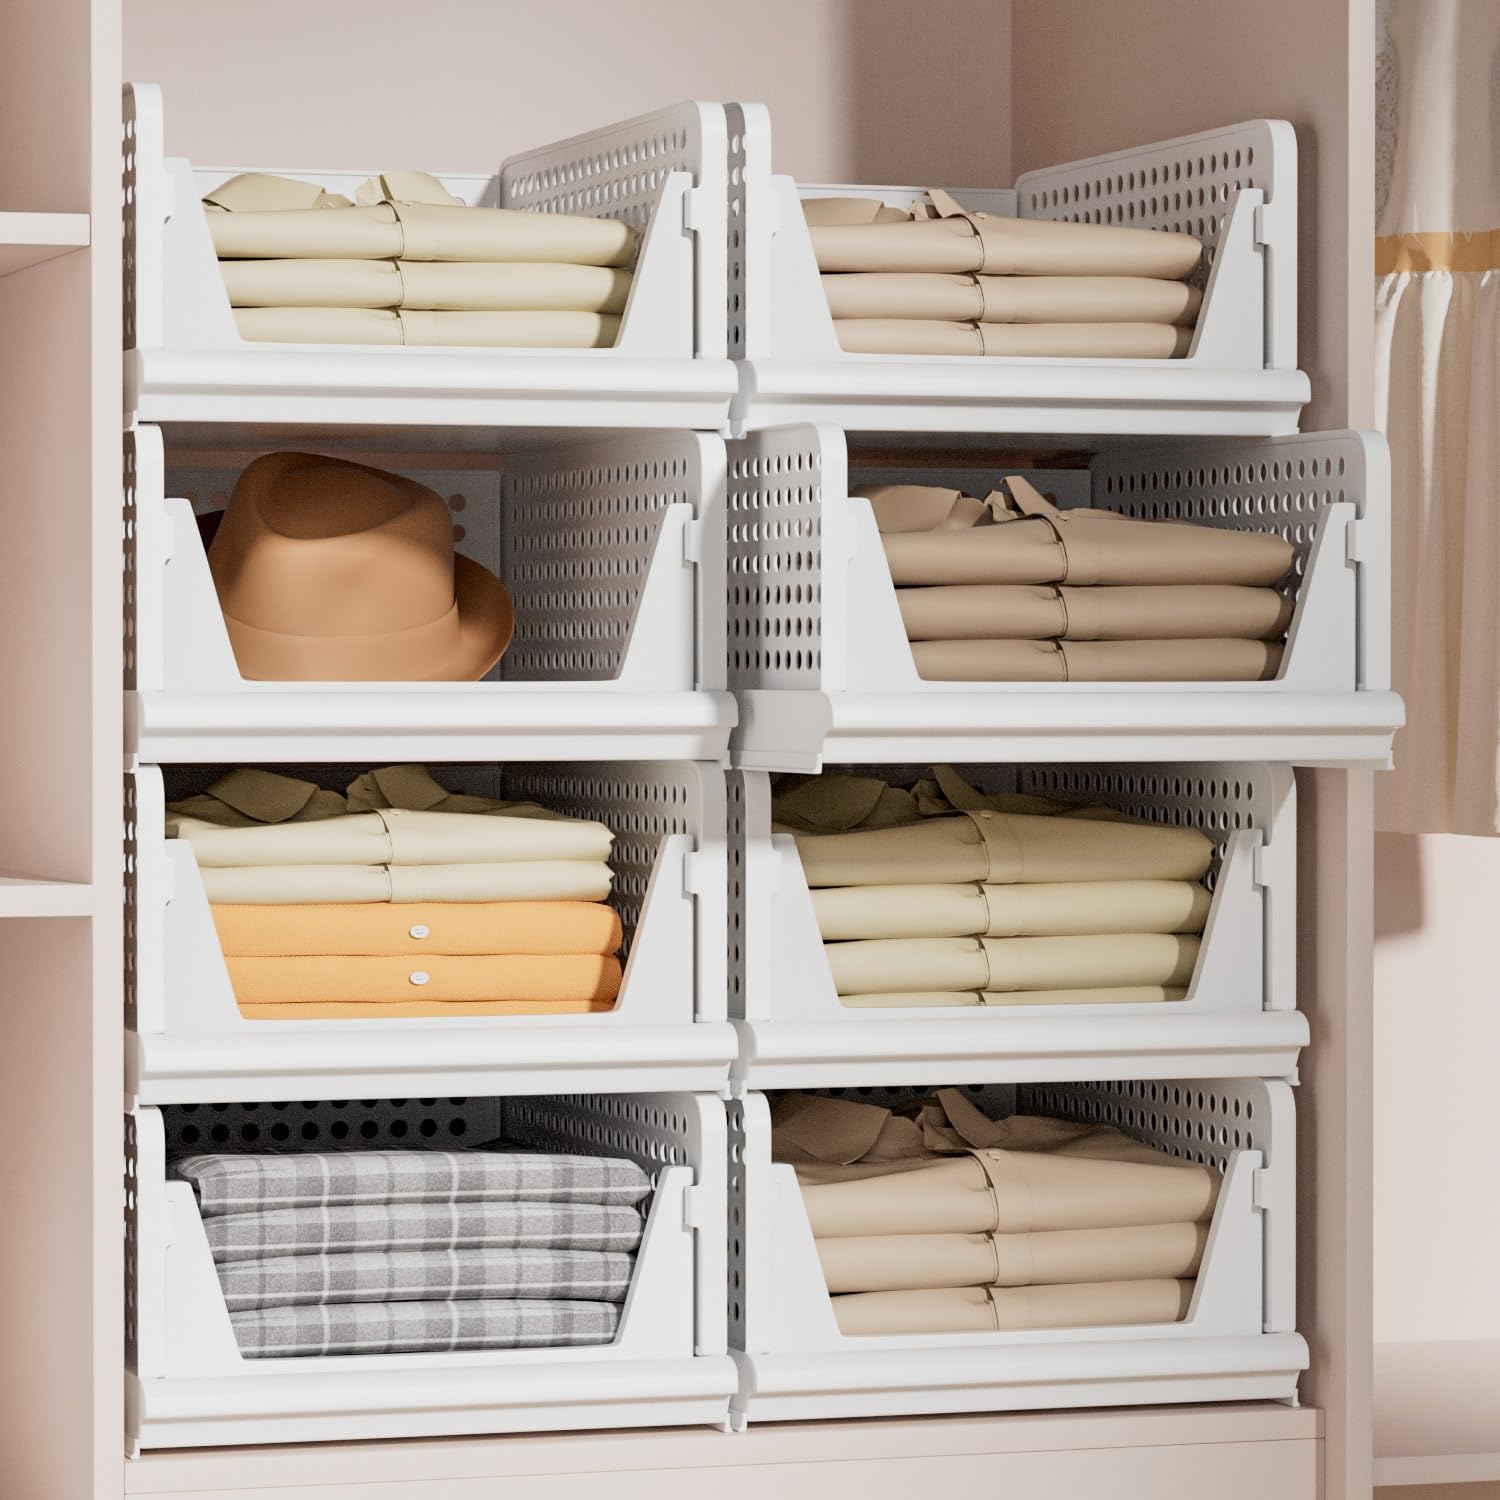
The defining feature of these bins is the slanted open front. This design is superior to a standard lidded box for items you use frequently. It allows you to see what’s inside and grab it without having to unstack or open anything. It combines the easy access of an open shelf with the containment of a bin. For closets, this is ideal for folded t-shirts, workout clothes, or even kids’ toys. You get the organization of a drawer system but with better visibility and at a much lower cost. It’s the perfect grab-and-go solution.
|
📋 Copy HEX 🔗 Share |
While these plastic bins are fantastic for organization, they do require some specific upkeep. The perforated or vented design, which is great for air circulation, can also trap a surprising amount of dust. Plan to wipe them down, inside and out, a few times a year. Because they are open to the air, the clothing inside is not protected from dust, so they are best for items that are in regular rotation and get washed frequently, rather than for long-term storage of delicate or out-of-season garments.
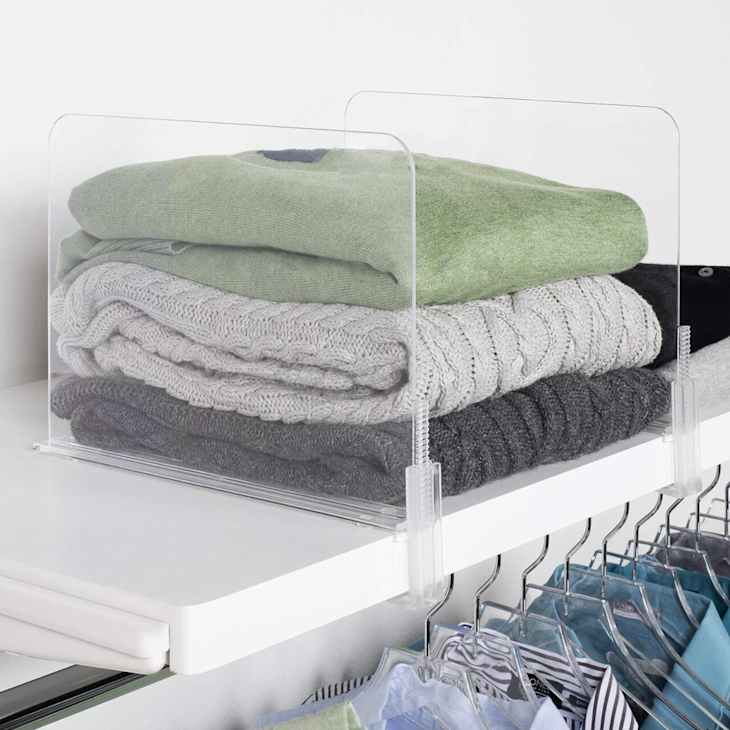
20. Use Clear Acrylic Dividers for an Invisible Organization Hack
Clear acrylic organizers are having a huge moment, and it’s easy to see why. This trend, popularized by celebrity home organizers and shows like ‘The Home Edit,’ is all about creating order without adding visual noise. The beauty of acrylic is that it does its job—dividing and containing—while being virtually invisible. This allows the color and texture of your clothes and accessories to be the star. It creates a high-end, boutique-like feel, making your closet look like it was professionally styled. It’s a bit of everyday luxury that feels light, airy, and incredibly clean.
|
📋 Copy HEX 🔗 Share |
Before you invest in a full set of acrylic dividers, check a couple of things:
- Shelf Thickness: Most clip-on acrylic dividers are designed to fit a standard 3/4-inch thick shelf. If you have thicker, custom-built shelves, they may not fit. Measure first!
- Item Height: Make sure the dividers you buy are tall enough to actually support your stacks of clothing. A 6-inch-high divider won’t do much for a 10-inch-high pile of bulky sweaters.
- Aesthetic Commitment: The ‘invisible’ look works best when the shelves are not overcrowded. If your shelves are packed to the gills, the clear dividers can start to look messy and lose their chic appeal.
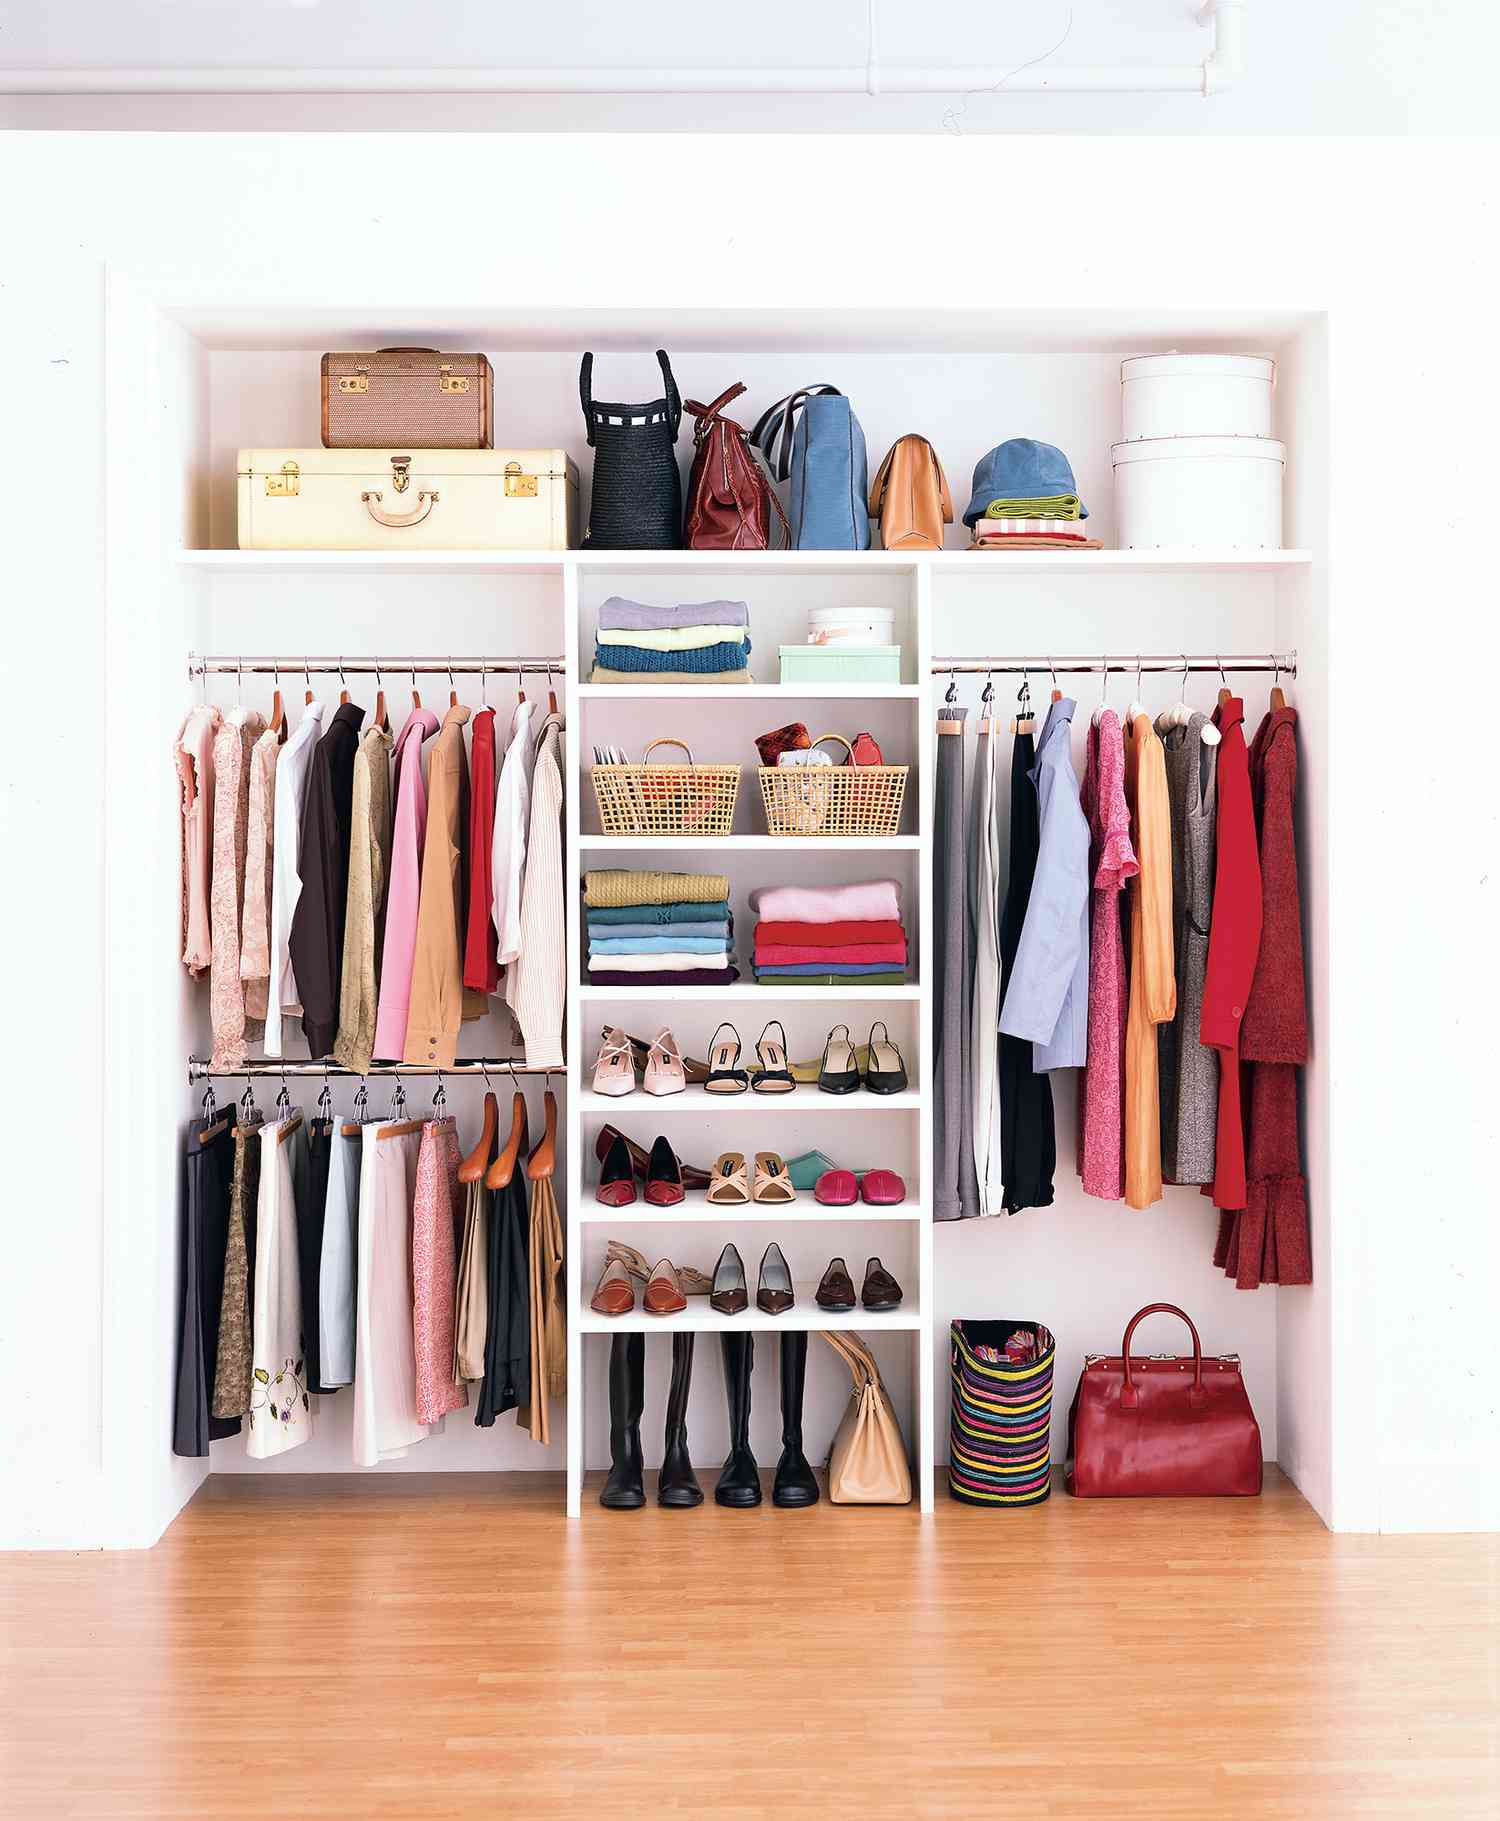
21. The Classic ‘Galley’ Walk-In with Central Shelving
This layout is a timeless classic for a reason: it’s incredibly efficient. By placing hanging rods along the sides and a central shelving tower at the back, it creates a natural and intuitive workflow. Long-hang and short-hang items are on the periphery, while folded items, shoes, and accessories are organized in the central, easy-to-access tower. This zoning prevents the dreaded ‘everything-on-one-rod’ chaos and gives every single item a logical home. The light wood flooring and all-white structure keep the space feeling bright and open, despite being packed with storage.
|
📋 Copy HEX 🔗 Share |
This ‘galley-style’ layout is the perfect solution for long, narrow walk-in closets. It requires a minimum width of about 6 feet to be comfortable. This allows for 24 inches of depth for the hanging clothes on each side and a 24-inch walkway in between. Ideally, a 7-foot width is even better, providing a more generous 3-foot walkway. The length can be anything from 5 feet onwards. It’s a more space-efficient layout for rectangular rooms than the U-shape seen in Idea #12.
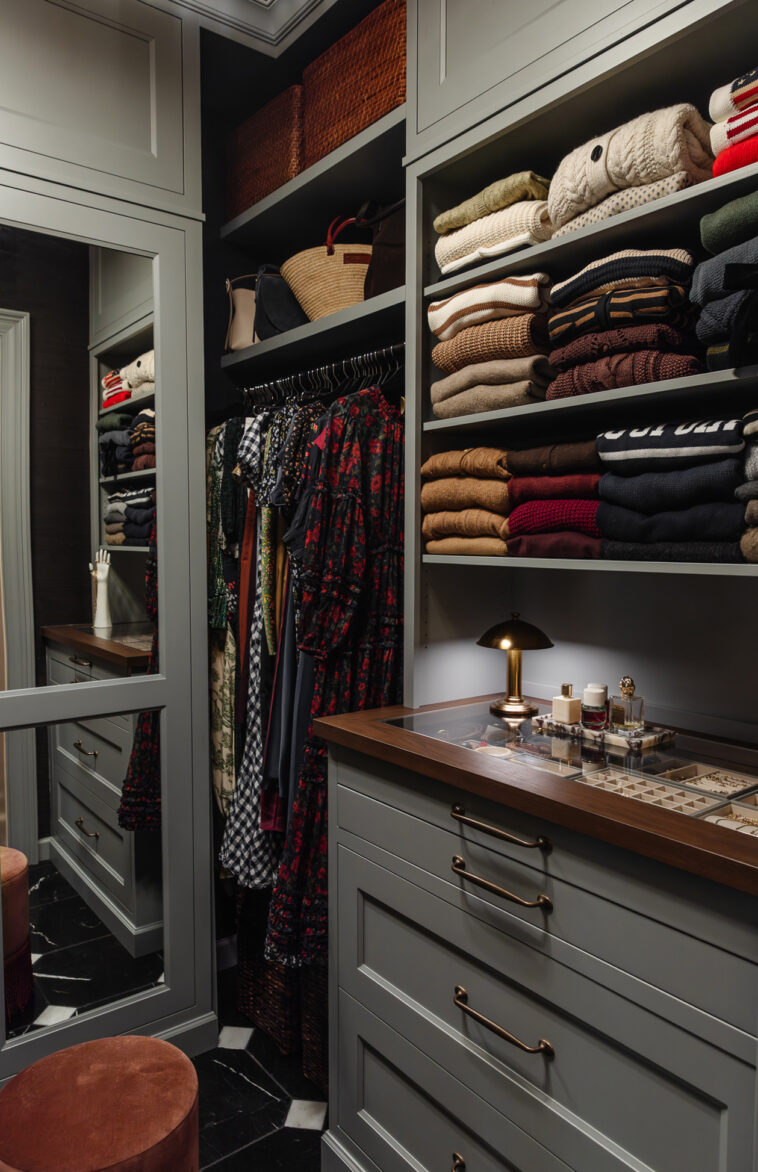
22. Luxurious Dark Gray Closet with a Glass-Top Display Drawer
The element that takes this closet into the realm of pure luxury is the glass-top display drawer. This single feature transforms a standard dresser unit into a personal jewelry counter or accessory boutique. It’s a moment of curated display in an otherwise highly functional space. It allows you to see your favorite watches, jewelry, or perfumes at a glance, making the act of choosing an accessory feel special. It’s a feature borrowed from high-end retail design, and it brings that same sense of opulence and care into the home.
|
📋 Copy HEX 🔗 Share |
A high-end, custom closet with luxury finishes like this is a serious splurge. The cost can vary dramatically based on materials and location, but here’s a ballpark:
- Custom Cabinetry (dark gray finish): $8,000 – $15,000
- Dark Walnut & Glass Display Island: $3,000 – $6,000
- Marble Floor Tiles (materials & labor): $2,000 – $5,000
- Specialty Lighting & Hardware (brass): $1,000 – $2,500
- TOTAL: $14,000 – $28,500+
- Budget Alternative: Use IKEA PAX wardrobes in a dark gray finish, and add a separate jewelry box or velvet-lined trays inside a standard drawer. This delivers the organization for under $2,500.
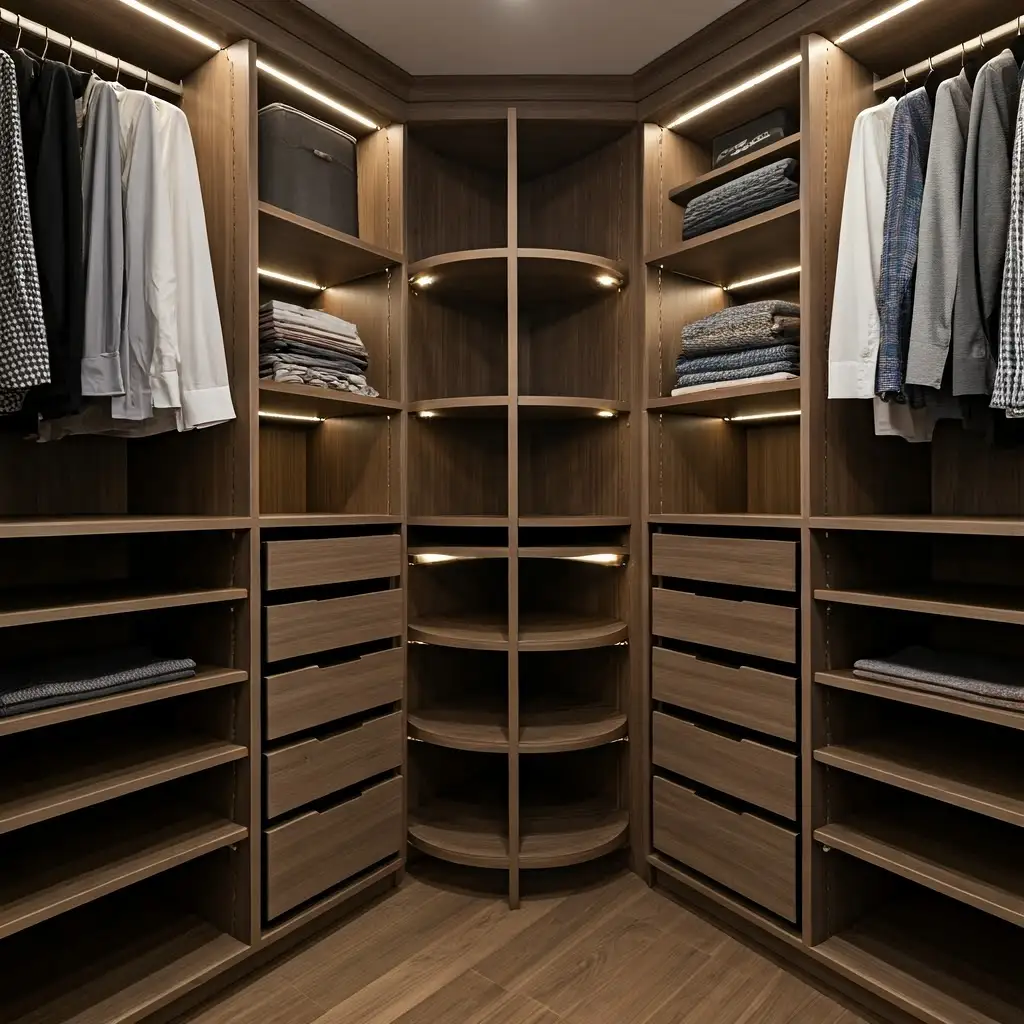
23. Solving Awkward Corner Storage in a Wood-Themed Closet
Corner space is the Bermuda Triangle of closets. The best way to handle it is with specialized shelving. Instead of letting two shelves meet at a sharp 90-degree angle where items get lost, use a curved hanging rod or custom-cut L-shaped shelves. These wrap around the corner, creating a continuous, accessible storage surface. For folded items, a lazy Susan made for corner cabinets can be a brilliant, if unconventional, solution. The goal is to avoid the deep, dark, inaccessible void that standard corners create.
|
📋 Copy HEX 🔗 Share |
Let’s be honest: truly maximizing a corner in a closet often requires a custom solution, and that can be expensive. Off-the-shelf modular systems often struggle with corners, forcing you to either leave a dead space or use an inefficient corner unit. If you’re going the DIY or budget route, often the simplest solution is the best: run shelving on one wall right into the corner, and start the shelving on the adjacent wall right after it. You’ll have a slightly harder-to-reach spot, but it’s often better than paying a premium for a clunky corner piece.
24. Make a Statement with a Bold Geometric Carpet in the Closet
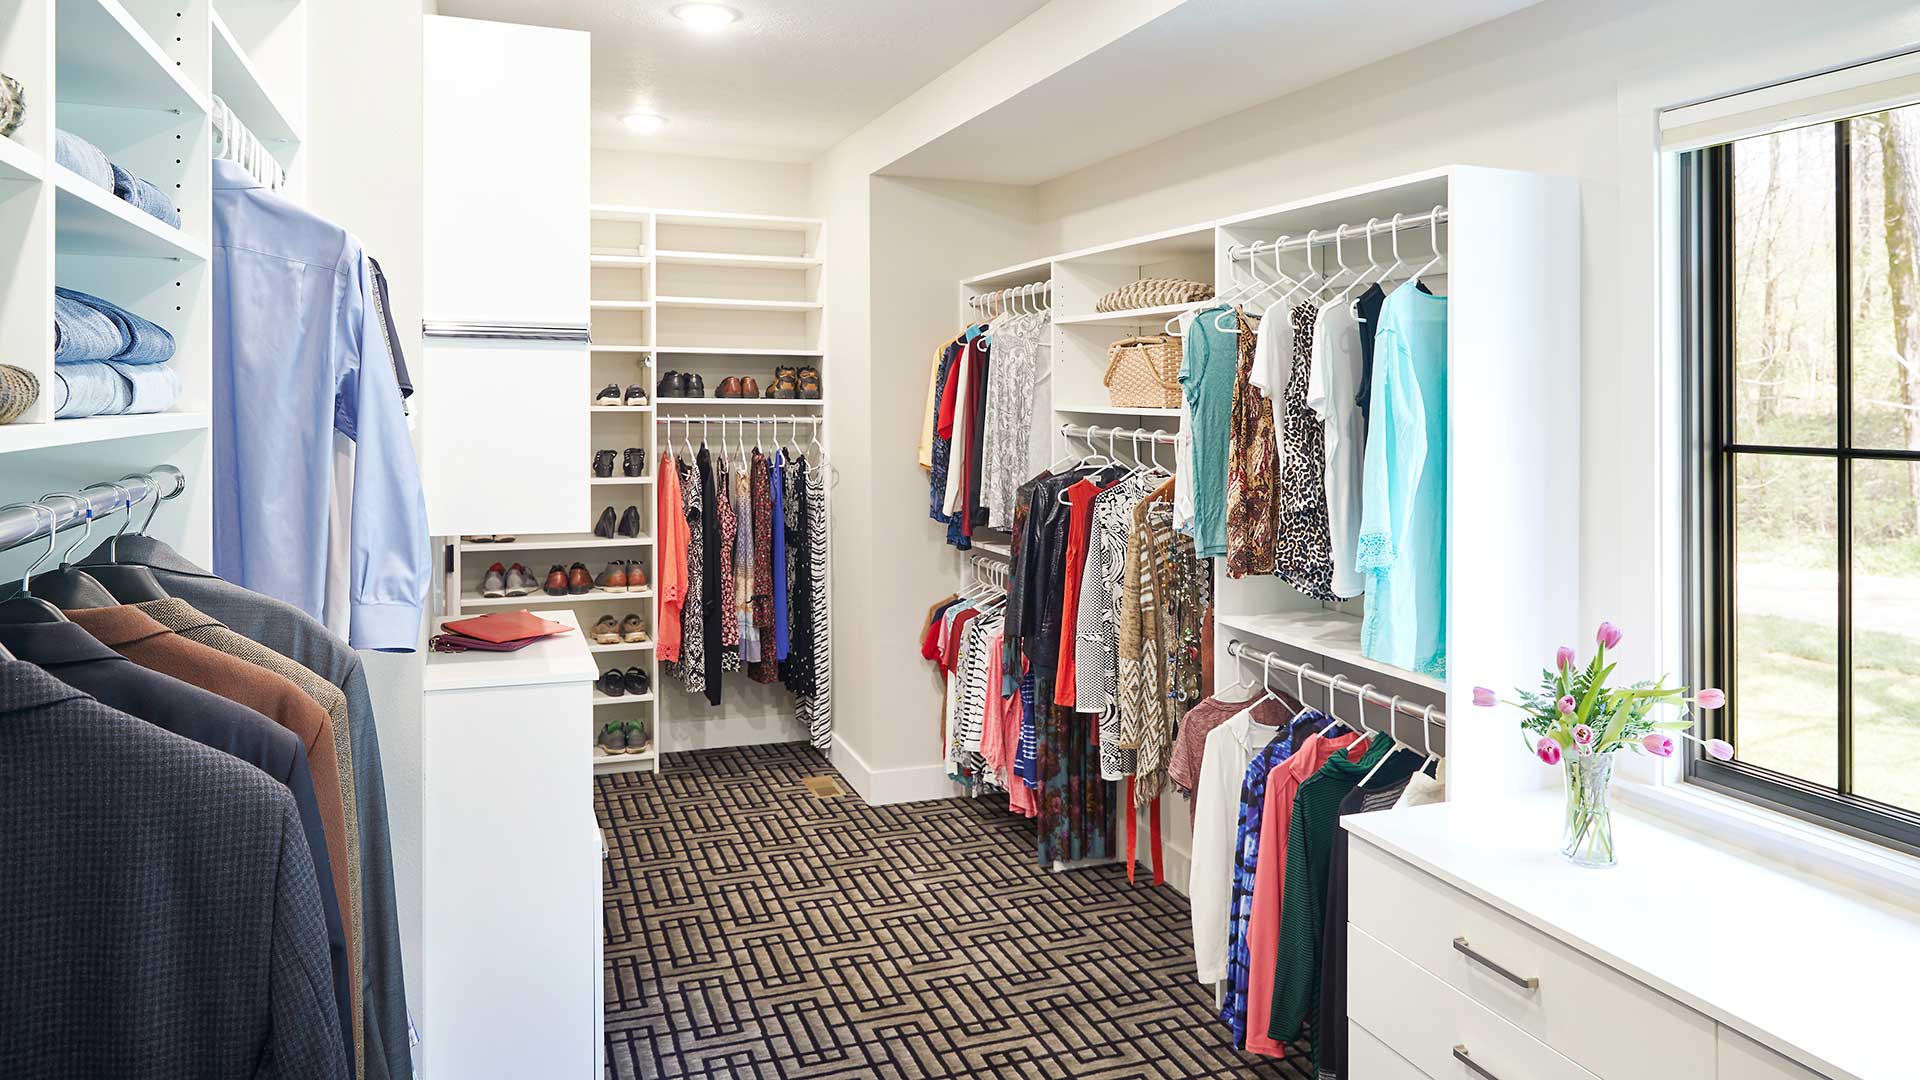
This closet confidently breaks the ‘neutral box’ rule, and it works beautifully. The success lies in the high contrast and balance. The closet system itself is stark white and simple, creating a clean, quiet framework. This allows the black and beige geometric carpet to be the undisputed star of the show. If the shelving were a dark or busy wood grain, it would compete with the floor, creating a chaotic mess. By keeping everything else minimal, the bold pattern feels intentional and chic rather than overwhelming. The natural light from the large window also helps to keep the energetic pattern from feeling too heavy.
|
📋 Copy HEX 🔗 Share |
A carpet in a walk-in closet adds a wonderful feeling of luxe softness underfoot, but it requires more maintenance than a hard floor. It will inevitably collect dust, lint, and hair. You’ll need to vacuum it thoroughly at least once a week. We’d also recommend a professional deep clean once a year, as closets can be surprisingly high-traffic areas. When choosing a carpet, a low-pile-height option with a pattern, like the one shown, is a smart choice, as it’s more durable and better at hiding the inevitable lint and stray threads than a solid, light-colored plush carpet would be.
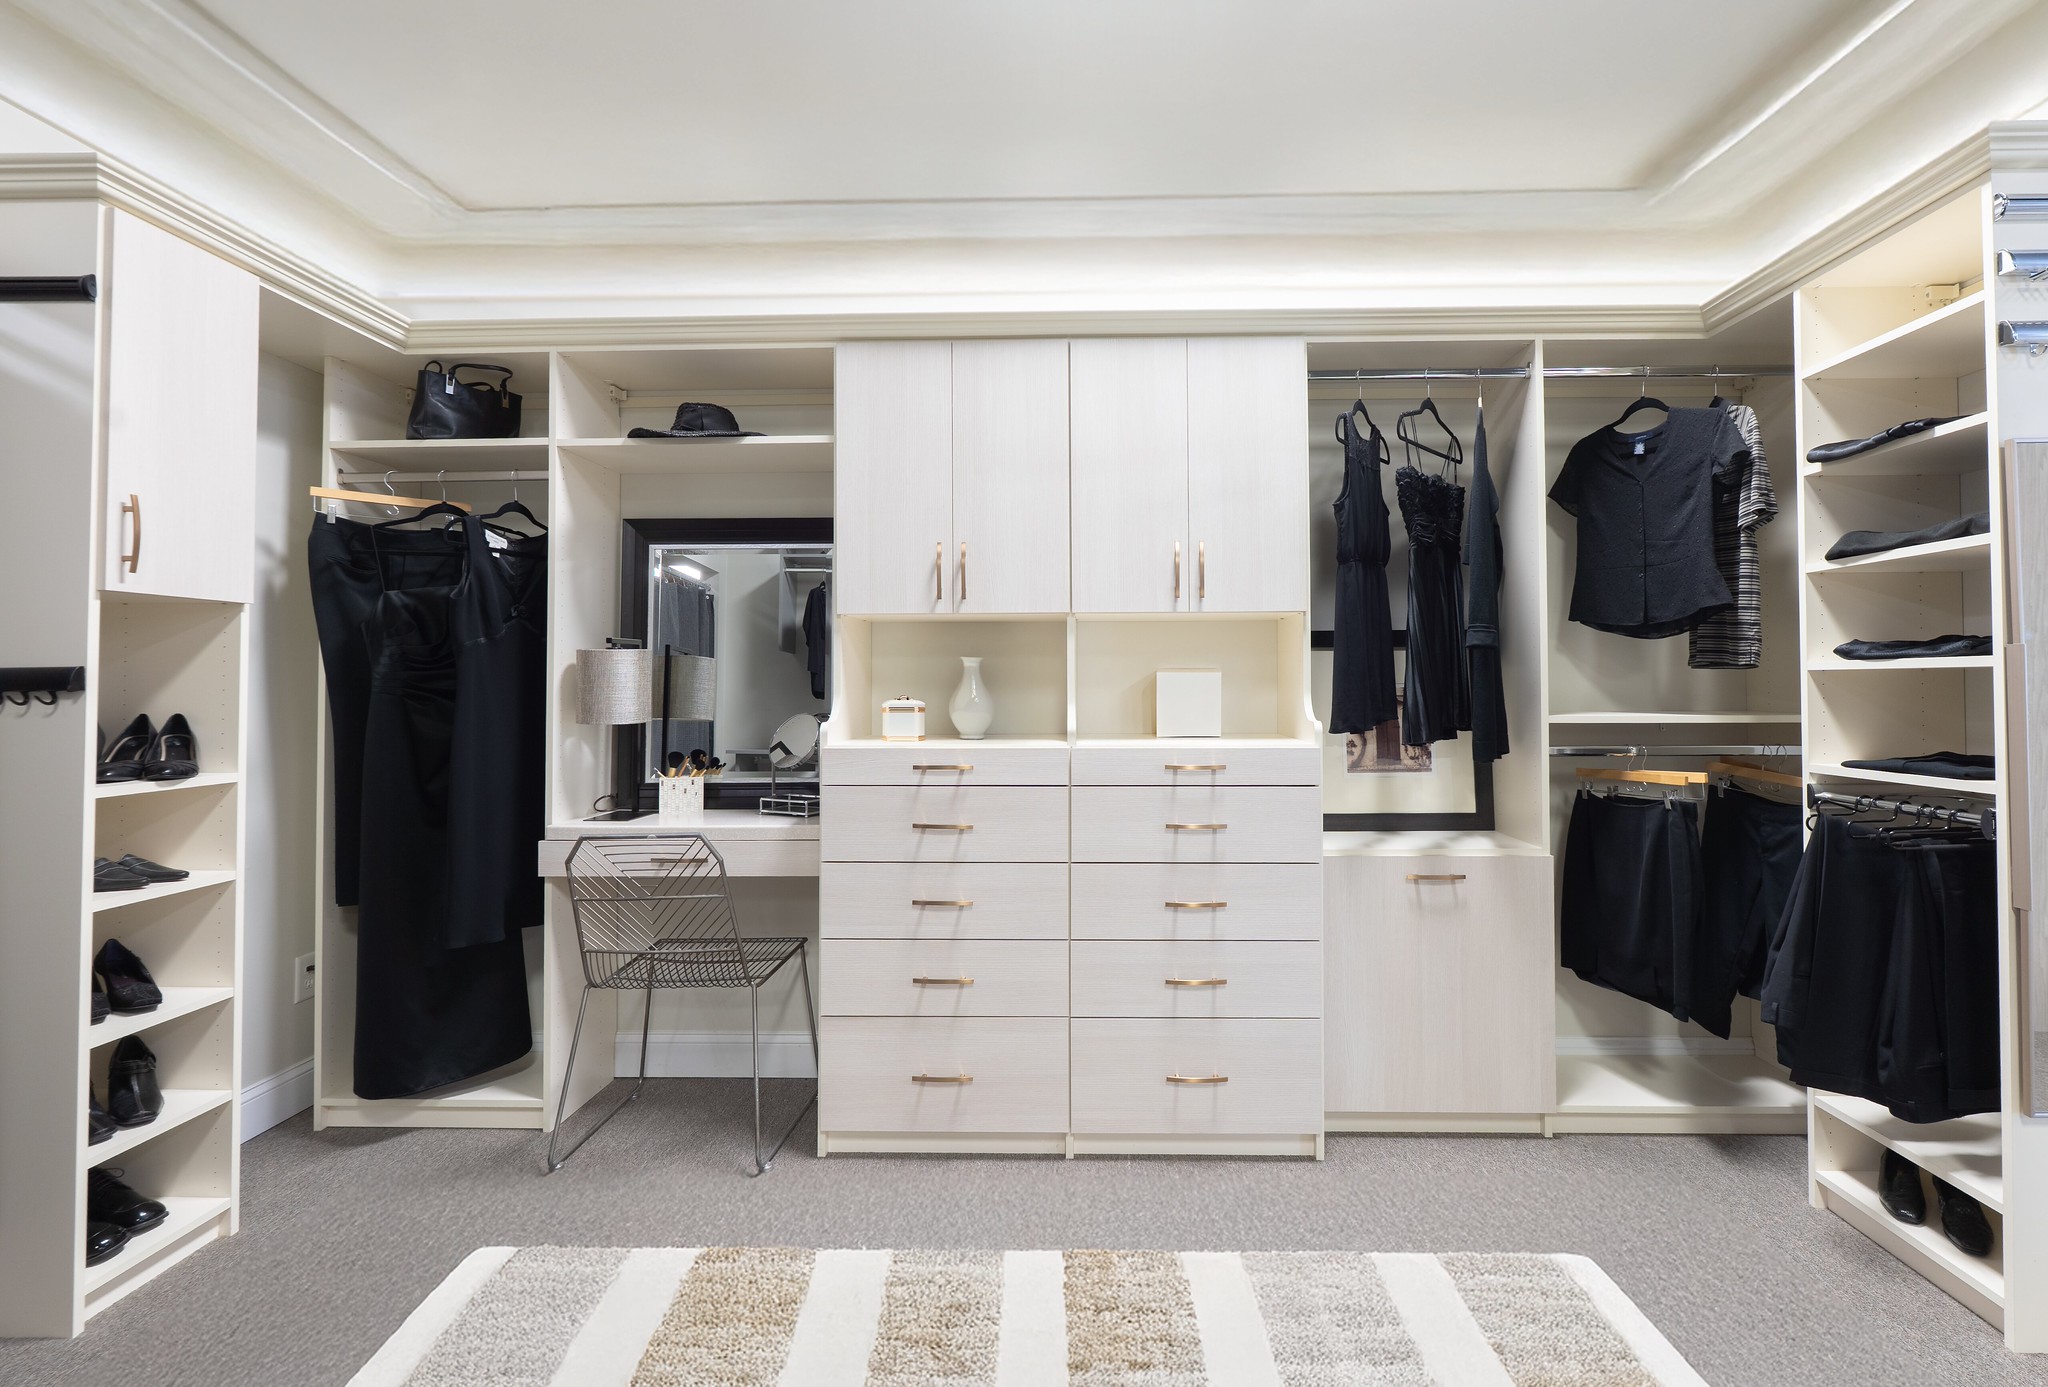
25. Create a Vanity Nook with a Recessed Mirror and Drawers
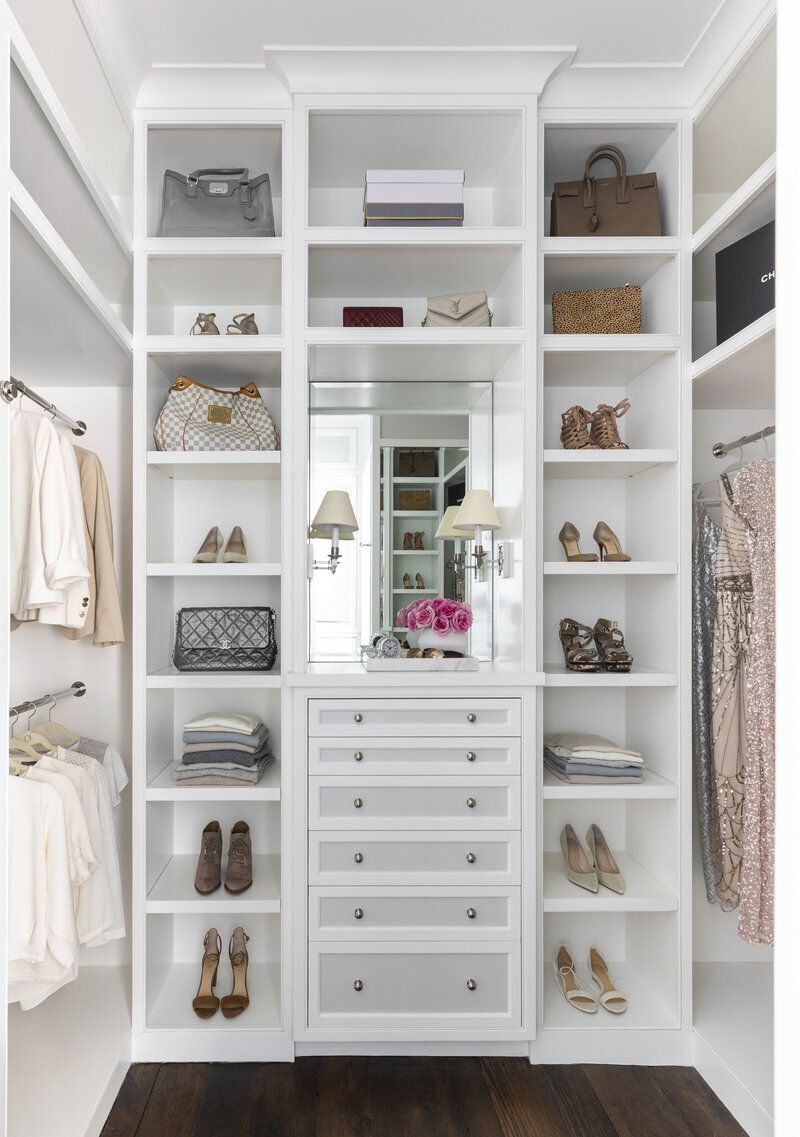
The smartest element in this design is the creation of a ‘closet vanity’ C. Instead of just a solid wall of storage, the central dresser with its recessed mirror and countertop carves out a functional, beautiful focal point. This dual-purpose design is brilliant. It provides ample drawer storage below, but the counter space and mirror also create a dedicated spot for putting on jewelry, applying perfume, or doing a final outfit check. It elevates the closet from a simple storage room to a personal dressing room, which feels far more luxurious.
|
📋 Copy HEX 🔗 Share |
Want to create a similar vanity moment in your closet? Here’s how:
- Identify a Central Point: Find the center of your main closet wall. This will be your focal point.
- Anchor with a Dresser: Place a drawer unit or a low dresser in this spot. It should be counter height (around 36 inches).
- Add a Mirror: Hang a large mirror on the wall above the dresser. Choose a frame that complements your closet’s style.
- Install Lighting: Flank the mirror with a pair of decorative wall sconces. This provides flattering, even light and adds a touch of elegance.
- Accessorize: Add a small tray for jewelry, a vase of flowers, and your favorite perfume bottles.
This project can be done in an afternoon for around $300-$800, depending on the furniture and lighting you choose.
26. Cost-Effective Corner Storage with a Wire Shelving System
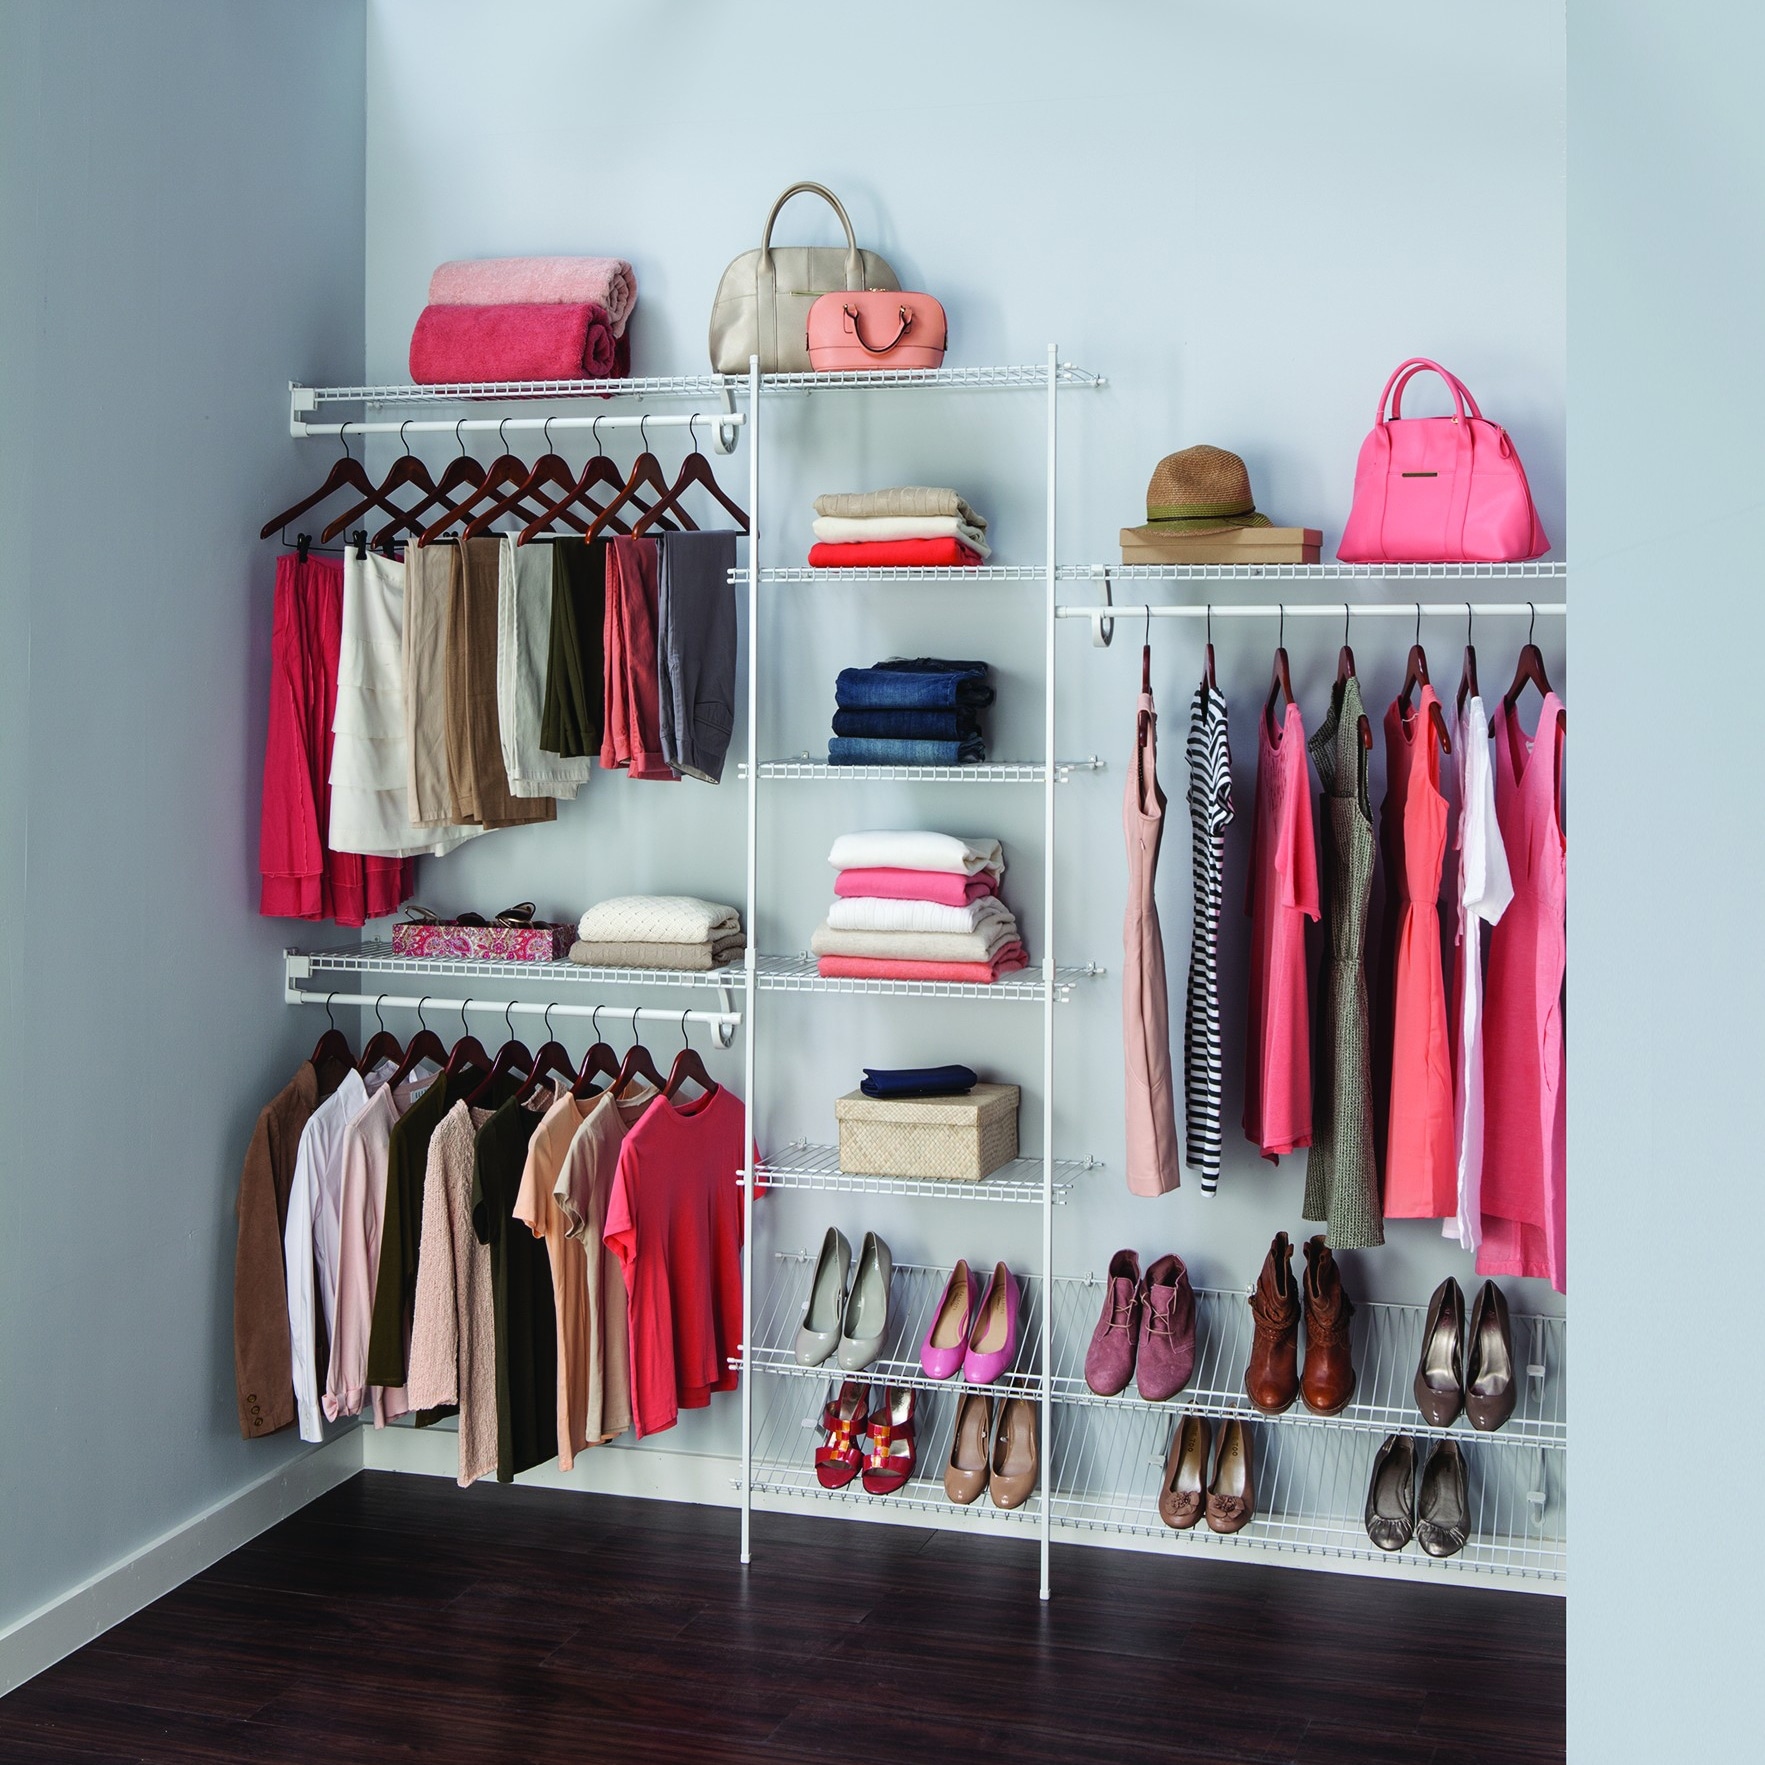
This is the pragmatic and affordable way to handle a corner closet. Instead of expensive custom-curved rods or L-shaped shelves, this system uses two straight hanging rods that meet in the corner. You can find complete wire closet kits like this from brands like ClosetMaid or Rubbermaid at Home Depot for $150 – $300. The key is to add specialized pieces, like the angled wire shoe shelves, to maximize utility. This no-frills approach delivers about 80% of the function of a custom build like Idea #22 for about 10% of the price. The dark brown wooden hangers are a smart touch, elevating the look of the inexpensive wire system.
|
📋 Copy HEX 🔗 Share |
Let’s be honest about the corner in this setup. The space where the two rods meet will be slightly awkward to access. You’ll want to store your least-used items in that deep corner spot—think out-of-season jackets or formal wear. Trying to grab a daily-wear shirt from the apex of that corner every morning would get frustrating quickly. Also, ensure you mount the system directly into wall studs. Wire shelves loaded with clothes carry a lot of weight, and you don’t want to come home to a collapsed closet.
27. Bright White Built-In with a Central Mirror and Dedicated Shoe Wall
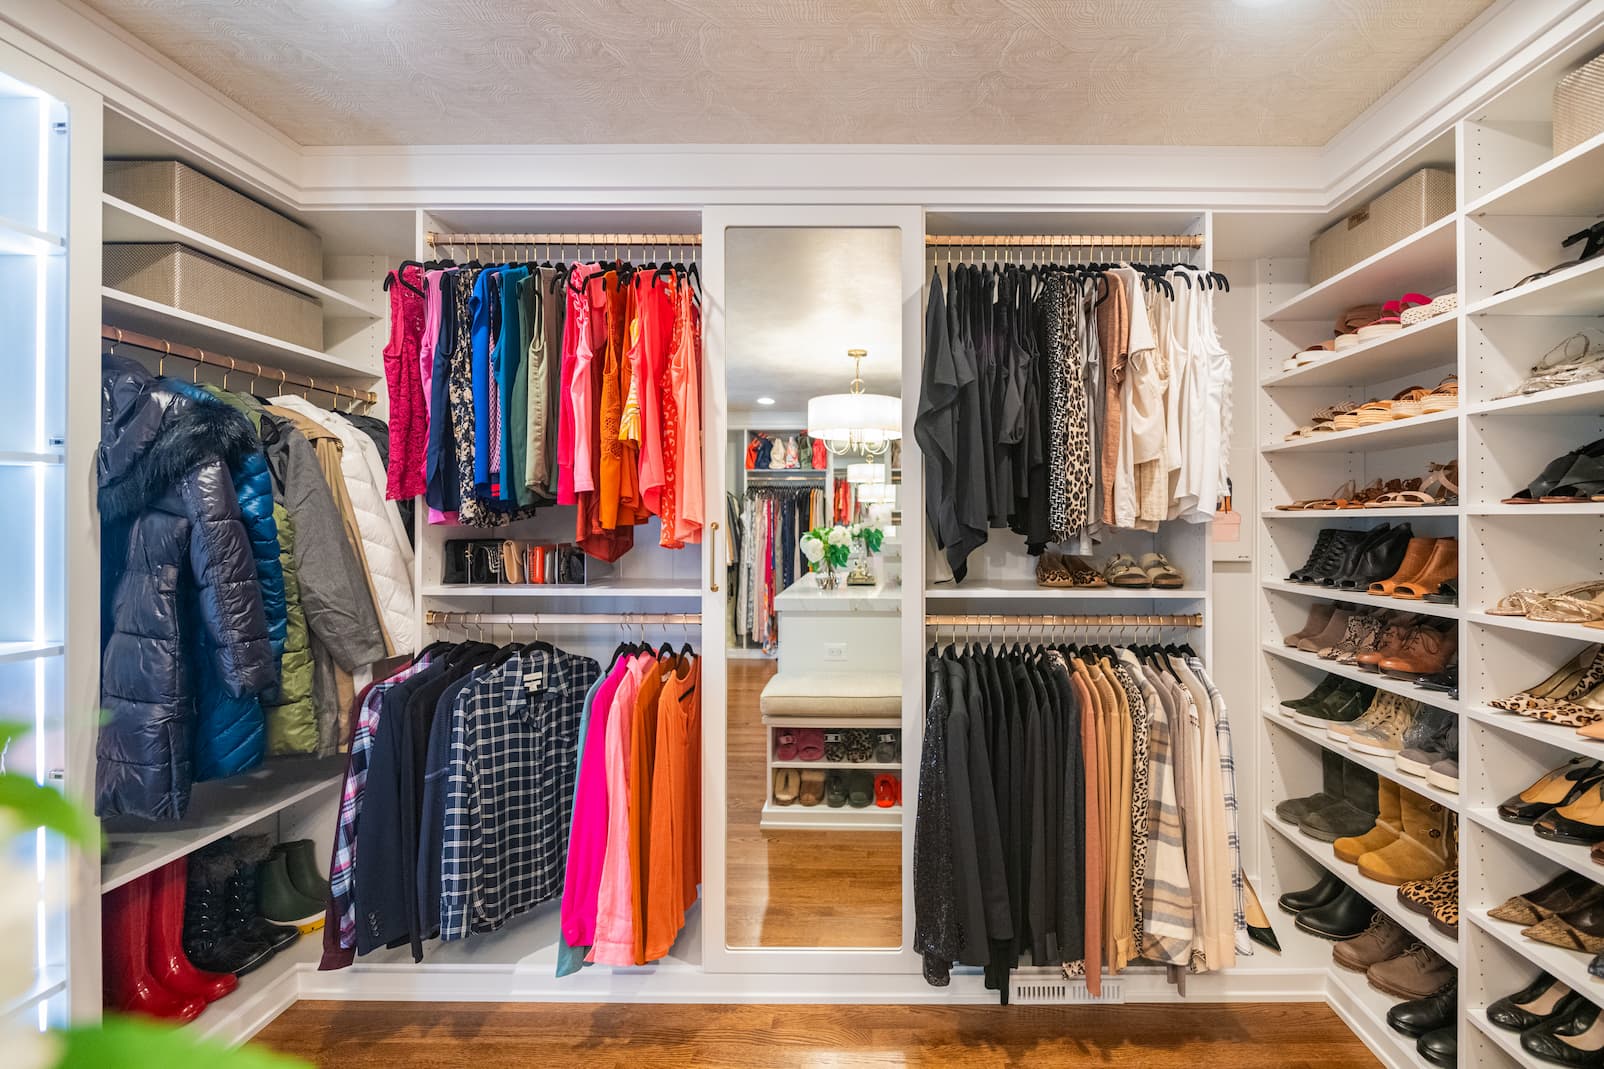
This design succeeds by dedicating entire zones to specific functions, which creates an incredible sense of order. There isn’t just ‘shoe storage’; there is a dedicated ‘shoe wall’ where an entire collection can be seen at a glance. There isn’t just a mirror; there’s a central mirror flanked by hanging space, creating a clear dressing zone. This hyper-organization makes the closet incredibly easy to use and maintain. The uniform white color scheme is crucial, as it prevents the visually ‘busy’ collection of clothes and shoes from feeling chaotic. It’s a clean canvas that celebrates the wardrobe.
|
📋 Copy HEX 🔗 Share |
If you’re a shoe lover, adjustable shelves are non-negotiable. Don’t accept fixed-height shoe shelves from a closet designer. Your collection will have a mix of flats, heels, and ankle boots, all requiring different vertical heights. Using adjustable shelves allows you to space them perfectly for each type of shoe, minimizing wasted space. For standard heels, you might need 7-8 inches of height, but ankle boots could require 10-12 inches. Adjustability lets you reclaim those precious inches, potentially fitting an entire extra row of shoes.
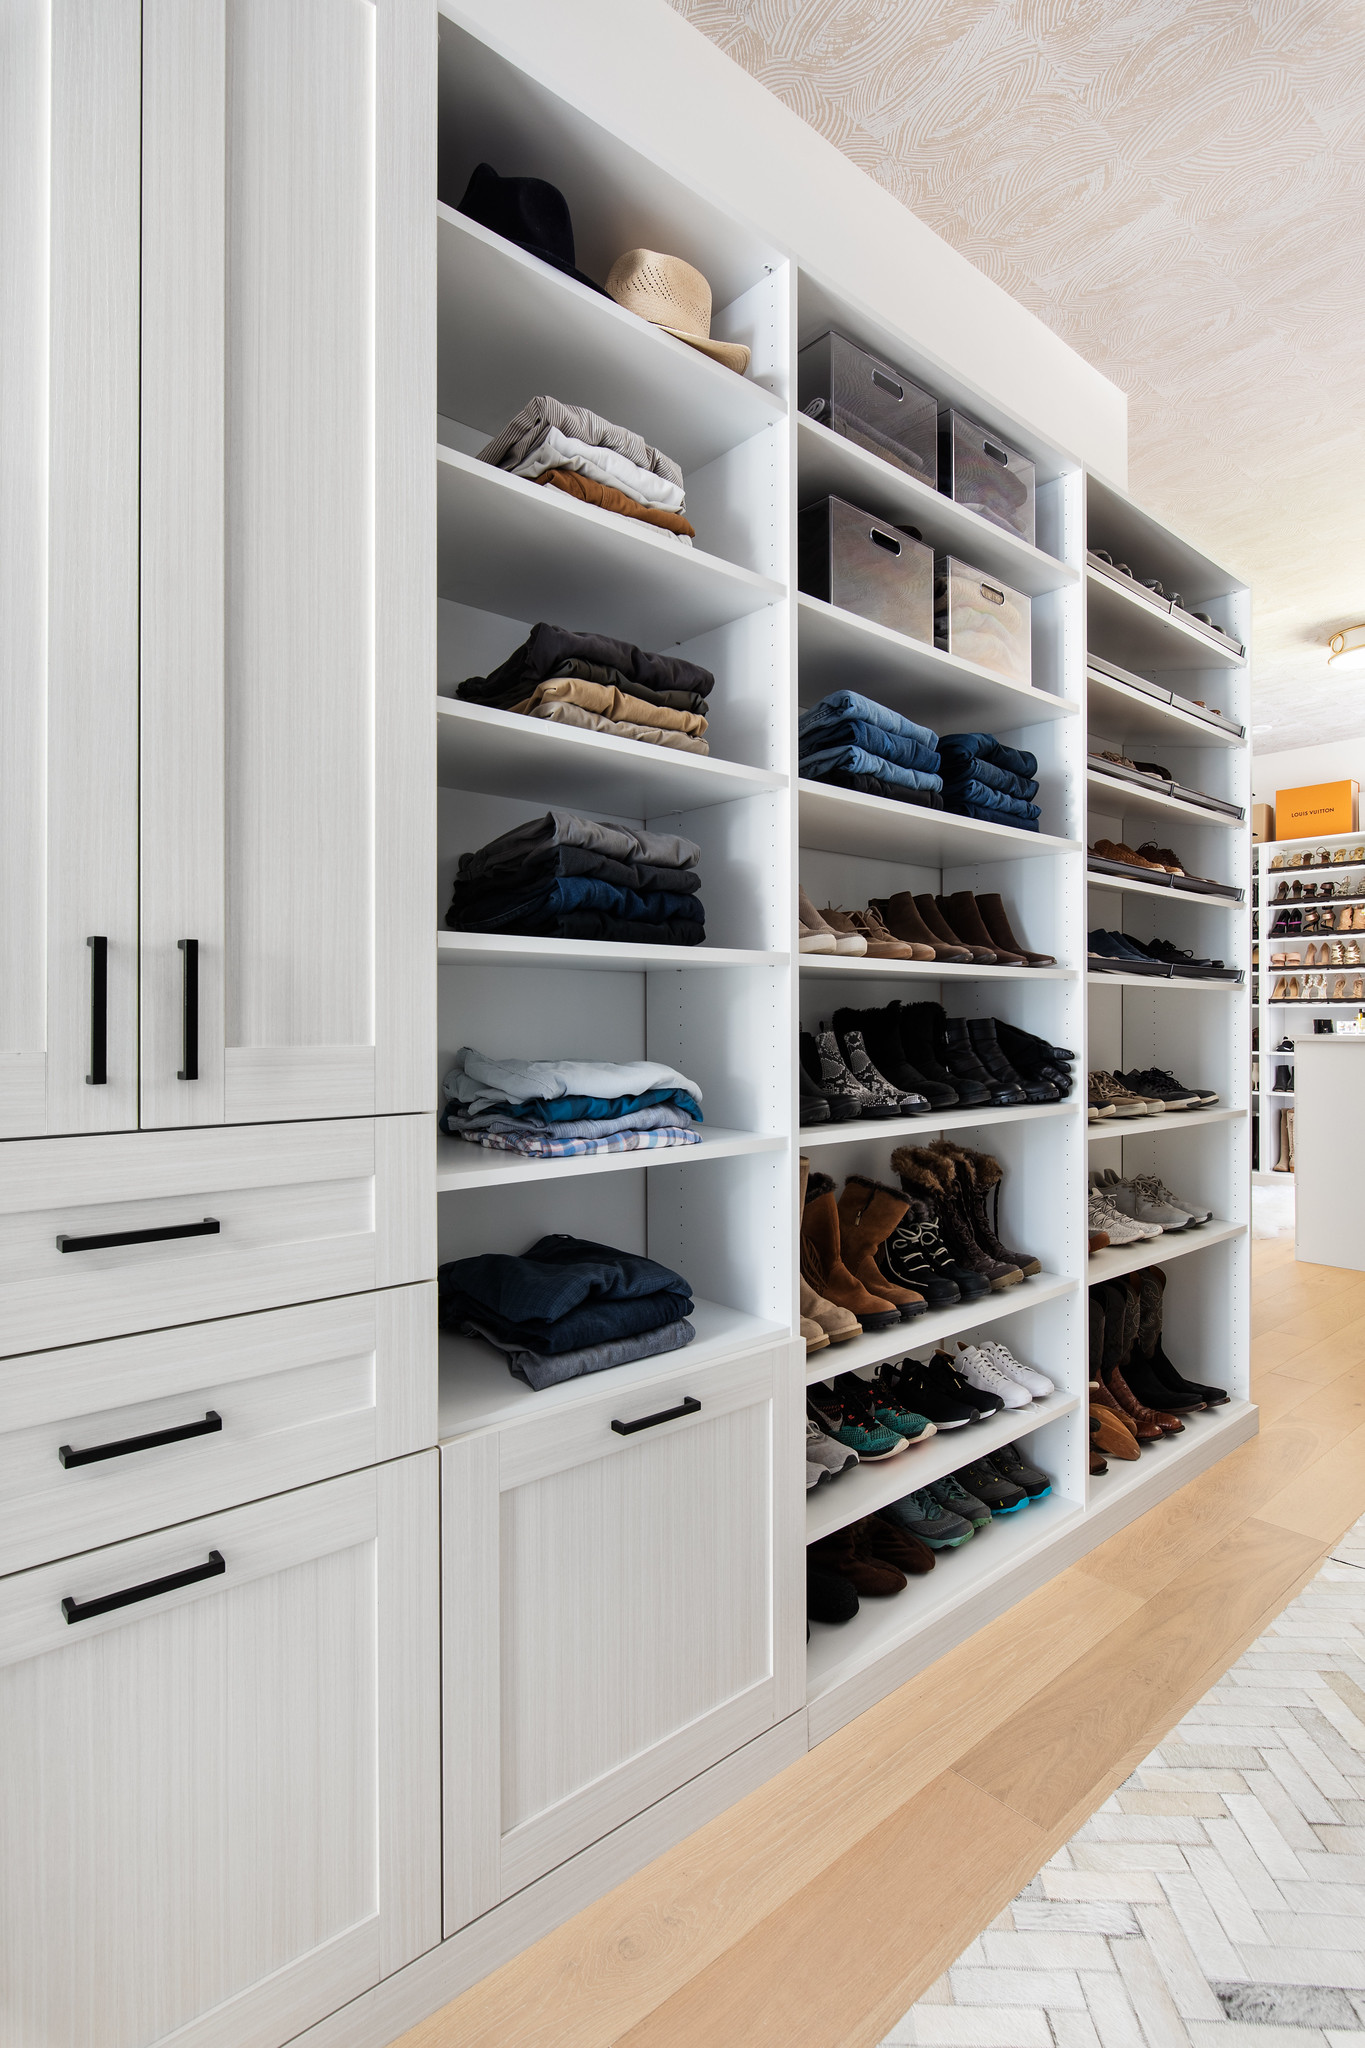
28. Contemporary Closet with Light Woodgrain Textured Shelving
The formula here is a contemporary classic: 60% textured woodgrain + 30% open shelving + 10% bold black accents. The light, textured woodgrain finish provides warmth and visual interest without being as overpowering as a traditional dark wood. Keeping a significant portion of the storage open prevents the wall-to-wall system from feeling like a monolithic block. The slim, black bar pulls are the ‘eyeliner’ of the design—a small but critical detail that adds a sharp graphic contrast and a modern edge.
|
📋 Copy HEX 🔗 Share |
Textured laminate or melamine finishes, like the woodgrain seen here, are incredibly durable and easy to clean, making them a great choice for a high-use area like a closet. They are resistant to scratches and stains and can simply be wiped down with a damp cloth. A word of caution: while the surface is tough, the edges can be prone to chipping if they take a hard hit. Be mindful when moving luggage or other hard items in and out of the closet. The black metal handles are also a practical choice, as they are less likely to show fingerprints than shiny chrome or brass.
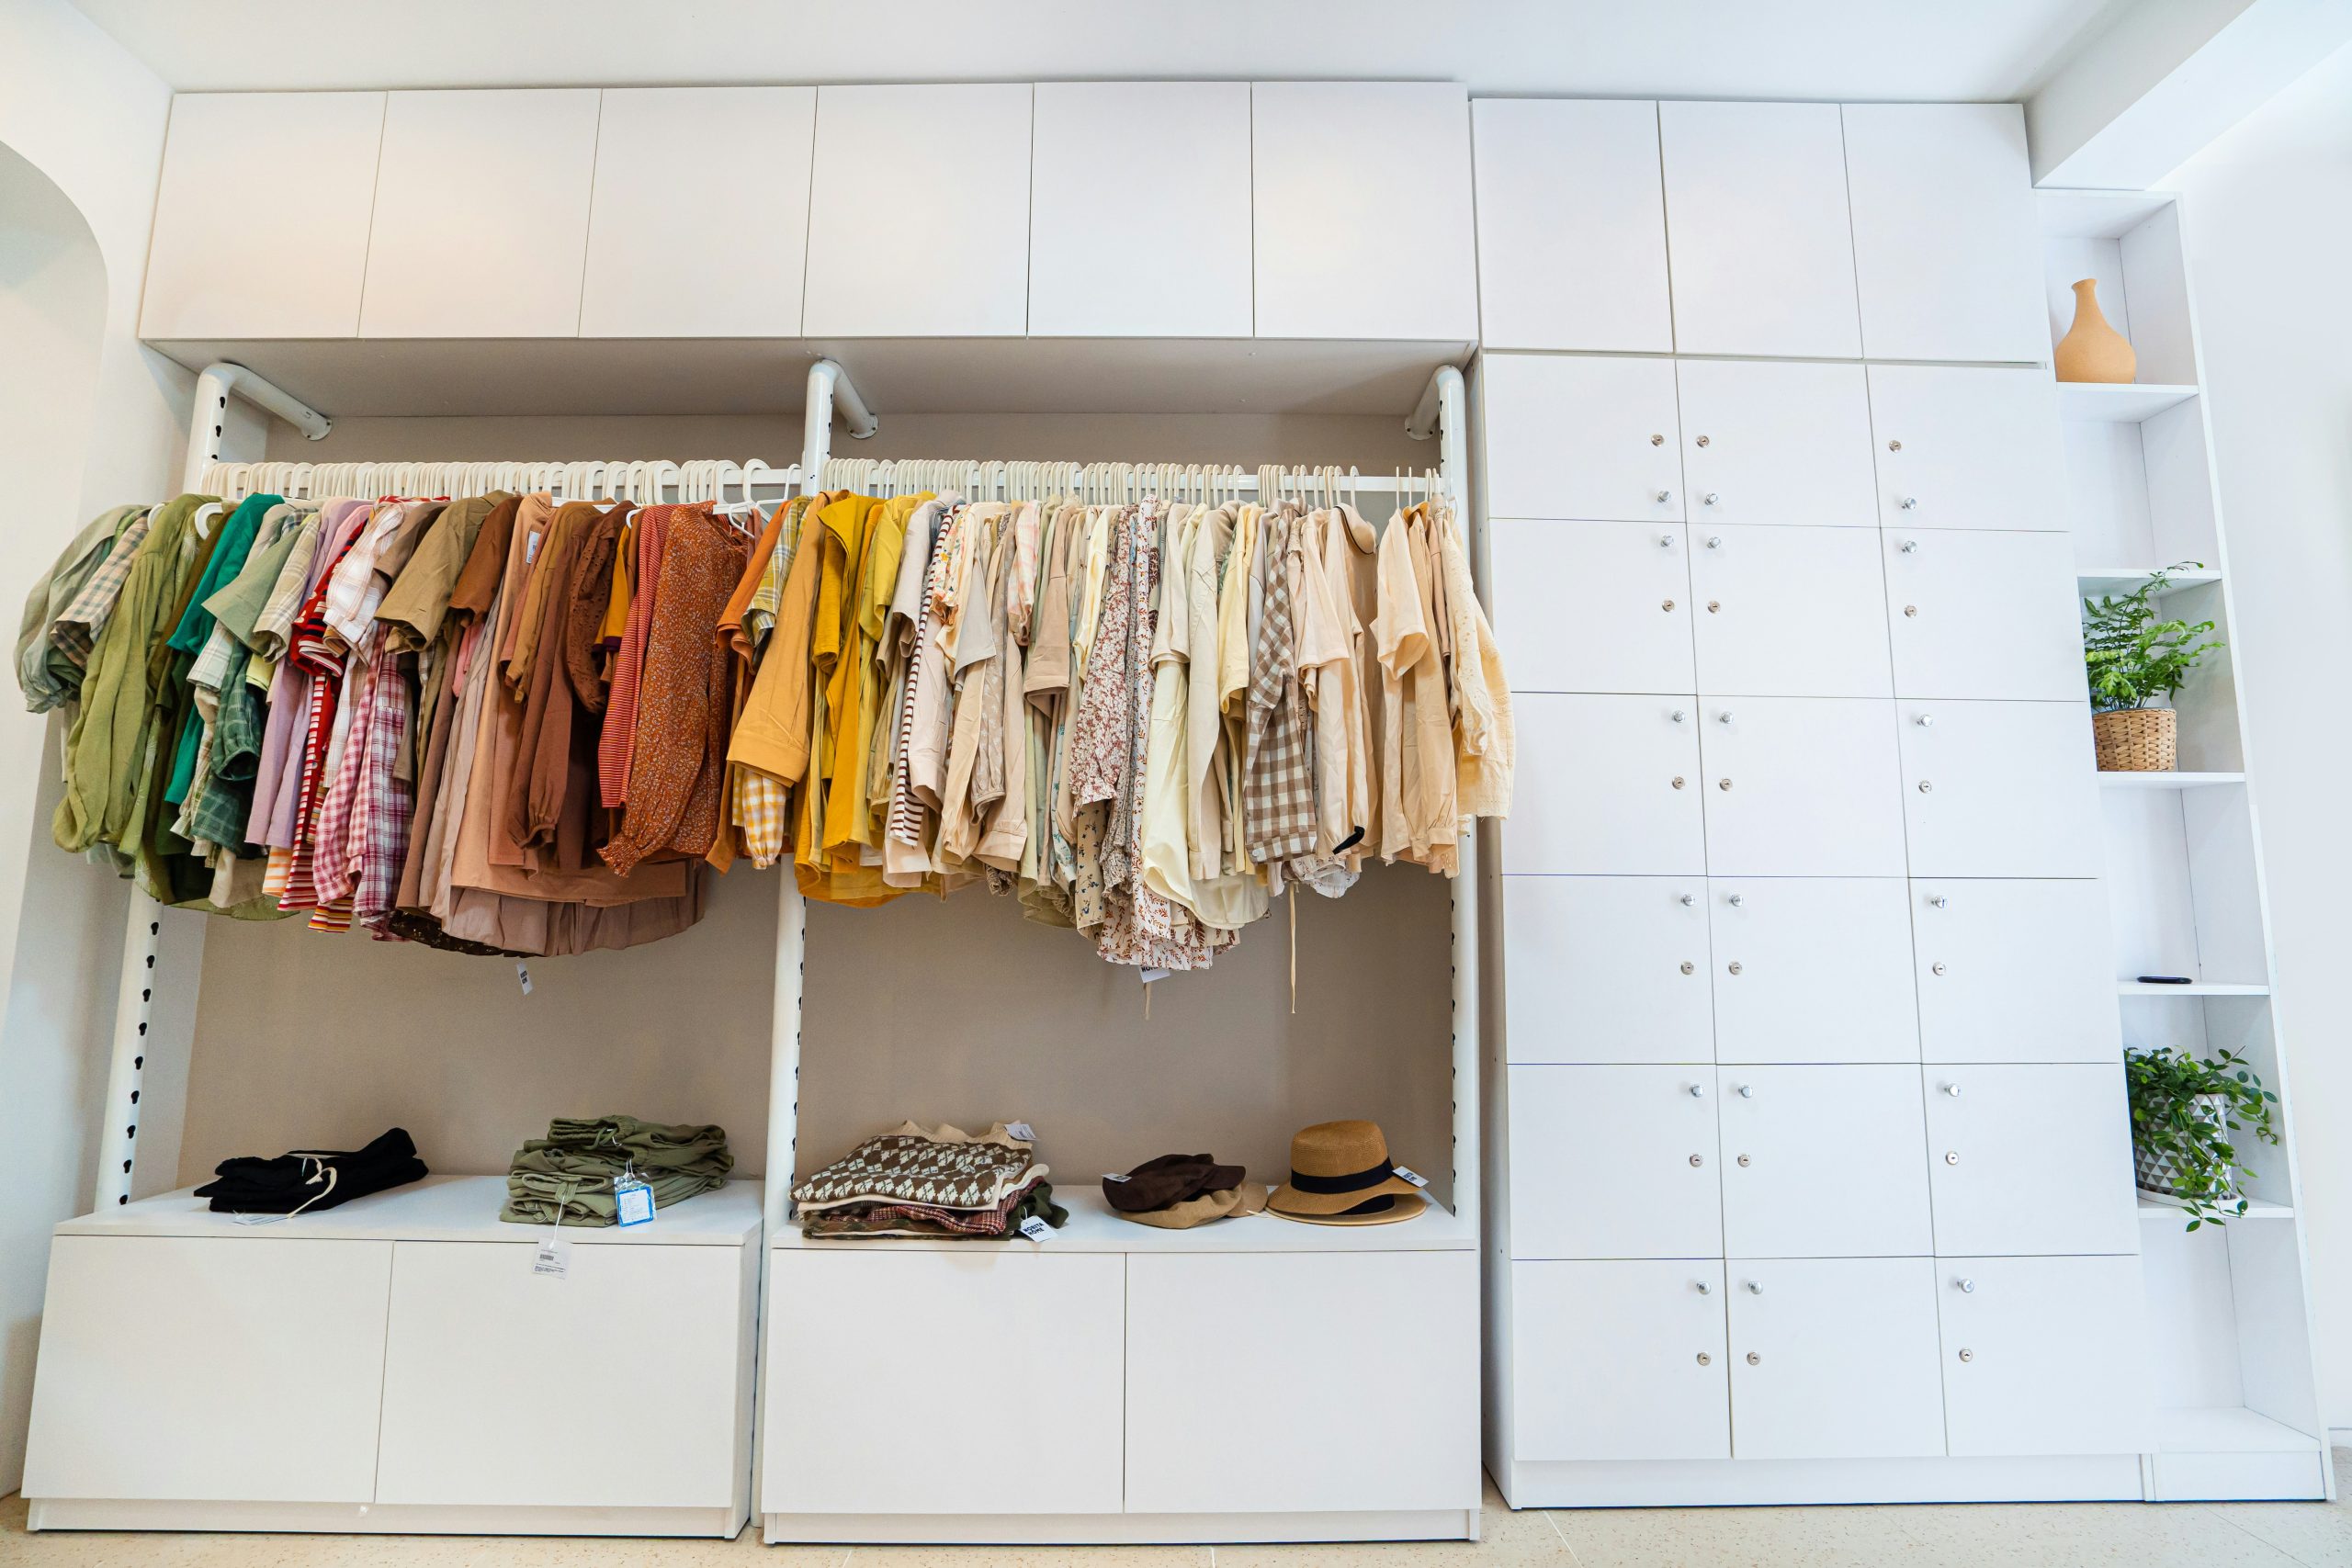
29. Minimalist White Modular System with Secure Lockers
The most unusual and compelling feature of this closet system is the bank of individual locked cabinets. This moves beyond simple organization and into secure storage. For a shared house, a high-end rental, or even a home where you want to keep certain items (like valuable accessories, documents, or personal belongings) completely private, this is a brilliant solution. It blends the aesthetics of a clean, minimalist locker room with the practical needs of residential storage. The asymmetrical open shelving next to it provides the perfect visual balance, offering a place for decorative, personal touches.
|
📋 Copy HEX 🔗 Share |
Before installing a system with secure lockers, ask yourself a few key questions:
- What am I securing? Is it for valuable handbags, sensitive documents, or just creating personal space in a shared environment? The answer will determine the quality of the lock you need.
- Who needs access? Will you be the only one with a key, or will family members need access? Managing multiple keys can become a hassle.
- Is it overkill? For many homeowners, a simple lock on the main closet door or a small safe is a more practical solution than building locks into the cabinetry itself. Weigh the unique benefit against the added cost and complexity.
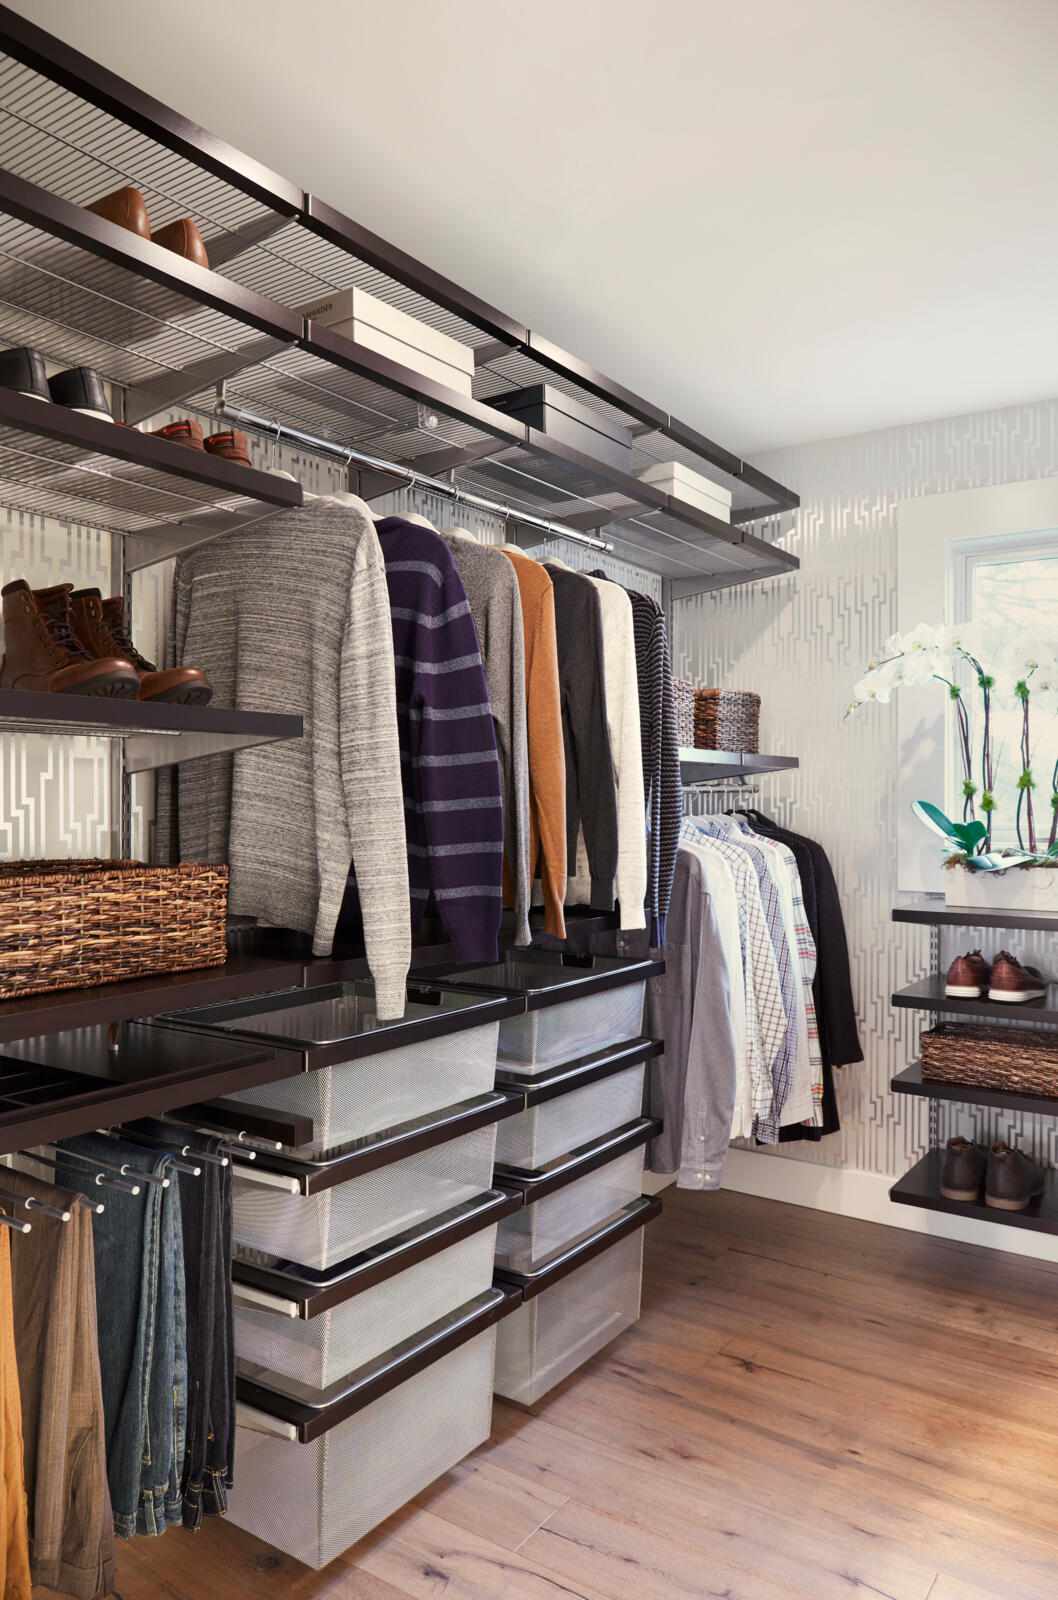
30. Walk-In with Dark Wood Shelves and Geometric Wallpaper
This closet design works because of the expert play between pattern and solid and light and dark. The geometric wallpaper is light in color and has a delicate, repetitive pattern. This creates a visually interesting background without being overwhelming. The closet system itself is made of dark, solid wood shelves, which ground the space and provide a strong contrast to the airy wallpaper. The silver wire mesh drawers add a third, industrial texture, while the natural light from the window keeps the dark wood from feeling too heavy. It’s a perfectly balanced mix of elements.
|
📋 Copy HEX 🔗 Share |
When using wallpaper in a closet, choose a ‘paste-the-wall’ type. It’s much easier to hang in a tight, enclosed space than traditional paper that requires a large pasting table. Also, consider the scale of the pattern. In a smaller walk-in or reach-in closet, a large-scale, dramatic pattern can feel overwhelming and make the space feel smaller. A small-to-medium-scale pattern, like the one shown here, adds texture and interest without visually shrinking the room. Always get a sample and tape it up inside your closet for a few days before committing.
Your Organized Closet Awaits
Now that you’re armed with 30 distinct ways to tackle your closet shelves, the next step is the fun part: choosing the one that speaks to you and your home. Don’t aim for perfection; aim for a system that makes your daily routine a little easier and a lot more beautiful. The best closet is one that works for you, not the other way around.
Ready to start planning? Head over to Pinterest and create a new board for your favorite looks from this list!