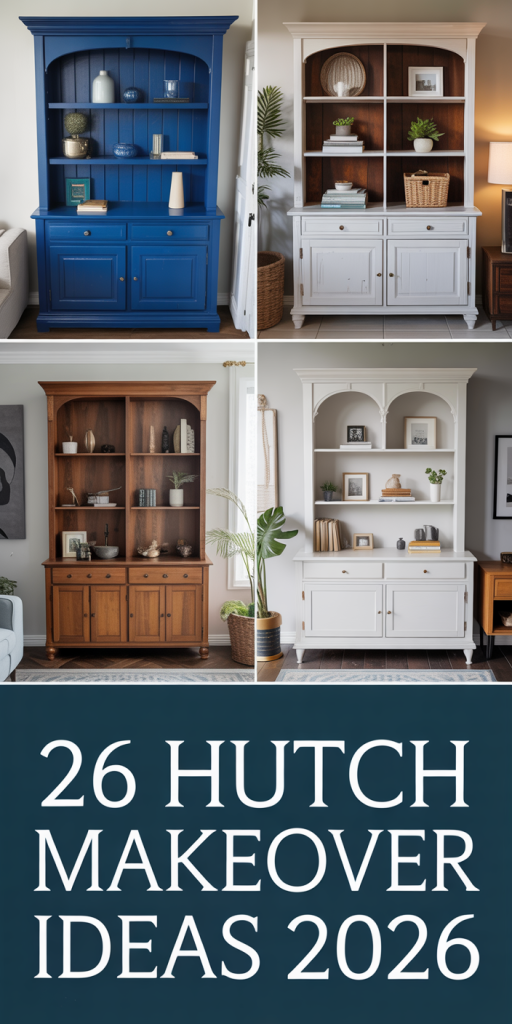
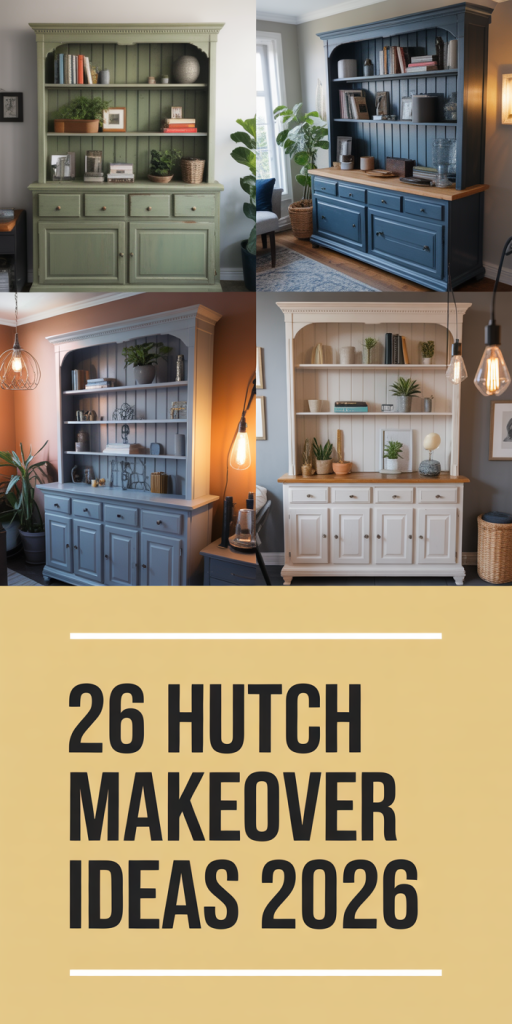
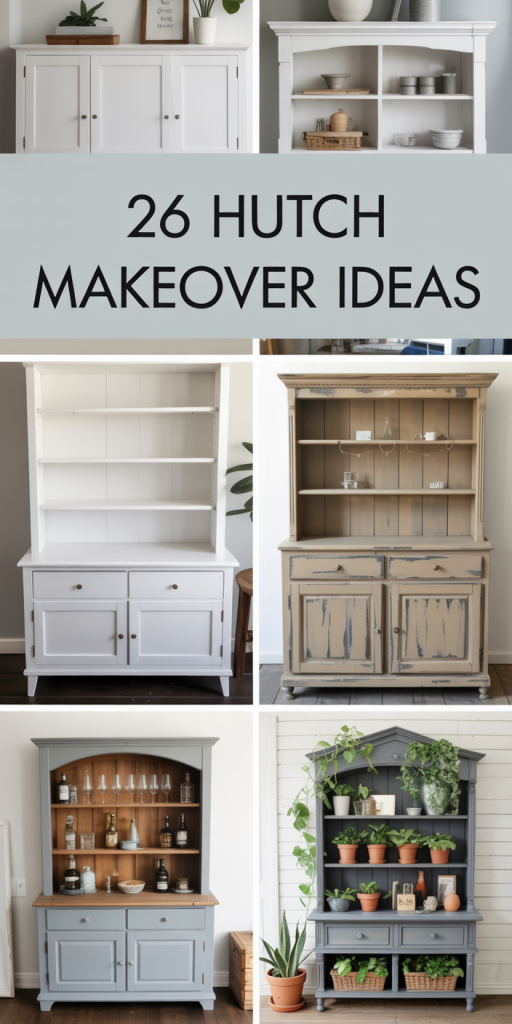
That old wooden hutch you inherited or snagged at a flea market? It’s not just a piece of furniture; it’s a canvas. But it’s easy to get stuck scrolling through endless photos, unsure how to translate inspiration into a real-life weekend project. That’s where we come in. We’ve sifted through hundreds of Pinterest boards and designer portfolios to find 26 genuinely fresh hutch makeovers that go beyond a simple coat of paint.
These ideas prove that you don’t need a massive budget to create something stunning. Whether you’re drawn to a sleek modern look or a rustic farmhouse vibe, there’s a project here for you. And stay until the end — we break down the most common mistakes that can ruin these looks.
📌 Save this to Pinterest for later — you’ll want to revisit these ideas.
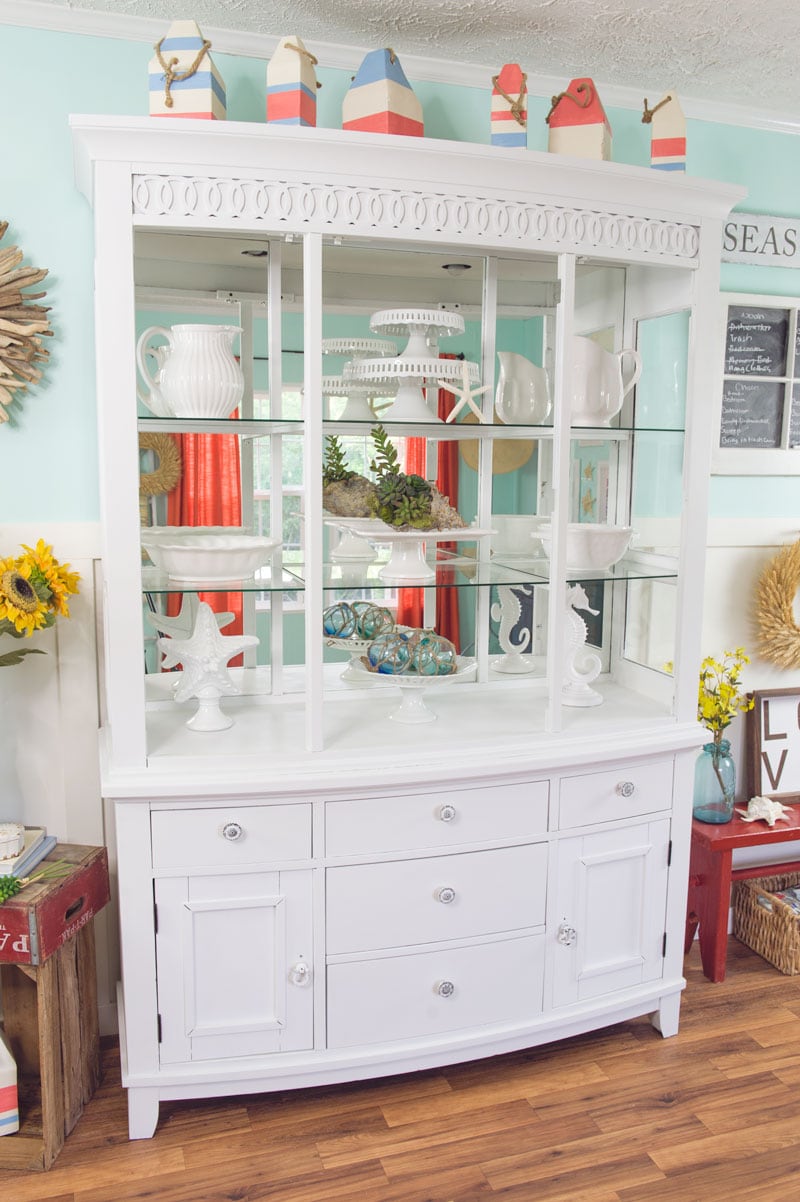
1. Create a Breezy Coastal Vibe with a White Hutch and Nautical Decor
This look is all about capturing a light, coastal feeling without being overly thematic. The combination of a crisp white hutch against a soft blue wall immediately sets a serene, beachy tone. The key is in the curated accessories: a mix of white ceramics keeps it clean, while glass floats and decorative buoys add pops of color and authentic nautical texture. It feels collected and personal, like treasures gathered from a seaside escape.
|
📋 Copy HEX 🔗 Share |
Recreating this bright and cheerful hutch is surprisingly achievable on a budget. The magic is in the paint and the curated decor, not necessarily an expensive furniture piece.
- Paint & Supplies (primer, white paint, blue wall paint): $100 – $200
- Main Furniture (secondhand hutch): $150 – $400
- Decorative Accents (ceramics, buoys, faux plants): $75 – $150
- TOTAL: $325 – $750
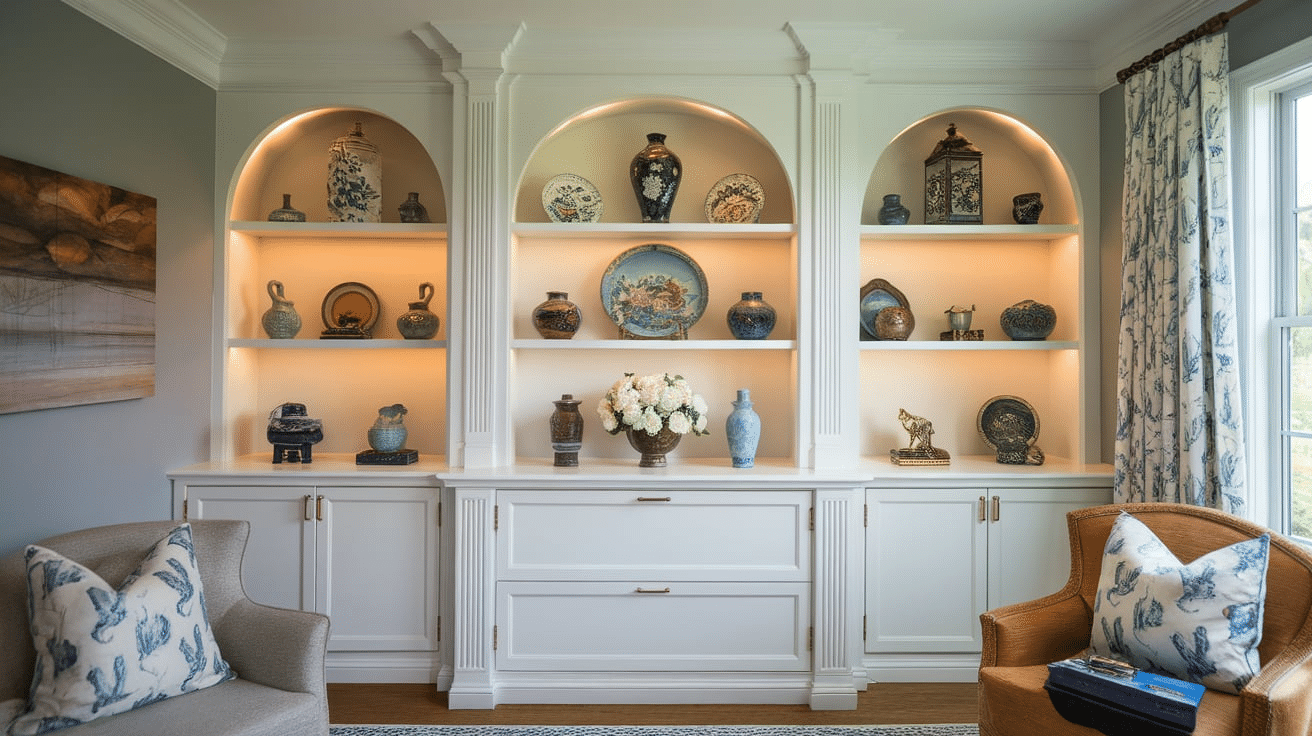
2. Use Arched Alcoves and Integrated Lighting for an Elegant Display
The under-shelf lighting within the arched alcoves elevates this entire design from a simple built-in to a showpiece. Without it, the decorative objects would remain lost in shadow. The warm glow not only highlights the collection but also turns the hutch into a major architectural feature, adding depth and a sense of luxury to the room. It transforms the unit from storage into a curated gallery.
|
📋 Copy HEX 🔗 Share |
For lighting like this to work, it must be warm and subtle. Use LED strips with a color temperature between 2700K and 3000K for a cozy, incandescent-like glow. To keep the strips hidden from direct view, position them along the front interior edge of each shelf. This ensures the light washes down the back of the alcove, creating a soft, ambient effect that highlights your objects without creating harsh glare.
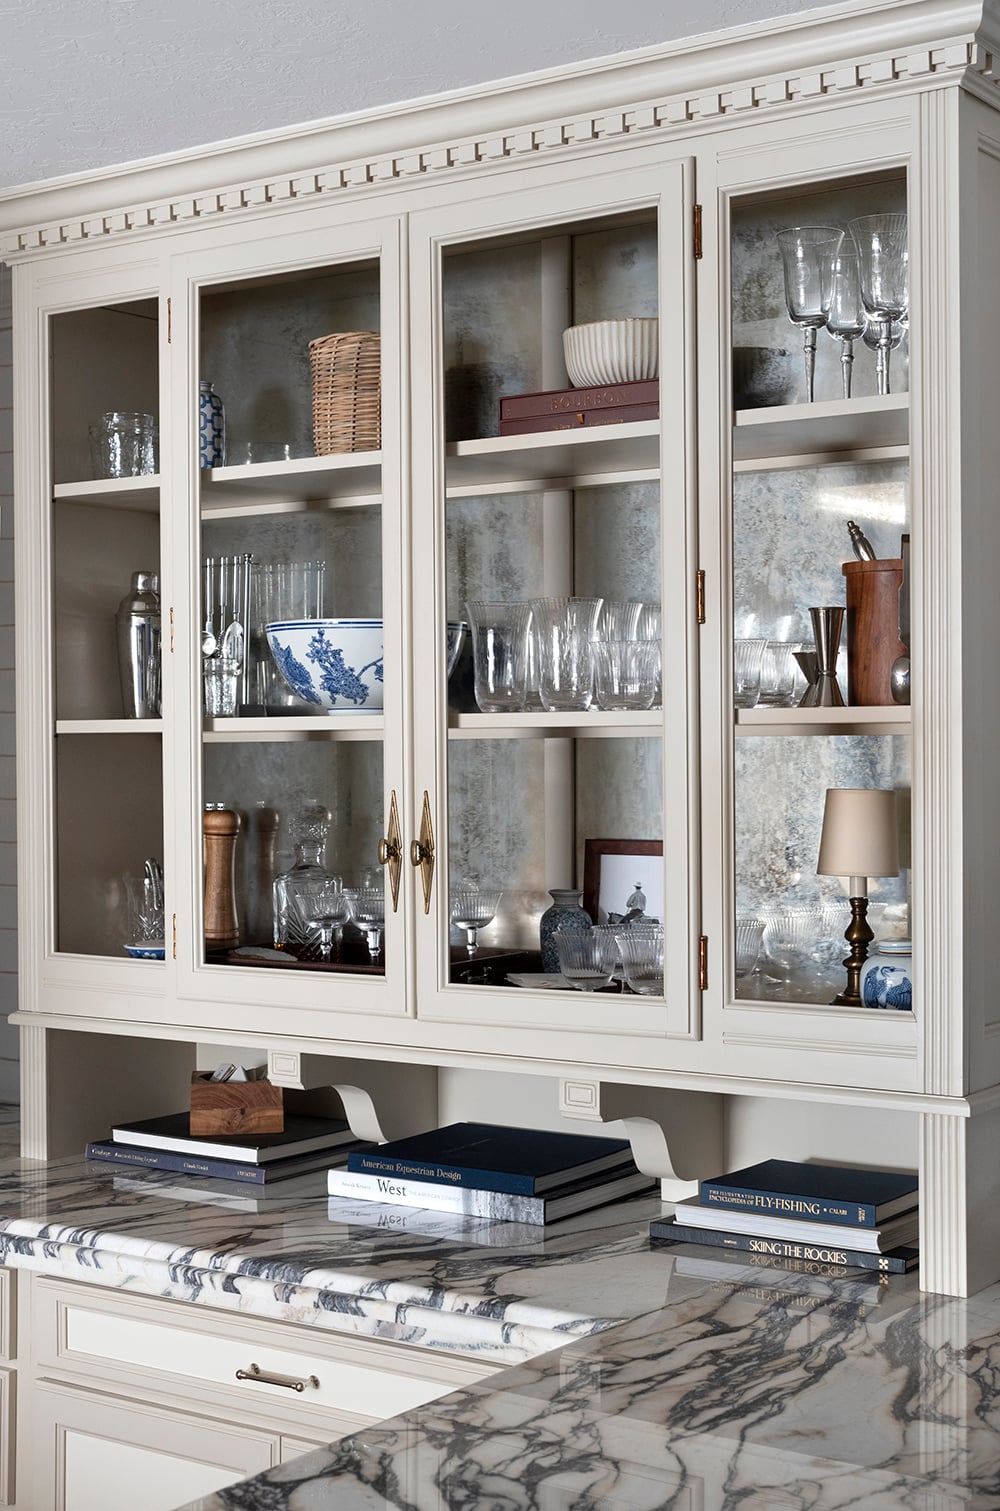
3. Combine a Distressed Mirror Backing with a Variegated Marble Countertop
This look achieves its refined elegance through a careful balance of materials. Think of it as a formula: 50% classic cabinet structure (the cream paint and raised panels), 30% luxe surface (the heavily veined marble), and 20% vintage charm (the antiqued mirror backing). The mirrors bounce light around and make the space feel larger, while the marble adds a grounding, organic element. Swapping the cream for a soft gray or adding brass hardware would shift the mood but maintain the successful formula.
|
📋 Copy HEX 🔗 Share |
That stunning, highly variegated marble is the heart of this design, but it’s also the most significant investment and requires care. Marble is porous and can easily stain from coffee, wine, or even water if not sealed properly and regularly (at least once a year). It can also be scratched or etched by acidic substances like lemon juice. If you love this look but have a busy, spill-prone household, consider a high-quality quartz or porcelain slab that mimics marble for a more durable alternative.
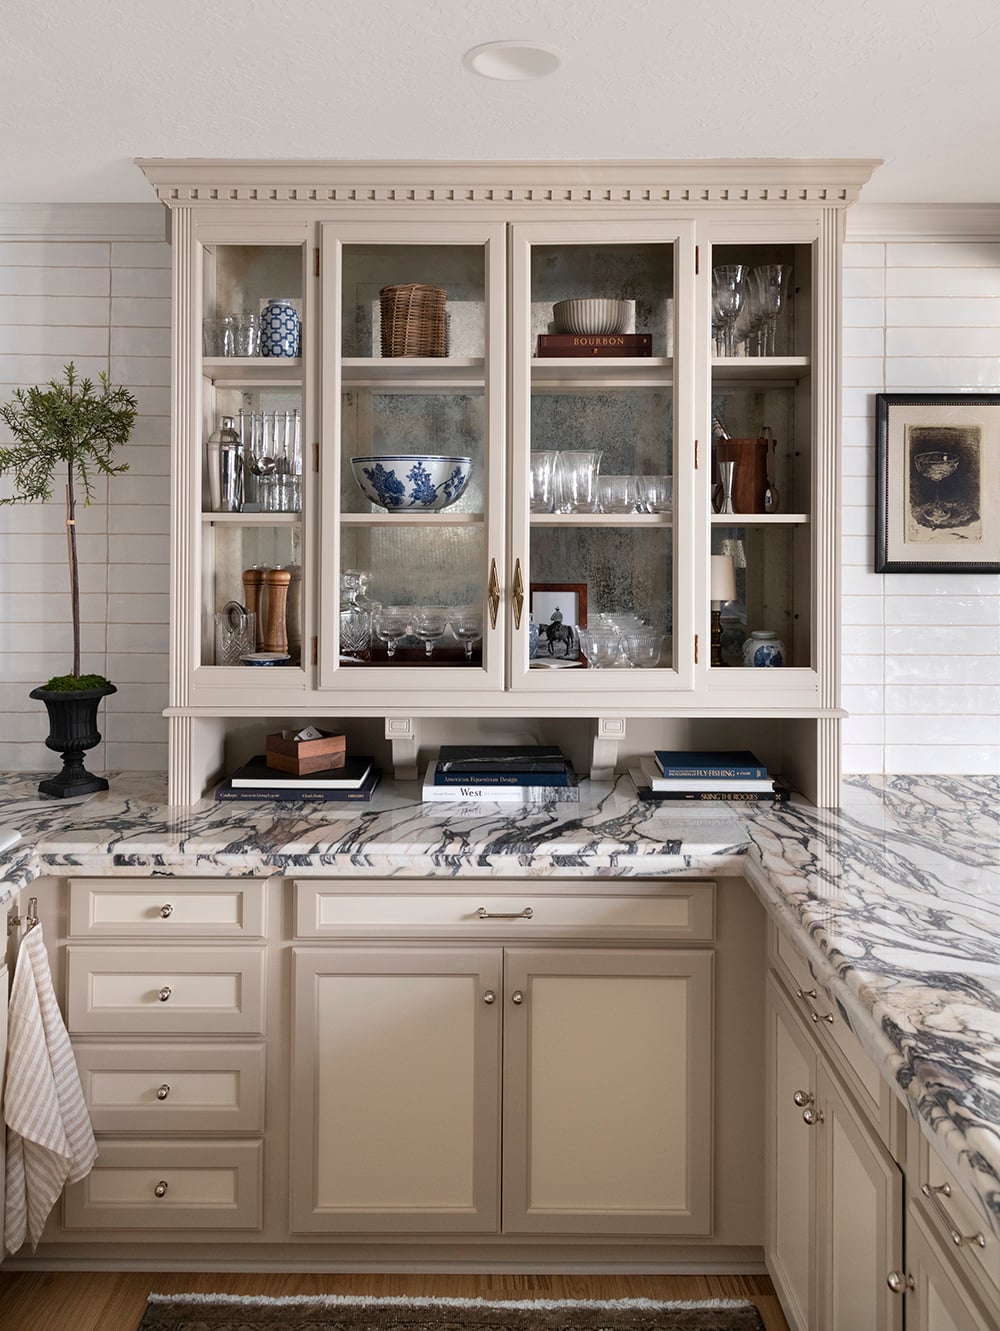
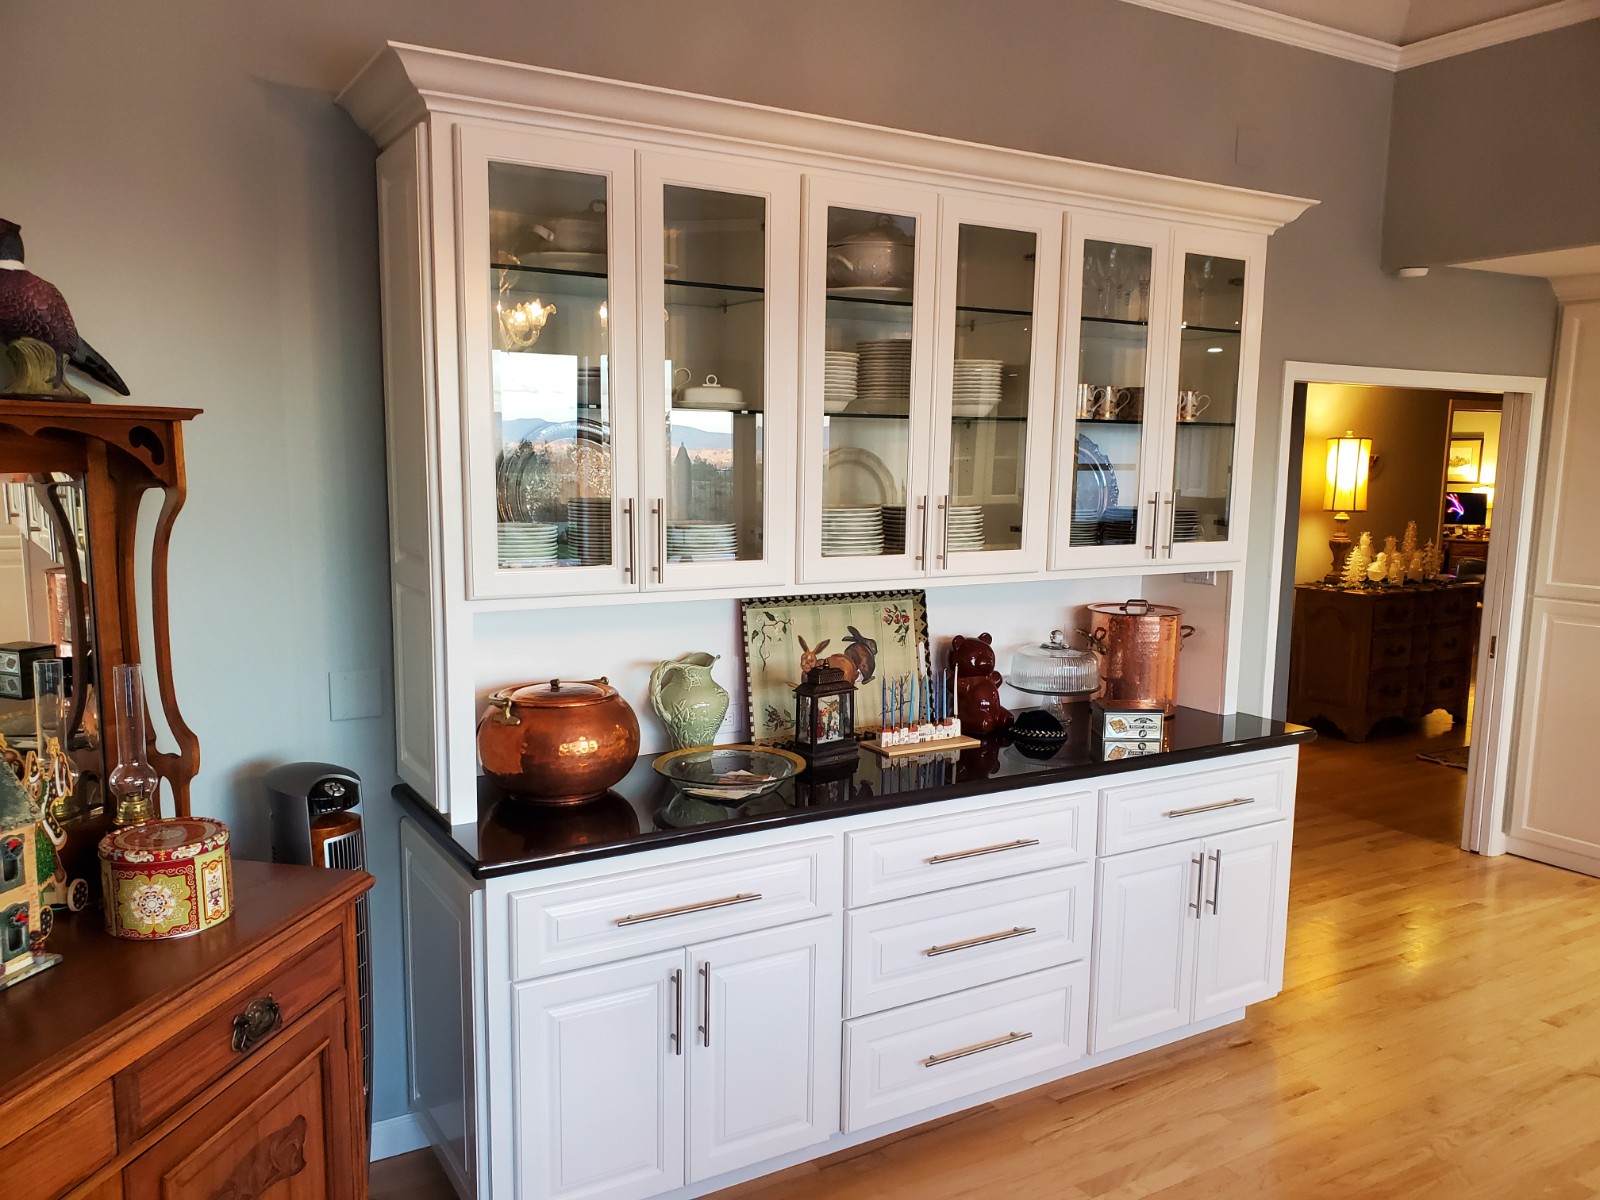
4. Add Sophistication with an Antiqued Mirrored Backsplash
This is a masterclass in creating visual depth. The antiqued mirrored backsplash behind the glass-paned doors serves two purposes: it reflects light into the room, making the entire space feel brighter and more expansive, and it adds a layer of vintage glamour. The soft, mottled reflection prevents the glassware display from feeling cluttered, instead giving it a sophisticated, gallery-like quality. The cream paint and brass hardware perfectly complement the warm, golden tones in the mirror, creating a cohesive and luxurious look. Compare this with the similar approach in Idea #3, which uses a different countertop.
|
📋 Copy HEX 🔗 Share |
A custom mirrored backsplash can be pricey, but you can get this look for much less. Purchase stock mirror tiles from a home improvement store and use a DIY antiquing kit. These kits typically involve a spray solution that you apply to the back of the mirror to create the mottled, aged effect. Alternatively, you can use peel-and-stick mirrored wallpaper designed with an antiqued pattern. It’s a project you can tackle in a weekend for under $200.
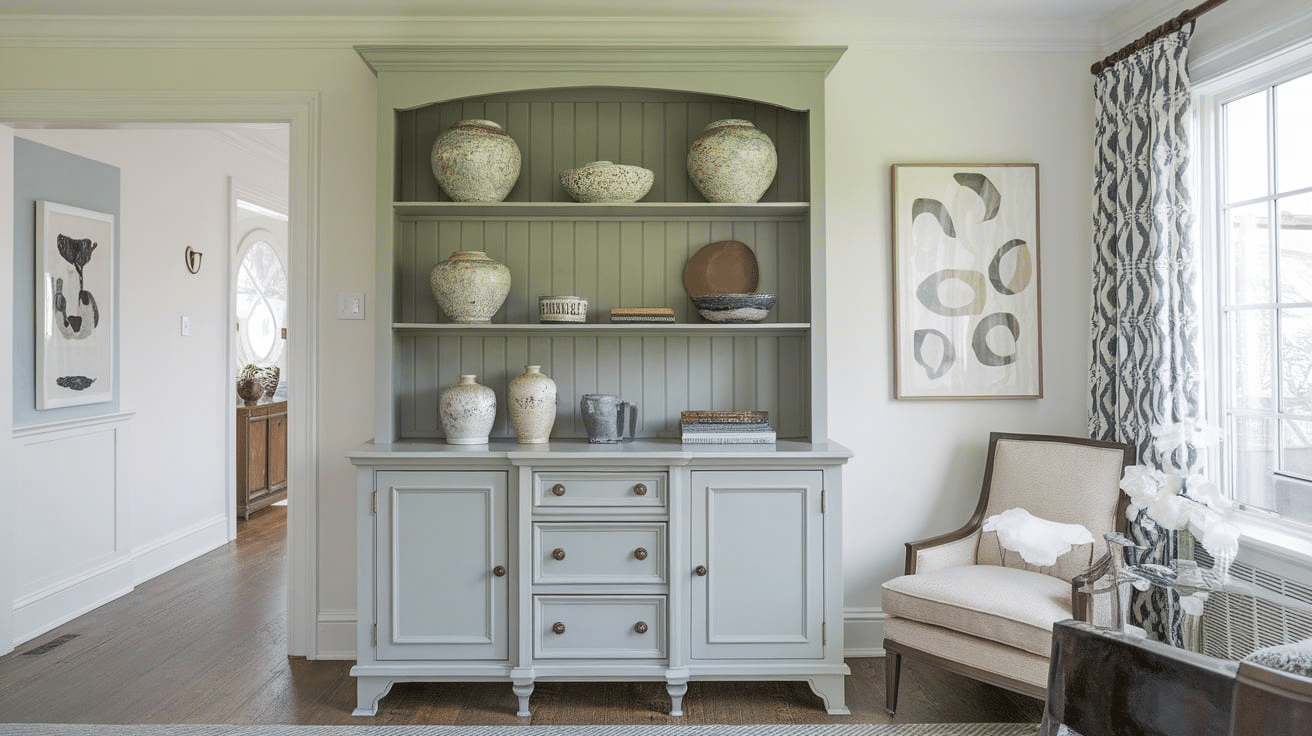
5. Layer Sage Green and Light Gray for a Serene, Collected Look
The collection of textured, off-white ceramics is what makes this hutch feel so special and curated. While the two-tone paint job is lovely, it is the sheer volume and cohesion of the pottery that tell a story. It suggests a passion for handmade objects and provides the entire piece a singular focus. Without such a thoughtfully amassed collection, it would just be a painted hutch; with it, it becomes a personal museum.
|
📋 Copy HEX 🔗 Share |
A hutch filled with this many decorative items, especially on open shelving, is a dust magnet. To keep it looking fresh, you’ll need to commit to a weekly dusting with a microfiber cloth. For the textured ceramic pieces, a soft-bristled brush can help get into crevices. About twice a year, you’ll likely want to do a deep clean, removing every item and wiping them down individually. An alternative for a similar feel with less work would be to display fewer, larger items or place more behind glass doors.
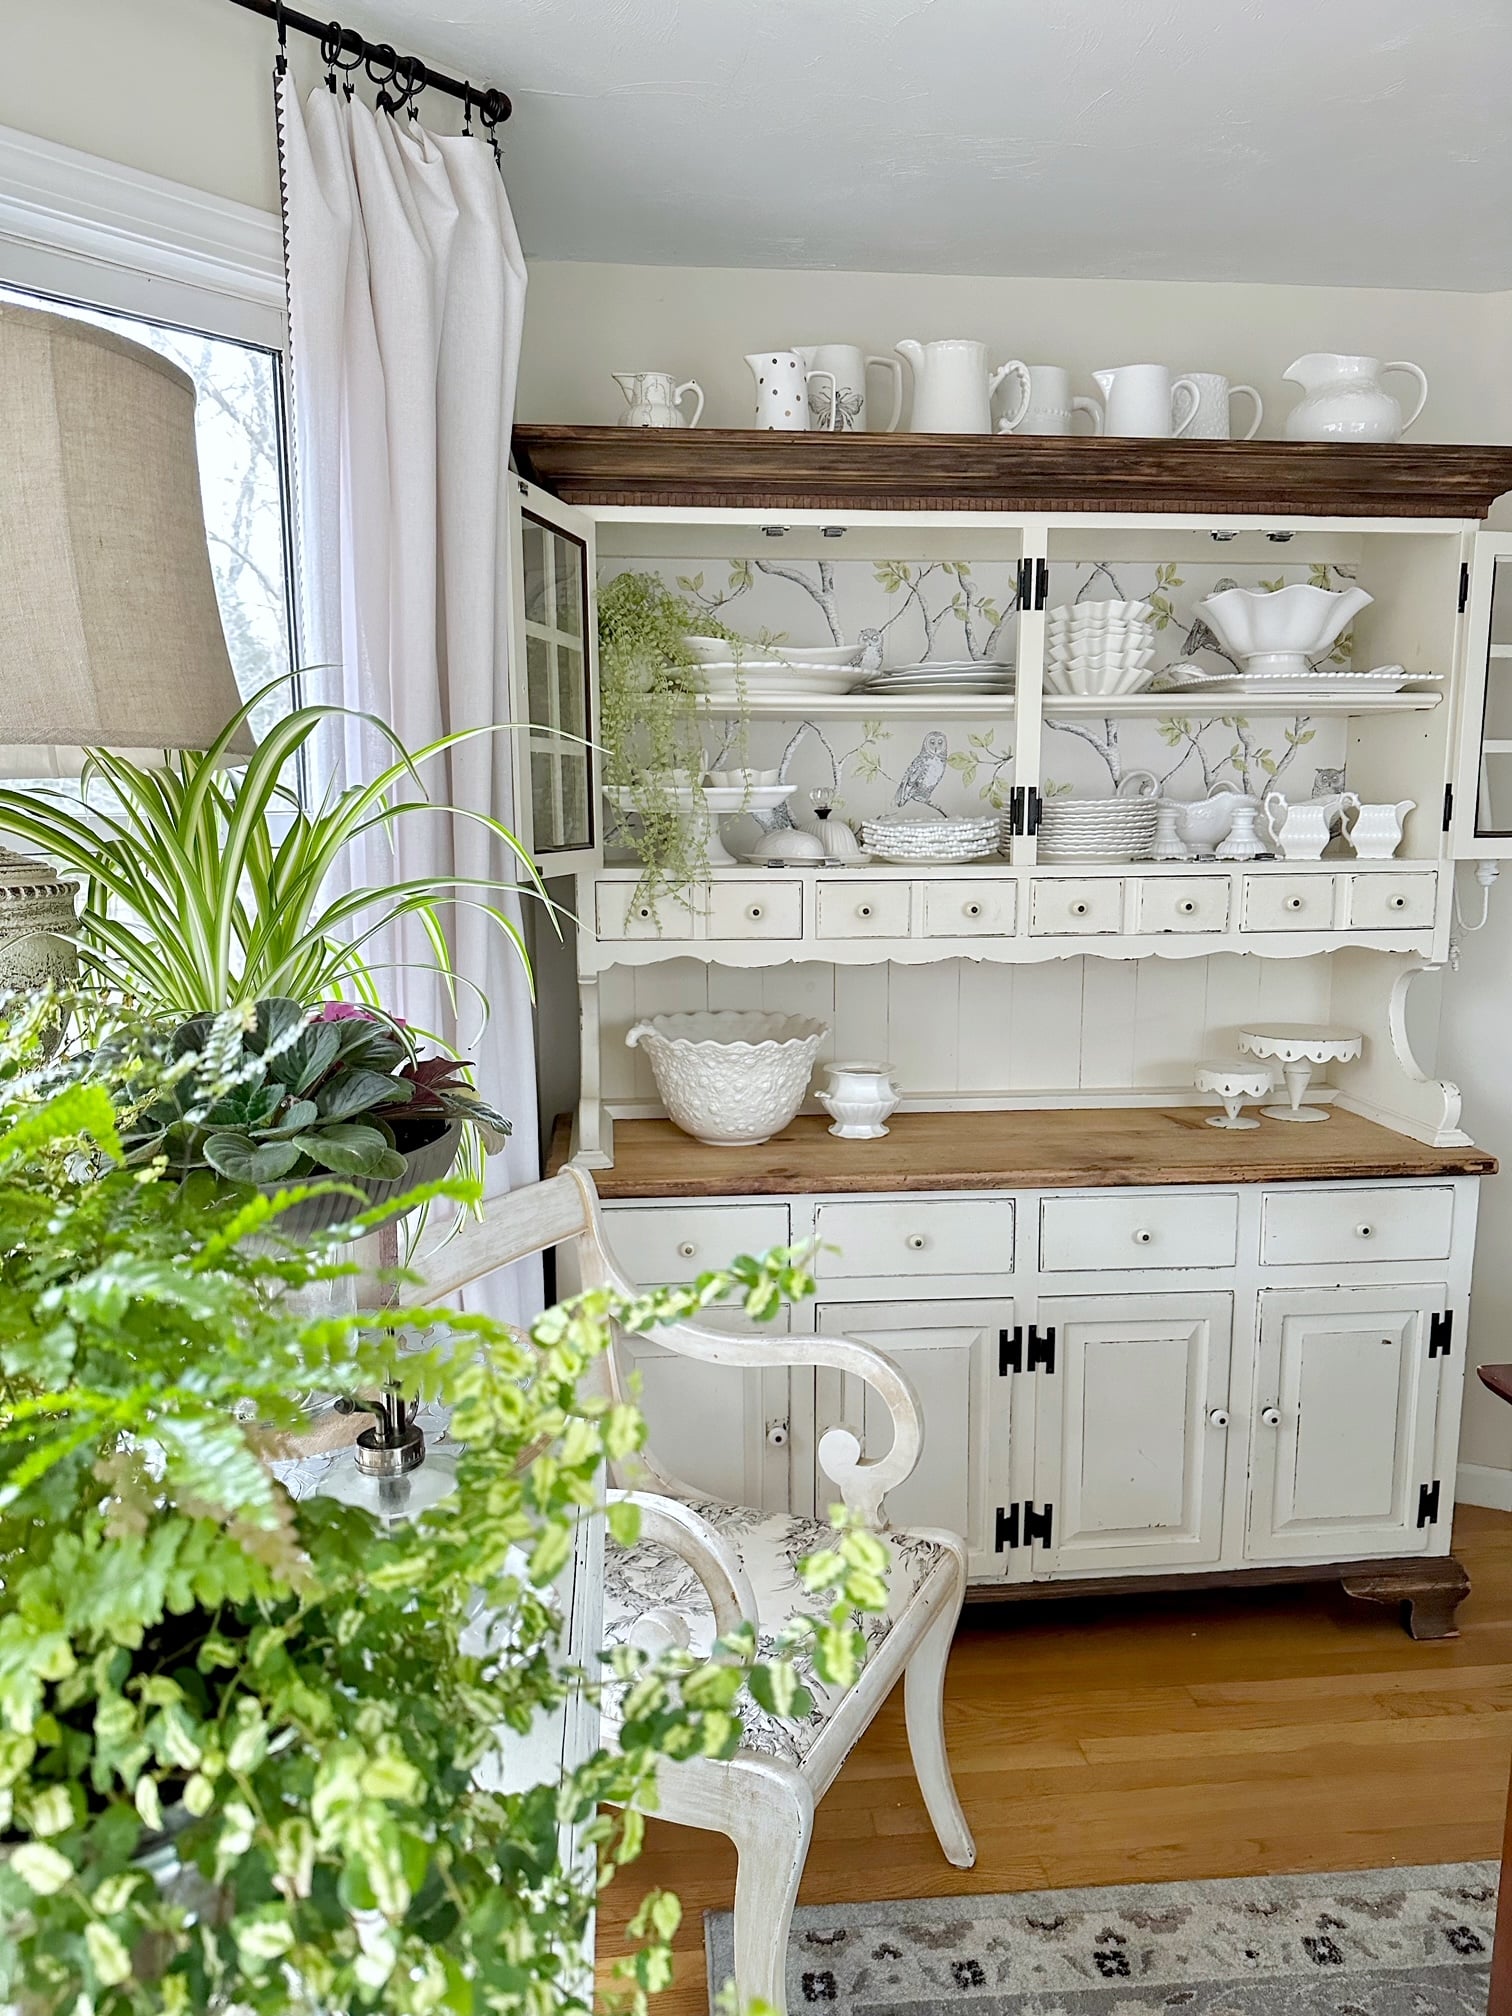
6. Use Botanical Wallpaper as a Backing for a Fresh Farmhouse Feel
Adding wallpaper to the back of a hutch is a high-impact, low-cost update. Here’s a quick guide to getting it right:
|
📋 Copy HEX 🔗 Share |
- Measure & Cut: Carefully measure the interior back panels of your hutch. Cut your wallpaper to size, leaving about an inch of excess on all sides to be trimmed later.
- Prep the Surface: Clean the back of the hutch thoroughly and let it dry. If the surface is glossy, give it a light sanding to help the adhesive stick.
- Apply Adhesive: If using traditional wallpaper, apply paste to the back panel. If using peel-and-stick, simply peel back the first few inches of the backing.
- Position and Smooth: Starting from a top corner, carefully position the wallpaper and use a smoother tool to work out any air bubbles as you go.
- Trim Excess: Once the panel is covered, use a sharp craft knife to trim the excess wallpaper along the edges for a clean finish.
This project typically takes 2-3 hours and costs $30-$80 depending on the wallpaper.
This trend has serious staying power because it perfectly taps into the “grandmillennial” and “cottagecore” aesthetics popular on Pinterest. It’s a direct answer to the years of stark minimalism, reintroducing pattern, color, and a sense of personal history into our homes. Using botanical or bird-themed paper, in particular, speaks to our collective desire to bring the outdoors in and create nurturing, nature-filled spaces.
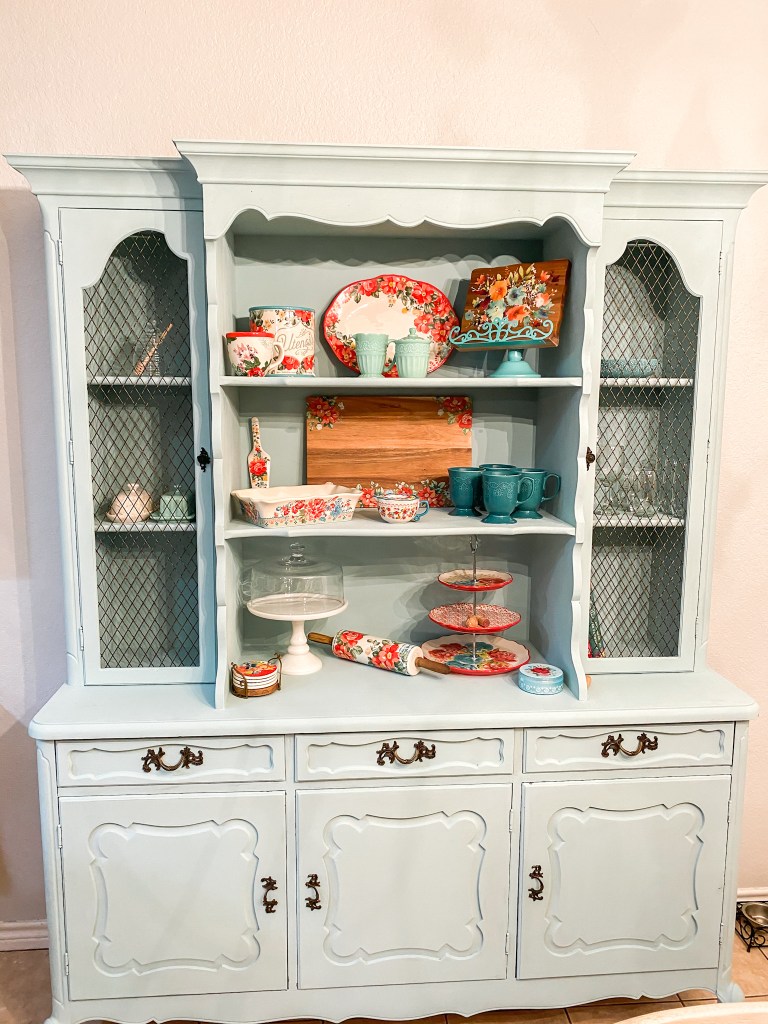
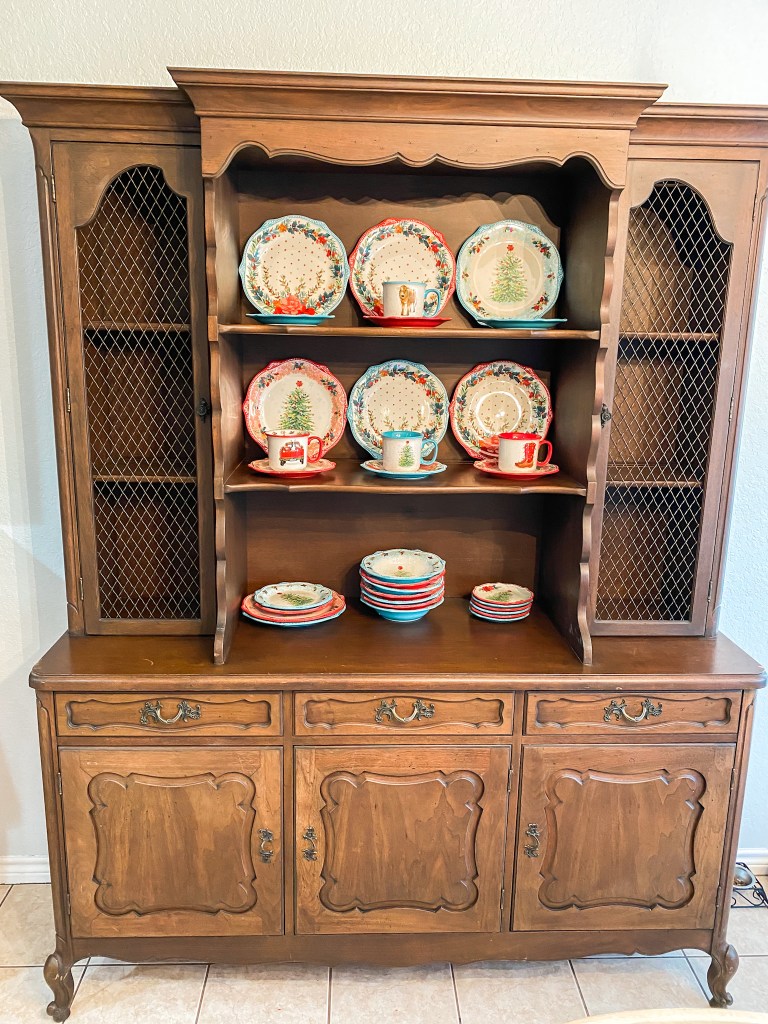
7. Showcase a Pioneer Woman Collection in a Light Blue Hutch
What makes the display so charming and effective is the unapologetic commitment to a single collection. The light blue of the hutch is chosen specifically to complement the teals, reds, and creams of the floral dishware, creating a cohesive and powerful color story. The wire mesh on the side cabinet doors adds a touch of rustic texture, preventing the piece from feeling too sweet and allowing glimpses of the collection inside without full exposure. The result is cheerful, organized, and bursting with personality. Be careful not to go overboard, which is a common issue we discuss in our mistakes section.
|
📋 Copy HEX 🔗 Share |
This look is fantastic if you are a dedicated collector of a specific dinnerware pattern. However, be honest with yourself: will you still love this collection in five years? A hutch painted to match a specific set of dishes is a major commitment. If your tastes change, you might find yourself with a hutch color that clashes with your new dinnerware. A more neutral paint color might offer more long-term flexibility.
8. Style a Traditional Wood Hutch with Festive Holiday Dishware
When styling a hutch for the holidays, the key to avoiding a cluttered look is repetition and restraint. Don’t try to display your entire holiday collection. Instead, choose a consistent theme or color palette. Group similar items together—for example, a stack of festive plates next to a row of matching mugs. Use varying heights to create visual interest: place smaller items in front and taller items, like a pitcher or cake stand, in the back to draw the eye upward.
|
📋 Copy HEX 🔗 Share |
The most important element here is the contrast between the dark, ornate wood of the hutch and the bright, festive colors of the dishware. The hutch itself acts as a rich, grounding backdrop that makes the reds, whites, and teals of the holiday collection pop. Without this dark, traditional frame, the cheerful dishes wouldn’t have the same impact or feel as special. It’s the juxtaposition of formal furniture with playful decor that creates the warm, inviting holiday mood.
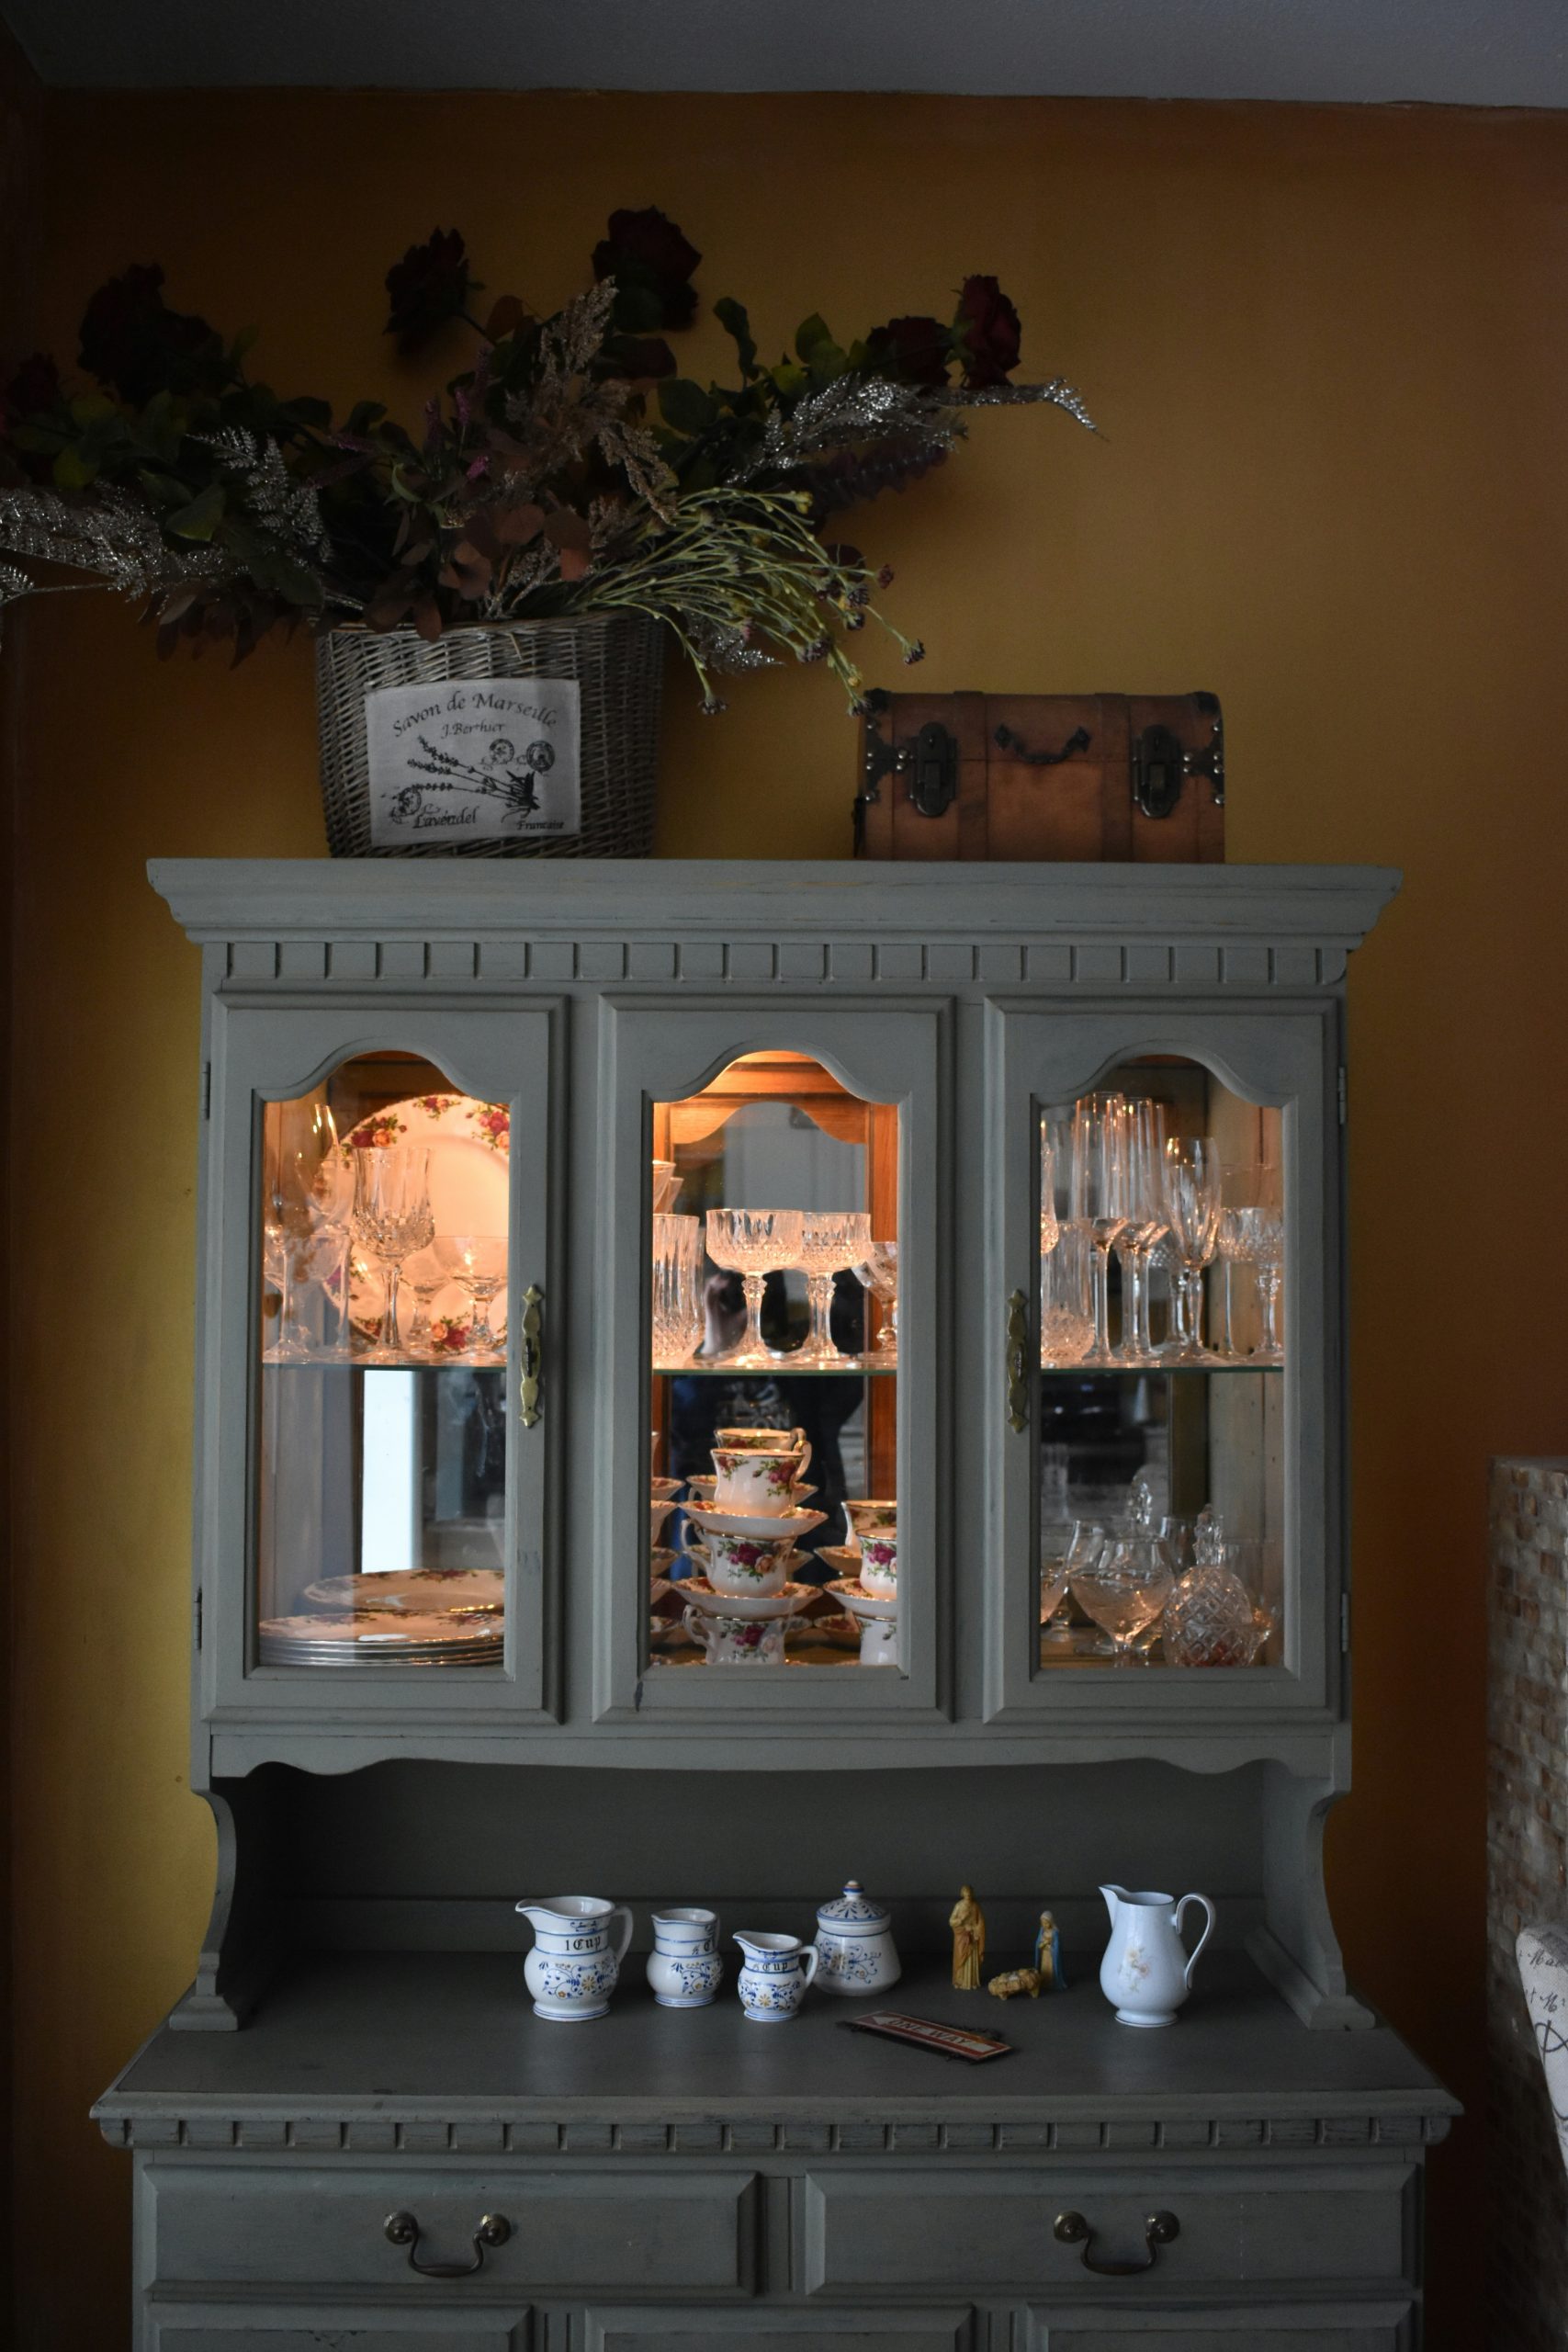
9. Pair a Sage Green Hutch with Warm Yellow-Gold Walls
The formula for this warm, traditional look is all about complementary colors. Think of it as 60% calming green (the hutch), 30% warm, sunny yellow (the walls), and 10% neutral texture (the woven basket and clear glassware). The green and yellow are neighbors on the color wheel, so they create a harmonious and inviting palette. The key is that both colors are slightly muted, preventing them from overwhelming the space. You could swap the sage for a dusty blue and the yellow for a warm cream and achieve a similar, gentle effect.
|
📋 Copy HEX 🔗 Share |
This combination works because it masterfully balances color temperatures. The sage green has cool, calming undertones, while the yellow-gold walls provide an enveloping warmth. The internal lighting in the hutch adds another layer of warmth, making the glassware and china glow. This mix of cool and warm tones creates a space that feels both refreshing and cozy at the same time—a difficult balance to strike, but incredibly effective when done right.
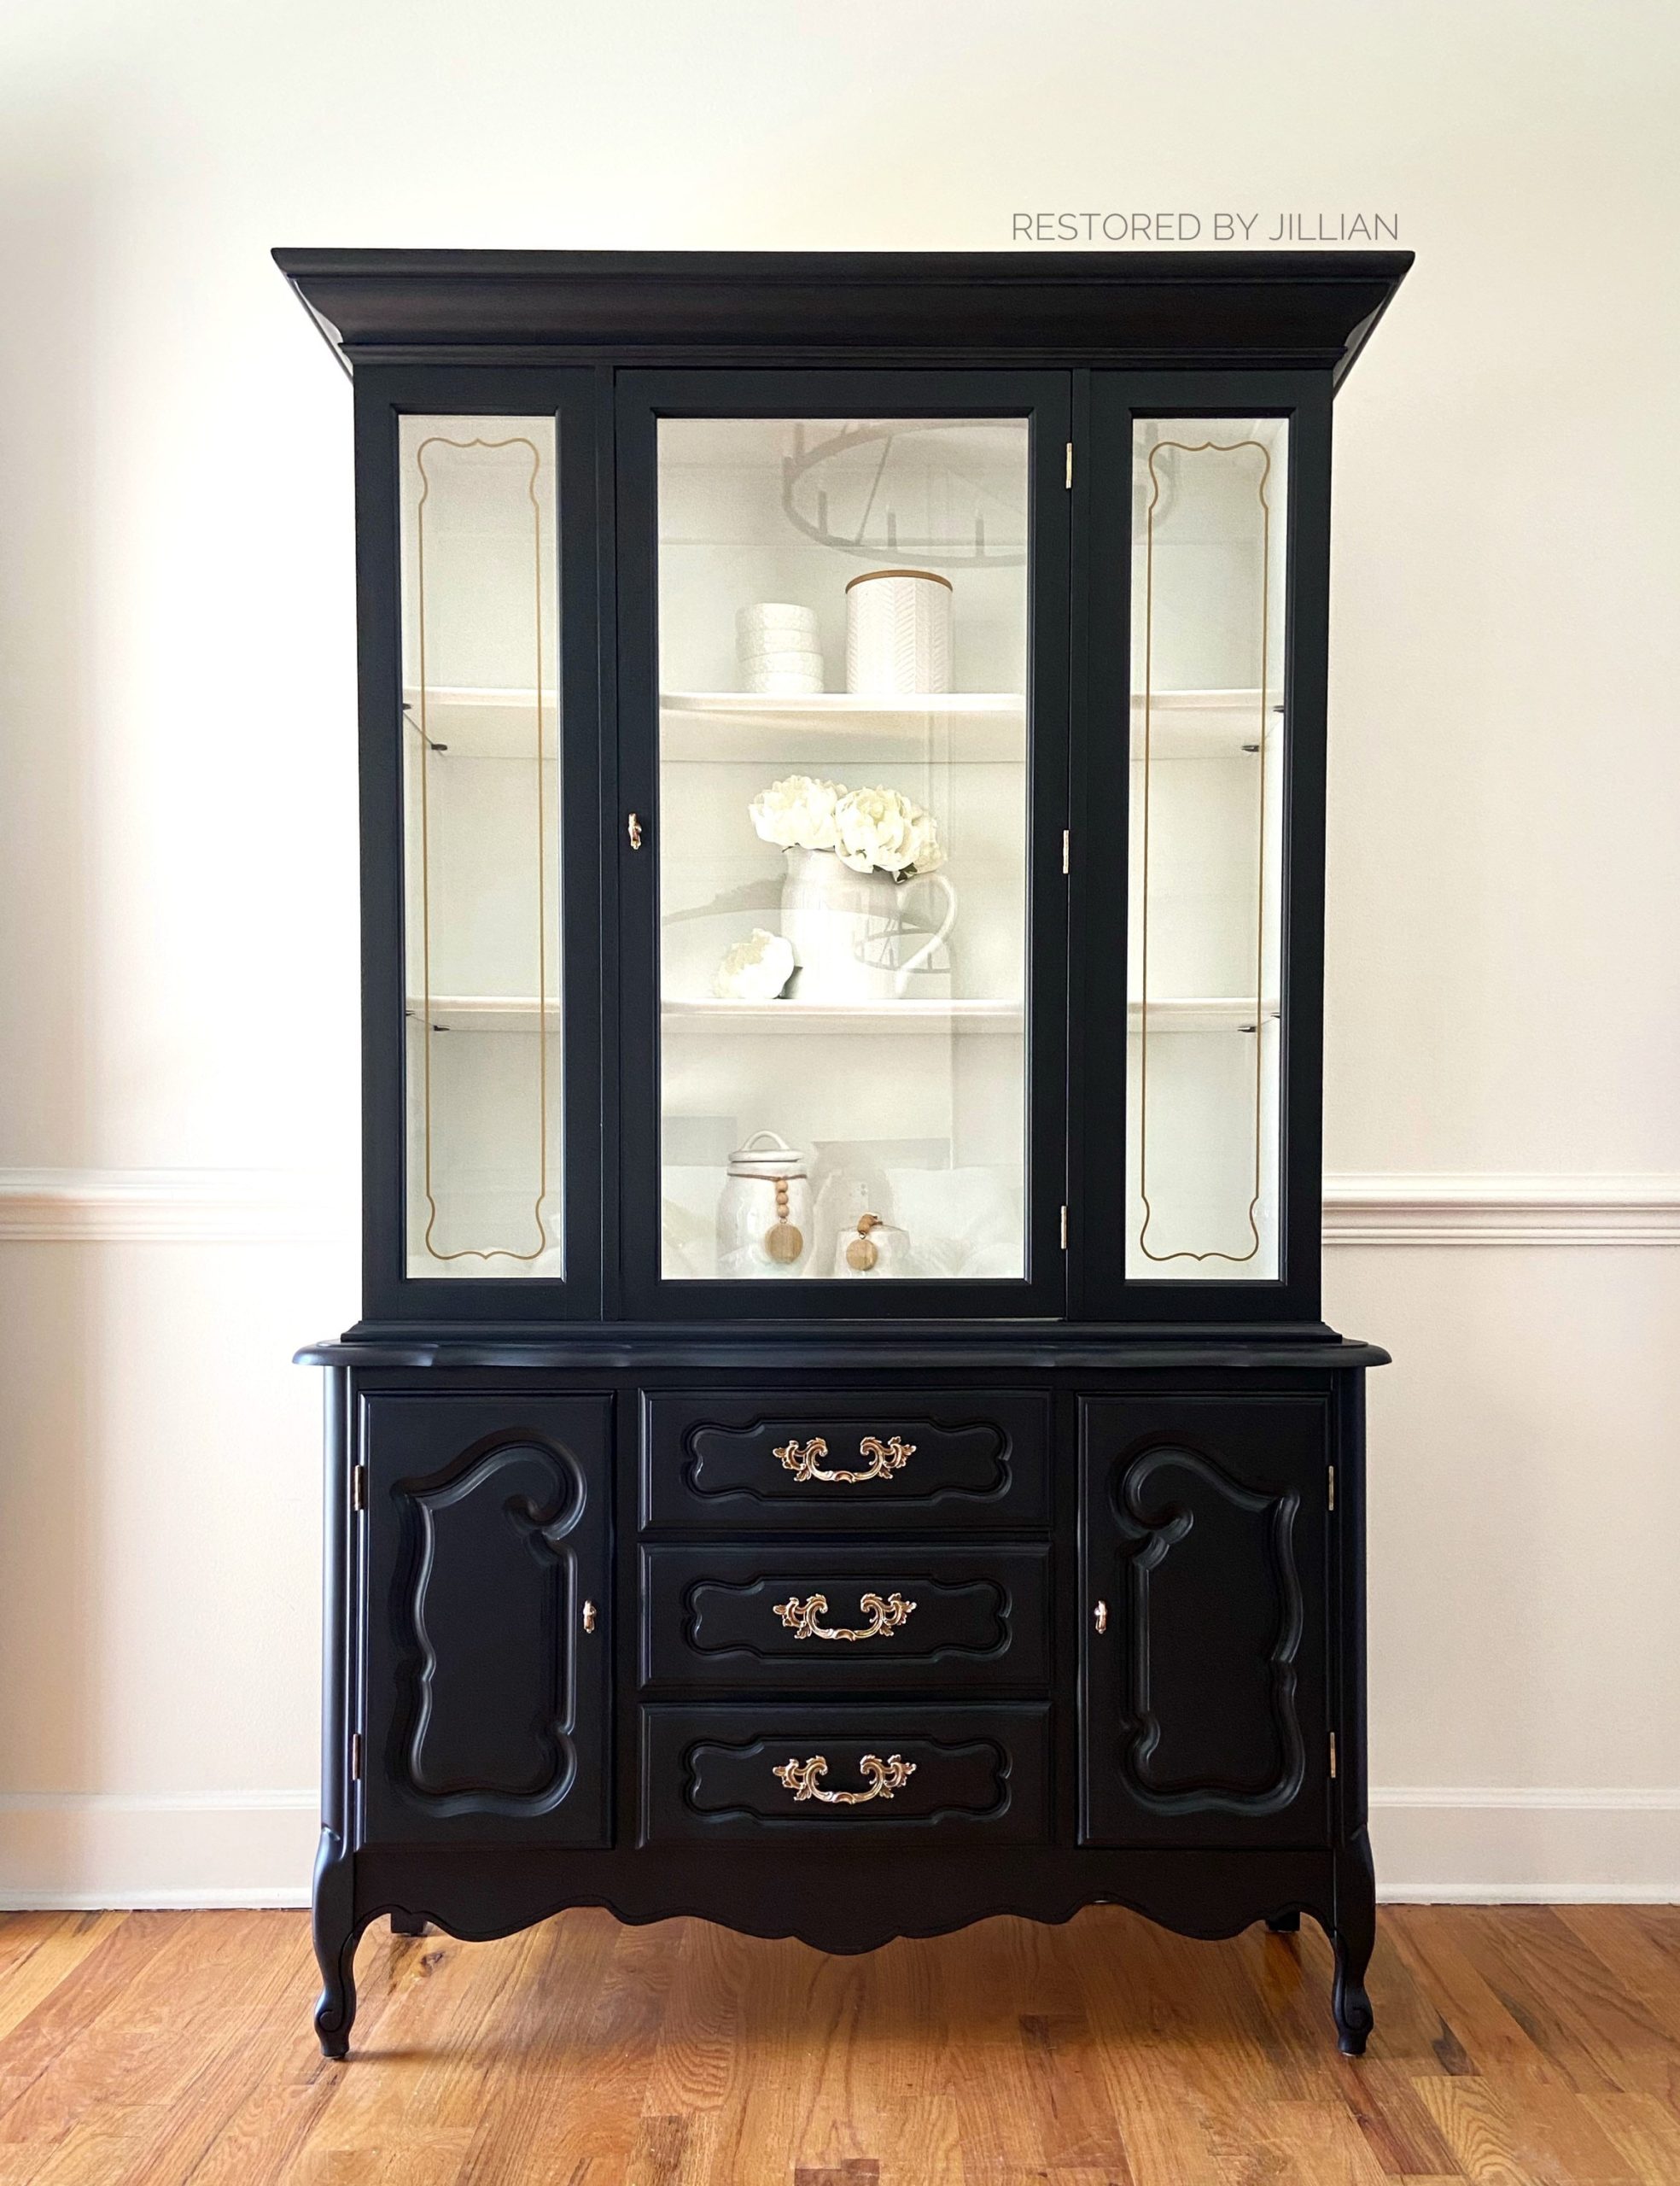
10. Go Dramatic with a Charcoal Black Hutch and Ornate Gold Hardware
The choice to paint the interior of the upper cabinets a crisp, clean white is the single most transformative detail in this makeover. A dark hutch with a dark interior can feel like a black hole, causing your display items to disappear. The white backing acts as a built-in spotlight, creating a bright, gallery-like backdrop that makes every single white ceramic piece pop. It provides a stunning contrast that is both dramatic and fresh.
|
📋 Copy HEX 🔗 Share |
You don’t need to buy a high-end hutch to get this glamorous look. Find a vintage hutch with striking lines on Facebook Marketplace—even one with a dated wood finish. A good clean, a light sanding, and two coats of a quality charcoal or black paint (like Benjamin Moore’s “Wrought Iron”) will work wonders. For the hardware, look for ornate pulls on Amazon or Etsy. You can find beautiful, heavy-feeling gold hardware for just a few dollars a piece, giving you that luxe look for a fraction of the price. This makes it a great budget-friendly alternative to the more playful Idea #11.
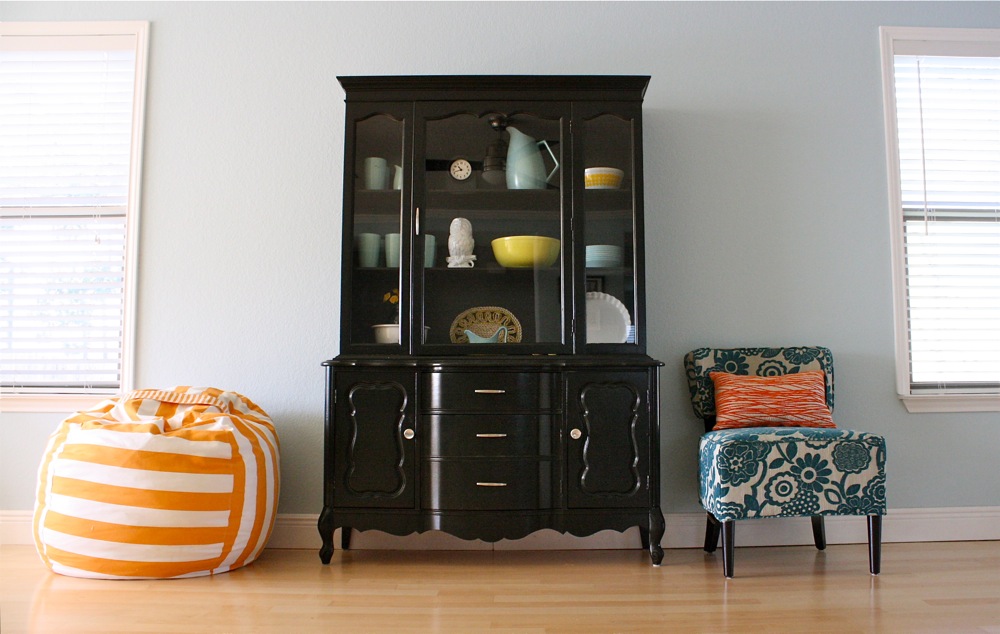
11. Pair a Glossy Black Hutch with Playful, Eclectic Seating
A glossy black finish looks incredibly chic and dramatic, but it’s not for the faint of heart. The high shine reflects a lot of light, which is particularly striking, but it also highlights every single fingerprint, smudge, and speck of dust. If you have kids or pets, or if you simply dislike constant cleaning, a matte or satin finish might be a more practical choice. A glossy finish also shows imperfections in the underlying wood, so proper prep work is absolutely critical for a smooth, professional-looking result.
|
📋 Copy HEX 🔗 Share |
This room’s success lies in its fearless use of color and its clever balance of formal and informal elements. The large, traditional black hutch acts as a sophisticated anchor for the room. This formality is then playfully undercut by the casual, vibrant seating—an orange and white striped beanbag and a floral armless chair. The light blue wall serves as a cheerful, unifying backdrop for all these disparate elements. It’s a reminder that serious furniture doesn’t have to create a stuffy room.
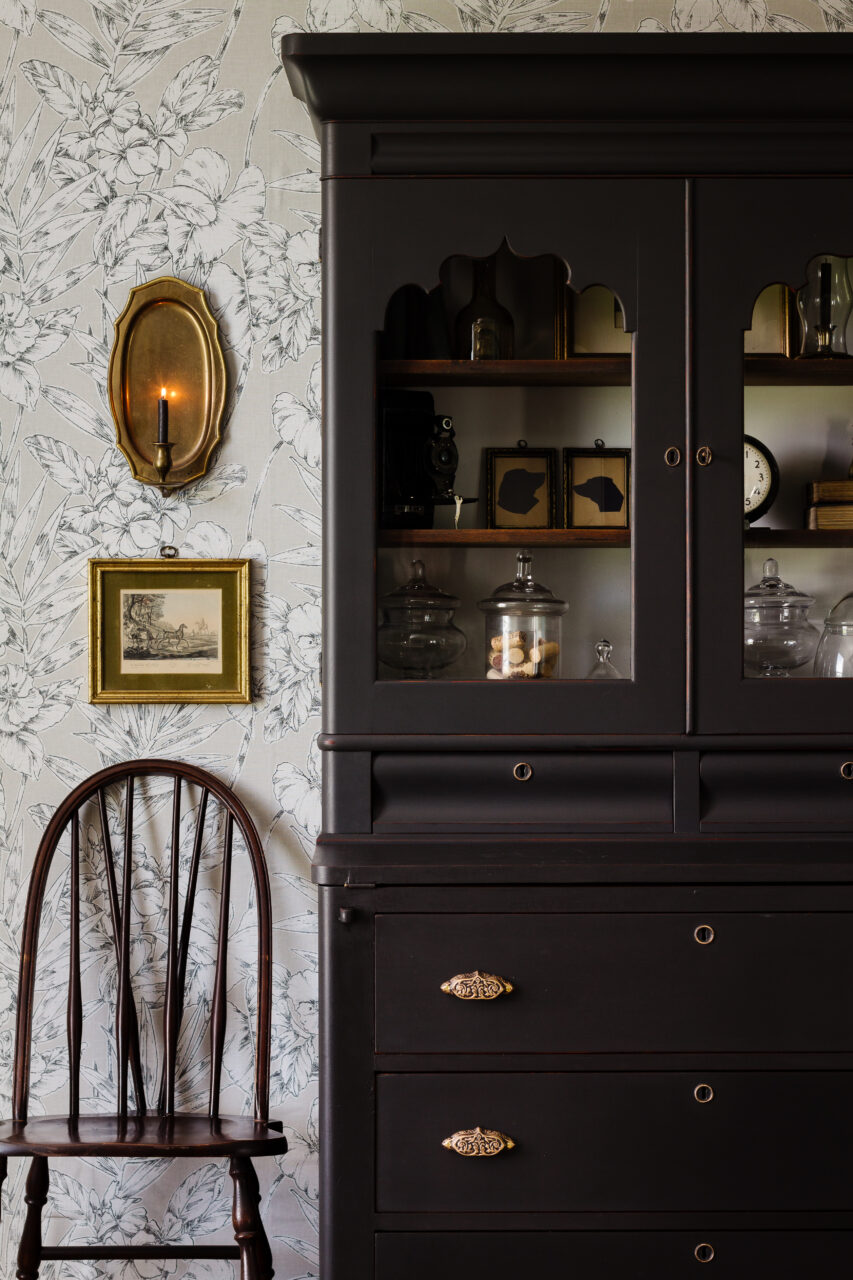
12. Set a Moody Tone with a Dark Hutch Against Botanical Wallpaper
When placing dark furniture against a patterned wallpaper, ensure the wallpaper’s background color is light enough to provide contrast. Here, the light grey background of the botanical print keeps the dark brown hutch from blending in and looking heavy. Aim for a pattern scale that complements the furniture piece. A large hutch can handle a medium-to-large-scale pattern, while a smaller piece might feel overwhelmed by it. The simple black-and-white print here adds detail without competing with the hutch’s ornate hardware.
|
📋 Copy HEX 🔗 Share |
This look is a perfect example of the “dark academia” trend that continues to evolve. It’s about creating a space that feels intellectual, historical, and deeply personal. The combination of a traditional dark wood hutch, botanical illustrations, and curated objects like framed silhouettes evokes a sense of history and learning. It’s a move away from minimalism and toward rooms that tell a story and are filled with character and intrigue.
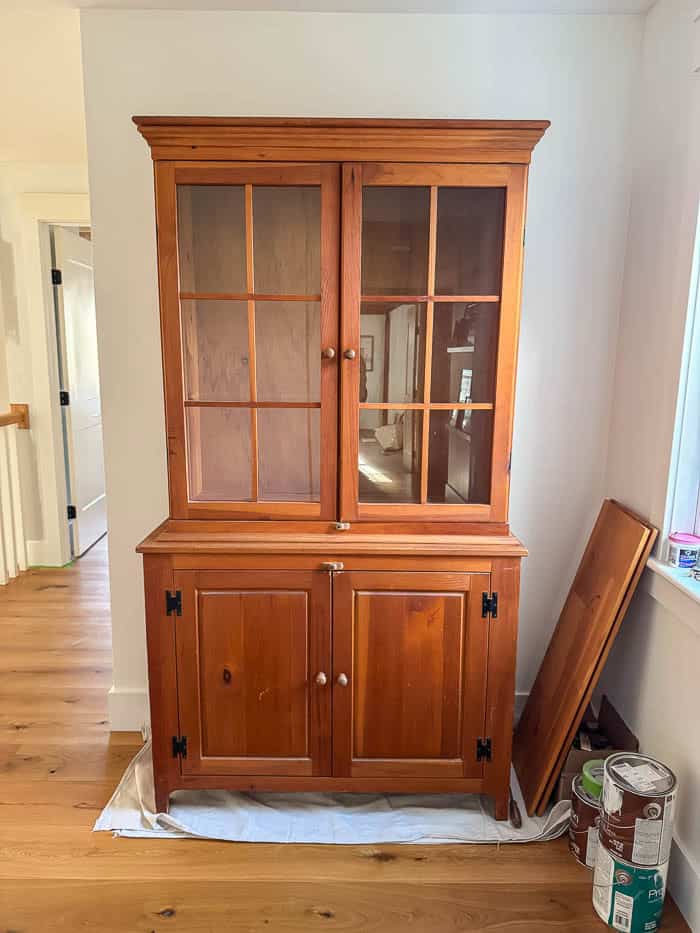
13. Highlight Natural Wood with Exposed Black H-Hinges
The most defining characteristic of this hutch is its straightforward, rustic hardware. The exposed black H-hinges on the lower cabinet doors are a classic hallmark of early American and colonial-style furniture. They aren’t just functional; they’re a key design element that provides a strong graphic contrast against the light-to-medium wood tone. Paired with the simple round knobs, the hardware firmly places this piece in a traditional, almost rustic category, making it a perfect canvas for a farmhouse or colonial-inspired makeover.
|
📋 Copy HEX 🔗 Share |
For a makeover on a piece like this, you need to decide if you’re keeping the hardware. If you plan to swap the exposed hinges for modern concealed ones, you’ll have significant work to do filling old screw holes and potentially re-drilling the doors. If you’re keeping them, please assess their condition. Do they need to be removed and spray-painted? Do you like the black, or would a different metallic finish work better with your design plan? This hardware decision will dictate much of the final look.
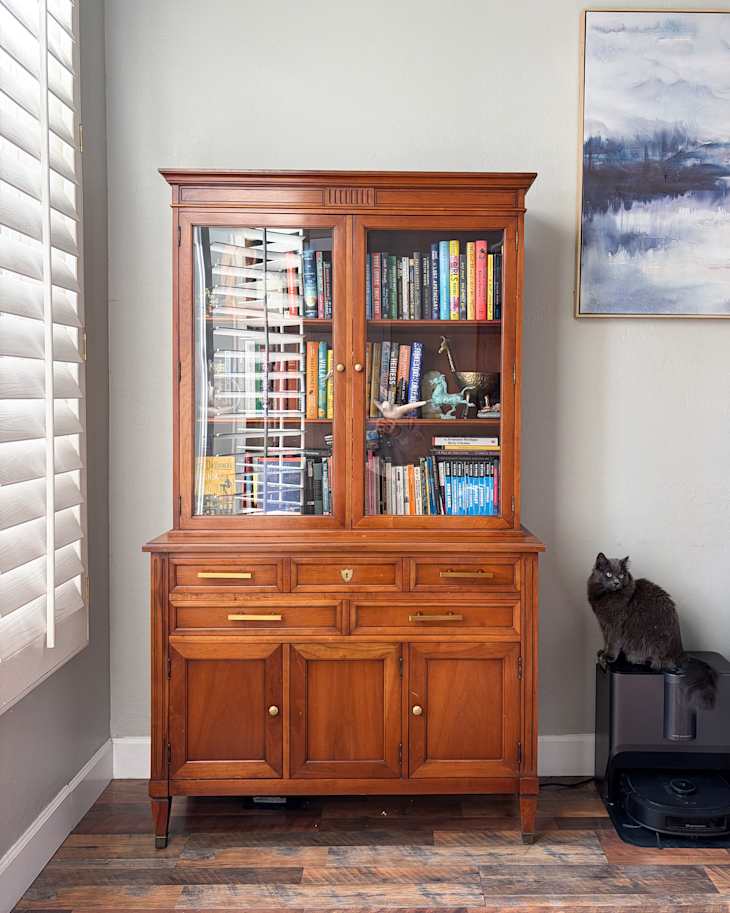
14. Warm Up a Neutral Room with a Classic Cherry Wood Hutch
This entire look is a beautiful exercise in balance. The formula is approximately 70% cool neutrals (the light grey walls, white shutters, and white trim) and 30% warmth (the deep, reddish tones of the cherry wood hutch). This high-contrast approach allows the hutch to be the undeniable star of the show. The 10% accent of brass hardware and colorful books adds just enough sparkle and personality without competing for attention. It’s a classic recipe for a reason.
|
📋 Copy HEX 🔗 Share |
The reason this simple setup feels so put-together is the interplay of textures and lines. The strong vertical and horizontal lines of the hutch, the louvered shutters, and the window panes create a subtle, pleasing grid. This structure is then softened by the varied shapes of the books and decor inside the hutch and the organic forms in the abstract painting next to it. It’s this combination of rigid geometry and soft, personal touches that makes the space feel both orderly and lived-in.
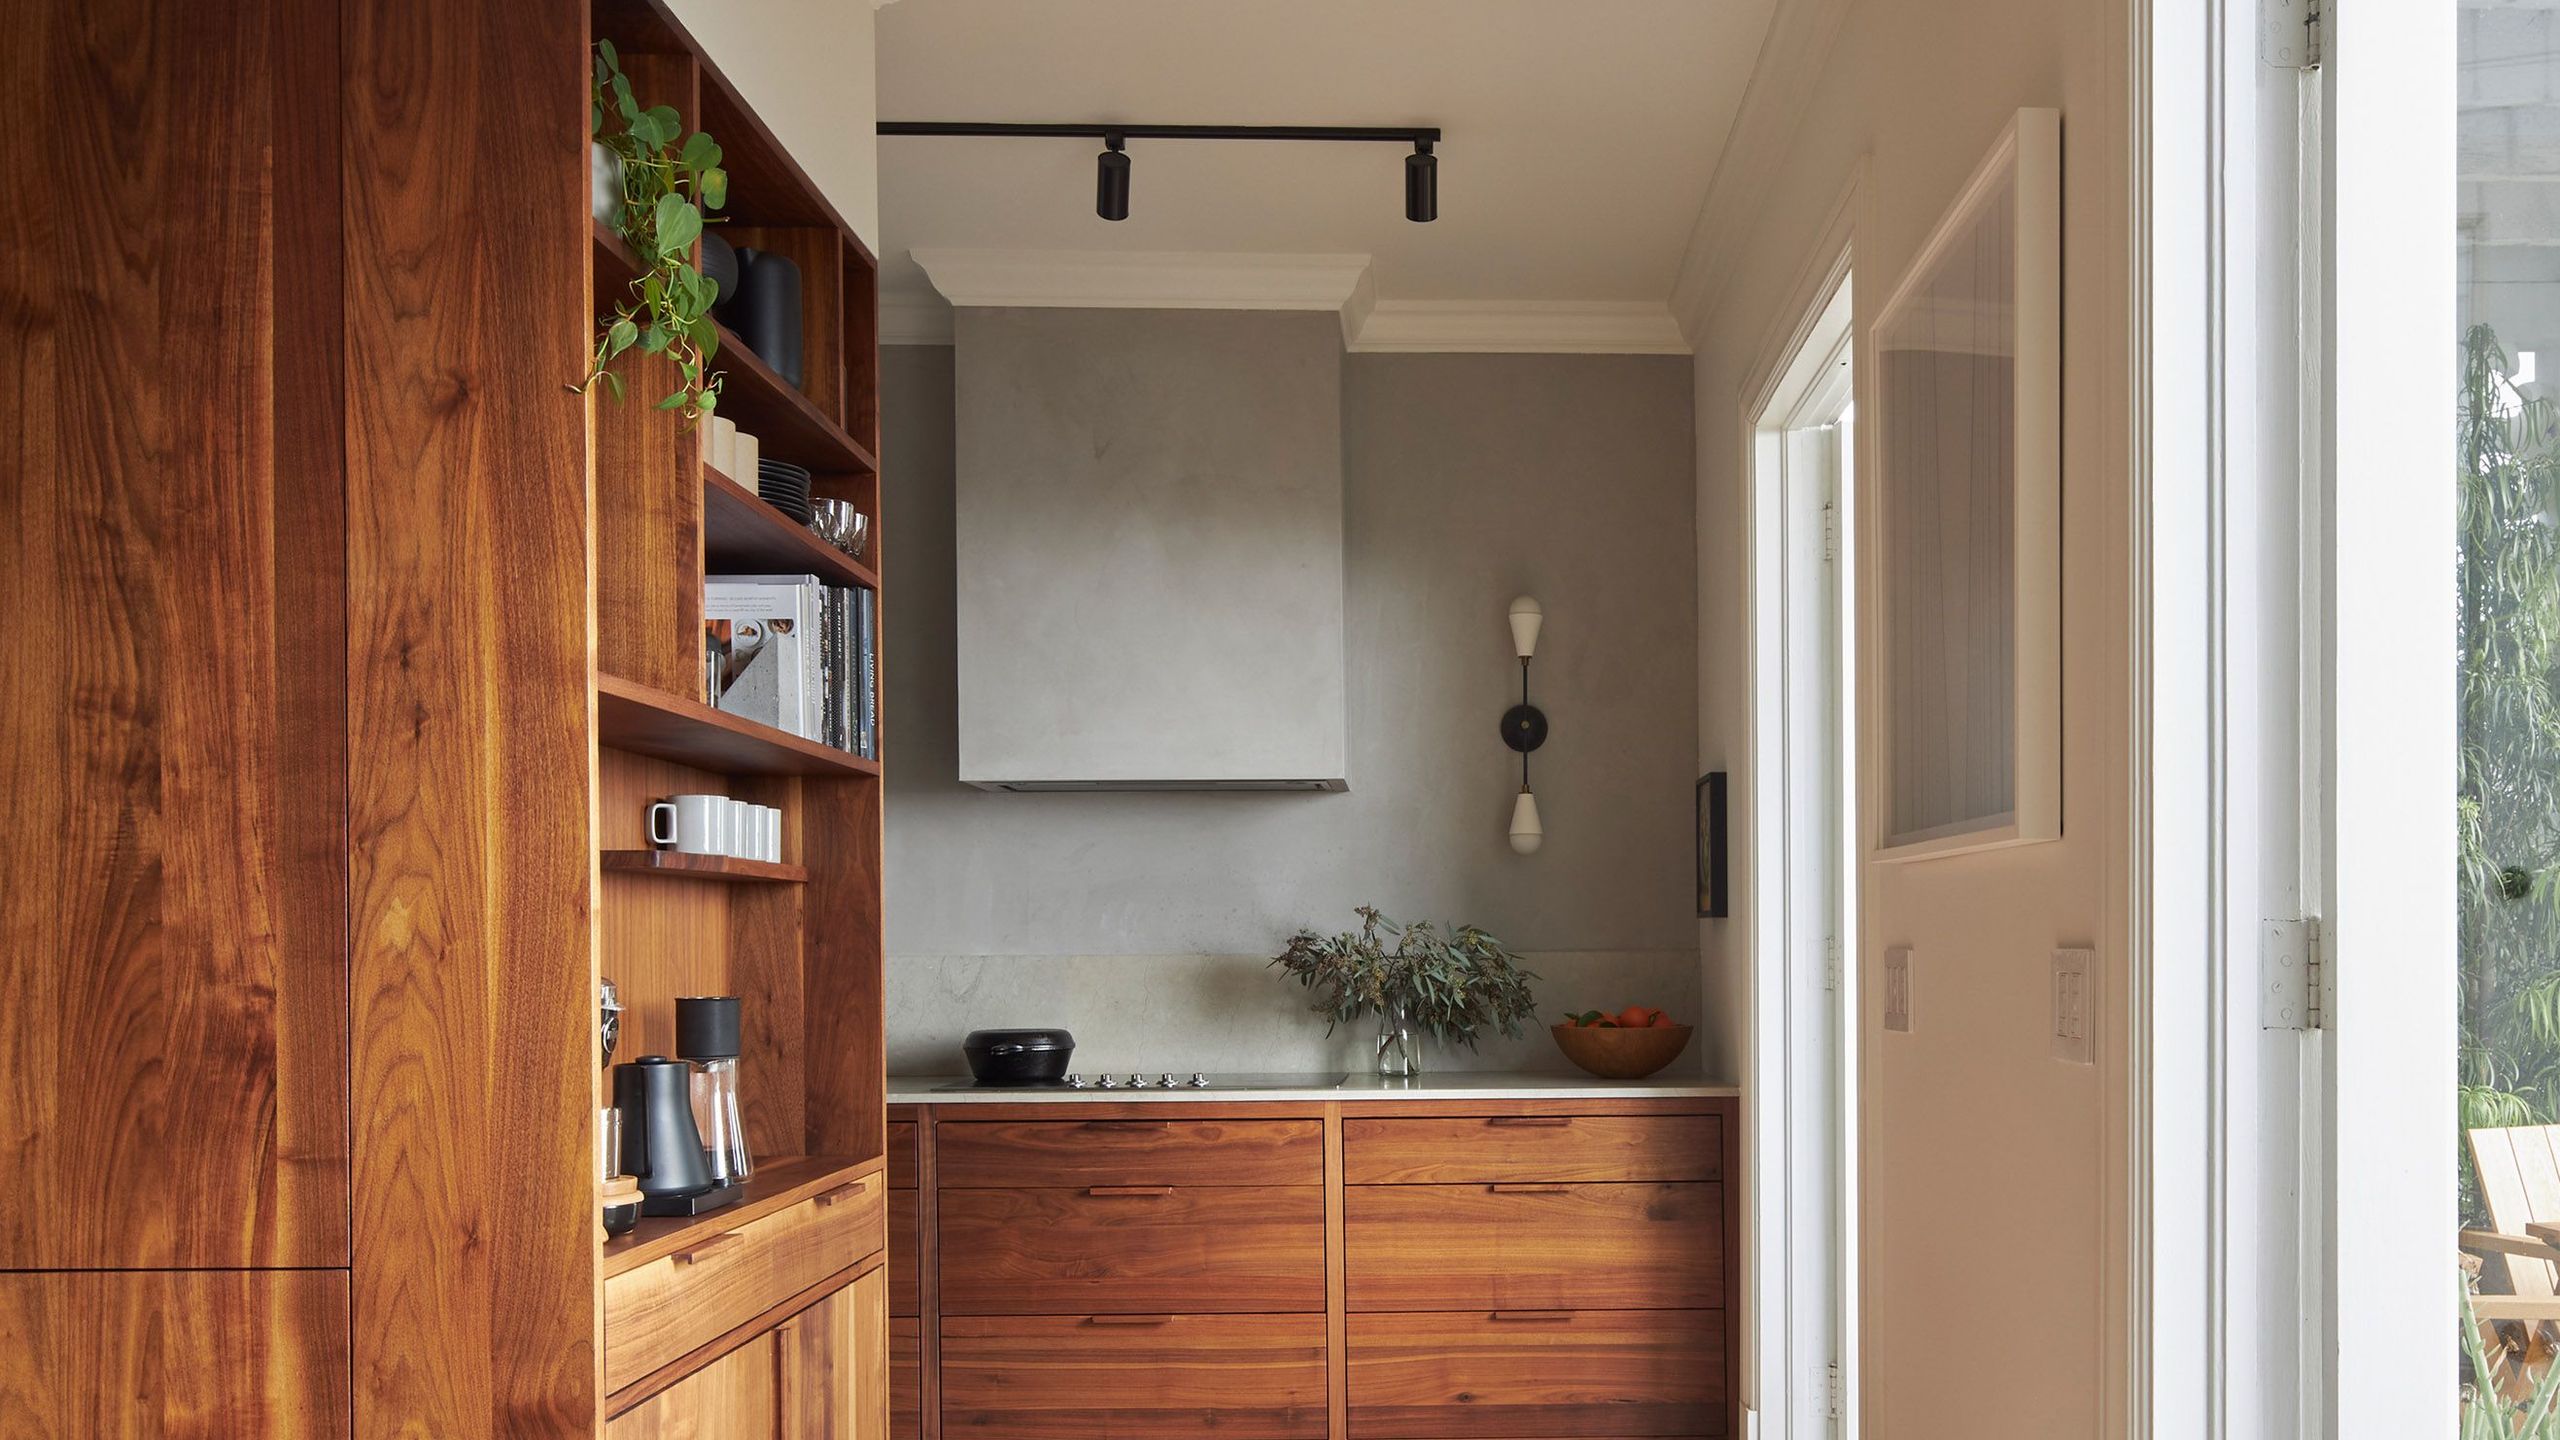
15. Mix Warm Wood, Grey Plaster, and White Countertops
A plaster-finish range hood or wall is a stunning way to add texture, but it requires specific care. Unlike a tiled or painted wall, you can’t just scrub it with an all-purpose cleaner. Grease splatters should be blotted immediately. For cleaning, use a soft cloth with a mild pH-neutral cleaner and water, and gently dab rather than rub. The raw, matte texture can show marks more easily, so it’s best for those who are diligent about wiping up splashes as they happen. Sealing the plaster can improve its resistance to stains.
|
📋 Copy HEX 🔗 Share |
To prevent a modern kitchen with mixed materials from feeling disjointed, create a ‘bridge’ element that connects the various finishes. Here, the black track lighting and black wall sconce serve that purpose. The black finish ties together the warm wood, the cool grey plaster, and the white countertops, providing a cohesive graphic line that runs through the space. Using a consistent metal finish for hardware and lighting is one of the easiest ways to unify a palette of diverse materials.
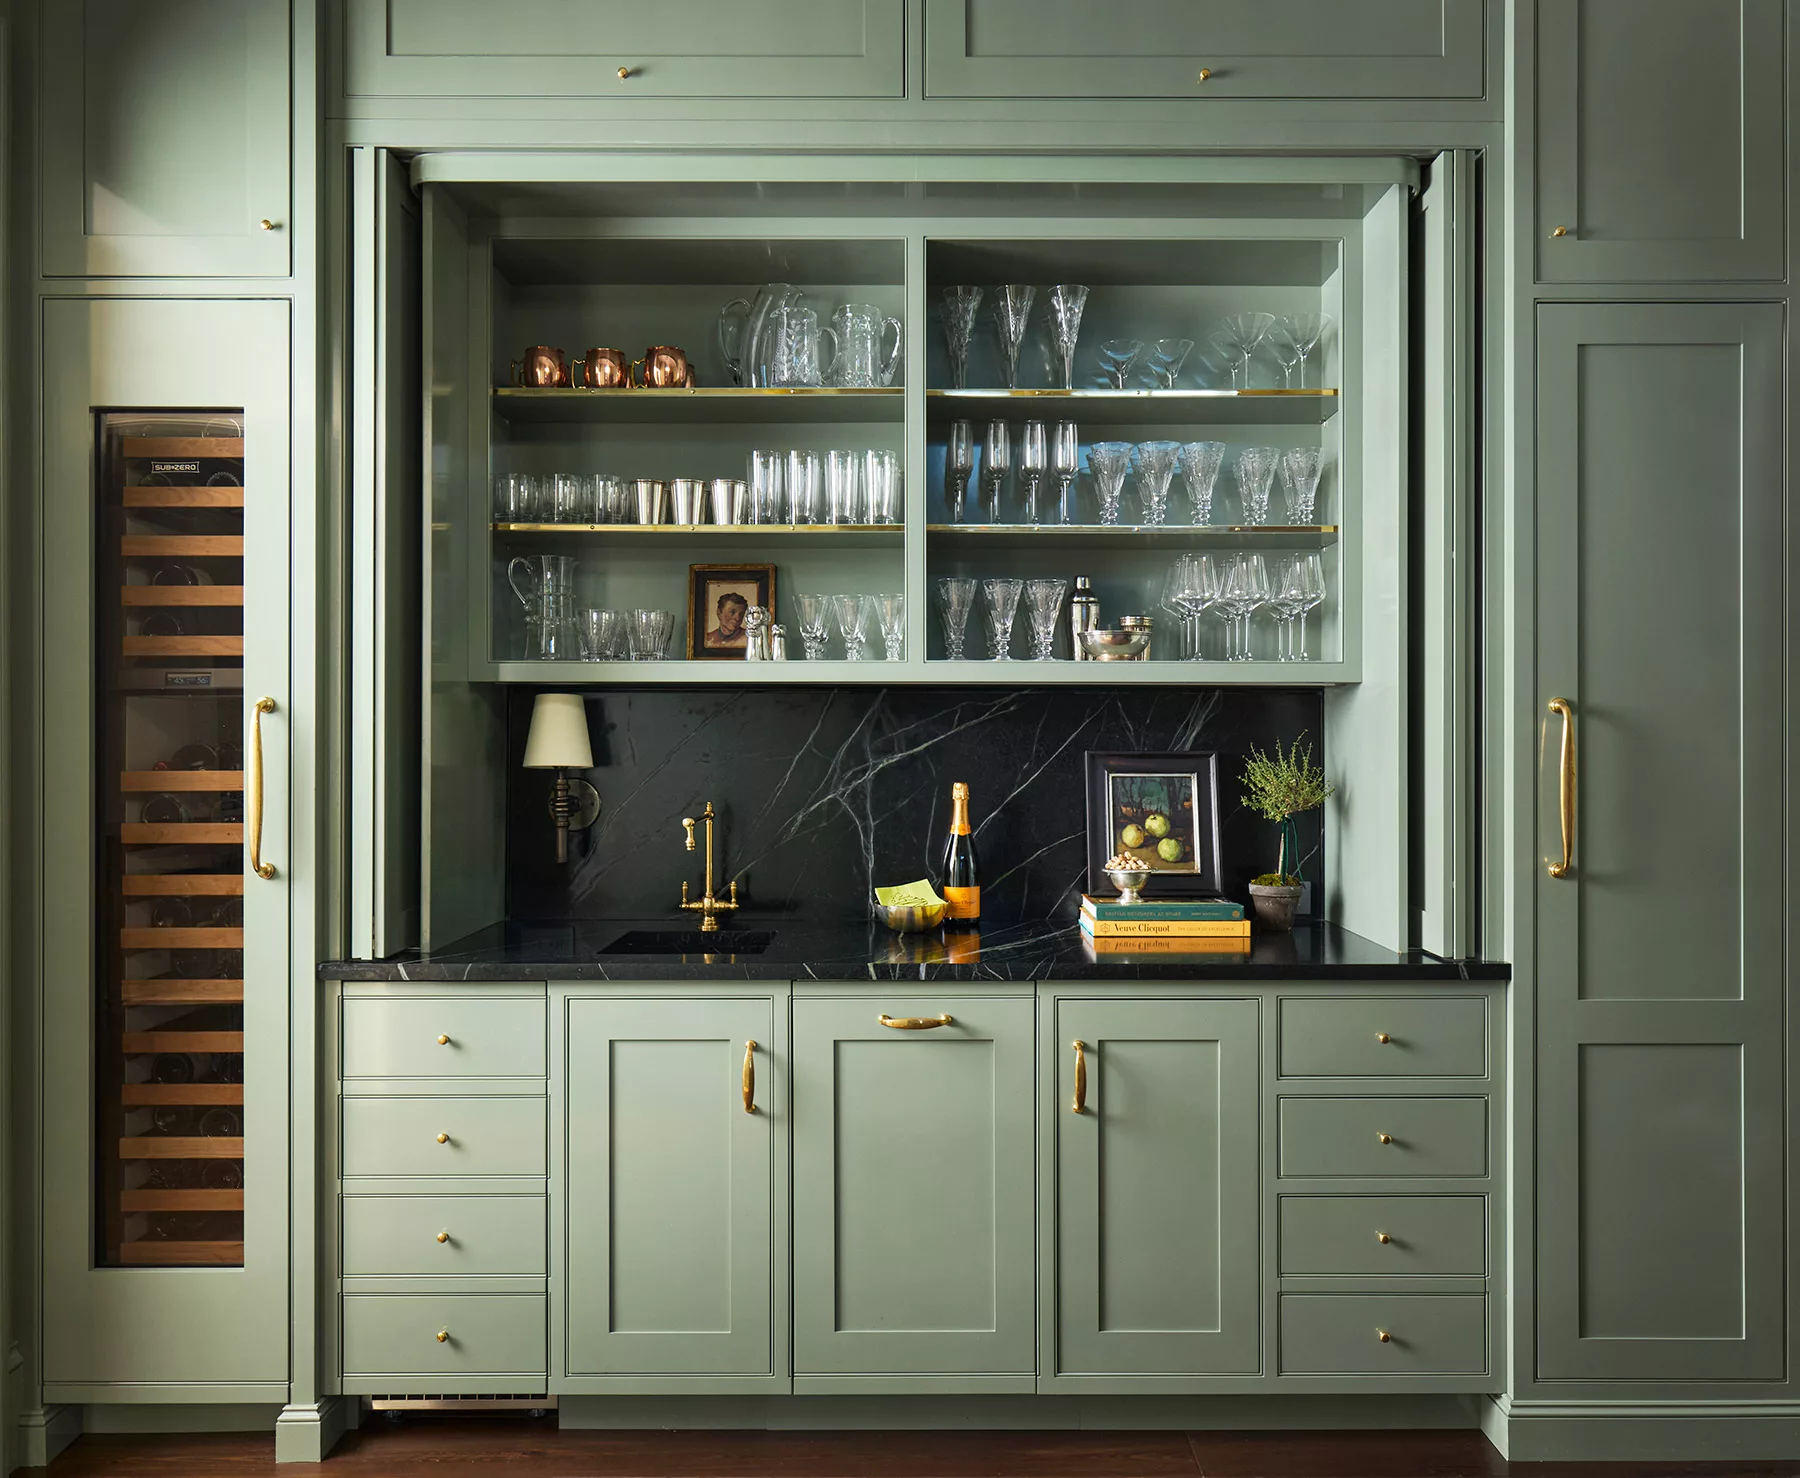
16. Design a Sophisticated Sage Green Bar with a Black Marble Backsplash
The black marble backsplash is the undeniable showstopper. While the sage green cabinetry is beautiful and on-trend, the dramatic, deep black marble with its stark white veining provides a powerful focal point and an immediate sense of luxury. It creates a dark, moody backdrop that makes the glassware and brass hardware glitter, turning a simple serving area into a glamorous home bar. This design is a much more dramatic approach than the coffee bar seen in Idea #22.
|
📋 Copy HEX 🔗 Share |
A built-in bar hutch like this is a fantastic use of space, but it needs the right dimensions to work. You need a wall section at least 4-5 feet wide to accommodate the base cabinets, countertop, and upper display cabinets without feeling cramped. A standard counter depth of 24 inches is ideal, but you could get away with 18 inches in a tighter space. Ceiling height should be at least 8 feet to allow for upper cabinets that are both functional and visually balanced.
17. Embrace Vintage Charm with a Dark-Painted Hutch
This look is successful because it leans into the hutch’s vintage character instead of trying to erase it. The matte, dark paint finish modernizes the piece and makes its ornate silhouette stand out while still highlighting the original carved details on the doors. Displaying just a few carefully chosen items—a framed photo, a couple of books, a decorative jar—prevents it from looking like a cluttered antique. The large, modern fiddle-leaf fig tree next to it provides a perfect contemporary counterpoint.

|
📋 Copy HEX 🔗 Share |
Before painting a vintage piece, there are a few key things to check:
- Assess the Wood: Is it a valuable antique made of solid mahogany or a less precious pine piece? If you suspect it’s highly valuable, consult an expert before painting.
- Check for Damage: Inspect for any necessary repairs. Do drawers stick? Are legs wobbly? Fix these structural issues before you start any cosmetic work.
- Test for Lead Paint: If the piece has an old, chipping paint finish, use a lead test kit. If it’s positive, you’ll need to follow specific safety protocols for stripping or encapsulating it.
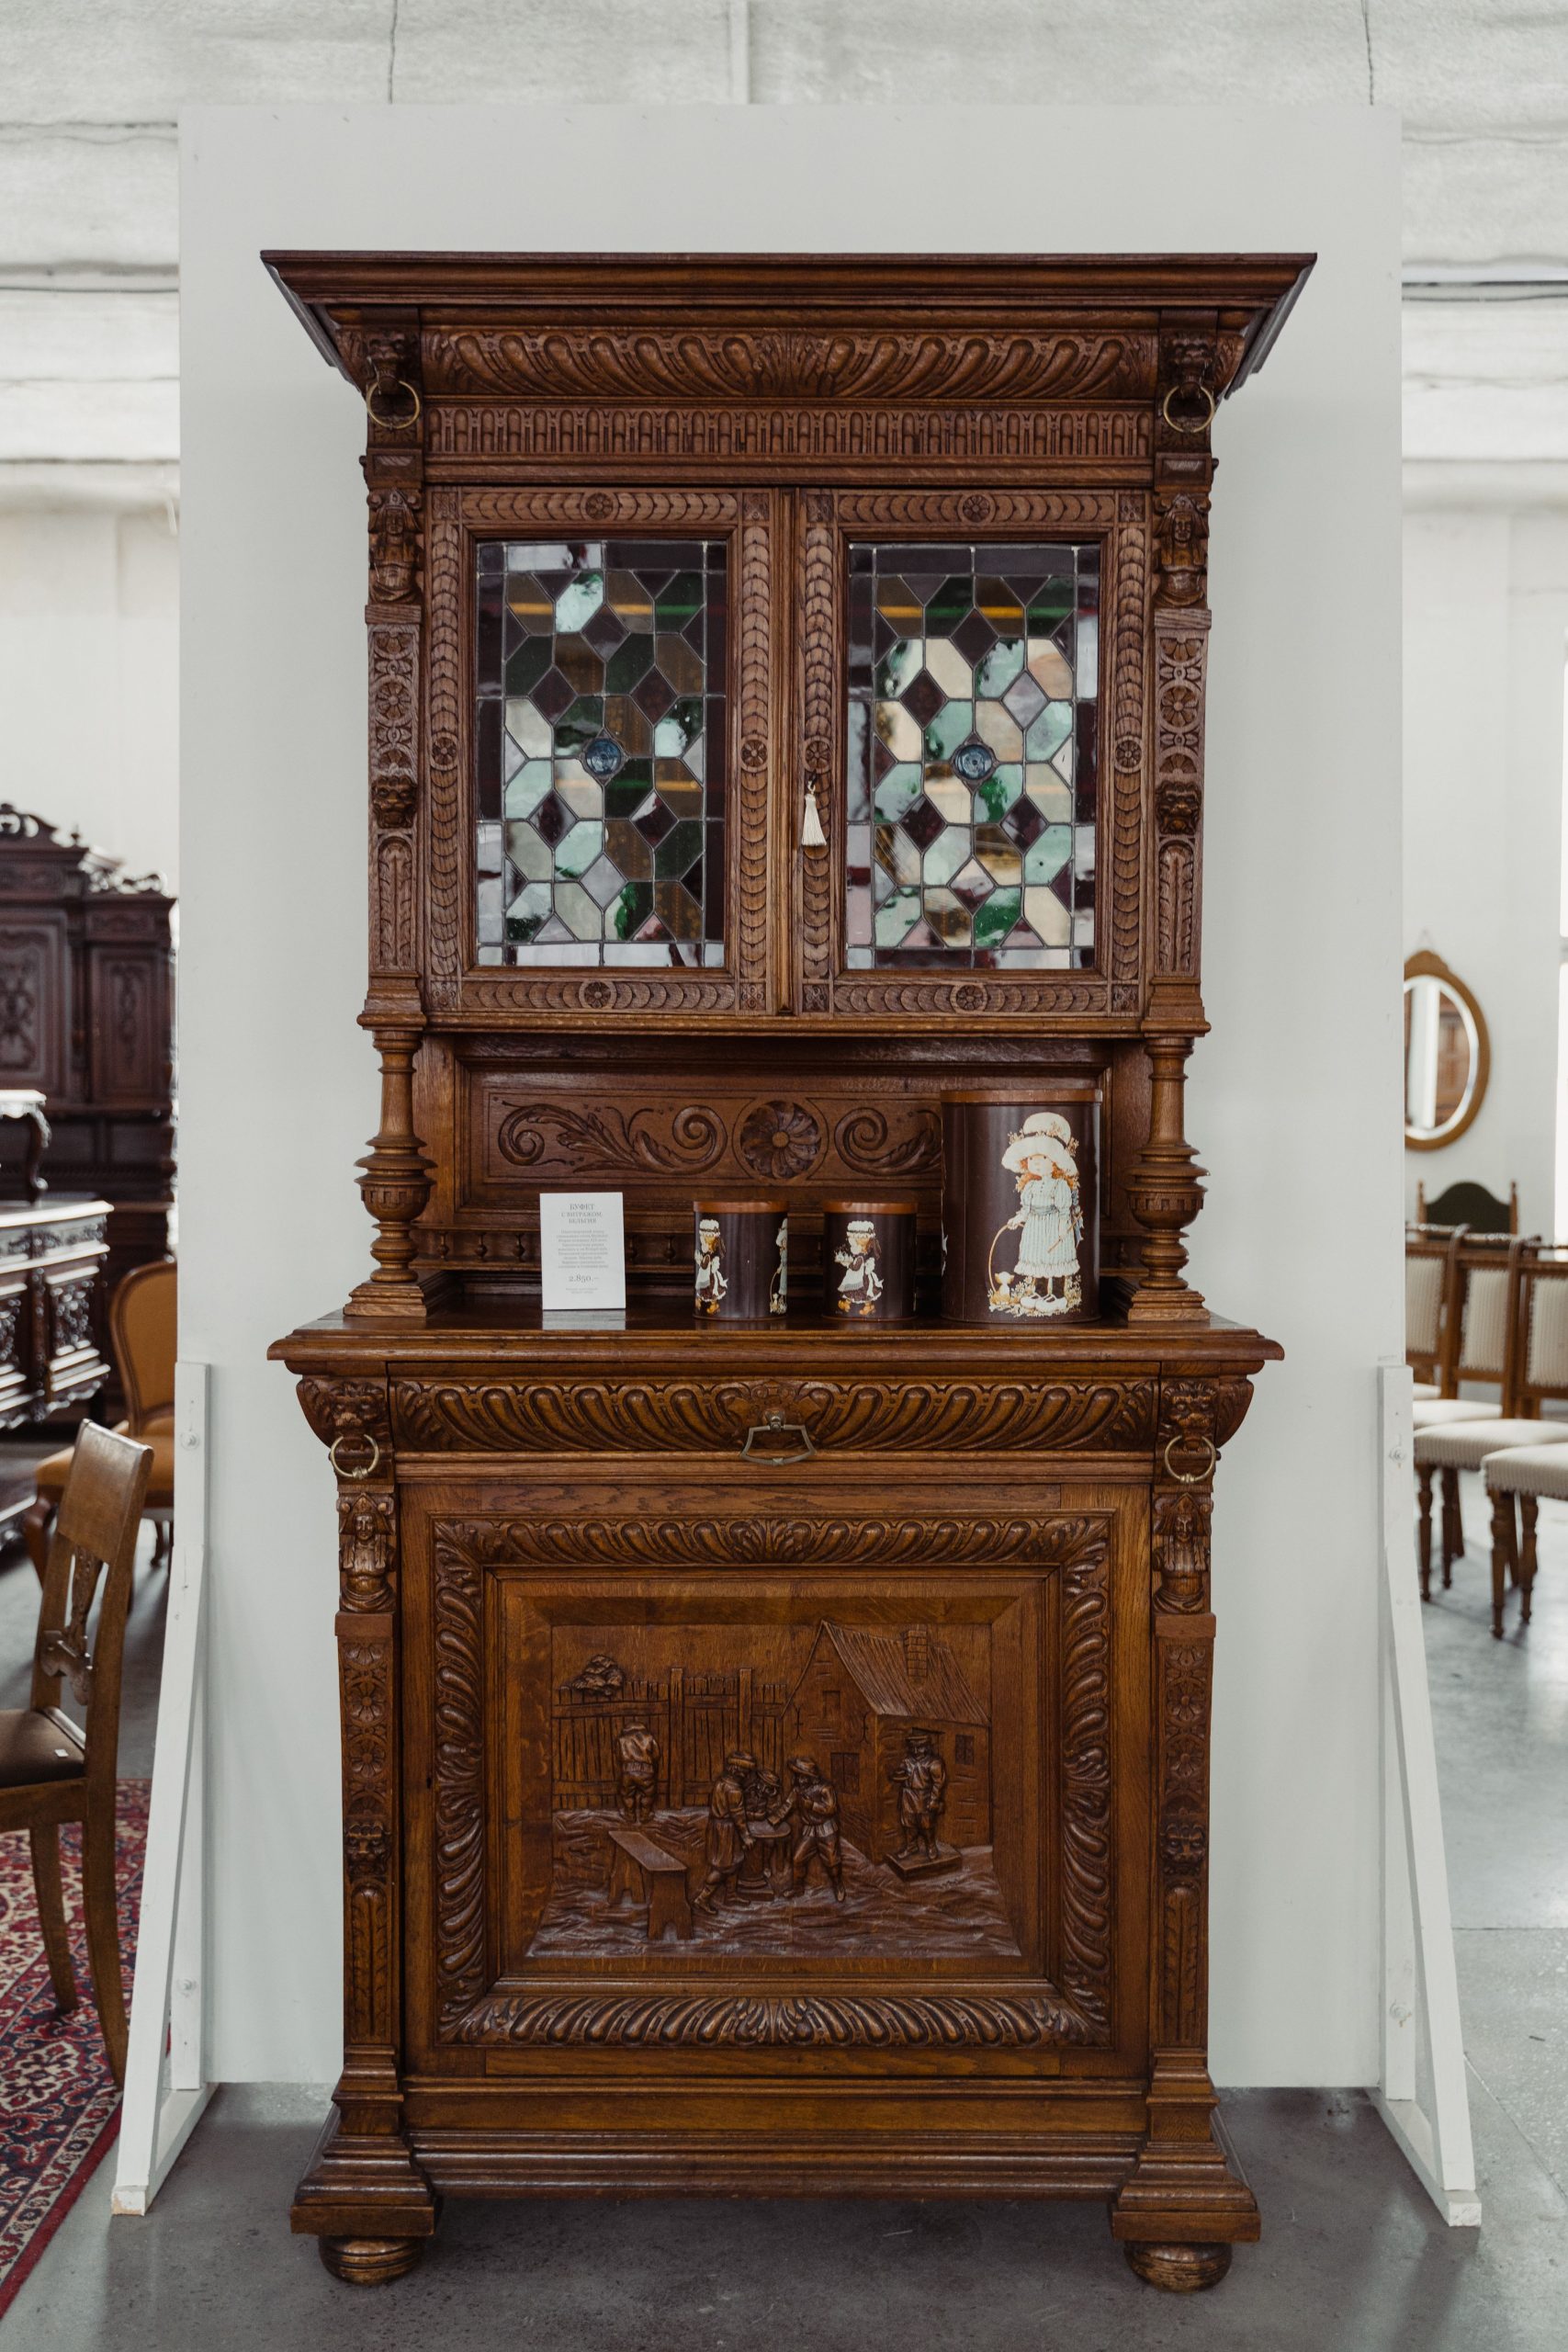
18. Showcase an Intricately Carved Antique Hutch as a Work of Art
The single element that makes this piece extraordinary is the exceptional level of craftsmanship in its wood carvings. From the figural scene on the lower panel to the intricate patterns framing the stained glass, the carving is the entire story. This isn’t just a hutch; it’s a piece of sculpture. Placing it against a plain white wall is a smart choice, as any competing pattern or color would detract from the stunning, detailed woodwork. This is a piece you display as art, first and foremost.
|
📋 Copy HEX 🔗 Share |
A hutch this ornate and grand is a statement piece that requires a very specific environment to shine. It will overwhelm a small room. It needs high ceilings (at least 9-10 feet) and plenty of breathing room around it. Trying to squeeze such a piece into a standard-sized dining room with 8-foot ceilings would make the room feel cramped and the hutch look comically oversized. You need the right scale to make a piece this size work.
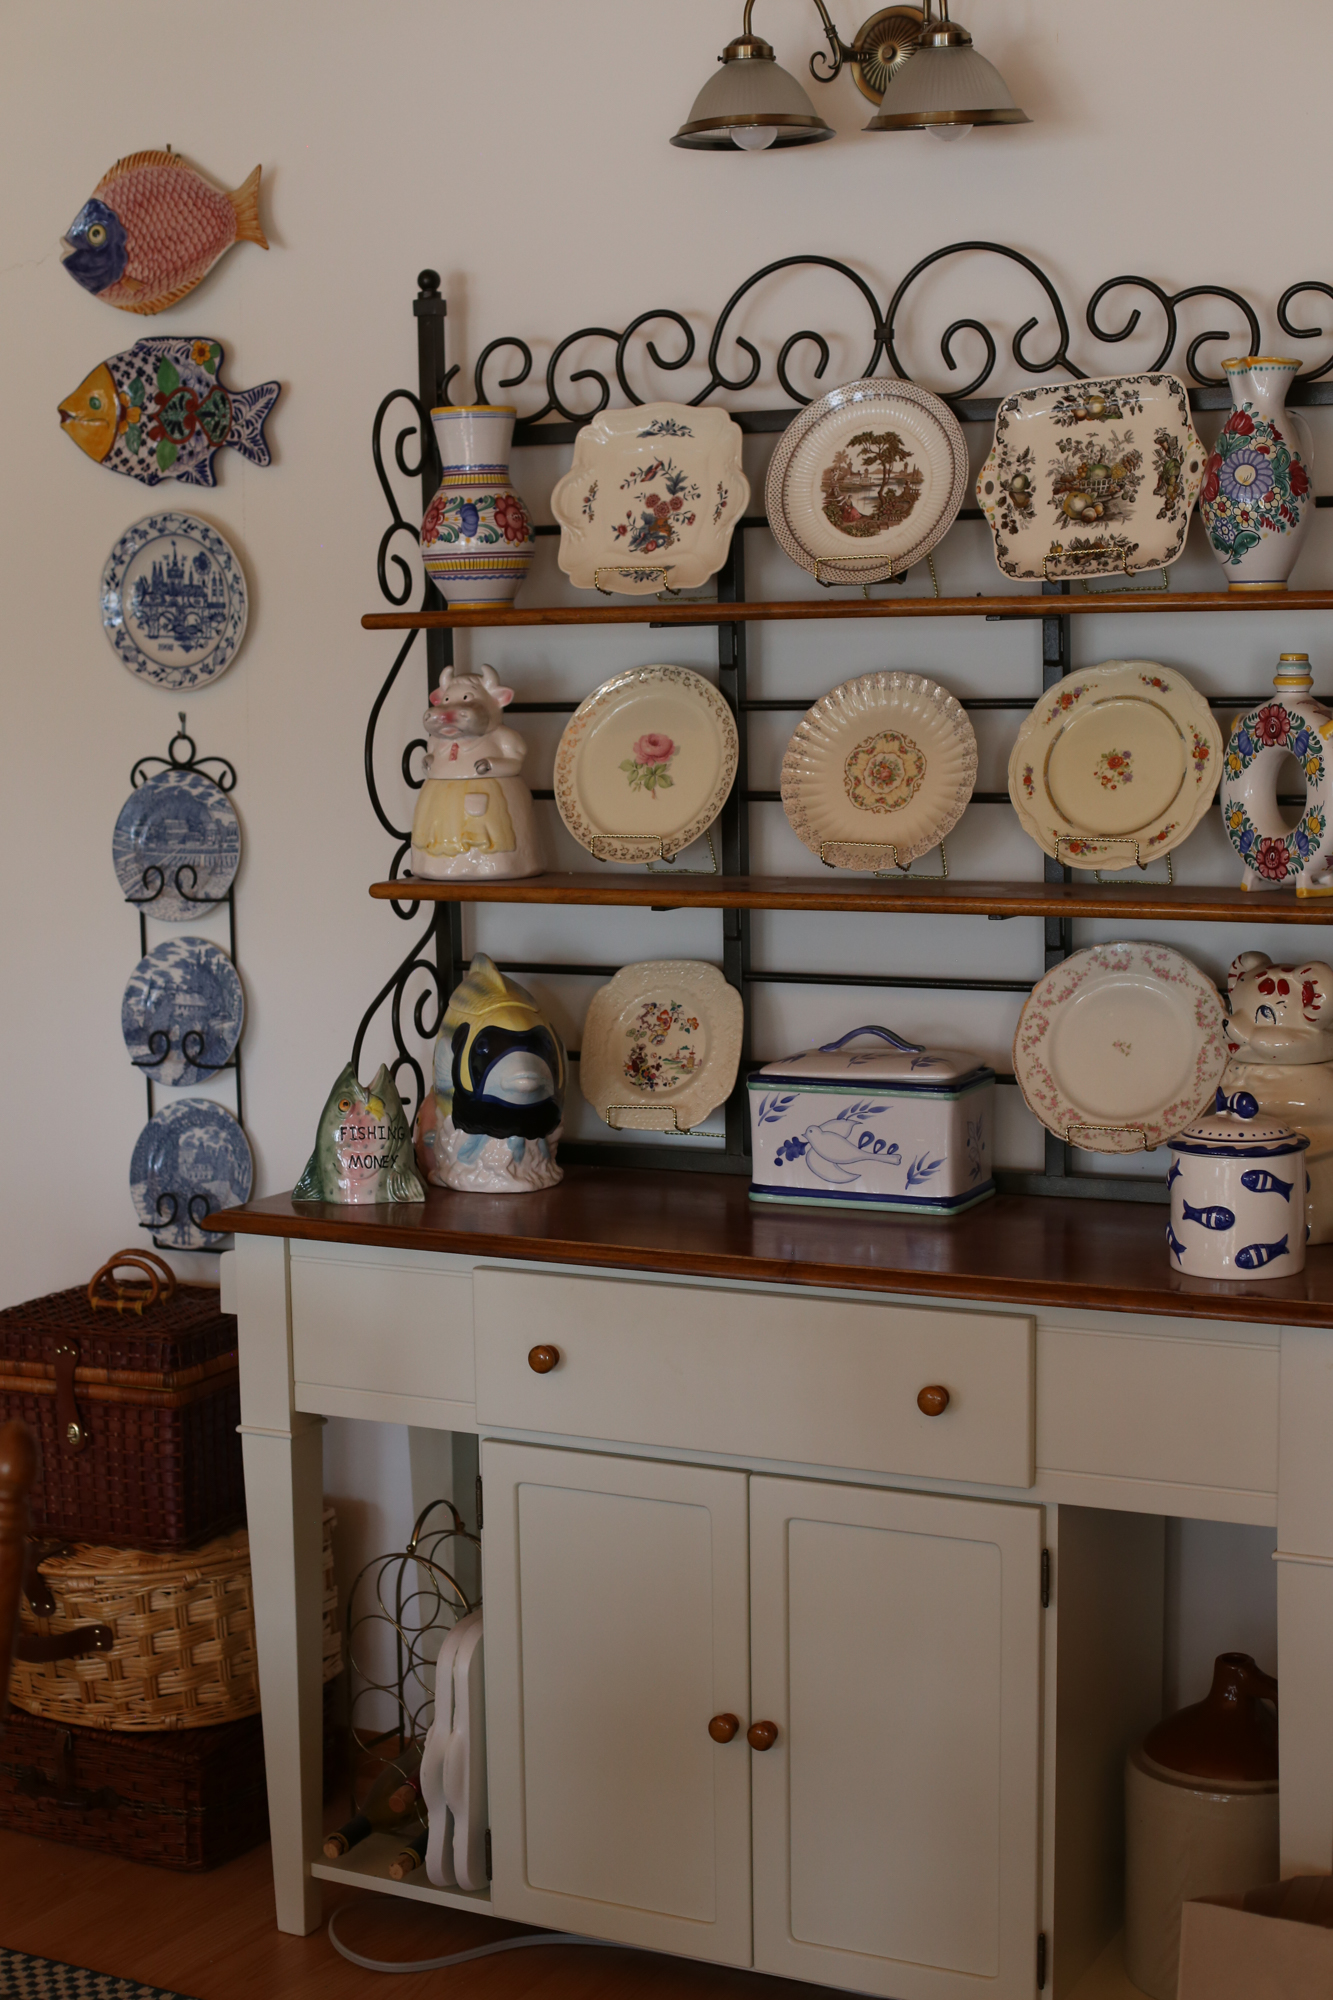
19. Create an Eclectic Display with Wrought Iron and Ceramic Plates
This look is a beautiful example of how to make a collection feel curated rather than cluttered. The key is the use of a unifying structure—the black wrought iron shelving unit. This frame gives the diverse assortment of ceramic plates, jars, and vases a cohesive home, organizing the ‘chaos.’ The repetition of blue and white throughout the display, both on the shelves and on the wall, further ties everything together into a pleasing, rhythmic whole. It feels personal and collected over time.
|
📋 Copy HEX 🔗 Share |
You don’t need a formal iron shelving unit to get this look. You can get a similar ‘organized collection’ vibe by installing simple floating shelves above a hutch or sideboard. Paint them black to get that same graphic, structural feel. Then, scour thrift stores, flea markets, and Target for blue and white plates and decorative ceramics. The fun is in the hunt, and you can build a beautiful collection for very little money.
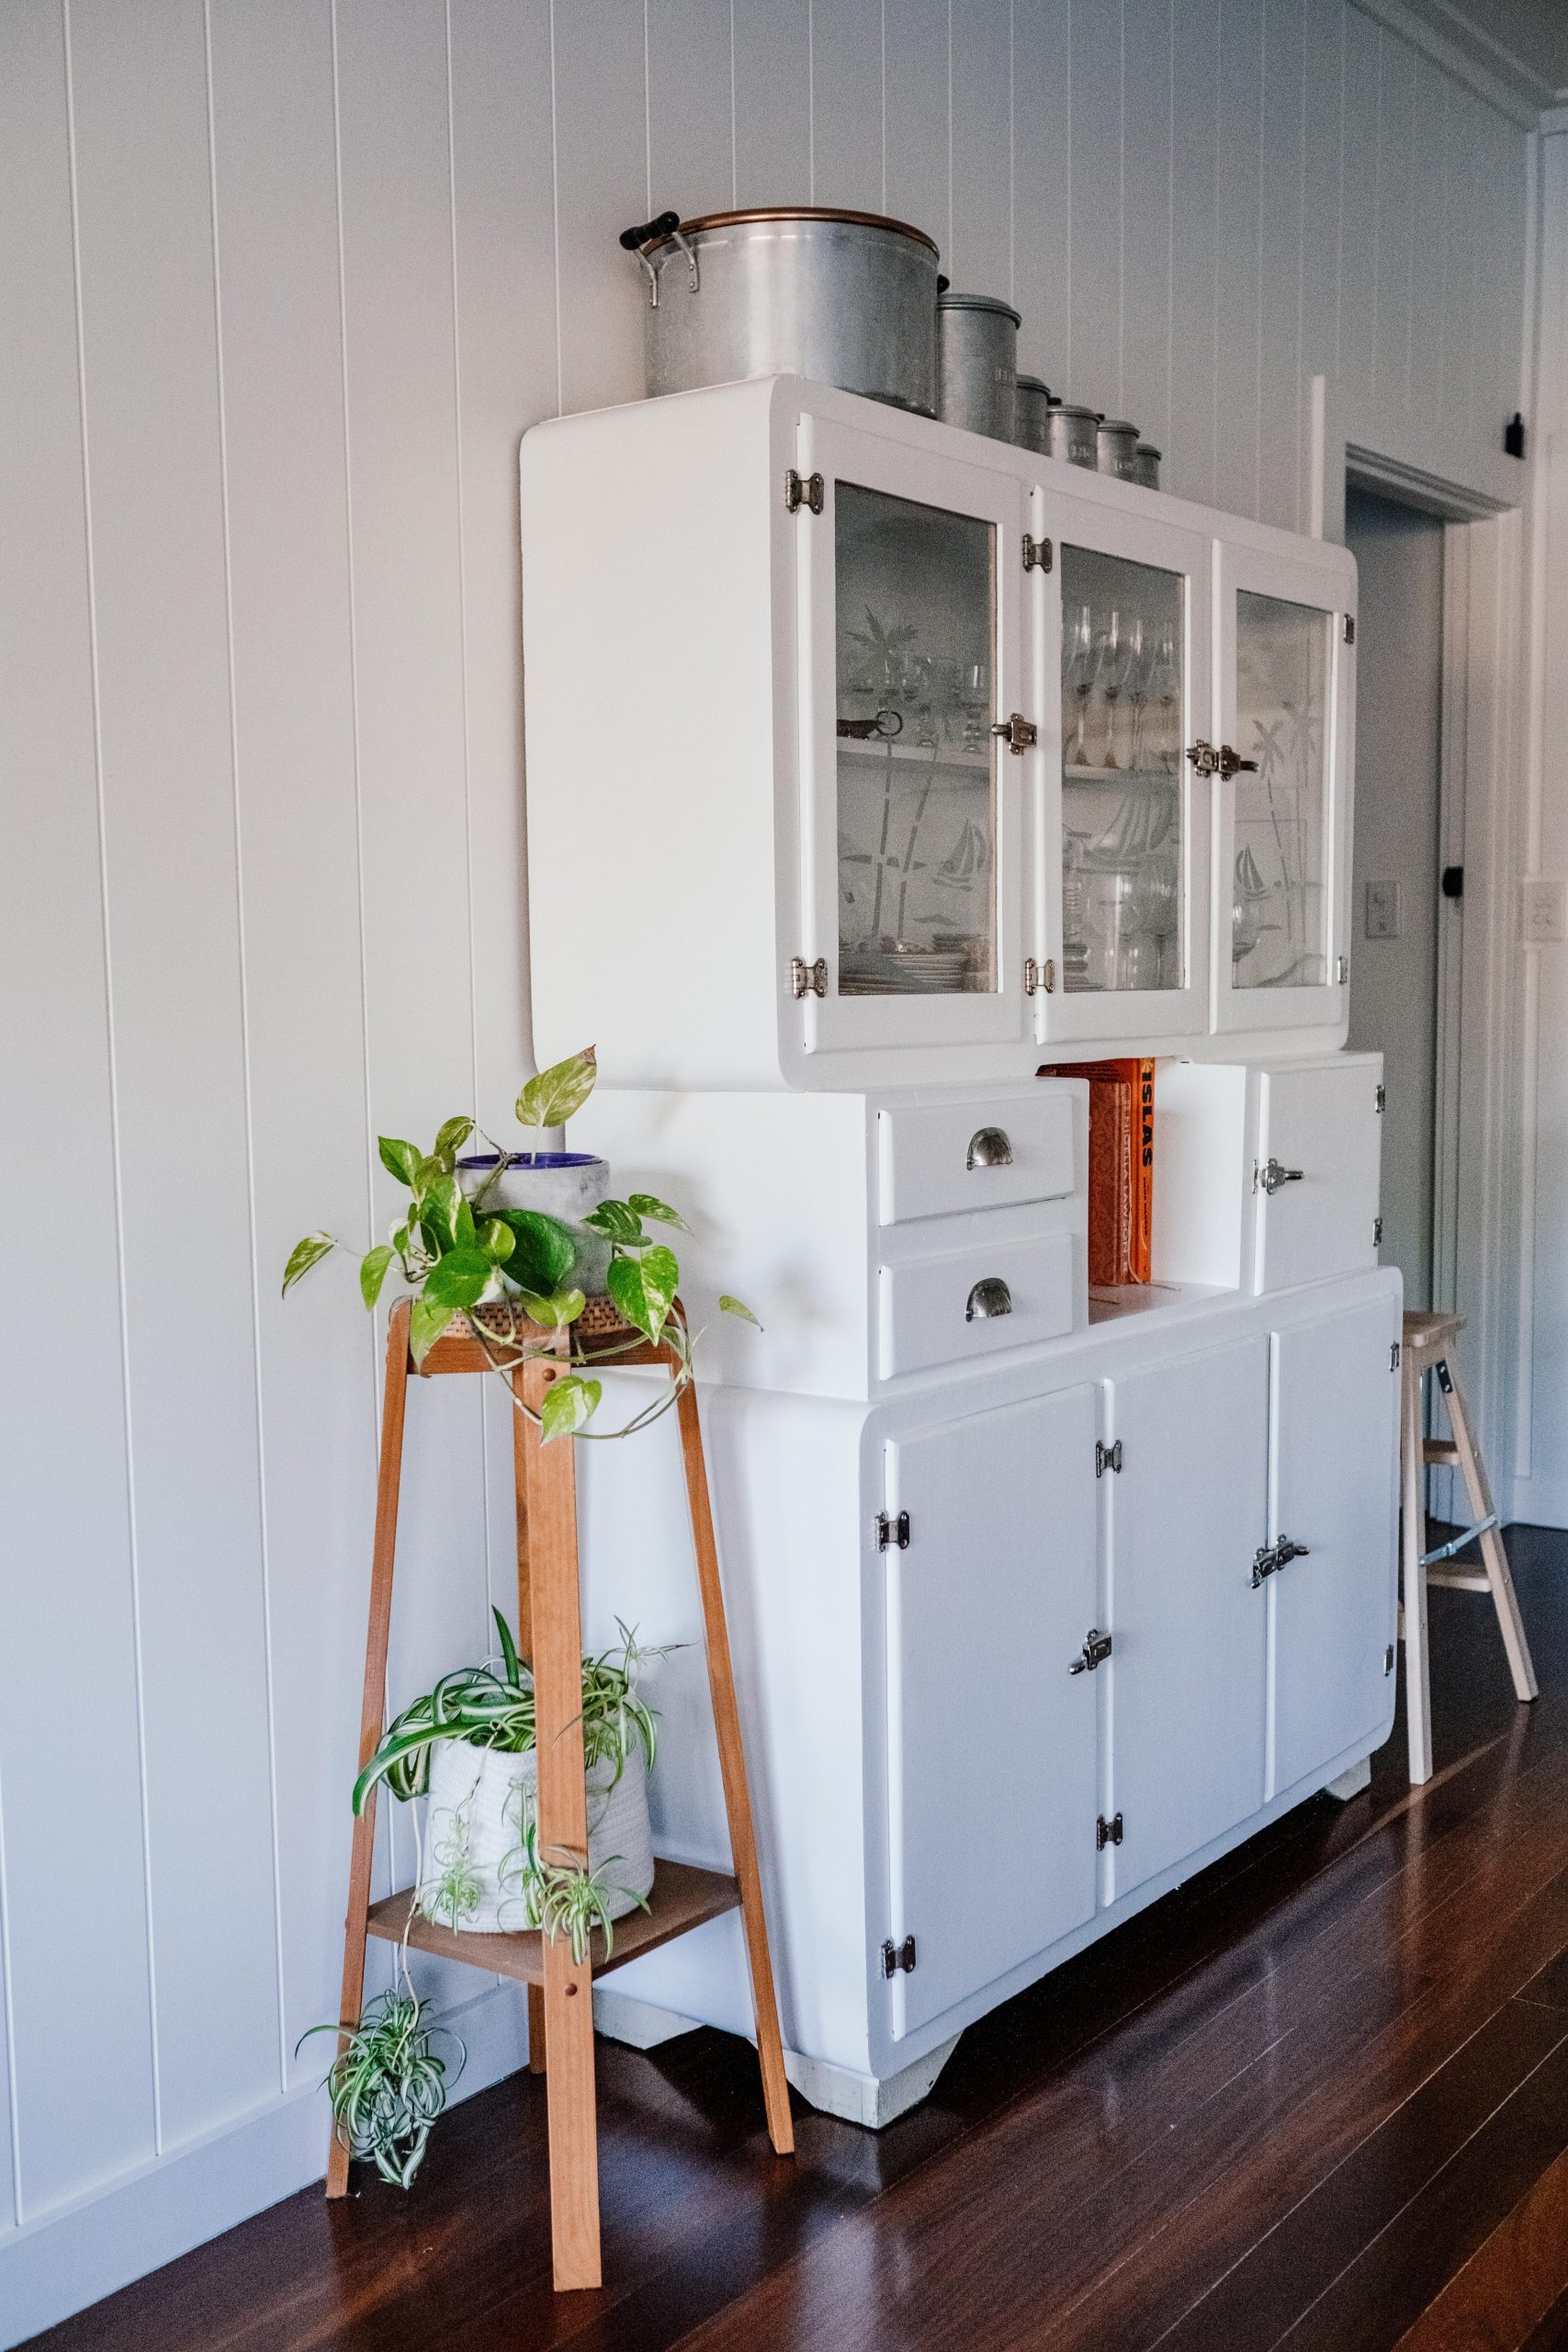
20. Achieve a Clean, Retro Look with a White Hutch and Green Plants
A tall, narrow hutch like this is a fantastic solution for smaller spaces. This one probably measures around 30-36 inches wide and 70-80 inches tall, making it ideal for a dining nook, a small kitchen, or even a wide hallway. Its verticality draws the eye upward, creating an illusion of height and making the room feel more spacious. The bright white color and glass doors also contribute to a feeling of lightness and openness, preventing it from weighing down the space.
|
📋 Copy HEX 🔗 Share |
The formula here is simple and effective: 60% clean retro lines (the white hutch and paneled wall), 30% natural, organic texture (the green plants, wood stand, and woven pots), and 10% contrasting dark floor. The severe contrast between the white furniture and the dark hardwood floor creates a bold, graphic foundation. The plants are essential; they breathe life into the otherwise monochrome scheme and keep it from feeling too sterile or clinical.
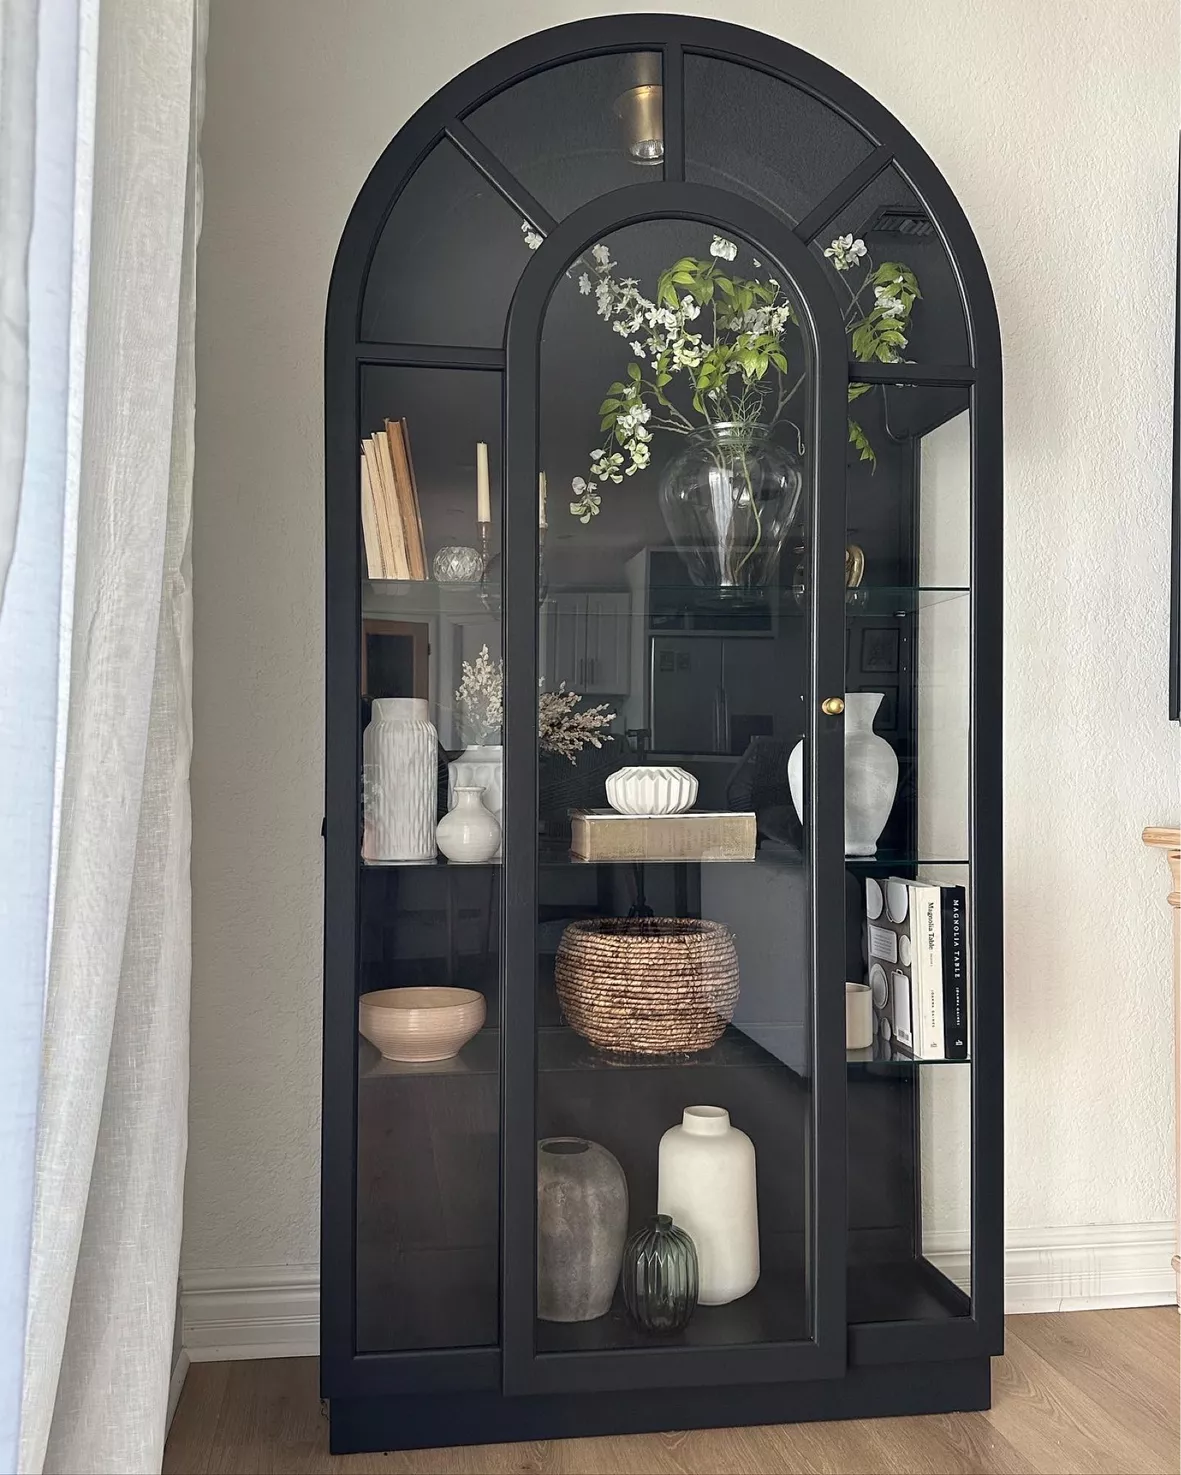
21. Style an Arched Black Hutch with Neutral, Textured Decor
When styling shelves with neutral decor, the key to making it look visually engaging is to focus on a variety of textures and shapes. Notice the mix here: the smooth, matte finish of some ceramic vases, the ribbed texture of others, the roughness of the woven bowl, the smooth pages of the books, and the fluffiness of the floral branches. This textural variety creates visual interest and depth, preventing the monochromatic palette from feeling flat or boring. Group items in threes and fives for a more dynamic composition.
|
📋 Copy HEX 🔗 Share |
The arched top is, without a doubt, the defining feature of this hutch. This simple curve transforms the piece from a basic rectangular cabinet into a strong architectural statement. The arch softens its silhouette and adds a sense of grace and elegance. It draws the eye upward and frames the items on the top shelf beautifully. While the black color is dramatic, it’s the arch that gives the hutch its unique and sophisticated personality.
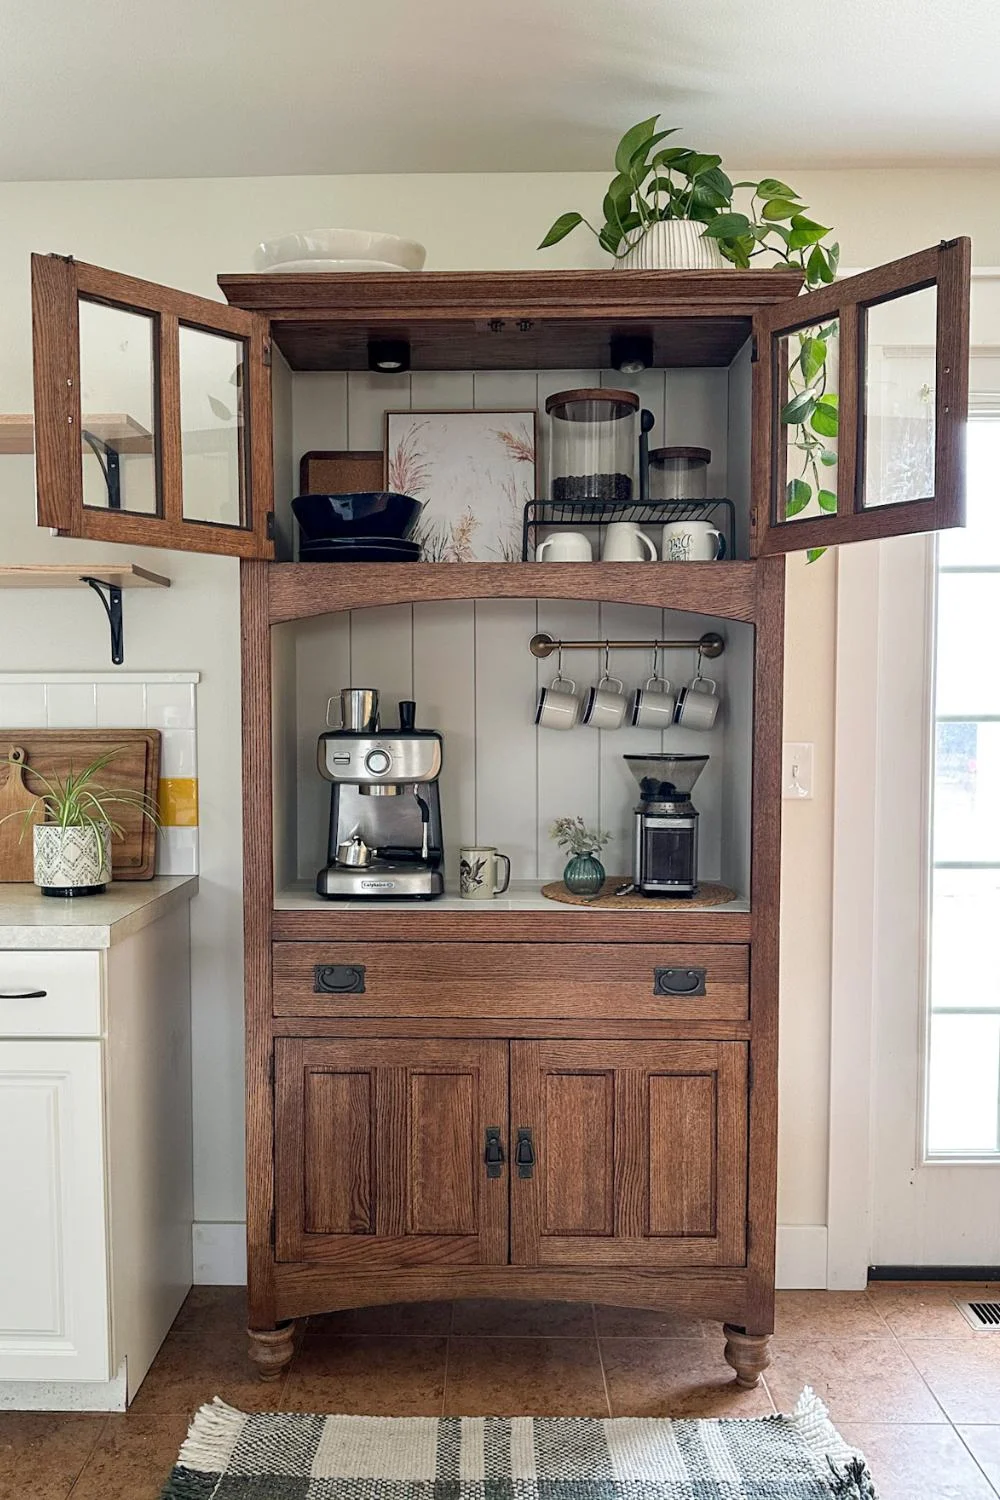
22. Turn a Dark Wood Hutch into a Functional Coffee Bar
Converting a hutch into a coffee station is a brilliant way to add function. Here’s how to do it effectively:
|
📋 Copy HEX 🔗 Share |
- Plan Your Layout: Designate zones. Place your coffee machine near an outlet. Decide where mugs, coffee beans, sugar, and other accessories will live.
- Add Task Lighting: If your hutch is in a dark corner, add under-cabinet LED light strips to illuminate your workspace.
- Drill for Cords: To keep things tidy, drill a small hole in the back of the hutch to run the power cords for your machine and grinder.
- Protect the Surface: Coffee-making can be messy. Place a small, attractive tray under your machine to catch any spills and protect the wood surface. A custom-cut piece of glass or plexiglass also works well.
- Use Vertical Space: As seen here, adding a small rail to hang mugs frees up valuable counter space.
This is a fantastic idea, but be realistic about your electrical situation. Many older hutches are placed on walls without conveniently located outlets. Running an extension cord across the floor or along the baseboard can look messy and create a tripping hazard. Before you commit to the coffee bar idea, make sure you have a safe and aesthetically pleasing way to get power to your coffee machine and grinder. You may need to have an electrician install a new outlet.
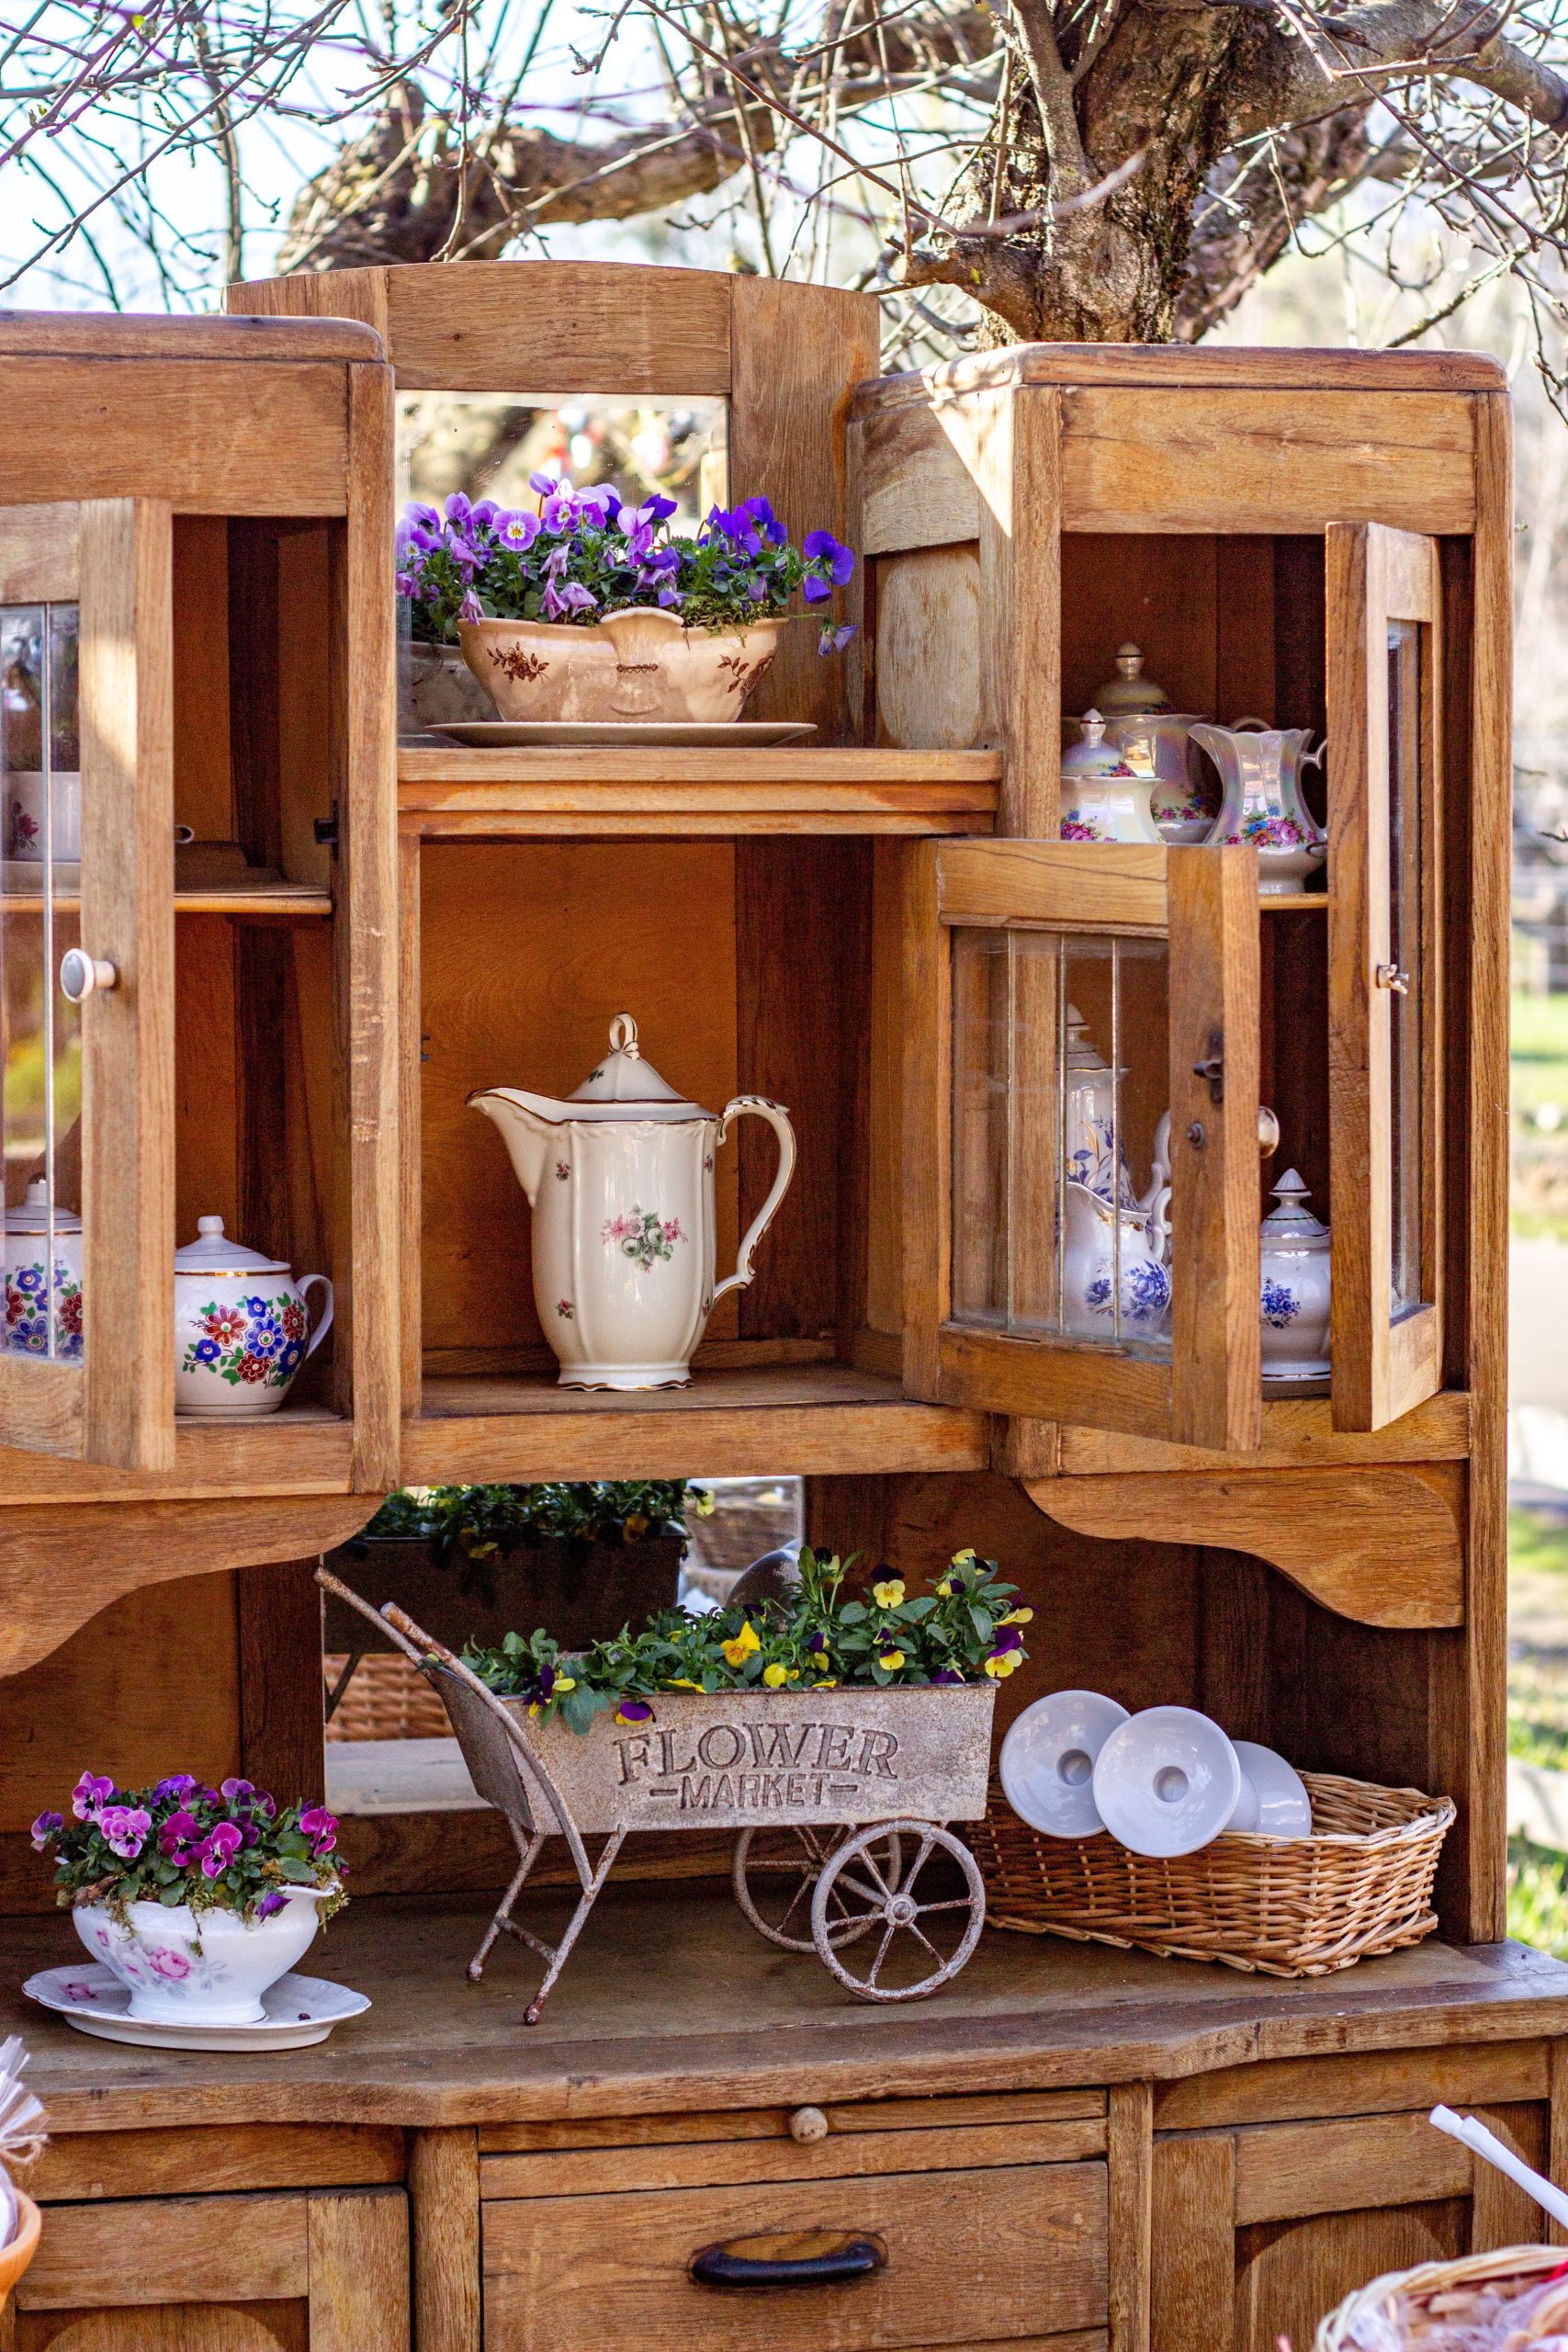
23. Style a Rustic Hutch with Floral Porcelain and Fresh Pansies
This hutch oozes charm because it masters the art of the ‘collected-over-time’ aesthetic. Nothing looks too perfect or brand new. The mix of different cabinet styles on the hutch itself, the variety of floral patterns on the porcelain, and the inclusion of real, living flowers creates a look that feels authentic and loved. The ‘Flower Market’ cart adds a whimsical touch that reinforces the country garden theme. It’s a carefully curated scene that manages to feel completely effortless.
|
📋 Copy HEX 🔗 Share |
As people continue to seek comfort and nostalgia in their homes, the ‘cottagecore’ and ‘country garden’ aesthetics have become more popular than ever. This hutch is a perfect embodiment of that trend. It’s not about sleek, minimalist design; it’s about creating a warm, inviting space that connects to nature and evokes a simpler time. Displaying floral china and fresh flowers is a direct way to bring that romantic, pastoral feeling indoors.
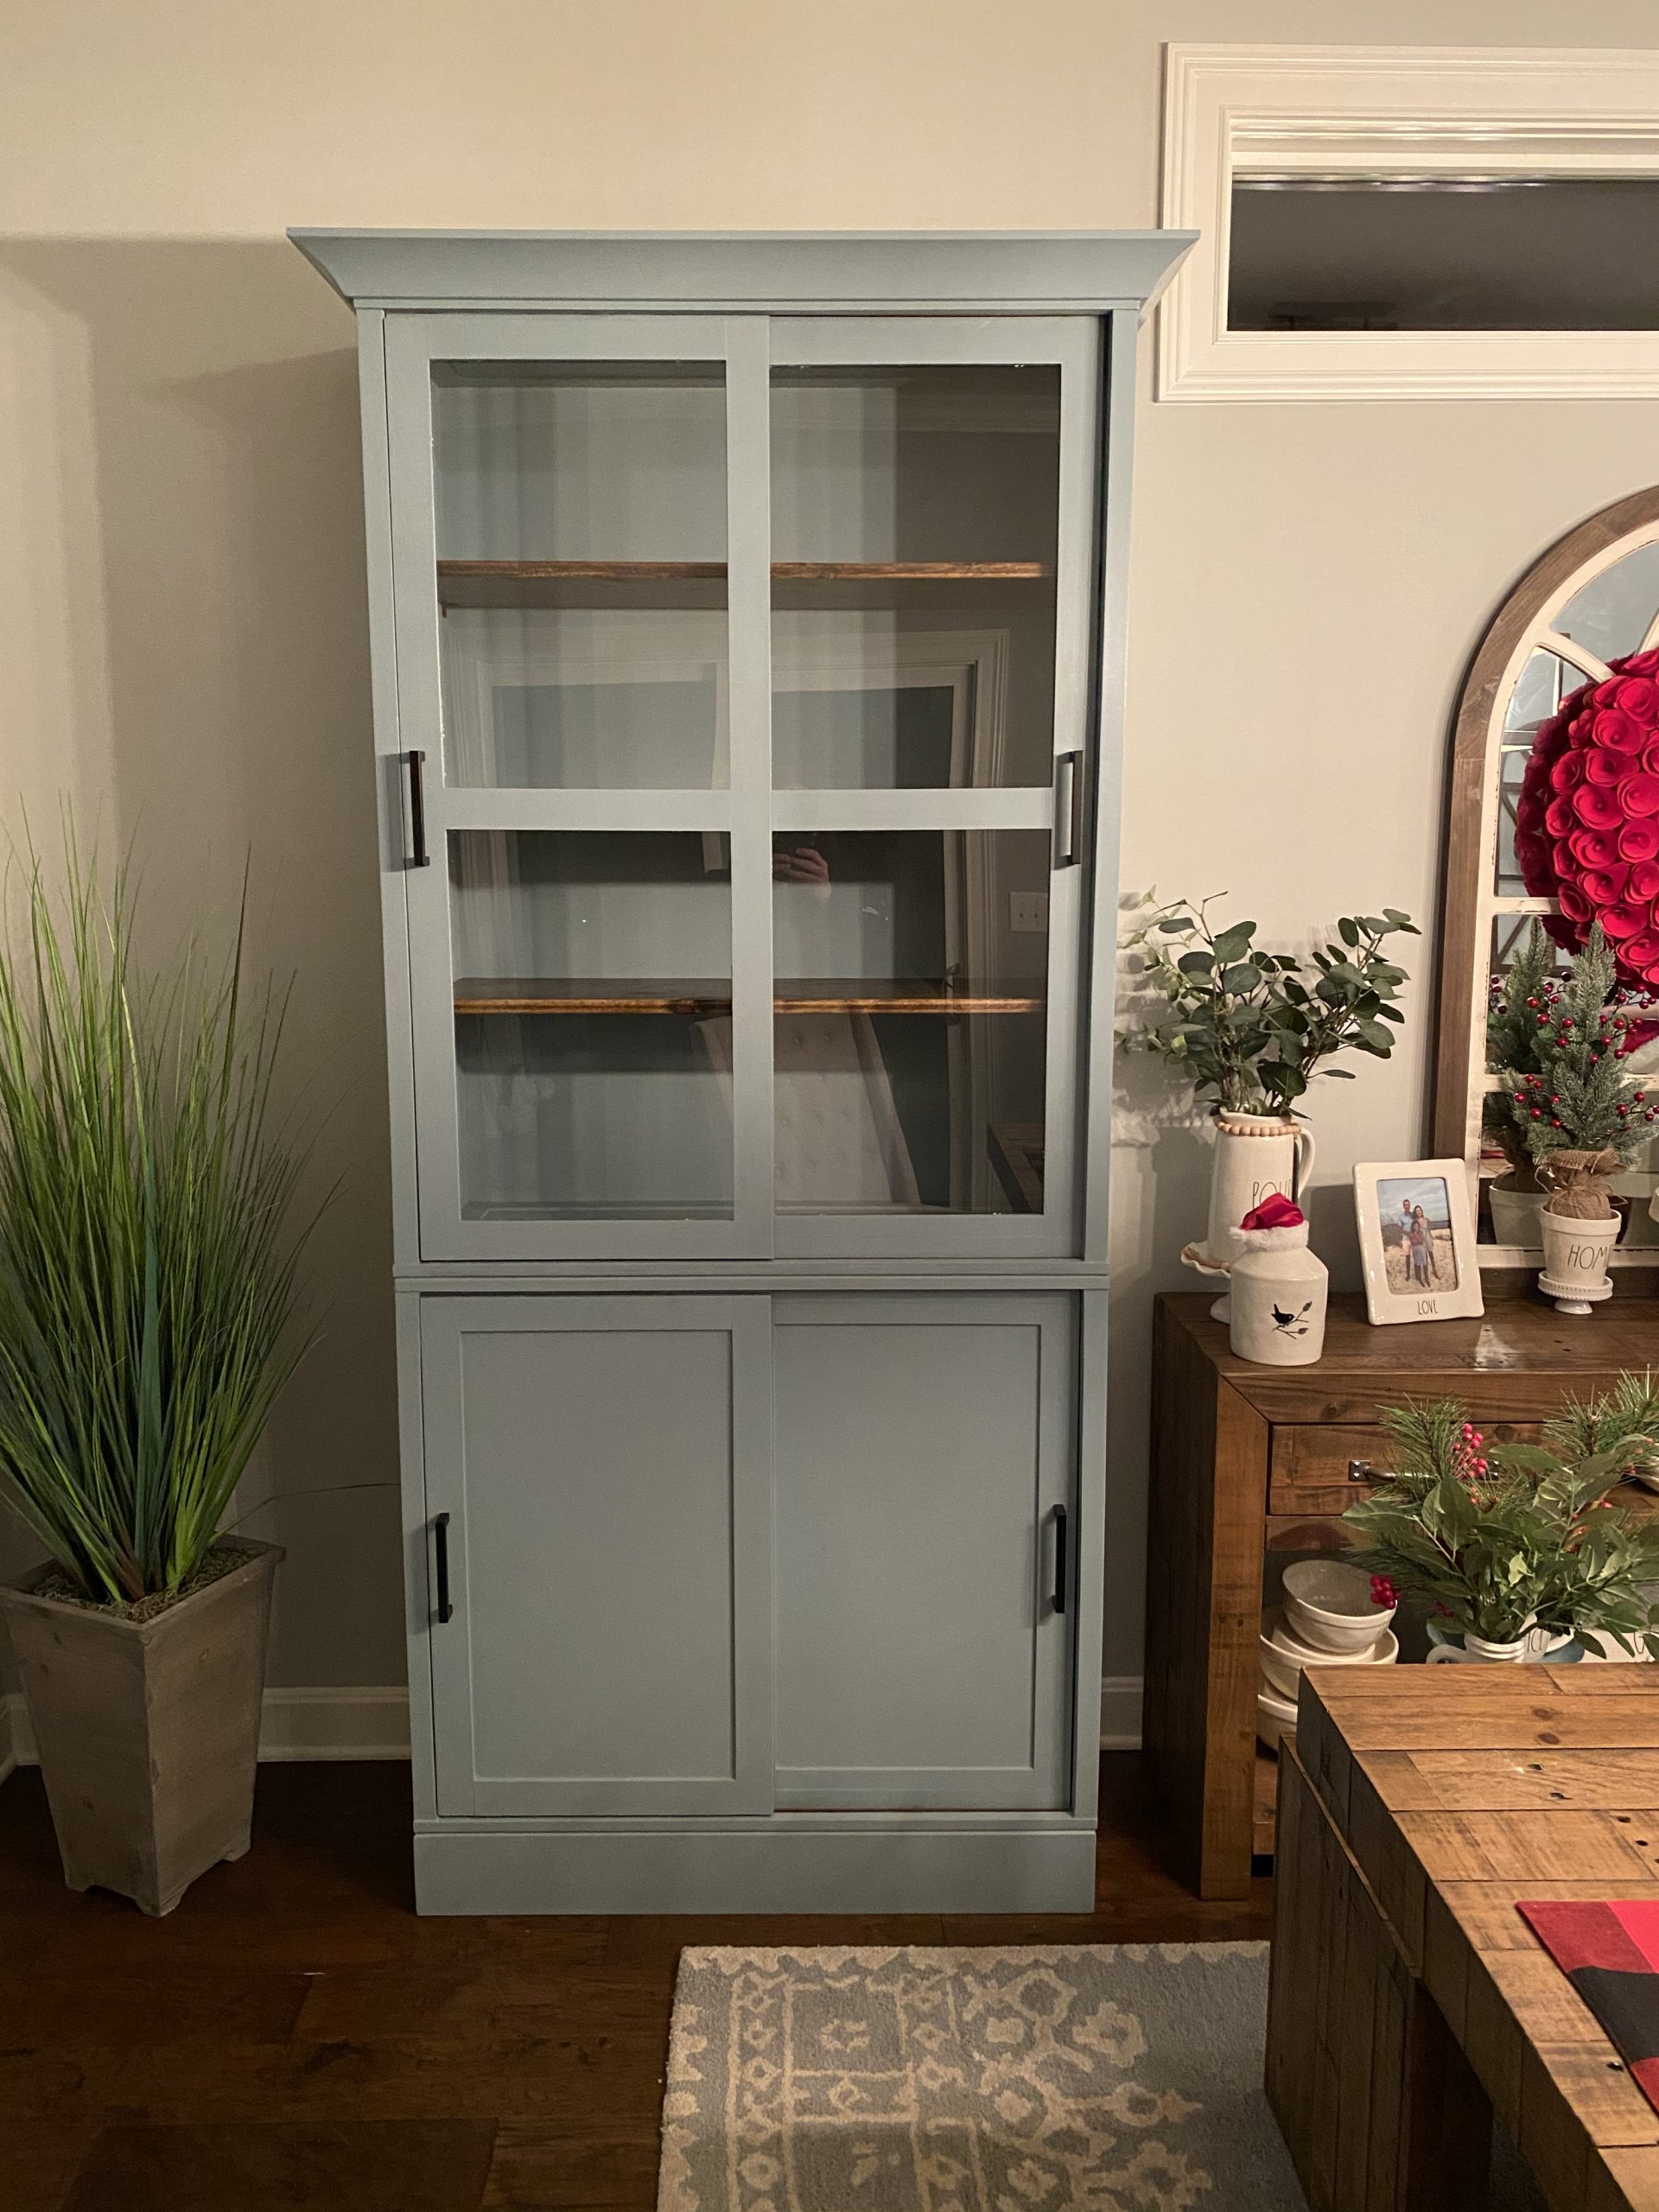
24. Try a Modern Farmhouse Look with a Sage Green Sliding Door Hutch
The sliding barn-style doors are the key element that gives the entire hutch its modern farmhouse identity. Traditional hutches almost always have hinged doors. The sliding mechanism, especially with the clean lines of the black hardware, feels fresh and contemporary. It’s also highly functional, saving space since you don’t need to account for door swing. This single feature updates the entire silhouette of a very classic furniture piece. The two-tone look with the stained shelves, as seen in Idea #5, adds another layer of modern sensibility.
|
📋 Copy HEX 🔗 Share |
This is a substantial piece of furniture, likely measuring around 6 feet wide and 7 feet tall. It’s best suited for a medium to large dining room or an open-plan living area where it can serve as a major focal point. You’ll need at least 10-12 feet of clear wall space to give it the ‘breathing room’ it deserves, especially with the large plant and console table flanking it. In a smaller room, a piece this large and dark could feel overwhelming.
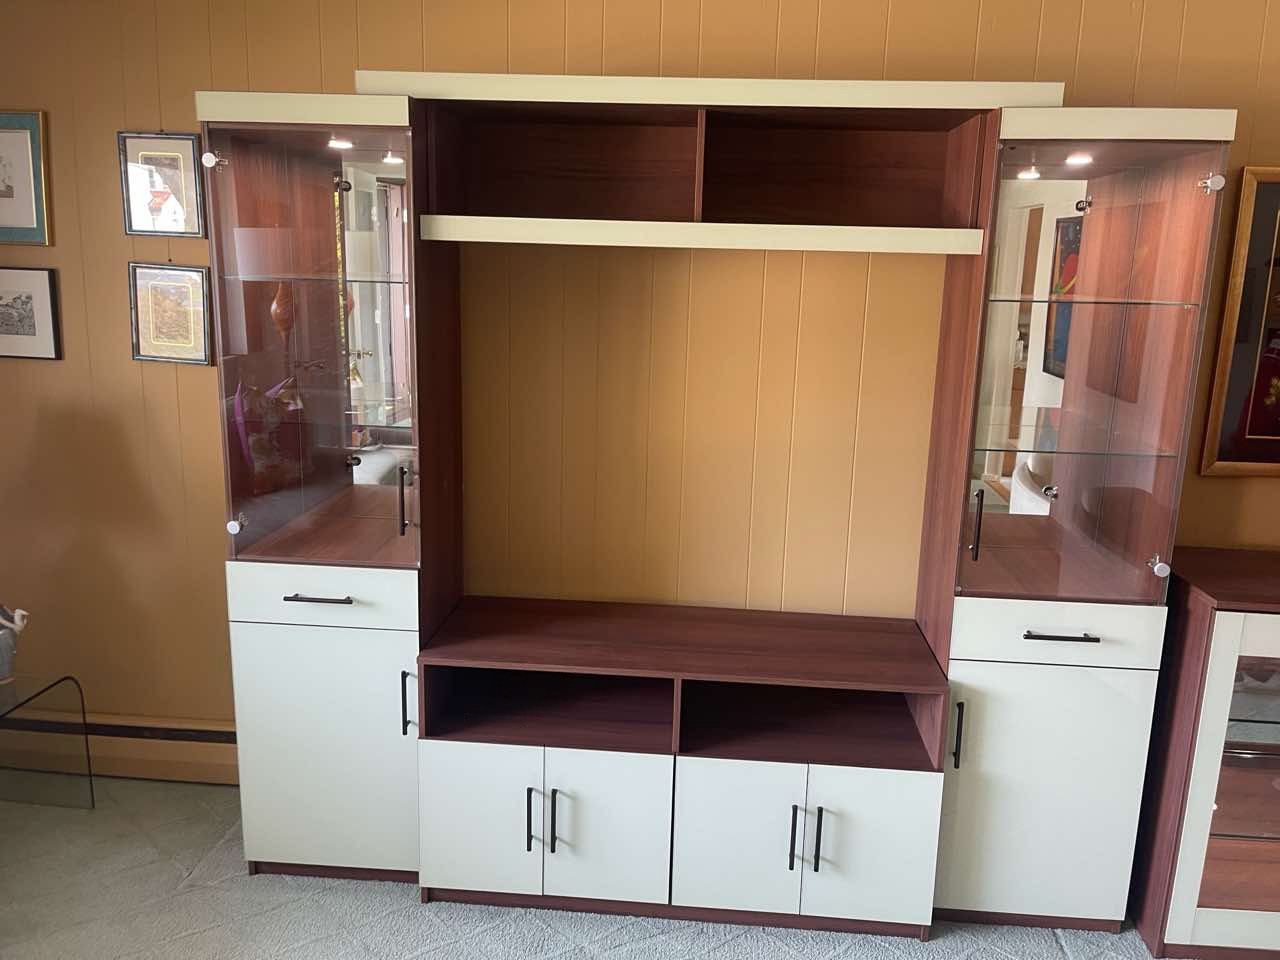
25. Go Modern with a Two-Tone Wood and Cream Wall Unit
A large, built-in or modular wall unit like this is a major commitment. While it offers incredible storage and display space, its scale and fixed nature mean it’s not very flexible. You can’t easily move it to another wall or take it with you when you move. Before investing in a system of this size, be absolutely certain about its placement and that your storage needs won’t drastically change in the next few years. Furthermore, a unit this big can dominate a room, so it’s best for larger, open-plan spaces.
|
📋 Copy HEX 🔗 Share |
This design’s success comes from its strong, graphic contrast and clean geometry. The dark wood grain creates a powerful frame around the lighter cream-colored panels, and the bold two-tone effect repeats throughout the unit. The use of simple, rectangular shapes and clean lines keeps the large piece from feeling fussy or overwhelming. The recessed lighting adds a touch of softness and luxury, highlighting the display items and preventing the large structure from feeling too monolithic.
26. Design a Custom China Cabinet for a Project Room or Nook
When planning a custom built-in, even for a project or craft room, a checklist is essential. Before you call a cabinet maker, please finalize these details:
|
📋 Copy HEX 🔗 Share |
- Inventory Your Items: What exactly will you store? Measure your tallest vase, your widest platter, or your sewing machine. Design shelves and cabinets around your actual belongings, not just guesses.
- Map Out Your Workflow: How will you use the space? A project room needs a durable work surface, accessible storage for frequently used tools, and specialized compartments.
- Finalize Your Electrical Plan: Do you need outlets for a sewing machine, glue gun, or task lighting? Plan the layout with your electrician before any construction begins.
For custom built-ins, always request a full “shop drawing” from your cabinet maker before they begin fabrication. This is a detailed technical drawing showing every dimension, the thickness of the materials, the shelf spacing, the door swing direction, and the hardware placement. Review this document with meticulous care. It is much easier and cheaper to move a line on a drawing than it is to rebuild a cabinet that was made to the wrong specifications. This is your final opportunity to catch any mistakes.
Conclusion
That dated hutch in the corner doesn’t have to be an afterthought—it can be the most personal, character-filled piece in your home. Whether you go for a simple coat of paint or a full-blown conversion into a coffee bar, the perfect project is all about reflecting your style. So pull up your favorite ideas, head to your Pinterest boards, and start dreaming up your hutch’s new story.