
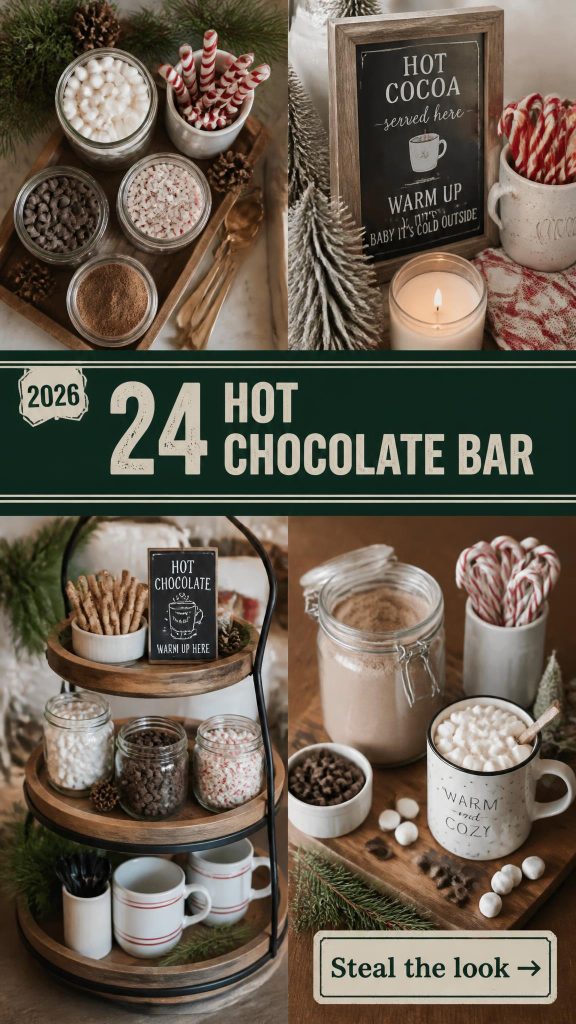
You know that feeling when you finally find the hot chocolate bar that looks exactly right for your space, only to realize you have no idea how to actually pull it off? We’ve all been there. After filtering through hundreds of options across Target, World Market, and Crate & Barrel, we narrowed it down to the ones that actually deliver. We pulled the best hot chocolate bar options across every price point—from $15 to $350. Inside, you’ll find 24 curated ideas covering everything from rustic cabin chic to playful and modern festive setups. In 2026, it’s all about micro-hospitality—creating these small, special moments at home for family and friends. And stay until the end—we break down the most common mistakes that can ruin these looks. 📌 Pin this guide for later—your future self will thank you when it’s time to actually do this.
1. Festive Countertop Bar with Santa Mugs and a White Keurig
When arranging your mugs, think like a merchandiser. Alternate heights and orientations. Place taller items like your Keurig and the tiered stand in the back, then create visual pathways with the wooden boards. Group similar mugs (like the Santa faces) together for impact, but don’t line them up like soldiers. A little bit of organized chaos feels more welcoming and less like a store display. Aim for at least three distinct levels to create depth on a flat countertop.
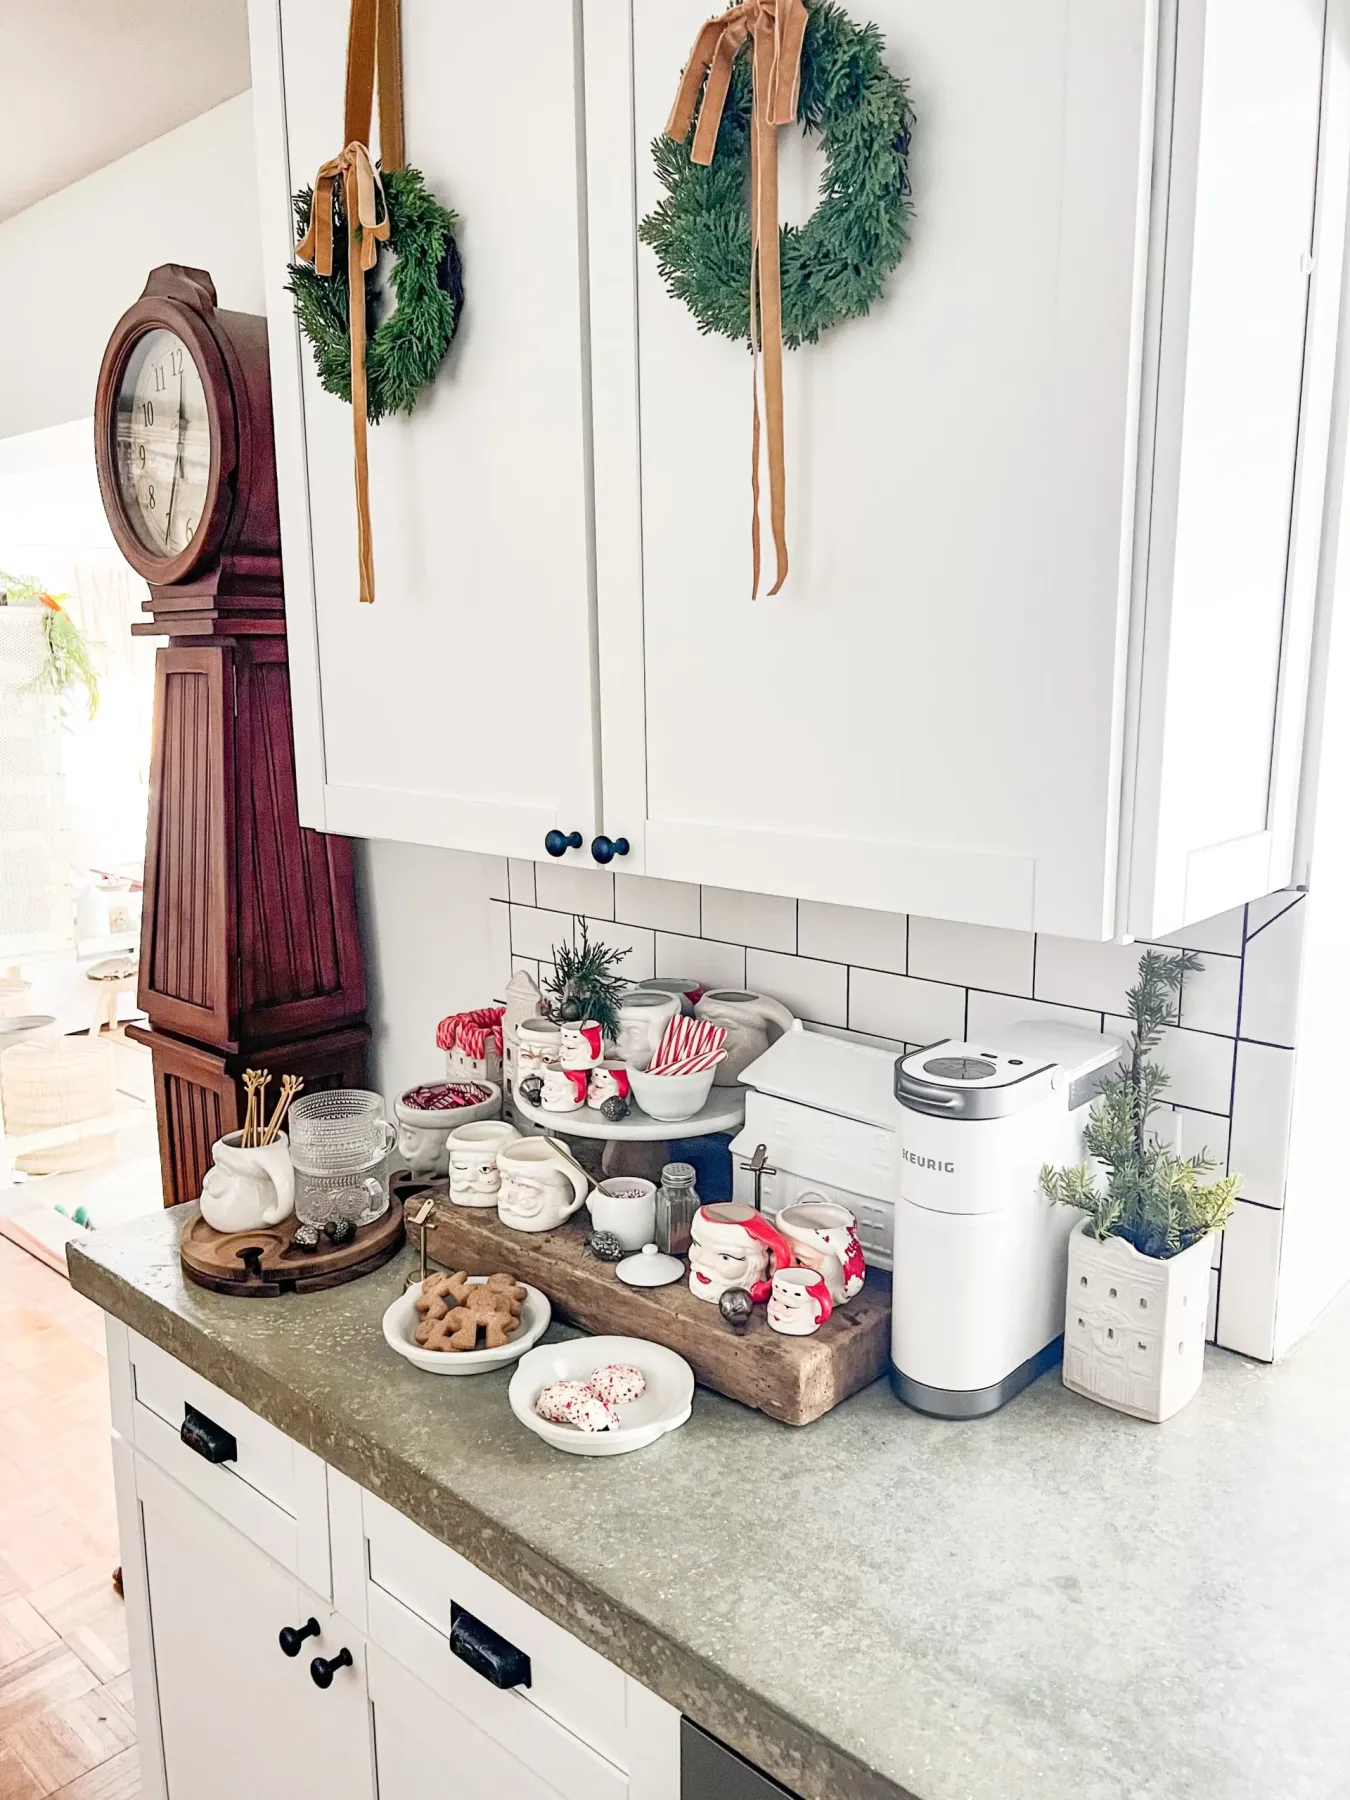
This setup nails the balance between warm and cool tones. The crisp white of the subway tile, shaker cabinets, and mugs provides a clean, bright backdrop that makes the warmer elements pop. The rich tones of the wooden serving boards and the deep green from the mini wreaths add organic warmth and prevent the scene from feeling sterile. It’s a classic kitchen combo that feels both timeless and perfectly festive.
2. Rustic Hot Chocolate & Mocha Station with Large Drink Dispensers
Those large glass beverage dispensers are beautiful, but they can be pricey. For a similar look with less investment, hunt for a pair of large, vintage-style sun tea jars with spigots at a thrift store or on Facebook Marketplace, which often go for $10-$15 each. Instead of pre-made chalkboard signs, grab a small can of chalkboard paint from a hardware store for about $12 and paint a piece of scrap wood. The buffalo check runner can easily be swapped for a fabric remnant from a craft store.
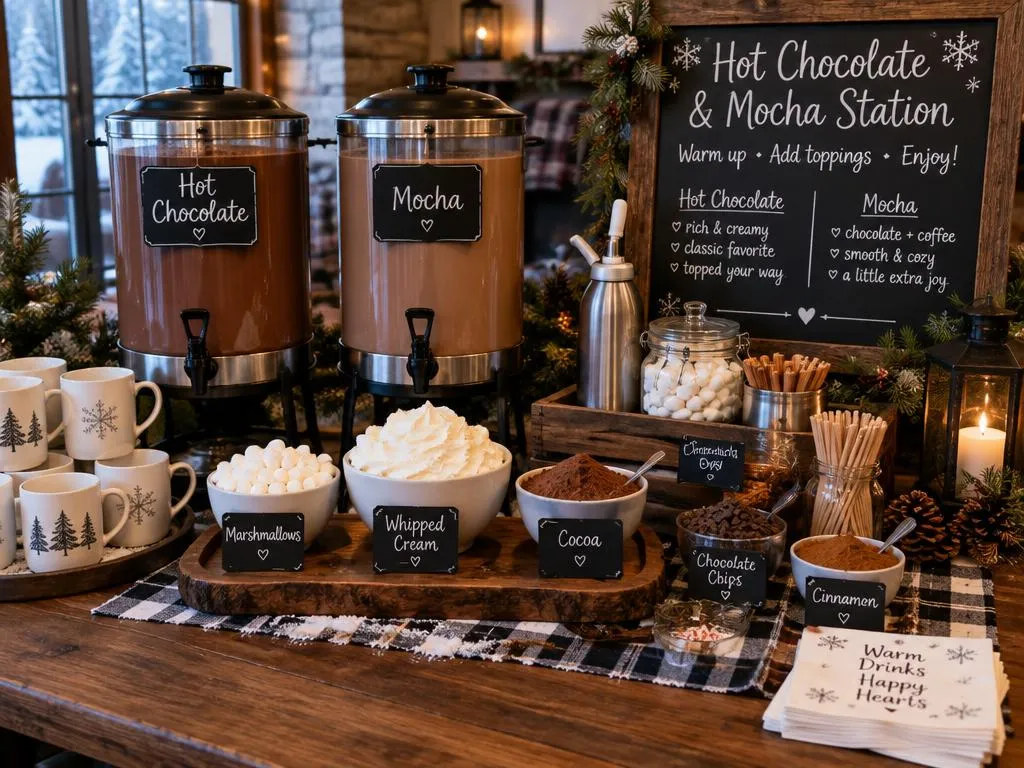
This idea is perfect for a standard 6-foot buffet table or a large kitchen island with at least 30 inches of depth. The two large beverage dispensers are the heroes here, and they need room to breathe—don’t cram them onto a small bar cart. This setup is designed for serving a crowd, so it works best in a dining room, open-concept kitchen, or a dedicated party space where guests can easily move around it without creating a bottleneck. For smaller spaces, see Idea #8‘s countertop approach.
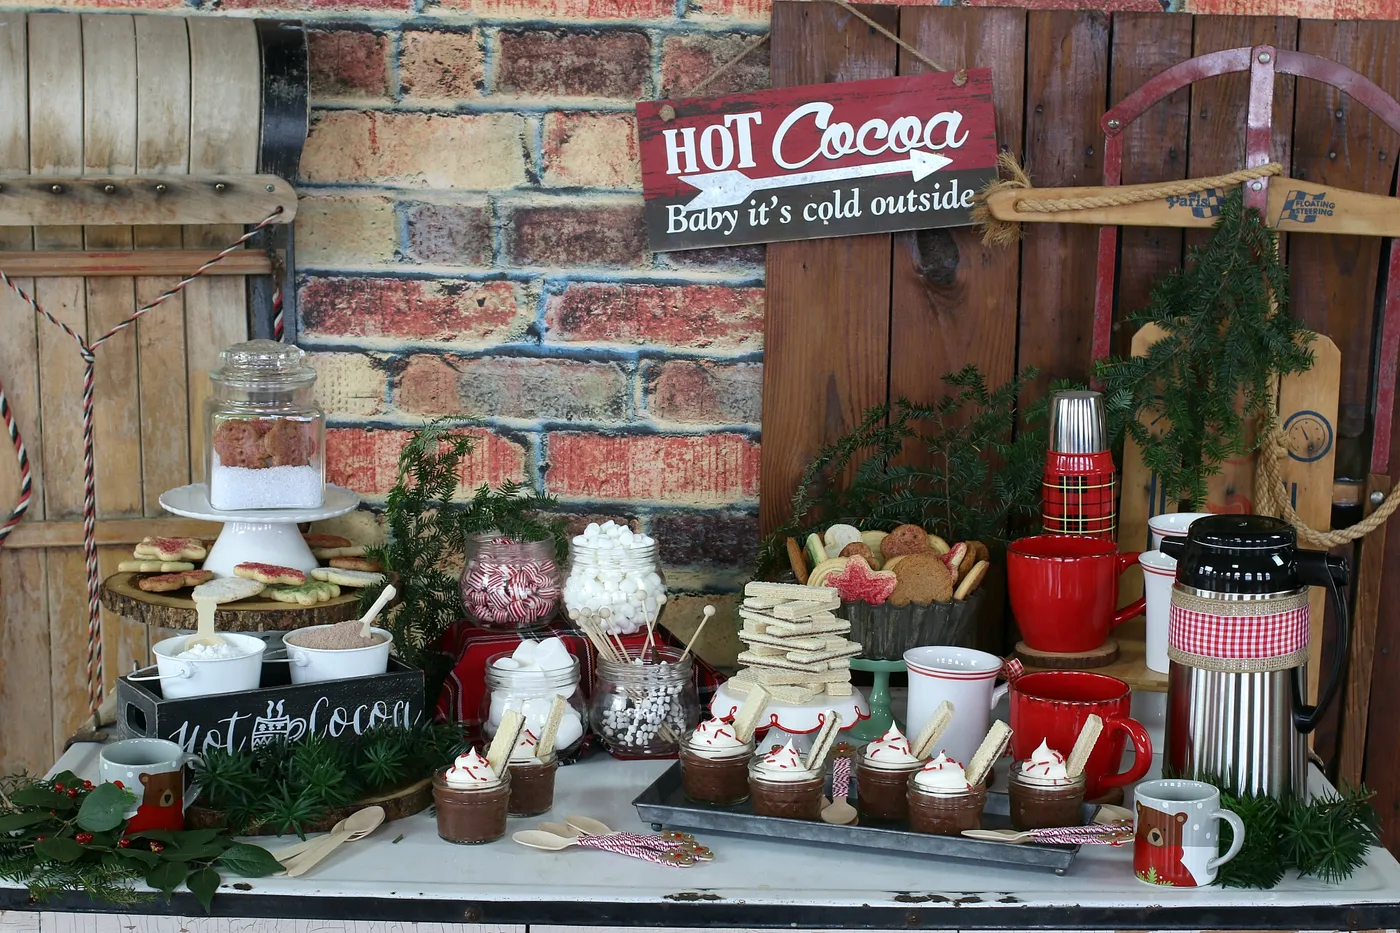
3. Cozy Cabin Hot Cocoa Bar with an Antique Red Sled
It’s the antique red sled. Take it away, and you still have a perfectly nice hot cocoa bar. But with it, you have a story. It instantly injects a dose of nostalgia and rustic character that none of the other elements could achieve on their own. It serves as a structural and thematic anchor, providing a bold block of color and a perfect perch for the ‘Hot Cocoa’ sign, tying the entire vintage winter theme together. It’s the piece that makes you feel like you’ve stepped into a cozy mountain lodge.
|
📋 Copy HEX 🔗 Share |
The magic here is in the layering of textures. You have the rough, distressed wood panels, the faux brick, the smooth gloss of the ceramic mugs, the shiny silver thermoses, and the soft, organic feel of the fresh evergreen branches. This textural variety creates a rich visual experience that feels authentic and lived-in. The repetition of the color red—in the sled, mugs, and thermos—guides the eye through the scene and creates a cohesive, festive look.
4. Winter Forest Hot Chocolate Bar with Artificial Snow
Here’s the recipe for this moody winter look: 50% crisp white elements (bowls, CREAM jar, sign frame) + 30% dark, reflective surfaces (the countertop itself) + 15% festive red accents (straws, text) + 5% natural texture (miniature trees). This formula creates high contrast and a dramatic feel. You could swap the red for a deep emerald green or a shimmering gold and still maintain the sophisticated winter forest vibe, as long as you keep the base of black and white strong.
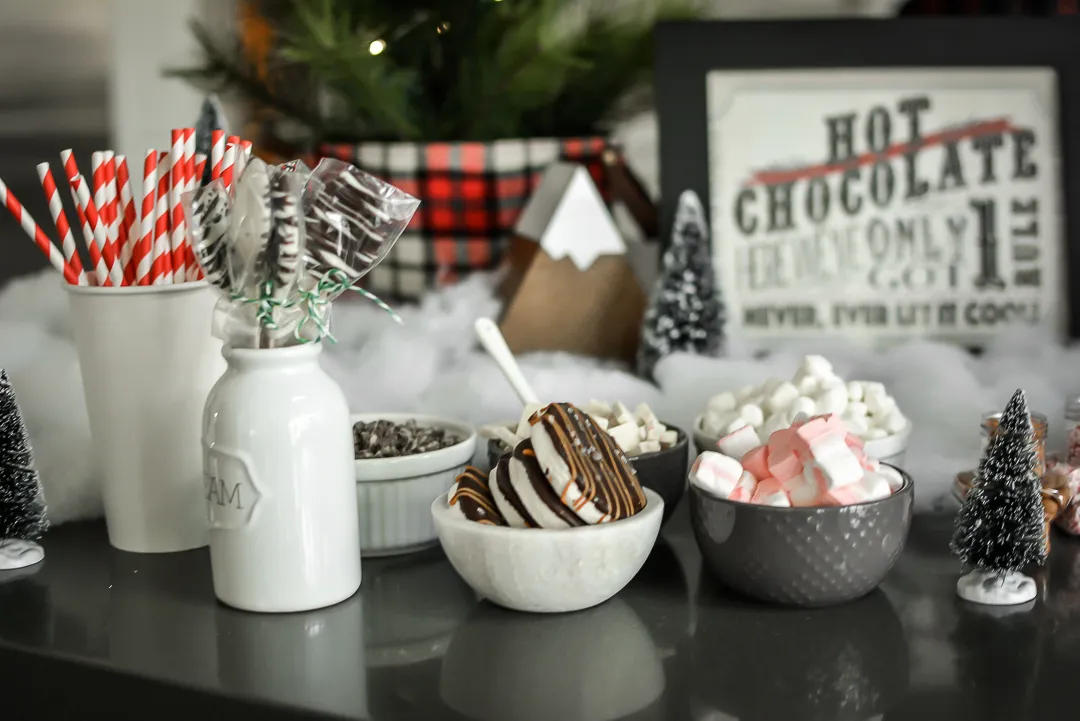
Let’s be honest: artificial snow gets everywhere. While it looks incredible for a party or a photoshoot, be prepared for some cleanup. It tends to cling to surfaces and can be a pain to vacuum off certain textures. If you have pets or small children who might be tempted to taste it, this is a hard pass. For a less messy alternative, use coarse white sparkling sugar or salt to create a similar frosty effect on the dark surface without the fluffy fallout.
5. Organized Toppings in a Rustic Teal Wooden Tray
Getting this specific, organized look is surprisingly affordable. The key is finding the right tray and jars.
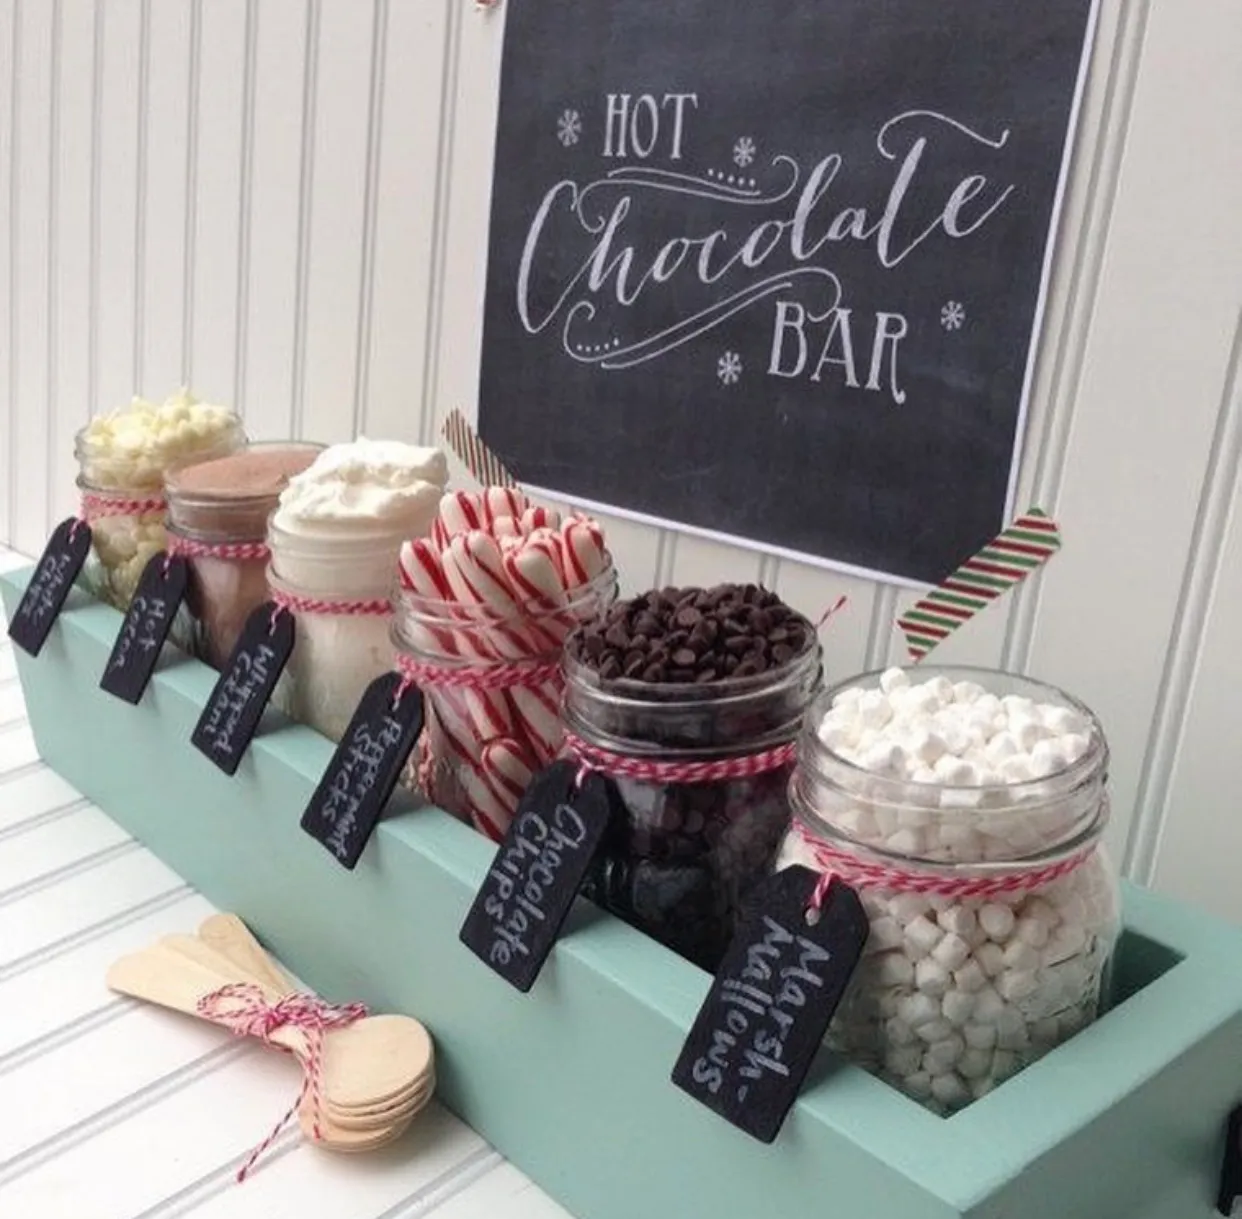
- Main Furniture (Tray & Sign): $40 – $75
- Glassware (6 Mason Jars): $15 – $25
- Decor/Accessories (Labels, Twine, Spoons): $10 – $20
- Toppings (Varies): $20 – $40
- TOTAL: $85 – $160
Budget alternative: Find a simple wooden tray at a thrift store for $5-$10 and give it a coat of chalk paint. Use recycled glass food jars instead of new Mason jars.
Before you commit to a dedicated bar, check these boxes to make sure it will work in your home:
- Do you have at least 24 inches of uninterrupted counter or table space? This look needs a bit of room to feel intentional, not cluttered. Compare with the more vertical setup in Idea #15.
- Is there a power outlet nearby if you plan to use a slow cooker or electric kettle?
- Will the location cause a traffic jam in your kitchen or party space?
- Have you inventoried what jars, bowls, and trays you already own? You might be halfway there already.
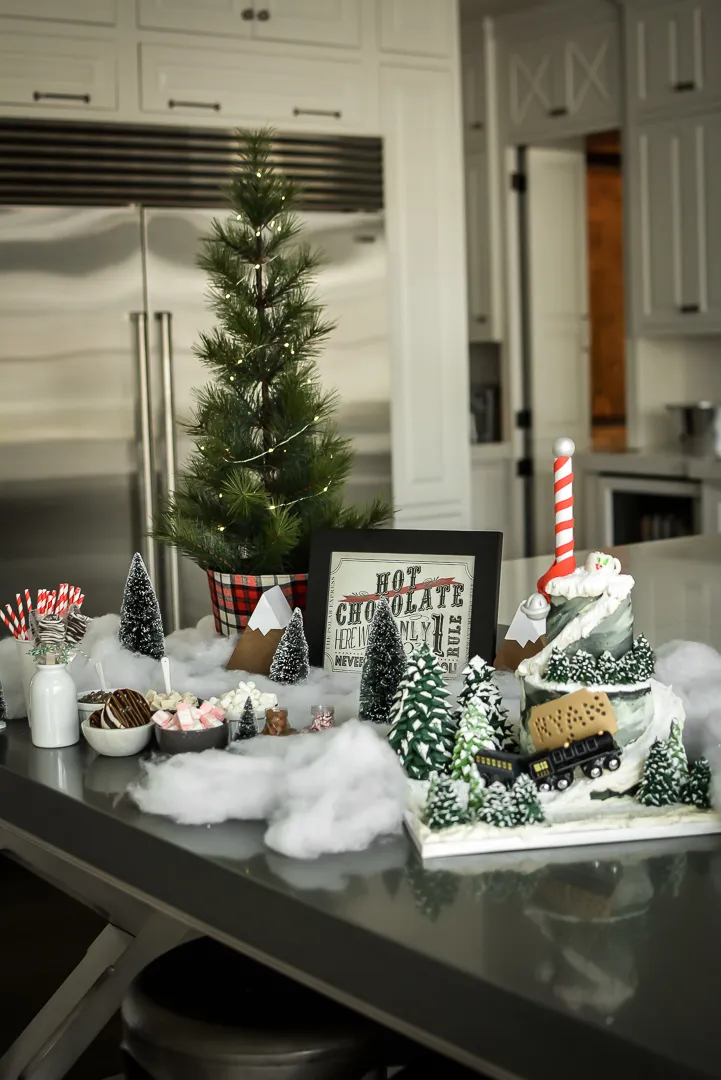
6. Winter Wonderland Bar with a Toy Train and Mini Trees
Create that fluffy, just-fallen snow effect without the mess of fake snow particles. This takes about 10 minutes and costs under $15.
|
📋 Copy HEX 🔗 Share |
- Start with a clean, dry surface on your kitchen island or table.
- Purchase a bag of polyester fiber fill (the kind used for stuffing pillows) from a craft store. Avoid cotton balls, which look too uniform.
- Gently pull apart large chunks of the fiber fill, stretching it thin in some areas and leaving it clumpy in others to mimic natural snow drifts.
- Drape and tuck the ‘snow’ around the bases of your miniature trees, bowls, and the toy train.
- For a touch of sparkle, lightly dust the fiber fill with an iridescent glitter—it will catch the light beautifully.
The key to making whimsical elements like a toy train feel chic and not childish is context. By surrounding it with sophisticated materials—a sleek countertop, simple white bowls, and a modern framed sign—the train becomes a charming, nostalgic accent rather than the main event. If everything else were equally playful, the look could quickly veer into kids’ party territory. Always balance whimsy with a healthy dose of restraint and classic design choices.
7. Festive Christmas Hot Cocoa Bar with Character Mugs
This is a fantastic solution for a smaller space. It requires a surface area of only about 30 inches wide by 18 inches deep, making it perfect for a small console table, a bar cart, or a dedicated section of your kitchen counter. Because it relies on vertical height from the cake stands, you can pack a lot of visual punch into a compact footprint. This works well in an apartment or a kitchen that doesn’t have a large island to spare. For a larger-scale version, check out the buffet in Idea #22.
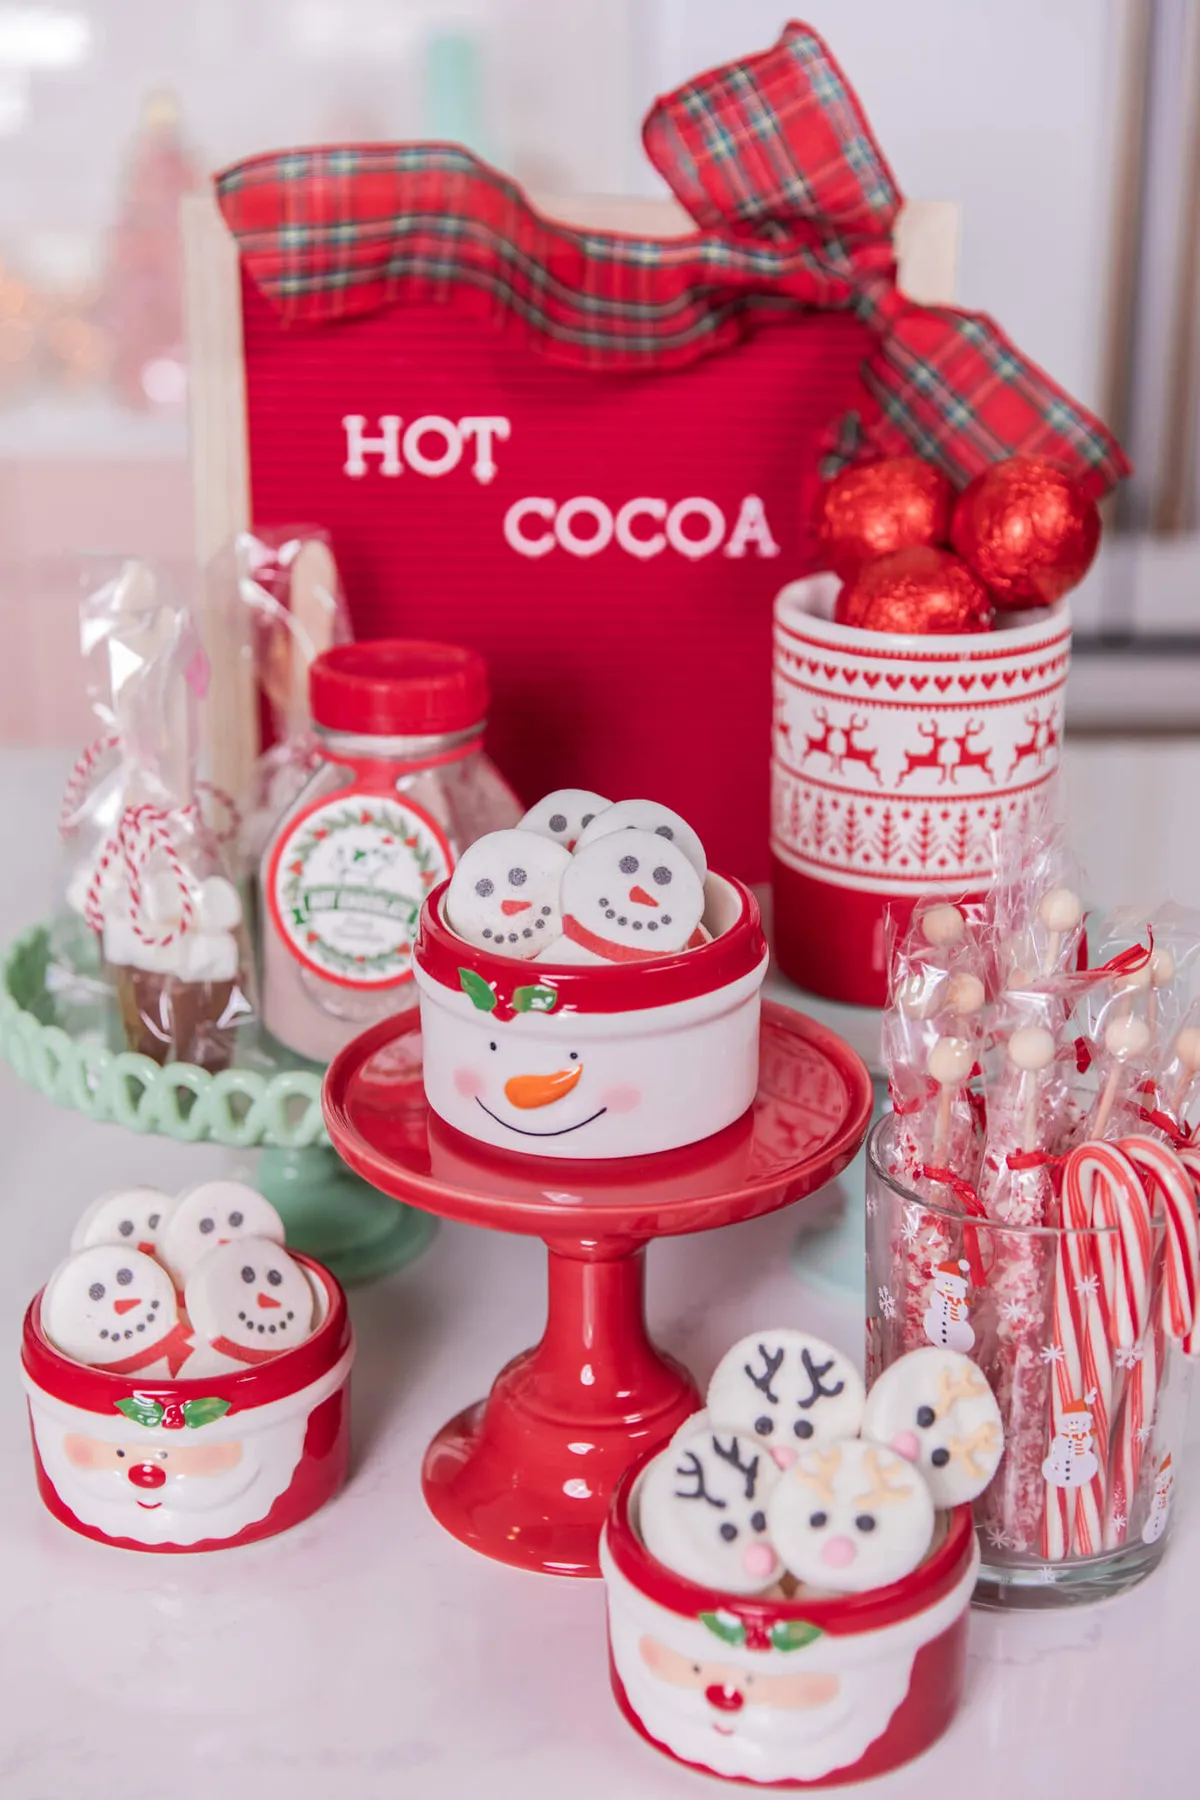
The red felt letterboard is the undeniable star. It acts as the anchor piece, clearly stating the purpose of the station with playful authority. The bold red color and tactile felt texture draw the eye immediately, and the plaid ribbon bow adds a perfect touch of holiday charm. Without the sign, it’s just a collection of Christmas treats; with it, it’s an official, inviting HOT COCOA destination. It sets the tone for the entire cheerful and whimsical vibe.
8. Cozy Countertop Hot Chocolate Station with Speckled Mugs
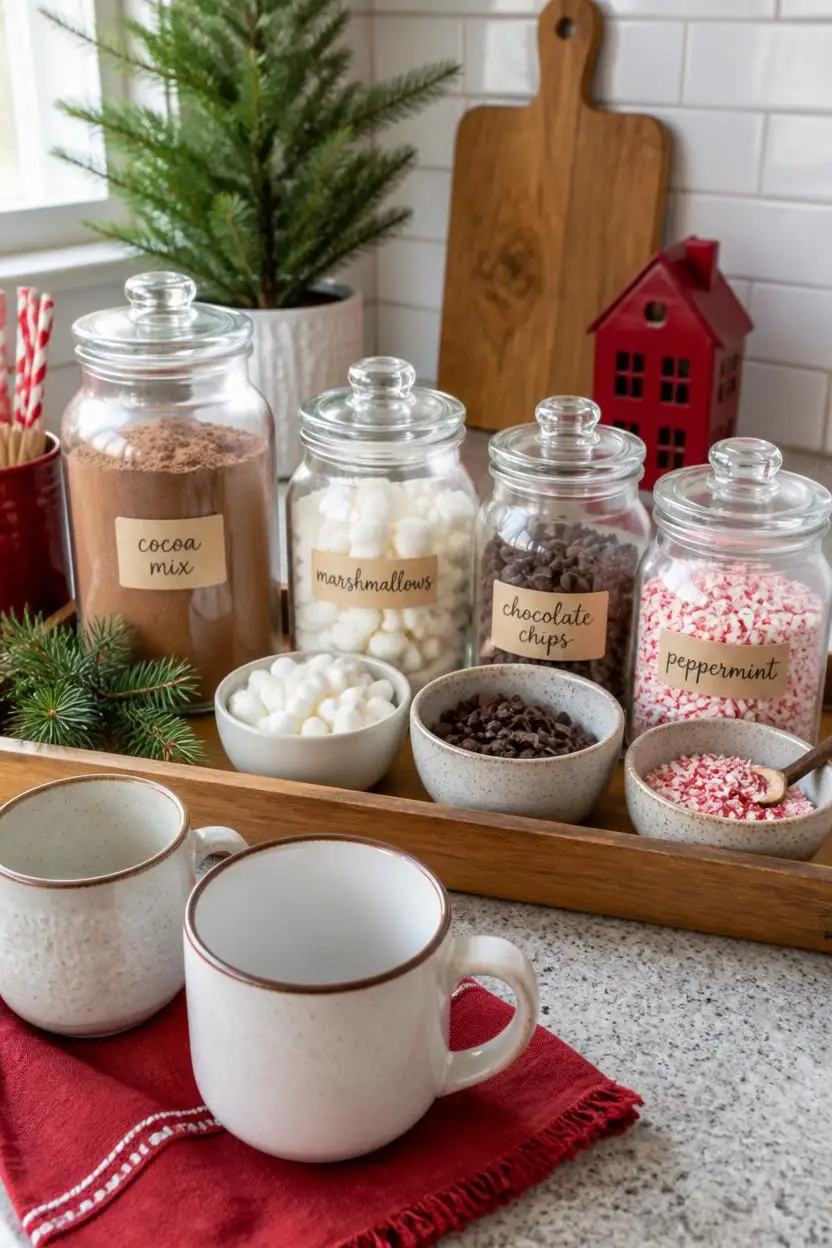
To keep a tray-based setup from looking flat, always include an element of height in the background. Here, the potted evergreen plant and the tall wooden cutting board leaning against the backsplash do the heavy lifting. They break up the horizontal line of the counter and tray, drawing the eye upward and making the whole arrangement feel more dynamic and intentionally styled. Your height element could be anything from a tall vase with branches to a stack of cookbooks.
|
📋 Copy HEX 🔗 Share |
This composition is a masterclass in the Rule of Threes. Notice how items are grouped in threes: three glass jars on the tray, three distinct red elements (napkin, house, and berries on the plant), and three primary materials (wood, ceramic, and glass). This principle creates a sense of harmony and visual satisfaction. The brain finds groupings of three naturally appealing, which makes this simple setup feel balanced and complete without being symmetrical or boring.
9. Christmas Hot Chocolate Bar with Red-Rimmed Enamel Mugs
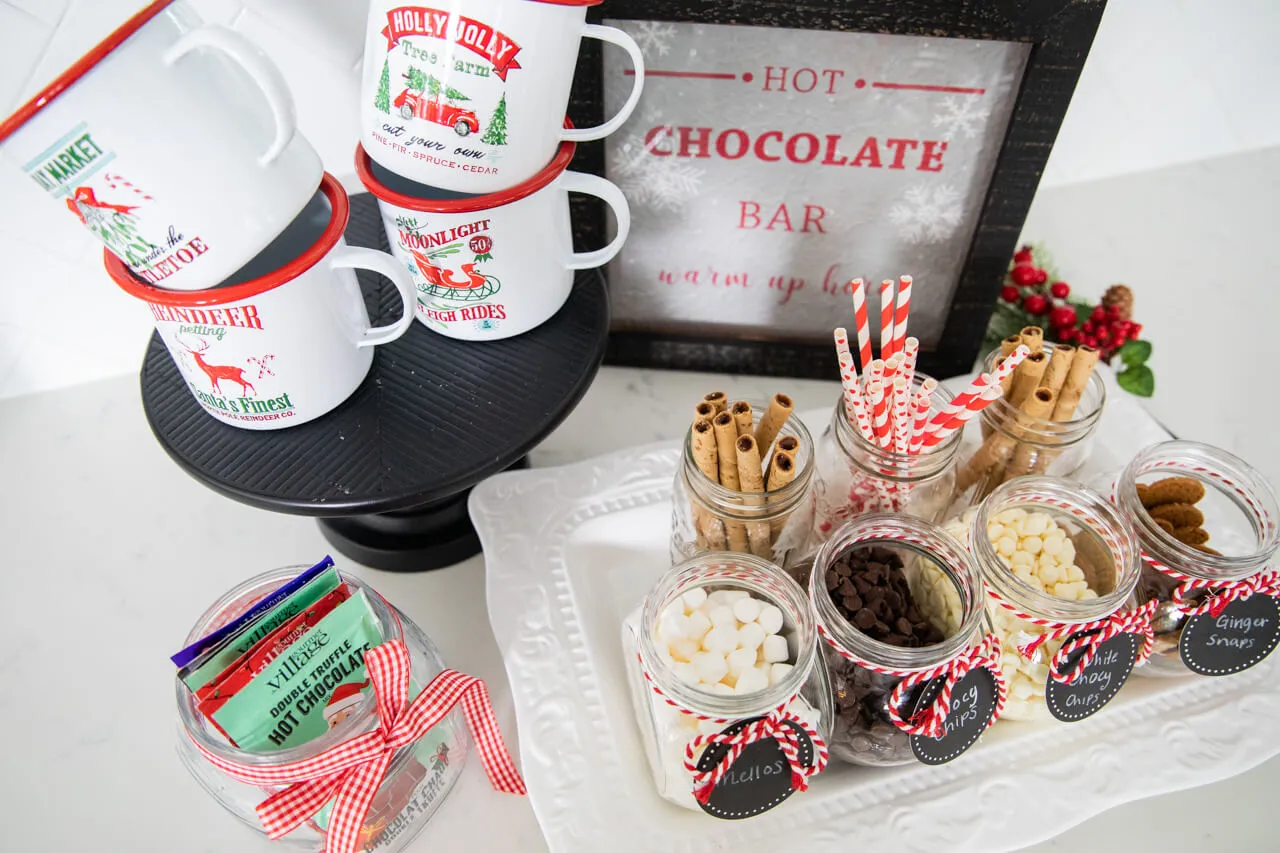
It’s the white enamel mugs with the bright red rims. They are the single element that sets the specific vintage, slightly retro Christmas tone. Swap them for plain white ceramic mugs, and the look becomes more modern. Use chunky pottery mugs, and it leans rustic. These specific mugs, stacked high on the black stand, are crisp, graphic, and evoke a sense of nostalgic holiday camping or a classic 1950s Christmas. They are the defining feature of this entire vignette, more so than even the sign.
|
📋 Copy HEX 🔗 Share |
You don’t need a fancy tiered stand or ornate tray to get this vibe. A simple black cake stand from Target or IKEA ($15-$25) will do the trick for stacking mugs. For the tray, look for a basic white serving platter you might already own, or find a vintage one at a thrift store for under $10. The enamel mugs are the star; you can often find sets of them at affordable prices at stores like Walmart or on Amazon. The vibe of this is very similar to the setup in Idea #1, but with a more retro twist.
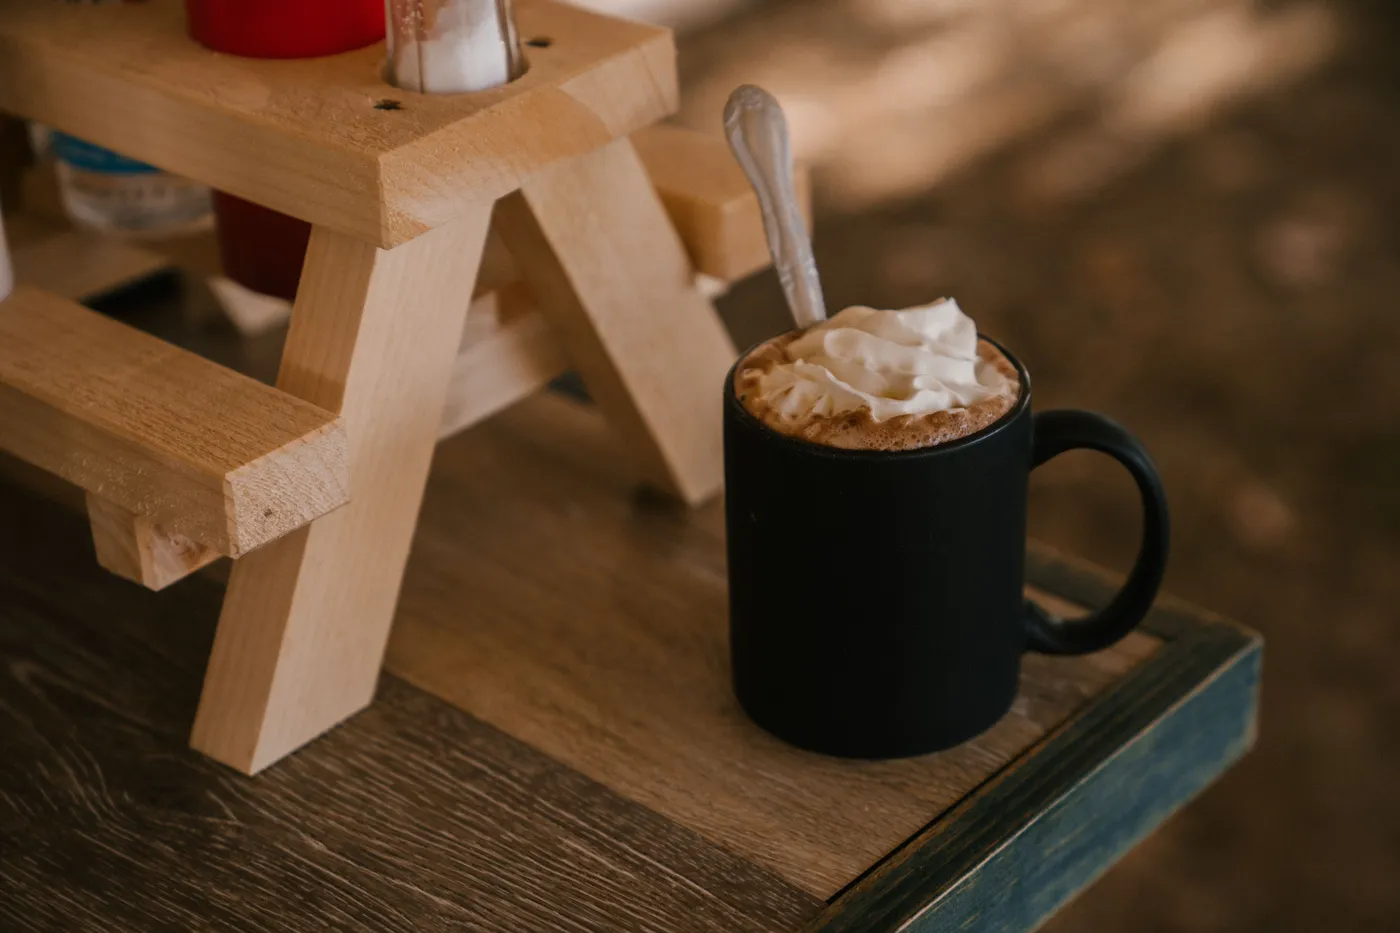
10. Matte Black Mug of Hot Chocolate on a Rustic Wood Table
This moody, rustic look is all about texture and restraint. Think: 60% dark, raw materials (matte black mug, dark wood table) + 30% creamy, soft texture (the whipped cream) + 10% unexpected color/finish (the distressed blue-green trim and silver spoon). The key is the high contrast between the dark, rough elements and the light, smooth topping. The pop of color from the trim keeps it from feeling too heavy or one-note. It’s a formula for sophisticated coziness.
|
📋 Copy HEX 🔗 Share |
A matte black mug looks incredibly chic, but be warned: it shows everything. Fingerprints, water spots, and any greasy residue will be much more visible than on a glossy mug. To keep it looking pristine, you’ll need to hand-wash and dry it thoroughly with a soft cloth immediately after use. Similarly, a dark, raw wood surface can be prone to water rings. Always use coasters, and be ready to wipe up any spills from your hot chocolate masterpiece right away.
11. Clean White and Wood Hot Chocolate Nook with Open Shelving
Under-shelf lighting is non-negotiable for a setup like this. It’s the secret ingredient that transforms it from a simple storage area into a high-end, intentional feature. It illuminates the workspace, makes the glassware sparkle, and creates a warm, inviting glow that highlights the entire nook. You can install inexpensive, battery-operated LED puck lights or strips in under an hour. Without this lighting, the area under the top shelf would be lost in shadow, and the whole effect would fall flat.
|
📋 Copy HEX 🔗 Share |
This design works because of its brilliant use of repetition and alignment. The white mugs are all identical and hung in a neat grid. The glass jars, while different sizes, are all of a similar style and arranged in a balanced way. The light wood of the shelves is echoed in the lids of some jars, creating a pleasing rhythm. This clean geometry, set against the simple grid of the subway tile, feels calming, organized, and incredibly satisfying to the eye. This is a more permanent version of the station seen in Idea #5.
12. Countertop Station with Green Subway Tile and a Tiered Mug Stand
A glossy subway tile backsplash looks stunning, but it’s a magnet for splashes and smudges. Hot chocolate, coffee from the Keurig, and sticky fingers from the toppings will all show up clearly on that shiny surface. Be prepared for daily wipe-downs to keep it looking clean, especially behind the drink-making area. Also, that gorgeous speckled granite has a lot of pattern, so keeping the accessories (like the white tray and simple wood stand) relatively simple is key to avoiding a visually cluttered look.
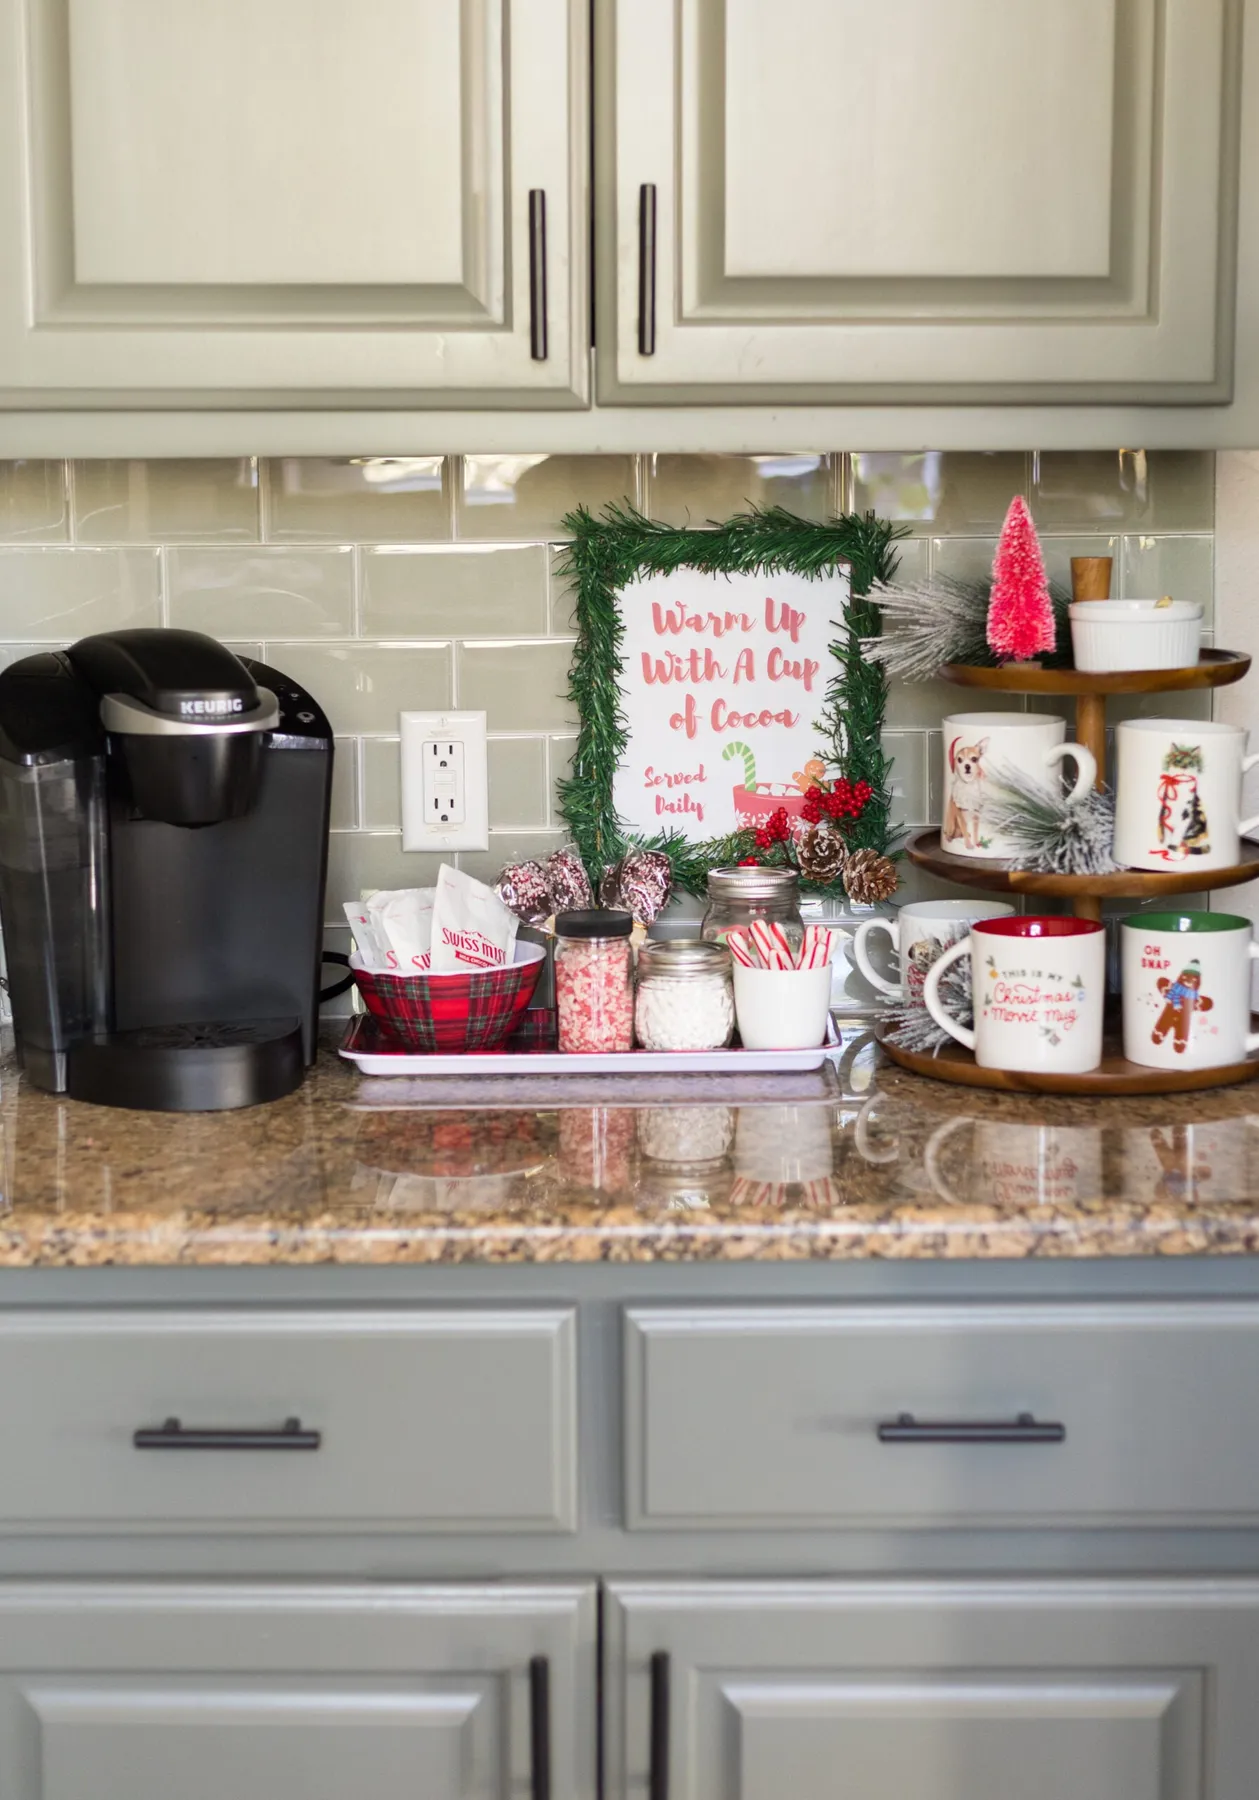
We’re seeing a huge move away from all-white kitchens, and this pale green subway tile is a perfect example of the new neutral. It adds a soft, organic touch of color without being overwhelming, and it pairs beautifully with both the light grey cabinets and the warm brown tones in the granite. This kind of dedicated, semi-permanent ‘beverage station’ is also a major trend, reflecting a desire to make everyday home routines feel a little more special and luxurious, like a personal café.
13. Playful Hot Chocolate Bar on a Blue Polka Dot Tablecloth
This cheerful, kid-friendly setup is incredibly budget-conscious. The magic comes from inexpensive, high-impact paper goods and textiles.
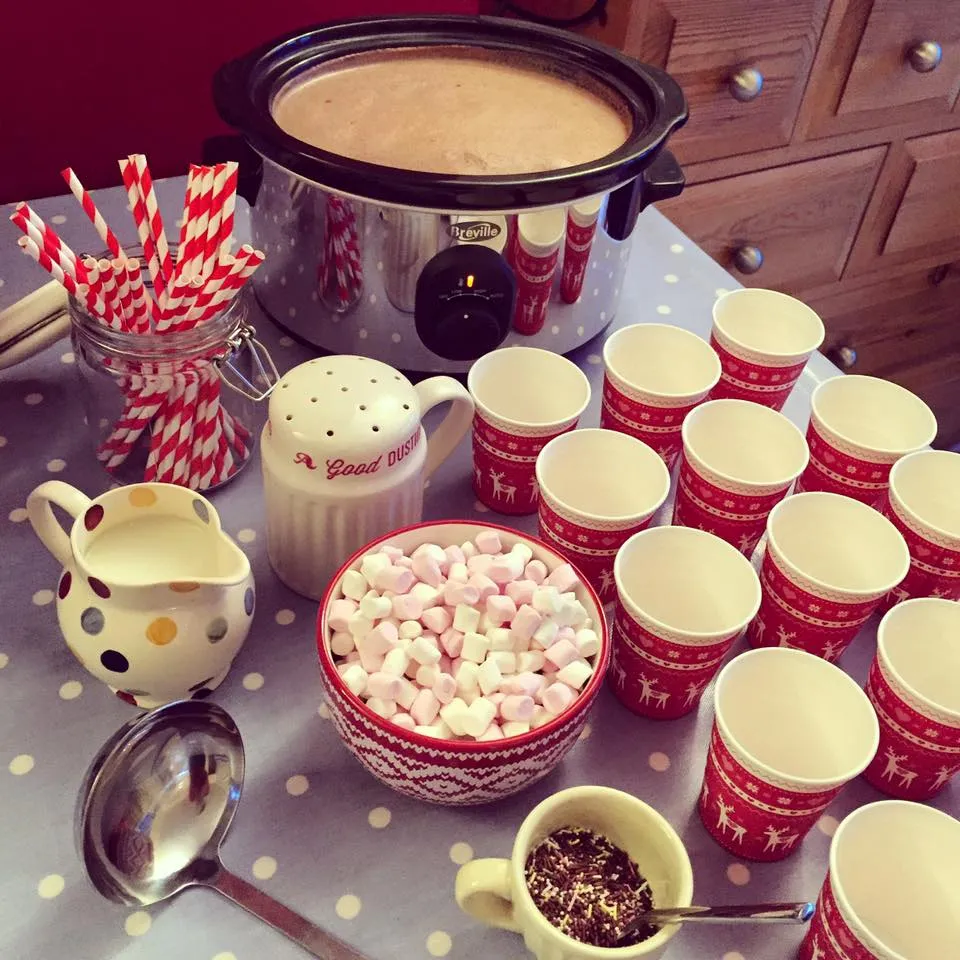
- Main Appliances (Slow Cooker): $25 – $40 (or use your own)
- Textiles (Tablecloth): $15 – $30
- Serveware (Paper Cups, Straws, Pitcher): $20 – $35
- Toppings (Marshmallows, Sprinkles): $15 – $25
- TOTAL: $75 – $130
Budget alternative: A simple colored flat sheet can stand in for a tablecloth, and you can find bulk paper goods at a party supply store for even less.
This setup is perfect for a party, but there are a few things to consider before you start pouring.
- Is the slow cooker on a stable, level surface where the cord won’t be a tripping hazard?
- Have you placed a mat or trivet underneath the slow cooker to protect the table surface from heat?
- Are the toppings in bowls that are low and wide enough for little hands to easily scoop from without tipping them over?
- Do you have a small trash bin nearby for used straws and cups? Planning for the mess is half the battle!
14. Three-Tiered Rustic Christmas Coffee & Cocoa Shelves
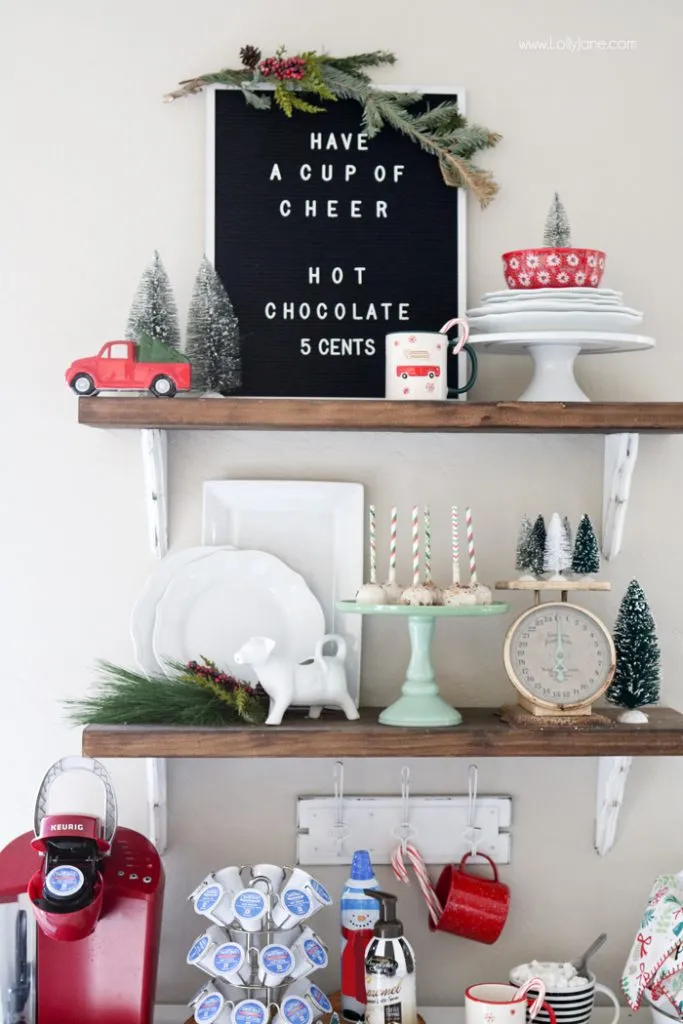
Let’s focus on styling one of those floating shelves to look curated, not cluttered. It should take about 20-30 minutes.
|
📋 Copy HEX 🔗 Share |
- Start with a blank shelf. Wipe it clean.
- Place your largest item first, slightly off-center. In this case, it’s the black letter board on the top shelf.
- Create a ‘visual triangle’ by adding two other items of varying heights. Here, the stack of plates and the small white house form a triangle with the board.
- Add your functional items, like mugs. Don’t just line them up; hang some, stack others.
- Fill in the gaps with smaller, textural decor like the bottle brush trees and ornaments.
- Step back, squint your eyes, and adjust until it feels balanced but not perfectly symmetrical.
The formula for this cozy, layered look is about balancing function and decor: 40% functional items (mugs, coffee maker, plates) + 40% festive decor (trees, ornaments, signs) + 20% negative space. The negative space is crucial; without it, the shelves would feel overwhelmingly crowded. The warm brown of the wood acts as a neutral base, allowing the 60% white and 40% red/green accents to pop. This is a great example of a functional, decorated space, much like the rustic setup in Idea #3.
15. Cozy Hot Chocolate Bar with Pink Mugs and String Lights
Pink is having a major moment in holiday decor, moving beyond just sweet and into a more sophisticated, warm territory. Paired with the dark, rustic wood and the amber glow of the string lights, the pink here feels earthy and cozy, not saccharine. This reflects a broader trend of embracing unexpected color palettes for seasonal decorating. People are tired of the standard red and green and are looking for ways to make holiday traditions feel more personal and unique to their own style.
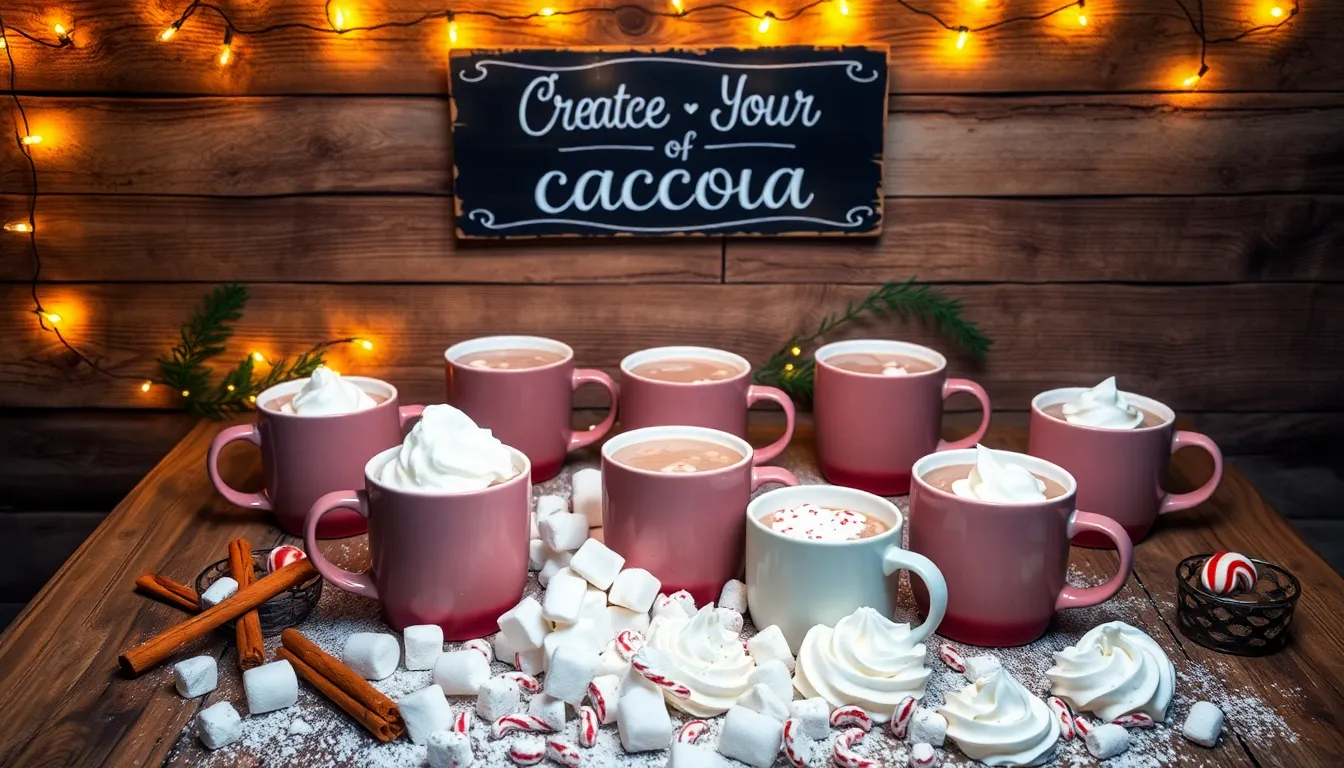
When using string lights for ambiance, choose a set with a warm white or amber color temperature (around 2200K-2700K). Avoid cool white or blue-toned LEDs, which can make your hot chocolate and treats look unappetizing and cast a sterile, clinical glow. The goal is to mimic the warm, flickering light of a candle or a fireplace. Also, opt for lights with a thin, dark-colored wire (black or brown) that will disappear against the wooden wall.
16. Festive White Countertop Bar with Gingerbread and Candy
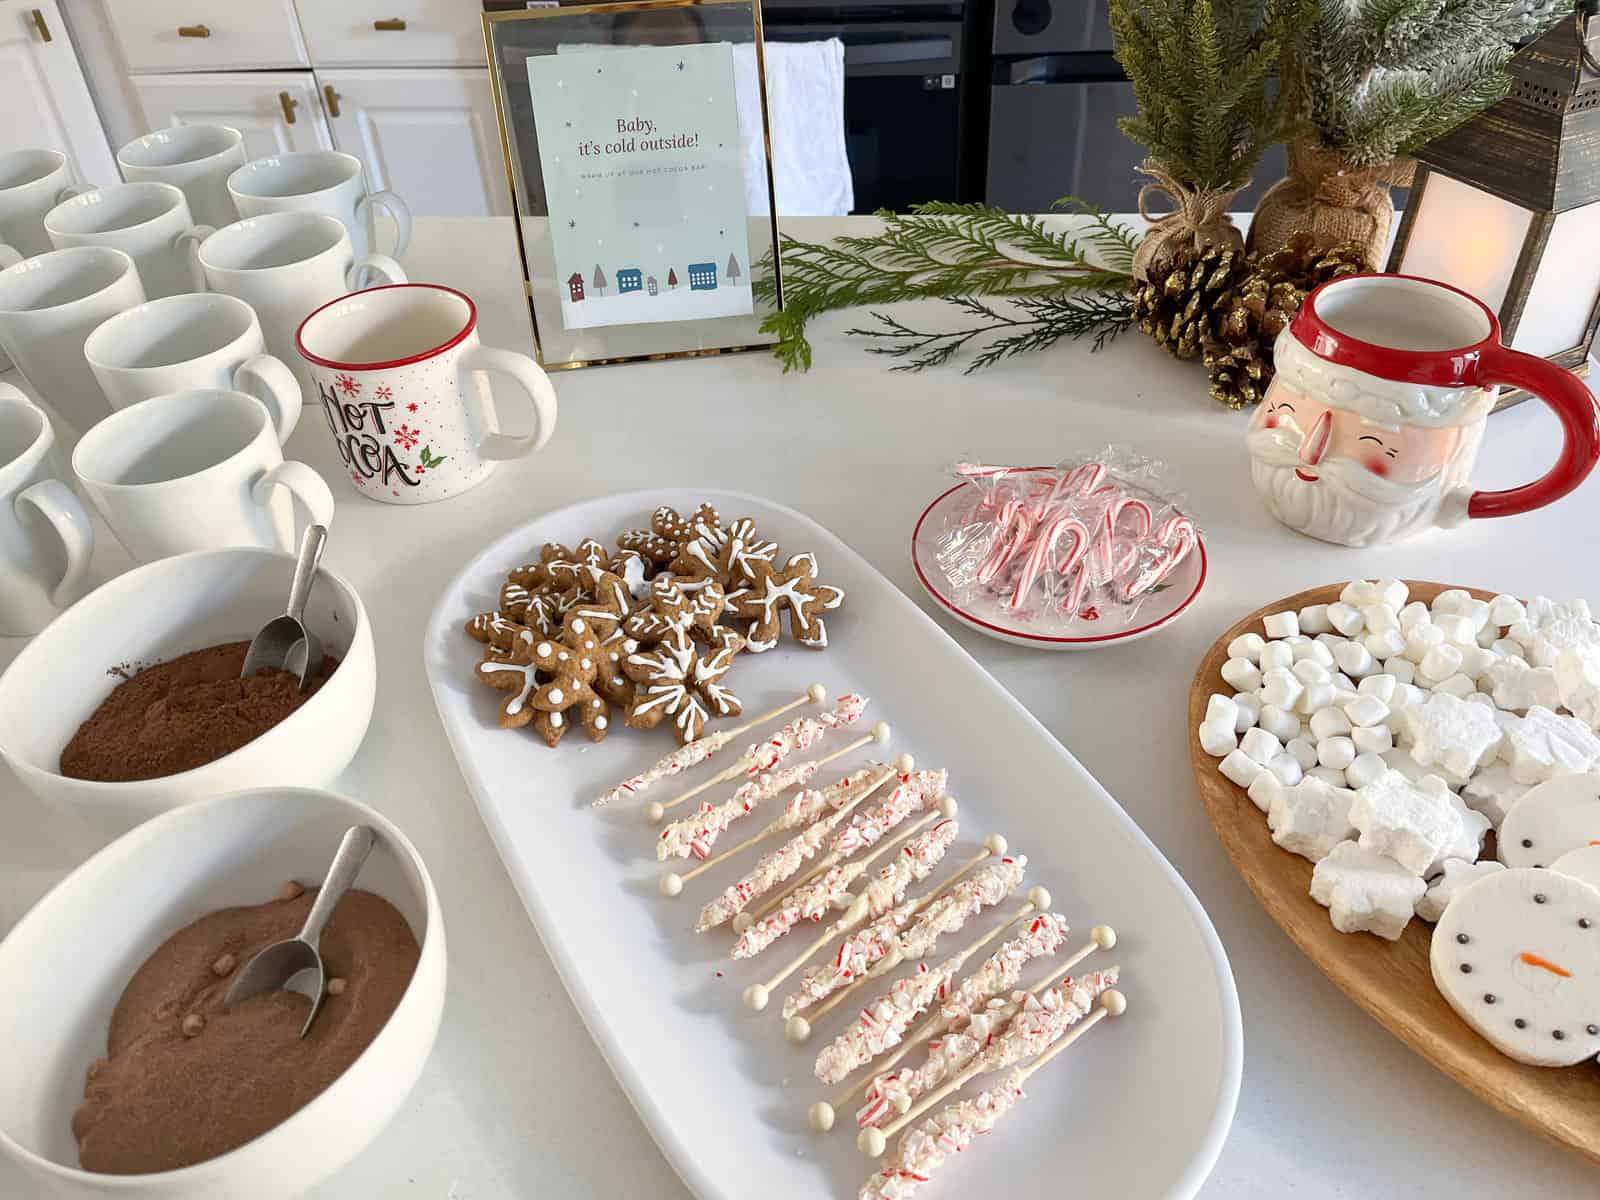
It’s the gingerbread people. While all the elements are festive, the cookies are what give this bar its soul and a touch of homemade charm. They provide a beautiful, warm brown color that breaks up the sea of white and red, and their classic shape is instantly recognizable and heartwarming. They suggest baking, family, and tradition in a way that store-bought marshmallows and candies can’t. Without them, the bar would feel a lot more generic and less personal.
|
📋 Copy HEX 🔗 Share |
This is a great example of a contained hot chocolate bar that works beautifully on a standard-depth (25-inch) kitchen counter. The whole setup occupies a space about 36 inches wide. By keeping most items in mugs and jars and using height (like the stacked mugs and tall candy canes), it feels full and festive without spilling out and taking over the entire kitchen. It proves you don’t need a separate piece of furniture to create a fully realized, impactful holiday station.
17. Rustic Beverage Bar with Silver and Gold Dispensers
This setup masterfully mixes metals, and it works because the finishes are consistent. Both the silver and gold have a warm, slightly brushed or polished tone—not a cheap, high-shine chrome or glittery gold. The gold is used as an accent on the spigots and lids, creating a cohesive look across both dispensers. The rule of thumb for mixing metals is to choose one dominant metal (silver, in this case) and use one or two others as smaller accents, and ensure they share a similar level of finish (e.g., all brushed, all polished).
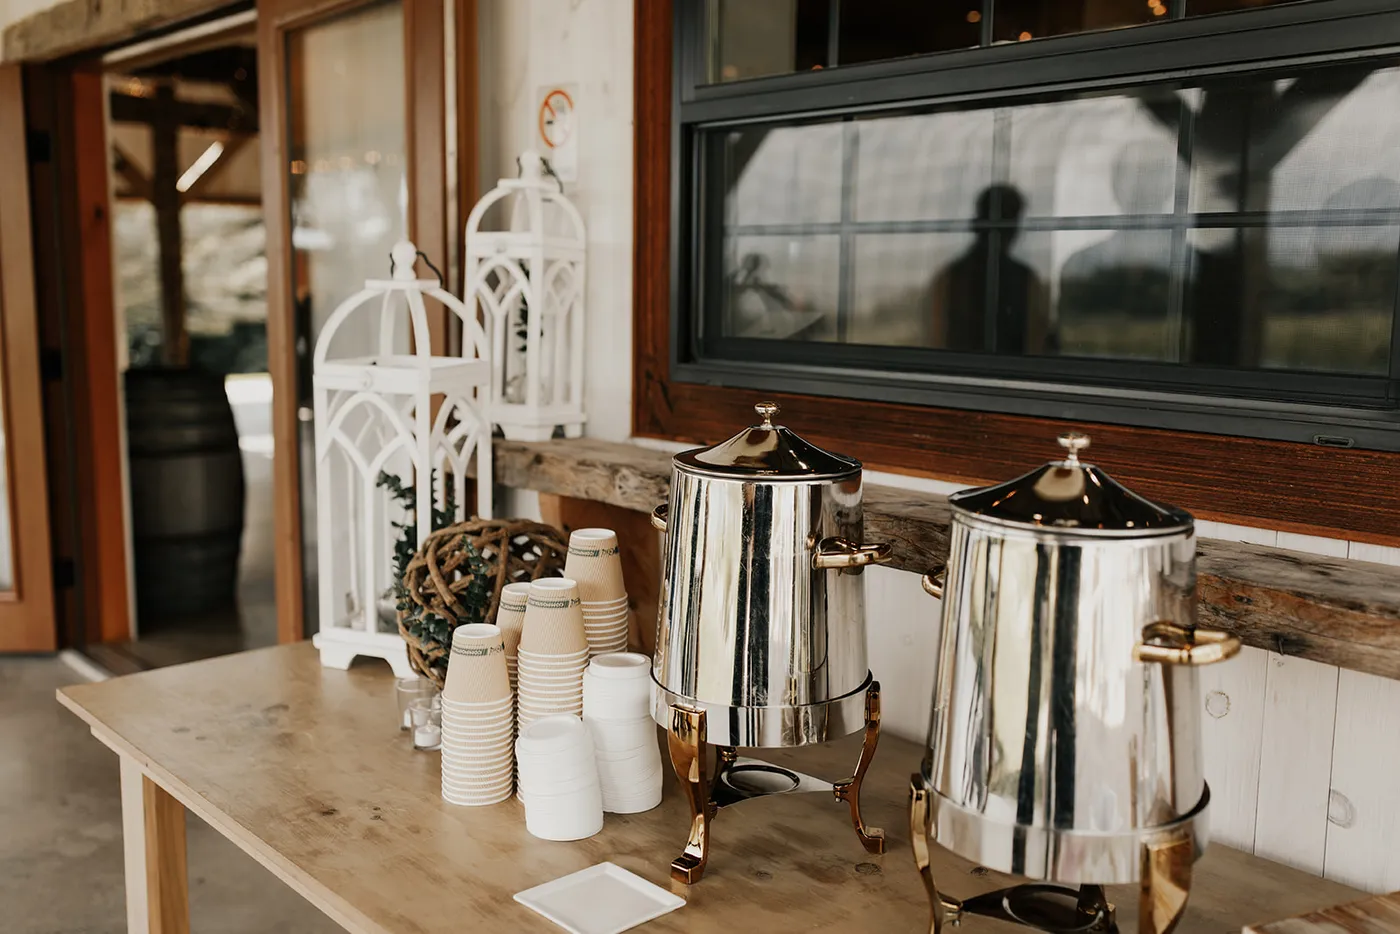
Those gorgeous beverage dispensers require some specific care. Never pour boiling hot liquid directly into a cool glass dispenser; it can cause the glass to crack from thermal shock. Let your hot chocolate or cider cool to a very warm, drinkable temperature first. After the party, you must disassemble the spigot completely for cleaning. If you don’t, milk or sugar residue can build up inside the mechanism, making it sticky, difficult to use, and a breeding ground for bacteria.
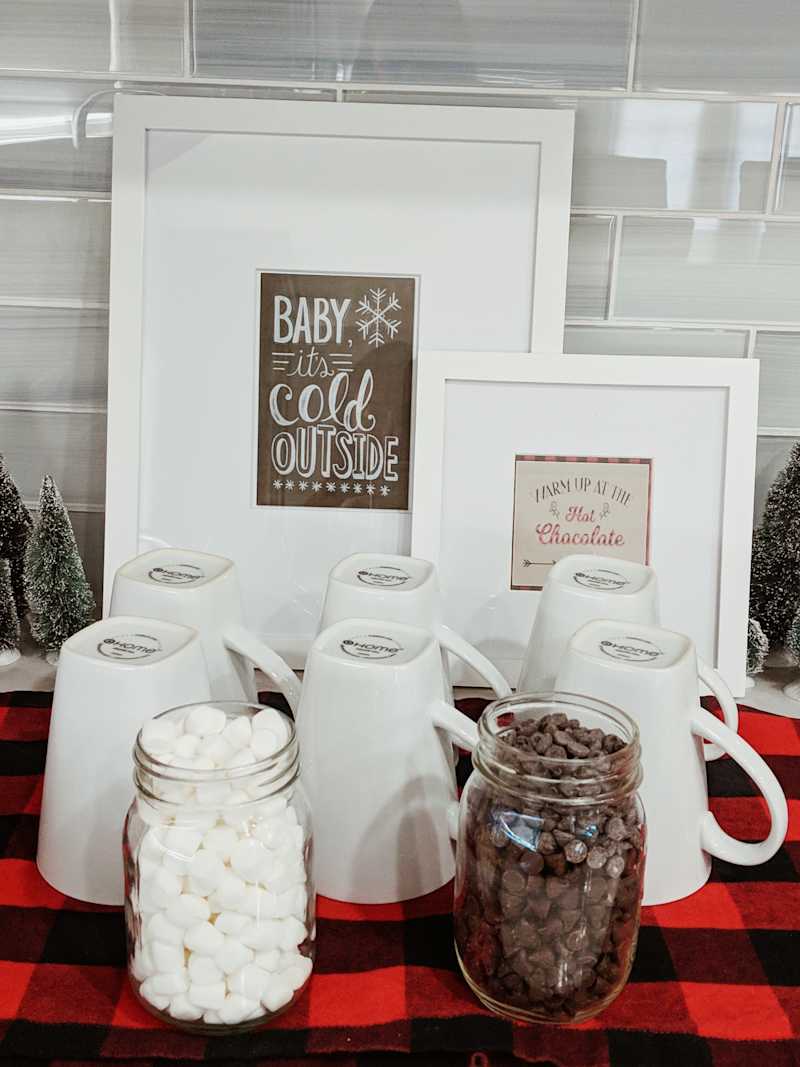
18. Cozy Hot Chocolate Nook with Buffalo Check and Winter Signs
While leaning signs against a backsplash is a popular and easy way to decorate, be careful with what’s behind them. If you have a gas range, this is a fire hazard. For any kitchen, be mindful of splashes. The frames here are white, and any splatter from the hot chocolate station will be obvious. It’s a great look for a corner that doesn’t see heavy-duty cooking action. Consider using removable adhesive strips to secure the frames if they’re in a higher traffic area to prevent them from getting knocked over. This shares a similar cozy vibe with Idea #7, but feels more rustic.
|
📋 Copy HEX 🔗 Share |
This cozy corner follows a simple but effective formula: 50% neutral base (white mugs, grey tile, white frames) + 30% bold pattern (the red and black buffalo check) + 20% natural elements (chocolate chips, marshmallows, frosted pine trees). The plaid textile is the star, providing a powerful dose of color and pattern. The rest of the elements are intentionally kept simple and neutral to support it without competing. This is a great recipe for incorporating a bold trend like buffalo check in a balanced way.
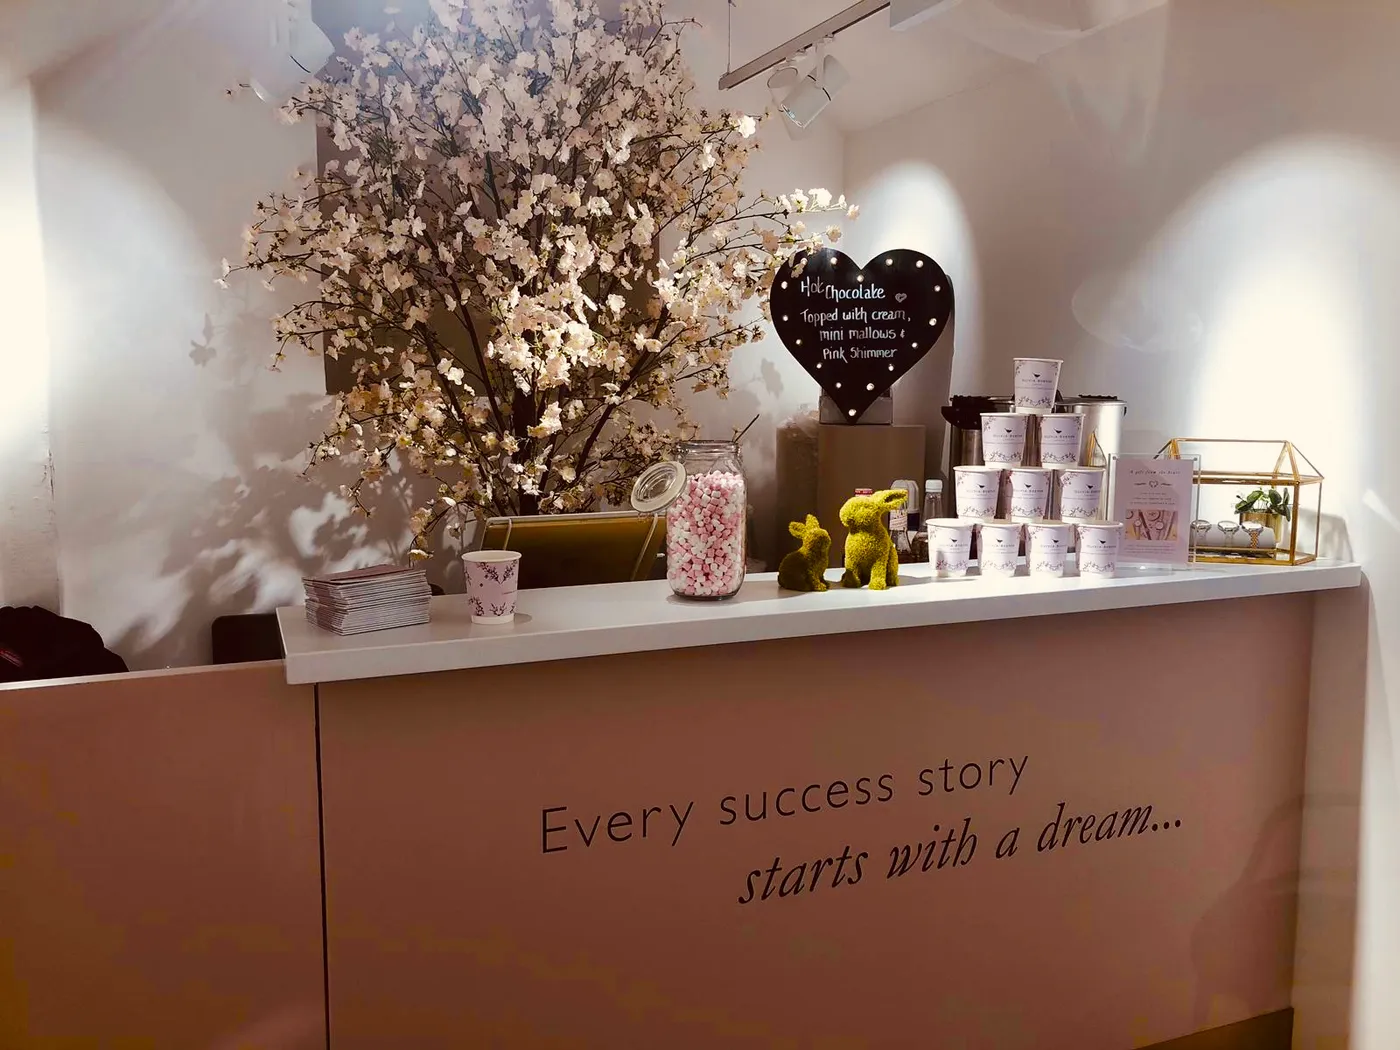
19. Whimsical Hot Chocolate Counter with a Faux Blossom Tree
A giant faux cherry blossom tree can be a huge investment. To get this whimsical, sweet vibe for less, focus on the counter level. Find a much smaller, tabletop-sized blossom tree online or at a craft store for $30-$50. Lean into the pink with a can of spray paint for your counter (if it’s a piece you can paint) or use a roll of pink adhesive vinyl for a temporary change. The moss bunnies and marquee heart can often be found at stores like Target or HomeGoods during the spring season for around $15-$25 each.
|
📋 Copy HEX 🔗 Share |
When using prominent branding or text in your decor, like the Hot Chocolate text on the counter or the marquee sign, repetition is key to making it feel intentional. Here, the phrase is repeated, which reinforces the theme. If you have just one sign, it can sometimes feel like a last-minute addition. By integrating the text into the physical counter and also having the light-up sign, it becomes a core part of the design concept, creating a fun, commercial-inspired pop-up shop feeling.
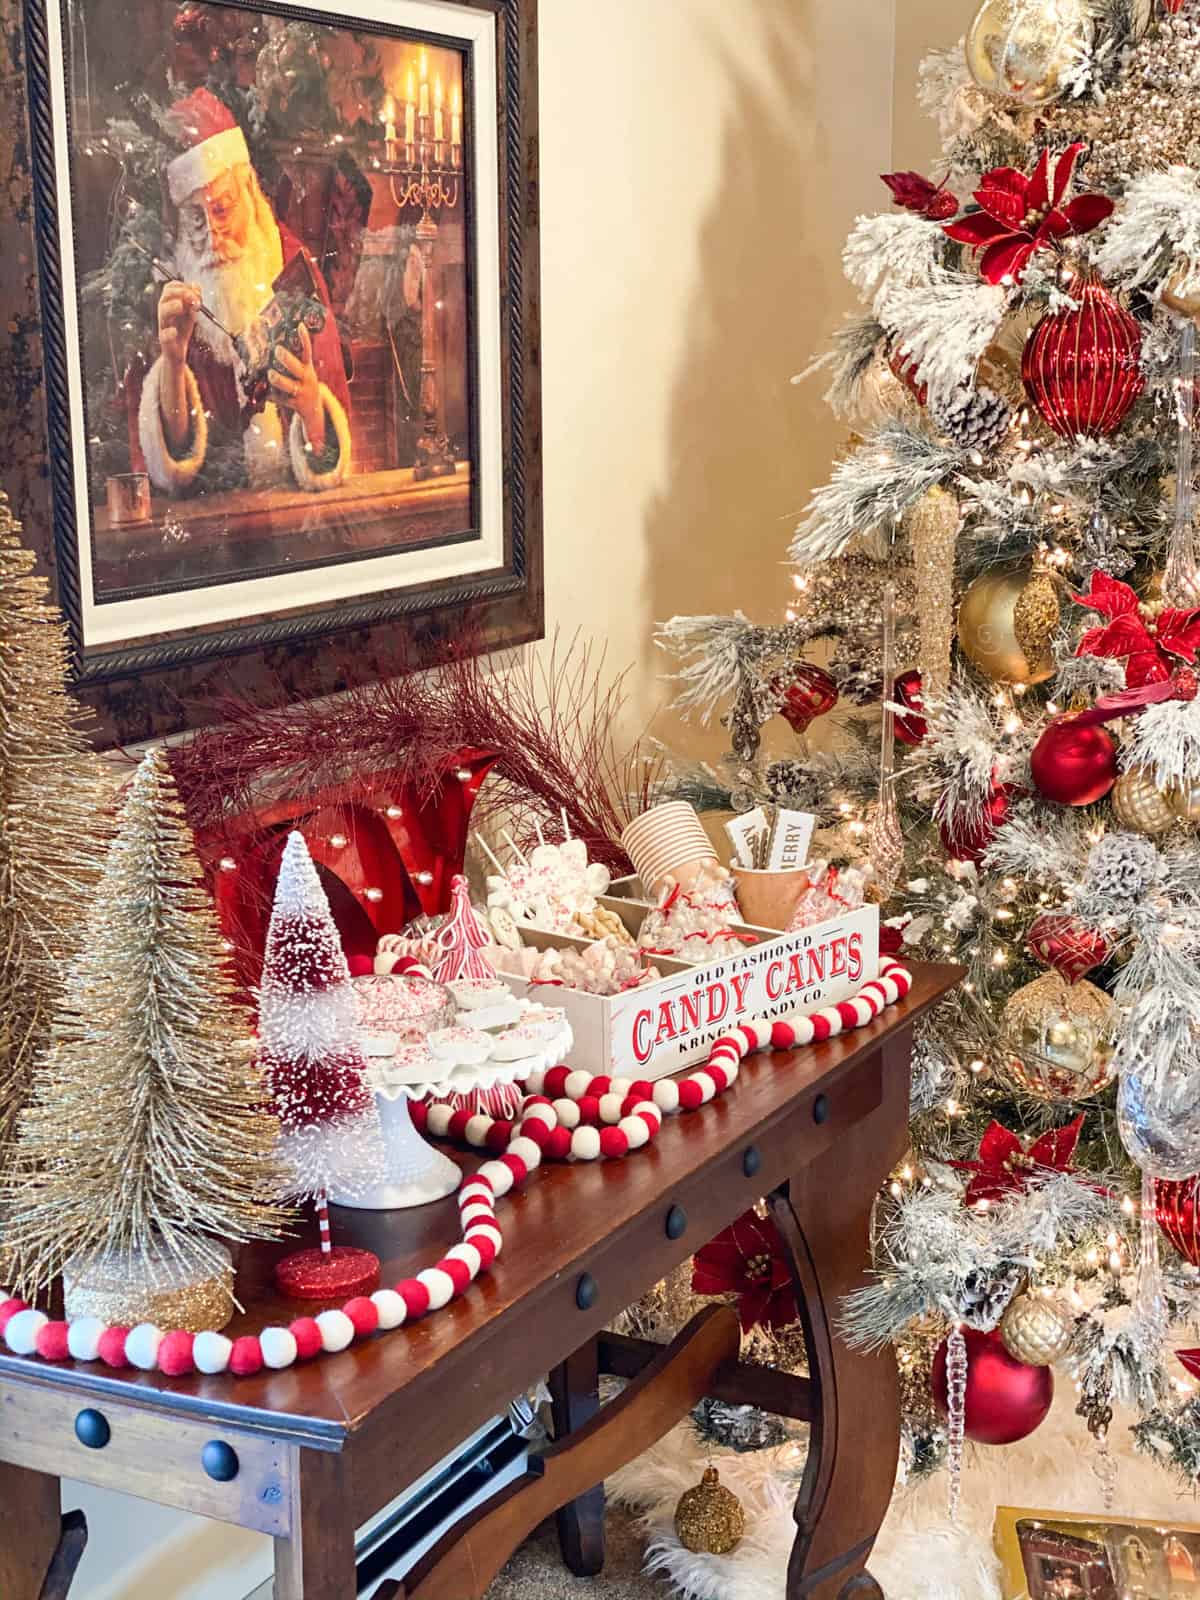
20. Traditional Christmas Hot Chocolate Bar with Santa Art
This traditional, art-focused look feels expensive, but can be assembled thoughtfully. The art is the main investment.
- Main Furniture (Dark Console Table): $150 – $400
- Wall Decor (Framed Santa Art): $50 – $250+
- Main Decor (Flocked Tree): $80 – $300
- Accessories (Garland, Candy Box, Trees): $40 – $75
- TOTAL: $320 – $1,025
Budget alternative: Source a console table from Facebook Marketplace and paint it a dark color. Find a printable vintage Santa image on Etsy for a few dollars and frame it yourself.
This arrangement is ideal for an entryway or the wall of a living or dining room. You’ll need a minimum of 5-6 feet of wall space to accommodate the console table and the flanked Christmas tree without it feeling cramped. The key is having enough space for the tree to stand beside the table, not in front of it. The ceiling height should be at least 8 feet to allow for a reasonably sized tree and to give the framed art enough breathing room above the console.
21. Festive Kitchen Island Buffet with Christmas Tree Backdrop
Set up a self-serve warming station on your island using a pressure cooker. This is perfect for keeping chili, soup, or even a large batch of hot chocolate warm for hours. Time: 5 minutes. Cost: $0 (using your own appliance).
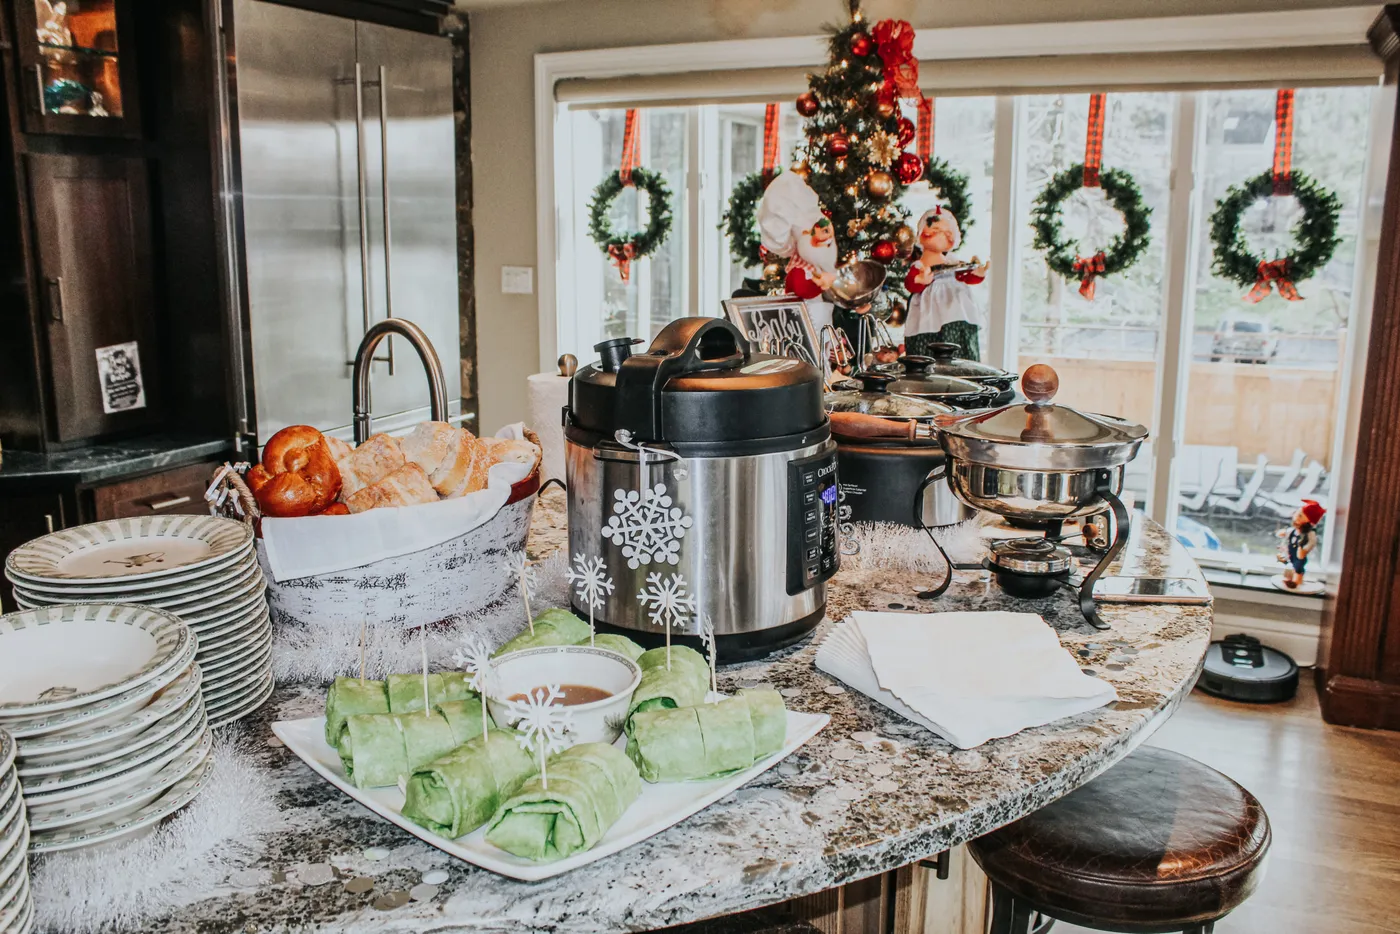
- Place a large, heat-proof trivet or cutting board on your granite countertop to protect it from direct heat.
- Position your pressure cooker (like an Instant Pot) or slow cooker on the trivet.
- Set the appliance to the ‘Keep Warm’ function (not Slow Cook or Pressure Cook).
- Place a ladle and a stack of bowls or mugs right next to it for easy serving.
- Make sure the cord is routed safely away from the main traffic flow around the island.
It’s the decorated Christmas tree in the background. While the island is laden with food and serving dishes, it’s the glowing tree that transforms the scene from a simple buffet into a truly festive holiday gathering. Its warm lights and pops of red and gold provide a magical backdrop, infusing the entire kitchen with the spirit of Christmas. Remove the tree, and it’s just a functional food setup. With the tree, it’s an experience.
22. Winter Wonderland Picnic with S’mores and Hot Chocolate Carts
Elaborate, themed indoor picnics are a huge trend for showers, birthdays, and even just cozy weekends, especially as people look for creative ways to celebrate at home. They blend the comfort of being indoors with the whimsical, communal feeling of a picnic. This Winter Wonderland theme takes it a step further, creating an immersive experience that feels incredibly special and Instagram-worthy. It taps into our collective desire for curated, beautiful moments. If you’re planning an event, consider checking out the mistakes section (Mistake #1) to avoid common pitfalls.
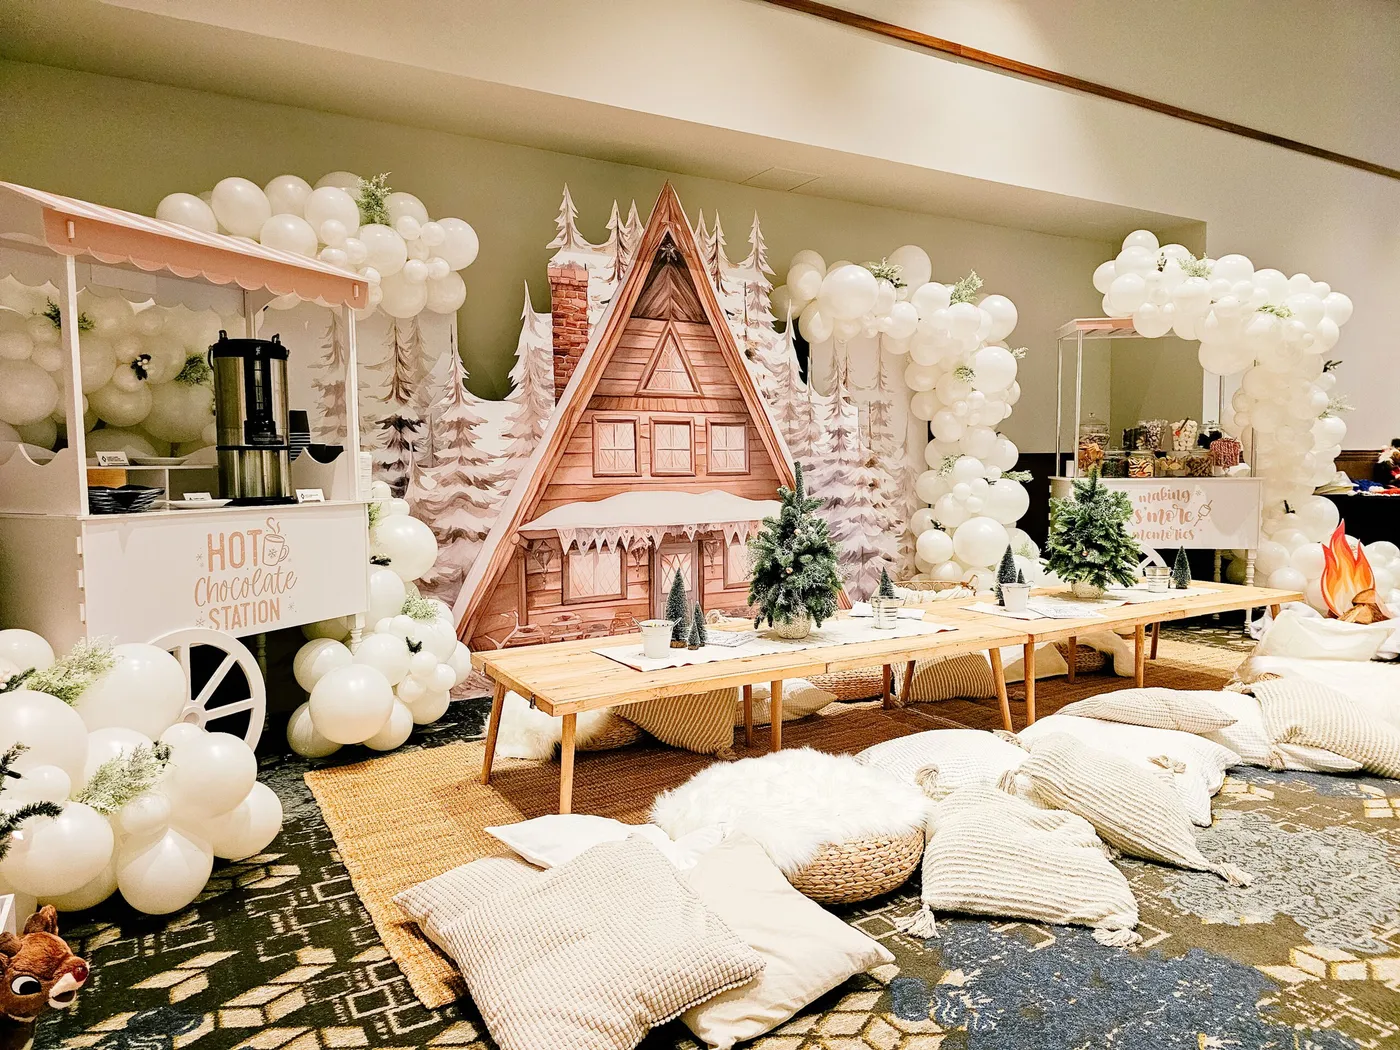
The design succeeds because of its cohesive world-building. It’s not just a few wintery items; it’s a complete environment. The consistent color palette of white, light wood, and muted pink is strictly enforced. The scale of the backdrop elements—the large cabin and tree cutouts—creates an immersive feeling. Finally, the use of soft textures like the floor cushions, woven rugs, and fluffy balloon clouds makes the entire space feel inviting and comfortable, encouraging guests to settle in and stay awhile.
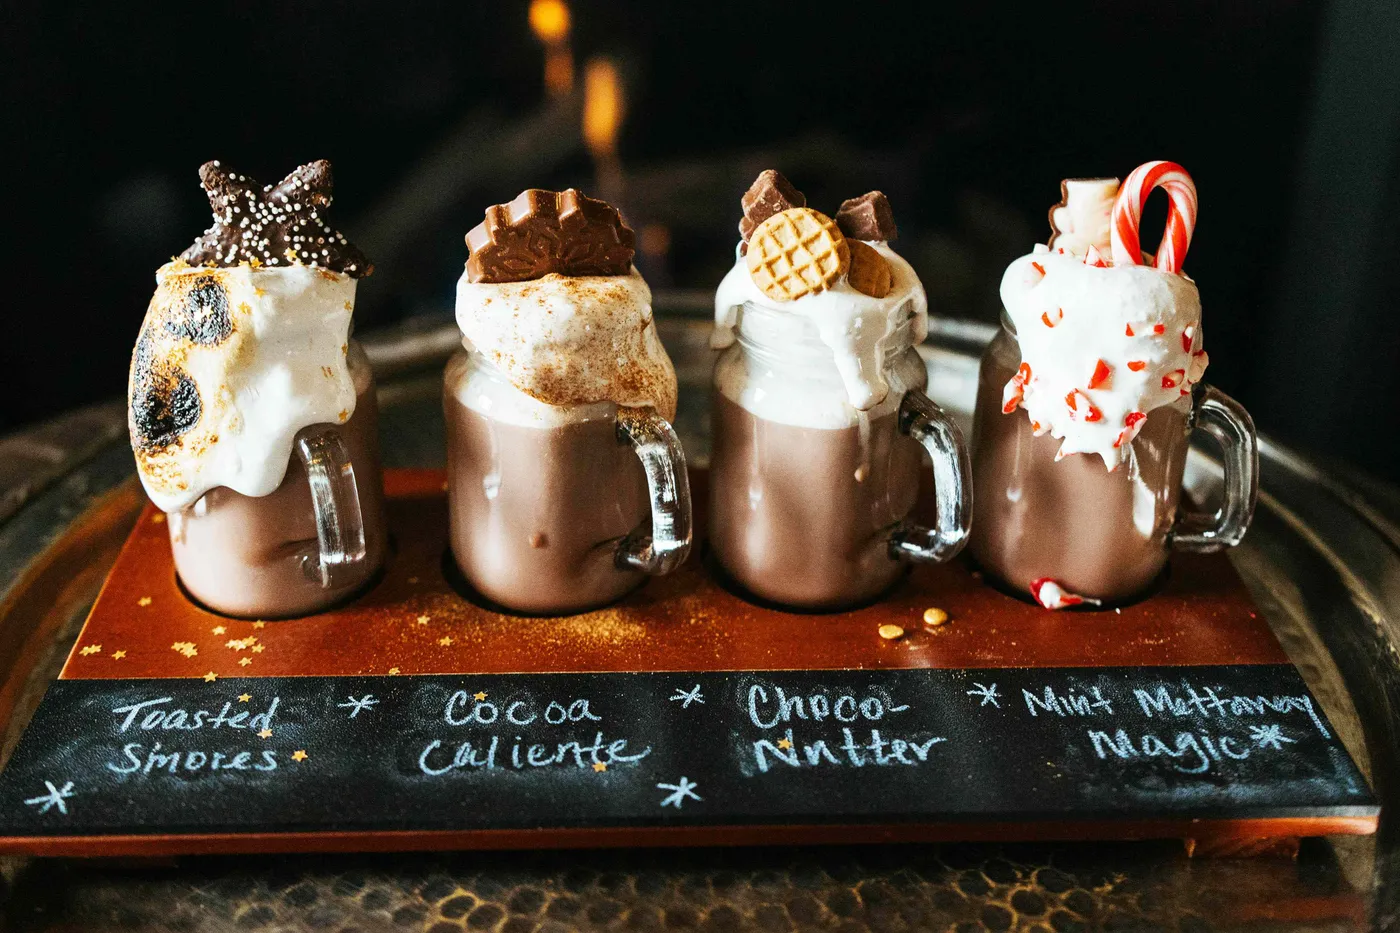
23. Assortment of Festive Holiday Drinks and Mini Desserts
This looks like an incredible holiday spread, but let’s be realistic about the prep time. Each one of these drinks and desserts was likely prepared and garnished individually right before being served. Whipped cream deflates, sprinkles can bleed color, and garnishes can wilt. This isn’t a set it and forget it bar. It’s a high-effort, high-reward display best suited for a party where you can assemble things à la minute or have them brought out right at serving time. Don’t expect it to look this perfect for three hours.
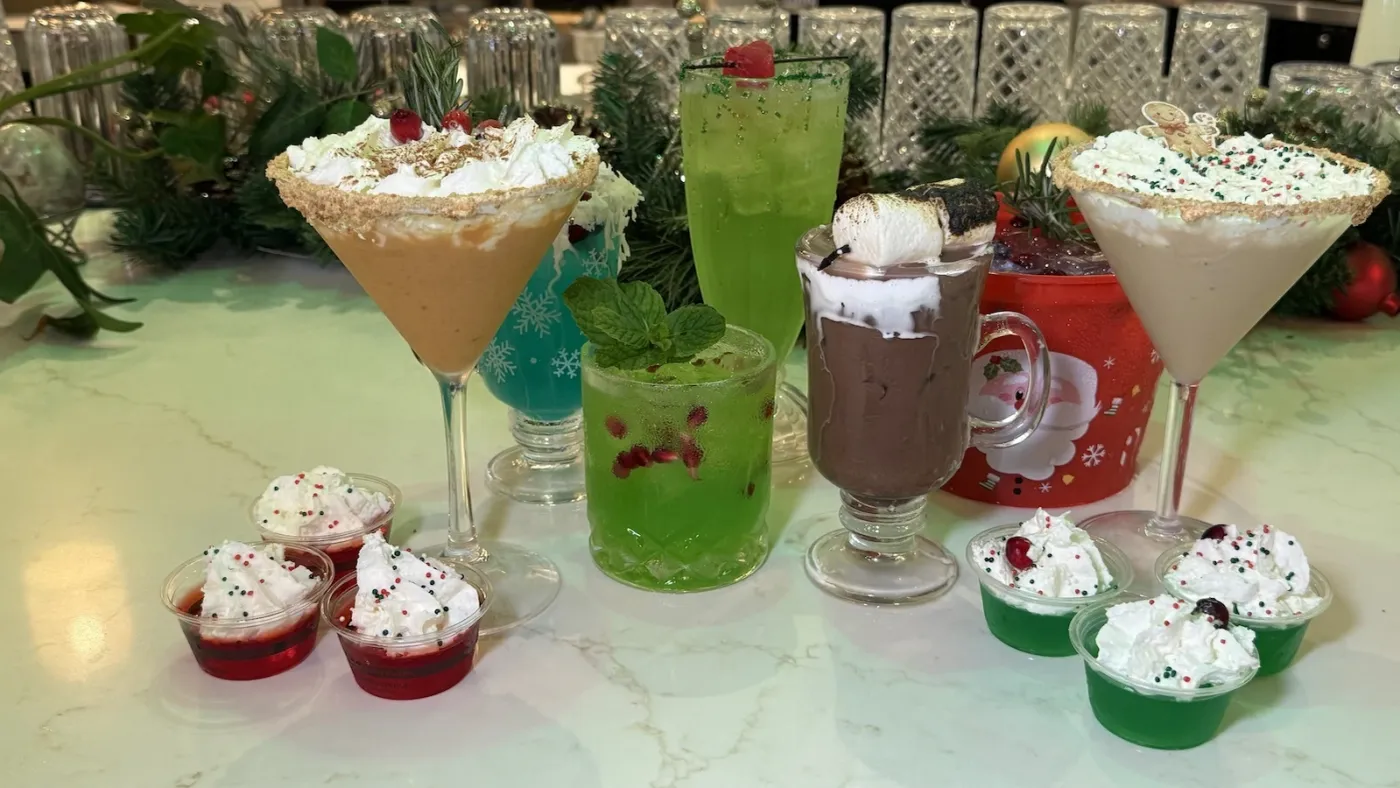
The visual success of this spread is 40% variety in glassware + 30% consistent toppings + 30% festive color palette. Using different types of glasses (martini, mug, highball) creates instant visual interest. The repetition of whipped cream as a topping across most of the drinks ties the diverse group together. Finally, the strict adherence to a red, green, and white color scheme, from the Jell-O to the sprinkles, screams holiday in the most delicious way possible.
24. Cozy Holiday Bar with a Woven Basket Tray
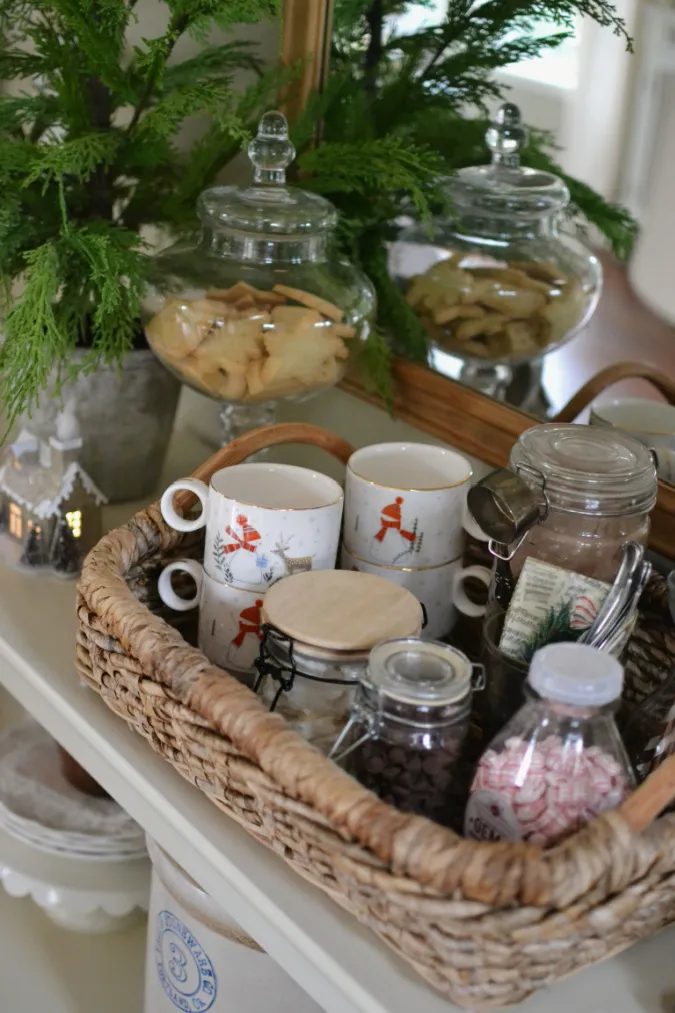
The large oval woven basket is the heart of this design. It single-handedly introduces a warm, natural, and slightly rustic texture that prevents the setup from feeling too slick or generic. It corrals all the essential items—mugs and jars—into one cohesive unit, making the bar feel organized and intentional. By acting as a giant tray, it also adds a layer of dimension and softness that a standard ceramic or metal tray couldn’t achieve. It’s the piece that makes the whole display feel effortlessly cozy.
|
📋 Copy HEX 🔗 Share |
Woven baskets are beautiful, but they aren’t the most practical choice for a potentially messy station. Cocoa powder, sticky marshmallow residue, and hot chocolate drips can easily get stuck in the weave, making it difficult to clean. To protect your basket, consider lining the bottom with a cloth napkin or a custom-cut piece of clear shelf liner before placing your items inside. This gives you the aesthetic benefit without the cleaning headache after the party is over.
Your Coziest Creation Awaits
See? Creating a memorable hot chocolate bar is less about having a huge budget and more about thoughtful details and a little bit of personality. Whether you go for a rustic cabin vibe or a playful pink wonderland, the best setup is the one that makes you want to grab a mug and stay awhile. Now, open up that Pinterest board you’ve been curating and start planning your perfect cozy corner!