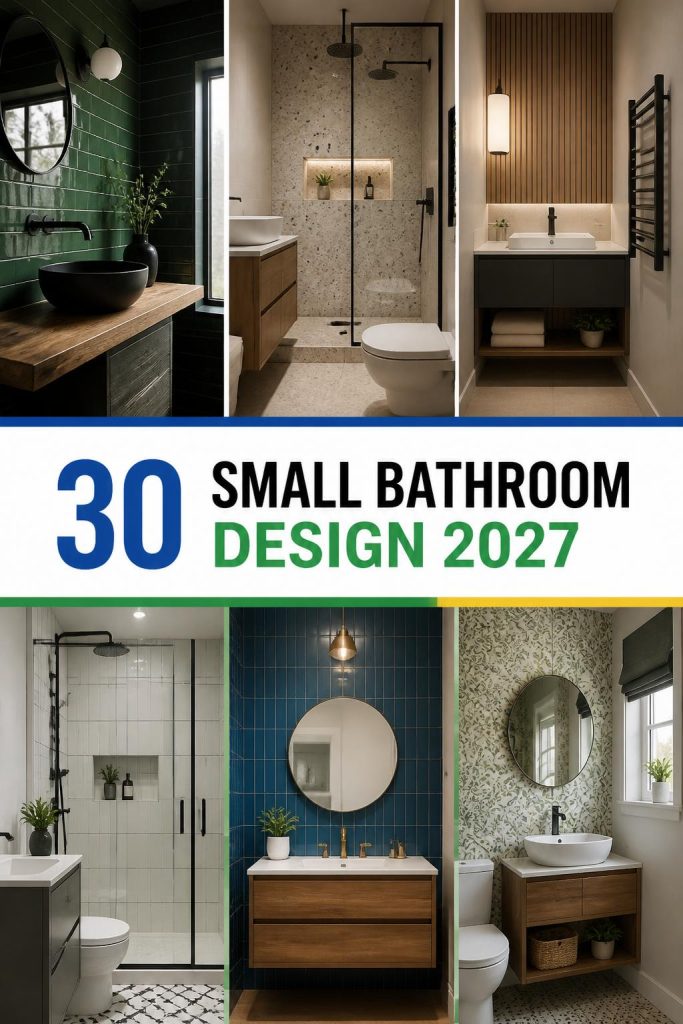
30 Stunning Small Bathroom Design Ideas for 2027 That Will Elevate Your Luxury Space

You know that feeling when you finally find the small bathroom design that looks exactly right for your space? That little spark of yes, this is it? We’ve been there. That’s why we spent serious time browsing Wayfair, Home Depot, and West Elm to bring you only what’s worth your attention this year. After filtering through hundreds of options, we narrowed it down to the 30 ideas that actually deliver.
Inside, you’ll find curated small bathroom ideas covering everything from modern minimalist to warm natural styles, showing you how to get that luxury feel without needing a massive footprint. For 2026, it’s all about quiet luxury and making small spaces feel intentional, not just functional. We’re seeing a huge move towards textures and integrated lighting on Pinterest, turning the bathroom into a personal retreat. And stay until the end—we break down the most common mistakes that can ruin these looks.
📌 Save this to Pinterest for later—you’ll want to revisit these ideas.
1. Embrace Serenity with a Minimalist Freestanding Tub Setup
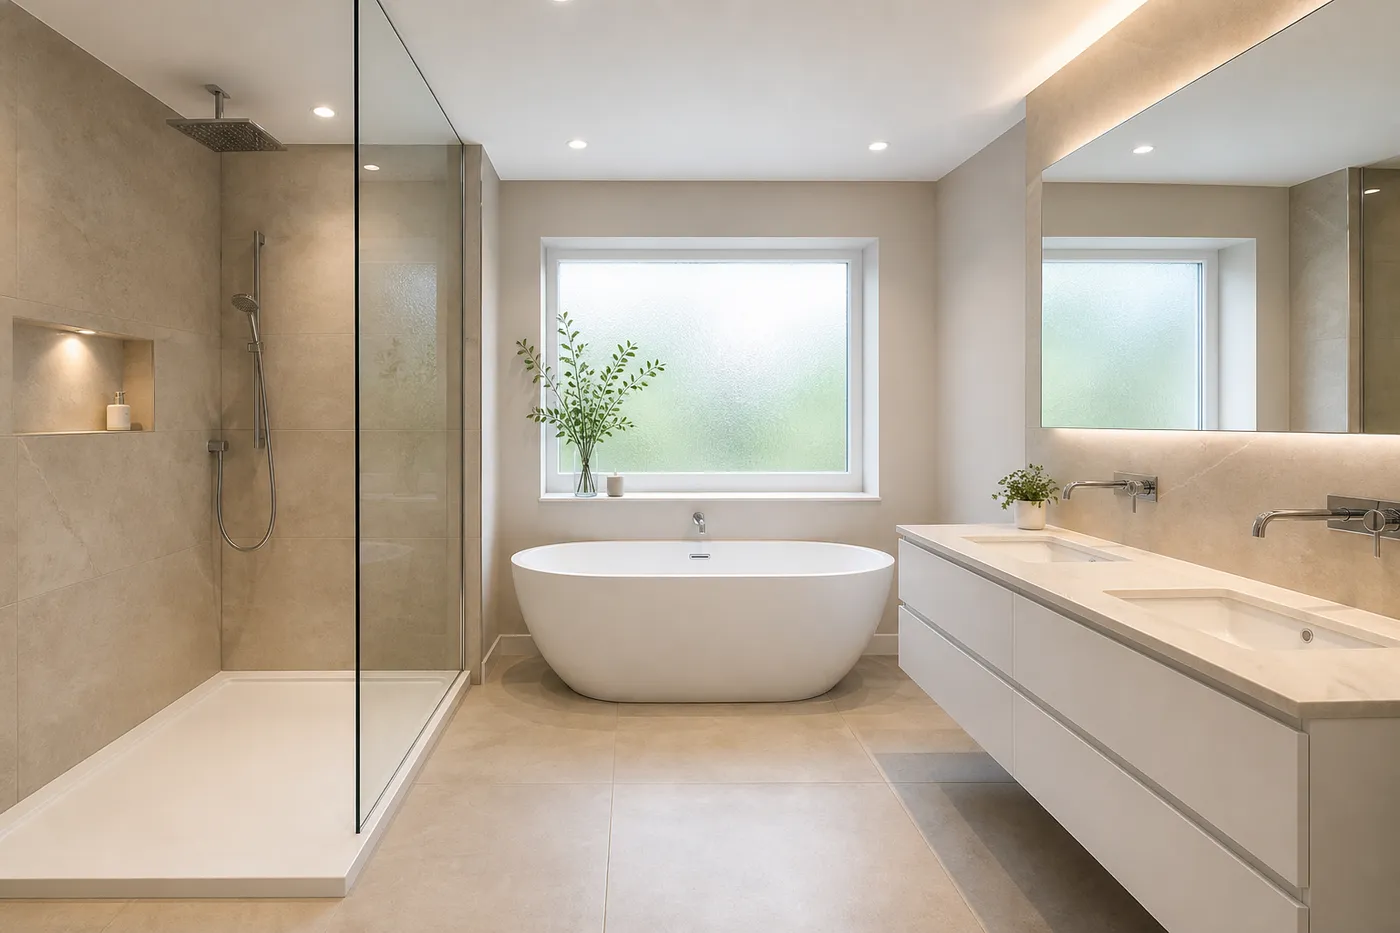
This bathroom is a masterclass in less is more. The magic here is cohesion. By using the same large-format beige tile on both the floor and walls, the room feels larger and uninterrupted, as there are no sharp visual breaks. The floating double vanity enhances this effect by freeing up floor space, making the room feel lighter and airier. Finally, the strategic use of warm backlighting under the mirror adds depth and a soft glow without cluttering the space with traditional sconces.
|
📋 Copy HEX 🔗 Share |
When installing a freestanding tub in a small-to-medium-sized bathroom, ensure you have at least 6 inches of clearance on all sides that aren’t against a wall. This is non-negotiable for cleaning. For the side where the tub filler is, aim for 10-12 inches to allow comfortable access for plumbing and operation. This not only looks better but prevents the tub from feeling crammed into the corner, which defeats the purpose of its sculptural, open design.
2. Create a Fresh Vibe with Aqua, Mint, and Terrazzo Tiles
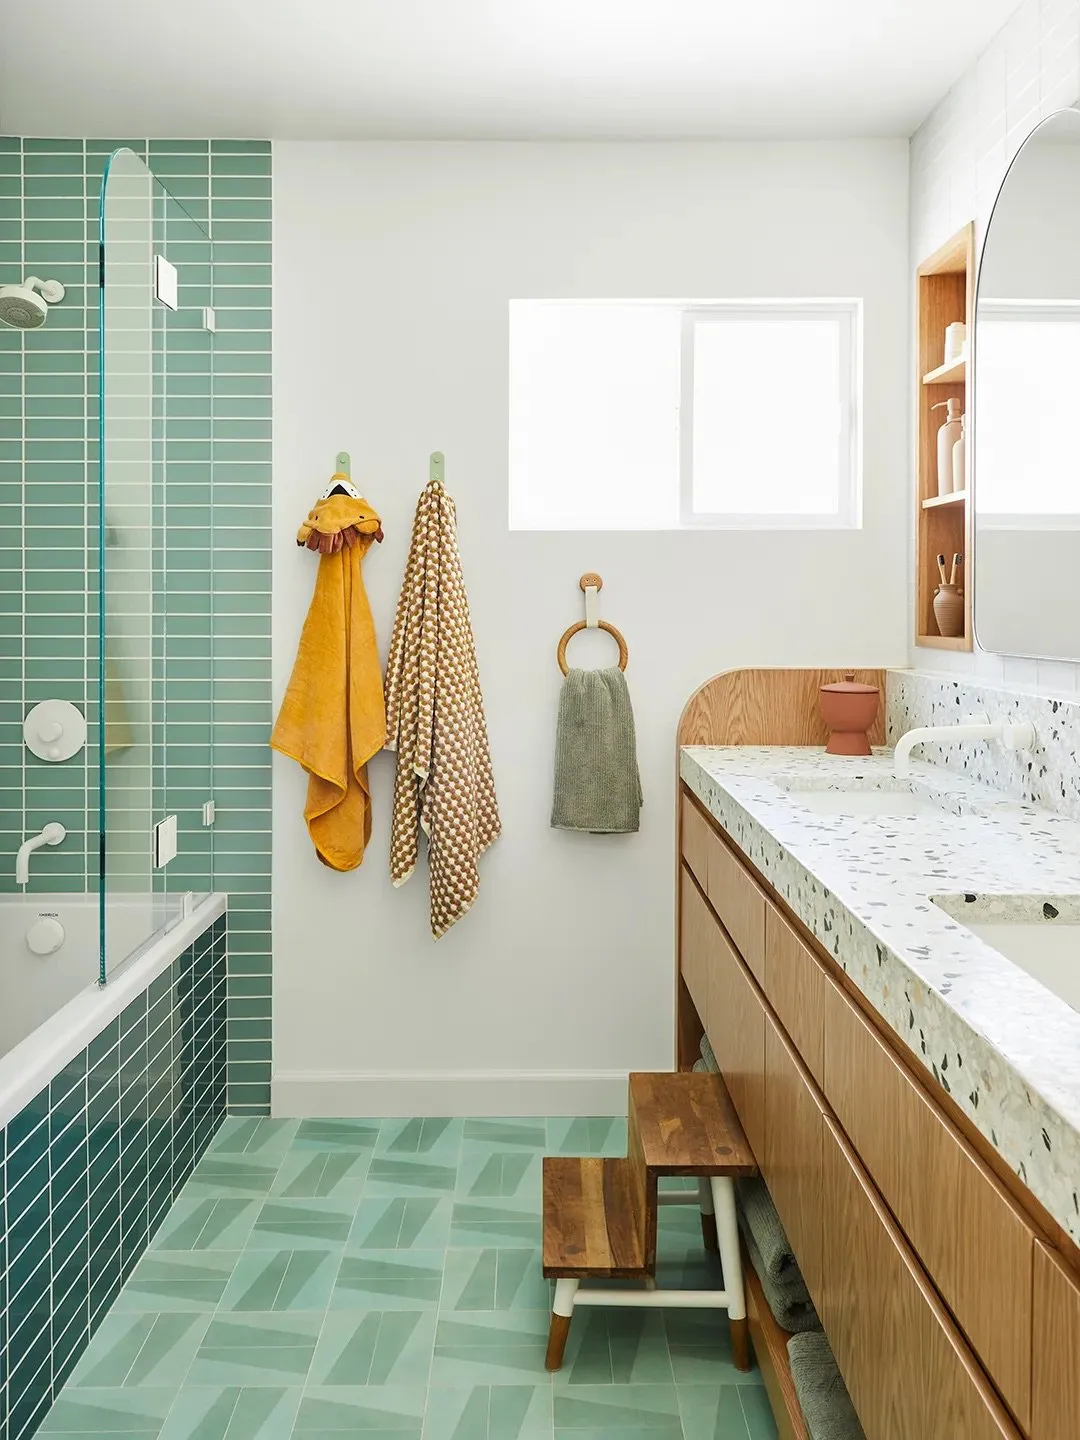
Think of this bathroom’s formula as a playful take on color blocking. It’s roughly 50% Active Color (the aqua and teal tiles), 30% Neutral Base (the light wood vanity), and 20% Patterned Interest (the mint geometric floor and terrazzo countertop). The key is that the active colors are all in the same cool family, preventing them from clashing. You could easily swap the aqua for a soft blush pink or sage green and keep the same balanced, energetic feel, as long as you stick to the proportions.
|
📋 Copy HEX 🔗 Share |
A bathroom with this much tile and grout requires a specific cleaning routine. The geometric pattern on the floor, while beautiful, will show dirt and hair more than a more uniform surface. Also, be mindful of the terrazzo countertop—it’s often a composite material containing marble chips, which means it can be sensitive to acidic cleaners (like vinegar or lemon) that can cause etching. Always use a pH-neutral cleaner to keep it looking pristine.
3. Layer Warmth with Vertical Gray Tiles and Natural Wood
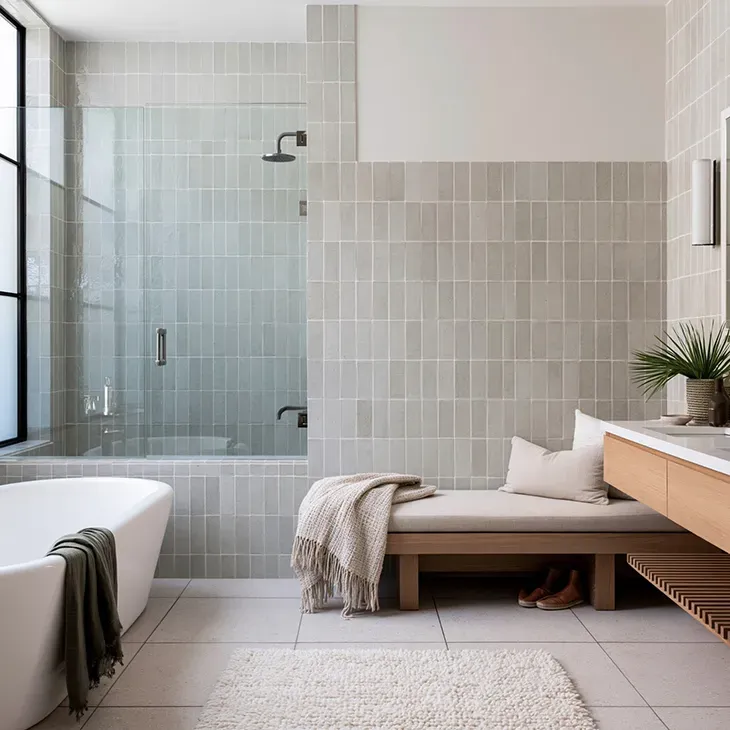
The single element holding this entire design together is the vertical orientation of the subway tiles. If you were to lay these same light gray tiles horizontally, the room would instantly feel shorter and more traditional. Stacking them vertically draws the eye upward, creating an illusion of height and a distinctly modern rhythm. It’s a subtle but powerful choice that elevates a simple material into a sophisticated architectural feature, making everything else—from the wood vanity to the black-framed window—feel more intentional.
|
📋 Copy HEX 🔗 Share |
You can achieve this calm, modern aesthetic for much less. Instead of a custom floating wood vanity, look for IKEA’s GODMORGON series and pair it with a wood-look front from a company like Semihandmade. For the tile, you don’t need expensive ceramic; big box stores like Lowe’s or Home Depot offer basic gray subway tiles for under $3 per square foot. The key is the vertical installation pattern, which costs nothing extra in materials. Finish with budget-friendly black fixtures from Amazon to complete the look.
4. Achieve Modern Luxury with a Marble and Glass Suite
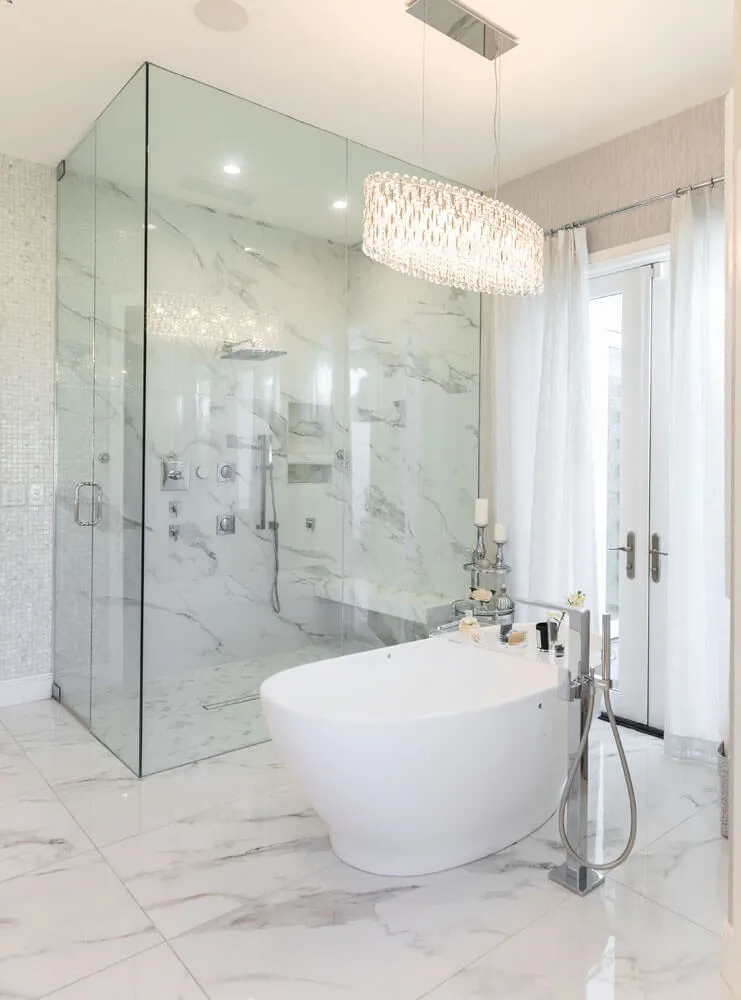
Recreating this level of luxury requires a significant investment, primarily in the tile and glasswork. The marble-look porcelain tile and professional installation are the biggest ticket items, followed by the high-end freestanding tub and fixtures.
|
📋 Copy HEX 🔗 Share |
- Main Furniture (Tub): $2,000 – $5,000
- Lighting (Chandelier): $500 – $1,500
- Fixtures (Chrome tub filler, shower system): $1,000 – $3,000
- Wall/Floor Treatment (Marble-look tile & installation): $6,000 – $12,000
- Glass Shower Enclosure (Custom): $2,500 – $5,000
- TOTAL: $12,000 – $26,500
Budget alternative: Use a luxury vinyl tile (LVT) with a marble pattern, a more affordable acrylic tub from a big-box store, and a crystal-look chandelier from an online retailer like Wayfair to get a similar vibe for around $5,000 – $9,000.
This layout works best in a bathroom that is at least 100-120 square feet, typically around 10′ x 10′ or 8′ x 15′. You need enough length to accommodate both a walk-in shower and a freestanding tub without them feeling crowded. A minimum ceiling height of 9 feet is recommended to properly showcase the chandelier without it feeling overwhelming. For a smaller space, consider the more compact layout in Idea #10, which uses a shower-tub combo to save space.
5. Go for Cozy Modern with Wood-Look Tiles and Black Accents
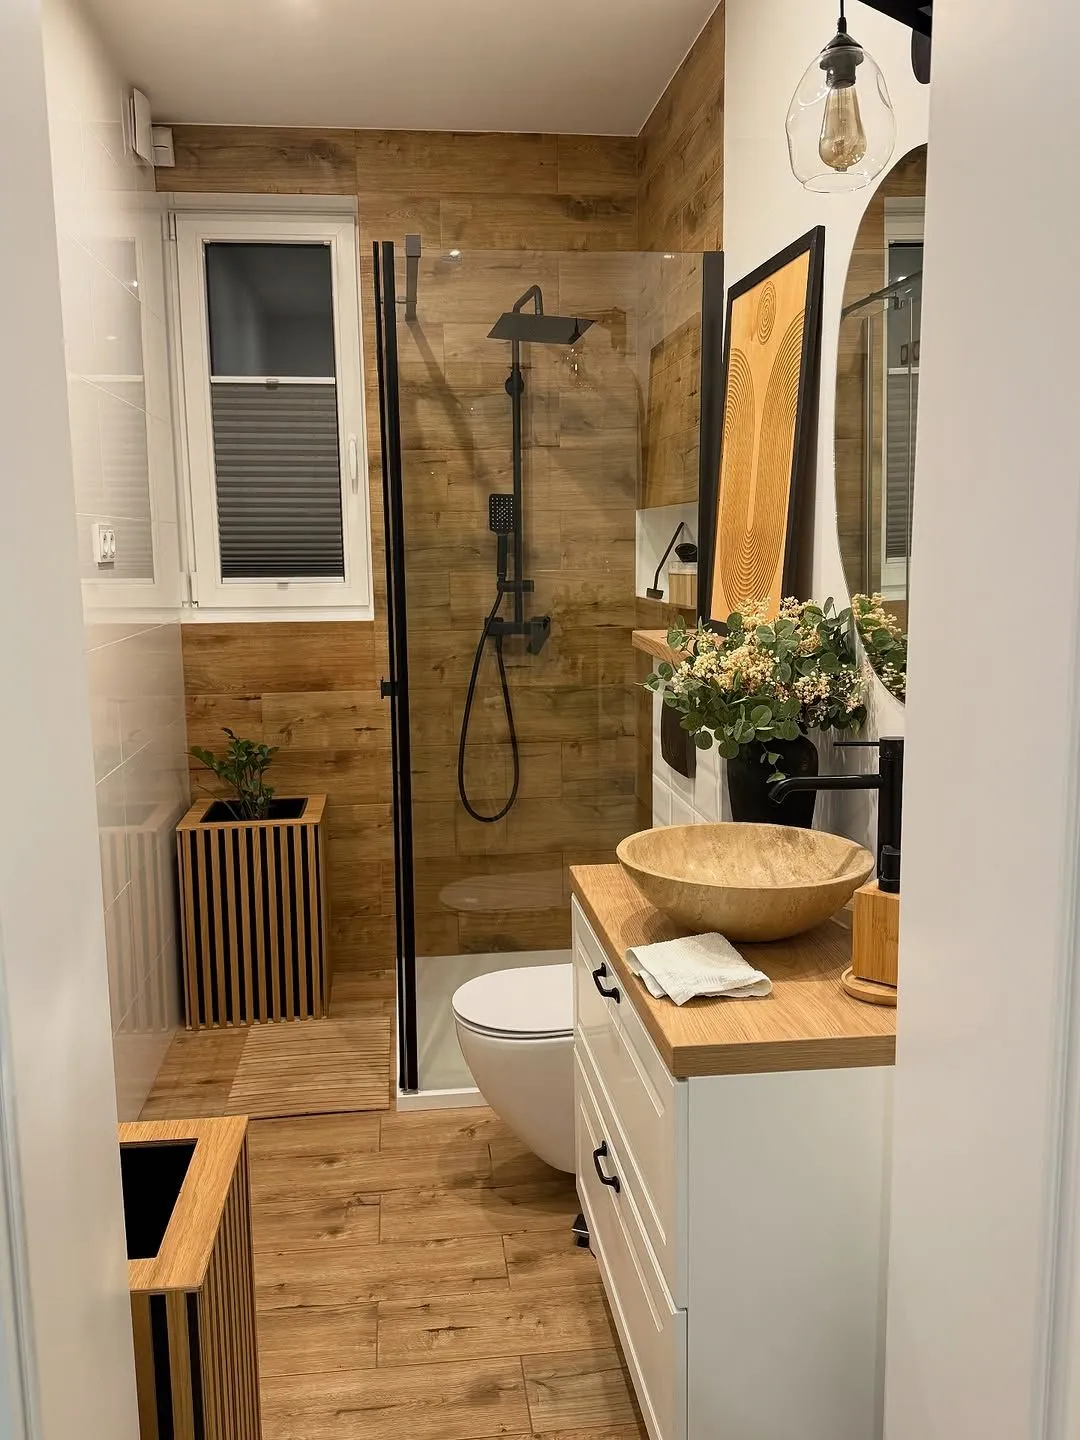
This look is a direct response to the cold, all-white minimalism that dominated the last decade. People are craving warmth and texture, and porcelain tile that mimics wood offers the perfect solution. It delivers the cozy, natural aesthetic of a cabin or spa but with the durability and water-resistance needed in a bathroom. This trend, often called ‘Japandi’ when mixed with minimalist black fixtures and clean lines, has serious staying power because it balances modernism with a deeply comforting, organic feel.
|
📋 Copy HEX 🔗 Share |
Wood-look tile is incredibly durable, but the illusion can be shattered by improper care. The biggest issue is grout. Choose a dark grout color that closely matches the darkest tones in the tile to hide dirt. For cleaning, avoid waxy or oil-based cleaners (like Murphy Oil Soap) that can leave a hazy residue and dull the finish. A simple solution of warm water and a pH-neutral cleaner is all you need. Also, the black-framed glass shower door will show hard water spots and soap scum, so a daily squeegee is essential.
6. Combine Concrete, Wood, and a Circular Backlit Mirror
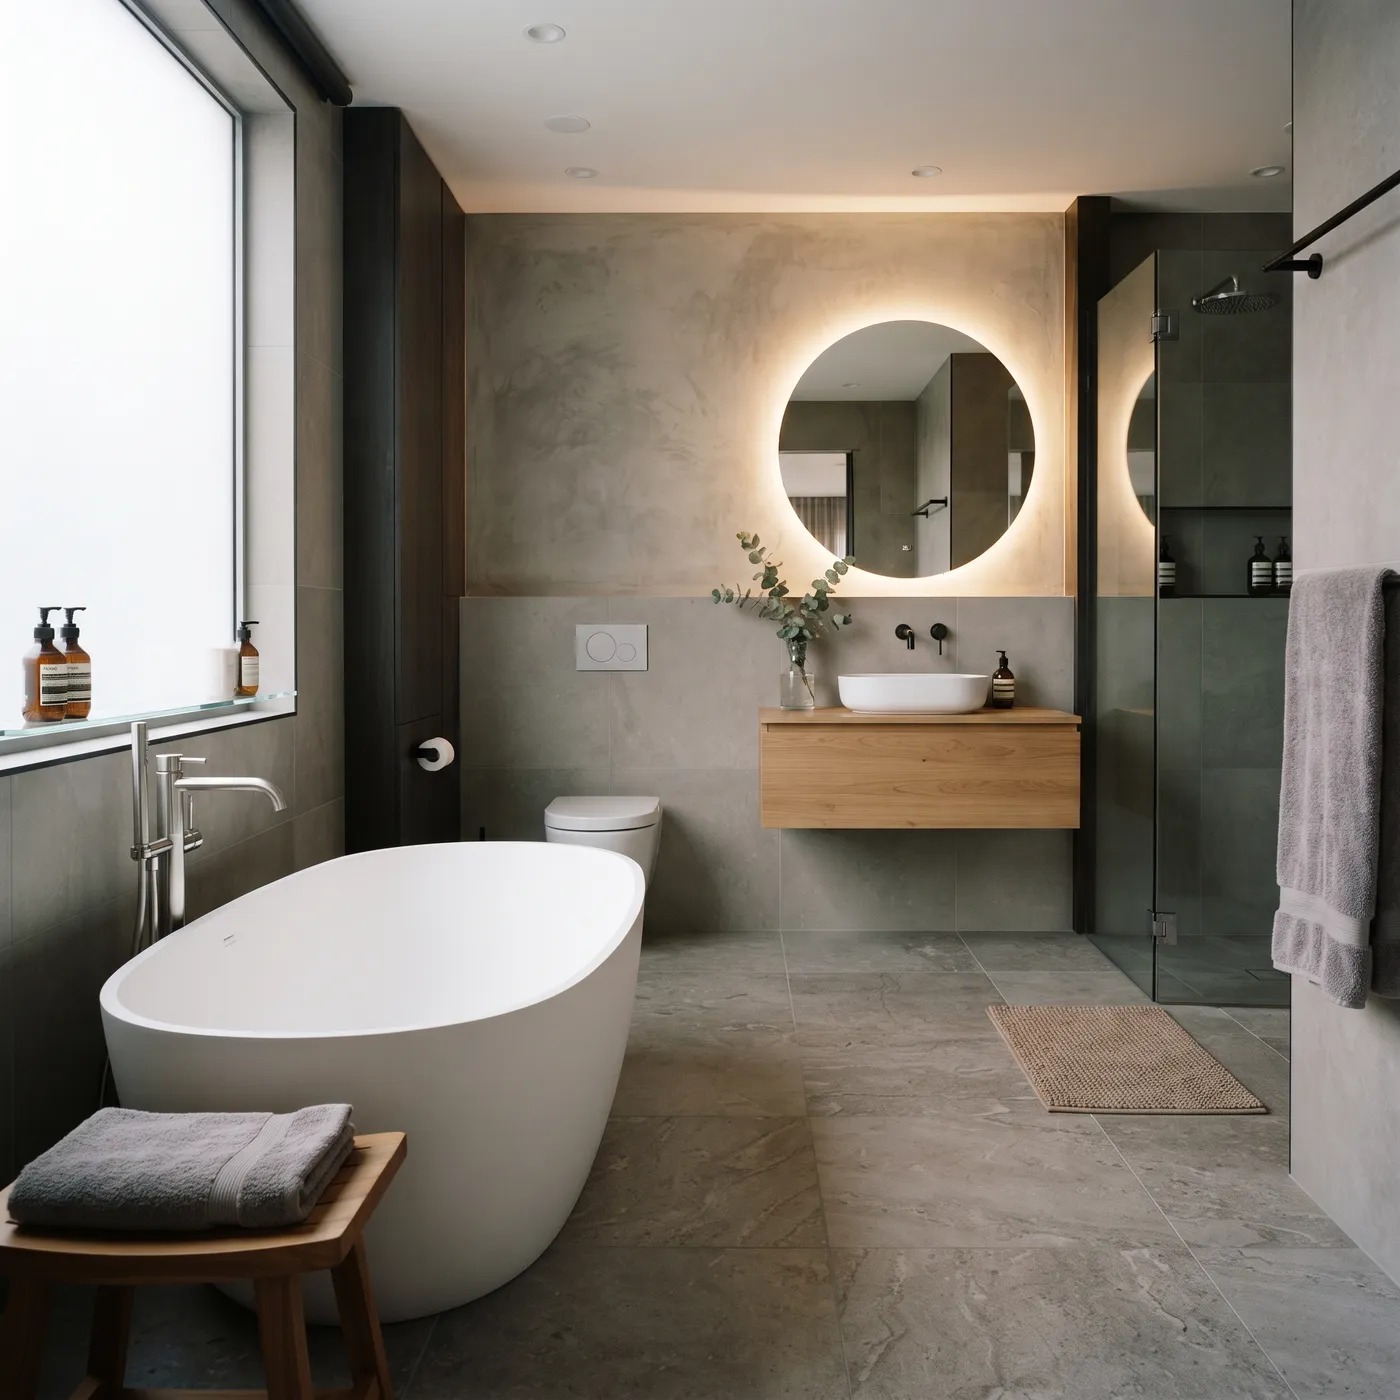
Creating a realistic concrete-look accent wall can be done over a weekend. This is a great DIY project that adds incredible texture.
|
📋 Copy HEX 🔗 Share |
- Prep the Wall: Clean the wall thoroughly and apply a coat of primer. Let it dry completely. (Time: 2 hours)
- Apply the Base Coat: Use a trowel to apply a thin, uneven layer of a concrete-finish plaster like Roman clay or microcement. Don’t aim for perfection; variation is key. (Time: 3 hours)
- Build Texture: Once the first coat is tacky, apply a second, thinner coat with sweeping, overlapping strokes to create movement and depth. (Time: 2 hours)
- Seal for Protection: After the plaster has fully cured (check manufacturer’s instructions, usually 24-48 hours), apply a matte or satin sealer specifically designed for bathrooms to protect it from moisture. (Time: 1 hour)
Material Cost: Approximately $150 – $300.
When installing a large backlit mirror, especially over a textured surface like this concrete wall, have your electrician install a recessed outlet directly behind where the mirror will hang. This allows you to plug the mirror in without a visible cord dangling down the wall, which would ruin the clean, minimalist effect. Ensure the outlet is placed so the mirror’s housing completely conceals it. This small bit of planning makes a world of difference in the final look.
7. Mix Gray and White Marble Tiles for a Layered Look
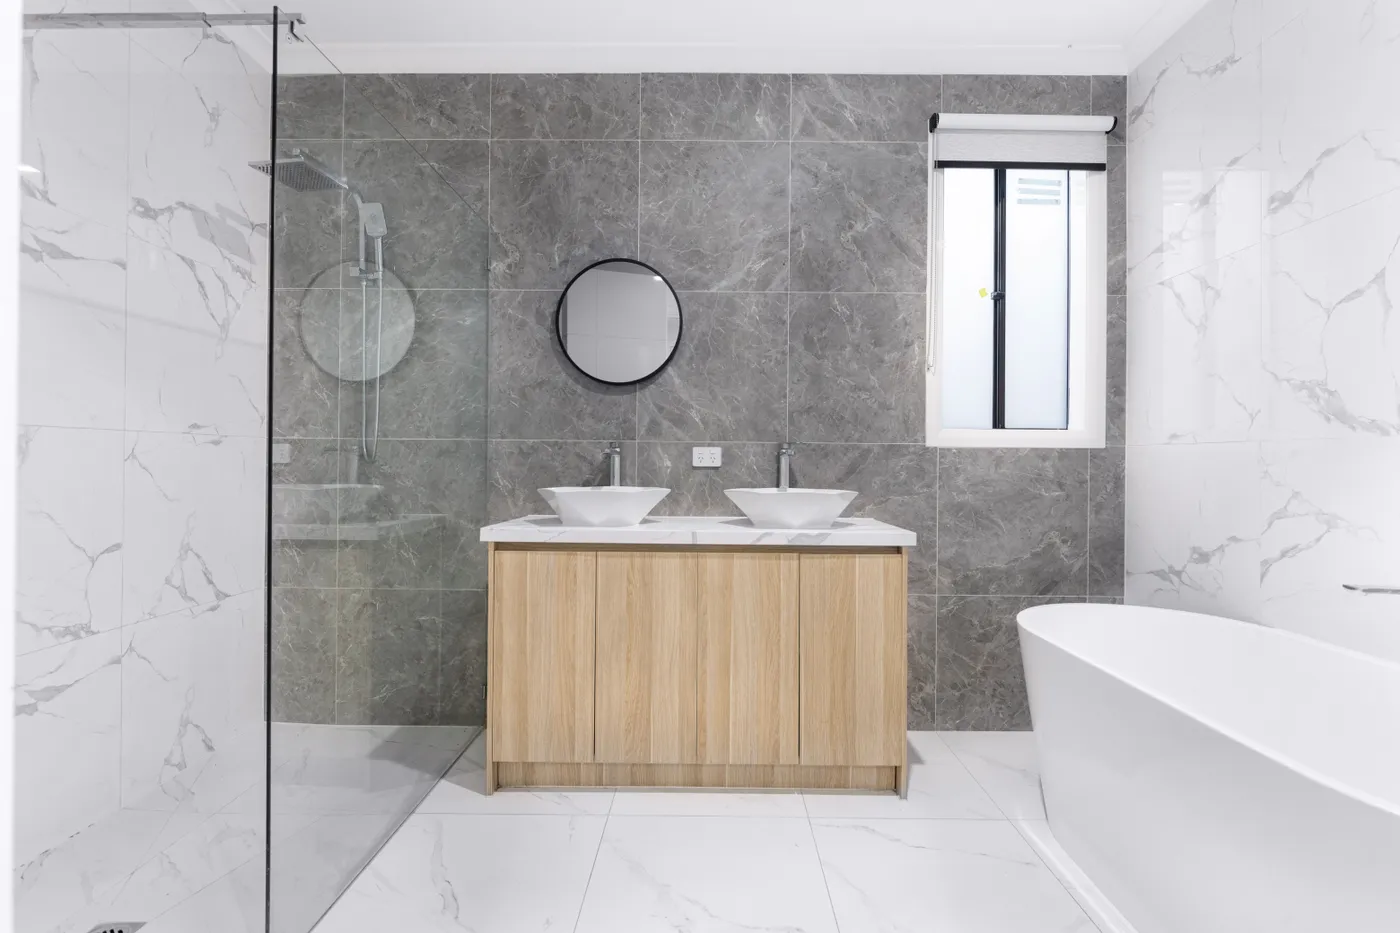
This bathroom design feels so clean and balanced because it uses a design principle called ‘zoning.’ The darker, gray-veined marble tiles are used exclusively behind the vanity, creating a distinct visual zone that anchors that area of the room. The rest of the space is wrapped in lighter, white-dominant marble, which keeps it feeling bright and open. The light wood vanity then acts as a warm bridge between the two stone patterns, preventing the look from feeling too cold or clinical. For a more opulent version of a marble bathroom, check out Idea #3.
|
📋 Copy HEX 🔗 Share |
While beautiful, mixing two different large-format marble-look tiles can be a headache for installation. The tiles, even from the same manufacturer, might have slight variations in thickness or exact dimensions, which can throw off your grout lines and create an uneven surface (lippage). Be sure to hire an experienced tiler who knows how to handle these variations. It will cost more upfront, but it will save you from staring at crooked lines for the next decade.
8. Use a Bold Black Shower Wall as a Focal Point
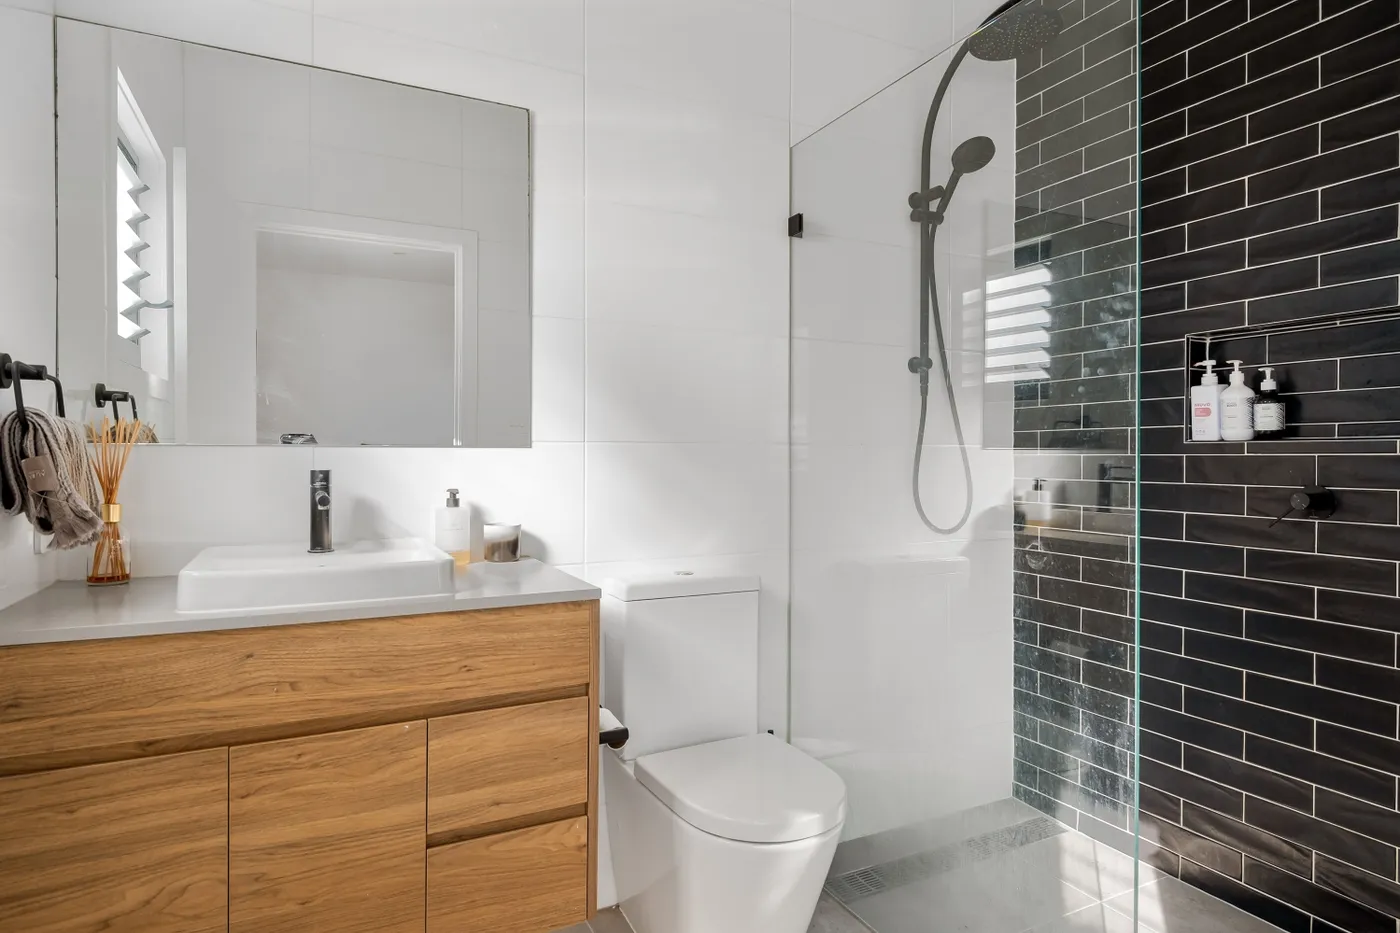
The formula here is a classic high-contrast recipe: 60% Crisp White (large format tiles, toilet), 30% Natural Wood (vanity), and 10% Matte Black (shower wall, fixtures). This ratio ensures the room feels bright and clean, not dark and cave-like. The black is used as a concentrated ‘punch’ in one area, creating a dramatic focal point. The wood’s job is to mediate the stark contrast between black and white, adding necessary warmth and a natural texture that keeps the space from feeling sterile.
|
📋 Copy HEX 🔗 Share |
The entire mood of this bathroom hinges on the horizontal black subway tiles. Without them, you’d have a perfectly pleasant but forgettable white and wood bathroom. That single wall of dark tile introduces drama, depth, and a strong graphic element. It visually recedes, making the shower area feel deeper, and provides the perfect backdrop to make the matte black fixtures pop. Remove it, and the design loses its entire personality and edge.
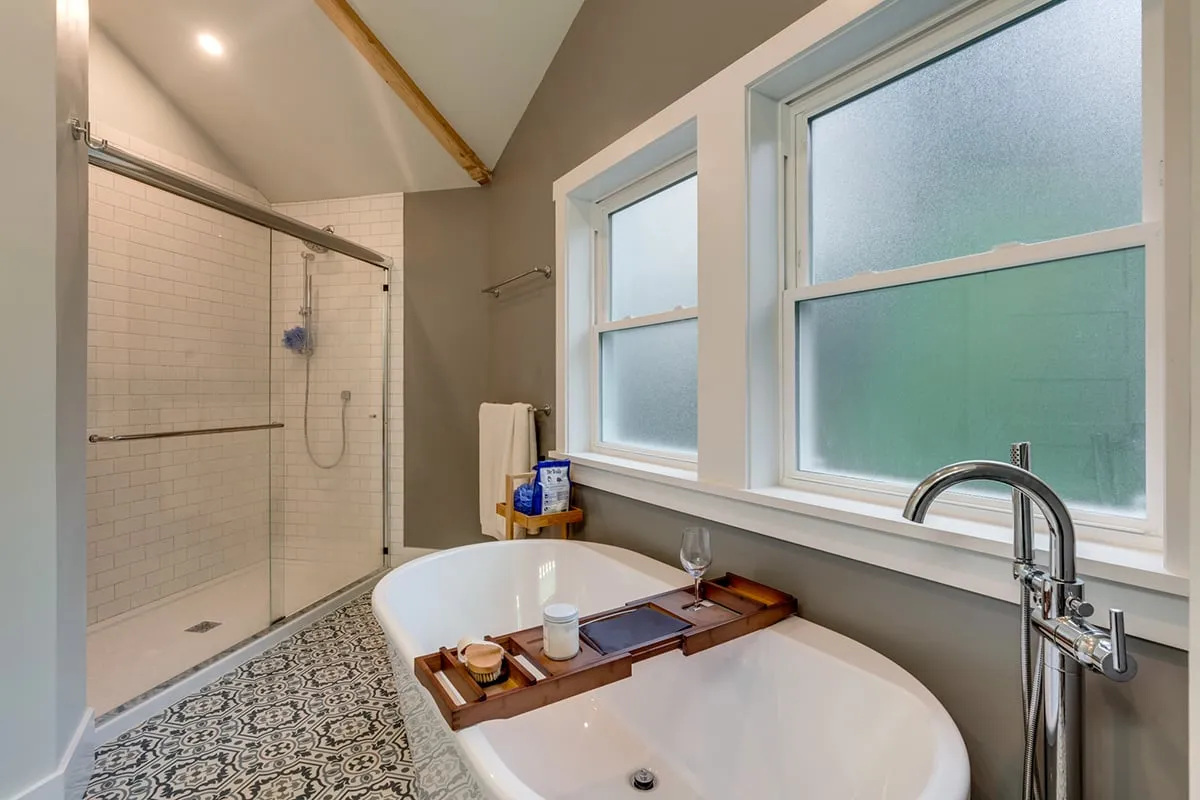
9. Pair a Freestanding Tub with Patterned Floor Tiles
Love this look but not the price tag? The key elements are the patterned floor and the freestanding tub, both of which have great budget options. Look for ceramic or porcelain patterned tiles at places like Floor & Decor or even Overstock—you can often find them for $5-8 per square foot. For the tub, skip the designer brands and check out acrylic options from big box stores; you can find a stylish soaker for under $1000. The white subway tile in the shower is a classic budget-saver, costing just a few dollars per square foot.
|
📋 Copy HEX 🔗 Share |
A freestanding tub and a separate shower enclosure require a decent amount of space. This layout is ideal for a rectangular bathroom that’s at least 7 feet wide and 10 feet long. This allows for a standard 60-inch tub, a 36-inch wide shower, and adequate walking clearance in between. The vaulted ceiling here adds to the sense of space, but this configuration can work with a standard 8-foot ceiling as long as the floor plan is generous enough.
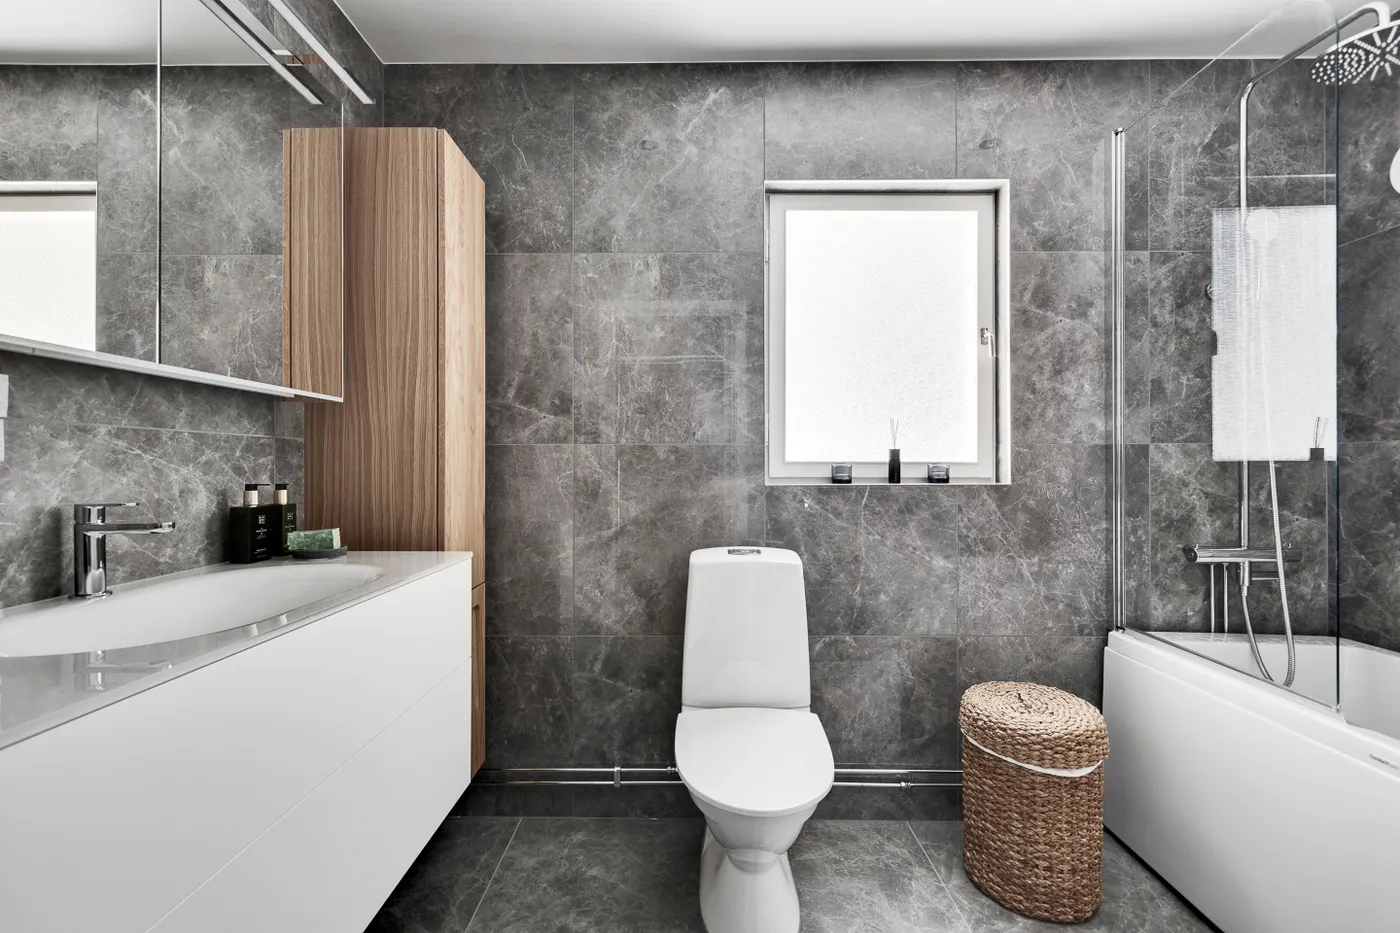
10. Wrap a Small Space in Sleek Gray Marble-Look Tile
Using the same large-format dark tile on every surface is a bold move that pays off beautifully here. It creates a seamless, monolithic look that paradoxically makes the small room feel more expansive, not darker. By eliminating contrasting walls and floor, you remove visual clutter and boundaries. The floating white vanity, white fixtures, and tall, light wood cabinet then appear to float within this unified space, adding function without breaking up the clean lines. The effect is sophisticated and calming.
|
📋 Copy HEX 🔗 Share |
Before you commit to this wall-to-wall dark tile look, run through this quick checklist to make sure your space can handle it.
- Lighting Plan: Do you have a plan for layered lighting? You’ll need more than a single overhead light. Think vanity lights, shower lights, and maybe even accent lighting to keep it from feeling like a cave.
- Counter-Points: Have you chosen your vanity, fixtures, and storage? They need to be light (like the white and light wood here) to provide necessary contrast and relief.
- Tile Sample: Have you viewed a sample of the tile in your actual bathroom at different times of day? The color can change dramatically with natural and artificial light.
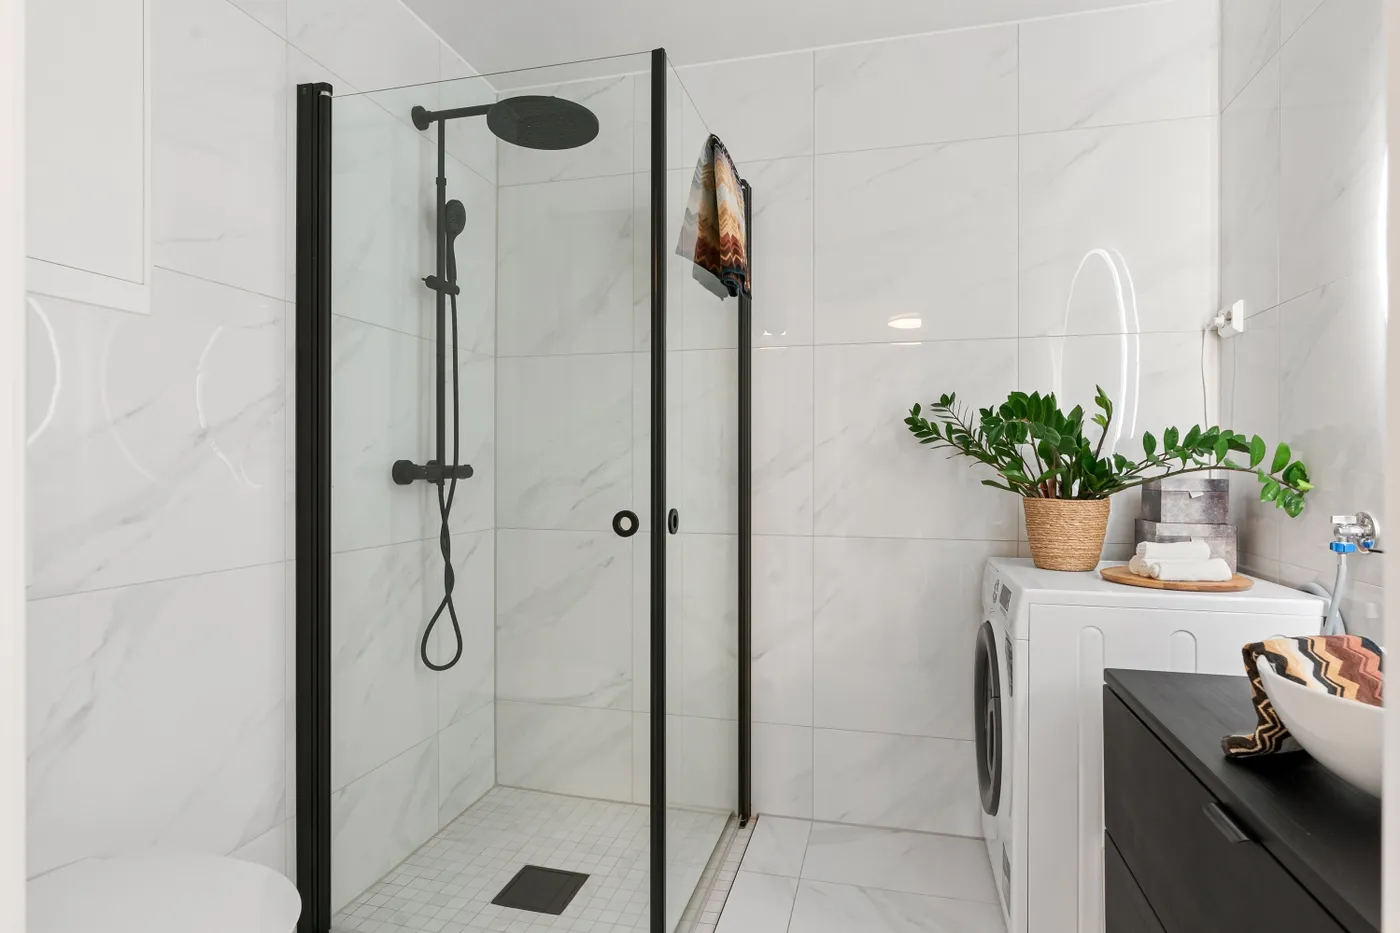
11. Maximize Function with Marble Tile and Black Fixtures
When using black fixtures in a small, light-colored bathroom, consistency is everything. Notice how the shower frame, shower head, vanity faucet, and even the hardware on the vanity (if it had any) would all be matte black. This repetition creates a cohesive visual language that makes the design feel intentional and high-end. Mixing black with chrome or nickel in a compact space can look accidental and cluttered. Stick to one finish for all your metals to create a strong, unified statement.
|
📋 Copy HEX 🔗 Share |
Placing a washing machine in a small bathroom is a brilliant space-saving move, but you need to account for the practicalities. First, ensure you have proper plumbing and drainage, including a floor drain in case of leaks. Second, vibration is a real issue. Choose a machine known for quiet, stable operation and consider placing it on an anti-vibration mat. Finally, remember that you’ll need easy access to the water shut-off valves, so don’t build it in so tightly that you can’t reach them in an emergency.
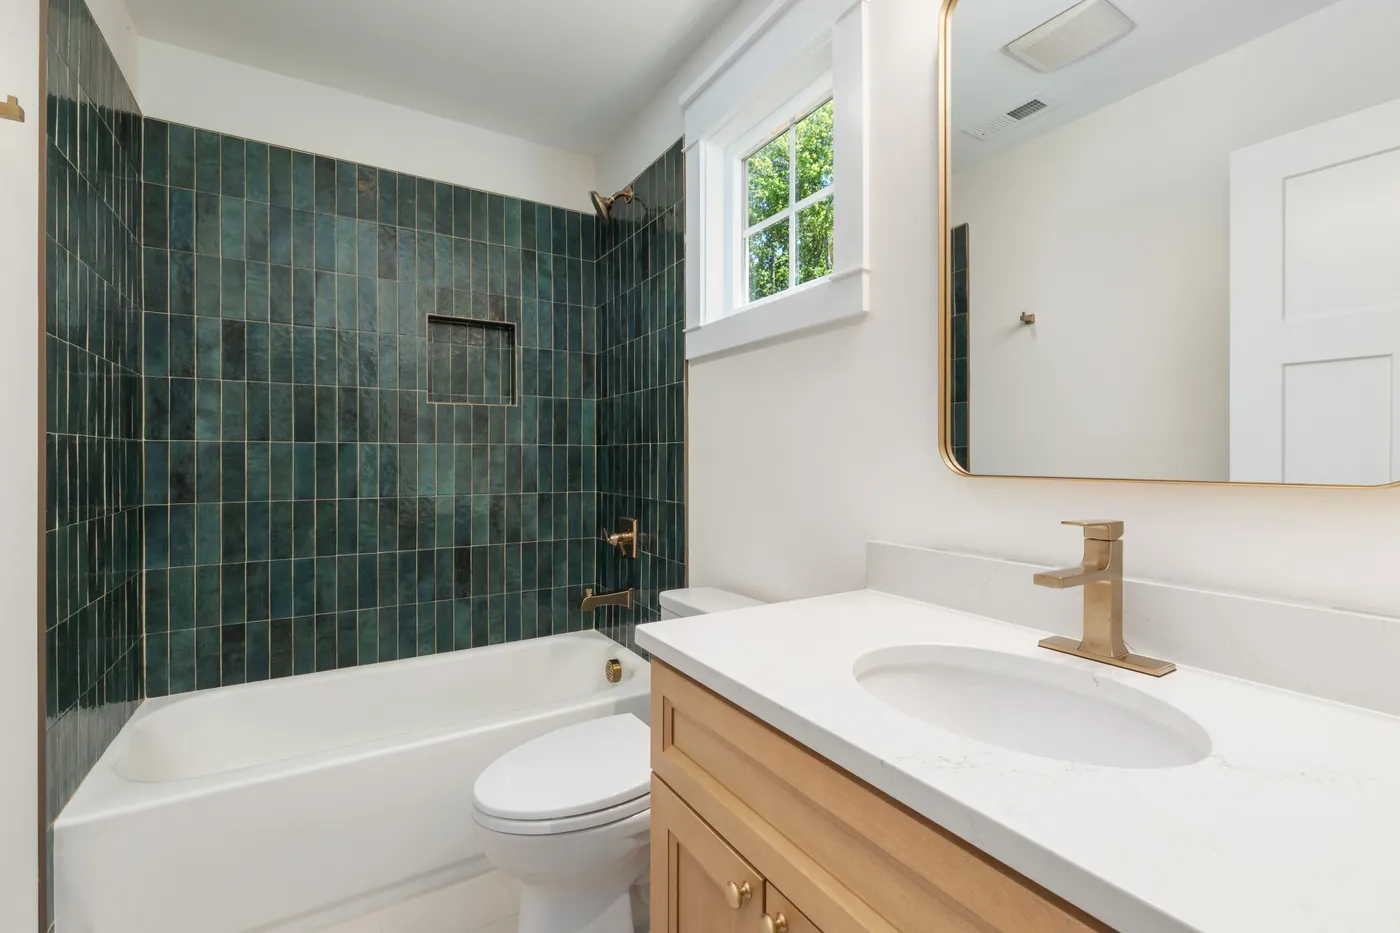
12. Make a Statement with an Emerald Green Tiled Shower
It’s all about the emerald green tile. This is the heart and soul of the design. Without that saturated, glossy green, you’re left with a very standard, safe bathroom: white fixtures, wood vanity, gold hardware. It would be nice, but completely forgettable. The bold color choice is what gives the room its unique personality and luxurious, jewel-box feel. It proves that in a small space, a single, decisive color statement can have more impact than a dozen smaller decorative elements. If you love this, check out the different take on green tile in Idea #15.
|
📋 Copy HEX 🔗 Share |
This bathroom’s visual recipe is a study in balance: 70% Neutral Foundation (the bright white walls, tub, and toilet), 20% Color Pop (the emerald green tile), and 10% Warm Metallic (the gold fixtures and frame). The high percentage of white is crucial; it acts as a clean canvas that keeps the vibrant green from overpowering the small space. The gold is the perfect accent because its warmth complements the deep green, adding a touch of classic elegance.
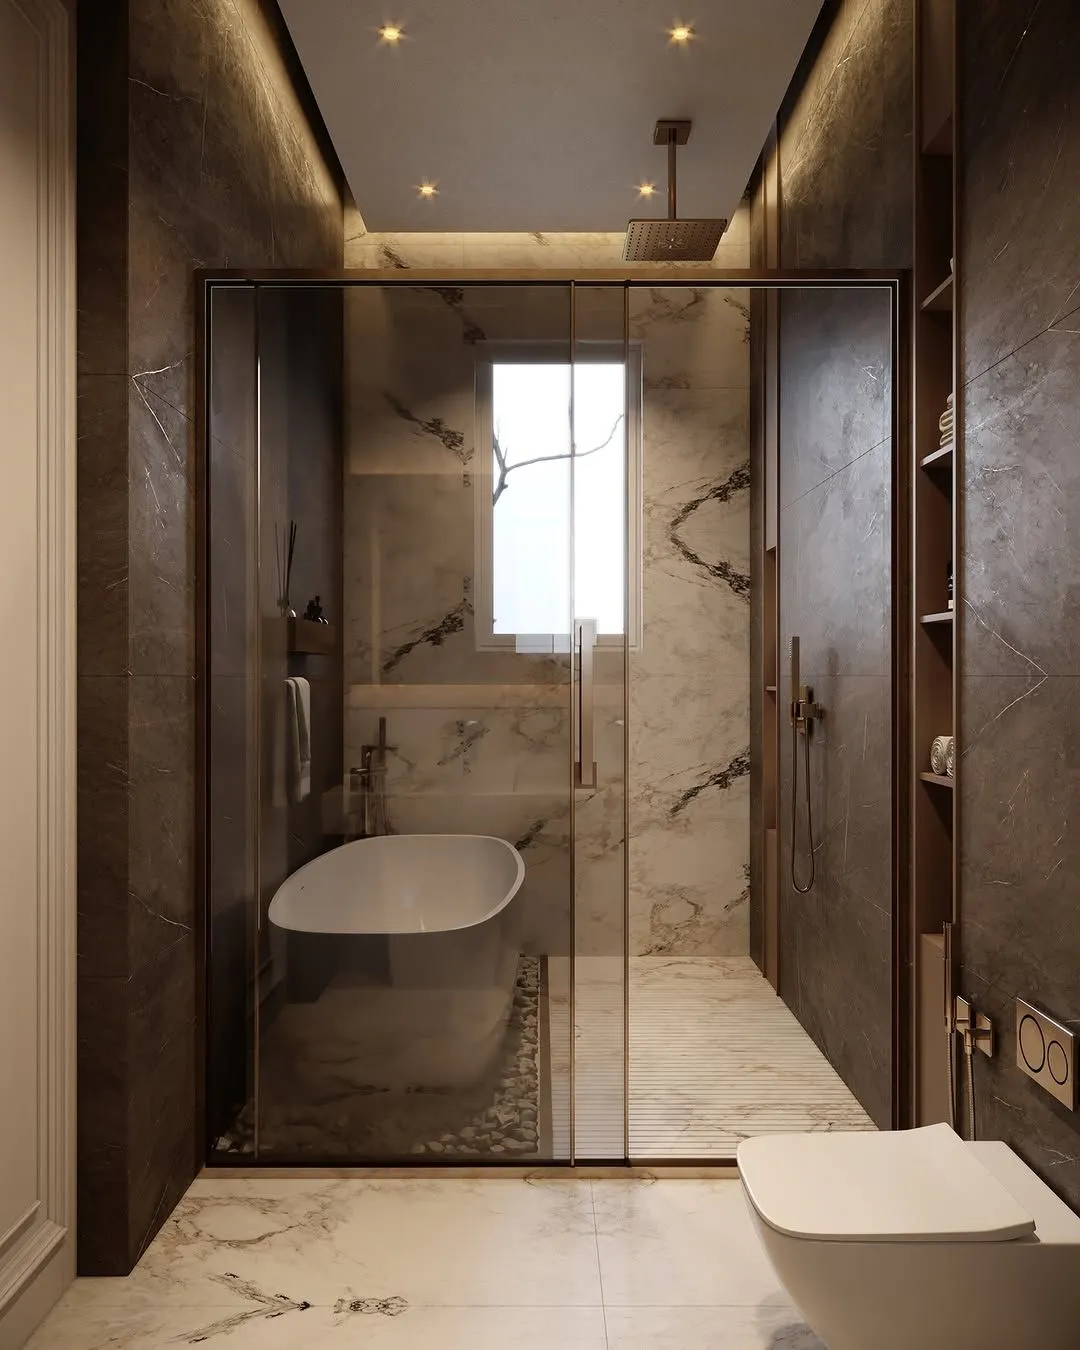
13. Craft a Luxurious Retreat with Dark Stone and Marble
This is a high-end look where the material costs are substantial. Natural stone or high-quality porcelain slabs are the primary expense, followed by custom glass and premium fixtures.
|
📋 Copy HEX 🔗 Share |
- Main Furniture (Freestanding Tub): $2,500 – $6,000
- Fixtures (Dark bronze shower system, faucets): $1,500 – $4,000
- Wall/Floor Treatment (Stone panels, marble tile, installation): $10,000 – $20,000+
- Lighting (Recessed and strip lighting): $1,000 – $2,500
- Glass Shower Enclosure: $2,500 – $5,000
- TOTAL: $17,500 – $37,500+
Budget alternative: Use large-format porcelain tiles that mimic dark stone and marble, an acrylic tub, and dark bronze fixtures from a more accessible brand to capture the essence for $7,000 – $12,000.
Both the dark stone and the white marble will require sealing every 1-2 years to prevent staining and water absorption, especially if they are natural stone. The dark bronze fixtures can be prone to showing water spots and fingerprints, so they will need to be wiped down regularly with a soft cloth. The recessed strip lighting, while beautiful, can be difficult to repair or replace if a section fails, often requiring a specialist.
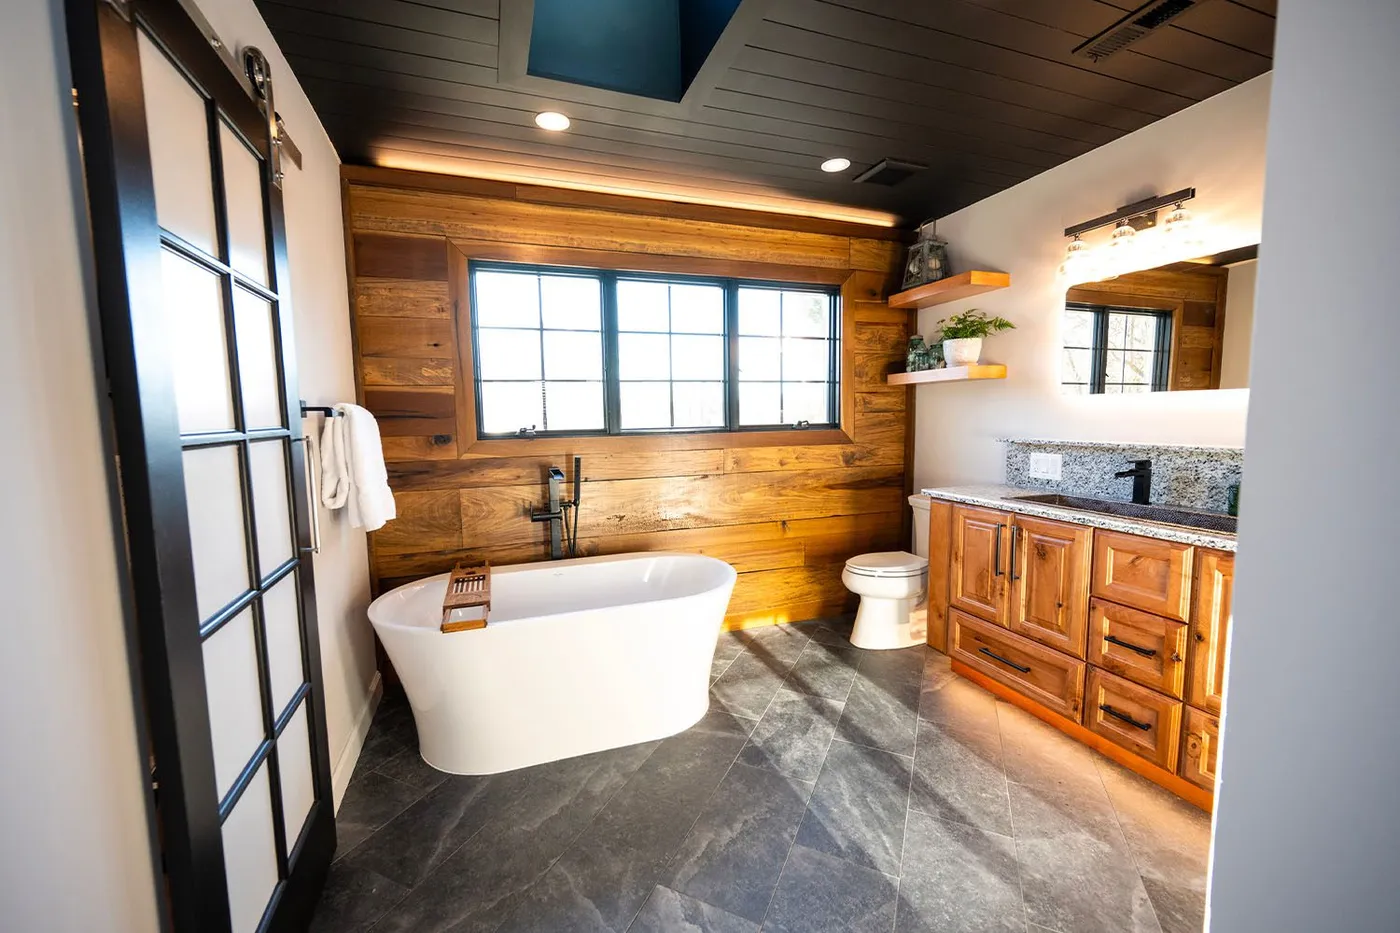
14. Plan a Smart Layout for a Very Small Modern Bathroom
In a truly tiny bathroom, every inch counts. A wet room layout, where the shower area isn’t fully enclosed and the floor is properly graded to a central drain, can be a game-changer. This eliminates the need for a bulky shower curb and door, visually opening up the space. Pair this with a wall-mounted toilet and a floating vanity. These pieces don’t touch the floor, creating an uninterrupted floor plane that makes the room feel significantly larger than it is.
|
📋 Copy HEX 🔗 Share |
any very small bathroom project, you absolutely must verify a few key things. First, measure everything three times—the location of the existing plumbing, the swing of the door, and the total floor space. Second, create a to-scale floor plan on paper or with a simple app. This will help you see if a 30-inch vanity will leave you enough room to stand or if that toilet placement will violate building codes. Don’t buy a single thing until you have a solid plan on paper.
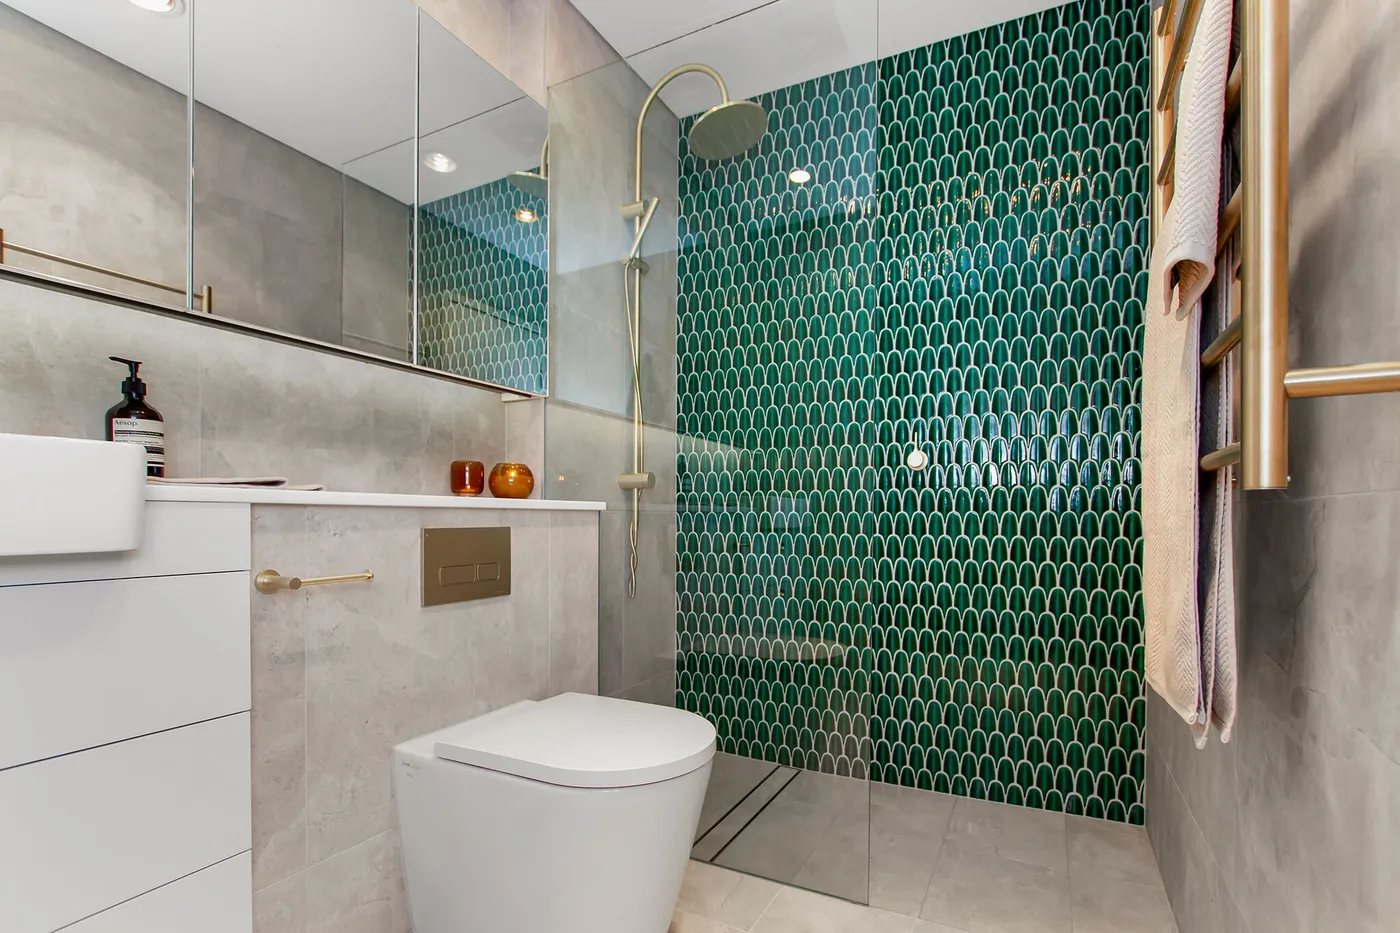
15. Pair Emerald Green Scallop Tiles with Brushed Brass
This look is peak 2026. The Art Deco-inspired scallop or fish scale tile shape has been gaining popularity, but pairing it with this deep, moody emerald green feels incredibly fresh. It’s a move away from the all-white or gray bathrooms of the past towards more personal, color-drenched spaces. The brushed brass fixtures add warmth and a touch of vintage glamour, a combination that feels both luxurious and livable. This trend has legs because it’s rooted in classic shapes and colors but feels completely contemporary.
|
📋 Copy HEX 🔗 Share |
The success of this design lies in the masterful balance of color, texture, and finish. The vibrant, glossy emerald green tiles provide the ‘wow’ factor. The large-format, matte grey tiles on the floor and adjacent walls act as a calming, neutral backdrop that prevents the green from being overwhelming. Finally, the brushed brass fixtures introduce a third element—a warm, soft metallic sheen that contrasts beautifully with both the glossy green and the matte grey. It’s a perfect trifecta.
16. Warm Up a Neutral Bathroom with Terrazzo and Brass
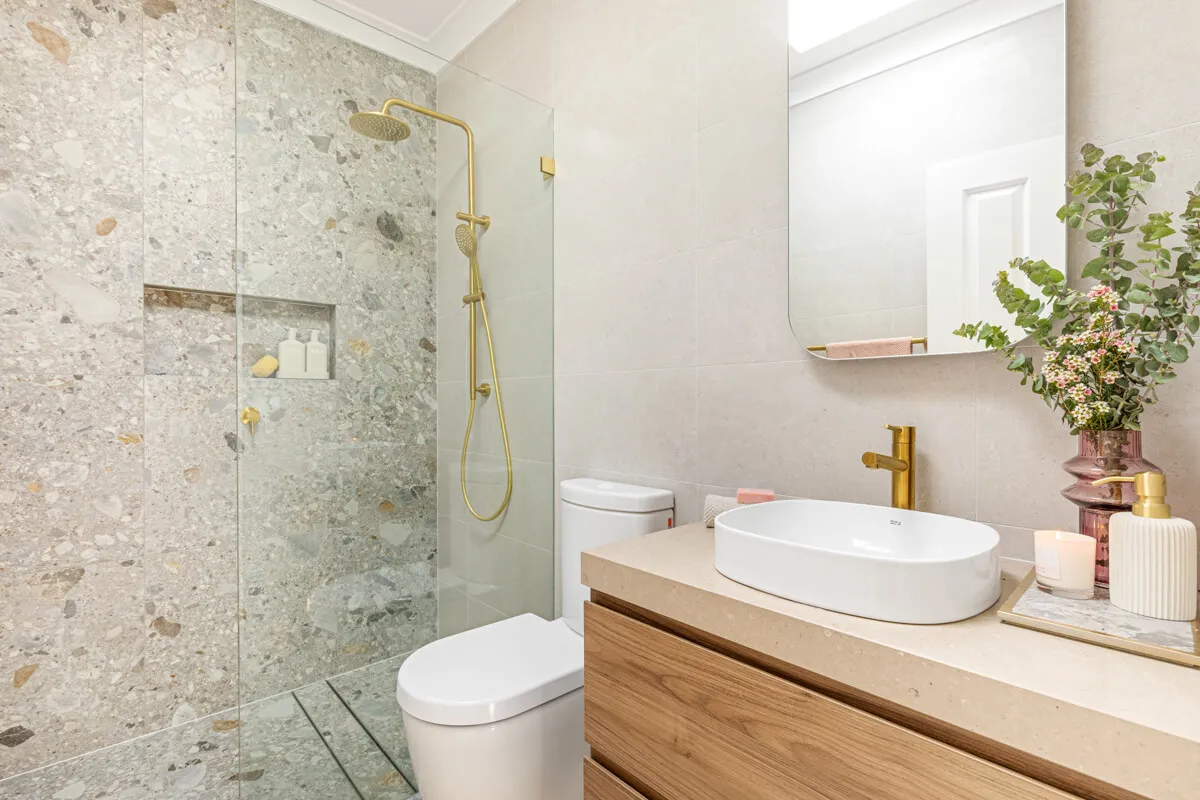
The terrazzo-look tile is the undeniable star here. It does all the heavy lifting in this design. It provides pattern, texture, and a subtle blend of colors (greys, beiges, whites) that ties the whole neutral palette together. Without it, the bathroom would be a simple composition of wood, white, and brass—nice, but lacking a central personality. The terrazzo introduces a playful, slightly retro-yet-modern element that feels sophisticated and unique, elevating the entire space from simple to stylish.
|
📋 Copy HEX 🔗 Share |
You don’t need to splurge on custom terrazzo to get this warm, modern vibe. Many tile companies now offer incredibly realistic porcelain tiles with a terrazzo pattern for a fraction of the cost. Pair this with a standard light wood vanity from a big-box store. The key is to spend a little more on the matte brass fixtures. Good quality fixtures from a brand like Delta or Moen will elevate the look and feel of the entire space, making the budget-friendly tile and vanity look more expensive than they are.
17. Define Your Space with an Elegant Arched Entryway
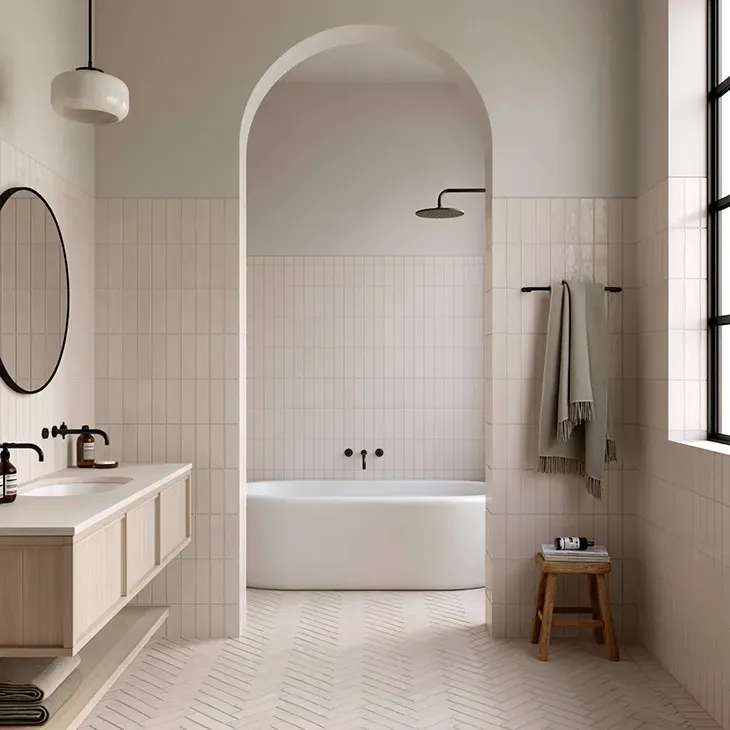
Framing an existing doorway into an arch is a high-impact project that transforms the feel of a room. Here’s a simplified approach for a non-load-bearing wall:
|
📋 Copy HEX 🔗 Share |
- Remove Existing Trim: Carefully pry off the door casing and trim. (Time: 30 mins)
- Build the Arch: Purchase a pre-made arch kit online or from a specialty lumber yard. These kits are designed to fit standard doorway widths. Secure it to the top of the door frame according to the instructions. (Time: 2 hours)
- Install Drywall: Cut flexible drywall or use two layers of 1/4″ drywall to cover the curve of the arch. This is the trickiest part; score the back to help it bend. (Time: 3 hours)
- Finish and Paint: Tape, mud, and sand the seams until smooth. Prime and paint to match your walls. (Time: 4-5 hours over 2 days)
Material Cost: $100 – $250 for a kit and supplies.
An architectural feature like an arch needs room to breathe. This idea works best when the bathroom is at the end of a short hallway or is part of a larger primary suite, allowing the arch to act as a proper frame. The bathroom itself should be at least 60 square feet (e.g., 6′ x 10′). In a very tiny powder room, a full arch might feel too heavy or grand; a simple doorway might be a better choice to maintain an open feel.
18. Achieve a Clean, Modern Look with Gray Tile and a Wood Vanity
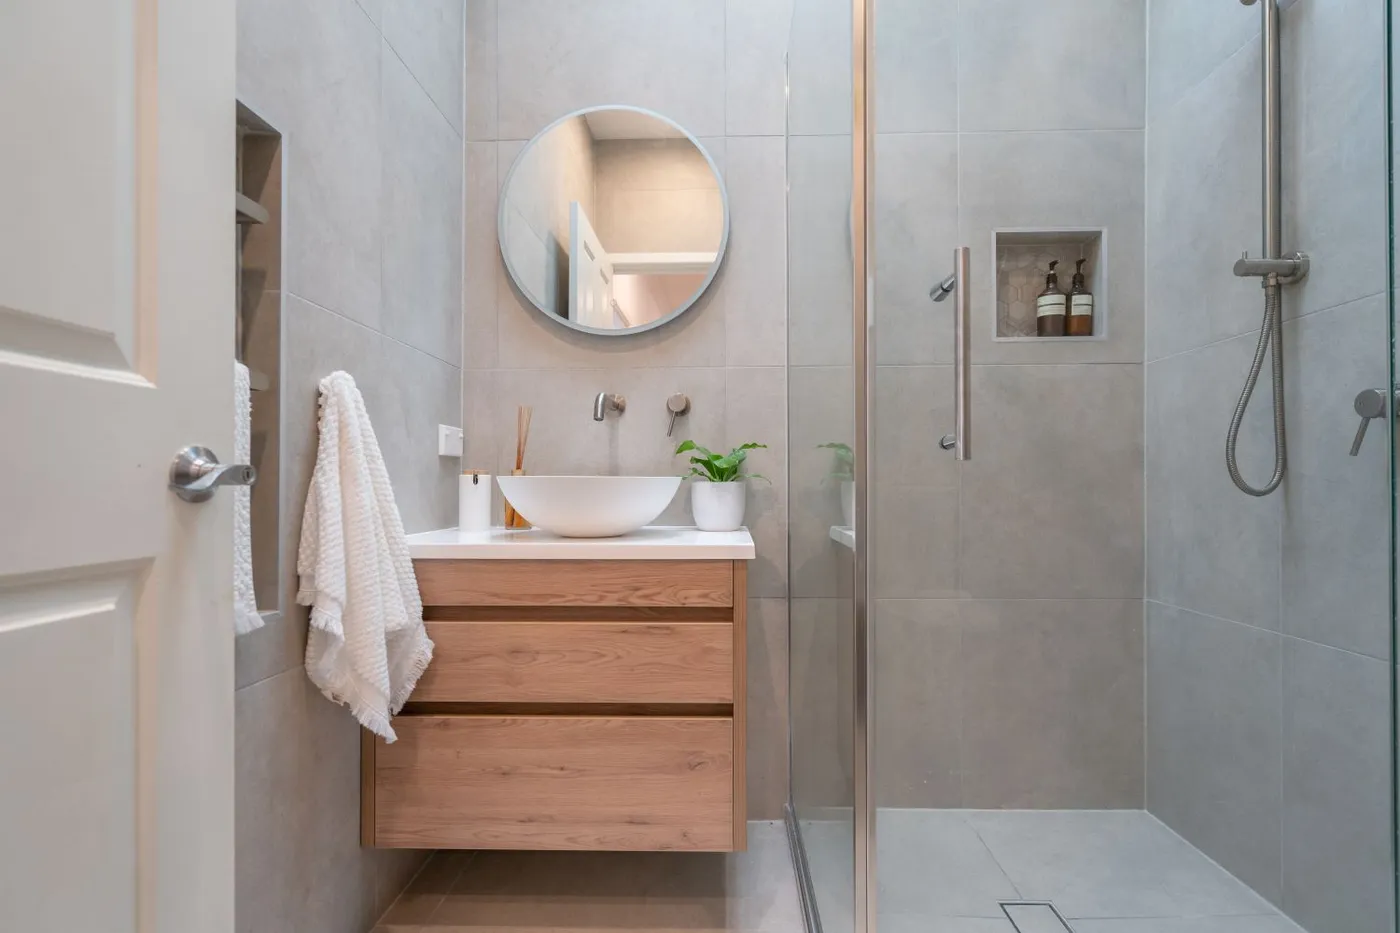
When using large-format tiles in a small bathroom, run the same tile from the main floor directly into the shower, without a curb if possible. This creates a seamless transition that makes the entire floor plan feel larger and more unified. Here, the large gray squares continue right into the shower, tricking the eye into seeing one continuous space. A contrasting shower floor tile would visually chop the room in half, making it feel smaller.
|
📋 Copy HEX 🔗 Share |
A floating vanity looks amazing, but it offers significantly less storage than a traditional floor-standing one. Notice the two drawers here—that’s all the concealed storage you get. This setup is best for a guest bathroom or for someone who is very minimalist. If you have a lot of products, you’ll need to plan for supplementary storage, like the recessed niche in the shower or a separate linen closet, to avoid a permanently cluttered countertop.
19. Try Modern Farmhouse with Scalloped Wainscoting
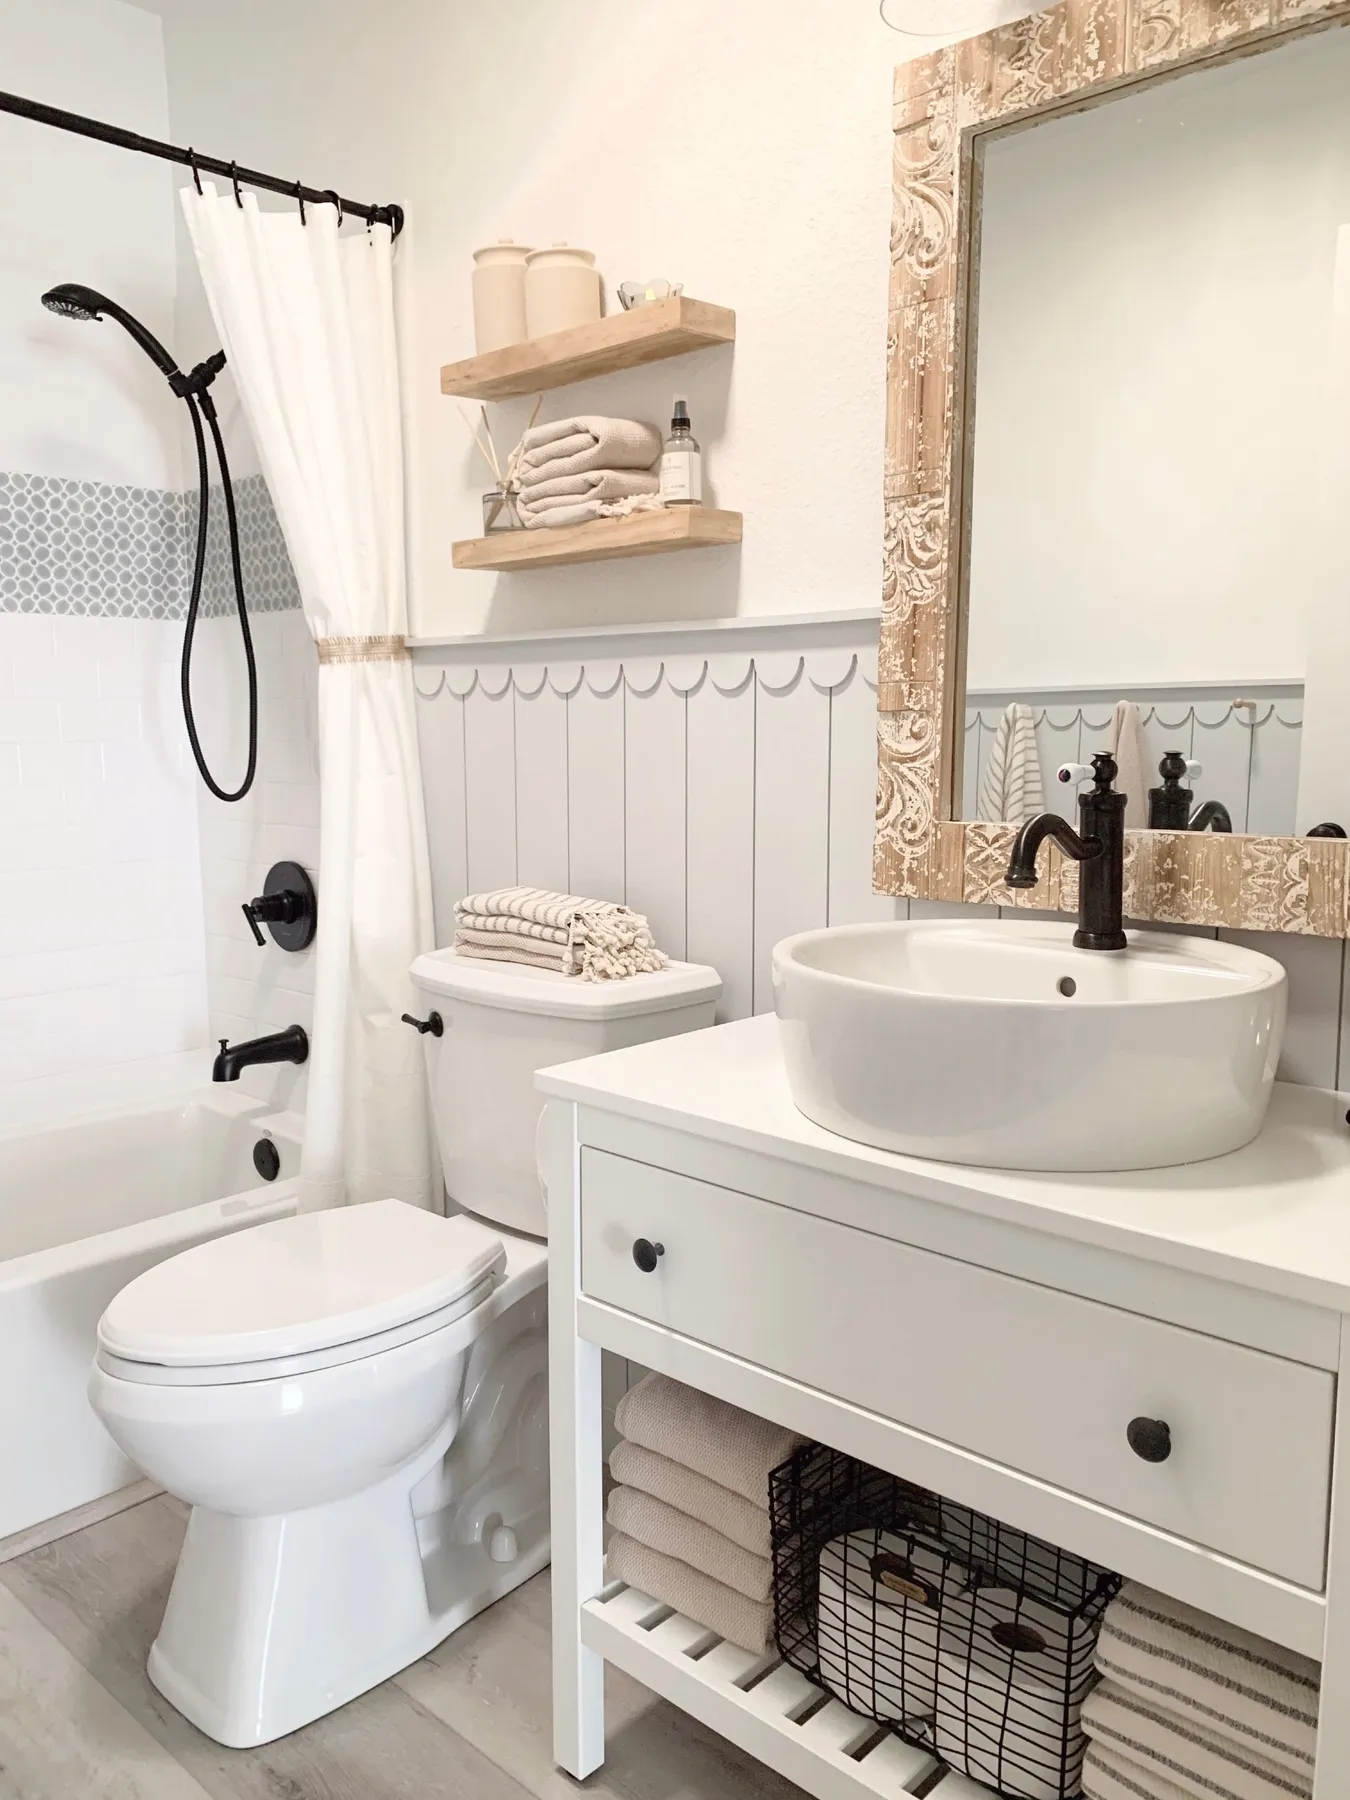
This bathroom’s charm comes from a clever mix of styles. The formula is approximately 50% Modern Farmhouse (the white subway tile, light wood shelves, black fixtures), 30% Rustic/Boho (the distressed carved mirror), and 20% Classic/Feminine (the scallop wainscoting). This blend works because the color palette is kept tightly controlled to whites, grays, and wood tones, which allows the different shapes and textures to coexist without looking chaotic. Compare this to the cleaner modern farmhouse in Idea #23.
|
📋 Copy HEX 🔗 Share |
This design succeeds by playing with expectations. The scallop wainscoting is a whimsical, almost sweet detail, but it’s balanced by the strong, modern lines of the matte black fixtures and the simple subway tile. The distressed wood mirror adds a layer of history and texture that keeps the room from feeling too new or sterile. It’s this tension between different styles—soft and hard, old and new—that creates a dynamic and interesting space.
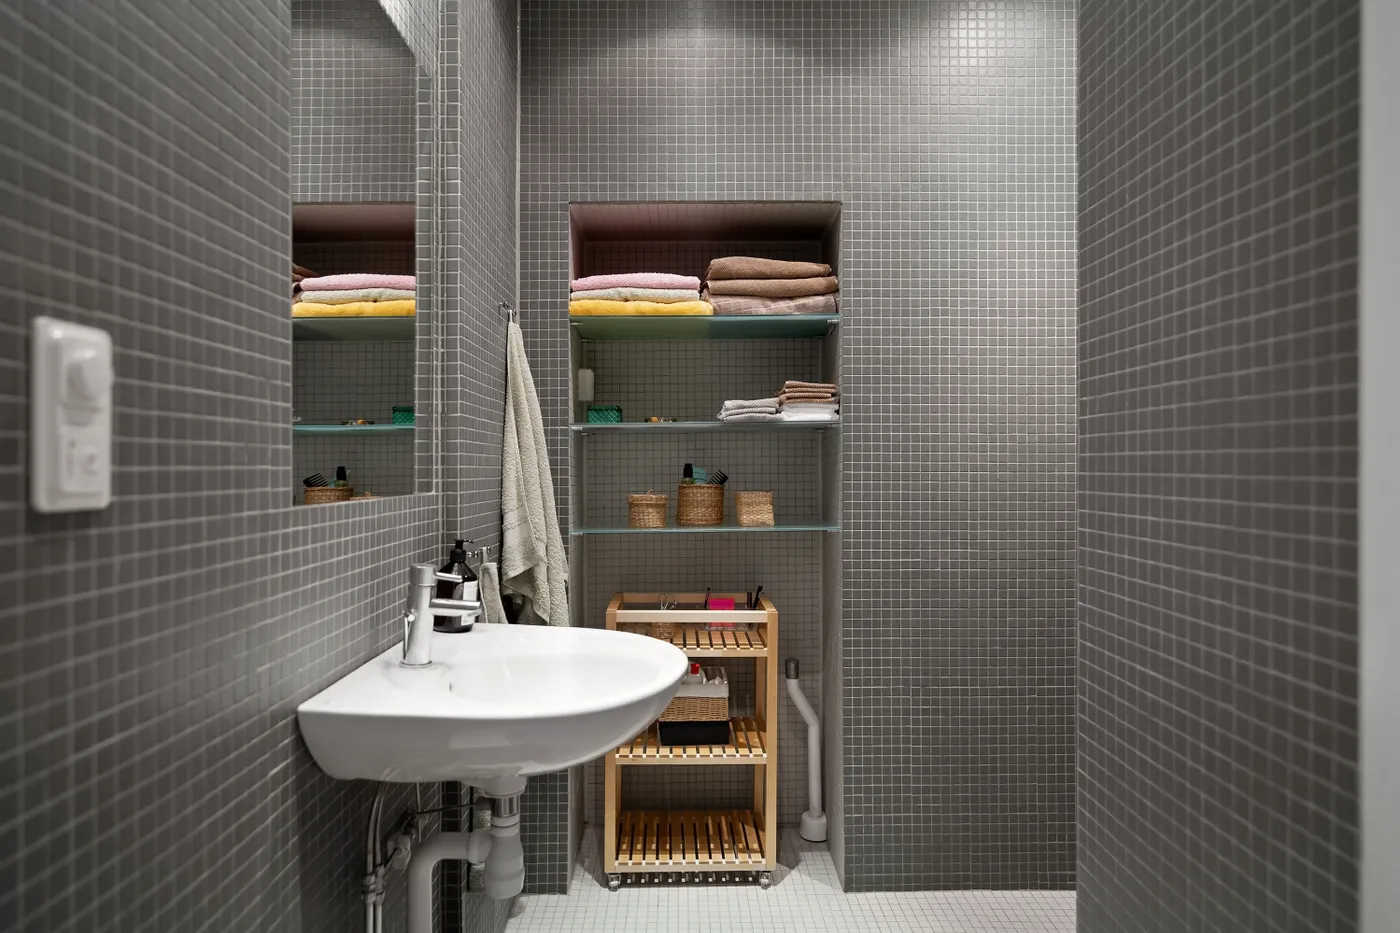
20. Maximize a Tiny Bathroom with Dark Gray Mosaic Tile
The smartest element in this tiny bathroom is the recessed shelving. By building storage into the wall cavity between the studs, the design adds multiple shelves for toiletries and towels without sacrificing a single inch of precious floor space. A freestanding shelf or cabinet would have made this narrow room feel impossibly cramped. This solution is the key to making an extremely compact bathroom functional and organized, proving that clever storage is the ultimate small-space luxury.
|
📋 Copy HEX 🔗 Share |
This wall-to-wall mosaic tile approach is designed for spaces that are 30 square feet or less—think a small powder room or a compact apartment bathroom (e.g., 5′ x 5′). The small scale of the tiles is proportional to the small scale of the room. Using huge 24×24 inch tiles in a space this tight would look awkward and result in a lot of wasted material from cuts. The use of a wall-mounted corner sink is another clue that this is for a truly minimal footprint.
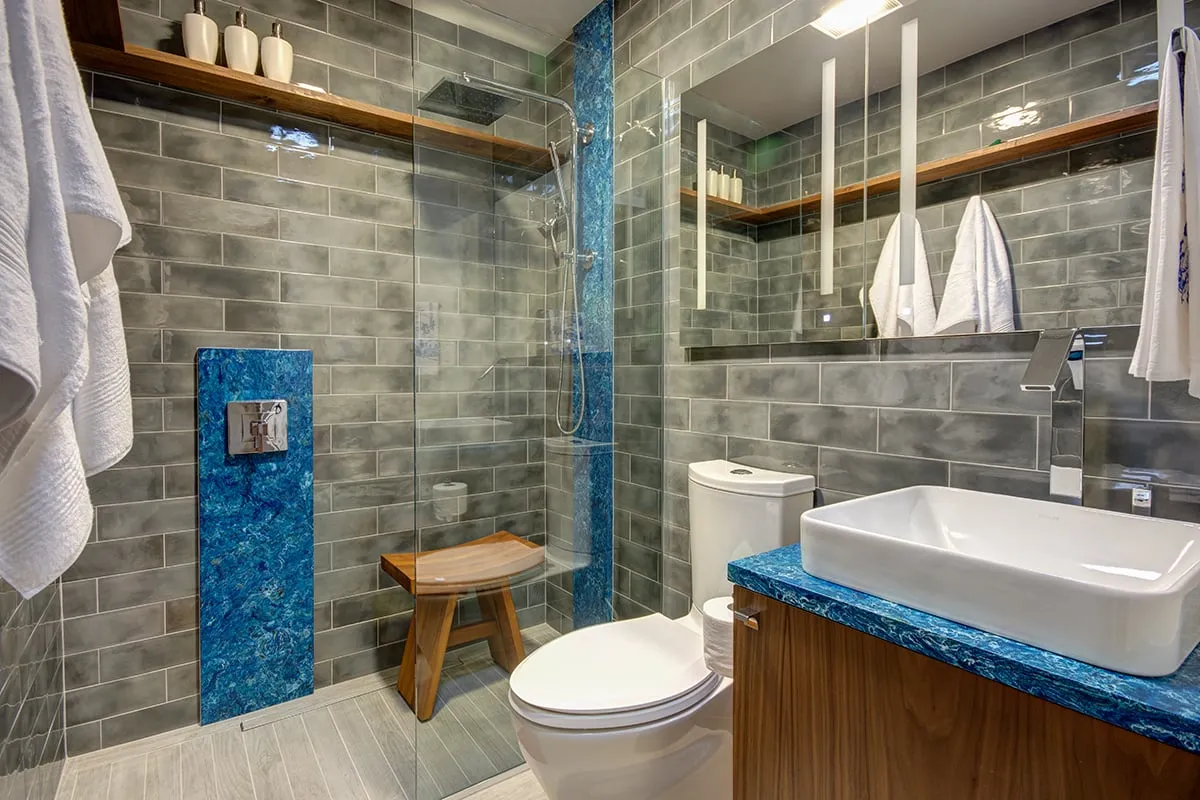
21. Inject Personality with Blue Accents and Gray Subway Tile
This is a fantastic example of a high-impact, low-cost design. Gray subway tile is one of the most affordable options available. The wow factor comes from the vibrant blue accent, which isn’t expensive tile but a waterproof wall panel in the shower and a matching laminate or solid surface countertop. A simple vessel sink from an online retailer like Amazon, a basic glass shower panel, and some wood for a floating shelf complete a look that feels custom and energetic on a shoestring budget.
|
📋 Copy HEX 🔗 Share |
In a small bathroom, every material choice matters. Using a clear glass shower enclosure instead of a frosted one or a shower curtain is critical. The transparent barrier allows your eye to travel all the way to the back wall, making the room feel deeper and more open. A shower curtain would act as a visual wall, effectively cutting the room in half and making it feel much more claustrophobic. It’s a simple swap that has a huge psychological impact on the perception of space.
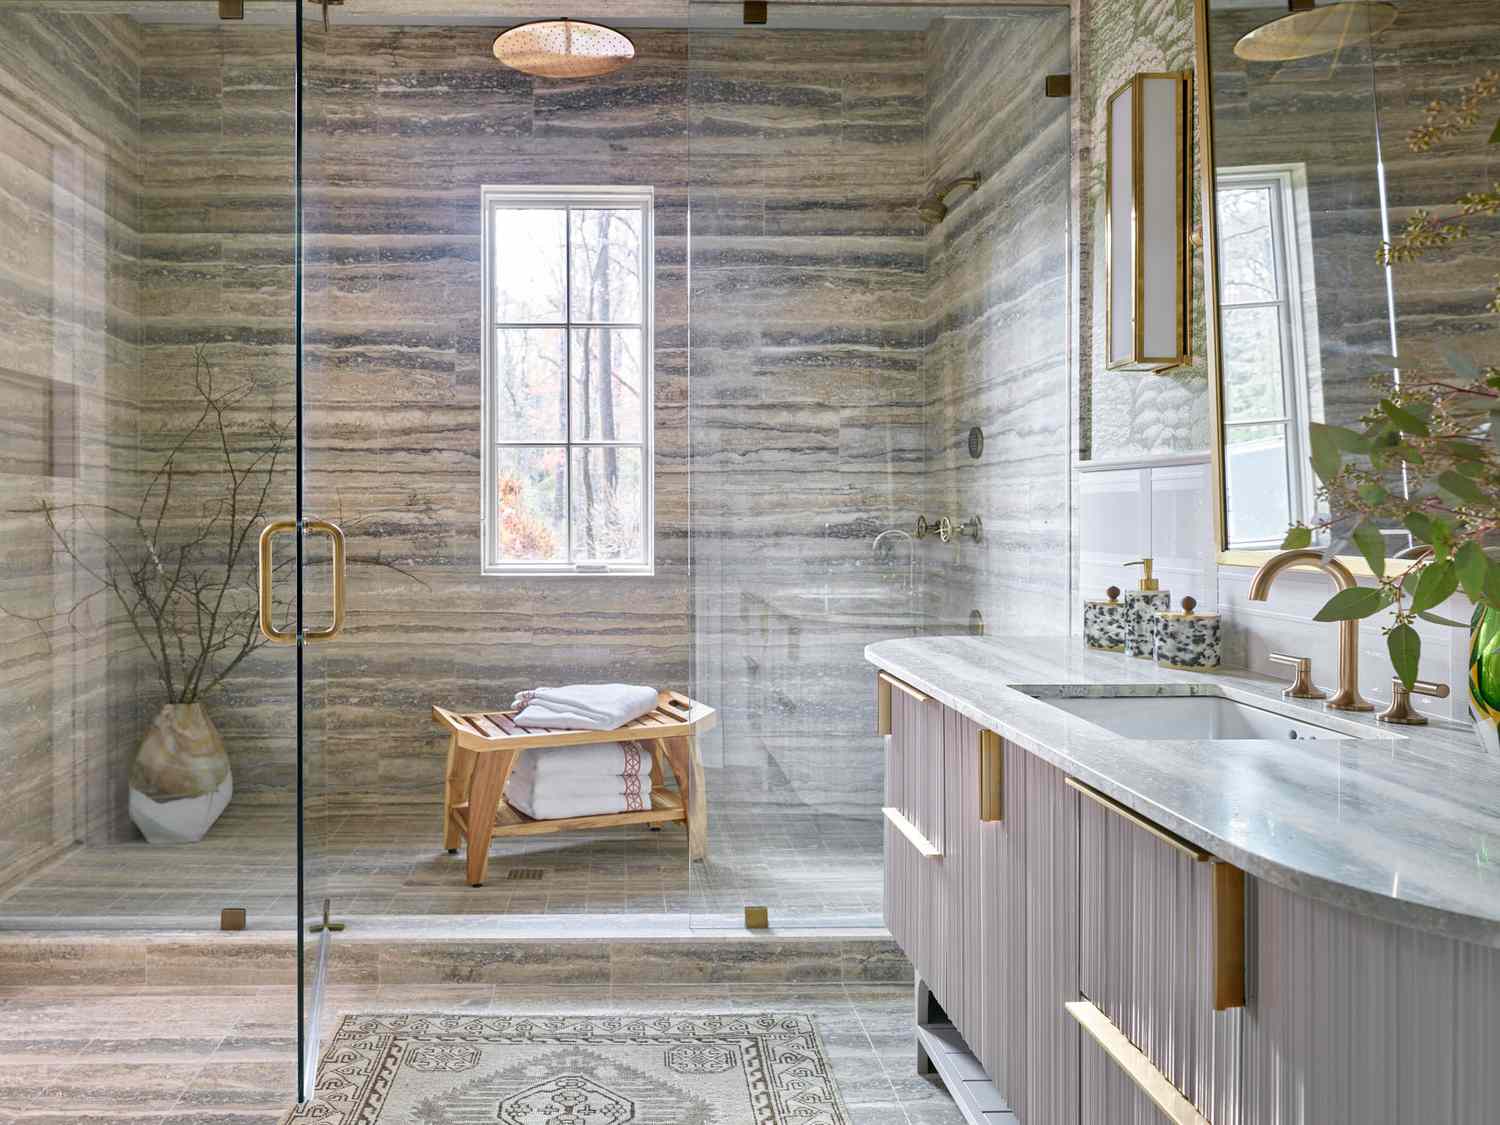
22. Create a Natural Spa with Stone Tiles and a Fluted Vanity
Natural stone tile, like the travertine or limestone pictured here, is stunningly beautiful but porous. It MUST be sealed upon installation and then resealed every 1-2 years, especially in a wet area like a shower. Without a proper seal, it will absorb water, soap, and oils, leading to discoloration and stains. The fluted vanity is another high-maintenance element; the grooves are dust magnets and require regular, careful cleaning with a soft brush or vacuum attachment to keep them looking sharp.
|
📋 Copy HEX 🔗 Share |
The design feels so serene because of its commitment to texture and a restrained palette. The horizontal bands of the stone tile create a sense of calm, flowing movement. This is beautifully contrasted by the tight, vertical lines of the fluted vanity. The gold fixtures and frame then add a third layer of smooth, reflective texture. Because all these elements share a similar warm, earthy color story, the focus remains on their tactile qualities, creating a rich, layered, and deeply relaxing environment.
23. Blend Rustic and Modern with a Barn Door Vanity
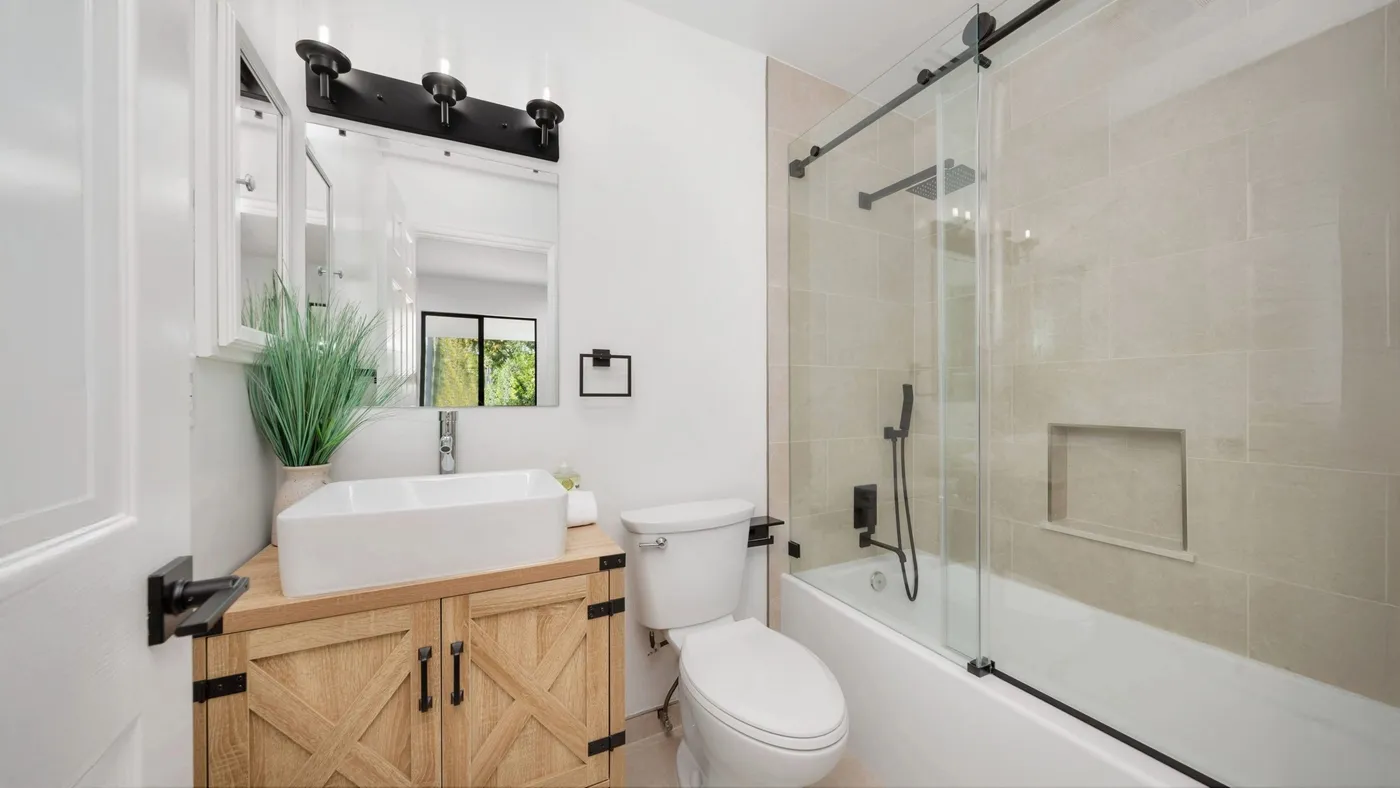
The barn door vanity is the piece that defines this bathroom’s entire style. It single-handedly introduces the modern farmhouse theme. If you swapped it for a sleek, handleless vanity, the room would be purely modern. If you swapped it for a traditional shaker vanity, it would lean classic. This specific piece, with its natural wood tone and rustic hardware style, is the anchor that all the other choices—the simple beige tile, the black fixtures, the vessel sink—revolve around. It’s the perfect blend of rustic texture and clean, modern form.
|
📋 Copy HEX 🔗 Share |
A vessel sink looks fantastic, but it’s not always the most practical choice for a family or high-traffic bathroom. Because the sink sits on top of the counter, it’s more prone to splashing onto the countertop and the floor. The exposed sides also make it a bit more delicate and susceptible to chipping than a sturdy undermount sink. It’s a great option for a powder room or a primary bath where style is the top priority, but maybe not the best for the kids’ bathroom.
24. Play with Texture Using Wood-Look and Veined Tiles
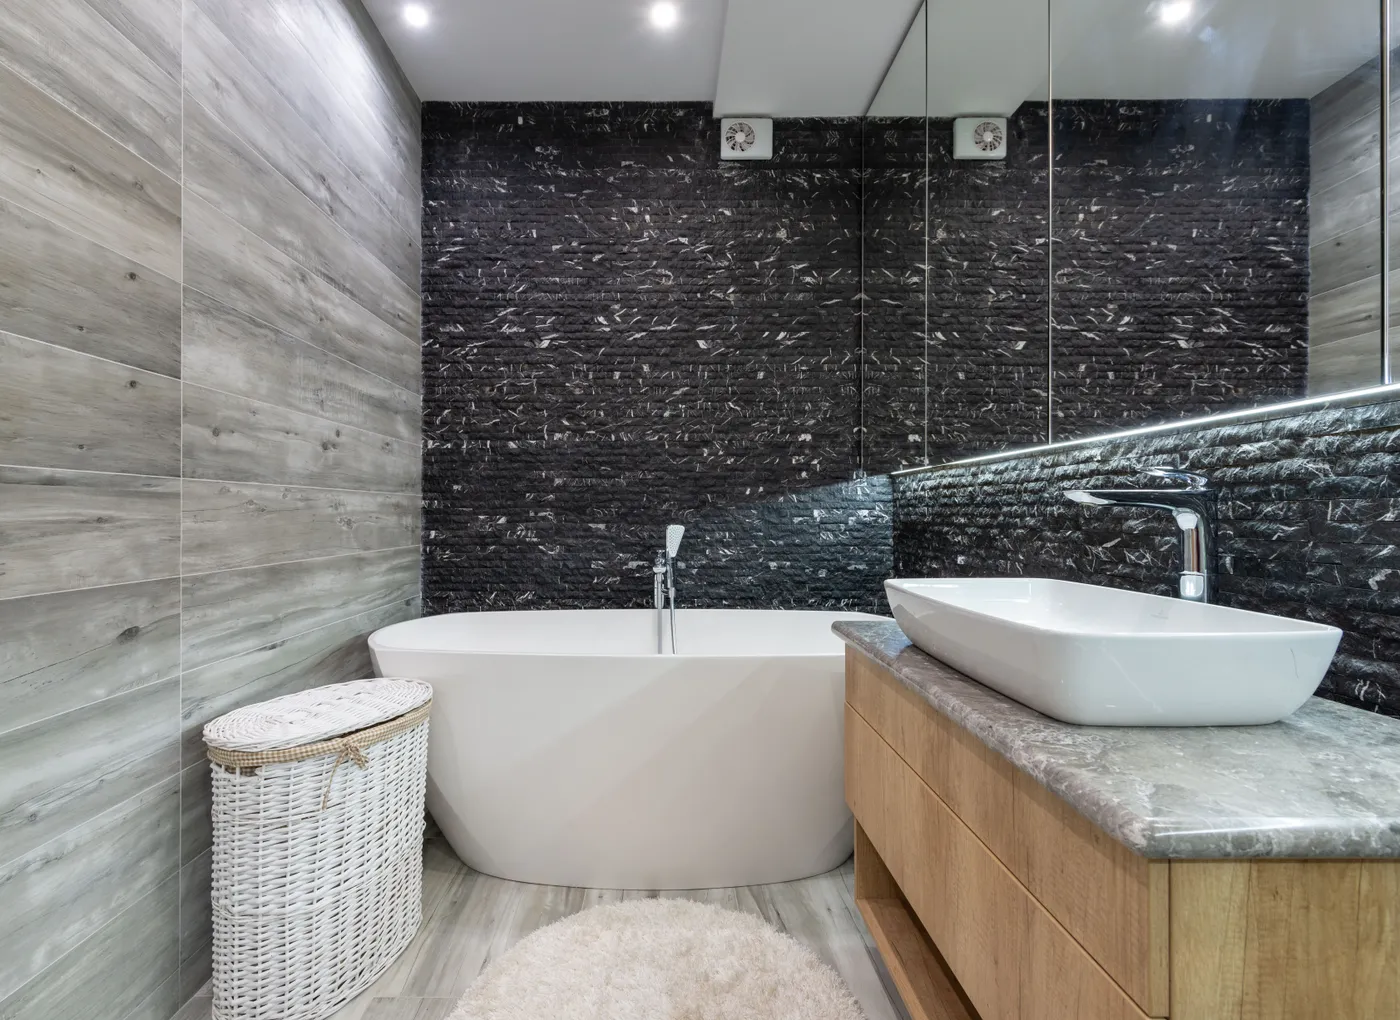
This bathroom’s visual formula is all about texture balance. It’s roughly 40% Cool/Hard Texture (the dark black veined tiles), 40% Warm/Soft Texture (the light grey wood-look plank tiles), and 20% Smooth/Neutral (the white tub, sink, and ceiling). By keeping the proportions of the two dominant textures equal, neither one overpowers the other. The smooth white elements act as a visual resting place, preventing the high-contrast textures from feeling too busy. For another take on wood-look tile, see Idea #5.
|
📋 Copy HEX 🔗 Share |
Get this high-contrast, textured look without the high-end price tag. The key is to shop for porcelain tiles that mimic more expensive materials. You can find excellent wood-look plank tiles and dramatic black marble-look tiles at big-box stores. The freestanding tub can be a budget-friendly acrylic model. Where to put your money? Invest in a decent vanity and good lighting. A well-made vanity with a quality countertop and a mirror with good integrated light will elevate the more affordable tile choices.
25. Update a Classic Look with a Gray Vanity and Herringbone Tile
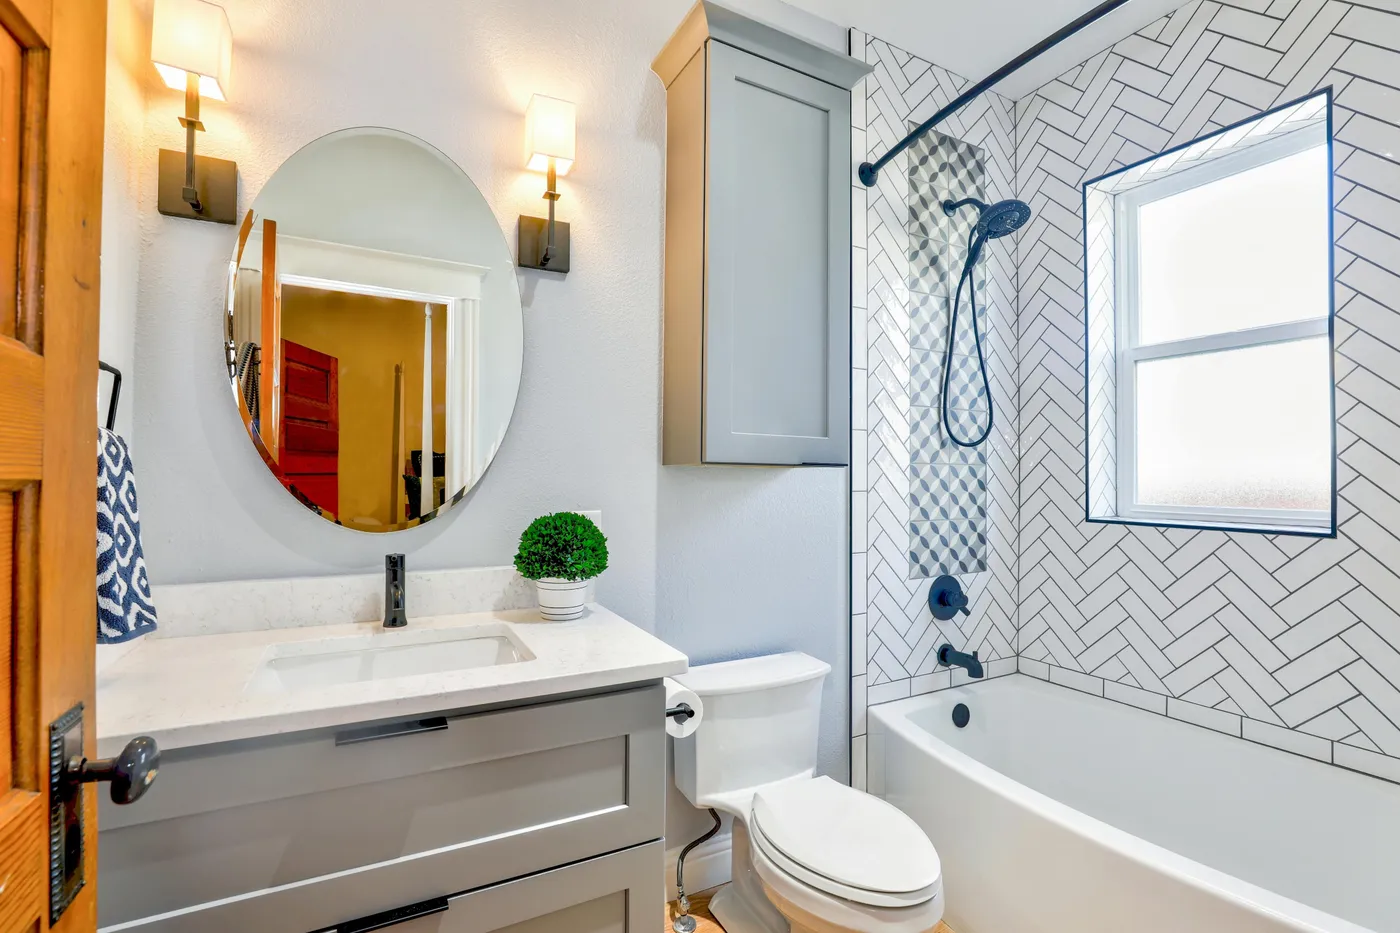
That patterned accent tile stripe is a perfect weekend DIY project to customize a simple subway tile shower. Here’s how:
|
📋 Copy HEX 🔗 Share |
- Plan Your Layout: Before tiling, use a level to draw perfectly vertical lines where your accent stripe will go. A typical stripe is 4-6 inches wide.
- Set the Main Tile: Tile the main field of white subway tile up to the edge of your drawn lines, leaving the central channel empty. Use tile spacers for consistency.
- Cut and Fit: Measure the width of your channel. Your patterned tiles will likely need to be cut to fit perfectly within the stripe. A wet tile saw is best for this.
- Install the Accent: Apply thin-set mortar within the channel and carefully place your cut accent tiles.
- Grout Everything: Once all tile is set and the mortar has cured, grout the entire wall at once for a uniform finish.
Material Cost: $50 – $150 for a few sheets of accent tile.
When using a dark grout with white subway tile, it’s essential to seal the tile before you grout. The porous, unglazed edges of many subway tiles can absorb the dark grout pigment, leading to a stained, hazy look that is nearly impossible to remove. A quick coat of an inexpensive tile sealer will create a protective barrier, ensuring your white tiles stay bright and your grout lines look crisp and clean.
26. Design a Compact, Functional Space with Beige and Dark Wood
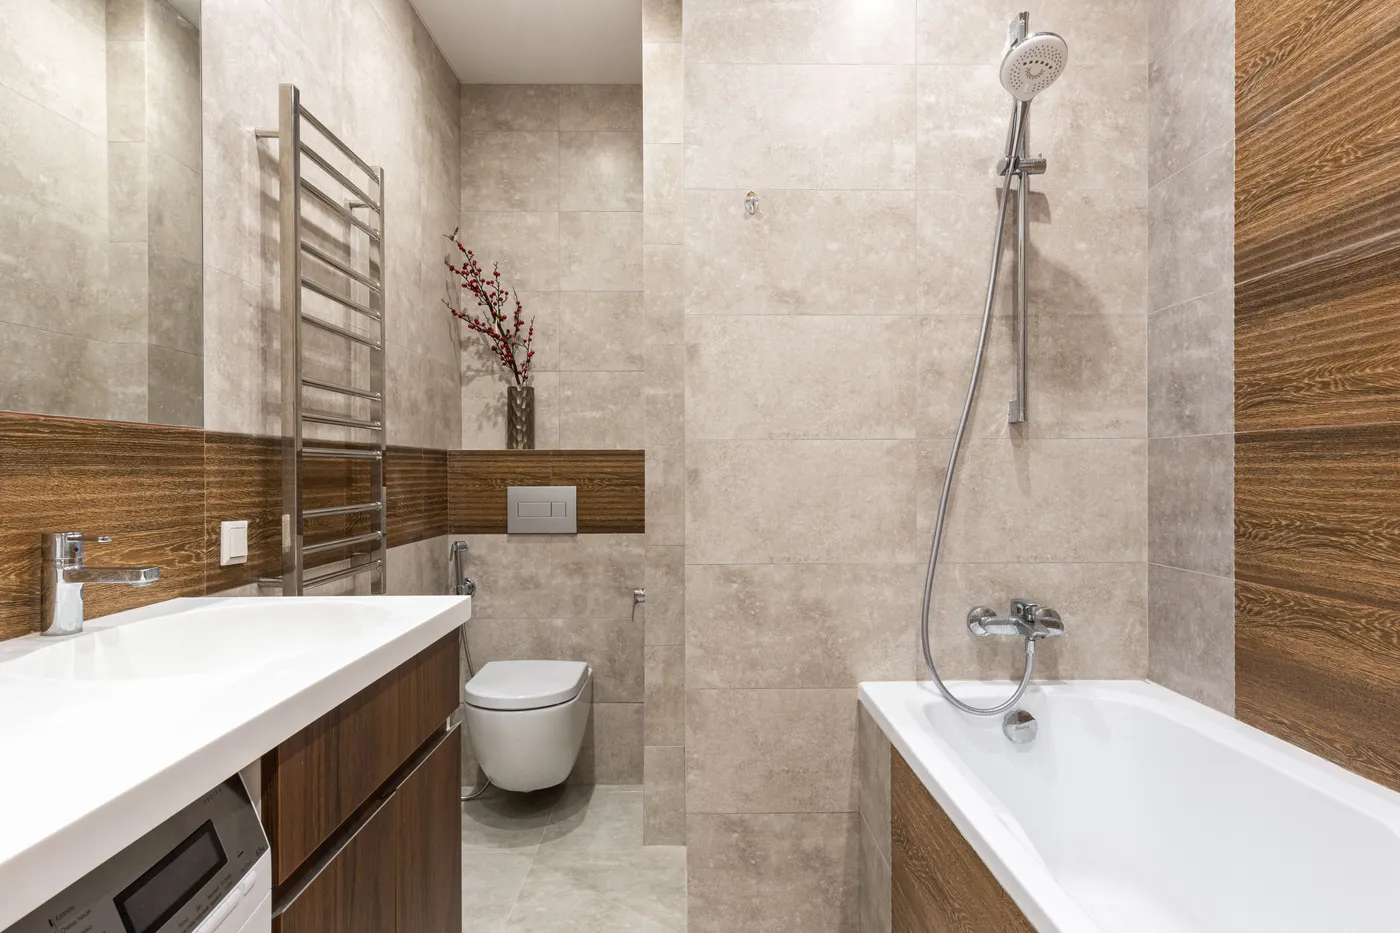
This layout is a masterclass in European-style space efficiency, perfect for a bathroom under 50 square feet (e.g., 5′ x 9′). The key is stacking functions. Placing the washing machine under the vanity counter is a brilliant move that saves valuable floor space. The wall-mounted toilet also contributes by freeing up the floor beneath it. This design proves that with clever integration, you can fit a tub, toilet, sink, and even laundry into a very compact footprint without it feeling impossibly cramped.
|
📋 Copy HEX 🔗 Share |
Having the washing machine right next to the bathtub can be a major noise issue. Imagine trying to have a relaxing soak while the machine is in its final spin cycle. If you’re considering this layout, invest in the quietest washing machine you can find and consider adding sound-dampening insulation in the vanity structure around it. It’s a practical trade-off, but you have to be honest with yourself about whether the convenience is worth the potential disruption.
27. Combine a Gray Double Vanity with a Classic Subway Tile Shower
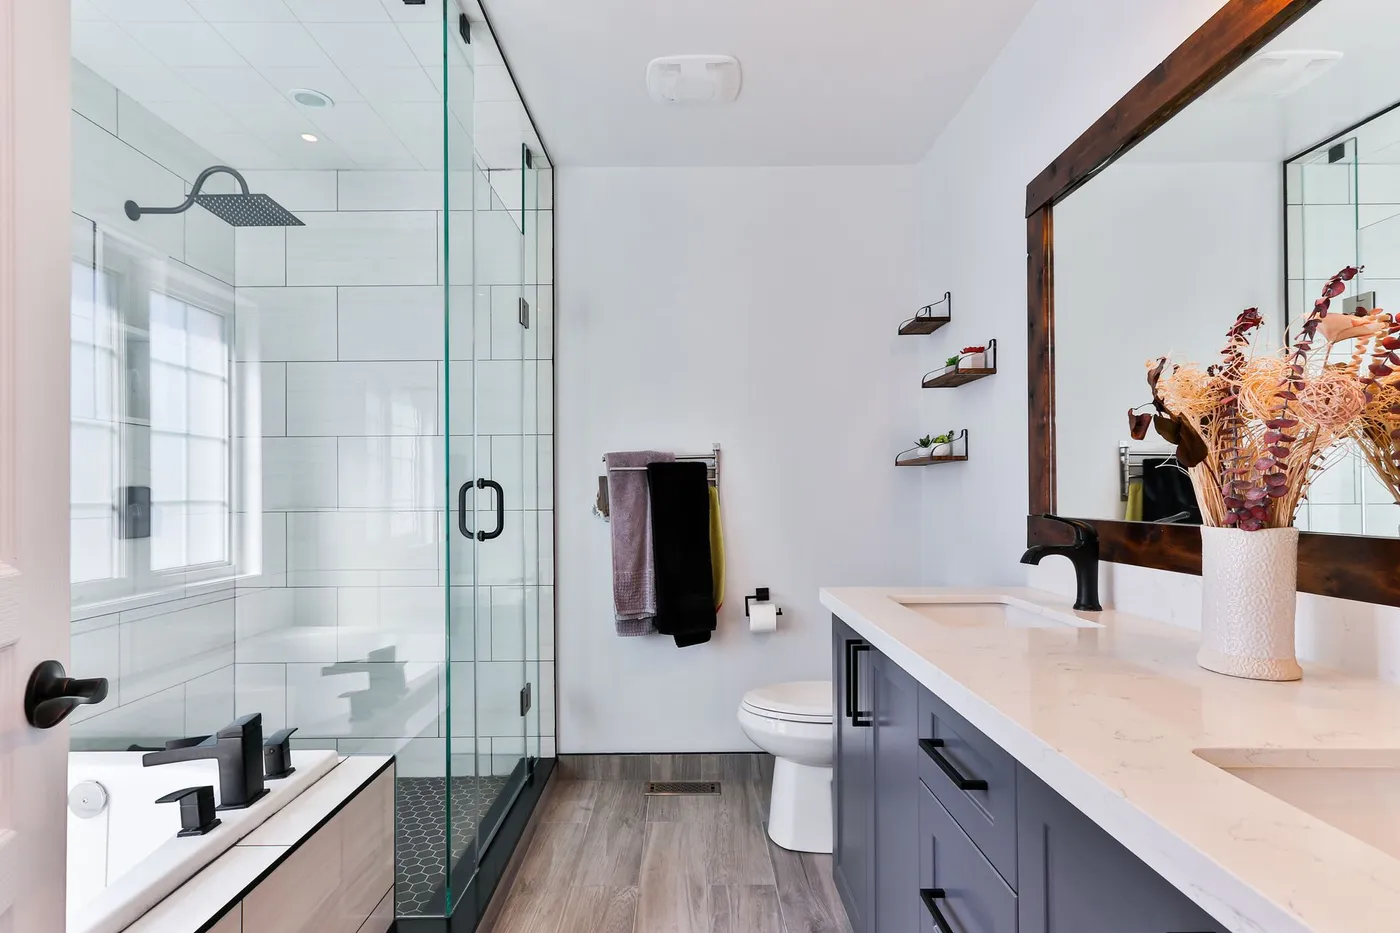
This design works because it sticks to a classic, timeless palette and lets the details shine. The combination of white, gray, wood, and black is foolproof. The interest comes from the subtle variations in texture and shape: the gloss of the subway tile, the dark hex floor in the shower, the smooth white countertop, the grain of the wood-look floor, and the matte finish of the black hardware. It’s a composition of simple, well-executed elements that add up to a sophisticated and calming whole.
|
📋 Copy HEX 🔗 Share |
The glass shower enclosure is the crucial element here. In a moderately sized bathroom like this, a shower curtain or a framed shower door would have visually chopped the room into smaller pieces. The expansive, frameless glass panel makes the entire bathroom feel like one large, open space. It allows the light to flow freely and lets you appreciate the clean lines of the subway tile and the contrasting hex floor from anywhere in the room. It’s what makes the space feel elegant and spacious.
28. Add Drama with Veined Marble and a Dark Purple Vanity
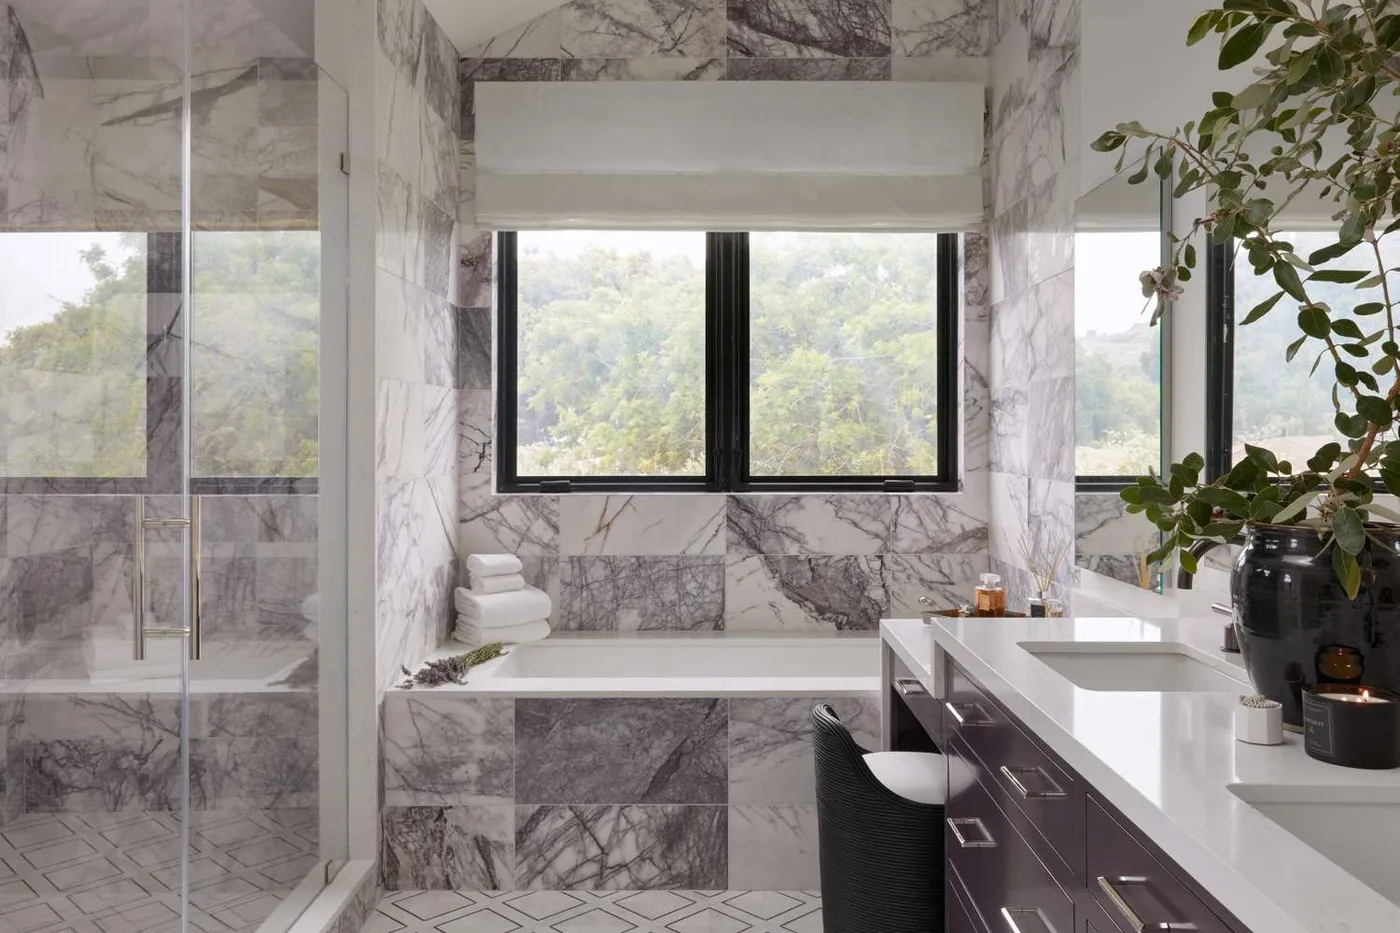
The formula for this elegant bathroom is about drama and restraint. It’s 60% Bold Pattern (the gray and white marble walls), 30% Solid Neutral (the white tub, countertop, and blind), and 10% Saturated Color (the dark purple vanity). The marble provides the luxury and movement, while the large areas of solid white give your eyes a place to rest. The vanity is the surprise—a single, concentrated dose of rich color that adds personality and keeps the room from feeling like a generic hotel bathroom. Compare the marble use here to the more zoned approach in Idea #7.
|
📋 Copy HEX 🔗 Share |
A dark, painted vanity in a bathroom is gorgeous but requires careful upkeep. It will show dust, water spots, and fingerprints more than a wood or white vanity. Use a soft, damp microfiber cloth for cleaning; avoid harsh chemicals that could damage the paint finish. Also, be mindful of chipping. A dropped hair dryer or bottle can easily chip the paint, which will be more noticeable on a dark color. Keep some touch-up paint on hand for quick repairs.
29. Wrap a Modern Bathroom in Warm, Wood-Look Tiles
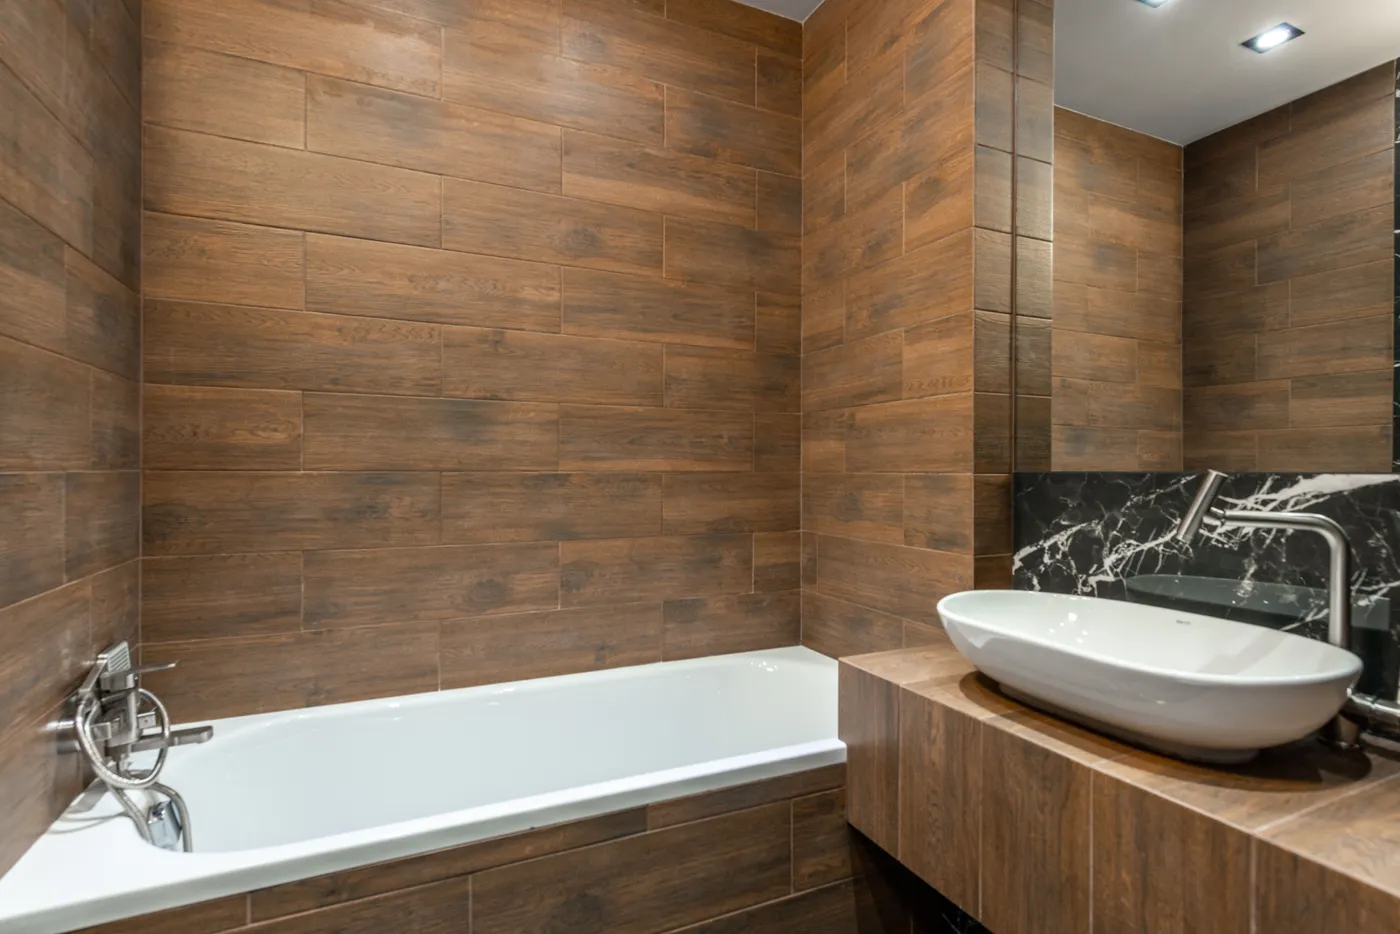
When cladding multiple surfaces in the same wood-look tile, pay close attention to the direction of the grain. Here, the tiles are laid horizontally on both the walls and the floating vanity. This continuous horizontal movement makes the room feel wider and more seamless. If you were to switch the direction on the vanity to vertical, it would break the flow and look less intentional. Consistency is key to making this monolithic look feel cohesive and high-end.
|
📋 Copy HEX 🔗 Share |
This sleek, integrated look can be achieved on a tighter budget. The most important element is the wood-look tile, which is widely available at affordable prices. Instead of a custom-built floating vanity, you can have a carpenter build a simple plywood box and clad it in the same tile. For the countertop, a black laminate with a marble pattern can provide a similar dramatic contrast to real marble for a tiny fraction of the cost. The white vessel sink and bathtub are standard, budget-friendly items.
30. Use a Sage Green Vanity and Brushed Gold for a Serene Look
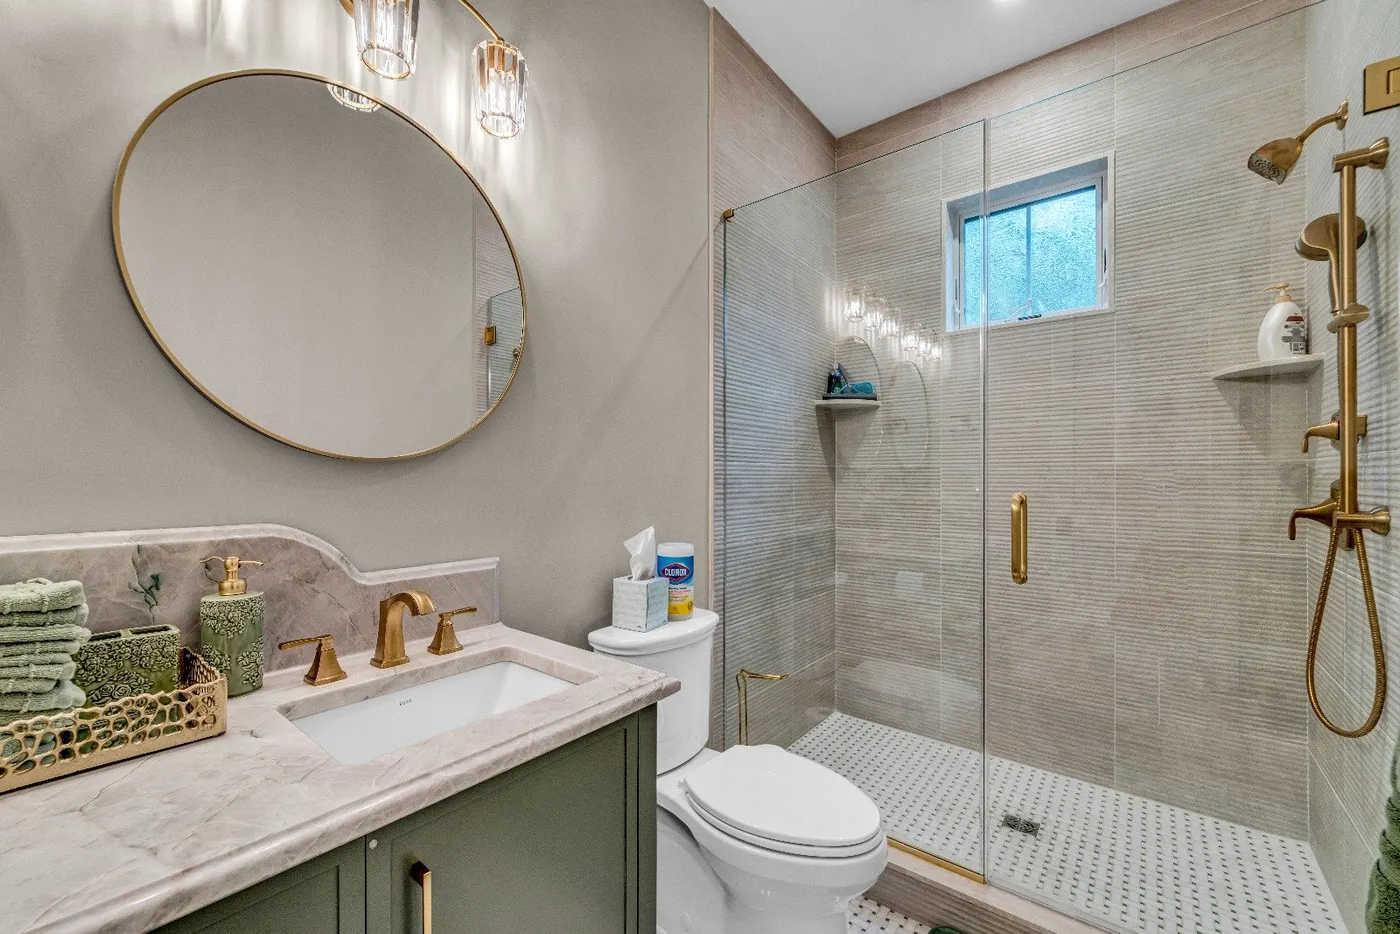
This color combination is everywhere right now, and for good reason. Sage green is calming and connects to nature, a huge trend in interior design as people seek to create tranquil spaces at home. Paired with brushed gold or brass, it feels sophisticated and warm, not dated. It’s a gentle step away from the all-neutral palettes, offering color without being loud. This trend has longevity because sage is a timeless color that plays well with many other materials like wood, marble, and beige tiles.
|
📋 Copy HEX 🔗 Share |
While every element here is lovely, the brushed gold fixtures are what truly elevate the design. Imagine this same bathroom with standard polished chrome fixtures. It would be nice, but it would lose all of its warmth and personality. The soft, satin finish of the gold faucet, shower system, and mirror frame is the perfect complement to the cool sage green. It adds a touch of luxury and ties the whole look together, making it feel curated and special.
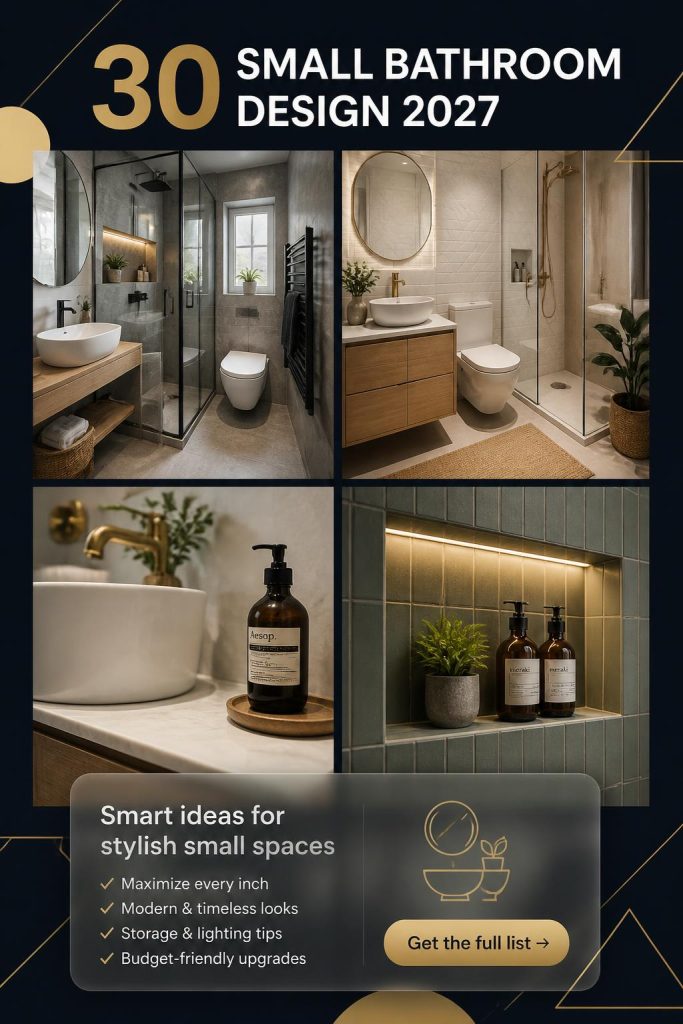
Your Small Bathroom’s Big Moment
See? A small footprint doesn’t have to mean a small impact. With the right layout, a cohesive color palette, and a bit of personality, even the tiniest bathroom can feel like a private retreat. Now, go save your favorites to your Pinterest board and start dreaming up your own perfect space!