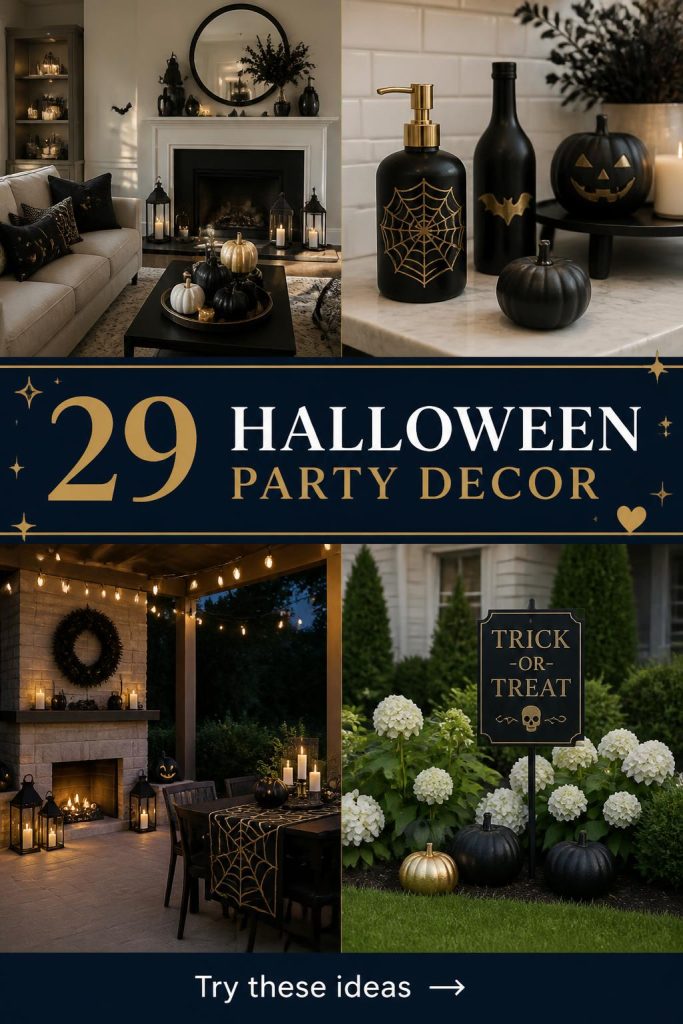
You know that feeling when you finally find the Halloween party decor that looks exactly right for your space but have no idea how to pull it off? After filtering through hundreds of options from high-end catalogs like Grandin Road to popular blogs, we narrowed it down to 29 incredible ideas that actually deliver. We’re covering everything from elegant gothic tablescapes to playful and modern mantelpieces, with options to suit every style. For 2026, the trend is all about creating a specific, curated mood rather than just throwing a few pumpkins by the door. And stay until the end—we break down the most common mistakes that can ruin these looks. 📌 Save this to Pinterest for later—you’ll want to revisit these ideas.
1. Set a Spooky First Impression at the Entryway
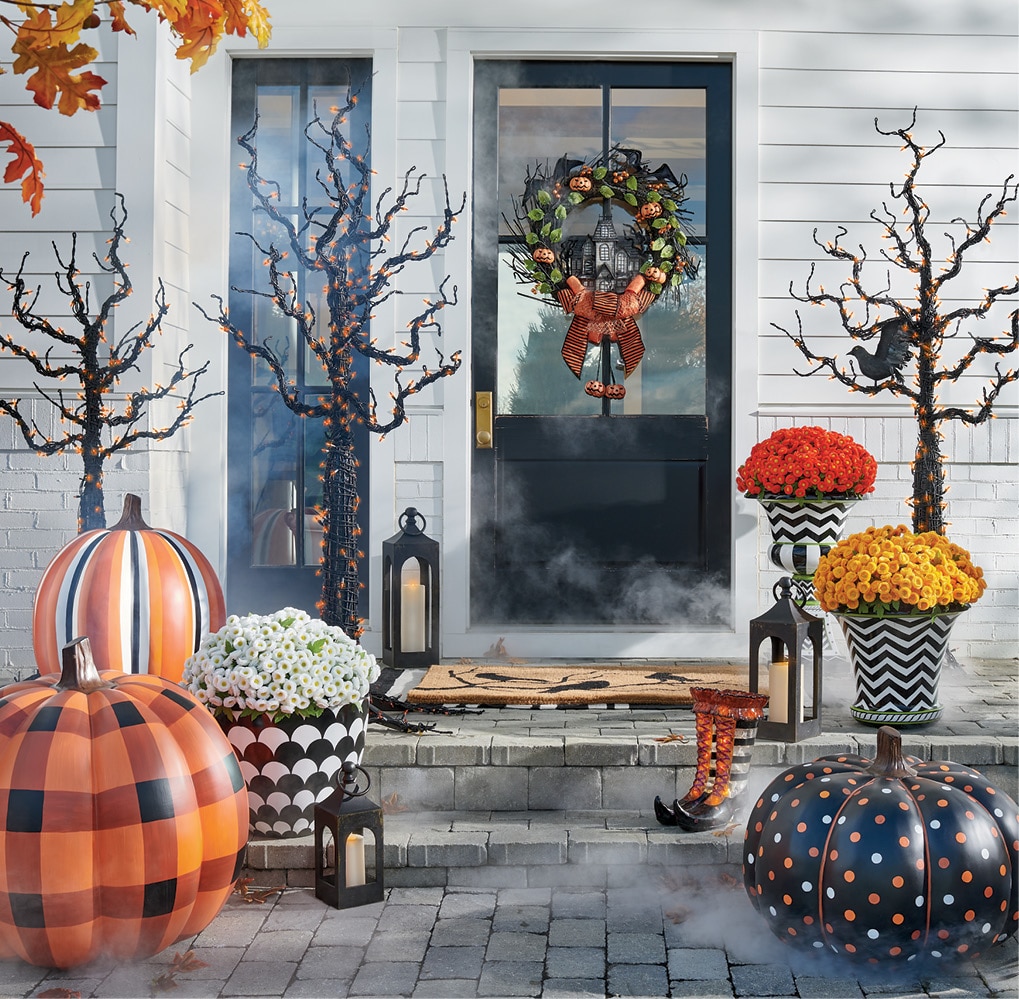
Your entryway is the first taste guests get of your party’s atmosphere. It’s the opening scene of your movie! This is the place to make a statement and set the tone for the rest of the experience. It works because it creates an immediate sense of immersion. By focusing your efforts here, you promise a well-thought-out event from the moment someone steps inside. It’s not just about a wreath on the door; it’s about creating a small, curated vignette that tells a story and builds anticipation for what’s to come.
|
📋 Copy HEX 🔗 Share |
Let’s be honest: entryway decor takes a beating. It’s a high-traffic area with guests coming in and out, brushing past with coats and bags. Avoid fragile or overly precious items that can easily be knocked over or damaged. Also, consider the flow of traffic. A grand, sprawling display is great, but not if it creates a bottleneck at the door. Ensure there’s still plenty of room for people to comfortably enter, remove their shoes, and greet each other without tripping over a strategically placed skeleton.
2. Create a Classic Black-and-White Spiderweb Dessert Table
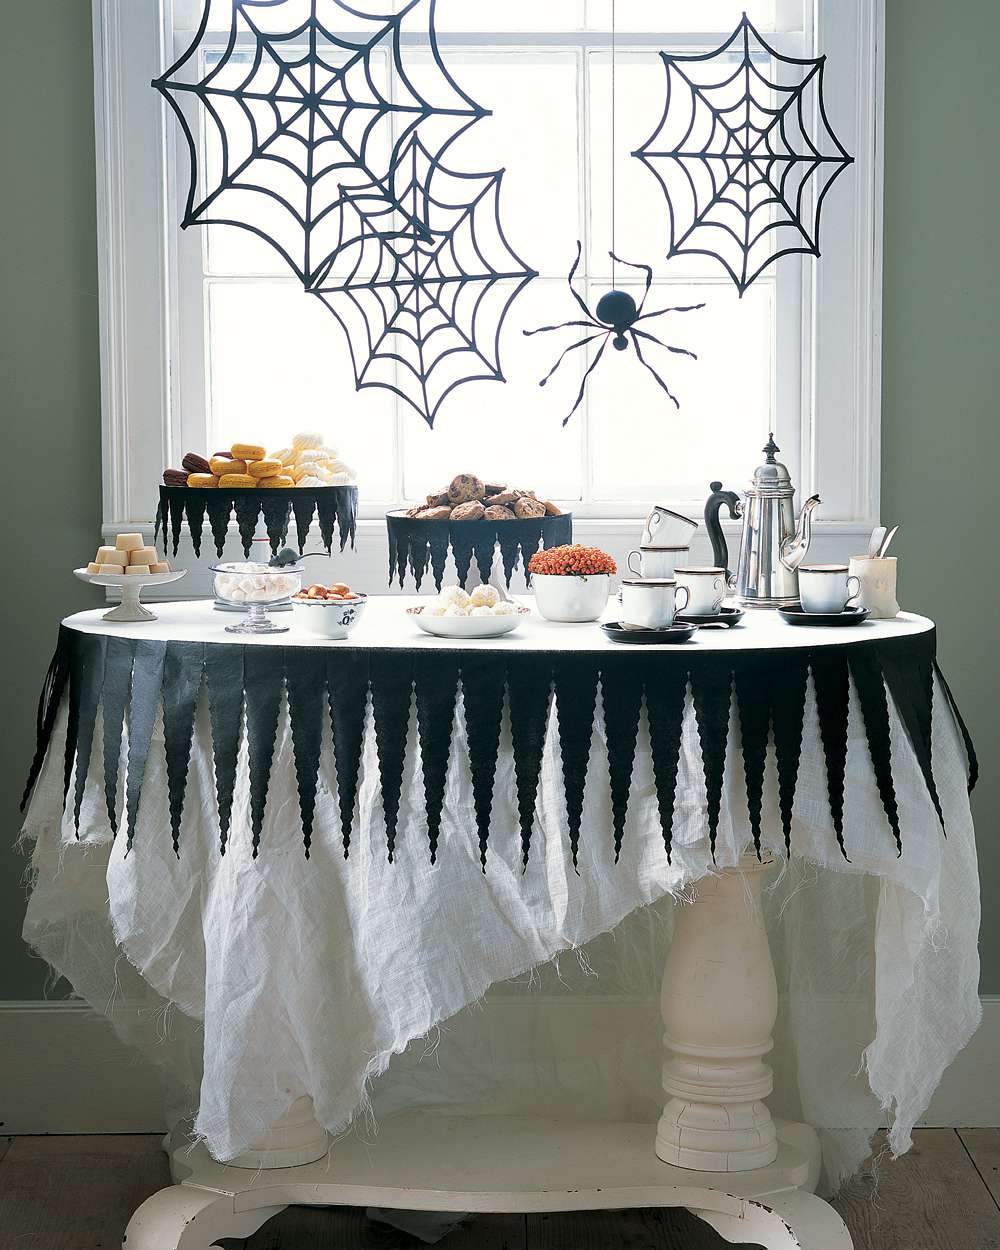
To get that clean, graphic look, use a paper punch for your spiderwebs instead of trying to cut them by hand. You can find large, intricate craft punches online or at craft stores. For the jagged table overlay, use black felt from a fabric store. It’s inexpensive, won’t fray when you cut it, and has a great matte texture that absorbs light, making your white serving dishes really pop. The key is creating sharp, deliberate shapes against a clean background.
|
📋 Copy HEX 🔗 Share |
The visual recipe here is simple and effective. It’s about 60% crisp white (tablecloth, serving ware, cups), 30% deep black (spiderwebs, table overlay, serving bowls), and 10% metallic accent (the silver coffee set). You could easily swap the accent color. Imagine replacing the silver with gold for a warmer, more opulent feel, or even a bright Halloween orange for a more playful, classic vibe. The core formula of high-contrast neutrals is what makes it so versatile and chic.
3. Layer String Lights for a Warm and Ghostly Porch Shelf
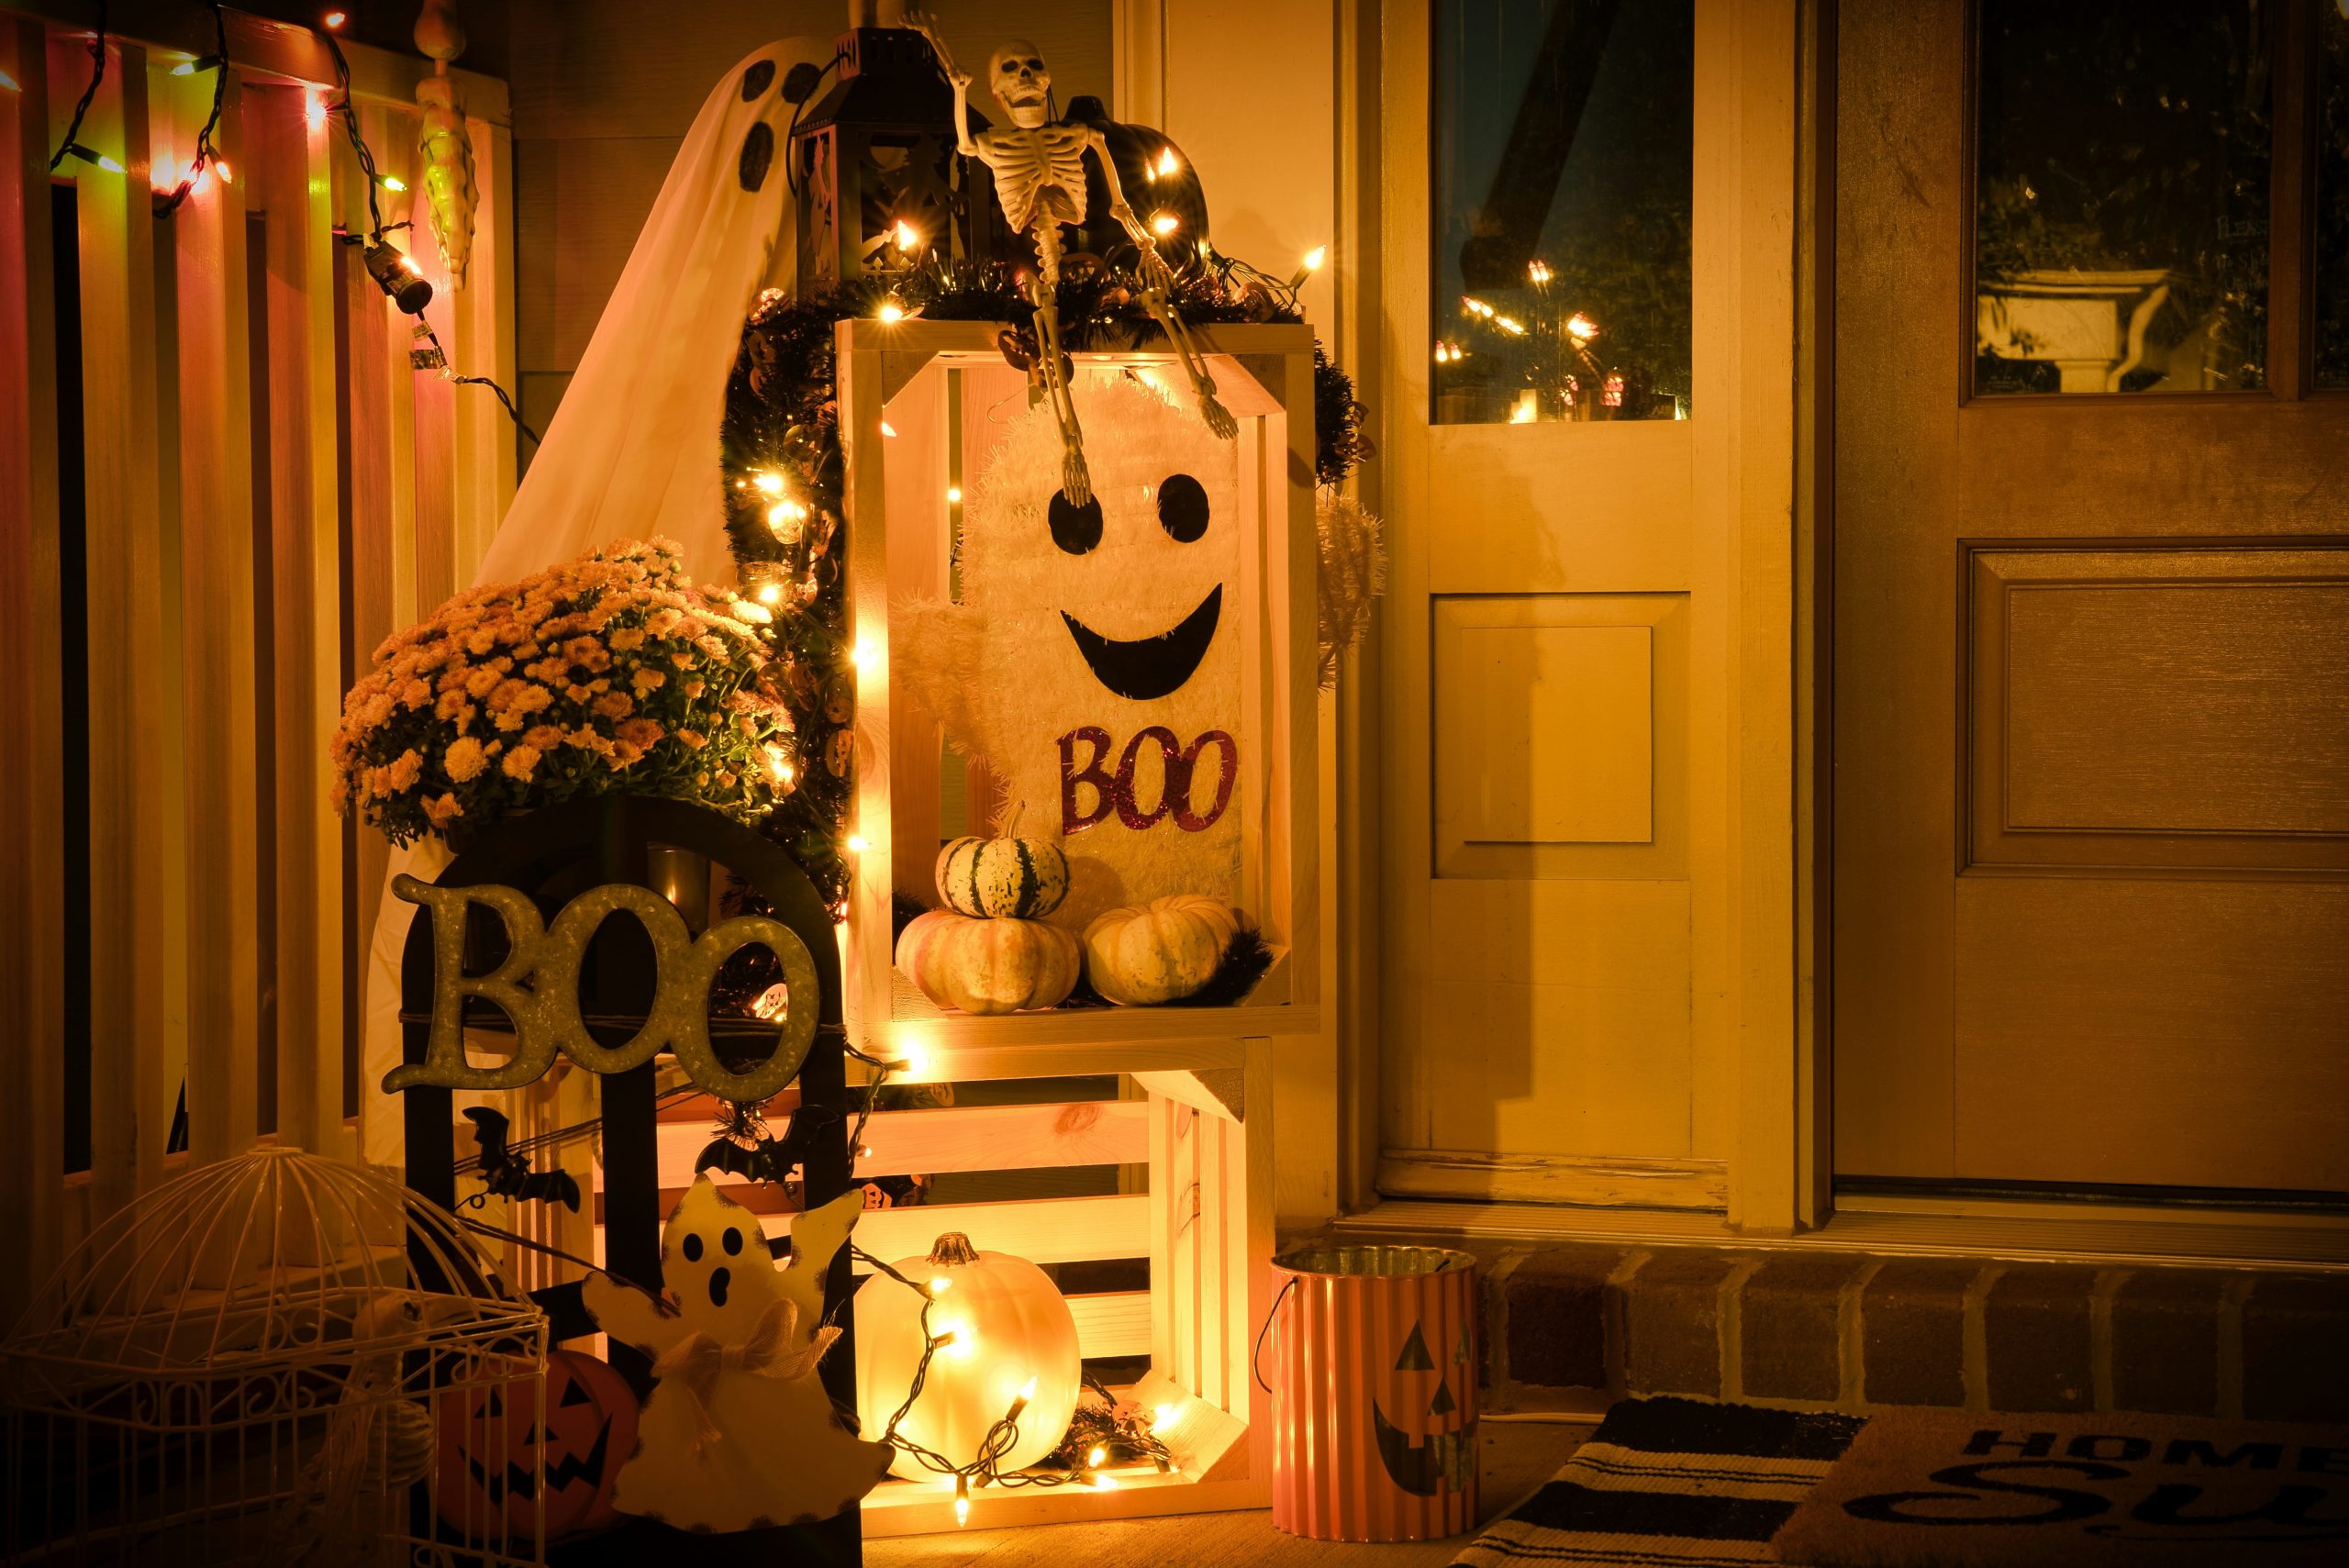
- Main Furniture: Wooden shelving unit ($150 – $400)
- Lighting: String lights, illuminated ghost ($50 – $120)
- Decor/Accessories: Decorative pumpkins, skeleton figure, metal letters ($80 – $200)
- Textiles: None
- Budget Alternative: Use an existing bookcase or ladder. Craft ghosts from white sheets and string lights ($20). Get pumpkins from a local patch ($30). Total: ~$50.
- TOTAL: $280 – $720
|
📋 Copy HEX 🔗 Share |
This look is all about the magic of layered light. The warm glow of the string lights woven through the shelves creates pockets of interest and draws your eye around the entire display. It feels cozy and inviting, not harsh or scary. The combination of different light sources—the string lights and the internally lit ghost—adds depth and visual complexity. It’s this thoughtful use of light that transforms simple decorations into a truly enchanting scene.
4. Style a Minimalist Halloween Corner with Pampas Grass and Skulls
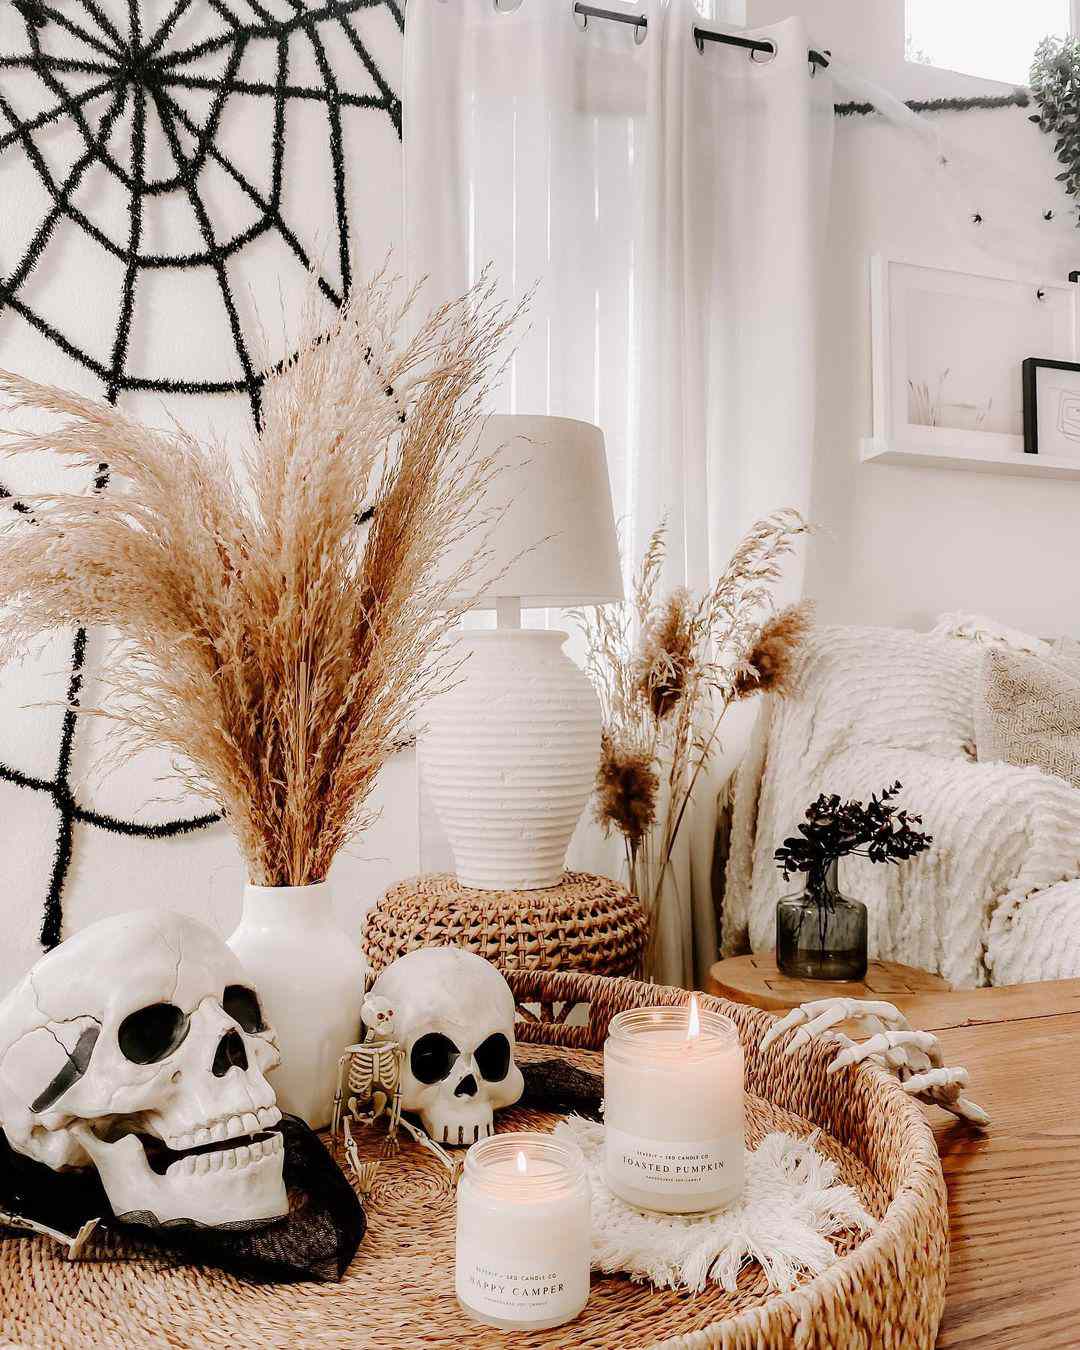
What makes this idea work is the pampas grass. Remove it, and you just have a few spooky items on a table. The tall, feathery grass adds dramatic height, texture, and a touch of softness that contrasts beautifully with the hard, macabre skulls. It bridges the gap between everyday decor (the lamp, the woven tray) and the seasonal Halloween elements, making the whole vignette feel integrated and stylish rather than jarring or cheap. It proves you don’t need to scream “Halloween” to create a spooky mood.
|
📋 Copy HEX 🔗 Share |
Pampas grass is gorgeous, but it sheds. A lot. Before you bring it inside, take it outdoors and gently shake it to remove loose plumes. Then, give it a generous coating of high-hold hairspray to set it in place. This will dramatically cut down on the feathery mess. Be aware that it can be brittle, so place the vase where it won’t get bumped. For a lower-maintenance alternative that gives a similar look, consider faux pampas grass or even dried reeds, which are far less prone to shedding.
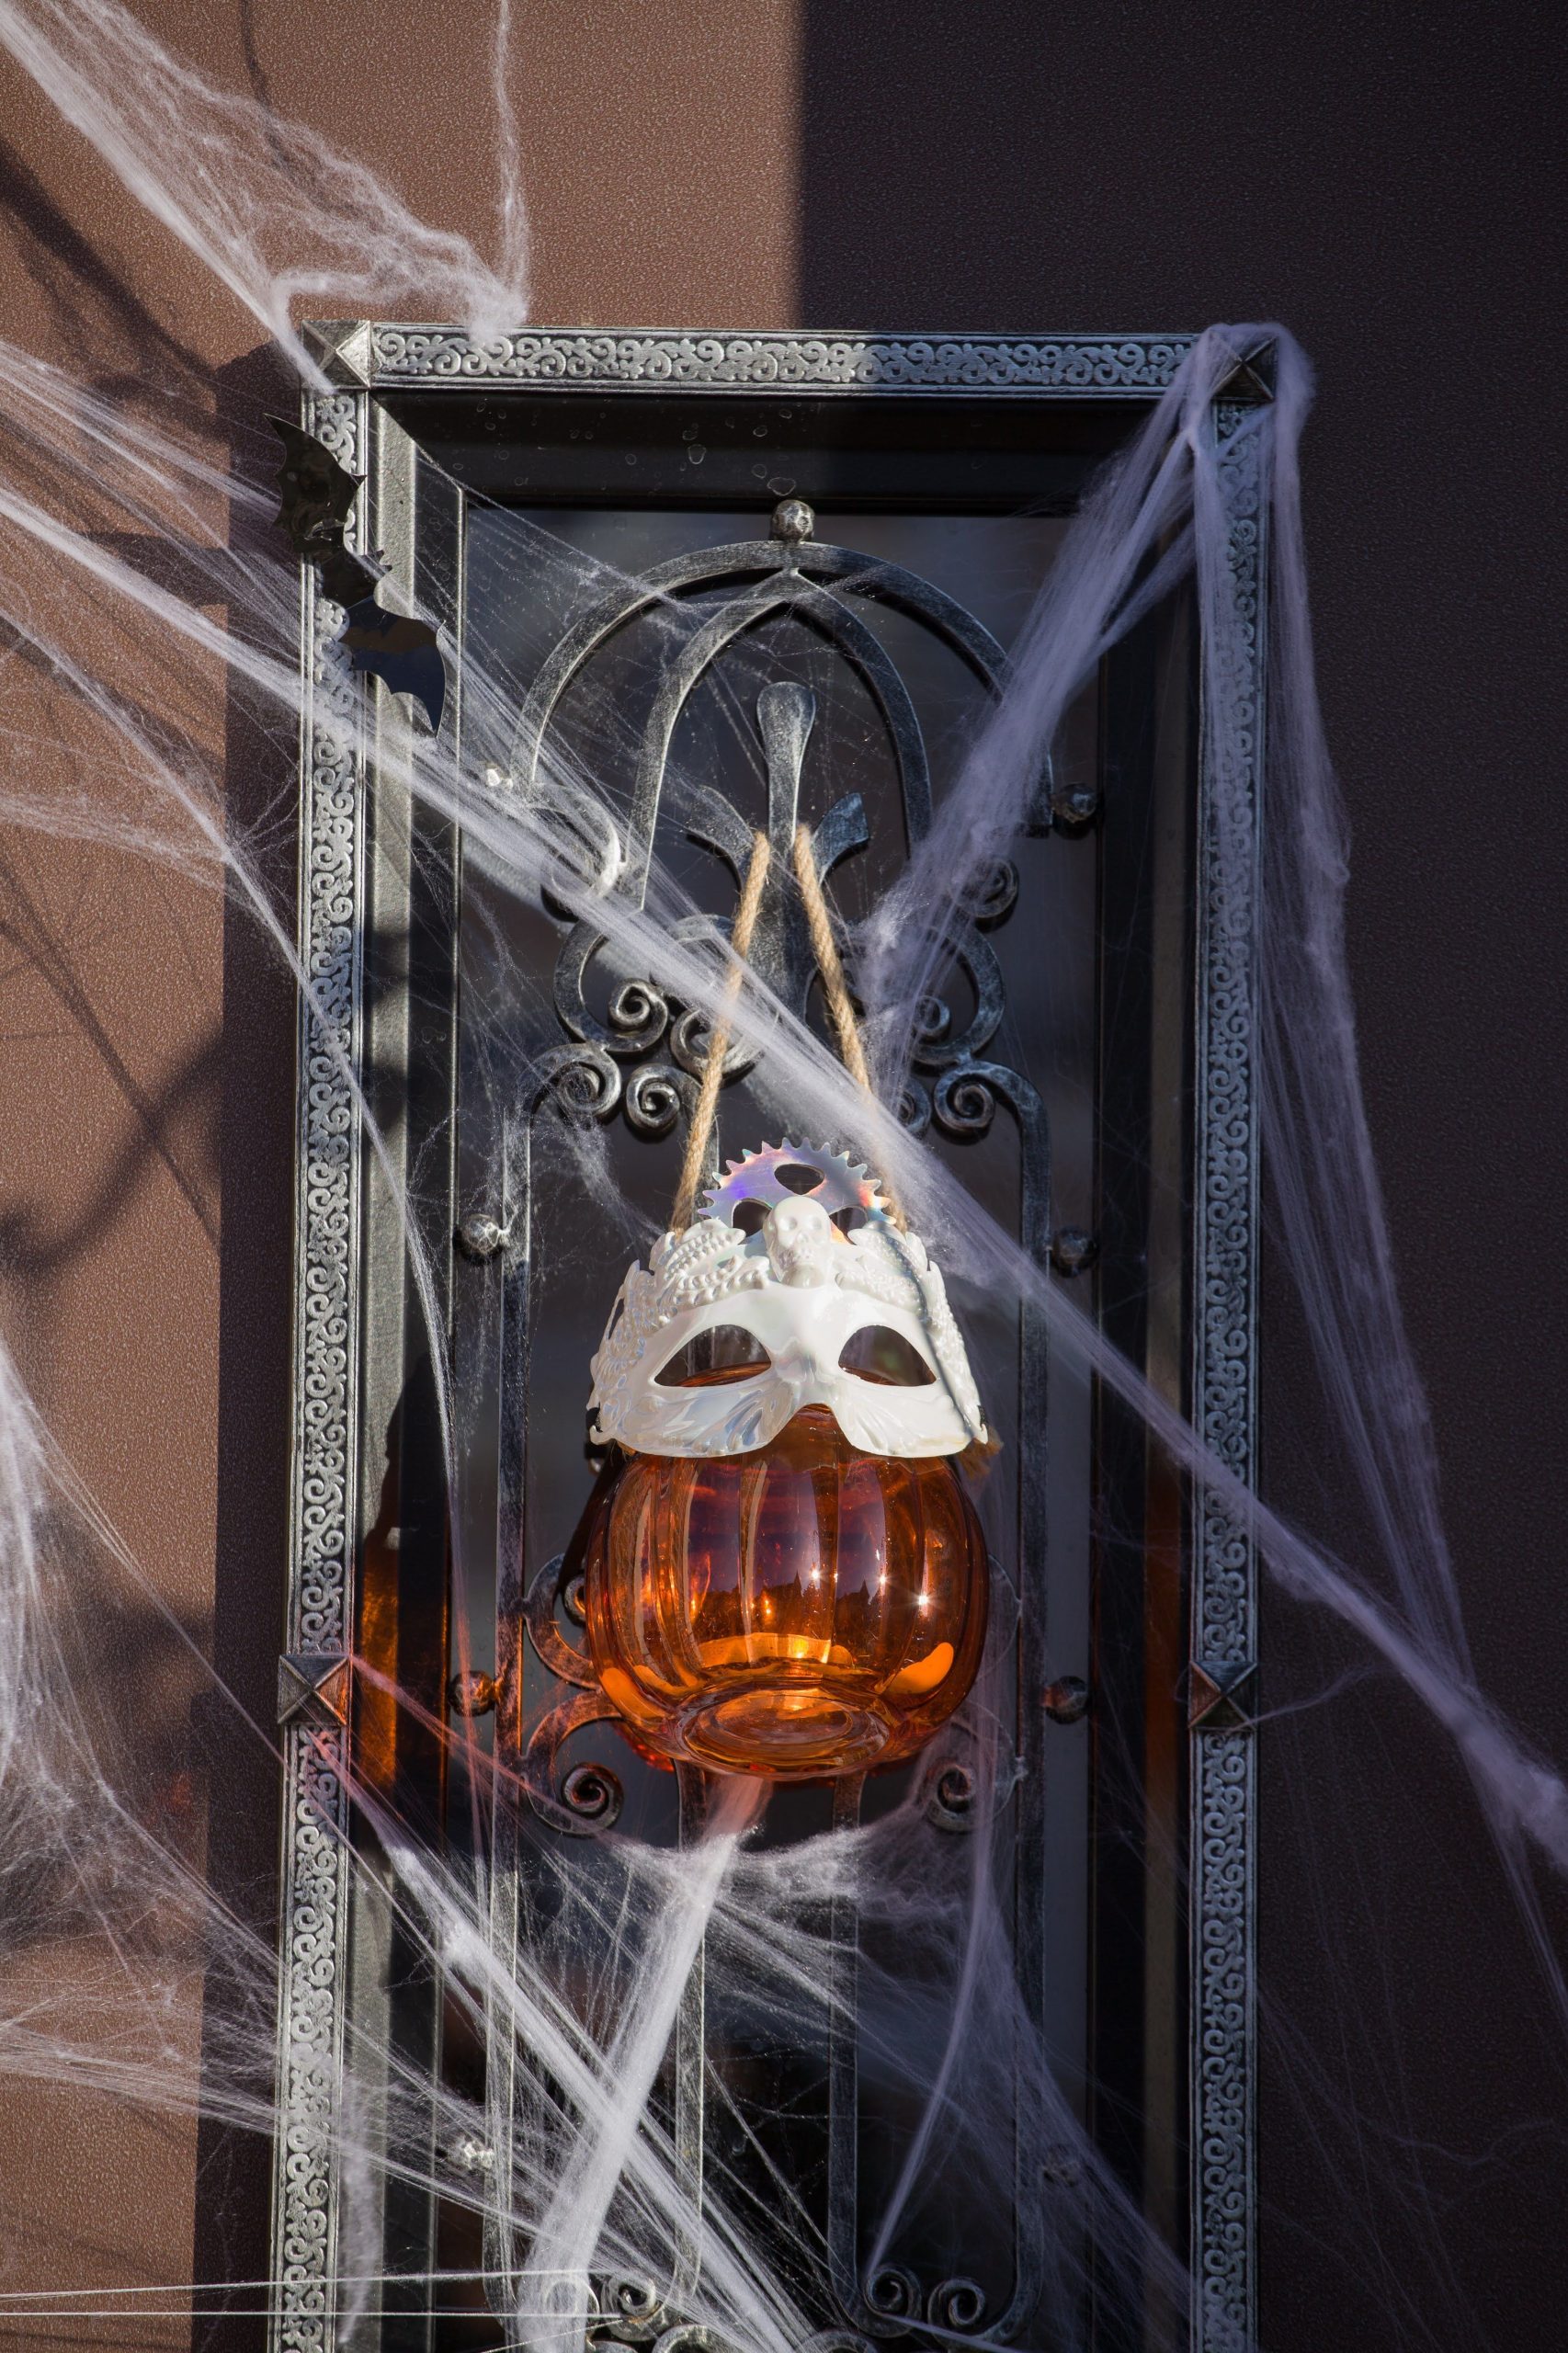
5. Drape an Ornate Gate with Webs and a Masked Pumpkin Lantern
When draping faux spiderwebs, the secret is to pull them much, much thinner than you think you should. The goal isn’t a thick, cottony blanket; it’s to create delicate, wispy strands that look like a real spider has been at work for weeks. Anchor the web in a few key spots on your gate or doorway, then stretch and tease the fibers apart until they are almost transparent. The more you pull, the more realistic it will look. A little goes a long way!
|
📋 Copy HEX 🔗 Share |
This look is fantastic for creating curb appeal, but it’s highly weather-dependent. A single windy or rainy night can turn your beautifully draped spiderwebs into a clumpy, sad mess. The glass pumpkin is also quite delicate. If you live in an area with unpredictable fall weather, you might want to save this look for a covered porch or a more protected area. It’s stunning, for sure, but maybe not the most practical choice for a two-week display in a stormy climate.
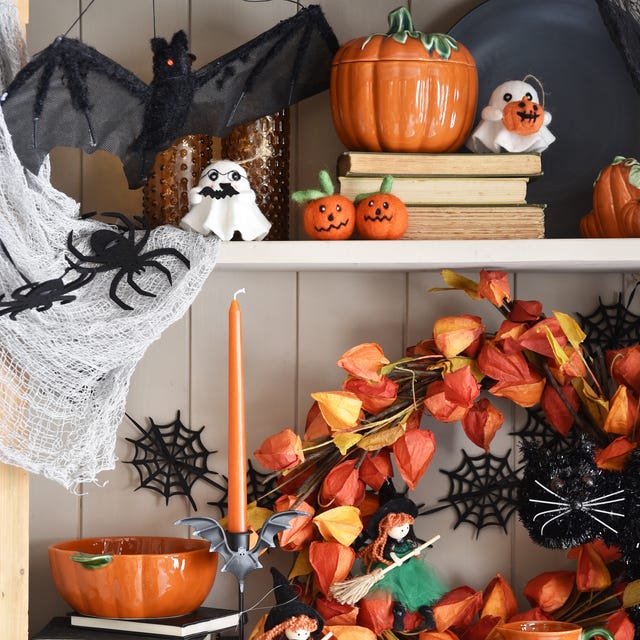
6. Curate a Cozy Halloween Shelf with Bats, Ghosts, and Pumpkins
This shelf follows a simple but effective formula: 50% traditional Halloween icons (bats, ghosts, pumpkins), 30% natural texture (the autumn leaf garland), and 20% ambient lighting (the orange taper candle). This mix ensures the decor feels festive and fun without being overwhelming. You could alter the formula by swapping the leaf garland for a string of fairy lights for a more magical feel, or by using black candles instead of orange for a moodier, more gothic vibe. The balance of elements is the key.
|
📋 Copy HEX 🔗 Share |
What makes this setup so pleasing to the eye is the smart use of varying heights and shapes. You have the tall, slender candle, the wide, low ceramic pumpkin, the small, round ghost figures, and the large, graphic bat silhouette. This variation keeps your eye moving across the shelf, creating a sense of dynamic energy. Nothing is perfectly symmetrical, which gives it a more casual and collected-over-time feeling. It’s a composition, not just a collection of items.
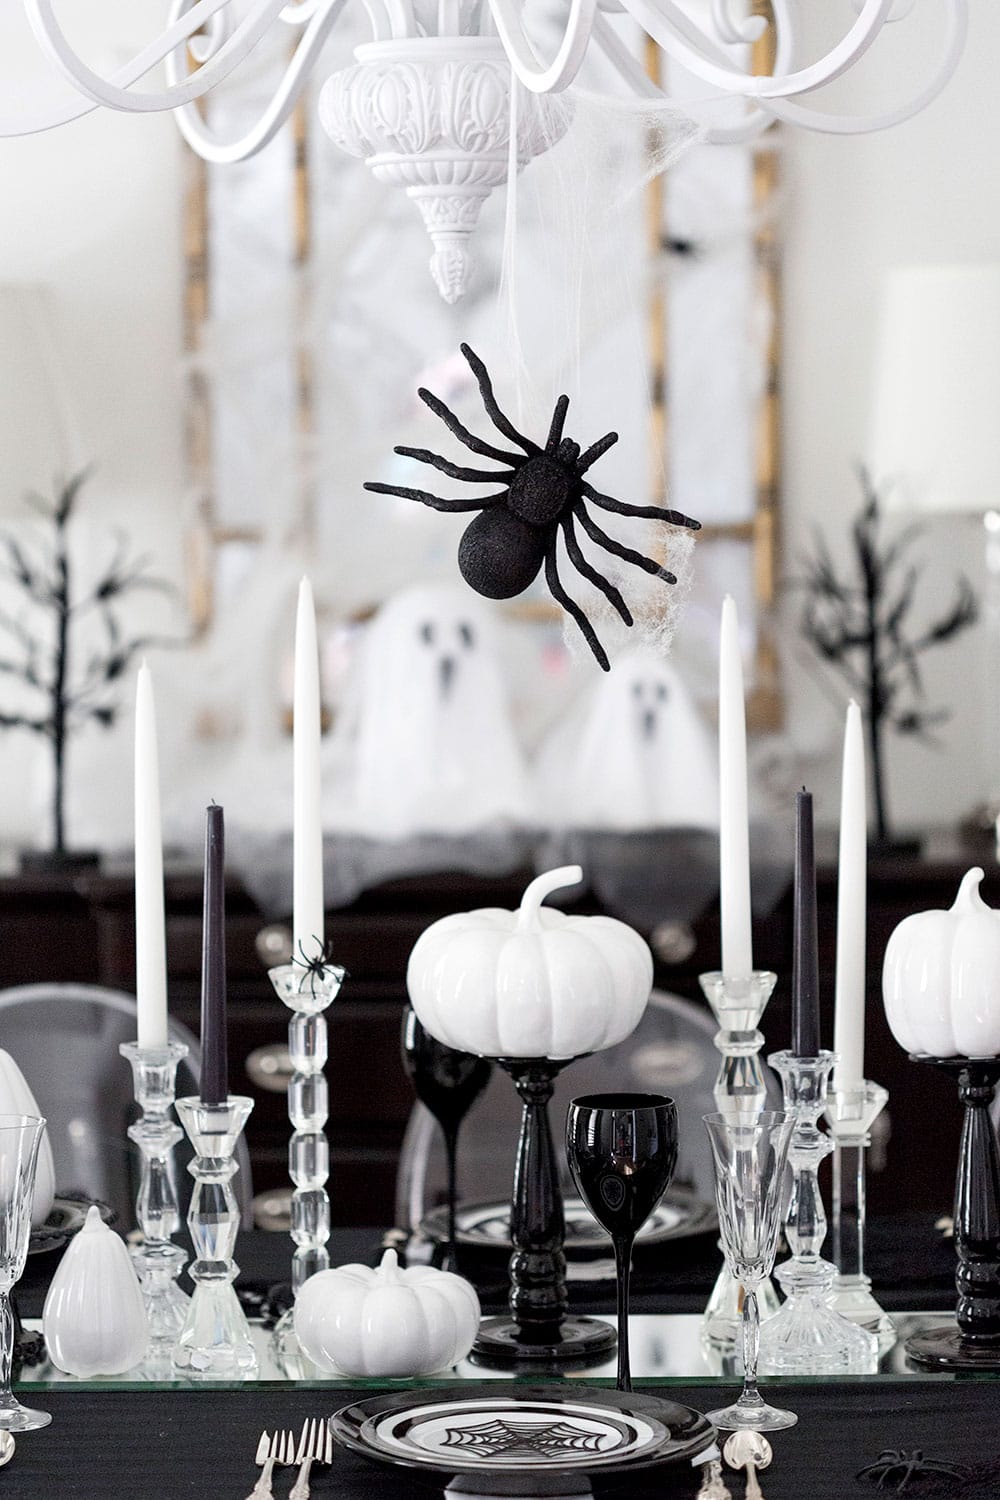
7. Set an Elegant Monochrome Table with a Dramatic Hanging Spider
It’s all about the giant spider. Without that single, dramatic element hanging from the chandelier, this is just a chic black-and-white dinner party setting. The spider introduces a sense of scale, surprise, and a touch of campy horror that instantly signals “Halloween.” It’s a brilliant focal point that draws the eye upward and adds a vertical dimension to the decor. It’s the one piece that transforms the entire room from merely elegant to elegantly spooky. Compare this to the more subtle use of spiders in Idea #8.
|
📋 Copy HEX 🔗 Share |
This idea is best suited for a dining room with ceilings that are at least 9 feet high. You need enough vertical space to hang the spider from the chandelier without it feeling cramped or becoming a hazard for taller guests. The table itself should be at least 72 inches long to accommodate the mirrored runner and allow enough breathing room for the pumpkins and candelabras without feeling cluttered. It’s a high-impact look that requires a bit of space to execute properly.
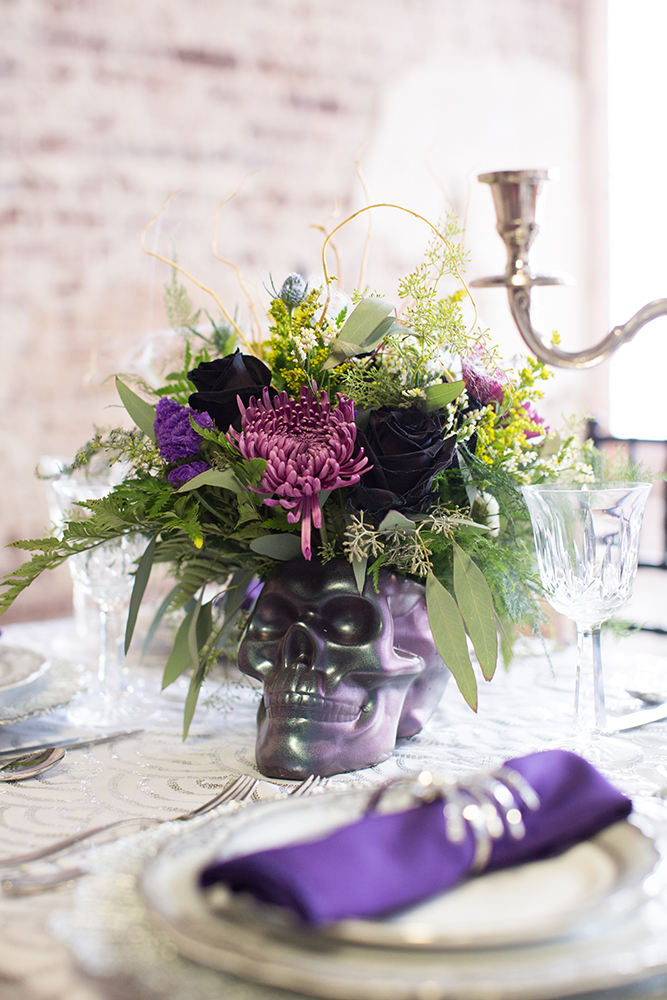
8. Anchor a Table with a Floral Skull Centerpiece in Purple and Black
To get that stunning iridescent finish on the skull, you don’t need to find a specialty prop. Buy a plain ceramic or resin skull from a craft store and use a color-shifting spray paint (often found in the automotive section). Apply it in thin, even coats to get that metallic, multi-toned effect. For the floral arrangement, use a block of wet floral foam inside the skull to keep your flowers fresh and securely in place throughout the evening.
|
📋 Copy HEX 🔗 Share |
This look taps directly into the “Gothic Romance” or “Dark Academia” trends that continue to dominate platforms like Pinterest and TikTok. It’s a move away from cartoonish Halloween decor towards something more atmospheric, historical, and mysterious. The iridescent skull adds a futuristic, almost sci-fi twist to the classic gothic elements, which feels very 2026. It’s for the host who appreciates artistry and mood over jump scares. This trend has staying power because it’s rooted in classic design principles but feels fresh and personal.
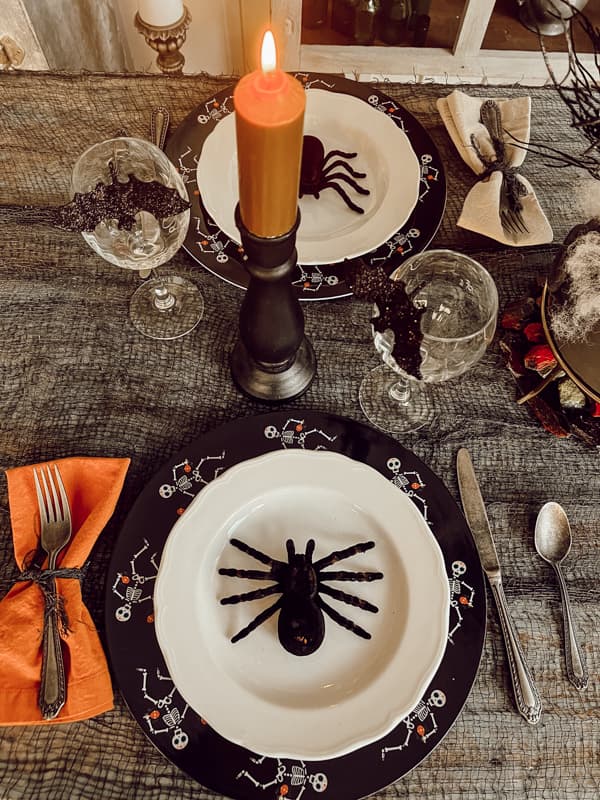
9. Layer Skeleton Plates and Spider-Adorned Glassware for a Spooky Setting
The success of this tablescape lies in its thoughtful layering. It’s not just one Halloween item per setting, but a curated combination. You have the patterned charger plate, the clean white dinner plate, and then the final accent of the black spider. This creates depth and a sense of occasion. The same principle applies to the glassware, with the bat decal adding another layer of detail. The single pop of orange from the candle and napkin cuts through the monochrome palette, drawing your eye in and adding warmth.
|
📋 Copy HEX 🔗 Share |
You don’t need expensive designer plates to achieve this effect. Grab a set of plain white plates from IKEA or Target ($20 for a set). The skeleton-patterned chargers can be swapped for simple black construction paper cut into a circle. The real star, the little black spider, can be bought in a bag of 100 for under $10 at any party store. The bat decals for the glasses? Also easily found online or at a craft store for a few dollars. This is a high-impact look on a very reasonable budget.
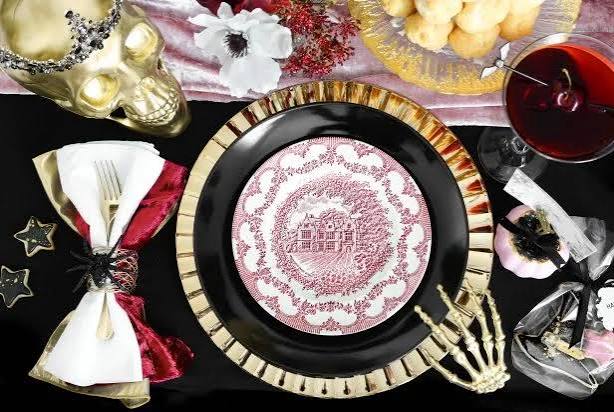
10. Weave Elegance into Your Eerie Party Decor
To achieve a sophisticated Halloween aesthetic, think like a designer. The formula is often 70% existing elegant decor + 30% spooky additions. This means you aren’t creating a Halloween theme from scratch; you’re layering it onto your already beautiful space. Keep your quality furniture, mirrors, and lighting, and then introduce elements like black taper candles, subtle cobwebbing, or a tastefully placed skull. The key is the contrast between the elegant base and the spooky accents.
|
📋 Copy HEX 🔗 Share |
- Inventory your accents: Before you buy anything, what elegant items do you already own that can be part of the look? Think silver trays, crystal glasses, and ornate frames.
- Choose your spooky palette: Will you stick to classic black and white, or introduce a jewel tone like deep purple or blood red? Decide on a limited palette to keep it looking chic.
- Test your lighting: An elegant look often relies on dim, ambient light. Do you have enough lamps, candles, or dimmers to create the right mood?
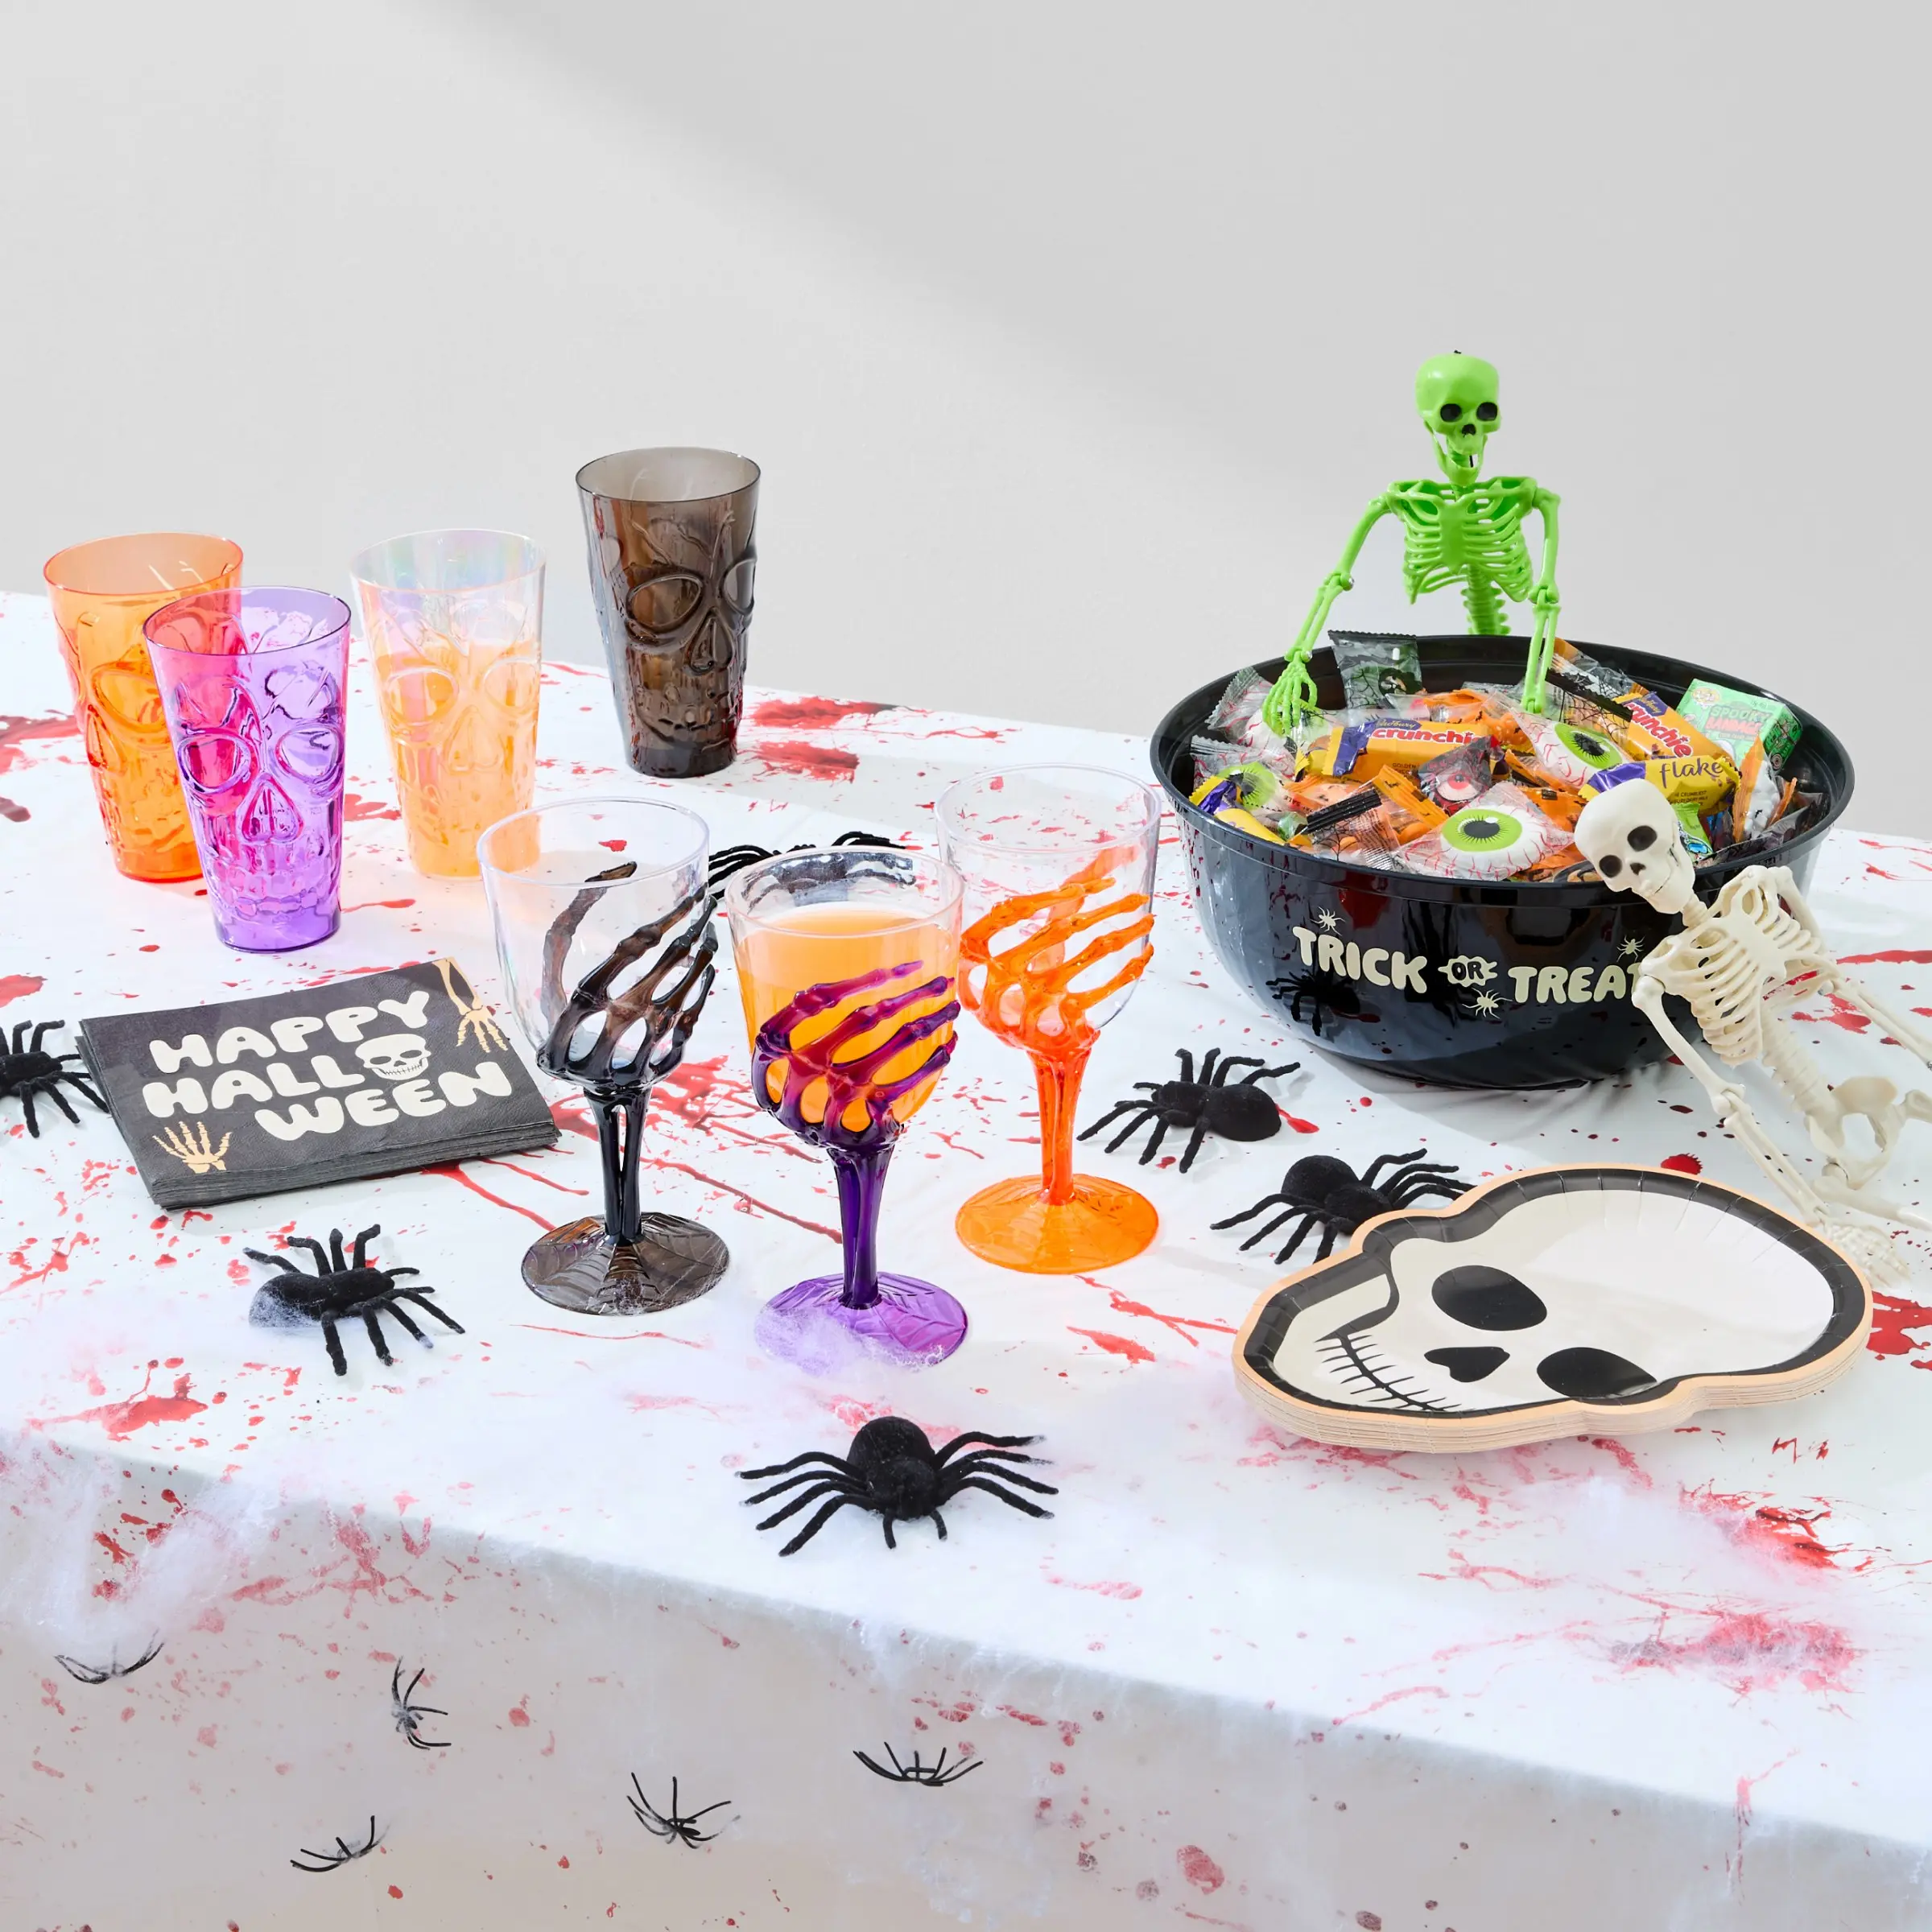
11. Go All-Out Ghastly with a Blood-Spattered Treat Table
The blood-spattered tablecloth is the undeniable hero of this entire setup. It immediately sets a gory, playful, and slightly shocking tone. Everything else—the skull glasses, the spider plates—is a great supporting actor, but the tablecloth is the star. It provides a bold, graphic background that makes all the other decor pop. It’s a single, inexpensive item that does 90% of the work in establishing the party’s fun and ghastly theme. This is a much more playful take than the spooky table in Idea #12.
|
📋 Copy HEX 🔗 Share |
Want to make your own blood-spatter tablecloth? It’s easy, cheap, and fun. Time Estimate: 20 minutes + drying time. Cost: Under $15.
- Buy a cheap white tablecloth (or an old sheet).
- Get a bottle of red fabric paint or acrylic paint mixed with a fabric medium.
- Lay the cloth on a protected surface (outside is best).
- Dip a paintbrush in the red paint and flick it forcefully at the cloth to create splatters.
- For drips, load the brush with more paint and hold it over the cloth, letting it drip down.
- Let it dry completely before using.
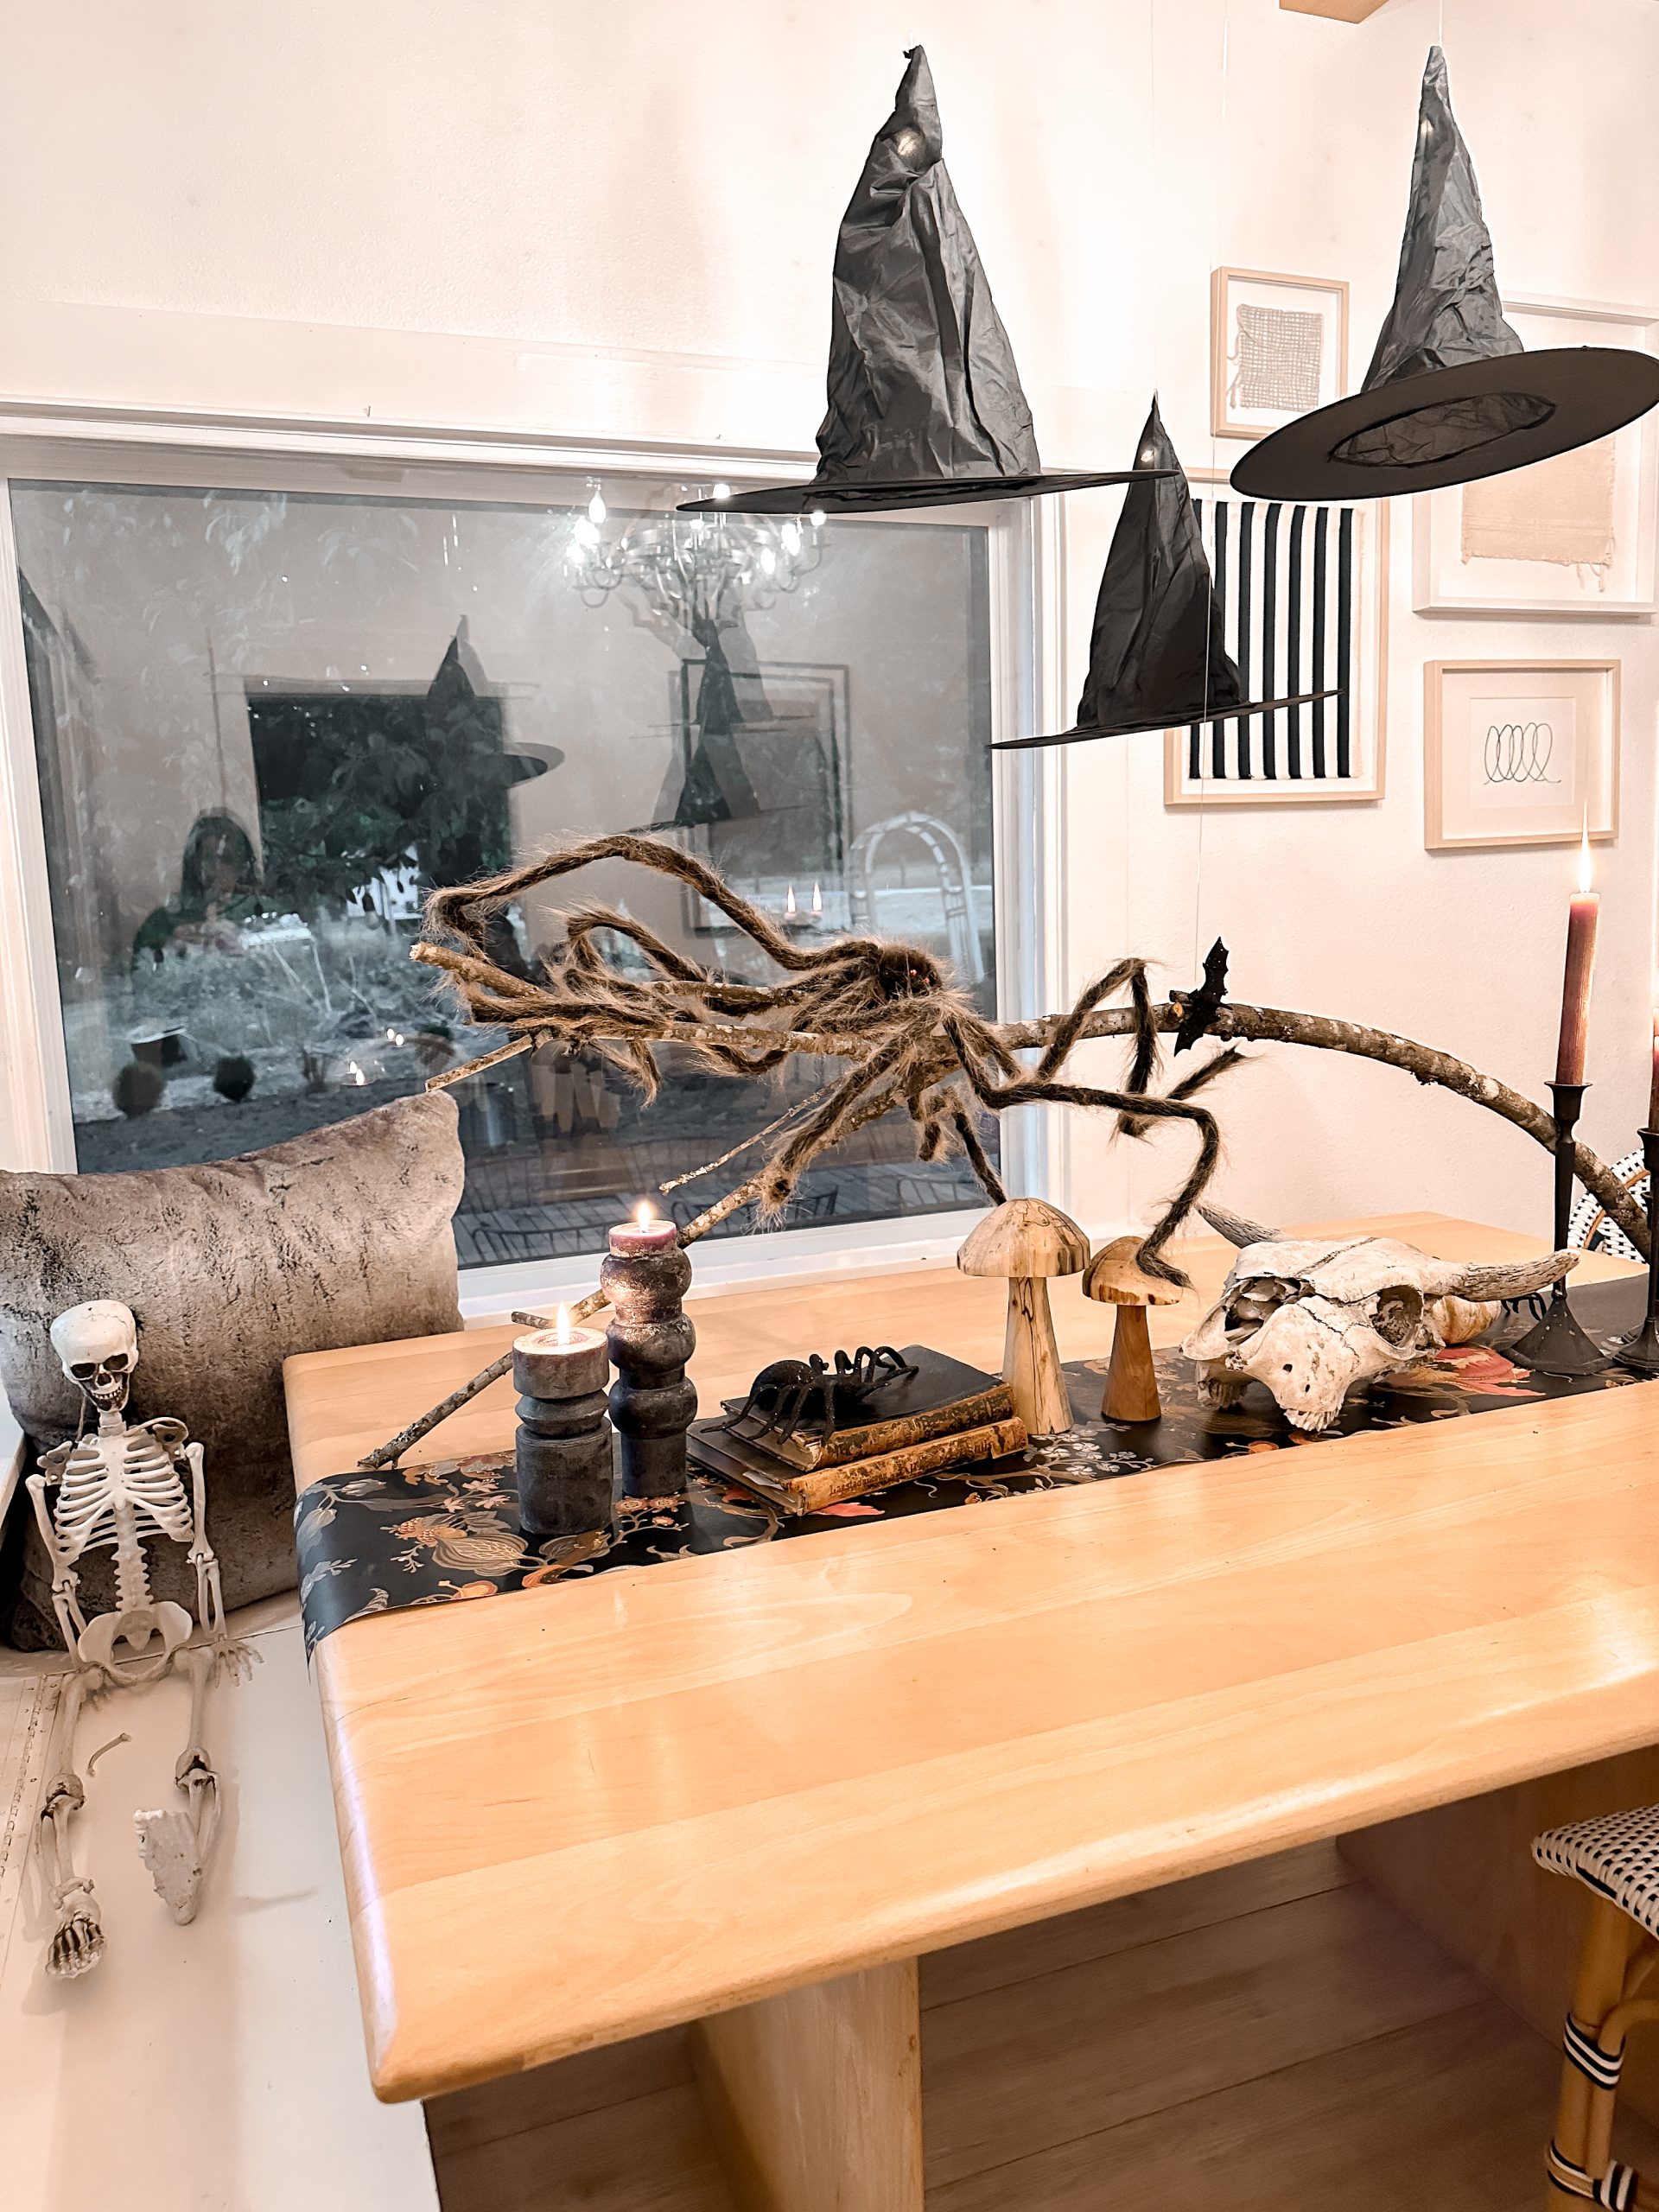
12. Hang Witch Hats for a Cozy, Macabre Dining Vibe
To hang the witch hats, don’t just tape them to the ceiling. It looks messy, and they’ll fall. Instead, use a clear fishing line and small, clear adhesive hooks (like Command hooks). Tie a length of fishing line to the point of each hat. Stick the hooks to the ceiling above your table. Then, hang the hats at varying heights to create a more dynamic, floating effect. The clear line and hooks will be virtually invisible, making it look like the hats are magically suspended in mid-air.
|
📋 Copy HEX 🔗 Share |
This looks amazing, but it can be a fire hazard if you’re not careful. If you’re hanging flammable party hats from the ceiling, you absolutely cannot have tall, open-flame candles on the table directly below them. Opt for flameless LED candles instead. They provide the same warm, flickering glow without any of the risk. It’s a simple swap that ensures your party is memorable for the right reasons. Safety first, spooky second!
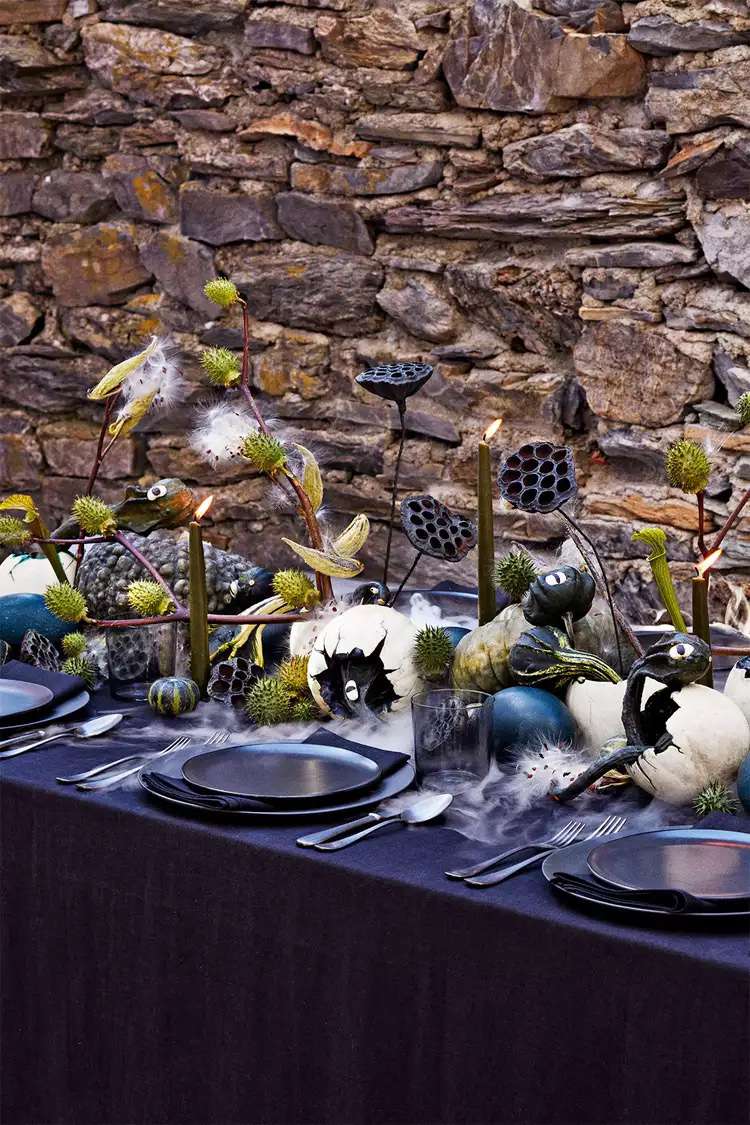
13. Embrace Nature’s Spooky Side with a Dark and Earthy Tablescape
This composition is so effective because it leans into the inherent spookiness of nature itself. The gnarled gourds, cracked-open pumpkins, and spiky seed pods feel genuinely unsettling in a way that plastic decorations never could. The use of organic, slightly decaying materials creates an atmosphere that is both beautiful and macabre. It’s a sophisticated take that feels less like a party store and more like something you’d stumble upon in a haunted forest. A great companion to the outdoor setting in Idea #27.
|
📋 Copy HEX 🔗 Share |
Using real gourds and pumpkins means you’re on a timeline. Once cut, they will begin to decompose. This look is best assembled the day of or the day before your party. Keep an eye out for any fruit flies that might be attracted to the produce. The dried lotus pods and seed pods can be saved and reused for years, but the fresh elements are a one-time-only feature. After the party, be sure to compost the gourds to avoid waste.
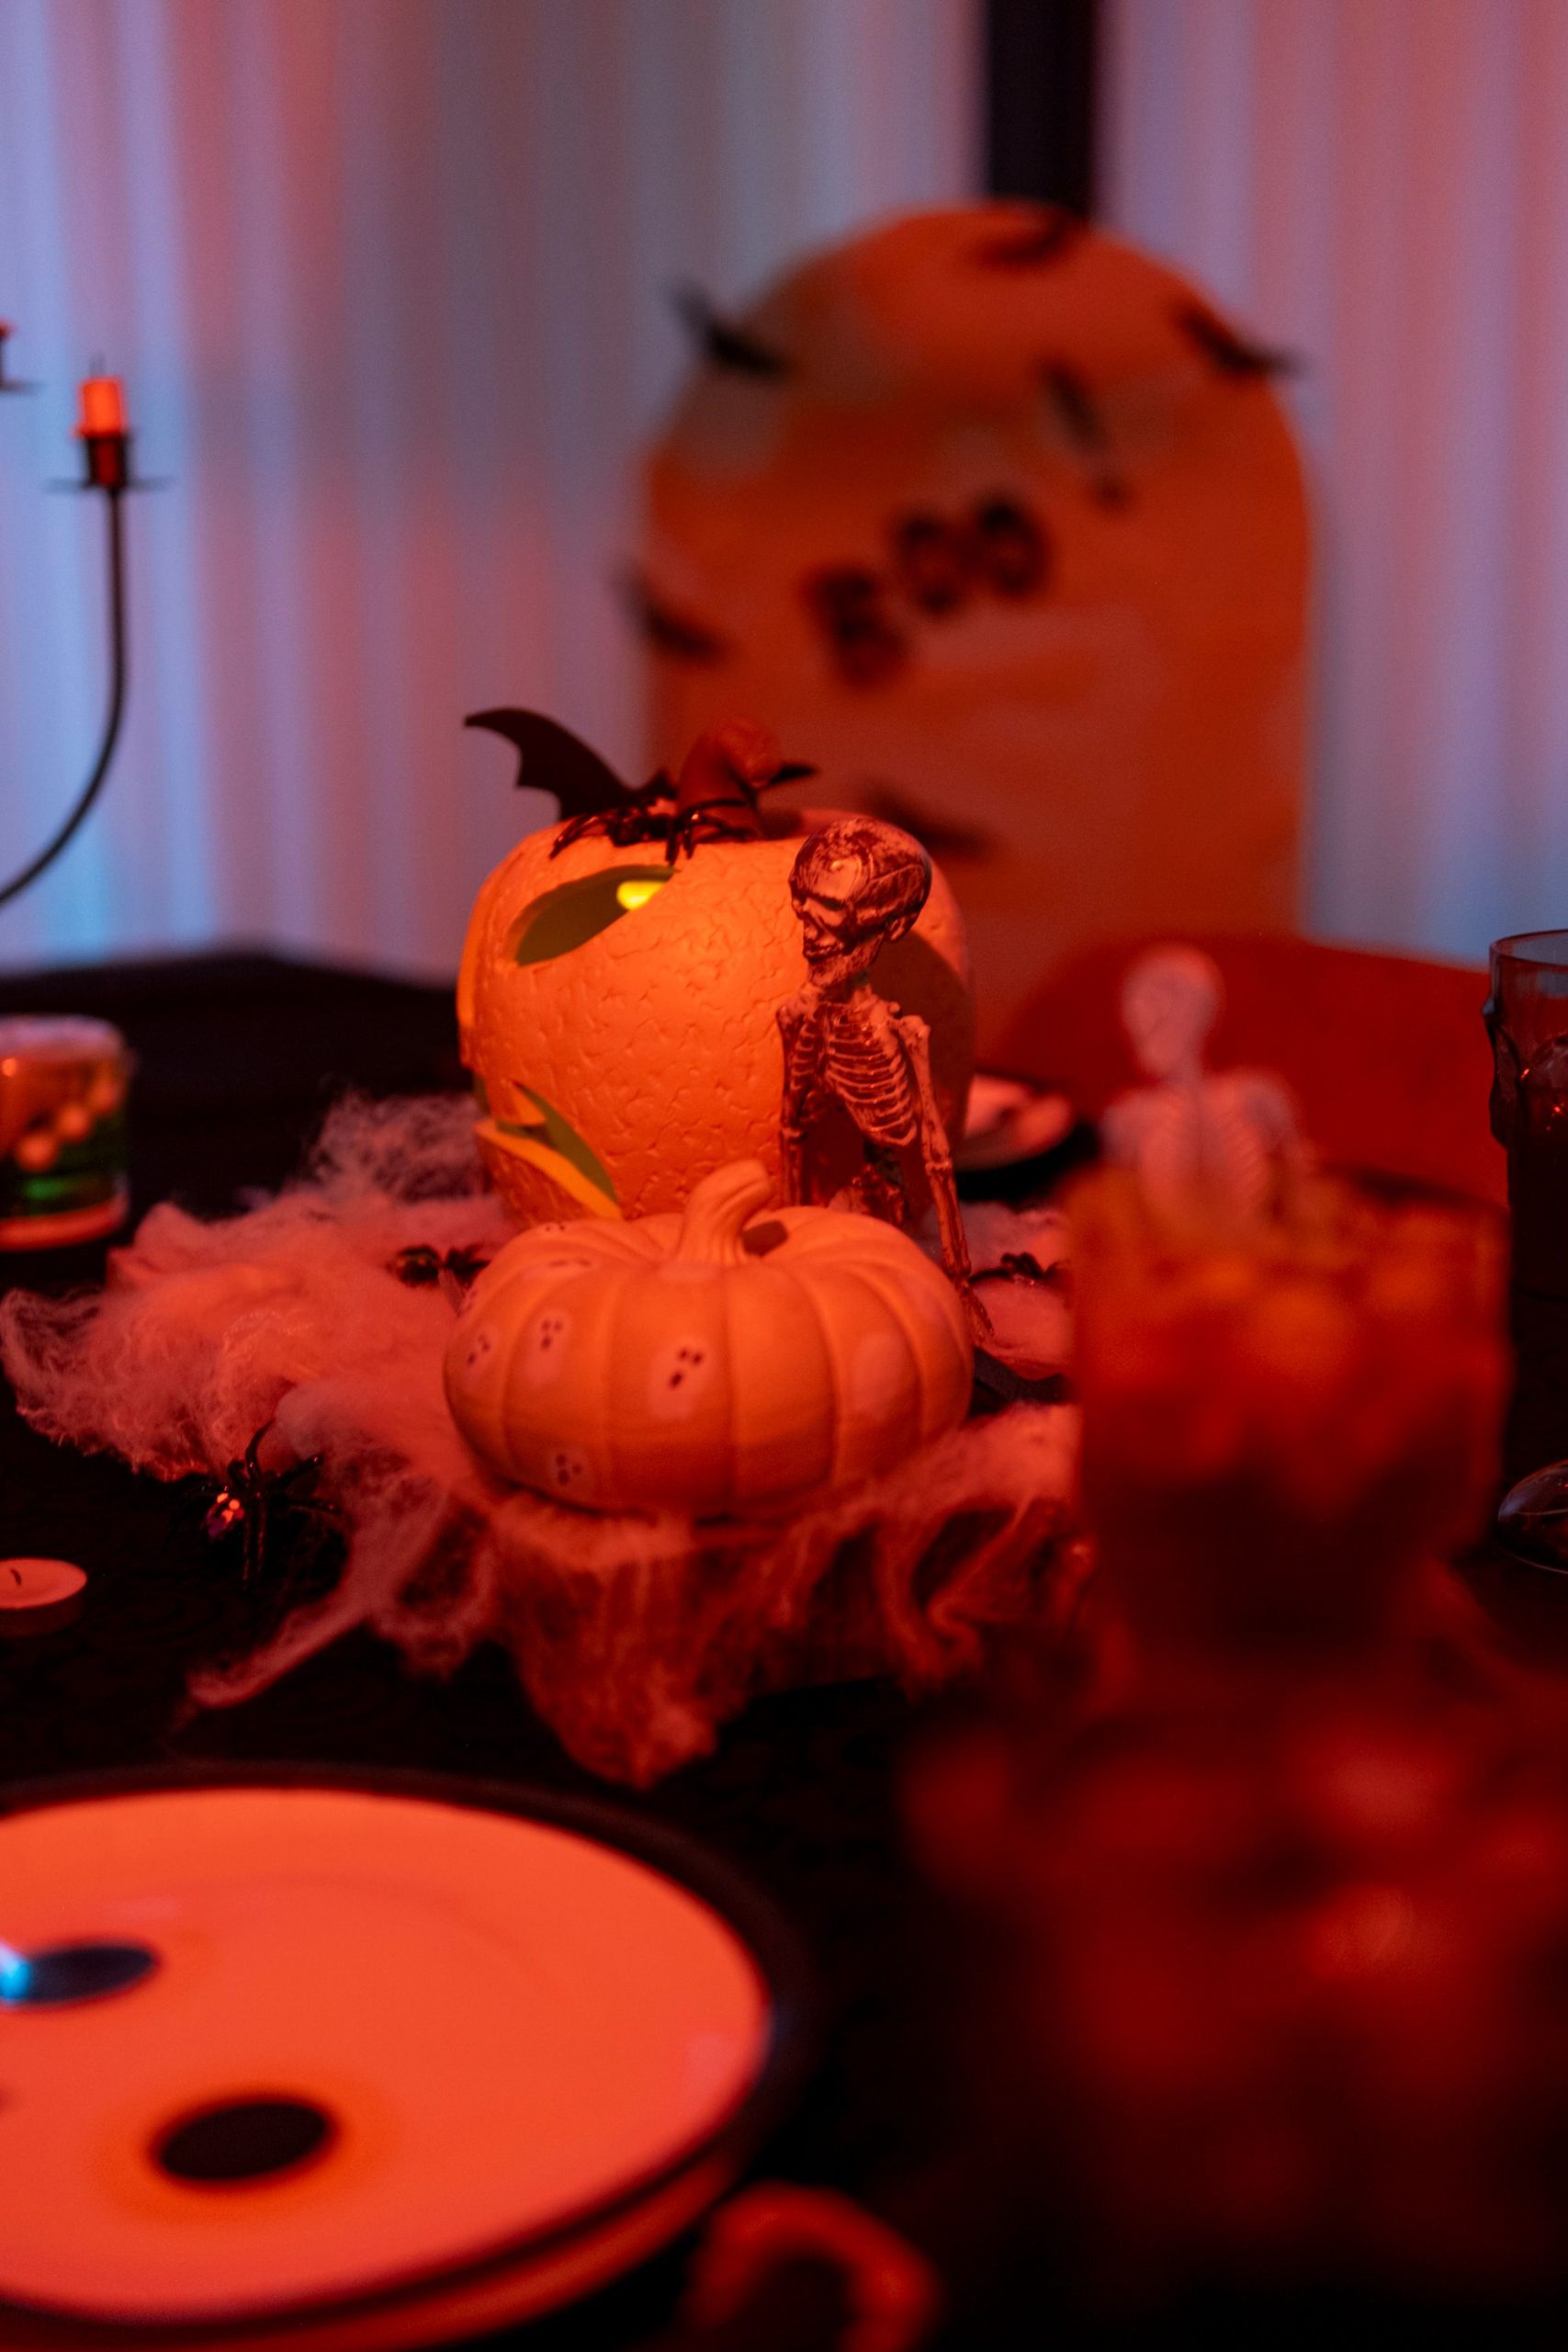
14. Illuminate a Tabletop with a Glowing Pumpkin and Spiderwebs
The single element that elevates this scene is the intense, colorful lighting. Without the wash of red and orange light, this would be a fairly standard pile of Halloween decorations. The colored light transforms it, creating long shadows, boosting the saturation of the orange pumpkin, and casting an eerie glow over the entire vignette. It’s a powerful reminder that lighting isn’t just for visibility; it’s one of the most effective tools for creating mood and atmosphere. It’s pure drama.
|
📋 Copy HEX 🔗 Share |
This is a perfect idea for a small space. You don’t need a whole room; a corner of a console table, a small side table, or even a section of a bookshelf will do. The entire vignette is likely no more than 24-30 inches wide. It’s a high-impact look for a small footprint. Because it relies on dim, colored light, it works best in a darker corner of a room where it won’t be washed out by ambient light, making it a great choice for apartments or smaller living areas.
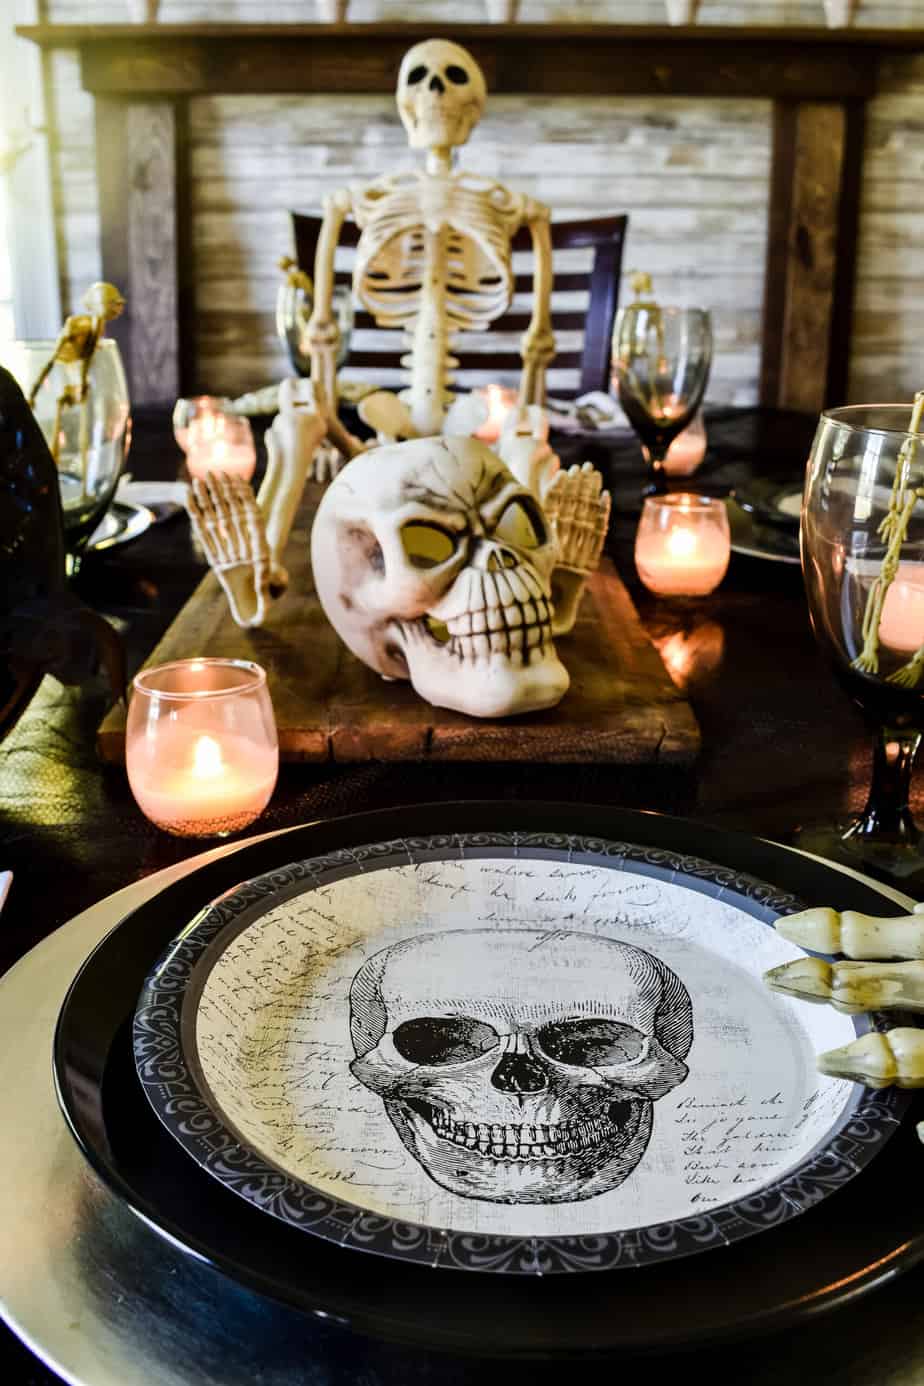
15. Create a Spooky Supper with a Skeleton and Skull Centerpiece
You don’t need a full-size anatomical skeleton to get this vibe. Party stores sell 5-foot posable skeletons for around $30-$50 during the Halloween season. The skull plates can be mimicked using decals or even printable designs placed on clear glass plates from a dollar store. A bag of votive candles is less than $10. You can recreate this entire dramatic tablescape for under $75 if you’re thrifty, proving that a killer concept matters more than a huge budget.
|
📋 Copy HEX 🔗 Share |
A full skeleton sitting at your dinner table is a great visual gag, but it’s also a major space hog. This setup really only works on a large table where you can sacrifice a seating spot for your bony guest of honor. On a smaller table, it will feel overwhelmingly crowded and make it difficult for guests to see and talk to each other across the table. Make sure your centerpiece enhances the party, rather than getting in the way of it.
16. Design a Gothic Tablescape with Candles, Skulls, and Spanish Moss
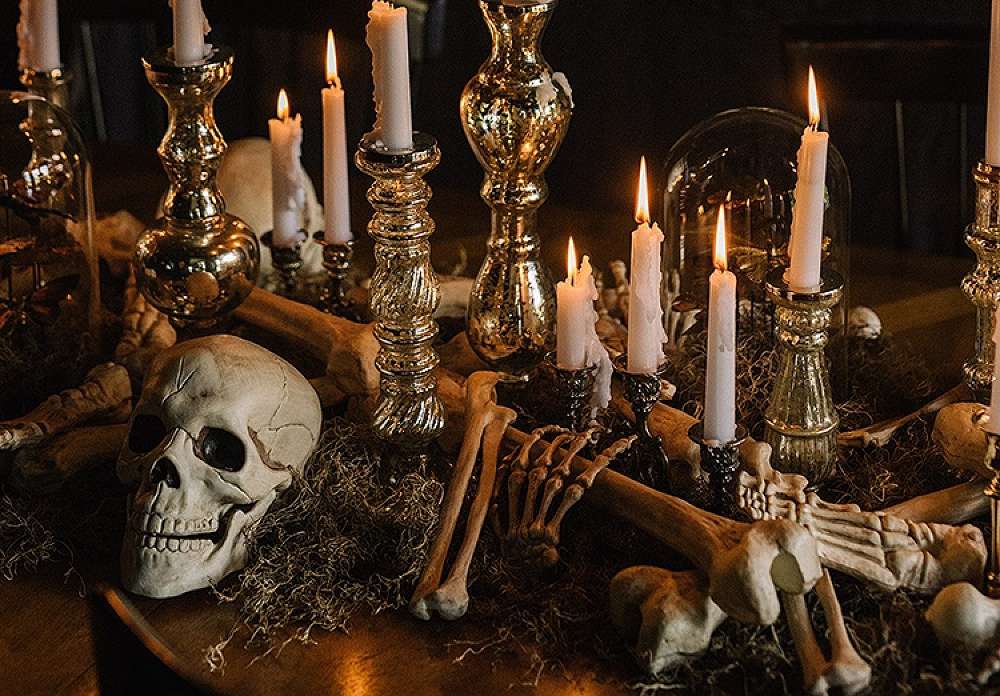
The drama here comes from extreme contrast. You have the pristine, clean white of the taper candles against the dark, gnarled Spanish moss and the dark wood table. You have the smooth texture of the skulls against the rough, stringy moss. And you have the warm, flickering candlelight against the cold, inanimate bones. This play of opposites—light and dark, smooth and rough, warm and cold—is what gives the scene its powerful gothic and mysterious energy. It is far more dramatic than the minimalist approach in Idea #3.
|
📋 Copy HEX 🔗 Share |
Be extremely careful with real candles and dried Spanish moss. Spanish moss is highly flammable. Do not let the moss drape anywhere near the open flames. A safer alternative is to use high-quality flameless LED taper candles. They provide a similar flickering effect without the fire risk. Also, be prepared for a bit of a mess. Dried Spanish moss tends to shed small bits, so you’ll likely need to do a thorough wipe-down of the surface after you clear the decorations.
17. Stage a Moody Still Life with Plaster Hands and Dark Fruit
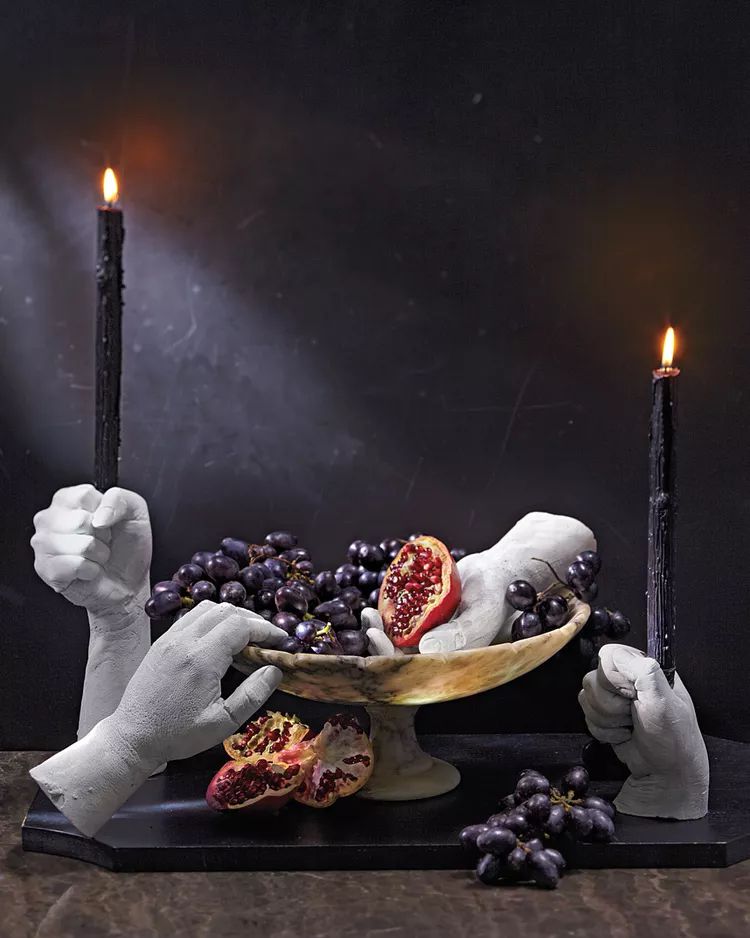
The plaster hands are what make this scene unforgettable. Without them, it’s a classic, dark still life—beautiful, but familiar. The disembodied hands, especially the ones gripping the candles, introduce a surreal and slightly unsettling element that is deeply artistic. They feel sculptural and strange, elevating the composition from simple decoration to a piece of performance art. They transform the table from a display of fruit to a mysterious narrative.
|
📋 Copy HEX 🔗 Share |
18. Craft a Mysteriously Moody Table with Smoky Drinks and Dark Florals
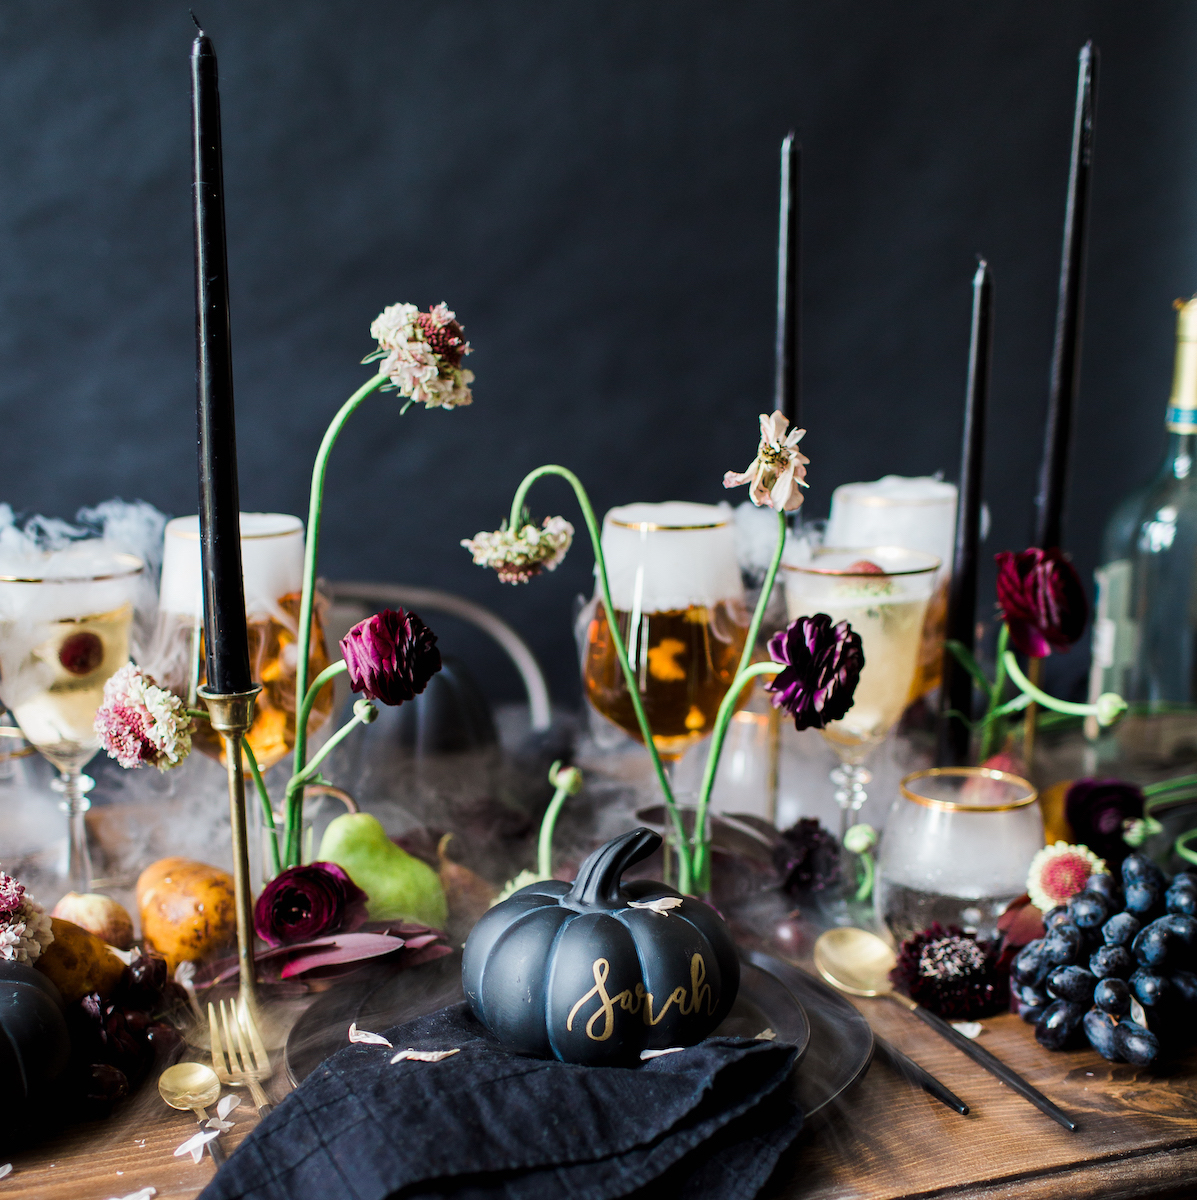
The smoky, misty effect is the secret ingredient here, and it’s surprisingly easy to achieve. You need dry ice. Place a small, hidden container of warm water in the center of your tablescape. Just before guests arrive, drop a few small pellets of food-grade dry ice into the water using tongs (never touch it with bare hands). It will immediately produce a thick, low-lying fog that snakes around your decor. It’s pure theatrical magic for the price of a few dollars.
|
📋 Copy HEX 🔗 Share |
This look is all about a sophisticated and moody formula: 40% deep black (candles, pumpkin), 30% rich color (dark red/purple florals), 20% warm metallic (gold-rimmed glasses, flatware), and 10% organic texture (wood table, fruit). The key is the restraint. There are no bright orange or playful ghosts. It’s a grown-up palette that relies on the interplay of deep tones and reflective surfaces to create its spooky, elegant atmosphere. The swirling white mist acts as a temporary, ethereal accent.
19. Illuminate Skulls in a Cloche with Books and Fairy Lights
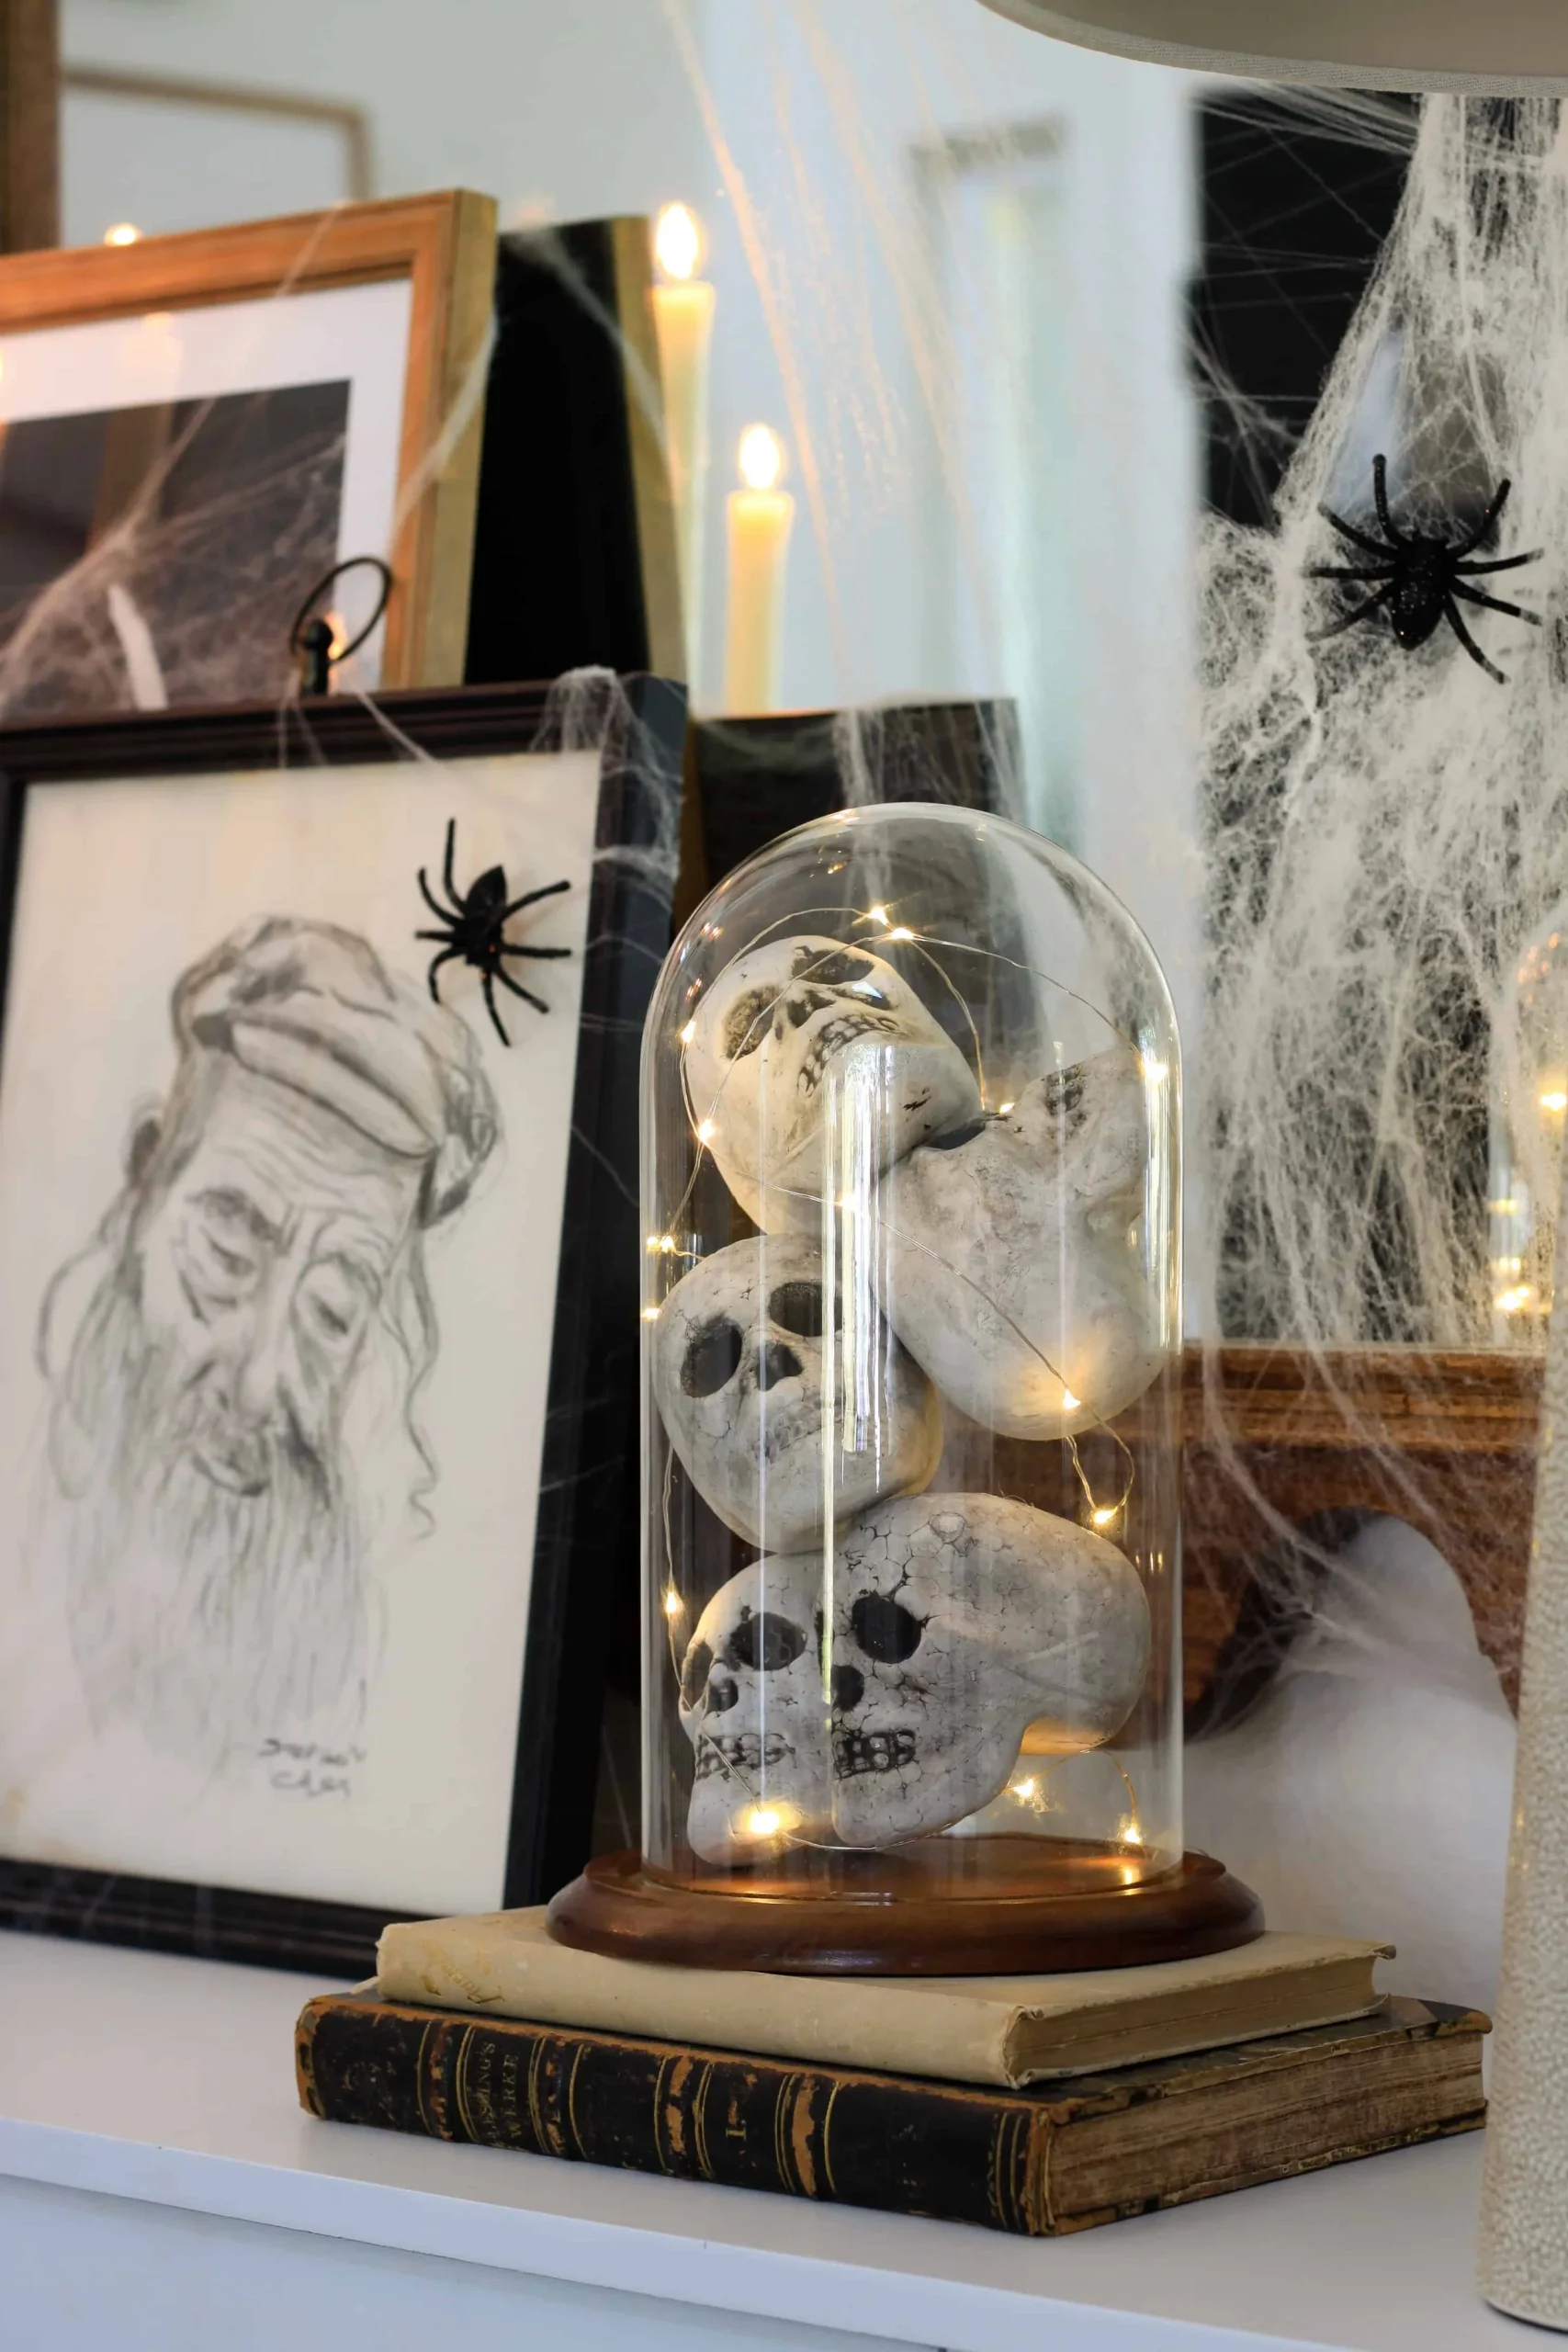
This vignette works so well because it plays with the idea of a museum specimen or a precious object. Placing the skulls and lights under a glass cloche instantly elevates them, suggesting they are something to be observed and studied. It feels more like a cabinet of curiosities than a pile of party decorations. The stacked antique books further reinforce this intellectual, slightly gothic aesthetic. It tells a story and creates a world, rather than just decorating a surface.
|
📋 Copy HEX 🔗 Share |
A large glass cloche can be pricey. For a budget-friendly alternative, you can get a very similar effect using an overturned glass vase or even a large, clear glass storage jar from a craft store like Michaels or a home goods store like Target. Old books can often be found for a dollar or two at thrift stores—look for ones with interesting, aged covers. The skulls and fairy lights are inexpensive, making this an accessible way to get that sophisticated, eerie look for less.
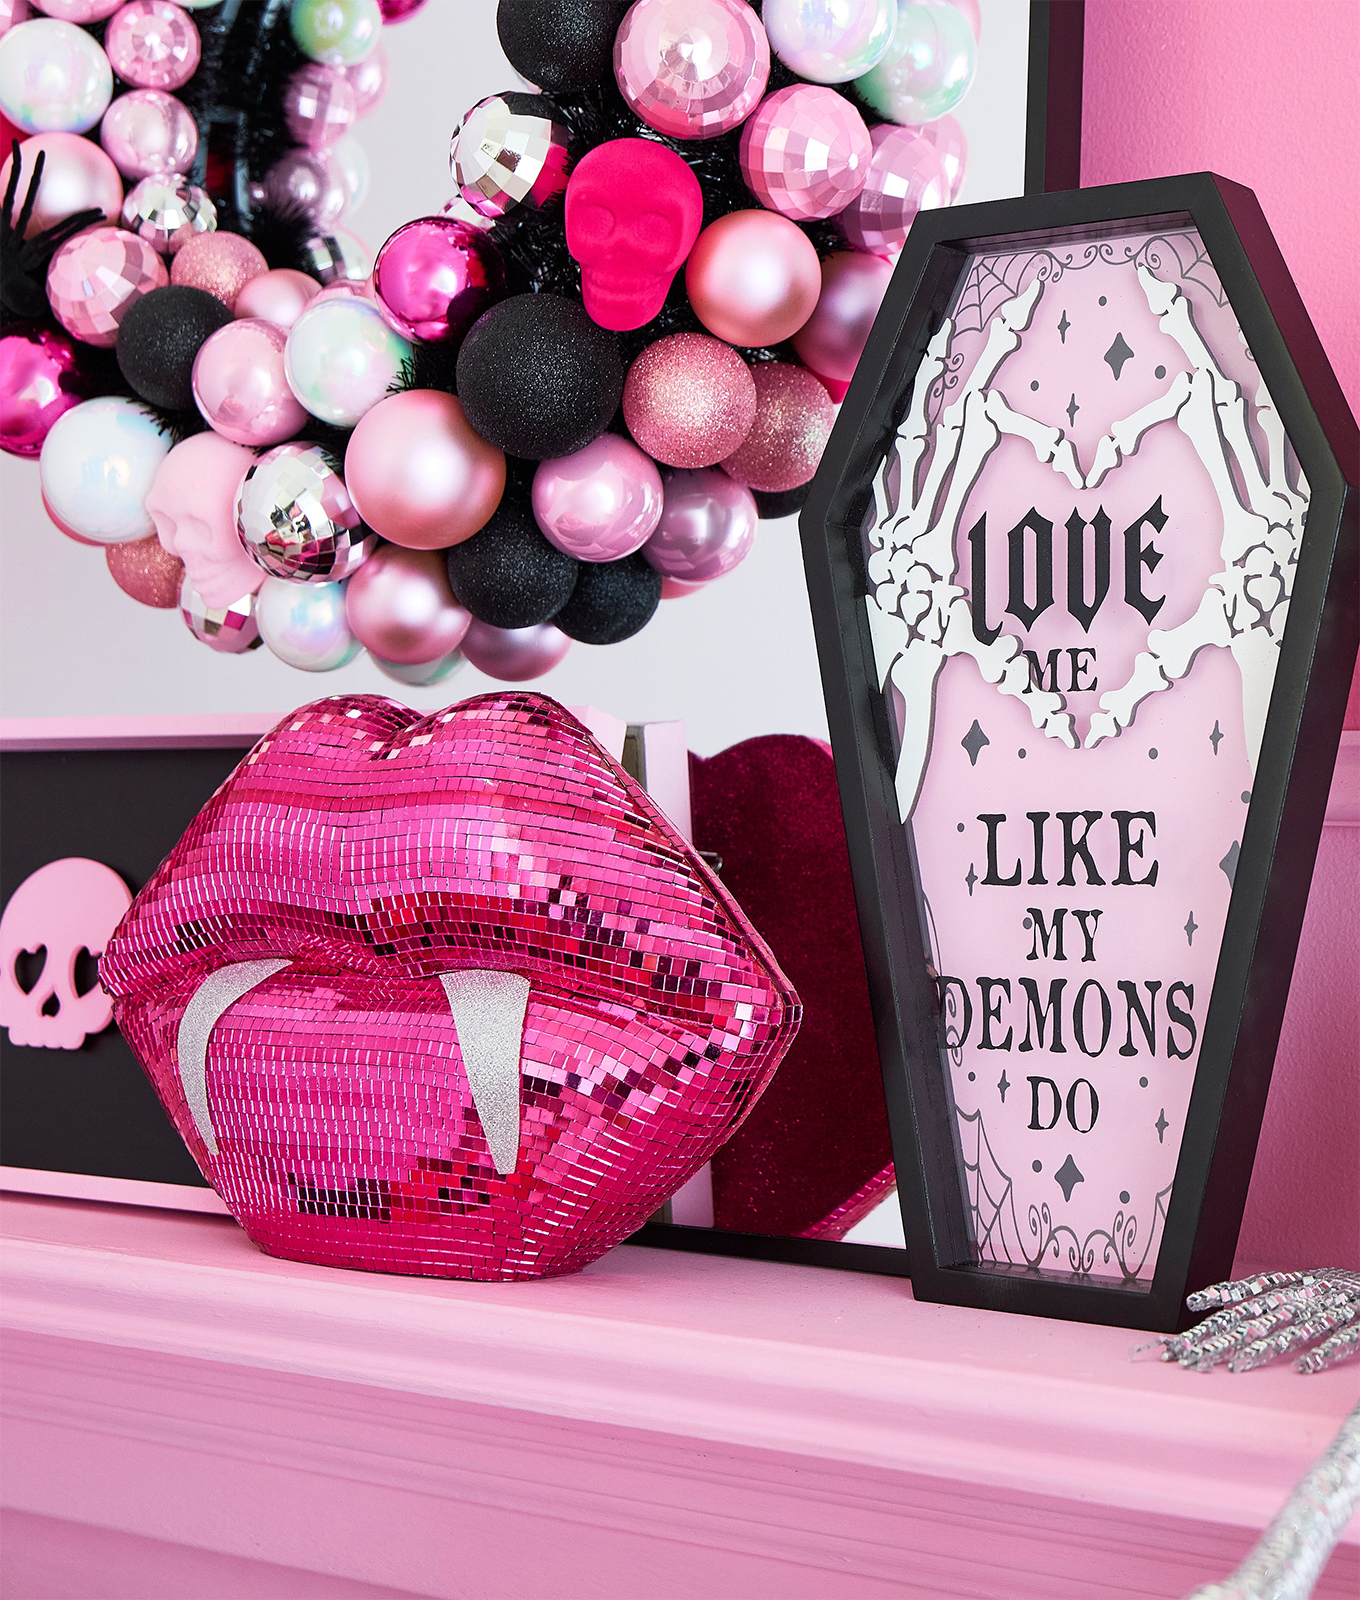
20. Go Glam with a Pink and Black Halloween Mantel
The single thing that makes this work is the unapologetic commitment to pink. By swapping out traditional orange for a vibrant, hot pink, the entire aesthetic shifts from classic Halloween to something modern, glam, and delightfully unexpected. The color choice is the whole concept. It’s playful, bold, and aimed at someone who loves Halloween but wants to filter it through their own unique, colorful style. It’s a statement of personality, proving Halloween can be any color you want it to be.
|
📋 Copy HEX 🔗 Share |
This is a very specific, stylized look that might not appeal to everyone. If you’re hosting a party for a diverse crowd that includes kids or people with more traditional tastes, this glam-goth-pink theme might be a bit of a swing and a miss. It’s a strong choice, which is great, but its strength is also its limitation. It’s perfect for a themed get-together with friends who share your aesthetic, but it might feel out of place for a more general family Halloween party.
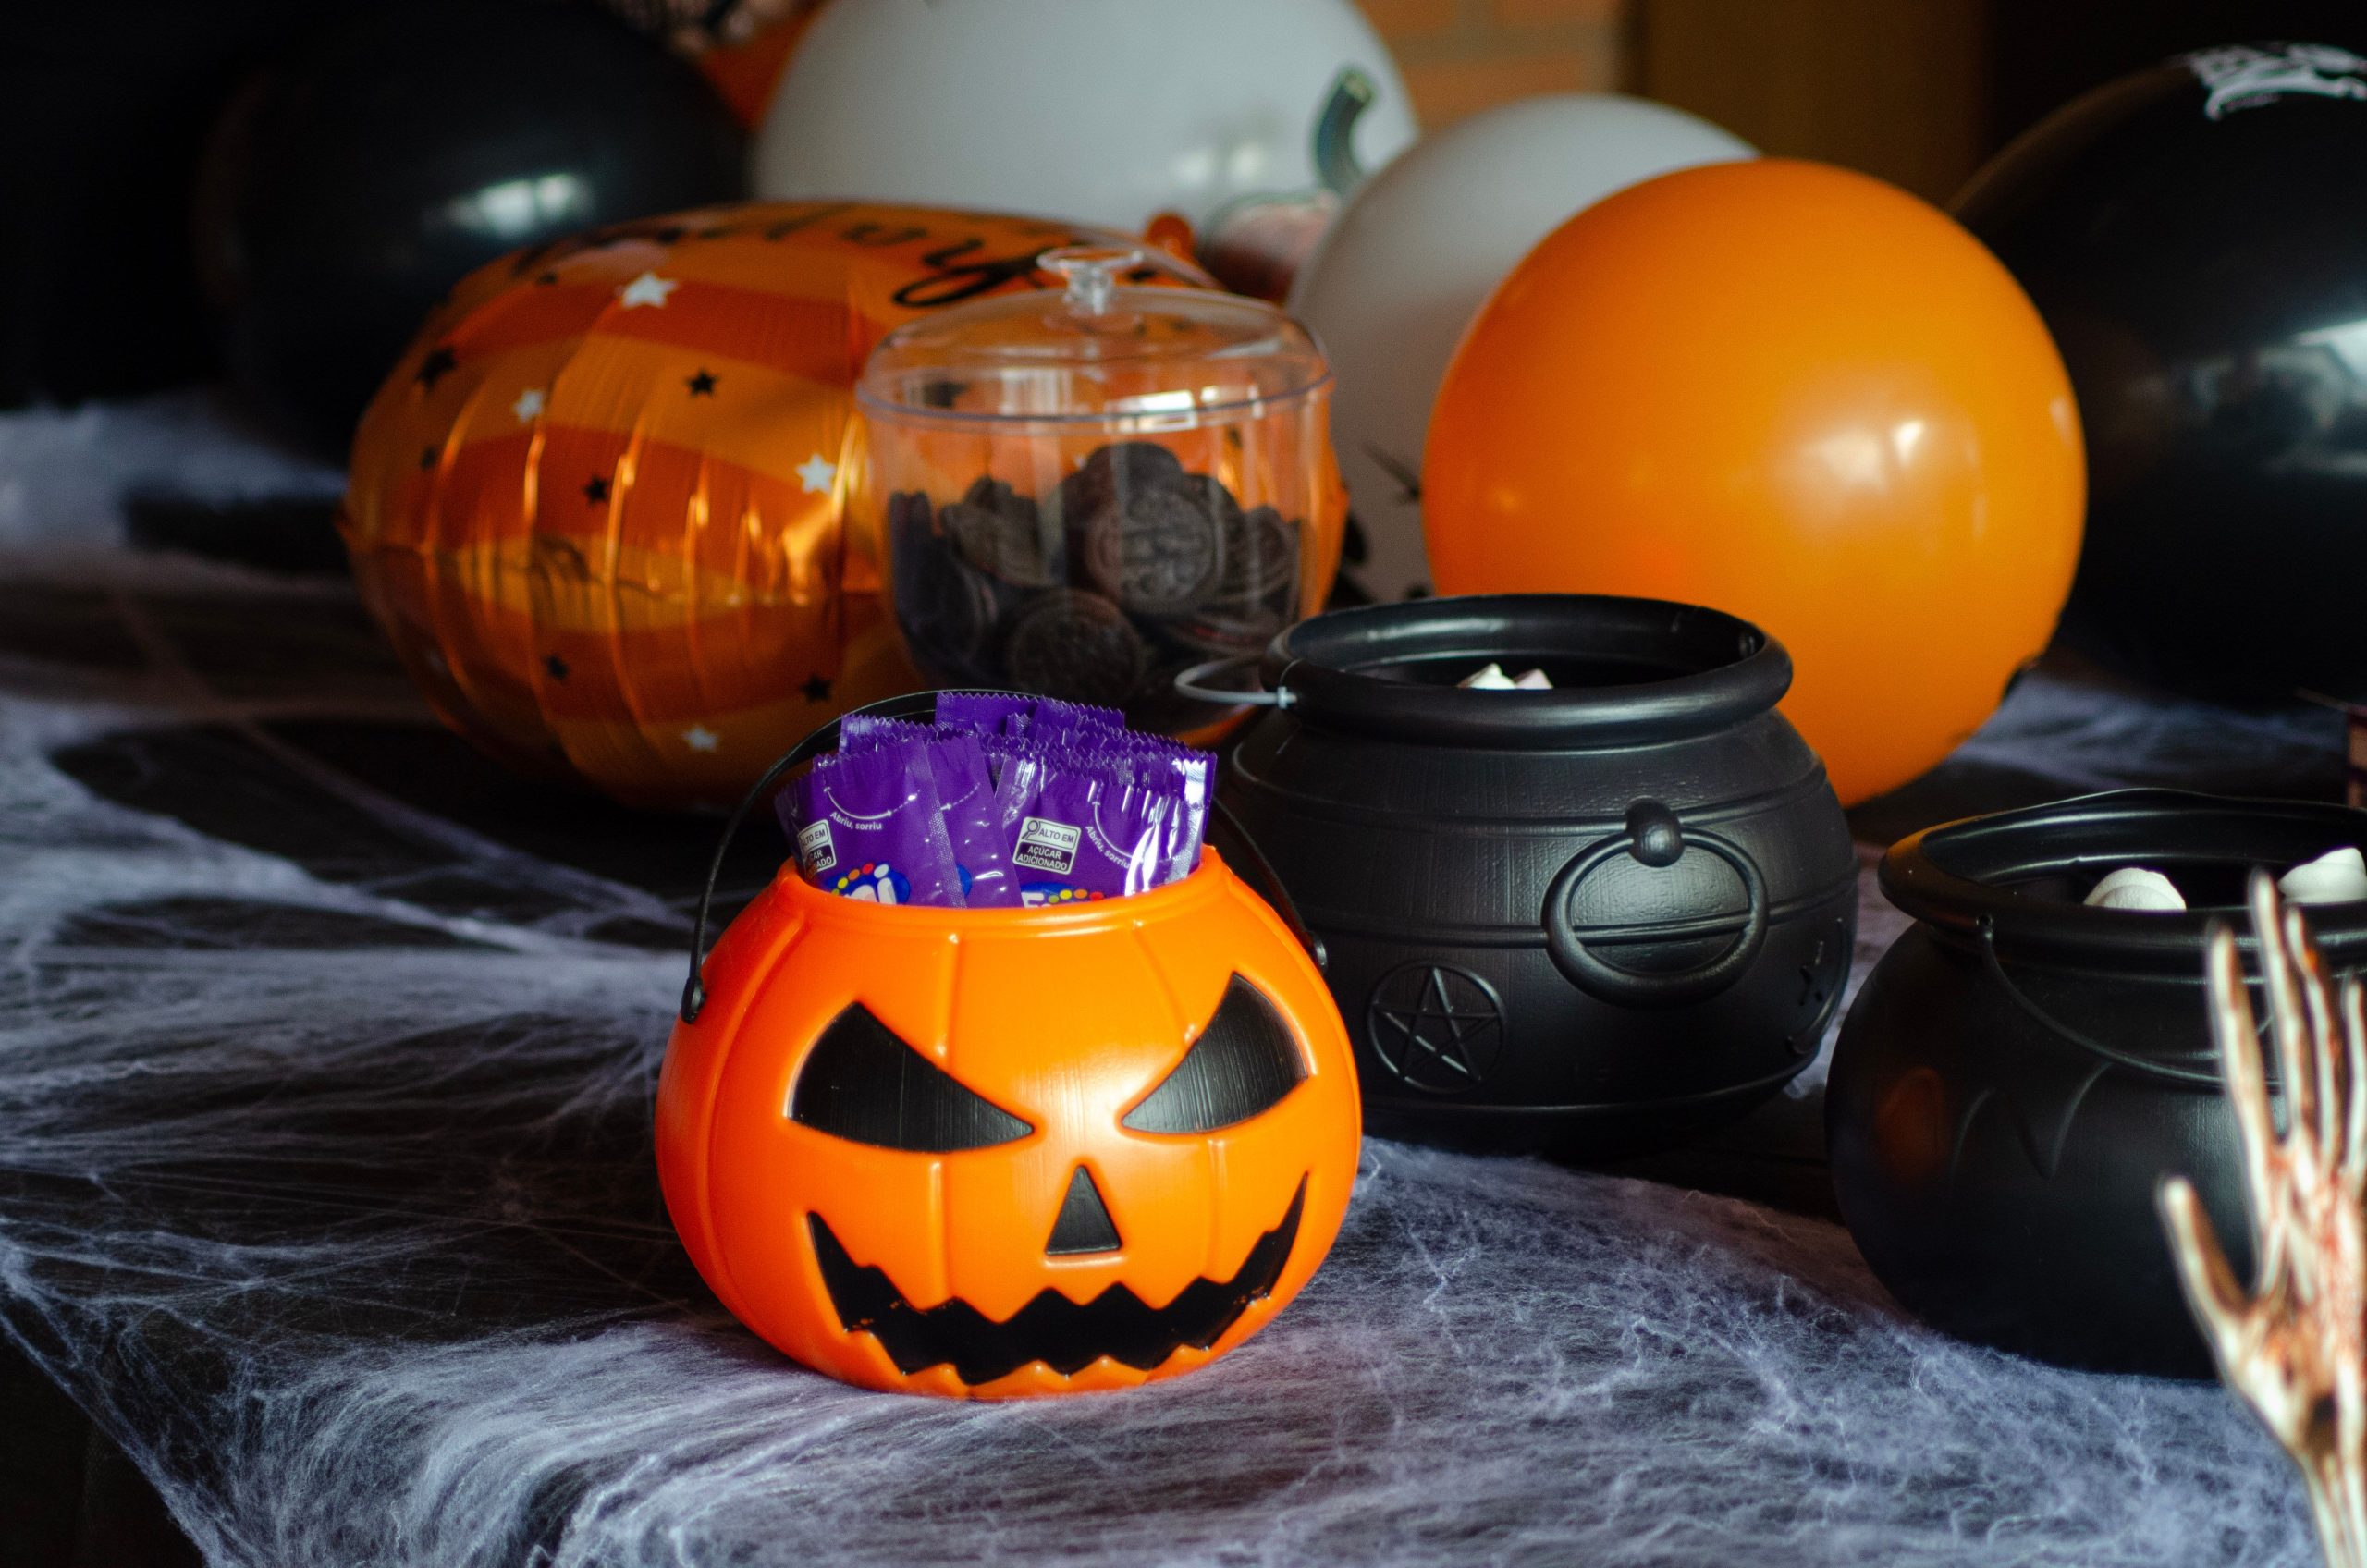
21. Set a Playful Treat Table with Cauldrons and Cobwebs
- Furniture/Linens: Tablecloth, white spiderweb material ($25 – $50)
- Serving Ware: Black cauldrons, clear cookie jar ($30 – $70)
- Decor: Balloons (standard and foil) ($20 – $40)
- Candy/Treats: Pumpkin bucket, assorted candies, cookies ($40 – $80)
- Budget Alternative: Use a black sheet for the tablecloth. Buy cauldrons and buckets from the dollar store. Bake your own cookies. Total: ~$35.
- TOTAL: $115 – $240
|
📋 Copy HEX 🔗 Share |
When creating a treat table, think in levels. Don’t just lay everything flat. Use hidden boxes or cake stands under your spiderweb cloth to create platforms of different heights. Place taller items, like the cookie jar, in the back and shorter, flatter items, like the cauldrons, in the front. This creates visual interest and makes it easier for guests to see and reach all the delicious treats you’ve laid out. A dynamic display is always more appealing than a flat one.
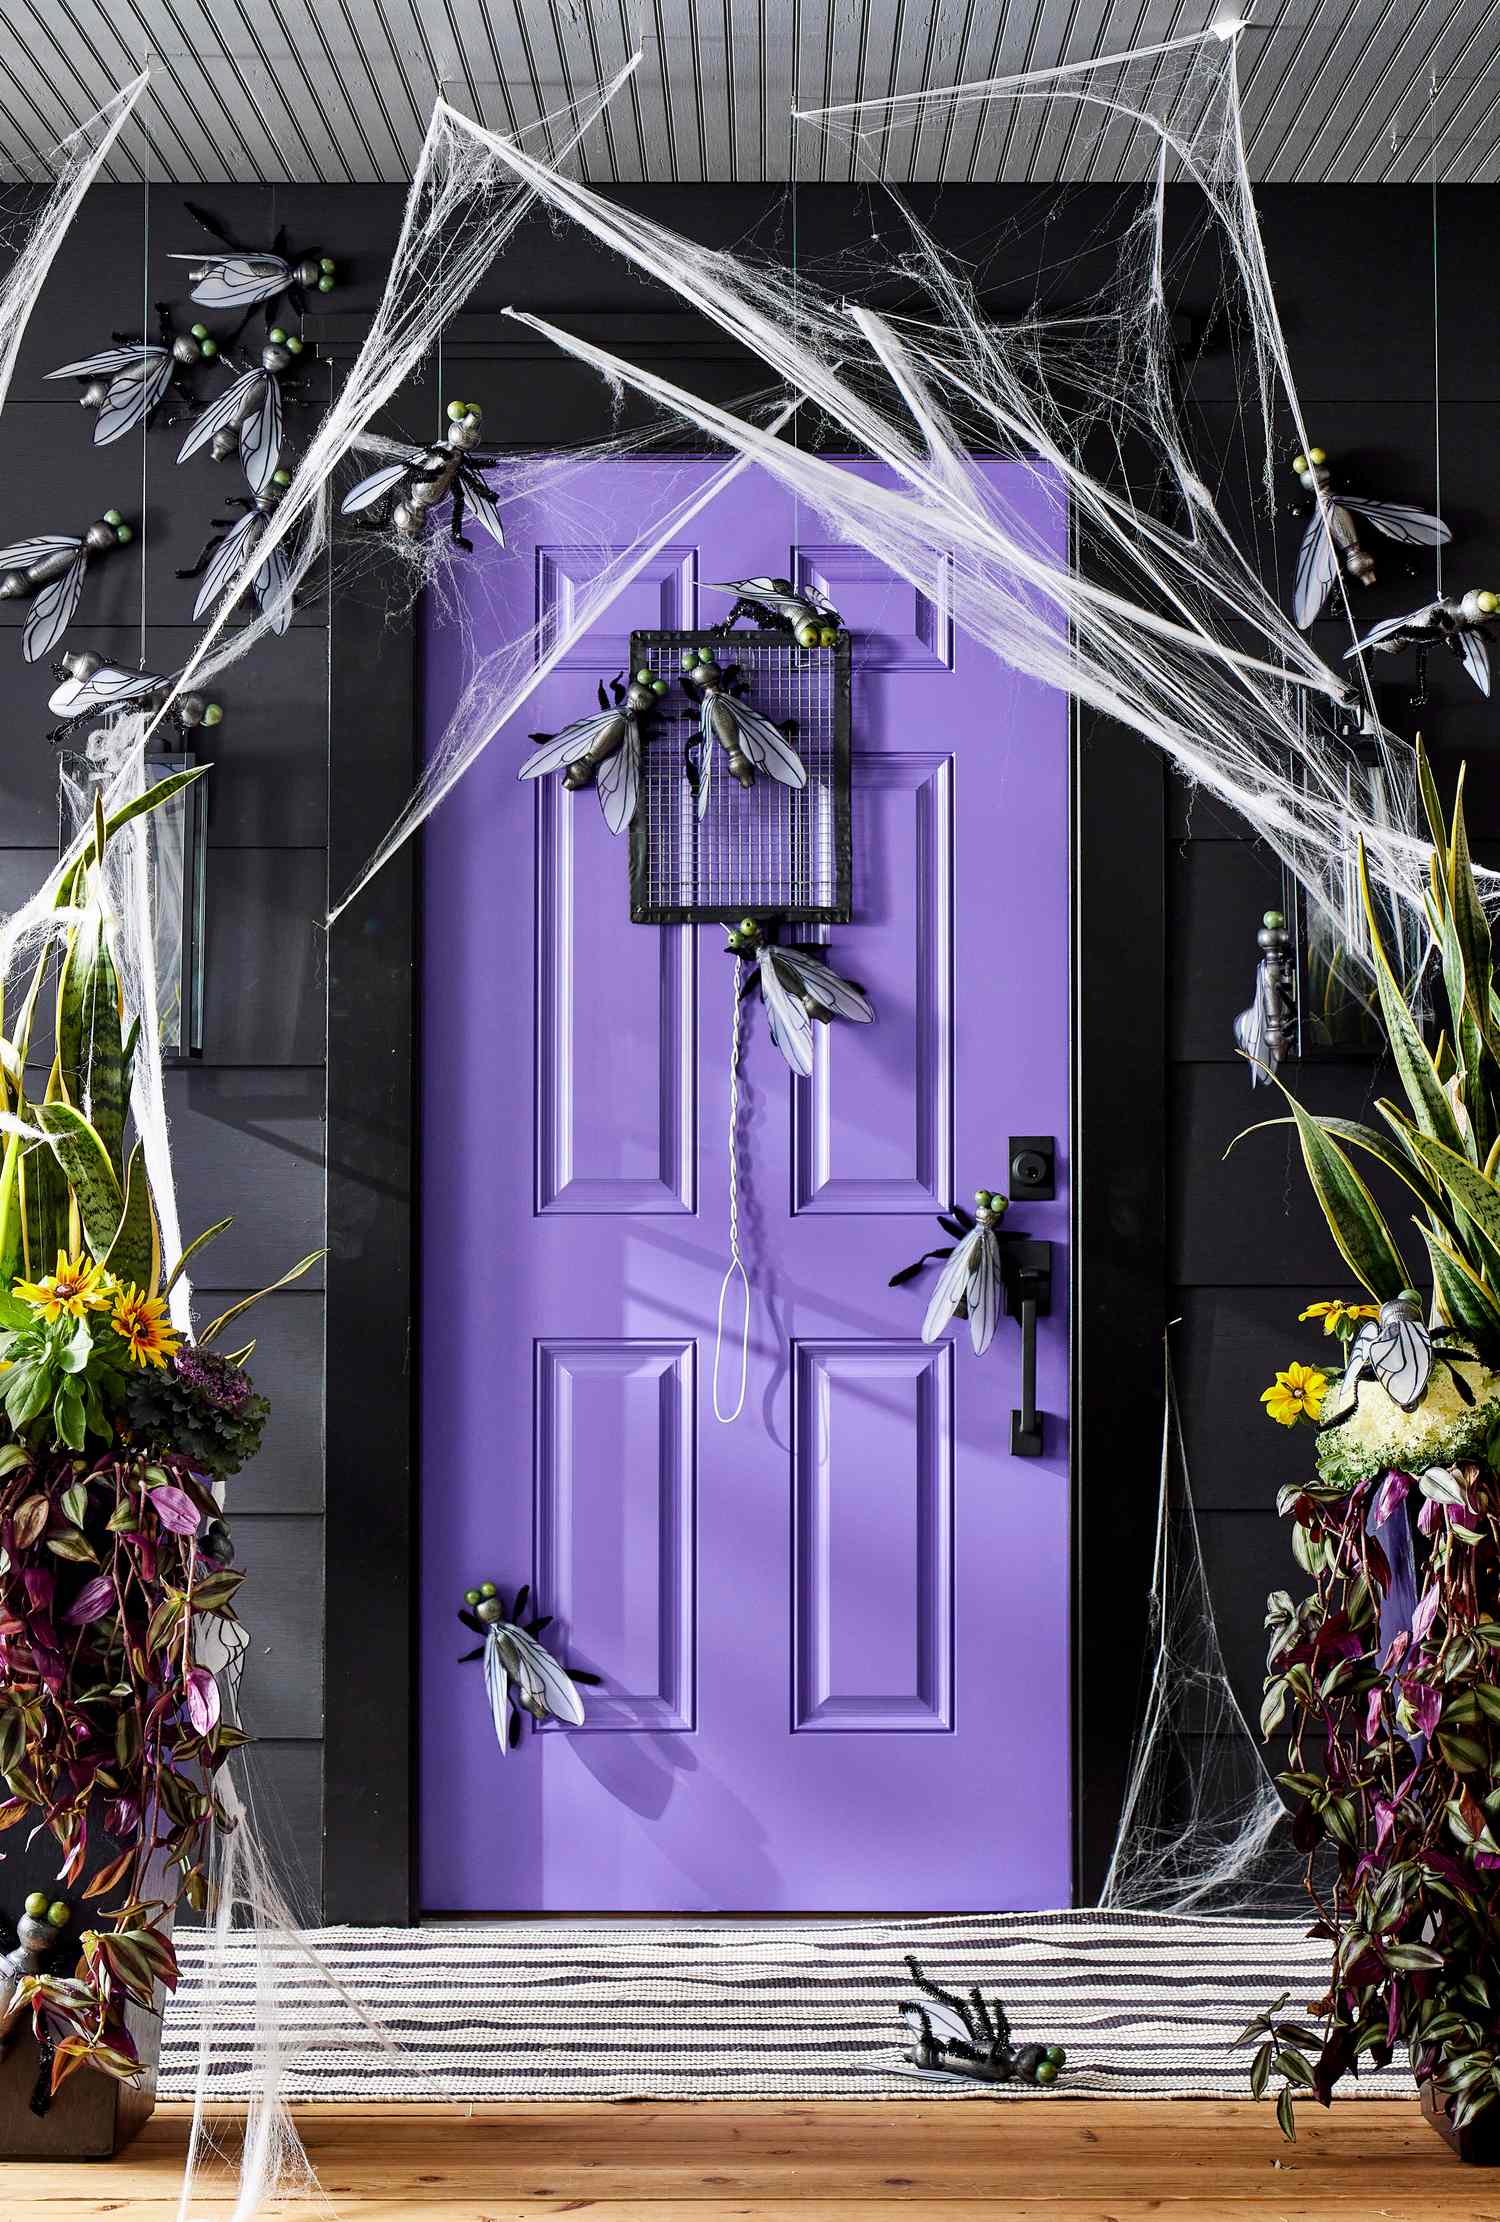
22. Decorate a Purple Door with Oversized Flies and Spooky Cobwebs
The genius of this design is the unexpected pest of choice. We’ve all seen spiders and bats, but giant, gross flies are genuinely creepy and surprising. The choice of a vibrant purple for the door color creates a fantastic, high-contrast backdrop that makes the black flies and white webs pop. It’s a color palette that is both playful and unsettling. The scale of the flies is also key—by making them unnaturally large, the scene moves from realistic to surreal and spooky.
|
📋 Copy HEX 🔗 Share |
Want to make those creepy oversized flies? It’s a simple DIY project. Time Estimate: 30 minutes for a set of 3. Cost: Under $20.
- Buy large, plastic ball ornaments (the clear, fillable kind works great). Spray paint them black.
- For the wings, cut wing shapes out of iridescent cellophane or clear plastic from a report cover.
- Hot glue the wings to the top of the black body.
- For the legs, cut black pipe cleaners into thirds and bend them into leg shapes. Glue three to each side of the body.
- Add two small green pom-poms or beads for eyes.
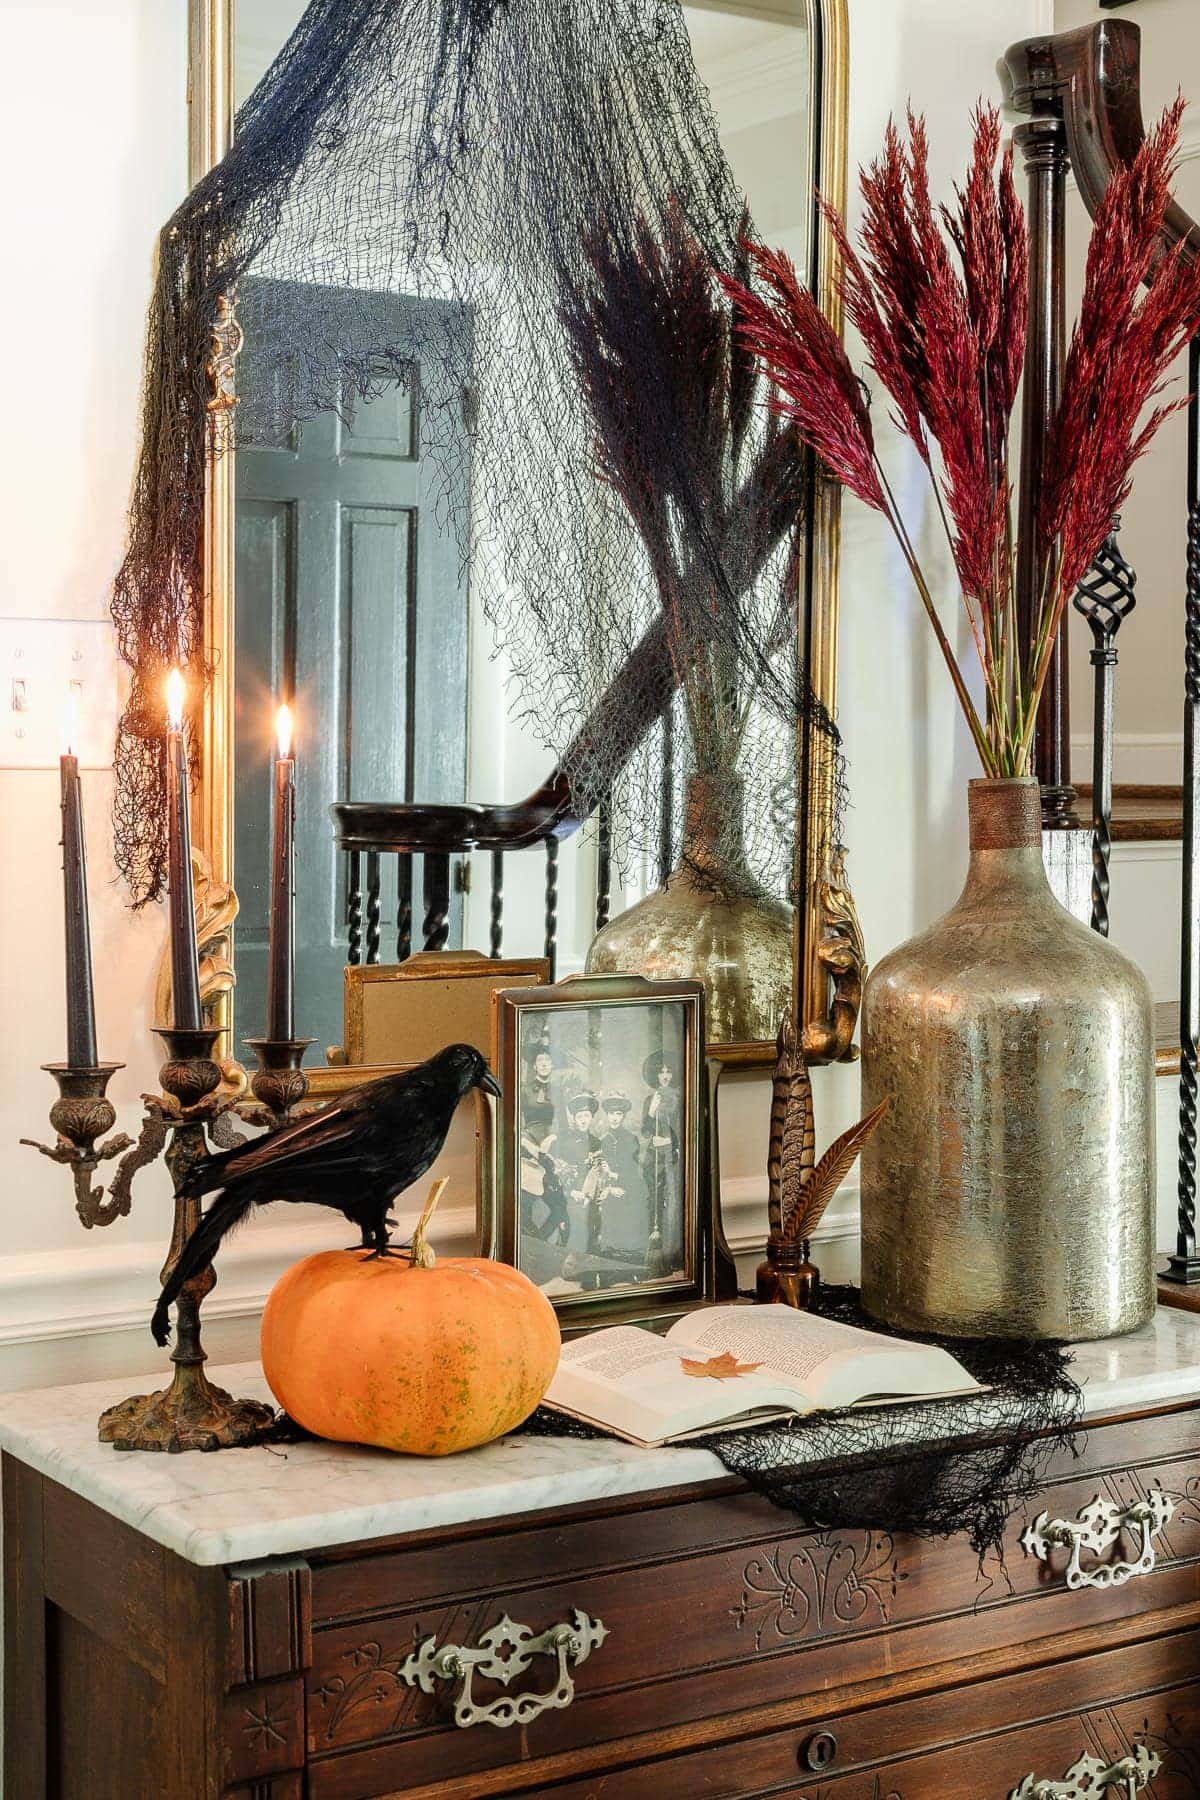
23. Create a Dark, Elegant Entryway with a Gold Mirror and Pampas Grass
This sophisticated look is a careful balancing act. Think of it as: 50% classic elegance (the gold-framed mirror, marble-top console), 30% dark and distressed texture (the black netting, dark candelabra), and 20% autumnal color (the orange pumpkin, deep red pampas grass). This formula ensures the space feels decorated for the holiday but not tacky. It respects the existing decor while layering in a seasonal, moody atmosphere. This is a great example of elevating your decor, similar to Idea #9.
|
📋 Copy HEX 🔗 Share |
- Measure your mirror: The scale of the mirror is key. Does it dominate the wall, leaving enough room for the decor to feel like an accent, not clutter?
- Check your surfaces: Using real candles? Make sure your console table has a non-flammable top like this marble one. If your table is wood, use a protective tray under any candelabras.
- Source your textiles: Find the right distressed netting or cheesecloth. You want something that looks aged and tears easily for that spooky, draped effect. Check fabric or craft stores.
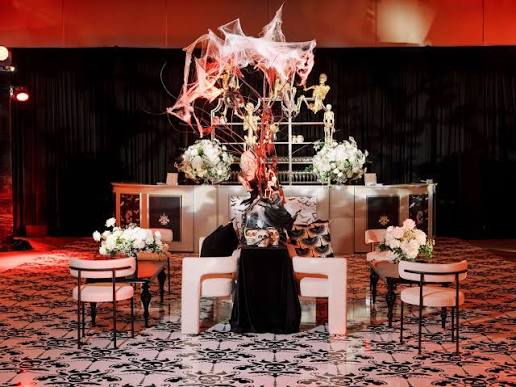
24. Achieve Grown-Up Halloween Glamour
The secret to an elegant Halloween party is focusing on texture and lighting over overt scares. Instead of plastic skeletons, think about a velvet table runner. Instead of bright orange string lights, opt for the moody flicker of dozens of candles (or high-quality LED versions). Mix materials like dark metal, aged brass, smoky glass, and rich textiles. The spooky element should come from the overall atmosphere you create, not from a singular prop. It’s about creating a vibe that feels mysterious and special.
|
📋 Copy HEX 🔗 Share |
A truly glamorous and elegant look often comes with a higher price tag. Quality materials like real velvet, heavy metal candle holders, and artisanal glass pumpkins cost more than their plastic counterparts from the party store. While you can certainly find budget alternatives, achieving that specific high-end, heavy, and authentic feel often requires a bit more investment. Be realistic about your budget and decide where you want to splurge versus where you can save.
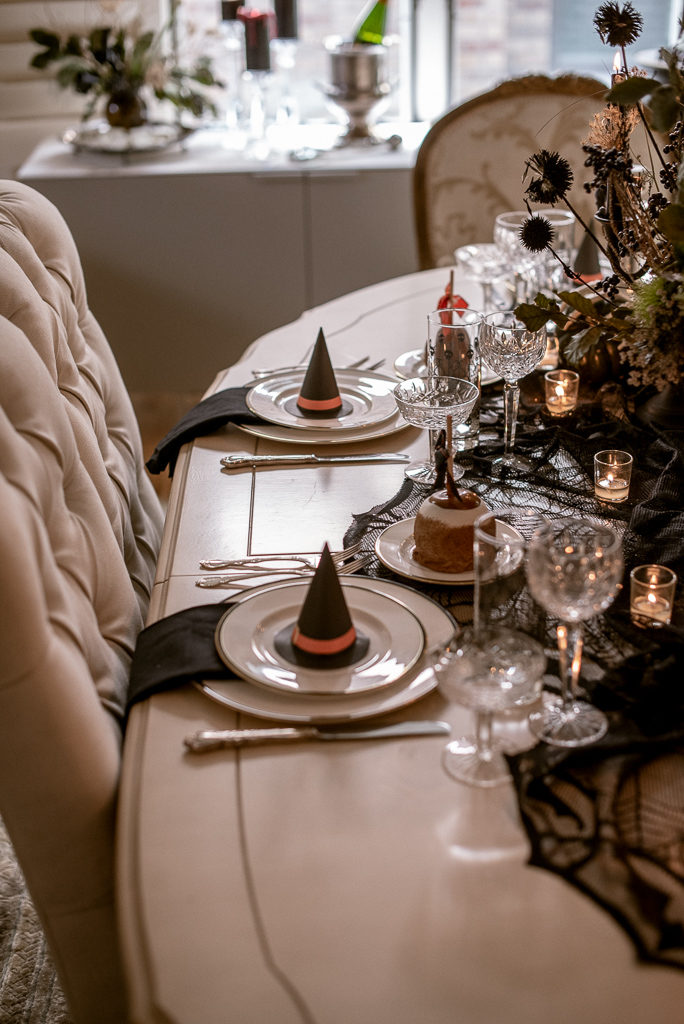
25. Top Each Place Setting with a Miniature Witch Hat
The miniature witch hats are the single detail that brings this whole table to life. It’s a touch of pure, unadulterated whimsy. Removing them would leave a perfectly nice autumn dinner table, but adding them instantly says “Halloween party” in the most charming way possible. It’s a small, inexpensive detail that acts as a place card, a party favor, and the main thematic element all in one. It shows a thoughtful attention to detail that guests will absolutely love, much like the floating hats in Idea #11.
|
📋 Copy HEX 🔗 Share |
You can find pre-made mini witch hats at craft or party stores during the season, but it’s just as easy to make them for less. Get black cardstock or stiff felt and cut it into circles. Cut a slit to the center of each circle and form it into a cone, securing with a dab of hot glue. Cut a larger circle for the brim and glue the cone on top. A small strip of orange ribbon completes the look. You could make enough for a whole party for under $10.
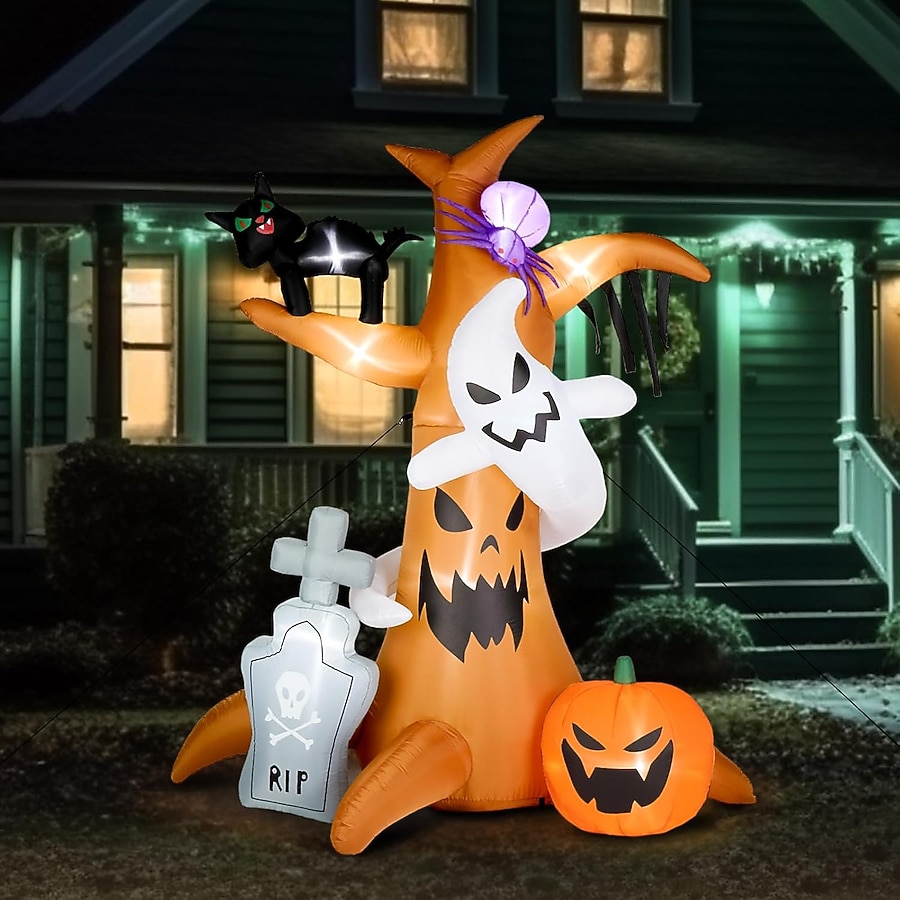
26. Go Big and Playful with an Inflatable Halloween Tree
This works because it’s a complete Halloween scene in one single piece. You get the tree, ghost, cat, spider, pumpkin, and tombstone all in one convenient, internally lit package. It delivers maximum impact for minimal effort. The bright, cartoonish colors and friendly-spooky faces are instantly appealing to kids and create a bold, festive statement that can be seen from down the street. It’s the opposite of a subtle, curated look, and in this case, that’s its strength. It’s pure, uncomplicated fun.
|
📋 Copy HEX 🔗 Share |
Inflatables are fantastic until they’re not. They need to be plugged into a power source, so you’ll have an extension cord running across your yard. They can be noisy due to the constant fan required to keep them inflated. A power outage or a simple unplugging deflates the whole scene. Finally, they are susceptible to damage from sharp objects or high winds if not secured properly. Annual setup and takedown can also be a bit of a chore, as they need to be completely dry before being stored to prevent mildew.
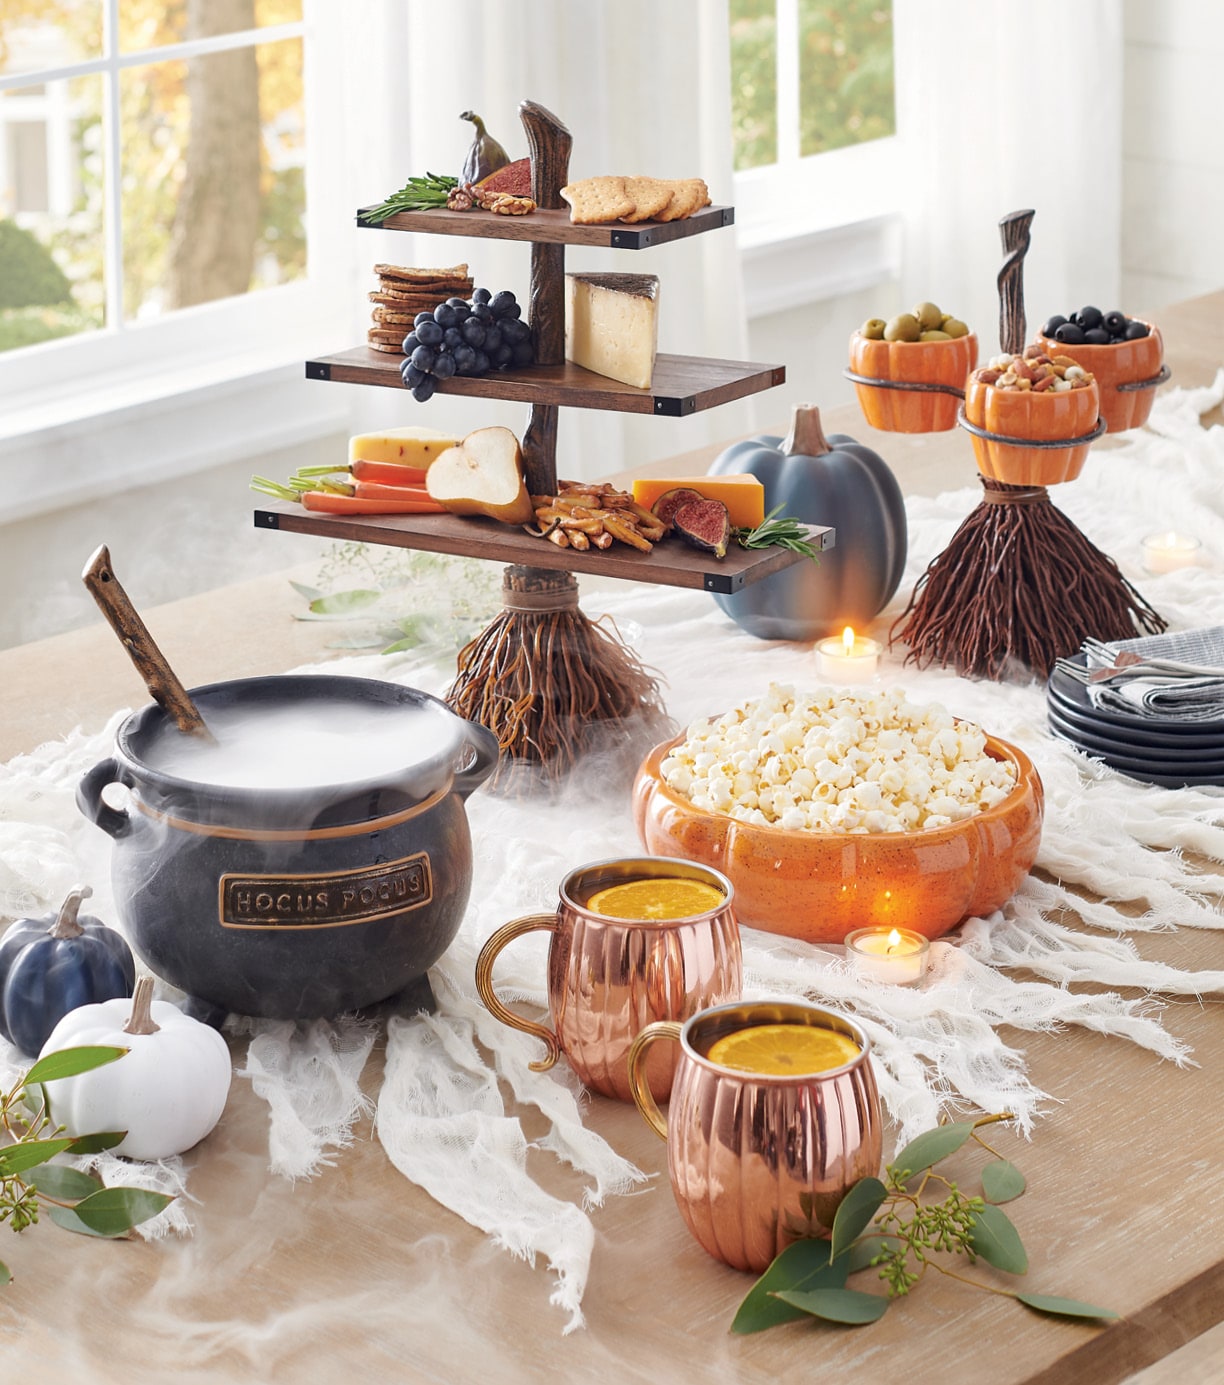
27. Design a Bewitching Buffet Table for Your Spooky Feast
Want to create a professional-looking buffet? The key is layering and elevation. Time Estimate: 30 minutes. Cost: Minimal (using household items).
- Start by draping your table with a dramatic tablecloth. Black or another dark color works well.
- Place sturdy, overturned bowls or small boxes at the back of the table. These will be your risers.
- Drape a second cloth or a decorative runner over the risers to hide them.
- Place your tallest platters and dishes on the risers in the back.
- Arrange shorter dishes and bowls in the middle ground.
- Put cutlery, napkins, and small items at the very front for easy access.
|
📋 Copy HEX 🔗 Share |
This concept is scalable to almost any party size. For a small apartment get-together, a single 4-foot console table can serve as your bewitching buffet. For a larger bash, you can use a full 8-foot dining table or even two tables pushed together. The principles of elevation and layering work regardless of the size. Just ensure you have at least 3 feet of clearance in front of the table for guests to move along the line without causing a traffic jam.
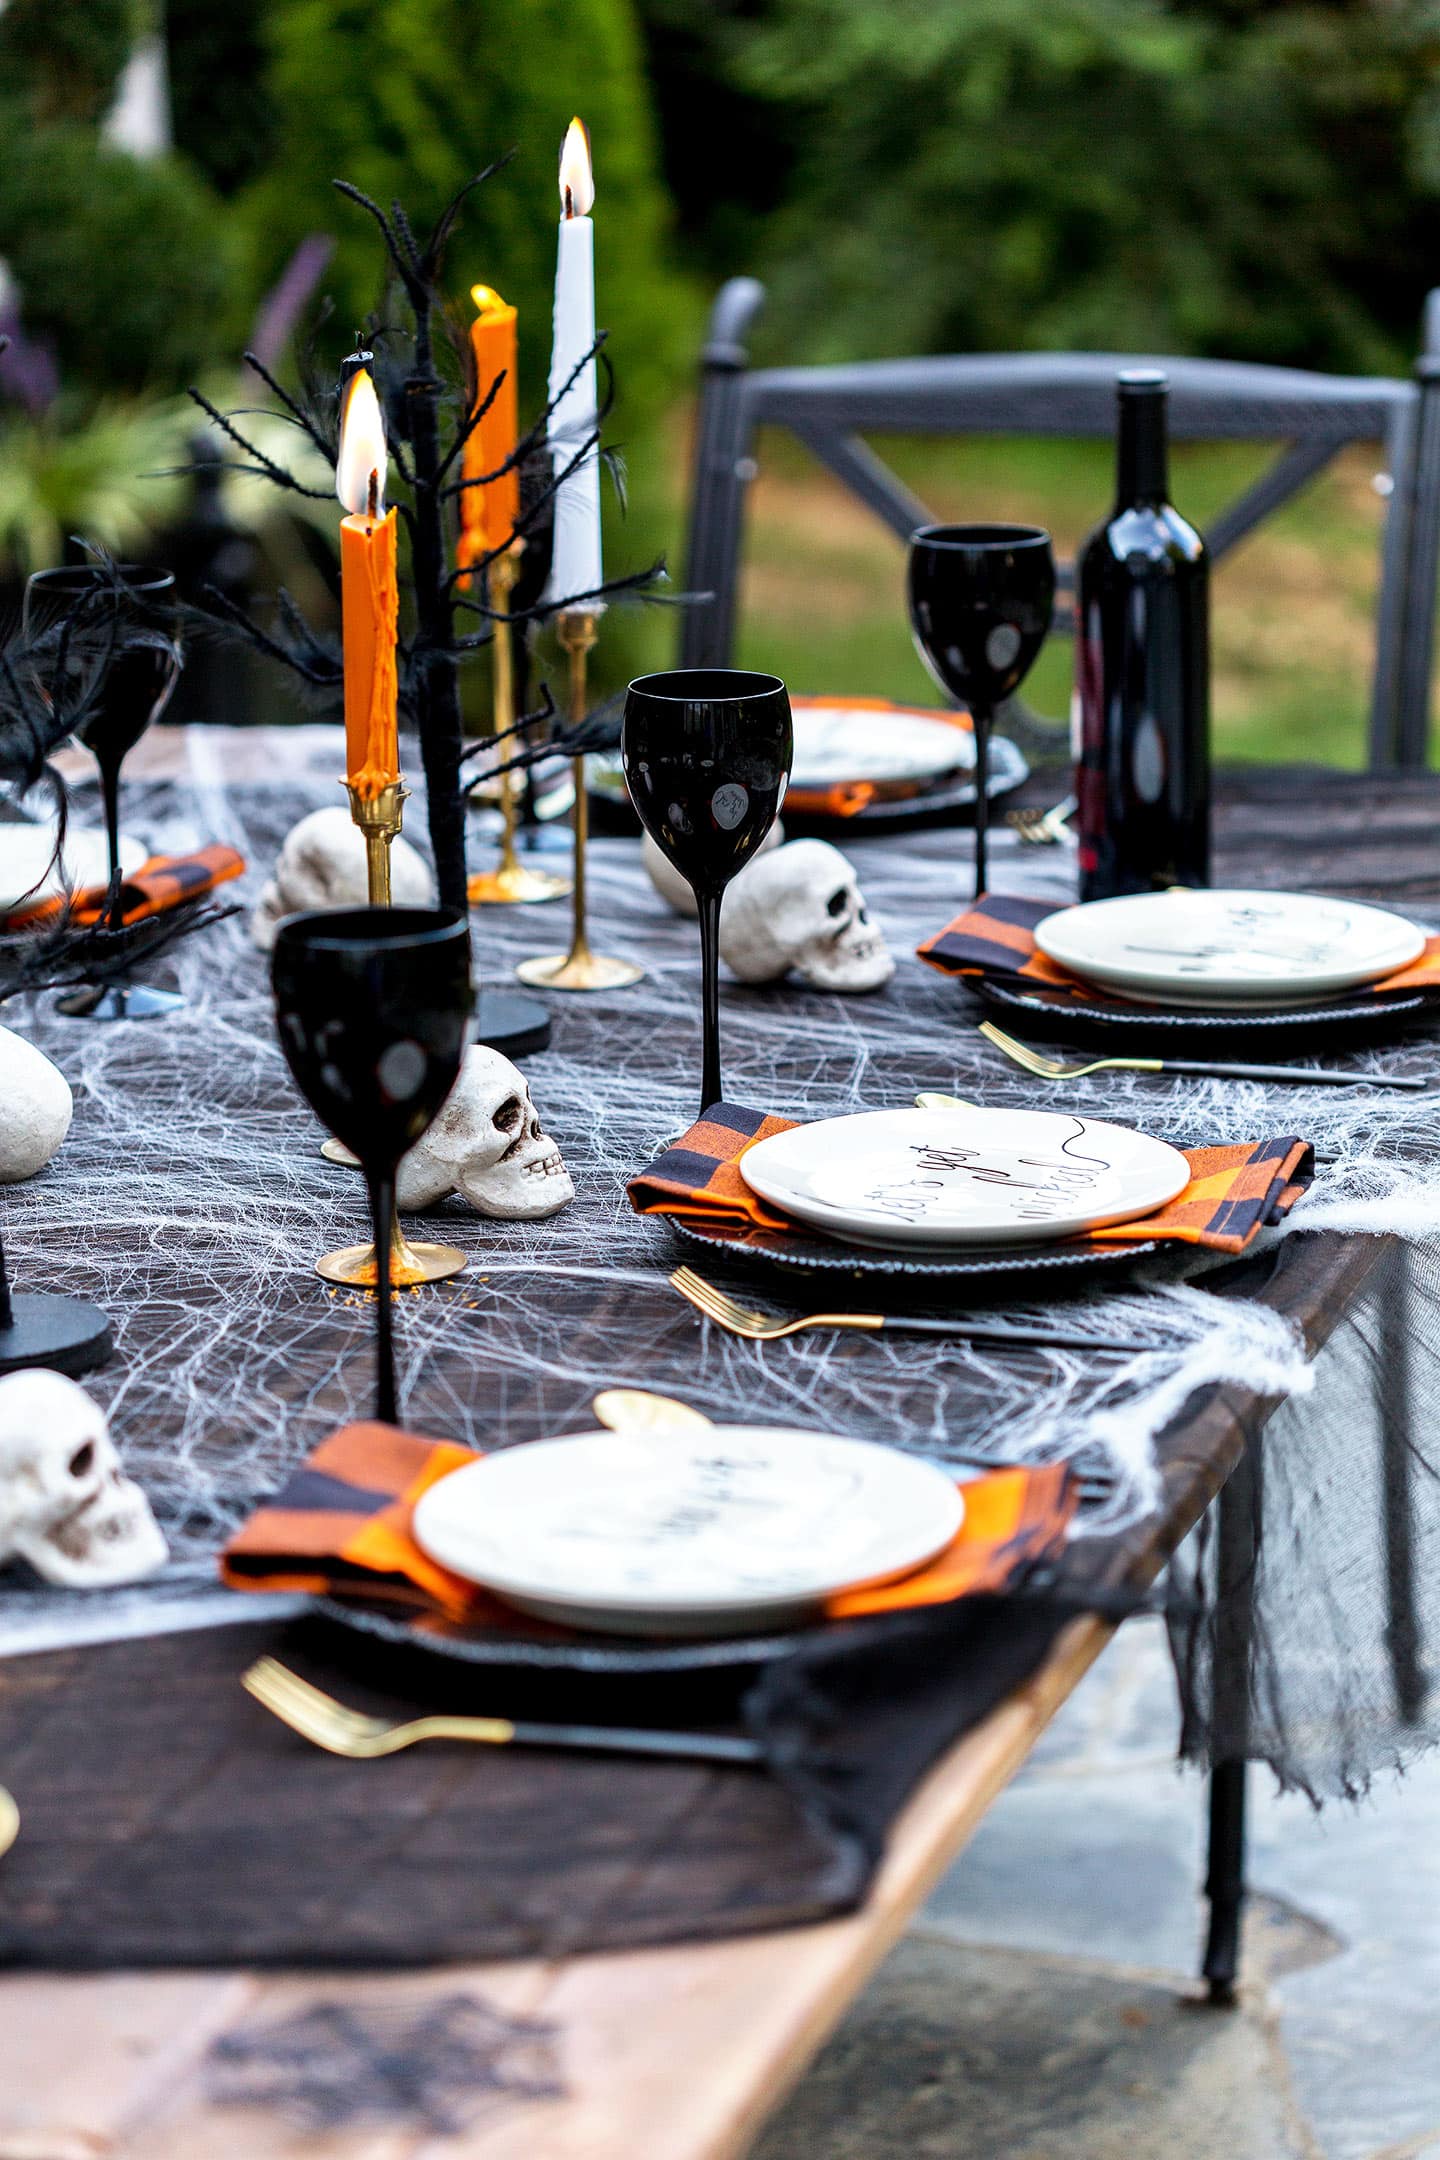
28. Dine Al Fresco with Skulls and a Spiderweb Table Runner
When setting an outdoor table, you have to account for wind. Use heavier items as your decor. These white skulls are perfect because they have enough weight to stay put. Use napkin rings or place a heavy object (like a small gourd or a skull) on each napkin to prevent them from blowing away. Instead of flimsy paper plates, use sturdy melamine or your regular dinner plates. The spiderweb fabric overlay is light, so make sure it’s securely anchored by your centerpiece and place settings.
|
📋 Copy HEX 🔗 Share |
The magic of this table comes from the high-contrast color palette set against a natural, outdoor backdrop. The crisp white of the skulls and appetizer plates pops dramatically against the black dinner plates and dark wood table. The bright orange in the plaid napkins and candles provides a necessary burst of warm, traditional color that keeps the scene from feeling too stark. It’s this confident mix of black, white, and orange that screams “Halloween” in a chic and sophisticated way, especially when compared to the natural palette of Idea #12.
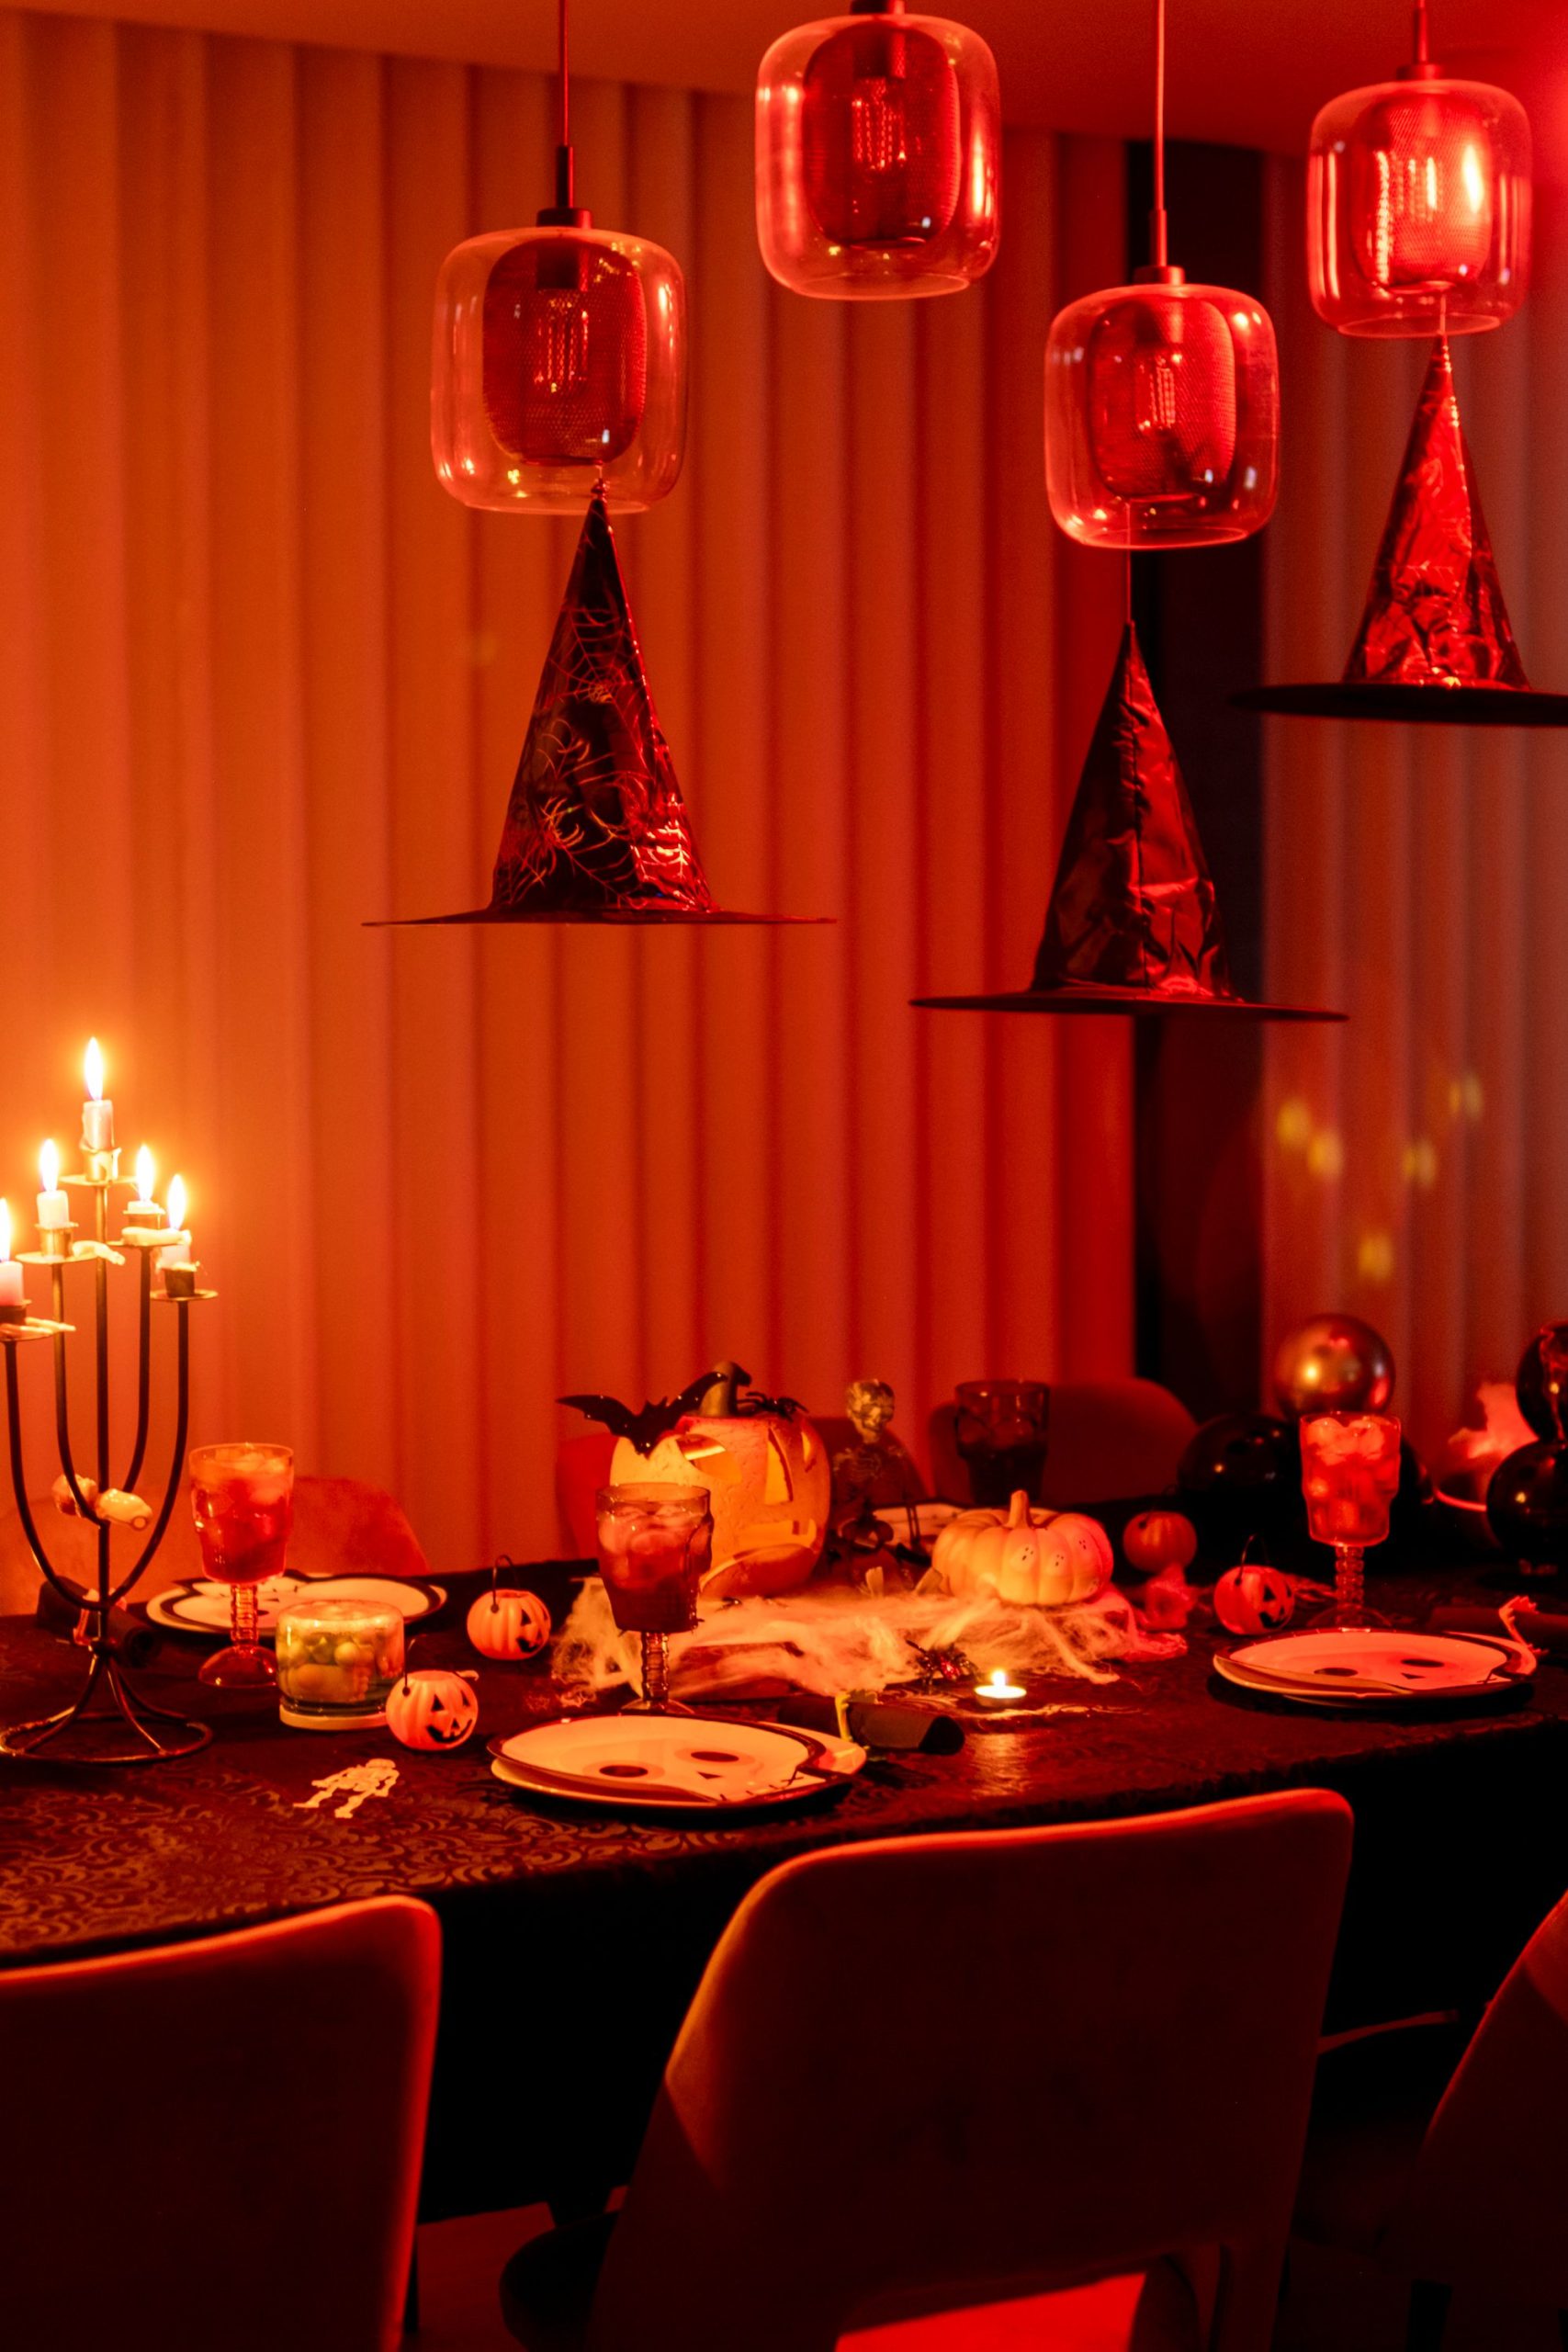
29. Bathe Your Dinner Party in an Eerie Red Light
The single most important element here is the red lighting. It does all the heavy lifting. Without it, you have a pretty standard Halloween-themed dinner table. With it, the entire room is transformed into an eerie, unsettling, and highly cinematic space. It washes over everything, unifying the decor and creating an immersive, otherworldly atmosphere. It’s a simple, high-impact trick that makes everything look and feel more dramatic and mysterious. This is proof that thoughtful lighting is your most powerful decorating tool.
|
📋 Copy HEX 🔗 Share |
While a room bathed in red light looks incredible in photos, it can be a little intense for an entire evening. It can make it hard to see your food properly and can even be a bit headache-inducing for some guests. A great compromise is to use smart bulbs (like Philips Hue) and turn the room red as guests arrive for initial drinks and mingling to get that big “wow” moment. Then, as people sit down to eat, transition the lights to a warmer, dimmer, more natural candlelight-style setting.
Your Spooktacular Story Starts Here
Remember, the goal is to create a mood and tell a story that feels like your own. Don’t be afraid to mix and match these ideas or give them your own personal twist. Now that you’re armed with all this inspiration, it’s time to start planning your own unforgettable Halloween party. Happy haunting!