You know that feeling when you finally find the DIY Halloween decoration that looks exactly right for your house? That “aha!” moment is what this guide is all about. After filtering through hundreds of options across the Dollar Tree, Target, and local craft stores, we narrowed it down to 28 ideas that actually deliver. Inside, you’ll find curated projects for every style, from playfully spooky to cozy autumnal, all achievable on a real-world budget. For 2026, it’s all about making your space uniquely yours. And stay until the end—we break down the most common mistakes that can ruin these looks. 📌 Save this to Pinterest for later—you’ll want to revisit these ideas.
1. Create an Abundant Autumnal Staircase with Gourds and Candles
This look is a masterclass in repetition and variation. By using dozens of pumpkins and gourds in different shapes, sizes, and shades of orange, yellow, and green, the design feels incredibly lush and abundant rather than chaotic. The repetition of a single category—gourds—creates a strong, unified theme. The variation within that category is what provides the visual interest and keeps your eye moving. The warm glow of the white pillar candles is then interspersed to add a layer of warmth and coziness, breaking up the density of the pumpkins.
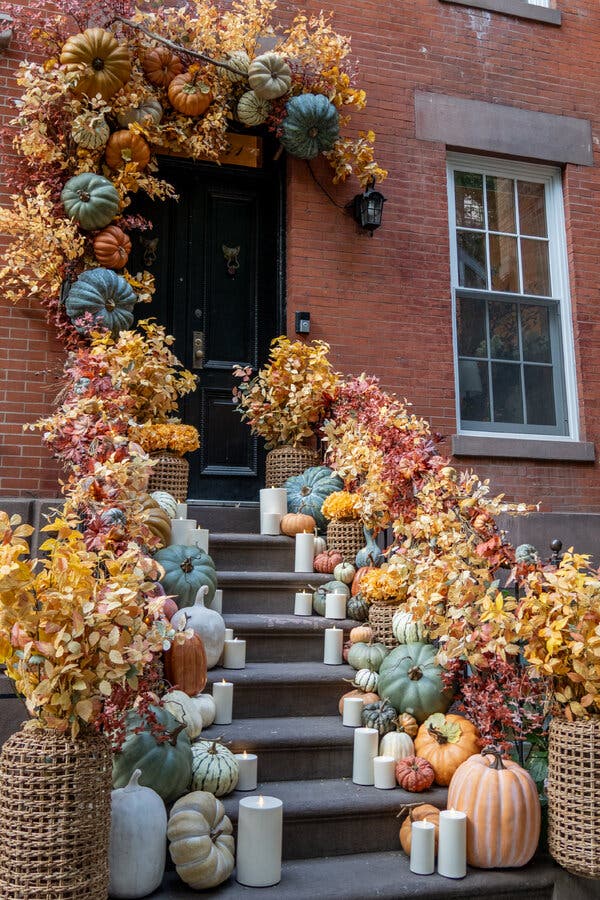
As beautiful as this is, using real pillar candles outdoors on a staircase is a significant fire hazard, especially when surrounded by dry autumn foliage and potentially flammable gourds. A single gust of wind or a misplaced step could be disastrous. For a worry-free alternative, use high-quality flameless LED pillar candles. You can find incredibly realistic ones that flicker and have a warm, yellow-toned glow. They provide the exact same ambiance without any of the risk, making your festive display both gorgeous and safe for trick-or-treaters and your home.
2. A Playfully Spooky Porch with Hanging Witch Hats and Tombstones
To get those witch hats to “float” perfectly, don’t just tie them to the ceiling. Use clear fishing line and attach a small, clear self-adhesive hook to the inside peak of each hat. Then, run another piece of fishing line through the hat’s brim from side to side to keep it level. This creates an invisible support structure that prevents the hats from tilting or drooping, making the magical floating effect much more convincing. It’s a small detail that makes a huge difference in the final presentation.
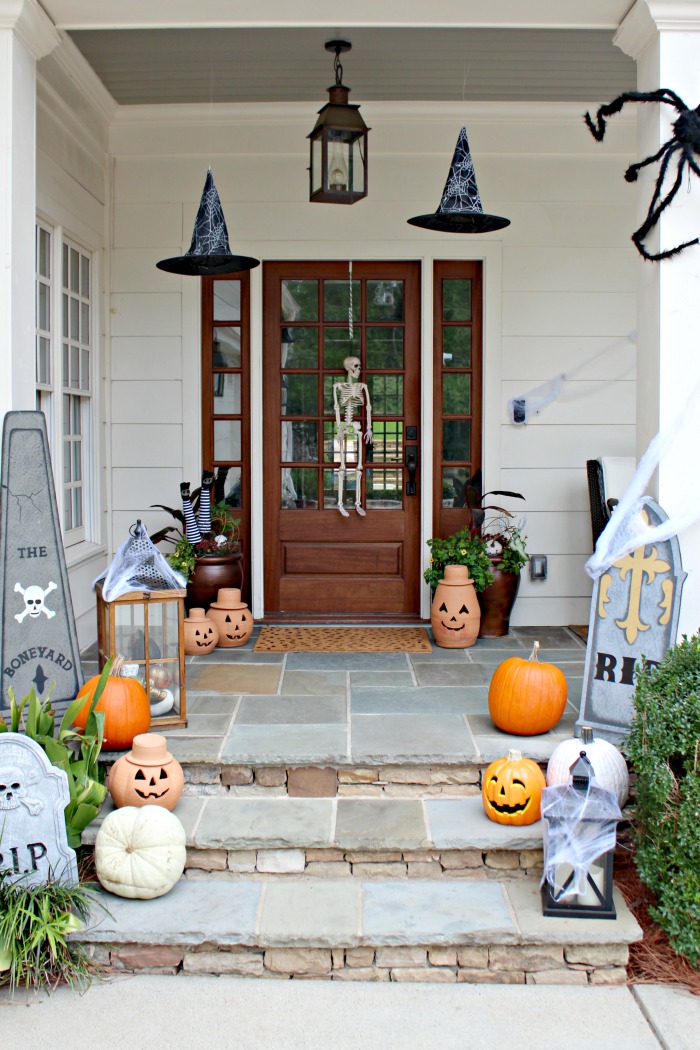
The visual recipe here is simple and effective. Think of it as 50% classic pumpkins, 30% spooky props, and 20% cozy lighting. The pumpkins provide a familiar, friendly base. The decorative tombstones and hanging skeleton add the distinctly Halloween fright factor. Finally, the string lights and jack-o’-lantern’s glow contribute to that essential, cozy, welcoming vibe. You can swap the props—maybe you prefer ghosts to skeletons—but keeping that 50/30/20 ratio of classic/spooky/cozy will ensure the overall feeling remains balanced and festive, not just scary.
3. Welcome Trick-or-Treaters with Friendly Porch Ghosts
You can get this charming, family-friendly look for under $30. The key is to focus on a few impactful DIY elements. The white ghost decorations can be easily made from old sheets or white plastic tablecloths from the Dollar Tree, draped over foam balls. Pumpkins are a must, but you don’t need a dozen; grab three or four from a local grocery store or farm stand for about $15-$20. The final touch is the potted plants, which you may already have. It’s a simple, high-impact setup that proves you don’t need a huge budget to create a festive and welcoming entrance.
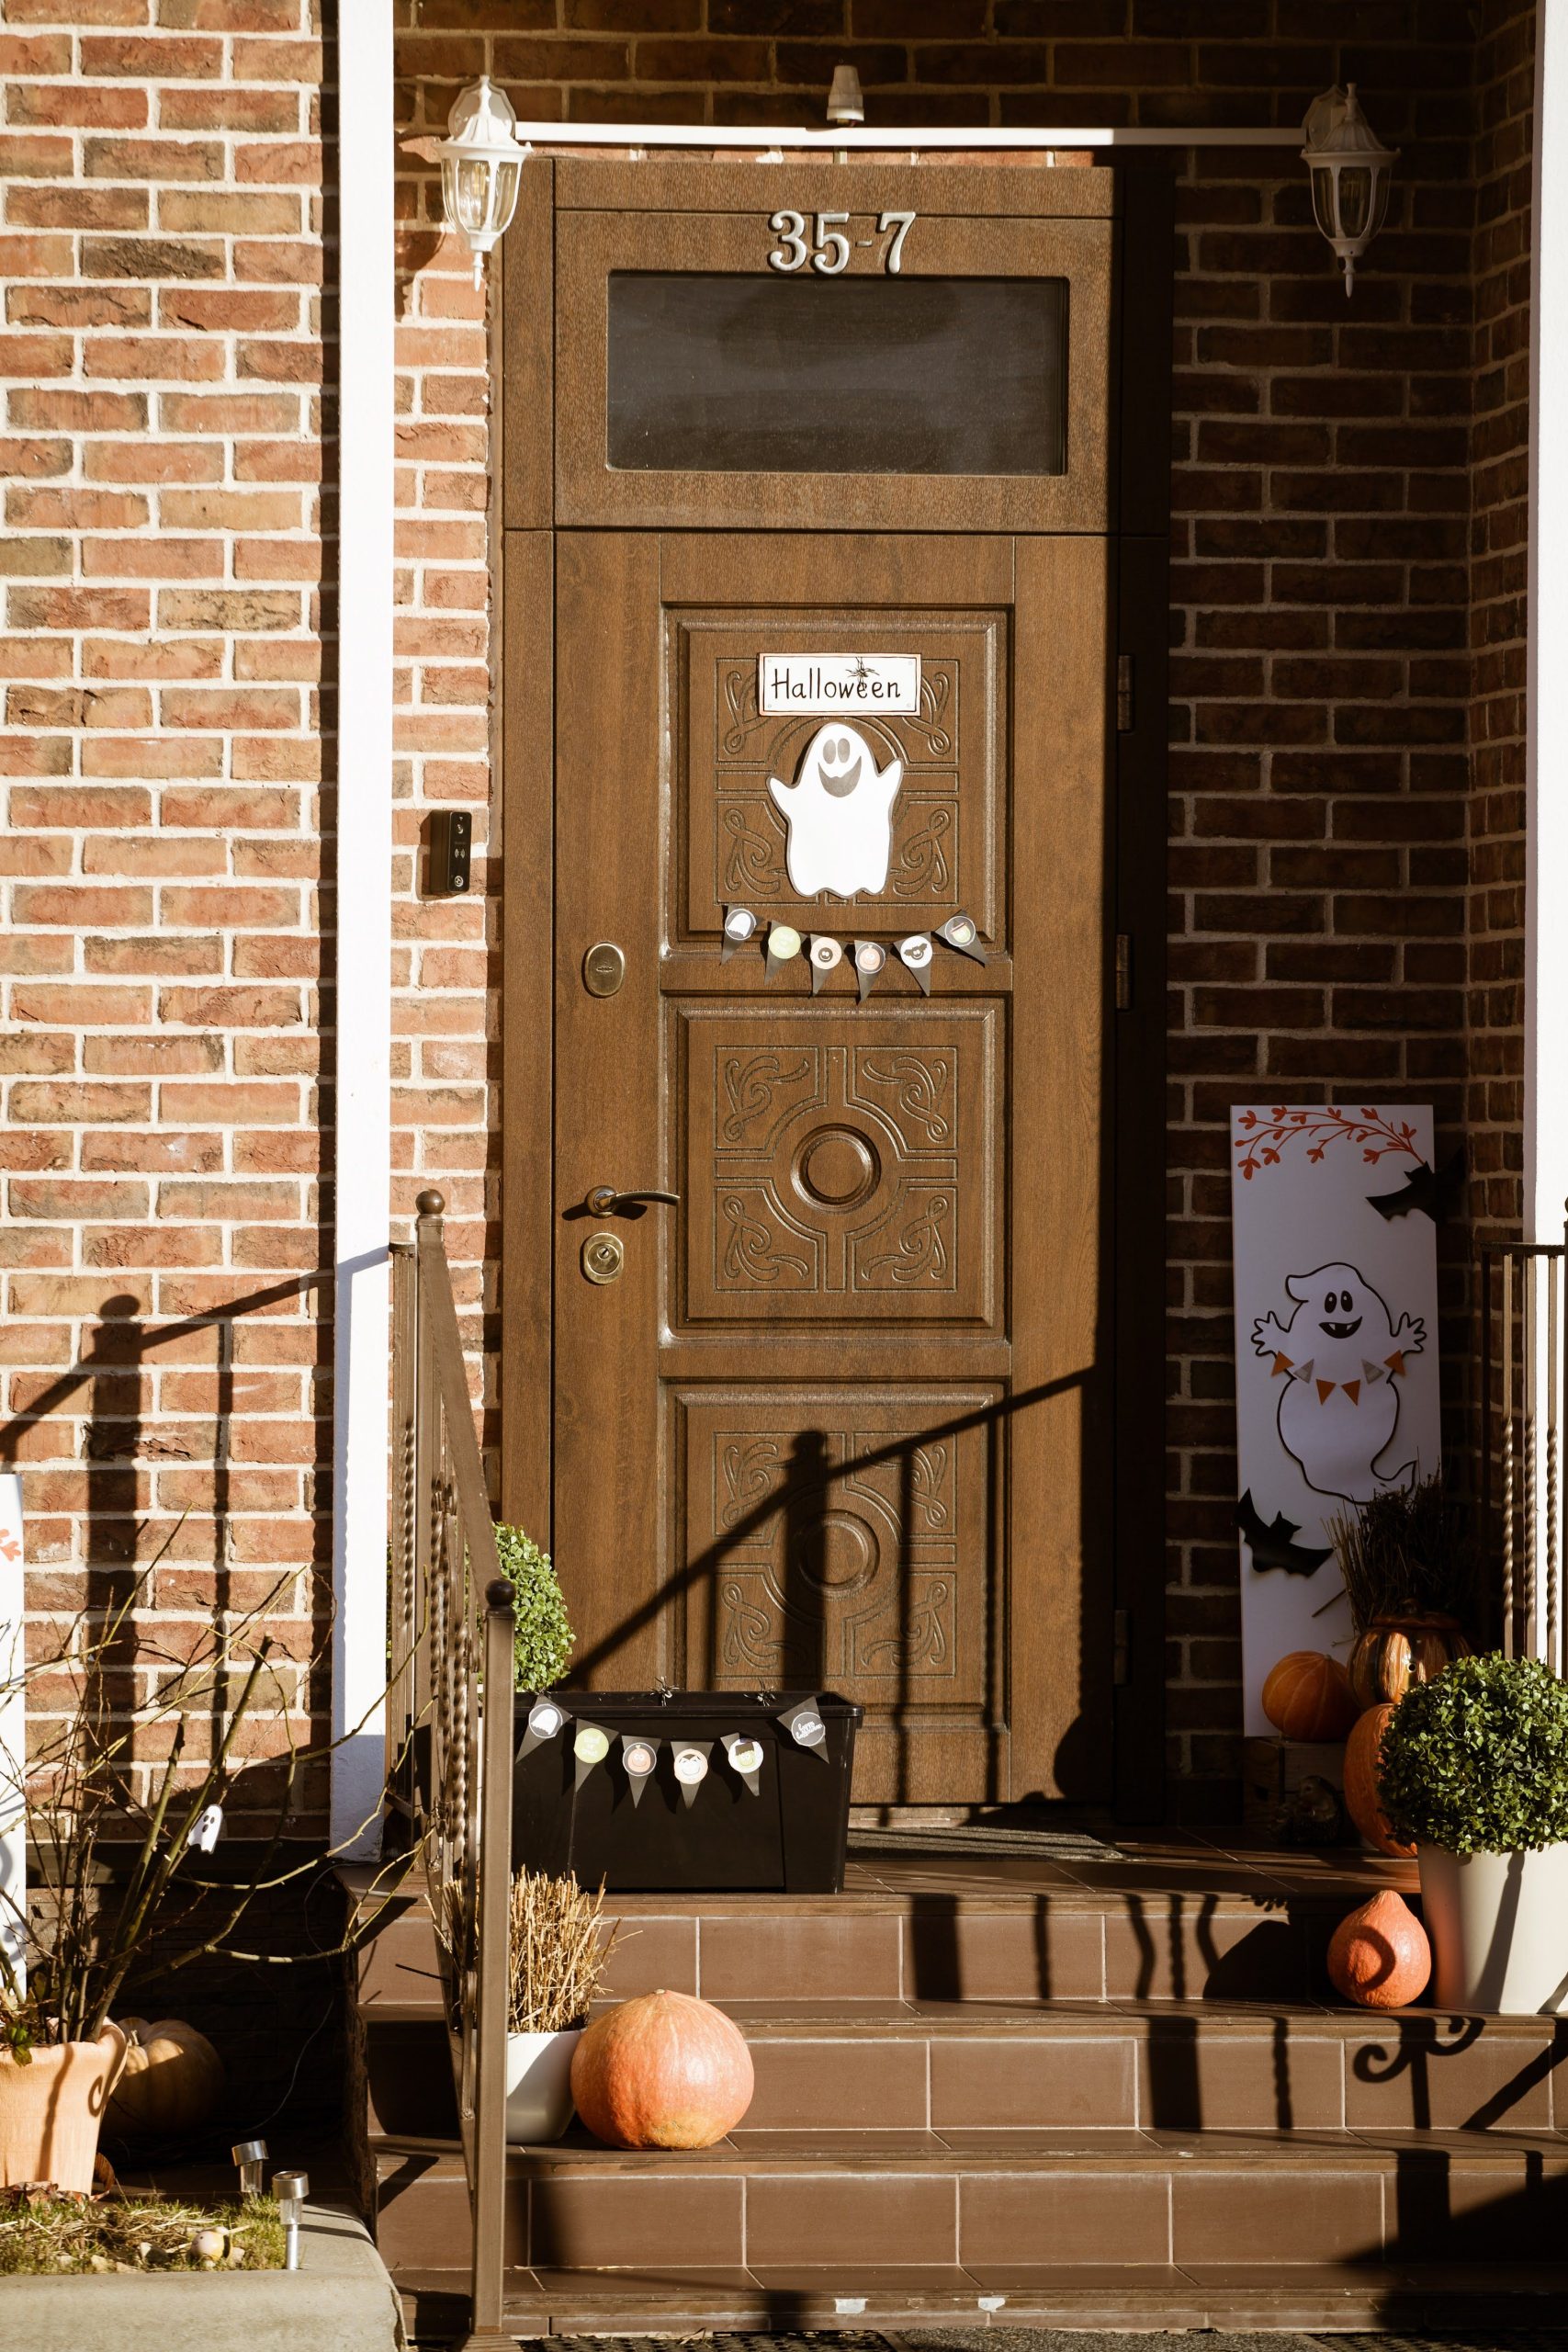
The single element that makes this entire design work so well is the set of friendly white ghost decorations. Without them, you’d have a lovely, generic autumn porch with pumpkins and plants. The ghosts instantly transform it into a Halloween scene. Their simple, slightly cartoonish appearance sets a tone that is welcoming and playful rather than truly scary. It’s a perfect choice for homes with young children or anyone who prefers a lighter, more cheerful approach to the holiday. They are the storytellers of this porch.
4. Drape Your Porch in Spooky Style with Skeletons and Netting
This idea is perfect for a small to medium-sized porch, roughly 50 to 120 square feet. The key is having enough vertical space to let the draped netting have an impact without overwhelming the area. A ceiling height of at least 8 feet is ideal. The use of rocking chairs implies a porch deep enough to accommodate seating, so you’ll need at least 6 feet of depth. For a much larger porch, you might need to double the amount of netting and add another skeleton or two to maintain the same visual density and prevent the decorations from looking sparse.
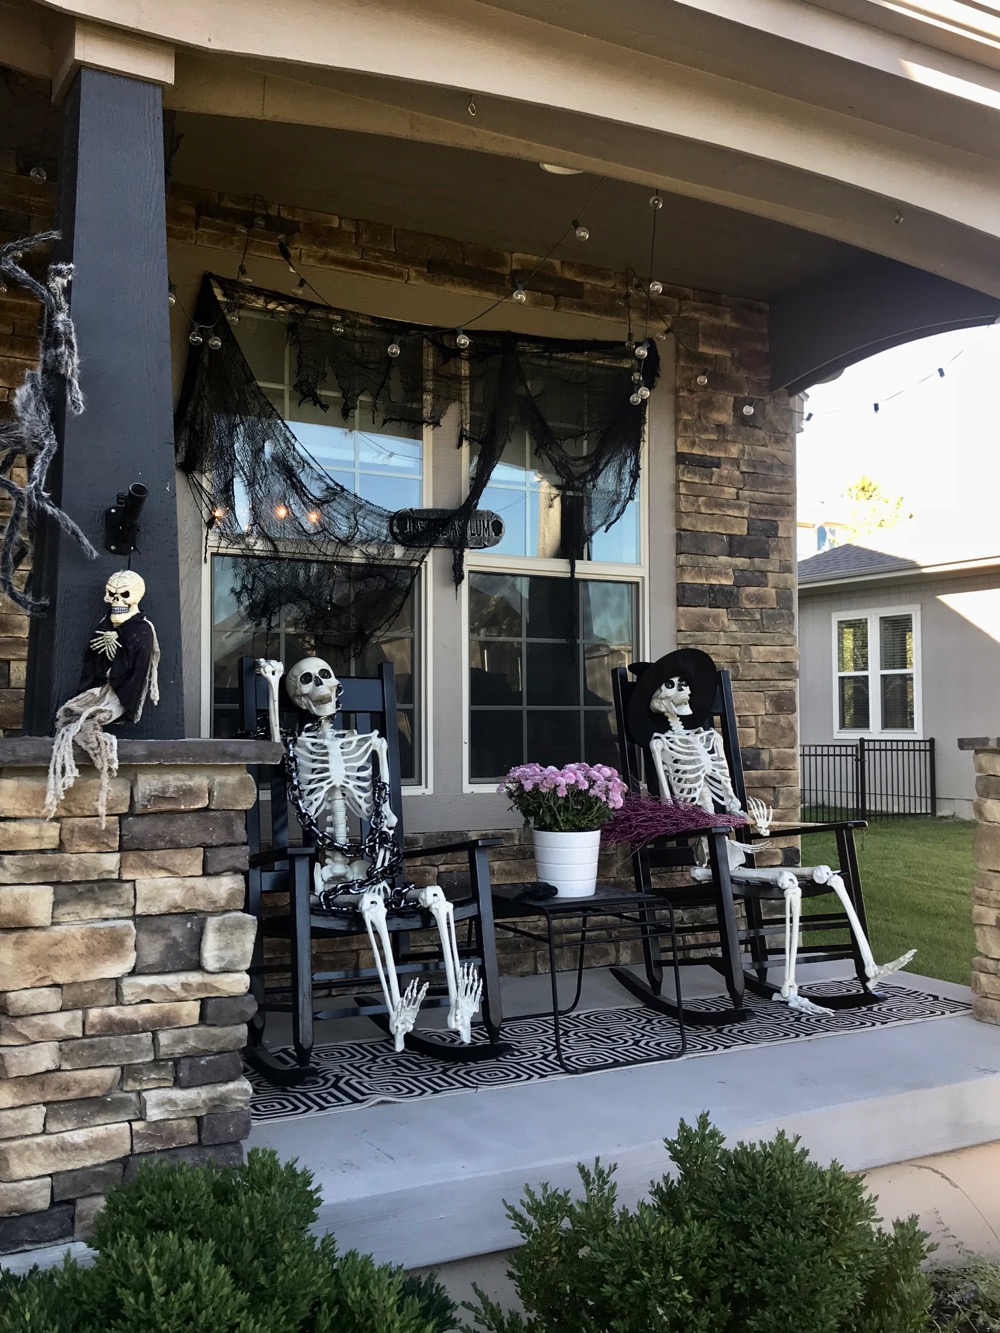
The success of this design lies in its clever use of contrast and character. You have the stark white of the skeletons popping against the black mesh netting and dark chairs, creating a strong visual anchor. But it’s the playful posing of the skeletons that really makes it special. They aren’t just propped up; they’re interacting with the space, lounging in chairs like they’re waiting for guests. This touch of humor turns them from scary props into quirky characters, making the whole scene feel more creative and intentional. The soft glow of the string lights adds the final touch, ensuring it reads as festive, not just frightening.
5. Layer a Brick Staircase with Mums, Pumpkins, and Sheet Ghosts
Recreating this lush, layered look involves a mix of floral and decorative elements. The potted mums are a major player, so expect to budget accordingly.
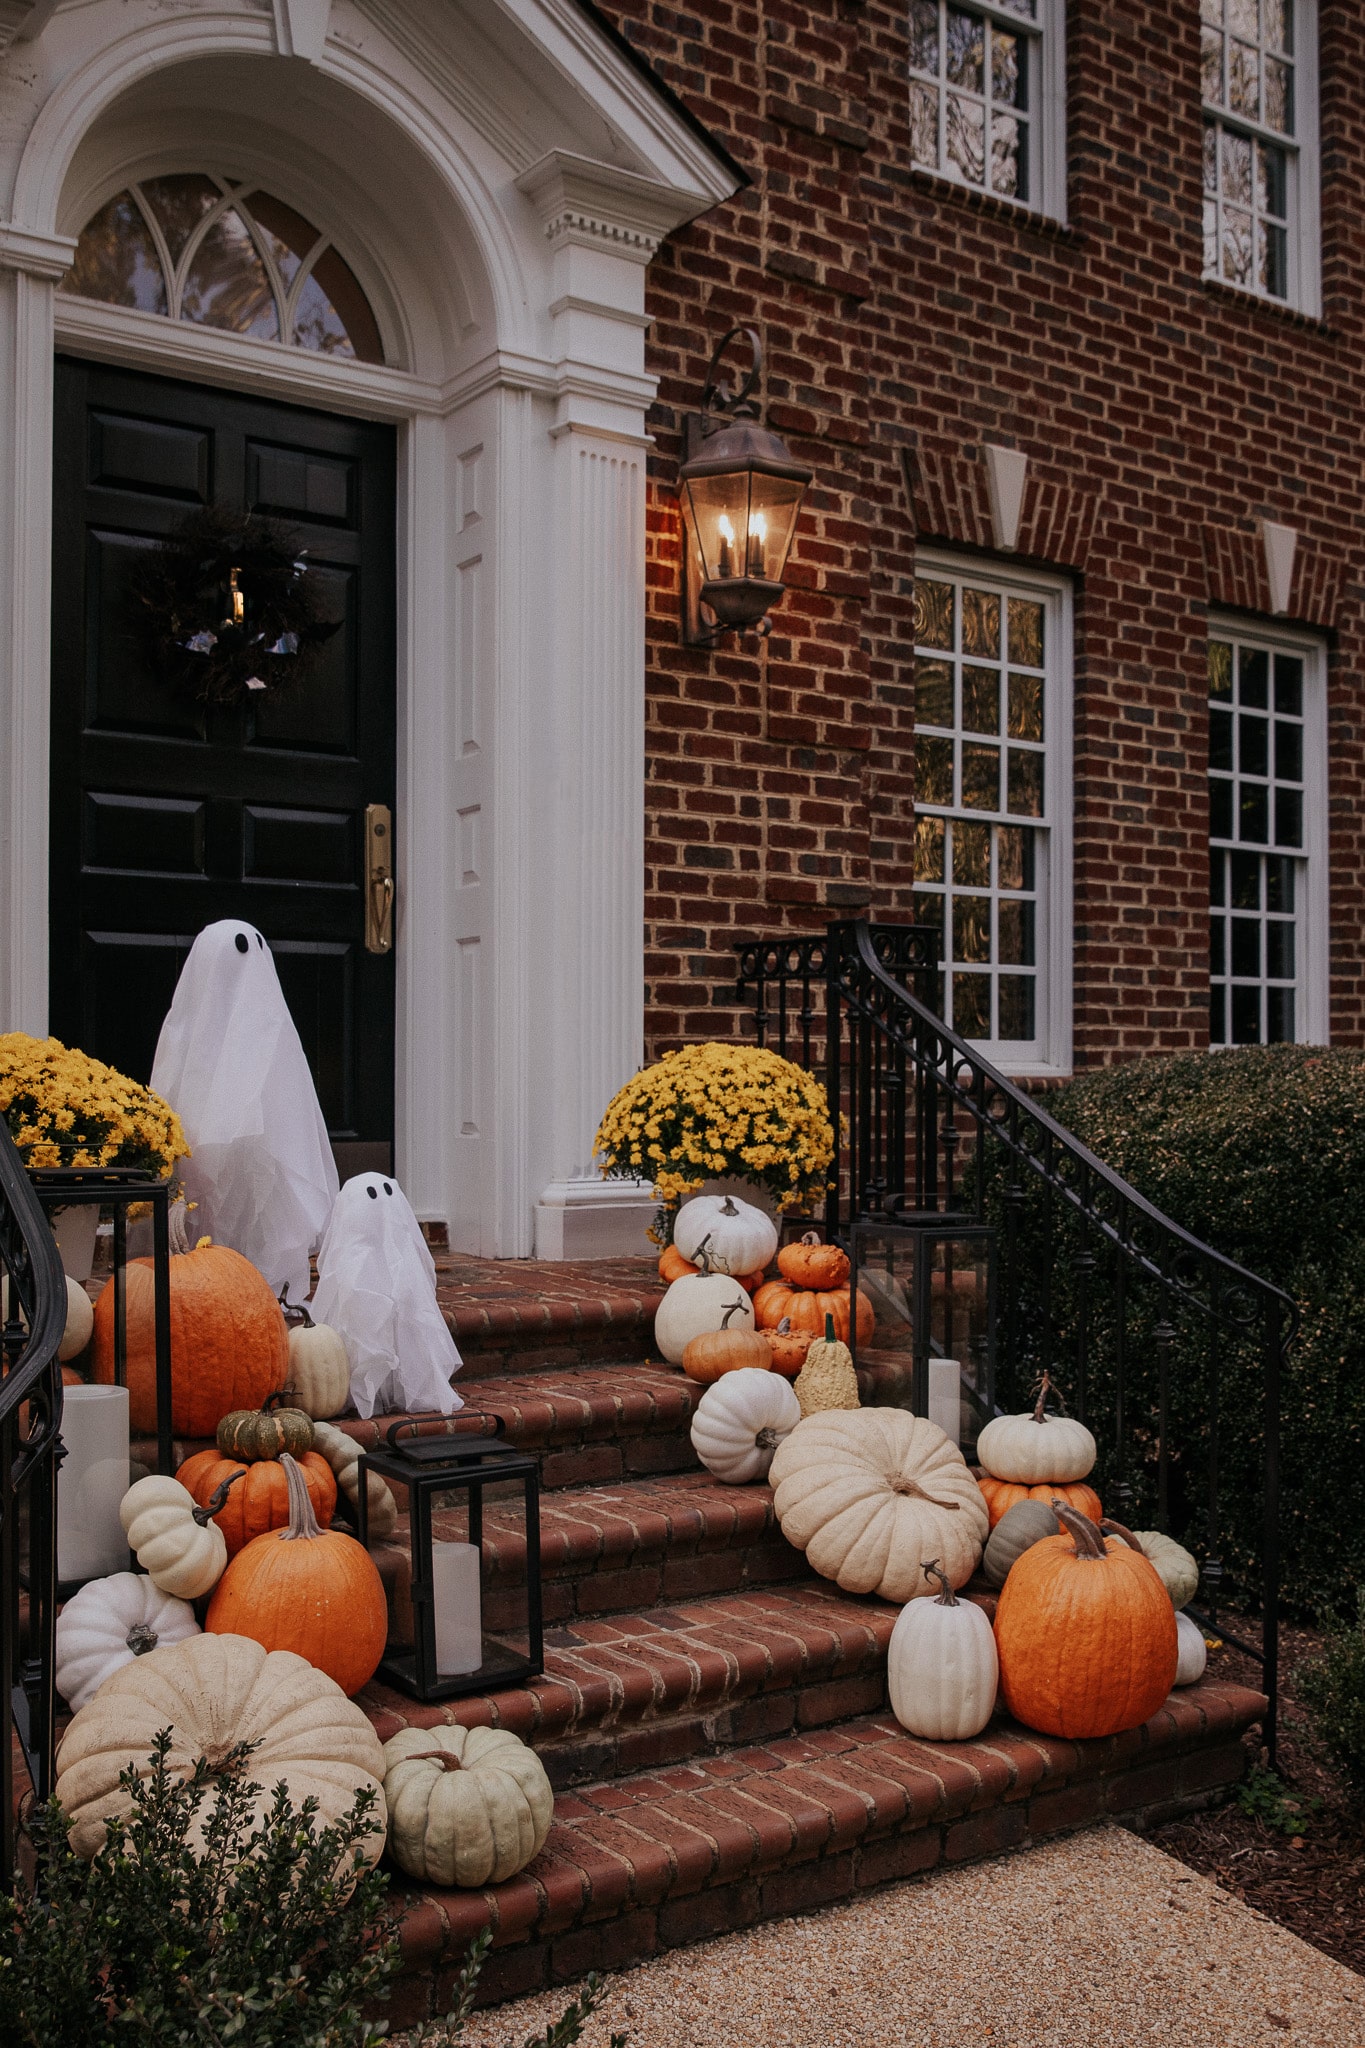
- Main Decor (Pumpkins, Gourds): $75 – $150
- Floral (Potted Mums): $60 – $120
- Lighting (Lanterns, LED Candles): $40 – $80
- DIY Ghosts (Sheets, foam balls): $15 – $25
- TOTAL: $190 – $375
Budget alternative: Focus the decor on just the top and bottom steps, use fewer pumpkins, and supplement with more faux foliage from a craft store to fill space for about 50% less.
Creating your own charming sheet ghosts is a quick and easy project. This should take about 15 minutes per ghost, with a material cost of around $10 each.
- Start with a tomato stake or garden stake and secure it in a pot filled with dirt or sand.
- Place a medium-sized foam ball (from a craft store) on top of the stake.
- Drape a white twin-sized flat sheet over the foam ball, adjusting it until you’re happy with the folds.
- Cut out two ovals from black felt for the eyes.
- Attach the eyes to the sheet using fabric glue or safety pins.
- For extra stability, you can bunch the sheet around the base of the foam ball and secure it with a zip tie before draping.
6. Craft a Creepy Stick Witch for Your Yard
When building a figure from natural materials like sticks and branches, the key to a sturdy structure is triangulation. Don’t just lash sticks together in a line. Create a series of connected triangles for the torso and limbs. For the main body, find a sturdy Y-shaped branch as your base. Then, lash a straight branch across the top of the ‘Y’ to form the shoulders. This immediately creates a stable triangular core to build from. Use dark-colored jute twine or black zip ties for a secure and visually discreet binding.
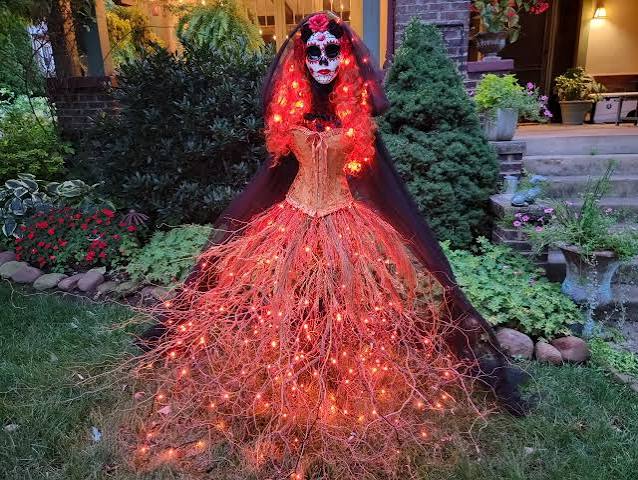
Before you head into the woods to gather materials, make a quick checklist to ensure your project is a success.
- Check Local Regulations: Are you allowed to gather fallen branches from the park or woods you’re planning to visit? Some conservation areas have rules against it.
- Measure Your Space: Decide exactly where the witch will go in your yard and measure the height and width you have to work with. This prevents you from building something that’s comically too large or disappointingly small.
- Gather Your Tools: You will need pruning shears, twine or zip ties, a hot glue gun (for details), and any fabric or accessories. Have everything ready before you start building.
7. A Chic Halloween Porch with Spider Garlands and Paper Lanterns
This look achieves its stylish feel by balancing textures and finishes within a tight color palette. The formula is approximately 60% sophisticated neutrals (the dark gray door and light gray siding), 30% graphic black and white (spider and tassel garlands and ghost sign), and 10% accent color/material (the orange lanterns and gold wreath). This disciplined approach keeps it from feeling childish. You could easily swap the orange for a deep purple or blood red, or trade the gold wreath for a silver one, and the chic, curated vibe would remain intact because the core formula holds up.
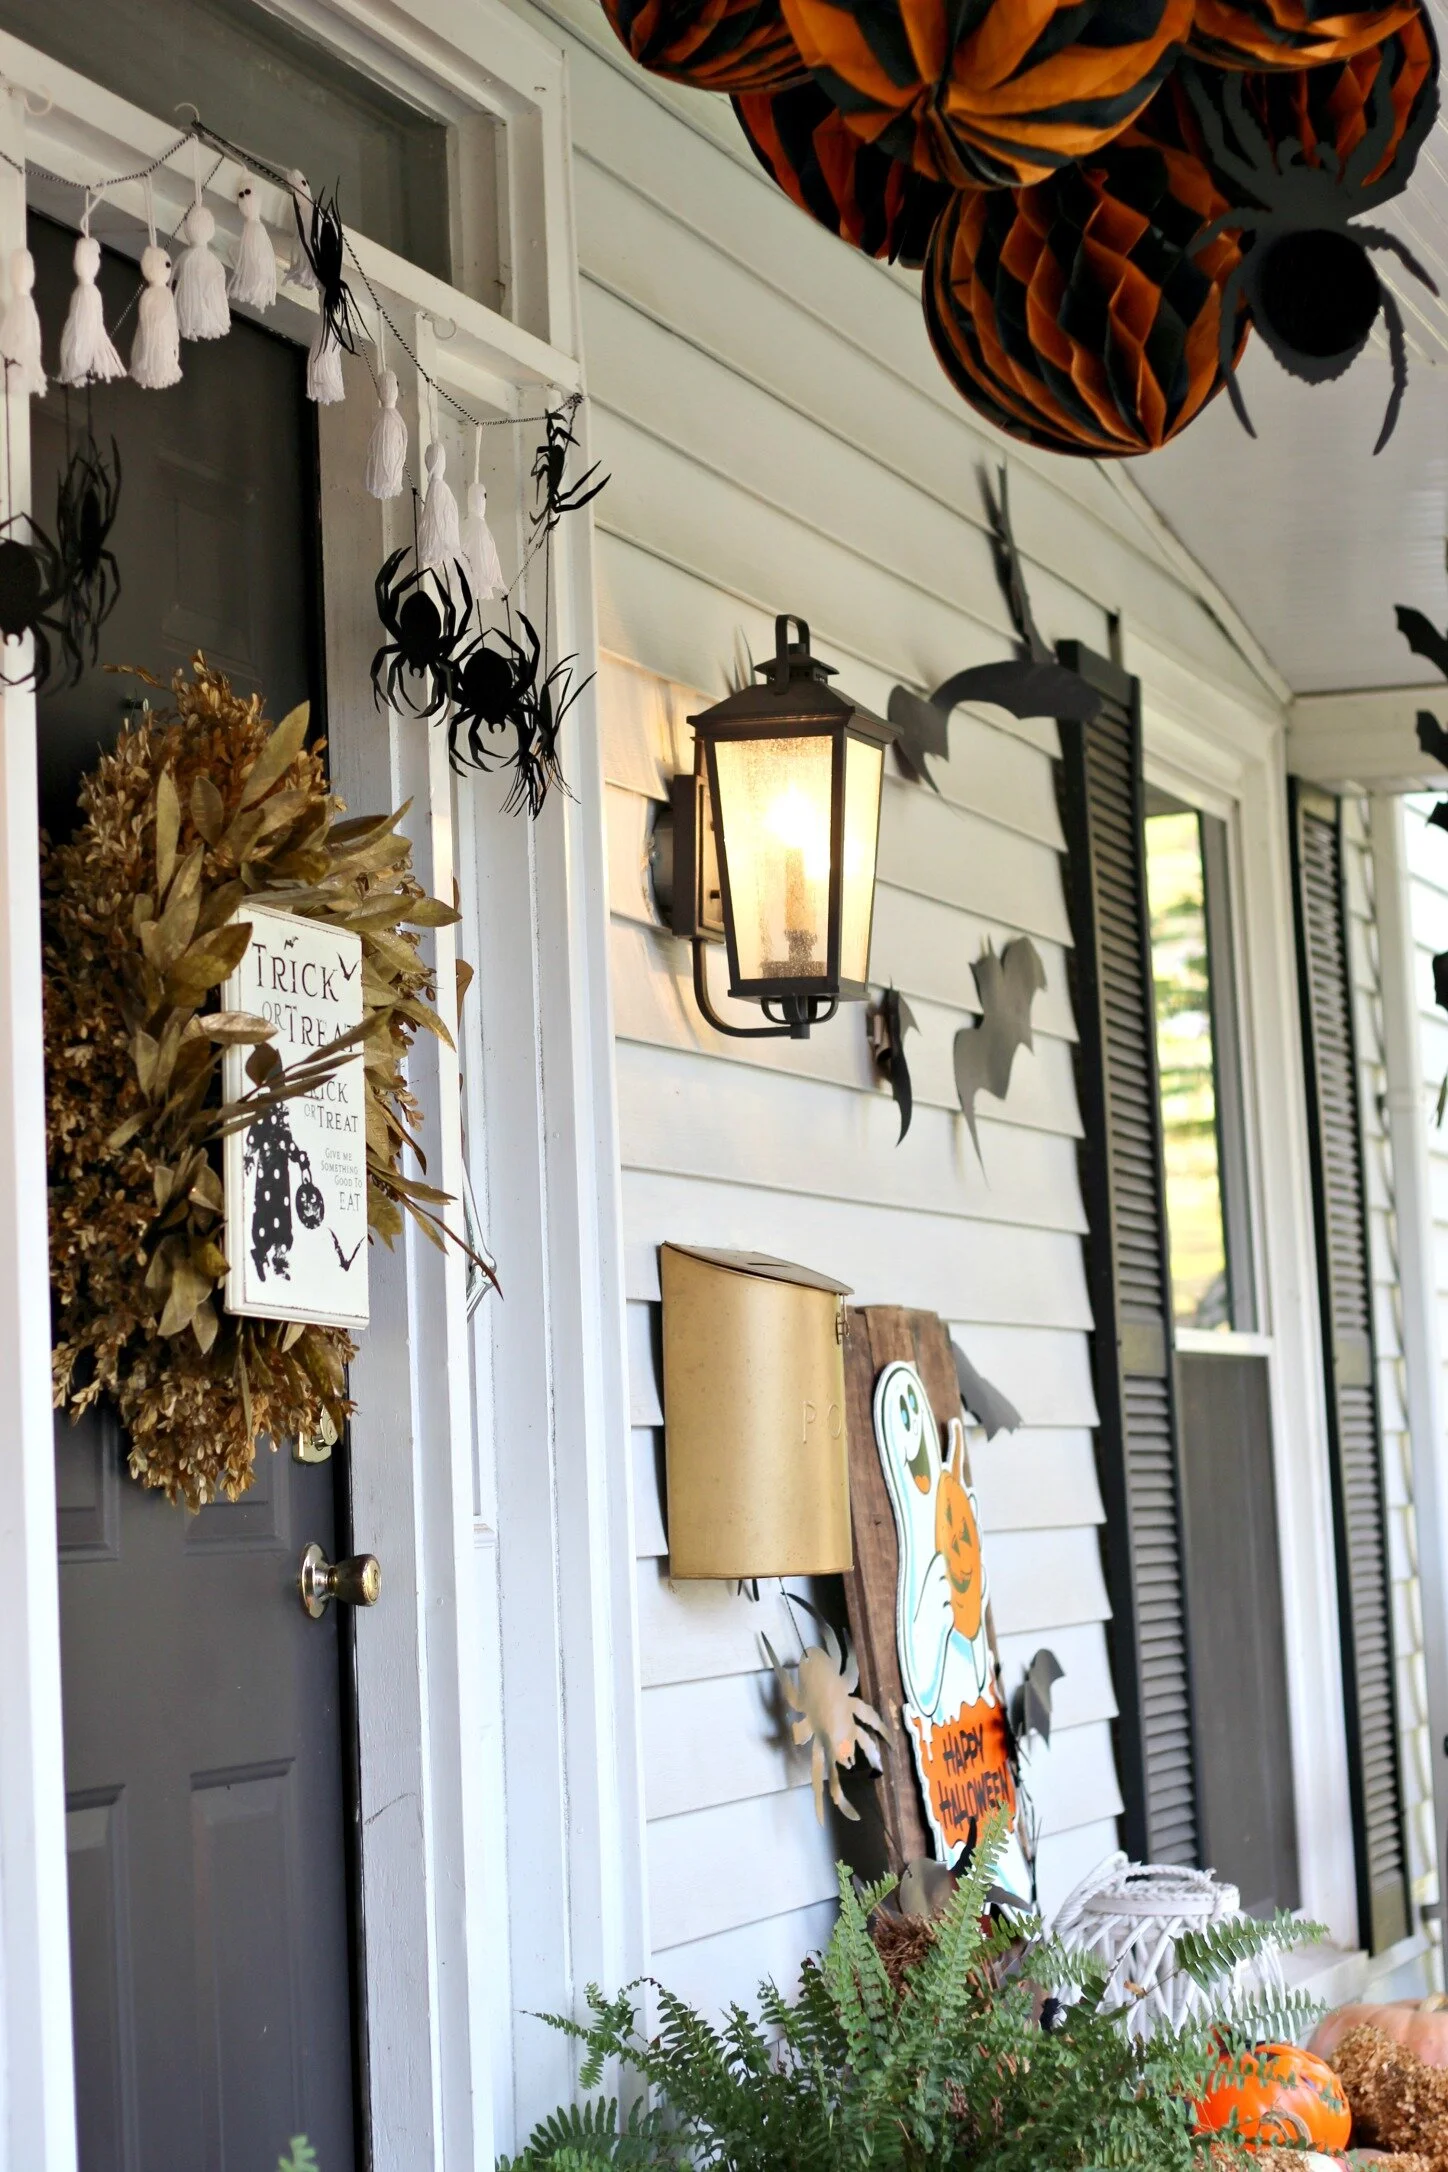
While paper and fabric decorations like these are incredibly charming, they are not built for wet autumn weather. The honeycomb paper lanterns will warp and disintegrate in rain, and fabric tassel garlands can become matted and sad-looking. Even a heavy morning dew can cause damage. Consider this a ‘fair-weather’ setup. Only put these decorations out if your porch is completely covered and shielded from the elements, or be prepared to bring them inside whenever rain is in the forecast. For a similar look with more durability, seek out plastic or nylon lanterns and garlands made of vinyl or plastic beads.
8. A Nostalgic Outdoor Display with Vintage-Style Blow Molds
There’s a huge wave of nostalgia driving decor trends right now, and Halloween is no exception. These plastic blow molds are a perfect example. For many, they evoke a sense of childhood and the classic, non-terrifying Halloween decorations of the 70s, 80s, and 90s. As people seek out comfort and happy memories in their home decor, these cheerful, glowing figures have made a massive comeback. They feel authentic and heartfelt in a way that modern, mass-produced decorations sometimes don’t. Their popularity is a direct nod to a desire for simpler, more joyful times.
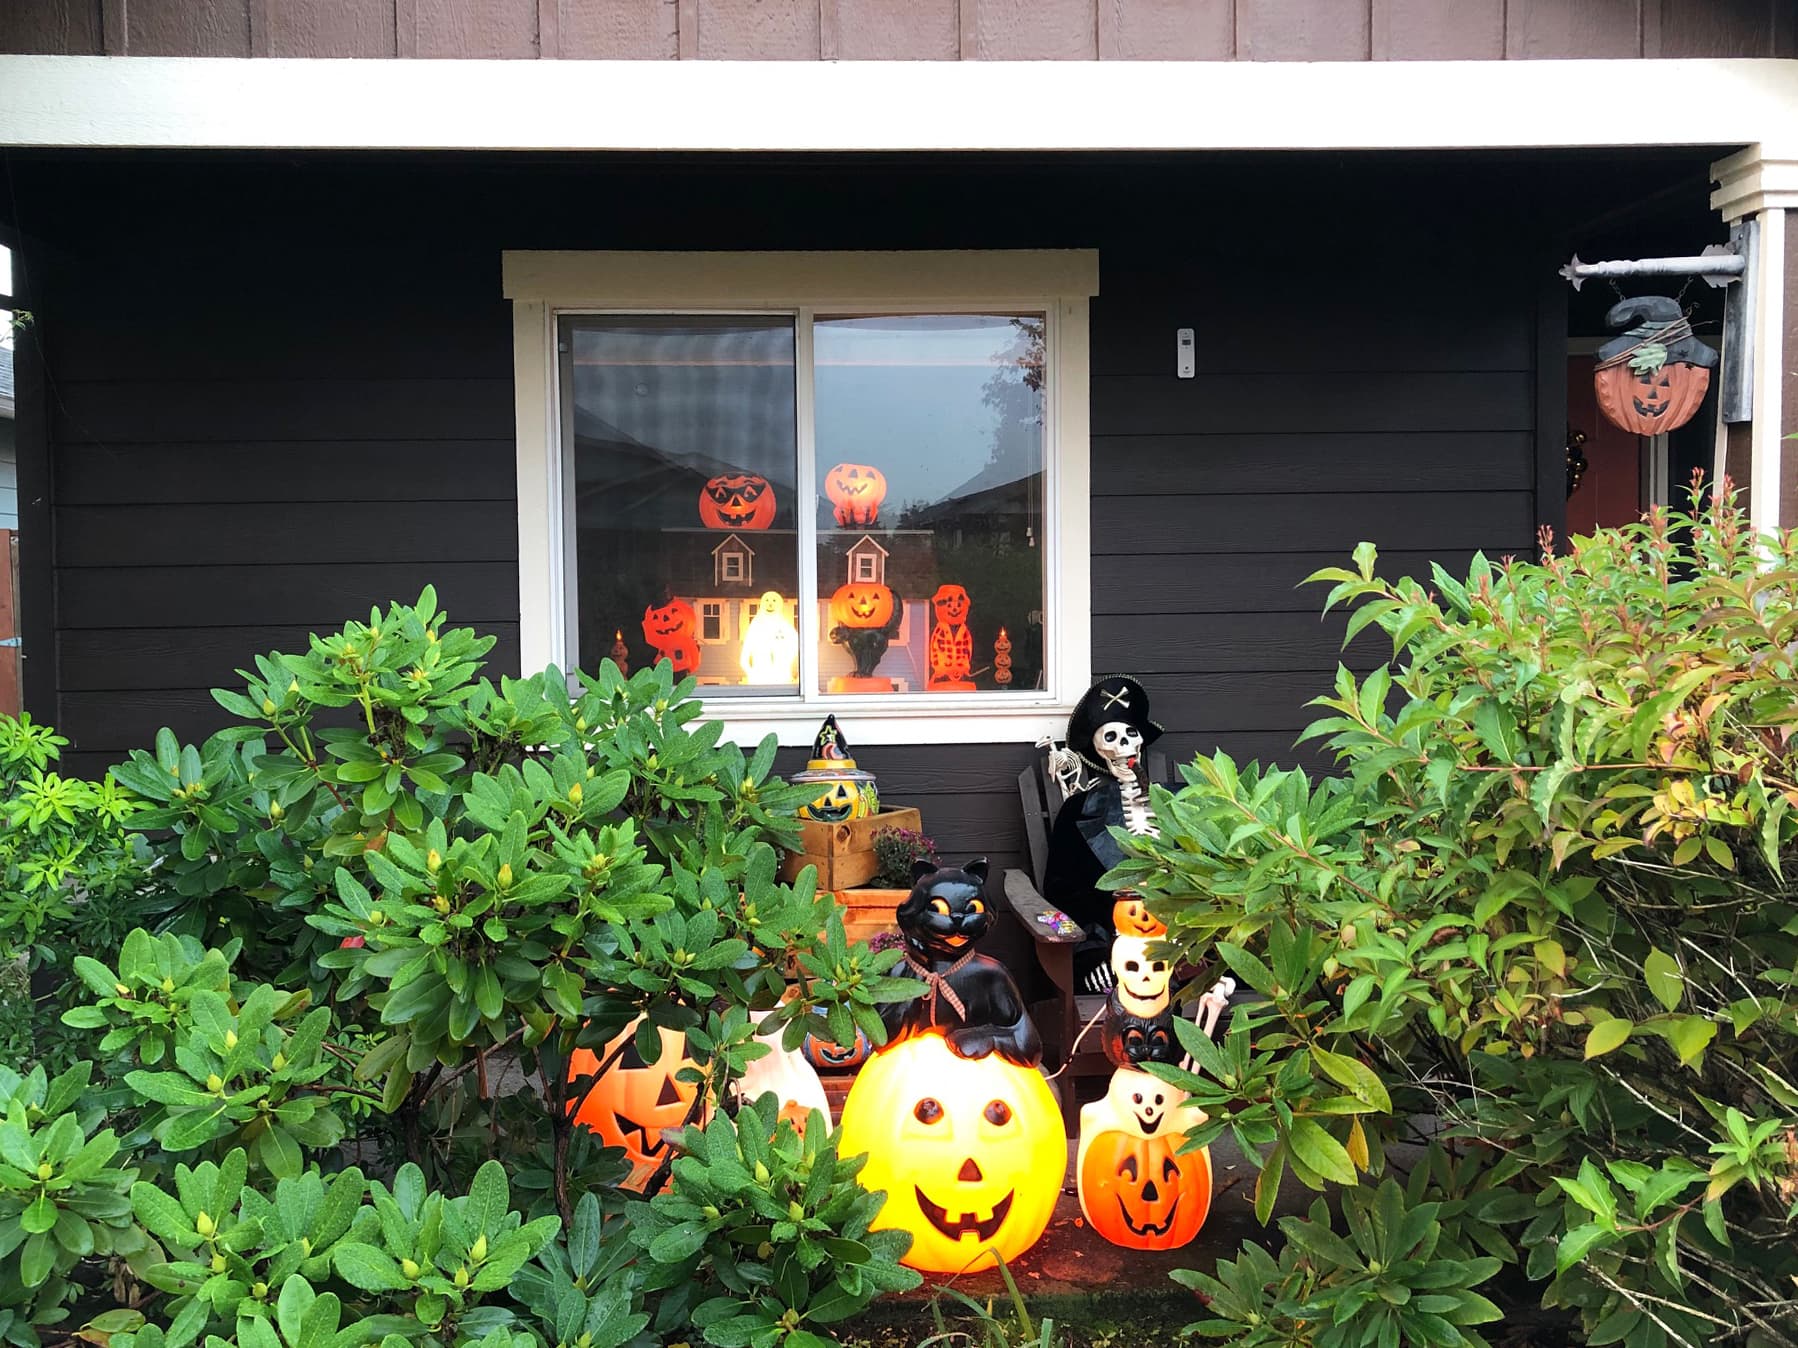
The single most important element in this scene is the light. Without the internal illumination of the blow molds and window silhouettes, this would be a daytime-only display of plastic figures in a bush. It’s the warm, inviting glow that brings the entire yard to life at dusk. The light is what creates the magic, transforming simple shapes into iconic Halloween characters and making the house feel like a beacon of festive spirit on a dark street. Everything else is secondary to the power of that nostalgic, colorful glow.
9. Classic Halloween Entry with Carved Pumpkins and a Paper Ghost
This entrance feels so quintessentially ‘Halloween’ because it perfectly blends natural and man-made elements. The real, carved pumpkins and scattered autumn leaves provide an authentic, earthy base that feels tied to the season. The DIY paper lantern ghost then adds a layer of handcrafted charm and personality. It’s this combination—the organic texture of the pumpkins and leaves against the smooth, simple form of the ghost—that creates a scene that is both festive and grounded. The red brick and decorative tiles add another layer of texture that makes the whole composition rich and interesting. This is a great example of how to build on your home’s existing character, which we see again in Idea #4.
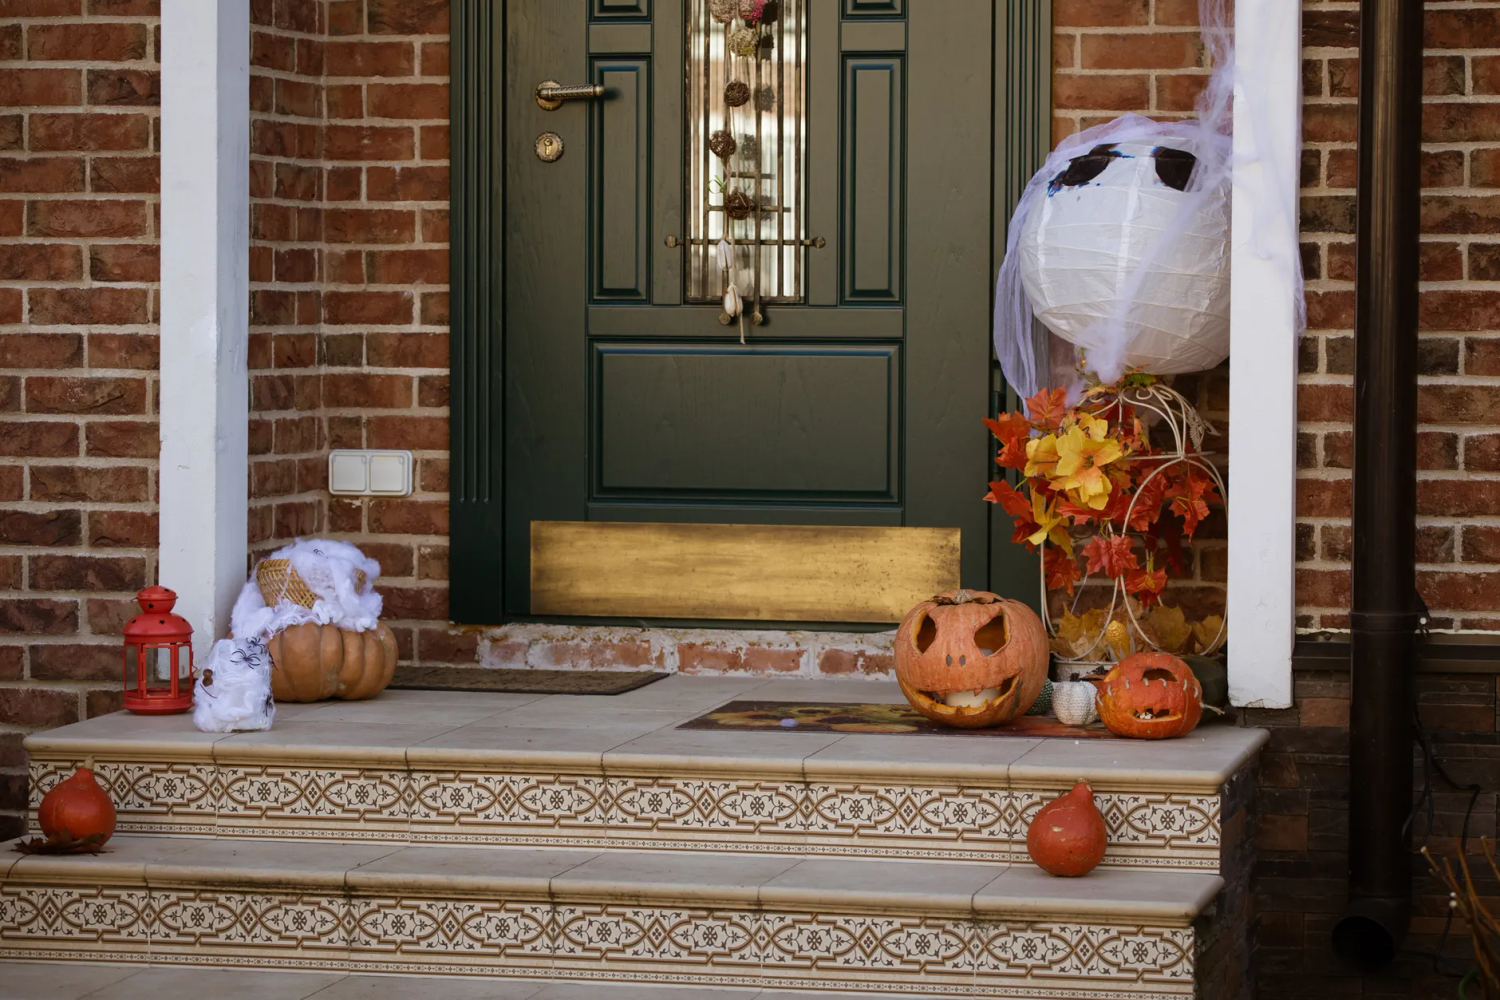
A paper lantern ghost is a fantastic and affordable DIY, but it’s also incredibly fragile. It is not going to survive a single rainy day. This is a decoration you should only consider if your porch is extremely well-covered and protected from wind and rain. Even a strong gust of wind can tear the delicate paper or send it flying. For a more durable alternative, you can use the same concept but start with a white nylon lantern instead of paper, which will give you a very similar look with much better resistance to the elements.
10. An Elegant Halloween Entrance with Tuxedo-Clad Skeletons
This high-concept look is all about the skeletons and their dapper attire. The cost can vary dramatically based on the quality of the skeletons and garland.
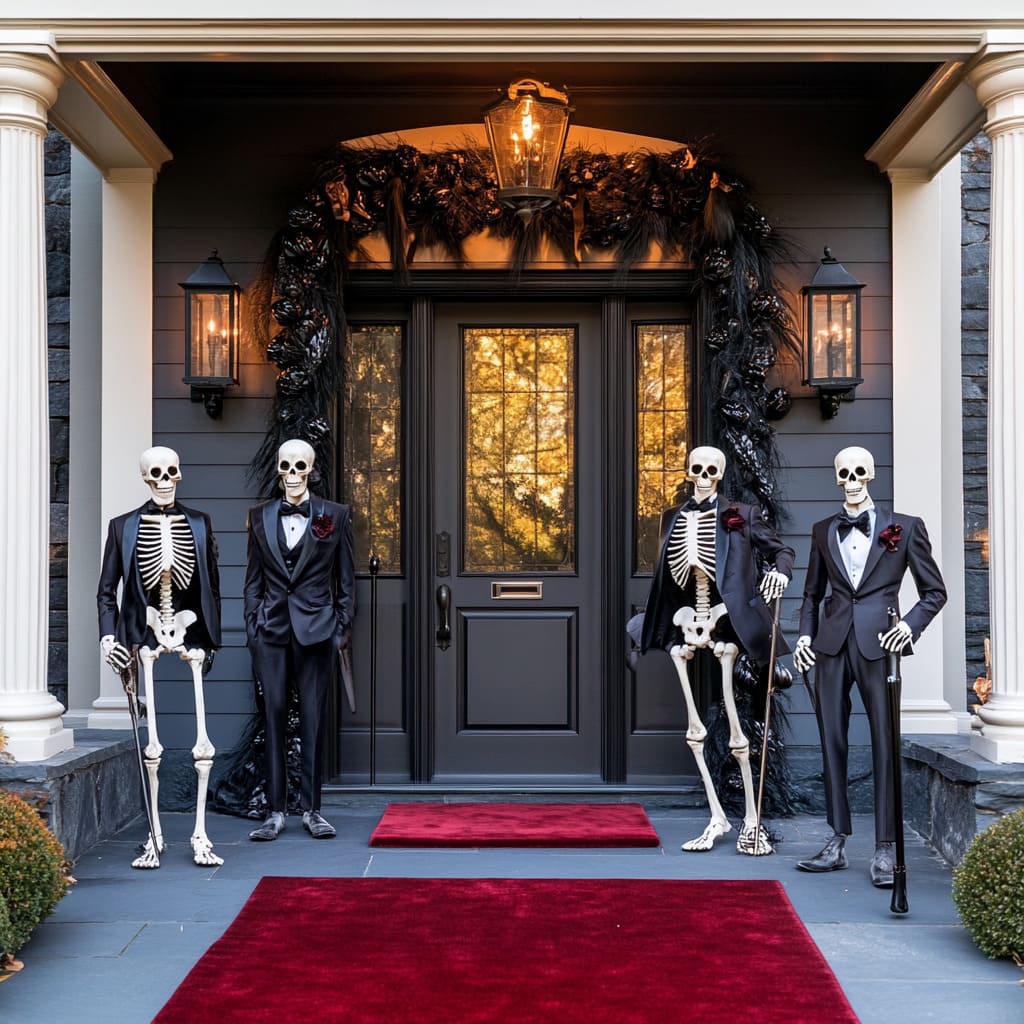
- Main Decor (4 posable skeletons): $200 – $400
- Wardrobe (Tuxedo costumes/props): $80 – $150
- Entry Decor (Garland, runner): $100 – $300
- Lighting (from reflections): Assumes existing
- TOTAL: $380 – $850
Budget alternative: Use two skeletons instead of four and dress them in DIY black felt bow ties and simple white collars instead of full tuxedos. A simple black fabric runner from a party store can replace the carpet for a similar effect at a fraction of the cost.
To make your skeletons look more life-like and less like store-bought props, use thin, clear zip ties to subtly pose their joints. Don’t just stand them up straight. Bend the knees slightly, tilt the head, or position an arm to be gesturing towards the door. For the skeletons flanking the entryway, use heavy-duty fishing line to anchor them to the wall or door frame in a few inconspicuous places. This will prevent them from toppling over in the wind and allow for more dynamic, stable posing.
11. Layer a Dark Door with a Golden ‘Trick or Treat’ Wreath
Love this look but not the price tag of a fancy wreath? You can recreate this chic entryway on a dime. Start with a basic grapevine wreath from a craft store (around $7). Buy a can of metallic gold spray paint ($8) and lightly coat some faux leaves or even real, dried leaves from your yard. Hot glue them to the wreath. The honeycomb balls can be found at any party supply store or online for a few dollars. The ‘Trick or Treat’ sign can be printed at home on cardstock. This entire high-end look can be achieved for under $25 with a little bit of creative crafting. Compare with the similar setup in Idea #6.
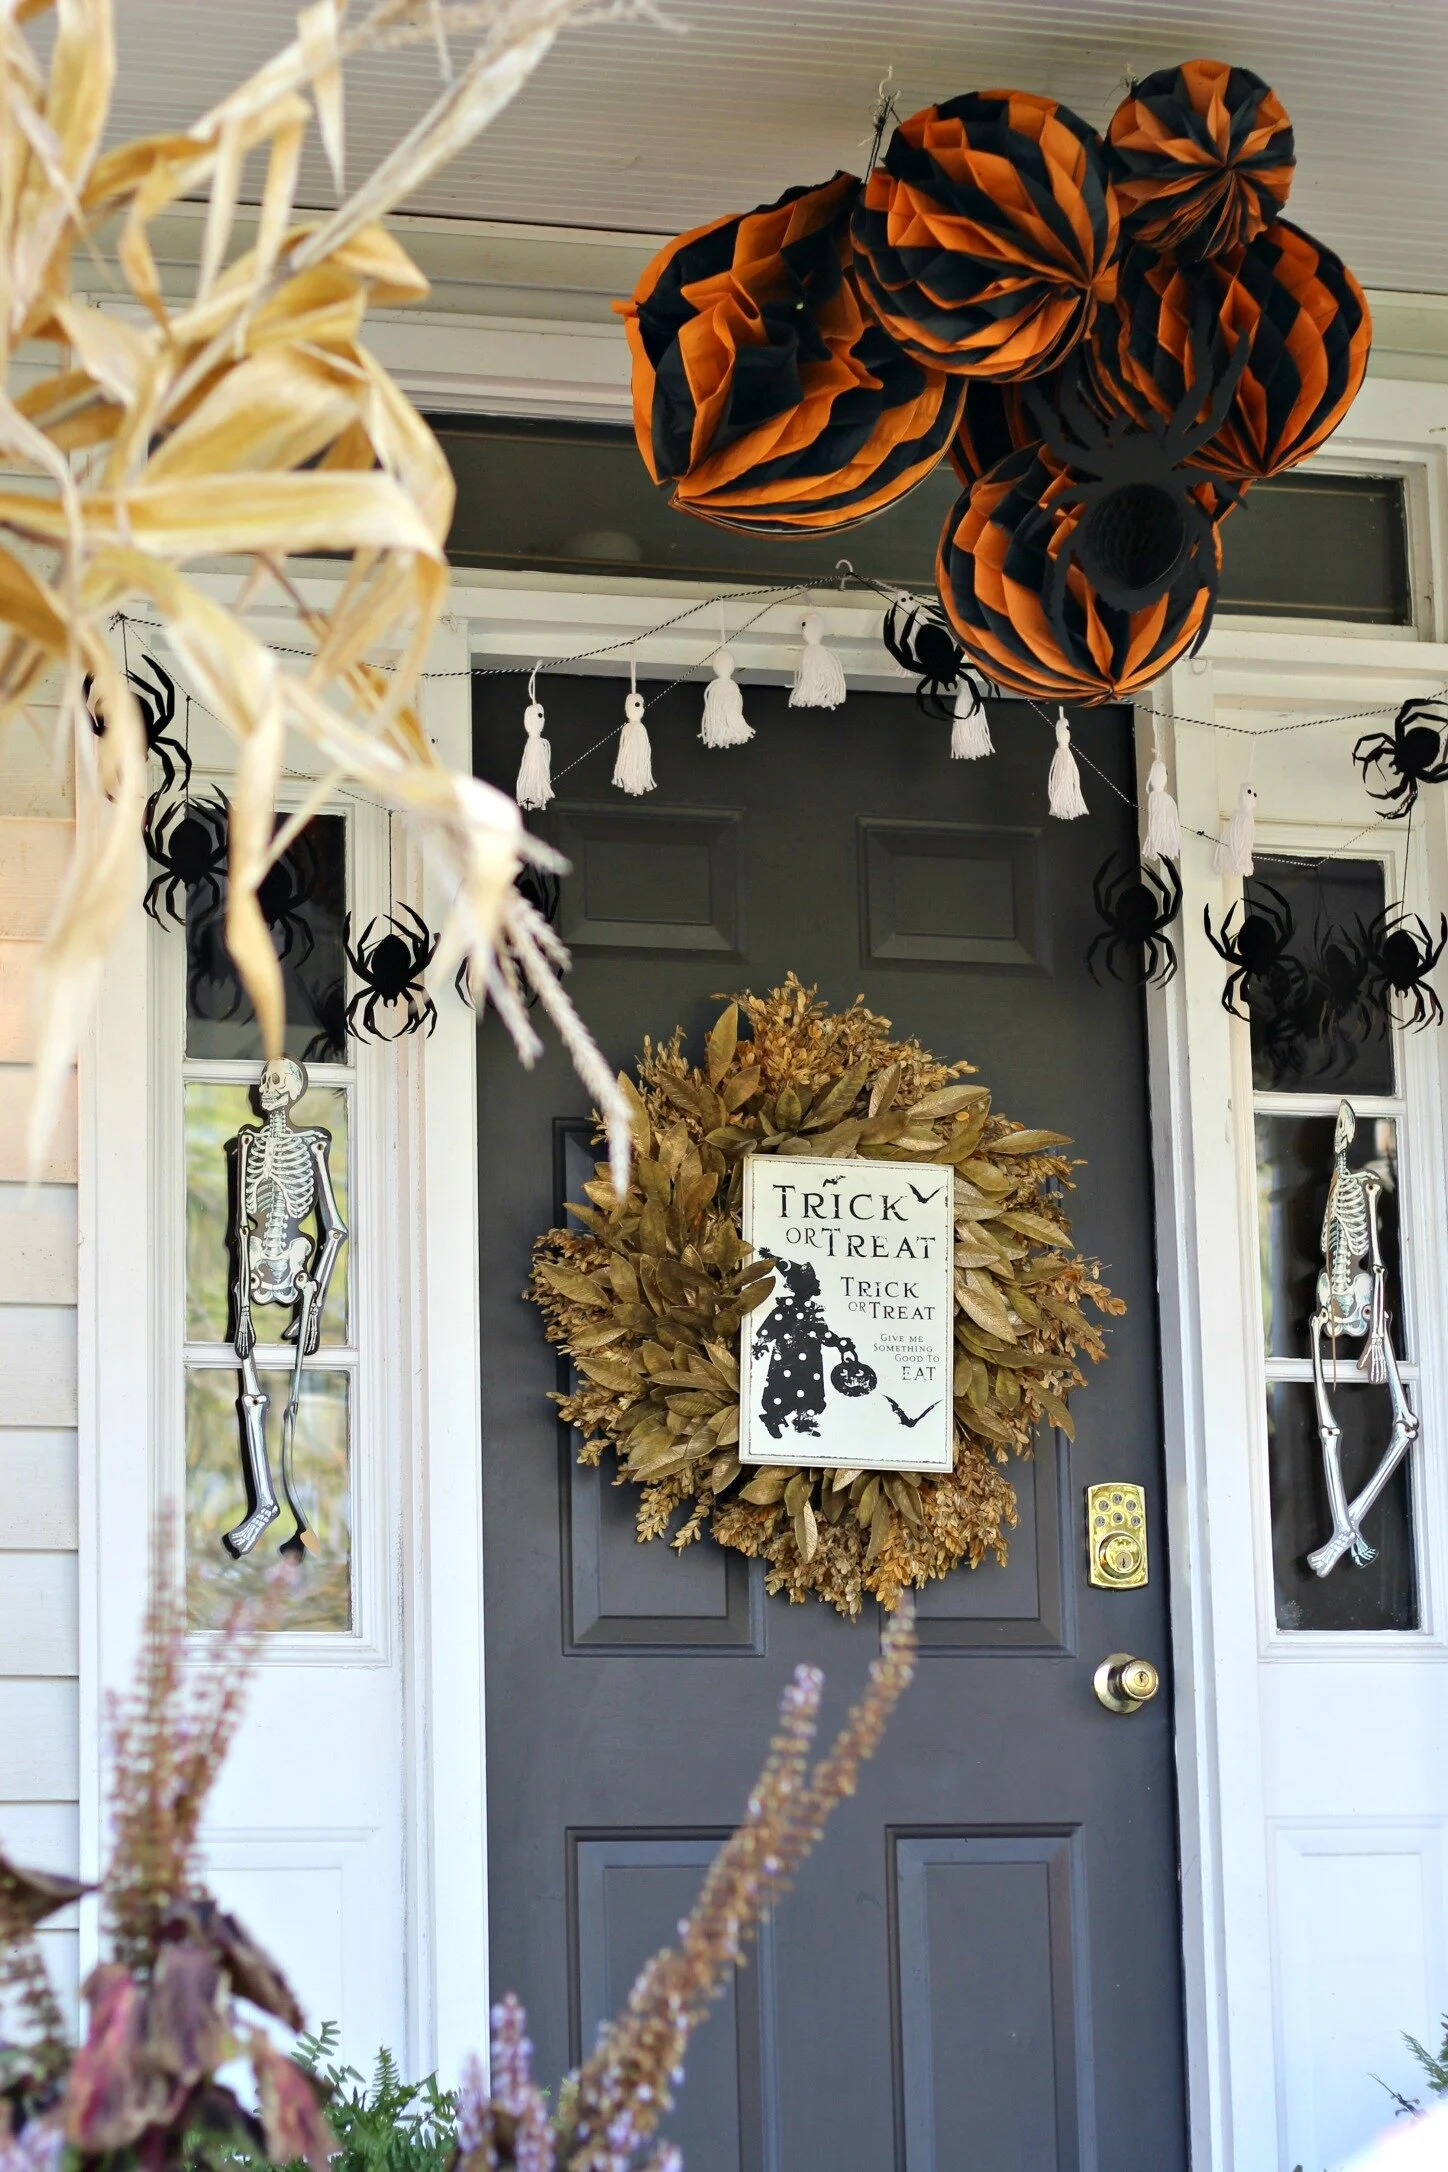
The visual success here comes from a tight, three-color formula: 70% Dark Neutral + 20% Bright Accent + 10% Metallic. The dark gray door provides a moody, sophisticated base that covers most of the visual real estate. The pops of orange from the honeycomb balls are the bold, seasonal accent that screams ‘Halloween.’ Finally, the shimmer of the golden wreath adds that crucial 10% of elegance and light. It breaks up the matte colors and adds a touch of luxury. You could swap the orange for purple or the gold for silver, and the design would still feel balanced and chic.
12. Decorate a Small Porch Bench with Cozy Halloween Touches
This idea is tailor-made for smaller porches or even apartment balconies where you don’t have a lot of floor space. The key is a bench with a compact footprint, typically around 48 inches wide and 18-20 inches deep. The decoration is focused vertically and on the furniture itself, rather than spreading out across the ground. The hanging paper garlands and lanterns draw the eye upward, making the small space feel taller and more intentionally designed. This is a perfect solution for an area of about 30-60 square feet, proving you don’t need a grand entrance to create a charming Halloween moment.
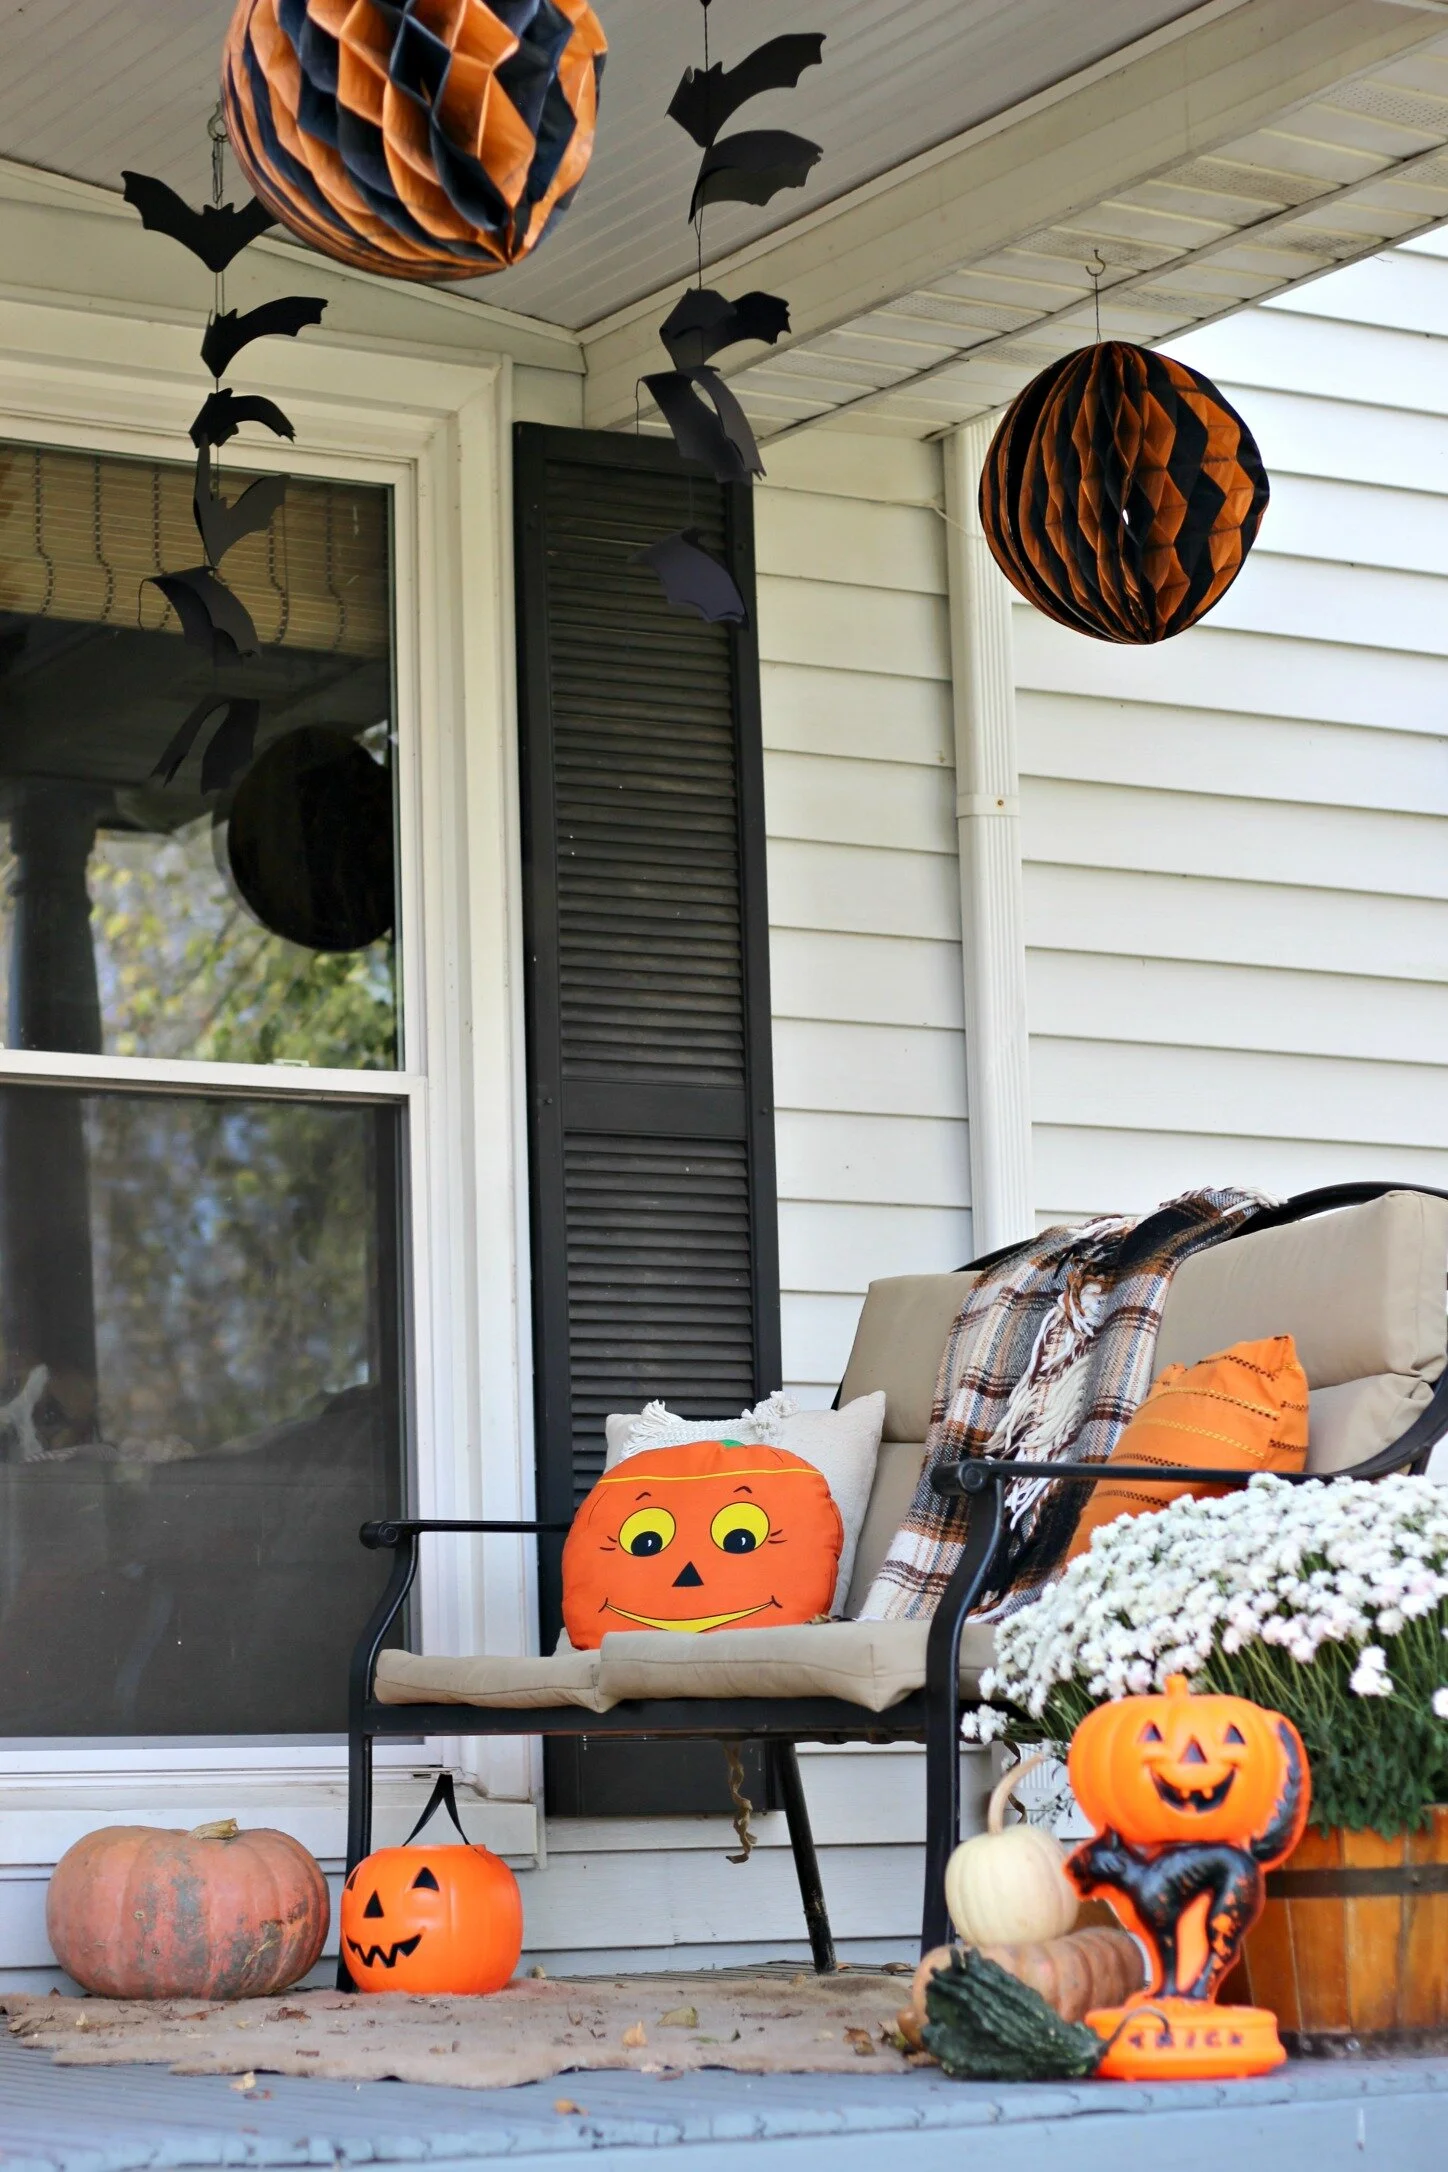
The element that truly pulls this whole vignette together is the plaid throw blanket. Without it, you have a collection of Halloween decorations on a bench. With it, you have a cohesive, intentional design. The blanket introduces texture, warmth, and a pattern that ties the tan cushions, black bench, and orange pillows together. It’s the grounding element that adds a critical layer of ‘cozy’ to the ‘spooky,’ making the space feel like an inviting spot to sit and enjoy an autumn evening, rather than just a temporary display. It’s the textural heart of the design.
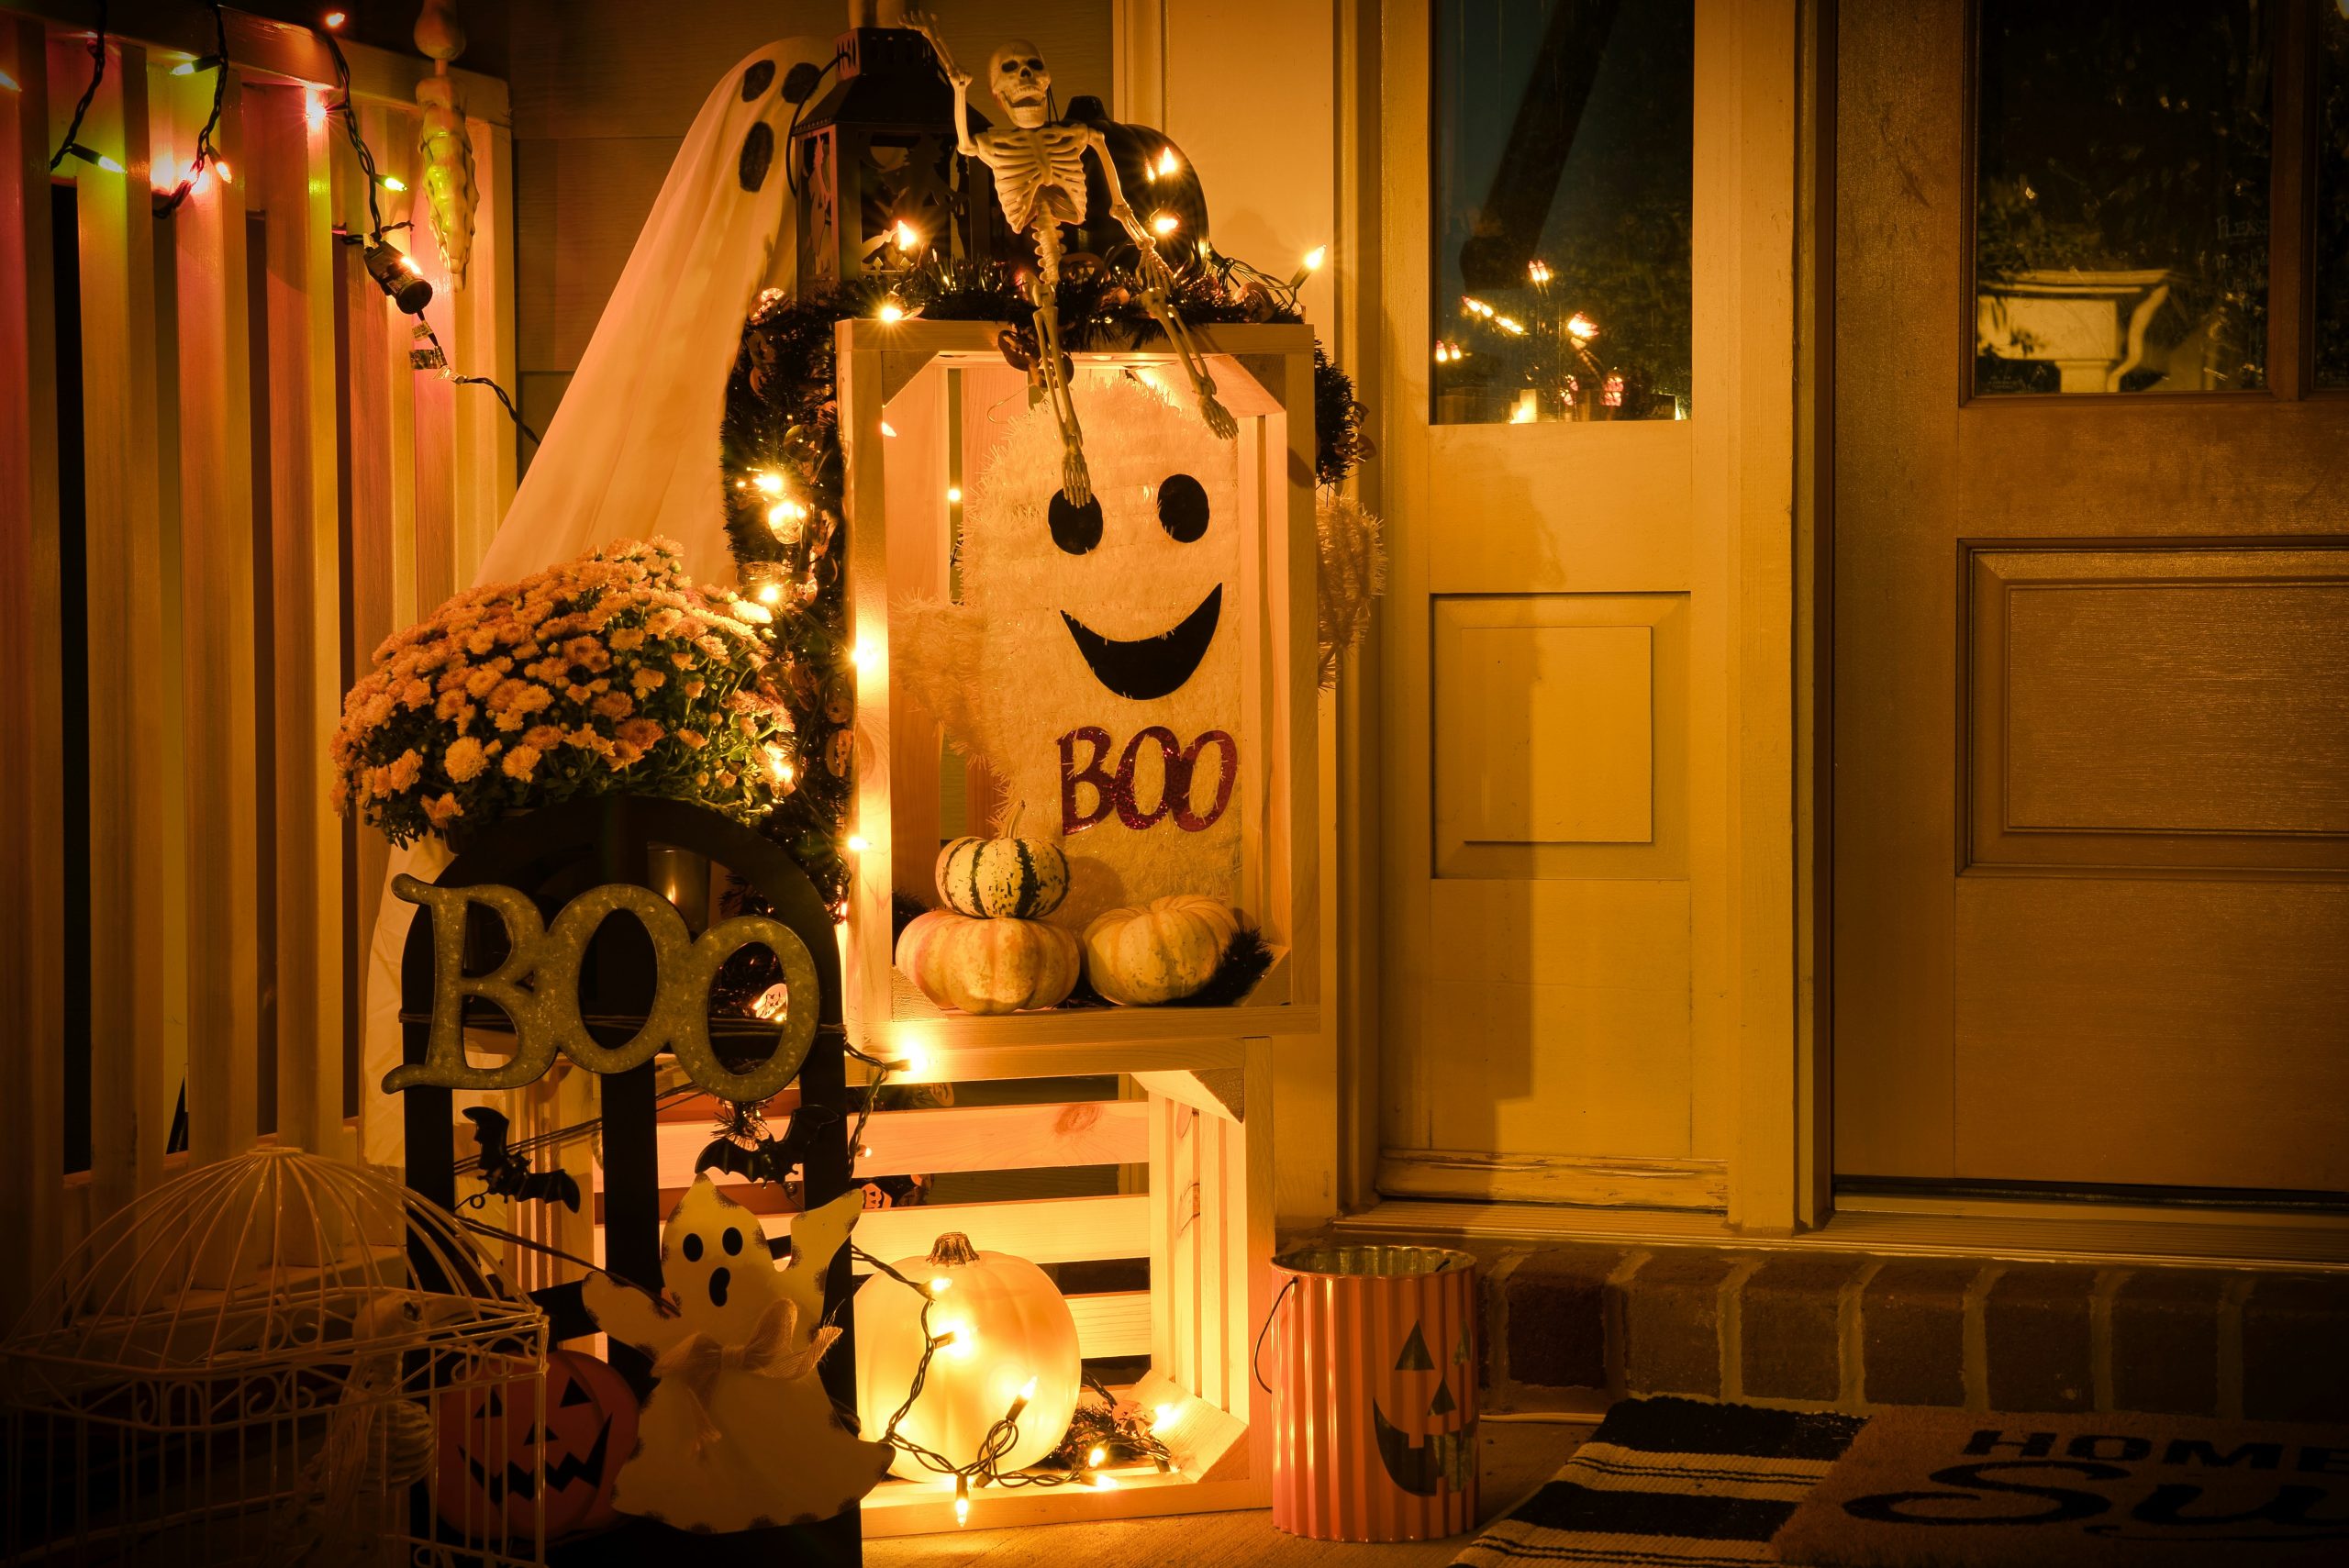
13. Create a Glowing Porch Display with a Crate and String Lights
Building a rustic display stand from wooden crates is a simple project that adds height and focus to your porch decor. It should take about 30 minutes to assemble, with material costs around $30-50 for the crates.
- Acquire three to four wooden crates from a craft store or home improvement store.
- Paint the crates white with chalk paint for a rustic, matte finish. Allow them to dry completely.
- Arrange the crates in an interesting, slightly asymmetrical stack. Place the largest one on the bottom for stability.
- Secure the crates to each other using small dabs of construction adhesive or a couple of small wood screws for a more permanent hold.
- Drape your string lights around the structure, weaving them in and out of the openings.
- Place your pumpkins, skeleton, and other decor on the different levels.
This design works so well because it creates a clear focal point. Instead of scattering decorations across the porch, everything is gathered into one glowing, multi-level display. The verticality of the stacked white crates draws the eye, making the arrangement feel more significant and organized. The warm, yellow-toned string lights then unify all the different elements—the pumpkins, the ghost, and the skeleton—bathing them in a single, cohesive light source. This creates a sense of warmth and magic, turning a simple collection of props into a purposeful and inviting scene.
14. A Farmhouse-Style Halloween Wreath with White Pumpkins
Before you commit to this charming farmhouse wreath, run through this quick checklist to make sure it’s the right fit for your door and your style.
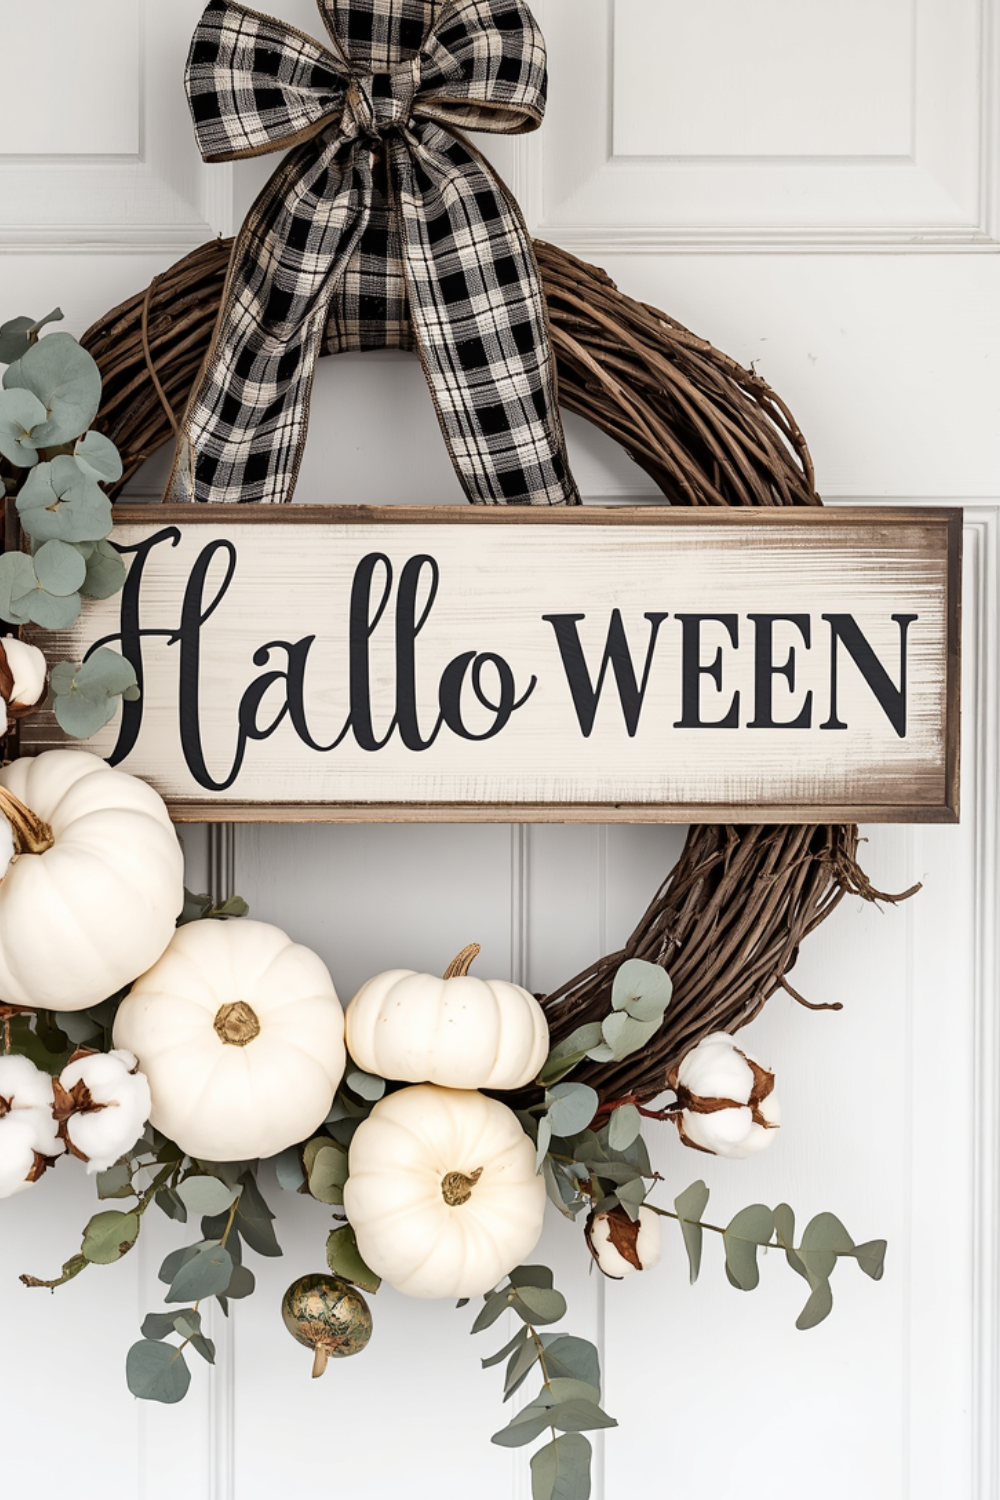
- Measure Your Door: A standard front door is 36 inches wide. For a wreath of this style, you’ll want it to be between 20 and 24 inches in diameter to look properly scaled. Anything smaller might look lost.
- Check Your Materials: Are you using real eucalyptus and cotton? While beautiful, they can be fragile and messy. Faux versions will last longer and stand up to the elements much better.
- Consider Your Color Palette: This wreath works best on a door that provides some contrast. A dark door (black, navy, or dark green) or a brightly colored one will make the white and cream elements pop. On a white door, it might blend in too much.
If you choose to use real cotton bolls and eucalyptus sprigs for your wreath, be aware of their delicate nature. The cotton can become discolored and matted if it gets wet, and the eucalyptus will dry out and become brittle over time, shedding leaves whenever the door is opened or closed. This wreath is best suited for a door that is well-protected by a deep porch overhang. To maintain it, you’ll want to gently dust it once a week and be prepared to replace any sprigs that break. For a zero-maintenance version that gives a nearly identical look, opt for high-quality faux florals from the start.
15. A Festive Autumn Wreath with Central ‘BOO’ Letters
A wreath this full and dense can be surprisingly heavy. Before hanging it, make sure you have a hook that can handle the weight. A simple, over-the-door metal hanger is usually the best bet, as magnetic hooks or suction cups will likely fail, sending your beautiful creation crashing to the ground. Also, be mindful of your door’s clearance. A very thick wreath can sometimes get scraped or crushed between the main door and a storm door, so measure the gap before you buy or build a wreath this substantial. It’s a practical step that can save you a lot of frustration.
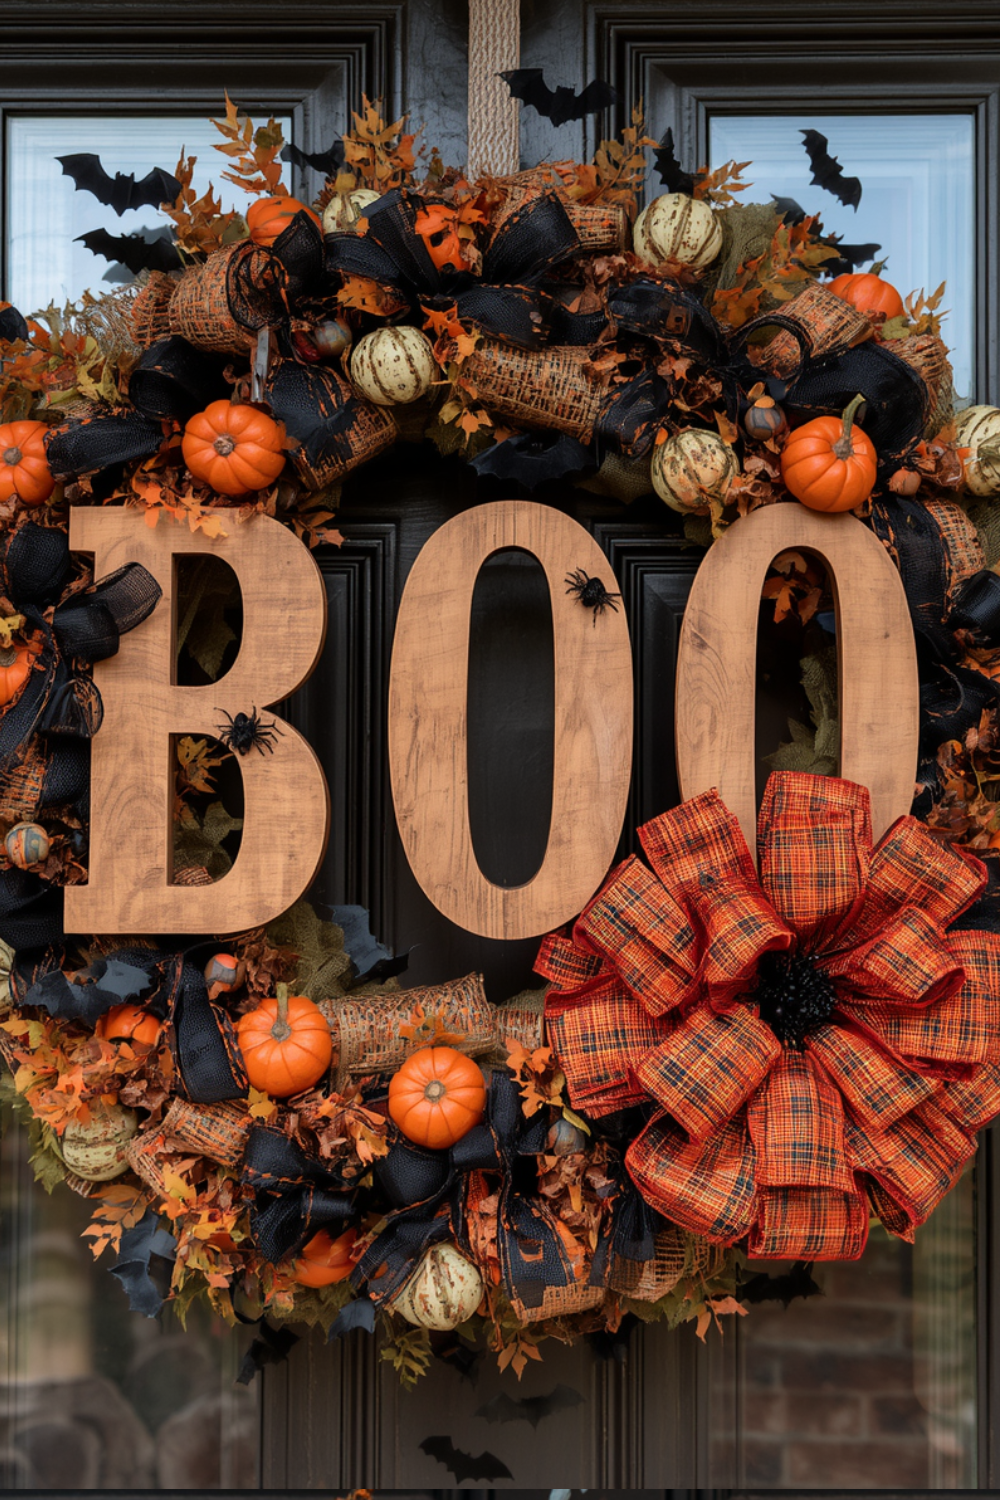
The key to making a wreath with lettering feel integrated is to partially obscure the letters with other elements. Notice how the tips of the leaves and the gourds slightly overlap the edges of the ‘BOO.’ This makes it look like the letters are nestled within the wreath, not just stuck on top of it. When you’re making your own, intentionally glue a few leaves or a small pumpkin so it just covers a corner of a letter. This simple trick adds depth and makes the entire piece look more professional and cohesive.
16. A Dramatic Gothic Wreath with Black Roses and Skulls
The single element that defines this wreath is its unapologetically dark and dramatic color palette. While other wreaths might use black as an accent, here it is the dominant base color, from the roses to the fern foliage. This commitment to black is what gives the wreath its distinctly gothic and moody character. The pops of orange from the pumpkins and the metallic glint of the skulls are there to provide contrast, but they are visitors in a world of shadow. Remove the black base, and the entire spooky, elegant aesthetic collapses. It’s a bold choice that makes a powerful statement. This offers a great contrast to the more rustic style of Idea #14.
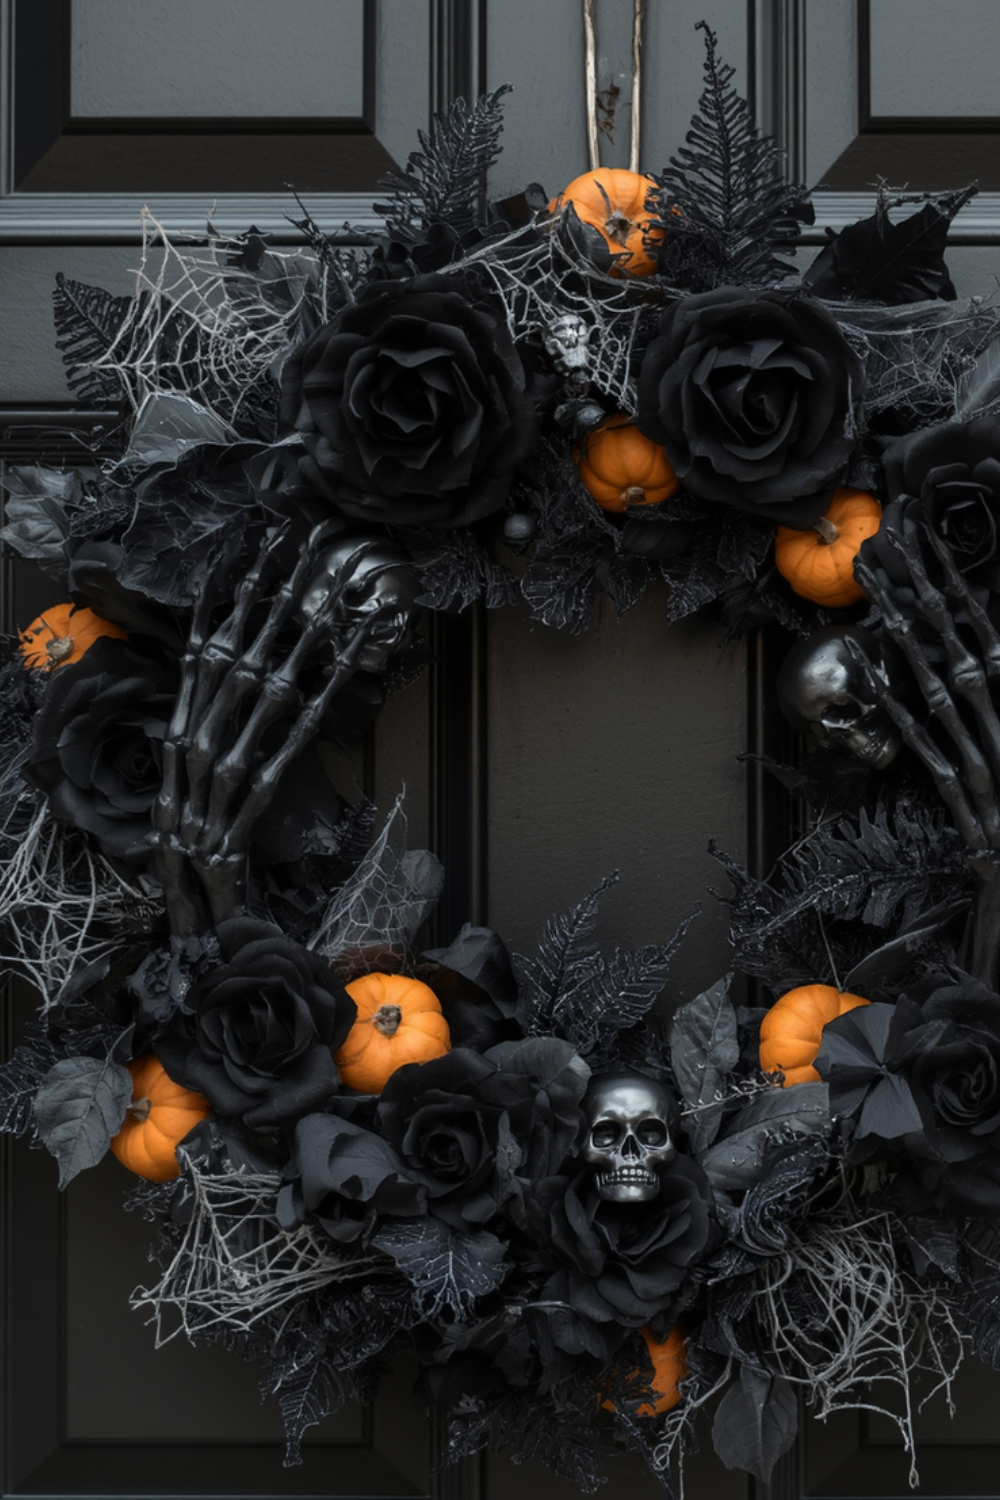
This wreath’s visual formula is all about balancing texture and color for a high-drama effect. Think of it as 70% Black Textures + 20% Color Pop + 10% Metallic Accent. The black roses, foliage, and base provide a deep, textured canvas. The small orange pumpkins are your 20% color pop, strategically placed to break up the darkness. The silver skulls and skeletal hands serve as the 10% metallic accent, catching the light and adding a touch of macabre glamour. You could swap the orange for a deep blood red or the silver for gold, and the gothic formula would still hold true.
17. Line a Walkway with Glowing Jack-o’-Lantern Stakes
This is one of the most budget-friendly ways to get a big impact for outdoor Halloween decor. You can find sets of these glowing pumpkin stakes at places like Walmart, Target, or even the Dollar Tree, often for around $10-$20 for a set of four or five. Because they are spaced out, you can cover a lot of ground—like a whole walkway—with just a couple of sets. It’s a fantastic way to create a festive and slightly spooky path for trick-or-treaters without breaking the bank. The cost-to-impact ratio is incredibly high with this idea.
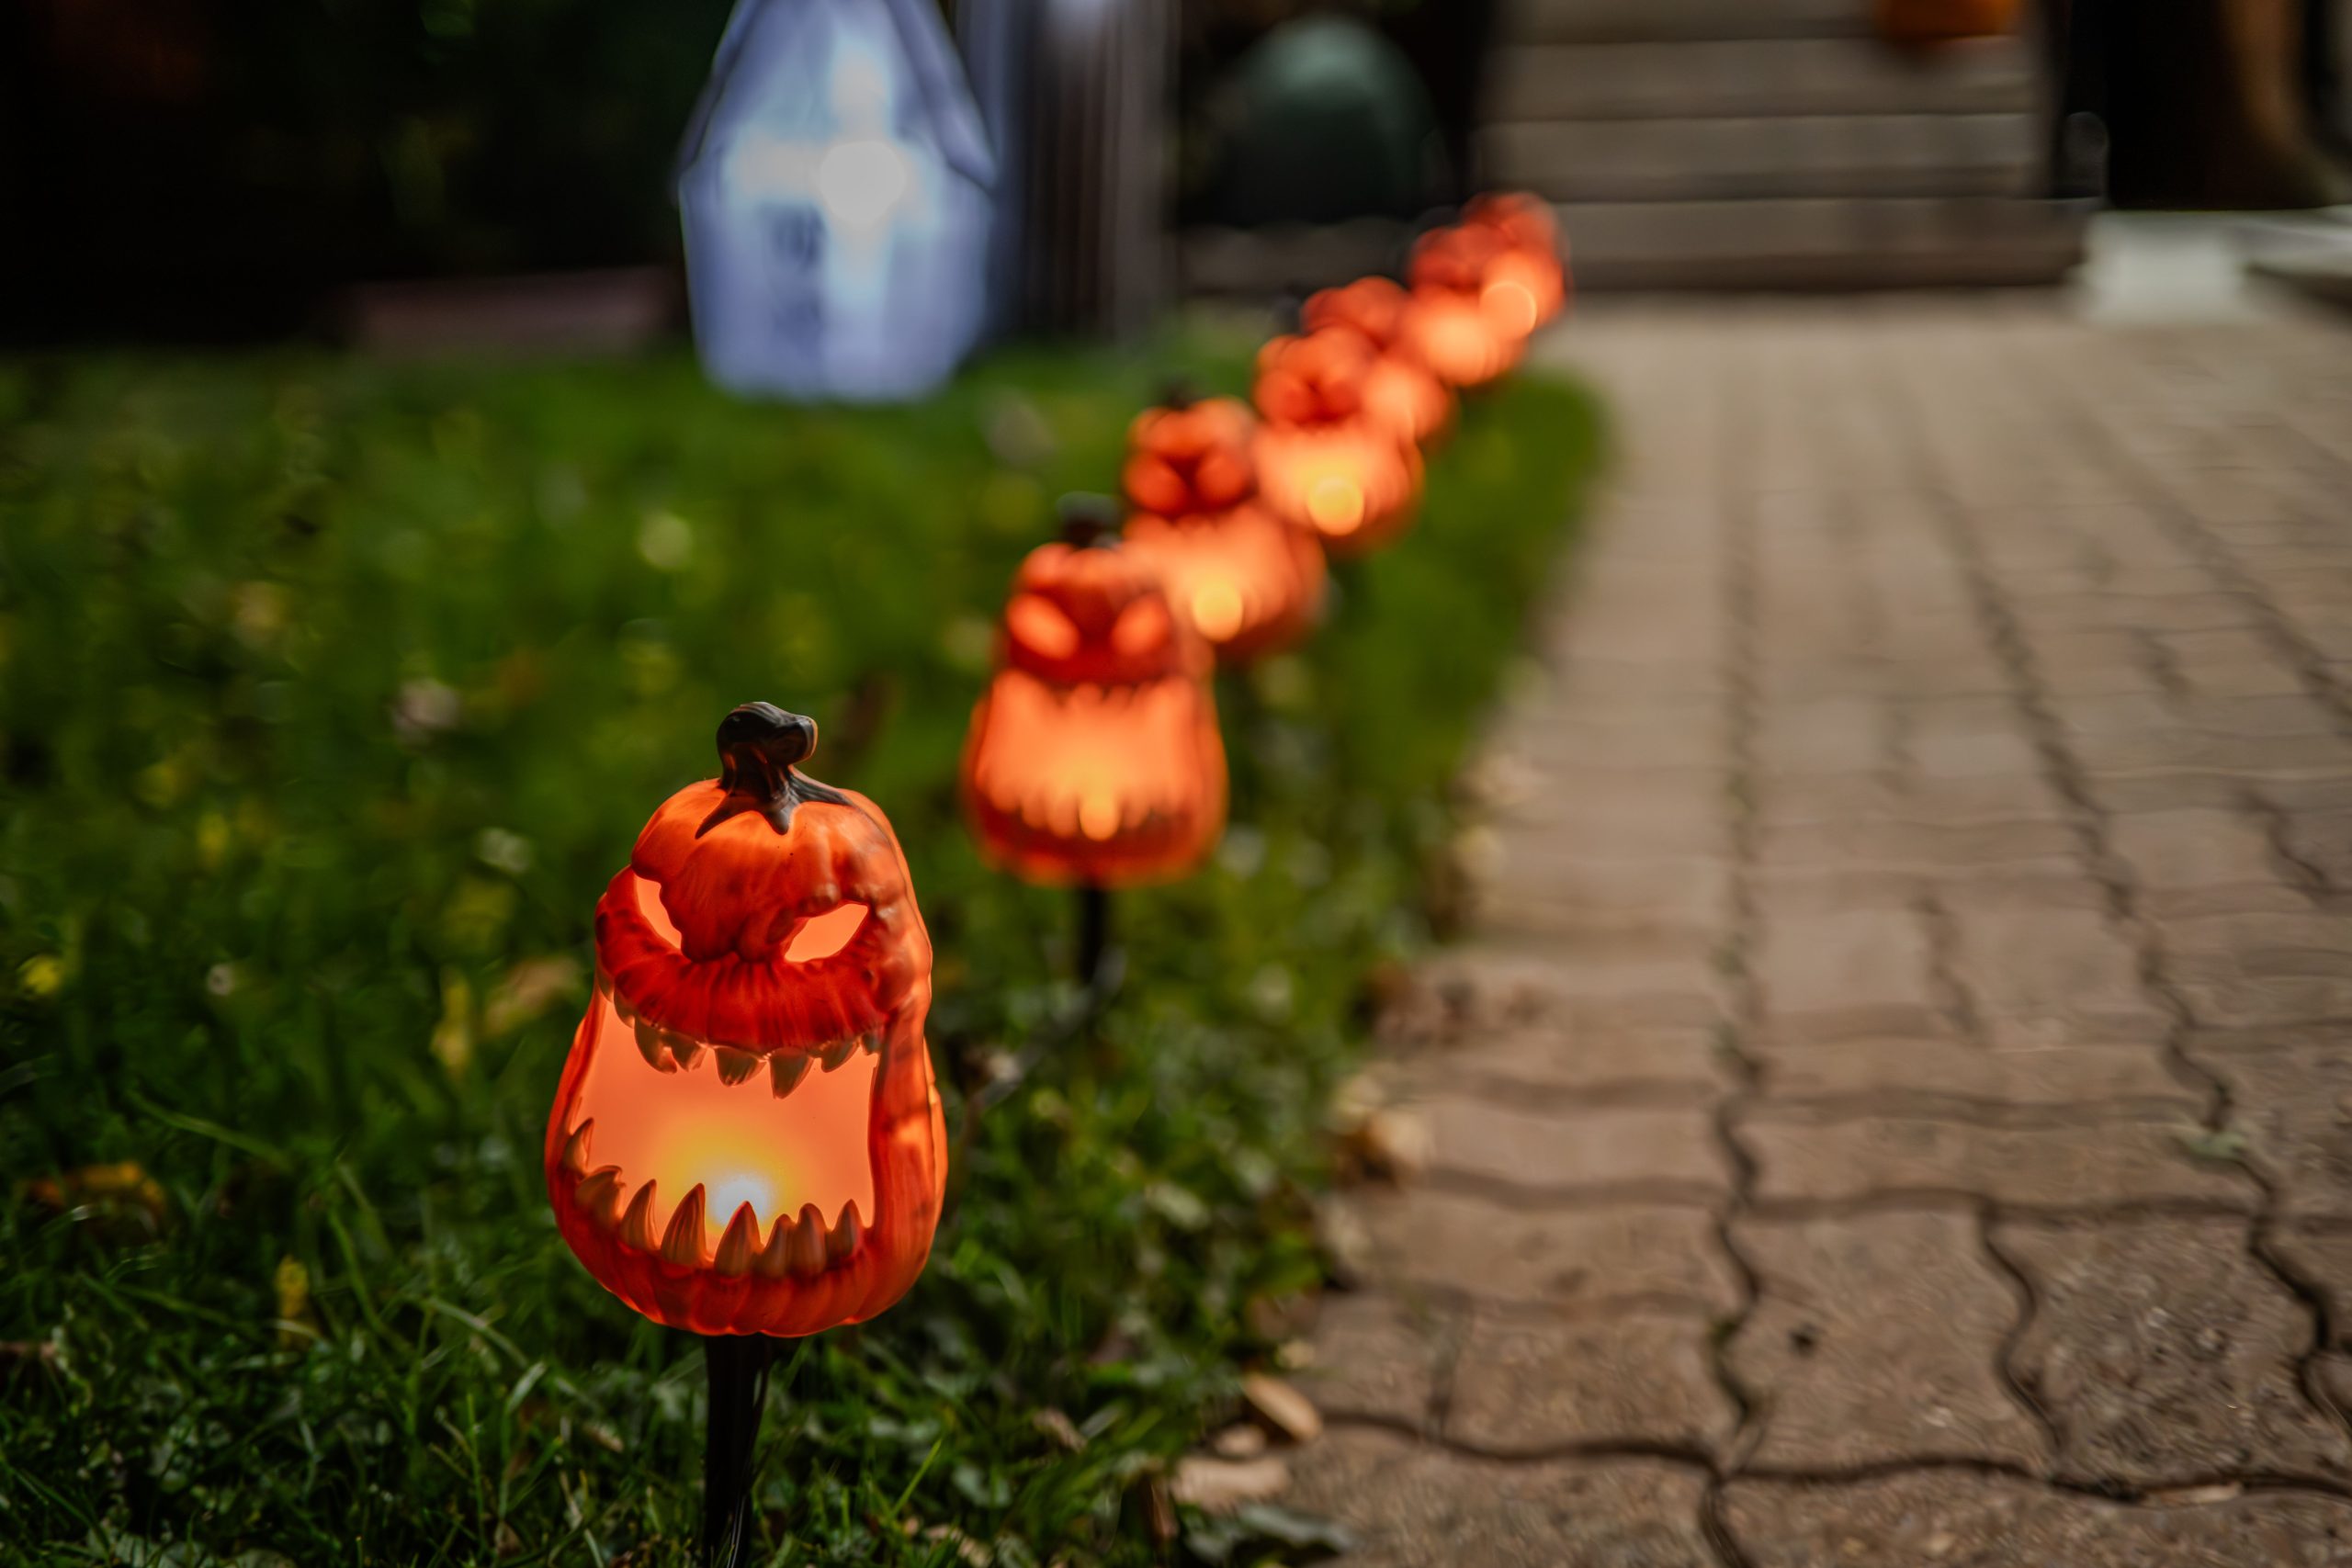
This idea works for almost any size yard, but it’s most effective along a defined edge, like a walkway, driveway, or garden bed. For a short path (10-15 feet), one set of 4-6 stakes spaced about 3 feet apart will look great. For a longer walkway (30+ feet), you’ll want to use at least two or three sets to maintain a sense of rhythm and density. The key is the spacing: place them close enough to create a continuous line of light, but far enough apart that each individual jack-o’-lantern face is distinct. Don’t be afraid to mix them with other decorations like the ghost in the background.
18. Simple and Spooky Carved Pumpkins on Concrete Steps
The power of this image lies in its simplicity and contrast. The bright, warm orange of the two illuminated pumpkins stands out dramatically against the cool, dark tones of the concrete steps and the evening shadows. By limiting the display to just two well-carved pumpkins, each one becomes a focal point. One is a classic spooky face, and the other is graphic text. This variation keeps it interesting. It’s a reminder that you don’t need an elaborate, cluttered display to make a strong Halloween statement. Sometimes, less really is more, especially when you have such a strong color and light contrast.
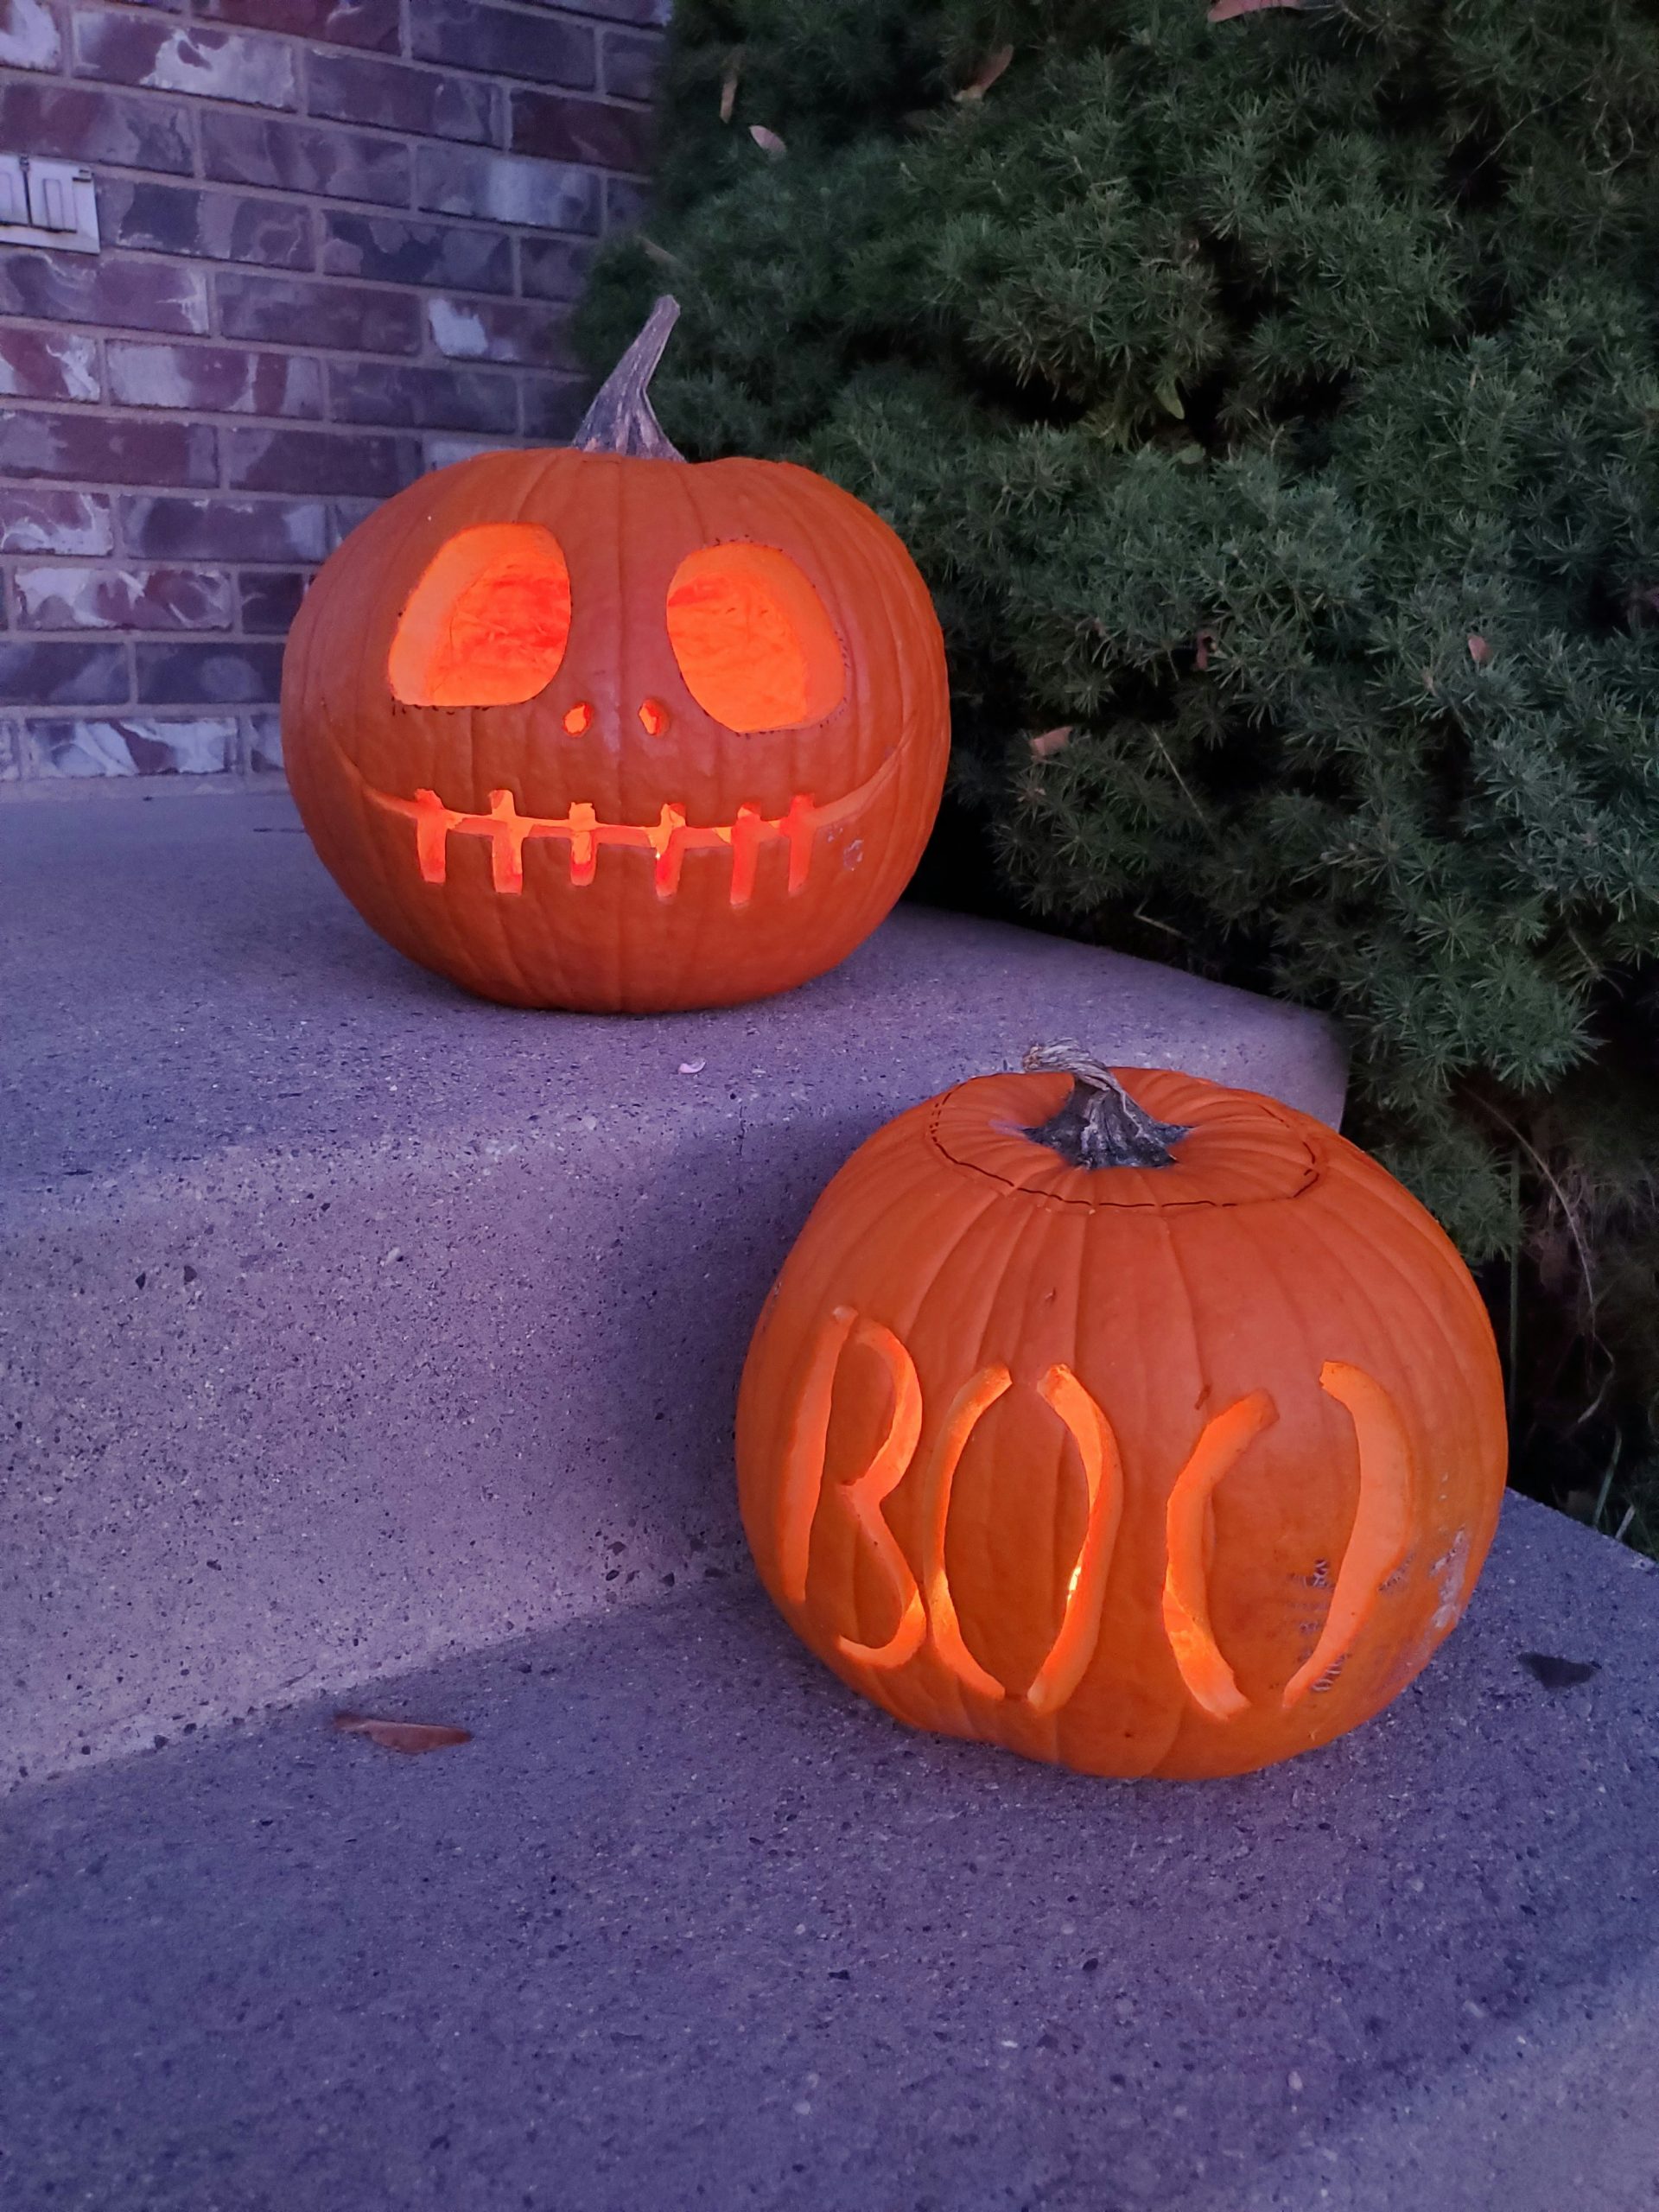
In a world of over-the-top animatronics and giant inflatables, there’s a growing appreciation for classic, handcrafted Halloween traditions. Carving pumpkins is a timeless activity, and a display like this taps directly into that nostalgic feeling. It feels authentic and personal. This trend is about rejecting the pressure to have the biggest, most expensive display on the block and instead focusing on the simple, joyful act of creating something with your own hands. It’s a return to the roots of Halloween, and its timeless appeal ensures it will never go out of style.
19. Create a Cozy Pumpkin Centerpiece with Candles and Autumn Leaves
When creating a centerpiece with multiple glowing elements, the key is to vary the height and intensity of your light sources. Notice how the tall pillar candles, the shorter votives, and the illuminated pumpkin all have different heights and emit slightly different qualities of light. This layering creates visual depth and a much more dynamic, interesting glow than if all the lights were at the same level. Place your tallest candle toward the back and arrange the shorter elements forward to create a pleasing triangular composition that draws the eye inward.
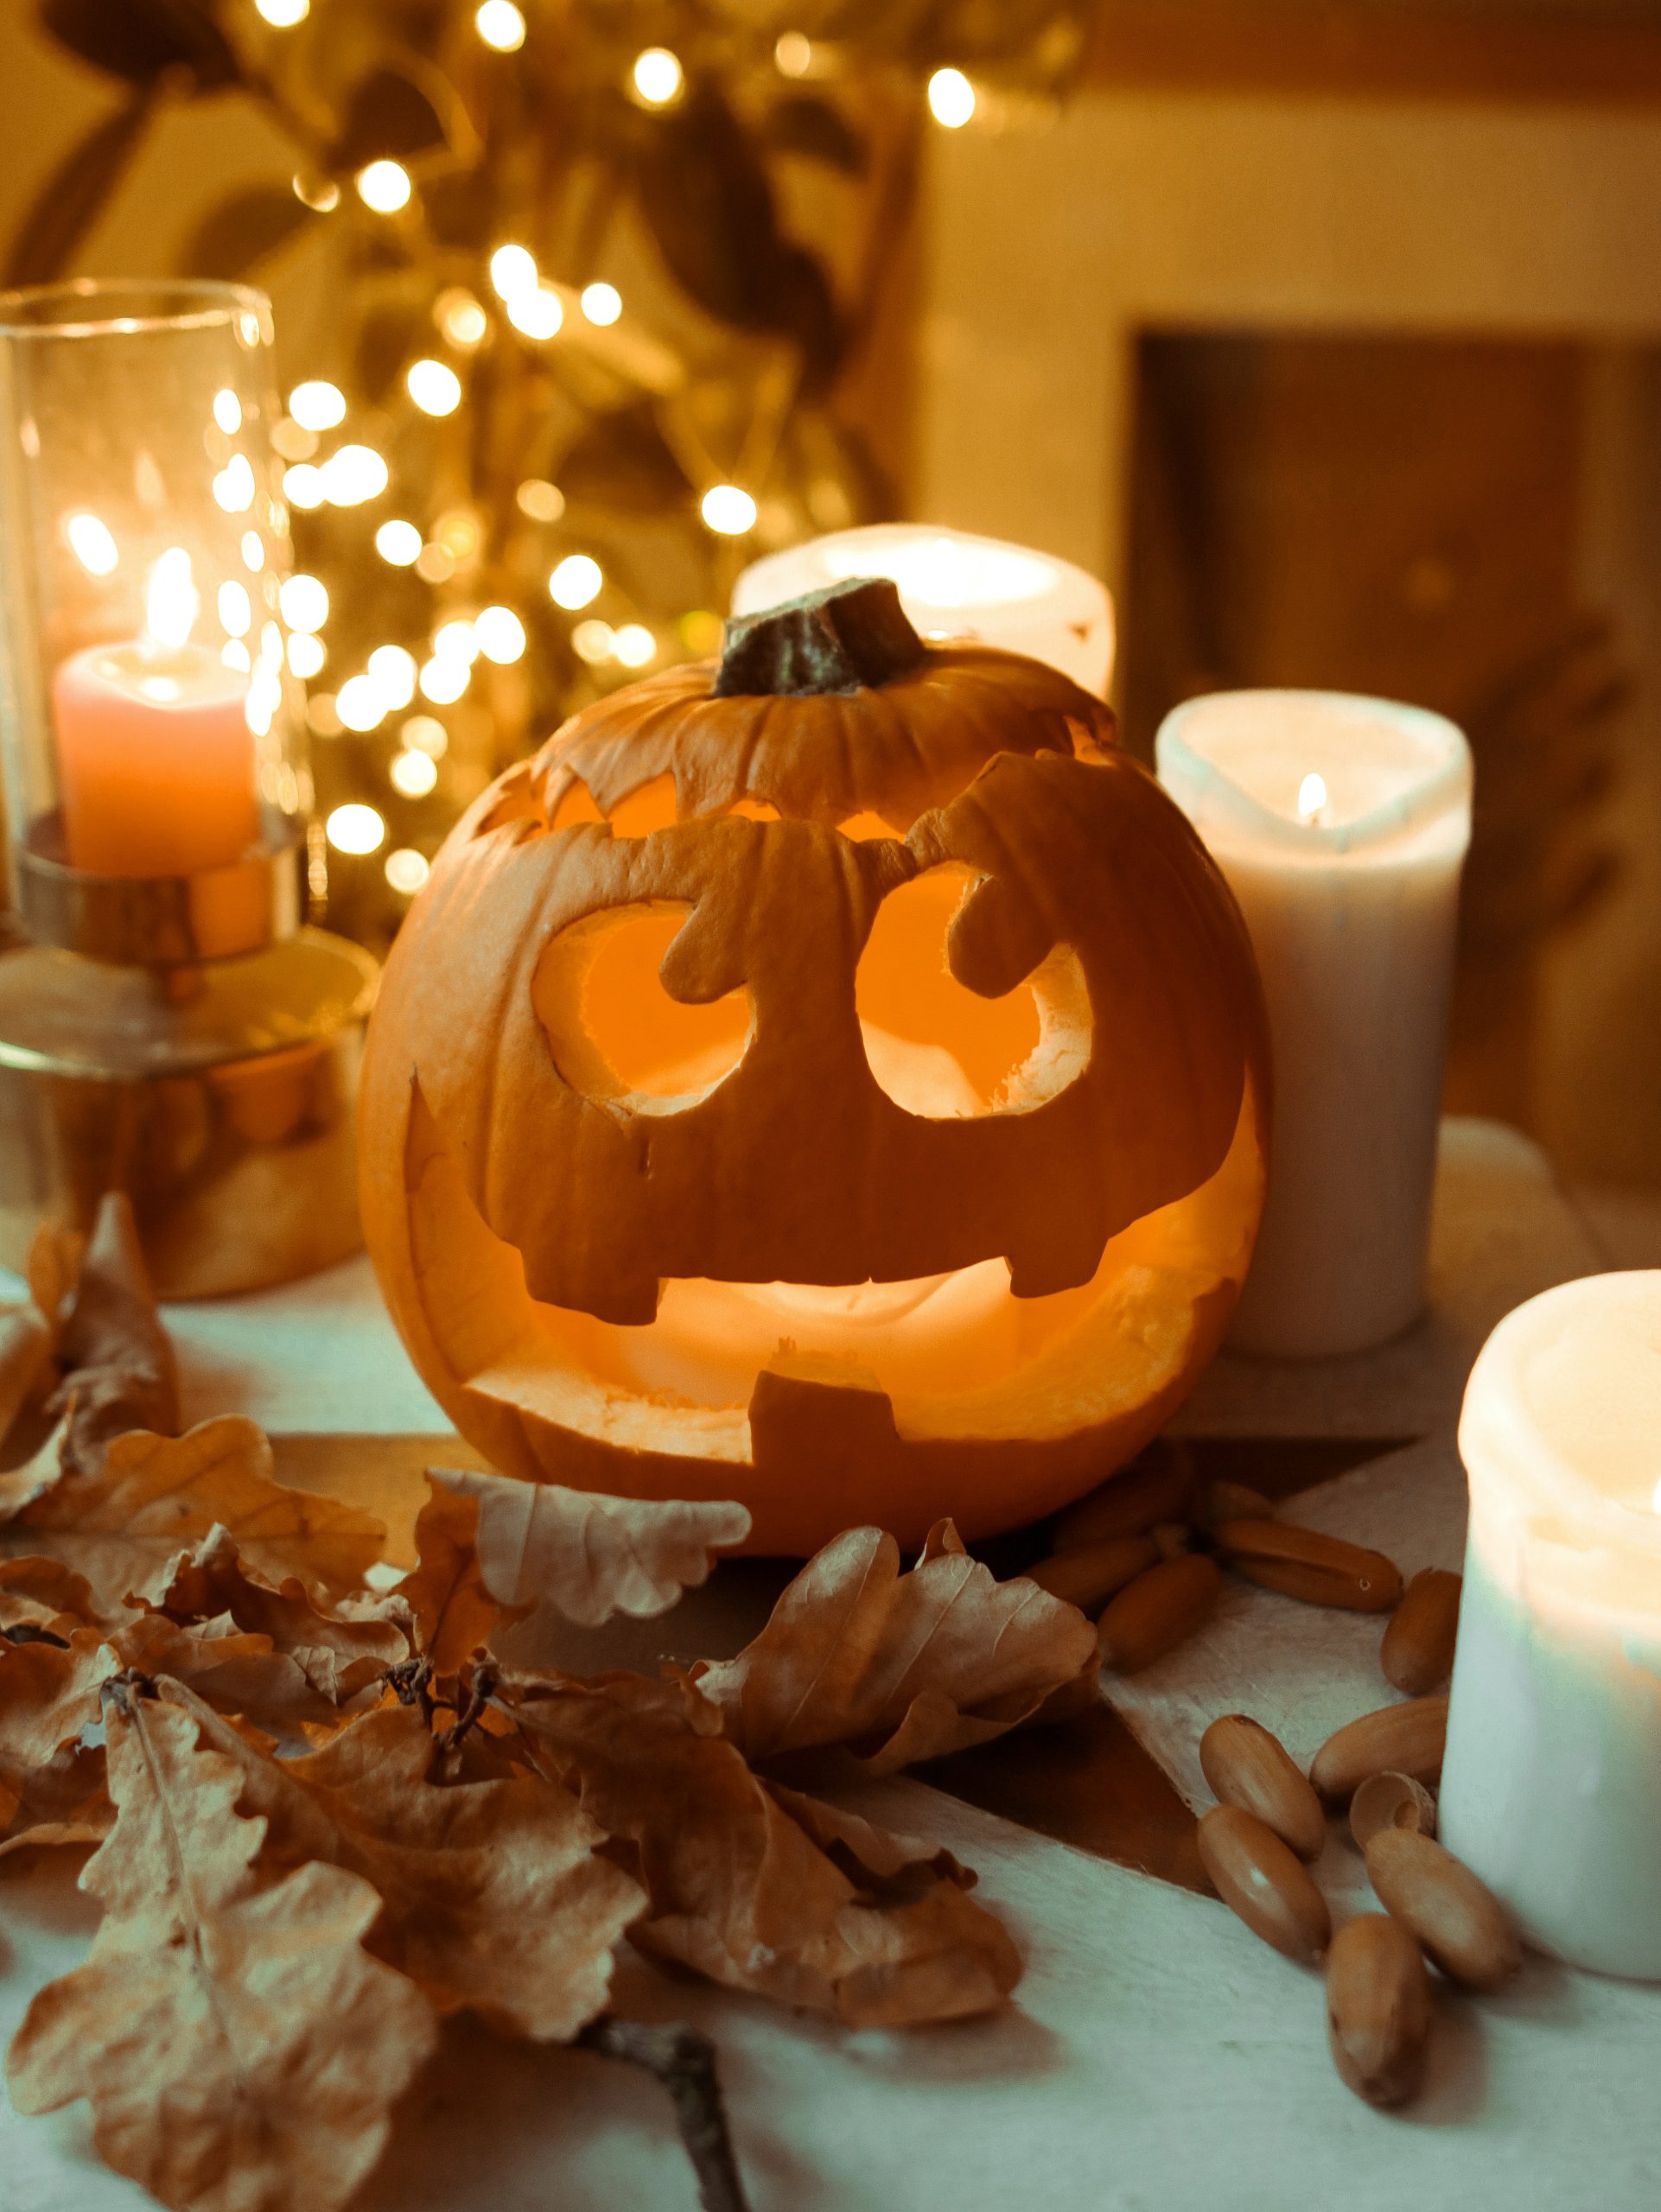
Let’s build this glowing centerpiece. It’s a quick project that delivers maximum cozy vibes, taking about 45 minutes (including pumpkin carving) with a low material cost if you gather leaves from outside.
- Carve your pumpkin with a simple, expressive face. A ‘scared’ or ‘surprised’ look works well for this setup. Place a battery-operated tea light inside.
- On a tray or a protected tabletop, place your carved pumpkin as the main anchor.
- Arrange several LED pillar candles of varying heights around the pumpkin.
- Scatter a generous amount of dried autumn leaves (like oak or maple) around the base of the candles and pumpkin.
- Tuck in a few acorns or small pinecones for added texture.
- For extra magic, place a string of fairy lights in the background.
20. Add Playful Halloween Spirit to Houseplants with Plant Picks
The magic of this idea is its sheer simplicity and unexpectedness. A houseplant is typically just a plant—a piece of everyday home decor. By adding these small, cheeky plant picks, you instantly transform it into a part of your seasonal celebration. It’s the element of surprise that makes it so delightful. It shows a level of detail and a sense of humor in your decorating, proving that you don’t need to cover every surface in your home with pumpkins to be festive. Sometimes the smallest, most whimsical touch can have the biggest impact and bring the most smiles.
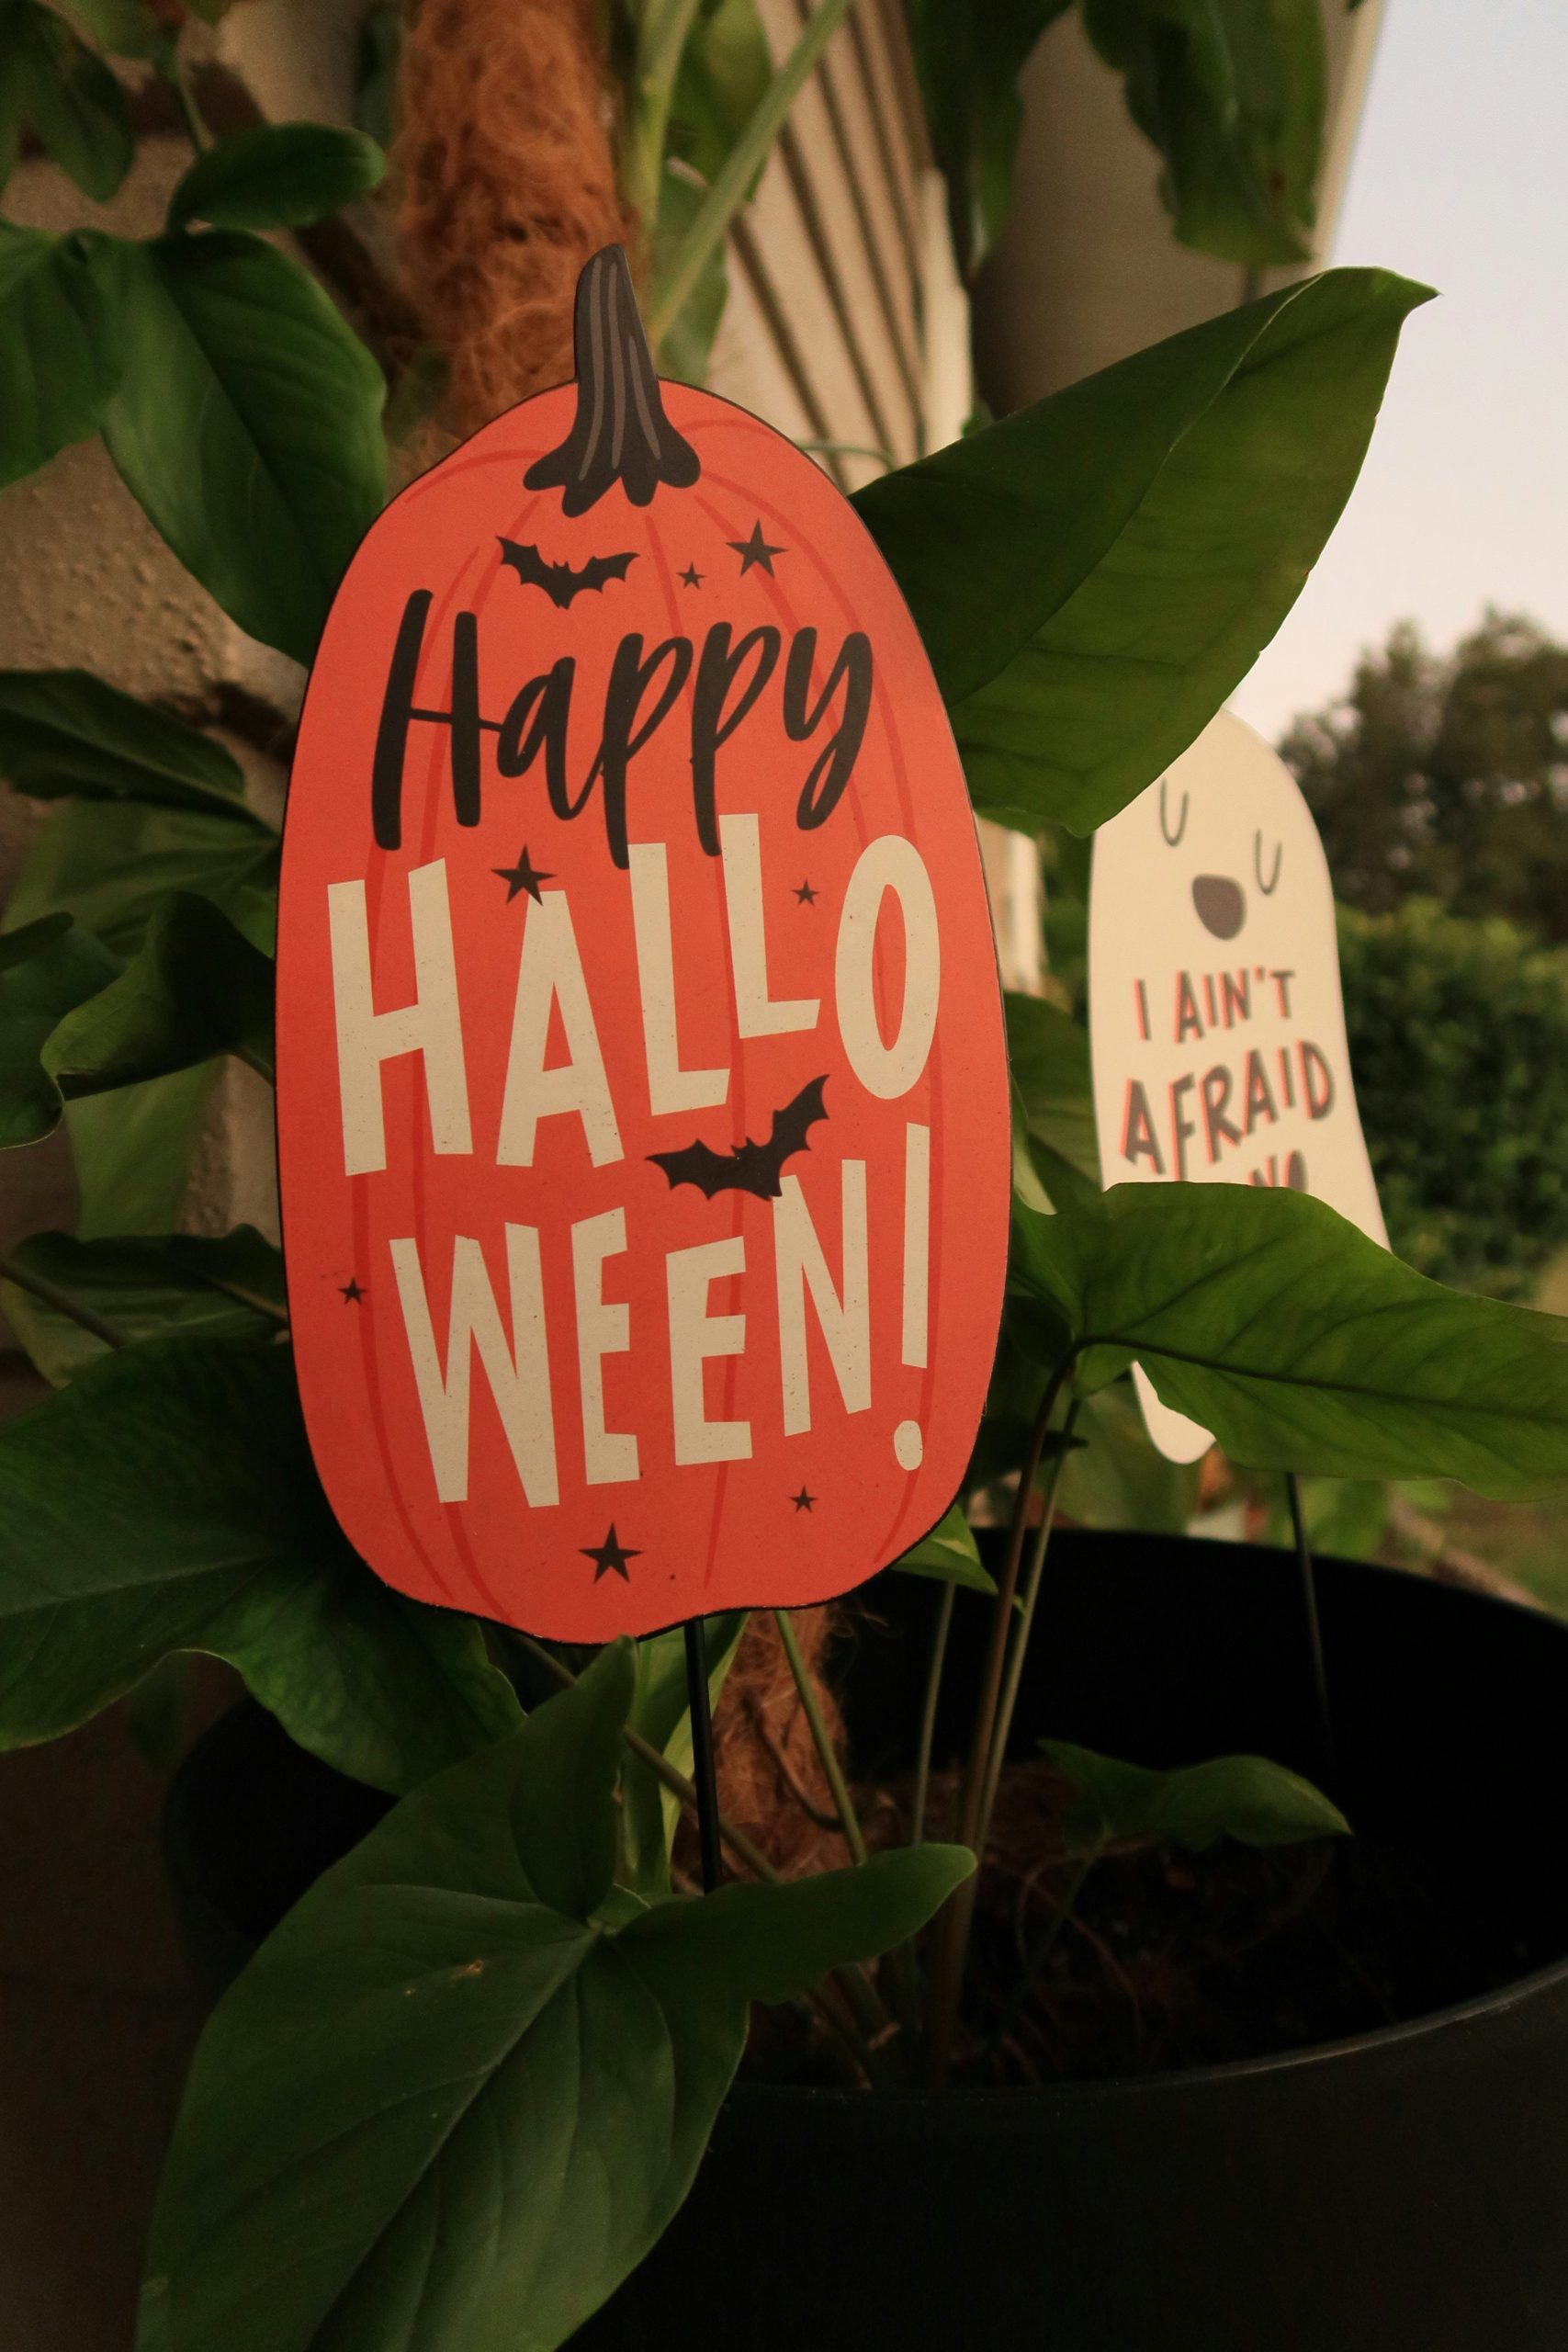
This is a super cute and easy way to decorate, but be mindful of your plant’s health. Make sure the stakes of the plant picks are clean before you insert them into the soil to avoid introducing any bacteria. More importantly, don’t let the decorations block sunlight from reaching the plant’s leaves. Position them in a way that is visible and fun but doesn’t cast a large shadow over the foliage. For a plant that needs a lot of light, this could be a problem if left in place for the entire season. Think of it as a temporary accessory, not a permanent addition.
21. A Simple and Spooky DIY Mesh Ghost Decoration
This is the epitome of a Dollar Tree DIY success story. The core material is white decorative mesh (often sold in rolls for wreath-making), which is incredibly inexpensive. You can create a whole army of these little ghosts for just a few dollars. A foam ball for the head and some black felt scraps for the face are all you need to complete the look. It’s a perfect project for kids and a fantastic way to add a touch of handmade charm to your garden beds or potted plants without spending more than the cost of a cup of coffee. It proves that clever material usage trumps a big budget every time.
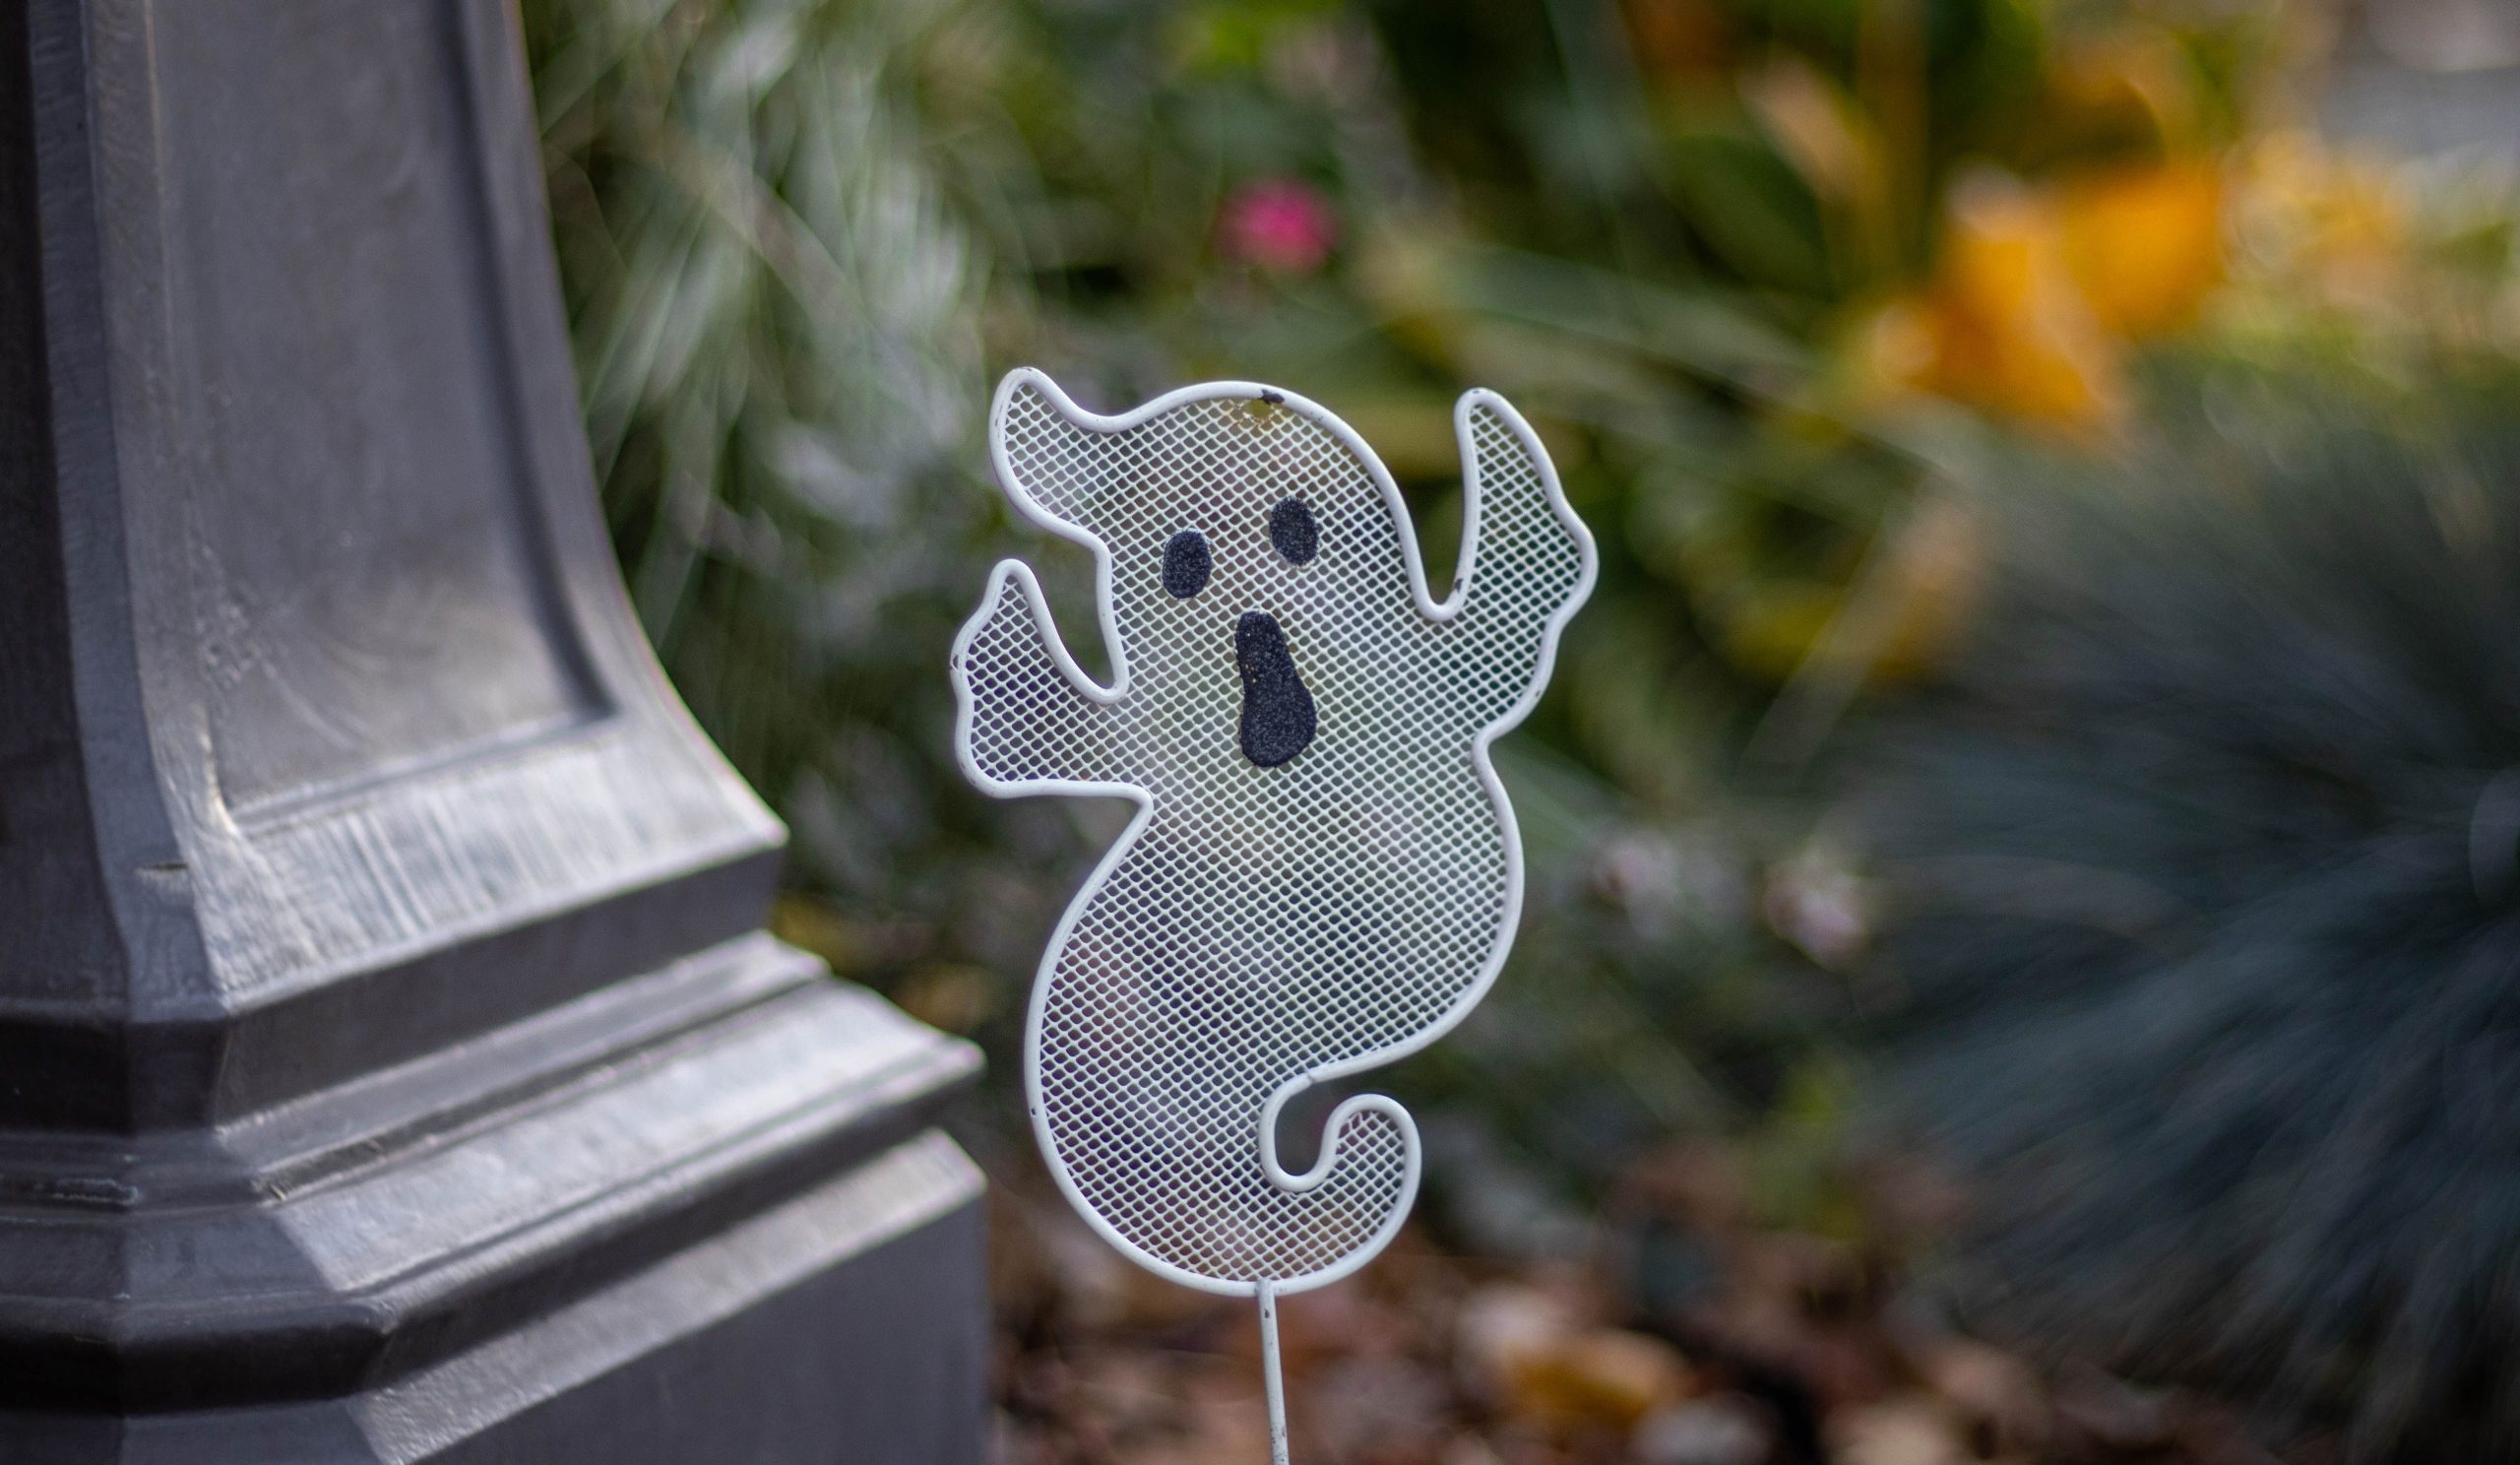
This little ghost charm works because it’s all about suggestion rather than literal detail. The wispy, translucent quality of the white mesh creates a perfect ethereal, ghostly effect. It captures the idea of a ghost—floating and transparent—without needing a complex shape. The simple black ovals for the eyes and mouth are just enough information for our brains to fill in the rest of the friendly, spooky character. The simplicity is what makes it so effective and universally understood as a Halloween ghost.
22. A Cheerful Autumn Yard Display with a Scarecrow and Pumpkin
Creating a friendly, harvest-themed yard scene like this involves a few key set pieces. The scarecrow is the star, and you can either buy one or DIY it.
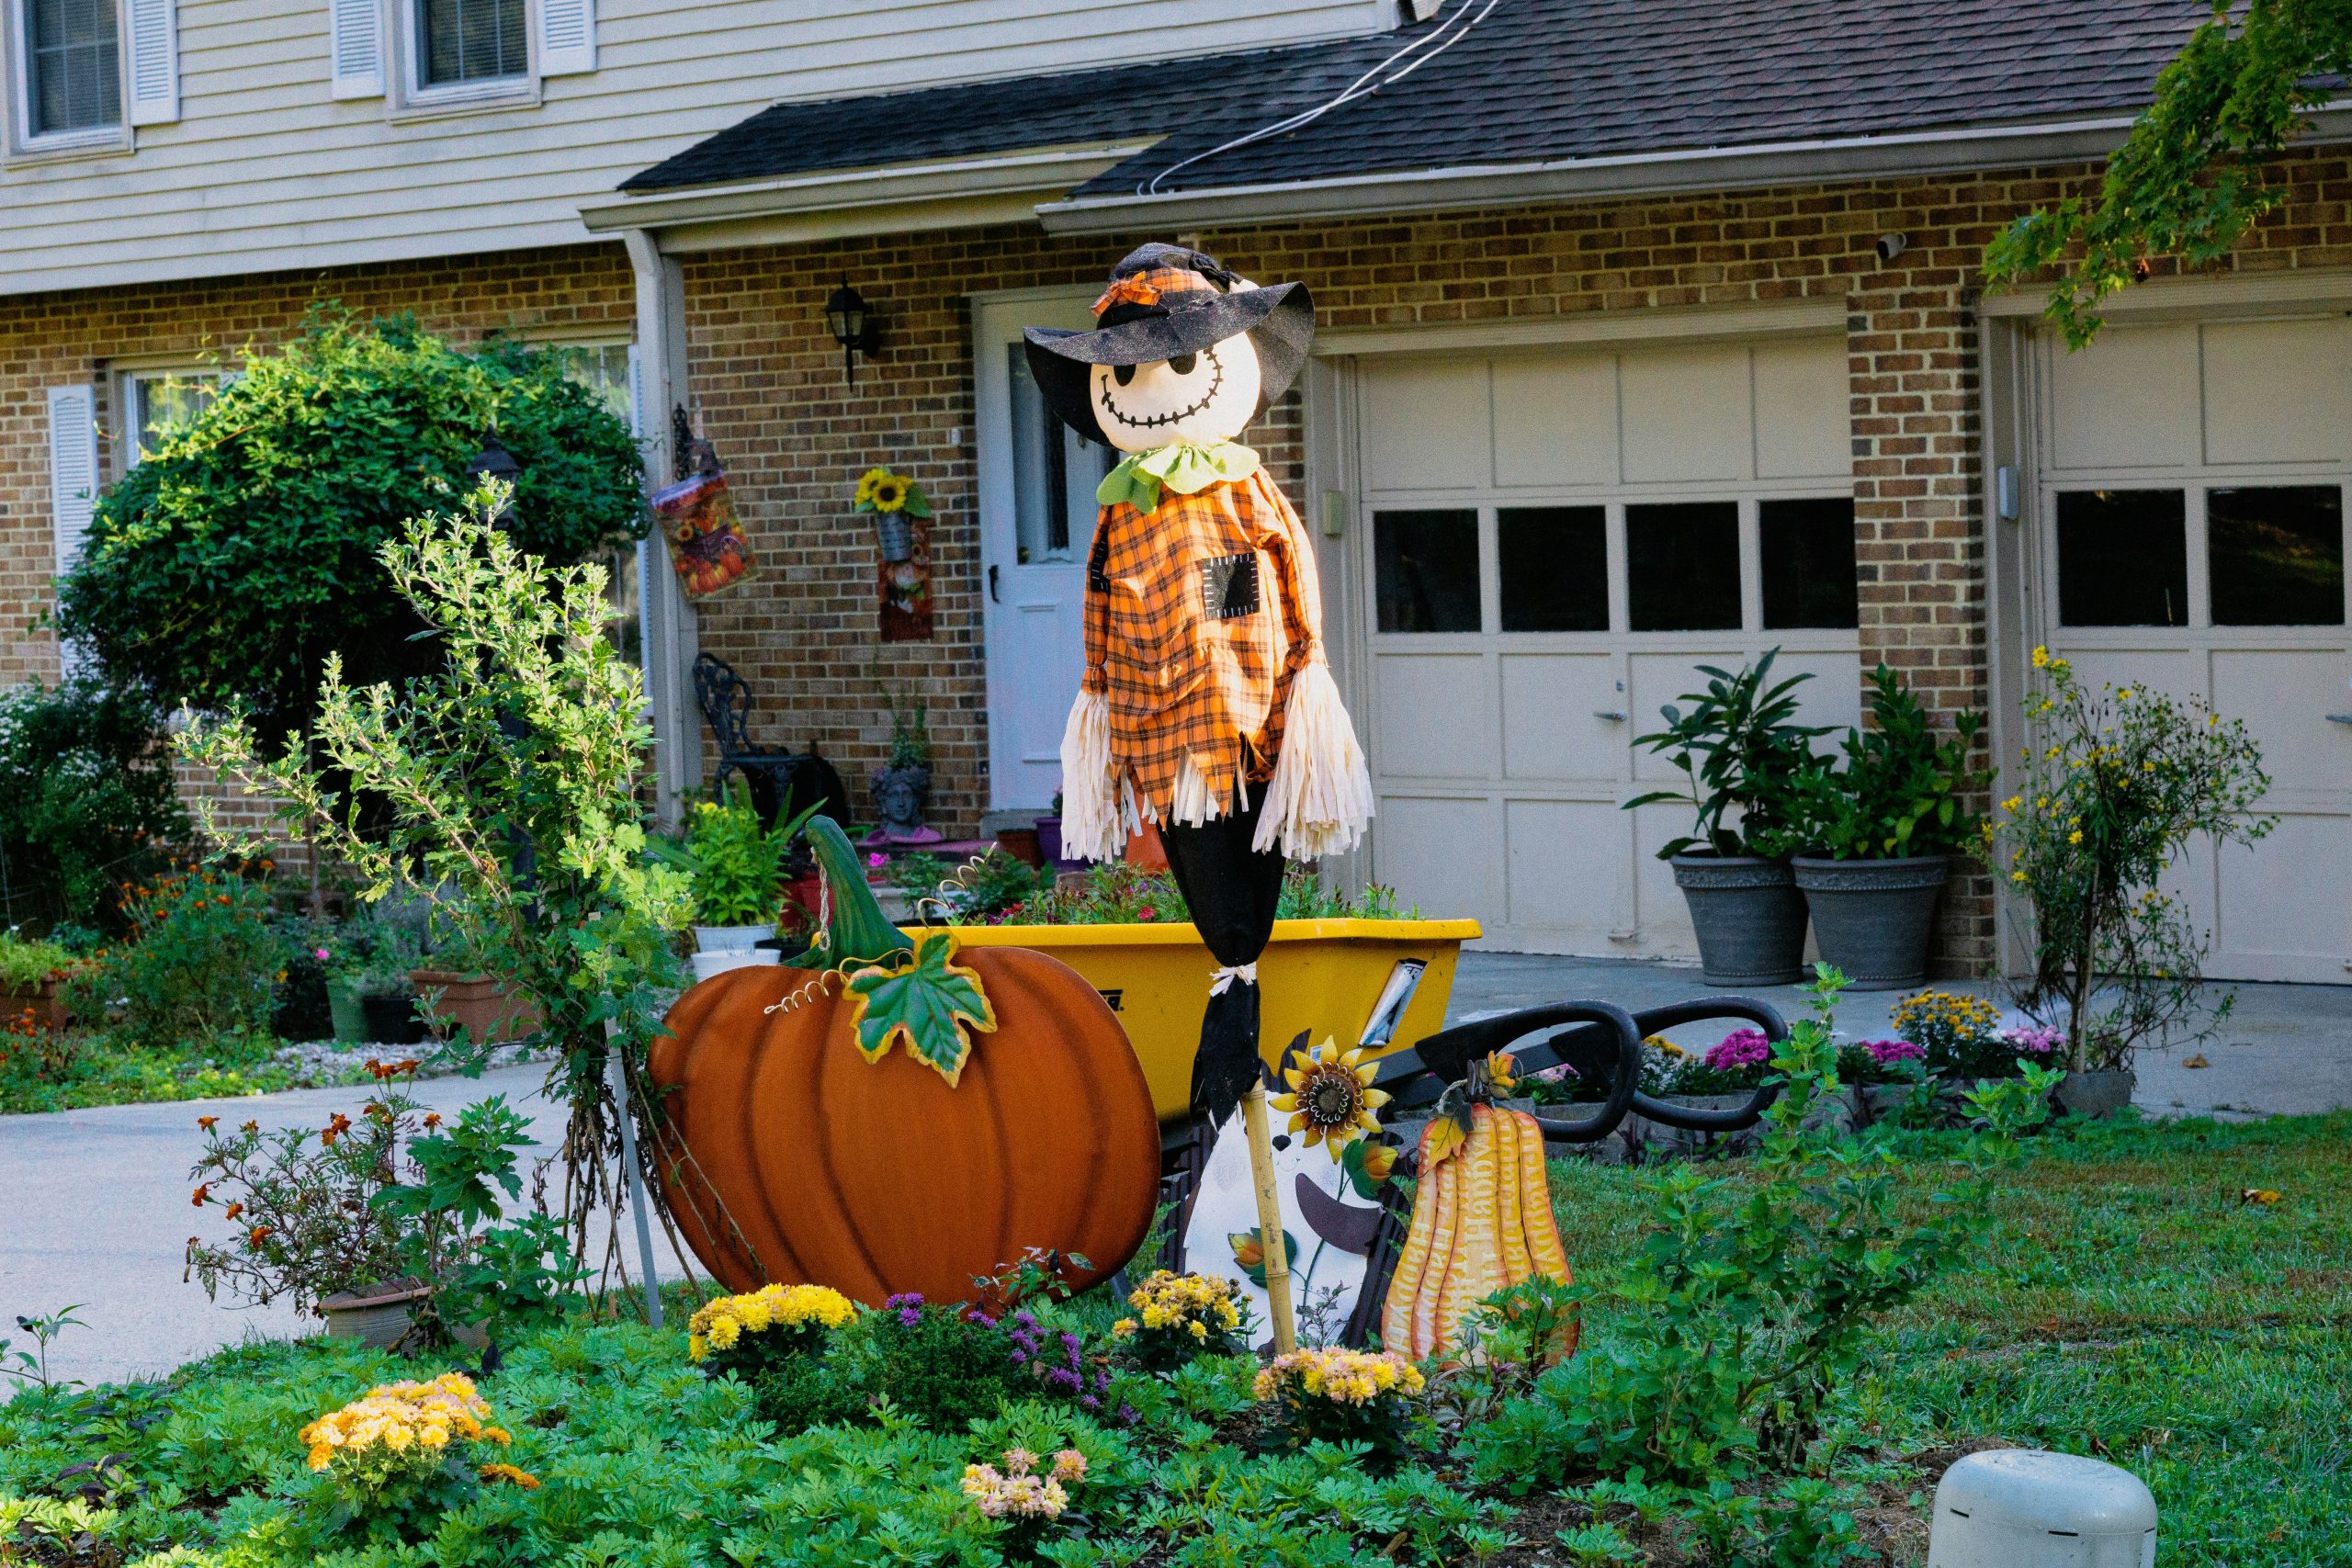
- Scarecrow Figure (pre-made or DIY kit): $30 – $75
- Large Pumpkin Decoration (resin or plastic): $25 – $60
- Accent Decor (Wheelbarrow, flowers): $40 – $100 (less if you own the wheelbarrow)
- Filler (potted mums, small gourds): $20 – $40
- TOTAL: $115 – $275
Budget alternative: Build a scarecrow from old clothes and a straw hat. Use real pumpkins from a farm stand, and focus on one or two large pots of mums for color. This can bring the total cost down to under $50.
This type of vignette is perfect for a front yard with a garden bed or a dedicated corner near the entrance. You need a space of at least 6×4 feet to arrange the elements without them feeling cramped. The scarecrow provides vertical height, so it works well even in yards without large trees. This setup is all about creating a focal point, so it’s more impactful in a smaller, defined space rather than floating in the middle of a huge lawn. It’s a great way to add concentrated charm to a specific zone of your yard.
23. Decorate a Rustic Wooden Box with Spiderwebs and a Pumpkin
This spooky shelf idea is a great way to add a touch of Halloween to an existing piece of furniture. Here’s what to check first.
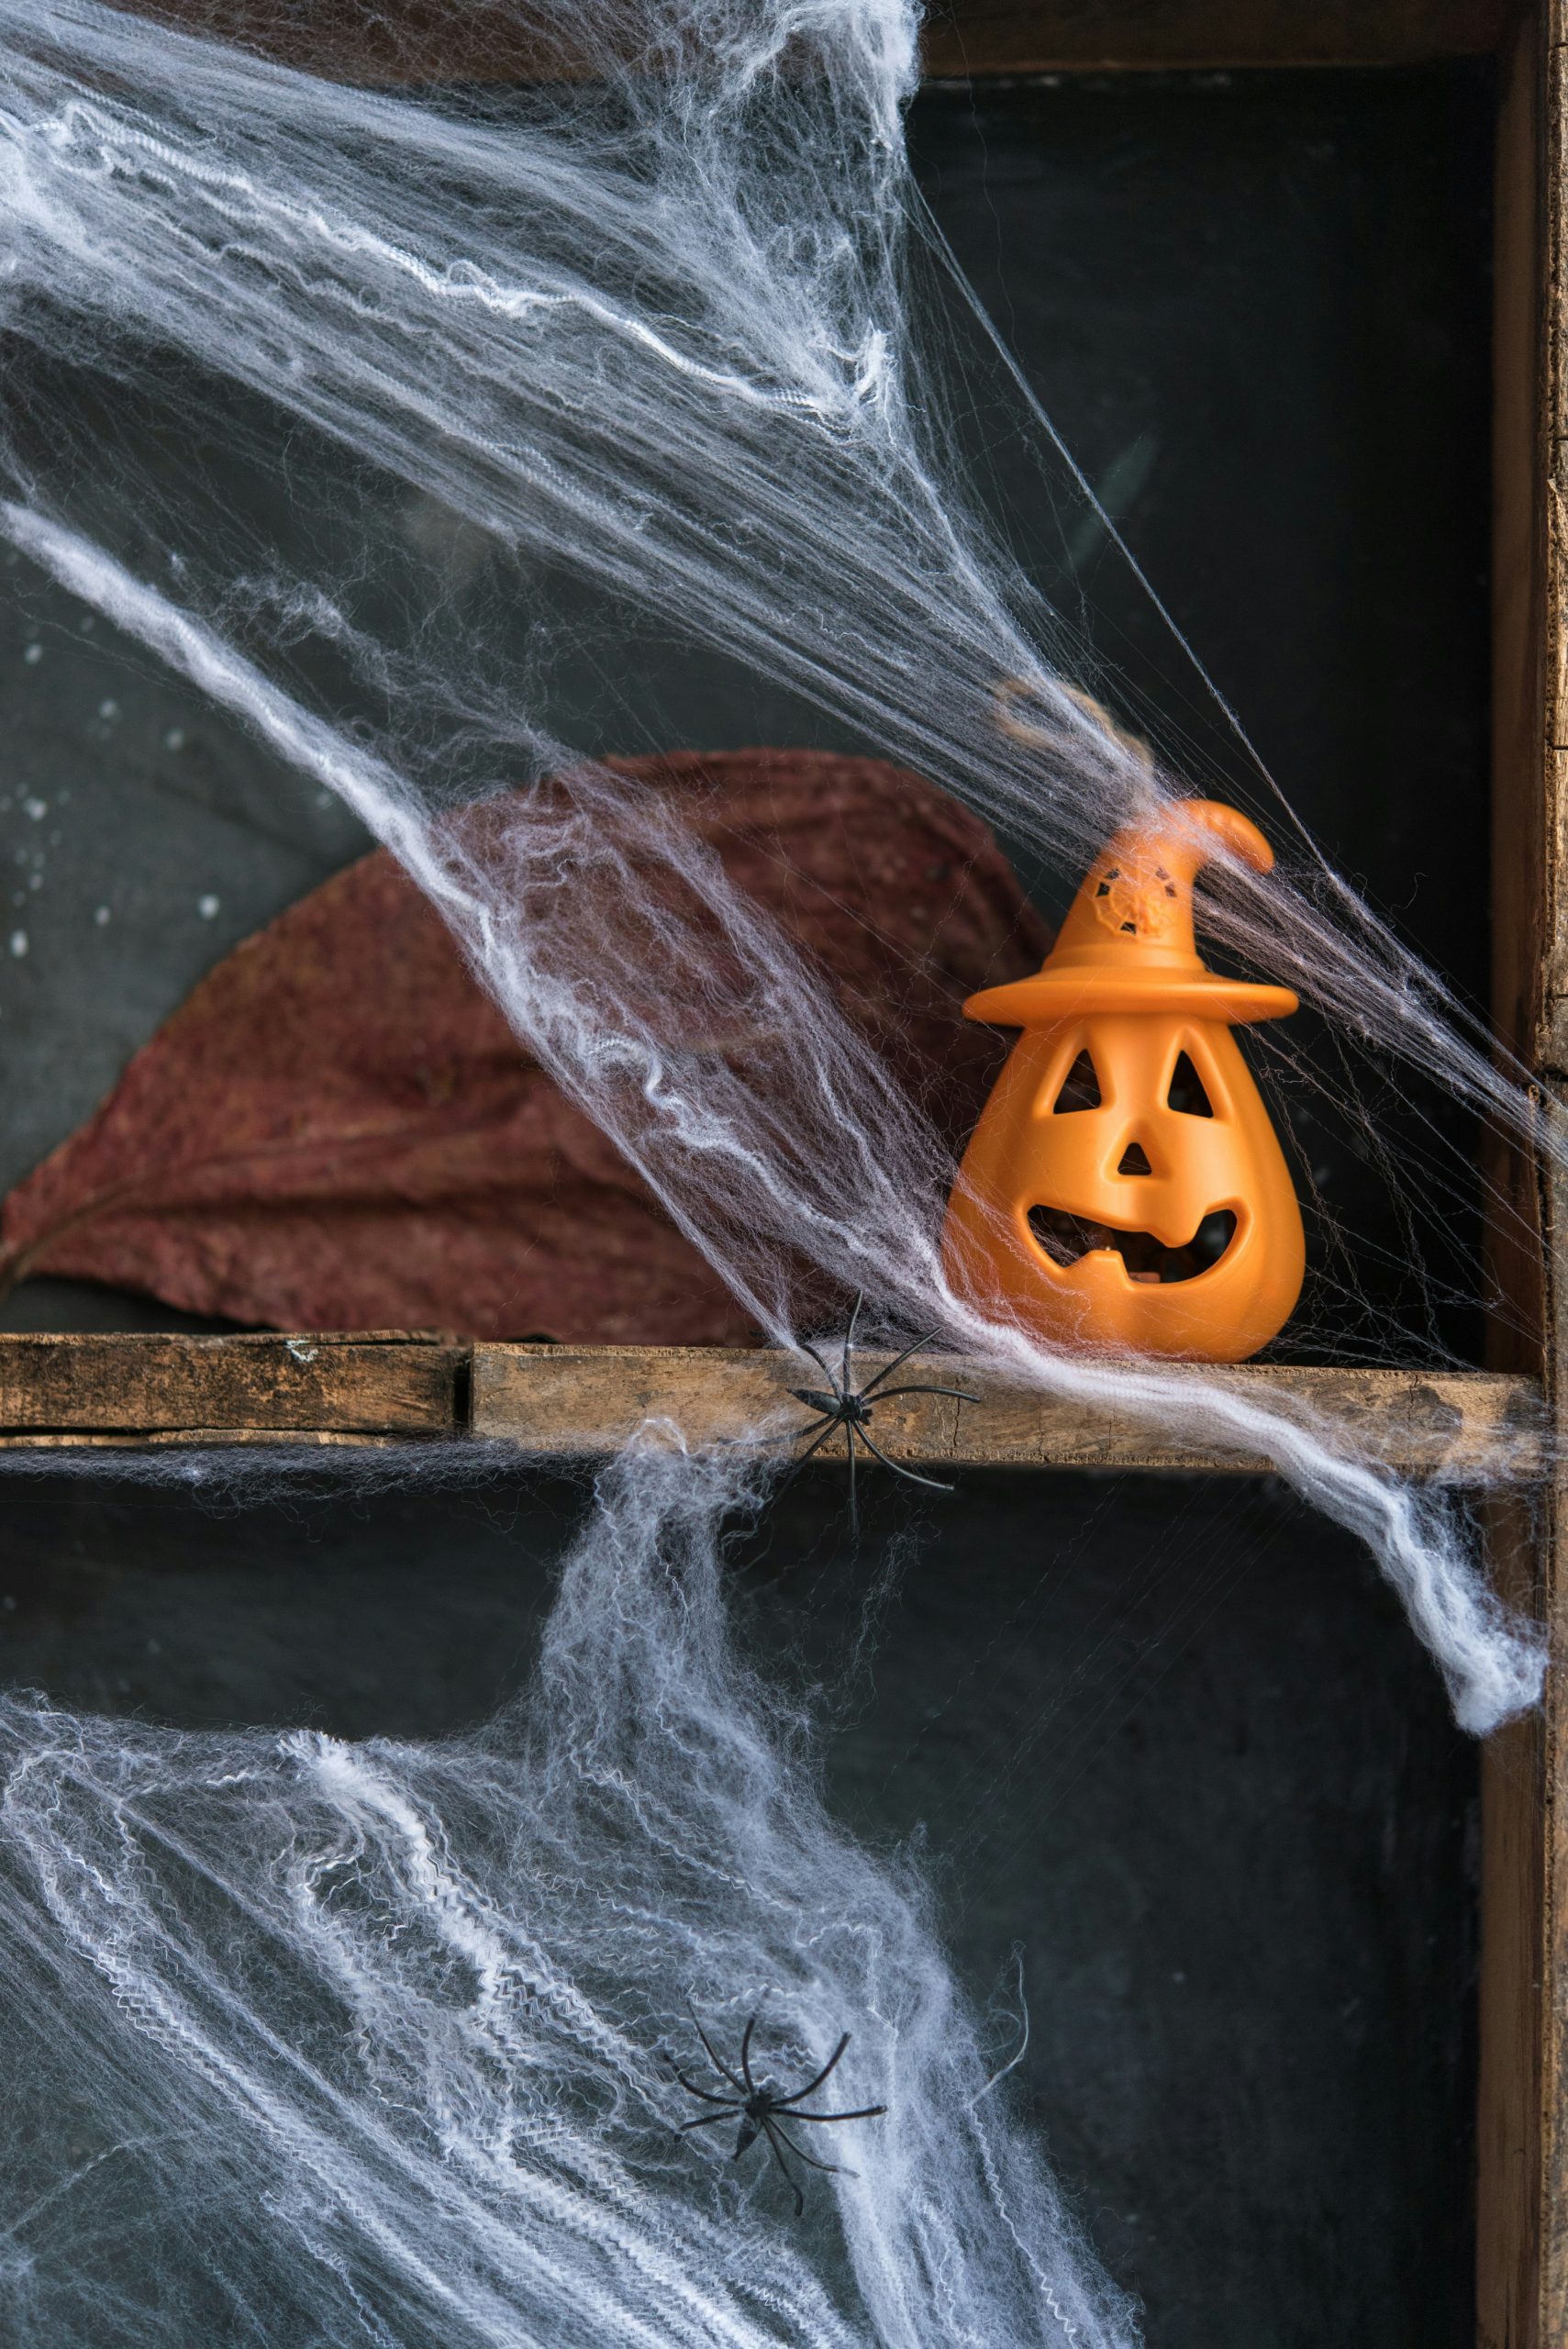
- Test Your Surface: That stretchy, artificial spiderweb material can sometimes leave a faint, oily residue or snag on rough, unfinished wood. Before you go all-in, stretch a small, inconspicuous piece on the back or underside of your shelf to make sure it removes cleanly without damaging the finish.
- Consider the Lighting: This look is all about texture—the rough wood, the wispy web, and the smooth pumpkin. It will have the most impact in a spot where it gets some good light, either from a nearby window or a lamp, which will create shadows and highlight the different materials.
- Check for Stability: If this box is hanging on the wall, make sure it’s securely anchored before you start adding decorations.
The formula for this rustic-spooky look is all about layering textures. Think of it as 50% Weathered Wood + 40% Wispy Texture + 10% Color Pop. The dark, weathered wooden box provides a strong, rustic foundation. The stretchy white spiderwebs create a layer of spooky, aged texture that contrasts with the solid wood. Finally, the small orange pumpkin with its black witch hat provides that essential pop of classic Halloween color. It’s the focal point that clearly signals the theme. You could swap the pumpkin for a skull or a black cat, and the formula would still hold.
24. Hang Friendly Ghosts from an Autumn Tree
To make your hanging ghosts dance in the wind without getting tangled, the attachment method is key. Instead of just tying a string to the top, use a fishing swivel. Tie one end of your fishing line to the ghost’s head (punch a small hole and secure it well) and the other end to the small metal swivel. Then use a separate piece of line to tie the other end of the swivel to the tree branch. This allows the ghost to rotate a full 360 degrees in the breeze without twisting up the line, ensuring they are always moving and looking lively.
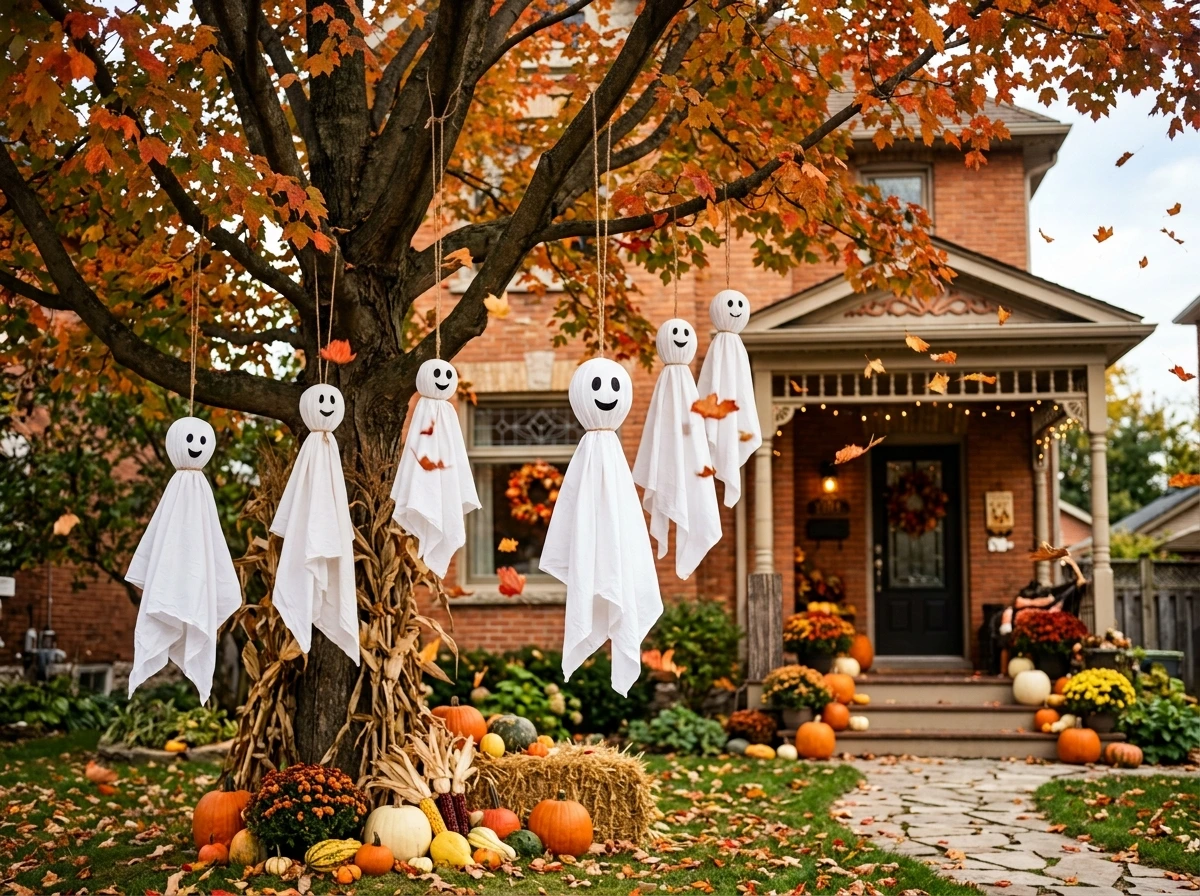
The single most captivating element here is the motion. While the pumpkins, hay bales, and mums create a beautiful and static autumnal base, it’s the white ghosts gently swaying and spinning in the breeze that brings the entire scene to life. Their movement catches the eye and adds a dynamic, slightly ethereal quality to the yard. Without them, it would be a lovely but stationary fall display. With them, it feels alive and animated, capturing the playful spirit of Halloween. For a similar use of playful ghosts, see Idea #2.
25. A Playful Black and Orange Wreath for a Child’s Room Door
While this wreath is adorable, be mindful of where you hang it, especially in a child’s room. The small pumpkin and ghost decorations, if not secured very tightly, could be pulled off by curious little hands and become a choking hazard. This is particularly true for children under three. Consider hanging it on the outside of the door or high up on the wall, well out of reach. For a completely kid-safe version, you could create a similar look by using felt shapes hot-glued directly onto a wreath form, with no small, detachable plastic parts.
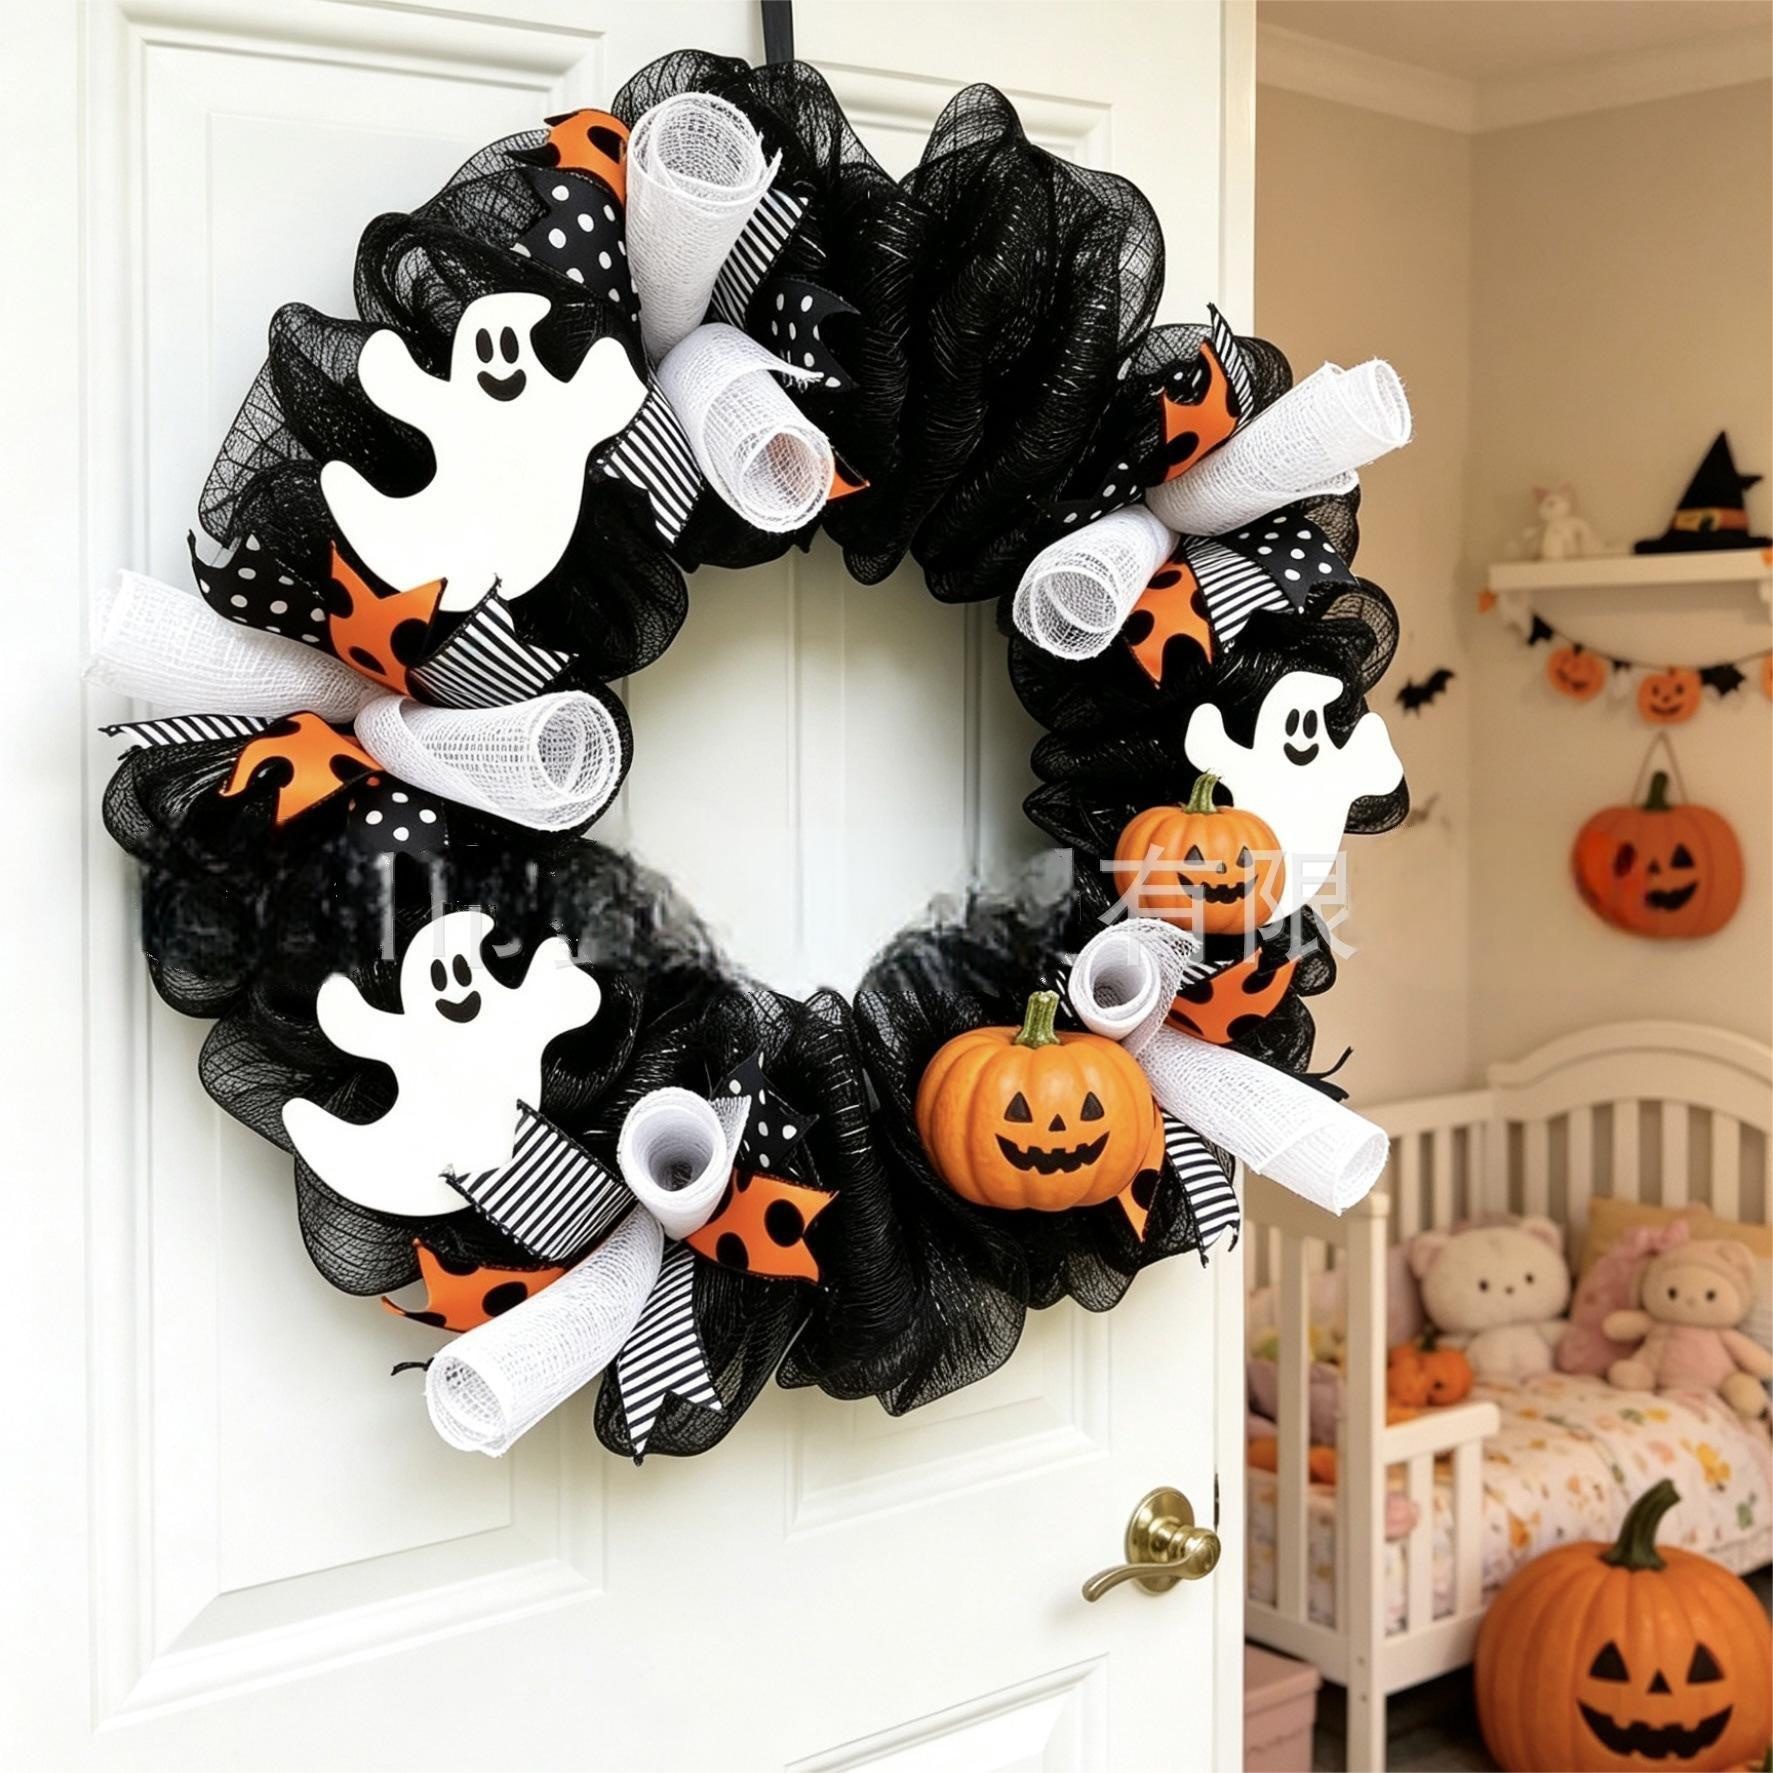
You can achieve this fun, graphic look for less than $15. Start with a wire wreath form from the Dollar Tree ($1.25). Buy two rolls of black decorative mesh ($2.50) and attach it to the frame. The key is the ribbon: you can find Halloween-themed ribbon with stripes and polka dots at any craft store or even Walmart, often for just a few dollars a roll. The ghost and pumpkin cutouts can be made from craft foam or even laminated paper. It’s a simple, affordable project that delivers a big splash of festive fun. This is a great budget-friendly alternative to the more elaborate wreaths like Idea #15.
26. Create a Cozy and Spooky Bedroom Corner with Bats and Webs
This bedroom transformation works because it uses the room’s architecture as a canvas. The giant spiderweb is stretched to fit the corner perfectly, turning an often-neglected space into a dramatic focal point. The bat cutouts aren’t randomly placed; they are arranged in a swooping pattern that flows from the window across the wall, creating a sense of movement and direction. By decorating the walls and windows, the design adds a festive layer without cluttering the floor or furniture, maintaining the room’s function while still feeling fully decorated. The mix of real pumpkins and autumnal foliage with the spooky bats adds a nice textural balance.
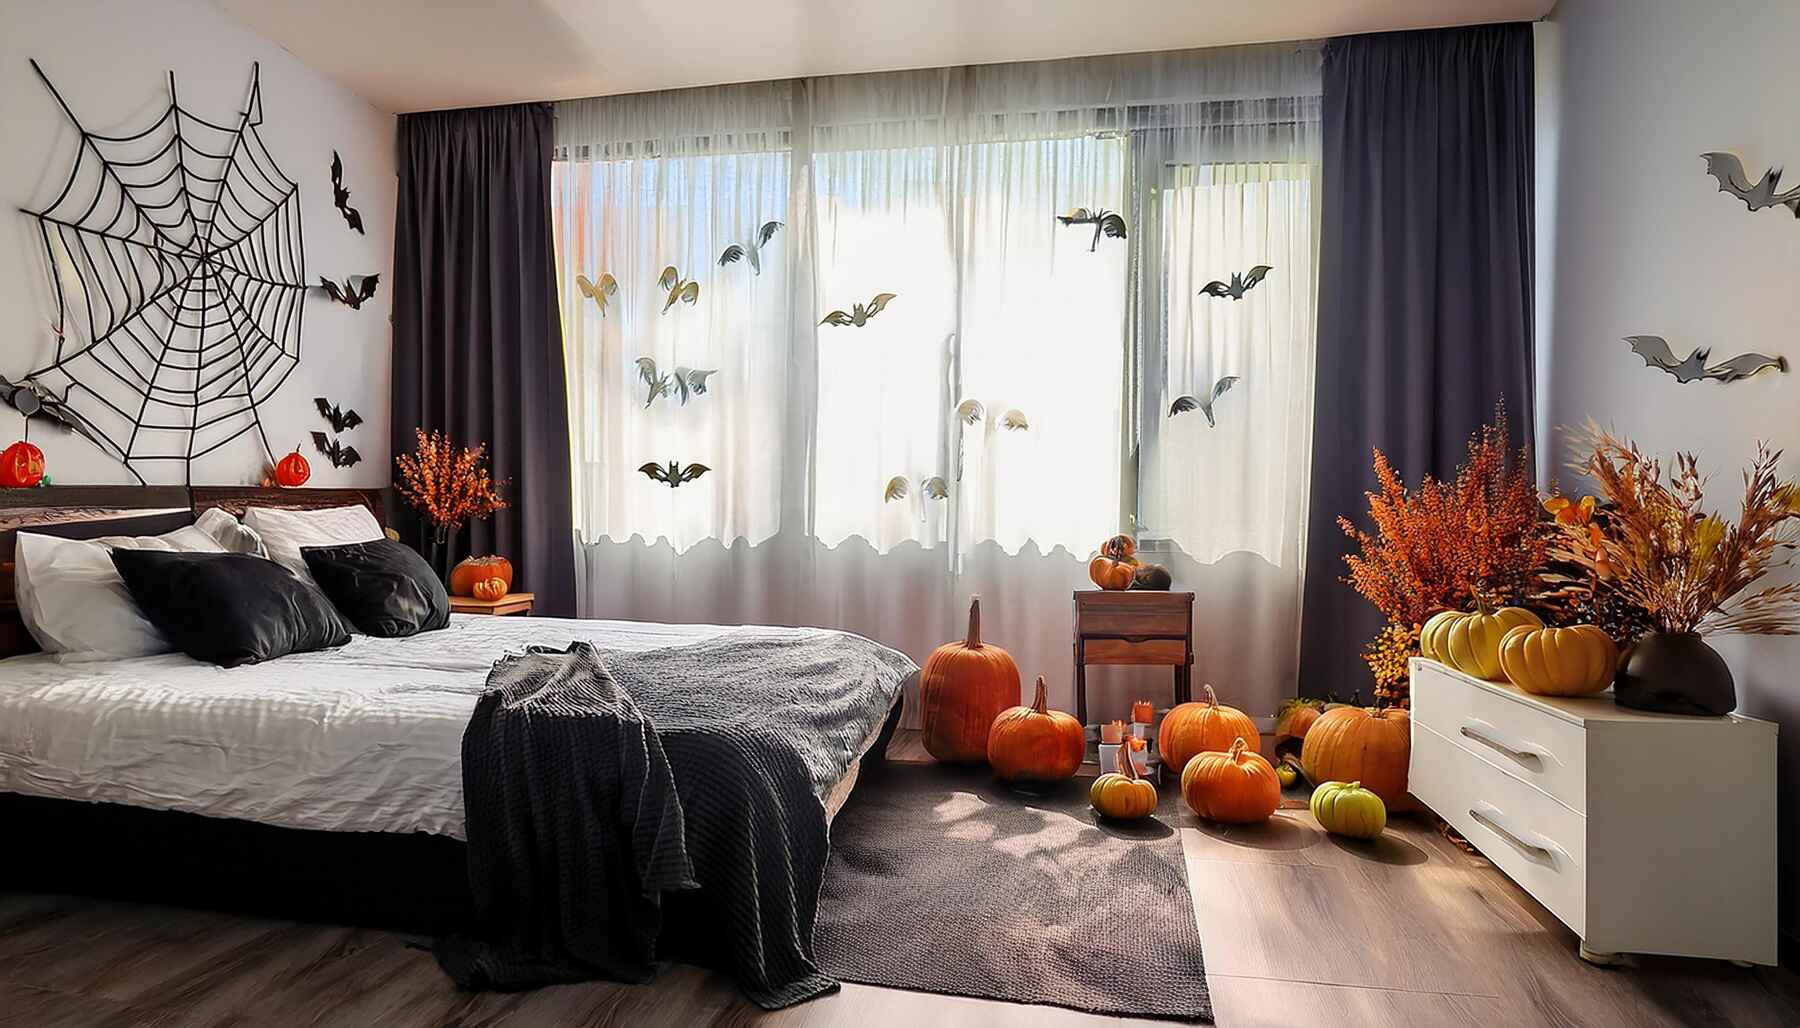
This idea is incredibly versatile and works in bedrooms of almost any size. The key is scaling the main elements. In a small room (around 100 sq ft), a single large spiderweb in a corner and a cluster of 15-20 bats are plenty to make a statement. In a larger room (200+ sq ft), you could create a ‘bat flight path’ across the entire length of a wall, using 50 or more cutouts. You could also add a second, smaller web over a headboard or doorway. The concept is adaptable; just adjust the quantity of your decorations to match the scale of your space.
27. An Abundant Pumpkin Display on Grand Entryway Steps
To create a truly lush and abundant pumpkin display like this one, the secret is to use ‘fillers.’ You don’t need 100 perfect, expensive pumpkins. Buy about 20-30 nice-looking ‘hero’ pumpkins in various sizes and colors for the most visible spots. Then, fill in the back and lower layers with cheaper gourds, smaller pie pumpkins, or even faux pumpkins from a craft store. This creates the feeling of density and volume without the massive expense. Tuck some inexpensive Spanish moss or faux autumn leaves in the gaps to hide any empty spots. Your display will look twice as full for half the cost.
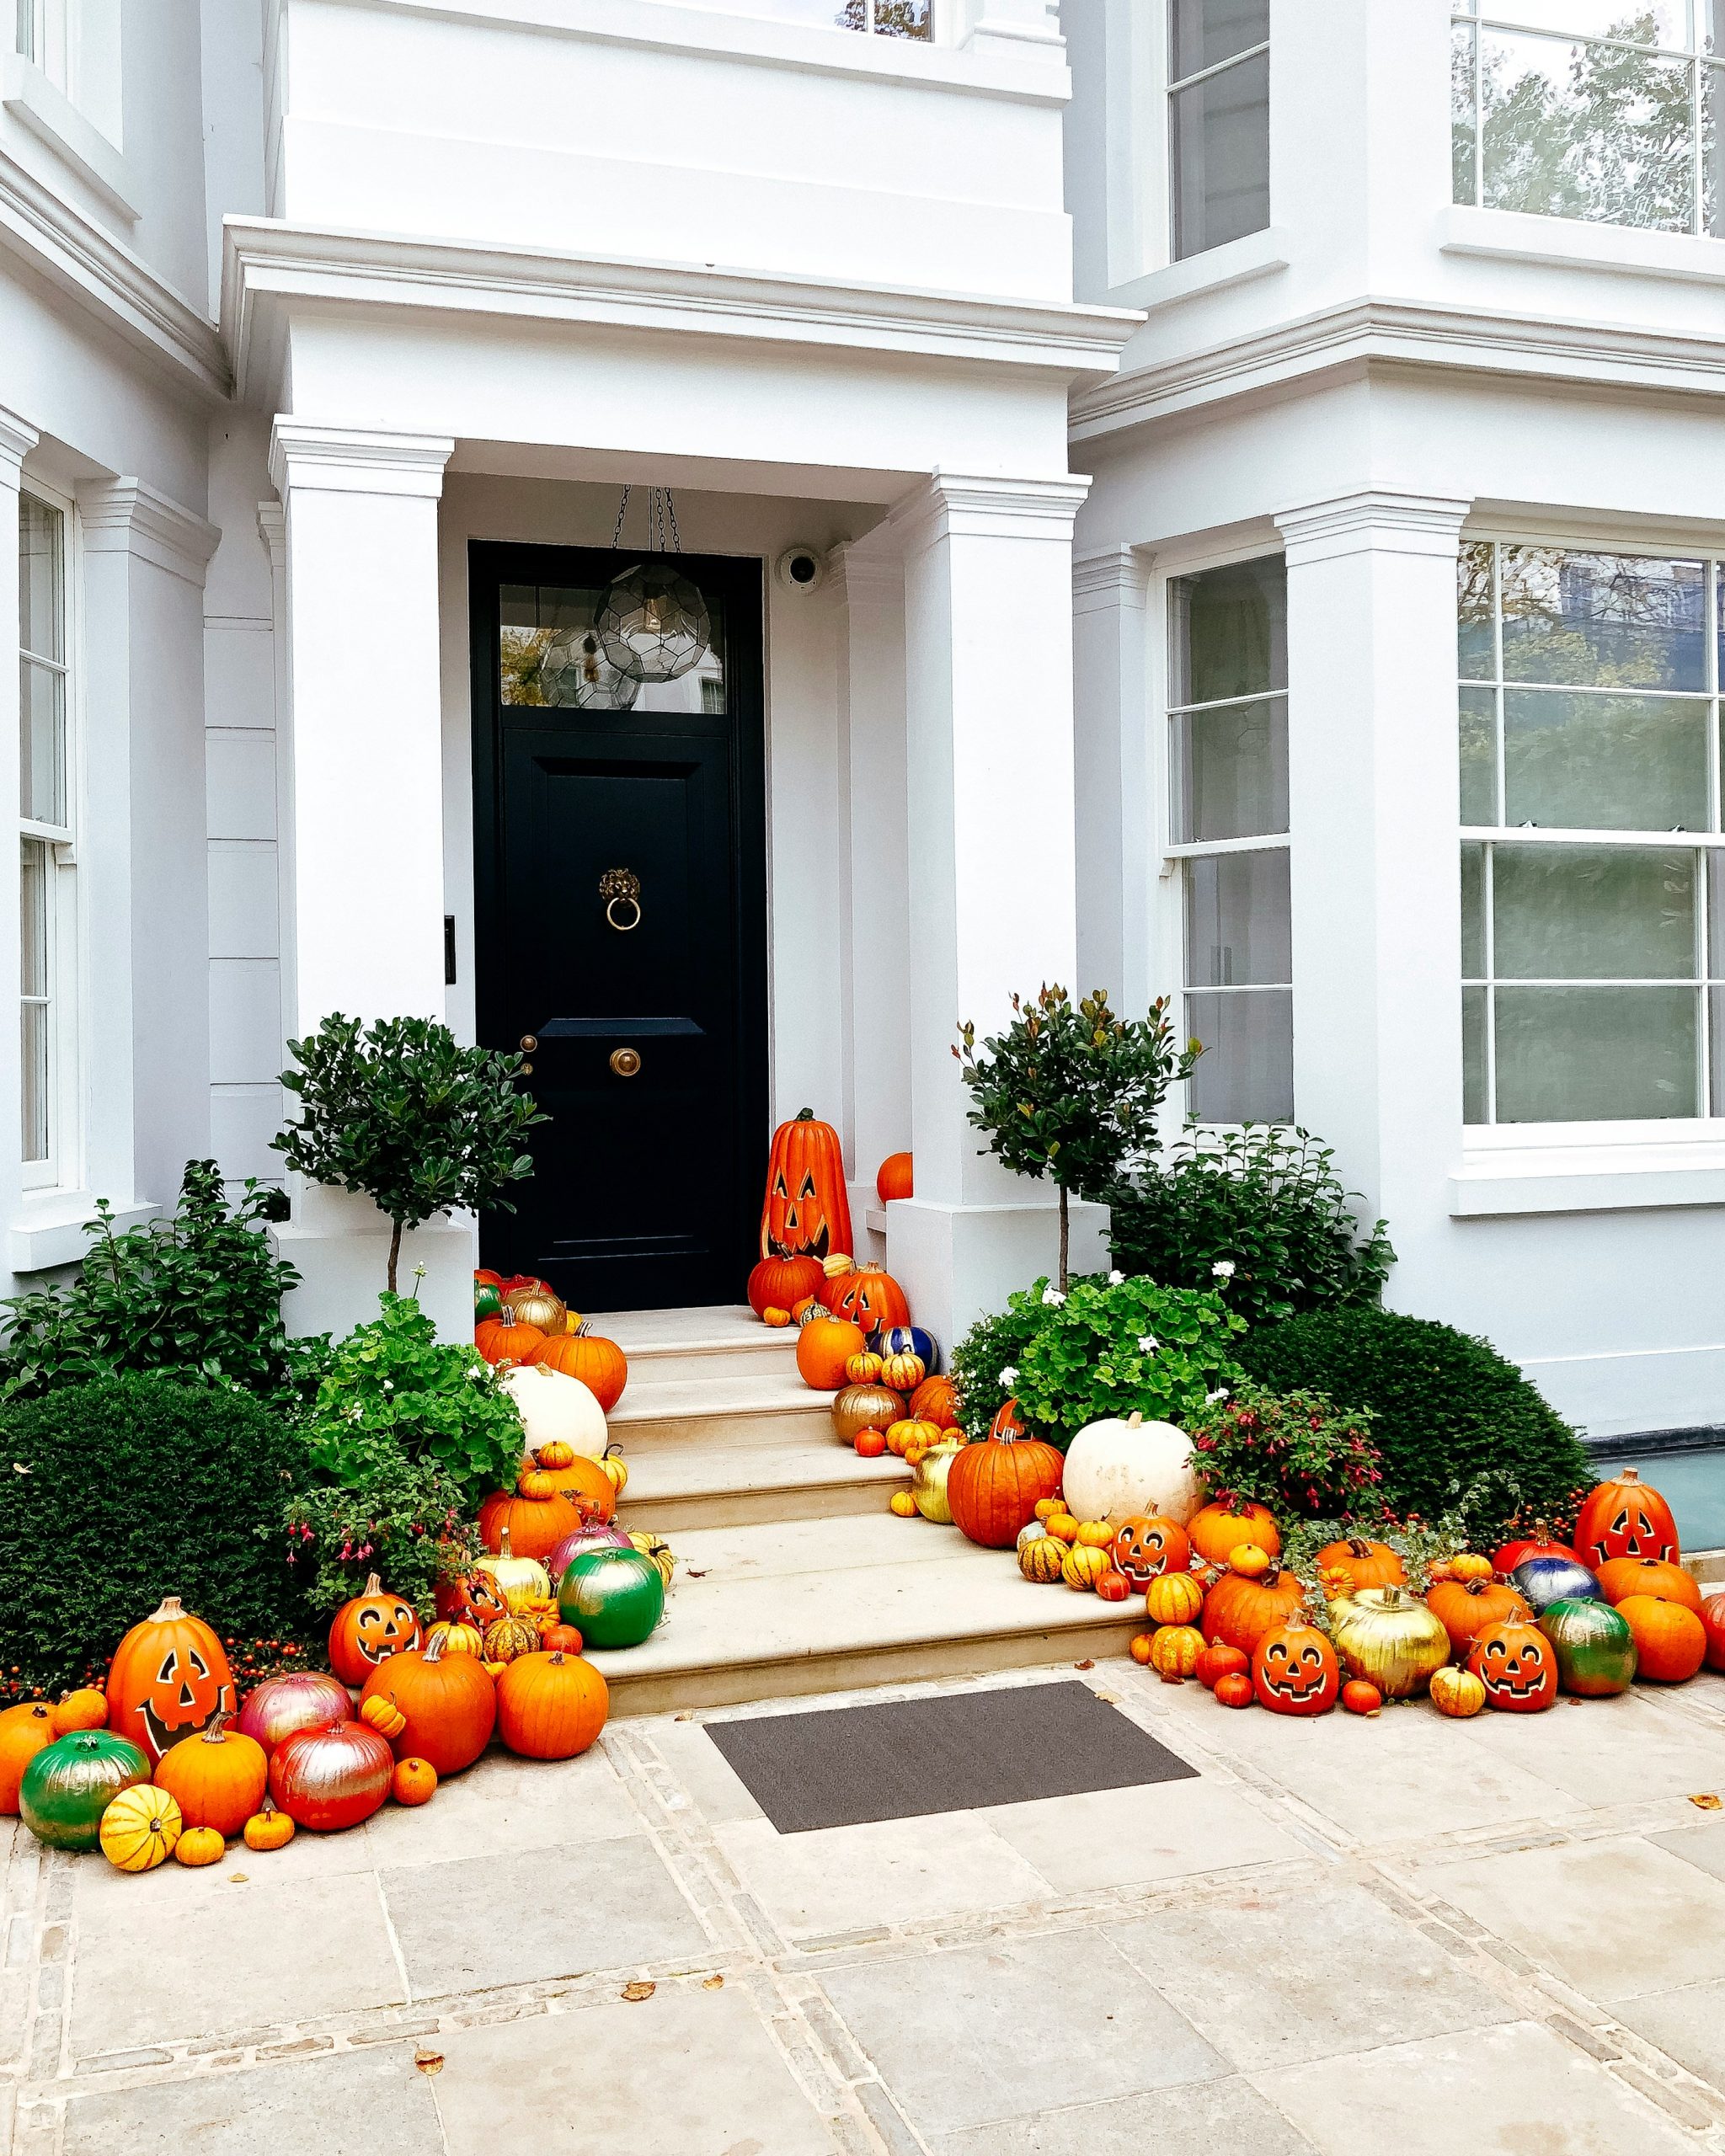
This look is all about volume, so the main cost is the sheer number of pumpkins. Prices can vary wildly depending on your location and source (farm vs. supermarket).
- Main Decor (Assorted pumpkins and gourds): $150 – $400
- Accent Plants (Shrubs): Assumes existing
- Lighting: Assumes existing architectural lighting
- Labor: Your time to arrange them!
- TOTAL: $150 – $400
Budget alternative: As seen in Idea #17, focusing on just a few beautifully carved pumpkins can also make a huge statement. For this look, focus the pumpkins in tight clusters on every other step to cut the cost by 50-60%.
28. Pyramid-Shaped Halloween Treat Boxes for a Party Display
These professional-looking treat boxes are surprisingly easy to make with a template. This project is great for party favors and takes about 5 minutes per box once you get the hang of it. Material cost is very low.
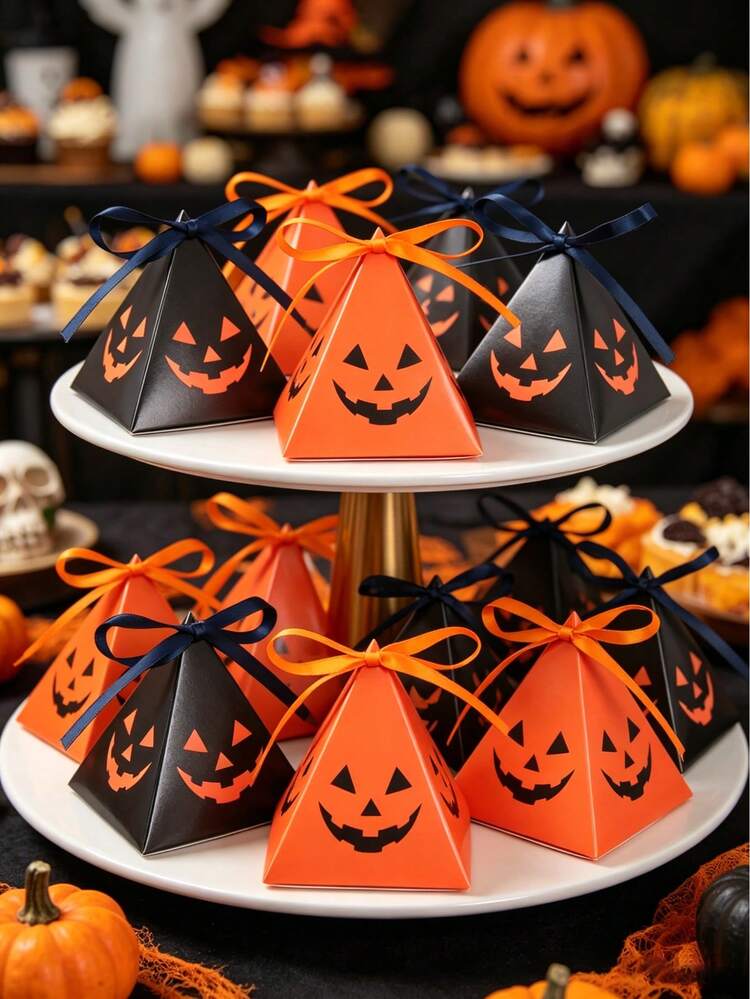
- Find a ‘pyramid box template’ online and print it onto sturdy cardstock. Use orange and black cardstock for this look.
- Cut out the template along the solid lines.
- Using a ruler and a bone folder (or the back of a butter knife), score along all the dotted fold lines. This ensures crisp, clean folds.
- Fold the box into its pyramid shape. Before you seal the top, punch holes in the four top flaps.
- Fill the box with candy or small treats.
- Thread a piece of ribbon (about 12 inches long) through the holes to tie the top shut with a bow. You can draw the jack-o’-lantern faces on with a black marker before or after assembly.
The single element that elevates this from just a pile of candy boxes to a show-stopping display is the two-tiered stand. The stand introduces height, structure, and a sense of occasion. It allows each individual box to be seen and appreciated, turning them into an organized, decorative centerpiece rather than just a container for treats. The white and gold of the stand provides a clean, elegant contrast to the playful orange and black of the boxes. It’s the serving piece that makes the whole presentation feel deliberate and special.
Time to Haunt Your Own House
With these 28 ideas, you’re ready to skip the generic store-bought aisle and create something that’s uniquely you. Whether you’re going for playfully spooky or cozy and chic, the perfect DIY project is waiting for you. Now go on, make your home the most memorable one on the block this Halloween.
Don’t forget to save your favorite ideas to your Pinterest board to get started!