28 Stunning Deck Layout Ideas and Floor Plans to Transform Your Outdoor Space

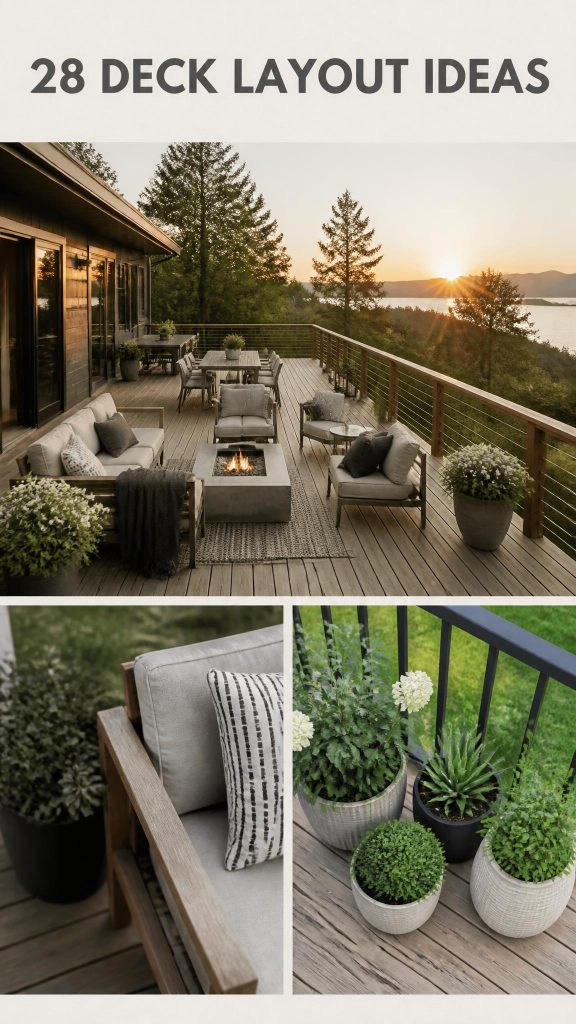
Still scrolling through deck layout photos on Pinterest without a clear plan? It’s easy to get lost in a sea of beautiful backyards, but a great outdoor space is more than just pretty furniture—it’s about smart, intentional design. We’ve done the hard work for you, curating 28 distinct, real-world deck designs that solve actual layout problems. From sprawling multi-level retreats to cozy, single-zone spaces, we’re covering the best ideas for creating flow, function, and serious style. And stay until the end—we break down the most common mistakes that can ruin these looks. 📌 Save this to Pinterest for later—you’ll want to revisit these ideas.
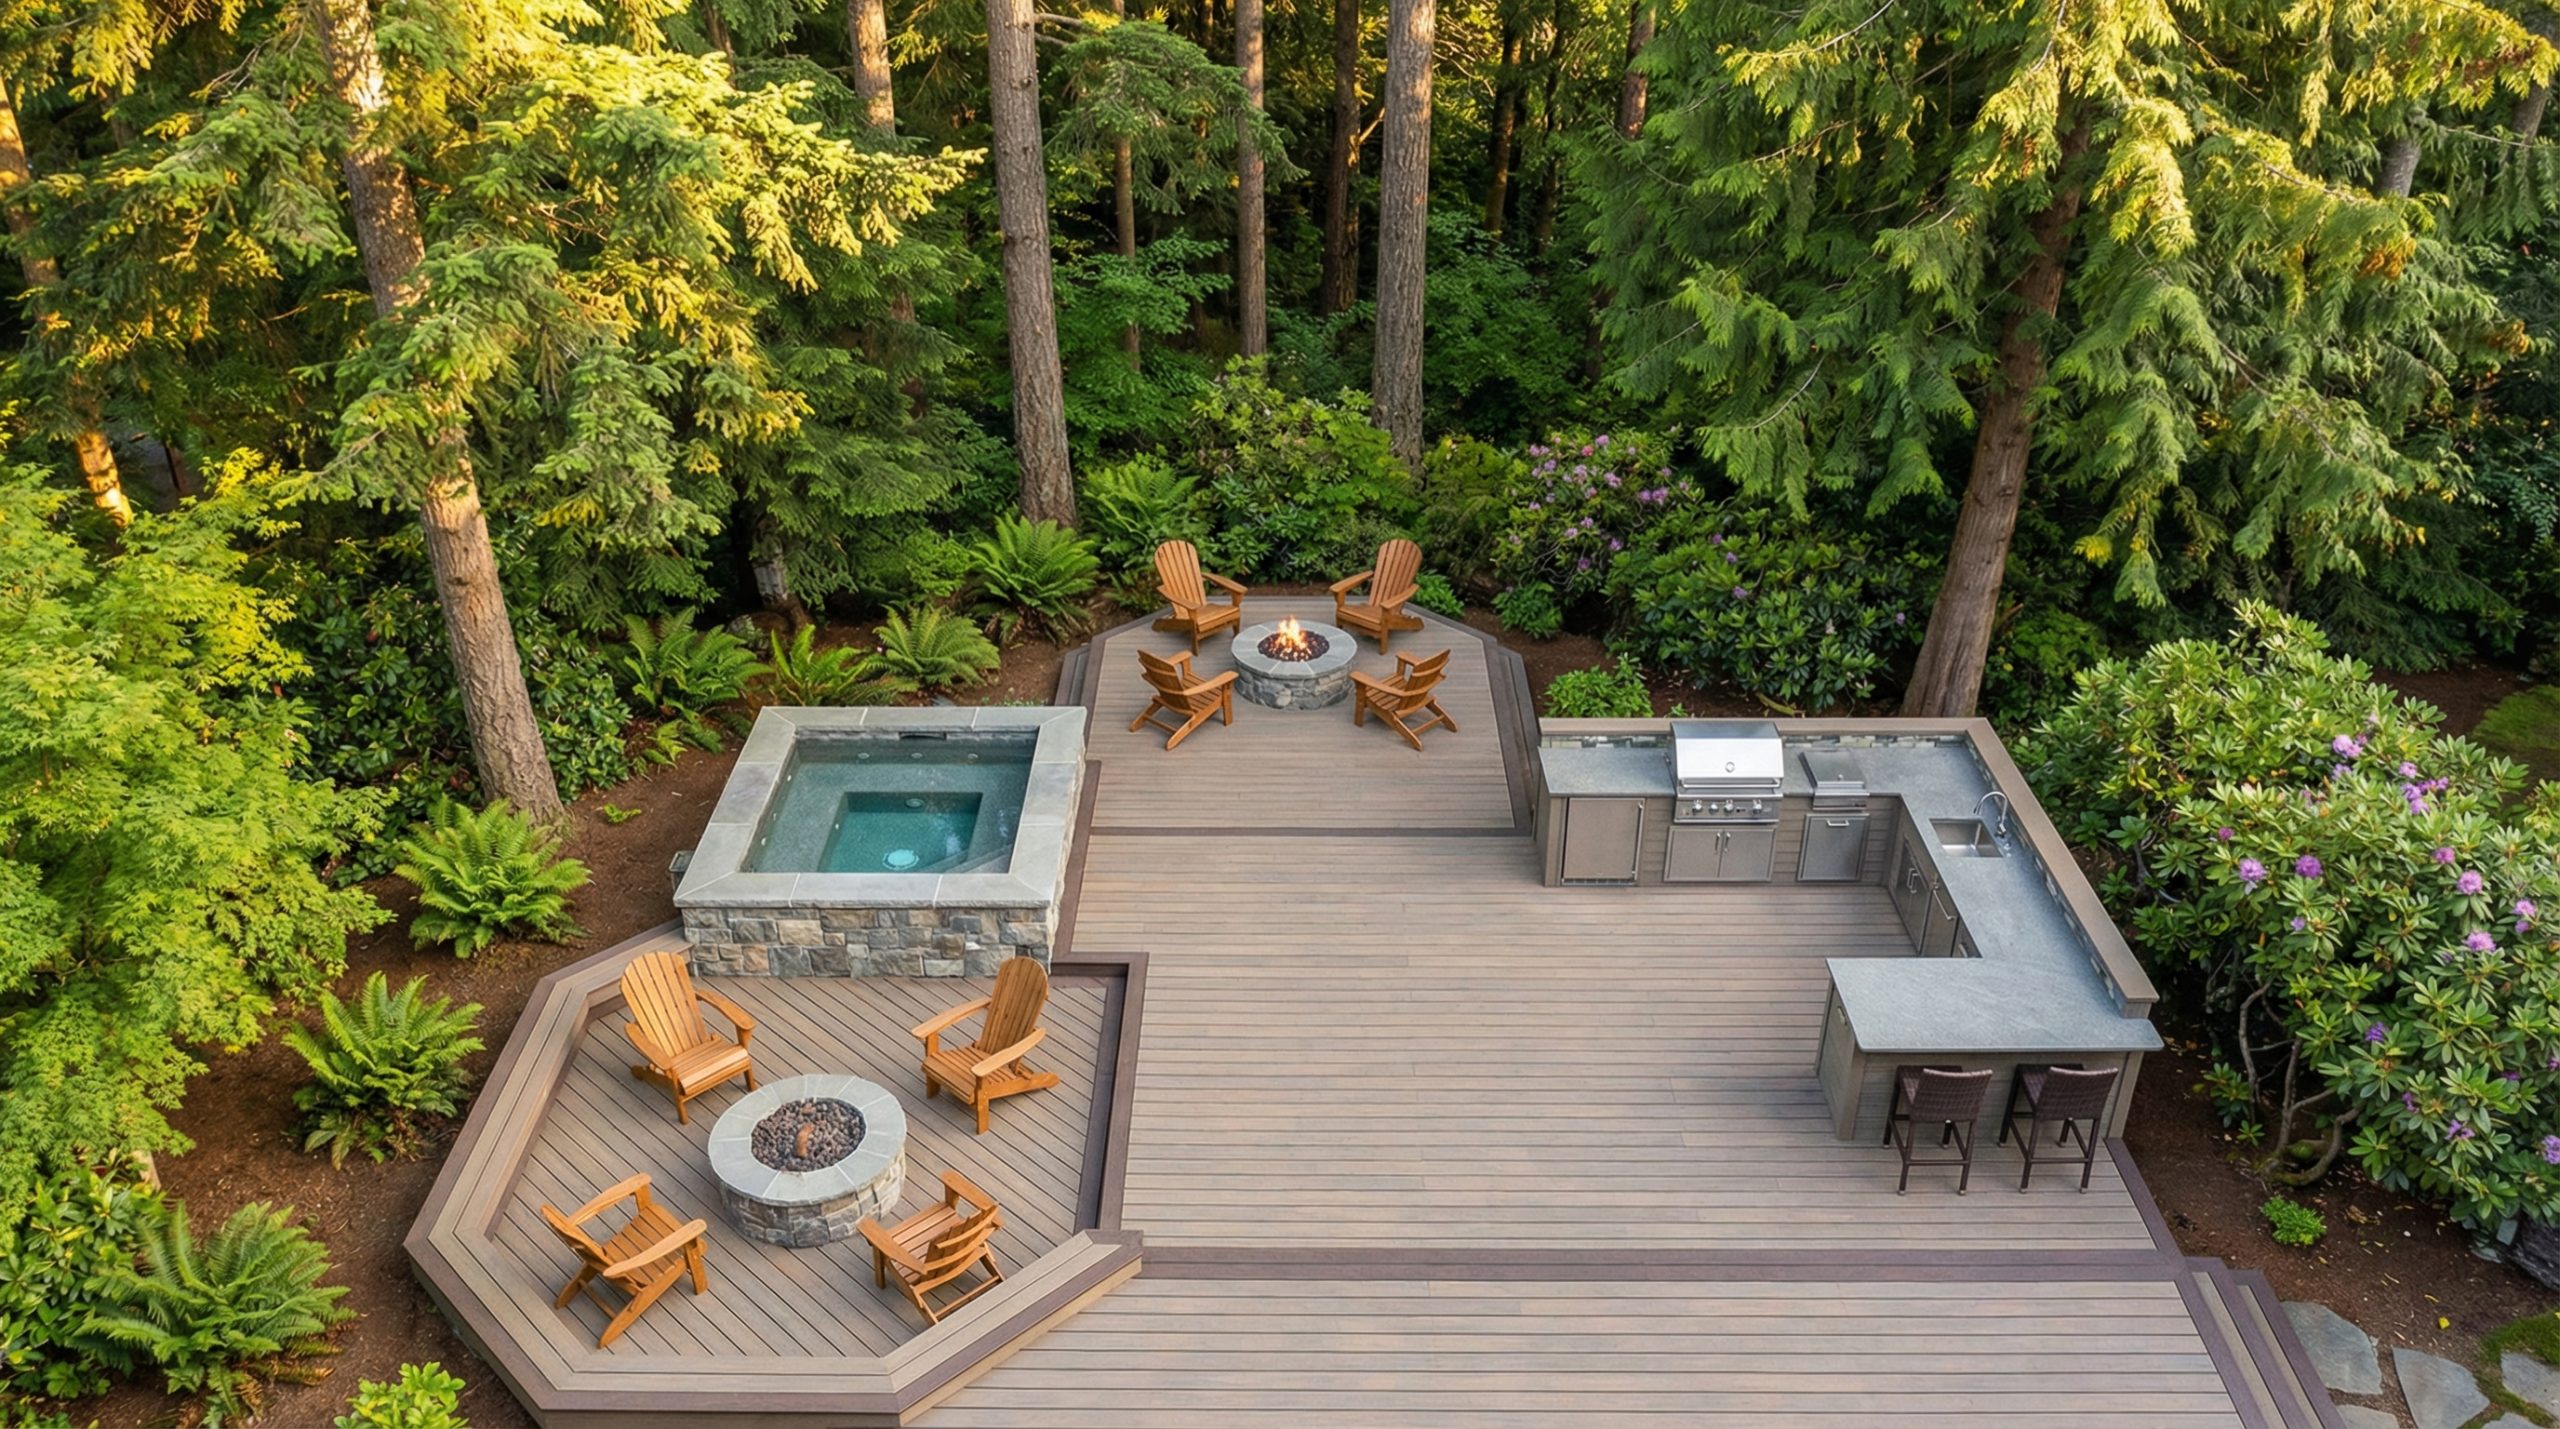
1. Build a Forest Retreat with a Multi-Level Deck and Hot Tub
What Makes It Work: This layout masterfully uses multiple levels to create distinct outdoor “rooms” without needing walls. The hot tub area, the fire pit lounges, and the kitchen bar all feel like separate destinations, which encourages movement and makes the space feel huge. Unity is achieved by repeating materials—the same light grey stone clads both the hot tub surround and the fire pits, tying the whole look together. The contrast between the light-toned composite deck and the deep green of the forest backdrop is what gives it that dramatic, luxurious feel.
|
📋 Copy HEX 🔗 Share |
Designer Tip: When designing a multi-level deck, plan your utilities first. Decide on the exact placement for your hot tub, grill, and any outdoor lighting before a single board is laid. Running electrical and plumbing lines after the deck frame is built is exponentially more difficult and expensive. For stairs that feel comfortable and safe, not steep, aim for a 7-inch riser height and an 11-inch tread depth. This classic ratio is the gold standard for a reason.
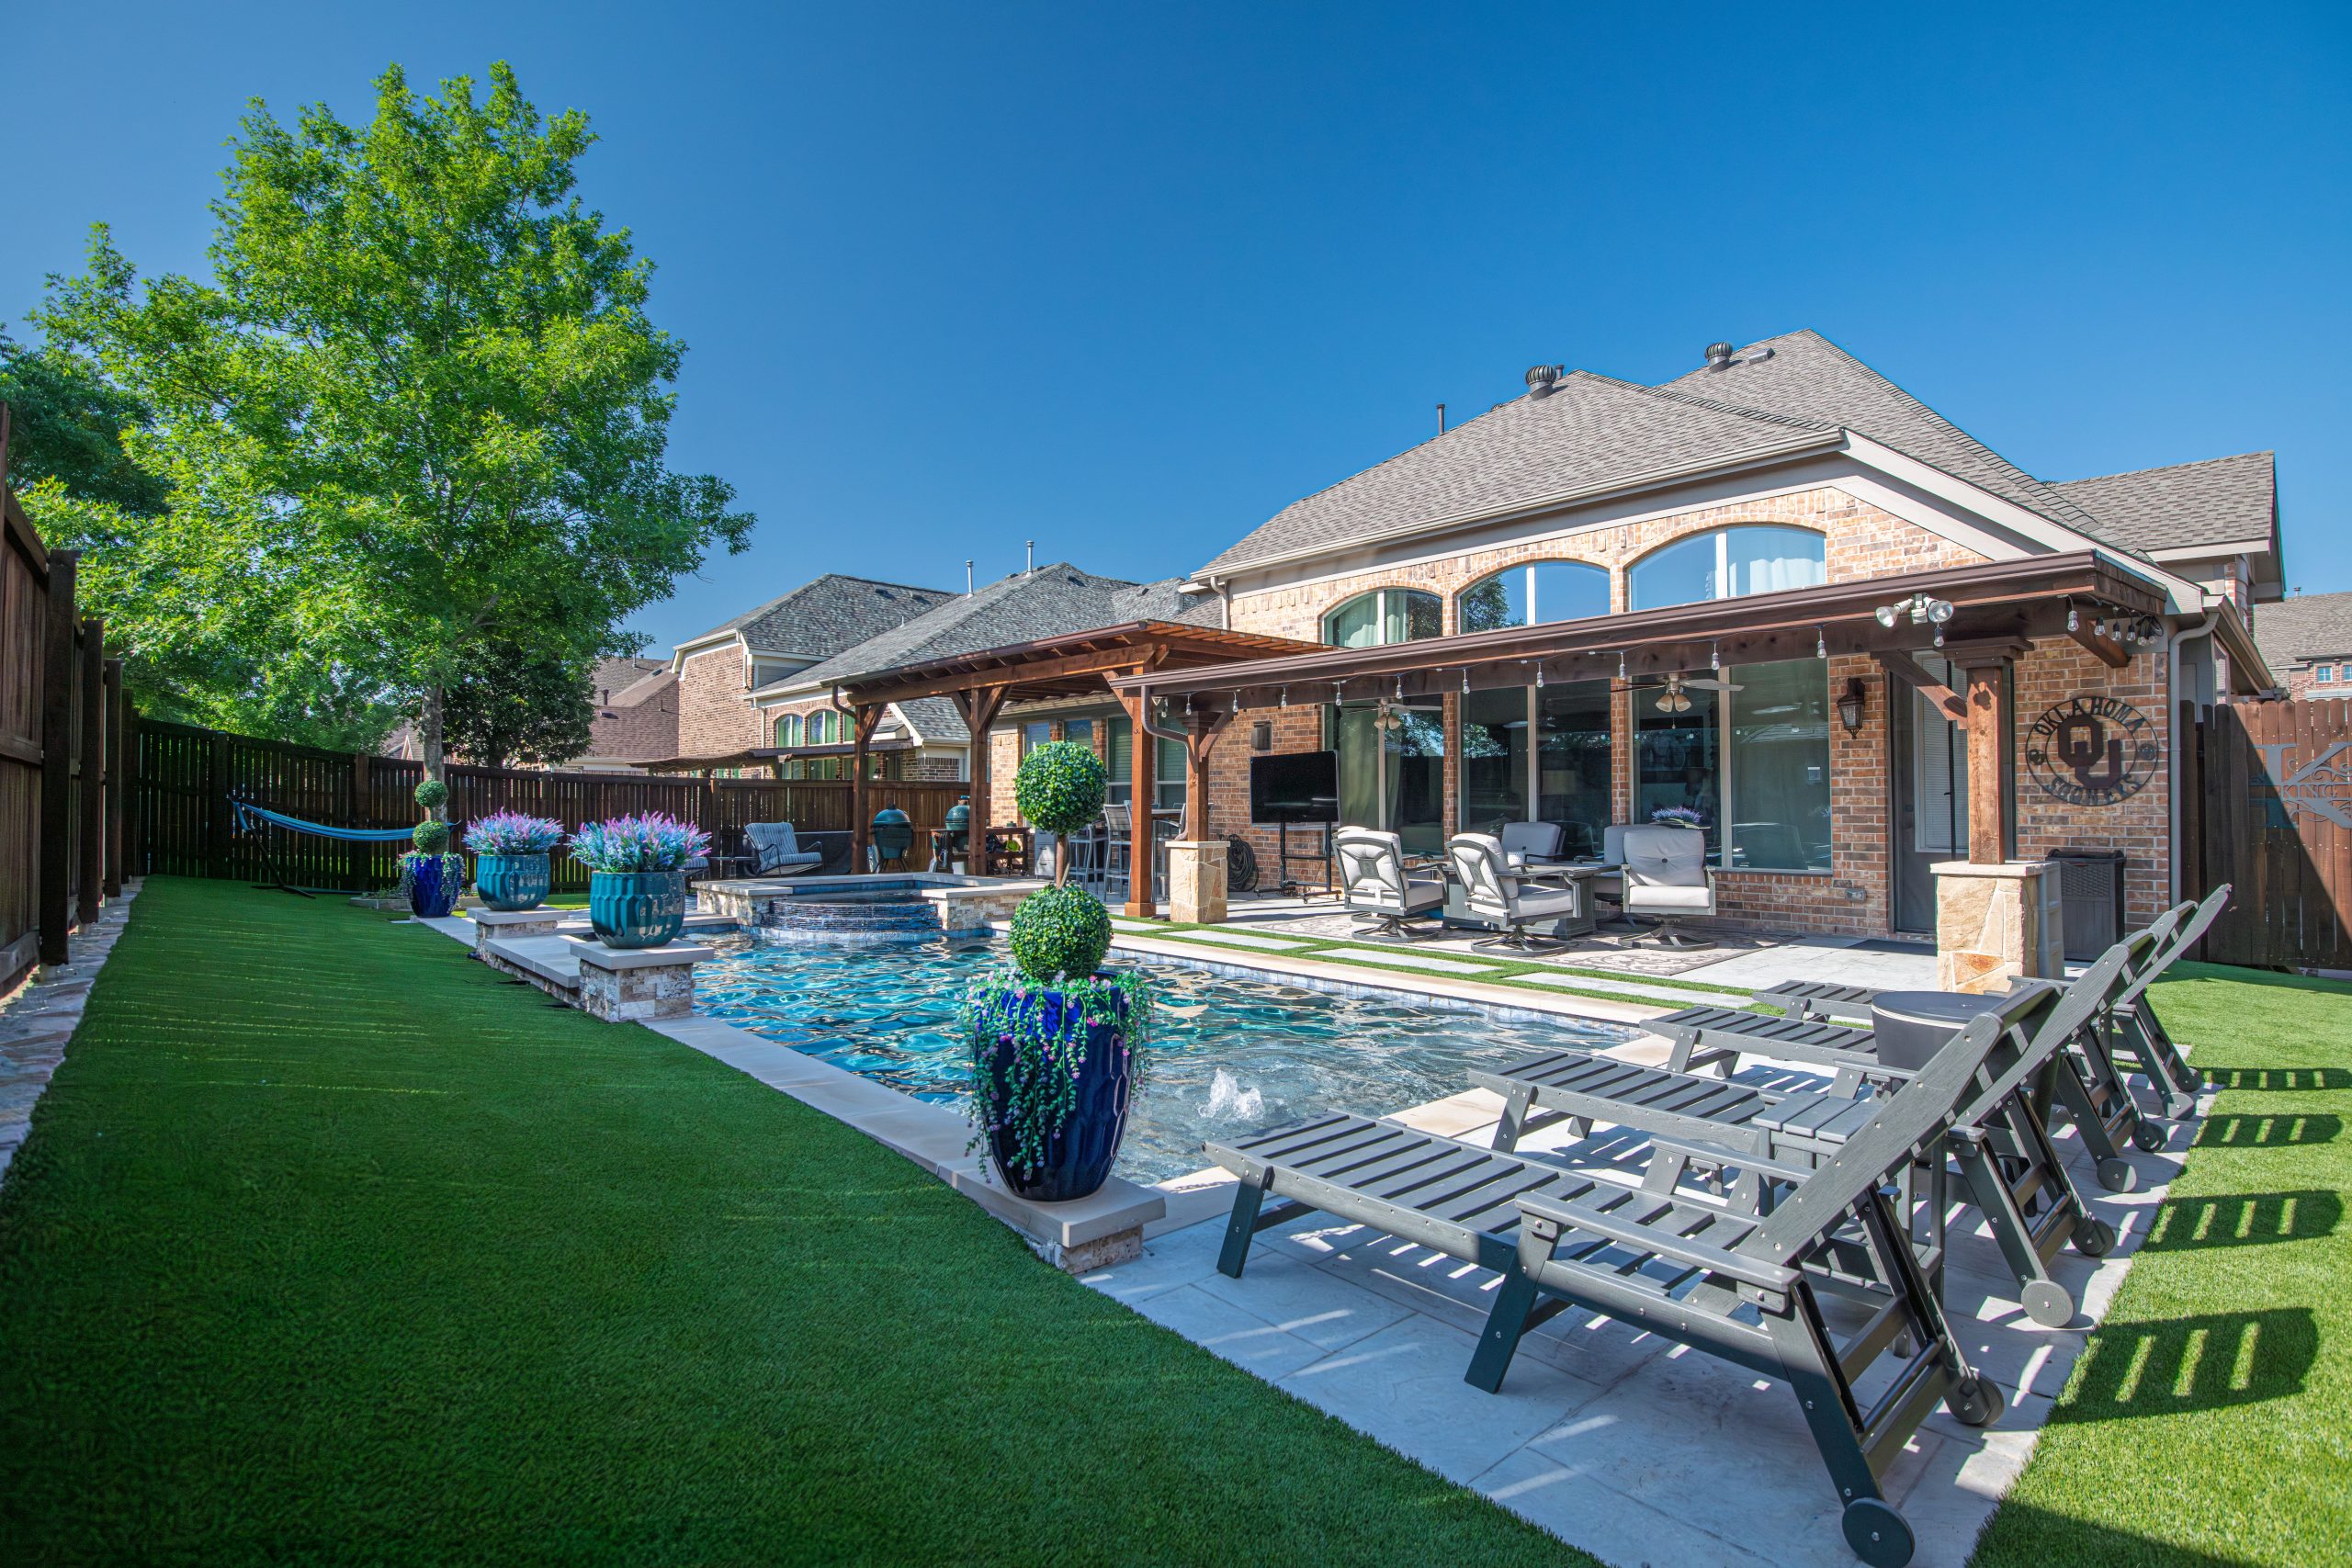
2. Combine a Pool, Pergola, and Turf for a Luxe Resort Vibe
Scale Guide: A layout this expansive demands a large, relatively flat yard—we’re talking a minimum of 1,500 square feet of open space to feel balanced, not crowded. For safety and comfortable lounging, plan for at least 4 to 6 feet of paver walkway around the entire pool perimeter. If your space is closer to 800 square feet, you can still get this look by scaling down to a plunge pool or a “spool” (spa/pool combo) and using a more compact pergola to define a single seating zone.
|
📋 Copy HEX 🔗 Share |
Real Talk: Let’s be honest about artificial turf: it gets hot. In direct, all-day sun, it can become uncomfortable for bare feet, especially for kids and pets. Consider its placement carefully, perhaps in areas that get afternoon shade. As for that gorgeous dark wood pergola? It will need to be cleaned and resealed every 2-3 years to maintain that rich color and protect it from sun and moisture damage. It’s not a set-it-and-forget-it feature, so be ready for the upkeep.
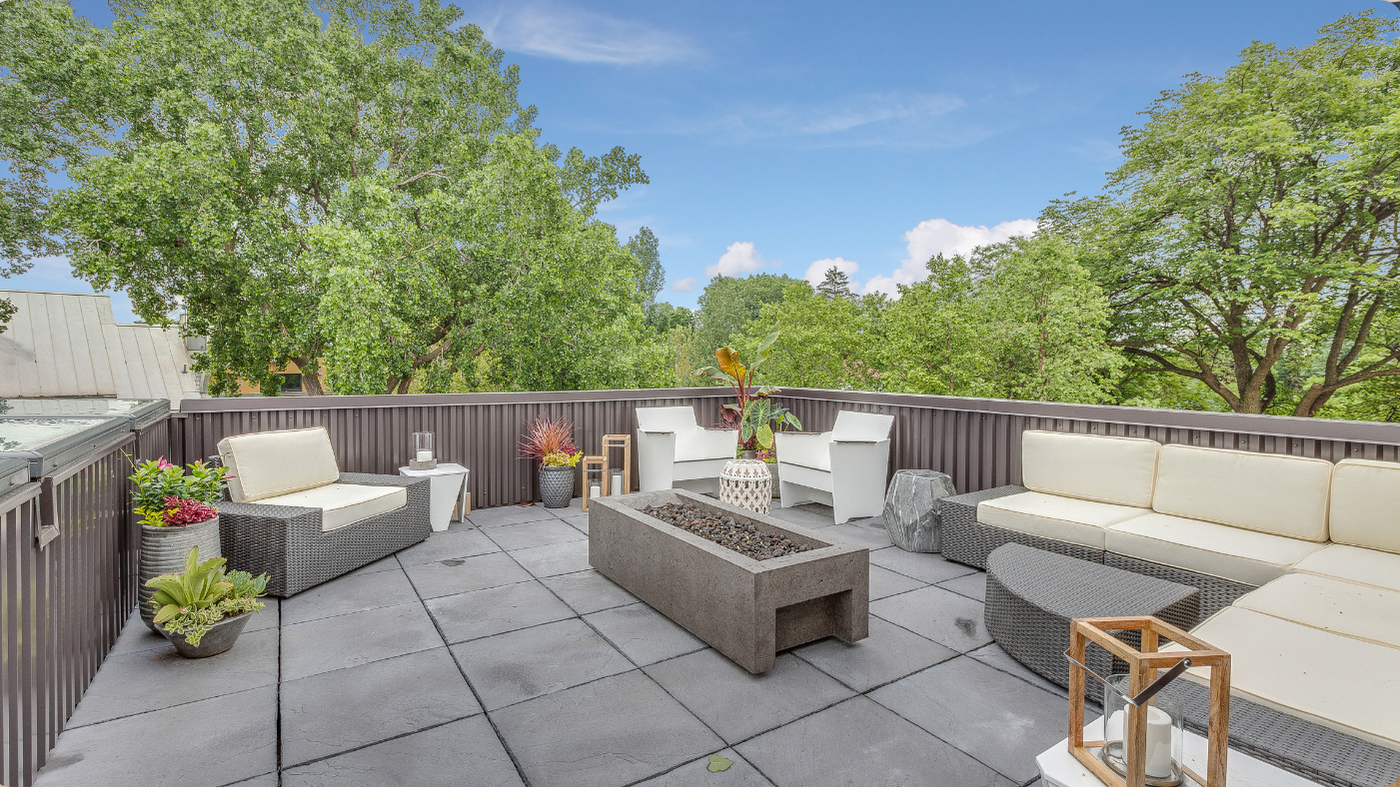
3. Anchor Your Patio with a Concrete Fire Pit and Modular Seating
The One Thing: It’s all about the rectangular concrete fire pit. This single element is the undisputed anchor of the entire layout. Its clean, modern lines and substantial form provide a grounding counterpoint to the softer, woven sectional sofa. If you took it away, the furniture would feel like a random collection of pieces floating on a vast patio. The fire pit dictates the arrangement, creates an irresistible focal point for conversation, and establishes the modern, inviting mood of the space.
|
📋 Copy HEX 🔗 Share |
Budget Breakdown:
- Modular Sectional Sofa: $2,500 – $6,000
- Modern Armchairs (2): $800 – $2,000
- Concrete Fire Pit Table: $1,200 – $3,500
- Large Pavers (per sq ft): $25 – $45 installed
- Decor (Lanterns, Plants): $300 – $700
- TOTAL: $7,000 – $16,000+
- Budget alternative: Get a similar vibe for less with a metal fire pit from a big box store ($300-$500), a used sectional from Facebook Marketplace ($800-$1200), and leveraging your existing patio space.
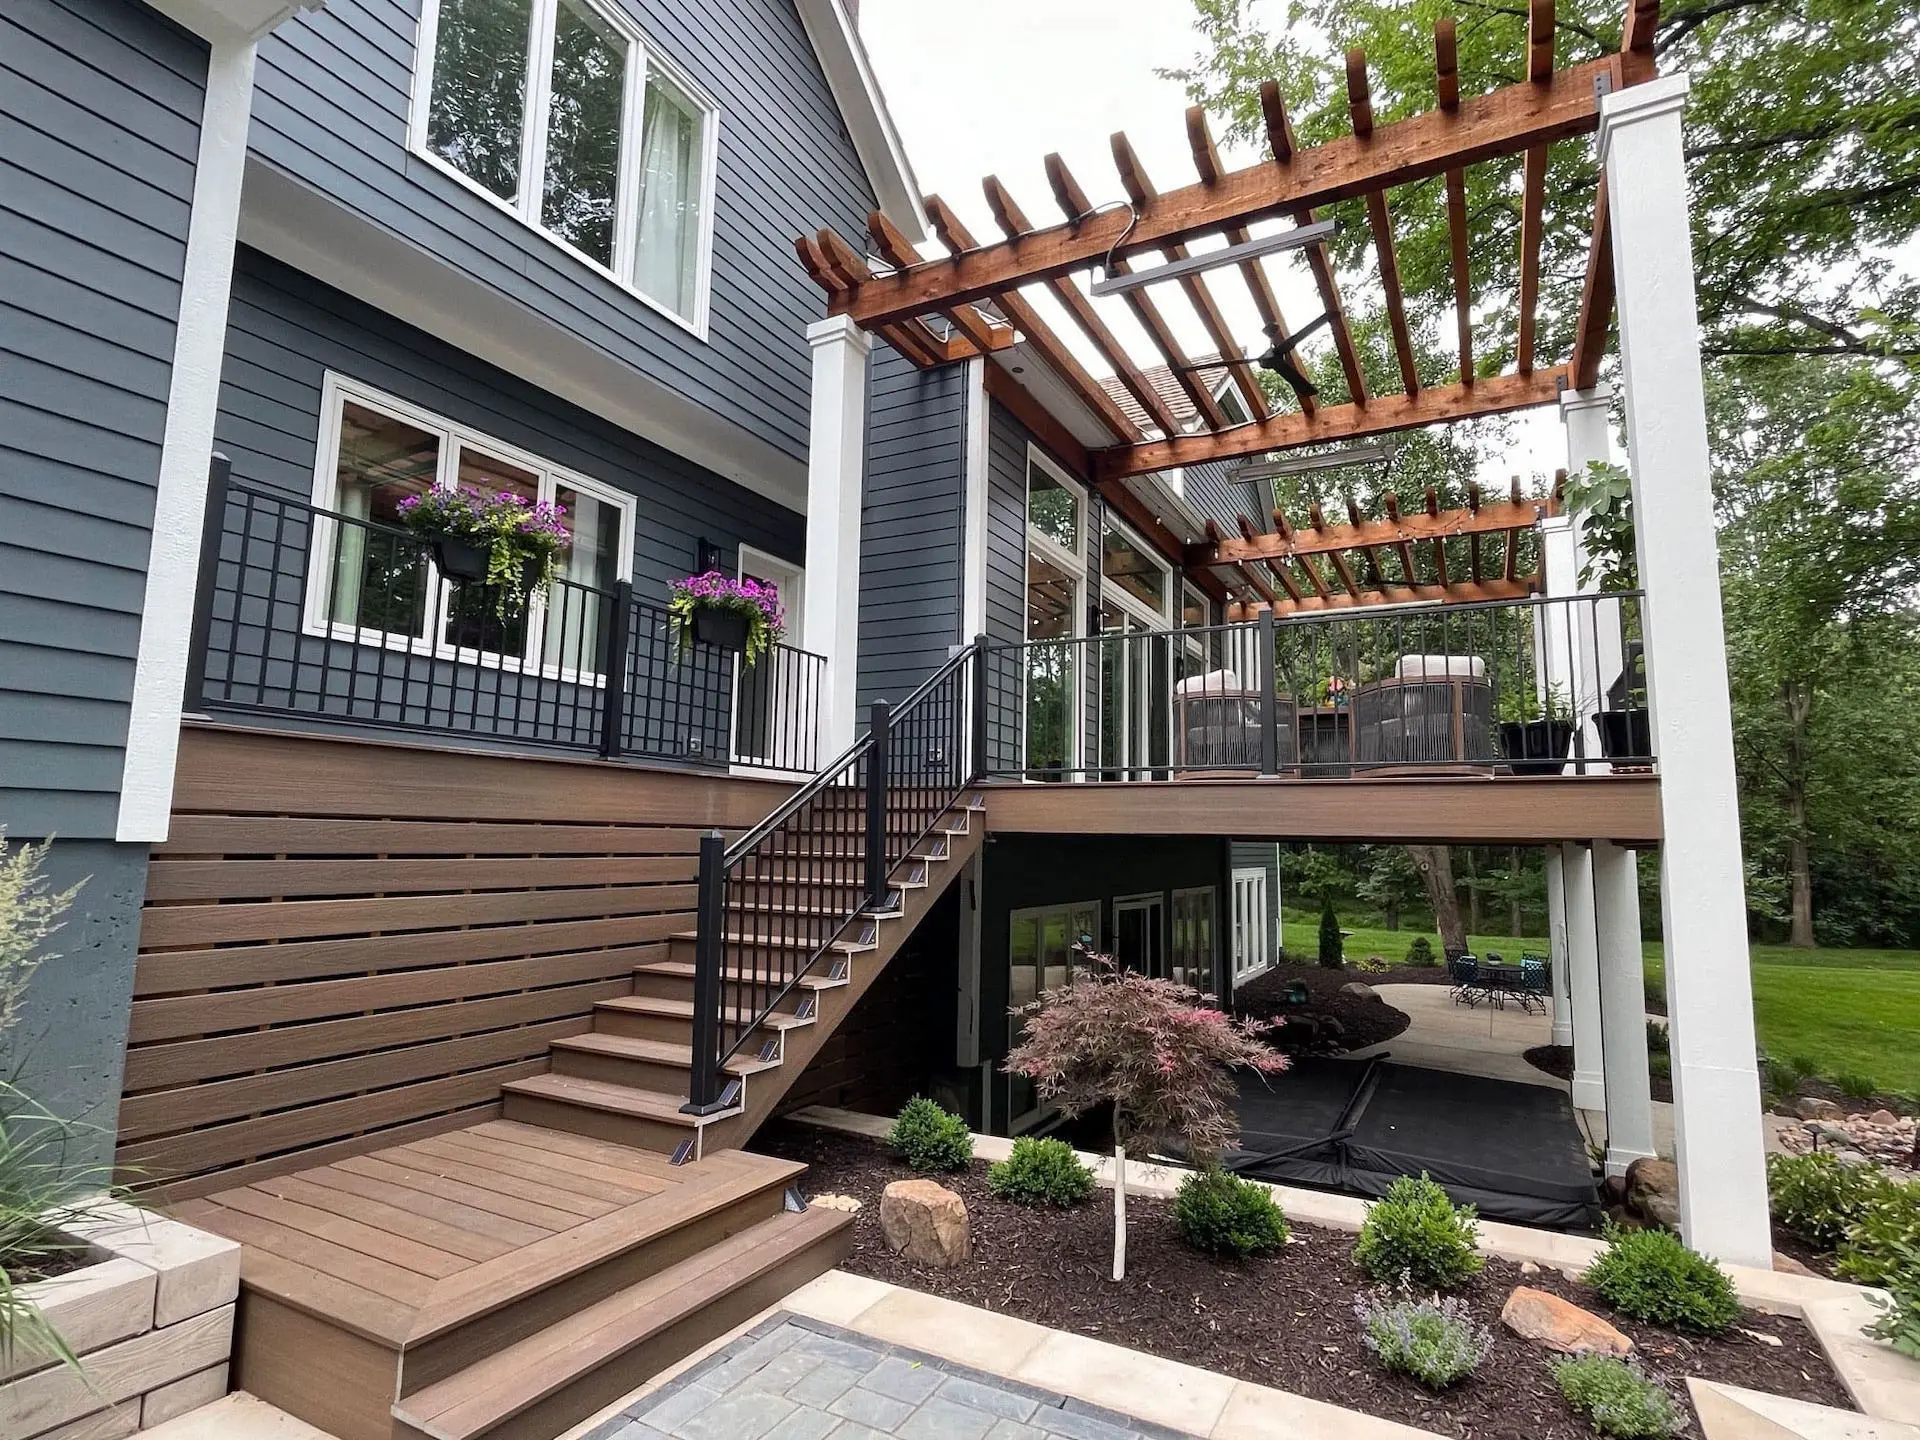
4. Create an Elevated Deck with a Pergola Over a Charcoal House
What Makes It Work: This design succeeds through powerful contrast. The warm, brown composite decking pops against the moody, sophisticated charcoal gray siding of the house. This isn’t an accident; it’s a deliberate choice to make the deck feel like a distinct, inviting feature. The black metal railings are thin and unobtrusive, preserving the view, while the substantial wooden pergola adds architectural interest and defines the main seating area without closing it in. The flow from the upper deck down to the lower patio is seamless thanks to the wide, welcoming staircase.
|
📋 Copy HEX 🔗 Share |
Style Math: The formula here is simple and effective: 50% dark, moody neutral (the charcoal siding). + 40% warm natural material (the brown decking and pergola) + 10% crisp architectural lines (the black metal railings and white columns). You could swap the materials while keeping the ratio. Imagine dark green siding instead of charcoal, or a lighter composite deck instead of warm brown. As long as you maintain that strong contrast between the house color and the deck material, you’ll achieve the same striking effect.
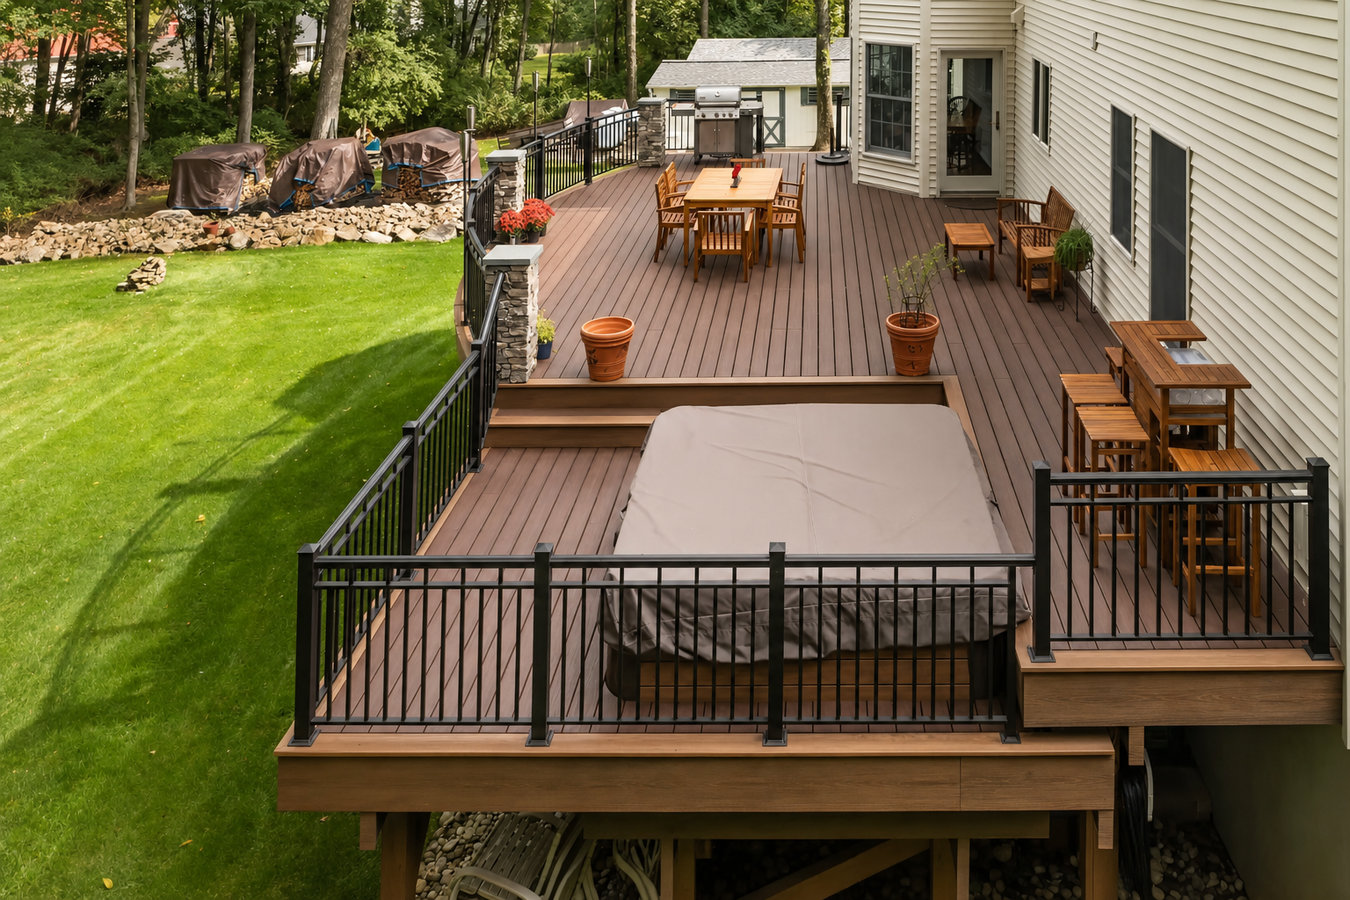
5. Organize a Multi-Level Deck with a Hot Tub and Bar
The One Thing: Clear, designated zones. This deck isn’t just a big, flat space; it’s a brilliant example of functional layout planning. You have a dedicated dining area, a separate bar for serving drinks, a lounging spot, and an integrated hot tub zone. Each space has its own purpose, which prevents the deck from feeling cluttered or chaotic, even when it’s full of people. The multi-level design helps define these zones naturally, creating a sense of discovery as you move through the space. This is how you make a large deck feel both expansive and intimate.
|
📋 Copy HEX 🔗 Share |
Maintenance Reality: A deck this feature-rich requires a maintenance schedule. The brown composite decking is low-maintenance, needing just a good power wash once a year. However, the wooden bar and dining furniture will require more attention. To keep that natural wood tone, you’ll need to clean and apply a UV-protectant sealer every 1-2 years, depending on your climate. For the hot tub, budget about $20-$40 per month for chemicals and plan to drain and refill it every 3-4 months for optimal hygiene.
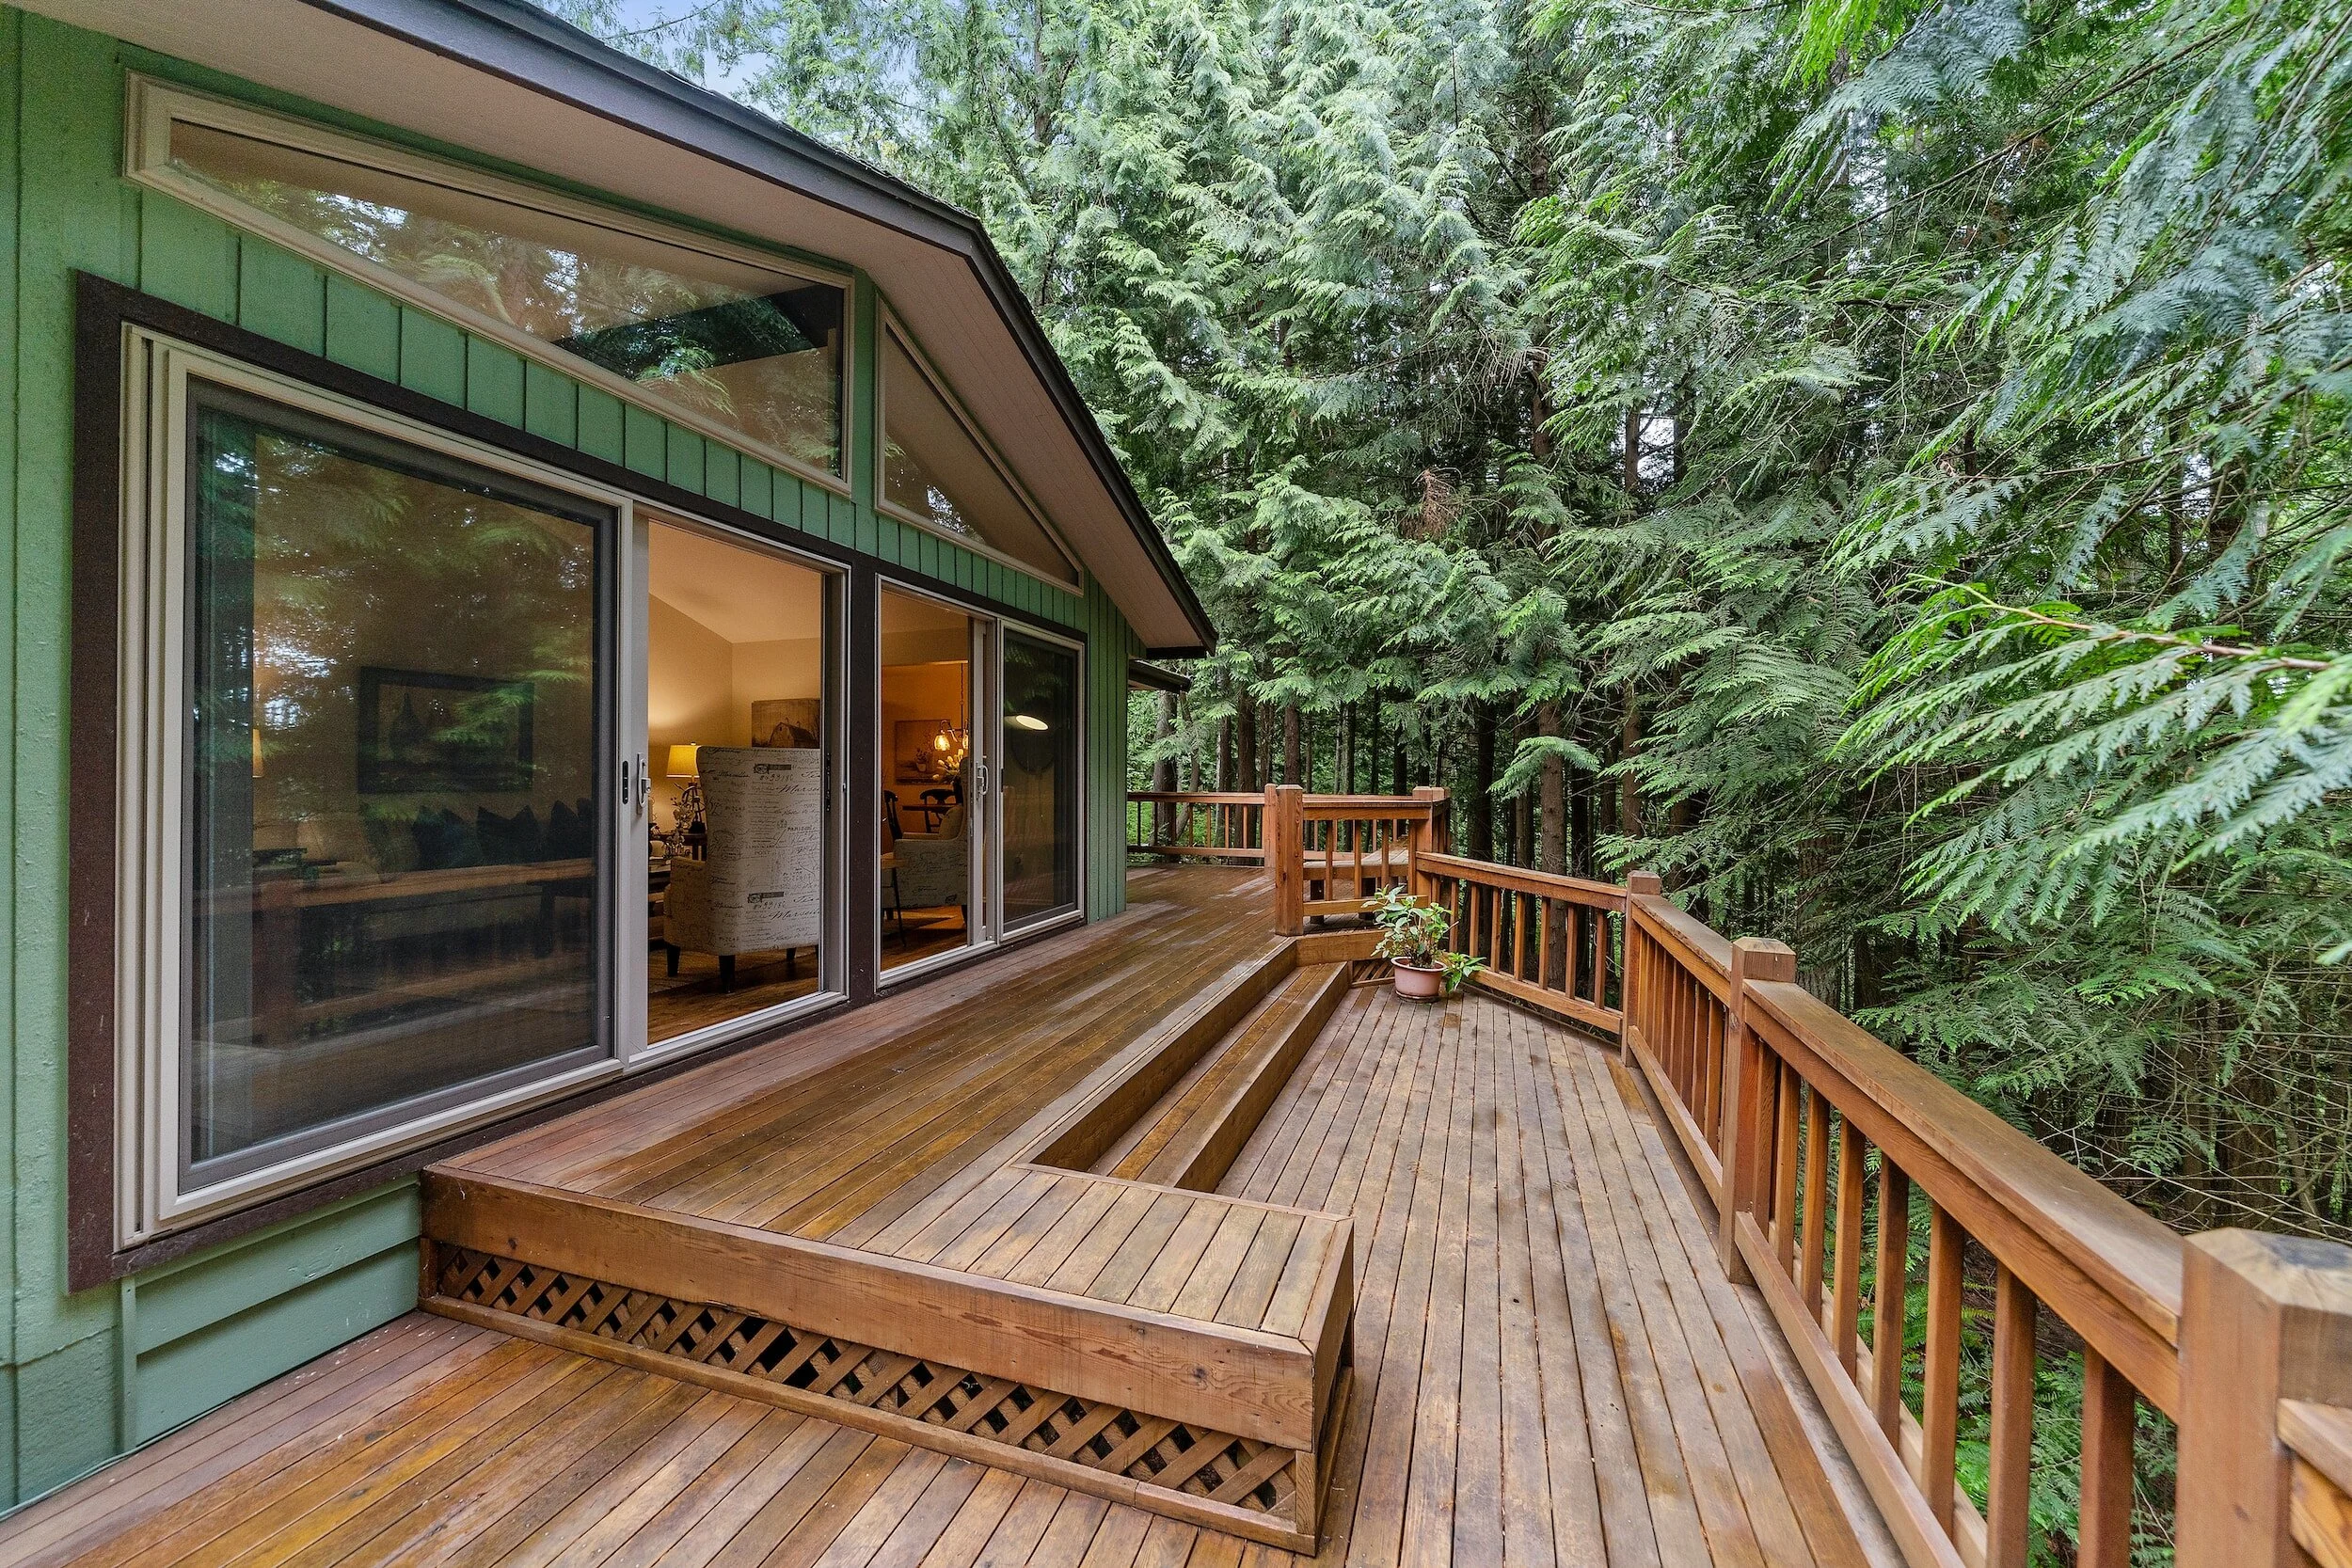
6. Embrace a Rustic Retreat with a Multi-Level Wood Deck in the Forest
What Makes It Work: This deck feels like a natural extension of the forest itself. The key is the consistent use of wood—the wide plank flooring, the robust railings, and even the built-in bench all share a similar tone, blurring the lines between the structure and the surrounding trees. The green board-and-batten siding on the house further connects the architecture to the landscape. Large glass doors don’t just provide access; they reflect the trees, making the barrier between inside and outside feel almost nonexistent.
|
📋 Copy HEX 🔗 Share |
Real Talk: A full wood deck in a dense forest setting is beautiful, but it’s also a magnet for moisture, mildew, and fallen leaves. The shade from the evergreen trees means the wood will stay damp longer after it rains, which can accelerate wear. You’ll need to be diligent about sweeping or blowing off debris to prevent staining and rot. A thorough cleaning and resealing will likely be an annual chore, not a biannual one, to keep this deck looking its best and protect your investment.
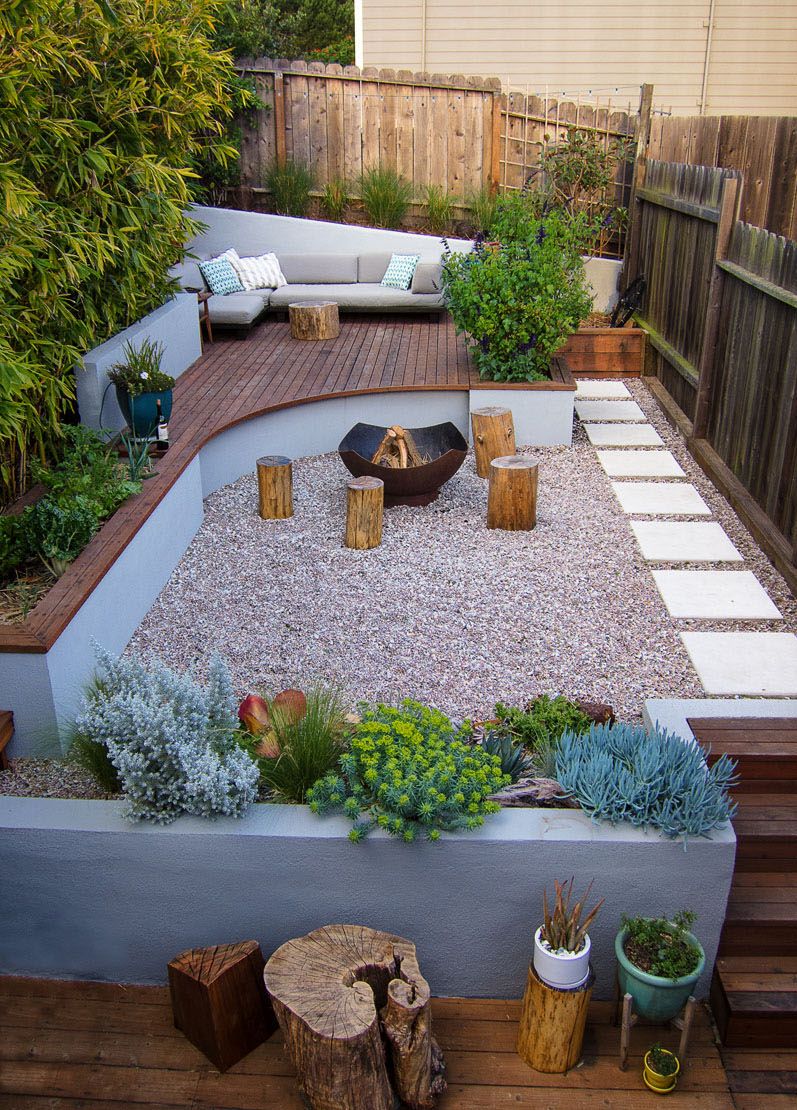
7. Mix Materials with a Tiered Deck and a Gravel Fire Pit Lounge
Style Math: This look achieves a relaxed, modern vibe with a formula of textural contrasts: 40% dark, refined wood (the deck) + 40% raw, industrial elements (the concrete walls and gravel base) + 20% soft, comfortable furnishings (the L-shaped sofa and cushions). The tree stump seats are a brilliant, rustic accent that keeps the space from feeling too cold or calculated. You could swap the gravel for a patch of artificial turf or use dark grey composite decking instead of wood and still achieve a similar balanced feel. The key is the tension between sleek and raw.
|
📋 Copy HEX 🔗 Share |
Designer Tip: When creating a gravel patio area like this, excavation is key. Don’t just dump gravel on top of dirt. For a stable, long-lasting surface, you need to dig down 4-5 inches. Lay down a heavy-duty landscape fabric first to suppress weeds, then add a 2-3 inch layer of crushed base rock and compact it. Finish with a 2-inch layer of your decorative gravel on top. This process prevents the gravel from sinking into the mud and becoming a weedy mess. Compare this to the more formal fire pit in Idea #3.
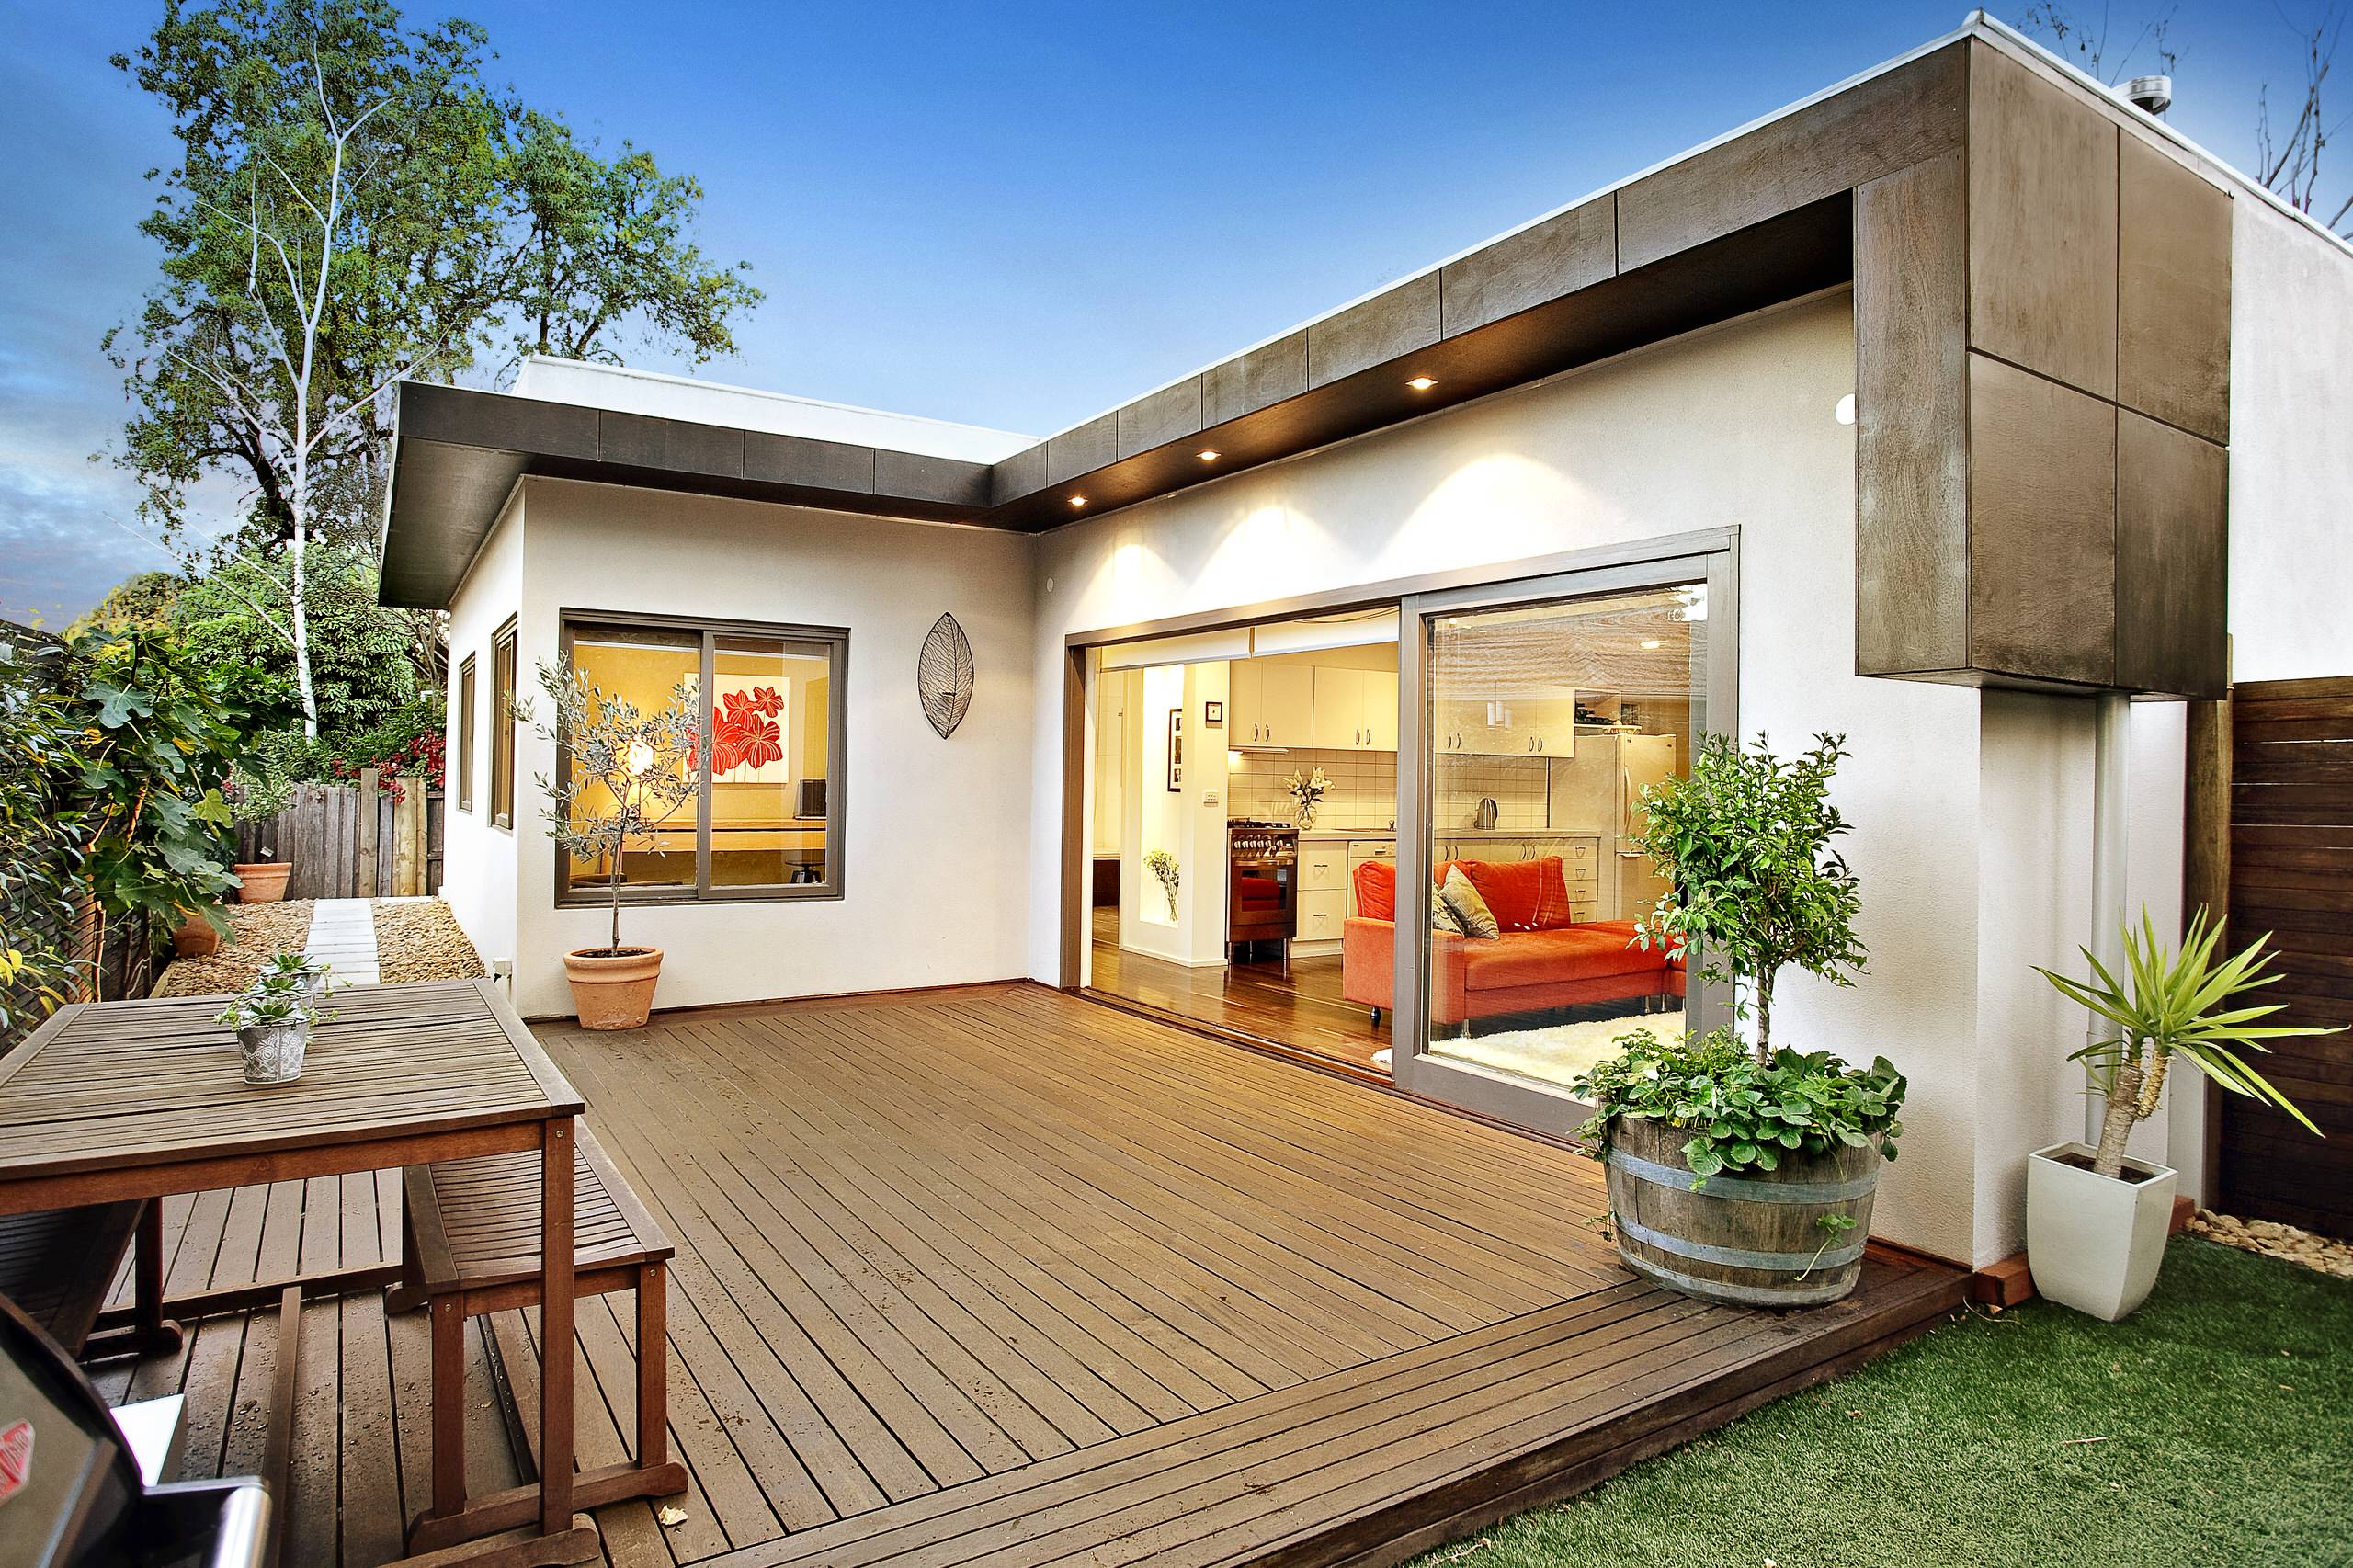
8. Extend a Modern Home with an Expansive Dark-Stained Deck
What Makes It Work: This deck’s success lies in its simplicity and clean lines. The dark-stained wood provides a warm, organic foundation that beautifully contrasts the clean, cream-colored stucco of the house. The deck isn’t cluttered with railings, which allows for an uninterrupted transition to the green lawn and creates a much more open, spacious feeling. The matching slatted wood of the dining table and benches creates a cohesive, intentional look. It feels less like an add-on and more like a core part of the home’s architecture.
|
📋 Copy HEX 🔗 Share |
Get This Look For Less: You don’t need a huge budget for this modern, minimalist vibe. Instead of a custom-built deck, check IKEA for their outdoor wood floor decking tiles (like the RUNNEN series), which you can lay over an existing concrete patio for under $500. For the dining set, look to Target’s outdoor collection or Facebook Marketplace for a simple wooden table and benches. A dark wood stain can make mismatched pieces look like a cohesive set. With smart shopping, you can recreate this look for under $1,500.
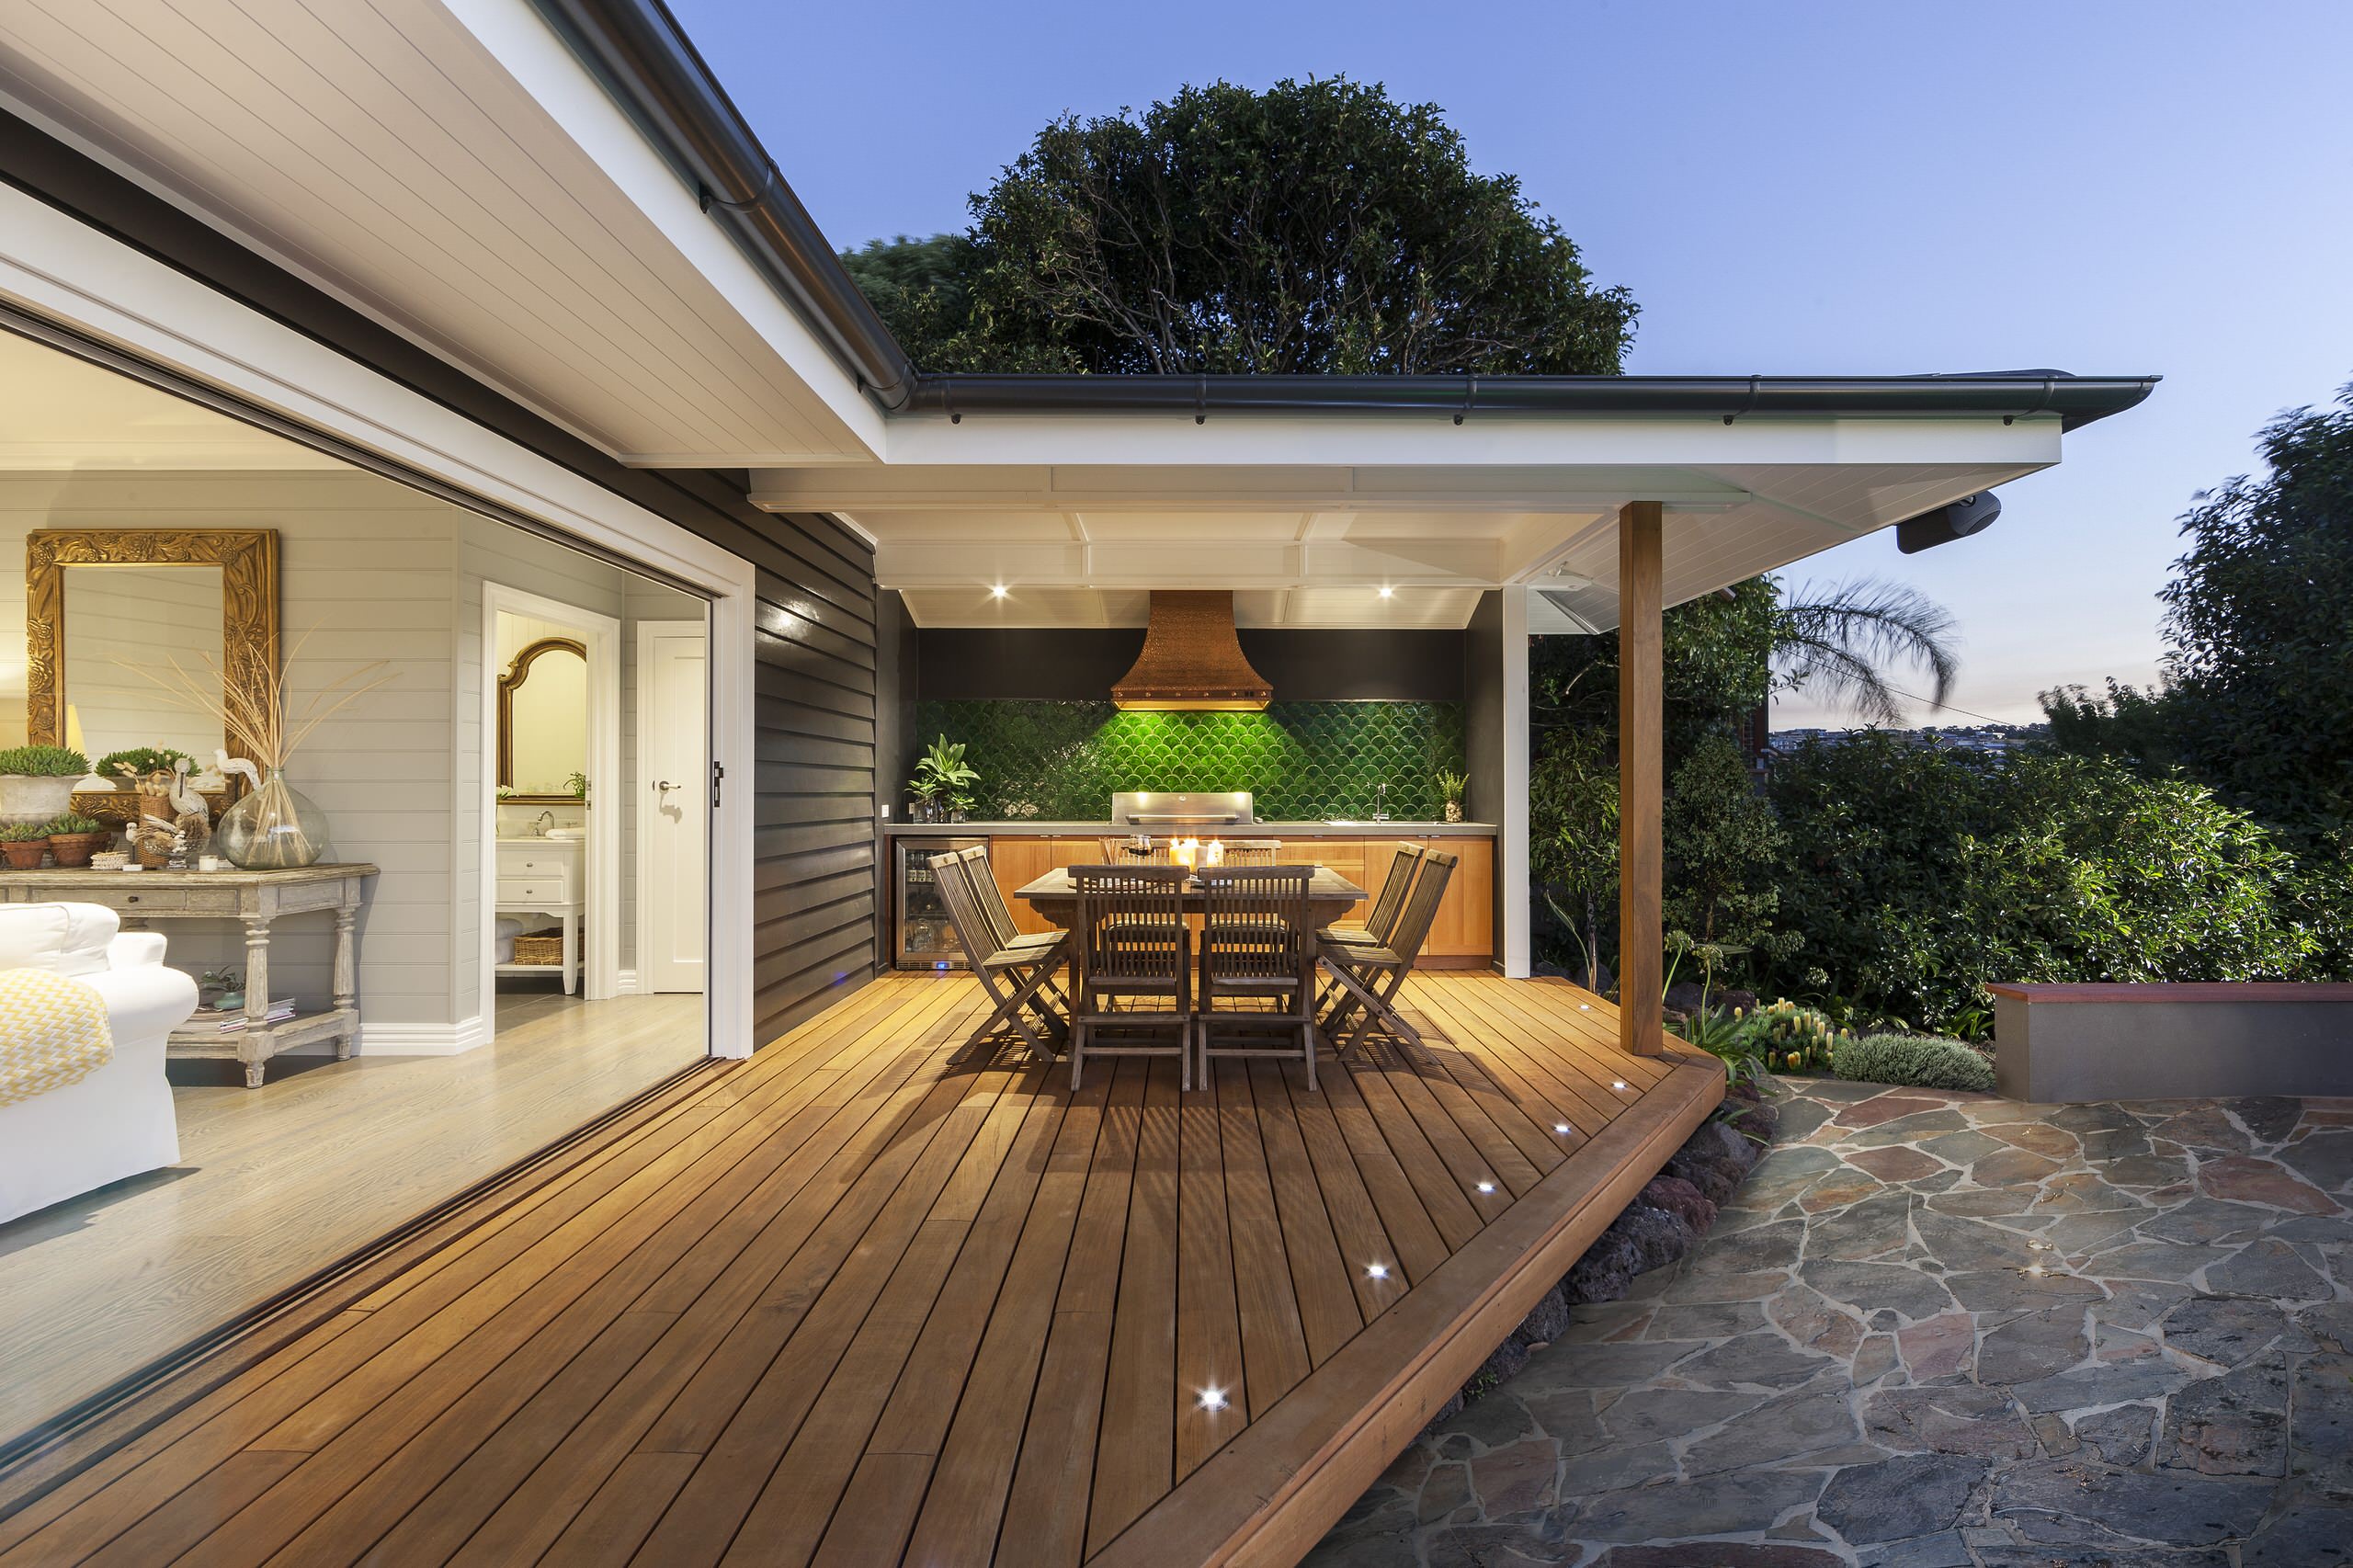
9. Create an Ambient Outdoor Kitchen with a Copper Hood and Green Tile
The One Thing: The vibrant green fish-scale backsplash is the heart and soul of this design. It’s a bold, unexpected choice for an outdoor kitchen that injects personality and a pop of sophisticated color. It elevates the space from a simple grill station to a true designer feature. The warm tones of the copper range hood and wood cabinetry are the perfect complement, but it’s that splash of green that everyone will remember and talk about. This is a masterclass in using a single, high-impact element to define a space.
|
📋 Copy HEX 🔗 Share |
How-To Brief: Installing Deck Ground Lights
Recreate that ambient glow with integrated deck lights. Time: 4-6 hours. Cost: $200-$500.
- Plan your layout: Mark the exact spots for each light on your deck boards, aiming for about 4-6 feet of spacing along pathways or perimeters.
- Choose your lights: Select a low-voltage LED deck light kit. Ensure it’s rated for outdoor, in-ground use.
- Drill the holes: Use a hole saw bit that matches the diameter specified by your light manufacturer to drill cleanly through the deck boards.
- Run the wiring: Feed the low-voltage cable under the deck, connecting each light fixture as you go. Secure the wires to the underside of the joists with cable staples.
- Connect to power: Run the main cable to your transformer and plug the transformer into a GFCI-protected outdoor outlet.
- Test and finish: Turn on the power to ensure all lights work before snapping them securely into place.
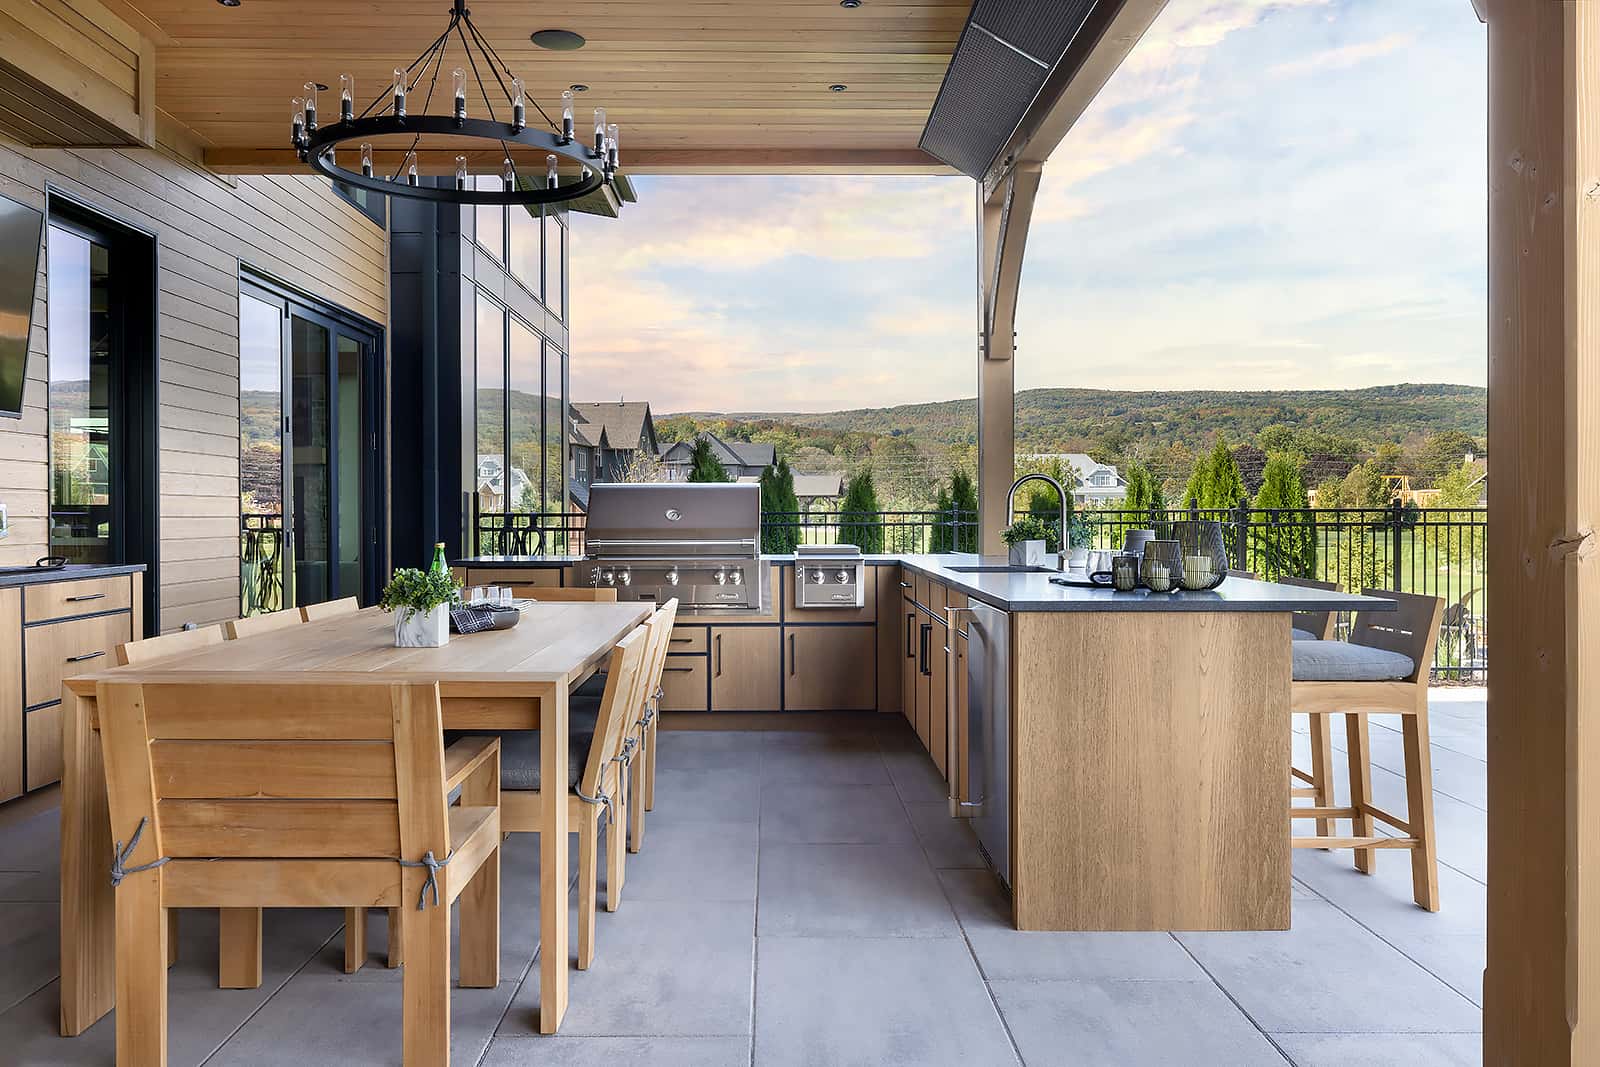
10. Design a Sleek Outdoor Kitchen and Dining Deck with Hillside Views
Scale Guide: This integrated kitchen and dining layout requires significant linear space. To comfortably fit the L-shaped kitchen island with bar seating and a separate dining table, you’ll need a deck area that is at least 20 feet long and 12-14 feet deep. This ensures you have adequate clearance (at least 36 inches) for walkways between the island, the dining table, and the deck edge. For smaller spaces, consider an inline (single wall) kitchen layout instead of an L-shape to save valuable square footage.
|
📋 Copy HEX 🔗 Share |
Designer Tip: When choosing materials for an outdoor kitchen, think long-term. While the light wood here is beautiful, it will require consistent maintenance in an exposed environment. For a similar look with less work, consider using a high-quality wood-look porcelain tile for the cabinetry fronts and durable quartz or granite for the countertops. These materials are far more resistant to UV fading, moisture, and staining than natural wood and many other countertop surfaces. Compare the casual dining of Idea #22 to this more built-in approach.
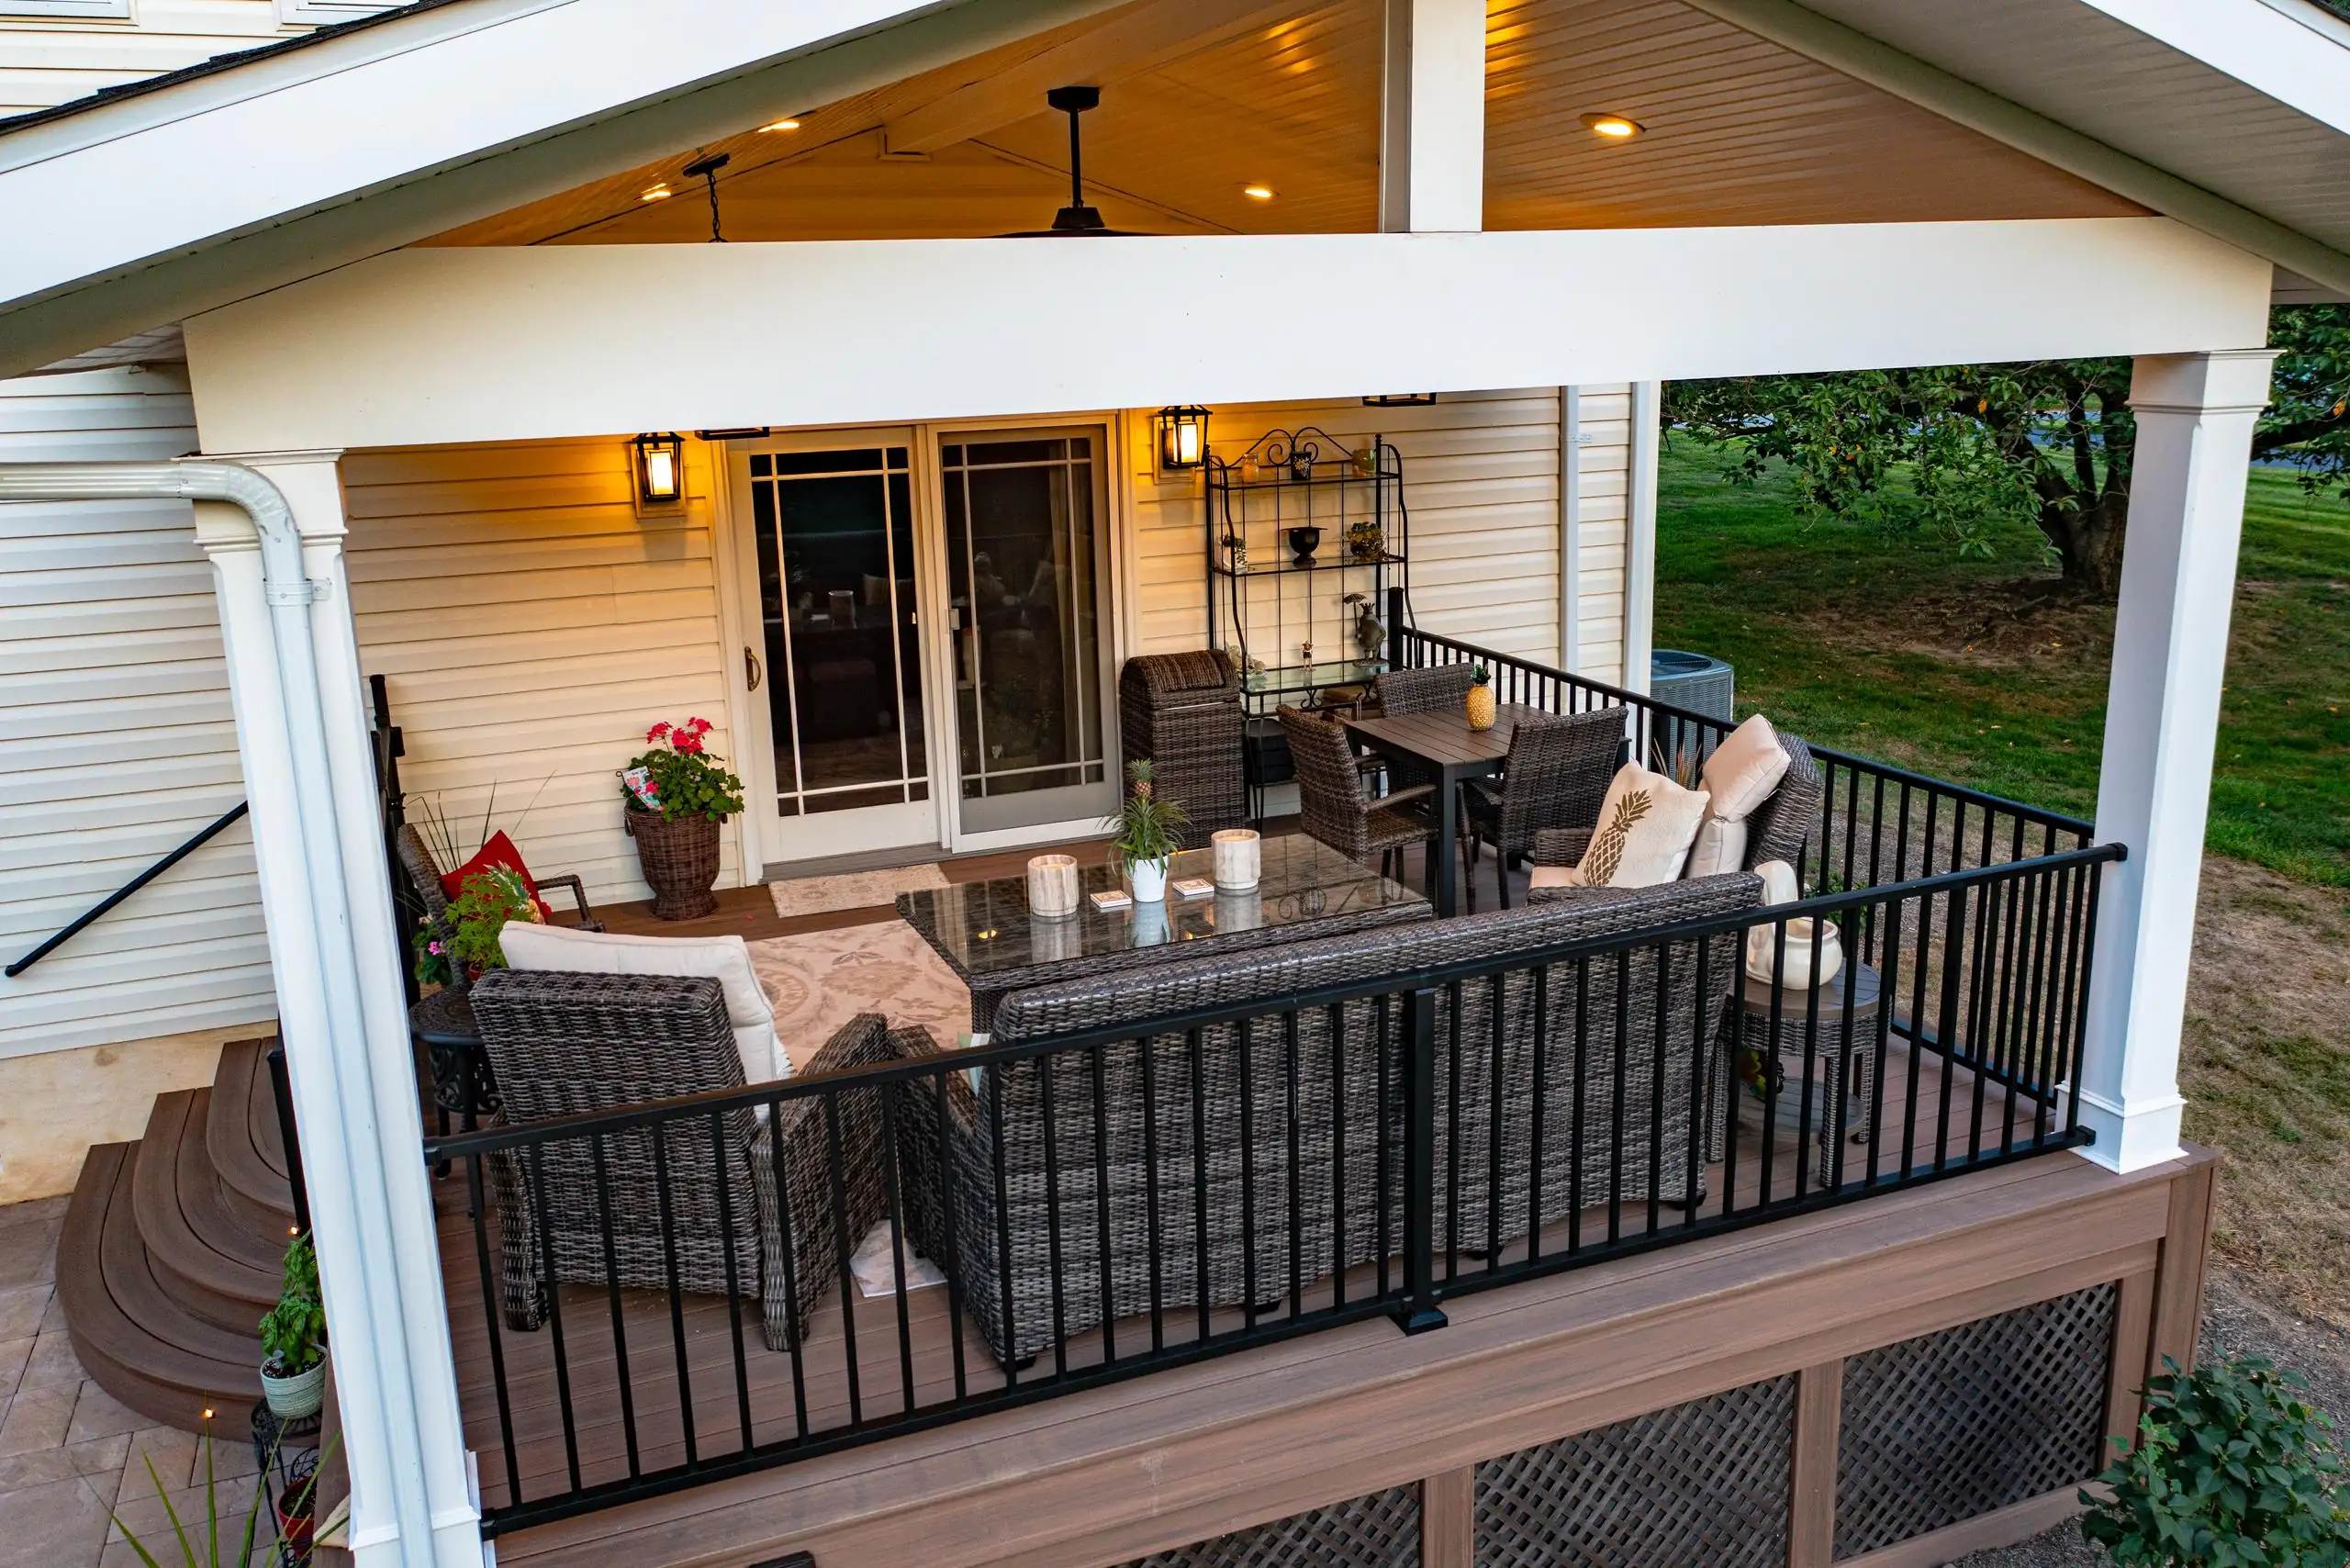
11. Furnish a Covered Composite Deck with Classic Wicker Seating
Get This Look For Less: A cozy, functional covered deck is totally achievable on a budget. The key is all-weather wicker furniture. You can find surprisingly stylish and durable sets at Walmart or Target for $500-$1,000. For the composite decking, look for overstock or discontinued colors at big box hardware stores for a significant discount. The black metal railings are a standard, affordable option. Add a simple outdoor ceiling fan ($100-$200) and some string lights, and you’ve captured the essence of this inviting space for a fraction of the custom-build cost.
|
📋 Copy HEX 🔗 Share |
Real Talk: Those white cushions look fantastic… when they’re clean. On any deck, covered or not, they will attract pollen, dust, and the occasional bird dropping. Invest in furniture covers and use them diligently when the seating isn’t in use. It’s a small hassle that will save you hours of scrubbing. Also, be sure to buy outdoor furniture with removable, machine-washable cushion covers. It’s a non-negotiable feature for keeping light-colored fabrics looking fresh.
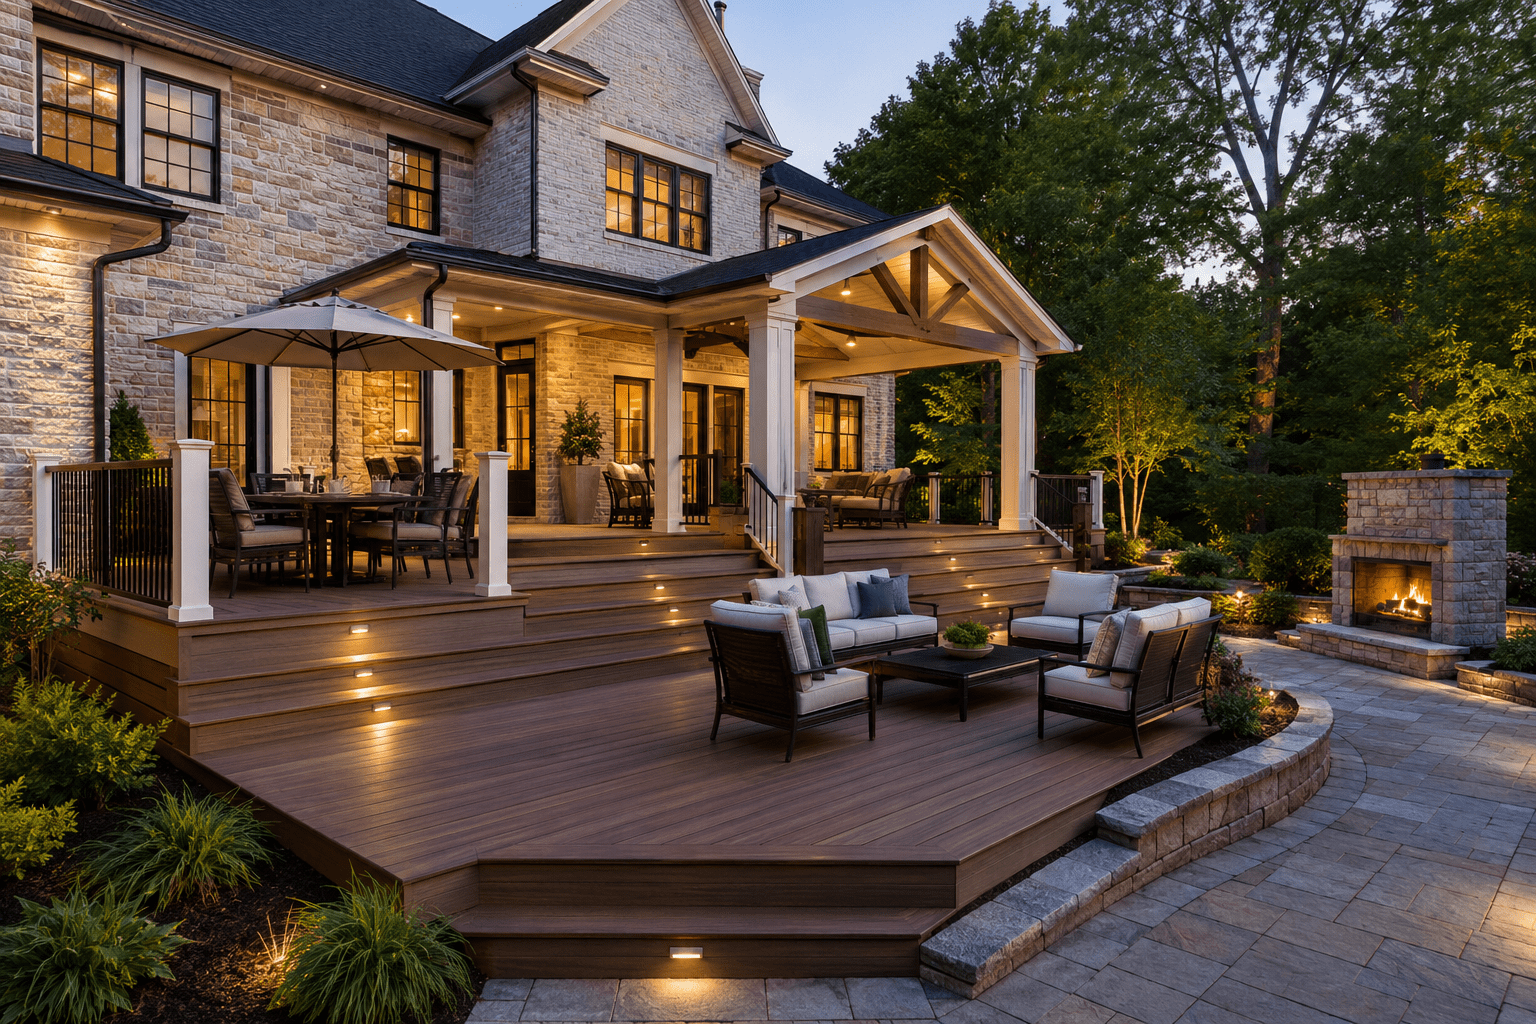
12. Layer a Multi-Level Deck with a Lounge, Dining Area, and Fireplace
What Makes It Work: This design is a masterclass in creating a journey. You don’t just step out onto a deck; you descend through a series of experiences. The covered lounge with its timber trusses feels like a protected, cozy outdoor room. The open-air dining area is perfect for sunny days. Finally, the stone patio with the grand fireplace offers a rustic, grounded destination. The integrated lighting on the steps is crucial—it not only provides safety but also highlights the multi-level architecture at night, making the space feel just as special after dark. This is a much grander version of the zones seen in Idea #1.
|
📋 Copy HEX 🔗 Share |
Before You Start Checklist:
- Check local codes: Does your municipality have restrictions on deck size, height, or proximity to property lines? A large stone fireplace may also require a specific permit and foundation.
- Map your sun exposure: Where does the sun hit at different times of the day? This will determine the best location for the covered lounge versus the open dining area.
- Plan your foundation: A multi-level structure like this, especially one attached to a stone house and including a heavy fireplace, needs a professionally engineered foundation plan.
- Get a comprehensive budget: This is a major construction project. Get detailed quotes that include materials, labor, electrical for lighting, and gas lines for the fireplace.
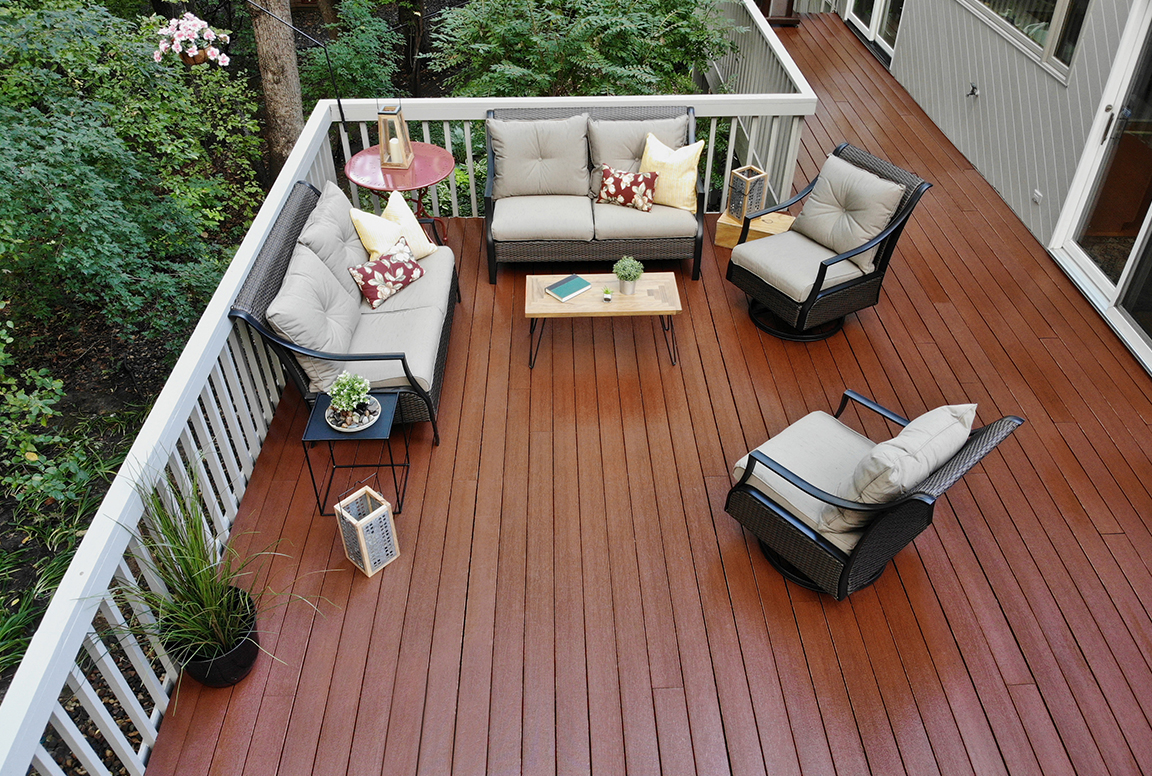
13. Arrange Expansive Wicker Seating on a Reddish-Brown Wood Deck
Style Math: The formula for this classic, inviting look is: 60% warm, reddish-brown wood tones (the deck itself) + 30% dark, textural wicker (the furniture frames) + 10% calm, light neutral (the beige cushions and white railing). The surrounding lush greenery acts as a vibrant, natural backdrop. This color and material combination is timeless because it’s rooted in nature. The key to making it feel current is the generous scale of the furniture and the clean lines of the white railing, which keep it from looking dated.
|
📋 Copy HEX 🔗 Share |
Designer Tip: When arranging a large multi-piece seating group like this, create a clear focal point. Here, the wooden coffee table acts as the center of gravity. Arrange the sofas and chairs so they are all oriented toward it, no more than 8-10 feet apart, to encourage conversation. Use an outdoor rug (even a simple neutral one) to visually anchor the entire grouping and make it feel like a cohesive, intentional “room” on the deck.
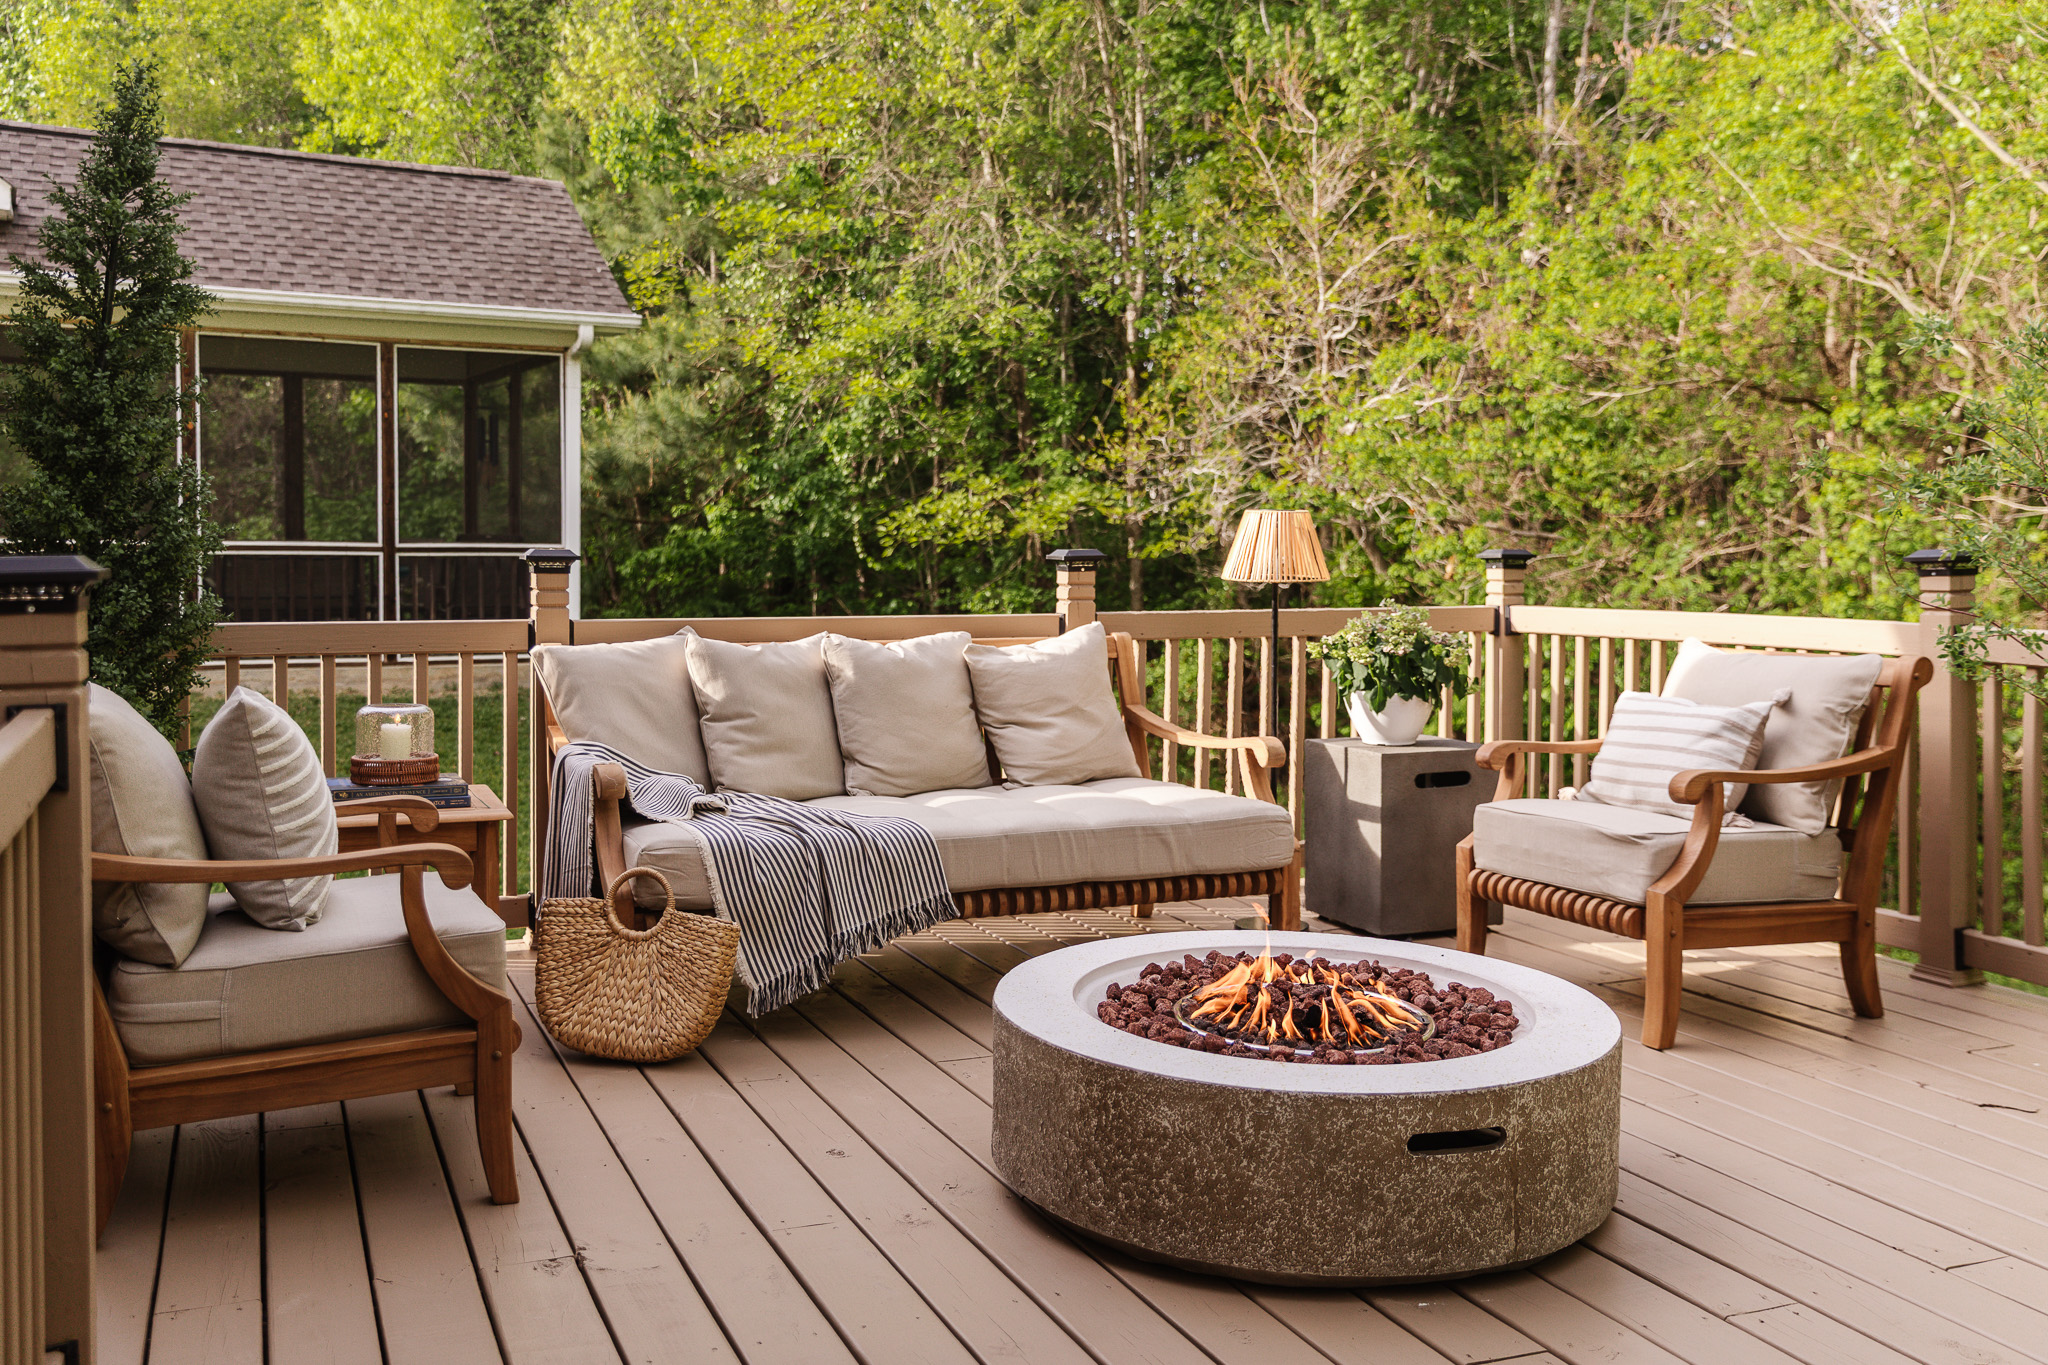
14. Create a Cozy Nook with Natural Wood Furniture and a Fire Pit
What Makes It Work: This arrangement feels incredibly cozy and intimate because of its circular composition. The sofa and two armchairs form a classic ‘U’ shape, physically turning inward towards the central fire pit. This naturally encourages conversation and shared experience. The use of natural wood for the furniture frames and the deck itself, paired with the lush green backdrop, creates a serene, almost ‘campsite’ feel, but with all the comforts of home. The striped throw blanket adds just the right touch of lived-in personality.
|
📋 Copy HEX 🔗 Share |
Get This Look For Less: A wood-and-cushion outdoor set can be pricey, but you can get the same feeling on a smaller budget. Build your own simple sofa and chairs using plans found online with standard lumber from a hardware store for under $400. Buy outdoor seat cushions separately during end-of-season sales. For the fire pit, a simple metal fire bowl from Target or Walmart ($100-$200) provides the same ambiance as a more expensive concrete model. The key is the arrangement, not the price tag of the individual pieces.
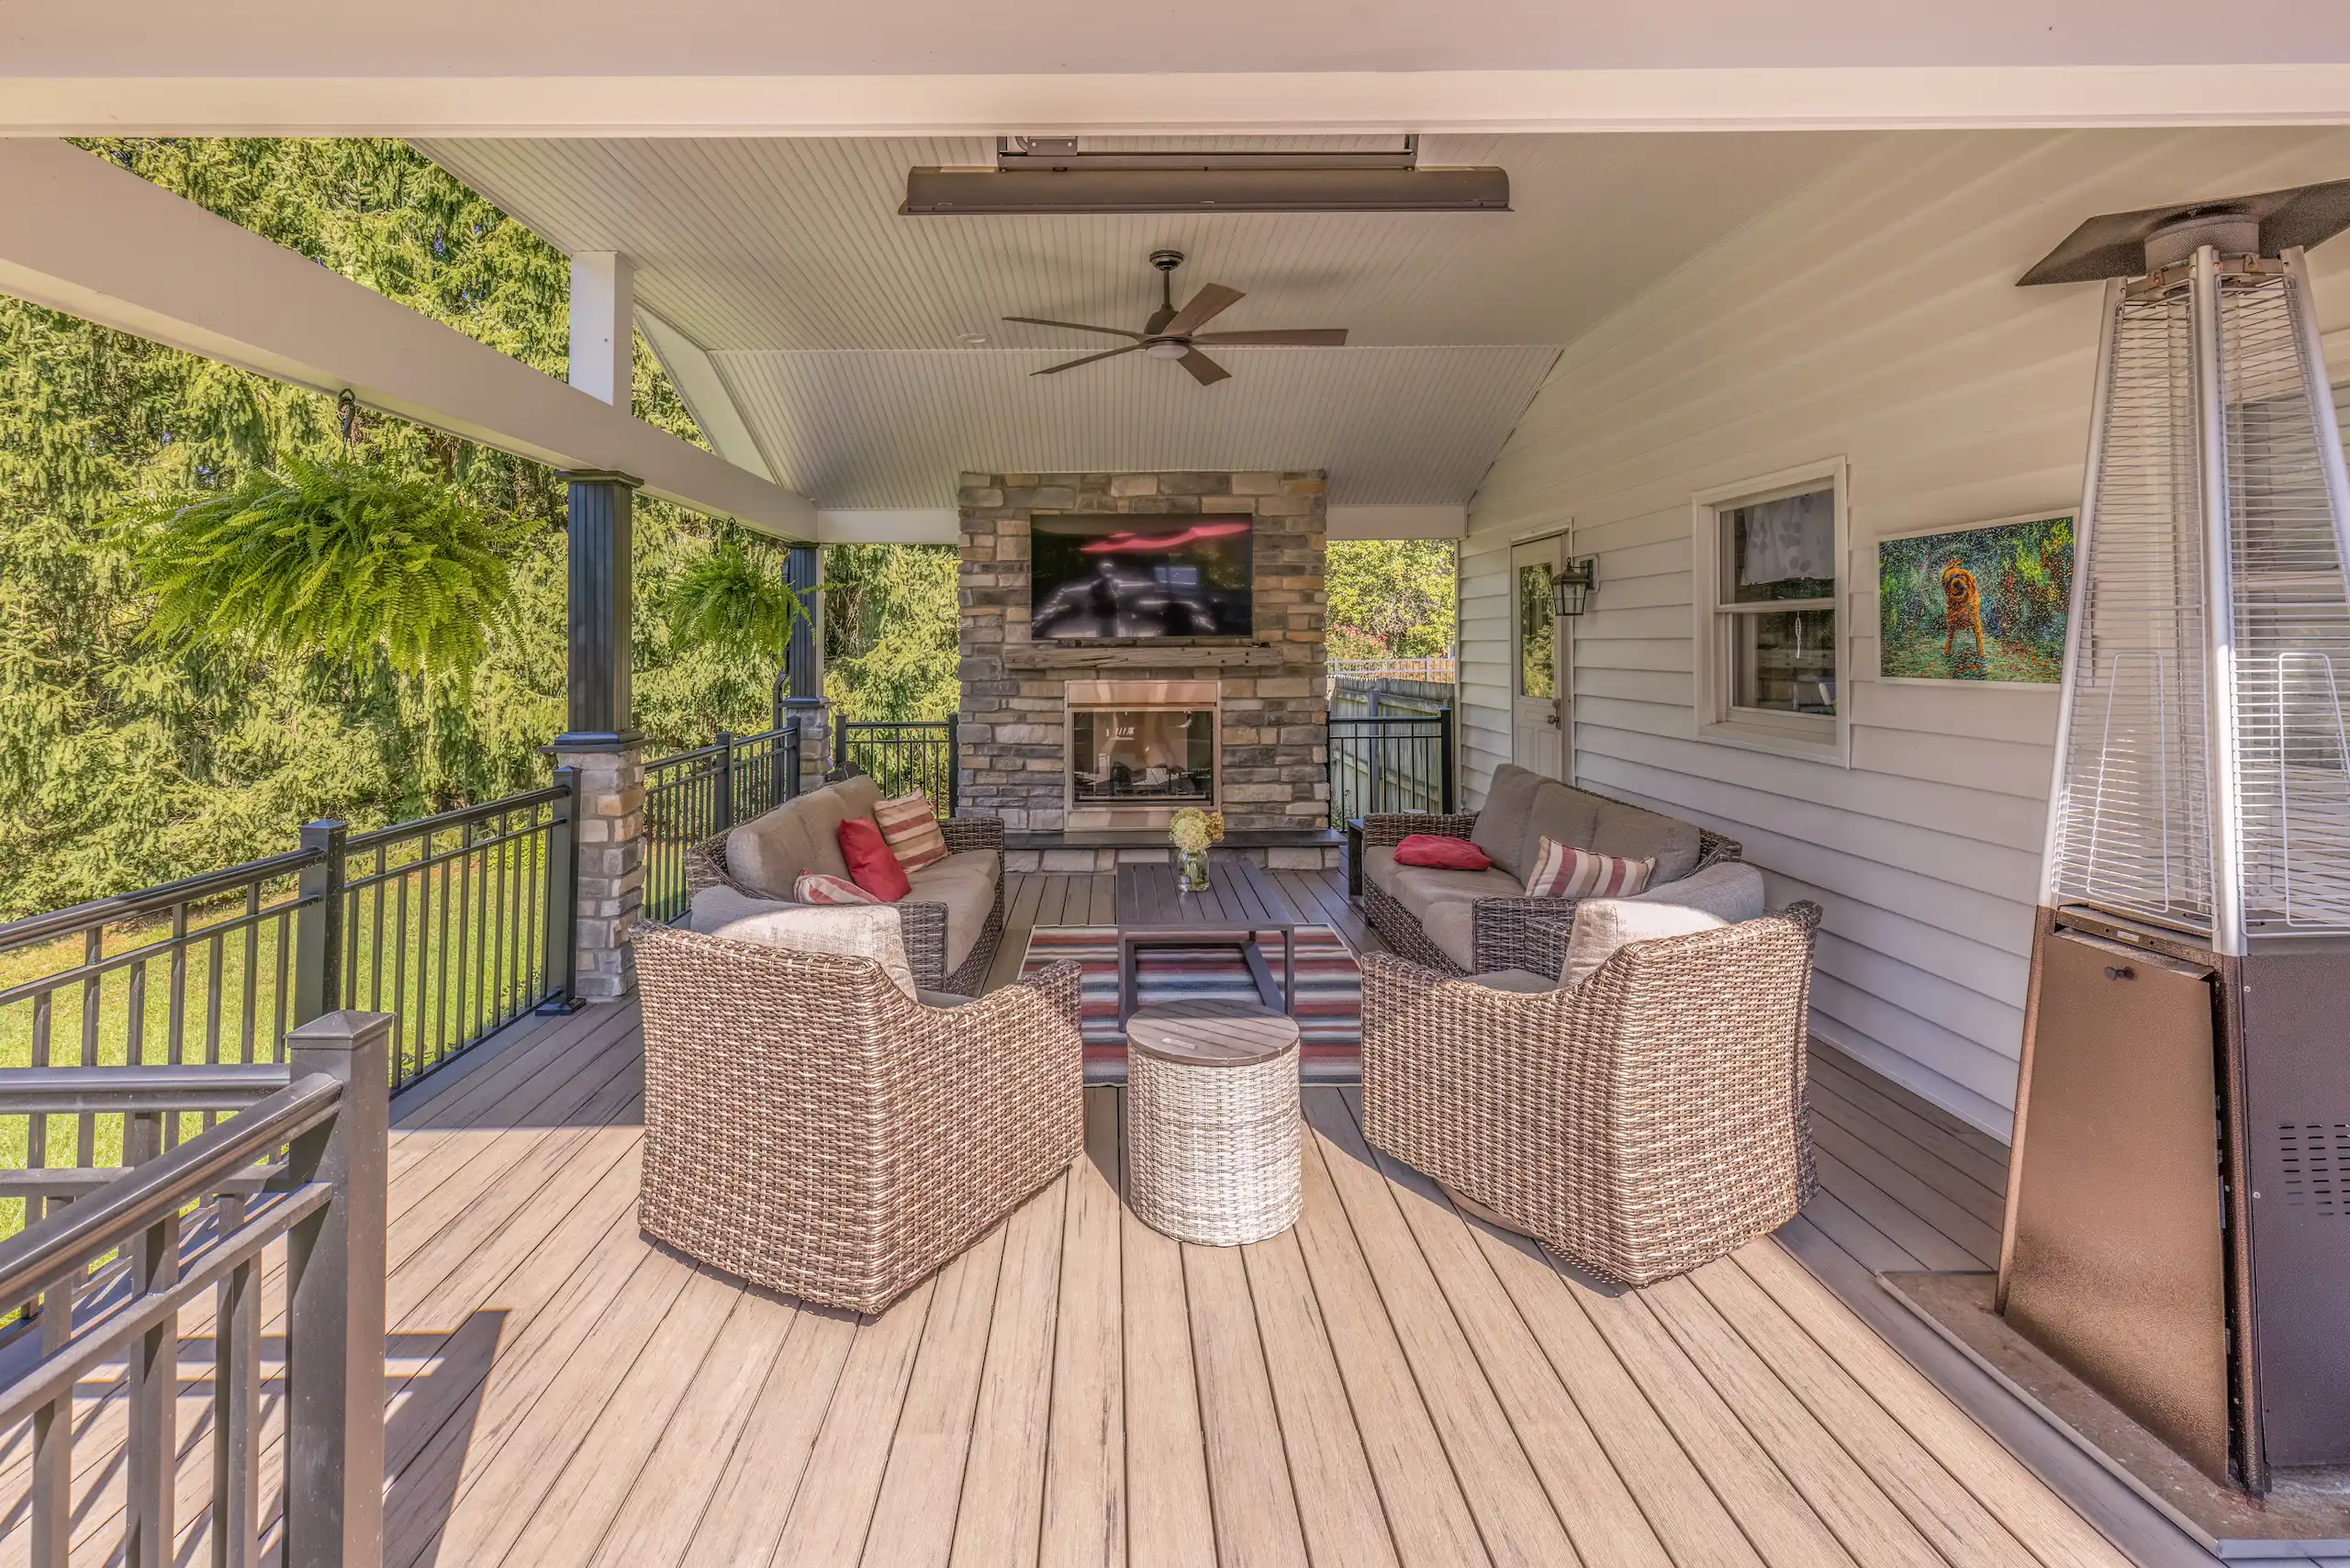
15. Design a Covered Outdoor Living Room with a Stone Fireplace
The One Thing: The stone fireplace with the mounted television. This single feature transforms the space from a simple covered deck into a true four-season outdoor living room. It provides warmth, ambiance, and entertainment, making this an area you can use on a cool spring evening, a crisp autumn afternoon, or even a mild winter day. It’s the element that says “we live out here,” not just “we sit out here.” This is a more enclosed and cozy version of the covered space seen in Idea #11.
|
📋 Copy HEX 🔗 Share |
Trending Context: The concept of the “outdoor living room” has exploded in popularity, and this is a perfect example of why. As our homes have become our offices, gyms, and sanctuaries, we’re looking for ways to expand our usable living space. A covered, furnished area like this effectively adds another room to the house—one that offers fresh air and a connection to nature without sacrificing comfort or technology. It’s a trend with serious staying power because it directly addresses our desire for more versatile, functional homes.
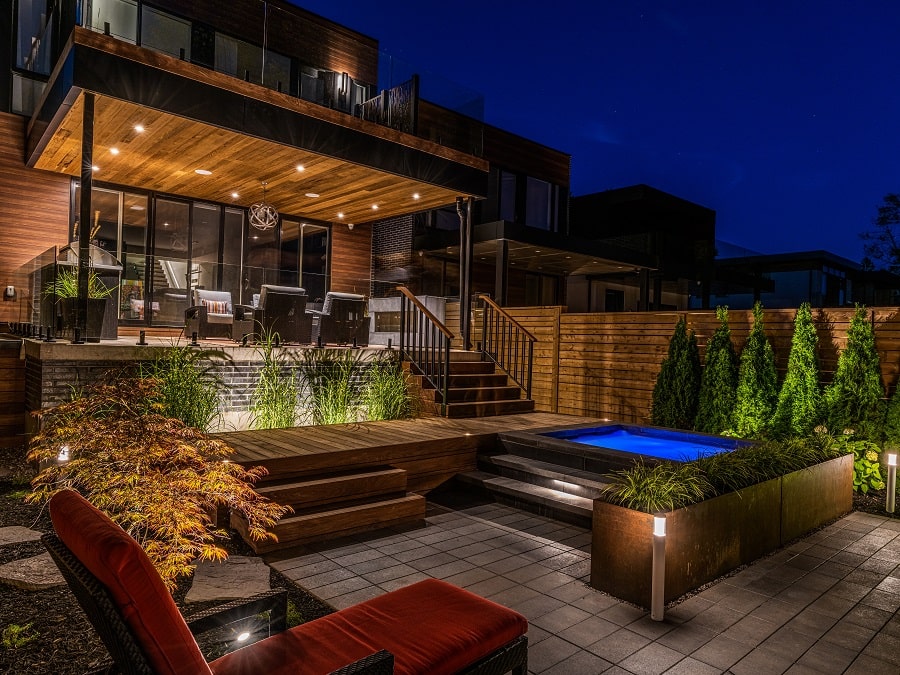
16. Build a Modern Lounge Deck with L-Shaped Seating and a Fire Pit Table
How-To Brief: Installing a Slatted Wood Privacy Screen
Get that modern, private feel. Time: 1 day. Cost: $300-$800.
- Set your posts: Securely anchor 4×4 posts into the ground with concrete or attach them to the deck’s framing. Ensure they are plumb (perfectly vertical) and spaced about 4-6 feet apart.
- Plan your slat spacing: Decide on the gap between your slats. A 1/2-inch to 3/4-inch gap provides privacy while still feeling airy. Use a piece of scrap wood as a spacer for consistency.
- Cut your slats: Cut your 1×4 or 1×6 boards (cedar or pressure-treated pine are great choices) to the desired length to span between your posts.
- Attach the slats: Starting from the bottom, attach the first slat, making sure it’s level. Use your spacer block and continue attaching slats up the posts with weather-resistant screws.
- Finish the wood: Apply a high-quality outdoor stain or sealer to protect the wood and give it a finished look.
|
📋 Copy HEX 🔗 Share |
Real Talk: String lights create amazing ambiance, but they don’t last forever. Even commercial-grade outdoor string lights will need to have bulbs replaced, and the strands themselves can become brittle after a few years of exposure to sun and weather. When installing, create a gentle drape rather than pulling them taut, which puts less stress on the wire. Also, plug them into a timer so you’re not wasting energy or having to remember to turn them off every night.
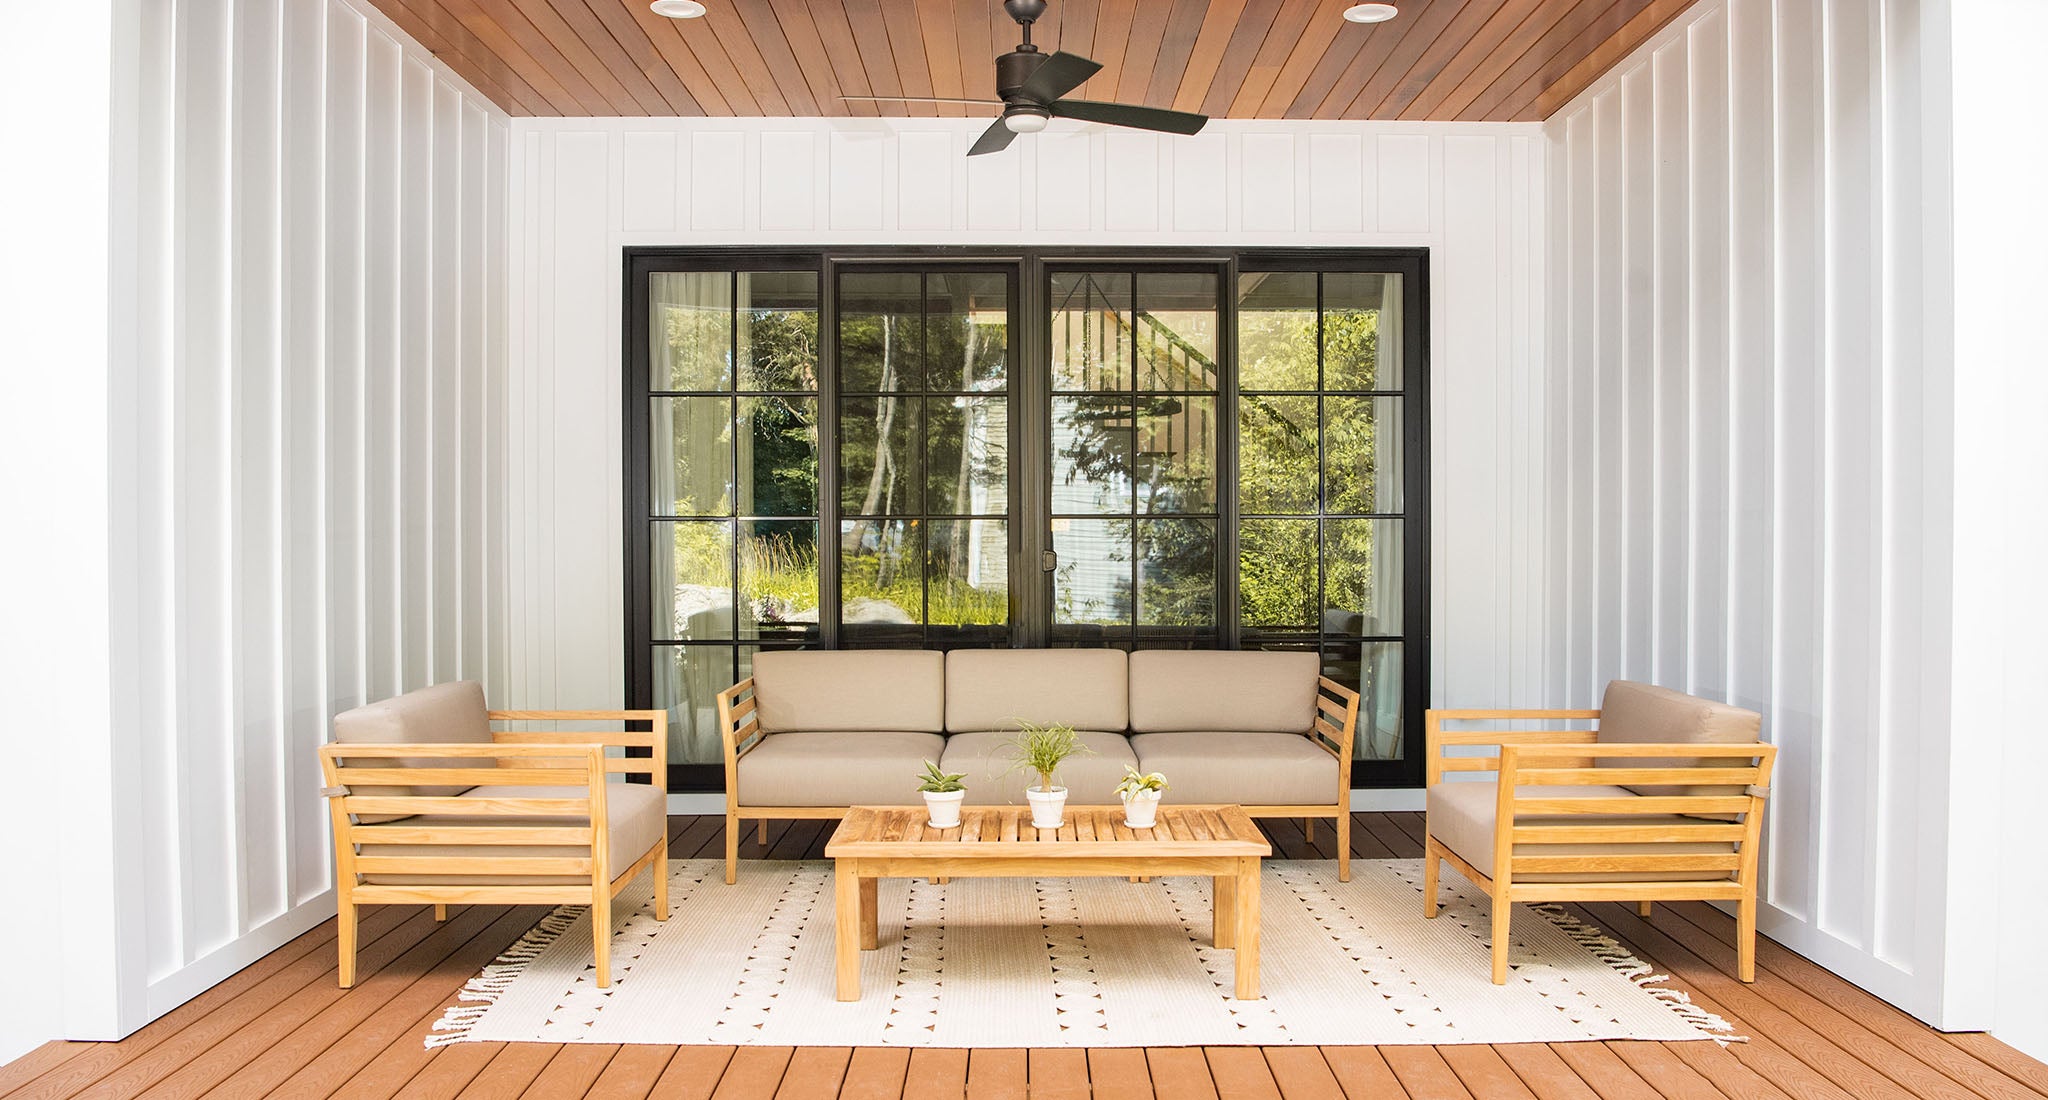
17. Style a Cozy Covered Nook with Light Wood Furniture and Slat Walls
What Makes It Work: This space is a masterclass in creating a cozy “hug” with materials. The white vertical slat walls and the warm wood plank ceiling enclose the area, making it feel protected and intimate, like a room. However, the slats have gaps and the large glass door prevents it from feeling boxed in. The light wood furniture harmonizes with the ceiling, while the cream rug softens the brown composite floor. The black accents—the fan and the door frame—add a punch of modern contrast that keeps the look crisp and sophisticated.
|
📋 Copy HEX 🔗 Share |
Designer Tip: Notice how the slats on the wall are vertical, while the planks on the ceiling and floor are horizontal. This intentional shift in direction adds subtle visual interest and keeps the space from feeling static or one-note. When working with a lot of linear materials like planks or slats, changing their orientation is a simple but powerful design trick to create depth and dynamism without adding clutter. It’s a detail that your brain registers as thoughtful design.
18. Warm Up a Patio with Natural Wood Dining and a Stone Fireplace
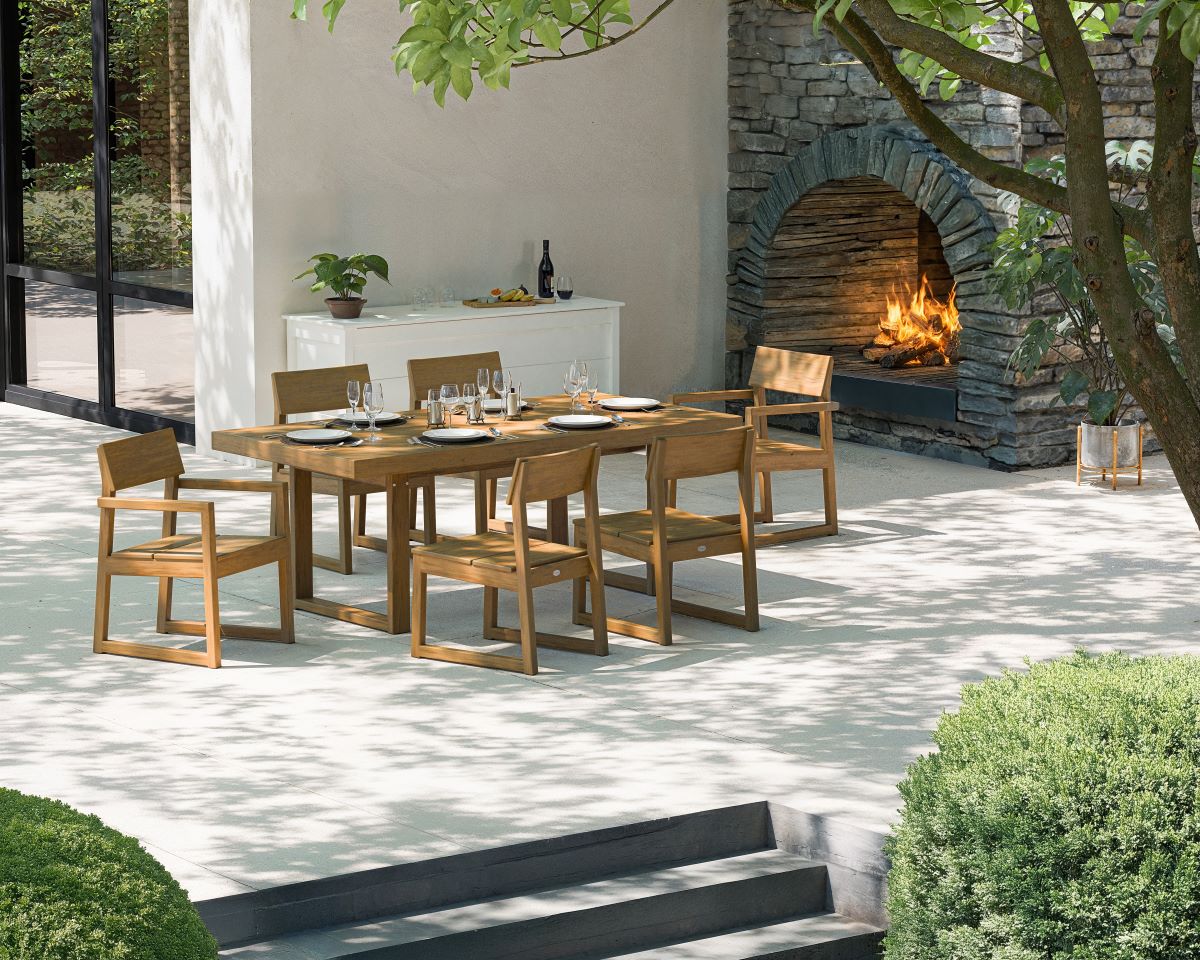
The One Thing: The stacked grey stone fireplace. It’s the undeniable hero of this patio. Its height adds verticality and grandeur to the outdoor space, while the rough texture of the stone provides a beautiful, earthy contrast to the clean lines of the dining furniture and large format tiles. The arched opening softens its massive form, making it feel more inviting. More than just a heat source, it’s a powerful architectural element that gives the patio a sense of permanence and rustic charm.
|
📋 Copy HEX 🔗 Share |
Scale Guide: A fireplace of this magnitude needs room to breathe. This layout works best on a patio that is at least 15 feet wide and 20 feet long. This allows for the dining set to be comfortably placed without feeling cramped by the fireplace hearth. You need at least 4-5 feet of clearance between the back of the chairs (when pulled out) and the fireplace or any wall. For smaller patios, consider a narrower, more vertical chimney-style fireplace or a fire table to achieve a similar focal point without overwhelming the space.
19. Use Multi-Toned Composite Decking for a Unique, Curved Layout
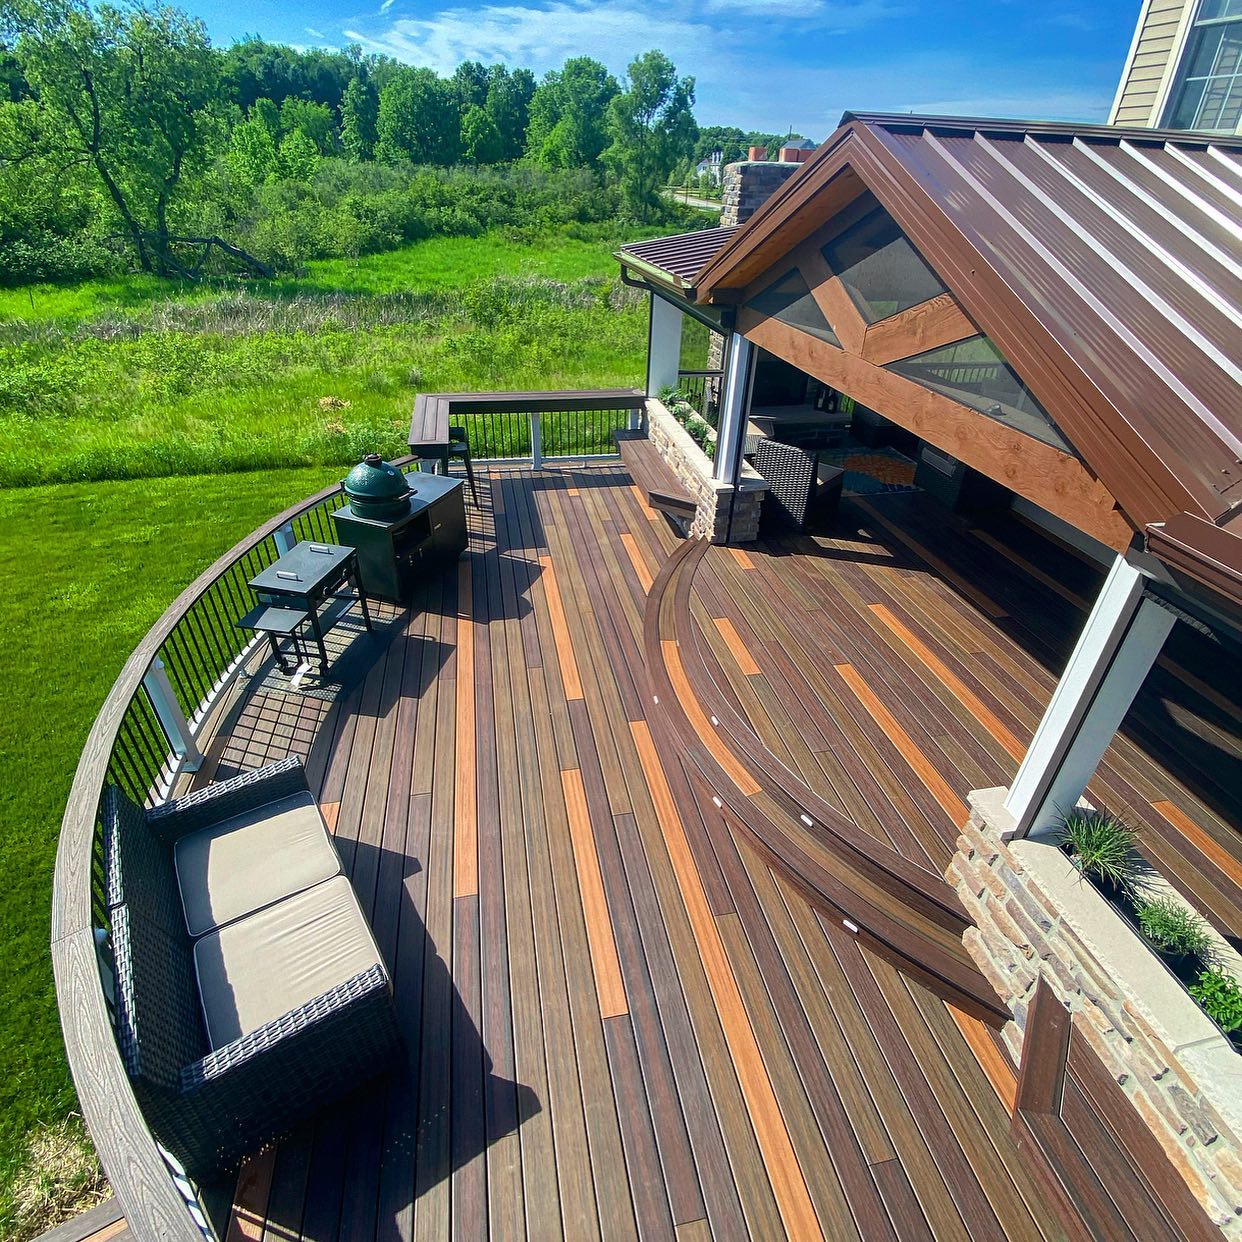
What Makes It Work: This design breaks the mold of standard, single-color decks. The use of multiple tones of composite planks—browns, grays, and oranges—creates incredible visual texture and depth. The darker, curved sections act as decorative inlays, breaking up the large surface and guiding the eye through the different zones. This technique makes the deck itself a major design feature, not just a platform for furniture. The stone veneer pillars add a sense of permanence and anchor the covered portion of the deck.
|
📋 Copy HEX 🔗 Share |
Maintenance Reality: Composite decking is famously low-maintenance, but ‘low’ doesn’t mean ‘no’. In a wooded setting like this, you’ll still get pollen, leaves, and other organic matter on the surface. These can lead to mold or mildew growth if left to sit. A yearly cleaning with a composite deck cleaner and a soft brush or a gentle power wash is essential to keep the colors vibrant and the surface safe. The good news? No sanding, staining, or sealing is ever required.
20. Layer a Wooden Deck with Glass Panels for Dining and Lounging
Designer Tip: The glass panel railing is the key to this deck’s open, modern feel. To get this look right, specify ‘low-iron’ glass. Standard glass has a noticeable green tint, especially when viewed from an angle, which can distort the natural colors of your landscaping. Low-iron glass is more optically clear and provides a truly seamless view. It’s a bit more expensive, but for a view-focused deck, it’s a worthwhile upgrade that makes a huge difference. This is a sleeker alternative to the metal railings in Idea #25.
|
📋 Copy HEX 🔗 Share |
Real Talk: Glass railings look stunning, but they show every single fingerprint, water spot, and streak of dust. If you have kids, pets, or live in an area with frequent rain, be prepared to squeegee them clean regularly to maintain that crystal-clear look. It’s a trade-off: you get an unobstructed view, but you also get a new cleaning chore. Using a squeegee and a simple solution of water and a drop of dish soap is usually more effective than spray cleaners, which can leave a hazy film.
21. Enjoy Woodland Views from a Multi-Level Composite Deck
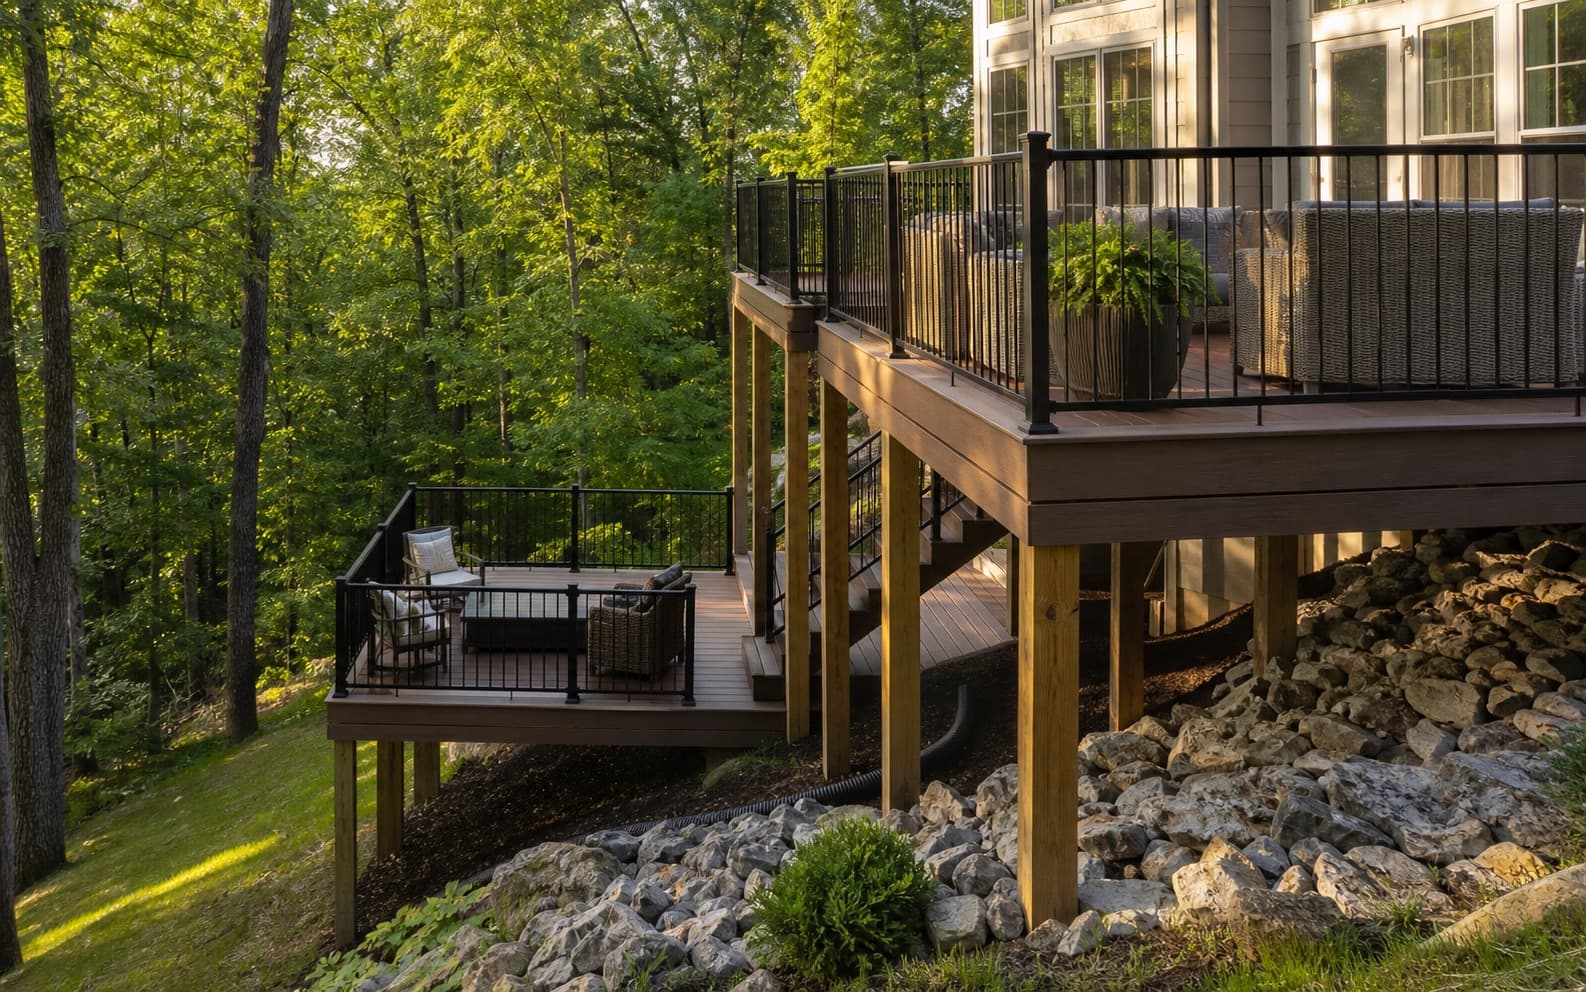
What Makes It Work: This deck design succeeds by celebrating its elevation. Instead of one large, flat platform, the two distinct levels create separate zones while maintaining a cohesive feel. The upper level feels more like a balcony, while the lower level feels more immersed in the surrounding nature. The black metal railings are a smart choice; they are visually lightweight and recede into the background, ensuring the focus remains on the dense forest view beyond. The natural wood support posts add a touch of rustic warmth that connects the man-made structure to the woods.
|
📋 Copy HEX 🔗 Share |
Maintenance Reality: A deck in a forest requires a specific upkeep strategy.
- Leaf Management: In the fall, you’ll need to clear leaves weekly. If left to sit, decomposing leaves can stain composite decking and create slippery spots. A leaf blower is your best friend.
- Pollen Season: A film of green or yellow pollen is unavoidable in the spring. A quick rinse with a hose or a good rainstorm will usually take care of it, but a deeper clean may be needed.
- Composite Cleaning: Plan for one deep clean per year using a cleaner specifically formulated for composite materials to prevent mold and mildew from taking hold in the shaded, damp environment.
22. Set Up a Casual Deck Dining Area with Navy and Neutral Tones
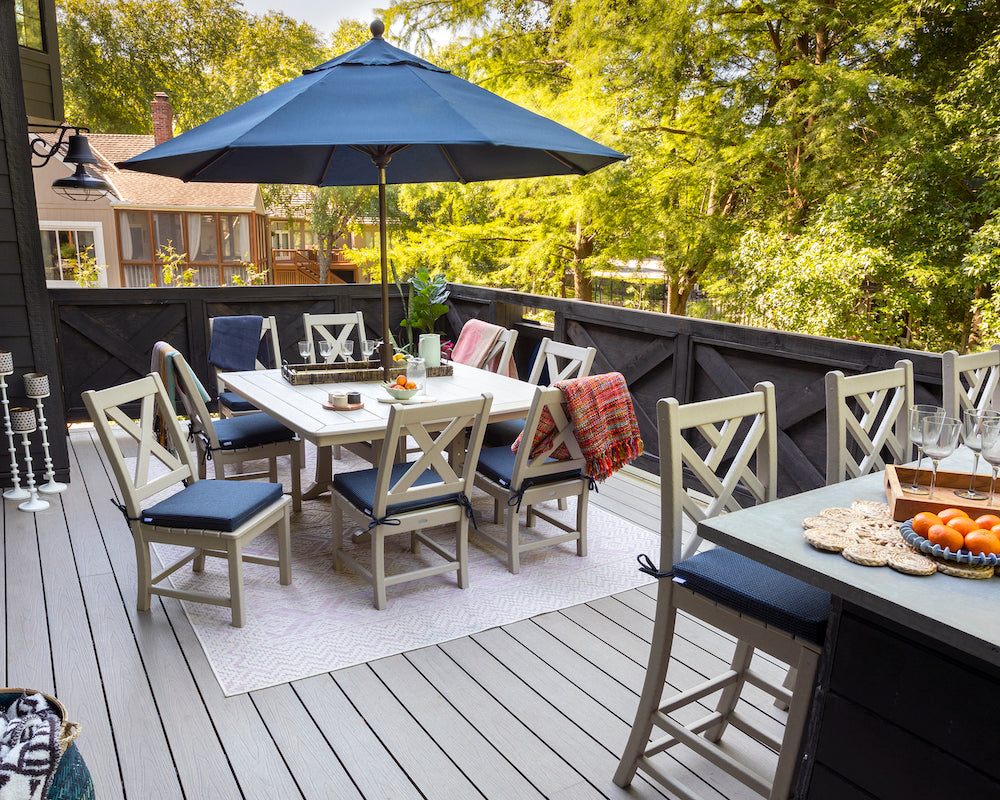
Style Math: This effortlessly chic look follows a simple coastal-inspired formula: 50% versatile neutral (the beige furniture and grey deck) + 30% classic accent color (the navy blue umbrella and cushions) + 20% mixed textures (the woven rug, wood railing, and metal furniture). The pops of pink in the rug and throws keep it from feeling too predictable. It’s a color palette that feels sunny, relaxed, and sophisticated all at once. You could easily swap the navy for forest green or terracotta to create a different mood with the same balanced feel.
|
📋 Copy HEX 🔗 Share |
Get This Look For Less: You can find dining sets with this classic X-back chair design at Wayfair or Overstock for a fraction of the price of high-end brands. The key is to buy a set in a neutral color like white, black, or gray, and then add your personality with affordable cushions and a large outdoor umbrella. An outdoor rug from Target or IKEA can instantly tie the space together for under $100. This is a much more casual dining approach than the built-in kitchen seen in Idea #9.
23. Integrate a Multi-Level Deck with Meticulous Landscaping
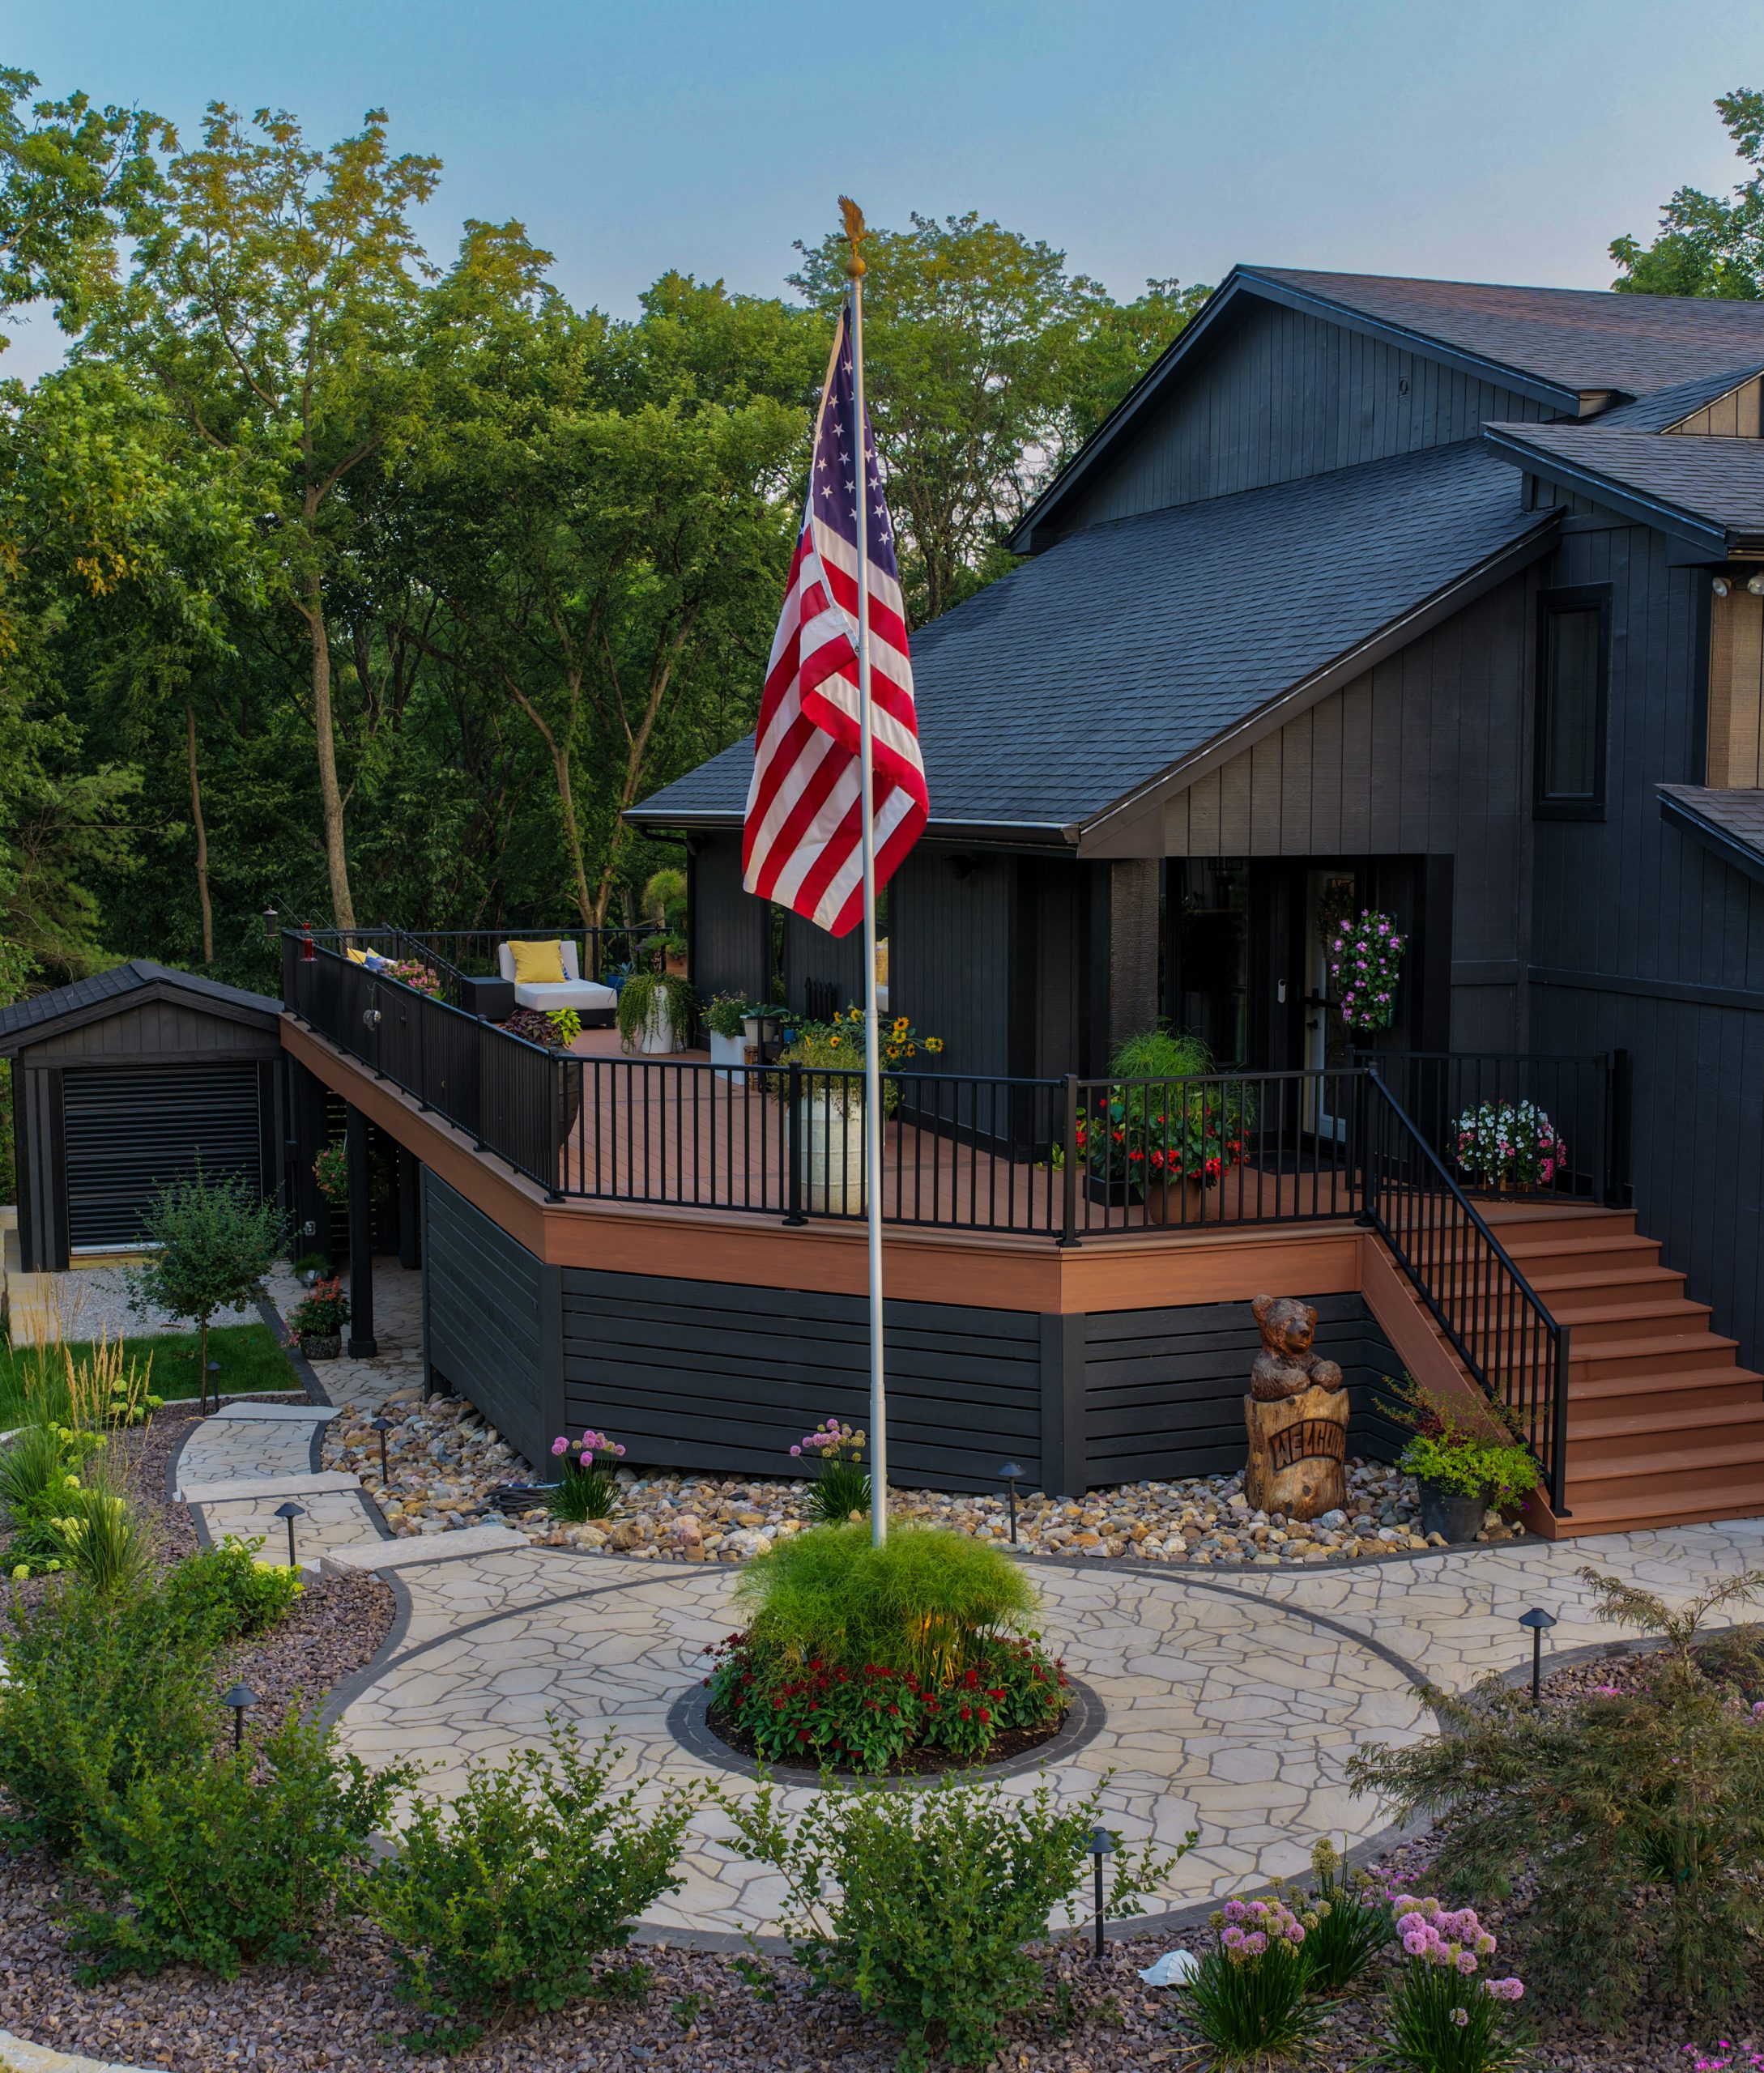
What Makes It Work: The deck and the landscaping were clearly designed together, not as separate projects. The curves of the flagstone path and garden beds echo the angles of the deck, creating a beautiful visual flow. The material palette is tightly controlled—the dark gray siding, the warm brown decking, the black railings, and the light gray stone—which creates a sophisticated and unified appearance. This isn’t just a deck placed in a yard; it’s a holistic outdoor environment where hardscape and softscape are in perfect harmony.
|
📋 Copy HEX 🔗 Share |
Before You Start Checklist: A fully integrated design requires serious planning.
- Create a Master Plan: Before you build anything, have a complete design that maps out the deck, pathways, planting beds, and any other features. A landscape architect can be invaluable here.
- Consider Drainage: With this much hardscaping, where will rainwater go? Ensure proper grading and drainage solutions are part of the plan to avoid water pooling against your house foundation or deck footings.
- Budget for Landscaping: The plants, stone, gravel, and labor for landscaping can easily cost as much as the deck itself. Don’t treat it as an afterthought.
24. Light Up a Raised Wooden Deck with a Pergola and String Lights
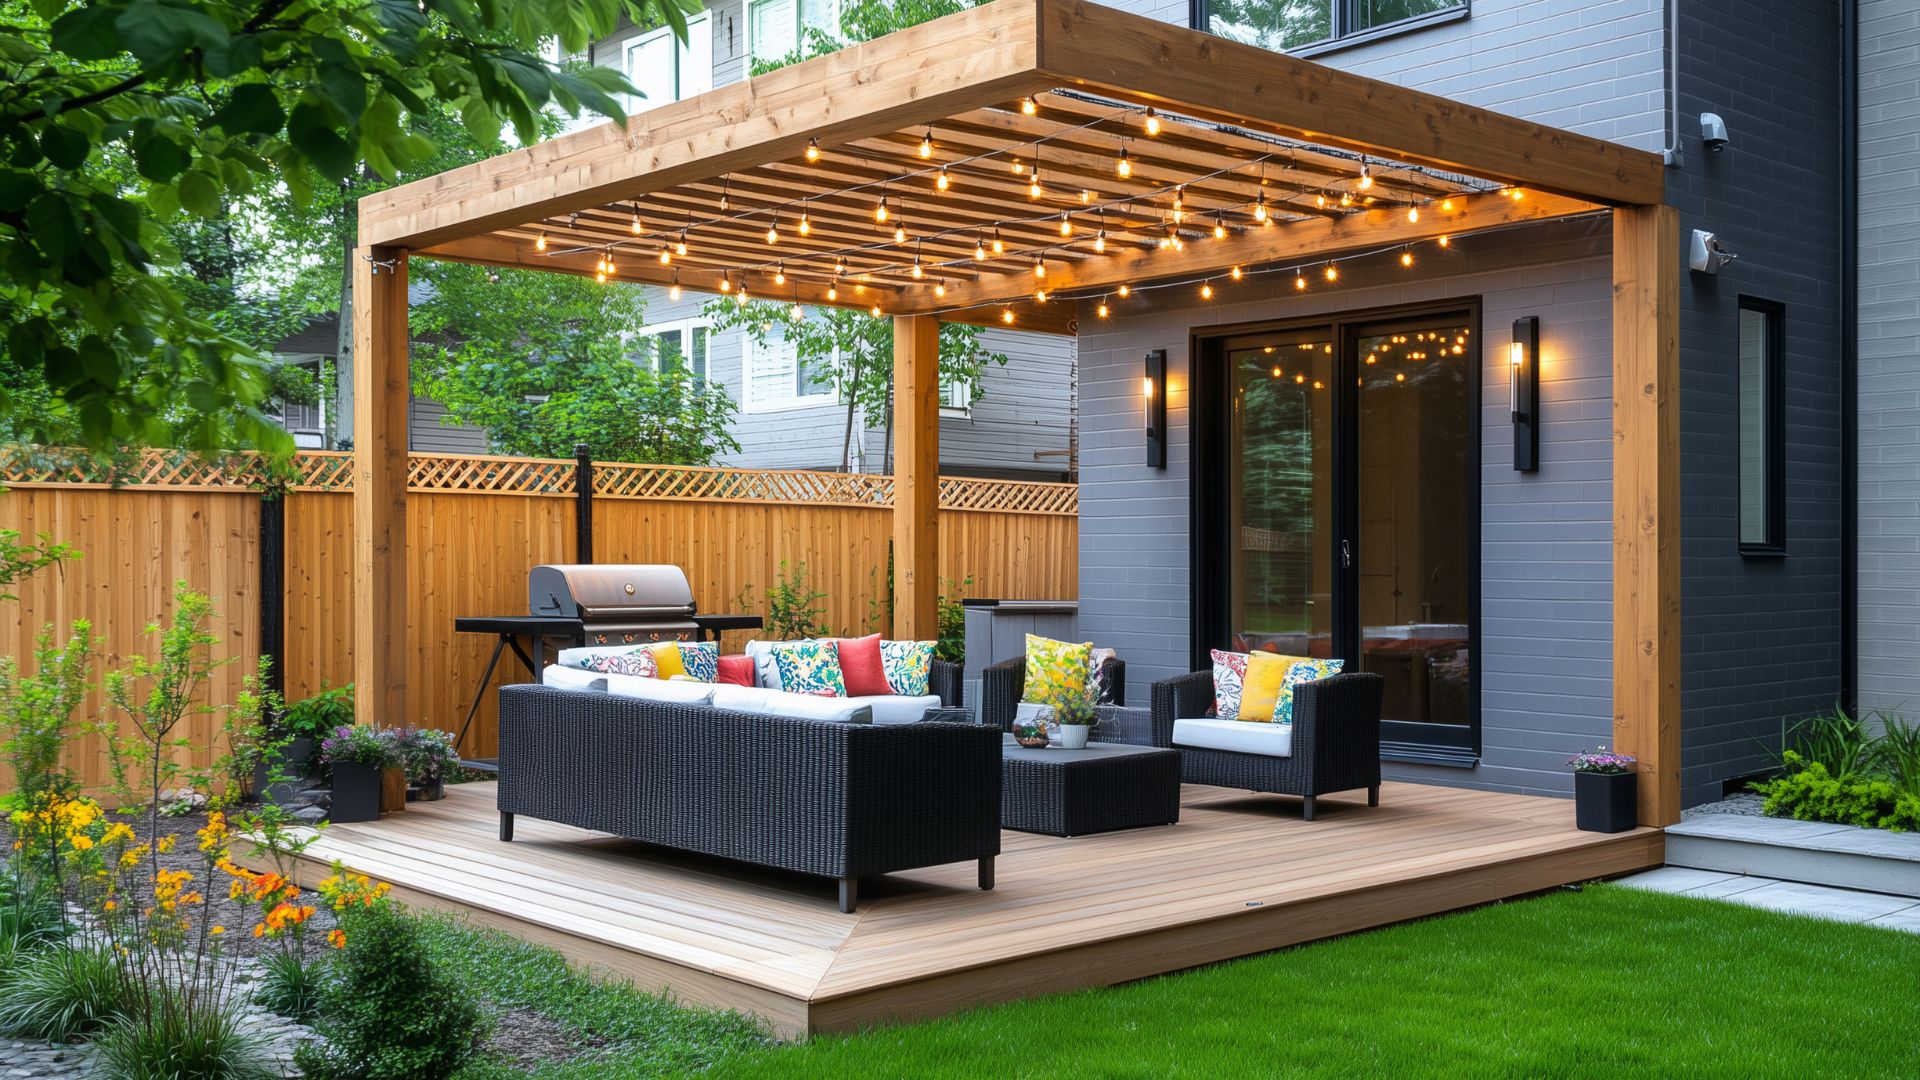
The One Thing: The pergola with string lights. This combination is the secret to creating instant coziness and ambiance. During the day, the pergola defines the seating area and adds architectural interest. At night, the warm glow of the string lights transforms the deck into a magical, inviting space perfect for entertaining or relaxing. It creates a “ceiling” for the outdoor room, making it feel intimate and sheltered without blocking the open sky. This feature does more to set the mood than anything else. See a different take on a pergola in Idea #2.
|
📋 Copy HEX 🔗 Share |
How-To Brief: Hanging Outdoor String Lights
Get that perfect starry-night glow. Time: 1 hour. Cost: $50-$150.
- Choose your lights: Opt for commercial-grade, weatherproof string lights with shatterproof LED bulbs. Measure your space to ensure you buy a long enough strand.
- Install guide wires: For spans longer than 15 feet, it’s best to hang a thin, galvanized steel guide wire first. This prevents the light strand from sagging too much and protects it from wind stress.
- Secure your anchor points: Install sturdy cup hooks or eyelet screws into your pergola, fence, or house siding. Make sure they are securely anchored.
- Hang the lights: Starting near your power source, attach the light strand to the guide wire (if using) or directly to your hooks using zip ties or clips. Create a gentle scalloped drape.
- Plug into a GFCI outlet: Always use a Ground Fault Circuit Interrupter outlet for safety. Consider adding an outdoor smart plug or timer for easy control.
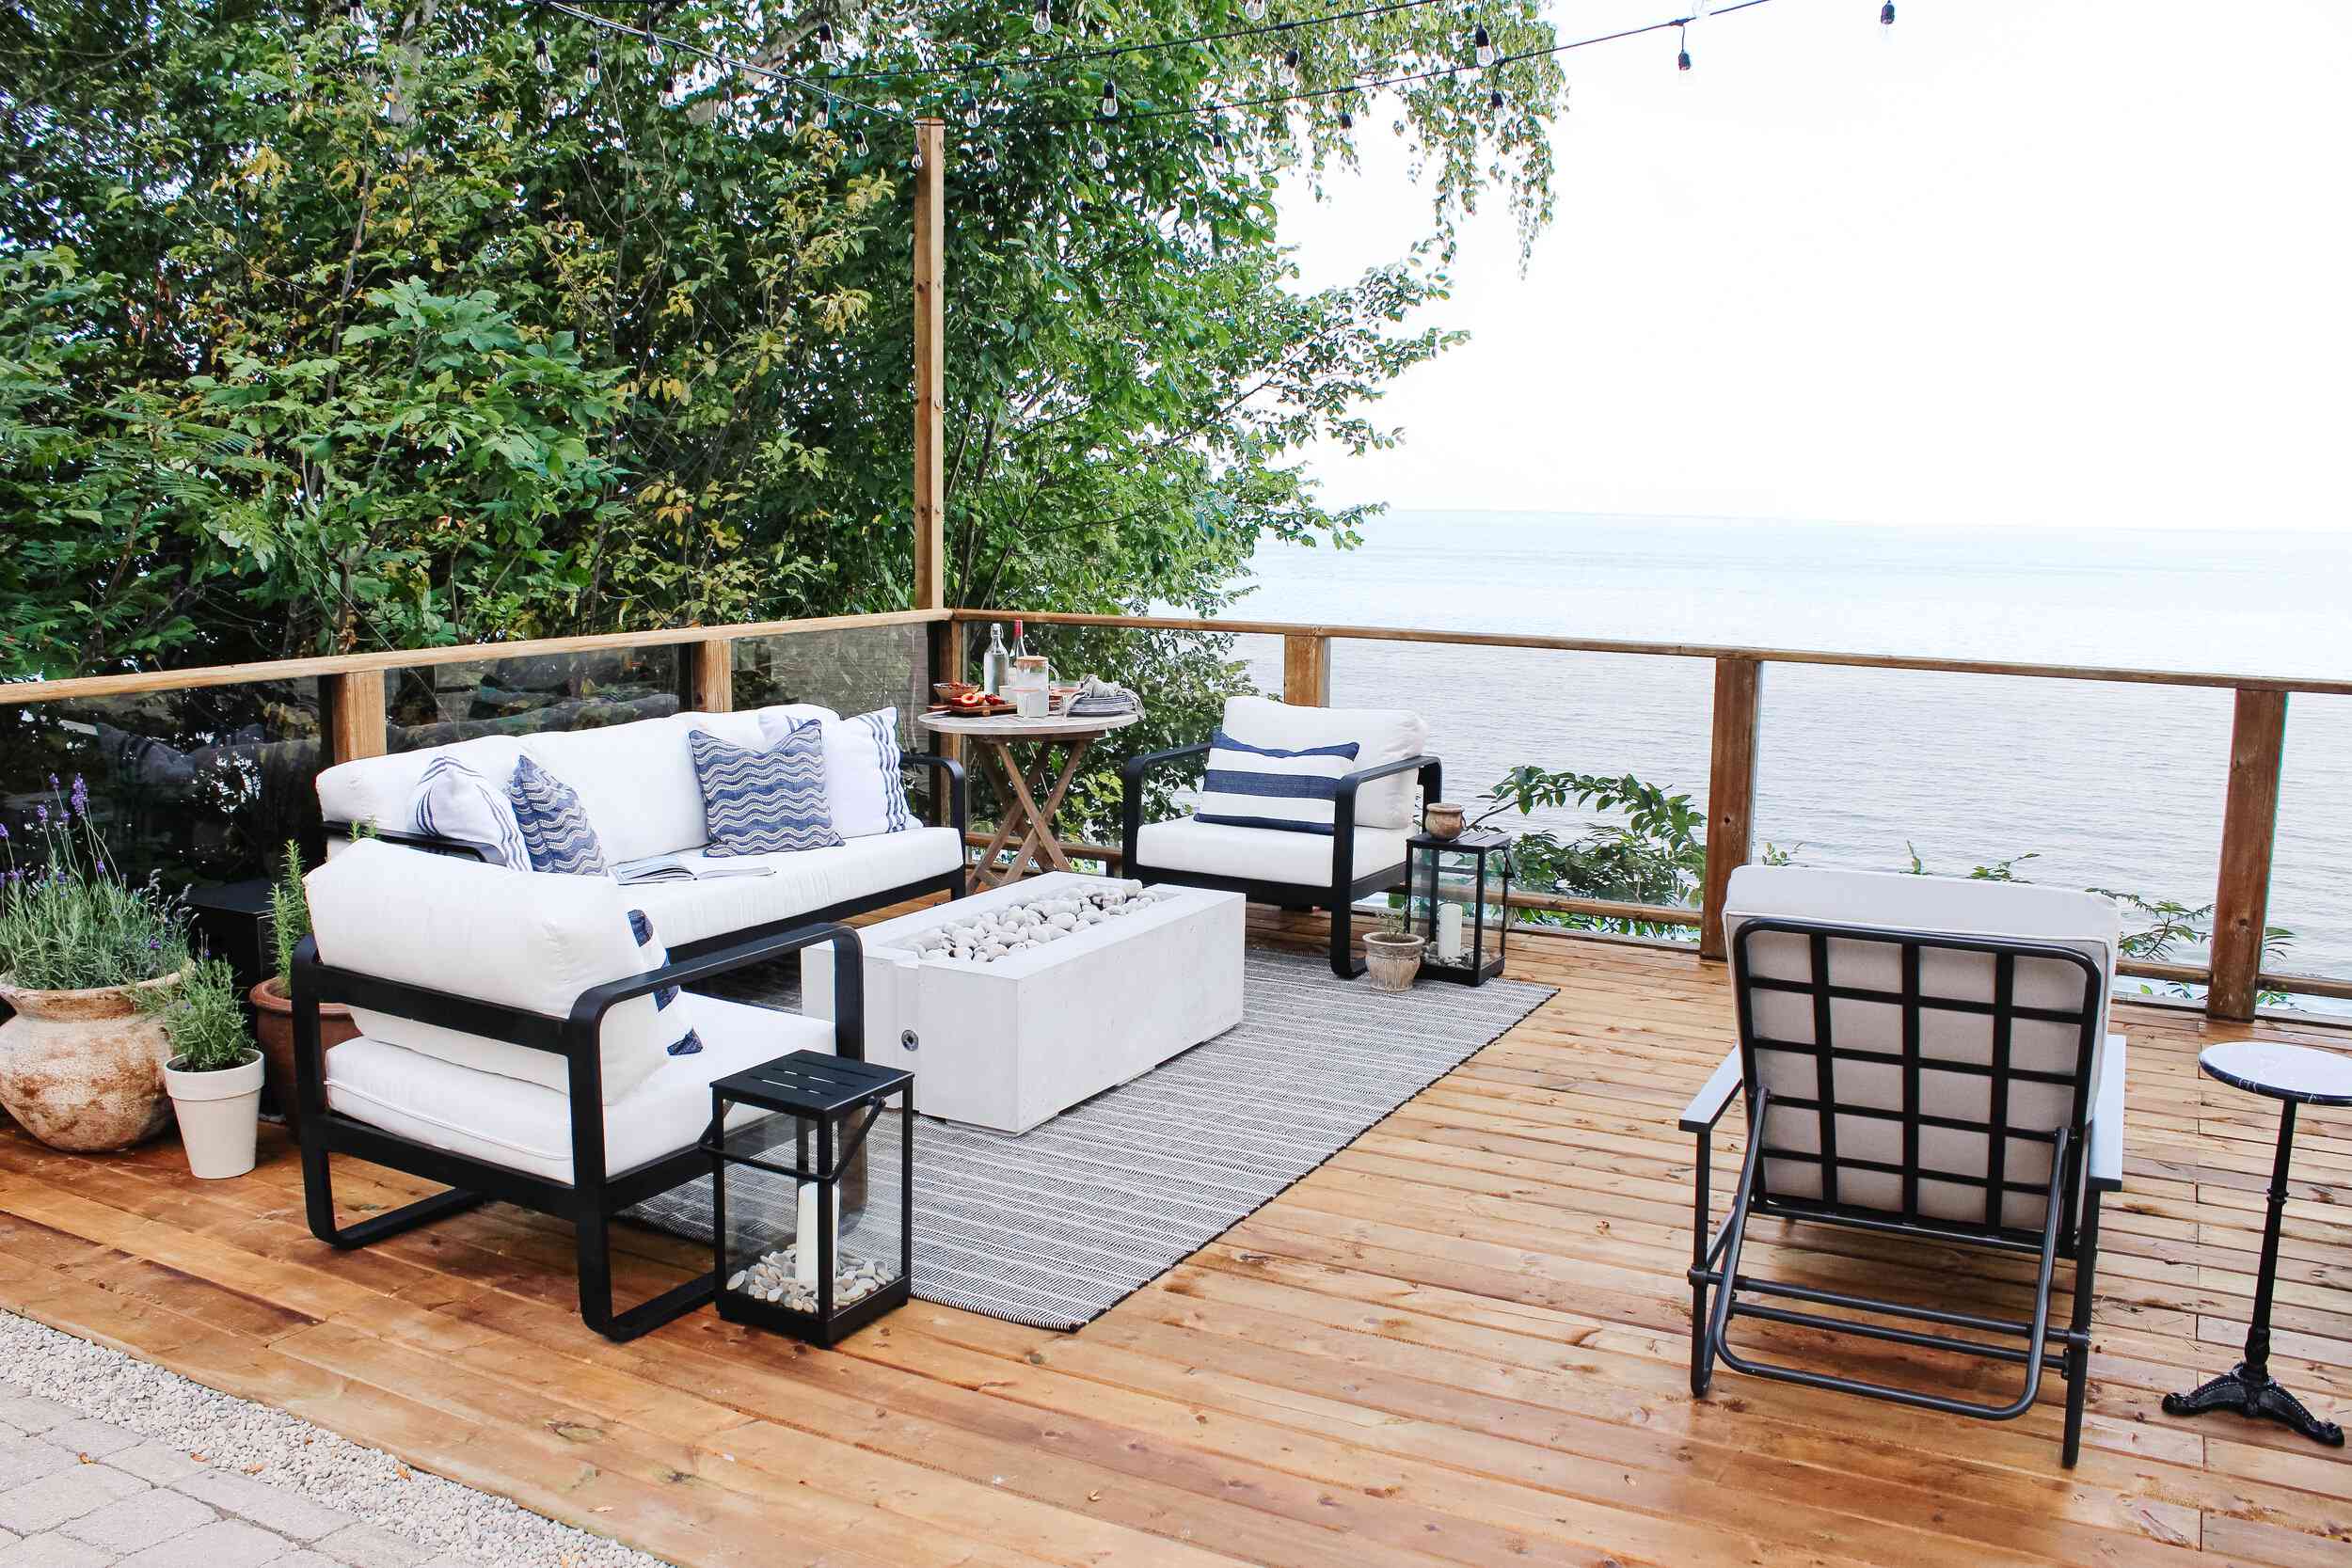
25. Embrace Minimalism with a Sleek Wooden Deck and Glass Railing
What Makes It Work: This deck is all about quiet luxury and unobstructed views. The success lies in what’s not there: no bulky railings, no fussy decor, no competing colors. The clear glass railing is the star player, creating a seamless connection to the landscape beyond. The low-profile, dark grey sectional with its clean lines doesn’t try to steal the show; it complements the minimalist aesthetic. The light wood decking provides a warm, natural base, proving that minimalist design can still feel inviting and relaxed. A similar use of glass can be seen in Idea #20.
|
📋 Copy HEX 🔗 Share |
Real Talk: That beautiful, seamless glass railing comes with a significant cost. Frameless or minimal-frame glass railing systems are one of the most expensive railing options on the market, often costing two to three times as much as traditional wood or metal railings. The installation is also more specialized and less forgiving of errors. Factor this into your budget from the beginning—it’s a high-impact feature with a high-impact price tag. You’re paying for the view.
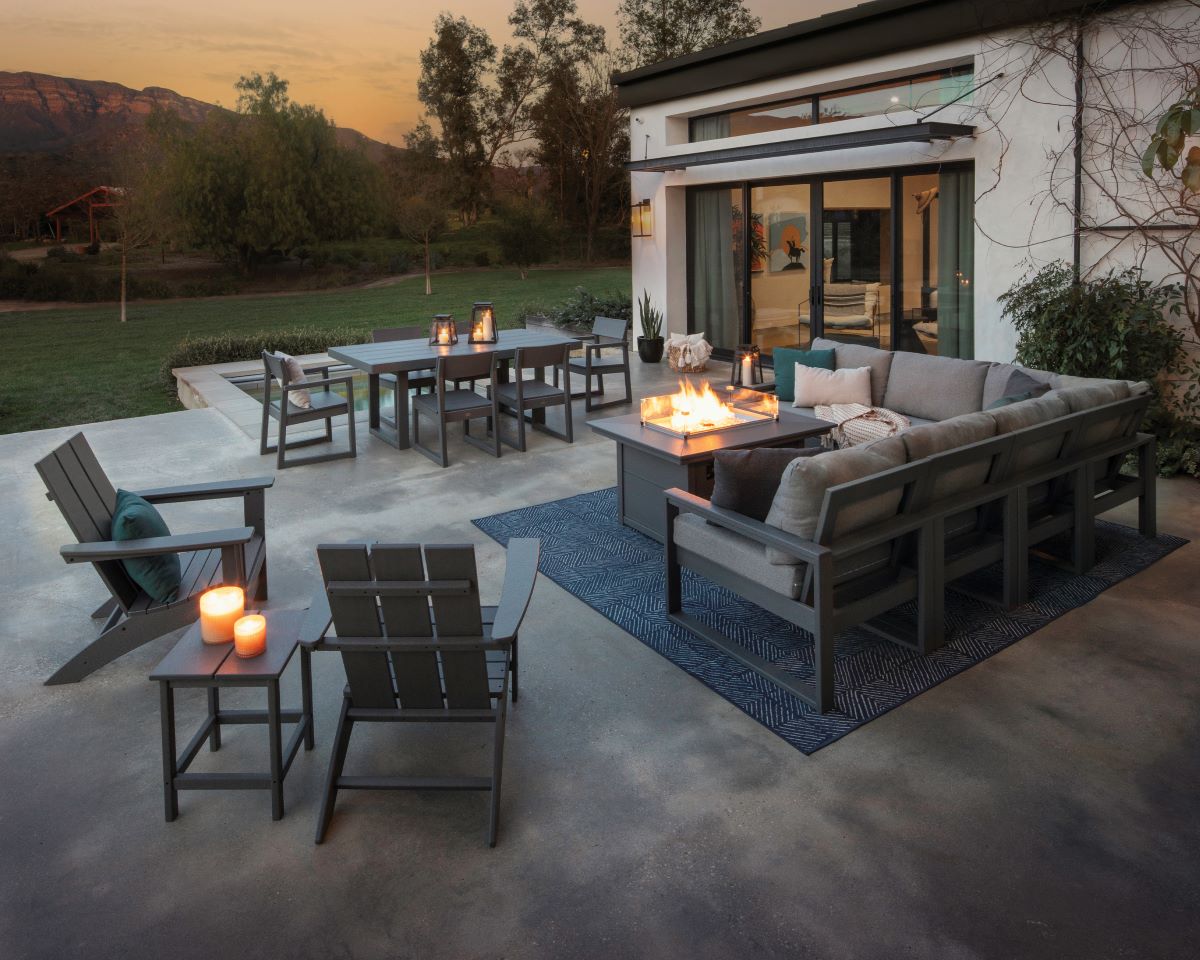
26. Design a Moody Evening Lounge with a Dark Gray Dining Set and Fire Pit
Style Math: This cozy, modern evening vibe is built on a sophisticated formula: 60% deep, moody charcoal (the furniture frames) + 20% cool, light neutral (the concrete patio and light gray cushions) + 10% bold color accent (the blue geometric rug) + 10% warm, glowing light (the fire pit and candles). The dark furniture against the light concrete creates a dramatic contrast that feels very intentional and chic. The blue rug is essential—it adds a layer of softness and personality that keeps the gray-on-gray palette from feeling flat.
|
📋 Copy HEX 🔗 Share |
Designer Tip: To make a large patio with multiple zones feel cohesive, use a consistent furniture style. Here, the dark gray sectional, the dining set, and the Adirondack chairs all share the same color and a similar modern, angular aesthetic. This repetition creates a visual language that ties the separate seating, dining, and lounging areas together. Even though they serve different functions, they feel like they belong to the same carefully curated collection, making the entire space feel unified and professionally designed.
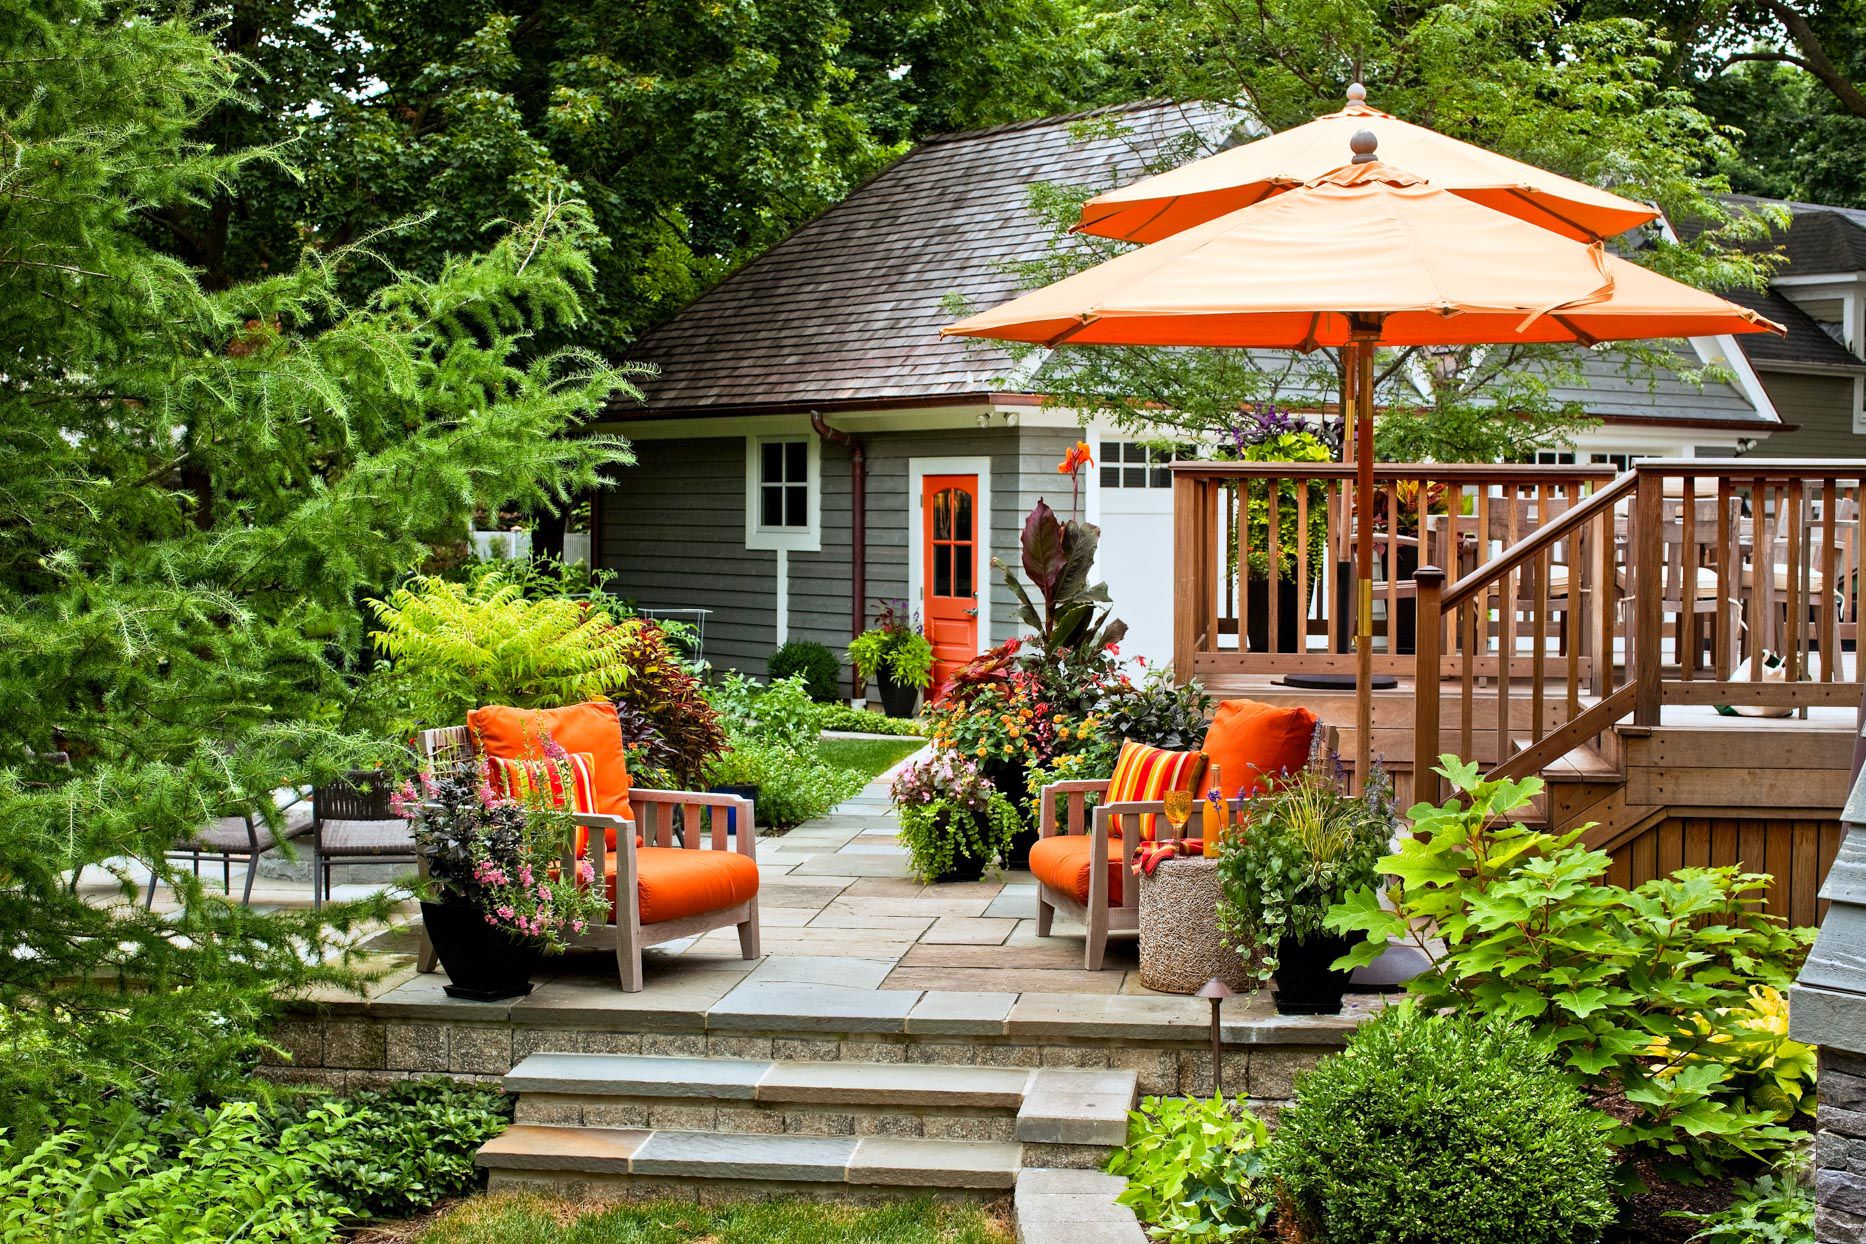
27. Contrast a Dark Pergola with White Modular Seating
What Makes It Work: This design is a study in high-contrast minimalism. The dark, linear pergola provides a strong, graphic frame against the sky, while the bright white modular sofas create a stunning visual pop against the light wood deck. The tension between the dark, rigid structure overhead and the soft, light seating below is what makes it so visually compelling. The clear glass railing ensures that nothing gets in the way of the view, reinforcing the open, serene, and modern atmosphere. The potted plants are a crucial touch of organic life.
|
📋 Copy HEX 🔗 Share |
Trending Context: Modular outdoor furniture is having a huge moment, and this layout shows why. Homeowners want flexibility. A modular sofa can be reconfigured to suit the occasion—pushed together for a large lounge bed for sunbathing, or broken apart into separate seating for a party. This adaptability is perfectly suited to our desire for multi-functional spaces. The clean lines and low-profile design also fit seamlessly into the popular Japandi and modern organic design trends that prioritize simplicity and connection to the outdoors.
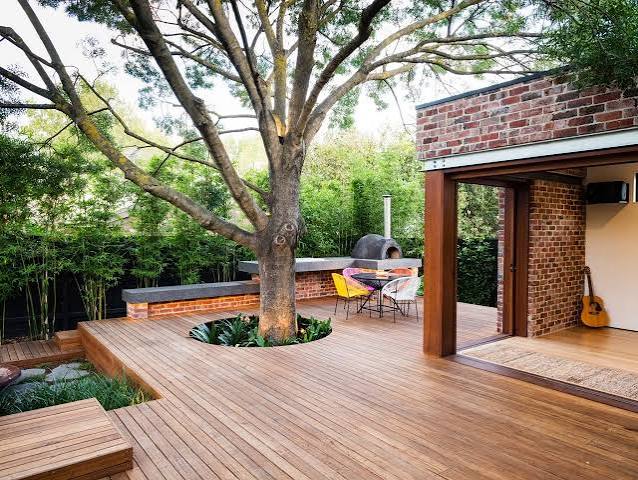
28. Combine Dining and Lounging Under a Modern Slatted Wood Ceiling
Scale Guide: A combined dining and lounge area like this needs generous proportions to avoid feeling cramped. For this side-by-side layout, plan for a deck that is at least 25 feet wide and 14 feet deep. This allows for a full-size dining table and a substantial L-shaped sectional, with enough space in between to create a clear, comfortable walkway. You need about 3 feet of clearance around the dining table for chairs to be pulled out, and at least 3 feet of walkway space between the two zones.
|
📋 Copy HEX 🔗 Share |
Designer Tip: When designing a layout with distinct zones, use lighting to help define the spaces. Here, a single, statement pendant light is hung directly over the dining table. This not only provides task lighting for meals but also visually anchors the dining area, clearly separating it from the lounge zone. The lounge area can then have its own, more subtle lighting scheme, like recessed lights or floor lanterns. This is a simple but highly effective way to create ‘rooms’ without walls.
Your Backyard’s Next Chapter
A well-designed deck is so much more than a pile of wood—it’s an extension of your home and the backdrop for future memories. Hopefully, these ideas have sparked some inspiration for your own outdoor project. Don’t be afraid to mix materials, create zones, and make choices that reflect how you truly want to live outside. The perfect layout is waiting for you. Now, go save your favorites to your Pinterest board and start planning!