You know that feeling when you finally find the deck privacy screen idea that looks exactly right for your space, but turning that pin into reality feels… daunting? We’ve been there. A great privacy screen is more than just a wall; it’s the final puzzle piece that turns your deck from an exposed platform into a true outdoor room. After filtering through hundreds of options across Wayfair, Home Depot, and Amazon, we narrowed it down to the 23 ideas that actually deliver. We’ve included modern composite styles, classic lattice looks, and tons of DIY-friendly wood slat designs. Because in 2026, it’s all about creating that seamless indoor-outdoor flow and claiming your backyard as a personal sanctuary. And stay until the end—we break down the most common mistakes that can ruin these looks. 📌 Save this to Pinterest for later—you’ll want to revisit these ideas.
1. Install a Retractable Screen for On-Demand Privacy
This setup is brilliant because it masters the art of contrast. The dark charcoal screen creates a strong, modern statement against the crisp white columns and trim of the covered porch. This isn’t just functional; it’s a deliberate design choice. The clean lines of the screen system complement the traditional gabled roof and stone pillar bases, proving that modern utility and classic architecture can absolutely be friends. It works by offering a solid block of color that grounds the space without being a permanent, heavy wall.
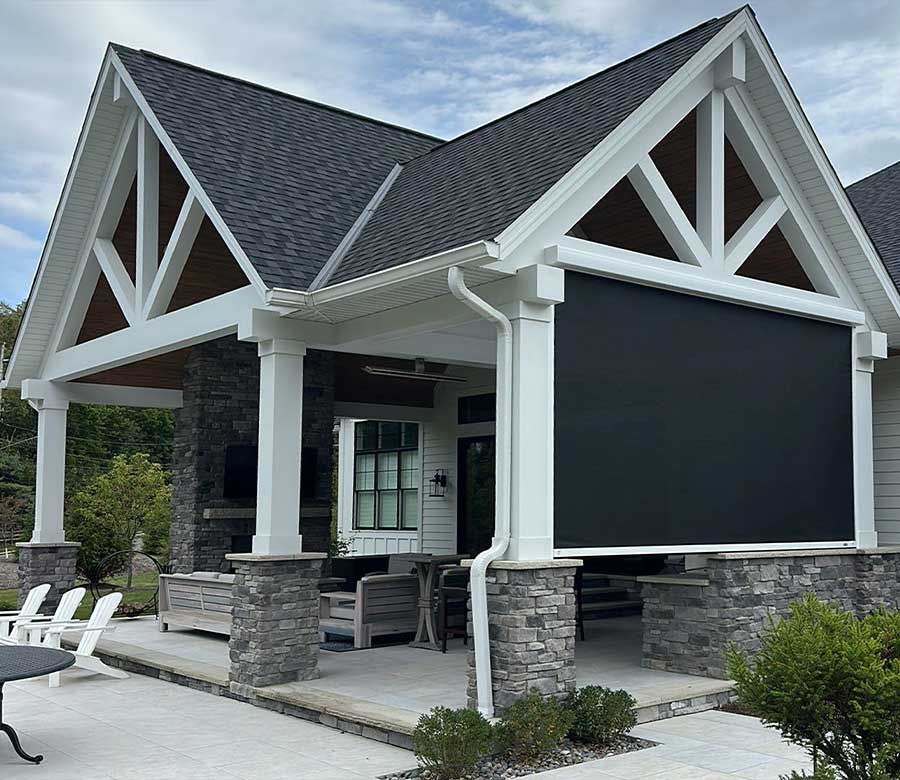
Let’s be honest about retractable screens: quality is everything. A cheap mechanism will jam, the fabric will fade or tear, and it can become a huge frustration. High-wind areas are also a major concern, as a strong gust can damage the screen or its housing if it’s left down. You need to be diligent about retracting it before storms. Also, consider that the housing unit, while sleek, is always visible. Make sure its design and color fit your home’s aesthetic even when the screen is rolled up.
2. Use a Tall Black Metal Trellis as a Living Privacy Wall
When using a trellis planter for privacy, don’t just plant one type of vine. Create a ‘green wall’ with varied textures and growth rates. Start with a fast-growing climber like a clematis or jasmine to get coverage quickly. Then, tuck in slower-growing, fuller plants like ferns at the base. Finally, add a pop of color with seasonal annuals that spill over the front of the planter box. This layered approach creates visual depth and ensures your screen looks lush and intentional from day one, not sparse and sad.
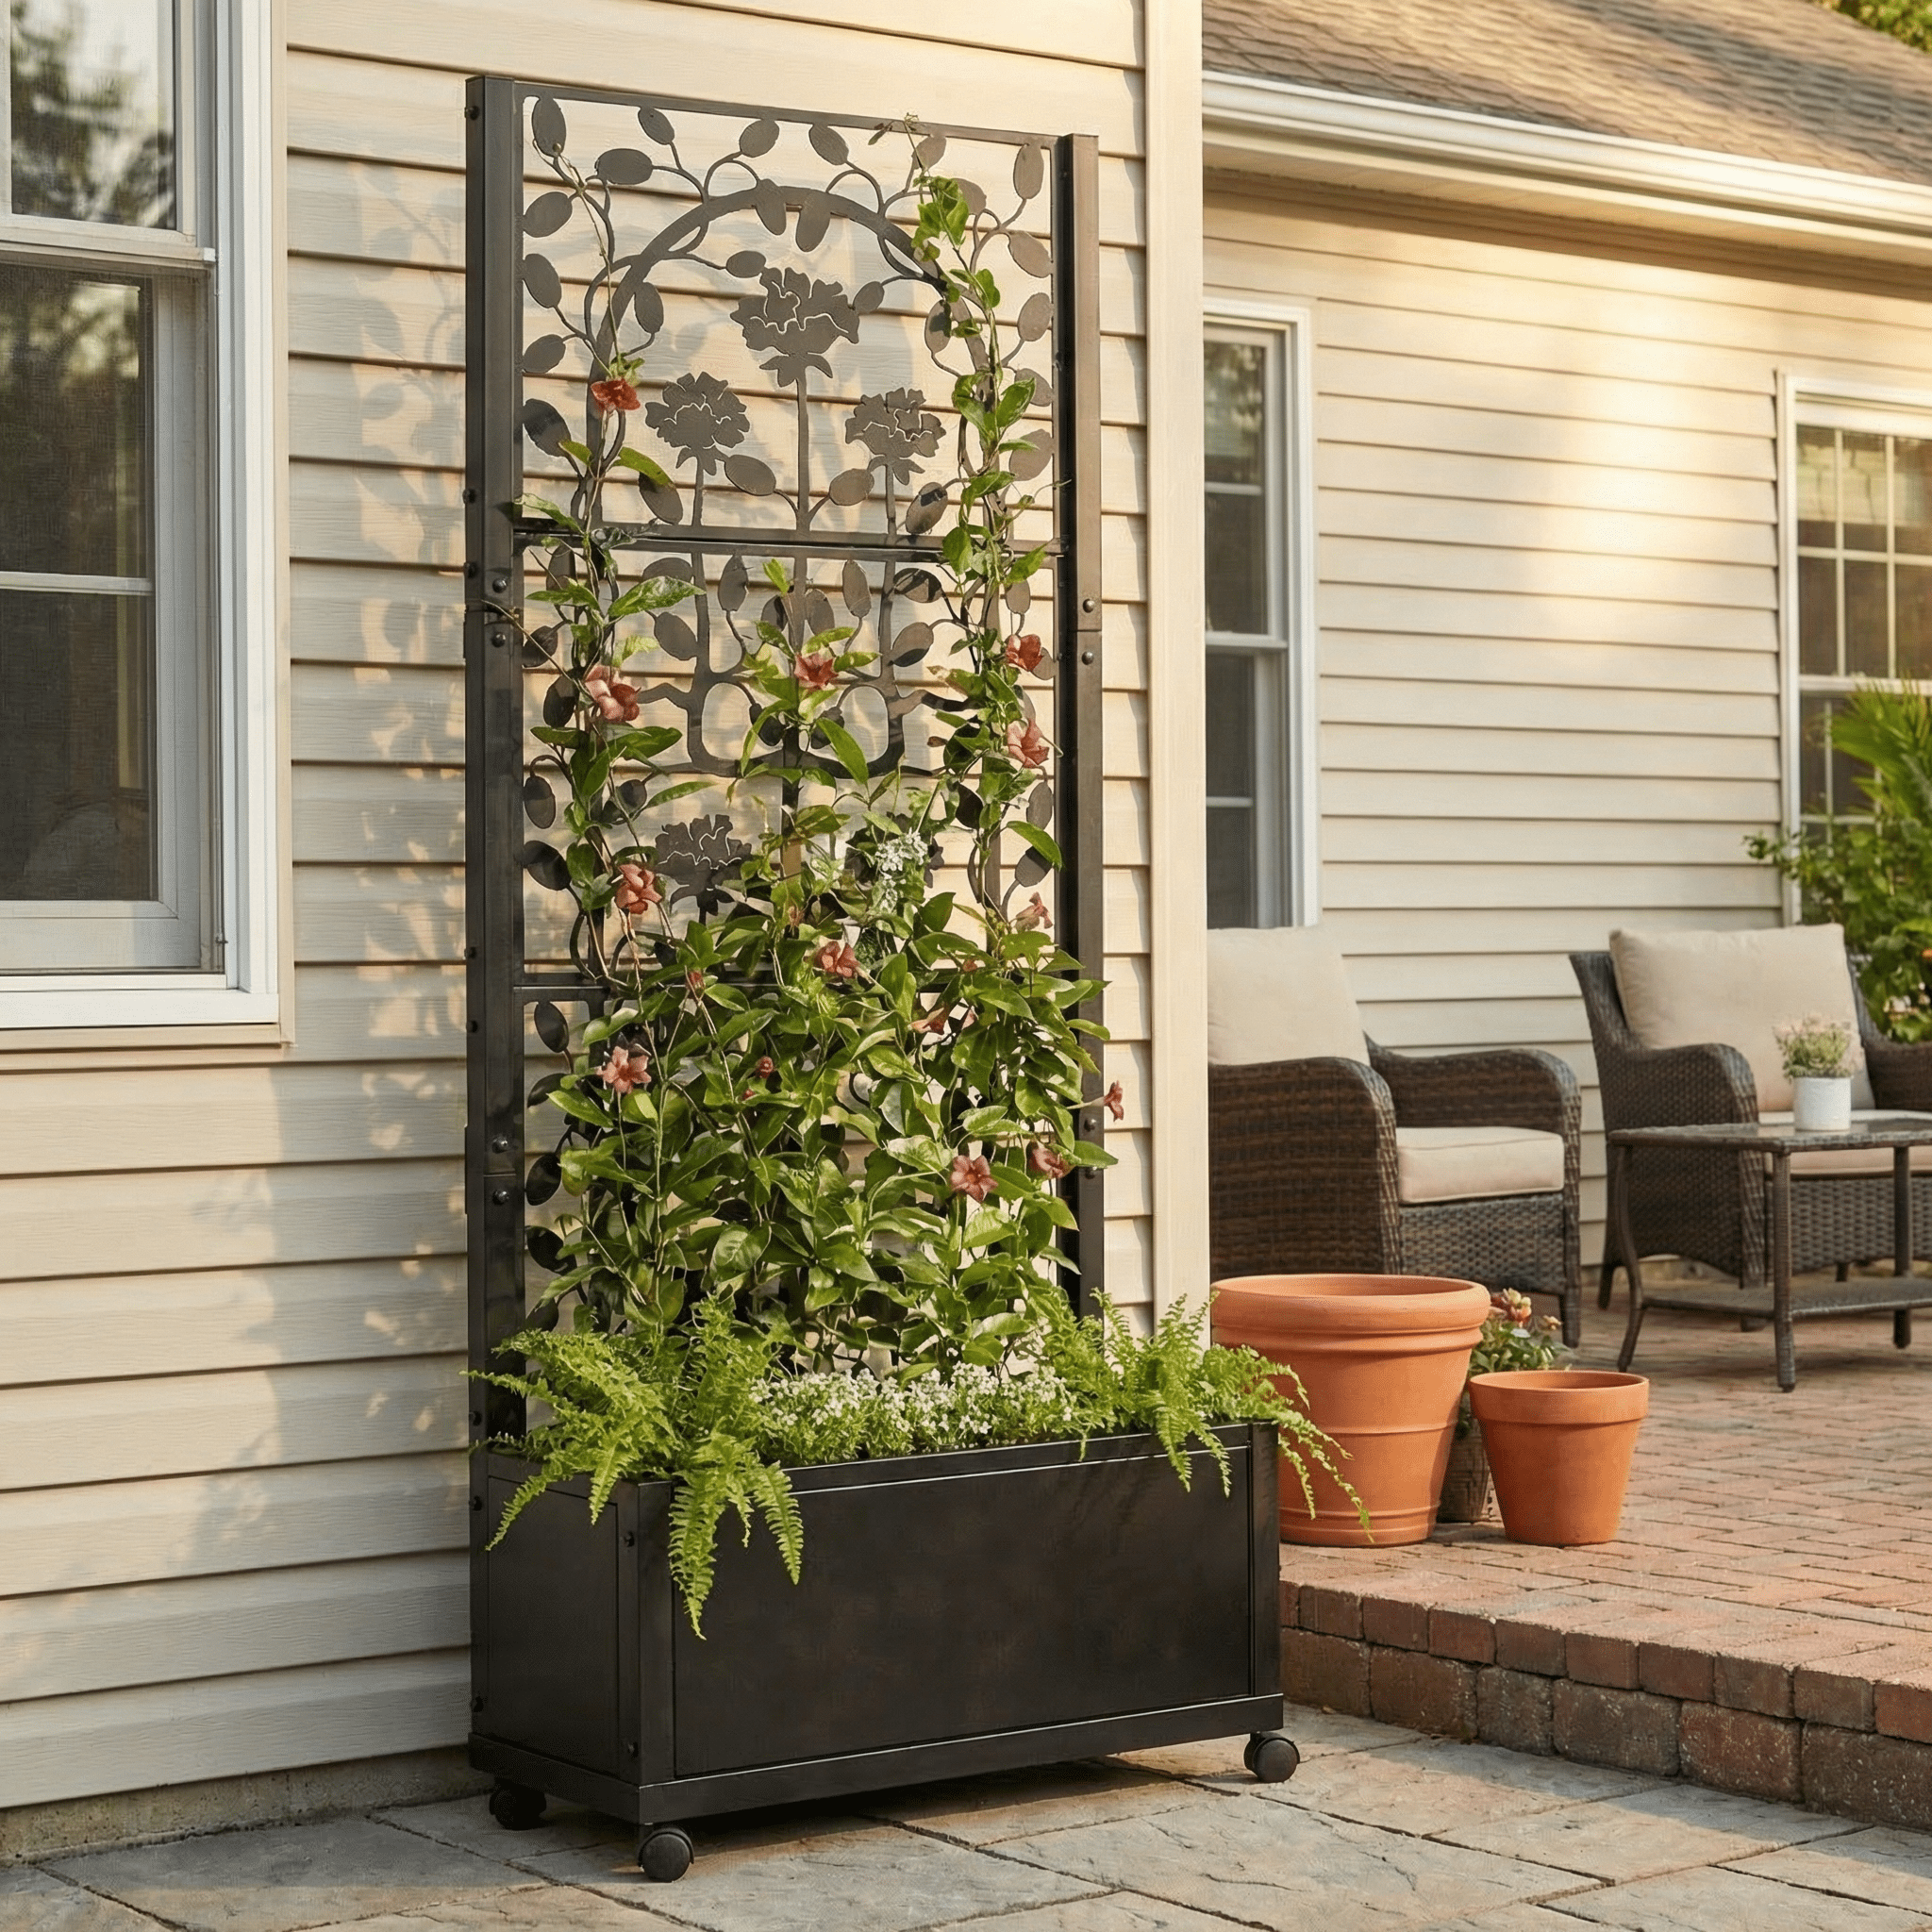
A living wall is beautiful, but it’s a commitment. The metal trellis itself is low-maintenance, but the plants are not. Expect to spend 10-15 minutes per week watering, especially in hot weather, and more if the planter is in direct sun. You’ll also need to prune the vines to encourage full growth and prevent them from getting leggy or encroaching on walkways. Annually, you’ll likely need to refresh the soil and fertilize to keep the plants healthy. If you’re a hands-off gardener, this might not be the solution for you.
3. Build a Modern Horizontal Wood Slat Privacy Wall
The formula for this look is all about balance: 70% warm, dark wood + 20% negative space + 10% structural framing. The key is the spacing between the slats. Too close and it feels like a solid, oppressive wall. Too far apart and you lose the sense of privacy. This design uses a gap that’s about 50% of the slat’s width, which is the sweet spot for maintaining an airy, modern feel while still screening the view. You could swap the dark stain for a light cedar or even a composite material, but keeping that slat-to-gap ratio is what preserves the style.
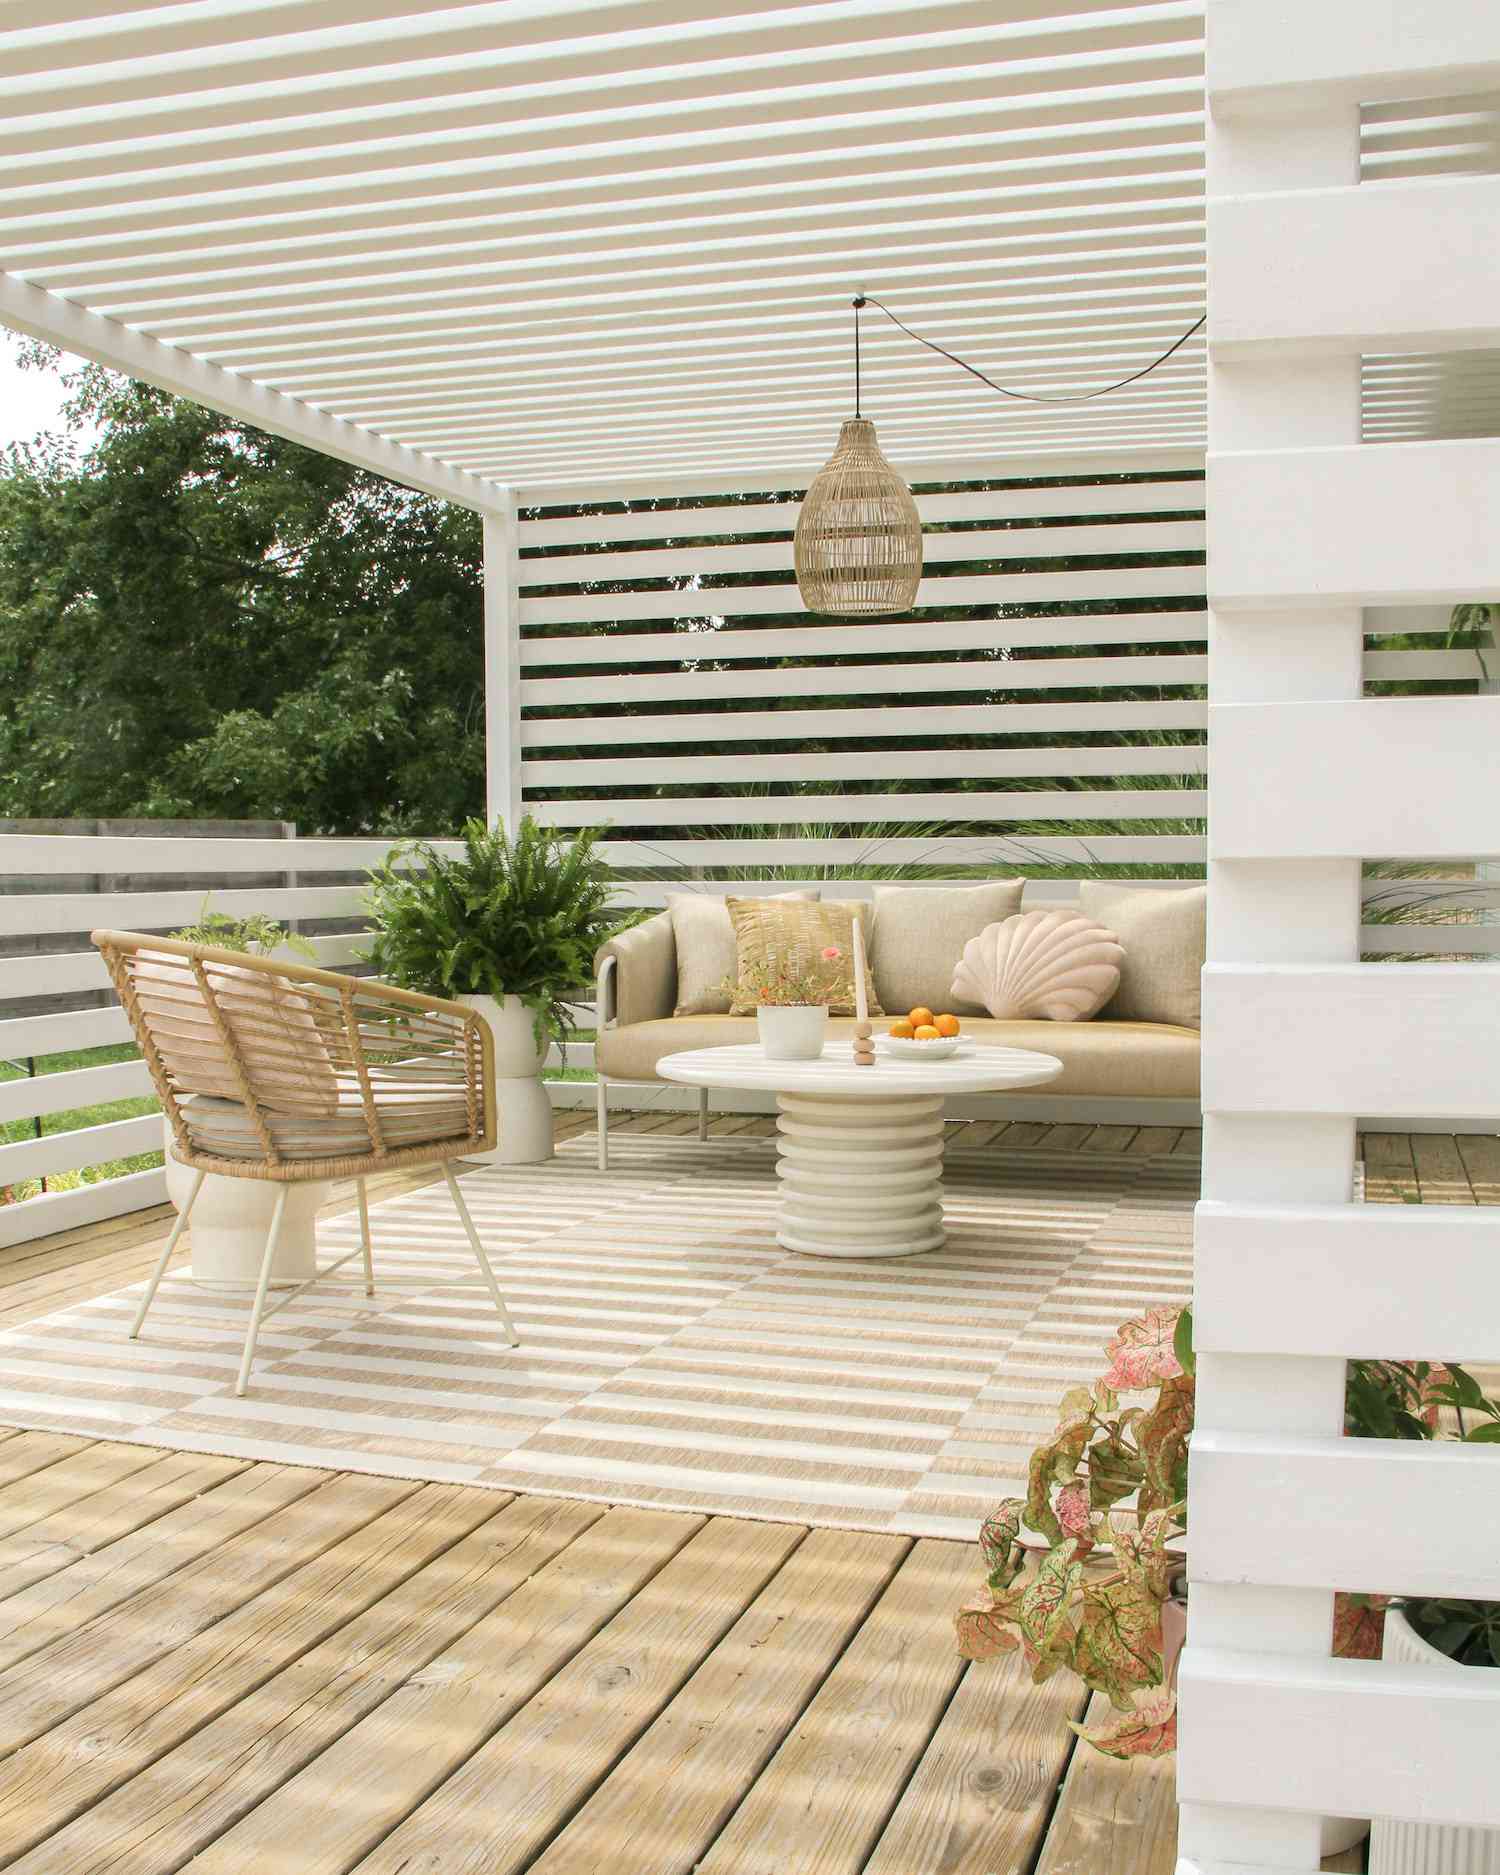
You can build a section of this screen in a weekend. Here’s a quick guide:
- Time Estimate: 6-8 hours for an 8-foot section.
- Materials Cost: $250 – $450, depending on wood choice.
- Step 1: Securely install your 4×4 vertical support posts, ensuring they are perfectly plumb and spaced no more than 6-8 feet apart.
- Step 2: Starting from the bottom, attach your first horizontal slat, making sure it’s perfectly level.
- Step 3: Use a ‘spacer block’—a small piece of wood cut to your desired gap size—to perfectly position the next slat. Screw it in place.
- Step 4: Repeat this process, using the spacer block each time to guarantee uniform gaps all the way to the top.
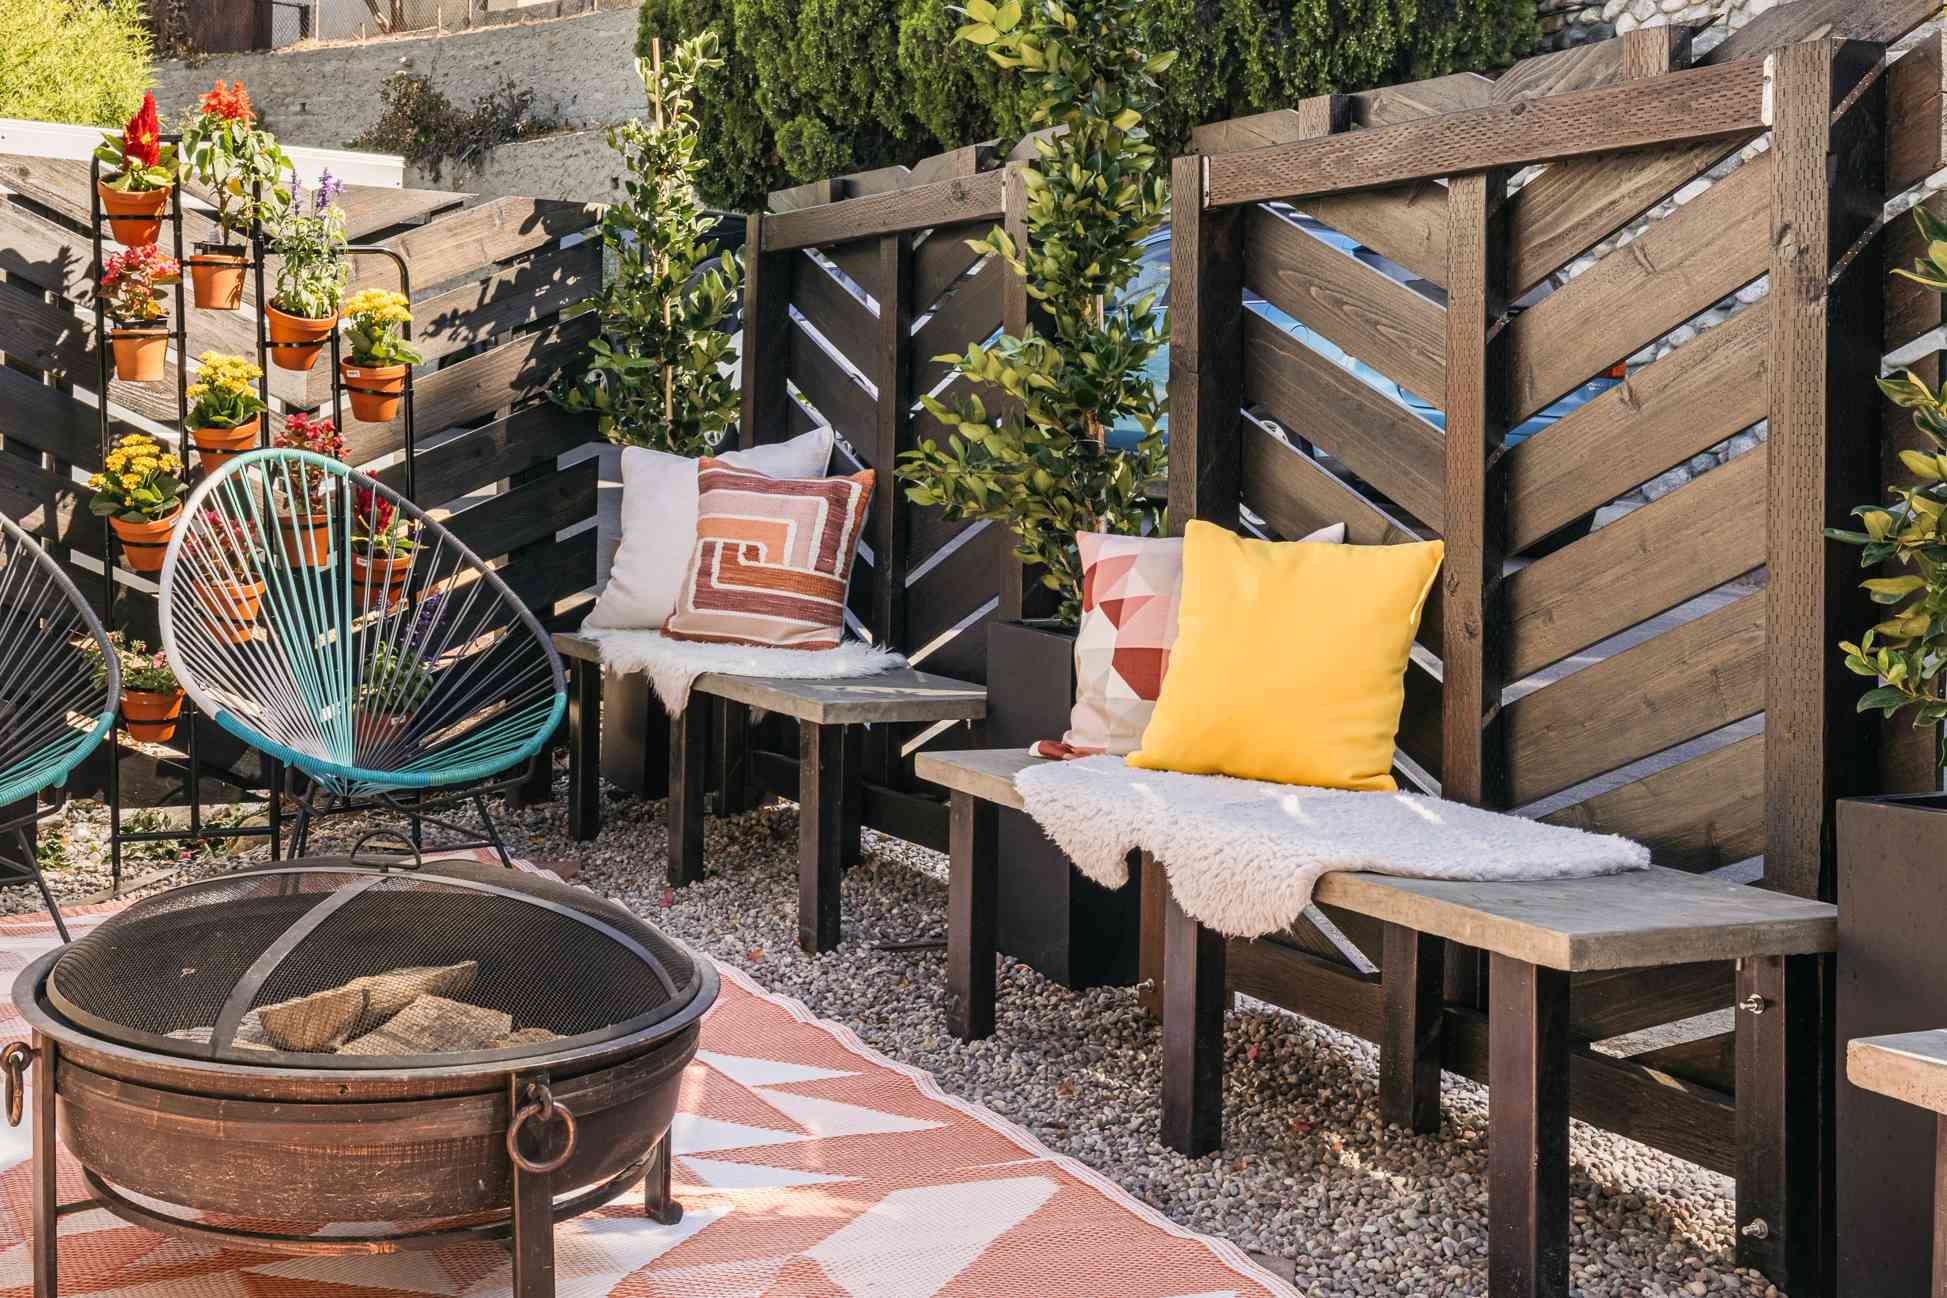
4. Integrate Corner Benches into a Stained Wood Screen
The single element that makes this design work so well is the built-in L-shaped bench. Without it, you’d just have a fence. With it, you have an outdoor room. The bench transforms the privacy screen from a simple barrier into a functional destination. It defines the corner of the patio as a place for conversation and relaxation, making the entire structure feel intentional and integrated. The screen isn’t just next to the seating; it is the seating. That’s a huge difference in creating a cohesive space.
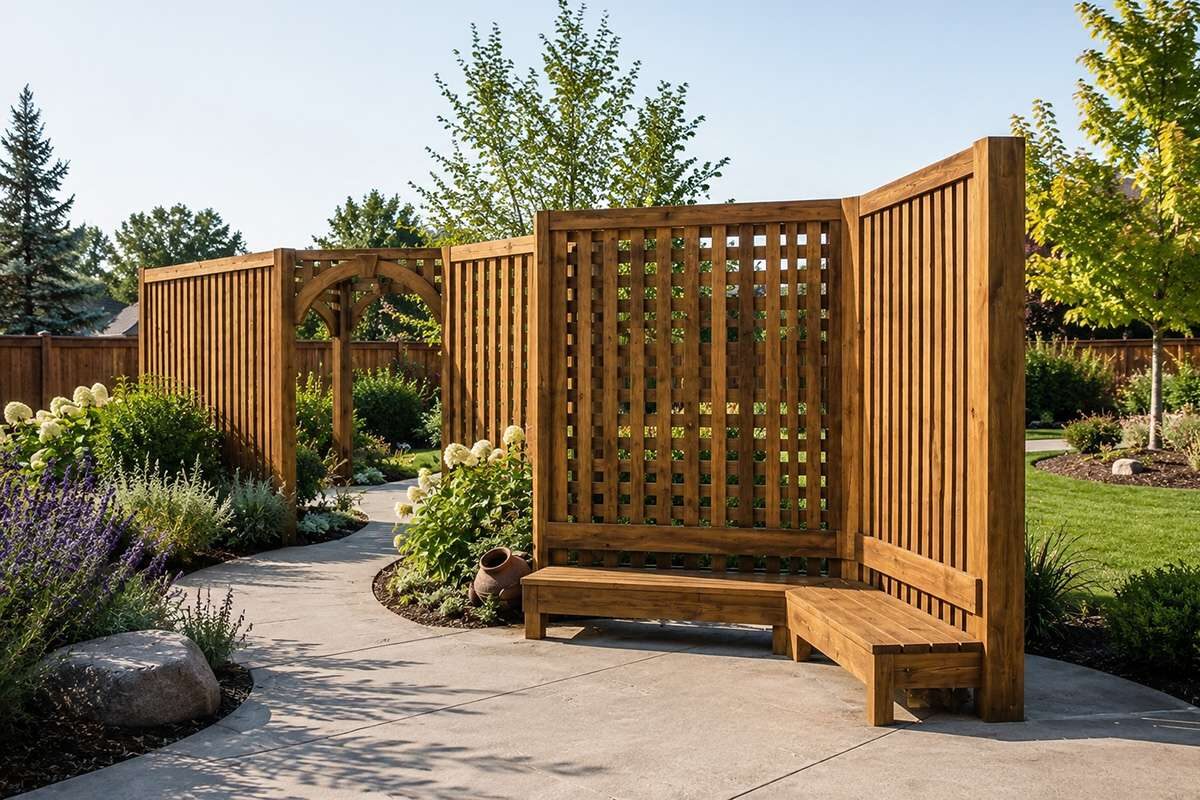
This idea is perfect for defining a corner in a medium to large backyard, roughly 300 sq. ft. or more. The bench requires a footprint of at least 6′ x 6′ to feel generous and not cramped. For smaller patios or narrow side yards, this exact design could feel bulky. If you’re working with less than 150 sq. ft., consider the vertical planter trellis from Idea #2, which offers privacy with a much smaller footprint. The arbor element also works best when you have a distinct path or transition point to highlight.
5. Add a Vertical Slat Screen to an Elevated Deck Railing
This design succeeds by repeating a single element: the narrow, vertical wood slat. By using the same material and orientation for the privacy screen as the lower part of the railing, the entire structure feels like one cohesive unit, not an awkward add-on. The clean lines draw the eye upward, making the space feel taller and more open, even as it provides seclusion. This repetition is a classic design trick that brings a sense of calm and order to the space. Compare this to the horizontal slats in Idea #3 for a different vibe.
You don’t need custom carpentry to get this look. You can achieve a very similar effect using pre-made fence panels or even just standard 1×2 or 1×3 lumber from a big-box store. A DIY version using pressure-treated pine and a quality outdoor stain could cost as little as $15-$20 per linear foot. For an even cheaper route, search Facebook Marketplace for people giving away old deck or fence materials. A weekend of sanding, staining, and some creative assembly can save you thousands.
6. Anchor a Vertical Slat Screen with Built-In Planters
When building a privacy screen with integrated planters, make the planter boxes at least 18 inches deep and 18 inches wide. Anything smaller will severely limit what you can plant and will dry out extremely quickly in the summer sun. A larger soil volume holds more moisture and allows for stronger root systems, meaning your plants will be healthier and provide better coverage. This also gives the entire structure a more substantial, high-end look, preventing it from appearing flimsy or tacked-on.
This look is a perfect equation for serene, modern privacy: 50% natural wood structure + 40% lush green foliage + 10% open air. The vertical wood slats provide the primary screening, but it’s the explosion of green from the built-in planters that brings it to life. The plants soften the hard lines of the wood and deck, turning a simple barrier into a living feature. The slivers of open space between the slats keep it from feeling too heavy, adding that crucial 10% of breathing room.
7. Install a Sleek, Modern Black Metal Slat Screen
A powder-coated aluminum or steel screen like this is one of the lowest-maintenance options available. Unlike wood, it won’t rot, warp, or need to be stained every few years. A simple rinse with a hose a few times a year is usually all it takes to remove dust and pollen. However, be aware that matte black finishes can show dust and hard water spots more readily than other colors. In coastal areas with salt spray, you’ll want to rinse it more frequently to prevent corrosion, even with a quality powder coat. Scratches can also be more obvious and may require a special touch-up paint to prevent rust on steel versions.
Before you commit to a metal screen, tick off these items:
- Check your deck’s structure: Can the framing support the weight and wind load of a tall metal screen? You may need to add blocking between joists where the posts will be mounted.
- Confirm material type: Is it aluminum or steel? Aluminum is lighter and won’t rust, but it can be more expensive. Steel is stronger but heavier and requires a perfect finish to prevent rust.
- Review HOA rules: Does your neighborhood have restrictions on fence material, color, or height? A sleek black screen might not fly in a community with strict aesthetic guidelines.
8. Pair a Black Horizontal Fence with Colorful Wicker Seating
This space feels so inviting because of the smart use of contrast. The dark, rigid lines of the black horizontal slat fence create a strong, modern backdrop. Against this, the soft texture of the wicker sectional and the bright pops of teal in the cushions and planters feel extra vibrant and welcoming. The fence provides the structure and privacy, while the decor provides the personality and comfort. It’s a classic pairing of hard and soft, neutral and colorful, that makes the entire seating area feel complete and intentional.
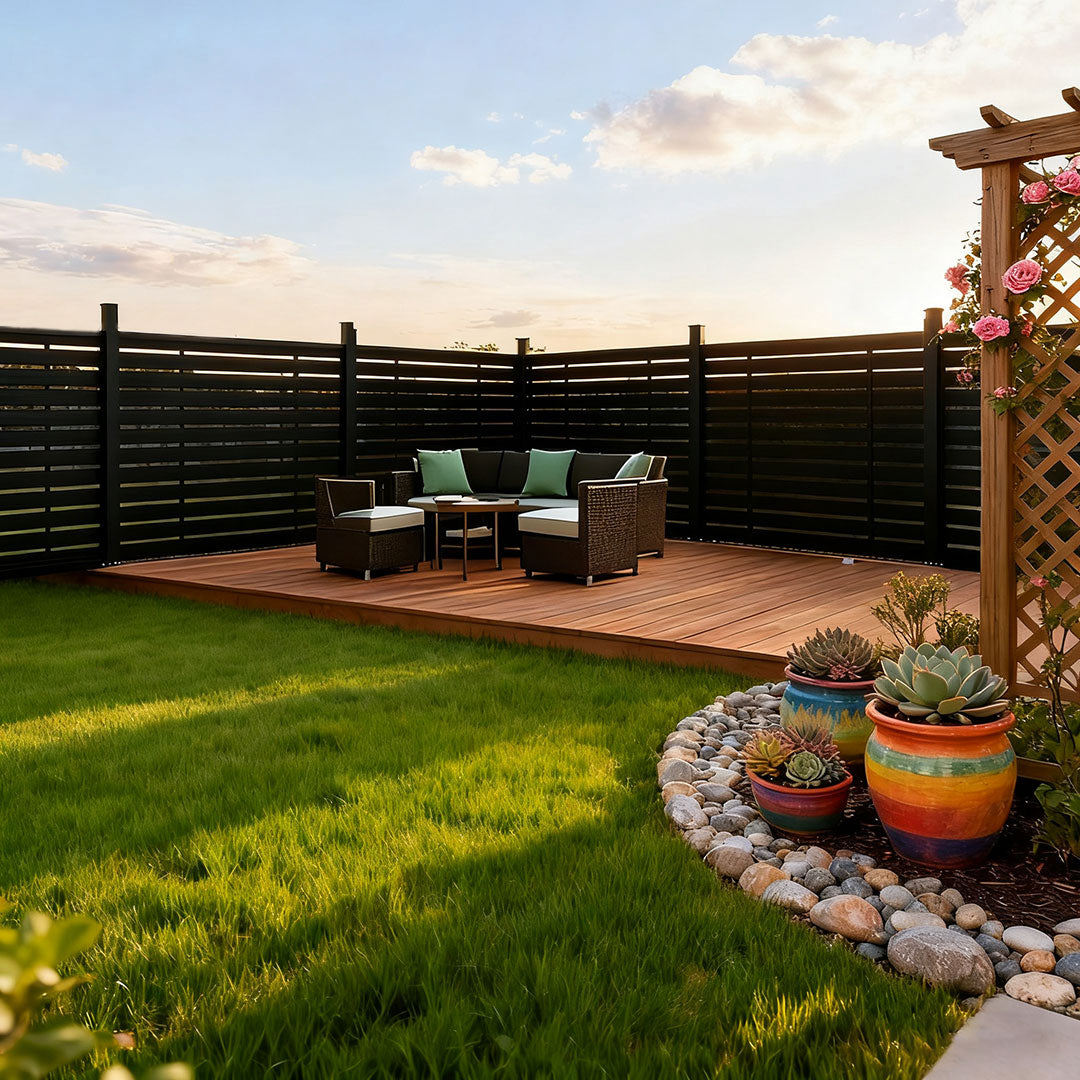
The ‘outdoor room’ concept has been gaining momentum for years, and this is a perfect example of why it’s so popular now. Homeowners are looking to maximize their usable living space, and a well-designed deck is no longer just a place for a grill. The combination of a stylish privacy fence, comfortable, living-room-worthy furniture, and curated decor like potted succulents turns this deck into a true extension of the home. It’s less about ‘backyard’ and more about ‘open-air den.’
9. Define Your Deck with a Composite Slat Privacy Screen
Recreating this sleek, modern look with composite materials requires an upfront investment, but offers long-term durability. Here’s a potential breakdown for an 8×10 foot section:
- Main Structure (Composite Slats & Metal Posts): $1,500 – $2,500
- Decking (Composite): $1,200 – $2,000 for a small 10×10 area
- Pergola Frame (Materials only): $800 – $1,800
- Labor (if not DIY): $2,000 – $4,000
- TOTAL (Pro-Installed): $5,500 – $10,300
Budget alternative: Use pressure-treated pine for the slats and stain them a dark charcoal. This can bring the materials cost down by 60-70%, but will require yearly maintenance.
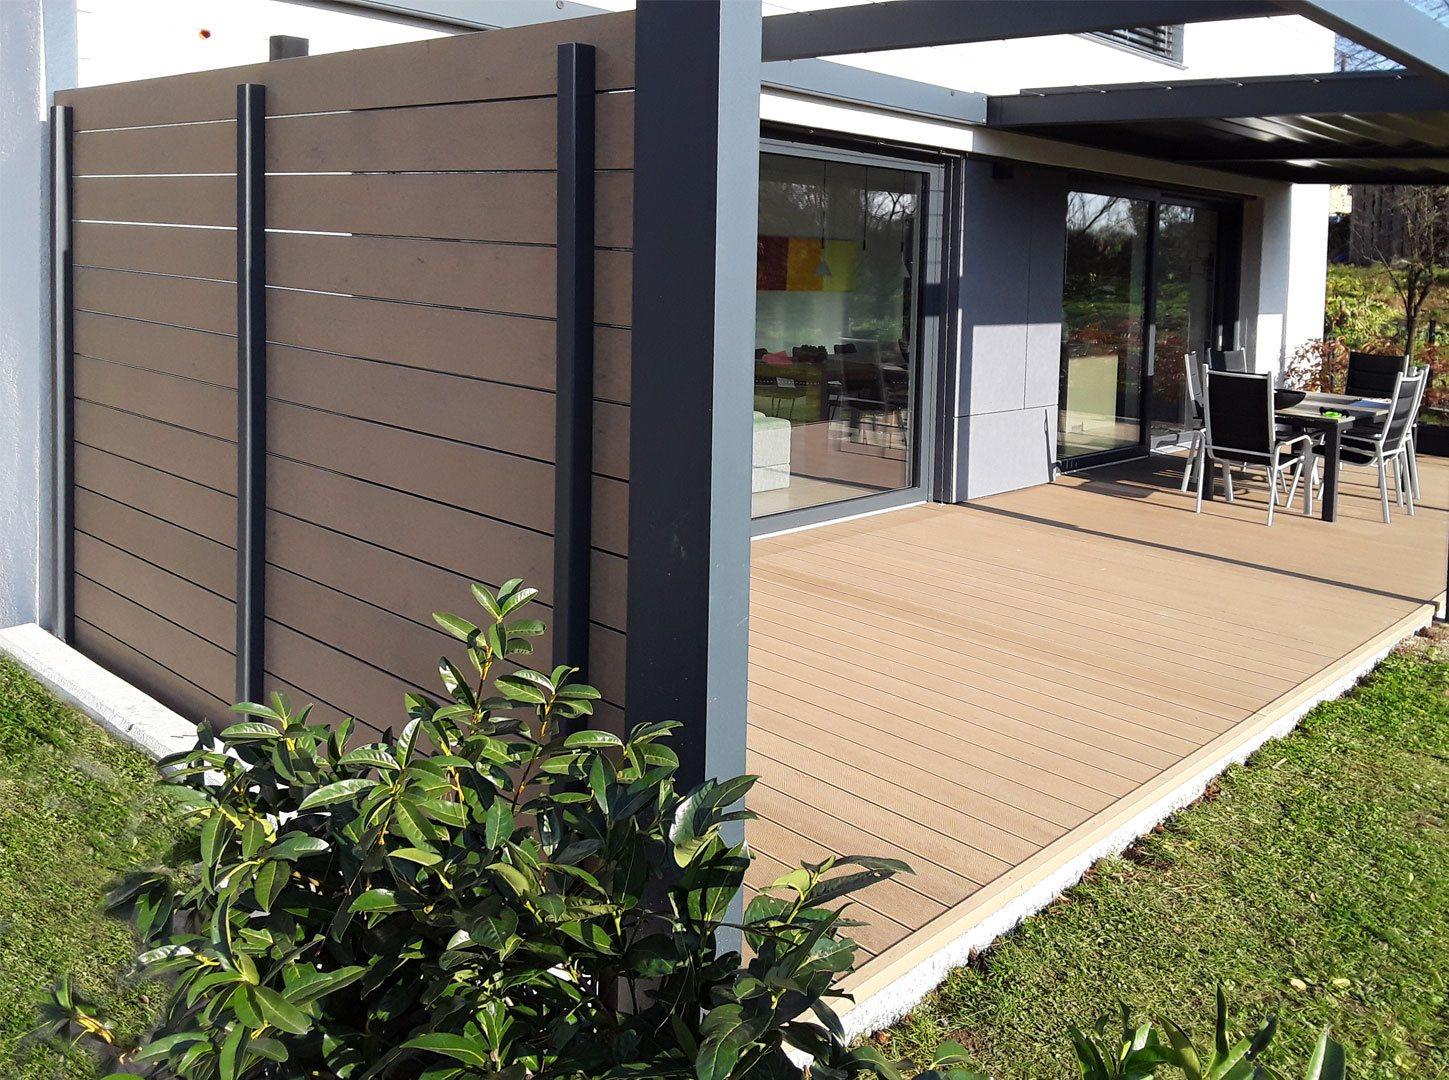
Composite materials are fantastic for their low-maintenance appeal, but they aren’t indestructible. Dark-colored composite decking and slats, especially in direct, all-day sun, can get incredibly hot on bare feet—sometimes dangerously so for kids and pets. Also, while they resist fading better than wood, they are not fade-proof and will lighten slightly over many years. Be sure to check the temperature rating of any composite product you’re considering if your deck gets a lot of direct sunlight. A lighter color might be a more practical choice.
10. Make a Statement with a Laser-Cut Metal Privacy Screen
The laser-cut metal panel is, without a doubt, the hero of this design. Remove it, and you have a pleasant but fairly standard patio set. With it, you have a piece of functional art. The intricate tropical leaf pattern does more than just block the view; it casts beautiful, dappled shadows that change throughout the day, adding a dynamic layer of texture and movement to the space. It acts as a stunning focal point that elevates the entire seating area from simple to sophisticated. This is a much better approach than a feature wall, which can sometimes feel too heavy for an outdoor space.
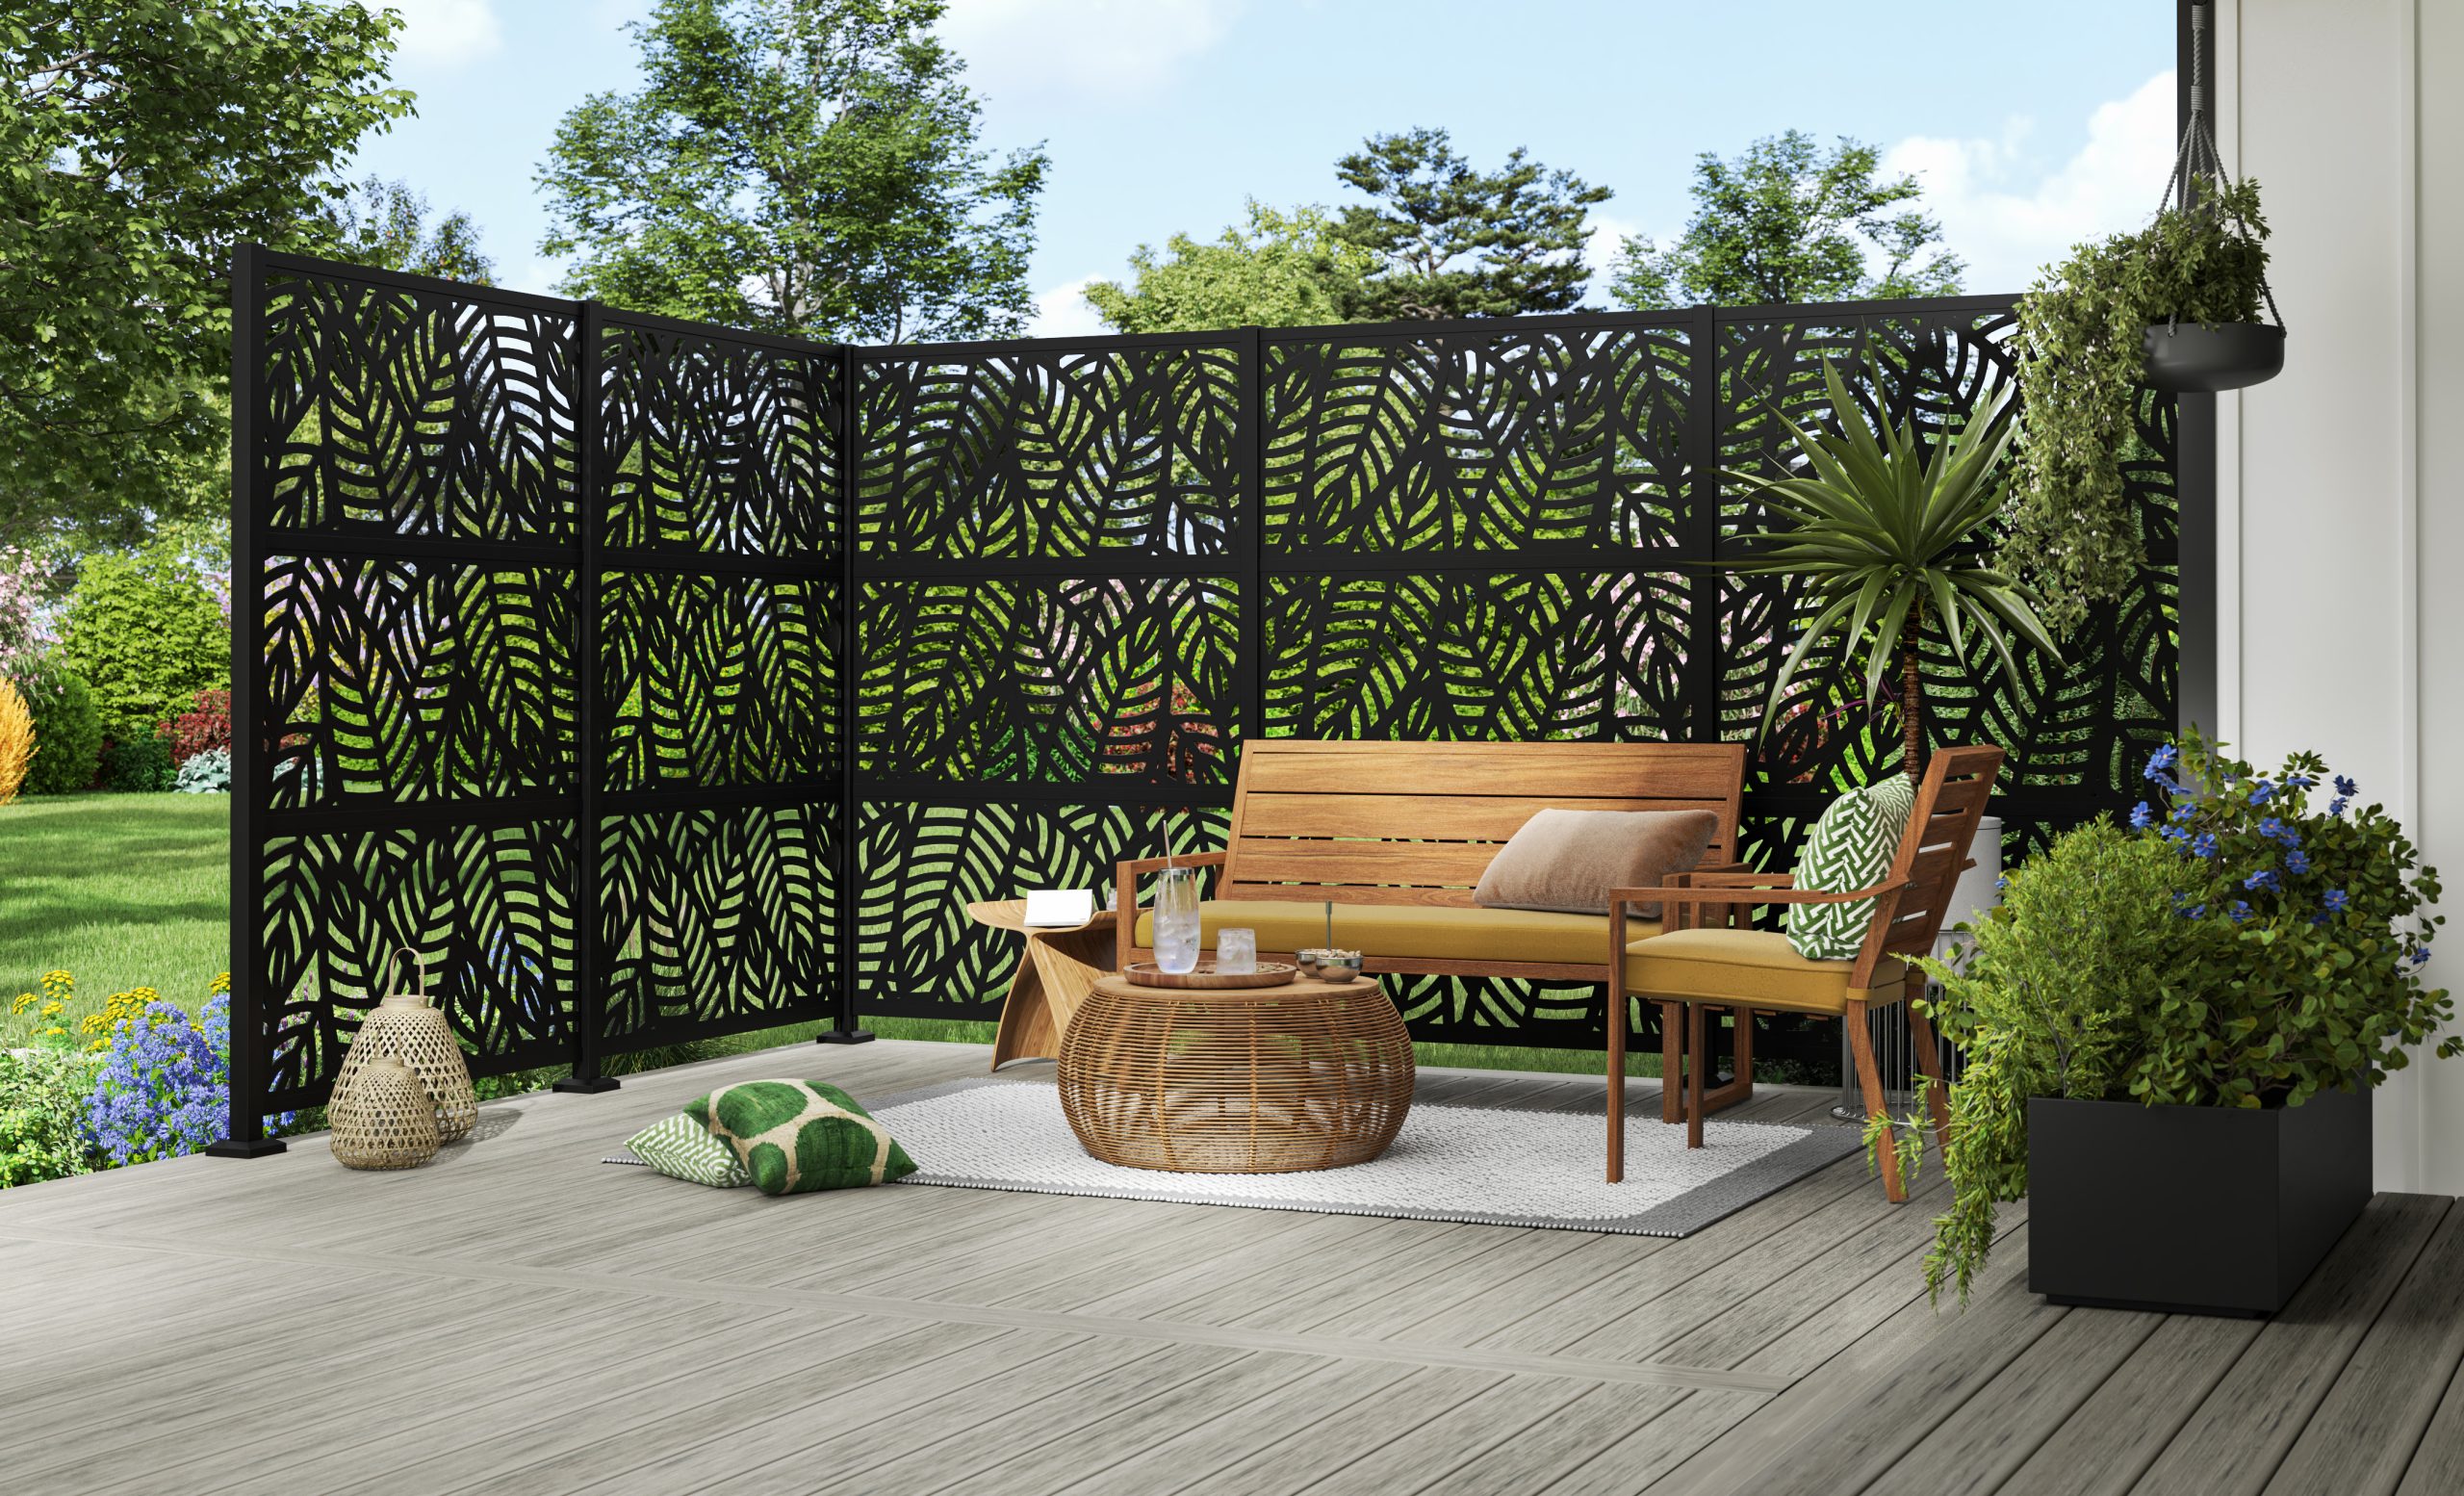
When using a visually dominant piece like a laser-cut screen, treat it like a major piece of art. Don’t place it in a location where it will be mostly hidden behind bulky furniture. Instead, position it to be the main focal point. To enhance the effect, consider adding uplighting at the base of the screen. At night, the light will shine through the cutouts, turning the panel into a dramatic lantern and creating an entirely new, magical ambiance for your deck or patio.
11. Build a Pergola with Integrated Slatted Privacy Panels
A large, structural element like this dark wood pergola works best in a space that can handle its visual weight. This is ideal for long, relatively narrow side yards or patios that run the length of a house. You’ll need a minimum length of 15-20 feet for it to feel like an intentional architectural feature rather than a random box. The height should also be considered; aim for at least 8 feet of clearance underneath the beams to avoid a cramped, oppressive feeling. This is not a solution for a small, square 10×10 deck.
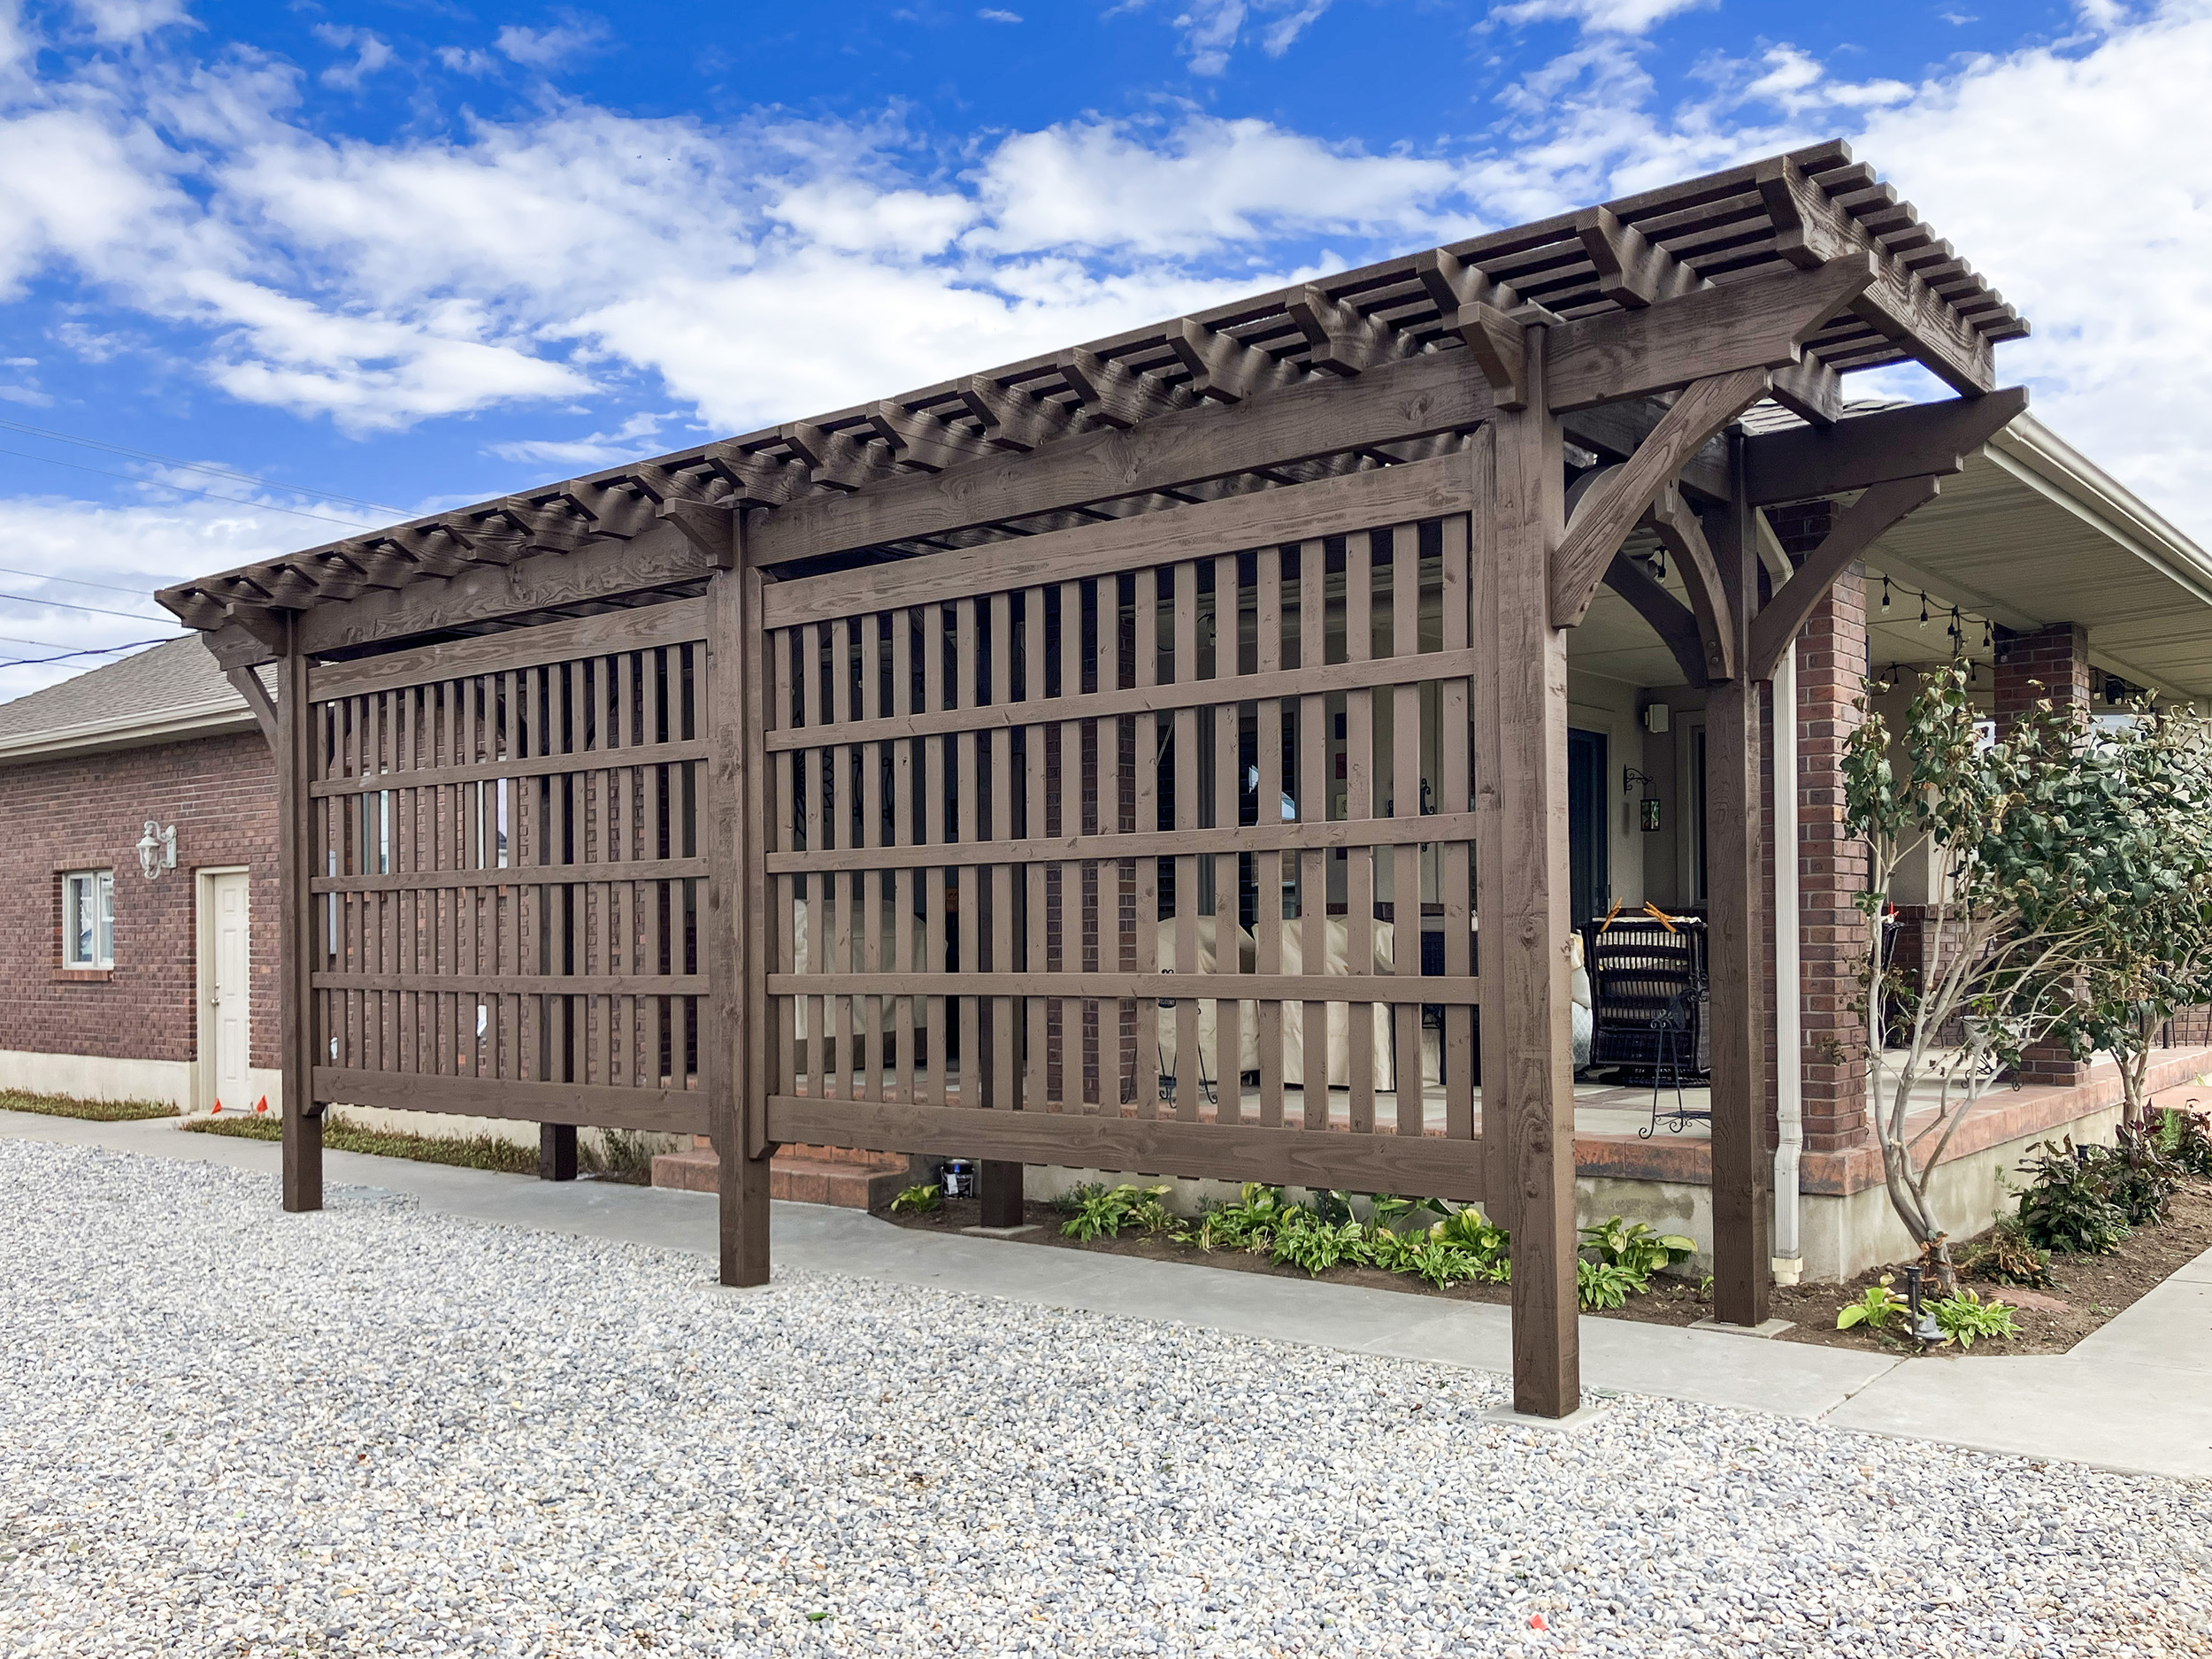
The success of this design lies in its bold, monochromatic formula: 80% dark-stained wood + 15% textured ground cover + 5% contrasting trim. By using the same dark brown stain for the support posts, overhead beams, and the vertical privacy slats, the entire structure reads as one powerful, cohesive unit. The light gray gravel and concrete path provide a clean, neutral base that makes the dark wood pop. The small flashes of white trim on the house are just enough contrast to keep it from feeling gloomy.
12. Opt for a Dark Composite Fence with Modern Lounge Chairs
This setup feels so serene and modern because it follows the principle of repetition with variation. The clean, strong horizontal lines of the dark grey composite fence are echoed in the sleek, low-slung frames of the chaise lounge chairs. However, the top section of the fence introduces a variation—a slatted design—that adds visual interest and prevents the tall fence from looking like a monolithic fortress. This subtle change in pattern, combined with the consistent linear theme, creates a look that is both coordinated and dynamic. It’s a much more sophisticated take than the busy wicker seating seen in Idea #8.
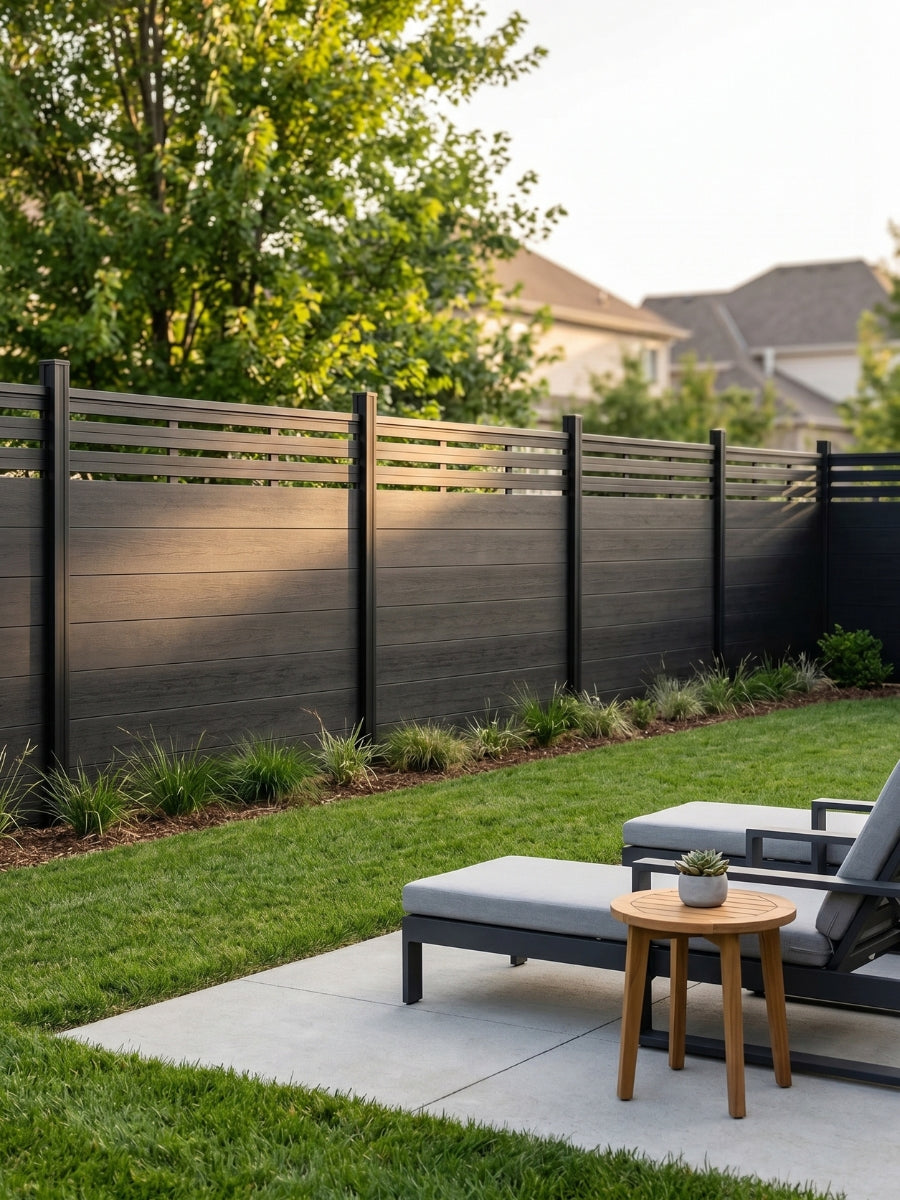
You can get this high-end look for much less. Instead of expensive composite fencing, you can use standard pressure-treated wood fence boards installed horizontally and painted with a high-quality dark grey exterior paint like ‘Iron Ore’ or ‘Peppercorn’. For the seating, skip the designer showroom and look for modern metal-frame loungers at Target or Walmart during their end-of-summer sales. You can often find a pair for under $400, giving you the same sleek silhouette for a fraction of the cost.
13. Create a Cozy Nook with a Slat Screen and Bistro Set
For a small space or corner nook, pay close attention to the proportions of your furniture. Notice how this tall, narrow bistro table and its matching stools have the same verticality and slender profile as the privacy screen’s slats and posts. This creates a harmonious, intentional look. A standard-height, bulky dining set would have looked squat and crowded in this corner. When your privacy screen is tall and linear, choosing furniture that echoes that form makes the entire space feel more cohesive and thoughtfully designed.
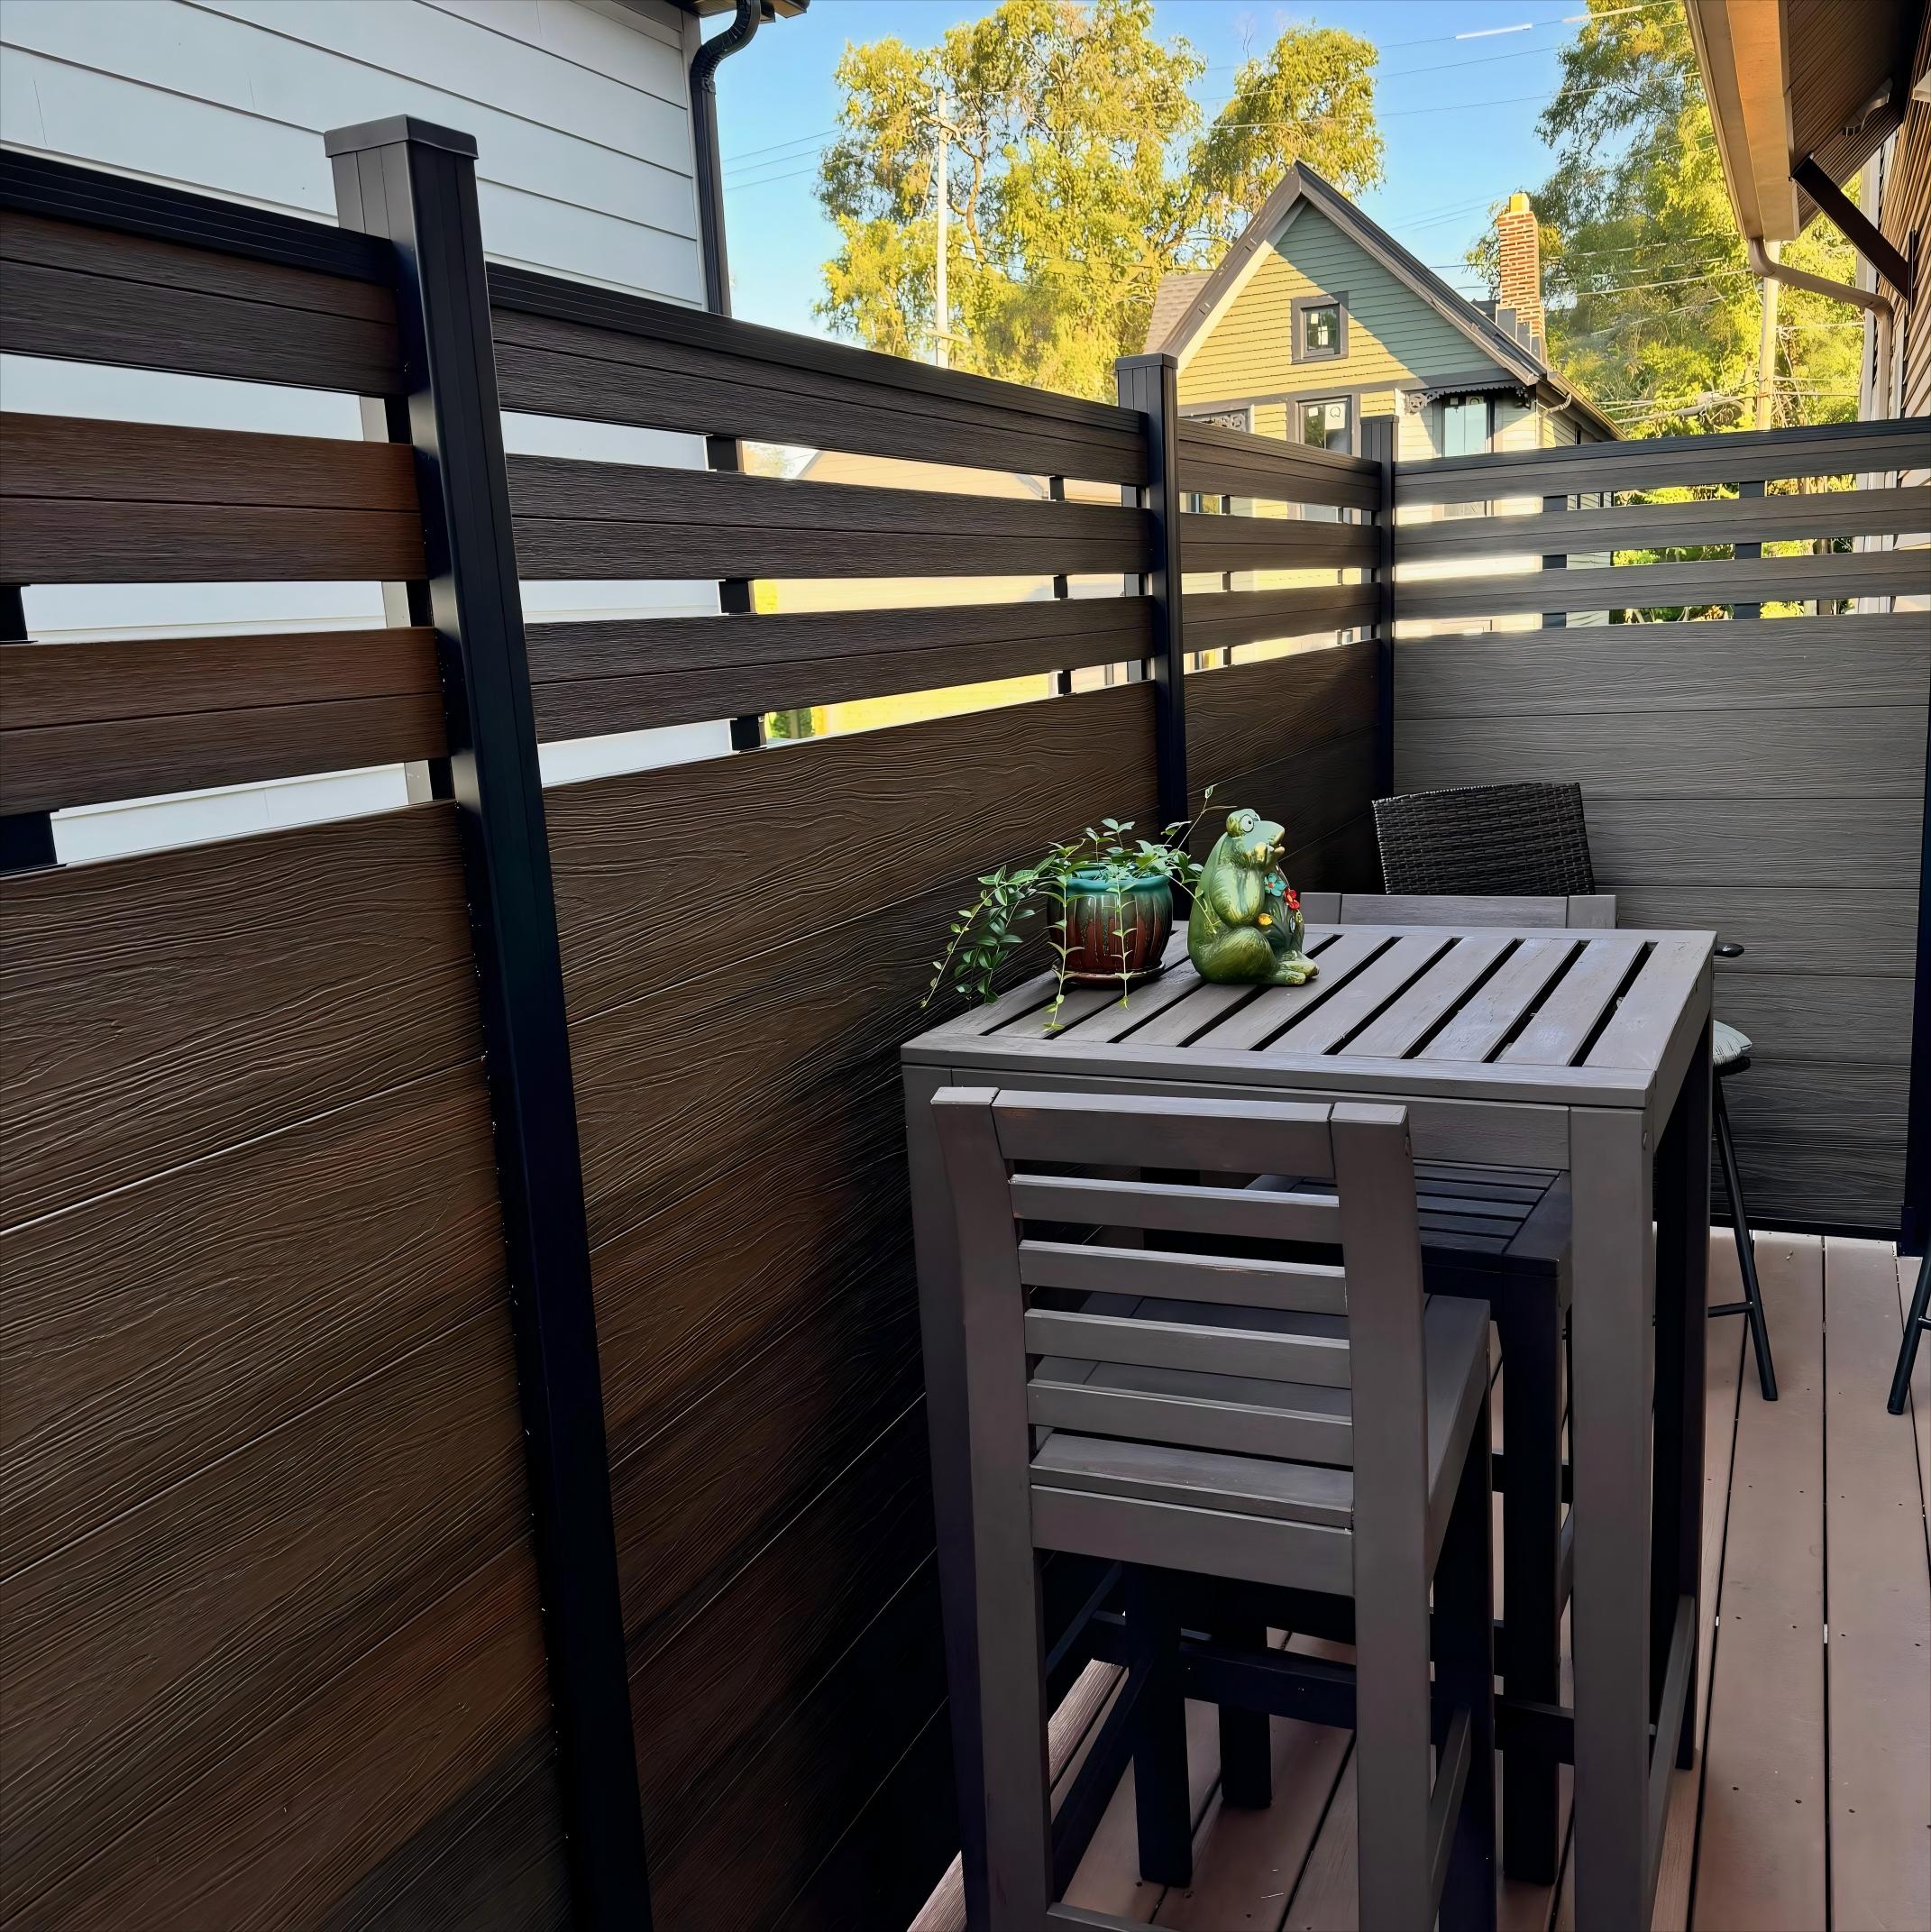
that makes this little corner feel special is the tiny ceramic frog figurine. It’s a small, almost silly detail, but it’s what injects personality and charm into an otherwise straightforward modern design. It tells you that a real person lives here and doesn’t take their decor *too* seriously. Removing it would leave you with a perfectly nice, but slightly sterile, setup. That little pop of unexpected whimsy is what makes the space feel like a home, not a showroom.
14. Accessorize a Light Wood Screen with Hanging Planters
You can easily add hanging planters to a wood slat screen. It’s a 30-minute project.
- Time Estimate: 30 minutes.
- Materials Cost: $30 – $80 for planters and hooks.
- Step 1: Choose small, lightweight planters. Terracotta or heavy ceramic may be too much for a single slat.
- Step 2: Buy S-hooks or specialty fence hooks that are wide enough to fit over your wood slats. Measure your slat depth before you buy!
- Step 3: Pot your plants, using lightweight potting mix. Trailing plants like string of pearls or pothos work beautifully.
- Step 4: Hook the planters onto the slats, arranging them at different heights for a more dynamic, natural look. Ensure the weight is distributed.
For a more advanced look like the one in Idea #21, you’ll want professional installation.
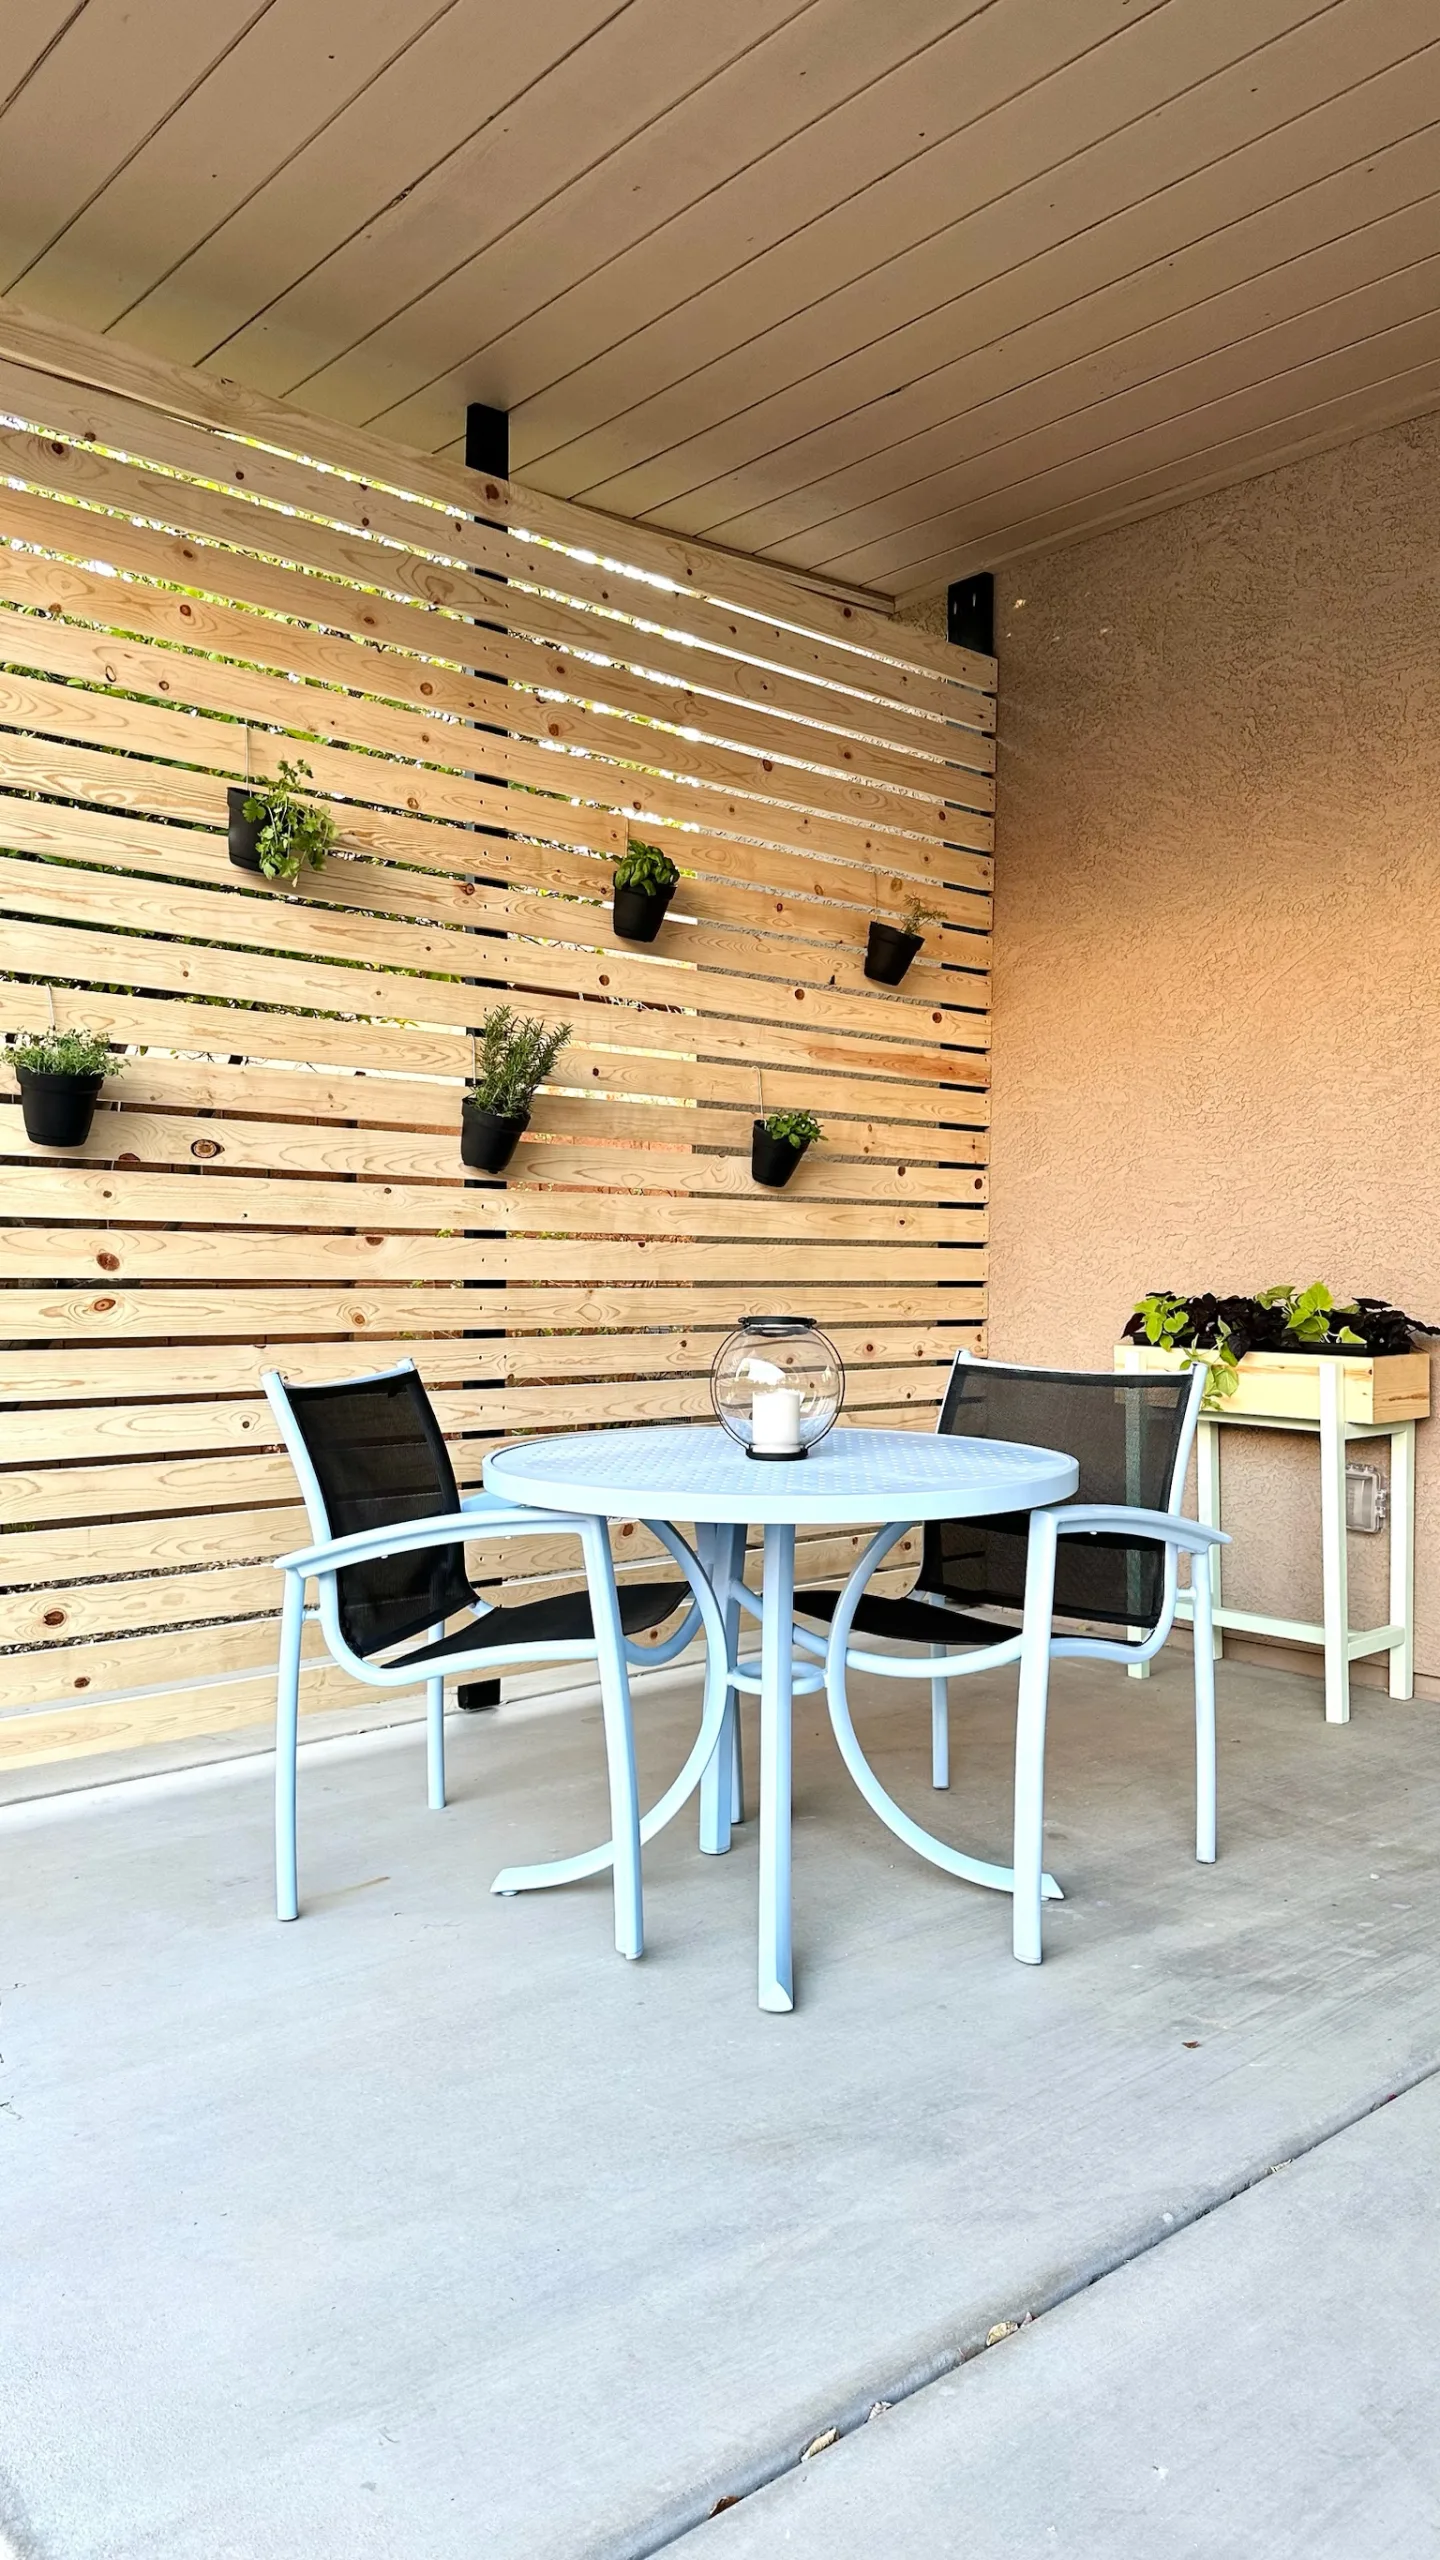
This cheerful, airy look follows a simple recipe: 60% warm, natural wood + 20% bright color pop + 20% living greenery. The light-toned wood screen provides a neutral, textured backdrop that feels clean and modern. The light blue bistro set is a bold, playful injection of color that becomes the immediate focal point. The green from the hanging planters and the larger planter box adds life and softens the clean lines, tying everything together. You could swap the blue for yellow, pink, or orange and the formula would still work perfectly.
15. Achieve a Clean Look with a Horizontal Cedar Slat Screen
The beauty of this design is its simplicity and precision. It works because of the unwavering consistency of the horizontal lines and the uniform spacing. This repetition creates a powerful sense of rhythm and order, which is inherently calming to the eye. The warm tone of the natural cedar wood prevents the strict geometry from feeling cold or sterile. It’s a perfect balance of architectural rigor and natural material warmth. This is a more purely architectural take compared to the mixed-material version in Idea #3.
A screen with strong horizontal lines like this is fantastic for making a space feel wider. It’s a great choice for a narrow deck or patio, as it visually pushes the boundaries outward. This design is best suited for screens up to 8 feet tall. If you need to go higher, consider breaking it up into tiers (as seen in Idea #25) or switching to a vertical slat design, like Idea #5. A very tall, unbroken horizontal screen can start to look like a giant shipping container from the side.
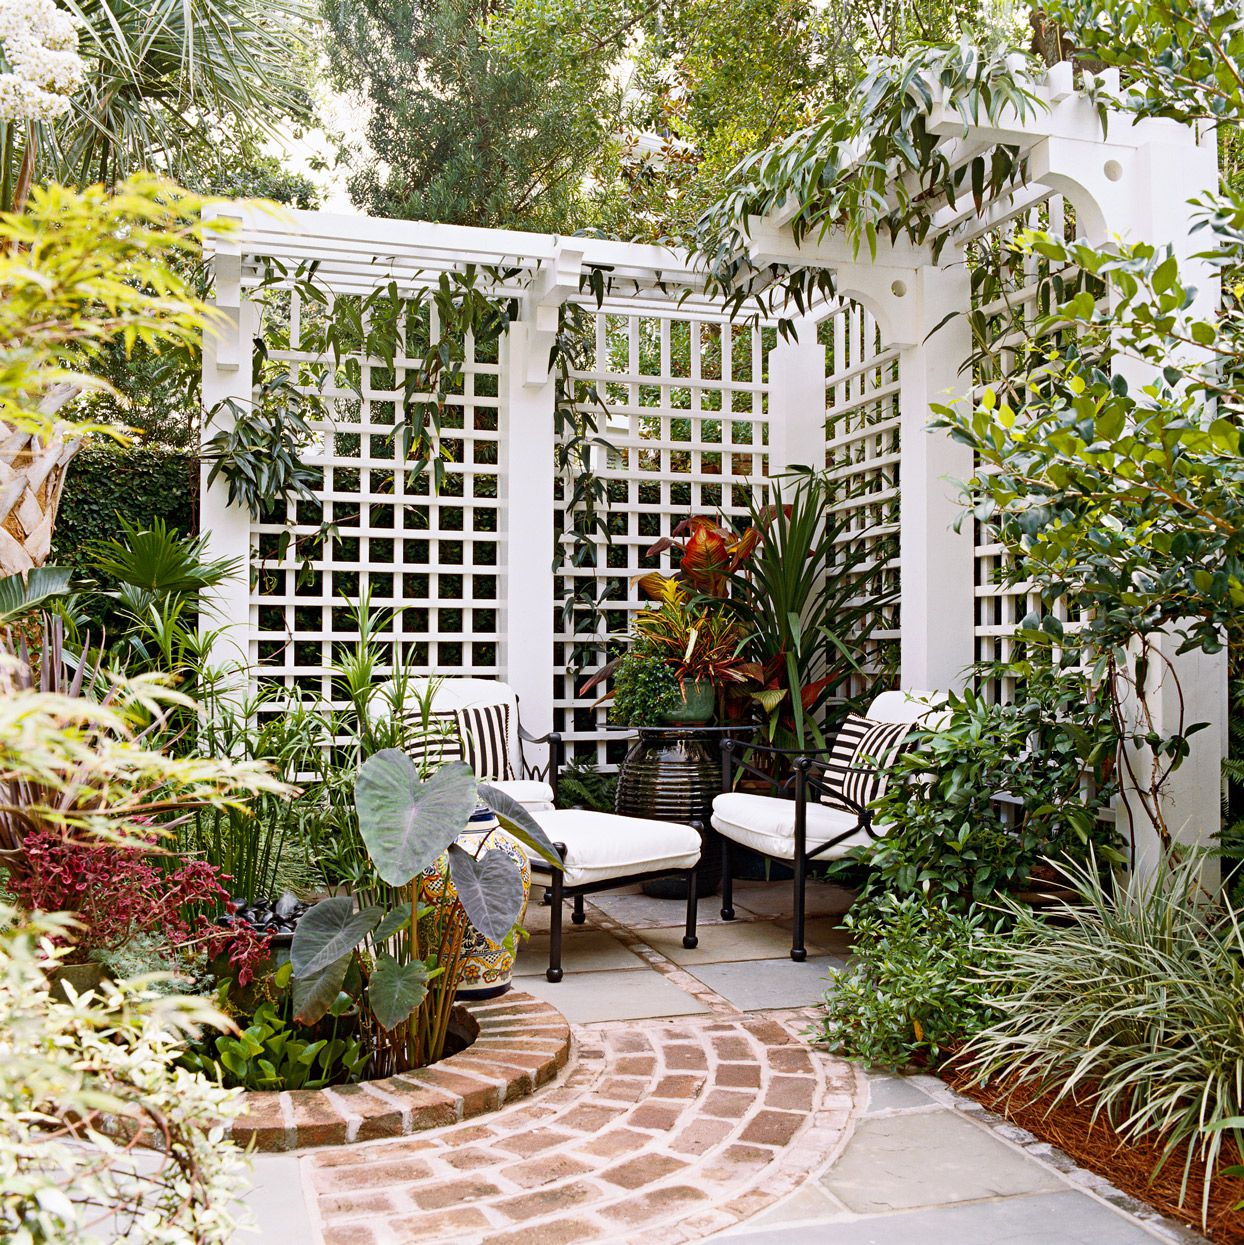
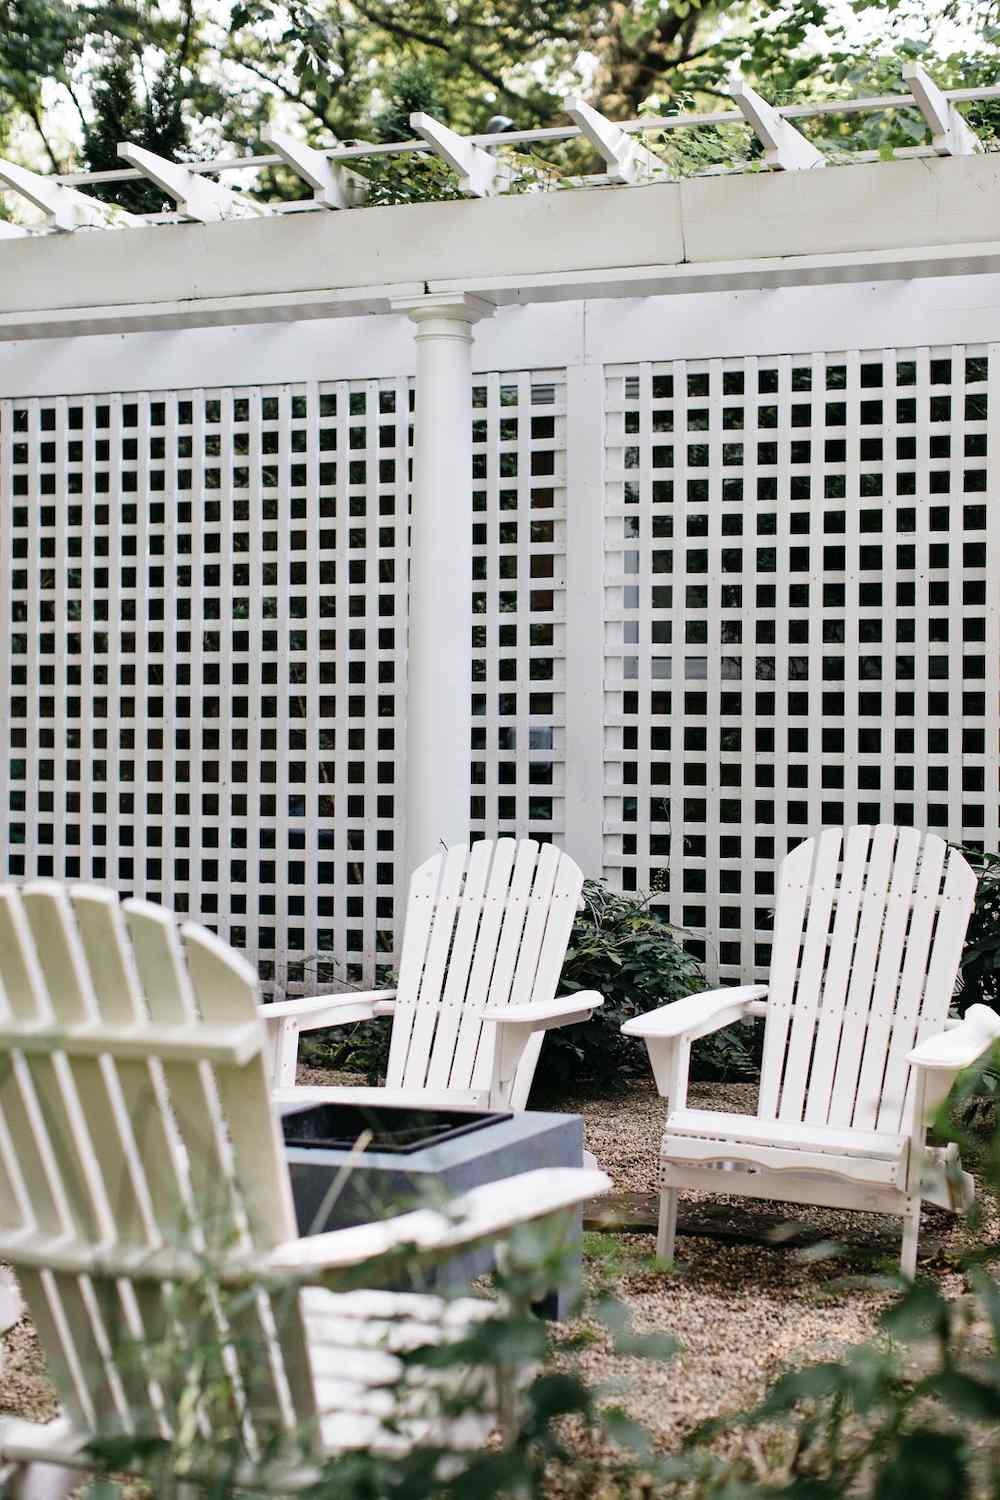
16. Embrace Classic Charm with a White Lattice Porch Screen
While modern, clean lines have dominated for years, there’s a huge resurgence of classic, traditional styles—think ‘Grandmillennial’ or ‘Coastal Grandmother’. A crisp white lattice screen fits perfectly into this trend. It feels timeless, established, and a little bit nostalgic. It provides privacy without feeling heavy or uninviting, maintaining a bright, airy quality. Paired with classic elements like red brick and boxwoods, it creates a look that feels both elegant and incredibly welcoming, which is exactly what people are craving right now.
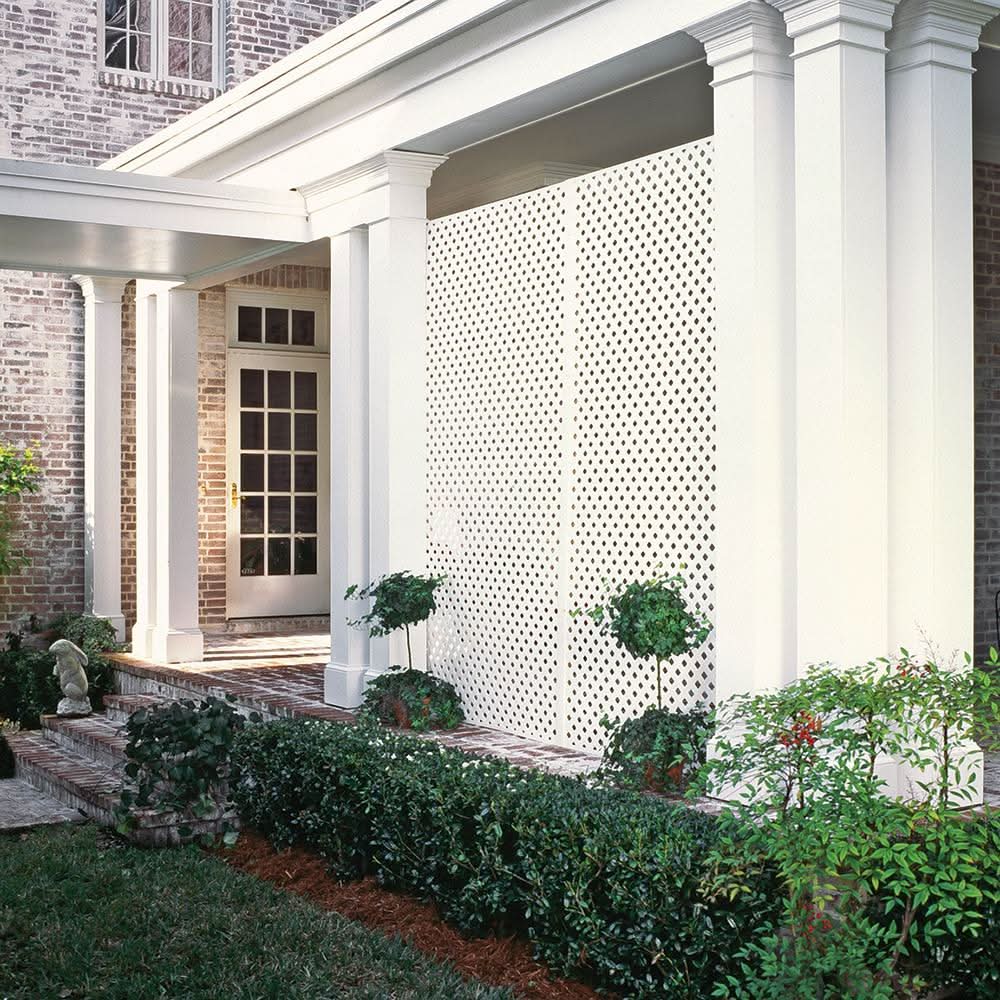
Lattice is one of the most budget-friendly privacy solutions you can find. A standard 4’x8′ sheet of white vinyl lattice from a store like Home Depot or Lowe’s can cost as little as $30-$40. Here’s how to get this look for less:
- Buy pre-made vinyl lattice sheets instead of custom-building with wood.
- Use standard pressure-treated 4×4 posts for the framing and paint them with a high-quality white exterior paint.
- Forgo the brick flooring for a stenciled concrete patio to mimic the look of classic tile or brick.
- Shop end-of-season sales for affordable boxwood shrubs and classic planters.
17. Opt for a Seamless Vertical Slat Wood Screen
This design is pure minimalism, and its formula is simple: 90% uniform vertical lines + 10% structural frame. The magic is in the consistency. Every slat is the same width, and every gap is identical. This obsessive repetition is what gives the screen its serene, architectural quality. Unlike the version in Idea #5, which is part of a larger railing system, this screen stands as a singular, clean plane. The natural wood provides just enough texture and warmth to keep the minimalist design from feeling sterile or boring.
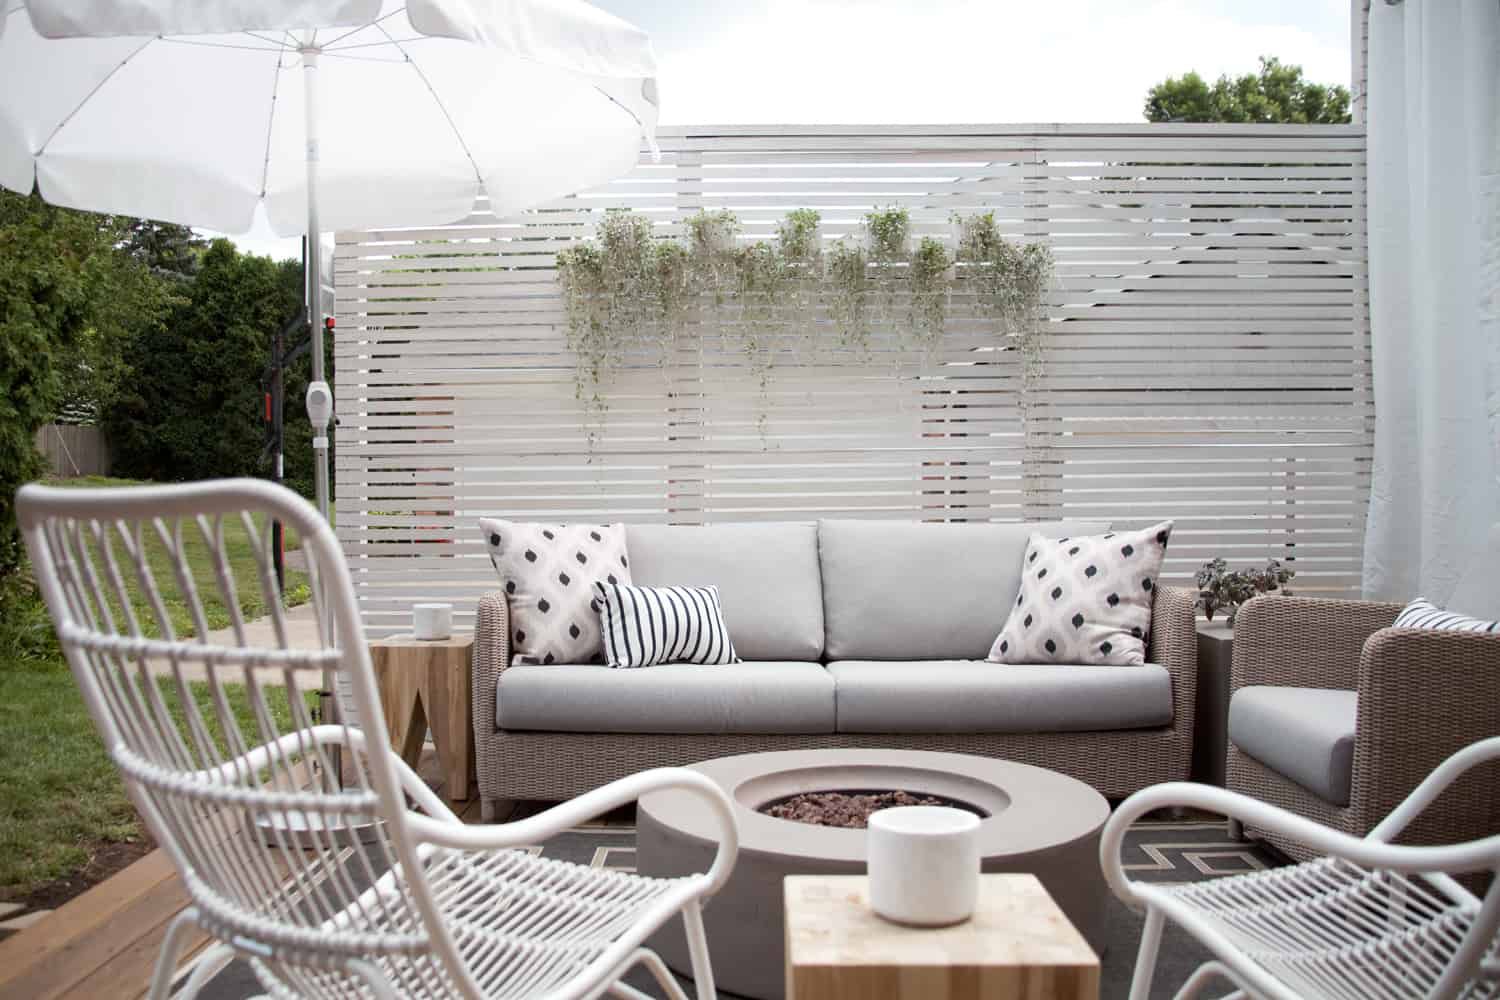
Natural wood screens, especially in warm tones like this, are beautiful but require regular care to stay that way. To maintain this rich, warm color, you’ll need to clean and re-apply a UV-protectant sealer or stain every 1-2 years, depending on your climate and sun exposure. If you don’t, the wood will gradually weather to a silvery-gray patina. Some people love the weathered look, but if you want to keep this specific color, be prepared for the recurring weekend project of re-staining. Also check for mildew in damp, shady areas.
18. Create a Tropical Retreat with Wood Screens and Woven Chairs
This space works because it masterfully layers textures. You have the smooth, hard lines of the vertical wood slats and the glass doors, the soft, woven texture of the rope-style armchairs, the plushness of the cream cushions, and the organic, varied textures of the tropical plants. This textural variety is what makes the space feel so rich, comfortable, and immersive. It’s a sensory experience that transports you to a high-end resort, even if it’s just in your own backyard. The monochromatic wood palette allows the textures to take center stage.
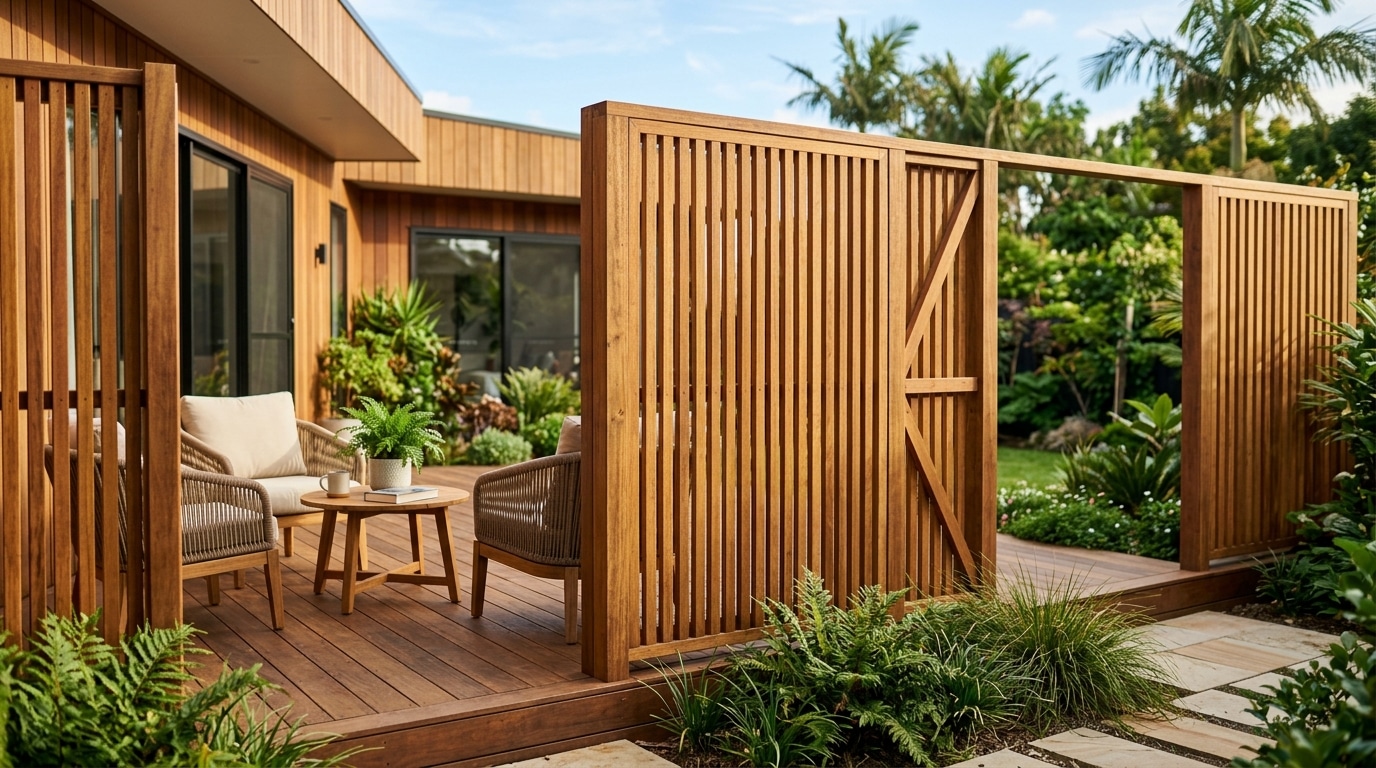
Creating this lush, resort-style retreat is an investment in both materials and furnishings. Let’s estimate for a 12×12 foot space:
- Main Furniture (2 chairs, 1 table): $1,200 – $3,500
- Vertical Slat Screens (Pro-installed cedar): $3,000 – $5,000
- Decking (Matching wood): $2,500 – $4,000
- Large Tropical Plants & Pots: $500 – $1,500
- TOTAL: $7,200 – $14,000
Budget alternative: Use pressure-treated wood slats, find similar chairs on Wayfair or Overstock, and start with smaller, less mature plants.
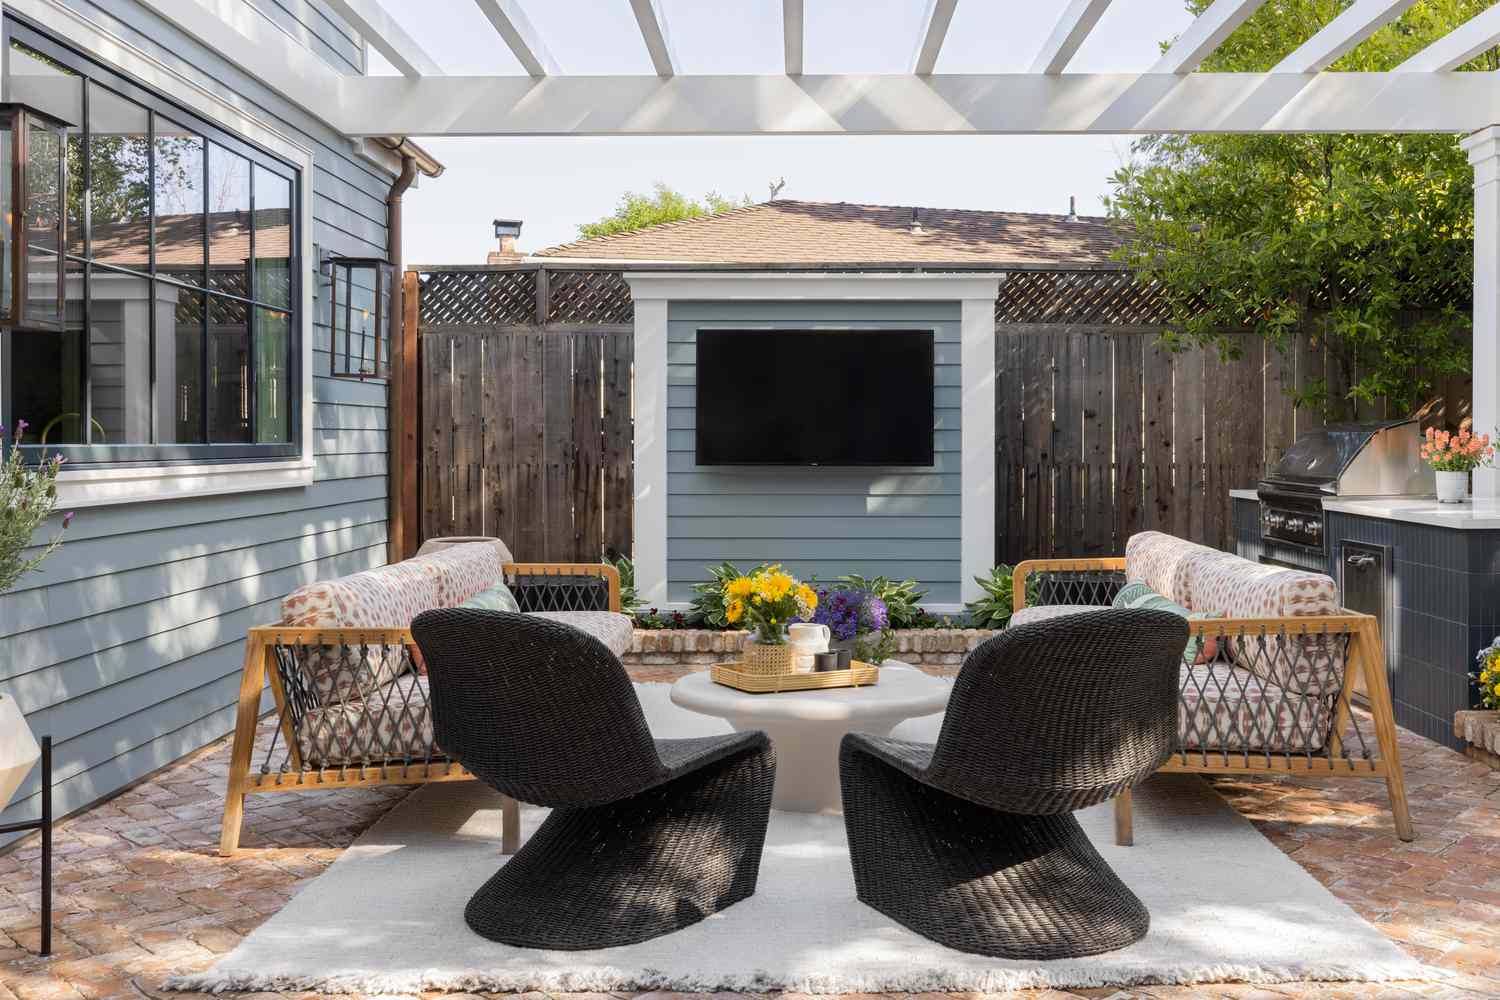
19. Integrate an Outdoor TV into a Pergola Privacy Wall
The outdoor television is the undeniable star of this show. It’s the element that transforms this from a beautiful poolside lounge into a full-fledged entertainment zone. The horizontal wood screen behind it is perfectly executed, providing a warm, textured backdrop that’s much more stylish than just mounting a TV to the side of the house. This integration of technology and design is what defines modern luxury outdoor living—it’s not just about being outside, it’s about bringing all the comforts and capabilities of inside, out.
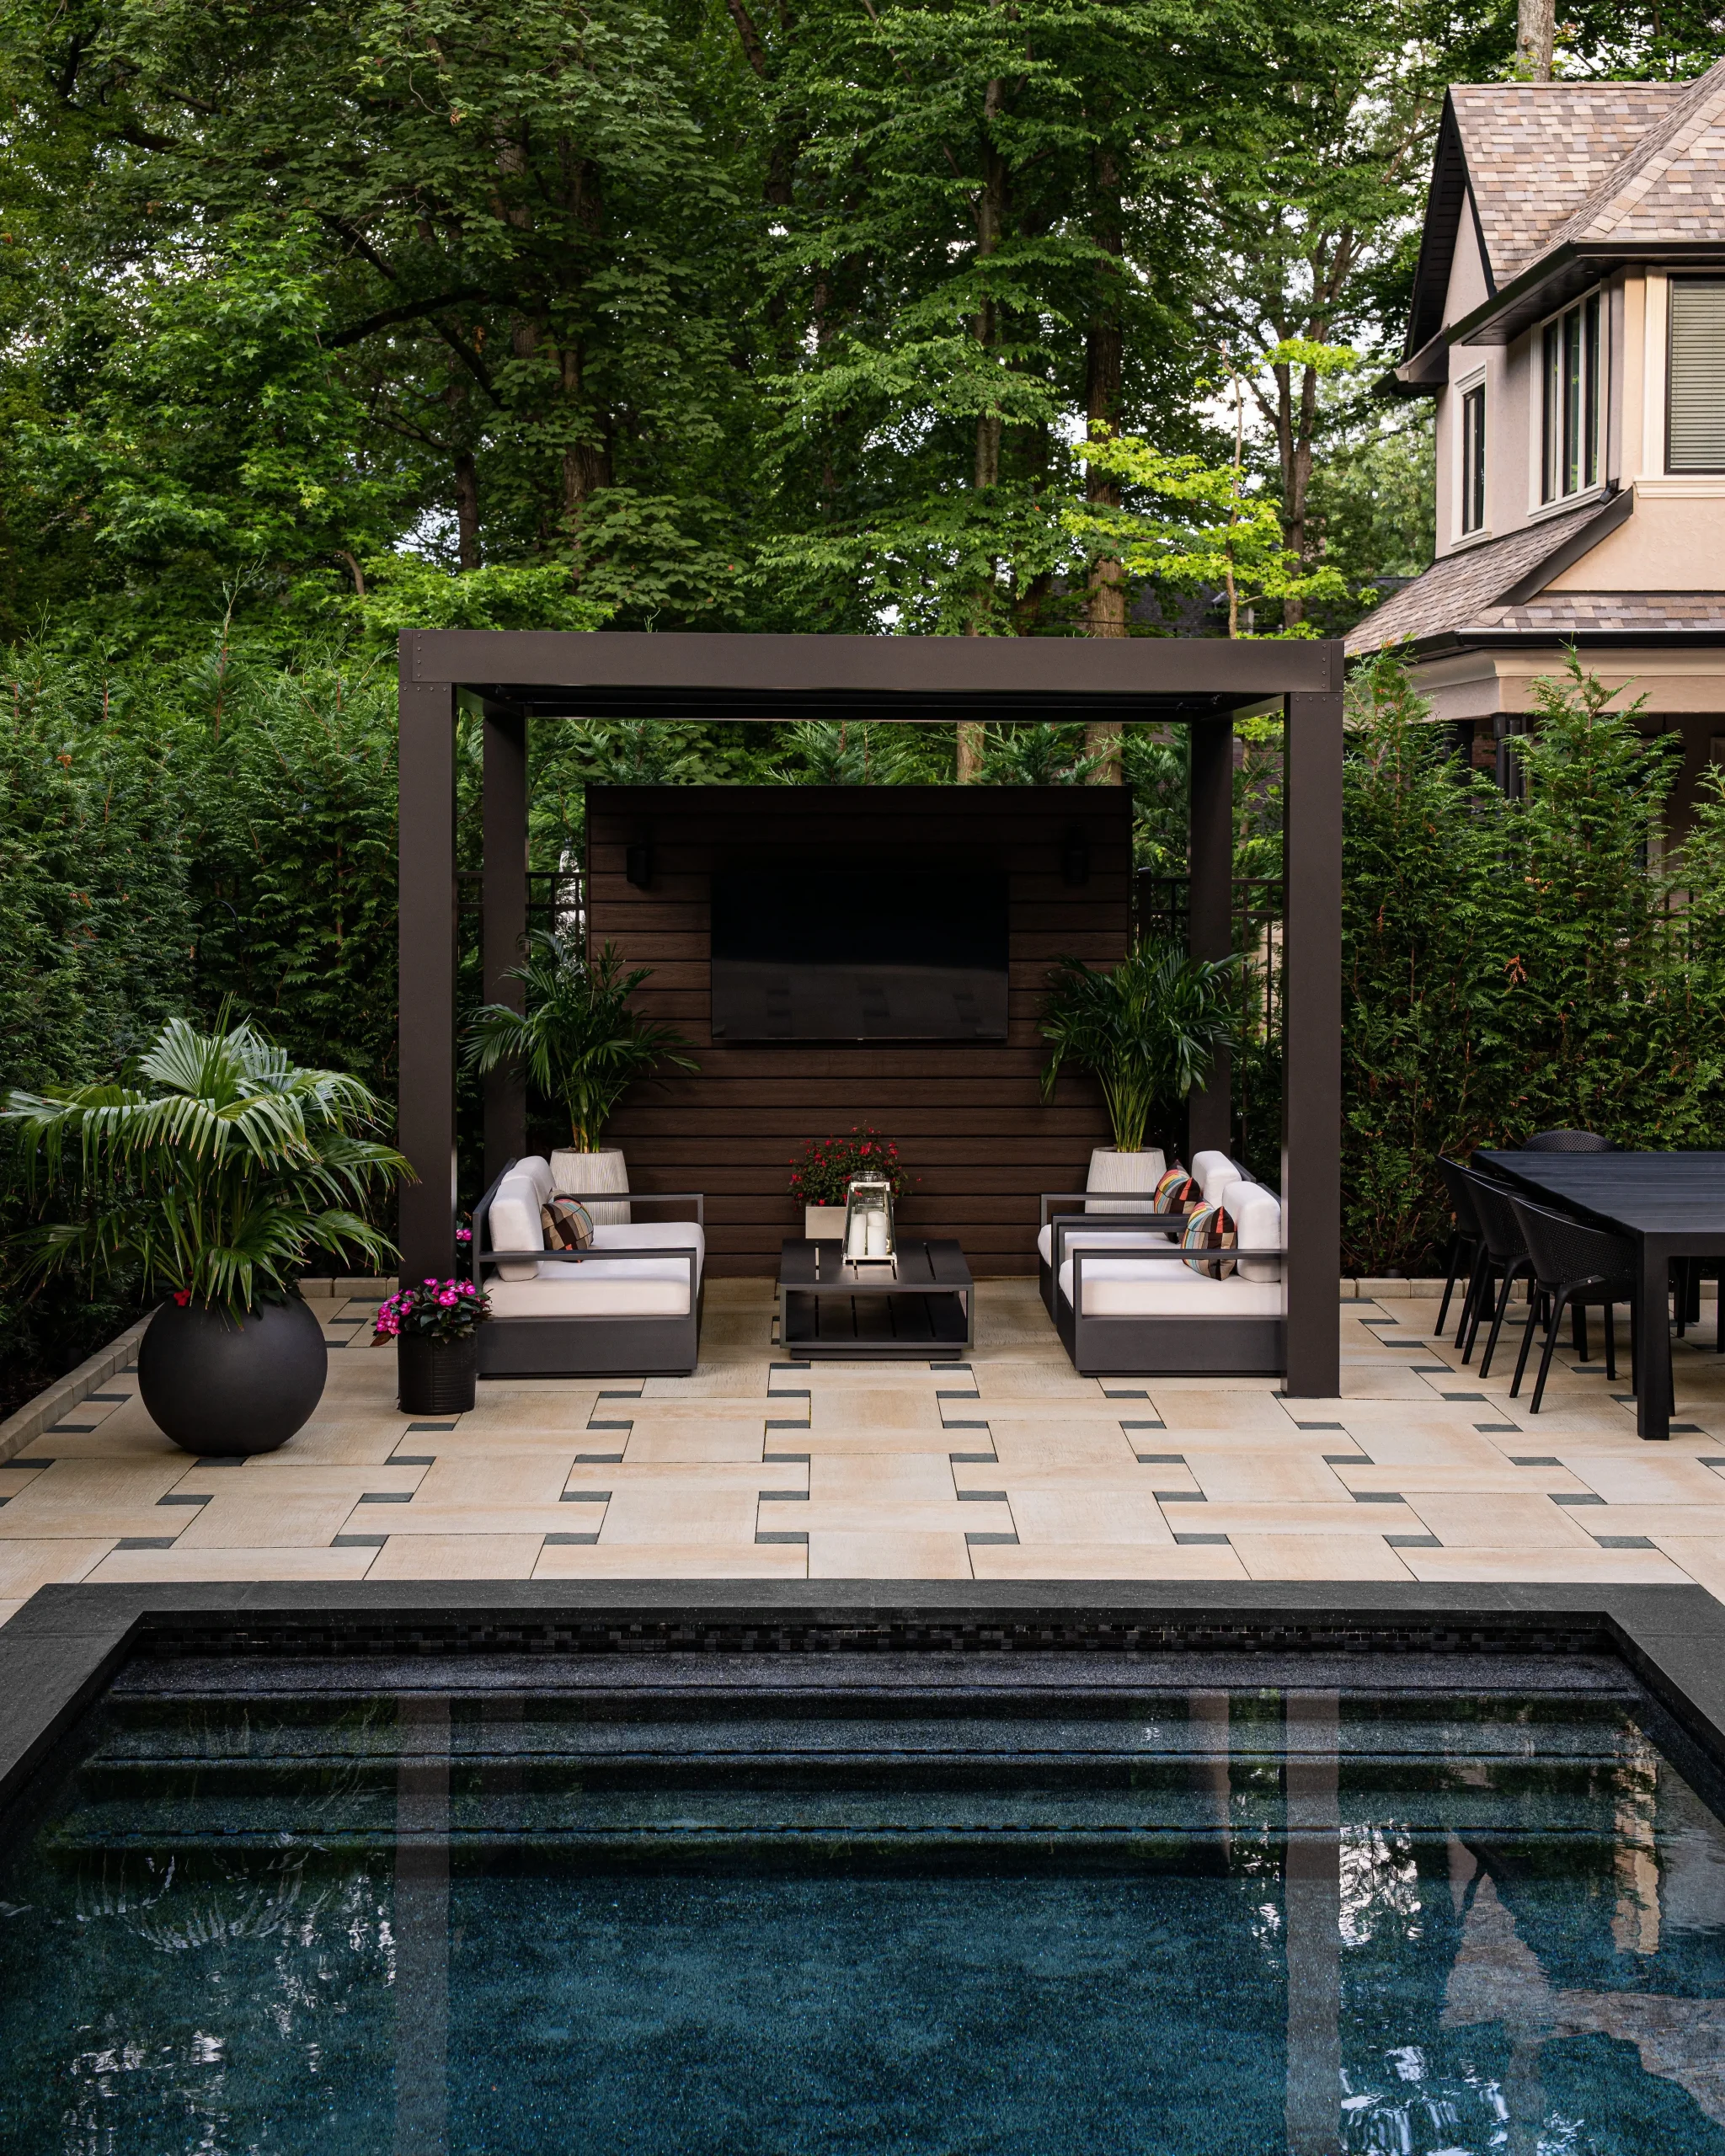
Let’s get real about outdoor TVs. A standard indoor television will not survive the elements. Humidity, condensation, dust, insects, and temperature swings can destroy it in a single season. You need a dedicated, weather-rated outdoor television, which can cost 3 to 5 times more than a comparable indoor model. You’ll also need to run power and cable to the location, which usually requires a licensed electrician to do it safely and to code. It’s a fantastic feature, but it’s a significant and specialized expense.
20. Install a Modern Louvered Metal Fence on a Concrete Wall
When installing a privacy screen on top of an existing retaining wall, you must ensure the wall can handle the additional force. A tall screen acts like a sail in the wind, putting significant lateral pressure on its base. For a louvered metal screen like this, which catches a lot of wind, have a structural engineer or experienced contractor inspect the retaining wall’s footing and construction. They might recommend reinforcing the connection points or even strengthening the wall itself. It’s a crucial safety step that should never be skipped.
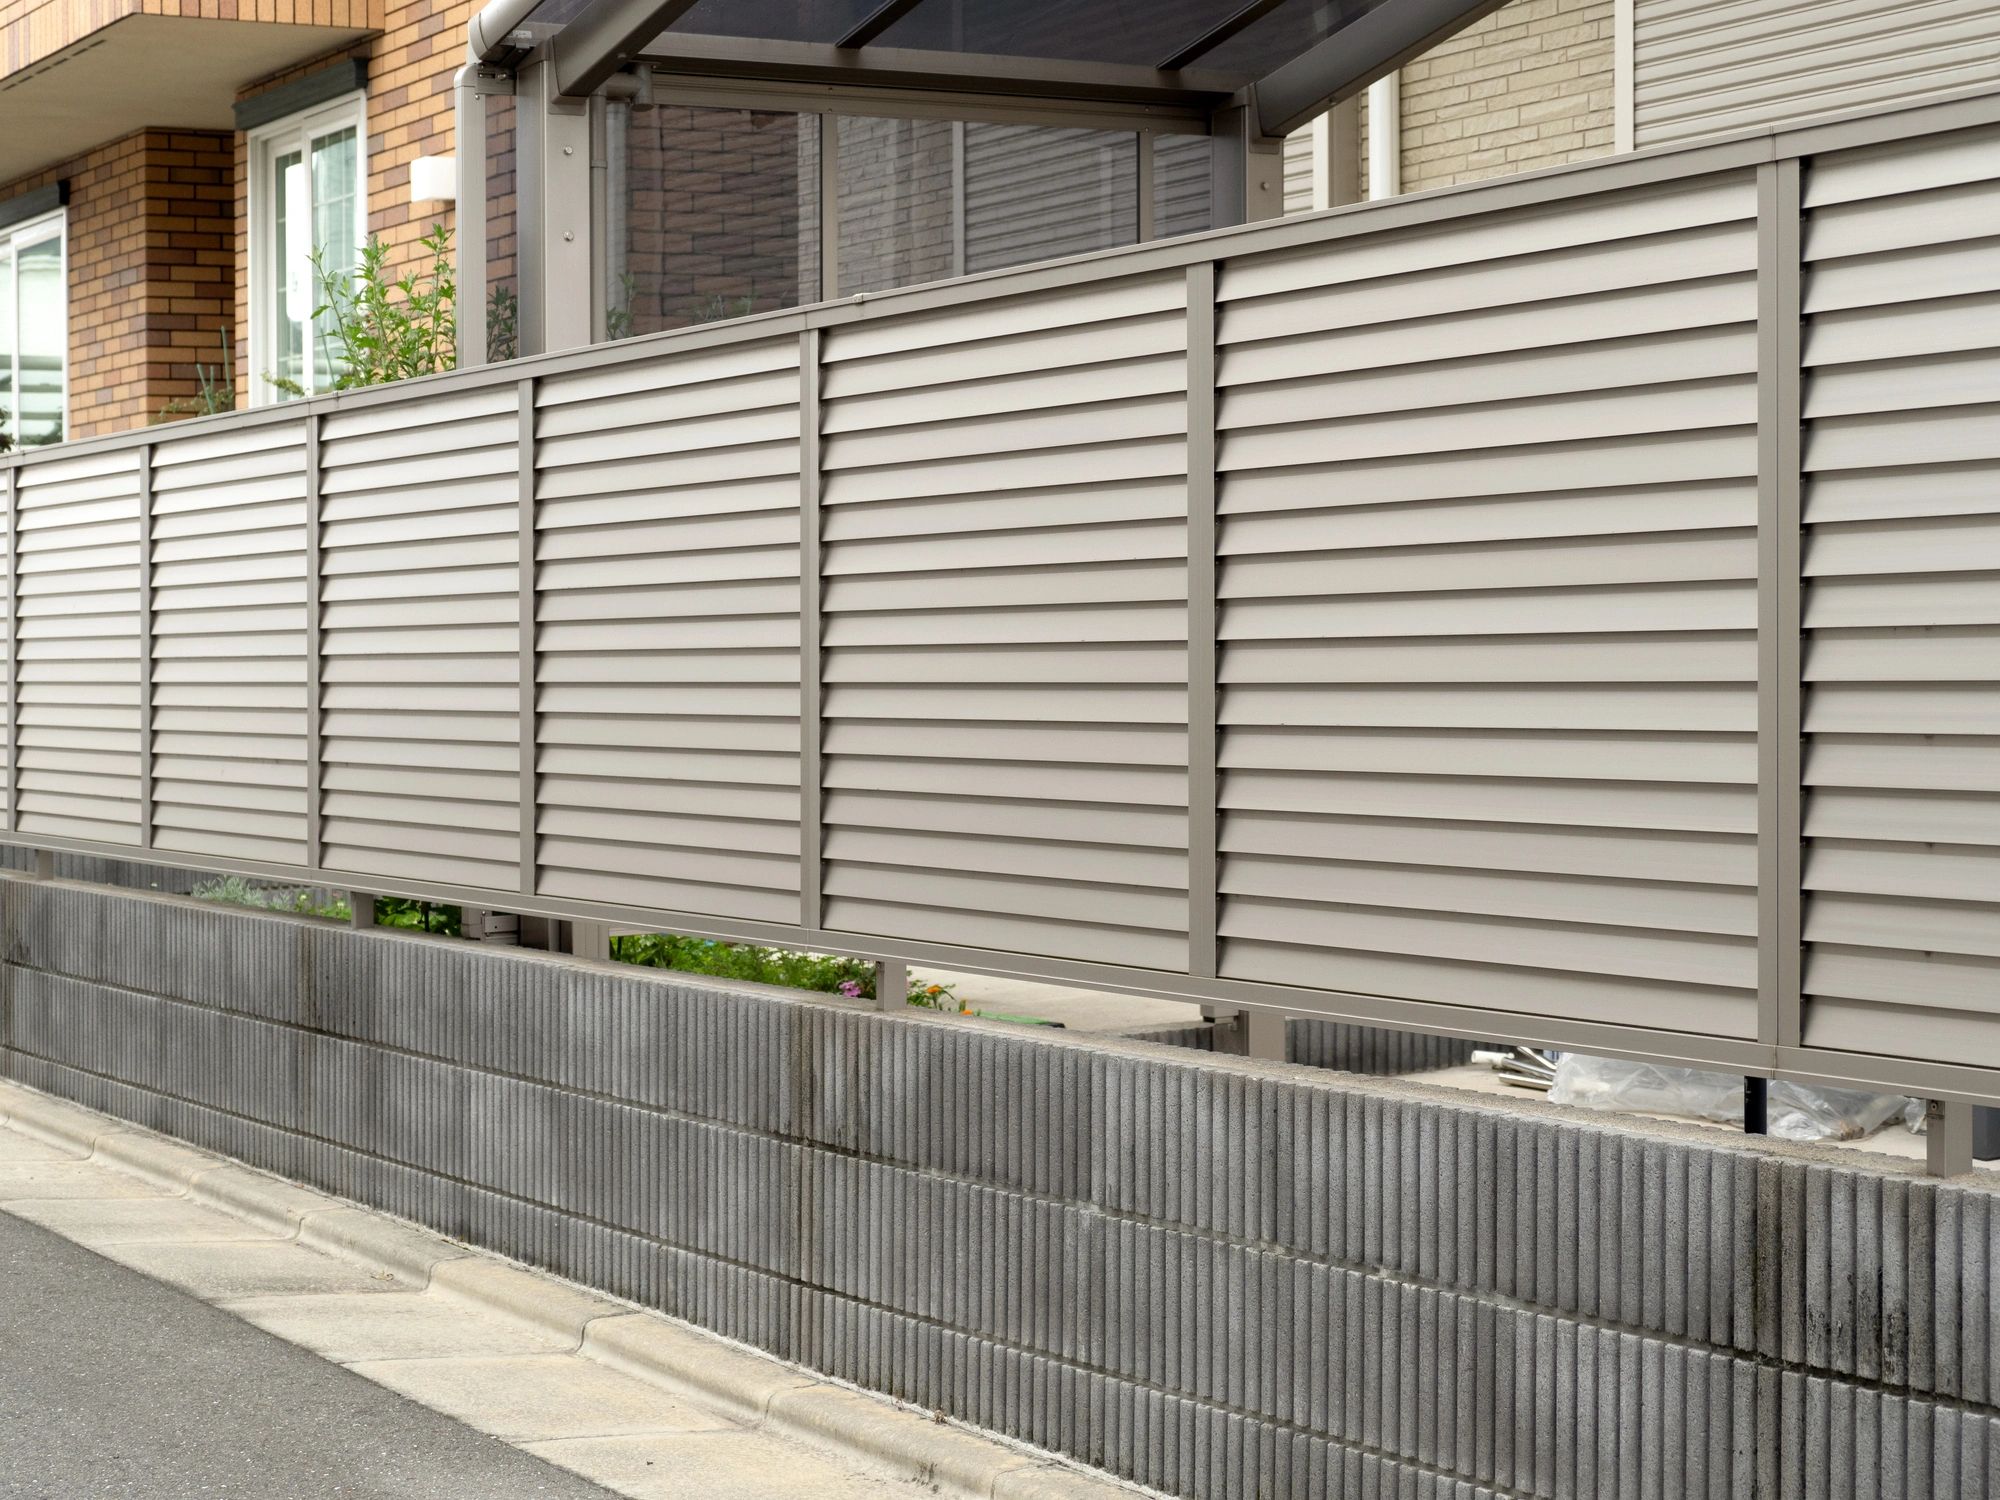
This type of fence-on-a-wall solution is ideal for properties on a slope or those fronting a street where you need to manage both grade changes and privacy. The concrete retaining wall can be anywhere from 2 to 4 feet high, with the louvered screen adding another 3 to 4 feet on top for a total height of 6 to 8 feet. This tiered approach feels less imposing than a solid 8-foot wall. It’s perfect for creating a secure, private front courtyard or separating a property from a public sidewalk. For a similar adjustable style, see Idea #23.
21. Add an Adjustable Louvered Wall to a Pergola
This design is the ultimate in functional modernism because it offers dynamic, controllable privacy. Unlike a fixed screen, the adjustable louvered wall panel allows the user to adapt to changing conditions. Need to block the low afternoon sun? Angle them down. Want to open up the view to the pool? Turn them parallel to the ground. This ability to change the function of the space on demand is a hallmark of sophisticated design. The matte black finish on the pergola and louvers gives the whole structure a sleek, architectural feel that is both powerful and understated.
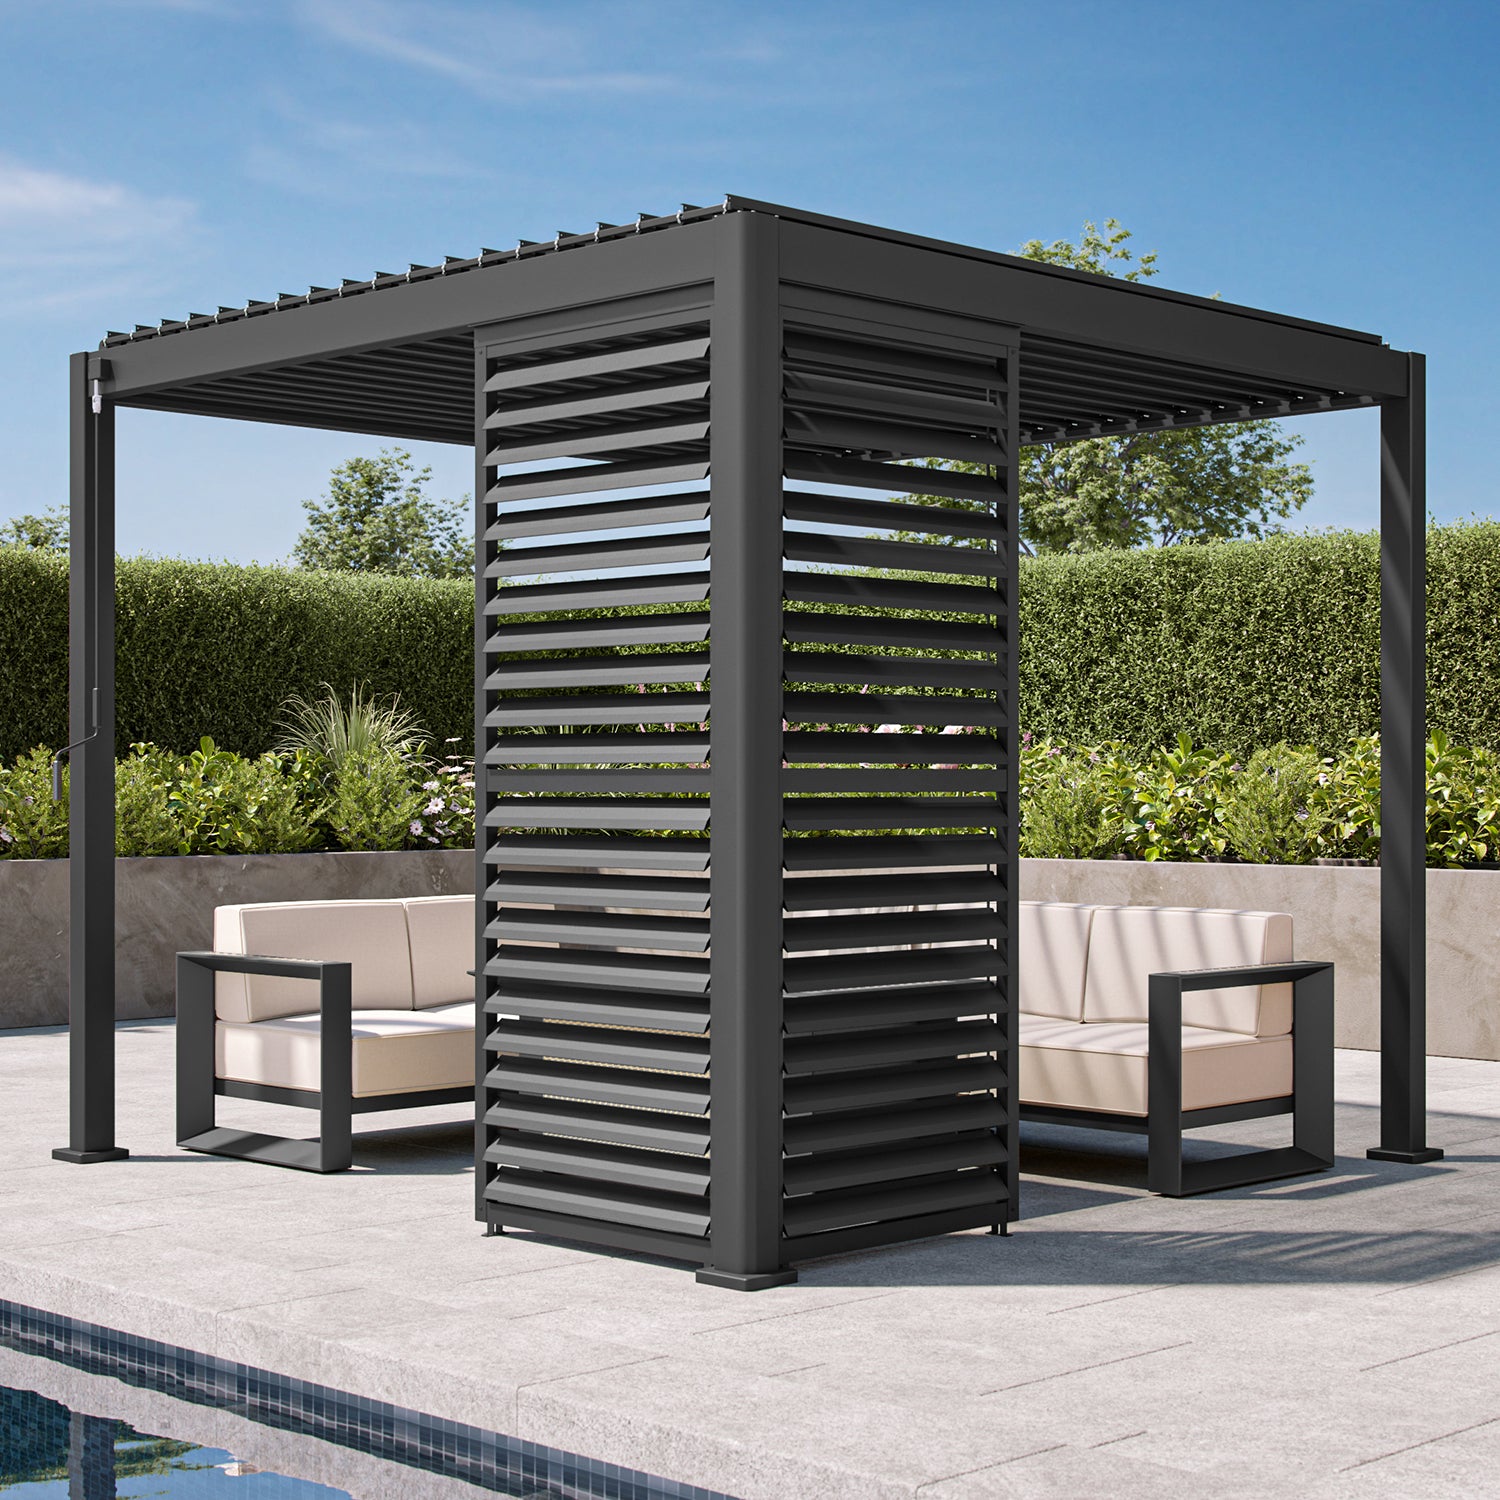
A high-end pergola with integrated, adjustable features is a significant investment. Here’s a realistic look at the cost for a high-quality aluminum system:
- Pergola Structure (10×12 ft, powder-coated aluminum): $5,000 – $12,000
- Integrated Louvered Wall Panel (one side): $2,000 – $4,000
- Louvered Roof System: $4,000 – $8,000
- Professional Installation: $3,000 – $6,000
- TOTAL: $14,000 – $30,000+
Budget alternative: A static wood pergola with DIY curtain rods and outdoor drapes can provide adjustable privacy for under $1,500.
22. Soften a White Lattice Screen with Abundant Flowers
Create a lush, overflowing flower display against your lattice screen in an afternoon.
- Time Estimate: 1-2 hours.
- Materials Cost: $100 – $300 for plants and pots.
- Step 1: Choose a variety of pot sizes, primarily in a single material like terracotta, to create a cohesive look.
- Step 2: Use the ‘thriller, filler, spiller’ method for planting. A tall ‘thriller’ plant for height, mounding ‘filler’ plants for fullness, and trailing ‘spiller’ plants to cascade over the edges.
- Step 3: Arrange the pots in layers. Place the largest pots in the back, directly against the lattice.
- Step 4: Use a plant stand or even overturned empty pots to elevate some of the medium-sized planters, creating different height levels for more visual interest.
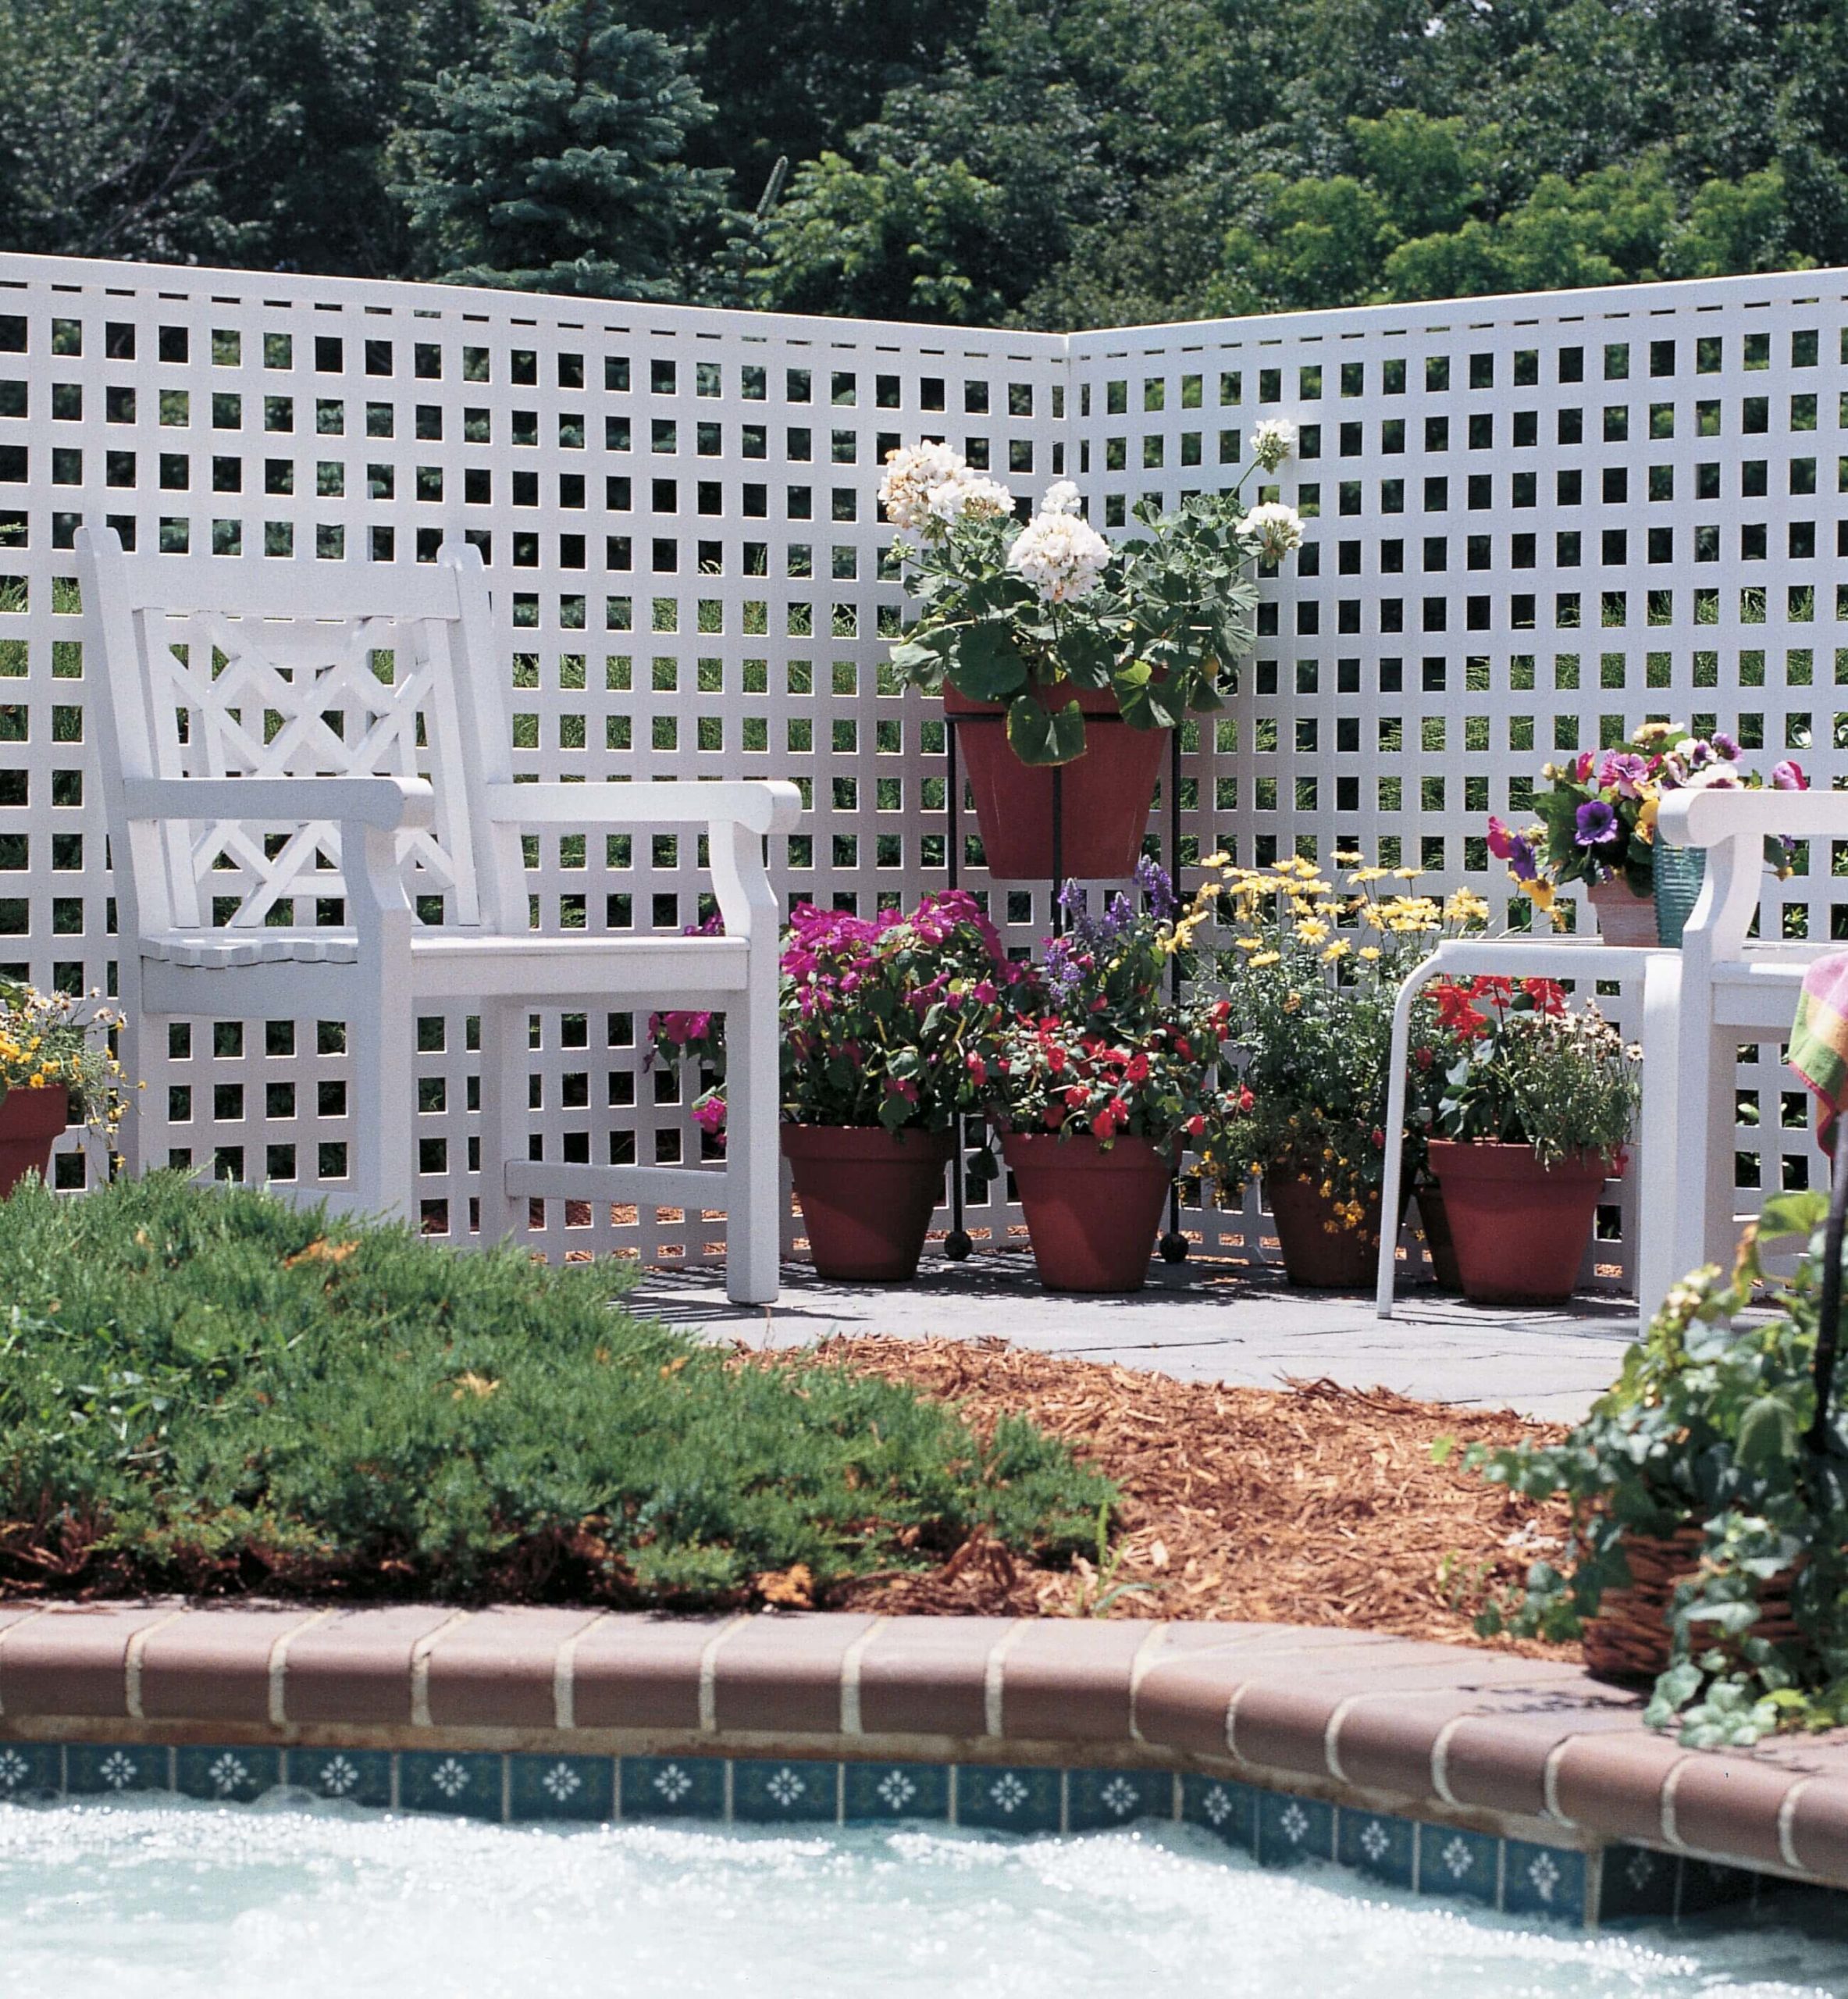
This classic, cheerful garden look is a beautiful mix of structure and nature. The formula is approximately 40% crisp white structure (lattice and furniture) + 40% lush, multi-colored florals + 20% rich terracotta and brick. The white lattice provides a clean, bright canvas that makes the colors of the flowers pop. The terracotta pots and brick coping of the hot tub add a warm, earthy element that grounds the entire scene and prevents the white from feeling too stark. It’s a timeless recipe for a charming English cottage garden feel.
23. Build a Multi-Tier Horizontal Wood Privacy Screen
When constructing a very tall privacy screen, breaking it into multiple tiers is a smart design move. For a screen over 8 feet tall, consider creating a lower section that is 6-7 feet high, with a shorter 2-3 foot section stepped back or above it. This design technique breaks up what would otherwise be a monolithic, intimidating wall. It adds architectural interest and dimension, making the tall structure feel lighter and more thoughtfully designed. It also helps the screen integrate better with the different levels of a house’s exterior.
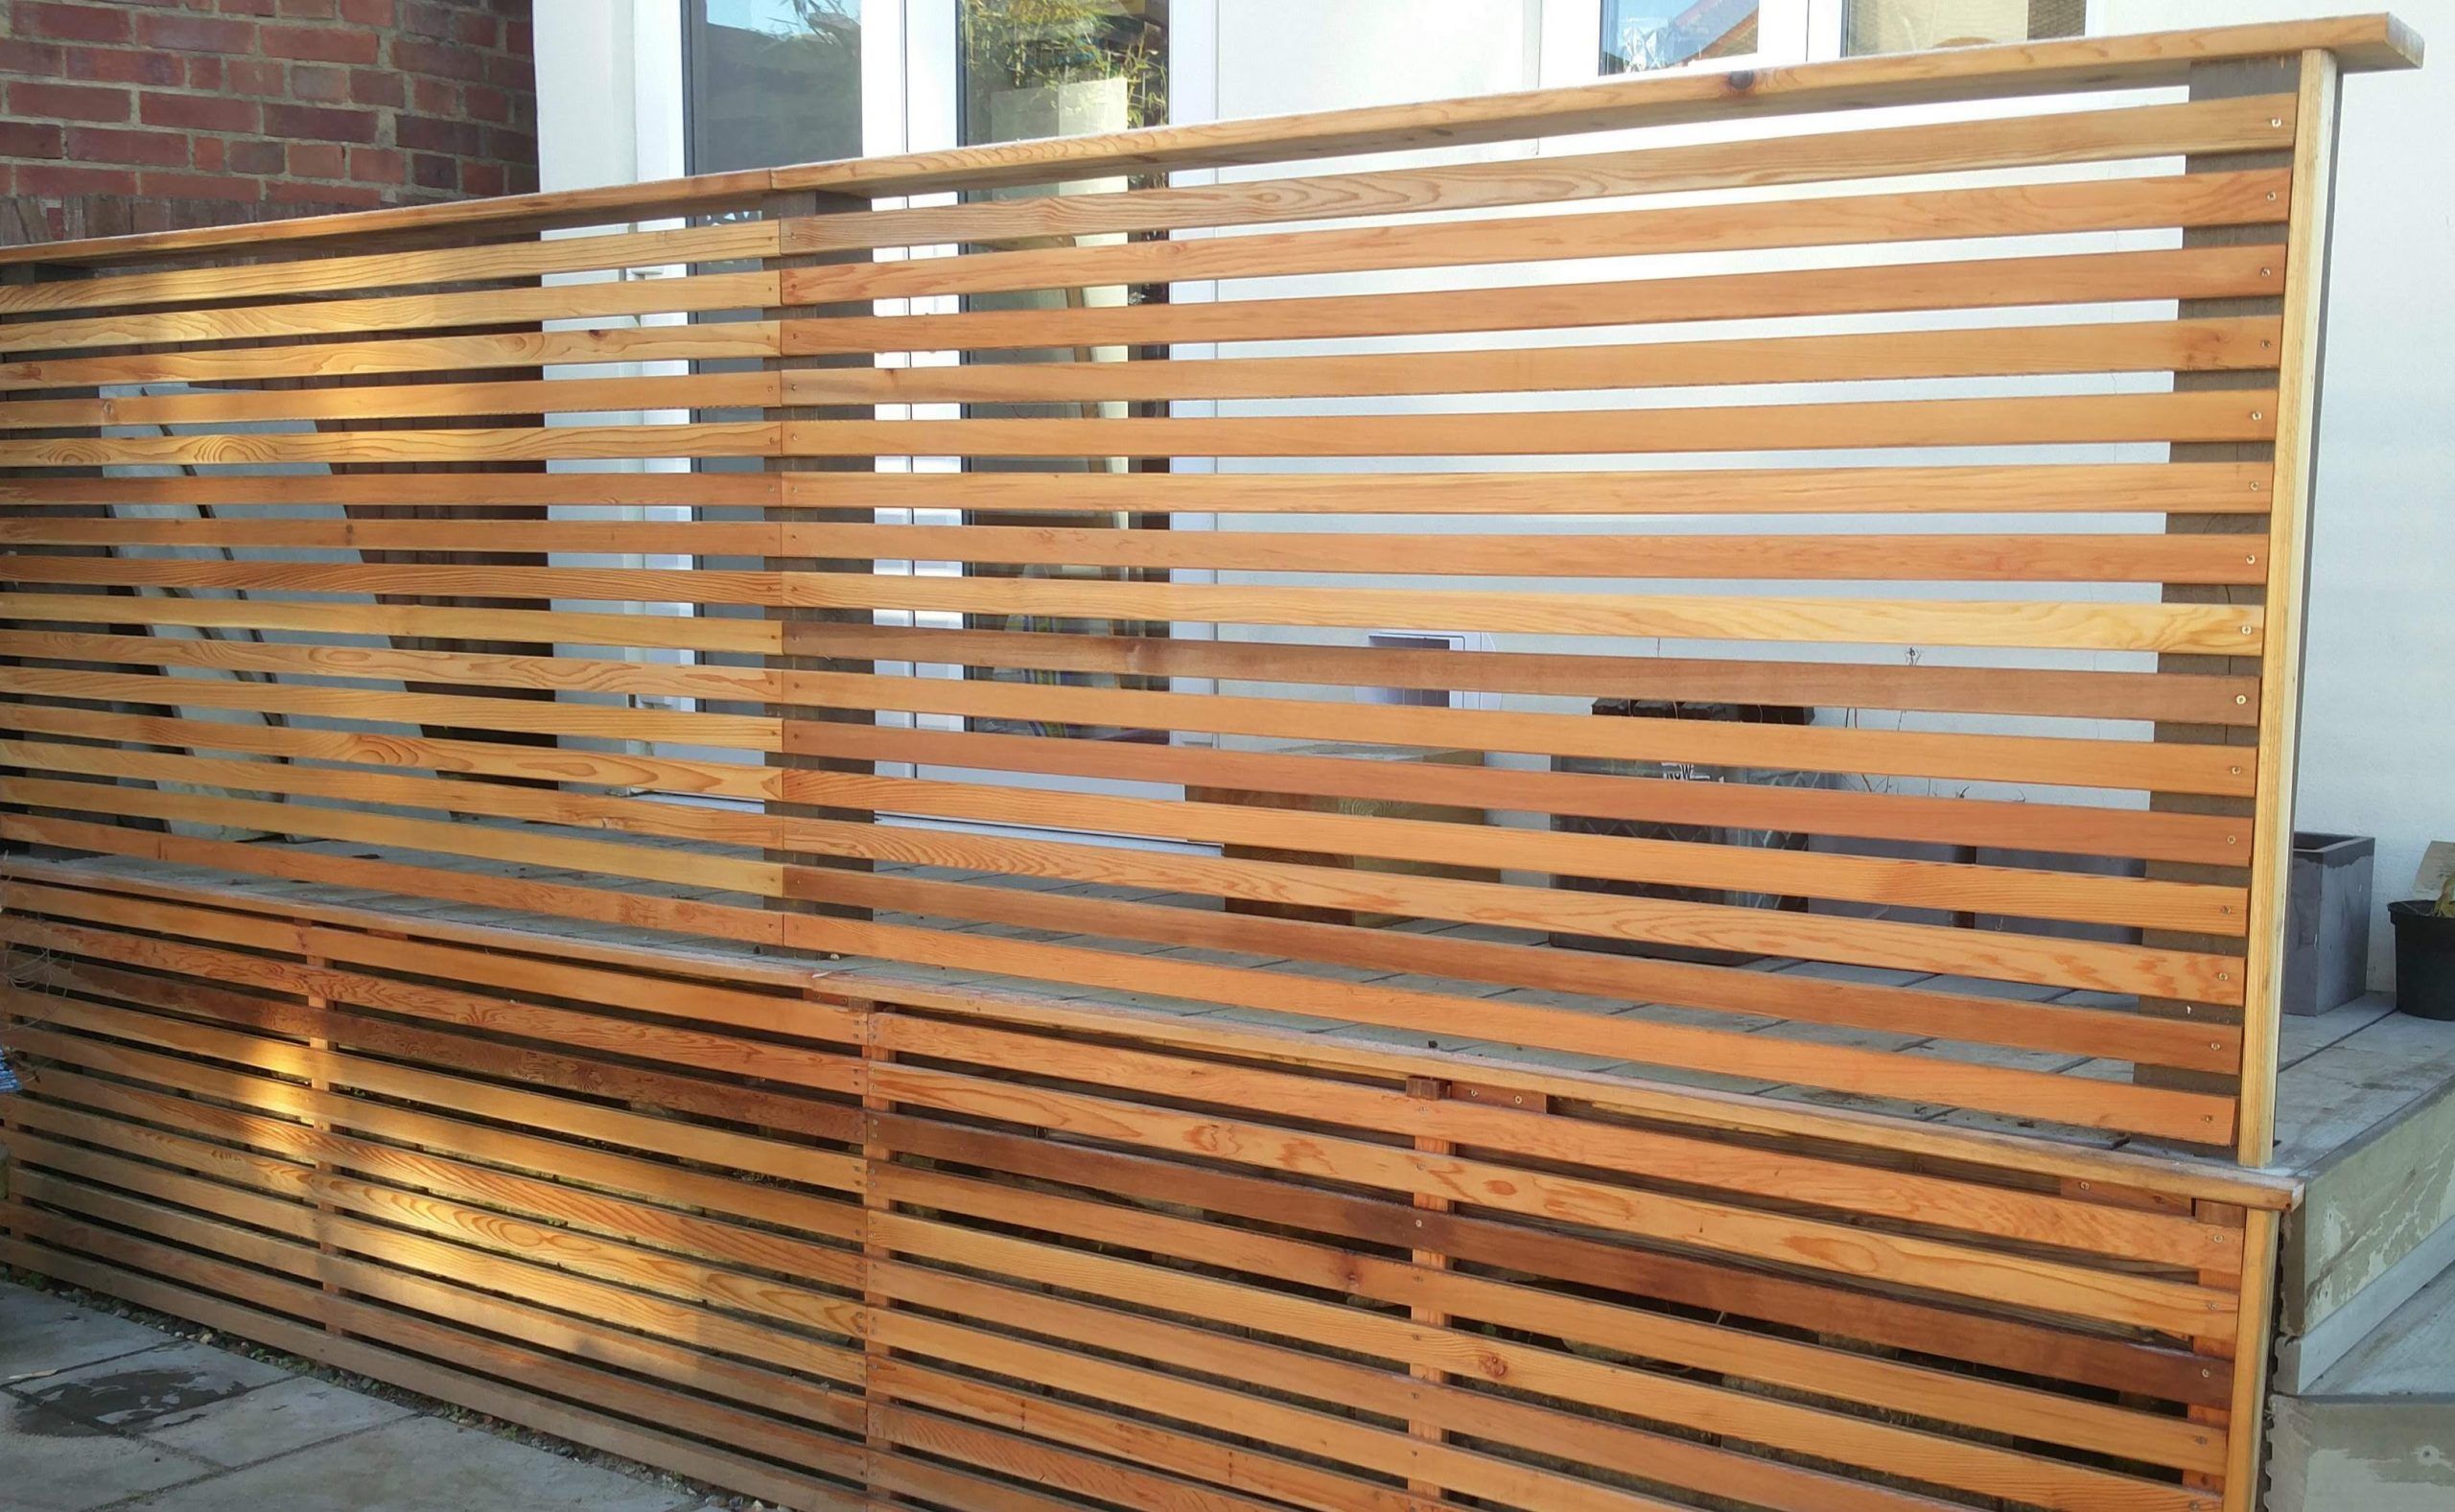
A tall, multi-level screen requires serious planning before you begin. Make sure you’ve covered these points:
- Check Local Setbacks: How close to your property line are you allowed to build a structure of this height? Fences and screens often have different rules.
- Confirm Frost Line Depth: The support posts for a tall, heavy screen must be set in concrete footings that extend below the frost line in your area to prevent heaving. This could be 3-4 feet deep or more.
- Plan for Wood Movement: Wood expands and contracts. Ensure your design allows for this movement, especially where different tiers and posts connect, to prevent warping and buckling over time.
Your Private Outdoor Oasis Awaits
Turning your deck into a private retreat is one of the most rewarding home projects you can tackle. Whether you go for a sleek modern screen or a classic living wall, the goal is the same: to create a space that feels like yours and yours alone. We hope these 23 ideas have sparked your imagination and given you the confidence to get started. Now go create that perfect outdoor escape! Pin your favorites so you can find them again when you’re ready to build.