
You know that feeling when you finally find the perfect kids’ bathroom on Pinterest, save it, and then… nothing? It’s easy to get stuck in the inspiration phase. We get it. That’s why we spent serious time browsing real projects and filtering through hundreds of ideas to find what actually works. This guide delivers 27 distinct, achievable bathroom designs that nail the balance between fun and function, covering everything from bold tile and whimsical wallpaper to clever storage for small spaces. In 2026, the biggest trend is creating a space with lasting personality, one that can evolve as your toddler becomes a teen. And stay until the end—we break down the most common mistakes that can ruin these looks. 📌 Save this to Pinterest for later—you’ll want to revisit these ideas.
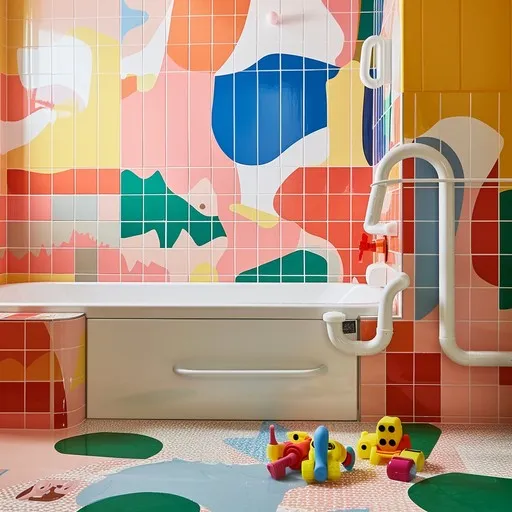
1. Embrace Colorful Chaos with Abstract Patterned Tiles
This bathroom is a masterclass in joyful maximalism. The magic here is the commitment to the pattern. By taking the small, abstract square tiles from floor to ceiling, it creates an immersive, art-like experience rather than just a feature wall. The contrast between the busy, colorful tile and the simple, clean lines of the white bathtub and plumbing fixtures is key. This keeps the look intentional and designed, preventing the vibrant pattern from feeling overwhelming. The larger, organic shapes on the floor provide a slight visual break while staying within the same playful palette.
|
📋 Copy HEX 🔗 Share |
A fully tiled space like this is a dream for cleanup—wipes, splashes, and tub-time messes are no match for ceramic. However, the sheer amount of grout is the hidden chore. Light-colored grout will show dirt and mildew fastest, so opt for a medium gray or even a colored epoxy grout to minimize scrubbing. You’ll want to seal the grout annually to prevent staining and water damage, which is a bit of a weekend project. While the tiles themselves are durable, be mindful that replacing a single cracked tile in such a complex pattern can be a real headache.
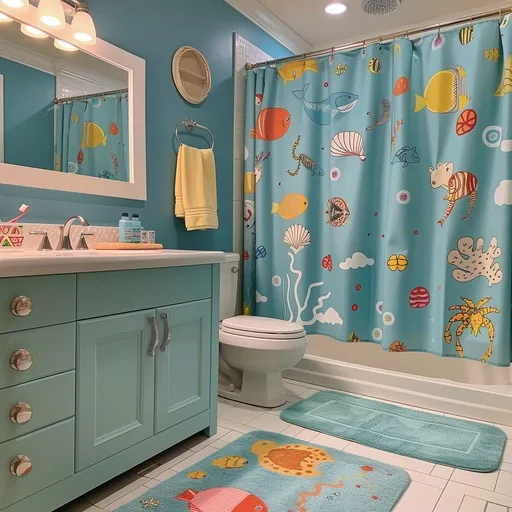
2. Dive into an Under-the-Sea Theme with Aqua Blue
You don’t need a huge budget to create a fun, thematic bathroom. This look is driven by affordable and easily swappable accessories. The core is a simple aqua blue paint color on the walls and vanity—a weekend DIY project for under $100. The real personality comes from the shower curtain and bath mats. You can find vibrant sea-creature-themed sets at places like Target or Amazon for $30-$50. Instead of custom cabinetry, find a basic white vanity at a big-box store and paint it yourself. The total transformation here relies more on thoughtful decor than expensive remodeling.
|
📋 Copy HEX 🔗 Share |
A heads-up about going all-in on a specific theme: kids’ interests can change in a flash. That adorable sea creature theme might be too babyish in two years. The strength of this design is that the most thematic elements (shower curtain, rugs) are inexpensive to replace. The aqua blue paint is more permanent but still versatile enough to pivot to a different theme later, like ‘beach day’ or just a simple, colorful bathroom. Avoid investing in permanent fixtures like dolphin-shaped faucets or fish-patterned tiles unless you’re truly committed.
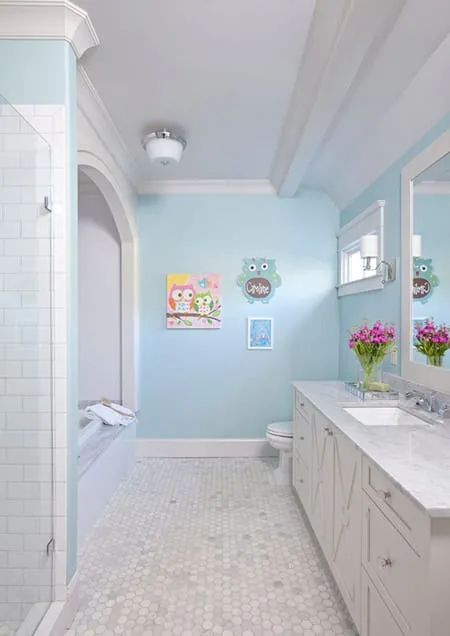
3. Soft and Sweet with Light Blue Walls and Owl Artwork
When using a soft wall color like this light blue, the trim is everything. Don’t just paint the baseboards; include crown molding and substantial window and door casings in a crisp, clean white. This creates a polished, architectural frame that makes the simple paint color feel elevated and intentional. For the vanity, a marble or quartz countertop adds a layer of durability and subtle pattern that keeps the all-white vanity from feeling flat. Aim for a countertop with very light, soft gray veining to complement the blue walls without competing with the playful art.
|
📋 Copy HEX 🔗 Share |
This room’s visual formula is a study in balanced charm. It’s roughly 60% serene base (light blue walls, white vanity), 30% classic texture (hexagonal floor tiles, subway tile shower, marble counter), and 10% playful personality (the colorful owl artwork). You could easily swap the art for a different theme—like dinosaurs or botanicals—and the room would still work perfectly. The key is containing the kid element in that 10% of easily changeable decor, ensuring the room has longevity.
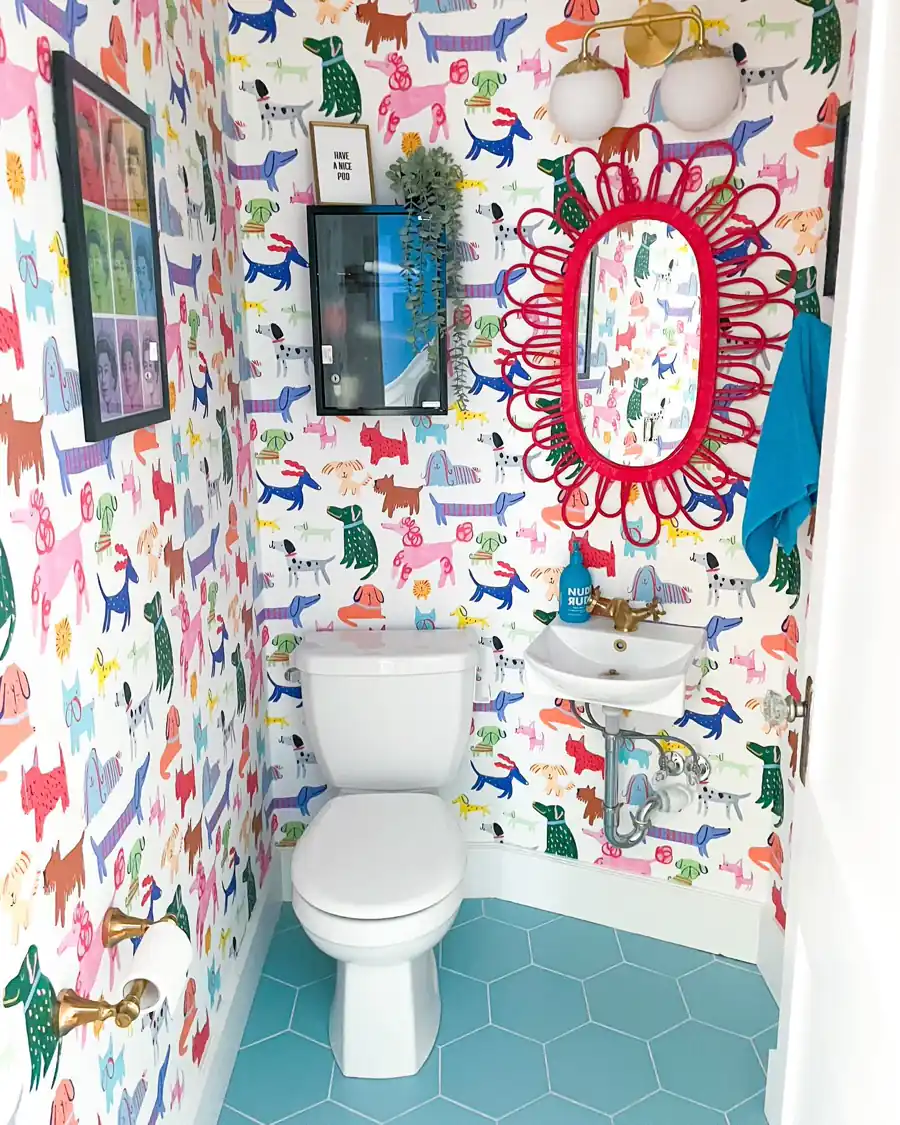
4. Whimsical Dog Wallpaper in a Compact Powder Room
What makes this room unforgettable is the wallpaper. Without it, you’d have a simple powder room with a wall-mounted sink. But with it, you have a conversation piece. The choice of a whimsical, colorful dog pattern instantly signals that this space doesn’t take itself too seriously. It’s a bold move that pays off by infusing the tiny room with immense personality and joy. The bright red mirror and blue floor tiles work because they pull colors directly from the wallpaper, making the entire design feel cohesive despite its boldness.
|
📋 Copy HEX 🔗 Share |
This idea is perfect for a small powder room or half-bath, typically around 20-30 square feet. In a tiny space, a bold, large-scale wallpaper can actually make the room feel more expansive and intentional, rather than cramped. Using a space-saving wall-mounted sink is crucial to maximize floor area. For a full bathroom (50 sq ft+), you might consider using this wallpaper on just one accent wall, as the pattern could become overwhelming in a larger, more humid environment. Compare this all-over pattern with the accent tile in Idea #9.
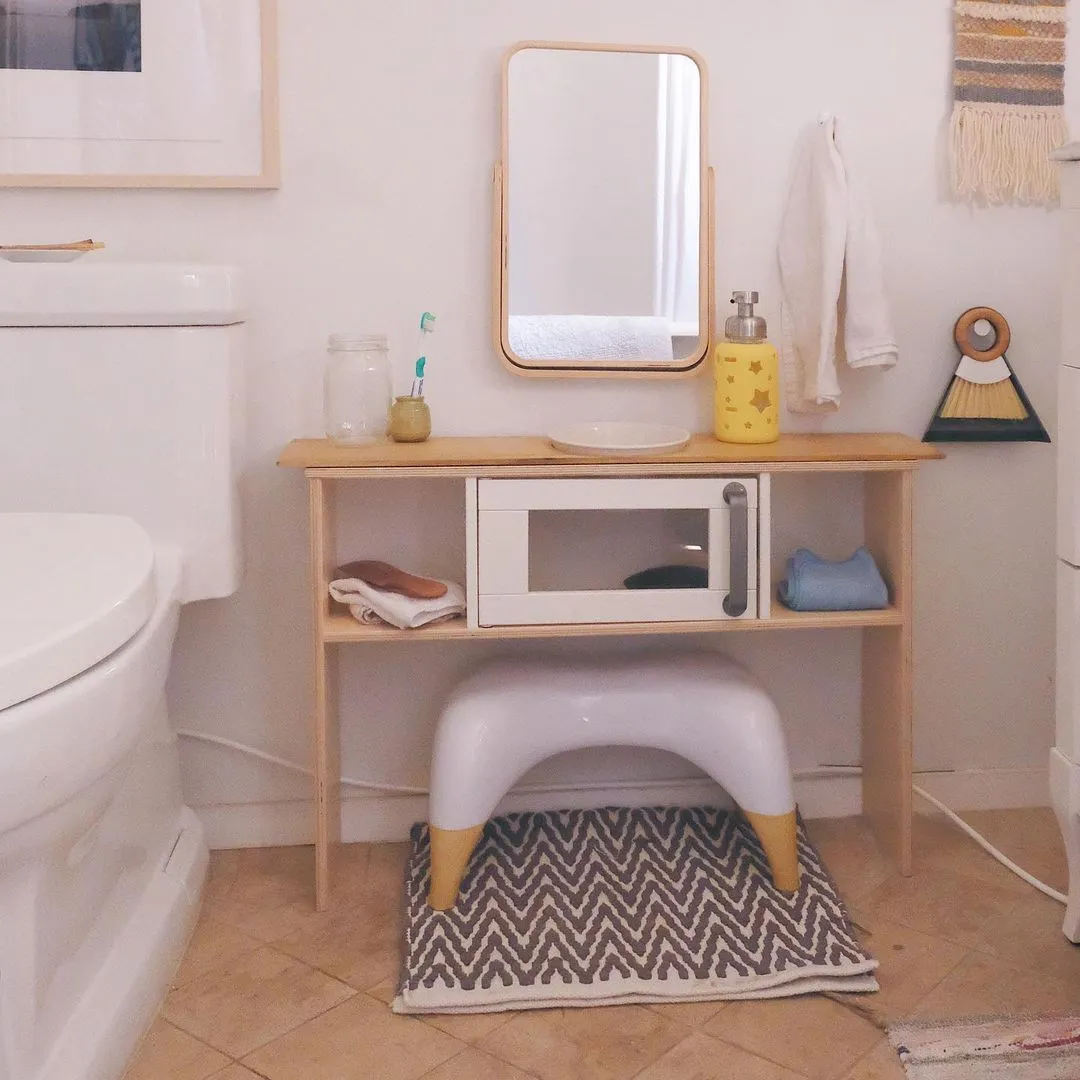
5. Create a Kid-Sized Station with Open Shelving
Setting up a kid-friendly vanity station is a game-changer for morning and evening routines. It builds independence and keeps your main counter clear. Here’s how to create one next to the toilet or on an open wall.
- Select a low shelf: Find a sturdy, open-shelf unit no taller than 30 inches. A light wood finish is warm and forgiving.
- Secure it: Anchor the unit to the wall using furniture straps. This is a non-negotiable safety step.
- Add a mirror: Mount a small, shatterproof acrylic mirror at your child’s eye level.
- Provide a stool: A wide, stable step stool is essential for reaching the toilet and sink. The one here with yellow feet adds a pop of color.
- Organize essentials: Use small bins or cups for their toothbrush, toothpaste, and comb. A fun, kid-friendly soap dispenser encourages hand-washing.
This simple setup takes about an hour and costs under $150.
|
📋 Copy HEX 🔗 Share |
This look is all about accessible, budget-friendly pieces that create a highly functional space for a little one.
- Open-shelf unit: $50 – $120
- Small mirror: $20 – $40
- Step stool: $25 – $50
- Decor & Accessories (soap dispenser, mat): $40 – $75
- TOTAL: $135 – $285
Budget alternative: Check IKEA for their TROFAST or KALLAX series for shelving options under $60. Look for step stools and mirrors at Target’s Pillowfort line or on Facebook Marketplace to get this entire look for around $80.
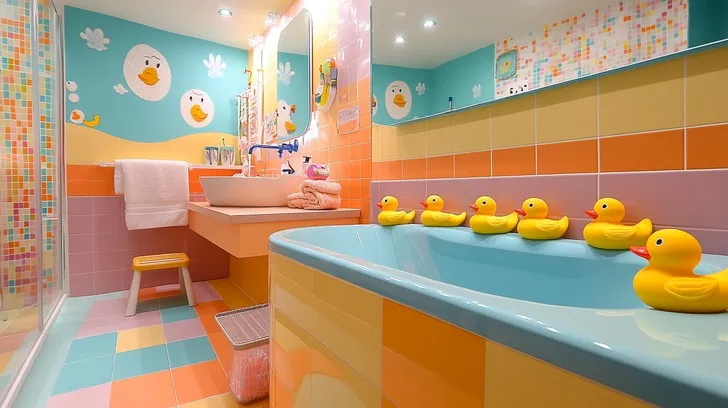
6. Go Bold with Duck-Themed Decor and Color-Blocked Tiles
This bathroom’s charm comes from its fearless use of color and repetition. The design works because it establishes a clear visual language and sticks to it. The square grid of the wall and floor tiles creates a foundational rhythm, which is then playfully interrupted by the wavy orange border and the organic shapes of the duck decals. The repetition of the duck motif—on the walls, in the tub—cements the theme in a way that feels intentional and fun, not random. The color palette is pulled directly from the theme, creating a cohesive, immersive world.
|
📋 Copy HEX 🔗 Share |
This bathroom is pure dopamine decor, a trend focused on creating spaces that actively make you feel happy. Instead of sticking to safe neutrals, it embraces bright, mood-boosting colors like yellow, orange, and pink. This style is gaining popularity as people look to make their homes a joyful refuge. While a duck theme is specific to childhood, the underlying color-blocking with tile is a sophisticated design choice that has surprising longevity. When the ducks fly the coop, the vibrant tile will still feel fresh and energetic.
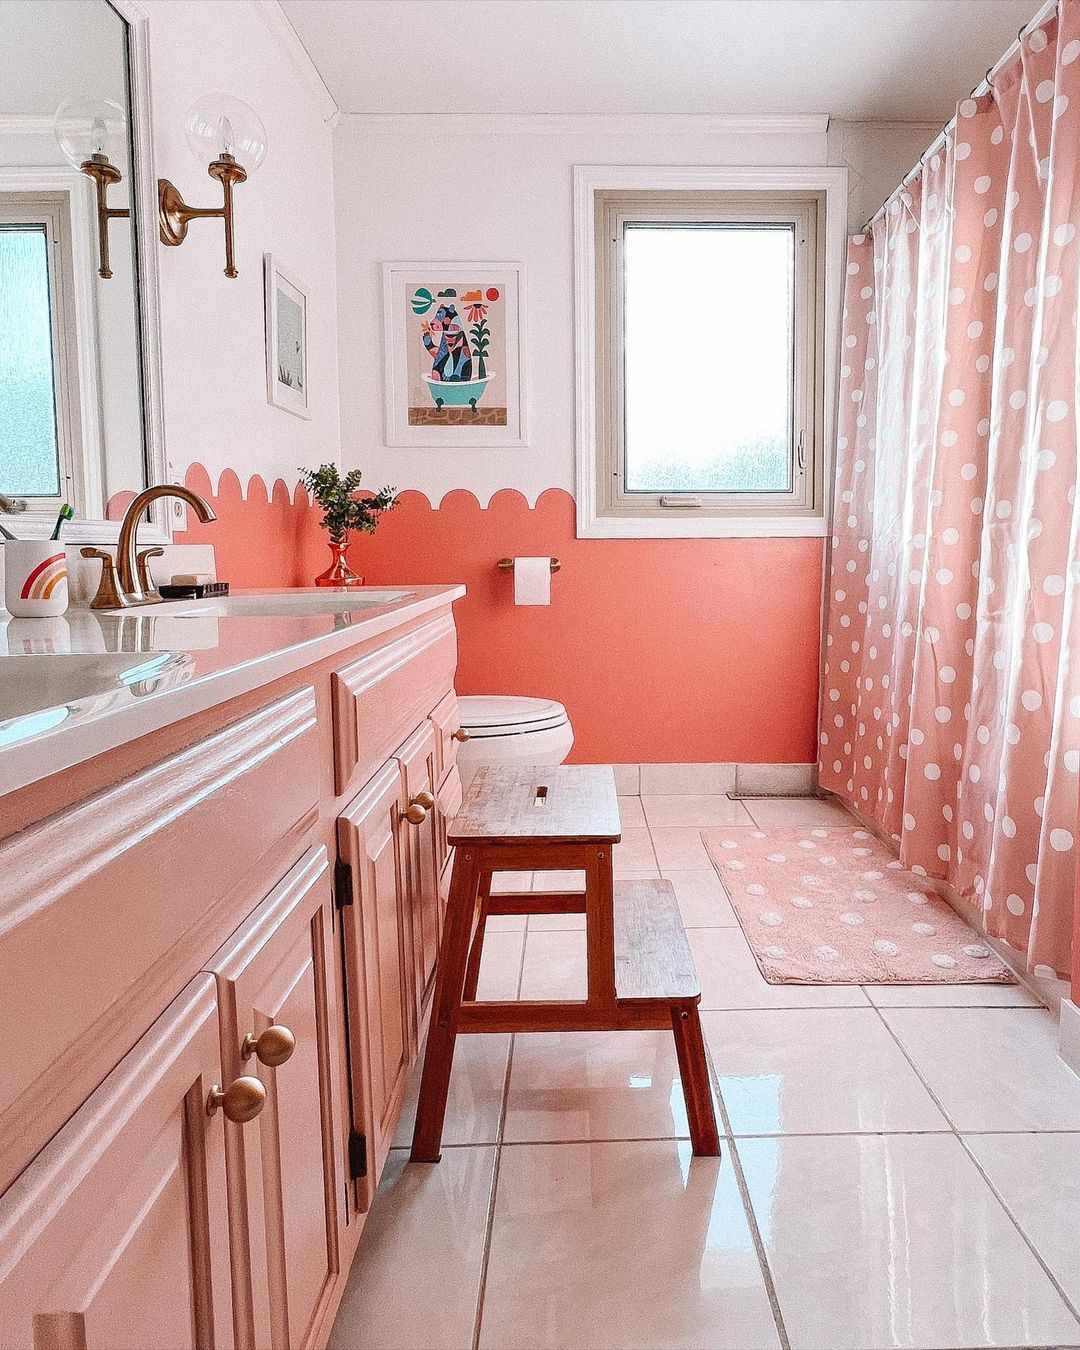
7. Sweet and Sophisticated with a Scalloped Coral Wall
To get a perfectly crisp scalloped edge like this, don’t try to freehand it. Use a large round object, like a dinner plate or a mixing bowl, as your template. Place it on the wall where you want the top of a scallop, trace the bottom half with a pencil, then slide it over and repeat, overlapping slightly to create the points. Use high-quality painter’s tape to carefully mask off just outside your pencil line for a flawless edge. It takes patience, but the result is a high-impact, custom look for the cost of a can of paint.
|
📋 Copy HEX 🔗 Share |
A design with this much pink and coral can be tricky to get right. The key is the white upper wall and ceiling, which provides visual breathing room and keeps the color from swallowing the space. It also bounces light around, which is crucial. In a bathroom with little natural light, this much warm color could feel claustrophobic. Also, be mindful of your brass fixtures. Unlacquered brass will develop a patina over time, which is beautiful but not for everyone. If you prefer a consistent shine, opt for a PVD or lacquered brass finish that won’t age.
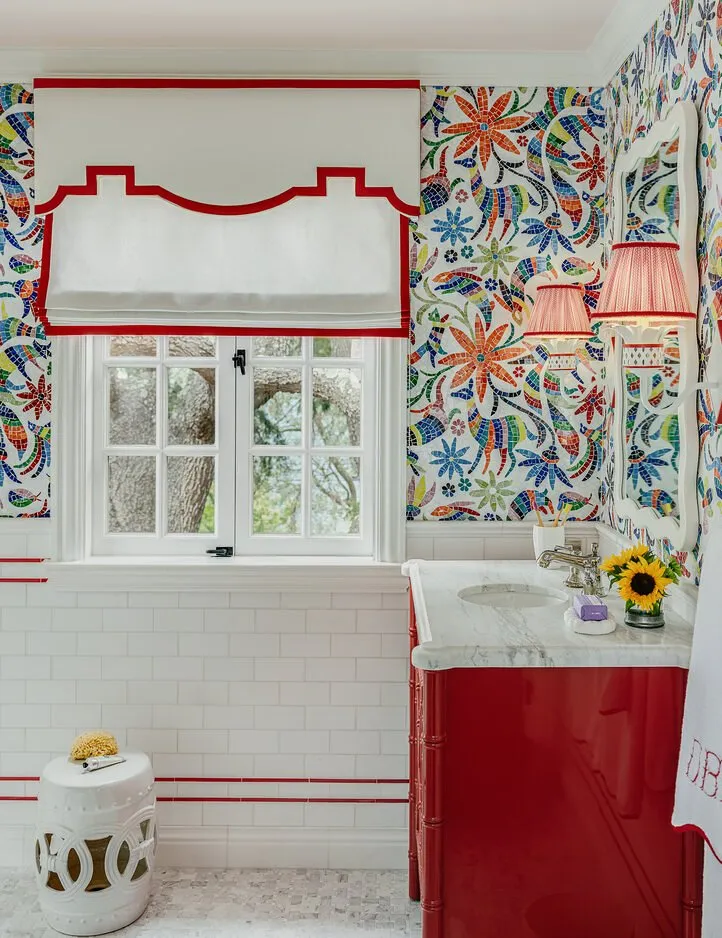
8. Energize with Mosaic Wallpaper and a Bright Red Vanity
The standout feature here is the fearless color combination, anchored by the bright red vanity. Red can be an intimidating color, but used on a single piece of furniture, it acts as a joyful exclamation point. It confidently pulls the red tones from the busy wallpaper, grounding the entire design. If you replaced this with a white or wood vanity, the room would lose its focal point and the wallpaper might feel chaotic. The red vanity makes the whole space feel curated, bold, and incredibly fun.
|
📋 Copy HEX 🔗 Share |
This room’s formula is about controlled chaos. It’s 50% maximalist pattern (the wallpaper), 30% grounding neutral (the white subway tile wainscoting and window trim), and 20% bold accent color (the red vanity and tile trim). This balance is crucial. The white space gives the eye a place to rest, making the pattern more enjoyable. The red accent provides focus and intention. You could change the accent color to a deep blue or emerald green, as long as you pull it from the wallpaper pattern to maintain that cohesive feel.
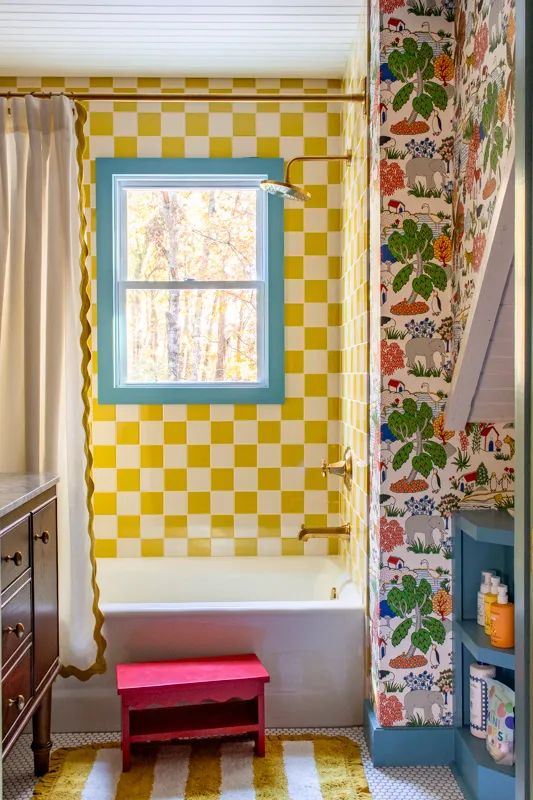
9. Pair Yellow Checkerboard Tile with Whimsical Wallpaper
That full wall of checkerboard tile is a stunner, but it’s also a significant investment in both materials and labor. To get a similar vibe for less, consider using peel-and-stick vinyl floor tiles (around $2/sq ft) to create the checkerboard pattern on an accent wall. It’s a DIY-friendly project that gives you the same graphic punch without the commitment of mortar and grout. For the wallpaper, look for similar whimsical patterns on sites like Spoonflower or Etsy, where you can often find removable options. Pair it with a thrifted vanity painted a dark, moody color to complete the look.
|
📋 Copy HEX 🔗 Share |
This design succeeds by masterfully mixing patterns and styles. The geometric rigidity of the yellow and white checkerboard tile provides a strong, graphic anchor for the room. This structure allows the adjacent wall’s organic, whimsical animal-and-tree wallpaper to feel playful rather than messy. The contrast is what creates the energy. The design further balances modern (the tile) with traditional (the dark wood vanity) and rustic (the wallpaper), proving that you don’t have to stick to one single style to create a cohesive and captivating space.
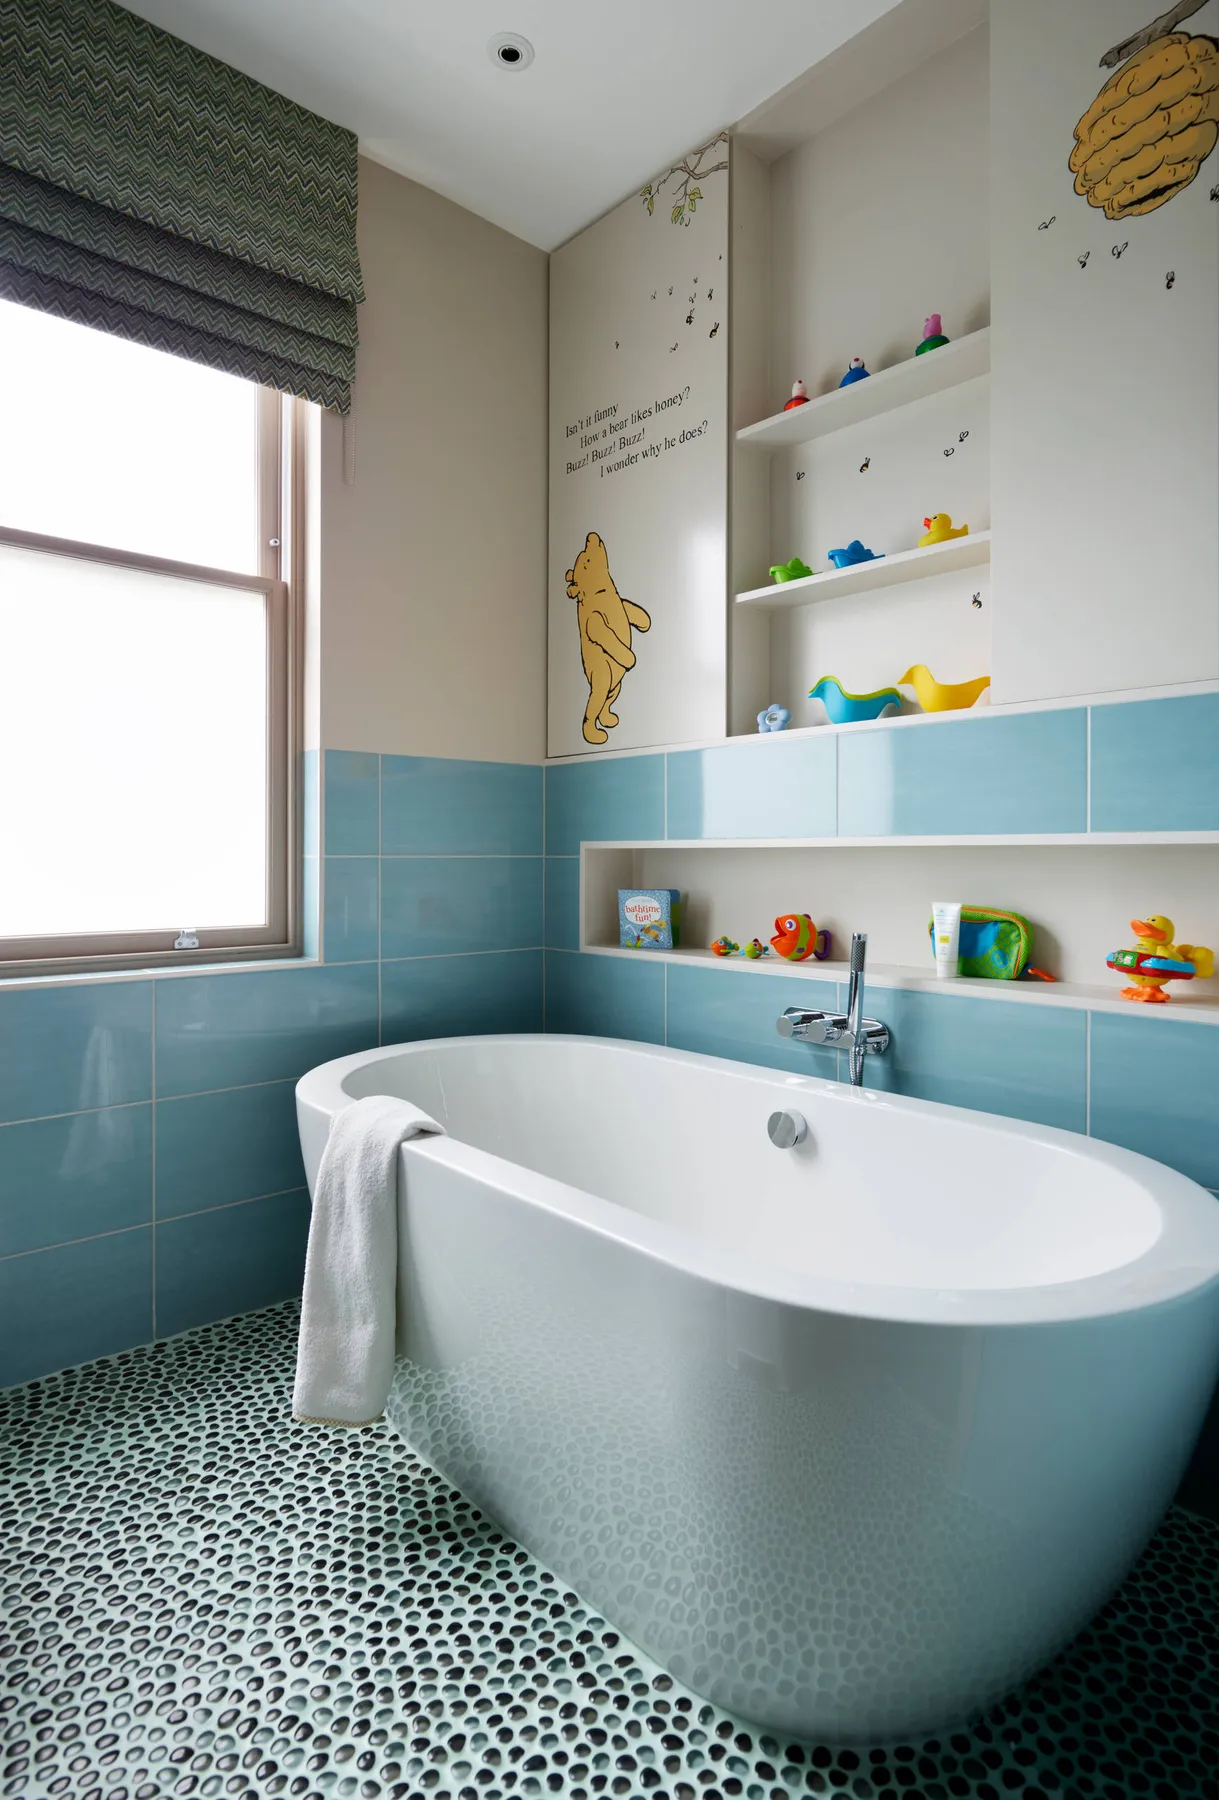
10. A Touch of Whimsy with Winnie the Pooh and Pebble Tile
Pebble tile floors look fantastic and feel great underfoot, but they require some specific upkeep. All those little nooks and crannies mean a lot of grout, which is prime real estate for dirt and mildew. Regular sealing (at least once a year) is essential to keep it looking fresh. A steam cleaner can be a lifesaver for deep cleaning the grout lines without harsh chemicals. Also, be aware that standing water can be an issue if the pebbles aren’t perfectly sloped toward the drain, so diligent squeegeeing after a bath is a good habit to start.
|
📋 Copy HEX 🔗 Share |
Before you commit to a character-themed bathroom, have an honest chat about longevity.
- Theme Intensity: Are you using decals and accessories, or permanent tiles and murals? This design wisely uses vinyl decals, which are easily removable when the Pooh-phase passes.
- Color Palette: Do the core colors (like the light blue tile and beige walls here) work without the theme? Yes, they create a calm, neutral backdrop that can adapt to future changes.
- Fixture Style: Are the tub, toilet, and vanity classic and simple? A freestanding tub is a timeless choice that won’t feel dated.
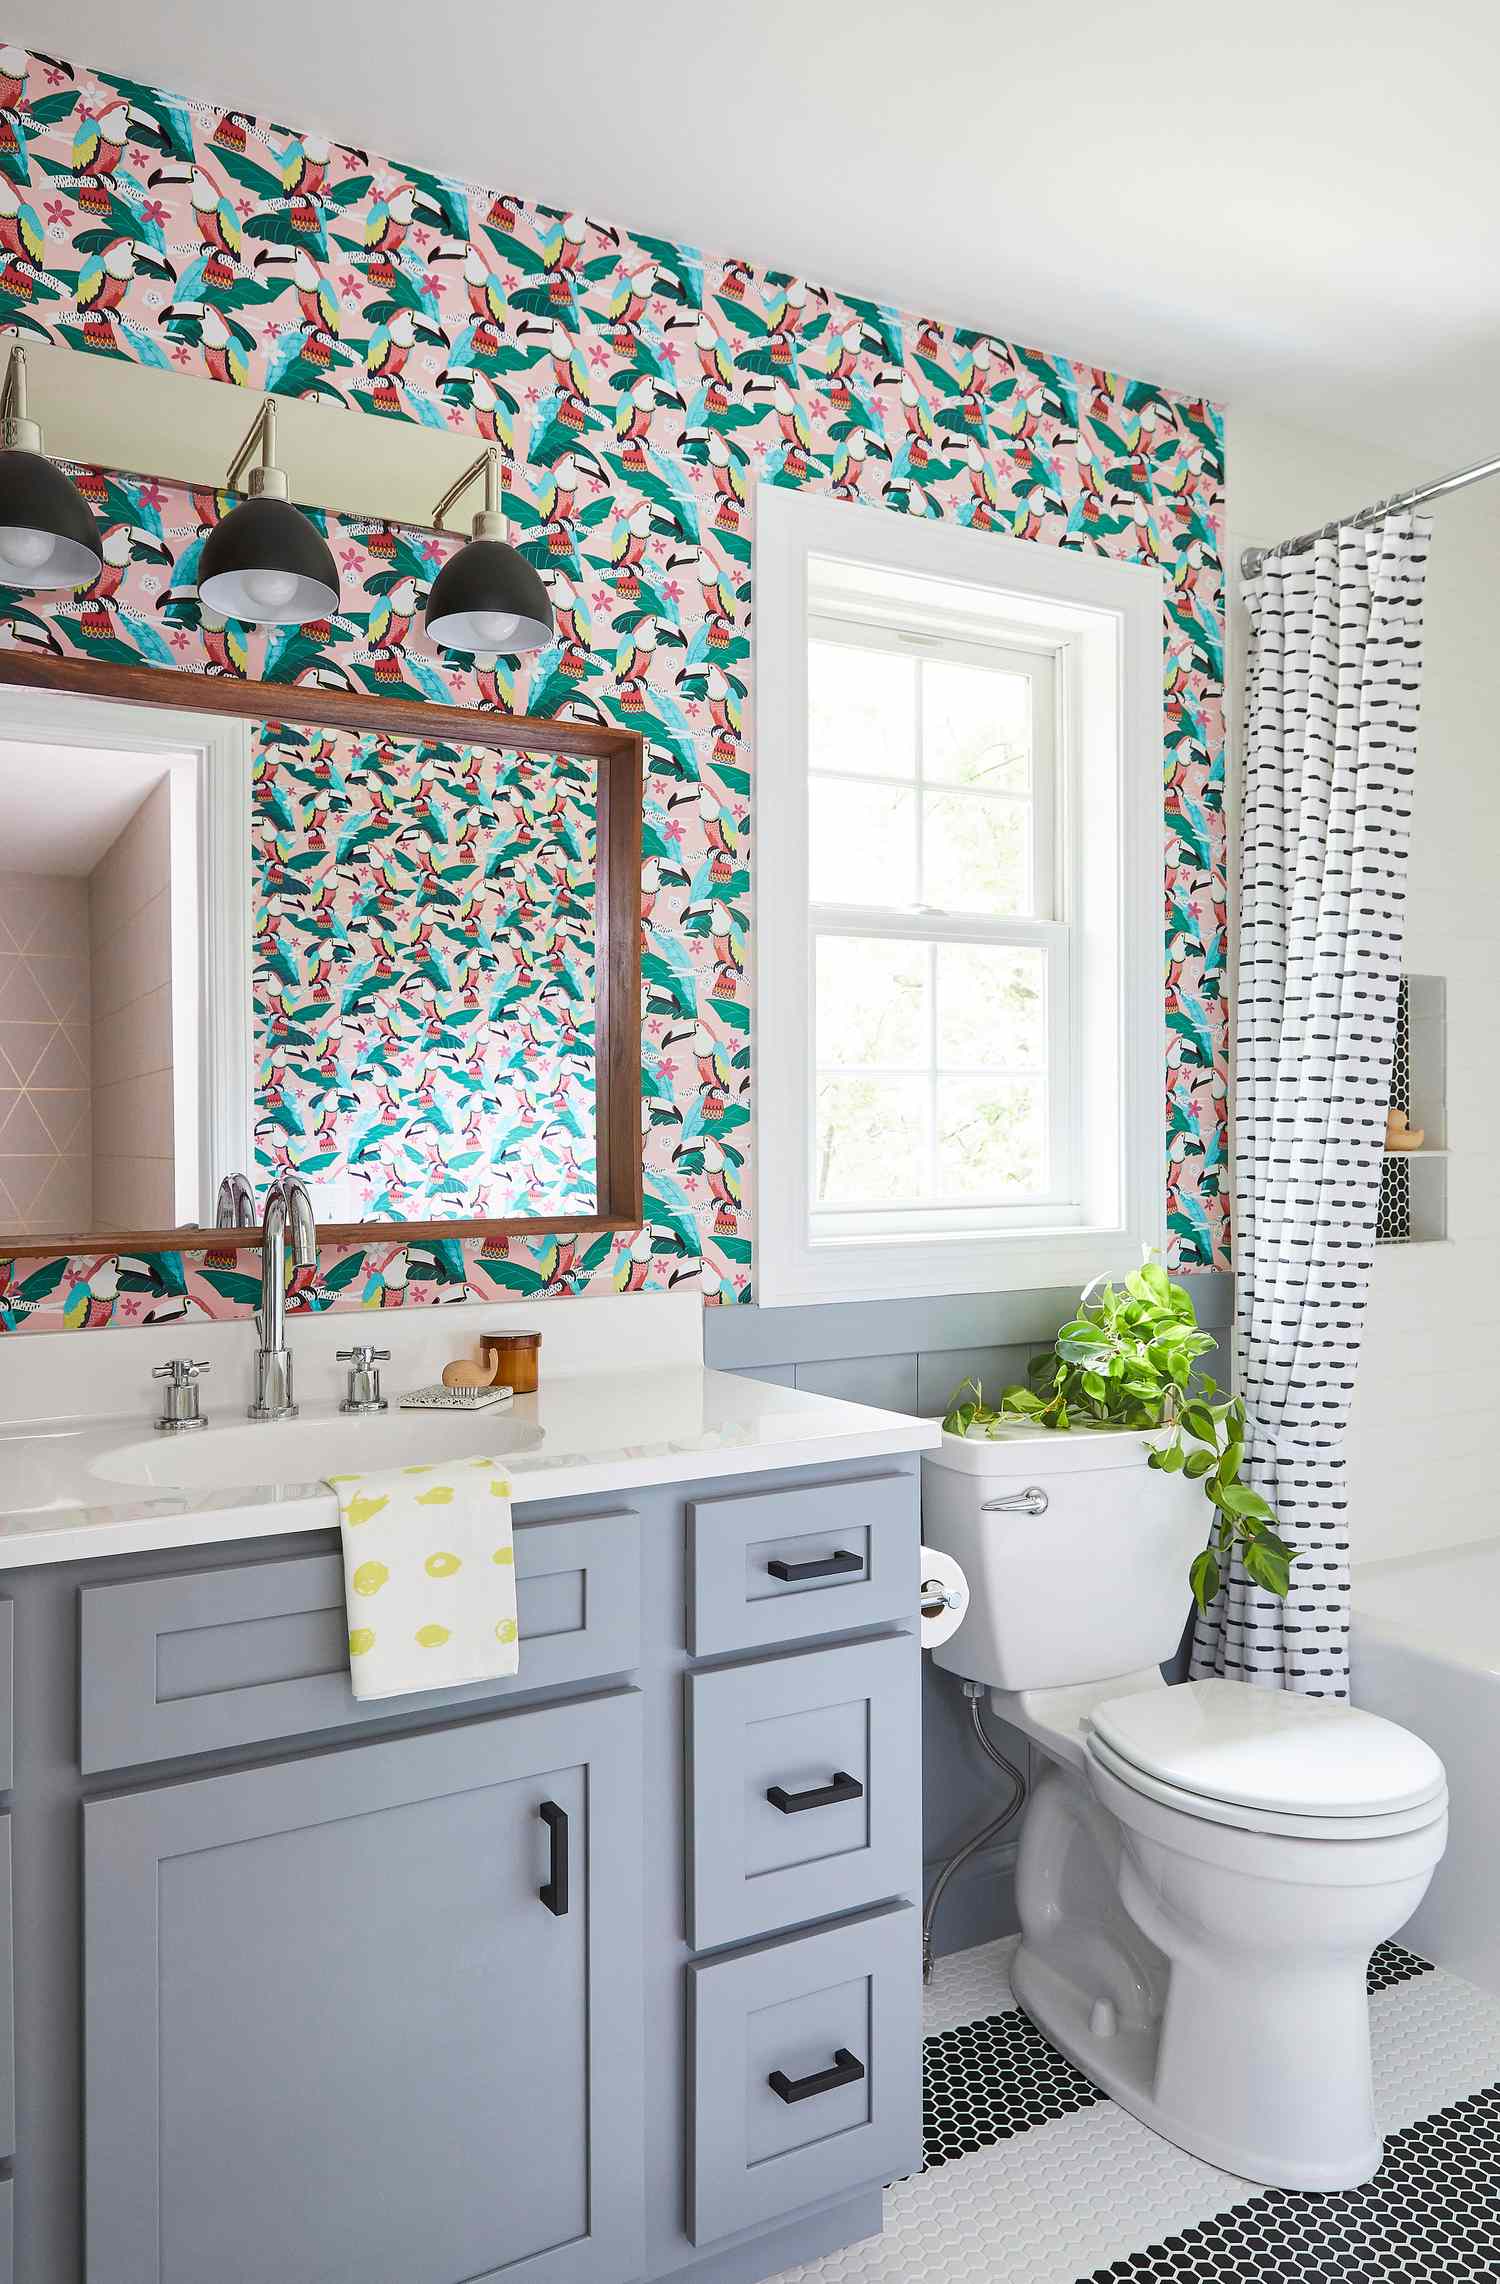
11. Go Tropic with Toucan Wallpaper and a Sleek Gray Vanity
When pairing a bold, colorful wallpaper with a neutral vanity, the hardware is your opportunity to tie everything together. The black cabinet pulls on this gray vanity are a smart choice. They echo the black details in the toucan wallpaper and the black stripes in the hexagon floor tile, creating a subtle thread of continuity. This makes the gray vanity feel like a deliberate part of the eclectic mix, rather than a safe, boring choice. Don’t underestimate the power of swapping out standard hardware for something more intentional.
|
📋 Copy HEX 🔗 Share |
This look is ideal for a medium-sized bathroom, around 60-100 square feet. The large scale of the toucan print needs some room to breathe so you can appreciate the pattern. In a very small powder room (under 40 sq ft), it might feel a bit overwhelming. The gray vanity and graphic black-and-white elements help ground the design, making it work well in a space that serves both kids and guests. For a larger primary bathroom, you could use this wallpaper to define a specific zone, like the wall behind a freestanding tub. The balance feels similar to Idea #4, but on a larger scale.
12. Mix Patterns with Checkers, Animal Prints, and a Wavy Mirror
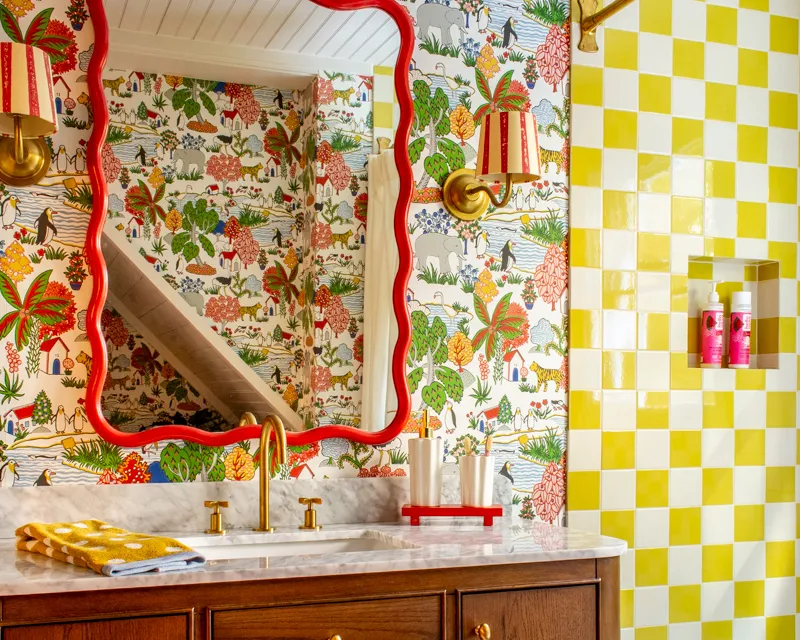
The single element that pulls this entire eclectic mix together is the wavy red mirror. In a room with competing patterns—checkered tile, animal wallpaper, striped sconce shades—the mirror’s unconventional shape and bold color act as a confident focal point. It says, Yes, this is all happening, and it’s intentional. Its playful, organic form contrasts beautifully with the grid of the tile, while its vibrant red color is repeated in the sconces and wallpaper, creating a sense of deliberate harmony amidst the joyful chaos. Without it, the patterns might just feel like noise.
|
📋 Copy HEX 🔗 Share |
This bathroom perfectly captures the Kidult design trend, which blends childish whimsy with sophisticated elements. You have the playful wallpaper and tile, but also a grown-up marble countertop and elegant gold fixtures. It’s a style that appeals to our desire for fun and nostalgia without sacrificing quality or design integrity. This approach has staying power because it doesn’t feel like a kids-only space; it’s a family space with a strong sense of personality that can be appreciated by all ages. The key is the high-low mix of playful and polished.
13. Smart Layouts for a Compact Kid-Friendly Bathroom
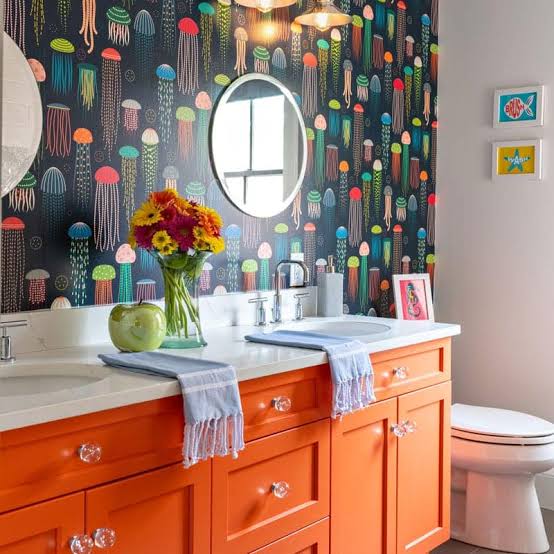
When designing for a small kids bathroom, every inch counts. This layout is likely focused on a standard 5’x8′ (40 sq ft) bathroom, the most common size in American homes. The key is to keep fixtures lined up on one wet wall to save on plumbing costs and maximize open floor space. A standard tub/shower combo is more space-efficient than a separate shower. Opt for a vanity that is no deeper than 21 inches and consider a model with drawers instead of doors for more accessible storage. Wall-mounted storage, like medicine cabinets or floating shelves, is your best friend.
|
📋 Copy HEX 🔗 Share |
In a small bathroom used by kids, clutter is the enemy. Without a smart storage plan, the limited counter and floor space will be instantly overrun with bath toys, towels, and toiletries. Before you finalize a layout, map out exactly where everything will live. Will bath toys go in a hanging mesh bag or a bin under the sink? Where will the step stool be stored when not in use? Is there a dedicated spot for wet towels? Answering these practical questions upfront will make a small space feel much more functional and serene. Lack of planning is a common mistake that can ruin a beautiful design.
14. Modern and Bright with Polka Dot and Striped Tiles
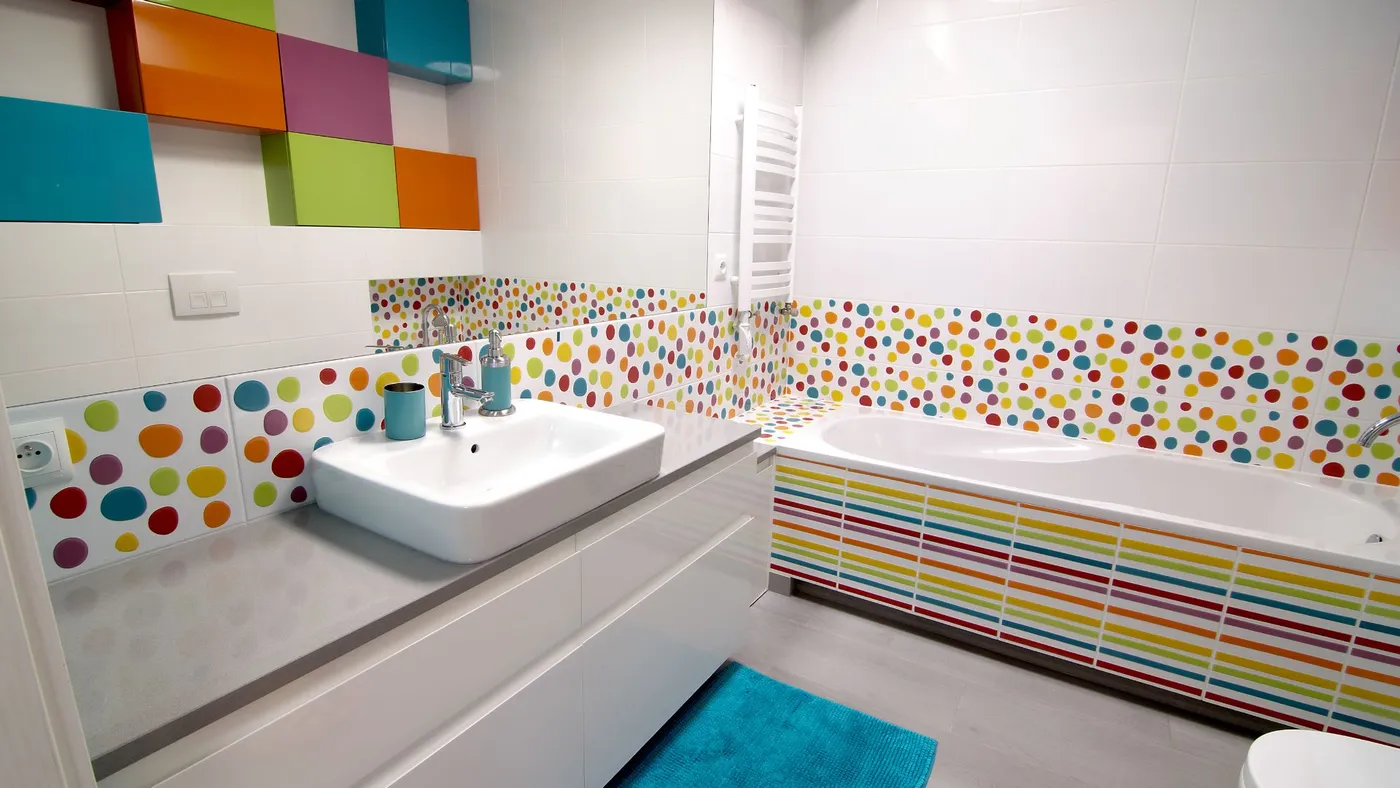
Adding a playful tile border is a fantastic way to customize a standard white-tiled bathroom. Here’s a quick guide to installing a decorative band:
- Plan Your Layout: Decide on the height for your border. A band at eye level for a child (around 42-48 inches) is a great choice. Use a level and pencil to draw a guideline around the room.
- Set the Field Tile: Install your main white tiles up to the bottom of your guideline.
- Apply the Border: Apply a thin layer of tile adhesive (thin-set mortar) and press your polka dot or striped tiles into place, using spacers to maintain even gaps.
- Complete the Wall: Once the border is set, continue tiling above it.
- Grout Everything: After the adhesive has cured (usually 24 hours), apply grout over the entire surface, then wipe away the excess.
This is a weekend project that adds a huge amount of custom personality.
|
📋 Copy HEX 🔗 Share |
This room’s success lies in its clever ratio of neutral to pattern. The formula is approximately 70% clean neutral base (the large white wall tiles, white tub, and mirror), 20% contained pattern (the polka dot and striped tile sections), and 10% bold color accents (the items in the cubby shelves). This balance ensures the room feels energetic and fun without being visually overwhelming. The pattern is used strategically to highlight key areas—the tub and the sink—drawing your eye and creating zones within the space.
15. Go Bold with Teal Walls and a Splash of Rainbow
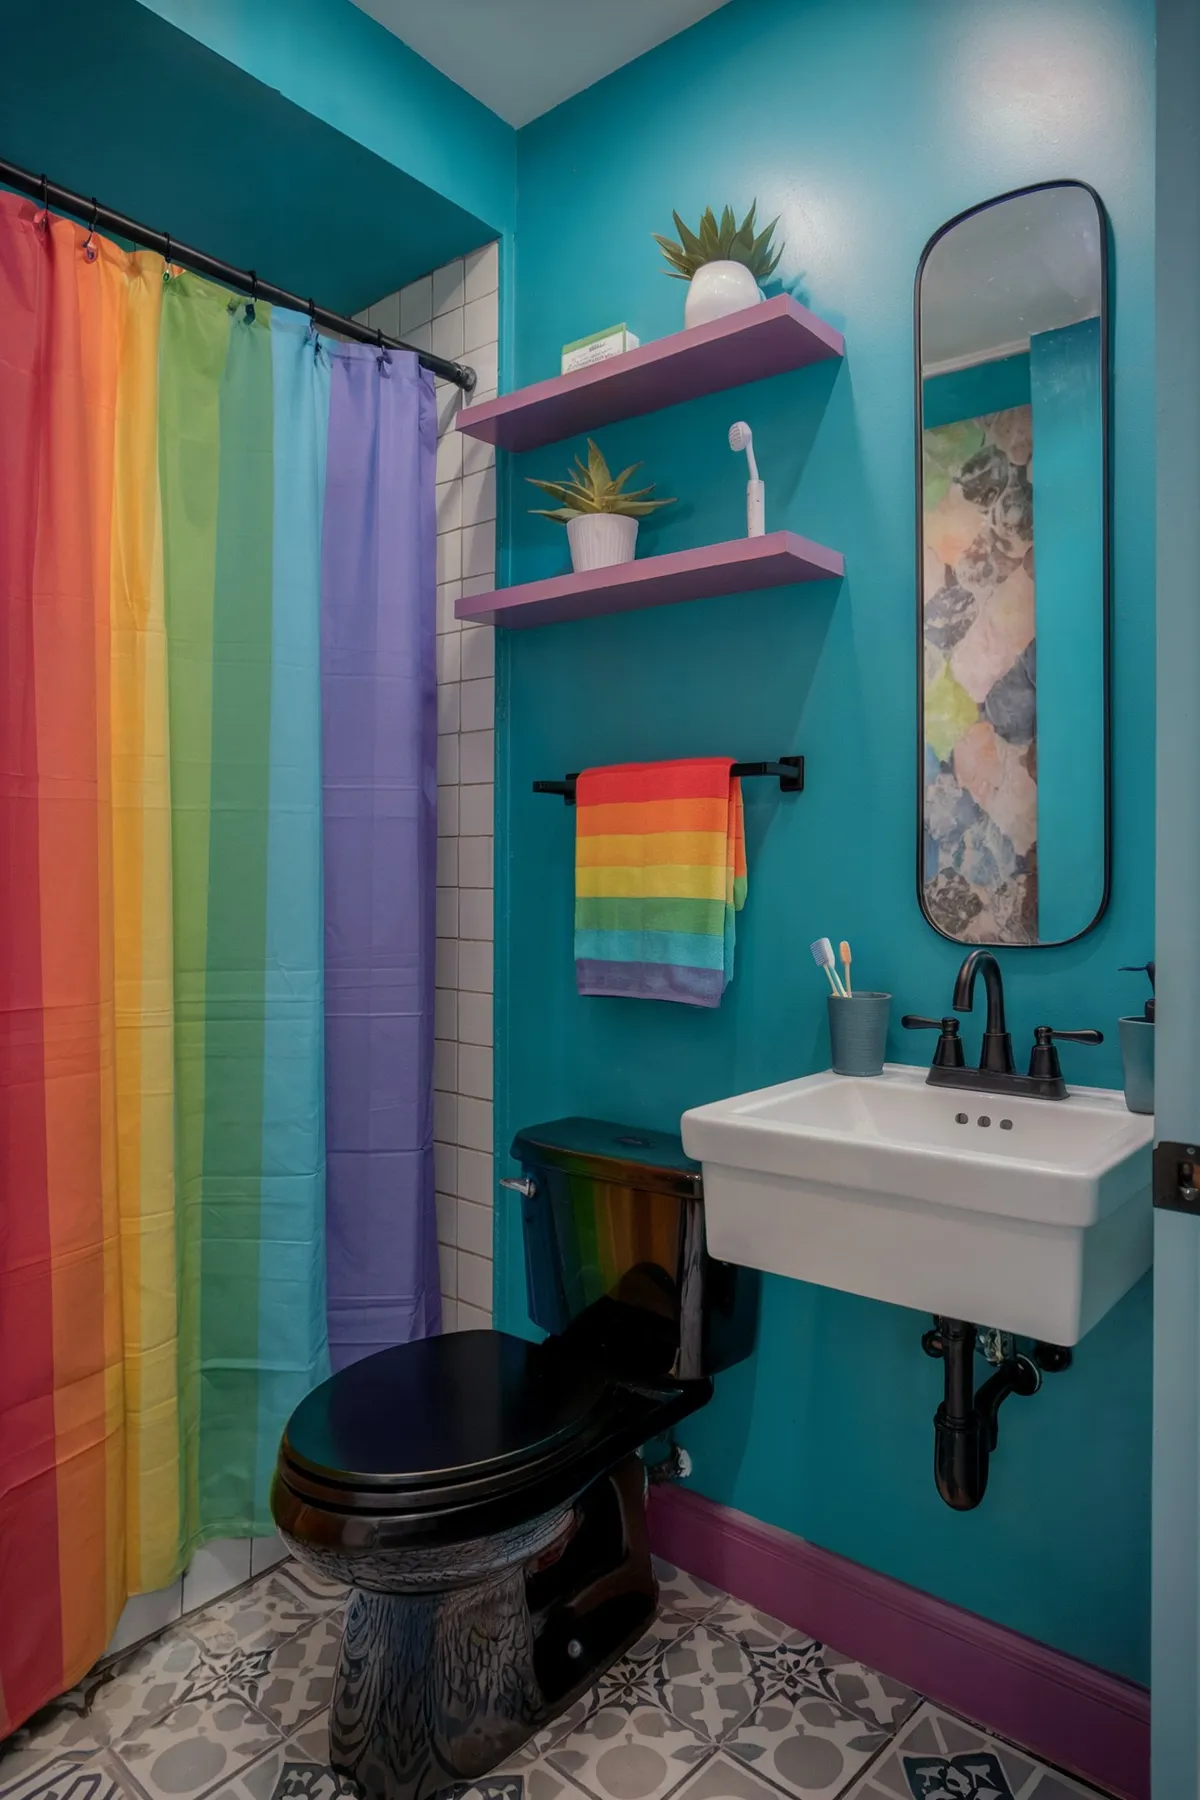
This vibrant, high-impact look is surprisingly achievable on a reasonable budget, as it relies on paint and accessories rather than expensive tile or custom work.
- Paint (Teal for walls/ceiling, Purple for shelves): $100 – $175
- Shower Curtain & Towel: $40 – $75
- Floating Shelves: $30 – $60
- Patterned Floor Tile (Vinyl or Cement): $200 – $500
- Black Toilet & Wall-Mount Sink: $300 – $600
- TOTAL: $670 – $1,410
Budget alternative: Use peel-and-stick floor tiles ($80), keep your existing white toilet, and paint the baseboards instead of replacing them. This could bring the total cost down to under $300 for a powerful transformation.
|
📋 Copy HEX 🔗 Share |
The design works because of its bold commitment and smart use of contrast. Painting the walls and ceiling the same deep teal color creates a dramatic, jewel-box effect that feels immersive. The vibrant rainbow stripes of the shower curtain pop against this dark, moody backdrop. The black toilet and faucet are unexpected choices that add a graphic, modern edge, while the gray and white patterned floor provides a neutral, textural base that keeps the colorful elements from clashing. This is a much more daring approach than the softer palette seen in Idea #24.
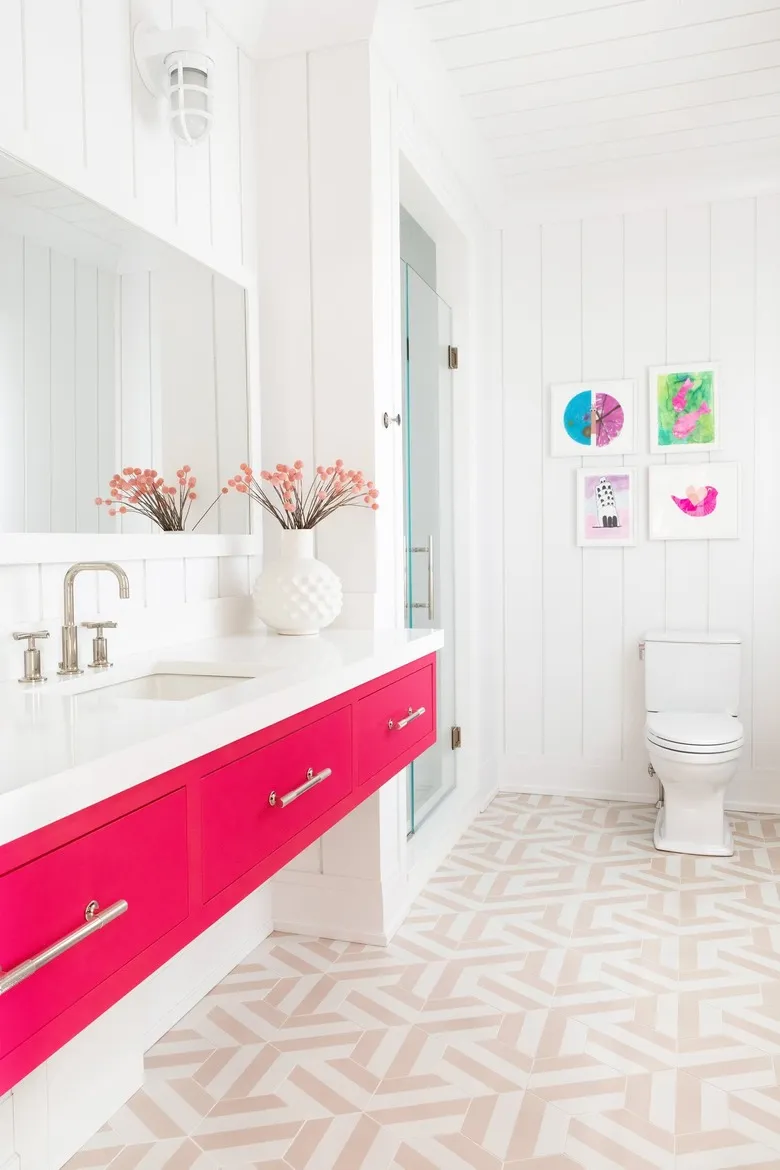
16. Pair Crisp White Shiplap with a Hot Pink Vanity
When using shiplap in a bathroom, proper installation is key to preventing moisture issues. Opt for PVC or fiber cement shiplap boards instead of real wood, as they are completely waterproof and won’t warp or rot. If you must use wood, make sure to prime and paint all six sides of every board (front, back, and all four edges) before installation. This seals the wood from humidity. And always ensure your bathroom has a powerful, properly vented exhaust fan to manage moisture effectively.
|
📋 Copy HEX 🔗 Share |
A floating vanity looks incredibly chic, but let’s talk about the reality of cleaning. While it does make mopping the floor underneath a breeze, that open space can also become a magnet for dust bunnies, stray toys, and dropped toothpaste caps. You’ll need to be diligent about sweeping or vacuuming under it regularly. On the plus side, the hot pink finish on this vanity is likely a durable lacquer or high-gloss paint, which is non-porous and very easy to wipe clean of fingerprints and splashes.
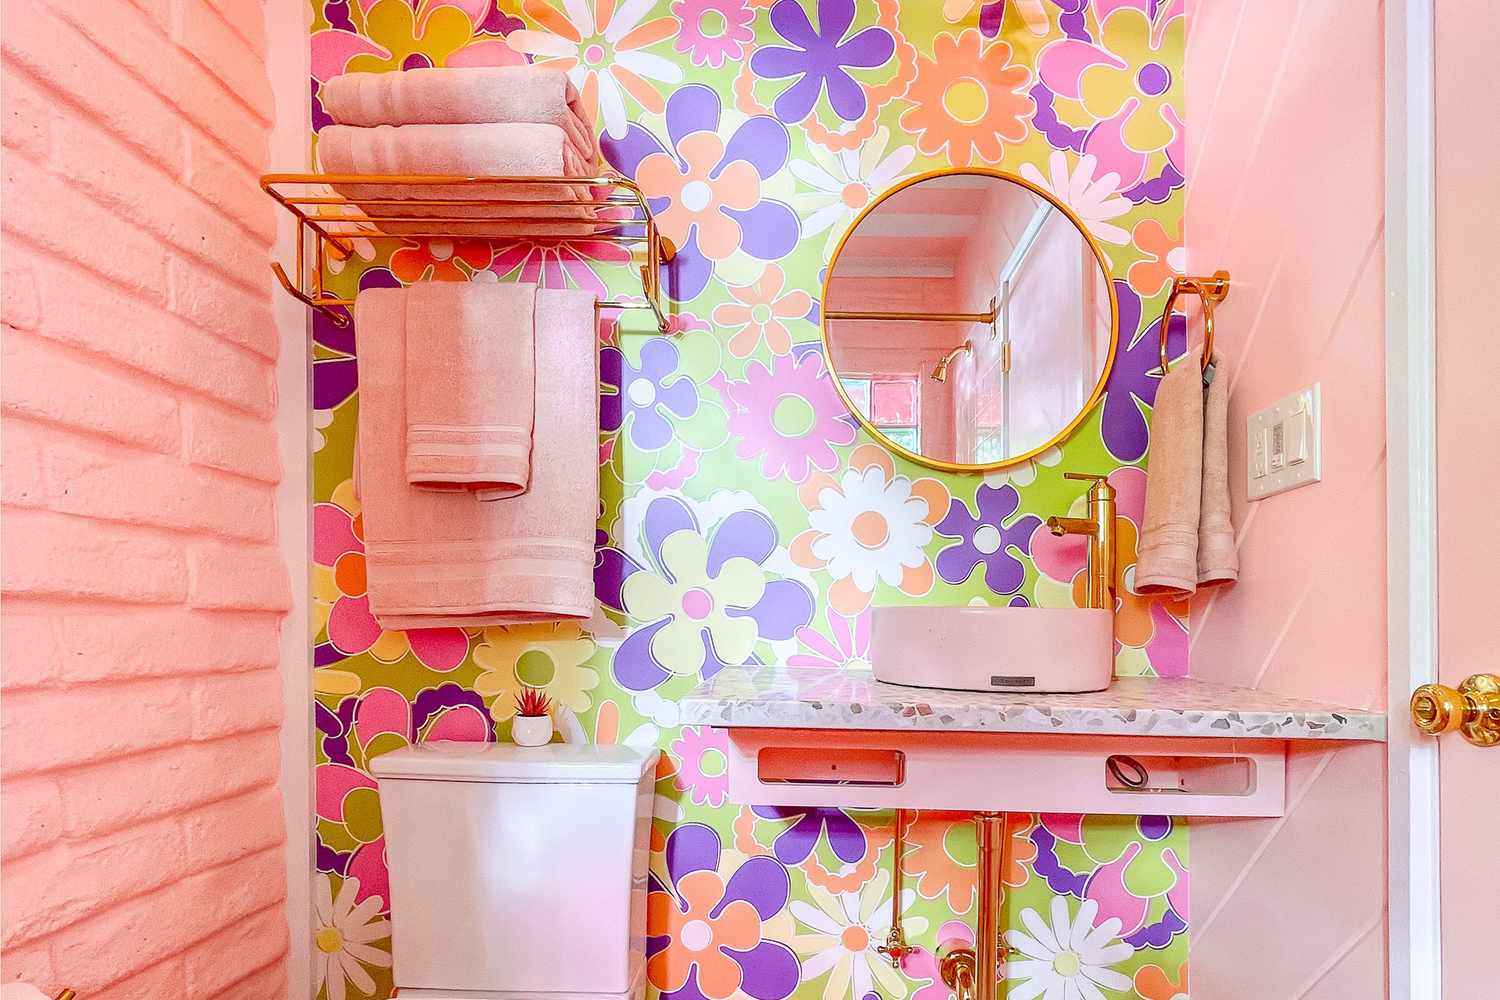
17. Retro Flower Power with Pink Fixtures and Brass Accents
The single element that defines this bathroom is the unapologetically bold floral wallpaper. It’s the heart and soul of the design, setting a vibrant, retro tone that everything else supports. The lime green background is an adventurous choice that radiates energy. The pink sink, pink brick, and brass fixtures are all pulling their color cues directly from the flowers in the wallpaper. If you were to remove it, the pink elements might feel random, but with the wallpaper as the anchor, the whole room sings in a coordinated, maximalist harmony.
|
📋 Copy HEX 🔗 Share |
A look this bold and specific is a major commitment. While incredibly fun, the retro floral wallpaper and pink sink aren’t for the faint of heart—or for those thinking about resale value in the near future. This is a forever home or a we love it and don’t care kind of design choice. If you love the vibe but are hesitant to commit, try to find a high-quality peel-and-stick version of a similar wallpaper. That way, you can embrace the flower power for a few years and swap it out when your tastes (or your child’s) evolve.
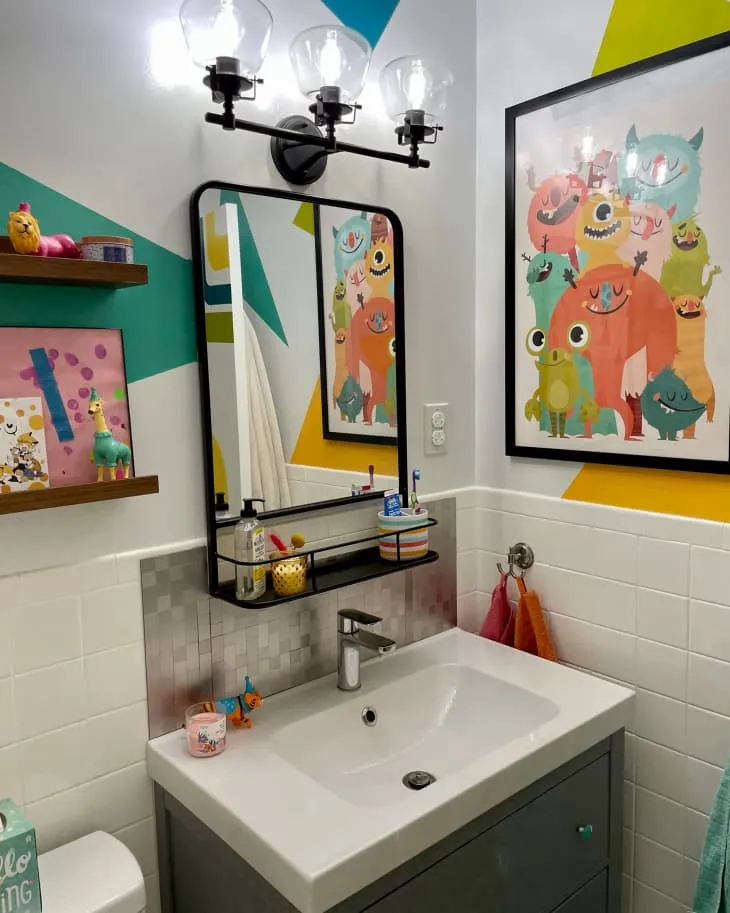
18. Geometric Painted Walls Meet Playful Monster Art
This high-impact geometric wall is a fantastic budget DIY project. All you need is a few sample pots of paint and a roll of painter’s tape. The monster art can be sourced affordably from sites like Etsy, where you can buy digital downloads for a few dollars and print them yourself. For the vanity, look for a simple, modern model at a big-box store. The metallic mosaic backsplash tile is often sold in 12×12-inch sheets, so you only need a few to create this accent, keeping costs down. This entire look focuses on creative, low-cost materials to achieve a custom feel.
|
📋 Copy HEX 🔗 Share |
Creating crisp geometric shapes on a wall is all about the right technique. Here’s a quick guide:
- Start with a base color: Paint the entire wall with your lightest color (in this case, white) and let it dry completely.
- Tape your design: Use high-quality painter’s tape (like FrogTape) to create your geometric shapes. Press the edges down firmly.
- Paint over the tape edge: Here’s the trick! Paint a thin coat of your base color (white) along the inside edge of the tape. This seals the edge and prevents the new color from bleeding under.
- Fill in the color: Once the seal coat is dry, paint your accent colors (teal, yellow) within the taped-off sections.
- Remove the tape: Pull the tape off while the accent paint is still slightly wet, pulling away from the painted section for the sharpest line.
19. Dive Deep with a Full-Wall Underwater Mural
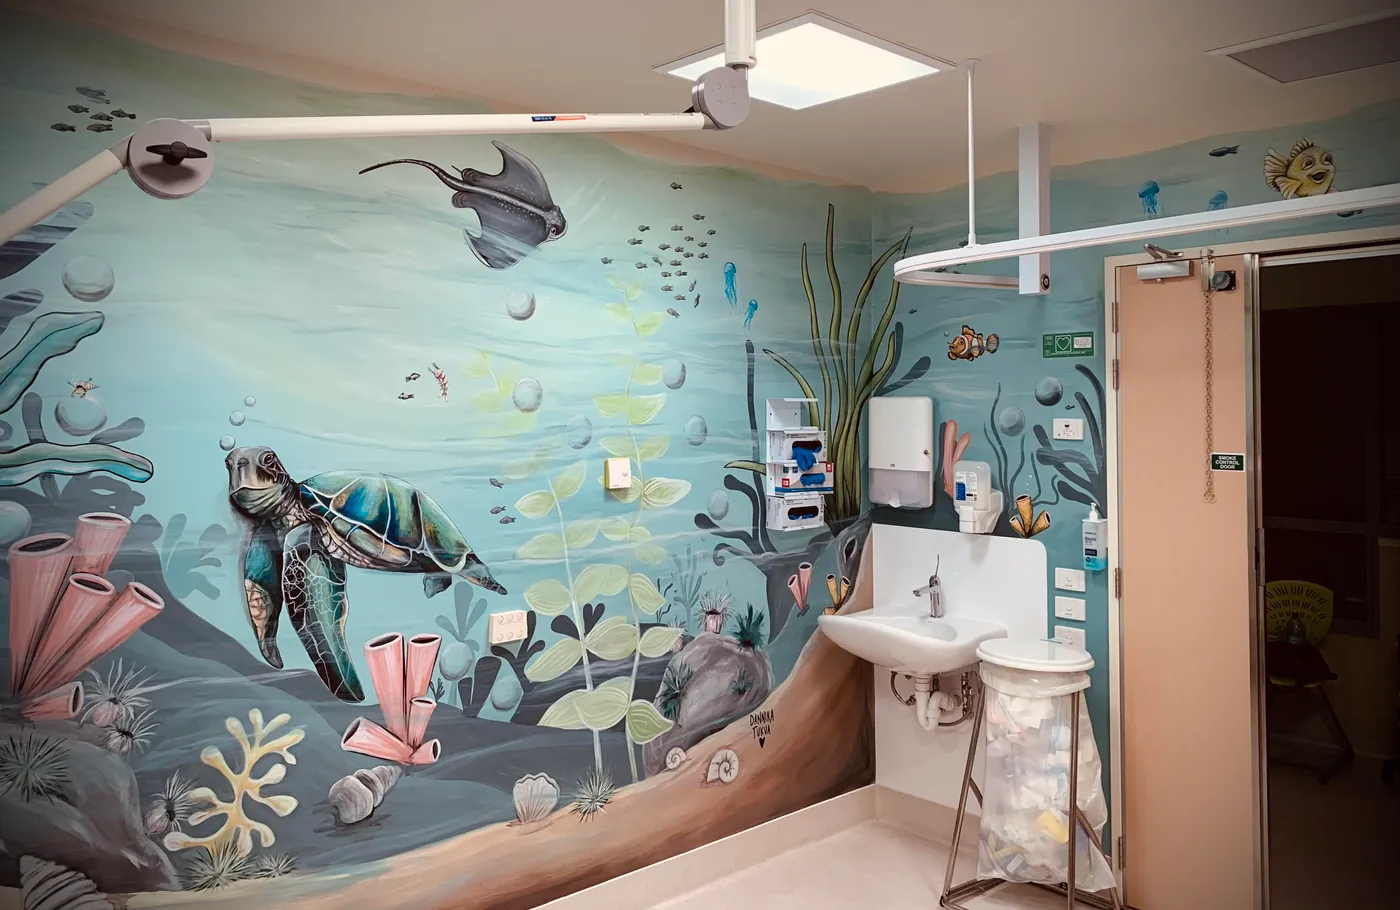
The mural is the undeniable star, and its success comes from its scale and color palette. By covering an entire wall, it creates a truly immersive experience, making the room feel like a window into another world. The design works because it uses a sophisticated, slightly muted palette of aqua, teal, and coral rather than primary cartoon colors. This gives the underwater scene a more artistic, calming quality that can appeal to a wider age range. The simple, functional white sink and fixtures wisely take a backseat, allowing the mural to be the sole focus.
|
📋 Copy HEX 🔗 Share |
A large-scale mural like this needs a significant, uninterrupted wall to have the proper impact. This idea is best suited for a medium to large bathroom (at least 70 sq ft) with a wall that is at least 8-10 feet long and free of windows or doors. In a smaller bathroom, a full mural could feel overwhelming and you might lose key parts of the illustration. For a more compact space, consider a vertical panel mural or a large-scale art print to get a similar effect without covering every inch of wall space. This is a much bigger statement than the removable decals in Idea #10.
20. Curate a Gallery Wall with Eclectic Animal Art
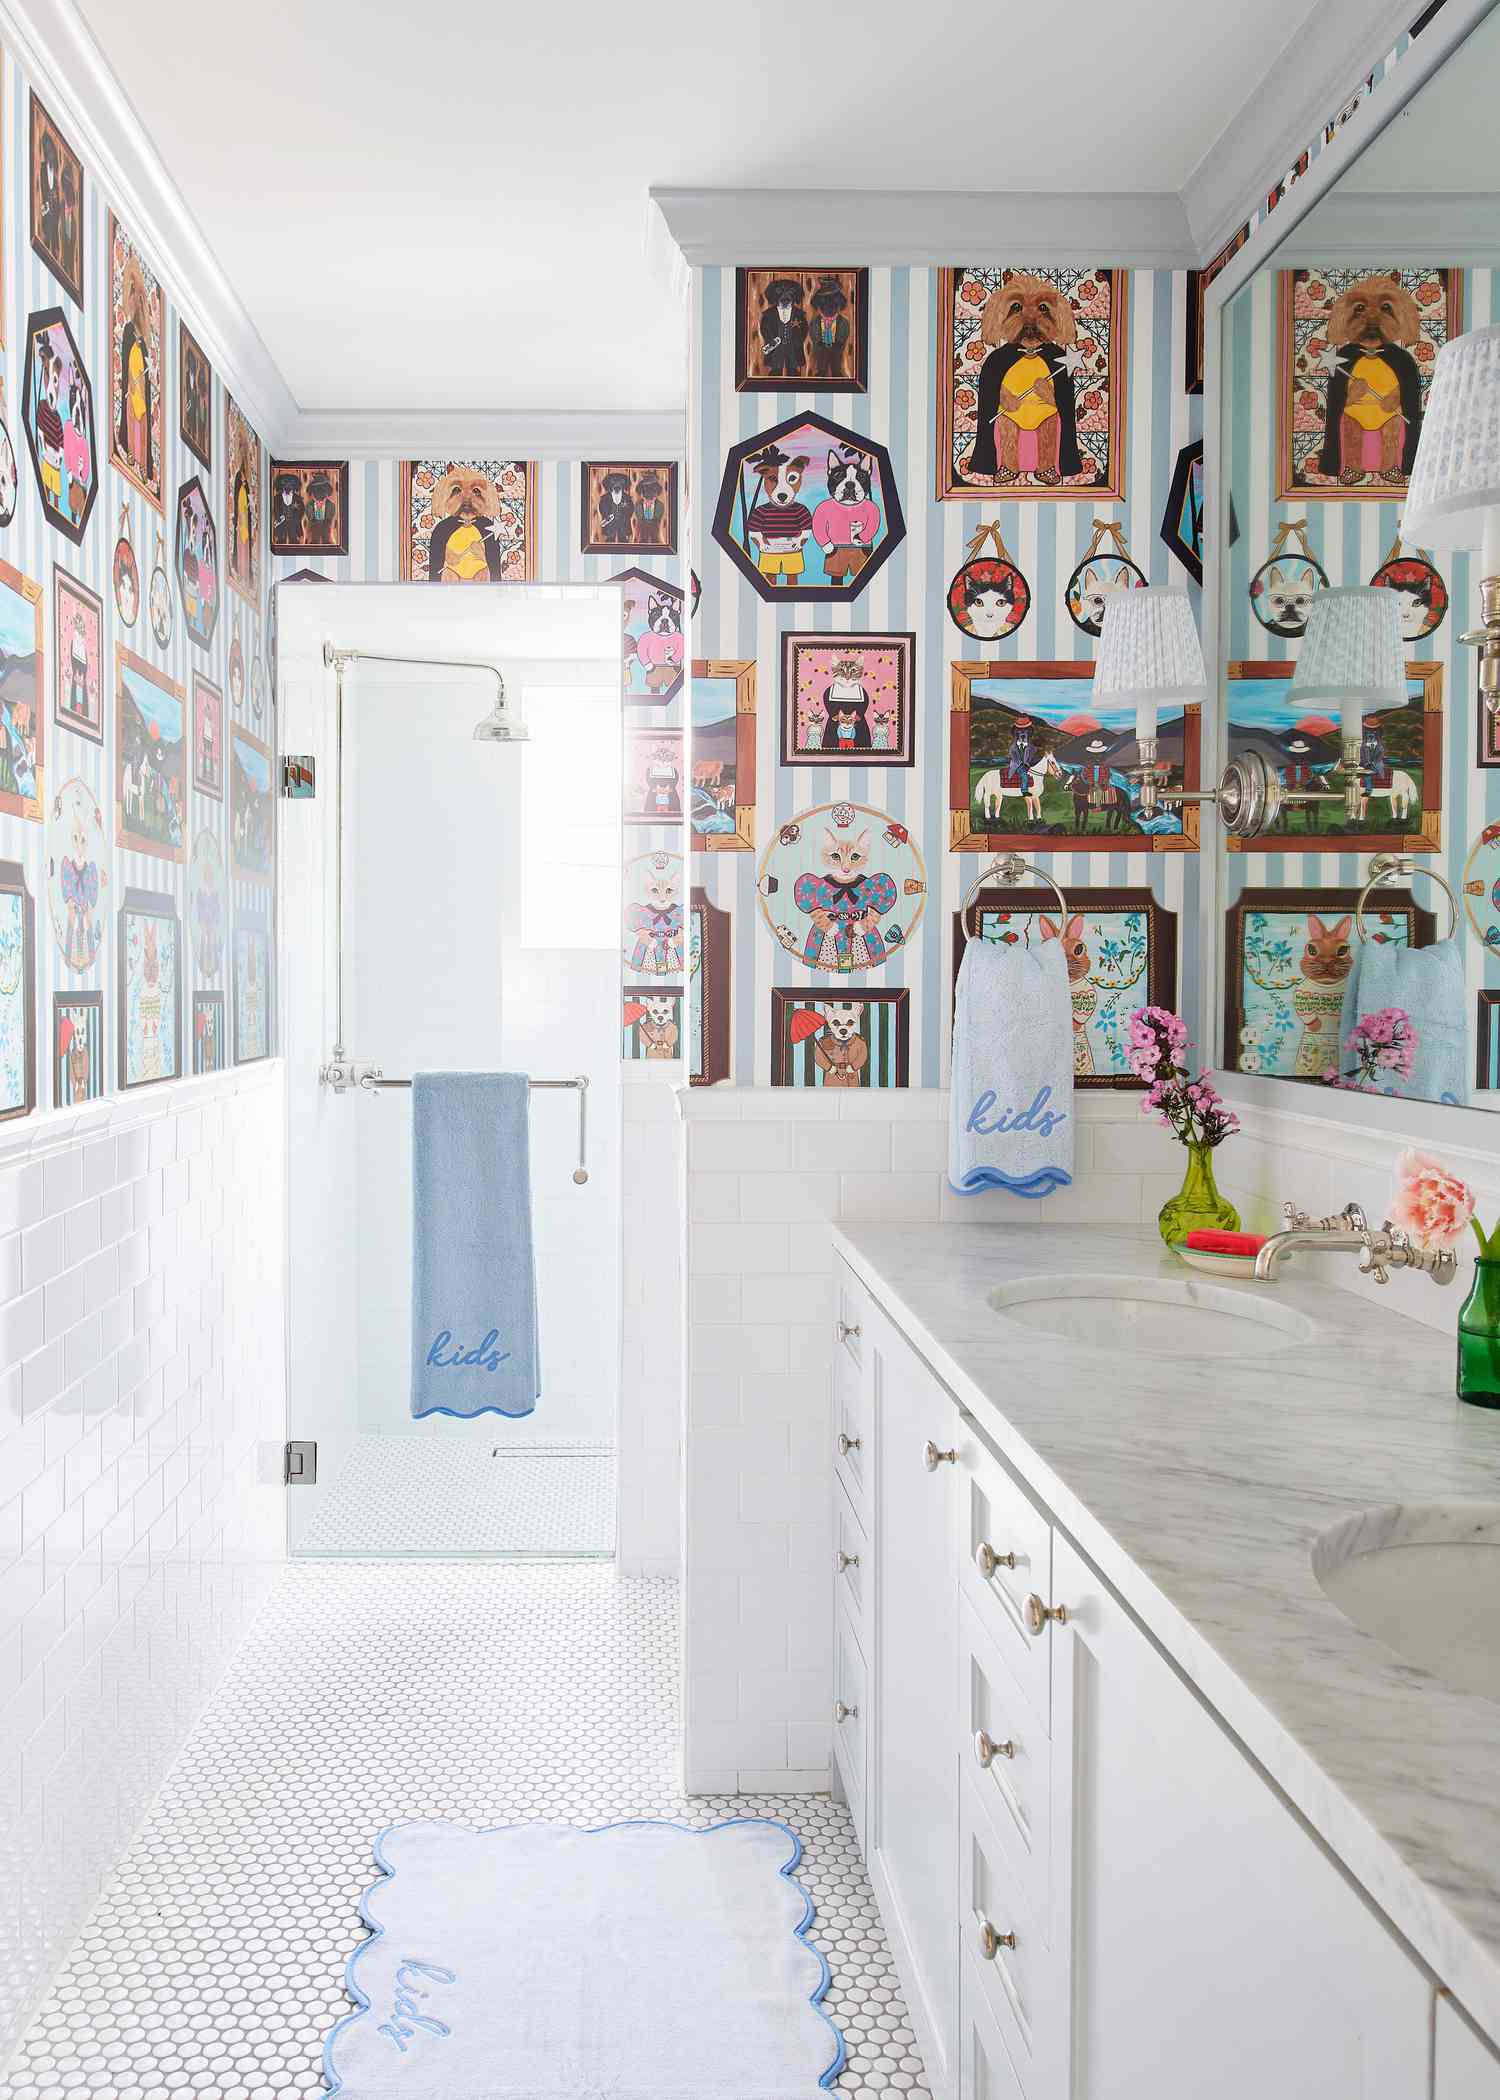
The secret to a successful gallery wall, especially one with this much eclectic art, is a unifying element. Here, it’s the consistent use of simple, identical frames. While the art inside is varied in color, style, and subject, the matching frames create a sense of order and rhythm. This turns a random collection of prints into a cohesive, intentional installation. For a kids bathroom, use frames with acrylic or plexiglass instead of real glass for safety. Arrange them on the floor first to perfect your layout before putting any nails in the wall.
|
📋 Copy HEX 🔗 Share |
This room’s formula is a delightful blend of classic and quirky. It’s about 50% traditional bathroom design (white subway and hex tiles, marble countertop, polished chrome fixtures), 40% playful pattern (the striped wallpaper and the content of the art), and 10% soft color (the light blue towels and mat). This high percentage of classic, neutral elements grounds the space and gives it longevity, while the whimsical wallpaper and art provide a layer of personality that is easy to update as the child grows. You could swap the art and wallpaper and the bathroom would still feel solid.
21. Make a Statement with a Bright Blue Double Vanity
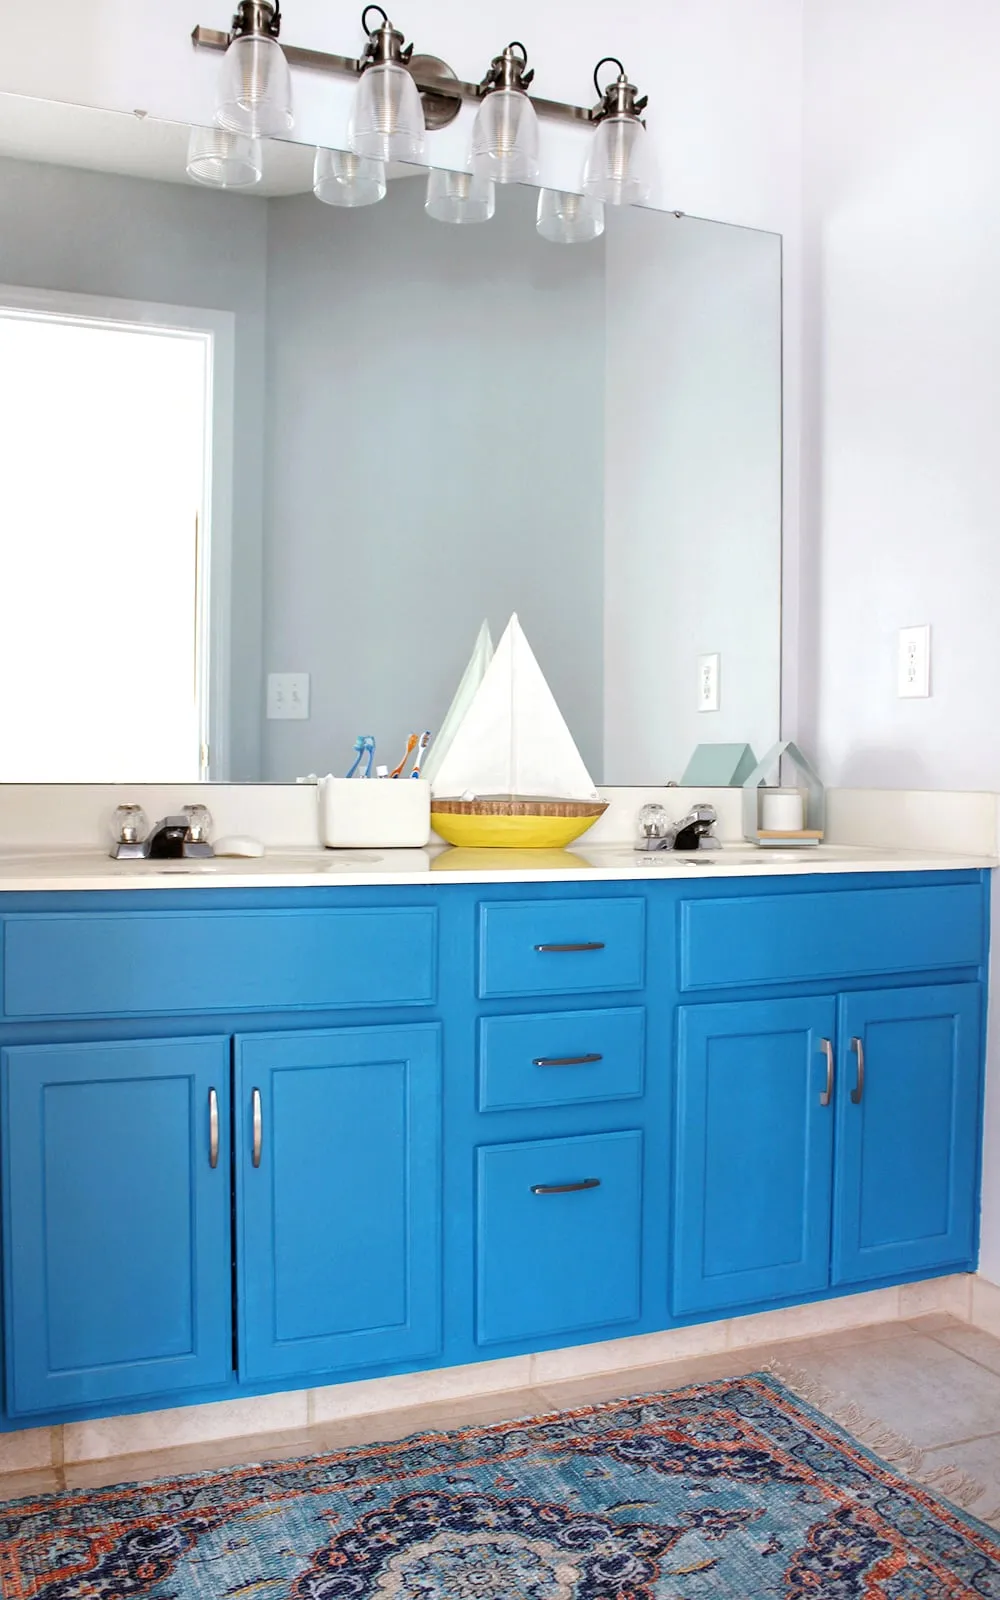
that elevates this bathroom from simply functional to truly special is the bold, bright blue of the vanity. It’s an instant mood-lifter. In a space with neutral walls and floors, the vanity becomes the primary source of color and personality. It’s a smart choice because it concentrates the design impact in one place. The nautical and playful decor on the countertop are charming additions, but the blue cabinetry is doing all the heavy lifting to define the room’s cheerful and coastal-inspired character.
|
📋 Copy HEX 🔗 Share |
Before committing to a colorful double vanity, run through this quick checklist.
- Measure Twice: A double vanity is typically 60-72 inches wide. Do you have the uninterrupted wall space, and will it leave enough room for door swings and traffic flow?
- Check Plumbing: Do you have existing plumbing for two sinks, or will you need to hire a plumber to run new lines? This can add significantly to the cost.
- Lighting Plan: Does your current lighting plan include sconces or overhead lights centered for two mirrors and two sinks? Repositioning electrical boxes is another hidden cost.
- Color Confidence: Get a sample door or a large paint swatch of your chosen color. Look at it in the room’s light at different times of day before you place the order.
22. A Playful Mix of Pastel Peach and Blue Tiles
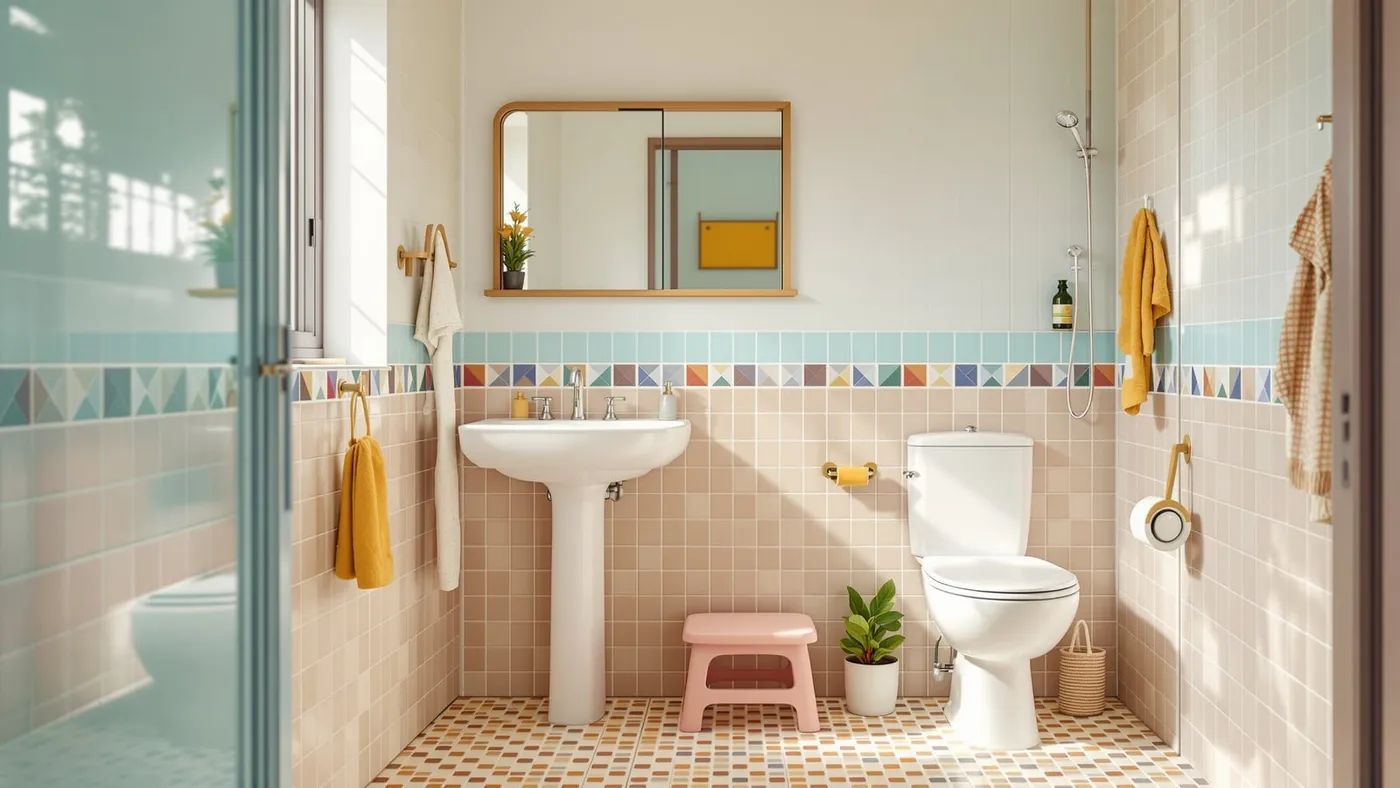
This bathroom design feels so cohesive because of its thoughtful color story and layering of textures. The soft peach and light blue tiles create a gentle, cheerful base that feels vintage-inspired but fresh. The magic is in the details: the multicolored geometric accent border tile introduces all the colors of the palette in one place, effectively tying the whole room together. The warmth of the wood-framed mirror and accessories provides a beautiful, natural contrast to the cool tones of the tiles, while the small mosaic floor tiles add another layer of texture and visual interest.
|
📋 Copy HEX 🔗 Share |
A fully tiled bathroom can be costly, but you can achieve this charming, retro-inspired look for less. Use a soft peach paint color on the upper walls instead of tile. For the lower walls, consider using beadboard paneling painted a glossy light blue. You can then add a single row of colorful geometric peel-and-stick tile as a border. For the floor, look for affordable mosaic-style sheet vinyl or luxury vinyl tile (LVT), which gives you the look of small tiles without the intensive labor of grouting. This approach delivers the same color and feel at a fraction of the cost.
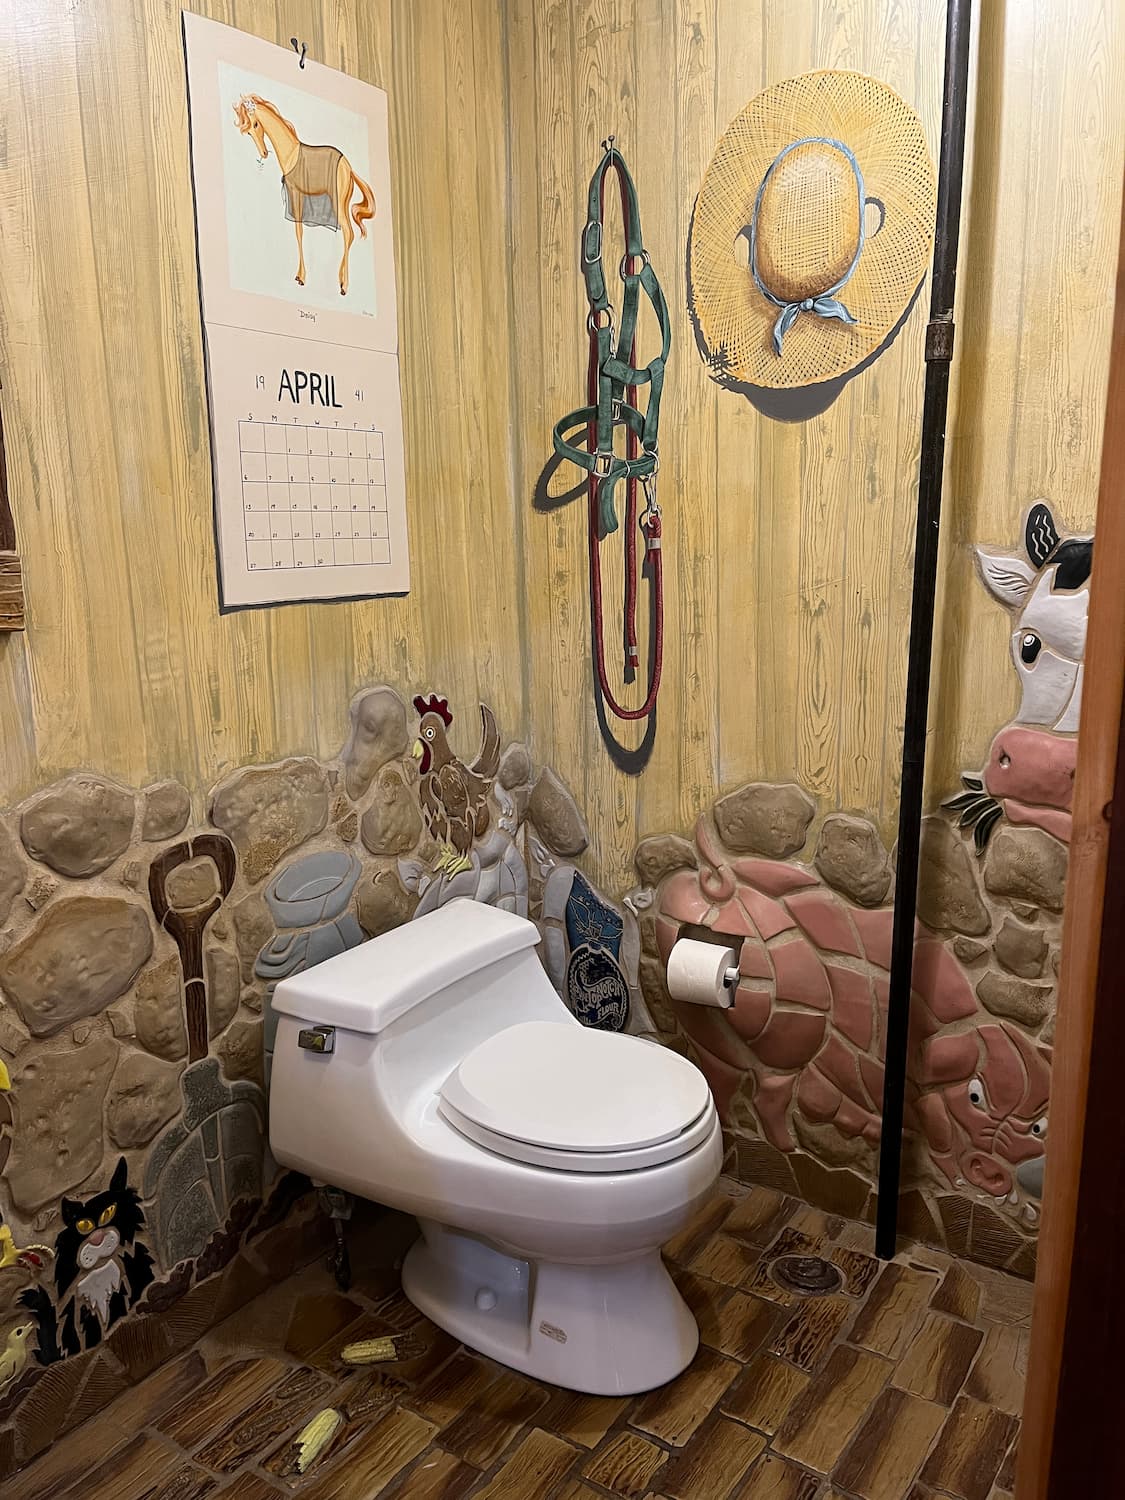
23. Go Rustic with a 3D Farm Animal Themed Bathroom
This is an incredibly creative and whimsical design, but let’s be honest about the cleaning. All of those three-dimensional figures and irregular, stone-like wall textures are a dust magnet. You won’t be able to just quickly wipe down these walls; you’ll need a vacuum with a brush attachment and a lot of patience to get into all the nooks and crannies. The scattered corn husks on the floor are a fun detail for a photo, but in a real, functioning bathroom, they would be a daily sweeping nuisance. This is a high-concept, high-maintenance choice.
|
📋 Copy HEX 🔗 Share |
This bathroom taps into the cottagecore and modern farmhouse trends but pushes them into a highly imaginative, almost storybook-like direction. It’s a move toward creating truly immersive, personalized spaces that tell a story. While a full farm scene might be niche, the underlying idea of using texture, dimension, and unexpected materials (like the wood paneling and stone-like elements) to create a unique environment is very current. It’s about crafting an experience, not just a functional room, which is a sentiment we’re seeing more and more in home design.
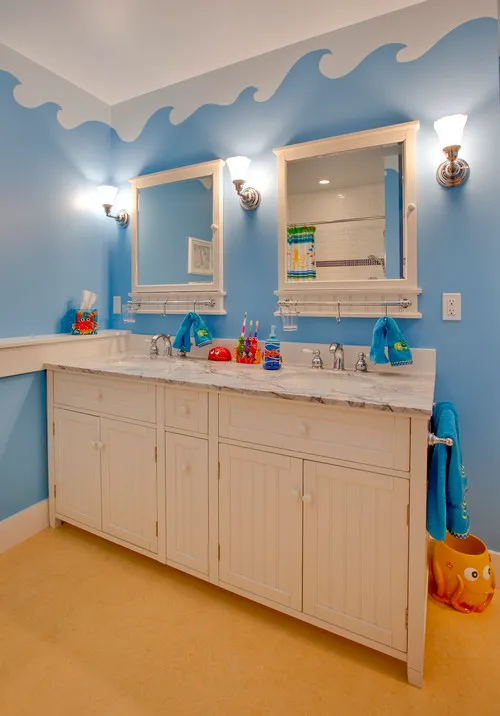
24. A Subtle Nautical Vibe with a Wavy Ceiling Border
For a double vanity setup like this, sconce placement is critical for functional, flattering light. Don’t just stick them anywhere. The ideal position is to have the center of the light source at roughly eye level, which is typically 60-65 inches from the floor. They should also be mounted about 4 inches from the side of each mirror. This placement ensures the light illuminates your face from the sides, minimizing shadows. Having a sconce on each side of both mirrors provides balanced light for two people using the vanity at the same time.
|
📋 Copy HEX 🔗 Share |
A long double vanity like this is perfect for a shared kids bathroom or a Jack-and-Jill layout. You’ll need a wall at least 60 inches long, but 72 inches is more comfortable to give each child enough elbow room. This design is best for a medium to large bathroom (80 sq ft or more) where the large vanity won’t crowd the space. For smaller bathrooms, you can capture the same playful, nautical feel with a single 36- or 48-inch white beadboard vanity and just one mirror, keeping the light blue walls and wavy border. The concept is scalable.
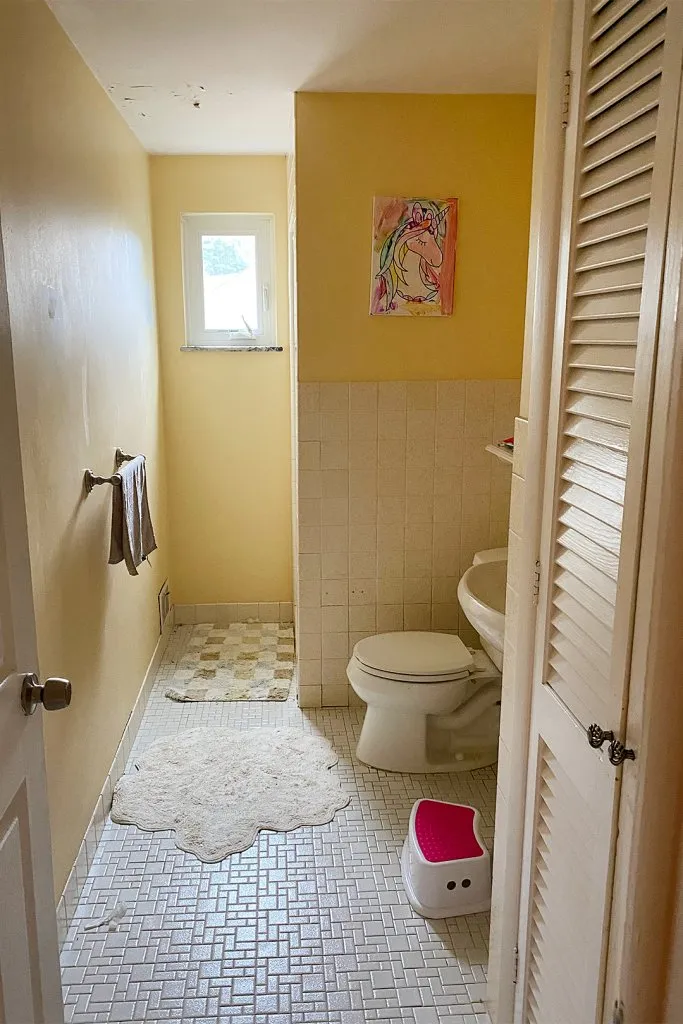
25. Simple and Sweet with Pale Yellow Walls and Unicorn Art
This is a perfect example of a cheerful kids bathroom on a shoestring budget. The core elements are incredibly affordable: a can of pale yellow paint and basic white ceramic tiles from a home improvement store. The personality comes from accessories that can be handmade or bought cheaply. A child’s own drawing, like the unicorn here, can be put in an inexpensive frame for a personal touch. The pink step stool adds a necessary pop of color and can be found at stores like IKEA or Target for under $20. This entire space prioritizes practicality and simple charm over expensive finishes.
|
📋 Copy HEX 🔗 Share |
A bathroom with this much white tile and white grout requires a consistent cleaning schedule. Grout lines, especially on the floor, will quickly show dirt. A weekly scrub with a grout brush and a simple solution of vinegar and water can keep it looking bright. The pale yellow painted walls are more forgiving than white, but you’ll want to use a satin or semi-gloss paint finish, which is scrubbable and resists moisture better than a matte finish. Keep a magic eraser on hand for any crayon or scuff marks that inevitably appear on the lower walls.
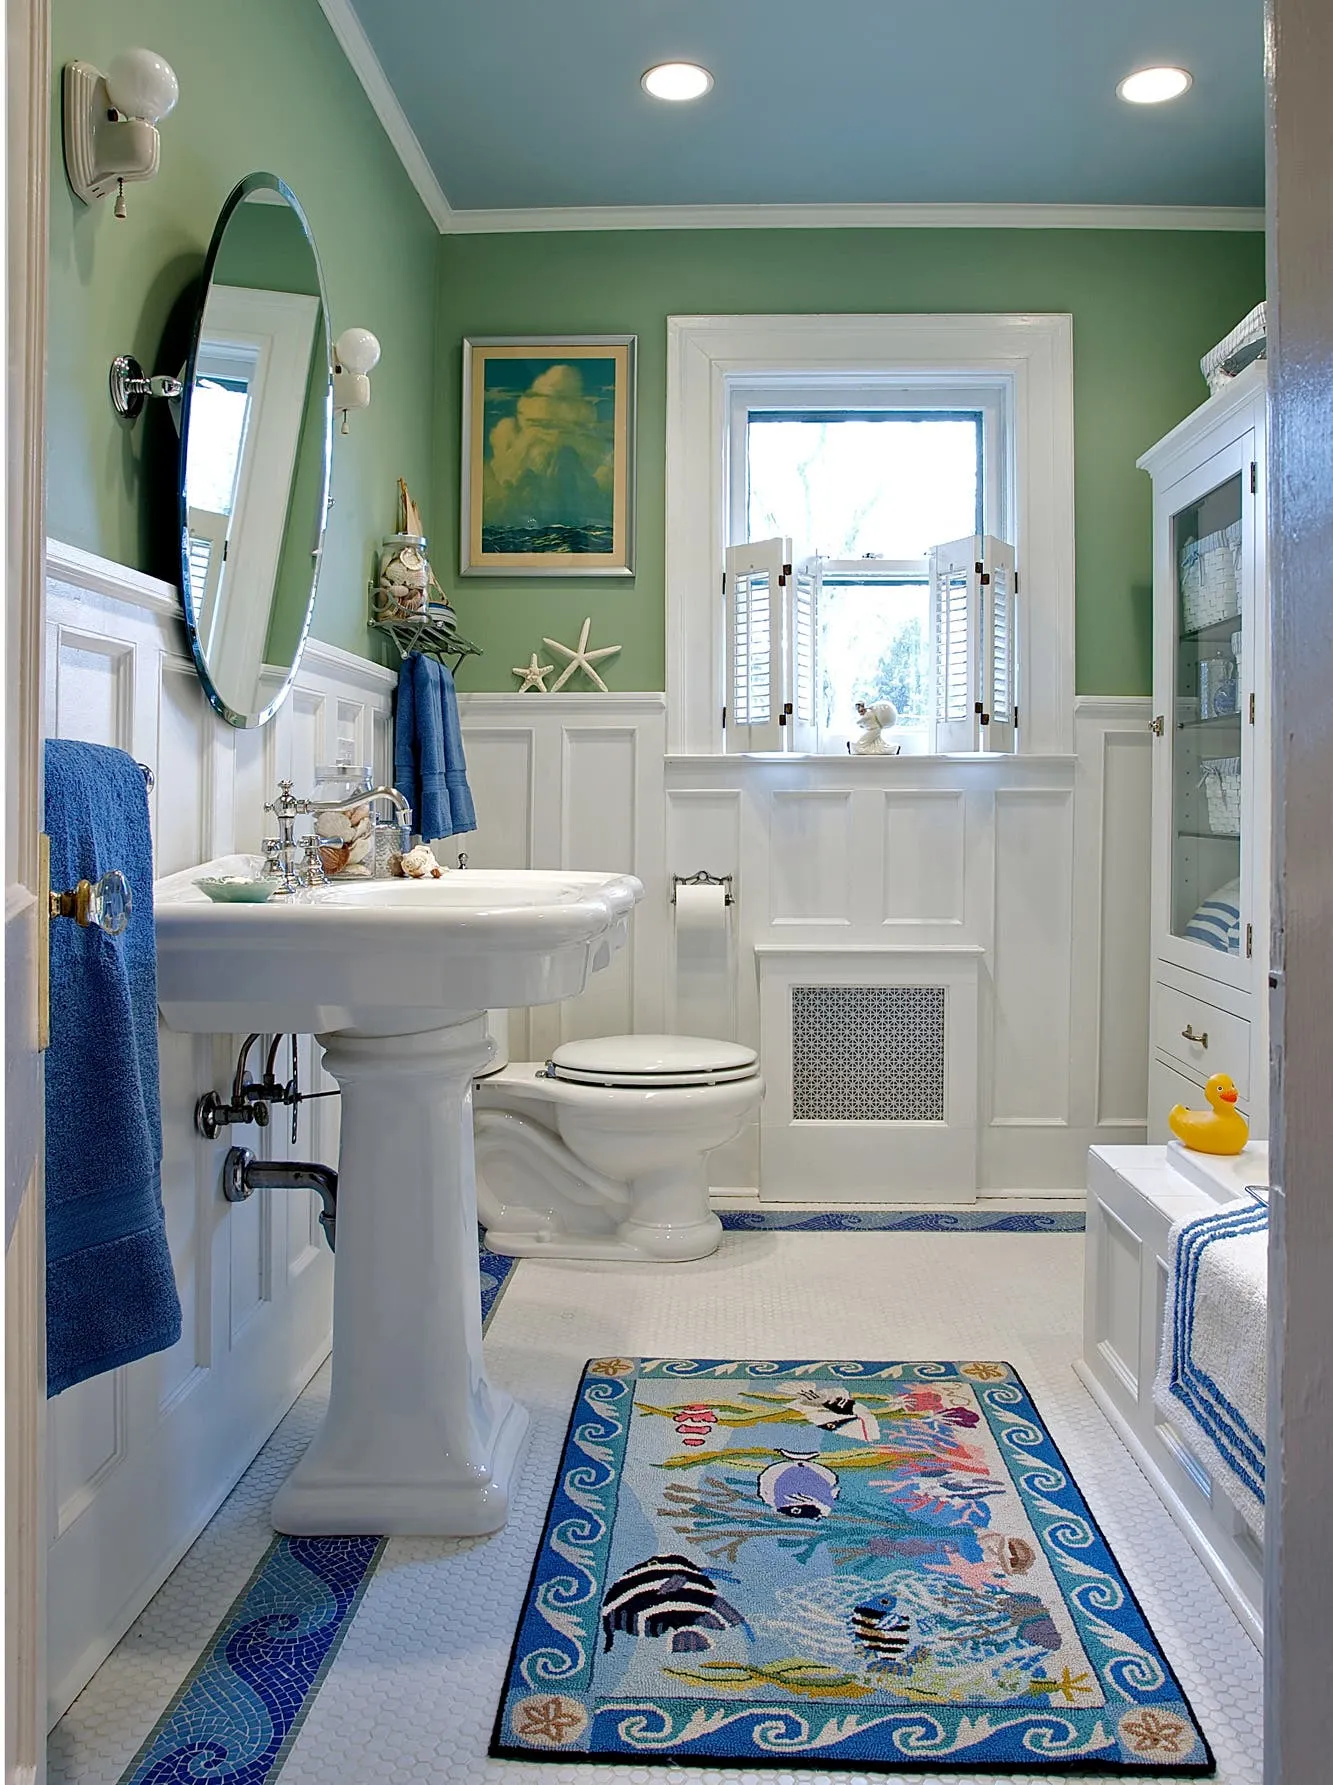
26. Classic Nautical Style with Green Walls and Wainscoting
This bathroom achieves its fresh, nautical feel through a balanced design recipe. It’s about 50% classic white base (the wainscoting, pedestal sink, toilet, and hex tiles), 40% soft color (the light green walls and light blue ceiling), and 10% bold pattern (the blue wave mosaic border and the ocean-themed rug). This formula ensures the space feels bright and clean, not overtly thematic. The white wainscoting is crucial, as it keeps the green from feeling overwhelming and adds a layer of traditional architectural detail. Compare this with the bolder take in Idea #15.
|
📋 Copy HEX 🔗 Share |
The design works by creating visual interest at every level. Your eye starts at the floor, intrigued by the crisp hexagonal tiles and the playful blue wave border. It then moves up to the clean, grounding white of the wainscoting and fixtures. Finally, it rests on the calming light green walls, with the light blue ceiling adding a subtle, sky-like touch that enhances the open, airy feeling. This layering of color and texture, from bottom to top, makes the room feel complete and thoughtfully designed.
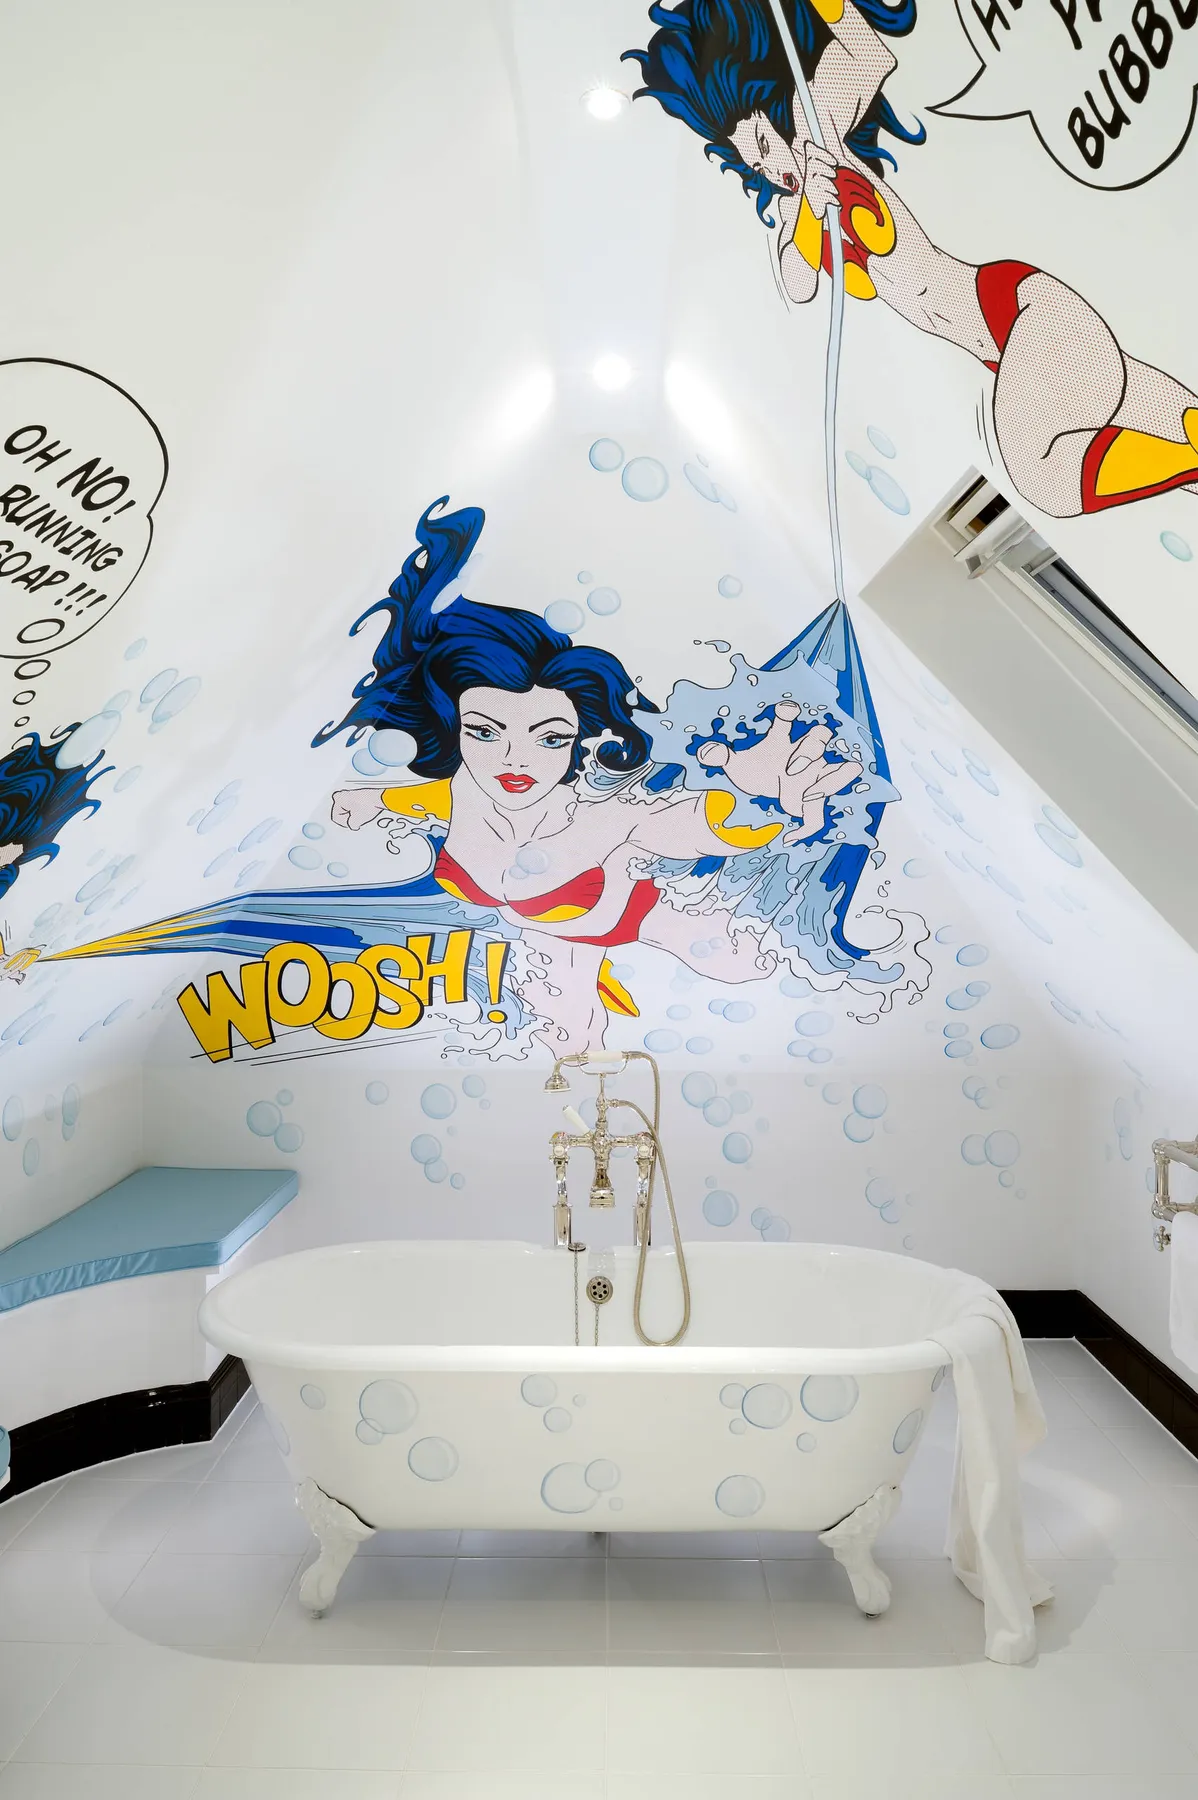
27. Pow! A Comic Book-Themed Bathroom with a Clawfoot Tub
that makes this room an absolute showstopper is the pop art comic book mural. It’s not just decor; it’s a full-blown artistic statement. The dynamic graphics, bold colors, and action words like Woosh! create an incredible sense of energy and fun. The mural transforms the sloped ceiling from an awkward architectural feature into the room’s main event. Even the painted bubbles on the classic clawfoot tub are designed to interact with the mural’s narrative. It’s a perfect fusion of theme and space.
|
📋 Copy HEX 🔗 Share |
While undeniably cool, a clawfoot tub isn’t always the most practical choice for a kids’ bathroom. The high sides can be difficult for small children to climb in and out of safely, and bathing them often involves a lot of leaning over for parents. Also, managing water splash is a real challenge without a full shower enclosure; a wraparound curtain can feel cumbersome. This setup is probably better for older kids who can manage it themselves or for a guest bath that gets occasional use by children. A standard alcove tub is often the more practical, albeit less glamorous, option.
Ready to Make a Splash?
Remember, the best kids’ bathroom is one that reflects their personality while making your life a little easier. Don’t be afraid to mix patterns, play with color, and prioritize function that can grow with them. Now that you’re full of ideas, head over to Pinterest and start creating a board for your own project!