25 Jaw-Dropping Purse Organization Ideas You Need to Try for a Dreamy Closet Transformation

You know that feeling when you finally find the purse organization that looks exactly right for your space, but then decision paralysis kicks in? It’s a real thing. After filtering through hundreds of options across The Container Store, IKEA, and Amazon, we’ve narrowed it down to the looks that actually deliver. We’ve curated 25 ideas covering everything from minimalist floating shelves and clear acrylic organizers to clever closet systems. In 2026, it’s all about functional aesthetics—making your storage part of your decor, not something to hide. It’s a shift away from just stashing things to beautifully displaying the items you love. Pin this guide for later—your future self will thank you when it’s time to actually do this.
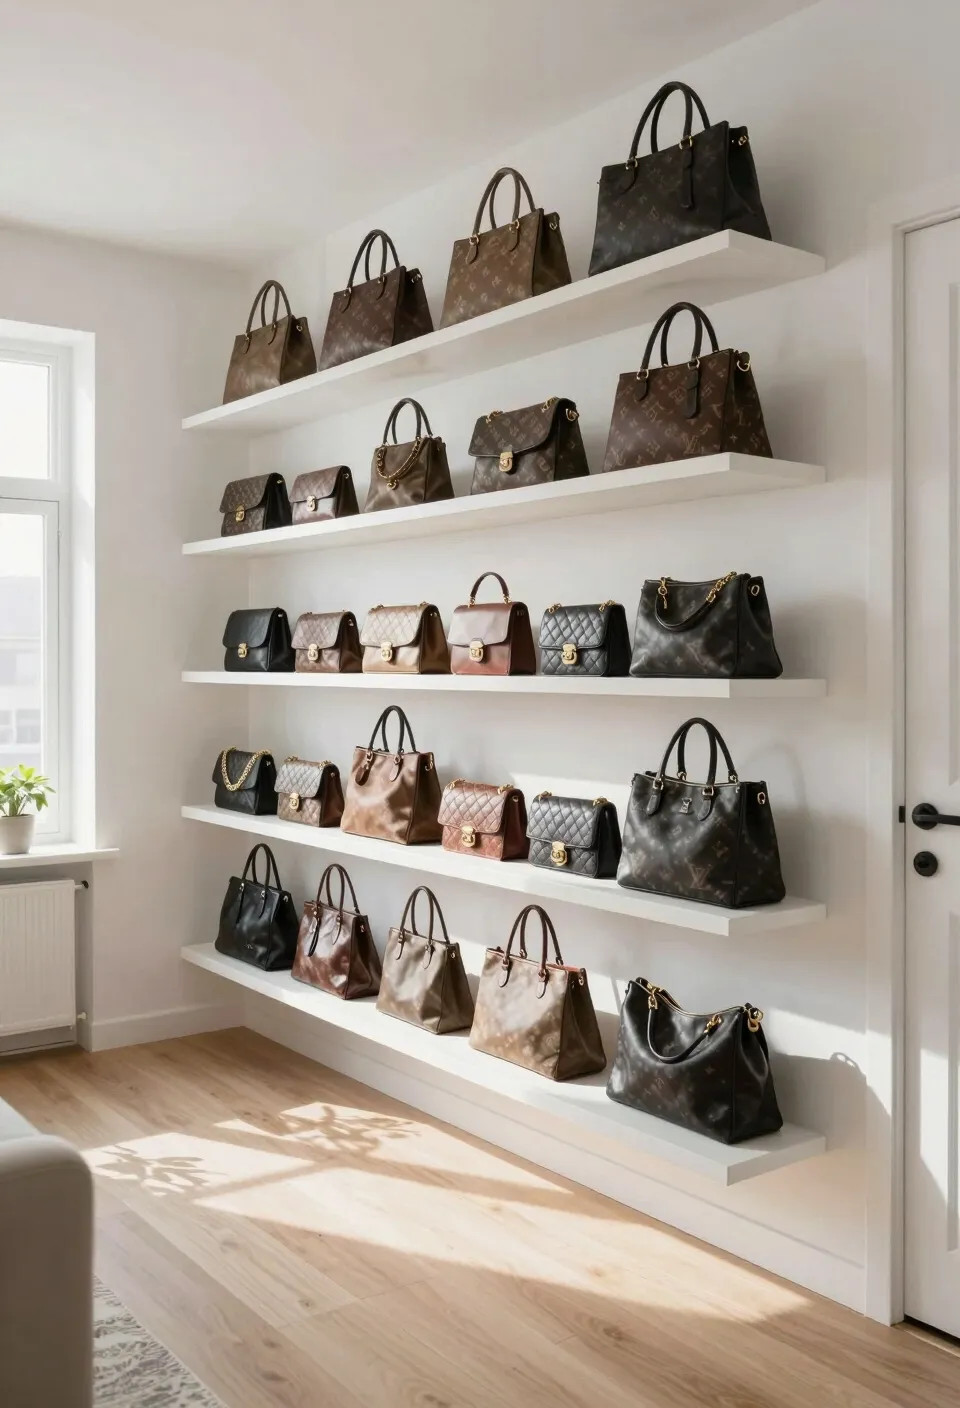
1. Create a Luxe Handbag Wall with Vertical Floating Shelves
This setup works because it treats your collection like art. The clean, white floating shelves create strong horizontal lines that draw the eye across the wall, while the repetition of purses creates a satisfying visual rhythm. By keeping the shelves and wall the same color, the focus remains entirely on the bags themselves. The mix of brown and black leather with gold hardware feels curated, not cluttered, turning everyday items into a sophisticated display piece.
|
📋 Copy HEX 🔗 Share |
When installing floating shelves for heavier items like leather purses, always aim to hit a stud in the wall. If that’s not possible, use heavy-duty drywall anchors rated for at least 50 lbs per anchor. For a clean, gallery-like look, space your shelves 18-24 inches apart vertically. This gives even your taller tote bags enough breathing room without making the display feel sparse. And always measure your tallest bag before you start drilling!
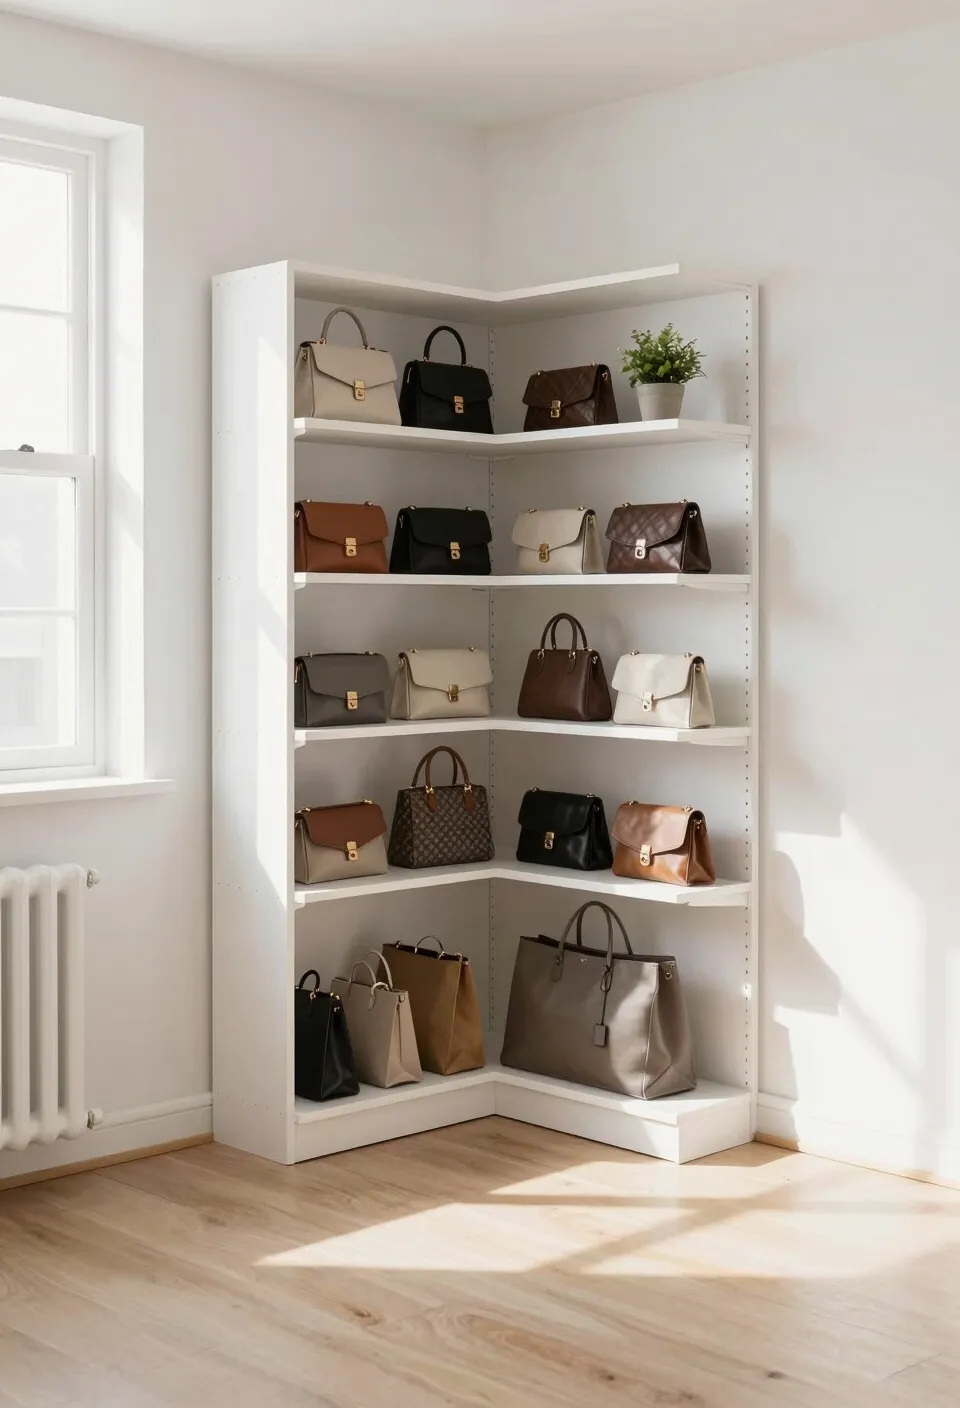
2. Utilize an Awkward Corner with L-Shaped Shelving
This L-shaped shelving unit is a fantastic solution for rooms where a long, straight wall isn’t available. It’s ideal for a corner with at least 24 inches of wall space on each side. The verticality of the unit draws the eye upward, making it a great fit for rooms with standard 8-foot ceilings, as it maximizes storage without taking up a large footprint. This approach works best in a bedroom, dressing room, or a spacious walk-in closet where the corner might otherwise become dead space. For a more linear look, check out the floating shelves in Idea #0.
|
📋 Copy HEX 🔗 Share |
You can absolutely get this look for less. Grab two IKEA LACK wall shelf units (around $20-$30 each) and mount them in an L configuration. For a more robust solution, use two narrow BILLY bookcases ($40-$50 each) and anchor them to the wall in the corner. The key is to paint them the same color as your walls for that seamless, built-in feel. Spend your savings on a few nice storage bins for the lower shelves.
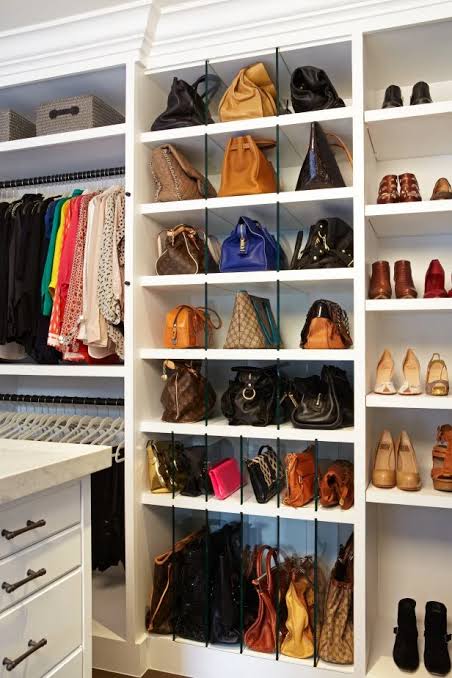
3. Maximize Walk-In Closet Space with a Built-in System
A fully integrated closet system is the holy grail of organization, but let’s be honest about what it takes. This is not a weekend DIY project for most people. Custom built-ins involve professional design, carpentry, and installation, which can run into the thousands. Dust can also be an issue on open shelving, so if you’re not committed to regular dusting, you might want to opt for more closed storage. It’s a significant investment, but one that can seriously pay off in functionality and home value.
|
📋 Copy HEX 🔗 Share |
The secret to a successful closet system is balance. Aim for a formula of 40% open display + 60% concealed storage. The open display (like shelves for purses) lets you see your beautiful items and grab them easily. The concealed storage (drawers and cabinets) hides the less glamorous stuff—seasonal items, workout clothes, or that sentimental-but-hideous sweater. This mix keeps the space from looking cluttered while still providing easy access to your favorites.
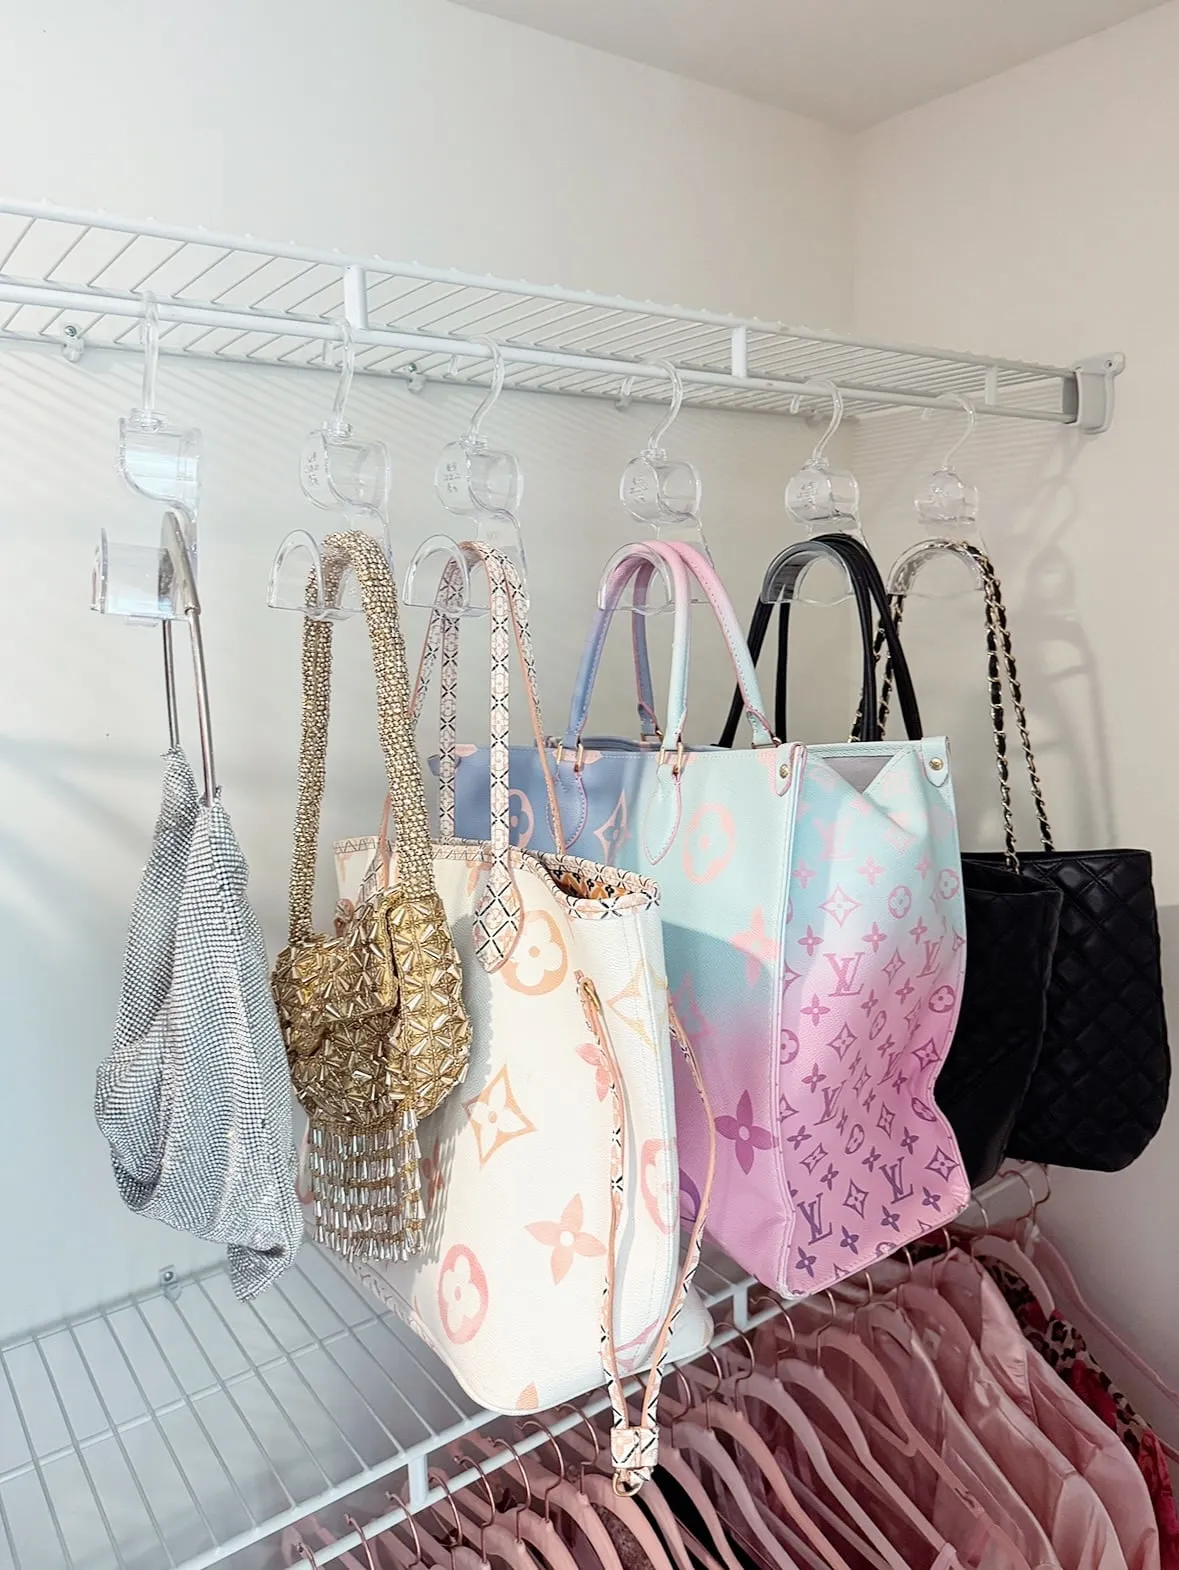
4. Hang Bags on a Wire Shelf Using Clear Hangers
The single most important element here is the S-shaped clear hanger. Without it, you’d be forced to either hang bags by their delicate straps (a huge no-no that causes stretching and wear) or stack them on the shelf, hiding the ones in the back. These hangers distribute the weight properly and let each bag hang freely, making them all visible and accessible. They transform a simple wire shelf from a stacking surface into a true organizational system.
|
📋 Copy HEX 🔗 Share |
Want to install a wire shelf like this yourself? It’s easier than you think. Here’s a quick guide for a 4-foot shelf:
- Use a stud finder to locate the studs in your wall and mark them with a pencil.
- Hold the shelf’s back bracket against the wall at your desired height, ensuring it’s level, and mark the drill holes over the studs.
- Drill pilot holes at your marks.
- Secure the back bracket to the wall using the included screws.
- Attach the angled support brackets to the wall and the front of the shelf as per the instructions.
- Pop your shelf on, and you’re ready to hang! Total time: under 30 minutes.
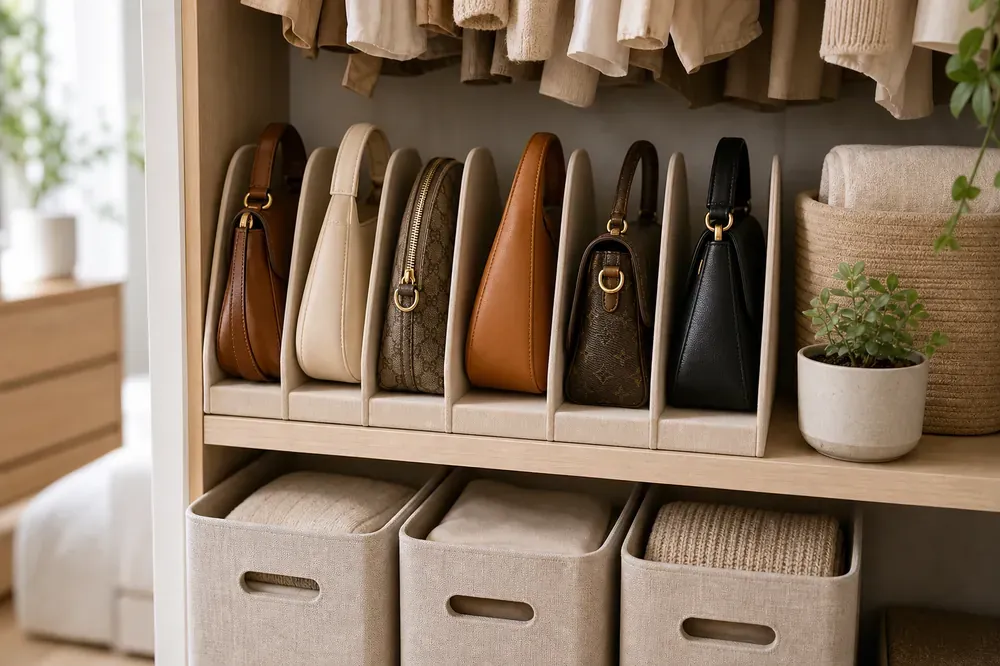
5. Organize Shelf Space with Velvet-Lined Purse Dividers
This is so satisfying because of the visual order it creates. The velvet-lined dividers act as bookends, giving each purse its own defined space. This prevents the dreaded ‘purse slump’ where softer bags collapse into a puddle. The neutral color palette—creams, browns, and beiges—feels incredibly serene and high-end. The addition of natural textures like the small plant and woven basket adds warmth and keeps the setup from feeling too sterile. Compare this soft look with the clear acrylic dividers in Idea #5.
|
📋 Copy HEX 🔗 Share |
Velvet-lined dividers look and feel luxurious, but they do require a little upkeep. The velvet texture can attract and trap dust more than a smooth surface like acrylic or wood. Plan to give them a quick once-over with a lint roller or a soft brush attachment on your vacuum every other week to keep them looking fresh. Be mindful of placing bags with glitter or loose embellishments next to them, as the fibers can be tricky to remove from the velvet.
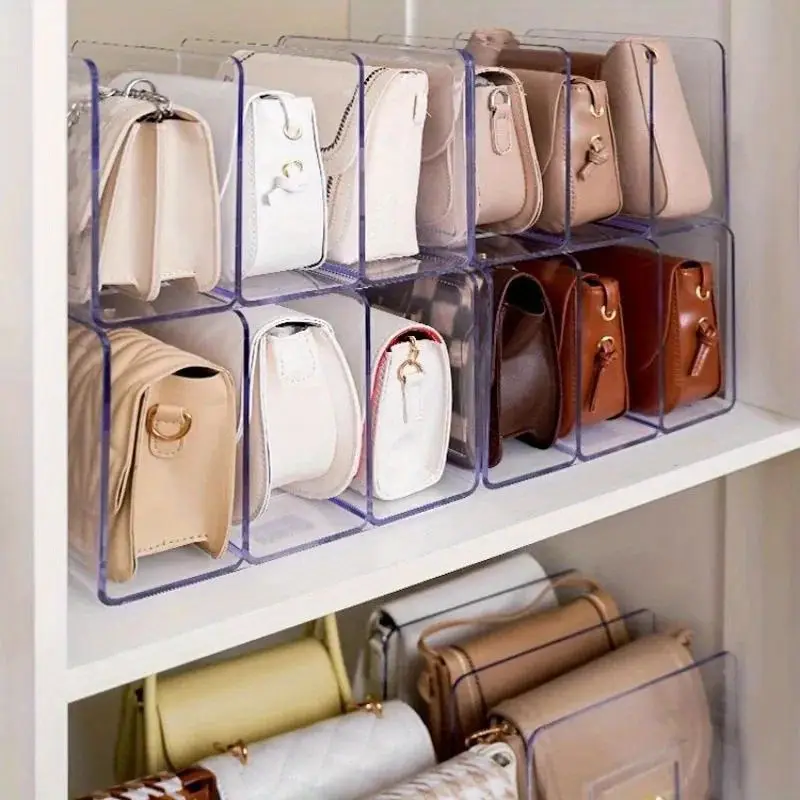
6. Keep Purses Upright with Clear Acrylic Shelf Dividers
When using acrylic dividers, the trick is to choose a height that’s about two-thirds the height of the purses you’re storing. This provides enough support to keep the bag upright without completely obscuring its design. If the divider is too short, slouchy bags will still flop over. If it’s too tall, it can make it awkward to grab the bag. For a mixed collection of totes and clutches, buy dividers in two different heights for a more custom fit.
|
📋 Copy HEX 🔗 Share |
While acrylic dividers are incredibly popular for a reason, they aren’t indestructible. Cheaper versions can become brittle over time and may crack or chip if you’re not careful. They also show every single fingerprint and scratch. To clean them, never use Windex or other harsh chemicals, which can cause clouding. Instead, use a soft microfiber cloth with a bit of mild soap and water. It’s a small hassle, but it keeps them looking crystal clear.
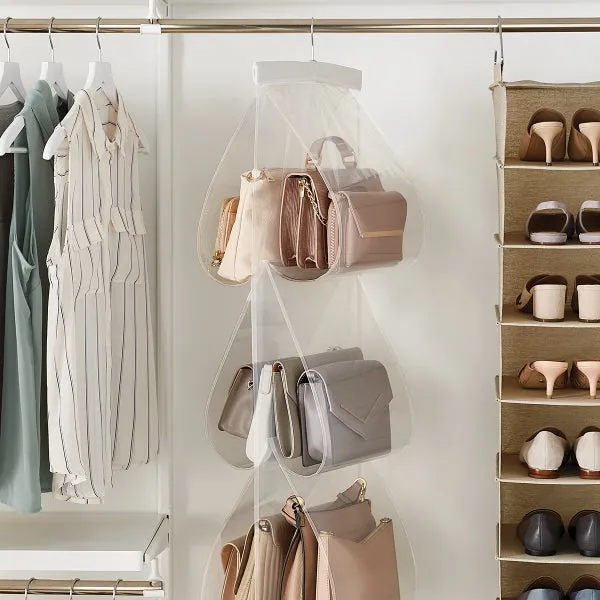
7. Use a Multi-Pocket Hanging Organizer for a Quick Fix
For less than $20, a transparent hanging organizer is one of the most cost-effective ways to get your purses off the floor. You can find them at Target, Amazon, or Walmart. They require zero installation—just hang them from your existing closet rod. This is a perfect solution for renters, dorm rooms, or anyone who wants an immediate fix without committing to shelves. This is a great renter-friendly alternative to a permanent built-in like the cabinet in Idea #7.
|
📋 Copy HEX 🔗 Share |
A hanging organizer like this is a small-space superhero. It’s ideal for reach-in closets that are at least 24 inches deep, allowing it to hang without getting squished by the door. It only takes up about 12-15 inches of vertical rod space, leaving plenty of room for clothes on either side. However, this solution is best for small to medium-sized bags; oversized totes or structured satchels may not fit in the pockets and are better suited for a shelf-based system.
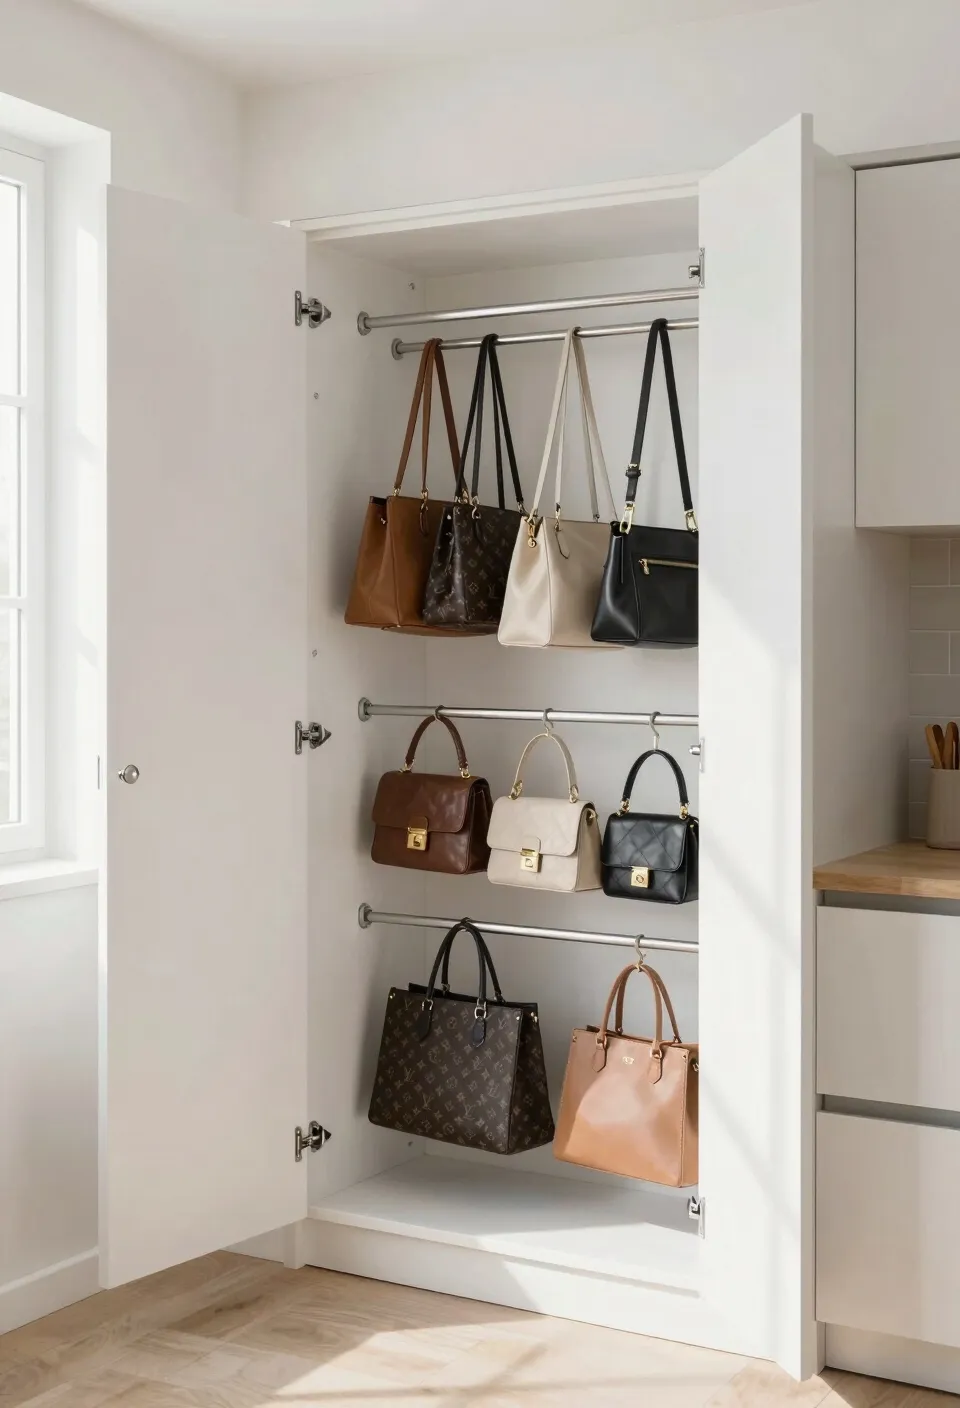
8. Install Silver Hanging Rods Inside a Tall Cabinet
The genius of this setup is the use of simple tension rods or mounted bars. It transforms a standard cabinet into a highly specialized storage unit for purses. Without the rods, this would just be a tall, awkward cabinet where you’d be forced to stack bags, losing visibility and potentially damaging them. The rods allow each purse to be hung individually via S-hooks or their own straps, making every single one visible and easy to grab. It’s a custom closet solution using basic hardware.
|
📋 Copy HEX 🔗 Share |
Before you commit to a cabinet solution, do these three things first:
- Measure your bags: Take an inventory of your collection. Measure the height of your tallest bag (including the handle) to ensure your rods will be spaced far enough apart.
- Count your collection: How many S-hooks or how much rod space do you actually need? Plan for a little extra room to grow your collection.
- Check cabinet depth: Make sure the cabinet is deep enough (at least 12-14 inches) to allow your widest bag to hang without the door squishing it shut.
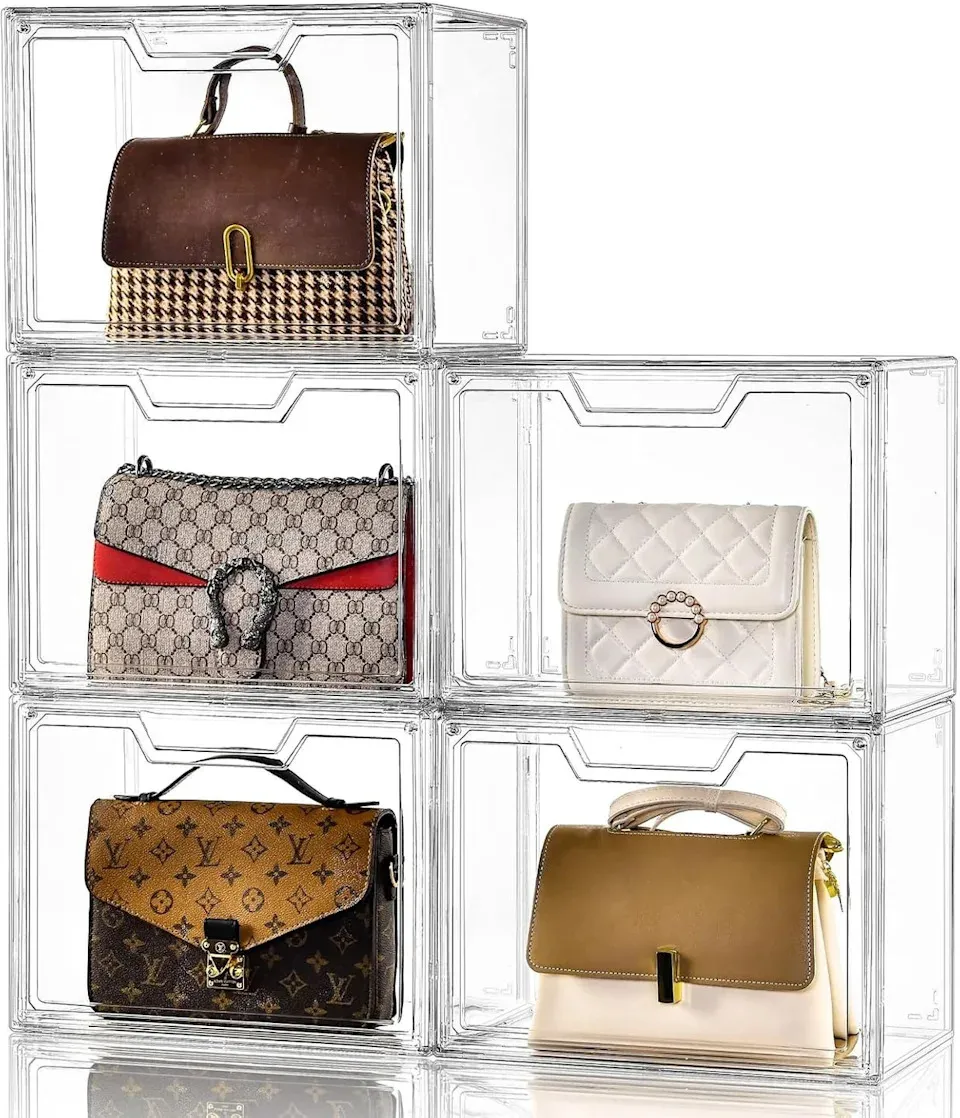
9. Display High-End Purses in Clear Acrylic Stackable Boxes
This look is a masterclass in controlled minimalism. It follows a simple formula: 95% transparent material + 5% hero object. The acrylic boxes are visually quiet, acting as a frame rather than a feature. This puts 100% of the focus on the color, texture, and hardware of the purses inside. The grid-like arrangement creates a sense of order and intention. You could swap the purses for sneakers or collectibles, and the powerful visual effect would remain the same.
|
📋 Copy HEX 🔗 Share |
It works because it combines protection with presentation. Each box creates a dust-free environment for an individual bag, preserving its condition. At the same time, the complete transparency means nothing is hidden. This solves the classic problem of storage: how do you protect your items without forgetting you own them? The stackable, modular nature also allows the display to grow with your collection. It’s practical, protective, and incredibly chic.
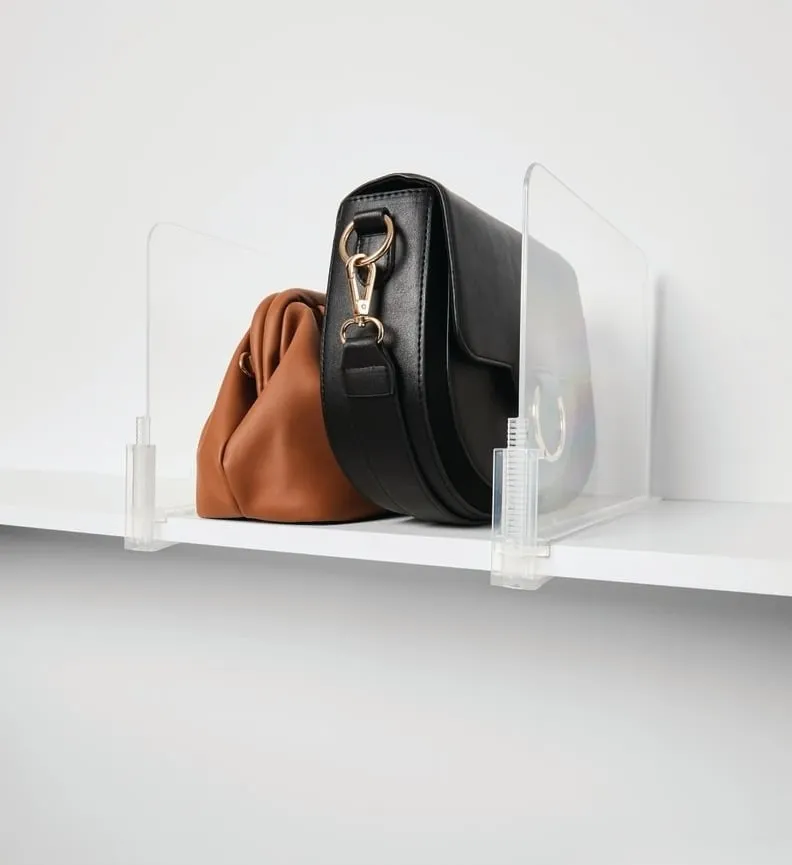
10. A Simple Solution: Two Acrylic Dividers on a White Shelf
Don’t have a huge collection? You don’t need a massive system. For just a few key pieces, a pair of simple slide-on acrylic dividers is all it takes to bring order. The key is to match the divider to the shelf. Most dividers are designed for standard 3/4-inch thick shelves. If your shelves are thicker or thinner, they’ll either not fit or wobble. Measure your shelf thickness before you buy to ensure a snug, secure fit that looks custom.
|
📋 Copy HEX 🔗 Share |
The beauty of acrylic is its barely-there appearance, but that also means it shows every smudge and speck of dust. To keep these dividers looking pristine, wipe them down weekly with a dry microfiber cloth. For any smudges or fingerprints, a slightly damp cloth will do the trick. Avoid paper towels at all costs, as their fibers can cause tiny micro-scratches that will dull the acrylic over time. It’s a small bit of upkeep for a perpetually clean look.
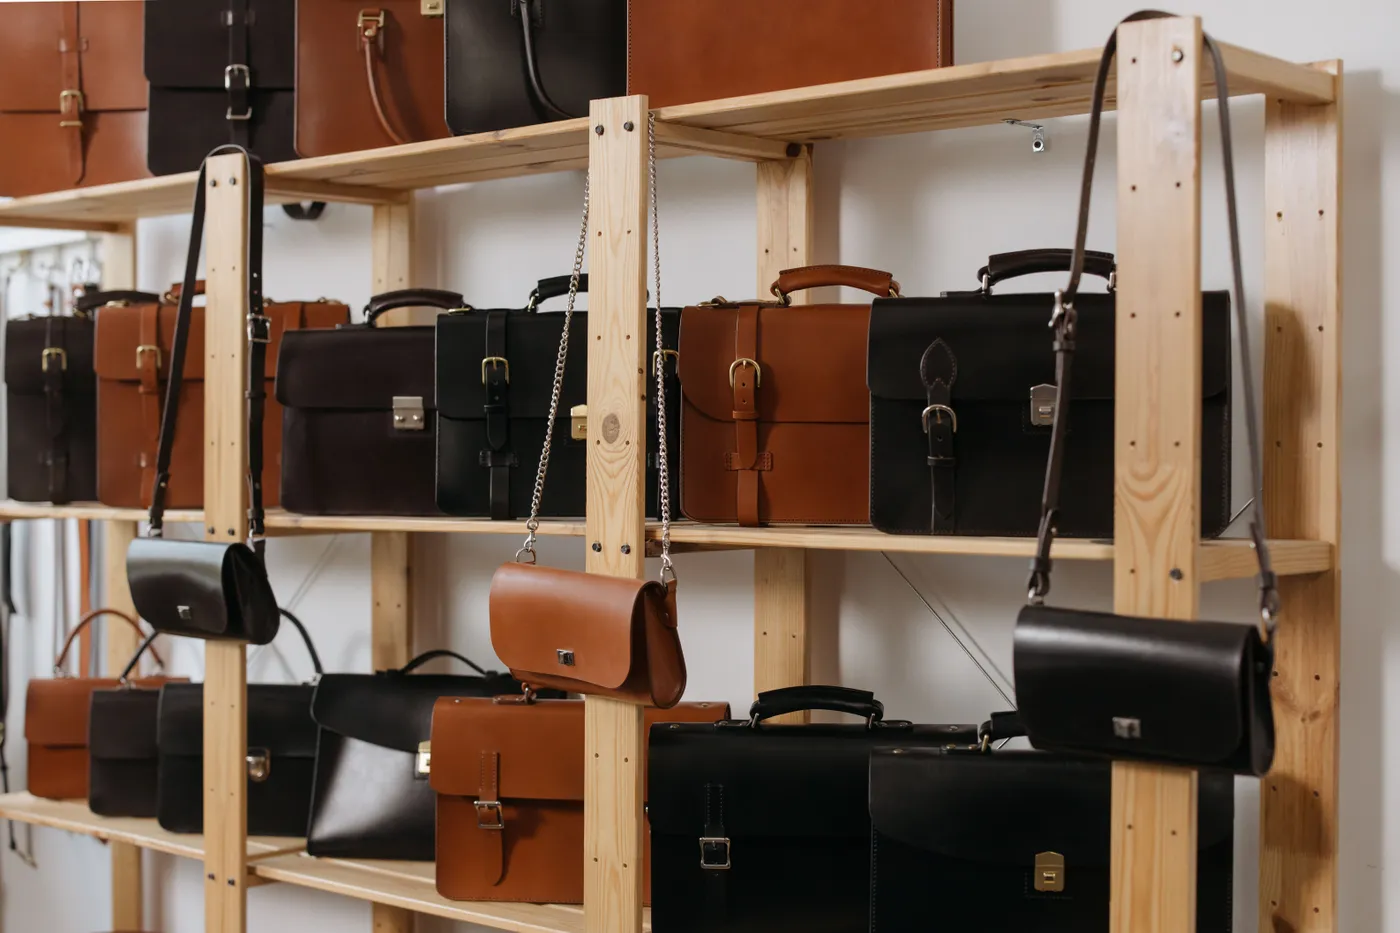
11. Arrange a Collection on Natural Wood Shelving
There’s a reason this look feels so current. We’re seeing a major design shift towards Japandi style—a hybrid of Scandinavian function and Japanese rustic minimalism. This purse display nails it. The natural wood grain brings warmth and an organic element, while the clean lines of the shelves keep it feeling modern and uncluttered. It’s about finding beauty in natural materials and simple, functional design, which is a huge trend on Pinterest right now.
|
📋 Copy HEX 🔗 Share |
Recreating this specific natural wood look can vary in price depending on the wood quality and hardware.
- Main Furniture (wood shelves & supports): $250 – $700
- Hardware (S-hooks, etc.): $20 – $50
- Accessories (purses not included!): N/A
- TOTAL: $270 – $750
- Budget alternative: Use IKEA ‘IVAR’ pine shelving units ($100-$200) and apply a natural wood stain. You’ll get a very similar vibe for about 60% less.
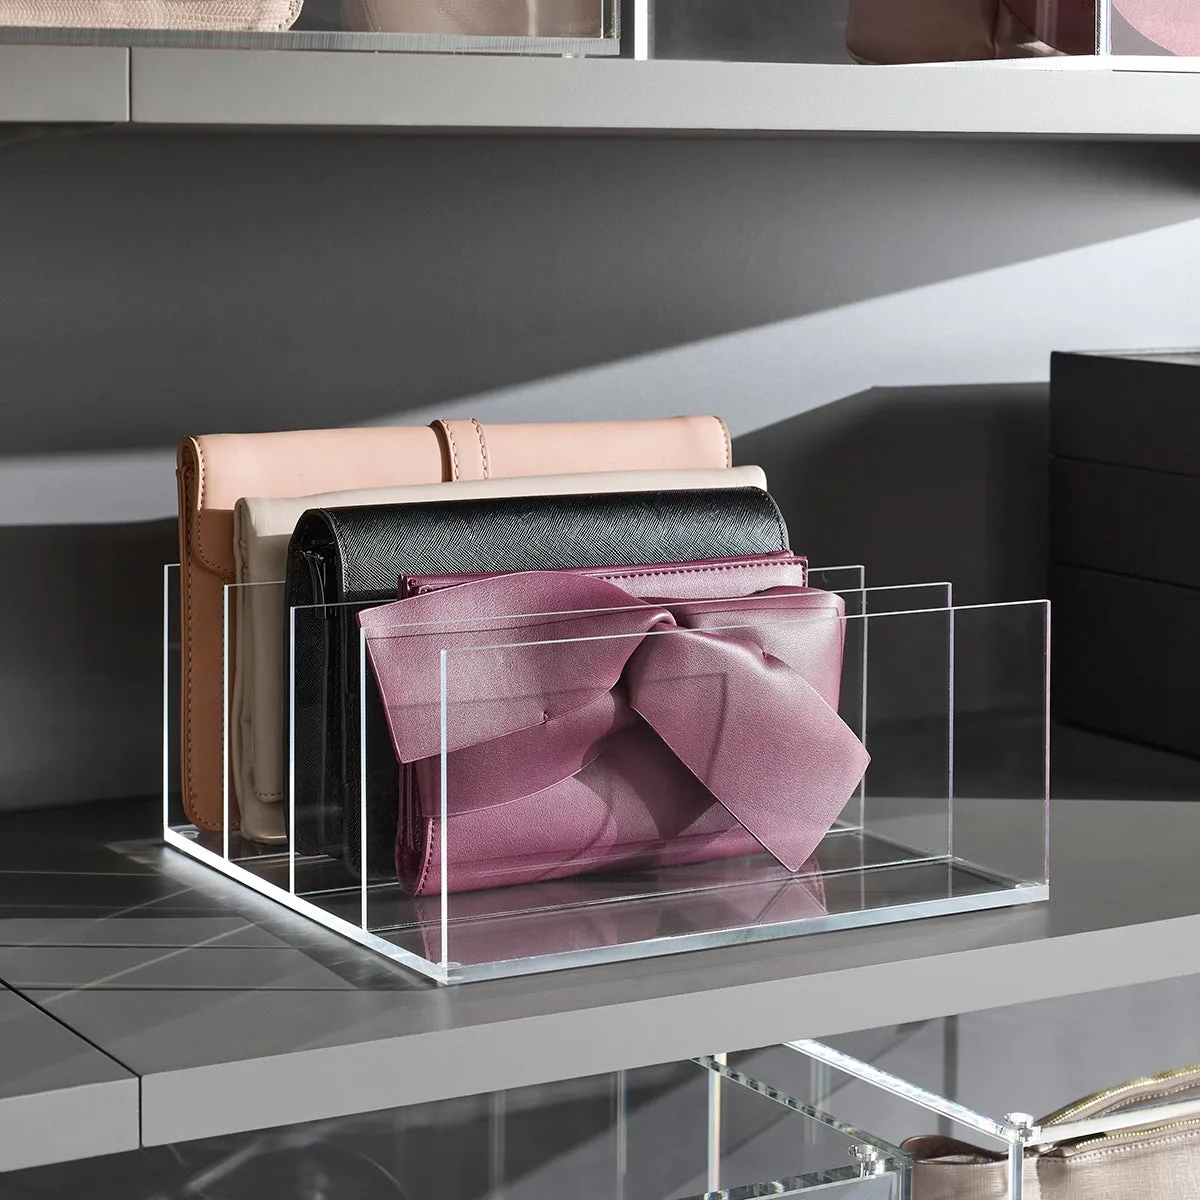
12. File Your Clutches Vertically in an Acrylic Organizer
This type of vertical file organizer is perfect for shallow shelves, like those in a bookcase or the top shelf of a closet system. You only need about 8-10 inches of depth for this to work perfectly. It’s an ideal solution for a collection of 5-10 clutches or small crossbody bags. If you have a deep shelf (20+ inches), you could place two of these organizers back-to-back to double your storage capacity without losing visibility of the items in the rear.
|
📋 Copy HEX 🔗 Share |
The magic here is storing the clutches vertically. Clutches and small, unstructured bags are notoriously difficult to store; they can’t stand on their own and get lost when laid flat in a drawer. By filing them upright, this simple acrylic organizer makes every single one visible and easy to grab. It transforms a messy pile into a neat, accessible library of your evening bags. It’s a small product that solves a very specific, very annoying problem.
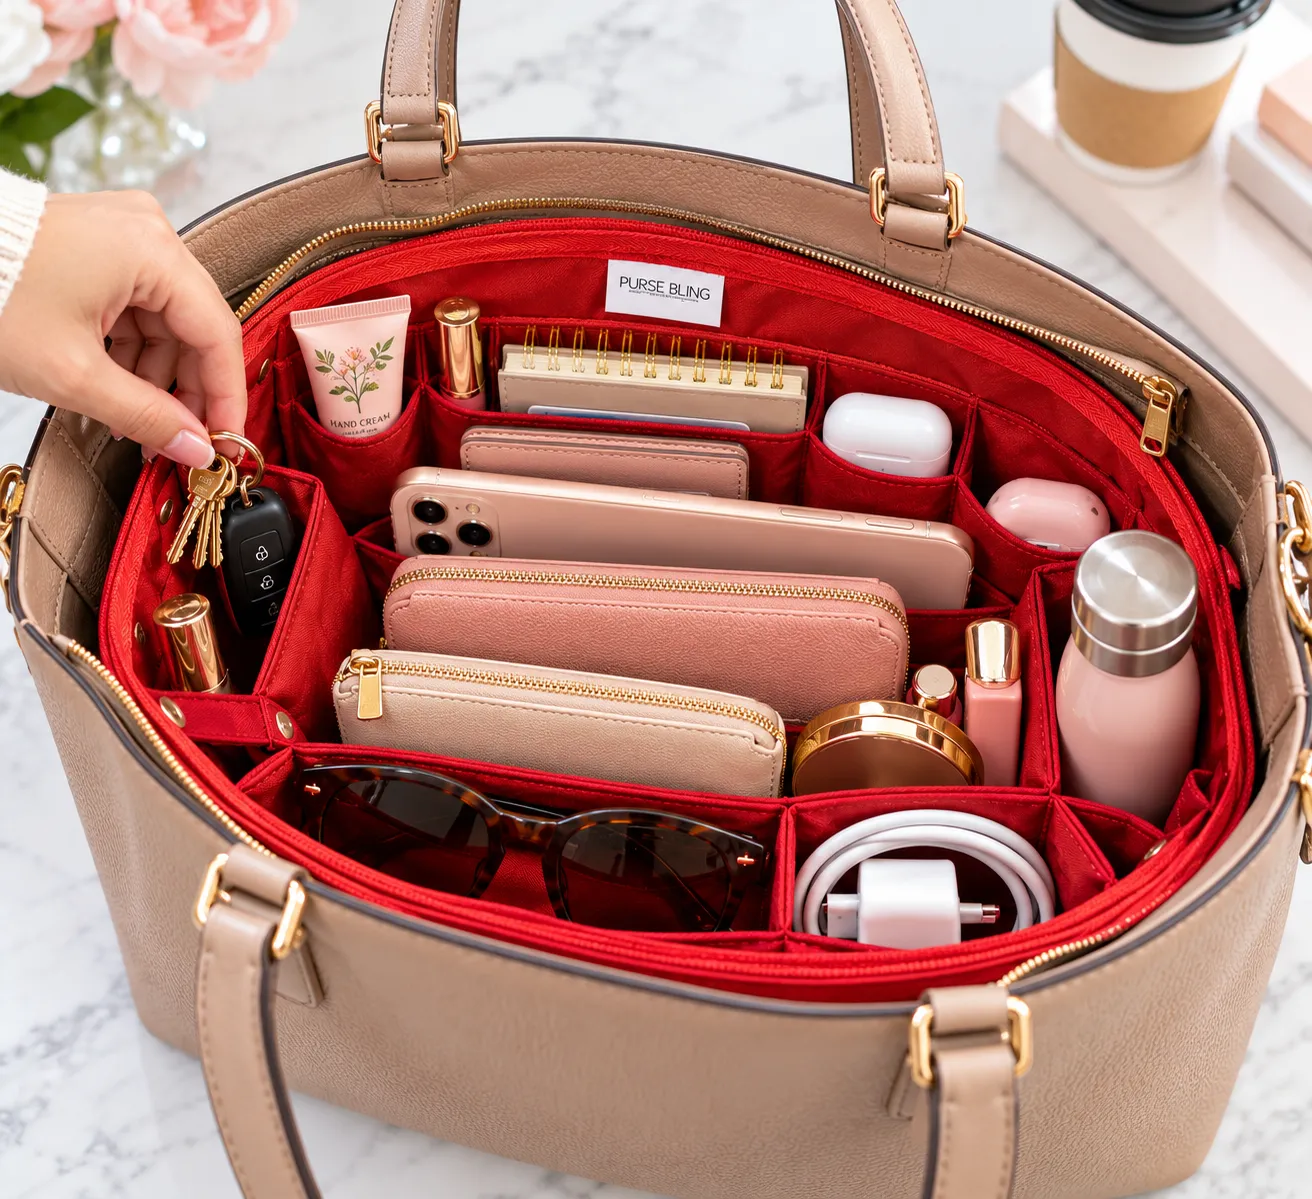
13. Add Function to Your Handbag with a Bright Red Organizer Insert
A purse organizer insert can completely change how you use your favorite tote. Here’s how to choose and use one effectively:
- Empty your purse completely and measure its interior length, width, and height.
- Buy an insert that is slightly smaller than your bag’s interior dimensions—you want it to be snug, not crammed.
- Before putting it in, zone your items. Designate specific pockets for keys, phone, wallet, and makeup.
- Load the insert outside the bag first.
- Simply drop the pre-loaded insert into your tote. Now you can switch bags in under 10 seconds!
|
📋 Copy HEX 🔗 Share |
An organizer insert is a game-changer, but it’s not a magic wand. It adds structure, but it also adds weight and takes up space. If you already carry a heavy load, the extra weight of the insert itself (especially felt ones) might be noticeable. Also, be realistic: if you’re the type to just throw things in your bag, you might find yourself throwing them on top of the organizer instead of using the pockets, which defeats the purpose. It requires a small commitment to putting things back in their designated spot.
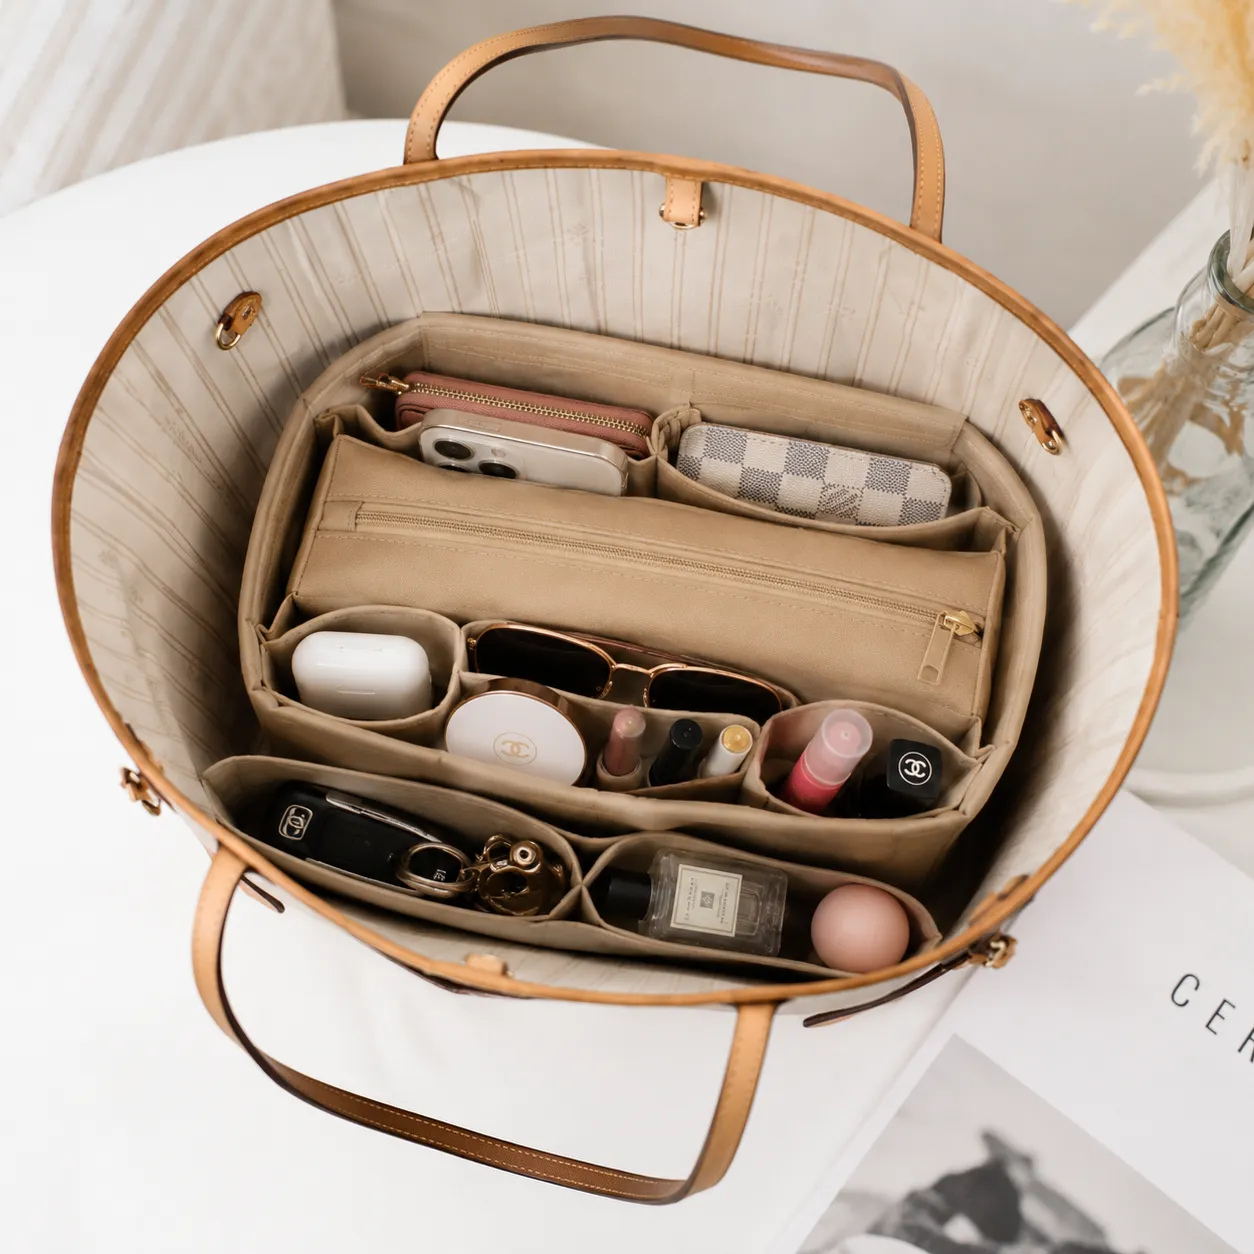
14. Keep a Designer Tote Tidy with a Neutral Beige Insert
When choosing an organizer insert for a high-end bag, pay attention to the material. Felt is a great option because it’s structured enough to stand up on its own but soft enough that it won’t scratch or indent delicate leather interiors. Look for inserts with a removable, zippered middle compartment. This gives you the flexibility to either create two large open sections or have a secure spot for valuables. If you love this concept but want a pop of color, see the vibrant red insert in Idea #12.
|
📋 Copy HEX 🔗 Share |
A great bag insert achieves the perfect balance: 70% organization + 30% open space. The organization comes from the dedicated pockets and dividers for your essentials—phone, keys, wallet, sunglasses. The open space is crucial for accommodating oddly shaped or bulky items like a water bottle, a book, or a light sweater. If an insert is too compartmentalized, it becomes rigid and less functional for the unpredictability of daily life.
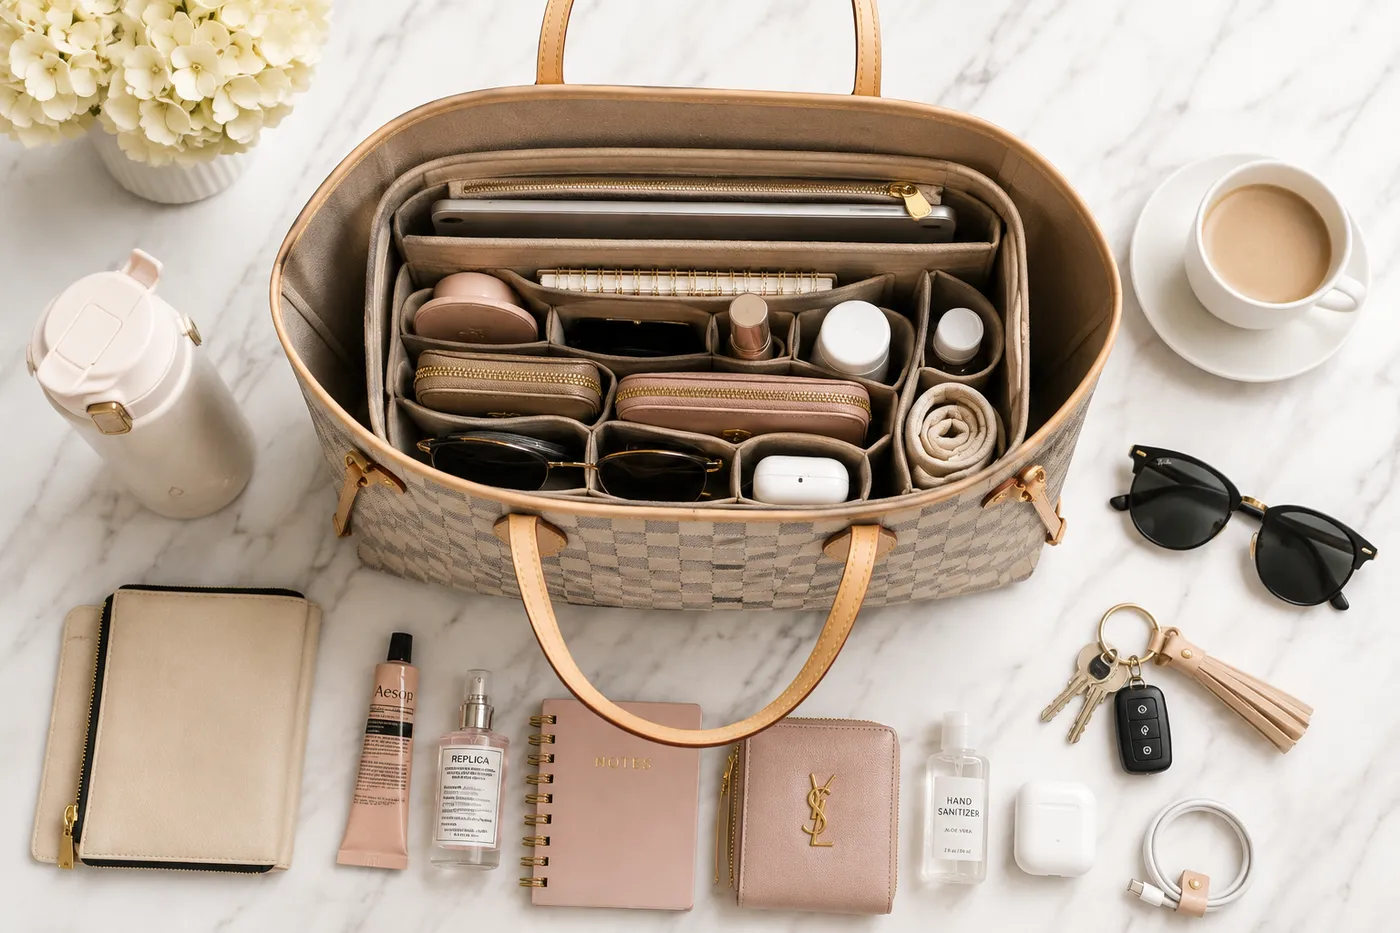
15. Use a Felt Organizer Insert in a Large Checkered Tote
This system is effective because it brings order to chaos. Large tote bags are wonderful for their capacity but notorious for becoming a black hole where everything gets lost at the bottom. The felt insert creates a clear structure, with dedicated slots for a laptop, notebook, and smaller pouches. It essentially builds a shelving system inside your bag, keeping everything upright, visible, and protected. The light color of the felt also makes it easier to see what’s inside compared to a dark lining.
|
📋 Copy HEX 🔗 Share |
You don’t need a designer tote to get this level of organization. The real hero here is the felt organizer insert, which you can find on Amazon or Etsy for $15-$30. Pair it with a simple, sturdy canvas tote from a store like L.L.Bean or Baggu ($40-$60). You’ll have the exact same functionality and everything-in-its-place peace of mind for a fraction of the cost of a luxury bag. It’s all about the system inside, not the label outside.
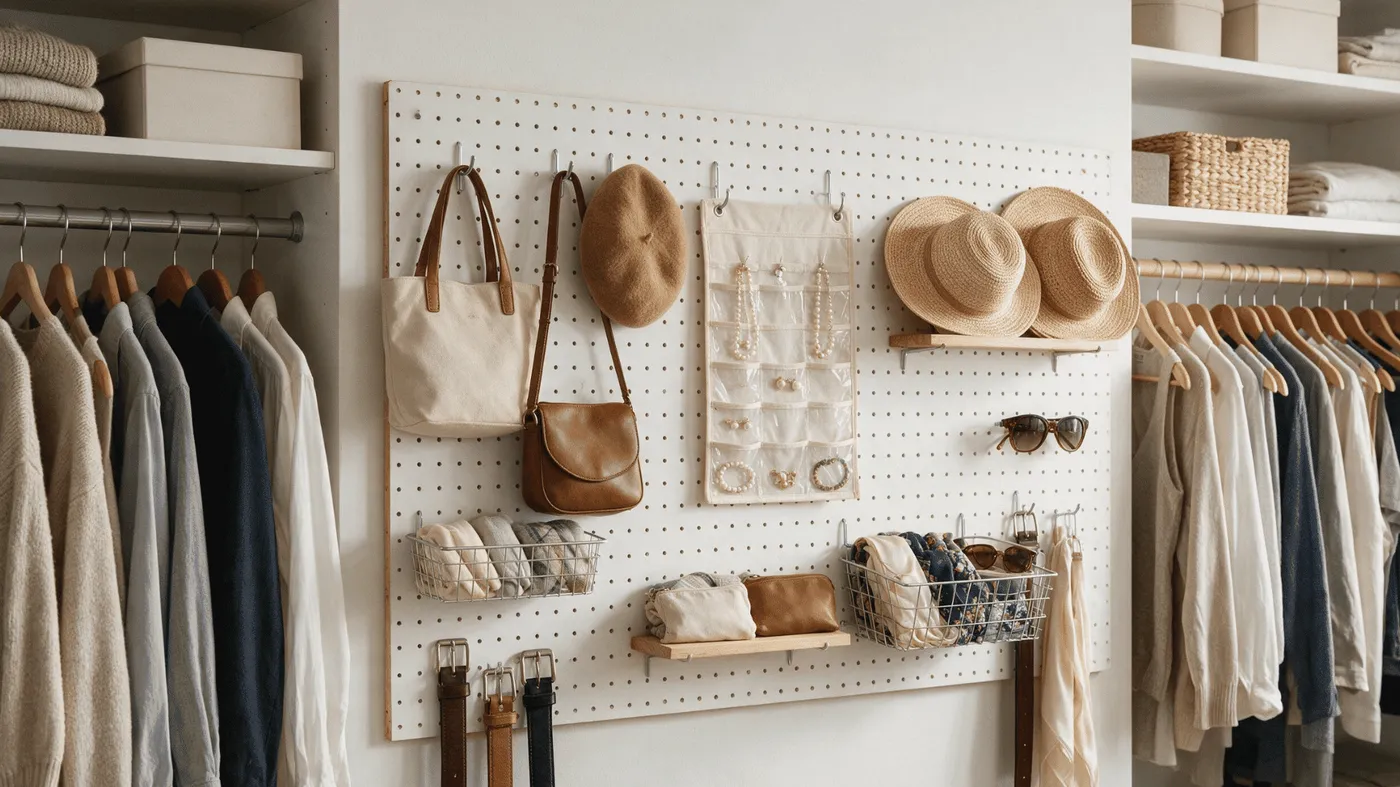
16. Install a White Pegboard Wall for Versatile Accessory Storage
Installing a pegboard is a game-changing weekend project. Here’s the quick version:
- Measure your wall space to determine the size of pegboard you need. They typically come in 2’x4′ or 4’x8′ sheets.
- Create a ‘frame’ on the back of the pegboard using 1×2 wood strips. This creates the necessary space between the board and the wall for the hooks to be inserted.
- Locate and mark the studs on your wall.
- Hold the pegboard against the wall, make sure it’s level, and screw through the board and the wood frame directly into the wall studs.
- Now the fun part: arrange your hooks, shelves, and baskets to fit your collection!
|
📋 Copy HEX 🔗 Share |
Before you run to the hardware store for a pegboard, check these items off your list:
- Wall Space: Do you have a clear, flat wall inside a closet or in your room? You’ll need an uninterrupted surface.
- Your Collection: Pegboards are best for small-to-medium bags, hats, sunglasses, and jewelry. They aren’t ideal for very heavy, oversized tote bags.
- The Aesthetic: Does the slightly industrial look of a pegboard fit with your room’s vibe? You can paint it to match your walls for a more seamless look.
- Drill-Friendliness: Are you allowed to drill into your walls? This is a key consideration for renters.
17. Create a Minimalist Display on the Floor and on Floating Shelves
This airy, minimalist display style works best in a room with a bit of space to breathe. You need at least 4-5 feet of clear wall length for the shelves to not feel cramped. The floor display requires an open area that isn’t a major traffic path—ideal for a dressing room, a wide walk-in closet, or a low-traffic corner of a bedroom. For this to look intentional and not like you just dropped your bags on the floor, the arrangement must be meticulously neat and linear.
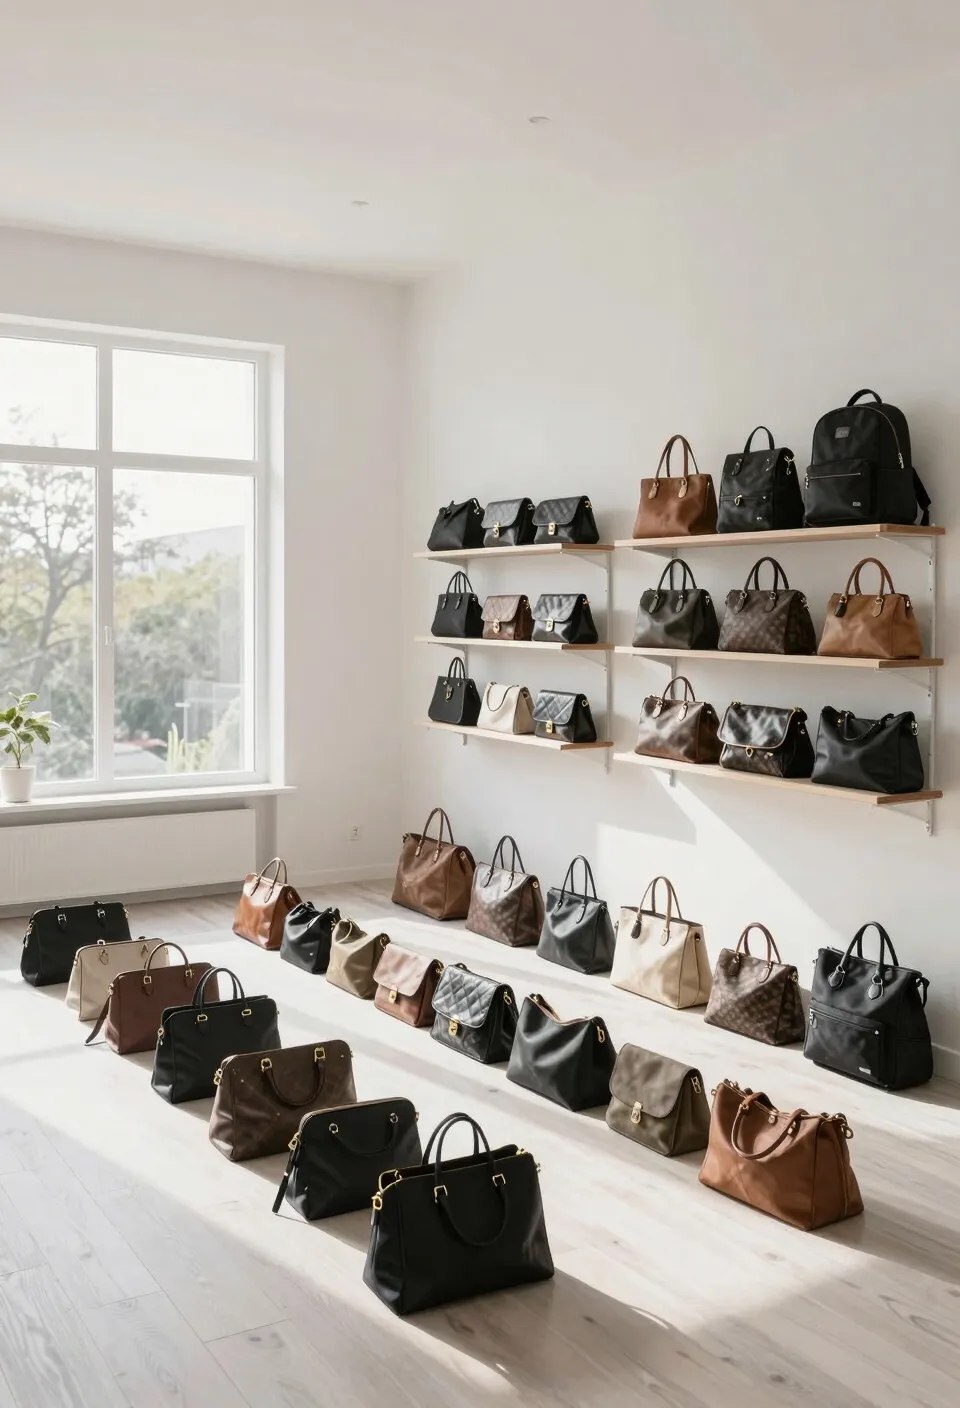
|
📋 Copy HEX 🔗 Share |
Let’s be real: while this looks incredible in a photo, the floor-level display is not practical for every home. If you have pets that shed or young children, your beautiful bags will quickly become covered in fur or a magnet for tiny, sticky hands. This kind of open, low-level storage is best suited for a dedicated, private dressing area or for someone who is committed to daily tidying and cleaning. It’s a high-style, high-maintenance choice.
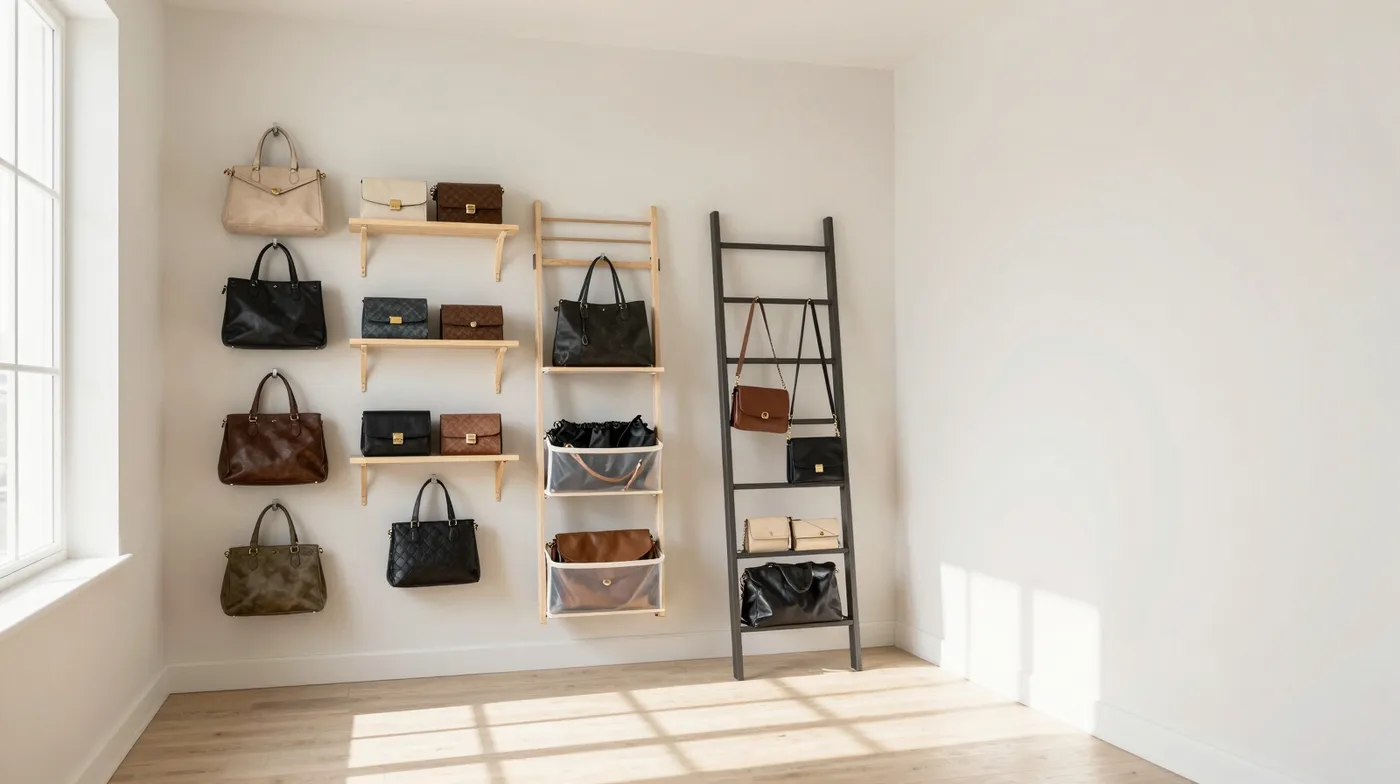
18. Mix and Match Hooks, Floating Shelves, and Ladder Shelves
The formula for this eclectic-but-cohesive look is all about variety within a strict palette: 30% hanging storage (hooks) + 40% open-shelf storage (floating shelves) + 30% freestanding storage (ladder shelves). By keeping all the elements within a tight color story of light wood, dark metal, and white, the mix of different storage types feels dynamic and interesting, not chaotic. The consistency in color is what holds it all together.
|
📋 Copy HEX 🔗 Share |
that makes this work is the variety of storage heights. You have hooks at eye level, floating shelves slightly higher, and ladder shelves that provide display space from top to bottom. This variation forces your eye to move around the space, making it feel more dynamic and curated. If everything were at the same height, it would look like a boring retail display. The mix of levels creates a more personal, collected-over-time feel.
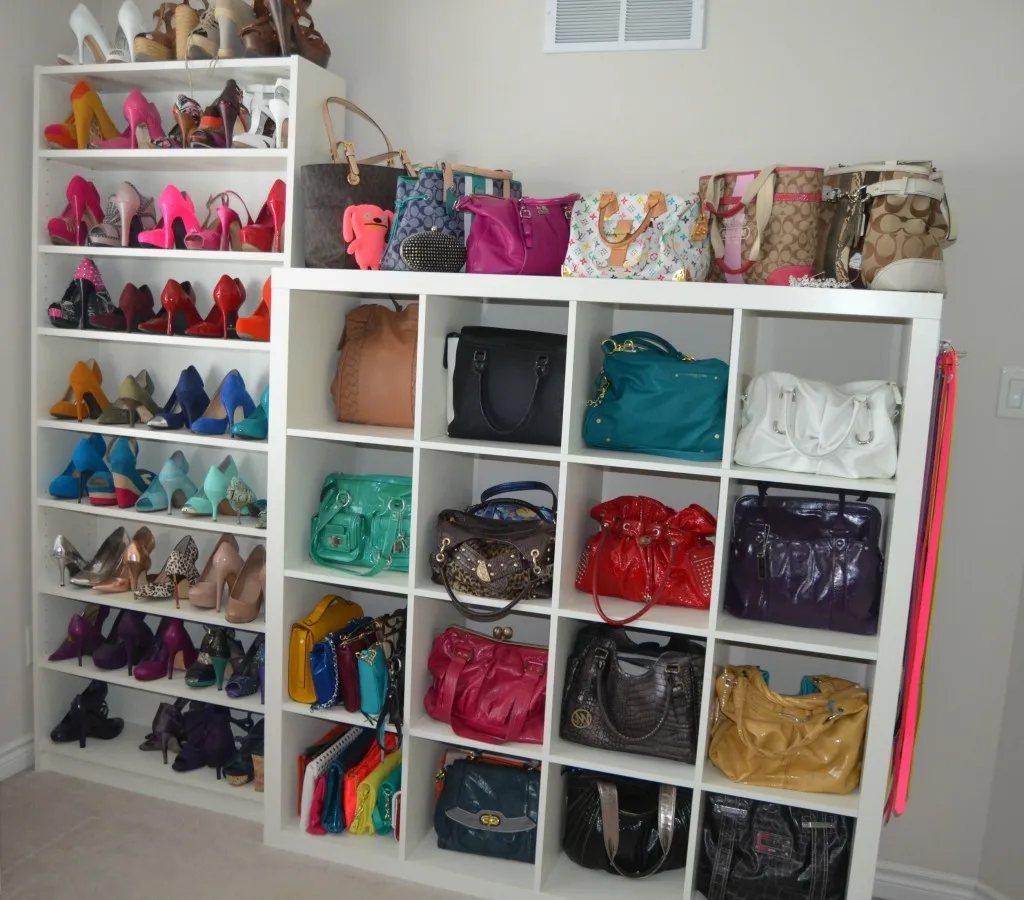
19. Use White Cube Shelves for Purses and a Tall Shoe Rack for Heels
This is a perfect example of using the right storage for the right item. The cube unit gives each handbag its own vignette, protecting it from being squished and allowing its shape to be the hero. Meanwhile, the tall, open shoe rack is ideal for heels, making them easy to see and grab. By dedicating specific types of furniture to specific types of accessories, the entire wall feels incredibly organized and intentional. The uniform white color of the units lets the colors of the accessories pop.
|
📋 Copy HEX 🔗 Share |
When using cube shelving for purses, stuff them with acid-free paper or an old, clean t-shirt to help them keep their shape. This is especially important for less structured or slouchy bags. For an extra touch, you can line the back of each cubby with a peel-and-stick wallpaper in a fun pattern. It adds a custom look and a little bit of hidden personality to your display. It also protects the shelf surface from potential color transfer from dark leather bags.
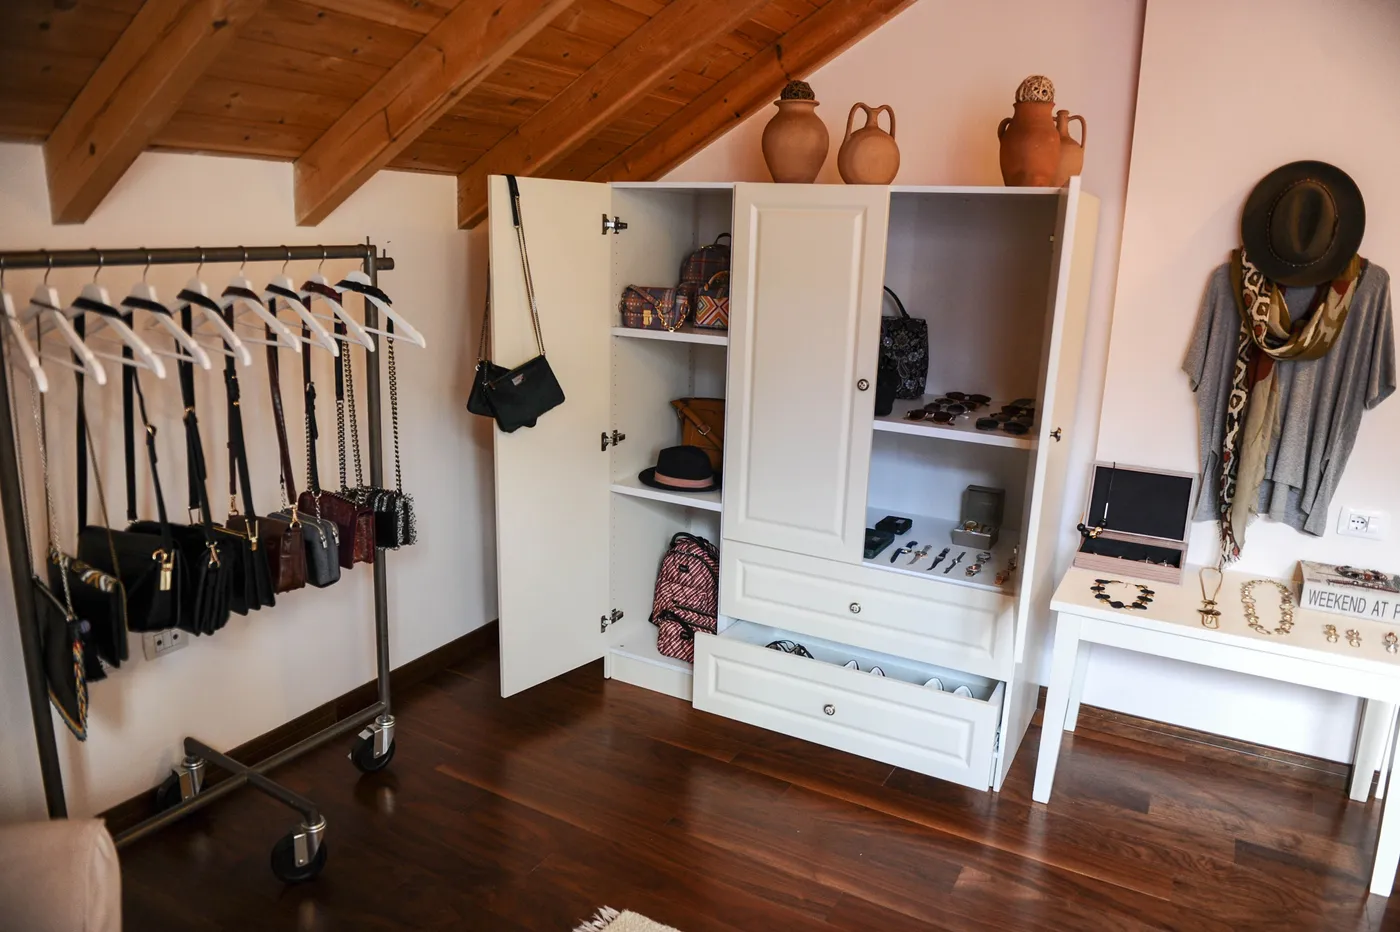
20. Design an Organized Accessory Corner with a Wardrobe and Garment Rail
Creating a dedicated accessory corner like this can be a smart investment in your daily routine. Here’s a possible cost breakdown:
- Main Furniture (White wardrobe unit): $300 – $900
- Storage (Metal garment rail, console table): $150 – $400
- Lighting & Decor (Jewelry displays): $50 – $150
- TOTAL: $500 – $1,450
- Budget alternative: Use an IKEA PAX wardrobe frame ($100), a simple MULIG garment rail ($15), and a LACK console table ($20). You’ll get the same zoned functionality for under $150.
|
📋 Copy HEX 🔗 Share |
This concept of creating a getting ready zone is part of a larger wellness trend in home design. People are moving away from purely functional closets and towards creating spaces that feel more like a personal boutique. It’s about elevating the daily routine of choosing your accessories into a more mindful and enjoyable experience. This idea of a dedicated, beautifully organized corner for your favorite things is all over aspirational Pinterest boards for that very reason.
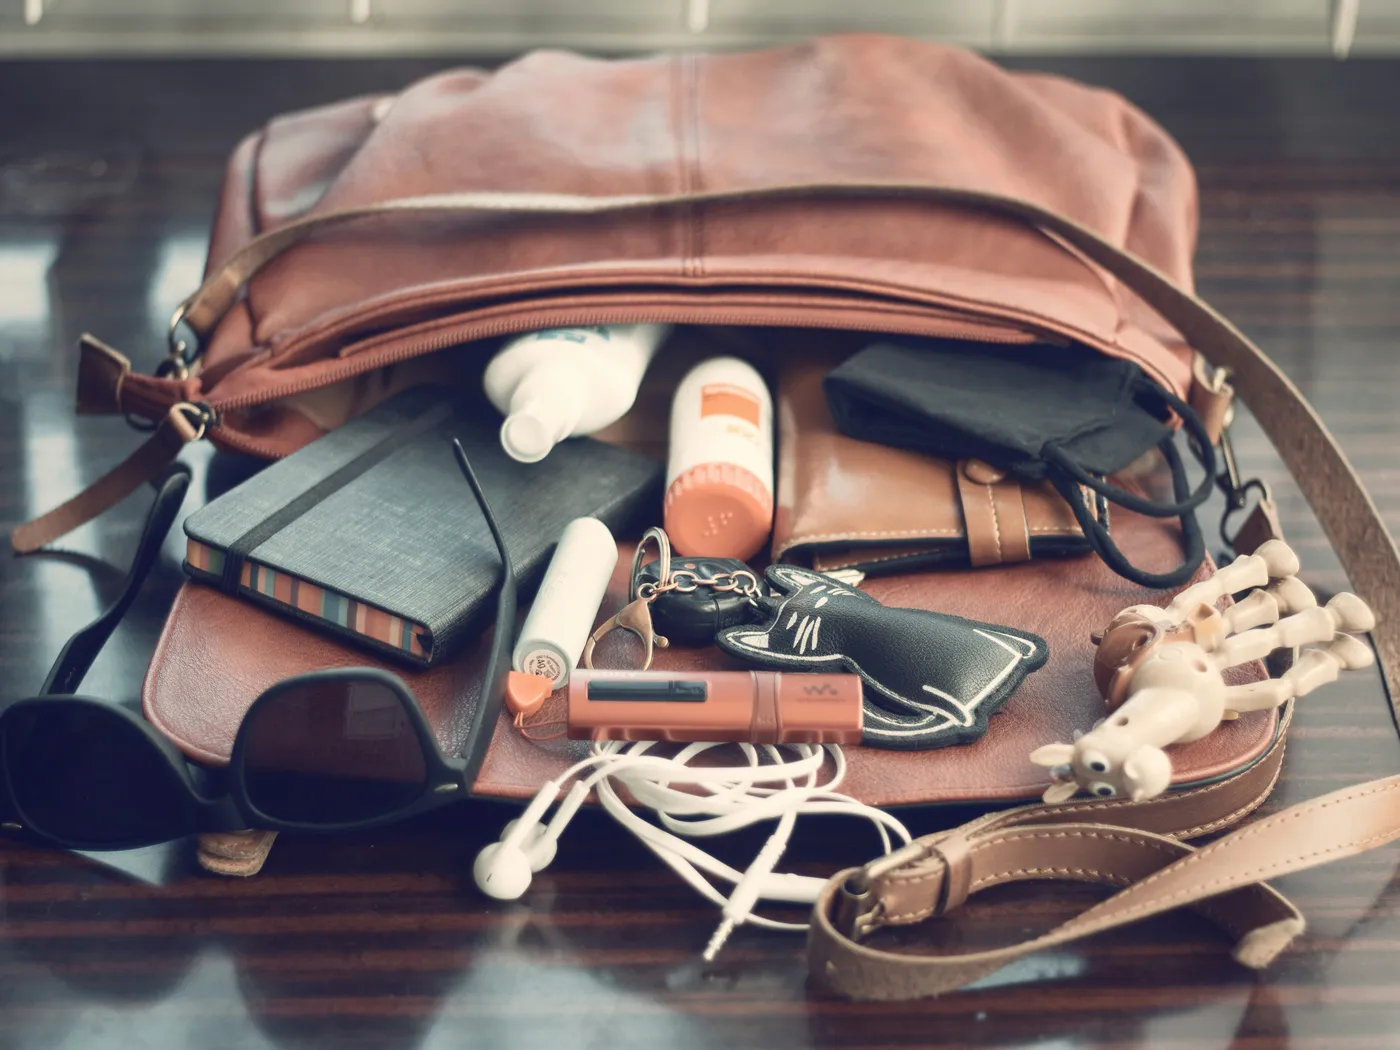
21. Organize Your Brown Leather Purse with Everyday Essentials
A perfectly styled what’s in my bag photo is one thing; daily reality is another. Leaks are the number one enemy of a beautiful purse interior. Lotions, hand sanitizers, pens, and lip glosses are the usual suspects. Always keep liquids and makeup inside a dedicated, waterproof pouch. One bad spill can permanently stain a light-colored leather or fabric lining, so an extra layer of protection is non-negotiable for keeping your bag in pristine condition.
|
📋 Copy HEX 🔗 Share |
Tired of digging for your keys? Here’s how to create a simple key leash for any bag:
- Get a small carabiner or clip hook.
- Find a thin strip of leather or a sturdy ribbon, about 8-12 inches long.
- Loop one end of the ribbon through the D-ring where your purse strap attaches, and tie a secure knot.
- Tie the other end of the ribbon to your carabiner.
- Clip your keys to the carabiner. Now they’ll always be attached to the top of your bag, ready to be pulled out in a second!
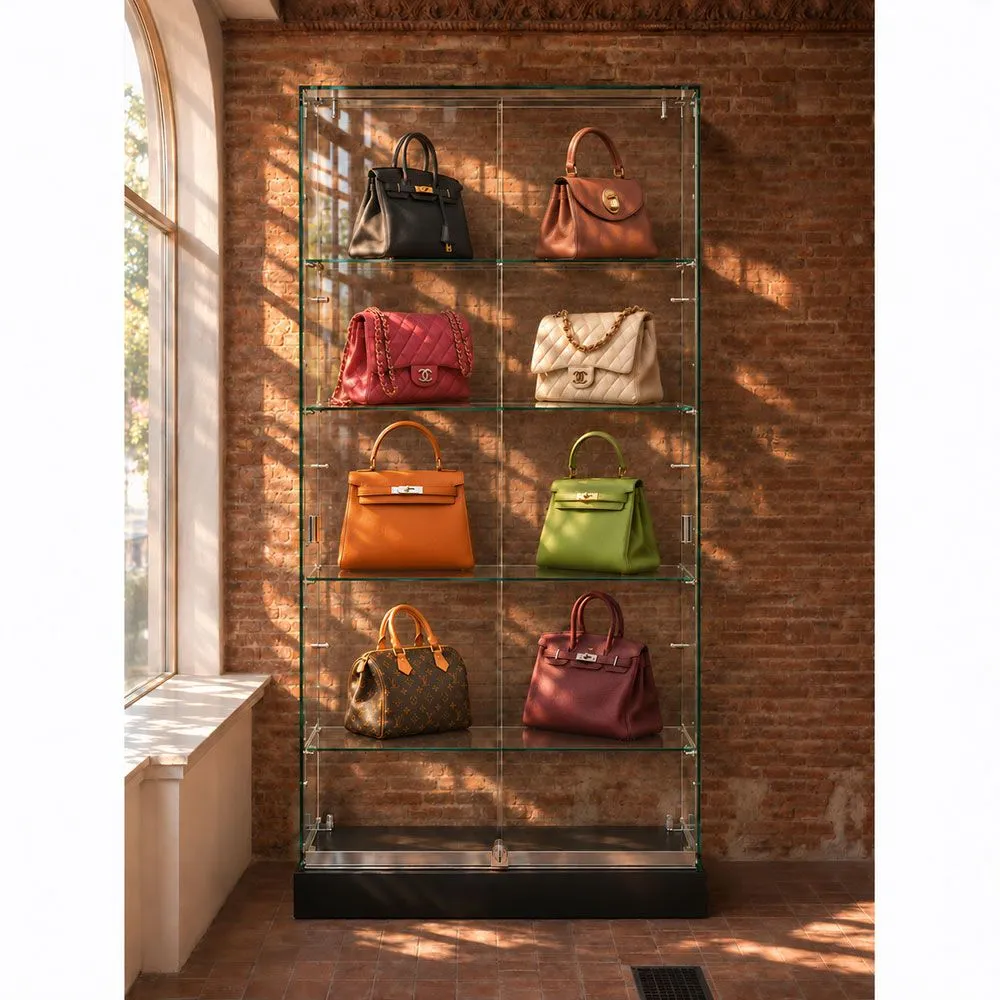
22. Showcase Designer Purses in a Glass Display Case
The glass case is what elevates this from simple storage to a museum-quality display. It communicates that the items inside are special, valuable, and worth protecting. The transparency offers the same visibility as open shelves, but adds a crucial layer of protection from dust, pets, and accidental spills. Against the rustic texture of the brick wall, the sleek glass and metal create a stunning contrast between raw and refined. It’s a true statement piece.
|
📋 Copy HEX 🔗 Share |
A glass display case looks incredible, but it’s a magnet for fingerprints, smudges, and dust. To keep it looking its best, you’ll need to clean both the inside and outside surfaces at least once a week with a good glass cleaner and a microfiber cloth. Be mindful of the lighting; direct sunlight streaming onto the case can cause fading on certain leathers over time. Consider a spot with bright, indirect light for the best balance of visibility and preservation.
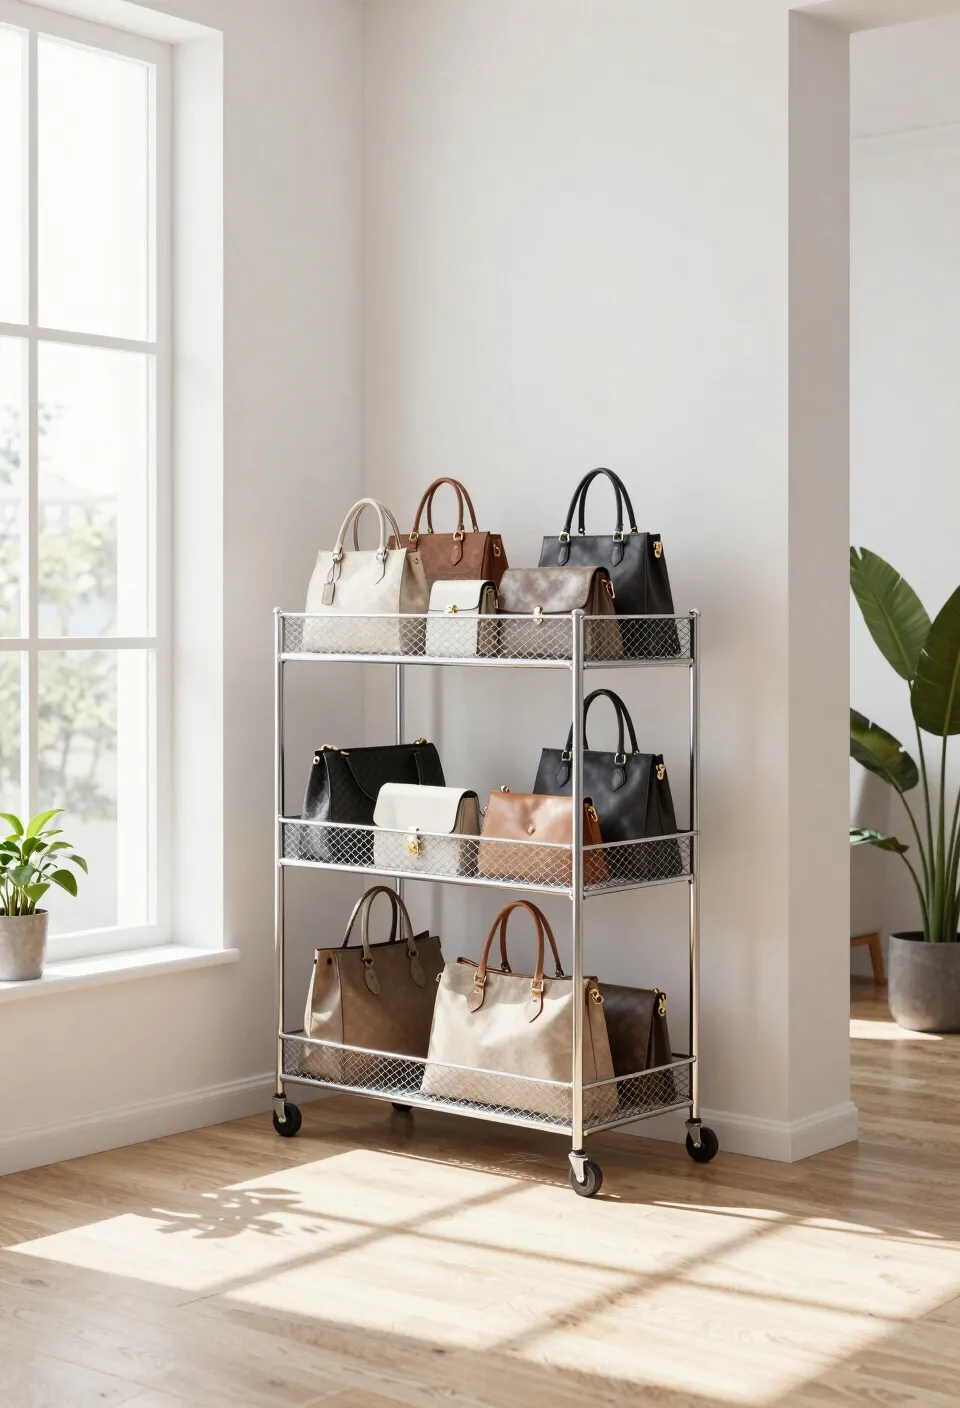
23. Use a Chrome Mesh Rolling Cart for Mobile Purse Storage
This is such a smart and flexible idea that’s also incredibly affordable. You can find a three-tier utility cart like this one from IKEA (the RÅSKOG), Target (Made By Design), or The Container Store for around $30-$40. It offers significant storage, can be moved around easily, and the industrial-chic chrome finish fits with a lot of different decor styles. It’s a stylish workhorse that provides a ton of organizational power for the price.
|
📋 Copy HEX 🔗 Share |
A rolling cart is the ultimate small-space solution. Because it’s typically only about 18 inches wide and 14 inches deep, it can tuck into almost any nook: next to a dresser, in a closet, or beside a desk. It’s perfect for apartments, dorm rooms, or any room where you need storage but can’t commit to bulky furniture. The mobility is key—you can roll it out when you need to access everything, and tuck it away when you need the floor space. This mobile cart is perfect for small spaces, unlike the more fixed corner unit in Idea #1.
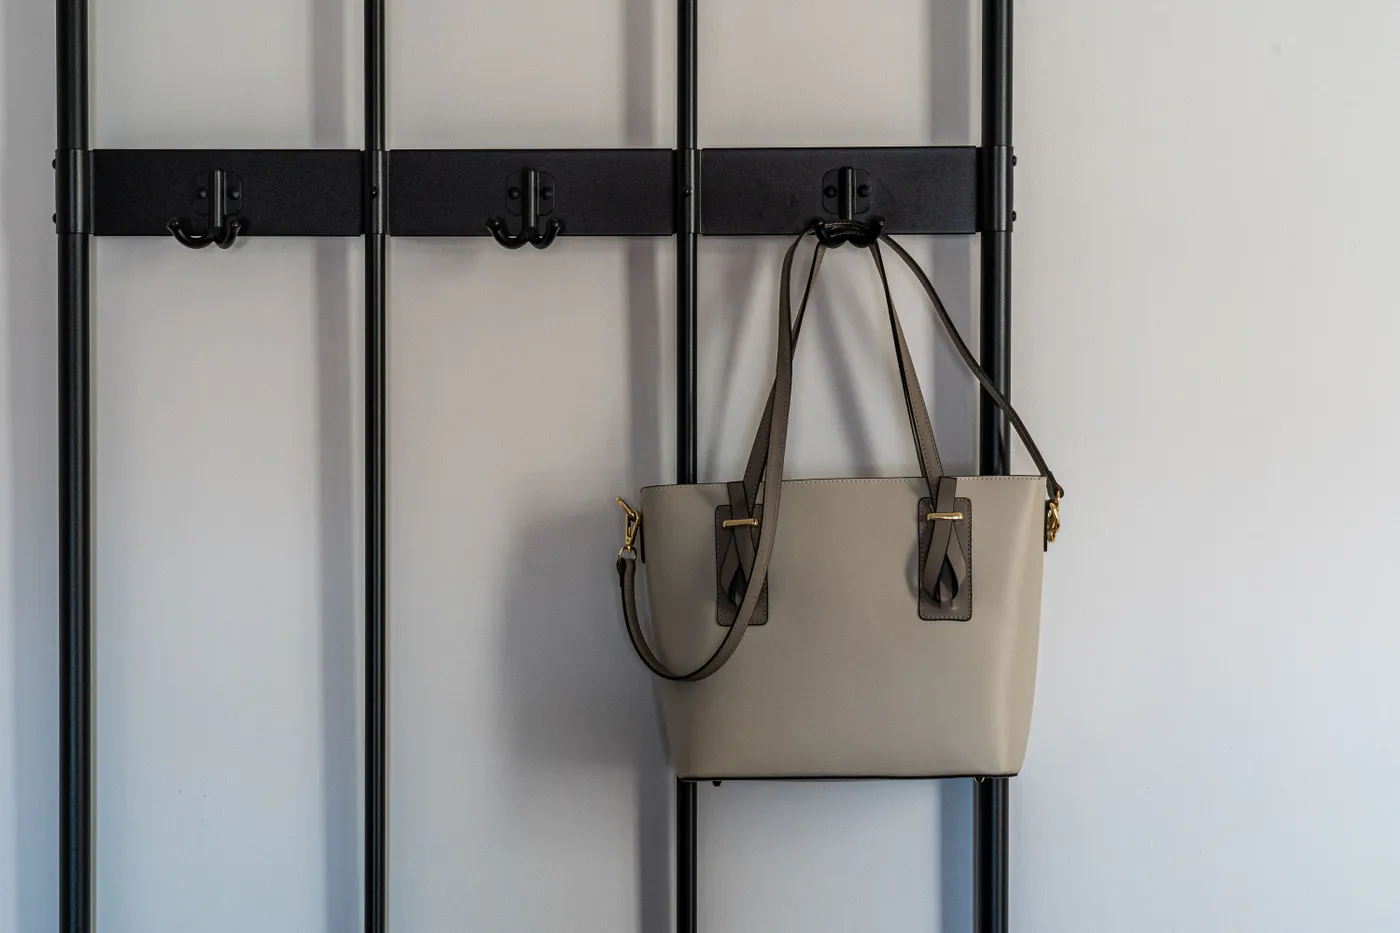
24. Hang a Tote on a Modern Black Metal Coat Rack
This simple solution works because of its honesty and utility. A coat rack is designed for hanging things, and a tote bag is designed to be hung. It’s a perfect functional match. The choice of a modern, minimalist black rack against a light grey wall keeps the look feeling intentional and design-forward, not like a messy entryway. By only hanging one or two key items, the rack acts as a display point rather than a clutter magnet. It celebrates the function of the object.
|
📋 Copy HEX 🔗 Share |
If you’re using a wall rack for your everyday bag, install it near your entryway for the ultimate grab-and-go station. Mount it at about shoulder height (around 60 inches from the floor). This is high enough to keep bags from dragging on the ground but low enough to be easily accessible. Add a small shelf or floating ledge above it for your keys and sunglasses to create a complete, functional ‘drop zone’ by the door.
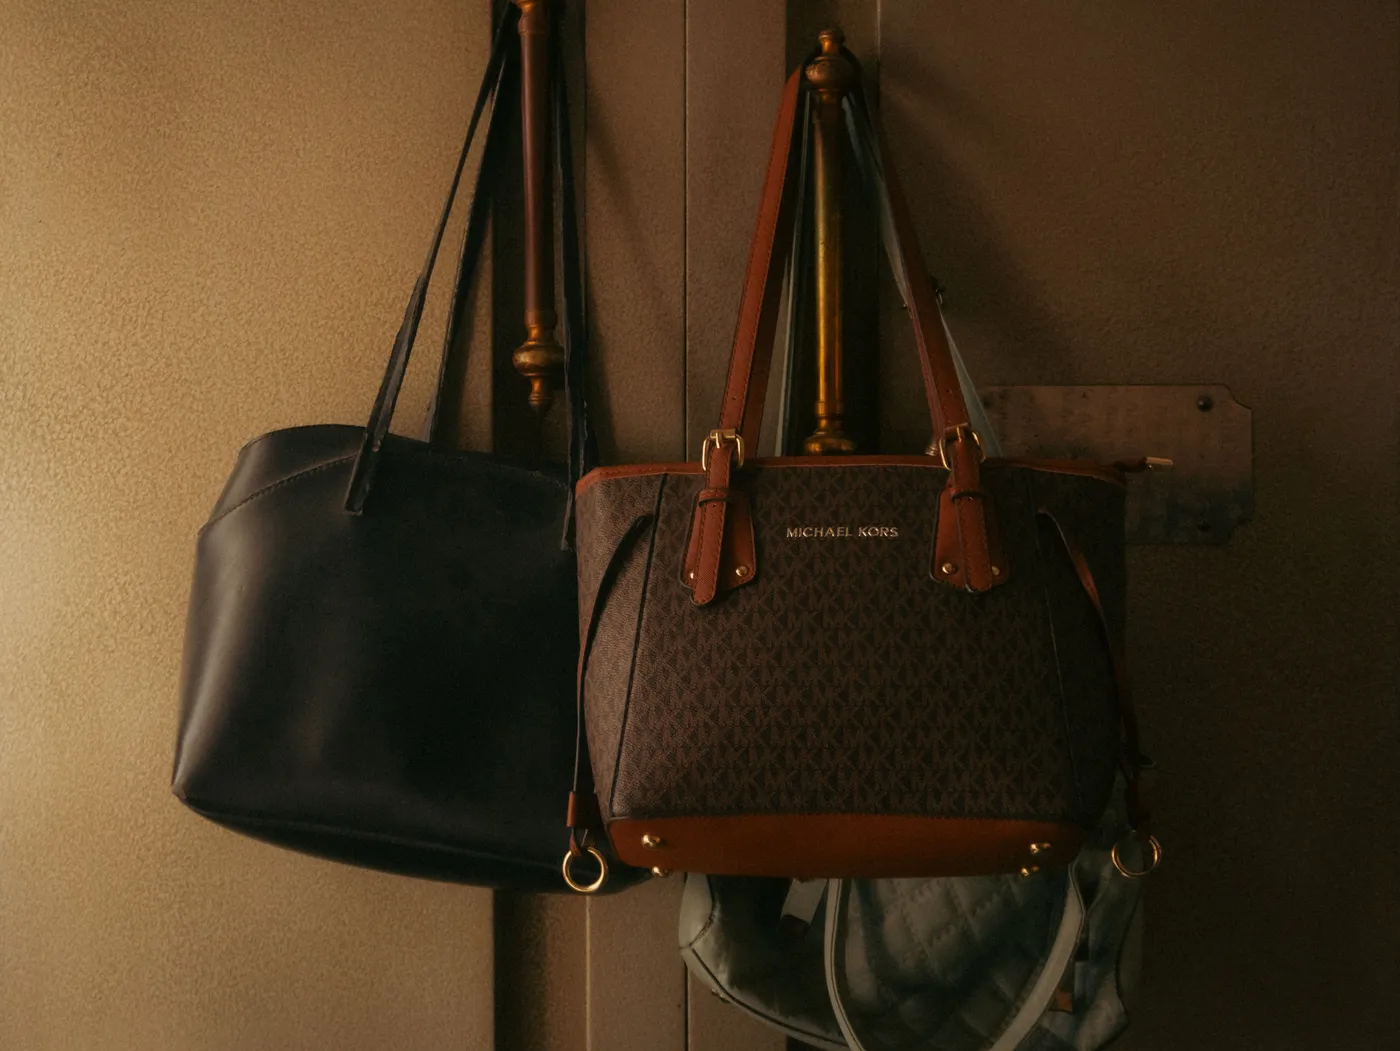
25. Display Purses on Decorative Wall Hooks
The formula for making wall hooks look chic is simple: 80% negative space + 20% object. The key is to not overcrowd the wall. The space around the hooks is just as important as the hooks themselves. For this to work as decor, treat each bag like a piece of art hanging in a gallery. Use only 2-3 hooks on a small wall, and choose hooks with a decorative finish (like the gold here) that complements the hardware on your purses. If shelving like in Idea #16 feels like too much, these simple hooks are your answer.
|
📋 Copy HEX 🔗 Share |
Be warned: hanging your bags from hooks is not a long-term storage solution for every purse. Hanging a heavy leather bag by its thin straps for months on end can cause the handles to stretch, weaken, or even crack over time. This method is best for your lighter-weight bags or for the one or two purses in your current rotation. For your investment pieces or vintage finds, shelf storage with dividers is a much safer bet for preserving their shape.
Your Perfectly Organized Purse Collection Awaits
See? Getting your handbags in order doesn’t have to be a huge, complicated project. Pick one idea that speaks to you and start there. It’s all about creating a system that feels good and makes getting ready a little more joyful. Now, head over to your Pinterest boards and start planning!