You know that feeling when you finally find the fall craft idea that looks exactly right for your home? We get it. That’s why we’ve done the hard work for you. After filtering through hundreds of options across craft havens like Michaels, JOANN, and Hobby Lobby, we narrowed it down to the absolute best. This guide features 27 distinct and inspiring ideas, covering everything from cozy knitting and watercolor art to natural decor and next-level pumpkin decorating. These aren’t just crafts; they’re the 2026 answer to the growing desire for tangible, screen-free activities that bring a personal touch to our spaces. Pin this guide for later—your future self will thank you when it’s time to actually do this.
1. Hand-Painted Watercolor Foliage Bookmarks
This craft works because it combines practicality with artistry in a beautifully small package. The success here lies in the principle of ‘contrast of finish. ‘The matte, slightly absorbent watercolor paper provides a soft, organic base for the botanical illustrations. This is set against the dark, distressed green wooden surface, making the warm autumnal colors of the bookmarks pop. The composition is also a lesson in gentle repetition—the rounded corners of the bookmarks, the circular watercolor pans, and the round wooden coaster create a subtle visual rhythm that is calming and cohesive.
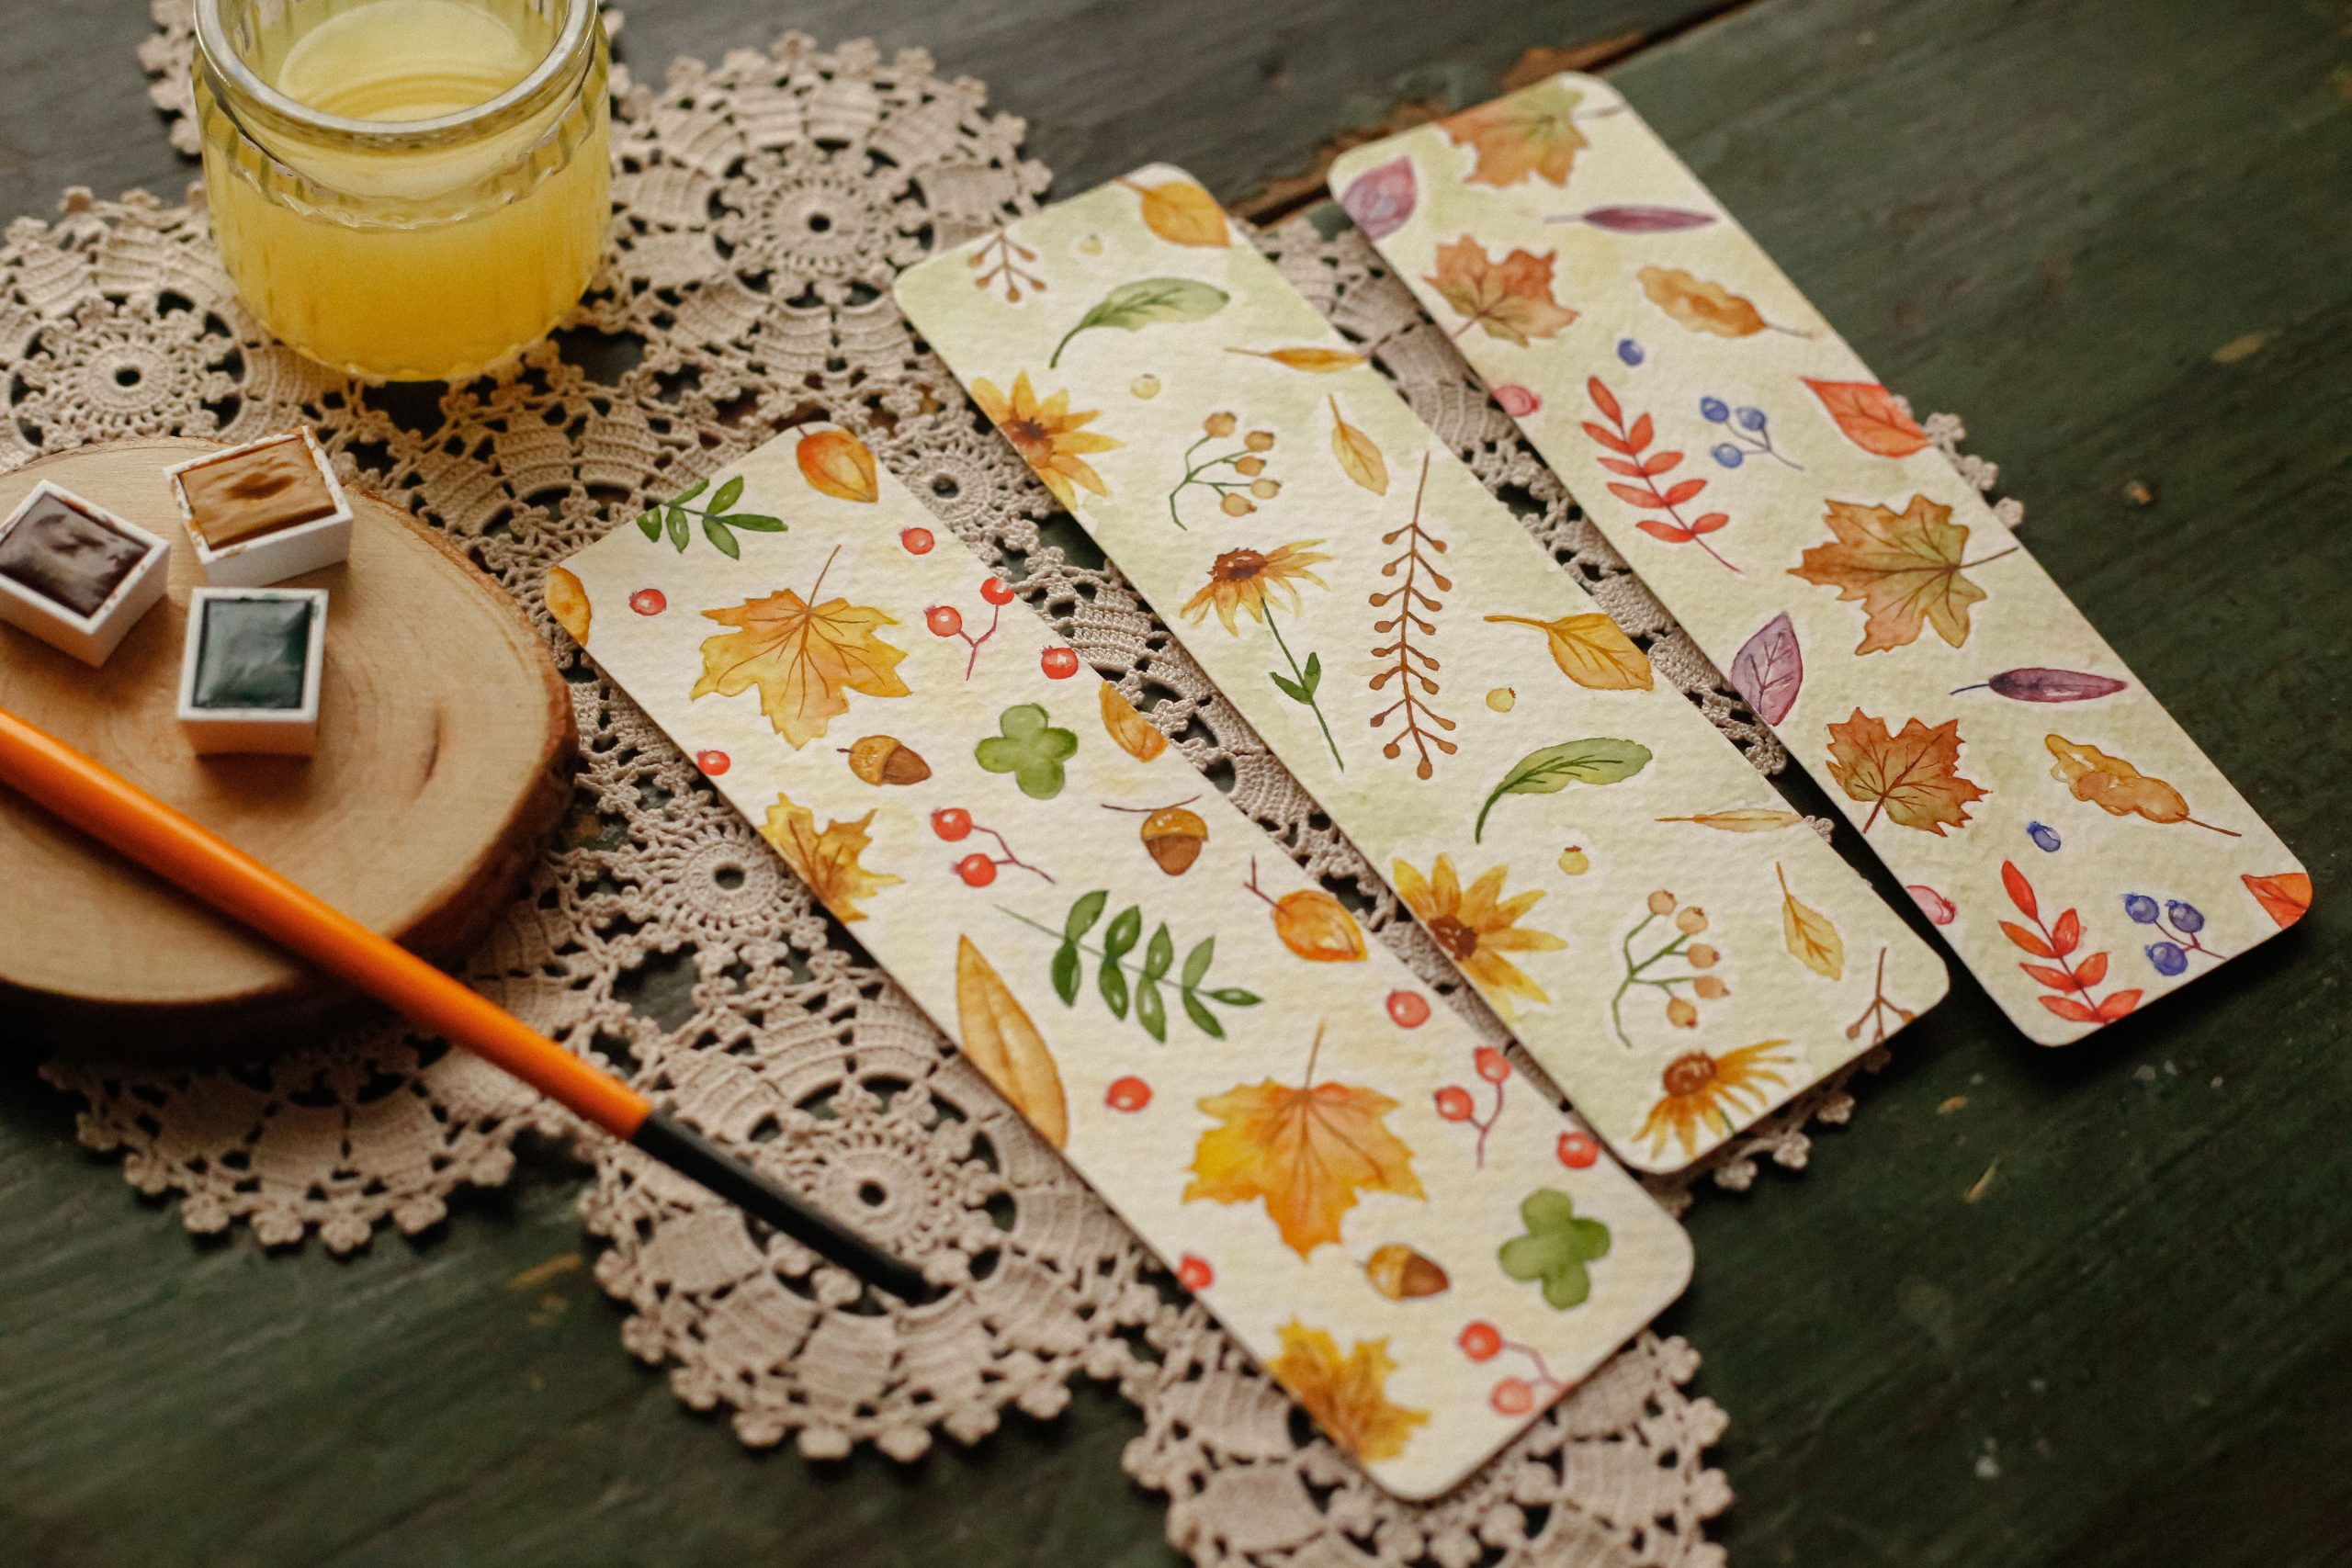
When you’re painting with watercolors, the paper is just as important as the paint. For small projects like these bookmarks, you don’t need a huge, expensive sheet. Instead, buy a smaller pad of 140 lb (300 gsm) cold-press watercolor paper. This weight prevents the paper from buckling or warping when you apply water and paint, which is a common frustration with thinner paper. You can find 5×7 inch pads that are perfect for cutting down into multiple bookmarks, giving you a professional-feeling result without a huge investment.
2. A Cozy Flat Lay with Knits, Pumpkins, and Reading Glasses
This cozy scene is a perfect formula for your next autumnal Instagram post. Think of it as Style Math: 50% cozy textiles (the chunky gray knit and the white wood backdrop count!), 30% iconic fall symbols (the orange pumpkins and scattered maple leaves), and 20% personal touch (the round-frame glasses and that little star anise). The key is the balance. Too many pumpkins and it looks like a patch; too many personal items and it just looks like a messy table. By keeping the color palette tight—orange, gray, brown, and white—the composition feels intentional and curated, not cluttered.
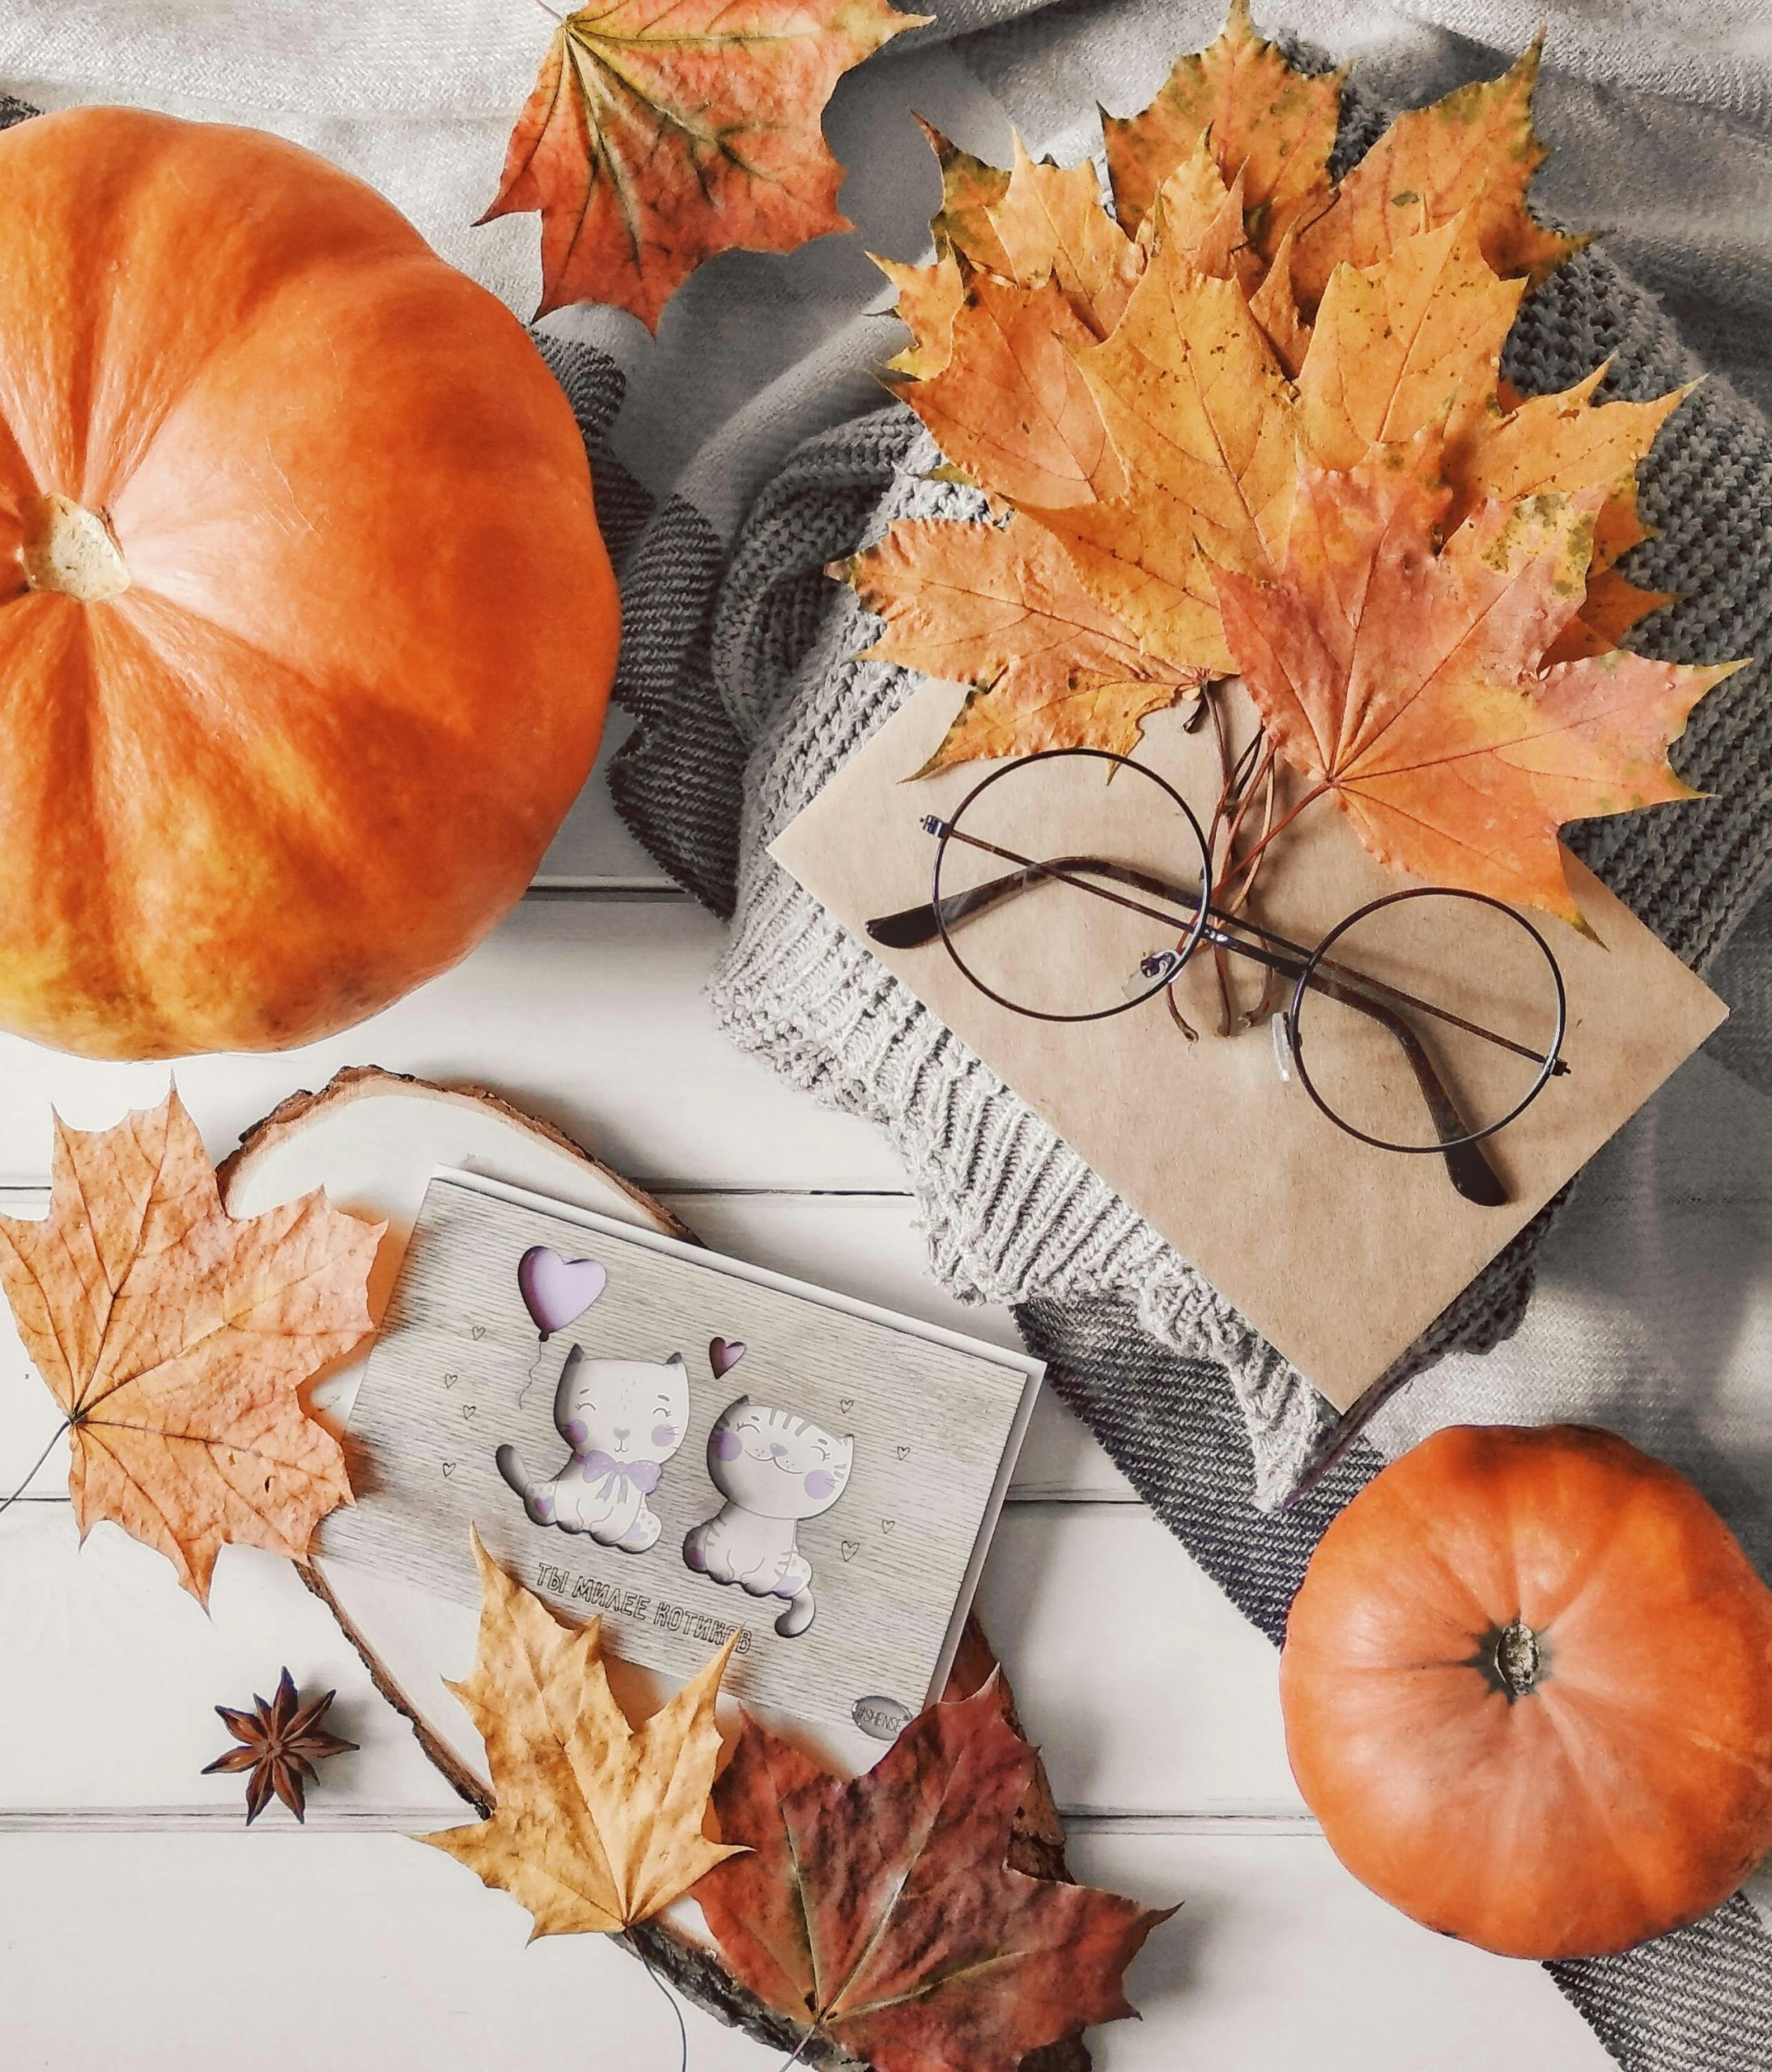
Let’s be honest: a perfectly effortless-looking flat lay takes effort. The biggest challenge is lighting. You need bright, indirect natural light to avoid harsh shadows that can make your composition look stark and amateur. The best spot is usually near a large window on a slightly overcast day. Direct sunlight will blow out the colors and create distracting glare on items like the glasses. It might take a few tries, moving things around, to get that soft, inviting glow you see here. It’s more art than science!
3. Adorning a Pumpkin with a Dried Chili and Flower Garland
What makes this project truly special is the wire garland. Without it, you just have a nice pumpkin on a pile of leaves. The garland transforms the pumpkin from a simple piece of fall decor into a sculptural, festive centerpiece. The unexpected inclusion of red chili peppers and papery physalis lanterns among the more traditional dried flowers adds a layer of sophistication and visual interest. It’s a detail that says ‘custom-designed’ rather than ‘store-bought,’ and it’s what elevates the entire look from rustic to refined.
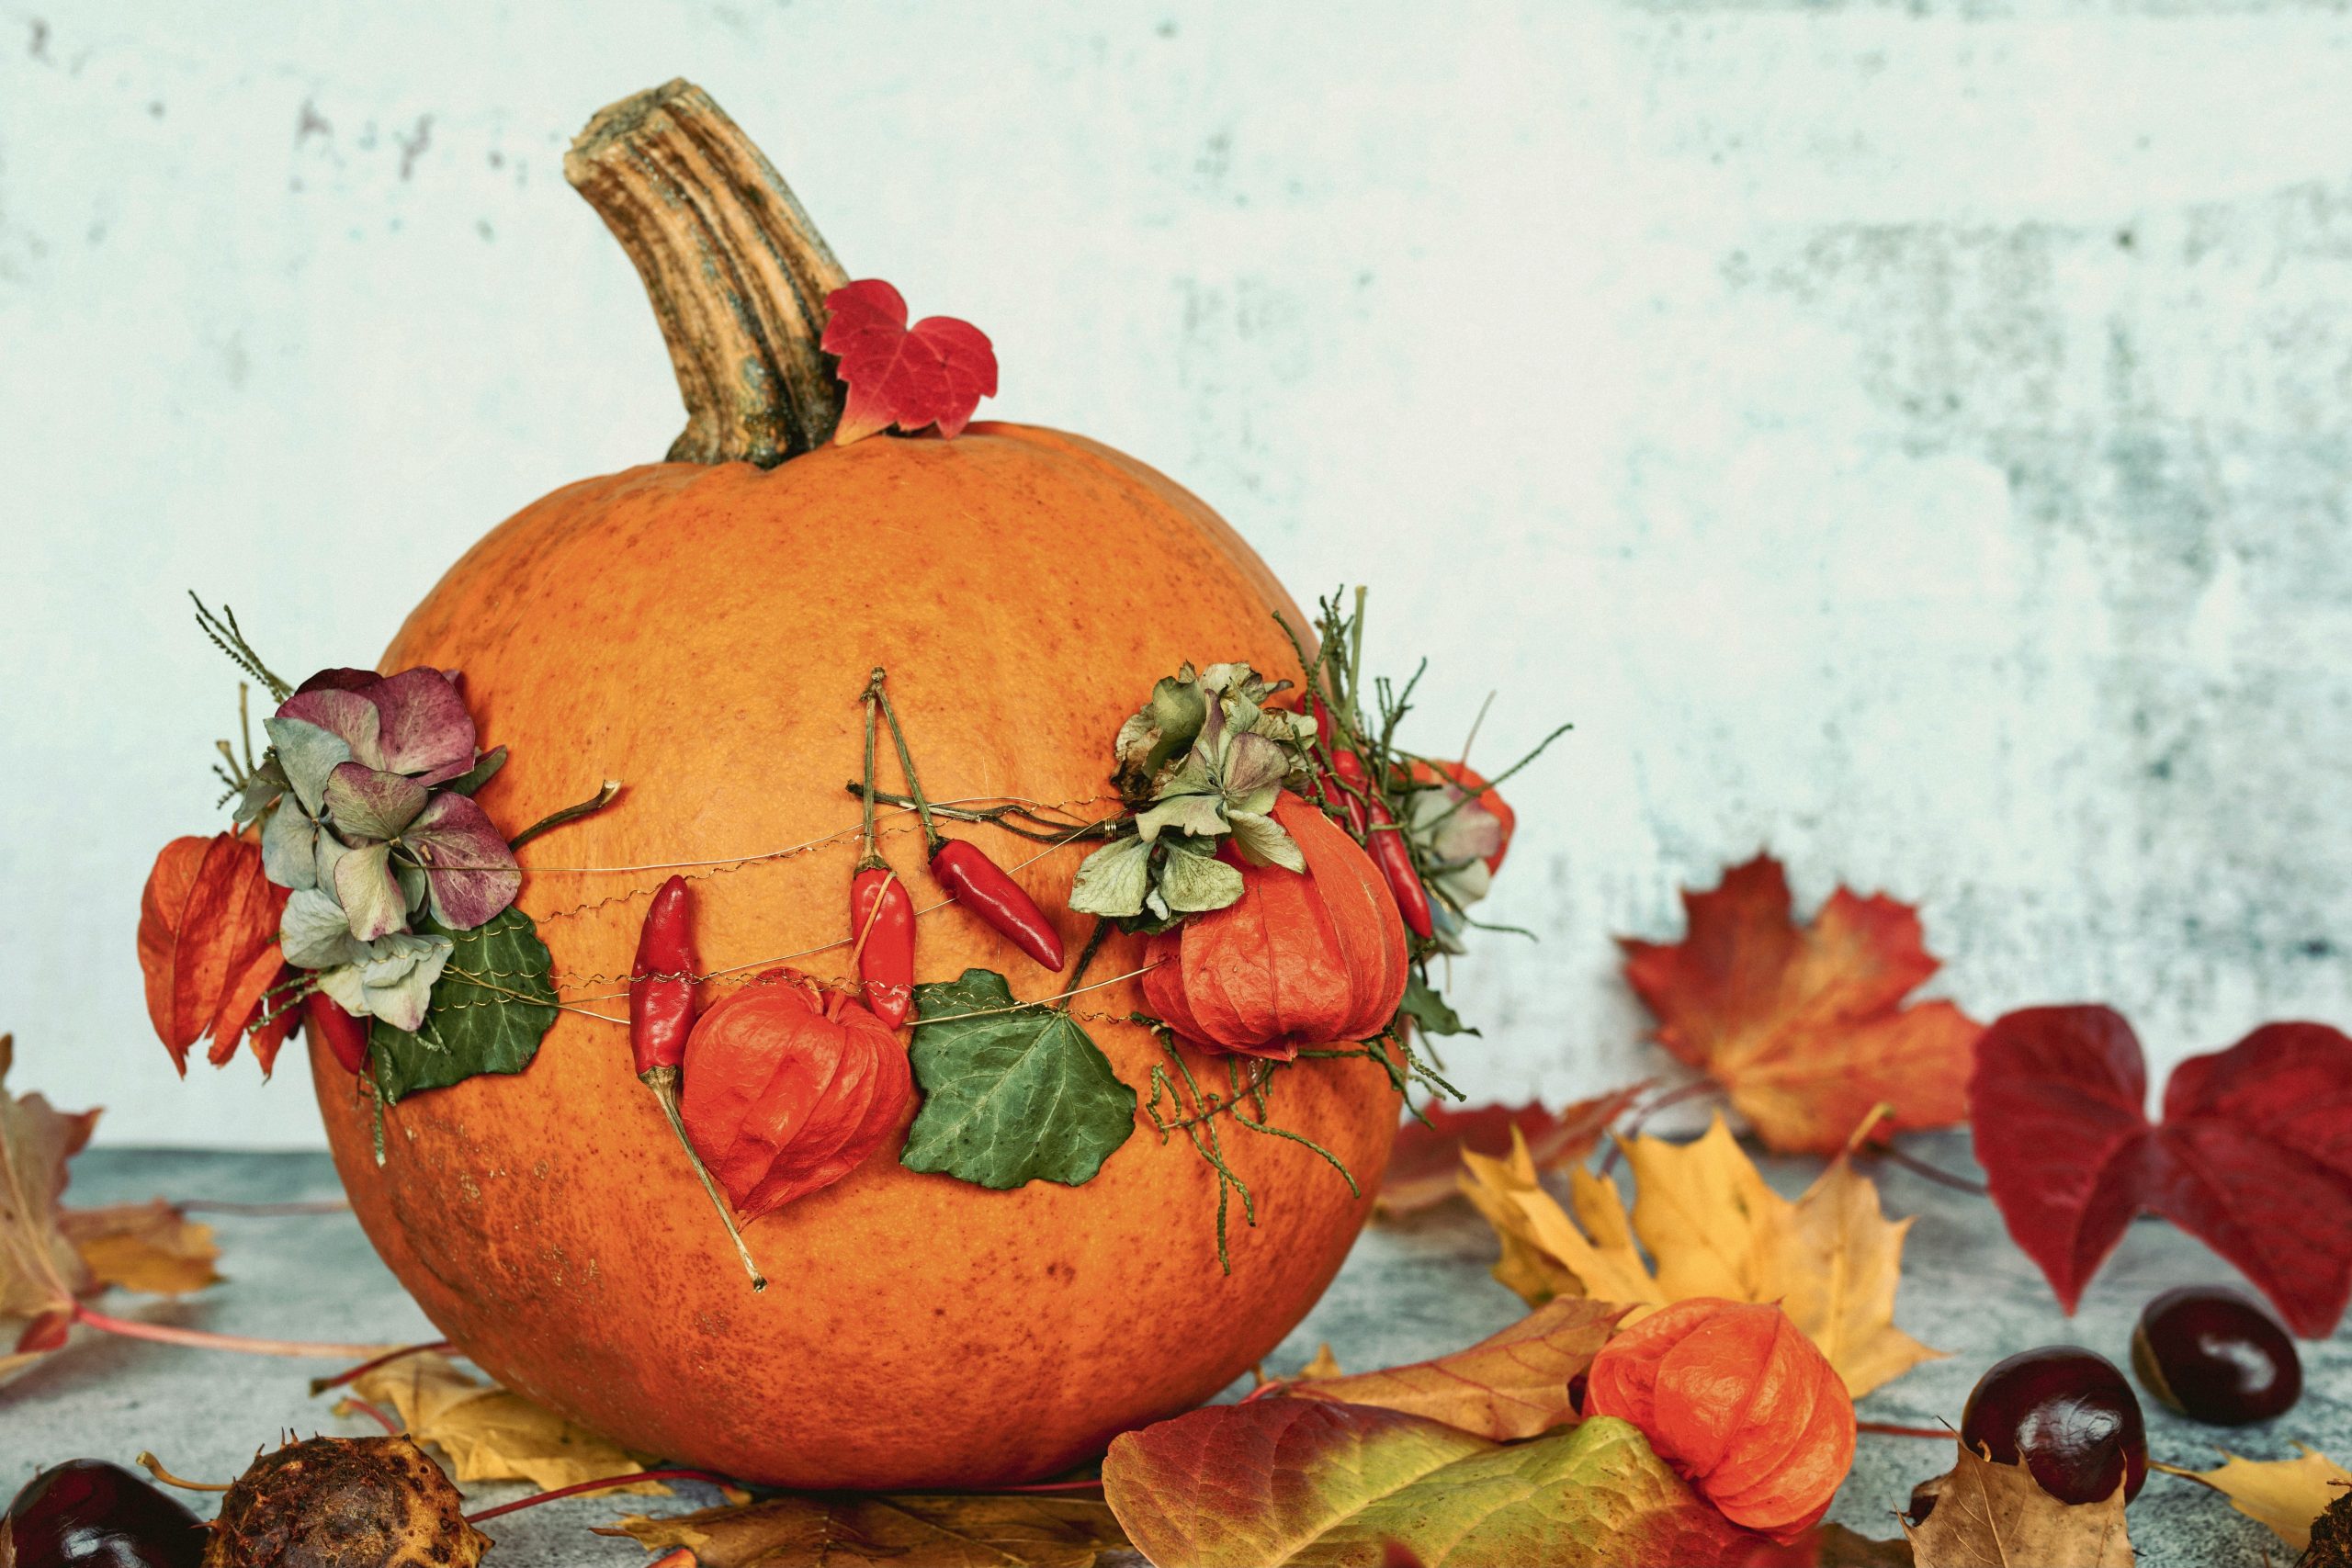
Want to make a similar garland? It’s easier than it looks. Here’s a quick guide:
- Gather Your Materials: You’ll need thin, pliable craft wire (24-26 gauge is ideal), a wire cutter, and your chosen dried elements like small flowers, physalis, and even chili peppers. (Estimated cost: $15-$25).
- Create Small Bundles: Take 2-3 small items and wrap their stems together tightly with a 2-inch piece of wire. Create about 15-20 of these mini-bundles.
- Build the Garland: Cut a length of wire about 1.5 times the circumference of your pumpkin. Attach your first bundle to the end by wrapping its wire around the main wire.
- Layer and Secure: Place the next bundle so it slightly overlaps the first, covering the wire mechanics. Wrap its wire around the main wire to secure it. Continue this process, layering bundles until you reach your desired length.
- Finish: Once complete, twist the ends of the main wire together to form a circle and gently place it on your pumpkin. The process should take about 30-45 minutes.
4. Rustic Craft Table with Owl Embroidery and Dried Oak Leaves
This entire arrangement is a masterclass in texture. What makes it work so well is the layering of different tactile surfaces. You have the rough, veiny quality of the dried oak leaves, the delicate, almost papery feel of the hydrangea blossoms, the smooth sheen of the green ribbon, and the fuzzy texture of the beaded strands. This rich textural variety is all anchored by the dark, grainy wood surface, creating a feast for the eyes (and the hands!). The circular owl embroidery acts as a perfect focal point, breaking up the linear elements and adding a touch of whimsy.
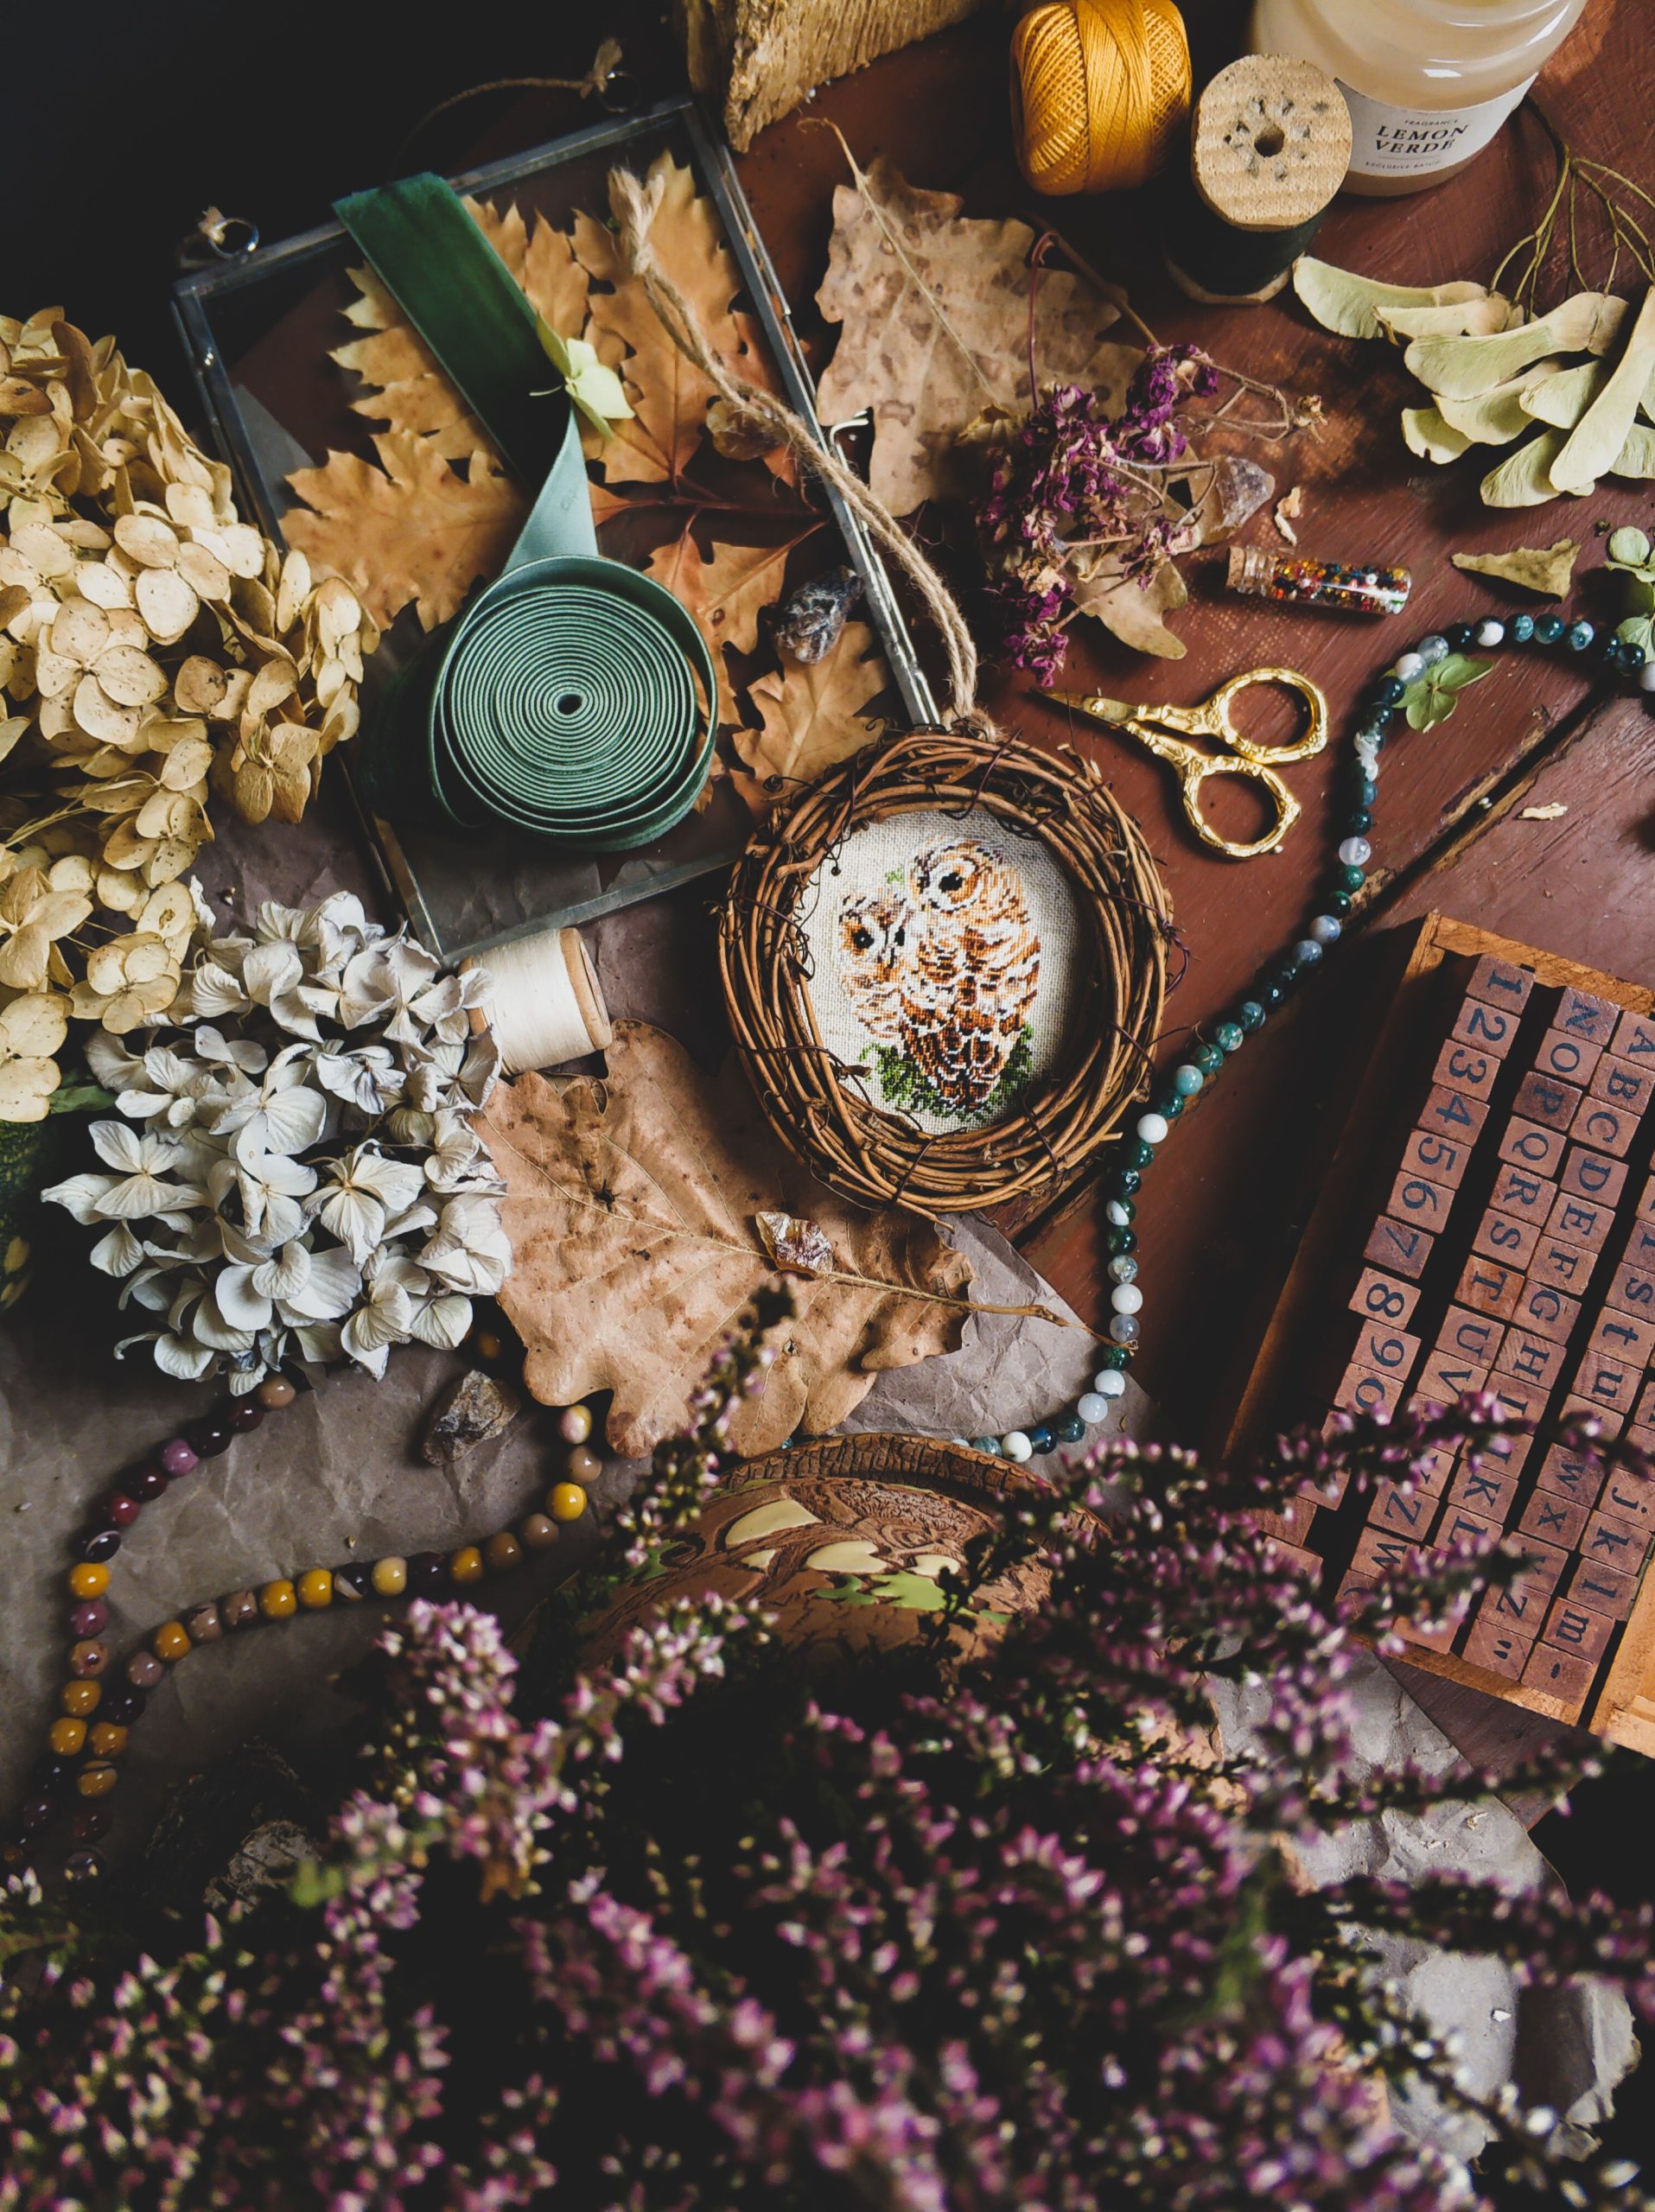
This look taps directly into the ‘Dark Academia’ and ‘Forestcore’ aesthetics that continue to dominate Pinterest and home decor trends in 2026. People are craving a connection to nature and a sense of history and intellect in their spaces. A craft project like this isn’t just about making something pretty; it’s about curating a collection of natural finds and vintage-inspired materials. It suggests a slow, thoughtful process, which is a welcome antidote to our fast-paced digital lives. This trend has staying power because it’s rooted in a timeless appreciation for nature and handmade quality.
5. Painting Pastel Pumpkins with Halloween Motifs
Love the idea but not the price tag of boutique pastel pumpkins? You can get this exact look for so much less. Forget the craft store—head to the grocery store’s pumpkin bin and grab a few mini pumpkins for about $1-$2 each. A bottle of multi-surface craft paint from Walmart or Target will run you about $2-3, and you can get a whole set of basic brushes for under $10. Instead of fancy glitter, raid the kids’ craft aisle for a multi-pack. All in, you can recreate this entire setup for under $20, especially if you already have some basic supplies. It’s a super accessible way to play with the pastel Halloween trend.
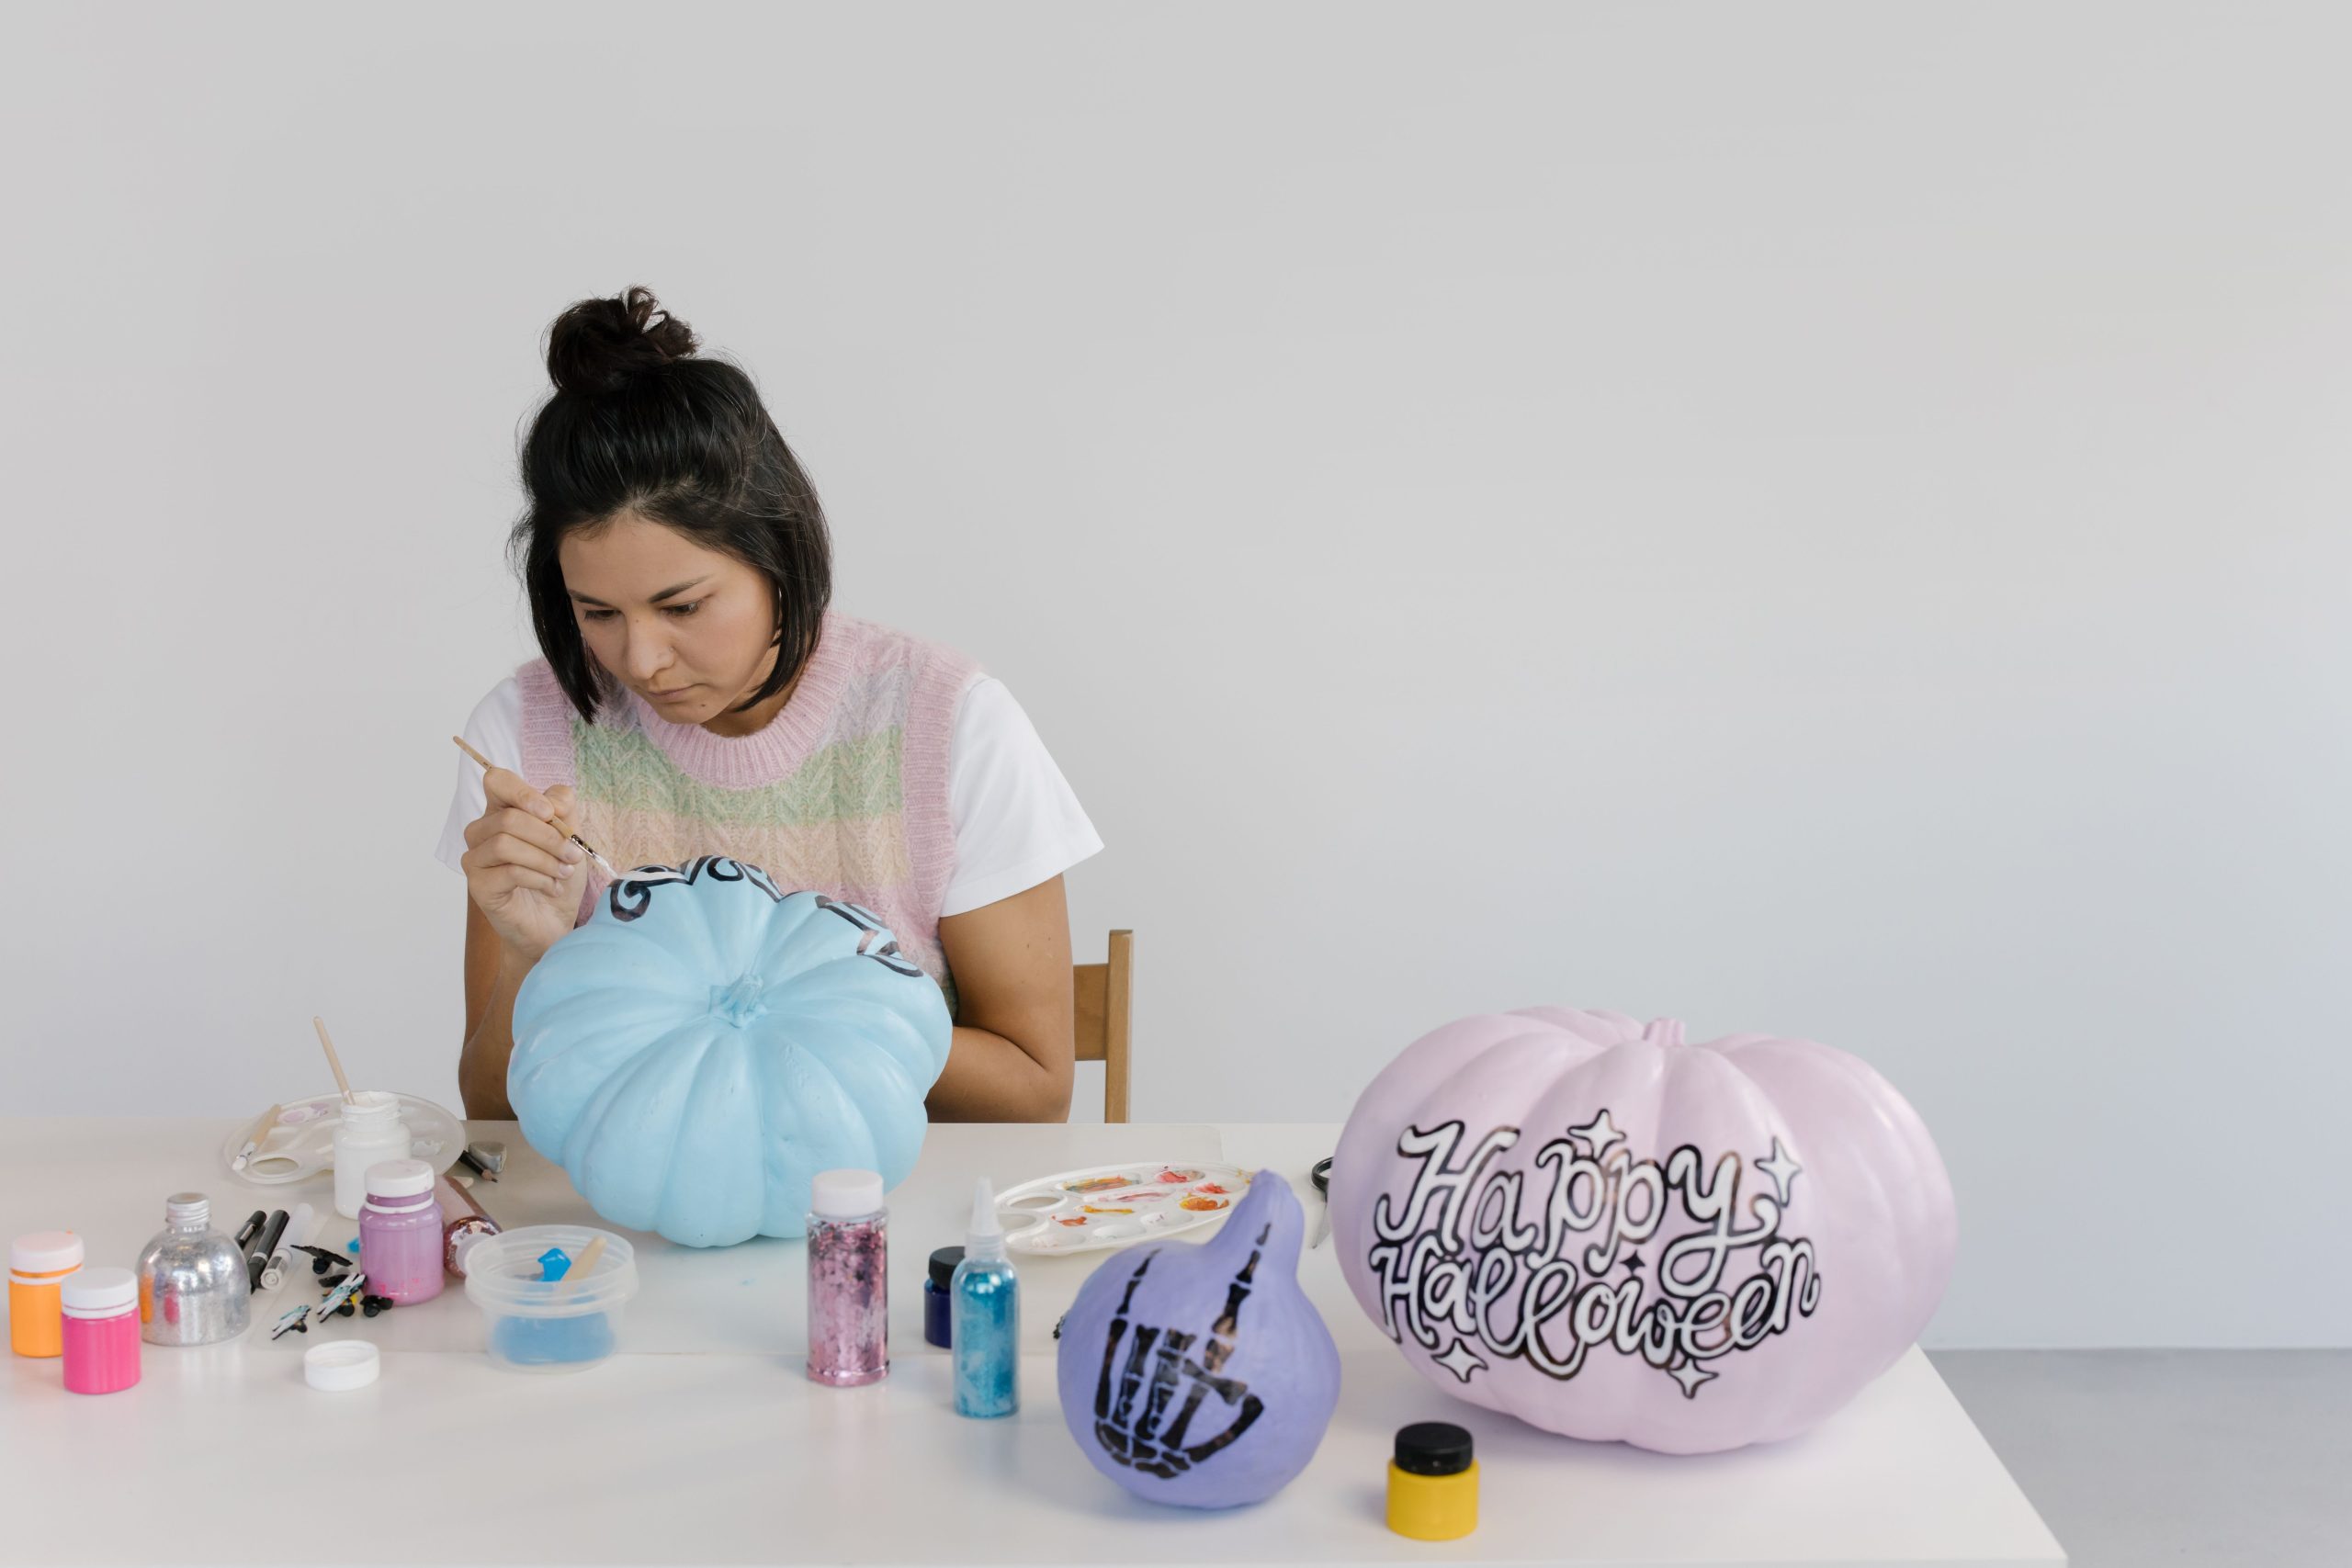
Here’s a little reality check on painting pumpkins: surface prep is everything. If you try to paint directly onto a waxy, shiny pumpkin, your beautiful design is going to scratch or peel off in a day. Before you even think about picking up a brush, wash the pumpkin with soap and water, dry it thoroughly, and then give it a quick wipe with rubbing alcohol. This removes dirt, wax, and oils, creating a much better surface for the paint to adhere to. It’s a boring extra step, but it’s the difference between a craft that lasts through Halloween and one that looks sad by morning. The comparison to the simpler orange decorating in Idea #7 is stark; this requires more prep.
6. Tracing Felt Bat Stencils for DIY Halloween Decor
Creating a swarm of these felt bats is a fantastic, high-impact, low-cost project. Here’s the simplest way to do it:
- Trace Your Shapes: Lay your black felt on a flat surface. Place your bat stencil on top and trace the outline using a white chalk pencil or a silver gel pen, which shows up great on dark fabric. Trace as many as you can fit on your sheet.
- Cut Them Out: Using sharp fabric scissors is key! Dull scissors will fray the felt and make the edges look messy. Carefully cut just inside your chalk line so the final bat is pure black.
- Give Them Shape: To make them look like they’re in flight, fold the bat in half down the center and create a sharp crease. Then, fold each wing back up at a slight angle. This will give them a 3D effect.
- Hang Them Up: Use a tiny piece of double-sided tape or a dot of removable poster putty on the back of the ‘body’ to stick them to your wall. Arrange them in a swooping ‘swarm’ pattern for the best effect. Total time for a dozen bats: under 30 minutes.
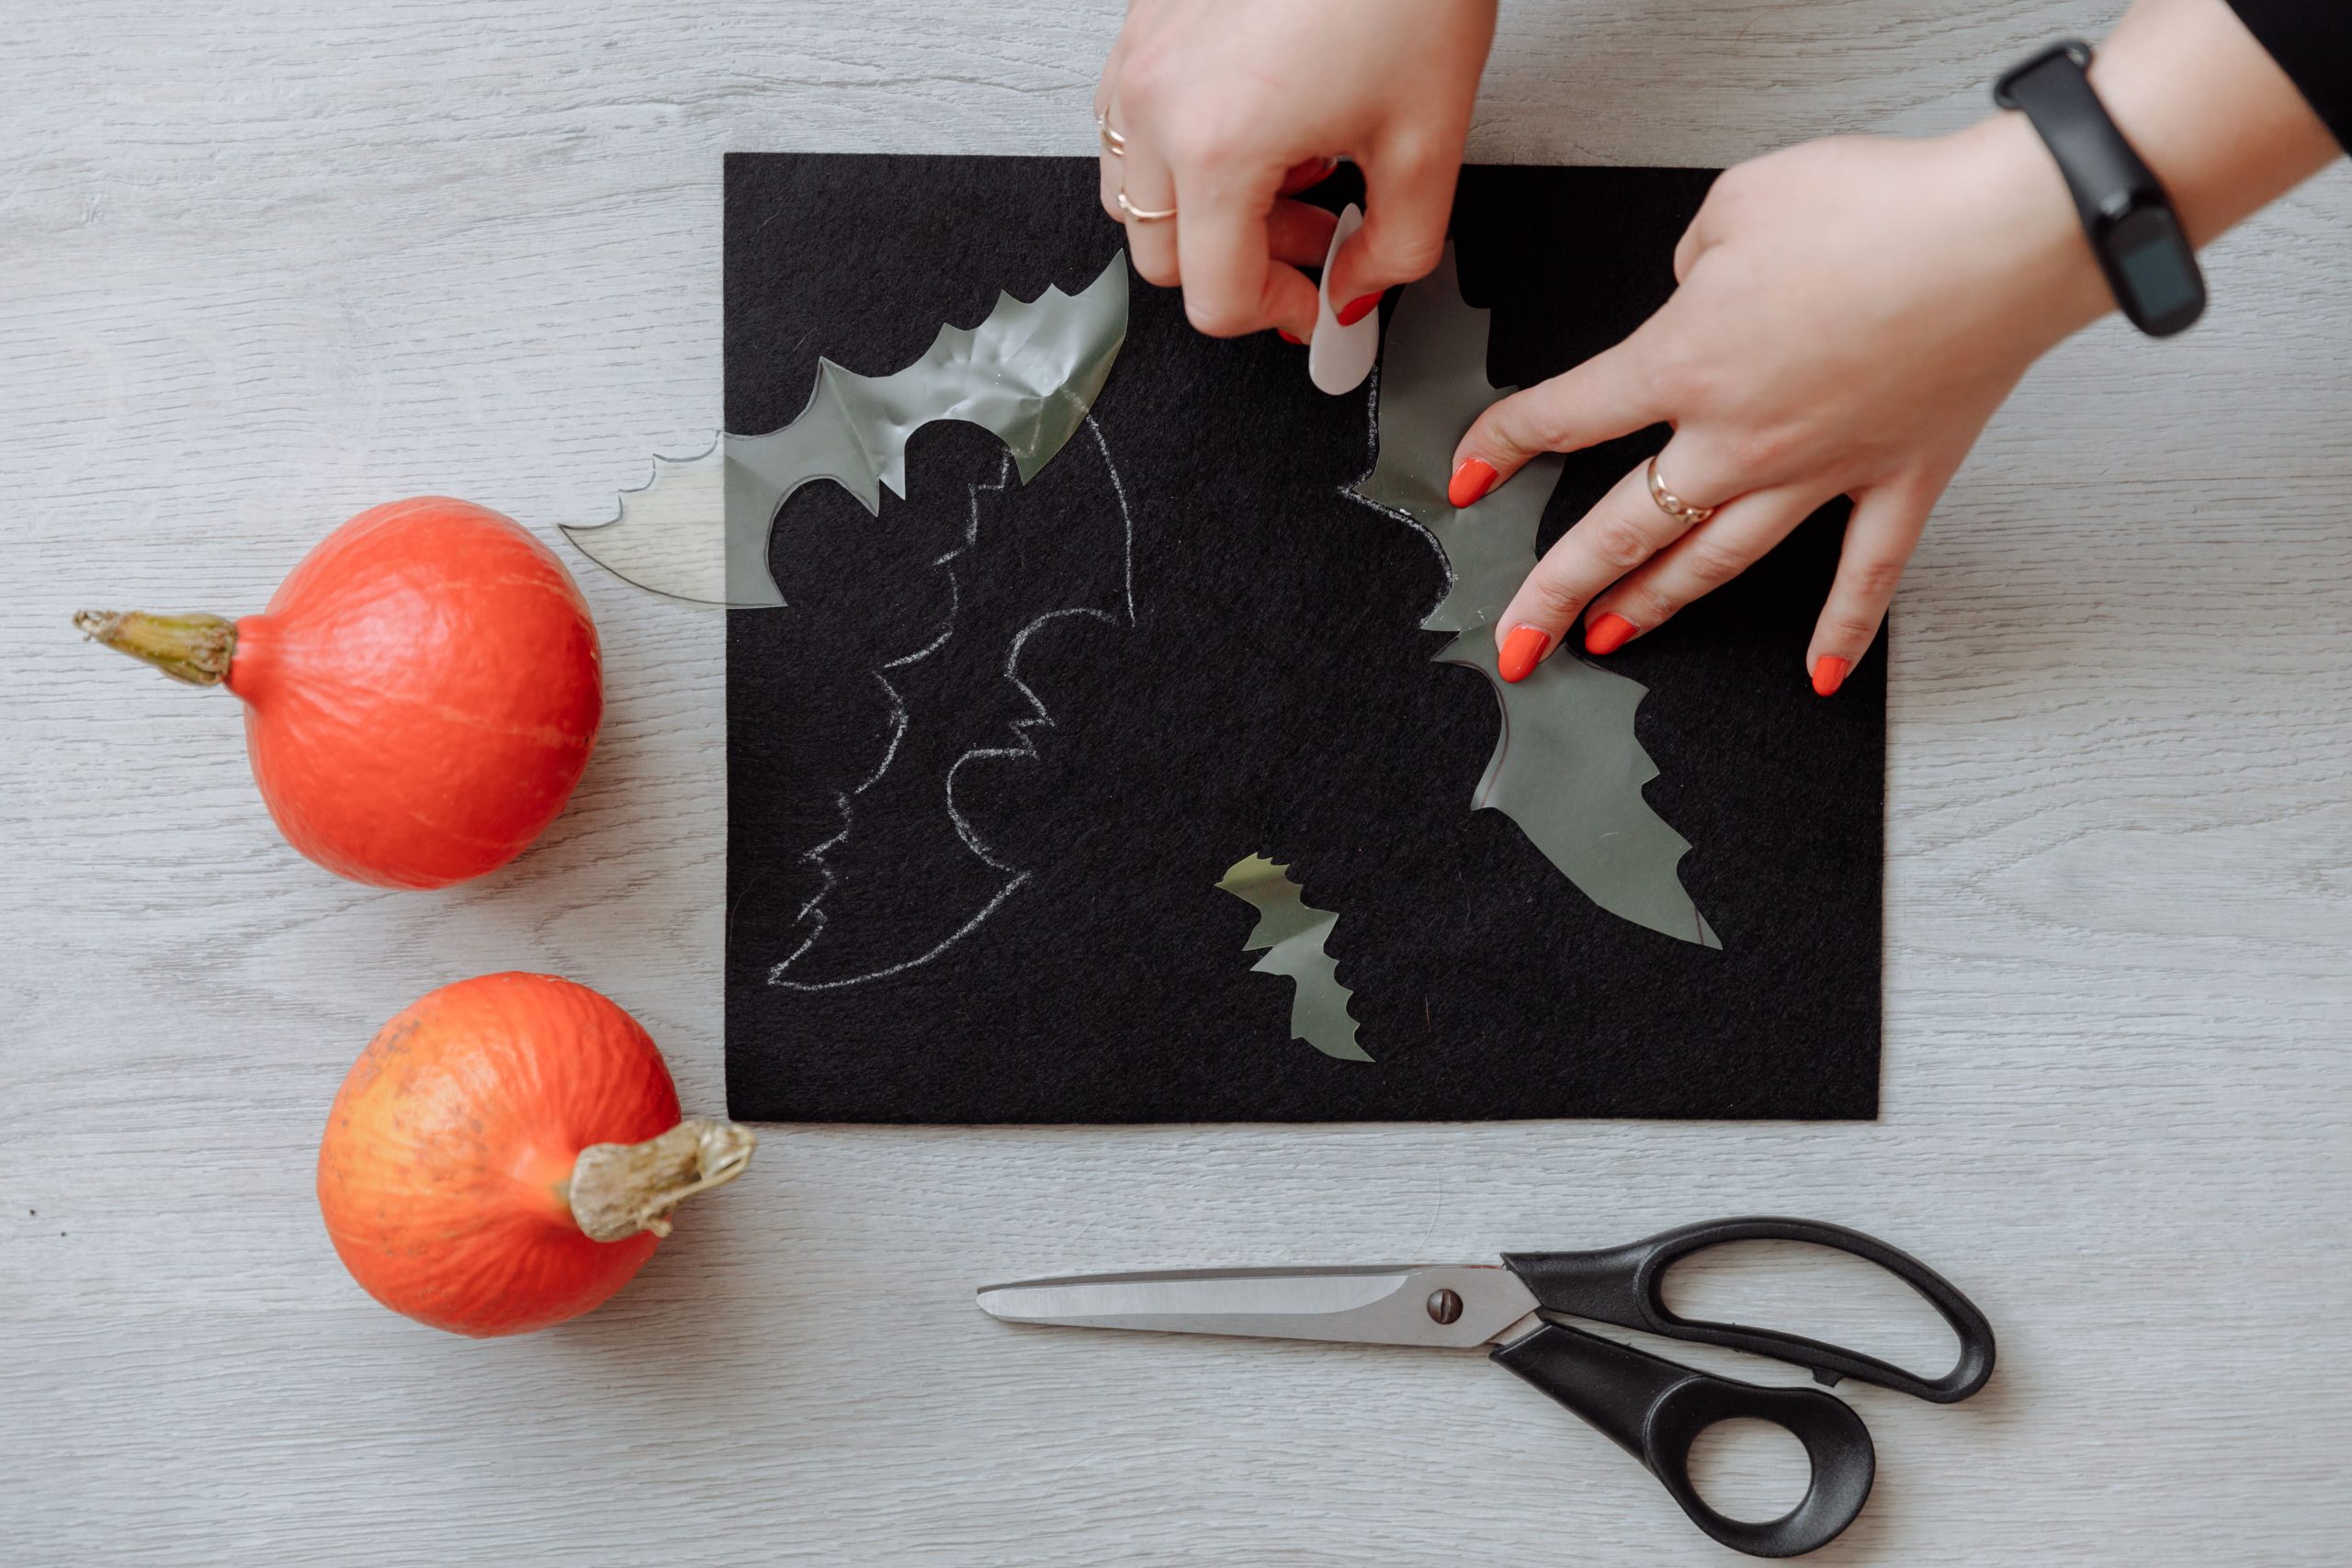
Before you dive into covering a wall with these spooky critters, it’s worth doing a quick check on a few things. This will save you a headache later.
- Test Your Adhesive: Make sure the tape or putty you plan to use won’t peel the paint off your wall. Test it in an inconspicuous spot (like behind a door or a piece of furniture) for 24 hours before you commit to creating your full swarm.
- Check Your Felt Supply: How big of a swarm are you planning? Measure the area and do a quick estimate. You might need more felt than you think to create a dense, impactful look. One standard 9×12 inch sheet usually yields 4-5 medium-sized bats.
- Verify Your Scissors: Are your scissors actually sharp enough for fabric? Trying to cut felt with dull paper scissors is a recipe for frustration and raggedy-looking bats. A dedicated pair of fabric shears is a game-changer. This project is a great companion to the sewing-machine version in Idea #27.
7. Creating Drippy Crayon Art on a Mini White Pumpkin
Okay, real talk about the melted crayon pumpkin craft: it’s incredibly fun, but it is MESSY. The wax will drip everywhere, so do not attempt this on your nice dining room table without serious protection. A disposable aluminum baking pan or a cardboard box lined with foil is your best friend here. Also, be aware that not all crayons are created equal. Some brands are more waxy and melt beautifully, while others are more pigmented and can get clumpy. And whatever you do, don’t use a high-heat hair dryer setting unless you want wax splattered on your walls, your clothes, and your cat. Low and slow is the way to go.
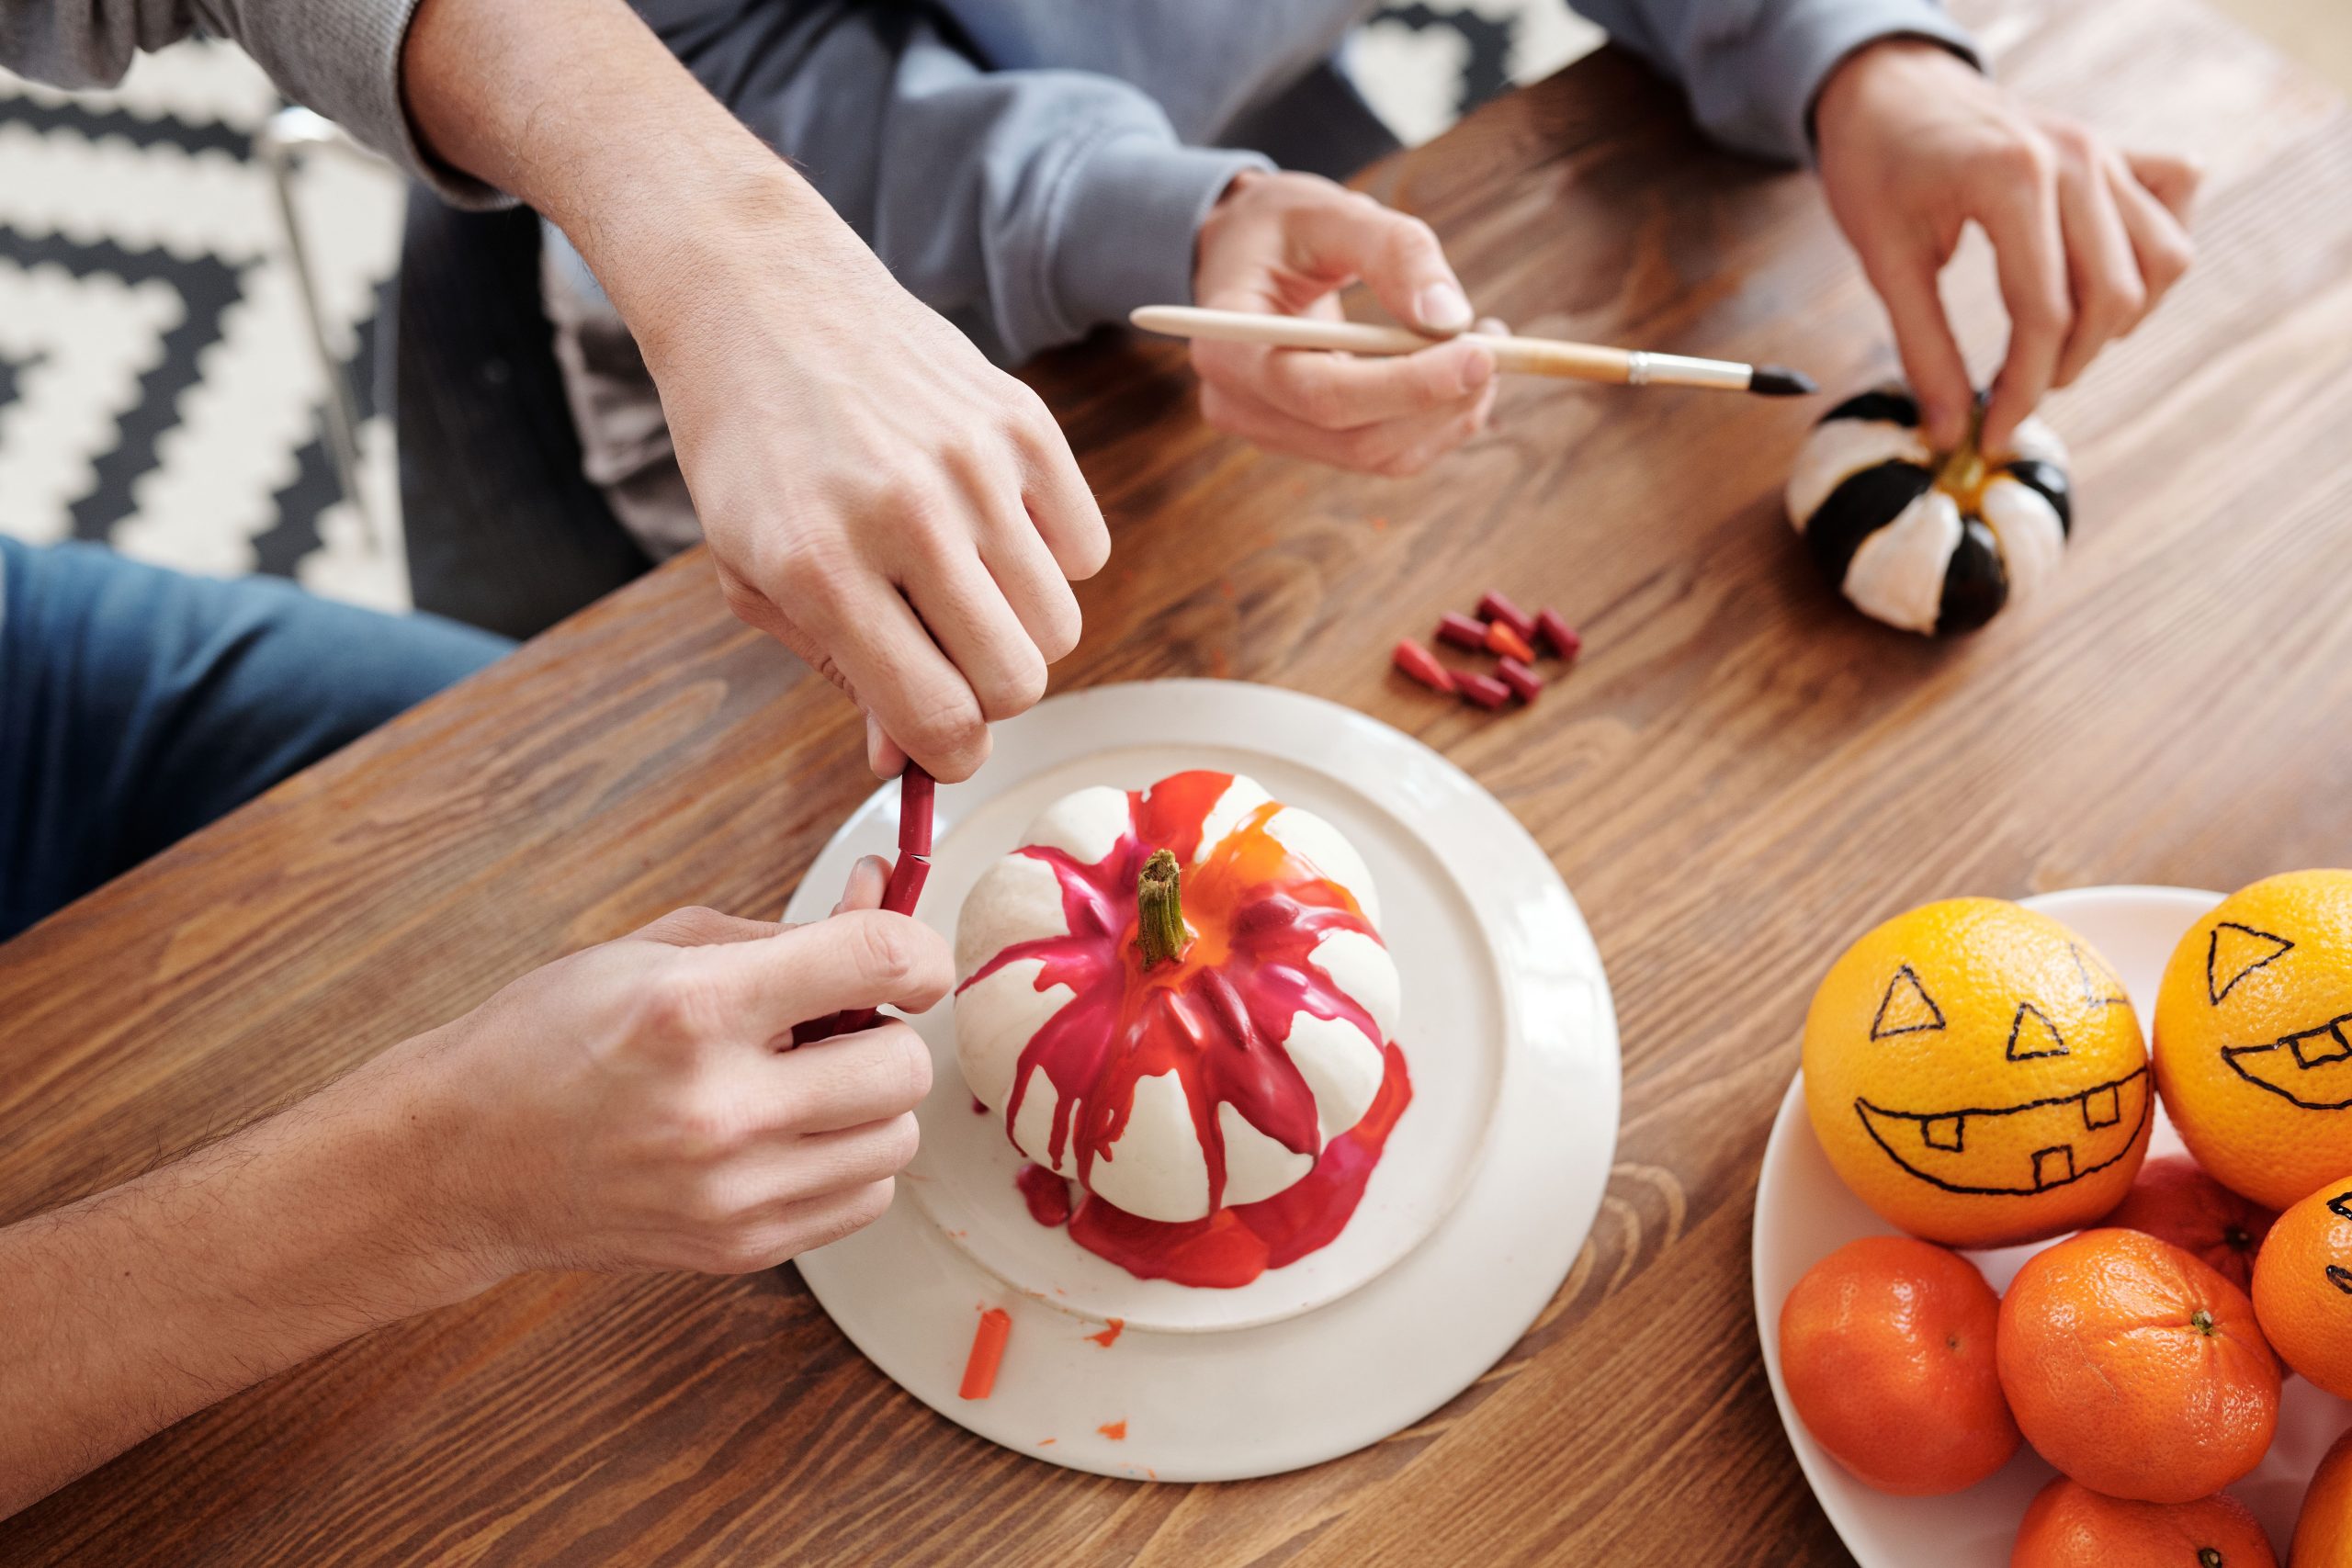
Here’s the professional tip that makes this project work better: start with a white or very light-colored pumpkin. The vibrant crayon colors will pop so much more against a neutral background than they will on a traditional orange pumpkin, where the colors can get muddy. If you can only find orange pumpkins, give them a quick coat of white spray paint or acrylic craft paint first. Let it dry completely before you start melting. This extra step provides a clean canvas and makes the final drippy masterpiece look so much more intentional and graphic. Compared to the pastel pumpkins in Idea #4, this method embraces vibrant, primary-style colors.
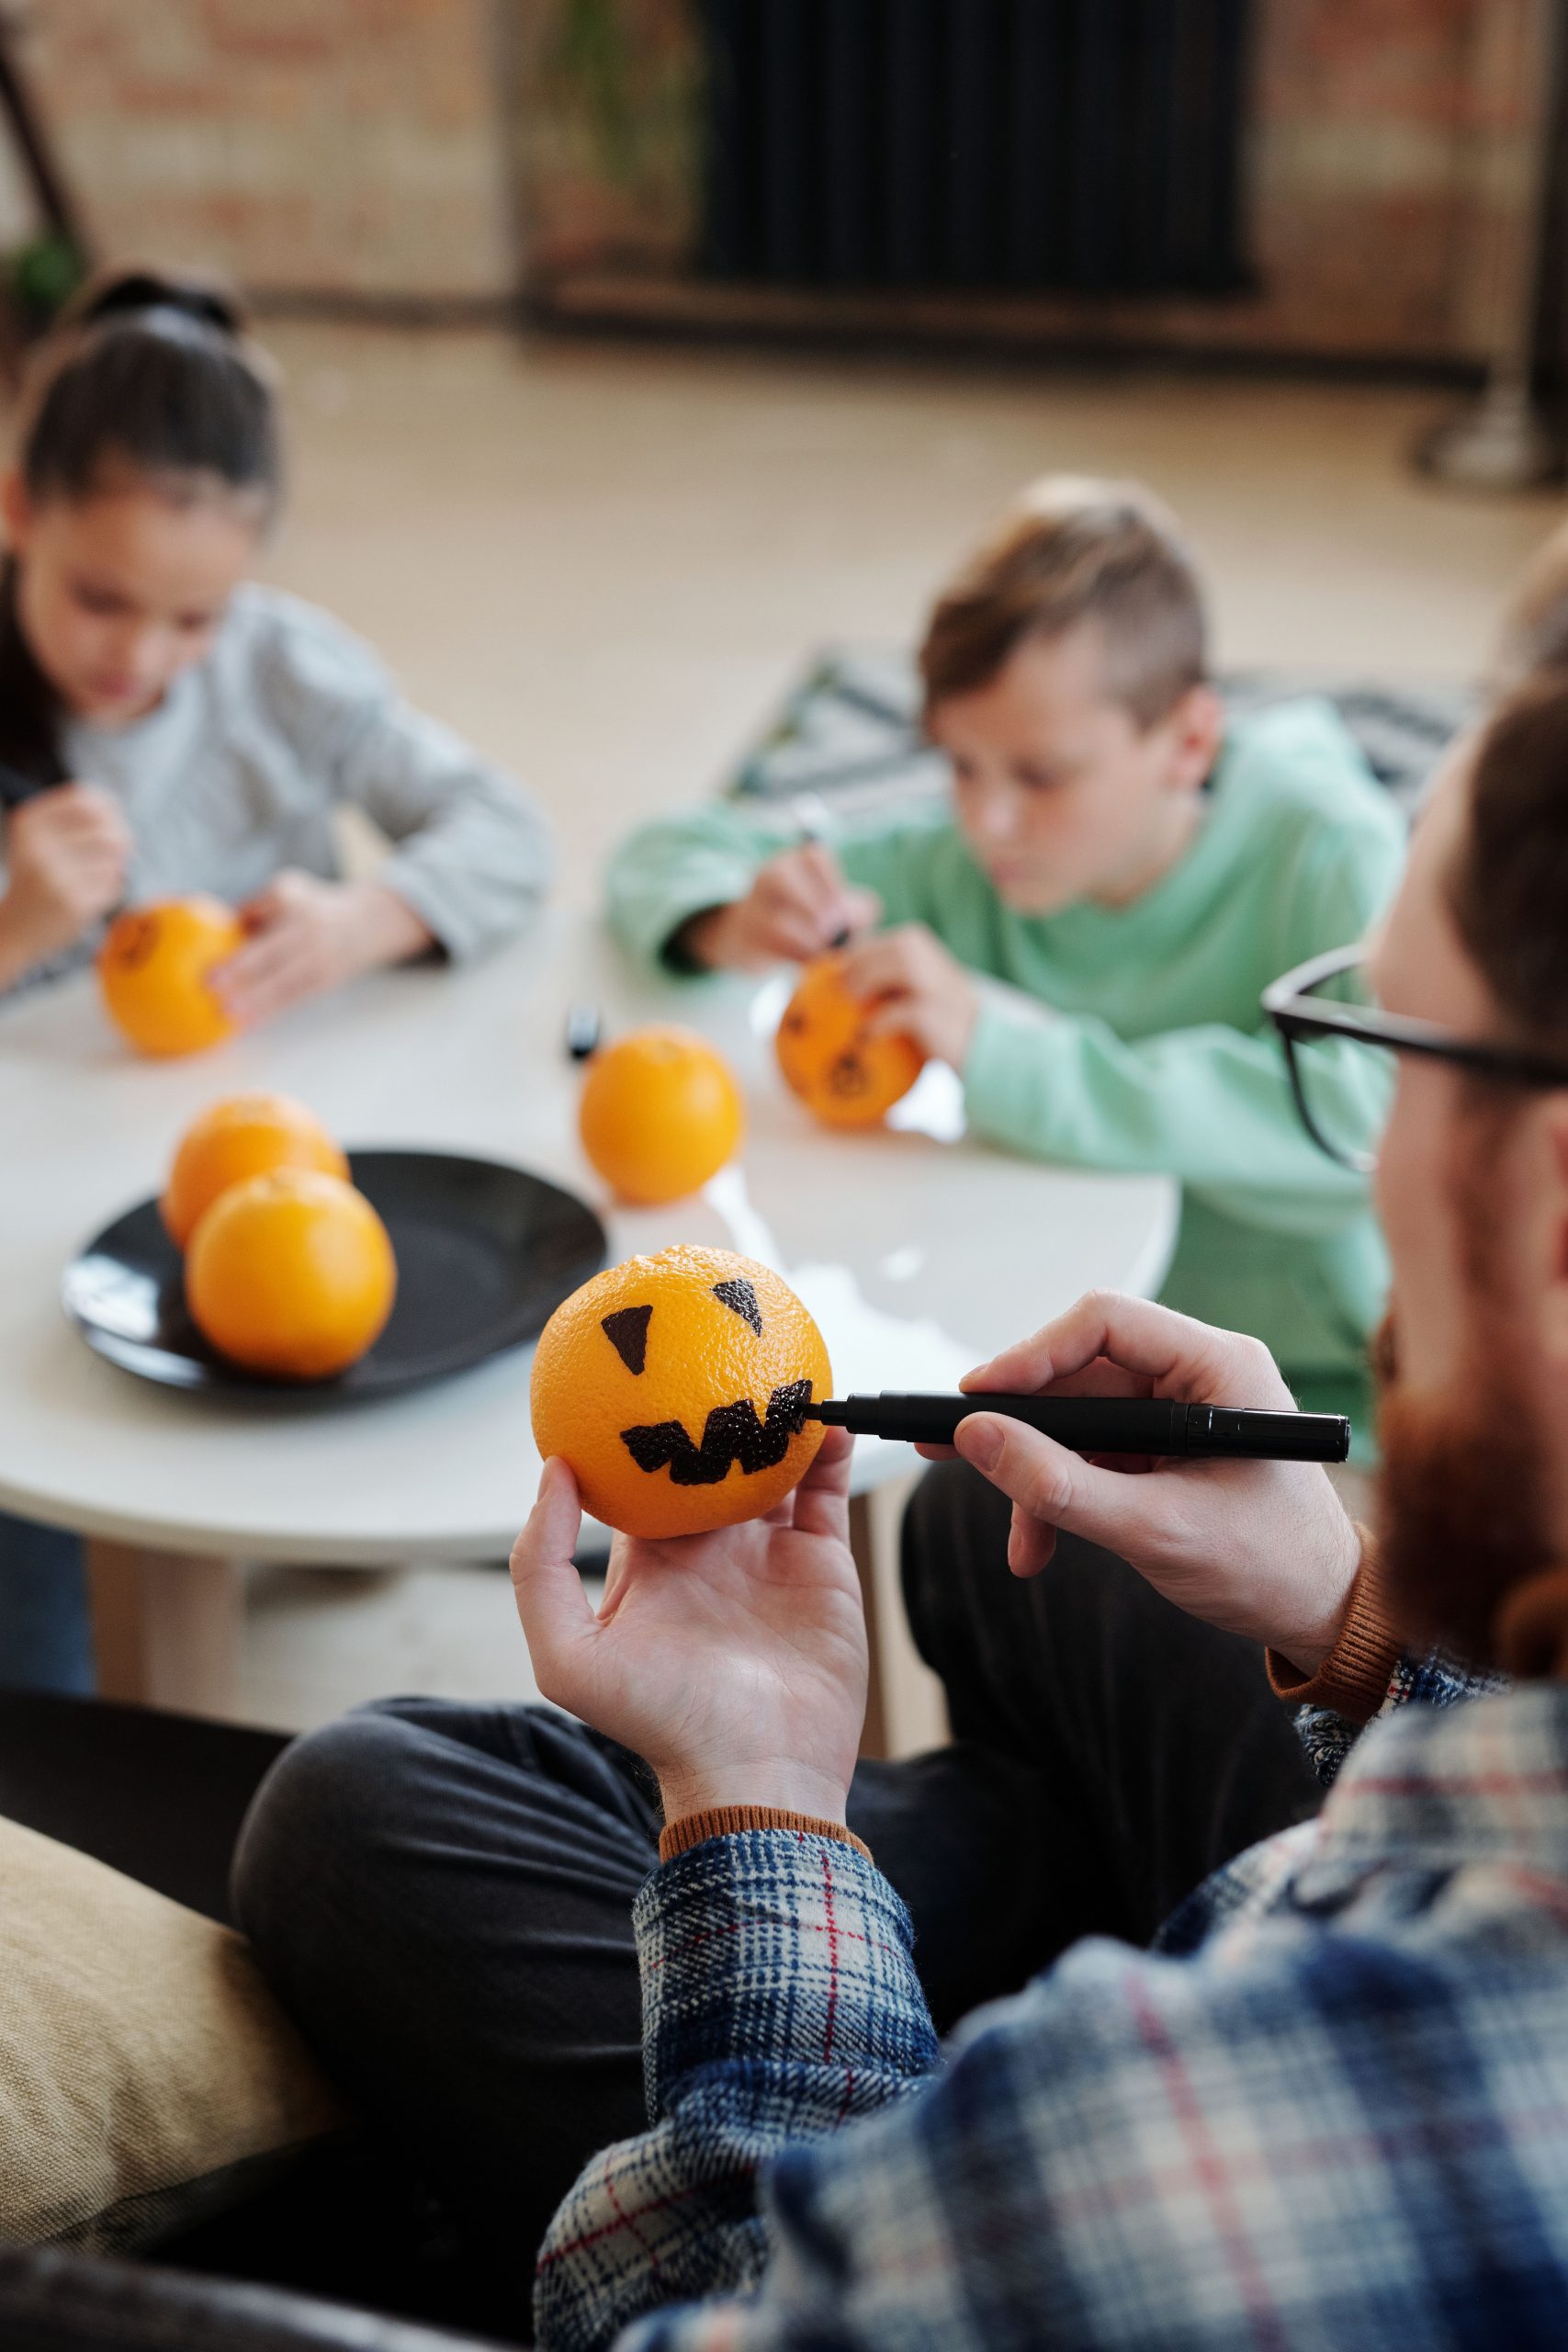
8. Drawing Jack-o’-Lantern Faces on Oranges with Markers
This is the ultimate ‘Get This Look For Less’ fall craft. A bag of oranges from the grocery store will cost you maybe $5-$7. A black Sharpie is about $2. That’s it. For under $10, you have a festive, fun activity that can occupy kids and adults for a good chunk of time. You don’t need special tools, you don’t need to deal with pumpkin guts, and the cleanup is virtually nonexistent. Plus, when you’re done admiring them, you have a healthy snack! It’s the perfect party activity or a simple way to add a bit of Halloween cheer to the kitchen counter without breaking the bank.
|
📋 Copy HEX 🔗 Share |
What makes this simple craft so effective is the power of suggestion and personality. Our brains are hardwired to see faces, and the simple act of drawing two triangles and a jagged smile onto an orange instantly transforms it into a character. The bright, cheerful orange color is already perfectly on-brand for fall, so you’re halfway there before you even uncap the marker. It’s a low-effort, high-reward project because it leans into pre-existing associations (orange color = fall, drawn face = jack-o’-lantern) to create something instantly recognizable and charming.
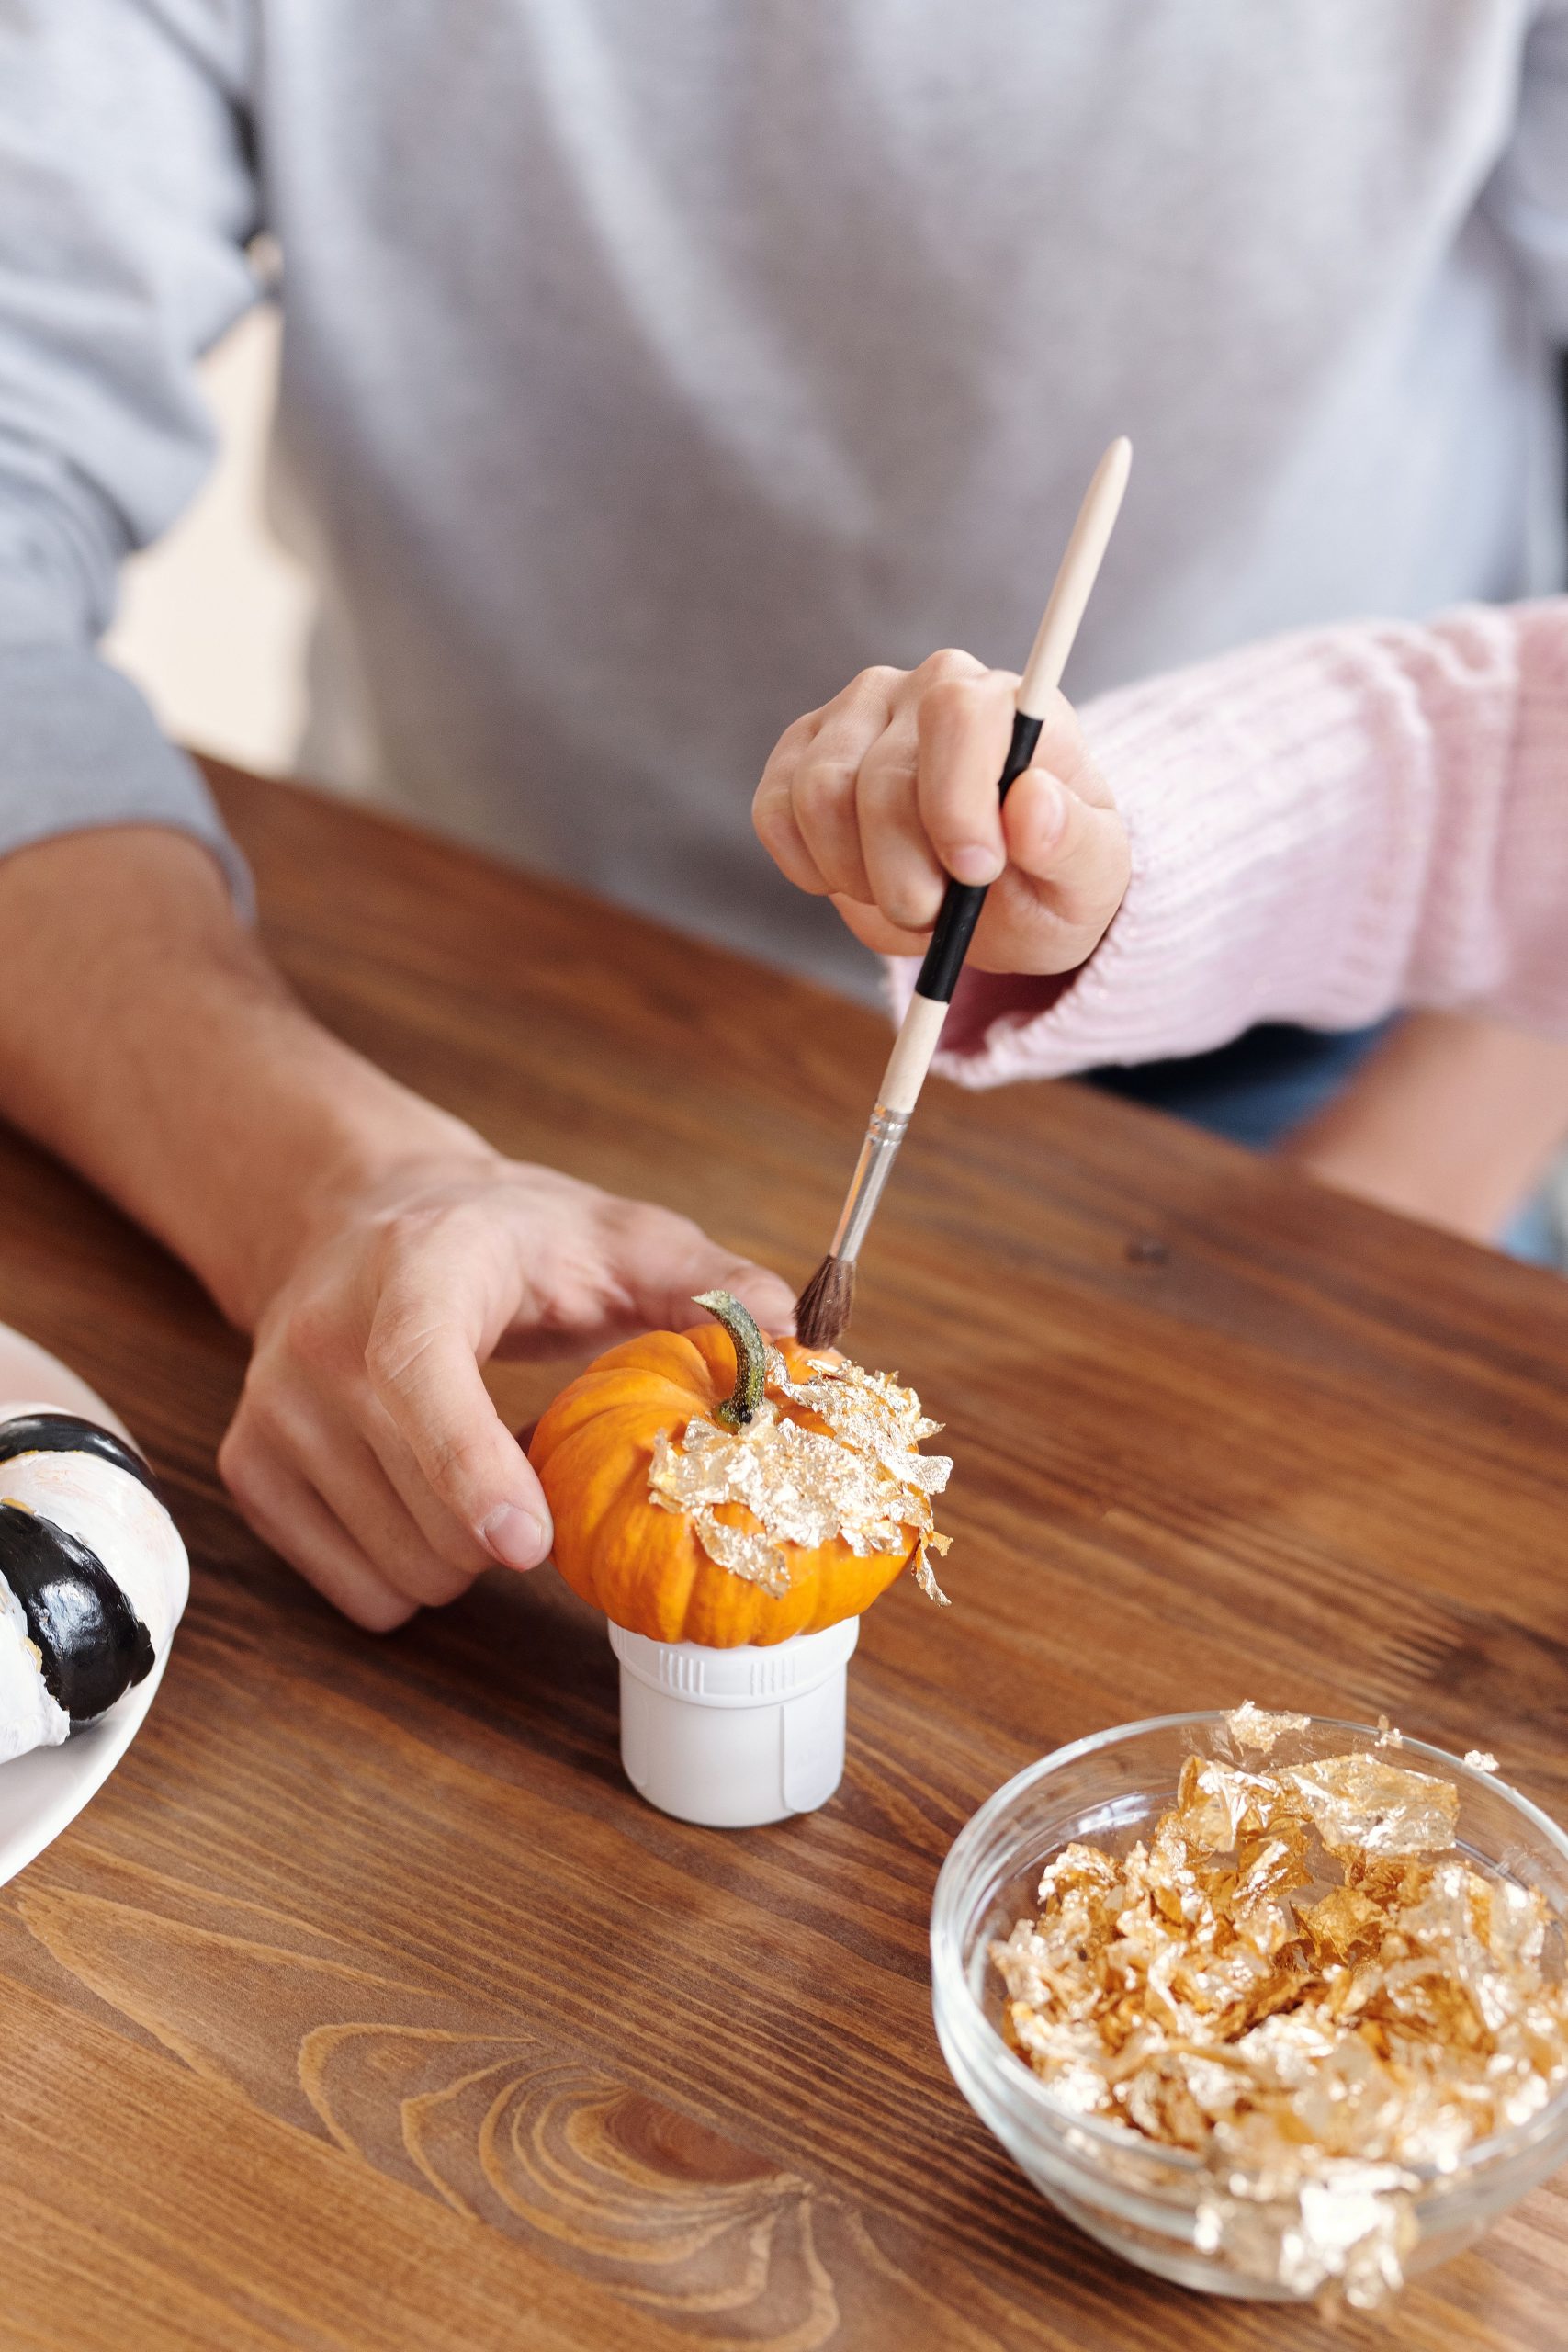
9. Applying Gold Leaf Flakes to a Mini Pumpkin
The single element that elevates this craft from simple to stunning is, without a doubt, the gold leaf. You could paint a pumpkin gold, but it would never have the same effect. The beauty of gold leaf is its incredible luminosity and texture. It catches the light in a way that paint just can’t, creating a shimmering, dimensional surface. The tiny, irregular flakes add a layer of texture that feels both rustic and luxurious. It’s this touch of metallic glamour against the organic, matte surface of the pumpkin that creates such a compelling visual contrast and makes the object feel precious.
|
📋 Copy HEX 🔗 Share |
A little honesty about working with gold leaf: it’s delicate and needs to be sealed. If you just apply the flakes to the pumpkin with a bit of adhesive, they will likely flake off over time, especially if the pumpkin is handled. To preserve your beautiful work, you must apply a top coat. You can use a spray-on sealant (look for one that’s safe for metal leaf) or carefully paint over it with a thin layer of Mod Podge or a similar water-based sealer. This will protect the fragile leaf from chipping and tarnishing, ensuring your gilded gourd stays glamorous throughout the season.
10. Autumnal Flat Lay with Yarn, Dried Oranges, and Knitting Needles
Let’s break down the formula for this perfectly cozy flat lay. It’s a composition based on texture and tone. I’d call it 40% soft textiles (the beige yarn, cream knitted fabric, and cotton bolls), 40% rustic naturals (the dried orange slices, walnuts, pinecones, and wood needles), and 20% linear elements (the knitting needles and strands of string). The magic is in the tightly controlled color story—shades of beige, brown, and off-white dominate, with the dried orange slices providing the only pop of accent color. This limited palette is what makes the collection of disparate items feel like a unified, curated whole.
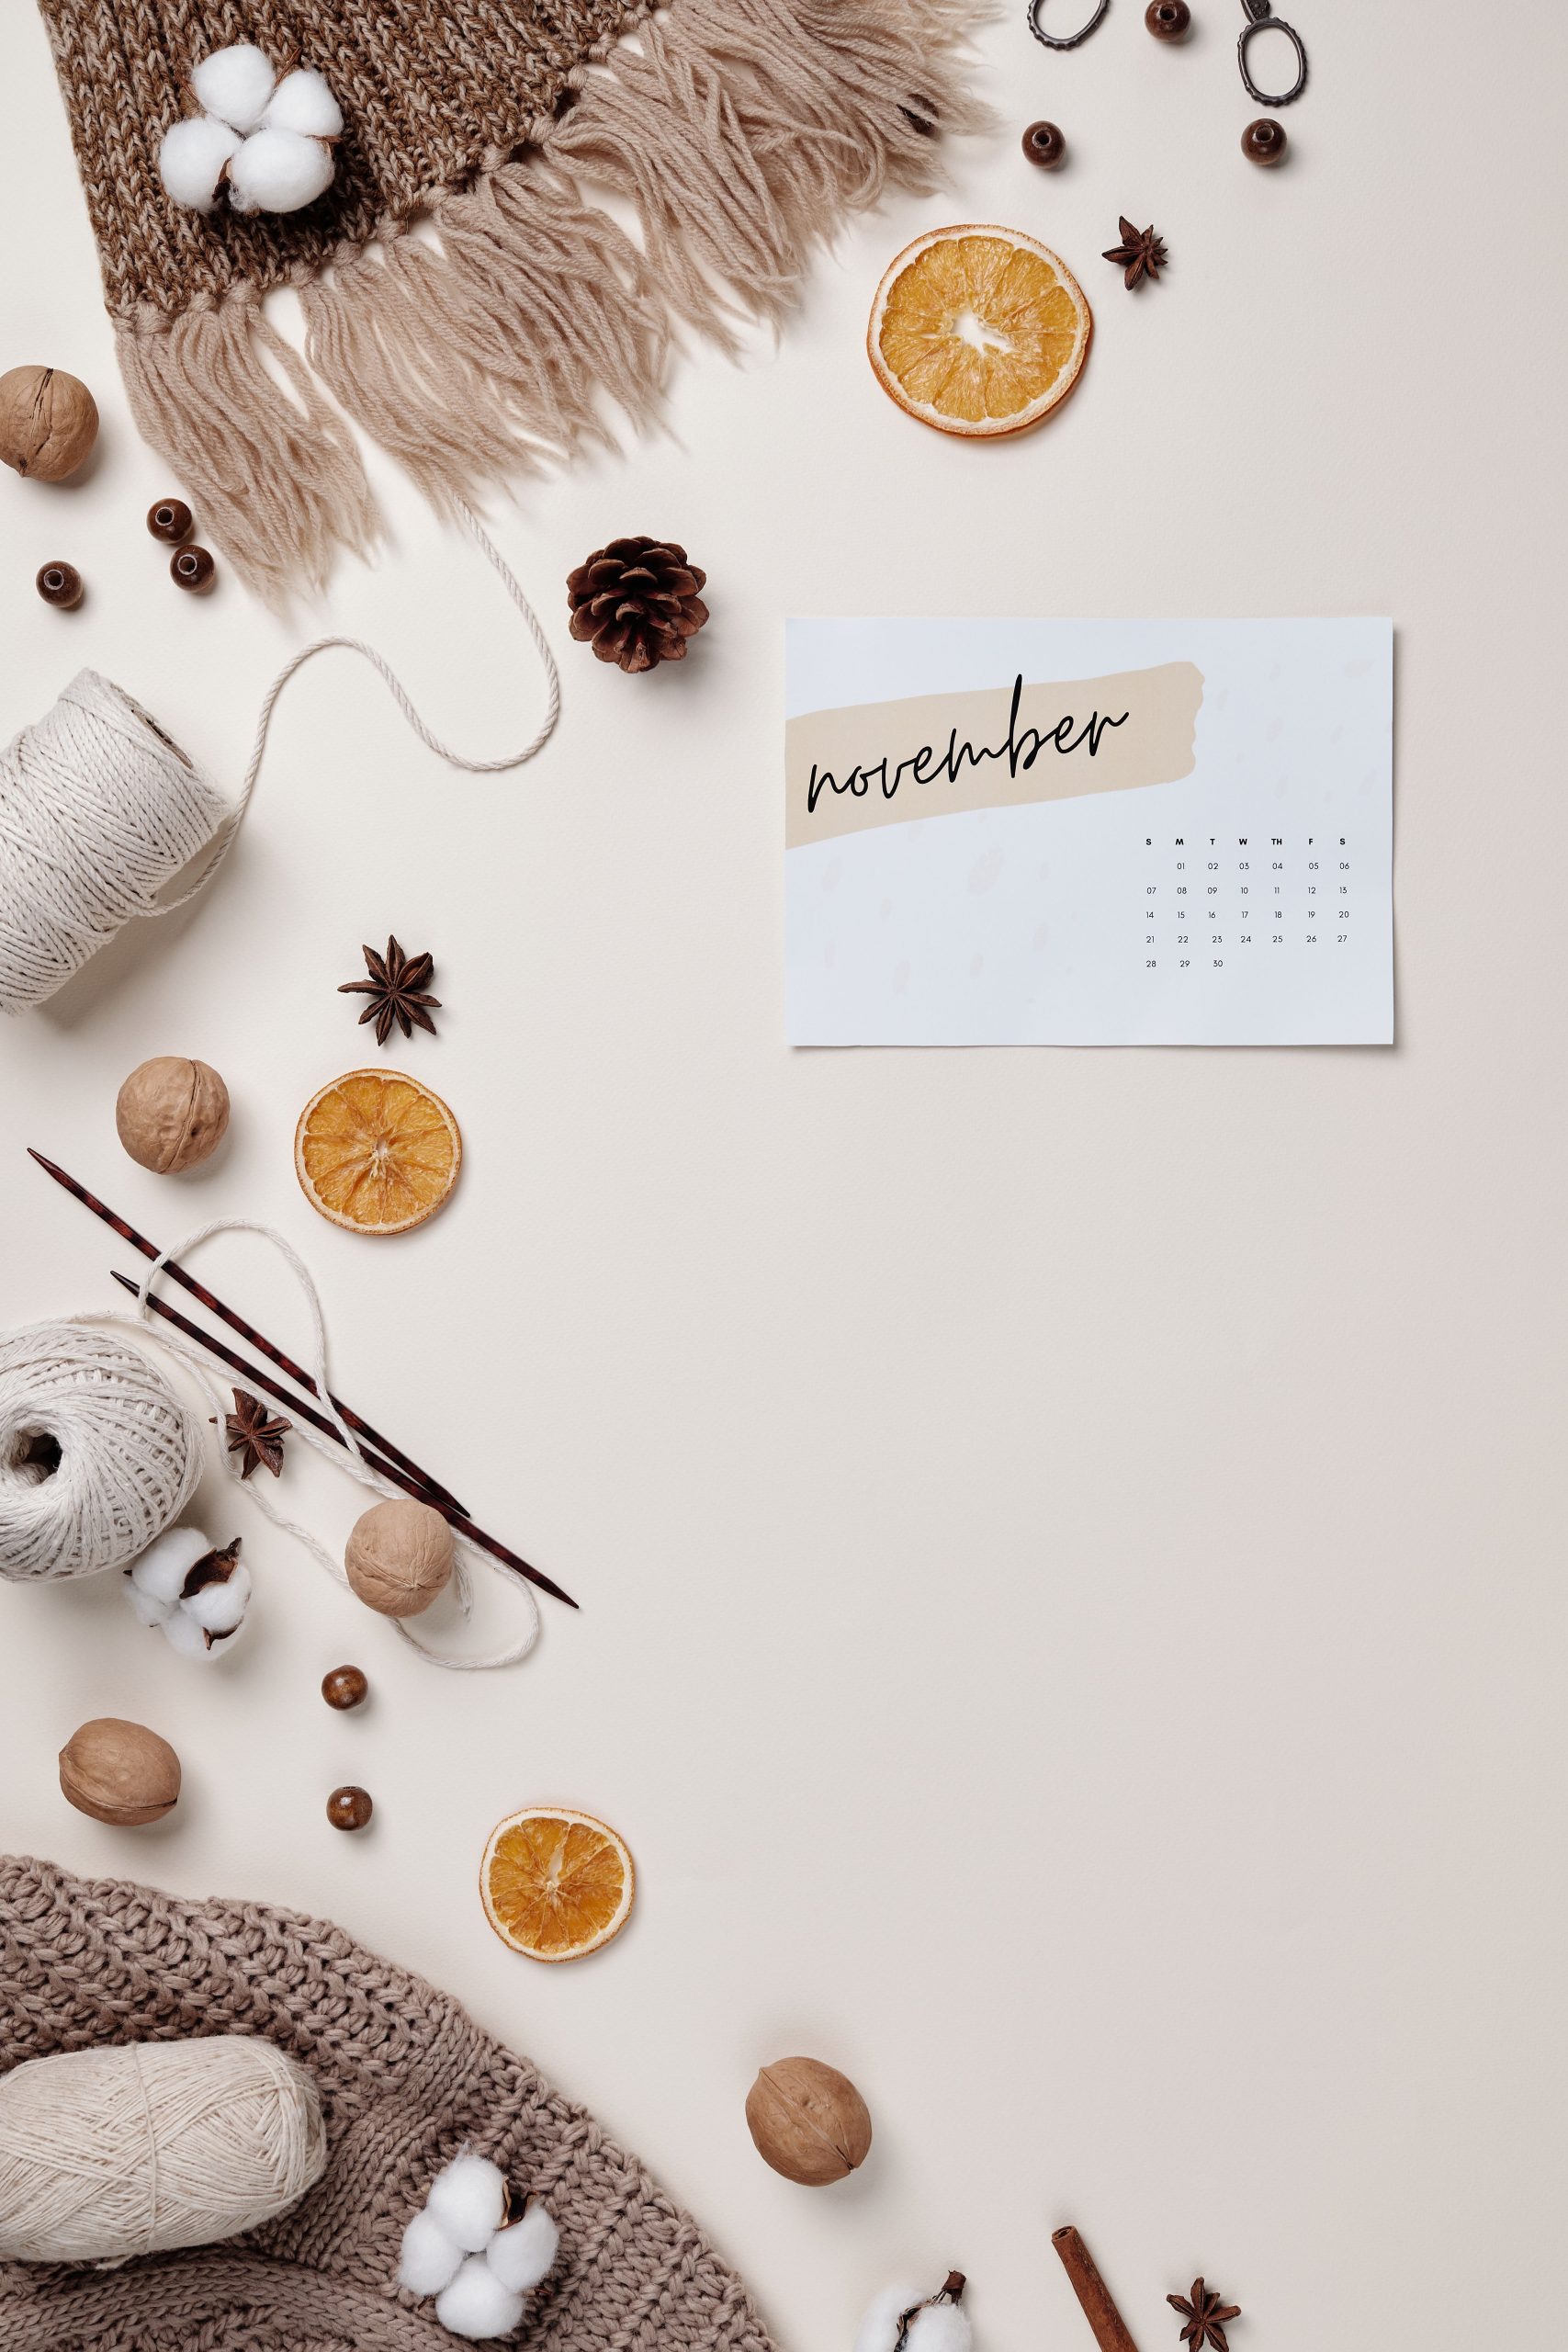
This kind of detailed, small-scale craft photography is perfect for anyone living in a smaller space. You don’t need a huge, dedicated studio or a perfectly decorated room. This entire shot could be staged on a surface no larger than 24 x 24 inches. A small coffee table, a cleared-off section of your desk, or even a large piece of foam board on the floor can serve as your ‘studio.’ It’s about creating a miniature world, not decorating a full room. This makes it an ideal creative outlet for apartment dwellers or anyone who wants to capture that fall feeling without a large-scale home makeover.
11. Cozy Knitting Scene with a Lit Candle and Dried Fruit
This image is so effective because it engages more than just the sense of sight; it implies scent and touch. The composition uses the design principle of ‘sensory layering. ‘You have the visual warmth of the orange and red yarn, which is echoed by the actual warmth and glow from the lit candle. You can almost feel the soft, fluffy cream textile and the smooth wooden coaster. The inclusion of the cinnamon stick and dried orange slices strongly suggests the classic autumn scents of spice and citrus. It’s a multi-sensory experience captured in a single frame, which is why it feels so deeply cozy and inviting.
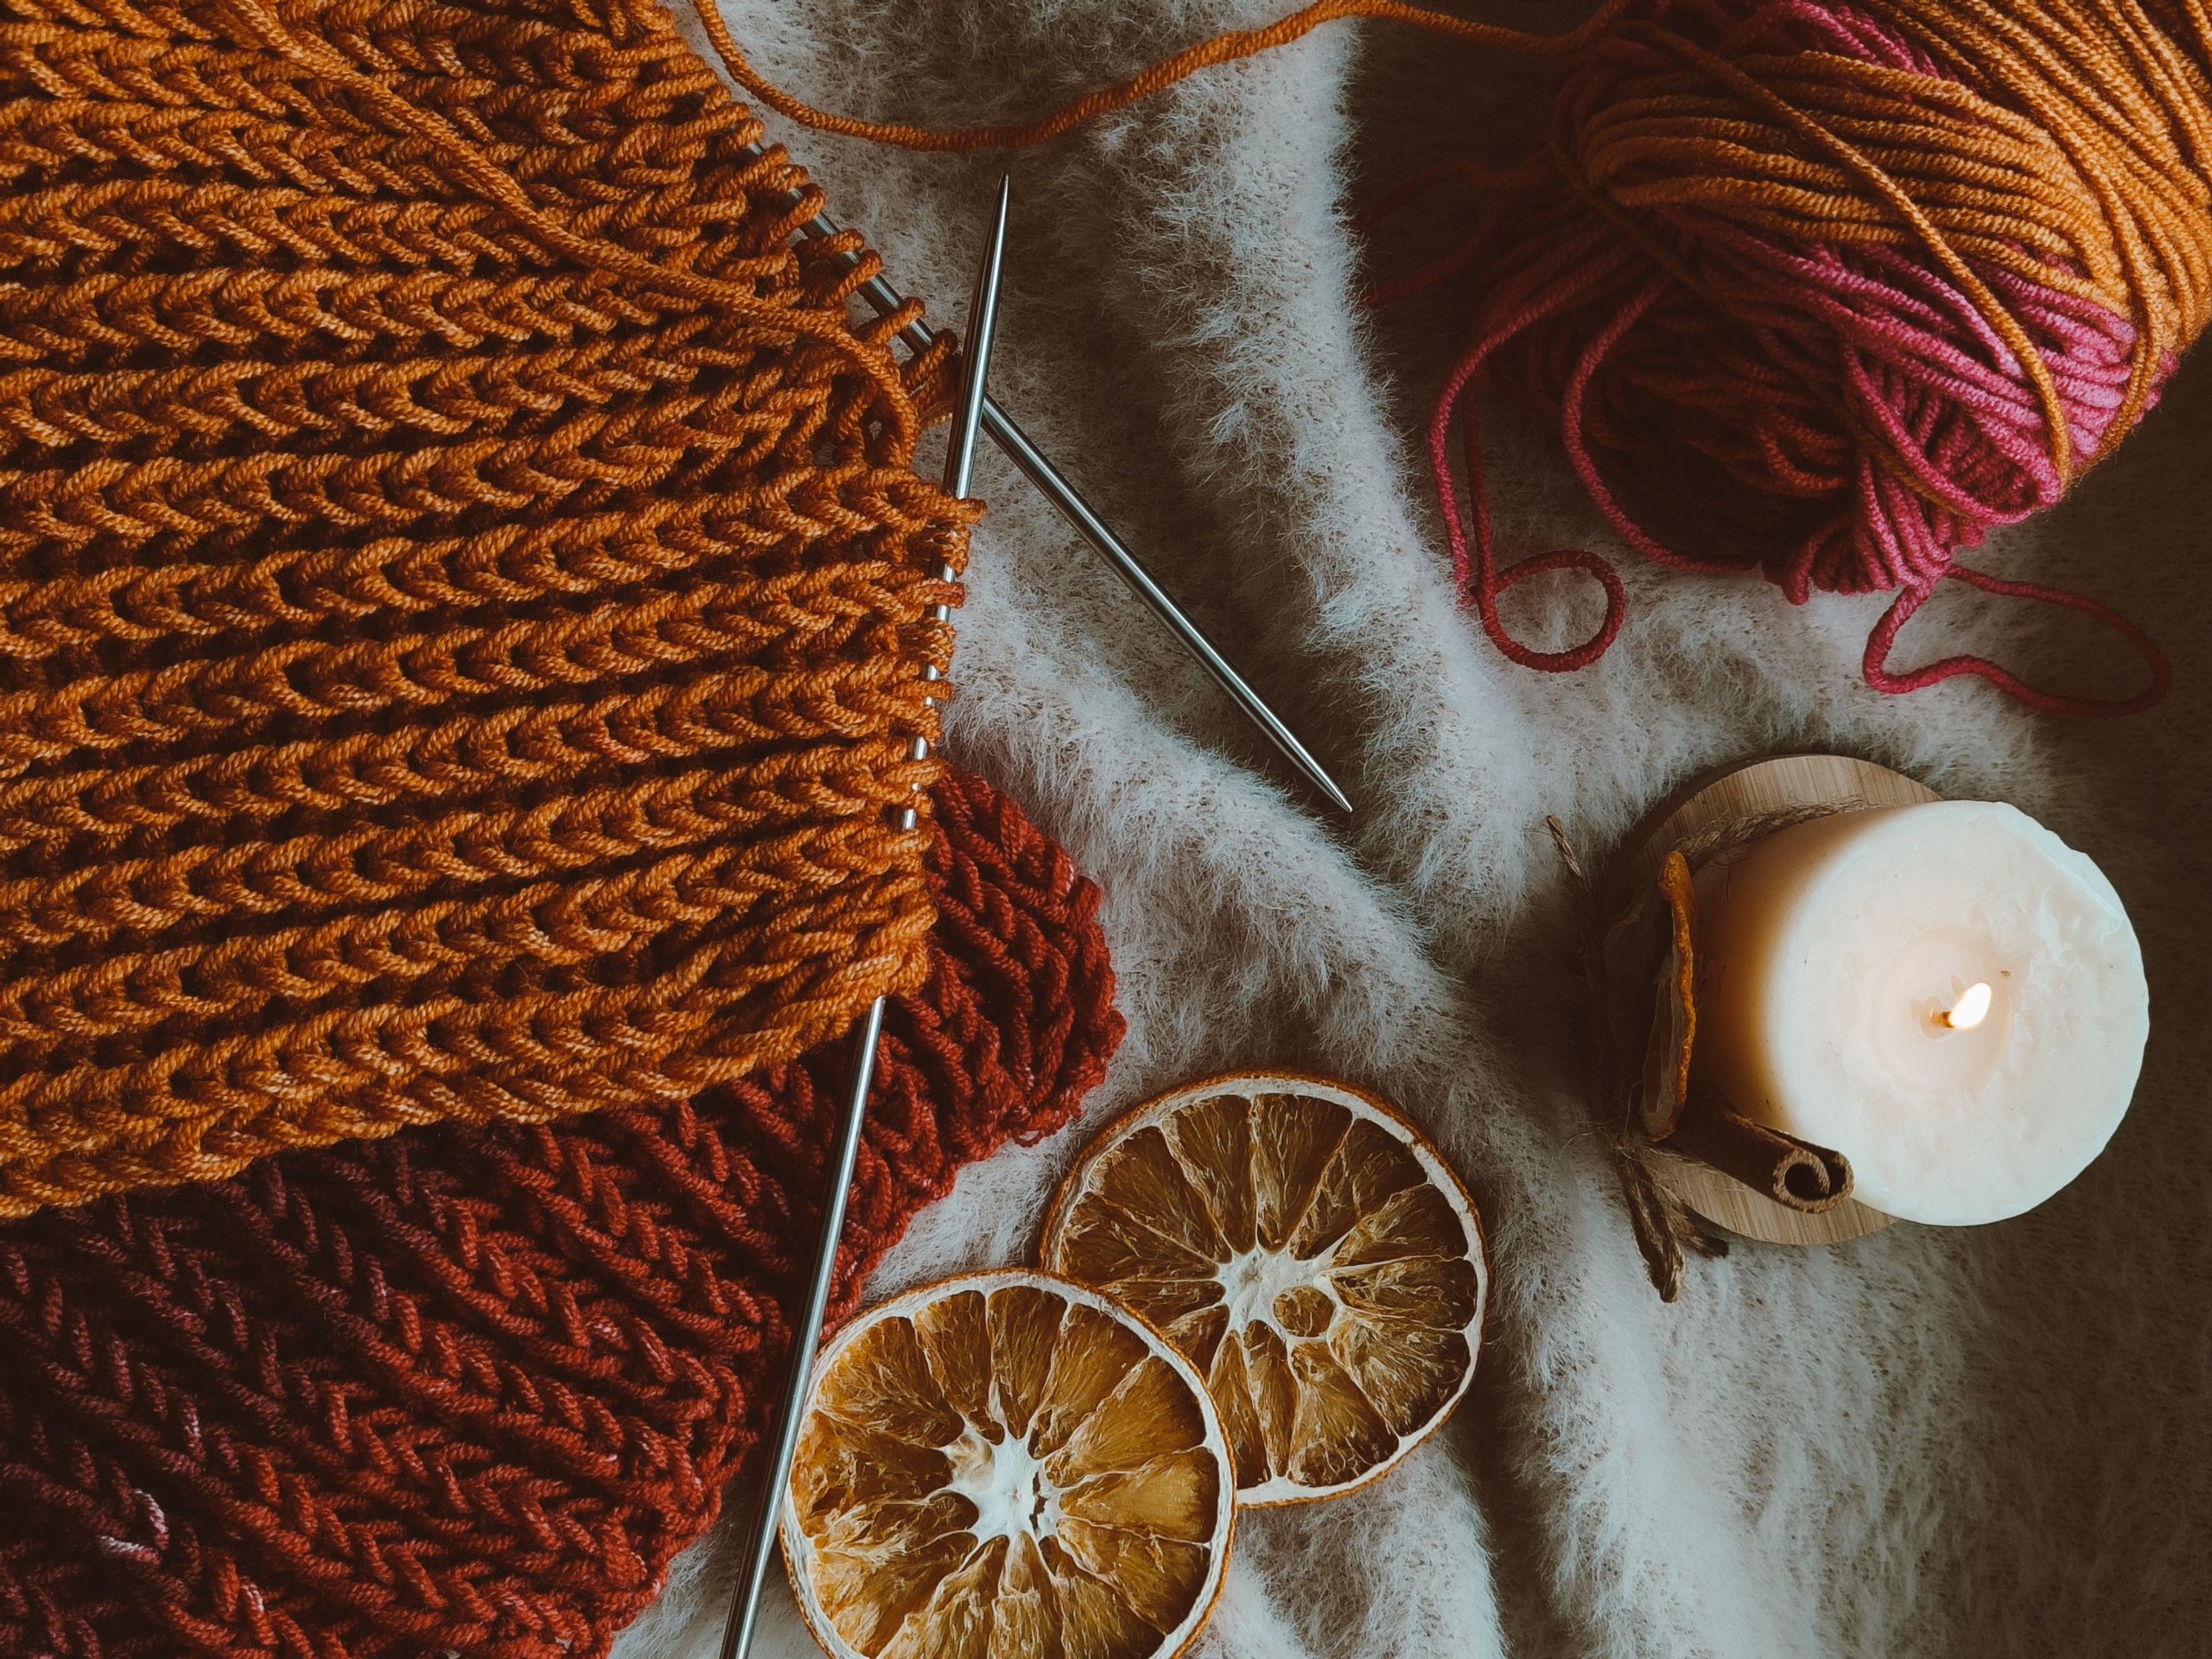
A quick word of caution for my fellow crafters who love a cozy vibe: please be careful with candles around yarn and textiles. It looks beautiful in a photo, but in reality, yarn (especially acrylic and other synthetics) can be quite flammable. A lit candle should never be left unattended, and it’s best to keep it a safe distance from your yarn stash and your work-in-progress. A better, safer option for a real-life crafting session is to use a high-quality flameless LED candle. You’ll get the same warm glow without any of the fire risk. Safety first, then teamwork!
12. Gathering Fall Foliage into a Beige Mug
The single most important element in this photo is the human hand. Without the hand in the dark brown knit sleeve holding the mug, this would just be a pretty but static pile of leaves. The hand introduces a sense of action and narrative. It tells a story: someone is out on a crisp fall day, gathering treasures. It transforms the image from a still life into a moment. This element of human interaction makes the scene feel personal, relatable, and much more dynamic. It’s a reminder that fall is not just something to look at but something to experience.
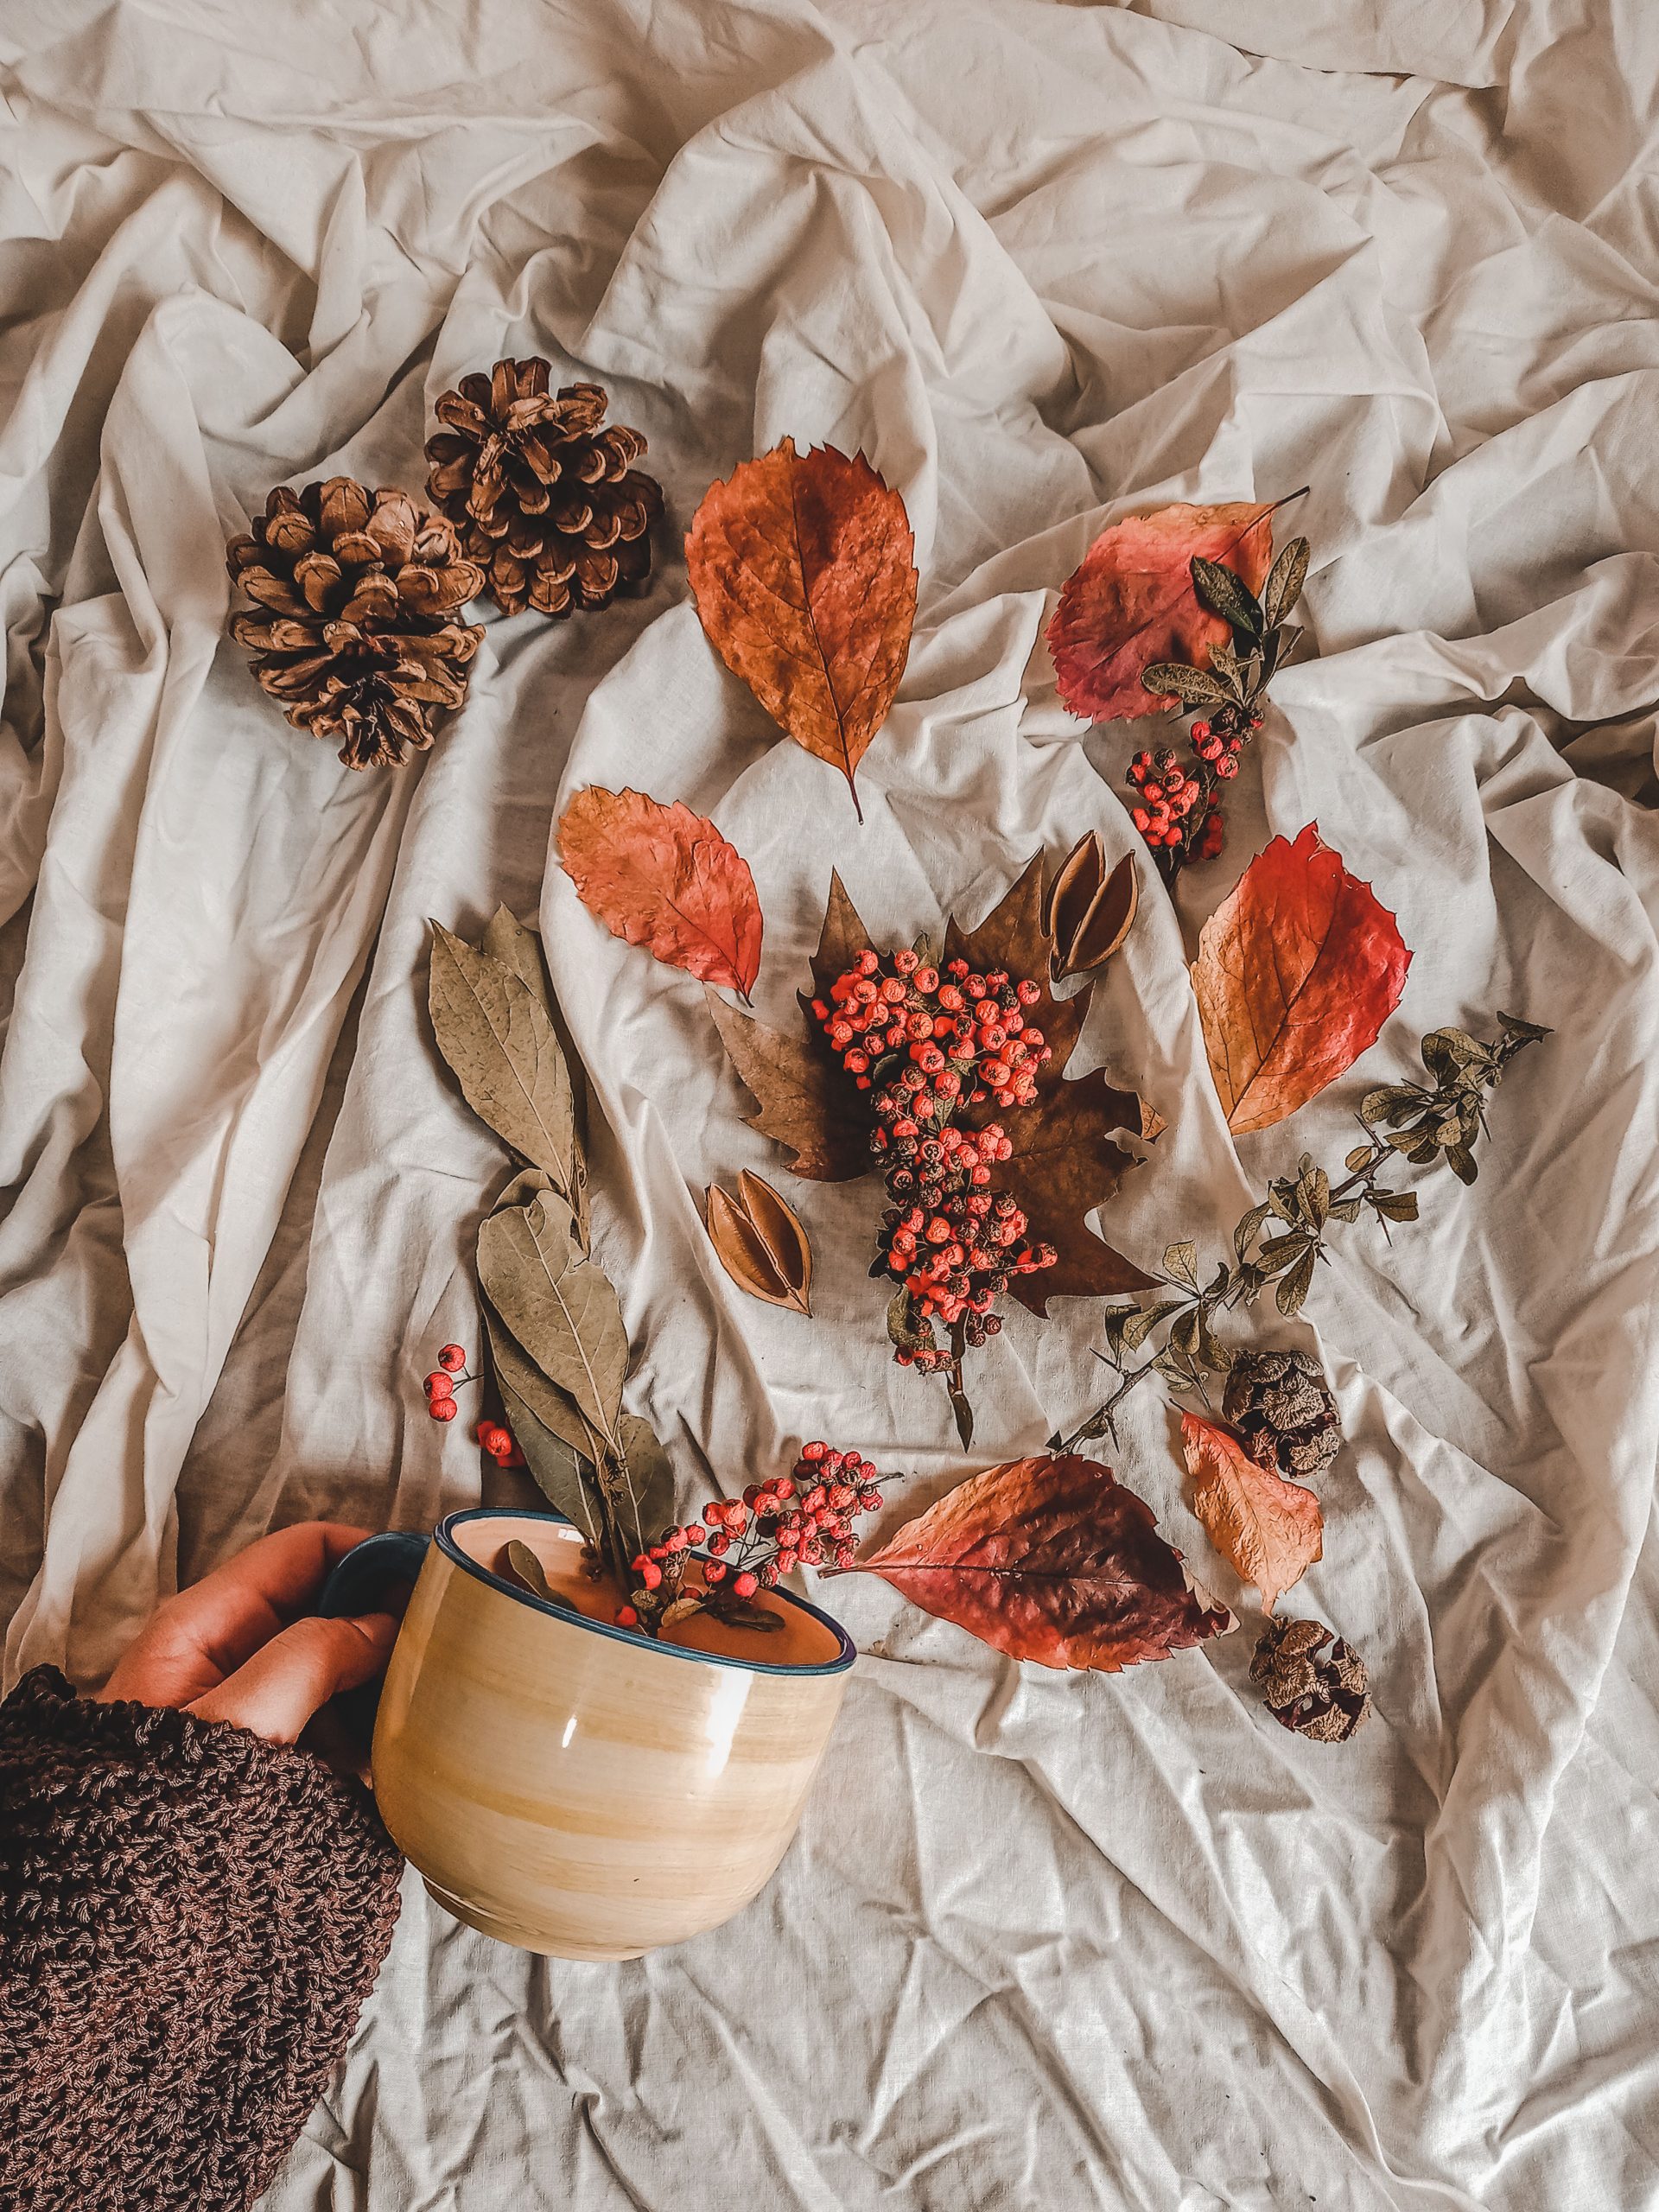
If you want to bring natural elements like leaves and berries indoors for decoration, you need to prep them first to avoid bringing in bugs or dirt. It’s a simple but crucial step. For leaves, press them between sheets of wax paper with a heavy book for a few days to flatten and preserve their color. For things like berries on branches or pinecones, give them a gentle rinse in a solution of one part white vinegar to ten parts water, then let them air dry completely on paper towels. This cleans them and helps prevent mold, ensuring your natural decor looks beautiful for longer.
13. Holding a Handmade Dark Brown Knitted Pumpkin
Why is this simple object so charming? It works because of the delightful juxtaposition of materials. The main body of the pumpkin is made from a soft, dark brown knit—a material we associate with warmth, comfort, and cozy sweaters. But the stem is a real, rough, natural twig. This combination of a handmade, soft element with a found, rustic object creates a wonderful sensory and visual contrast. The coiled beige tendrils add another layer of texture and detail, making the whole piece feel thoughtfully designed and lovingly crafted. It’s a perfect blend of cozy and rustic.
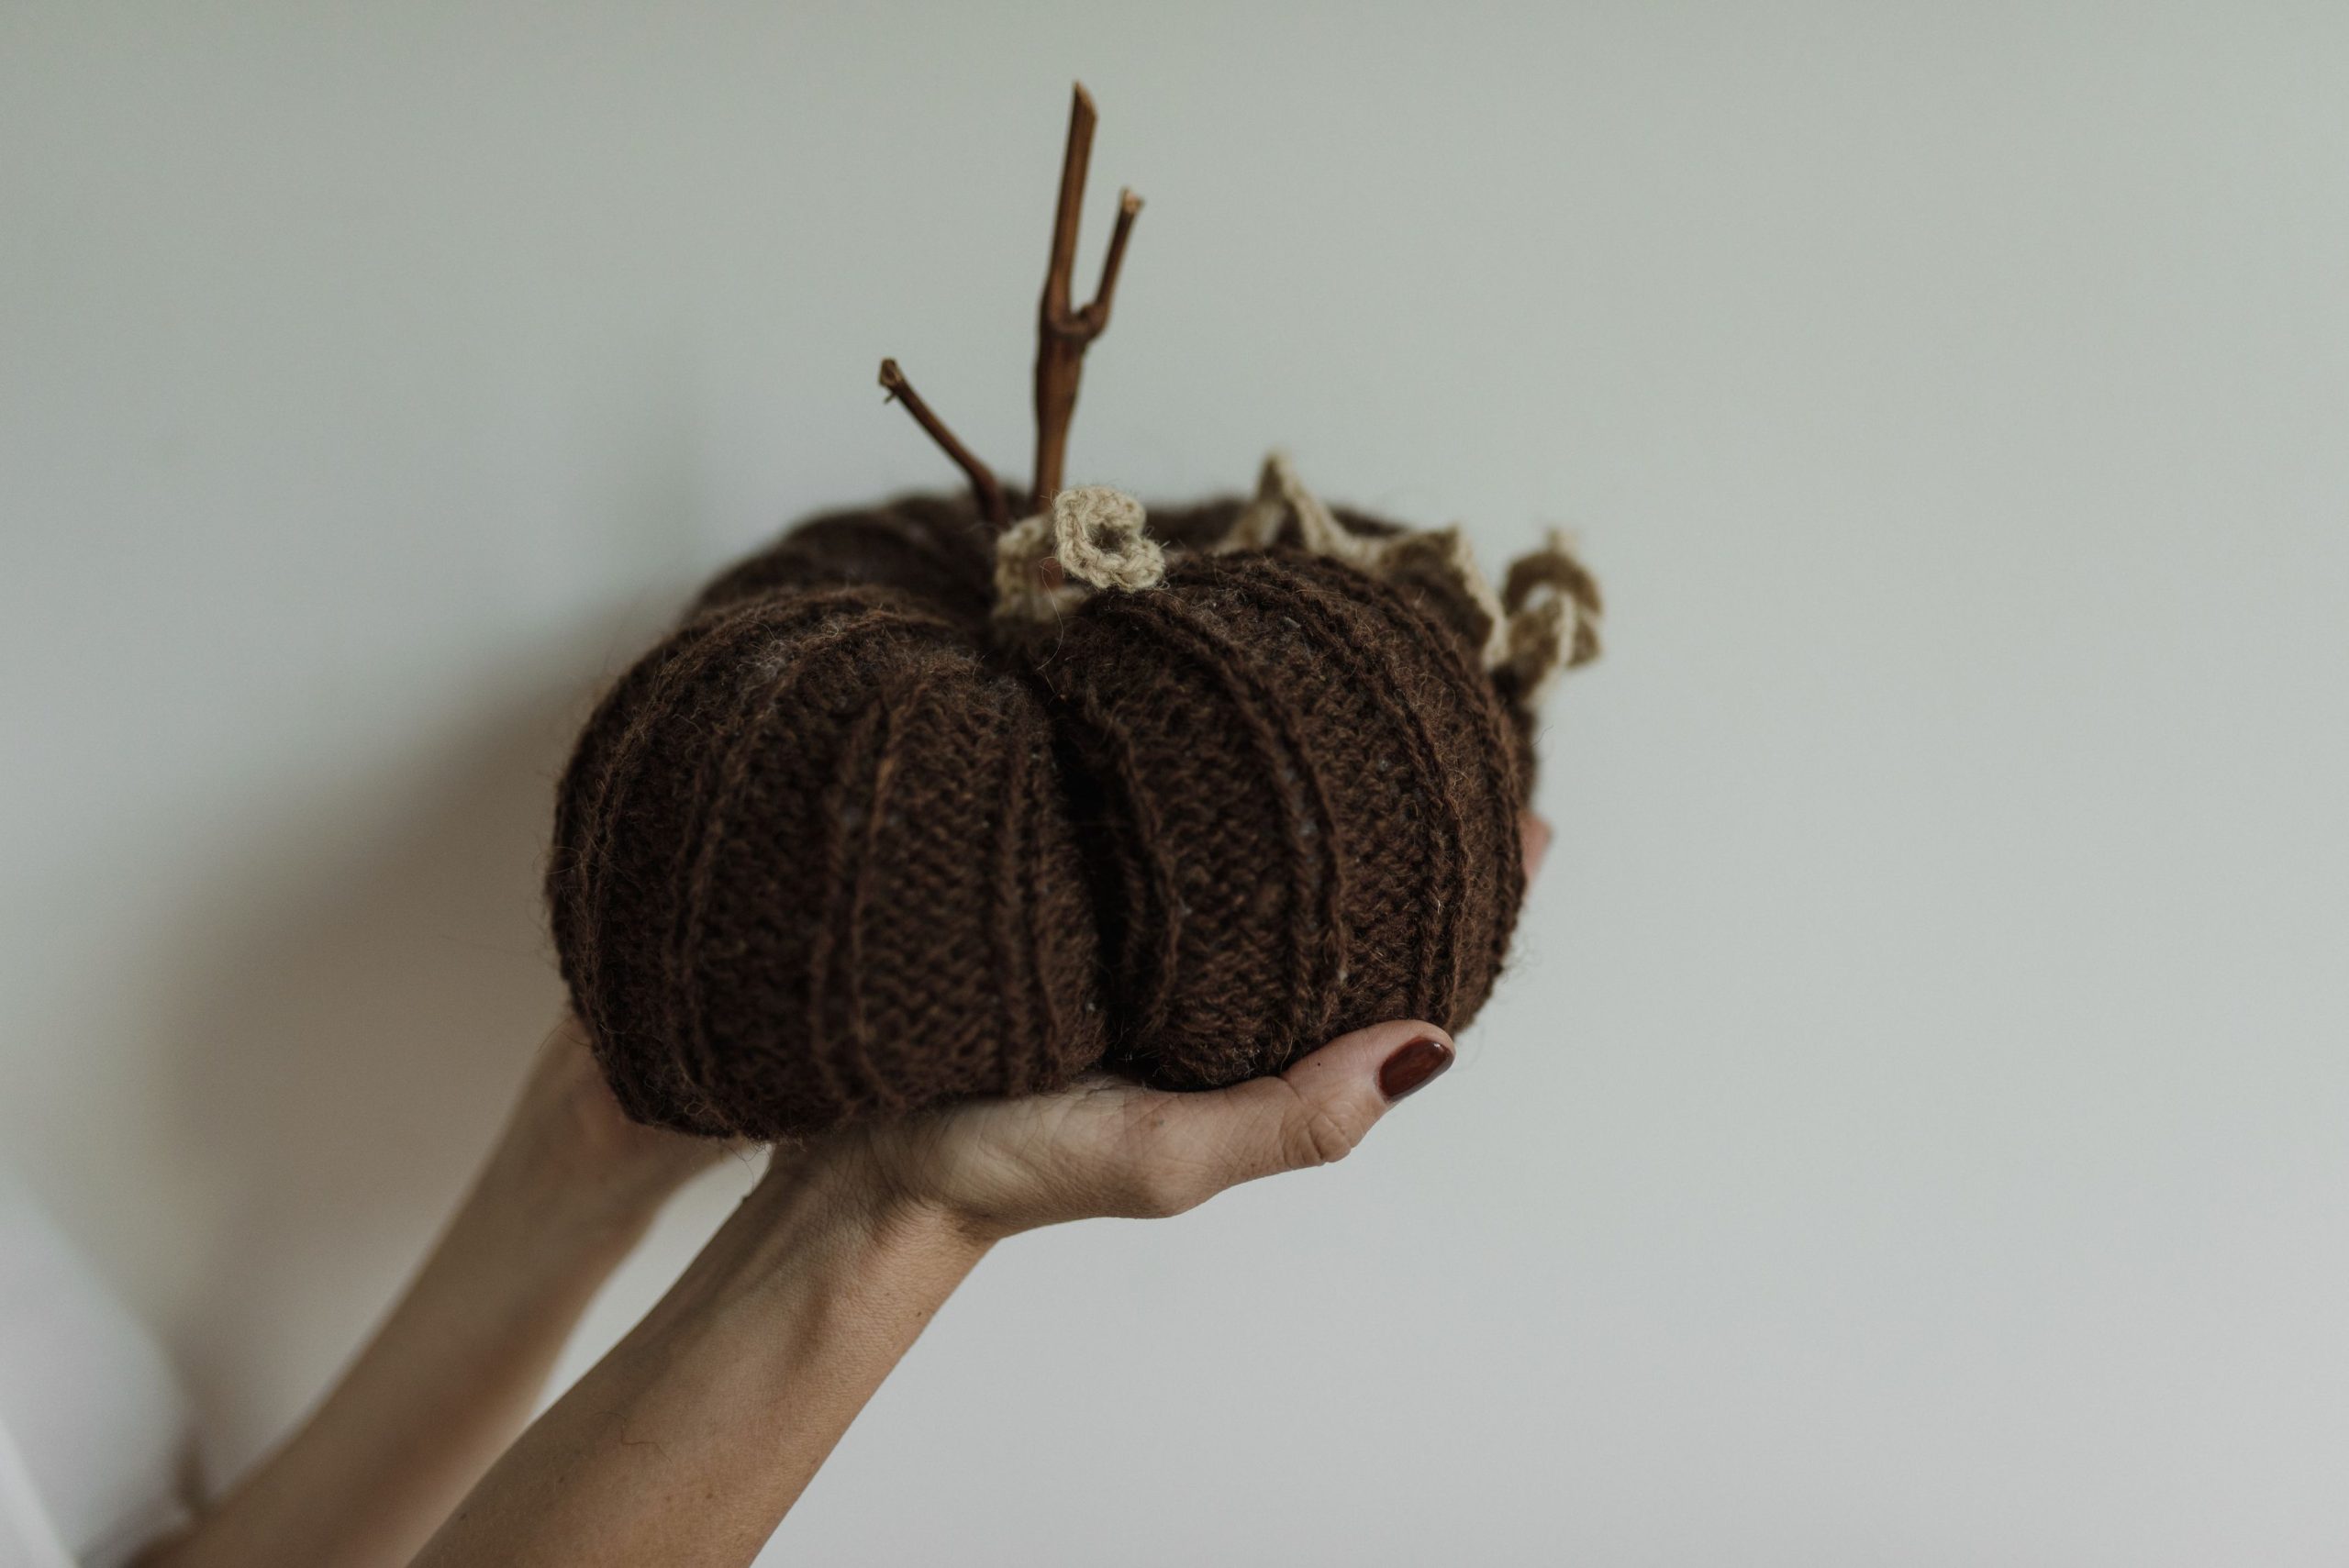
Want to make your own knitted pumpkin but don’t know how to knit? No problem. You can get a very similar look using a repurposed sweater. Find an old cable-knit sweater at a thrift store for a few dollars. Cut a large circle out of the fabric, do a simple running stitch around the edge, and pull to gather it, leaving a small opening. Stuff it with fiberfill (or even old fabric scraps), then pull the opening tightly closed and stitch it shut. Hot glue a real twig into the top for a stem. You get the same cozy, handmade vibe for a fraction of the effort!
14. Knitted Pumpkins and Dried Wheat on a Geometric Rug
This scene is a beautiful equation of modern rustic style. Let’s call the formula 50% cozy handmade (the burnt-orange knitted pumpkins, the beige knitted slippers), 30% natural texture (the warm wood floor, the bundle of dried wheat), and 20% modern pattern (the geometric rug). The key is how the simple, rustic charm of the pumpkins and wheat is grounded and updated by the clean lines of the rug. The palette of burnt orange, denim blue, beige, and warm brown is a classic fall combination that feels both fresh and timeless. This is a great example of mixing handmade items with store-bought decor for a balanced look. The knitting here is a more rustic version of the project in Idea #11.
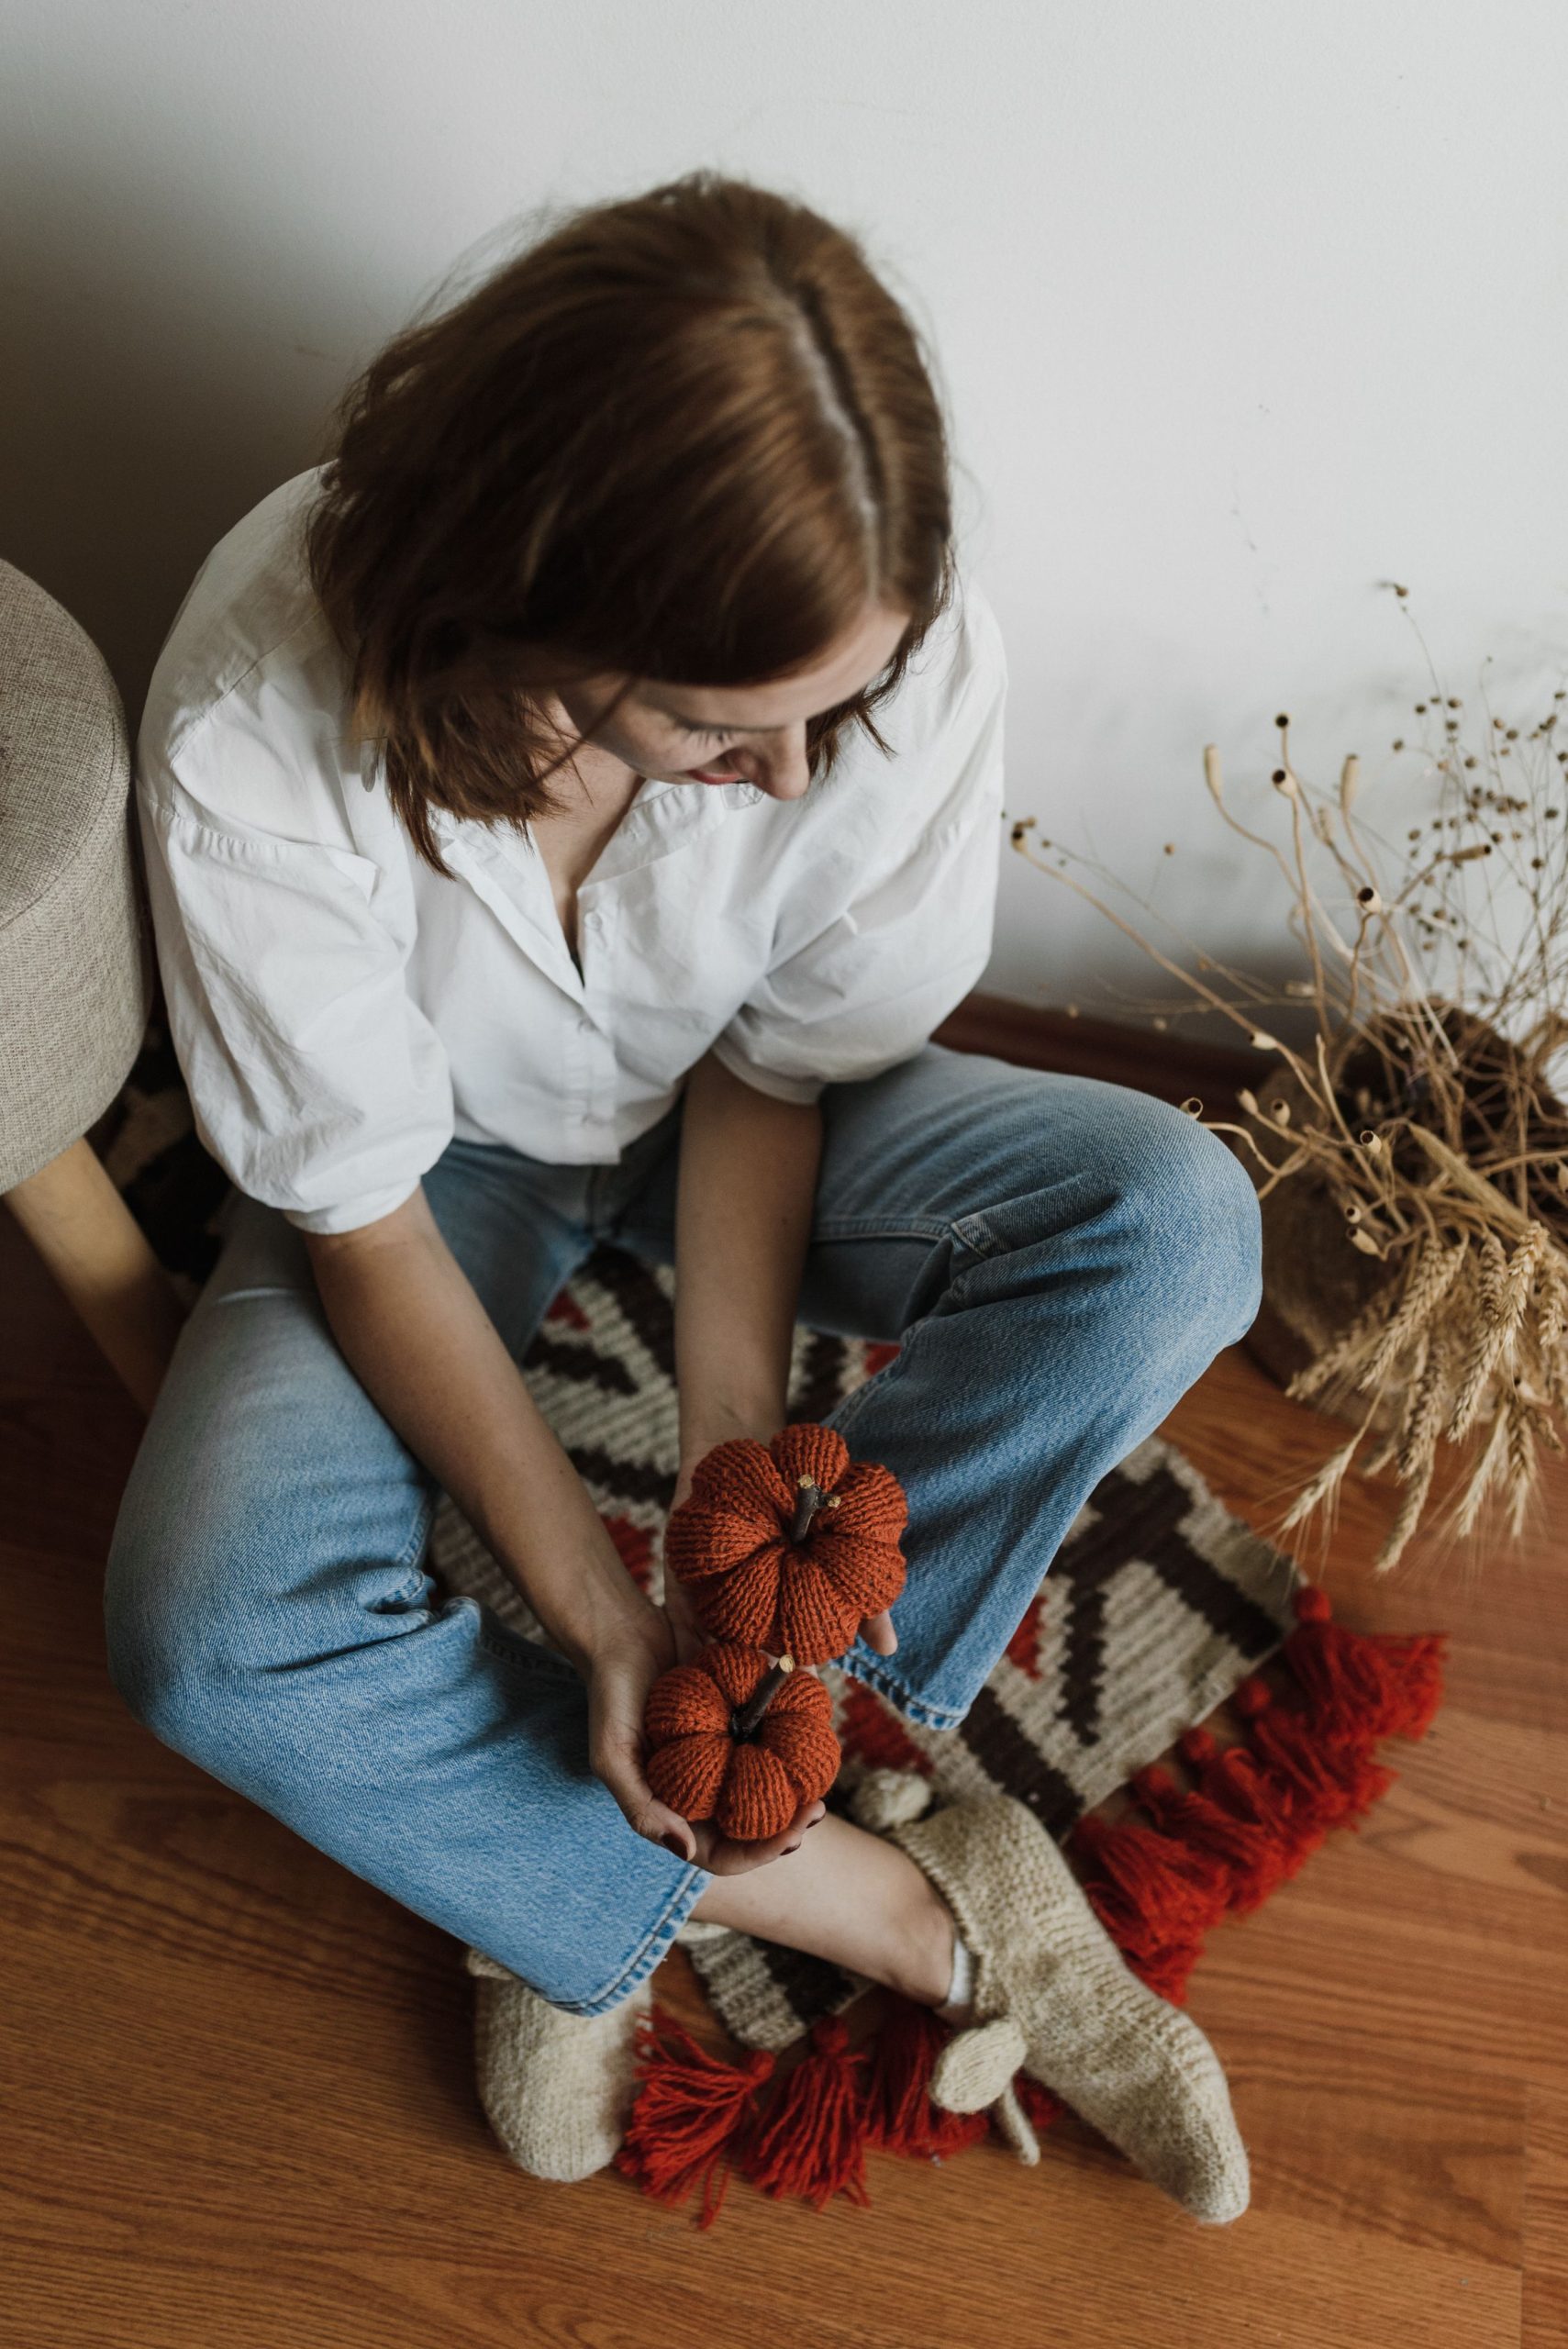
This kind of cozy, floor-level arrangement is perfect for filling awkward or empty corners in a living room or bedroom. All you need is a space about 3×3 feet. It’s an ideal solution for that spot next to the fireplace, under a console table, or at the end of a hallway where a full-sized piece of furniture wouldn’t fit. The key is to create a layered vignette. Start with a small area rug (a 2×3 foot one works well) as your base, then add your larger items like a basket of wheat, and finish with smaller decor like the knitted pumpkins. It creates a focal point without taking up a lot of floor space.
15. A Cozy Vignette with a Pumpkin, Gourd, and Candlelight
Before you create a cozy candlelit vignette like this one, run through this quick checklist to make sure it’s both beautiful and safe:
- Check Your Surface: Is the surface you’re building this on stable and heat-resistant? A wobbly side table is not the place for a lit candle. Ensure it’s away from the edge where it could be knocked over by a pet or a passerby.
- Assess Flammability: Look at your decor. The chunky knit blanket, dried leaves, and rust-colored fabric are all potentially flammable. Is there at least a 12-inch clearance between the flame and any of these items? If not, swap for a flameless LED candle.
- Plan for Wax Drips: Even in a glass holder, wax can sometimes drip. Placing the candle on a small ceramic plate or coaster can save your furniture or textiles from a waxy mess.
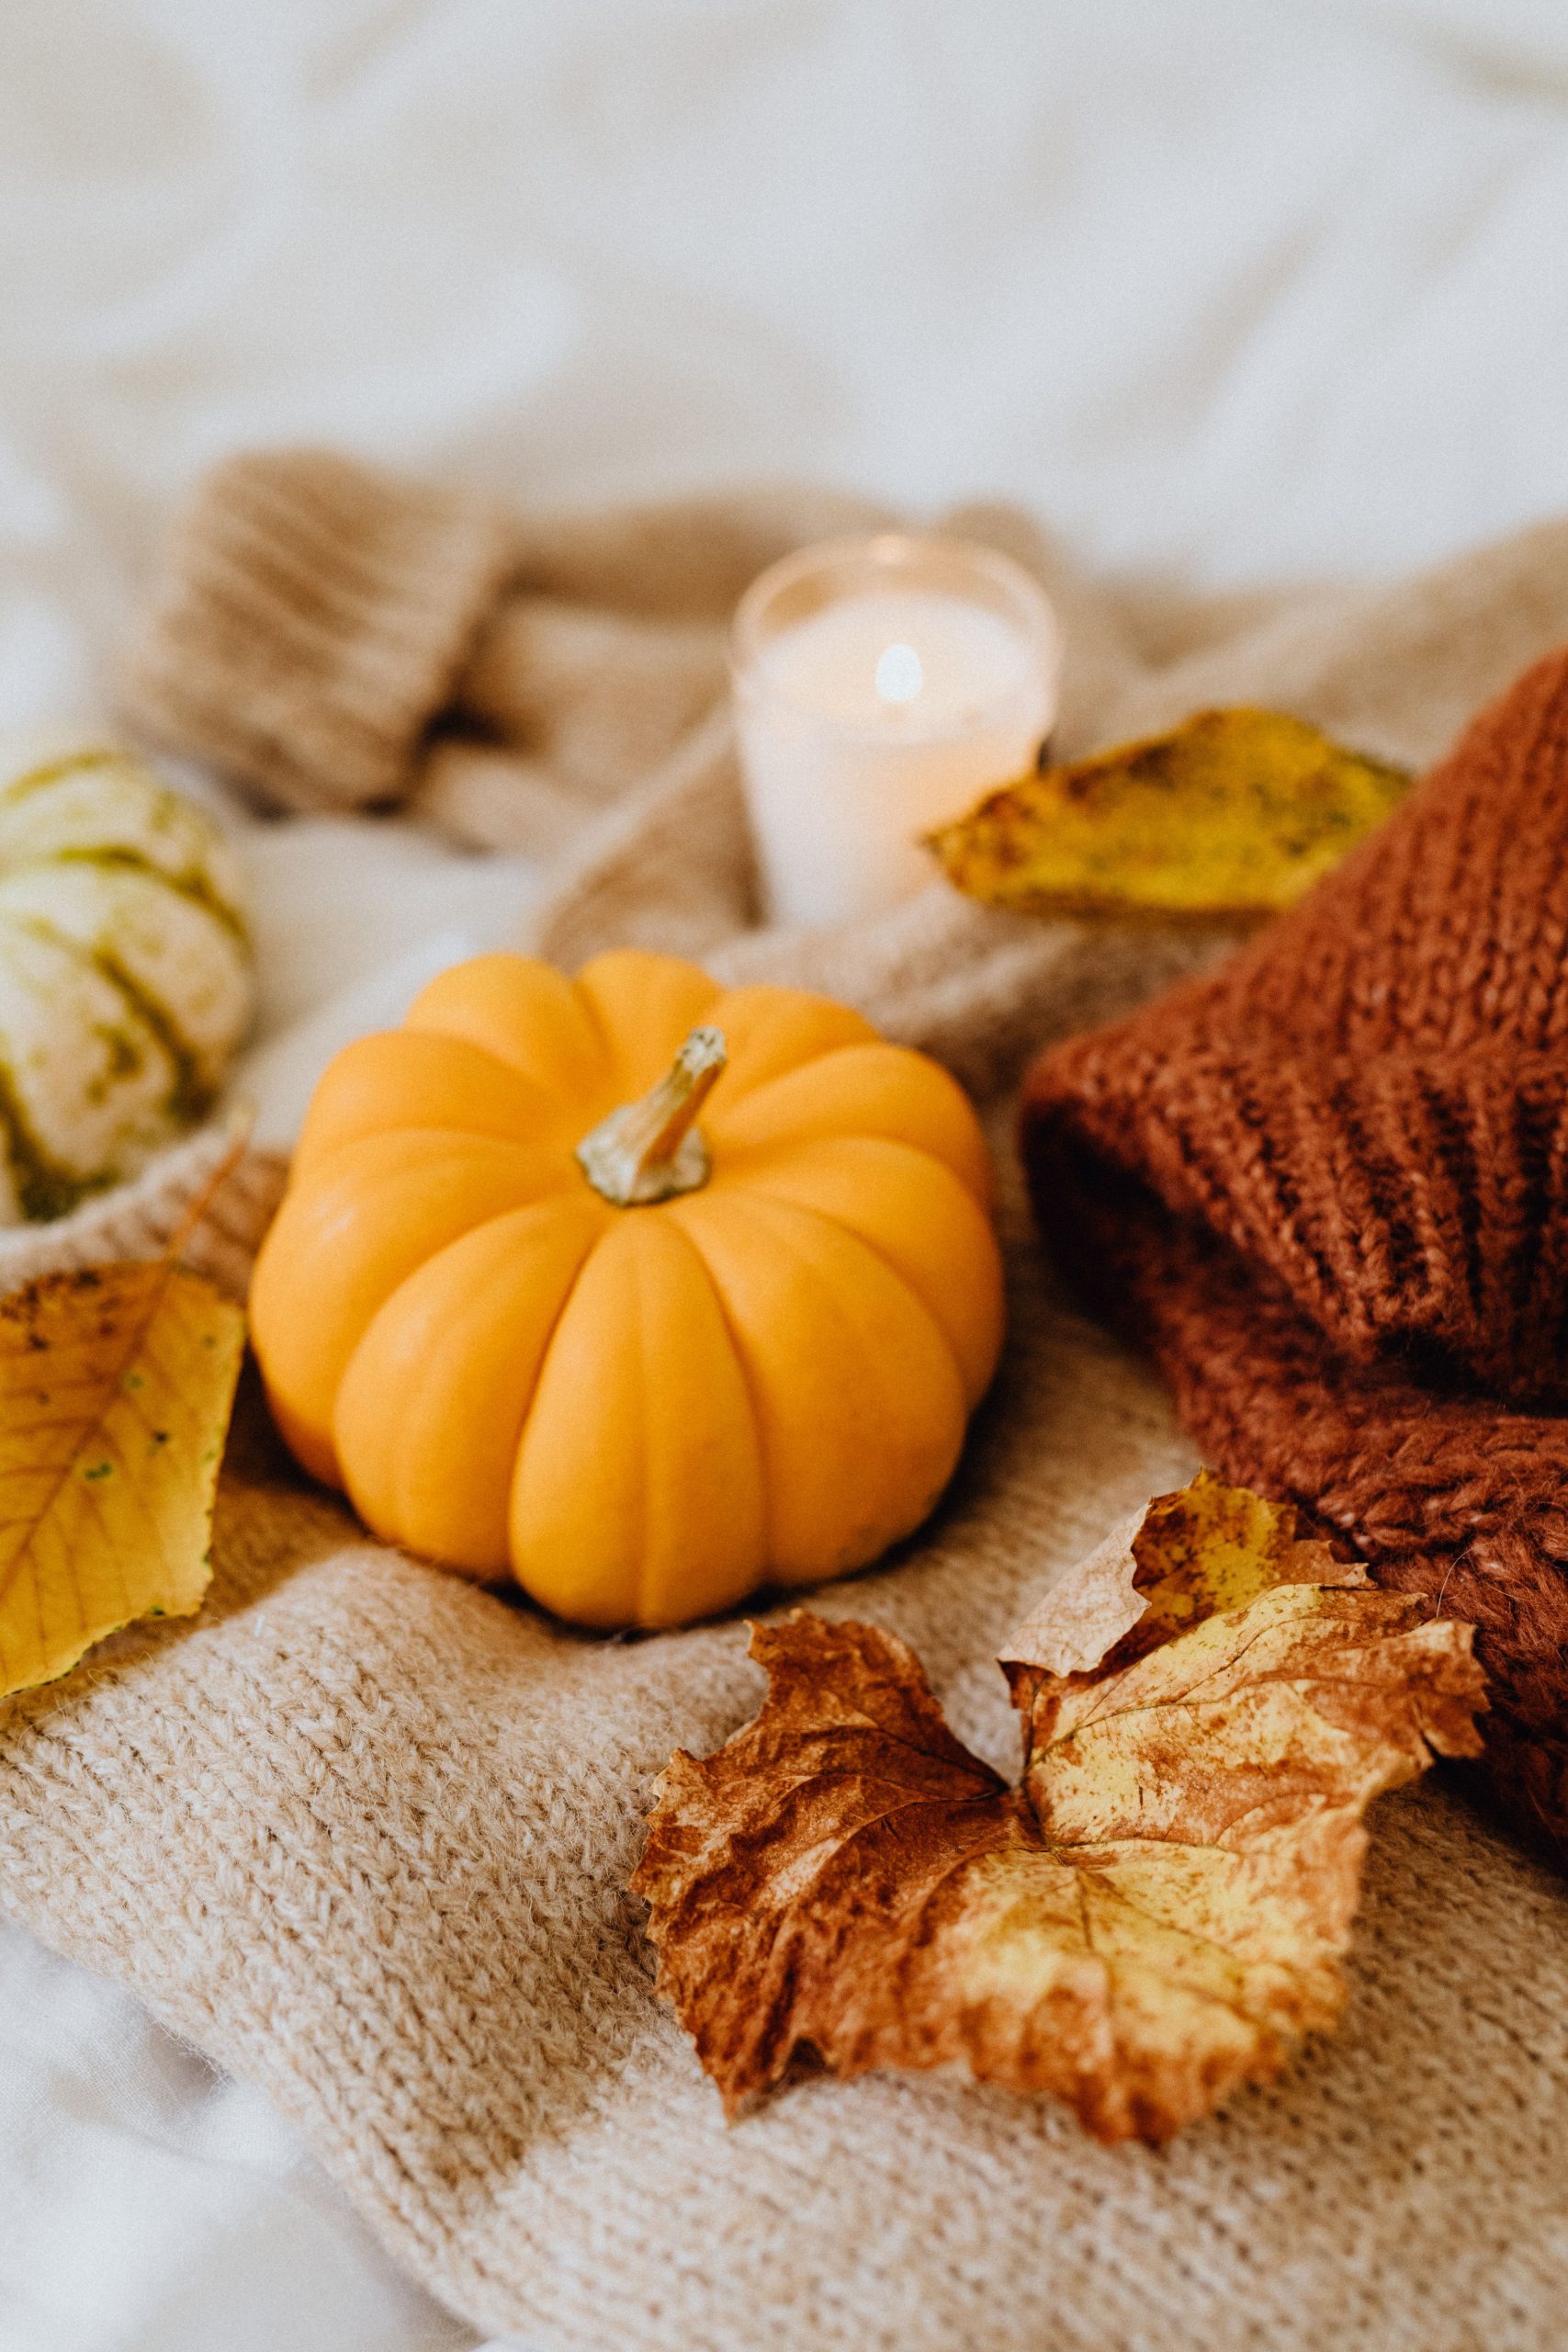
The reality of using real gourds and pumpkins indoors is that they have a limited shelf life. A small, uncut pumpkin like this one, kept in a cool, dry spot, will typically last for a couple of months. However, the green-striped gourd might have a shorter lifespan, sometimes only a few weeks before it starts to soften or show blemishes. The key to making them last is to keep them dry. Don’t let them sit in any moisture, and ensure there’s good air circulation around them. Check on them every few days and remove them at the first sign of softness or mold to protect the surfaces they’re resting on.
16. Rustic Fabric Pumpkins with Hand-Drawn Faces and Twine
What gives this craft its specific rustic charm is the jute twine. It appears three times: as a decorative wrap on one pumpkin stem, connecting all the elements in a loose strand, and in its pure form on the spool. This repetition of a single, humble material ties the whole composition together. It reinforces the handmade, slightly imperfect, farmhouse aesthetic. If you replaced the twine with, say, a satin ribbon, the entire feel of the project would shift from rustic and playful to something much more polished and less charming. The twine is the heart of its style.
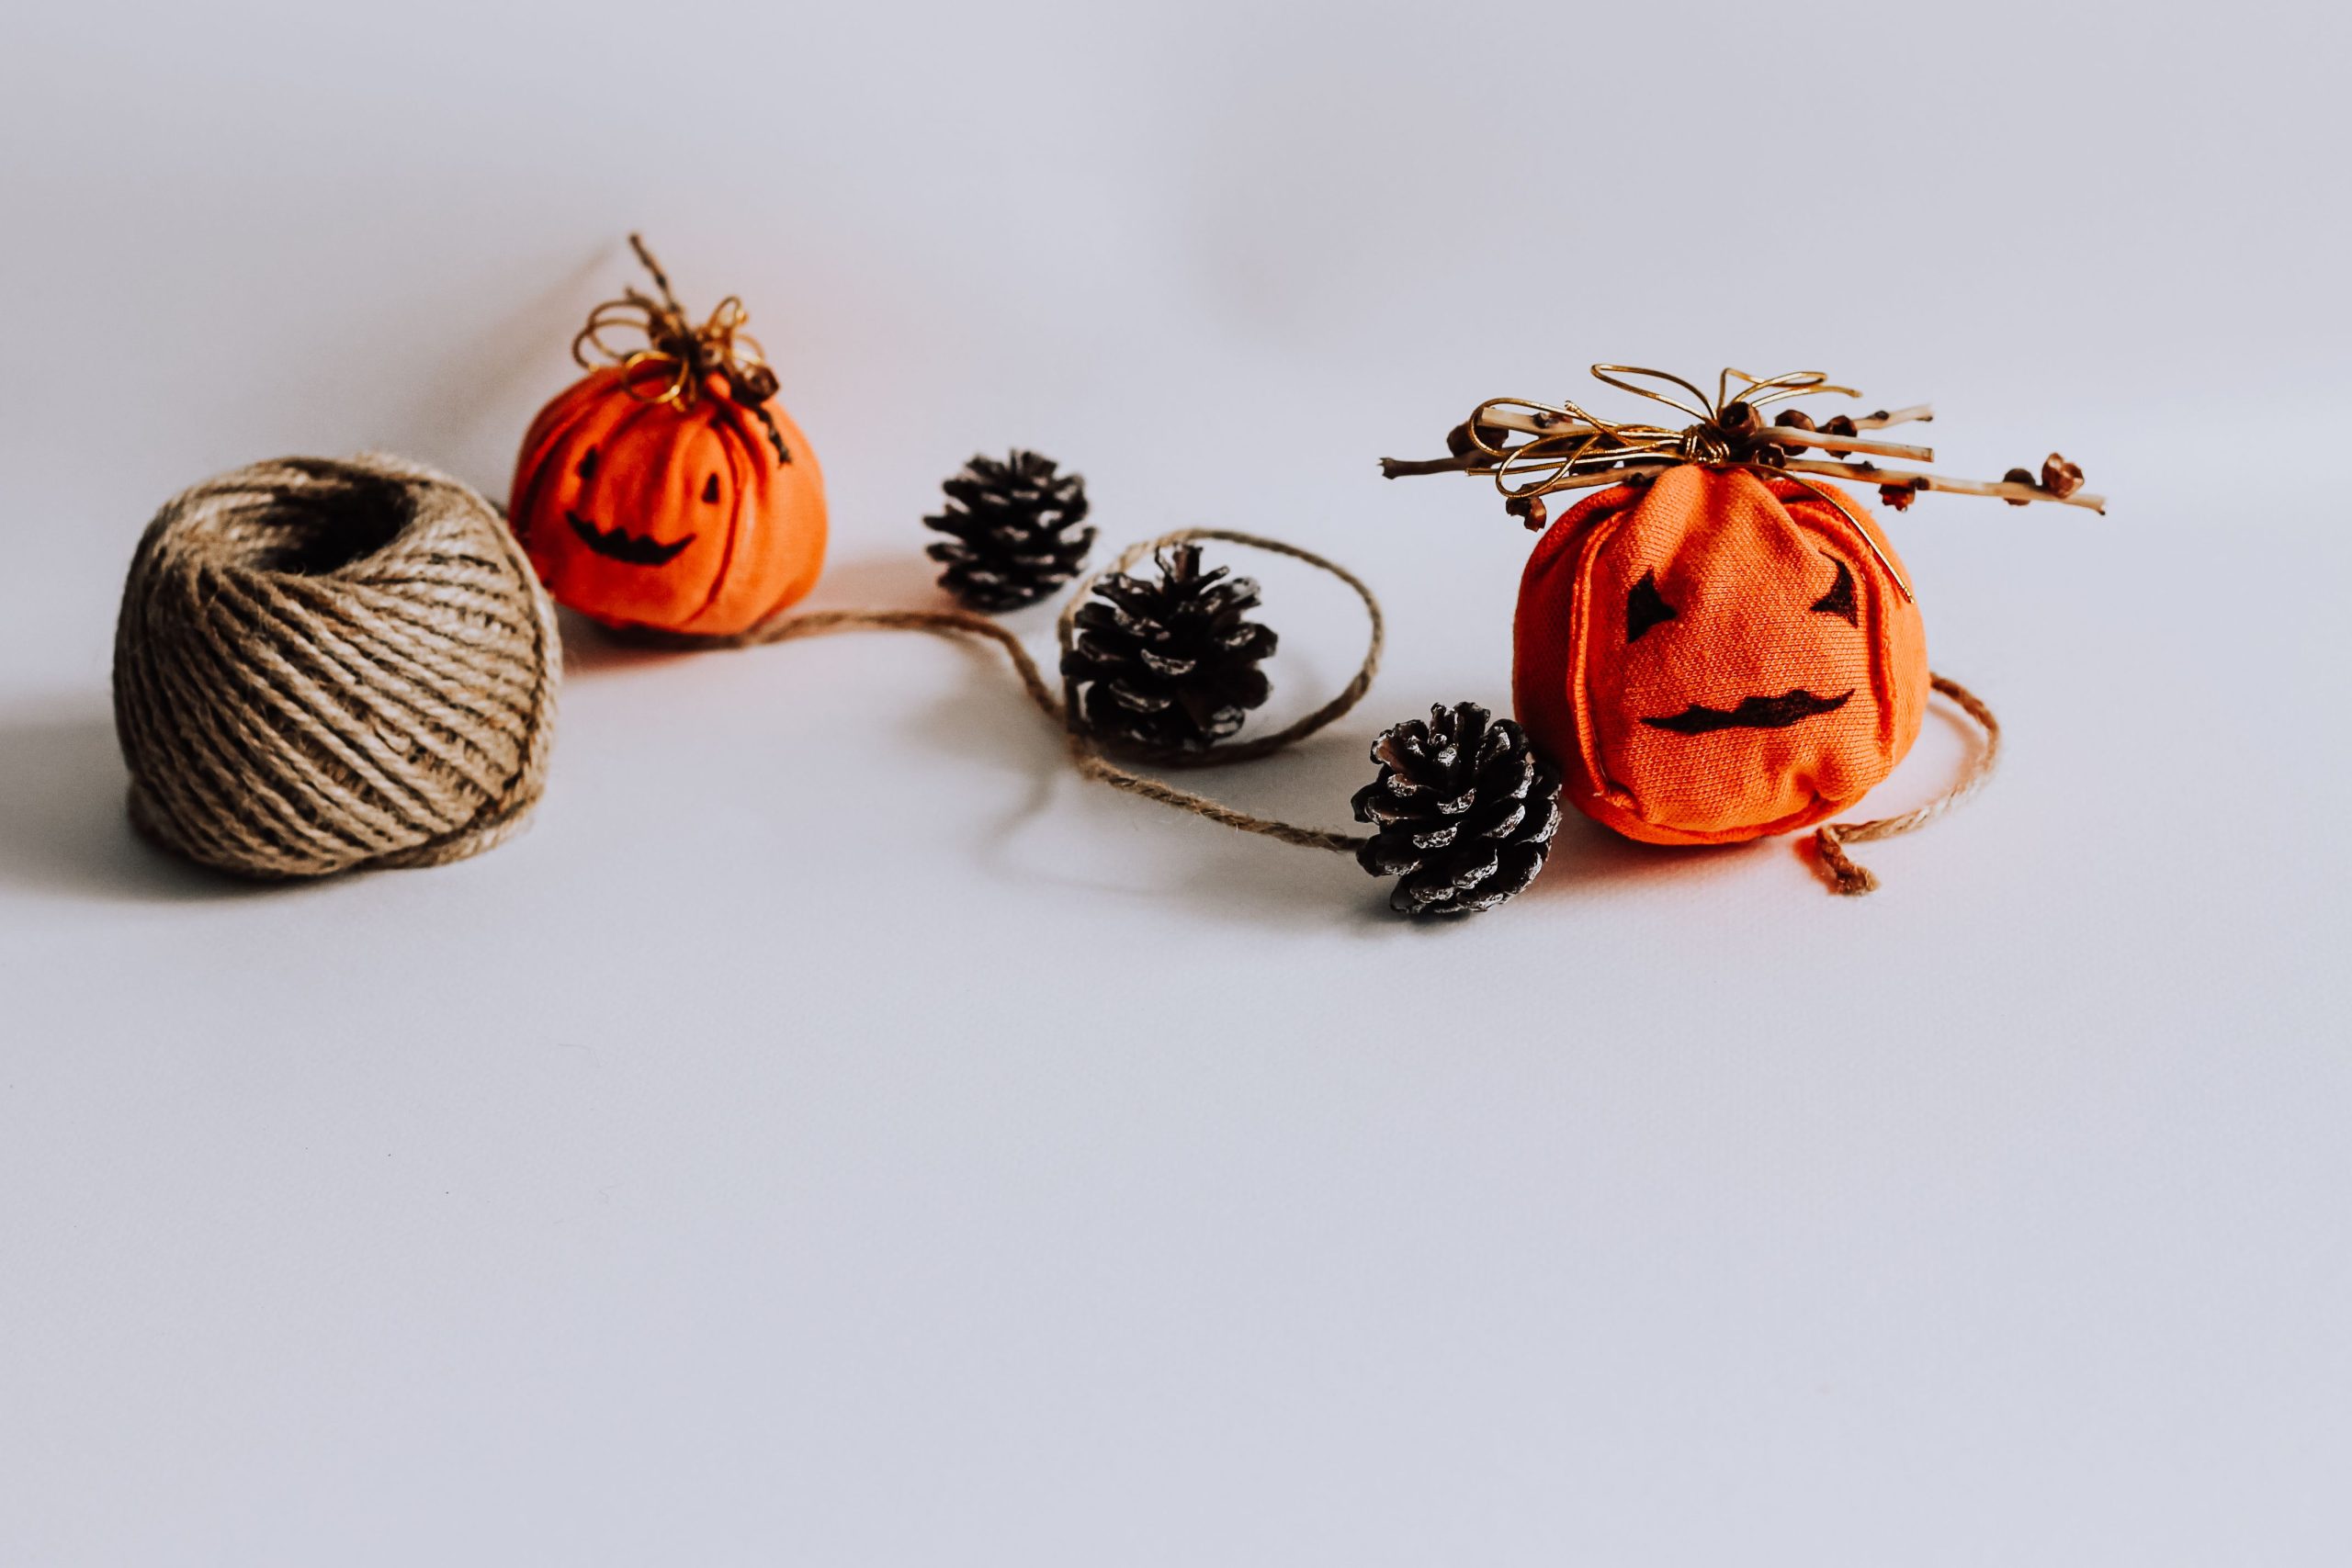
You can absolutely recreate this look with items you might already have or can get very cheaply. Don’t have orange fabric? Use an old t-shirt, a scrap of felt, or even a cloth napkin. The hand-drawn faces are intentionally simple, so you don’t need to be an artist—a regular black permanent marker will do the trick. The pinecones can be gathered from a park walk (just be sure to bake them at a low temperature to debug them first!). Jute twine is available at any dollar store. This is a perfect example of how clever use of simple materials can create something really effective and festive.
17. Autumnal Craft Flat Lay with a Kraft Paper Notebook
What makes this flat lay so pleasing to the eye is the masterful use of a limited, earthy palette. The entire composition is built on shades of brown, tan, cream, and muted green. This creates a sense of calm and cohesion. The principle of ‘implied action’ is also at play: the open notebook, the unspooled ribbons, and the scattered leaves suggest that someone has just stepped away from their creative work. It doesn’t feel static; it feels like a snapshot of a process, which is much more engaging for the viewer. The distressed white wood background provides the perfect bright, textured canvas to make all these earthy tones stand out.
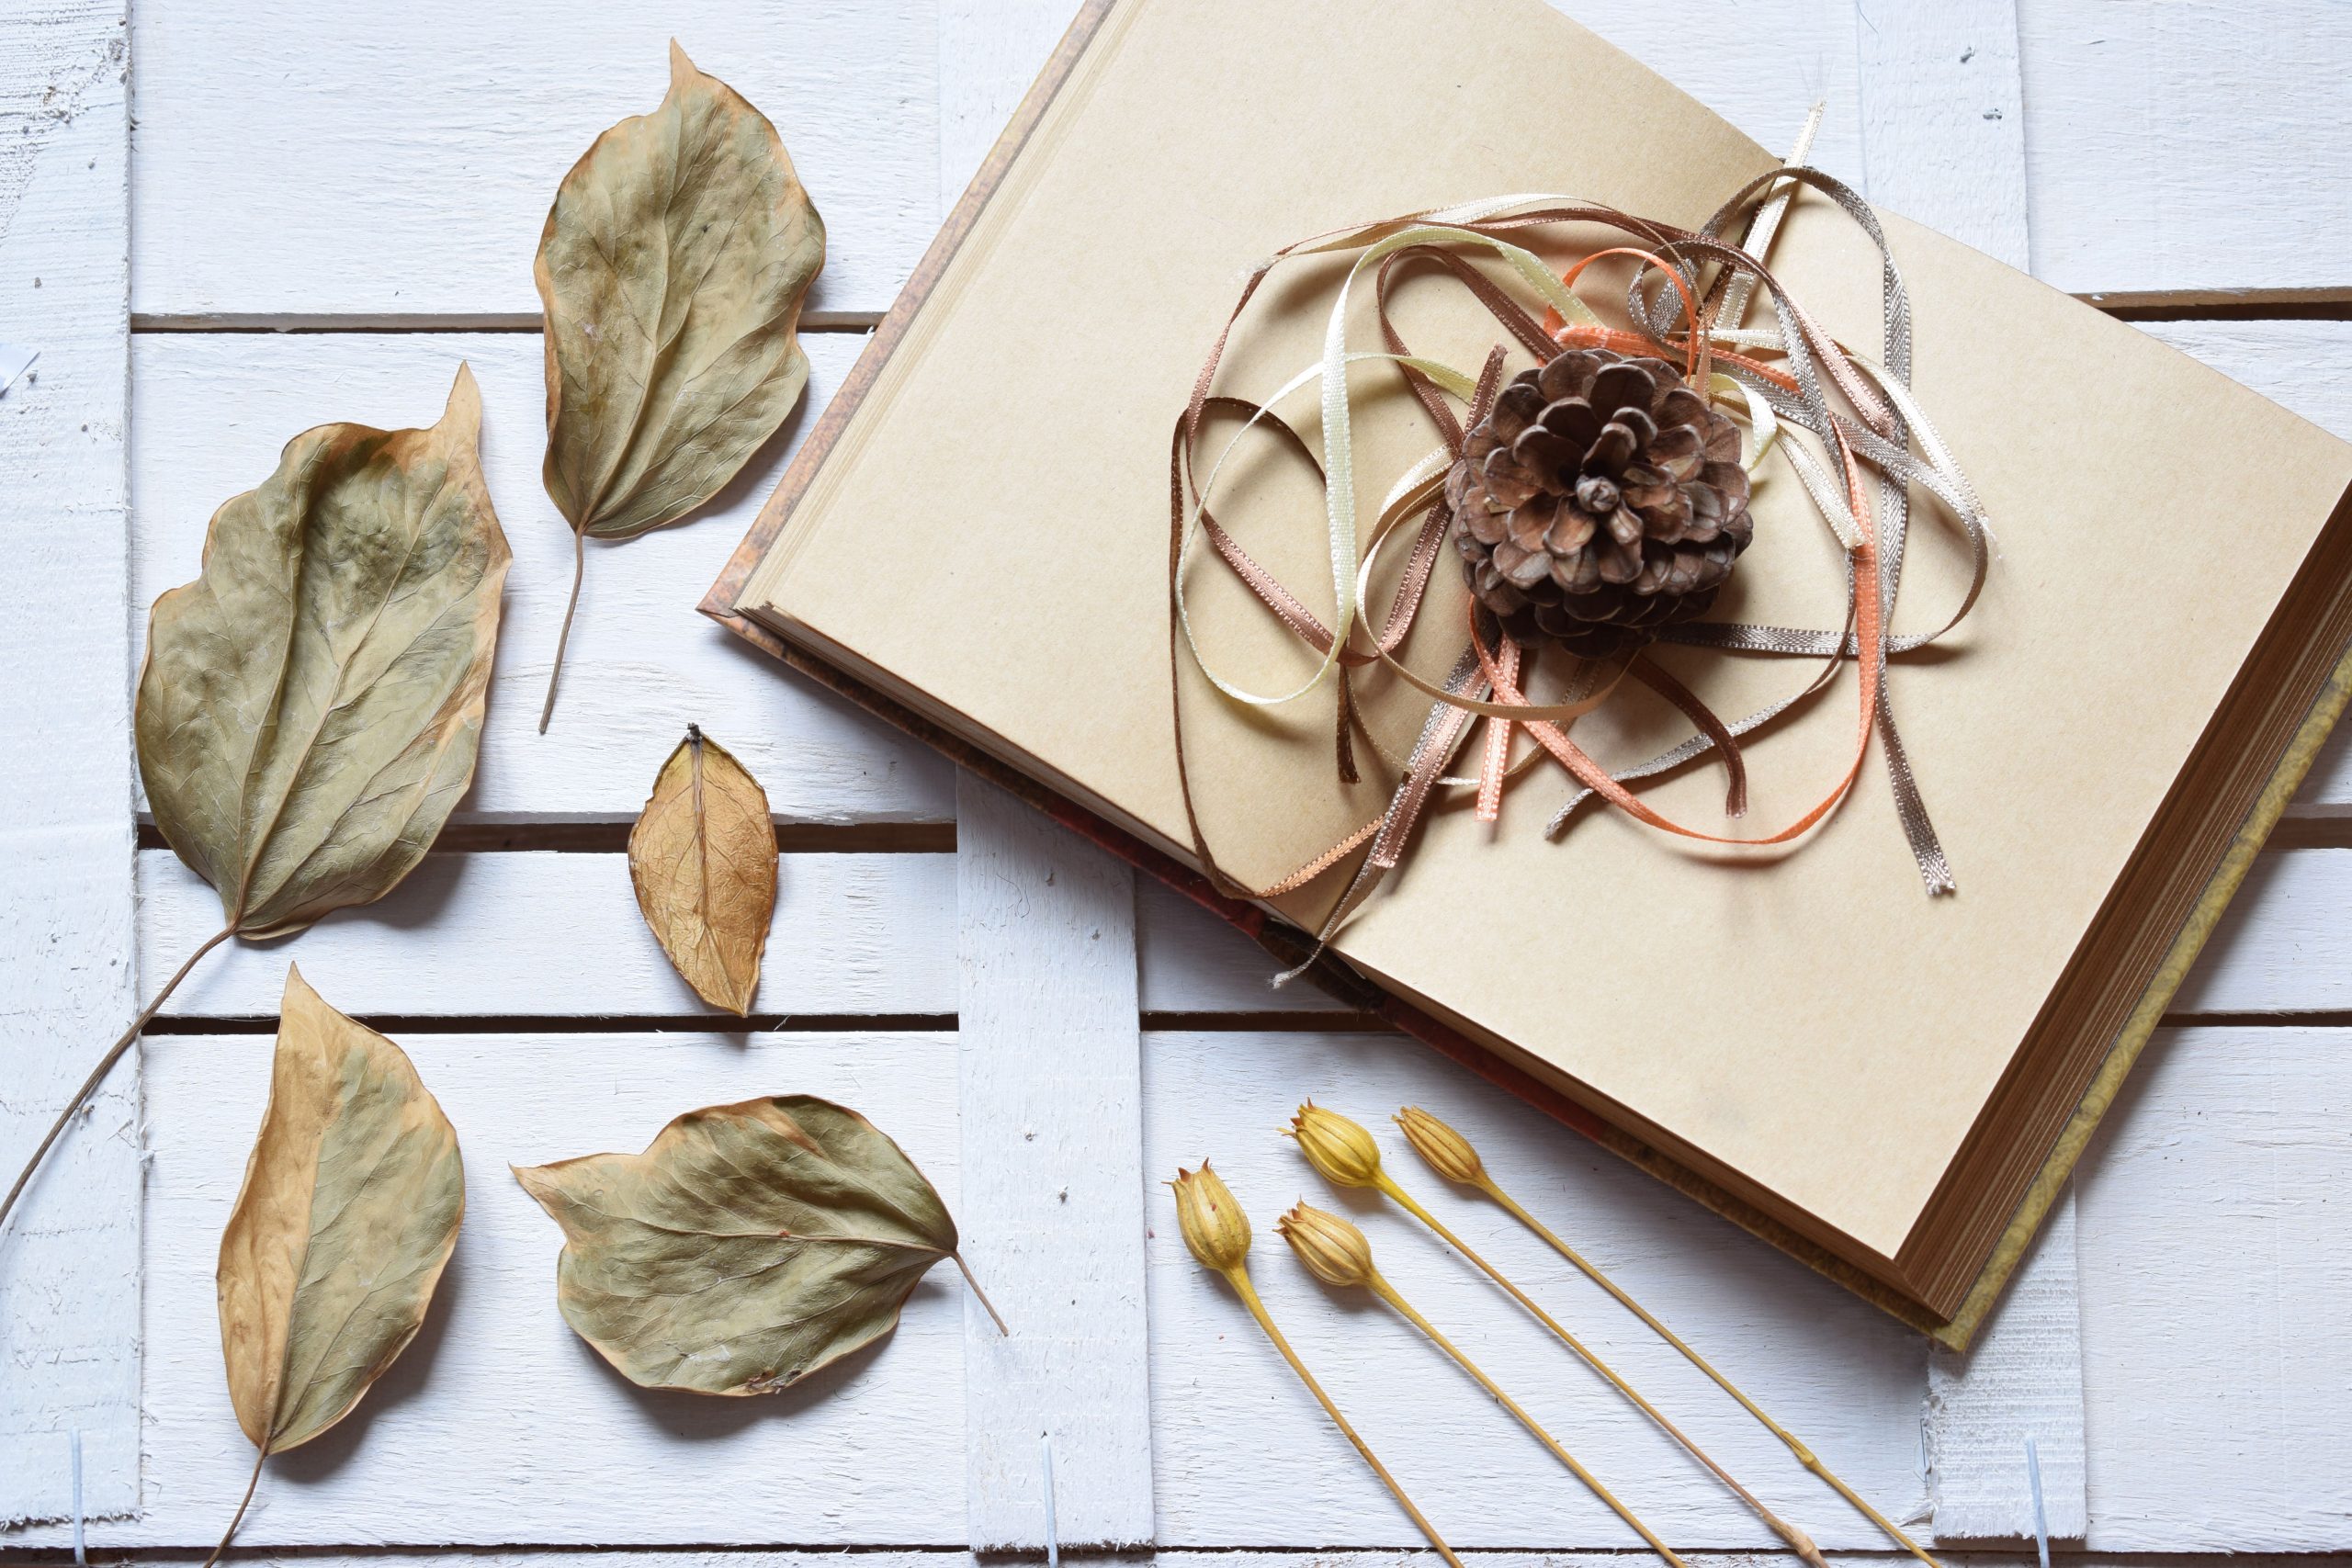
This type of styling is a direct reflection of the ‘Cottagecore’ and ‘Slow Living’ movements that have found a permanent home on social media. In 2026, this isn’t just a fleeting trend; it’s an established aesthetic that speaks to a desire for a simpler, more connected way of life. It romanticizes quiet, analog activities like journaling, crafting, and nature collecting. An image like this has staying power because it sells a feeling as much as a craft idea—the feeling of a quiet, creative afternoon spent appreciating the small, beautiful details of the season.
18. A Cozy Macrame Session with Pumpkins and a Laptop
Let’s have some real talk about this super cozy scene. While combining work (the laptop) with a craft project and a lit candle looks incredibly aesthetic for a photo, it’s not the most practical setup for actually getting anything done. Macrame requires your full attention and both of your hands, and the intricate knots can be tough to see on a dimly lit, blanket-covered lap. And that lit candle, while lovely, is precariously close to both a knitted scarf and a cable-knit blanket. So, admire this for the beautiful, staged moment it is, but for your actual macrame session, maybe opt for a well-lit table. Or at least use a flameless candle!
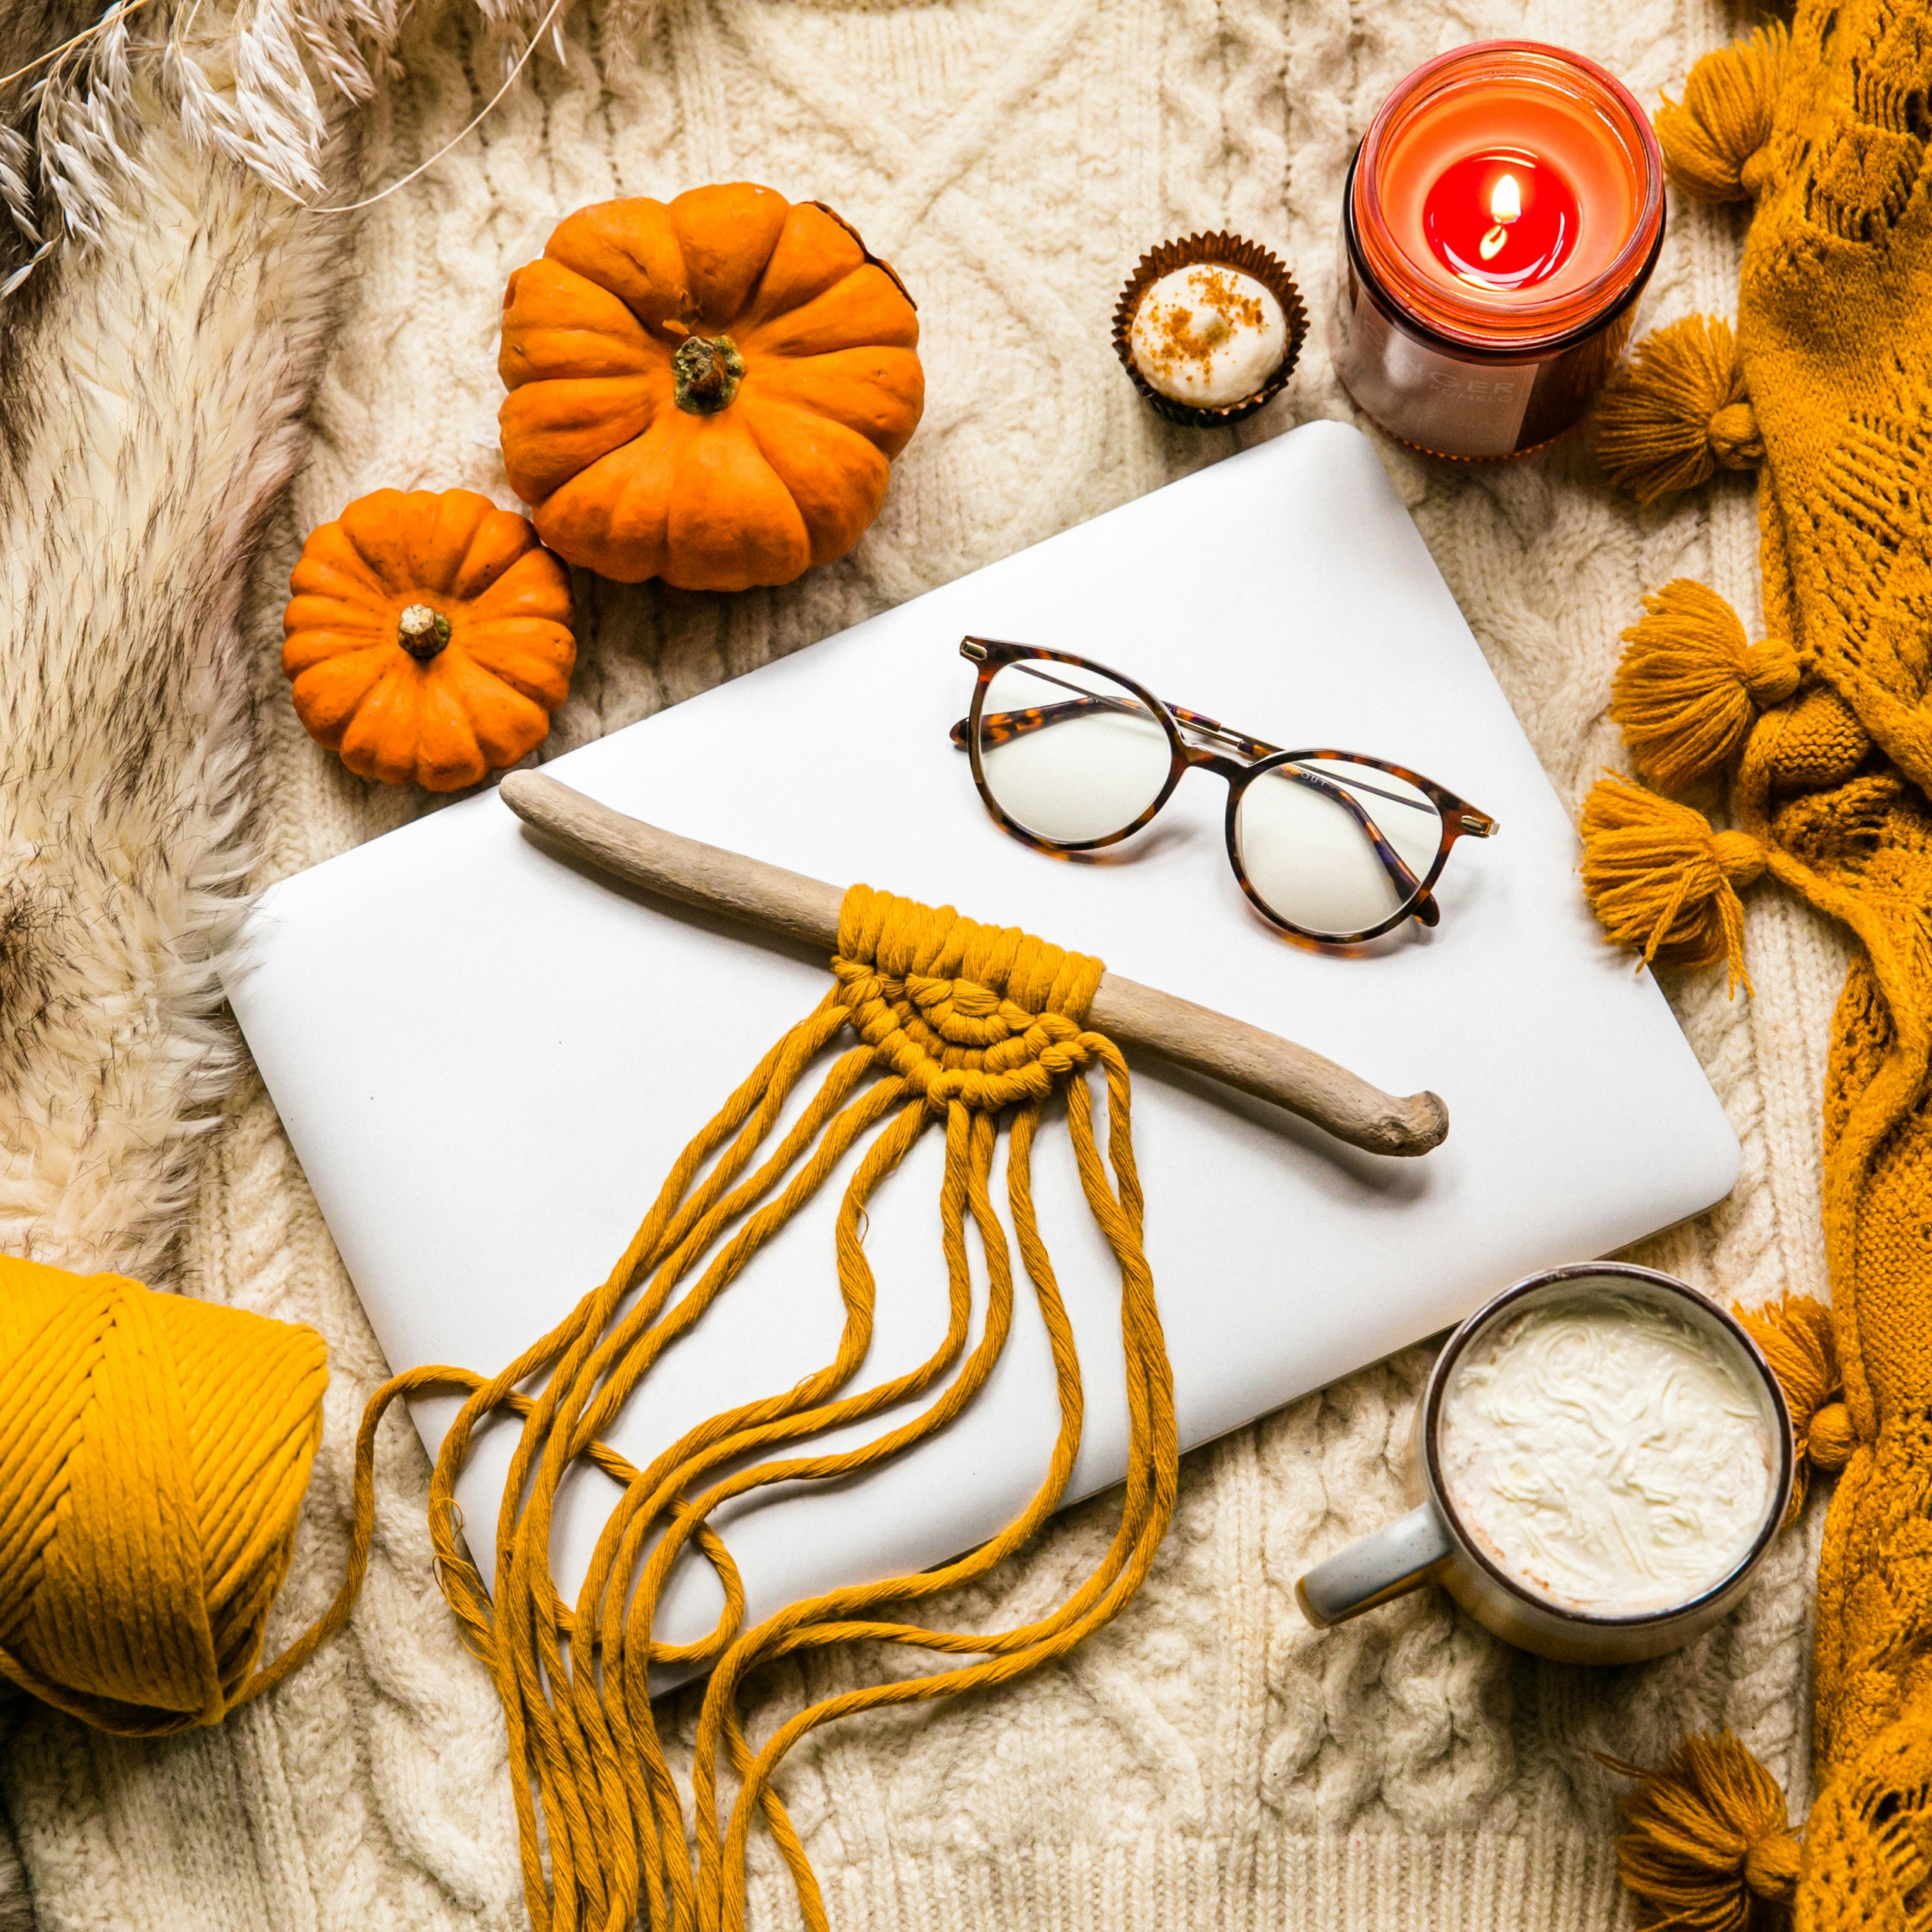
This composition is a masterclass in tonal color harmony. The style math is simple: 60% neutral base + 40% accent color. The cream cable-knit blanket and the white laptop create a soft, neutral canvas that takes up the majority of the frame. Then, the vibrant mustard yellow of the macrame cord and the knitted scarf is introduced as a powerful, unifying accent color. The small orange pumpkins act as a secondary, complementary pop of color. You could easily swap the mustard yellow for a deep forest green or a rich burgundy, and the formula would still work perfectly. It’s all about a strong neutral base plus one dominant accent.
19. Arranging a Dried Banksia Pod and Grass Bouquet
Dried floral arrangements like this are stunningly beautiful, but they do come with a maintenance reality: they are dust magnets and incredibly fragile. To keep your bouquet looking its best, you’ll need to dust it regularly. The best method is to use a hairdryer on its coolest, lowest setting and blow the dust off from a safe distance. Be warned, though: dried elements become more brittle over time. Keep the arrangement away from direct sunlight, which can fade its subtle colors, and in a spot with low humidity where it won’t be accidentally bumped or knocked. This is not a low-maintenance decor item.
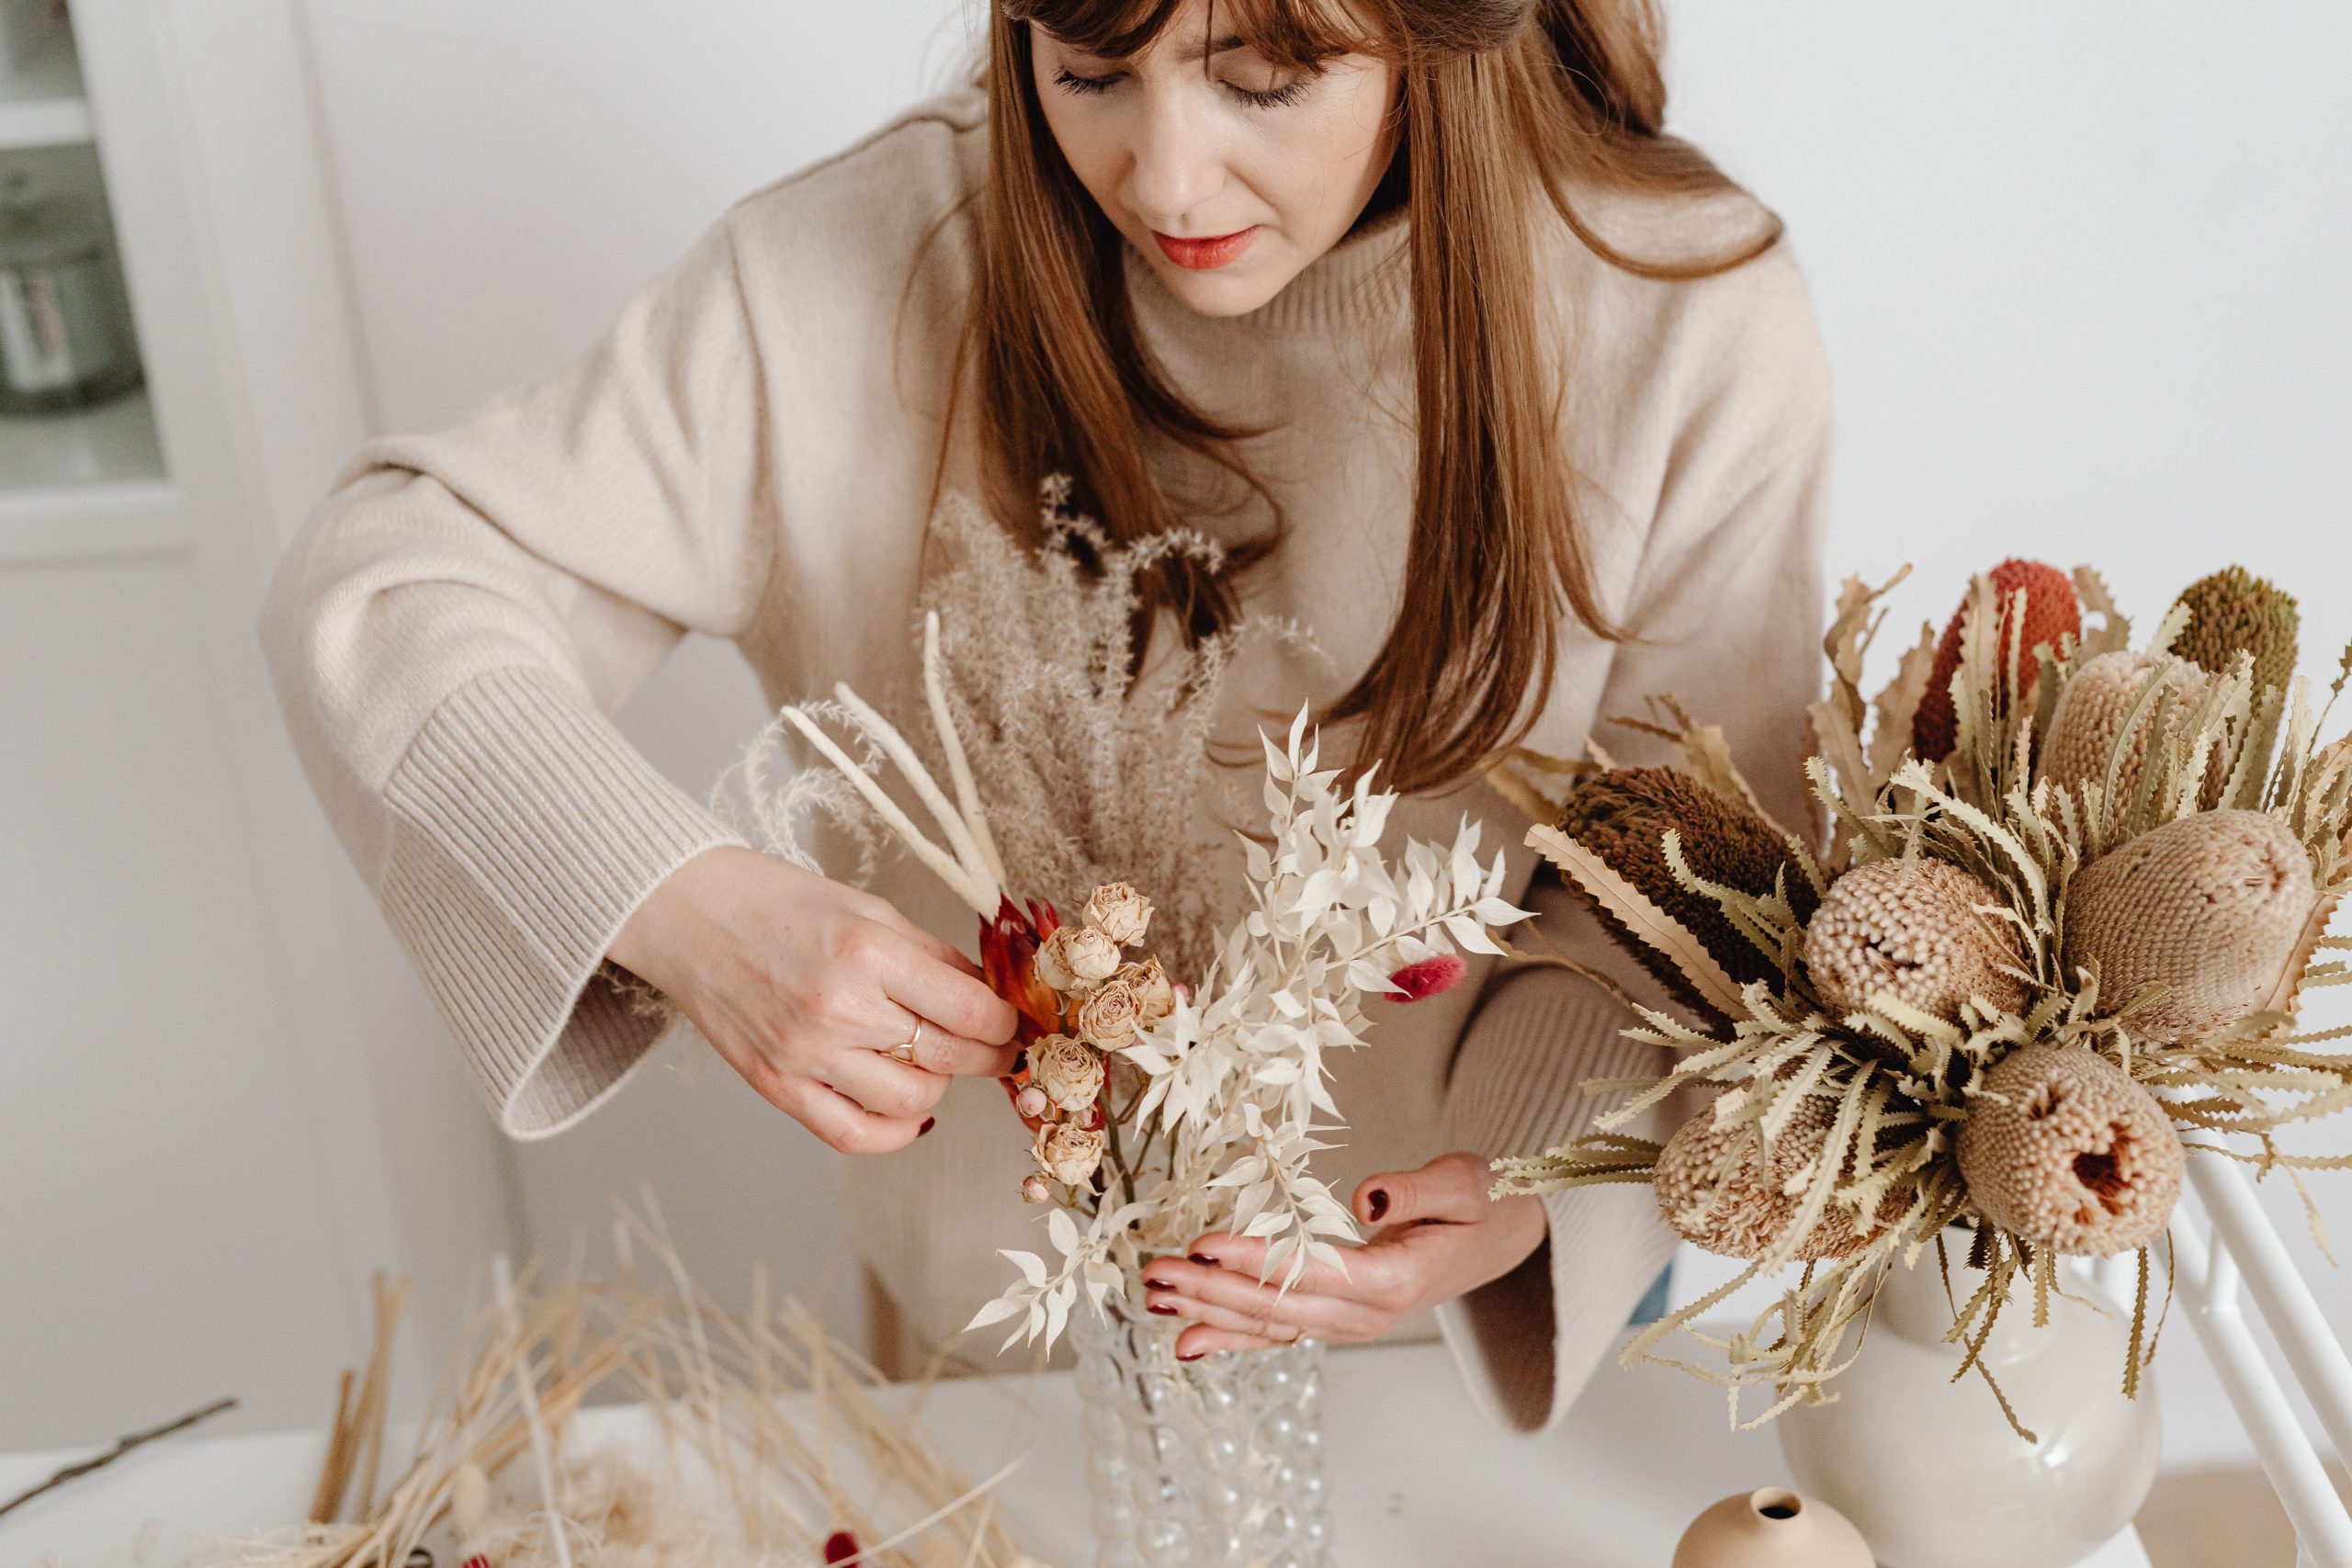
When creating a dried floral arrangement, the secret to a professional look is to vary not just the colors but also the shapes and textures. Don’t just stick to one type of grass or flower. For a successful bouquet, you need at least three distinct textures. Here, you see the large, bold, and woody shape of the banksia pods, the fine and wispy texture of the grasses, and the delicate, papery forms of the smaller buds. This trio of textures creates depth and interest, preventing the arrangement from looking like a flat, one-note bundle of twigs. Think ‘thriller, filler, and spiller’ just like with fresh flowers.
20. Autumnal Tray with Hot Cocoa, Pumpkin, and Croissants
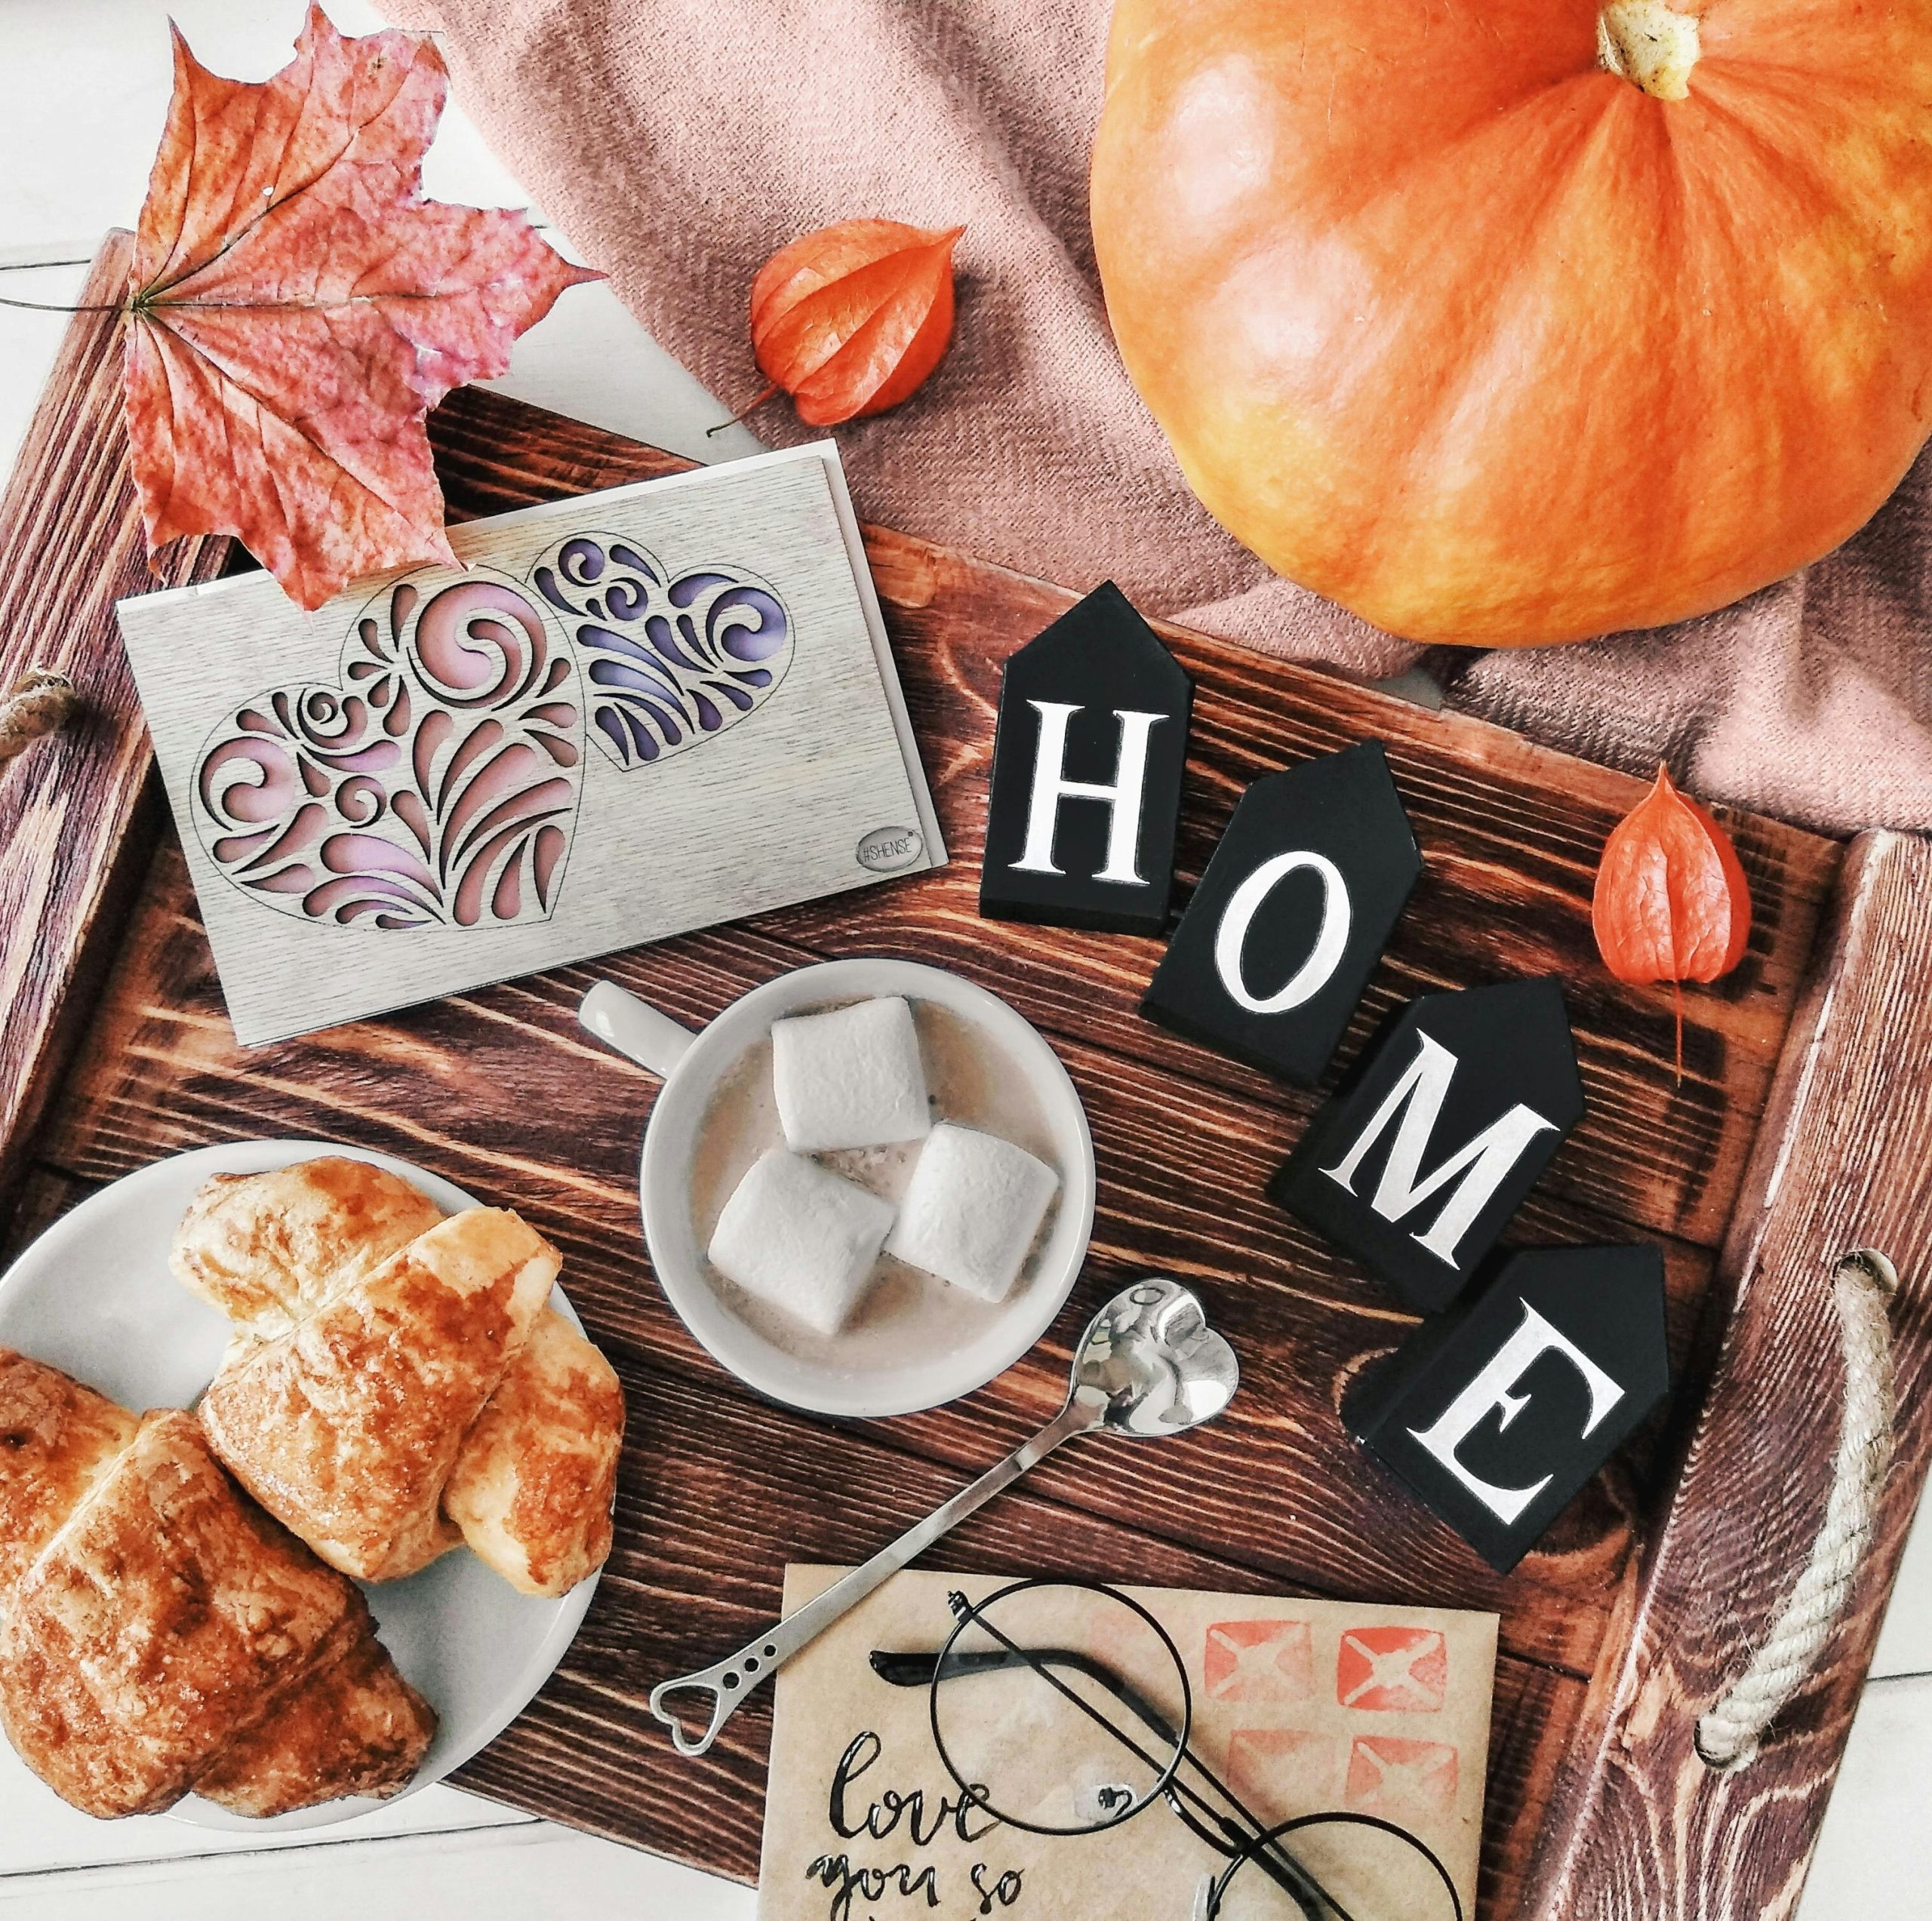
What makes this entire scene feel so indulgent and inviting is the mug of hot chocolate. Take it away, and you have a lovely tray of fall decor. But with the hot chocolate, topped with pillowy marshmallows, the image tells a story of comfort, self-care, and taking a moment to enjoy the season. It adds a human, sensory element that is instantly relatable. It’s the difference between decorating for fall and *living* in fall. The steam you can almost see rising from the mug is what sells the entire cozy fantasy. The comparison to the simpler mug in Idea #12 is striking; this one is all about indulgence.
|
📋 Copy HEX 🔗 Share |
This ‘tray-scape’ concept is a brilliant solution for decorating a specific zone, like a coffee table or a large ottoman, without committing to a full room makeover. A tray defines the boundaries and makes a collection of items feel like a purposeful vignette. For this to work, the tray needs to be substantial. A tray that is at least 18-20 inches wide is ideal. This provides enough surface area to create layers and arrange items of different scales—like the large pumpkin, the smaller mug, and the scattered physalis pods—without it feeling cramped. A tray that’s too small will just look like clutter.
21. Watercolor Pumpkin Painting with Sequins and Craft Supplies
This creative flat lay uses a sophisticated style formula: 70% soft & matte + 30% shimmer & shine. The majority of the scene is composed of matte textures—the watercolor paper, the cardstock, the wooden stamps, and the paint tubes. This creates a soft, inviting base. Then, pops of high shine are introduced with the scattered gold sequins and the glossy washi tape. This contrast is what makes the composition so dynamic. The shimmer catches your eye and adds a touch of magic and celebration to the otherwise rustic and earthy elements. It’s a lesson in how a small amount of a contrasting finish can elevate everything around it.
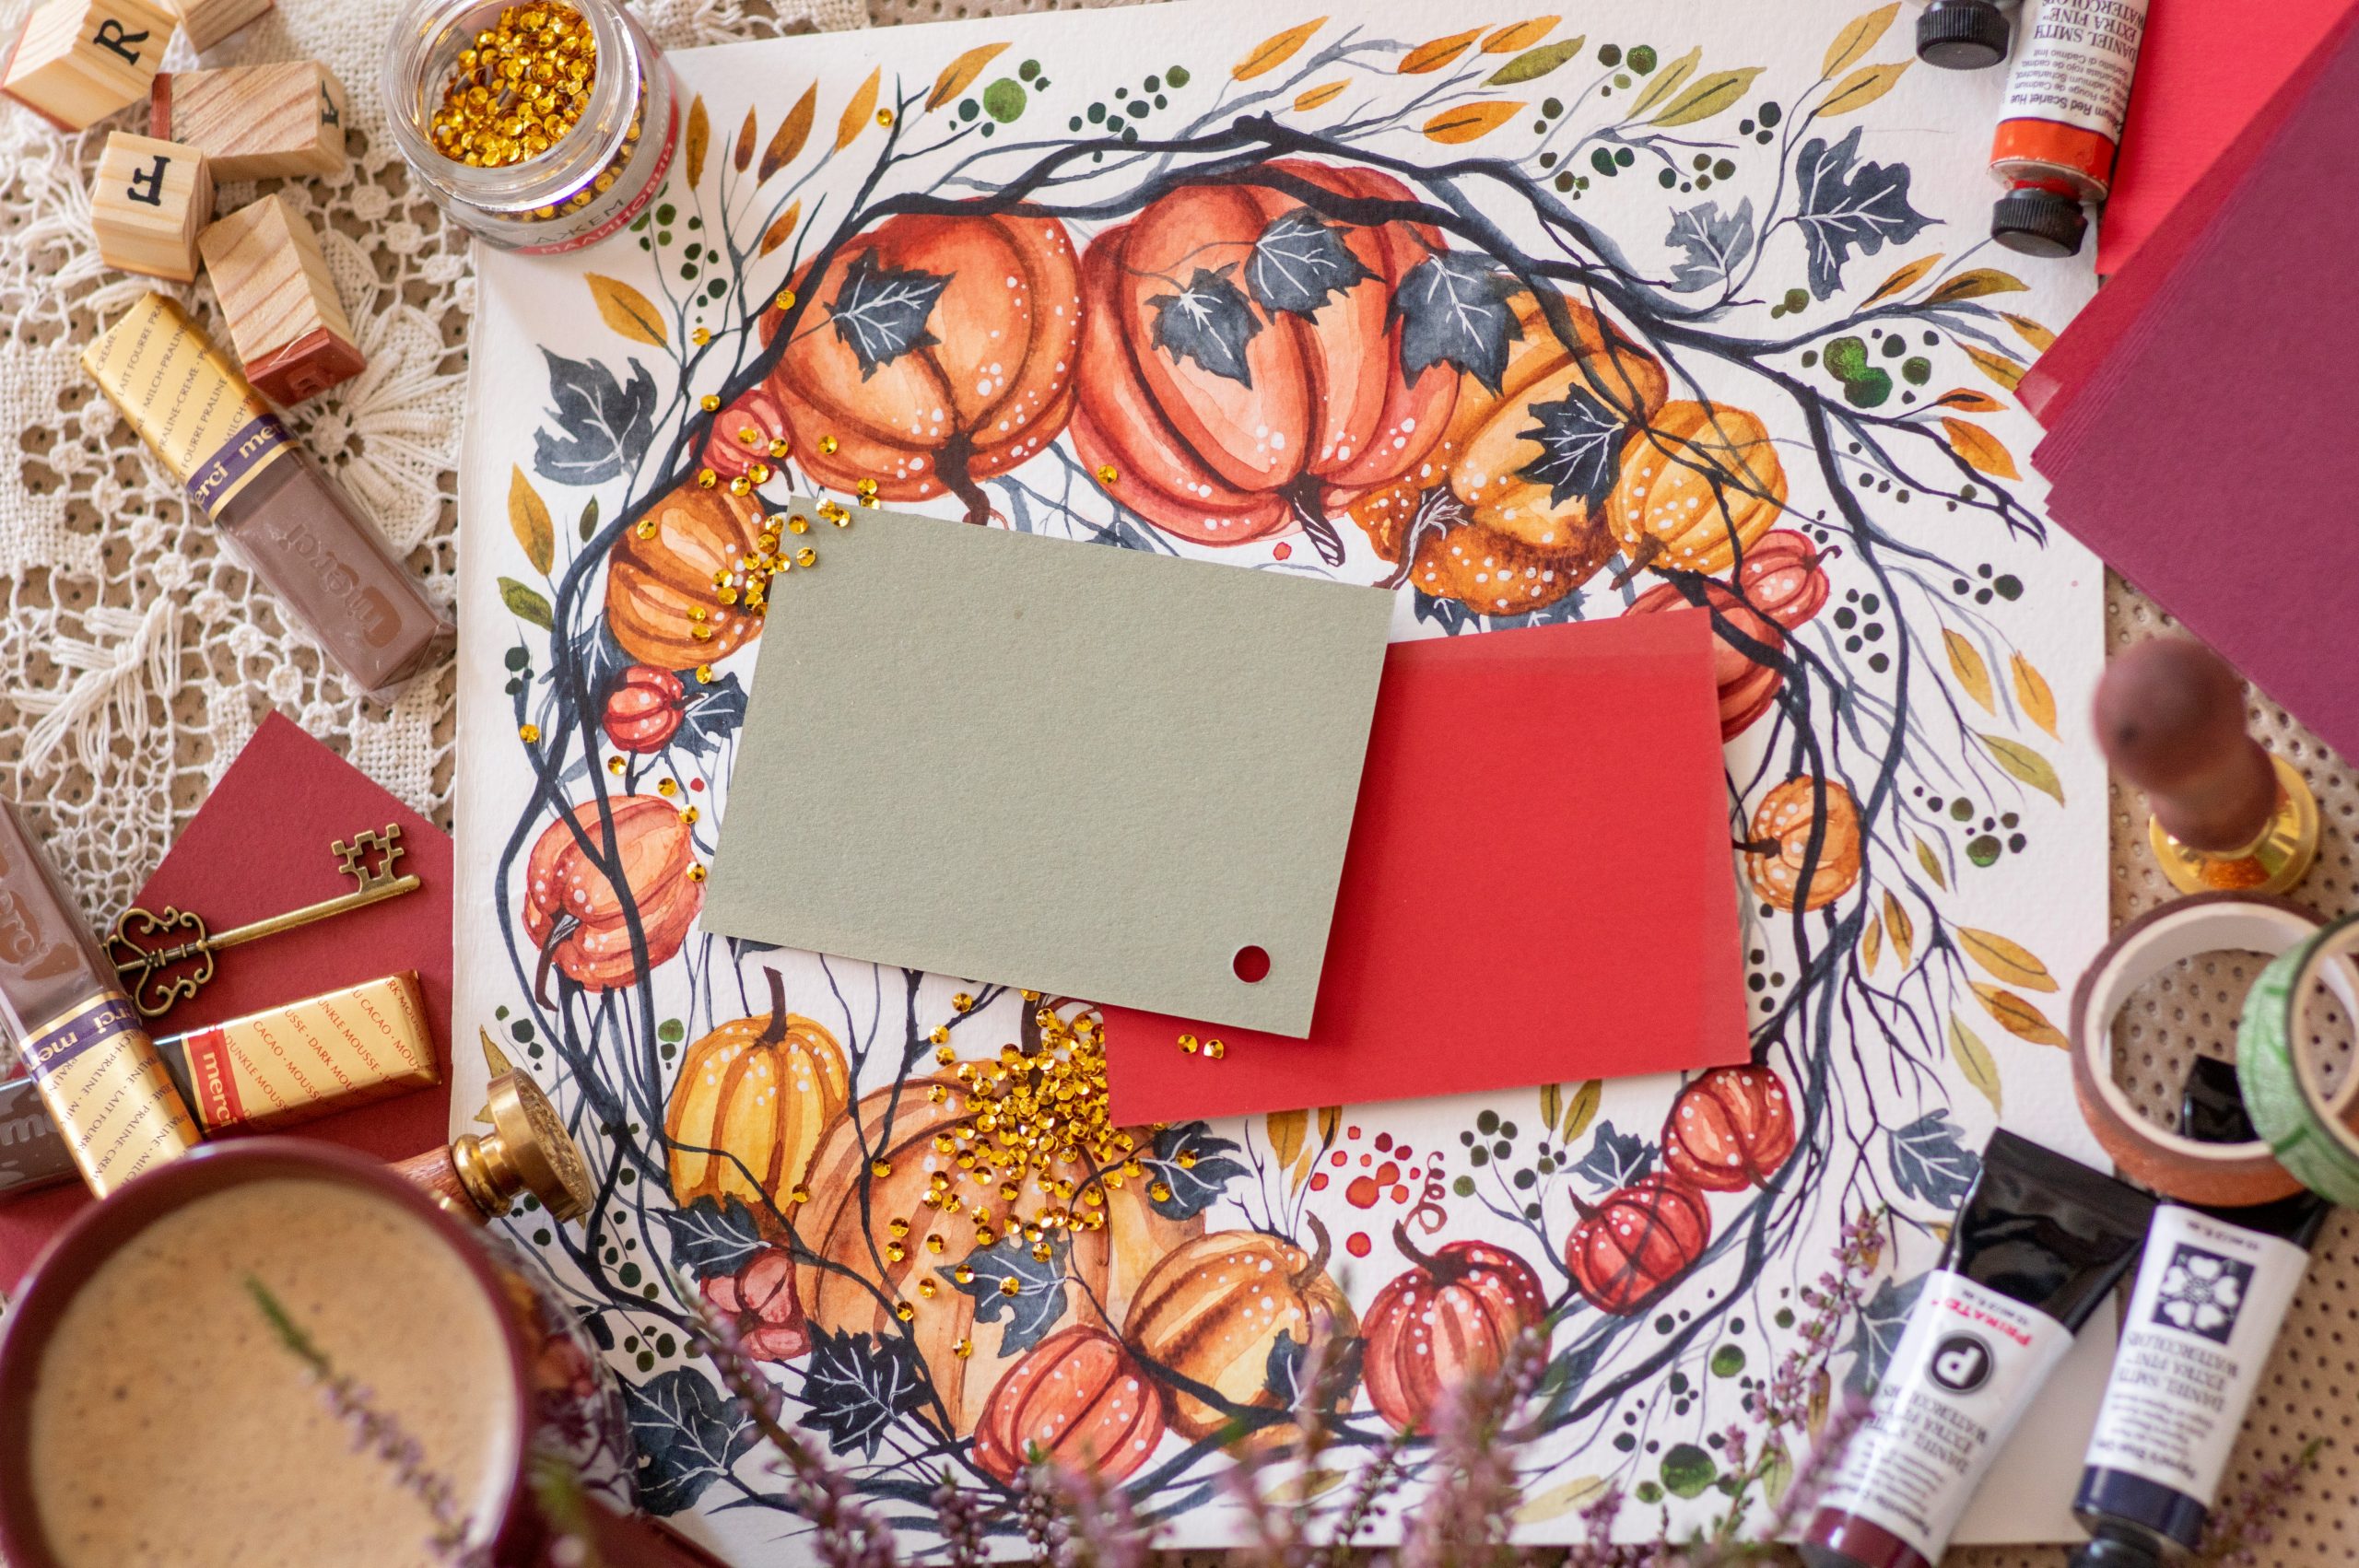
What makes this composition so successful is the masterful ‘organized chaos.’ It feels spontaneous and creative, but it’s actually very carefully constructed using the principle of framing. The central watercolor painting is the hero, and all the surrounding craft supplies—the paints, brushes, stamps, and paper—are arranged to frame it and draw your eye toward the center. The placement isn’t random; items are layered and overlapped to create depth and guide your gaze through the scene, telling the story of how the central artwork was made. This is a more complex version of the simple watercolor setup in Idea #1.
22. Hand-Lettered ‘Hello October’ Card with Paper Pumpkins
The secret to making lettering on black paper pop is layering your colors. Don’t just draw with a white pen. Start with your white chalk or gel pen as your base layer for the letters. Let it dry completely. Then, go back over parts of the letters with your gold and red accent colors. The white base will make these top colors appear much brighter and more opaque than they would on their own. This technique of layering light-to-dark is what gives the lettering such dimension and makes it leap off the page. The same principle applies to the paper pumpkins at the bottom.
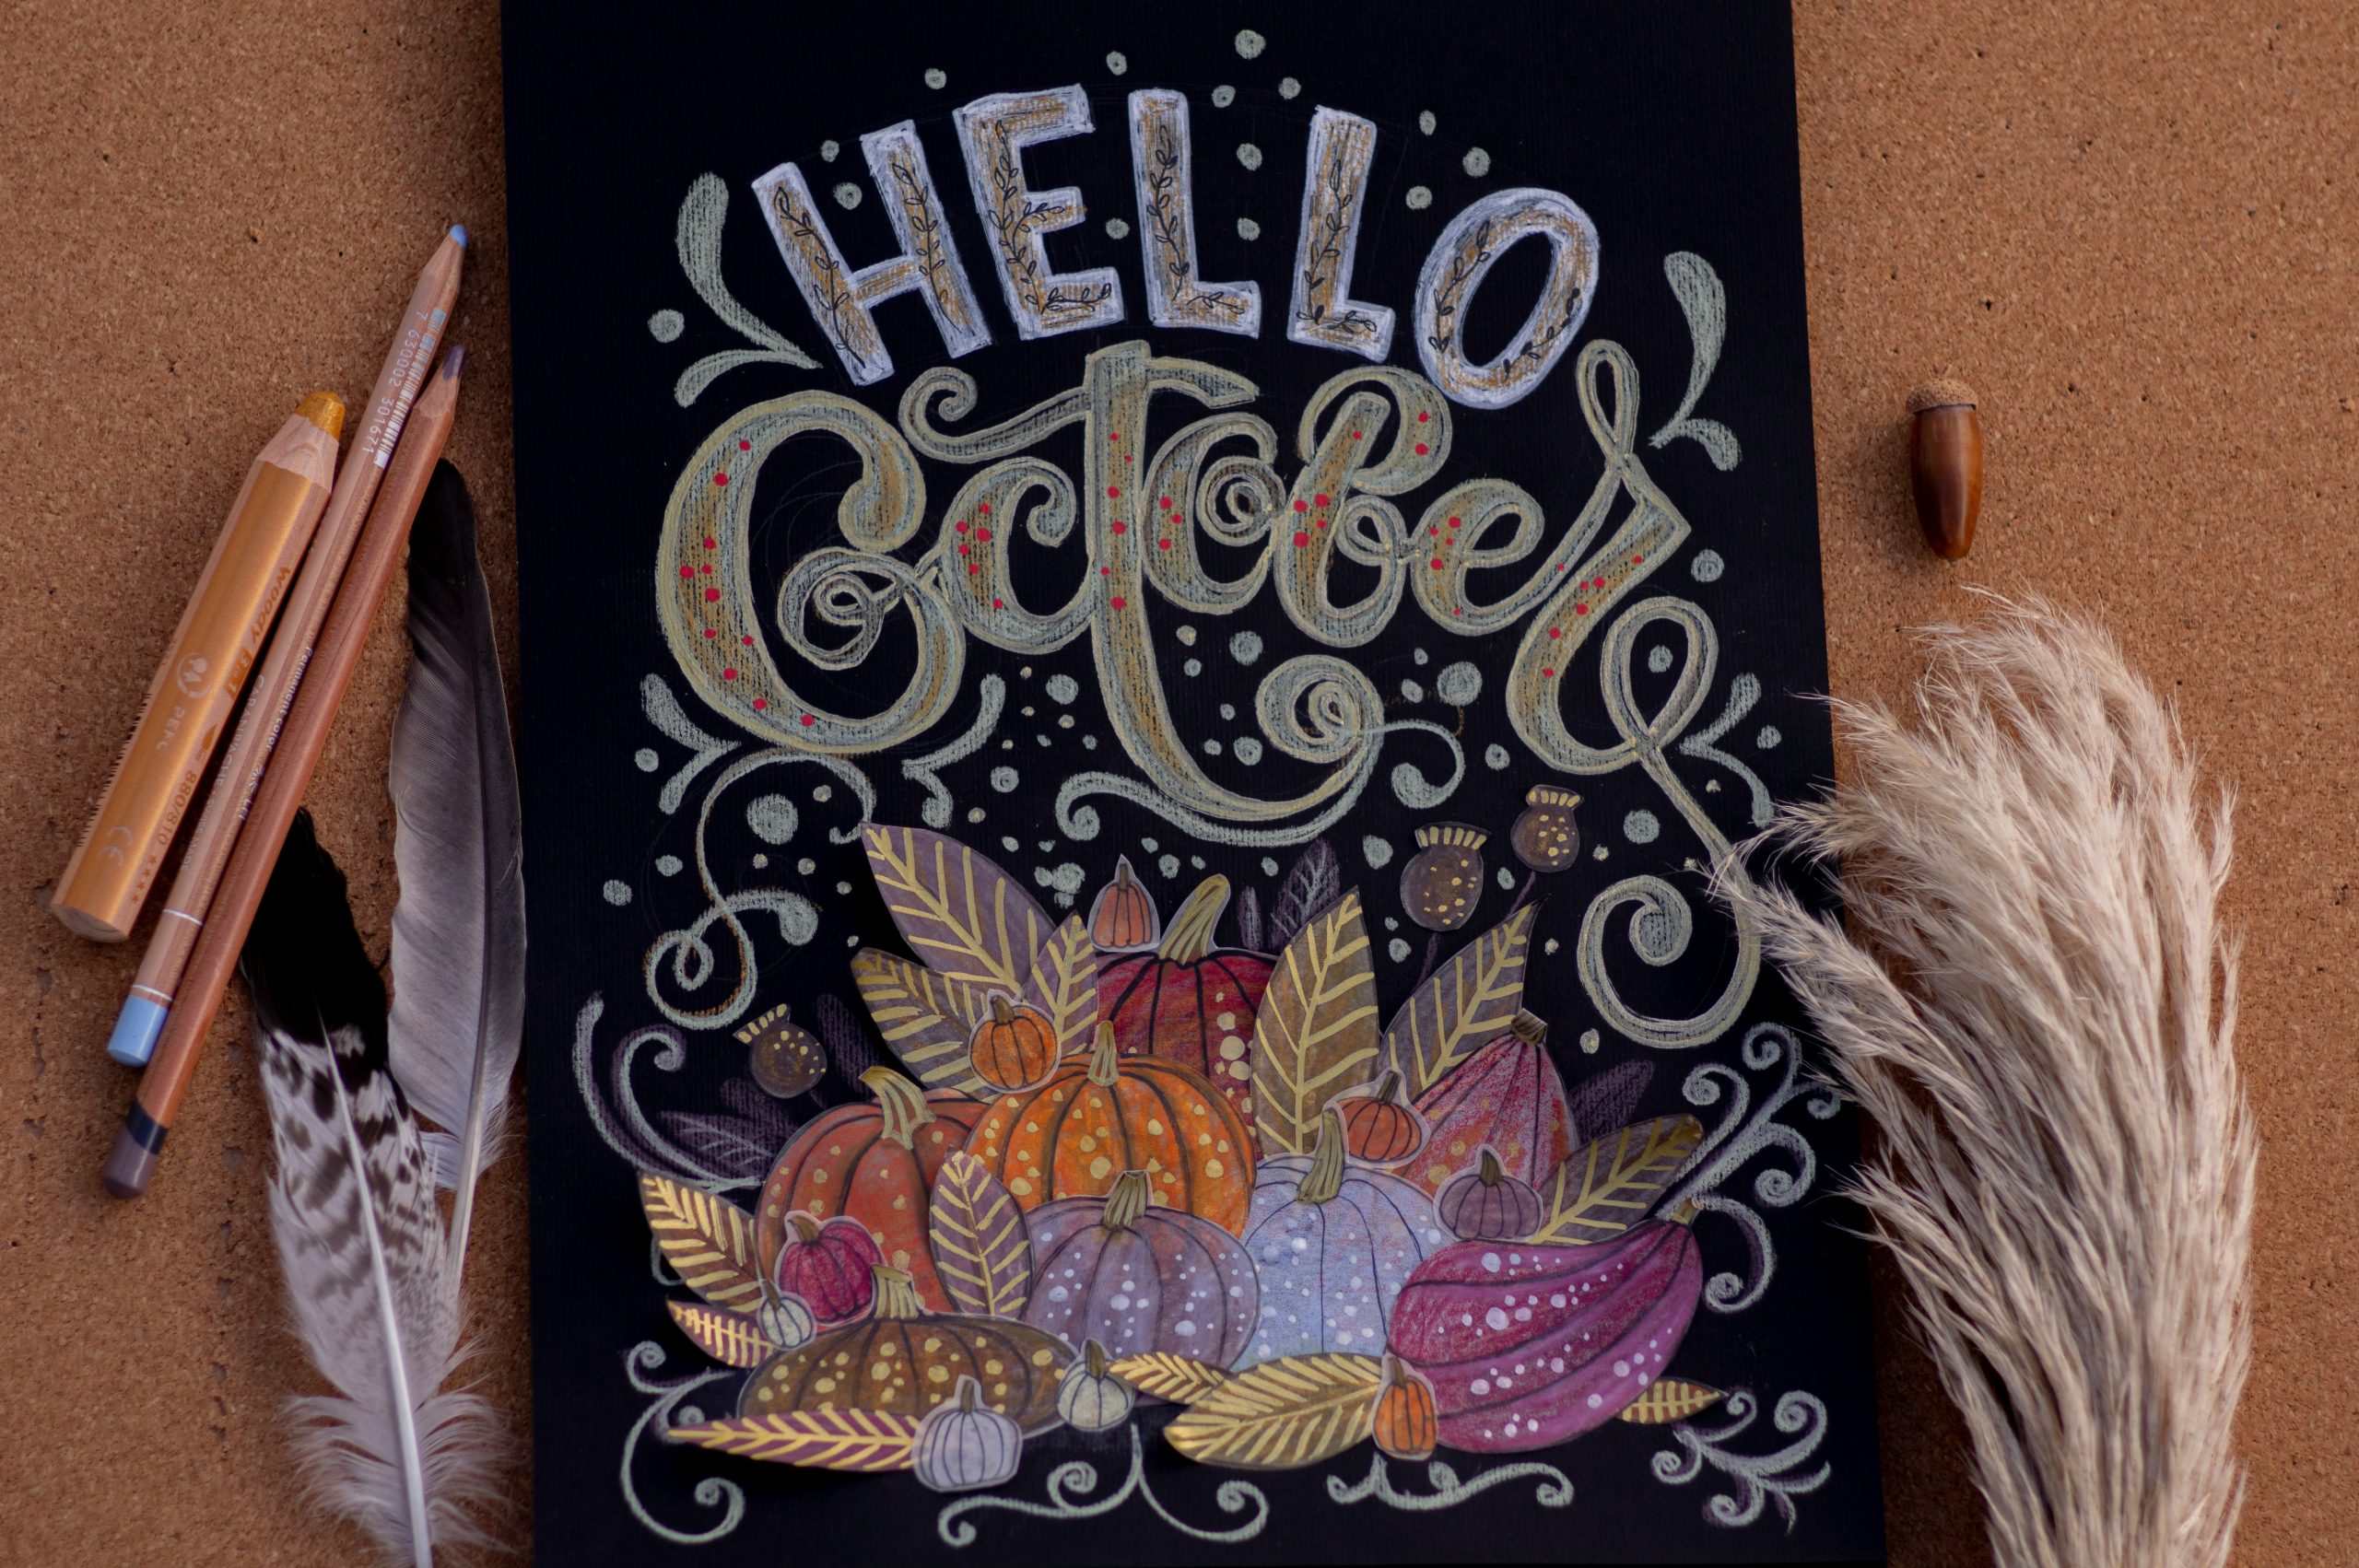
You can create those beautiful, layered paper pumpkins with just a few simple steps. It’s a great way to use up small scraps of paper.
- Cut Your Shapes: From various colors of cardstock, cut out several simple pumpkin shapes in different sizes. Don’t worry about perfection; slightly irregular shapes add charm.
- Add Details: Use markers, gold pens, or white pens to draw lines, dots, or other patterns on some of your pumpkin cutouts. This is where you can add personality.
- Create Depth: To make them pop, use small foam adhesive squares to layer the pumpkins on top of each other. Start with the largest shapes in the back and add smaller ones on top.
- Arrange and Adhere: Once you have a few small clusters you like, glue them to the bottom of your main card. Overlap them slightly to create a sense of a ‘pumpkin patch.’
This entire process for the pumpkin embellishments shouldn’t take more than 20 minutes.
23. Autumnal Leaf Wreath Watercolor with Paint Supplies
What makes this piece so compelling is the negative space. The artist didn’t just paint a collection of leaves; they arranged them into a wreath, leaving a pristine, scalloped-edge circle in the center. This blank space is the hero of the painting. It provides a resting place for the eye and makes the surrounding colors and details of the leaves feel even more vibrant and intense. It’s a brave and confident choice that invites the viewer to imagine what could be placed there—a name, a date, a special quote—making the artwork both beautiful and functional.
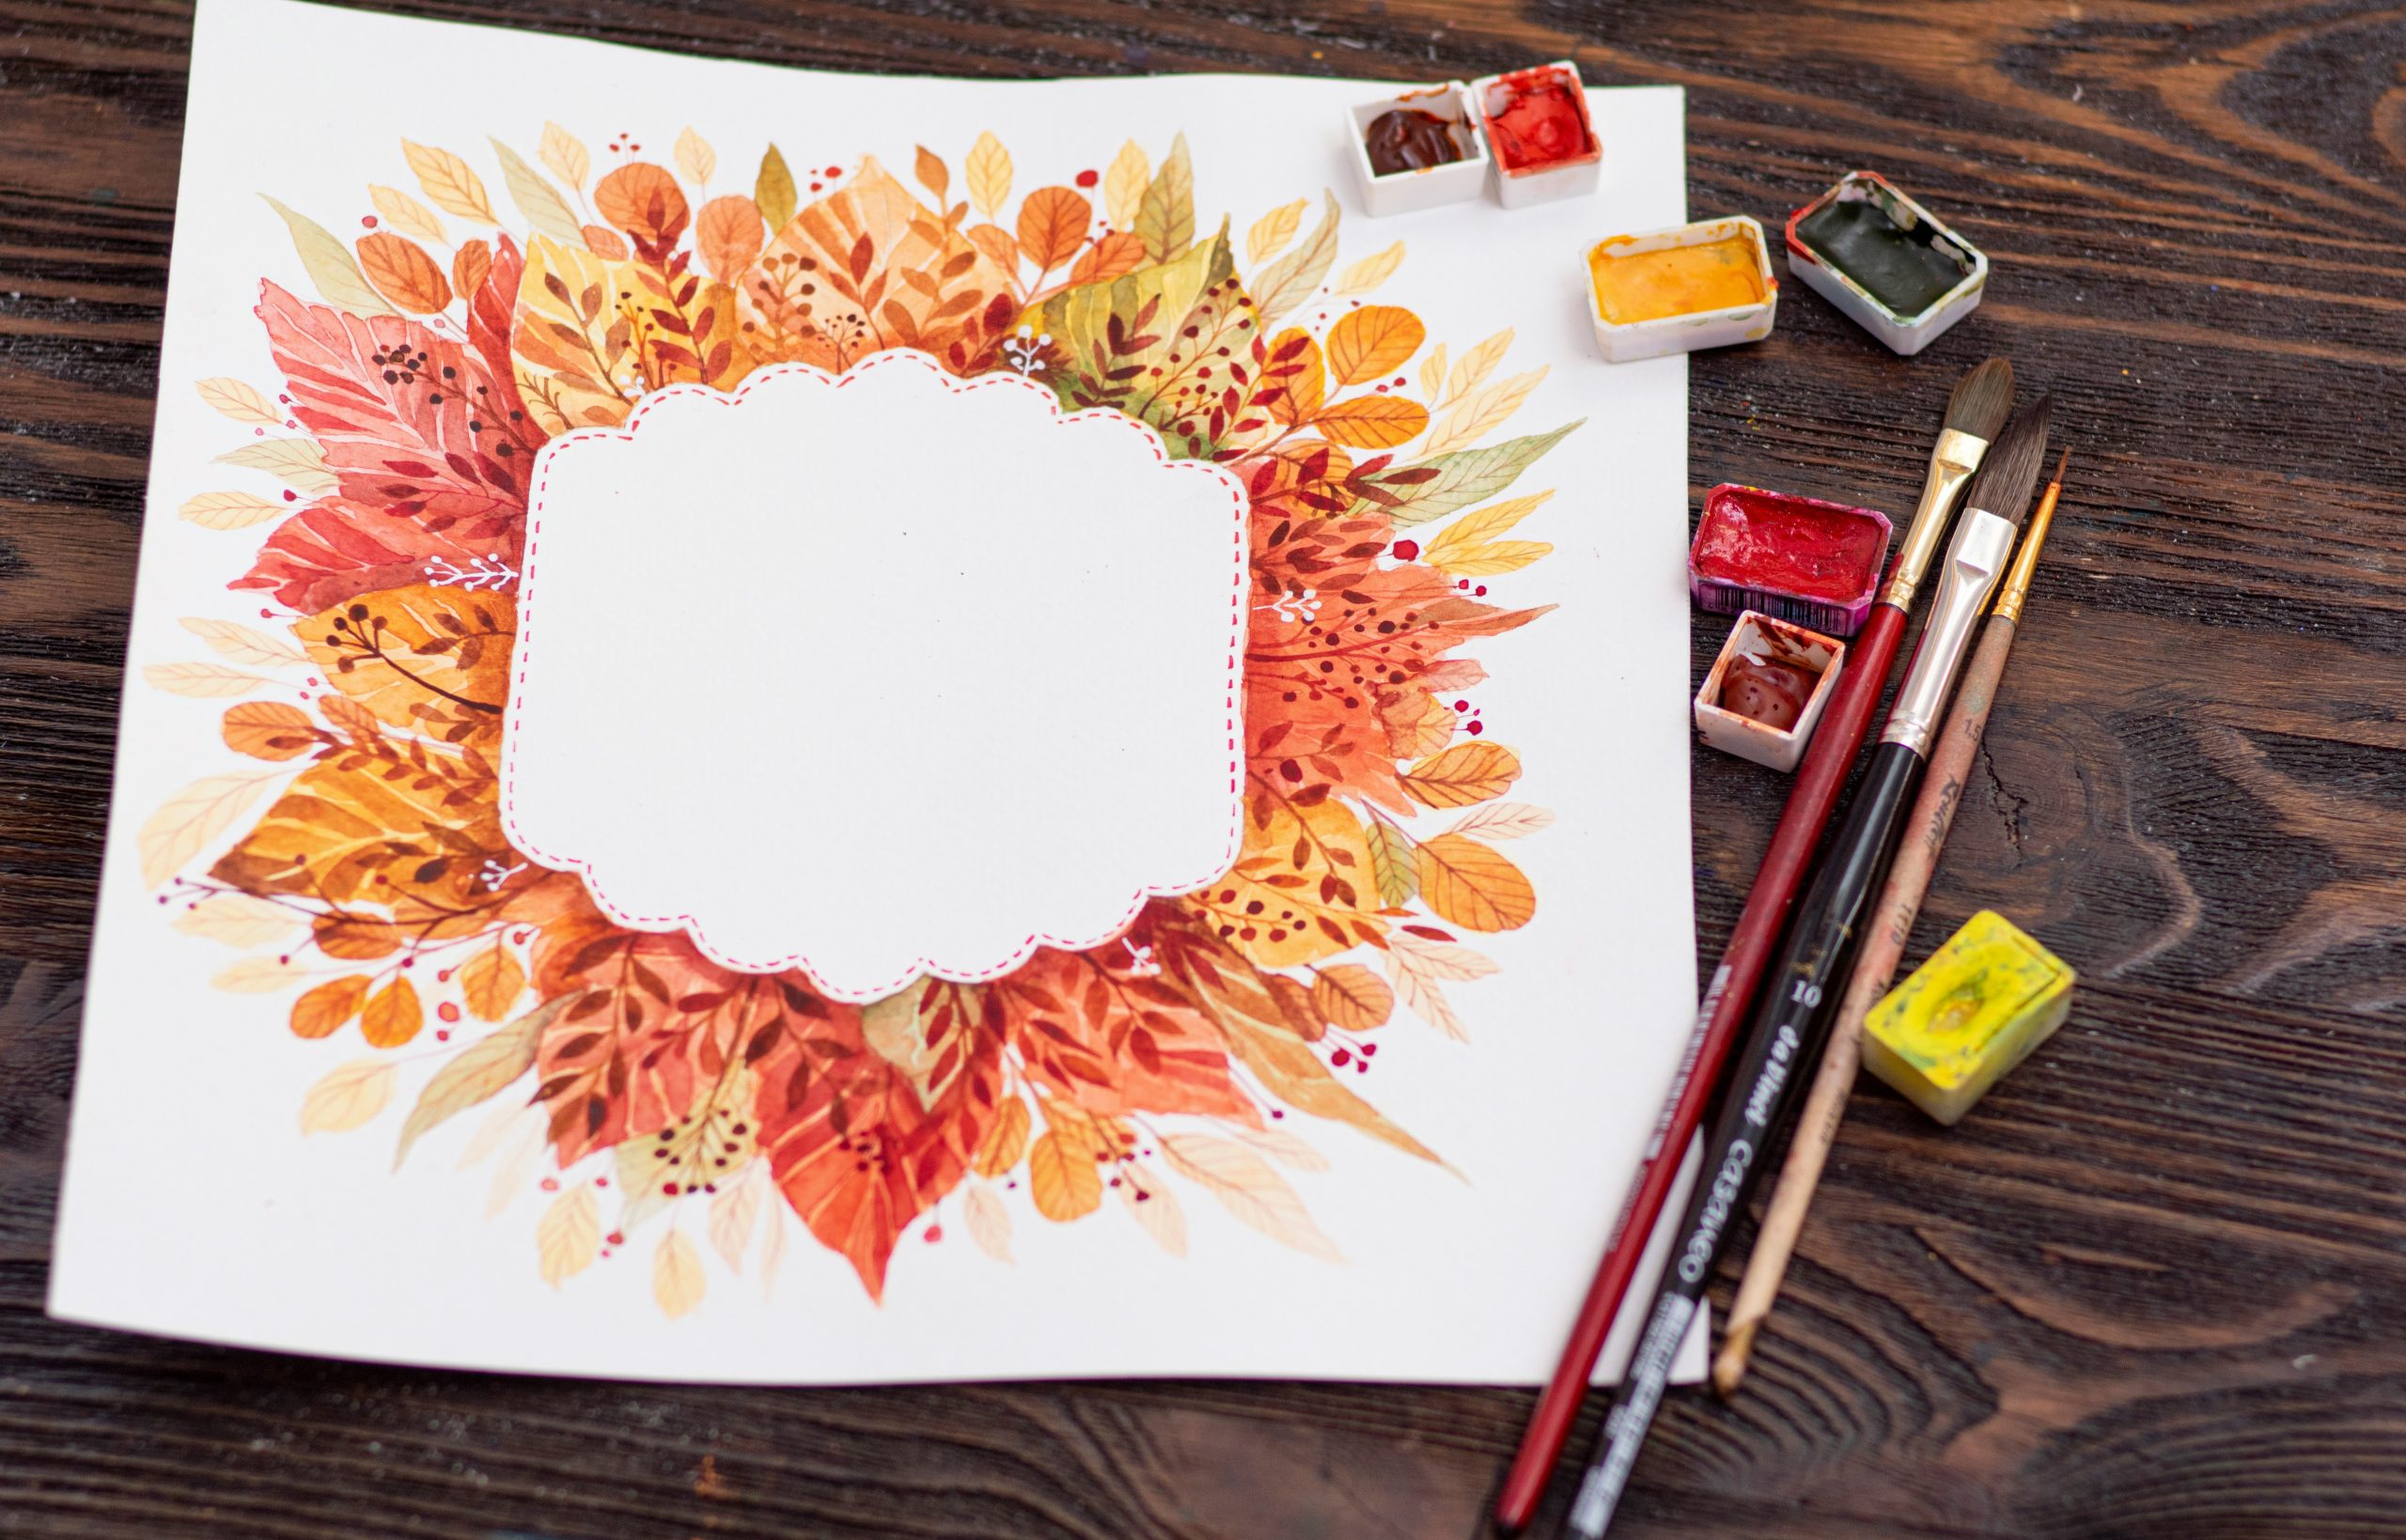
Recreating a watercolor setup like this is more affordable than you might think. You’re investing in tools that will last for many projects. Here’s a potential breakdown:
- Artist-Grade Watercolor Pan Set (includes many colors): $25 – $60
- Watercolor Paper Pad (140 lb): $15 – $30
- Set of Assorted Brushes: $10 – $25
- Decorative items (for styling): $5 – $15
- TOTAL: $55 – $130
Budget alternative: You can get a student-grade watercolor set (like a Prang or Arteza), a basic brush set, and a Canson XL watercolor pad for a total of around $25-$40.
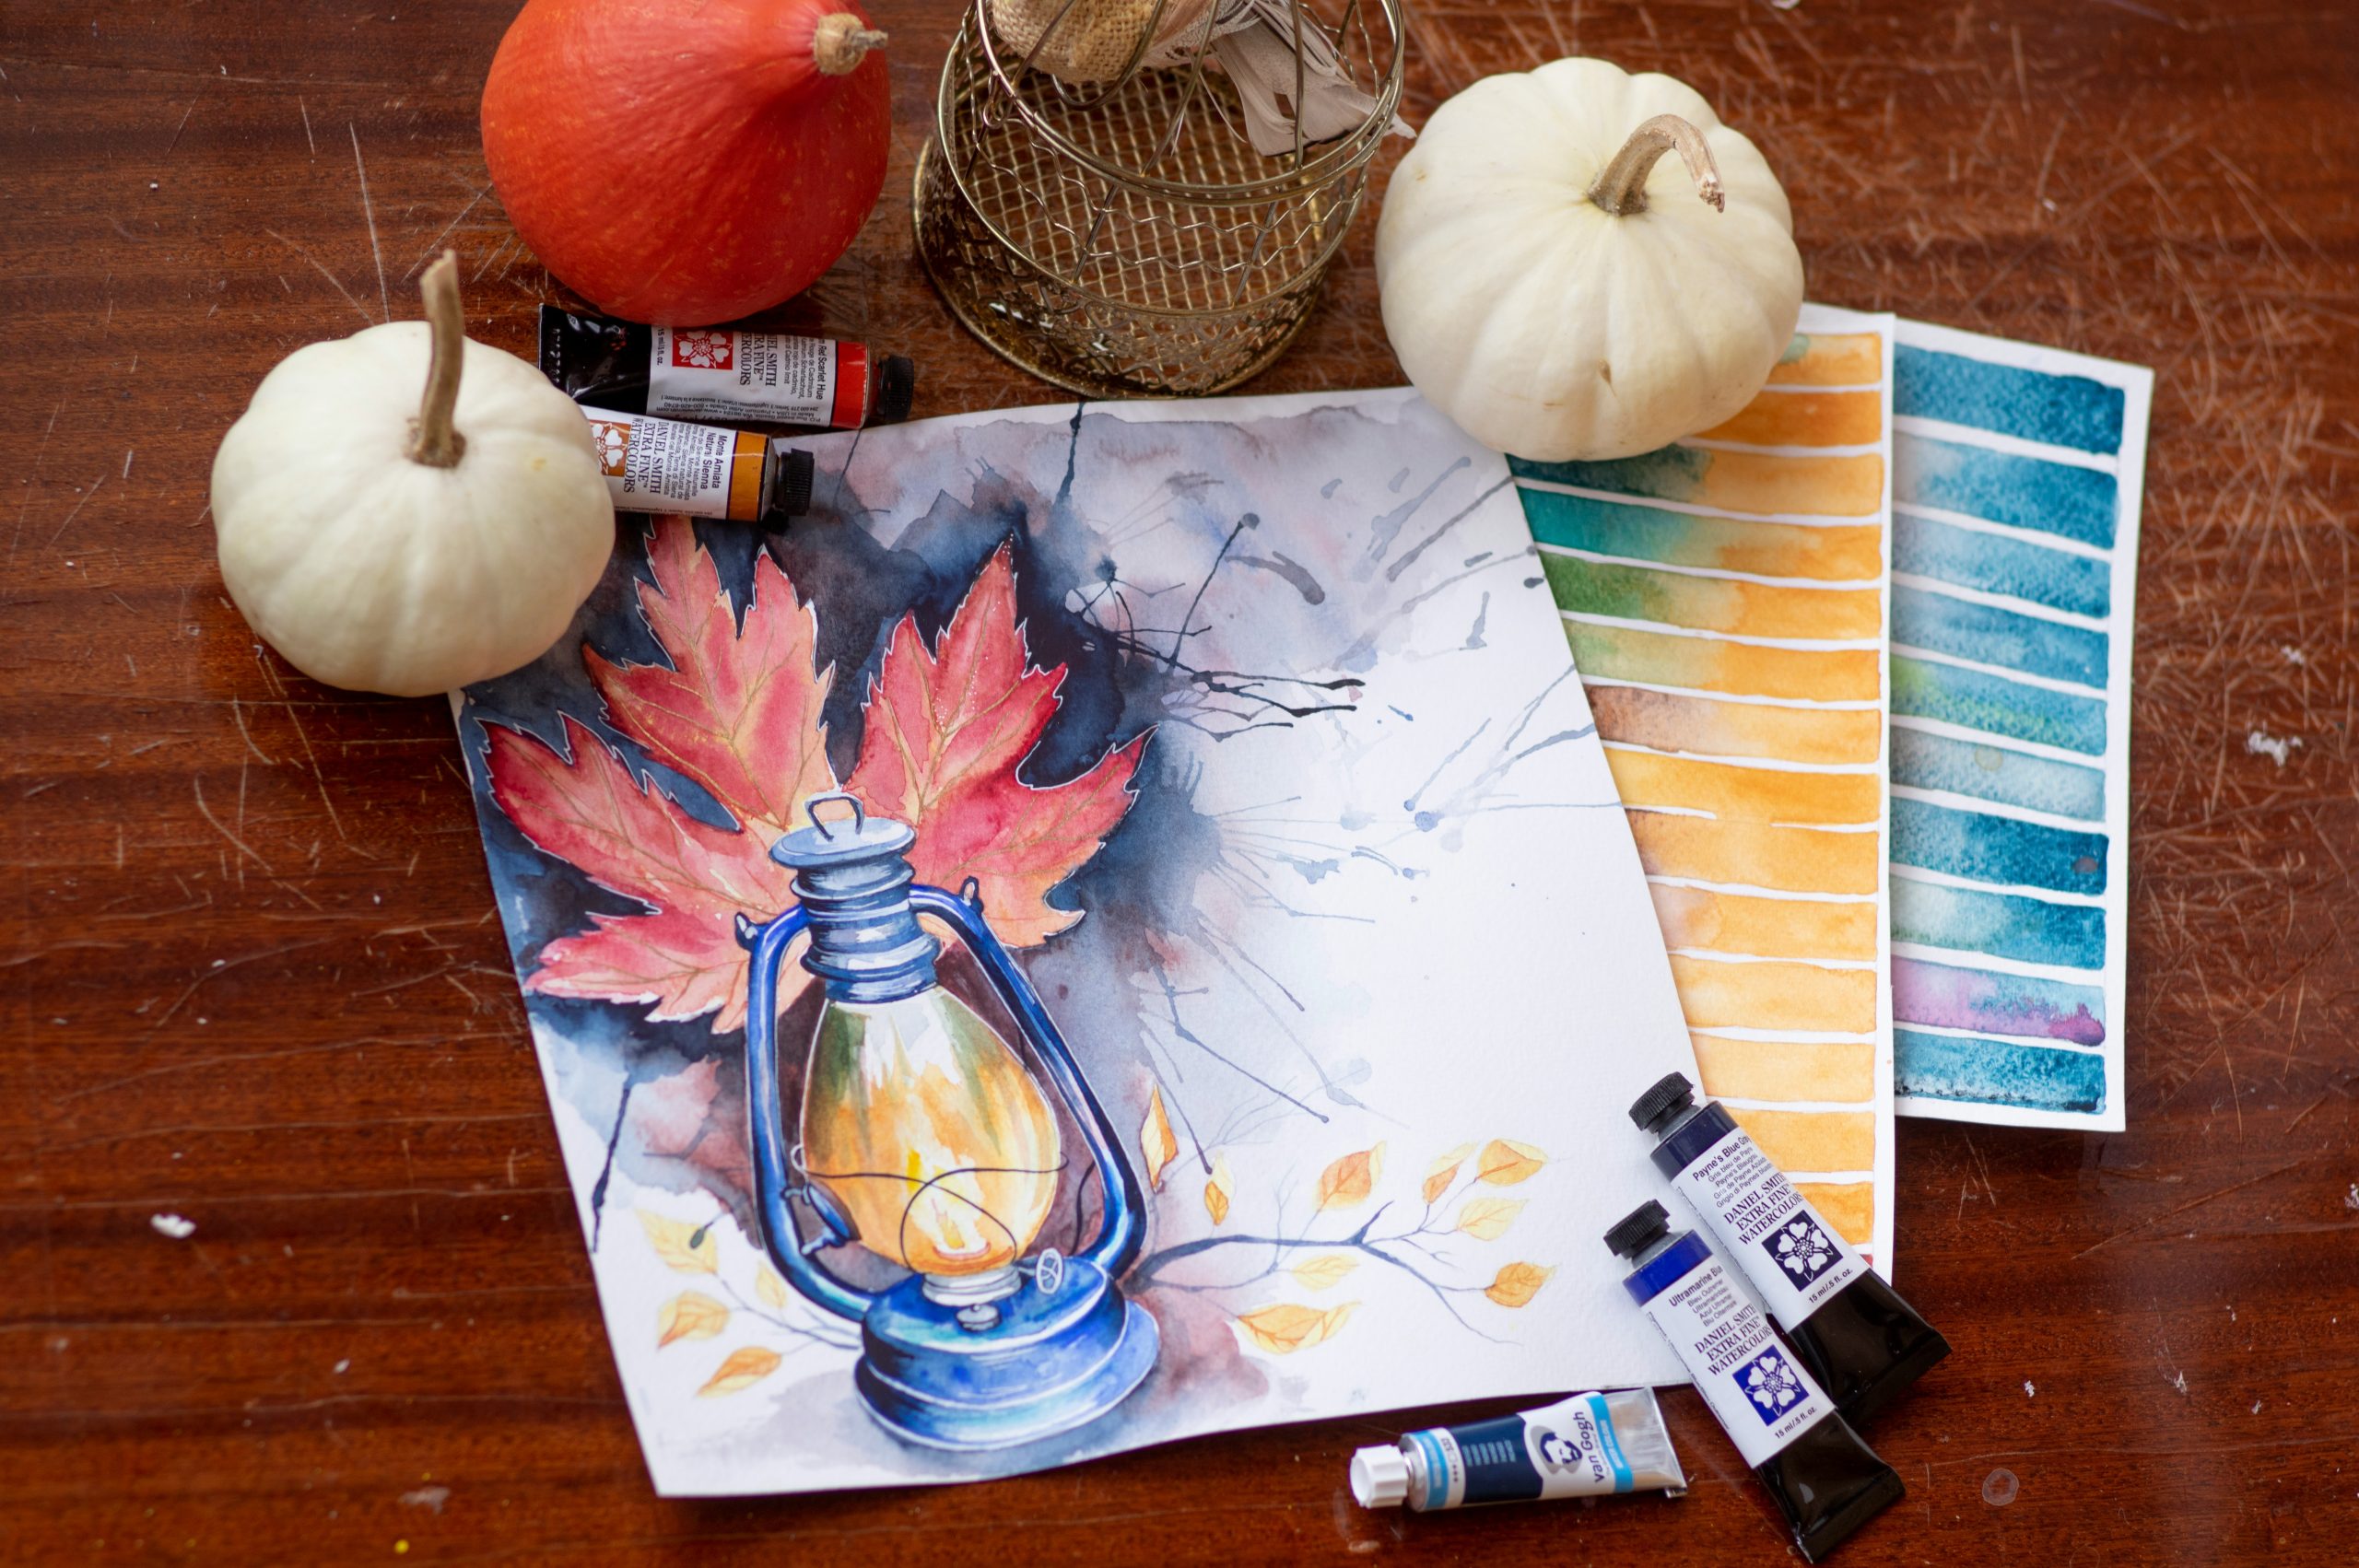
24. Fall Watercolor Art Station with Mini White Pumpkins
This scene works so well because it beautifully blends the 2D with the 3D. It’s not just a painting of fall; it’s a painting surrounded by the very objects that inspired it. The real white and orange pumpkins on the table connect directly to the subjects in the watercolor art. This creates a cohesive story and a much more immersive and interesting composition than just showing the painting or the pumpkins alone. The dark wood surface acts as a rich, grounding backdrop that makes both the vibrant paint colors and the light-colored pumpkins stand out dramatically.
|
📋 Copy HEX 🔗 Share |
A little reality check: that tube of white watercolor paint you see is most likely gouache or a white gel pen, not traditional watercolor. True watercolor painting relies on the white of the paper for its highlights, making it a ‘subtractive’ art form (you preserve the white). Adding opaque white on top is a different technique, often used in mixed media. There’s nothing wrong with it—it’s how the artist achieved those bright white details on the lantern—but it’s good to know if you’re a beginner trying to understand the ‘rules’ of watercolor. Don’t be afraid to mix your media to get the effect you want!
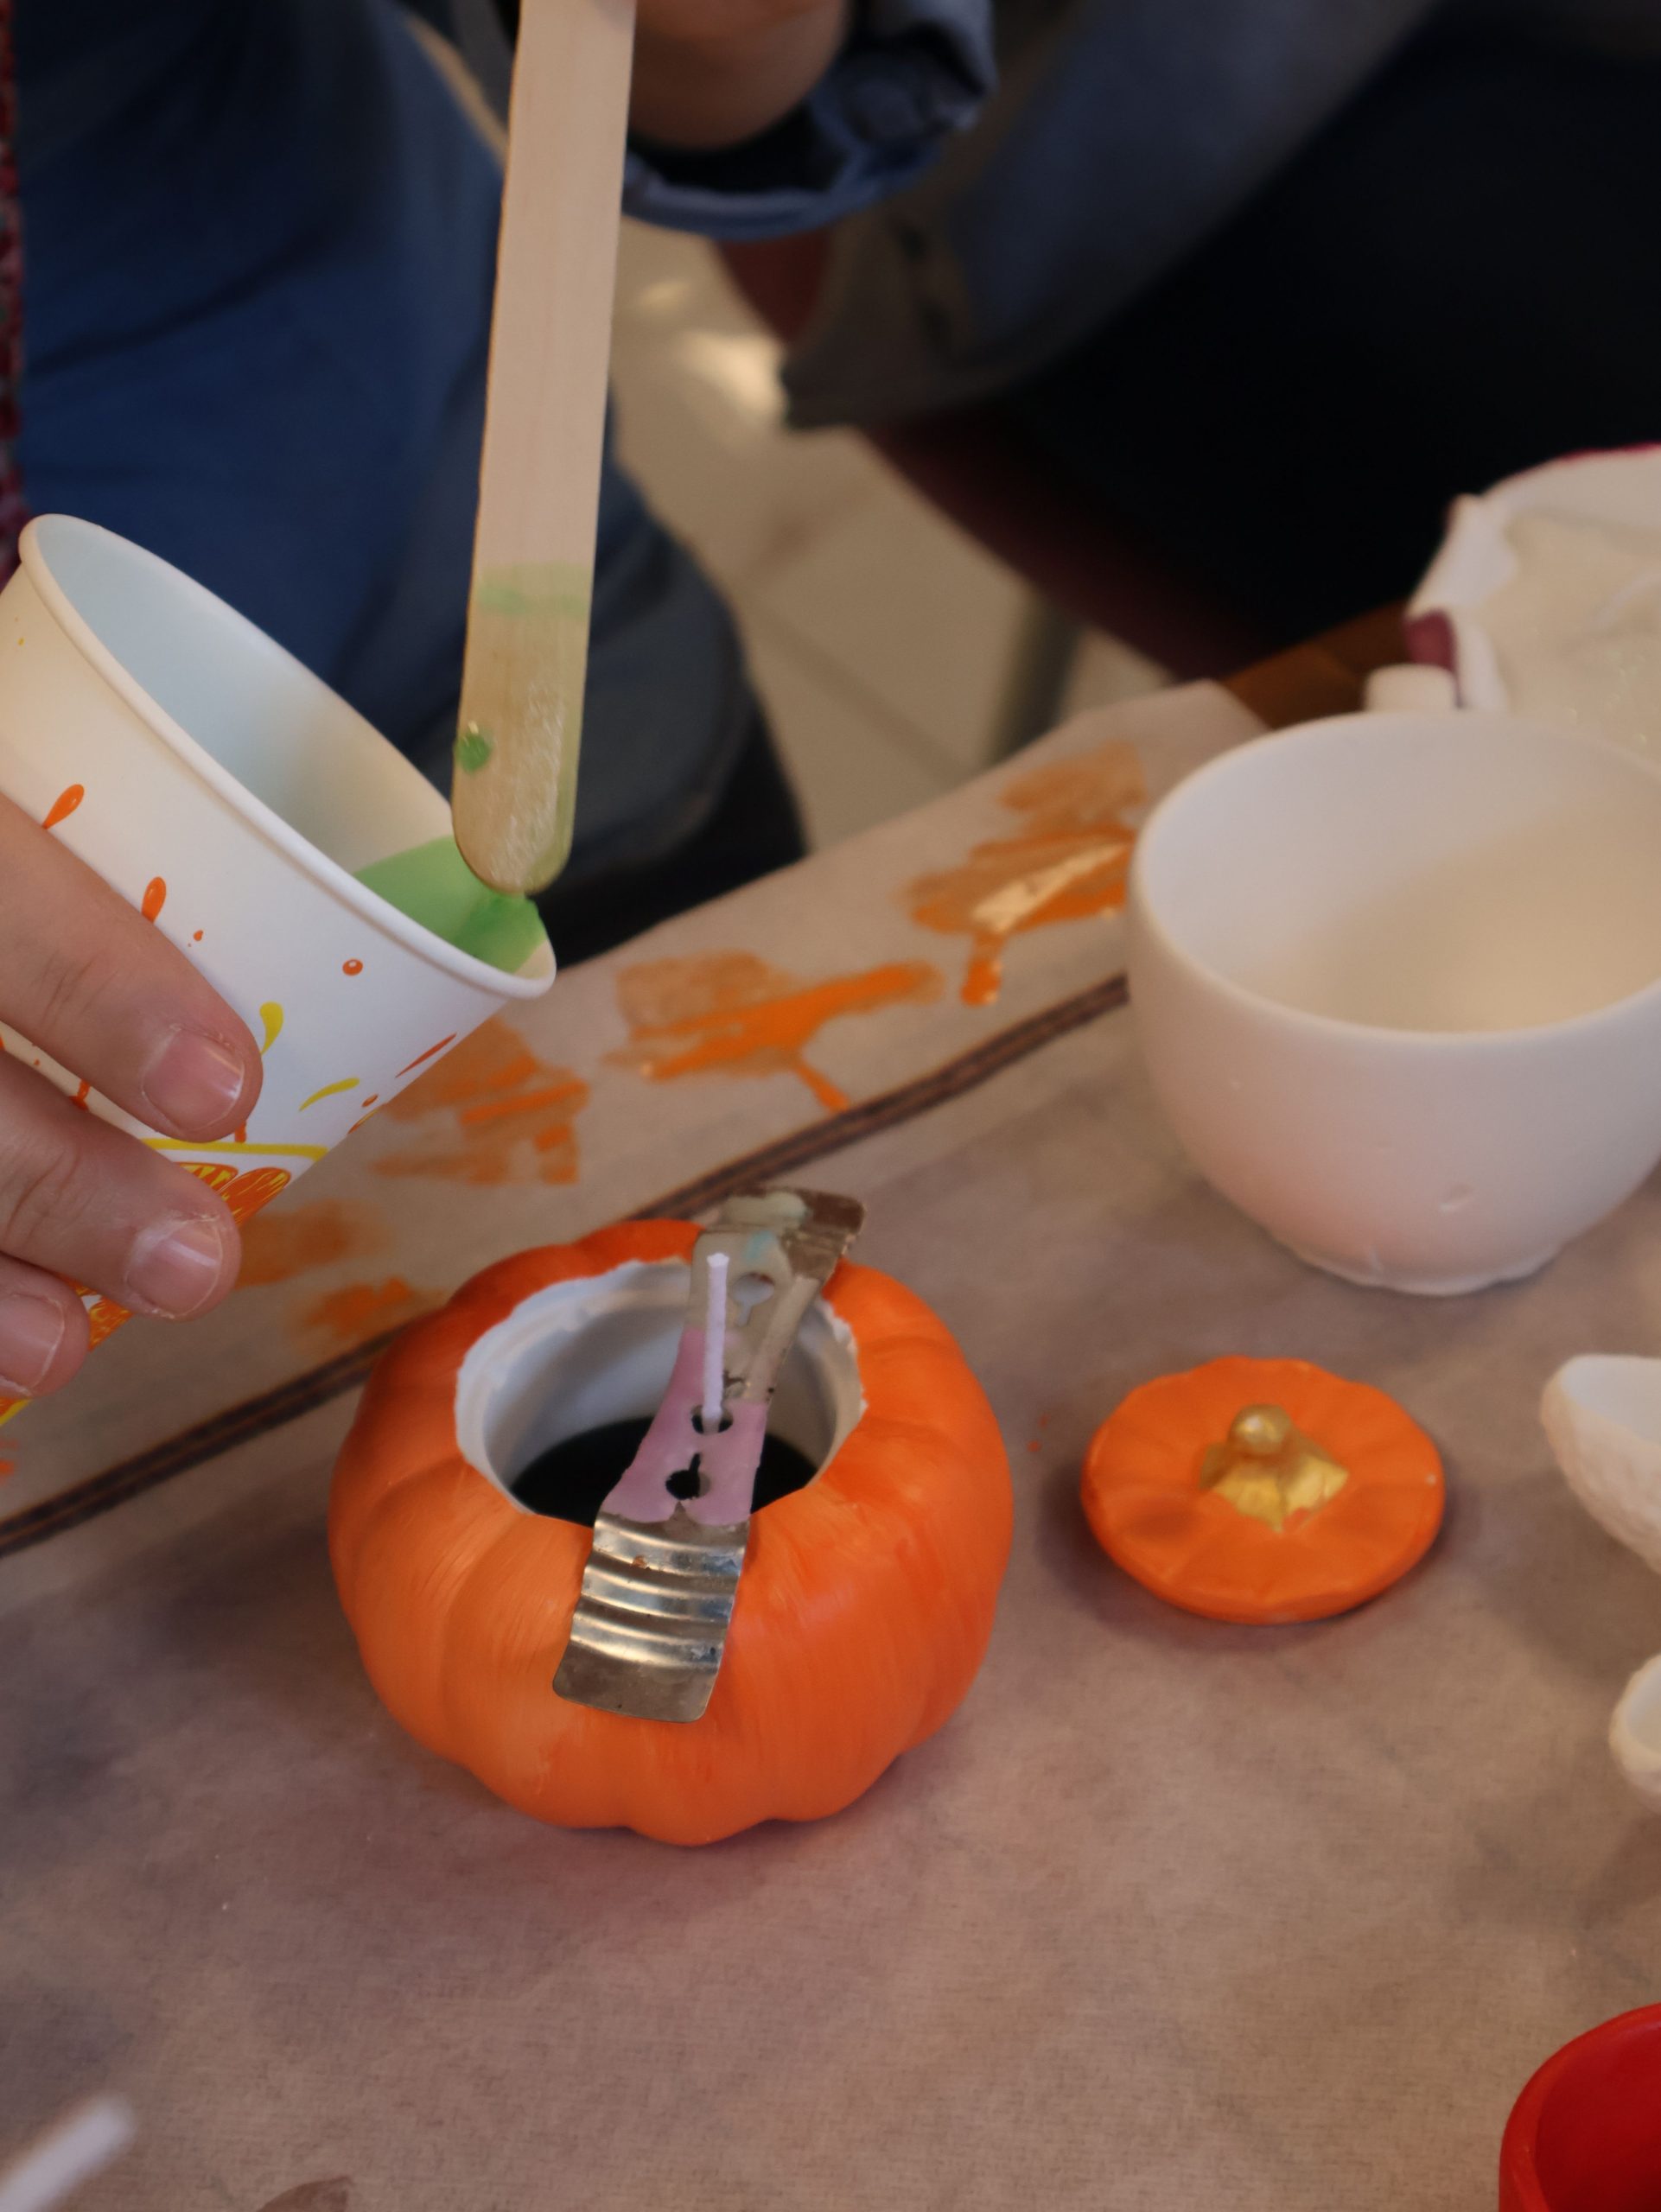
25. Pouring Green Resin into a Pumpkin-Shaped Candle Mold
Making your own molded candles is a surprisingly straightforward process. Here’s how you can make a pumpkin candle like this one:
- Prep Your Mold: Thread a waxed wick through the bottom of your silicone pumpkin mold. Secure it at the top with a wick holder (or just a clothespin laid across the opening) to keep it centered and taut.
- Melt Your Wax: In a double boiler or a dedicated wax melting pot, melt your chosen wax (soy, beeswax, or paraffin) over low heat. Never melt wax directly on the heat source.
- Add Color & Scent: Once the wax is melted, remove it from the heat and stir in your color dye (the green liquid shown) and any fragrance oil you’d like. Stir gently but thoroughly for two minutes.
- Pour Carefully: Let the wax cool slightly to the recommended pouring temperature (check your wax instructions). Then, pour slowly and steadily into the mold to avoid air bubbles.
- Cool and Cure: Let the candle cool completely at room temperature for several hours, or even overnight. Once fully hardened, gently demold your pumpkin candle and trim the wick to 1/4 inch.
Before you jump into the world of candle making, it’s not just about pretty colors and molds. This craft requires some safety awareness. Here is a quick sanity check:
- Do you have a well-ventilated workspace? Melting wax and fragrances can release fumes. Working near an open window is a great idea.
- Is your workspace protected? Wax spills happen. Cover your table with newspaper or craft paper like in the photo. Have paper towels on hand for quick cleanups.
- Are flammable materials cleared away? Make sure there are no loose papers, fabrics, or other flammable items near your melting setup.
- Do you have a dedicated pot for wax? Do not use your good cooking pots. Wax is very difficult to clean. A thrift store pot is a perfect, cheap solution for your new hobby.
26. A Minimalist Display of Dried Leaves and Jute Twine
What makes this simple arrangement feel so chic and intentional is the white tray. Without it, this would just be a few leaves and a spool of twine on a white surface. The tray acts as a stage. It contains the elements, defines the boundary of the composition, and elevates the humble, natural items into a curated display. Its clean, round shape provides a soft, modern contrast to the rustic textures of the leaves and twine. It’s proof that sometimes the most important part of a display is the frame you put around it. This is a far more minimalist take than the busy tray in Idea #20.
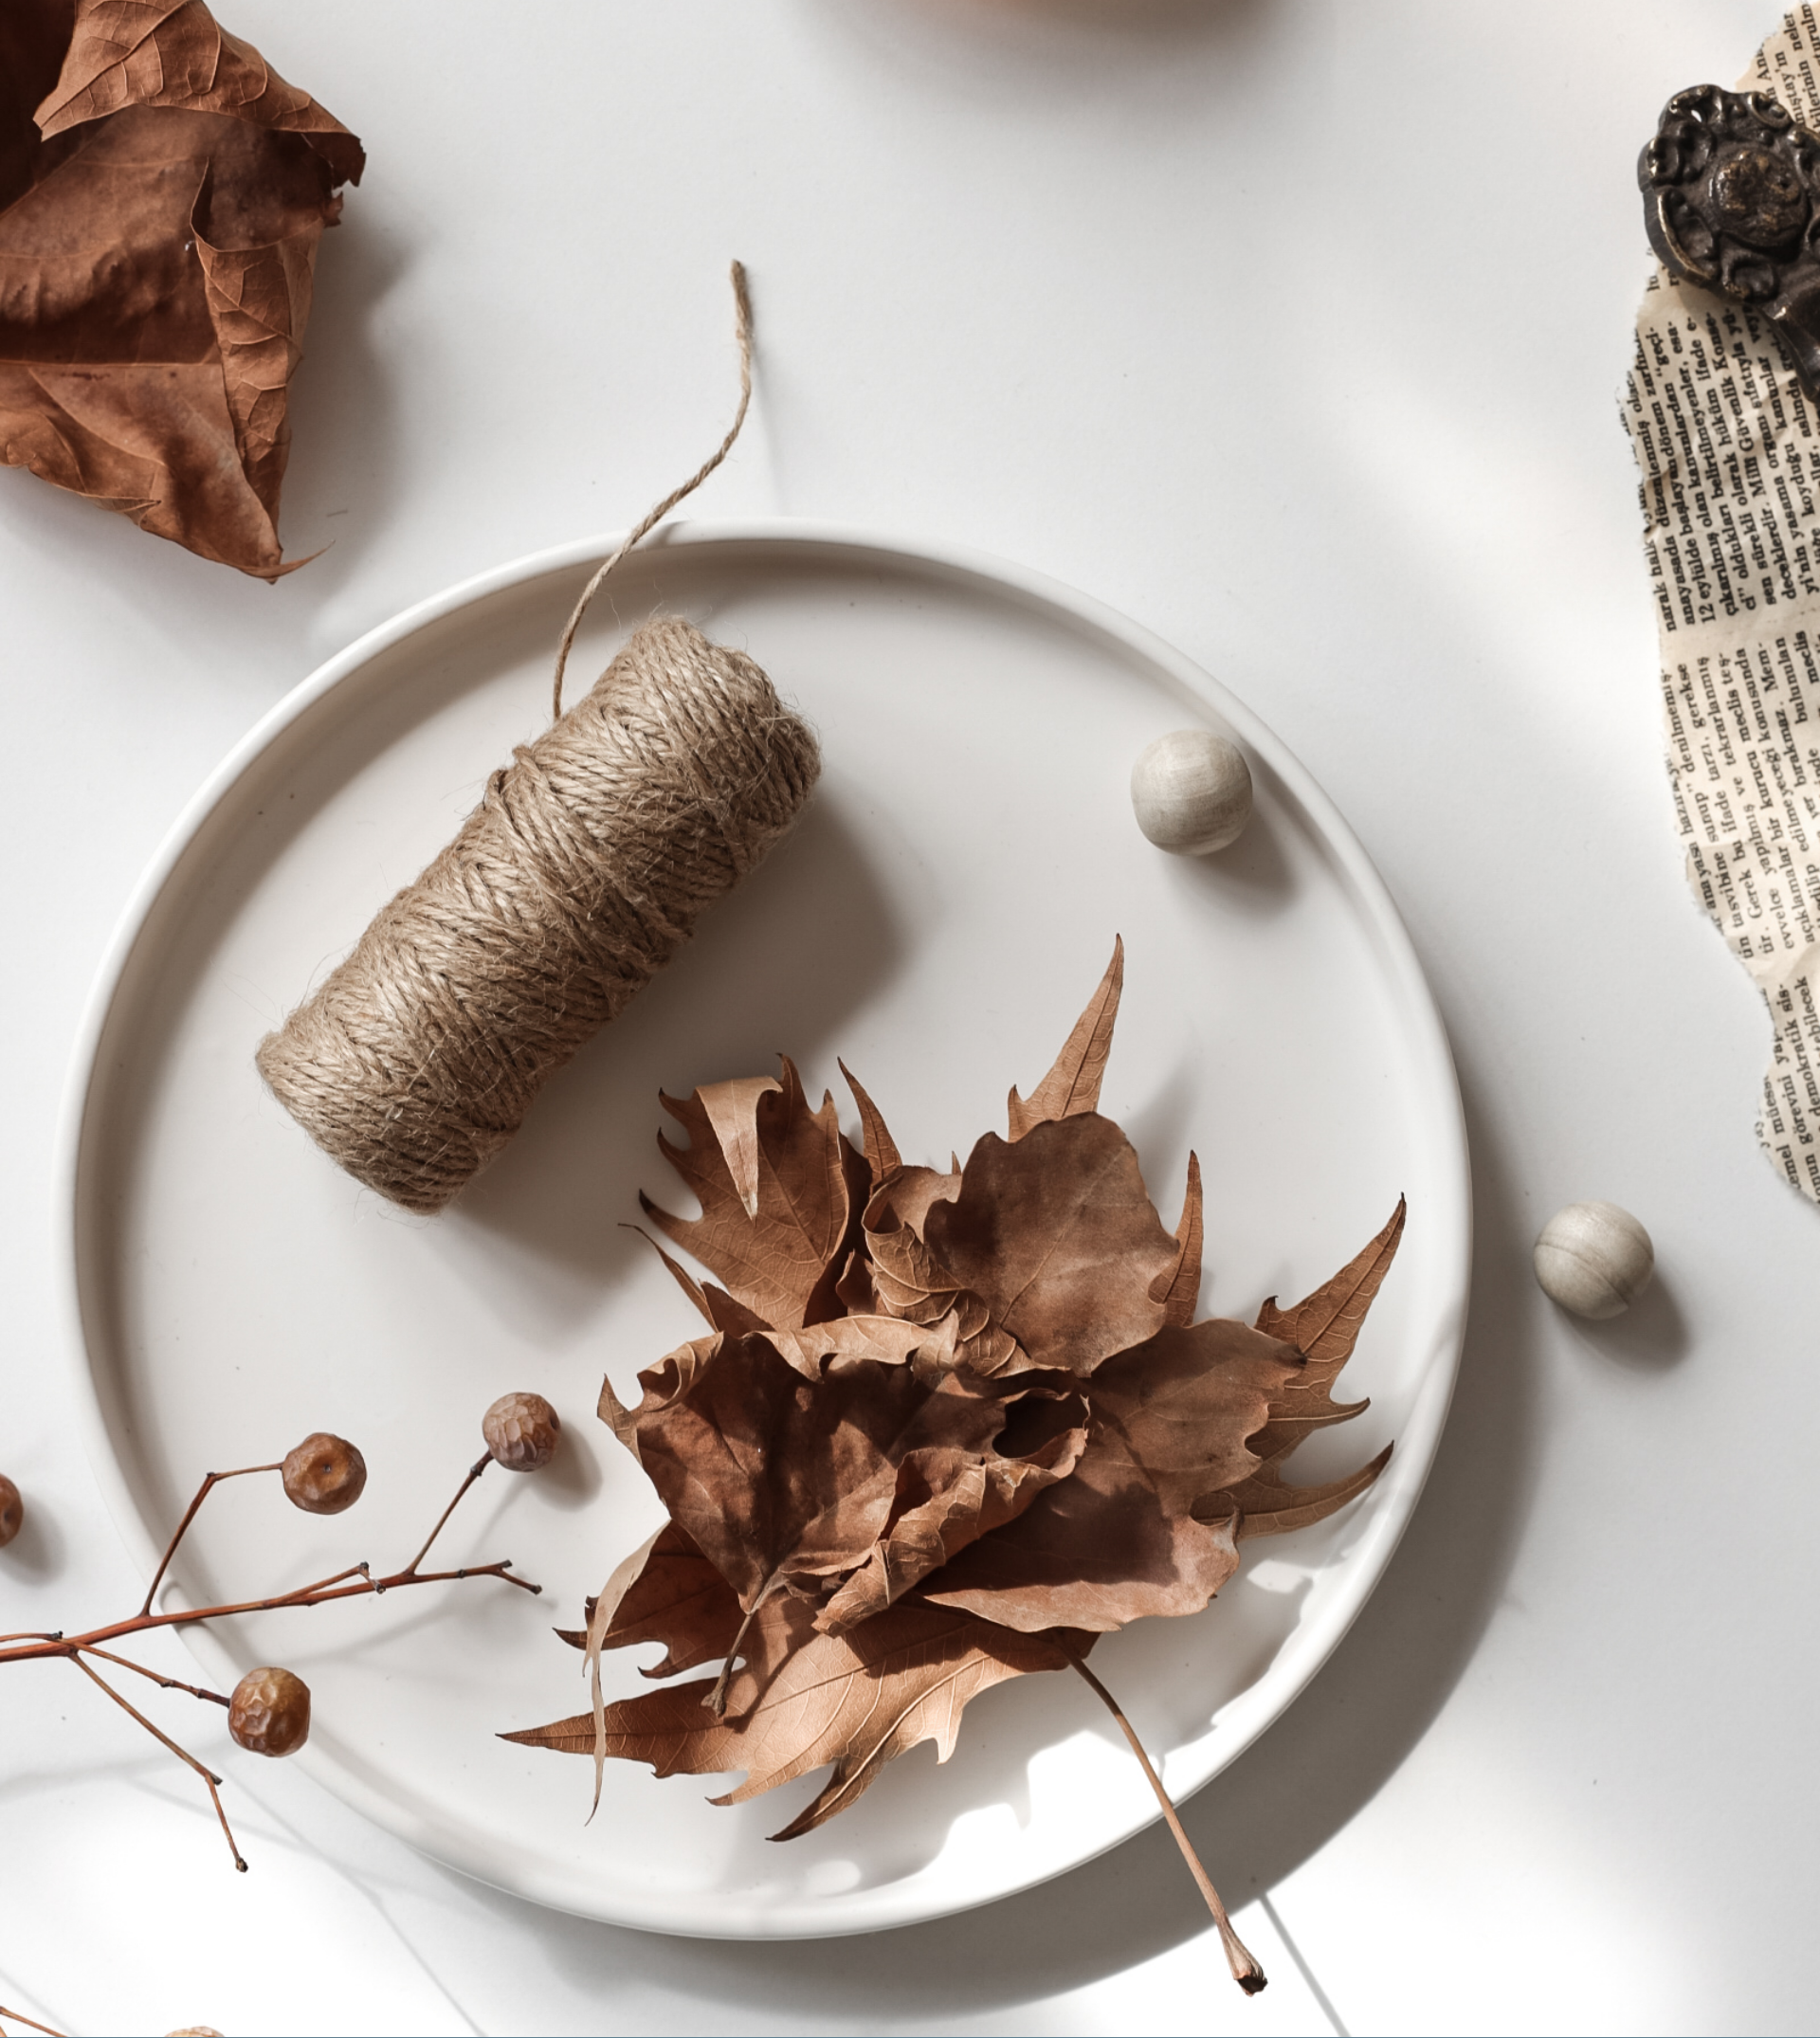
If you’re creating a minimalist, rustic display like this, ‘less is more’ is your guiding principle, but that doesn’t mean it’s easy. The secret is to edit ruthlessly. Start with more items than you think you’ll need, and then take things away one by one until only the most essential, beautiful elements remain. Pay attention to the ‘visual breathing room’ between objects. Don’t crowd them. Each piece—the leaf, the bead, the branch—should have enough space around it to be appreciated for its individual shape and texture. It’s a quiet, confident approach to decorating.
27. Crafting Felt Bats with a Sewing Machine and Pumpkin
What makes this image so effective is its storytelling. It’s a snapshot of a ‘craft in progress,’ which is often more compelling than the finished product. The white sewing machine is the hero of the story. The scattered black felt bat shapes, the pins in the cushion, and the yellow felt tucked into the machine are all clues that tell us what’s being made. The carved pumpkin in the background sets the scene and the mood perfectly. It’s a composition that doesn’t just show you an object; it shows you the act of creation, which feels personal and inspiring. The felt bats here are a more advanced version of the simple stick-on ones from Idea #6.
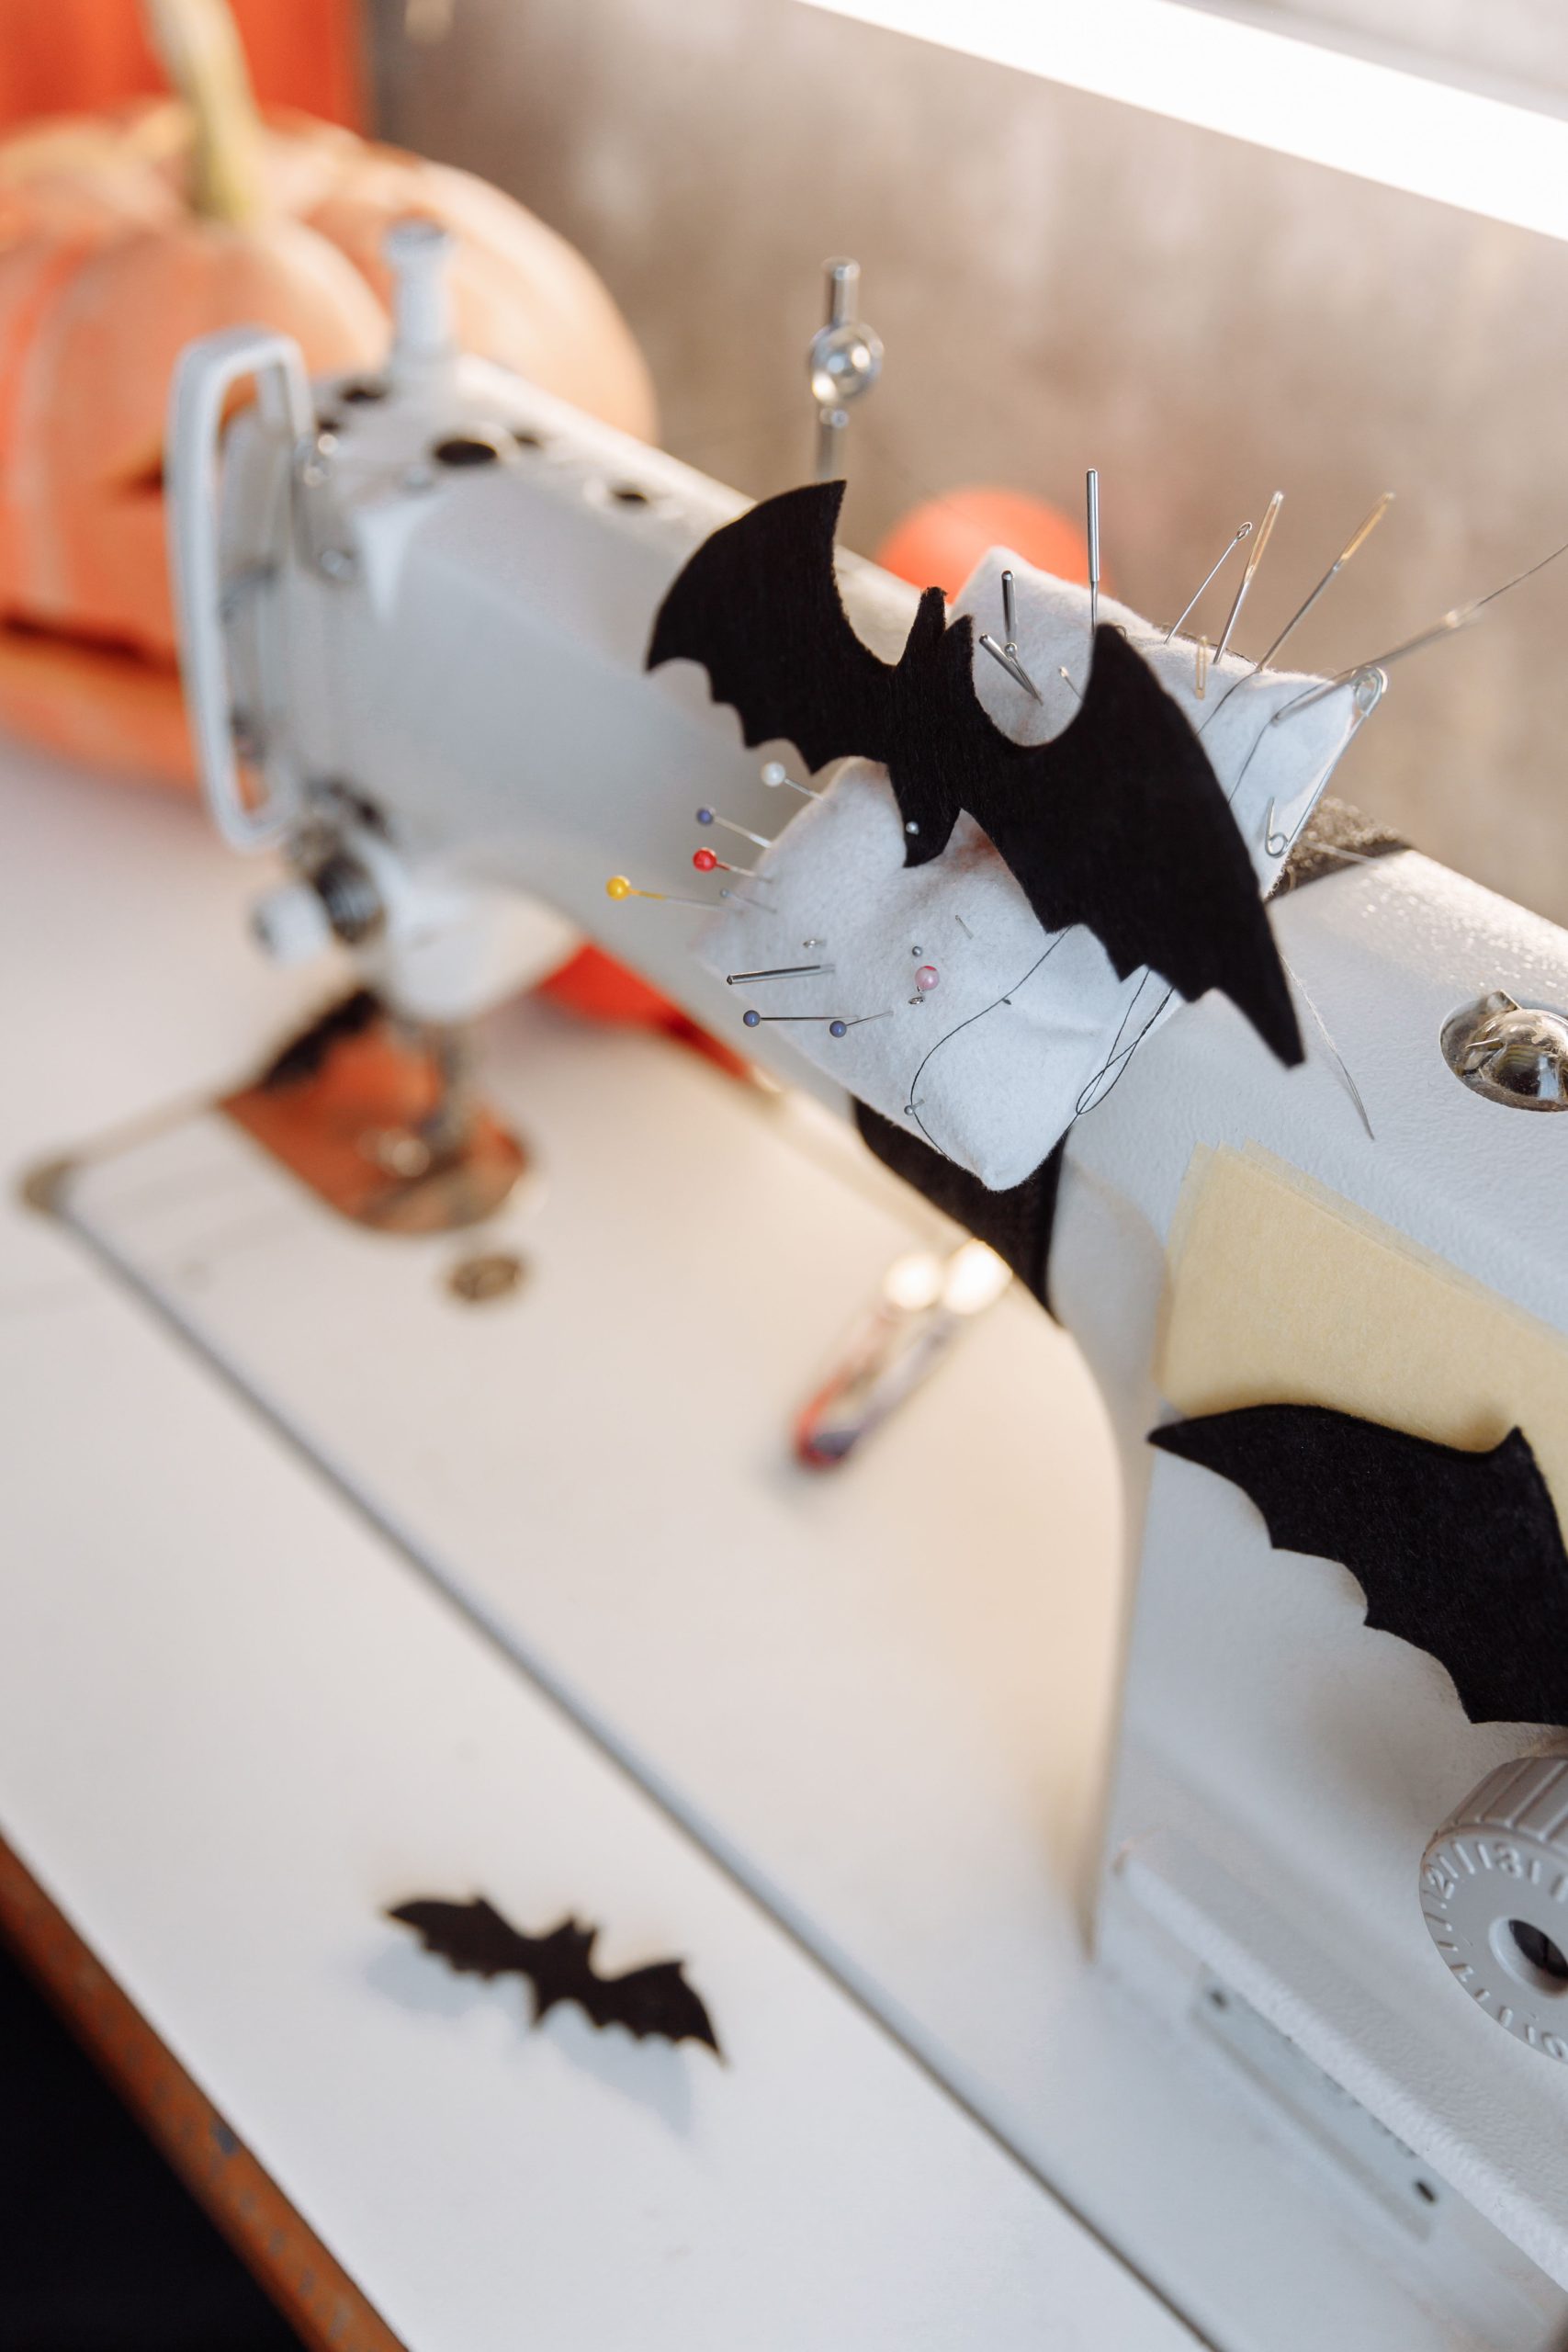
Don’t own a sewing machine? You can still get a very similar, charmingly handmade look. A pack of black felt is only a few dollars at any craft store. Cut out your bat shapes, but instead of machine sewing, grab a needle and some black embroidery floss. Use a simple running stitch or a blanket stitch around the edges of the bats. This adds a lovely, textural detail that looks just as intentional as machine sewing, if not more so. You can then string them into a garland or use them as individual decorations. It’s a much lower barrier to entry for a very similar spooky-cute result.
Time to Make Your Autumn
Now that you’re armed with a ton of inspiration, the best part begins: making it your own. Pick a project that sparks joy, put on a cozy playlist, and have fun creating. After all, the best fall decor is the kind that holds a memory. Find even more ideas and save your favorites over on our Pinterest boards!