You know that feeling when you finally find the deck cover idea that looks exactly right for your space? It’s that perfect blend of shade, style, and ‘wow’ that turns a simple deck into your favorite room in the house. We filtered through hundreds of options to bring you only what’s worth your attention this year. This guide features 26 curated ideas—from sleek modern pergolas to rustic timber pavilions—that we’re seeing everywhere for 2026. The shift towards creating true outdoor living rooms is bigger than ever, and a well-designed cover is the centerpiece of that movement. And stay until the end—we break down the most common mistakes that can ruin these looks. 📌 Save this to Pinterest for later—you’ll want to revisit these ideas.
1. Classic Wood Pergola with Climbing Vines and String Lights
This design is a masterclass in layering. The rigid, architectural lines of the light wood pergola are softened by the organic, climbing green vines, creating a perfect balance between structure and nature. It works because it engages multiple senses: the warmth of the wood, the texture of the woven rug, and the soft glow from the festoon lights. The choice of navy cushions against the natural tones provides a classic, grounded color contrast that feels both sophisticated and completely unstuffy. This isn’t just a cover; it’s a complete atmosphere.
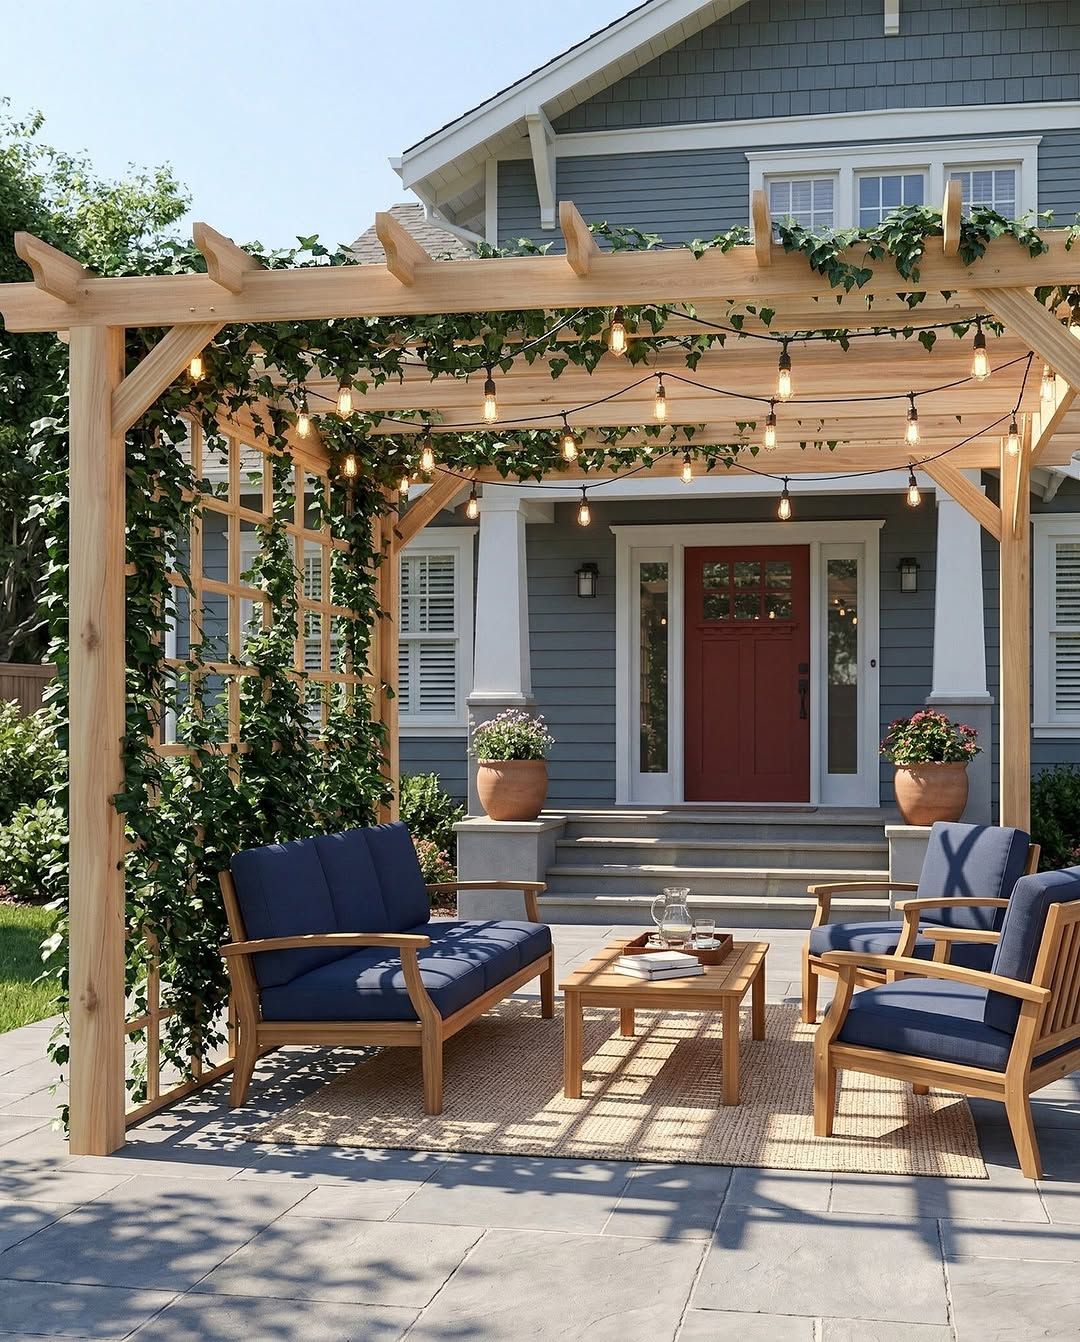
To get that magical, ambient glow from string lights, always opt for warm white, shatterproof, outdoor-rated bulbs (look for a color temperature around 2700K). For a structure of this size, plan on using at least two to three strands. Instead of just stringing them in straight lines, drape them with about 12-18 inches of sag between attachment points. This slight curve makes the lighting feel more relaxed and decorative, less like a commercial installation. Installing an outdoor-rated dimmer switch is the ultimate pro move for controlling the mood.
2. Modern Dark Pergola with a Slatted Roof and Fire Pit
The formula here is all about high-contrast minimalism. Think of it as 60% bold structure, 30% soft furnishings, and 10% natural elements. The dark, charcoal-framed pergola provides the strong 60% backbone. The 30% comes from the light gray modular sofa and off-white cushions, which soften the look and prevent it from feeling too stark. The final 10% is the fire’s orange glow and the green from the potted plants, injecting life and a focal point into the scene. You could swap the dark frame for white and the light cushions for charcoal to completely reverse the palette while keeping the same balanced, modern feel.
A dark metal pergola is incredibly chic, but let’s be honest about maintenance. Dark colors show dust, pollen, and bird droppings more than lighter finishes. Expect to hose it down every few weeks during peak pollen season to keep it looking sharp. Also, that beautiful slatted roof offers partial, not full, shade. It’s designed to dapple the light, not block it completely. If you live in an area with intense, direct sun, you may find it doesn’t provide enough relief during the hottest part of the day without an additional retractable shade.
3. Bright White Pergola Featuring Integrated Strip Lighting
Recreating this sleek, modern look involves some specific high-end features. Here’s a potential breakdown:
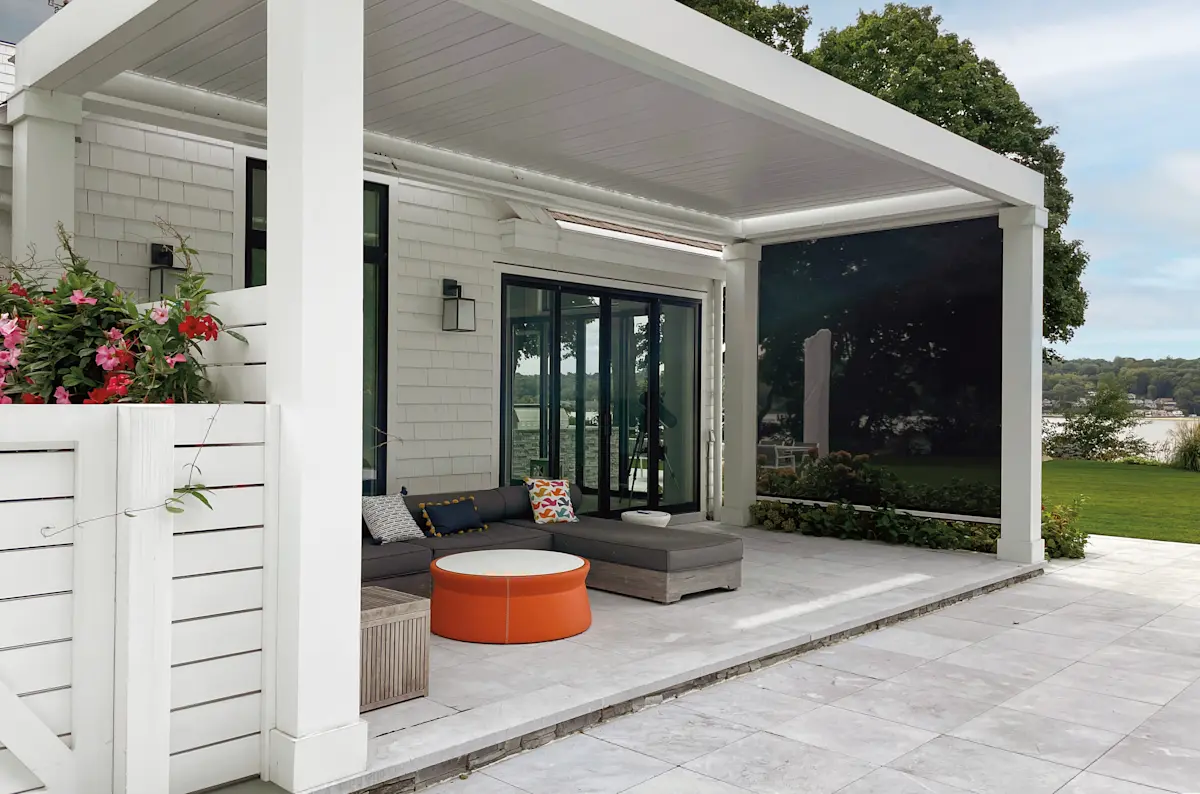
- White Pergola Kit (Vinyl or Aluminum): $3,000 – $7,000
- Integrated LED Strip Lighting (Professional Install): $800 – $2,500
- Large Format Pavers (Materials & Labor): $2,500 – $6,000
- Outdoor L-shaped Sectional: $2,000 – $5,000
- Statement Coffee Table: $300 – $800
- TOTAL: $8,600 – $21,300
Budget alternative: Use a standard white wood pergola, add solar-powered LED strip lights yourself, find a similar sofa on Facebook Marketplace, and use larger concrete pavers from a home improvement store to bring the total cost down to the $3,500 – $7,000 range.
The single element that elevates this entire design is the integrated LED strip lighting. Without it, you’d have a nice, but standard, white pergola. With it, the structure transforms into a custom architectural feature. It provides clean, even illumination without the visual clutter of string lights or bulky sconces, reinforcing the minimalist aesthetic. The lighting is built *into* the pergola, not just added on, which signals a level of design intentionality that feels incredibly high-end and cohesive. It turns the cover itself into a light fixture.
4. Gabled Pavilion with Stone Pillars and a Wood-Paneled Ceiling
A substantial gabled structure like this needs room to breathe. This idea is best suited for larger yards and patios with a minimum footprint of 20×20 feet (400 sq ft). The visual weight of the stone pillars and high-pitched roof requires a generous surrounding space to avoid looking cramped. A ceiling height of at least 10 feet at the eaves, rising to 14+ feet at the peak, is essential to maintain the open, airy feeling. Trying to scale this down too much can make it feel squat and disproportionate. For smaller spaces, a lean-to style or a simpler pergola like in Idea #1 would be a better fit.
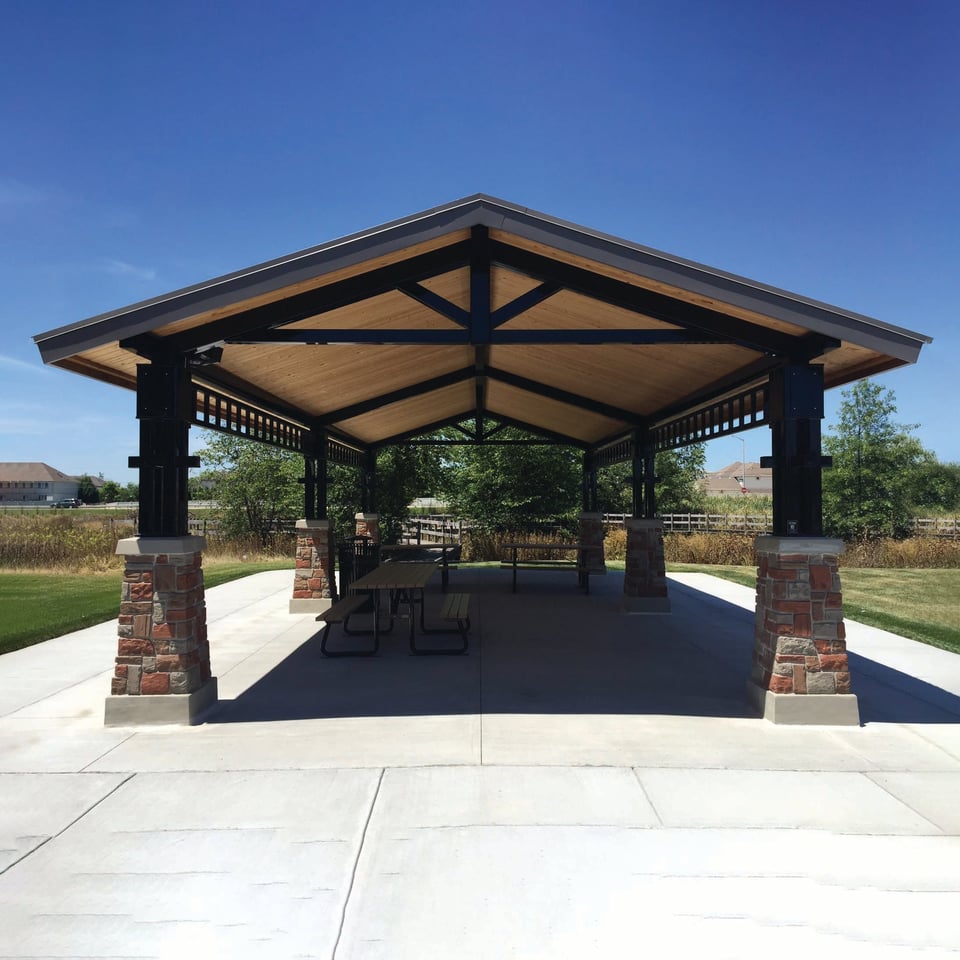
While this pavilion is built to last, it’s not zero-maintenance. The beautiful light wood-paneled ceiling will need to be inspected annually for any signs of water intrusion or pest activity, especially where it meets the roof trim. The multi-toned natural stone pillar bases should be pressure washed on a low setting every 2-3 years to remove mildew or moss buildup, which can be common in shaded, damp areas. Check the mortar or grout lines in the stone every few years for any cracking that might need to be repointed to prevent water from getting behind the veneer.
5. Elevated Wooden Gazebo with Natural Stone Landscaping
This design succeeds by embracing its elevation. Instead of trying to hide the height difference, the structure celebrates it, turning the gazebo into a destination. The use of consistent materials—warm wood for the gazebo, stairs, and deck—creates a cohesive journey from the house to the lookout point. The sturdy natural stone retaining walls anchor the airy wooden structure to the landscape, making it feel integrated and intentional rather than just plopped on top. The gray metal railings provide a modern, low-profile contrast that keeps the view open.
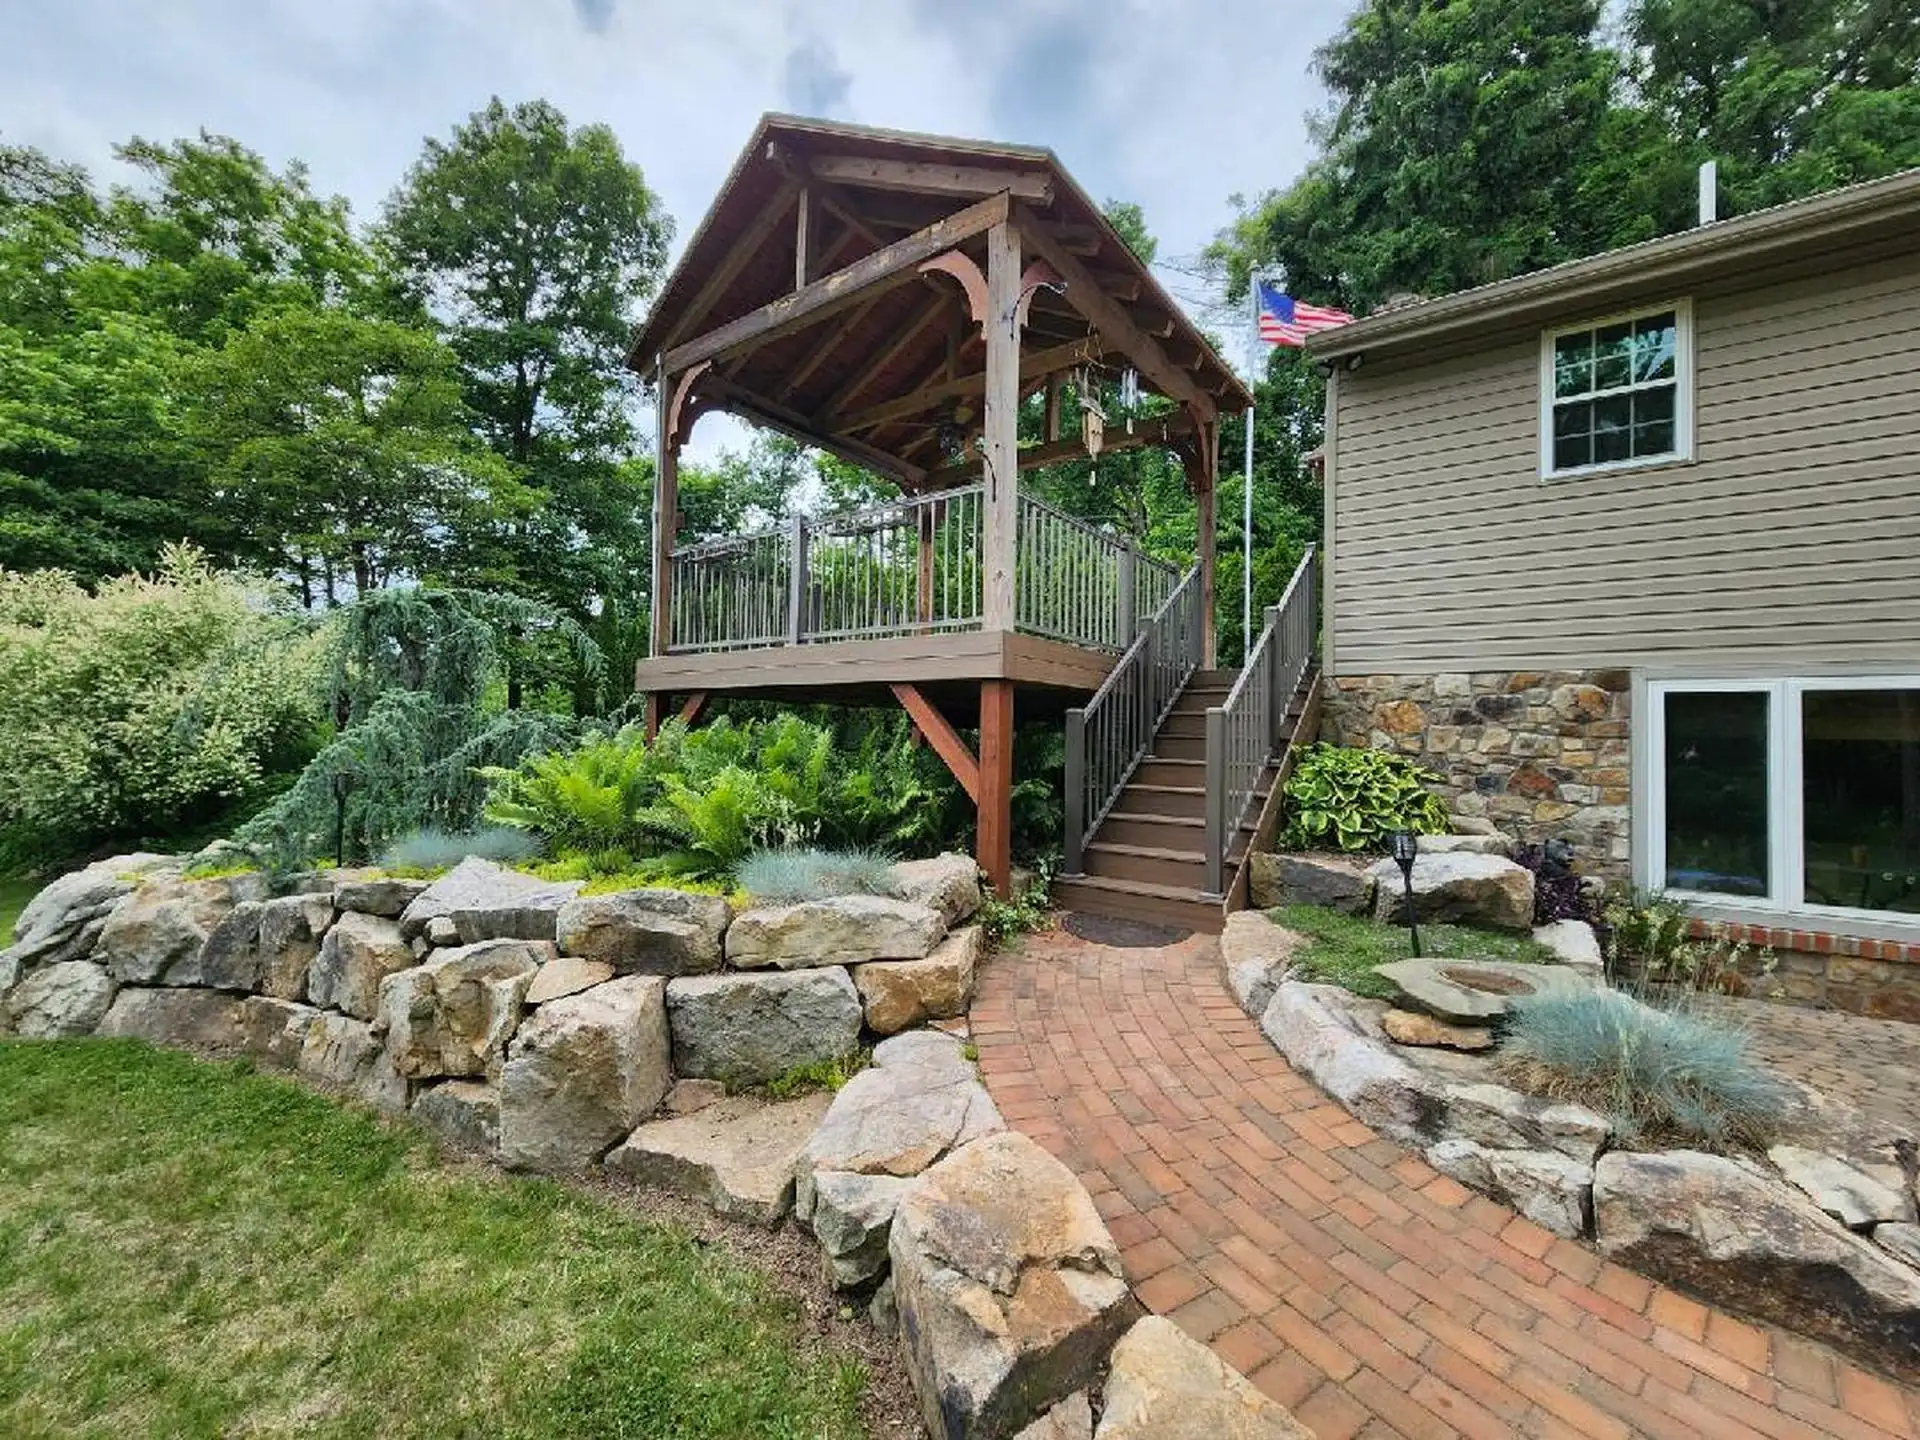
You don’t need a custom-built structure to get this elevated retreat vibe. You can find pre-fabricated wooden gazebo kits at stores like Home Depot or Lowe’s for $2,000 to $5,000. For the landscaping, instead of hiring a mason for expensive stone walls, consider using interlocking concrete retaining wall blocks, which are DIY-friendly and cost a fraction of the price. Hunt for reclaimed bricks on Facebook Marketplace or Craigslist for the pathway to add character without the new-material cost. The entire look could be achieved for under $7,000 with some savvy shopping and sweat equity.
6. Patio with a Translucent Roof and Integrated Ceiling Fans
When using translucent roofing panels (like polycarbonate), pay close attention to the ‘light transmission’ percentage. A panel with 85% light transmission will be very bright and can create heat buildup (the greenhouse effect). For a comfortable balance of light and heat reduction, look for panels in the 30-50% light transmission range, often labeled as ‘opal’ or ‘bronze’ tint. These will give you that lovely diffuse light without cooking you on a sunny day. Also, ensure the roof has a minimum pitch of 5 degrees (a 1-inch drop for every 12 inches of run) for proper water runoff.
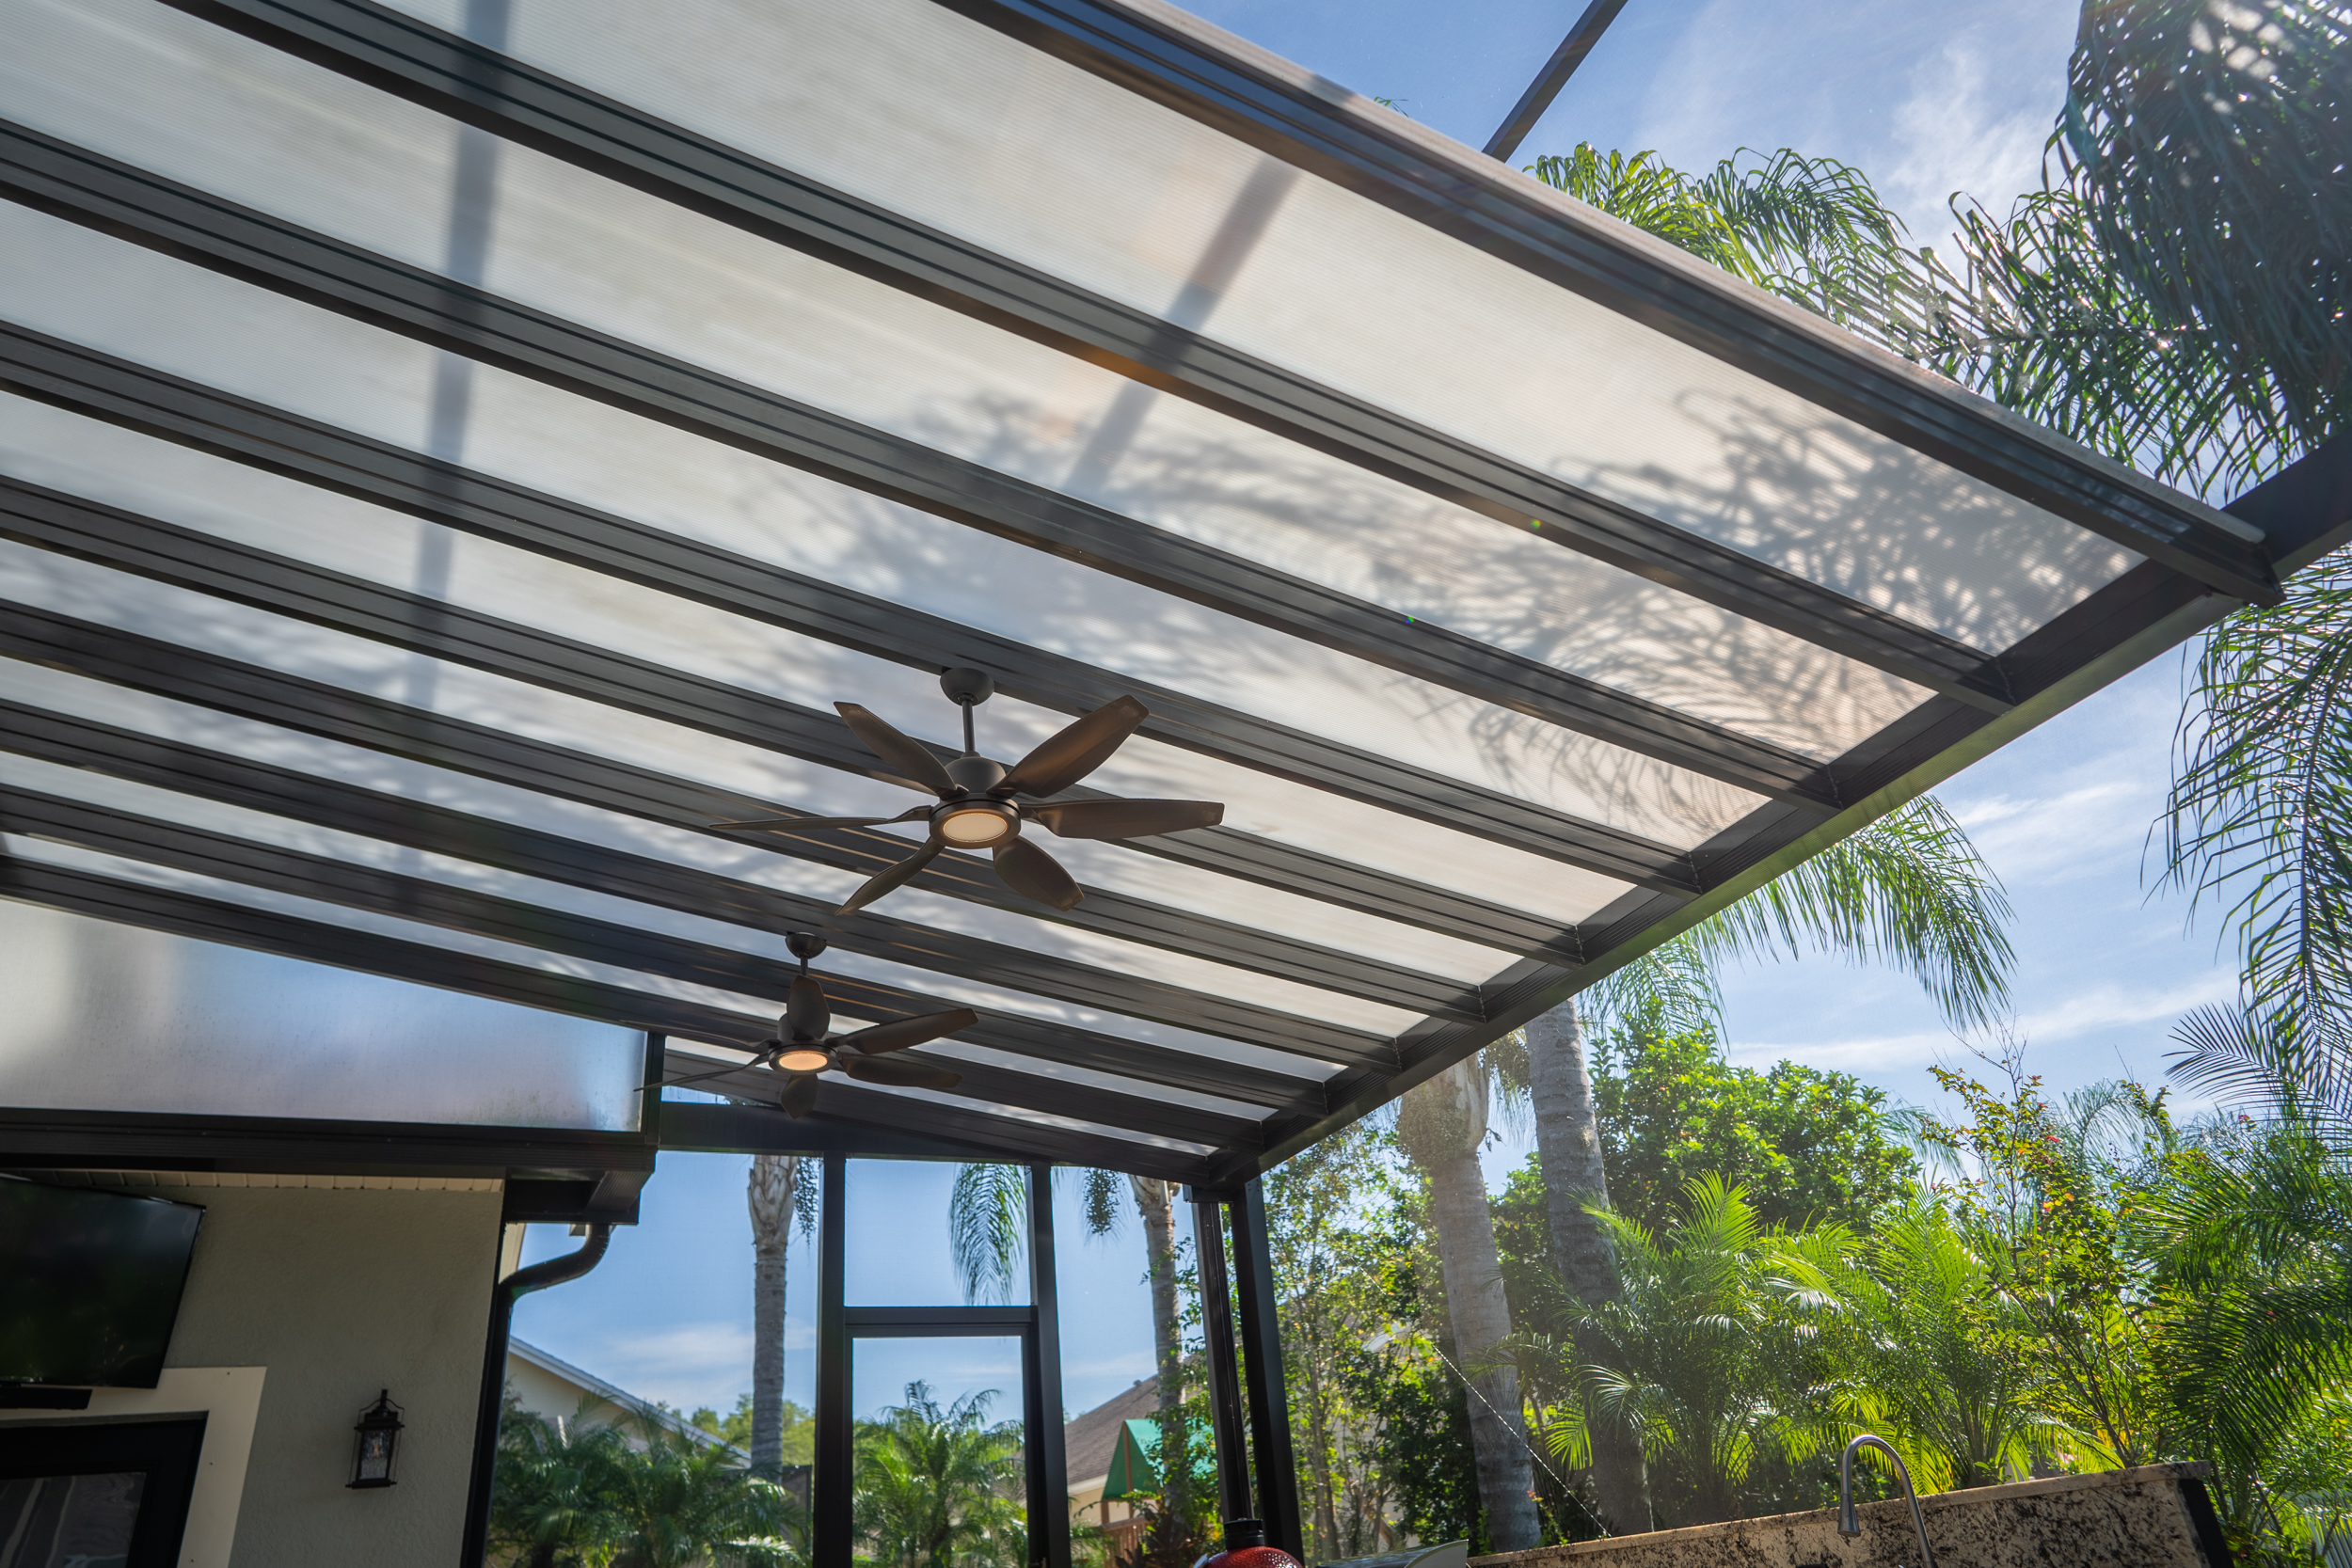
This style is surging in popularity because it solves a fundamental problem: we want to be outside, but we don’t want to bake in the sun or get rained out. Translucent covers offer the best of both worlds. They block UV rays and rain while still letting in tons of natural light, so the space doesn’t feel dark or cave-like. As we continue to invest in making our outdoor spaces as functional as our indoor ones, these all-weather solutions are moving from a ‘nice-to-have’ to a must-have for serious outdoor living. It’s a practical upgrade that extends the usability of a patio from a few months a year to nearly all of it.
7. Rustic Timber Pavilion Featuring a Prominent Stone Fireplace
A project of this scale, combining heavy timber framing and a full masonry fireplace, is a serious construction project, not a weekend DIY. The photo shows the reality: lots of materials and a dedicated work zone. The foundation required for both the posts and the massive fireplace is substantial and requires professional expertise. You’ll need to budget for not just the materials you see, but also for a structural engineer to approve the plans and ensure the weight is properly supported. Be prepared for a construction timeline measured in weeks or months, not days.
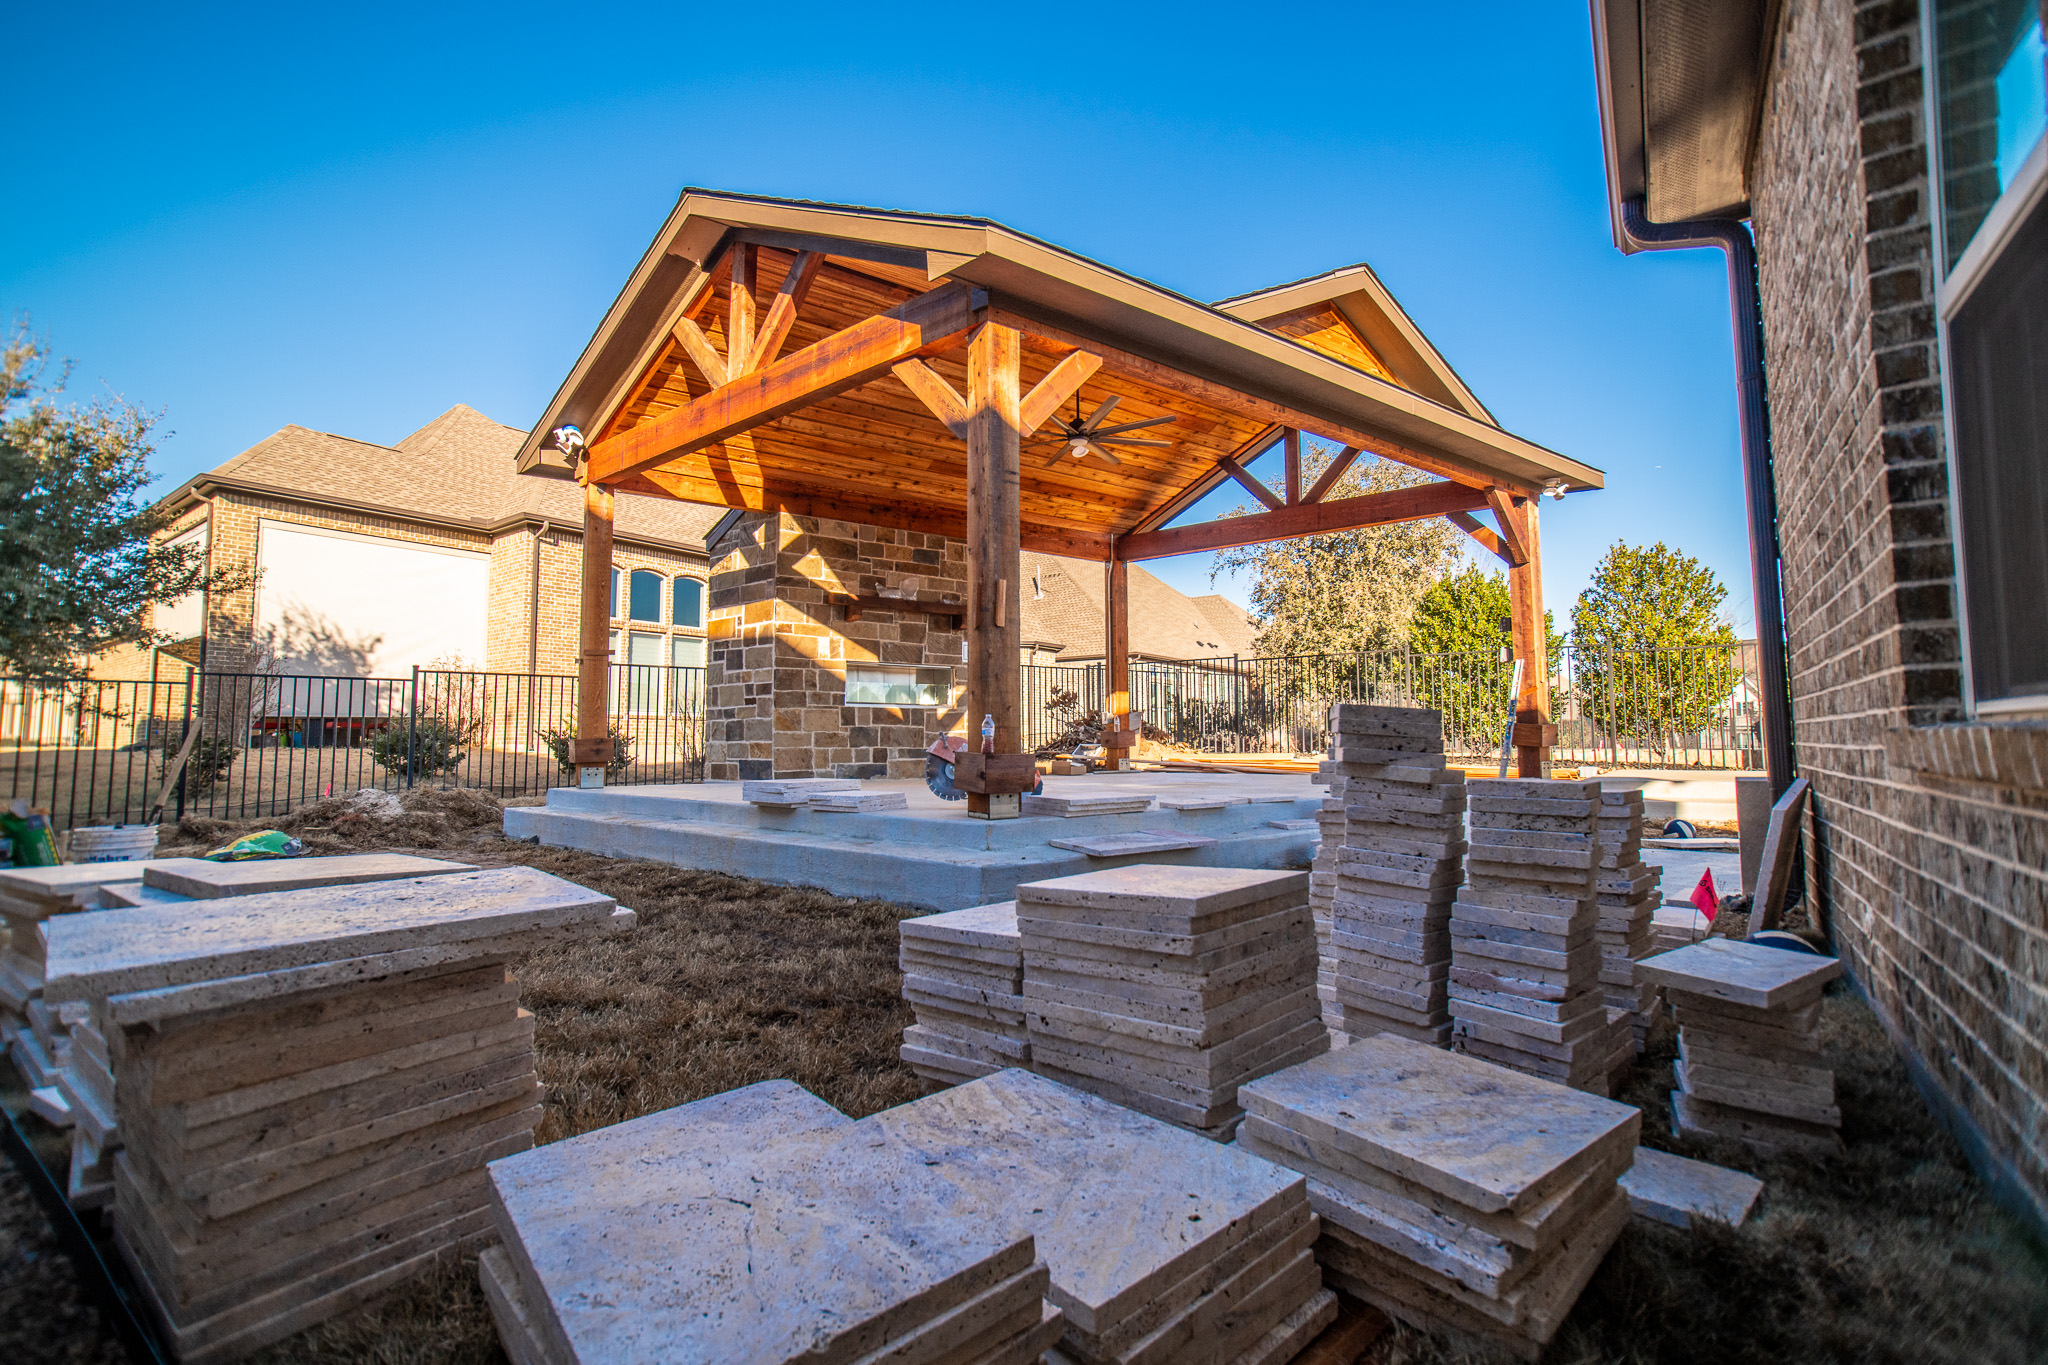
Before you even dream of breaking ground on a structure like this, make a checklist:
- Have you checked your local building codes and permit requirements for detached structures and outdoor fireplaces?
- Do you know your property’s setback lines? This structure cannot be built too close to your property line.
- Have you gotten at least three detailed quotes from licensed contractors who specialize in both timber framing and masonry?
- Is your budget realistic, including a 15-20% contingency fund for unexpected issues?
8. Partially Covered Deck with a Decorative Privacy Screen
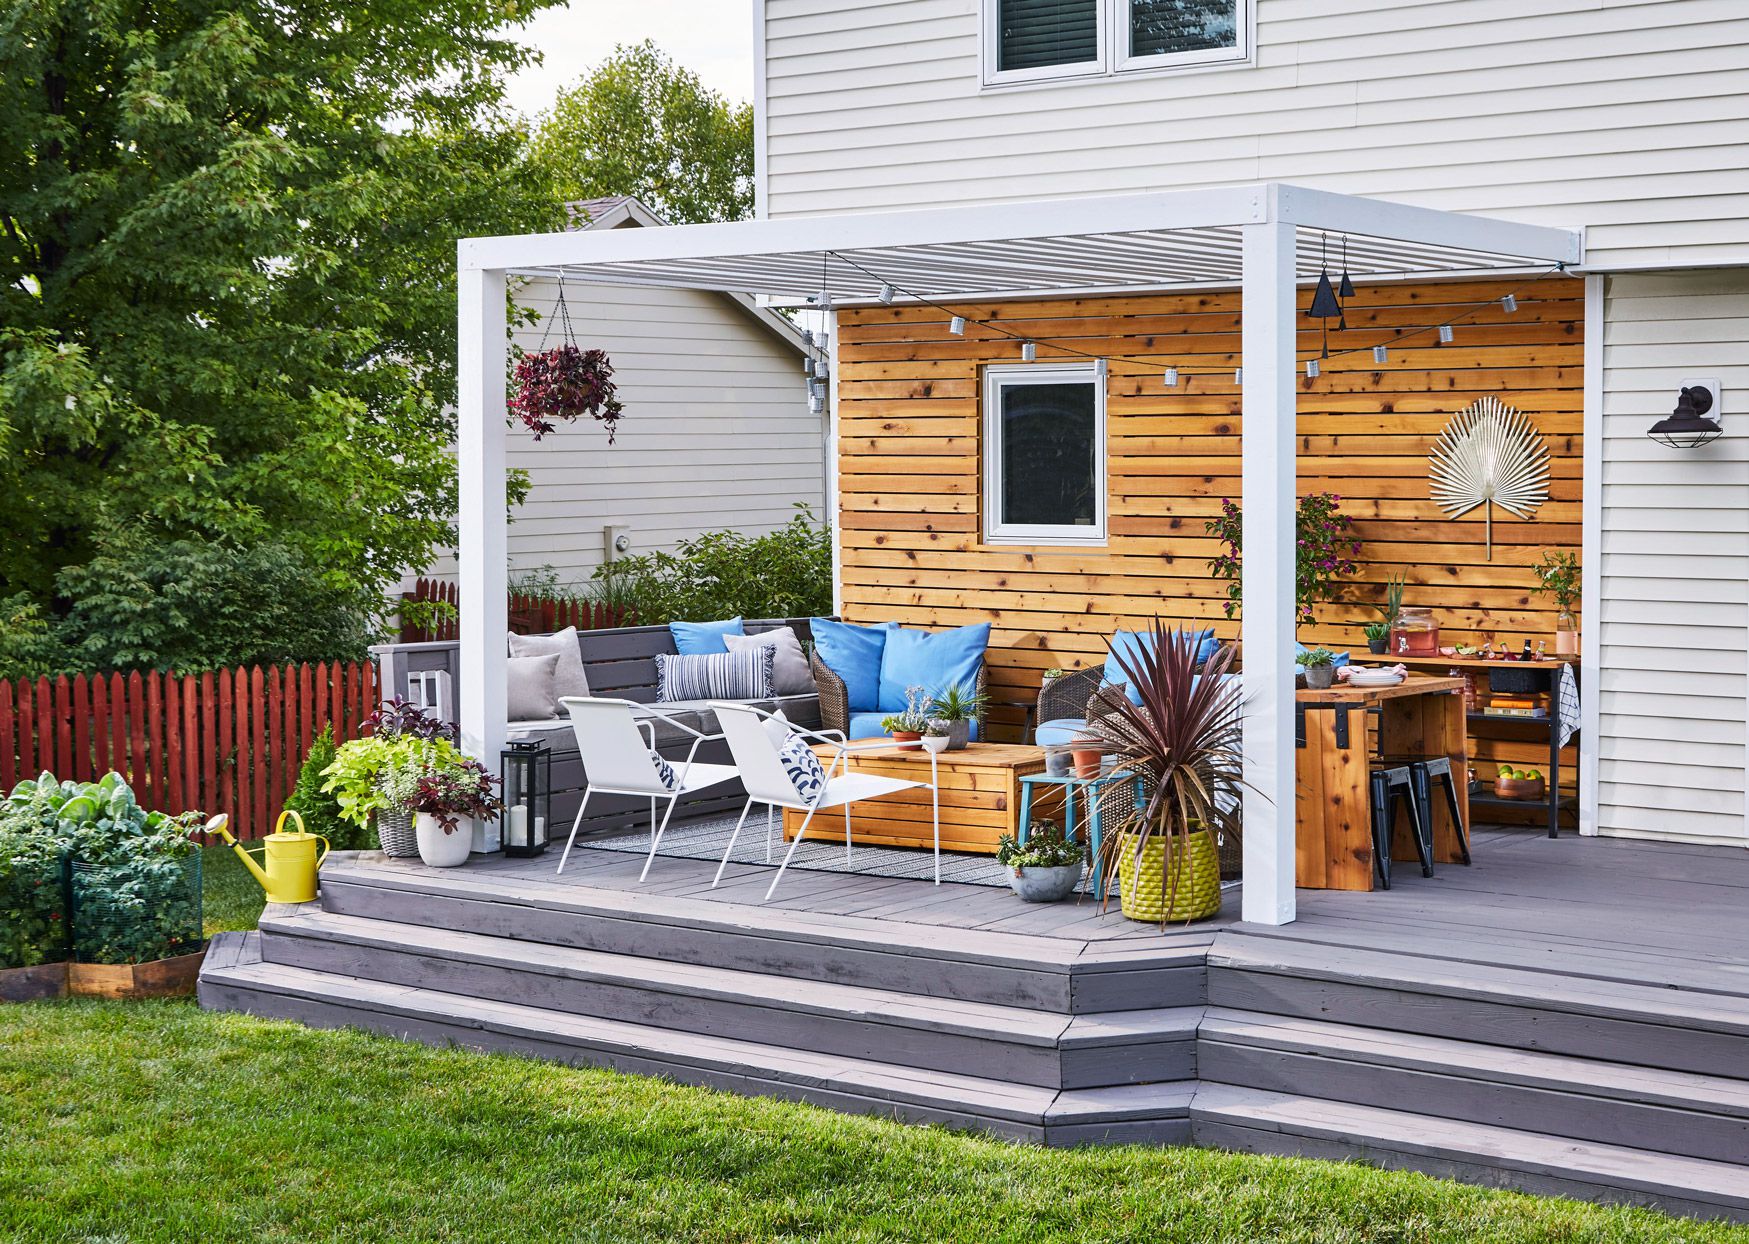
This design is a study in functional zones, achieved through a simple formula: 50% covered living space + 40% open sun deck + 10% decorative screening. The covered portion provides reliable shelter for seating, while the open area is perfect for sunbathing or grilling. The key is the 10% accent—the black patterned privacy screen. It adds a crucial dose of modern style, breaks up the monotony of the house’s tan siding, and provides a bit of seclusion without feeling like a solid wall. The consistent use of brown wood flooring across both zones ties the entire space together into a cohesive whole.
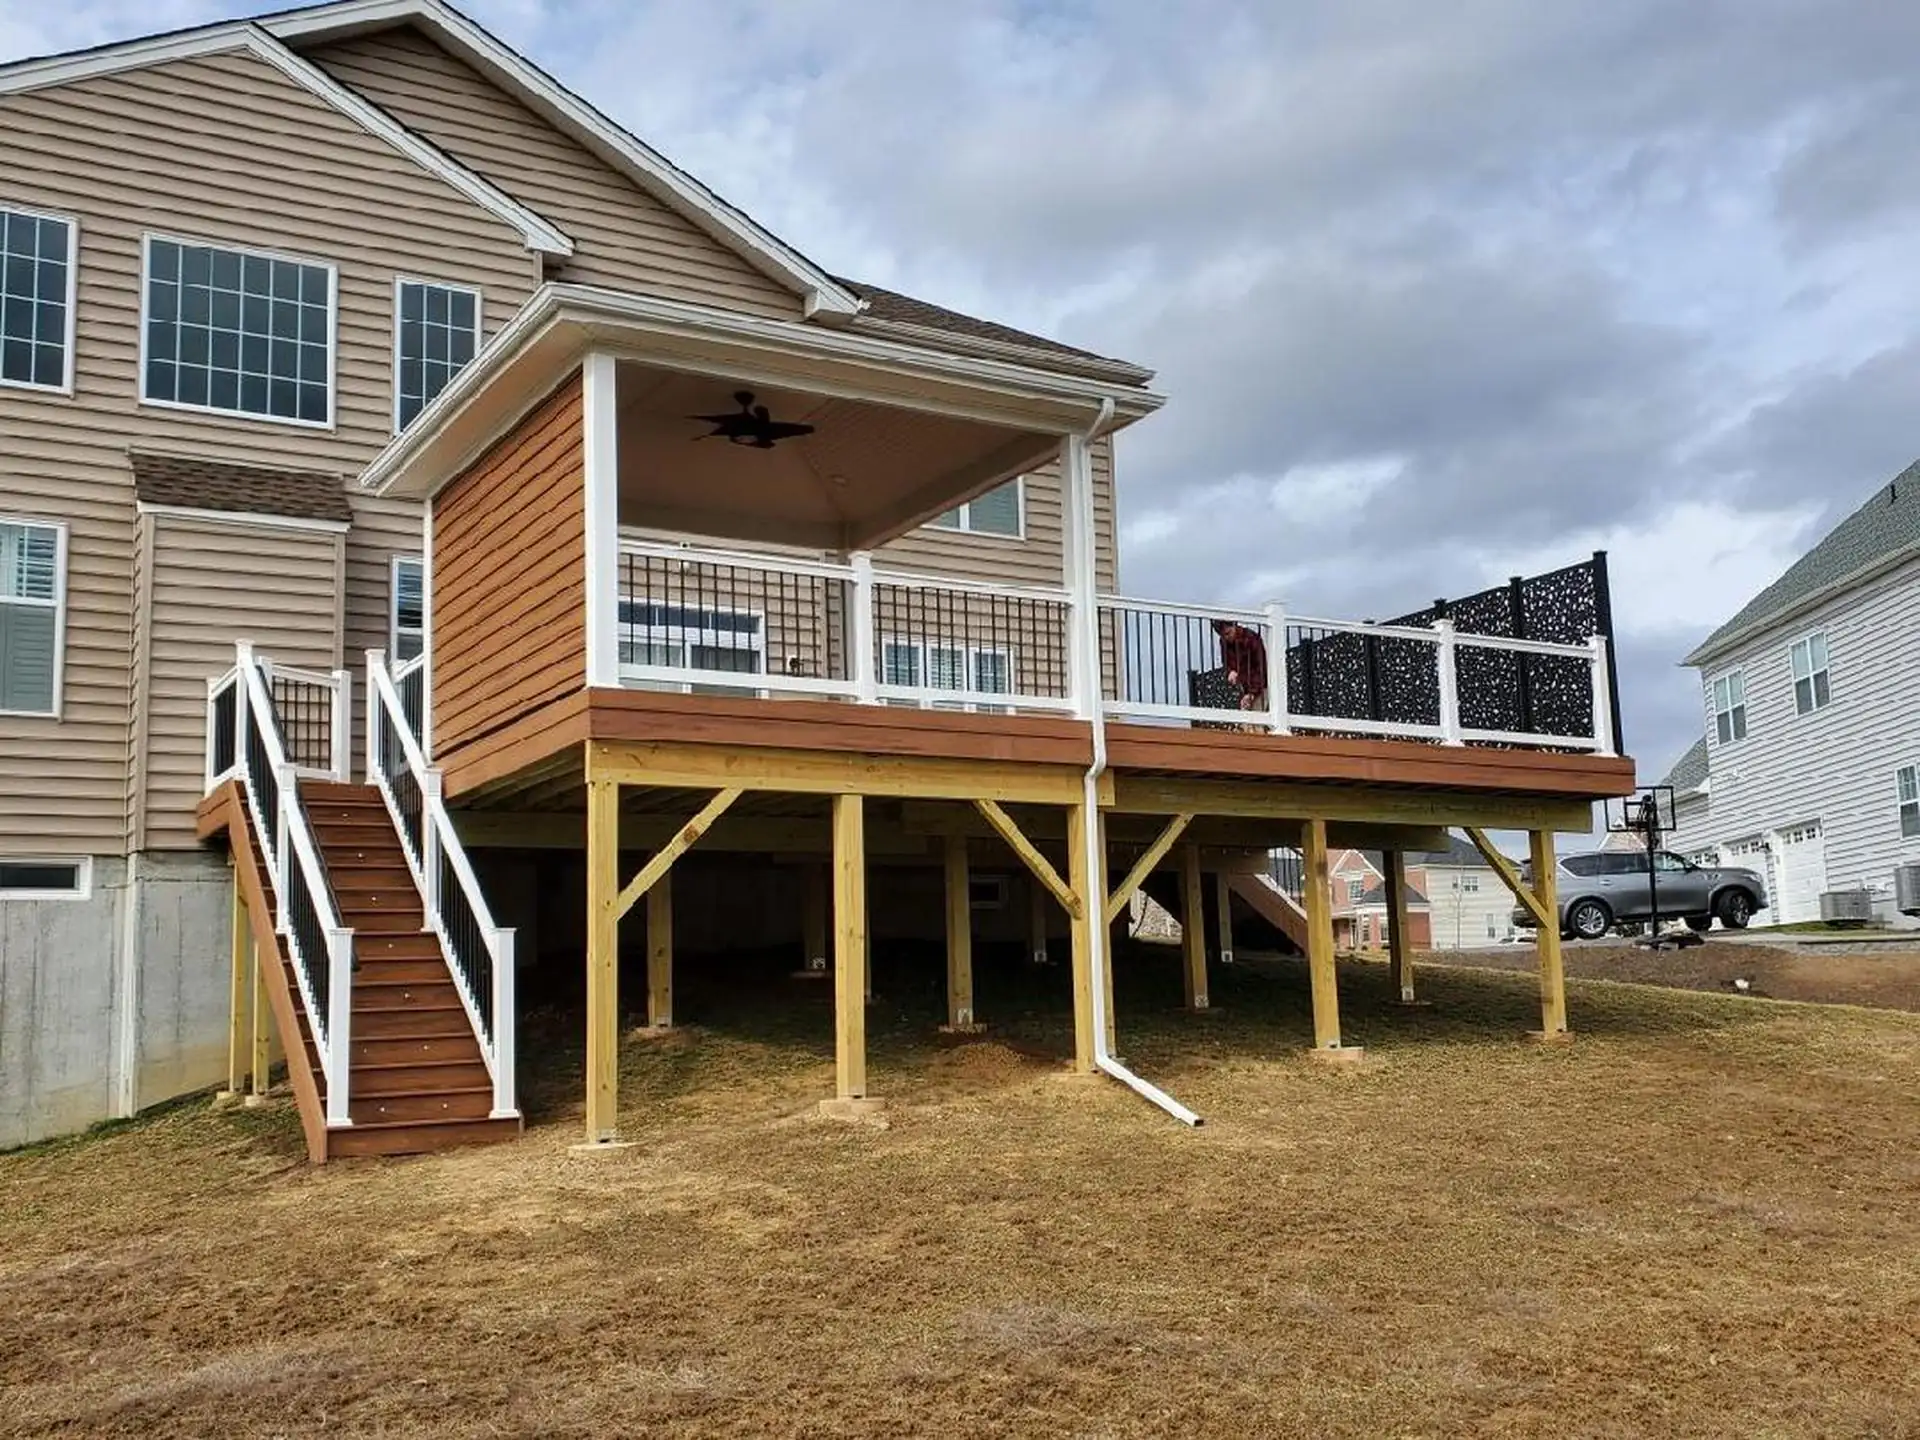
The single element that makes this deck work is the patterned black privacy screen. Remove it, and you have a very standard, functional deck. But with it, the space gains a distinct personality and a contemporary edge. It serves a practical purpose by providing a visual barrier, but its primary role here is aesthetic. It acts as a piece of outdoor art, introducing a pattern and a bold dark accent that contrasts beautifully with the tan siding and brown decking. It’s a relatively small addition that has a massive impact on the overall style.
9. Outdoor Kitchen Sheltered by a Curved Wood Pergola
Want to add string lights to a pergola for that perfect evening ambiance? Here’s a quick guide:
- Estimate your length: Measure the path your lights will take, adding extra for a gentle drape between beams. It’s better to have too much than not enough.
- Choose your lights: Select outdoor-rated, commercial-grade string lights with shatterproof bulbs. Warm white (2700K) is usually best for a cozy feel.
- Install hooks: Screw in weather-resistant cup hooks or screw eyes on the inside faces of the pergola beams, about 24-36 inches apart.
- String the lights: Starting near your power source, loosely hang the string along the hooks. Avoid pulling them taut; a gentle sag looks best.
- Secure with zip ties: For extra security against wind, use black or clear UV-resistant zip ties to fasten the cord to the hooks.
Time: 1-2 hours. Cost: $50 – $200 for lights and hardware.
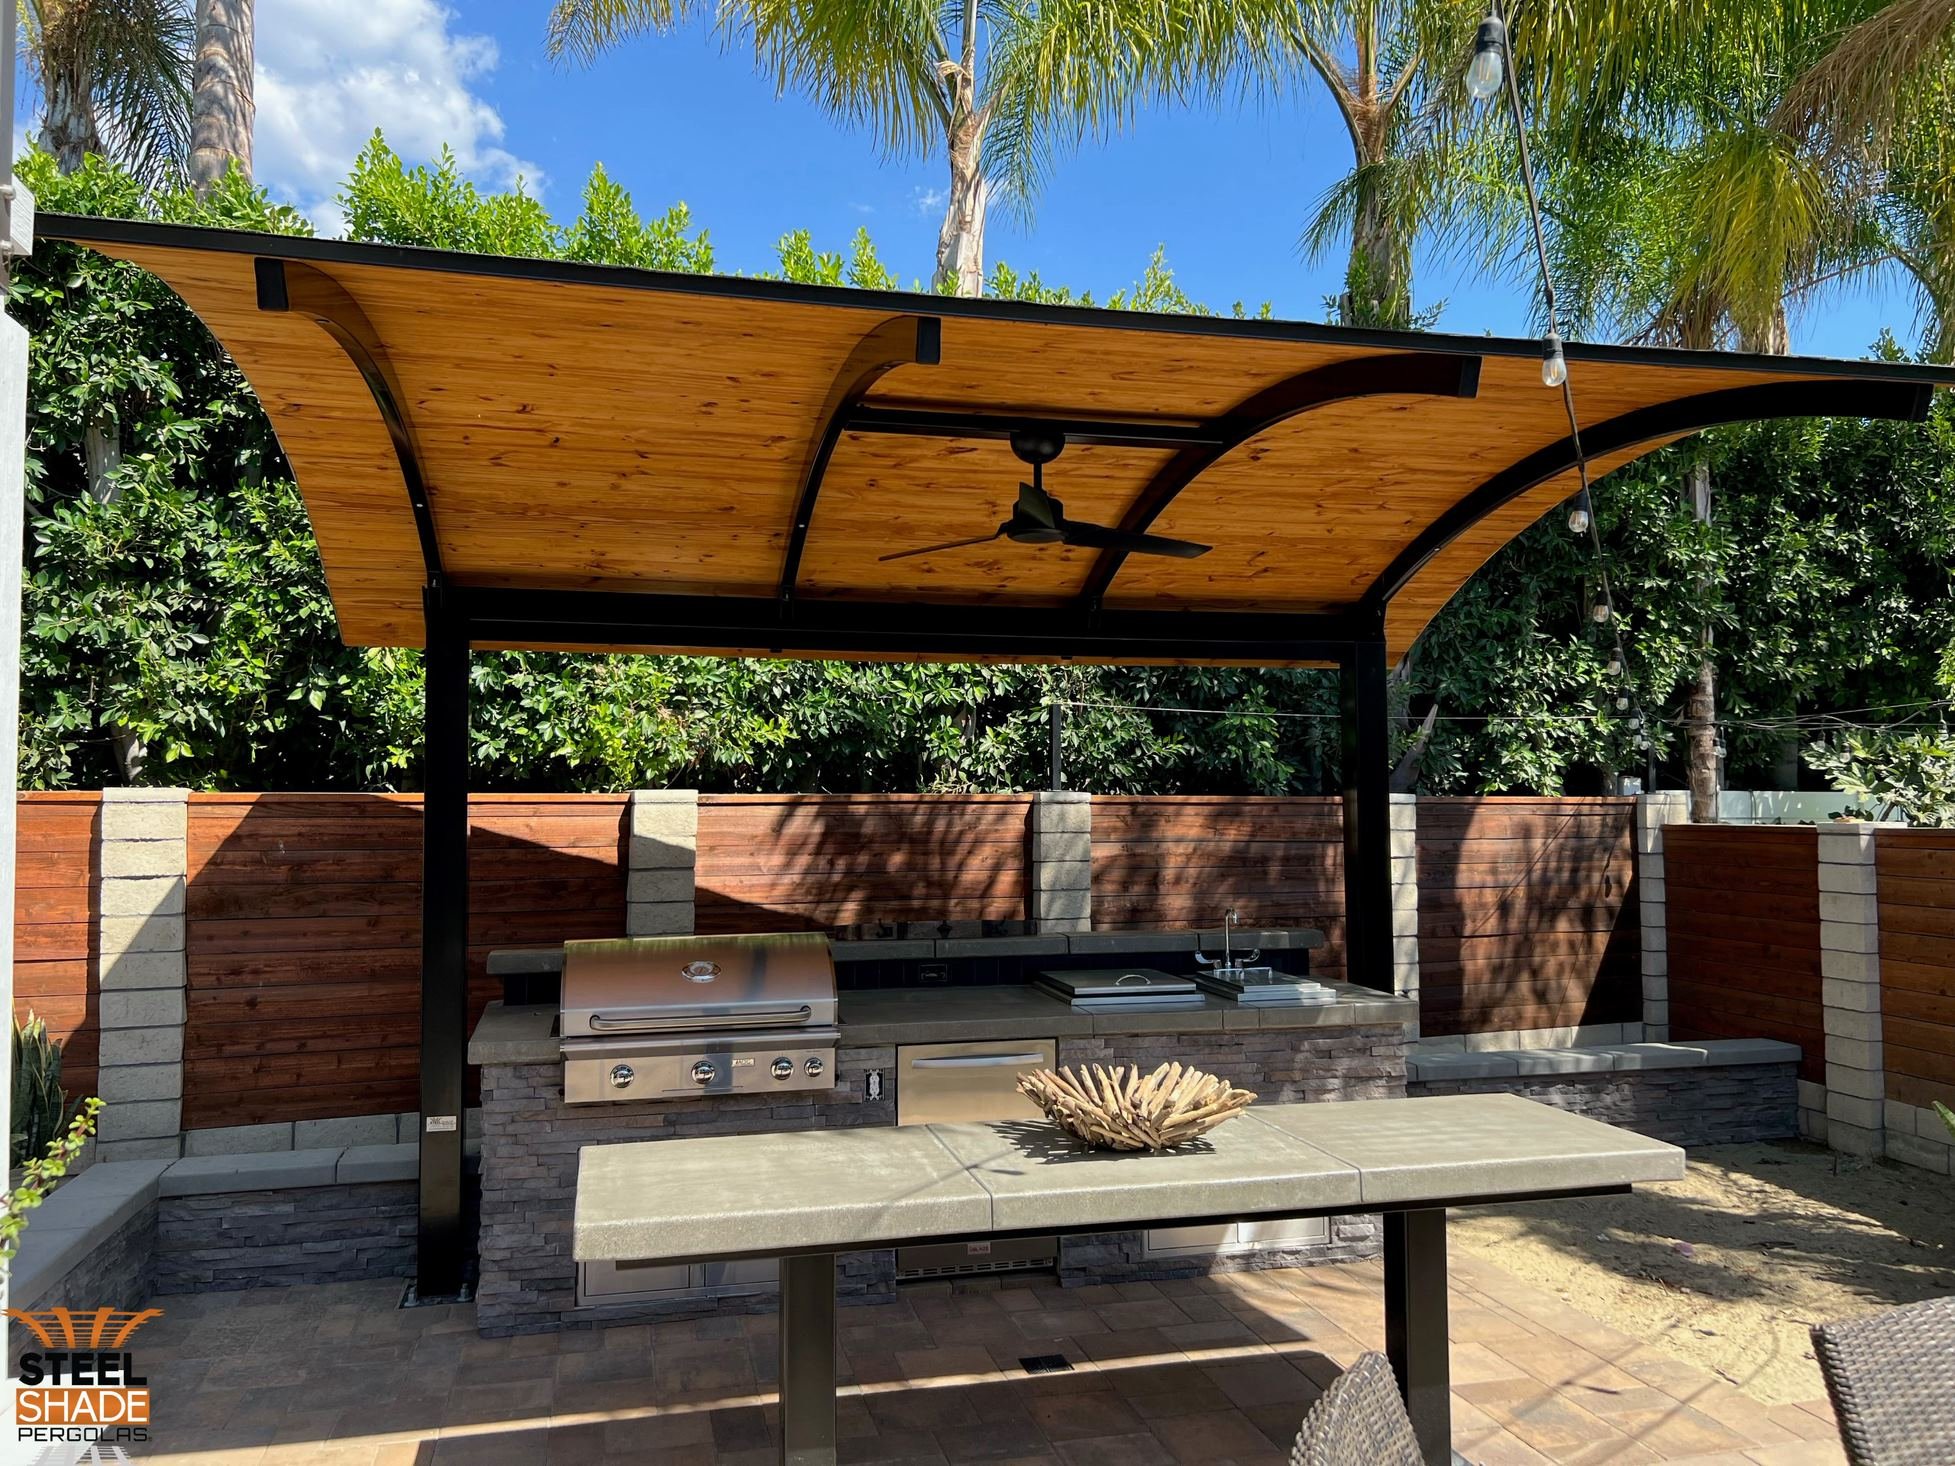
The magic here is in the curves and contrast. While most pergolas are rigidly rectangular, the gentle curve of this wooden slatted roof softens the entire space, making it feel more organic and custom. This curved line is beautifully contrasted by the strong horizontal lines of the fence slats and the rectangular form of the stone kitchen island. It’s a sophisticated play on geometry. Furthermore, the mix of materials—warm wood, cool stainless steel, rugged stacked stone, and smooth concrete—creates a rich textural palette that feels both modern and grounded.
10. Multi-Level Wood Deck with a Grand Lattice Pergola
A sprawling, multi-level deck and pergola combination like this is designed for a large, sloped backyard. The main deck area should be at least 15×20 feet to feel spacious, with the wide tiered steps requiring significant horizontal run. The pergola itself is a major structure; its complex lattice roof adds visual weight, so it looks best over a larger area rather than a small corner. This design is ideal for connecting a house’s main floor to a lower yard, transforming an awkward slope into a grand, usable outdoor space. For a flat yard, a single-level version like Idea #4 might be more appropriate.
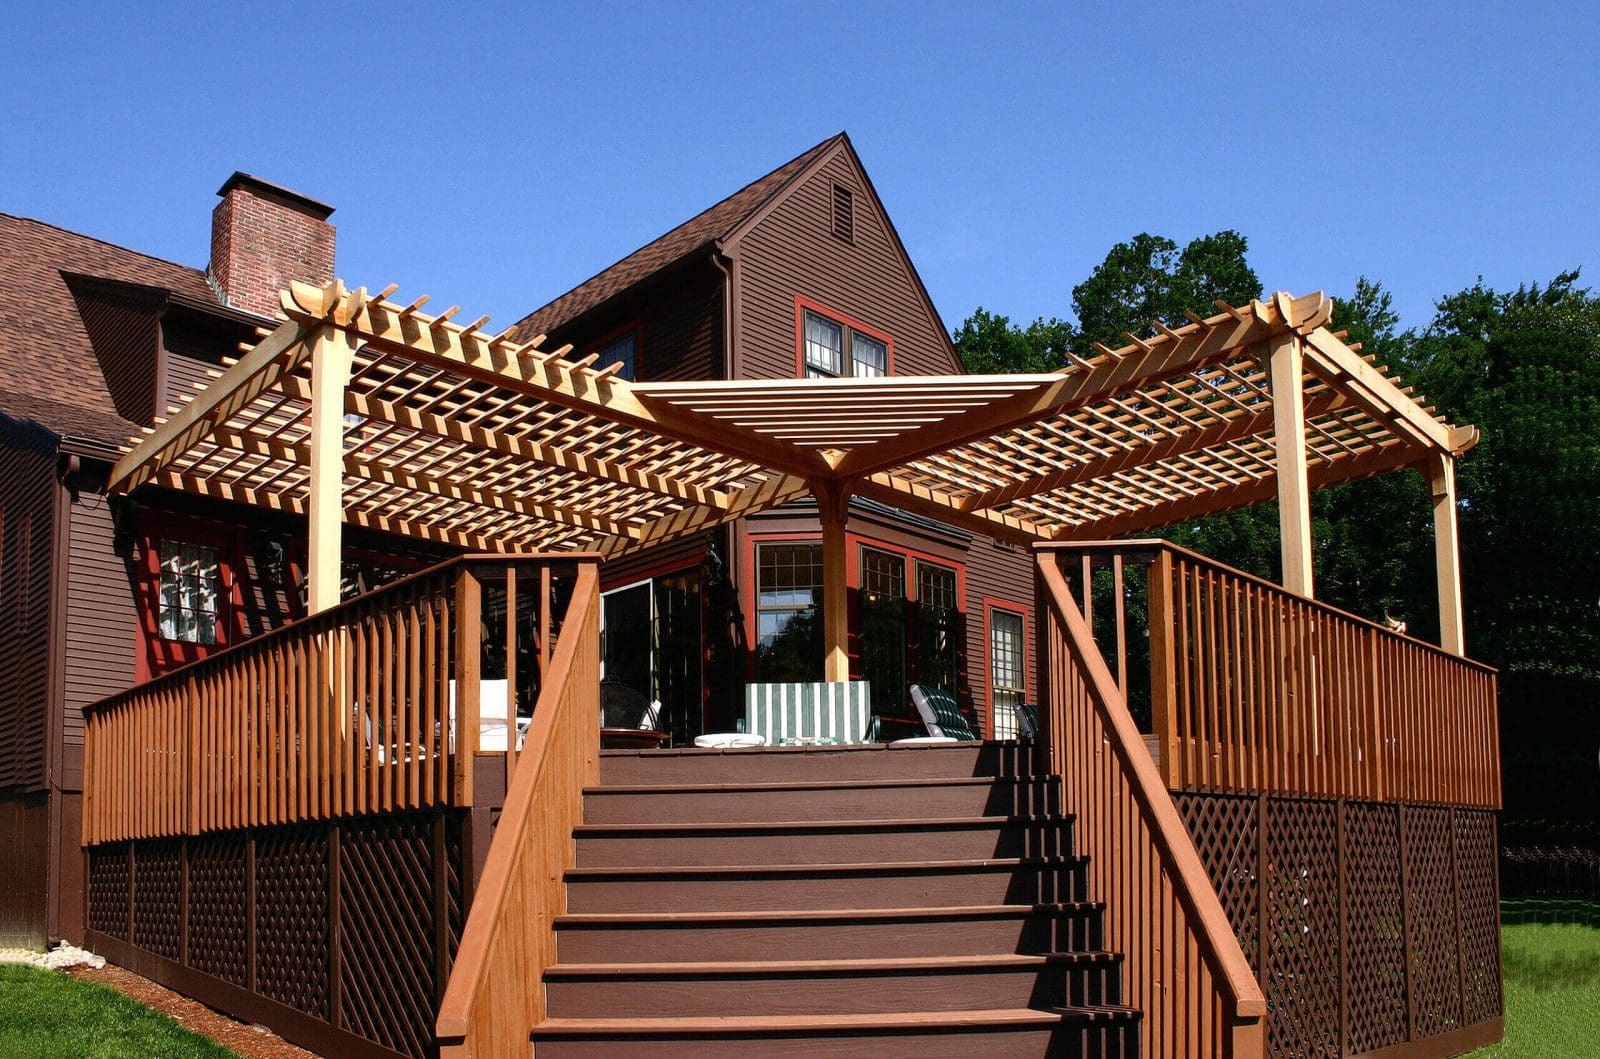
A custom-built, multi-level deck with a complex pergola can be a five-figure project. To get a similar zoned feel for less, focus on a single-level deck. Use DIY-friendly deck blocks for the foundation instead of poured concrete footings. For the shade element, purchase a more standard 10×12 foot pergola kit from a big-box store ($800 – $2,000) instead of custom building the intricate lattice. Create the ‘multi-level’ feel using large planter boxes to define different ‘rooms’ on the deck, a trick that adds dimension without the massive structural cost.
11. Elevated Deck with a Dark Frame and Wood Plank Ceiling
The combination of a beautiful natural wood ceiling and a composite deck floor is smart but requires two different maintenance routines. The composite decking is low-maintenance; a simple soap and water wash once or twice a year is usually enough. However, the wood plank ceiling, while protected from rain, is still exposed to humidity, temperature swings, and insects. It will need to be resealed every 3-5 years to maintain its color and protect it from moisture. Keep an eye out for any wasp or hornet nests in the corners where the ceiling meets the beams.
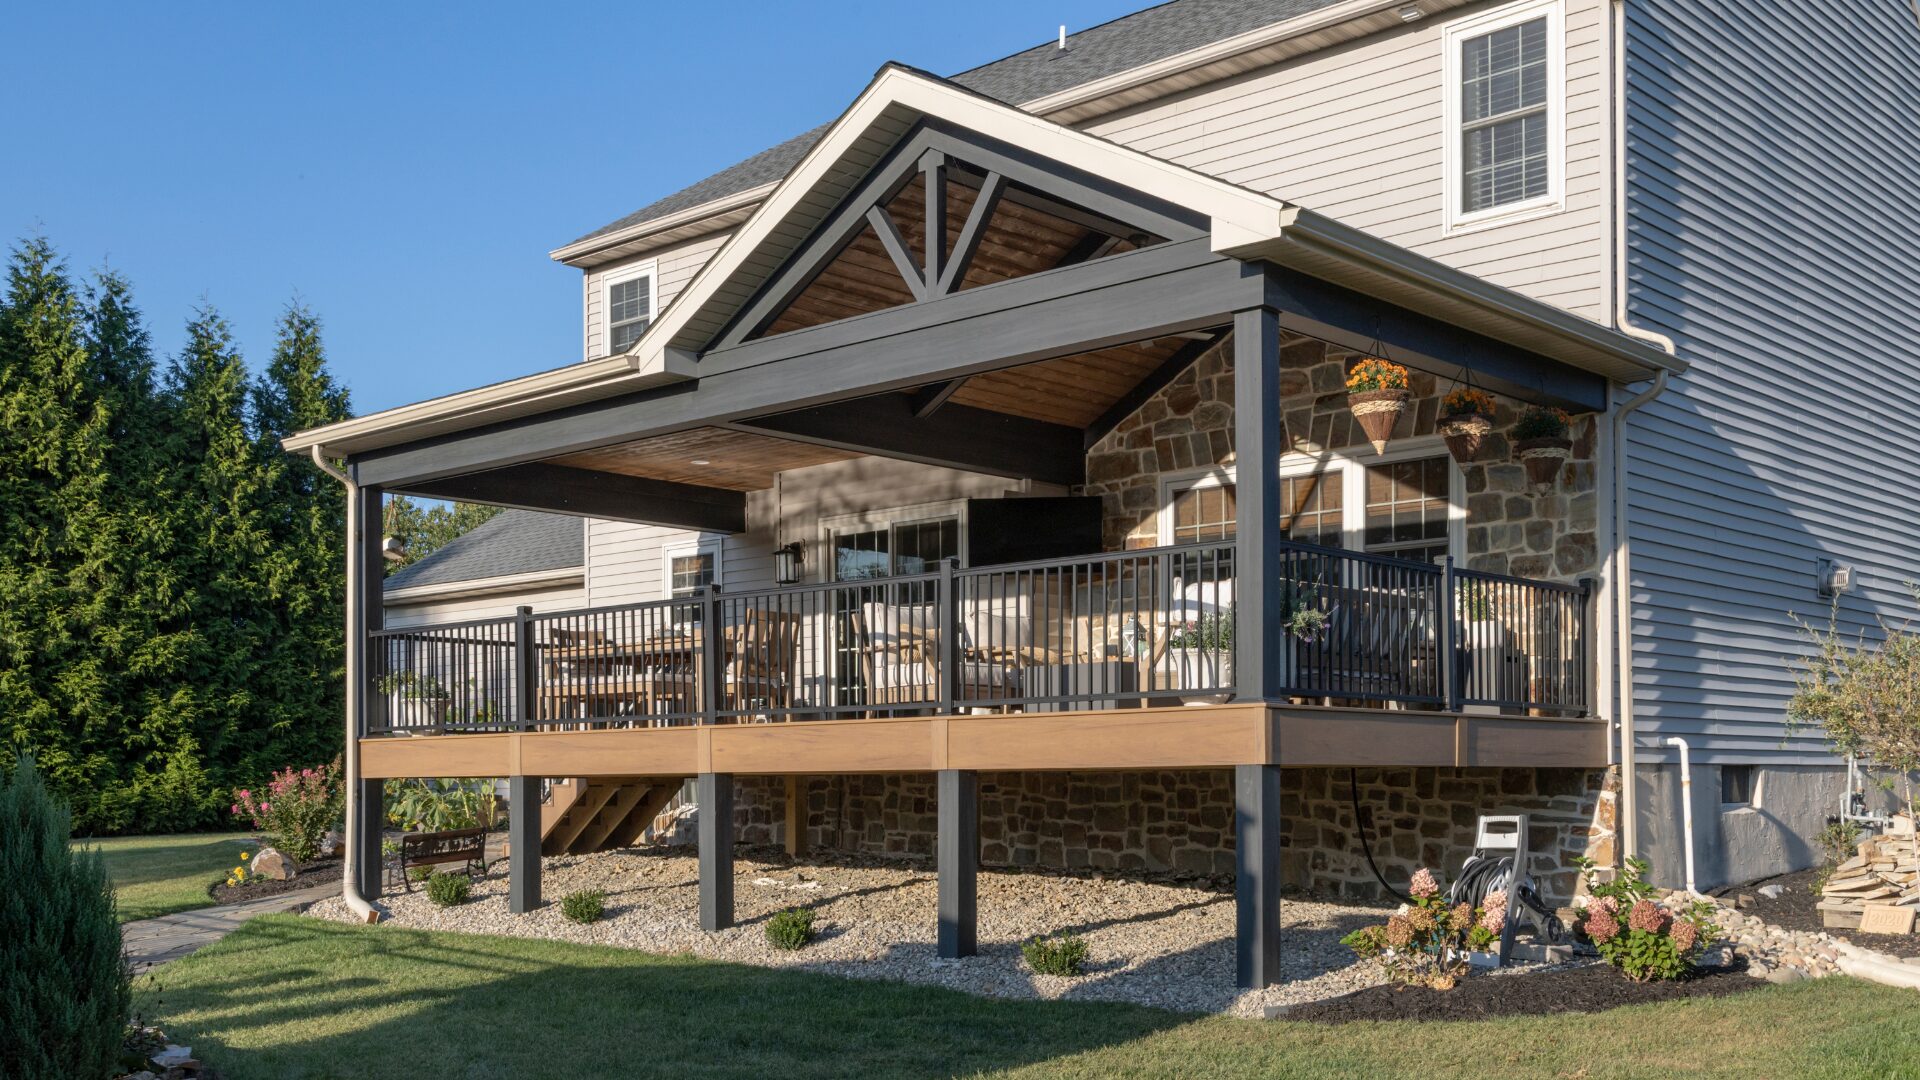
When designing an elevated deck, what you do with the space underneath is just as important as the deck itself. Here, they’ve used gray gravel, which is a brilliant, low-maintenance solution. It promotes drainage, prevents weeds (with a landscape fabric underneath), and creates a clean, finished look. To do it right, excavate about 4 inches of soil, lay down a heavy-duty landscape fabric, and then fill with 3-4 inches of 3/4-inch angular gravel. This prevents the under-deck area from becoming a muddy, overgrown mess.
12. Modern Flat-Roof Cover with a Slatted Wood Privacy Screen
The horizontal slatted wood privacy screen is the undisputed hero of this design. Without it, you’d have a simple, functional deck cover. With it, the space gains architectural interest, a sense of enclosure, and a warm, organic element to balance the dark metal posts and light cushions. It’s the feature that makes the space feel like a true outdoor ‘room.’ It provides privacy from the side without completely blocking light or airflow, striking the perfect balance between open and enclosed. This screen is what you’d be pinning this photo for.
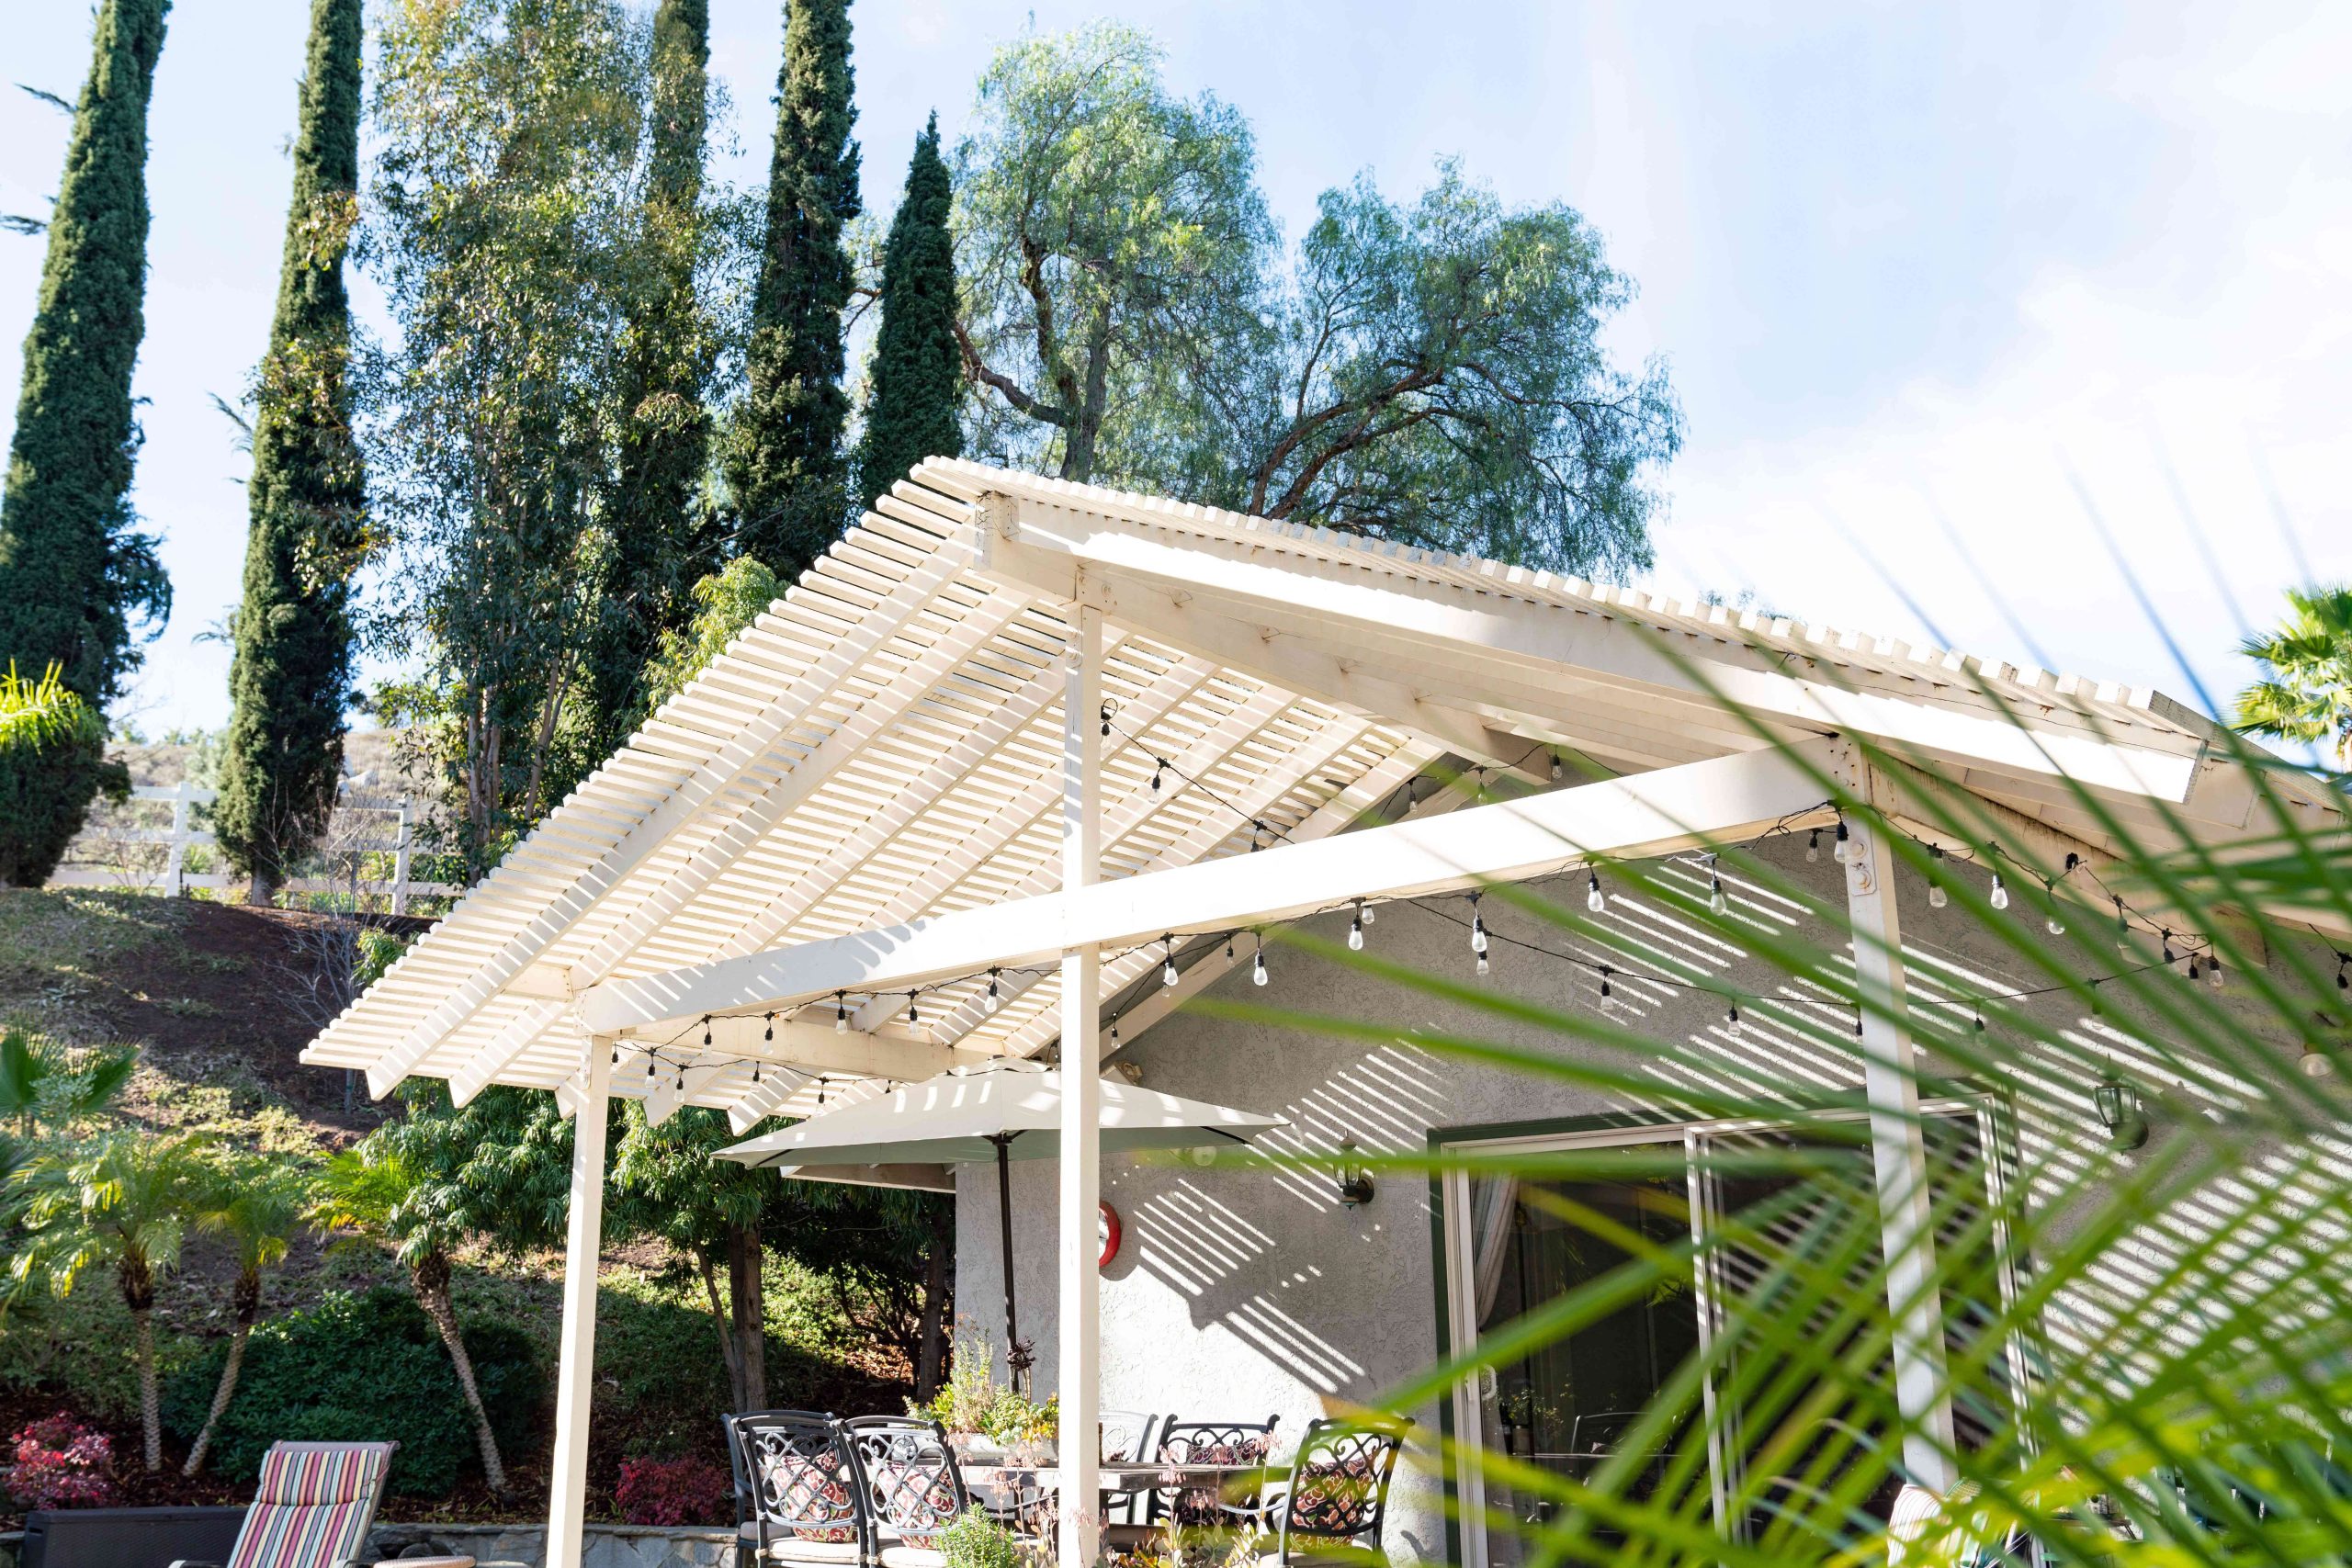
A light wood privacy screen and deck look stunning when new, but they are the highest-maintenance elements in this picture. That beautiful blonde wood color will fade to a less attractive gray within a year or two if left untreated. To keep it looking this fresh, you’ll need to clean and reapply a UV-protecting sealer every single year, especially on the horizontal deck surfaces that take a beating from sun and rain. If you’re not up for that annual chore, consider using a light-colored composite material that mimics wood for a similar look with far less upkeep.
13. Sleek Pergola with Outdoor Kitchen and Slatted Wood Wall
This high-end, integrated outdoor living space is a significant investment. Let’s look at the numbers:
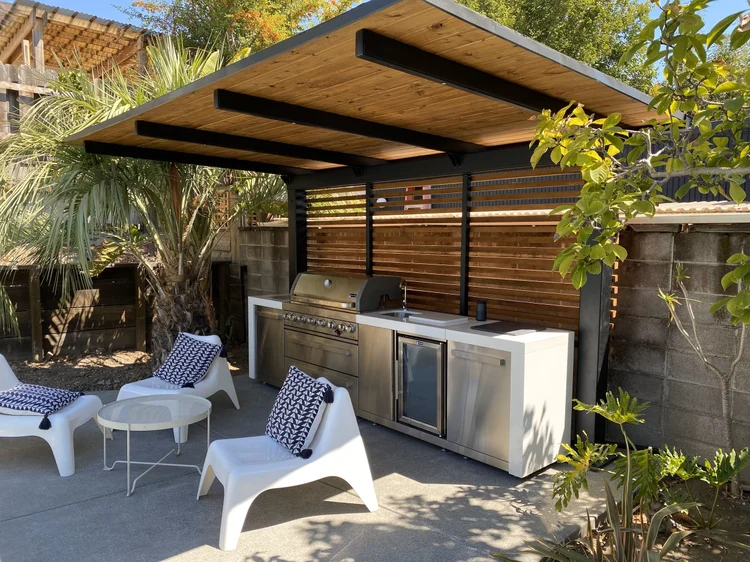
- Wood and Metal Pergola Structure (Custom): $8,000 – $15,000+
- Outdoor Kitchen Module (Grill, Cabinets): $5,000 – $12,000
- White Countertops (e.g., Dekton, Quartz): $3,000 – $7,000
- Slatted Wood Privacy Wall: $1,500 – $4,000
- Lounge Chairs & Decor: $1,000 – $3,000
- TOTAL: $18,500 – $41,000
Budget alternative: Build a simpler pressure-treated wood pergola, buy a standalone grill instead of a built-in, use poured-in-place concrete countertops, and find similar lounge chairs at Target or Wayfair. You could achieve a similar function and style for around $6,000 – $11,000.
The visual recipe for this chic space is about balancing natural and industrial materials. It’s roughly 50% natural wood (pergola, privacy screen) + 30% hard architectural surfaces (concrete patio, white countertops) + 20% matte black and steel accents (pergola frame, grill). The wood brings warmth and texture, preventing the modern elements from feeling sterile. The black metal provides a sharp, graphic outline that defines the space. The key is the repetition: the black of the pergola frame is echoed in the window frames (not shown) and chair legs, creating a cohesive, professionally designed look.
14. Rustic Pergola Patio with Sheer Curtains and Cozy Seating
This space feels so inviting because it successfully translates indoor comfort to an outdoor setting. The key is the addition of soft textiles. The sheer beige curtains, even when tied back, instantly soften the hard lines of the wooden pergola and define the space as a ‘room.’ The plush cushions and striped throw pillows on the sofa add layers of texture and comfort, inviting you to sit down and stay awhile. It’s this combination of a sturdy, rustic structure with soft, cozy elements that creates a perfectly balanced and livable outdoor lounge, much like the inviting setup in Idea #21.
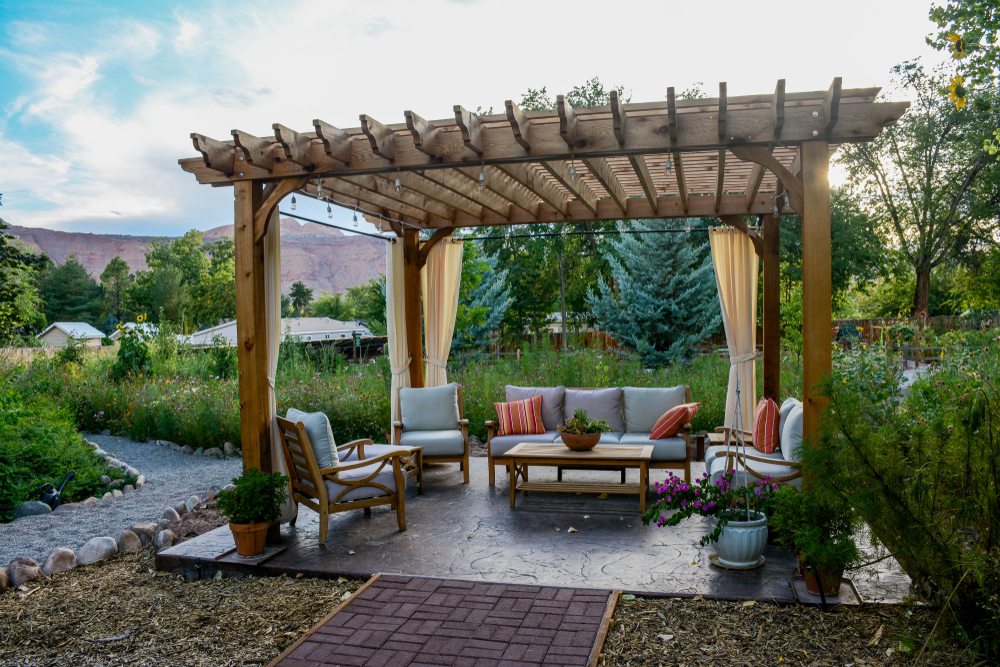
You can get this exact cozy vibe on a much smaller budget. Start with a basic pergola kit from Walmart or Amazon ($400 – $900). The real magic is in the styling. Find a used outdoor sofa on Facebook Marketplace ($200-$500) and refresh it with new cushion covers from an online retailer. The sheer outdoor curtains are an inexpensive but high-impact addition—you can find sets for under $50. Add a large, inexpensive outdoor rug from Target or IKEA to anchor the space and finish with a strand or two of solar-powered string lights. You’re achieving the same mood for less than $1,500.
15. Covered Lower Deck with a Picnic Table and Waterfront View
This ‘dry space’ under an upper-level deck is a brilliant use of otherwise neglected real estate. This idea works best for walk-out basements or homes on a slope where there’s at least 8 feet of vertical clearance under the upper deck’s support beams. Anything less than 7.5 feet will start to feel claustrophobic. The size of the space is dictated by the deck above, but even a modest 10×12 foot area can be transformed into a functional, sheltered patio perfect for a dining table or a couple of lounge chairs, providing a shady retreat from the main sun deck above.
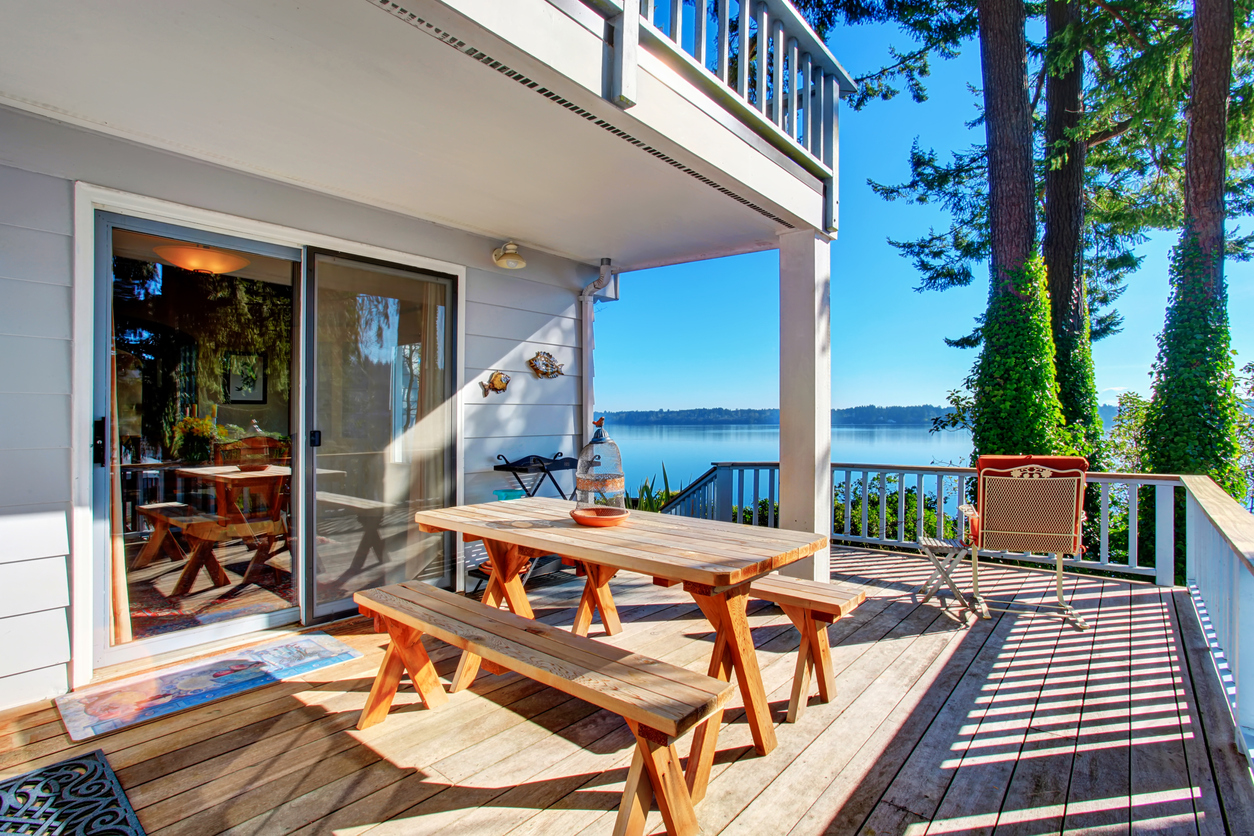
Called a ‘dry-below’ system, this concept is gaining huge traction. Homeowners are realizing the space under their deck is valuable square footage waiting to be claimed. With specialized decking systems and under-deck drainage products becoming more accessible, it’s easier than ever to create a completely dry and finished patio space. This trend is all about maximizing every inch of a property. Why have one outdoor living area when you can have two—one for sun and one for shade—using the same footprint? It’s a smart, efficient way to double your outdoor enjoyment.
16. Gable Roof Deck Cover with a Two-Tone Composite Finish
Using two tones of composite decking can create a high-end, custom look. Here’s how to do it right:
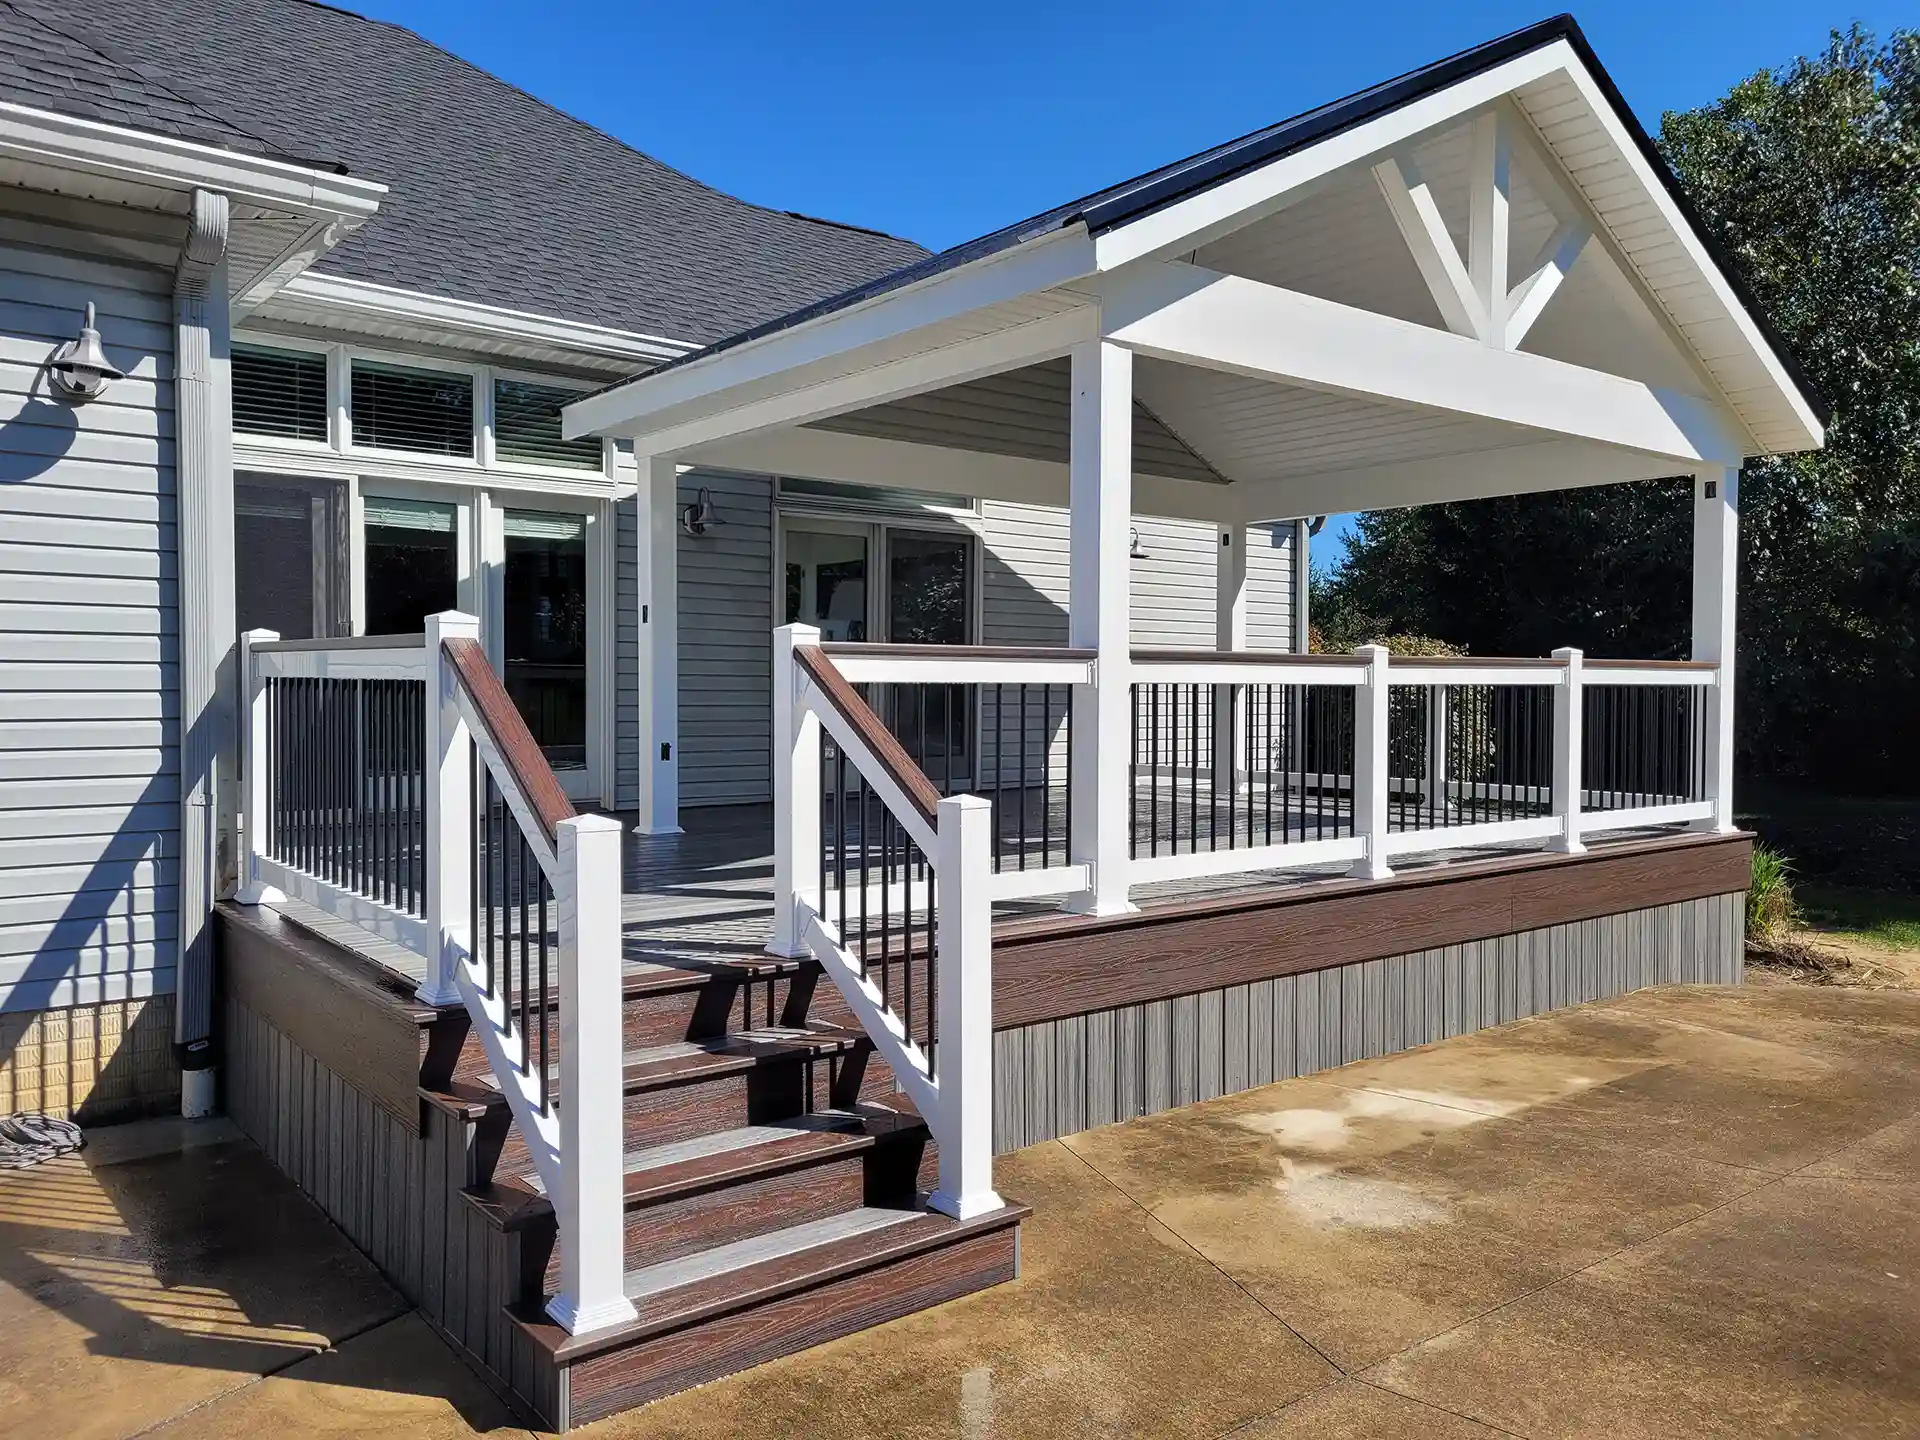
- Choose your colors: Select a main color for the body of the deck and a contrasting color for a border or ‘picture frame’ around the perimeter. Here, they’ve used a lighter greyish-brown for the main field and a dark brown for the border and stair treads.
- Install the main decking: Lay the main deck boards as you normally would, letting them run long over the edges of the frame.
- Snap a chalk line: Mark a straight line for your border, typically 5.5 to 11 inches in from the edge (the width of one or two boards).
- Cut the main boards: Use a circular saw to cut along the chalk line, creating a clean, straight edge.
- Install the border: Attach the darker border boards around the perimeter, mitering the corners for a professional finish.
This detail adds a day or two to the project, but the visual payoff is immense.
The white decorative truss in the gable isn’t just for looks; it’s a clever design trick. A simple gable roof can sometimes feel a bit plain or barn-like. By adding a non-structural, decorative truss, the design introduces a layer of architectural detail that elevates the entire structure. It breaks up the large triangular space and adds a focal point. When painting, ensure you use a high-quality exterior trim paint on all sides of the truss *before* installation to protect it from the elements and prevent premature peeling or rot, even if it’s made from a composite material.
17. Modern Dark Grey Slatted Pergola with Integrated Lighting
While this setup is a showstopper, be realistic about the functionality of a slatted roof over dining and seating areas. This type of roof offers partial, patterned shade, not full protection. A surprise rain shower will send you and your guests running for cover, as everything underneath will get wet. The open slats also mean leaves, pollen, and other debris will fall directly onto your furniture and fire pit. It’s a design choice that prioritizes aesthetics and dappled light over all-weather functionality. This is a fair-weather space, pure and simple, much like the modern design in Idea #2.
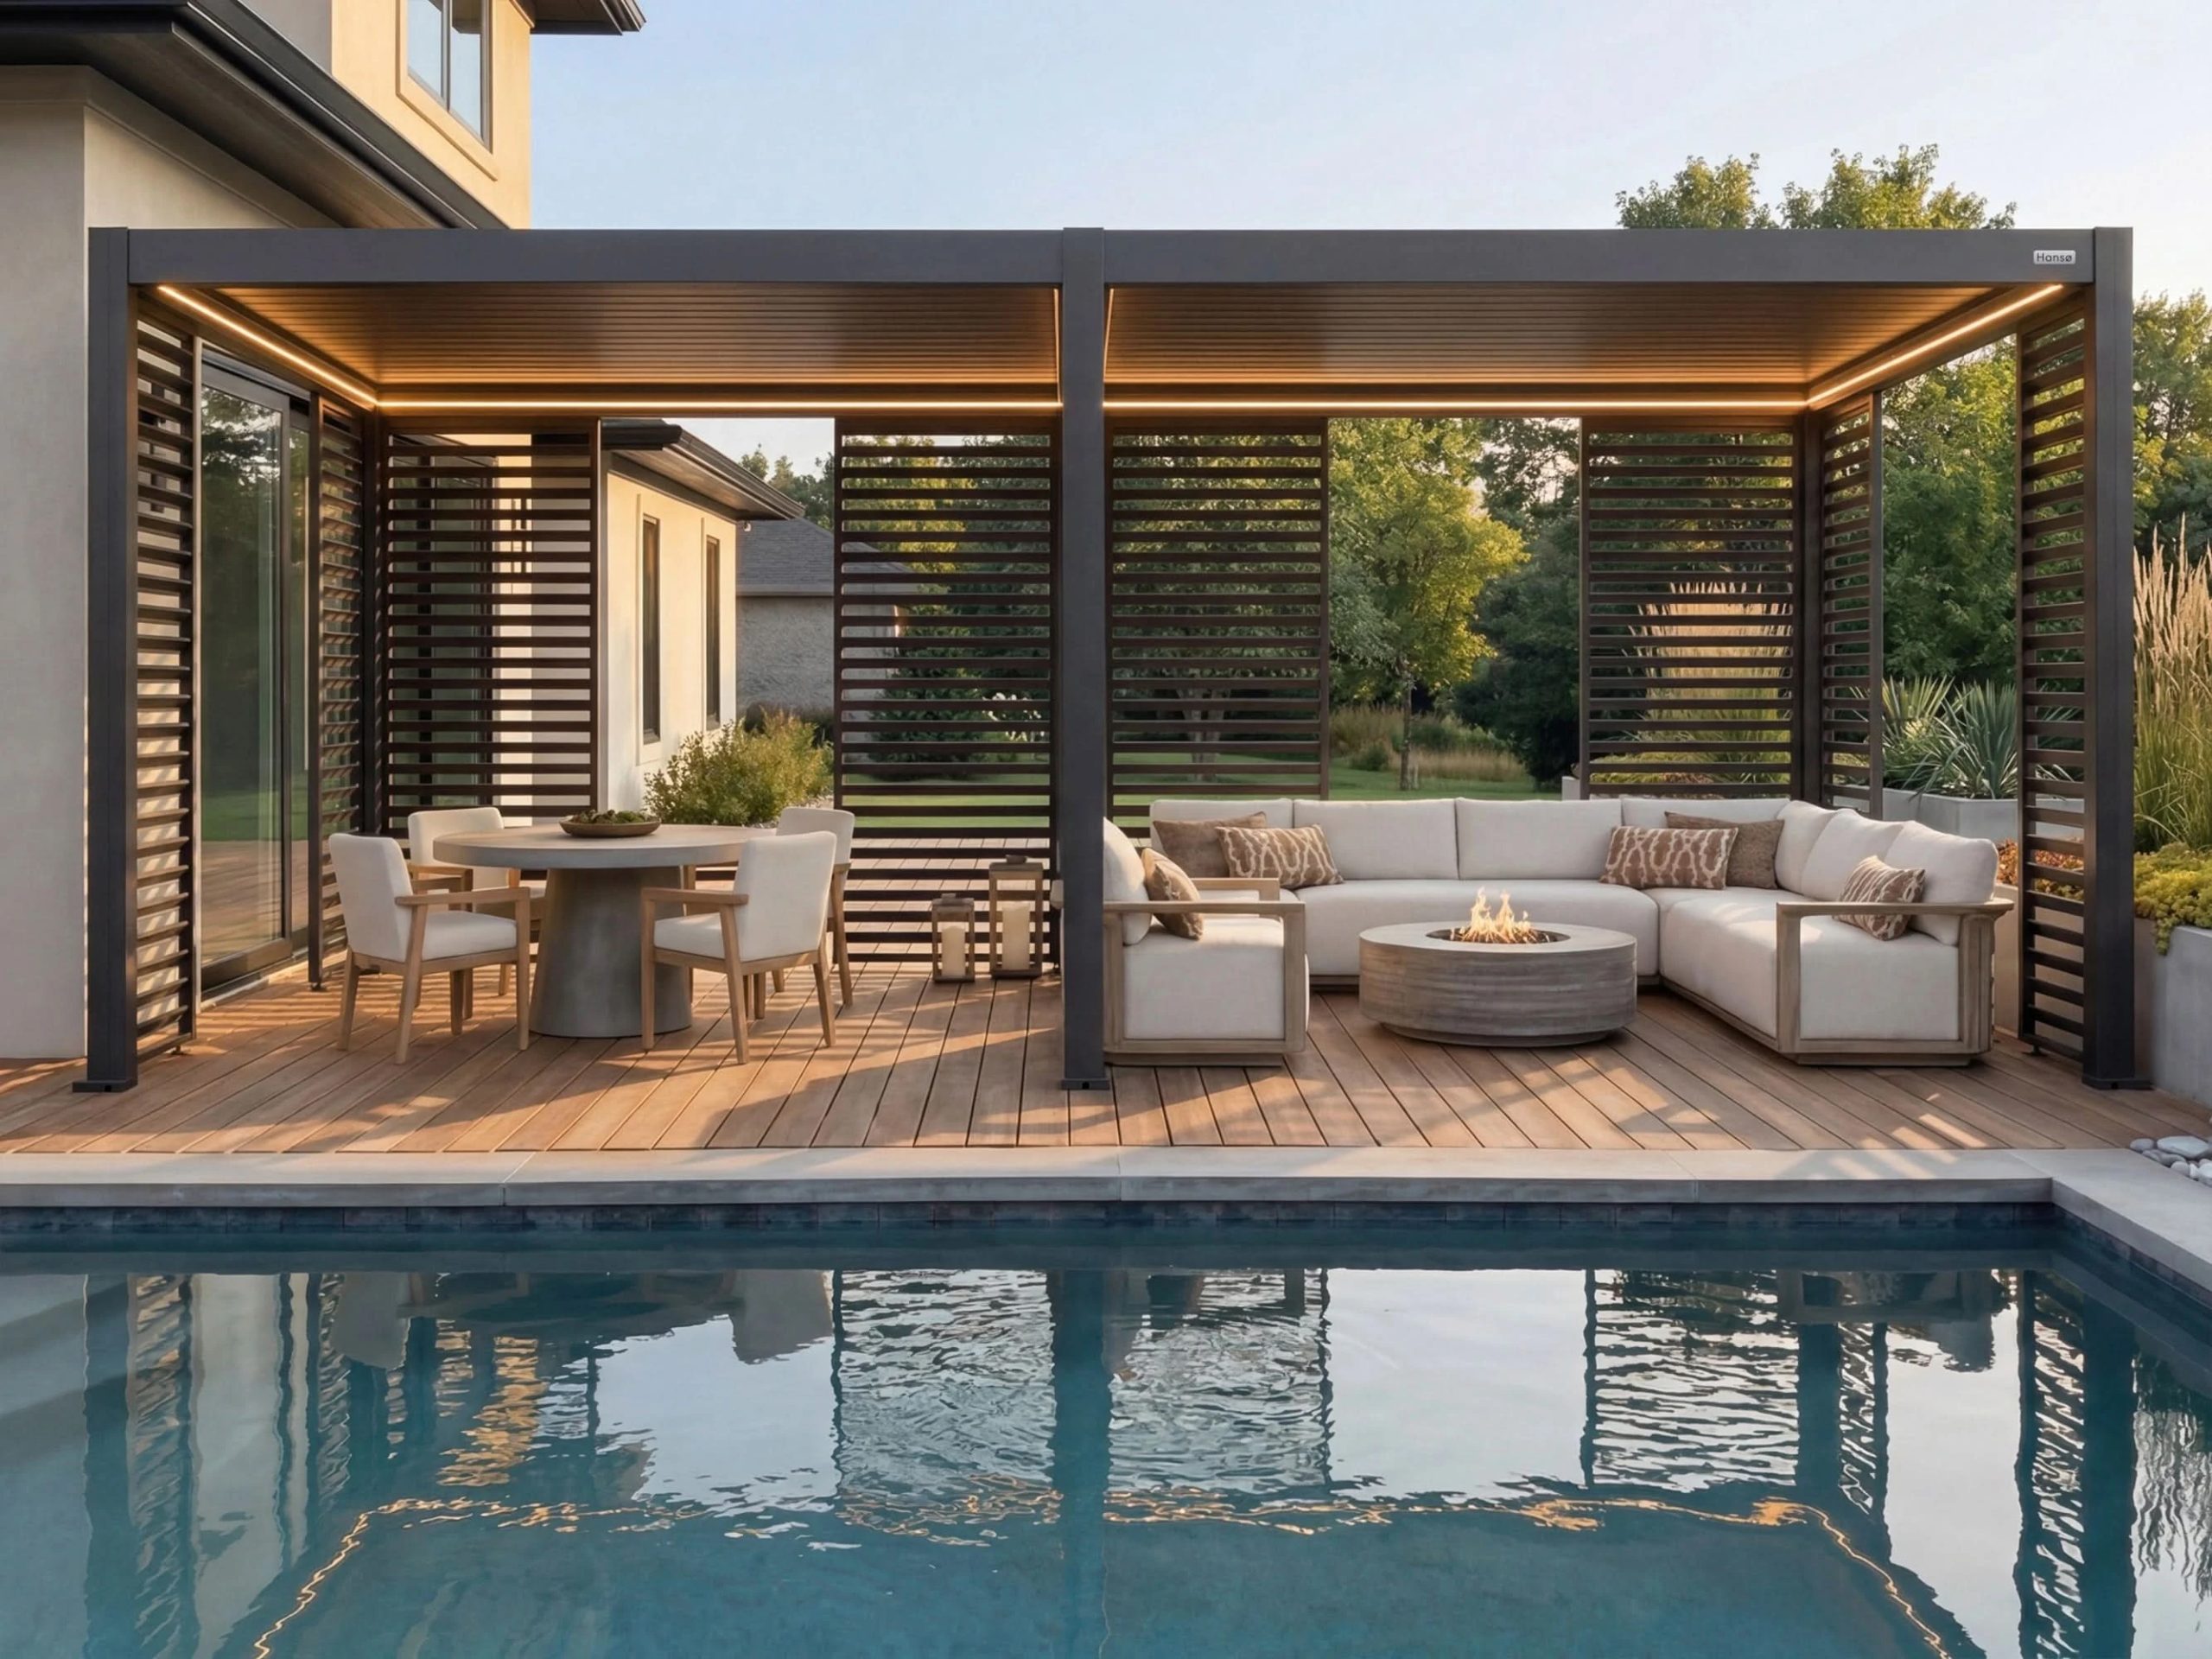
The integrated linear LED strip lighting is the single feature that pushes this design from ‘great’ to ‘exceptional.’ It’s a detail that feels incredibly custom and luxurious. During the day, the pergola is a shade structure. At night, the pergola *becomes* the light source. This clean, seamless illumination highlights the architecture of the cover itself and provides perfect ambient light for the entire deck without the visual clutter of add-on fixtures. It’s the kind of feature that makes a space feel professionally designed and utterly complete.
18. Expansive Wood Beam Patio Cover Extending from a Brick House
A substantial, custom-built wood patio cover of this size is a significant home improvement project. Here’s a rough estimate:
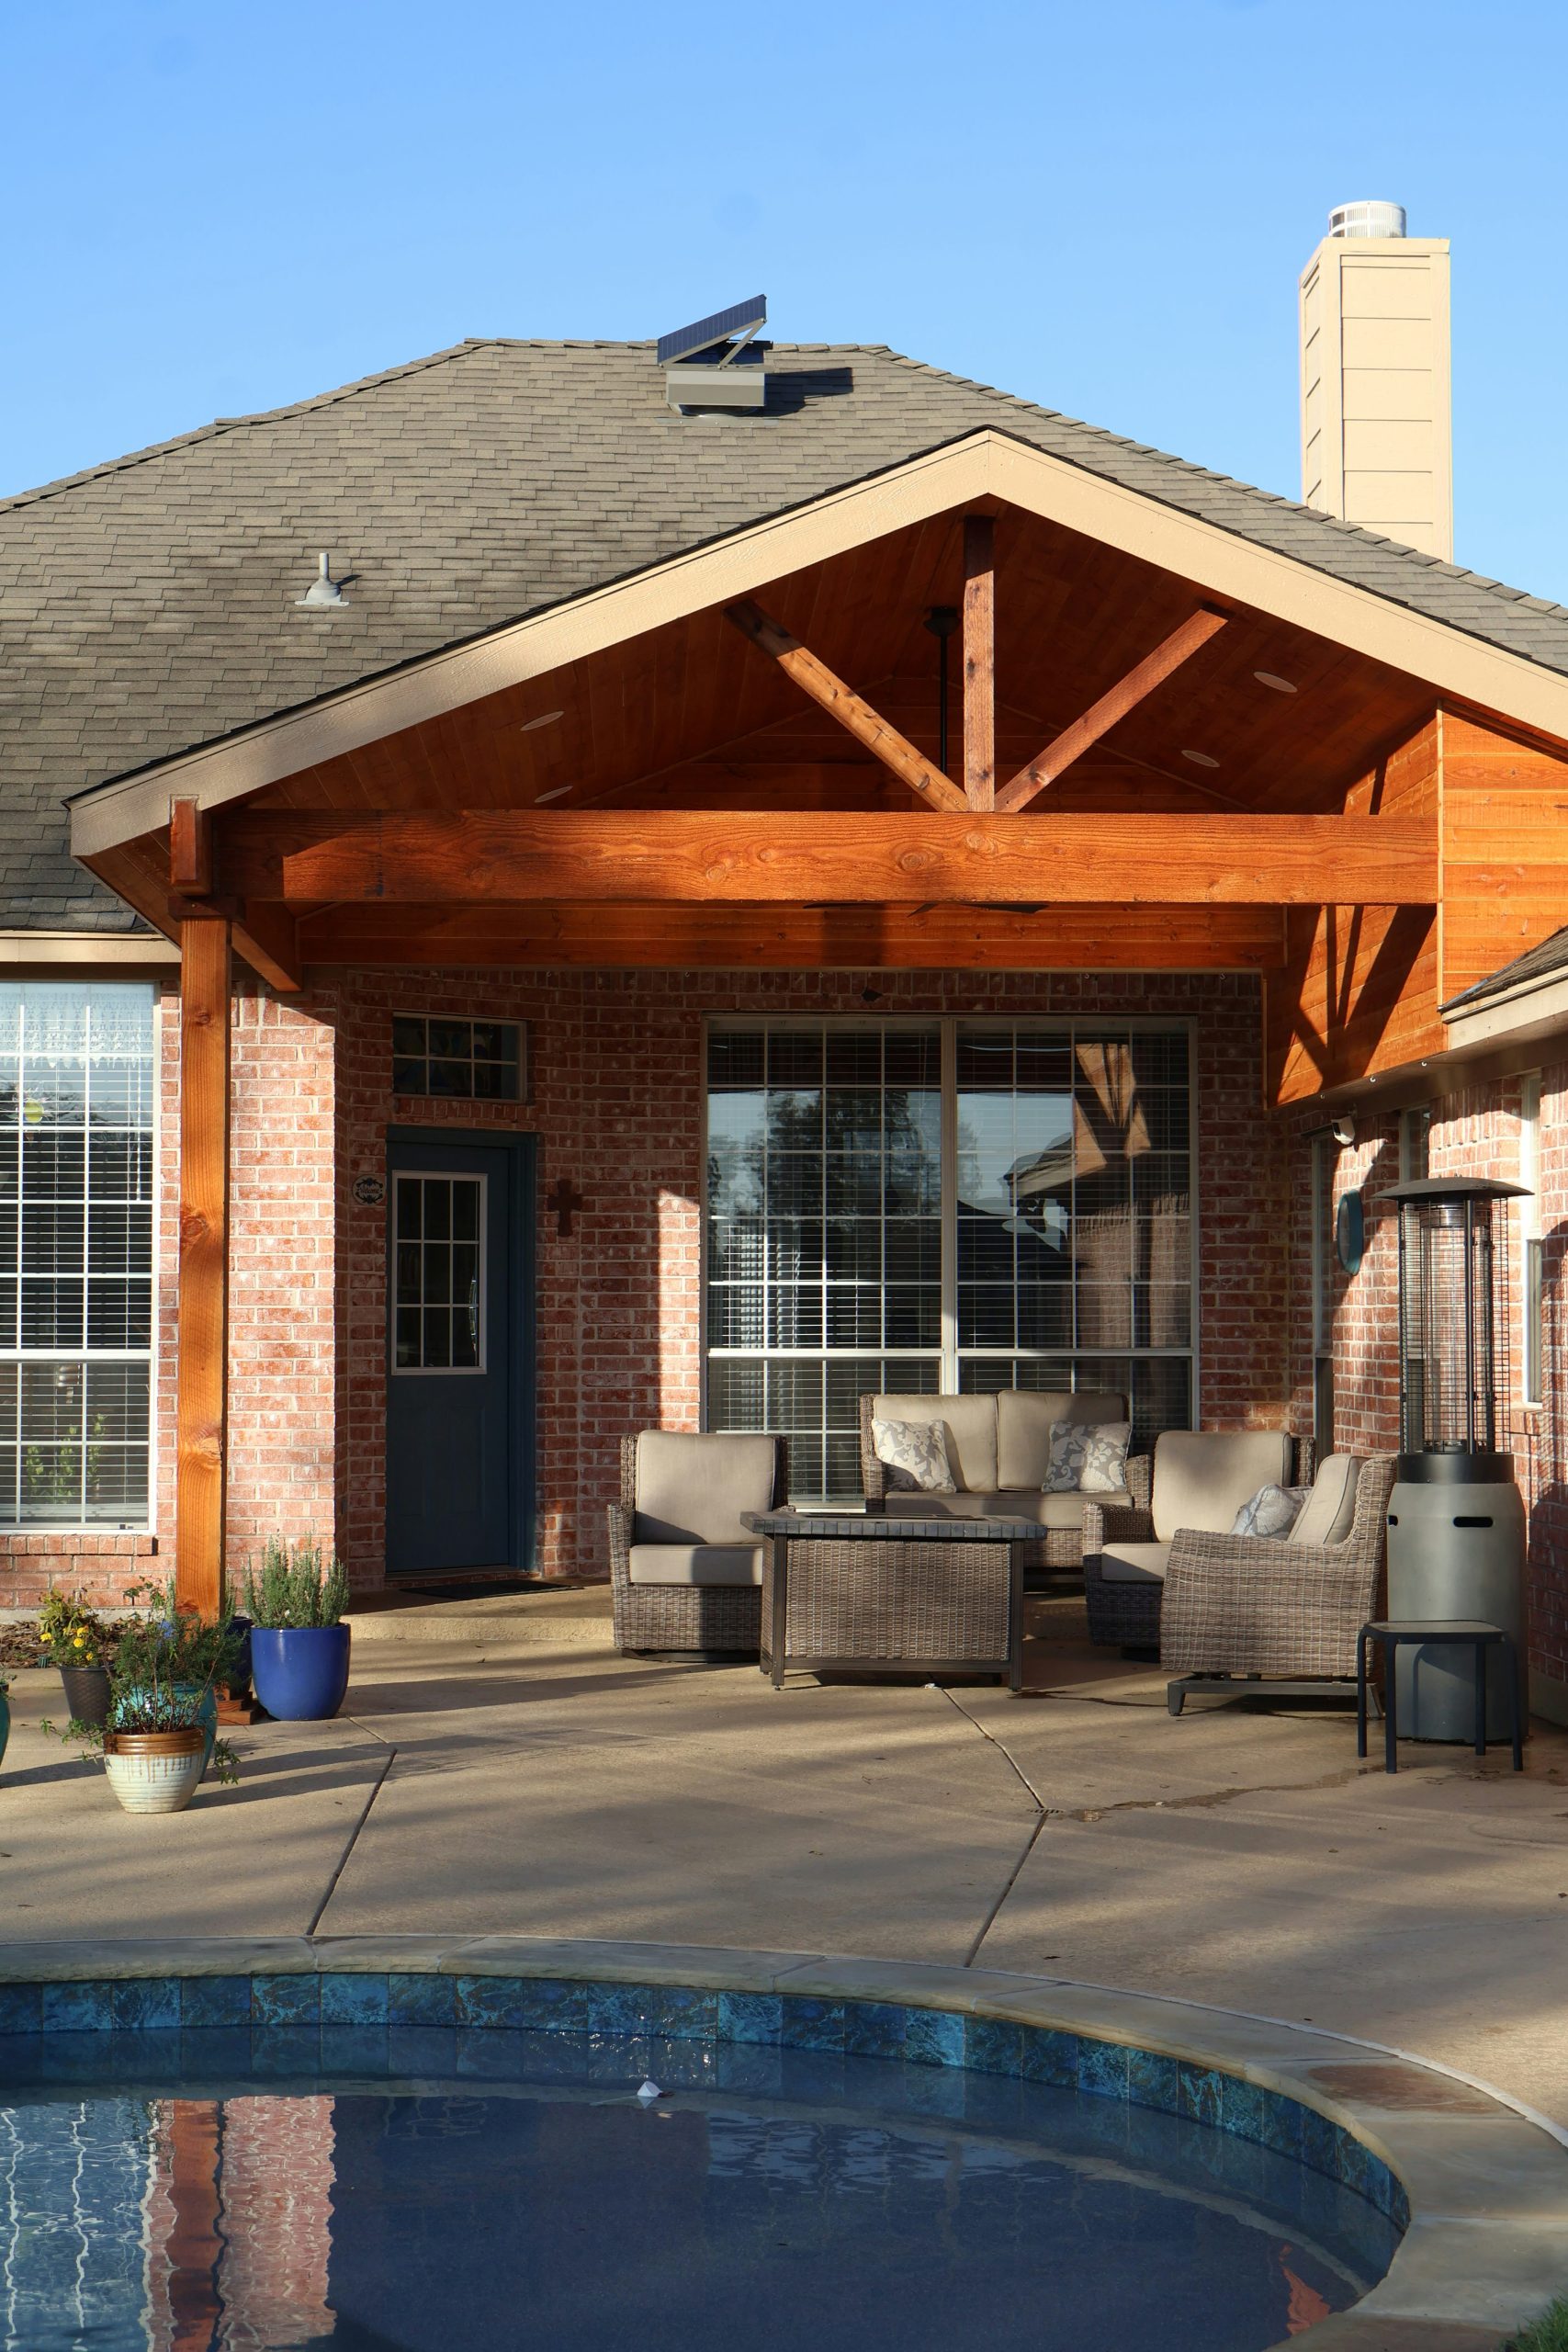
- Engineering and Permits: $1,000 – $3,000
- Lumber (Beams, Trusses, Planks): $7,000 – $15,000
- Roofing Materials (Shingles, etc.): $2,000 – $4,000
- Labor for Construction: $8,000 – $16,000
- Wicker Furniture Set: $1,500 – $4,000
- TOTAL: $19,500 – $42,000
Budget alternative: Instead of a custom build attached to the house, consider a large freestanding pergola kit placed over the patio. This often requires less complex engineering and can provide a similar amount of shade and presence for a total project cost of $5,000 – $10,000.
This design works beautifully because of its masterful use of scale and material harmony. The patio cover is massive, but its scale is appropriate for the large brick house and spacious patio, creating a grand but proportional outdoor room. The warmth of the natural wood beams and trusses is a perfect complement to the earthy, textural red brick of the house. They are different materials, but they share a warm, natural color temperature, creating a cohesive and inviting palette. The simple concrete floor acts as a neutral canvas, allowing the brick and wood to be the stars.
19. Open-Air Deck with a Slatted Wood Pergola and Fire Pit
This serene look follows a ‘nature-forward’ design recipe: 70% natural textures + 30% soft neutral comfort. The 70% is driven by the light wood of the pergola and deck, which seamlessly blend into the surrounding green landscape. The low stone wall below adds another layer of natural material. The 30% comes from the plush, light-colored upholstered seating. There are no loud colors or jarring patterns here. The focus remains on the interplay of wood, stone, and foliage, with the furniture providing a comfortable perch from which to enjoy it all. The dark fire pit acts as a small, grounding accent.
When you have a beautiful natural view, frame it; don’t block it. Notice how the pergola is constructed with relatively thin slats and posts. The railing system (not fully visible, but implied) would likely be a minimal cable or glass rail. The furniture is low-profile. Everything is designed to guide the eye outward, toward the landscape. If your deck has a great view, select a cover and furnishings that are visually lightweight. Avoid heavy, bulky structures or high-backed furniture that will chop up the scenery you’re trying to showcase.
20. Modern Deck with Glossy Reddish-Brown Wood and Sliding Doors
A glossy, reddish-brown wood deck like this is absolutely stunning, but it comes with a serious commitment to upkeep. That high-gloss finish is achieved with multiple coats of a marine-grade varnish or a high-end penetrating oil. To keep it from looking scratched, dull, or sun-faded, it will need to be lightly sanded and recoated every 1-2 years. This isn’t a simple ‘slap on some sealer’ job; it requires proper prep to maintain that smooth, furniture-like finish. It’s also not ideal for high-traffic areas with kids and large pets, as the glossy surface will show scratches more readily than a matte finish.
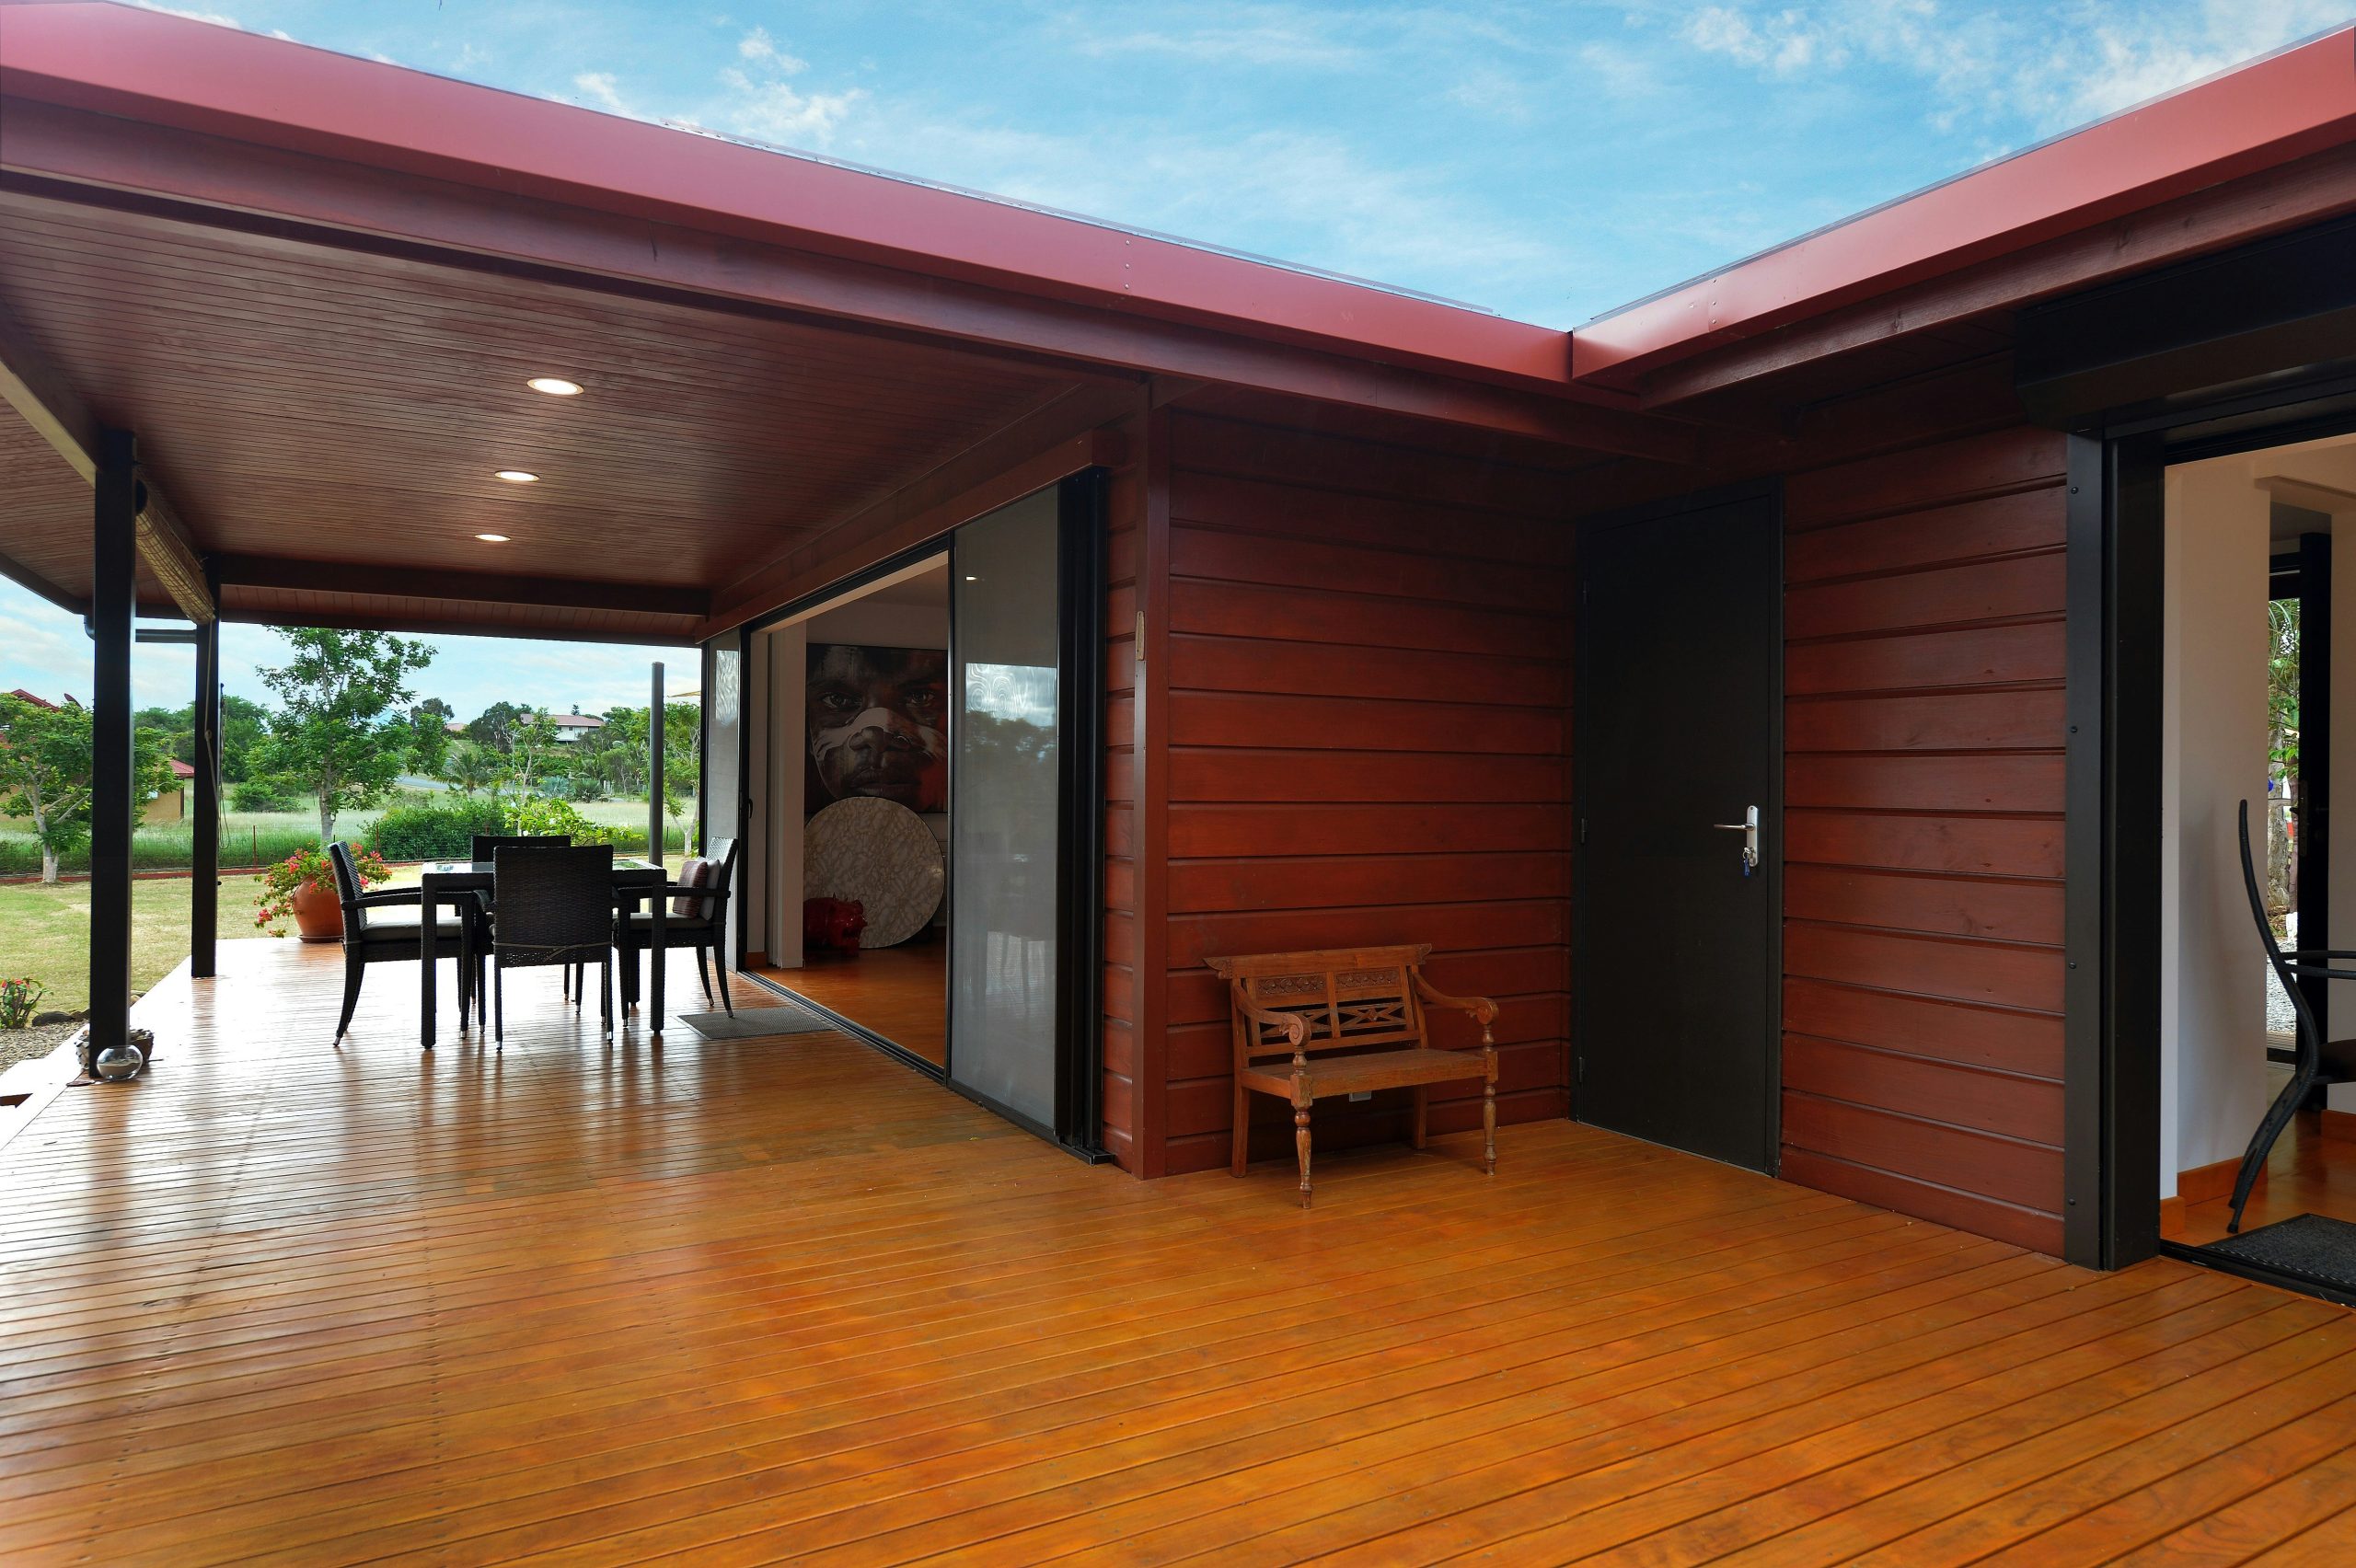
This seamless indoor-outdoor feel, created by using the same wood on the walls, ceiling, and deck, works best when you can install large-format sliding or folding glass doors. The opening should be at least 10-12 feet wide to create the intended effect of a disappearing wall. The deck itself needs to be substantial, at least 12 feet deep from the house, to create a true ‘outdoor room’ that feels like a genuine extension of the interior living space. A smaller deck or standard patio door would break the illusion and diminish the dramatic, expansive effect.
21. Bronze Pergola with Sheer Curtains and Modern Deck Dining
It’s the sheer beige curtains. Hands down. Take them away, and you have a very handsome bronze pergola and dining set. But add them, and the entire space is transformed into a breezy, sophisticated, resort-like cabana. They soften the hard, metallic lines of the pergola, add a layer of texture and movement, and create a sense of intimacy and enclosure without blocking the light. They are the single element that injects a feeling of relaxed luxury into the scene, making it feel less like a backyard deck and more like a private villa patio. The effect is similar to the rustic version in Idea #14, but with a more modern feel.
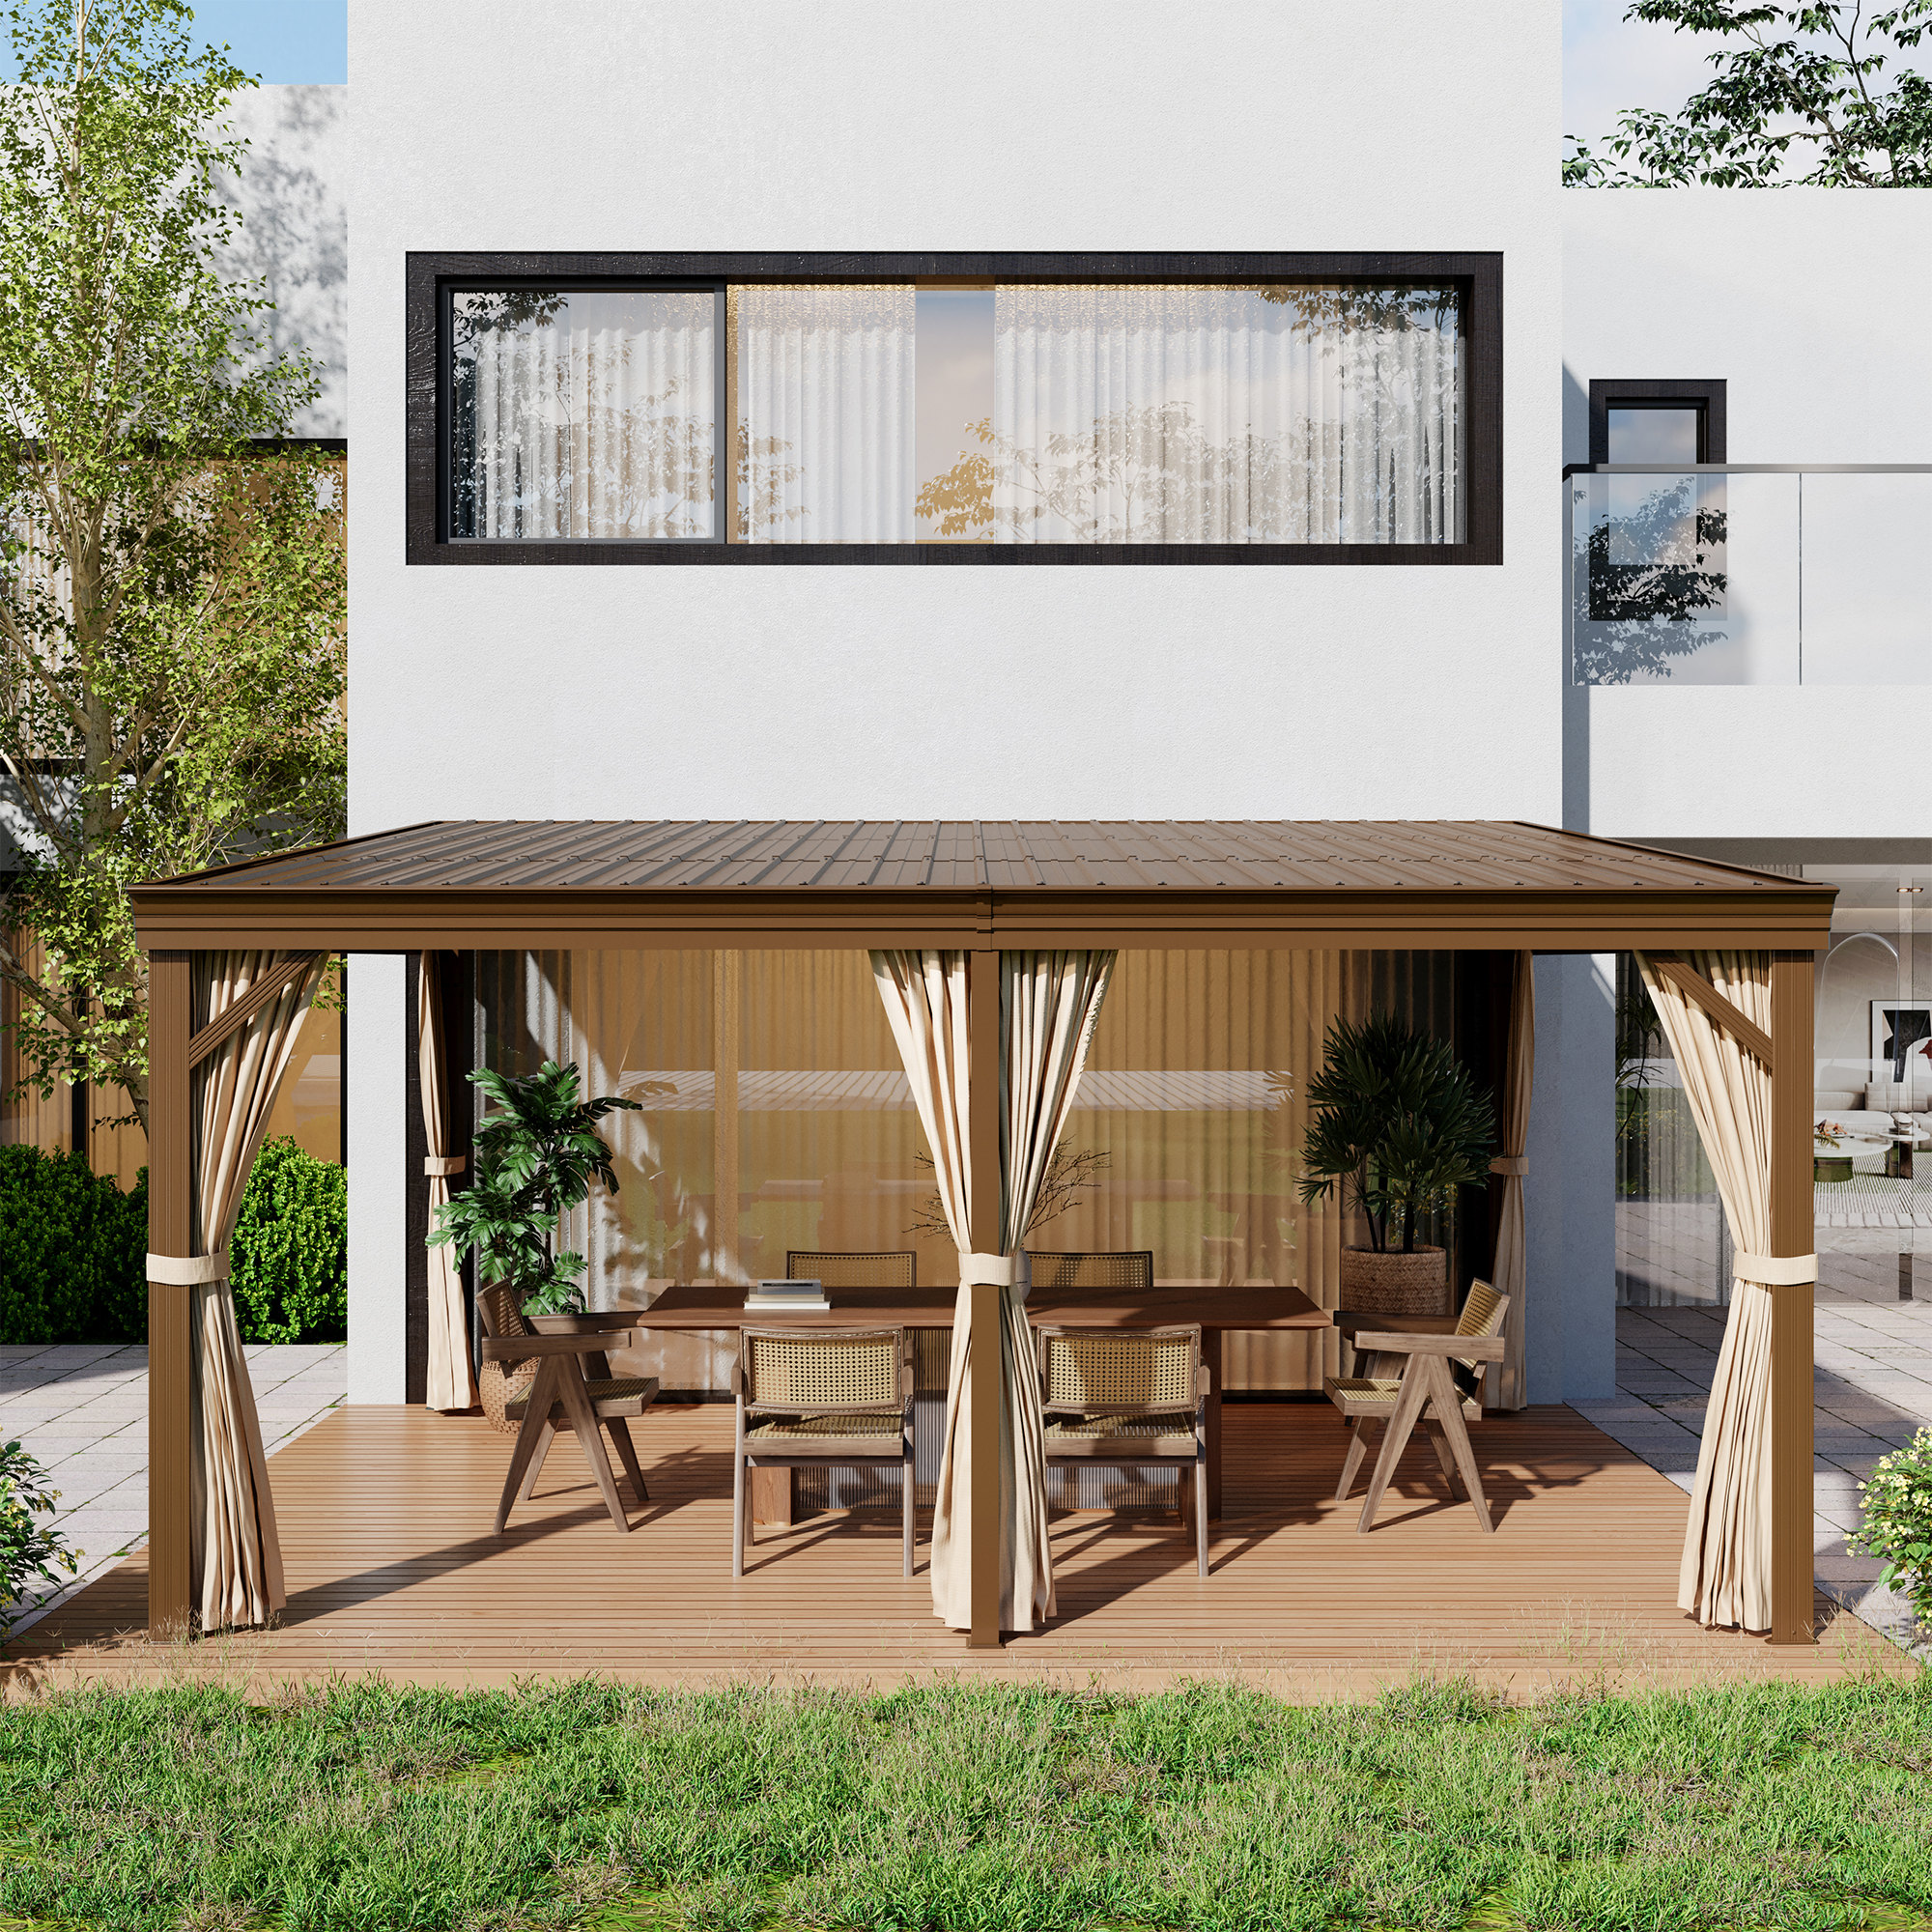
A bronze aluminum pergola can be pricey. To get this look for less, start with a more affordable black or dark gray steel pergola from a retailer like Wayfair or Overstock, which can be had for $500 – $1,000. The key is in the styling. Spend your money on the elements that deliver the ‘luxe’ feel. Find a set of outdoor-rated sheer curtains online for under $75. Look for a dining set with similar woven details from Target’s outdoor collection. Add a few large pots with lush green plants. You’re capturing the essence—the contrast of dark metal, light fabric, and natural textures—for a quarter of the cost.
22. Covered Deck with Dark Siding and a White Picket Railing
Let’s talk about that translucent grey patio cover. While it’s great for keeping the rain off, these corrugated or multiwall polycarbonate panels can get surprisingly dirty. They attract dust and pollen, and algae or mildew can grow inside the channels if not properly sealed. You’ll need to get up there and clean them at least once a year with a soft brush and mild soap to keep them from looking dingy. Also, they can be noisy in a heavy rainstorm—it’s a feature some find cozy, but others might find disruptive if the deck is off a bedroom.
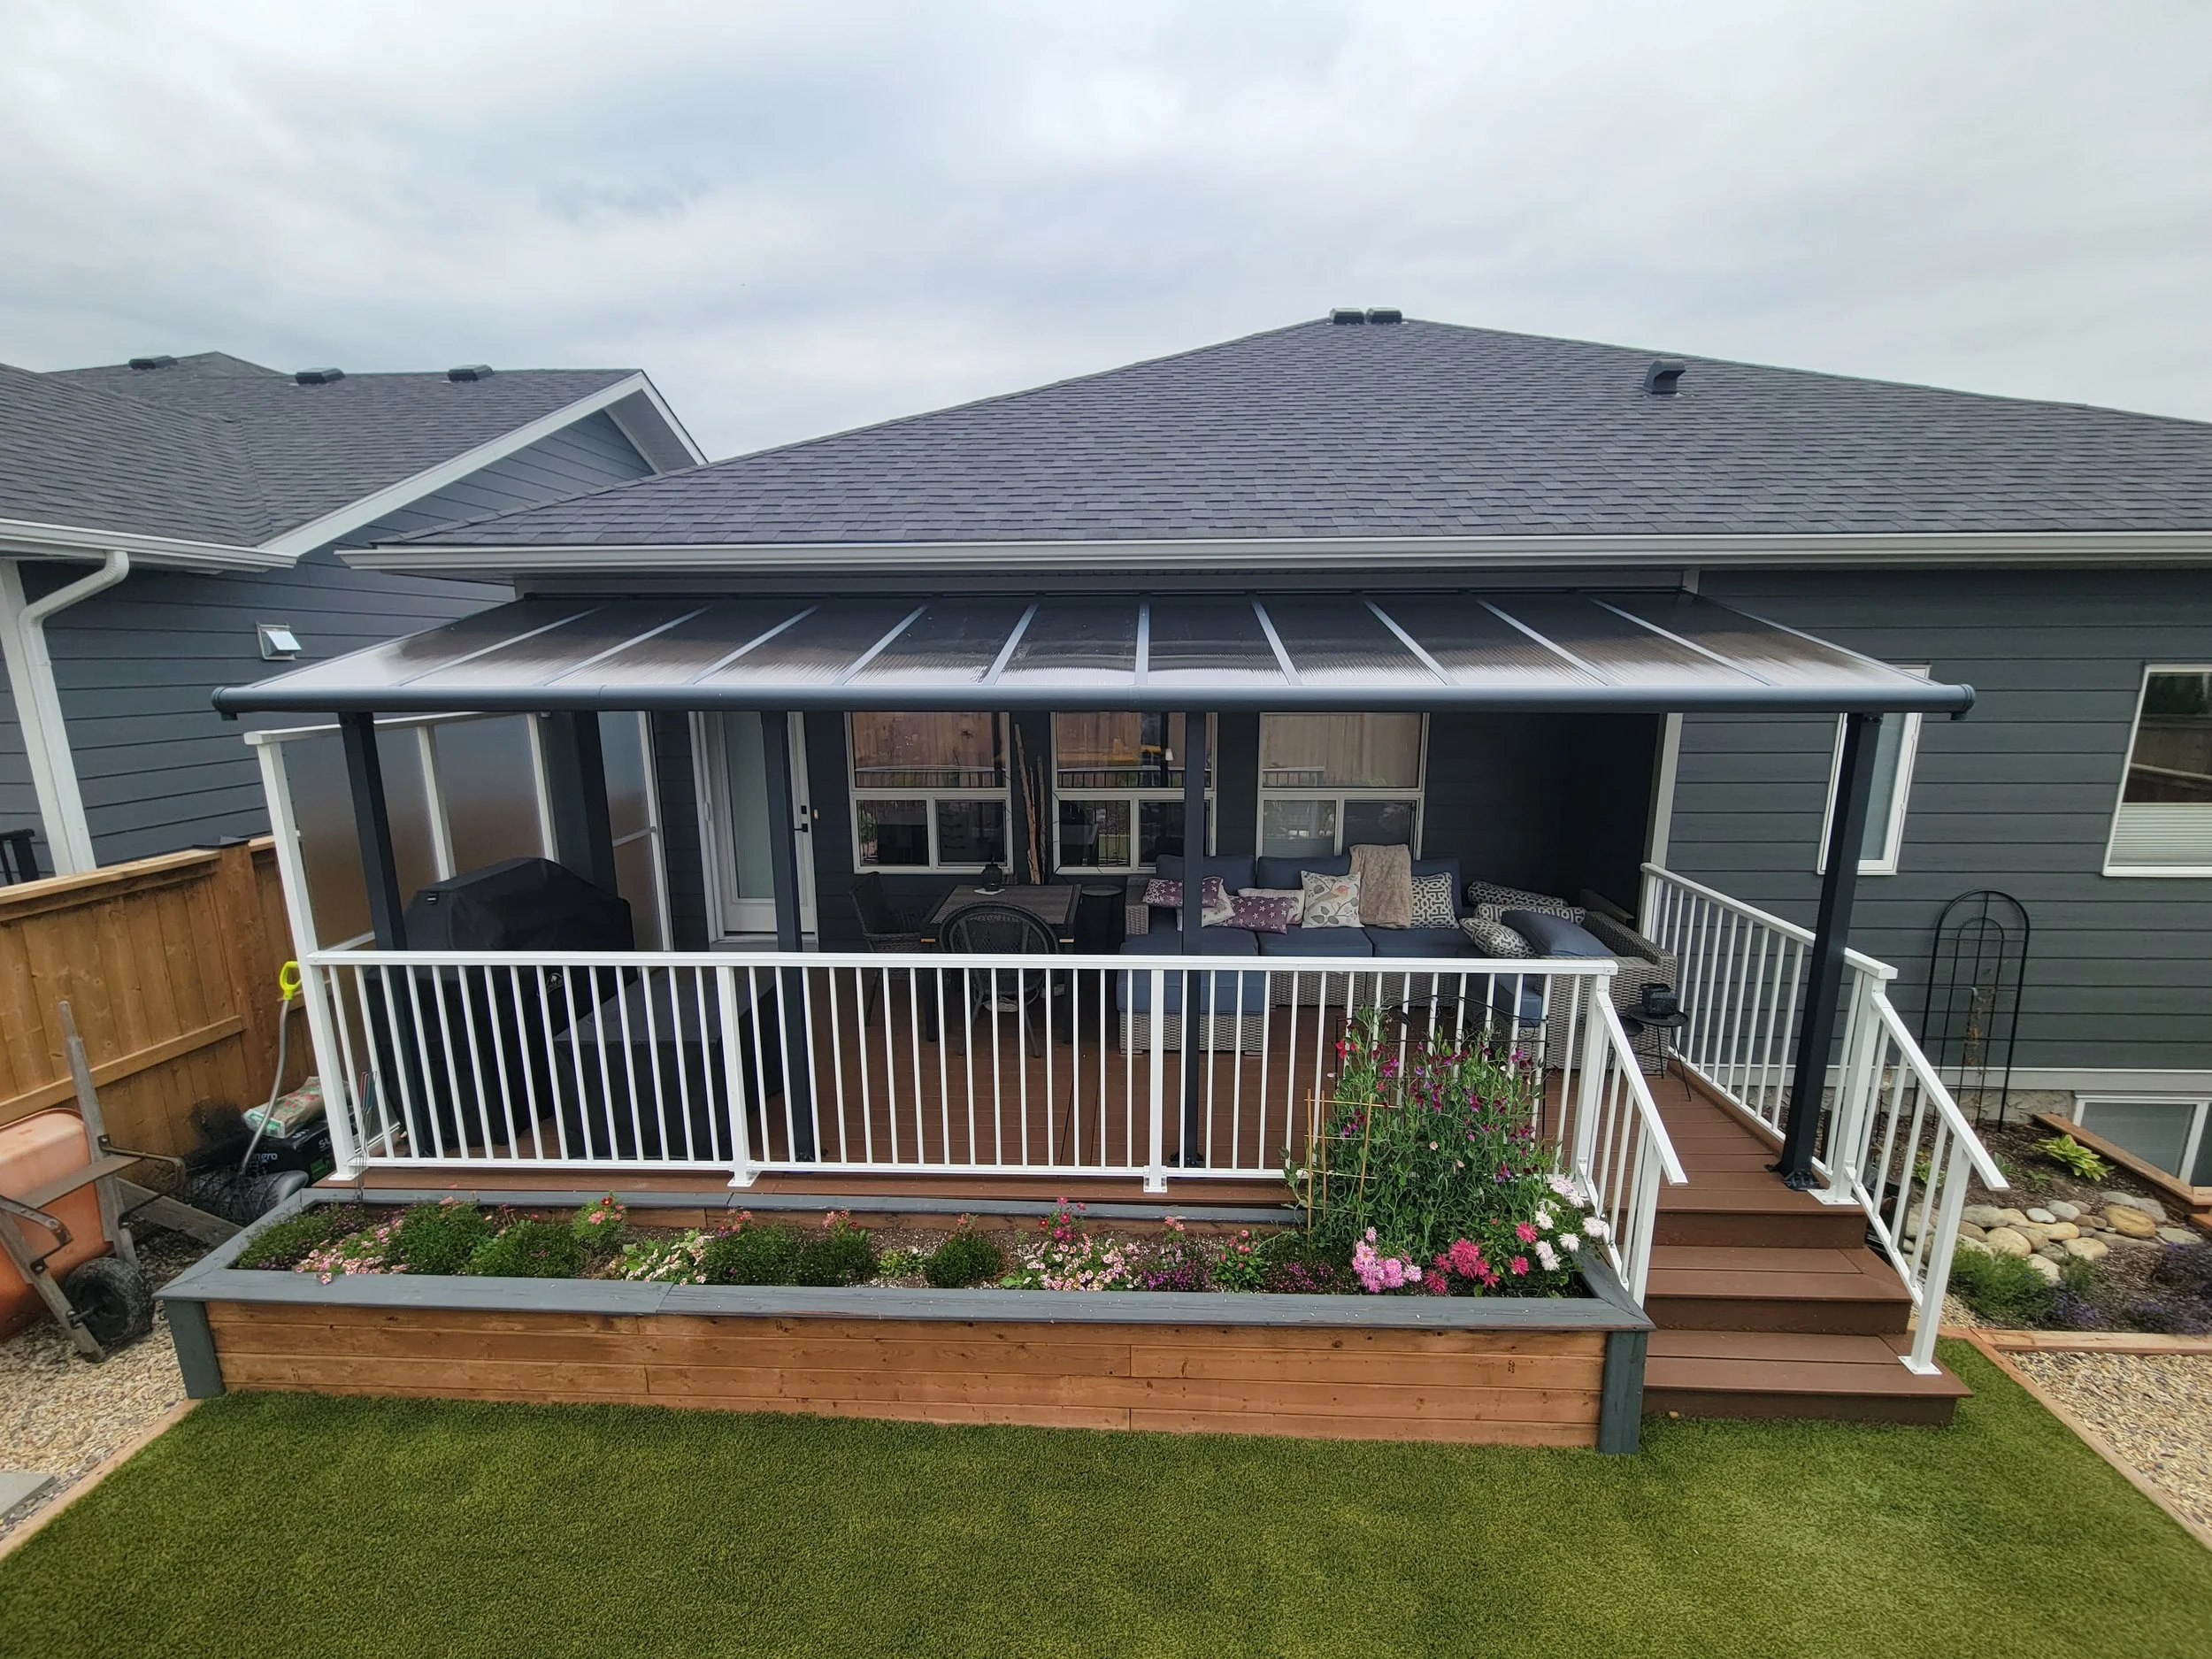
A raised wooden garden bed is a fantastic way to add greenery and define the edge of a deck. Here’s how to build a simple one:
- Plan your size: A simple 4’x8′ or 3’x6′ rectangle is great for beginners. A depth of 12-18 inches is ideal.
- Get your materials: You’ll need untreated cedar, redwood, or pressure-treated lumber rated for ground contact. Get decking screws for assembly.
- Cut your boards: Cut four sides for your desired dimensions. Cut four 4×4 posts to your desired height (e.g., 18 inches).
- Assemble the box: Attach the side boards to the inside of the 4×4 corner posts to build your frame.
- Position and fill: Place the box, line the bottom with cardboard to smother weeds, and fill with a mix of topsoil, compost, and peat moss.
Time: 2-4 hours. Cost: $100 – $300, depending on wood type and size.
23. Dark Wood Pergola Over a Dining Set on a Composite Deck
When placing a rug on an outdoor deck, especially a composite one, you need to think about water. Always choose a rug made from a synthetic material like polypropylene that won’t hold moisture. More importantly, lift the rug to allow the deck underneath to dry completely after heavy rain. Trapping moisture between the rug and the composite decking can lead to mold or mildew growth on the deck surface. If your deck gets a lot of direct sun, be aware that the area under the rug may not fade at the same rate as the exposed deck, potentially leaving a ‘shadow’ over time.
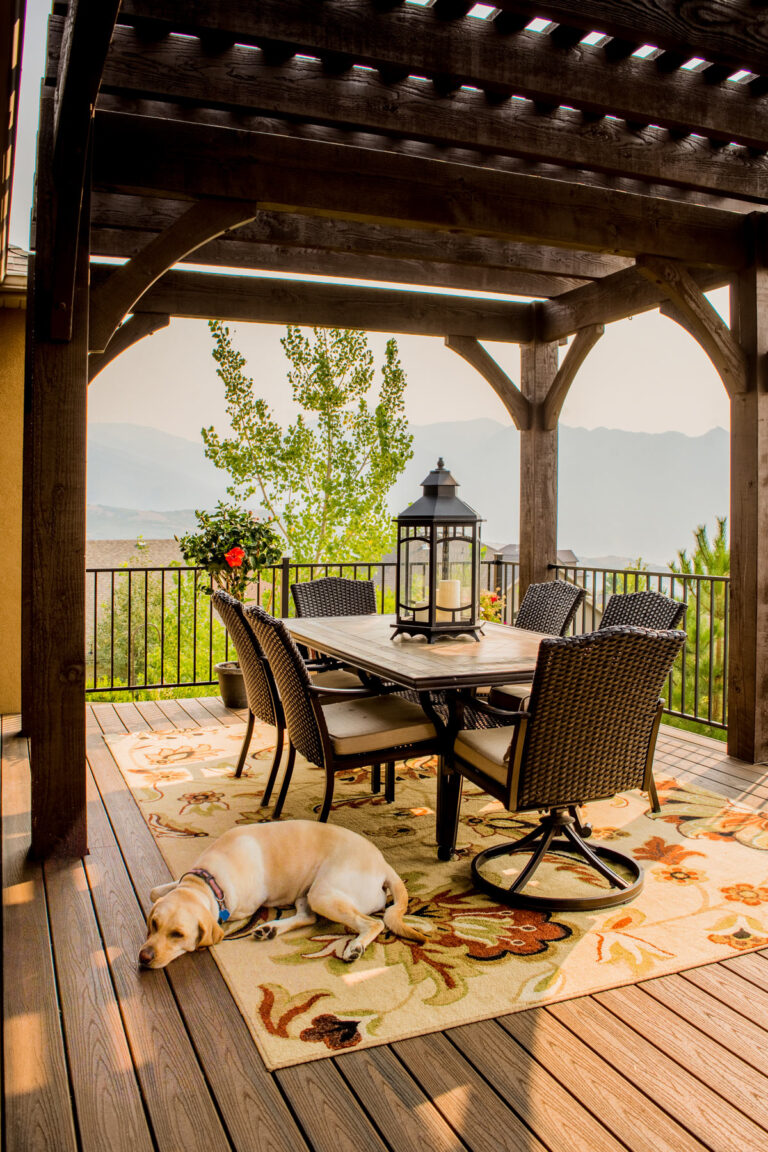
This composition is effective because it creates a clear ‘room’ without walls. The dark wood pergola acts as the ‘ceiling,’ visually defining the dining area. The floral area rug acts as the ‘floor,’ anchoring the furniture and separating it from the rest of the deck. The dining set itself is the ‘content’ of the room. This layering of elements—pergola above, rug below—is a classic interior design technique applied brilliantly to an outdoor space. The color palette, with its warm gray deck, dark brown wood, and pops of rust orange, feels sophisticated and connected to the natural landscape beyond. If you are worried about making a mistake with this, check out our guide on common mistakes.
24. Natural Wood Pergola with a Stone Outdoor Fireplace
Creating a multi-functional outdoor space like this involves several major components. Here is a possible cost breakdown:
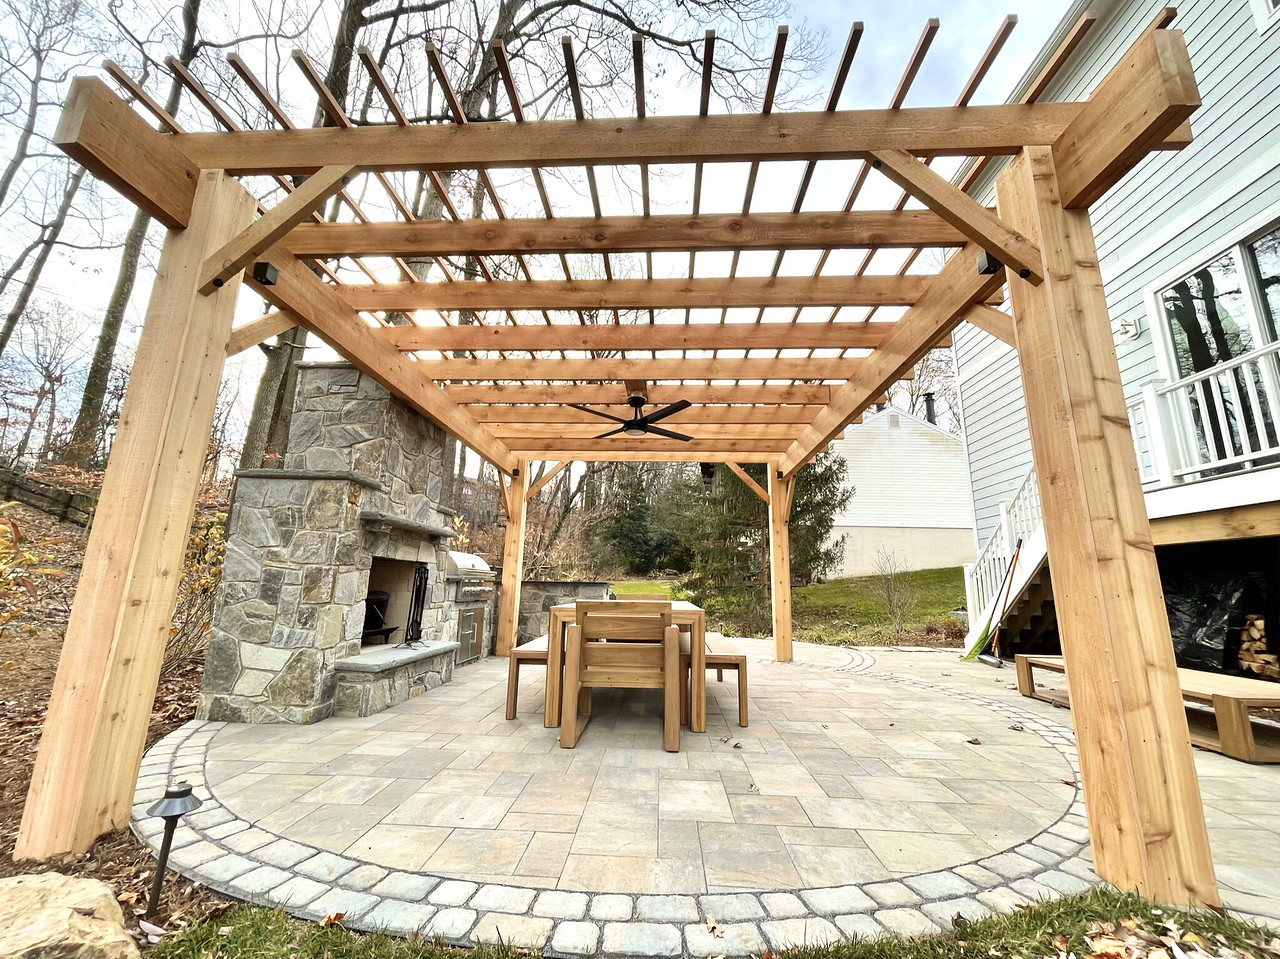
- Light Wood Pergola Structure (16’x20′): $5,000 – $12,000
- Stacked Stone Fireplace/Grill (Masonry Work): $10,000 – $25,000+
- Paver Patio (Materials & Labor): $4,000 – $9,000
- Outdoor Dining Set: $1,000 – $3,000
- Electrical for Fan/Lighting: $800 – $2,000
- TOTAL: $20,800 – $51,000
Budget alternative: Use a pre-fabricated pergola kit, opt for a metal and stone veneer fireplace kit instead of full masonry, and choose more affordable pavers. This could bring the project into the $9,000 – $18,000 range.
This is a major project, so a checklist is essential before you begin:
- Have you confirmed local regulations on outdoor fireplaces, including chimney height and distance from property lines and structures?
- Does your plan include proper utility lines? You’ll need to trench for both electrical (for the fan) and potentially a gas line for the grill.
- Is the planned location on level ground, or will you need to budget for significant site prep and grading?
- Have you finalized a lighting plan? Decide on placement for ambient, task, and accent lighting early in the process.
25. Expansive Timber-Covered Patio with Kitchen and Lounge
A massive, all-encompassing timber roof structure like this requires a very large footprint to feel balanced. We’re talking a minimum of 600 square feet, but this example looks closer to 800-1,000 square feet. It’s designed to house multiple ‘rooms’—a kitchen, a dining area, and a lounge—so each zone needs adequate space. The ceiling height is also critical; the eaves should start no lower than 9 feet, with the peak reaching 15 feet or more to maintain an open, cathedral-like feeling. This is a statement structure for a large property, not an addition to a small patio. An attempt to shrink this would lose its grand, multi-zone purpose.
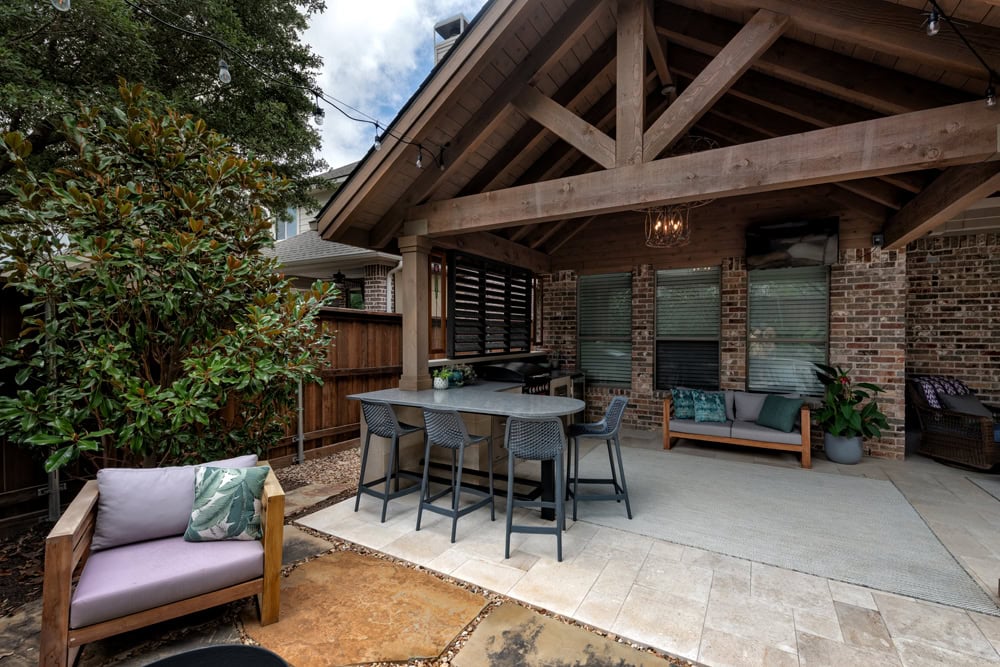
The single most important element is the exposed timber roof structure itself. It’s the unifying feature that brings all the different zones and materials—brick, stone pavers, flagstone, and wicker—together under one cohesive architectural statement. It defines the sheer volume and scale of the outdoor living space. Without this massive wooden ‘umbrella,’ you would simply have a collection of furniture on a patio next to a house. The roof turns it into a destination, a grand outdoor lodge that feels both expansive and sheltered at the same time. It is the heart and soul of the entire design.
26. Modern White Louvered Pergola for Adjustable Shade
The formula for this crisp, modern look is simplicity itself: 70% clean white structure + 20% dark, contrasting furniture + 10% natural elements. The white louvered pergola provides the dominant, bright, and airy feel. The dark gray dining set creates a strong visual anchor and a sophisticated contrast, preventing the scene from feeling washed out. The final 10% comes from the light wood deck and the green foliage in the background, which add necessary warmth and life. This minimalist palette is intentional; the focus is on the function and form of the adjustable louvers, a more flexible version of the fixed slats in Idea #3.
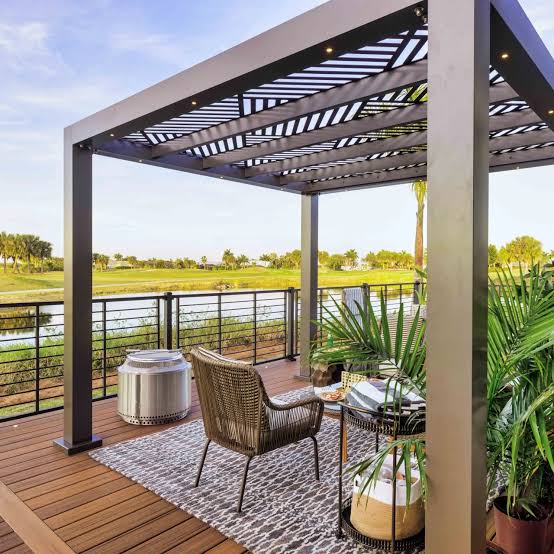
A louvered pergola is brilliantly versatile, but it’s a mechanical system exposed to the elements. The moving parts—gears, pivots, motors—can require maintenance. It’s crucial to keep the tracks and louvers clear of leaves and debris to prevent jamming. In areas with freezing rain or snow, it’s best to leave the louvers in an open/vertical position to prevent ice buildup from damaging the mechanism. While many are made of low-maintenance aluminum, the internal workings are more complex than a simple fixed pergola and may require occasional service over their lifespan.
Your Outdoor Story Begins Here
A deck cover is more than just shade; it’s the defining feature of your outdoor living space. We hope these 26 ideas have sparked your imagination and given you the confidence to create a backyard you’ll never want to leave. Now, head over to your Pinterest board and start saving your favorites!