You know that feeling when you finally find the curbless shower idea that looks exactly right for your space, but the details feel impossible to figure out? We get it. A curbless, walk-in shower is one of the best upgrades you can make, but getting it right is all about the planning. We filtered through hundreds of options to bring you these 26 distinct, real-home examples that deliver on style and function. In this guide, you’ll find minimalist, modern, and luxurious spa-like designs that work for various bathroom sizes. The move toward seamless, accessible design is why these showers are dominating Pinterest boards in 2026, creating a sense of spaciousness and calm. And stay until the end—we break down the most common mistakes that can ruin these looks. 📌 Save this to Pinterest for later—you’ll want to revisit these ideas.
1. Illuminated Marble Walk-In Shower With Integrated Bench
This design is a masterclass in layering. The combination of large-format, white marble-look tiles on every surface creates a monolithic, serene shell. But the magic is in the lighting. Instead of a single, harsh overhead light, warm perimeter LEDs trace the ceiling and tuck under the floating bench. This creates a soft, ambient glow that makes the space feel like a high-end spa, while the main rain showerhead provides the functional light. The frameless glass keeps it all feeling open and airy.
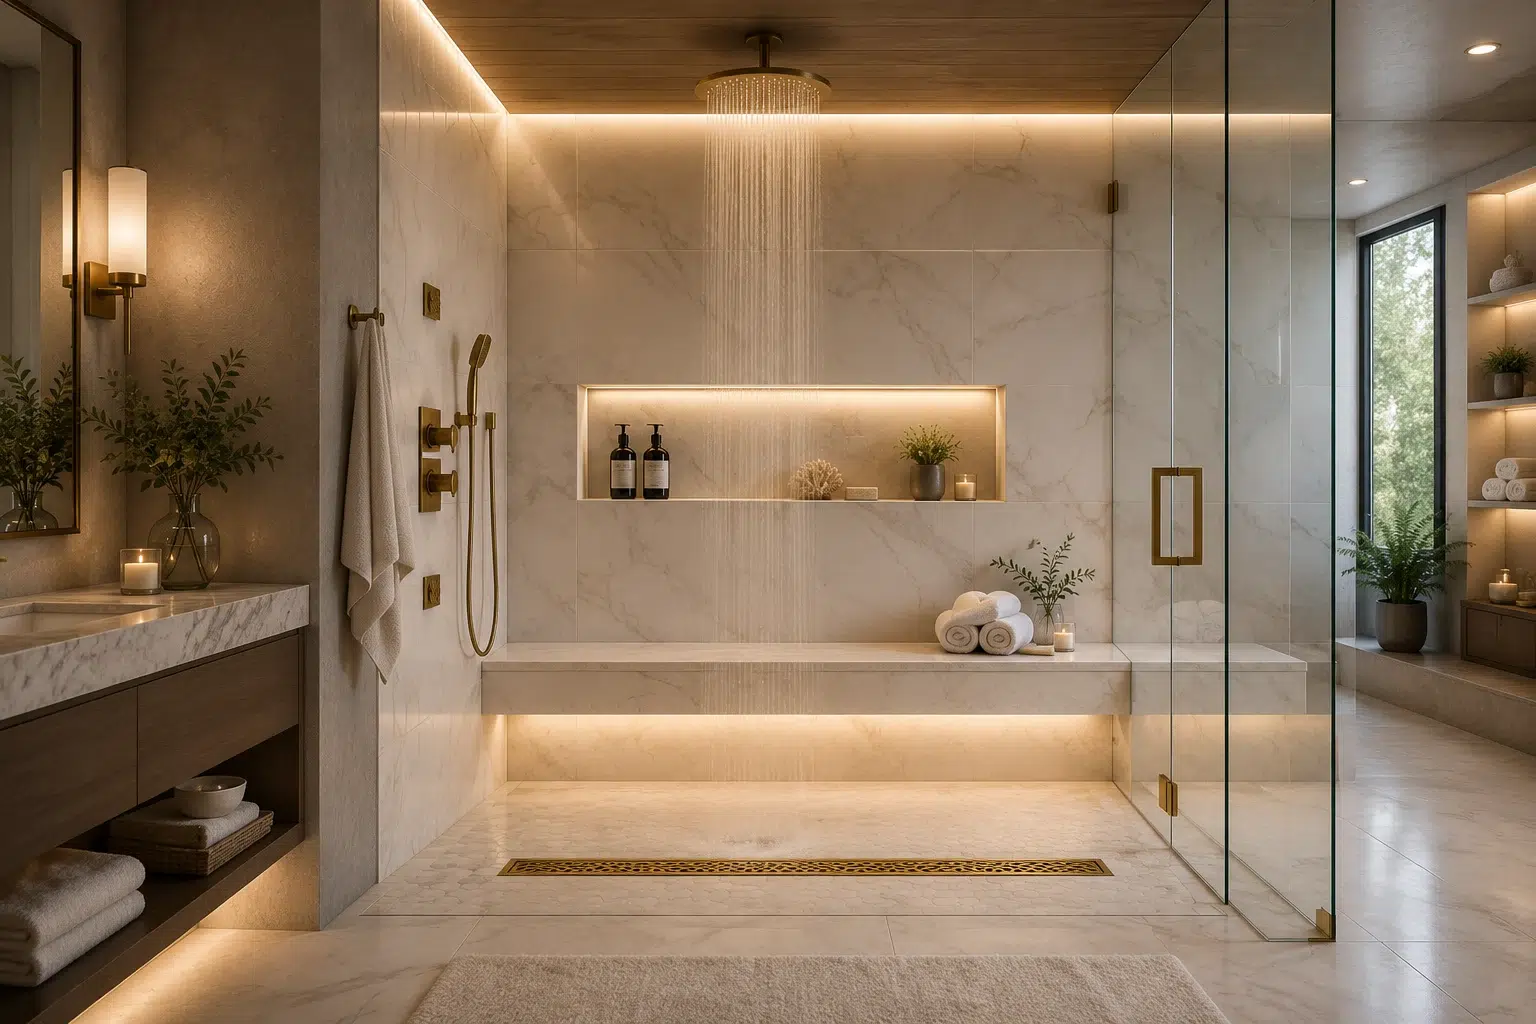
When you’re installing integrated LED lighting in a wet zone like under a shower bench, you can’t just use any light strip. You must use a waterproof system with an IP67 or IP68 rating, which means it’s fully protected against water immersion. The lighting should be housed in a sealed, waterproof channel with a diffused cover to create that smooth glow and prevent water from ever reaching the electrical components. This is a job for a licensed electrician who understands bathroom-specific code requirements.
2. Curbless Shower and Freestanding Tub with Gray Wood-Look Tile
The visual harmony here comes down to a simple formula: 70% unifying tile + 20% sculptural white + 10% metallic accents. The gray wood-grain porcelain tile runs across the floor and up the walls, creating a cohesive backdrop that makes the room feel larger. The crisp white of the freestanding tub and toilet pop against this neutral base. Finally, polished chrome fixtures add just enough shine to feel clean and modern. You could swap the gray for a warmer wood tone and the chrome for brass, and the successful balance would remain.
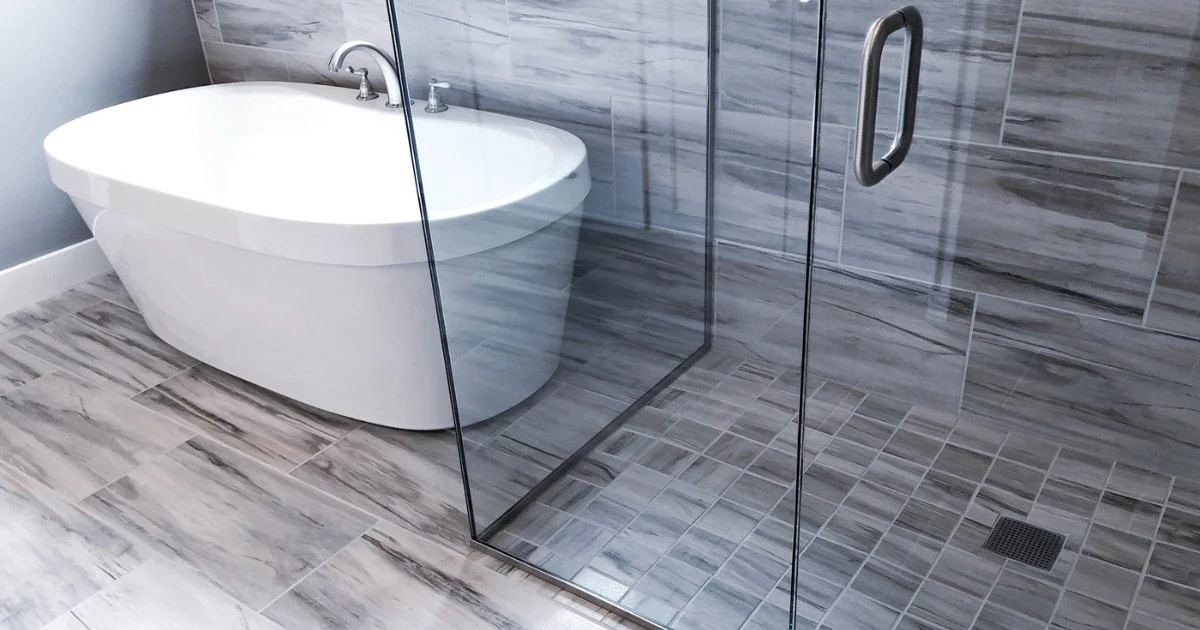
Placing a freestanding tub right next to a glass-enclosed shower looks stunning, but think about the practicalities. Water from the shower will inevitably splash onto the glass and potentially the side of the tub. This means you’ll be wiping down not just the inside of the glass but also the outside and the tub surface to prevent water spots, especially if you have hard water. It’s not a dealbreaker, but be honest with yourself about whether you’re up for that extra bit of daily maintenance to keep it looking pristine.
3. Opulent Wet Room with Full-Height Marble Slabs
- Full-Height Marble Slabs (Materials & Install): $18,000 – $35,000
- Floating Concrete Vanity & Vessel Sink: $3,000 – $7,000
- Brushed Gold Fixtures (Shower, Faucet): $1,500 – $4,000
- Backlit Pill Mirror & Lighting: $800 – $2,500
- Dark Marble Flooring & Waterproofing: $4,000 – $9,000
- TOTAL: $27,300 – $57,500+
- Budget alternative: Get a similar vibe with large-format porcelain slabs (like those in Idea #1) instead of real marble to save 50-60% on the wall treatment.
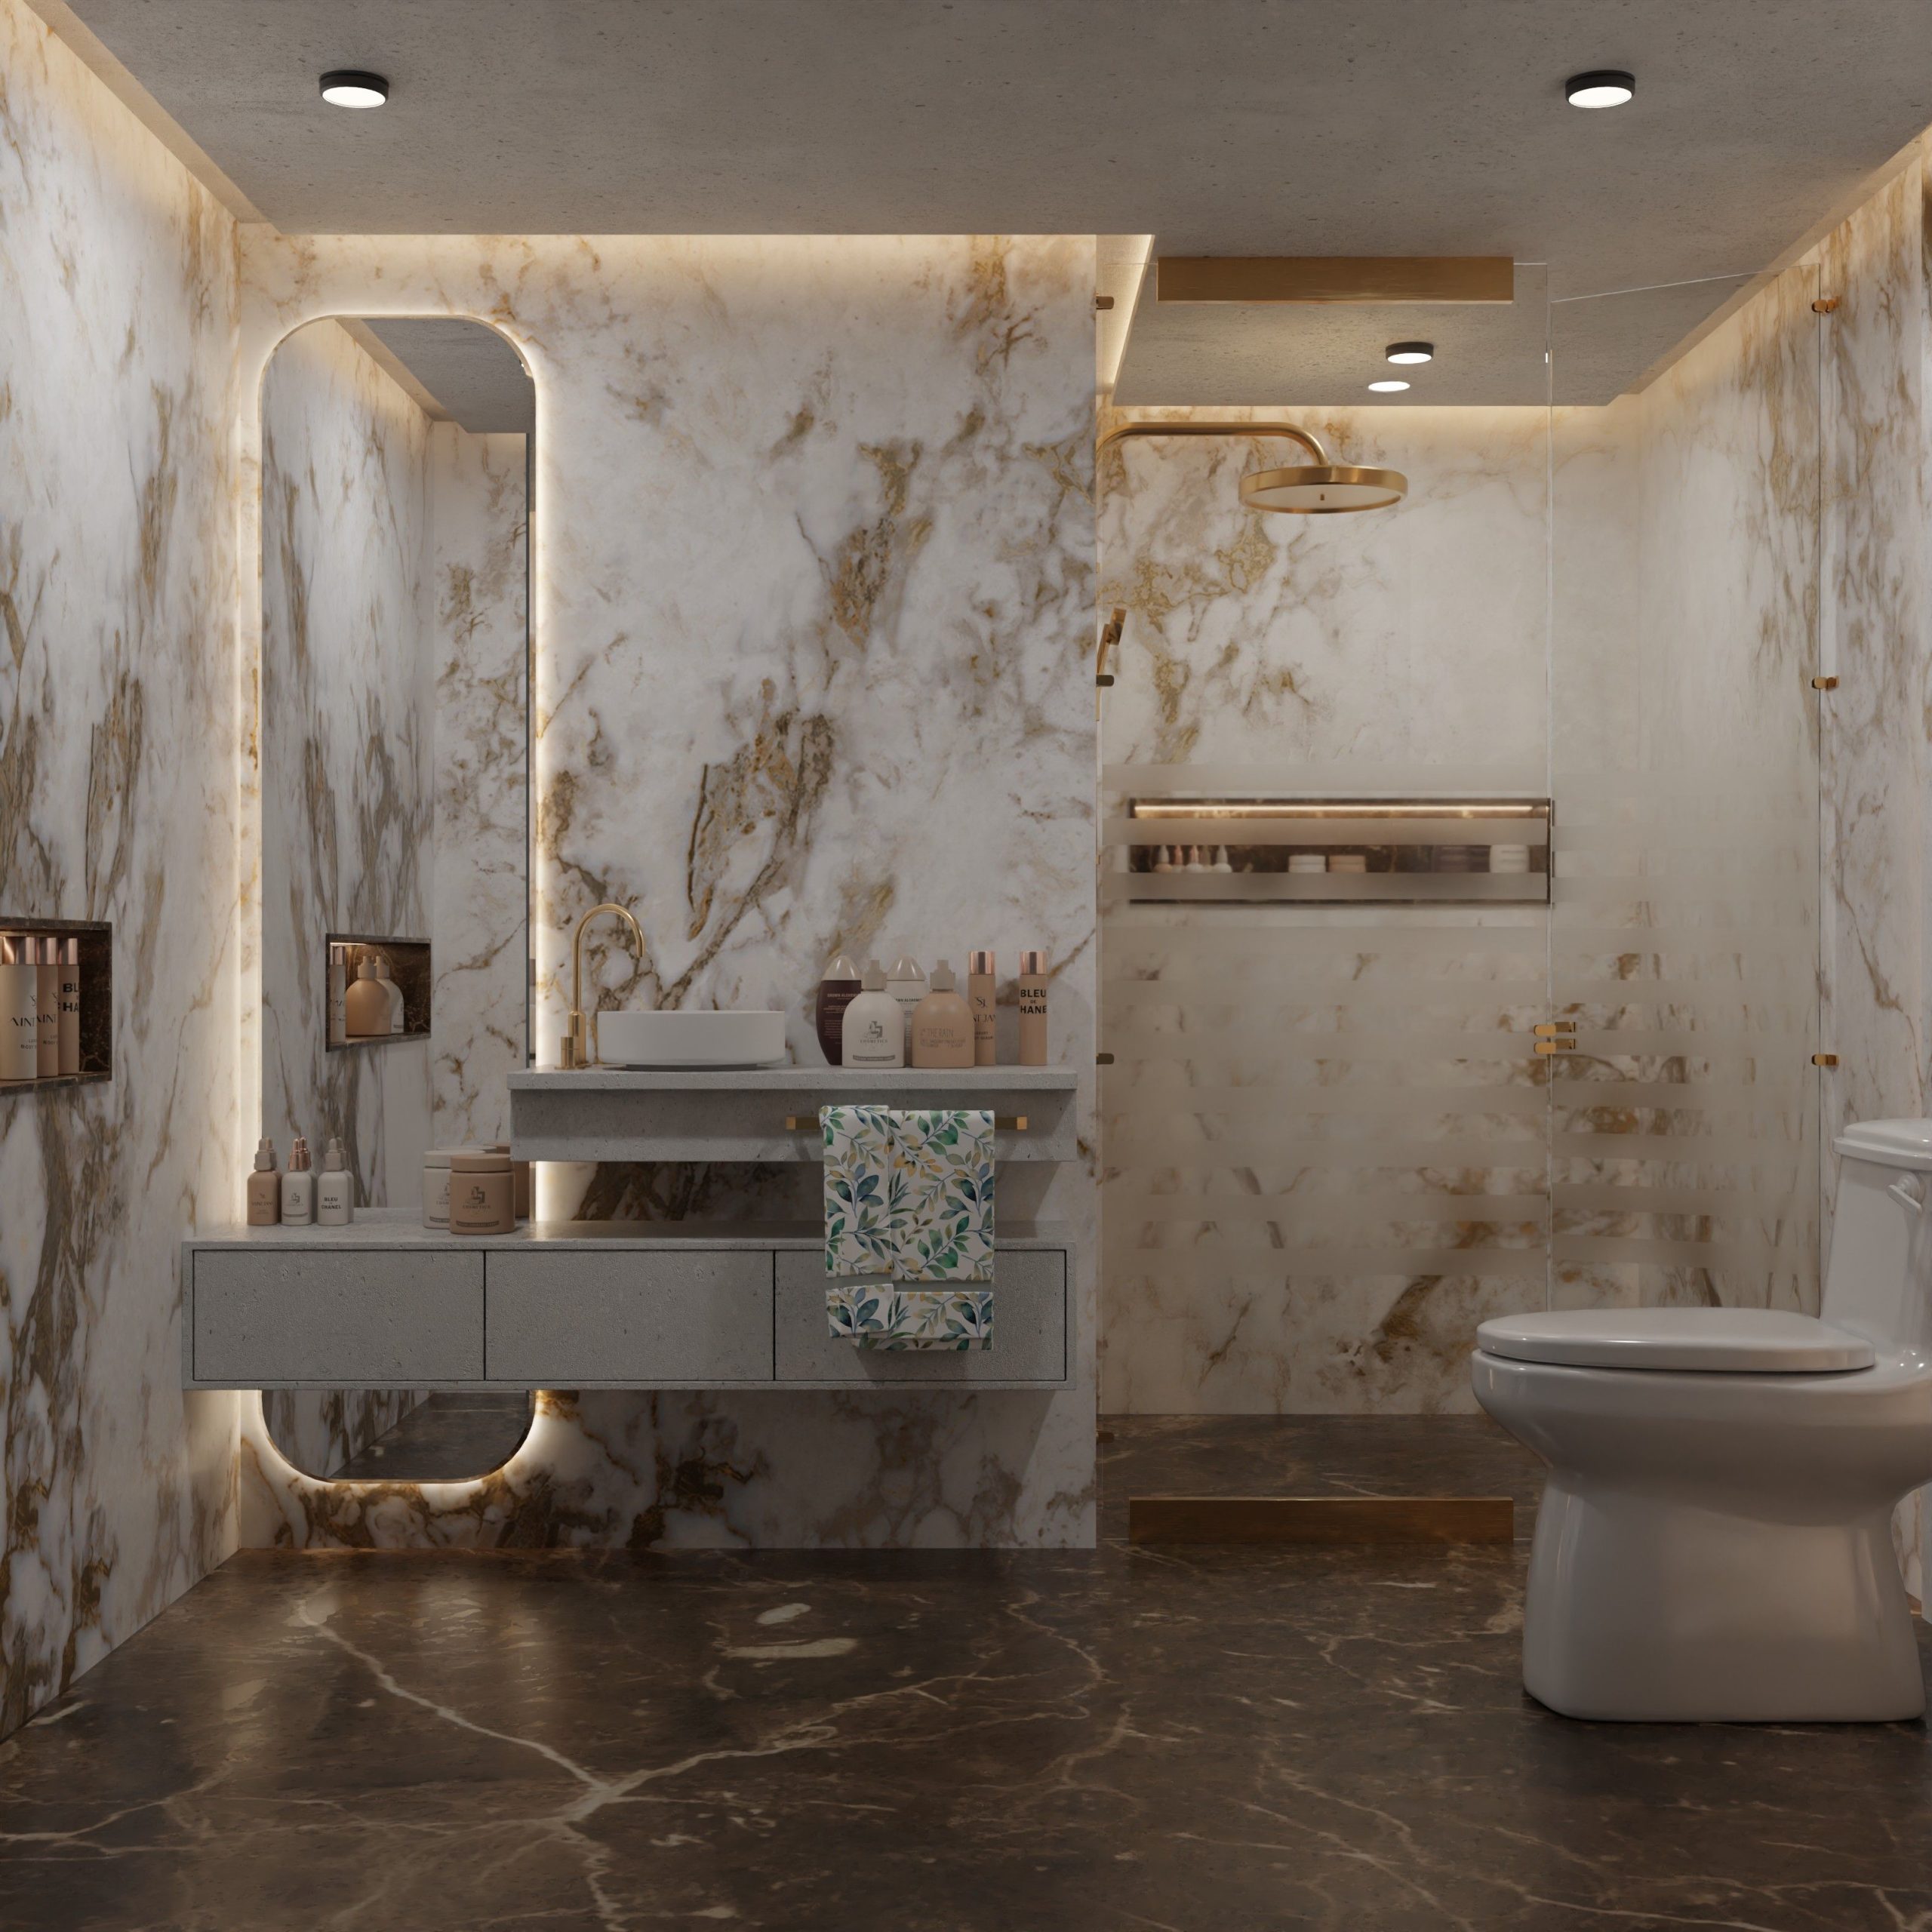
The single element that defines this entire space is the use of full-height, bookmatched marble slabs on the walls. Removing them would completely change the character of the room from opulent and monumental to just another nice bathroom. Unlike tile, which has grout lines that create a grid, these massive, continuous sheets of stone make the walls feel like art. The seamless vertical veining draws the eye upward, creating a sense of grandeur and turning a functional room into a breathtaking statement of luxury.
4. Minimalist All-White Bathroom with a Black-Framed Shower Enclosure
You don’t need a custom budget to get this high-contrast, minimalist look. The key is sourcing smart. A floating double vanity can be achieved with two IKEA GODMORGON cabinets ($200-$300 each) topped with a custom countertop. Look for simple white vessel sinks from online retailers for under $100 apiece. The star of the show, the black-framed shower door, can be found at big box stores for $500-$900, a fraction of a fully custom version. Paired with classic, affordable large-format white tile, you can capture this serene vibe for a surprisingly reasonable cost.
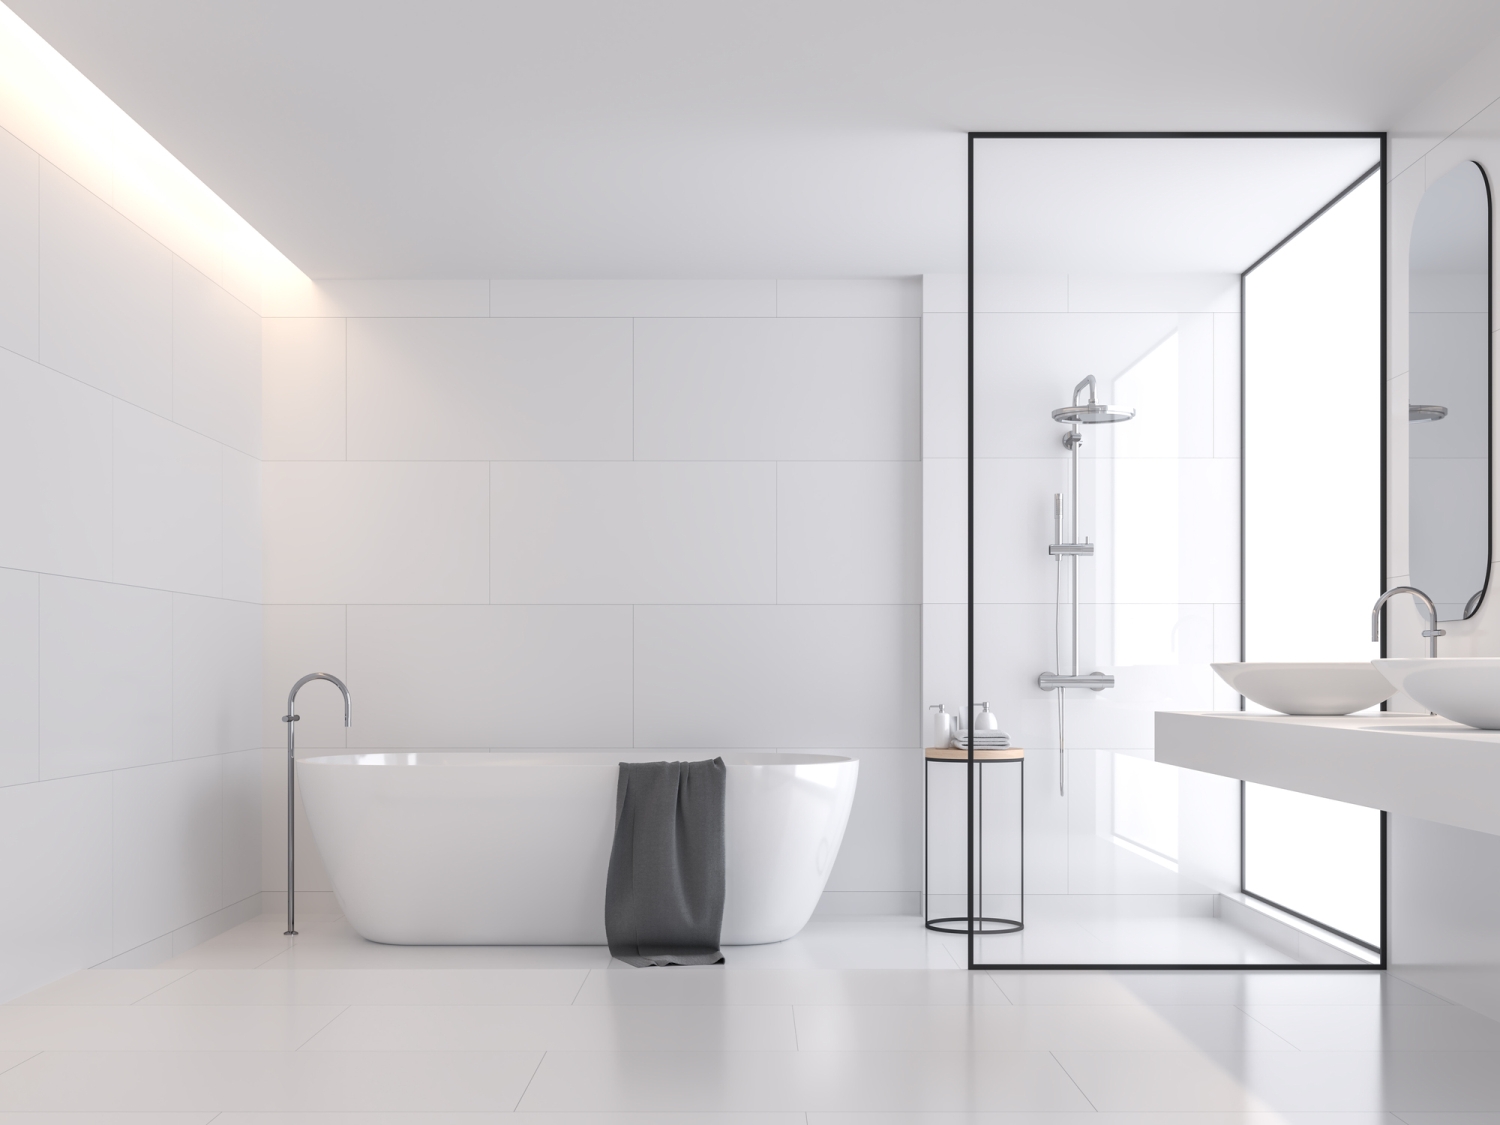
This room’s success hinges on the power of graphic contrast. The space is almost entirely enveloped in soft, matte white, which creates a quiet, gallery-like atmosphere. This makes the sharp, black lines of the shower frame and the draped towel pop with intention. It’s a disciplined choice. The design restrains color to let form and line do all the talking. The rounded mirrors and bathtub provide a soft counterpoint to the rigid grid of the shower enclosure, preventing the room from feeling too sterile or harsh.
5. Minimalist Curbless Shower with a Single Glass Partition
This ultra-clean look is perfect for medium-sized bathrooms, typically ranging from 75 to 120 square feet. The continuous floor tile and single, fixed glass panel create an uninterrupted sightline, making the room feel much larger and more open than it is. It requires a shower area at least 60 inches long to help contain water with just a single pane of glass. A ceiling height of at least 8 feet is ideal to accommodate the scale of the large-format tiles and prevent the space from feeling squat. For a much larger wet room concept, see Idea #8.
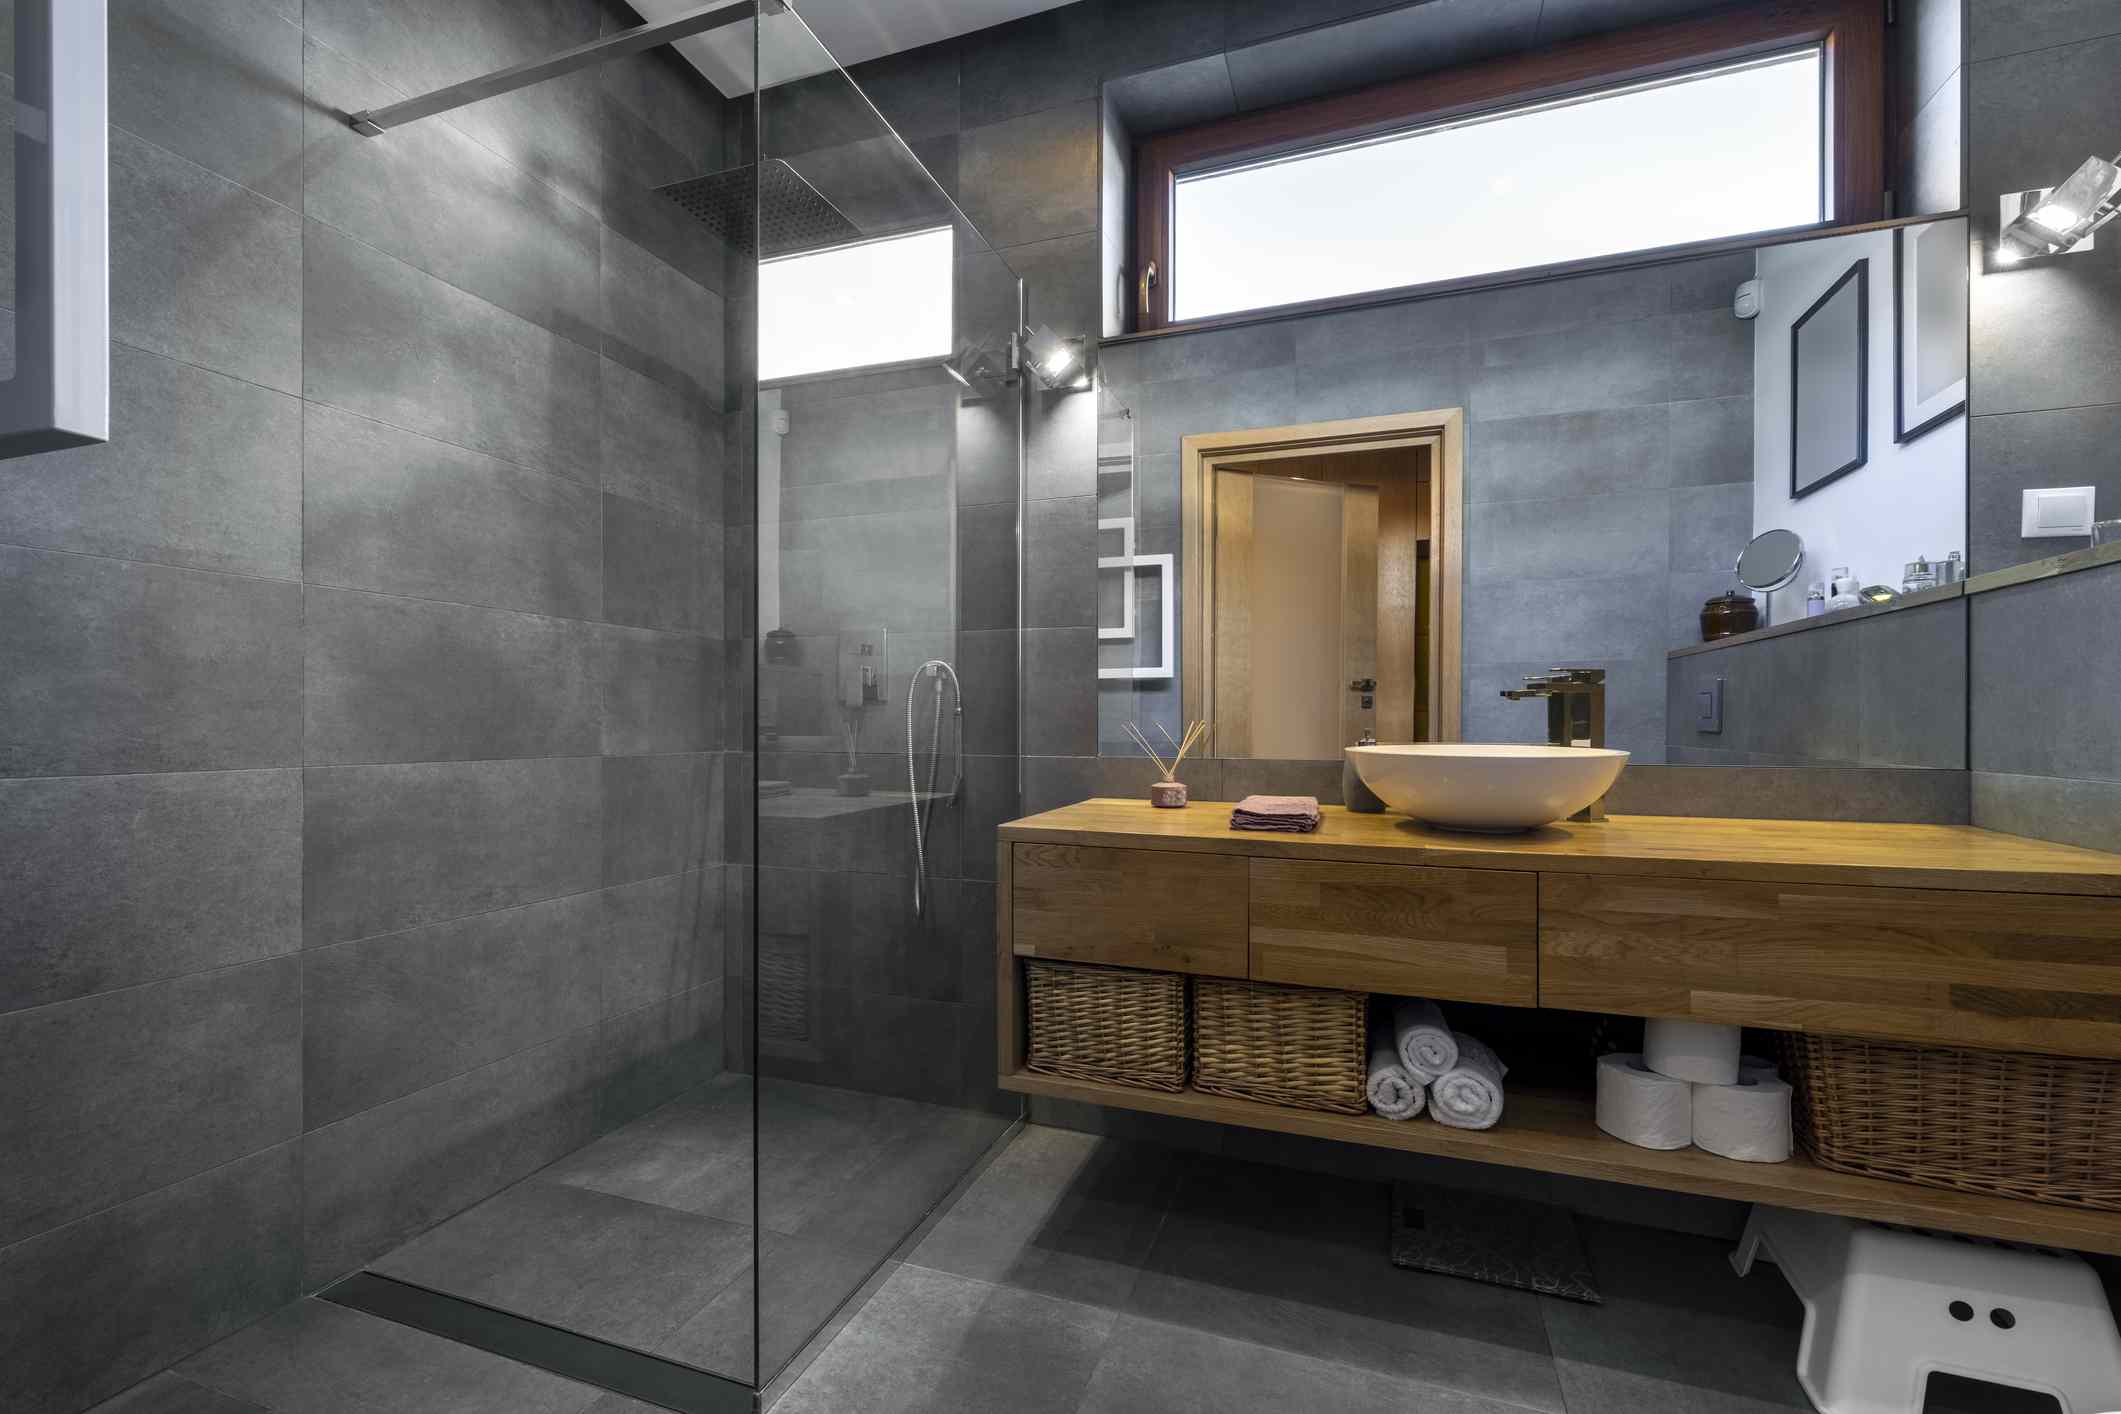
To minimize water splashing out of a shower with only a single glass panel, the panel’s length is critical. As a rule of thumb, the glass partition should cover at least two-thirds of the length of the shower area. So, for a 60-inch-long shower, you want a fixed panel that is at least 40 inches long. For extra protection without adding a door, consider placing your showerhead on the opposite wall, aimed towards the tiled back wall rather than towards the opening. This simple change can dramatically reduce splash.
6. Sleek Curbless Shower with a Dark Floating Double Vanity
A floor-to-ceiling glass shower and a black marble countertop are the definition of sleek, but they demand a commitment to cleaning. Squeegee that glass after every single use—no exceptions—if you want to avoid a permanent film of water spots and soap scum. For the black marble, use a pH-neutral stone cleaner and wipe up water immediately. Acidic products (like some cleaners or even lemon juice) can etch the surface, and standing water will leave mineral deposits that are very noticeable on a dark, polished finish.
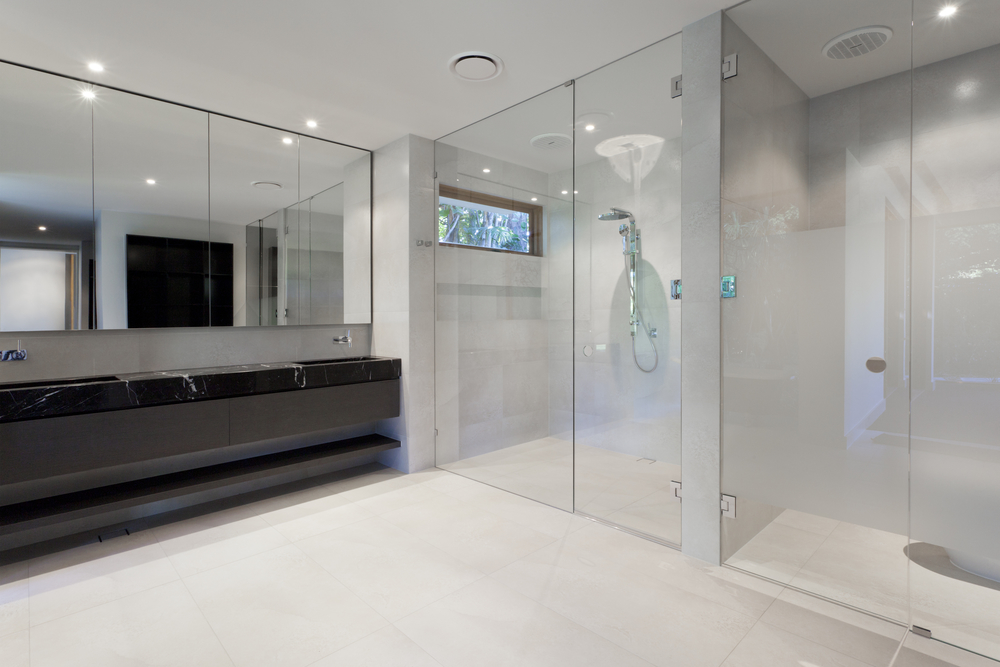
This look is a study in tonal balance. The formula is roughly 60% light neutral + 30% dark anchor + 10% reflective surface. The light gray large-format tiles provide a soft, neutral envelope for the majority of the space. The dark floating vanity and black marble countertop act as a strong visual anchor, grounding the room. Finally, the polished chrome fixtures and massive glass panels bounce light around, adding a layer of brightness and sophistication that keeps the gray and black from feeling too heavy or somber.
7. Bright Curbless Shower and Tub Combo with Tiled Bench
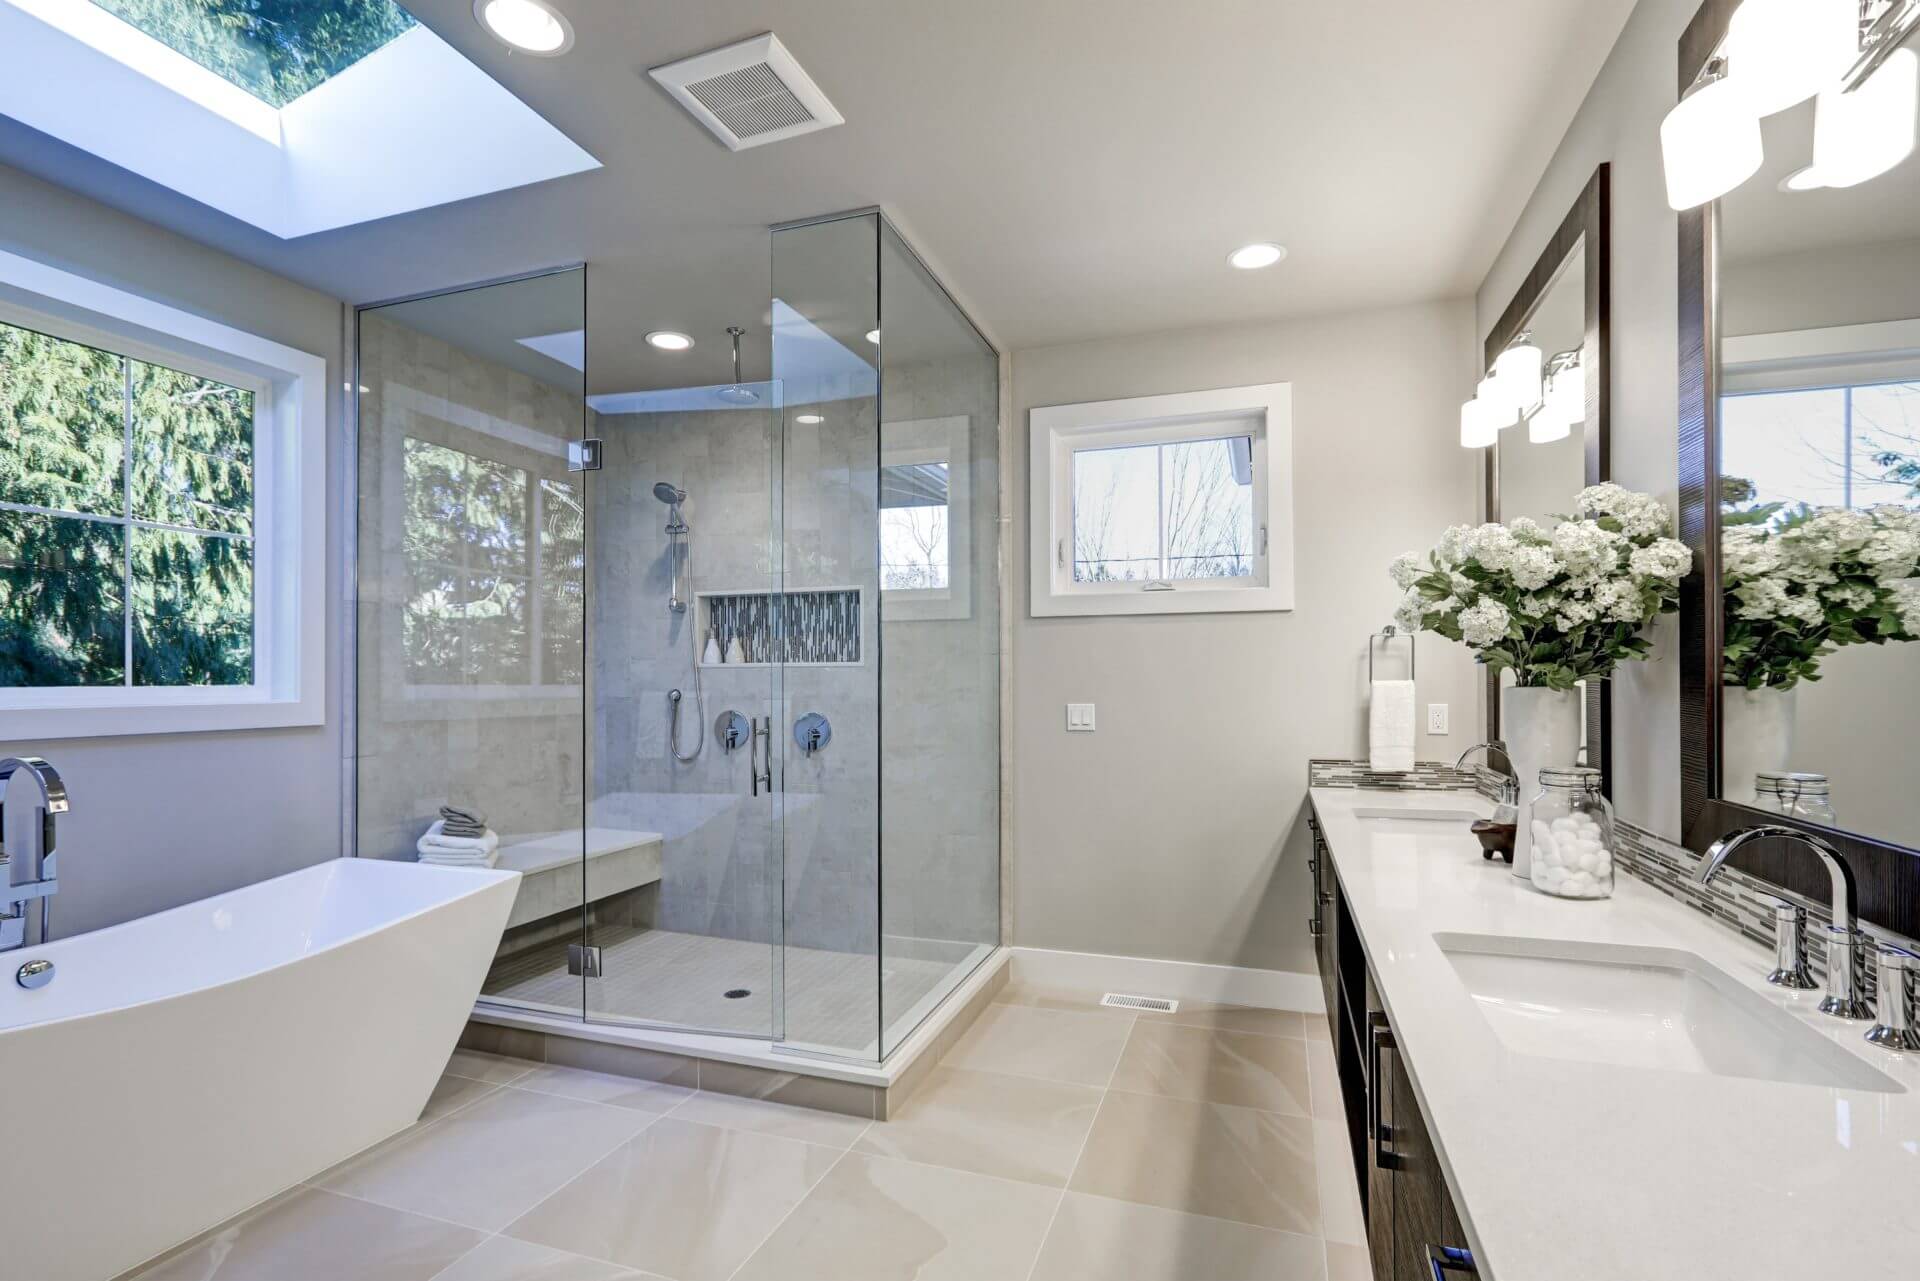
The single most important decision in this design was to run the same large beige floor tile from the main bathroom area, across the curbless entry, and up onto the face of the built-in shower bench. This simple move is what makes the entire layout feel so integrated and custom. It visually connects the spaces, making the shower feel like a natural extension of the room rather than a separate cubicle. Without that continuous tile, the bench would just be a box; with it, it’s a seamless piece of architecture.
- Confirm your floor joist direction: For a curbless design, the subfloor often needs to be lowered in the shower area. This is much easier if the joists run parallel to your desired slope. Check this before you get your heart set on a specific layout.
- Waterproofing is non-negotiable: Have a detailed conversation with your contractor about their waterproofing method (e.g., Schluter-KERDI, RedGard). A curbless system requires meticulous, comprehensive waterproofing that extends well beyond the shower footprint.
- Plan for niche and bench framing: That built-in bench and recessed niche need to be framed and waterproofed before any cement board goes up. Decide on their exact size and location early in the process.
8. Luxurious Marble Wet Room with Freestanding Tub Inside the Shower
The concept of placing a freestanding tub inside a large, glass-enclosed shower area—creating a true “wet room”—is a top-tier trend driven by a desire for the ultimate home spa. It’s a move straight out of luxury hotels and spas. On Pinterest and Instagram, this look signifies a departure from purely functional bathrooms towards creating personal wellness sanctuaries. It’s practical, too: all splashes and drips from the tub are contained within the easy-to-clean wet zone. It’s the peak of bathroom luxury for 2026.
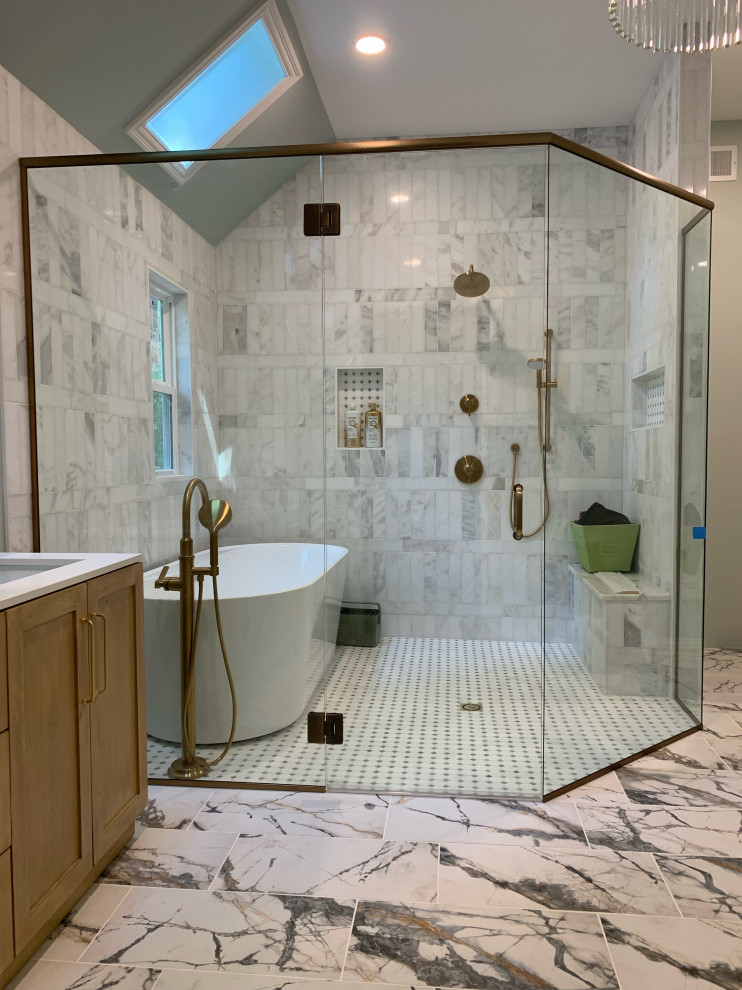
A wet room of this scale is a major construction project, not a simple remodel. The entire room’s subfloor needs to be sloped perfectly, and comprehensive waterproofing must extend up every wall to the ceiling. This is significantly more complex and expensive than waterproofing a standard shower stall. If not executed flawlessly by an experienced professional, you risk catastrophic water damage to the structure of your home. This is a look you commit to fully, with a budget to match. For a more conventional tub-and-shower layout, see Idea #2.
9. High-Contrast Bathroom with Black Hexagon Floor and Subway Tile
This room is all about smart, timeless contrast. The sharp, graphic quality of the black hexagon floor tiles provides a bold, modern foundation that anchors the entire space. It’s a classic shape given a contemporary edge. The glossy white subway tile on the walls offers a clean, light-reflecting counterpoint, preventing the dark floor from overwhelming the room. The natural wood vanity injects necessary warmth and texture, bridging the gap between the cool black and white elements. It’s a lesson in balancing graphic pattern, texture, and color.
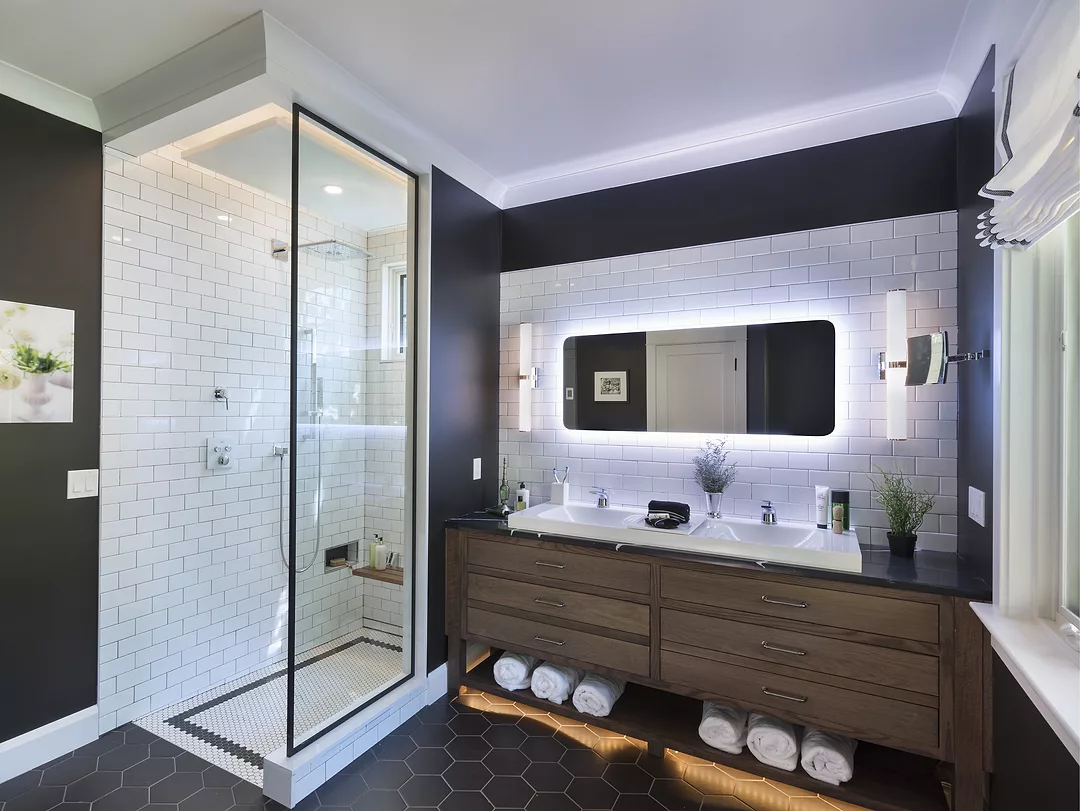
The core elements here are classics, making this look very achievable on a budget. Basic 3×6 white subway tile is one of the most affordable options available, often under $3 per square foot. Black hexagon porcelain mosaic tiles are also widely available from big-box stores like Home Depot or Floor & Decor for $5-$10 per square foot. For the vanity, check out Facebook Marketplace for a used mid-century dresser you can convert, or find affordable wood-look options at stores like Target or Wayfair to complete this stylish, high-impact look.
10. Marble-Look Shower Beside a Tub and Scalloped Mirror
When using a dominant tile like this large-format marble look, the key to a polished design is mixing scales. Notice how the large rectangular tiles on the wall create a serene, expansive feel. But on the shower floor, the scale shifts to a small mosaic. This isn’t just for looks; smaller tiles with more grout lines provide better slip resistance, which is crucial in a wet area. The small mosaic border on the wall is the element that ties the two scales together, showing the choice was intentional and creating a cohesive, professionally designed look.
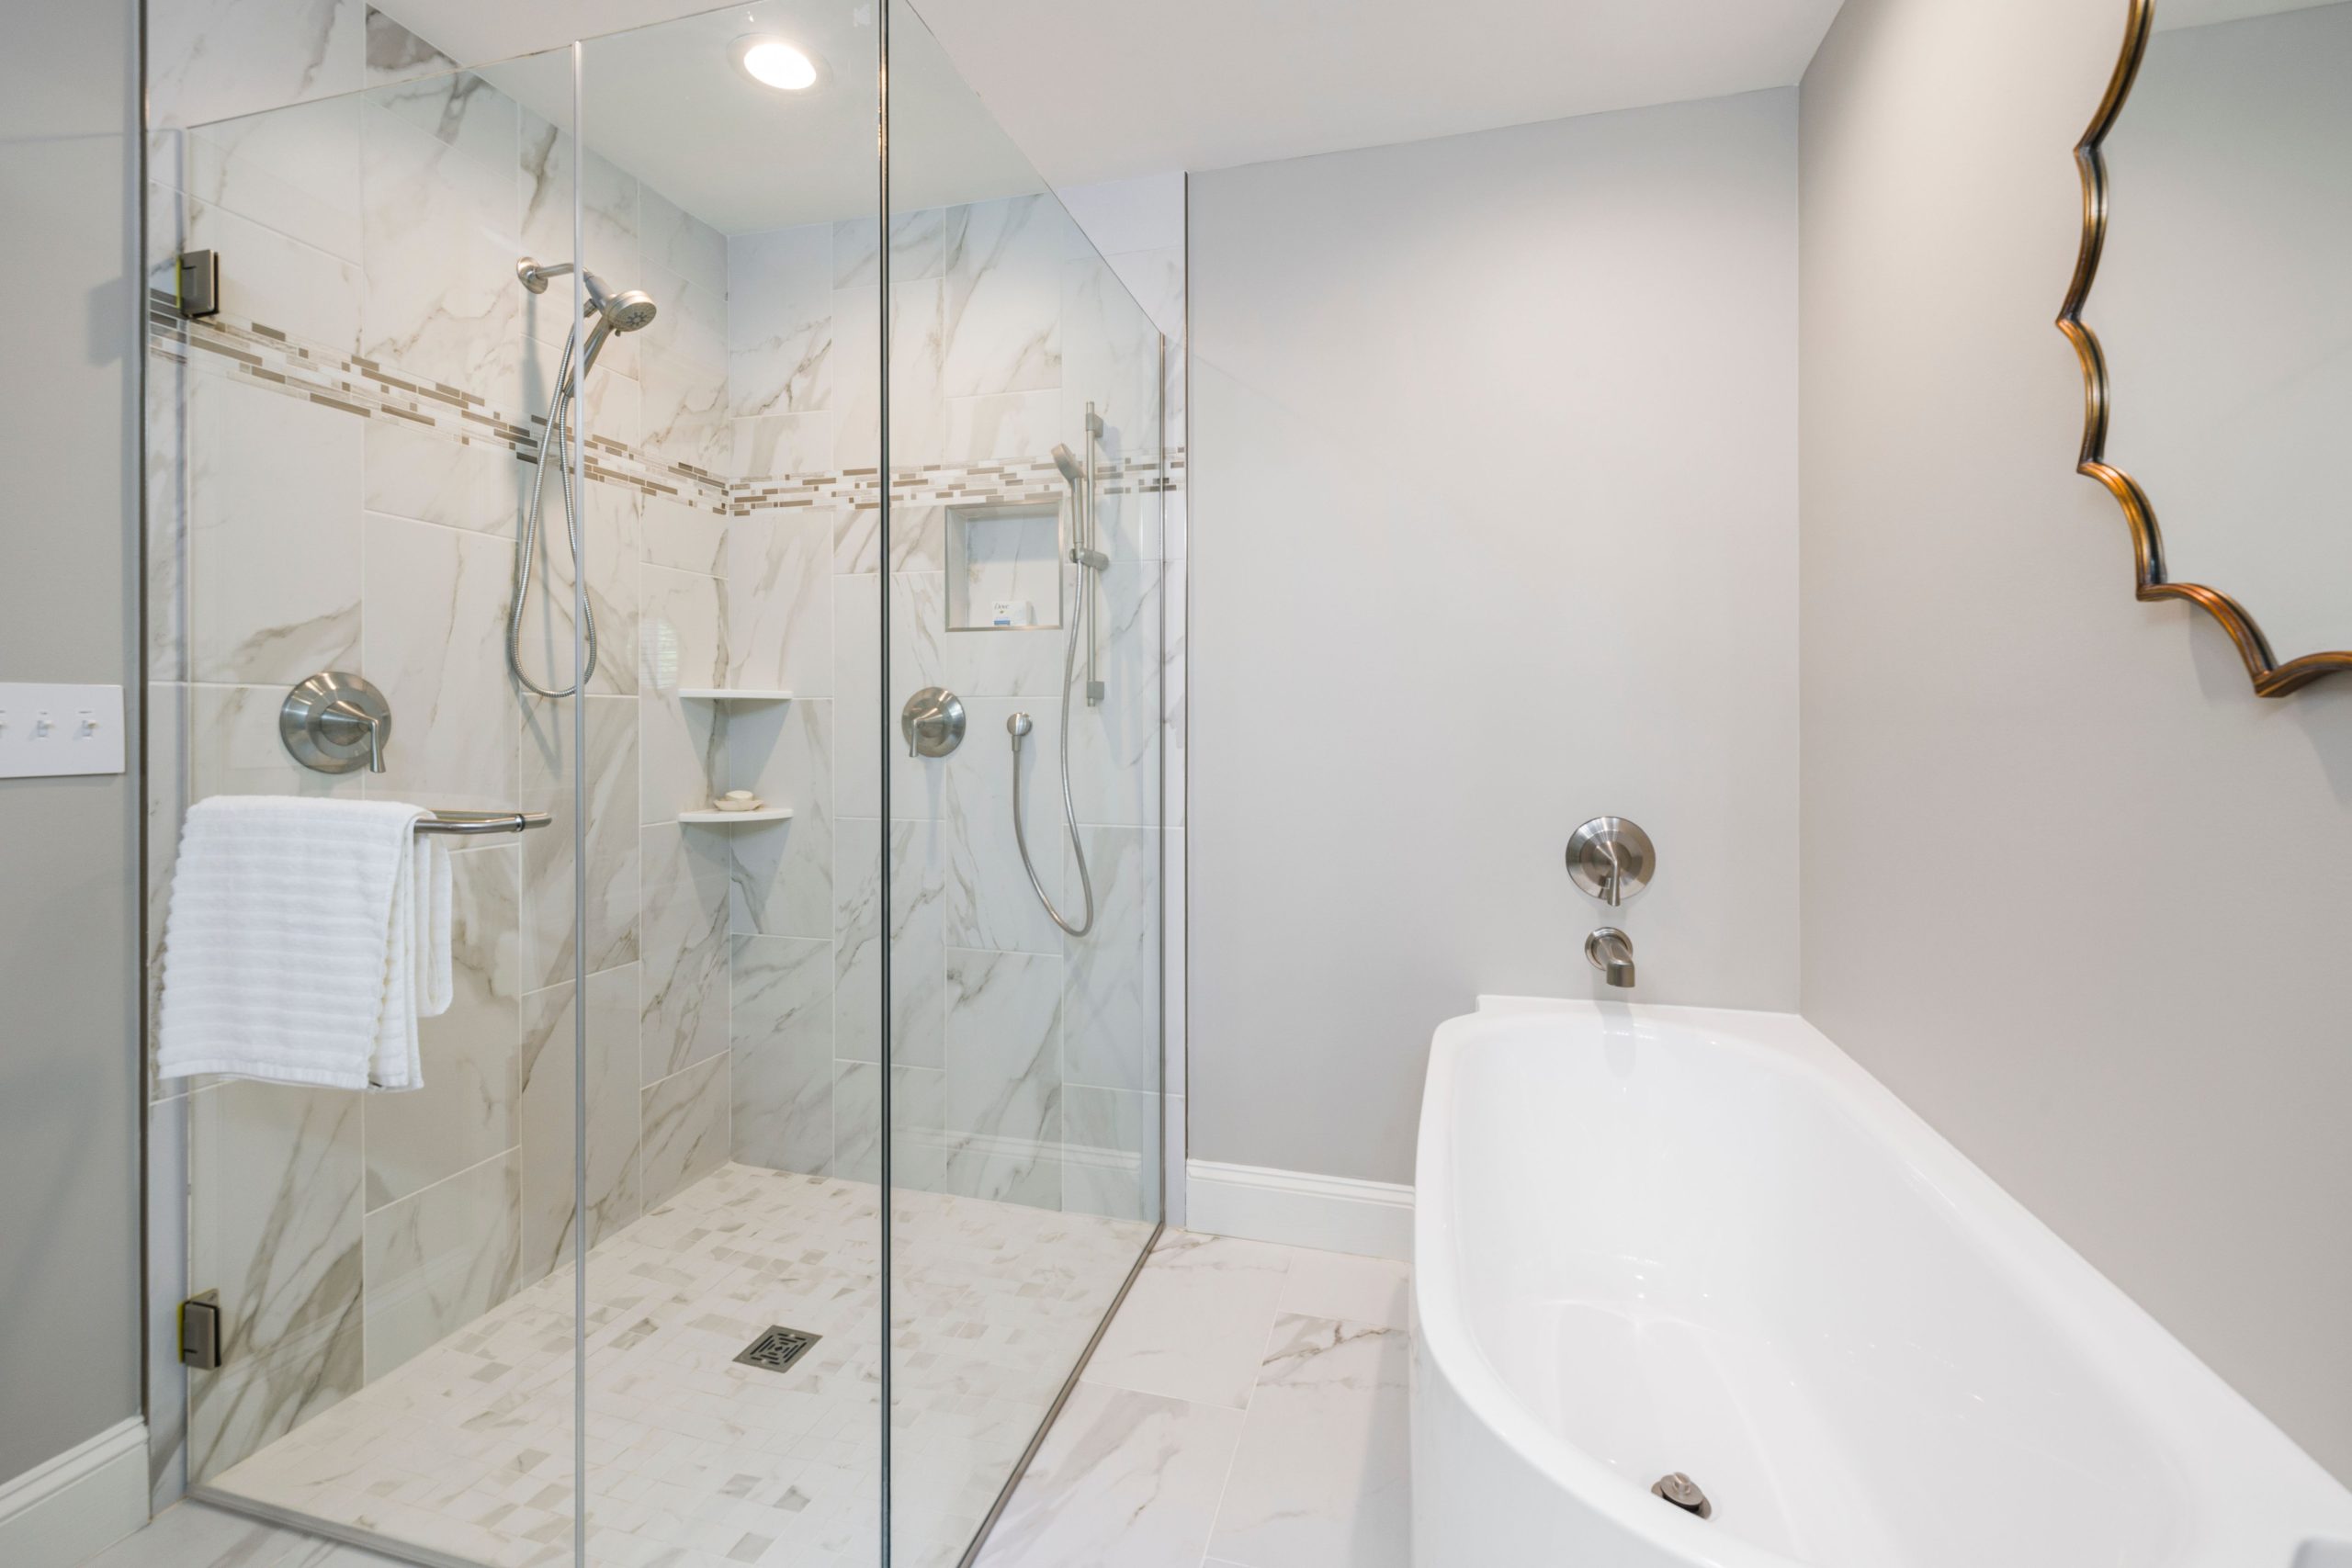
If you remove the scalloped wall mirror, this is just a very nice, clean, contemporary bathroom. With it, the space has personality. The mirror’s soft, curved, decorative shape is a deliberate departure from the straight lines and hard right angles of the tile and glass enclosure. It introduces a touch of softness and whimsy, preventing the all-white-and-gray palette from feeling too clinical. It’s a reminder that even in a functional space, one well-chosen decorative element can elevate everything.
11. Stone-Tiled Curbless Shower with an Integrated Linear Drain
Installing a linear drain is a job for a pro, but understanding the process helps. This is a simplified overview for a tile-in drain.
- Frame the subfloor: The floor joists under the shower are lowered to create the recess for the drain and the mortar bed slope.
- Install the drain body: The drain flange is secured to the subfloor and connected to the plumbing. The entire area is then waterproofed, sealing to the drain’s integrated flange.
- Create the slope: A mortar bed is laid, creating a single, gentle slope (1/4″ per foot) towards the drain. This is much simpler than the four-way slope needed for a center drain.
- Set the tile: Tile is laid over the mortar bed, and the tile-in drain cover is filled with a matching piece of tile for that seamless look.
This continuous, monolithic look works best in bathrooms that are at least 5 feet wide and 8 feet long. The uninterrupted flow of the large-format stone tile from the main floor into the shower needs some runway to be appreciated. In a very small or chopped-up space, the effect can be lost. This design is particularly effective in long, rectangular bathrooms, where the linear drain can be placed along the far short wall, emphasizing the room’s length and creating a clean, gallery-like feel.
12. Monolithic Travertine Shower with Brushed Brass Fixtures
Natural stone like travertine is gorgeous but requires care. Travertine is porous and must be sealed upon installation and then resealed every 1-2 years, especially in a shower. This prevents water from penetrating the stone and causing discoloration or damage. For cleaning, you must use a pH-neutral, stone-safe cleaner. Avoid vinegar, bleach, or any acidic or abrasive cleaners, as they will etch and dull the stone’s surface. That beautiful, earthy look is a commitment, but one many find worthwhile.
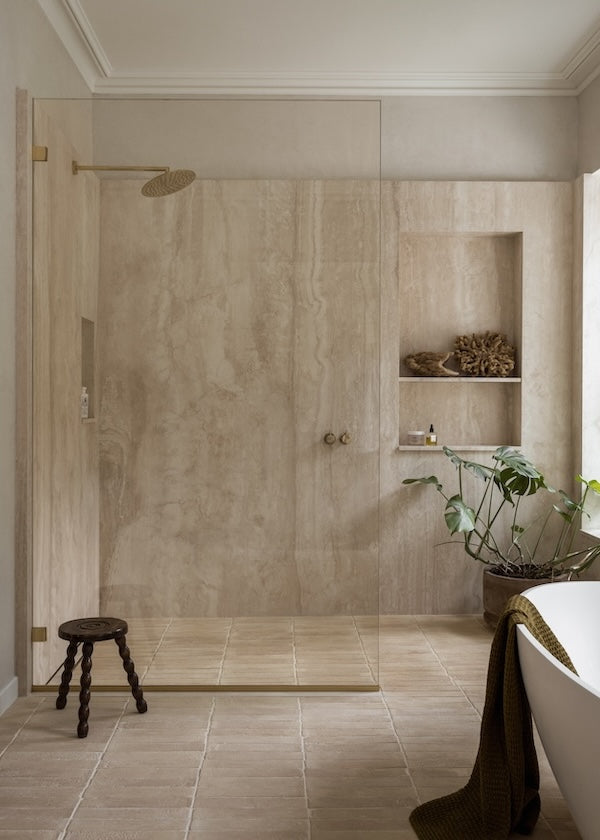
This design feels so serene because of its warm, harmonious palette and soft geometry. The beige travertine has a natural warmth that is perfectly complemented by the brushed brass fixtures—they share the same warm undertone. The choice of an arched recessed niche instead of a standard rectangle is a subtle but brilliant move. It softens the hard lines of the tile and glass, adding an organic, gentle curve that elevates the entire design and makes it feel custom and thoughtfully considered.
13. Walk-In Shower with a Textured Stone Accent Wall
The rich, layered feel of this bathroom comes from a deliberate mix of textures. The formula is roughly 40% smooth surfaces + 30% rough texture + 20% natural wood + 10% metal. The large white wall tiles and white basin are the smooth, clean base. The stacked stone accent wall in the shower provides a powerful, rough texture that adds depth and an organic feel. The light wood of the vanity and shelving unit injects warmth. Finally, the brushed metal of the fixtures and towel warmer adds a sleek, industrial touch.
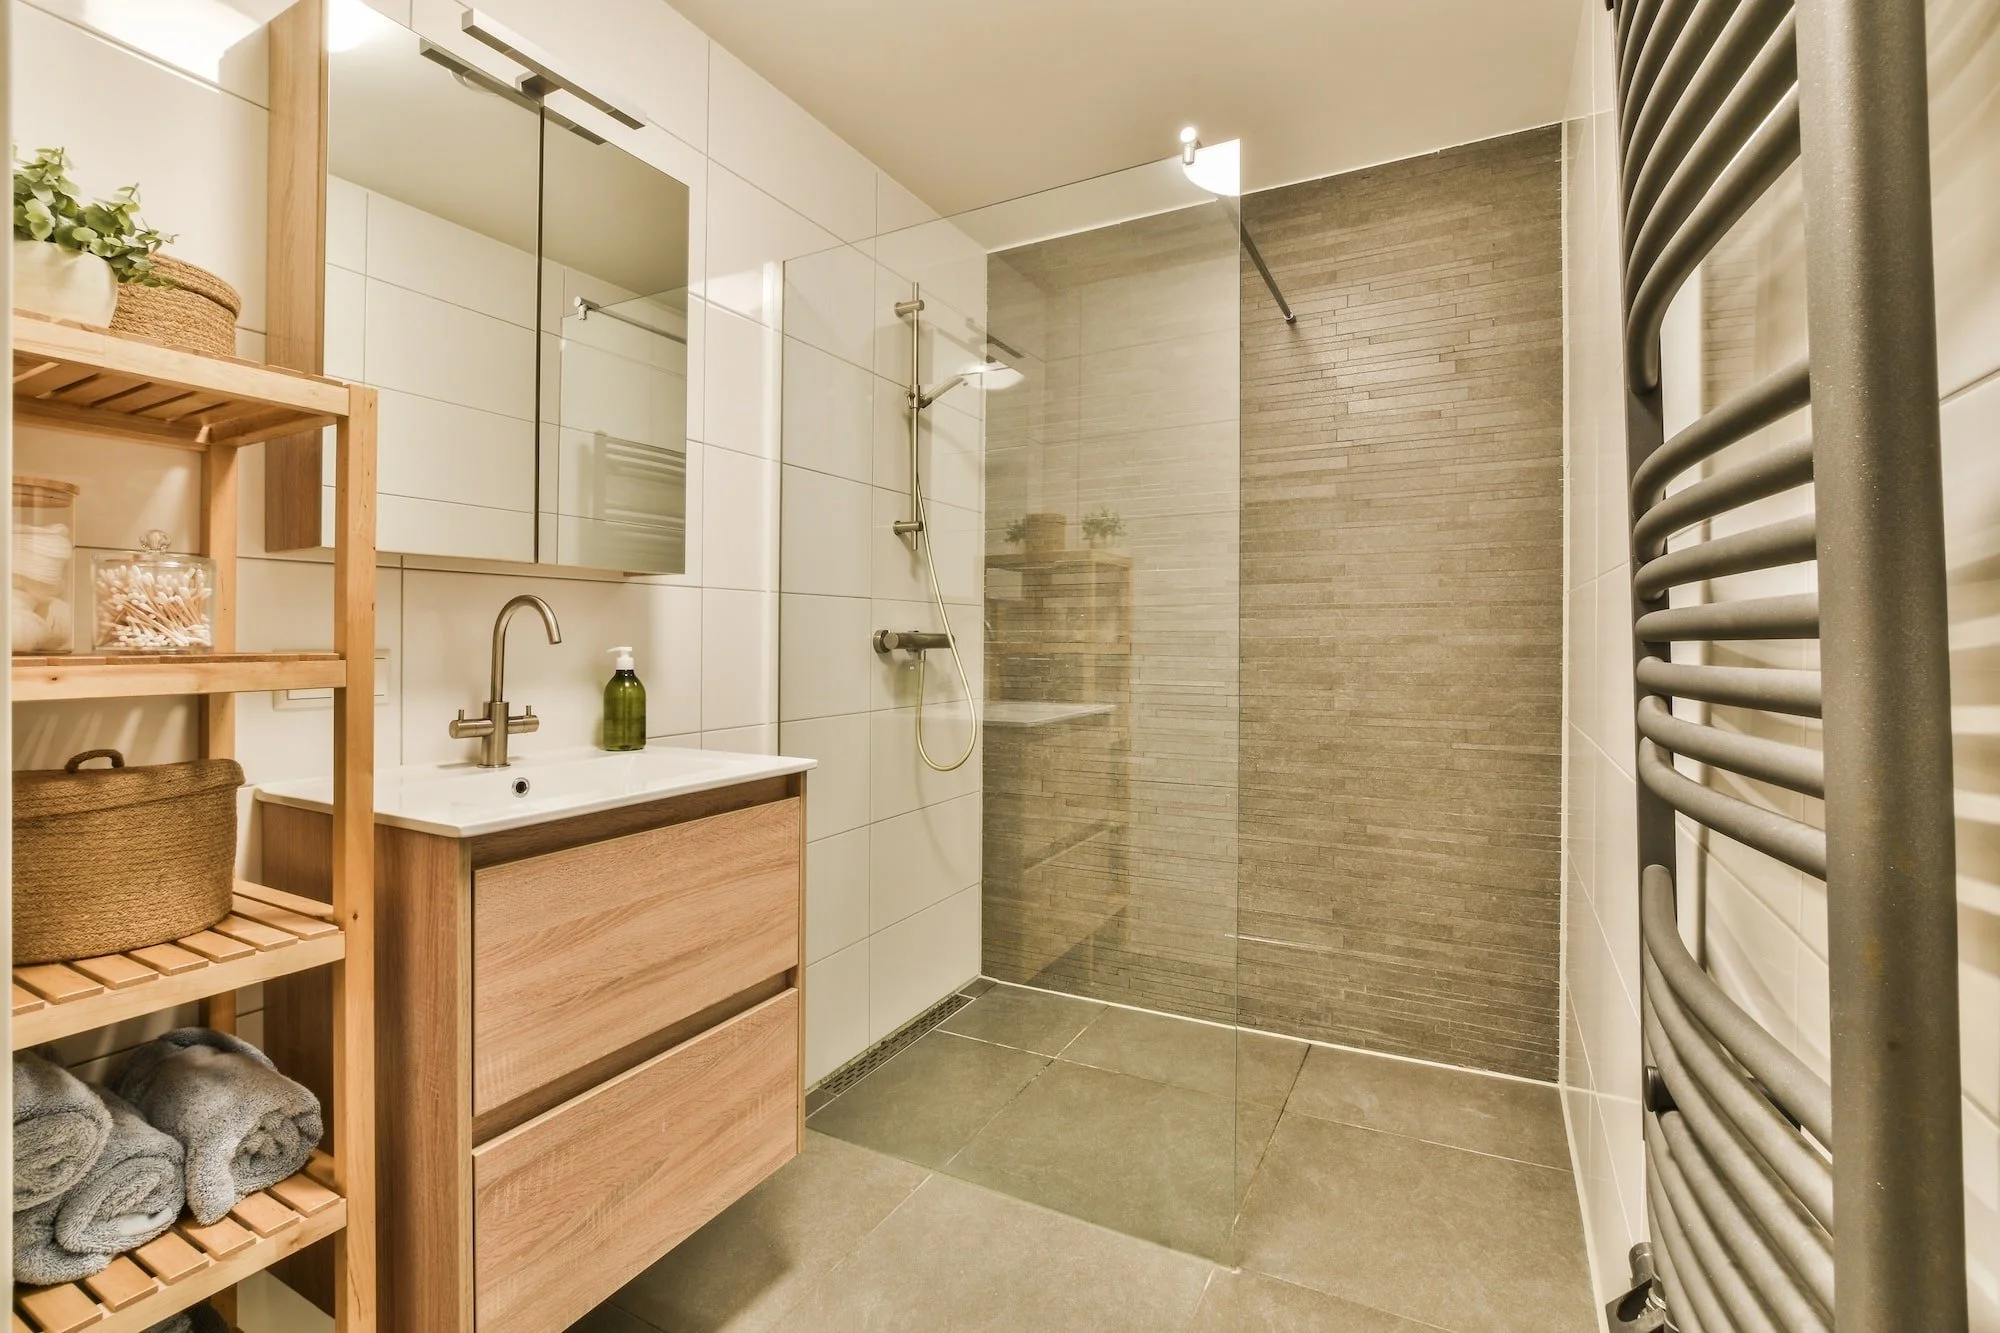
A stacked stone wall looks incredible, but it might be the single hardest surface to clean inside a shower. All those nooks, crannies, and rough surfaces are perfect little homes for soap scum, mildew, and hard water deposits. You can’t just wipe it down; it requires a brush and a lot of patience. Sealing it regularly is an absolute must. If you love the look but not the upkeep, consider a porcelain tile that mimics the look of stacked stone for an easier-to-clean alternative.
14. Minimalist Open Shower with Dark Slate Grey Tiles
The defining feature here is the bold, uncompromising use of a single material. By wrapping the entire space—walls and floor—in the same large-format, slate grey tile, the design achieves a dramatic, monolithic effect. It creates a dark, moody, cave-like sanctuary. This isn’t a light and airy bathroom; it’s an intentionally enveloping and serene space. Using different tiles would have broken the spell, but this singular choice creates a powerful, cohesive, and deeply calming atmosphere. Compare this to the high-contrast approach of Idea #4.
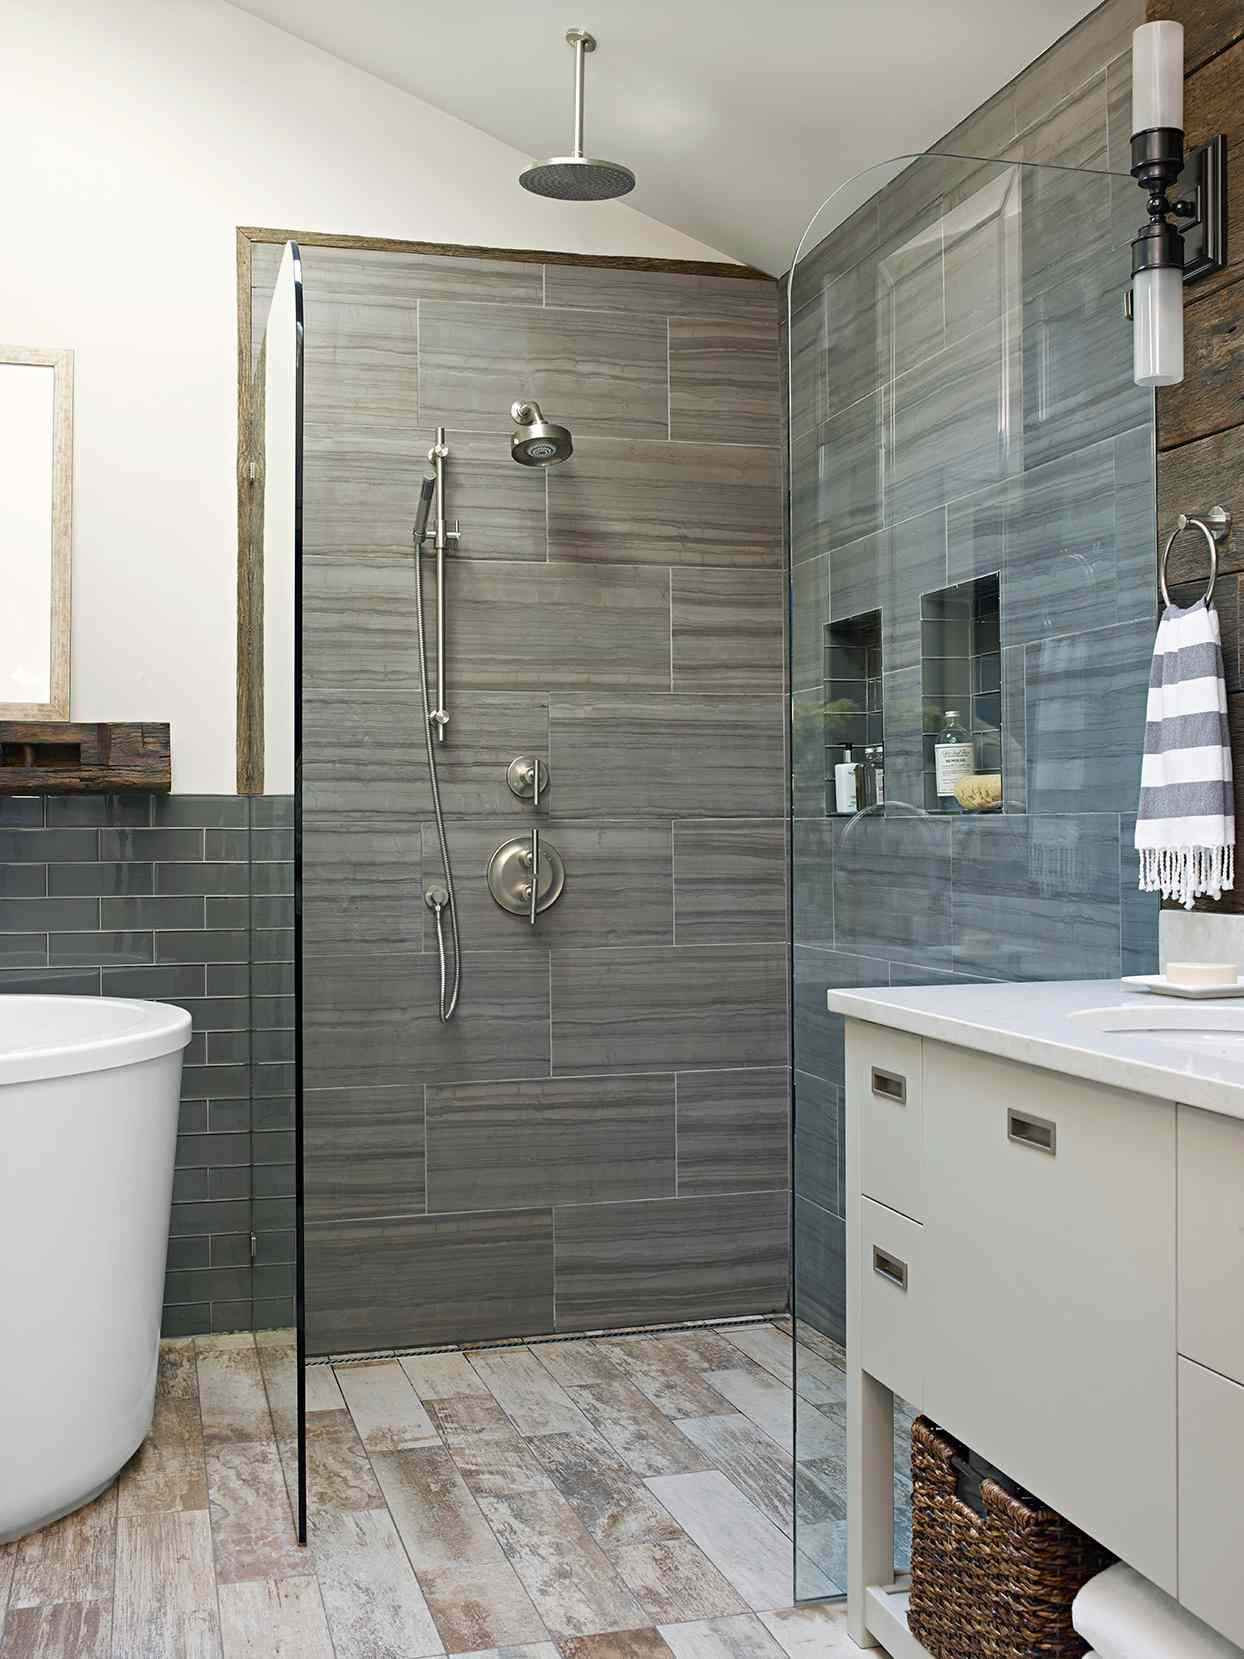
When designing a dark, moody shower like this one, lighting is everything. You need to layer your lighting to prevent it from feeling like a gloomy dungeon. A waterproof recessed can light directly over the shower area is essential for task lighting. Consider adding a second, wall-washing light that grazes the textured tile to highlight its surface and add depth. Finally, ensure the main bathroom area outside the shower is brightly lit to create a pleasant contrast and make the shower feel like a deliberate, cozy retreat.
15. Modern Curbless Shower with Mixed Marble Tiles and Ombre Floor
This shower is a masterclass in dynamic tile mixing. It works because it follows a few clear rules. First, a simple color palette of white, charcoal, and gray keeps the look cohesive. Second, it plays with orientation: the dark back wall tiles are laid vertically, while the white side wall tiles are horizontal, creating subtle energy. Finally, the hexagonal floor tile acts as a brilliant transition, using an ombre effect to blend the dark and light elements together. It’s playful yet incredibly sophisticated.
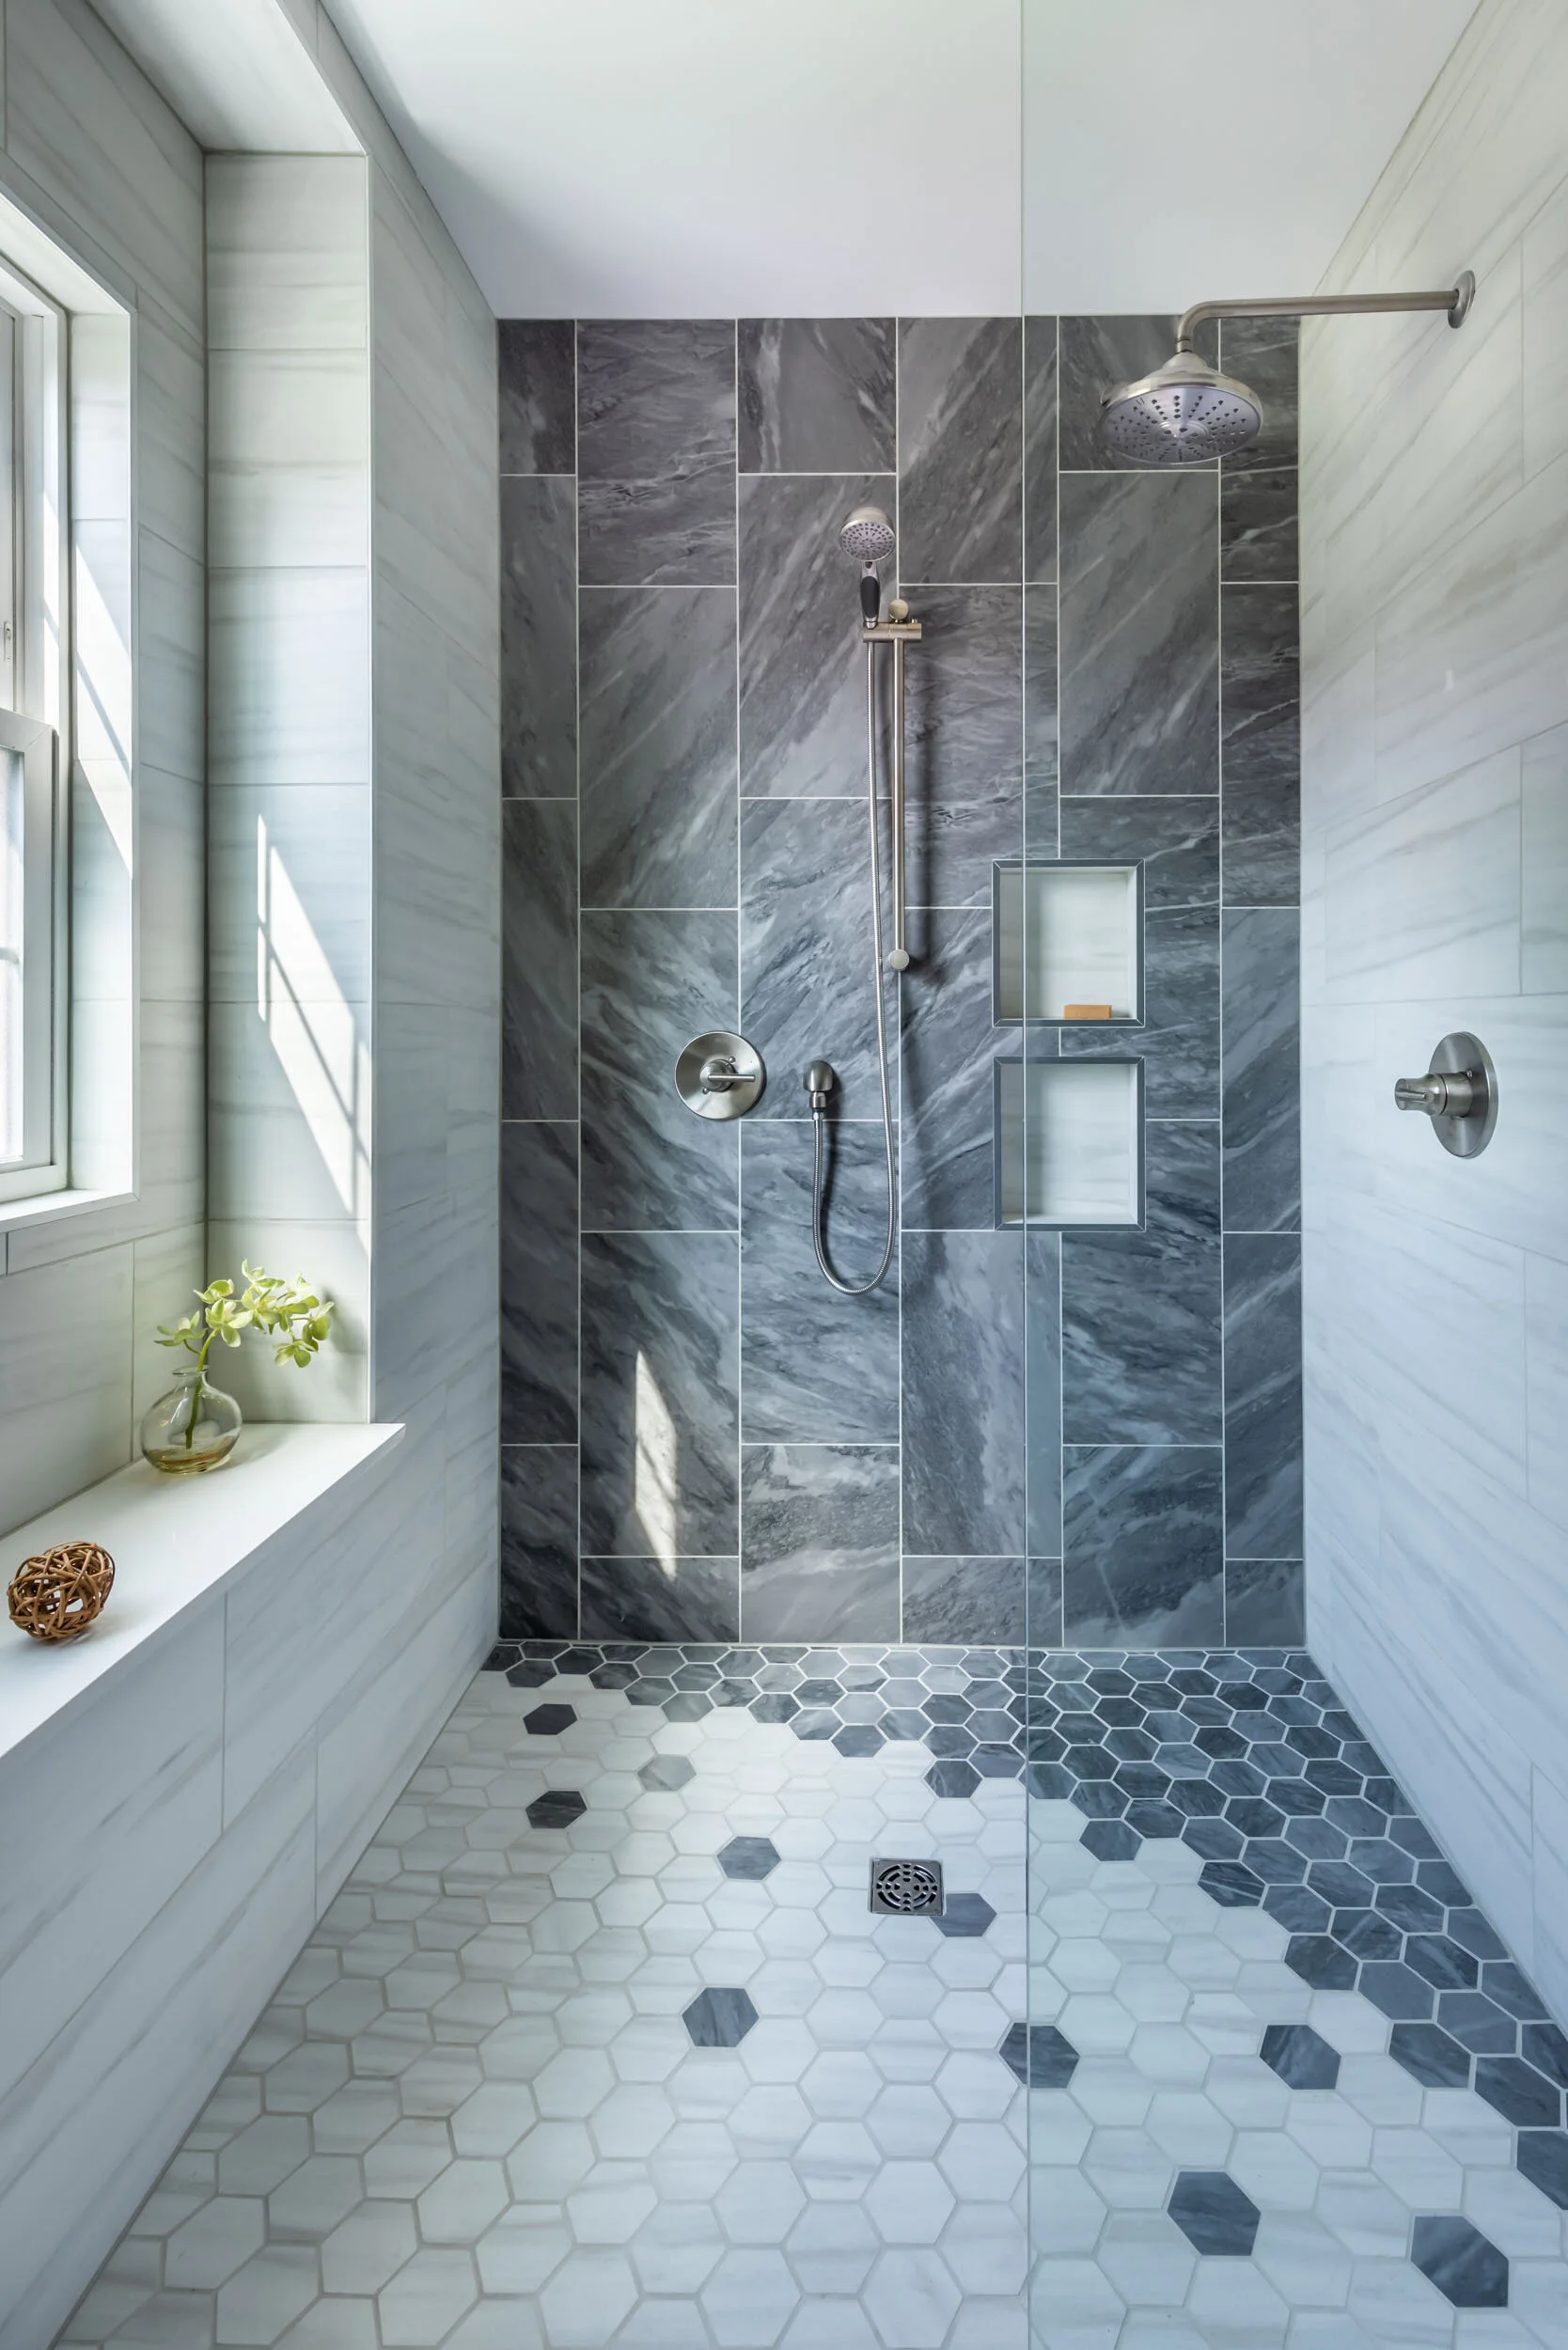
The intricate tile work is the main cost driver here. Labor for setting three different types of tile, especially the detailed ombre hex floor and vertical slabs, will be significantly higher than a standard job.
- Charcoal & White Marble Tile (Materials): $2,500 – $6,000
- Hexagonal Floor Tile (Materials): $800 – $2,000
- Intricate Tile Installation Labor: $5,000 – $10,000+
- Brushed Nickel Fixtures & Glass: $2,000 – $4,500
- Waterproofing & Prep: $1,000 – $2,500
- TOTAL: $11,300 – $25,000+
16. Open-Concept Shower with Grey Vertical Tiles and Wood Accents
This serene space follows a classic Scandinavian-inspired formula: 50% soft neutrals + 30% natural wood + 20% clean white & green. The warm beige walls and grey tiles create a calm, earthy base. The wooden vanity, towel ladder, and peg rail introduce organic texture and warmth, preventing the gray from feeling cold. The white sink, shower base, and textiles add crispness, while the potted plant brings a touch of life. It’s a balanced, breathable design that feels effortlessly chic.
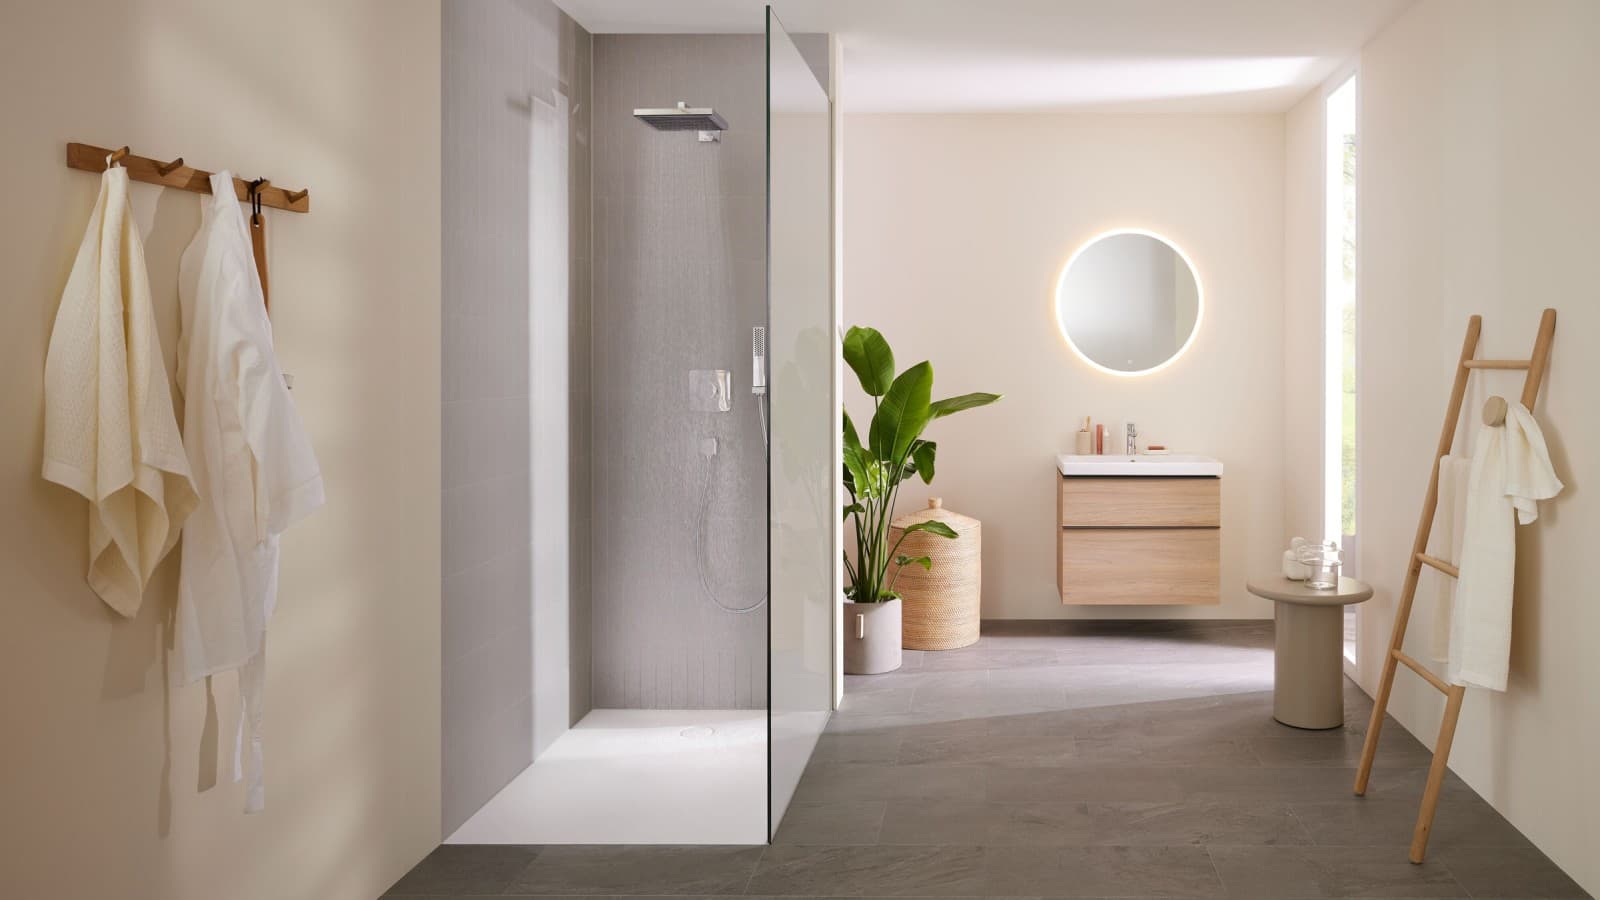
Love the warm, organic accessories? You don’t need to splurge on designer pieces. A nearly identical wooden towel ladder can be found at Target or on Amazon for $50-$80. The simple floating vanity is a look easily replicated with an IKEA GODMORGON cabinet and a wood-look top. For the round lit mirror, look to online lighting retailers or even Costco for options under $200. The key is to focus on the combination of warm wood tones with a simple gray and white palette.
17. Modern Glass Walk-in Shower with Black Hardware
The high-contrast black and white bathroom is back in a big way for 2026, but with a softer, more sophisticated twist. Instead of cold, stark minimalism, today’s trend, as seen here, incorporates texture and warmth. The woven window shade adds an organic touch, the grey veining in the marble-look tile softens the white, and the dramatic globe chandelier acts as jewelry for the room. The black fixtures provide that graphic punch, but the overall feel is curated and livable, not sterile. It’s a look with serious staying power.
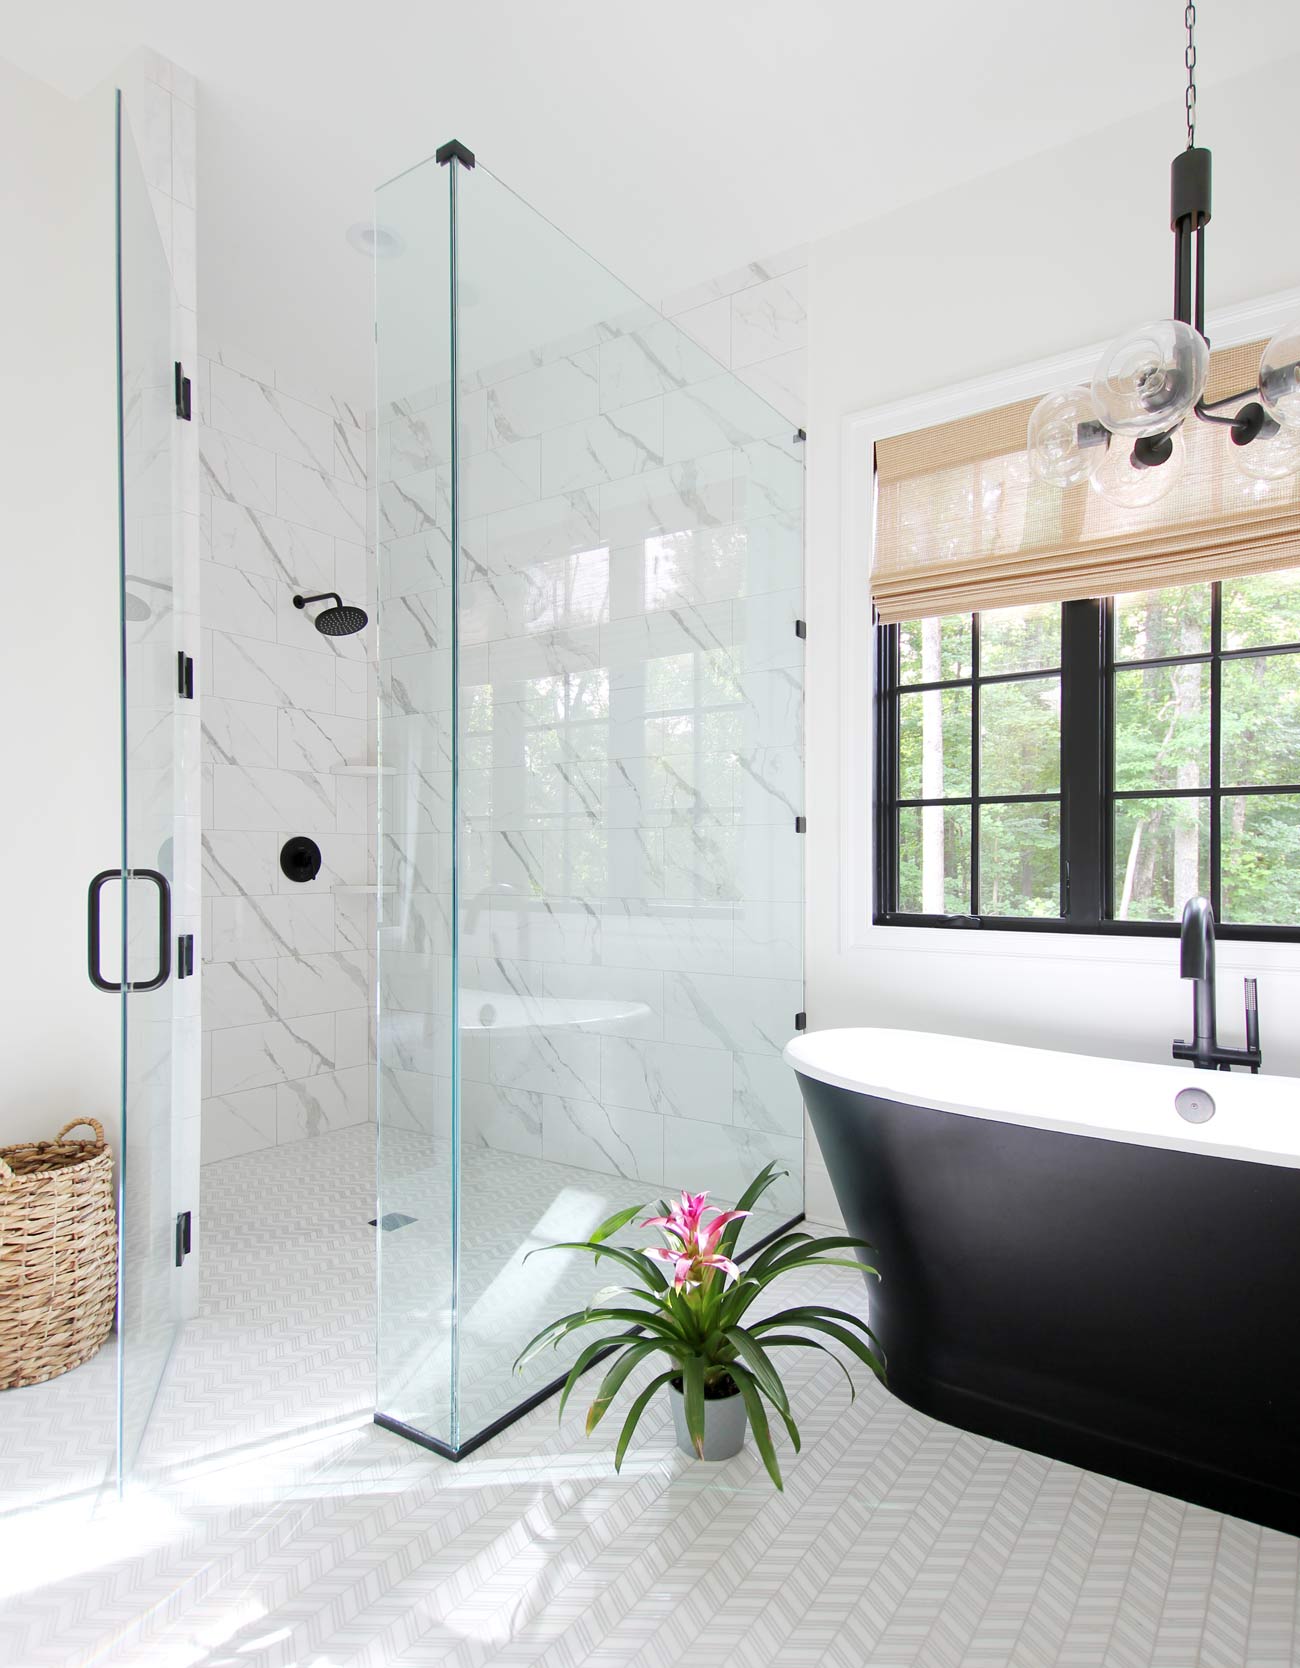
That freestanding black and white tub is a showstopper, but let’s be honest about what it’s like to live with. The exterior black surface will show every single speck of dust, water drip, and bit of lint from your towel. To keep it looking its best, you’ll need to wipe it down frequently with a soft, microfiber cloth. It’s a high-maintenance choice. If you love the drama but not the work, consider a classic all-white tub and bring in black through fixtures and accessories instead.
18. Serene Gray Bathroom Featuring a Curbless Shower with a Wood Bench
If you’re putting a wooden bench inside your shower, the type of wood you choose is paramount. Don’t just use any pretty piece of lumber. You need a naturally water-resistant hardwood. Teak is the gold standard because it’s rich in natural oils that repel water and prevent rot and mold. Ipe and cedar are also excellent choices. Make sure the bench is finished with a marine-grade sealer for maximum protection and is designed to allow water to drain off easily. This is a far cry from the luxurious stone bench in Idea #0 but offers a warmer touch.
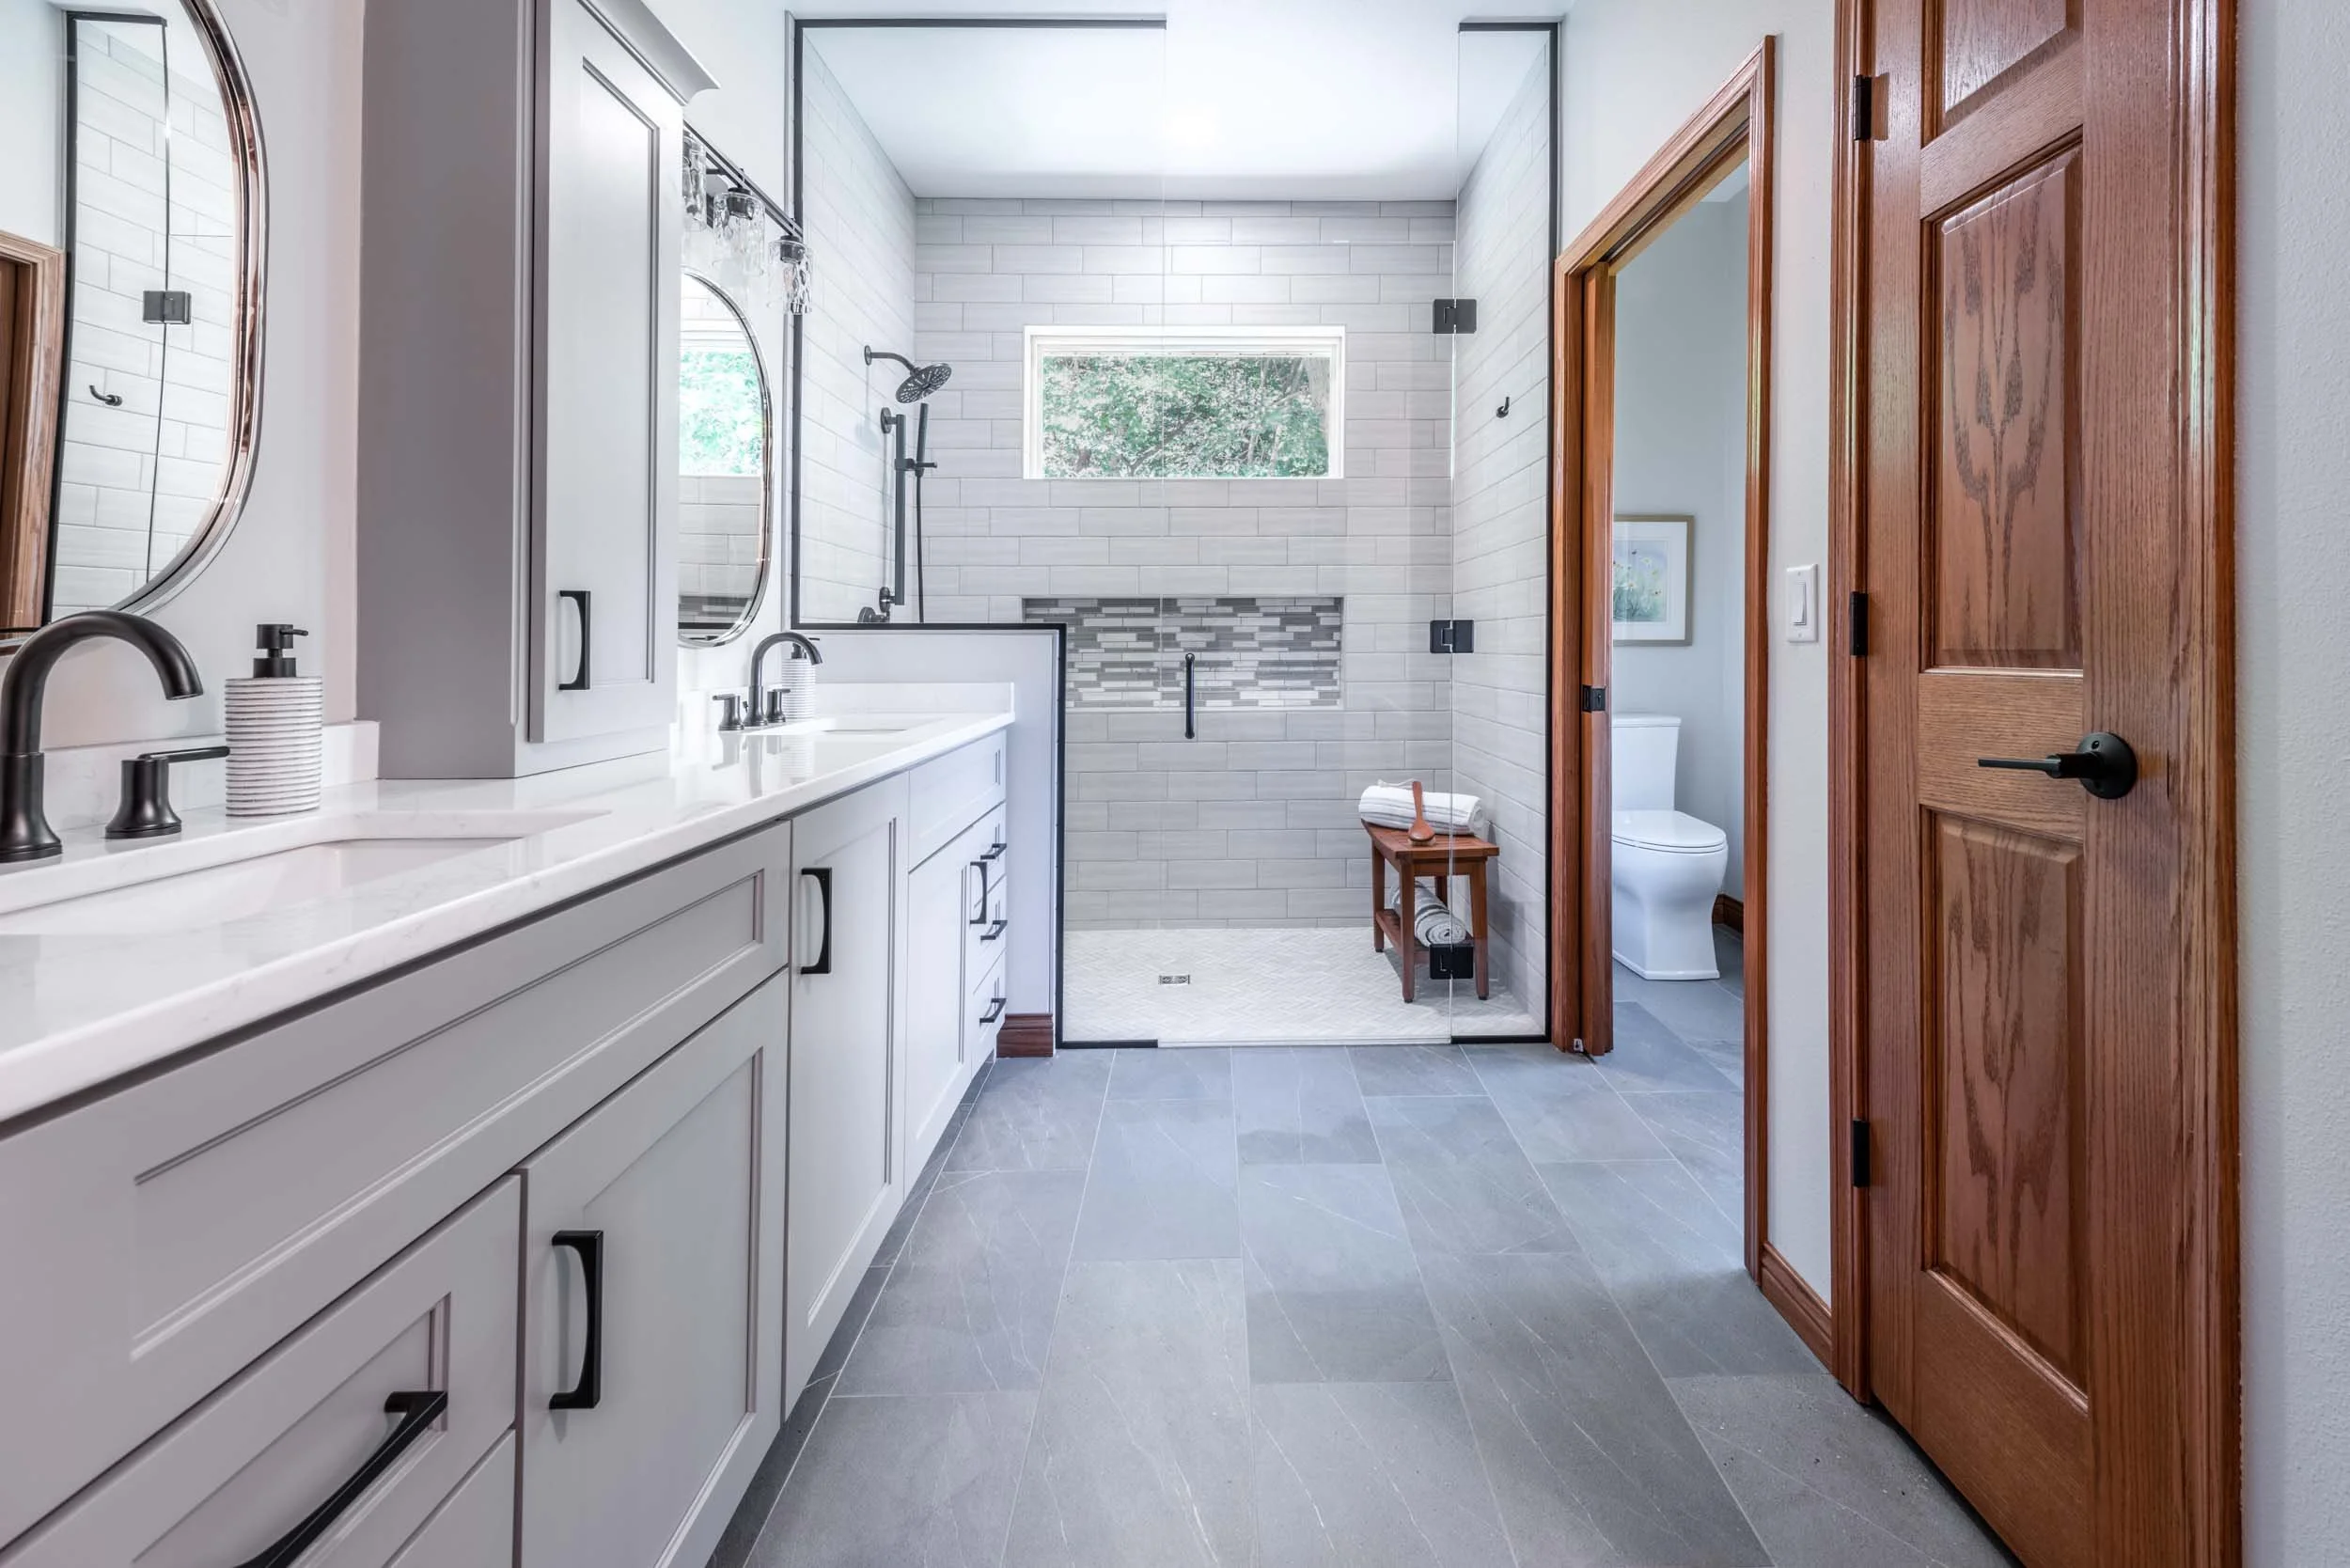
This layout is a fantastic, functional choice for a primary bathroom in a family home, working well in a space that is at least 100 square feet. The long double vanity provides ample storage and counter space, while the walk-in shower is generous without being cavernous. The minimum width for the shower area to comfortably accommodate the bench is about 36 inches deep by 60 inches wide. This ensures you have plenty of room to stand and move without the bench getting in the way.
19. Accessible Walk-In Shower with Graphic Mosaic Floor and Grab Bars
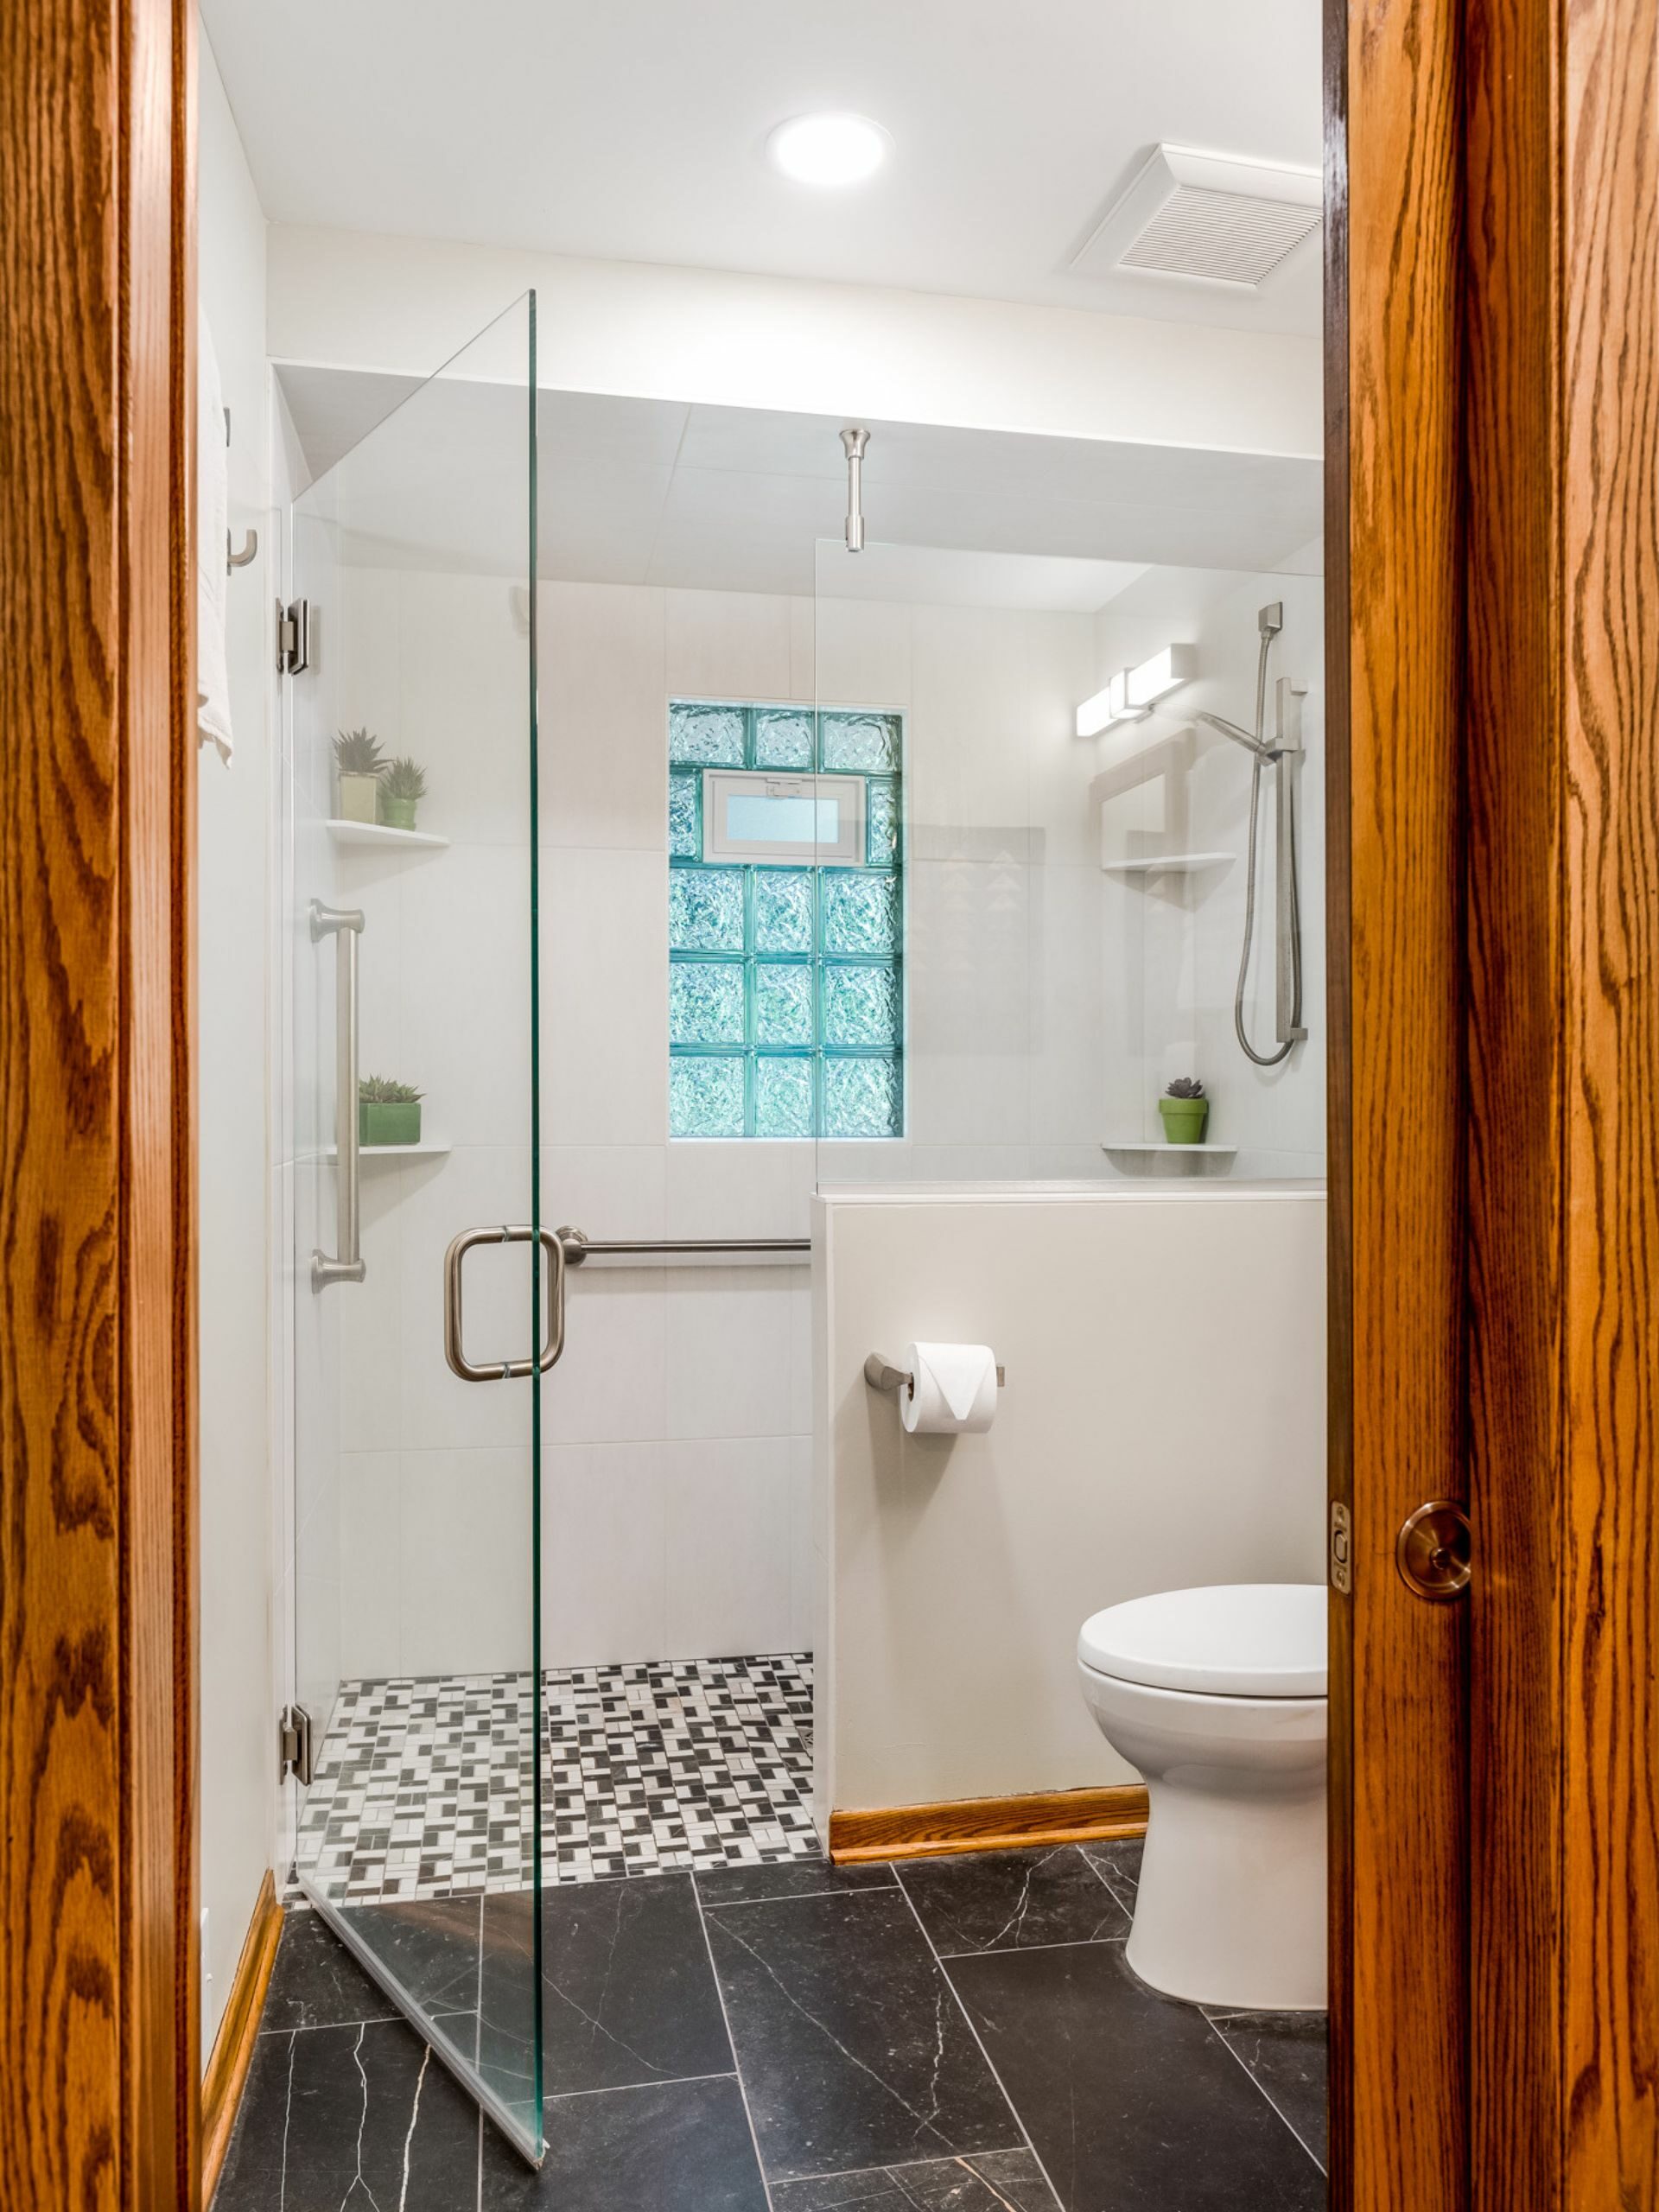
This design brilliantly demonstrates that accessible design can be beautiful. It works because the safety features are treated as integral parts of the aesthetic, not as clinical afterthoughts. The brushed metal grab bars have a clean, modern profile that matches the plumbing fixtures. The curbless entry is a core principle of modern design anyway. Most importantly, the high-contrast black and white mosaic floor provides excellent slip resistance while also being the main style statement of the shower. It’s safe, functional, and stylish all at once.
Planning a truly accessible shower requires thinking about what’s behind the walls. Before any tile goes up, you need to:
- Install solid blocking: Add 2×6 or 2×8 wood blocking between the wall studs exactly where you plan to mount grab bars. Drywall anchors are not safe enough to support a person’s weight.
- Verify tile slip resistance: Check the DCOF (Dynamic Coefficient of Friction) rating of your chosen floor tile. For a wet area like a shower floor, you need a rating of 0.42 or higher.
- Plan for a wider doorway: If this is for wheelchair accessibility, ensure the bathroom and shower entry points meet ADA guidelines, which typically require a minimum of 32 inches of clear width.
20. Sage Green Tiled Shower with Polished Brass Fixtures
The star, without a doubt, is the wall of vertical sage green zellige-style tile. This element is doing all the heavy lifting. The color is calming yet fresh, providing a beautiful focal point in an otherwise neutral bathroom. The vertical orientation draws the eye up, making the narrow space feel taller. Most importantly, the slight variations in color and texture inherent in this style of tile give the wall a handcrafted, luminous quality that you simply can’t get from standard porcelain. It’s pure, tactile beauty.
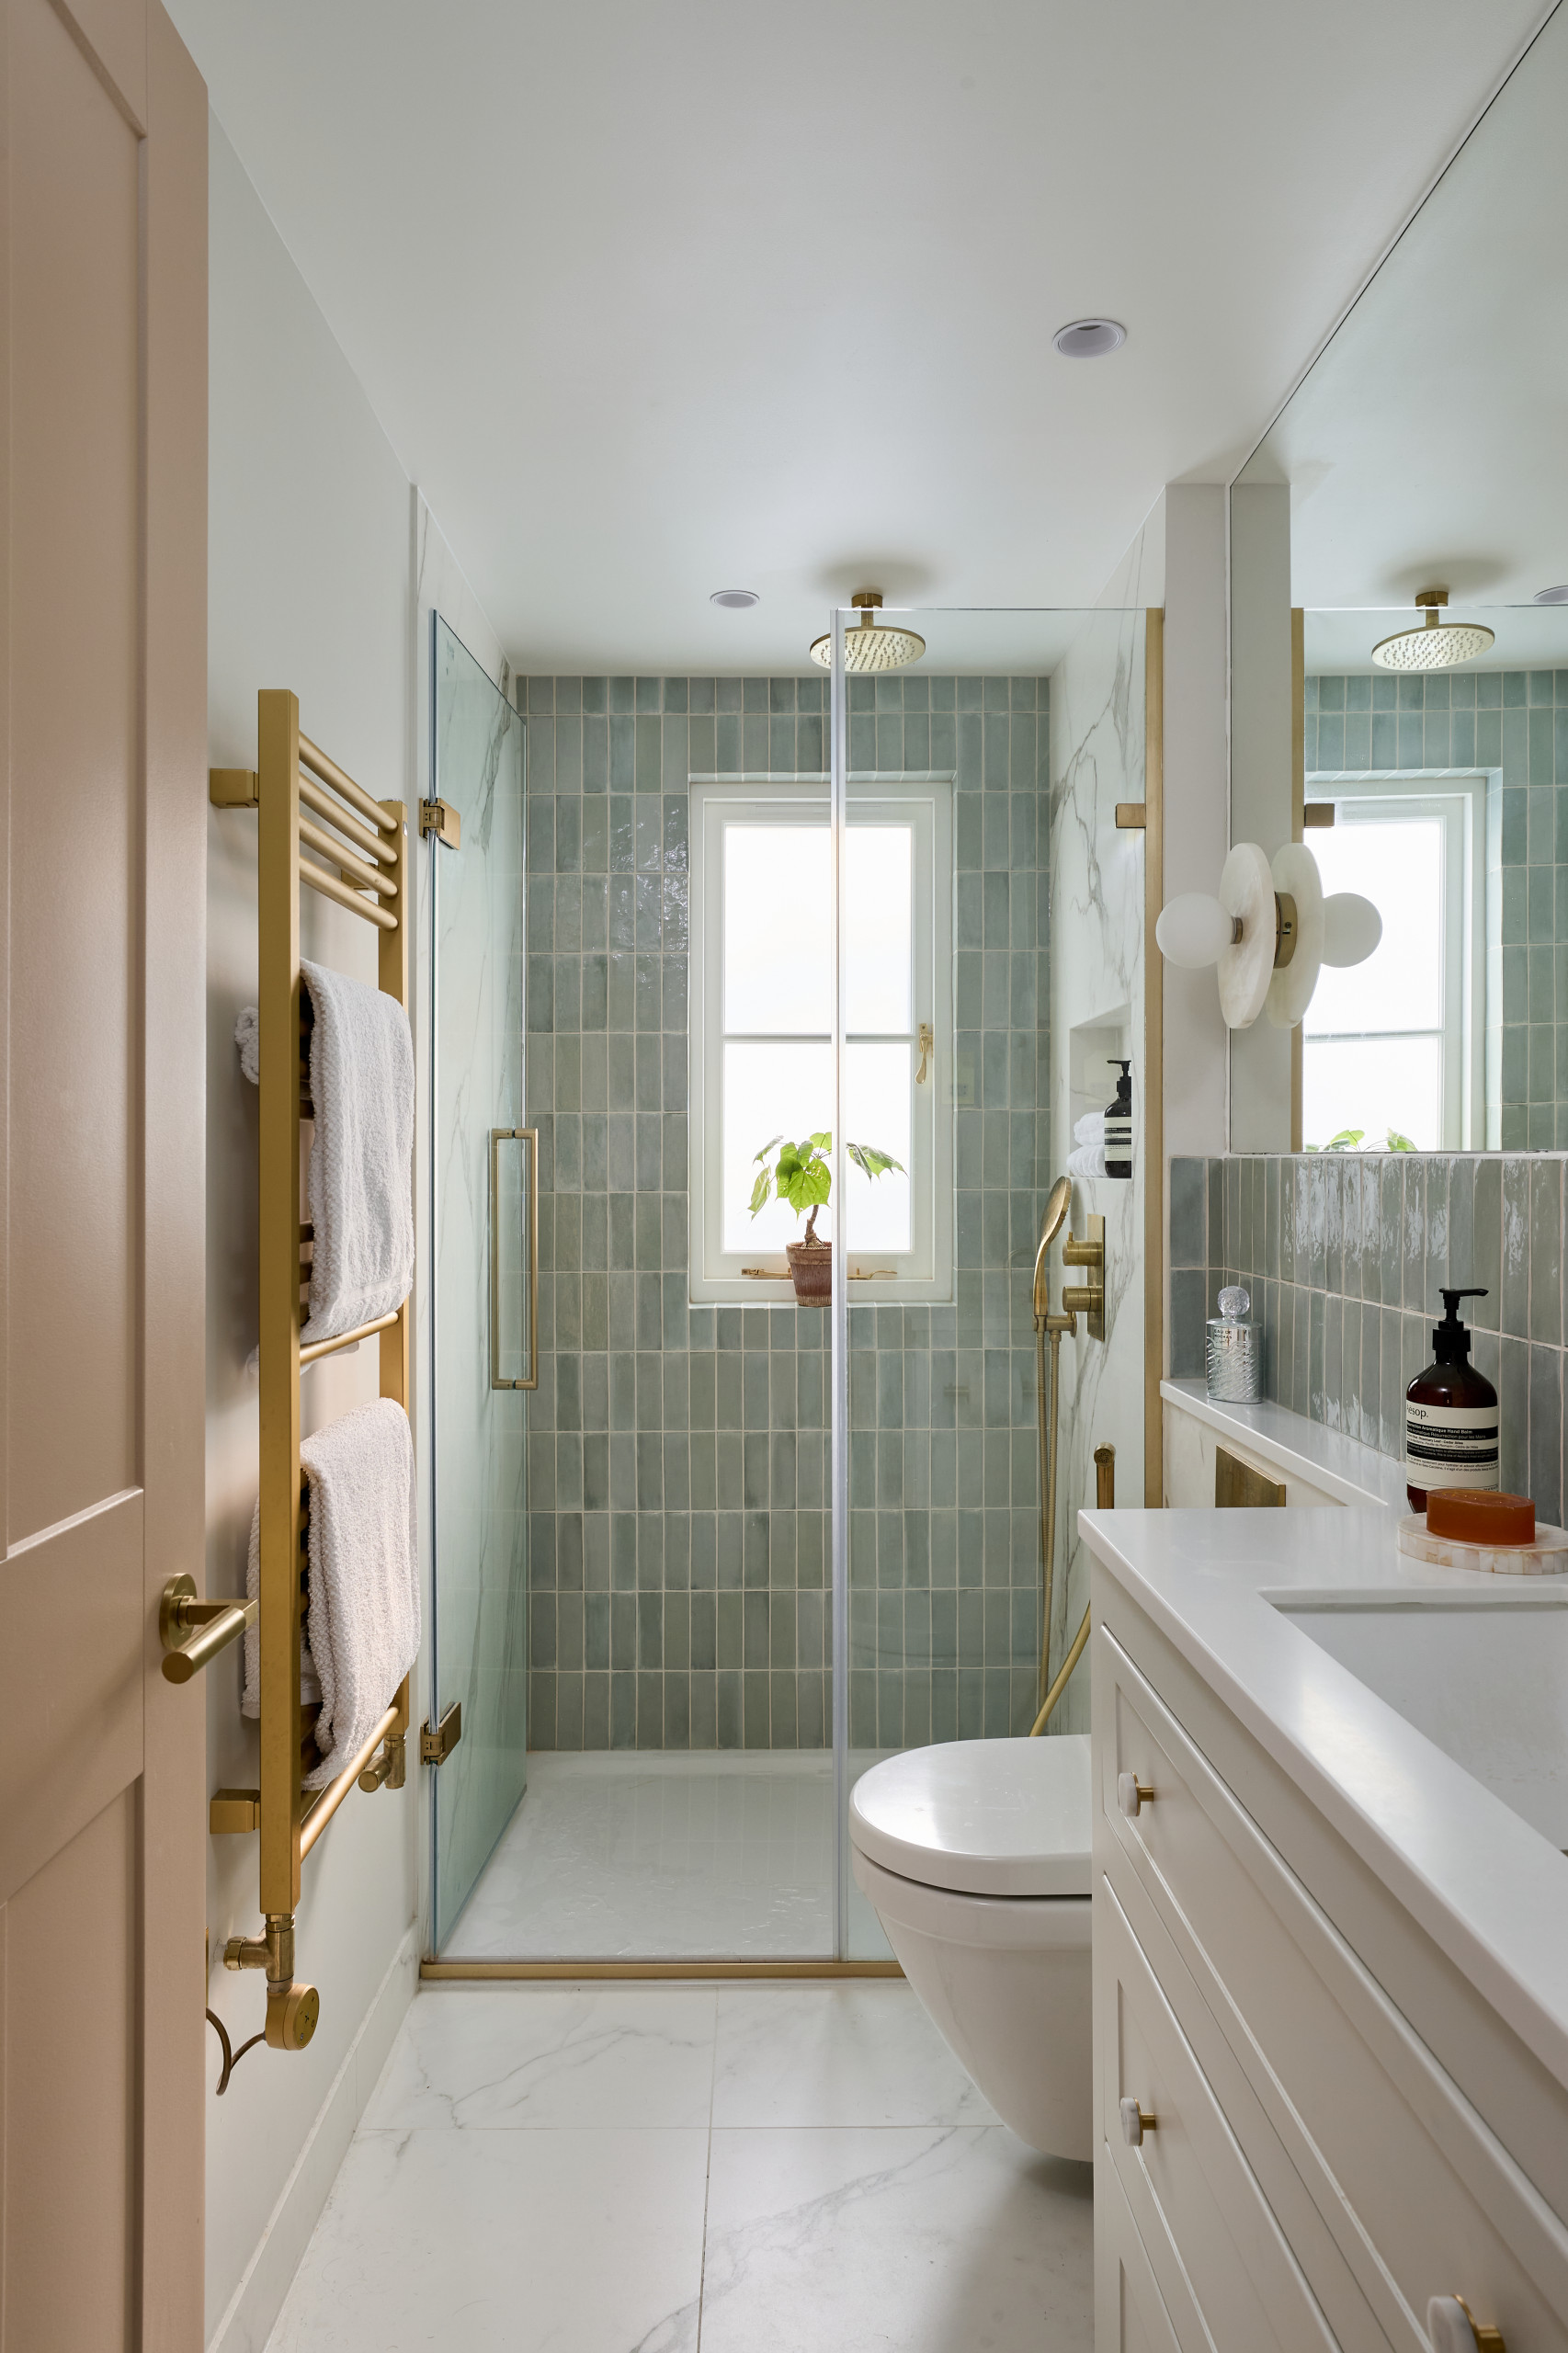
Polished brass is a living finish, and its maintenance depends on the look you want. If you love the bright, high-shine look, you will need to polish it regularly (every few months) with a dedicated brass cleaner to remove tarnish and water spots. Alternatively, you can let it be. Over time, it will develop a unique patina—a duller, darker, and more character-rich finish. There’s no right or wrong, but you must decide if you’re a polisher or a patina-embracer before you commit to unlacquered brass.
21. Modern Walk-In Shower with Patterned Floor Tile and Black Fixtures
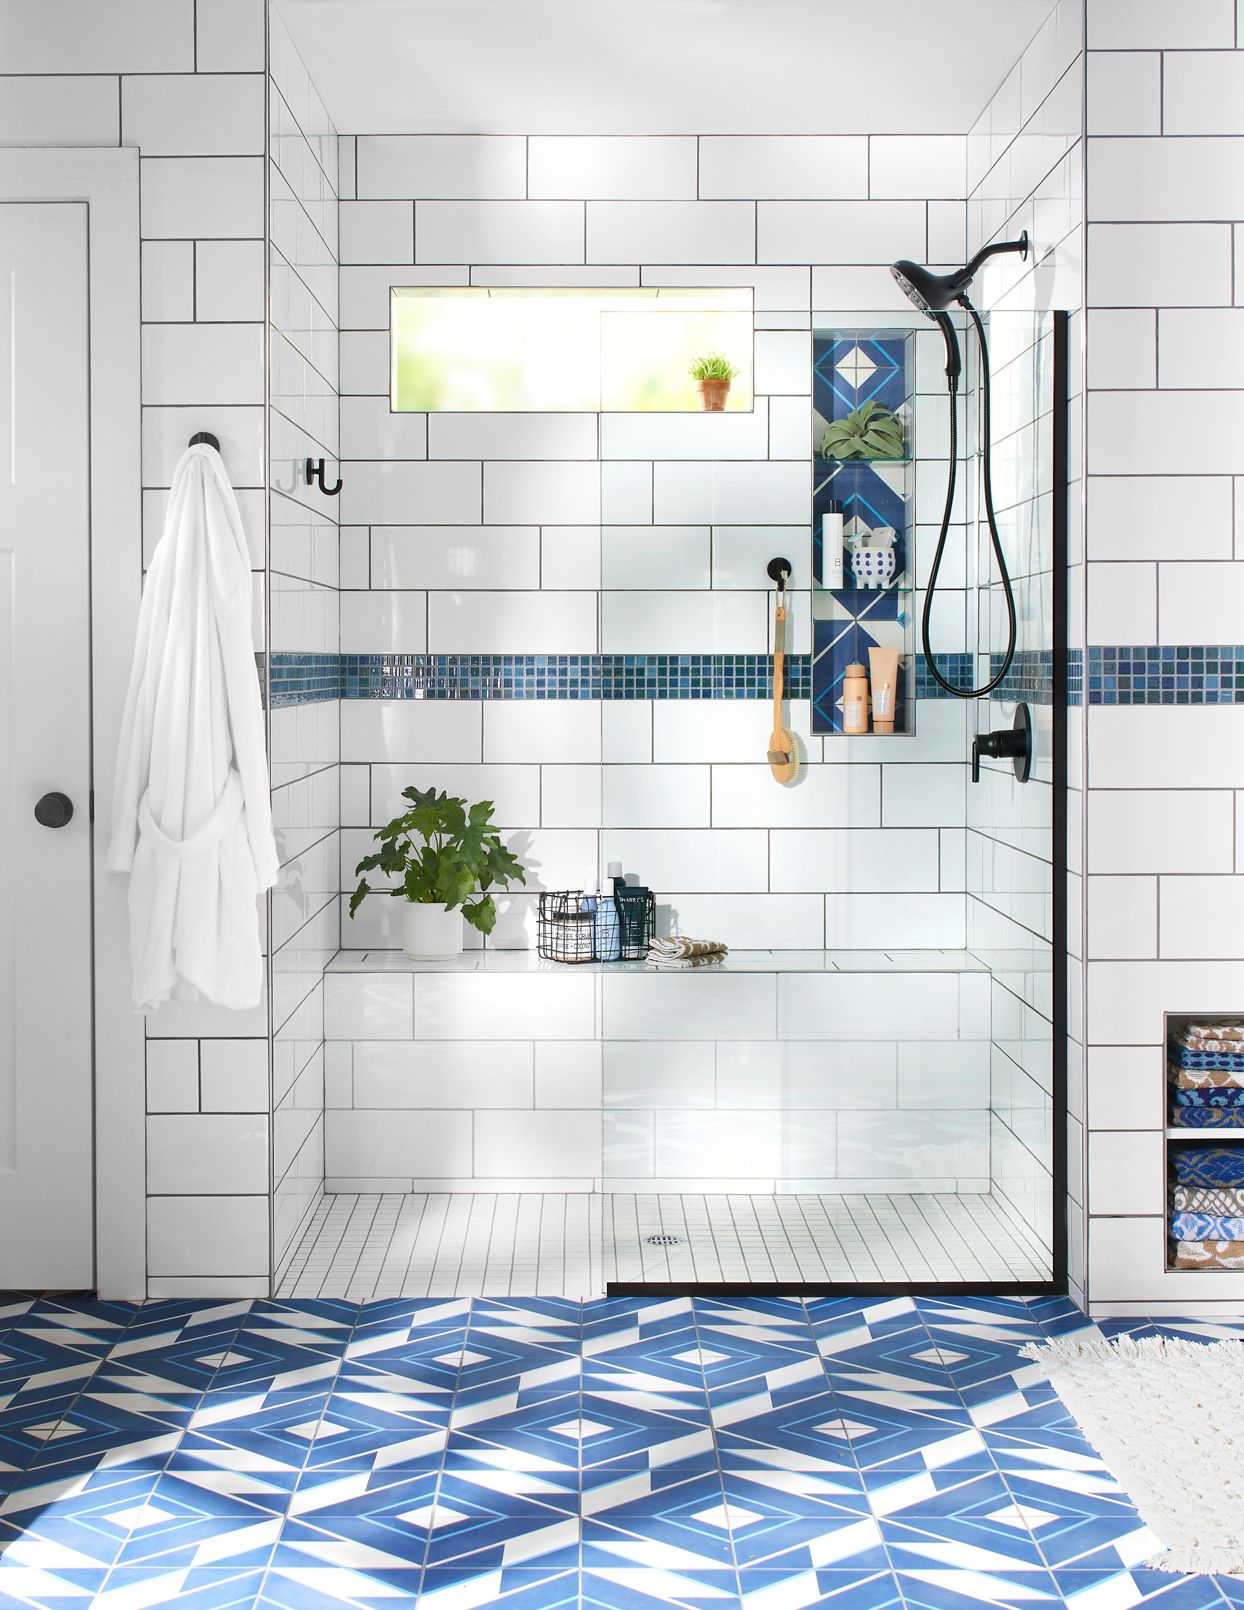
A perfectly tiled niche is a mark of quality craftsmanship. Here’s the key to making the pattern flow seamlessly from the floor into the niche:
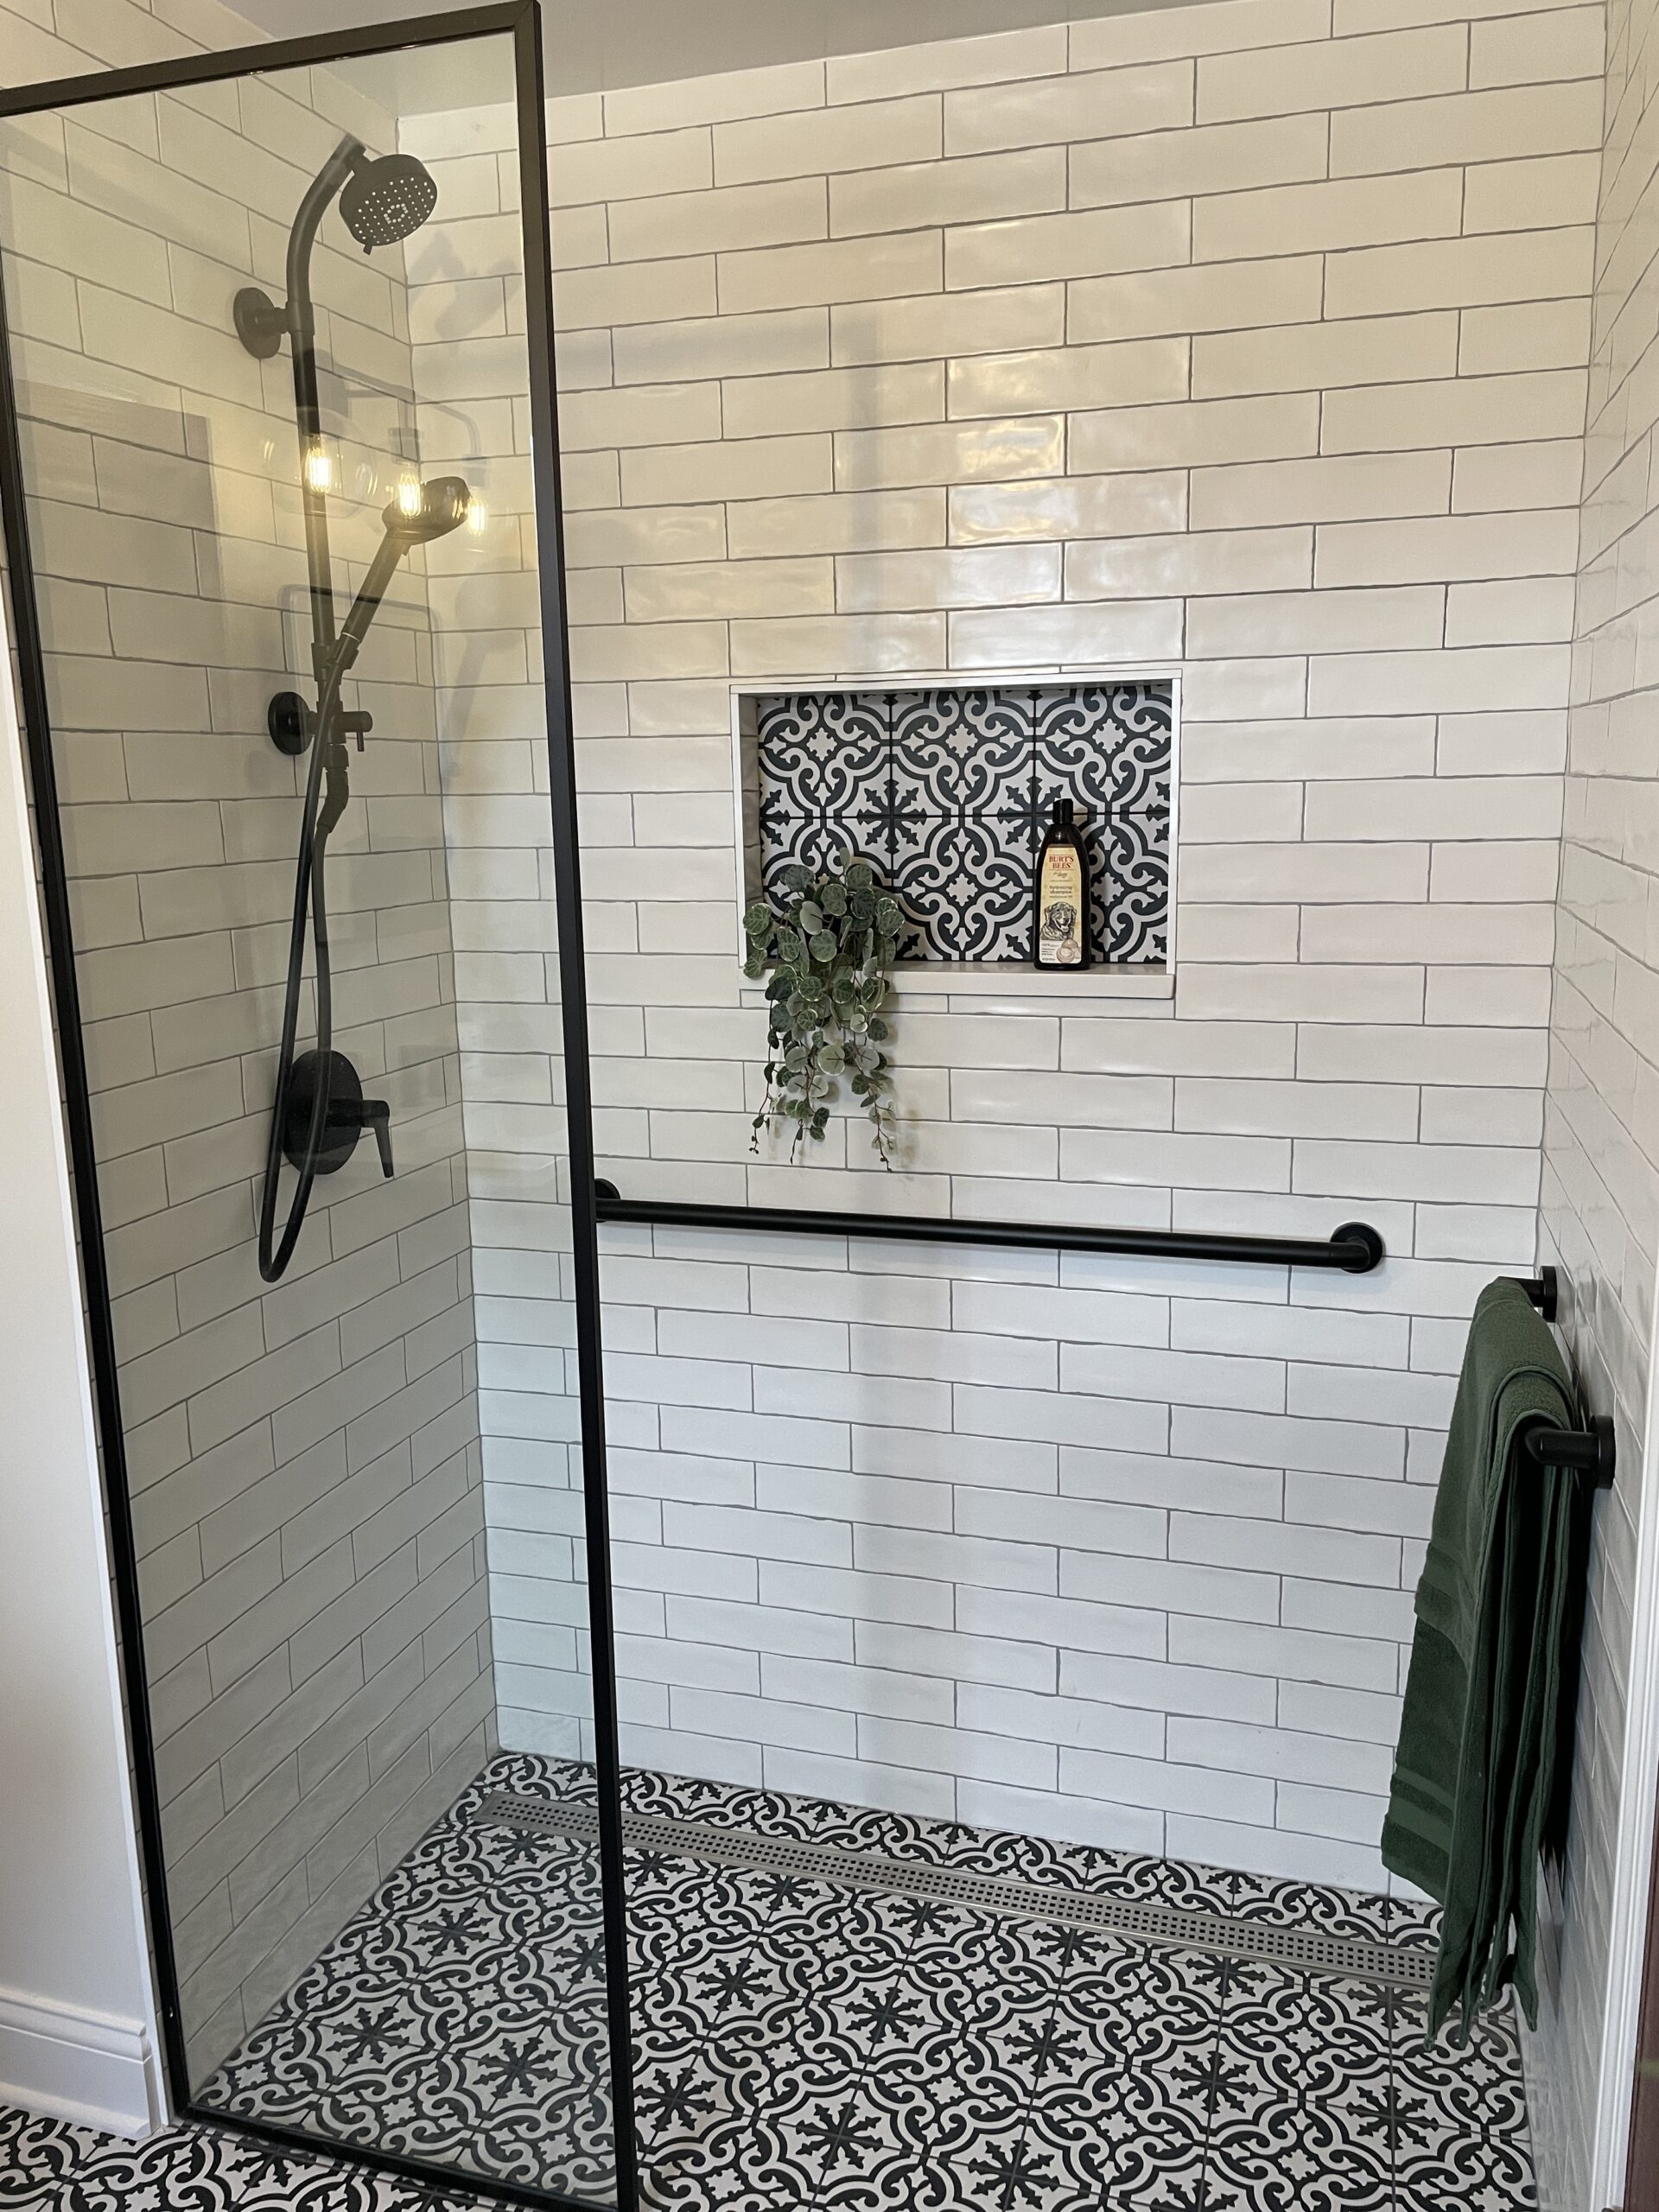
- Plan the Layout First: Before setting any tile, dry-fit your patterned floor tiles to determine the best starting point. Plan where the cuts will happen.
- Center the Niche on the Pattern: Ideally, position your niche on the wall so that it aligns horizontally with a full row of tiles.
- Use a Single Tile for the Back: For the back of the niche, cut a single piece from your floor tile that captures the most interesting part of the pattern.
- Wrap the Pattern: If possible, use the off-cut pieces from the back to tile the top, bottom, and sides of the niche, creating a ‘wrapped’ effect. This takes skill but looks incredibly custom.
True cement encaustic tiles are stunning, handmade, and expensive (often $20-$40+ per square foot). They’re also porous and require sealing. The good news? You can get this exact look for a fraction of the cost with patterned porcelain tile. Dozens of manufacturers now make durable, waterproof porcelain that perfectly mimics the look of encaustic tile. You can find beautiful options at Wayfair, TileBar, or even Home Depot for $6-$15 per square foot, giving you this high-impact floor without the high-end cost or maintenance.
22. Seamless Curbless Shower with a Floating Tiled Bench
For a built-in shower bench to be comfortable and safe, its dimensions matter. The standard, ergonomic height for a shower bench is between 17 and 19 inches from the finished floor, the same as a standard dining chair. The depth should be between 12 and 15 inches. This is deep enough to sit on comfortably but shallow enough that it doesn’t overly crowd the standing space in the shower. A floating bench like this one should also be slightly sloped towards the drain to prevent water from pooling on top.
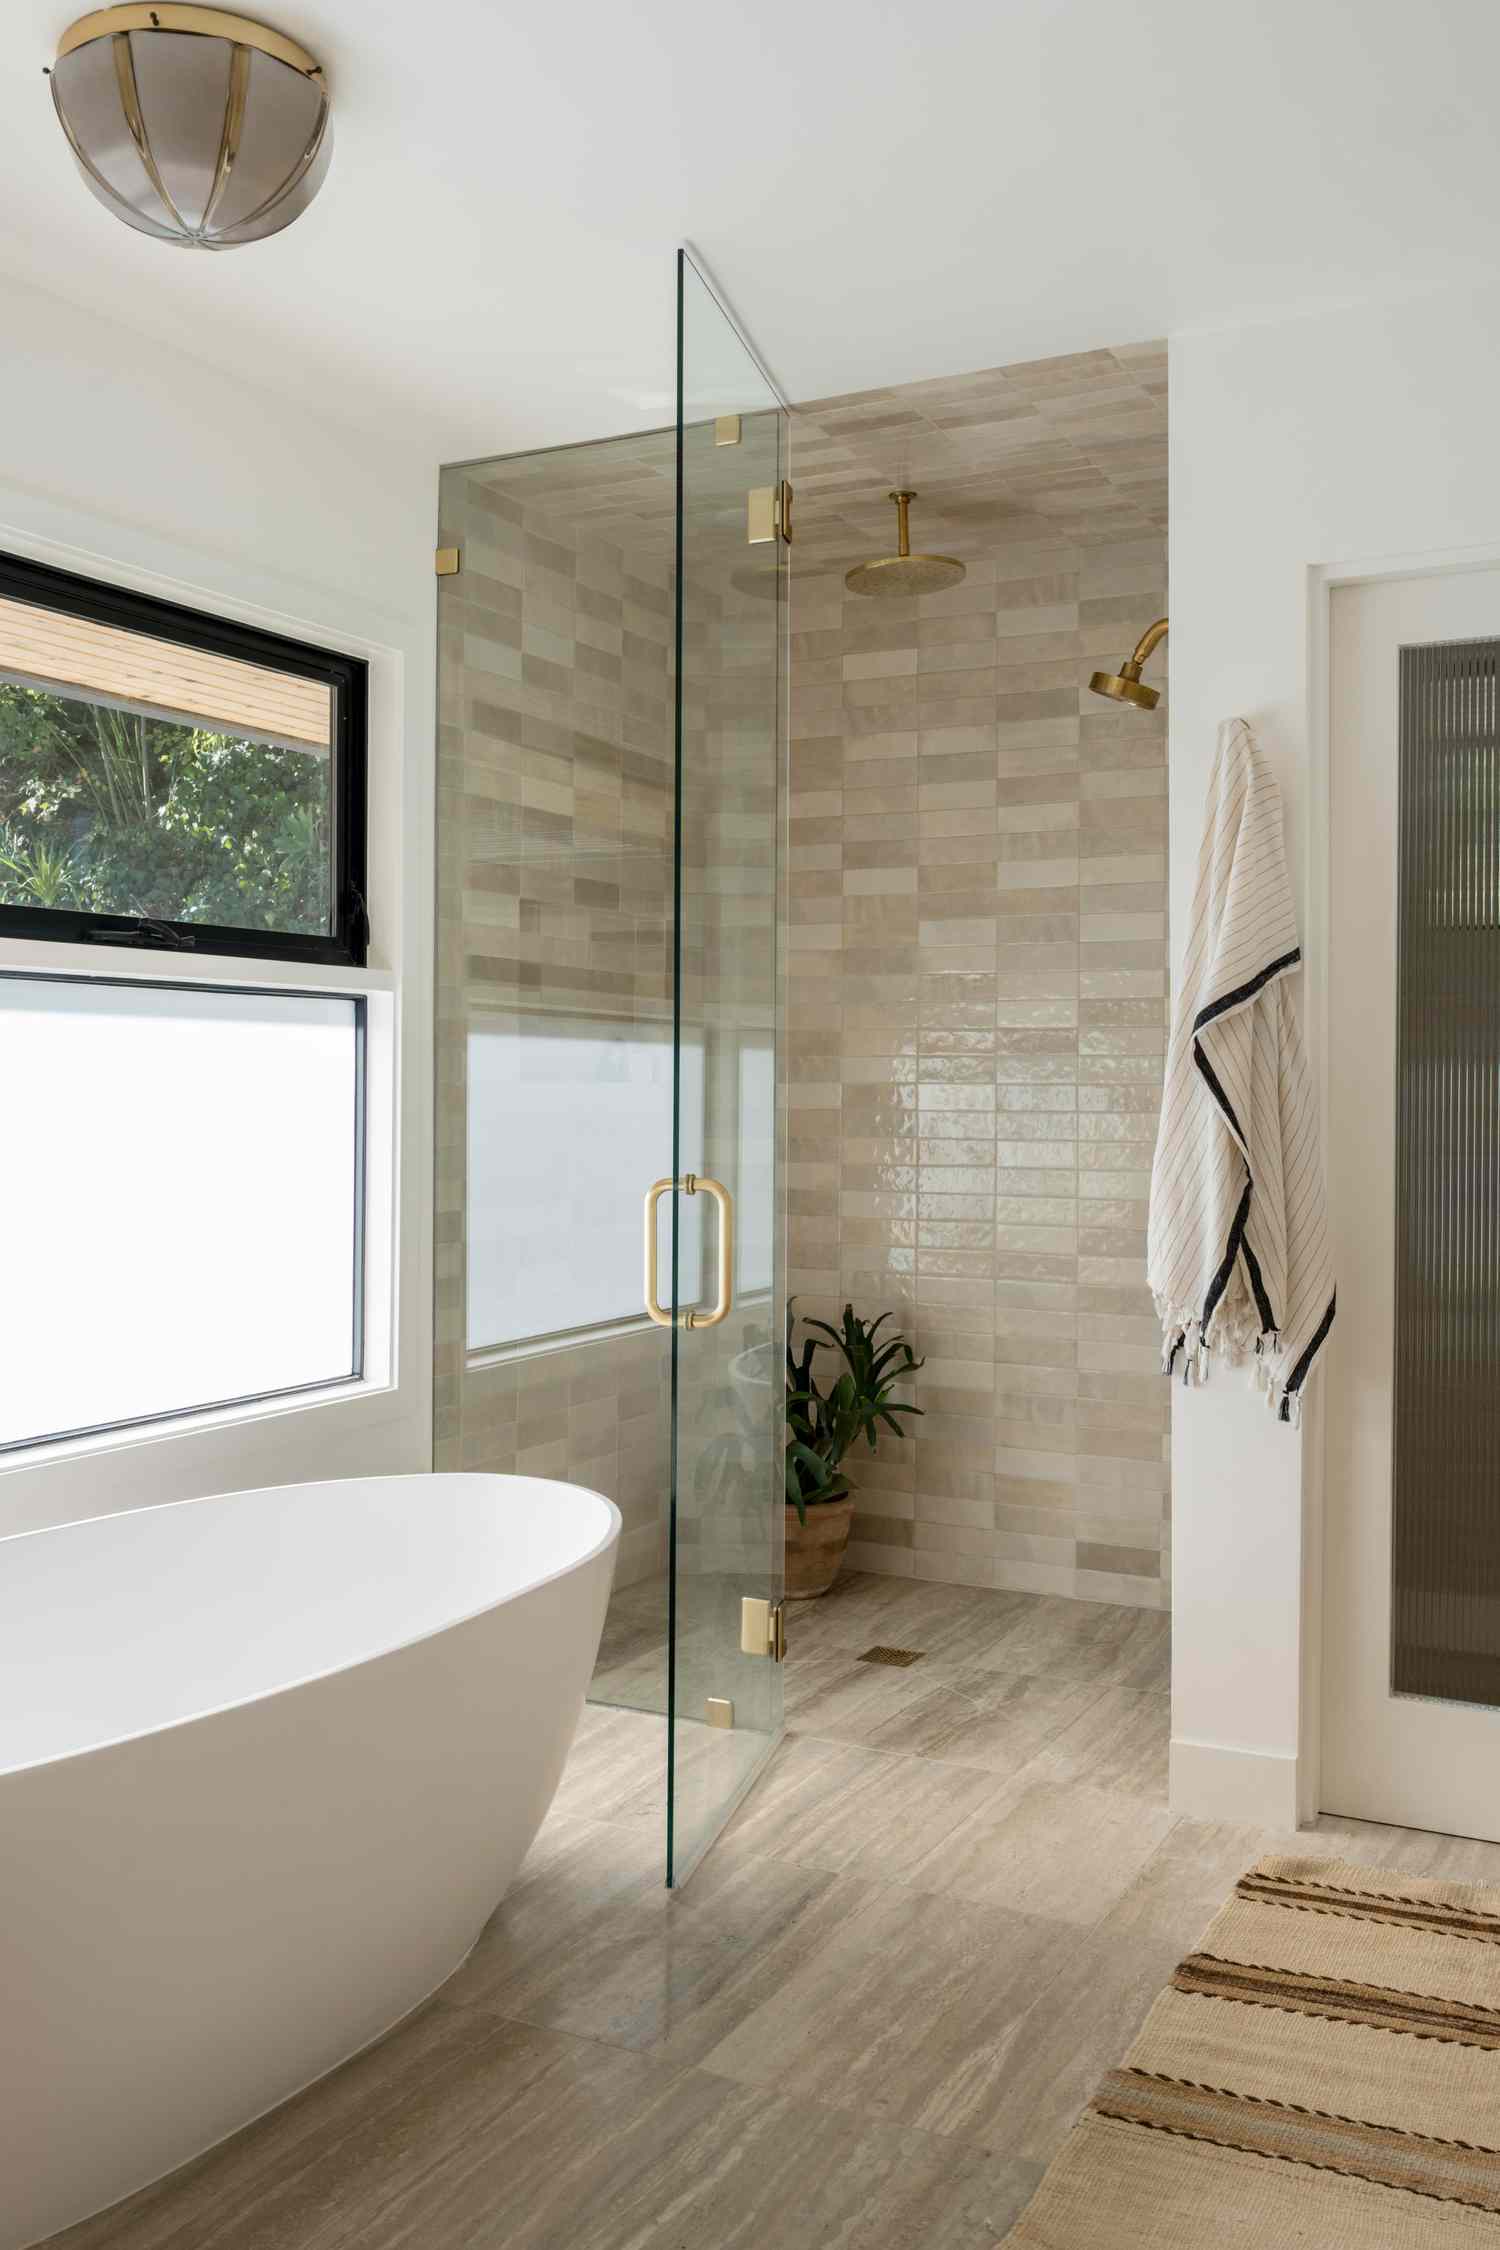
A shower with a built-in bench requires a bit more floor space to feel comfortable, not cramped. Aim for a minimum shower footprint of 42 inches deep by 60 inches wide. This provides a 15-inch-deep bench and still leaves a generous 27-inch by 60-inch standing area. You can go smaller, but it starts to feel tight. This design is a great solution for moderately sized bathrooms (80-120 sq ft) where you want the luxury of a bench without building a massive shower. For a more minimal approach in a similar footprint, check out the benchless design of Idea #13.
23. Gray Textured Tile Shower with Dual Vessel Sinks
This design’s success lies in its sophisticated layering of textures. While the color palette is a simple, calming gray and white, the tactile experience is rich. You have the rough, linear texture of the large-format wall tiles, which adds depth and an almost industrial feel. This is contrasted by the perfectly smooth, sculptural curves of the white ceramic vessel sinks. Finally, the small mosaic tiles on the shower floor provide a third layer of texture underfoot, which also serves the practical purpose of providing grip.
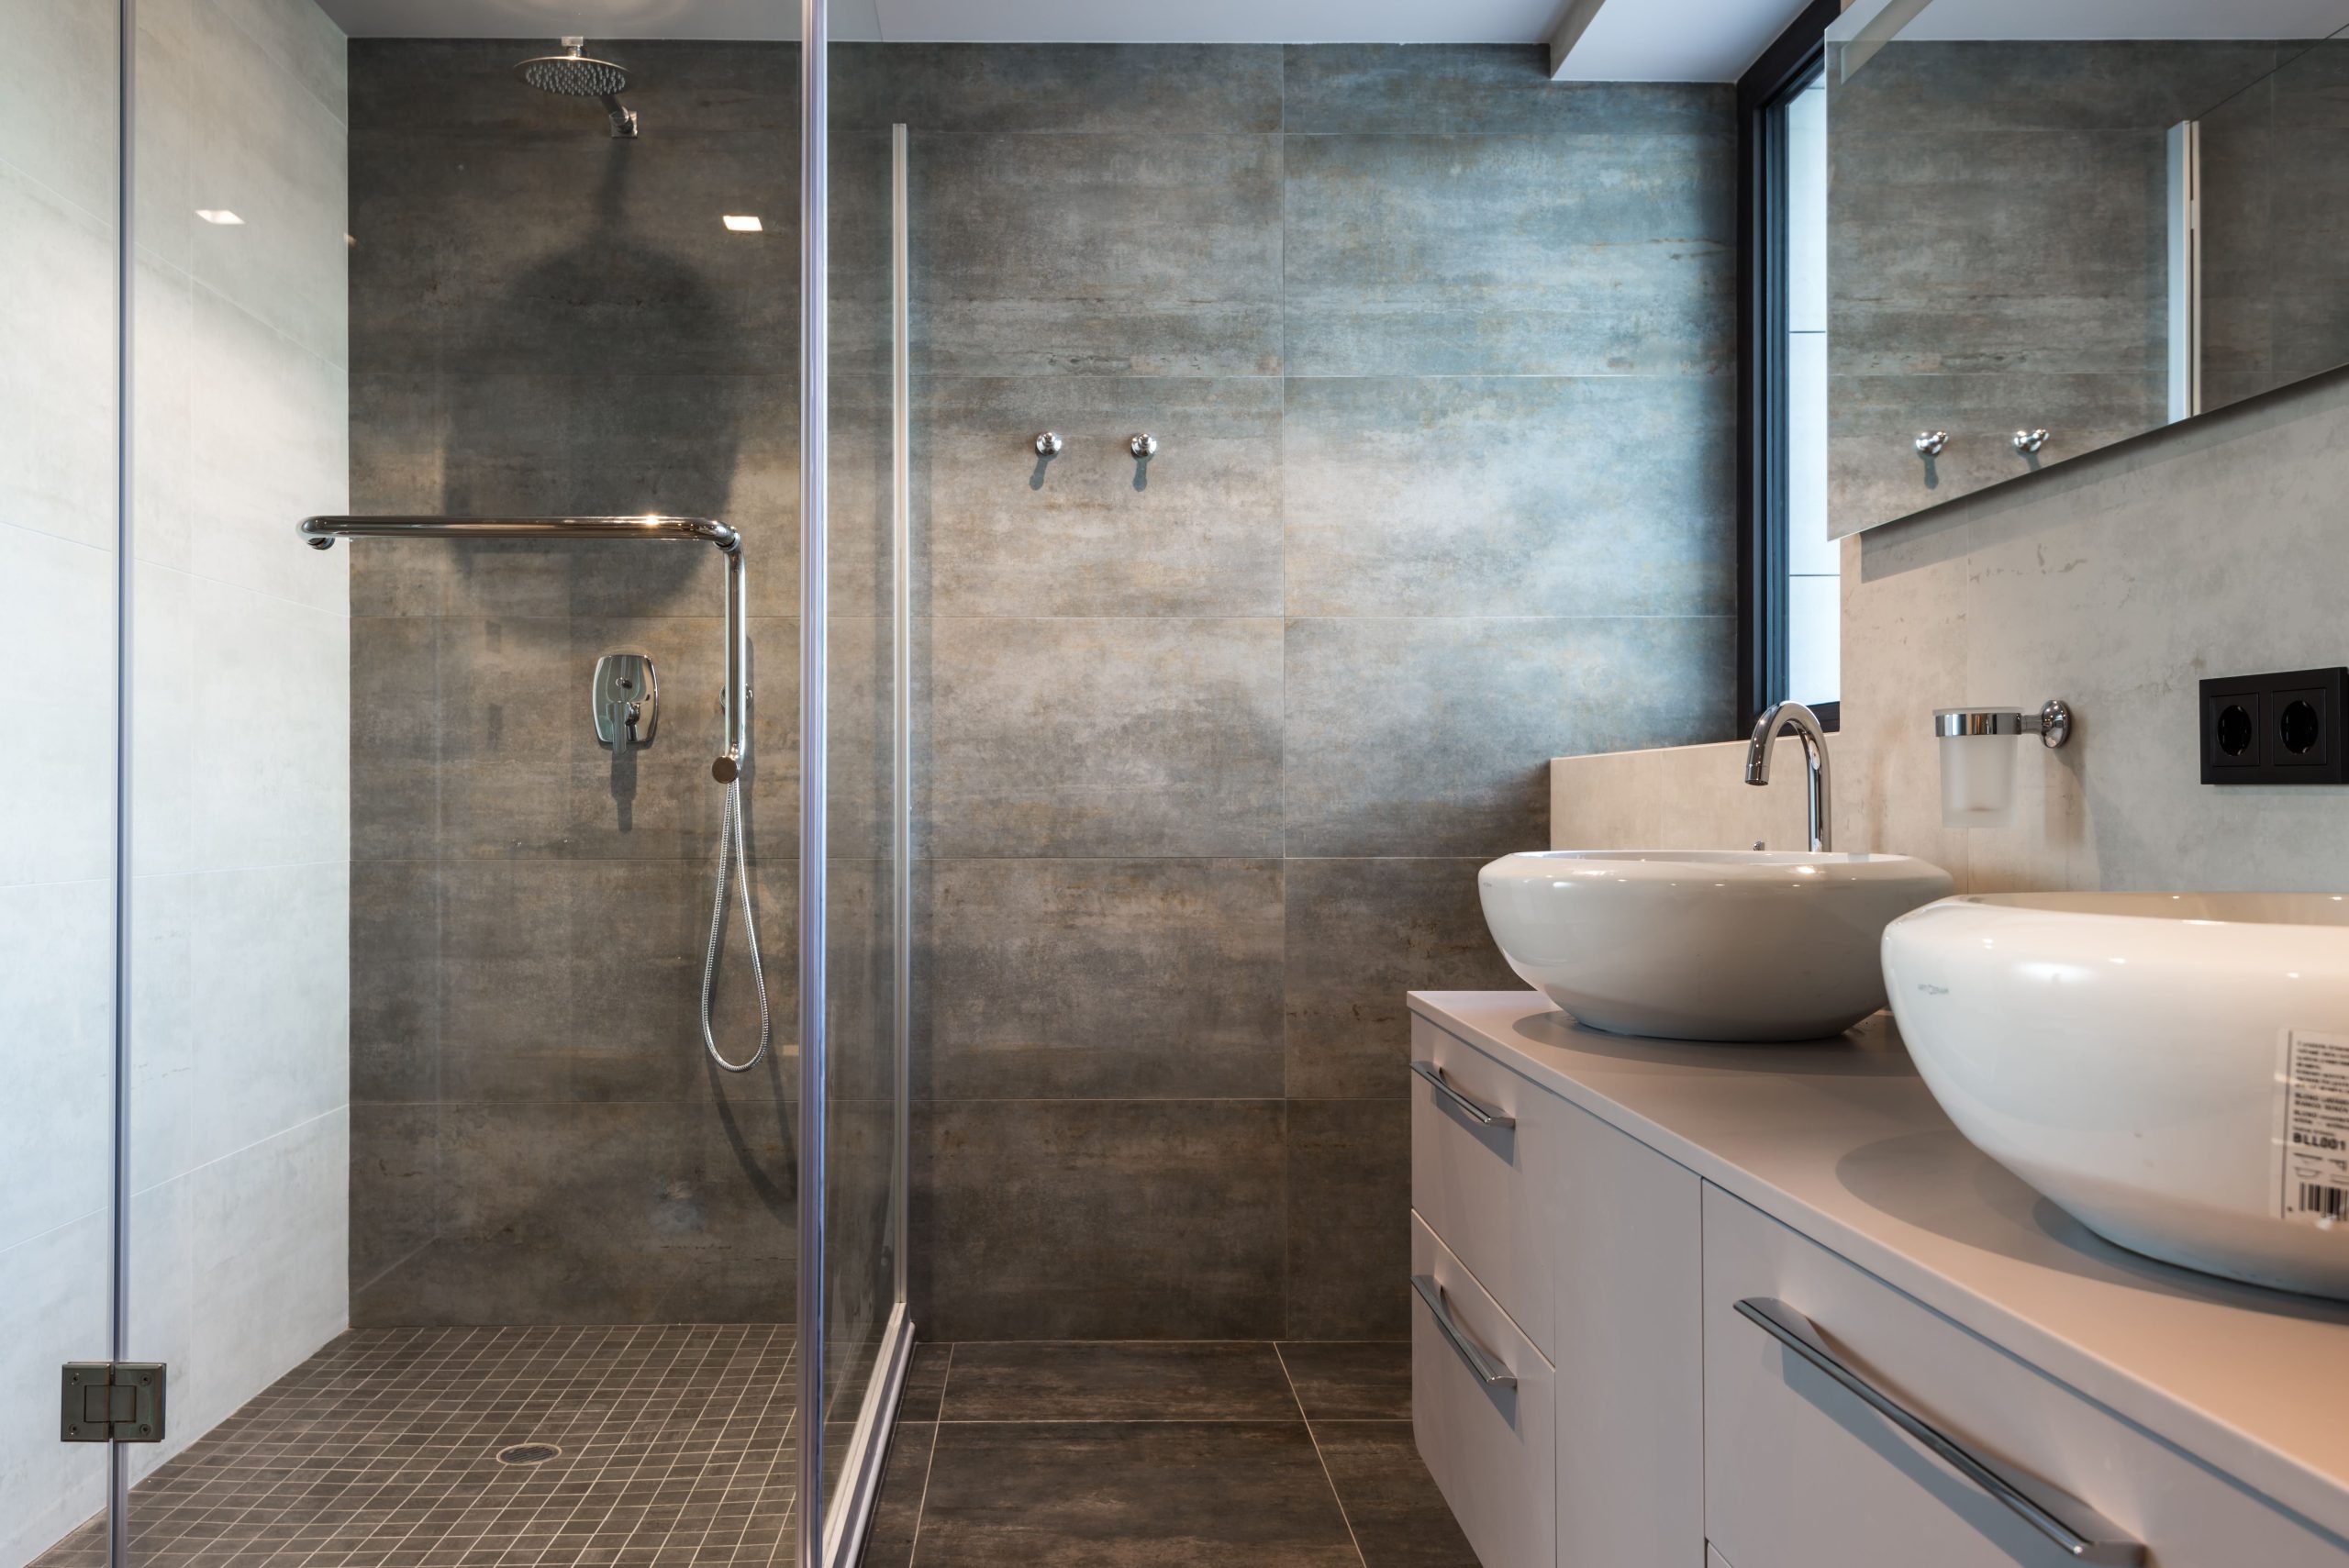
Vessel sinks look fantastic, but they create a cleaning challenge that standard undermount sinks don’t have. The small, awkward space where the base of the sink meets the countertop is a magnet for dust, hair, and toothpaste drips. You’ll need a small brush or a dedicated cloth to clean around it properly. Also, be aware that water can splash behind the sink, so wiping down the counter and wall area after use is key to preventing grime buildup and water damage over time.
24. Accessible Beige Tiled Shower with a Built-In Bench and Grab Bar
The single most successful element here is how seamlessly the accessibility features are integrated. This doesn’t look like a ‘special needs’ shower; it looks like a thoughtfully designed, comfortable shower that happens to be very safe. The grab bar has a sleek, modern finish that matches the other fixtures. The built-in bench is tiled with the same material as the walls, making it feel like part of the architecture, not a separate piece of equipment. It’s a prime example of universal design, where good design is accessible to everyone. Compare the built-in bench here to the wooden one in Idea #17.
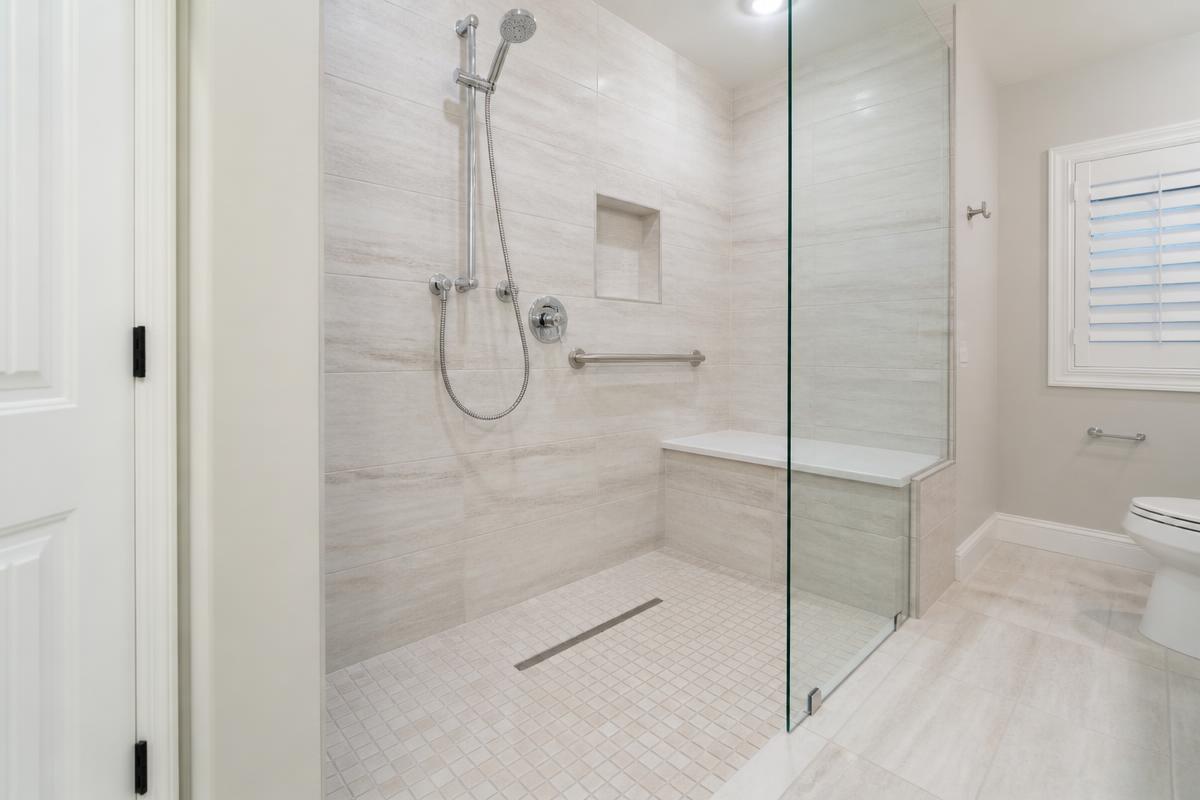
Thinking about a similar accessible design? Run through this checklist first:
- Check your local codes: Many areas have specific requirements for shower dimensions, grab bar placement, and bench height for them to be considered ADA-compliant. Do your research.
- Choose high-traction flooring: Look for a matte-finish mosaic tile with a DCOF rating of 0.42 or higher. The extra grout lines in mosaic tile also add crucial grip.
- Plan for a handheld showerhead: A fixed showerhead is not practical for someone who is seated. Ensure your plumbing plan includes a handheld wand mounted on an adjustable slide bar.
25. Minimalist Grey Marble-Effect Bathroom with a Wall-Hung Vanity
This sleek look is achieved with a strict visual recipe: 80% dominant tile + 15% floating white fixtures + 5% subtle accents. The large-format grey marble-effect tile covers almost every surface, creating a seamless and expansive feeling. The wall-mounted vanity and toilet appear to float, which enhances the sense of space and makes the floor feel continuous. Finally, the chrome fixtures, lighted mirror, and single gold planter add just enough detail and function without creating clutter. The key is the commitment to the tile.
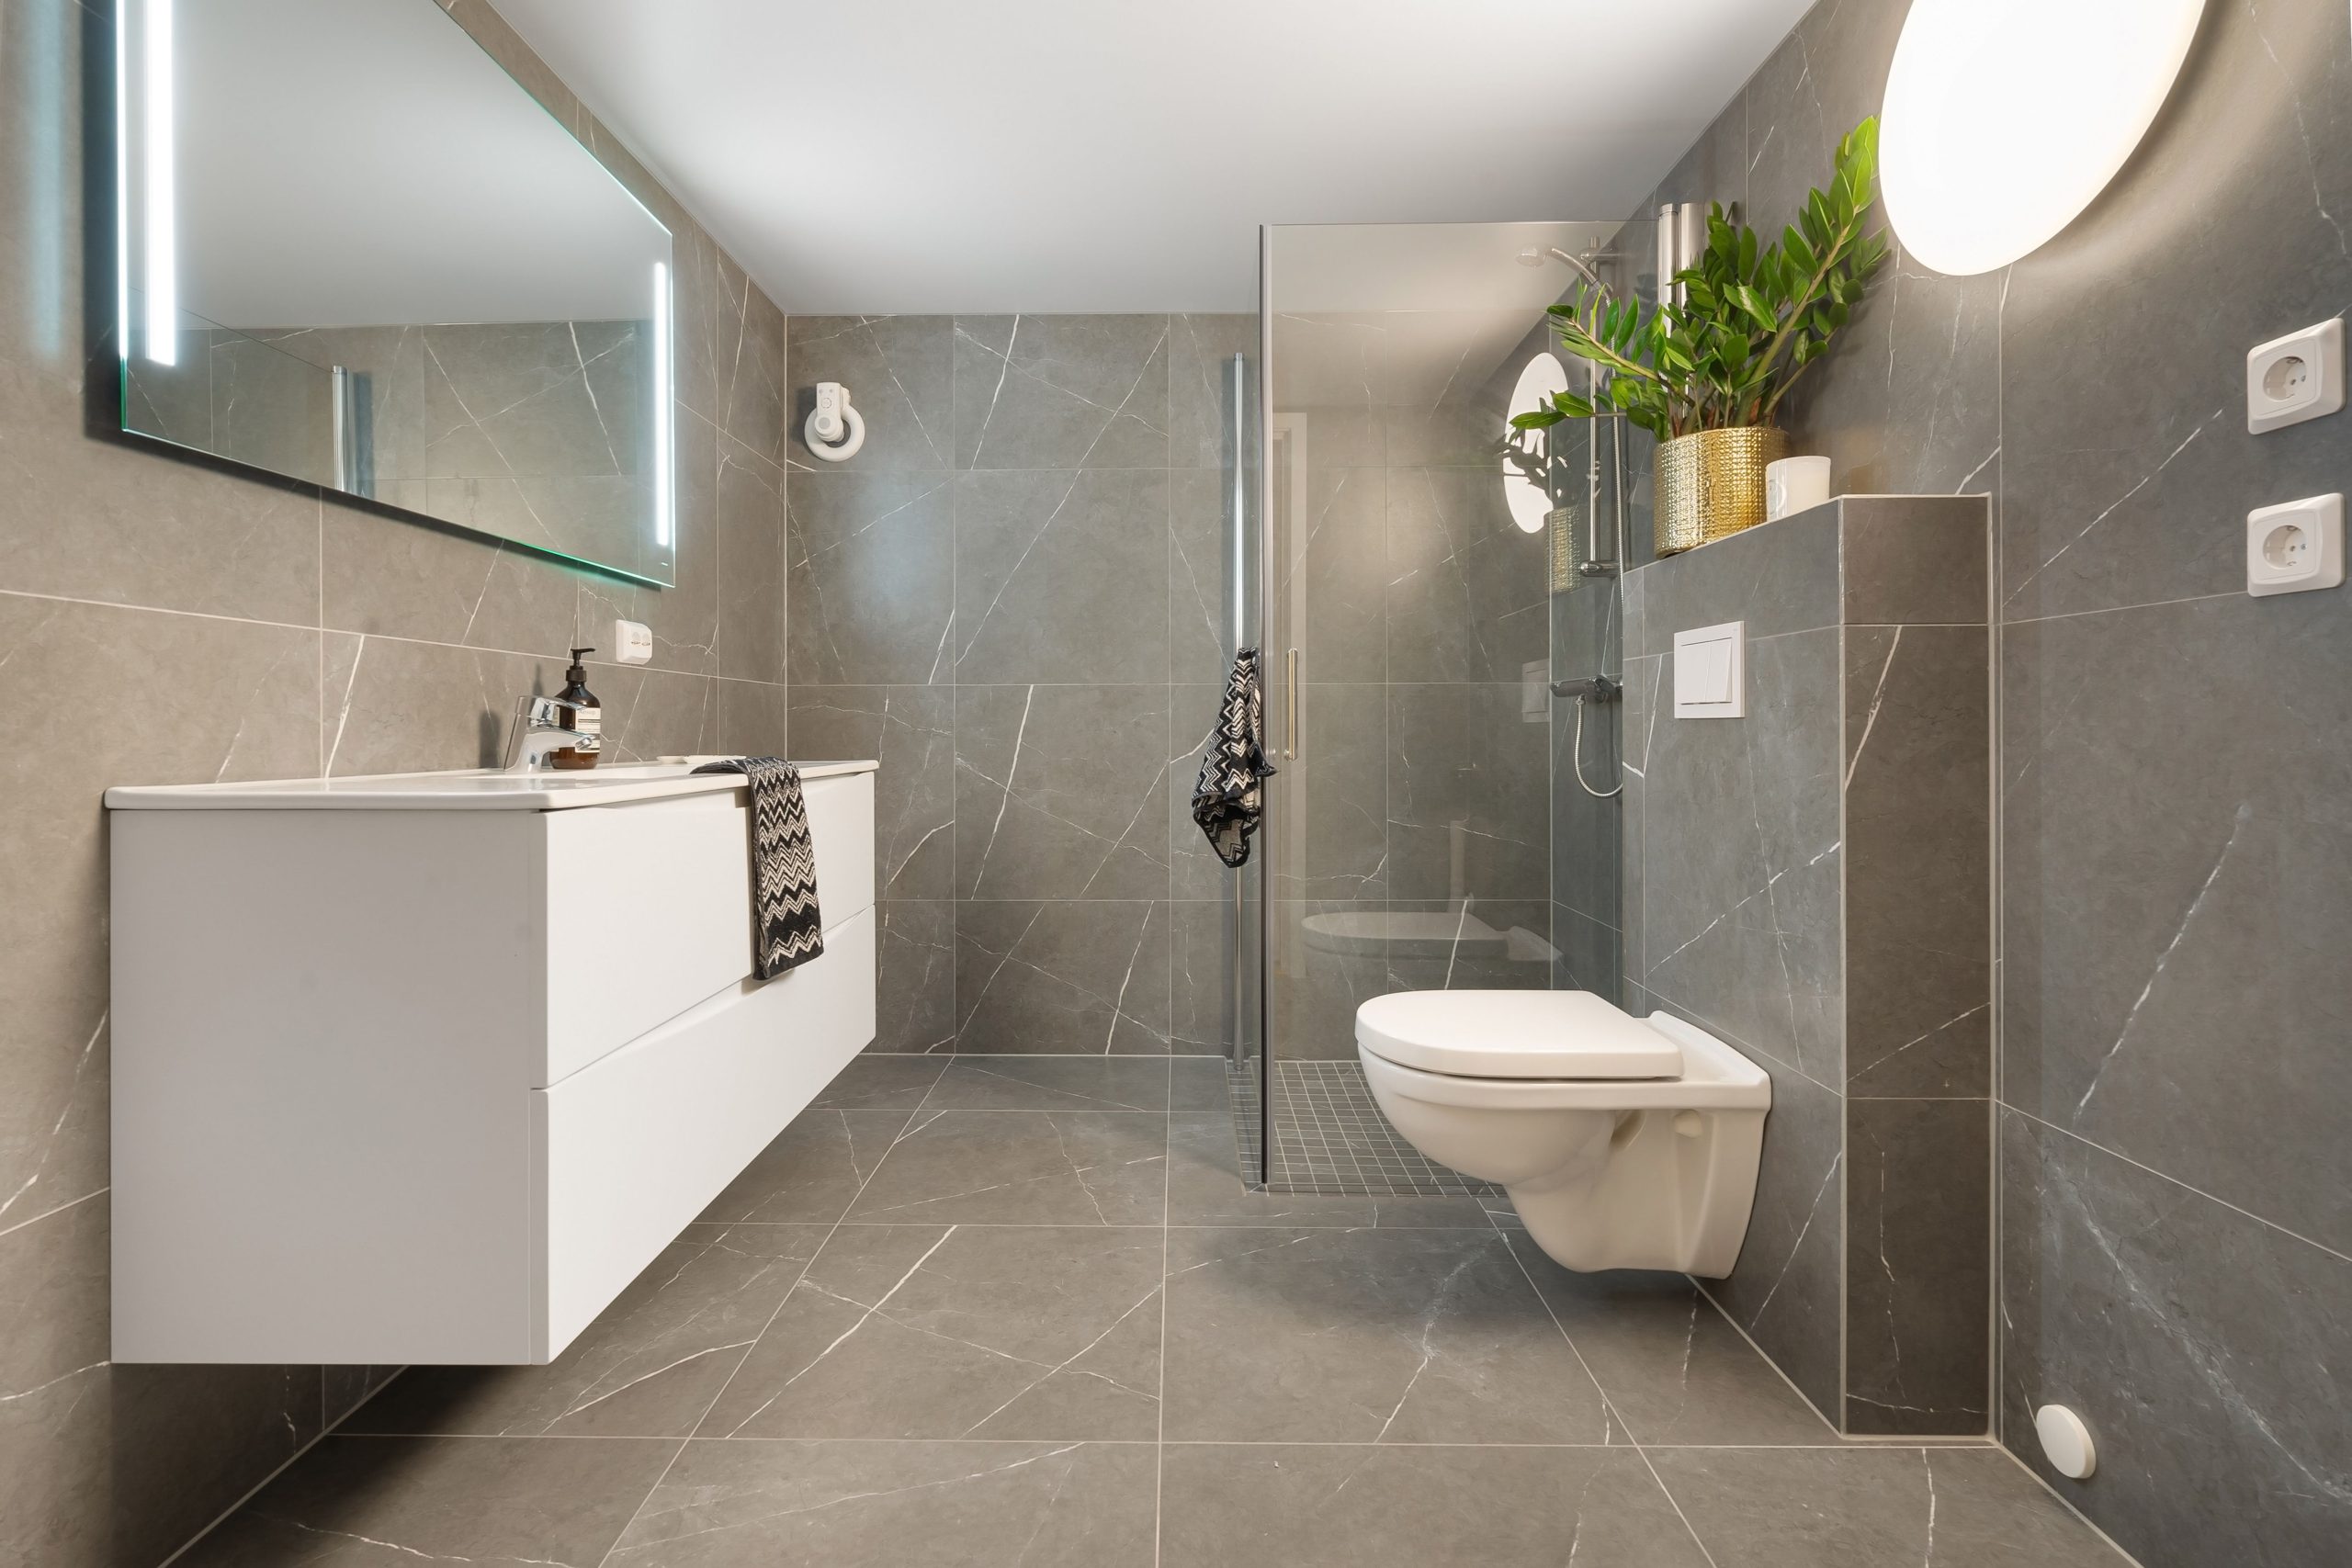
Wall-hung toilets and vanities create a wonderfully clean and modern look, and they make cleaning the floor a dream. However, the installation is more complex and costly than for standard fixtures. The wall must be opened up to install a sturdy in-wall carrier system to support the weight. This is not a simple swap-out project; it’s a small construction job. Also, if there are any plumbing issues down the line, accessing the tank or pipes requires opening the wall again, though access panels can mitigate this.
26. Industrial-Modern Shower with a Concrete Trough Sink
This bathroom nails the balance between cold industrial materials and warm organic ones. The dark gray tiles, clear glass, and raw concrete sink bring a strong, sleek, industrial vibe. On their own, these could feel sterile. But the introduction of the dark, horizontal wood paneling behind the toilet completely changes the feel. The wood’s natural grain and warm brown tone provide a necessary counterpoint, adding texture and life. The backlit mirror then casts a soft glow, bridging the gap between the two styles.
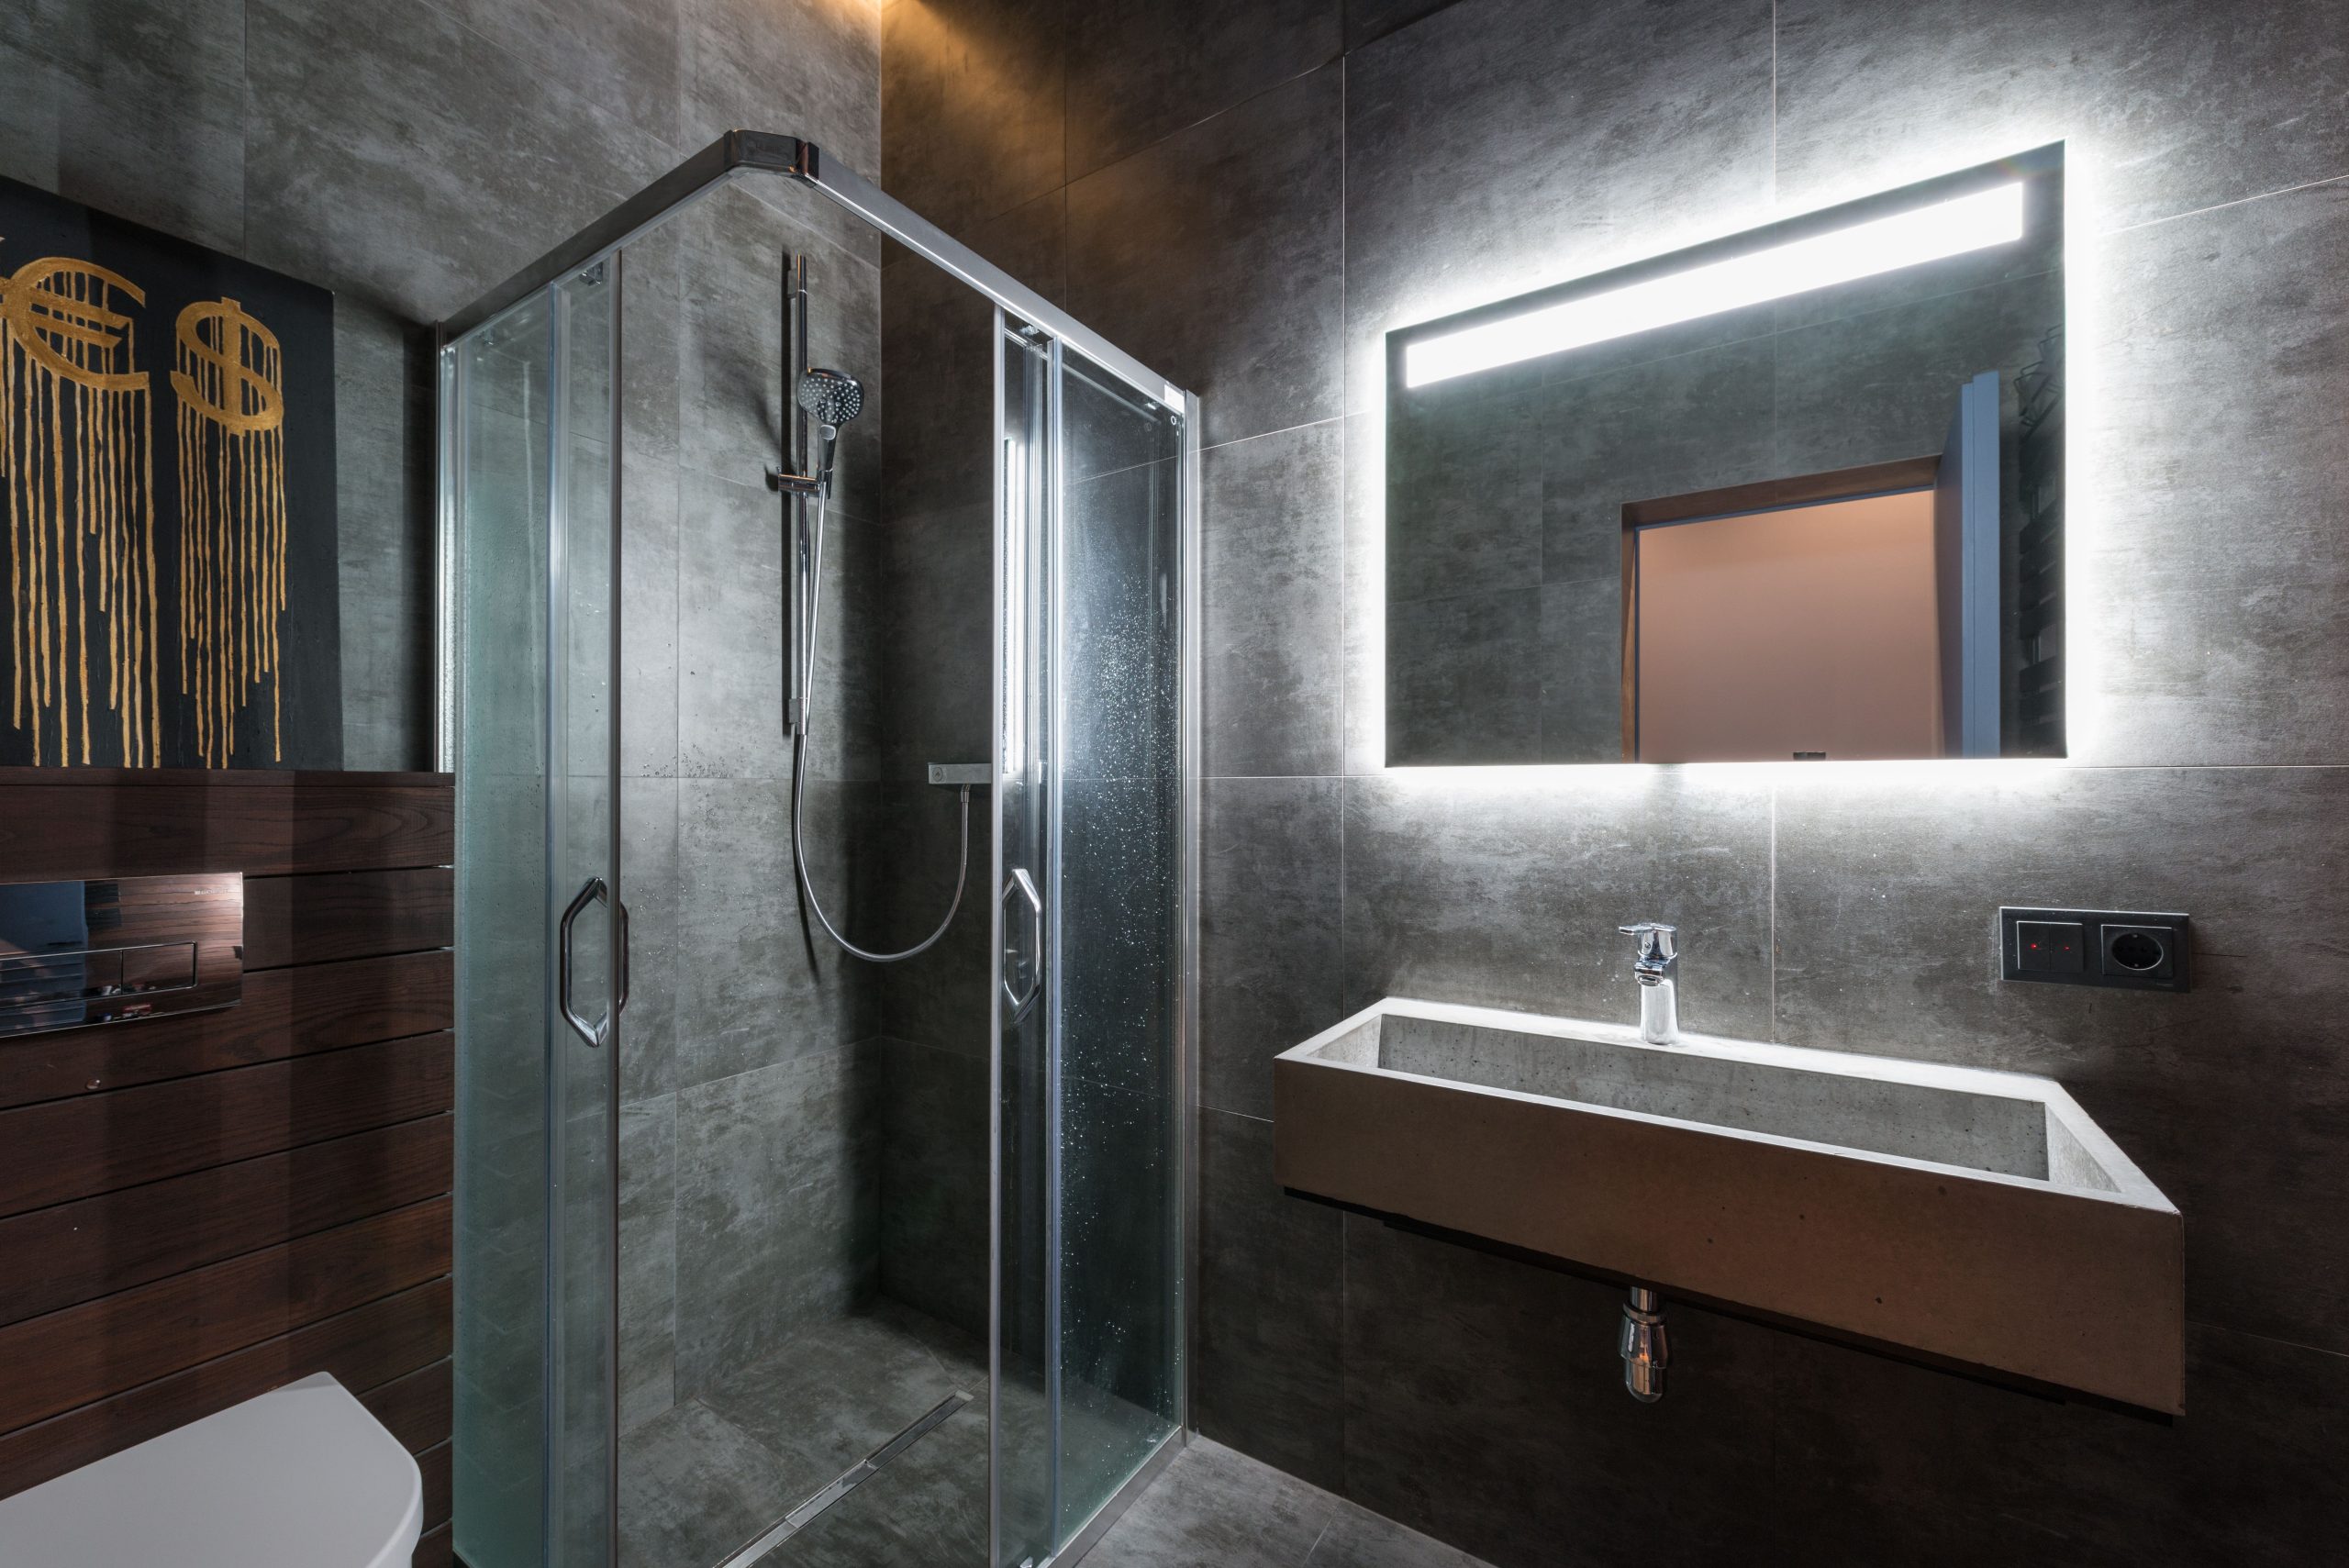
This is a look with some significant custom elements that drive up the cost, particularly the concrete sink.
- Concrete Trough Sink (Custom): $2,500 – $6,000
- Large-Format Dark Gray Tile (Materials & Install): $3,000 – $7,000
- Dark Wood Wall Paneling: $800 – $2,500
- Backlit Mirror & Lighting: $700 – $2,000
- Glass Enclosure & Linear Drain: $2,000 – $4,000
- TOTAL: $9,000 – $21,500+
- Budget alternative: Look for pre-cast concrete or concrete-look sinks from retailers like Wayfair or Signature Hardware to cut the sink cost by 40-60%.
Your Seamless Shower Sanctuary Is Closer Than You Think
That dream of a seamless, spa-like shower is absolutely within reach. The key is in the details: choosing the right slope, the perfect tile, and a layout that feels both open and functional. Use these ideas as your blueprint, but don’t be afraid to mix and match to create a space that feels uniquely you. Now that you’re armed with inspiration, head over to Pinterest and start creating a board for your perfect bathroom remodel.