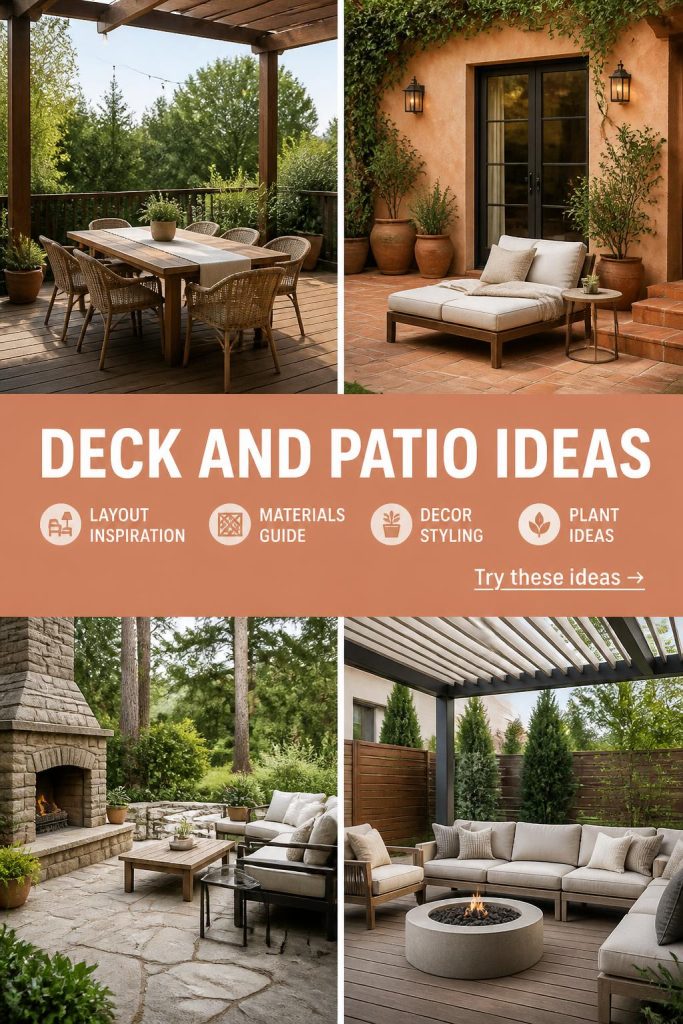
You know that feeling when you finally find the deck or patio idea that looks exactly right for your space? It’s that perfect mix of stylish and livable that just clicks. We’ve curated 30 incredible real-life examples to get you there. After filtering through hundreds of options across Wayfair, Home Depot, and Outer, we narrowed it down to these top looks that truly work. Inside, you’ll find designs covering everything from modern layouts to natural retreats and clever multi-level solutions. And stay until the end—we break down the most common mistakes that can ruin these looks. In 2026, it’s all about creating outdoor spaces that feel like a true extension of your home, not just an afterthought. 📌 Save this to Pinterest for later—you’ll want to revisit these ideas.
1. Spacious Rooftop Deck with a Glass Railing Overlooking a Lake
This design succeeds by prioritizing the view. The clear glass railing is the hero here, creating an unbroken sightline to the lake so the deck feels like it’s floating above the water. The simple, low-profile furniture—like the woven rattan armchairs—complements the scene without competing with it. By keeping the color palette neutral with grey planking and light cushions, the vibrant blue of the water and sky becomes the primary color pop, making the entire space feel expansive and serene.
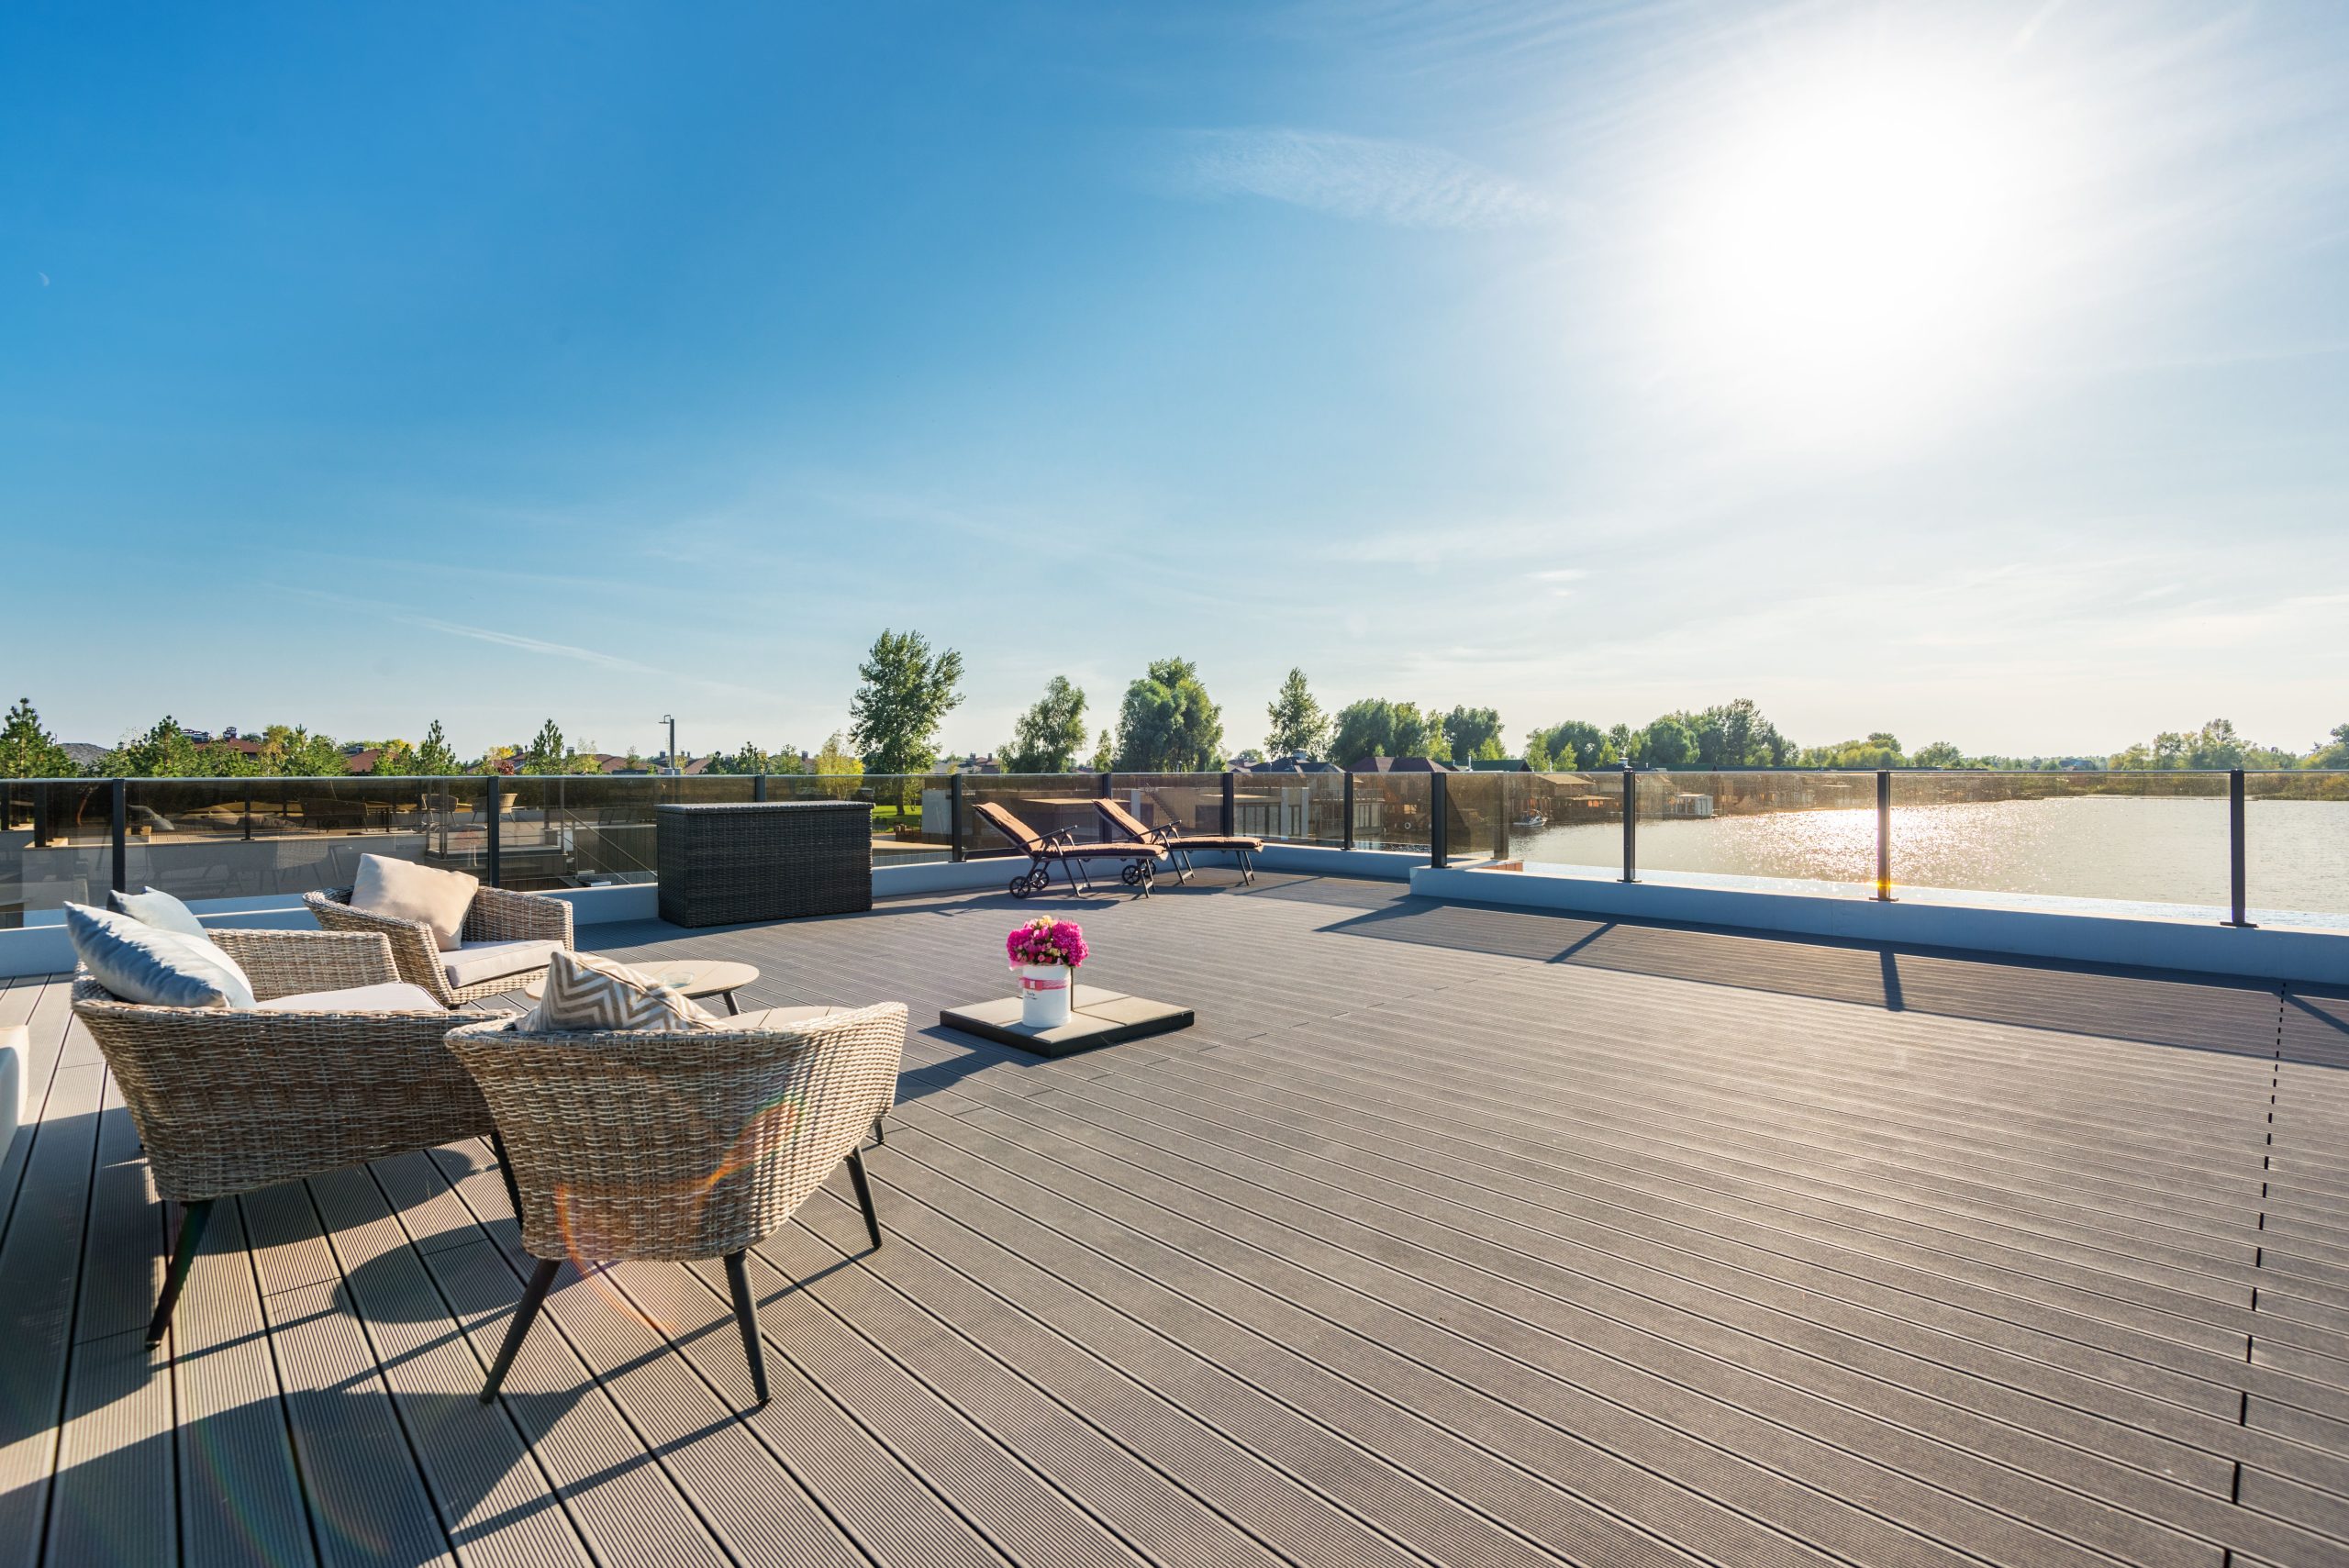
When using glass railings for a premium view, always opt for low-iron glass. Standard glass has a slight green tint that can subtly distort the colors of the landscape beyond. Low-iron glass is optically clear and ensures that the blues of the water and greens of the trees look true to life. It’s a small up-charge, typically 15-20% more than standard tempered glass, but for a view-dependent space like this, the color fidelity is absolutely worth it.
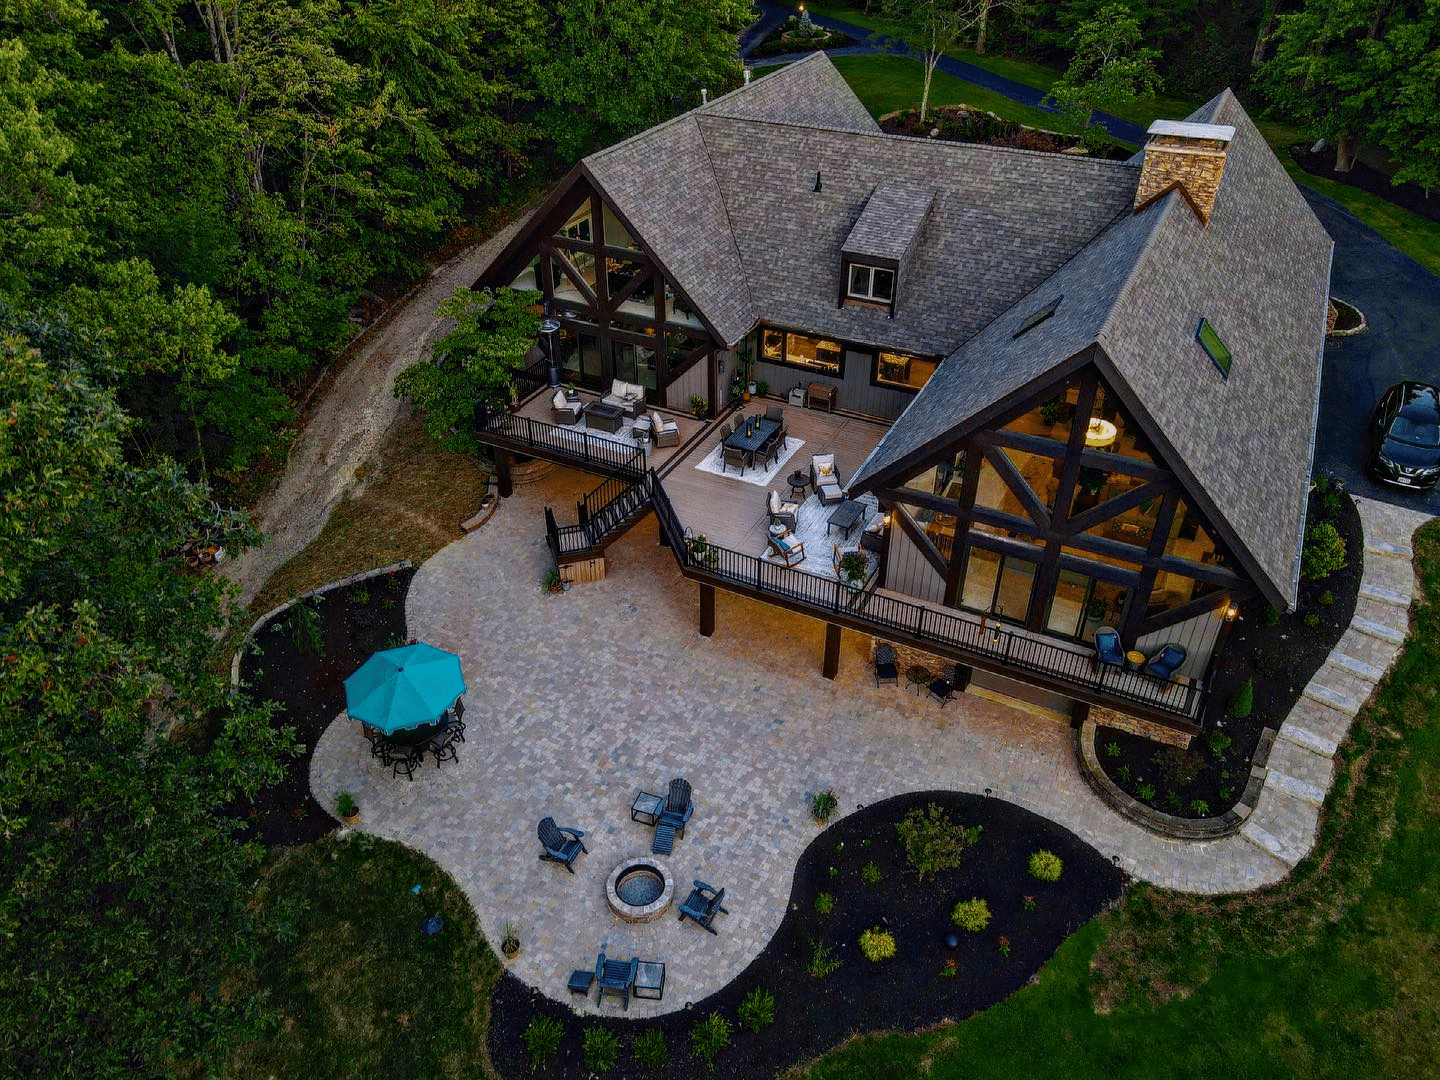
2. Multi-Level Wood Deck and Curvilinear Paved Patio
A grand, multi-zone design like this works best in backyards that are at least 60 feet wide and 40 feet deep. The key is having enough space to create distinct ‘rooms’ without feeling cramped. You need a minimum of 12×12 feet for the dining area under the teal umbrella, another 15×15 for the fire pit lounge, and at least 8 feet of clearance for walkways between zones. The multi-level aspect is fantastic for sloped yards, but the transitions require generous landings and wide steps, so plan for at least a 300 sq. ft. deck and a 400 sq. ft. patio to achieve this level of functionality.
- Main Furniture (2 seating groups, dining set): $4,000 – $9,500
- Structure (Deck & Railings): $15,000 – $28,000
- Hardscaping (Paver Patio & Fire Pit): $12,000 – $22,000
- Lighting & Accessories (Umbrella, etc.): $1,000 – $2,500
- TOTAL: $32,000 – $62,000
- Budget alternative: Use pressure-treated lumber instead of composite for the deck and a prefabricated fire pit kit, and focus on one seating area to start. This could bring the cost down to the $15,000 – $25,000 range.
3. Modern Poolside with Composite Deck and Artificial Turf
The visual balance here is a lesson in modern texture mixing. Think of it as 40% warm element (the light brown composite deck), 30% cool element (the light blue pool water and grey concrete patio), 20% natural green (the artificial turf), and 10% crisp architecture (the white coping and fence). This formula keeps the space from feeling sterile. You could swap the artificial turf for a fine gravel like decomposed granite or change the deck to a light grey composite, and the core balance would still hold, proving the flexibility of the approach.
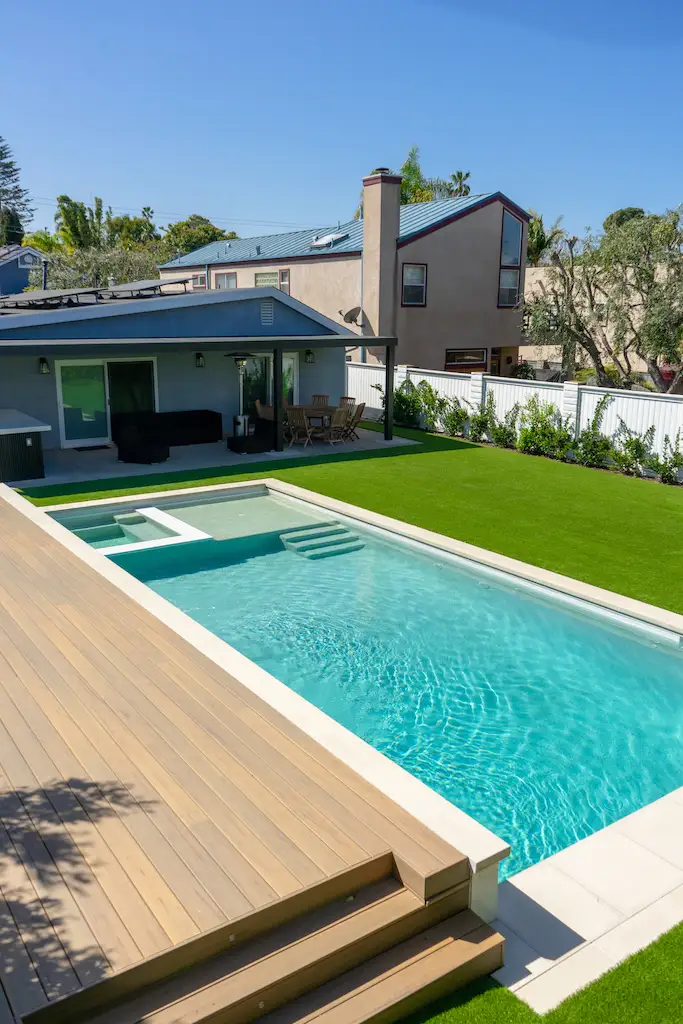
Let’s be honest: artificial turf gets hot. In direct, intense sun, high-quality turf can reach temperatures 40-60 degrees hotter than the air, making it uncomfortable for bare feet. While it’s zero-maintenance in terms of mowing, it does require occasional rinsing to remove dust and debris. If you have pets, you’ll need to use enzymatic cleaners to manage odors. This setup is gorgeous and clean, but be prepared with outdoor rugs in high-traffic zones and have a hose handy on scorching days.
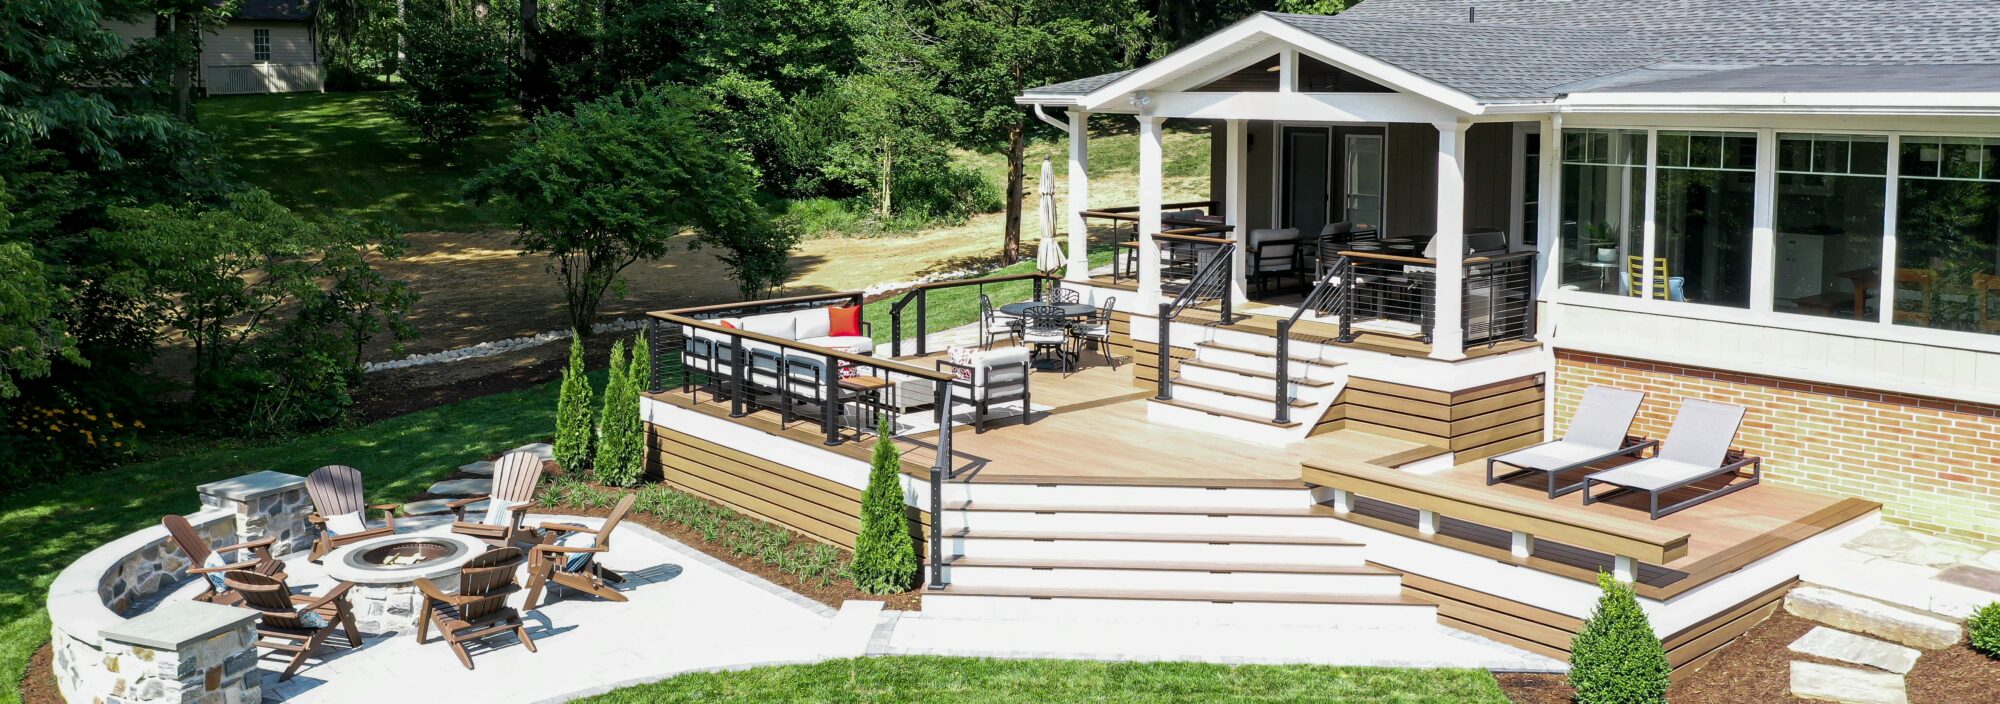
4. Multi-Level Deck & Patio with Cable Railings and a Stone Fire Pit
The single element that makes this design work so well is the contrast between the clean, modern lines of the deck and the rustic, organic feel of the lower patio. The black cable railings are sleek and minimalist, directing your eye outward. Then, you descend to the textured stone fire pit and retaining wall, which feels grounded and timeless. If you removed the stone elements and made the entire space with composite decking, you’d lose that wonderful tension between new and old. That contrast is what gives the space its sophisticated character. Compare this to the layout in Idea #2, which uses curves to soften its levels.
|
📋 Copy HEX 🔗 Share |
You can achieve this look for a fraction of the price. Swap the composite deck for pressure-treated pine (you can stain it a similar color) and look for a DIY fire pit kit from Home Depot or Lowe’s for around $400-$700. For seating, score some wooden Adirondack chairs on Facebook Marketplace—they pop up all the time for $50-$100 each. Instead of a custom paver patio, consider a compact gravel or decomposed granite area. You’ll get the same multi-level, multi-material vibe for under $5,000 if you’re willing to do the work yourself.
5. Composite Deck with Illuminated Stairs and Integrated Planters
To install integrated stair lighting like this, you’ll want to plan before you build. Here’s a quick guide:
- Choose Your Lights: Select low-voltage (12V) LED riser lights designed for outdoor use. They’re safer and more energy-efficient.
- Plan the Wiring: Run low-voltage landscape wire from a transformer, routing it underneath the deck and up to each stair location before the treads are installed.
- Cut the Openings: Use a drill with a hole saw or a jigsaw to carefully cut the correct-sized opening for each light fixture in the stair risers.
- Connect and Install: Connect each light fixture to the main wire line using waterproof wire nuts. Tuck the wires neatly behind the riser and secure the fixture in place.
- Test Everything: Before closing everything up, connect the transformer and test all the lights to ensure they work properly.
Estimated time: 3-4 hours for 10 stairs. Cost: $200-$500 for lights, wire, and transformer.
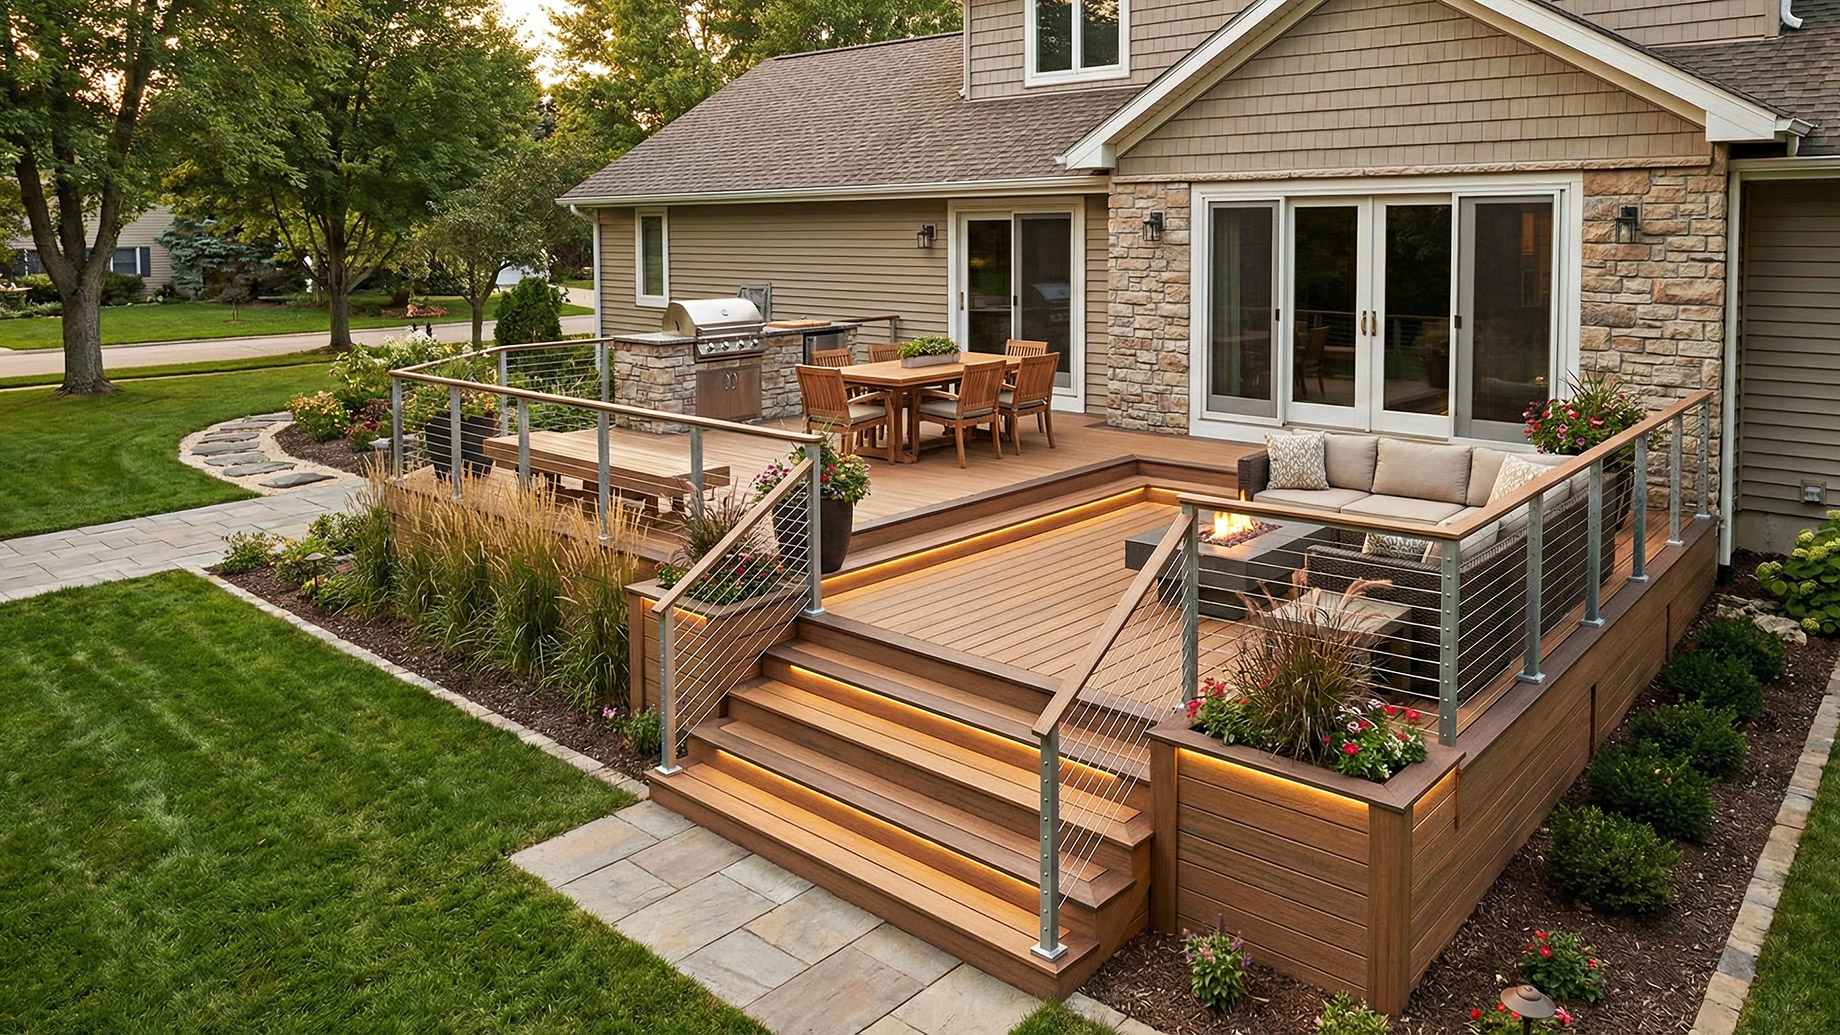
Composite decking is fantastically low-maintenance compared to wood, but it’s not ‘no-maintenance.’ Twice a year, you’ll need to give it a good cleaning with a soft-bristle brush and a composite deck cleaner to prevent mildew and pollen buildup, especially in shaded, damp areas. Be careful with suntan lotion and insect repellent, as they can stain the surface. The stainless steel cable railings will also show water spots and fingerprints, so a quick wipe-down with a microfiber cloth and some stainless steel cleaner every few weeks keeps them looking sharp.
6. Modern Dark Grey House with a Slatted Pergola Over a Wooden Deck
This look is gaining traction because it perfectly embodies the ‘Japandi’ outdoor trend—a hybrid of Scandinavian function and Japanese minimalism. The clean lines of the slatted pergola, the natural wood tones, and the moody, dark grey facade create a feeling of calm sophistication. Homeowners are moving away from fussy, decorative outdoor spaces and craving clean, architectural extensions of their living area. This design feels intentional and serene, which is a huge priority as we continue to invest more in our homes as personal sanctuaries.
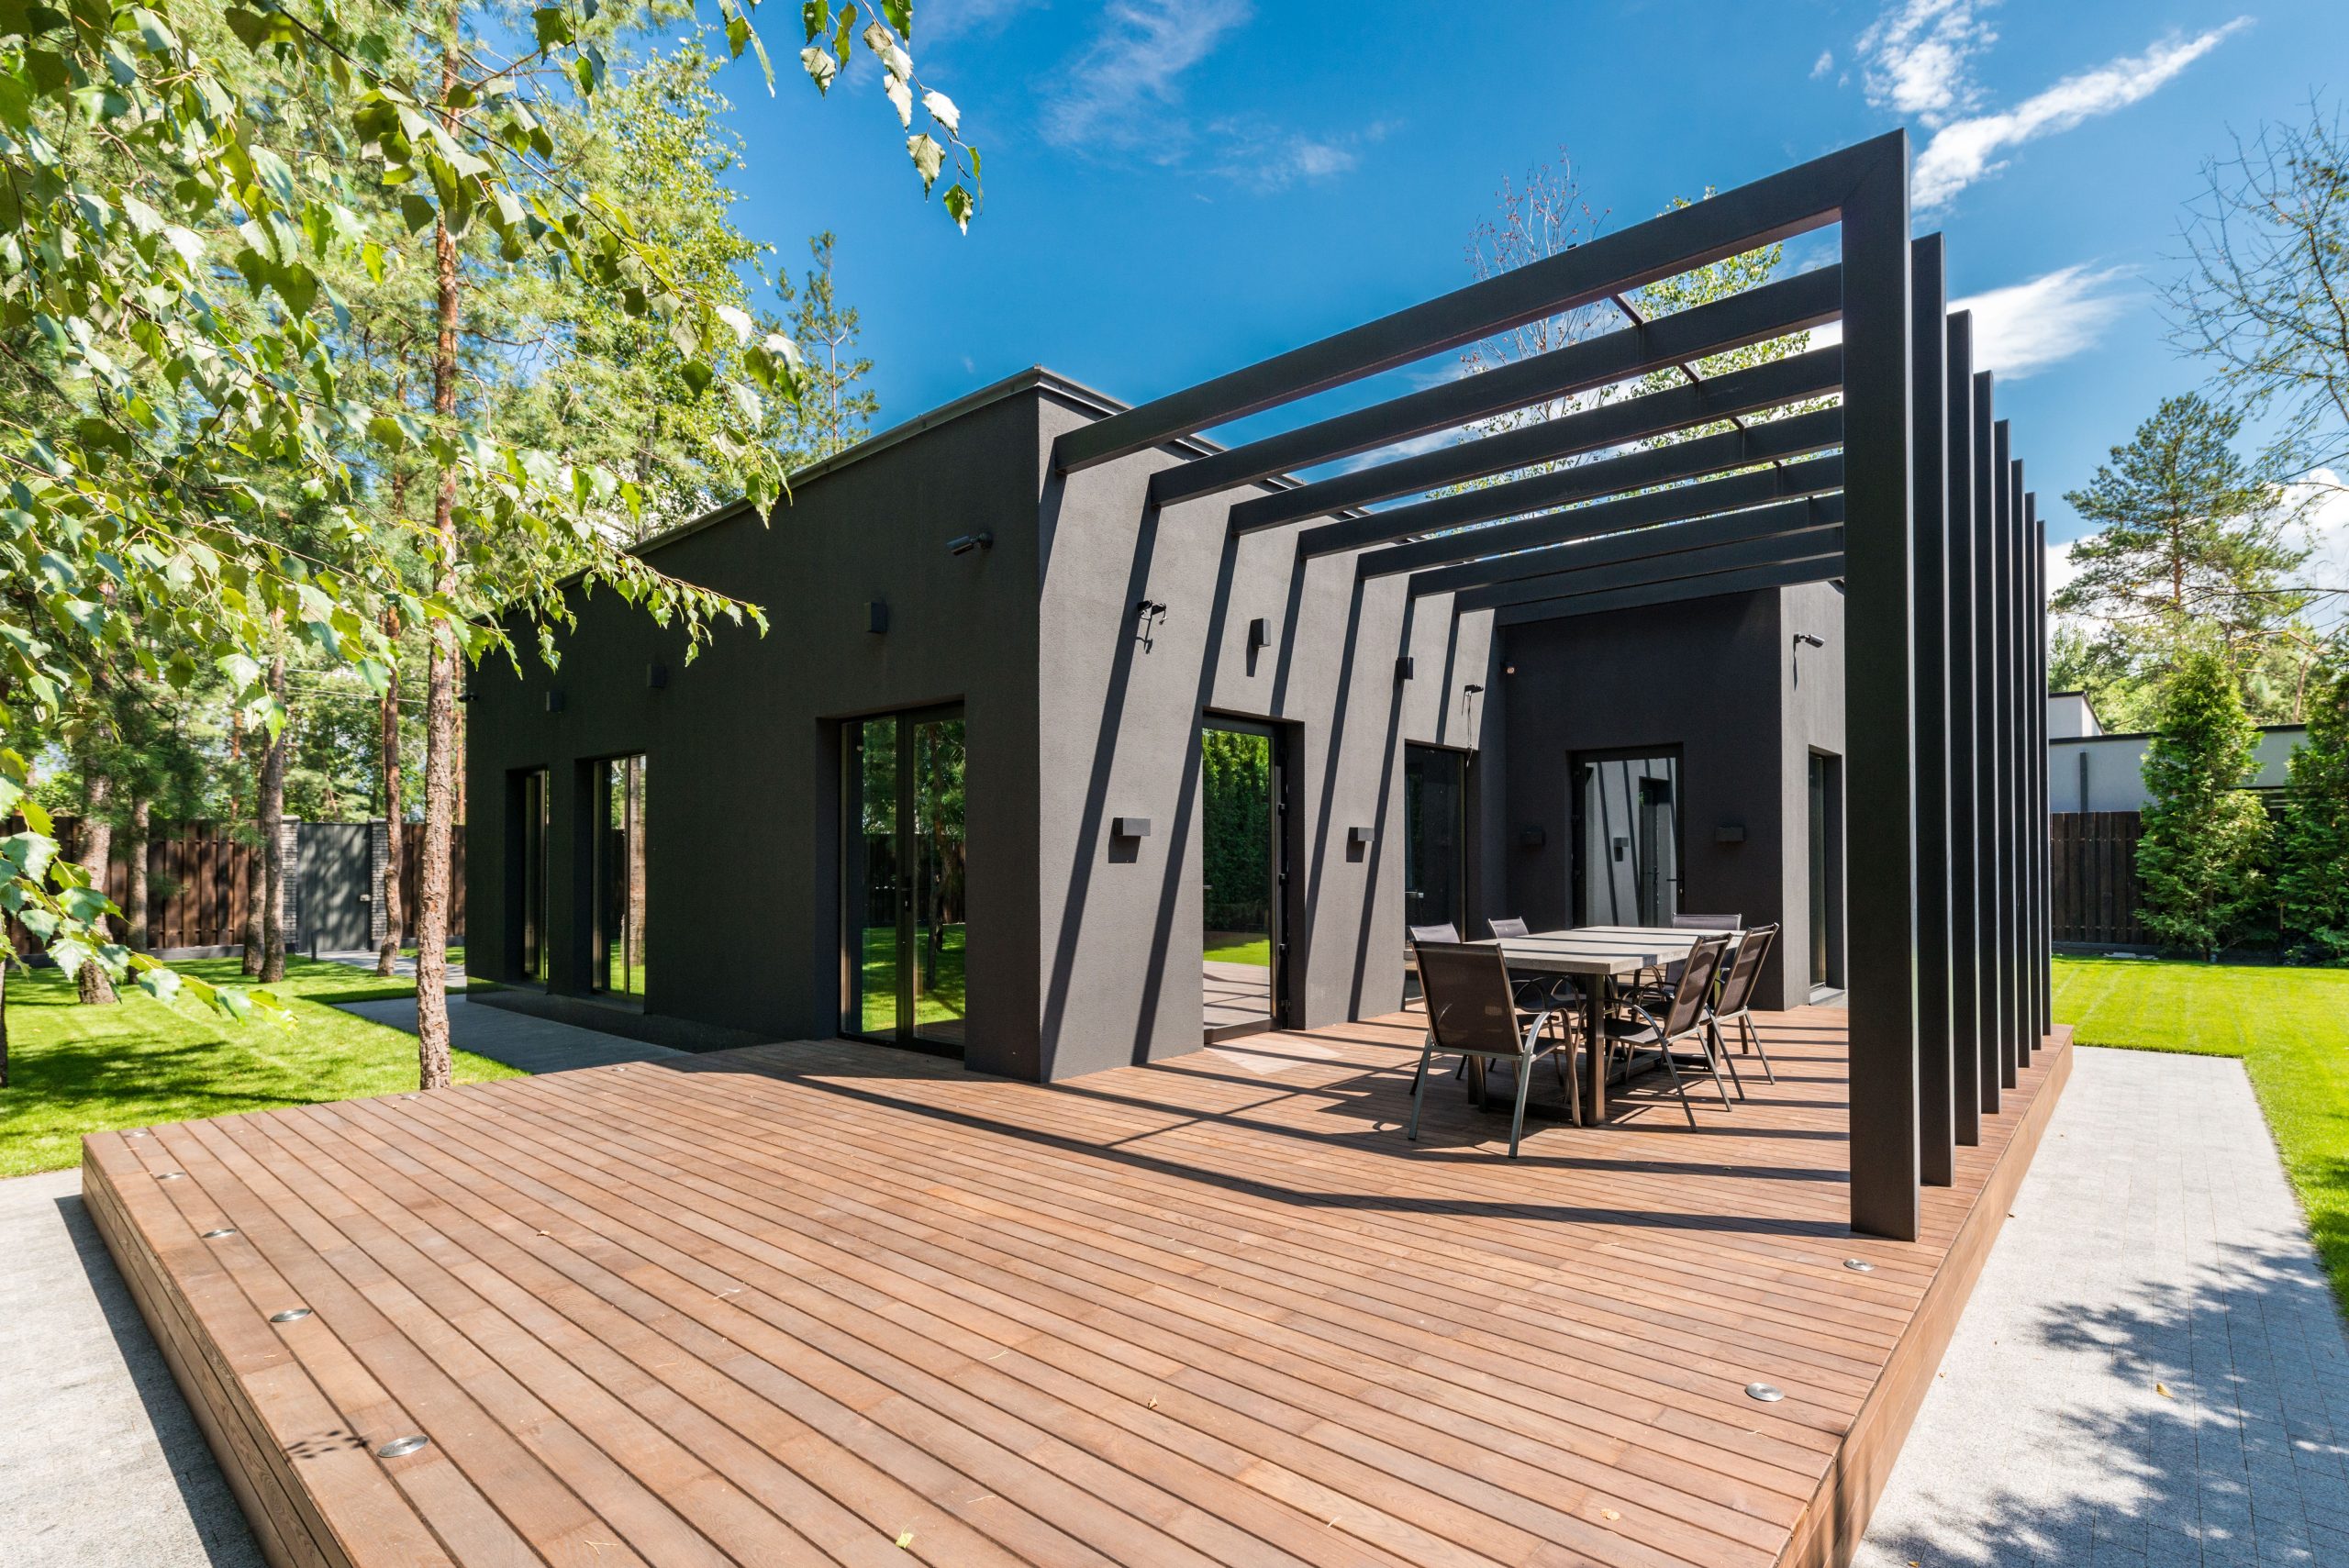
When designing a pergola attached to your house, the ‘drop’ is critical. To ensure proper water drainage away from your home’s foundation and siding, the pergola’s roof beams should have a minimum slope of 1/4 inch per foot. For a pergola that extends 12 feet from the house, the outer edge should be at least 3 inches lower than the edge attached to the house. This is subtle enough not to be noticeable visually but essential for preventing water damage over time. Always check local building codes for specific requirements.
7. Rooftop Patio with a Wooden Pergola and Woven Rattan Furniture
This rooftop oasis works because of its brilliant use of zoning and material repetition. The wooden decking, pergola, and even the woven dining set all share a similar warm, natural finish, which unifies the large space and makes it feel cohesive. The design then cleverly creates two distinct ‘rooms’—a plush lounge area with sofas and a separate dining spot—without using walls. The dark-tiled water feature acts as a focal point and a gentle sound barrier, further enhancing the sense of separation and tranquility. It’s a masterclass in creating function on a blank canvas.
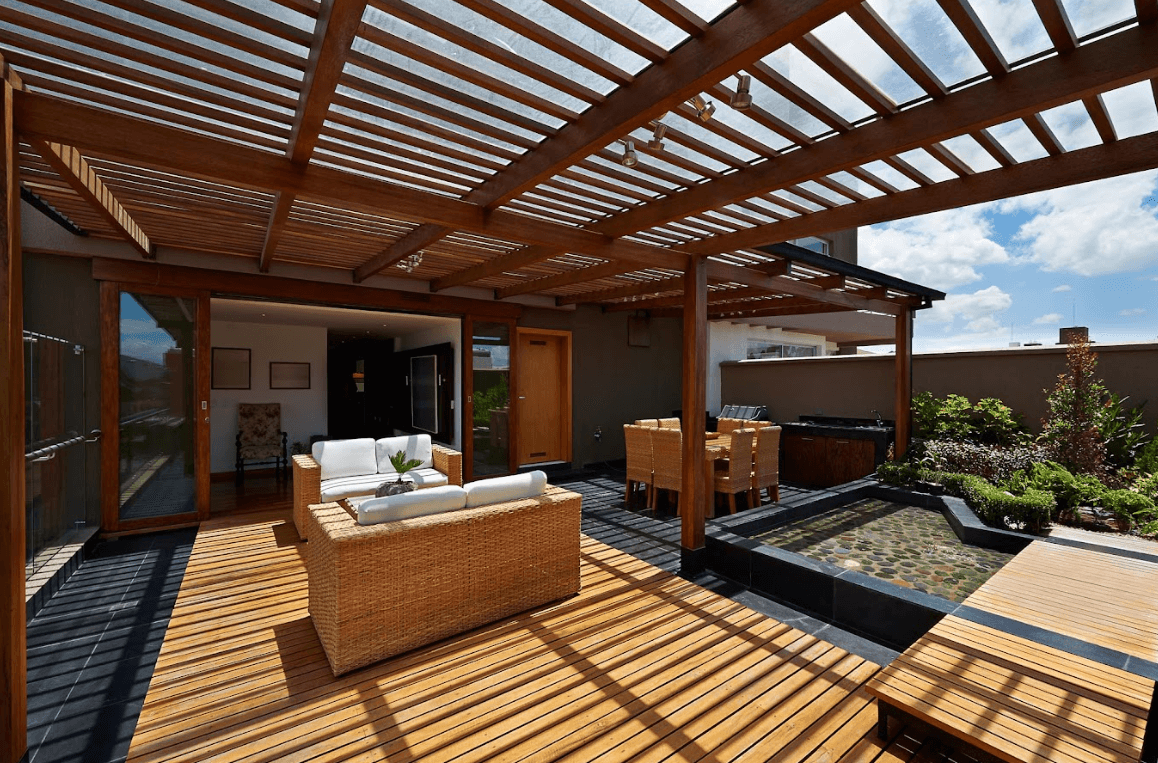
Before you commit to a rooftop deck or patio, tick these boxes:
- Structural Load: Have a structural engineer verify that your roof can handle the weight of the deck, furniture, soil, plants, and people. This is non-negotiable.
- Waterproofing and Drainage: Ensure your existing roof membrane is in perfect condition. The deck system should be designed to allow for easy inspection and proper water flow to drains.
- Access and Egress: How will you get materials up and people in and out? Check local building codes for requirements regarding railings, stairs, and door access.
- Sun and Wind Exposure: Rooftops are often intensely sunny and windy. Plan for shade structures like this pergola and select durable, wind-resistant furniture from the start.
8. Multi-Level Wood Deck with Adirondack Chairs and Raised Gardens
This is a fantastic solution for a yard with a moderate slope and a footprint of at least 50×30 feet. The multiple, smaller levels break up the visual bulk of a single massive deck, making the space feel more dynamic and approachable. For this to work, each level needs a purpose. Plan for at least a 12×14 foot area for a dining zone (like the picnic table shown) and 10×10 foot nooks for conversational seating with the Adirondack chairs. The integrated planters are key; they need to be at least 2 feet wide to hold enough soil for substantial plantings.
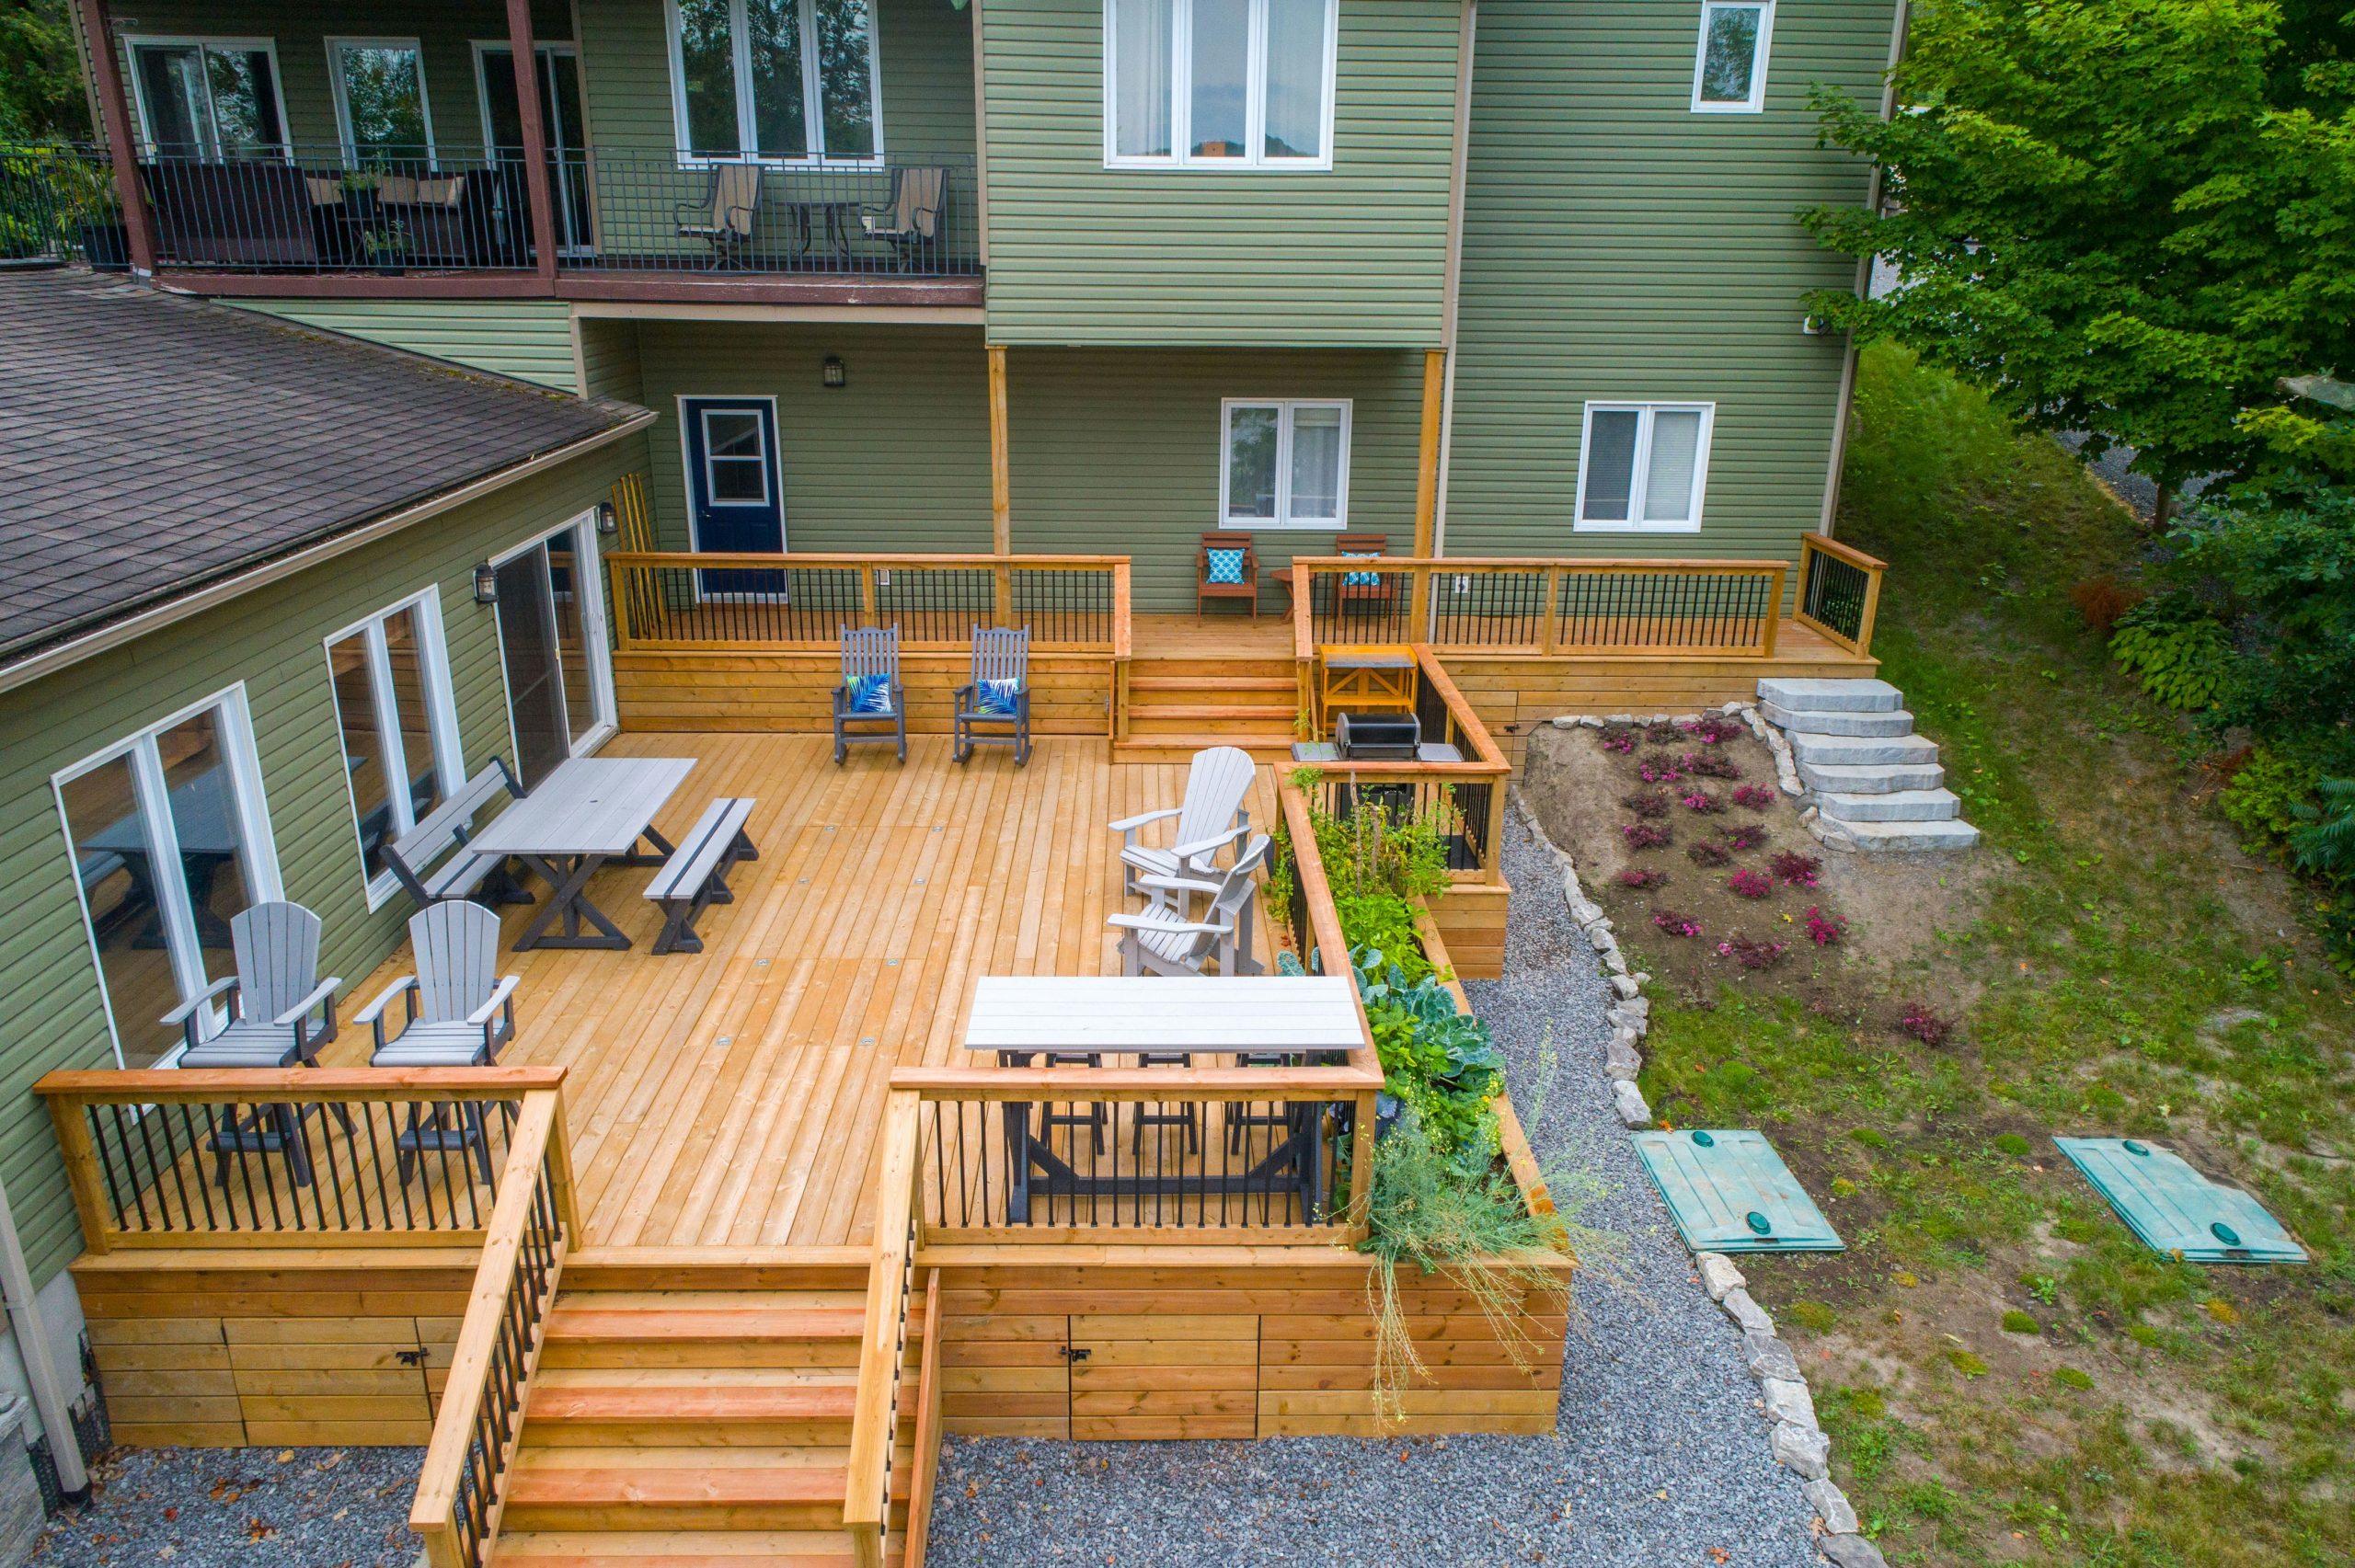
A deck this large with integrated planters requires a very specific foundation plan. You can’t just build planters on top of a floating deck; the weight of the wet soil will cause it to sag or fail over time. The planters themselves need to be built as separate, ground-supported structures with proper drainage. Also, a large wooden deck requires consistent maintenance. Expect to clean and re-stain or seal it every 2-3 years to protect it from the elements and keep that natural wood tone from turning a dull gray.
9. Shaded Stone Patio Beneath an Elevated Deck
The single most important decision here was to embrace the under-deck space instead of ignoring it. By installing a proper under-deck drainage system (which catches water from the deck above and diverts it away), this area was transformed from a damp, muddy spot into a dry, usable patio. Without that system, the furniture would be unusable after every rain, and the stone pavers could become slick with mildew. It’s the invisible infrastructure that makes this cozy, shaded retreat possible. The ceiling fan and recessed lighting elevate it even further. This is a brilliant way to double your outdoor living area. Check out Idea #20 for another well-executed covered patio concept.
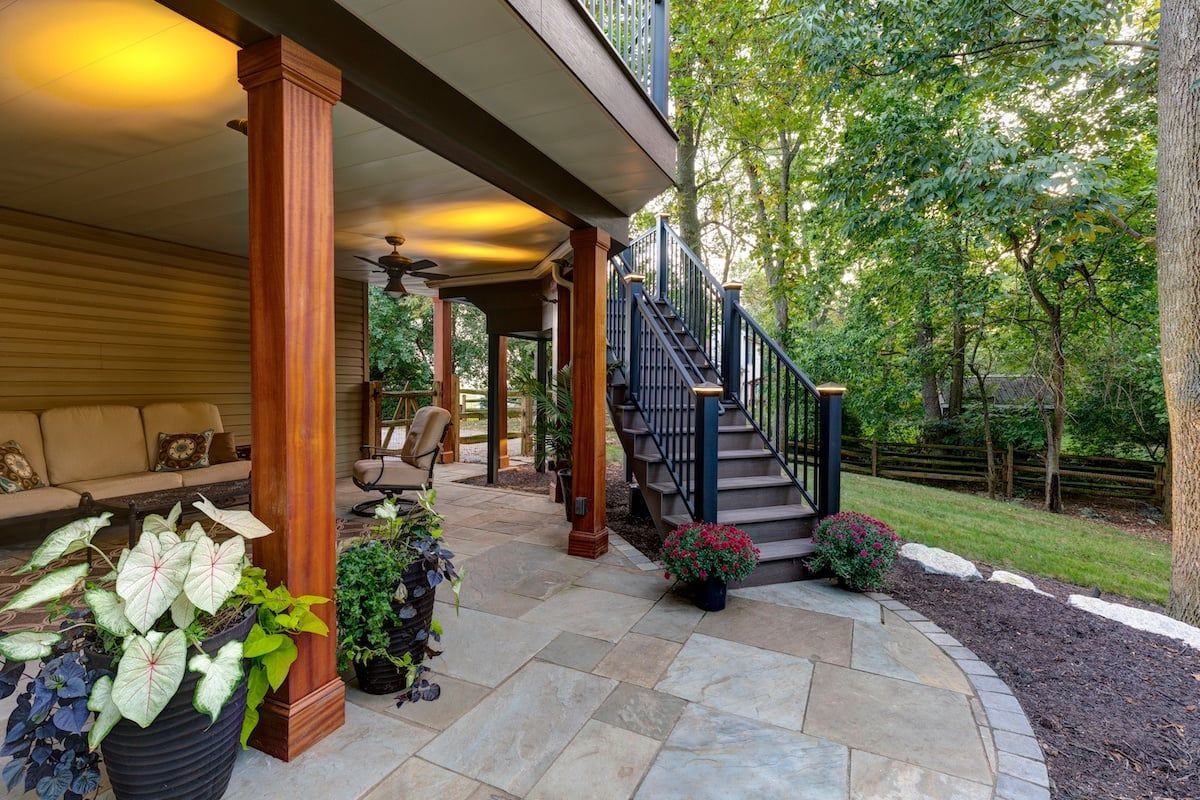
You don’t need a custom stone patio to get this look. You can create a beautiful and functional under-deck space using budget-friendly materials. Start with a simple DIY rain-diversion system (kits are available online for under $500). Then, lay down a thick layer of landscape fabric and cover it with 3-4 inches of pea gravel or crushed stone for about $1-$3 per square foot. It provides excellent drainage and a clean, finished look. Hunt for secondhand outdoor sofas on Facebook Marketplace to complete your cozy, all-weather hideaway.
10. Multi-Level Deck with Built-in Seating, Fire Pit, and String Lights
The magic formula here is all about warmth and enclosure. It’s 50% dark, grounding elements (the dark wood deck, the grey cushions), 30% points of light (the string lights, the fire), and 20% living texture (the lush perimeter plants). The dark colors create a sense of intimacy, making the space feel like a cozy room even though it’s outdoors. The lights and fire then act like jewelry, drawing the eye and creating a warm, inviting glow. The tall plants form natural ‘walls,’ completing the effect. It’s a perfect balance for creating a captivating evening atmosphere.
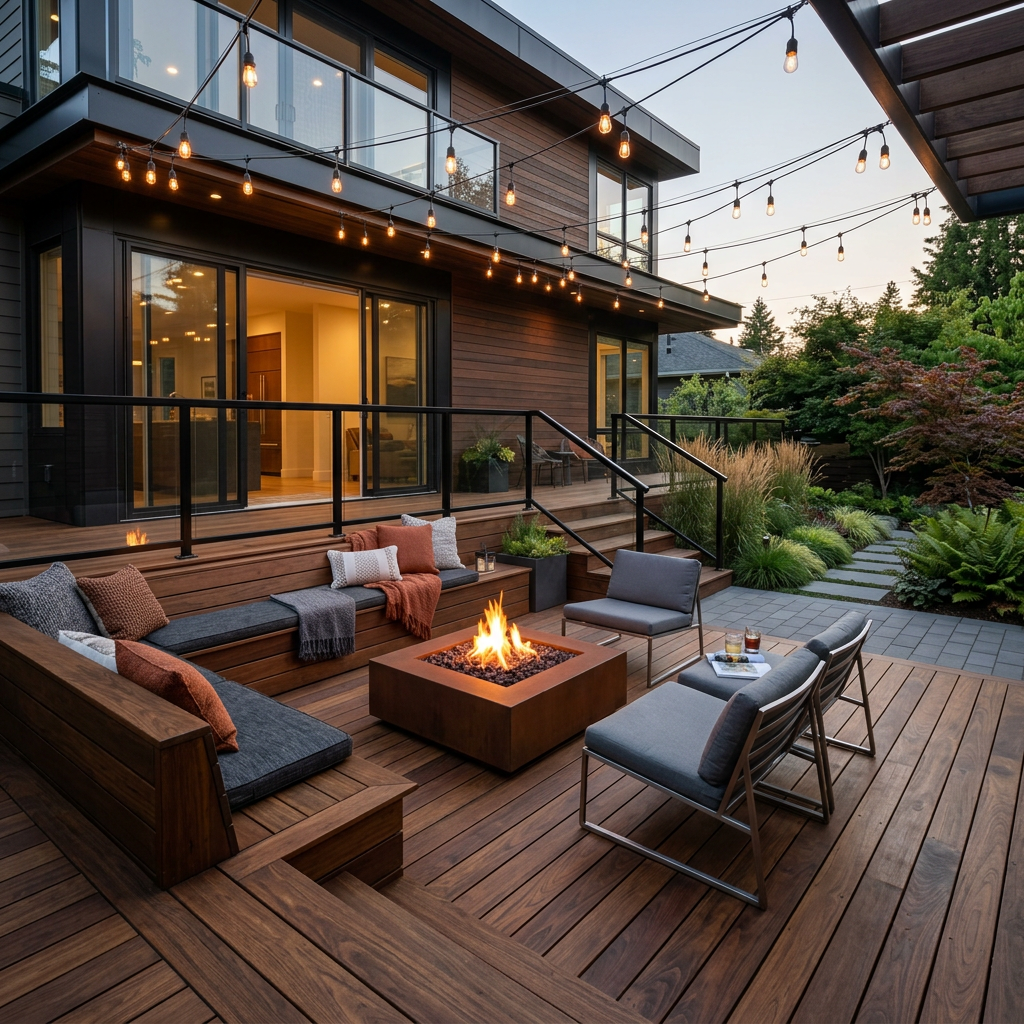
For overhead string lights, always use a steel guide wire. Don’t just string the lights themselves across a long span. Over time, the tension and weight will cause the light cord to stretch and sag, and it can even pull out of the sockets. A simple galvanized or stainless steel cable, secured with turnbuckles to get it taut, provides the structural support. You then attach the string lights to the guide wire every 18-24 inches with zip ties or clips. This ensures your lights hang perfectly straight and will last for many seasons.
11. Pergola Patio with Terracotta Flagstone and Lush Greenery
Laying an irregular flagstone path with gravel joints is a great DIY project. Here’s how:
- Excavate the Area: Dig out the path or patio area to a depth of about 4-5 inches. Ensure the soil is compacted and level.
- Add a Gravel Base: Fill the area with 2-3 inches of paver base or crushed stone. Rake it smooth and tamp it down firmly.
- Place the Flagstones: Arrange your terracotta flagstones, leaving 1-3 inch gaps between them. Wiggle each stone into the base so it’s stable and doesn’t rock. Use a level to ensure the surface is relatively even.
- Fill the Gaps: Pour dark gray pea gravel or crushed stone into the gaps. Use a broom to sweep it into all the crevices.
- Tamp and Top Off: Gently tamp the gravel down. You may need to add a little more gravel to ensure the gaps are filled flush with the top of the stones.
Estimated time: A weekend for a 50 sq. ft. path. Cost: $8-$15 per sq. ft.
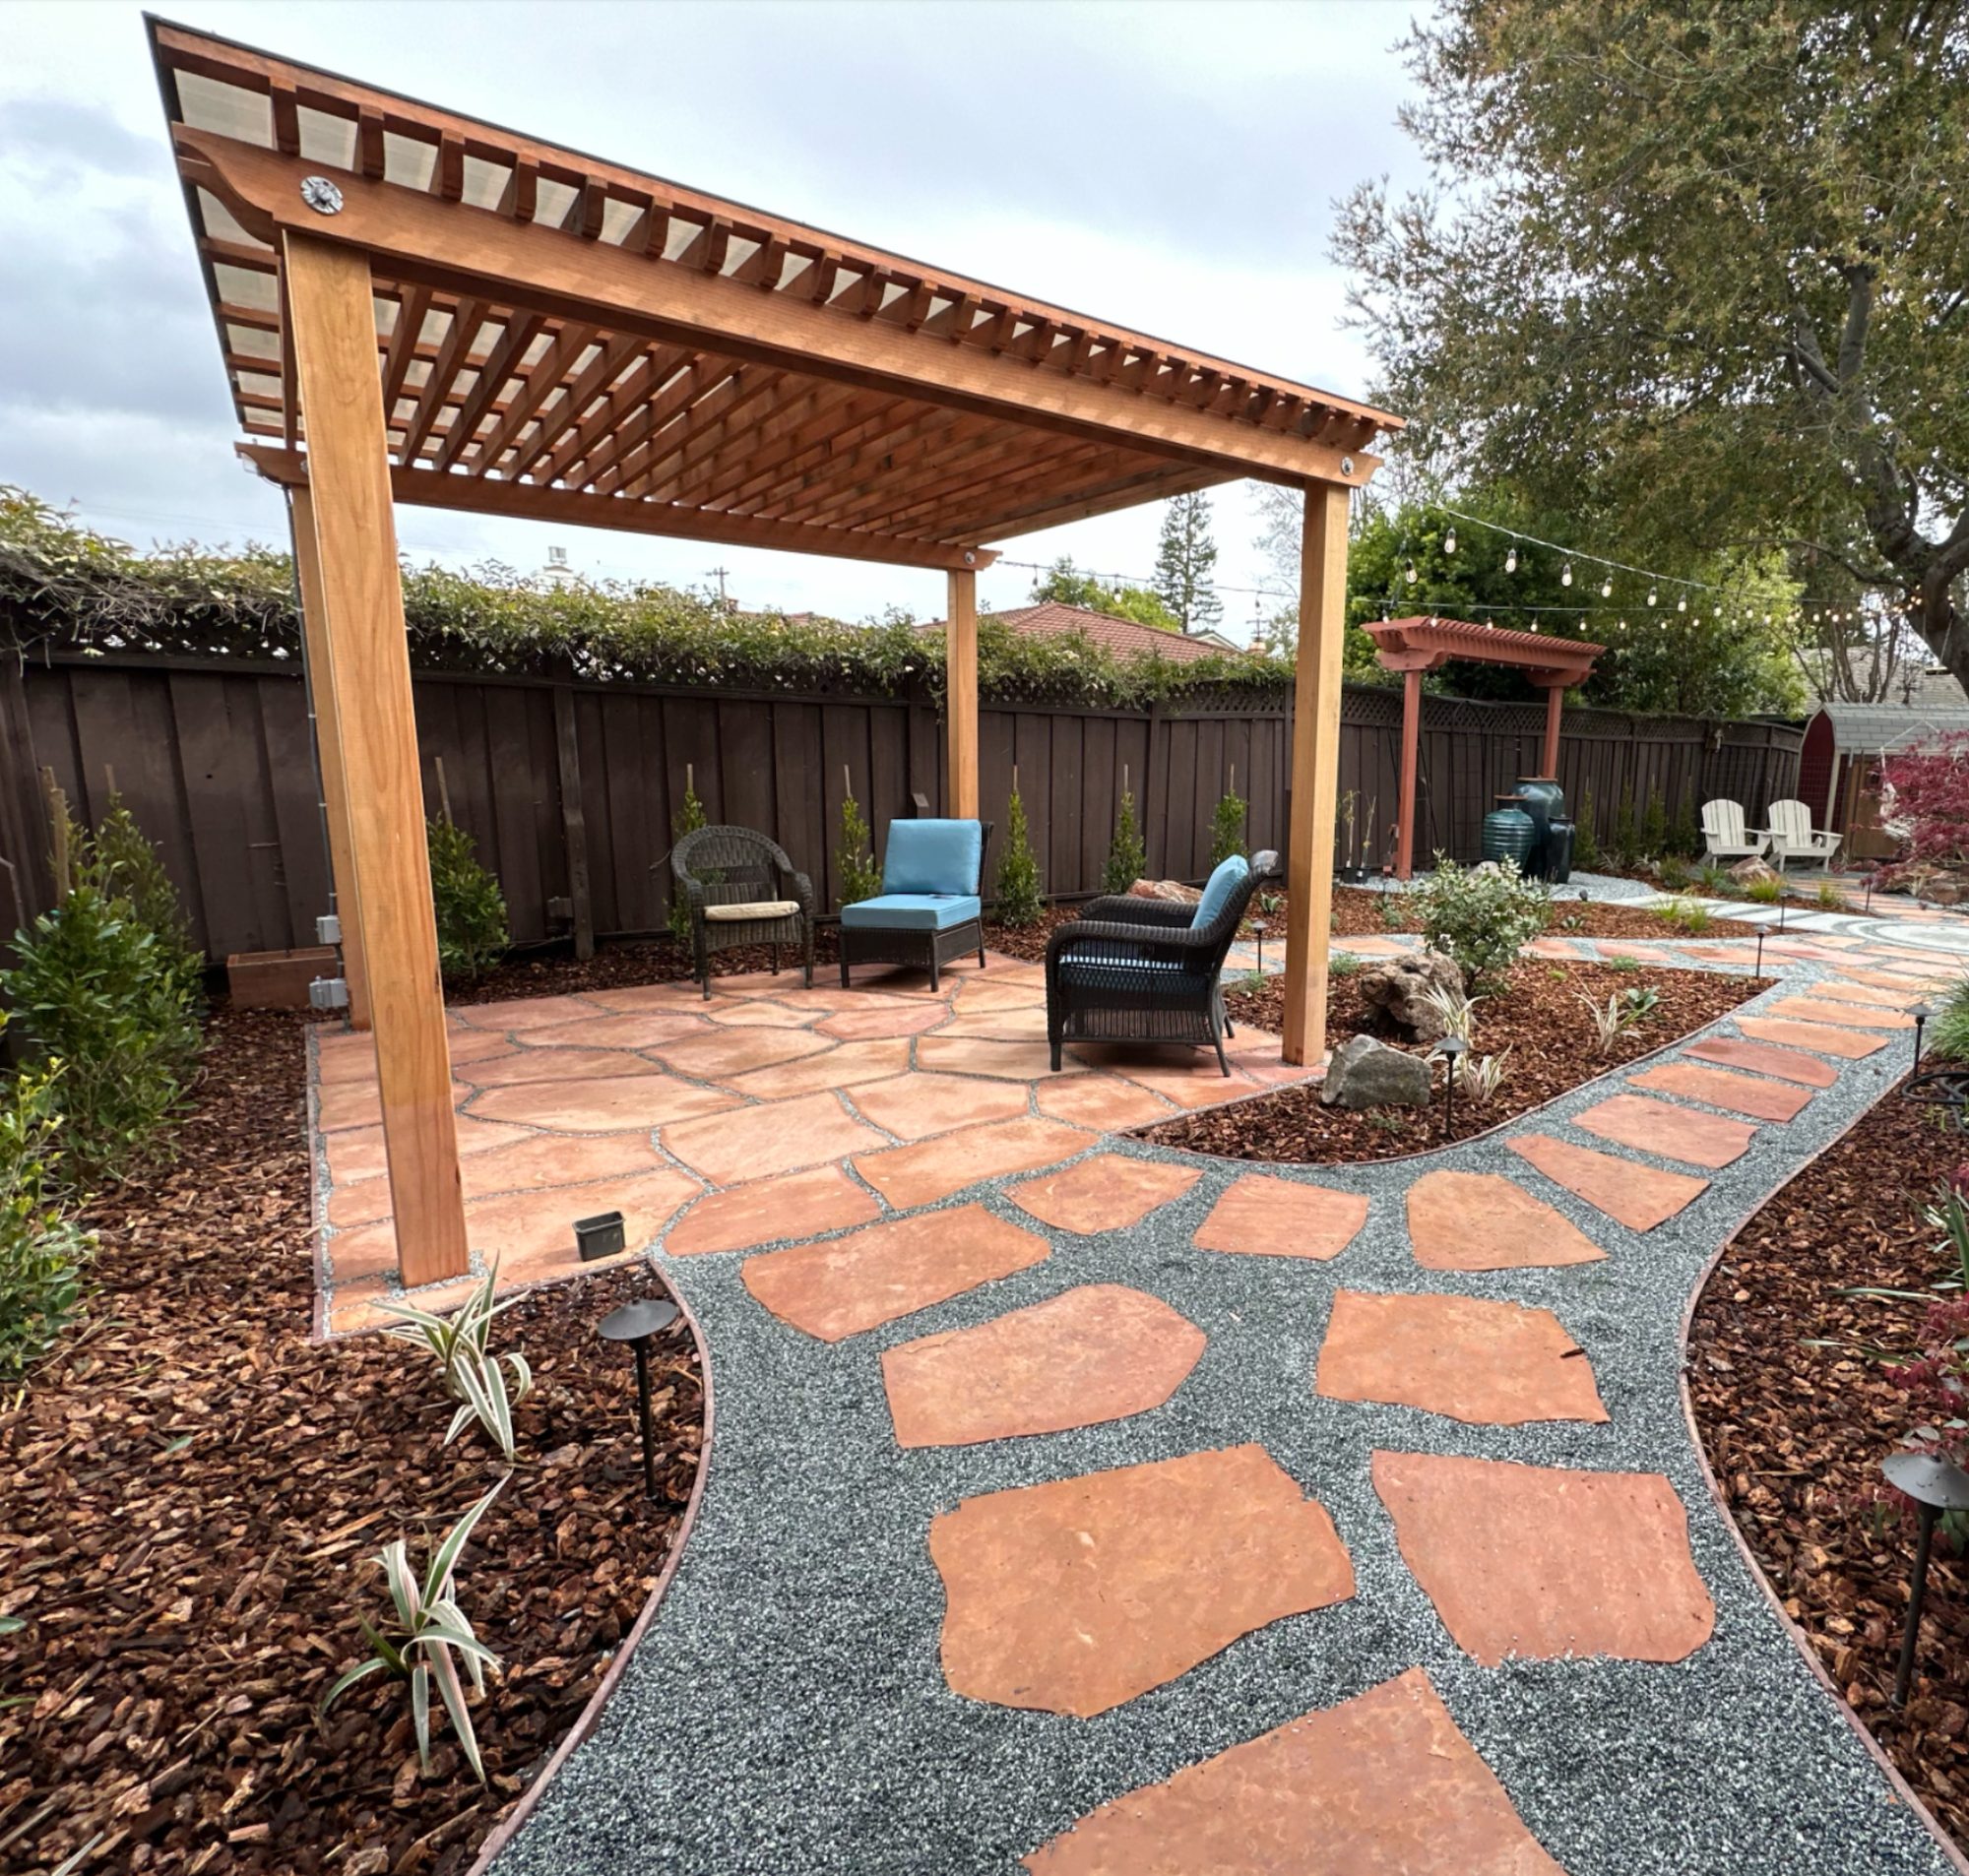
This rustic, natural look is beautiful, but be prepared for some upkeep. The dark gray gravel between the flagstones will inevitably have weeds sprout up. You’ll need to weed it by hand or use a vinegar-based or commercial weed killer a few times a season. Also, leaves and debris will collect in the gravel, so a leaf blower is your best friend for quick cleanups. The wood chip mulch in the garden beds will decompose and need to be topped off every year or two to keep it looking fresh and suppressing weeds.
12. Curved Wooden Deck with Wicker Seating and Lush Planters
This design is successful because of the interplay between curves and straight lines. The circular deck and the sweeping arc of the white-rendered planters create a soft, organic flow that feels very natural. This is then balanced by the strong, horizontal lines of the slatted wooden wall in the background. This contrast prevents the design from feeling too soft or undefined. The dark wicker furniture provides a point of visual weight, anchoring the seating area within the flowing curves of the garden design.
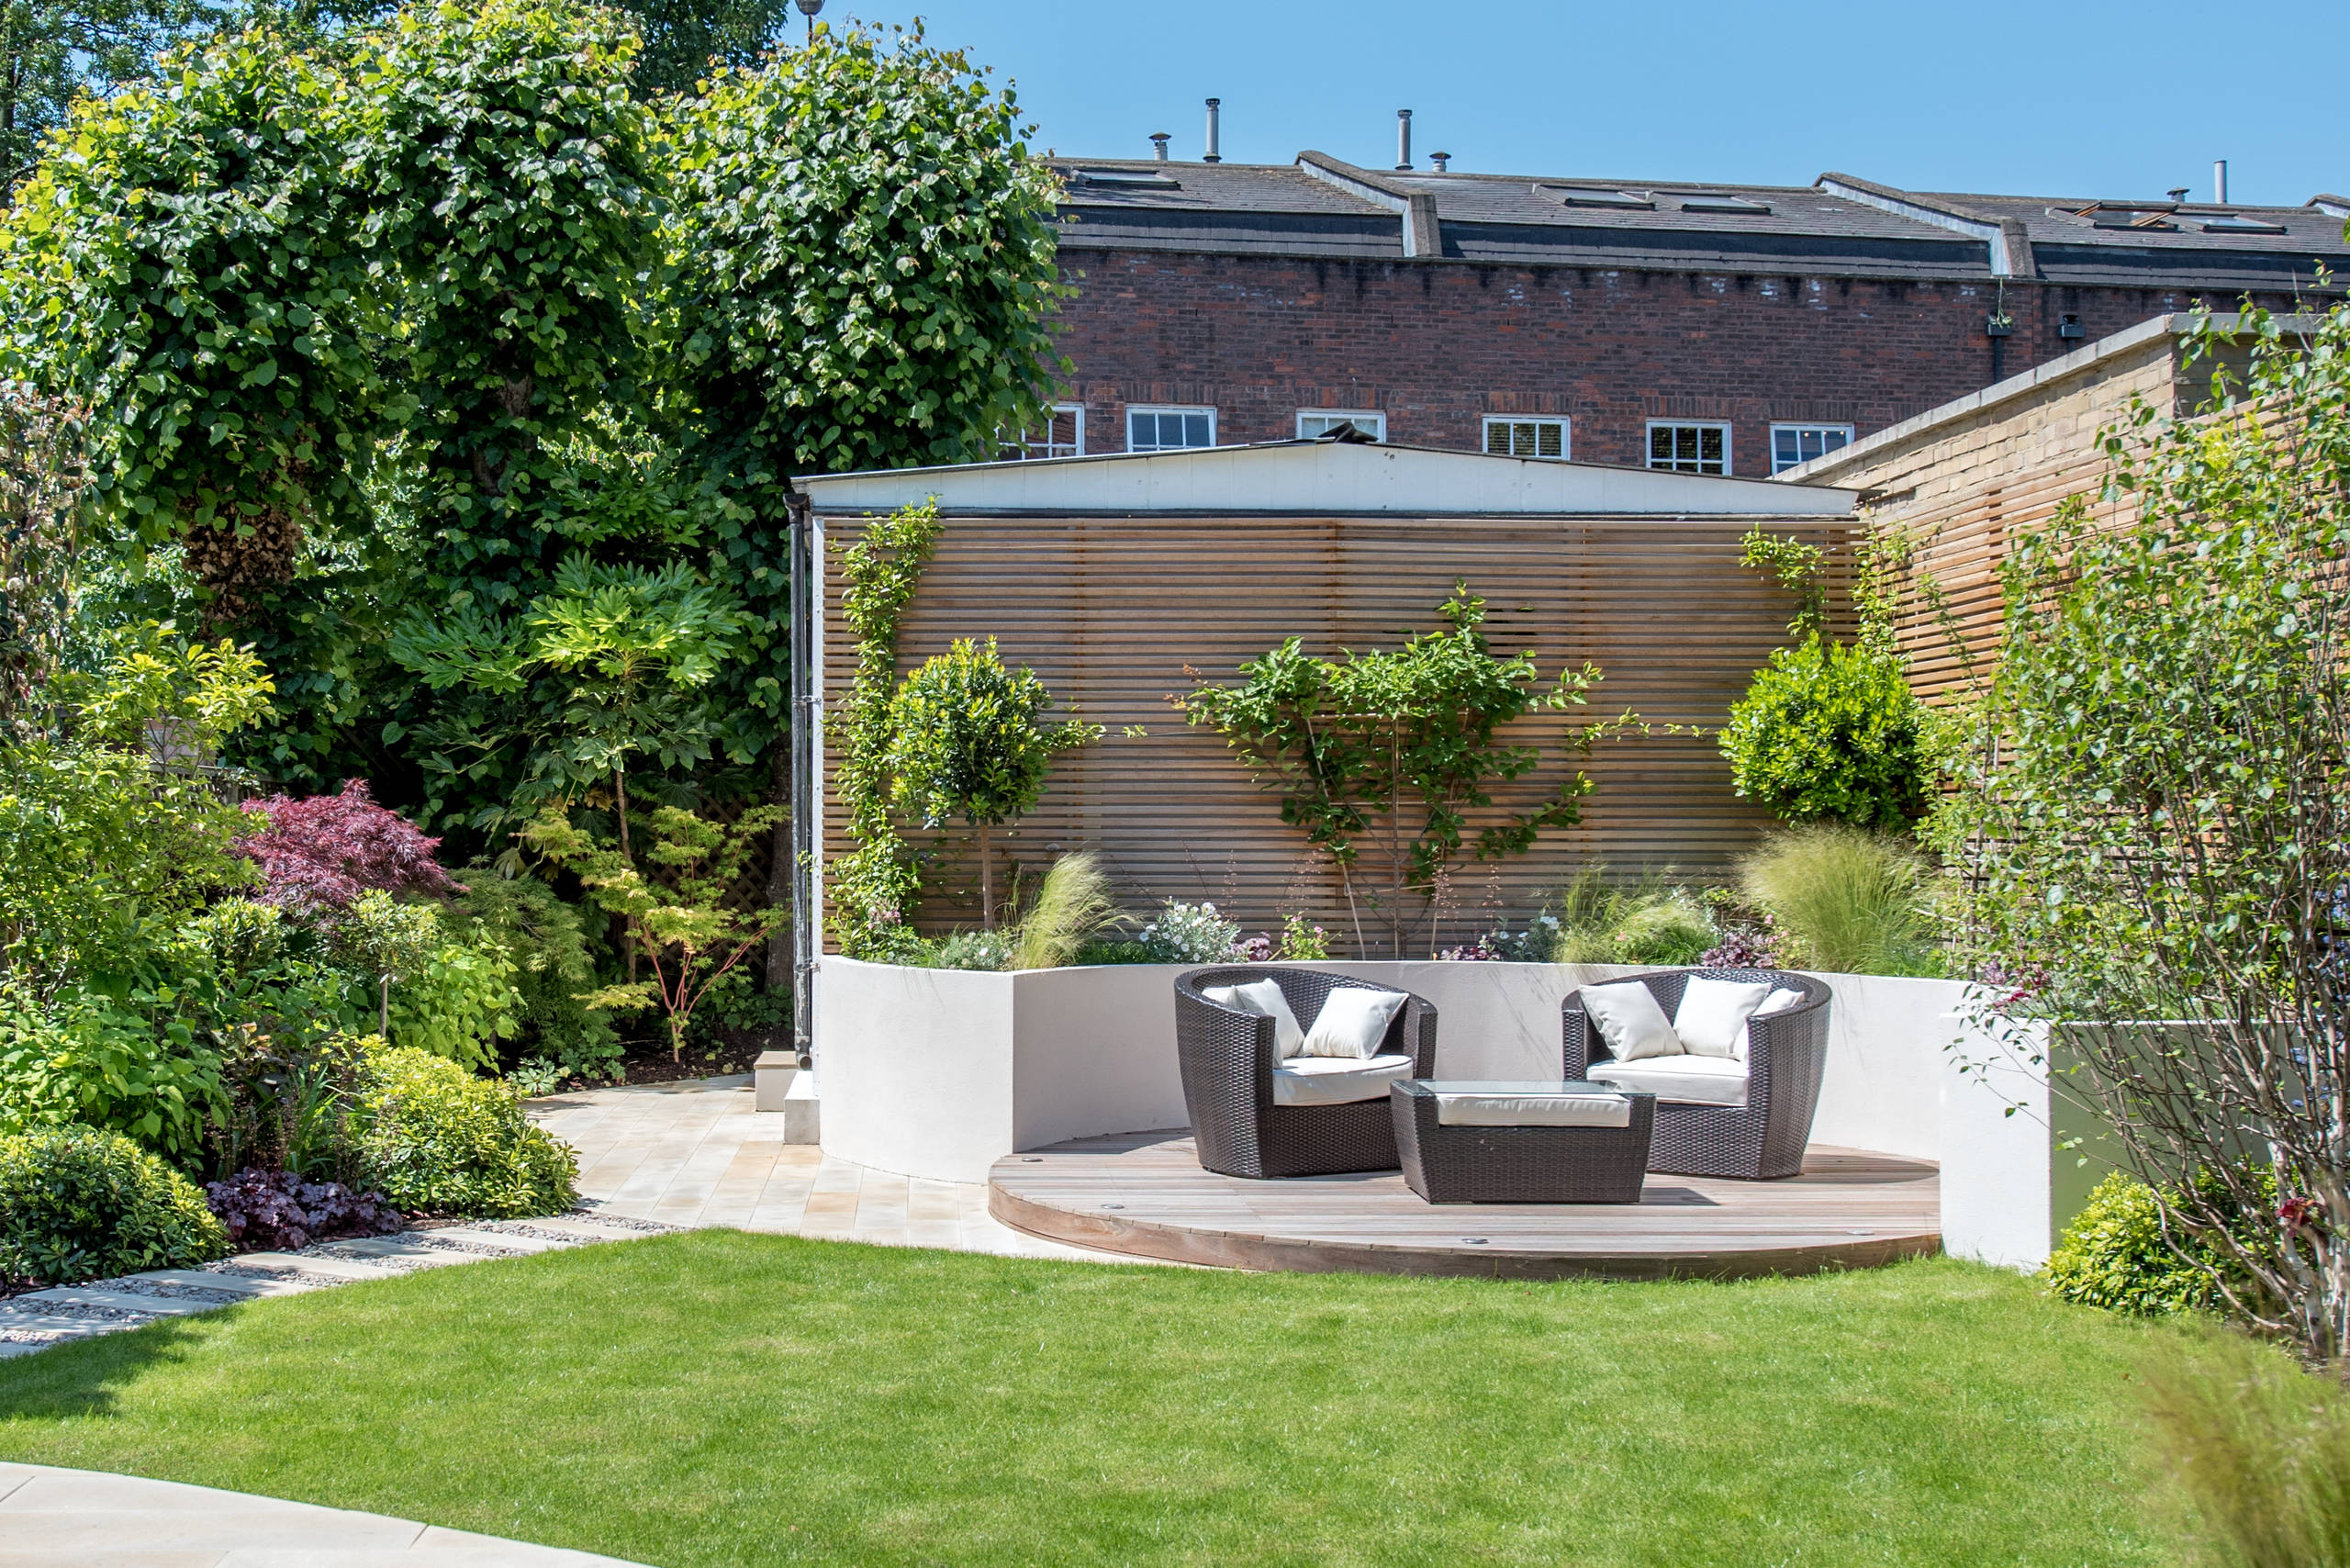
- Main Furniture (Wicker chairs & table): $1,200 – $3,000
- Structure (Circular Wood Deck): $4,000 – $7,500 (depending on size and wood type)
- Hardscaping (Rendered Planters & Paving): $3,500 – $8,000 (custom planters are labor-intensive)
- Plants & Landscaping: $1,500 – $4,000
- TOTAL: $10,200 – $22,500
- Budget alternative: Use pre-fabricated curved concrete landscape blocks for the planters instead of custom rendering, and opt for a simple gravel circle instead of a wooden deck. You could achieve a similar curvy layout for under $4,000.
13. Modern Deck with Hot Tub, Sun Loungers, and Forest Views
To accommodate this variety of relaxation zones—a hot tub, loungers, and a separate seating area—you’ll need a deck that’s at least 400 square feet, ideally around 20×25 feet. A standard 6-person hot tub requires an 8×8 foot reinforced space. The sun loungers need about 7 feet of length plus walking room, and the Acapulco chair grouping works well in a 10×10 foot corner. The key is generous spacing; you don’t want to feel like you’re tripping over furniture to get to the hot tub. This design thrives on feeling spacious and uncluttered.
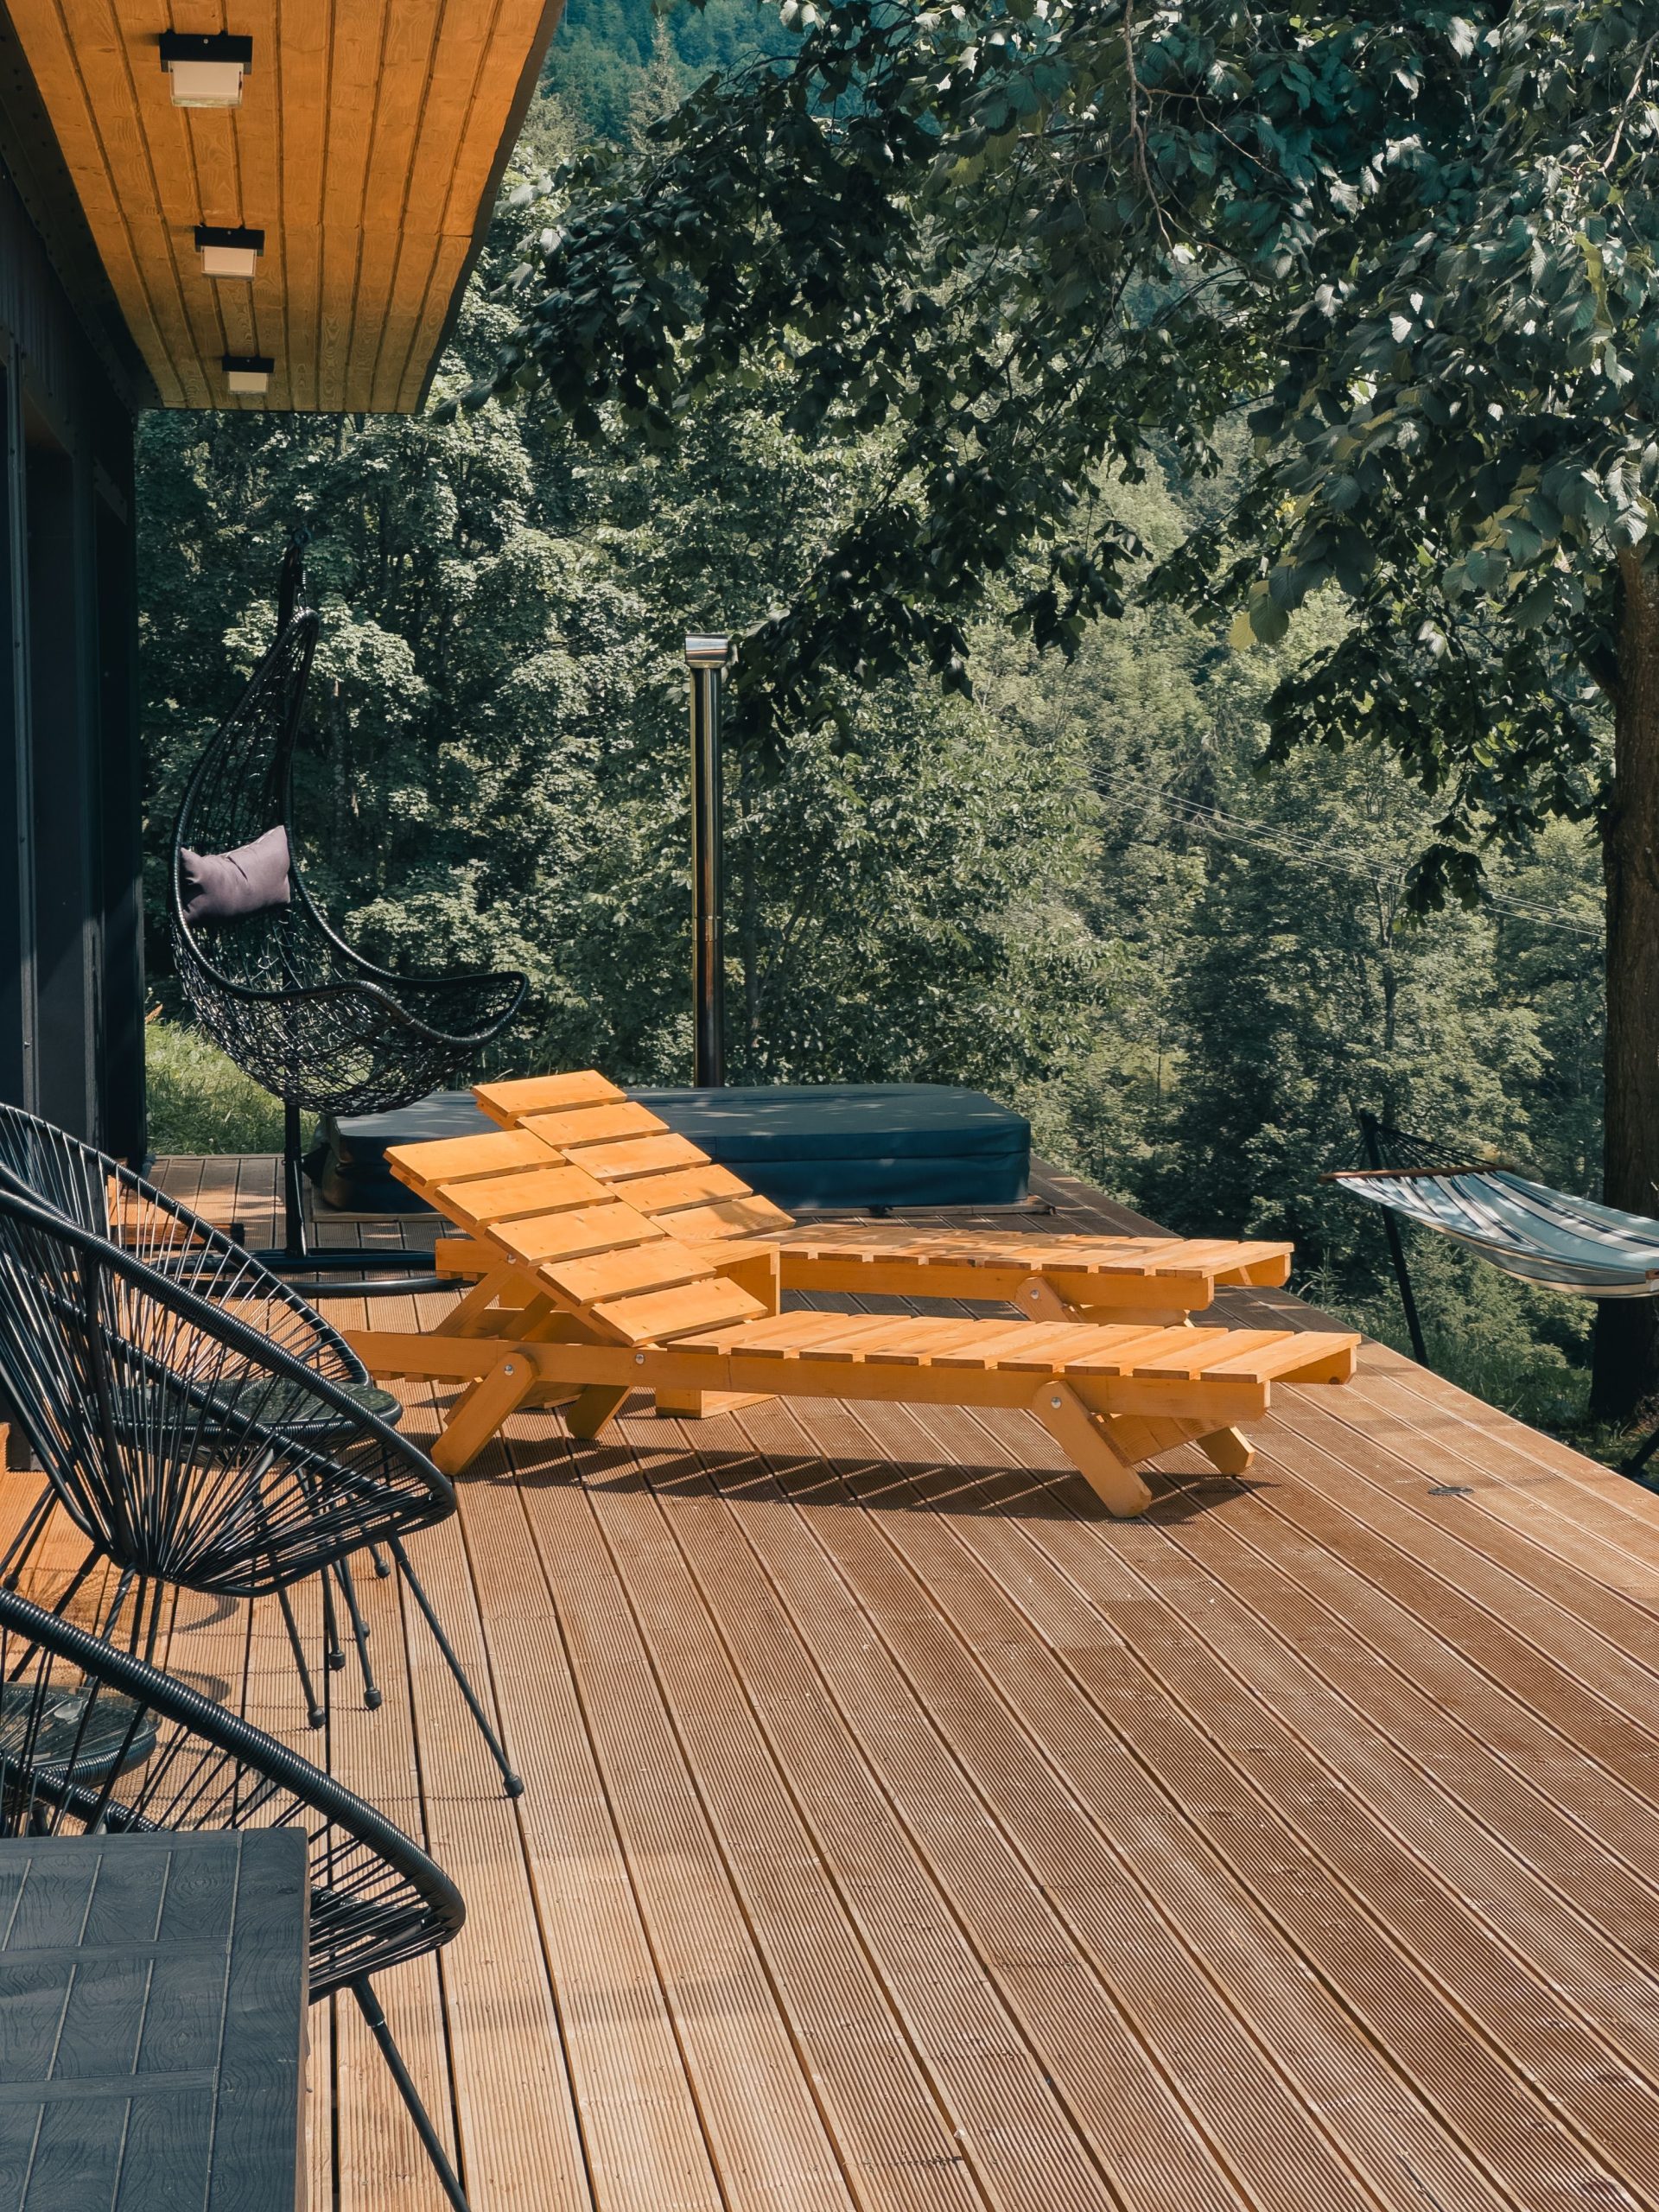
That truly elevates this deck is the thoughtful mix of seating *types*. It’s not just one matching set. There are structured sun loungers for napping, airy Acapulco chairs for conversation, a fun hanging chair for curling up with a book, and even a hammock for total loafing. This variety communicates that the space is designed for all different kinds of relaxation, not just one activity. It transforms the deck from a simple platform into a true retreat, inviting you to stay all day and unwind in whatever way you choose.
14. Multi-Level Brown Deck with a Built-In Gazebo
A built-in gazebo with a solid, shingled roof is a major structural commitment. Unlike a fabric-topped pergola, this is a permanent addition that will significantly shade any windows it’s near. Before you build, spend a full day tracking the sun’s path across your yard to understand exactly what will be cast in shadow and when. A structure this solid can make an adjacent interior room feel much darker. Also, be aware that a shingled roof will need to match your house’s roof for a cohesive look, which might mean sourcing specific materials.
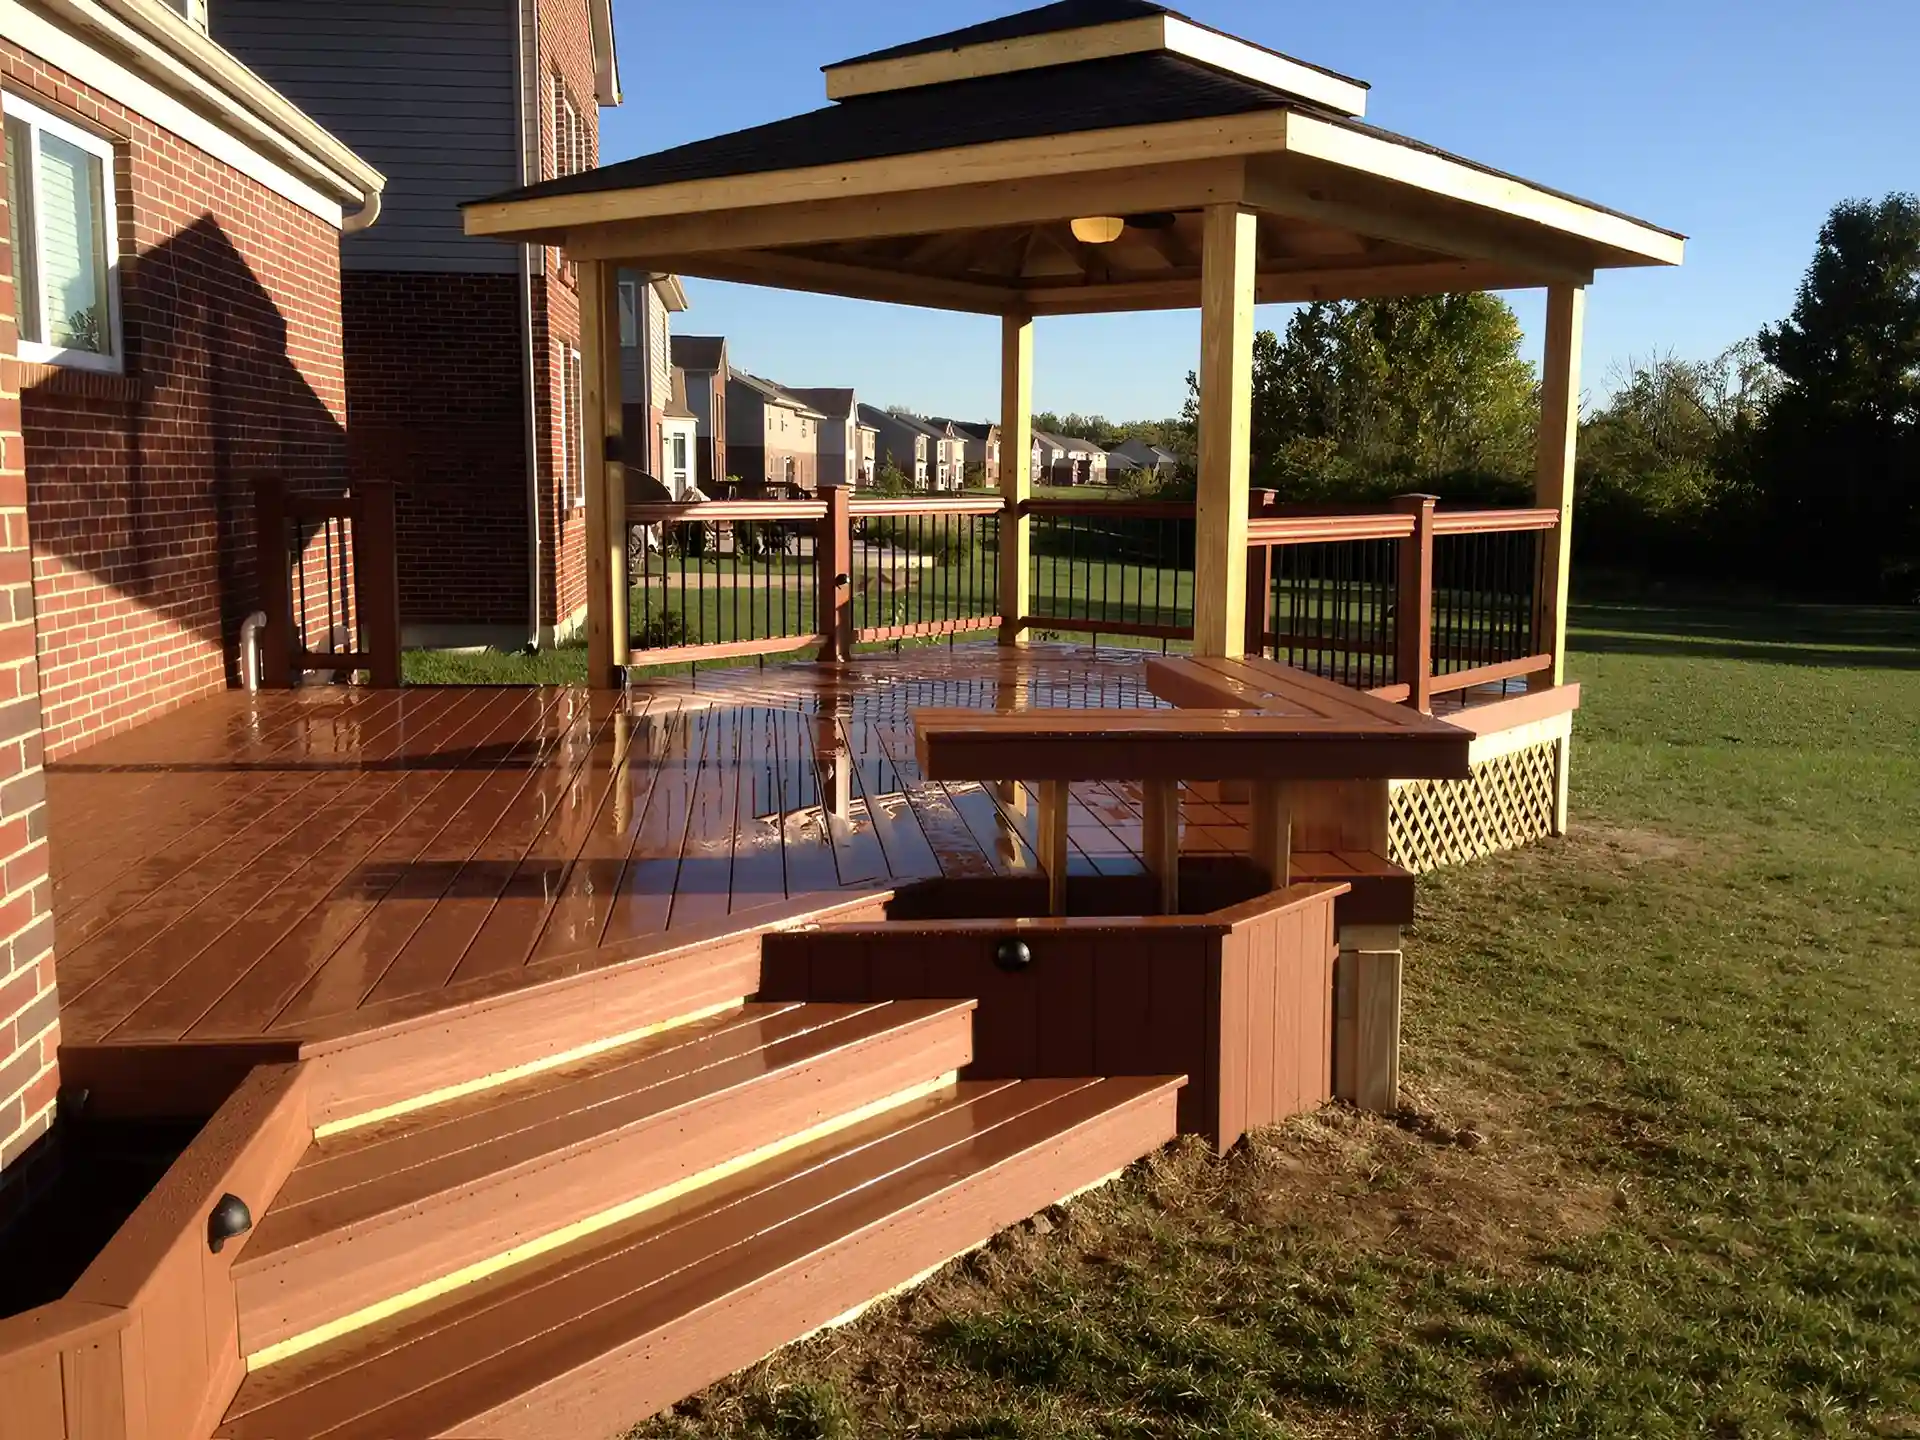
When mixing wood tones, like the rich brown deck and the light natural wood of the gazebo, the secret to making it look intentional is repetition. Here, the designer smartly used black as a unifying accent. The black metal balusters on the railing, the black shingled roof, and the black stair lights all tie the two wood tones together. Without that consistent black element, the different woods might just look like a mistake. When in doubt, a strong neutral accent can bridge the gap between different materials.
15. Hillside Wooden Deck with Integrated Bench Seating
Building into a slope can be expensive, but integrated bench seating is a brilliant money-saver. By making the benches part of the deck structure, you eliminate the need to buy several separate chairs or a large outdoor sofa. A well-built perimeter bench can easily cost 50-70% less than purchasing high-quality furniture to seat the same number of people. For a budget-friendlier version of this natural look, use pressure-treated lumber for the deck and benches and add color and comfort with inexpensive outdoor cushions and a vibrant tablecloth from Target or IKEA. The natural setting, similar to Idea #11, does a lot of the heavy lifting.
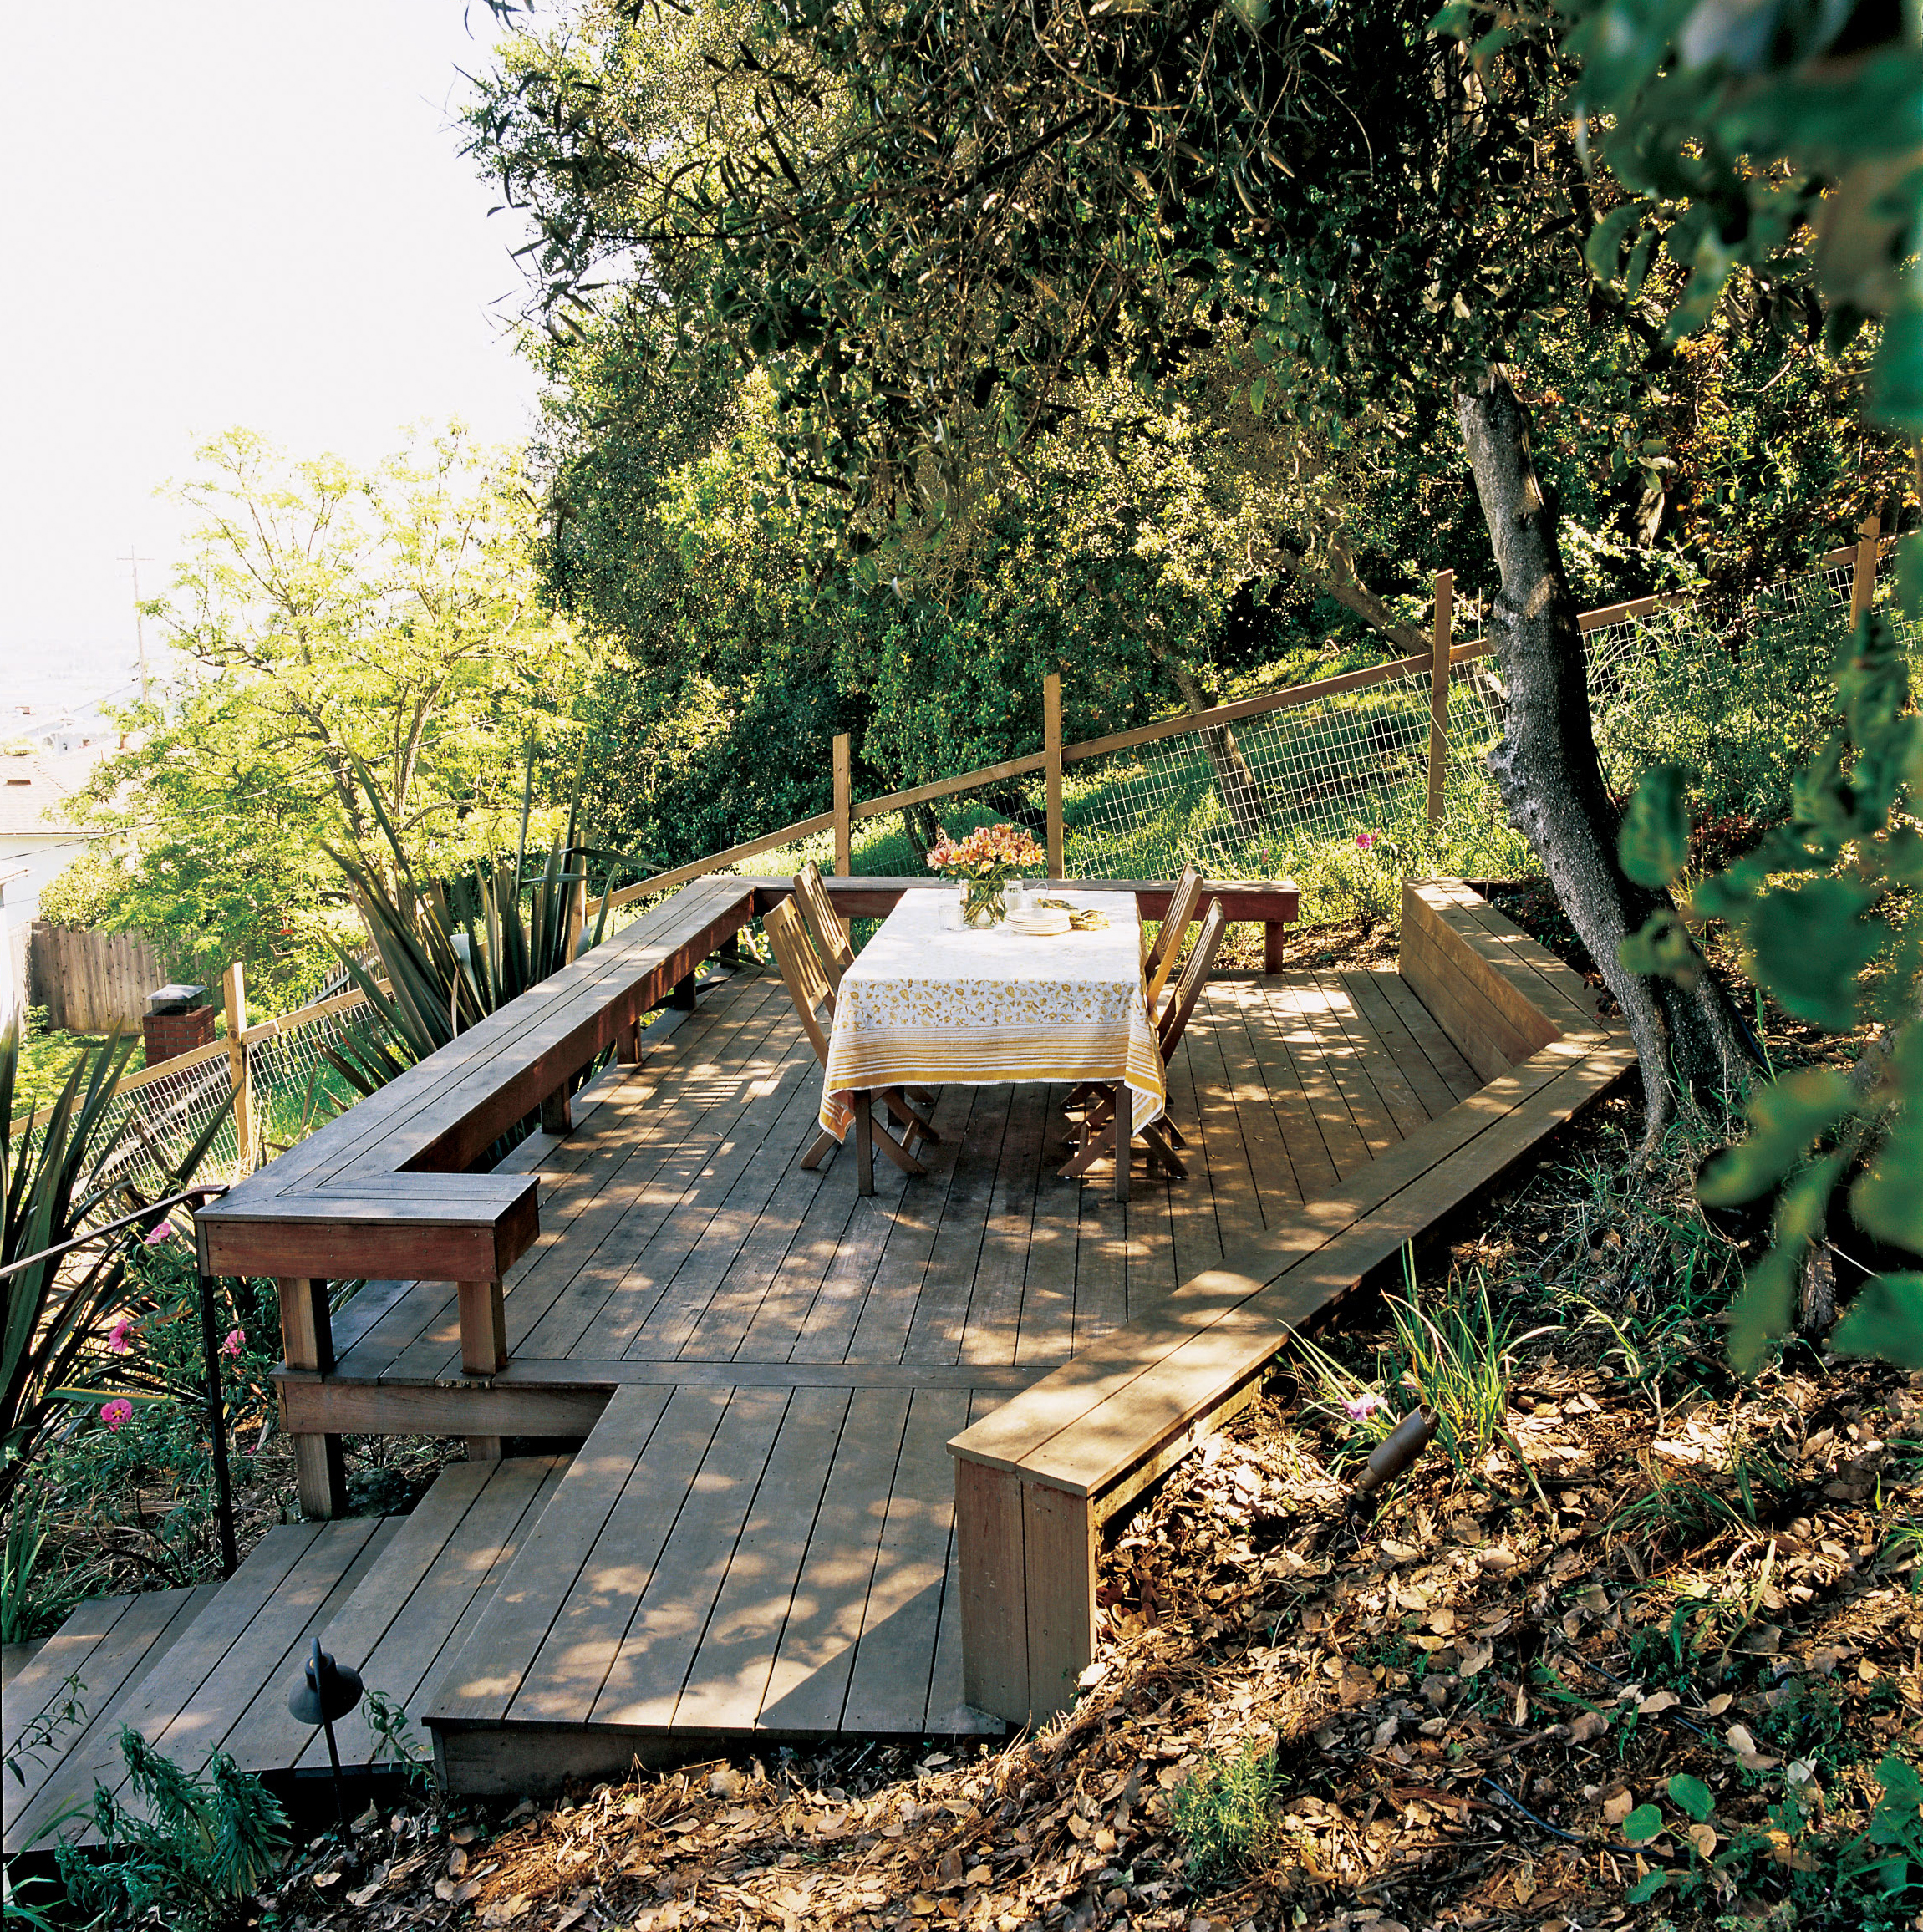
This look is all about letting nature dominate. The formula is roughly 80% natural elements and 20% man-made structure. The deck itself, while large, is just a simple platform of medium-brown wood that blends with the tree trunks and earth. The overwhelming majority of the visual field is the lush green canopy, the dappled sunlight, and the surrounding foliage. The pops of color from the tablecloth and flowers are small accents, not the main event. This high nature-to-structure ratio is what makes the space feel so serene and integrated into the landscape.
16. Expansive Deck with Louvered Pergola, Grilling Station, and Lounge Zone
This design’s success lies in its incredibly clear ‘zoning.’ The space is visually divided into three distinct areas with unique functions: grilling, dining, and lounging. The stone-clad grilling station creates a solid anchor for the ‘kitchen.’ The louvered pergola defines the cozy lounge ‘room’ with its sectional and fire pit. The open-air dining set occupies the transitional space between them. This clear separation, reinforced by furniture groupings and overhead structures, makes a very large deck feel organized, intentional, and highly usable, rather than just being a vast, empty platform.
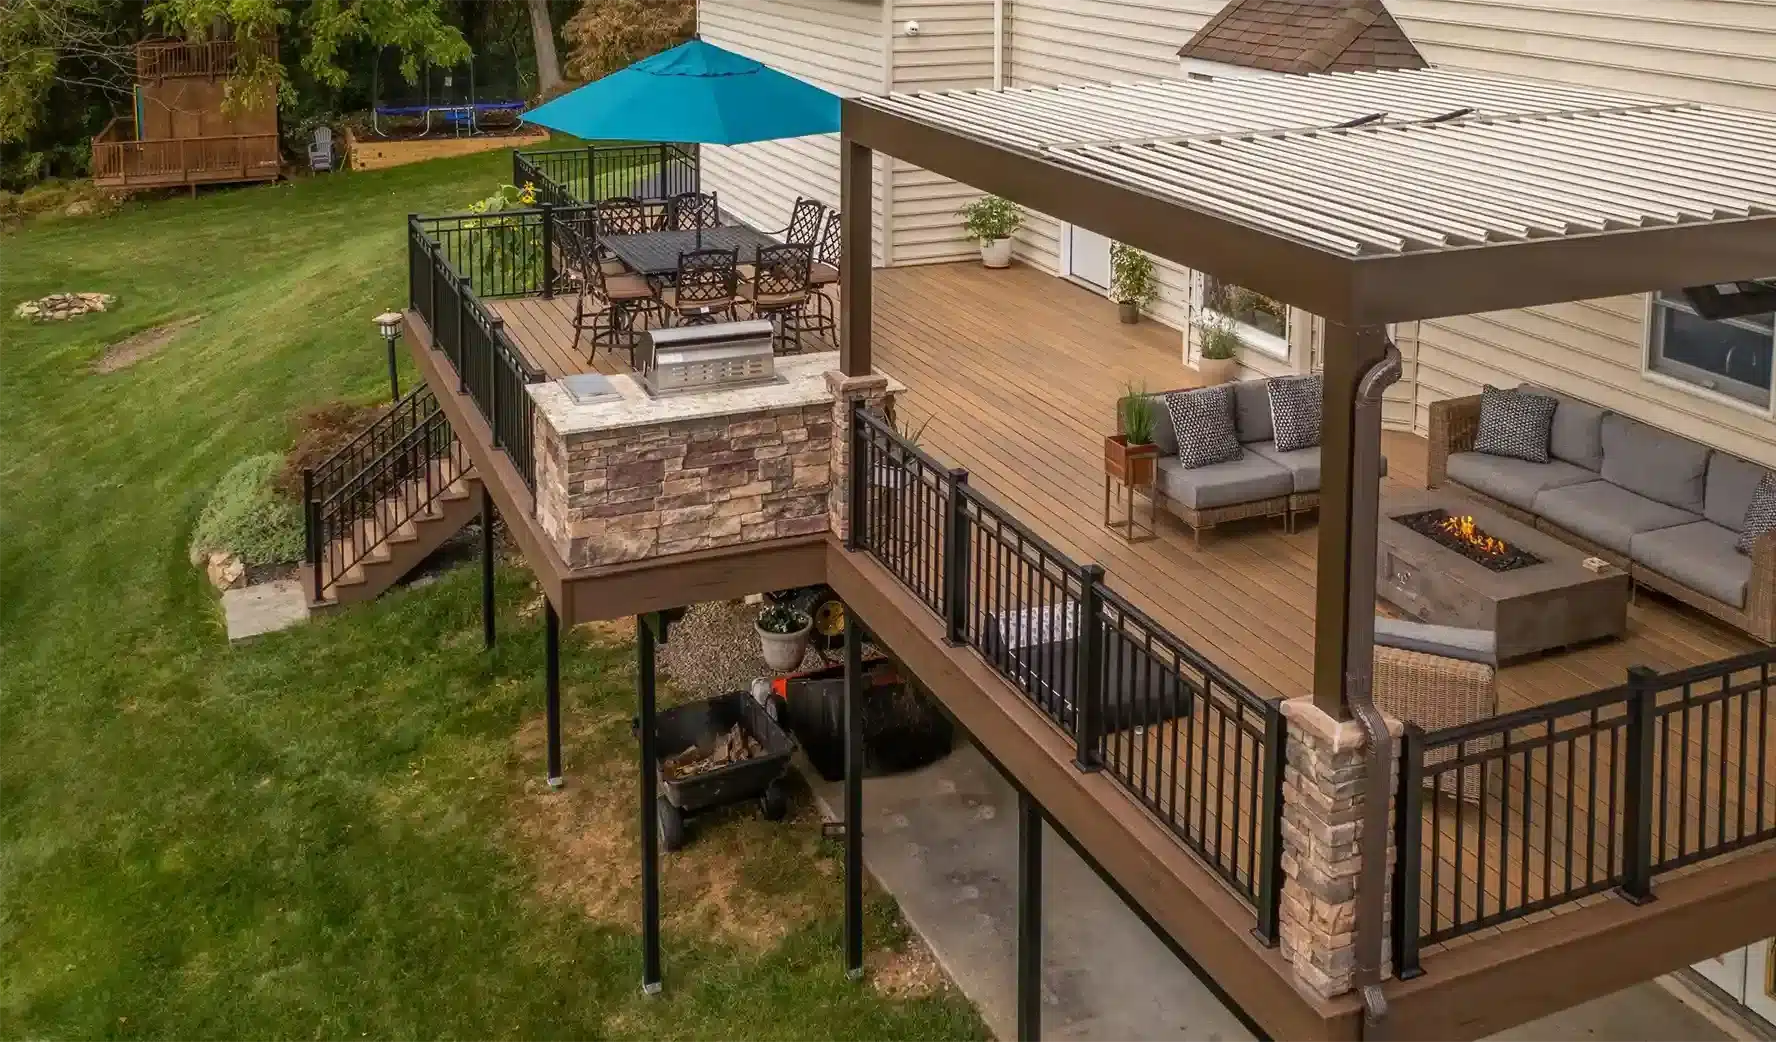
A project of this scale has a lot of moving parts. Here’s what to confirm before you start:
- Utilities: Do you have easy access to a gas line for the grill and fire pit? Is there a convenient place to run electrical for lighting or a future outdoor fridge? Planning this now saves major headaches later.
- Weight Loads: The stone grilling station is incredibly heavy. Ensure your deck’s foundation plan includes extra footings directly beneath it to support the concentrated load.
- Sun Path: Where will the sun be during the times you’ll use the space most? Position your pergola and umbrella to provide shade exactly where and when you’ll need it for dining or lounging in the afternoon.
17. Modern Outdoor Dining and Lounge Area with a Grey Palette
The key to this serene, contemporary space is its strict monochromatic color palette. By using the same medium gray for both the L-shaped sofa and the dining table, the two zones feel completely unified. This creates a calm, uncluttered visual field that reads as sophisticated and intentional. If the dining set were a different color or material, the area would feel broken up and less cohesive. The disciplined use of gray, accented only by black, white, and the texture of the light brick, is what gives this patio its powerful minimalist punch.
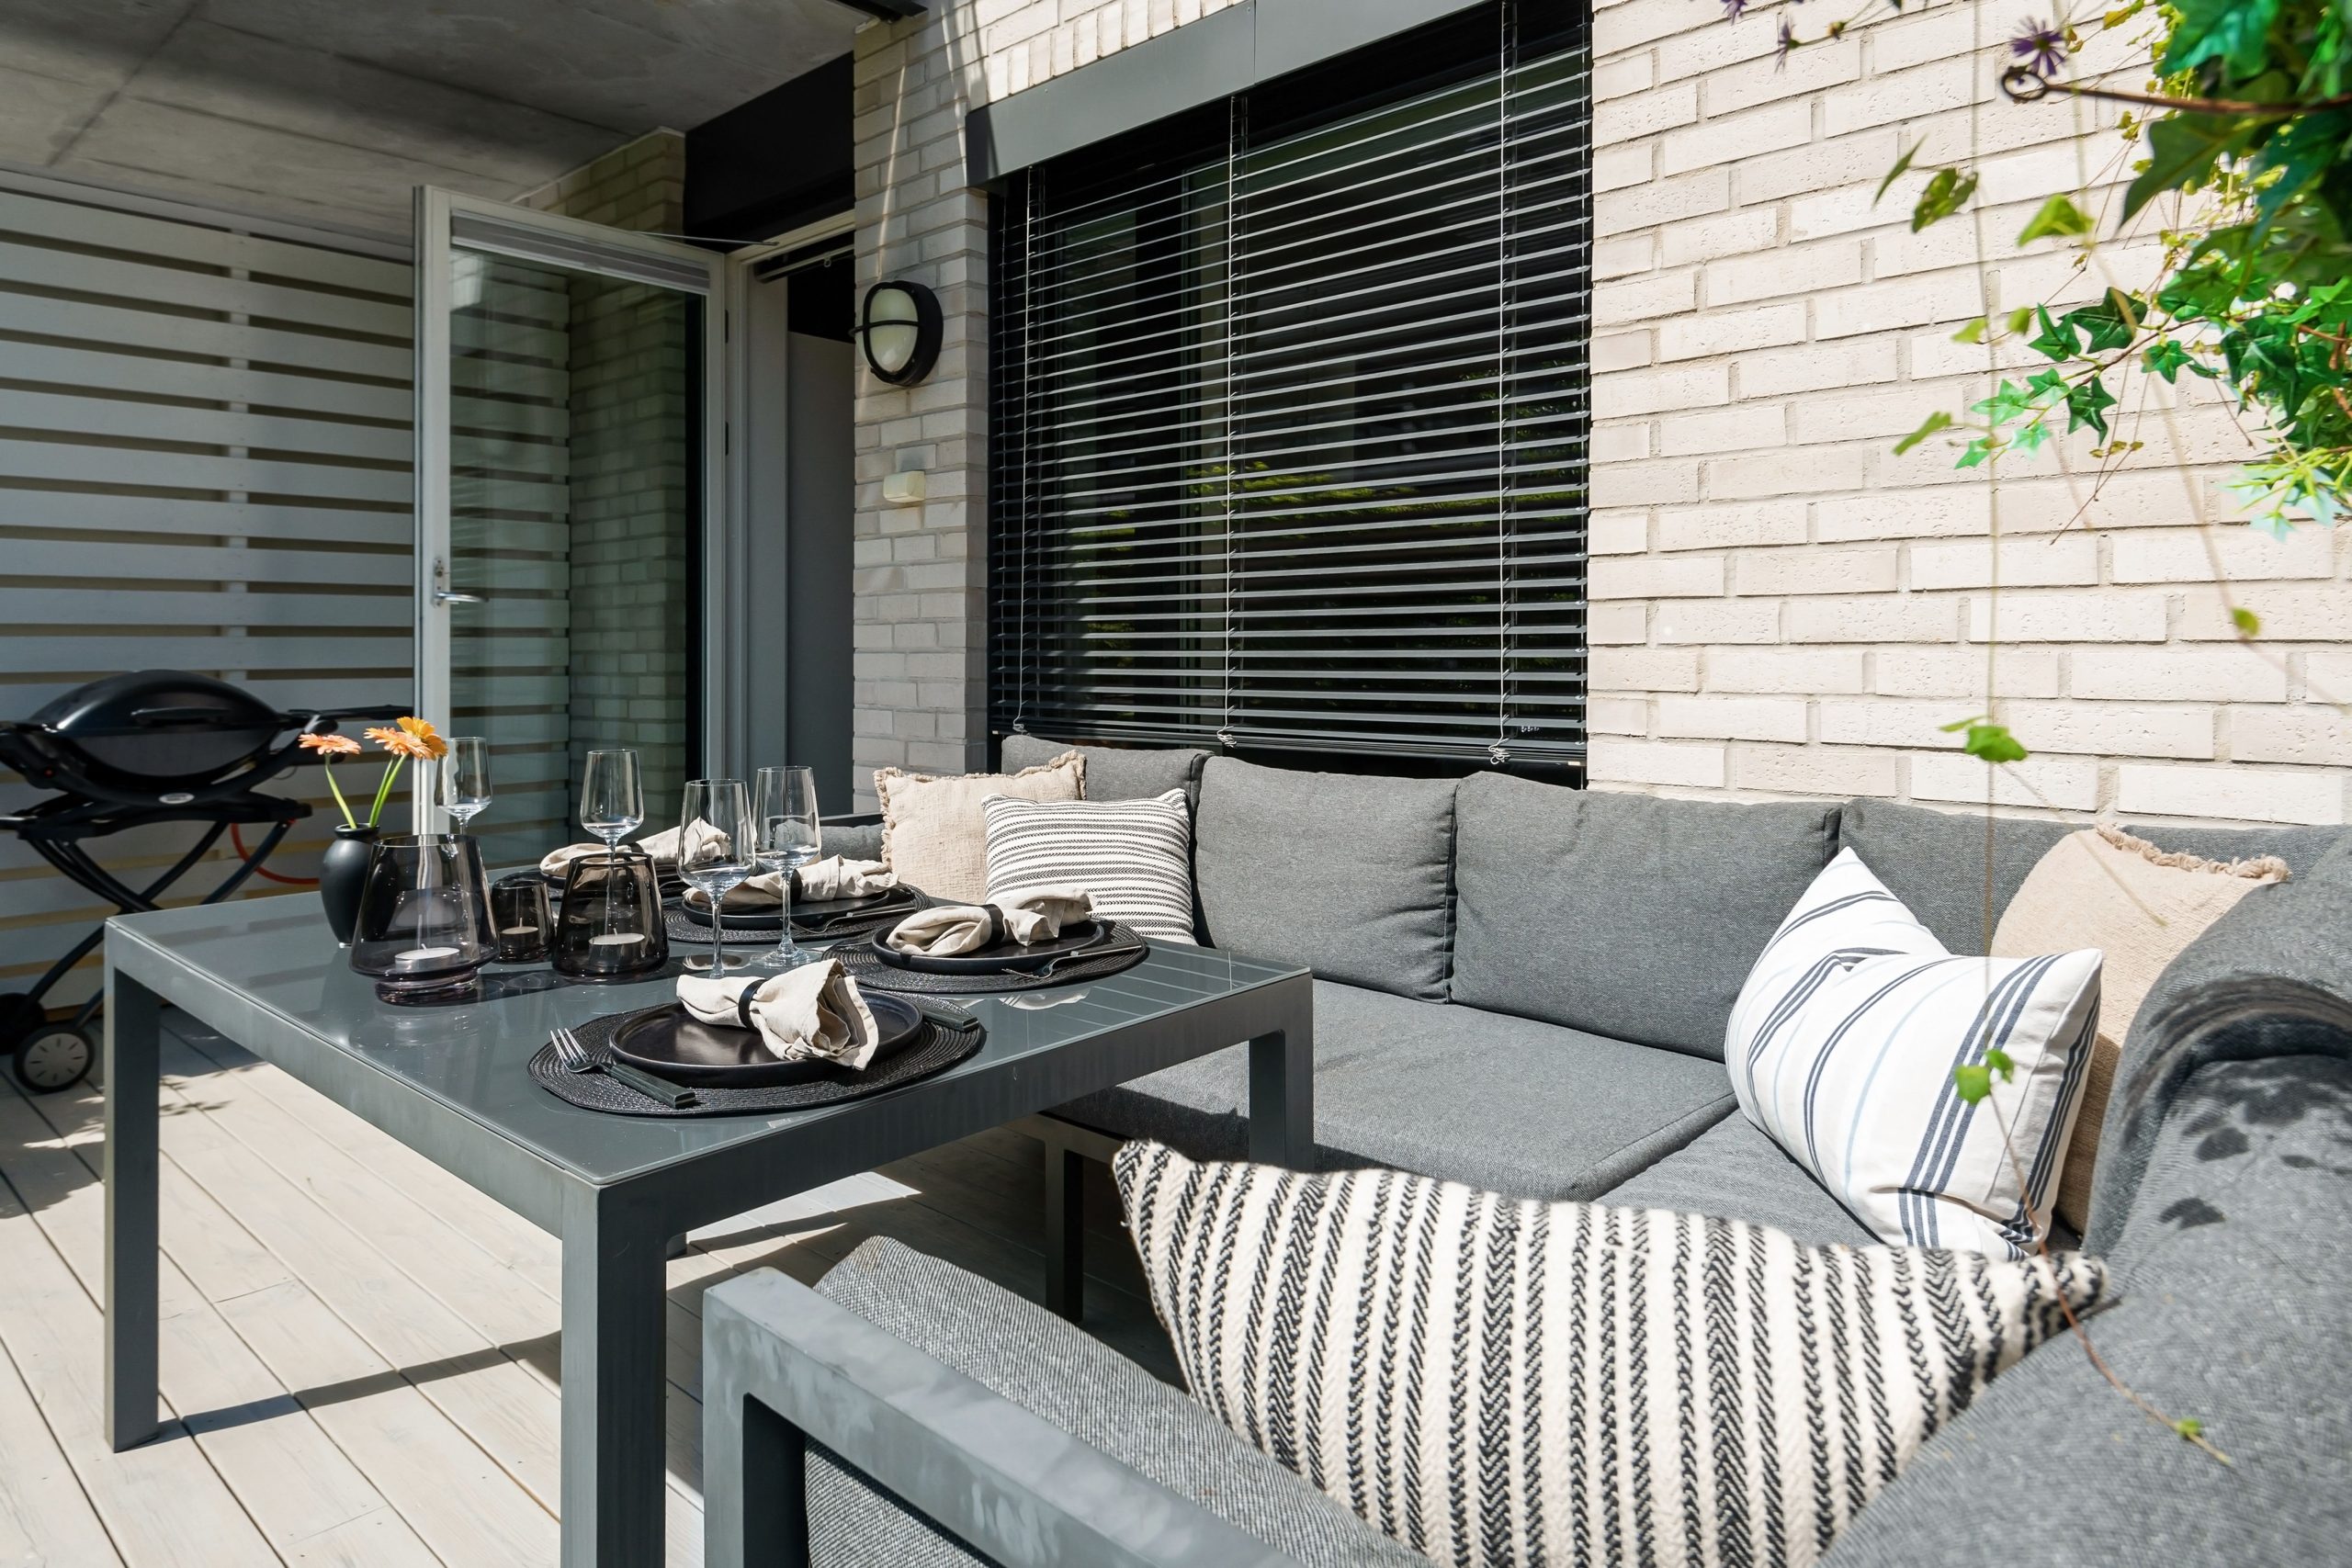
When using a monochromatic scheme, texture is your best friend. Notice the mix of surfaces here: the smooth finish of the dining table, the woven fabric of the sofa, the rough texture of the brick wall, the smooth wood deck, and the sleek lines of the window blinds. If everything were the exact same texture, the space would fall flat and feel boring. To replicate this, aim for at least four to five different textures within your single-color palette to create depth and visual interest.
18. Tropical Wooden Deck with Poolside Seating and a Crochet Hammock
This is the epitome of the ‘resort at home’ trend that continues to surge. People want their backyards to feel like a vacation, and this design delivers. It’s not just about having a deck; it’s about creating multiple destinations for relaxation. The combination of traditional wicker chairs, a modern wooden sofa, a bohemian hammock, and a fun hanging chair taps into a desire for personalized, eclectic comfort. The lush, tropical plants are essential, creating a sense of private enclosure and escape. This is less about entertaining large groups and more about creating a personal oasis.
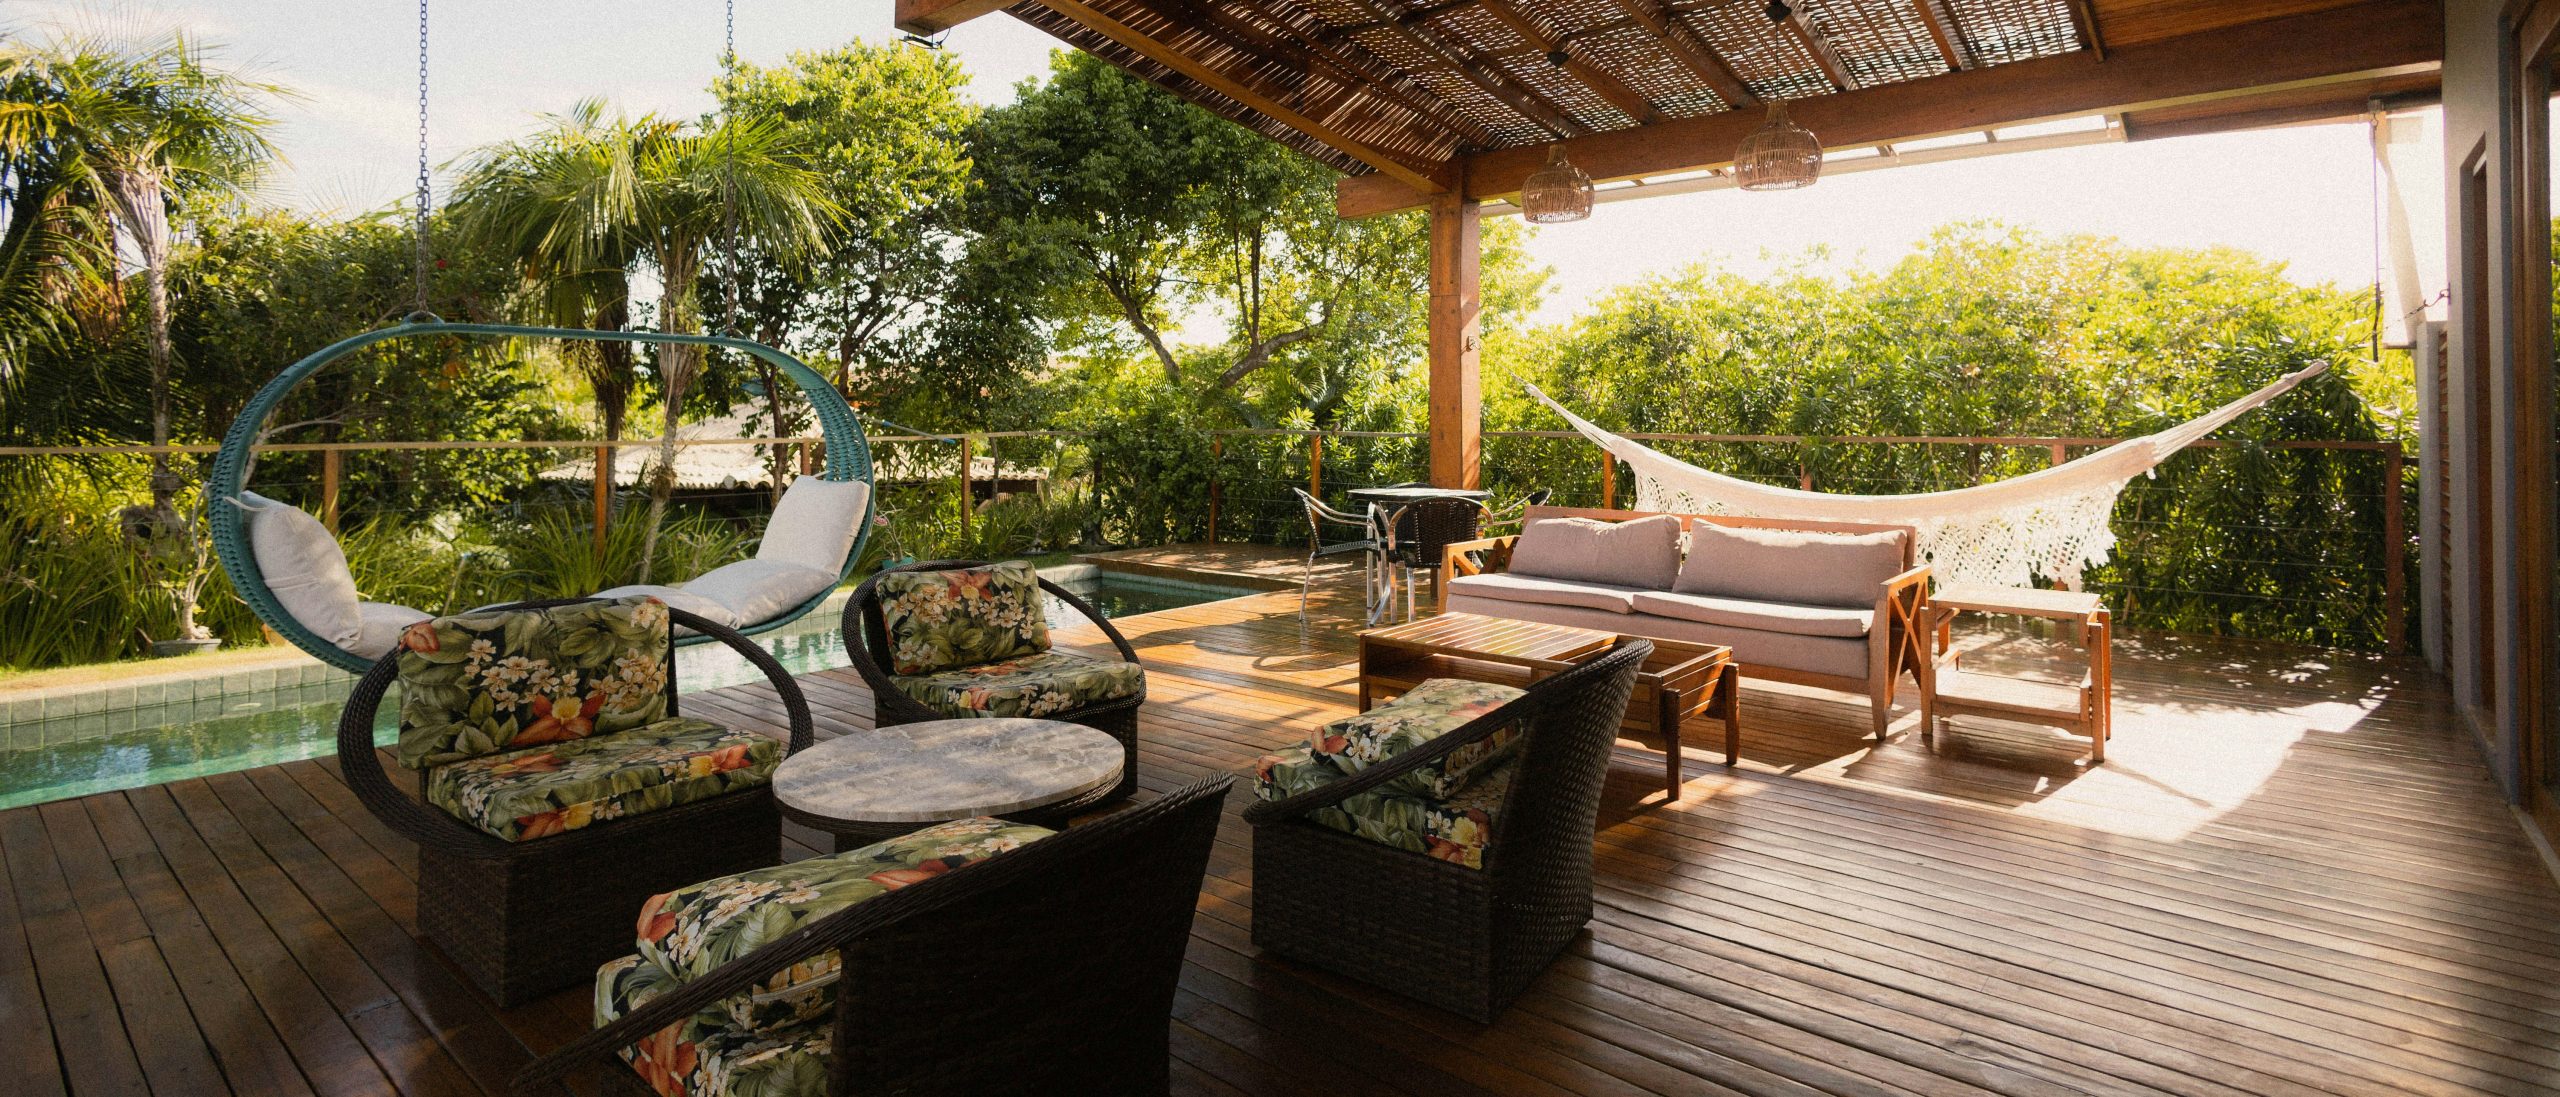
That beautiful dark-stained wood deck requires commitment, especially in a sunny, poolside environment. The combination of intense UV exposure and splashes of pool chemicals (like chlorine) can be brutal on wood finishes. You’ll need to re-stain and seal this deck every 1-2 years without fail to prevent it from fading, drying out, and splintering. The wicker furniture, even if it’s all-weather, will also benefit from being covered when not in use for long periods to prevent fading and brittleness from the sun.
19. Modern Patio with a Stacked Stone Wall and Wooden Pergola
This design’s formula is a perfect balance of hard and soft, warm and cool. It’s roughly 40% cool stone and pavers (the grey floor and the stacked stone wall), 30% warm wood (the pergola and the coffee table), and 30% soft textiles and foliage (the sofa, rug, and plants). This mix is what makes the space feel both modern and inviting. The cool, hard surfaces provide a clean, architectural backdrop, while the warm wood and soft furnishings add comfort and a human touch. Sticking to this ratio ensures the space doesn’t feel too cold or too rustic.
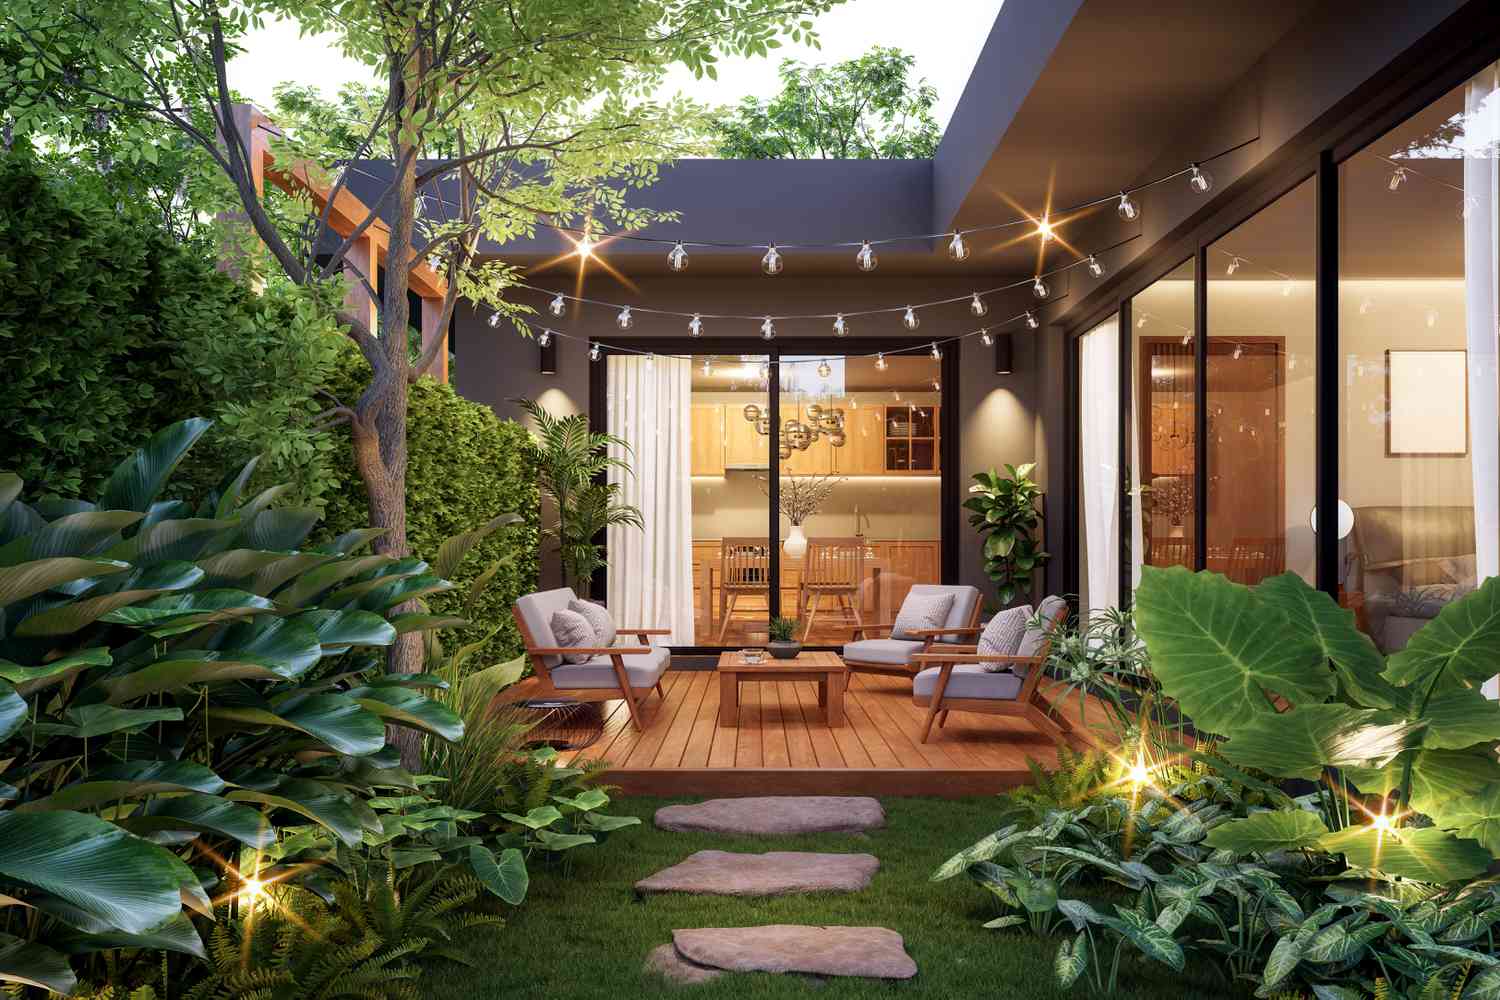
A prominent feature wall like this works best on patios that are at least 15 feet wide. The stone wall needs some breathing room to feel intentional rather than cramped. The sectional sofa requires a footprint of about 10×10 feet, and you need at least 3 feet of clear walkway around it. This entire setup, including the pergola, fits comfortably in a 16×20 foot space. If your patio is smaller, consider a narrower stone ‘column’ instead of a full wall, or use the stone on a built-in fireplace to get the same texture without overwhelming the space.
20. Covered Patio with an Outdoor Fireplace and TV Lounge
Creating an outdoor living room like this is a significant investment, making the patio a true four-season extension of the home.
- Main Furniture (Sectional, chairs, tables): $5,000 – $12,000
- Structure (Fireplace & Chimney): $10,000 – $25,000+
- Electronics (Outdoor-rated TV & Sound): $3,000 – $7,000
- Finishing Touches (Rug, Fan, Lighting): $1,500 – $3,500
- TOTAL: $19,500 – $48,000
- Budget alternative: Swap the custom fireplace for a large portable propane fire pit table ($800 – $2,000), use a standard TV on a rolling cart that you can bring indoors, and find a sectional on sale at the end of the season. This can bring the total closer to the $8,000 – $15,000 range.
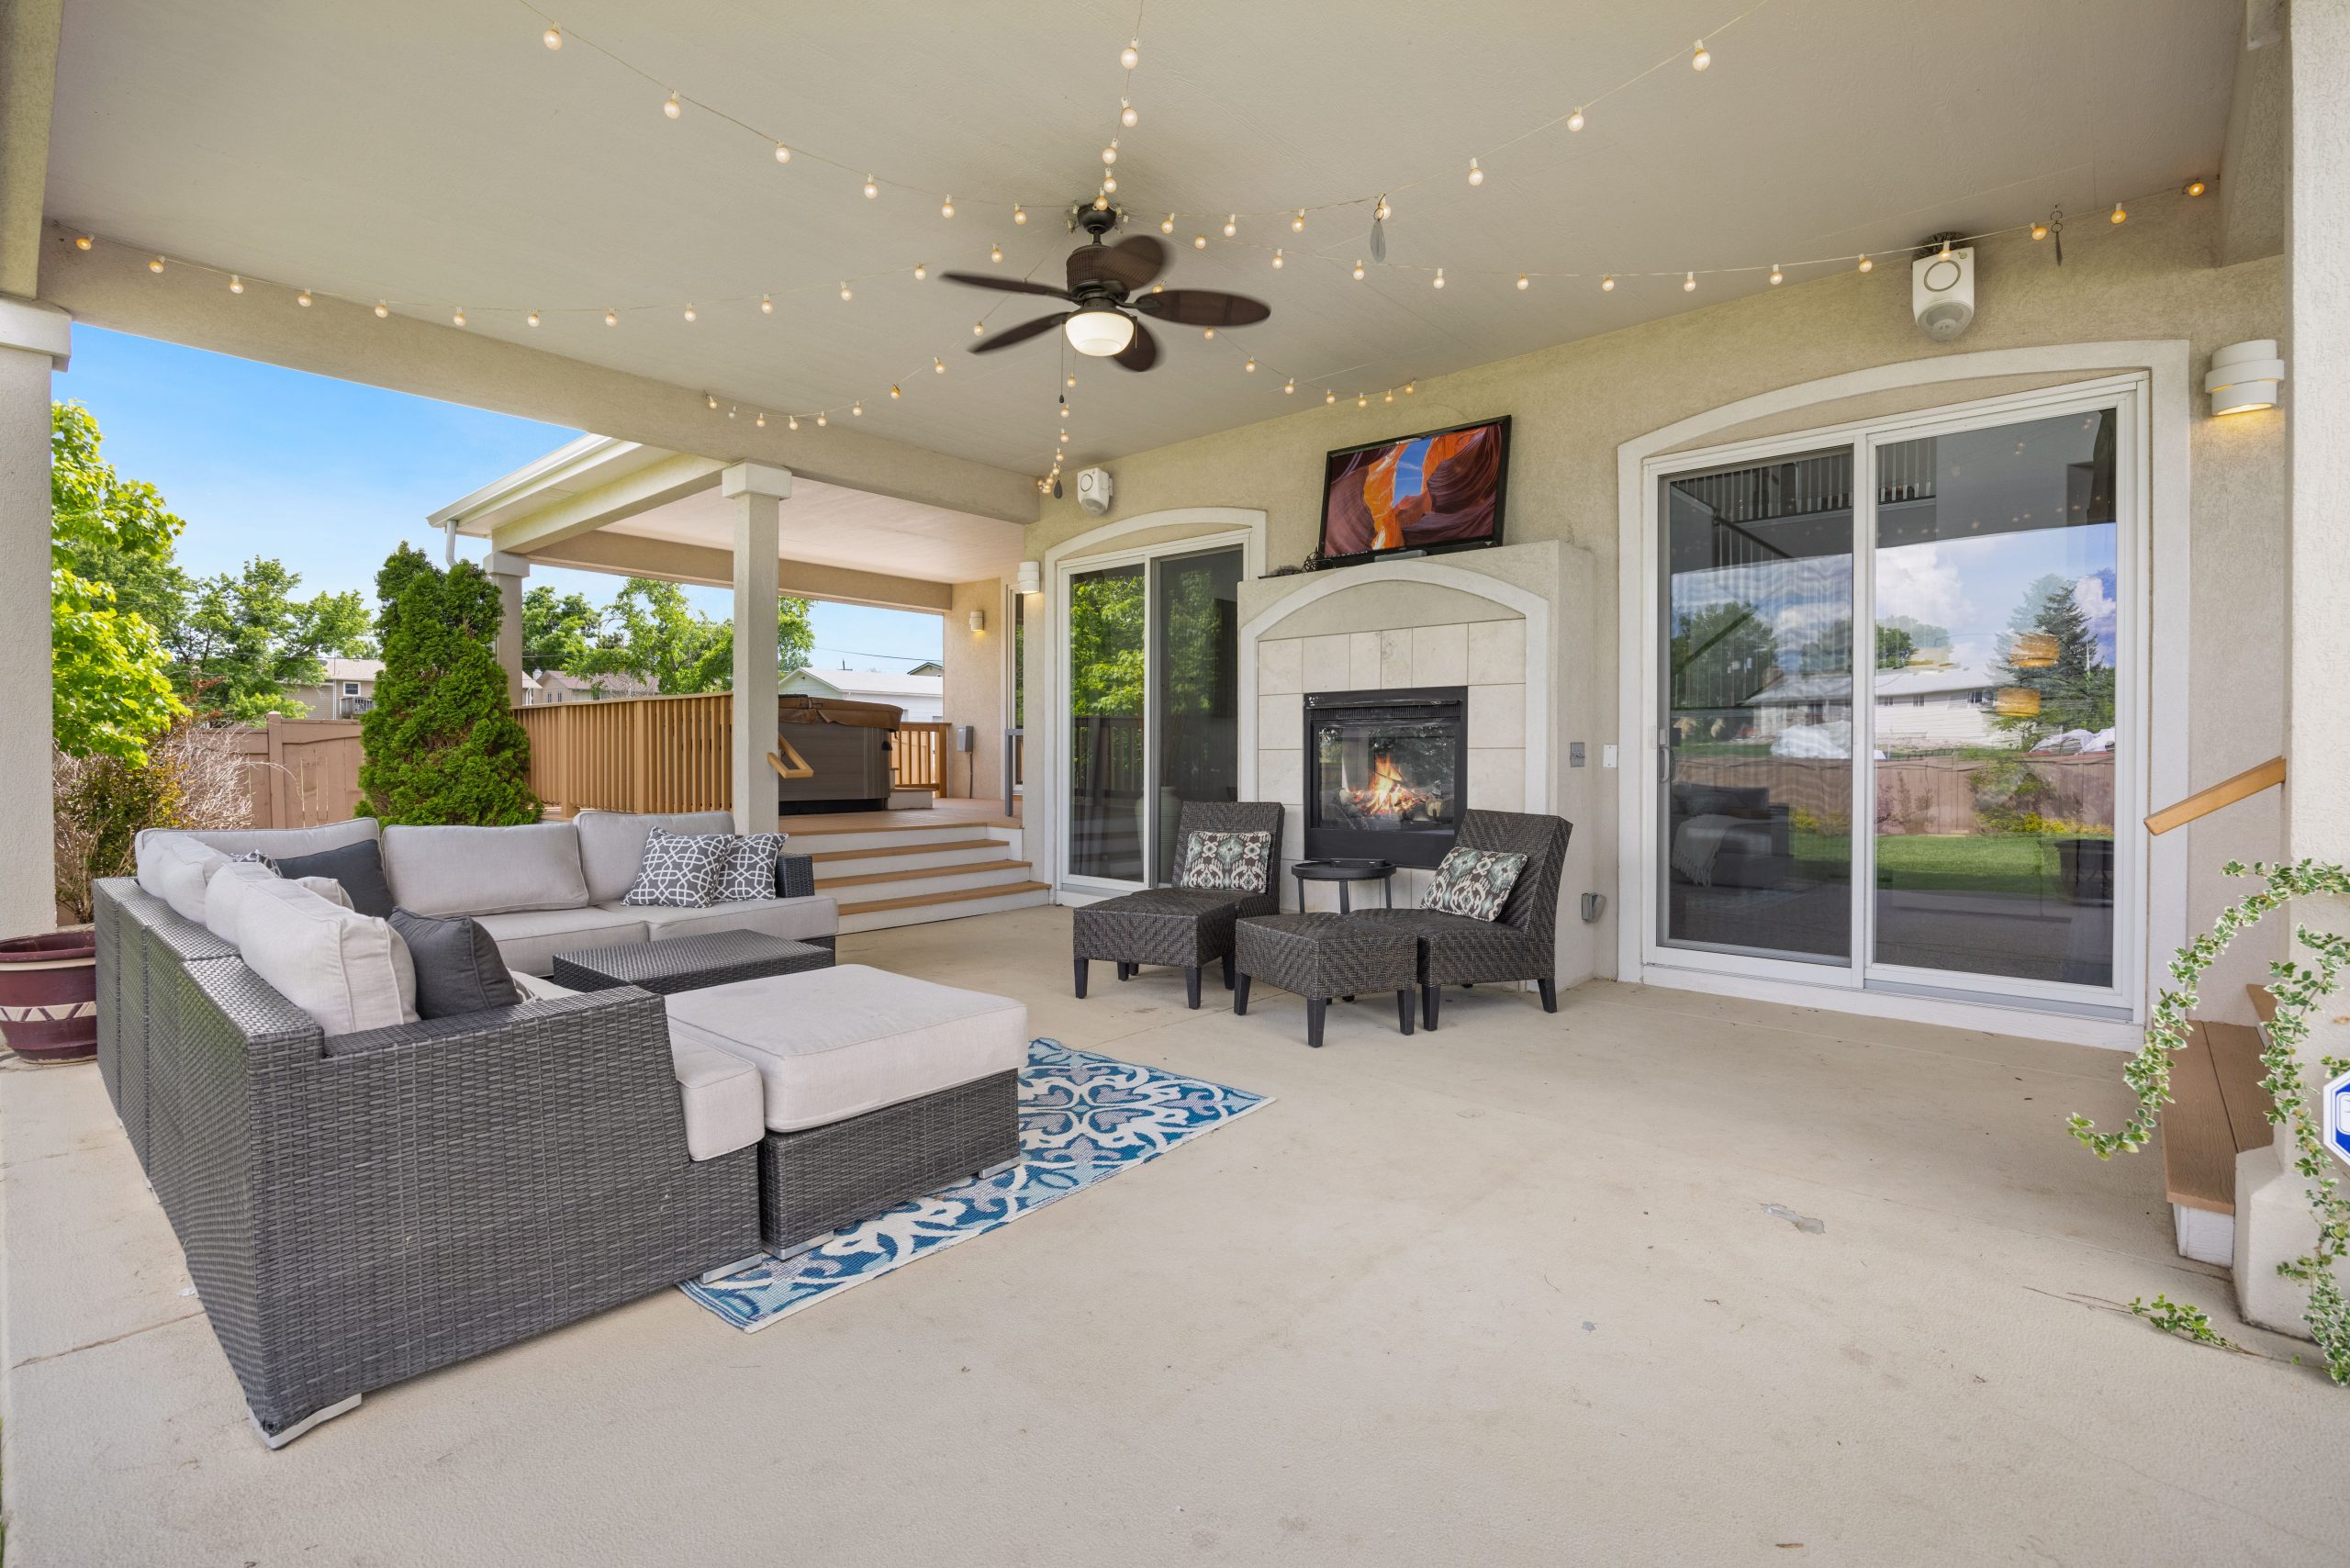
Hanging outdoor string lights under a covered patio for a professional look is easier than you think.
- Choose Your Lights: Opt for commercial-grade, weatherproof string lights with shatterproof bulbs. Look for a cord color that matches your ceiling (like the brown here).
- Install Cup Hooks: Screw small, sturdy cup hooks into the ceiling beams or joists every 24-36 inches. Pre-drilling a small pilot hole makes this easier.
- Create a Pattern: Lay out your desired pattern on the ground first. A simple zig-zag or grid pattern works well. Start hanging the light string from the hooks, beginning closest to your power source.
- Secure the Cord: Pull the cord taut (but not banjo-tight) as you go from hook to hook to create clean lines and prevent sagging.
- Manage the Extra: If you have extra cord at the end, either loop it back or neatly coil and secure it with a zip tie near the last hook.
It’s a 2-hour project that adds major ambiance for about $100-$200.
21. Deck with Light Wood Pergola, String Lights, and Colorful Pillows
This space feels so vibrant and inviting because of the smart use of a neutral foundation to support bold accents. The light wood deck, light wood pergola, and white cushions create a bright, clean canvas. This allows the colorful throw pillows to be the stars of the show without overwhelming the space. The dark grey wall and dark wicker furniture add depth and keep the look grounded. It’s a classic design principle: when you want to use a lot of color and pattern, make sure the background is calm and consistent.
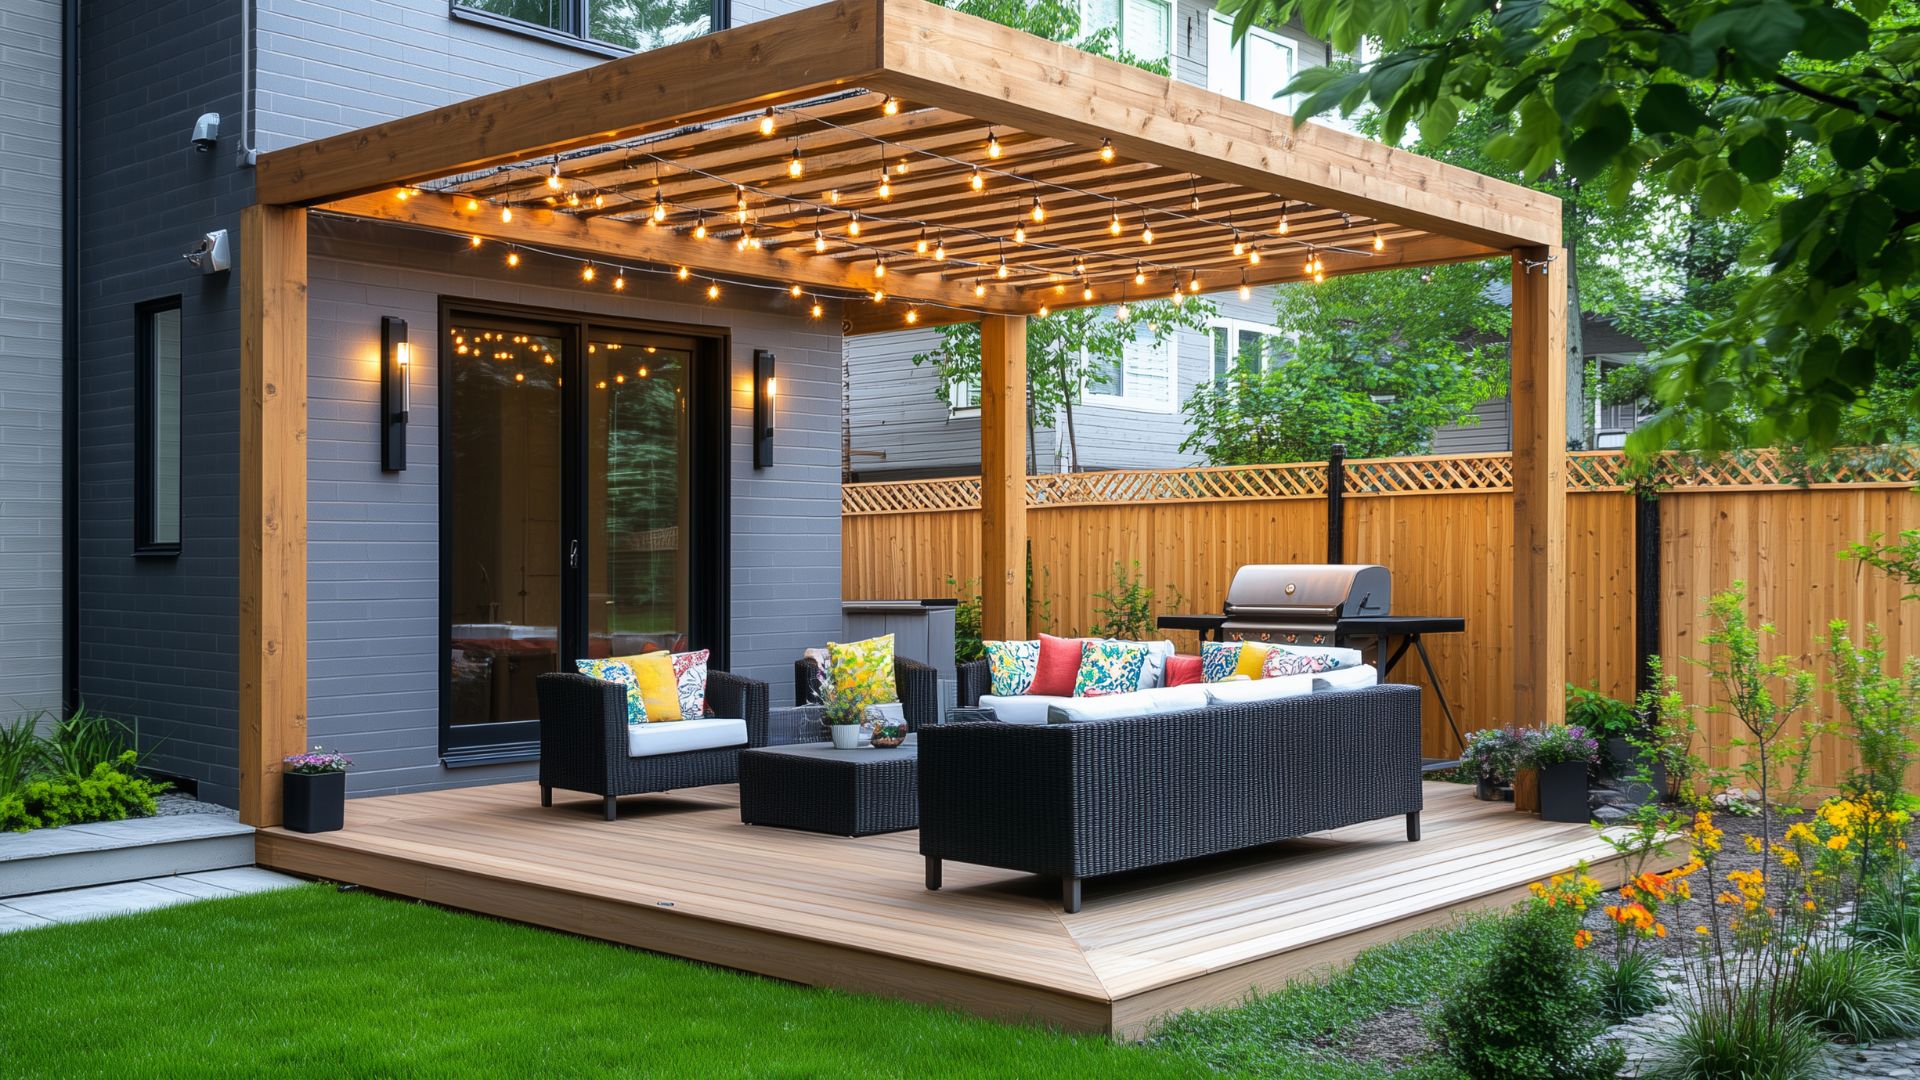
Want your throw pillows to look plush and high-end like this? Always buy inserts that are 2 inches larger than your pillow covers. For an 18×18 inch cover, use a 20×20 inch insert. This ensures the pillow is filled out to the corners, looks full and fluffy, and avoids that sad, saggy look. For outdoor use, invest in high-quality down-alternative inserts, as they hold their shape better than standard polyester fill and are more resistant to moisture and mildew.
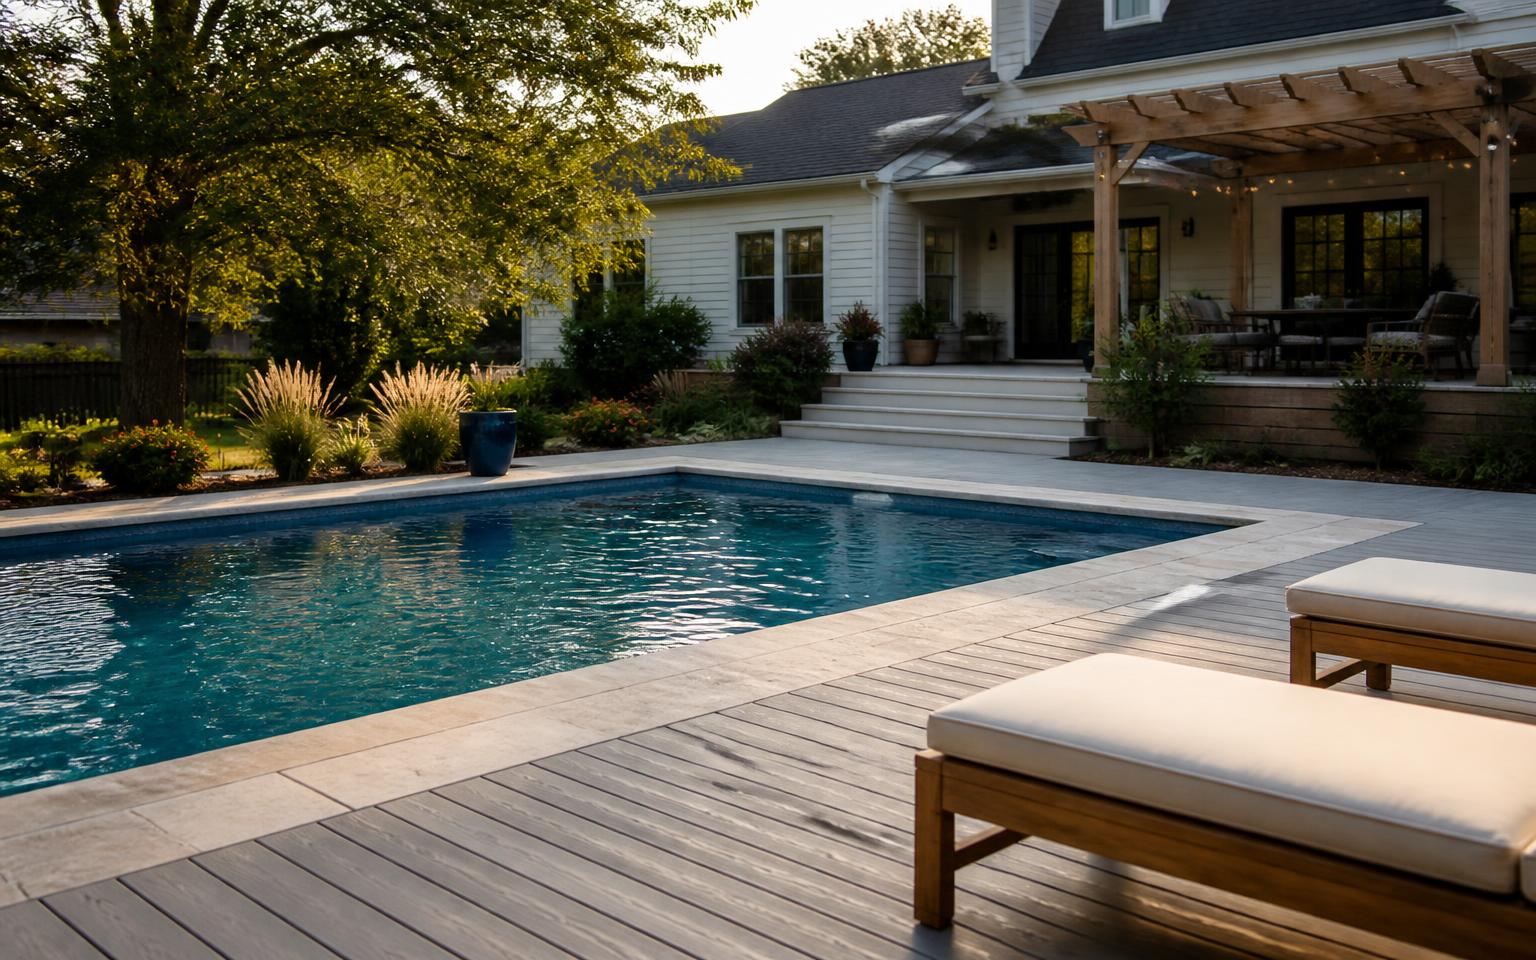
22. Backyard Pool with a Grey Deck and Pergola Patio
The single element that ties this entire backyard together is the consistent use of light, warm neutrals across different materials. The light stone coping around the pool, the light grey composite deck, the light beige cushions on the loungers, and the white house siding all belong to the same calm, cohesive color family. This creates a serene, resort-like atmosphere. Even the wooden pergola fits in, adding a touch of natural warmth. If the deck were a dark brown or the coping a different color, the space would feel disjointed. This strict color discipline is what makes it feel so luxurious and peaceful. This is a more expansive version of the pool area seen in Idea #3.
|
📋 Copy HEX 🔗 Share |
You can get a similar serene, poolside vibe on a smaller budget. Instead of a custom-built pergola, consider a large cantilever umbrella or a sail shade for a fraction of the cost. For the deck, pressure-treated wood stained in a light grey is a great alternative to expensive composite. And for seating, look for simple, modern loungers from places like Target or IKEA during their summer sales. The key is sticking to that light, neutral color palette—it costs nothing to be disciplined with your color choices, and it makes all the difference.
23. Cozy Evening Deck with Slatted Wood Furniture and Warm Lighting
The charm of this space is undeniable, but the materials require care. The dark-stained slatted wood furniture will show dust and pollen easily, so a quick wipe-down will be a frequent task. To maintain the deep color and protect the wood, it should be cleaned and sealed annually, especially if it’s left uncovered. The white-painted railings are classic but will need scraping and repainting every few years to combat chipping and peeling. The wicker lantern, while beautiful, should be brought indoors during harsh weather to prevent it from deteriorating.
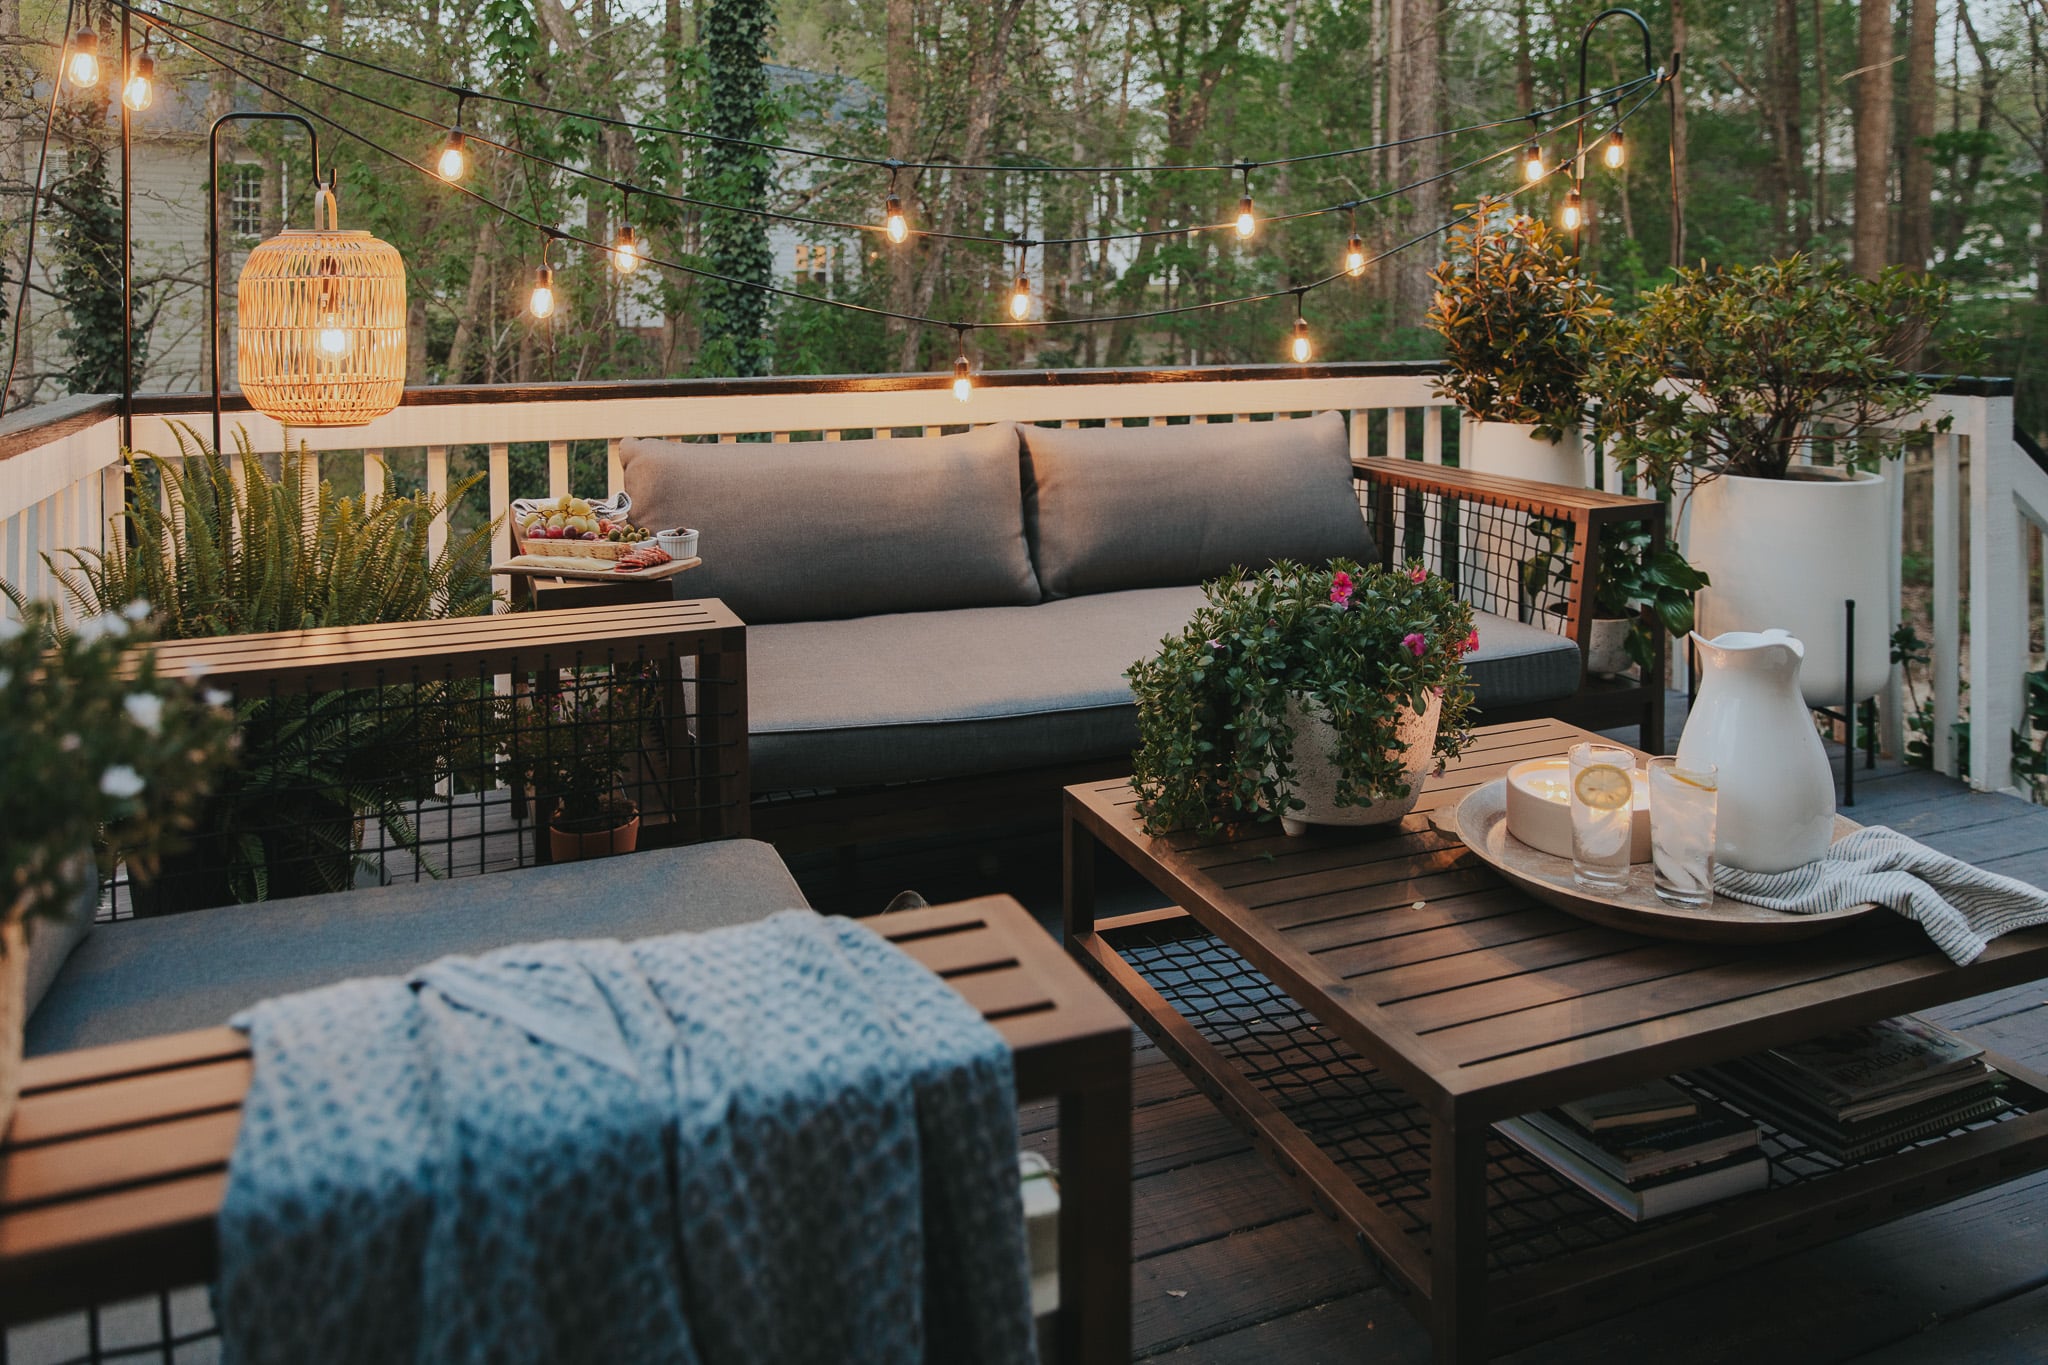
The ambiance here is a careful calculation of light and shadow. The formula is 70% dark, moody surfaces (the dark wood furniture, the charcoal cushions, the evening sky) + 30% warm, focused light sources (the string lights, the lantern, light from inside). This high-contrast ratio is what creates the drama and intimacy. The light sources are intentionally kept low and warm-toned (around 2700K) to create a soft glow rather than harsh, bright light. This makes the space feel like a cozy sanctuary, perfect for winding down at the end of the day.
24. Modern Patio with Low-Profile Grey Seating and a Cantilever Umbrella
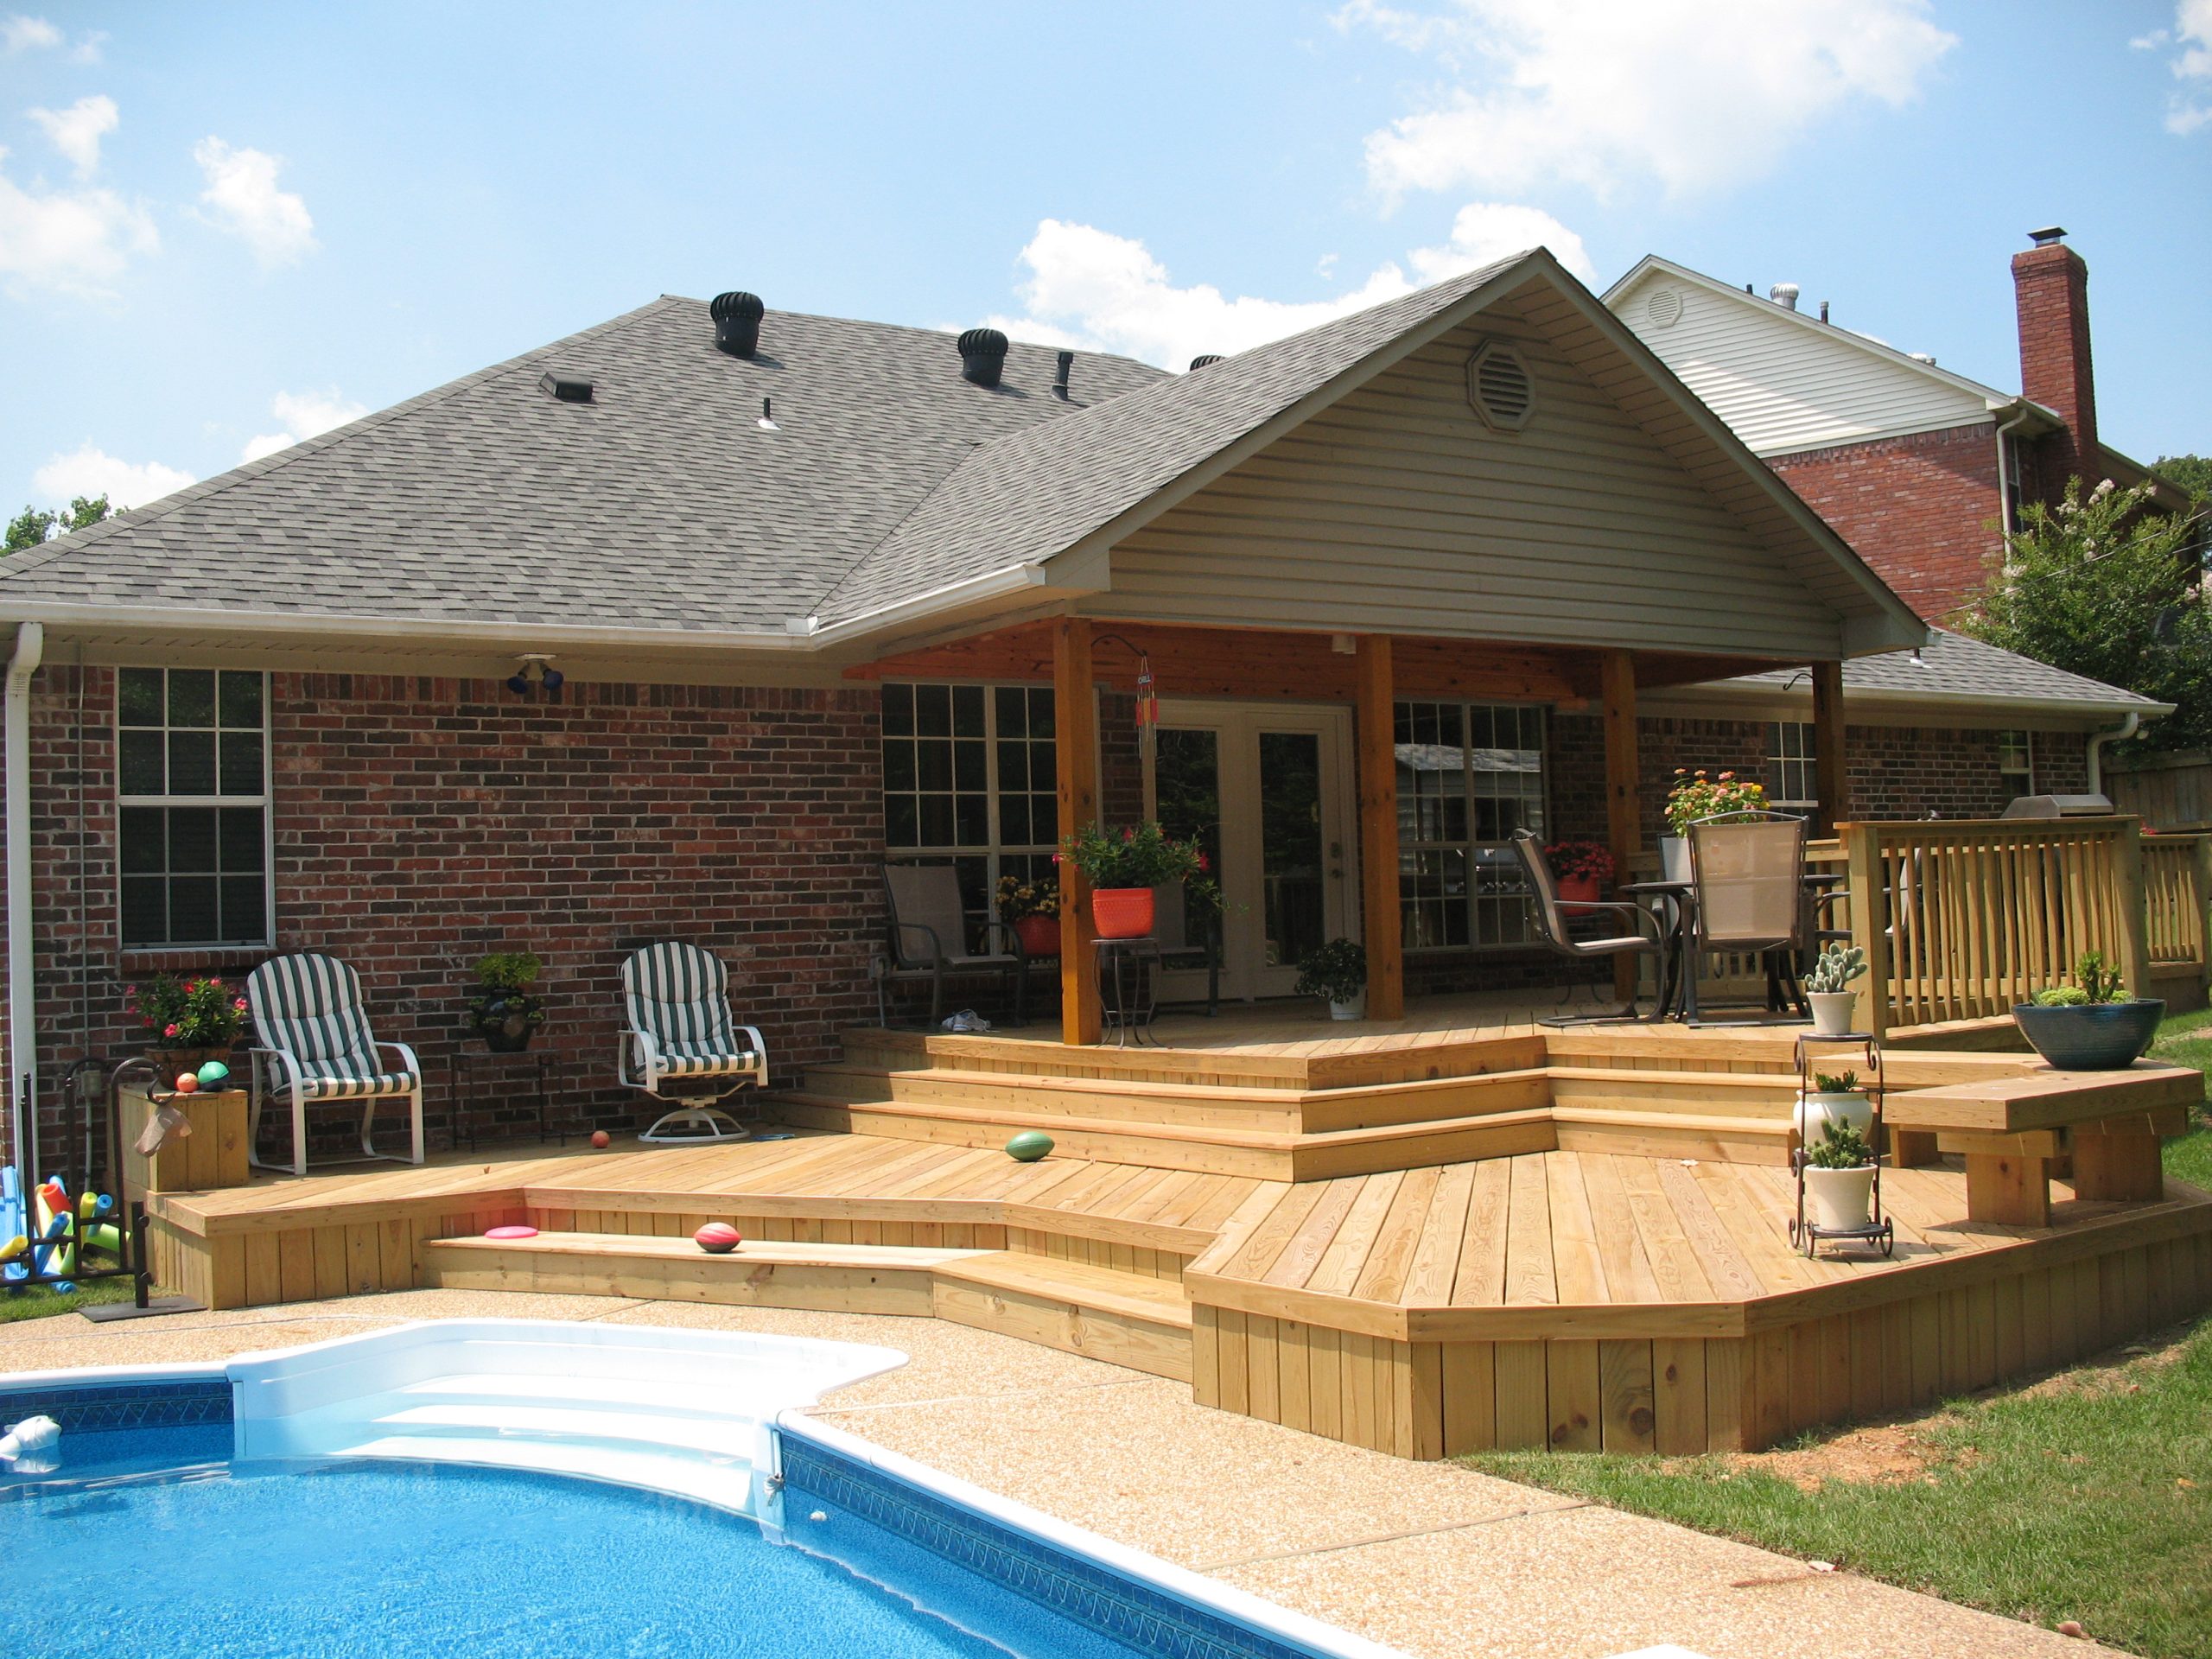
This minimalist, low-profile look is ideal for patios adjacent to large glass doors or windows, as the furniture doesn’t obstruct the view from inside. The setup works well in a space that is at least 14×18 feet to accommodate the sectional, chair, and the large footprint of the cantilever umbrella’s base. You need about 3 feet of clearance on all sides of the seating for comfortable traffic flow. The large-format pavers also enhance the sense of space, so this idea is best for areas where you can lay pavers that are 24×24 inches or larger.
|
📋 Copy HEX 🔗 Share |
That beautiful, large cantilever umbrella is a lifesaver for shade, but it’s also a giant sail. You absolutely must use the weighted base recommended by the manufacturer, which often requires hundreds of pounds of sand or water. In areas with high winds, it should always be closed when not in use. A strong gust can catch it, potentially damaging the umbrella, your furniture, or even the side of your house. They are amazing for flexible shade, but they demand respect for the weather.
25. Modern Patio with a Built-In Linear Fireplace and Pergola
Building a custom linear fireplace feature requires careful planning, especially for gas lines. Here’s the simplified process:
- Plan the Foundation: Pour a concrete footing for the structure. It needs to be level and able to support the weight of the fireplace unit and finishing materials.
- Frame the Structure: Build the frame for the fireplace enclosure using steel studs, not wood, due to the heat. Follow the fireplace manufacturer’s specifications for clearances precisely.
- Run Utilities: Have a licensed professional run the gas line and any electrical wiring for the ignition system to the unit. This is not a DIY step.
- Install the Firebox: Secure the linear fireplace insert into the steel frame.
- Install Cladding and Cap: Apply your chosen exterior material (like stone, tile, or stucco) to the frame and install a non-combustible cap on top.
This is a major project; expect it to take a professional 3-5 days and cost upwards of $8,000.
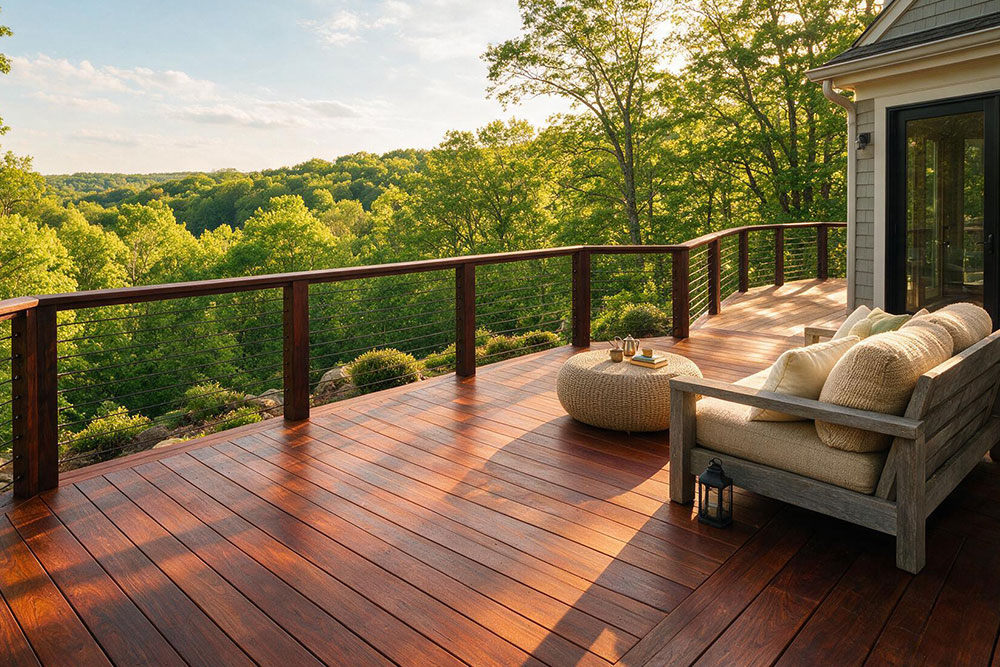
When designing a seating area around a linear fireplace, pay close attention to the coffee table height. The goal is to keep an unobstructed view of the flames from a seated position. Your coffee table should be no taller than the seat height of your sofa cushions, which is typically 16-18 inches. A low-slung coffee table, around 12-14 inches high, is even better. This preserves the clean, horizontal lines of the fireplace and ensures the mesmerizing flames remain the undeniable focal point of the evening.
26. Curved, Multi-Toned Deck with a Covered Patio Area
This design masterfully avoids monotony on a very large deck by using multiple colors and shapes. The curved front edge breaks up the long, rectangular expanse, creating a much more organic and interesting shape. Using two different tones of deck boards—a lighter one for the main field and a darker one as a border—acts like an area rug, defining the space and adding custom detail. These two choices, the curve and the color-blocking, transform a potentially boring large deck into a dynamic, high-design feature.
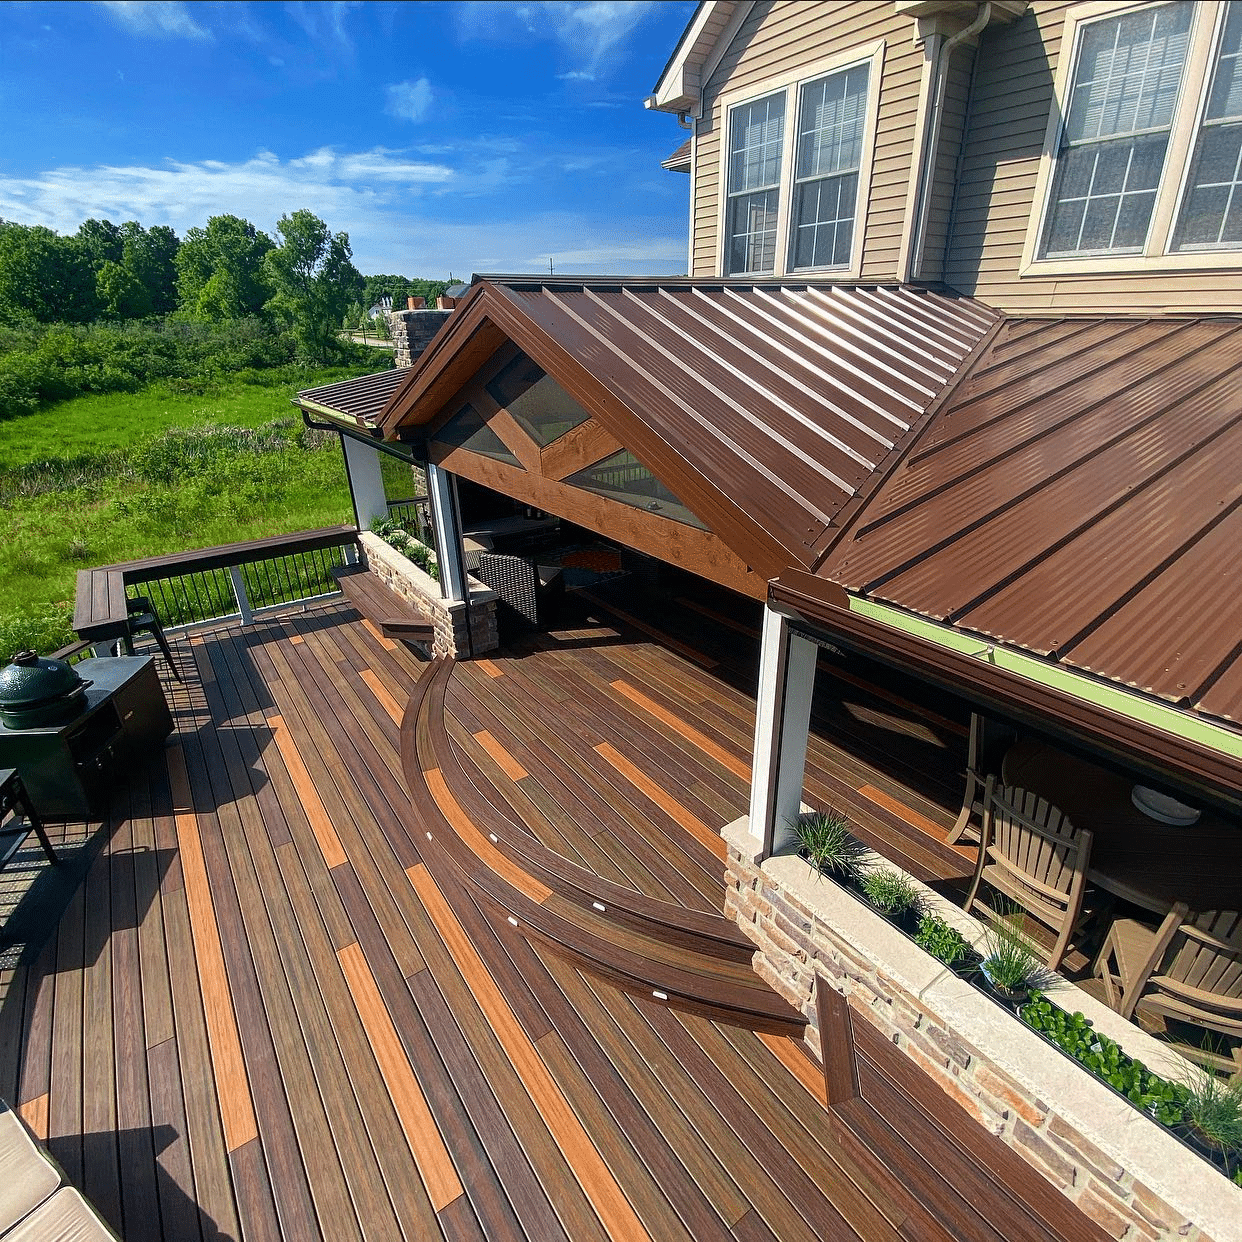
Creating a multi-toned, curved deck with a covered section is a high-end project with costs reflecting the complexity and materials.
- Structure (multi-toned composite deck, curved): $25,000 – $45,000 (curves and picture framing add significant labor)
- Covered Patio Structure (Roof, beams, stone pillar): $15,000 – $30,000
- Railings and Planters: $4,000 – $8,000
- Furniture & Grill: $2,000 – $5,000
- TOTAL: $46,000 – $88,000
- Budget alternative: Use pressure-treated wood in two different stain colors. Create angled corners instead of true curves (much easier for DIY). Use a standard wood pergola kit instead of a custom-roofed structure. This could bring the cost into the $15,000 – $25,000 range.
27. Stamped Concrete Patio with Red Cushions and a Pergola
The single thing that brings this patio to life is the unapologetic use of bright red. Against the neutral backdrop of grey stamped concrete and light grey brick, the red cushions on the lounge chairs are a jolt of energy and personality. It’s a bold, confident choice that defines the whole mood of the space. If you swapped them for beige or gray cushions, the patio would still be nice, but it would lose its spark. That pop of vibrant color is the heart of the design, making it feel lively and fun. For another great fire pit area, see Idea #10.
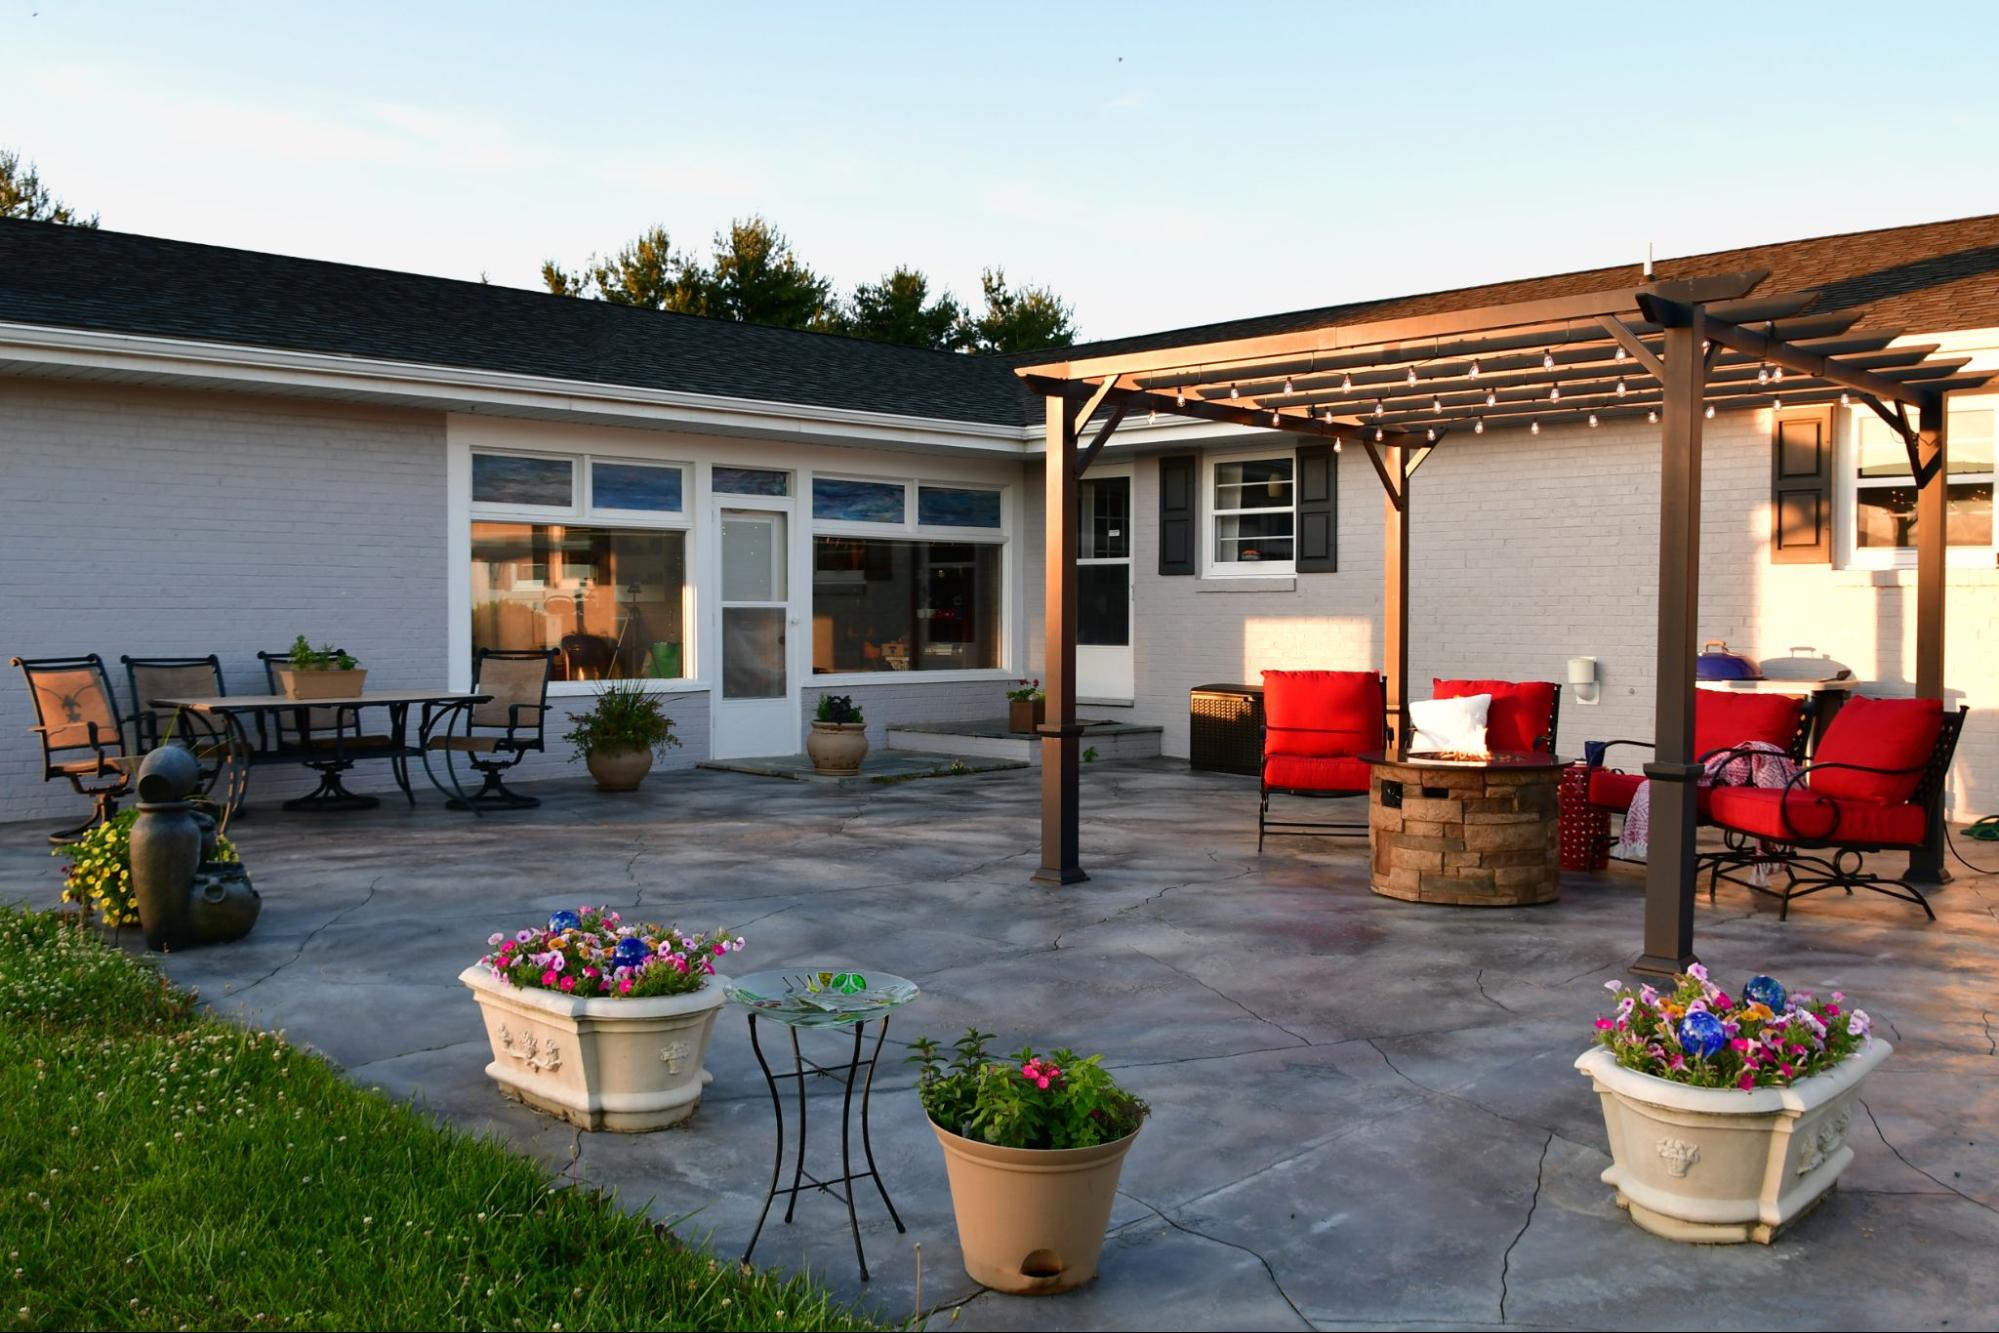
You can get this cozy, colorful look for less. Stamped concrete can be pricey ($15-$25/sq ft). Instead, consider staining your existing plain concrete patio a dark gray color with a DIY concrete stain kit from a home improvement store for under $200. Instead of a large wood pergola, find a more affordable metal gazebo from a big-box store. Then, splurge a little on the bright red cushions for your existing or thrifted furniture—they’re the most important part of this look, and you can find great options at stores like At Home or online.
28. Shaded Wooden Deck with an Ornate Cast-Metal Dining Table
This is a classic ‘secret garden’ formula. It breaks down to about 60% lush, untamed greenery + 30% warm, simple structure (the wooden deck and railing) + 10% ornate detail (the cast-metal dining set). The simplicity of the deck allows the dense foliage to be the main feature, creating a feeling of enclosure and privacy. The ornate table then acts as a sophisticated surprise in the middle of all that nature, like finding a formal dining room in the woods. It’s the tension between the rustic and the refined that makes it so charming.
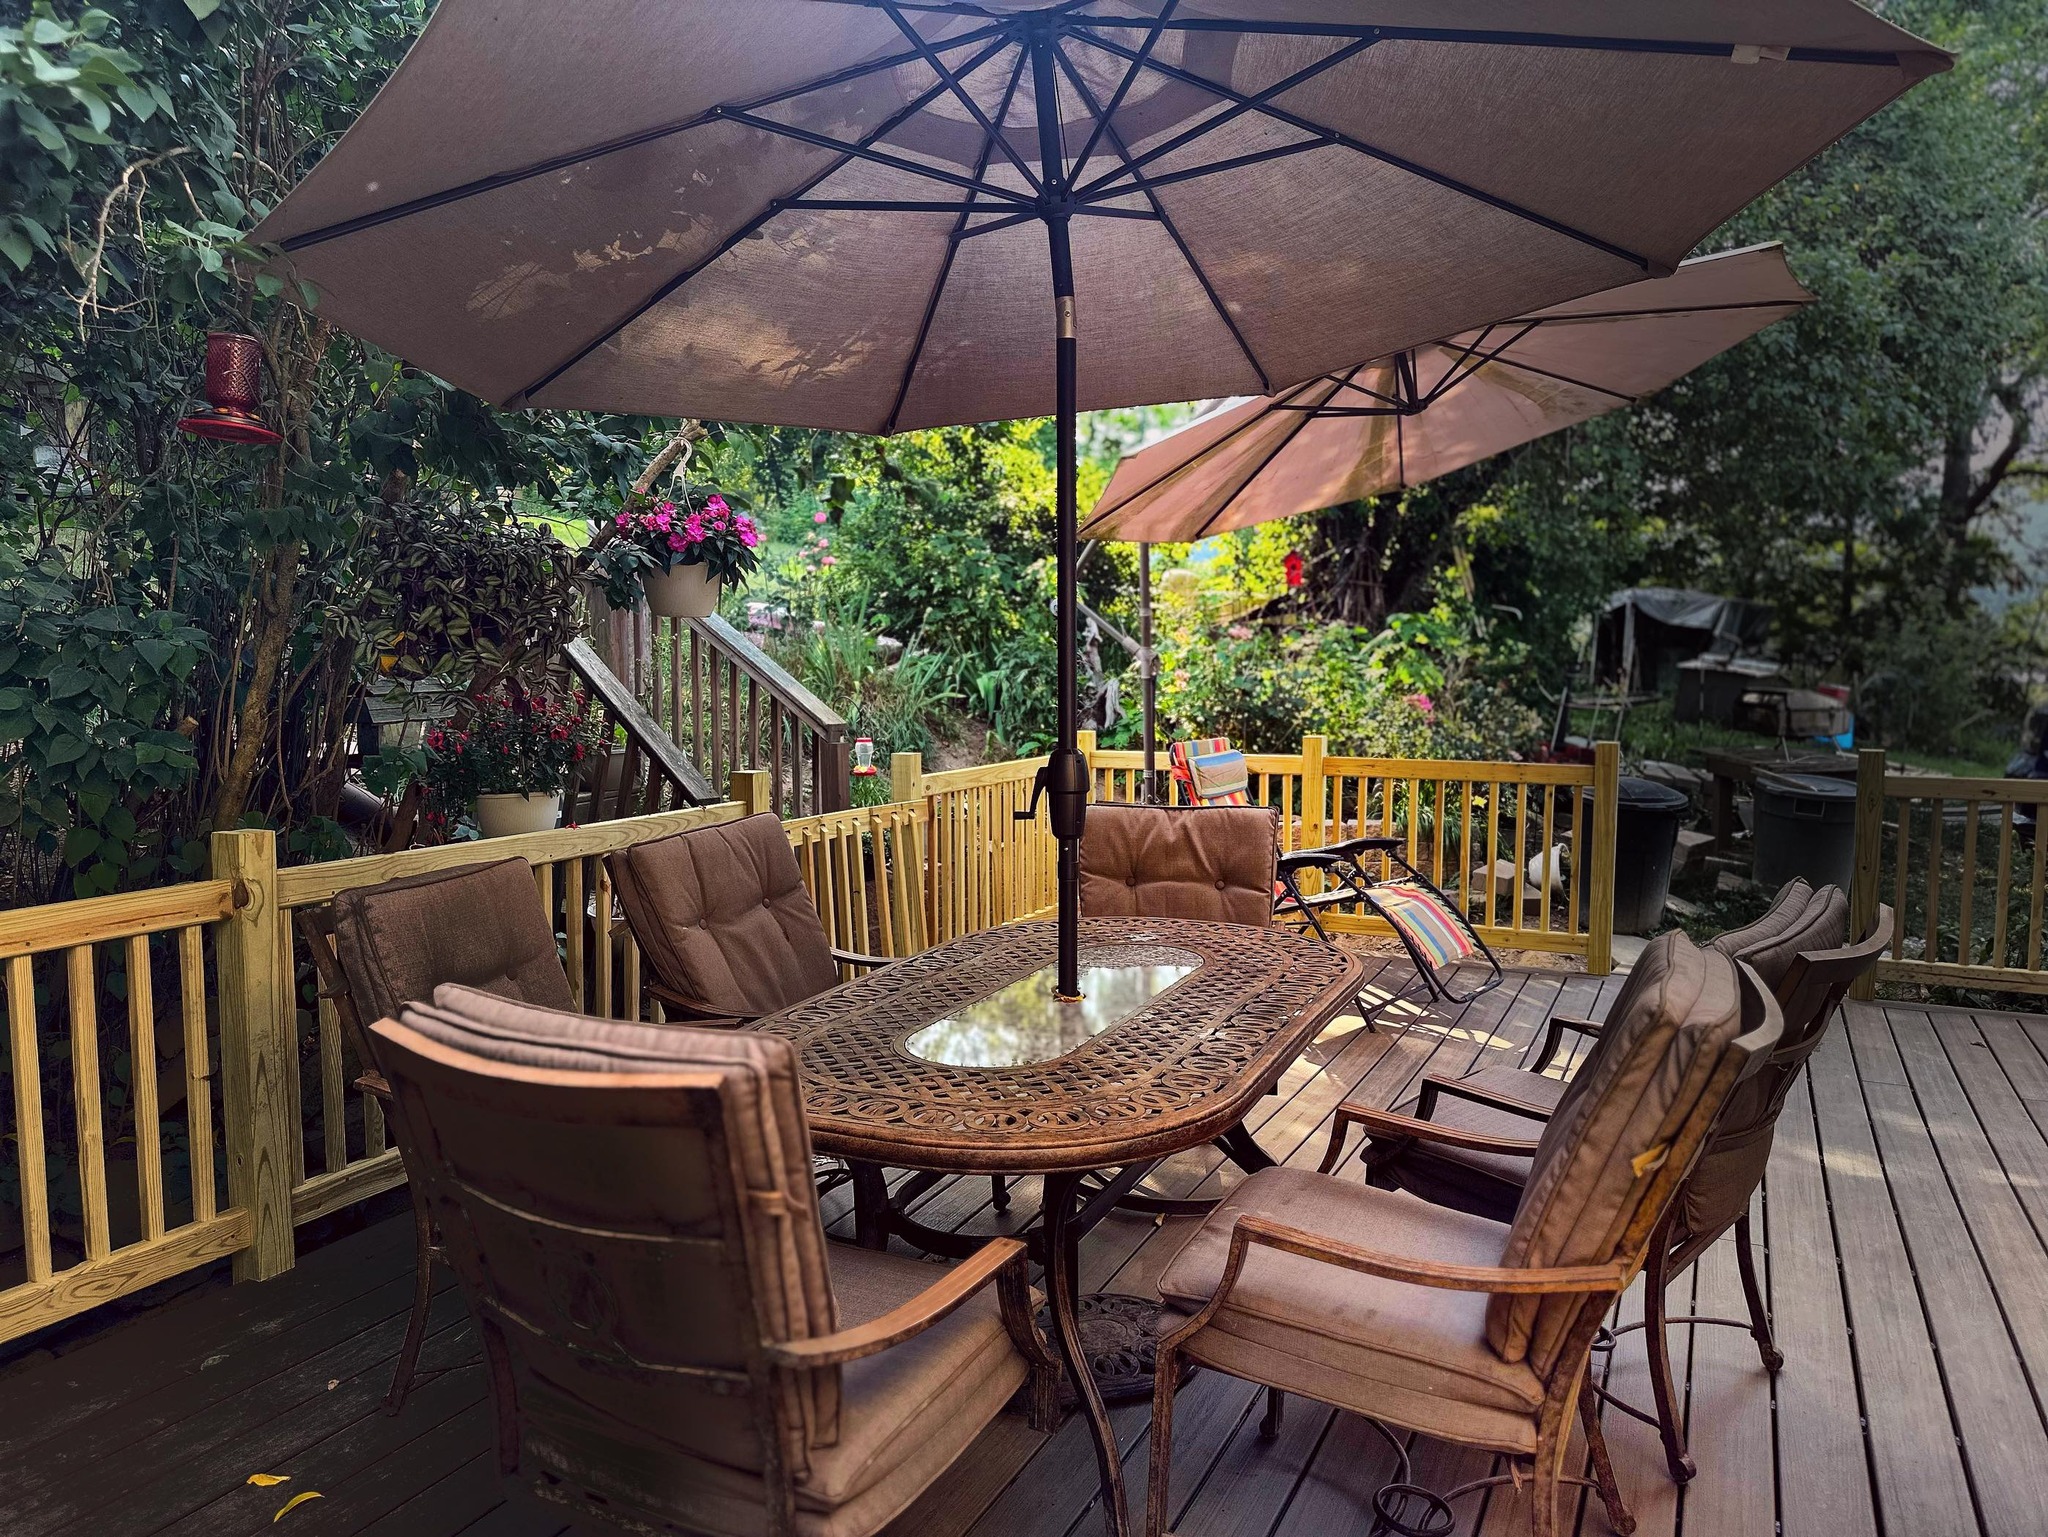
Glass-top outdoor tables look sleek, but they come with a few realities. They show every speck of dust, pollen, and bird droppings, so you’ll be wiping them down constantly to keep them looking clean. In direct sun, the glass can create a glare and get extremely hot to the touch. It’s also important to use a patio umbrella, as the glass can act like a magnifying glass and scorch the deck boards underneath in intense, direct sunlight. They’re beautiful but require a bit more daily upkeep than a solid-top table.
29. Covered Wood Deck with Pergola, Ceiling Fans, and Dining Set
A covered structure with dual ceiling fans like this is best suited for a larger deck, at least 15 feet deep and 24 feet wide. Each ceiling fan needs a clearance of at least 18-24 inches from any wall or beam and about 8-10 feet between the fans themselves for optimal, non-interfering airflow. The round dining table shown here is about 48 inches in diameter, which requires a 10×10 foot space to comfortably pull out chairs. This setup is about maximizing comfort in a generous space, not cramming features into a small one.
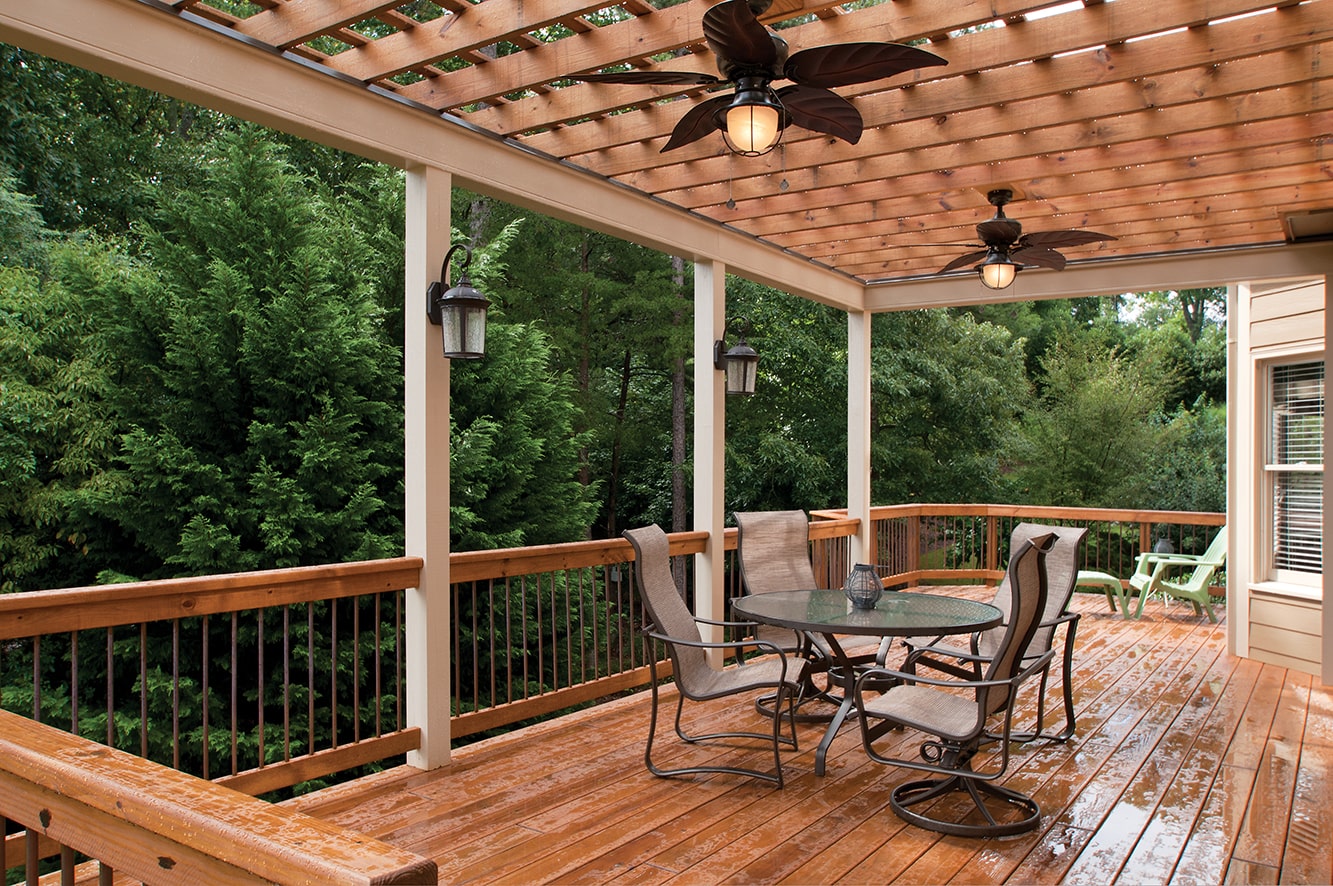
When installing ceiling fans on a slatted pergola, you must add solid blocking. A standard pergola doesn’t have a solid surface to mount the fan’s electrical box and support its weight and motion. You’ll need to install a 2×6 or 2×8 piece of lumber running perpendicular between two of the main rafters. This ‘blocking’ provides a secure mounting point. Make sure the blocking is installed perfectly level and is securely fastened to the rafters to prevent any wobbling or vibration when the fan is running.
30. Expansive Multi-Level Paver Patio with Bright Green Umbrellas
This design is a direct response to the growing trend of ‘backyard zoning.’ As we spend more time at home, we’re demanding more functionality from our outdoor spaces. This isn’t just a patio; it’s an outdoor great room. The separate seating areas, defined by the two bold green umbrellas, function like a living room and a den. The multi-level design, connected by those grand, curved steps, adds architectural interest and helps delineate the zones. This is about creating distinct ‘destinations’ within your own yard, a key concept for 2026. If you’re considering a project this large, make sure to avoid the common issue in Mistake #1.
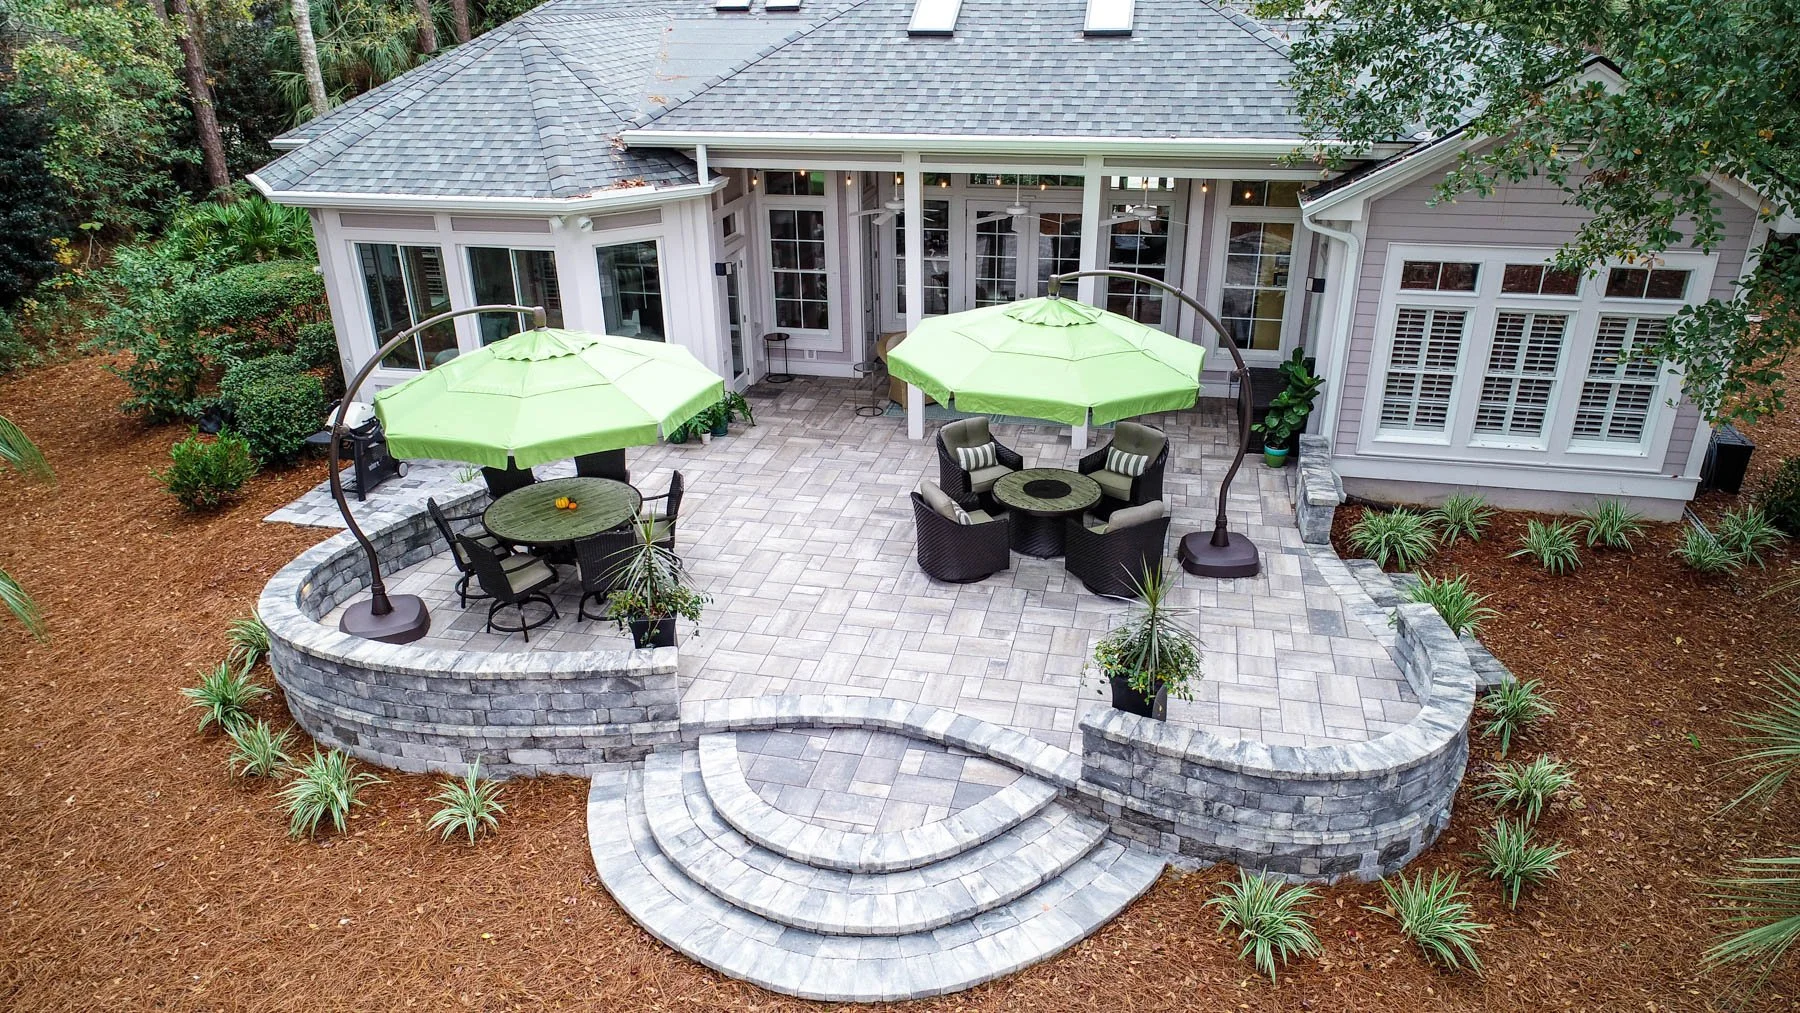
A large-scale paver project like this requires some serious groundwork. Before a single paver is laid, be sure you’ve checked these items off your list:
- Grading and Drainage: Does your yard slope away from the house? A patio this large can redirect a massive amount of water, so proper grading is essential to prevent a wet basement.
- Underground Utilities: Call 811 to have all your underground utility lines (gas, electric, and water) marked before any digging begins. It’s free and it’s the law.
- Material Quantities: Accurately calculate your need for base material, sand, pavers, and edge restraints. Always order 10% more pavers than you think you need to account for cuts and breakage.
- Access for Delivery: Can a large truck deliver multiple pallets of pavers to your work area, or will you be moving it all by wheelbarrow from the street?
Your Outdoor Story Starts Here
Whew, that was a lot of inspiration! Remember, the best deck or patio is one that reflects how you truly want to live outside. Whether it’s a quiet morning coffee spot or a hub for neighborhood parties, start with one element you love and build from there. Don’t forget to save your favorite ideas to your Pinterest board so you can find them when you’re ready to start your project!